

AJM
-
Posts
198 -
Joined
-
Last visited
Content Type
Profiles
Forums
Events
Gallery
Posts posted by AJM
-
-
Thx guys, really appreciate the compliments!
-
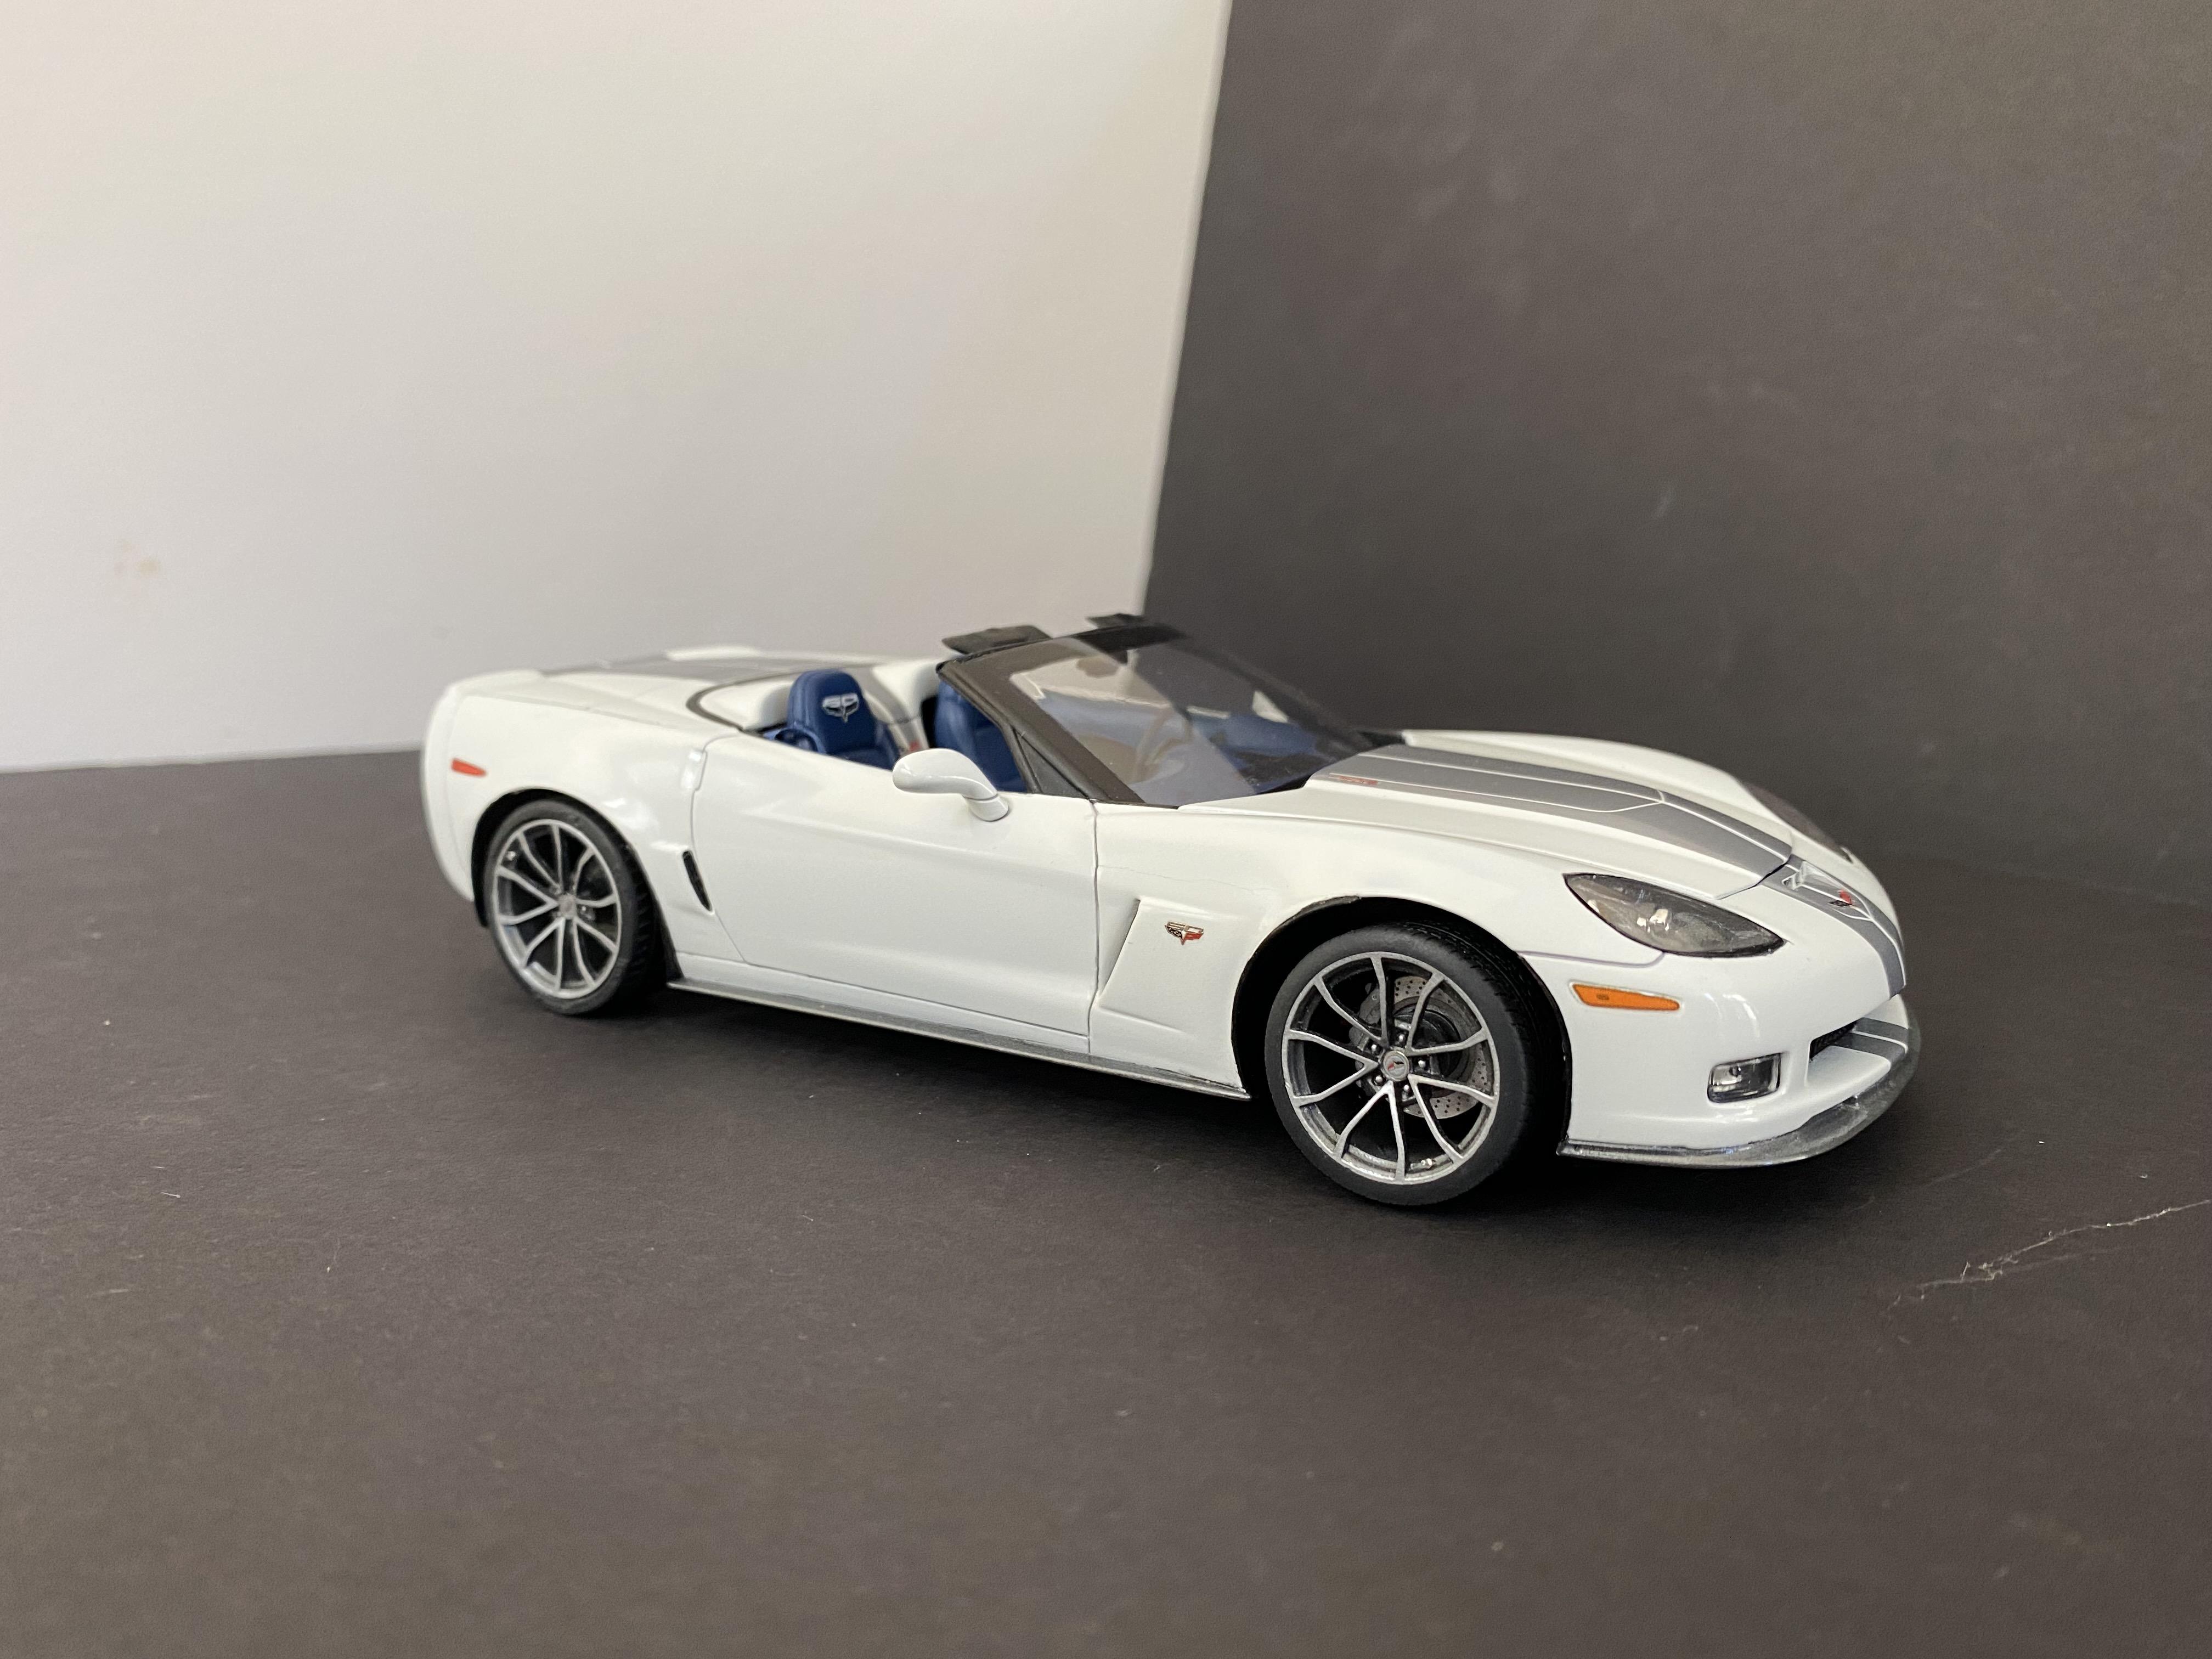
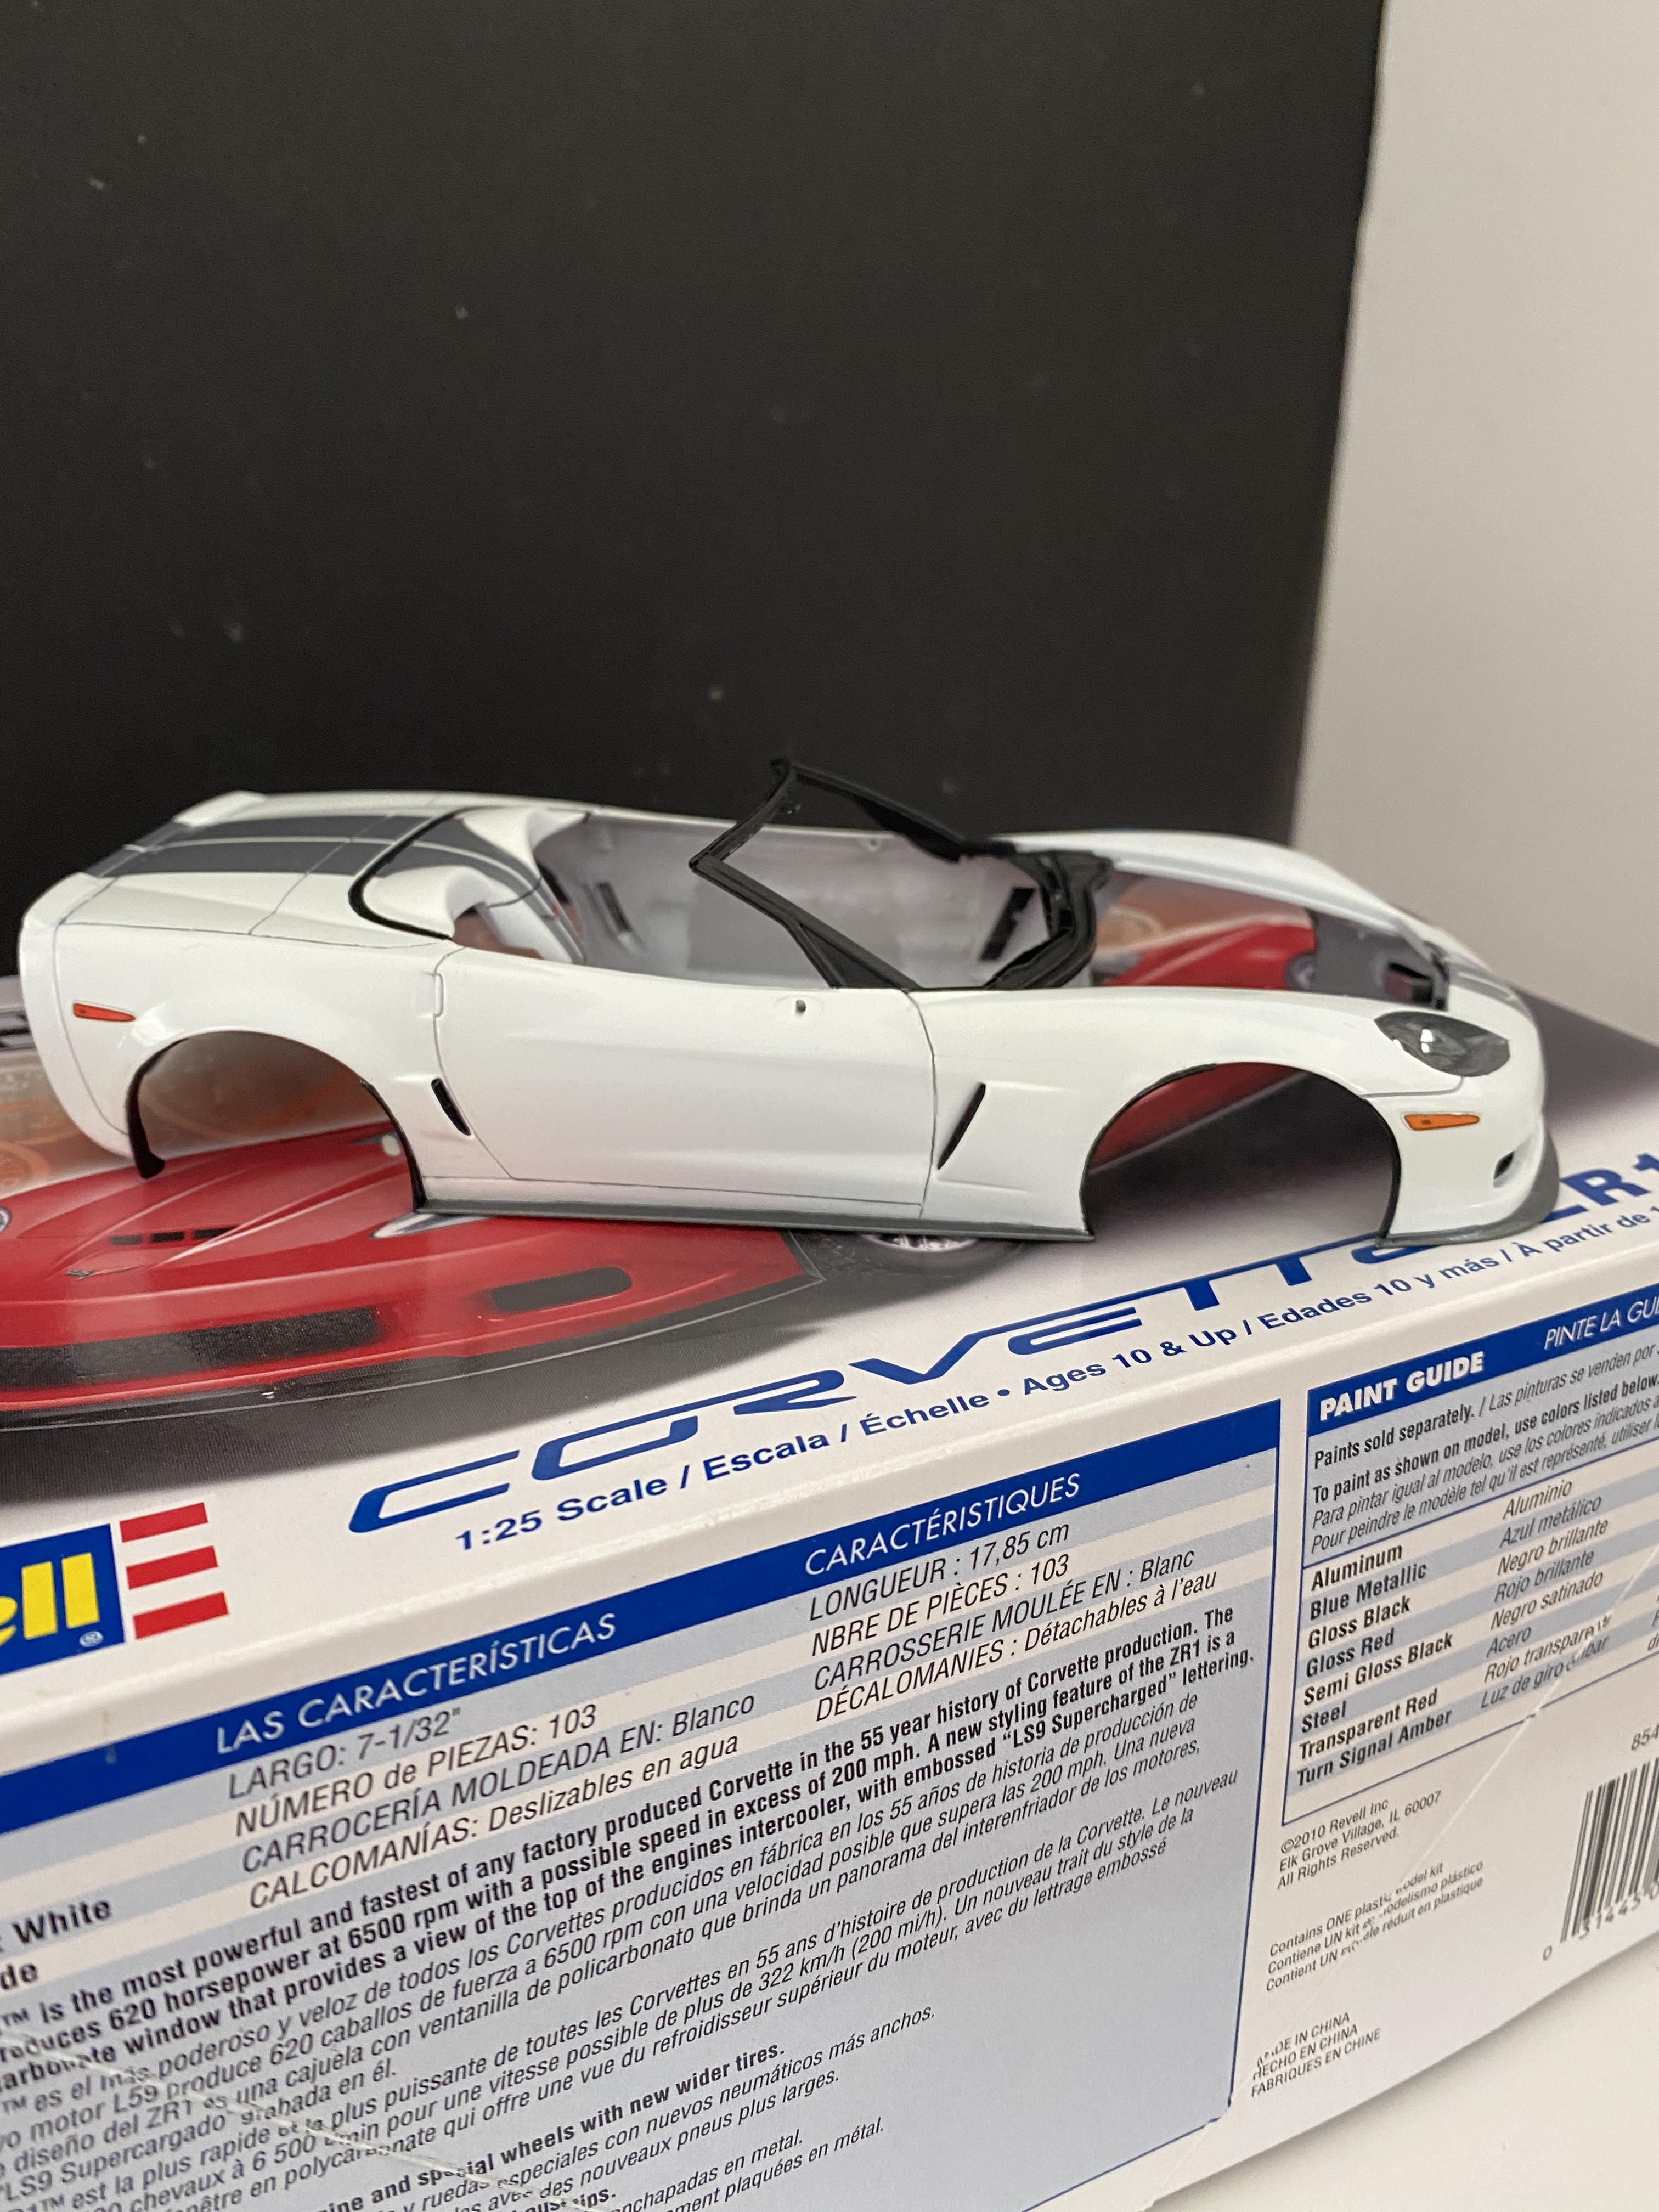
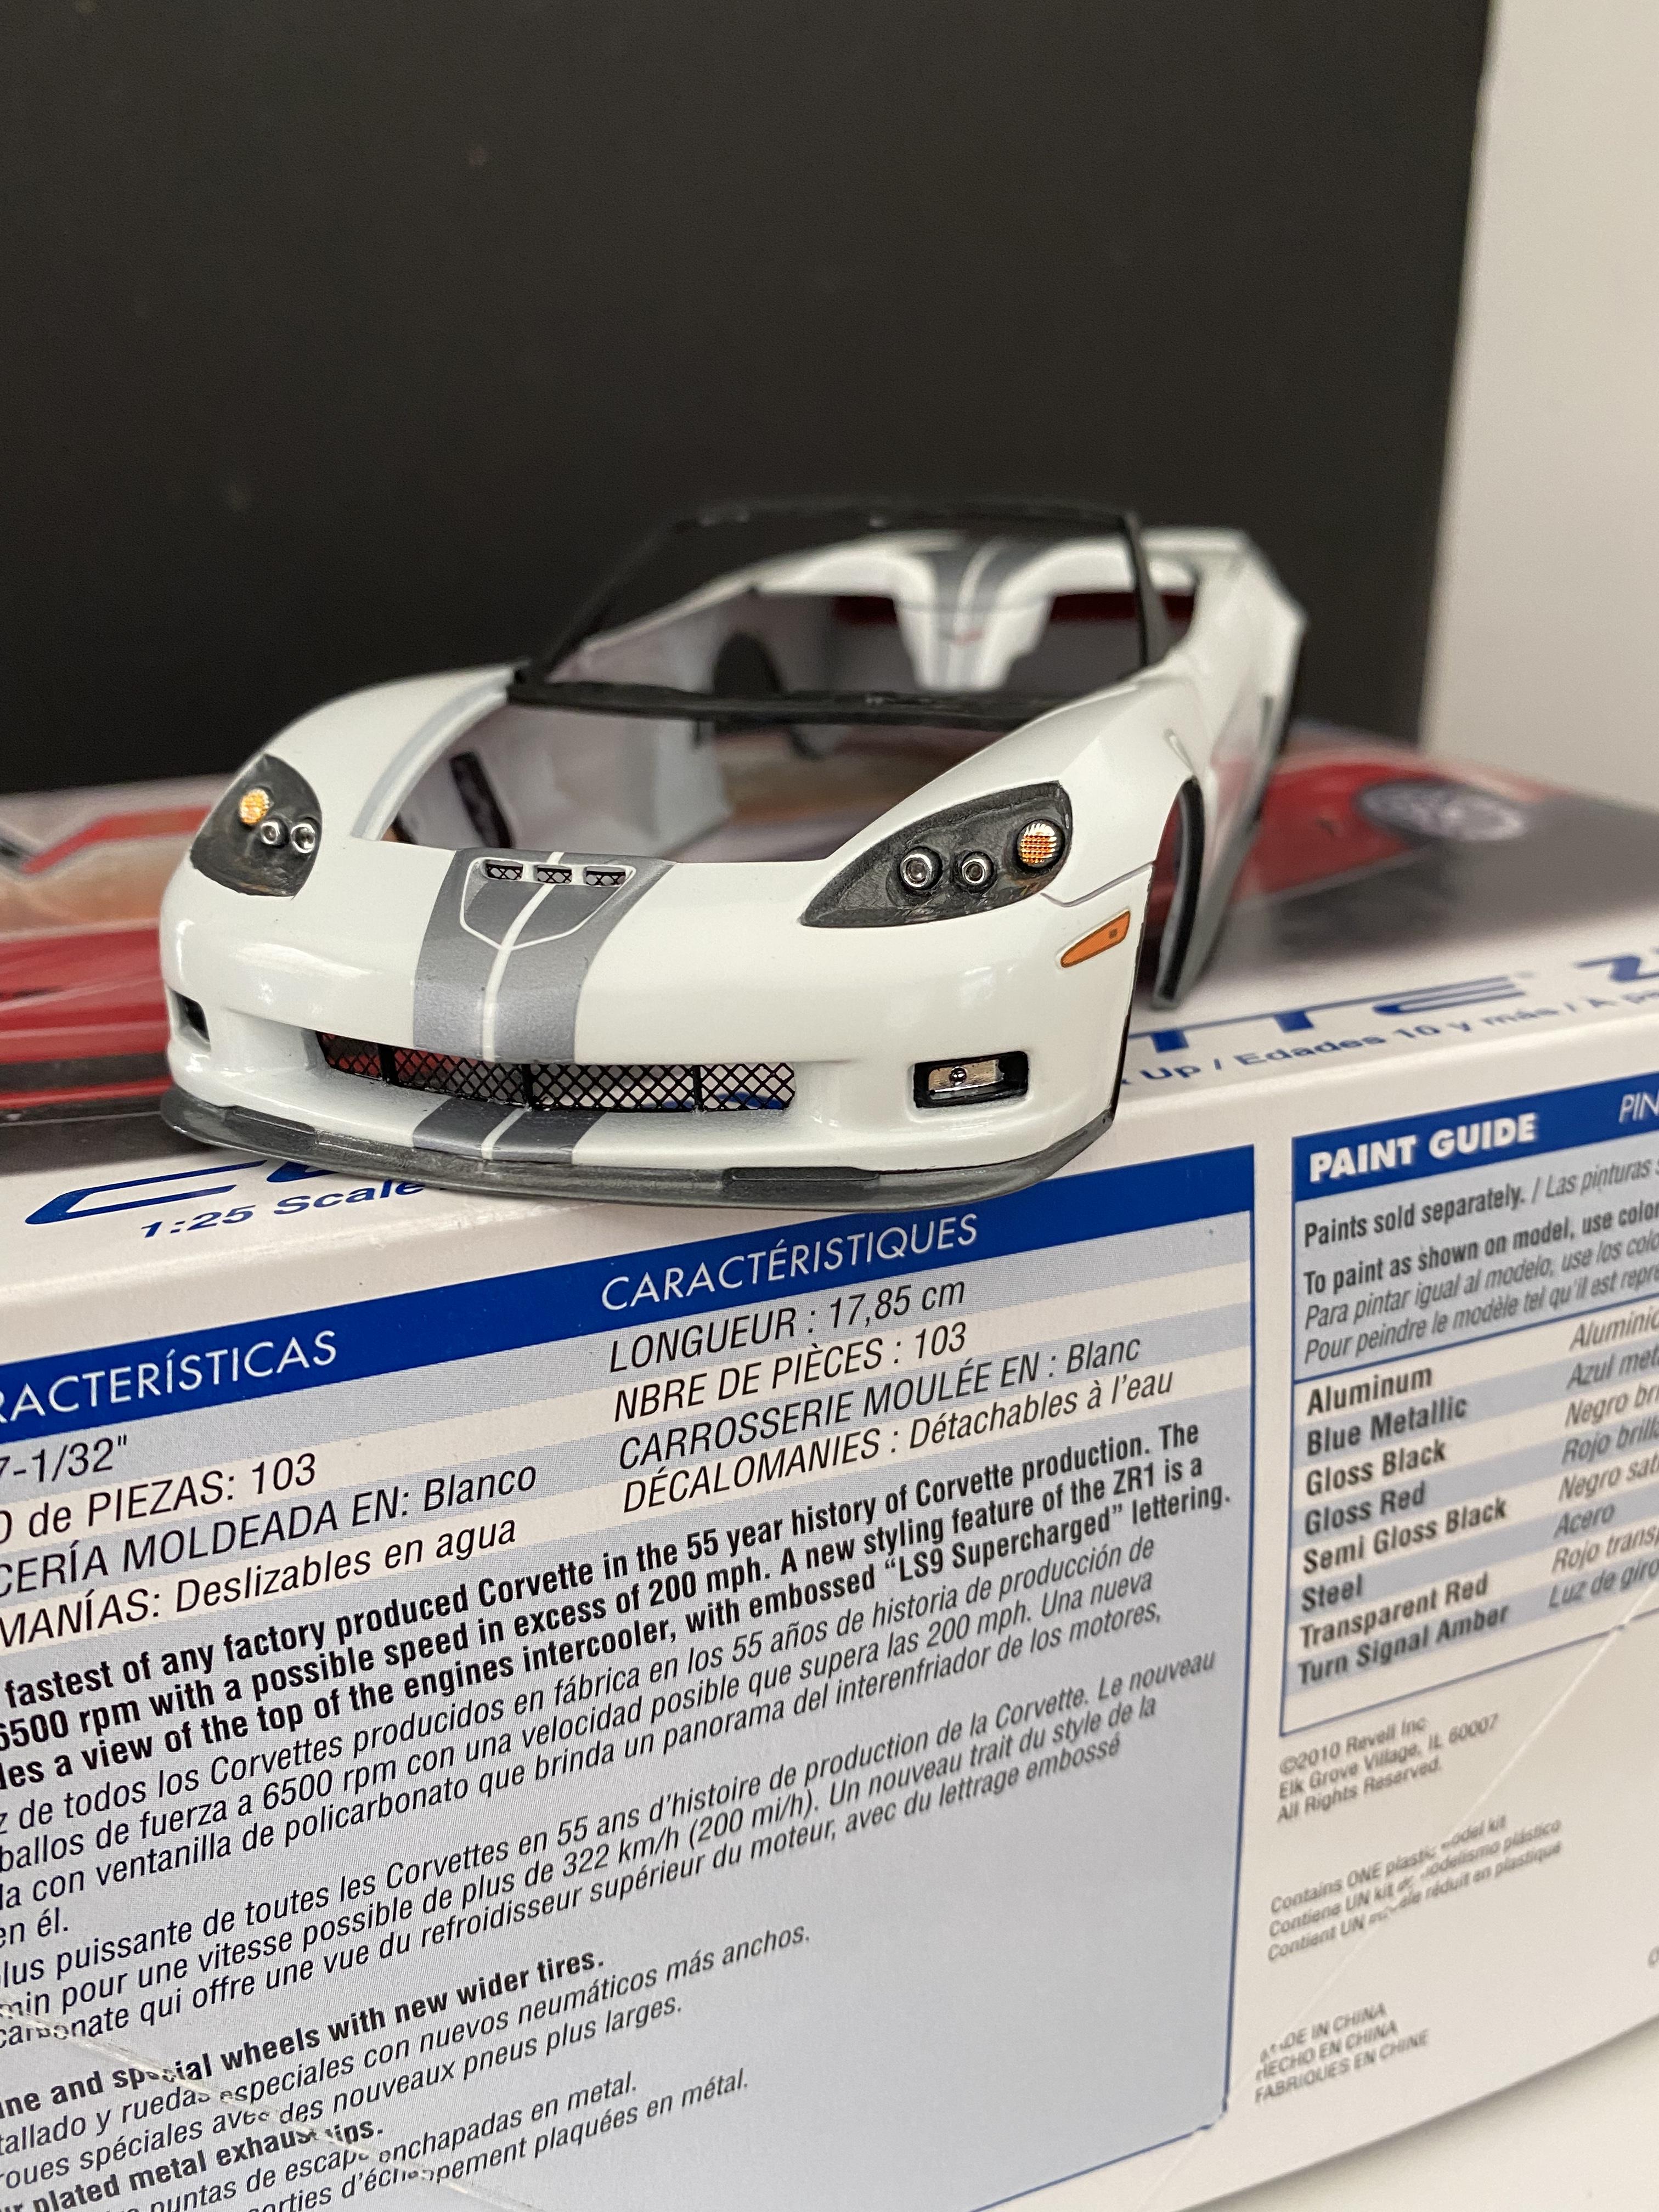
Finally finished the 60th Anniversary Corvette '427' convertible -- you can follow the detail of the build at the link below to the 'WIP' section. Thx for looking and as always, appreciate all the comments, it was a fun , but long build!

-
 1
1
-
-
great job --you brought your 1:1 to scale life!!
-
Mike and Joe , thx for the compliments, learned a lot from everyone here on the forum!
-
A couple more views of the almost completed 60th Anniversary Vette -- I think the next post will be 'Under Glass' , we'll see how this all looks with the wheels attached and a good view of the interior! Thx for viewing and all the comments,
-
2
-
-
On 8/25/2021 at 8:20 AM, Mattilacken said:
Suggestions needed.
I test fitted the non RS grill and I have a huge gap on top of the grill. Any special fixes for this?
I'd use some strip styrene, layer in with some ABS glue, that will 'weld' the plastic stipes together and you can then sand for a perfect fit. Good luck , looks like a great start and love the subject!
-
 1
1
-
-
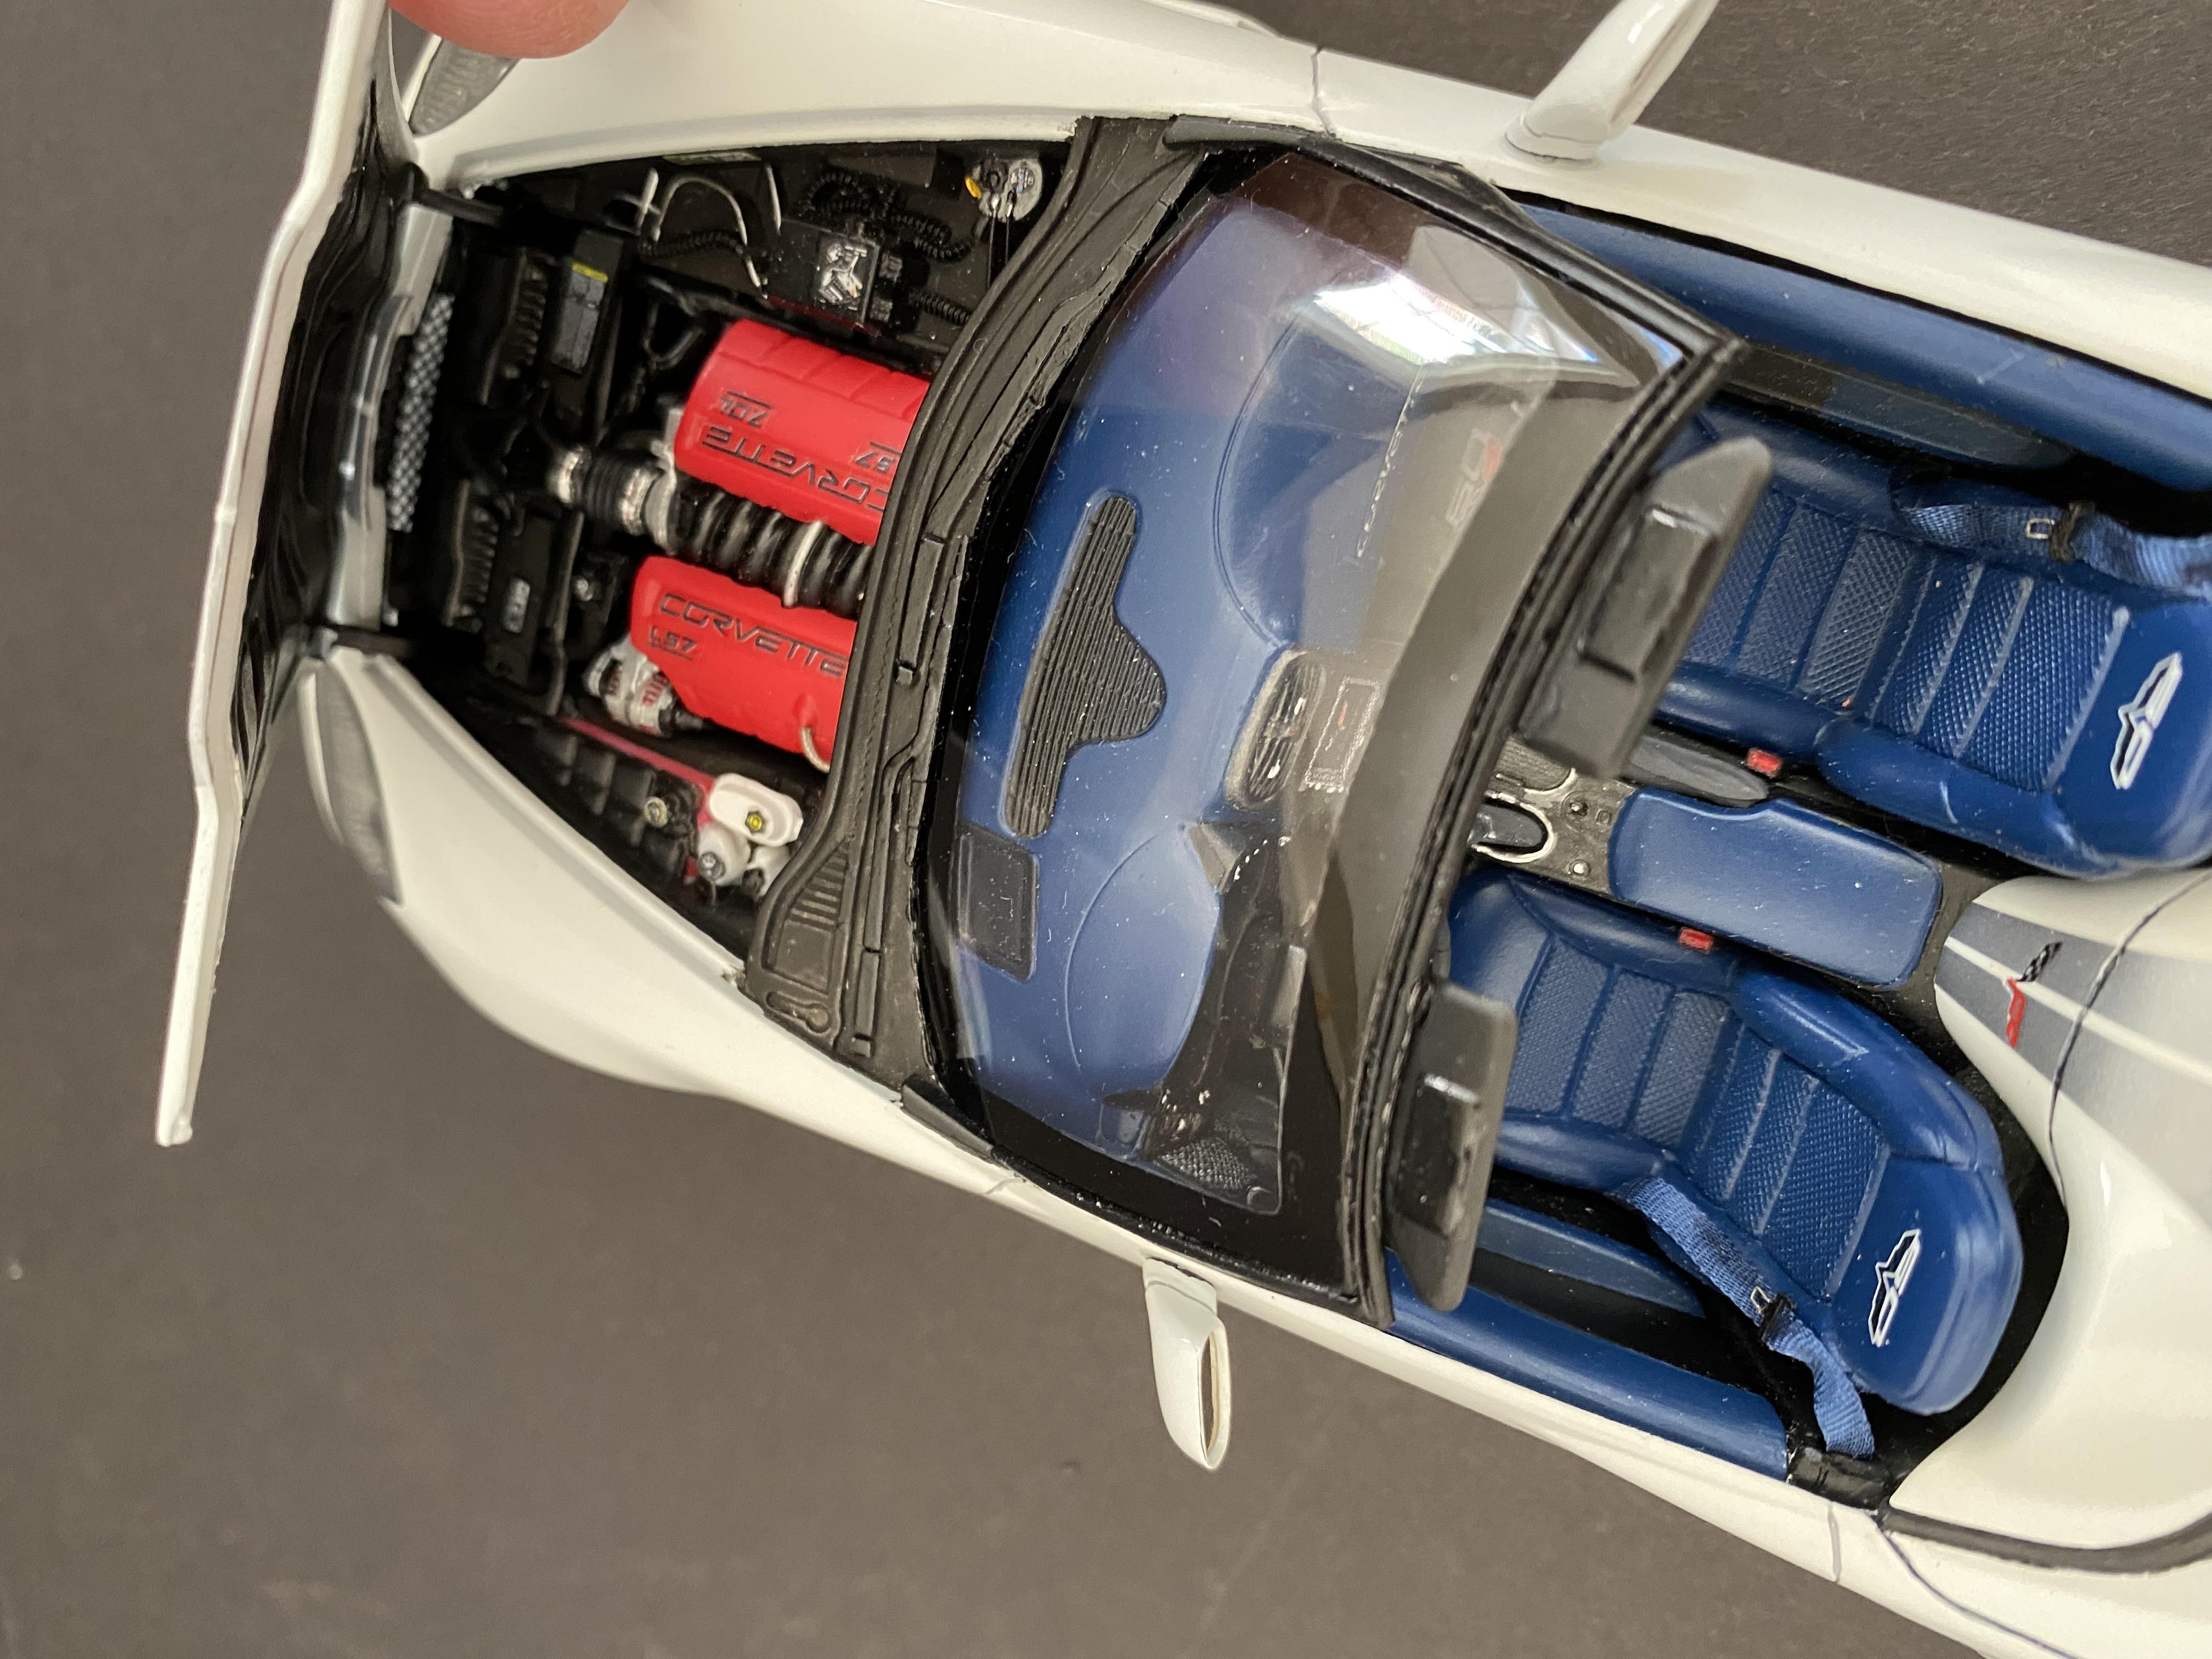
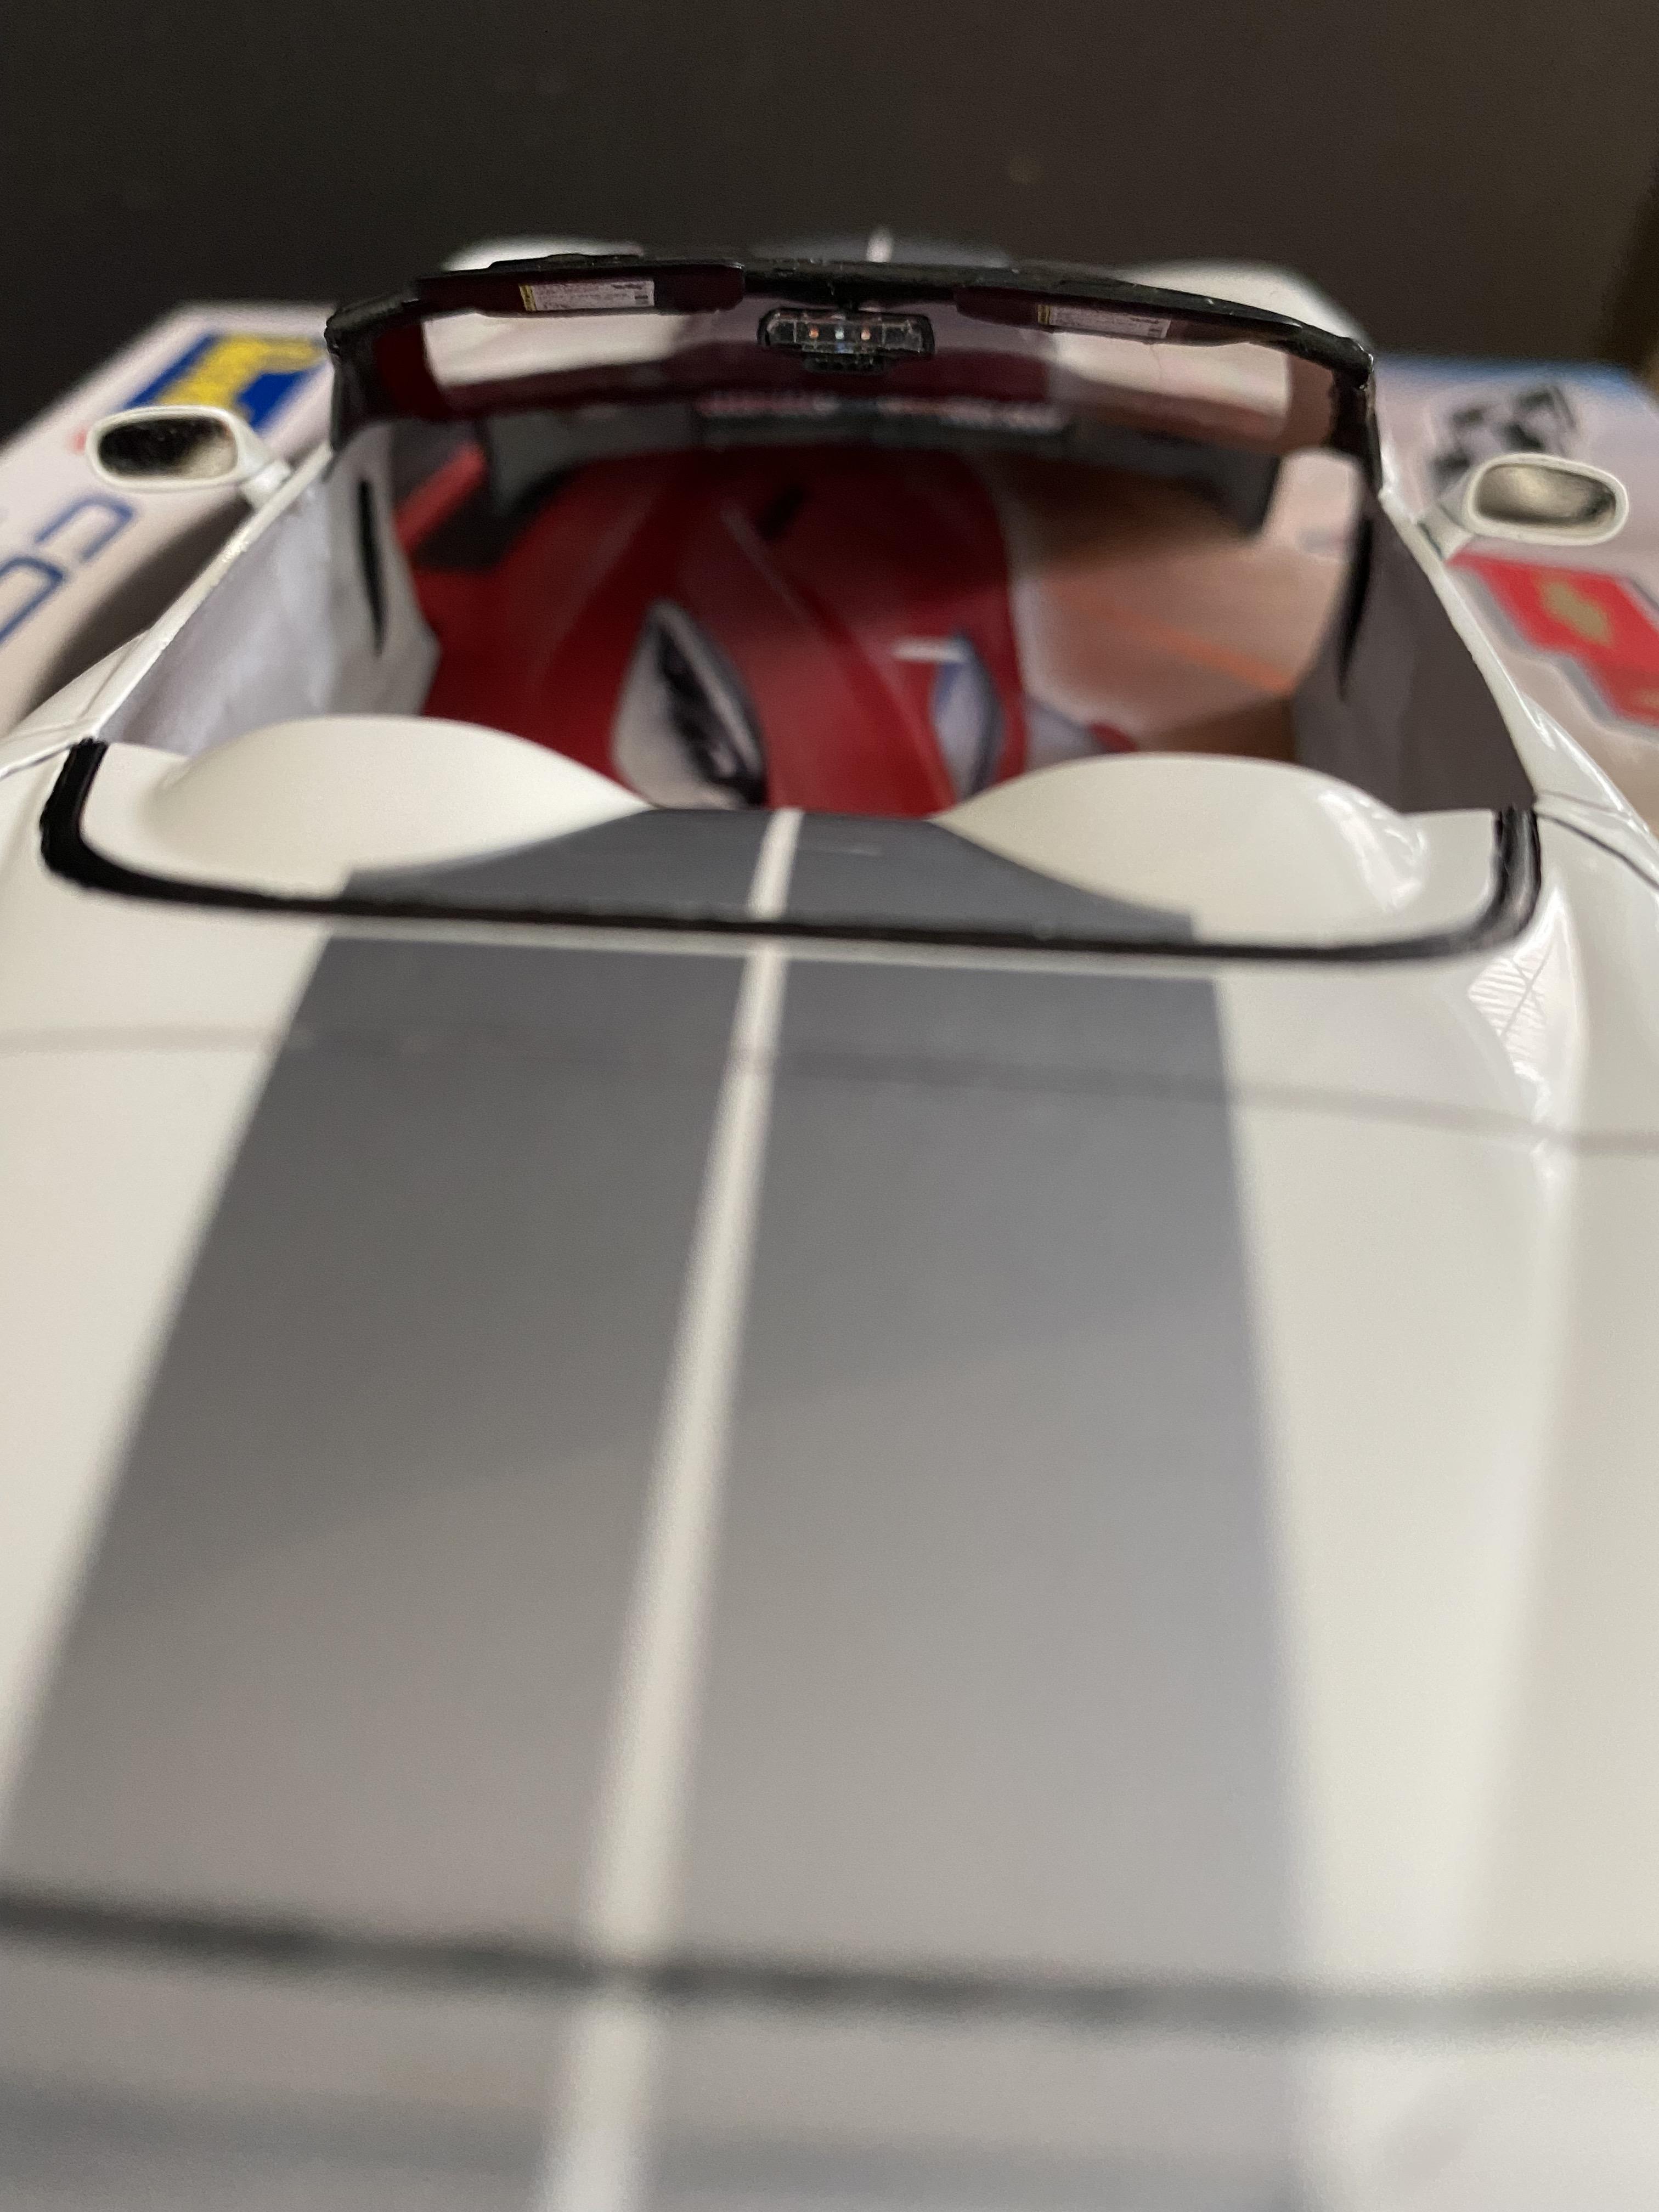
View of the inside rear view mirror with decal added to simulate the 'display' that is projected in the mirror; also added 'warning decals' to the sun visors that were cut from the 'snap-tite' convertible kit glass. Also is a pic of the Plamoz PE emblems that i described in the previous post -- a lot of patients in applying the decals!
-
1
-
-
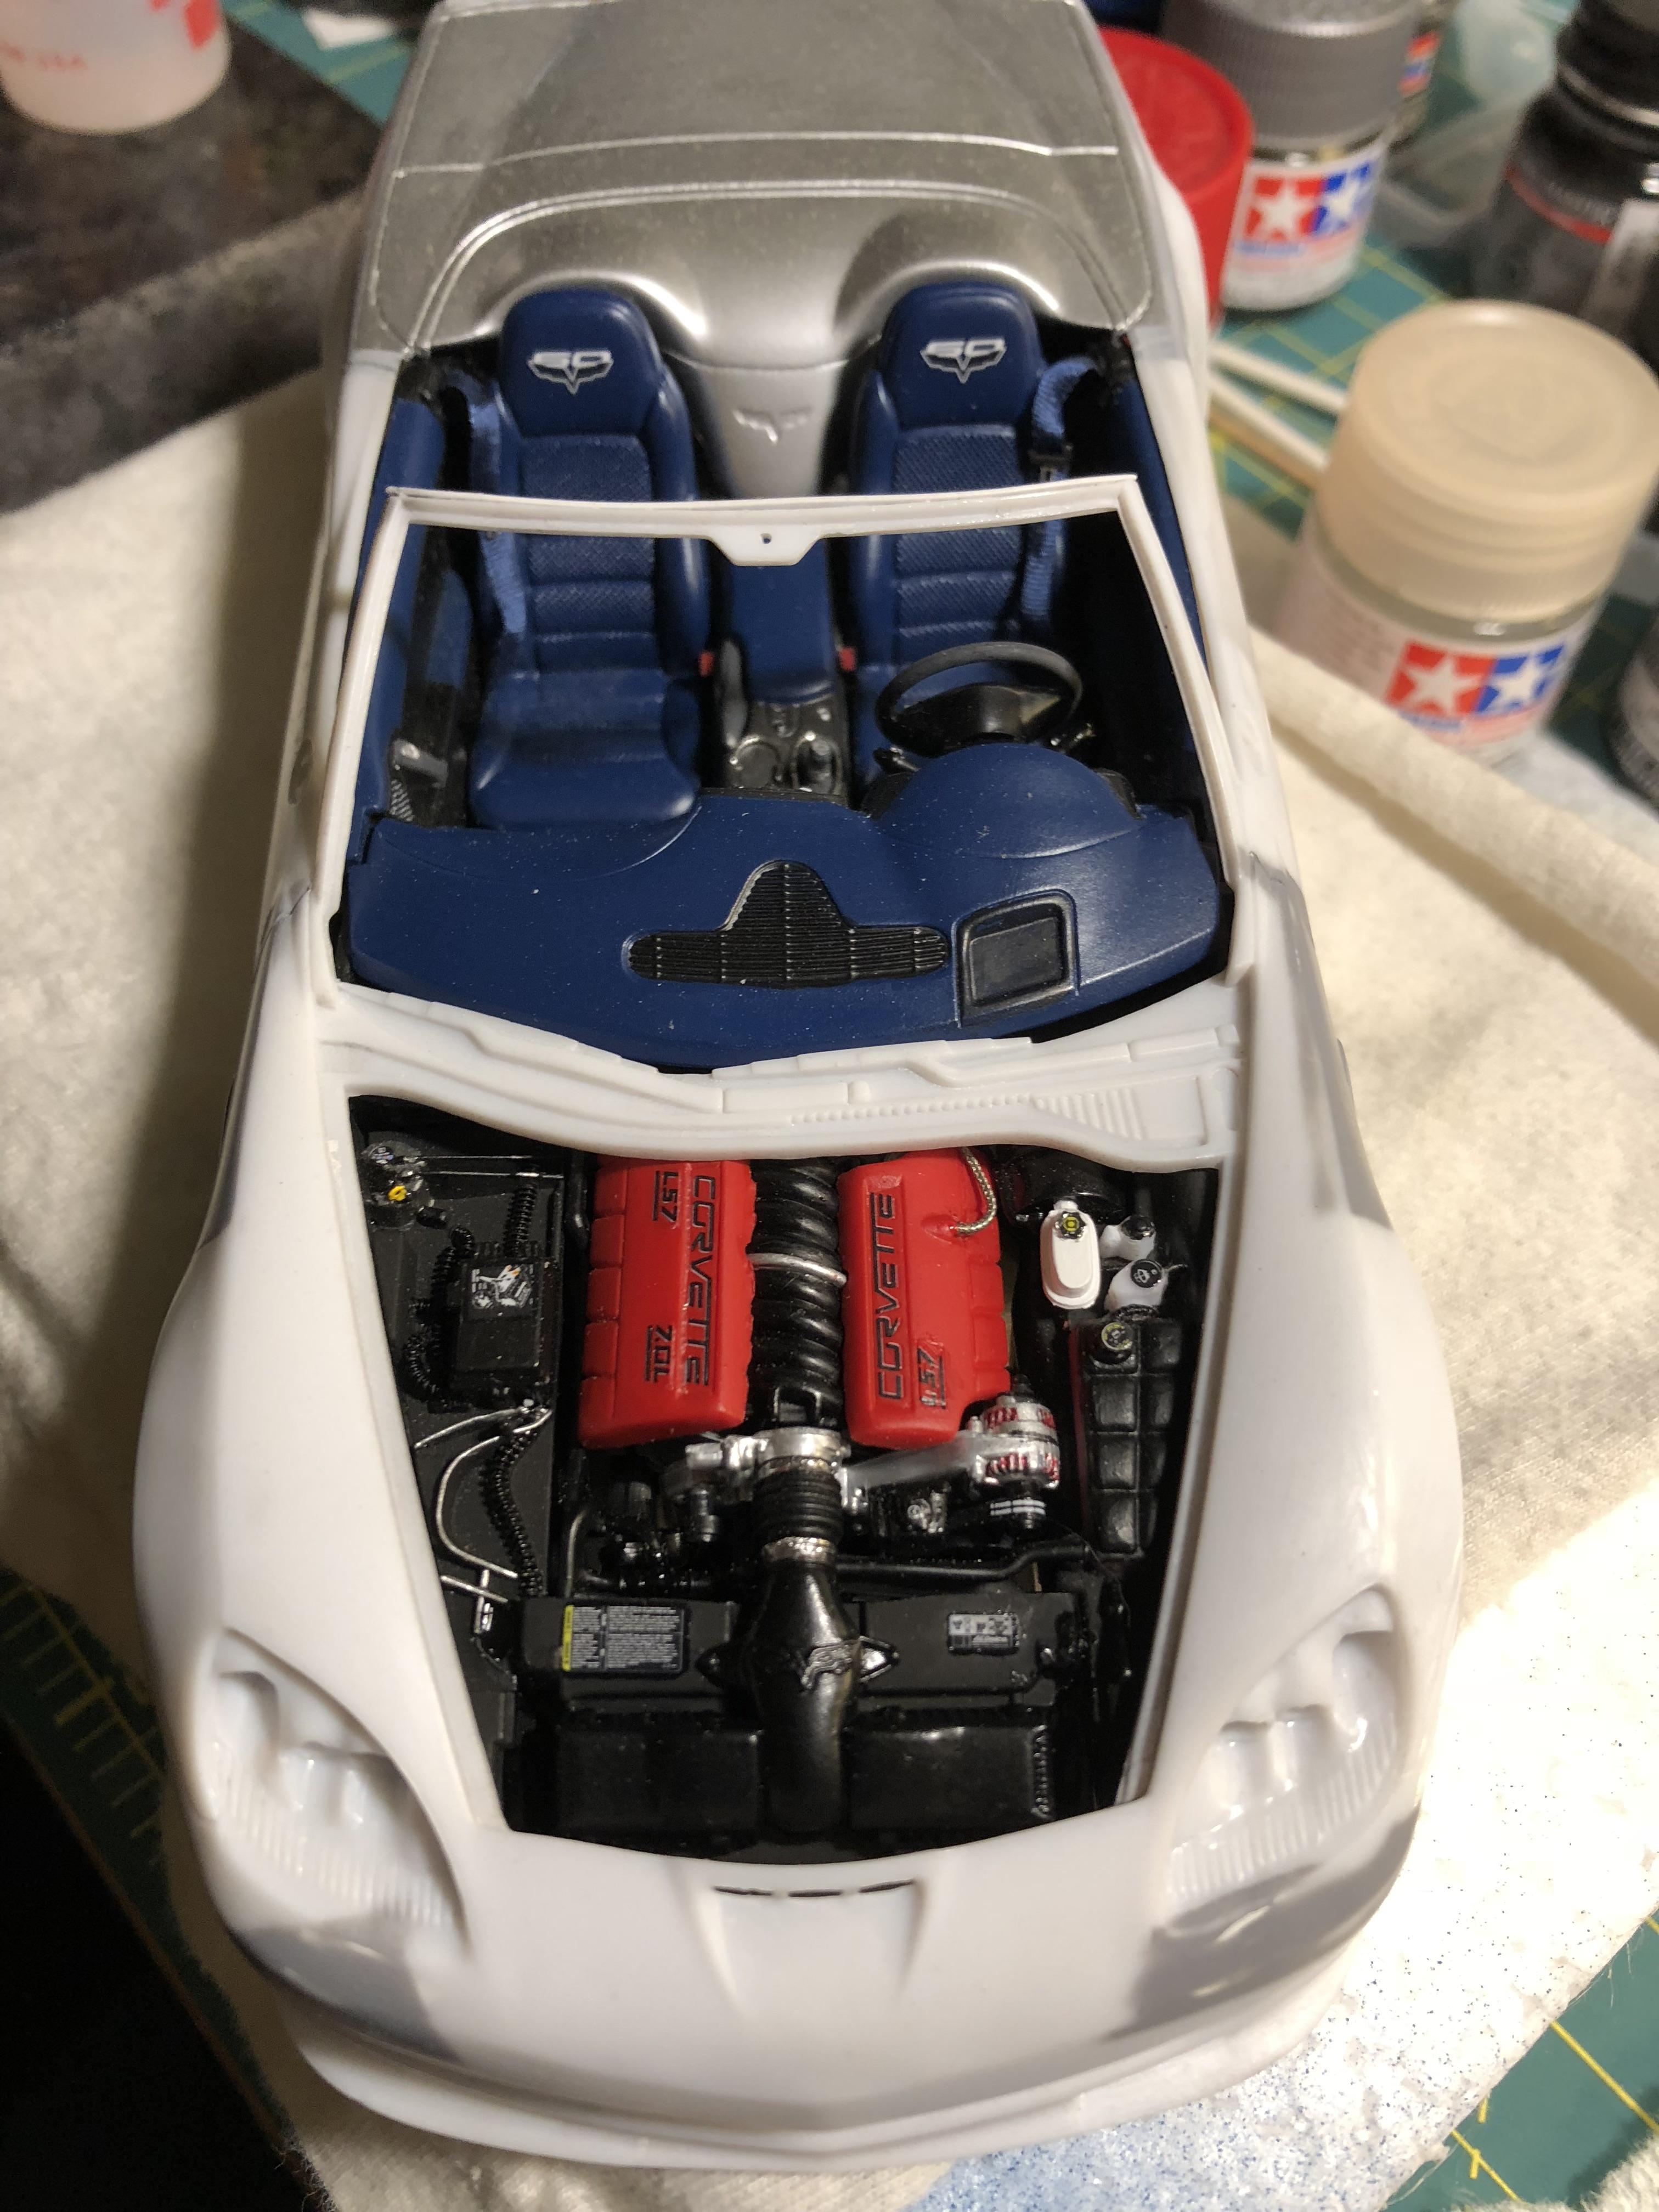
We was able to make a lot of progress on the Vette -- added the outside and inside rear view mirrors, front windshield, head light and directional lenses covers were added, as well as the excellent Plamoz PE emblems that have the decals applied to them -- this really makes the realism pop!
-
1
-
-
On 8/20/2021 at 2:07 PM, Flynlo said:
Looking great, thanks for sharing!
Thank you for the compliment! Still more to go!
-
On 8/20/2021 at 12:16 PM, Mattilacken said:
I believe that’s the fuel line not trote cable since these are drive by wire 🙂
grwat build!! Looks really good!!
Anton - -Thx for the correction, yes it is the fuel line --sorry for that, but appreciate the comments.
-
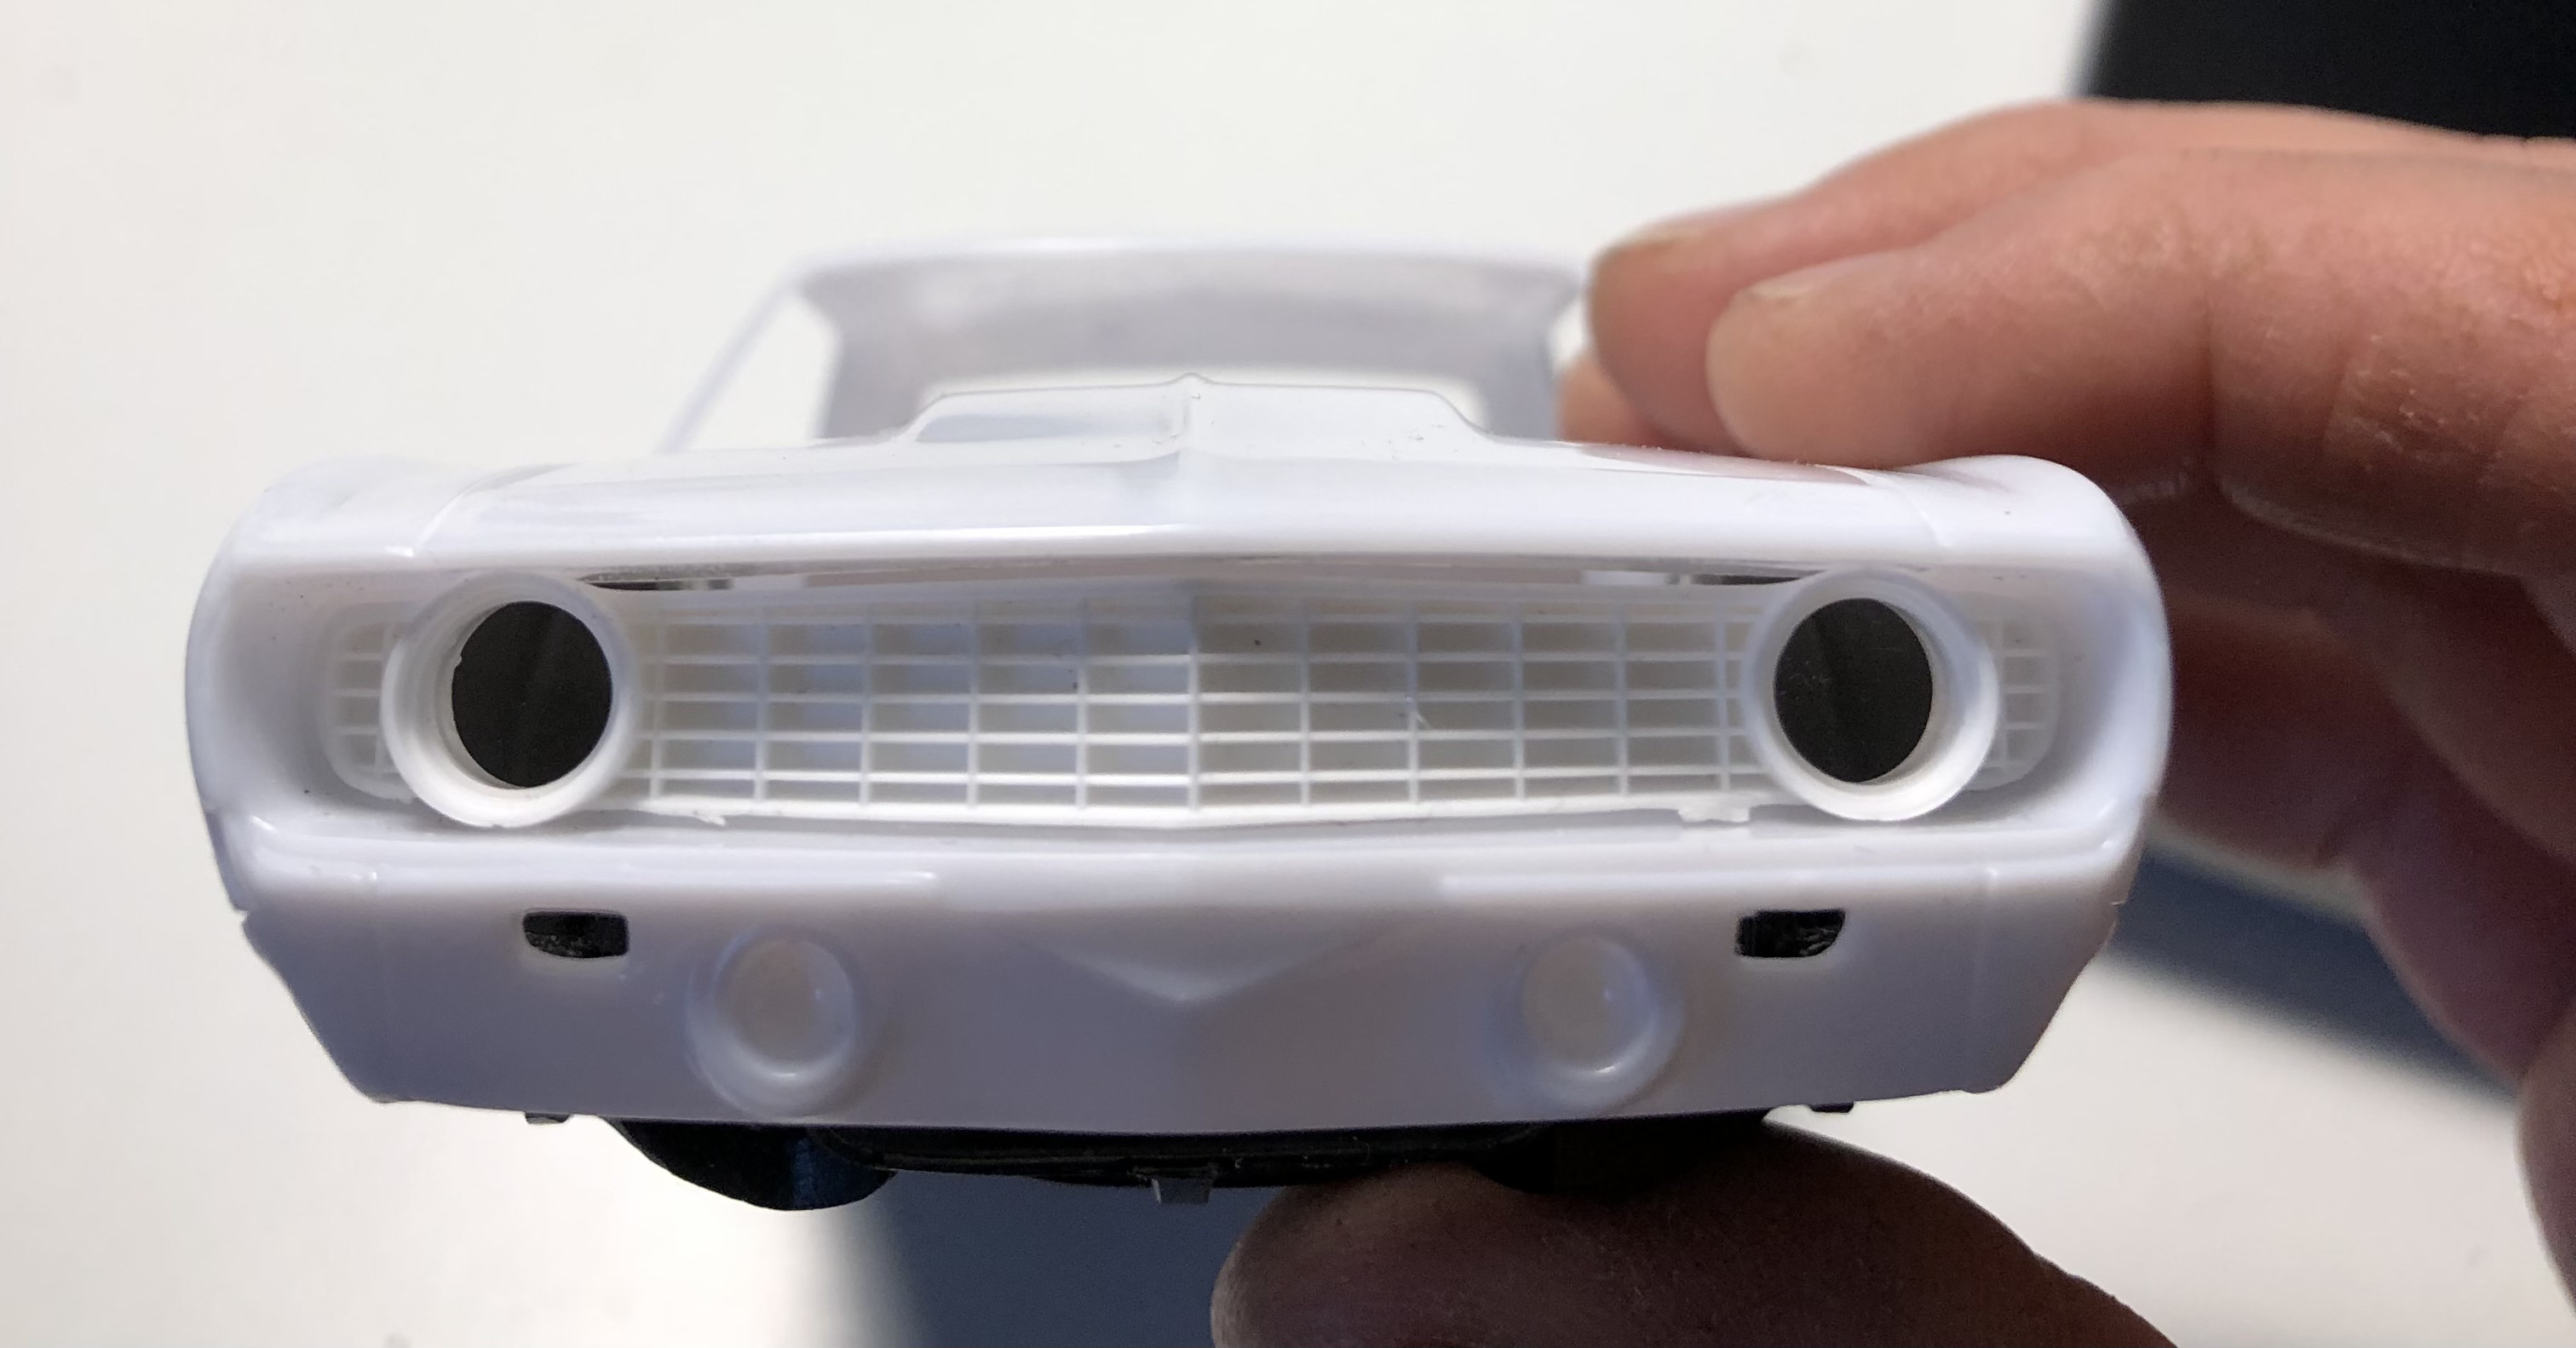
This is the part of the build that I love, when everything starts to come together -- detail painted the front and rear wheel arch stone guards(a real pain!), the convertible top compartment gasket, windshield 'A' pillar and wipers. Also added the Plamoz photo etch lower front grill and air intake grill; added the front and rear fender air scoops. Finally applied the panel line accents and added the rear taillights --thx for looking!
-
2
-
-
Thx for the kind comments, just finished up some detail painting on the body -- I'll try to post a couple more pictures over the next couple of days,
Thx
Al
-
Thanx for the compliments -- a lot more work to go.
-
I then applied a light mist coat of thinned AT Clear, to seal in the decals, then applied two more heavy coats of clear and let the body, hood and mirrors outgas for about 7 days. The clear was then 'cut' with 3000, rubbed out with 3M Perfect III compound and followed by Scratch X and polished. Appreciate you looking and any comments, thx
-
2
-
1
-
-
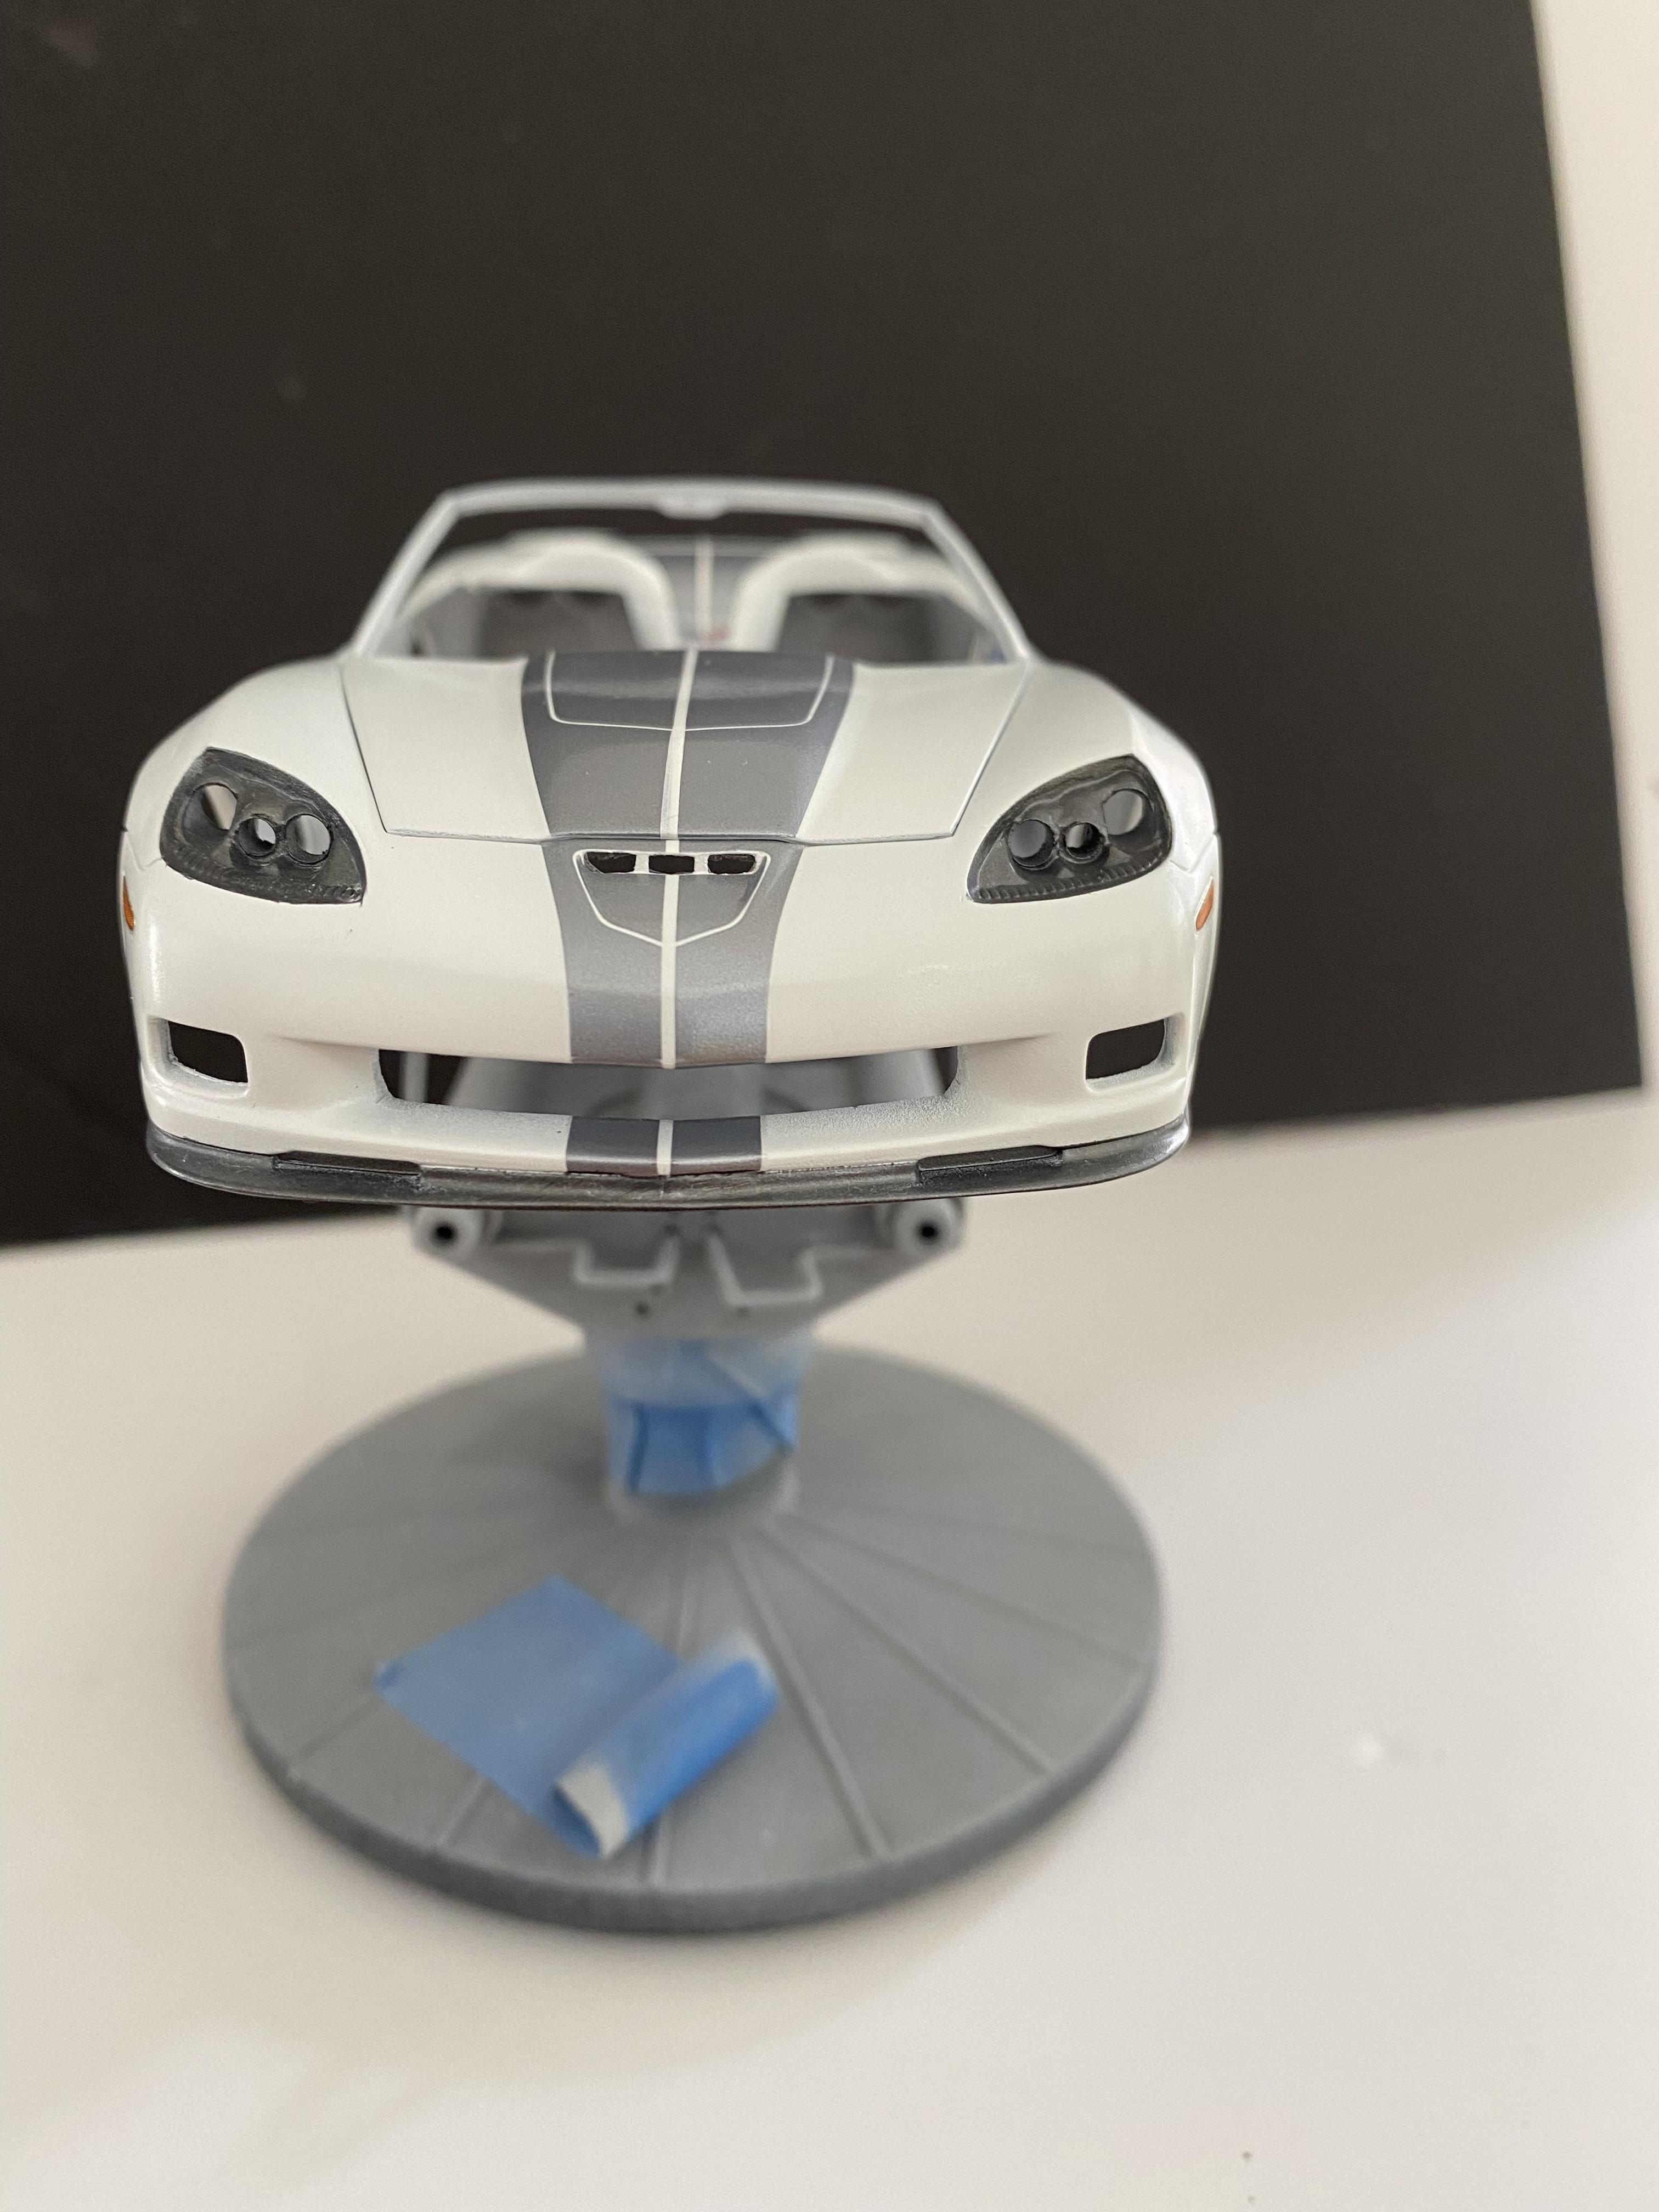
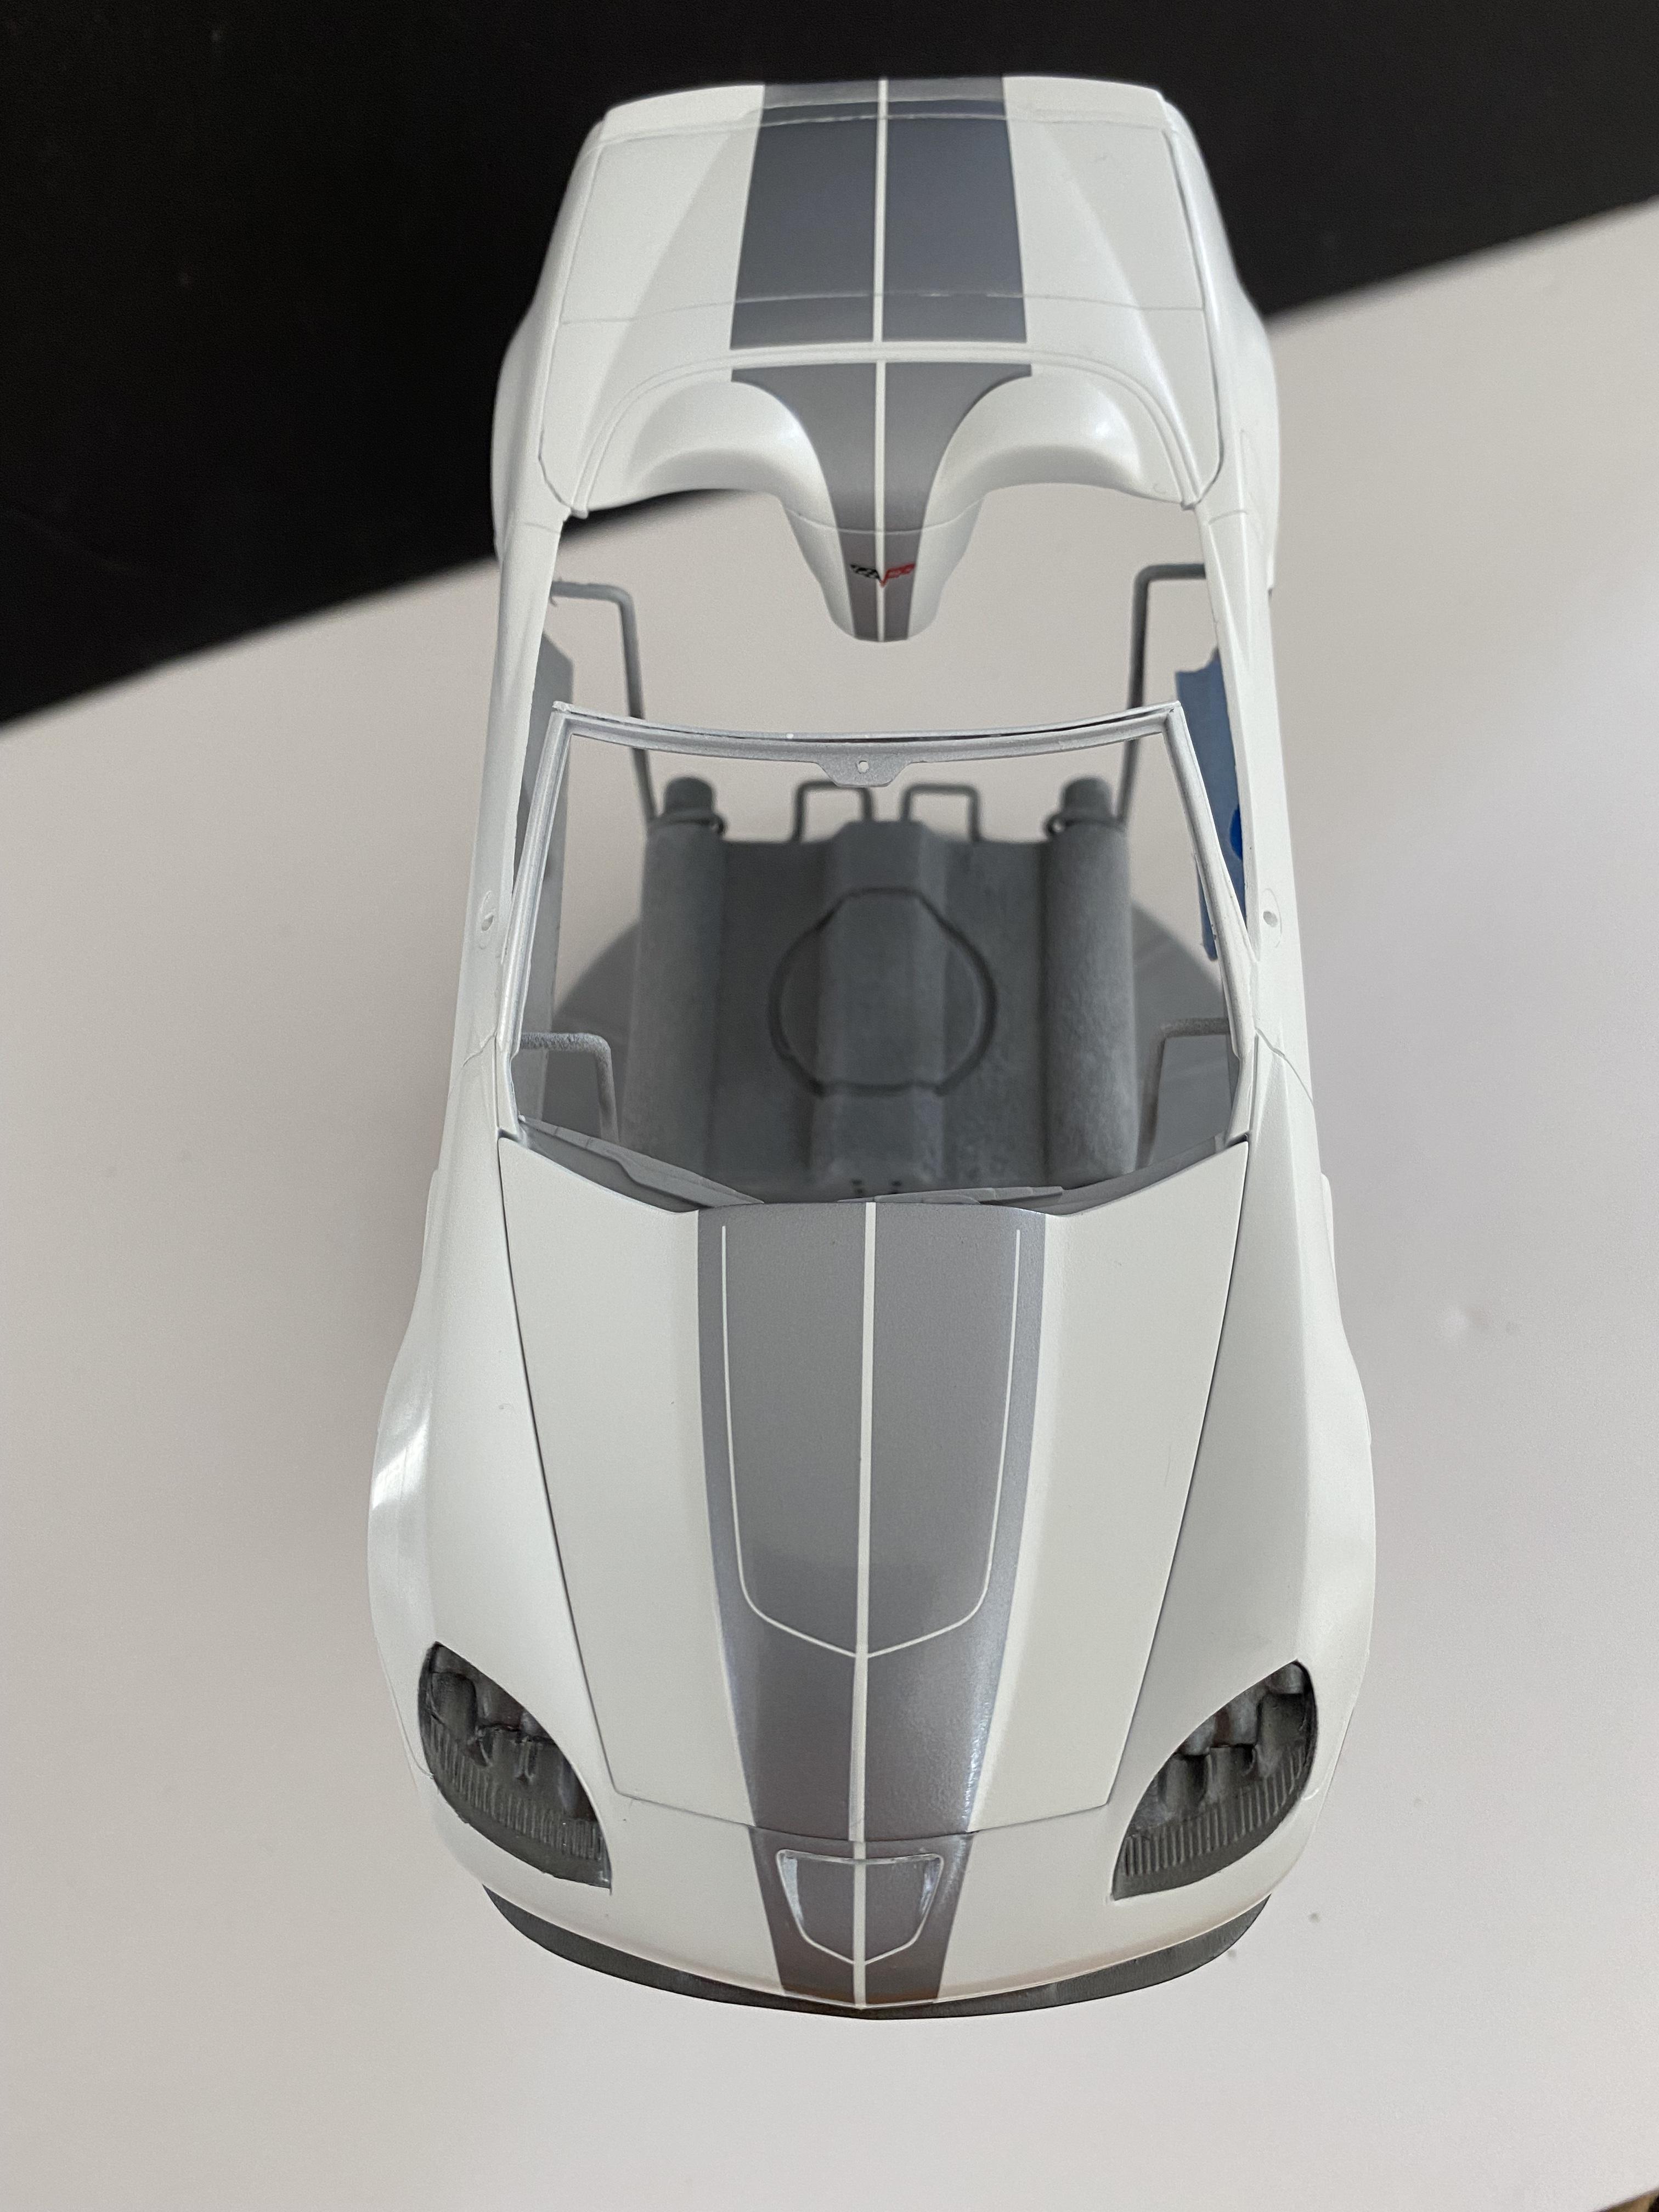
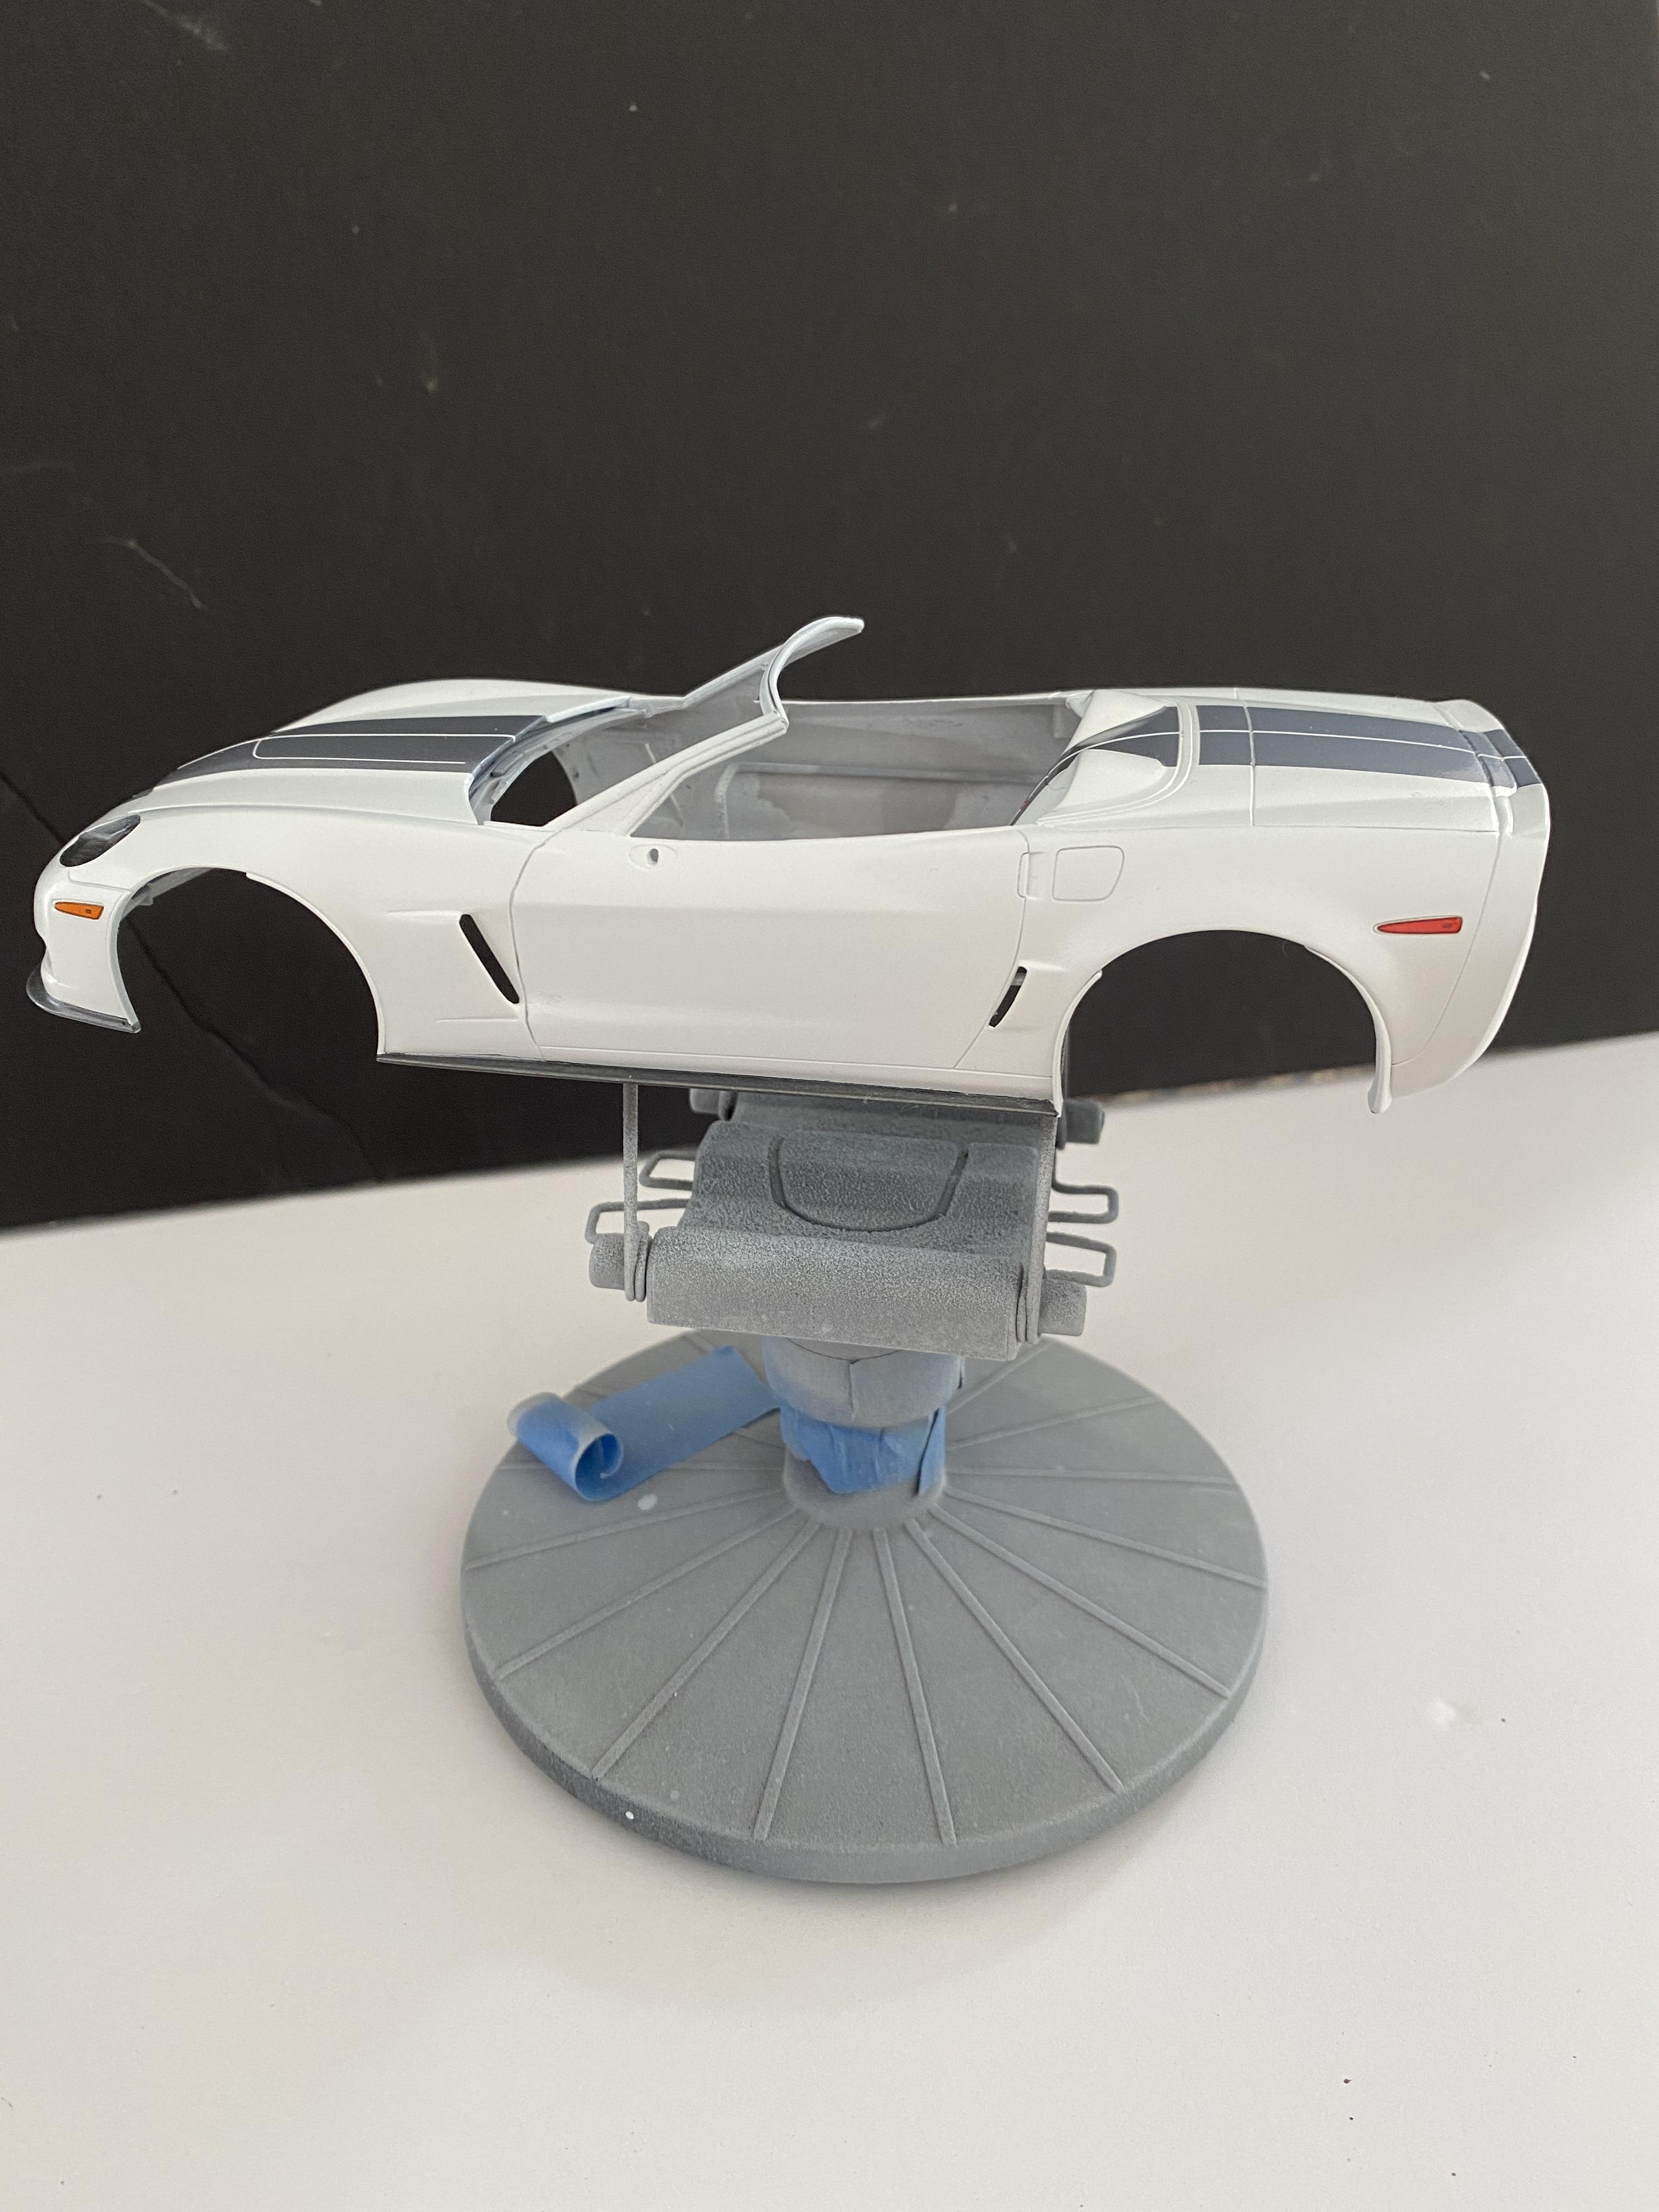
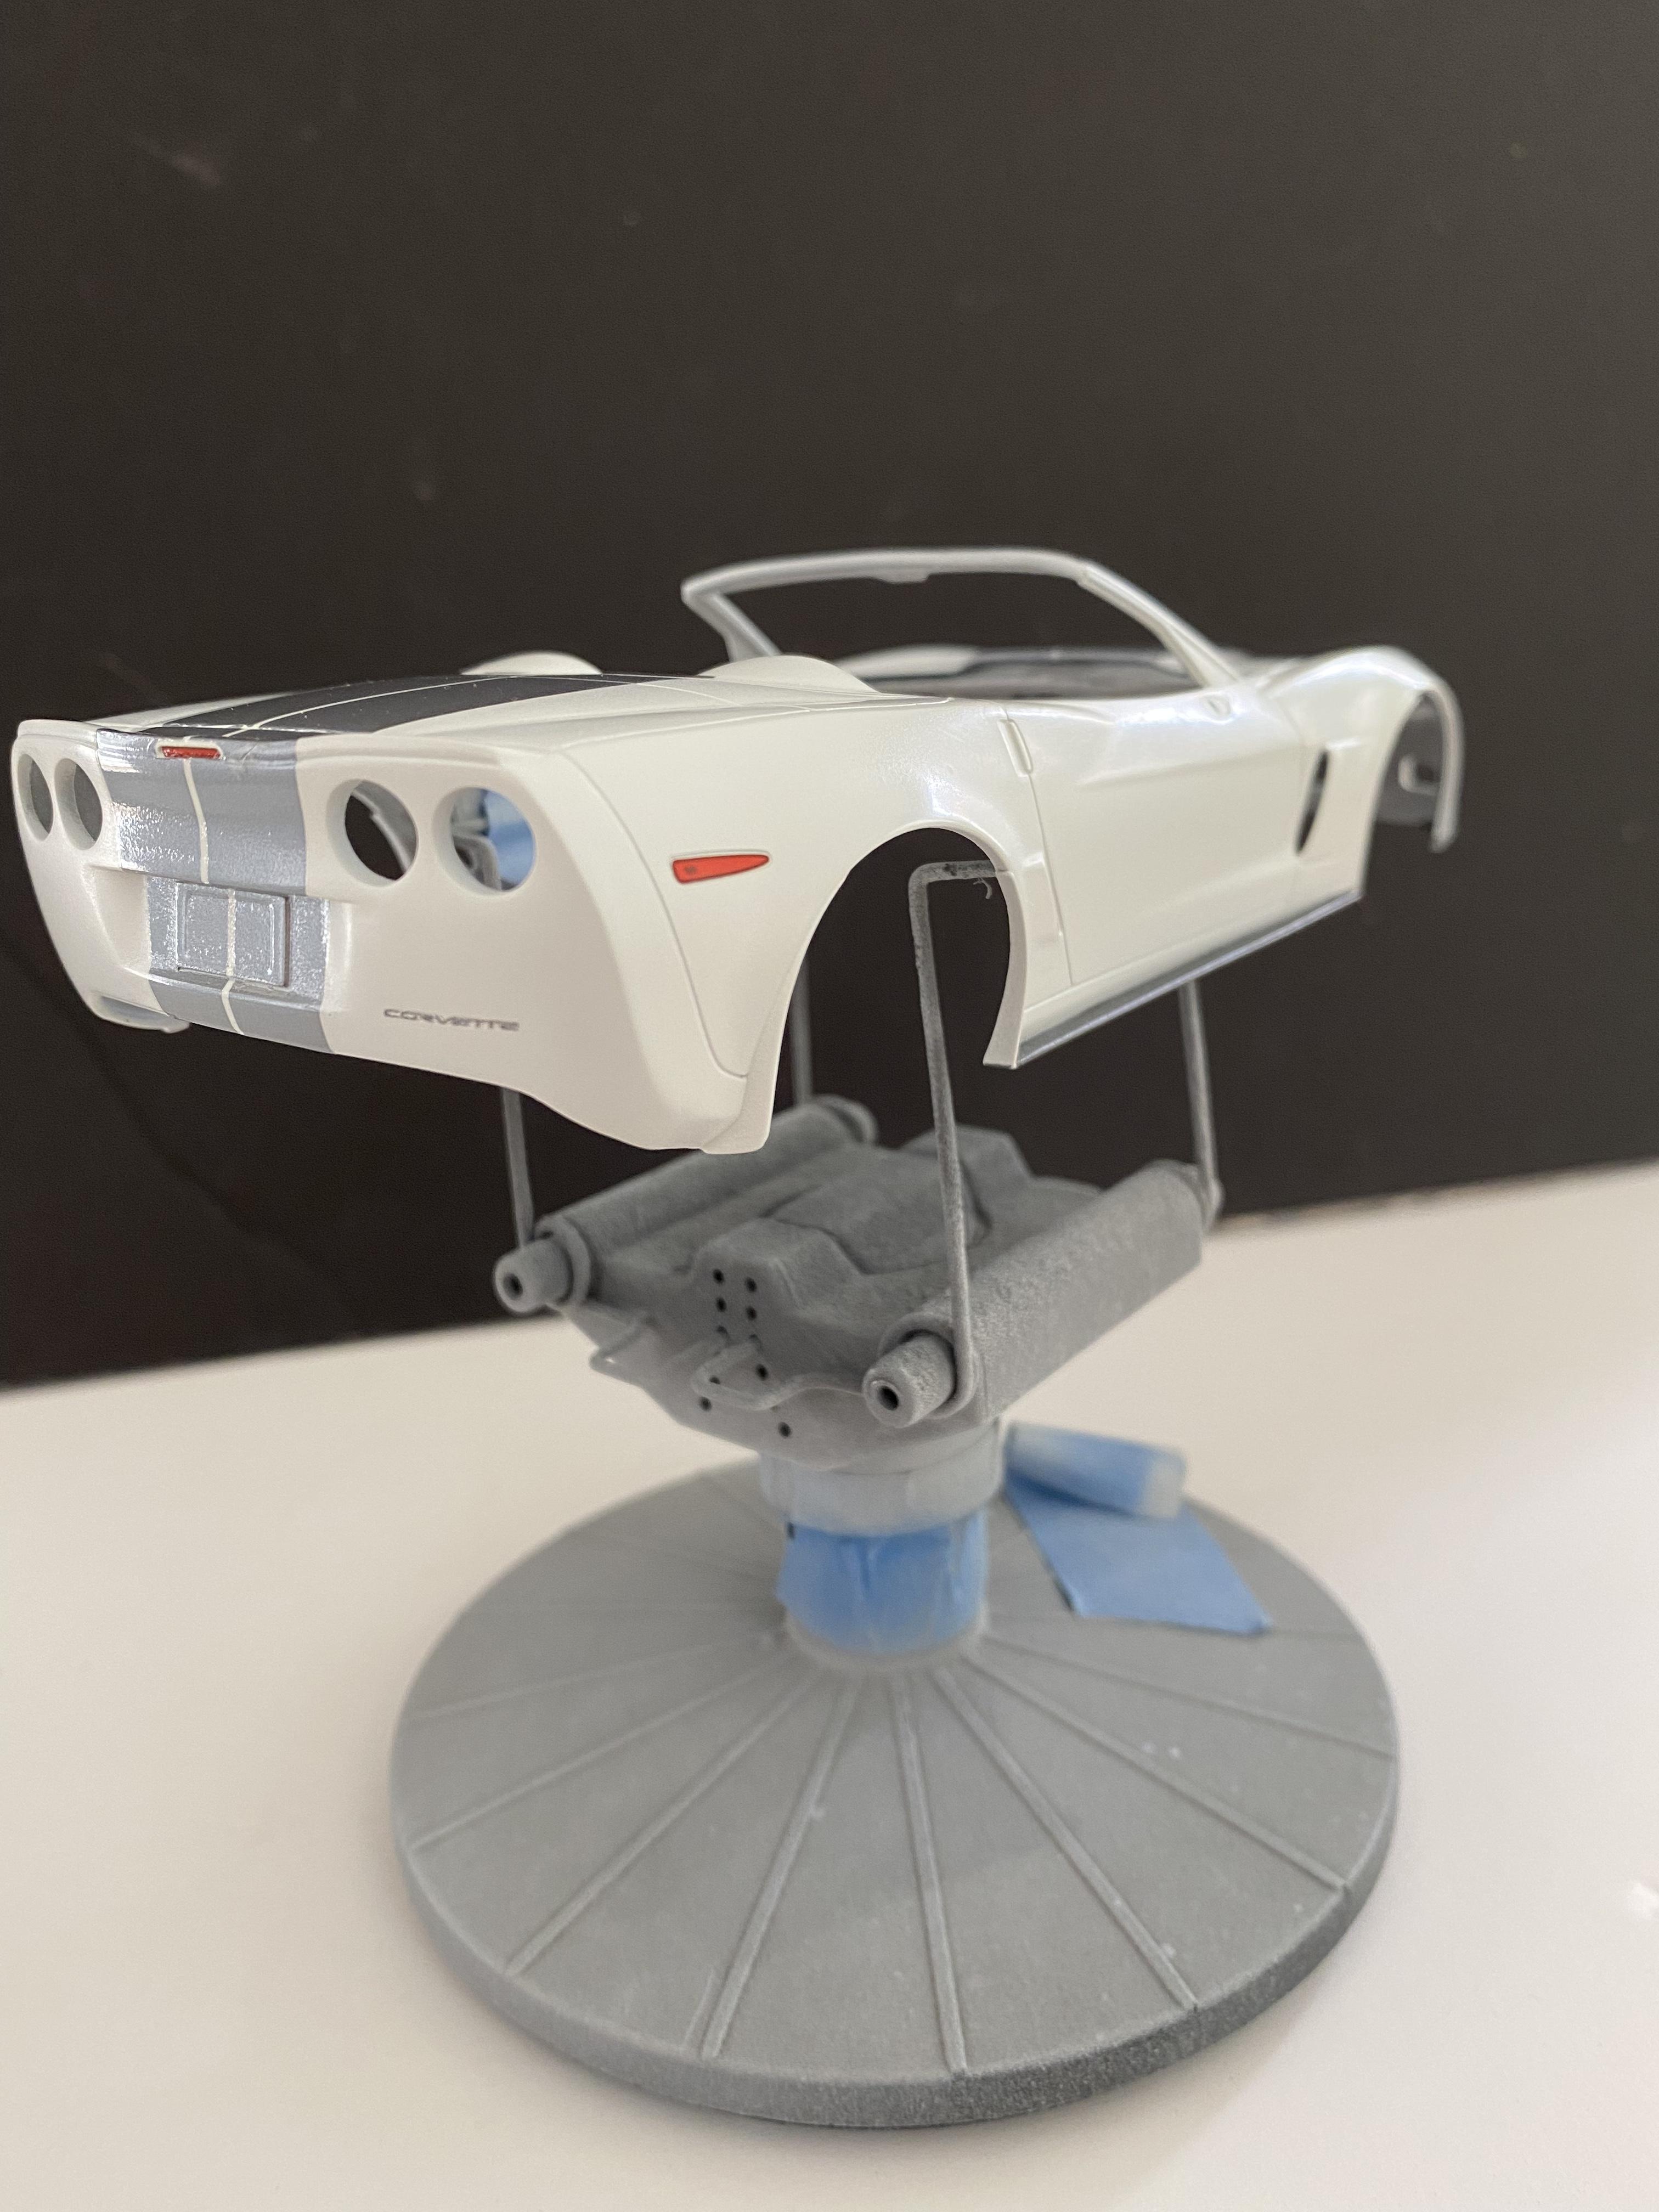
After priming the body, it was AB'd with Automotive Touchup Arctic White, rocker skirts, front splitter and headlight bezels were painted Vallejo Gunmetal -- the paint was thinned 1:1 with Mr. Color leveling thinner.
The body was then color sanded starting with 3000 grit and working up to 12000 grit to smooth the paint out. The Plazmos decals were then applied.
-
1
-
-
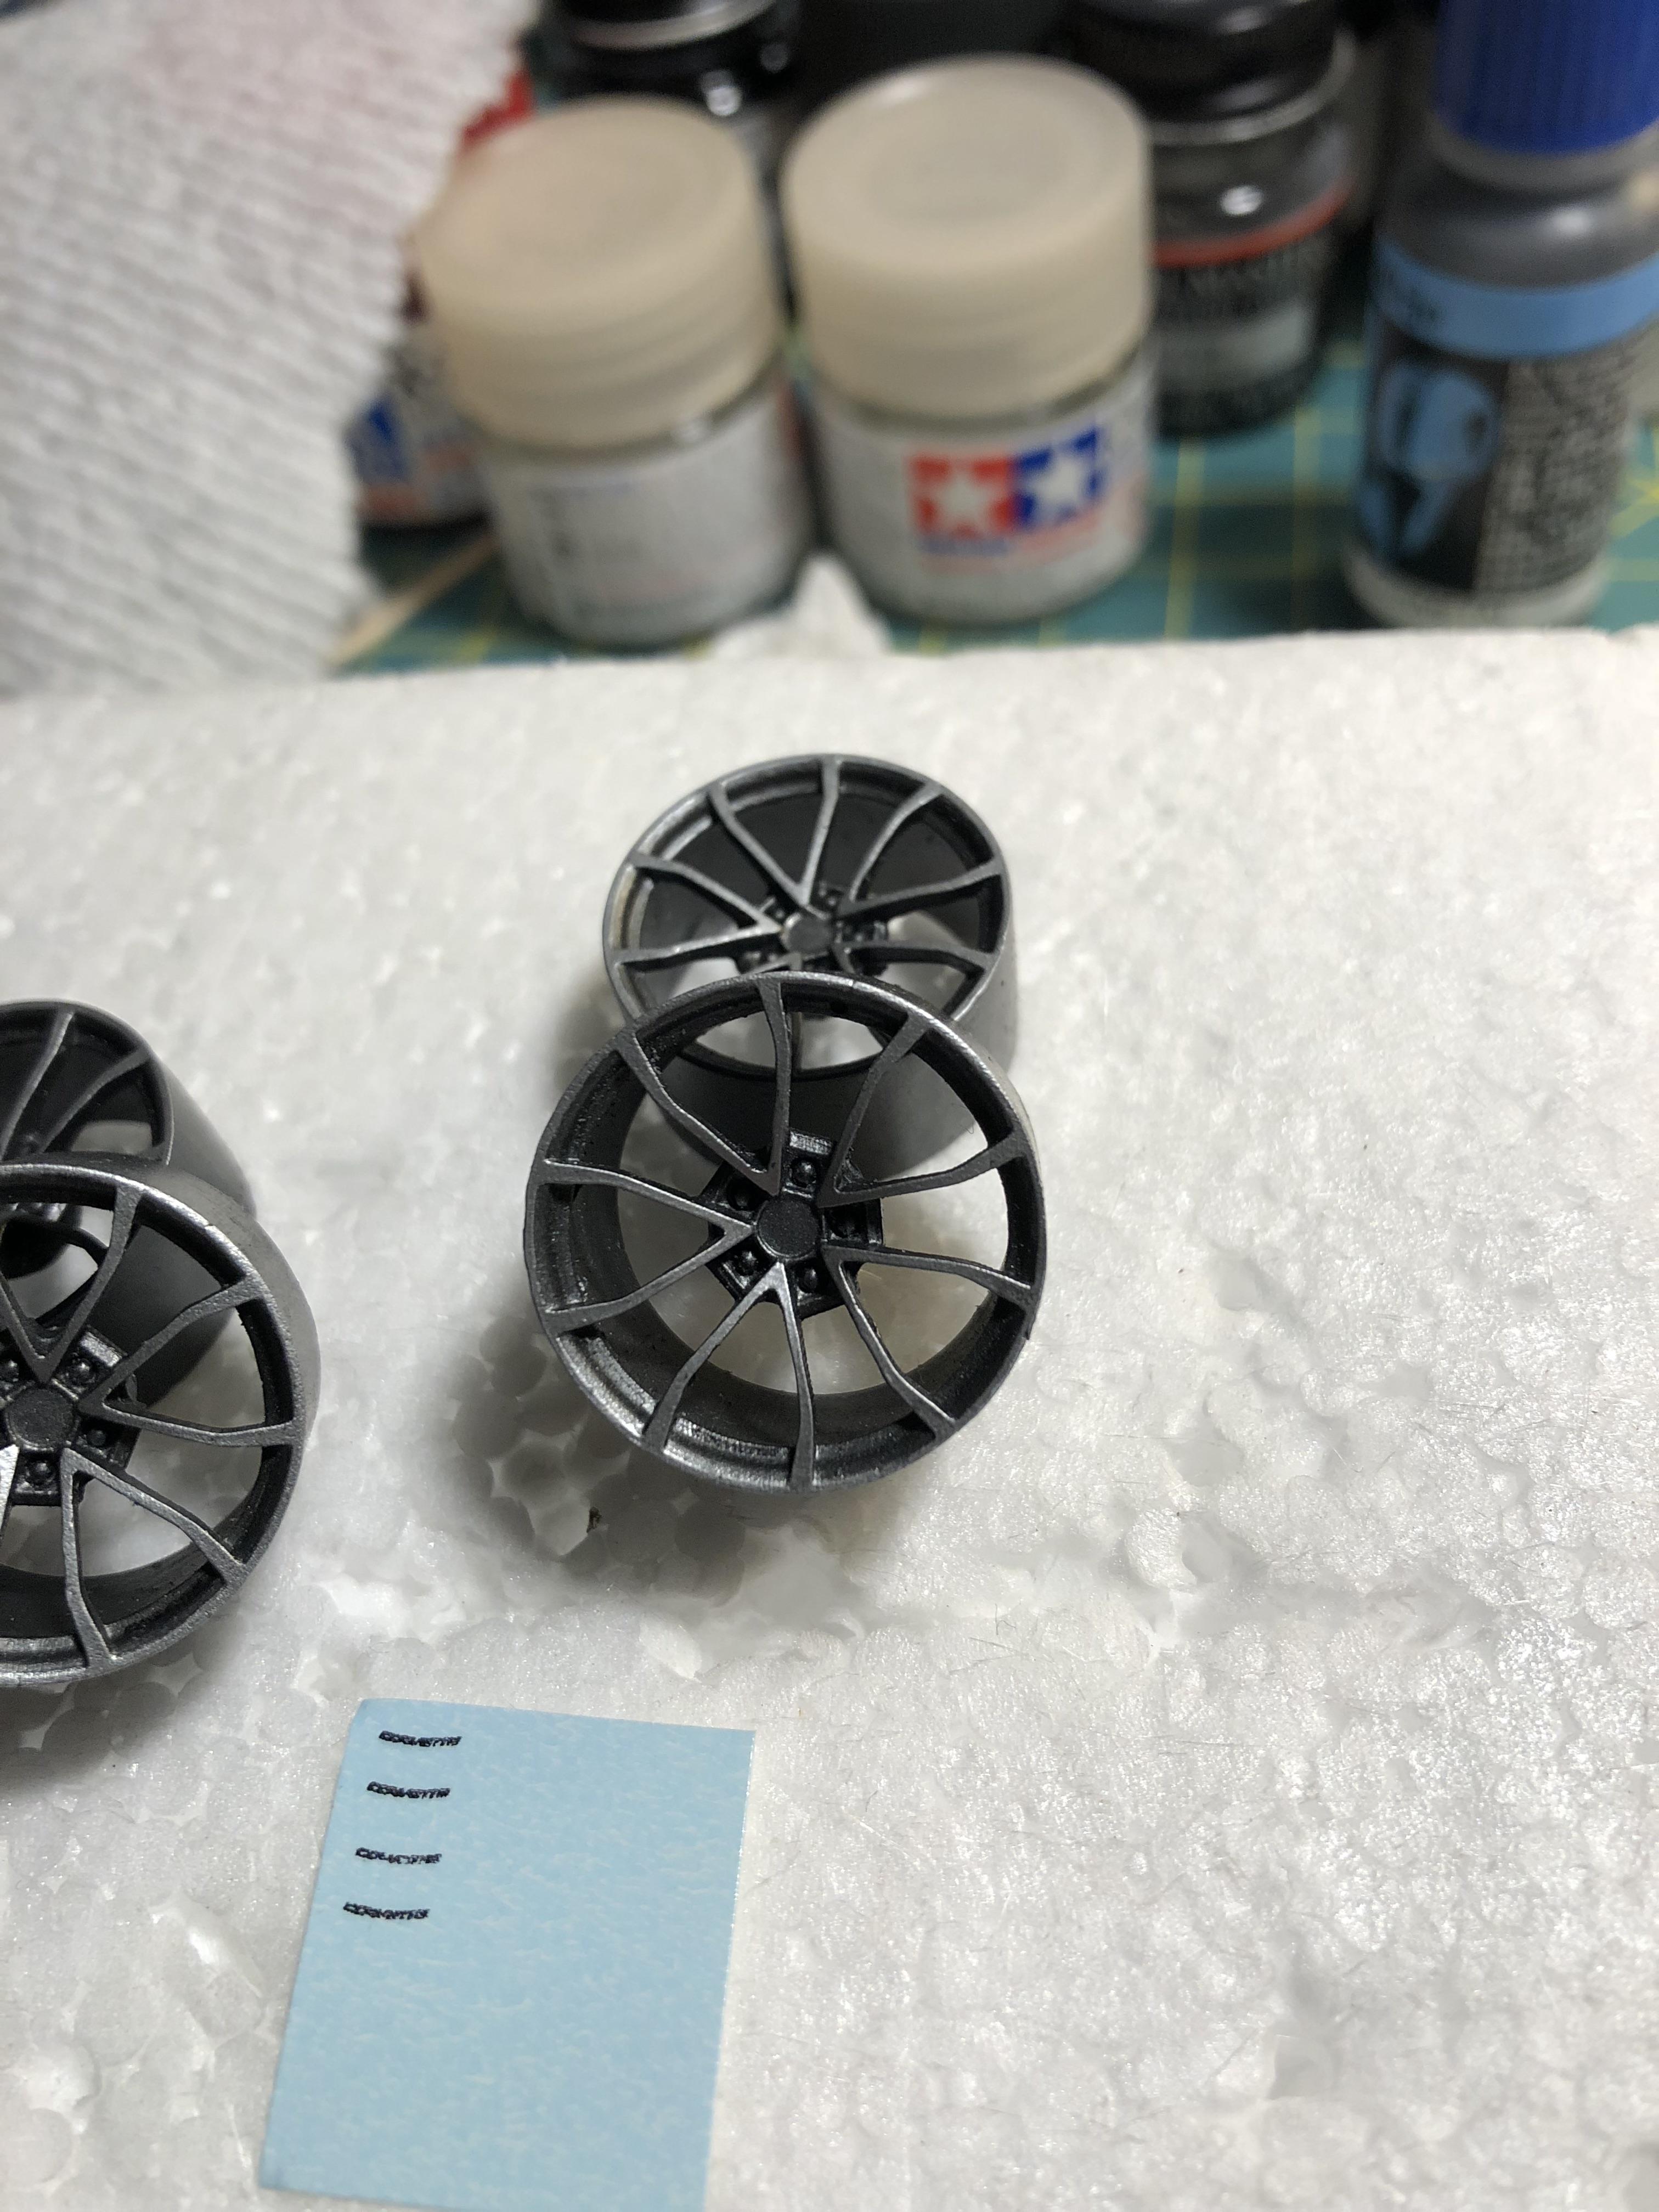
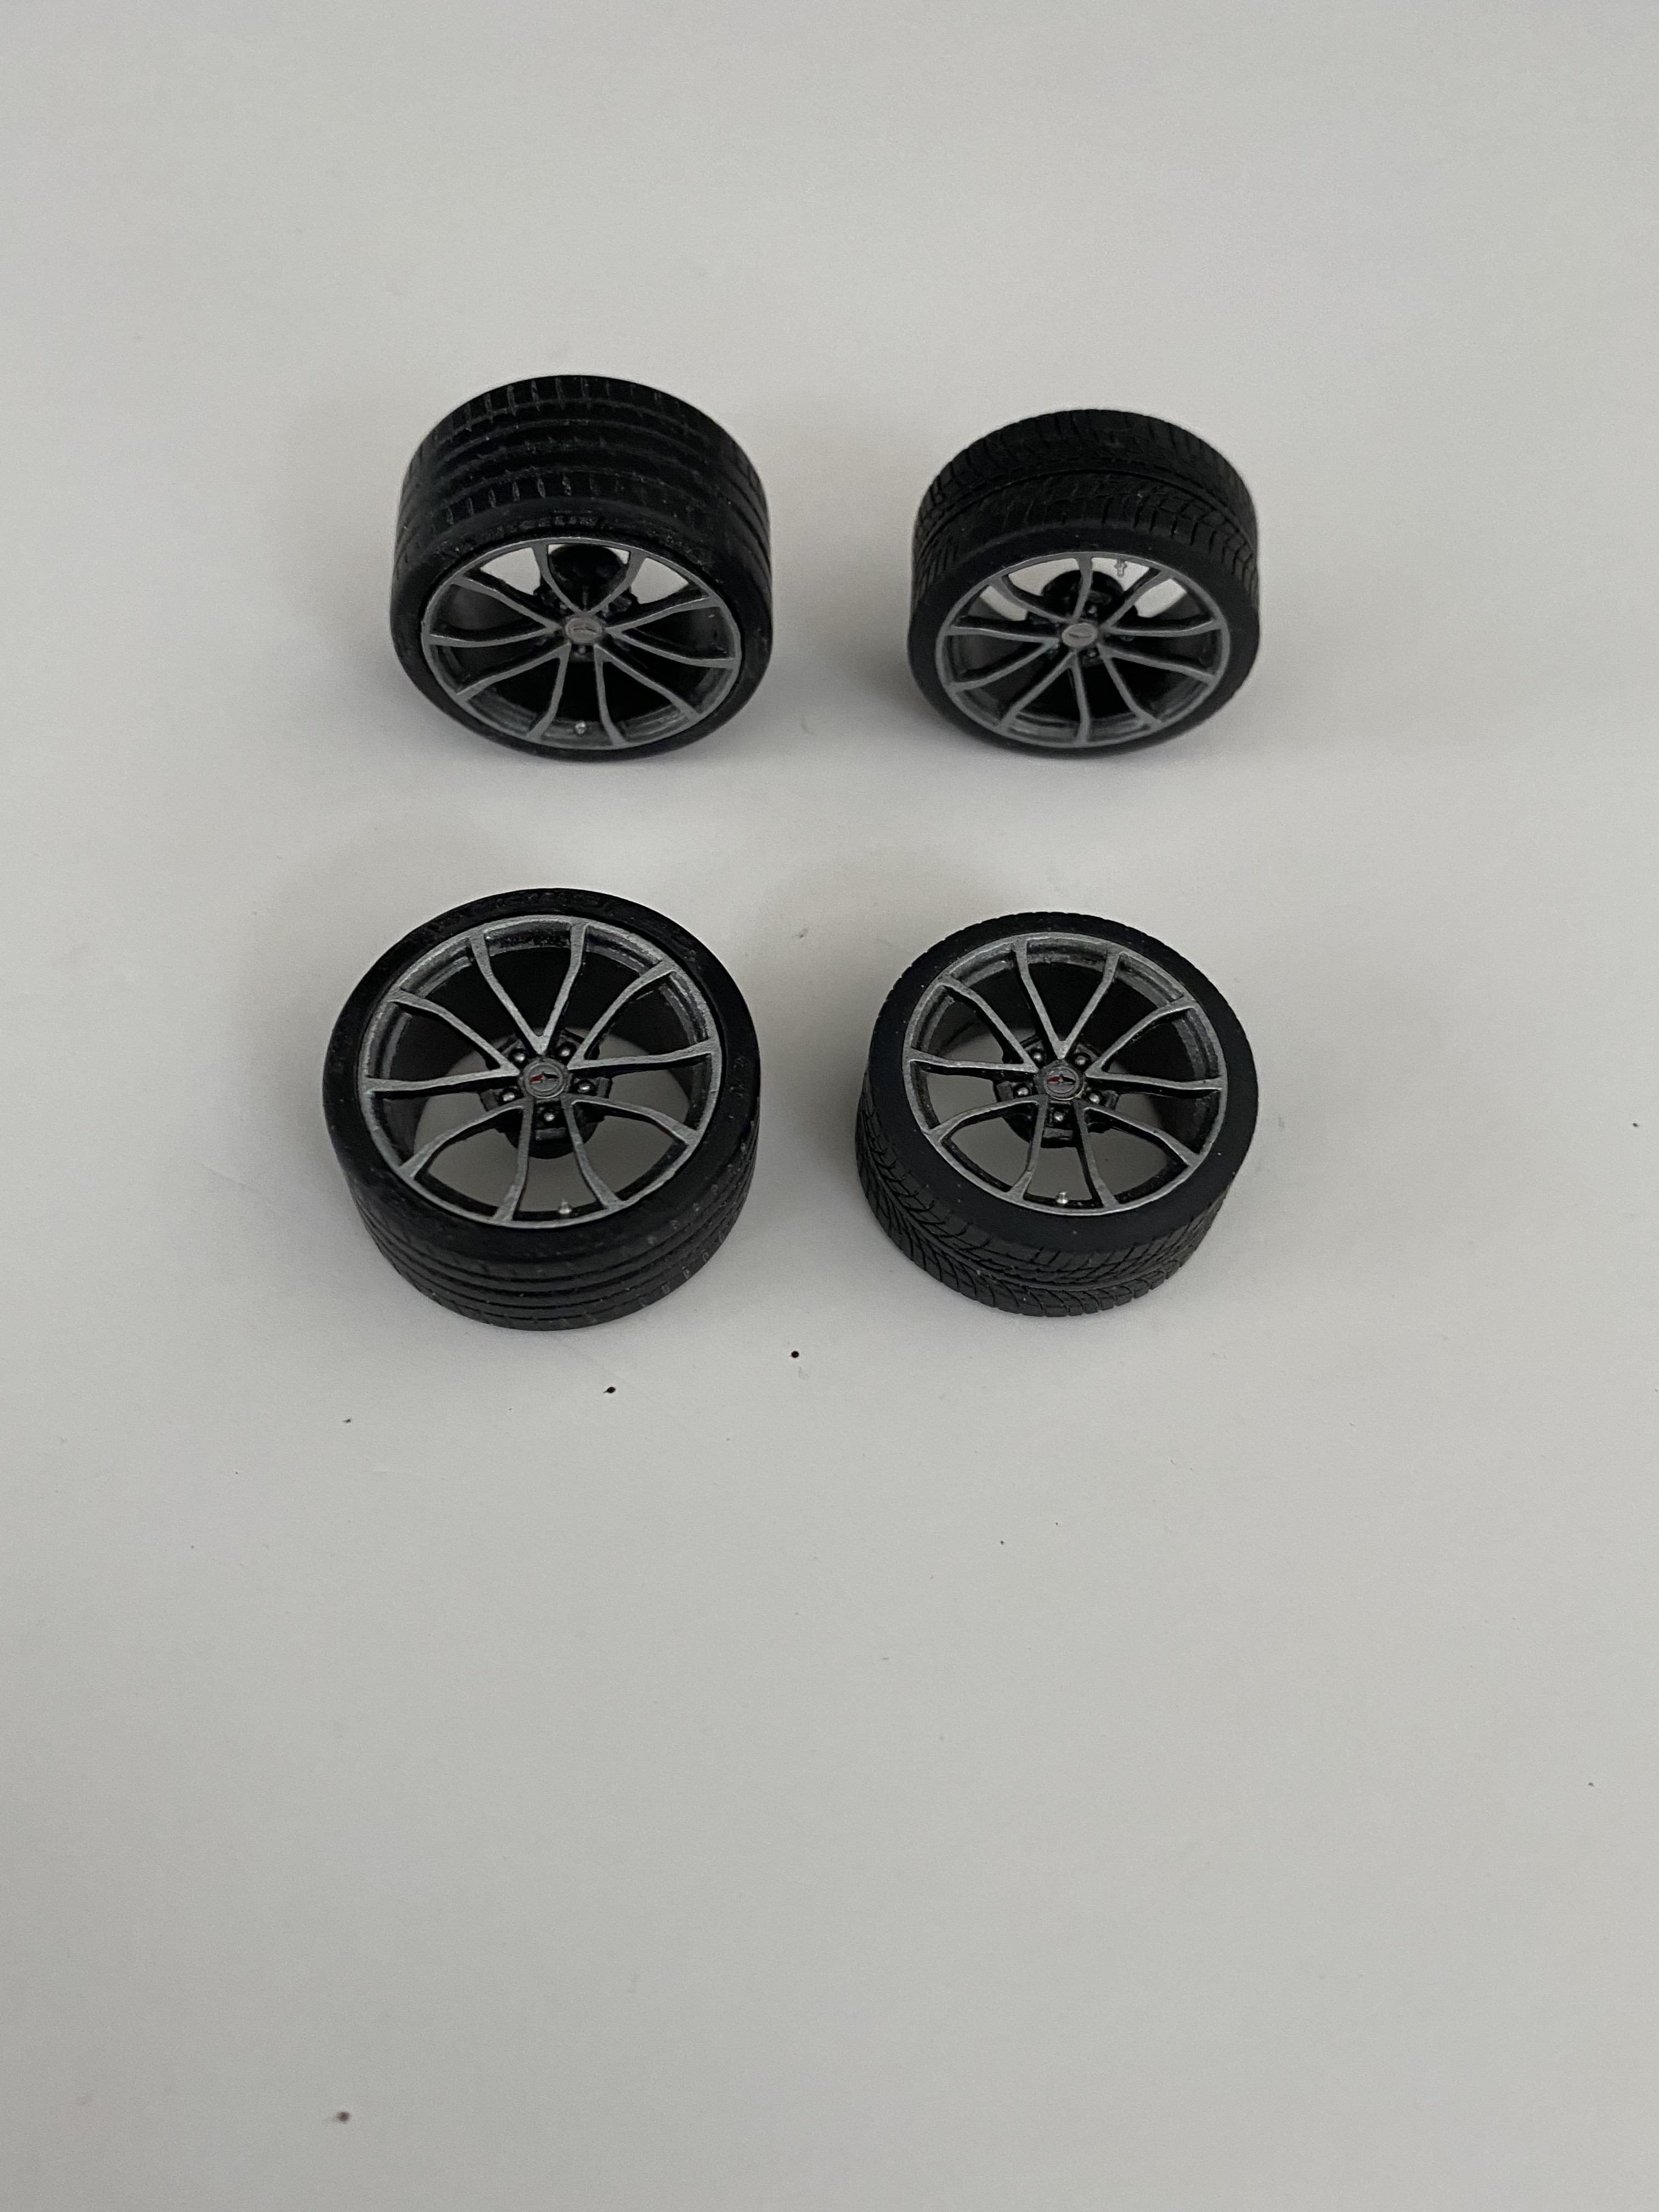
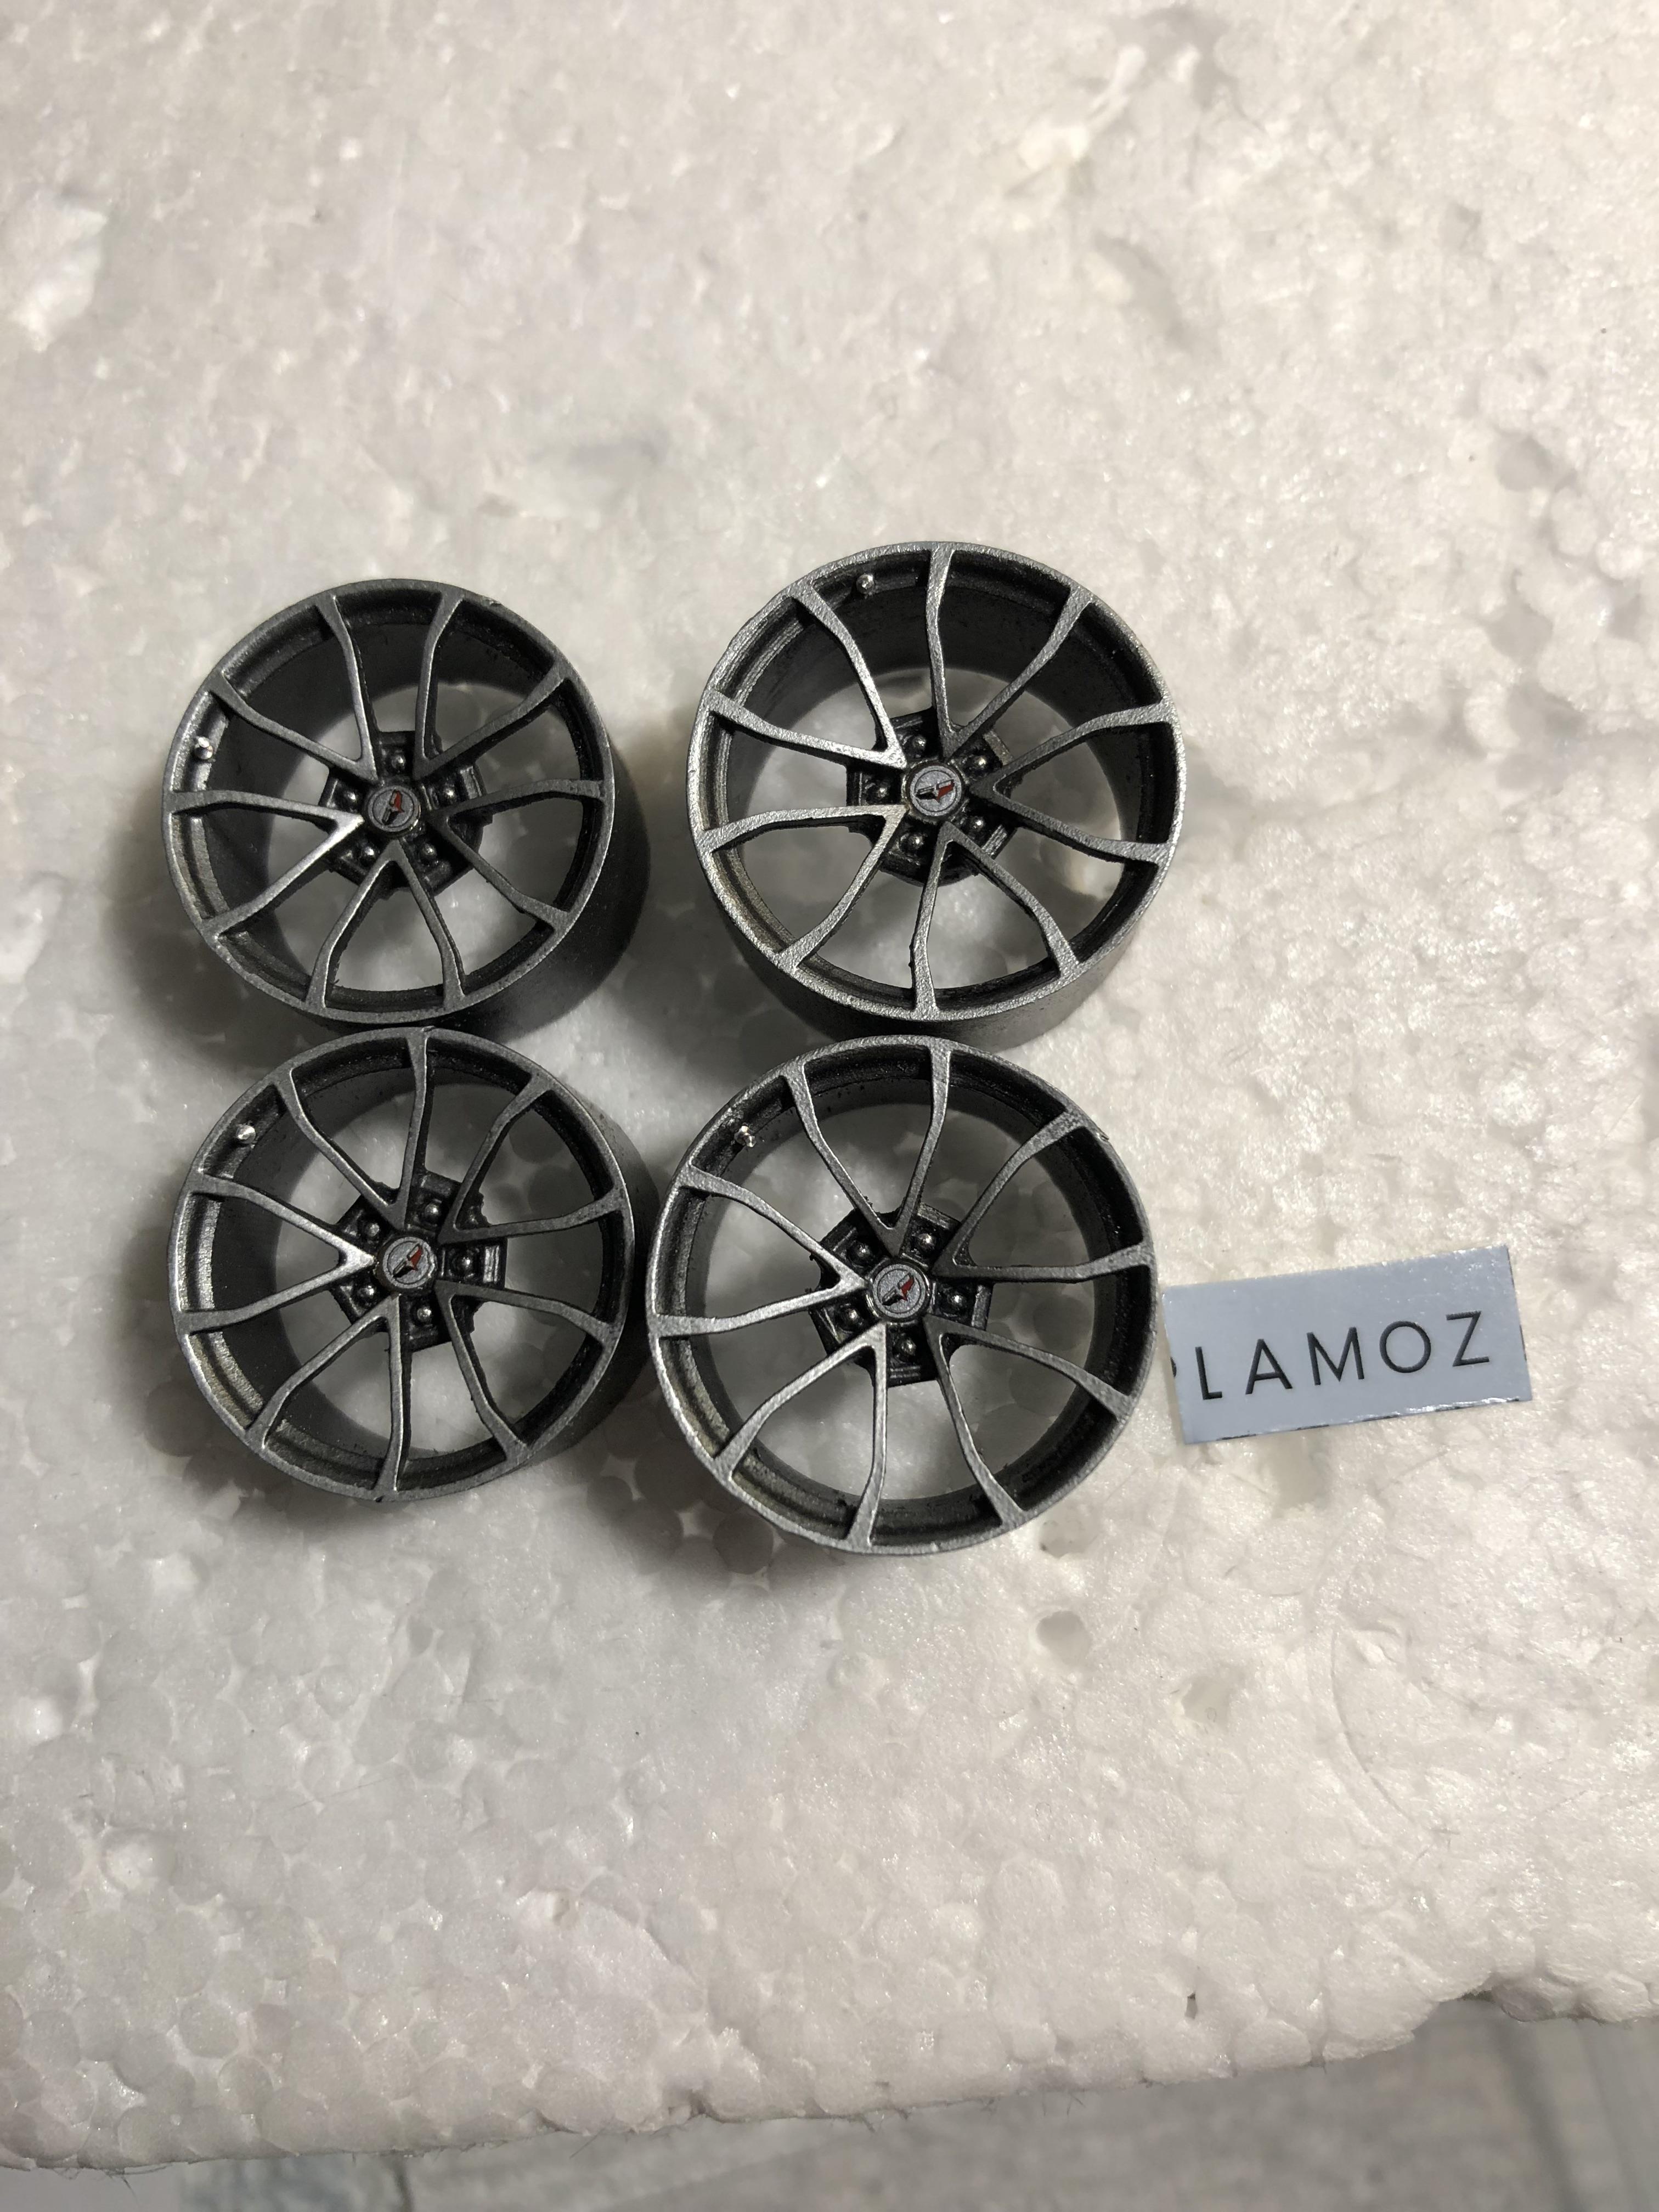
Onto the Wheels -- painted the Plazmos 'Cup' wheels Alcad polished Aluminum(lacquer) and then paint acrylic valejo Gunmetal over the wheels and 'wiped' off the Gunmetal from the spokes and wheel rim. also had tiny 'Corvette' decals made by speedway for the wheel lip --barely visible. Also added valve stems and 60th center caps. Rear tires were 20" Michelin's from Ukrainian Scale Auto and the front were from the 'spare' box, but scaled out to about 19".
-
1
-
-
Some more decals were added to the top of the radiator. Also added a PE cross flag(from the Plazmoz set) to the air-box inlet --a little hard to see. Also added the PE radiator front face , which will be seen thru the lower grill opening. And finally a test fit with the body. Appreciate any and all comments, thx for looking!
-
1
-
-
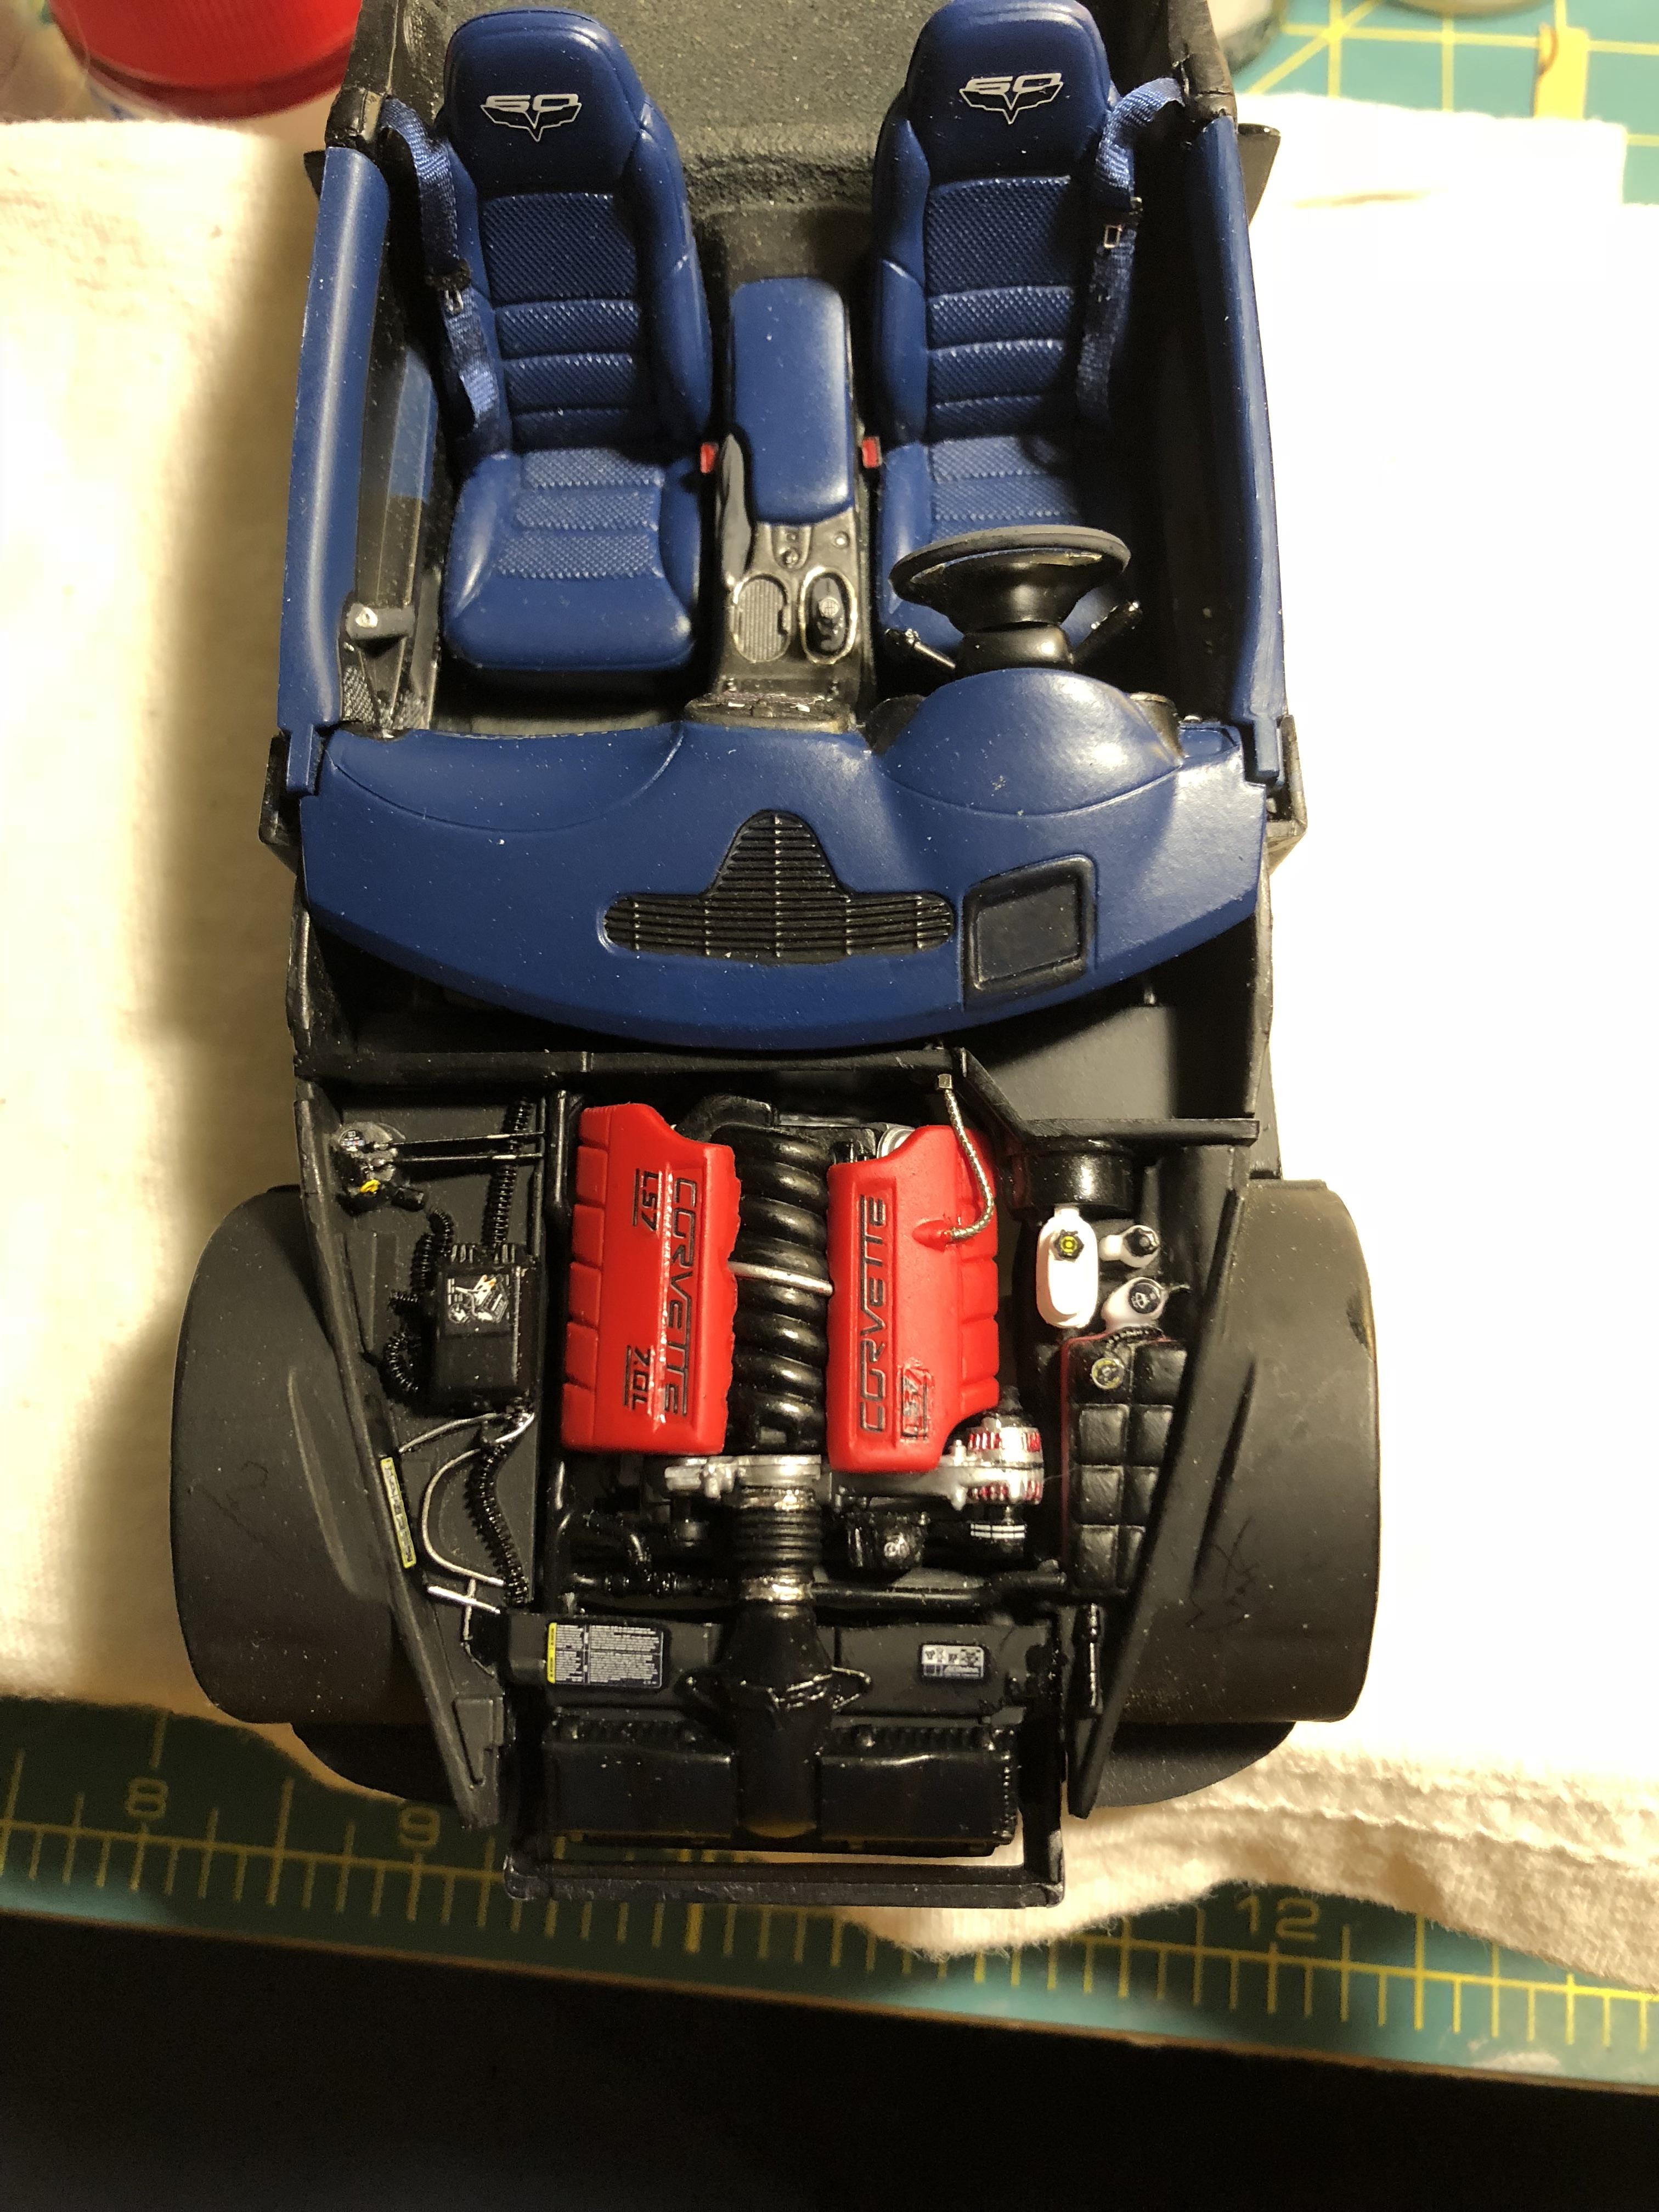
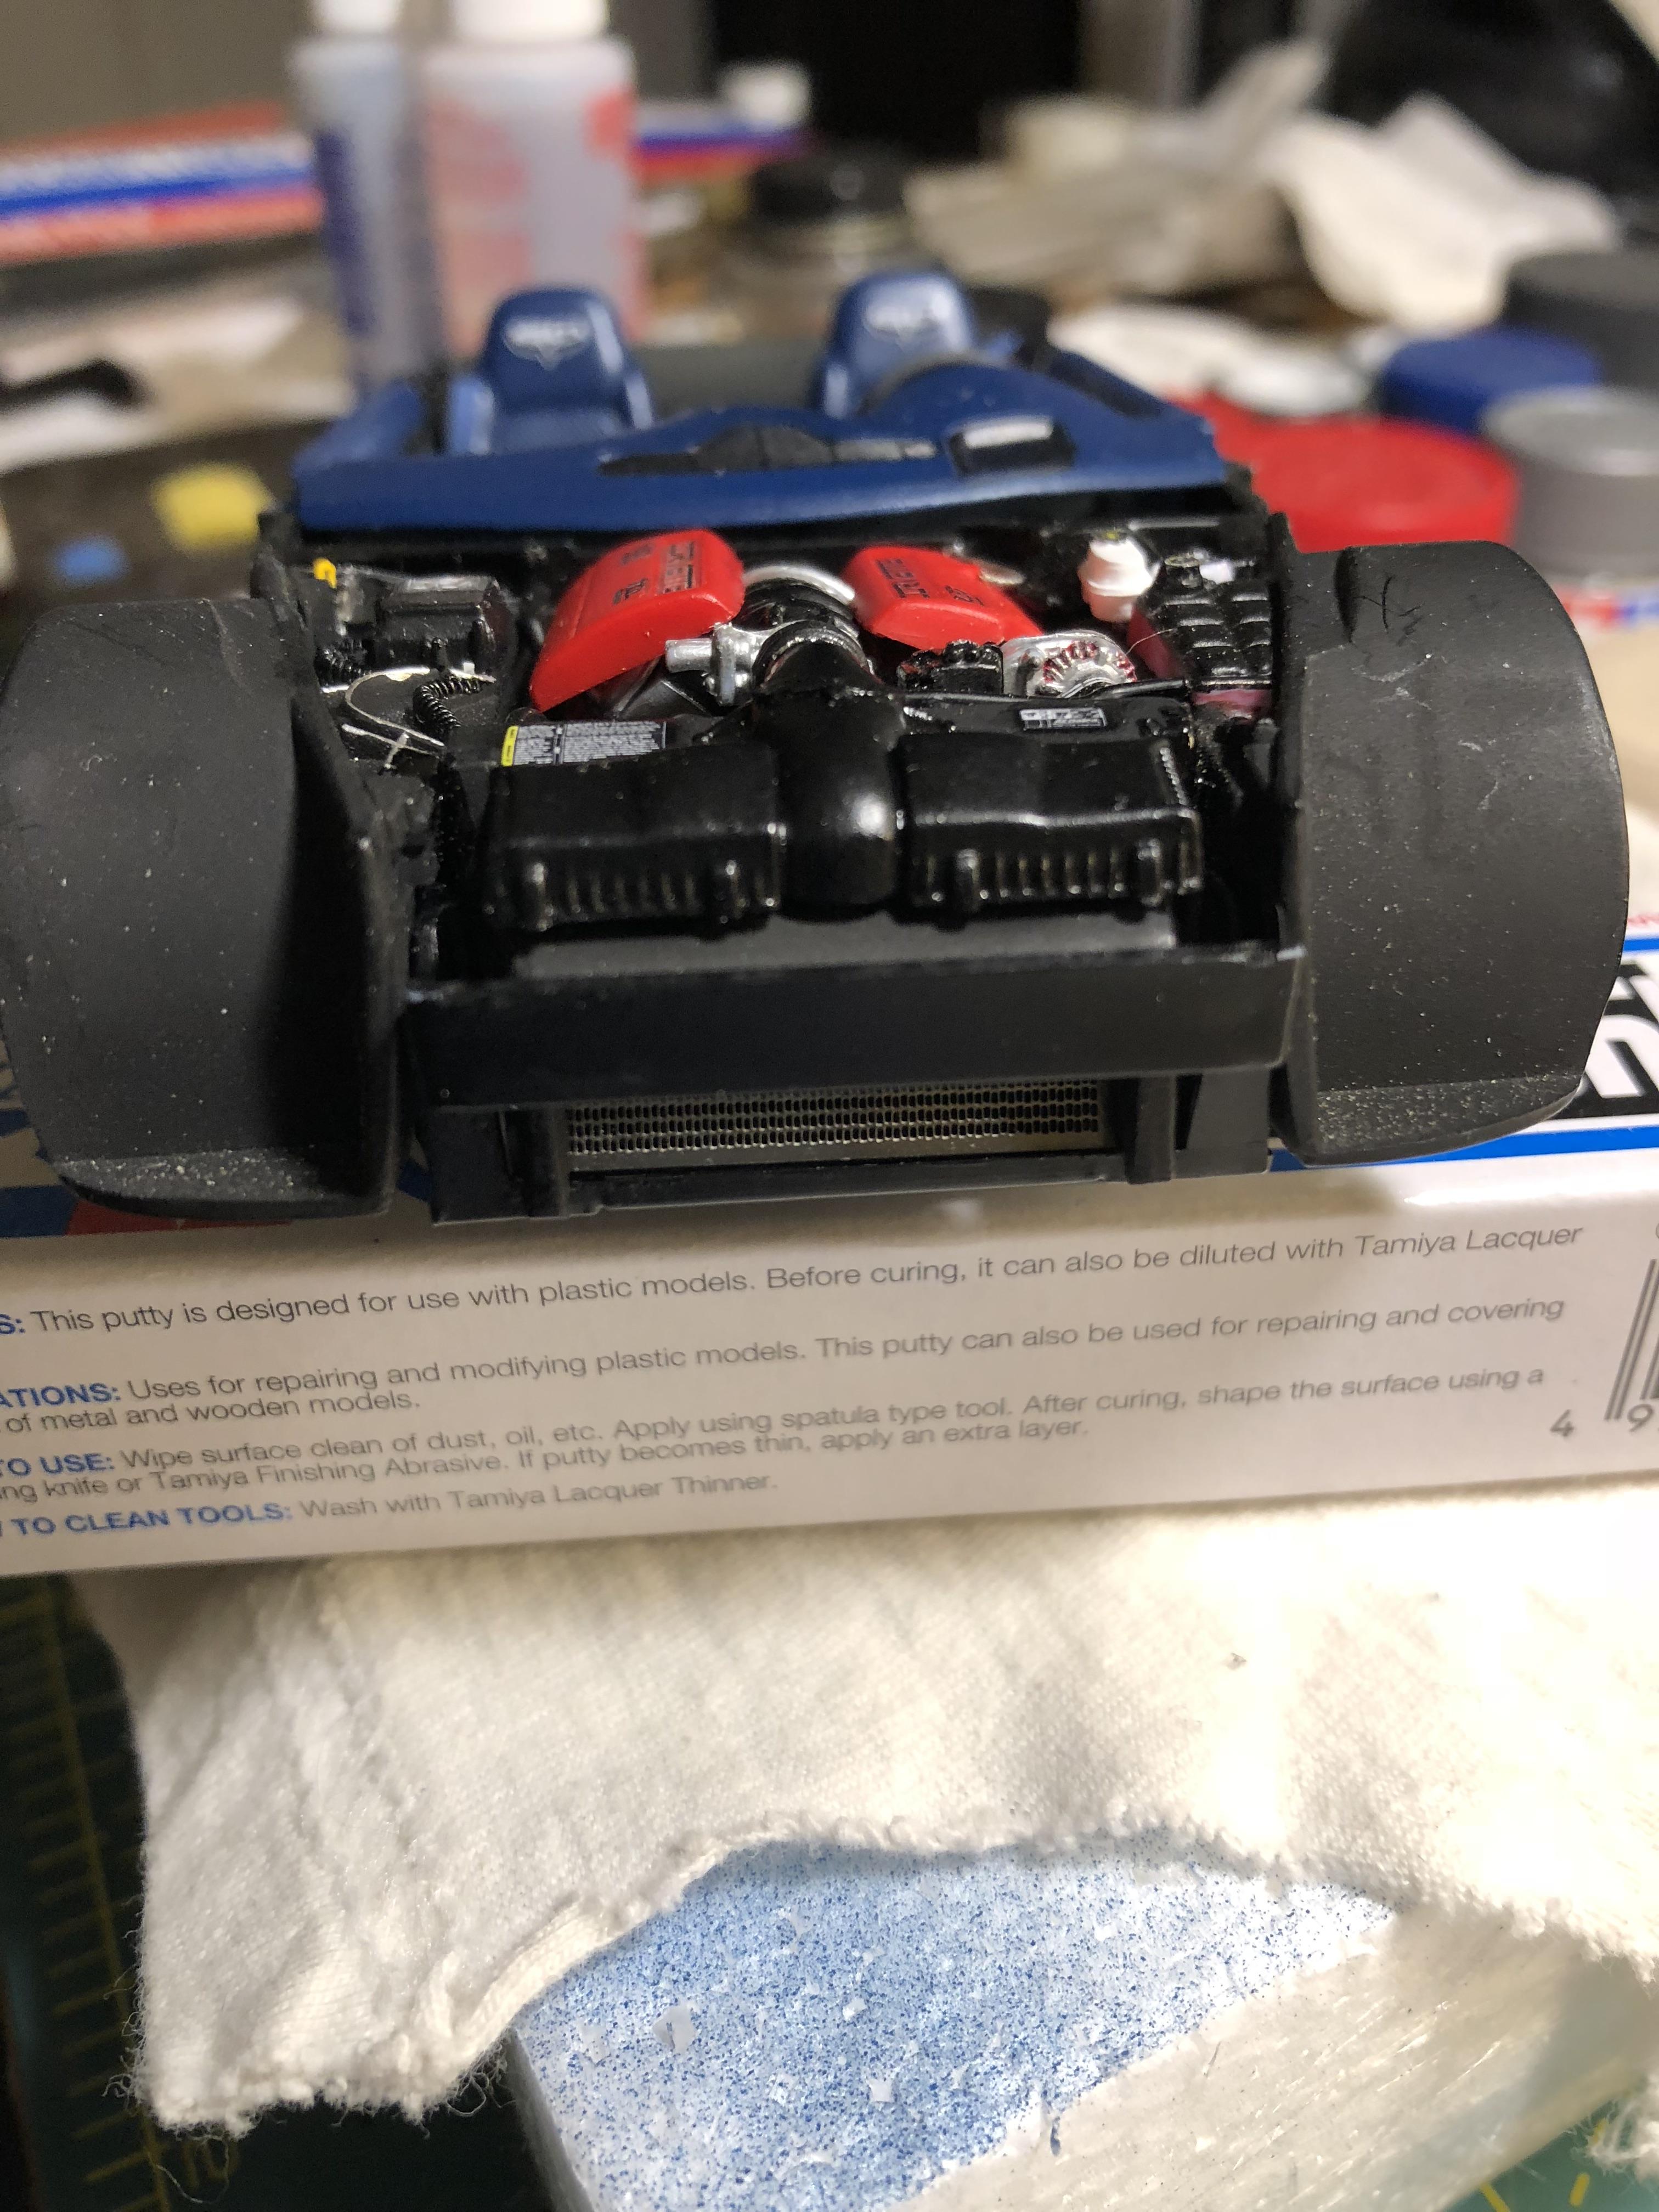
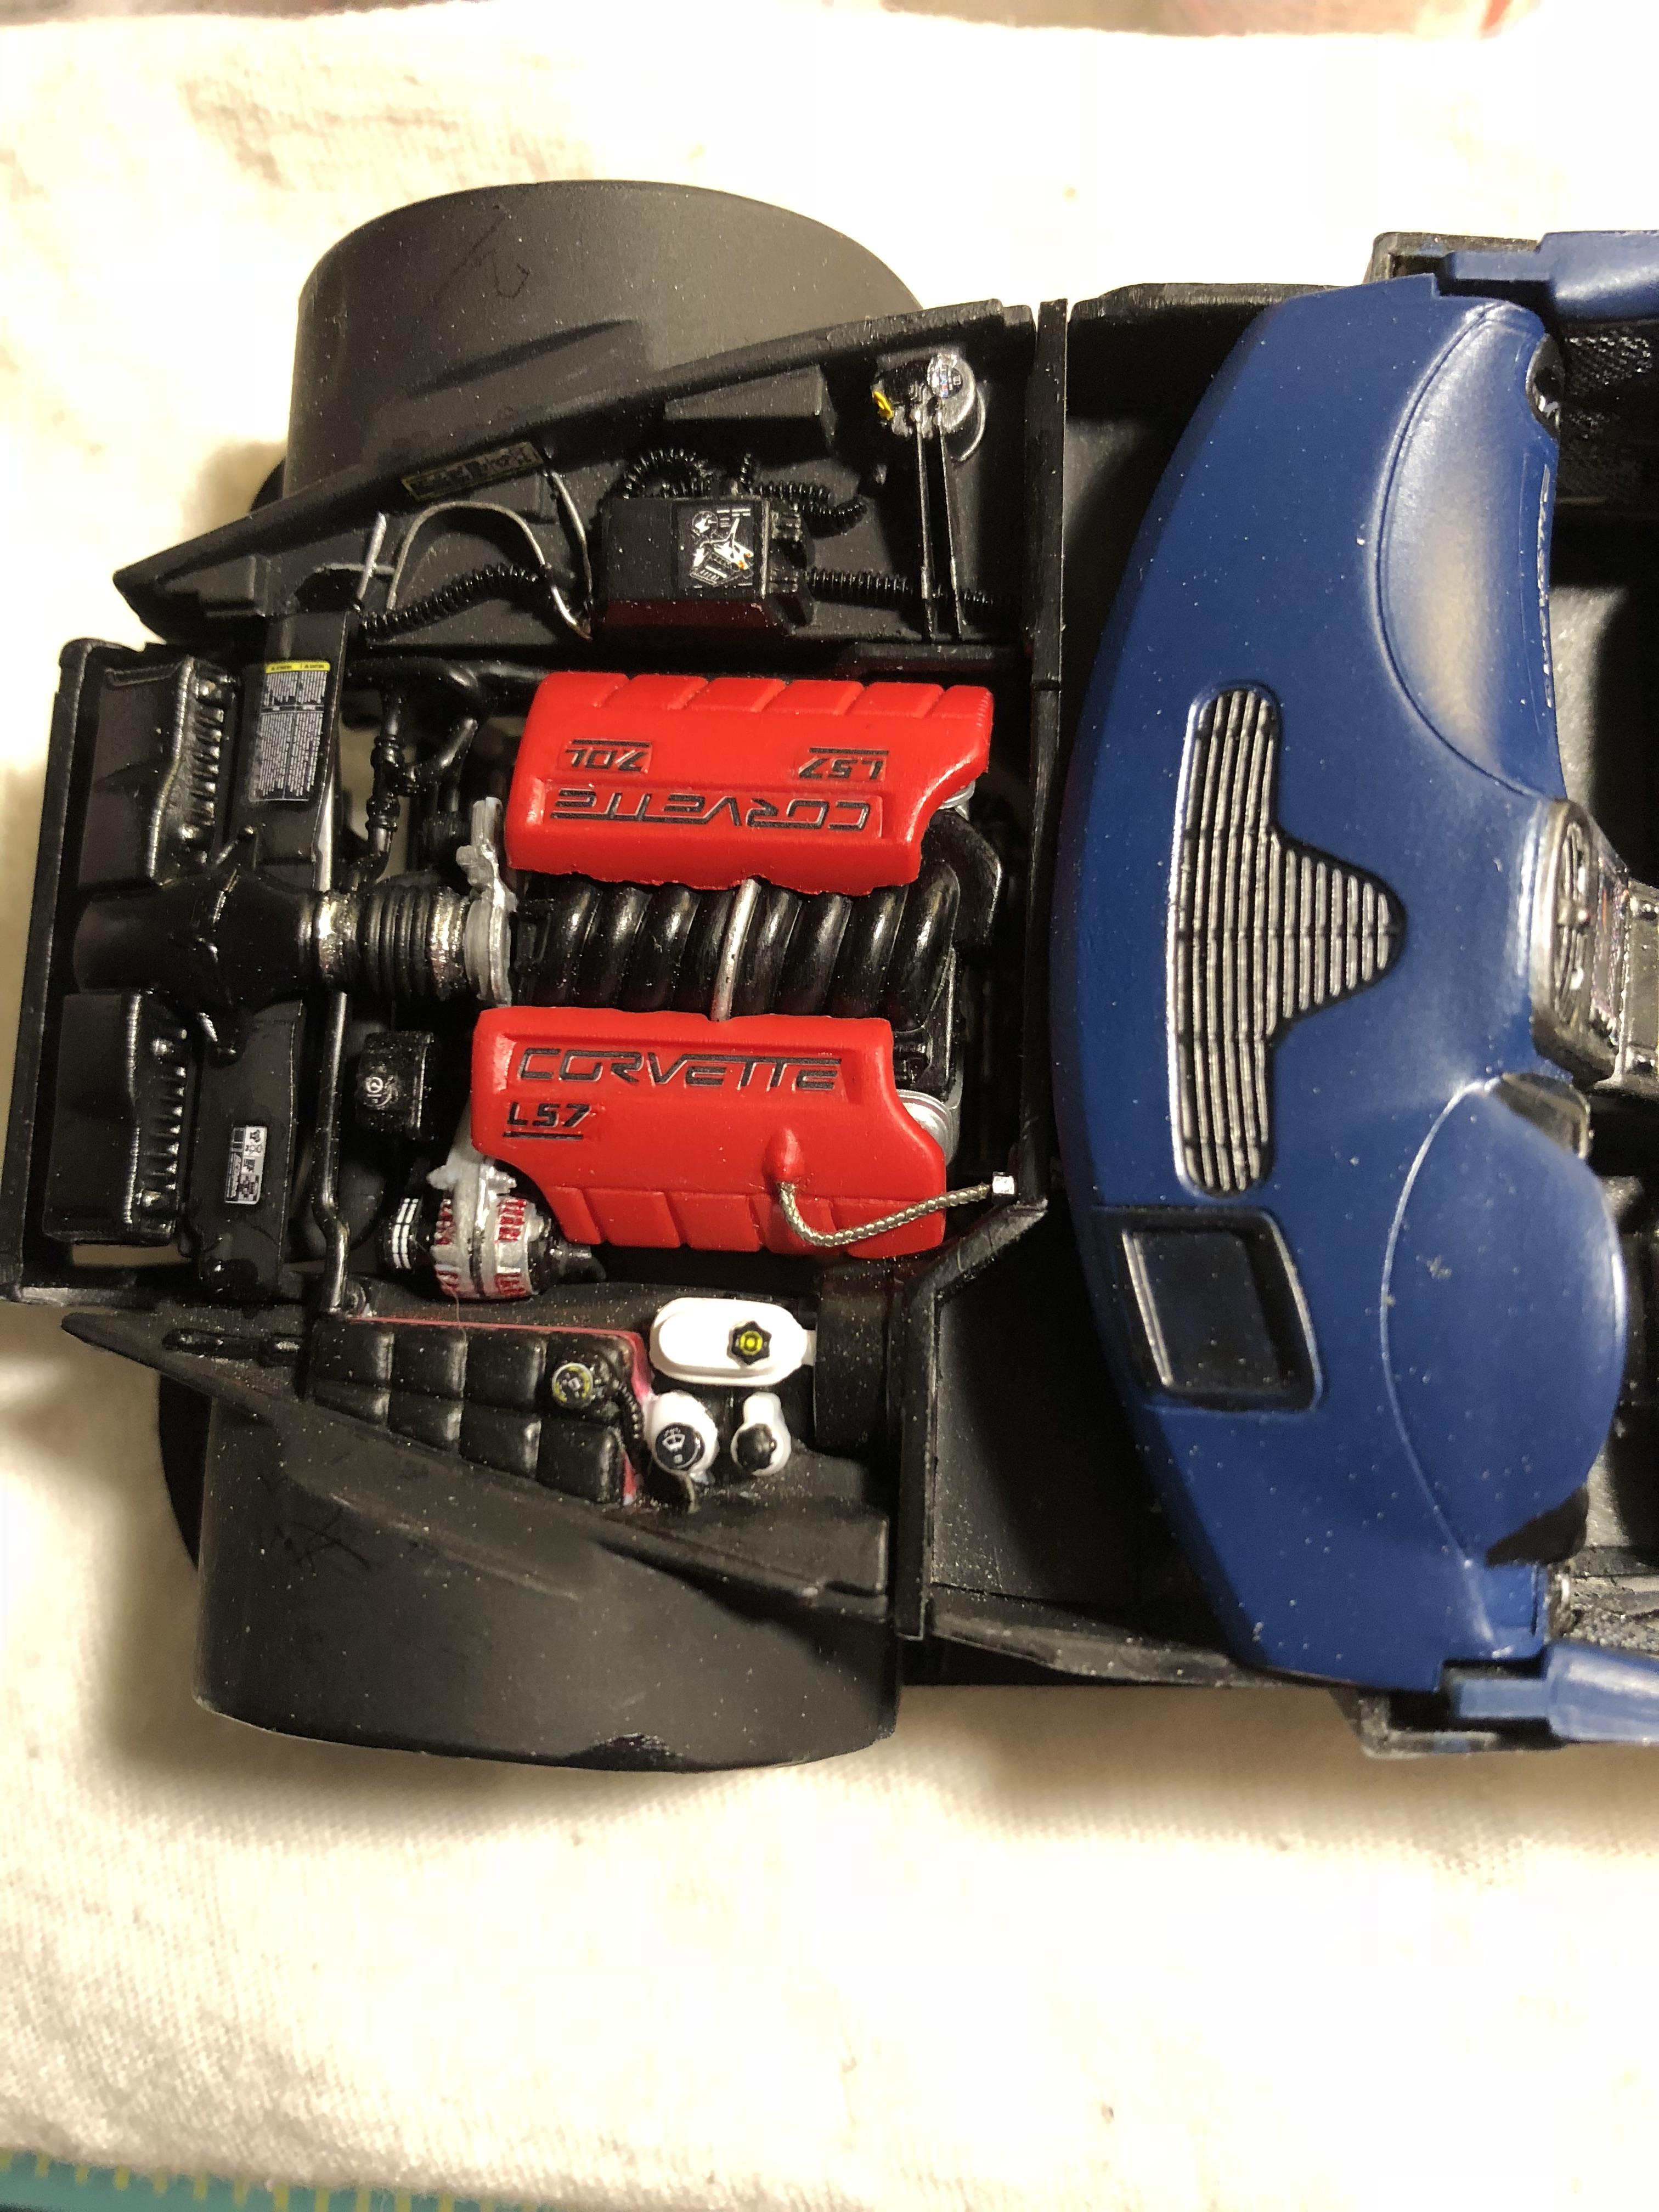
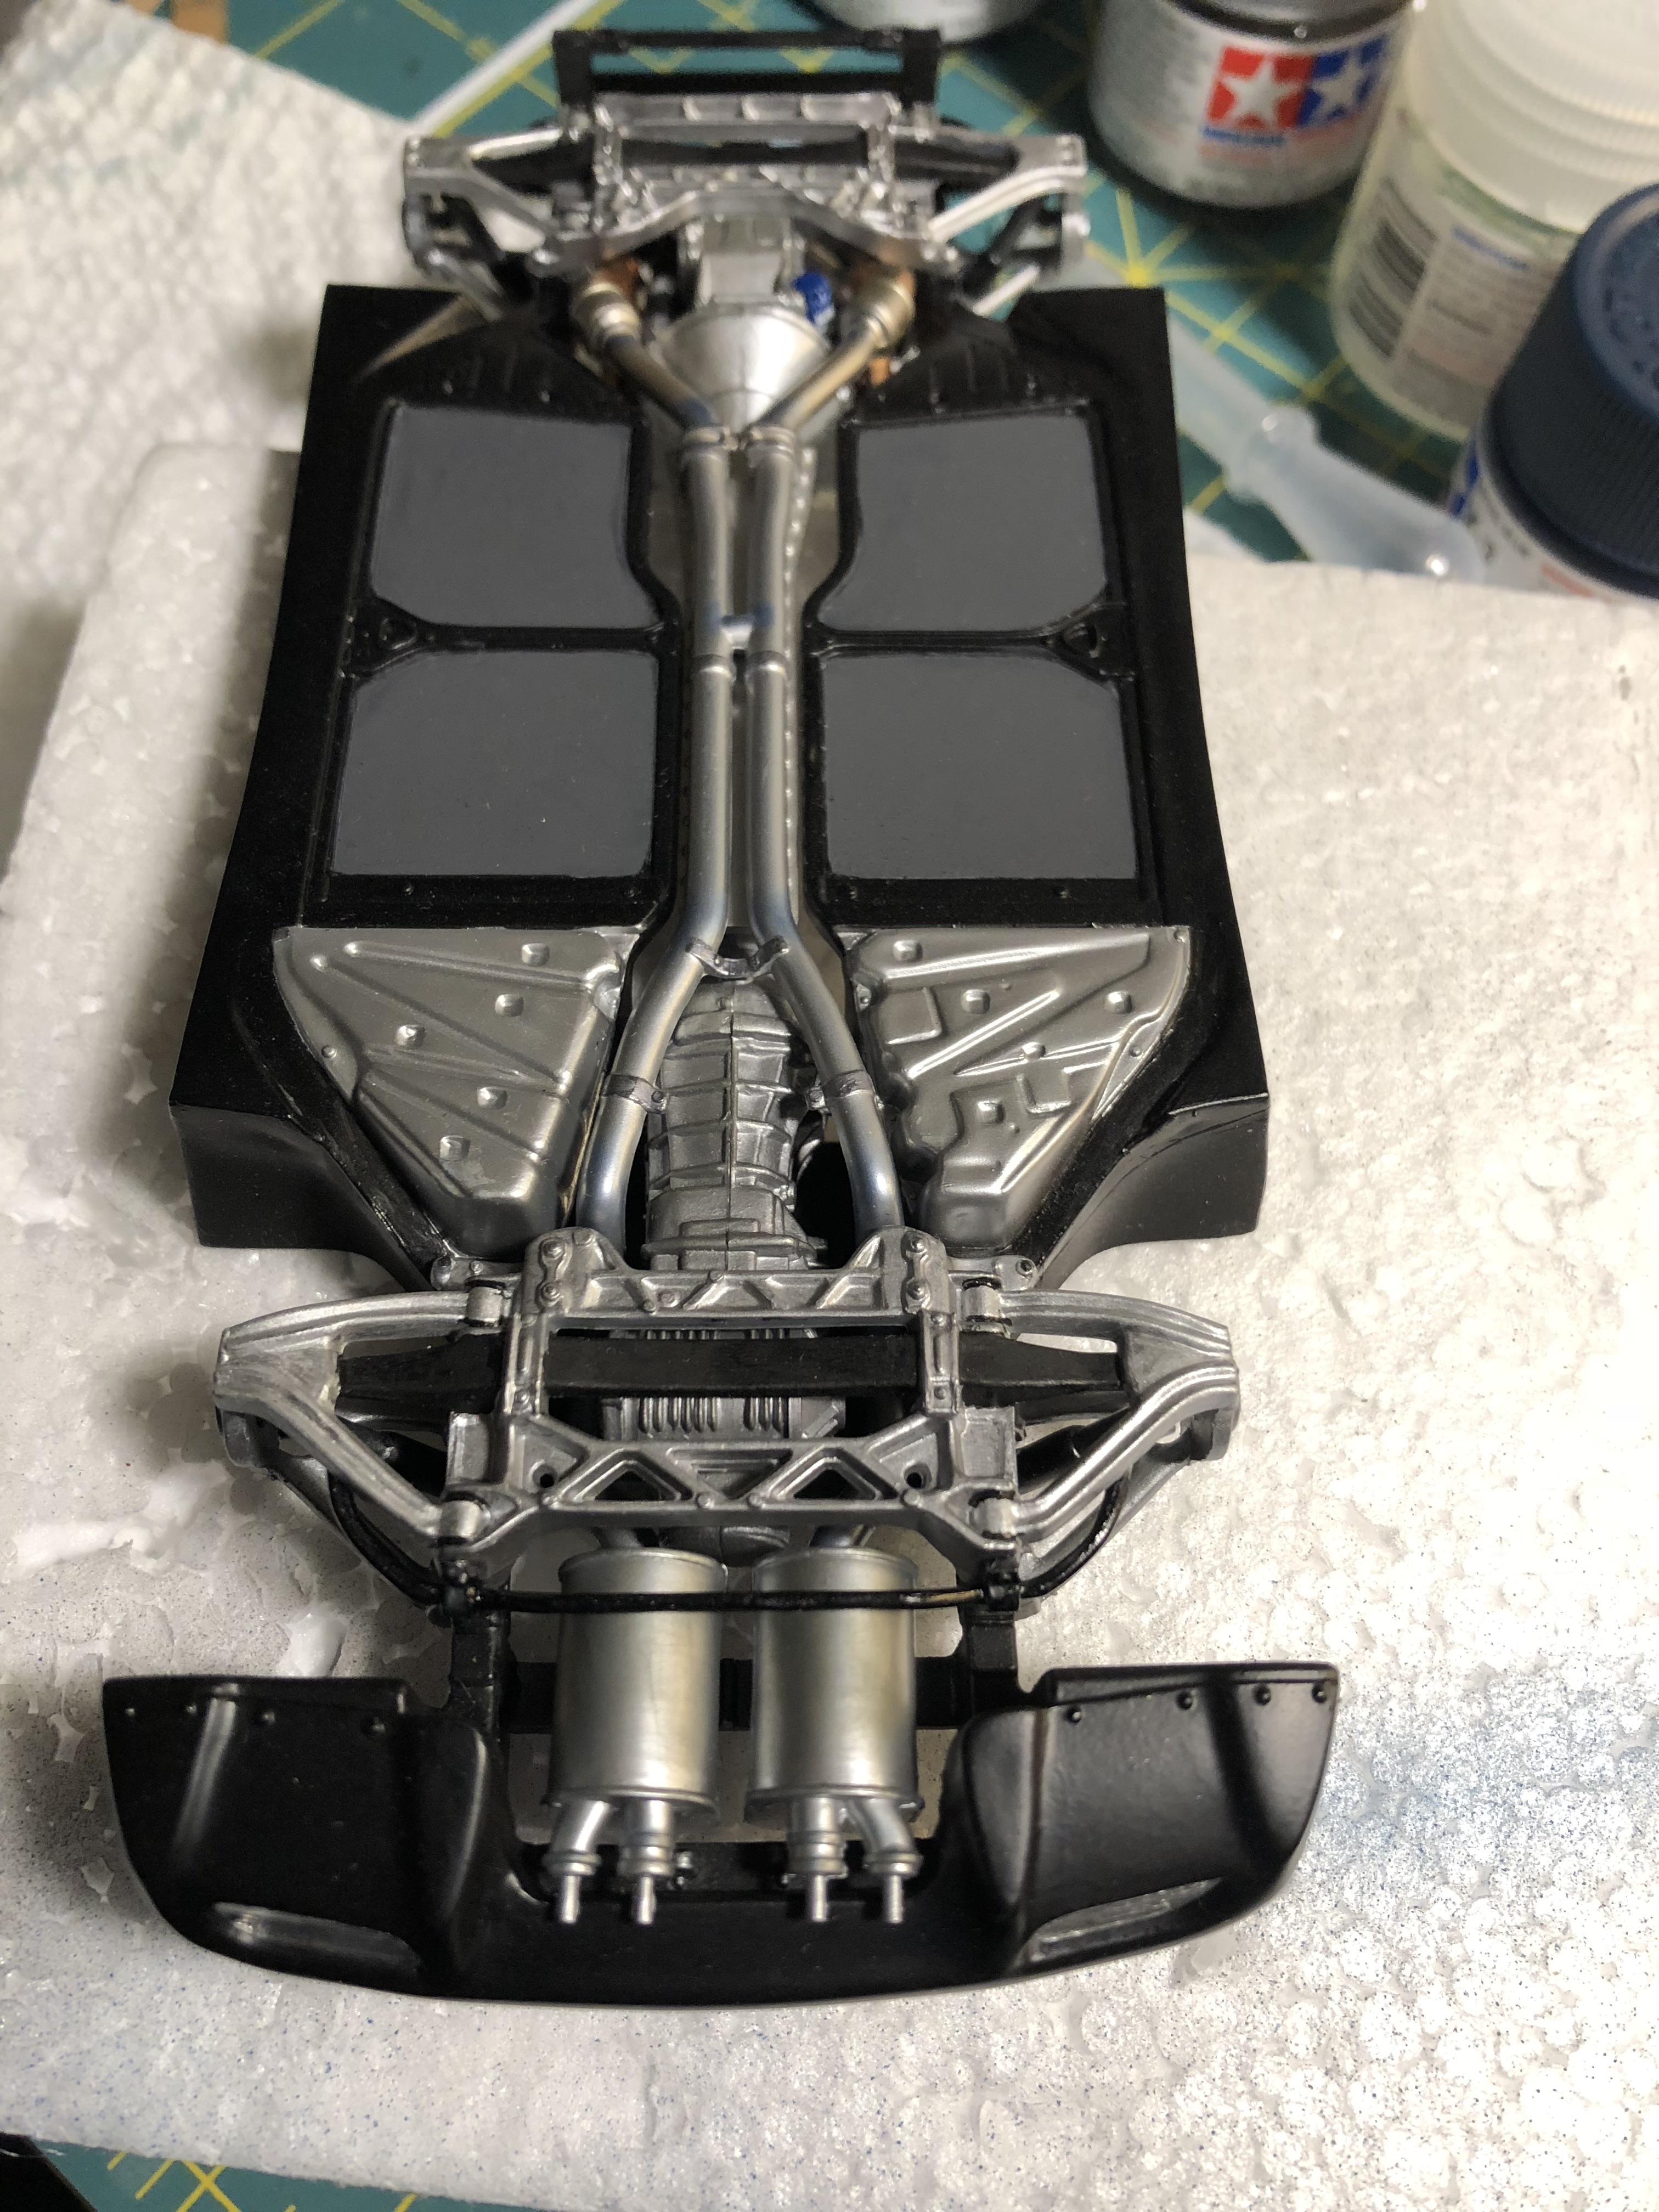
Brought together the chassis/transaxle/motor with the interior assembly. Beauty cover painted Tamiya flat red with a coat of semi-gloss clear and decals from the ZR-1 kit really set it off. Also added a throttle control cable to the cover and to the firewall. Another view of both beauty covers attached.
-
2
-
-
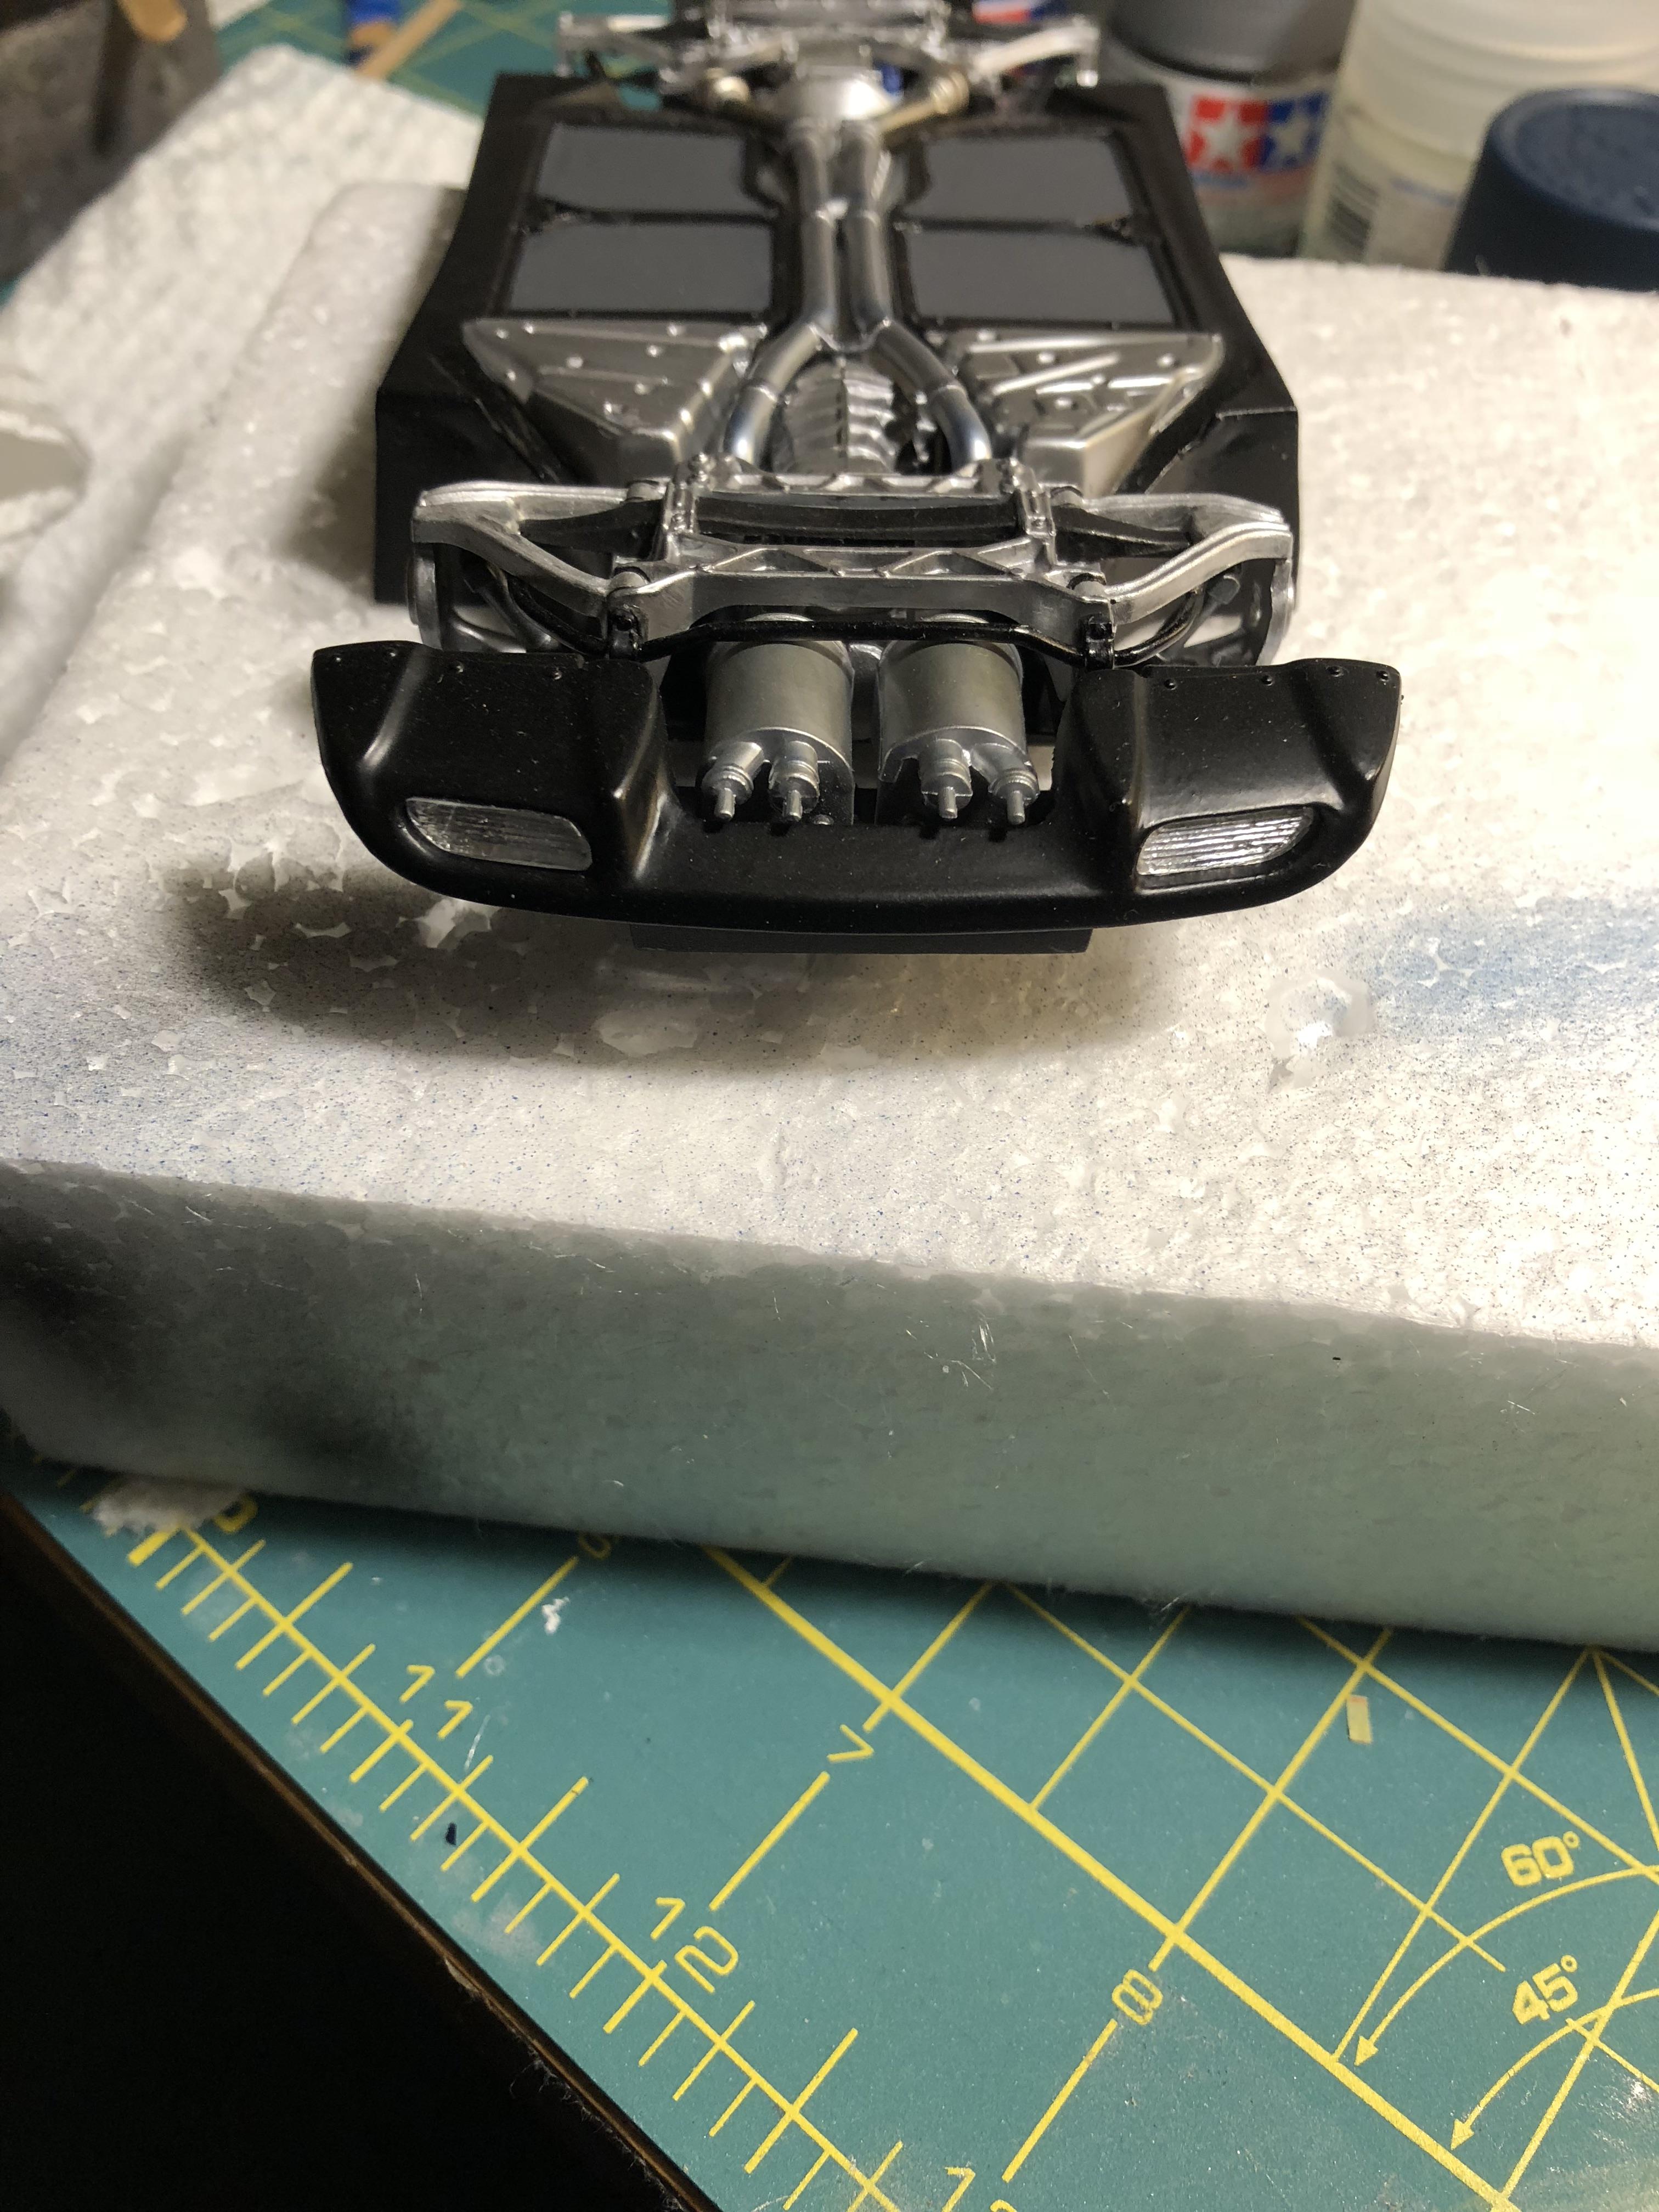
Completed the rear suspension and AB the lower rear valance Vallejo Black and attached the rear back-up lights.
-
1
-
-
Began the detail painting of the 'under hood' area, with various fluid reservoirs painted flat white and the radiator overflow painted 'pink/red' to simulate the radiator fluid. Many small decals from the ZR-1 kit were used on the under hood area/reservoir caps. Also made a very small dip stick for the 'dry sump' oil fill. Various fluid lines and wire conduits were detailed using Sliver and Black Sharpies. Well that's enough for tonight, as always, appreciate any and all comments,
-
2
-
-
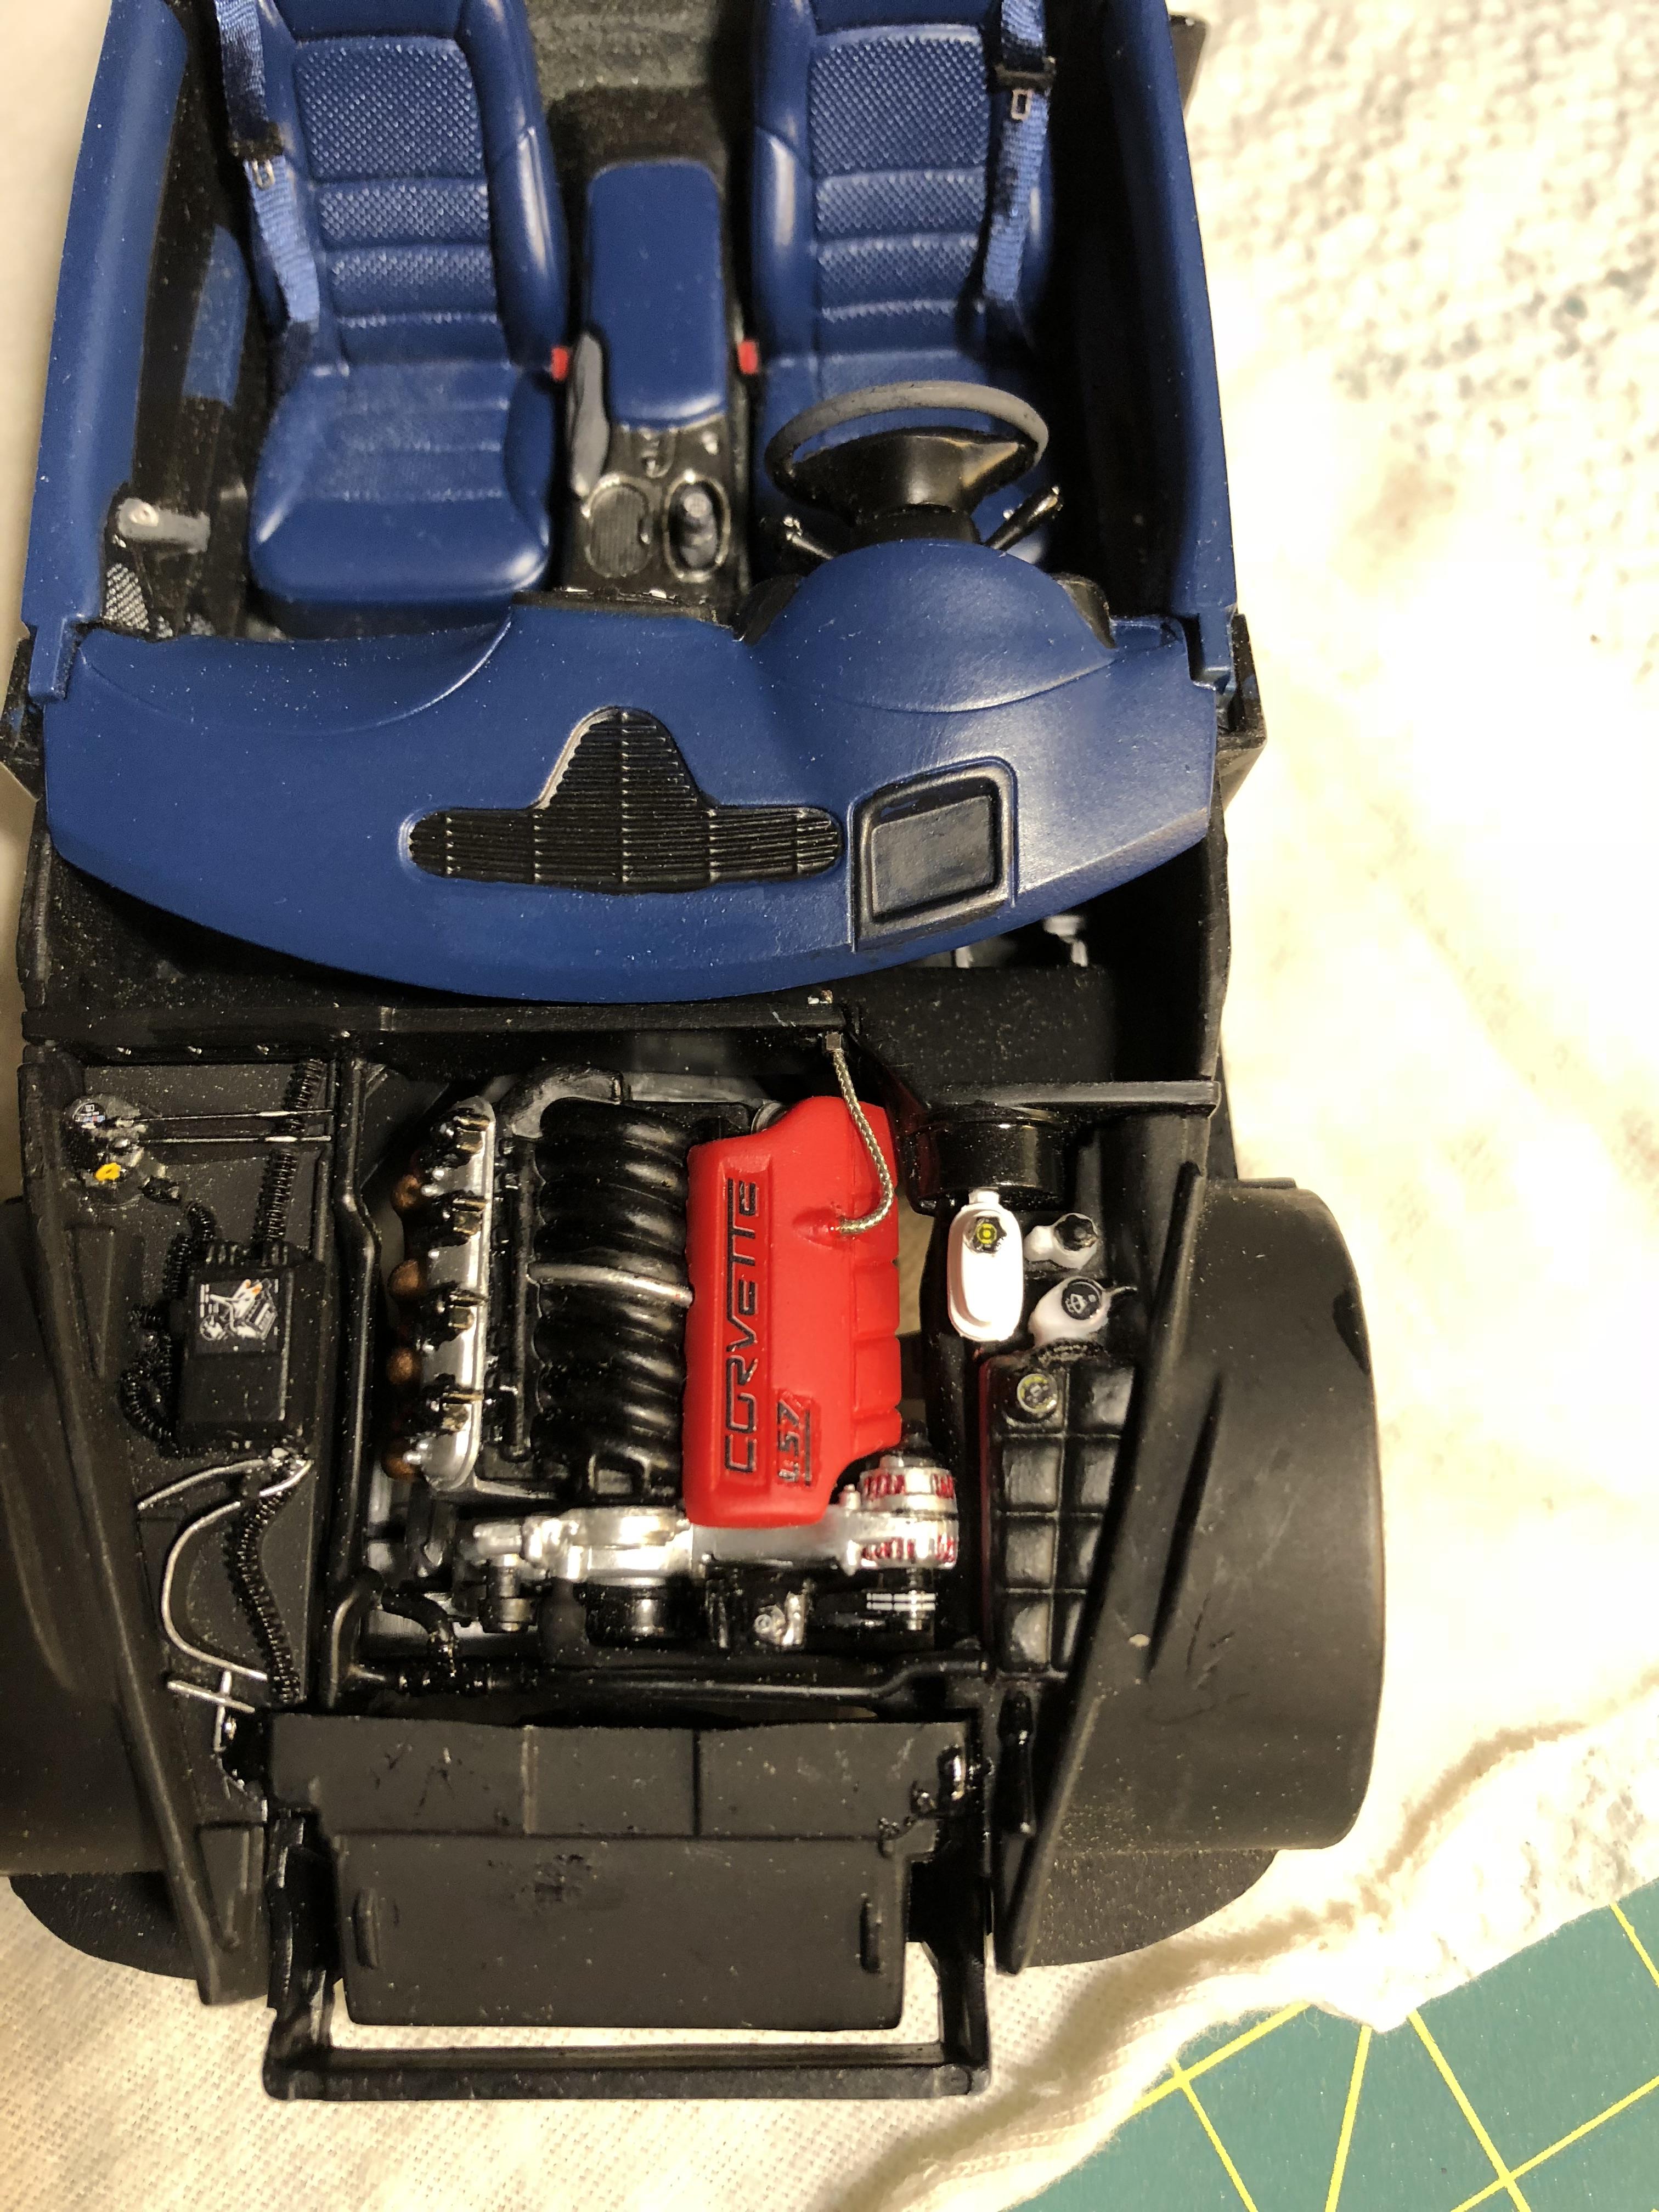
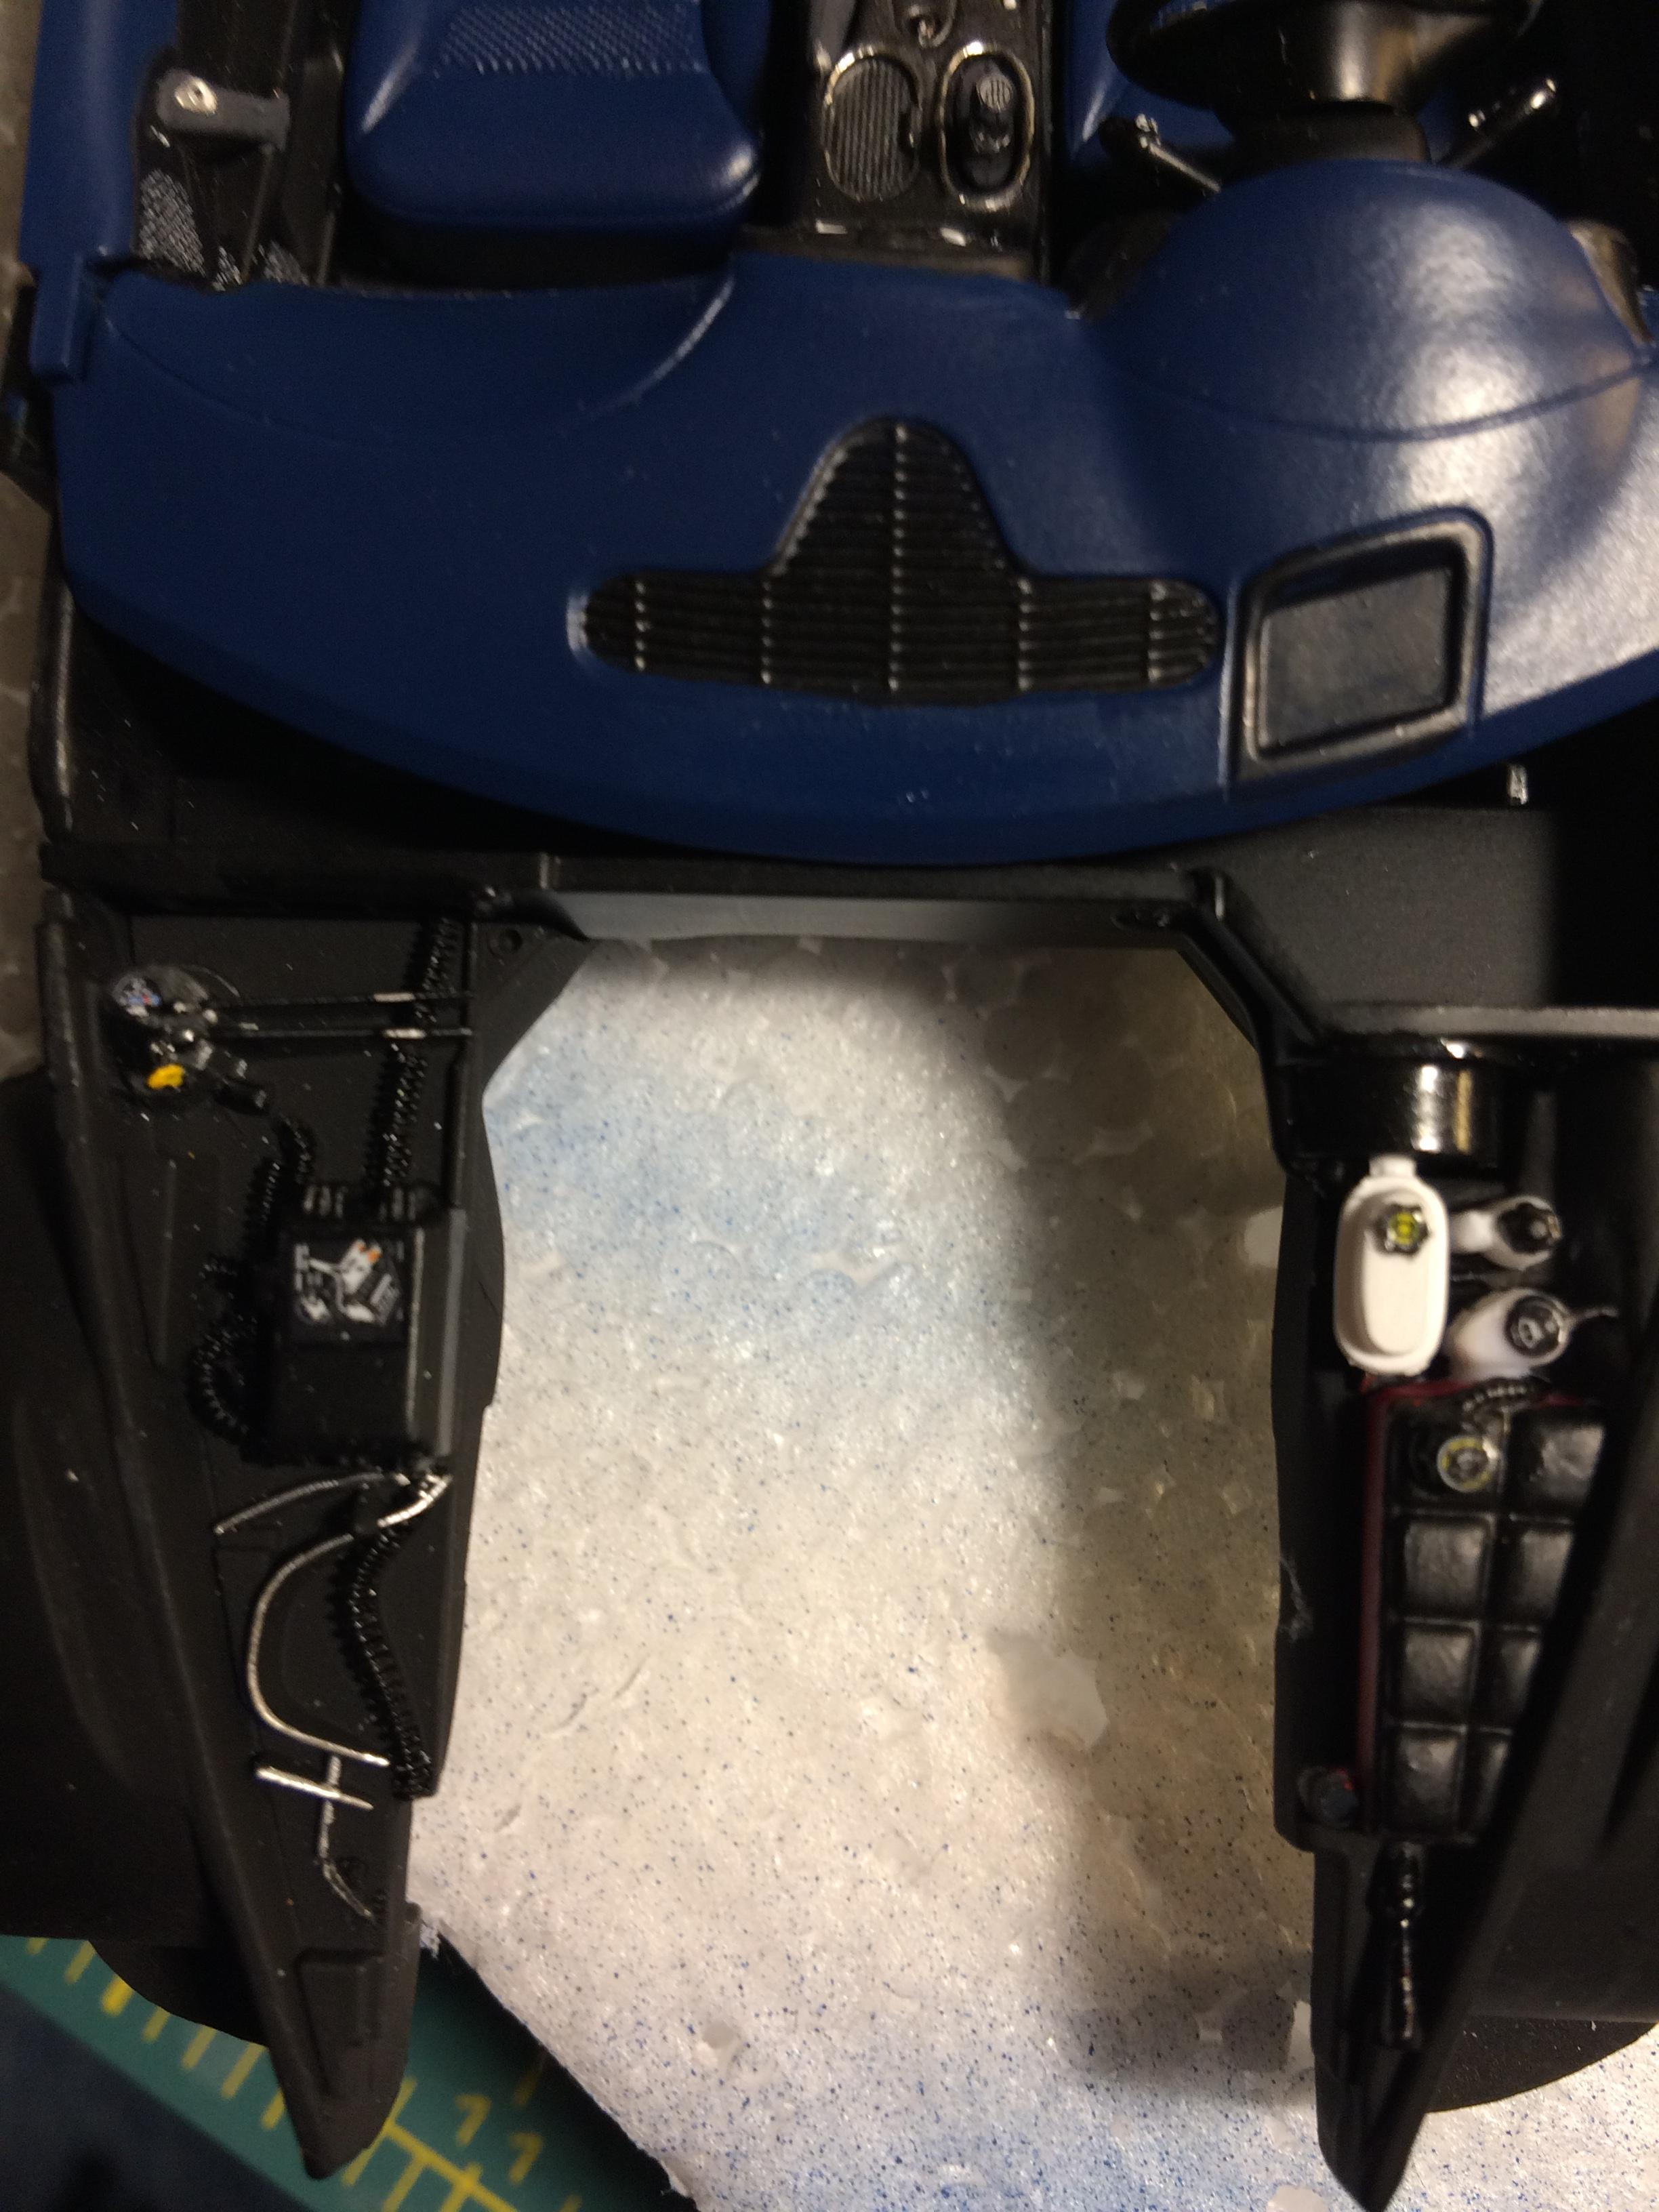
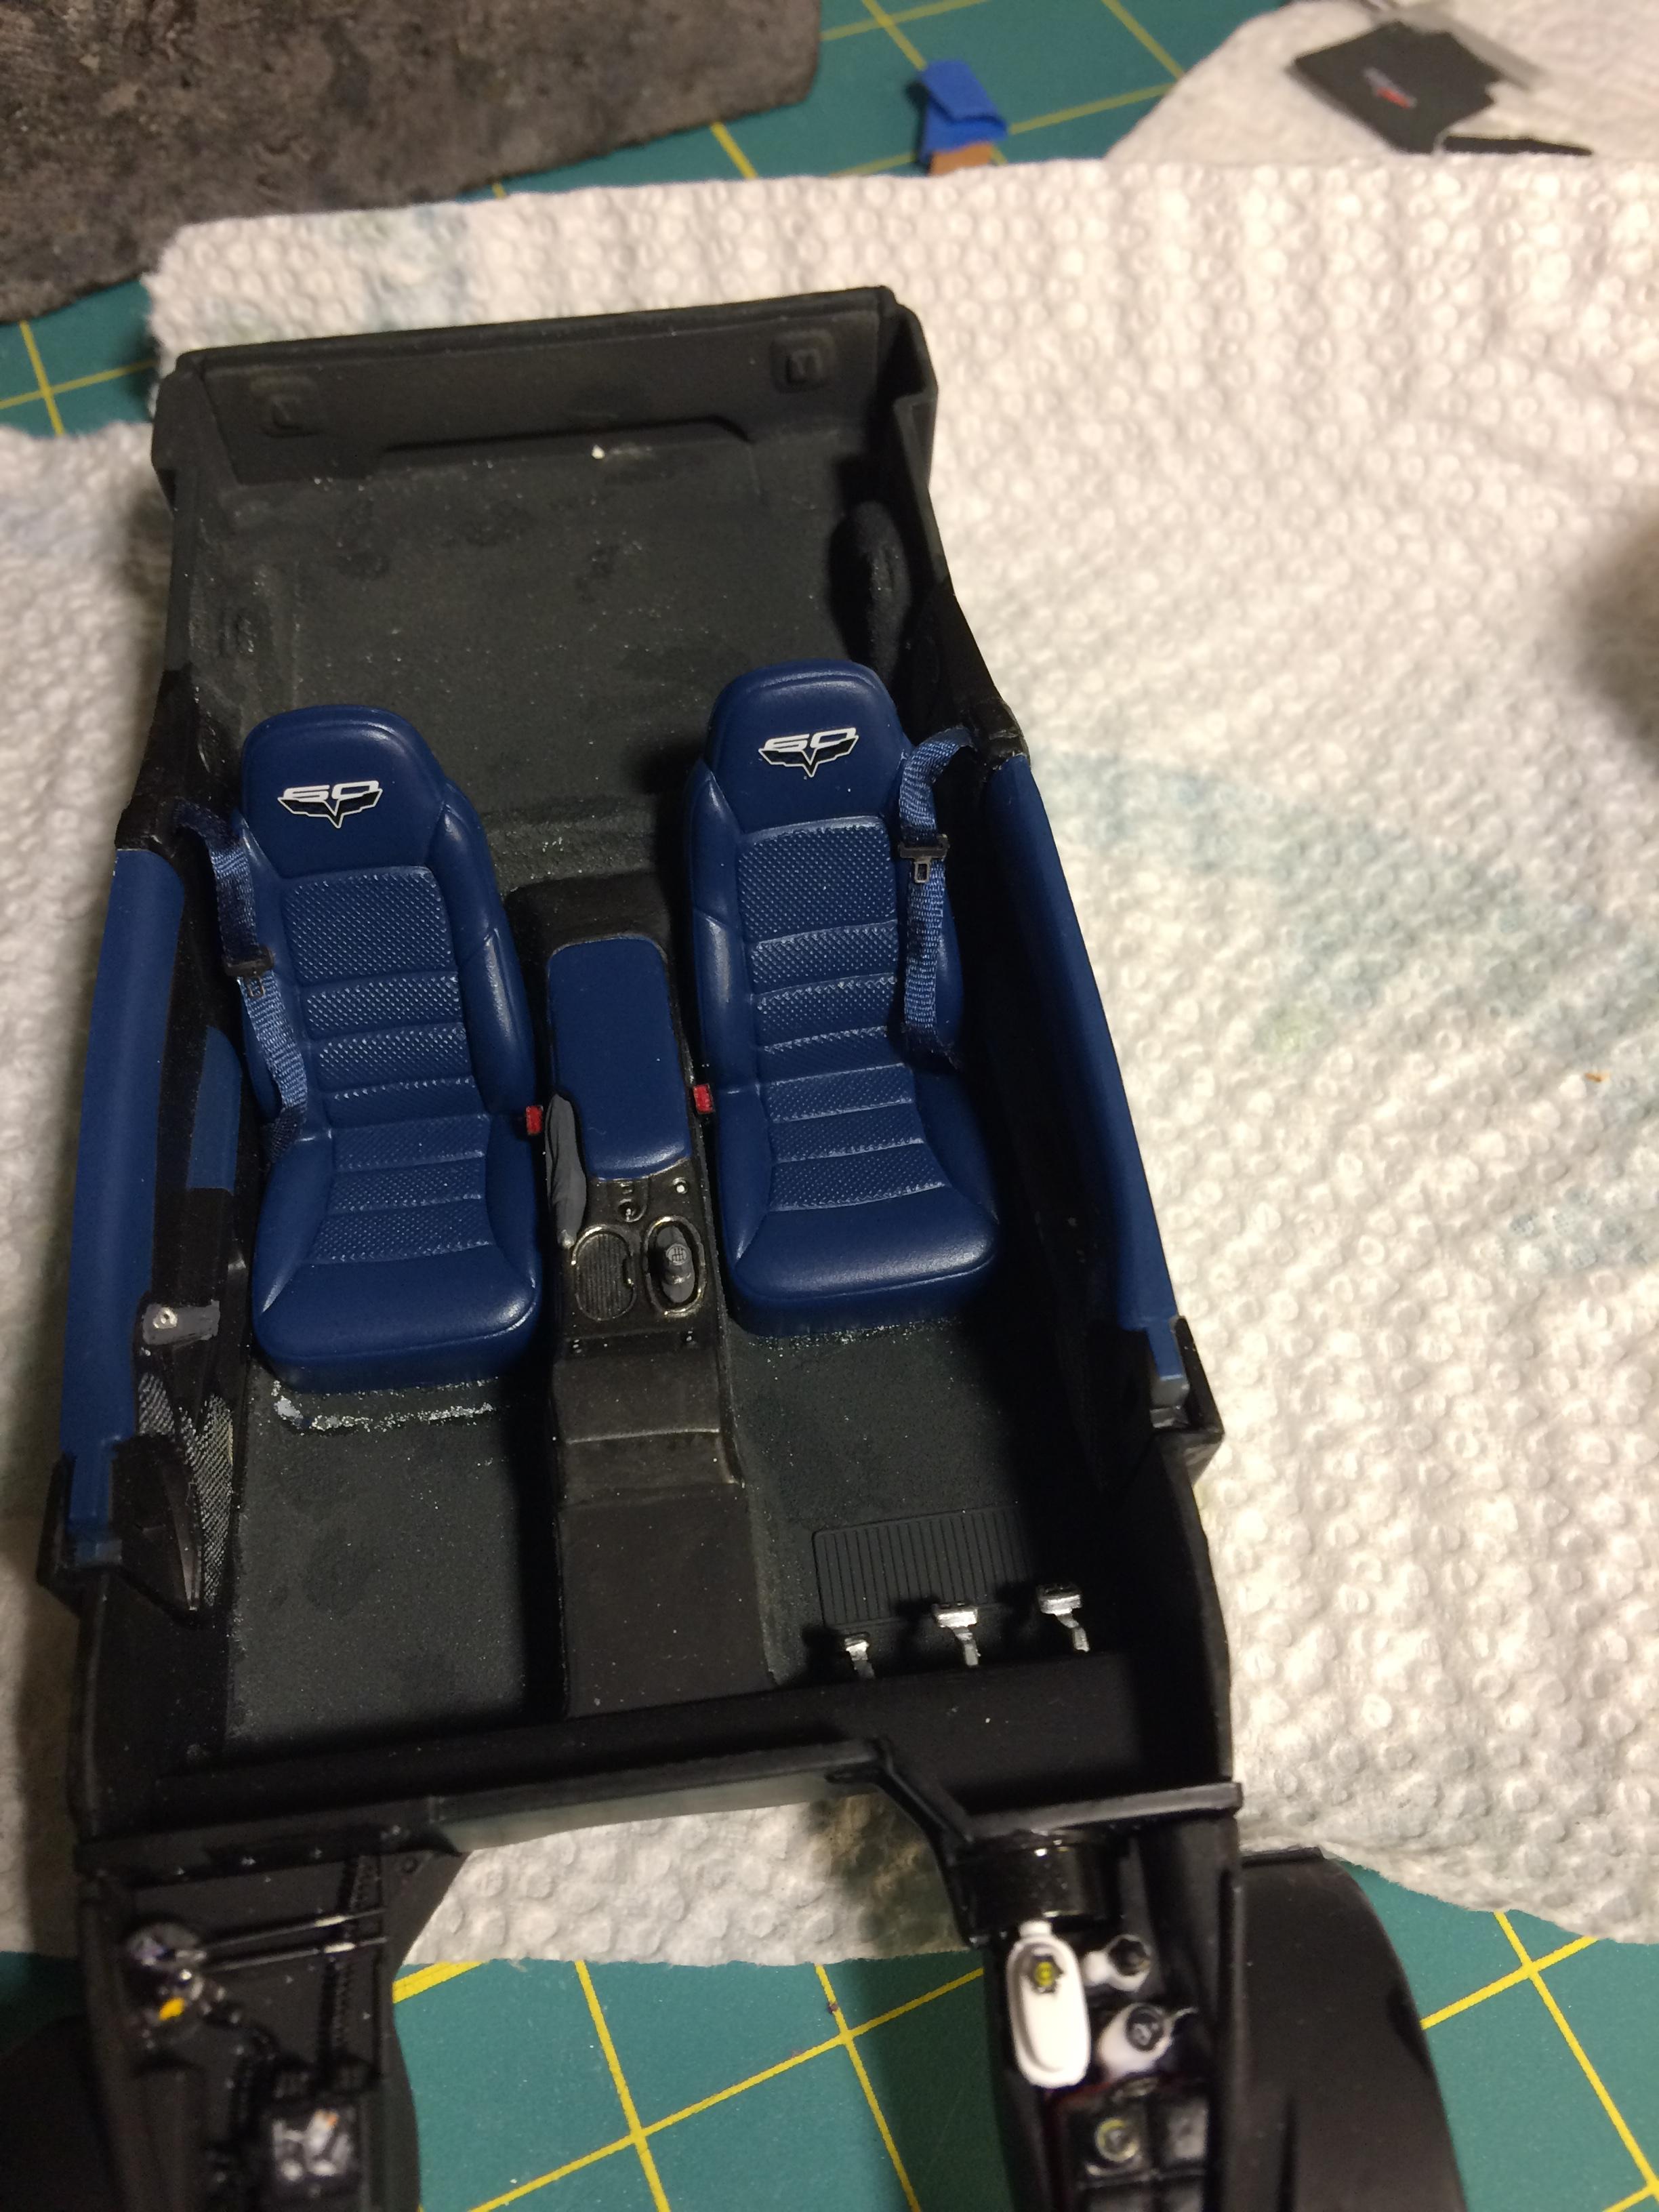
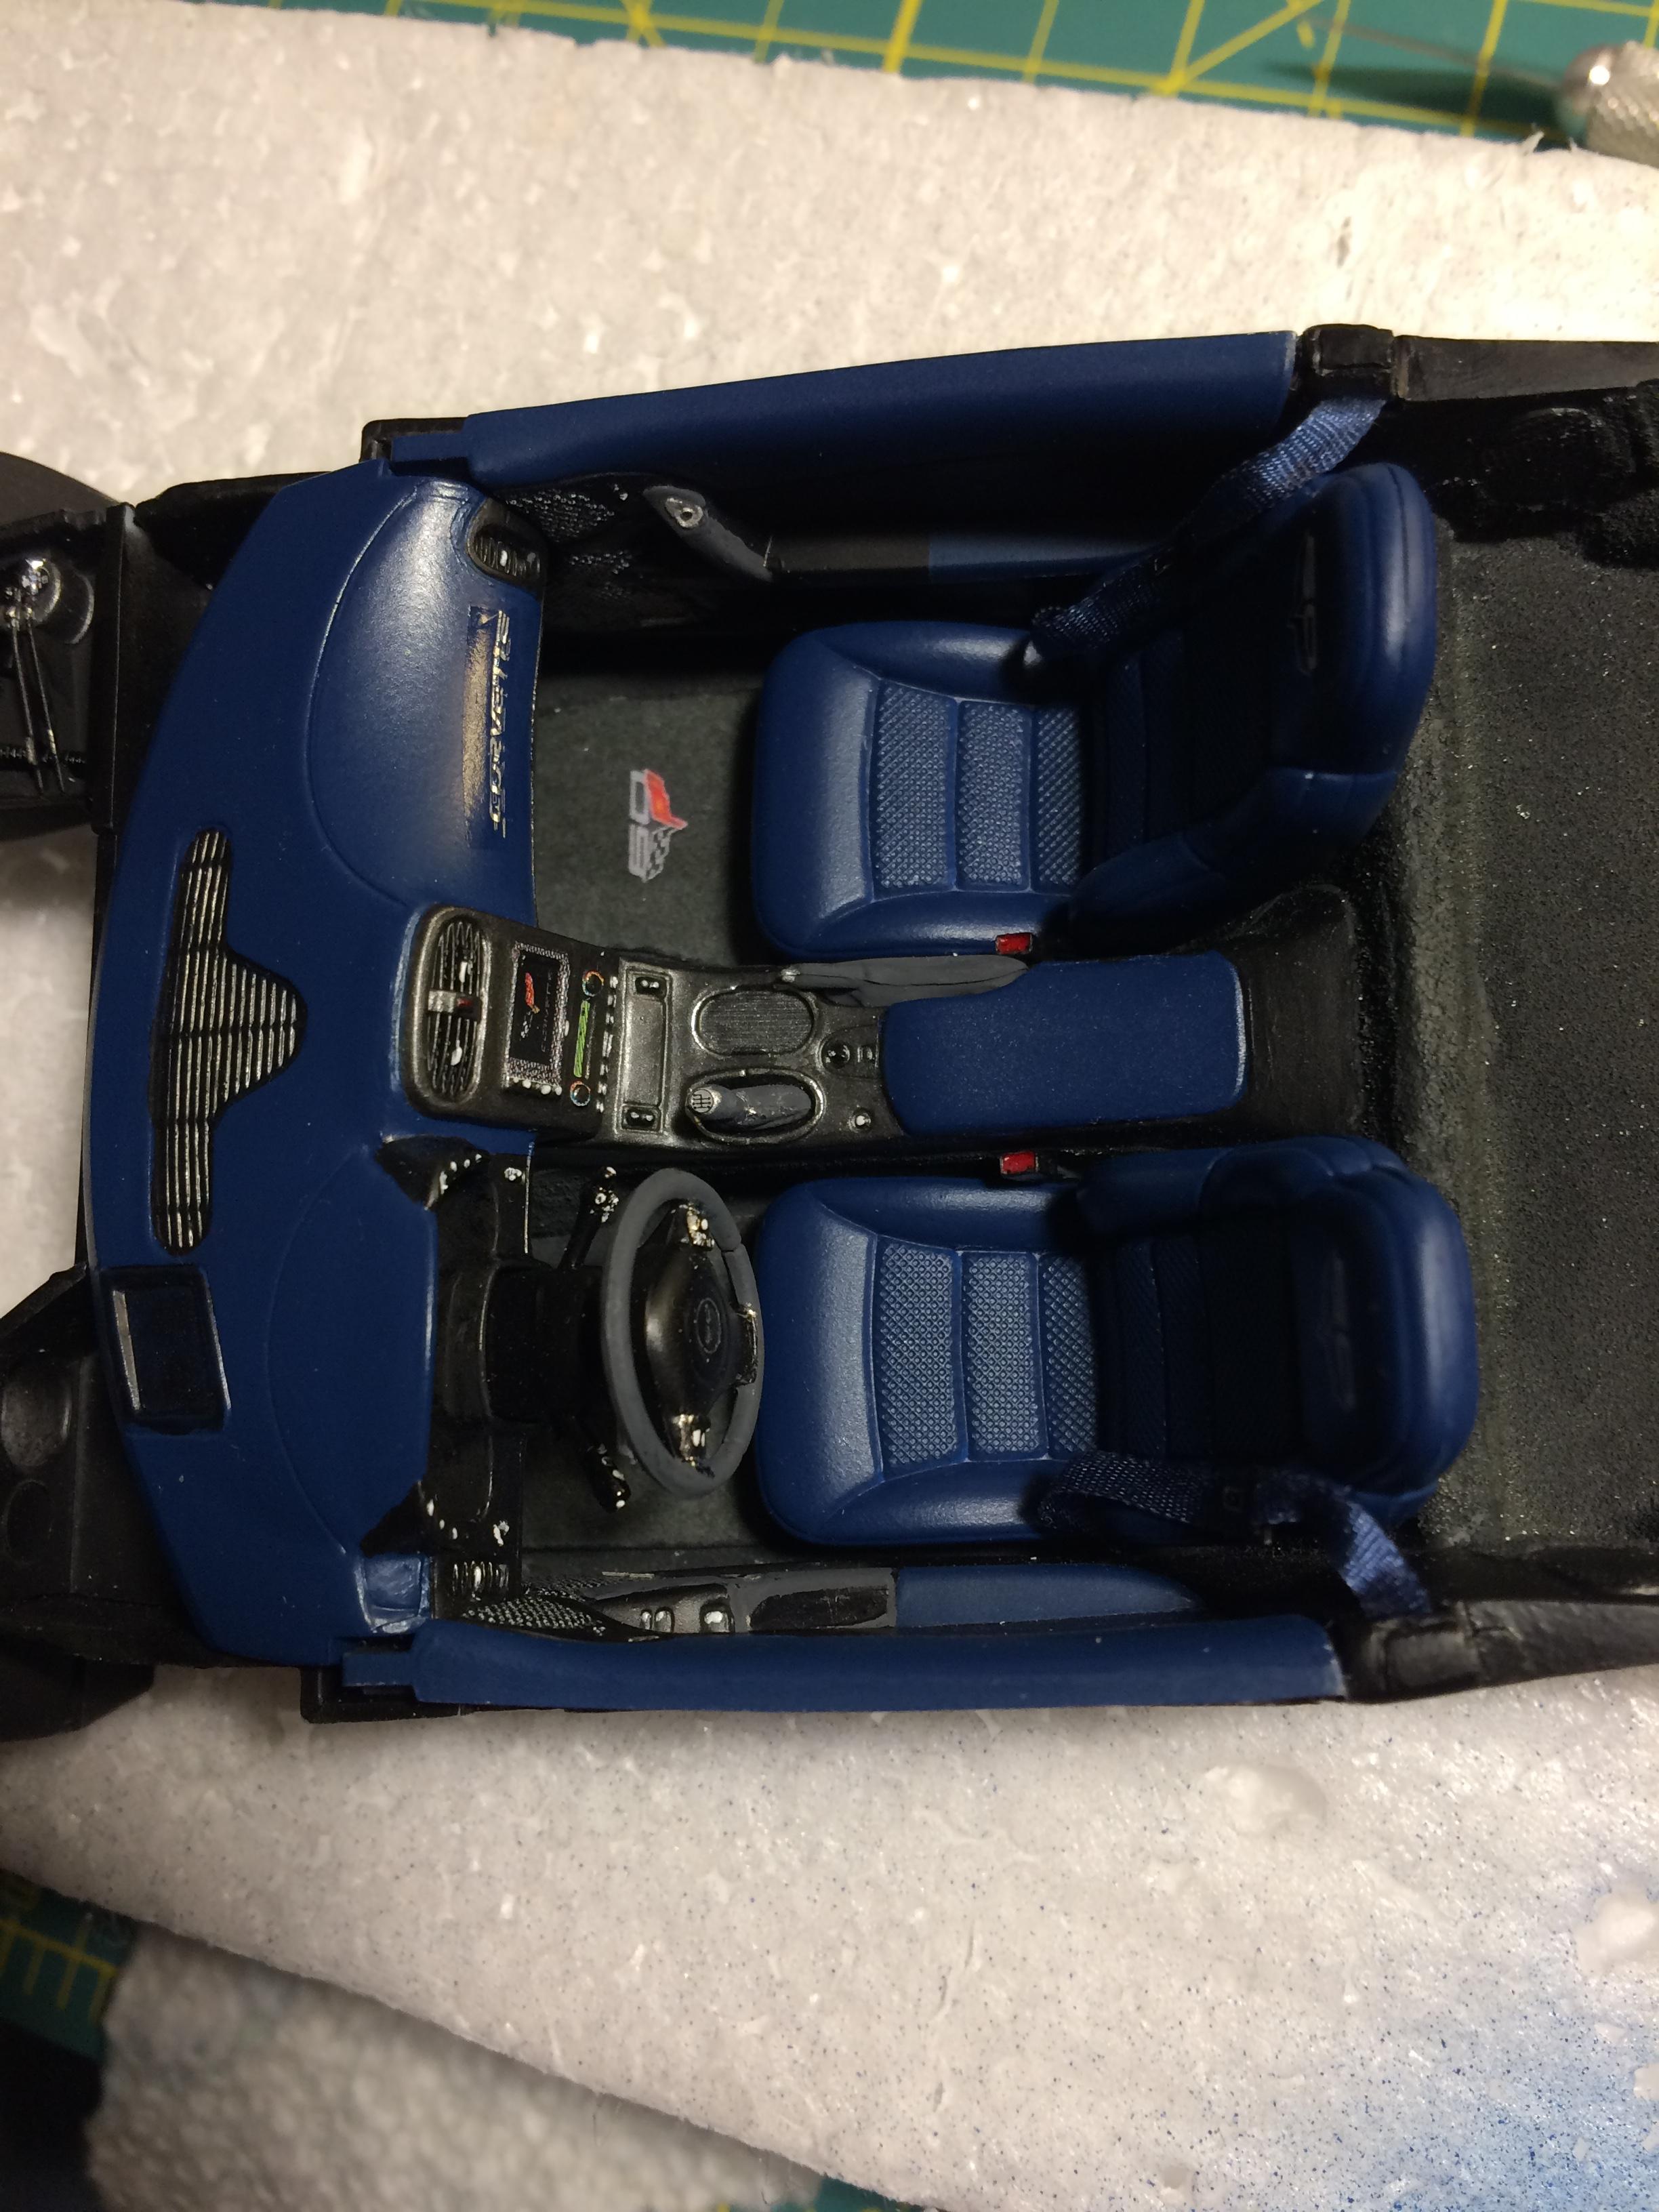
Seats have the 60th Anniversary logo on the headrest, using decals from the Plamoz 60th Anniv decal sheet. Added seatbelts, since with the drop-top, these will be prominently seen. Seat belt receivers were made from strip styrene and detail painted. The floor was painted with a thick coat of white glue and then added black embossing powder to simulate the carpeting. Also photo reduced a set of 60th Anniversary floor mats from the web, glued to masking tape and cut to fit. You can also see the very small decal on the manual shift knob.
-
2
-
-
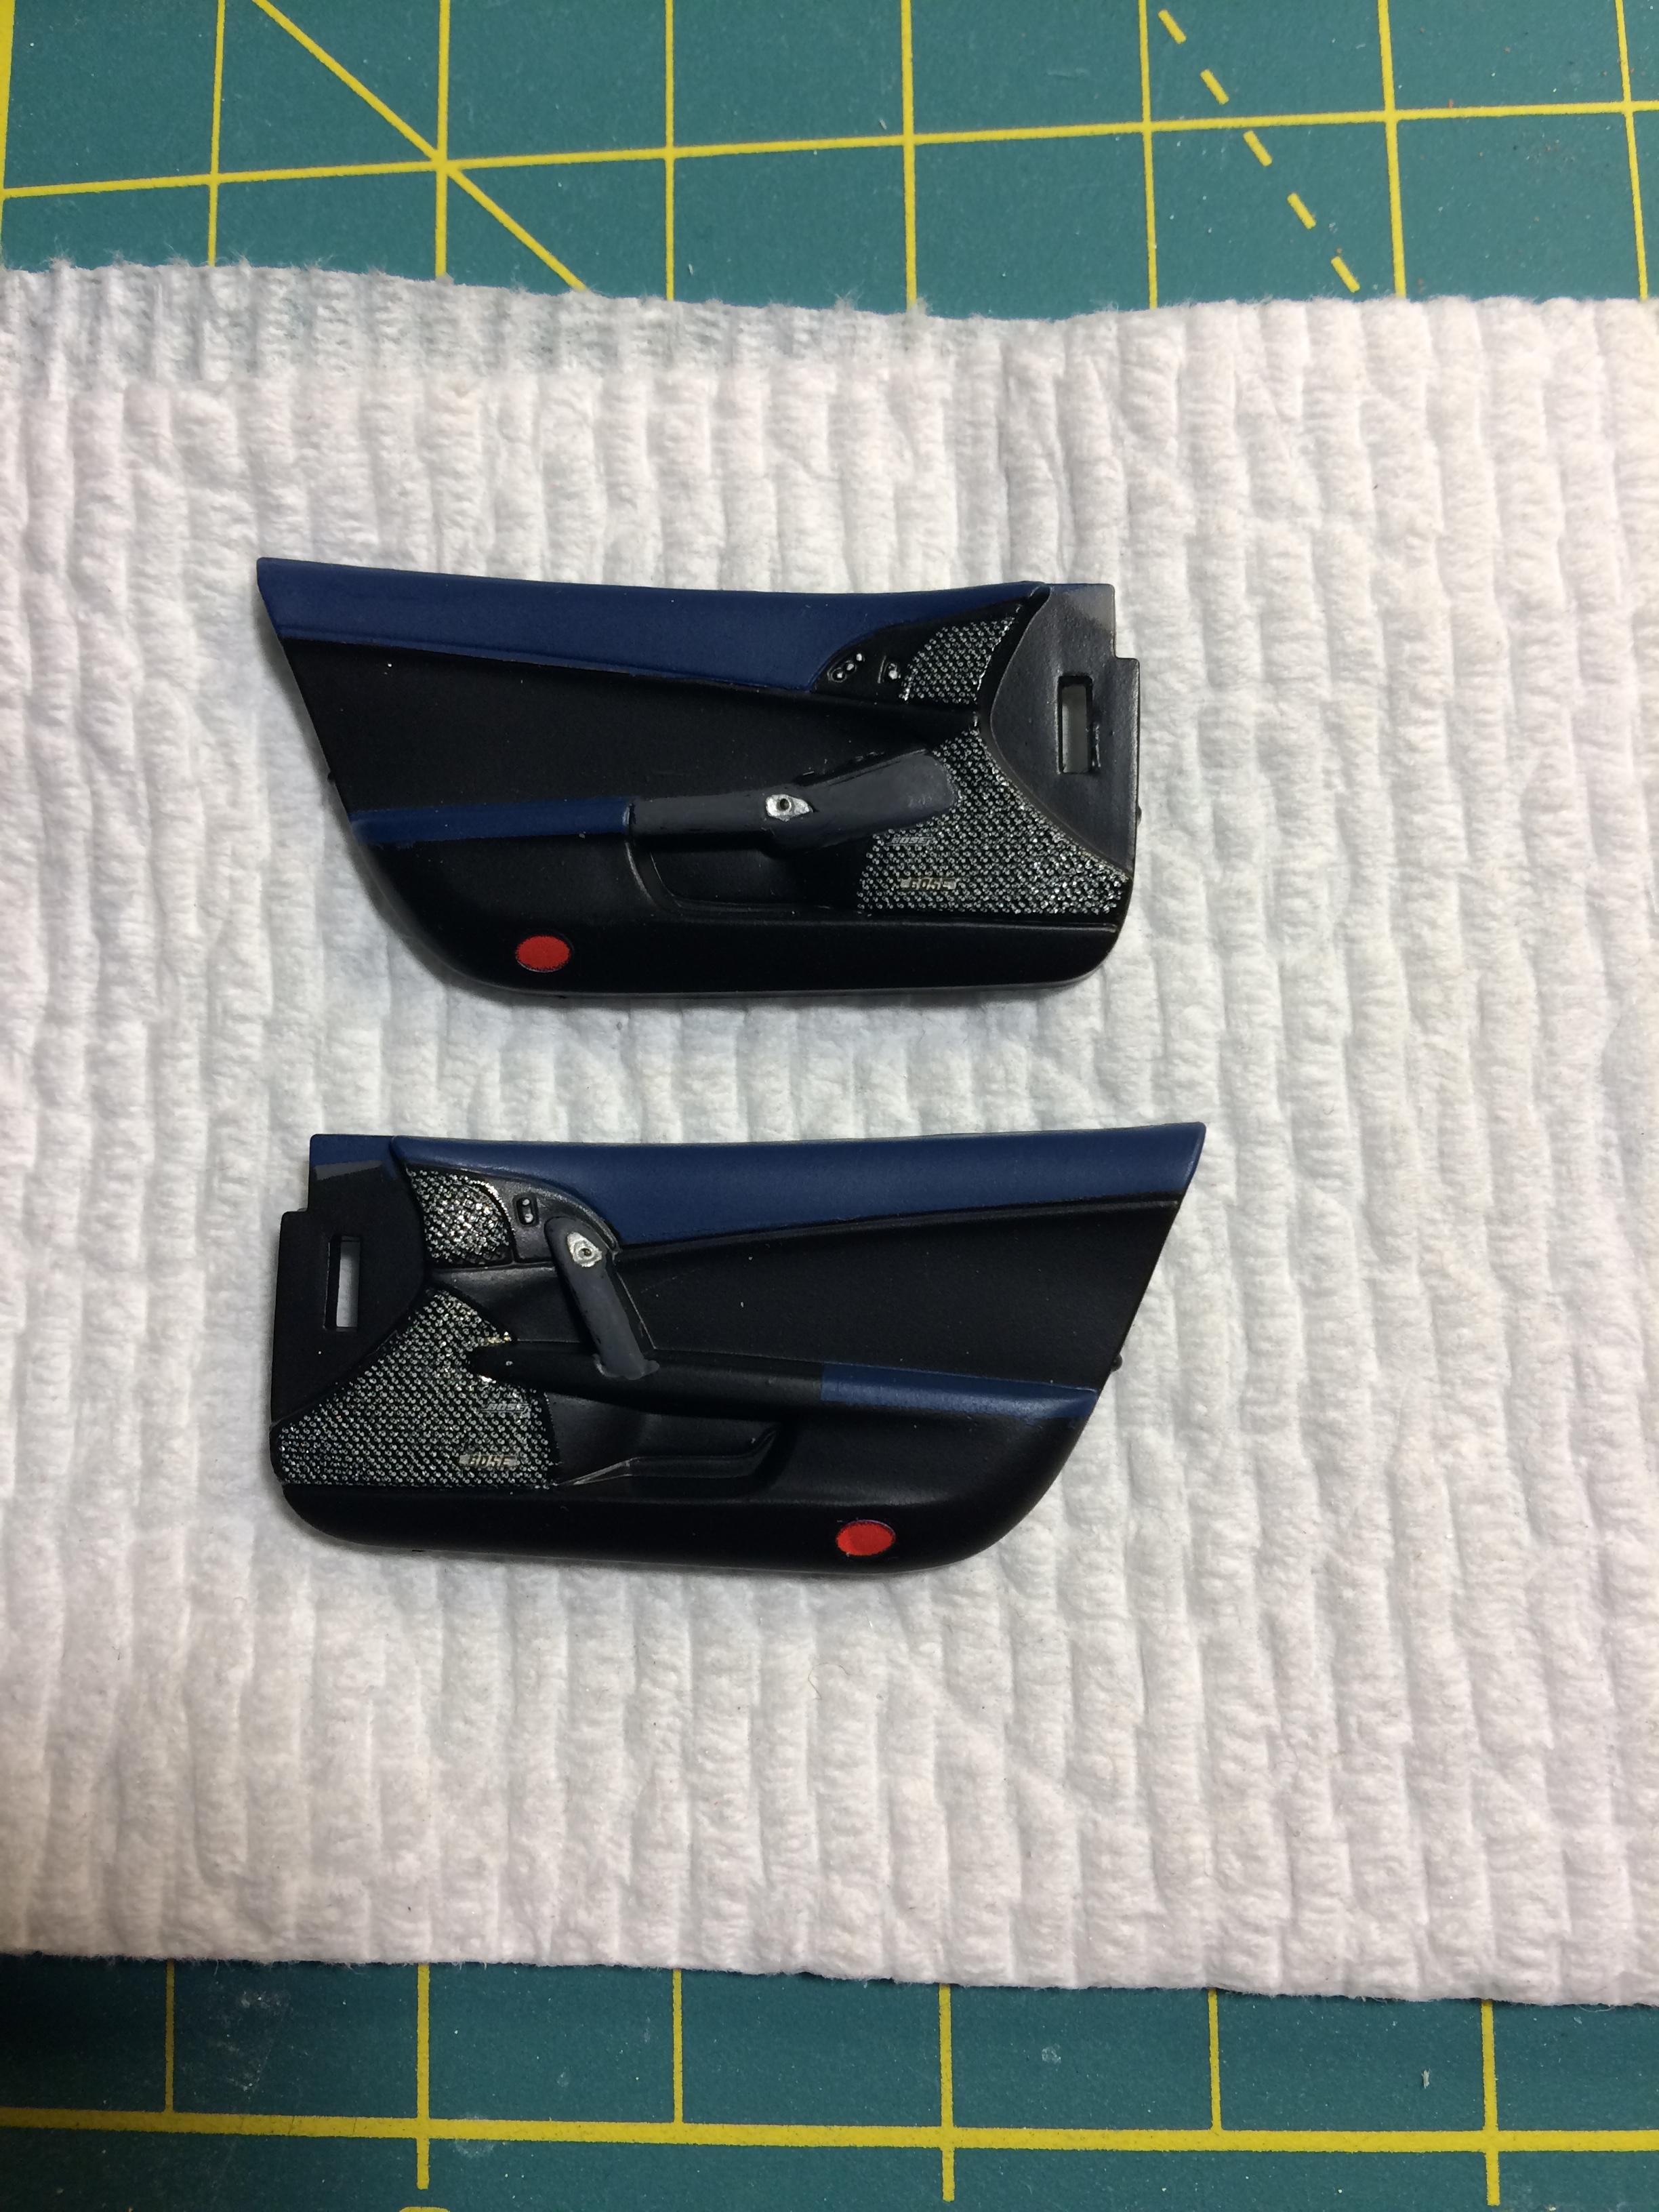
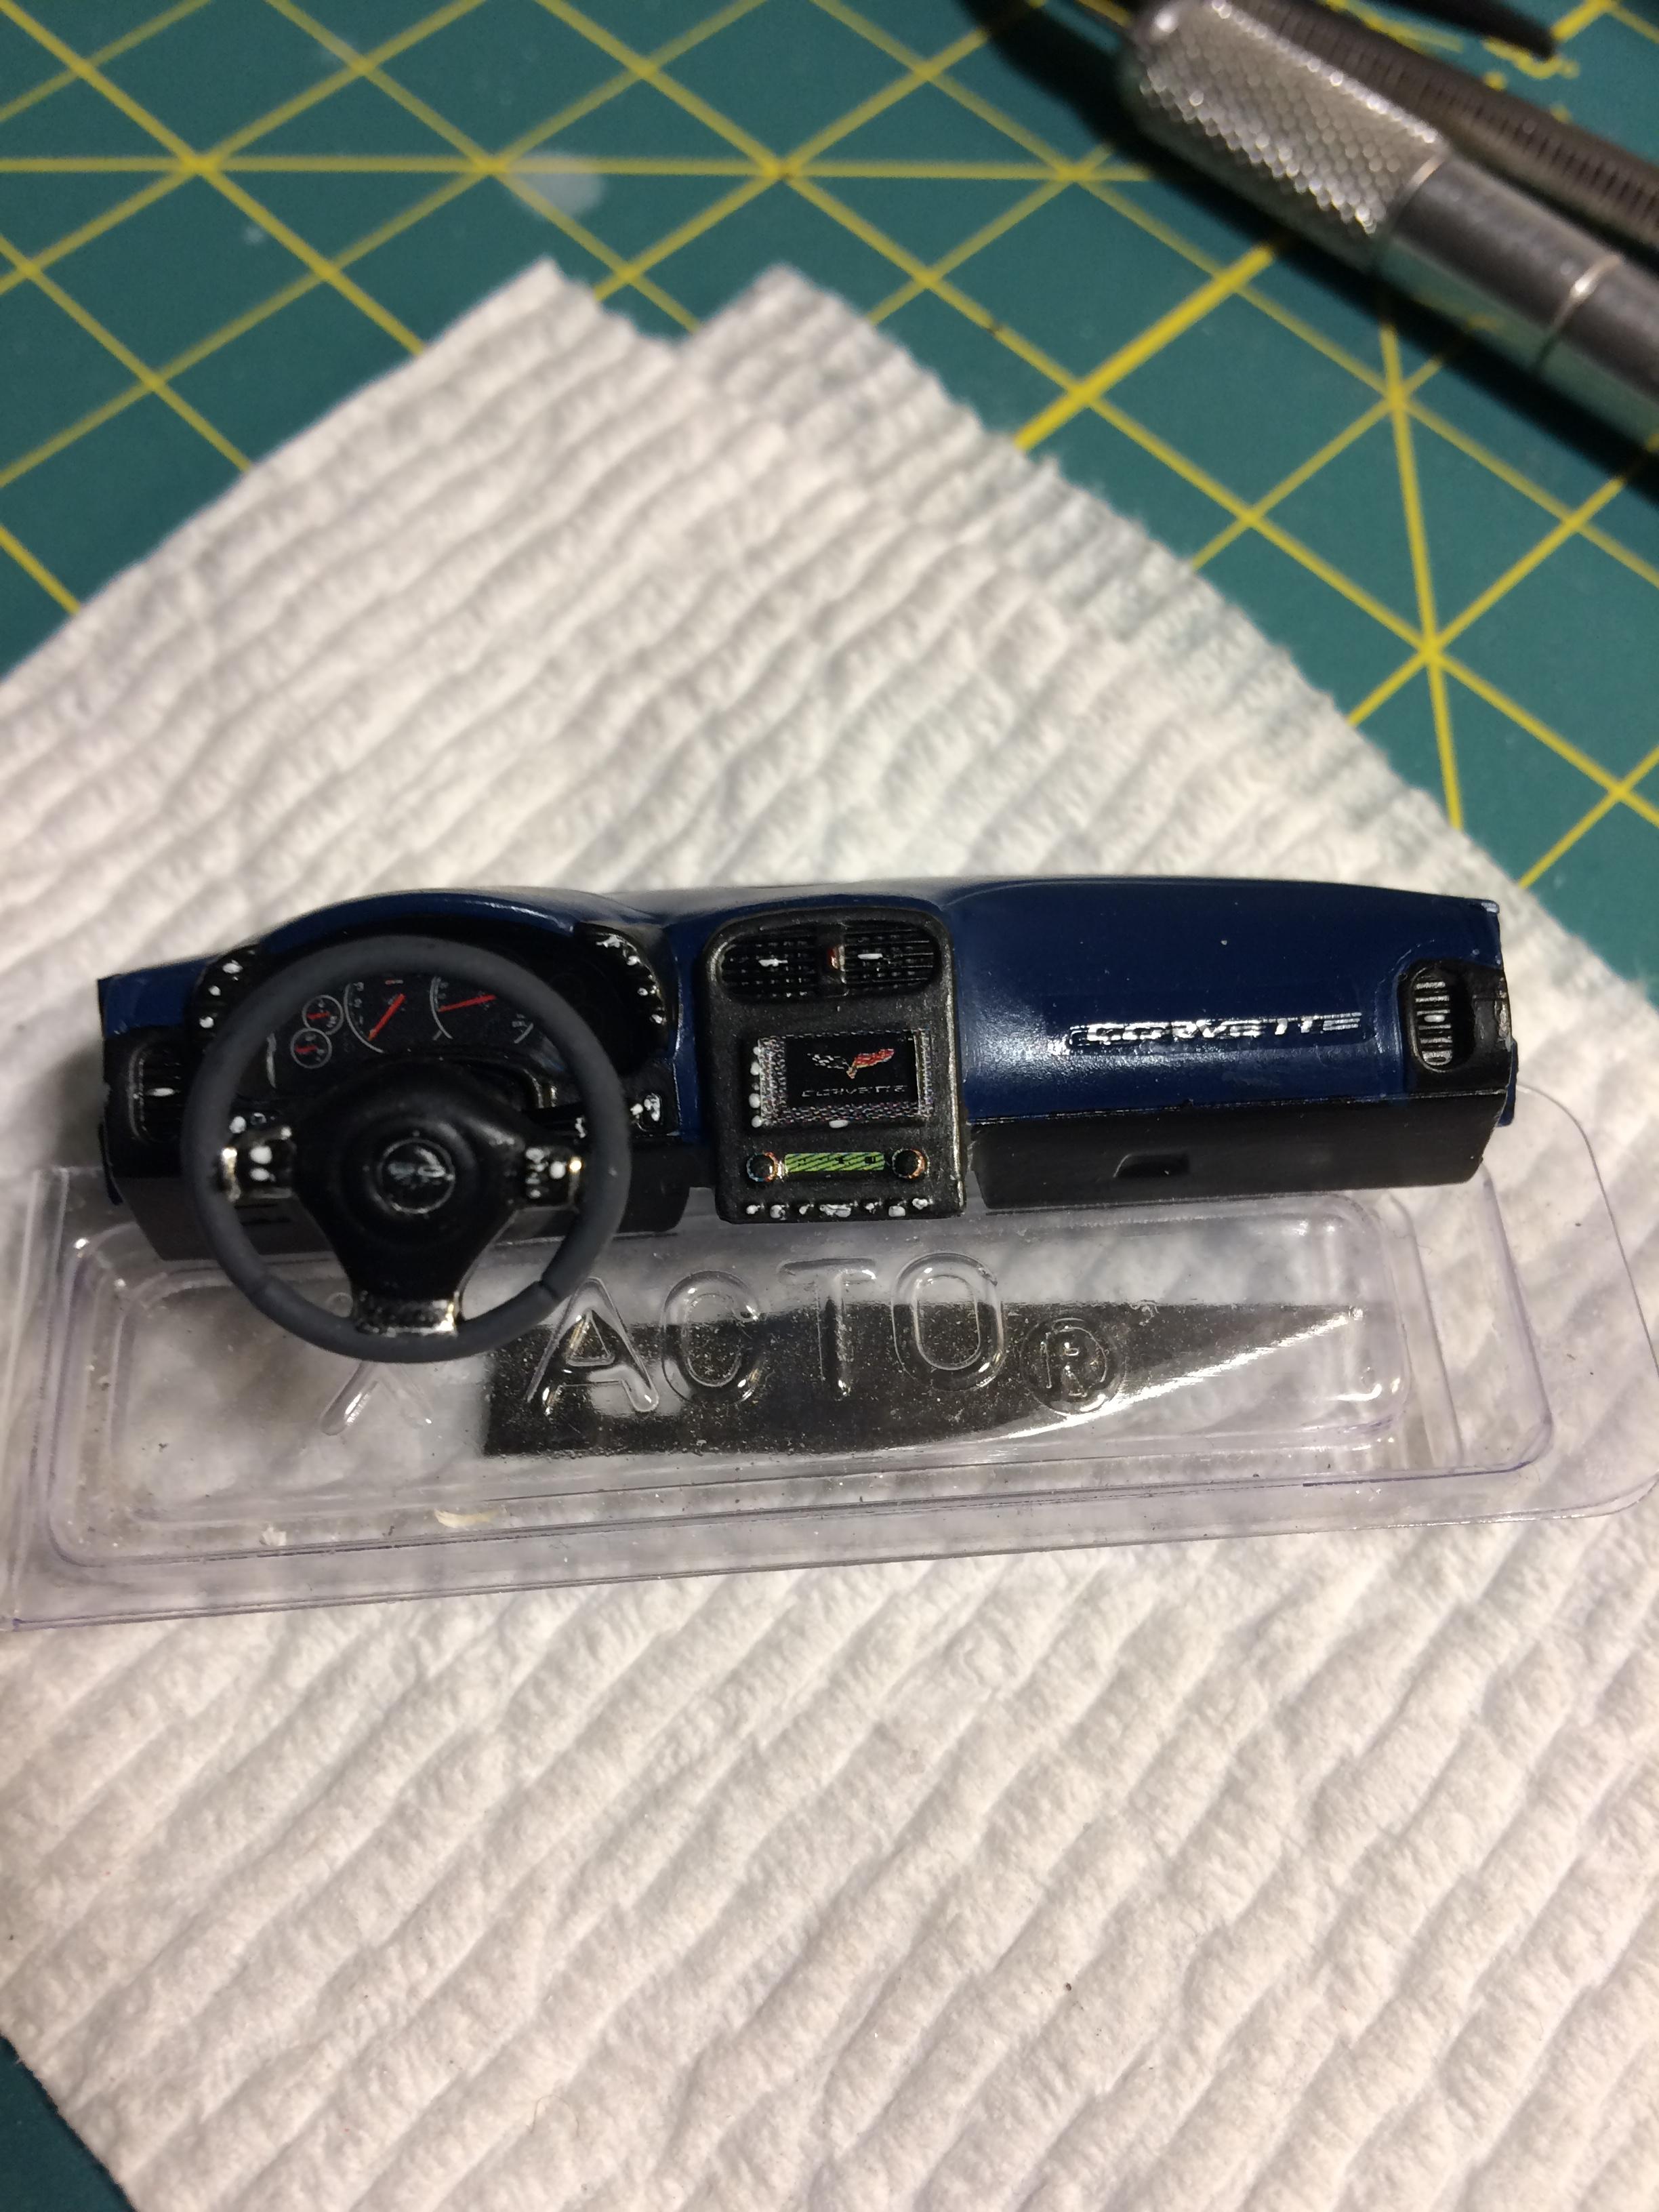
Onto the Interior build -- The Anniversary car has a 'Blue Diamond' and black interior. The steering wheel, shifter boot and the E-brake boot are Alcantera. The diamond blue is a mix of Tamiya 'Royal Blue and Flat Blue' AB onto the masked, door panels, dash board and seats. The door panels have decals for the 'Bose' speakers and the 'red' bottom door reflector and the black is a Vallejo 'Black' acrylic. I simulated the Alcantera using a a thinned mix of Tamiya German Grey and a small amount of talcum powder --the effect looks close. The steering wheel '60th' decal in the center; the A/C - Heater and mode controls are decals from Thomas at Speedway decals.
-
2
-
-
welcome back to the hobby -- great job on the GT-40, paint job looks great!!
-
A beautiful 'clean' build --love the garage diorama! Great job!!


2013 60th Anniversary Corvette '427' Convertible
in Model Cars
Posted
Thx again for all the compliments and comments, it's much appreciated,
Al