modelfink
-
Posts
361 -
Joined
-
Last visited
Content Type
Profiles
Forums
Events
Gallery
Everything posted by modelfink
-
That's awesome Tim! I'll have to check out that issue
-
Thanks for your interest Tim. I got distracted with other projects. I'll get back to it soon
-
Thanks Tim! I'm excited to see yours. Since this is supposed to be a "quick and fun" project, I didn't fool with lots of engineering of the rear suspension. Depending on the rear slick you are using, the Ala Kart coil springs were the perfect height for the AMT dragmaster slicks. I'm hoping to have it done in time for the show in Atlanta, you should bring yours and we can line em up together!
-
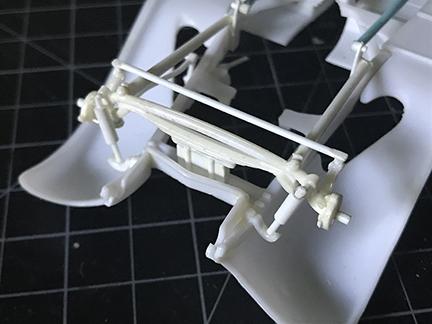
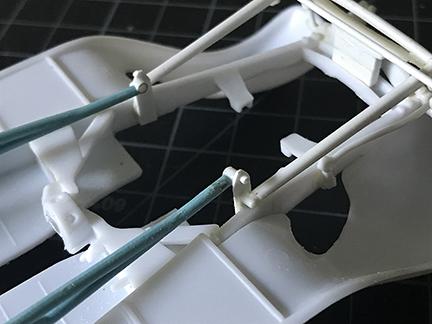
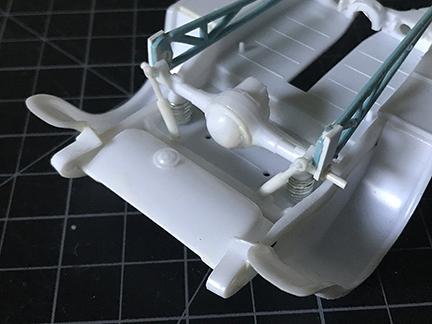
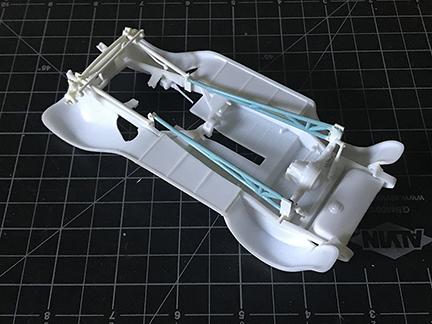
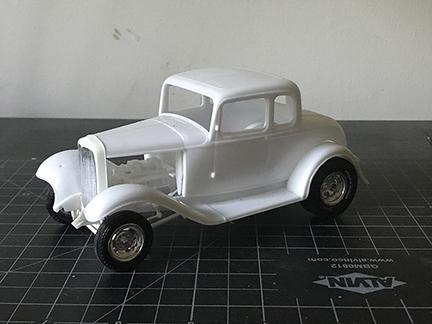
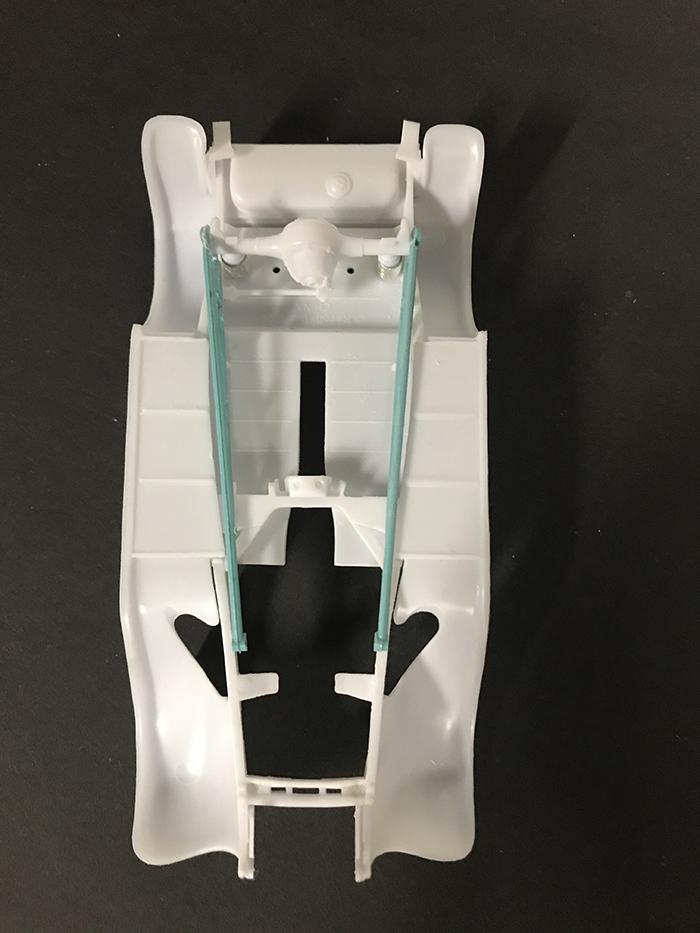
AN UPDATE! After a couple years away from the bench I'm back on this project and feeling pretty good about it! Since I last posted I sorted out all the suspension components. Up front I'm using the dropped tube axle from the Revell 32 which required a significant blocking of the leaf spring to get the ride height I wanted. I built some front shocks and a tie rod out of styrene. Split wishbones are from the Revell 29 Ford. I made some brackets to attach the front bones and rear ladder bars. Out back the Ford 9 inch is supported by coil springs from the parts box and shocks from the AMT 41 Willys with ladder bars from the Revell SW&C Willys. I replaced the super long tail on the Y block trans with a 4 speed from a mid 60s Mustang Gt kit. (Thanks Dennis) and cut down the long oil filter to clear the steering box. I'm really happy with the ride height and how everything is fitting together.

-
cool project! looking good
-

29 Ford: Race of Gentlemen presents... California Drag Racing 2023
modelfink replied to Calb56's topic in WIP: Model Cars
good stuff! -
Unfortunately it has been sitting dormant, and I have not sat at the modeling bench for some time. But your interest has inspired me to dust it off and get it done!
-
I may need to steal that 48 fender trick!
-
VERY nice! I really love this build. You nailed it
-
cool project!! Your modifications are looking great. Another way to lower the front is to make relief cuts in the top and bottom of the rails and "sweep" the front of the frame in a gradual way to achieve the same result. Also, the Revell 32 frame sits much lower in the front when compared side by side to the Revell 29 frames.
-
The model Master Aluminum metalizer paints are pretty good. Maybe try achieving the finish before stripping the chrome first, maybe try a dull clear coat. Then strip the chrome if that doesn't work. I'm sure there are lots of options, but I don't have an airbrush so, I'm by no means an authority on scale finishes.
-
Tough little roadster! lookin' good
-
I wouldn't want to leave the line without a panhard bar under me!
-
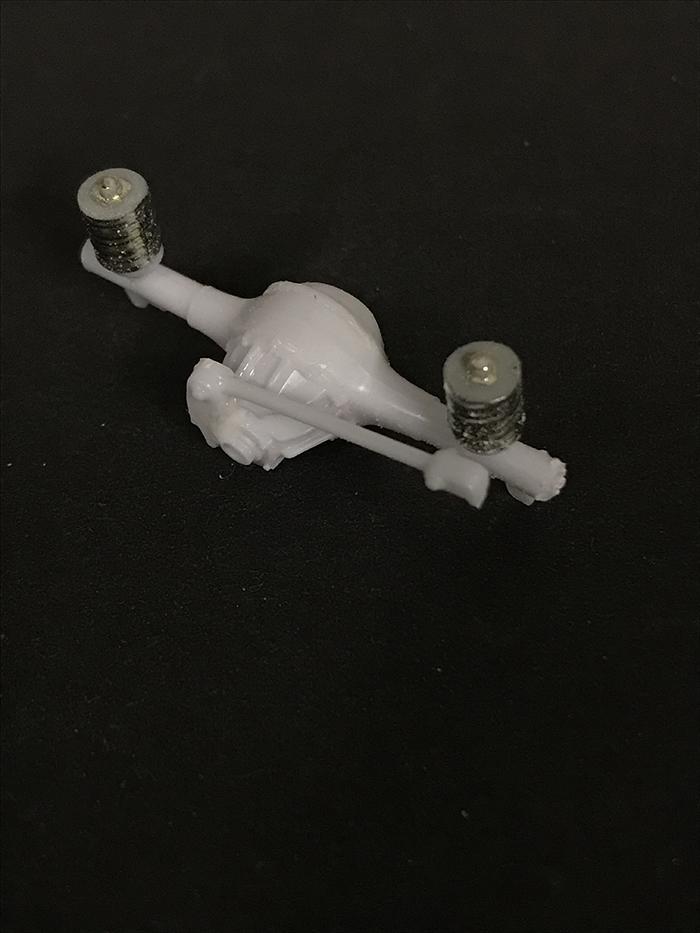
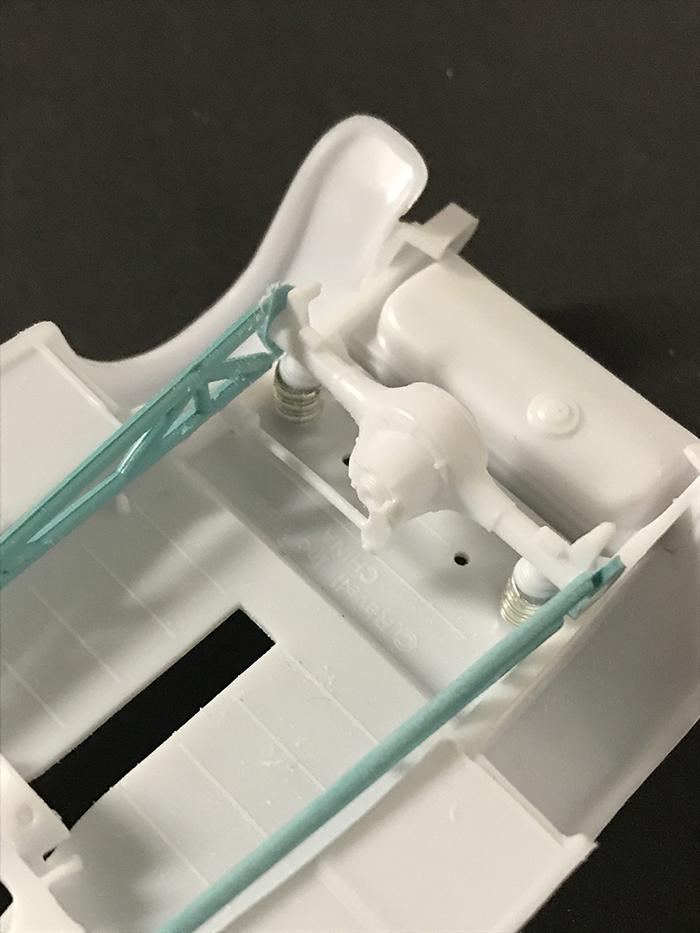
I made a panhard bar by using one of the rear trailing arms from the 57 Ford gasser kit and "welded" it to the front of the rear end. The other end will be attached to the frame in final assembly. I also cut the axles to accept the ladder bars and mocked them up. They will be shortened and mounted to the same bracket the front bones are mounted to, so I'll need to figure out the front end placement before finalizing the ladder bars. The radiator from the AMT Willys gasser was a great fit in the 32 grill shell. I just needed to sand the front to a desired thickness to make it appear recessed into the shell.
-
Thanks Tim, yes, I have seen 30 and 31 coupes built in the same style. I think they were pretty common until the Willys and Anglias came on to the scene. I'm sure your build will be outstanding! (provided the 30 coupe ever gets back into production)
-
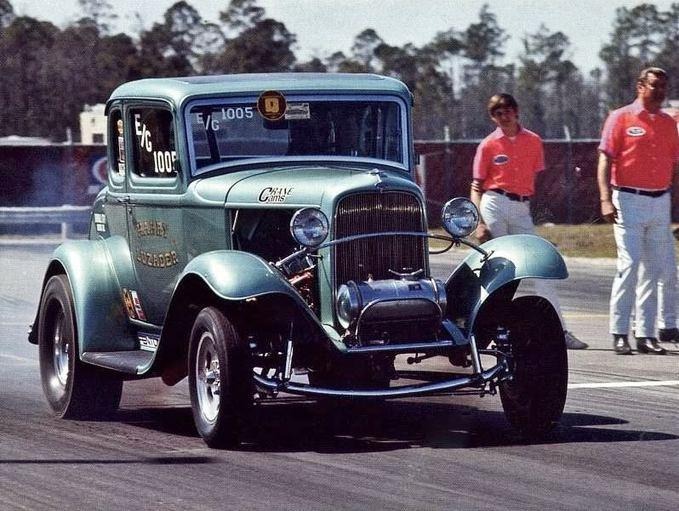
Thanks! This will not be a replica, but I'm using the Luzader coupe as heavy inspiration. Mine will be a different color with the Y block instead of an injected SBC
-
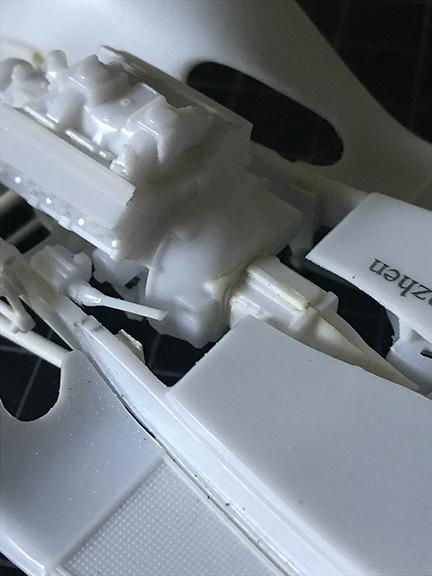
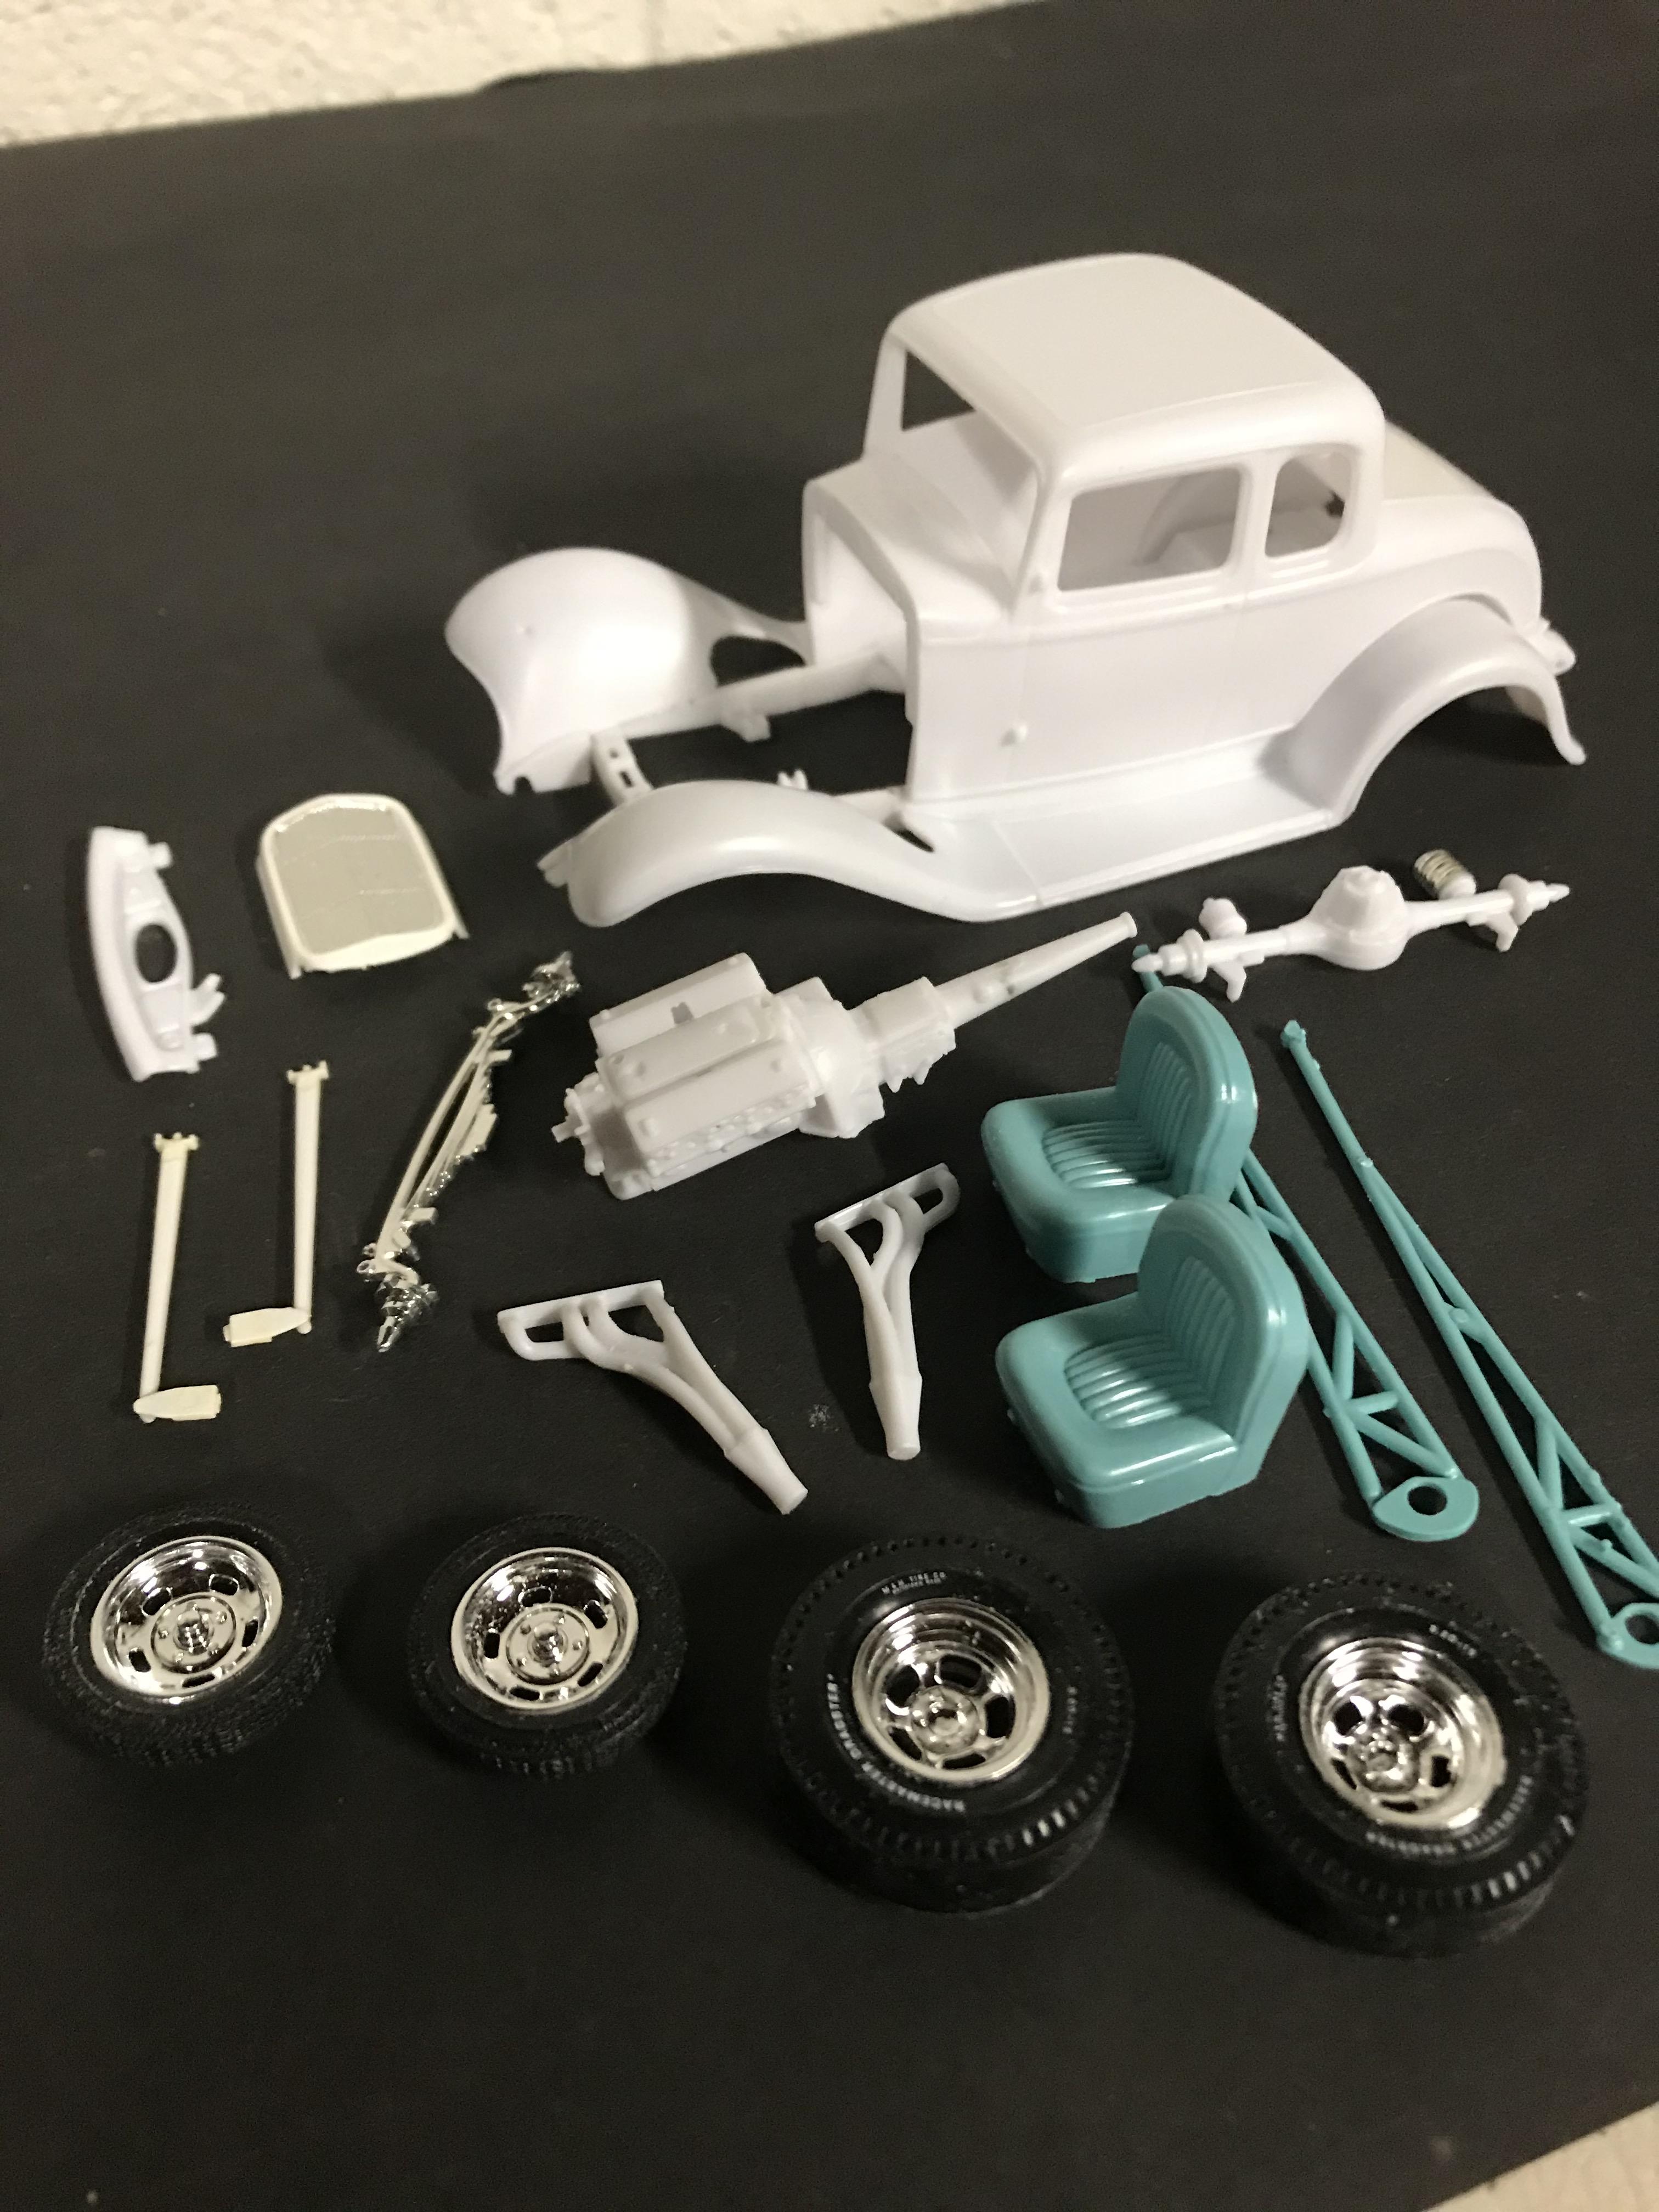
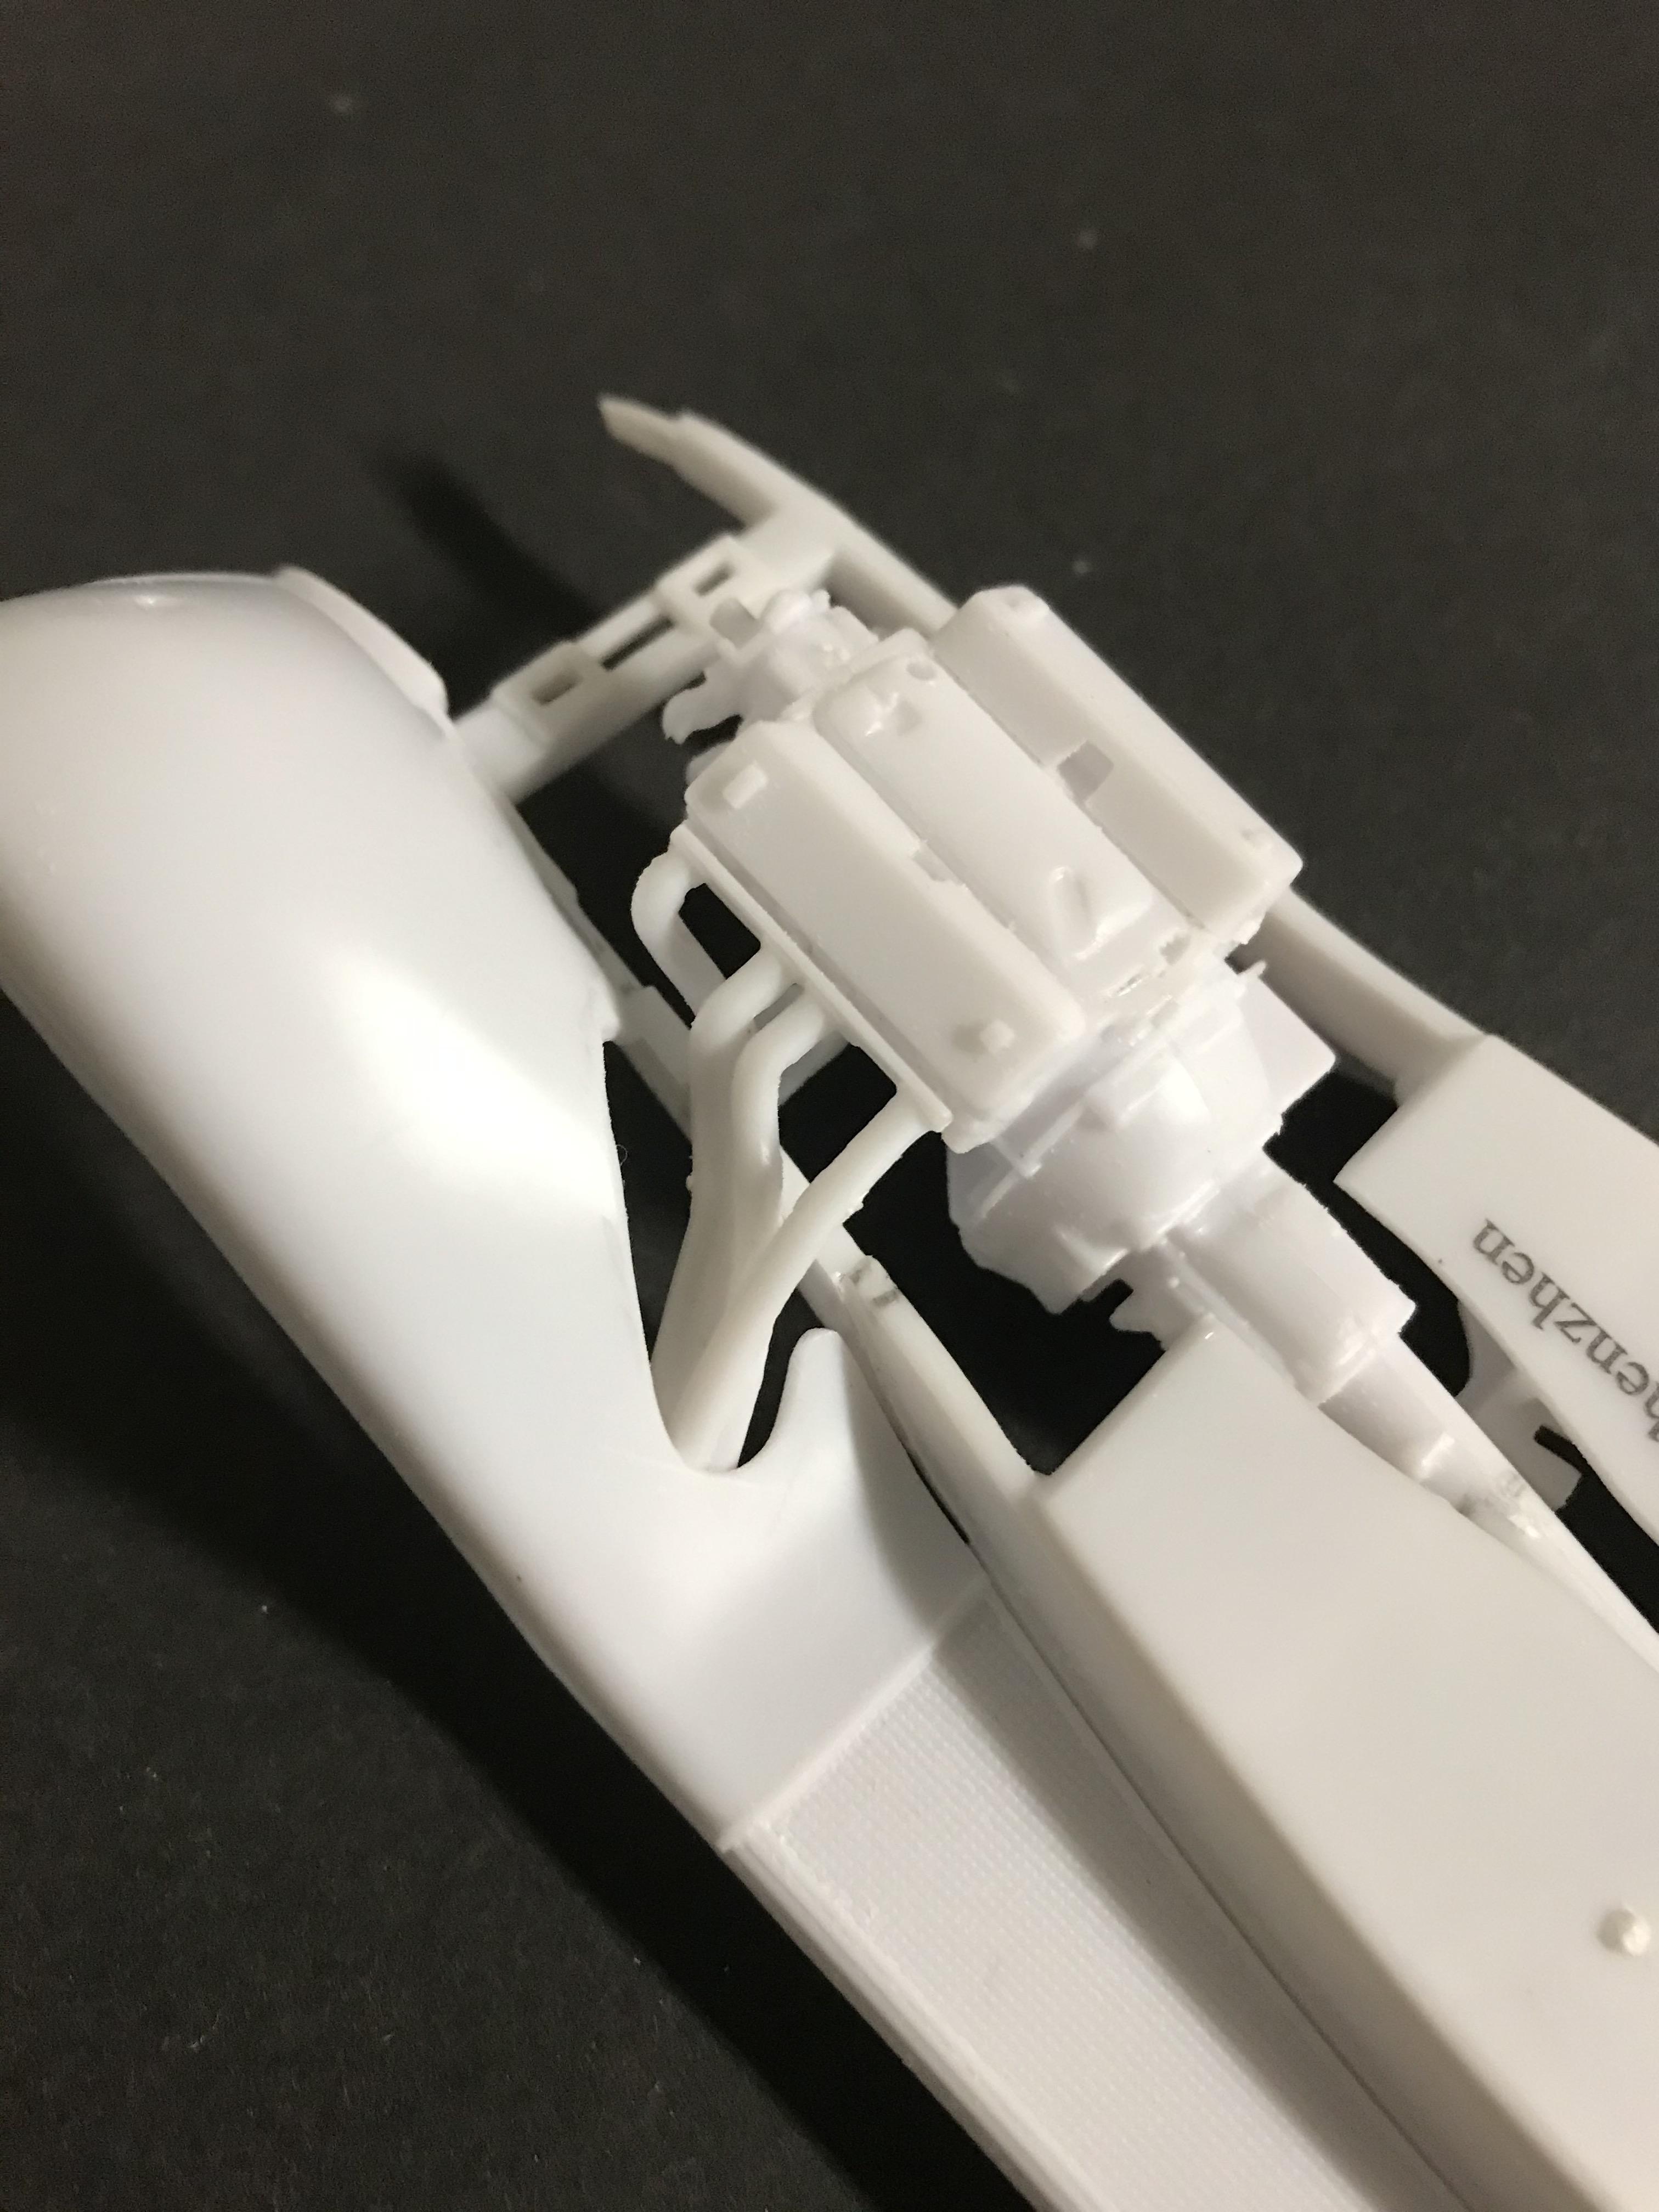
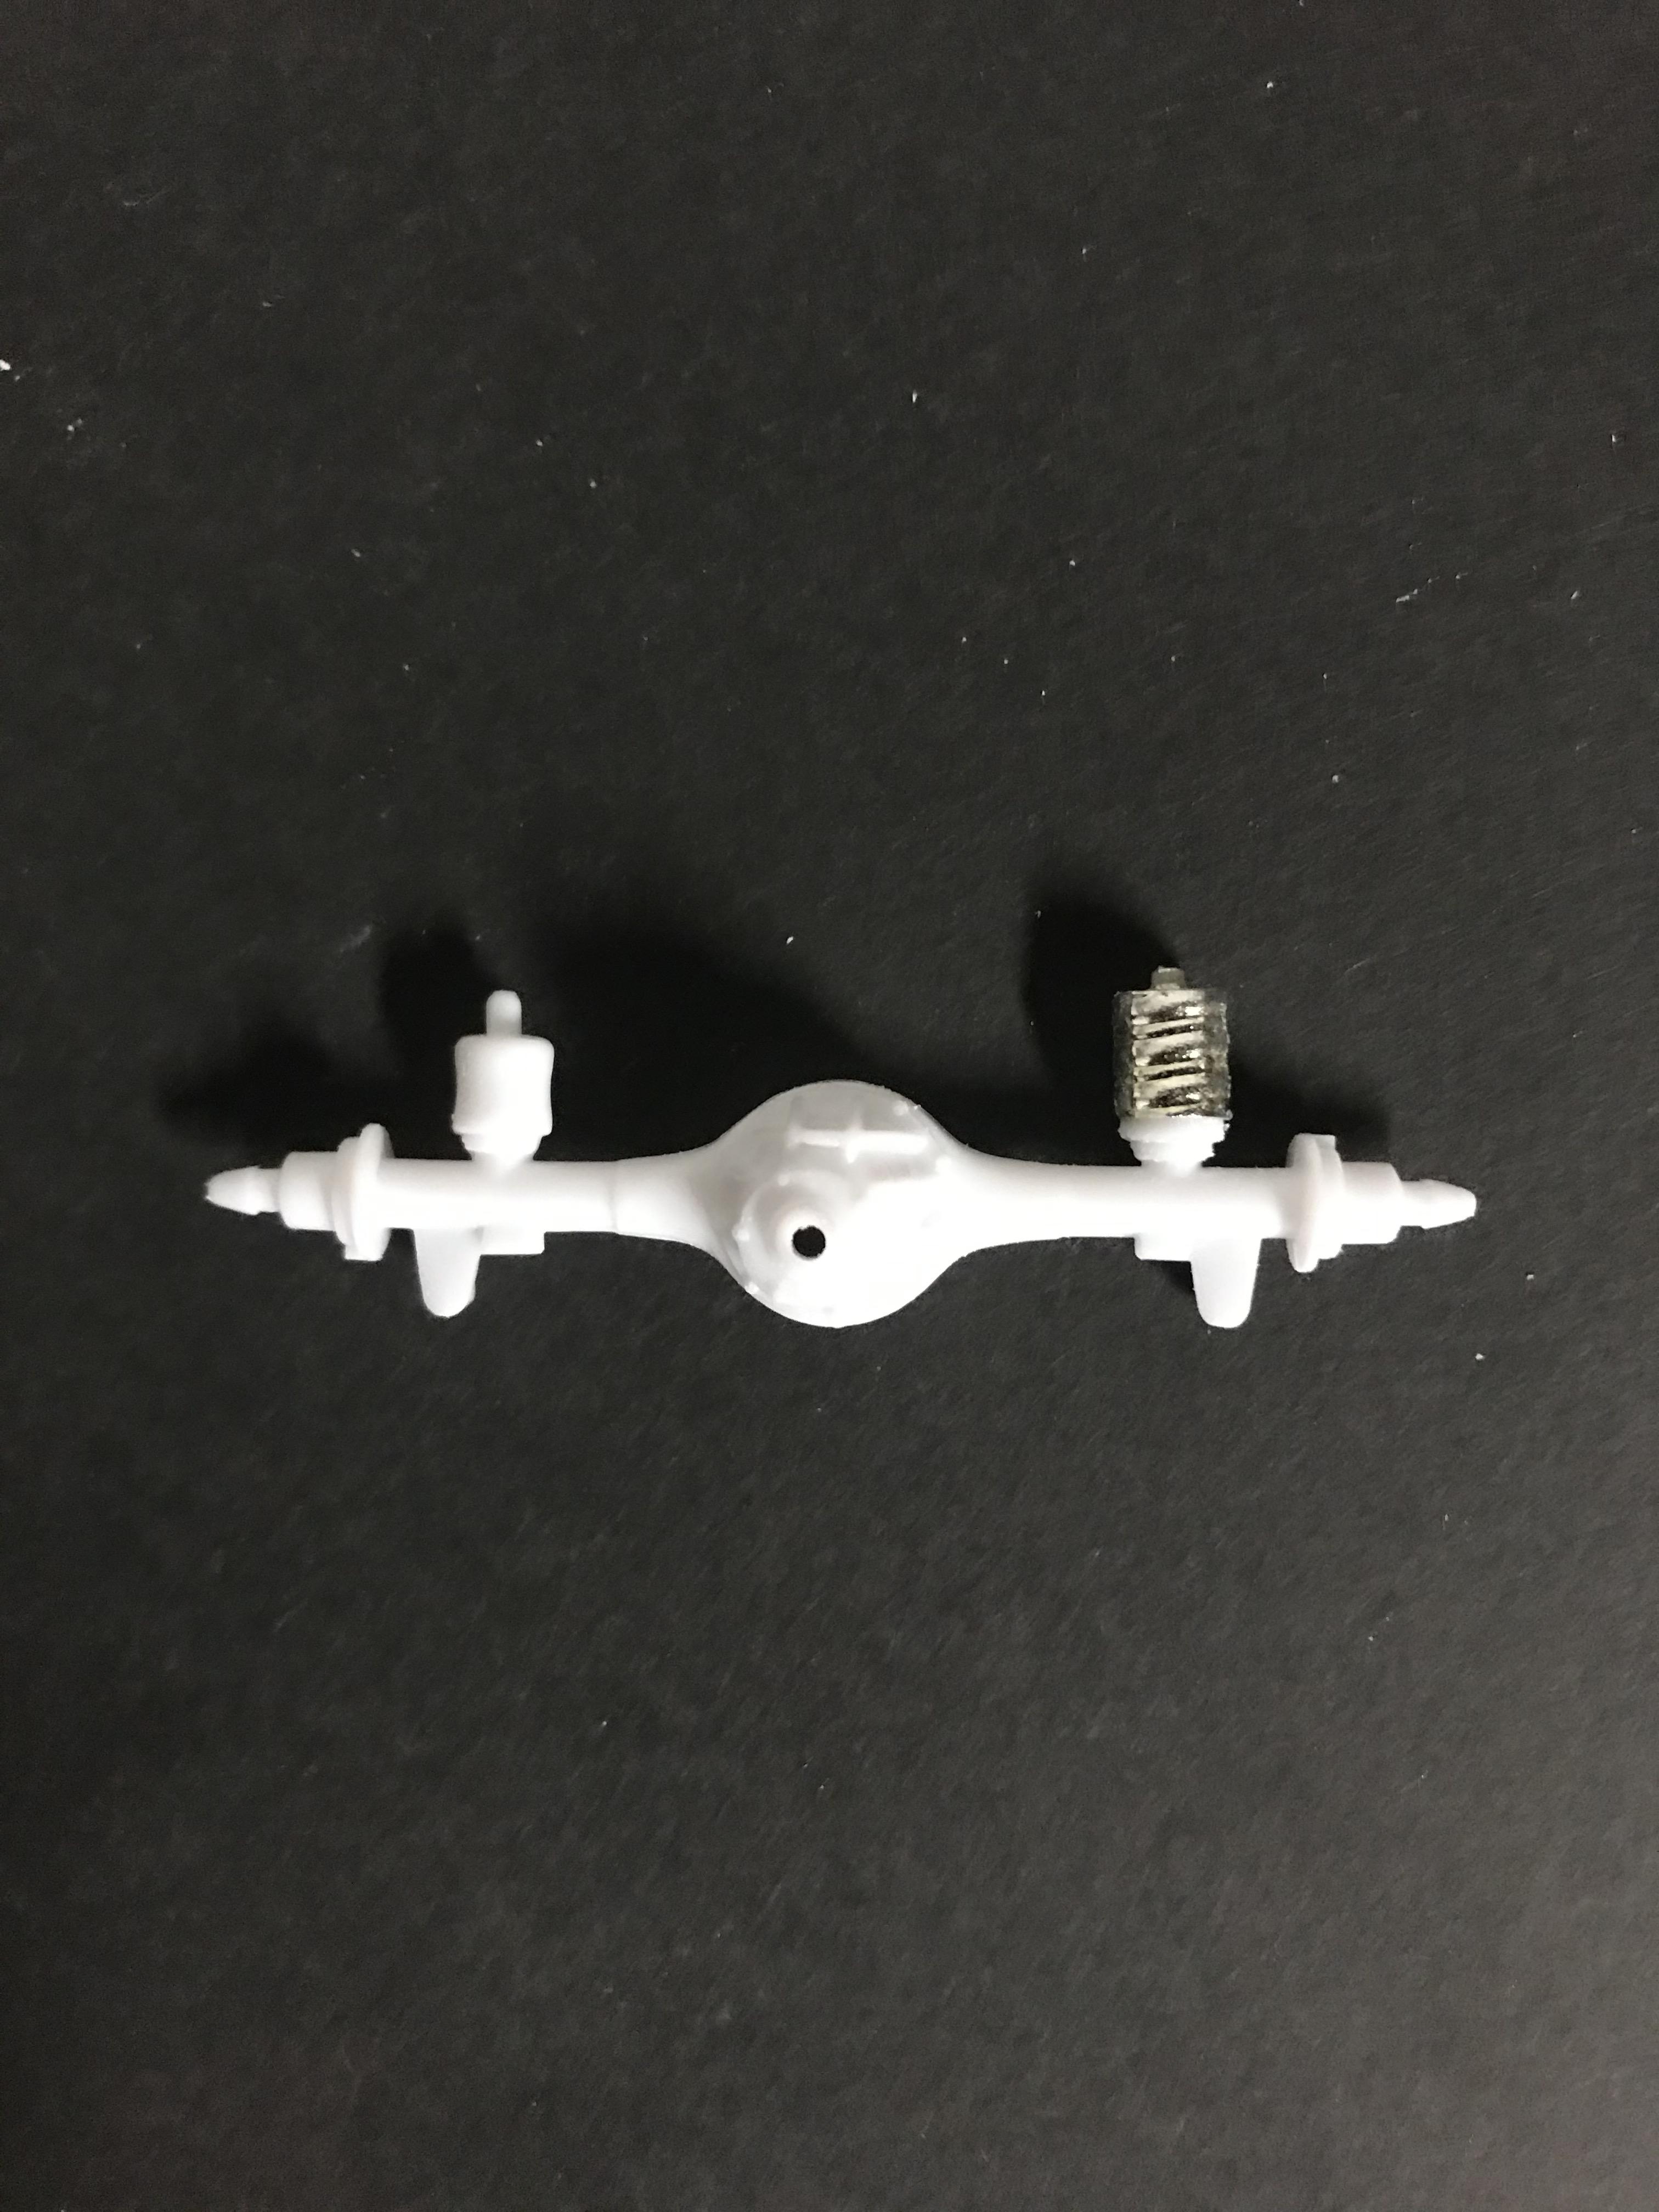
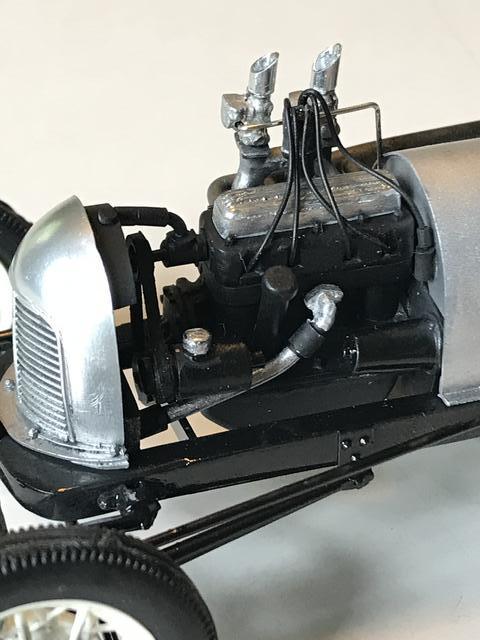
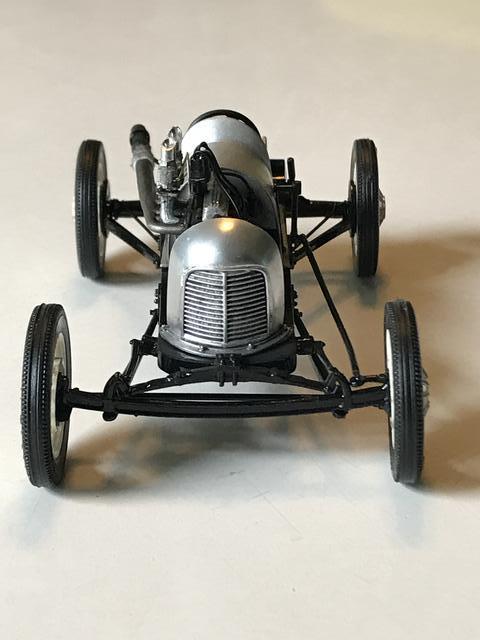
This project has been floating around in my head for a while, so I thought I would give it a shot. The inspiration comes from the Harry Luzader 32 coupe that competed in the gas class in the 60s. This will be my first time building a 32 with fenders! Mine will not be a replica but a similar build based on the mid 60s design aesthetic and tech. My goal with this one is to not get in the weeds regarding detail and focus on the fit and finish, keeping the scratch built items to a minimum. I have collected parts and here is whit I have so far: Body: Revell 32 5 window coupe Engine: Revell 57 Ford Y block with fenderwell headers, Edelbrock valve covers, 2 4brl carbs with air cleaners from the Hemi in Revell 32 kit Rear tires: AMT Racemaster slicks with Halibrand kidney bean mags Front tires: AMT front tires from the 41 Willys with Halibrand kidney bean mags Front suspension: chrome tubular axle from Revell 32 kit (will be modified), split wishbones from the Revell 29 roadster Rear Suspension: Ford 9" rear from Revell 32 kit, air bags removed and coil springs attached, long ladder bars from Revell 41 Willys SW&C gasser Misc: moon tank, seats from the Revell 41 Willys, gas pedal from AMT 41 Willys, The first order of business (and one of the primary features I wanted to highlight) was to get the headers through the fenders. I love the look of the headers tucked up under the front fender behind the front wheels. I cut both fenders and test fit the headers before attaching the fenders to the frame. I got lucky with the Y block motor mounts lining up with the 32 frame without having to create my own. (not accurate, but I'm trying to keep the scratch building at a minimum) Next up was the rear end. I'm using the Ford 9" rear from the kit, but the air bags had to go. I found some coil springs in the Ala-Kart kit that gave me the extra height I needed for the larger slicks. The coil springs would have been mounted behind the rear axle but agin, I'm trying to keep it simple.
-
The car Banjo drove was a 39. I used a 37 hood.
-
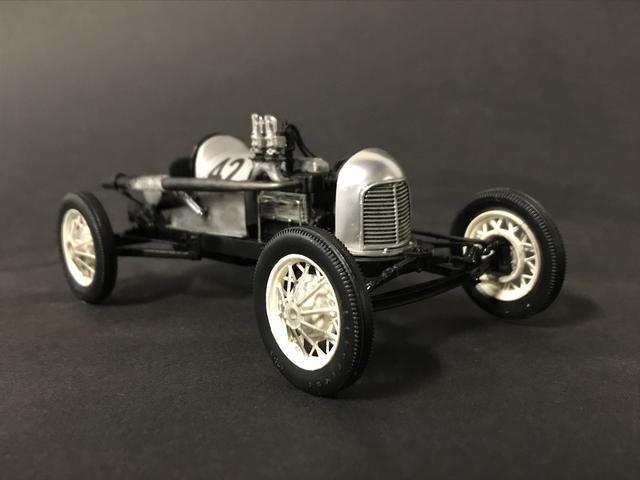
Finished this one up this weekend. The original inspiration came from Mike Santiago's single seat speedster that ran on the beach at TROG a couple years ago. My research took me back to the early 30s and the birth of open wheel sprint cars. Most of the kit parts in this build came from the Revell 31 Woody. I narrowed and shortened a T model frame, kicked the rear, used a model A rear crossmember and a perch style front sprint mount. Split bones front and rear. I made my own front spindles, and relocated the steering arms. The only brakes are rear mechanical brakes operated by a hand lever. The nose is from the Revell 29 pickup, flipped upside down and cut in half. the grill is 37 Ford. I scratchbuilt the Cragar/Miller OHV speed head, the headers, the body and the gas tank. A full build thread can be seen here: http://trakinscale.proboards.com/thread/18983/single-seat-bobtail-speedster-trogster Thanks for looking.
-
Really like this build. Any more pics of it?
-
Very nice! I especially like the front end set up. Which kit is that dropped front axle from?
-
Silver Sapphire Little Deuce Coupe - engine fitting - Jan 24
modelfink replied to Phildaupho's topic in WIP: Model Cars
Ahh yes. The radiator / engine / axle clearance issue on hot rods is always a challenge. Yours is looking good. Keep up the good work -
Silver Sapphire Little Deuce Coupe - engine fitting - Jan 24
modelfink replied to Phildaupho's topic in WIP: Model Cars
This is a very cool build. I love your kit bashing resourcefulness. It looks like you can come back a few scale inches with the radiator /grill. Since the grill is so much thicker than a 32 shell it gives the impression the car is longer. -
I have had good results. It's very glossy and goes down good. Check out Showtime Studios on YouTube. He has tutorials on this exact process.
-
Thank you. Yes, they are Tamiya rattle cans. I first used Tamiya white primer, then 2 coats of Tamiya gunmetal, then 2 coats of Tamiya Mica Red followed by 2 coats of Testors Wet Look Clear. I wet sanded the clear coat with 2800 grit then used the 3 step Tamiya polishing compounds (course, fine, finish) with a soft cloth. I warmed the cans before spraying in a can of hot water for about 5 min.