

ibj40
-
Posts
352 -
Joined
-
Last visited
Content Type
Profiles
Forums
Events
Gallery
Everything posted by ibj40
-
1/18 Fantasy Custom Petty Enterprises 1971 Torino Cobra
ibj40 replied to ibj40's topic in WIP: NASCAR
Got a dry fit of the body onto the chassis done. Had to cut a lot more of the interior and exterior firewalls than I had expected, but I have the four corner screws set and I think it looks good.You be the judge.Next I will turn back to the engine compartment and start to shave the header flanges to see if I can make that work.Merry Christmas and Happy New Year! -
Your attention to historically accurate detail makes my efforts seem like ham-handed axe wielding. Stay the course!
-
1/18 Fantasy Custom Petty Enterprises 1971 Torino Cobra
ibj40 replied to ibj40's topic in WIP: NASCAR
One of the many things that I need to work around when blending the body from one 1/18 scale diecast to the chassis of another is the differences in treatment of certain elements.Here I have to deal with the dogleg hinges of the hood from the Torino which are closer together than in the firewall of the Plymouth chassis.Fortunately, from my racing days, I have acquired a nibbling tool that helps.This tool takes a roughly 1/4 inch wide by 1/16 inch deep bite out of most any lighter material. Here you can see where I have started a new notch. I'll have to make similar cuts on the firewall, to match the interior.Might have to relocate the master cylinder for accuracy.Dogleg hinges are also popular on earlier model diecast for hanging doors.Since this is a Nascar stock car, that won't be a problem, as I will remove the hinge and solidly mount the door skin to the body for final assembly prior to painting.I use a pin vise of sorts, with an 1/18 inch drill bit. -
1/18 Fantasy Custom Petty Enterprises 1971 Torino Cobra
ibj40 replied to ibj40's topic in WIP: NASCAR
So, making some progress on this one.Here's the back of the chassis, and you can see that the Plymouth chassis doesn't quite match up with the body.Going to use the same technique I used at the front, and cut a slice off the rear of the Torino chassis.Then bond that piece onto the Plymouth chassis, which will allow me to use the screw mounts at both the front and rear of the custom.Will reinforce the joint with a piece of sheet styrene.Now, onto wedging the GMP Boss 429 engine into the Ertl Torino engine compartment.I dry fit the headers and dumps from the Plymouth to their proper location on the Plymouth chassis.Because of the way that the Plymouth engine mold is made, the headers are really funky.I removed the street exhaust manifolds from the GMP 429, and they have a nice flat surface, almost like a real engine would have.When you dry fit, this is what you get.Going to have to very carefully sand back the headers to where the engine will drop into the chassis and look, hopefully, correct. -
Nice!
-
Inspired by, I think, someone on here that was doing one in 1/24, I've started on a 1/18 scale Petty 1971 Ford Torino Cobra. We all know the story about the one year that Petty bailed on Plymouth before they created the Superbird. But what if Chrysler blinked, and didn't bow down to the Pettys? What if Petty Enterprises stayed with Ford? Here are my two donors, an Auto World 1972 Petty Plymouth Roadrunner will donate the chassis. An Ertl American Muscle 1971 Torino Cobra will donate the body. Wasn't sure how successful this one was going to be, so didn't take any progress pictures, but when it clicked, thought I would chronicle the rest of the build. You might be thinking, wow, that looks too easy, you just put the new body onto the old chassis. Well . . . I wanted to get rid of the torsion bar front suspension of the Plymouth, and use a more Ford-like coil spring setup. But I also wanted to keep the race chassis detail of the Plymouth (and the Torino had a molded in exhaust system, among other things). So, I cut the front clip off the Ford chassis, and put it in place, then bonded (actually Super Glued) the Plymouth chassis to it. In order to use the front spindles from the Plymouth with the front suspension from the Ford, I had to fabricate a ball joint extension out of aluminum rod (circled in the picture), which also cured a front/rear rid height issue. Encouraged by this progress, this one is going forward.
-
Kind of a hard/soft final. There are still a couple of details to the chassis I need to do (including re-attaching the rear wheels, but that is another story).Thought I would share, decals will be applied, maybe over the weekend.Kind of a walk-around visit.
-
Some updated shots.First, the donor chassis drivetrain was all in chrome, for some reason. I replaced the exhaust dumps with those from a Lane GT350, and painted the rear shocks Koni red.And here is a dry fit of painted panels. I like the Guardsman Blue/Gulf Orange contrast. More to come as I reassemble it. Lots of little bitty pieces.
-
So I moved away from the body, and turned to the chassis and interior.Remember what the original chassis/interior looked like.Now, here's the updated version.Now, some close ups of the changes.For the interior, I removed the console, changed the shifter to one that looked a little more realistic, added ignition boxes and a fire bottle. I also changed out the seats, adding a racing seat with seat belt for the driver, and a standard passenger seat to comply with the regulations at the time.In the trunk, I added a battery and a fuel cell with filler.Some pictures with the body on.Next will come the paint. Turned cold here, so might be a few days.
-
Laid down a coat of primer.This turkey is going to take a break.Happy Thanksgiving everyone!
-
Progress?Here's an update on where I have been since the last posting.My interpretation of the rules is that if the car came with bumpers, it needed to race with bumpers. So, even though we are using a GT350 front valence to direct air to the radiator, we still need the stock bumper in place.Wanted to share what it took to fit the chassis back to the body, with the GT350 front valence in place.You can see some of the cut marks from this view. Also needed to trim some of the plastic chassis.Took two cuts and some sanding to get it right.But we've got a good fit now.Scavenged an export brace from the Lane GT350 that also sourced the front valence.Had to notch the diecast inner lip to make it fit, but worth the effort.Currently setting the final fit of the front valence, hoping to get a coat of primer on everything tomorrow, weather pending.
-
My workbench is in my garage. You can tell how much work I have done by looking at how silvery the carpet looks from all the Zamac dust. Looking Good, Mike!
-
You are the master! Keep it up!
-
So, after this (which one is a new 1 1/4" Jeweler's saw blade?).We have this.
-
This is another fantasy build, using my imagination and 1/18 scale diecast.Prior to 1966, the FIA's Group 4 classification applied to Sports Cars which were in compliance with FIA Appendix C regulations.It also included recognized Series Touring Cars, Improved Touring Cars and Grand Touring Cars which had been modified beyond the respective Group 1, Group 2 or Group 3 regulations under which they had been homologated.In 1966, an overhaul of FIA categories saw Group 4 Sports Cars redefined such that they were now subject to a minimum production requirement of 50 units in 12 consecutive months and had to be fitted with all equipment necessary for use on public roads.Ford, realizing that the Shelby Cobra/Cobra Daytona could never satisfy the minimum production requirement, nor the public roads criteria, hatched a plan based on the 1968 Ford Mustang Coupe, to be called the “GTCS”.The original California Special Mustang, which features characteristics of both a classic Shelby Mustang and a classic GT coupe, got its start in February of 1968.Select California Ford Dealers offered the car as a limited-edition Mustang, naming it the Mustang GT CS with CS standing for “California Special.”The marketing message associated with the car was “California made it happen!”Some of the original California Special Mustangs were offered with big-block 390 engines.There were also Cobra Jet 428 versions.In all, only 4,118 of these limited-edition cars were made. They were eventually sold in other states as well.It’s reported that 251 of the GT/CS Mustangs were sent to Denver, Colorado, where they were re-branded as “High Country Special” Mustangs.Few know, however, that the “GTCS” designation originally was intended to stand for G(rand) T(ouring) C(arroll) S(helby).Shelby was to continue along the lines of the GT350 and build 50 units under contract to Ford.As with the prior versions, subtle but effective body work would distinguish the model, with competition improvements to the engine, suspension, and drivetrain reserved for a select few.The coupe versus fastback body was chosen to save weight, primarily, as well as to take advantage of already existing componentry that the car would share with the Trans Am versions raced in the USA, including the tried and true 289 cubic inch engine.The GTCS would carry over one element of the GT350, the iconic fiberglass front bumper. This would serve two purposes, one it would provide better directed air flow to the radiator, and two it would incorporate front brake cooling ducts.Air flow management at the front would also be aided by deleting the turn signal lights incorporated into the hood, and opening them up to allow heated radiator air to exit the engine compartment.At the rear, a subtle (but assuredly aero effective) rear spoiler would be a design feature incorporated into the trunk (boot) lid.A separate homologation from the Trans Am versions would also be required, in order to identify the equipment necessary for the GTCS to meet the public roads requirement.A 5000cc engine capacity limit was applied by the FIA for 1968 and the minimum production requirement was reduced to 25 units for the 1969 season.This build is based on two 1/18 scale Greenlight Ford Mustangs, with a GTCS version offering up the bodywork, and a Gulf-liveried version providing the competition chassis.The paint I chose is Ford Guardsman Blue, to follow along with this same primary color on many of the Cobra Daytonas campaigned previously.The first, and hardest task will be the incorporation of the GT350-type front bumper.There will be a considerable effort cutting through the diecast metal at the front of the donor body. I'll also be adding some details to the chassis, such as a fire system, spark boxes, and fuel cell.
-
I think you are all aware of my admiration toward Wendell Scott and what he was able to accomplish with limited resources.Was looking at some of the "tribute" versions produced, especially the Nascar Camping World Toyota driven by Bubba Wallace to a win at Martinsville back in 2014 (as well as David Ragan's Ford that same weekend).Found a set of Ragan's decals, contacted the decal artist (a really nice guy named Mark Reynaldo) and asked if he could do me a set in 1/18 scale. Not only did he do that, but he also customized them to be placed on a 1995 Racing Champions Dodge.Here's the results, beginning with comparison shots between the donor model and the final.And the final model. Enjoy!
-
Not sure how many of you subscribe to Vintage Motorsport magazine, but it is an excellent read and a great source of information. That was the source of a 1/18 scale custom BTC Chevy II I did about a year ago.Anyway, the cover featured Salon car for the September/October issue was one of the Roush Racing Merkurs, incorrectly referred to as an XR4Ti (in which the "4" refers to the number of cylinders in the engine, the "T" stands for Turbocharged, and the "i" stands for fuel injected.In reality, the cover car is one that Roush prepared as a "back up" that was prepared for the 1988 IMSA endurance season, for reliability. The turbocharged four cylinder had a reputation of being a hand grenade when stressed, so a 355 cubic inch V8 with a Holley four barrel carburetor was installed in one of the chassis (hence, XR8Na - "Na" standing for Normally aspirated).For all intents and purposes, and purists can surely debate the subtleties, a Roush chassis was a Roush chassis, whether used in Trans Am or IMSA, and whether badged as a Mustang, Capri, or Merkur.With this in mind, and with hours of researching the VM article from the magazine stash in my "library" (if you know what I mean), I thought I might try to create a custom XR8Na.The parts sources are out there. I had a spare GMP IMSA Mustang on the shelf, along with a couple of AutoArt Ford Sierra bodies.So, alone out here on 1/18 Scale Island (accompanied by Swede70 on occasion), I'm going to give it a shot.Here are some initial comparison pictures of the two donor bodies.What I will need to do, at least in my world, is graft the Merkur nose, tail, and roof/greenhouse onto the Mustang body, and merge features from the Merkur hood and rear deck lid into their Mustang counterparts.I have previously, for one of my other fantasy customs, grafted a '69 Camaro Z28 hood scoop onto a '71 Mustang hood.Will probably use a similar Dremel cutting tool-based technique on this one.Stay Tuned!
-
Been thinking about trying something like that in 1/18 scale. Autoworld makes a Torino Cobra. s-l1600 by Jim Forte, on Flickr And they also produced this Petty Roadrunner. 1-18-Richard-Petty-STP-Diecast-1972-Plymouth-Roadrunner by Jim Forte, on Flickr Got the Roadrunner, about to buy a Torino.
-
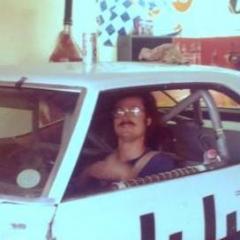
The location of the pumps at TIS/TWS was right outside the tech inspection portal in the garage area, actually between the hot pit entrance and the garages. Drivers, owners, and crew chiefs almost all had to walk by at one time or another. We had a U-Haul truck that Union 76 would drive in that was loaded with all the oil and lubricants parked right next to the pump island. That served as our "office" during the weekend. This is a picture of me at the pump island. I'm in all white, with my back to the camera. Me and the #6 - TWS by Jim Forte, on Flickr We watched from there as Richard Petty and Andy Granatelli filmed an STP commercial one year. Of course, behind the cameras were all the other drivers and crew, trying to distract them. It was pretty funny to watch the interaction between and among them. Marty Robbins had a guy hanging out with him one year that had one of those empty collar dog leash things, and the guy wouldn't put it down. Every time you saw Robbins you saw this guy, with the leash and collar, pretending there was a real dog, including hunching around on other guy's legs with the collar part. Back then, Buddy Parrott was just another crew member for Harry Hyde, and he'd come over and hang around the pumps during his breaks. Bill Broderick, "The Hat Man", was my point of contact. He'd arrive, and almost seemed like he ran the show. Wow, those were the days. Of course, I spent so much time out at the track that I was put on scholastic probation at the end of the first semester of my Junior year at Texas A&M. Had to sit out a year before they would let me back in.
-
Thanks for the compliments everyone! I didn't have a great deal of time to get to know Wendell Scott (he was preparing his race car and I was pumping gas). When you saw him in the garage area, he was as proud of his efforts as anyone else. As many know from the literature, he had a determination to succeed, in spite of the obstacles that confronted him.
-
I met Wendell at the inaugural Nascar Winston Cup race that was held on December 7, 1969, at Texas World Speedway in College Station, Texas.I had been hired by Union 76 to man the fuel pumps and distribute oil and lubricants to the Nascar teams.I always admired the courage and diligence of Wendell, and have gone on to not only collect a considerable amount of memorabilia, but to also create (or have created) a number of custom 1/18 scale diecast models of the various paint schemes he used during his career.Apparently, Wendell Scott had wrecked his usual Ford at the race immediately prior to the 1970 Falstaff 400, held at Riverside, California on June 14, 1970.George Wiltshire was a black journeyman Nascar West owner/driver, not noted for much success. He had a 1969 Dodge Charger prepared to Nascar Winston cup regulations. He used either #39 or #139 depending on the venue.Nascar Hall of Famer Scott, of course, is iconic. He was also a died-in-the-wool Ford associate, with reports of “backdoor” contributions of used parts from the Ford factory teams.Not sure about the details, but Scott ended up in Wiltshire's Dodge for the race, qualifying 28th, but finishing a dismal 35th when the Hemi in Wiltshire's Dodge overheated.There are not a lot of pictures of Wiltshire’s Charger. I have attached the two that I have been able to find on the Internet. The photo quality is not great, and it is difficult to tell if they are color photos or black and white. There is also only one picture I have found to document Scott in Wiltshire’s Dodge, a picture in a newspaper the day after the race.There is some video of the 1970 Falstaff 400 available on YouTube. If you look at 0:11, you see a purple Charger with what appears to be a lime green rear bumper on the outside. The outside line was the even-numbered starters for the race (at the start of the video you can see Richard Petty’s pole-sitting Plymouth Superbird leading the inside line), so it would be appropriate for Scott to be in that line following the green flag.Based on the video, I chose Mopar Plumb Crazy as a paint color. To me it made sense that a low budget racer would use a factory paint, especially with Wiltshire carrying Star Dodge as a sponsor. I used SubLime Green for the rear bumper.My donor model for this is the Paul Goldsmith driven Ray Nichels prepared Dodge Charger 500 distributed by Merchandising Incentives Corporation (MIC). This model was part of the Winged Warrior Series, and appears to be based on an Ertl mold.Working with a very talented artist and decal maker, Sam Lopez with Three Amigos Decals (https://switchlinedecals.com/3-amigos-decals/), we have been able to produce, to the best of my ability, as close of a factual model of the Charger as humanly possible.I’ve attached some comparison shots of the donor and final paint.The finished model.Enjoy!
-
20200328_221525 by Jim Forte, on Flickr Here's the build album: https://flic.kr/s/aHsmM6vwLH
-
Thanks, took me a while. I don't paint too many by myself, or decal to that point. Had to take the Ram by the horns on this one.
-
The neat thing is the debate about whether there were two (#76 for Posey and #77 for guest drivers Ronnie Bucknam and Tony AtoZ), or three! 1970 Trans Am Dodge Challenger # 77 - Page 2 (theroaringseason.com) Autodynamics (race car manufacturer) - Wikipedia
-
Thanks, it was a fun build.
