R. Thorne
-
Posts
776 -
Joined
-
Last visited
Content Type
Profiles
Forums
Events
Gallery
Everything posted by R. Thorne
-
Thanks, Edgar. Though I didn’t get enough detail in the build (do we ever?), it was fun.
-
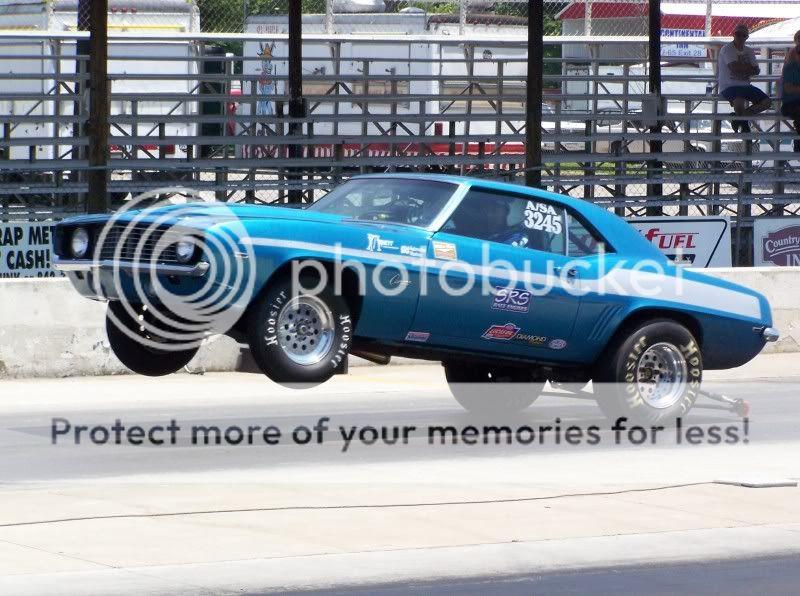
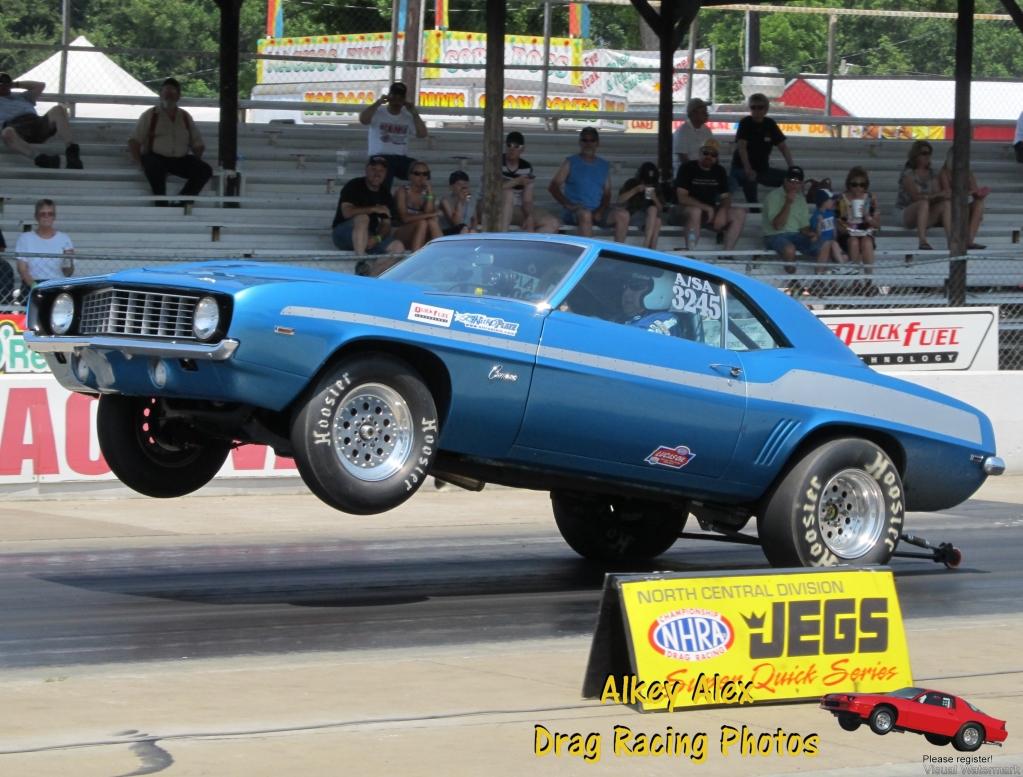
1969 Camaro A/SA (possibly Thomas Arnett’s)
R. Thorne replied to R. Thorne's topic in WIP: Drag Racing Models
It is soaking in the tank. It’s not the first time this has happened to me. As you say, it’s part of the hobby. -
Holloman & McKinney 57 Chevy C/MP circa 1964
R. Thorne replied to R. Thorne's topic in WIP: Drag Racing Models
Thanks, Mike. Maybe I am just getting old and lazy. I have 2 airbrushes, and all the equipment to use them and some experience with airbrushing, but the spray cans (Tamiya, that is) are just so easy to use. -
1969 Camaro A/SA (possibly Thomas Arnett’s)
R. Thorne replied to R. Thorne's topic in WIP: Drag Racing Models
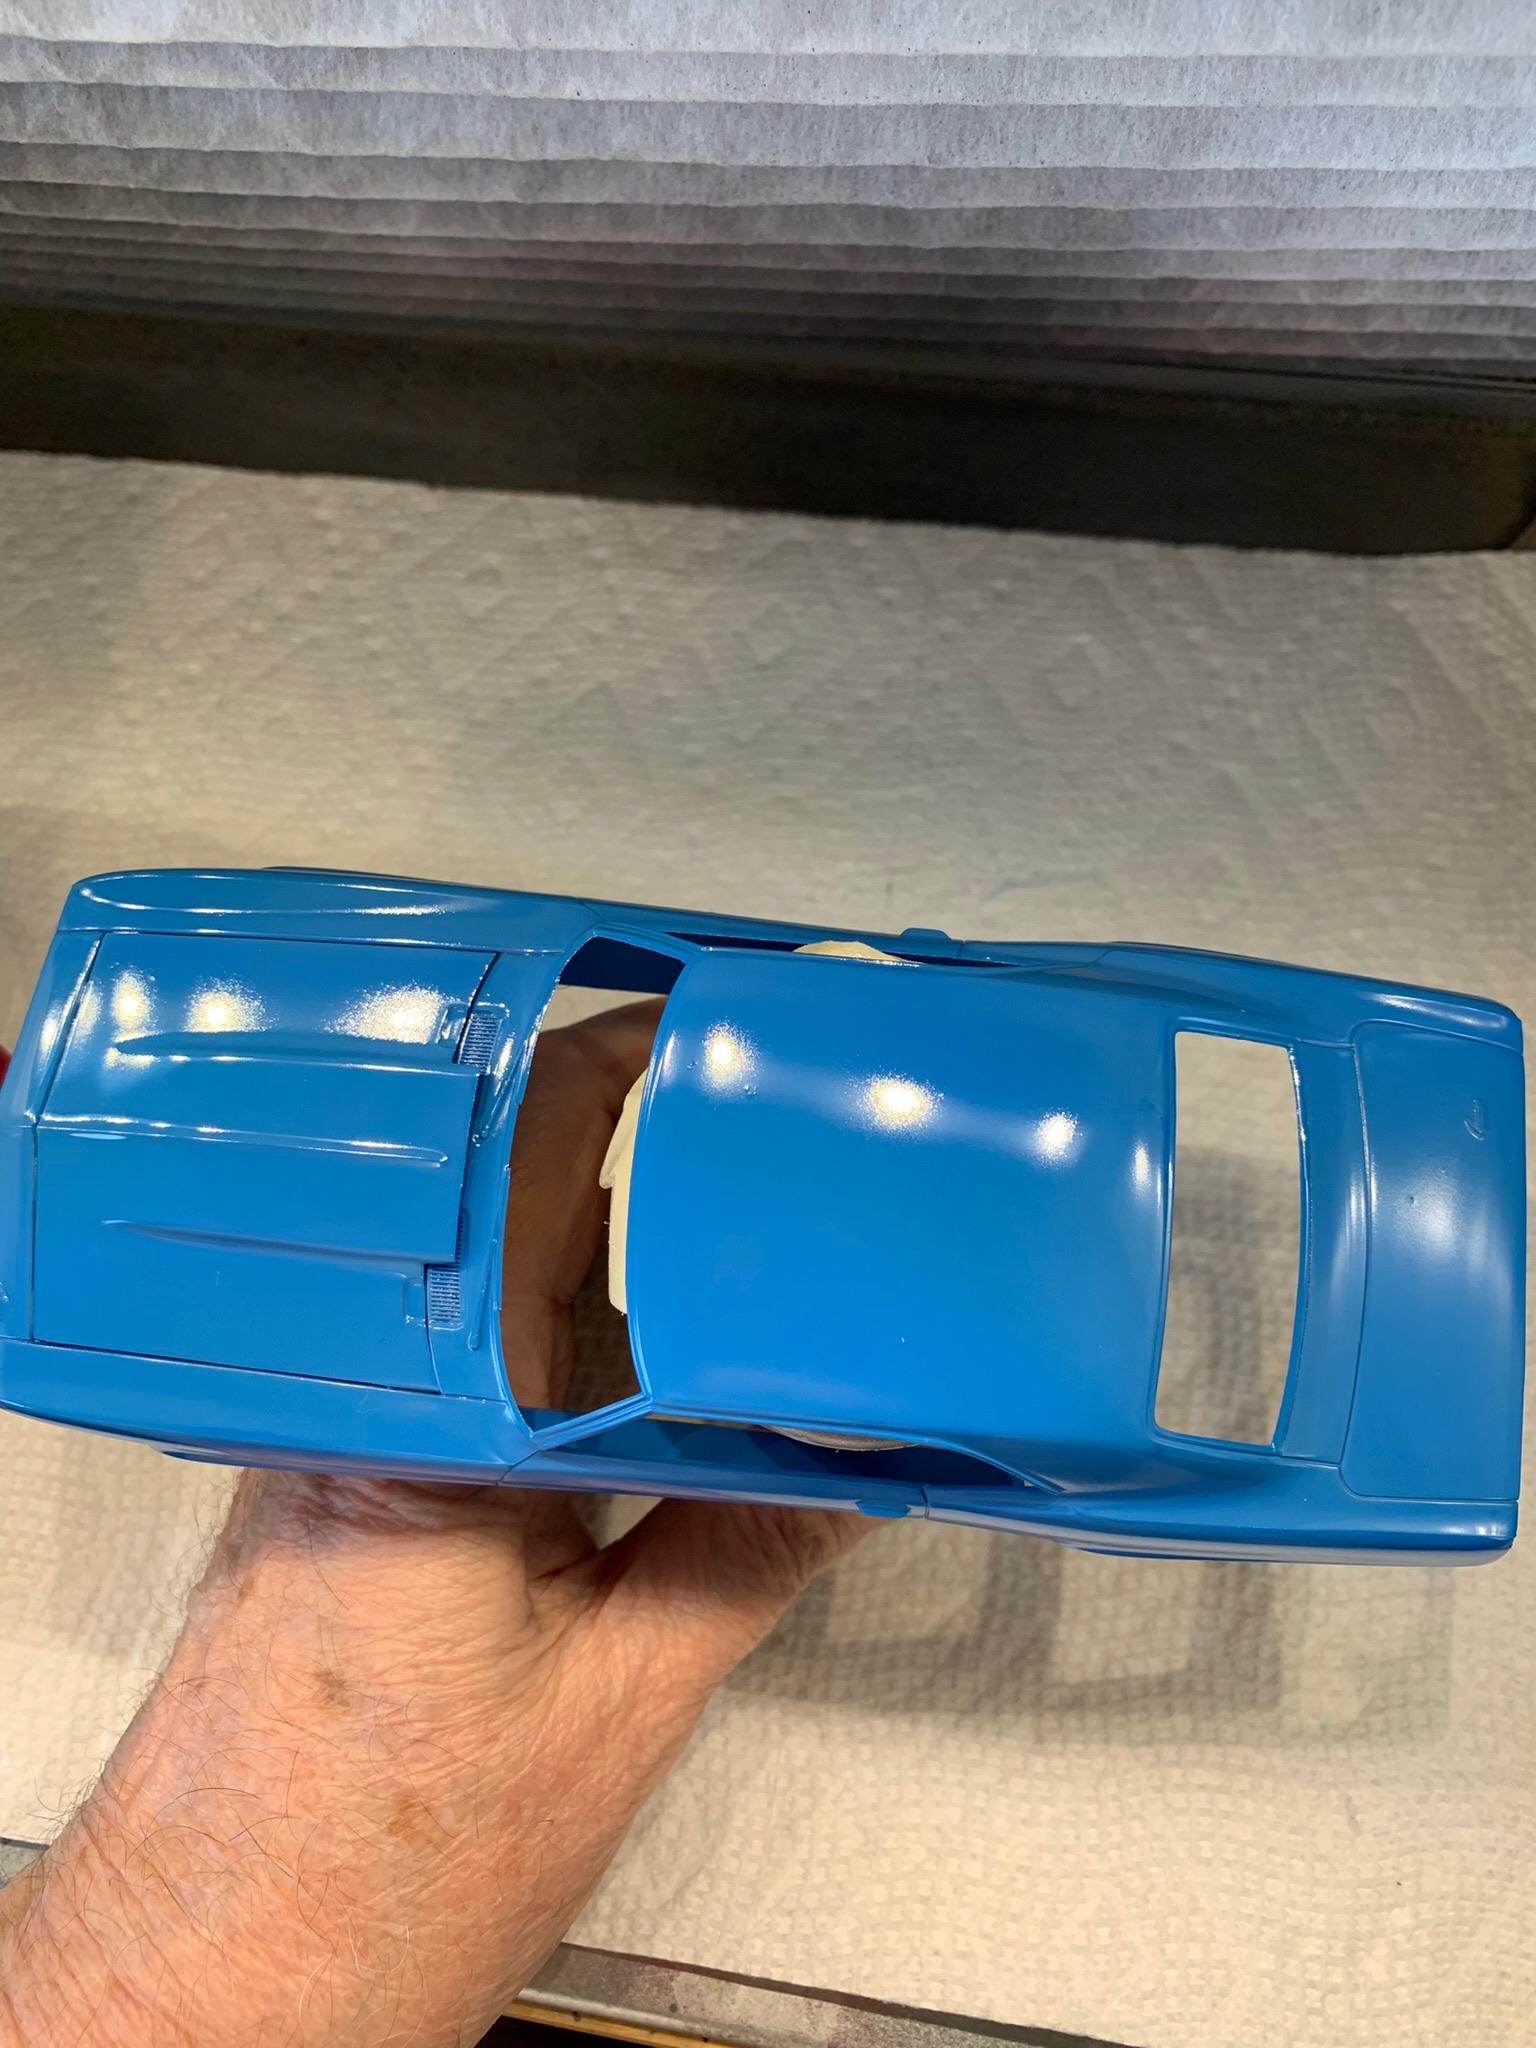
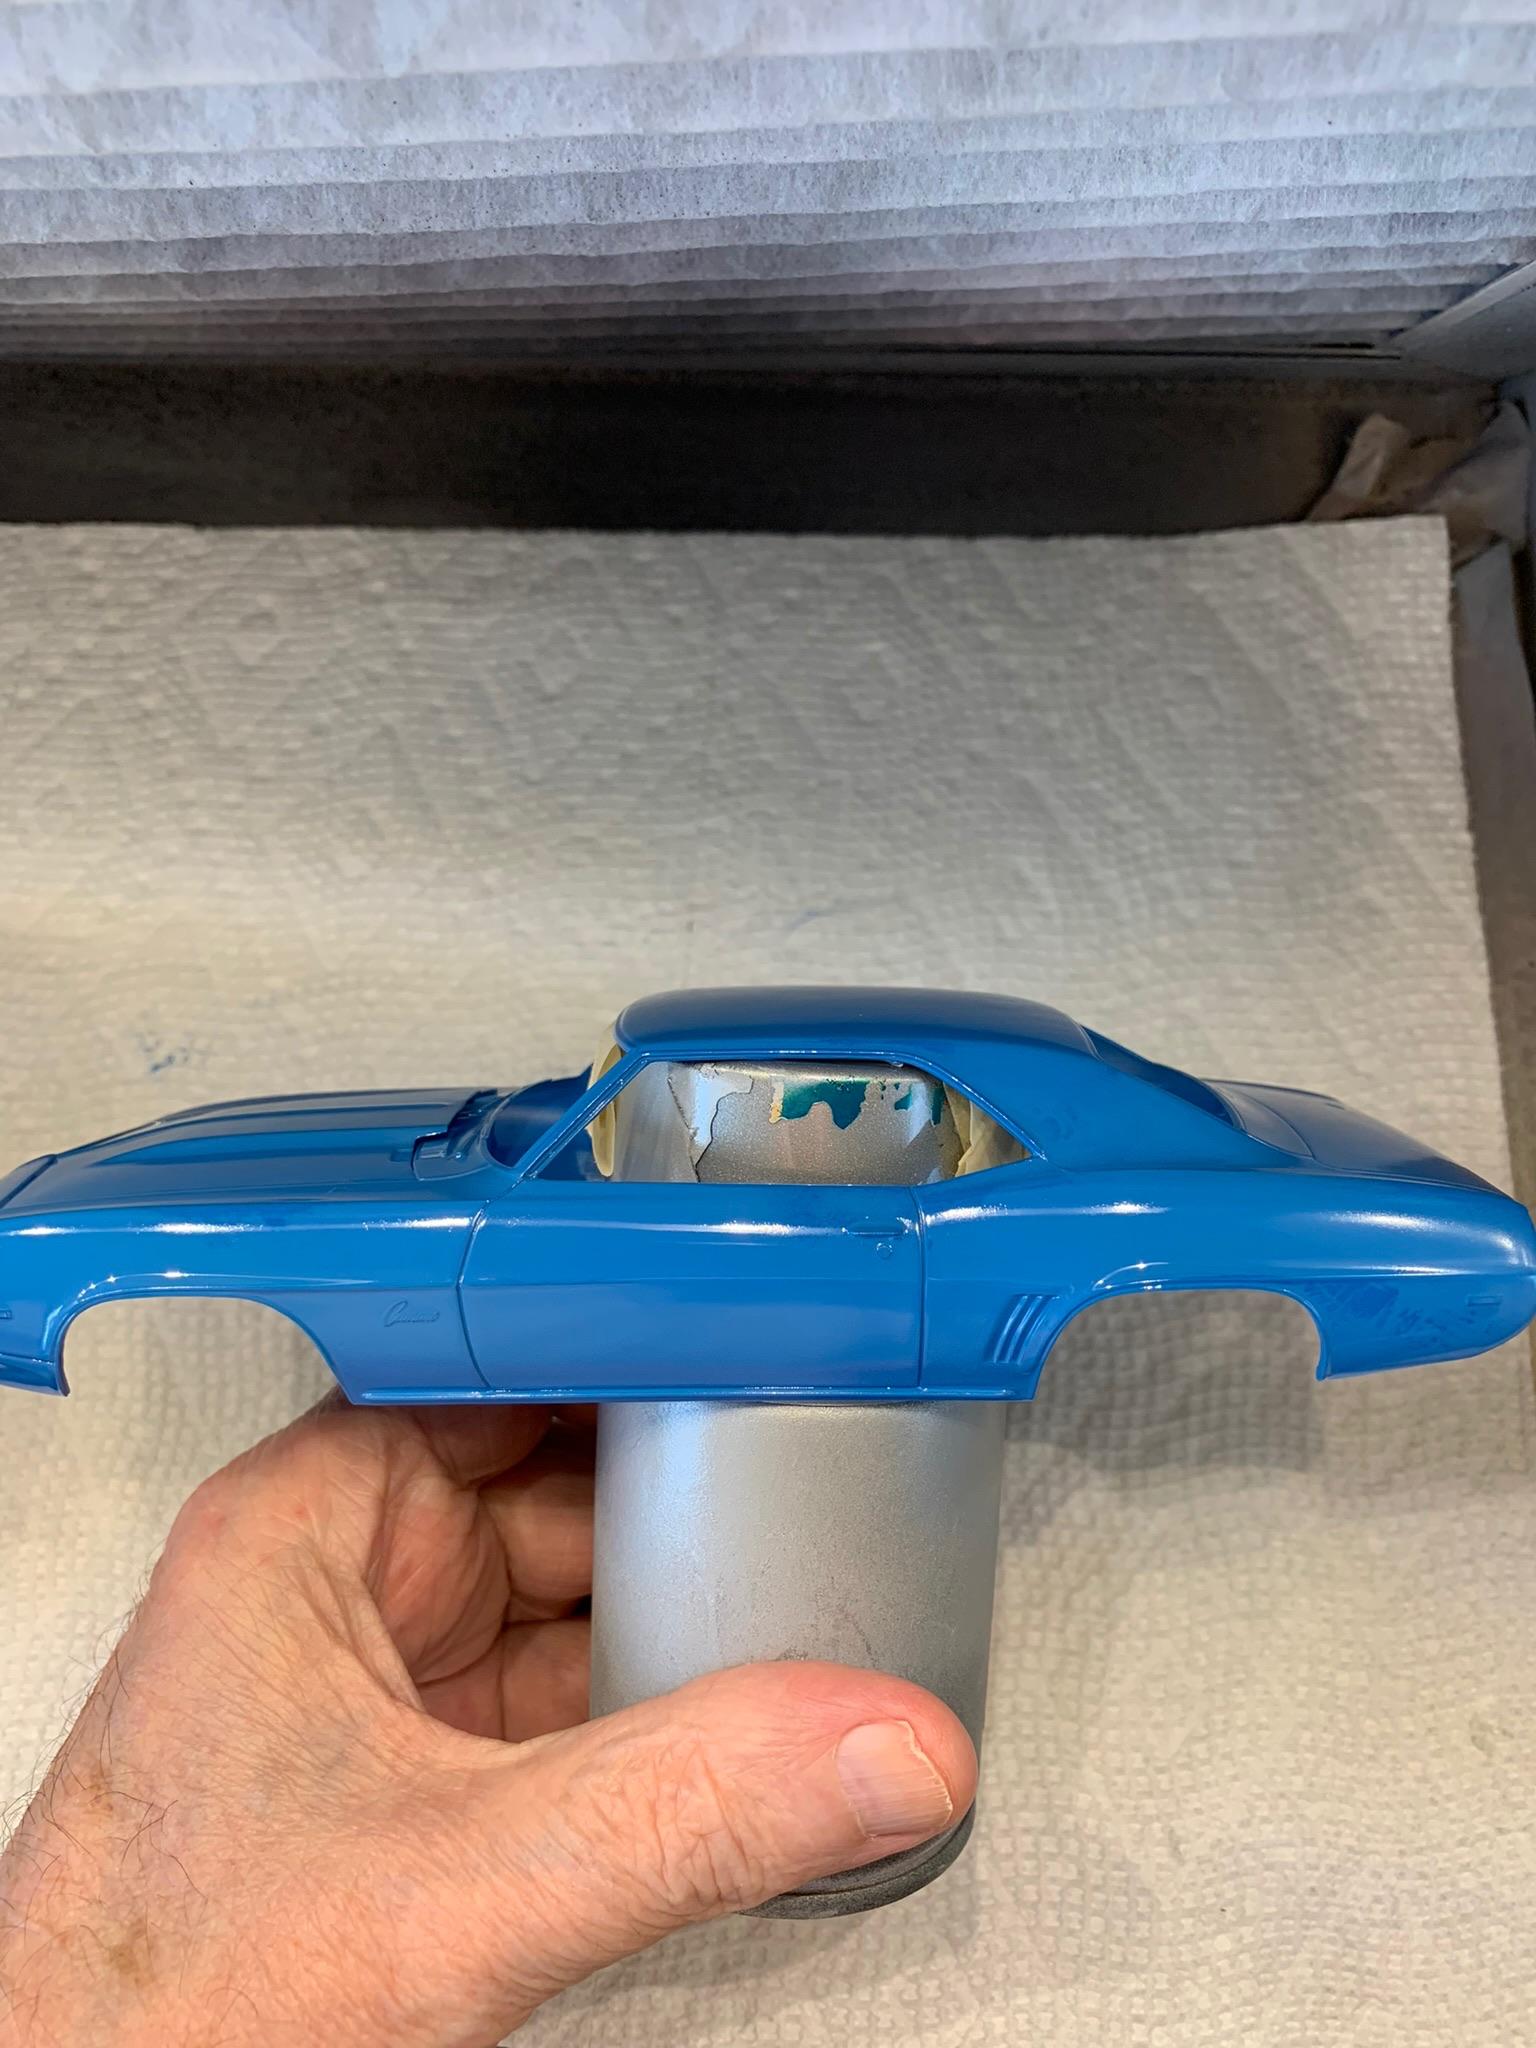
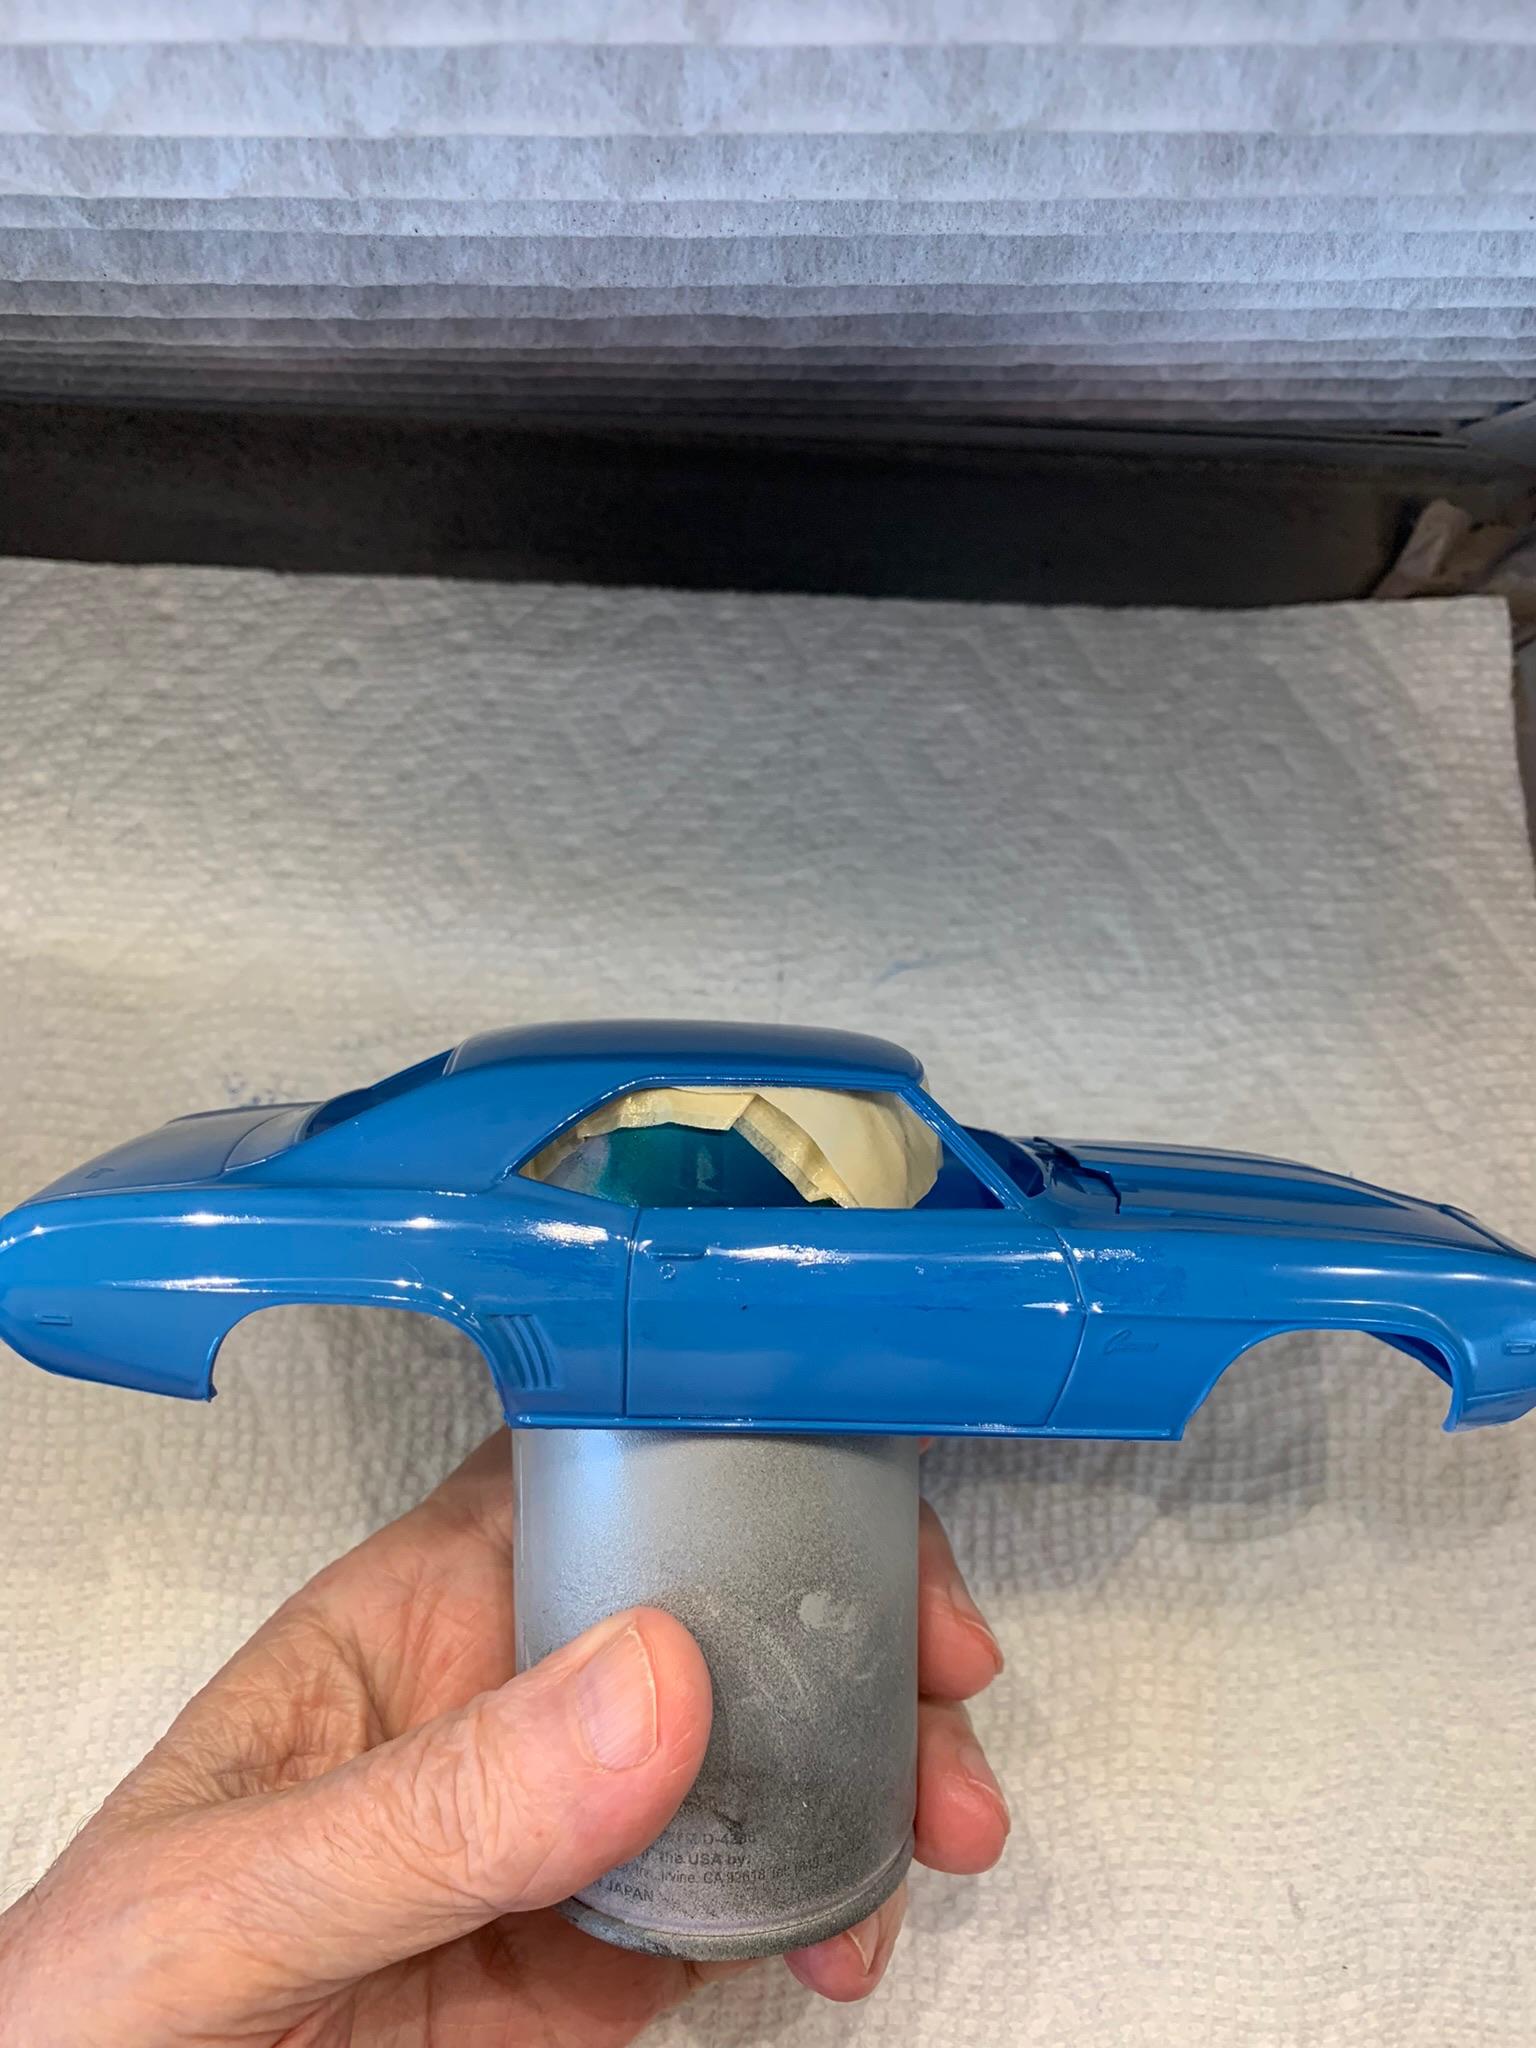
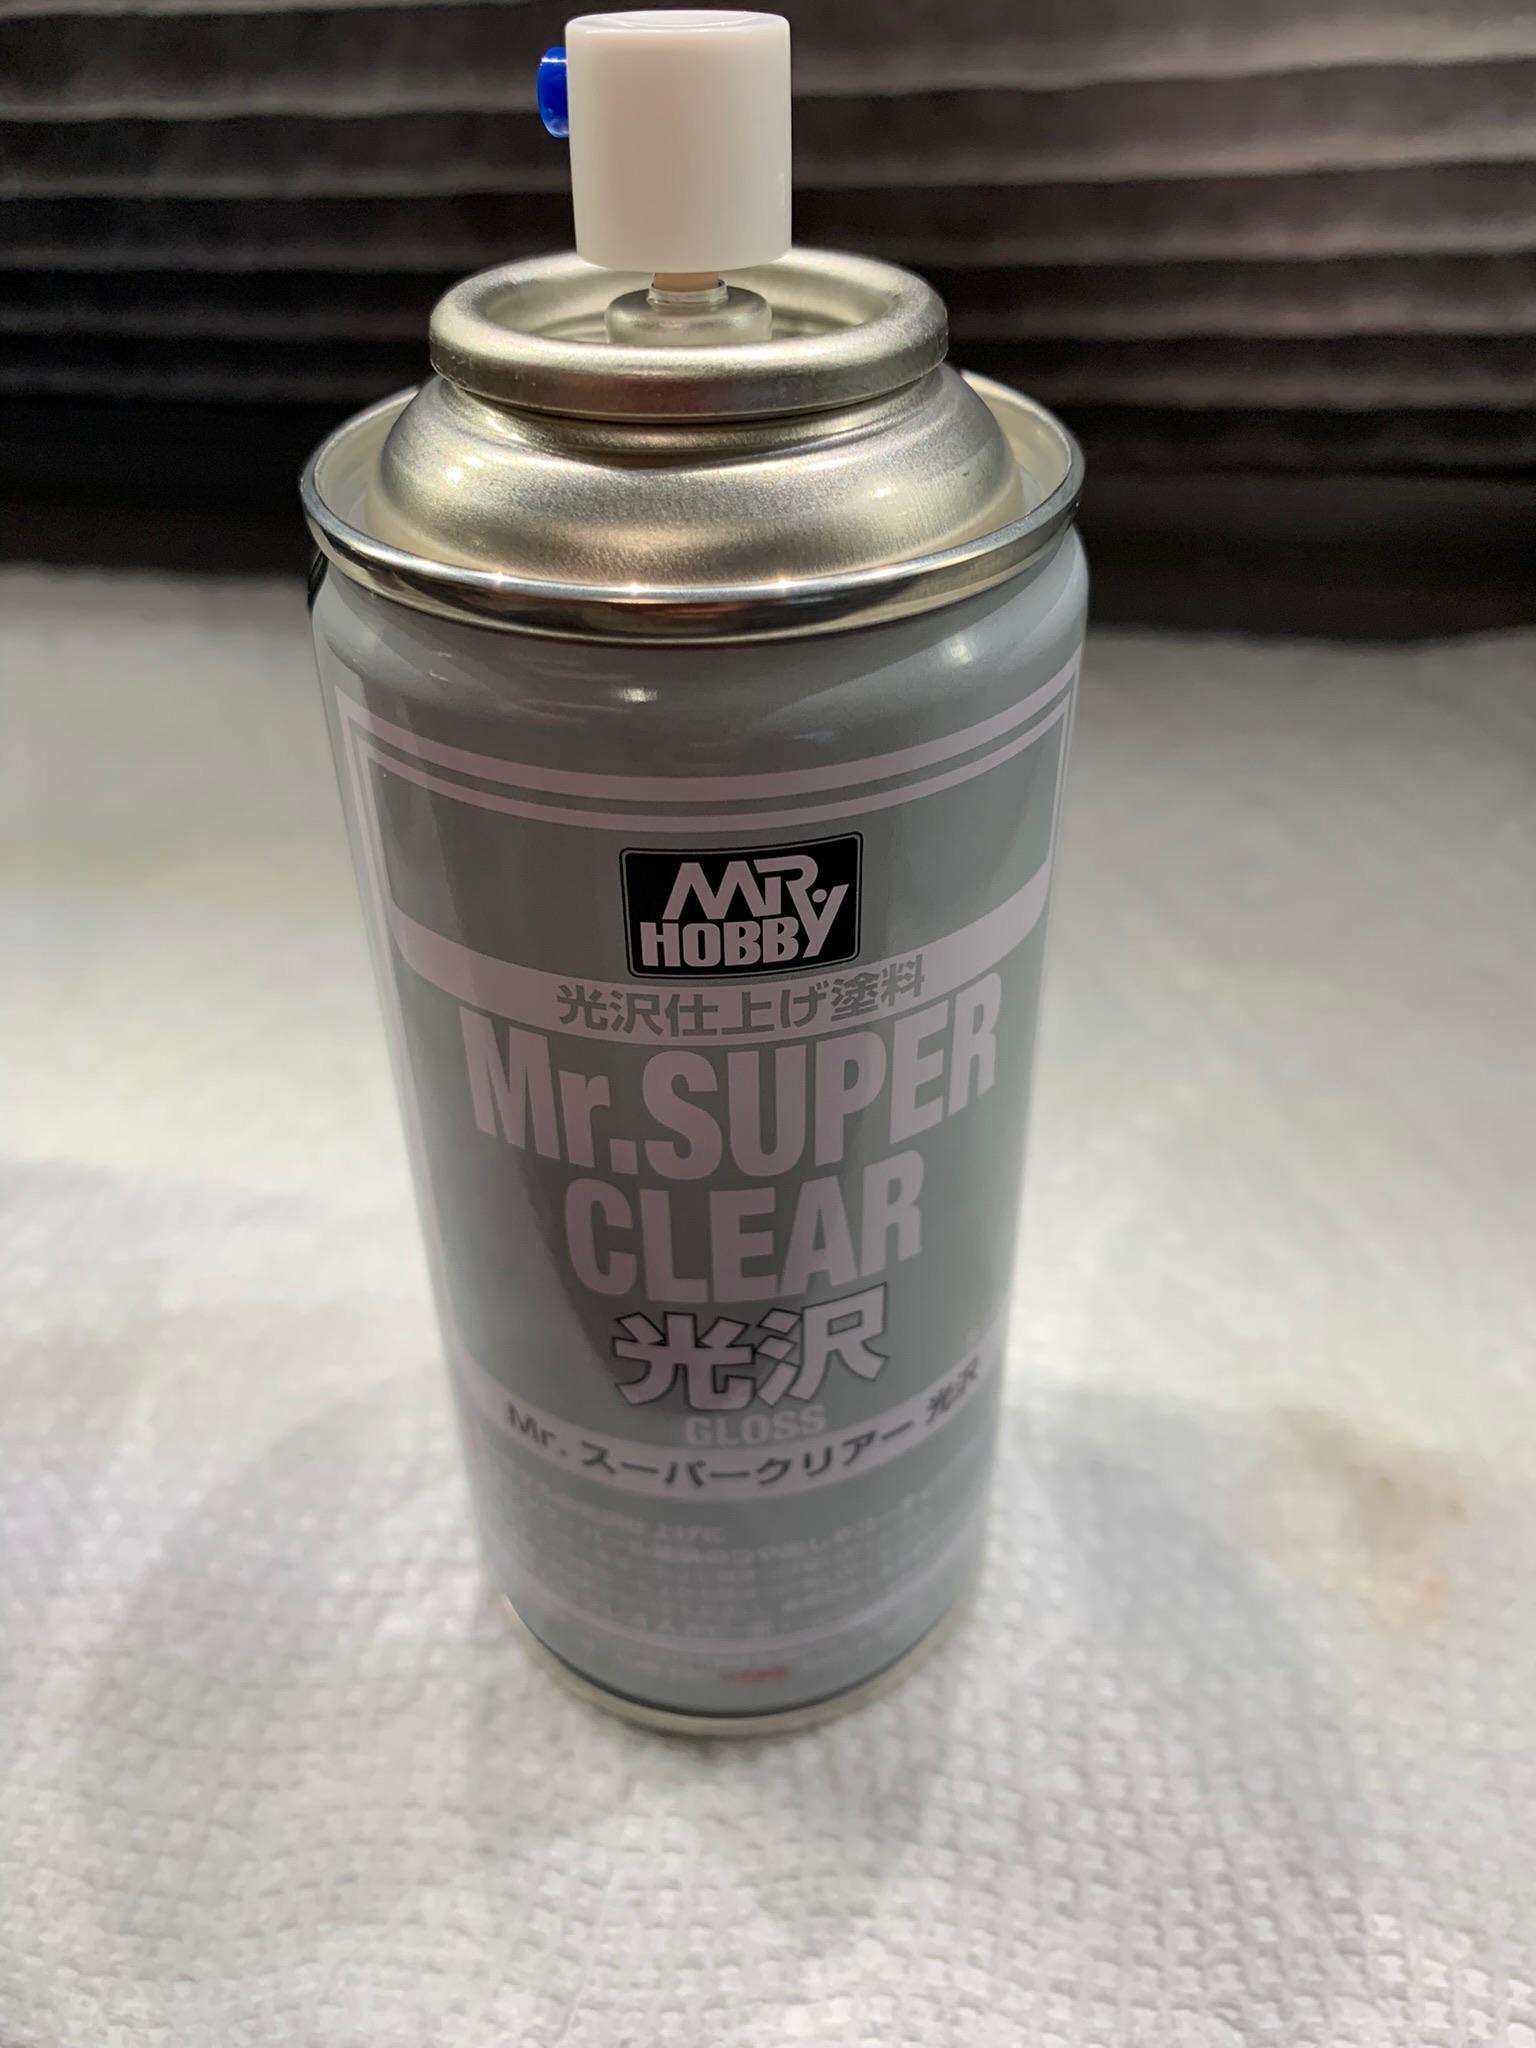
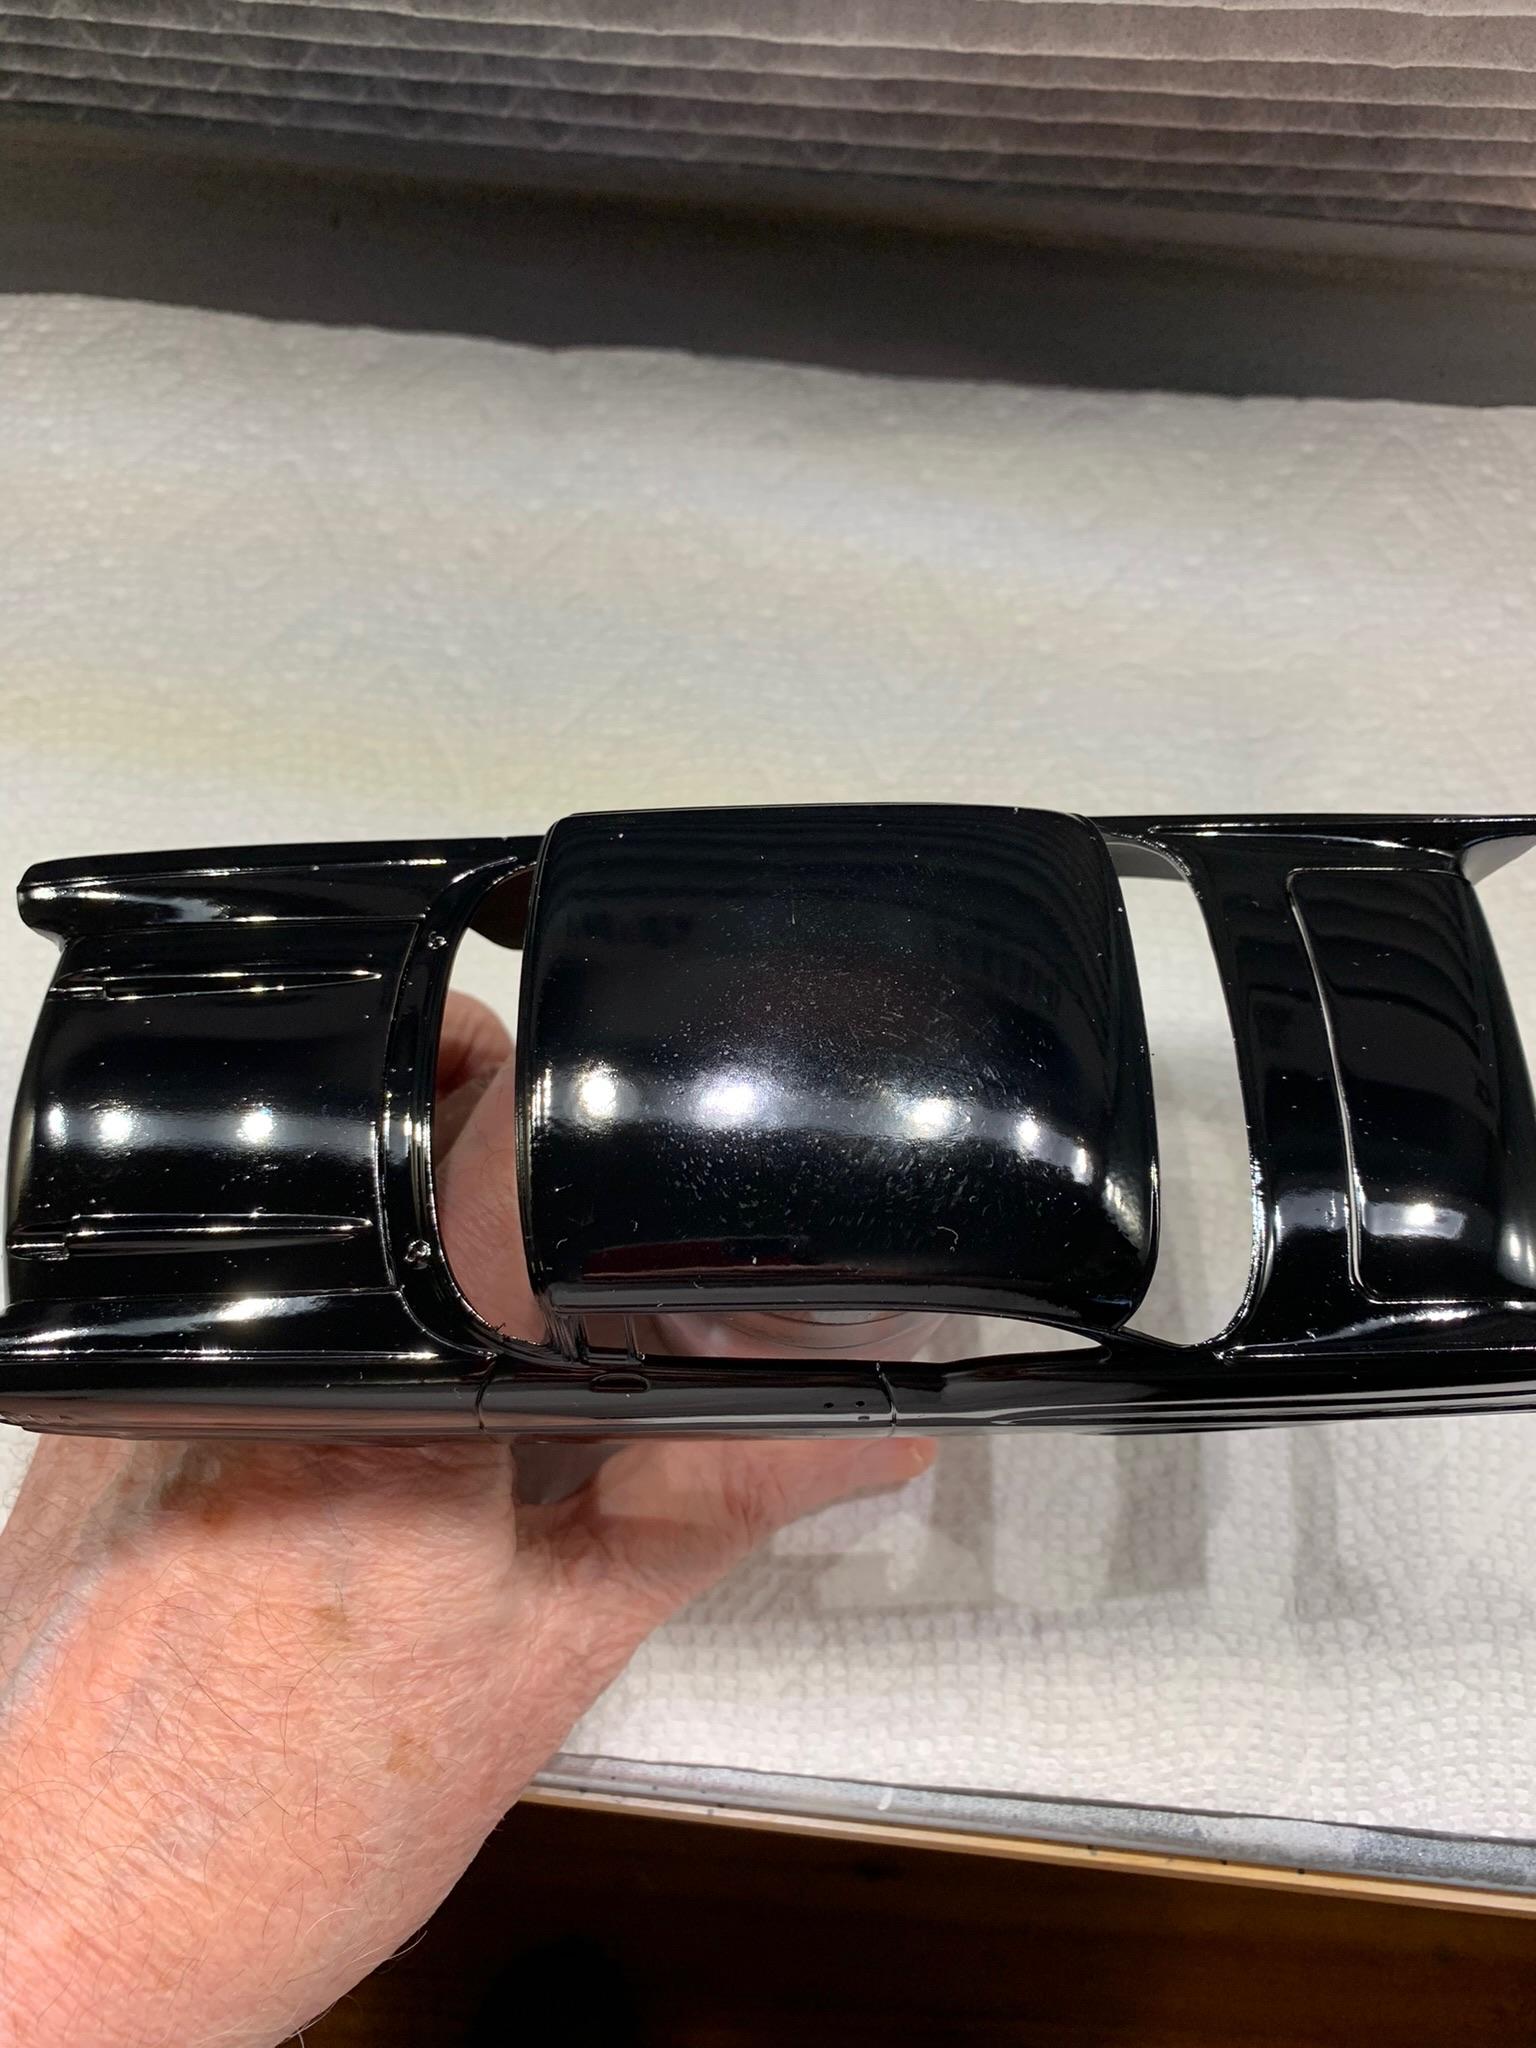
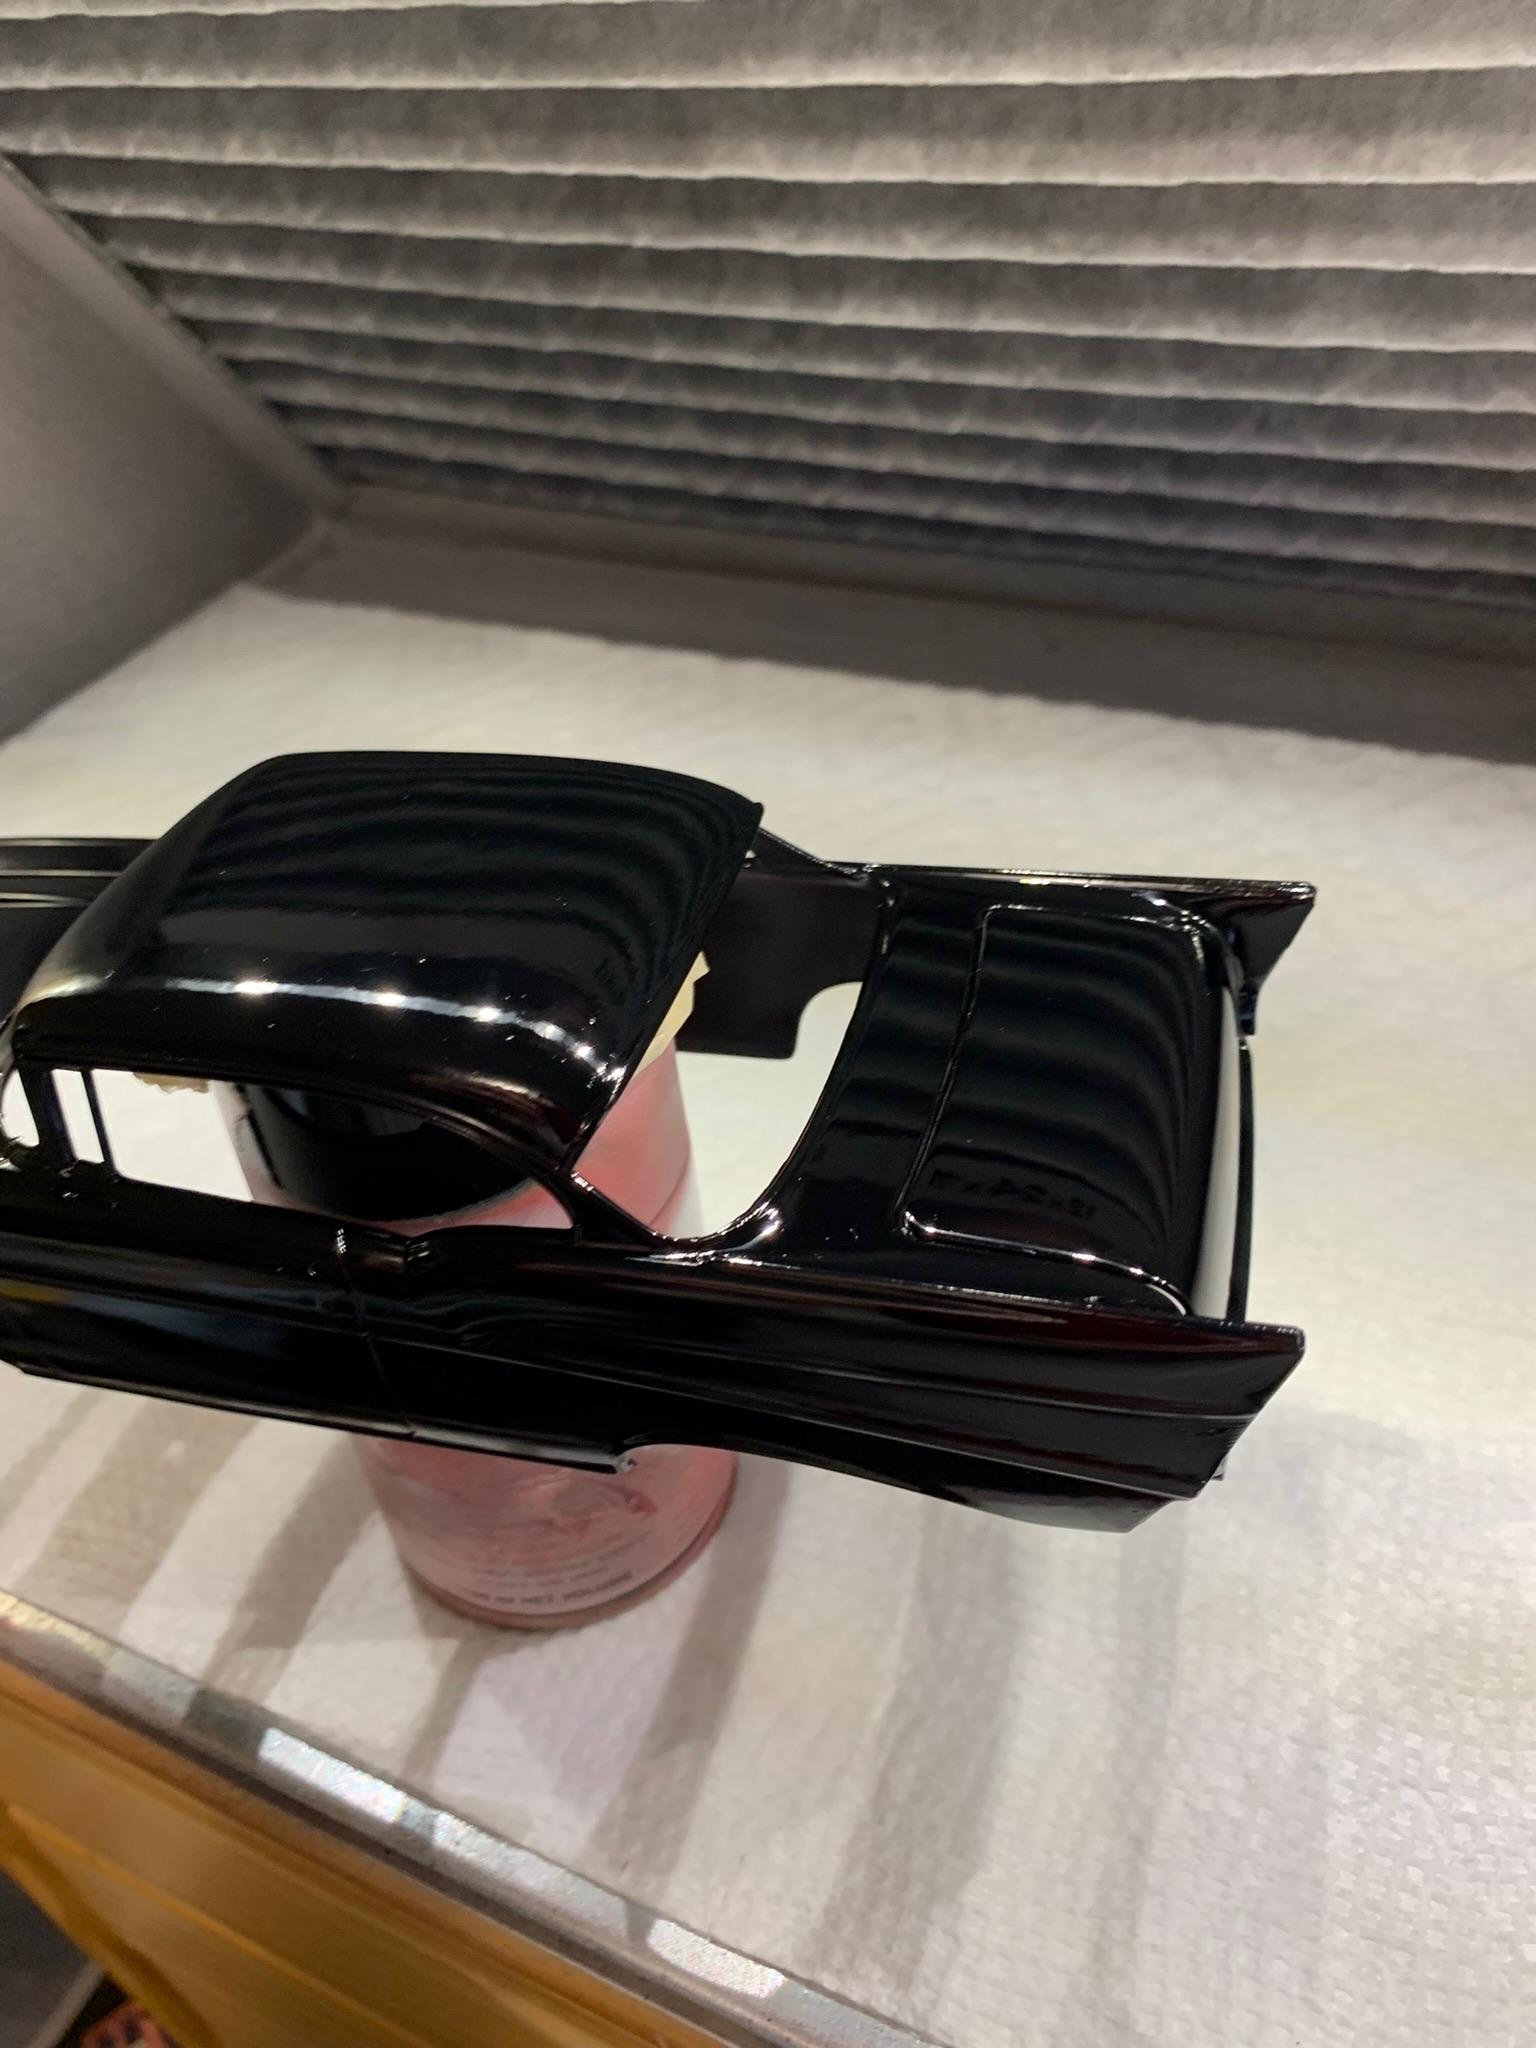
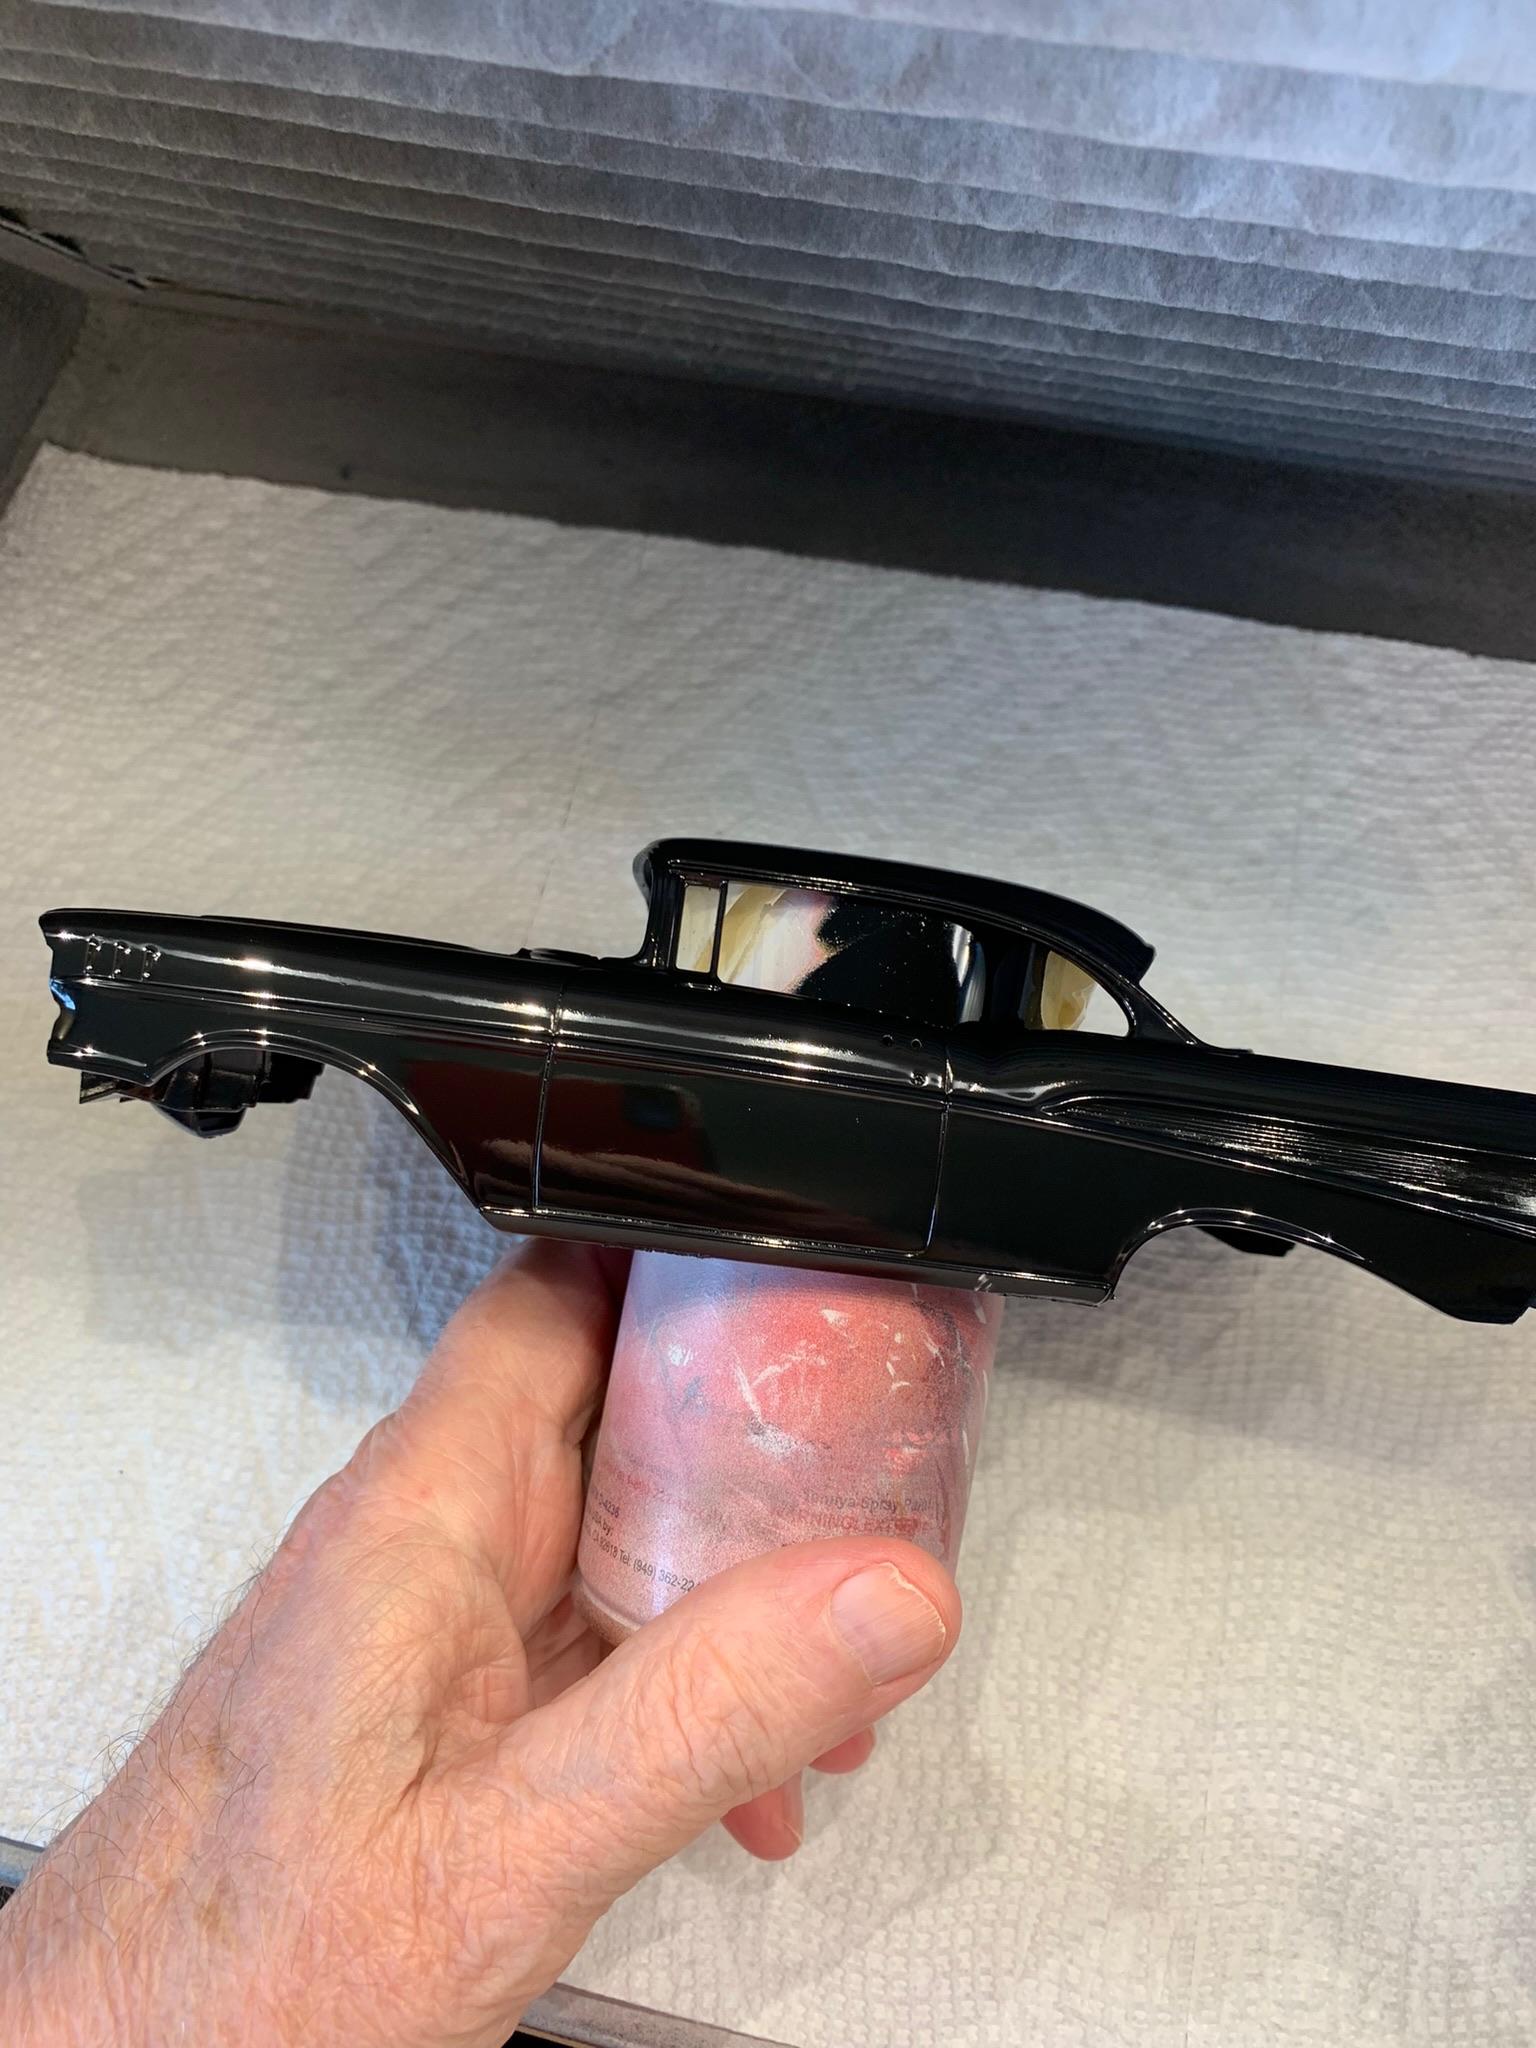
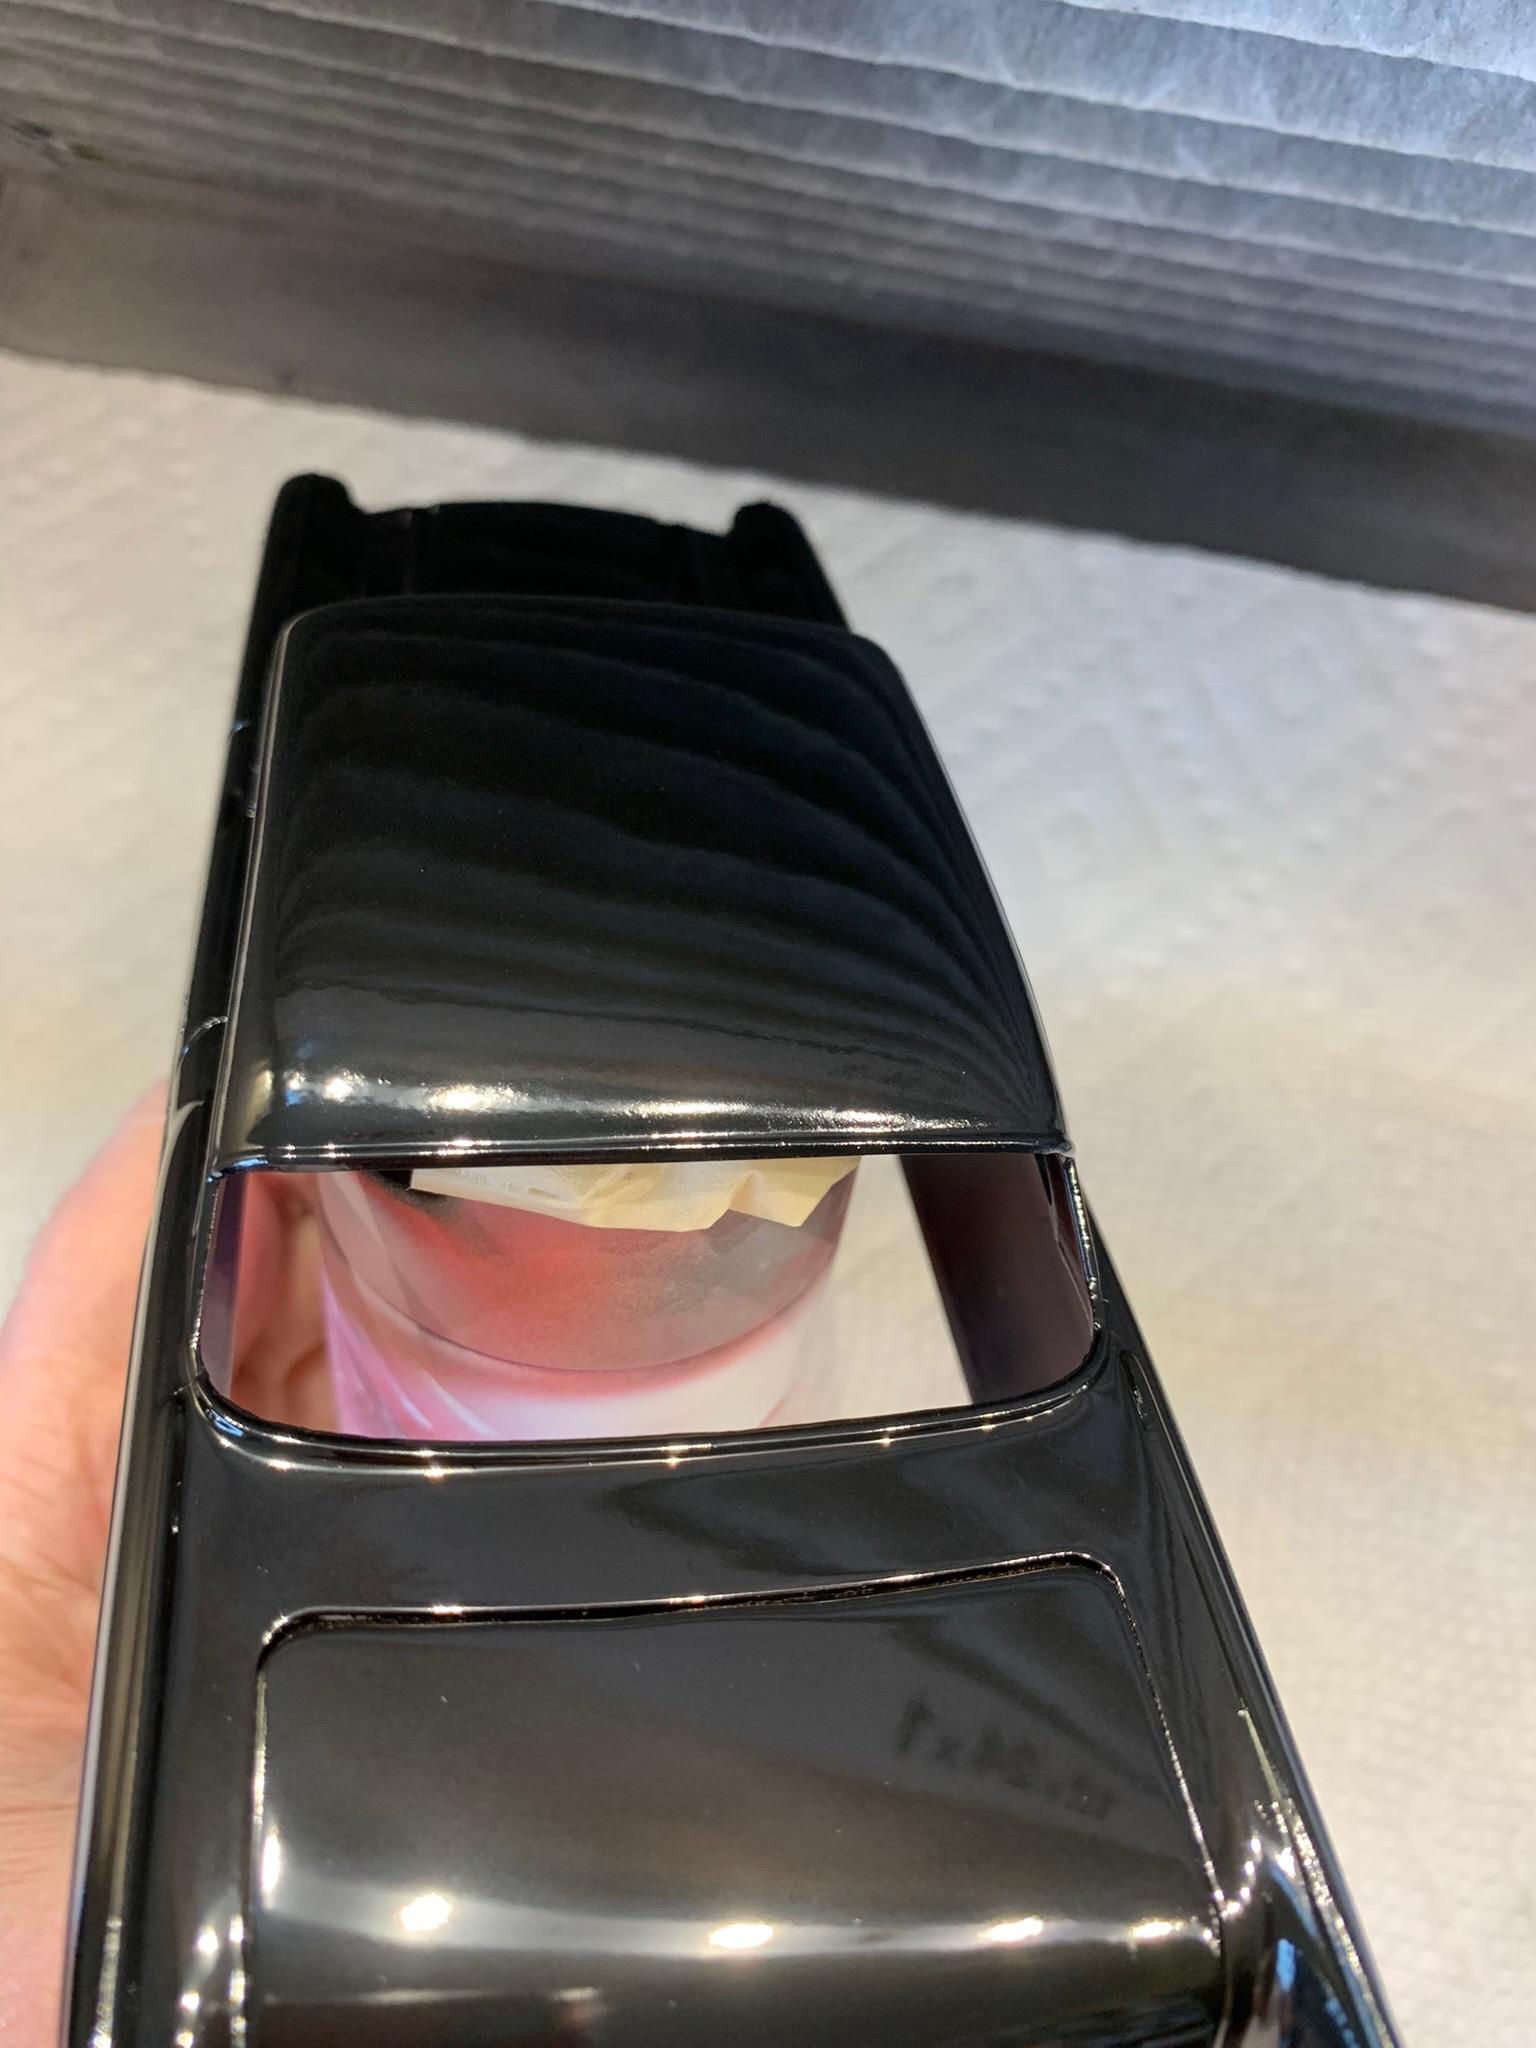
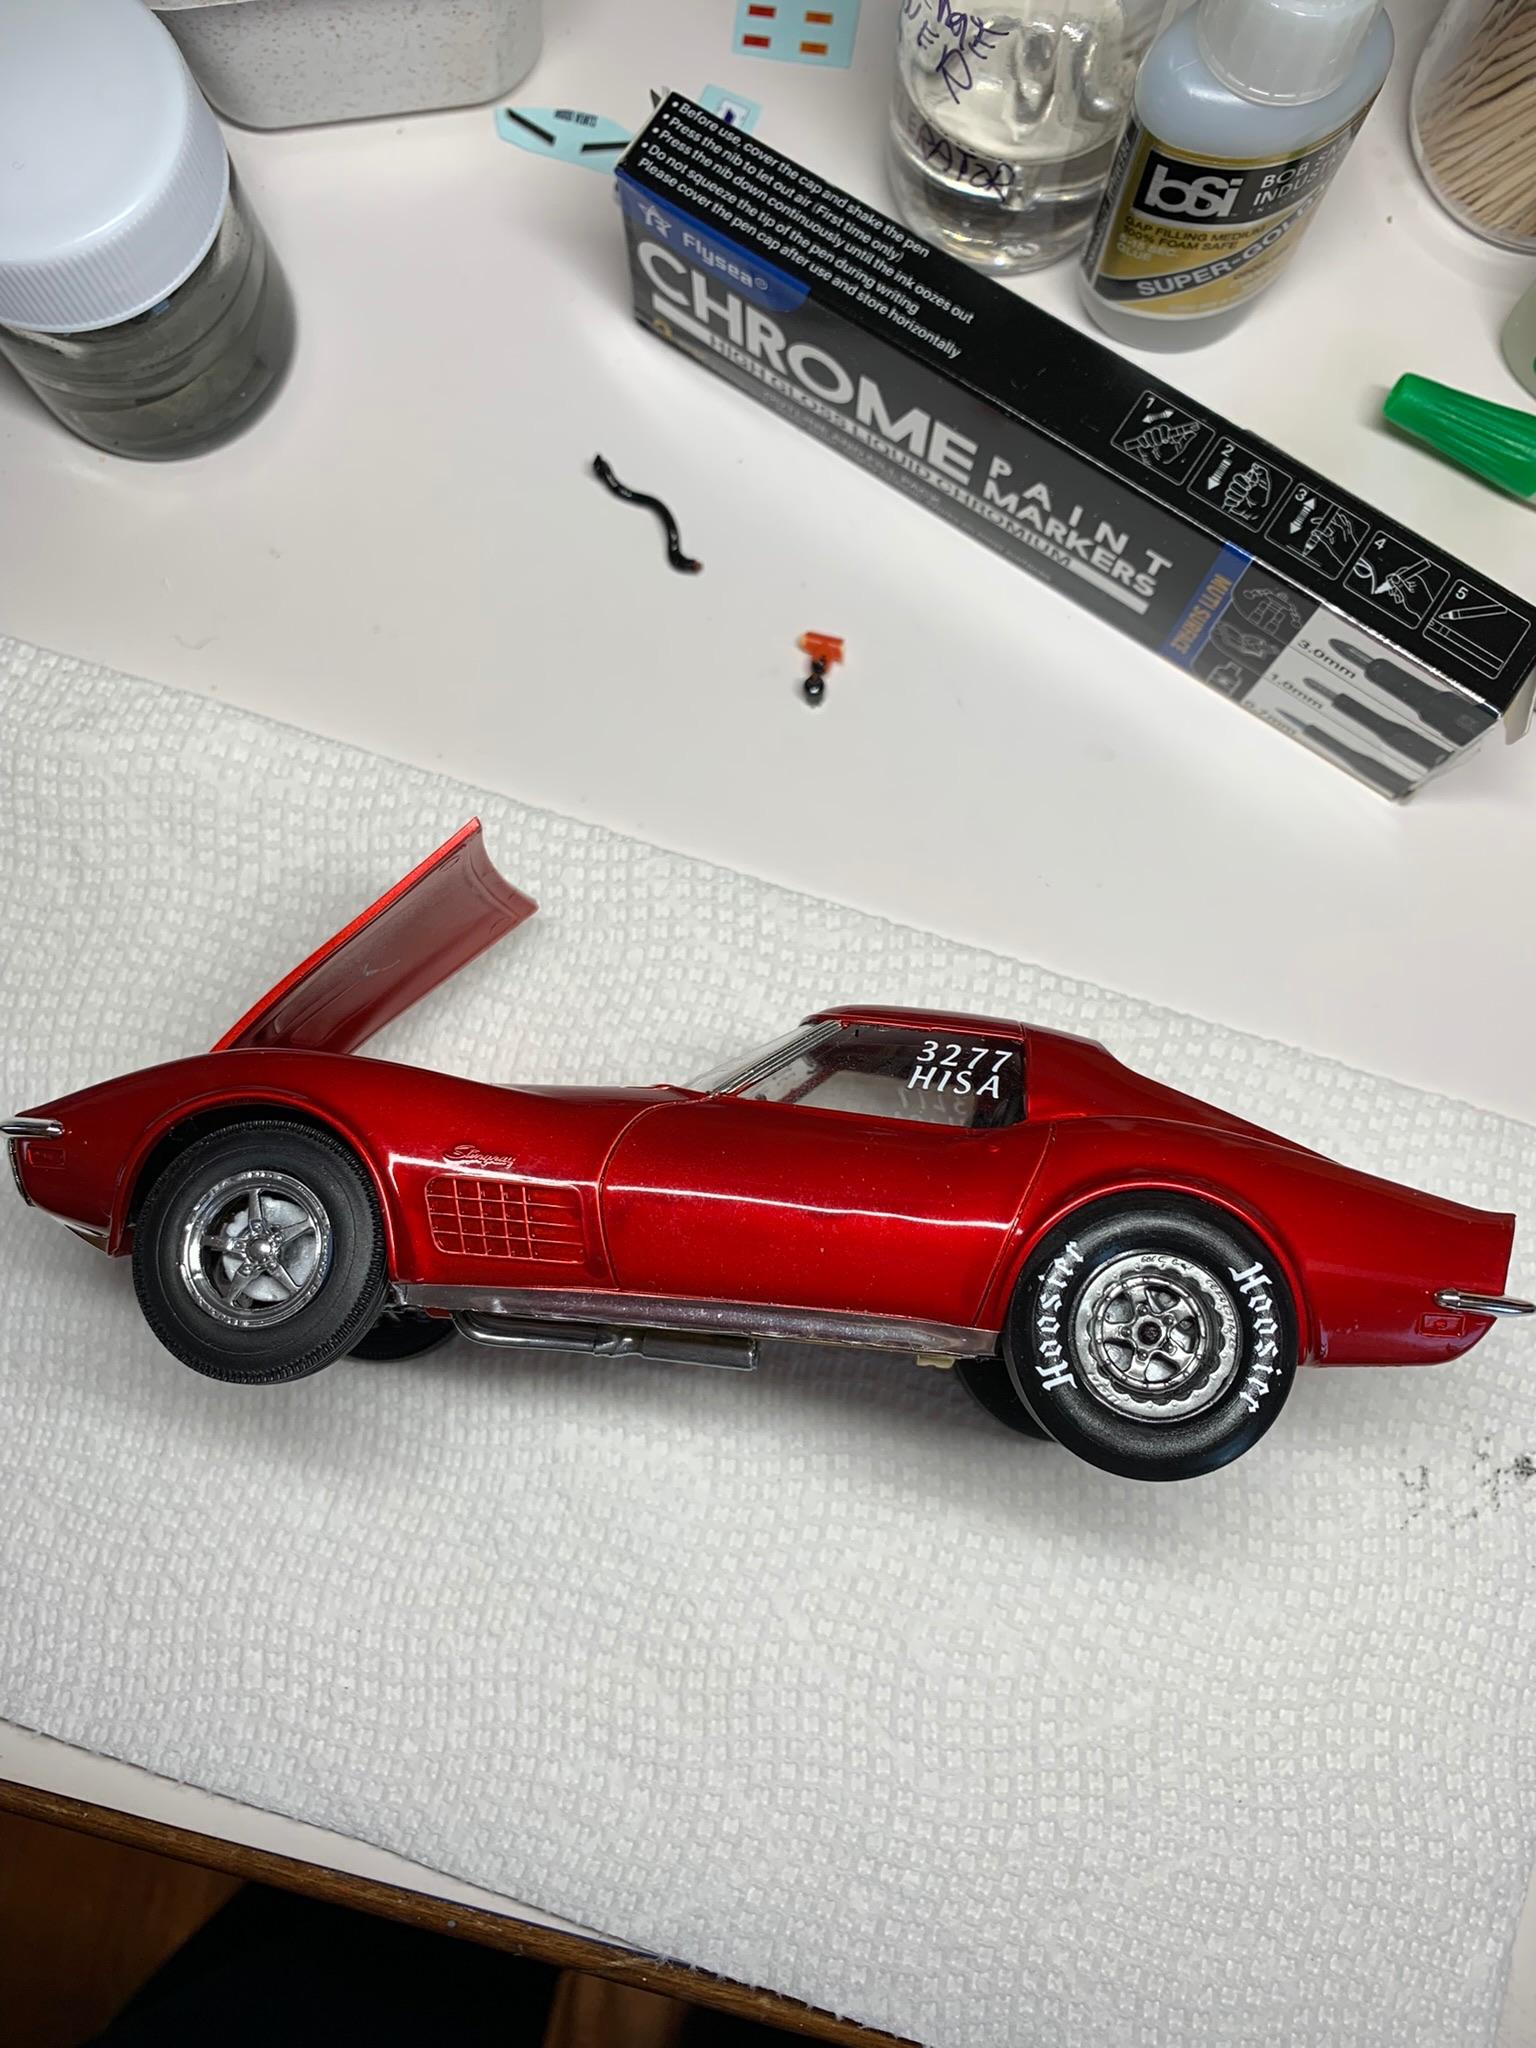
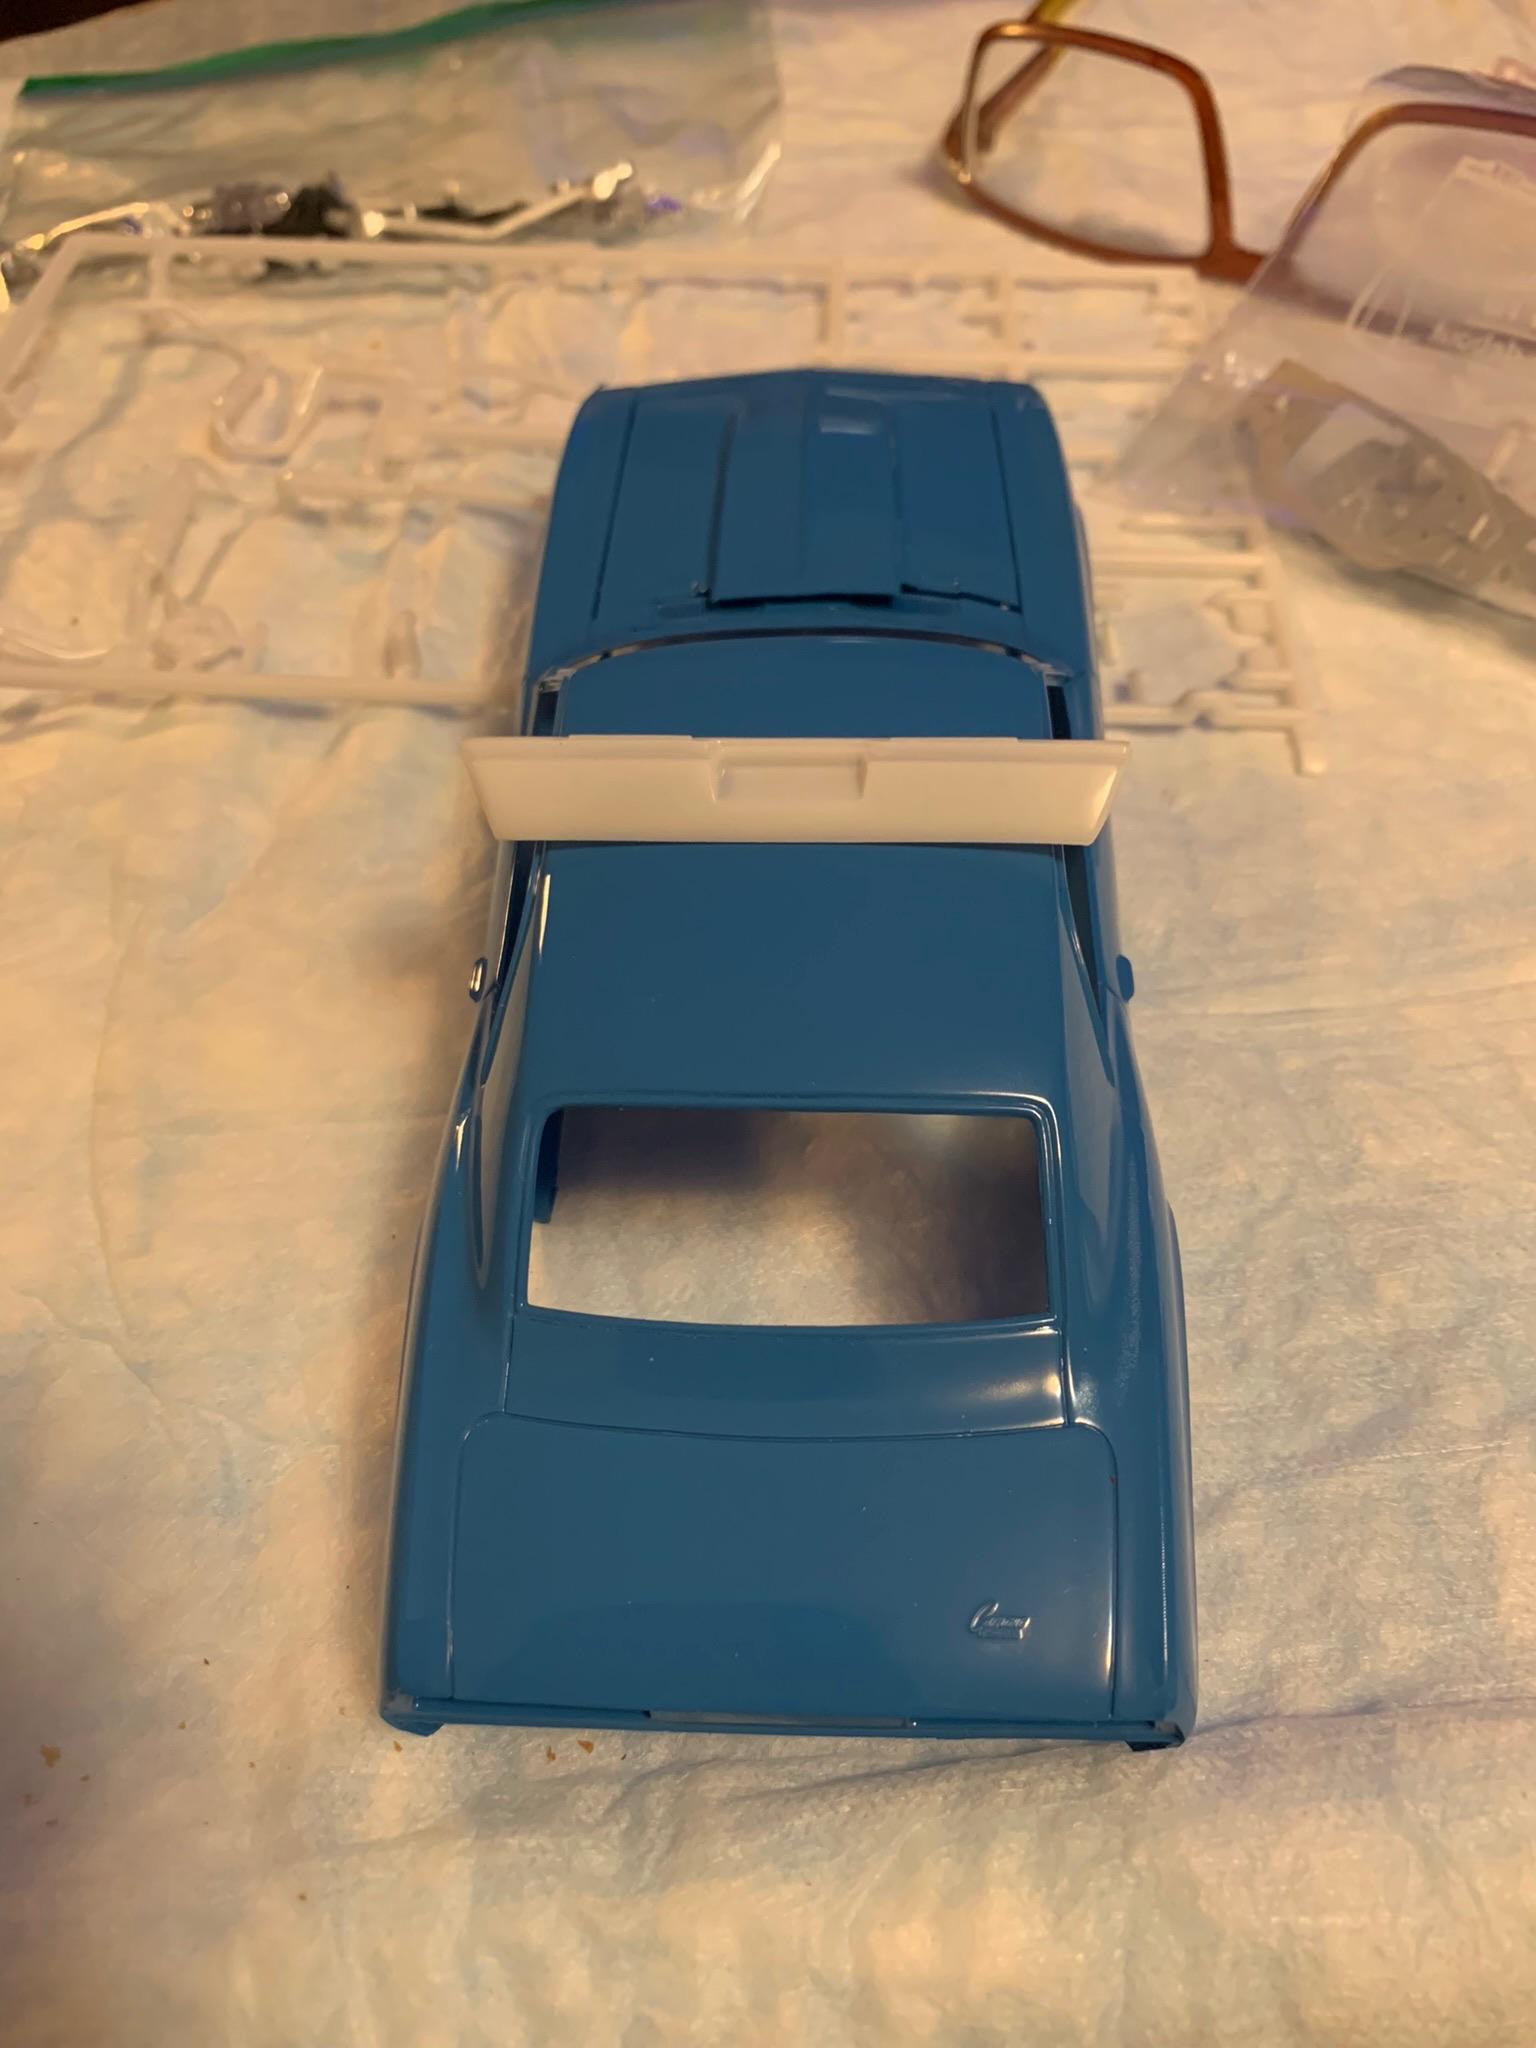
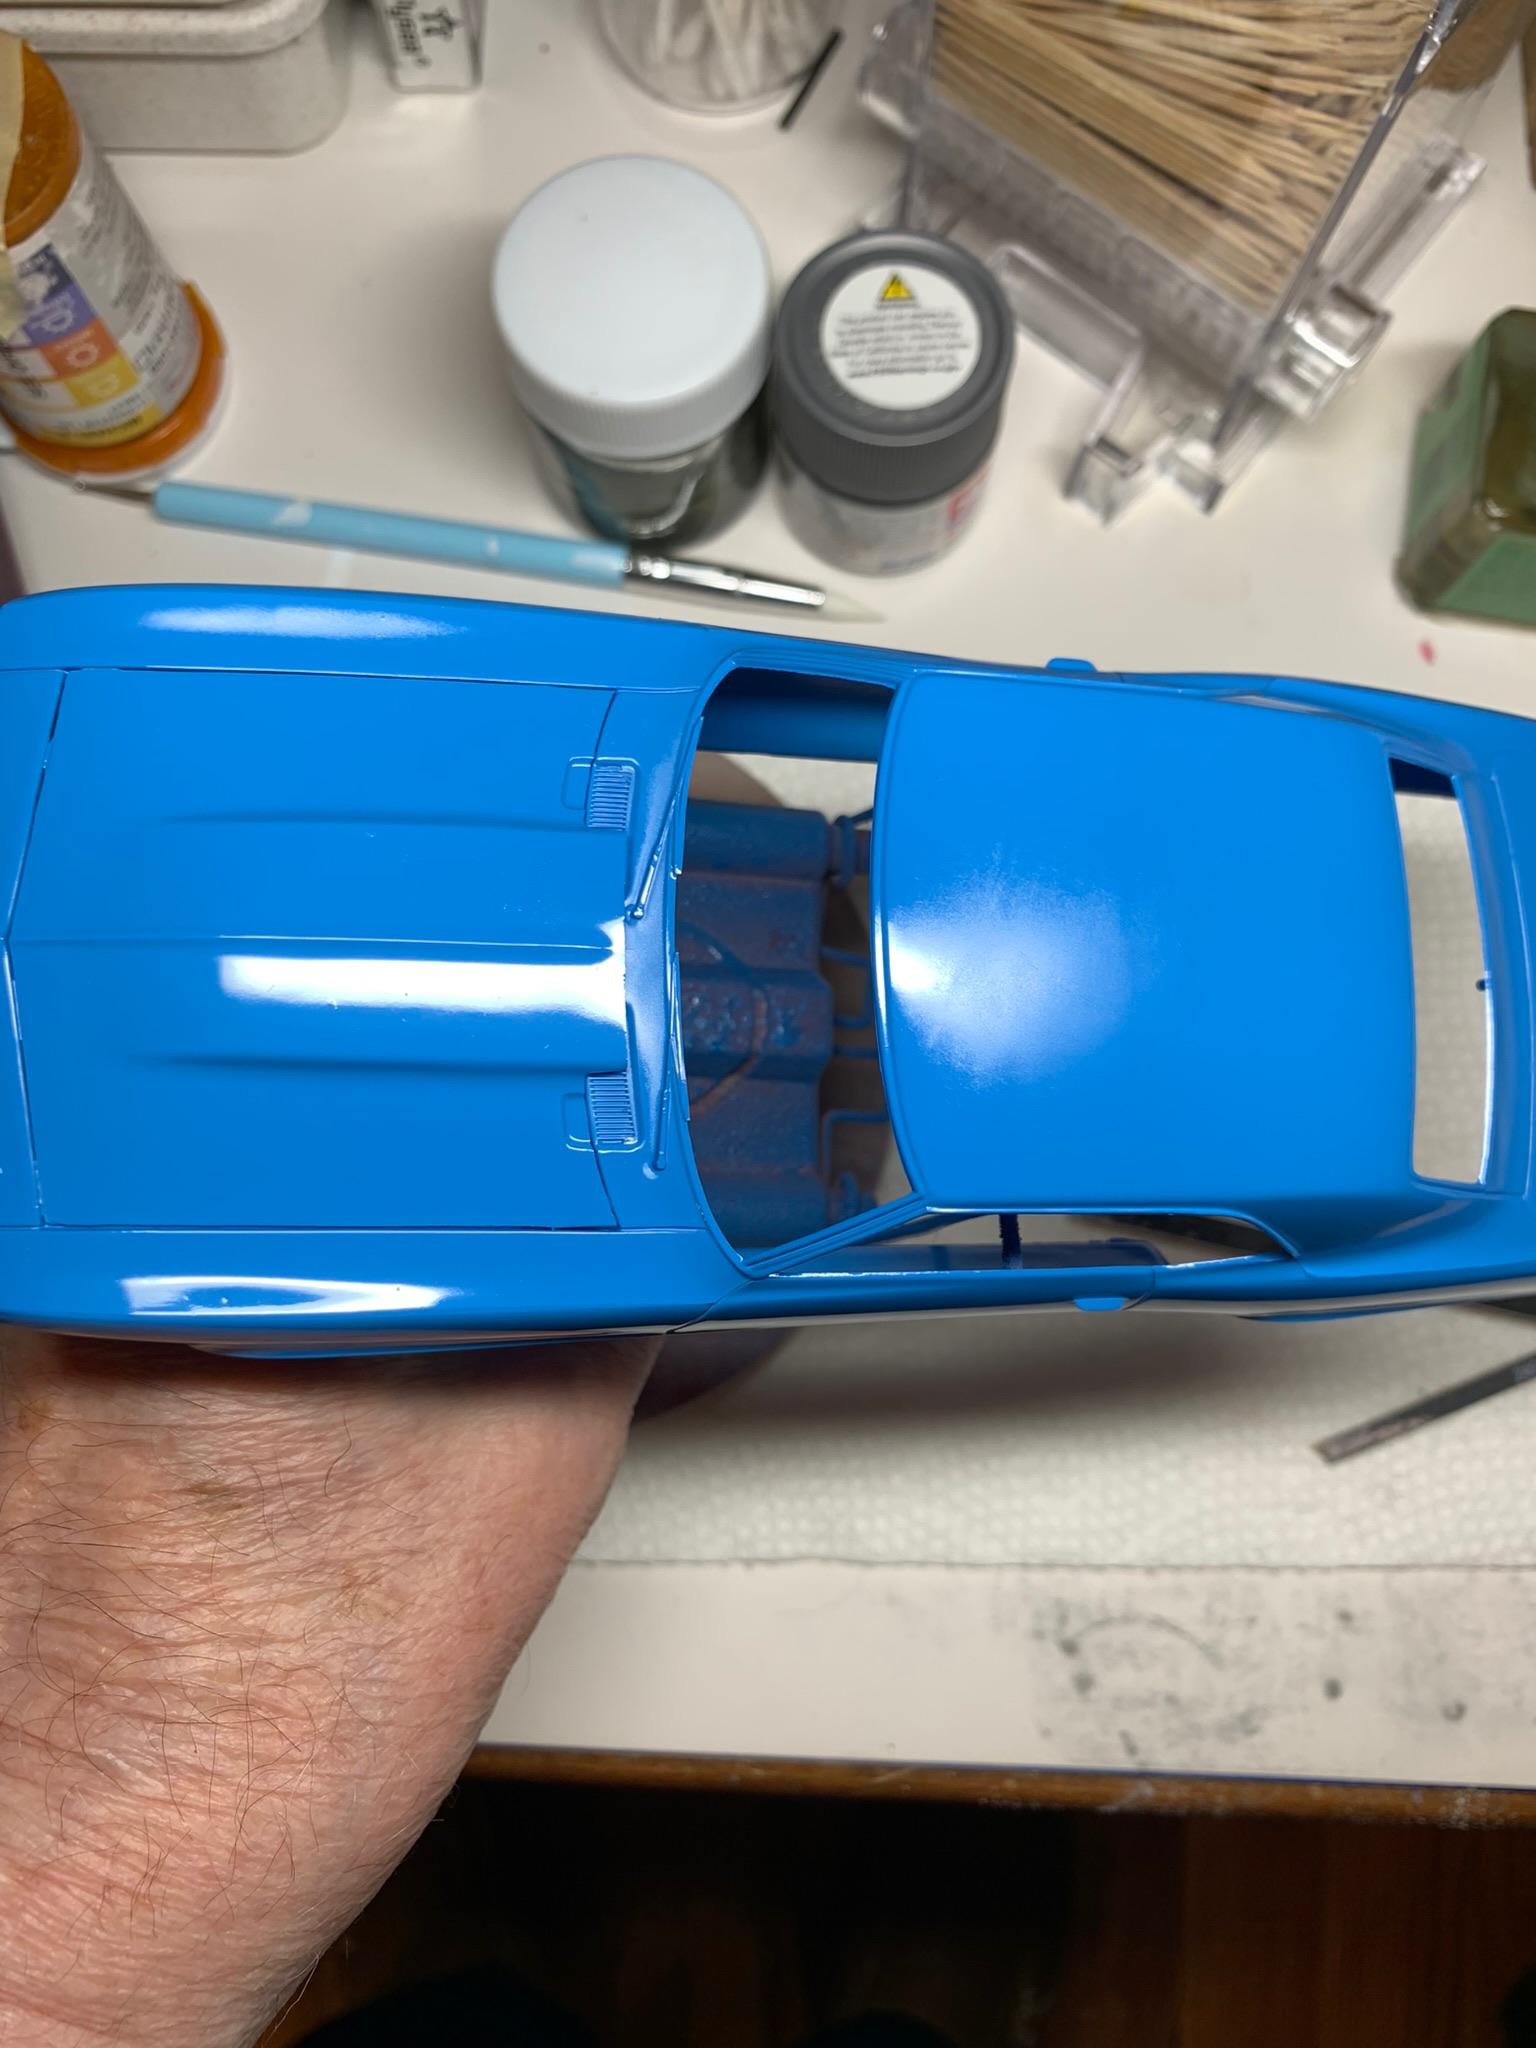
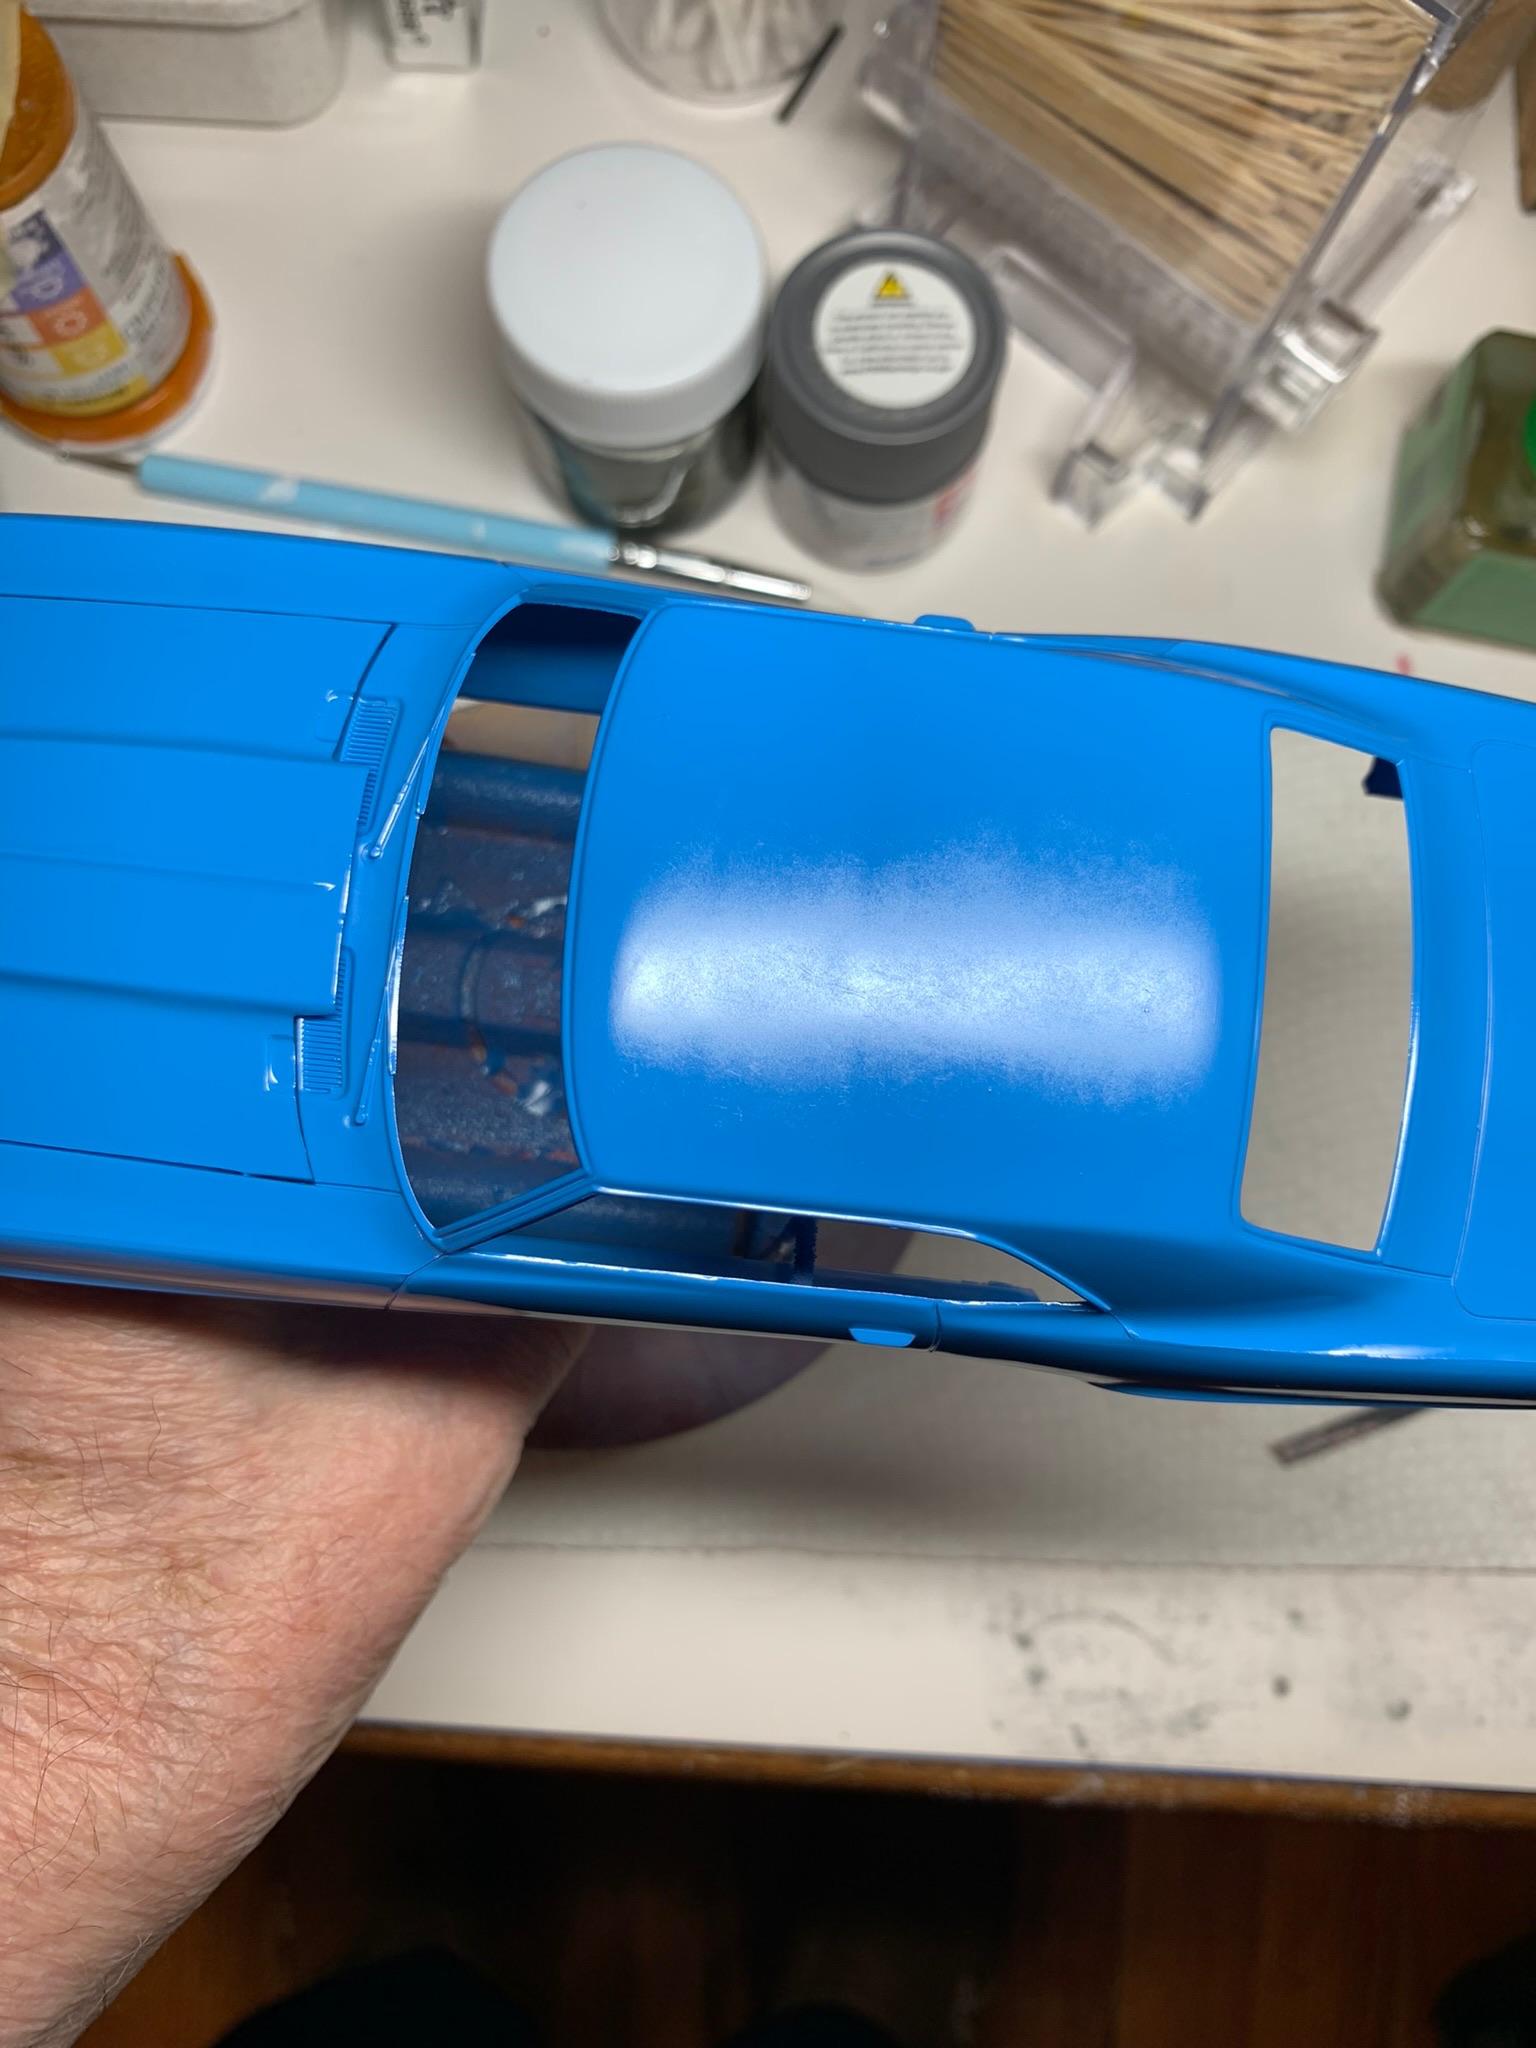
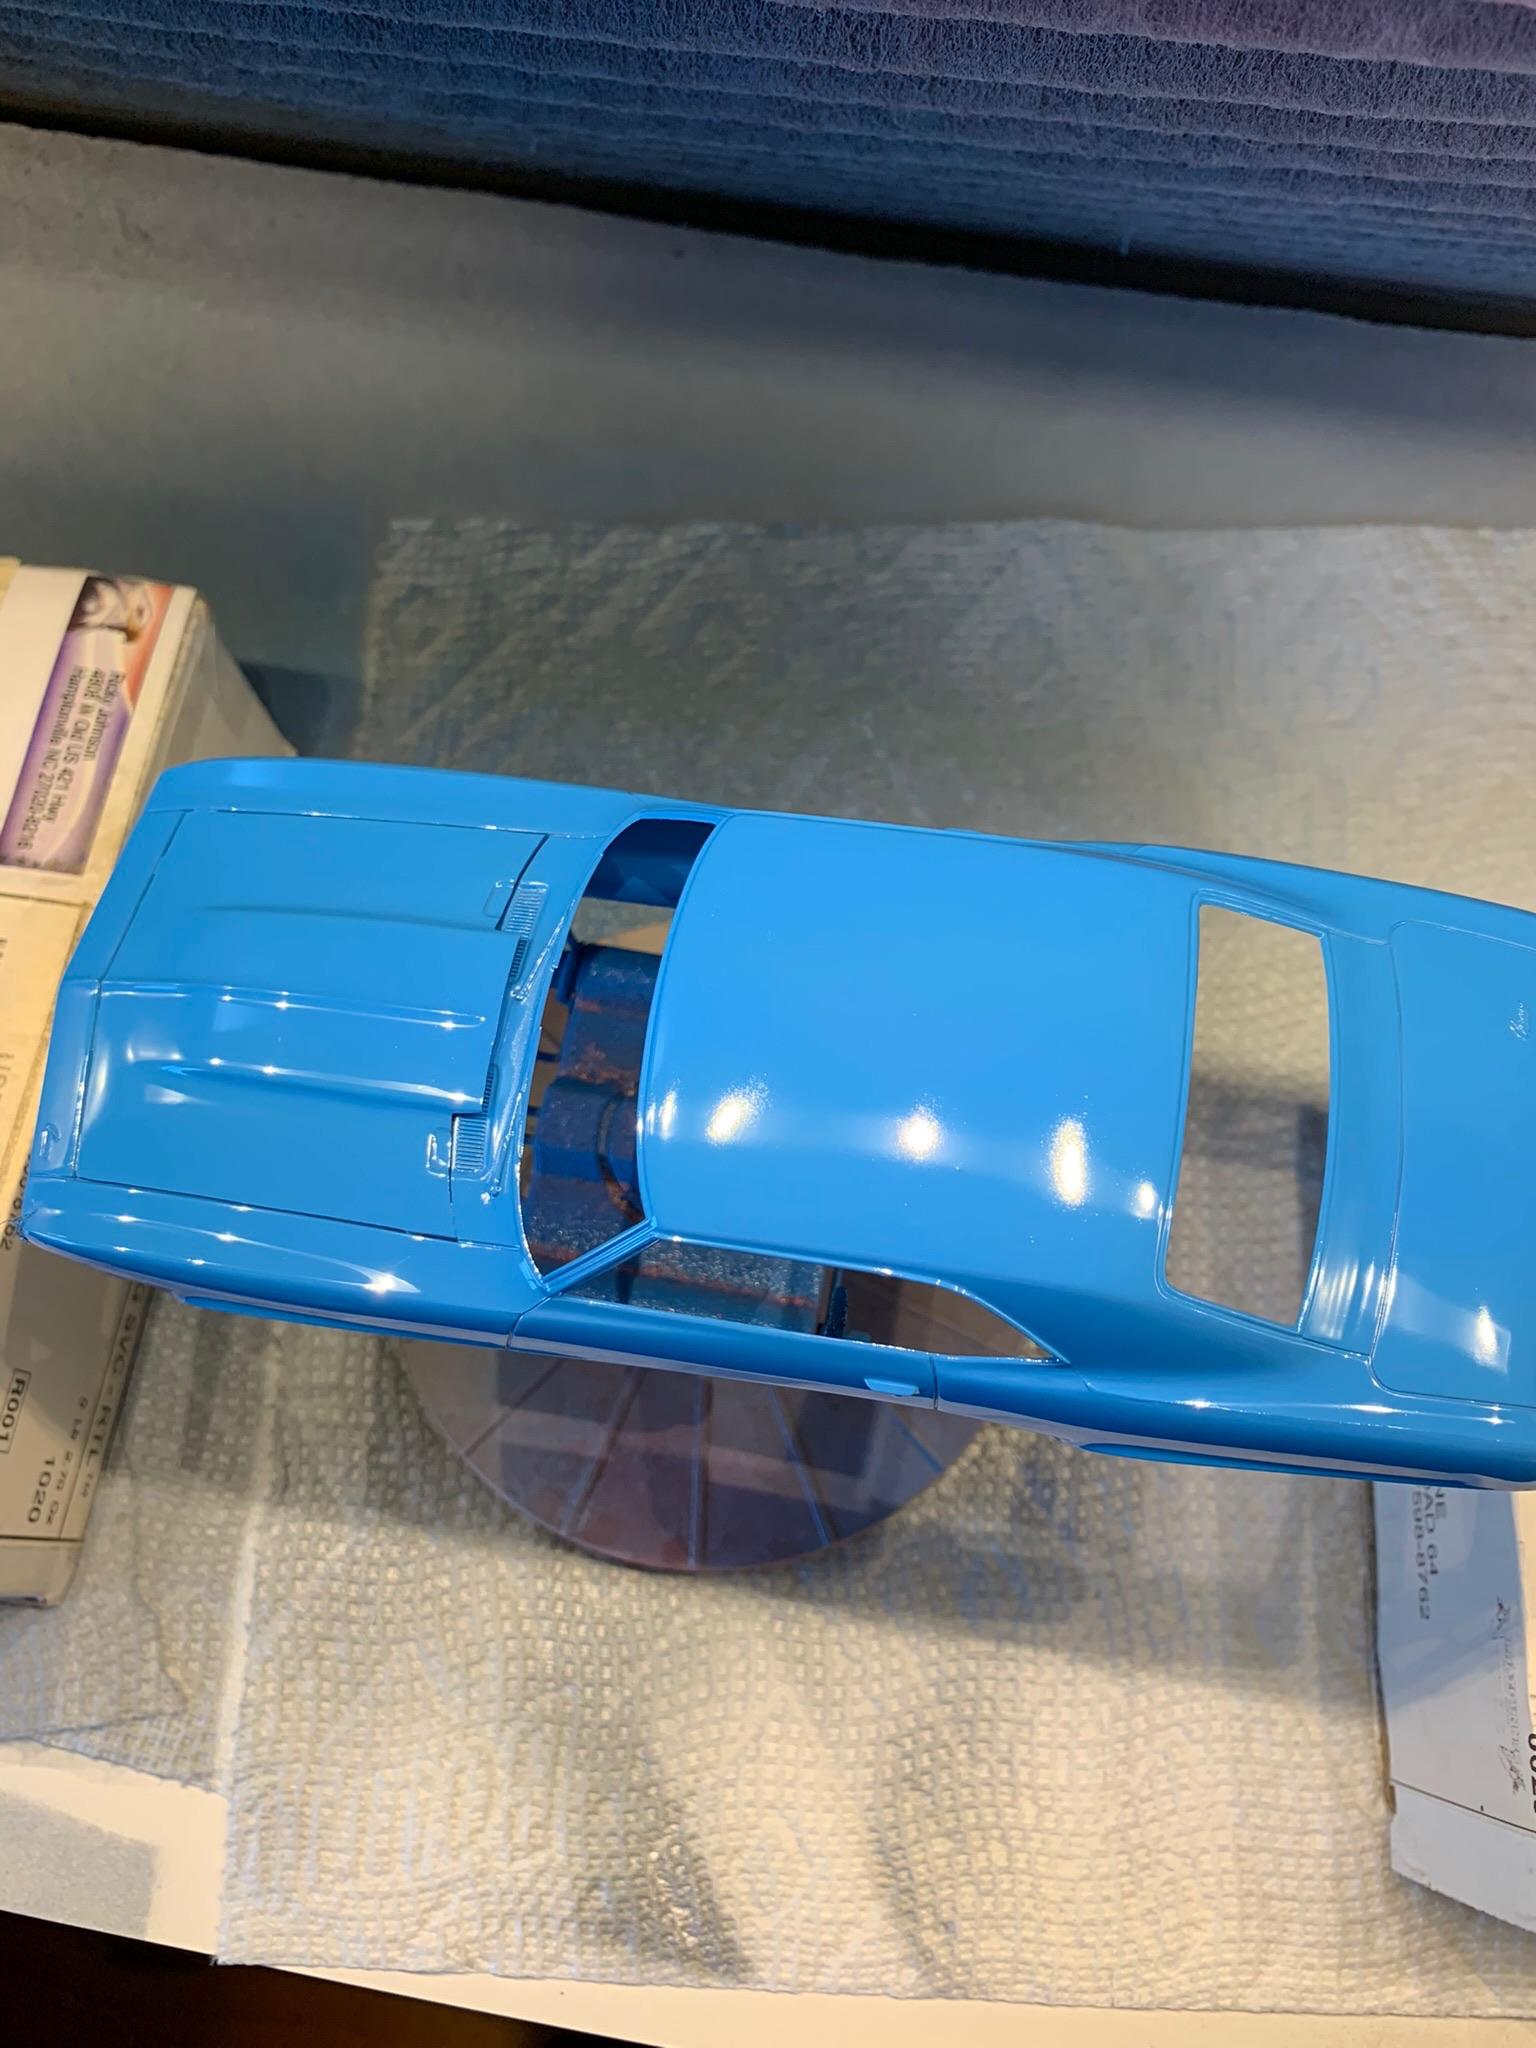
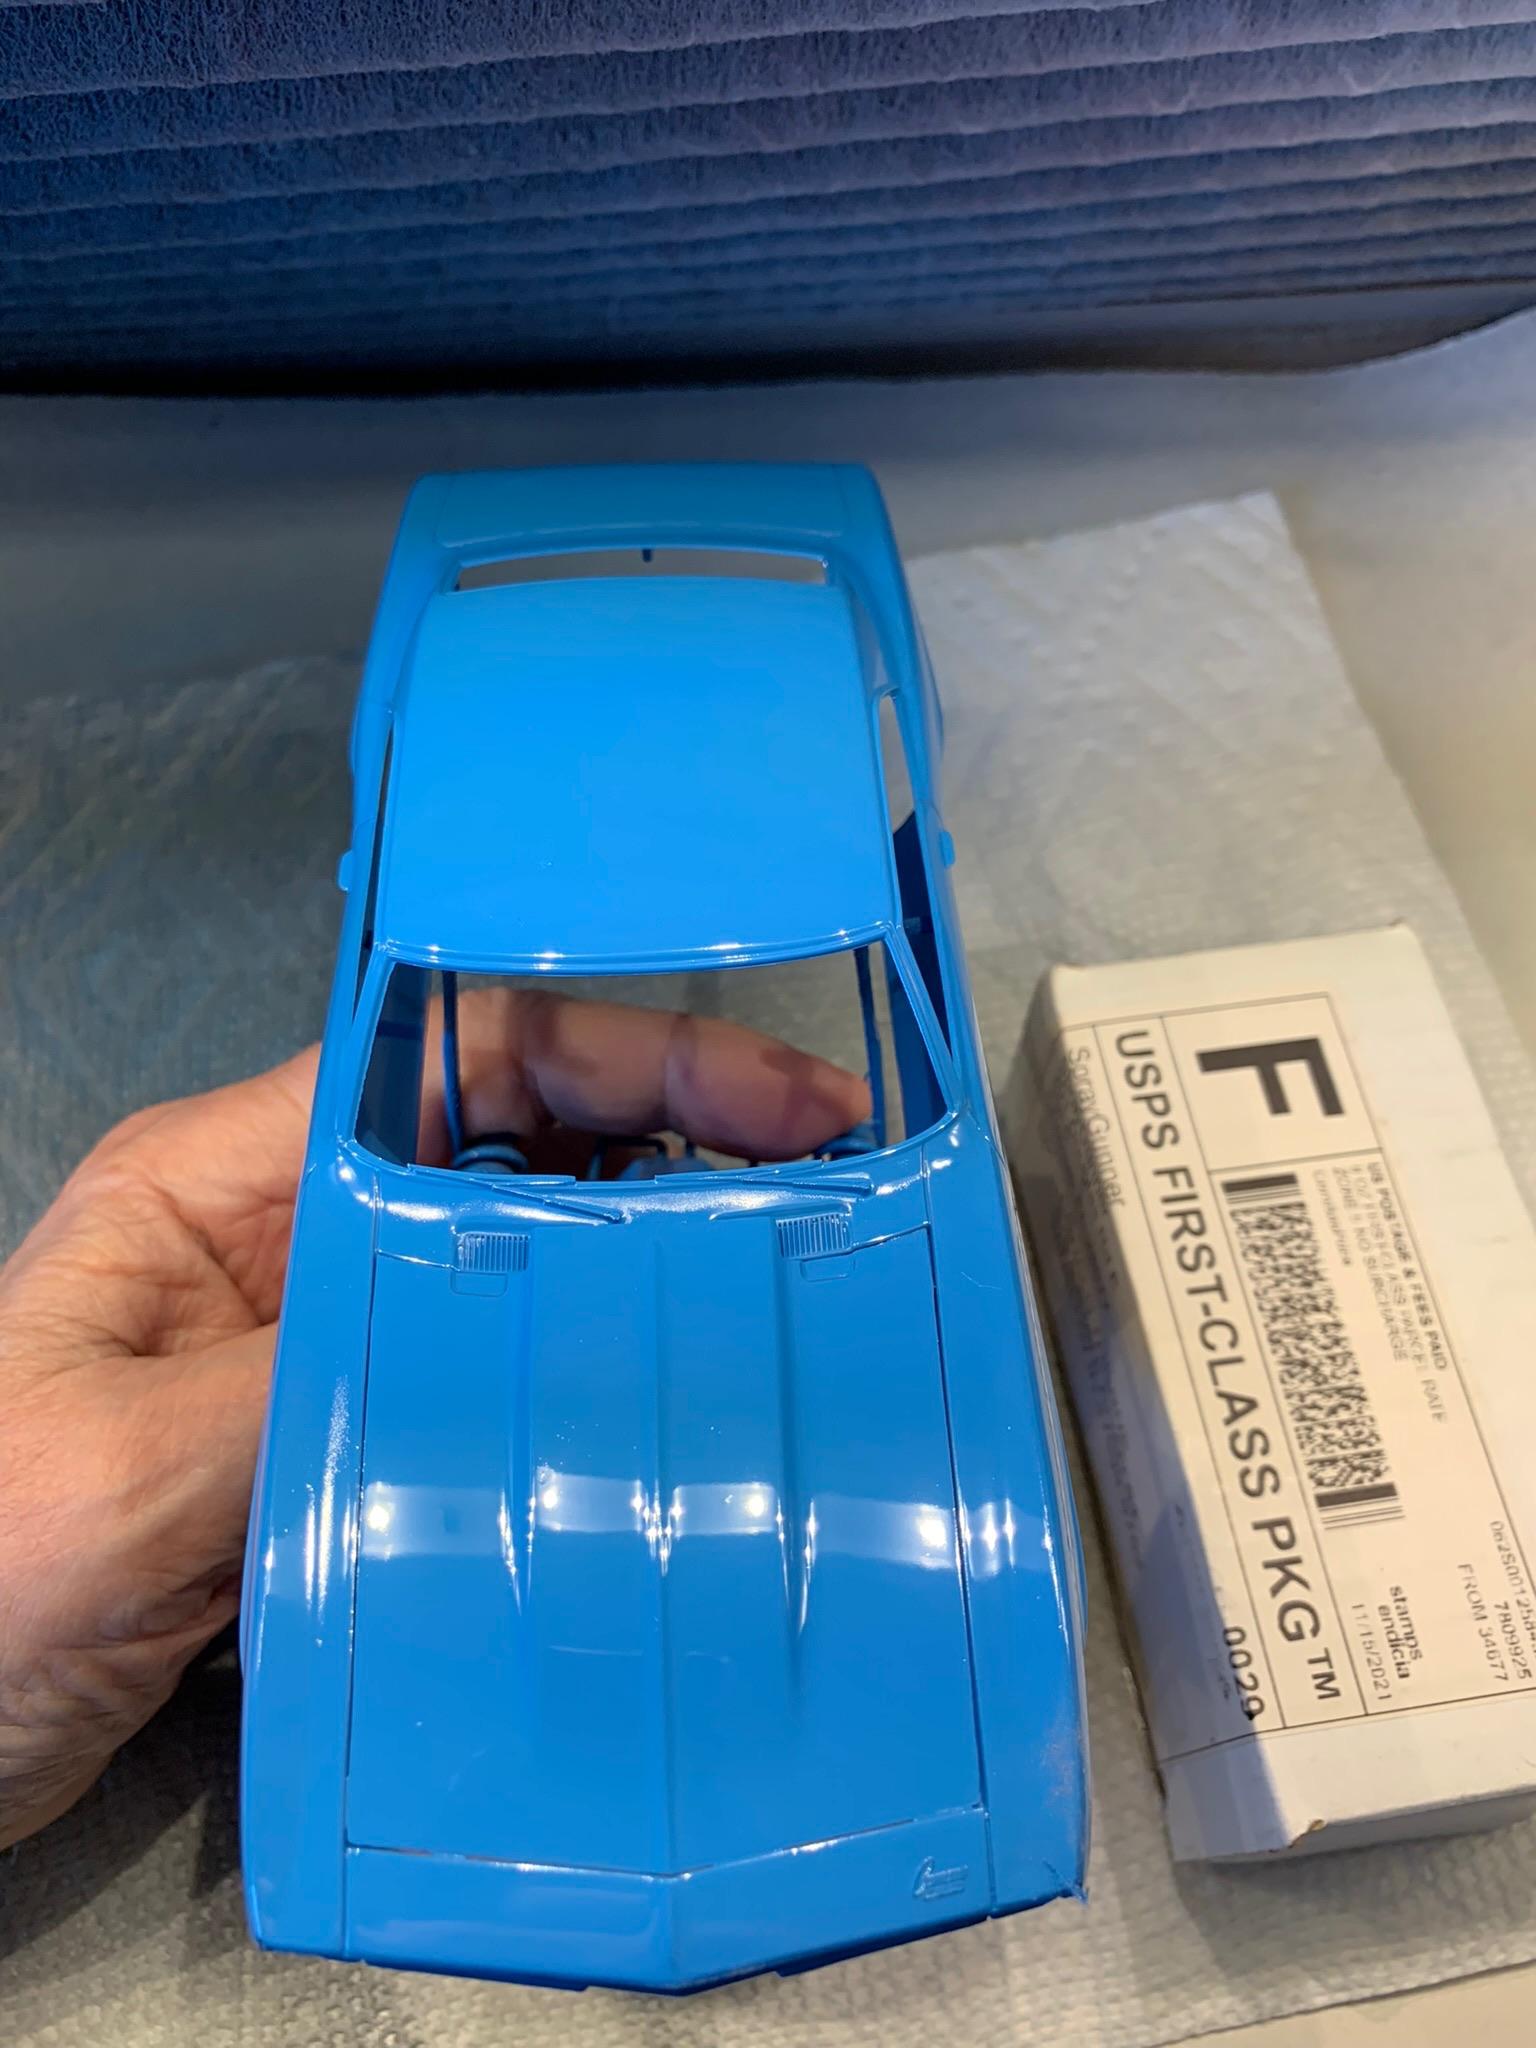
Decided to put some Mr. Super Gloss clear on today. Turned out good until I decided to cover it (to keep the dust bunnies out while drying) with my back up resin sanding box, as I had just cleared the 57 Chevy also. Big mistake, as it is too clear, and I hit the car and knocked it over on it’s side. Tried to wipe it off quickly and resprayed it. Didn’t work, so it is currently soaking in 91 % alcohol. Today I ordered 2 tall shoe box covers, so, hopefully this will not be repeated. It’s what I get for breaking my routine. If you look, you can see the smudges all down the right side and on the left side, the rear quarter panel.
-
Holloman & McKinney 57 Chevy C/MP circa 1964
R. Thorne replied to R. Thorne's topic in WIP: Drag Racing Models
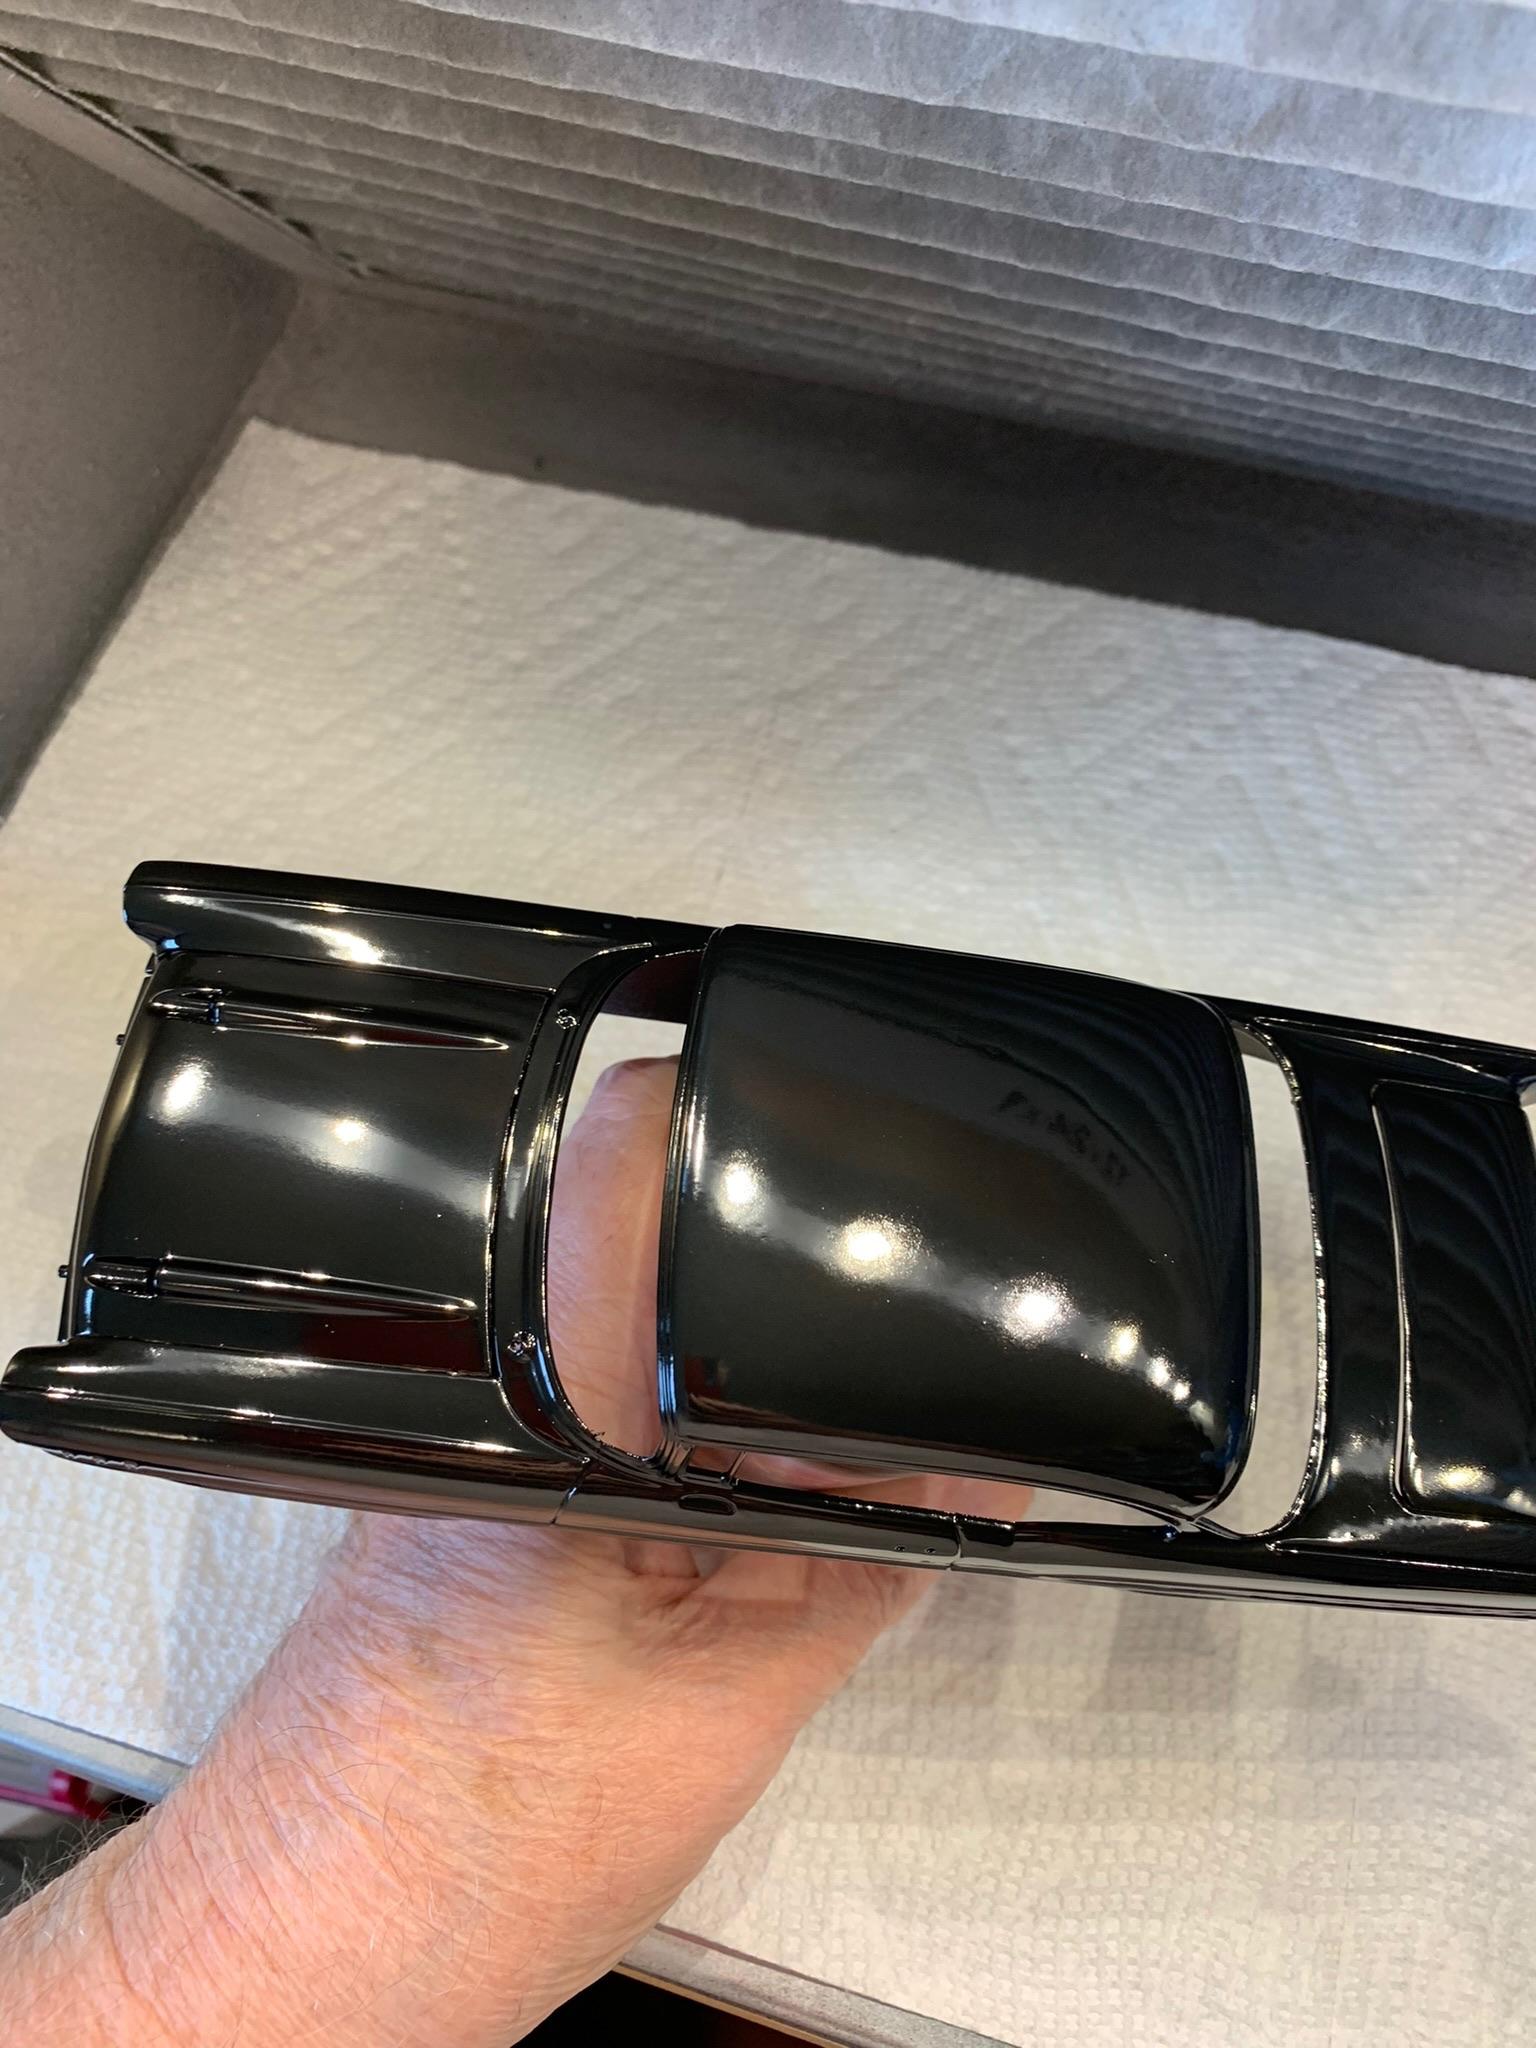
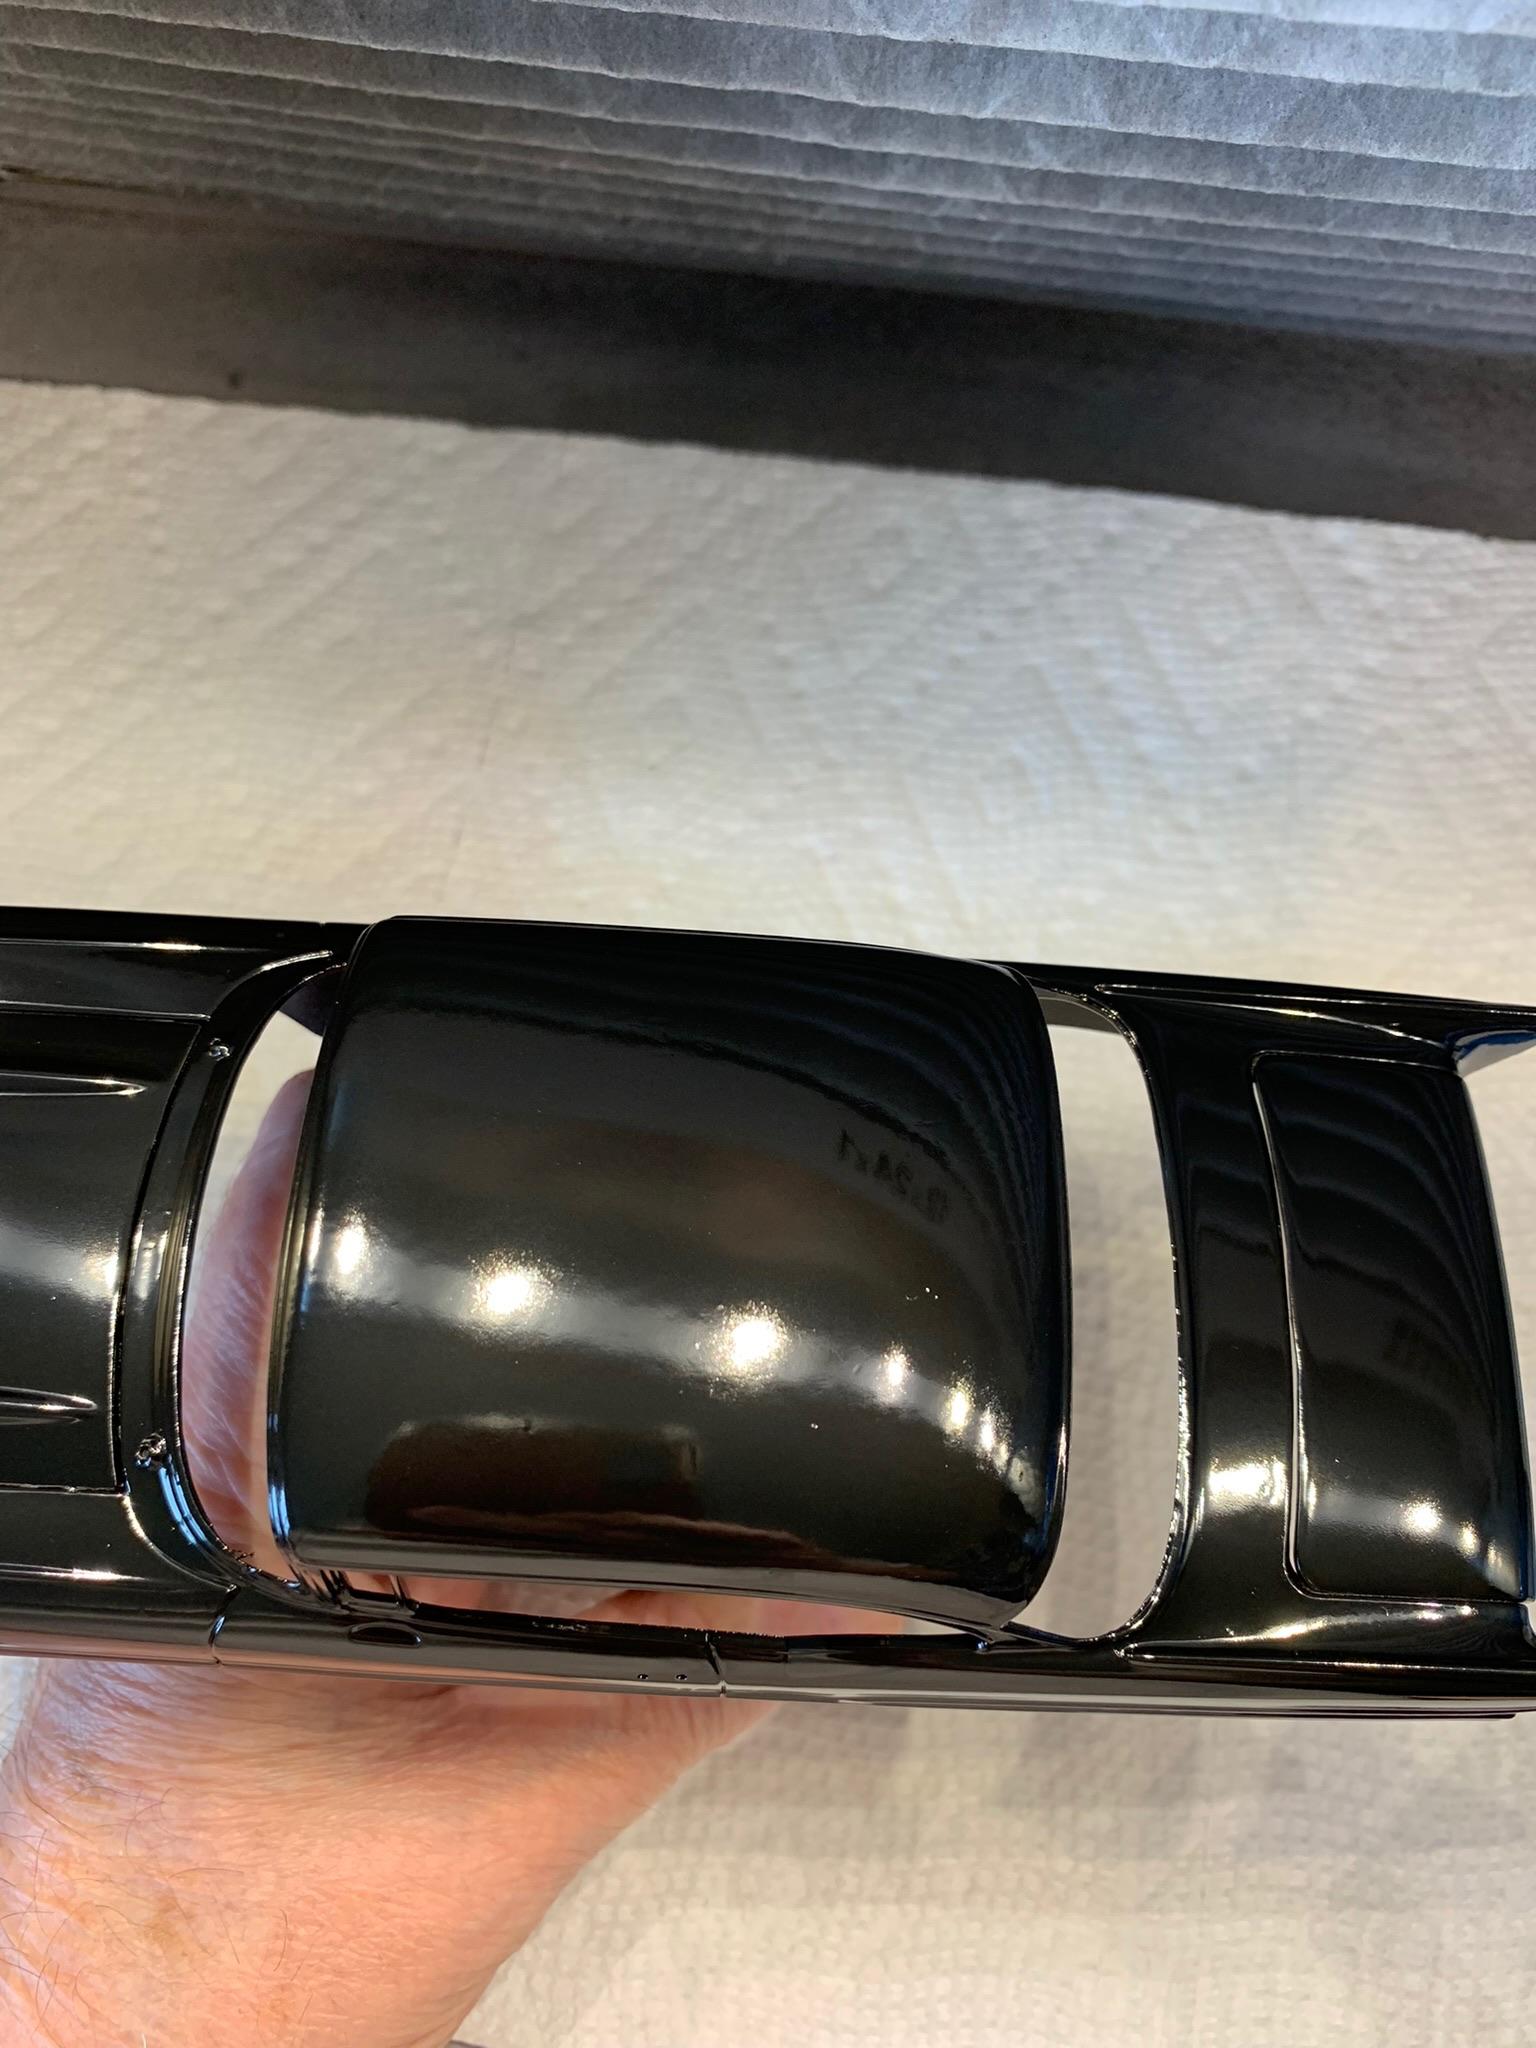
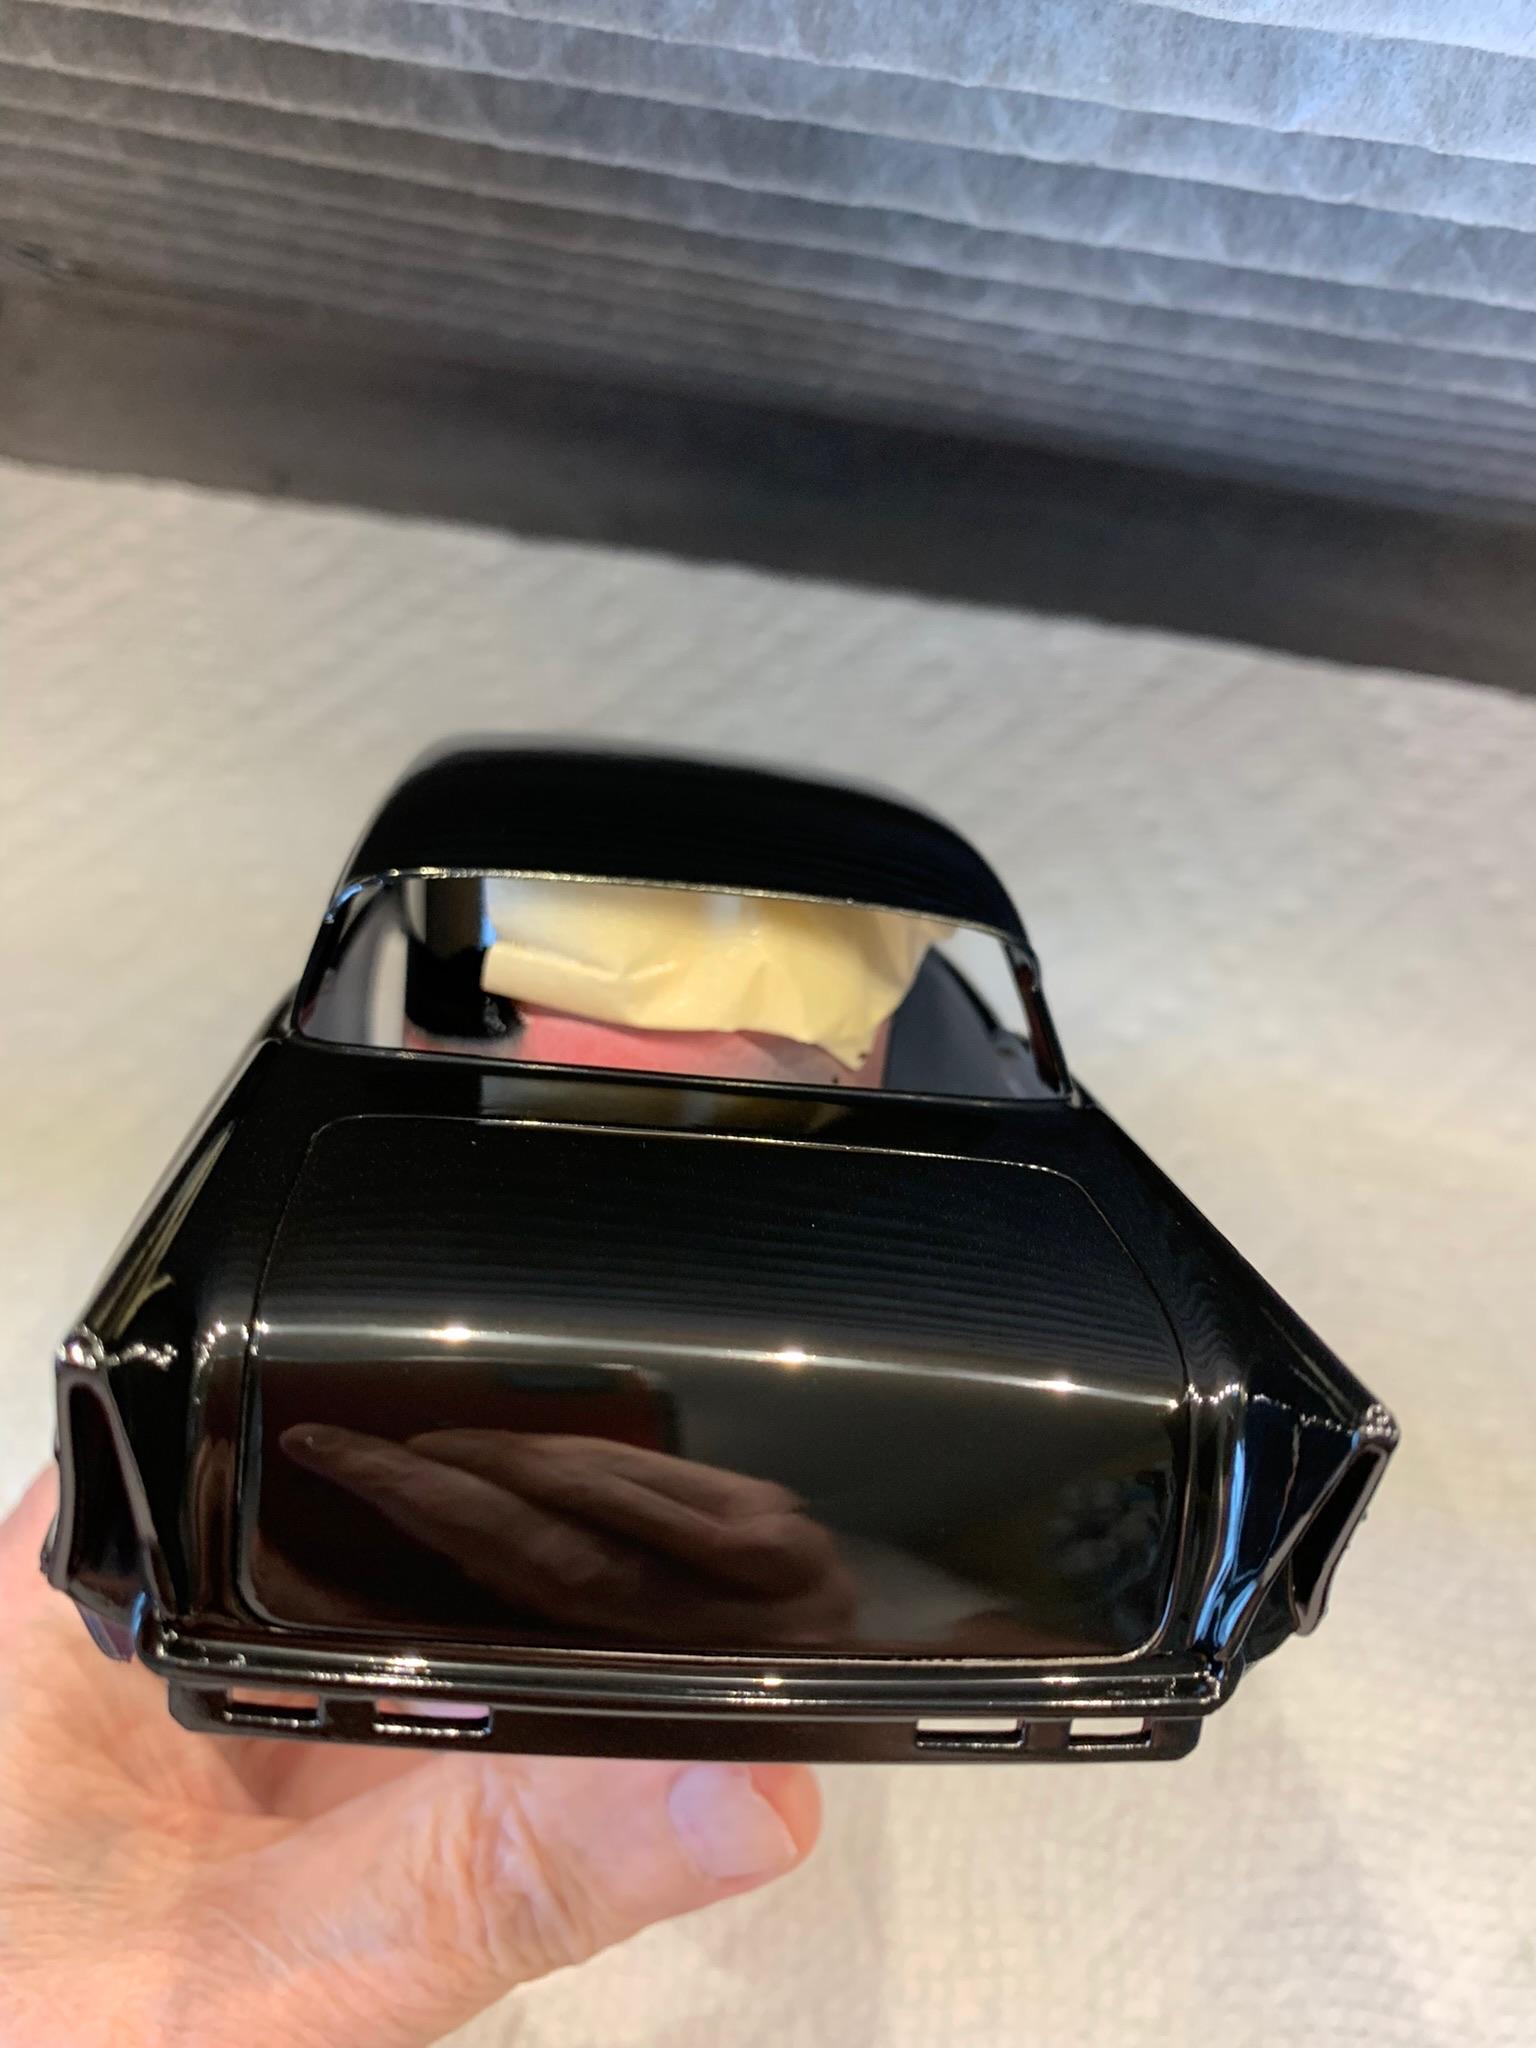
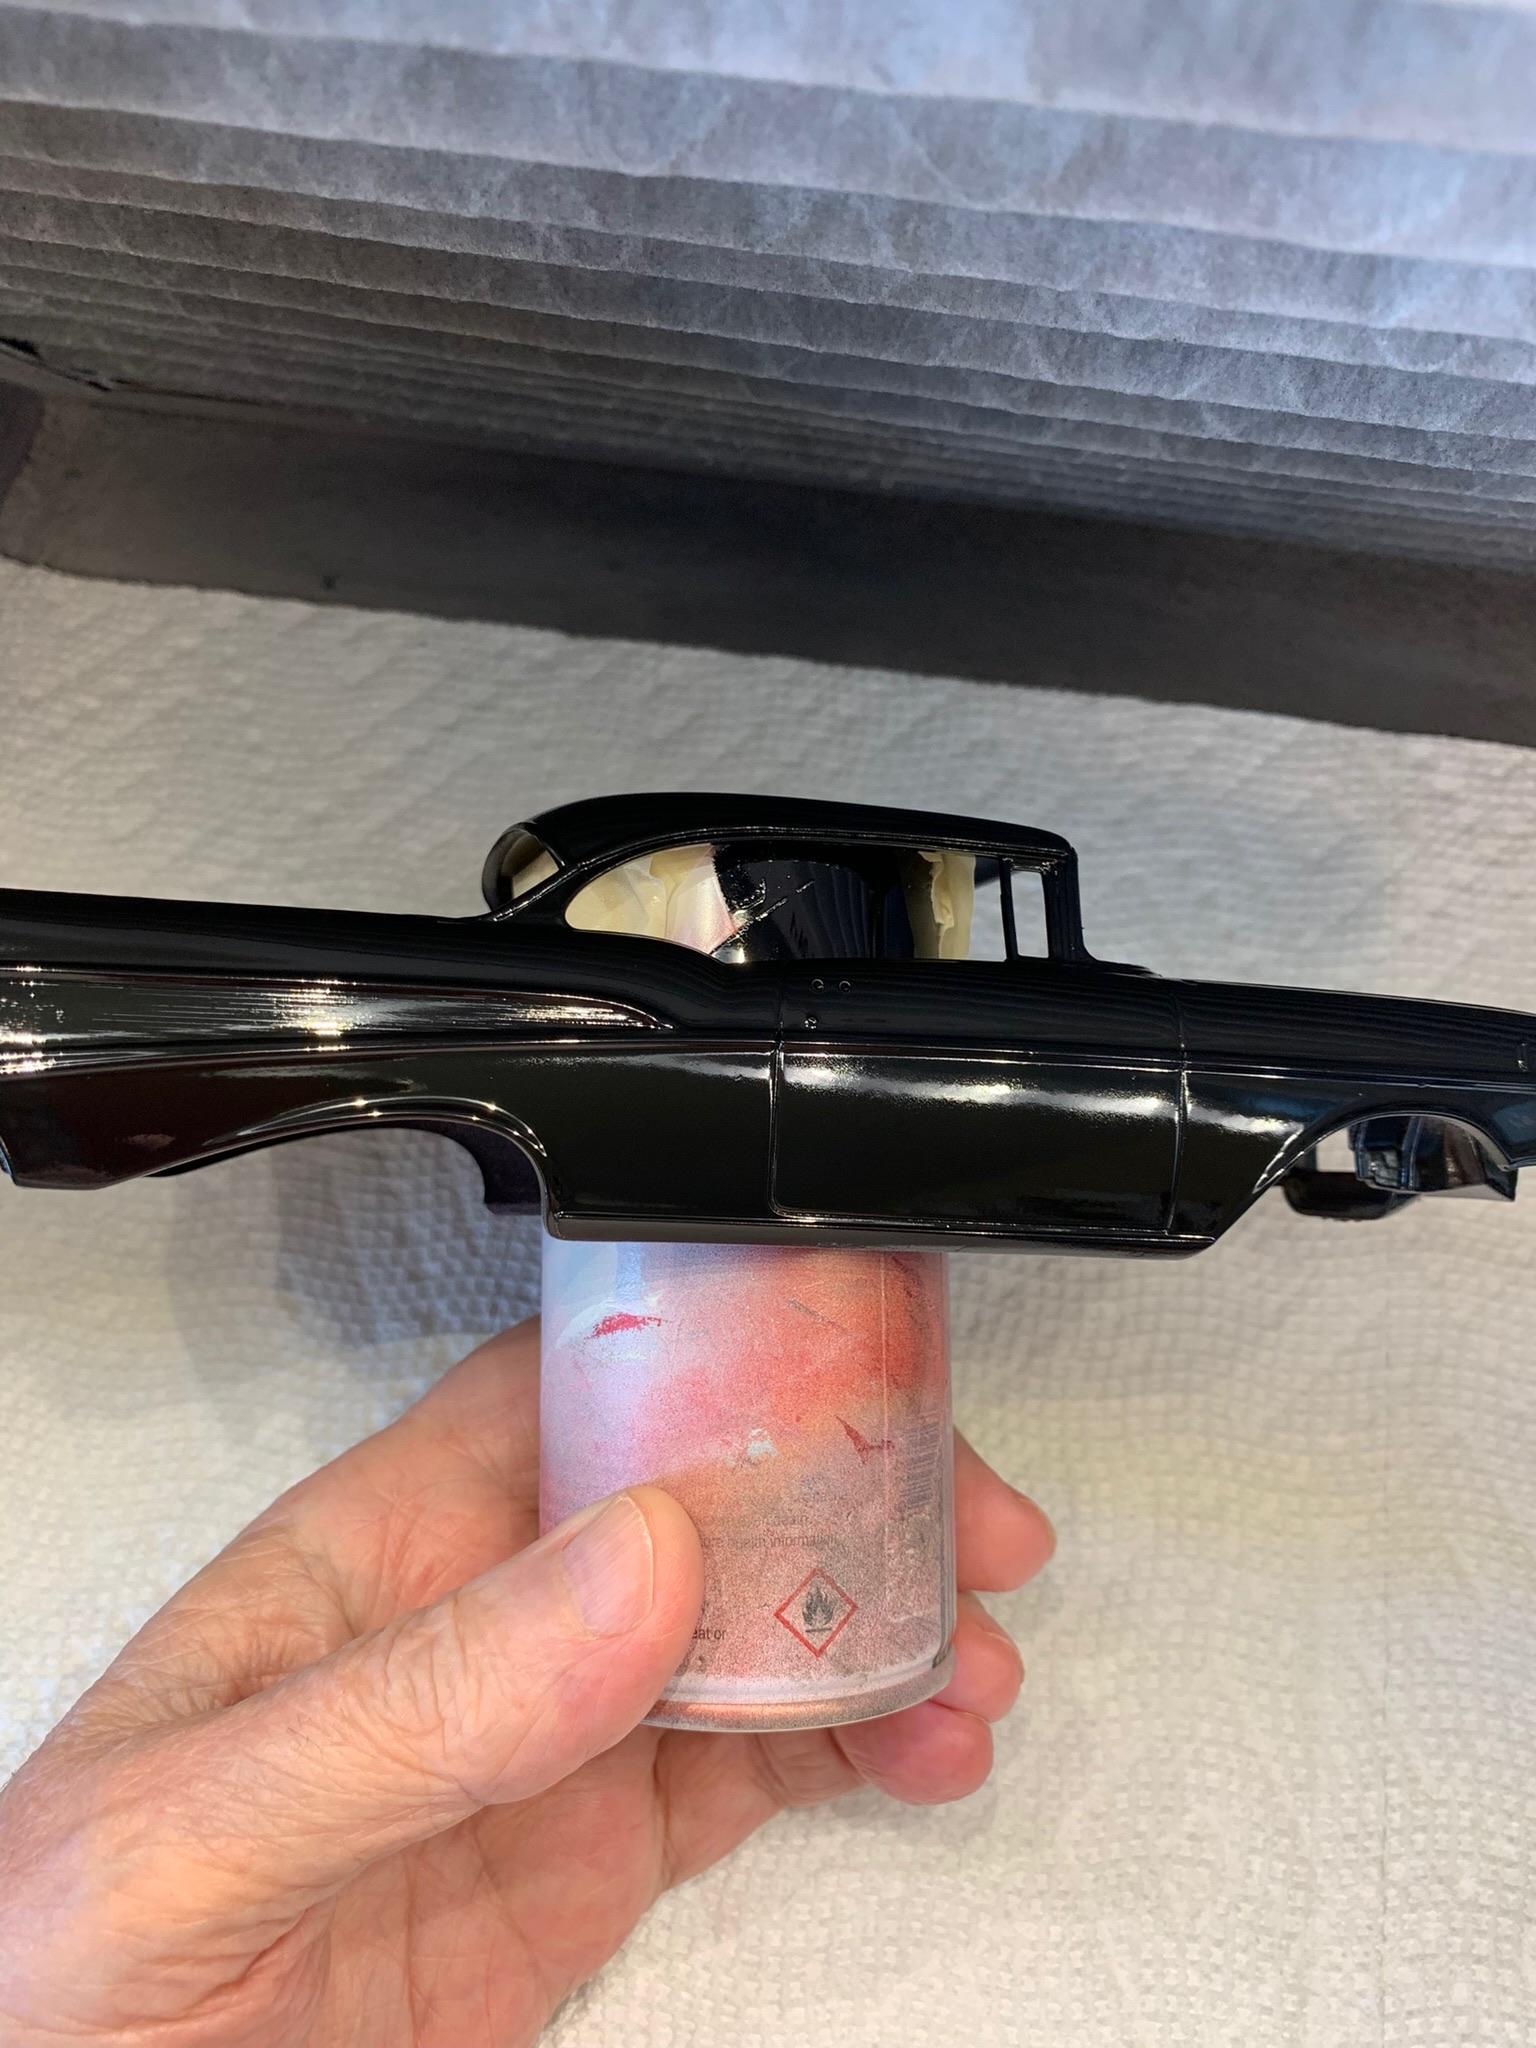
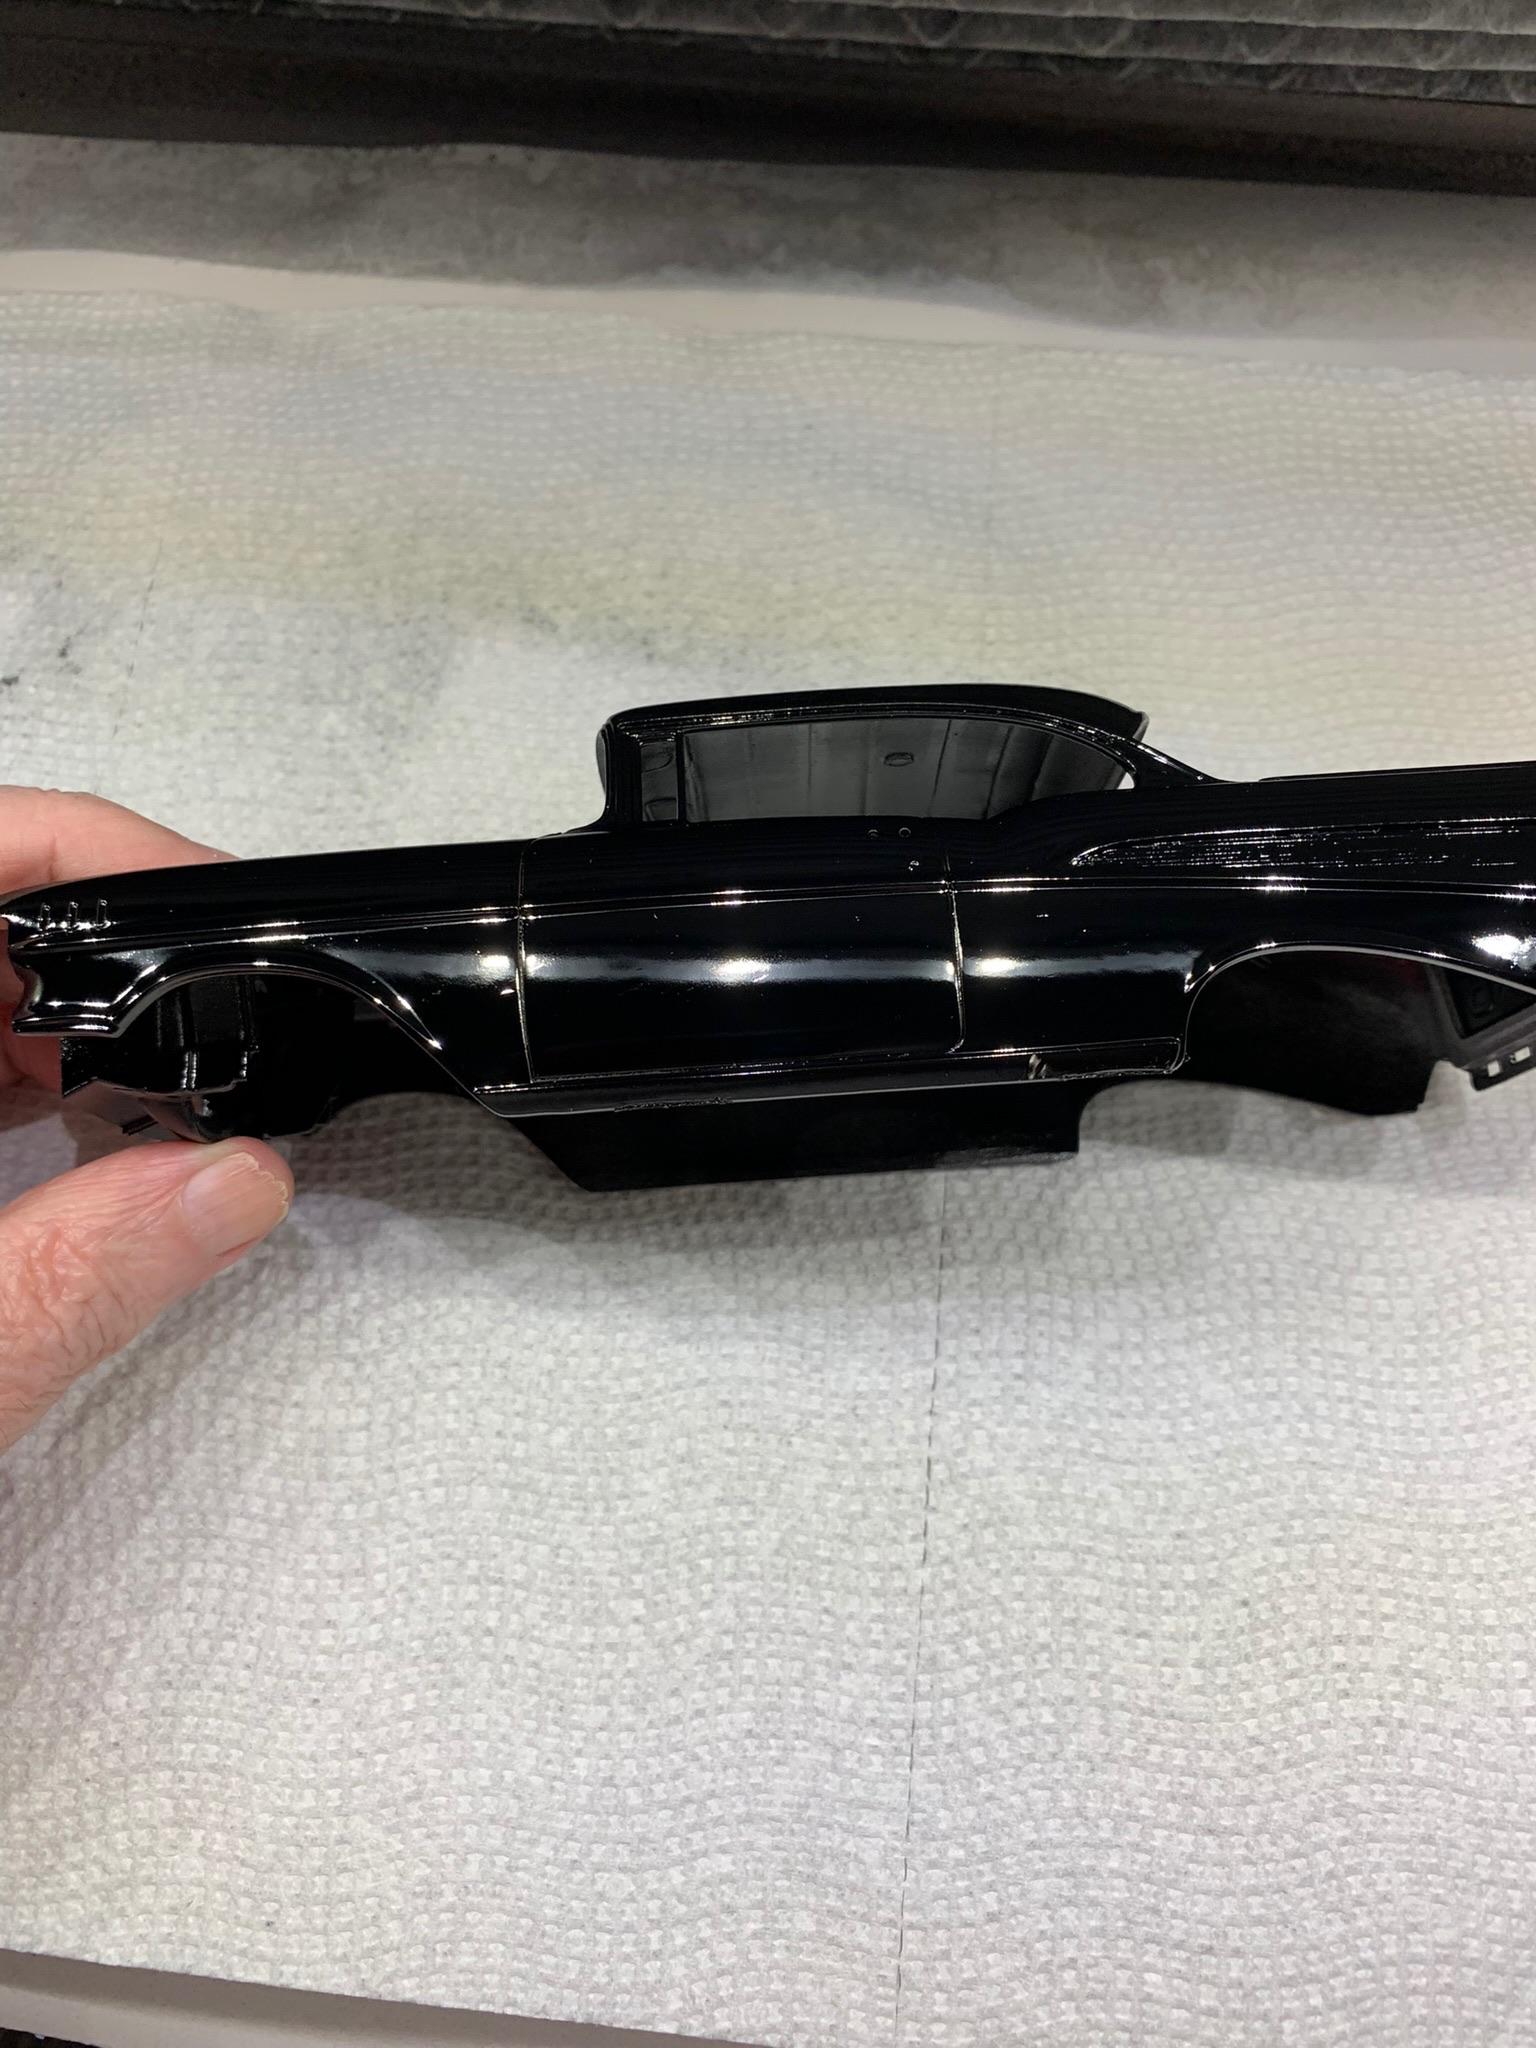
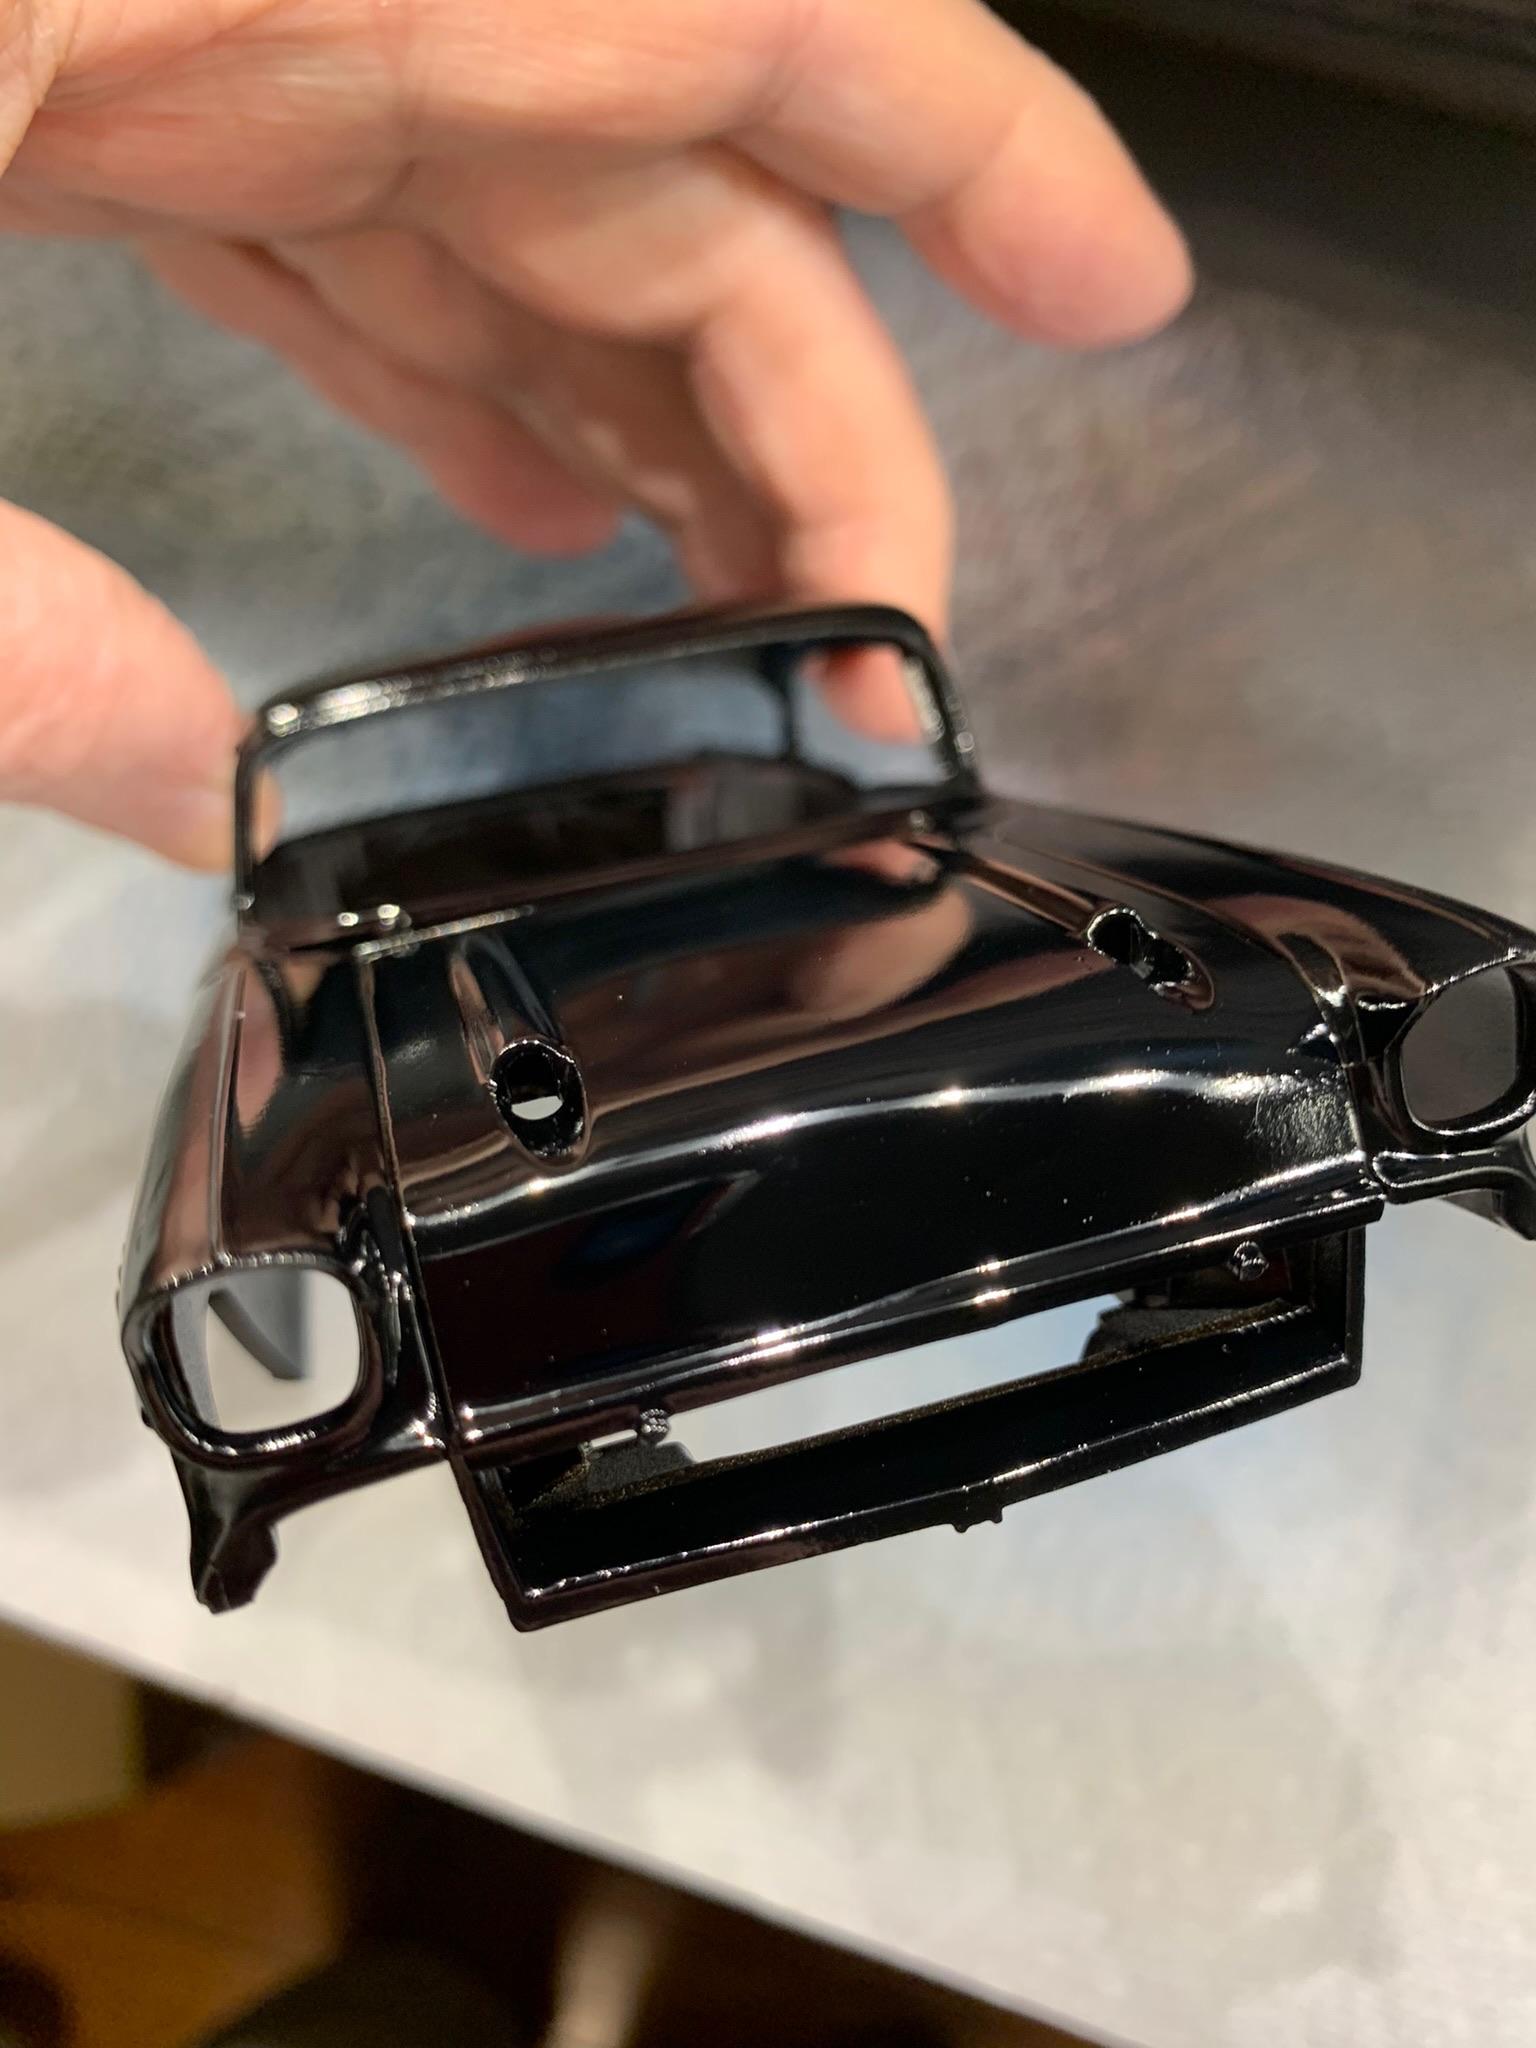
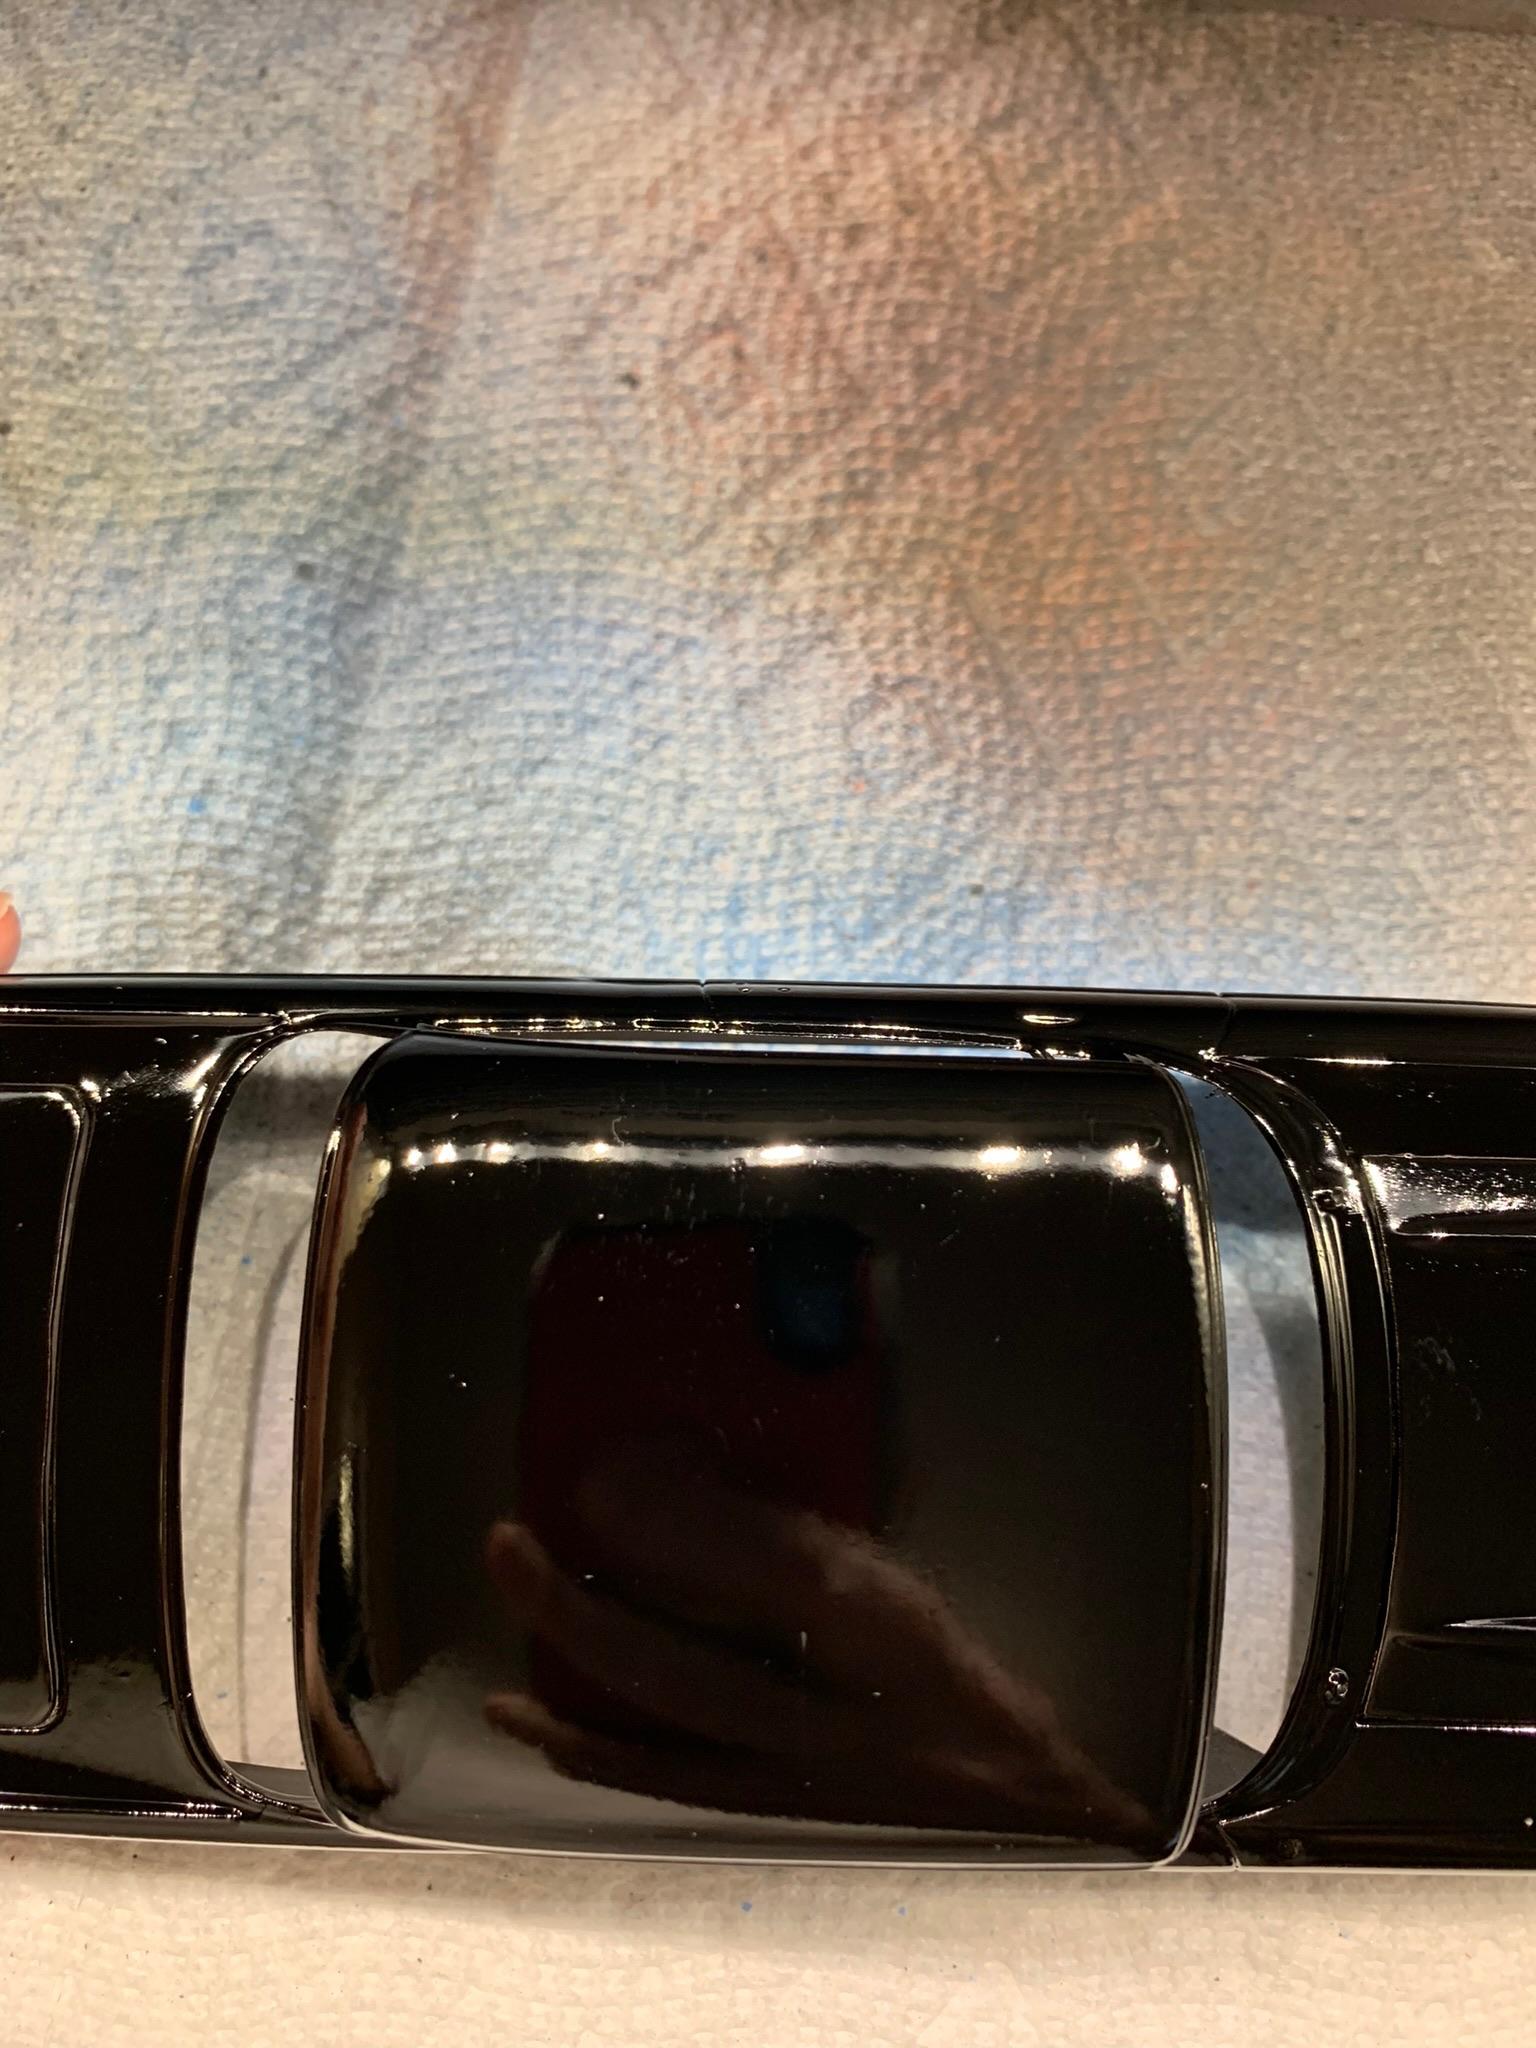
Tried out some Mr. super Clear gloss coat. Turned out ok. Buffed the top down with my t-shirt first.
-
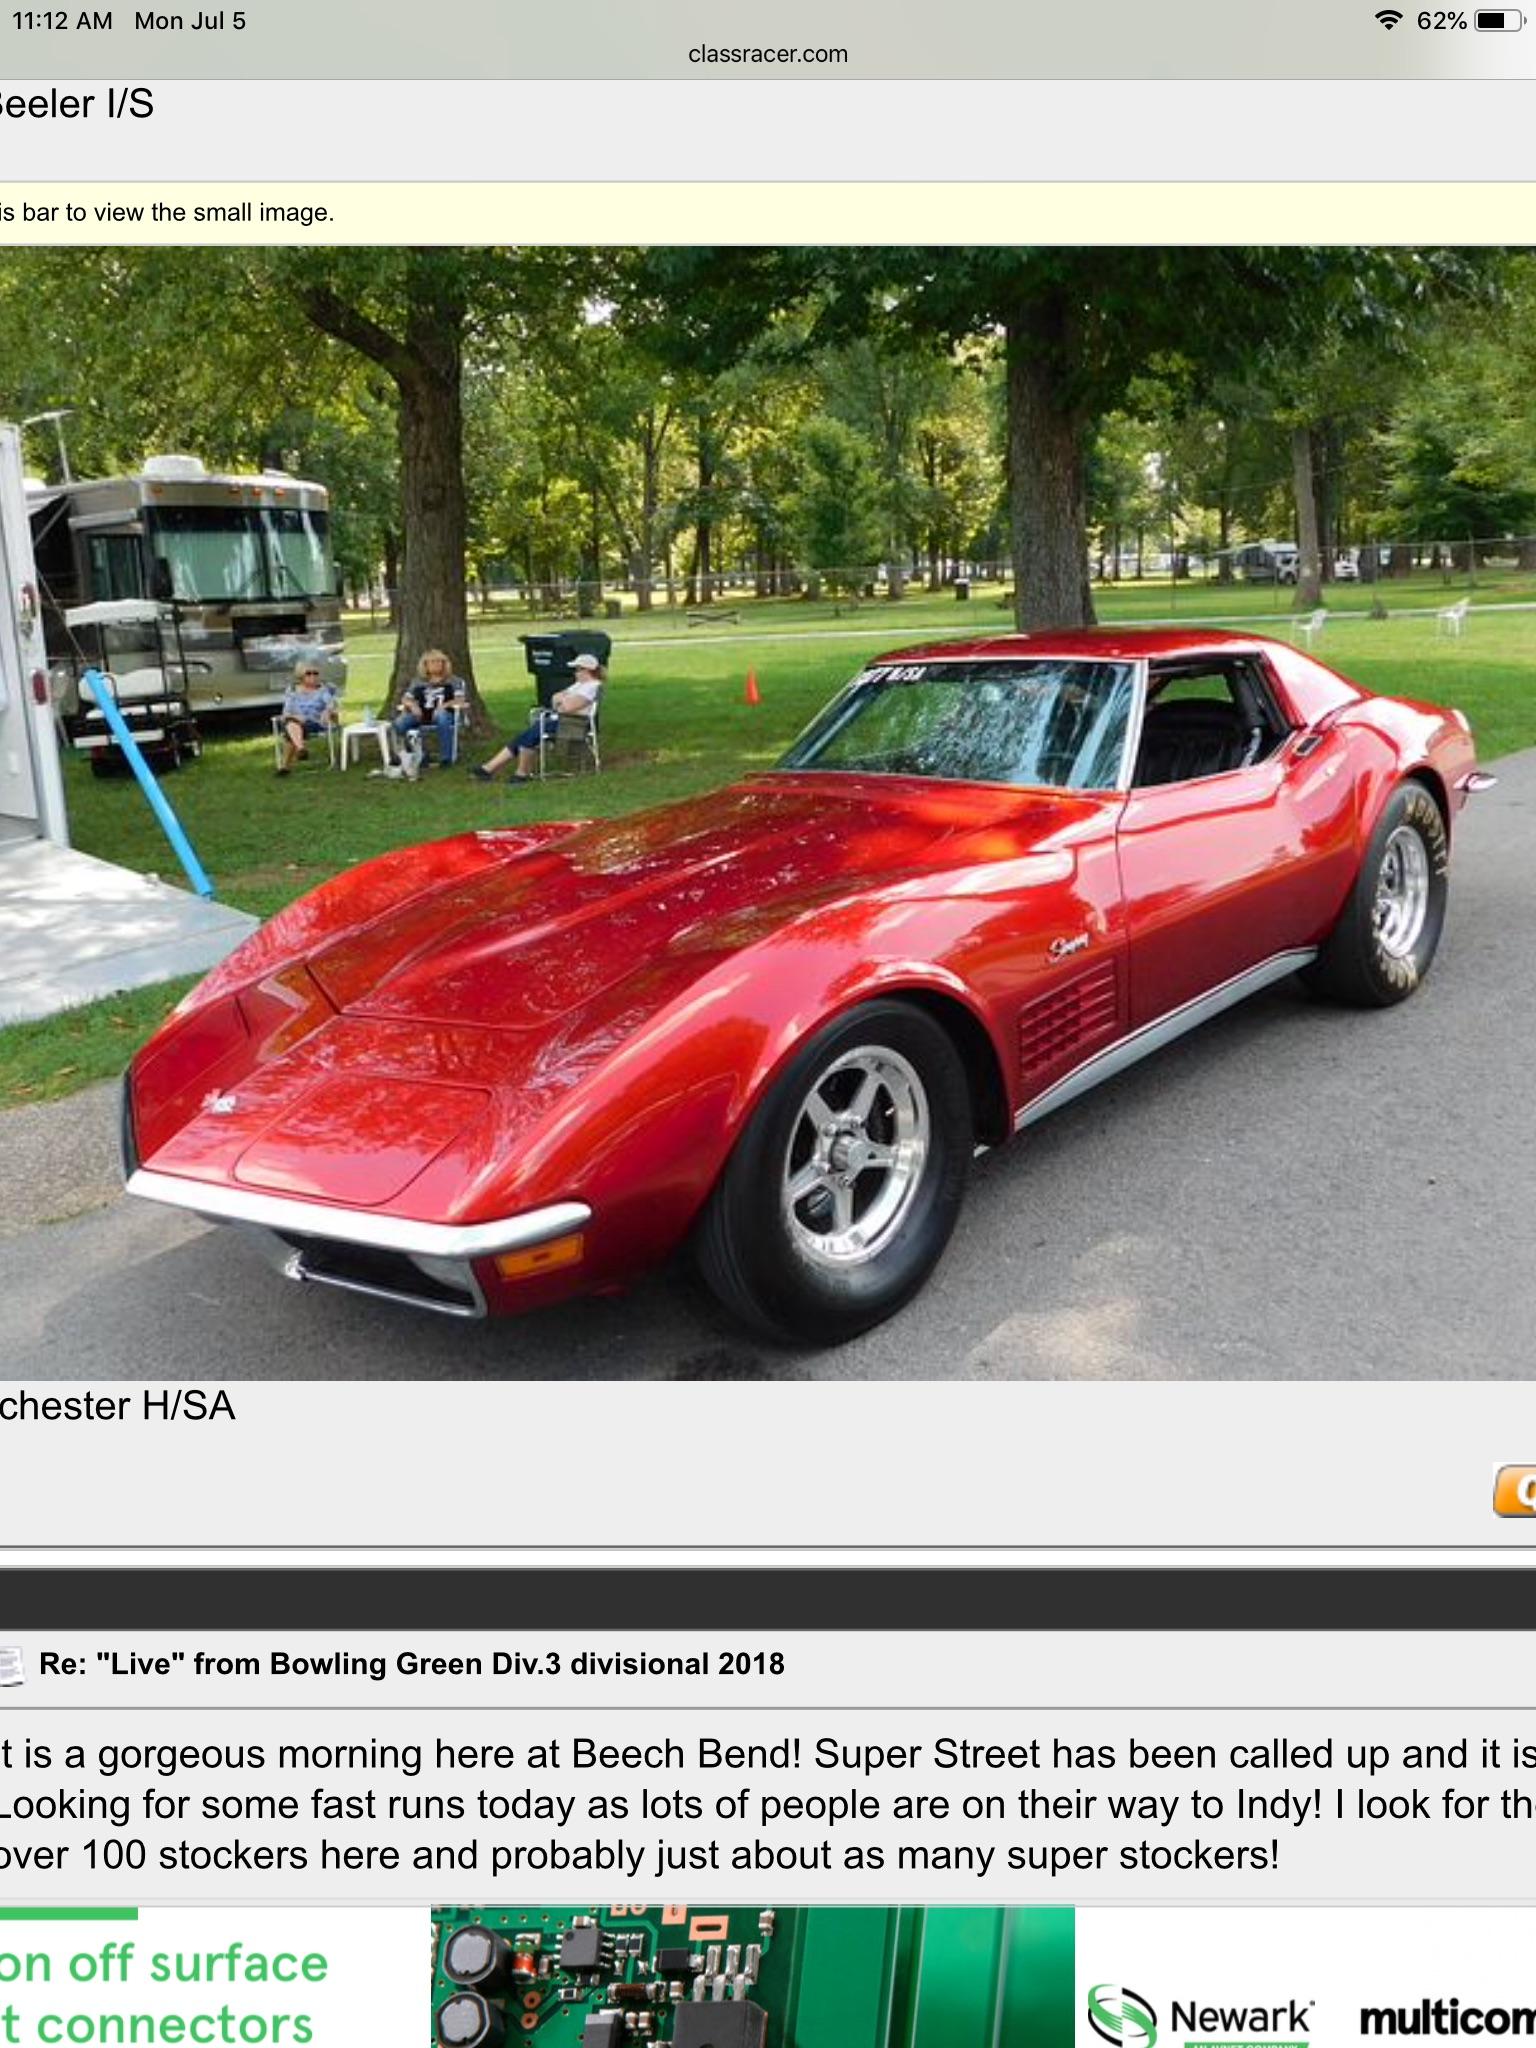
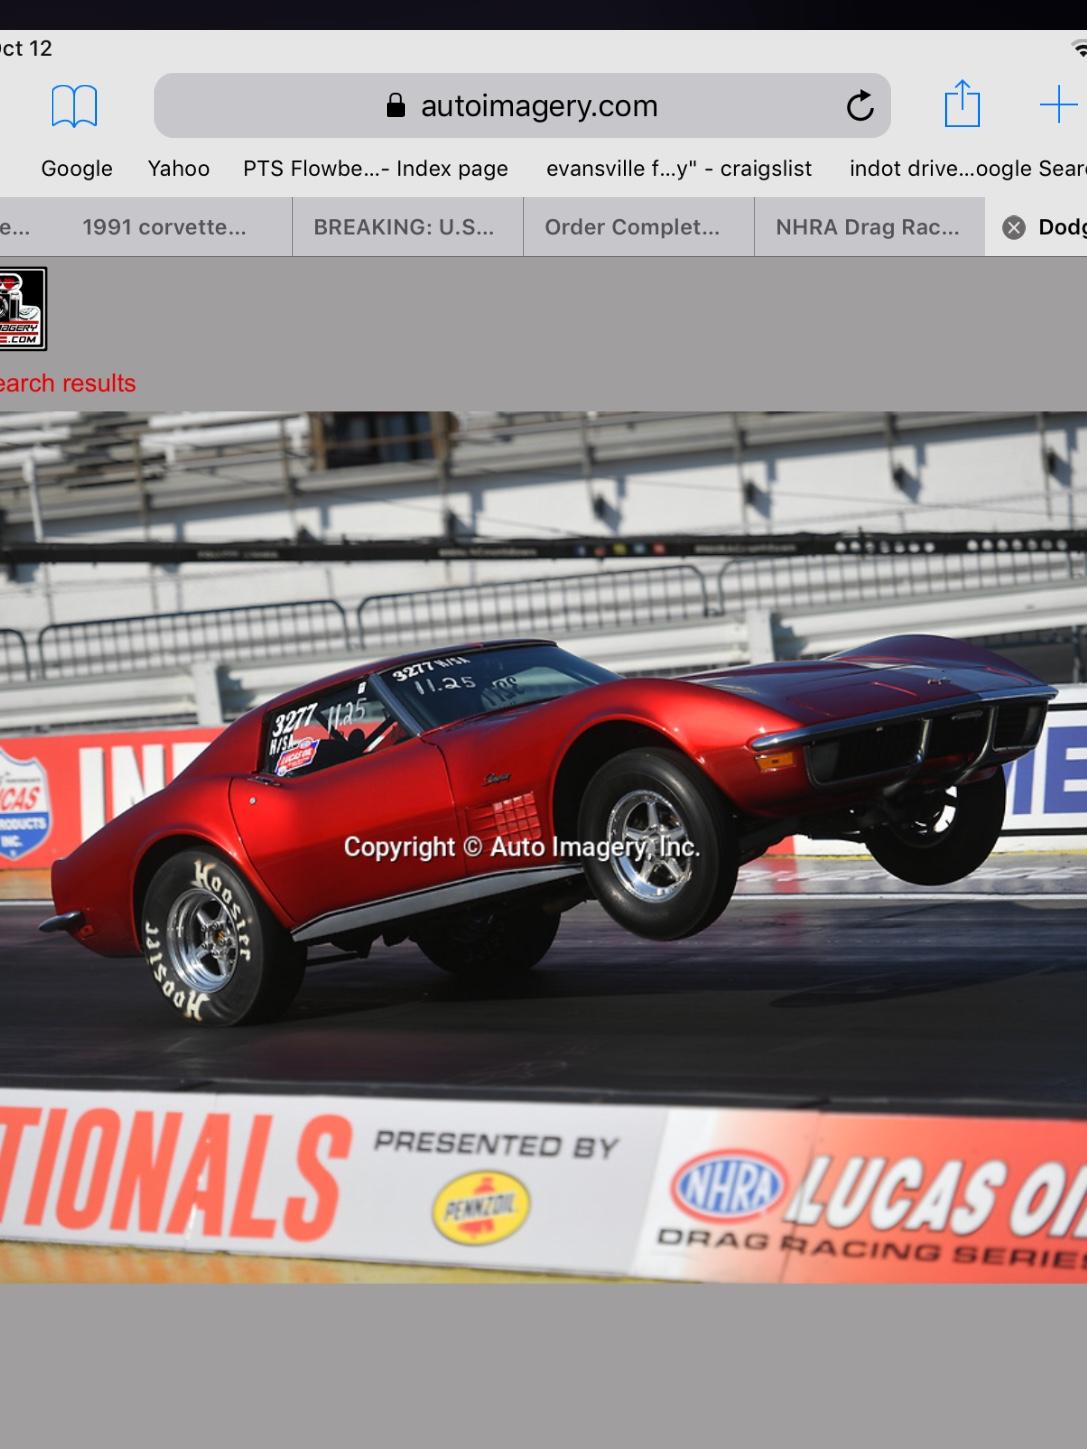
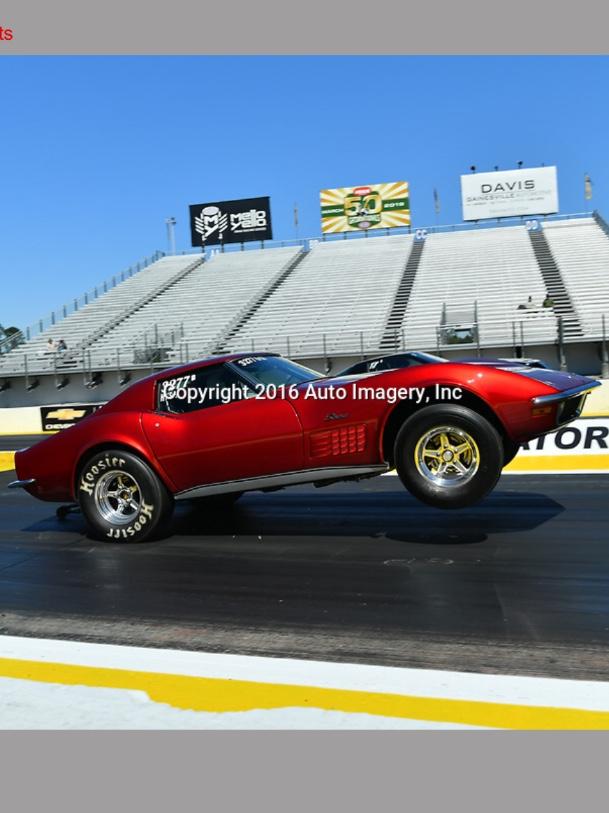
Saw this car about 10 years ago at a points meet in Bowlingreen, Ky. Thought at the time, it was one of the prettiest stockers there. This build is covered in my WIP post. Learned something about molds and casting parts. This is the kit I used. Overall, a fun build.
-
1969 Camaro A/SA (possibly Thomas Arnett’s)
R. Thorne replied to R. Thorne's topic in WIP: Drag Racing Models
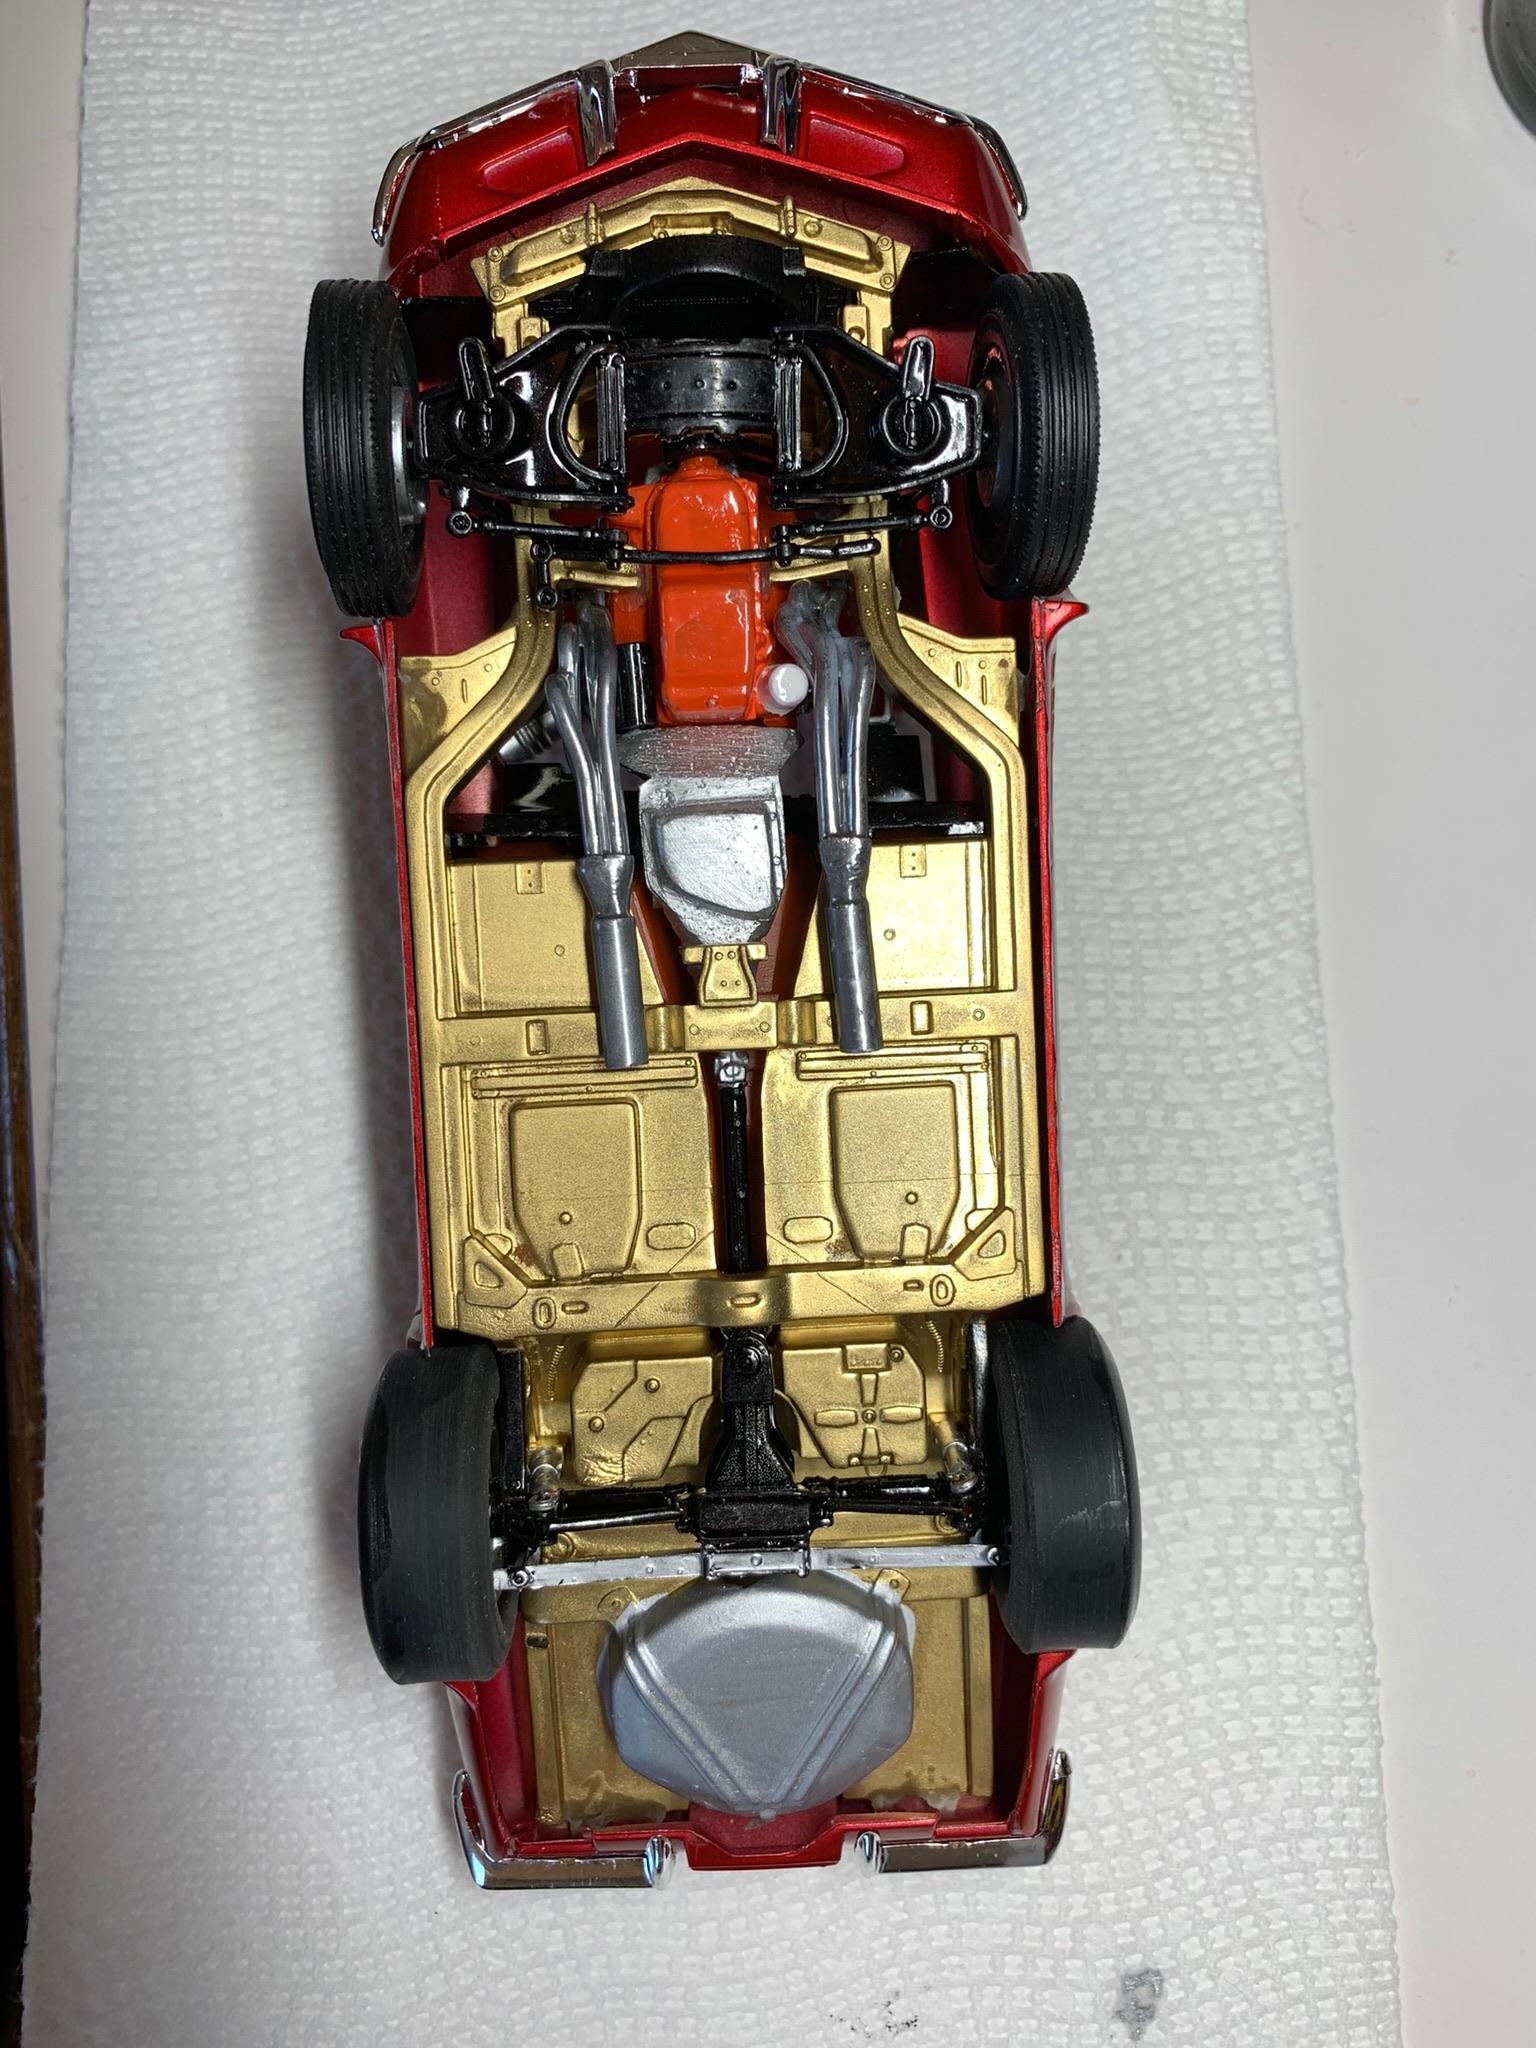
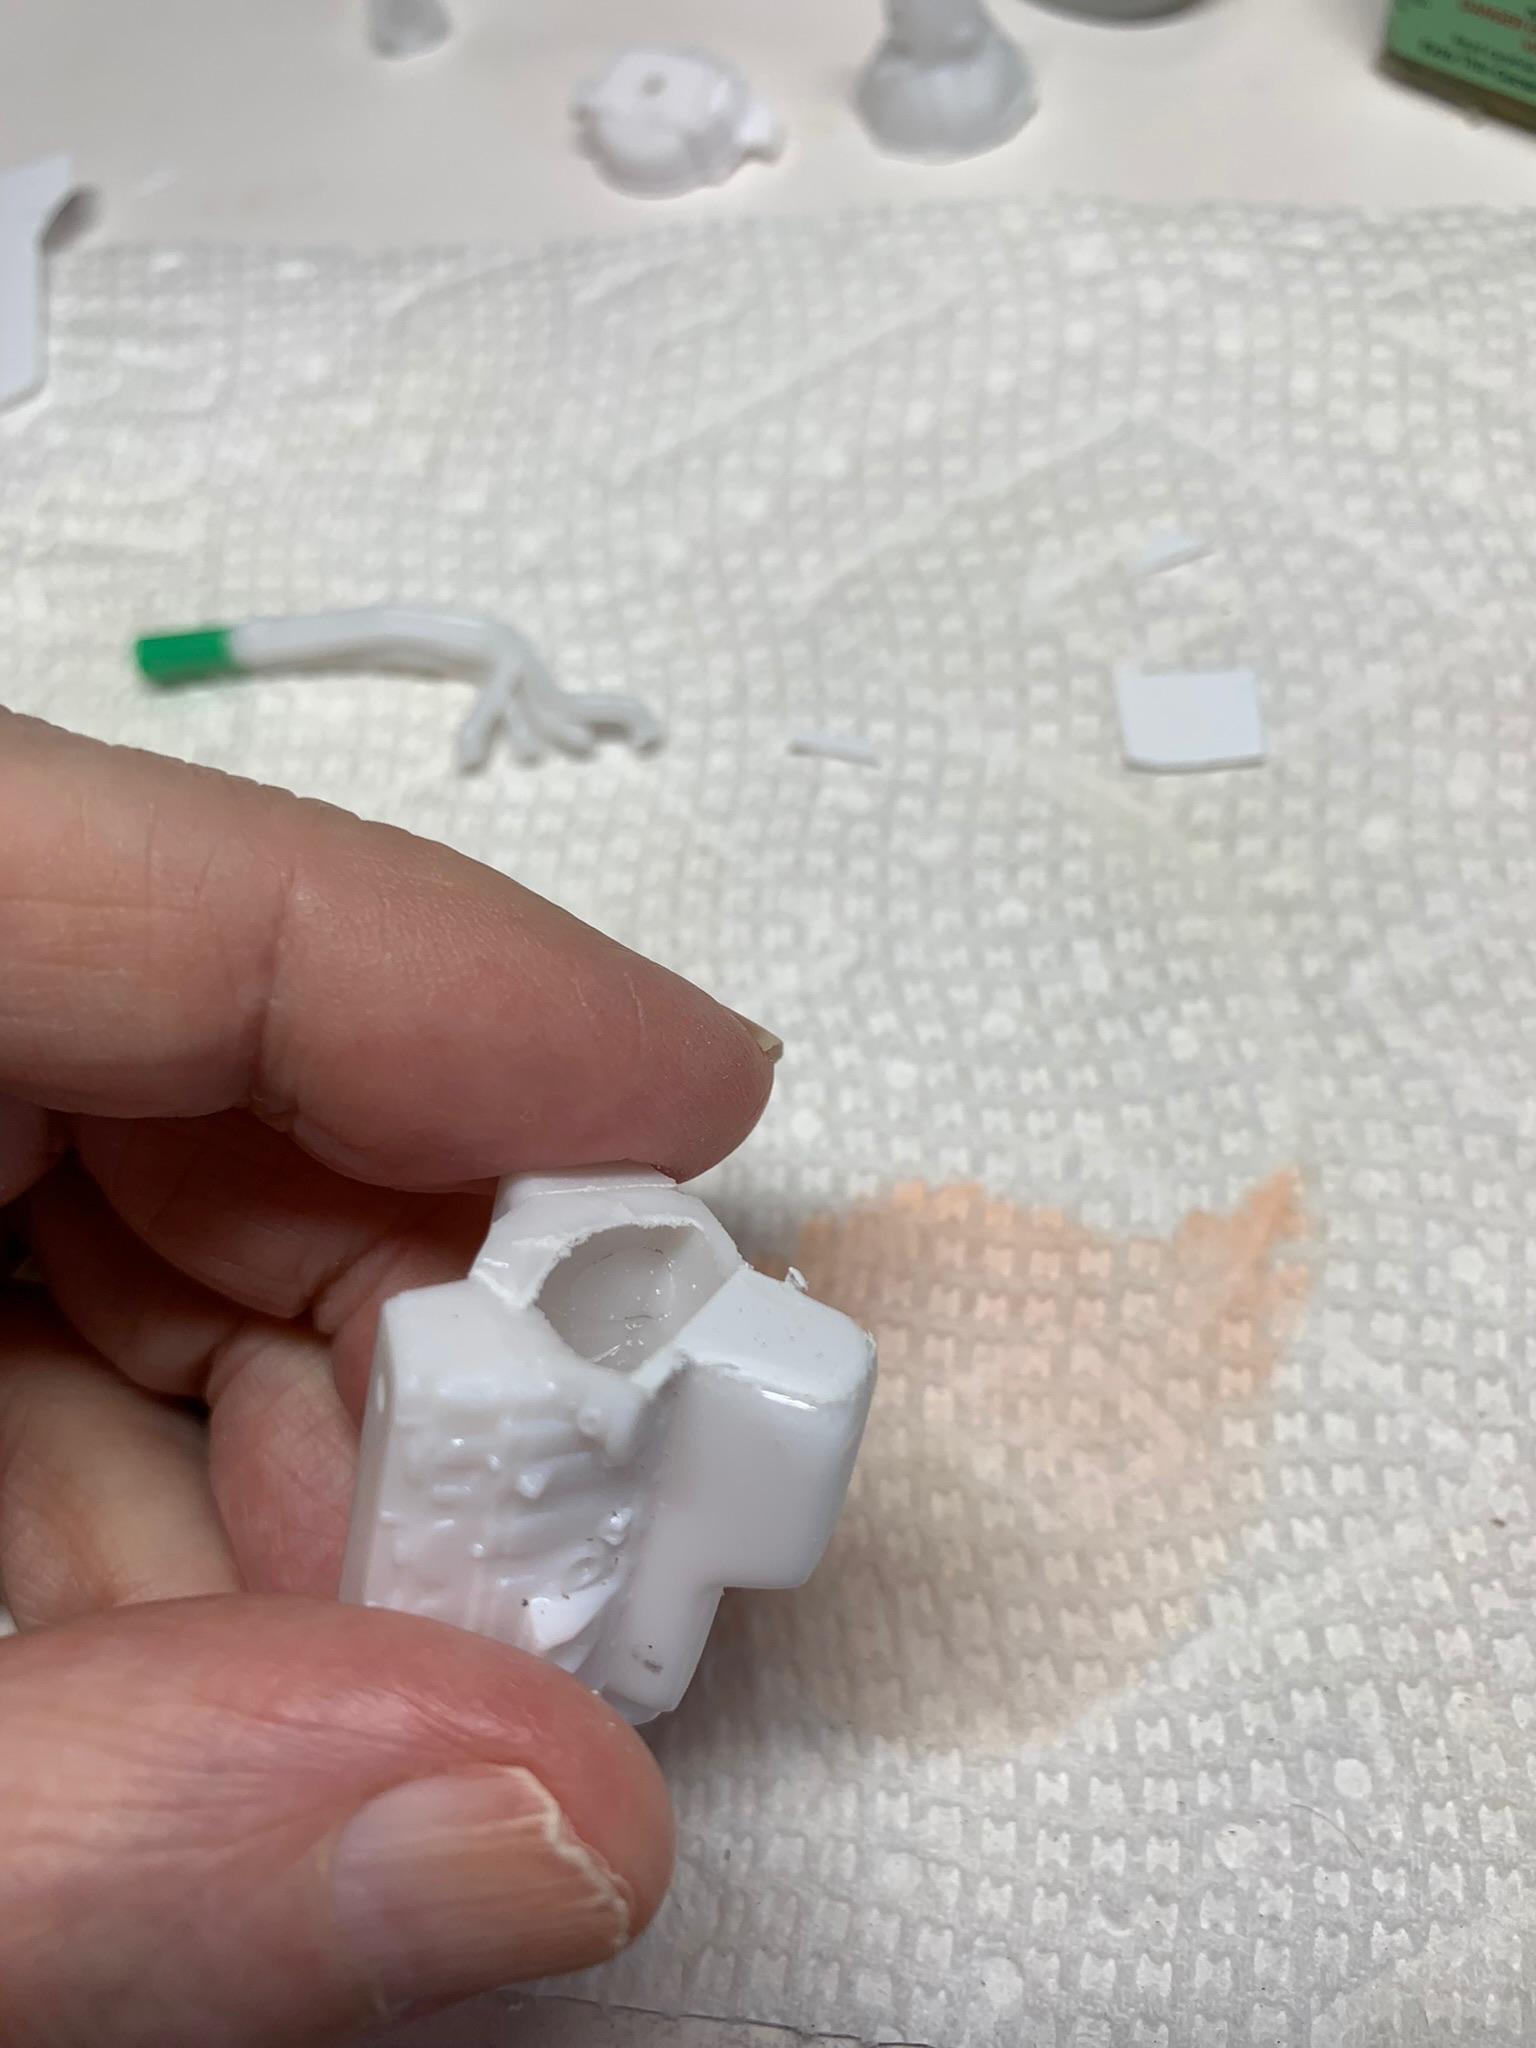
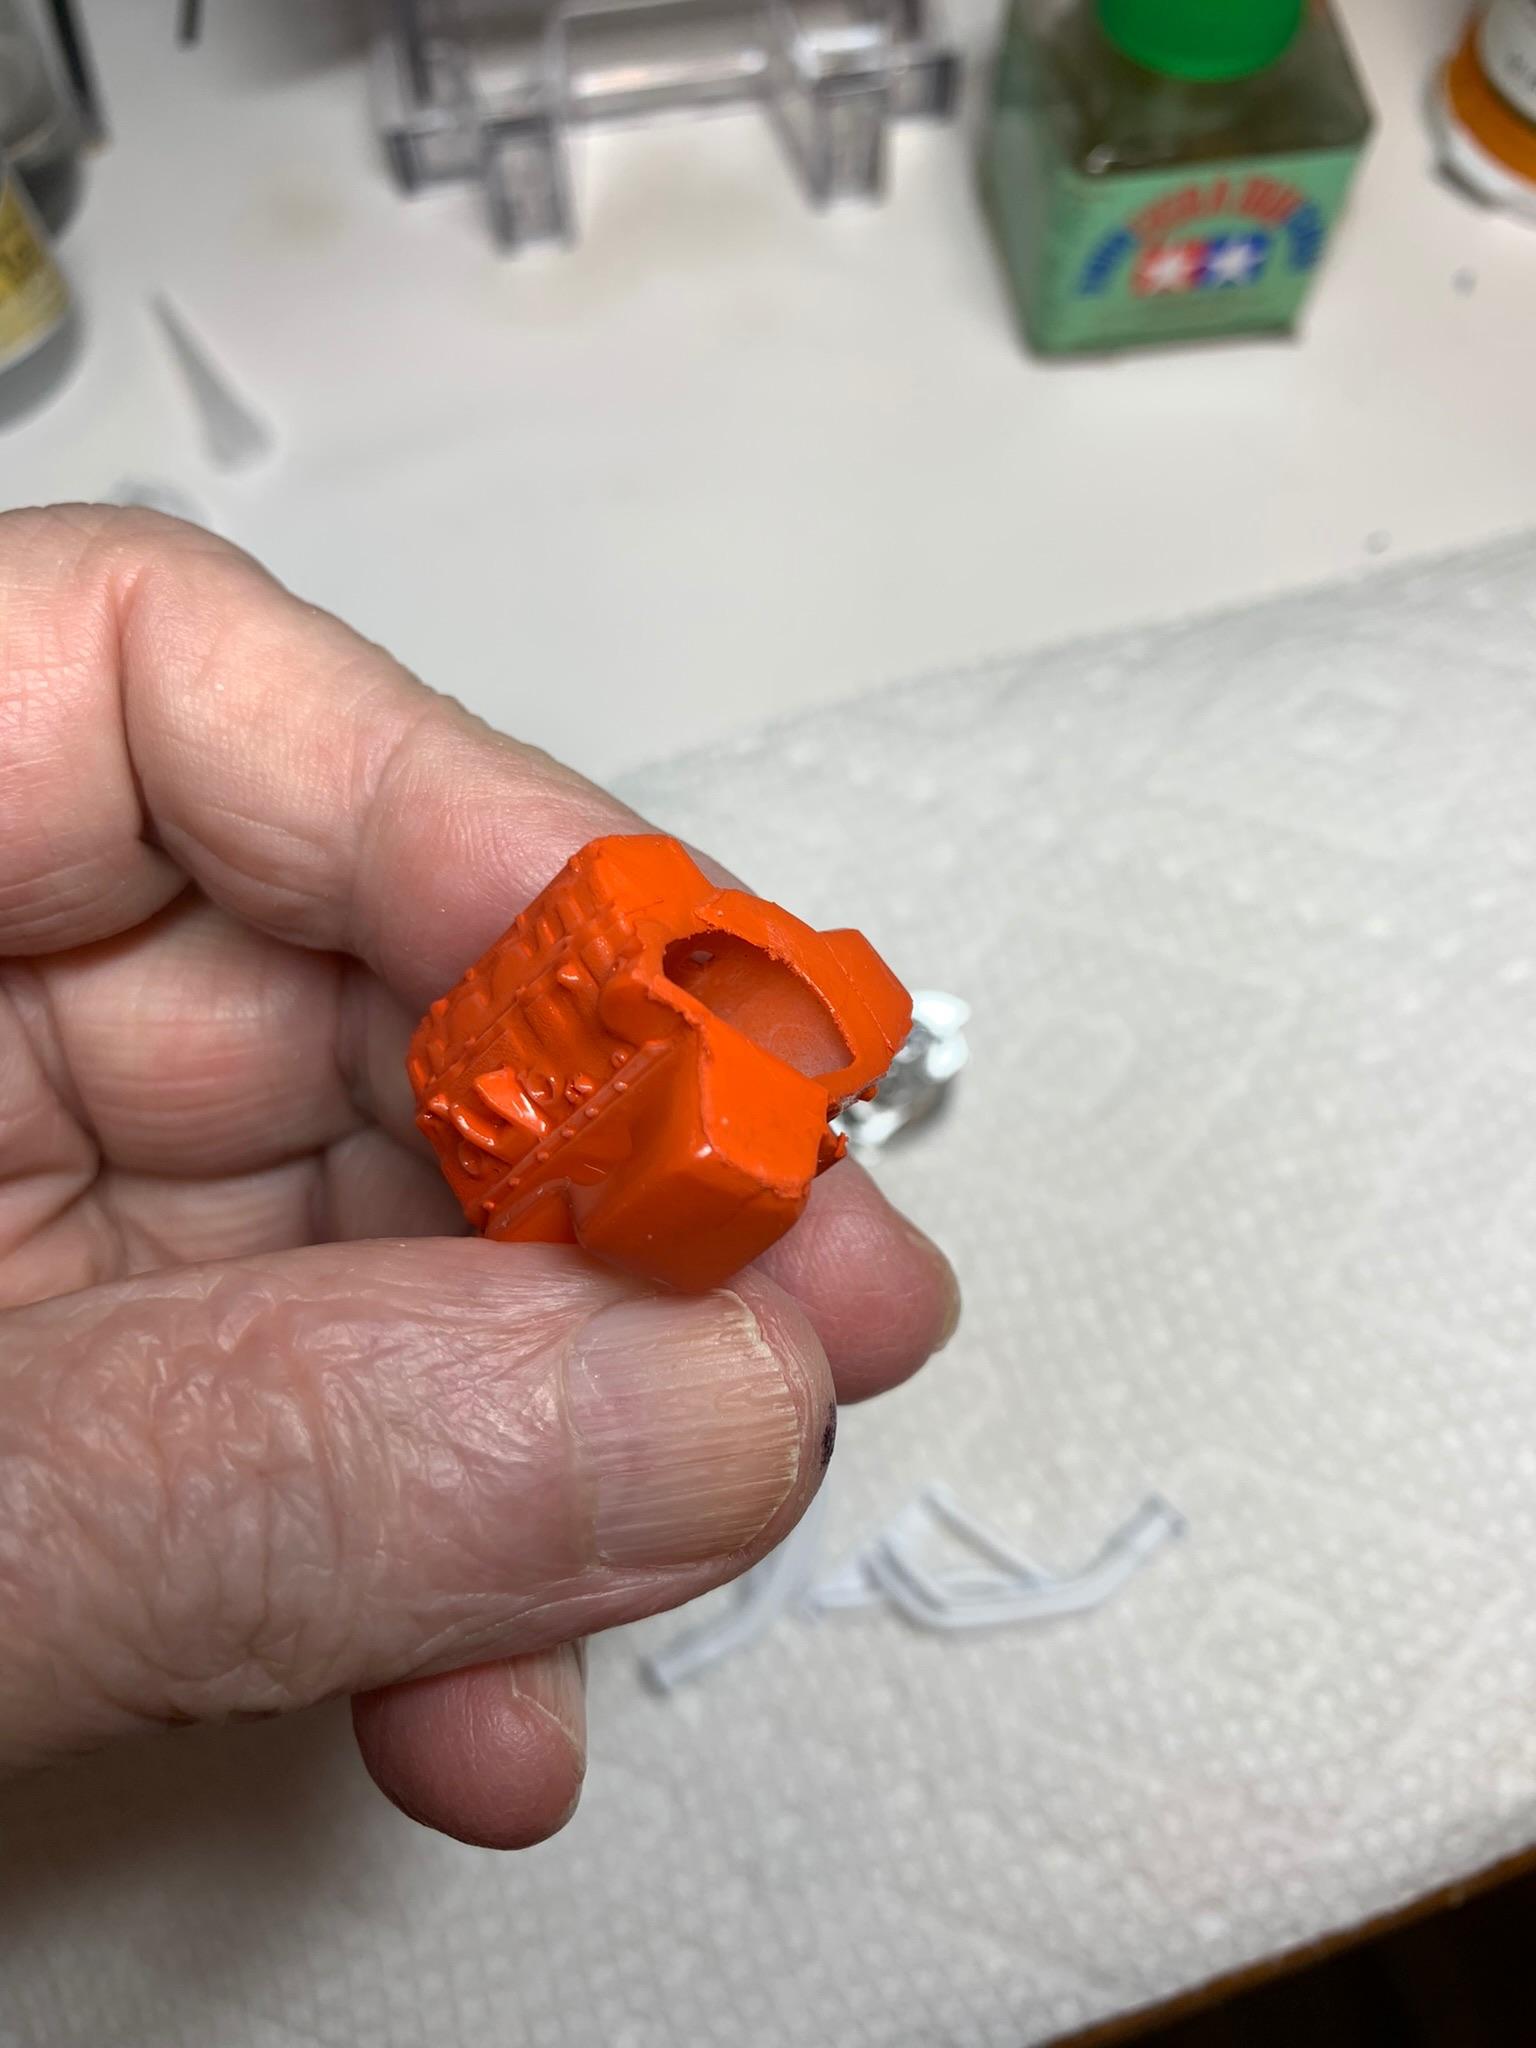
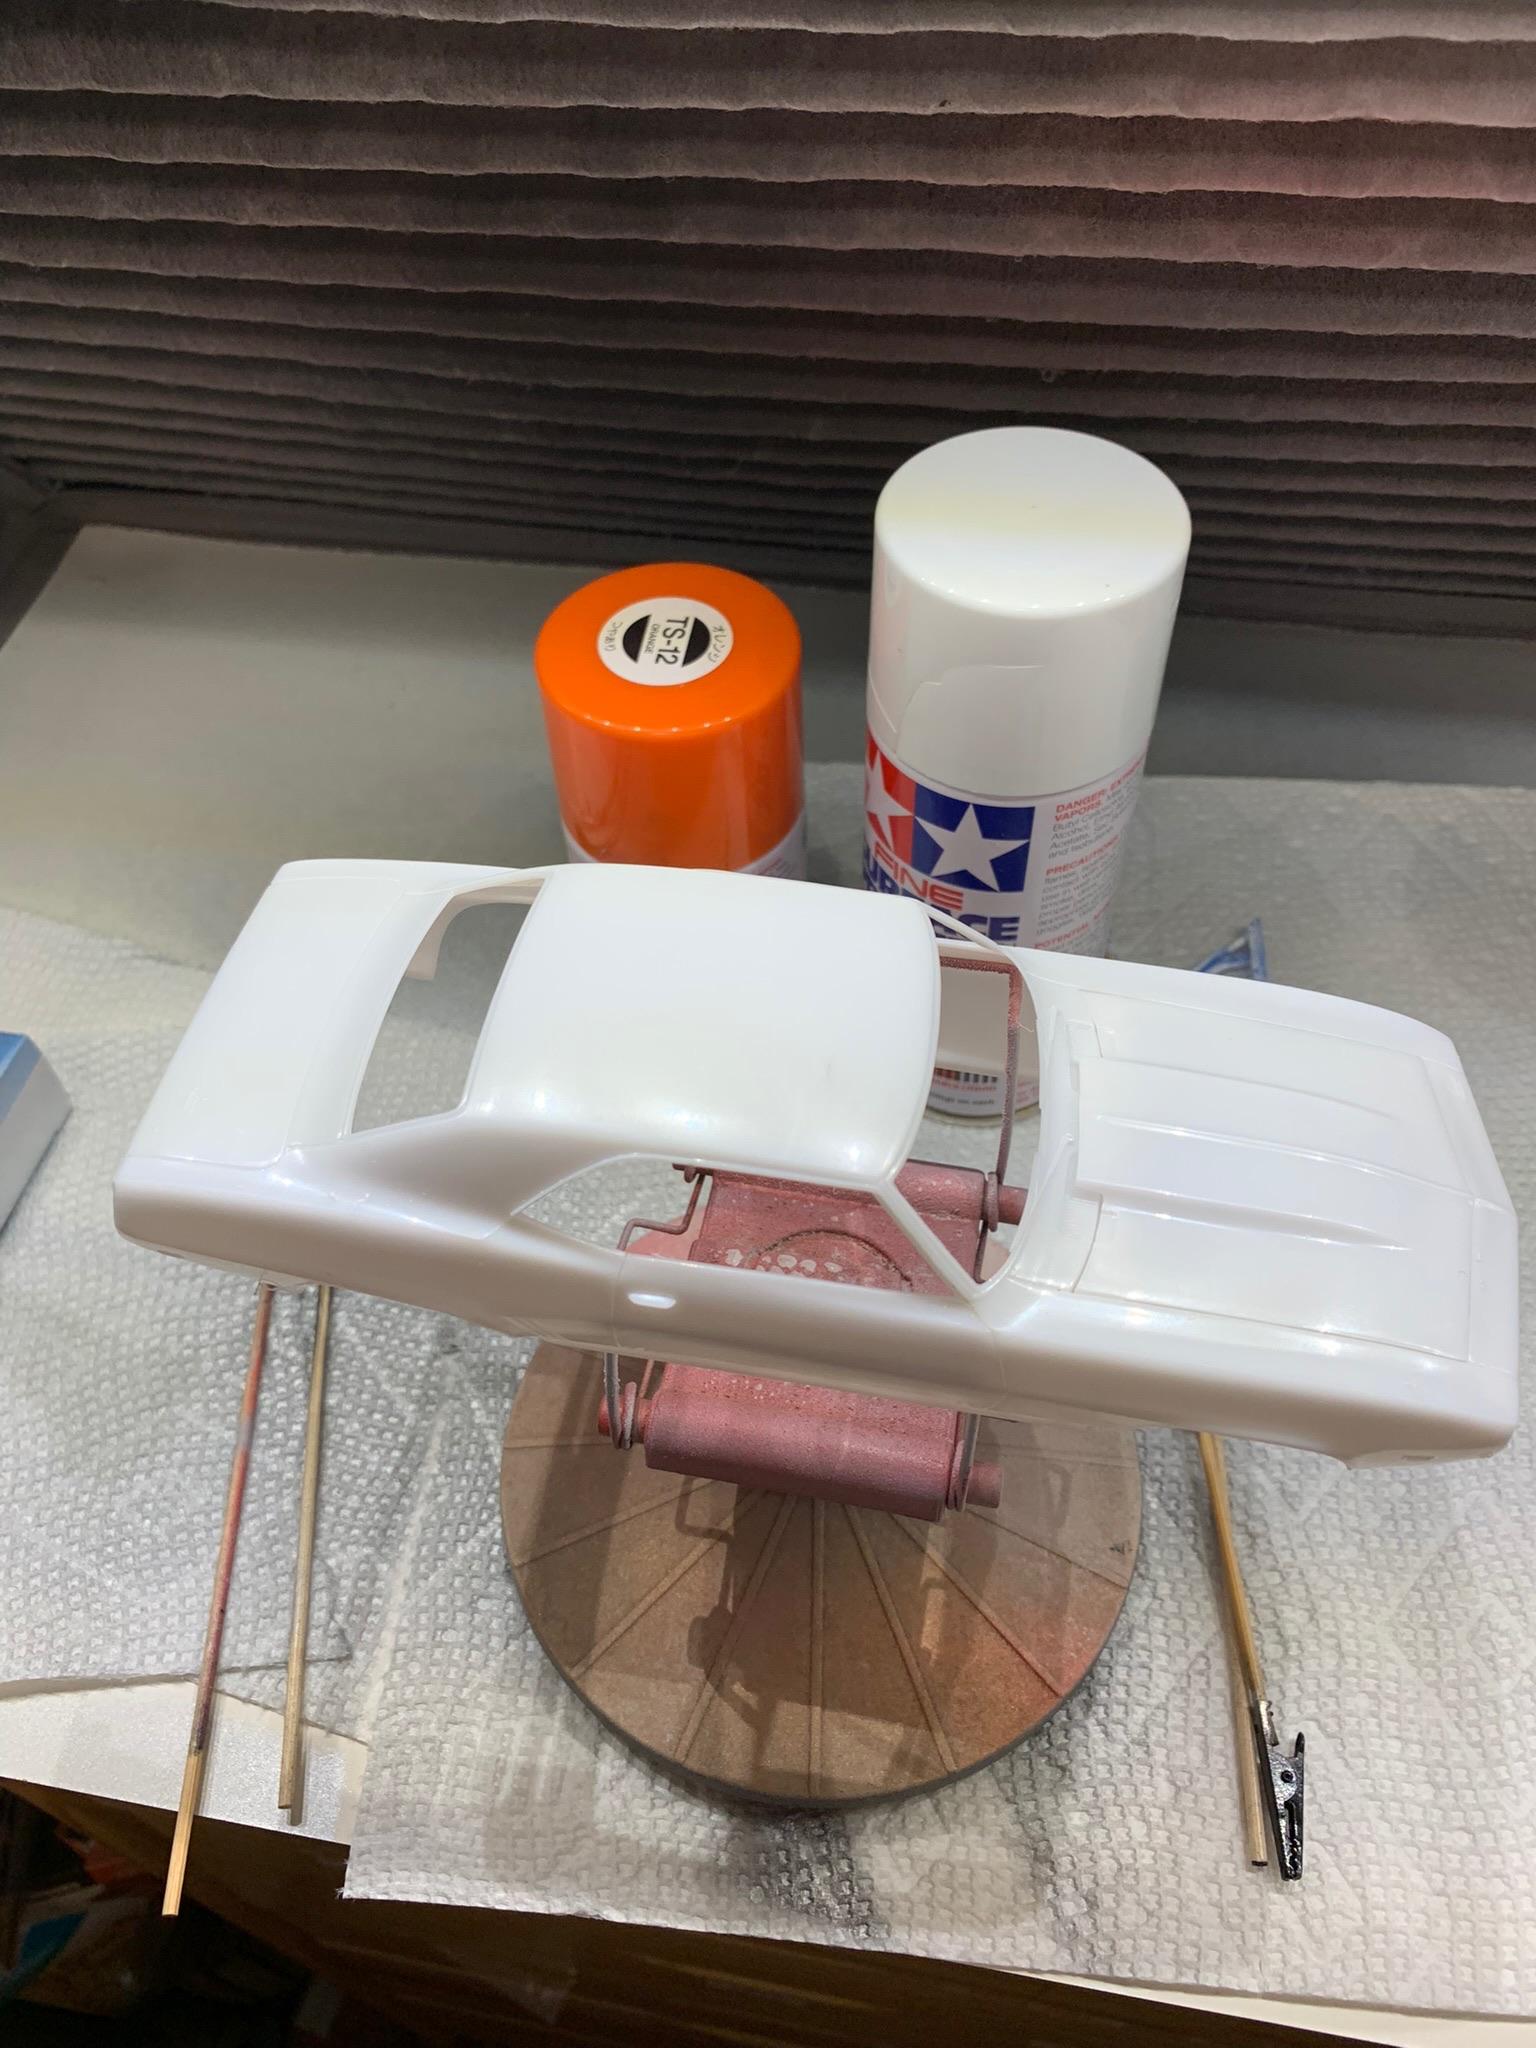
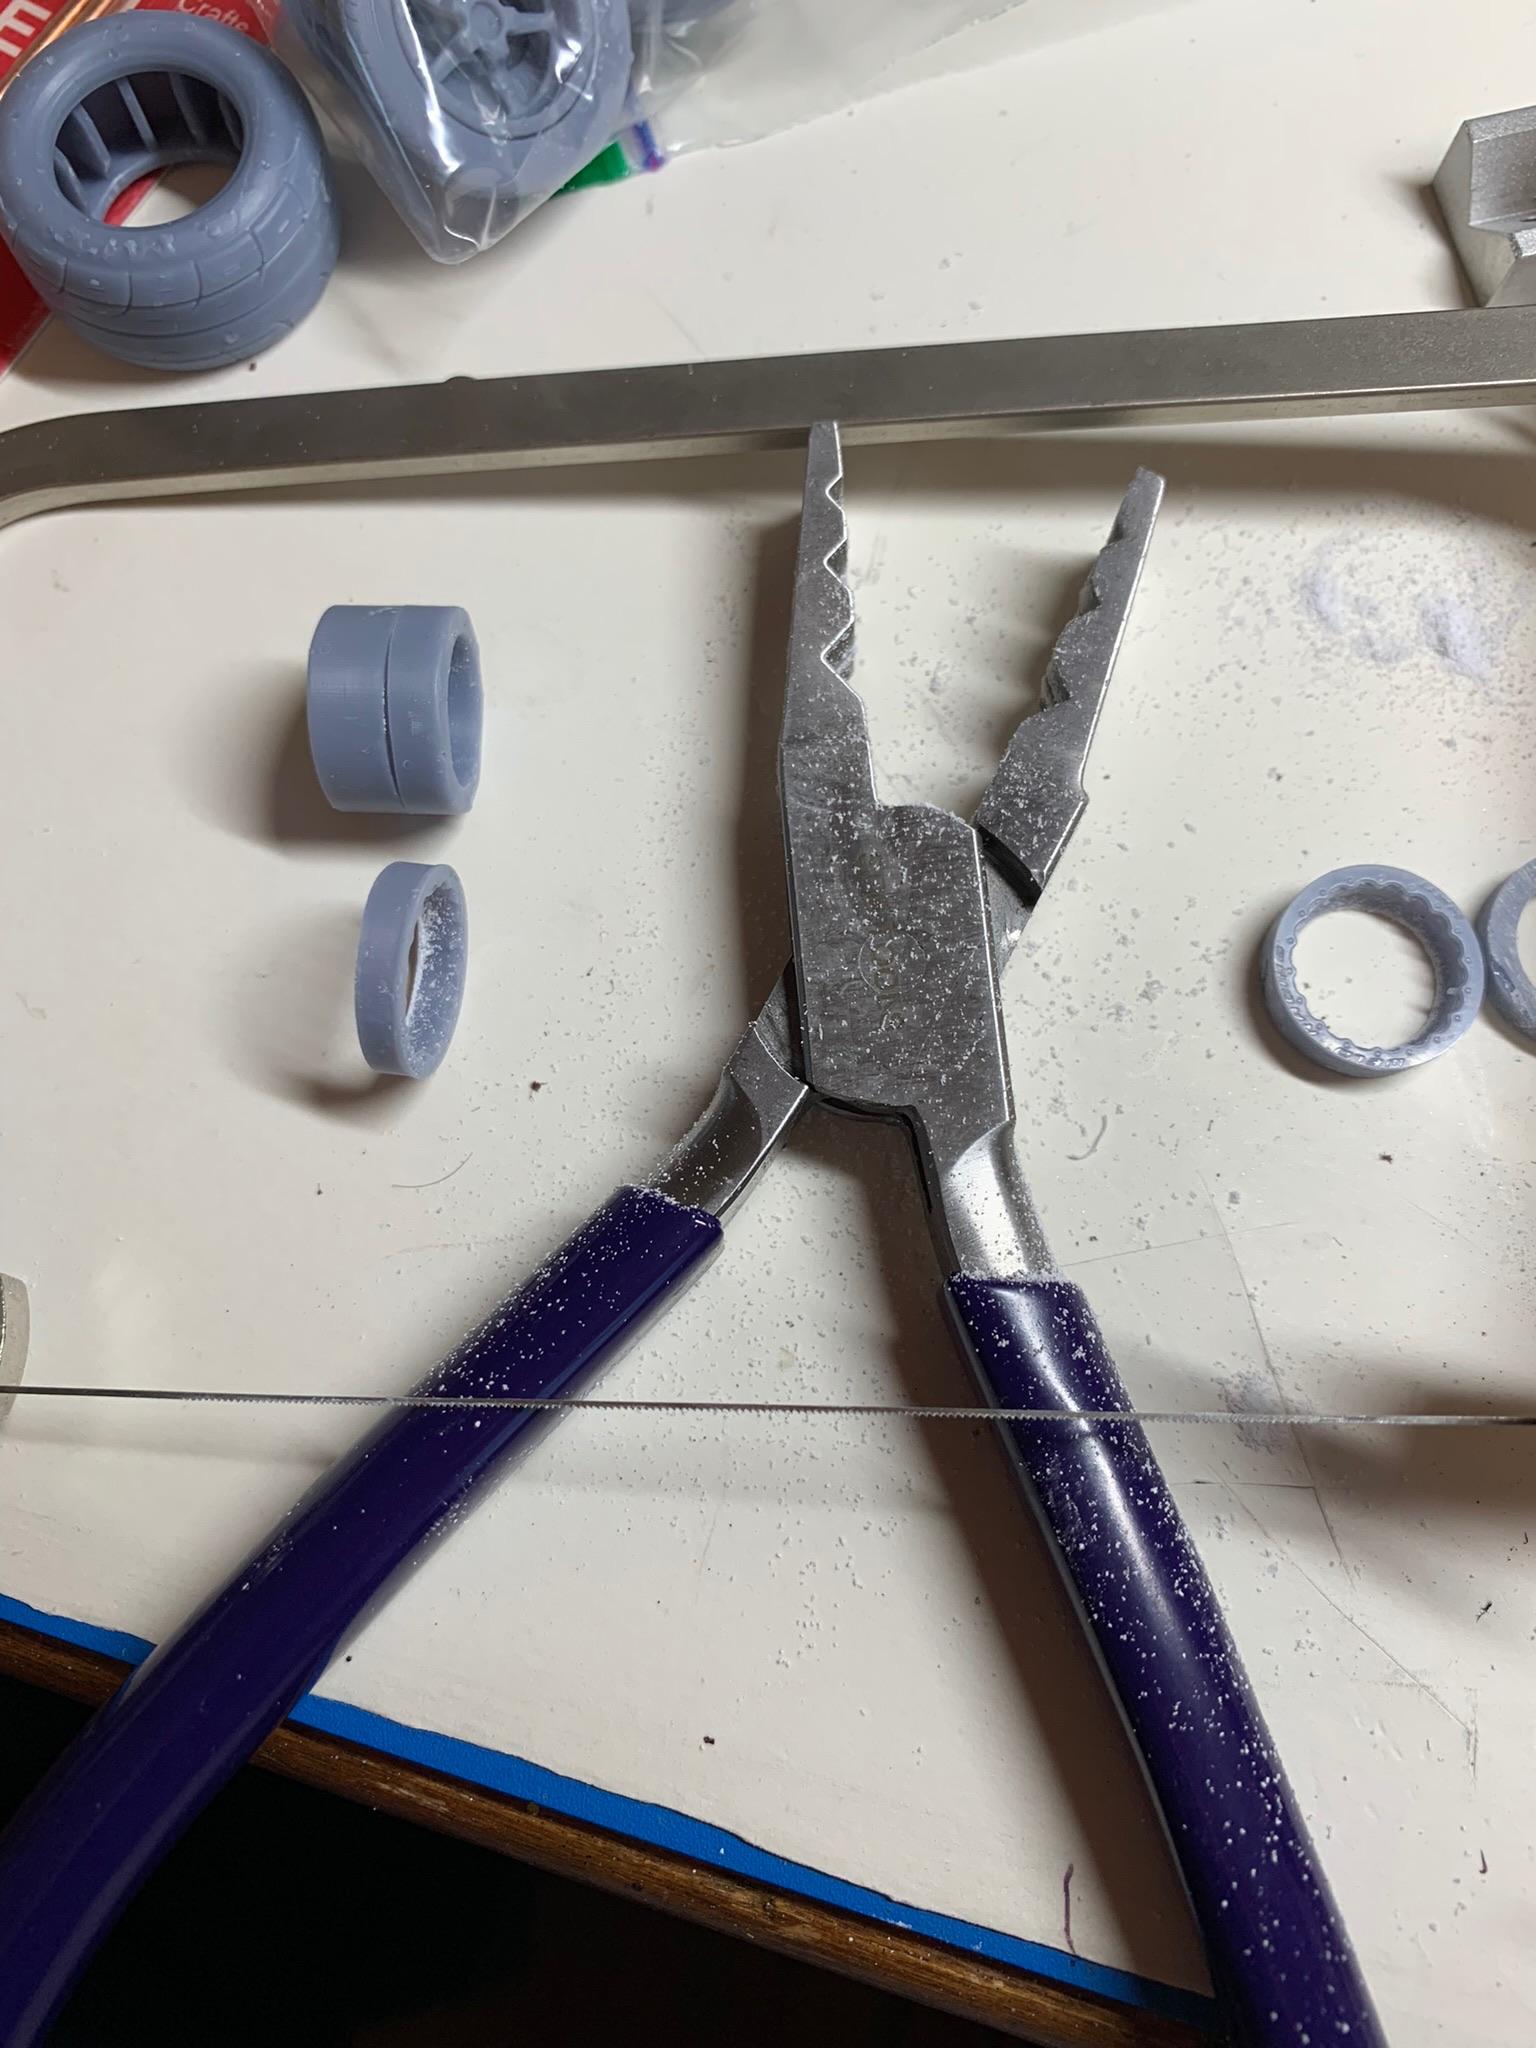
After cutting off the 4 speed trans (in preparation for a th200 automatic), patched the resulting hole with some .010” styrene, then painted orange. Painted some miscellaneous parts semi gloss black.
-
1969 Camaro A/SA (possibly Thomas Arnett’s)
R. Thorne replied to R. Thorne's topic in WIP: Drag Racing Models
Forgot to install the rear lower part of the body, so painted it separately. Had a little “blushing” ,so a couple more coats eliminated that issue.
-
1969 Camaro A/SA (possibly Thomas Arnett’s)
R. Thorne replied to R. Thorne's topic in WIP: Drag Racing Models
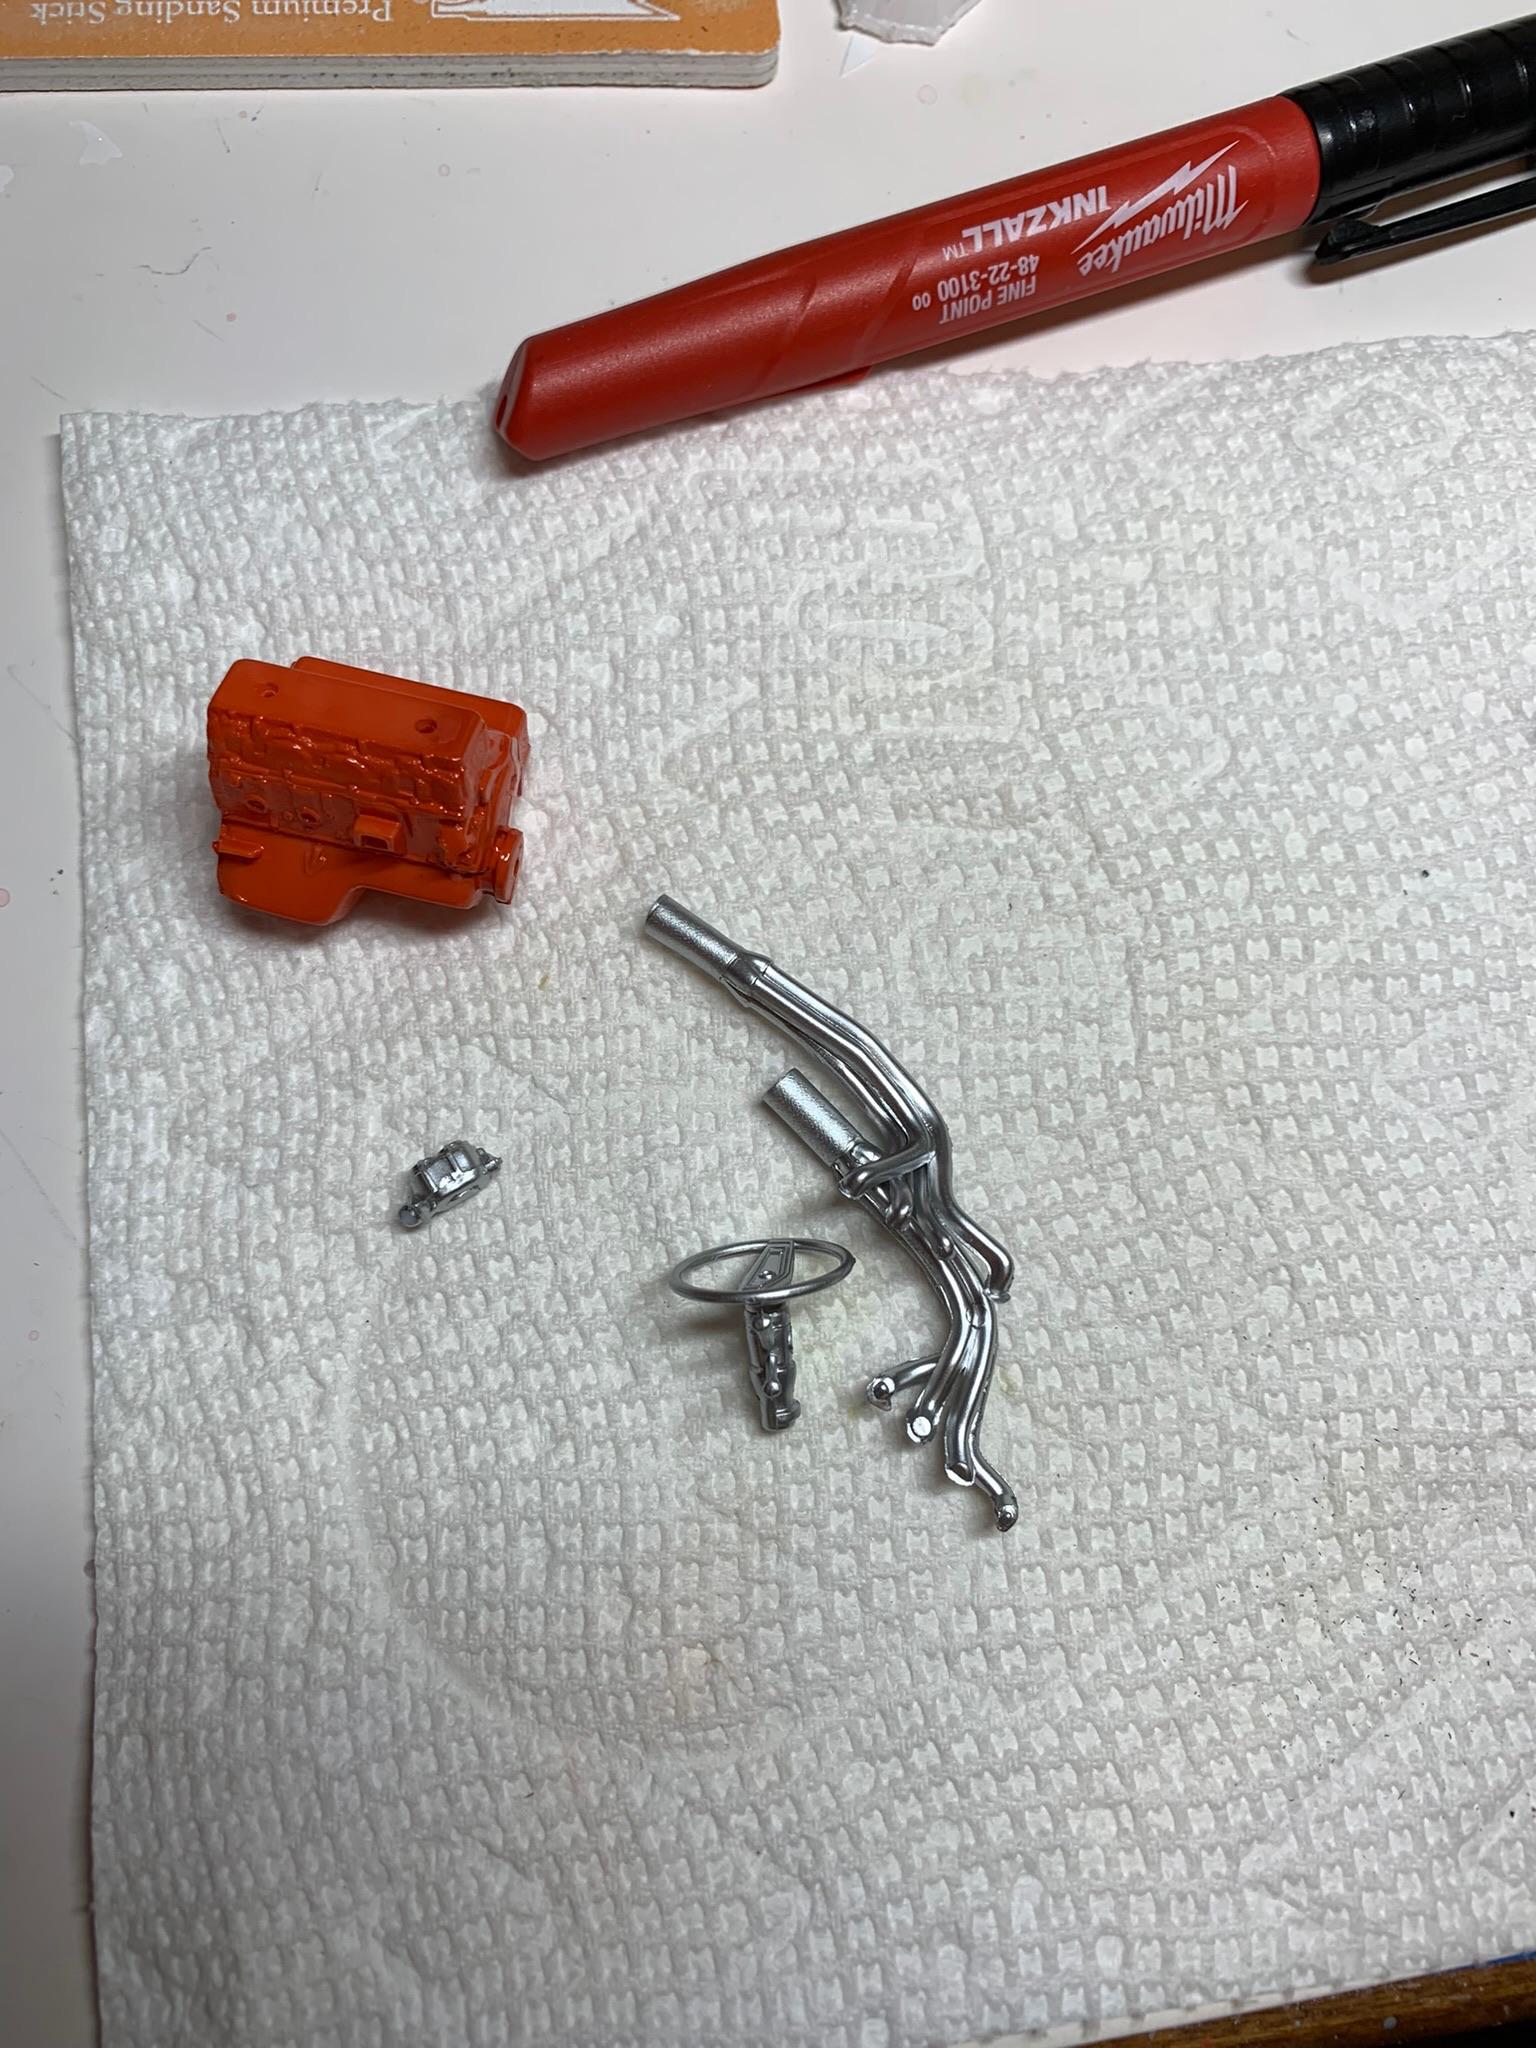
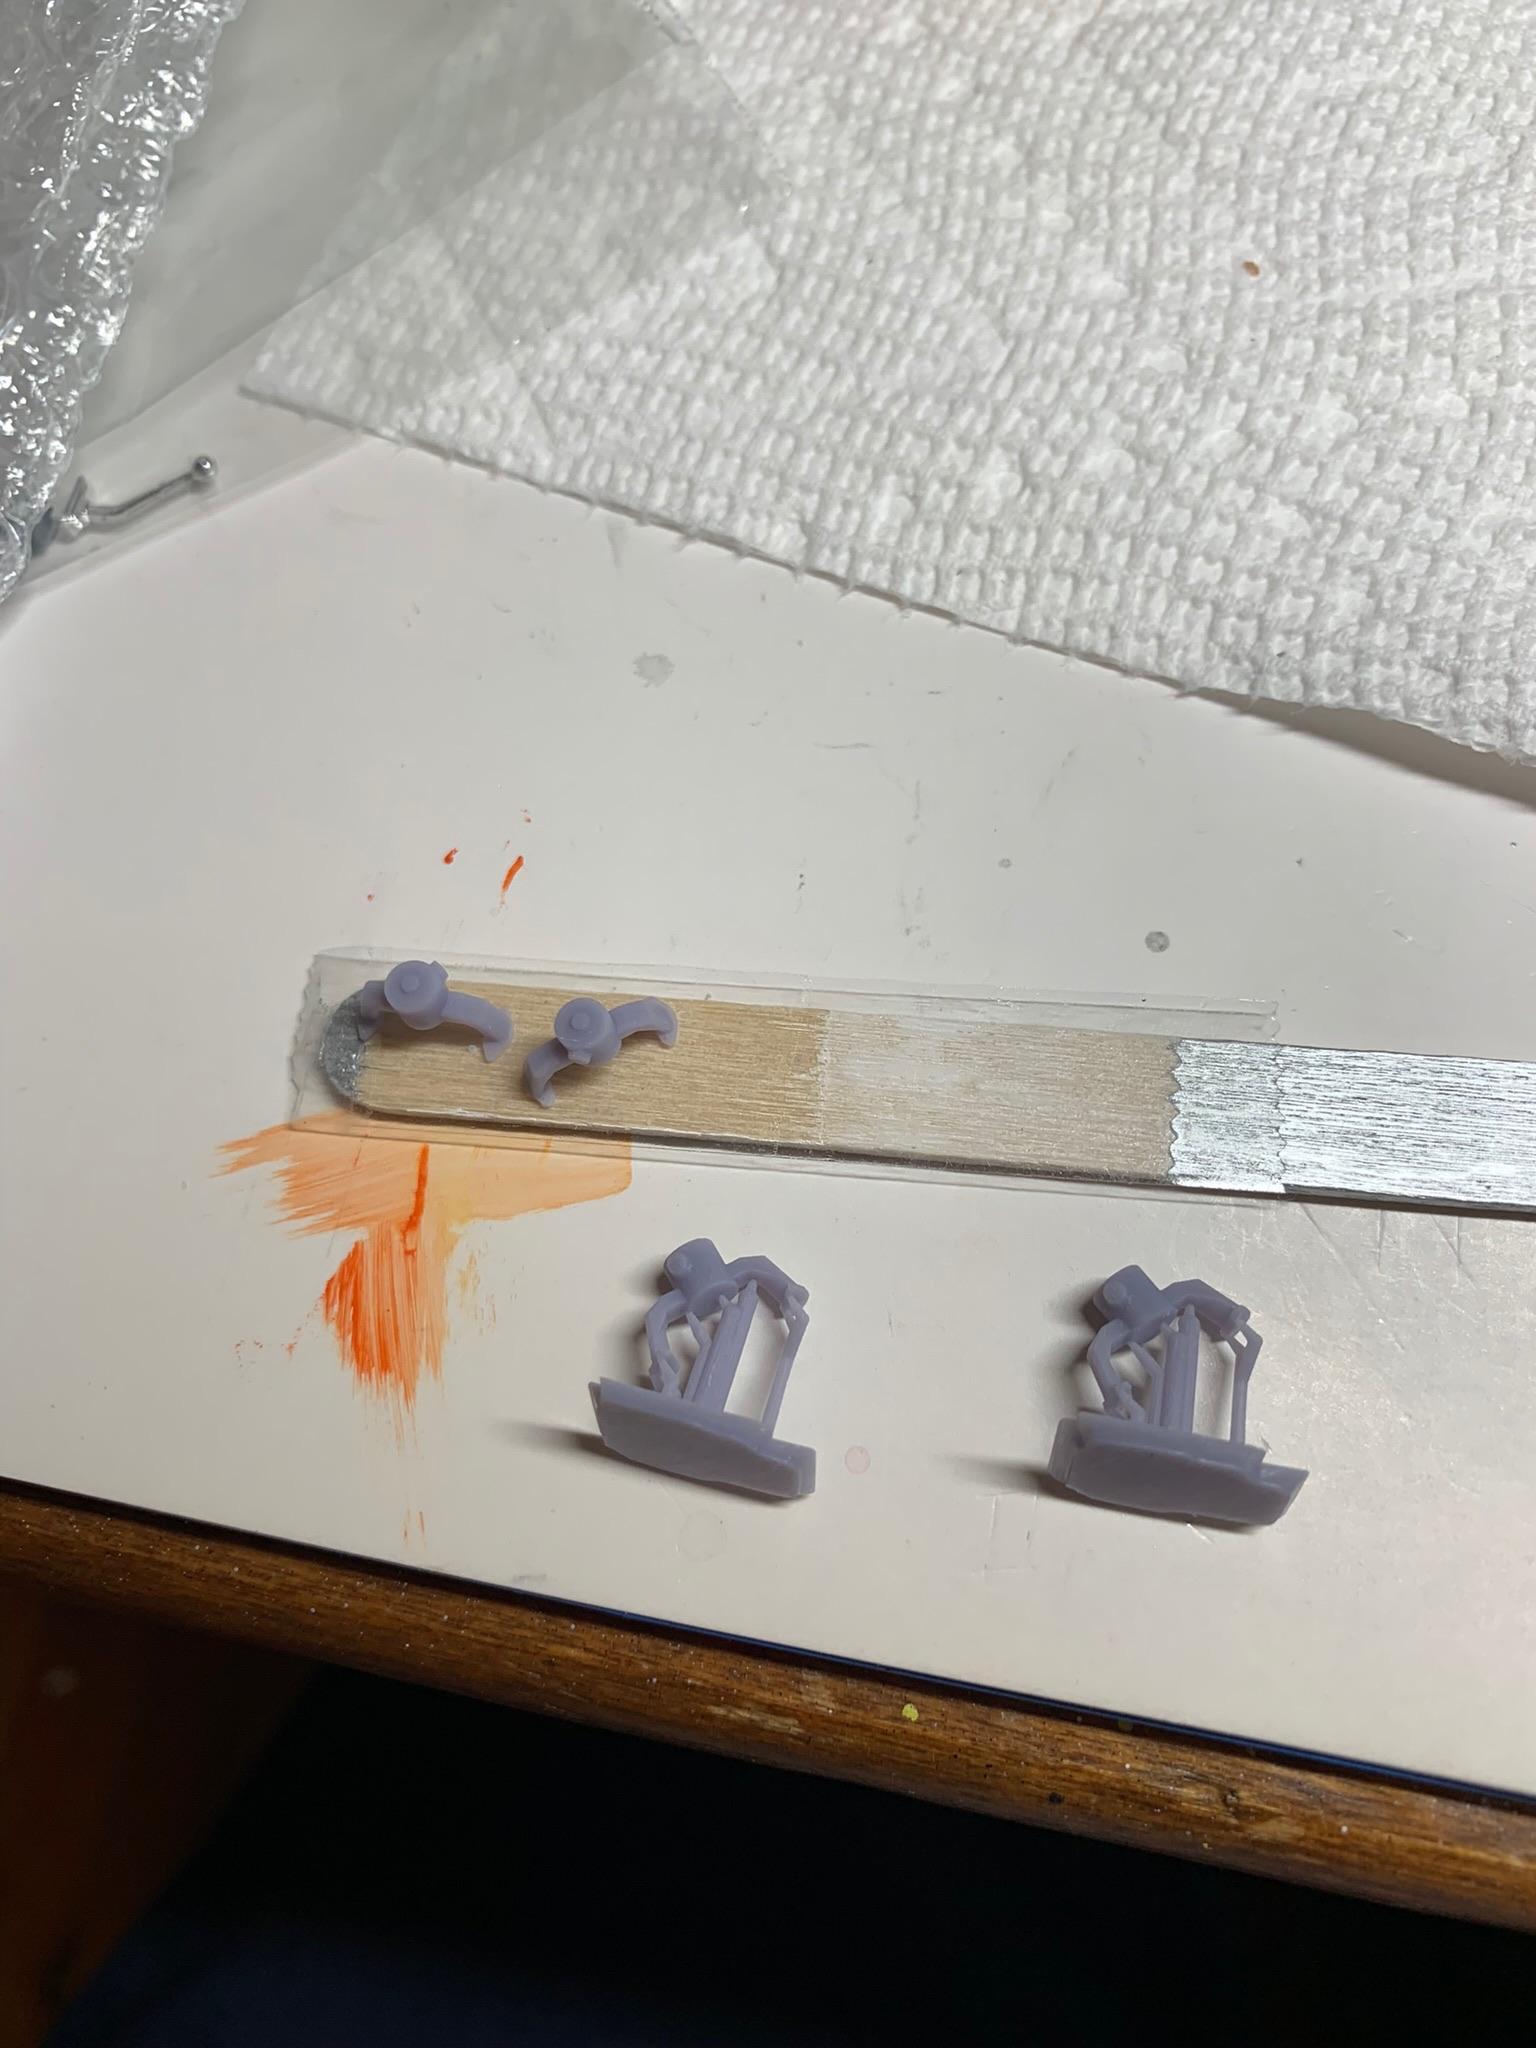
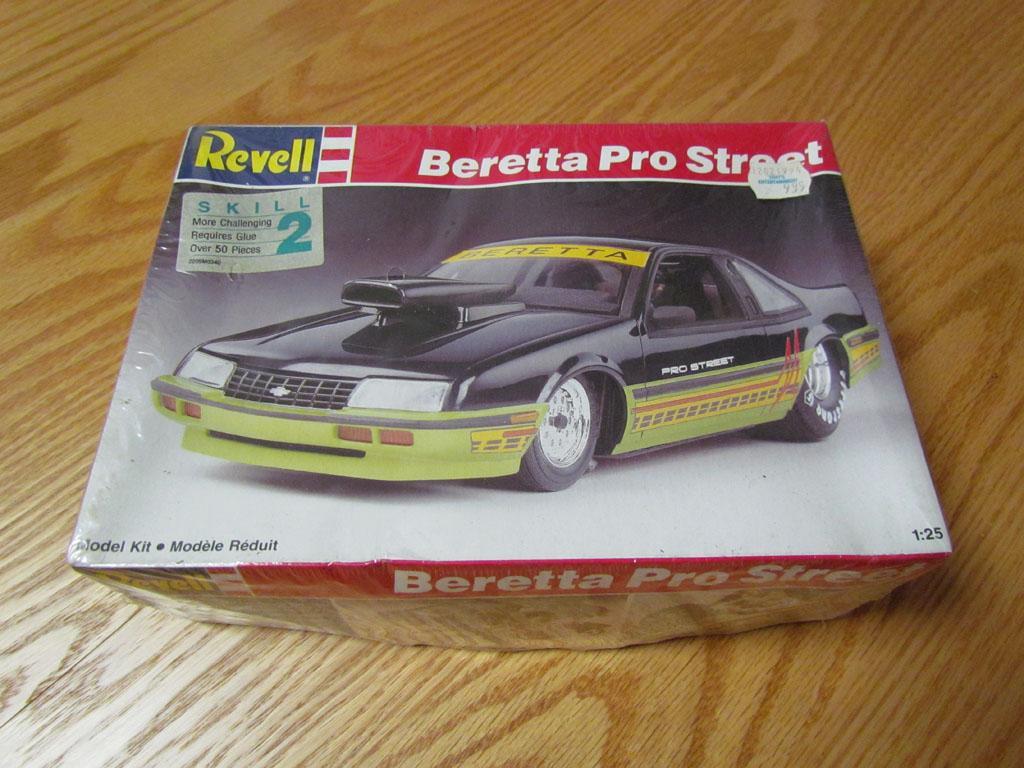
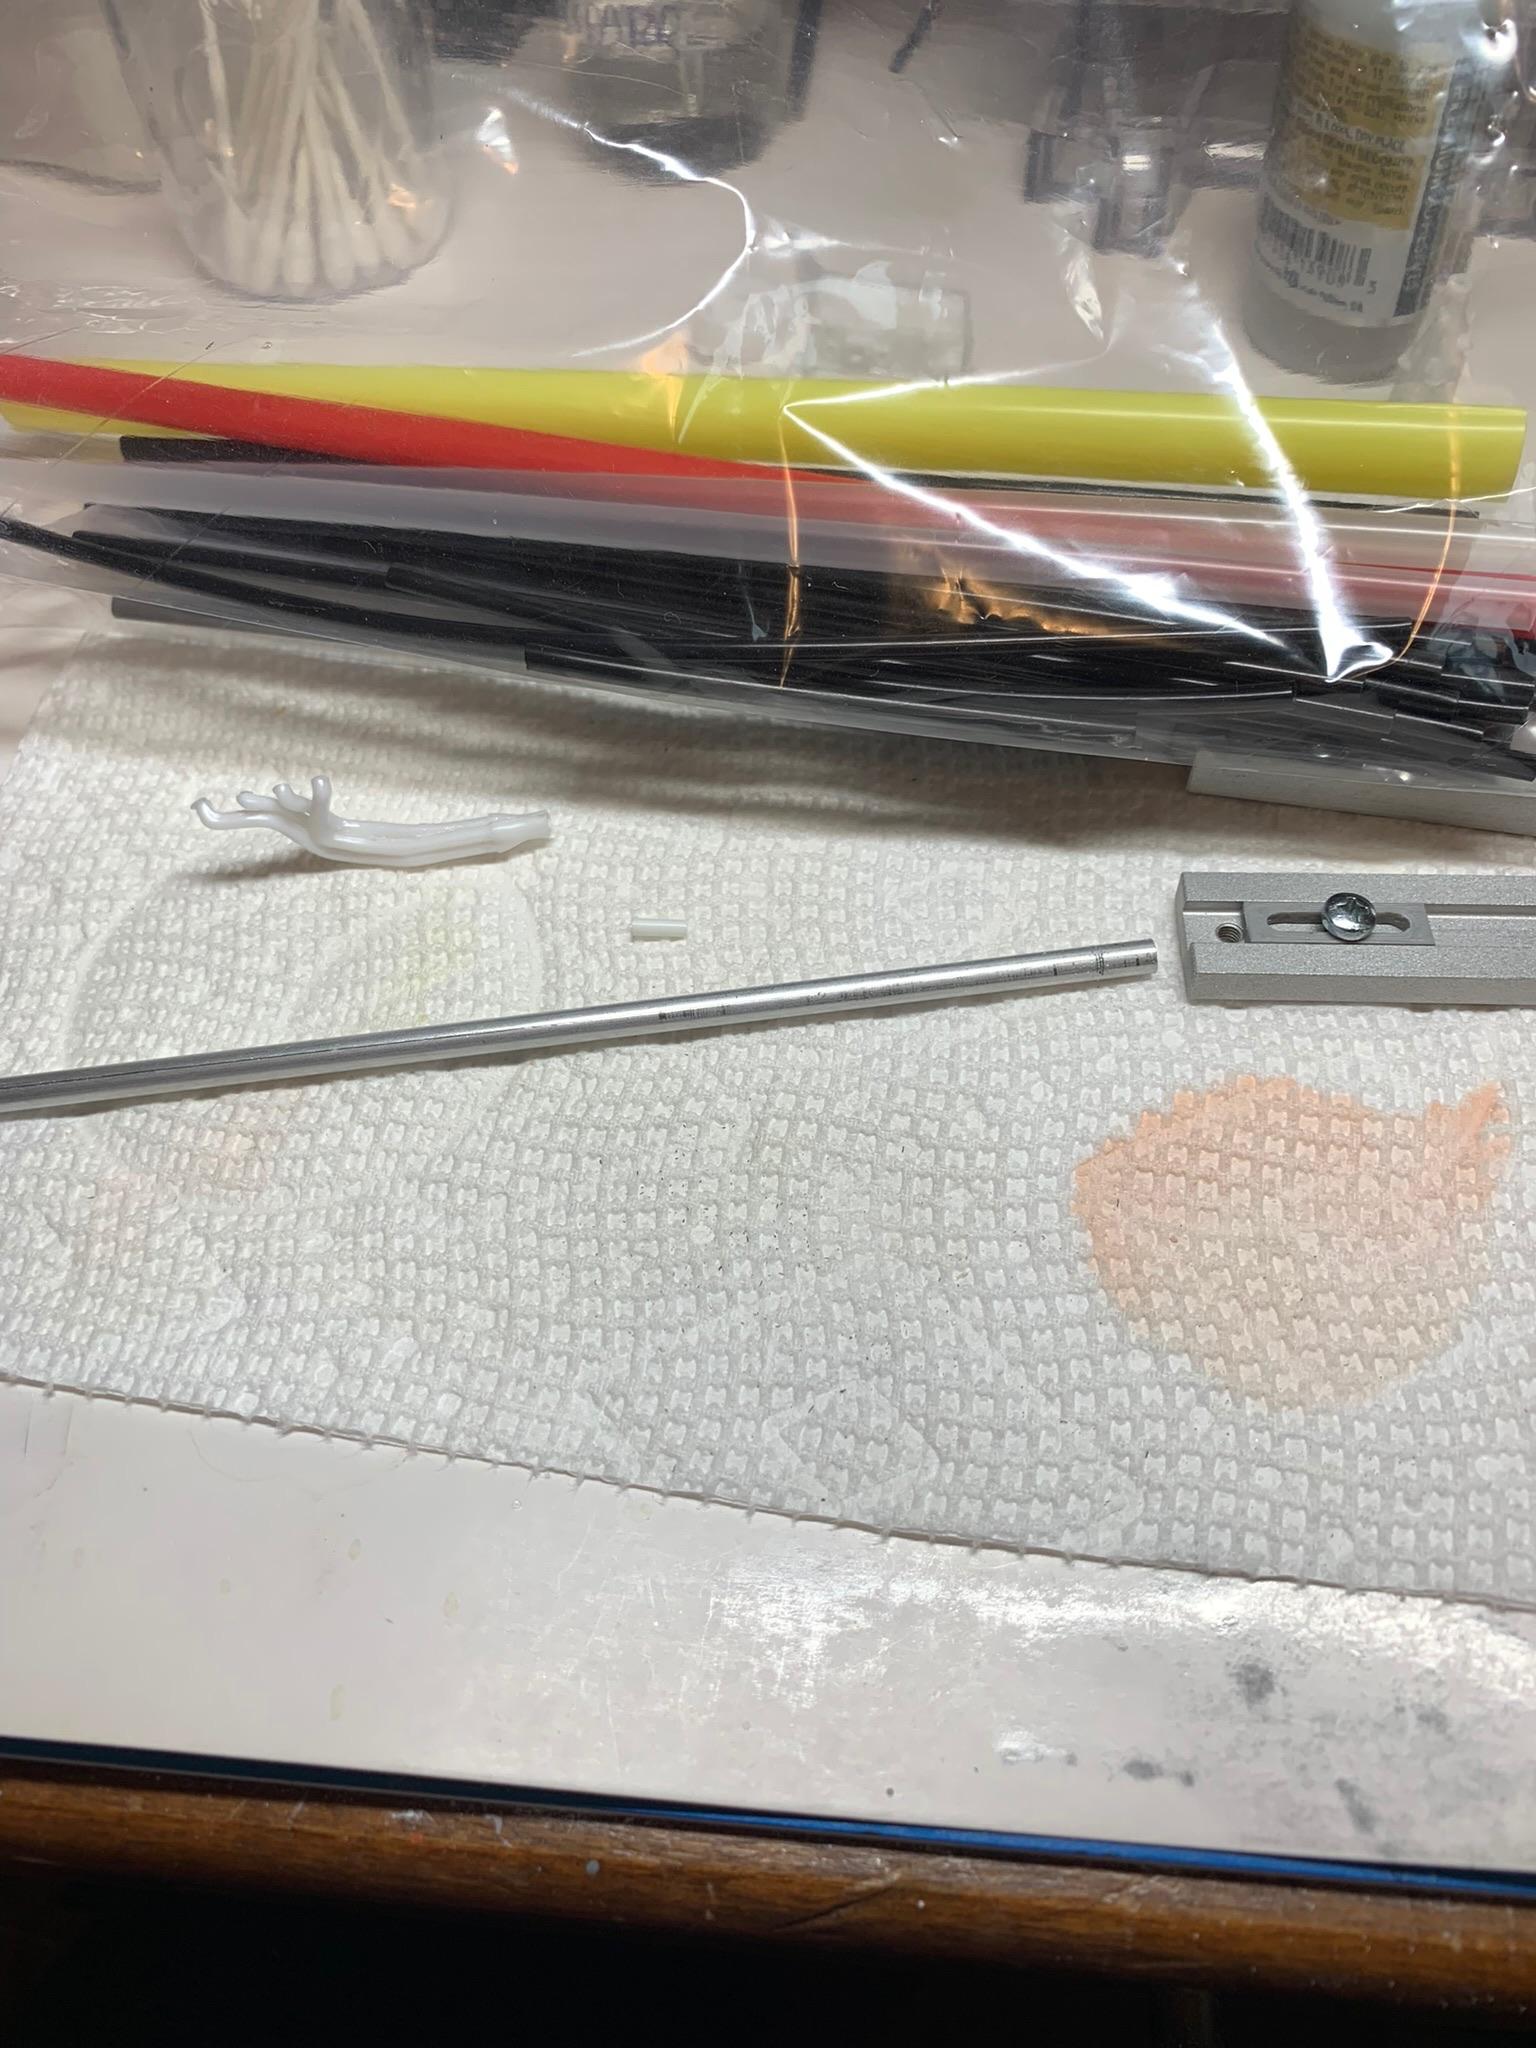
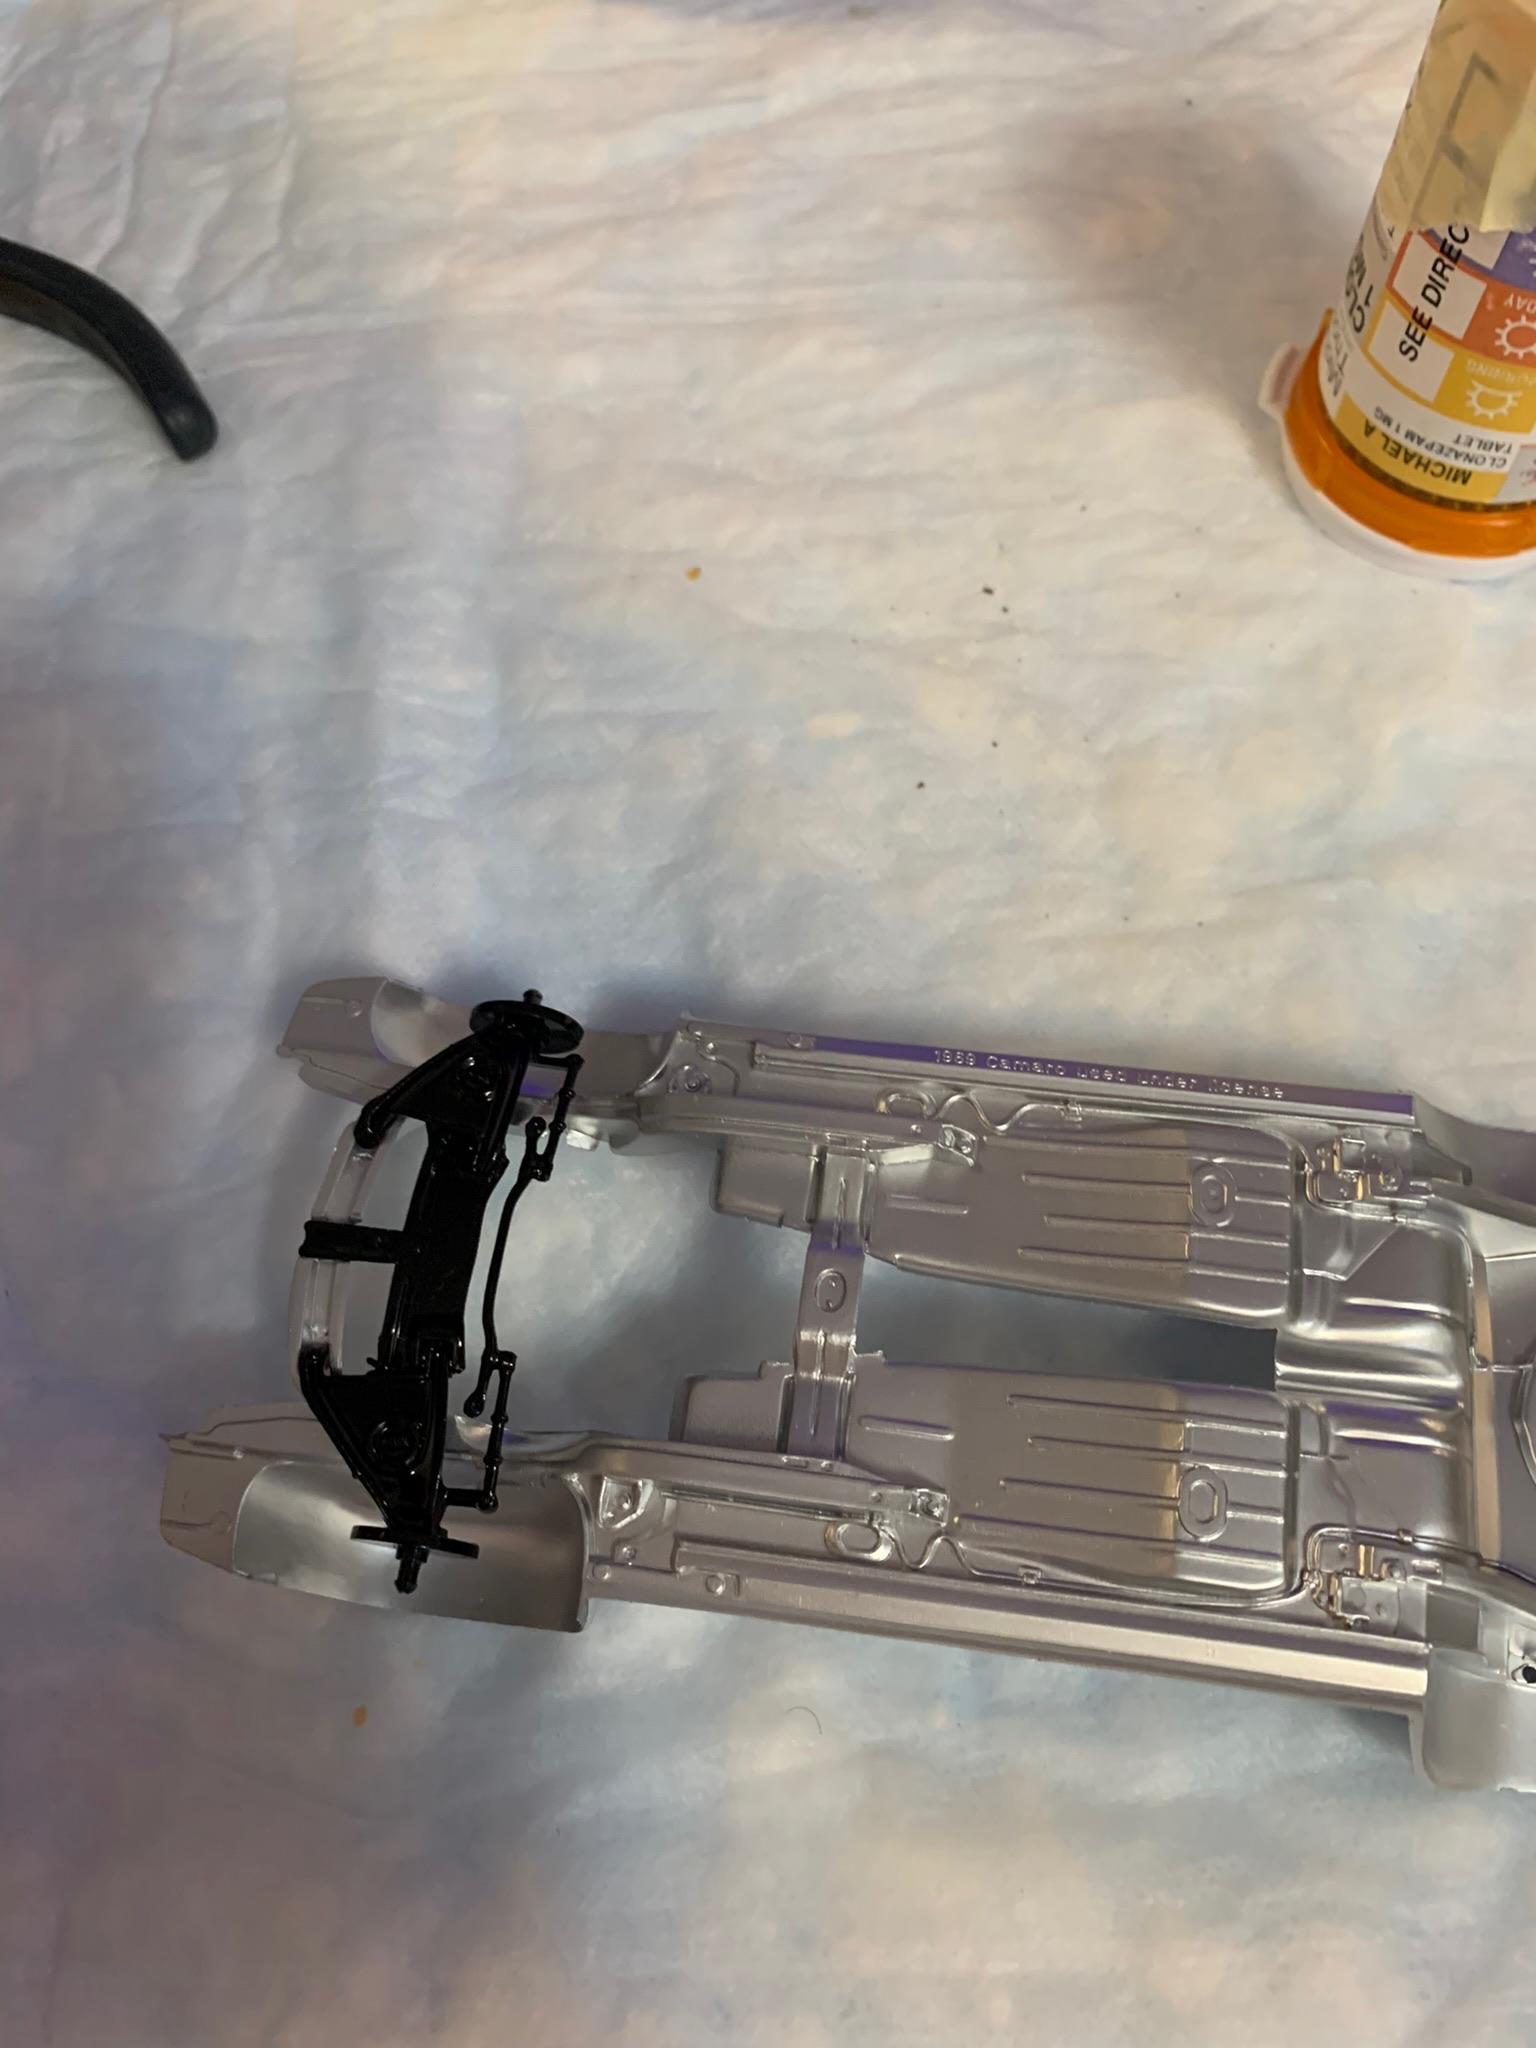
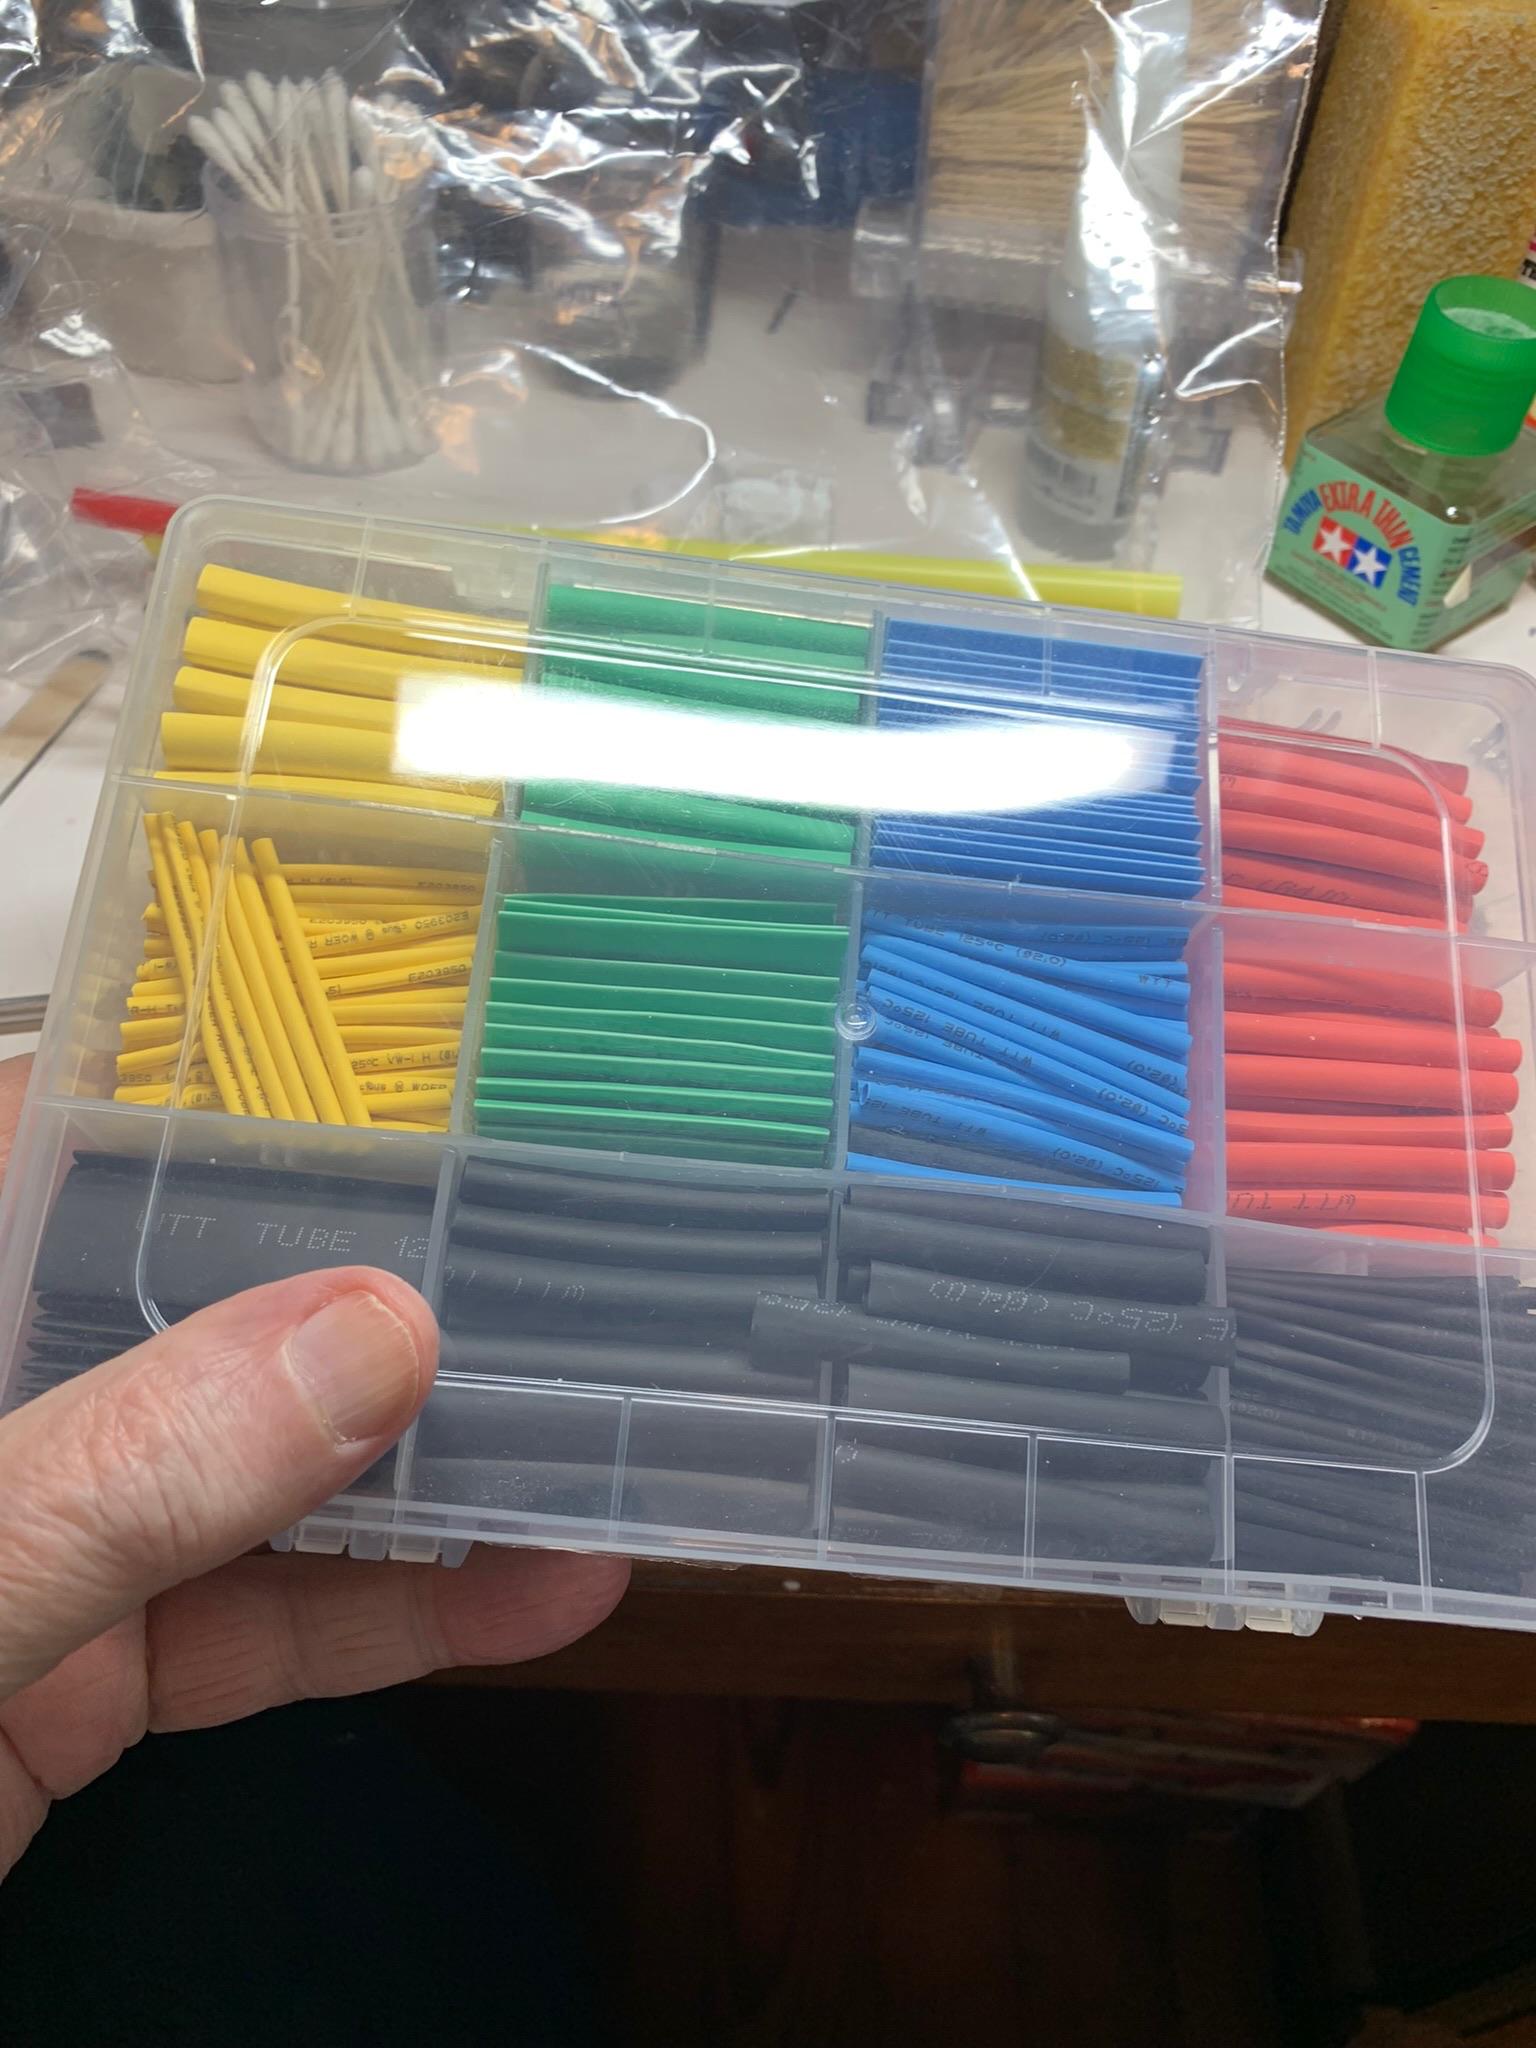
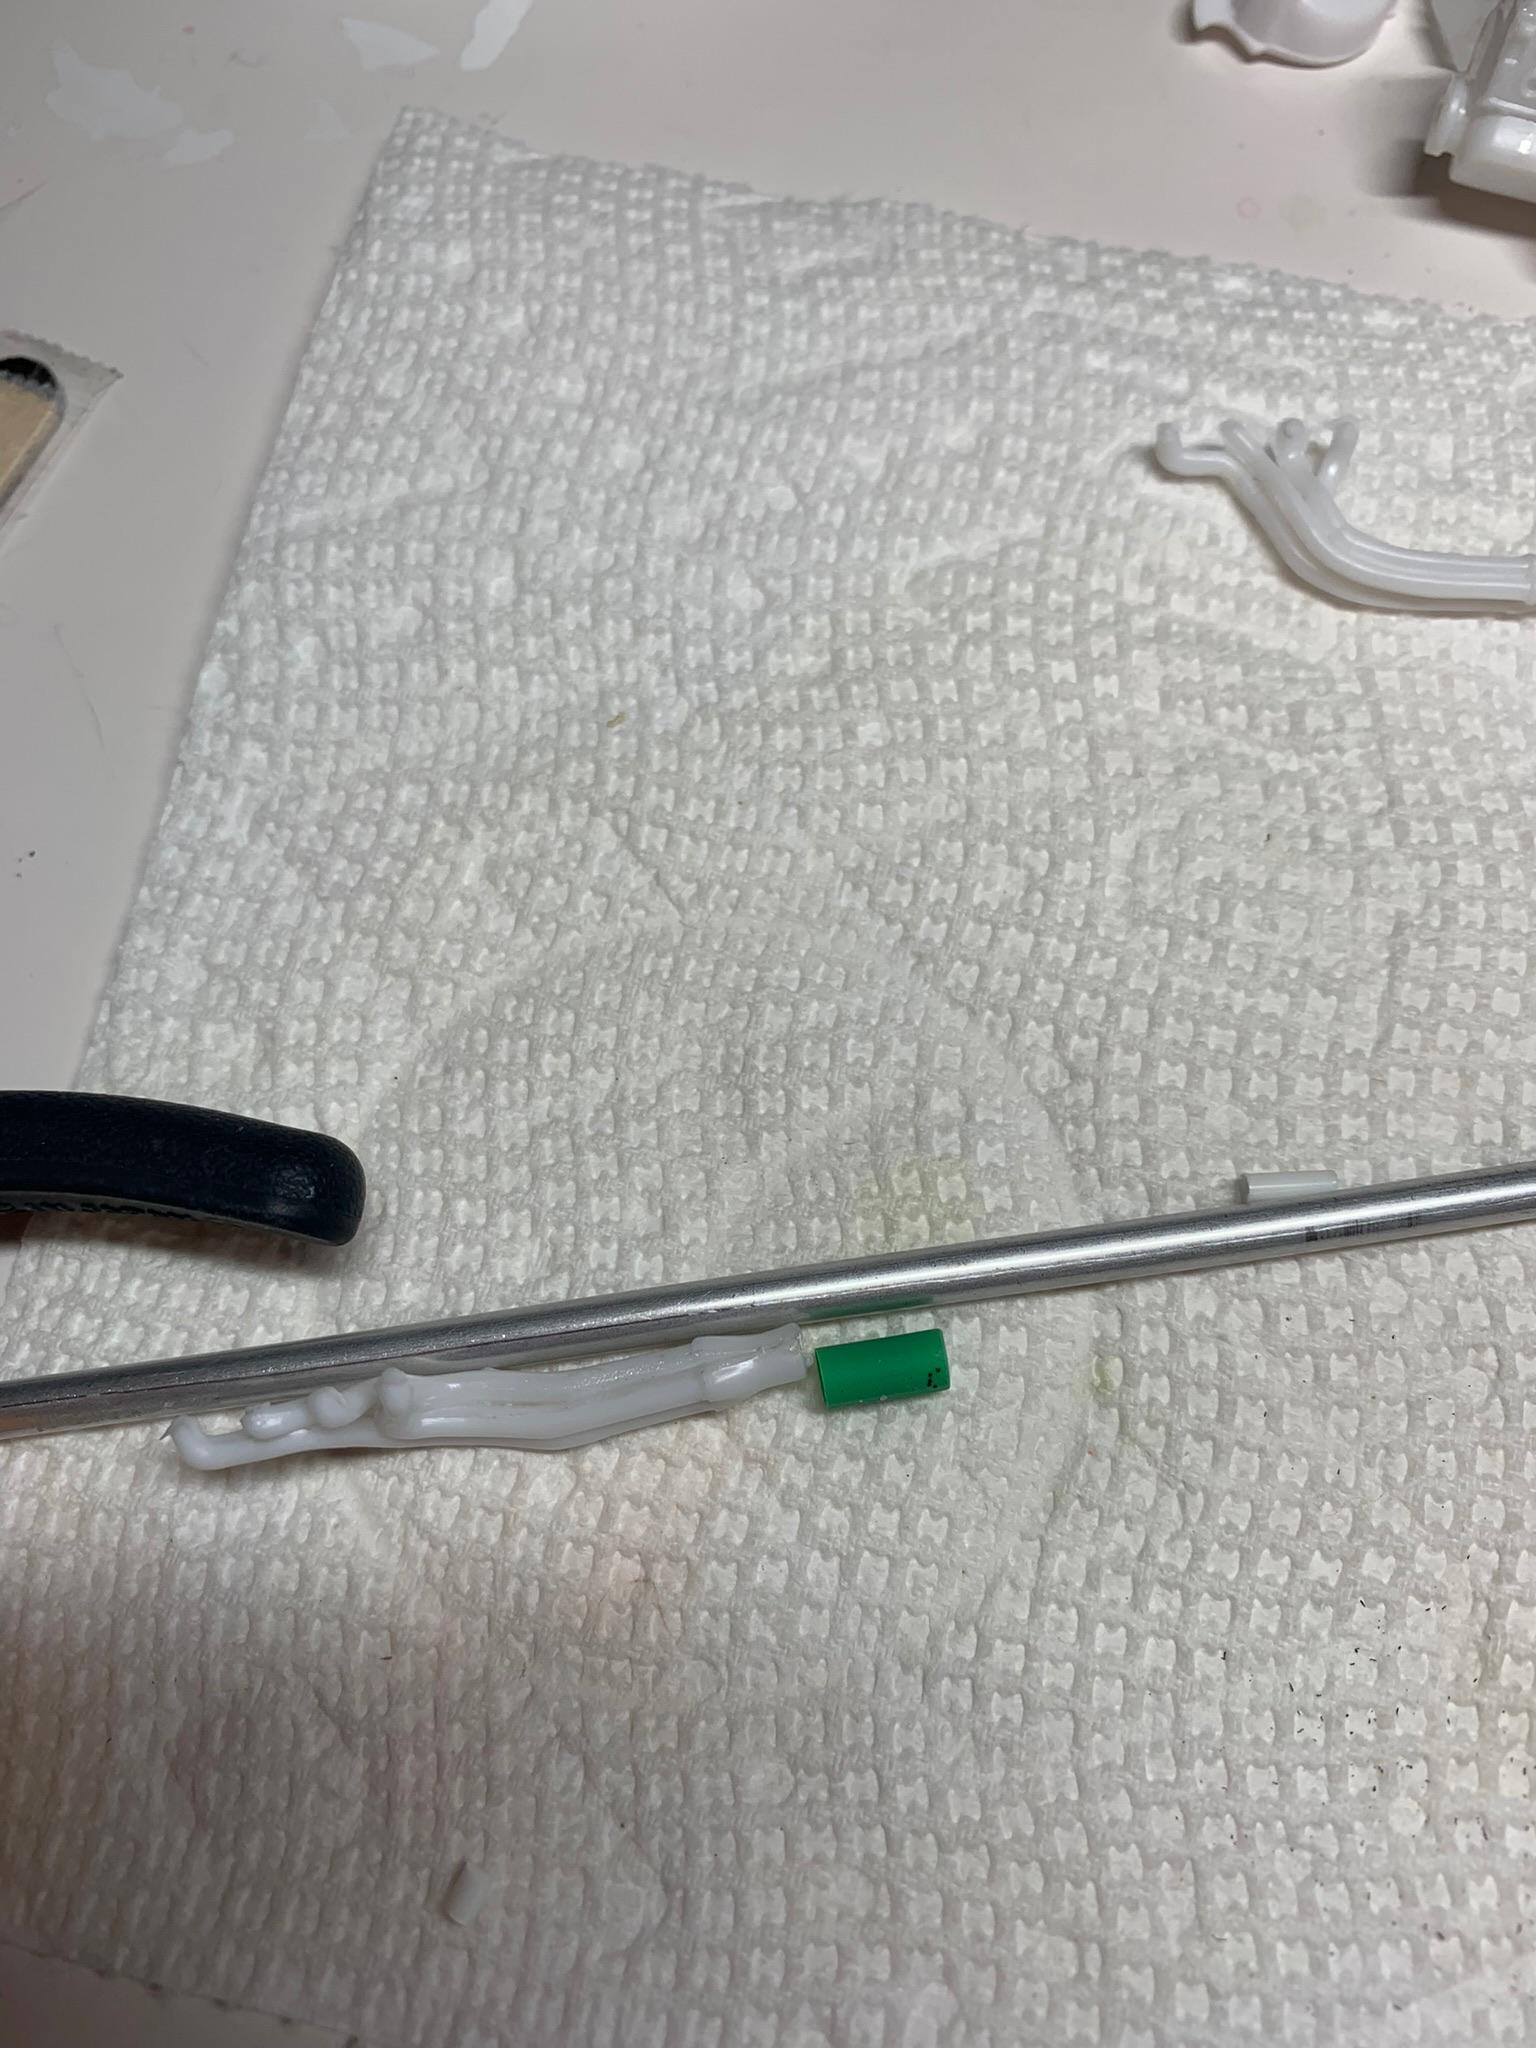
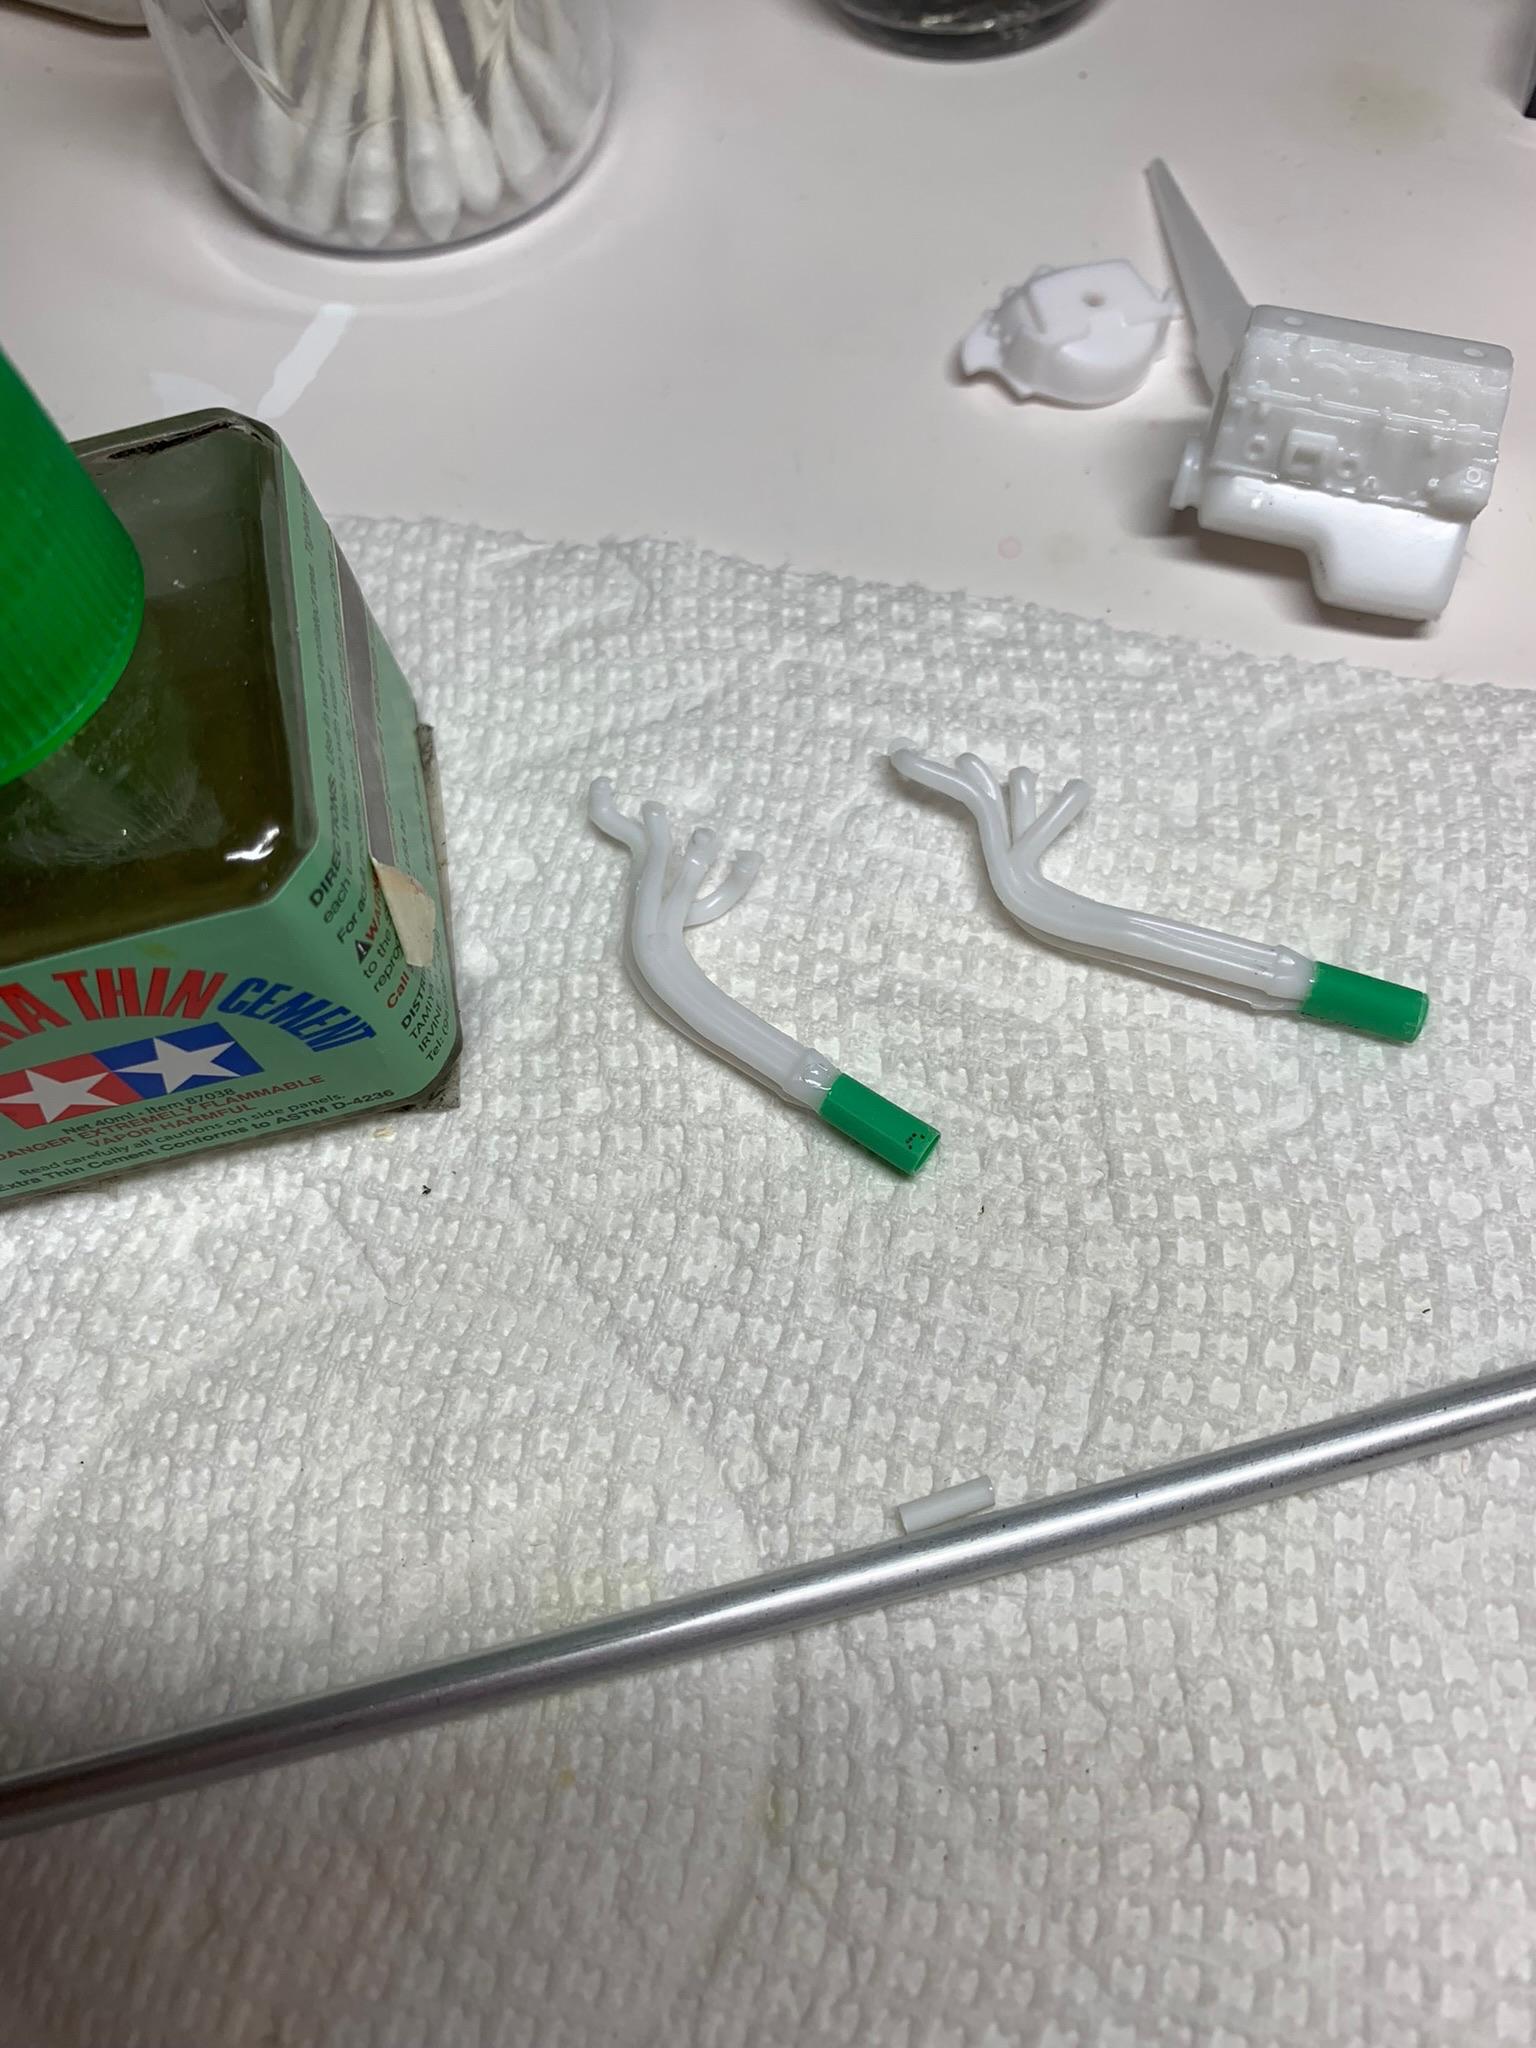
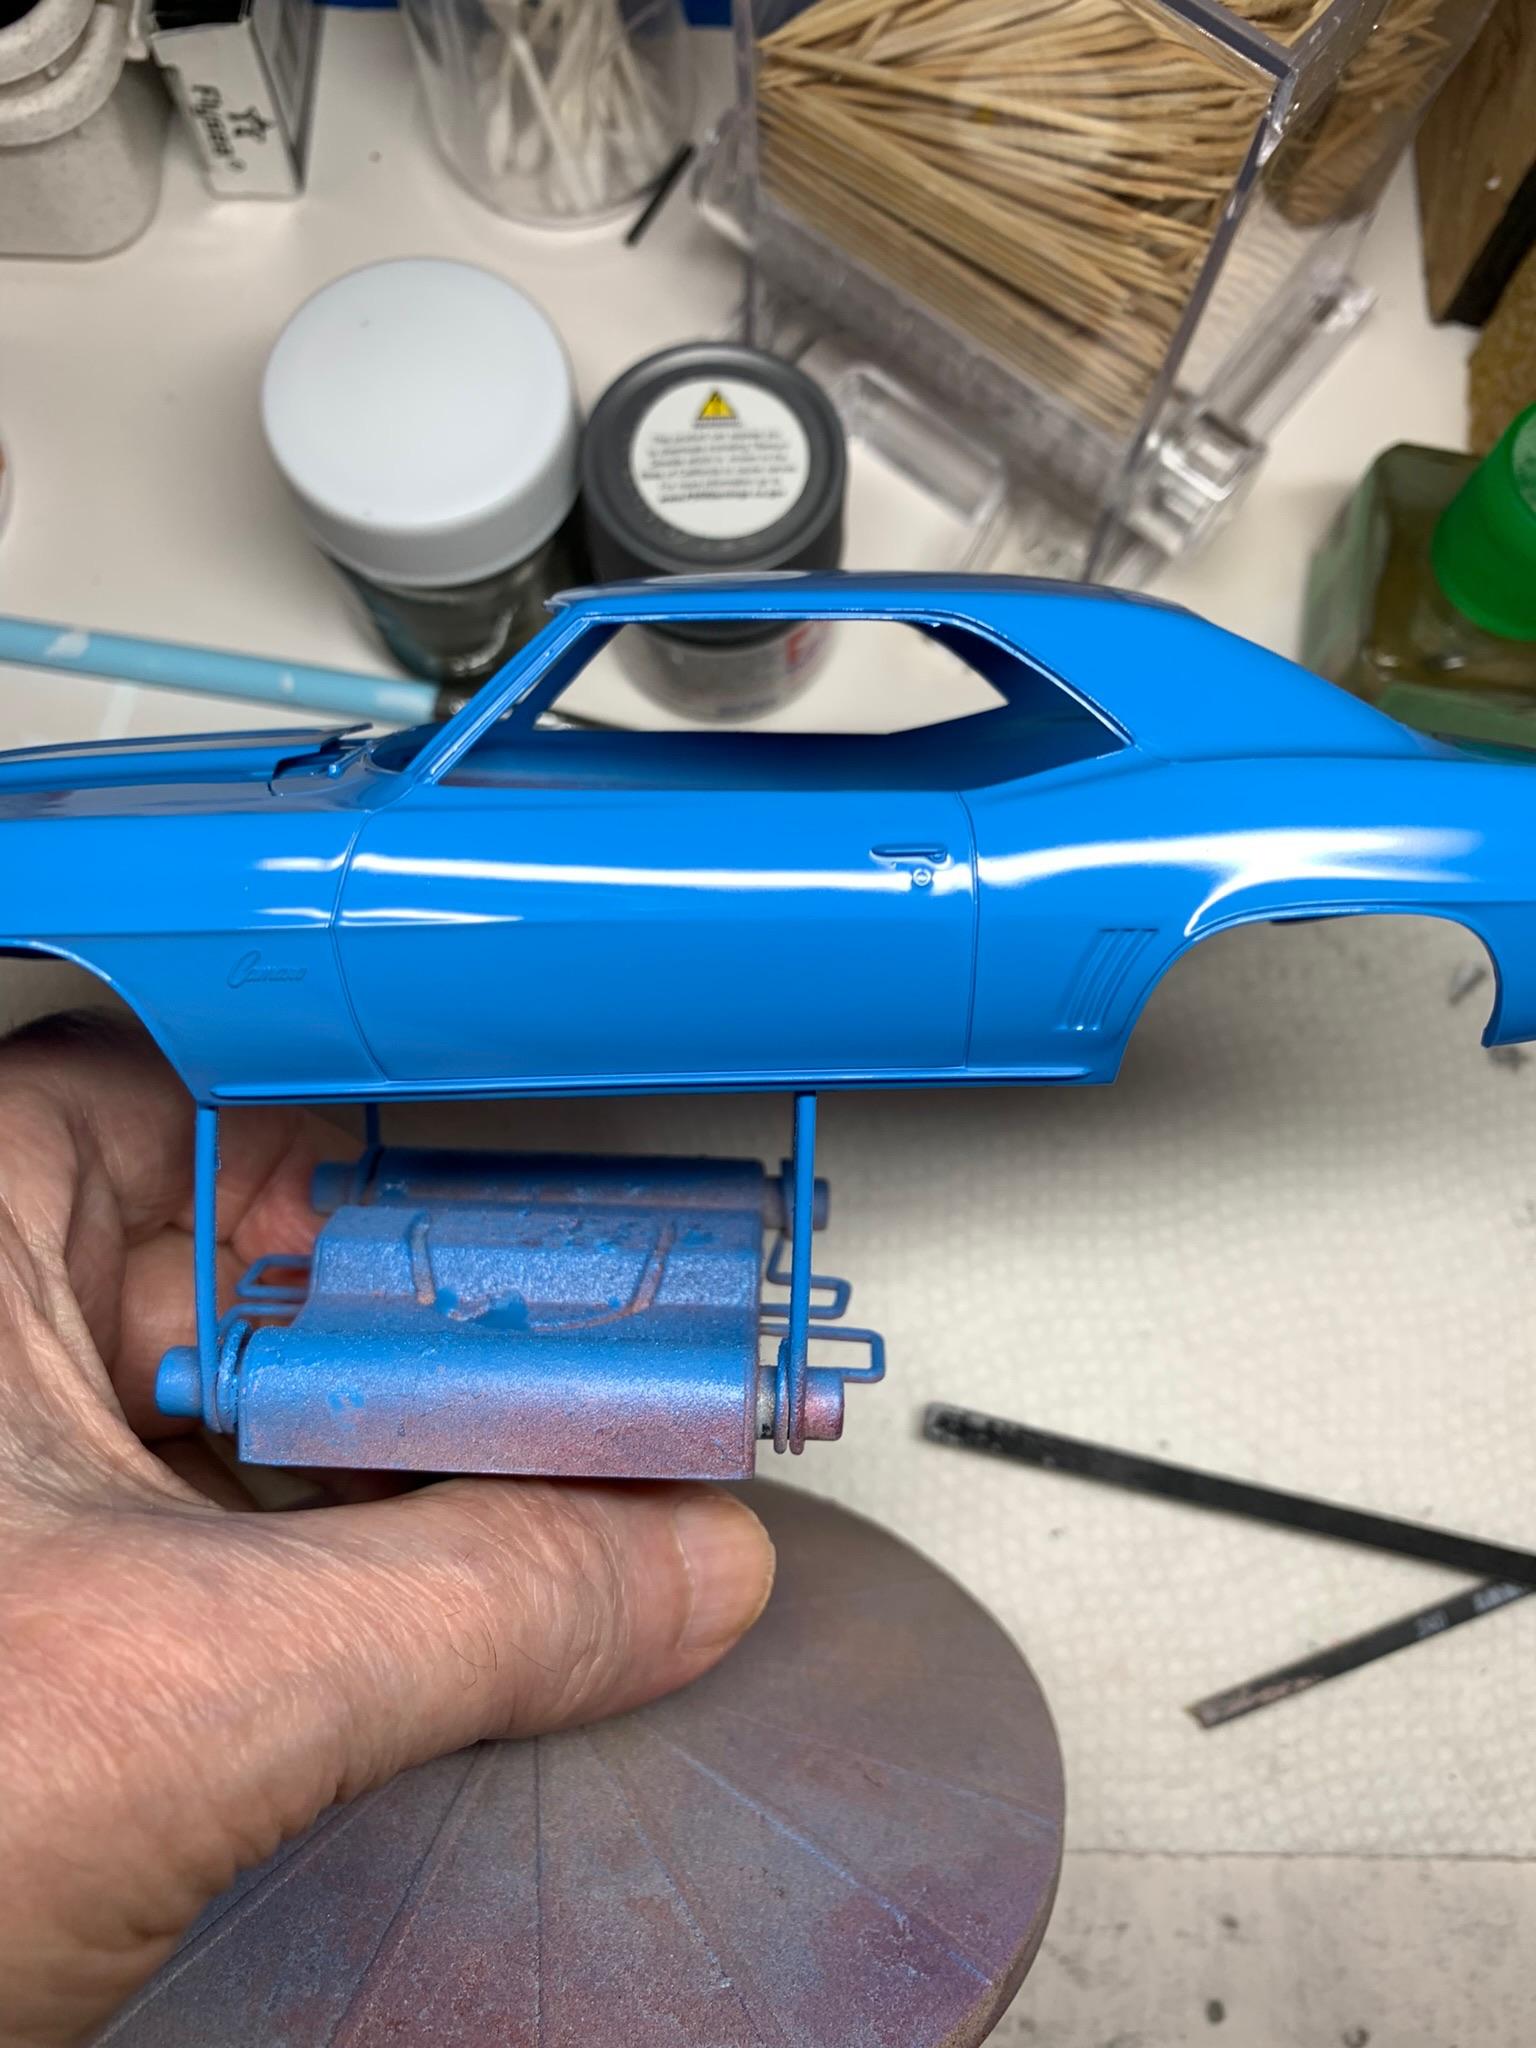
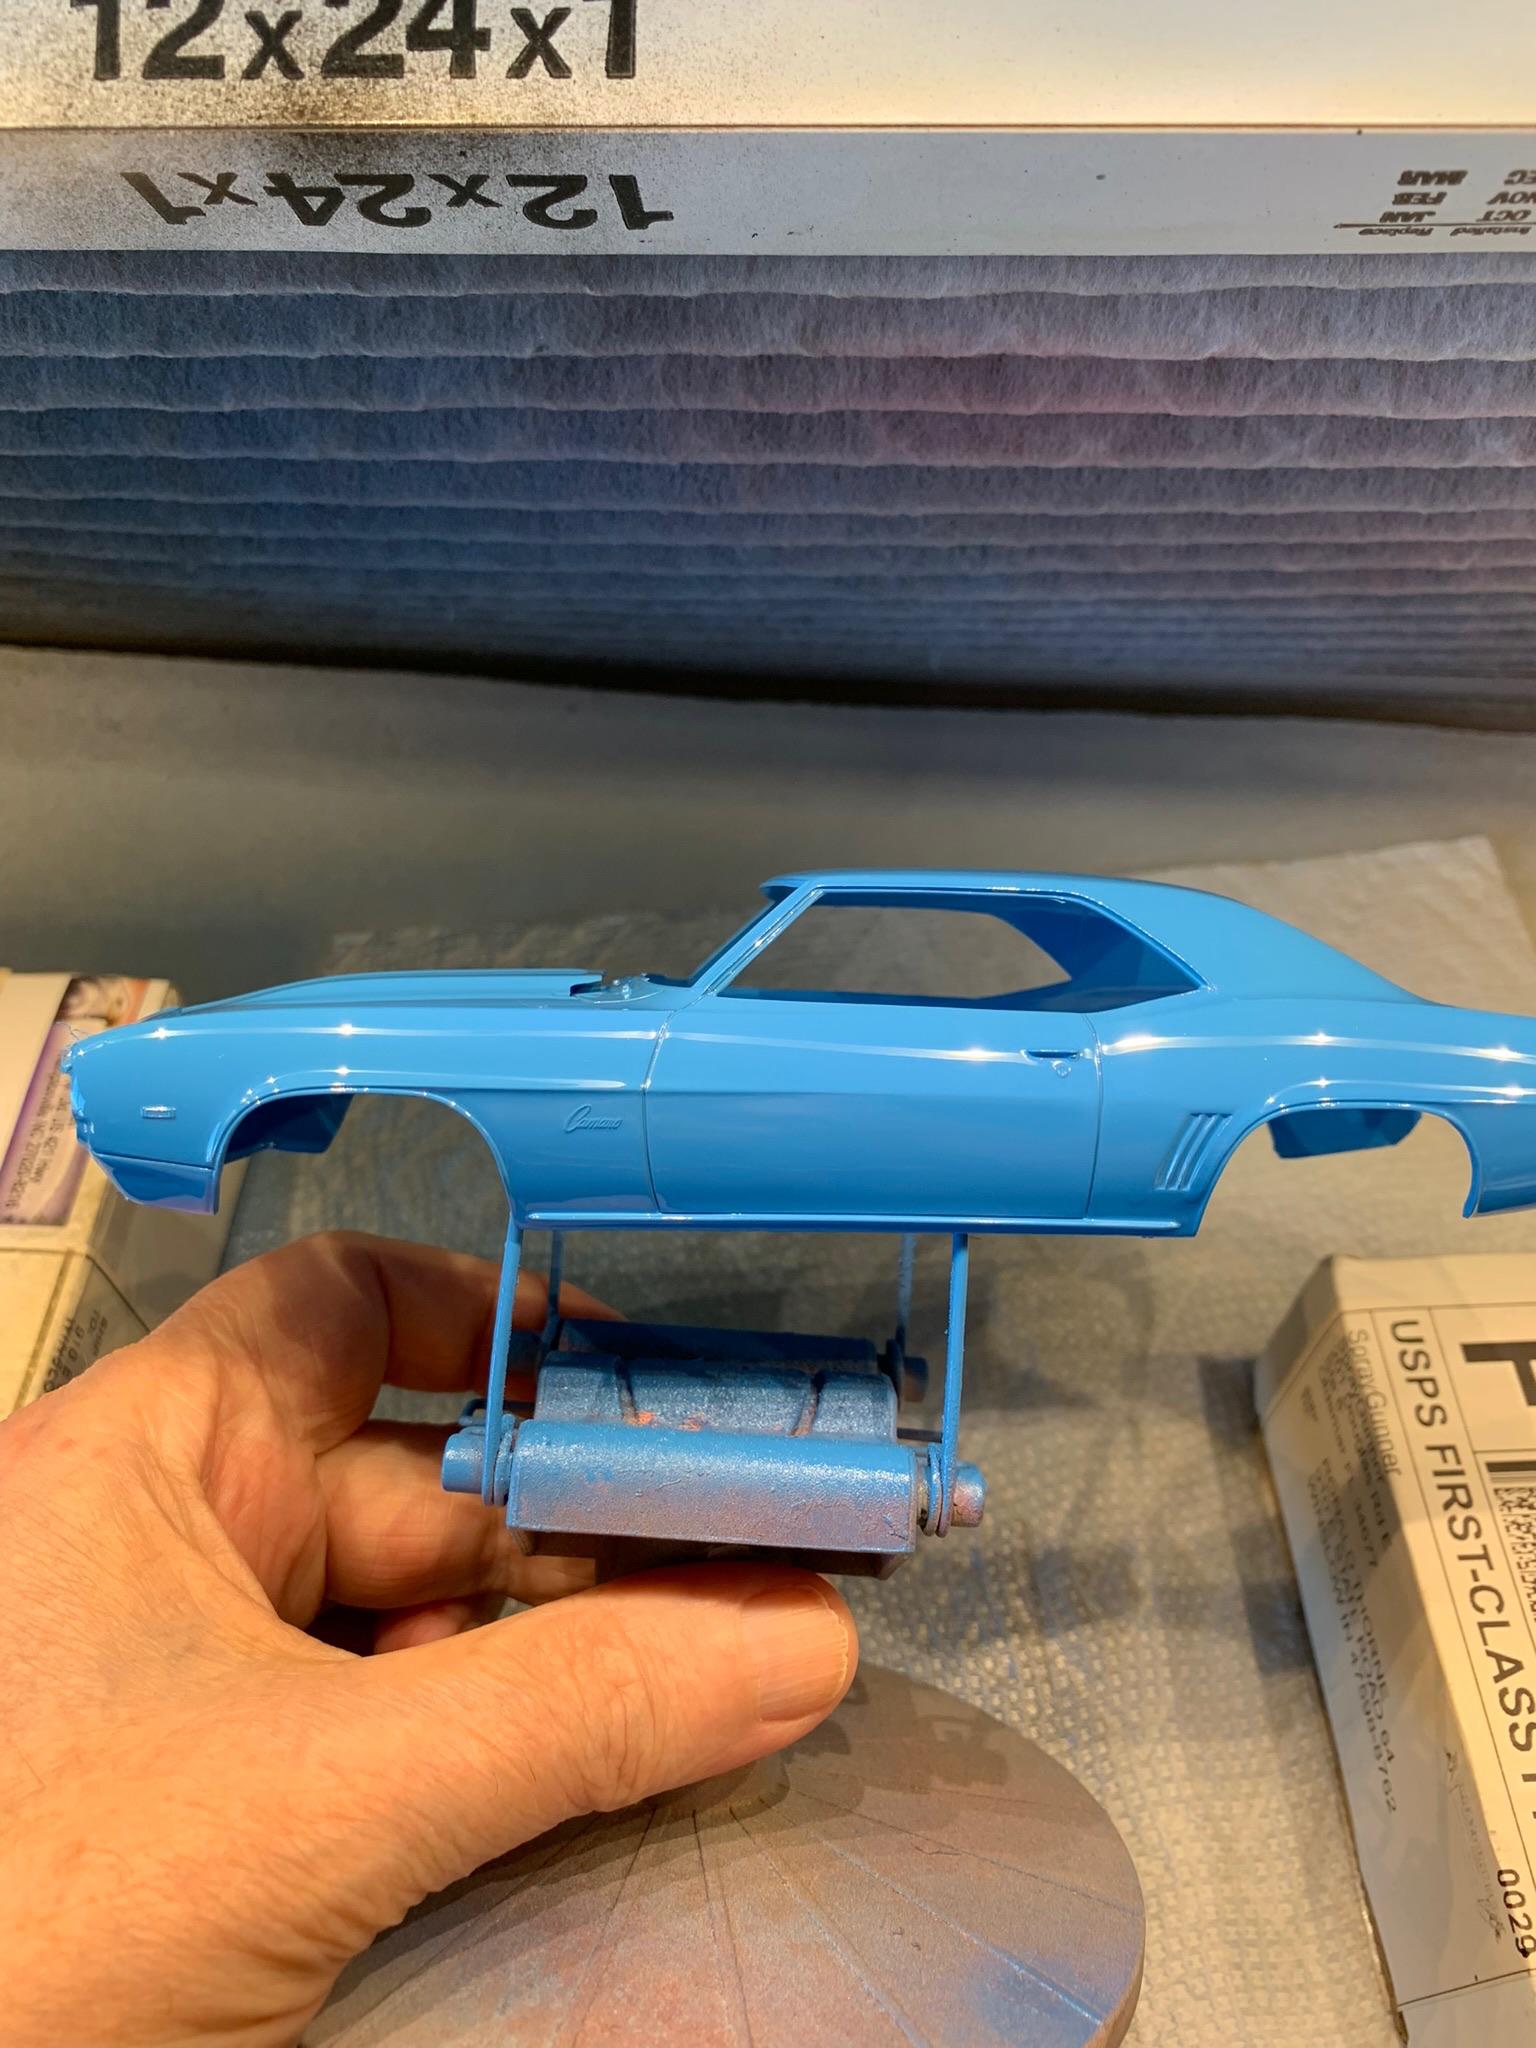
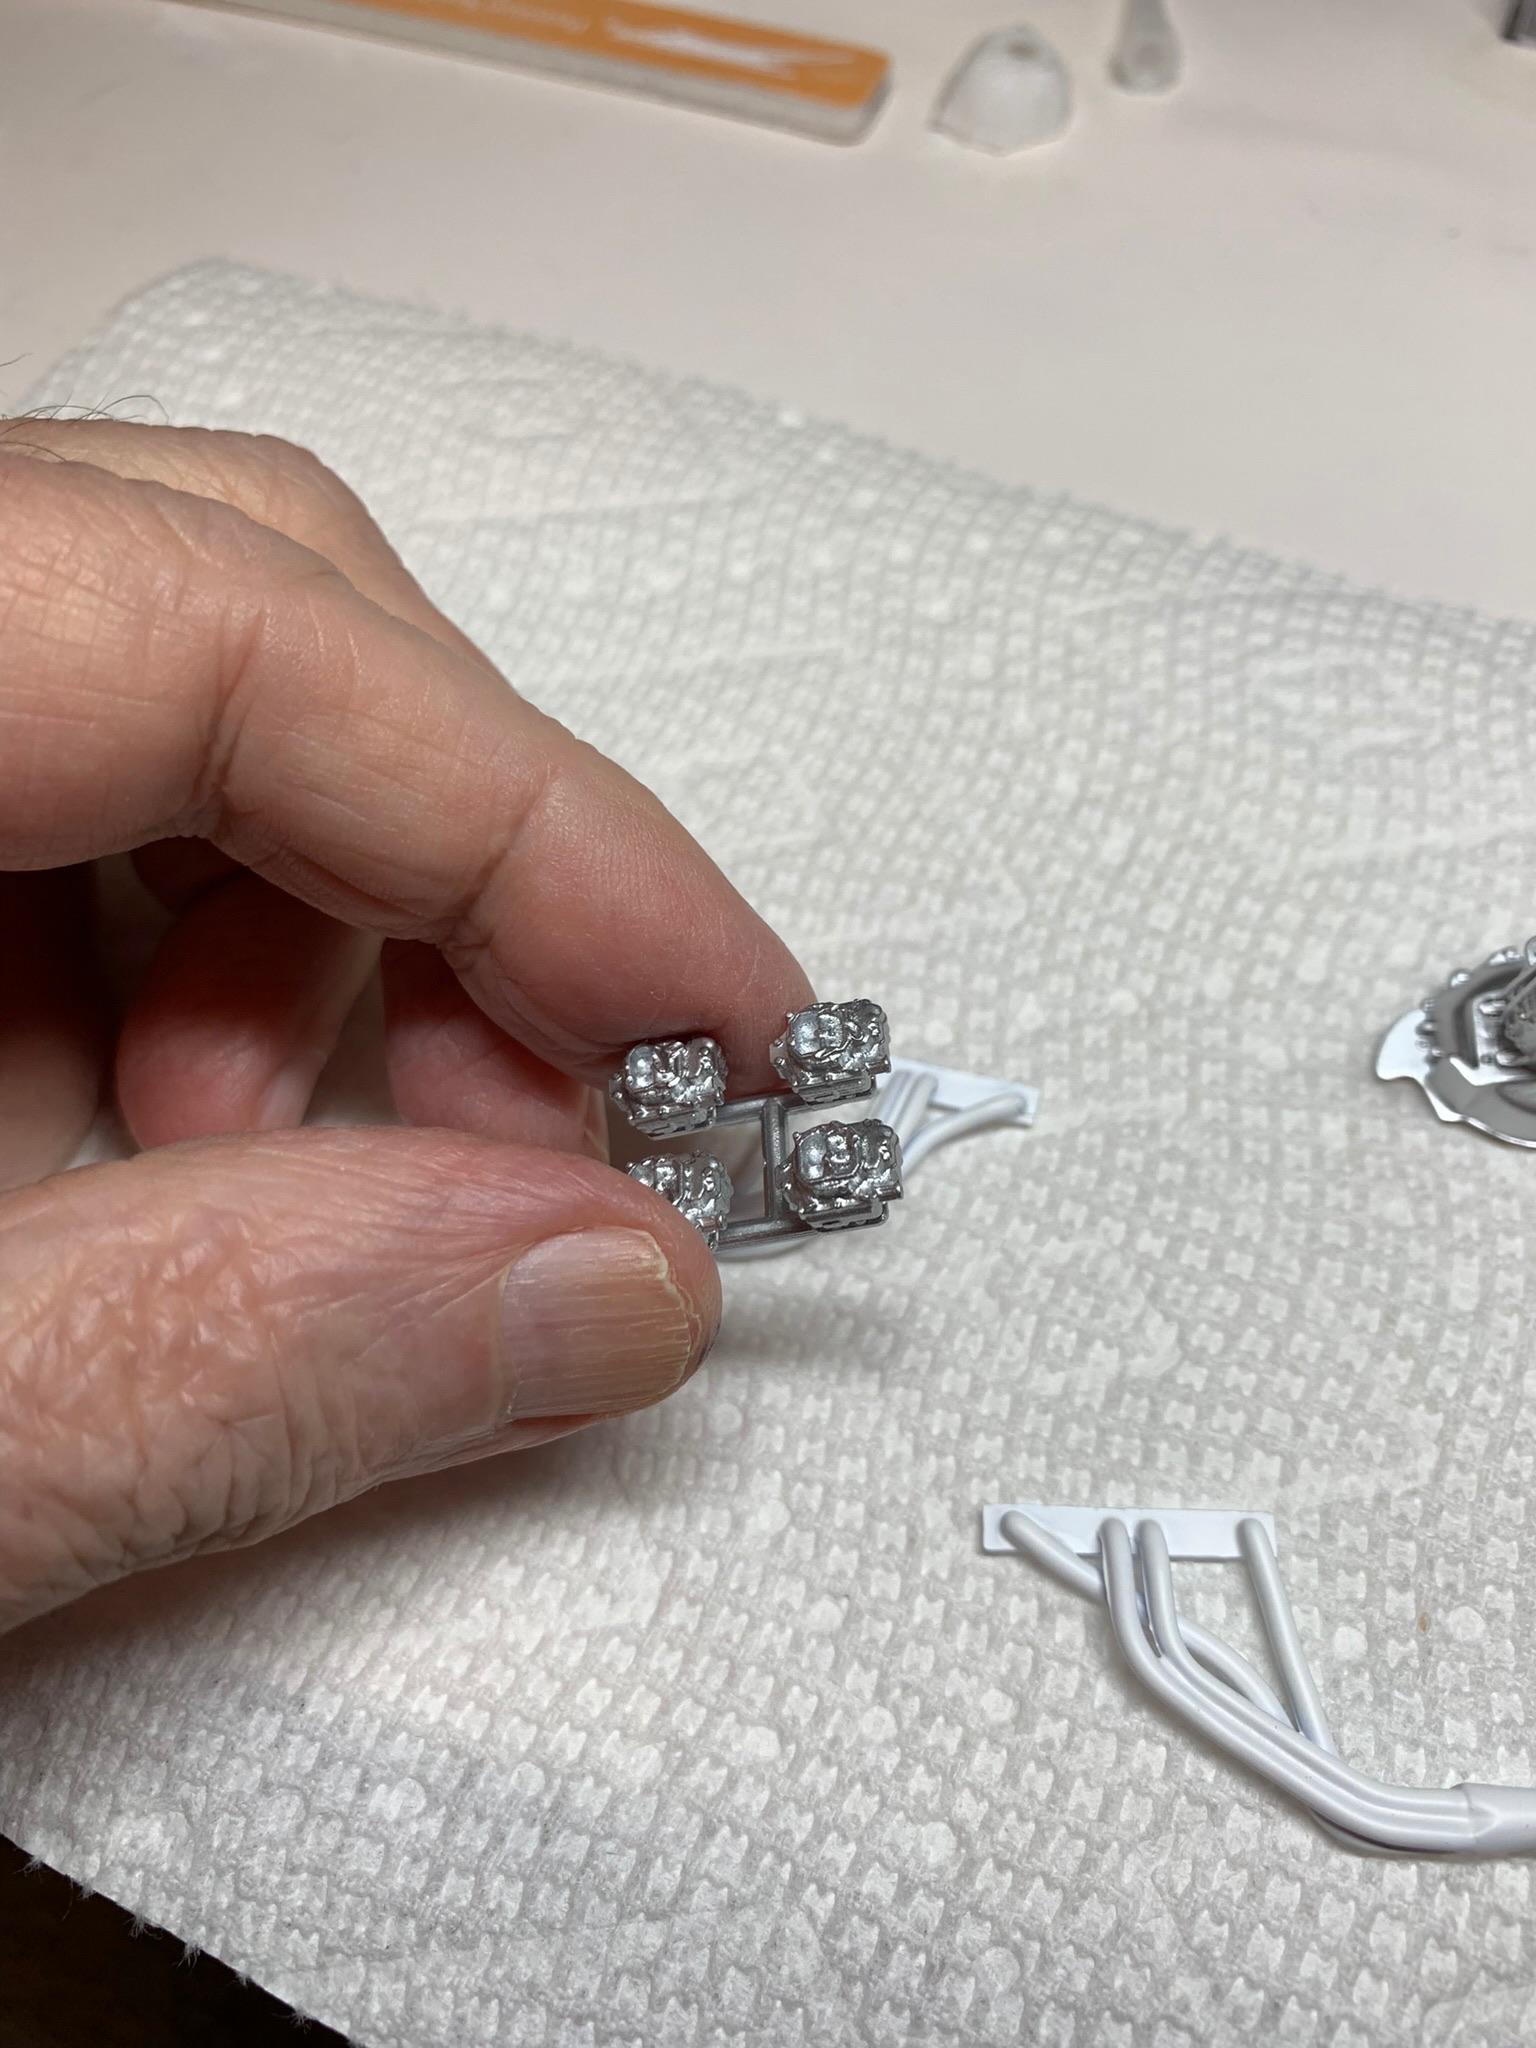
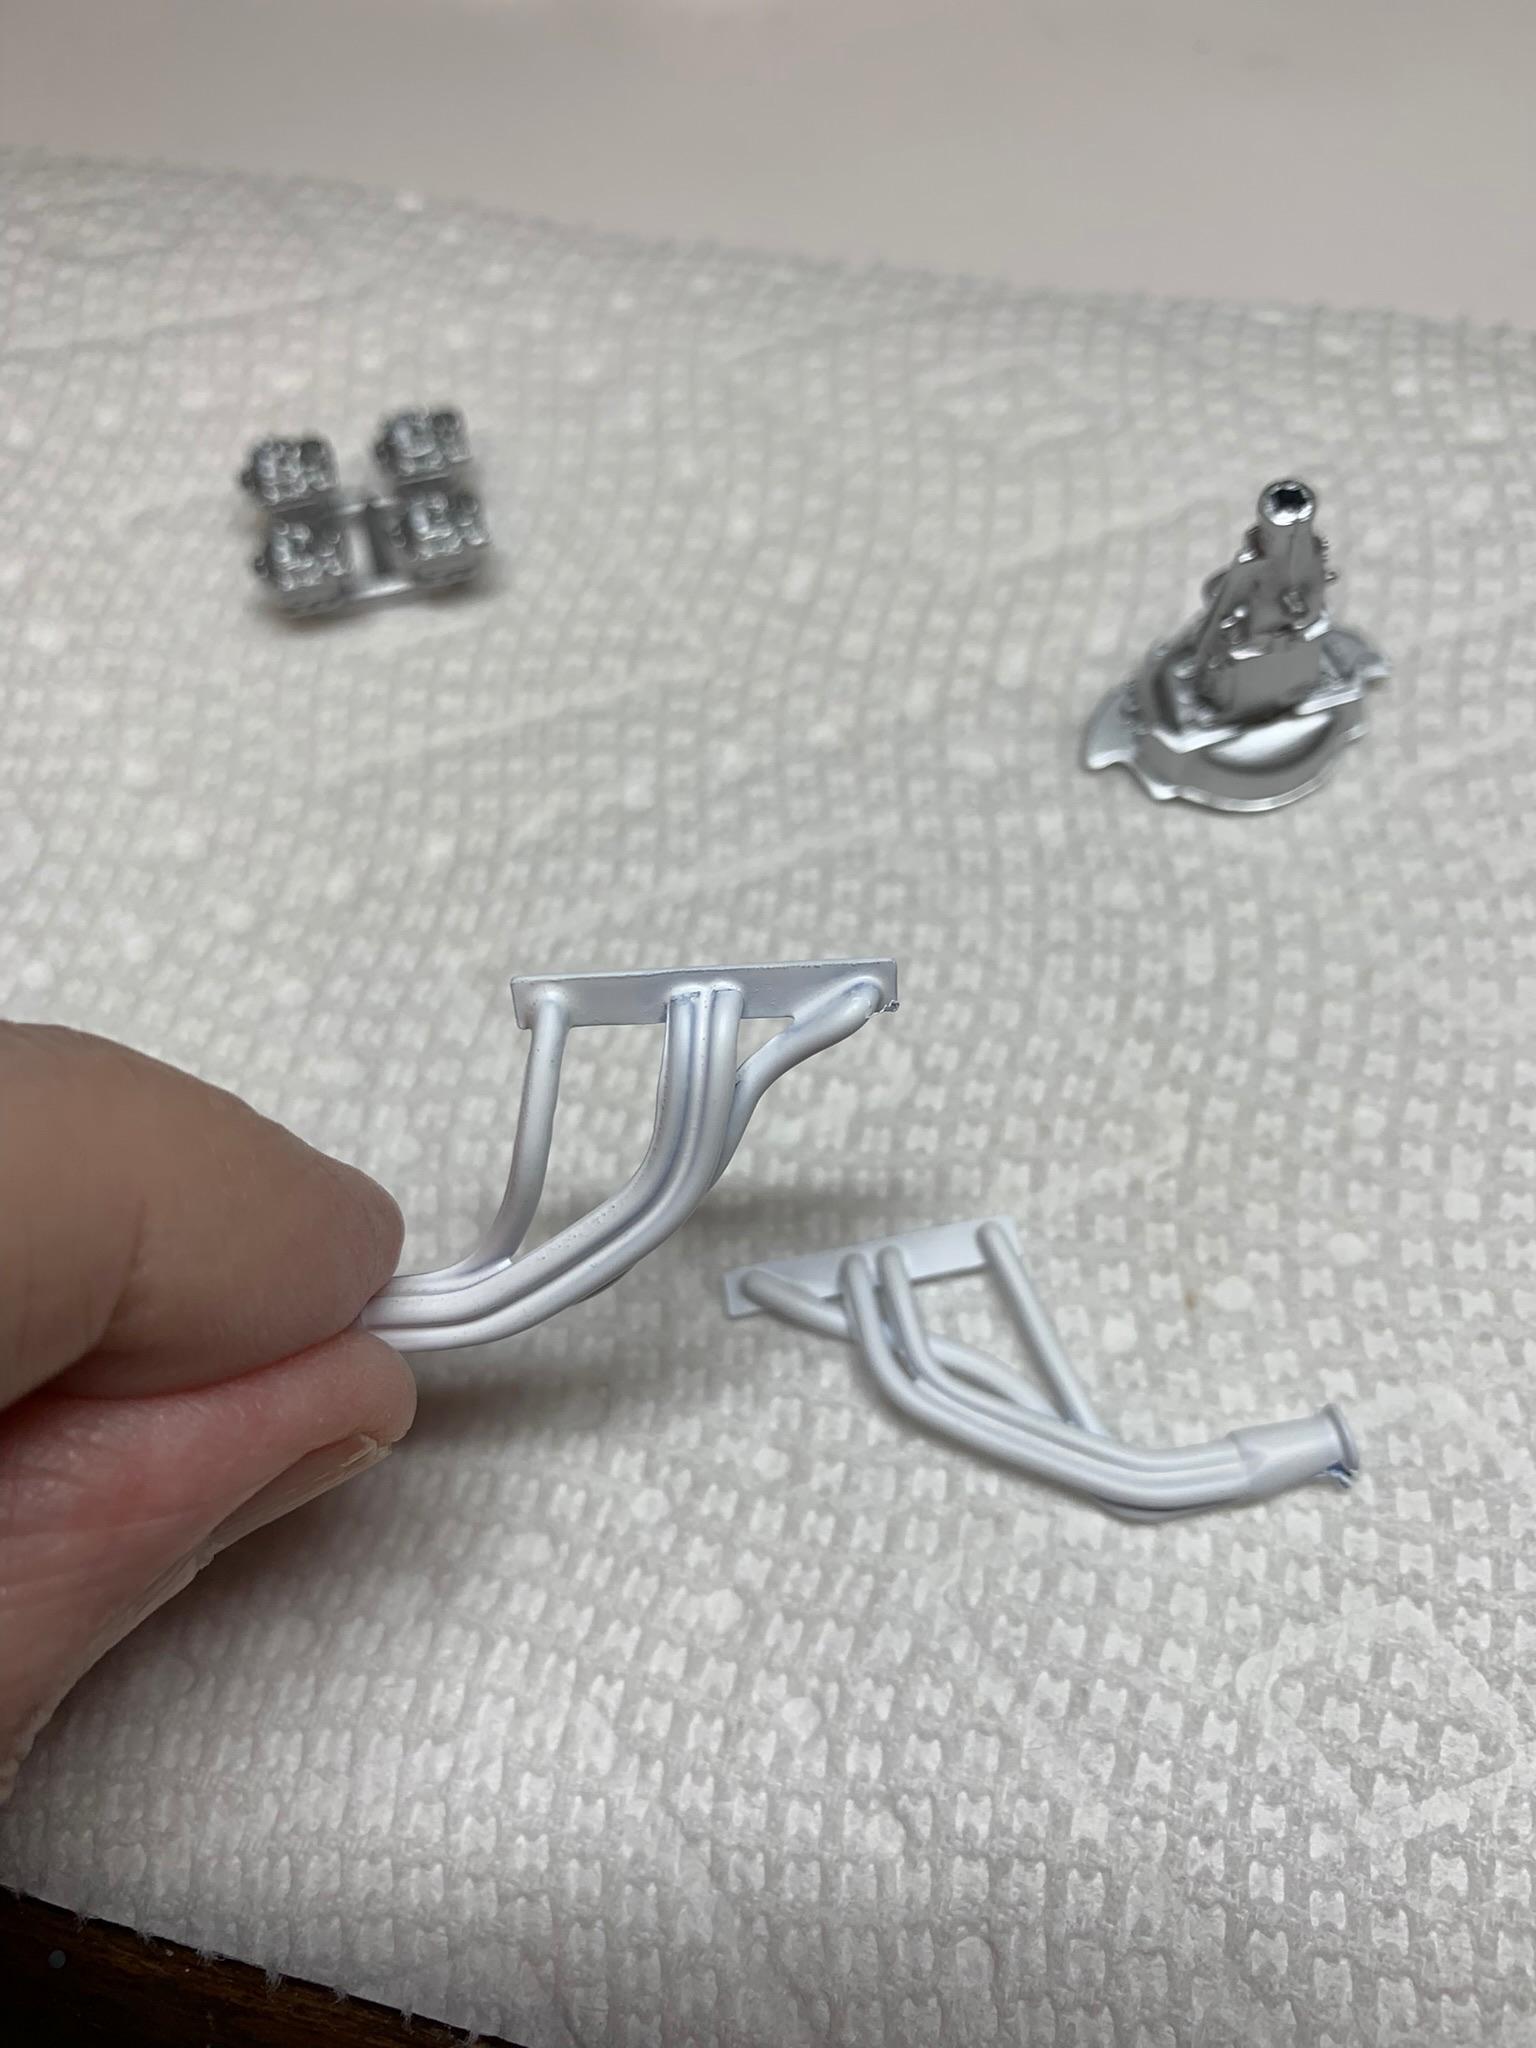
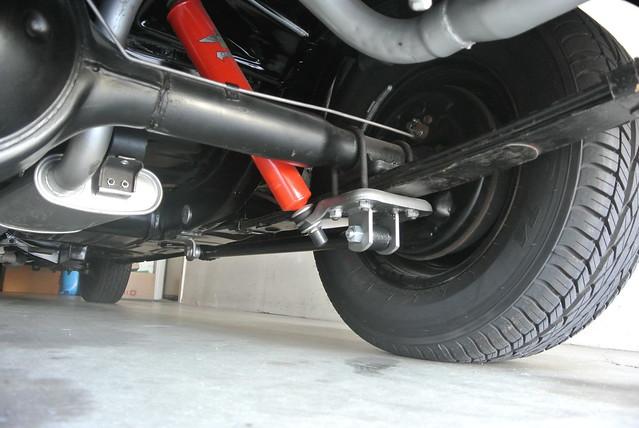
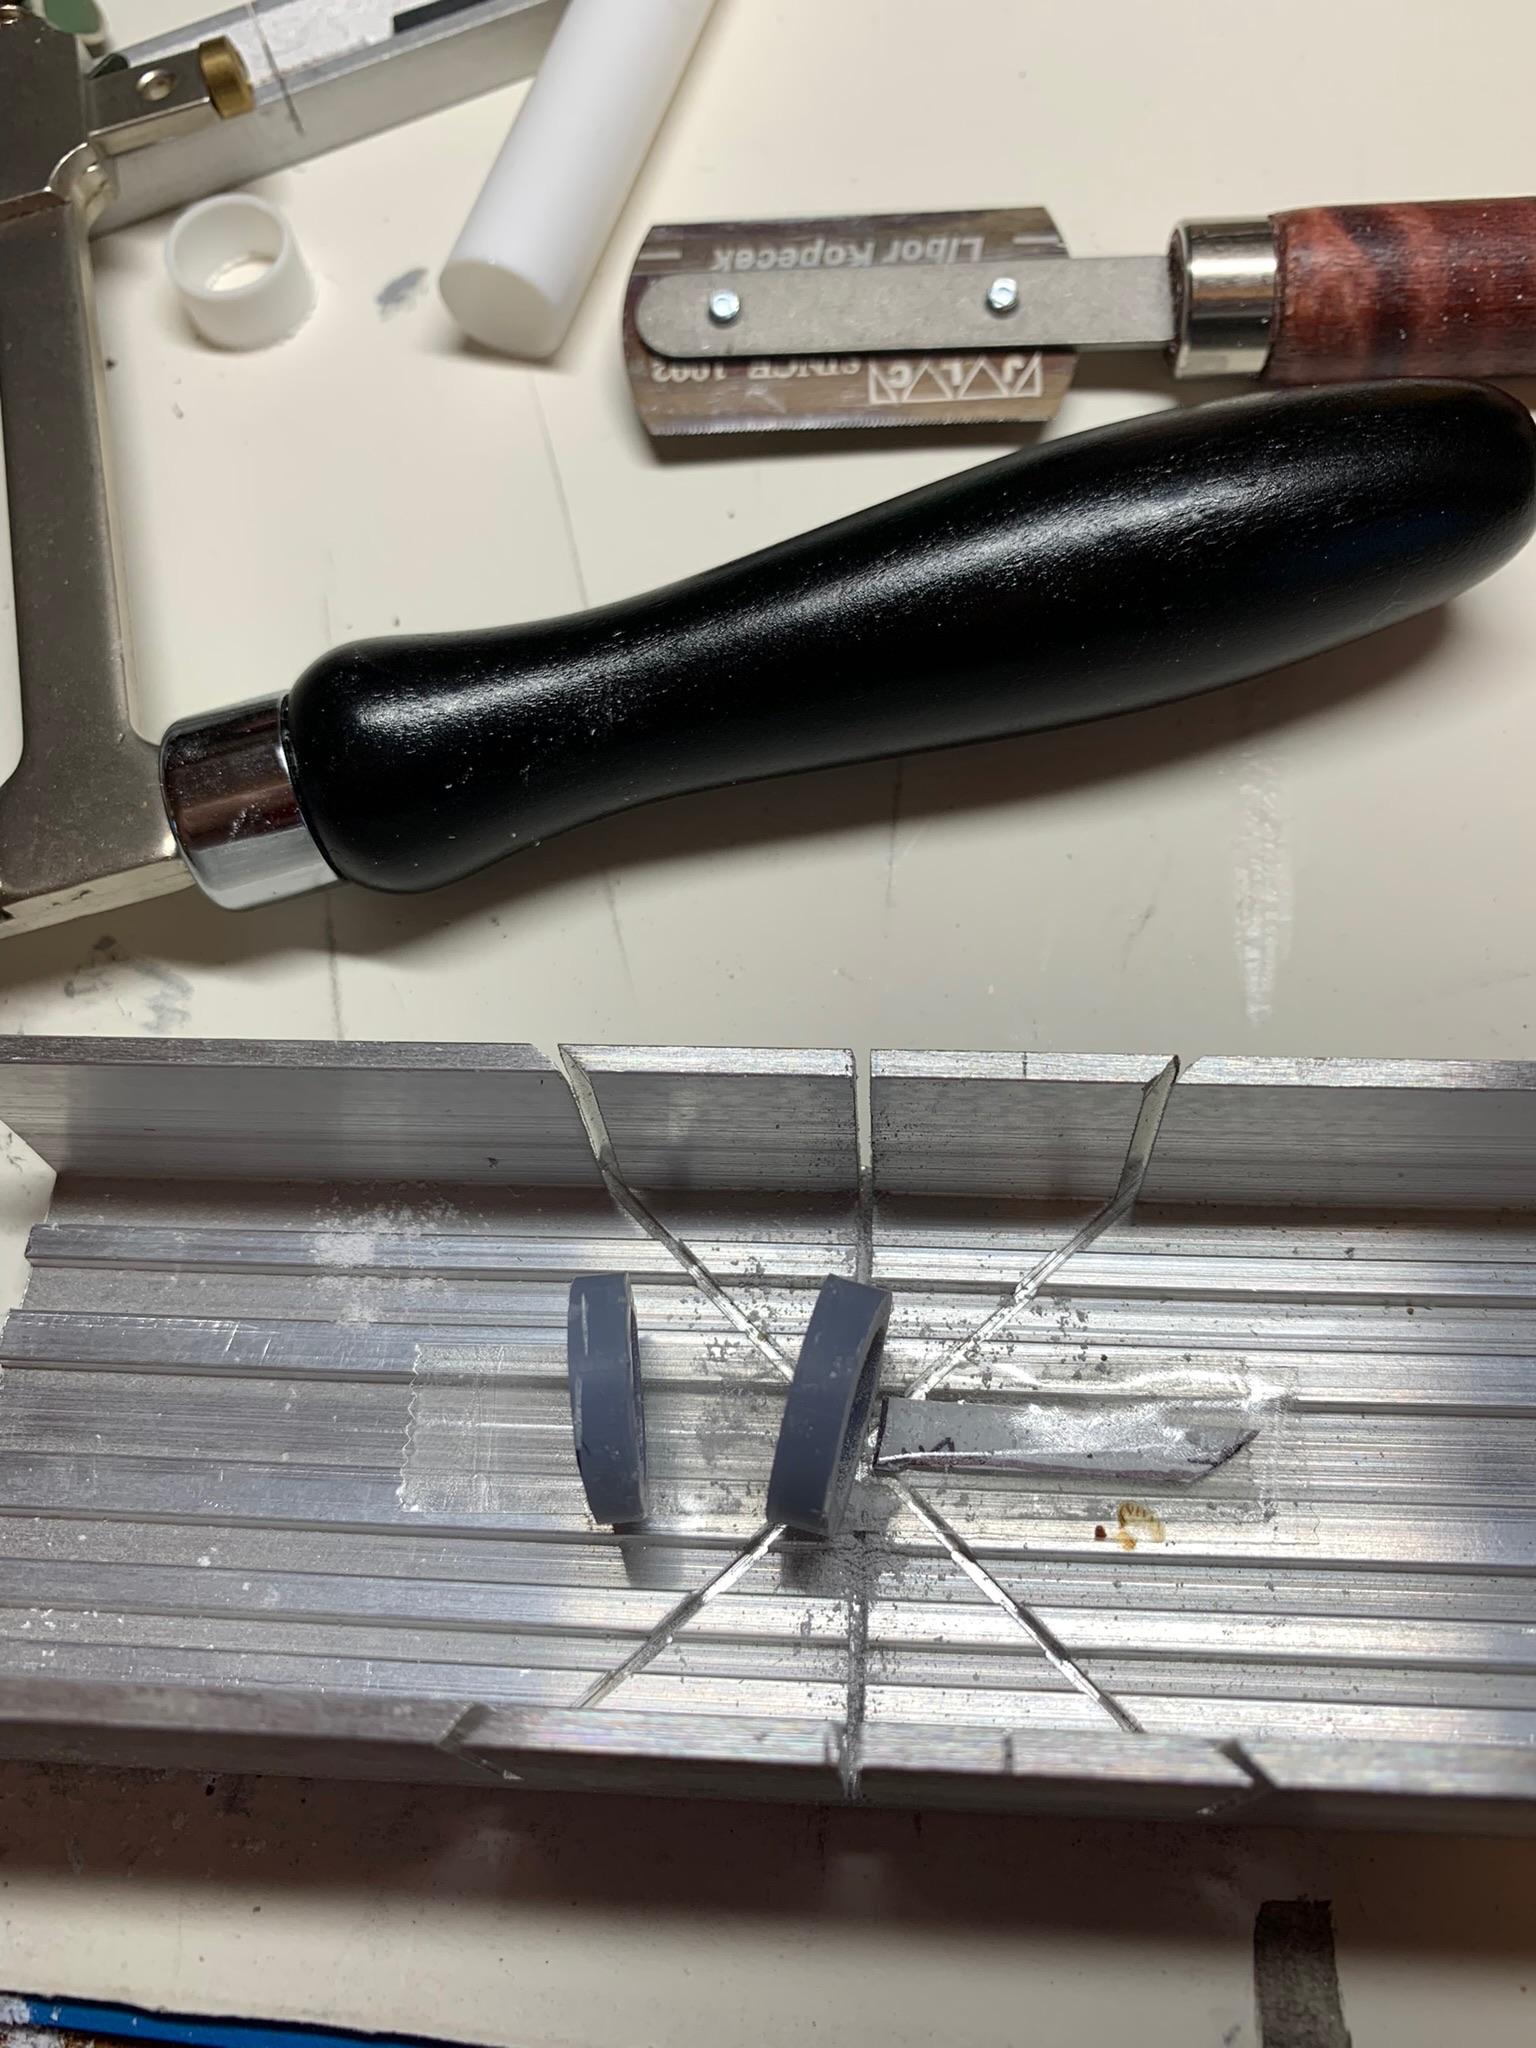
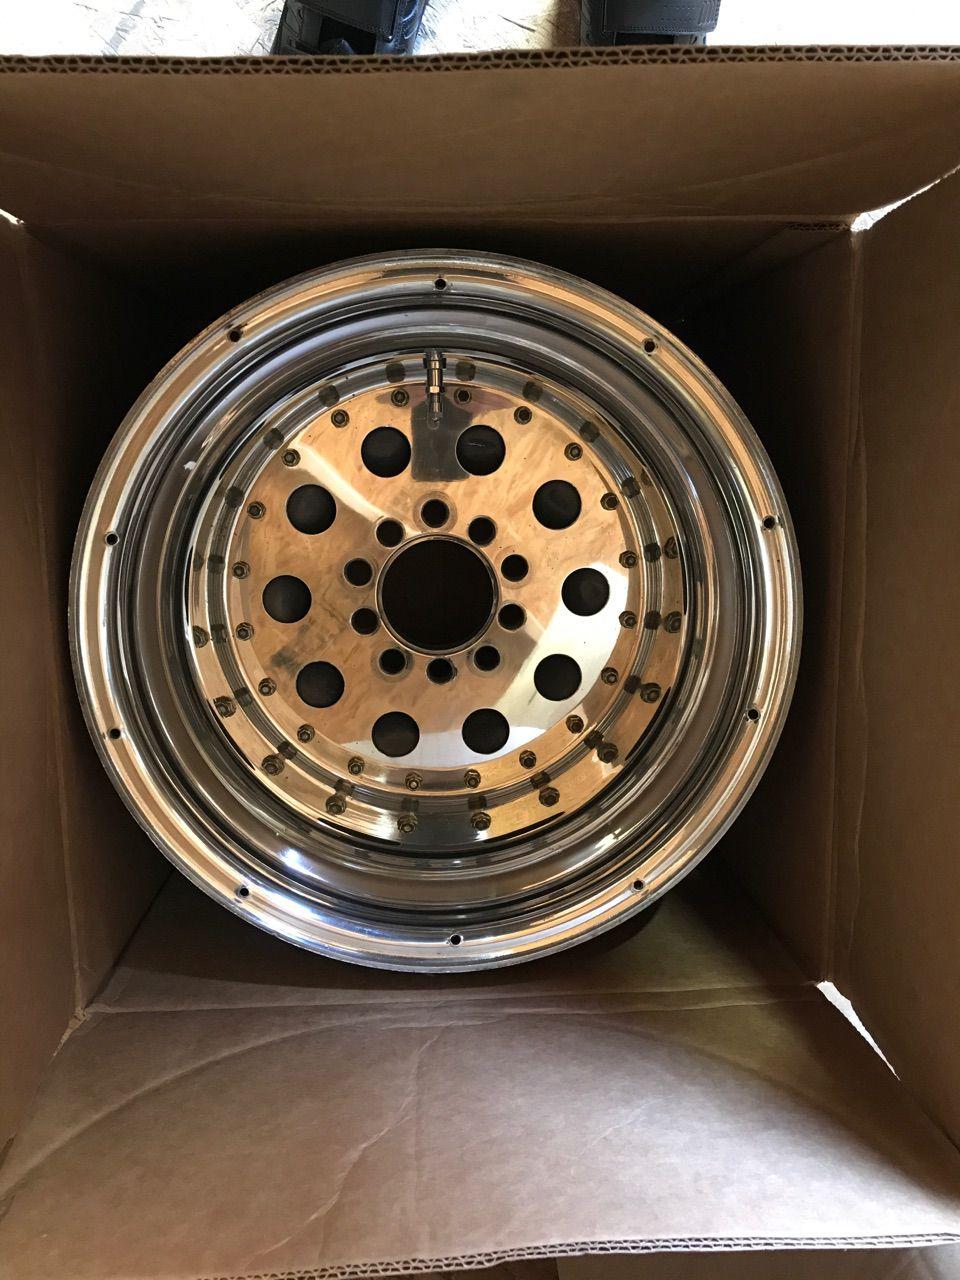
Electric water pump I gotta paint. Another pic of the 1:1 wheels, and the Beretta Pro Street kit they come in. Don’t want to buy a kit just to get the wheels, so may try to modify some Cragar Super Tricks (drill 10 holes in each wheel). Installed front suspension, then started to cut some aluminum tubing for better looking collectors. Then, remembered I had used shrink tubing on a previous build. Looks better than tubing, I think.
-
1969 Camaro A/SA (possibly Thomas Arnett’s)
R. Thorne replied to R. Thorne's topic in WIP: Drag Racing Models
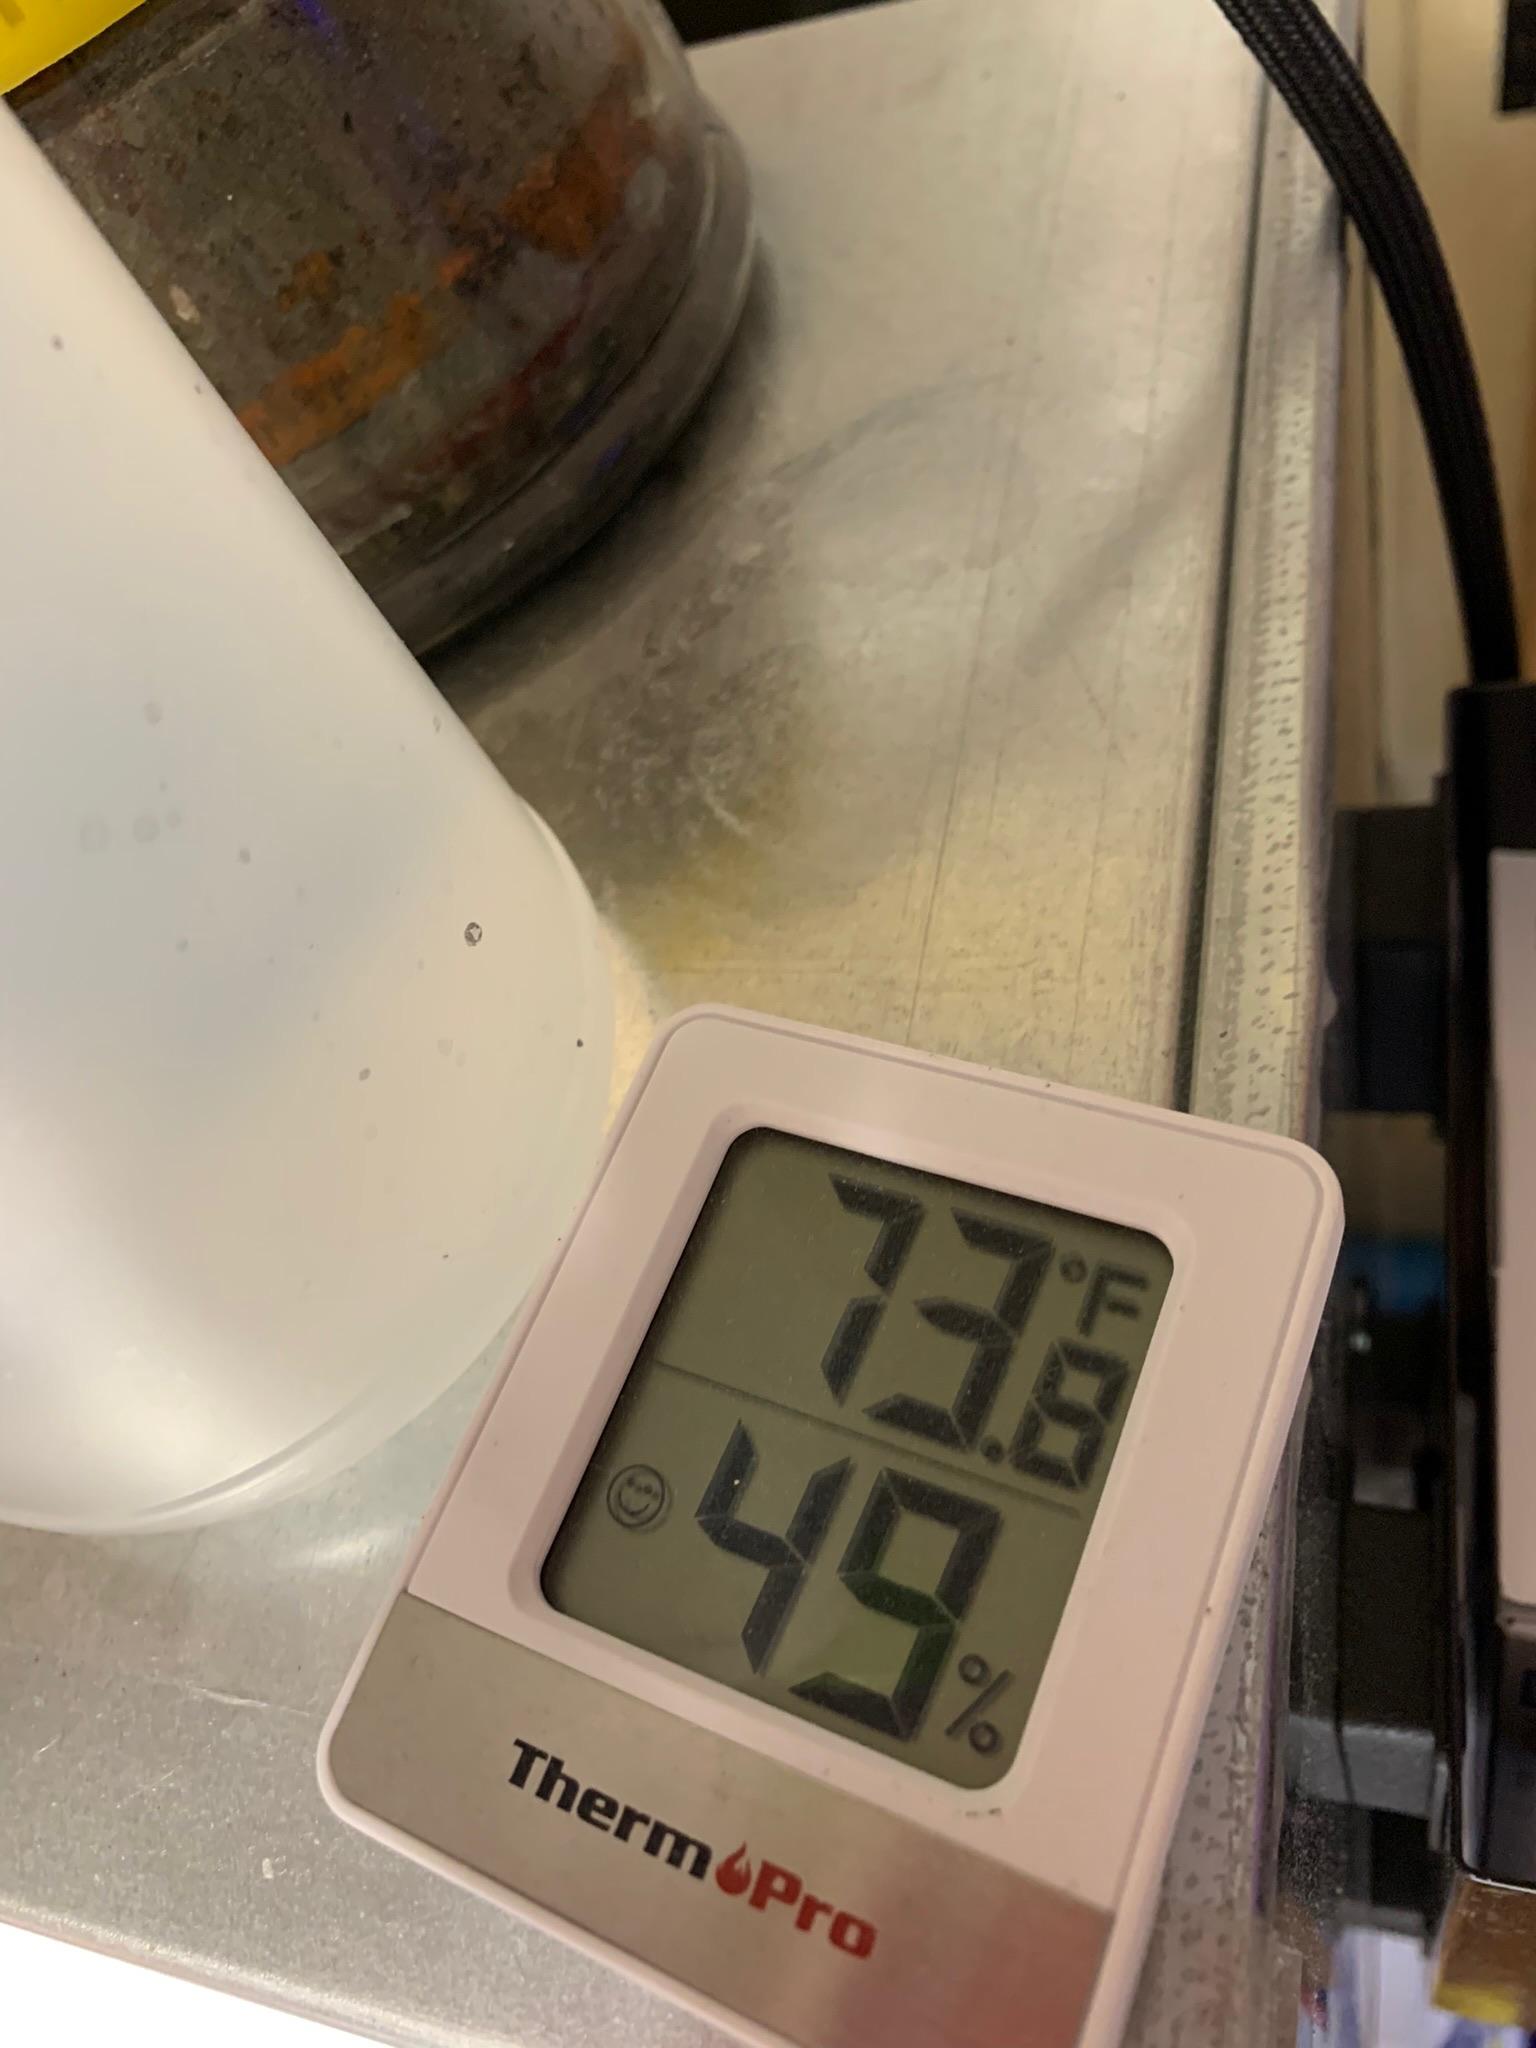
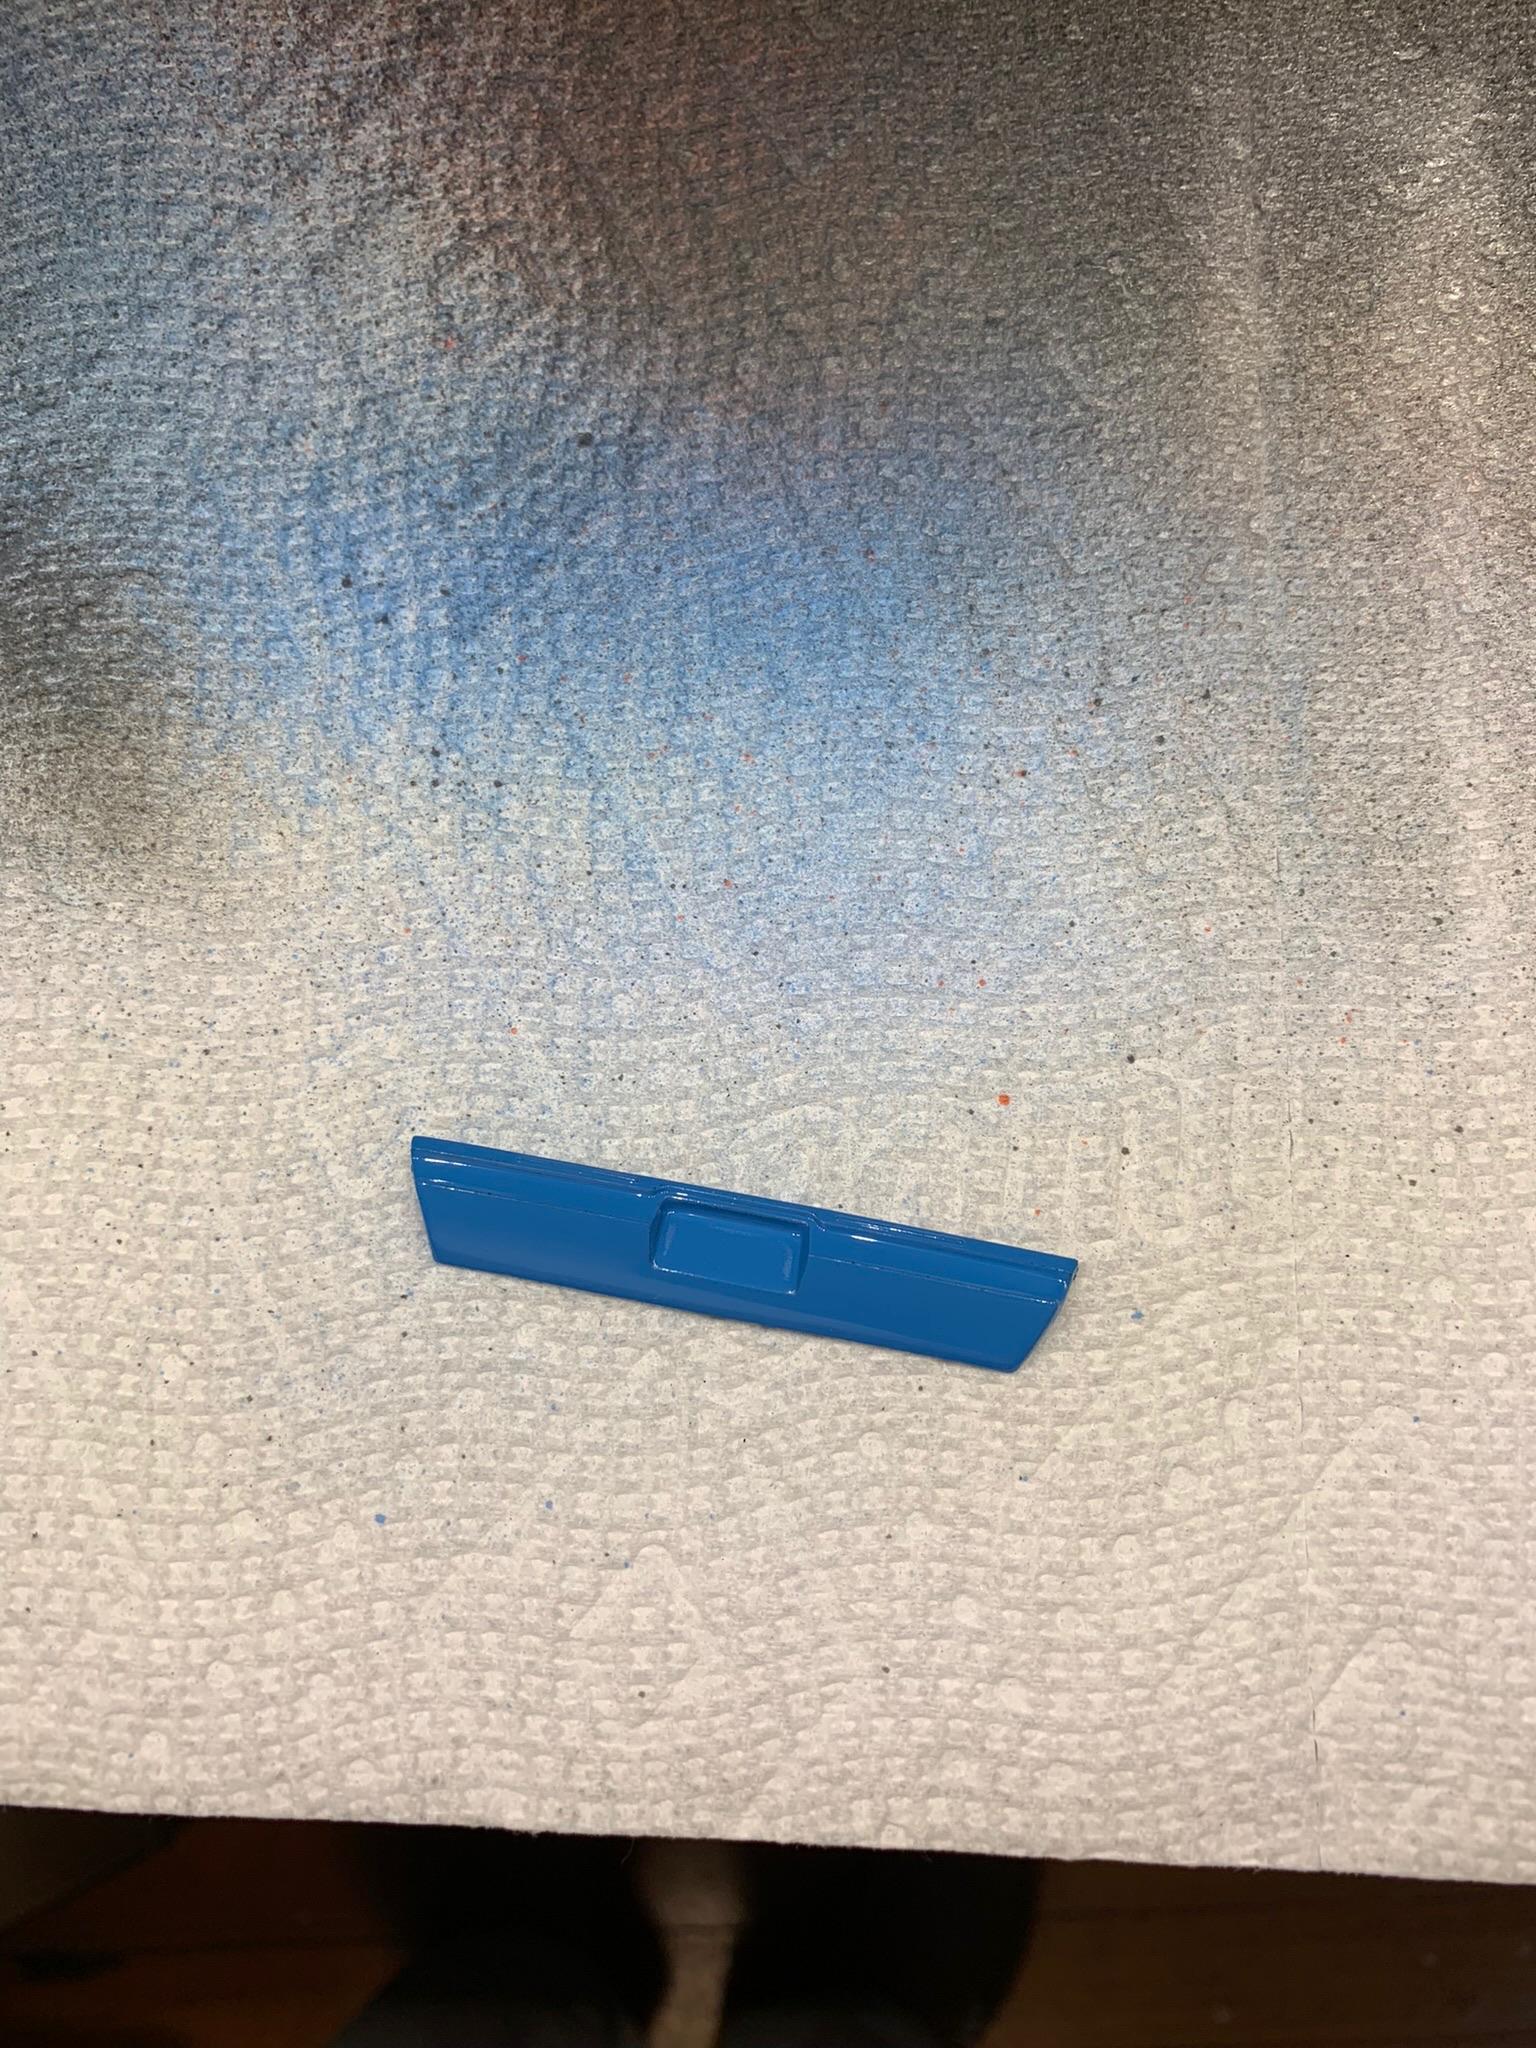
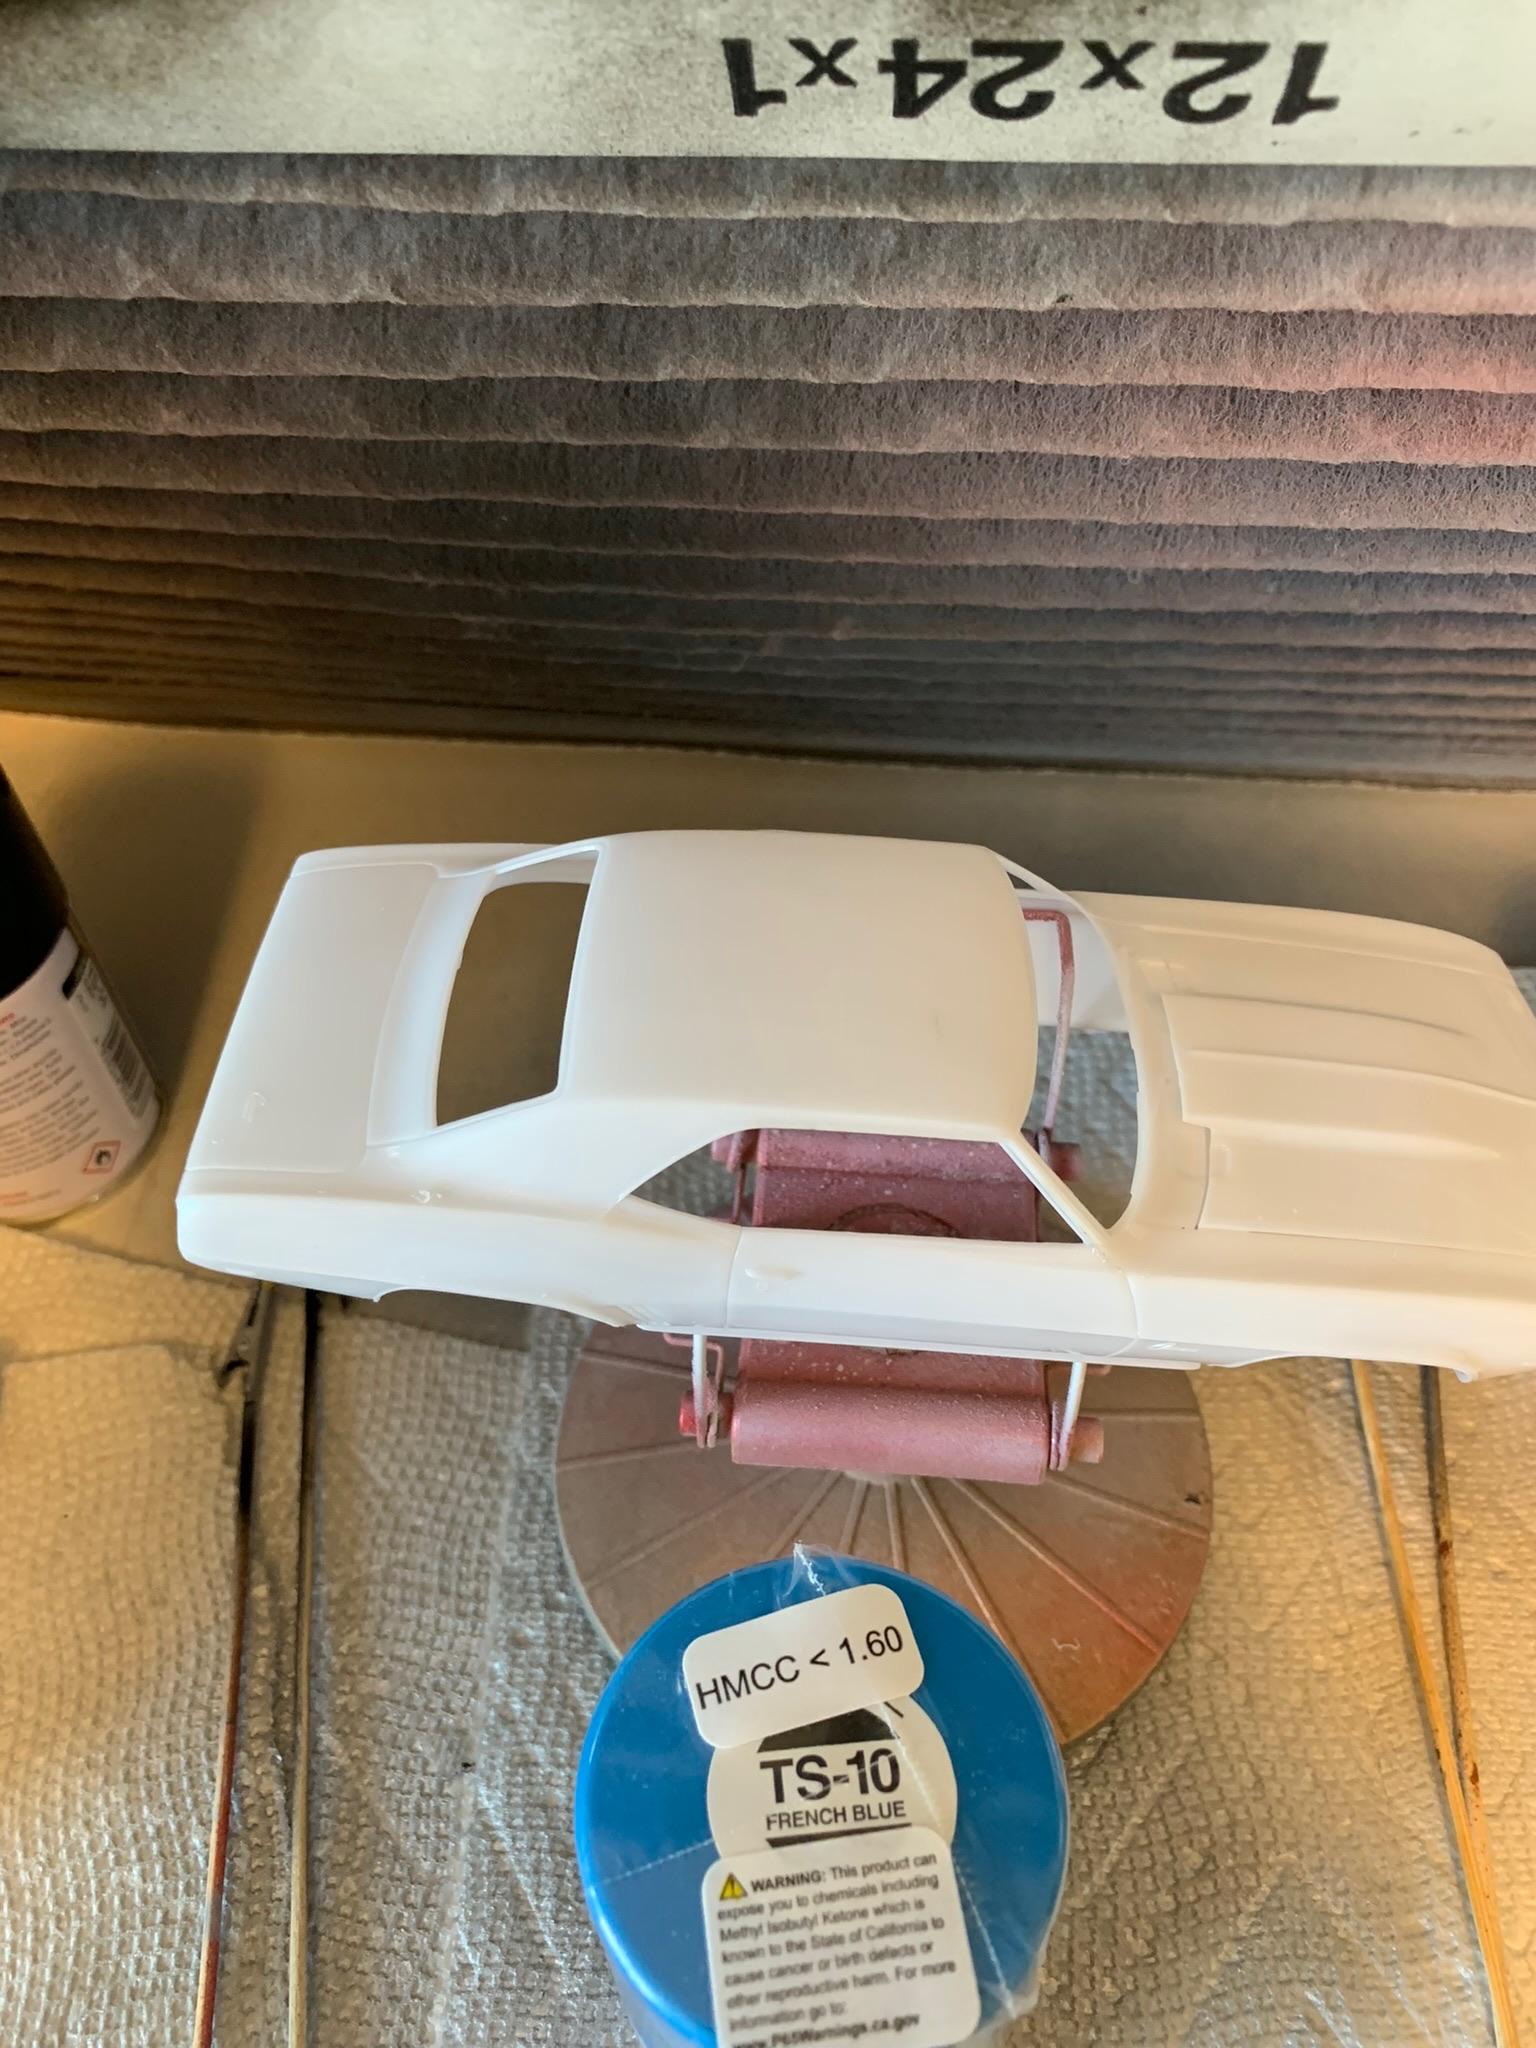
Applied a couple coats of ts 10 French blue. A couple hours later, I noticed some “blushing” or dull spots on the top and one side that were not there after the wet gloss coats. The humidity was 41 percent and temp was 73 degrees, or I would have guessed high humidity as the culprit. After some head scratching, decided to put a couple more gloss coats on. That eliminated 90 percent of it.
-
1969 Camaro A/SA (possibly Thomas Arnett’s)
R. Thorne replied to R. Thorne's topic in WIP: Drag Racing Models
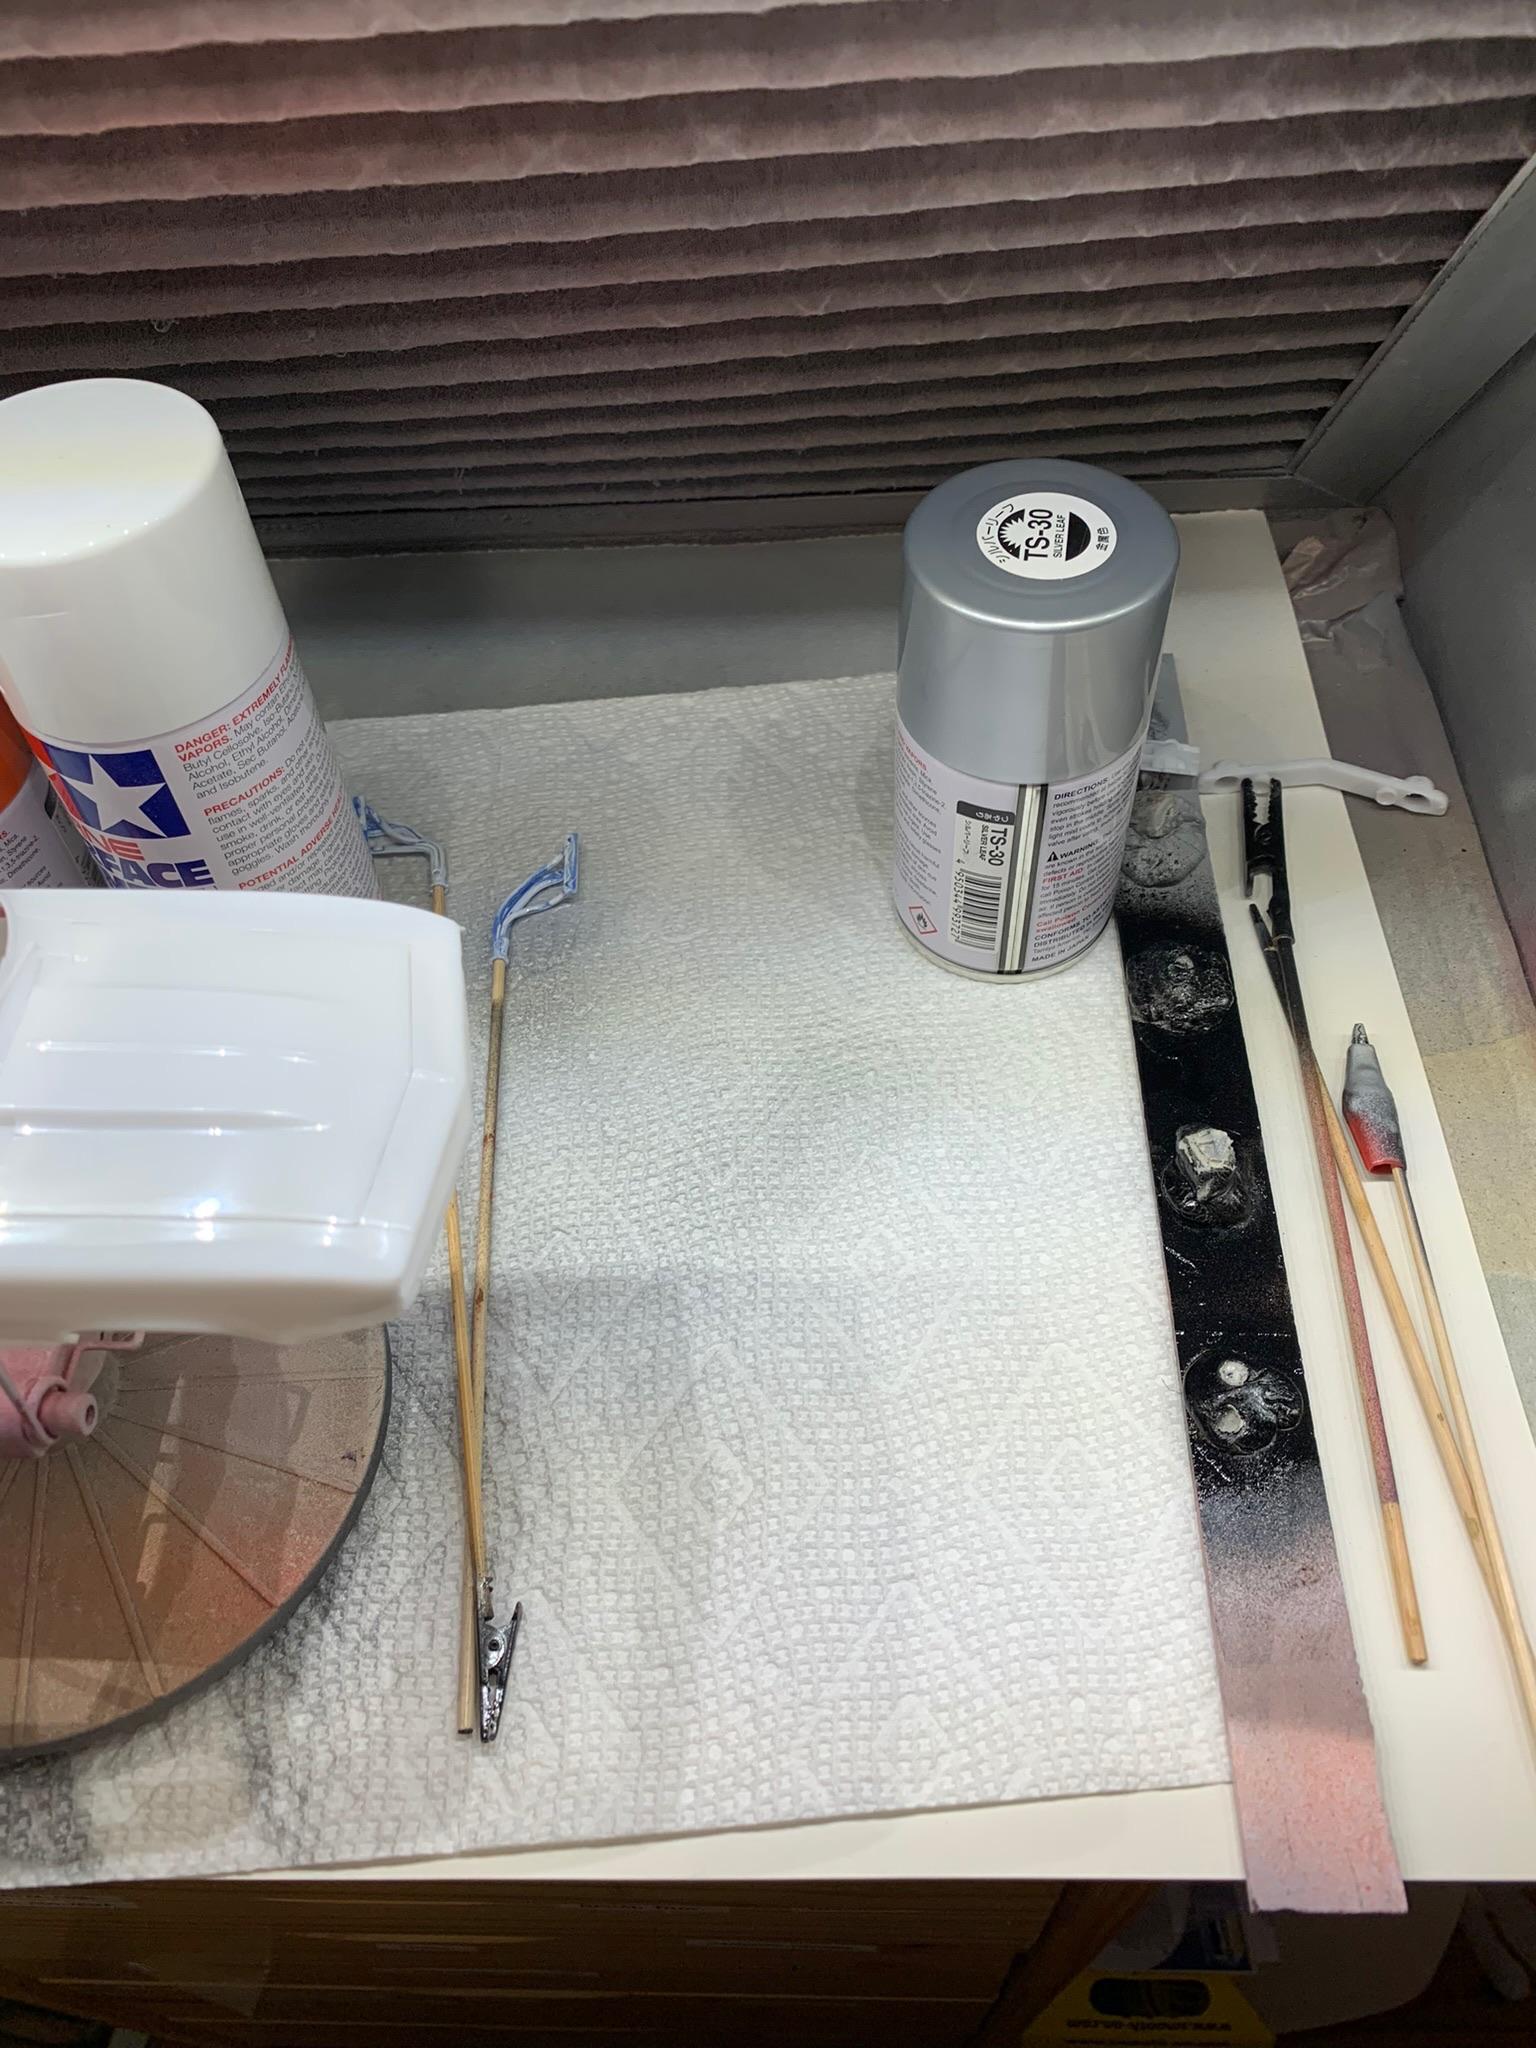
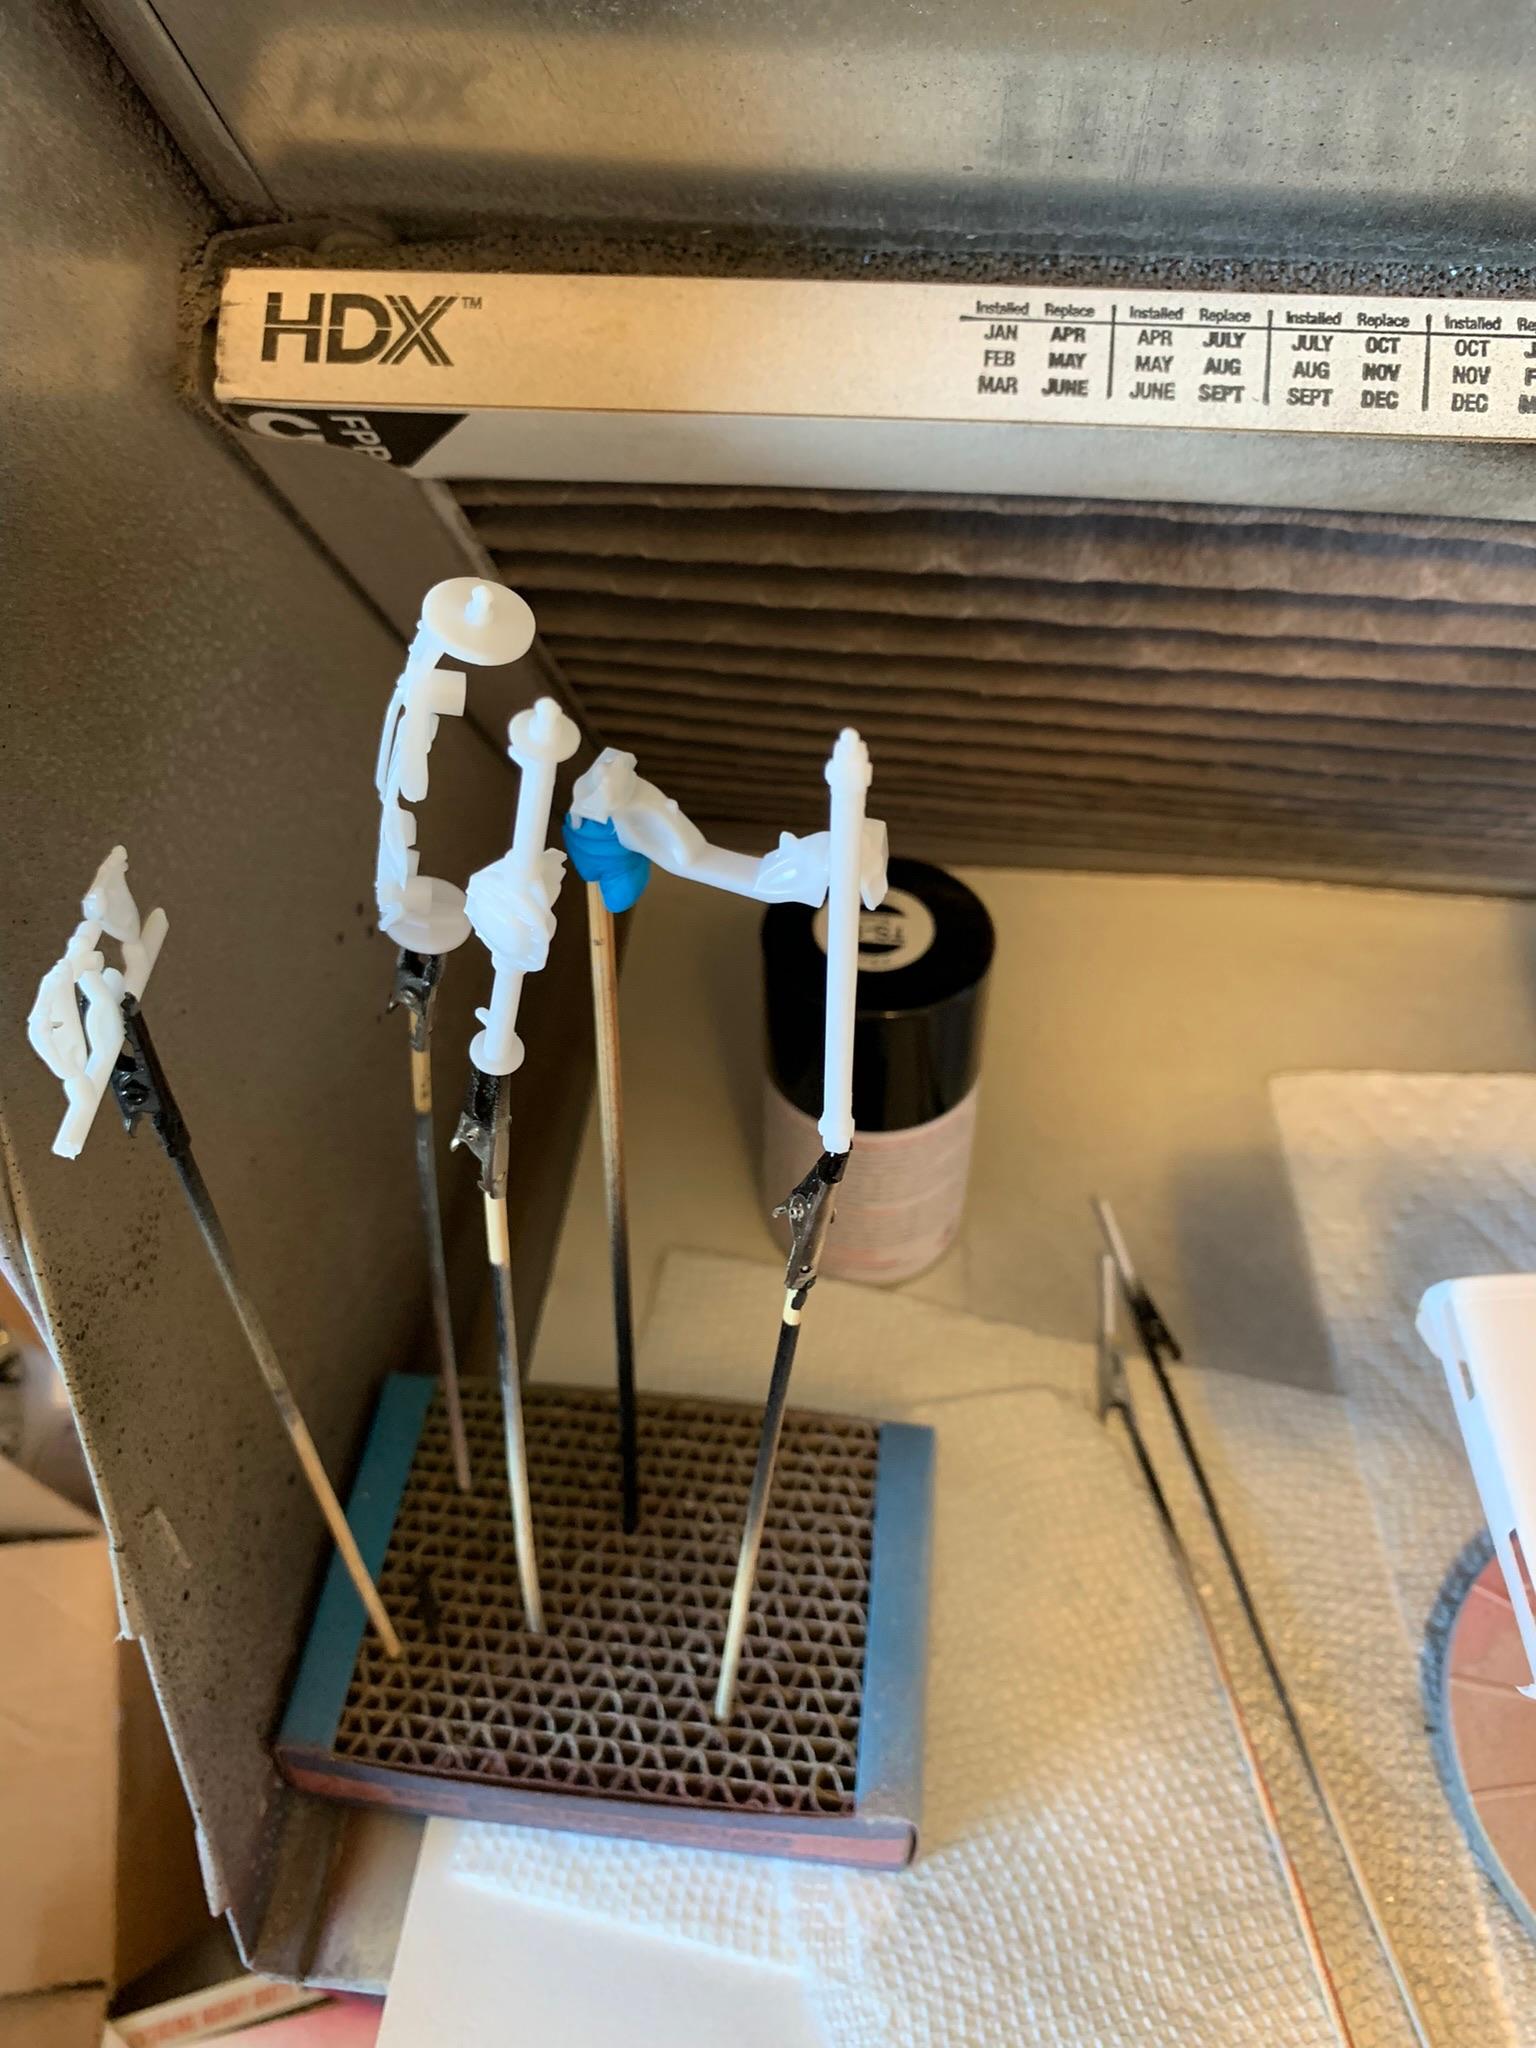
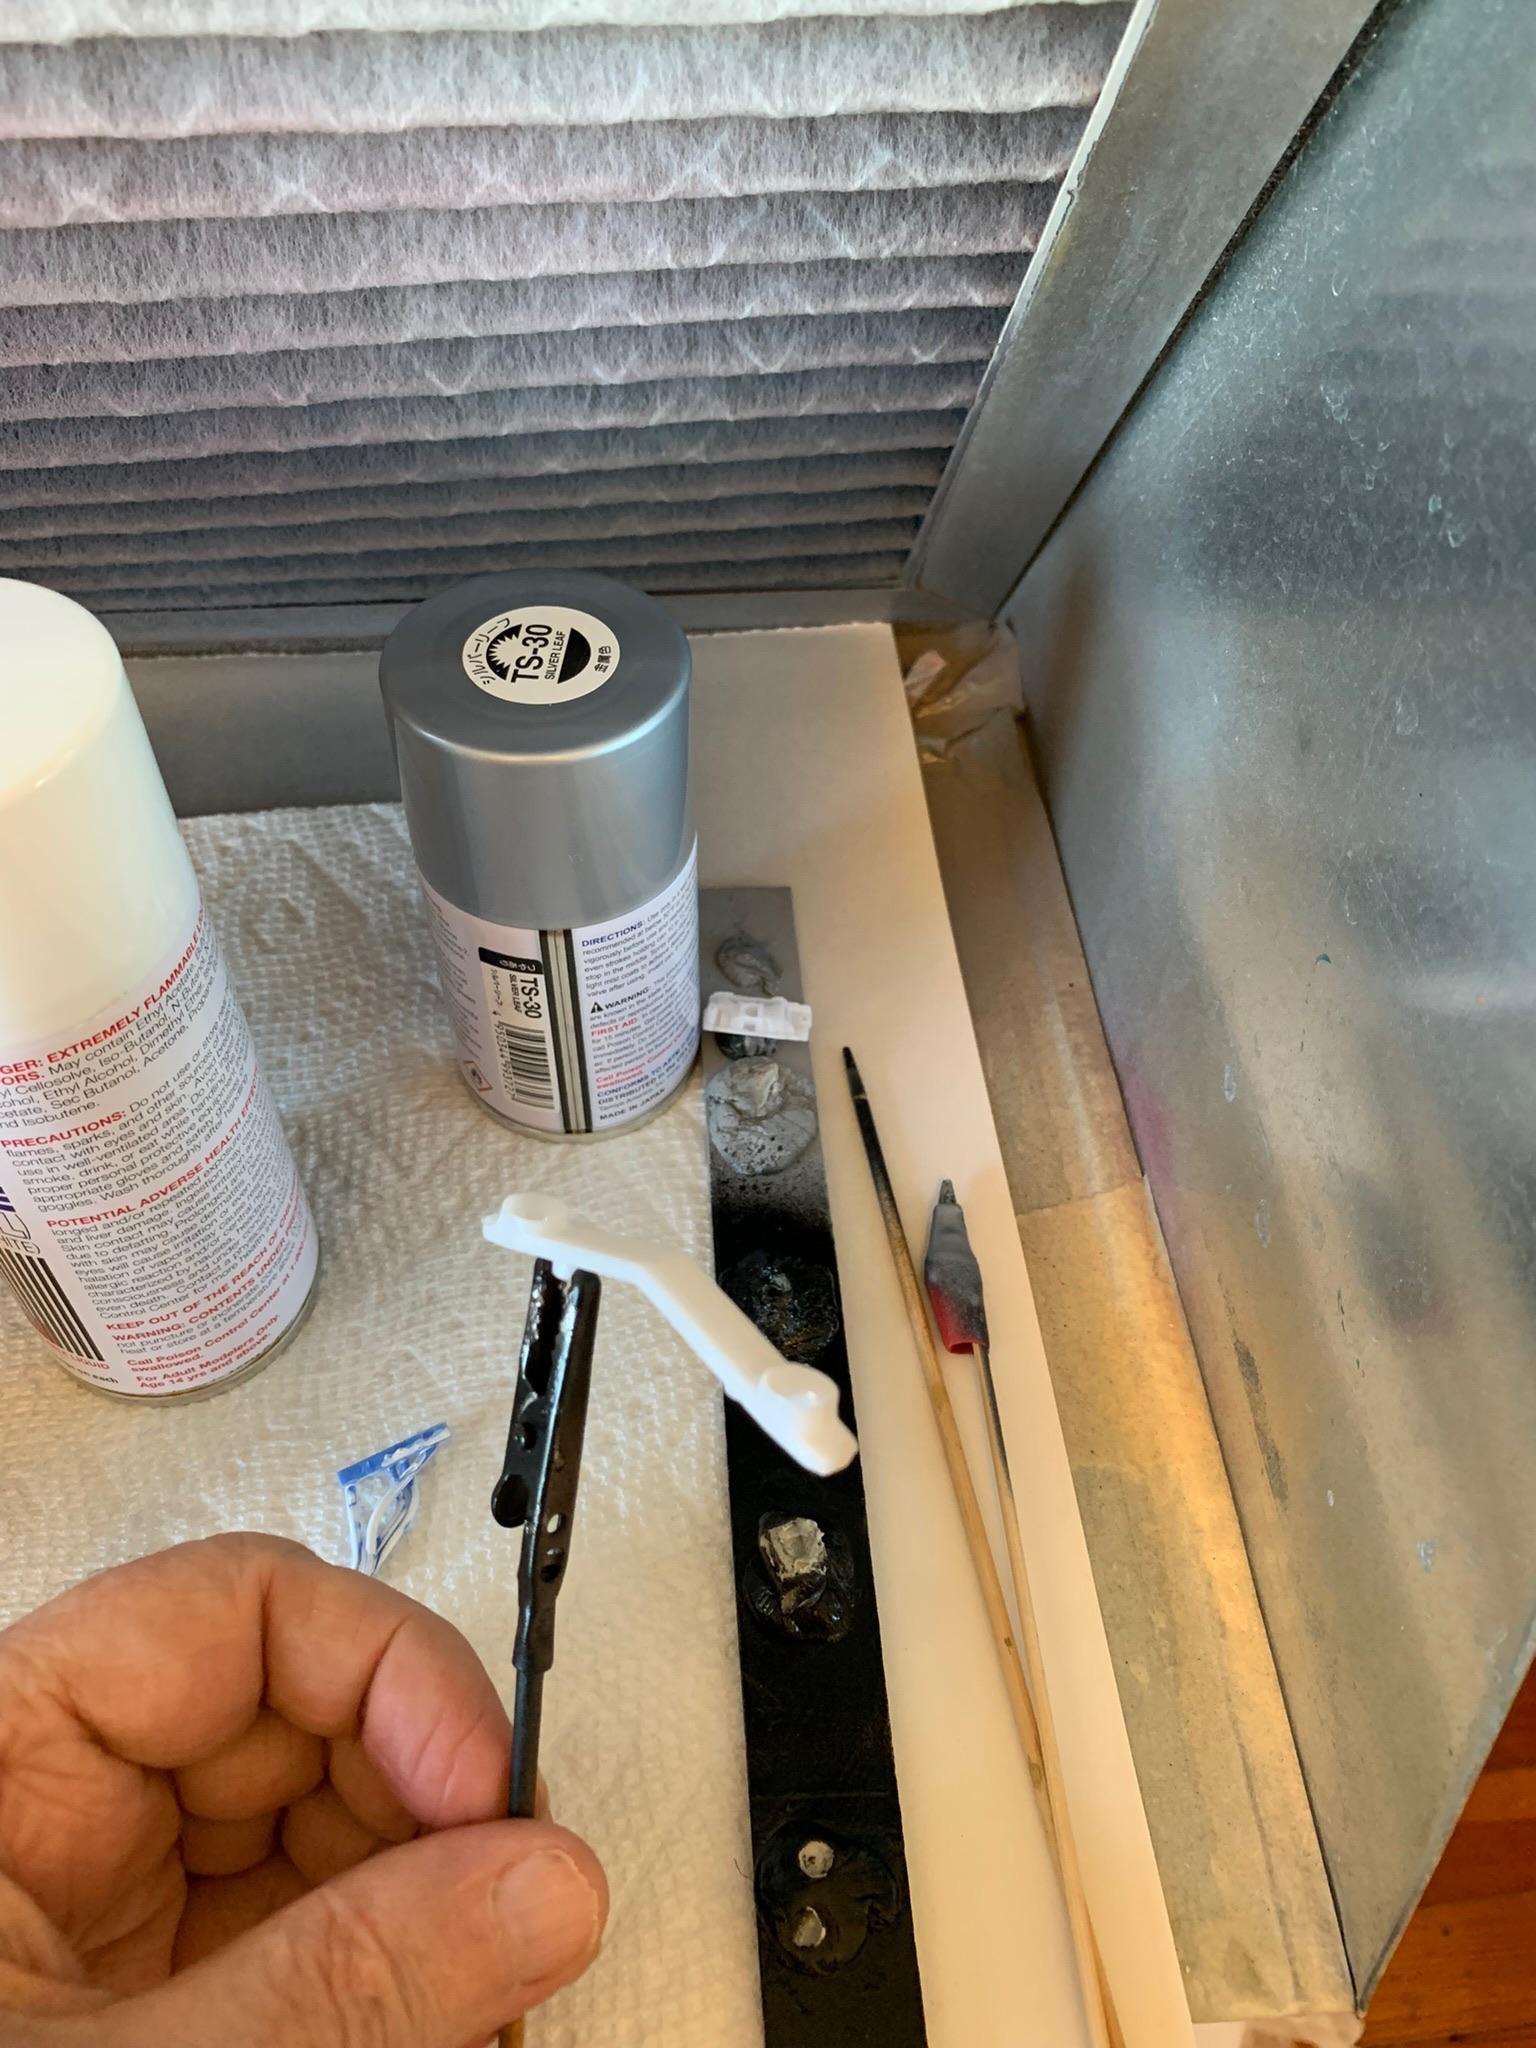
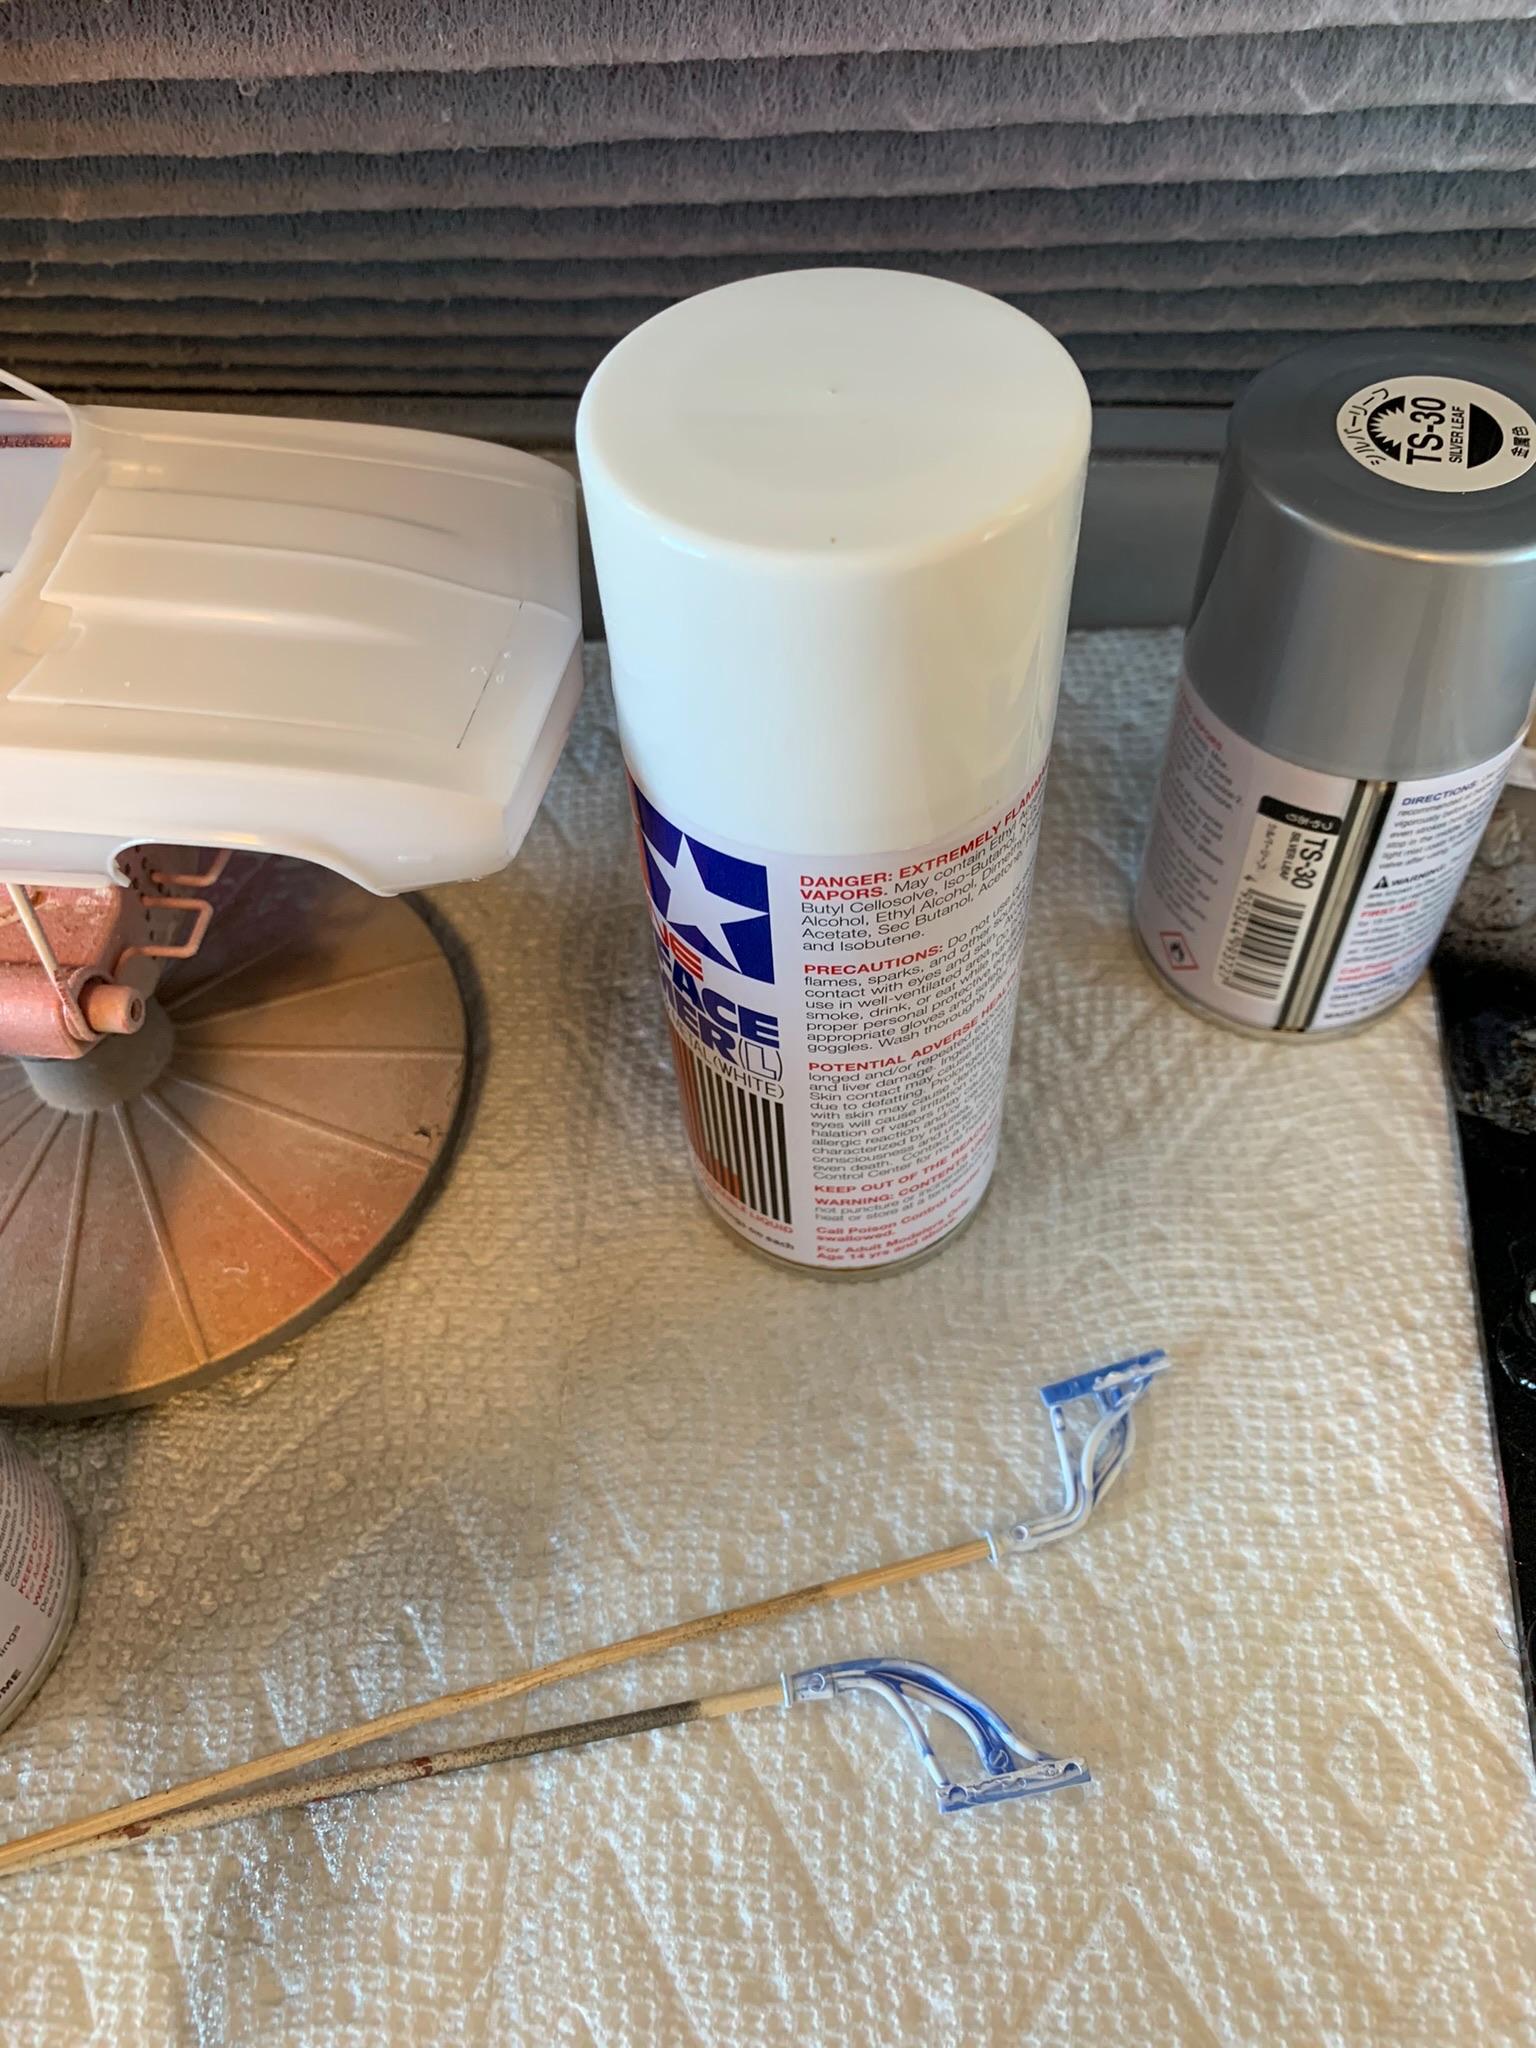
Removed a couple sharp seam lines, sprayed some Tamiya fine white primer, sprayed the grill with some ts30. Also, some ts14 on the rear end and miscellaneous parts. Headers are for another build.
-
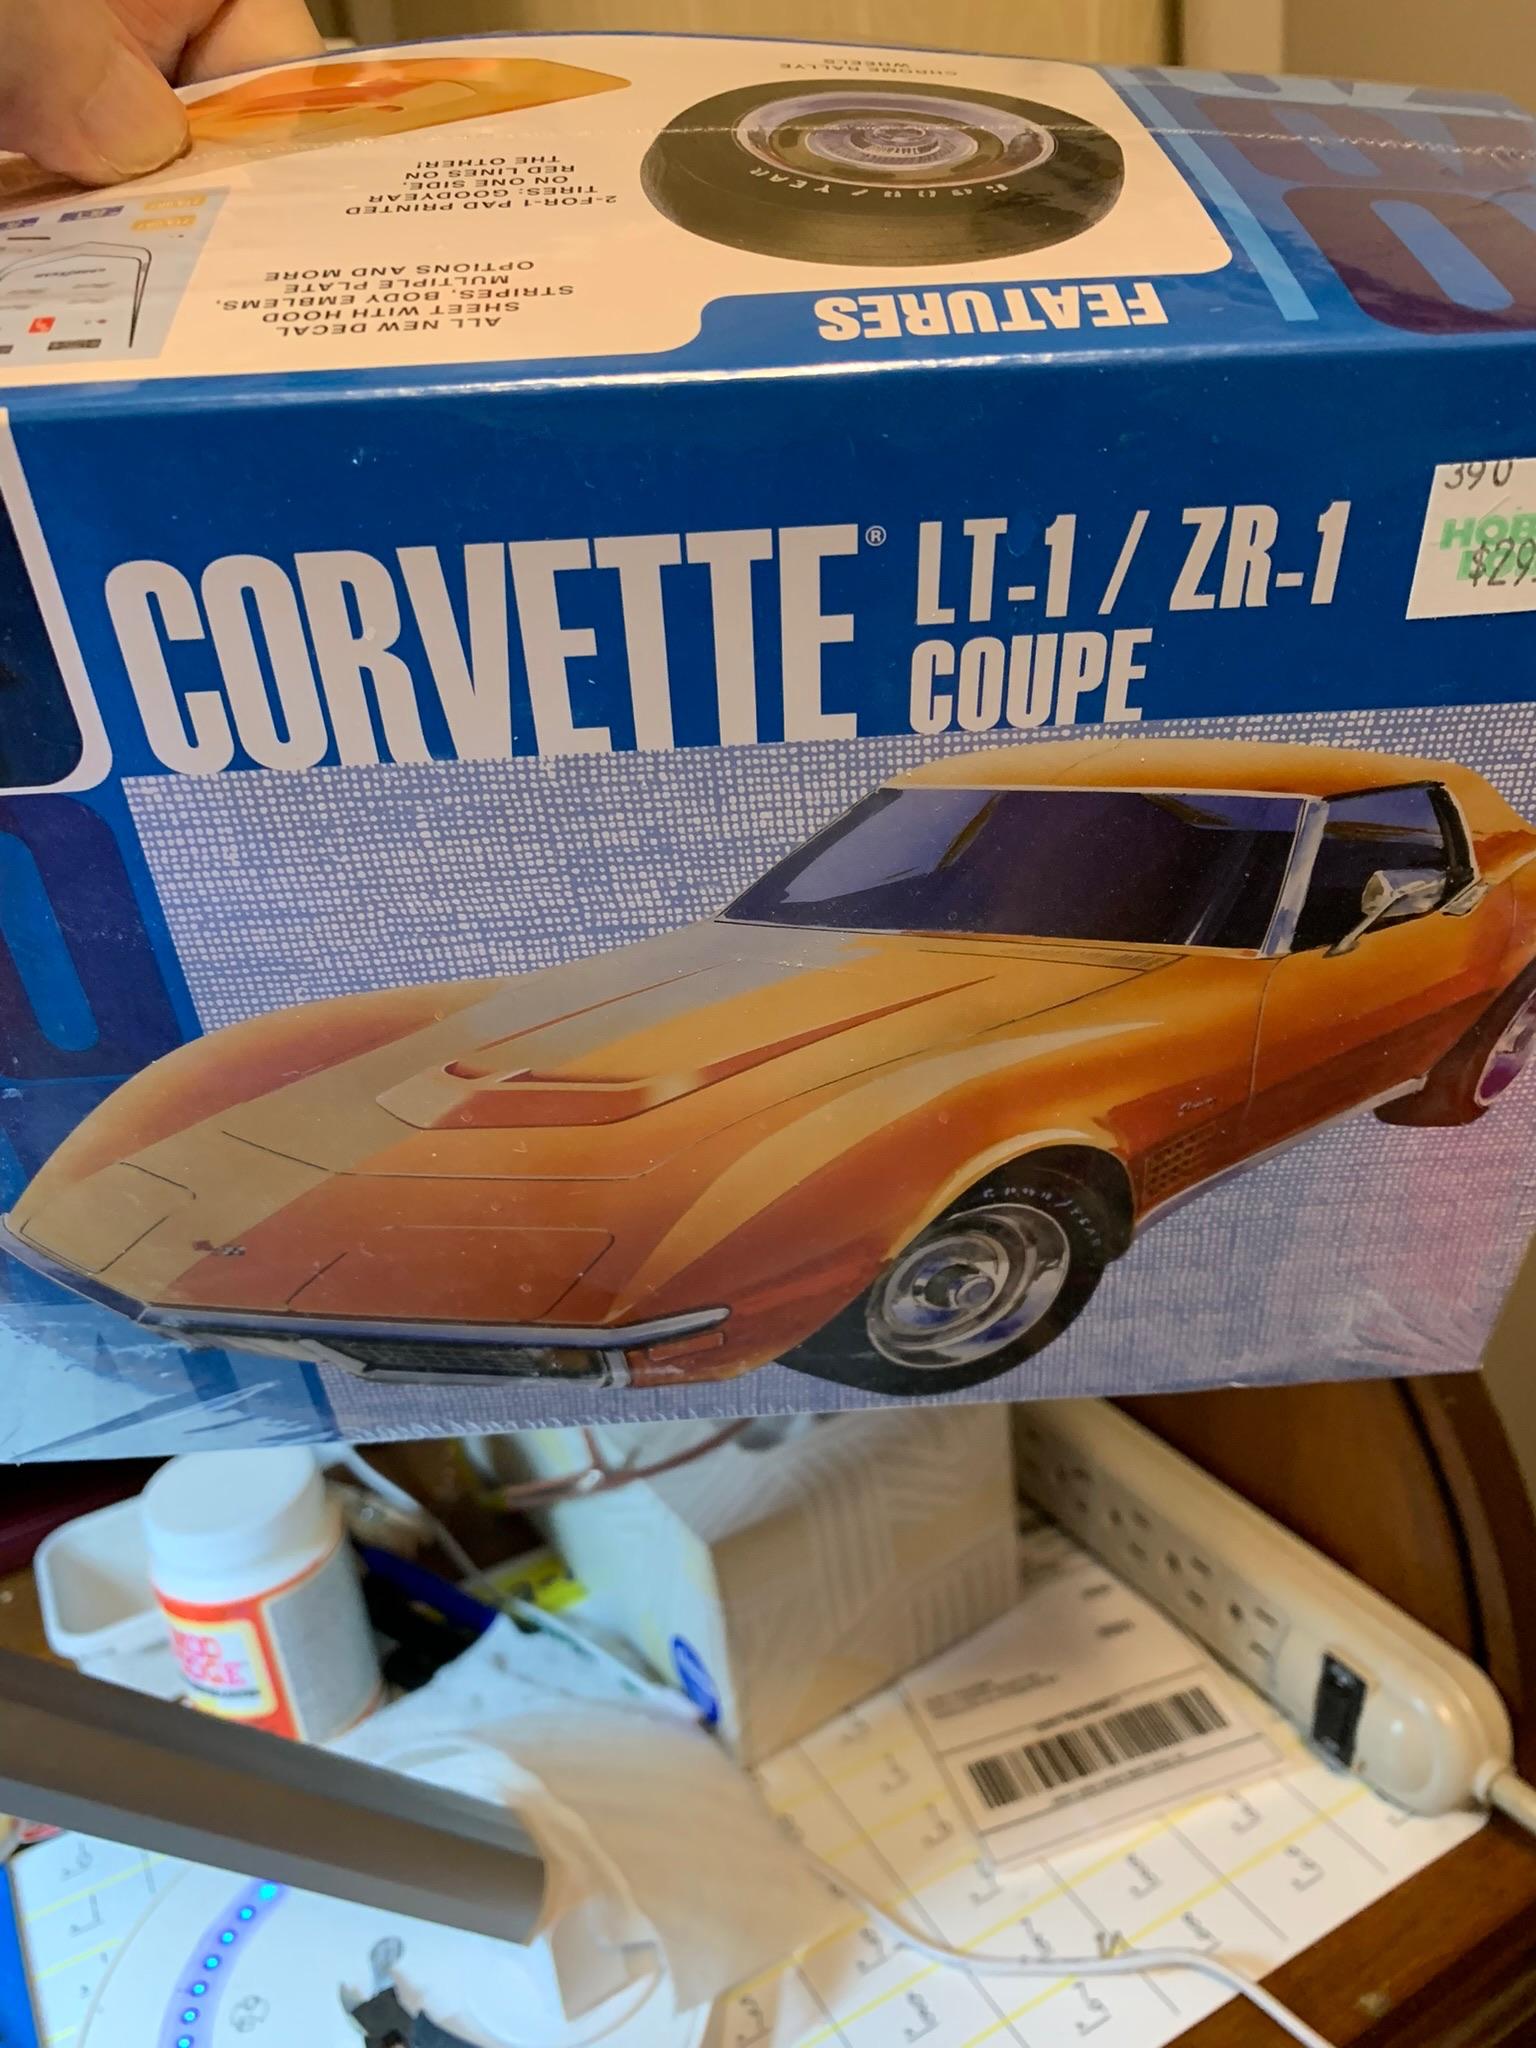
Another fairly current Stock Eliminator build. If I feel confident enough to tackle the painted on side trim and come up with the Monocoque 10 hole wheels, then it will be a replica of Thomas’s car. If not, then a nondescript Stocker similar to his car in 2006-2010. This is the kit I am using. Painted the chassis and interior with ts 30 Tamiya.
-
Holloman & McKinney 57 Chevy C/MP circa 1964
R. Thorne replied to R. Thorne's topic in WIP: Drag Racing Models
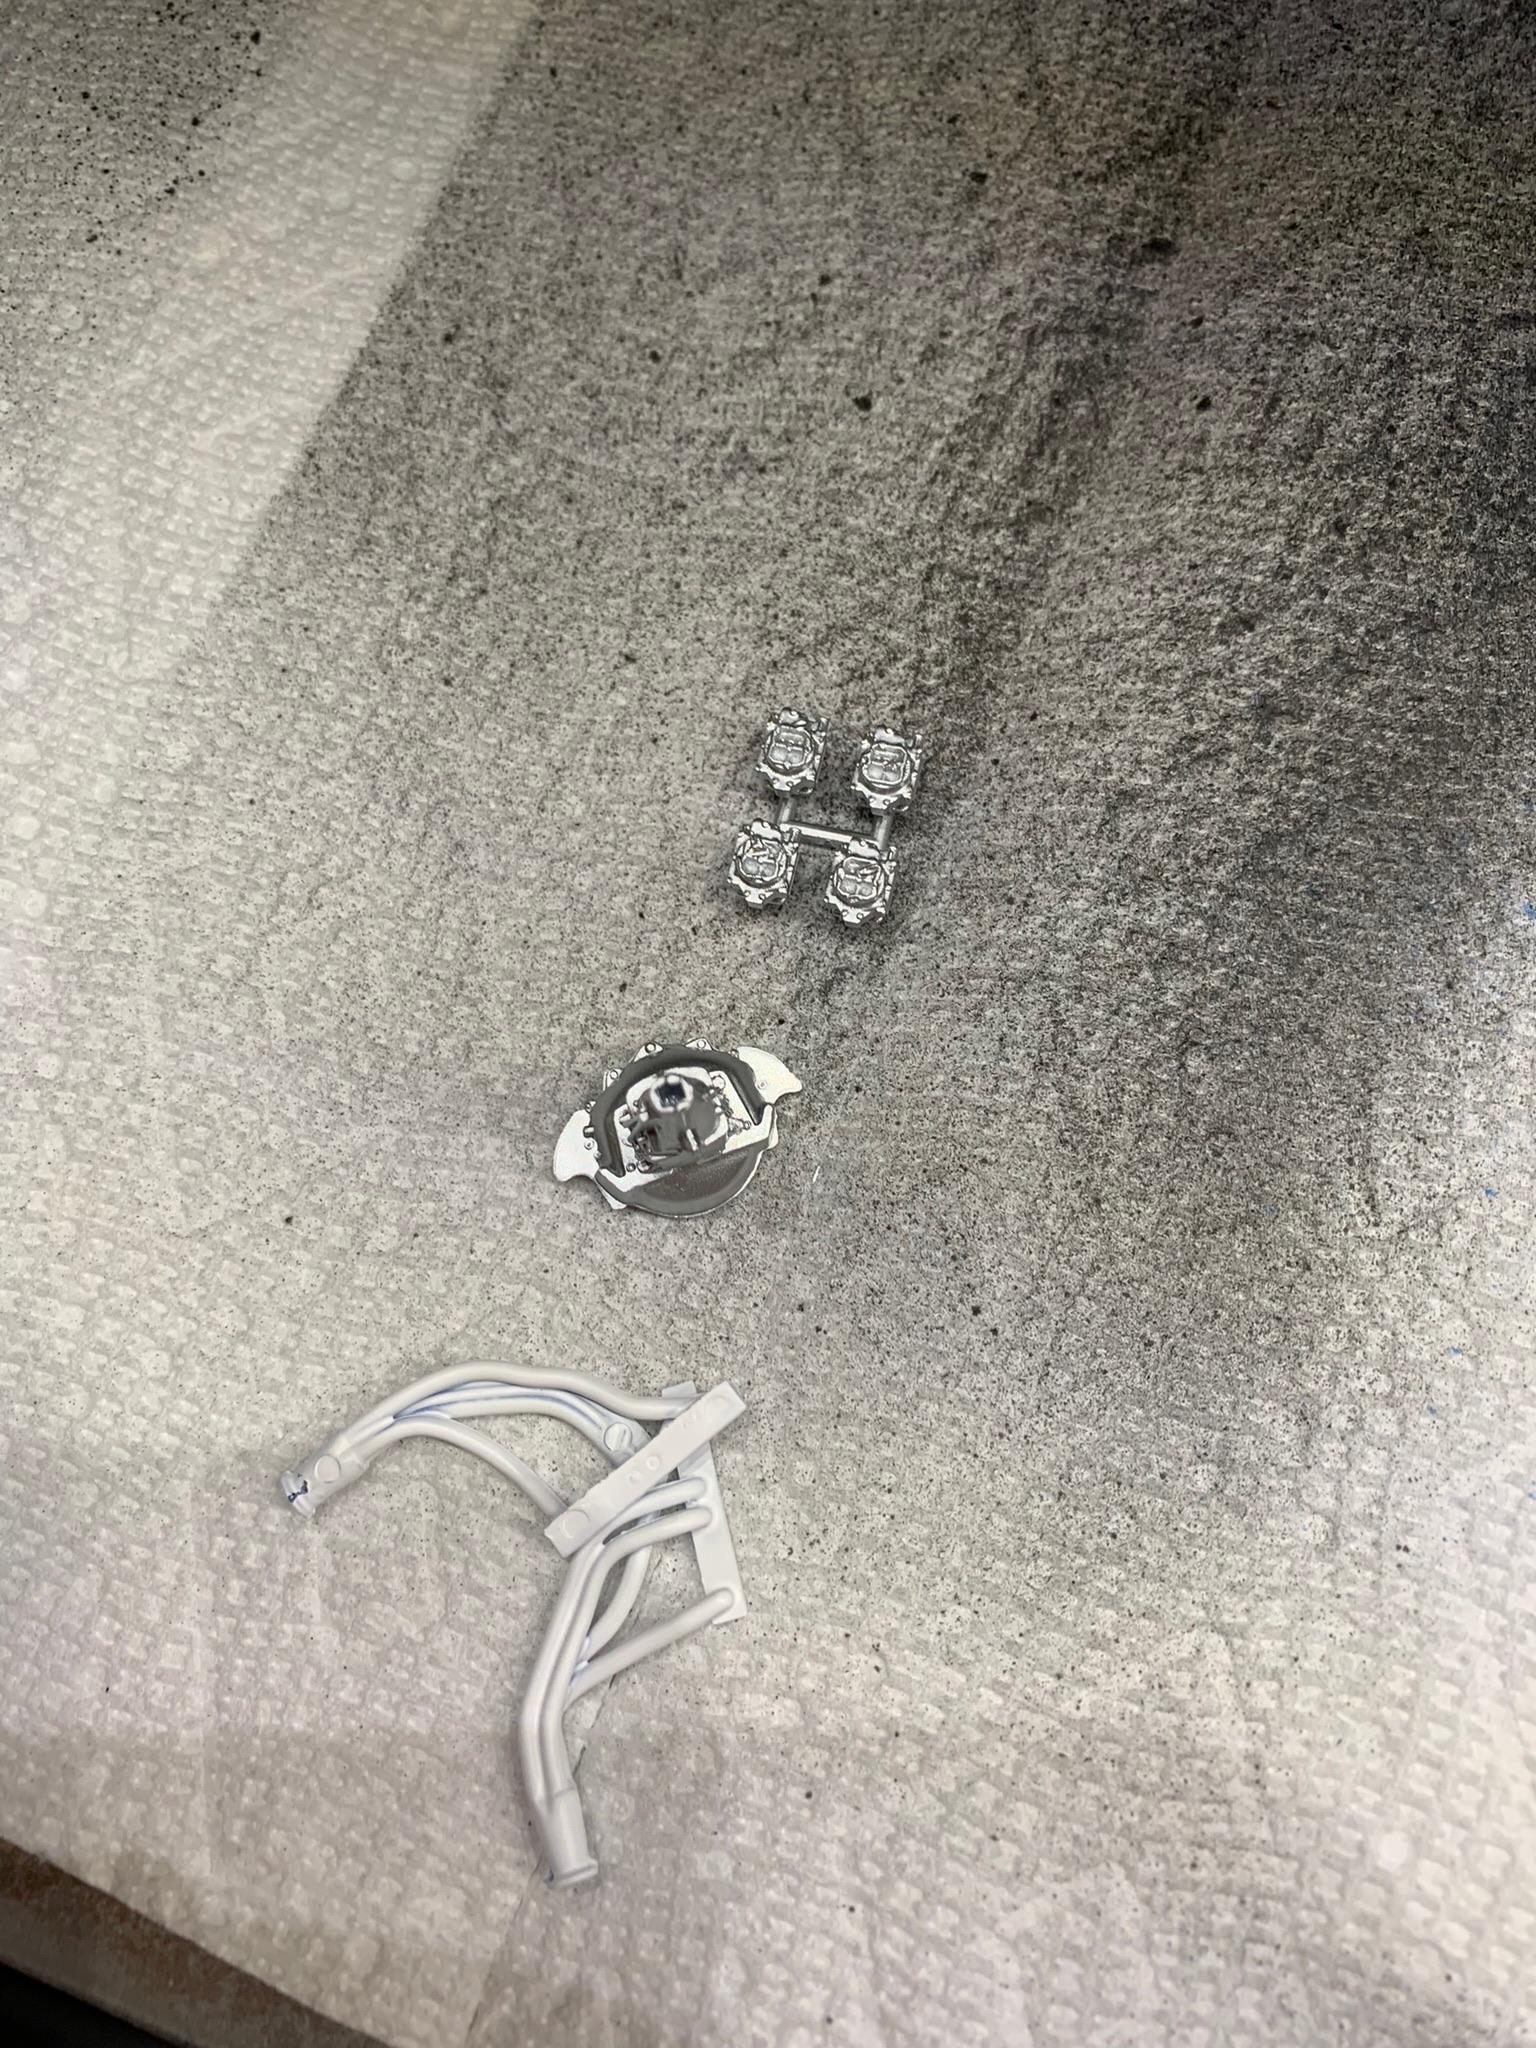
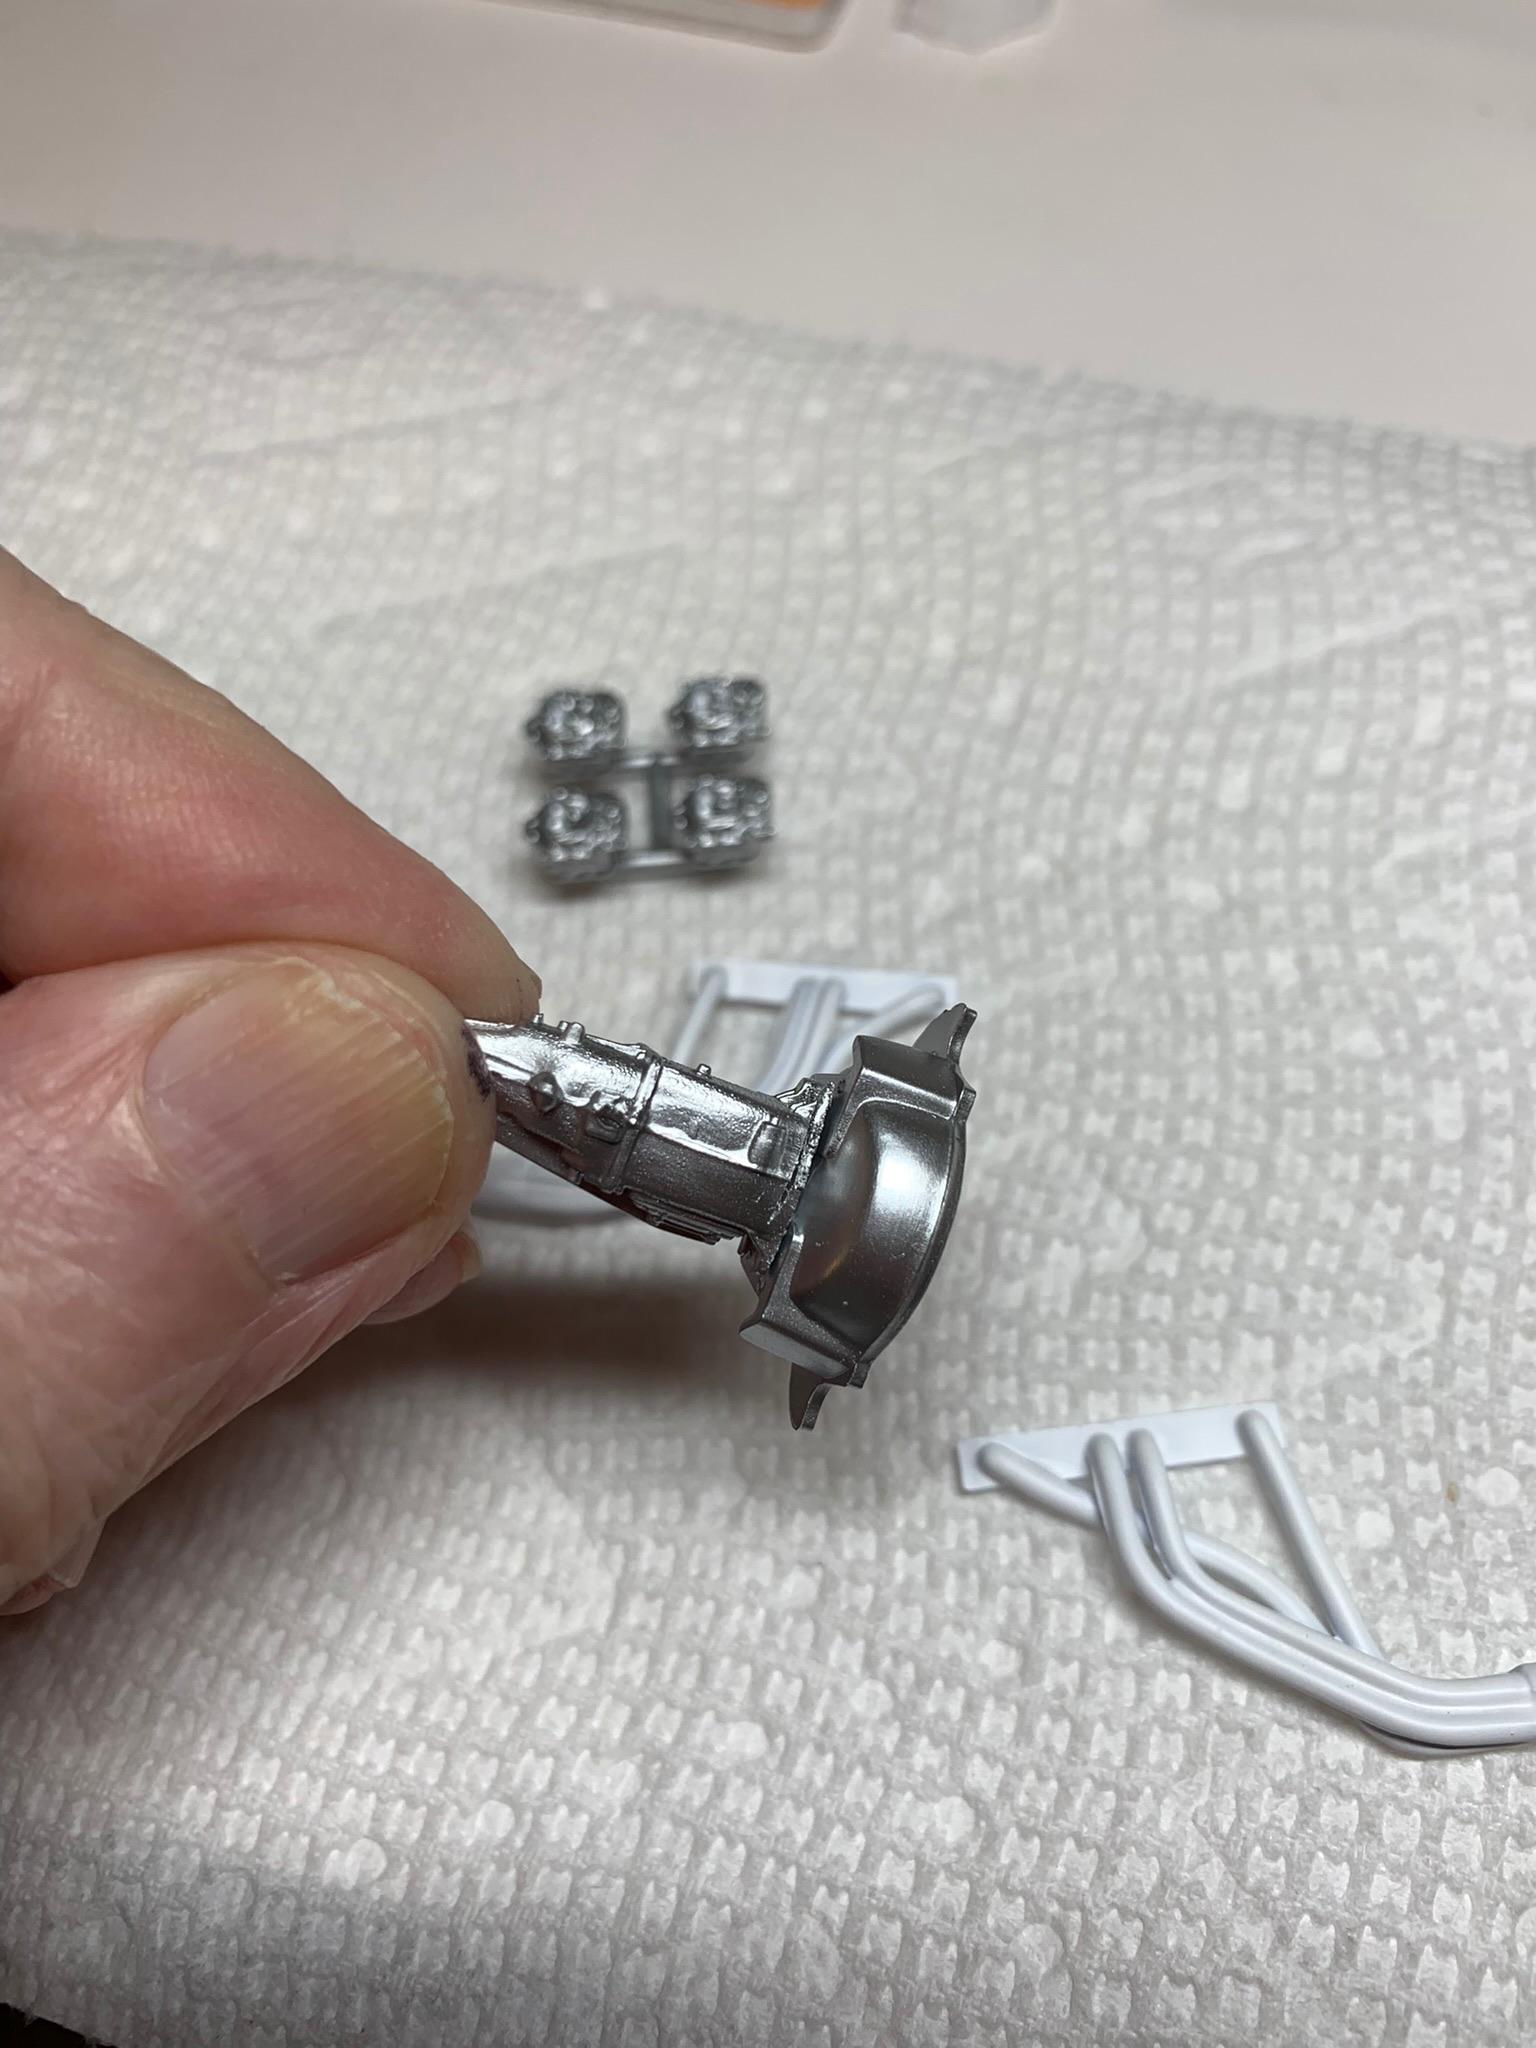
Used a trans out of a 69 zl1 Camaro stocker I am building and mated it to the bellhousing and painted with TS30 Tamiya. May use these wcfb Carter carbs, or, possibly, afb’s. Headers are done.
-
Holloman & McKinney 57 Chevy C/MP circa 1964
R. Thorne replied to R. Thorne's topic in WIP: Drag Racing Models
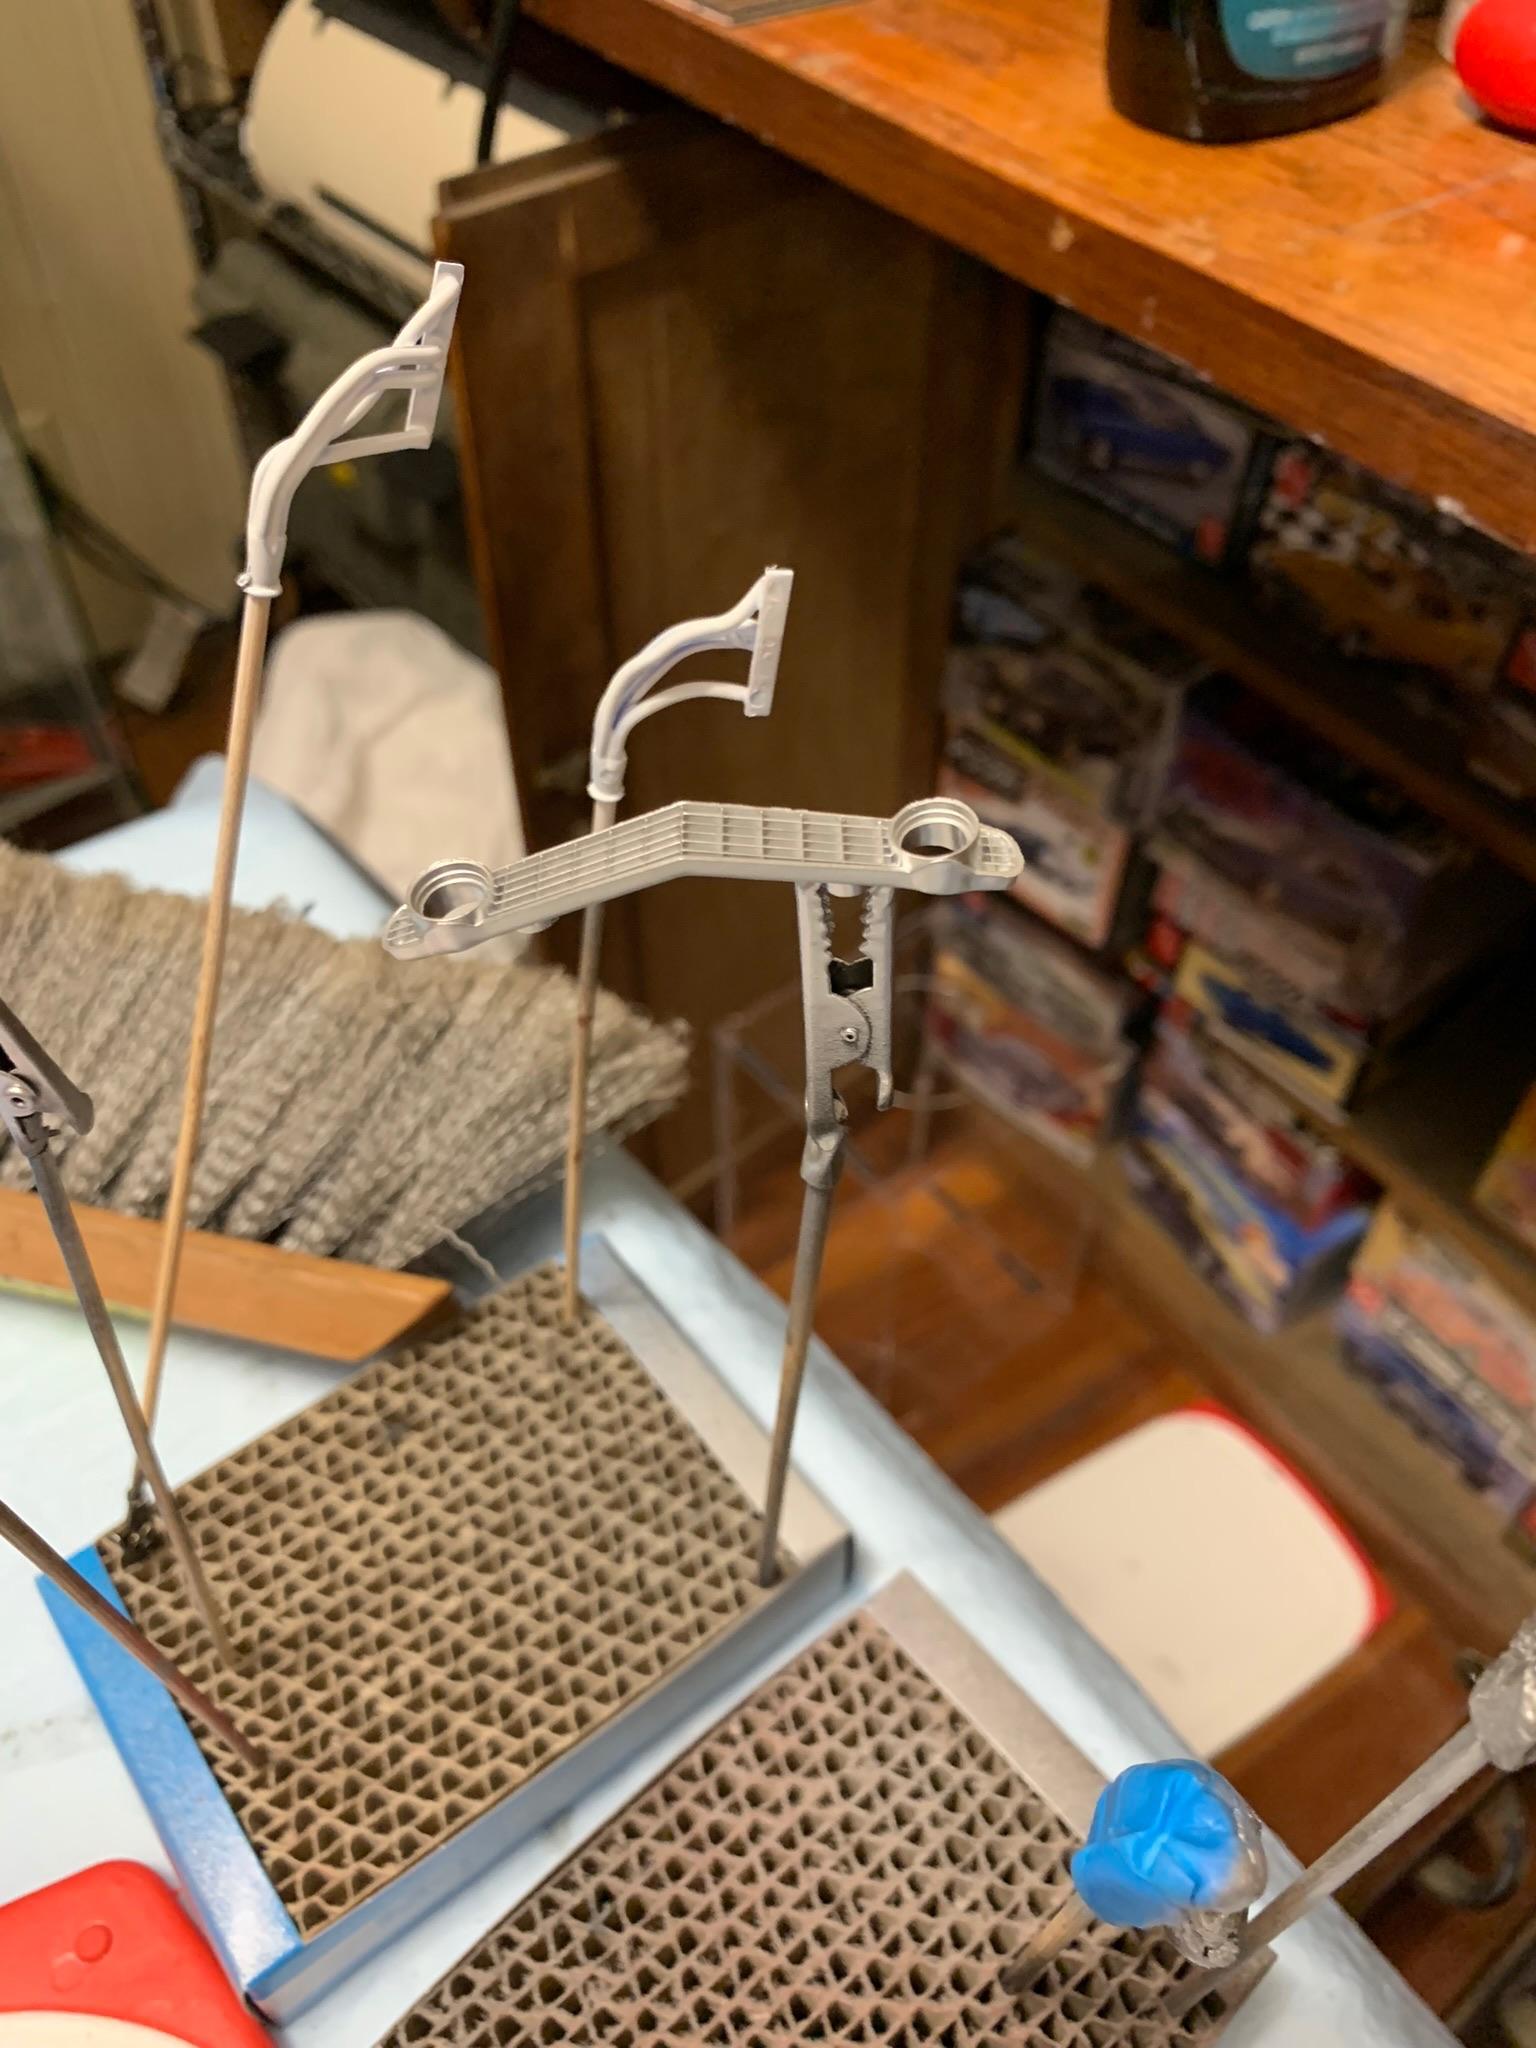
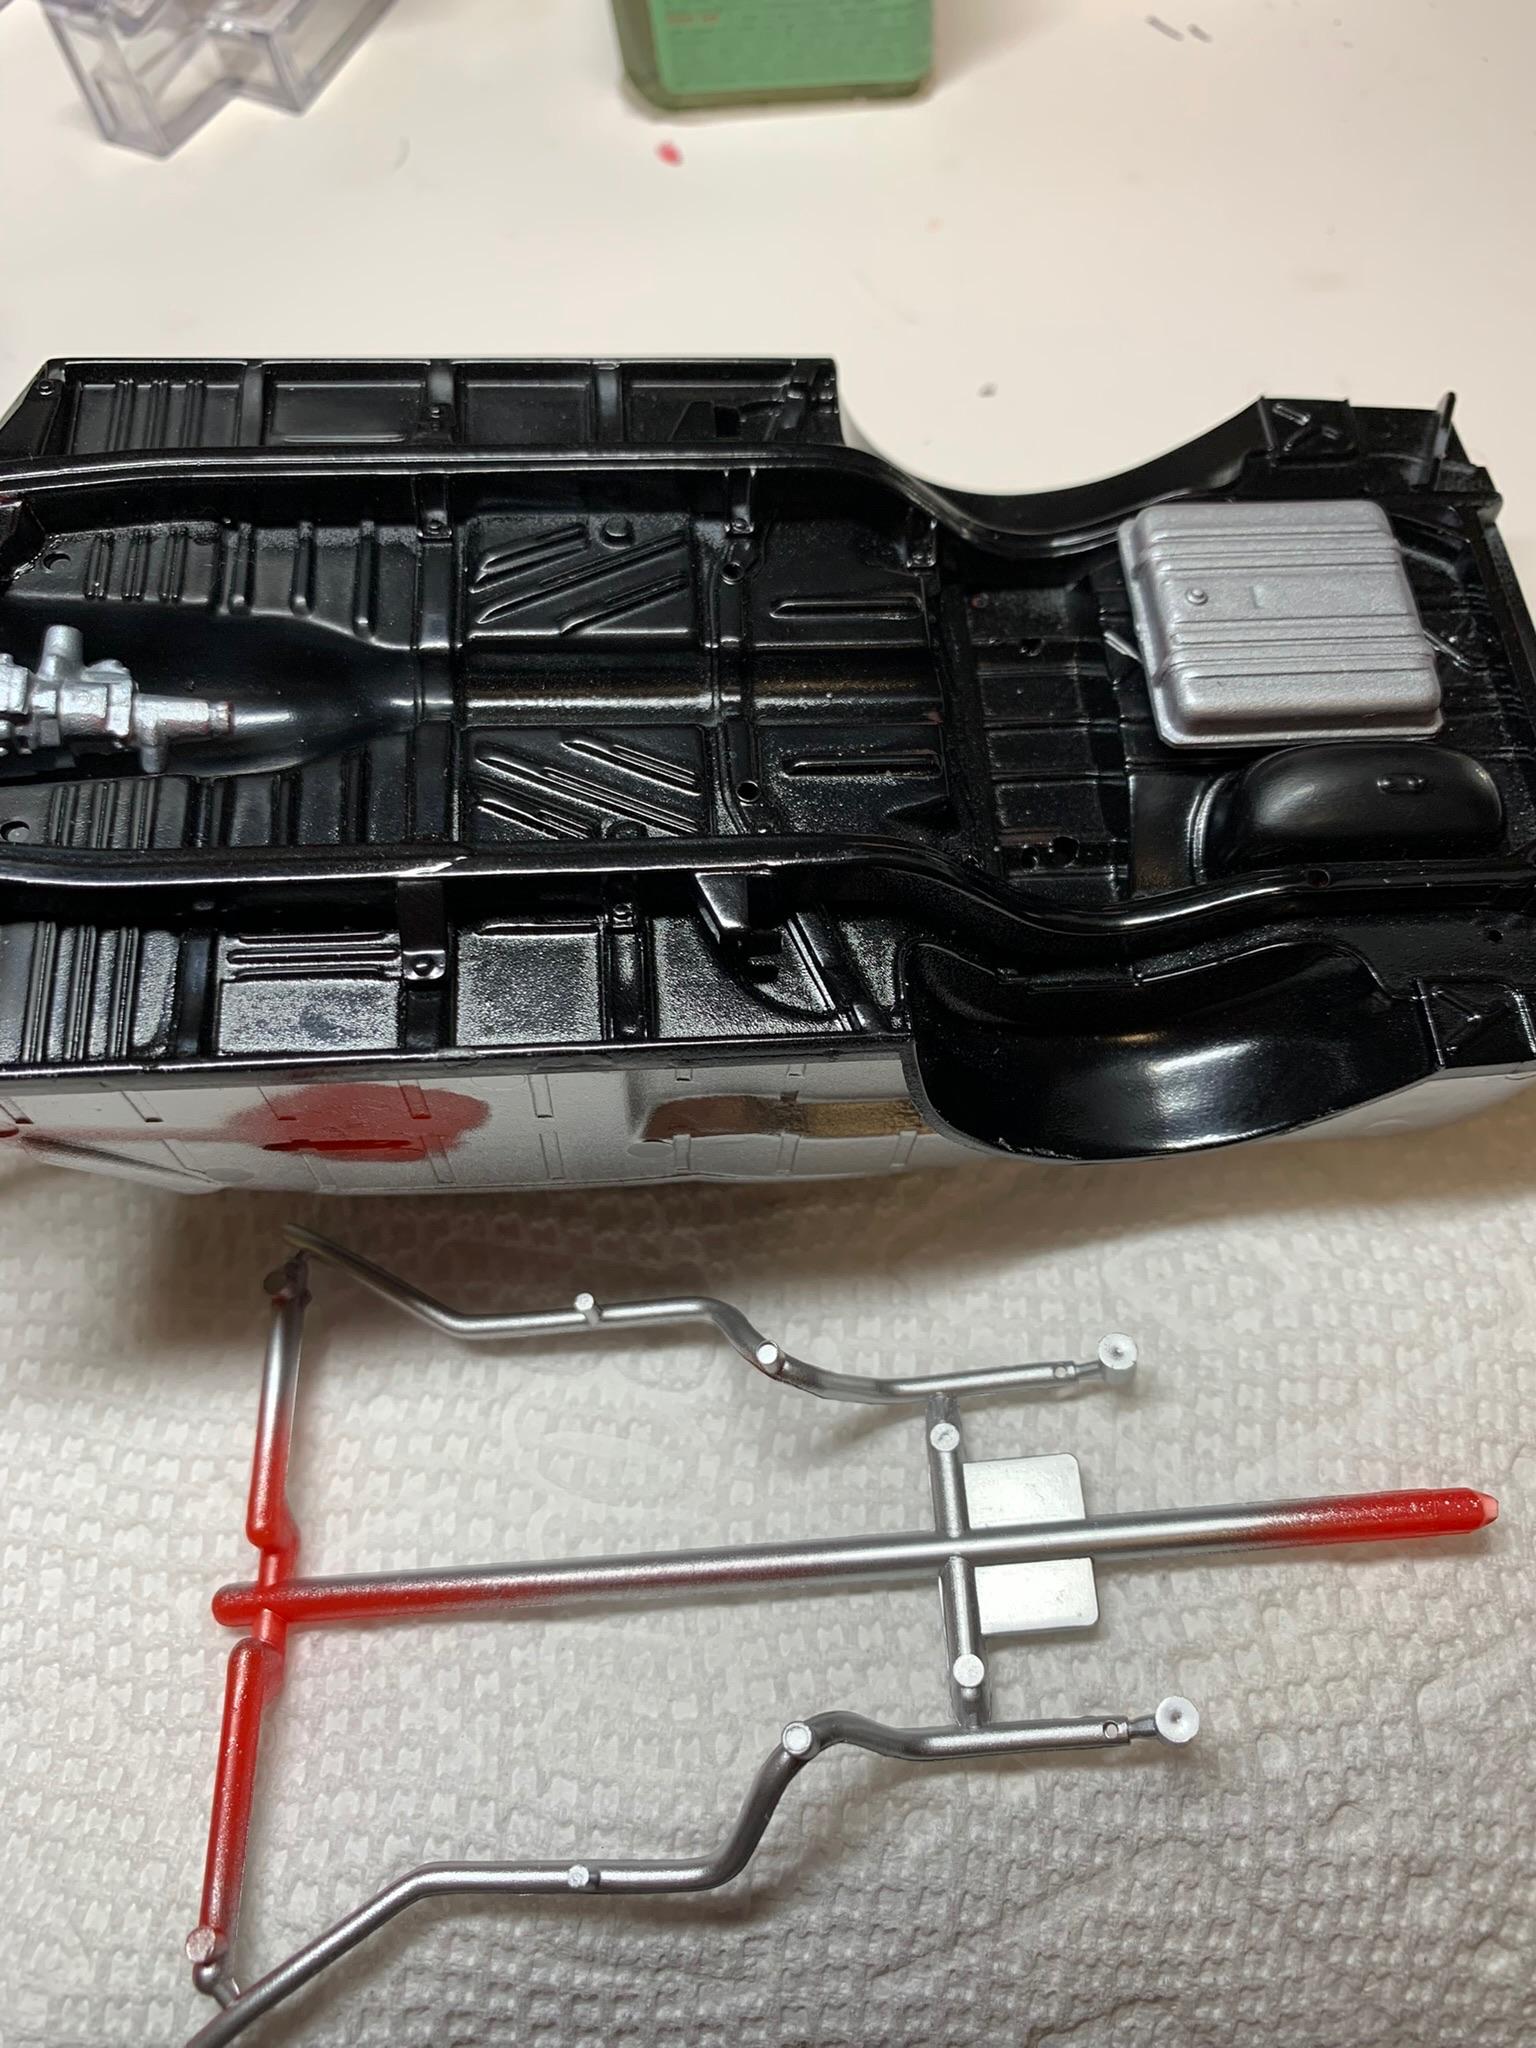
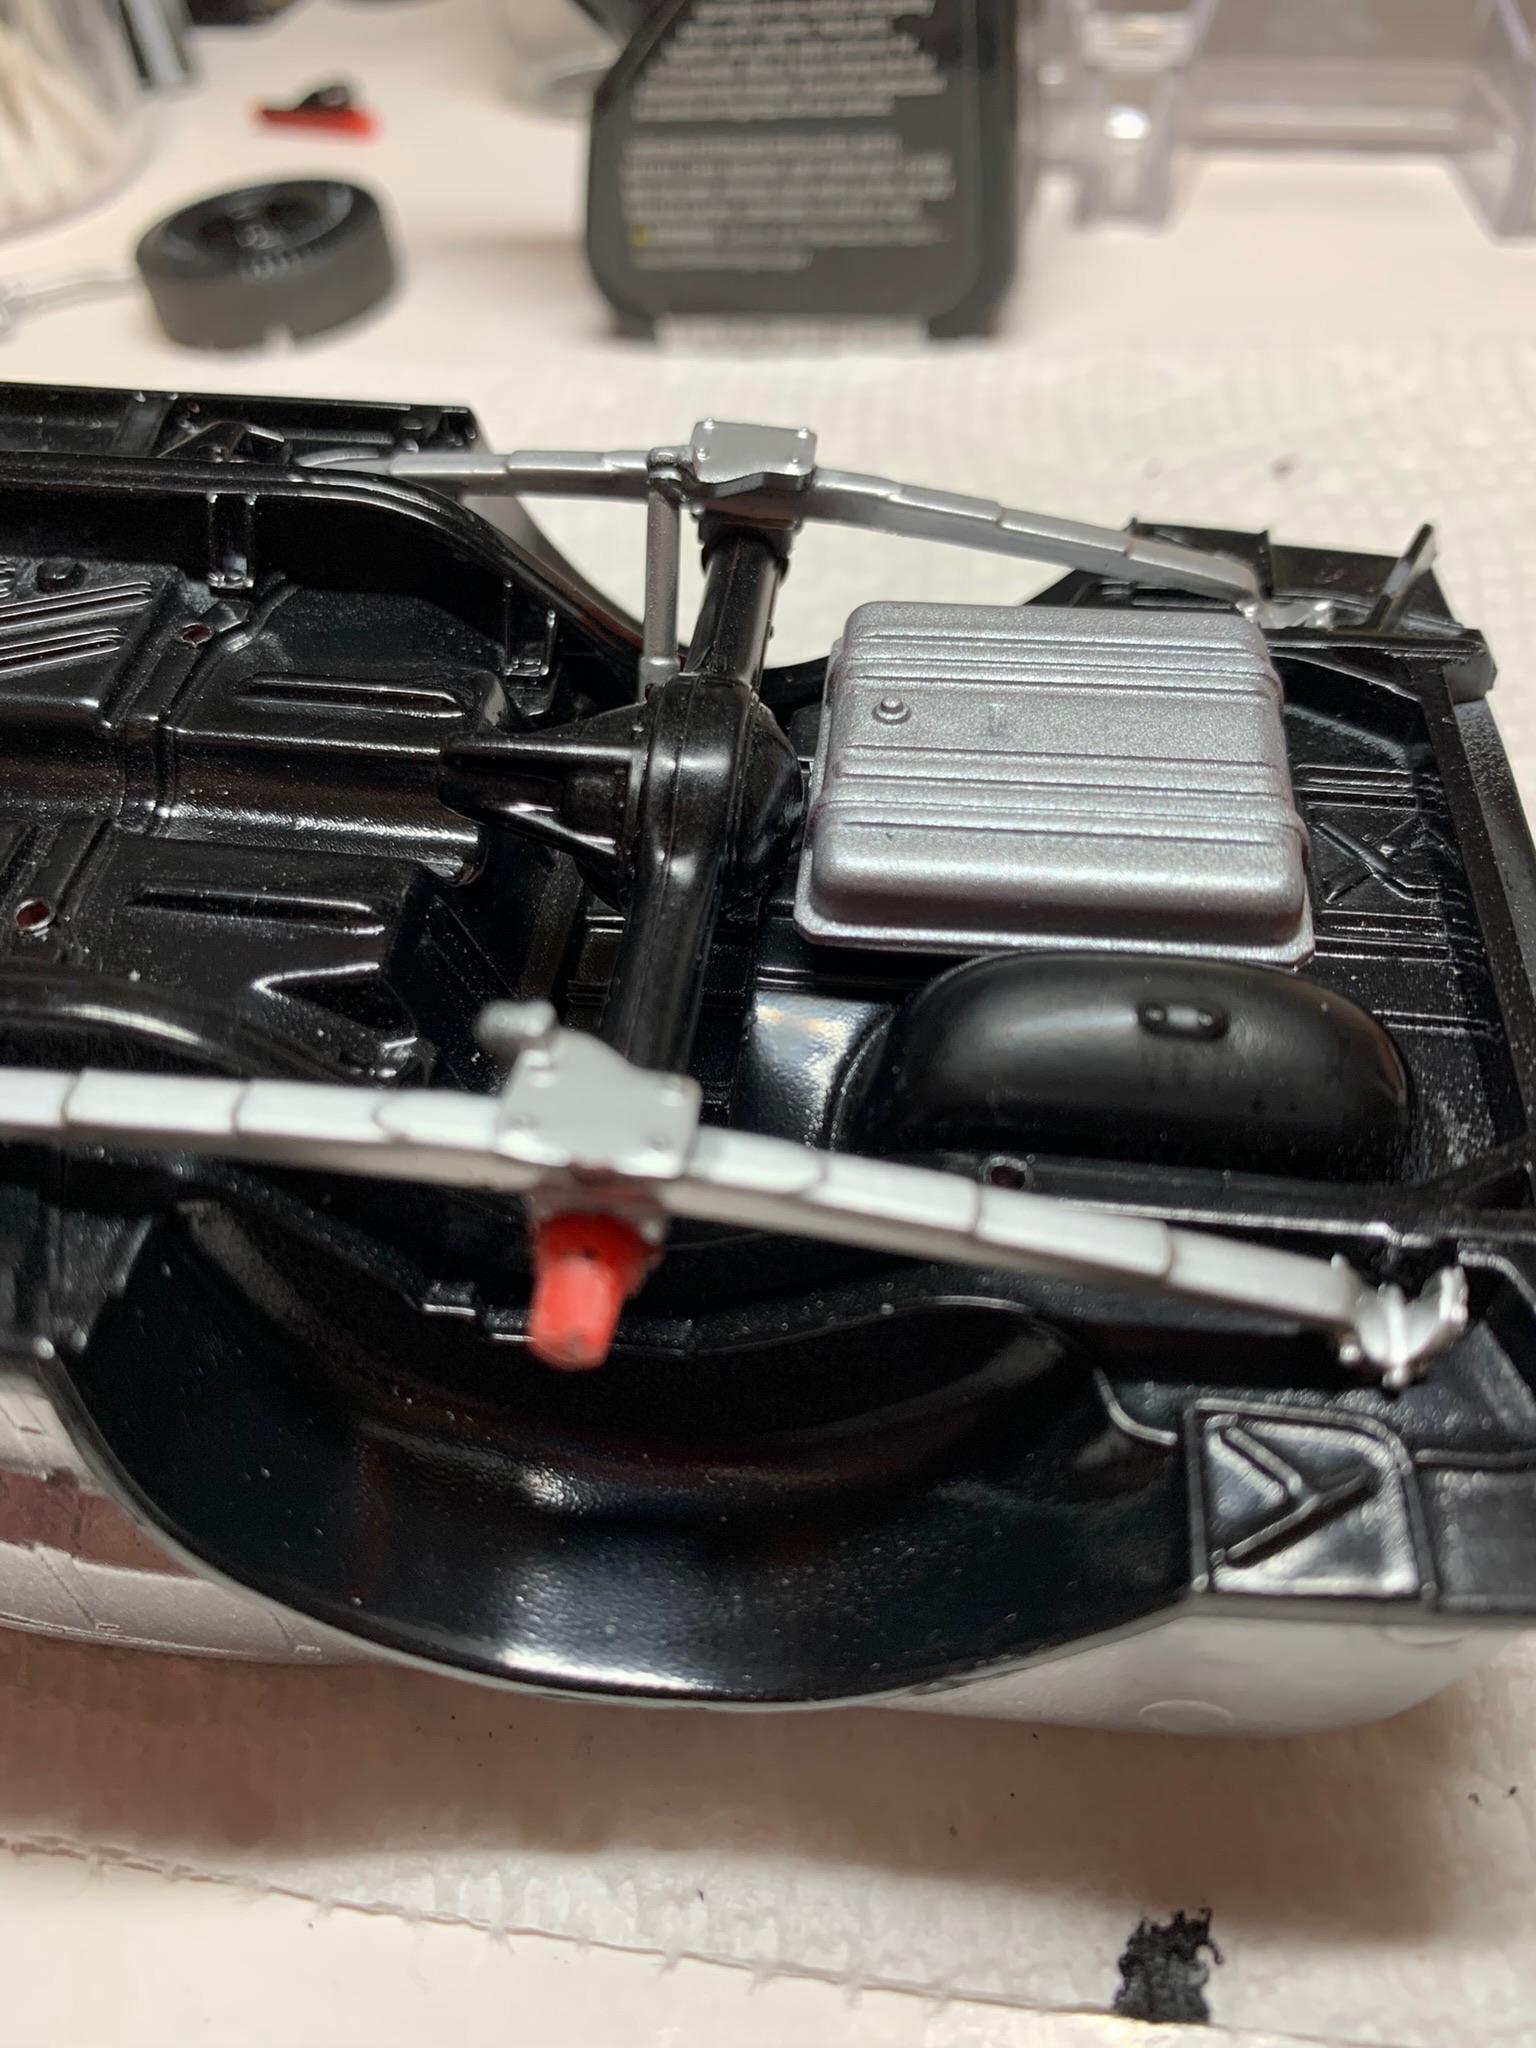
Some chassis work. Undecided about what type of exhaust I will use. Probably just extend to the rear axle with the pipes and maybe use some glass pack mufflers. Also, may make up some traction bars like these.
-
Holloman & McKinney 57 Chevy C/MP circa 1964
R. Thorne replied to R. Thorne's topic in WIP: Drag Racing Models
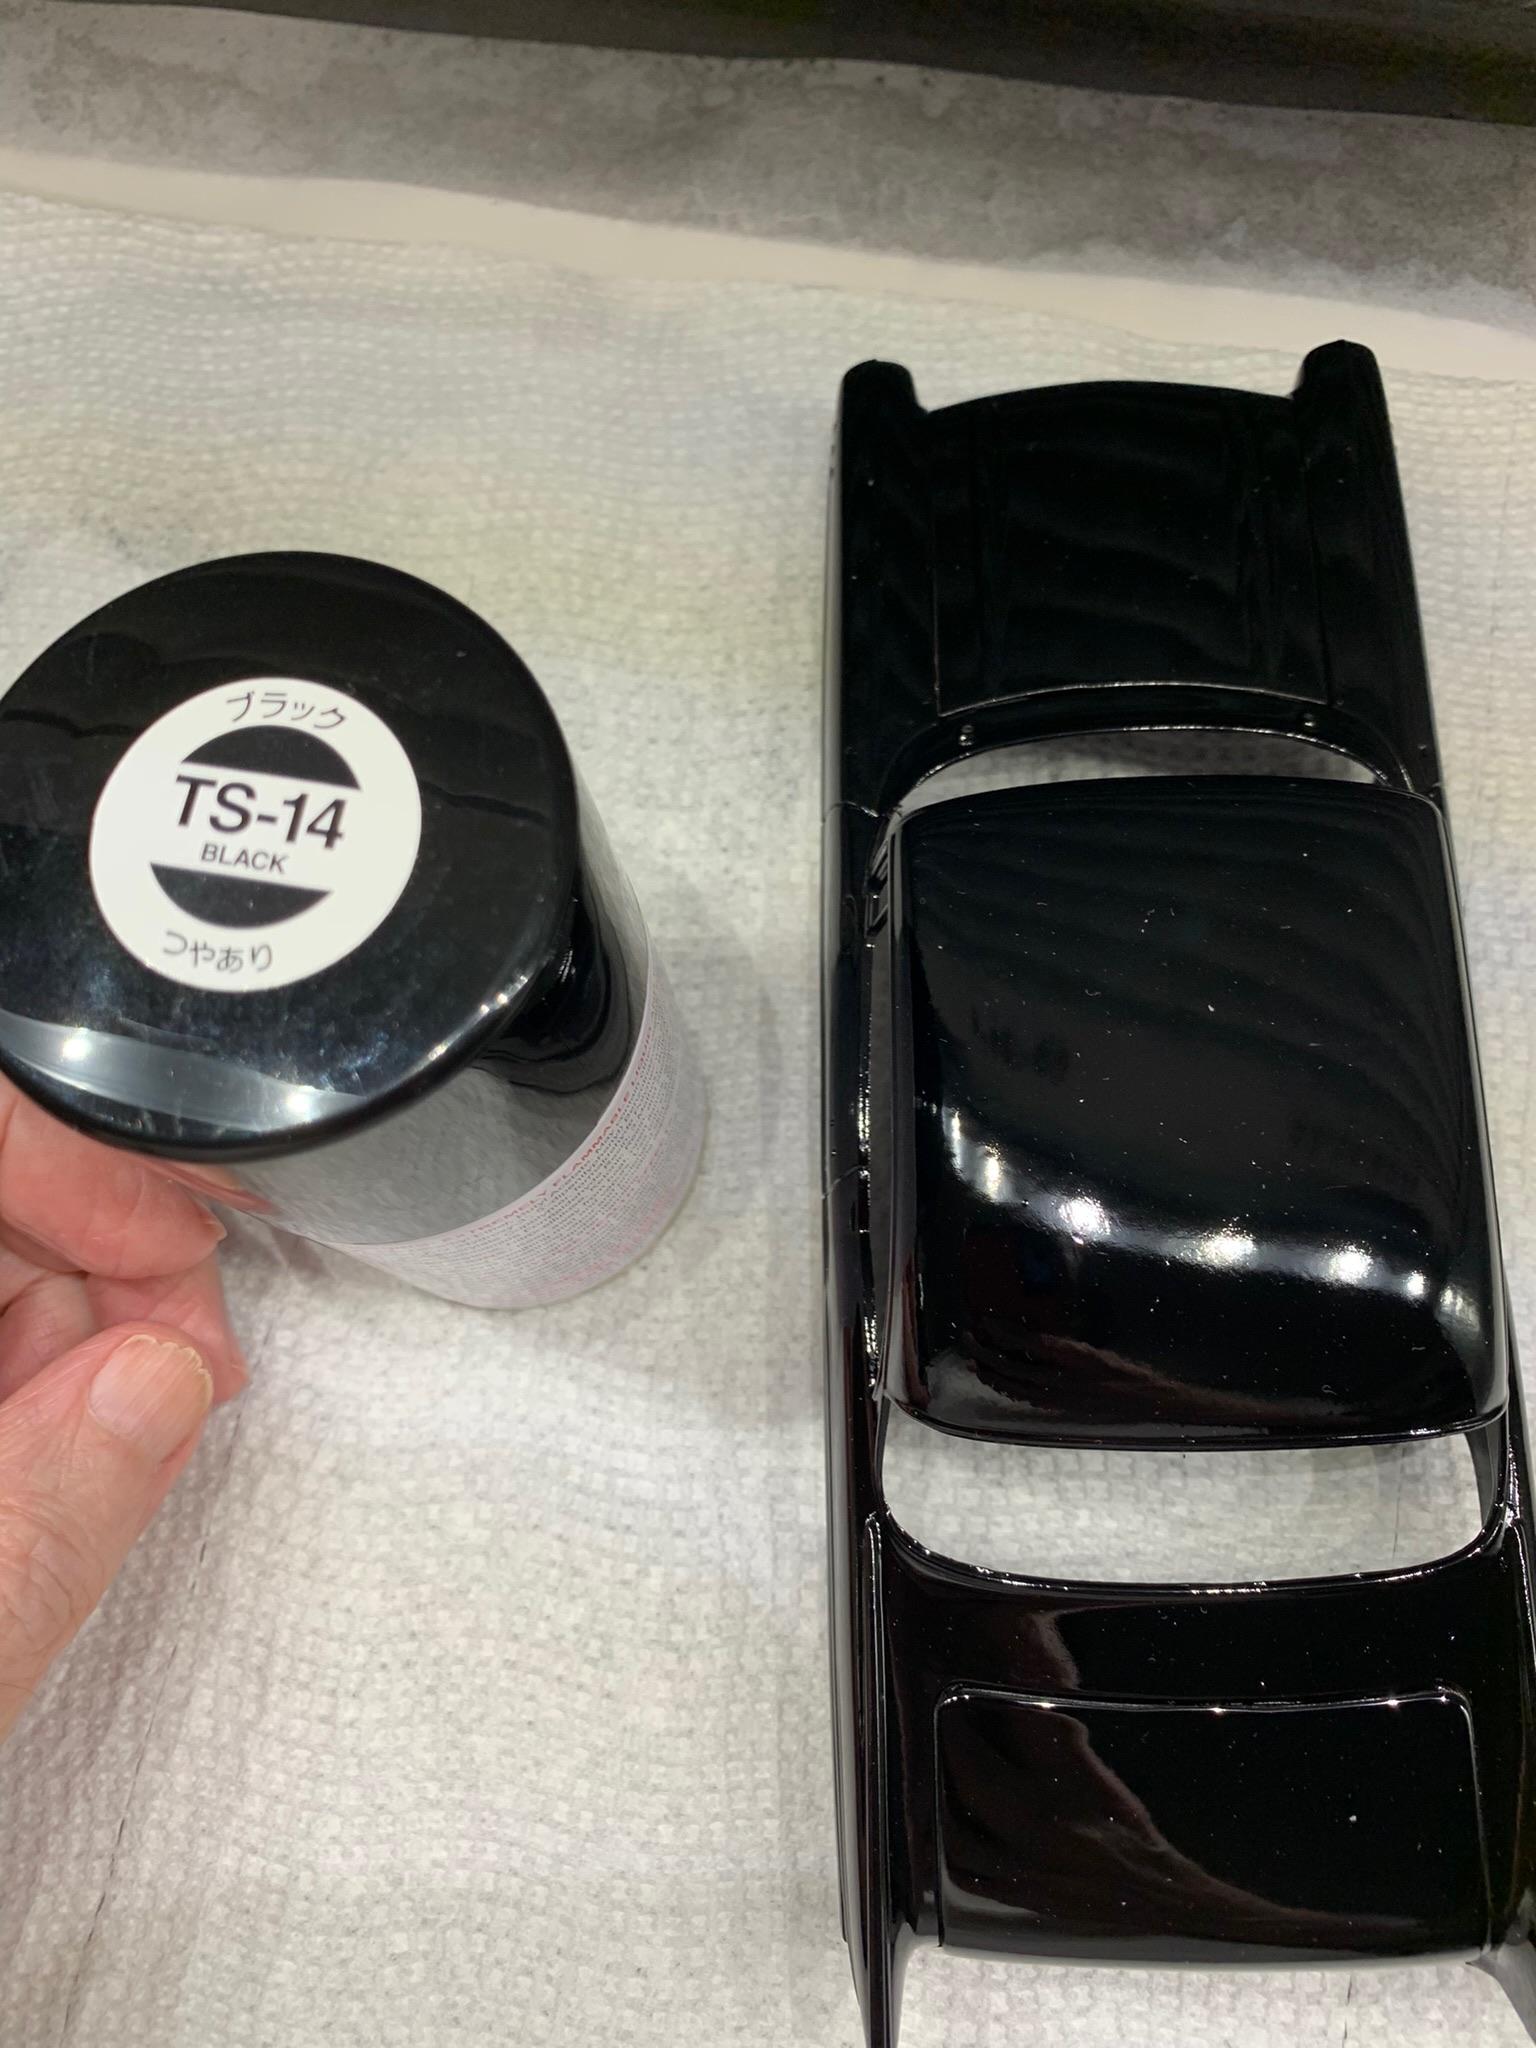
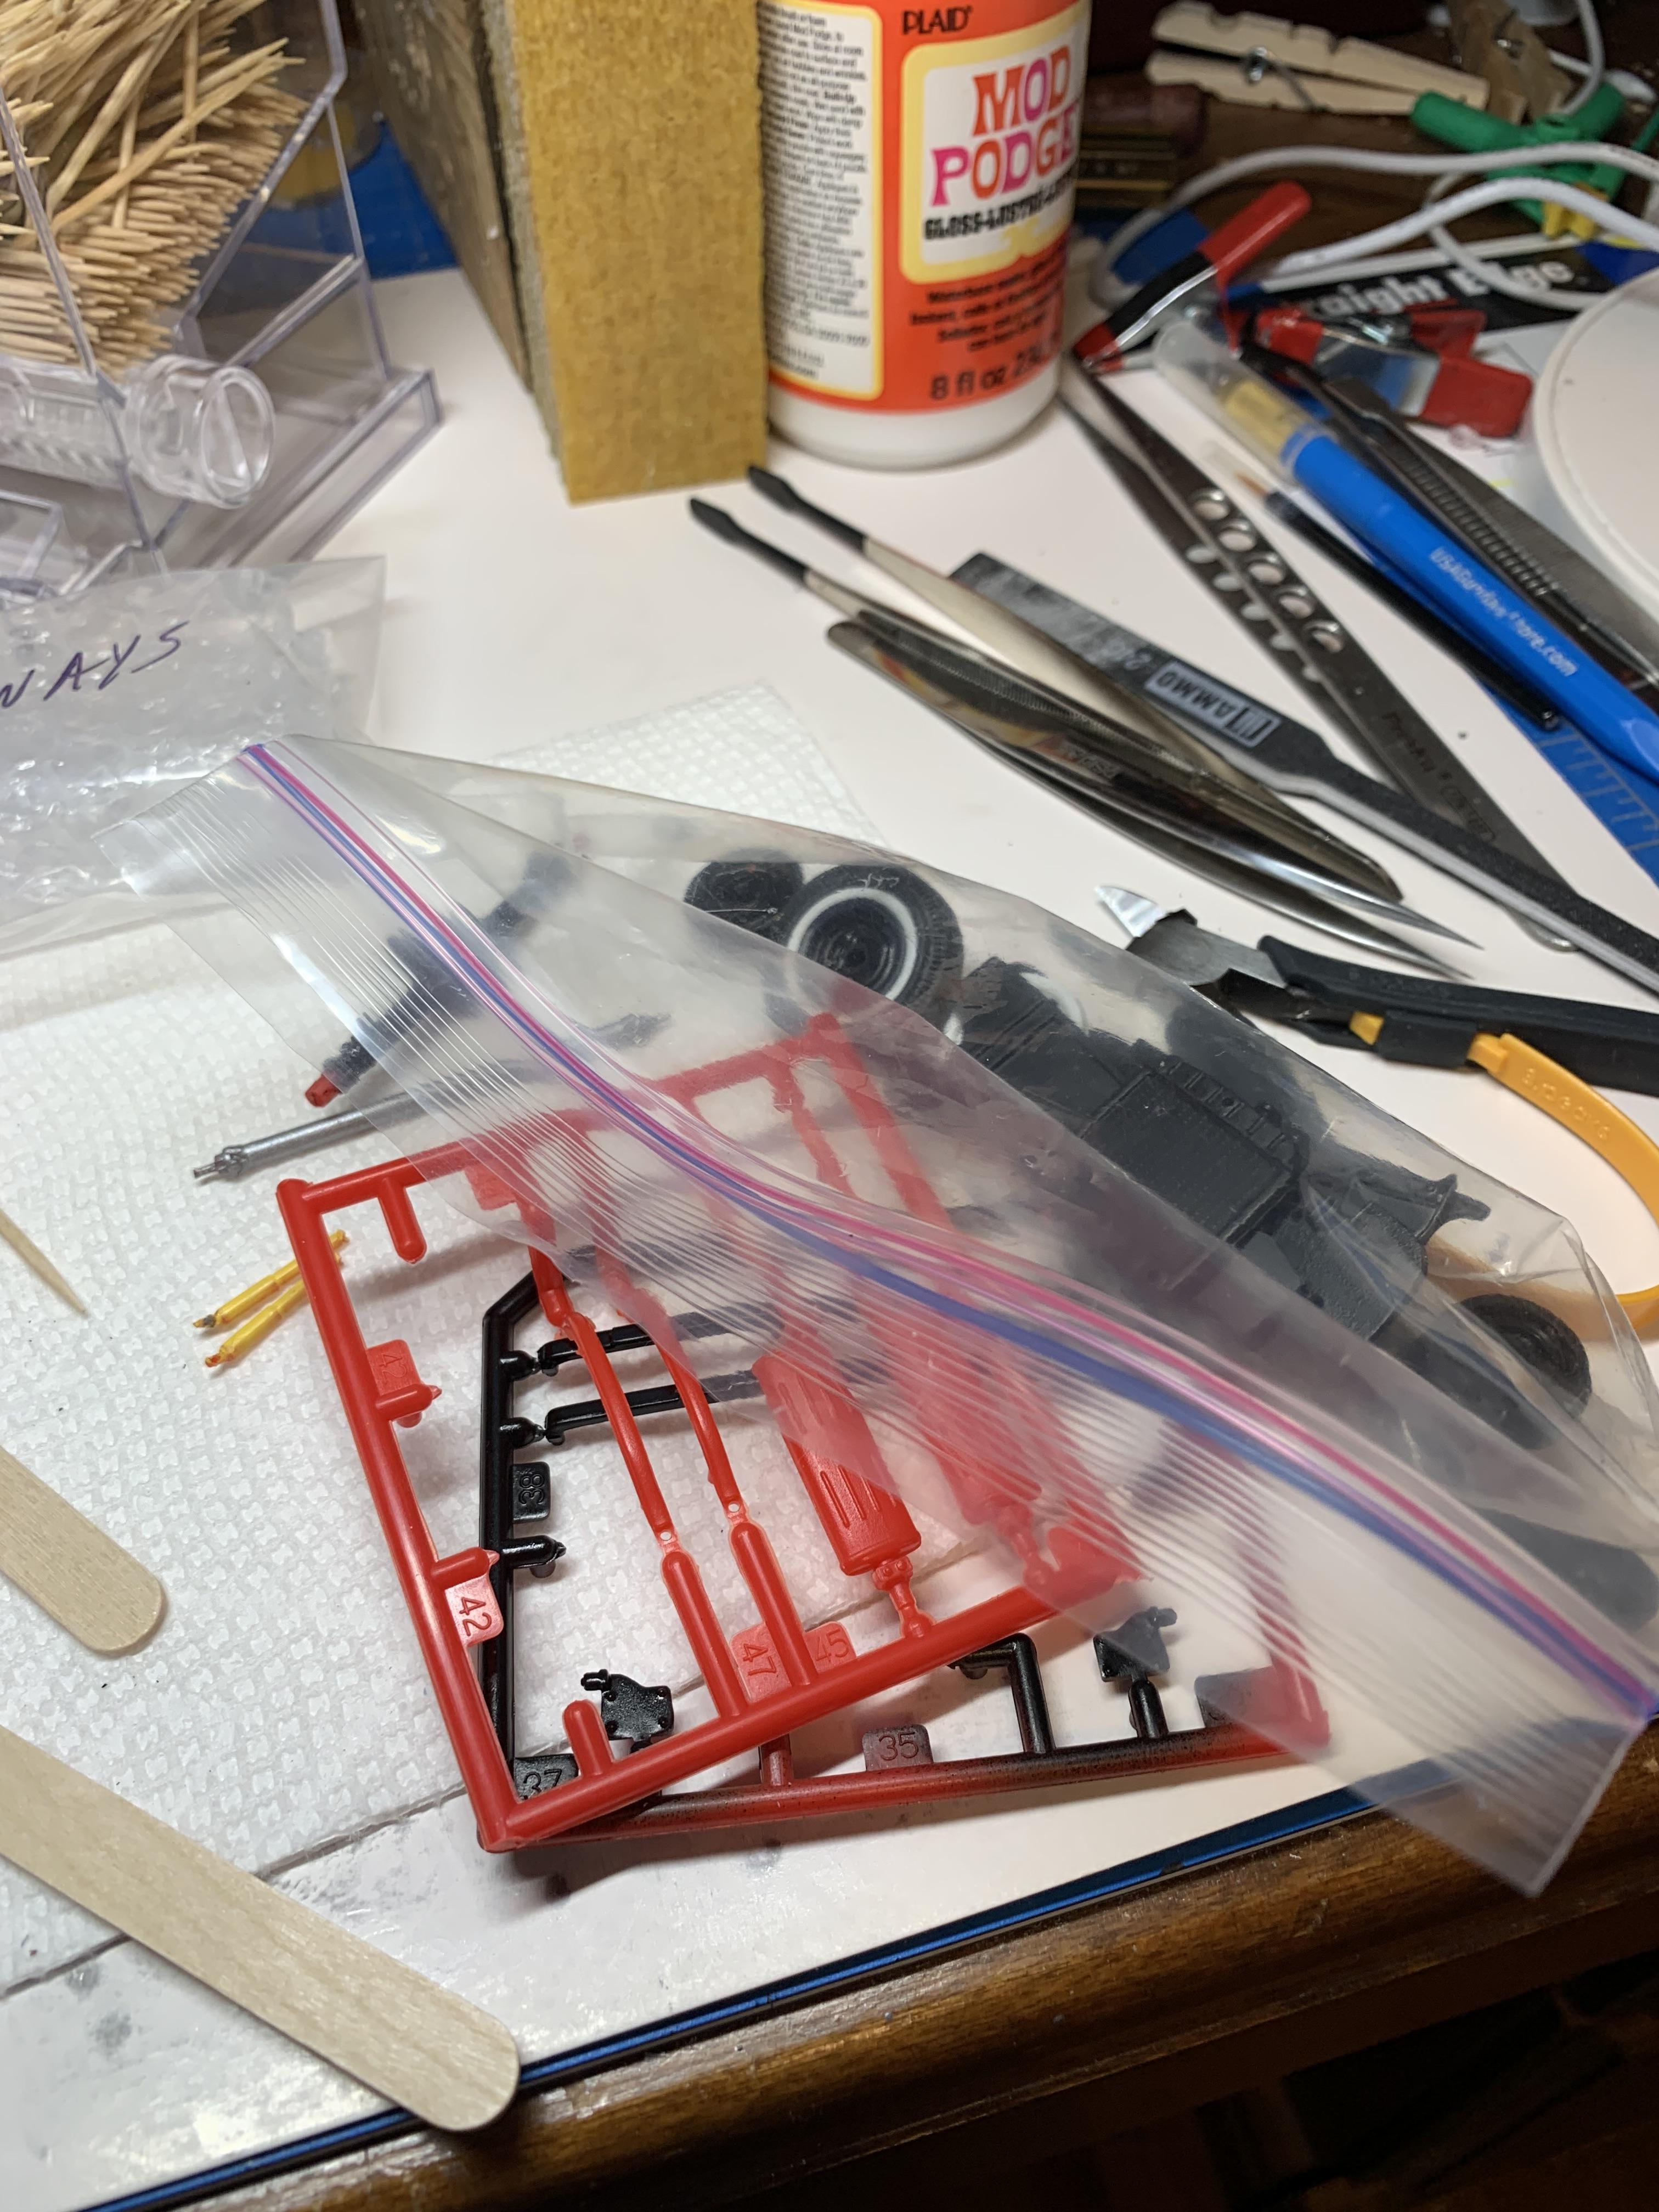
There are a lot of helpful people on here. Thanks, Ace. Scrounged some headers from the 66 Nova kit and going to put a couple of coats of white primer on them. White high temp paint was very common on 1:1 cars back then. Also, painted the car with ts14 Tamiya spray paint. Got a Double Dragster kit and took the scattershield out of it as the cast iron unit was about all that was available at this time.
-
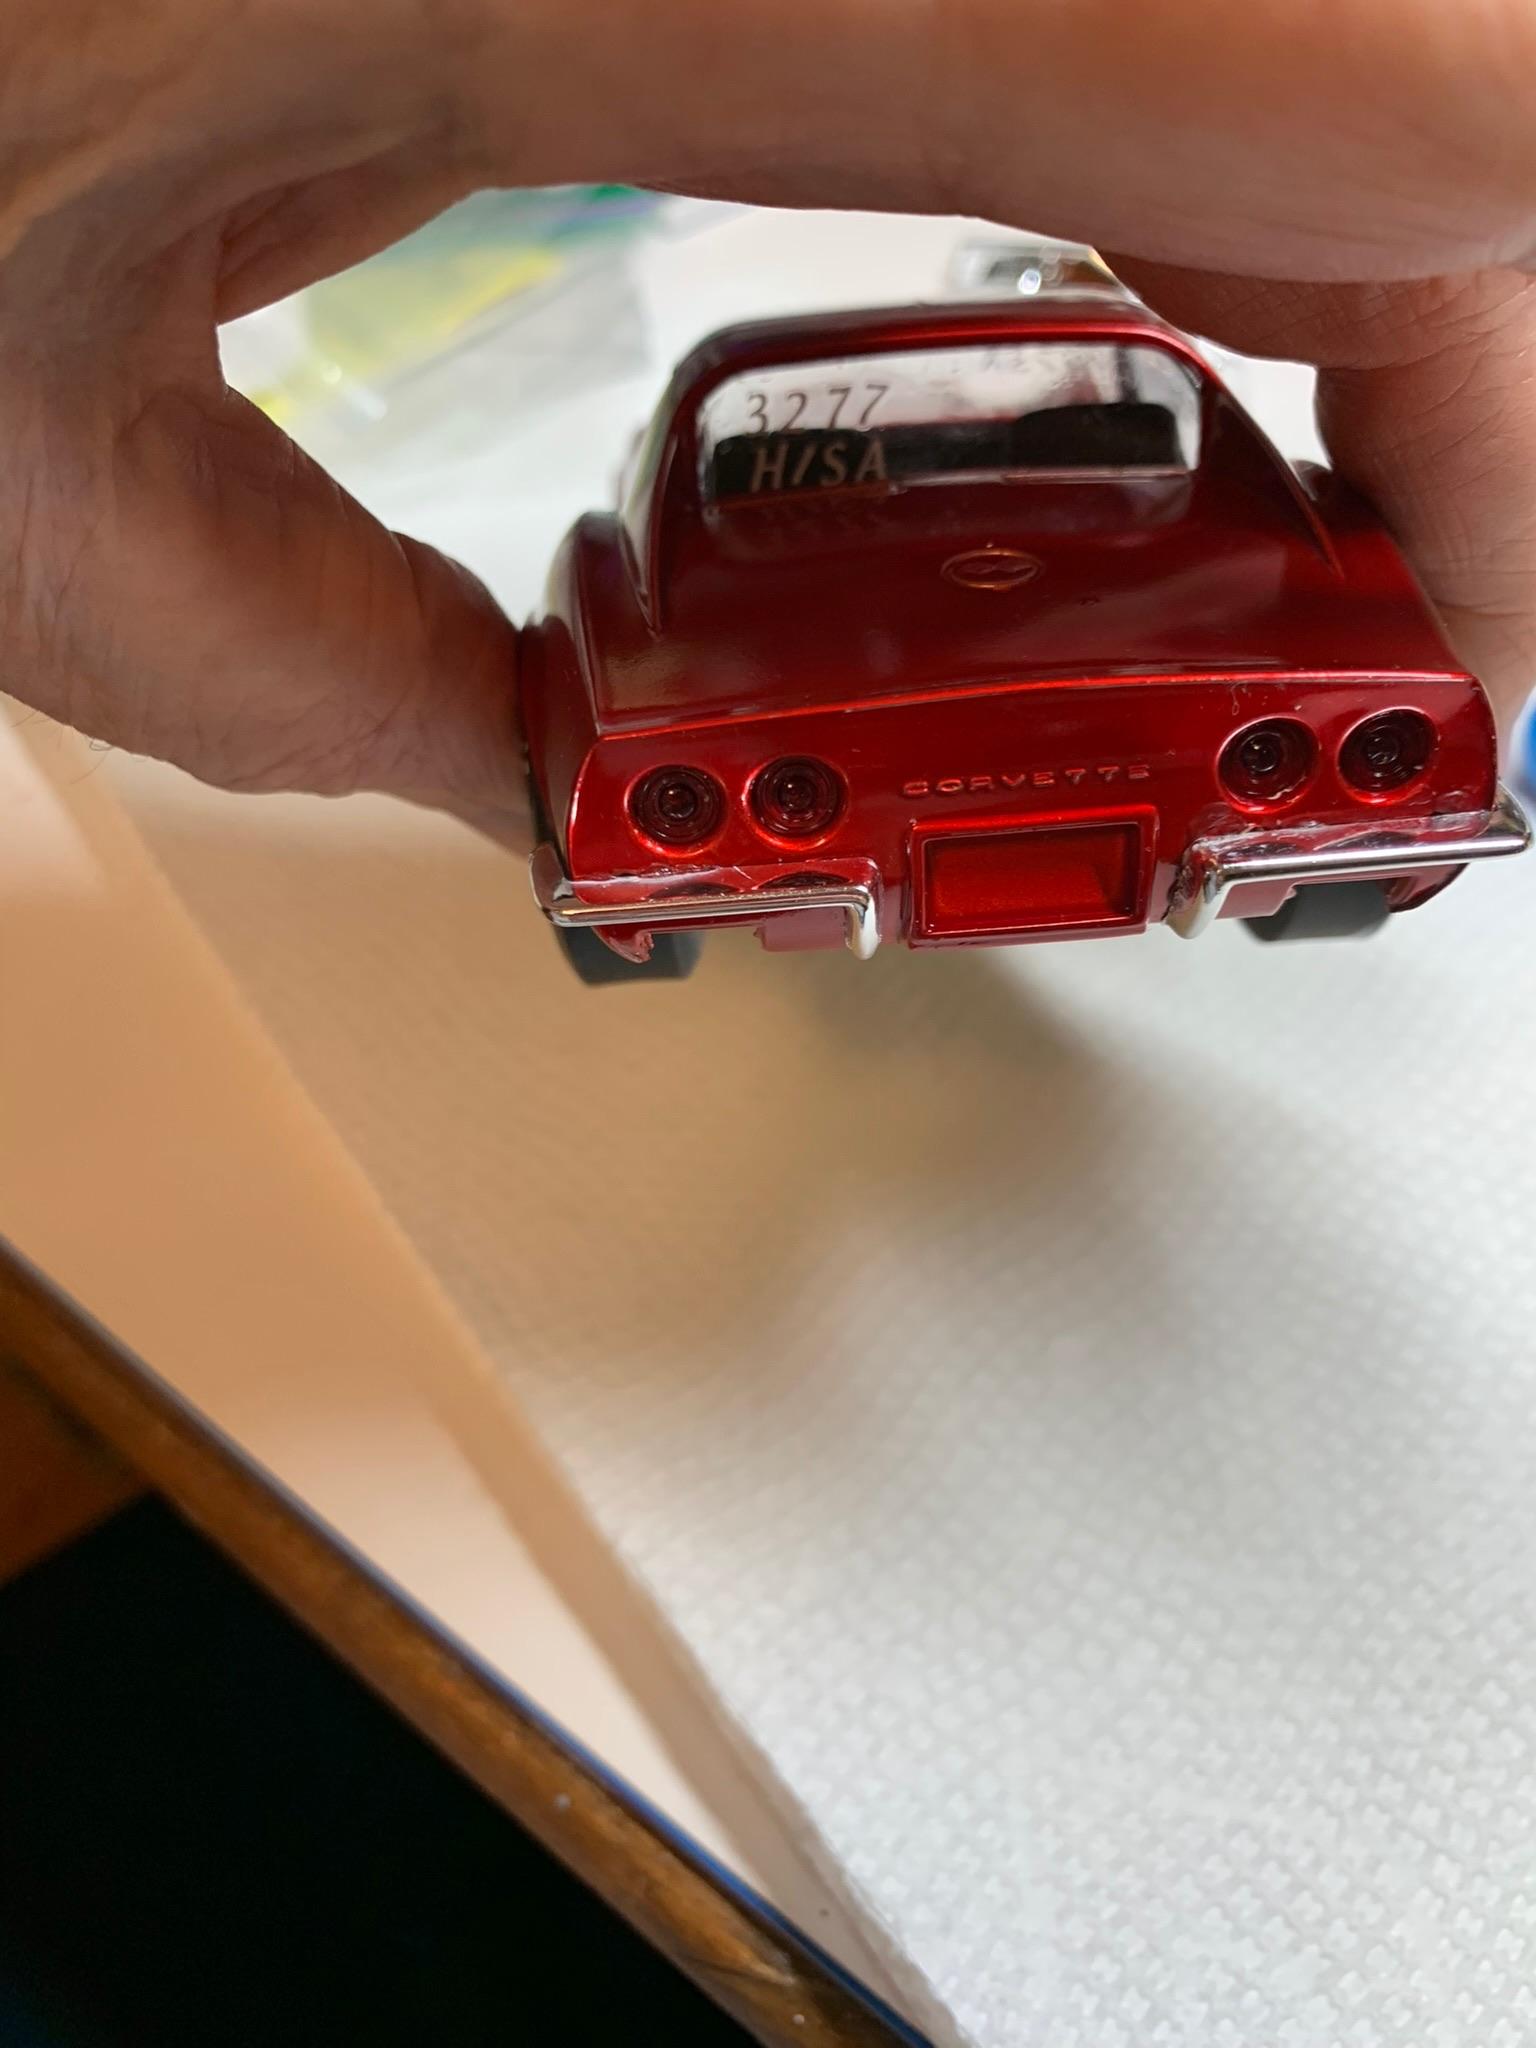
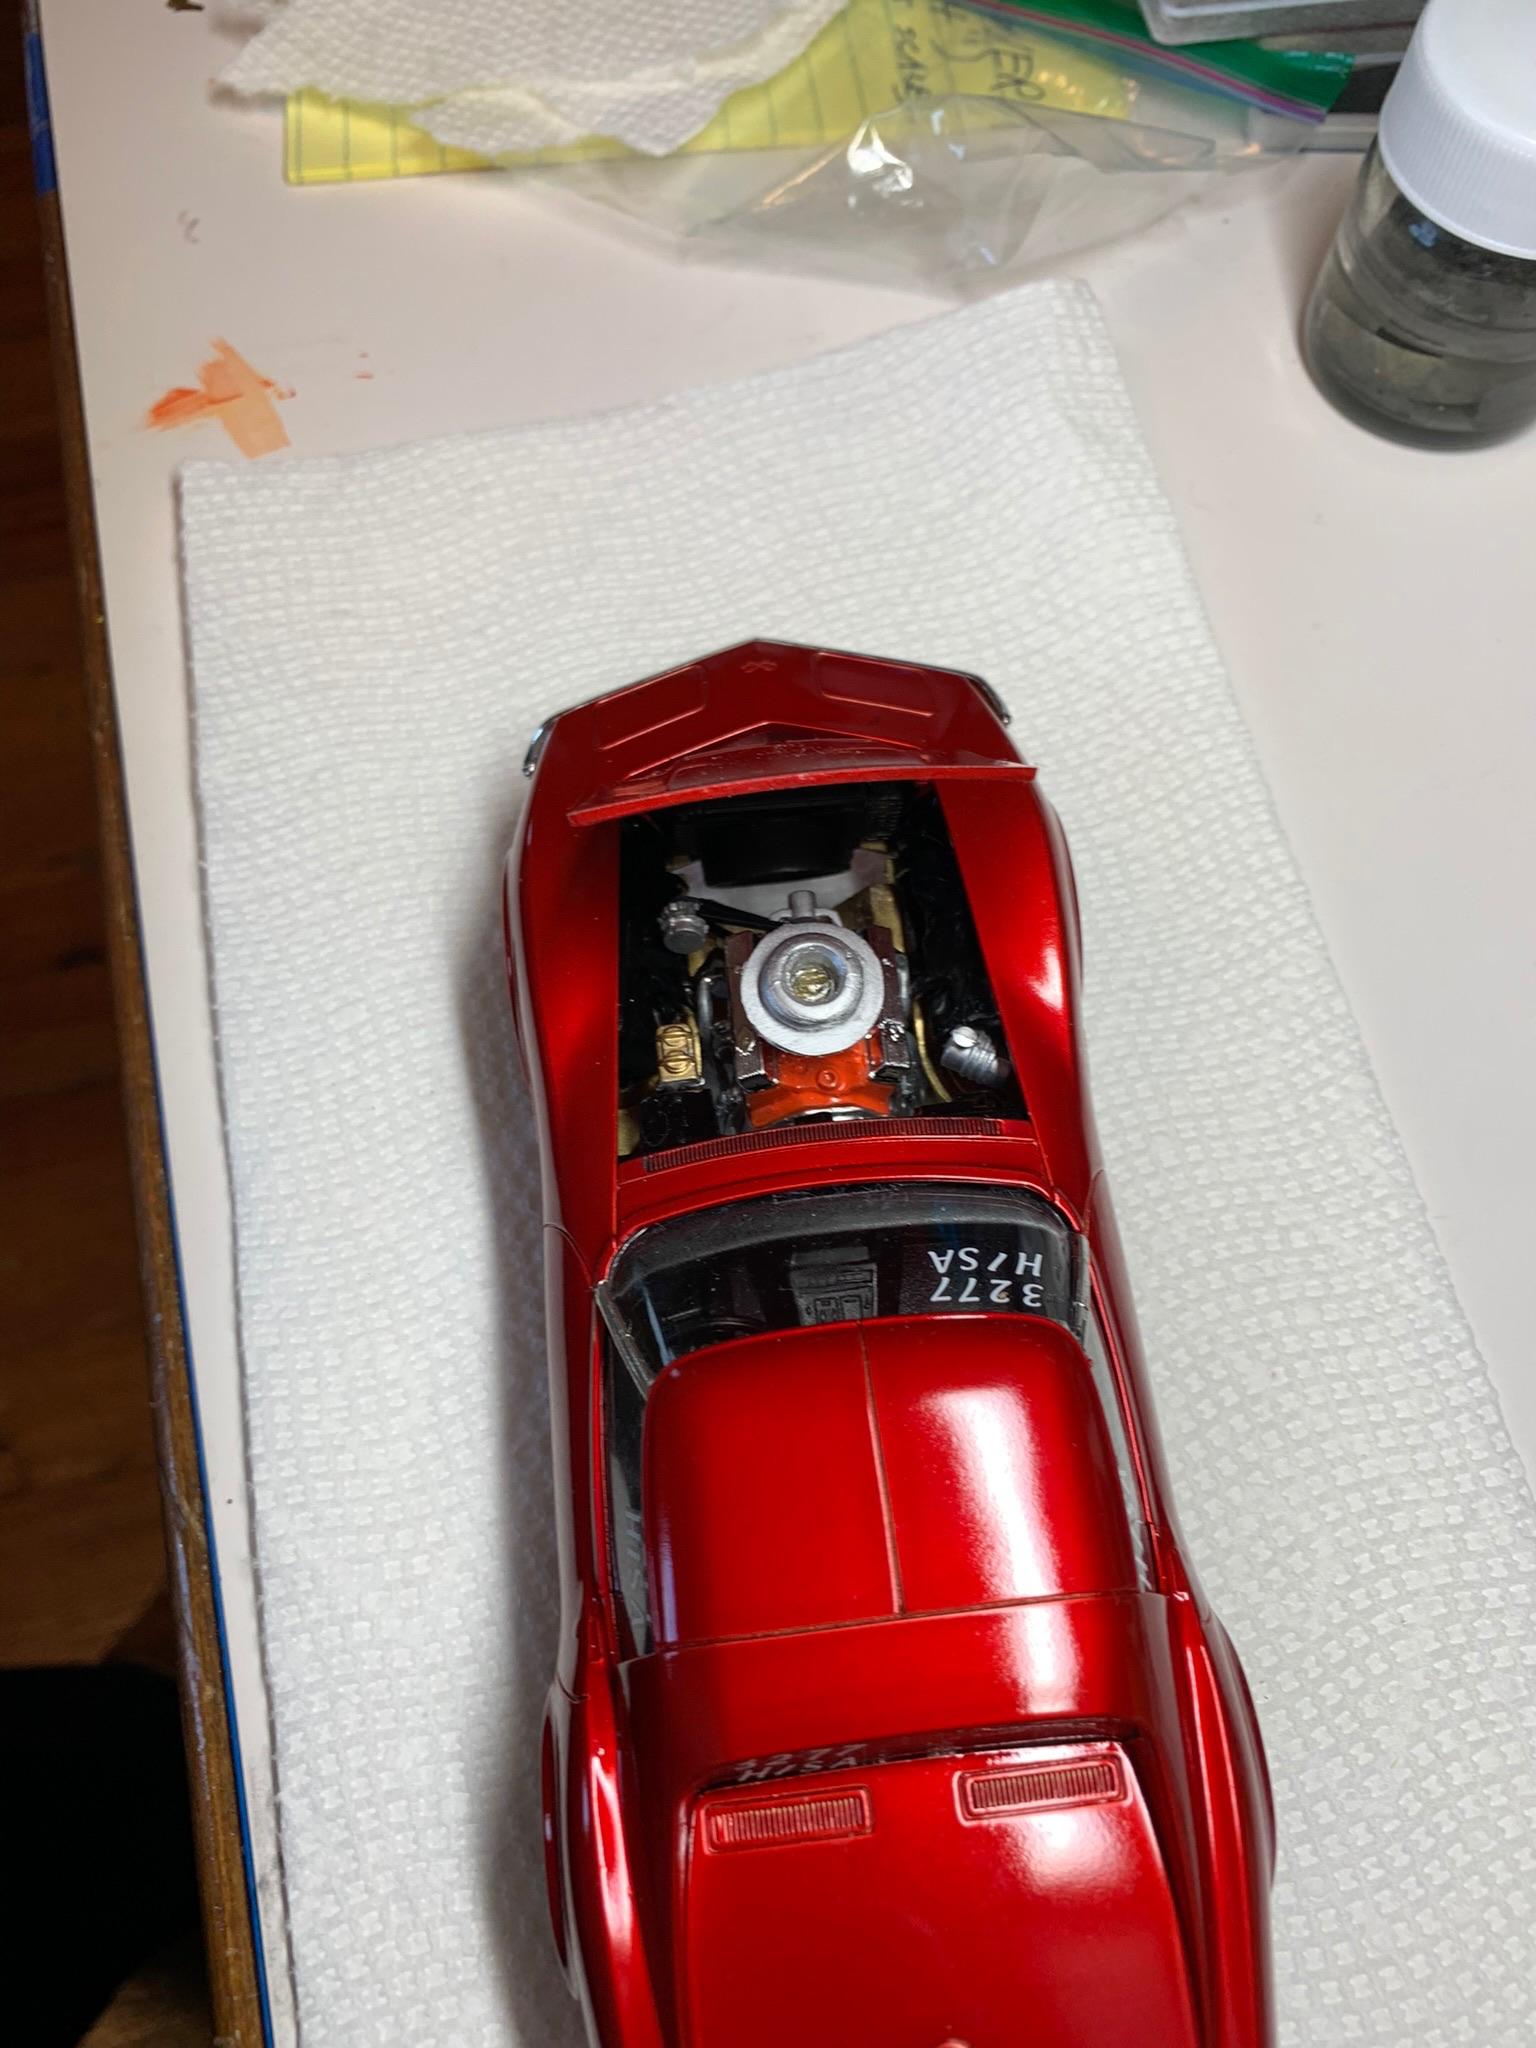
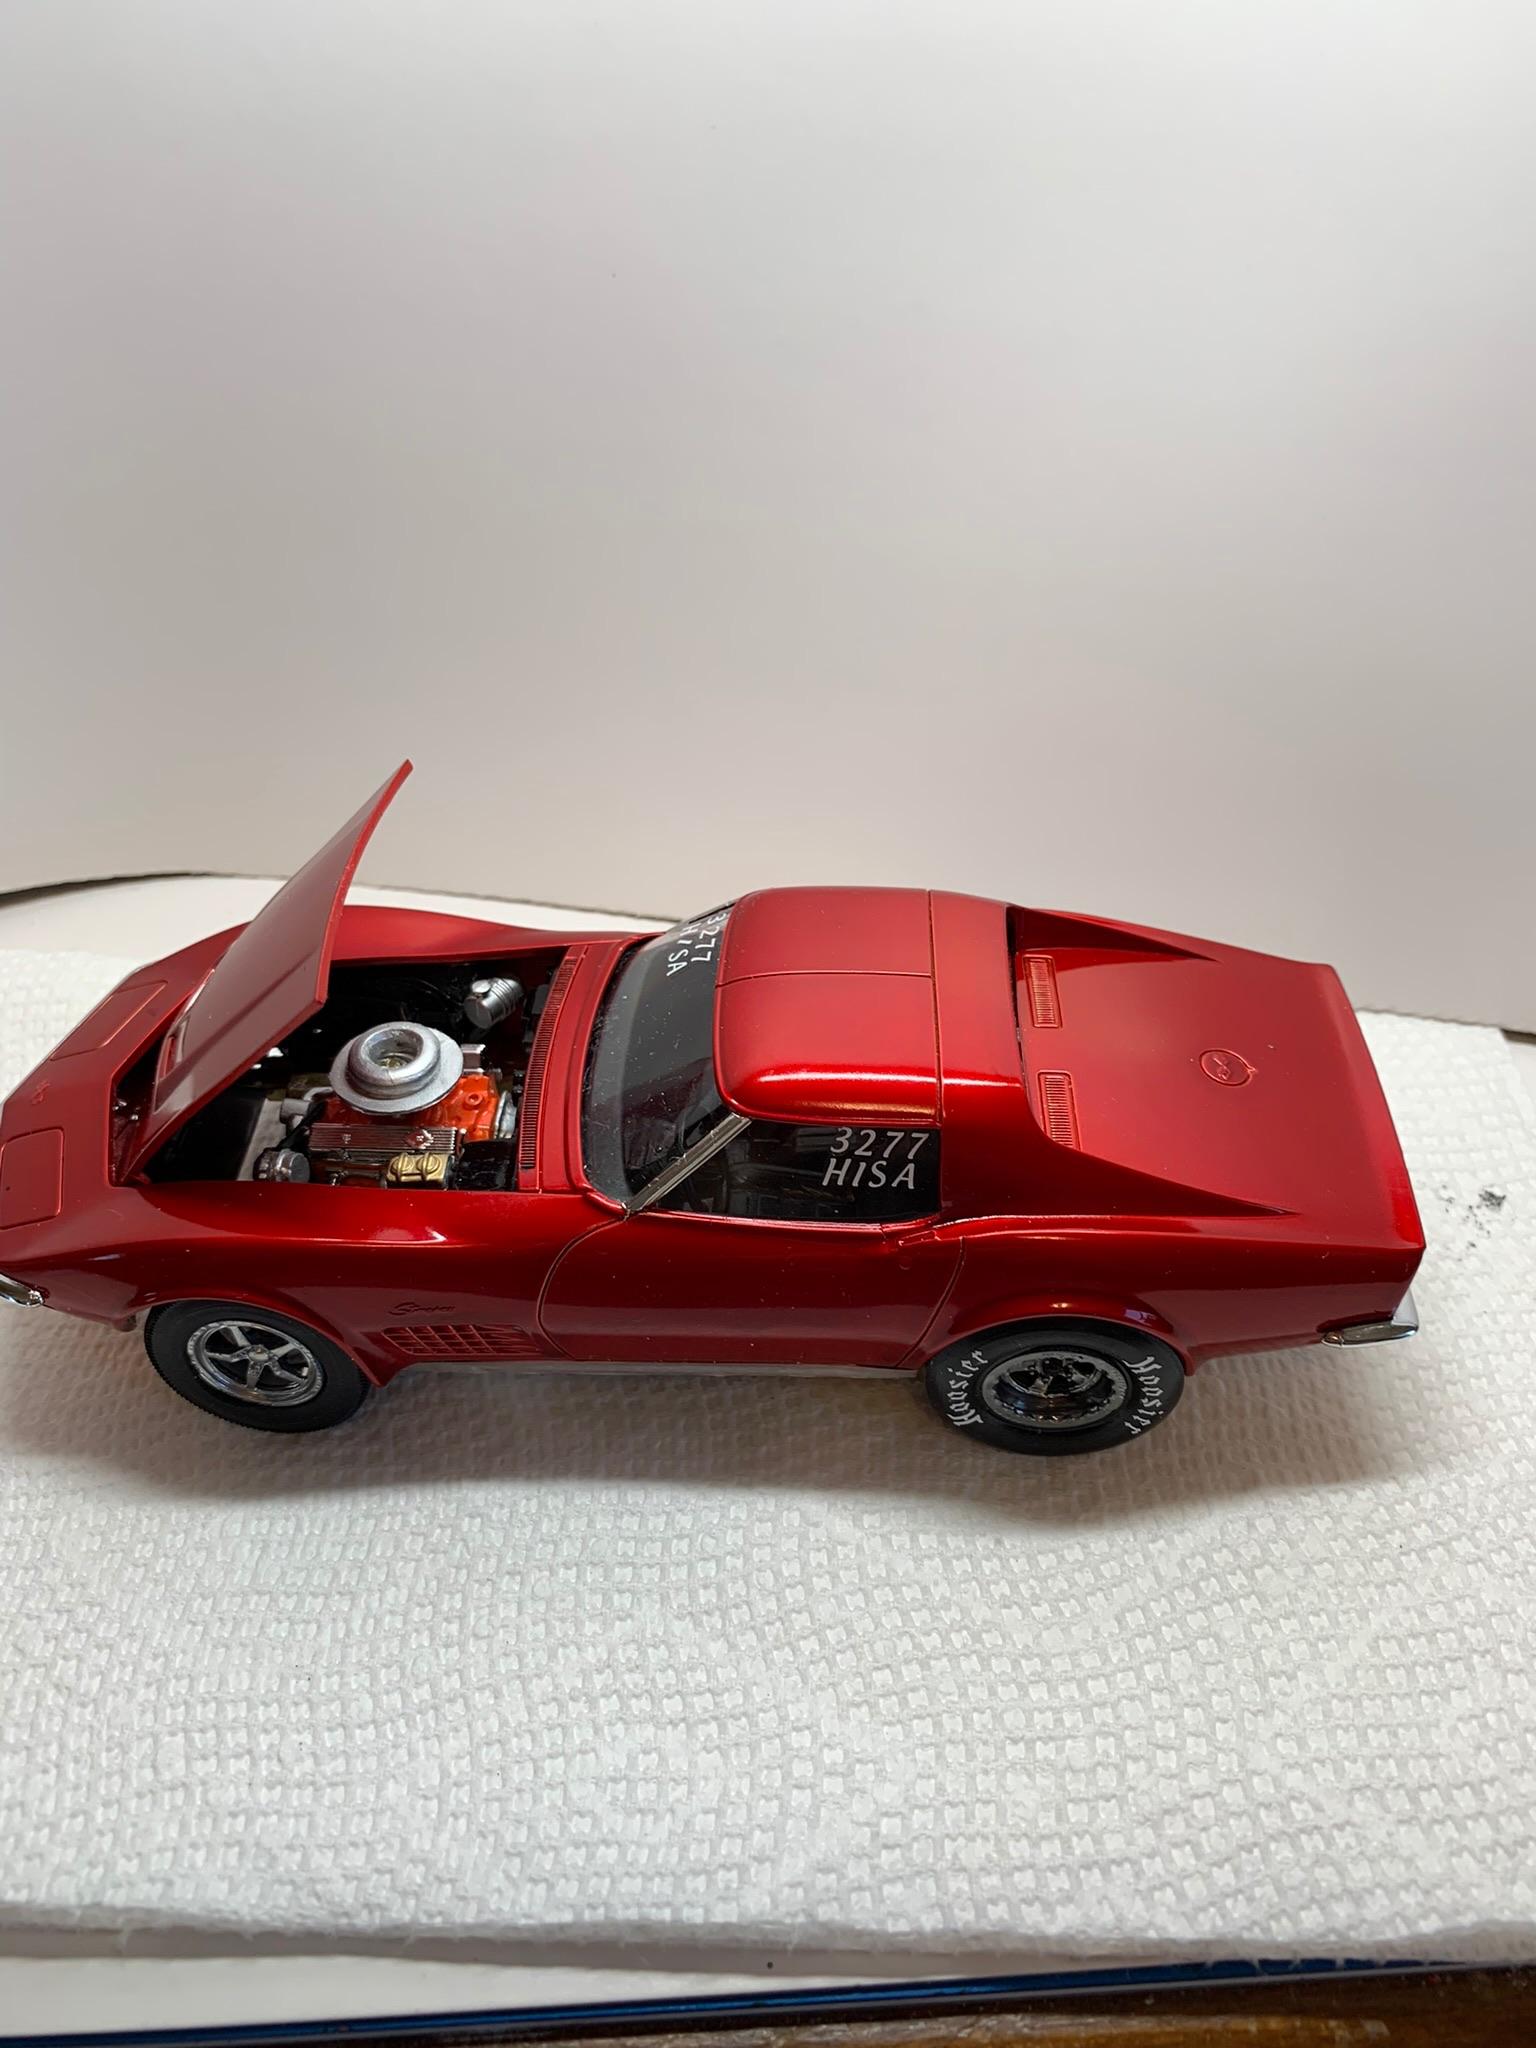
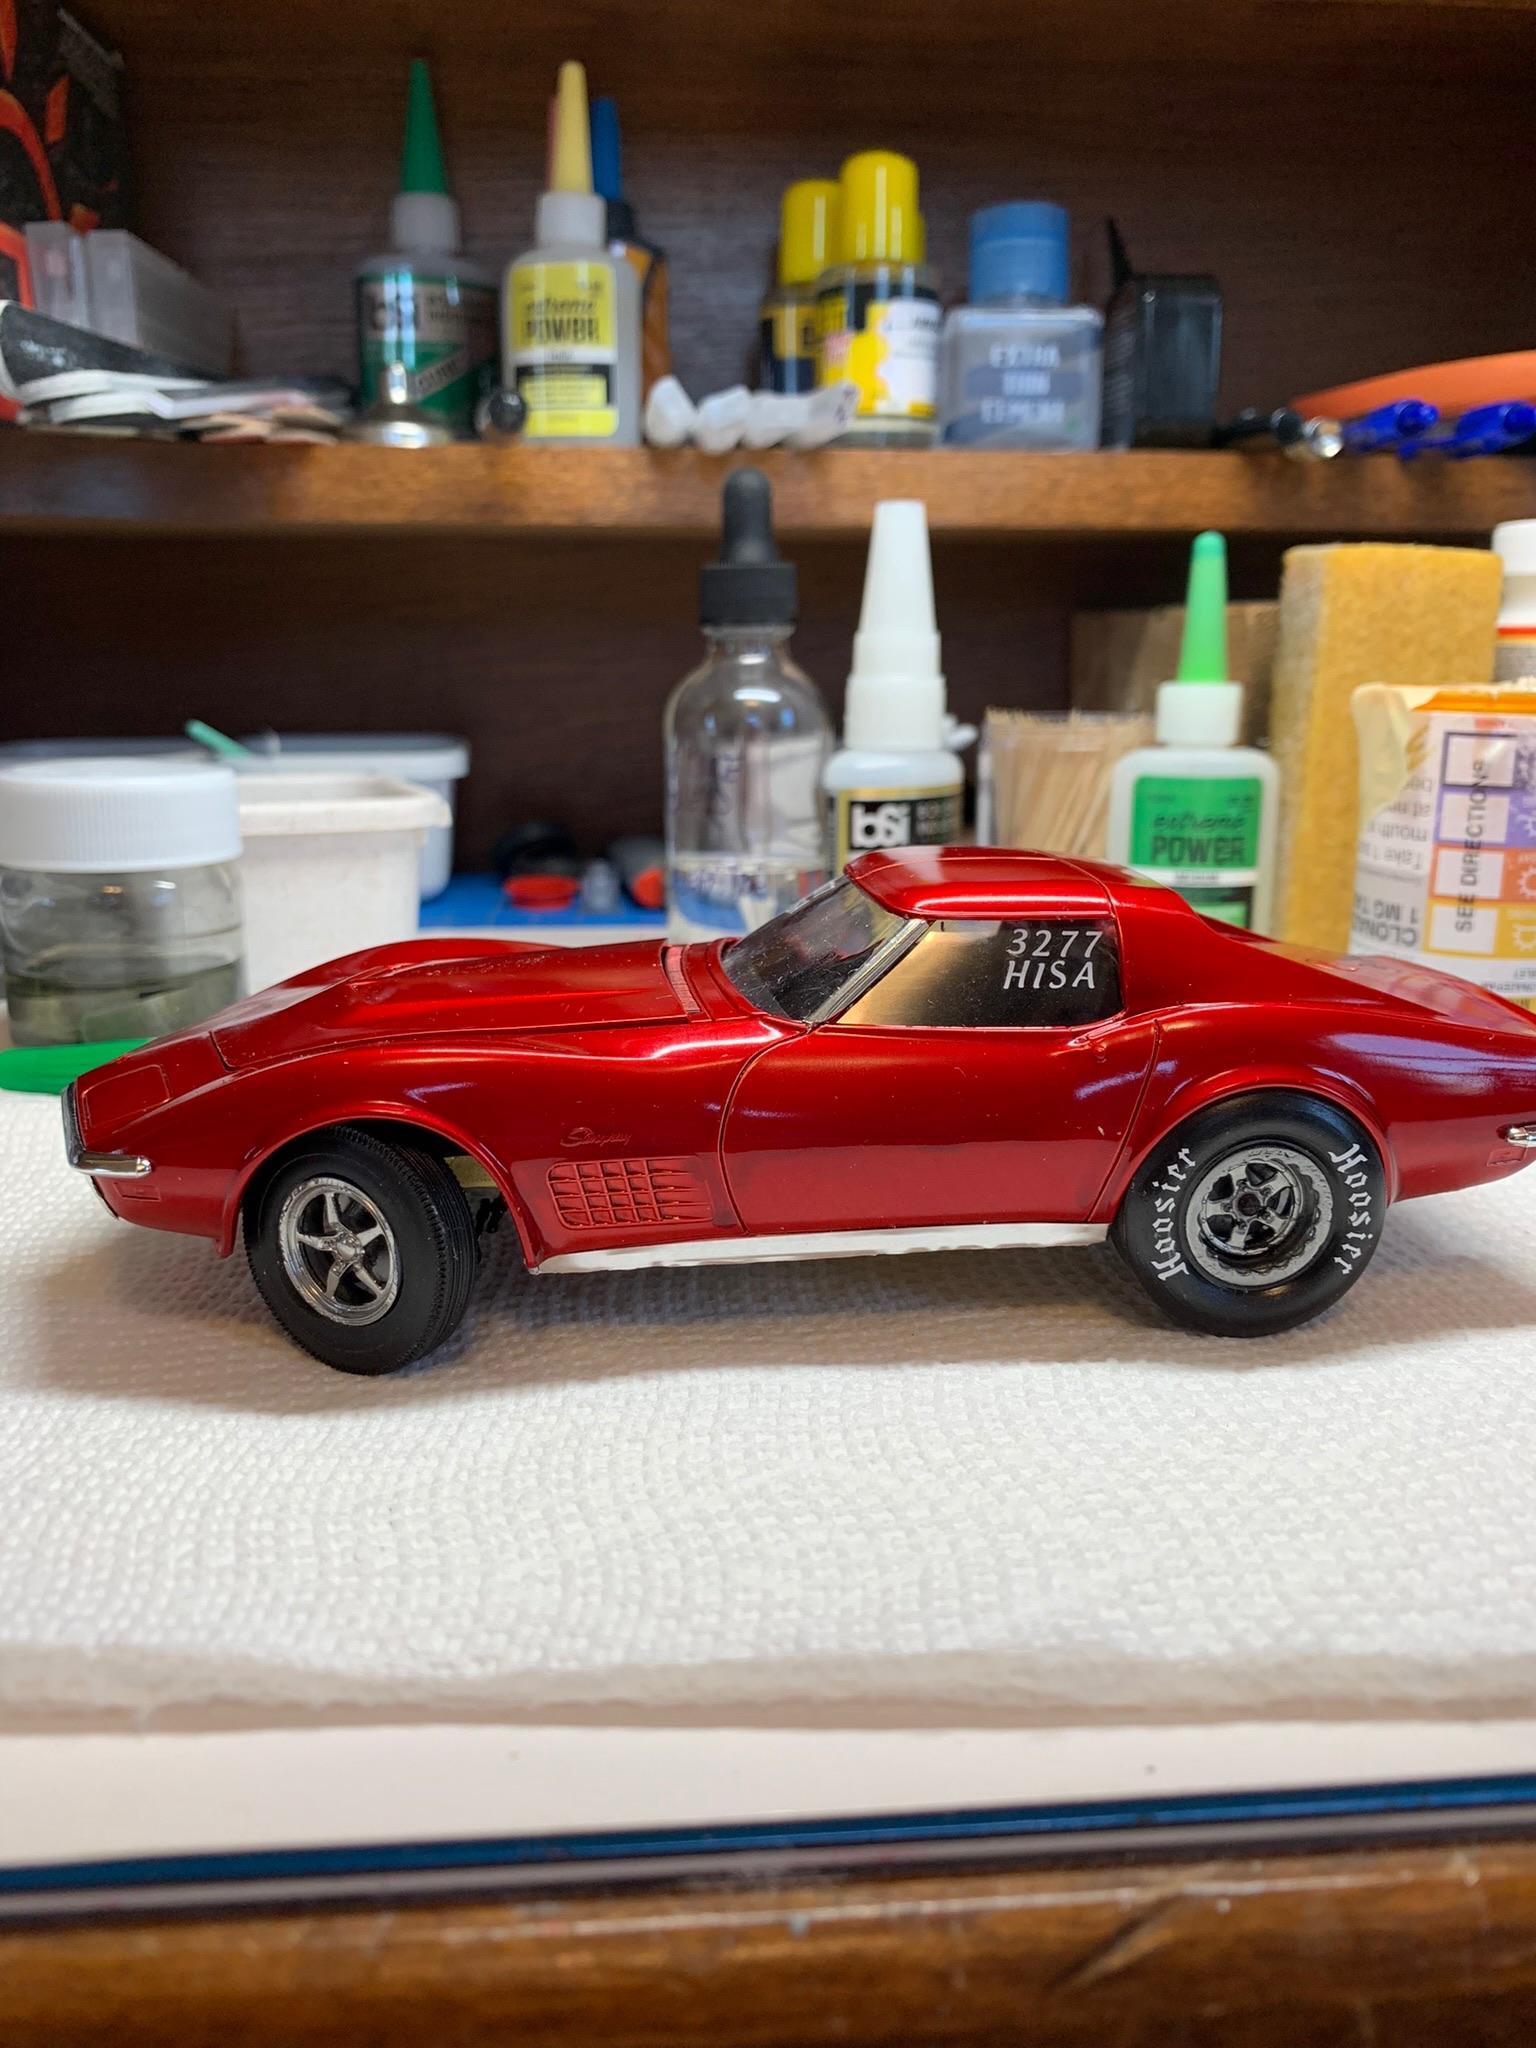
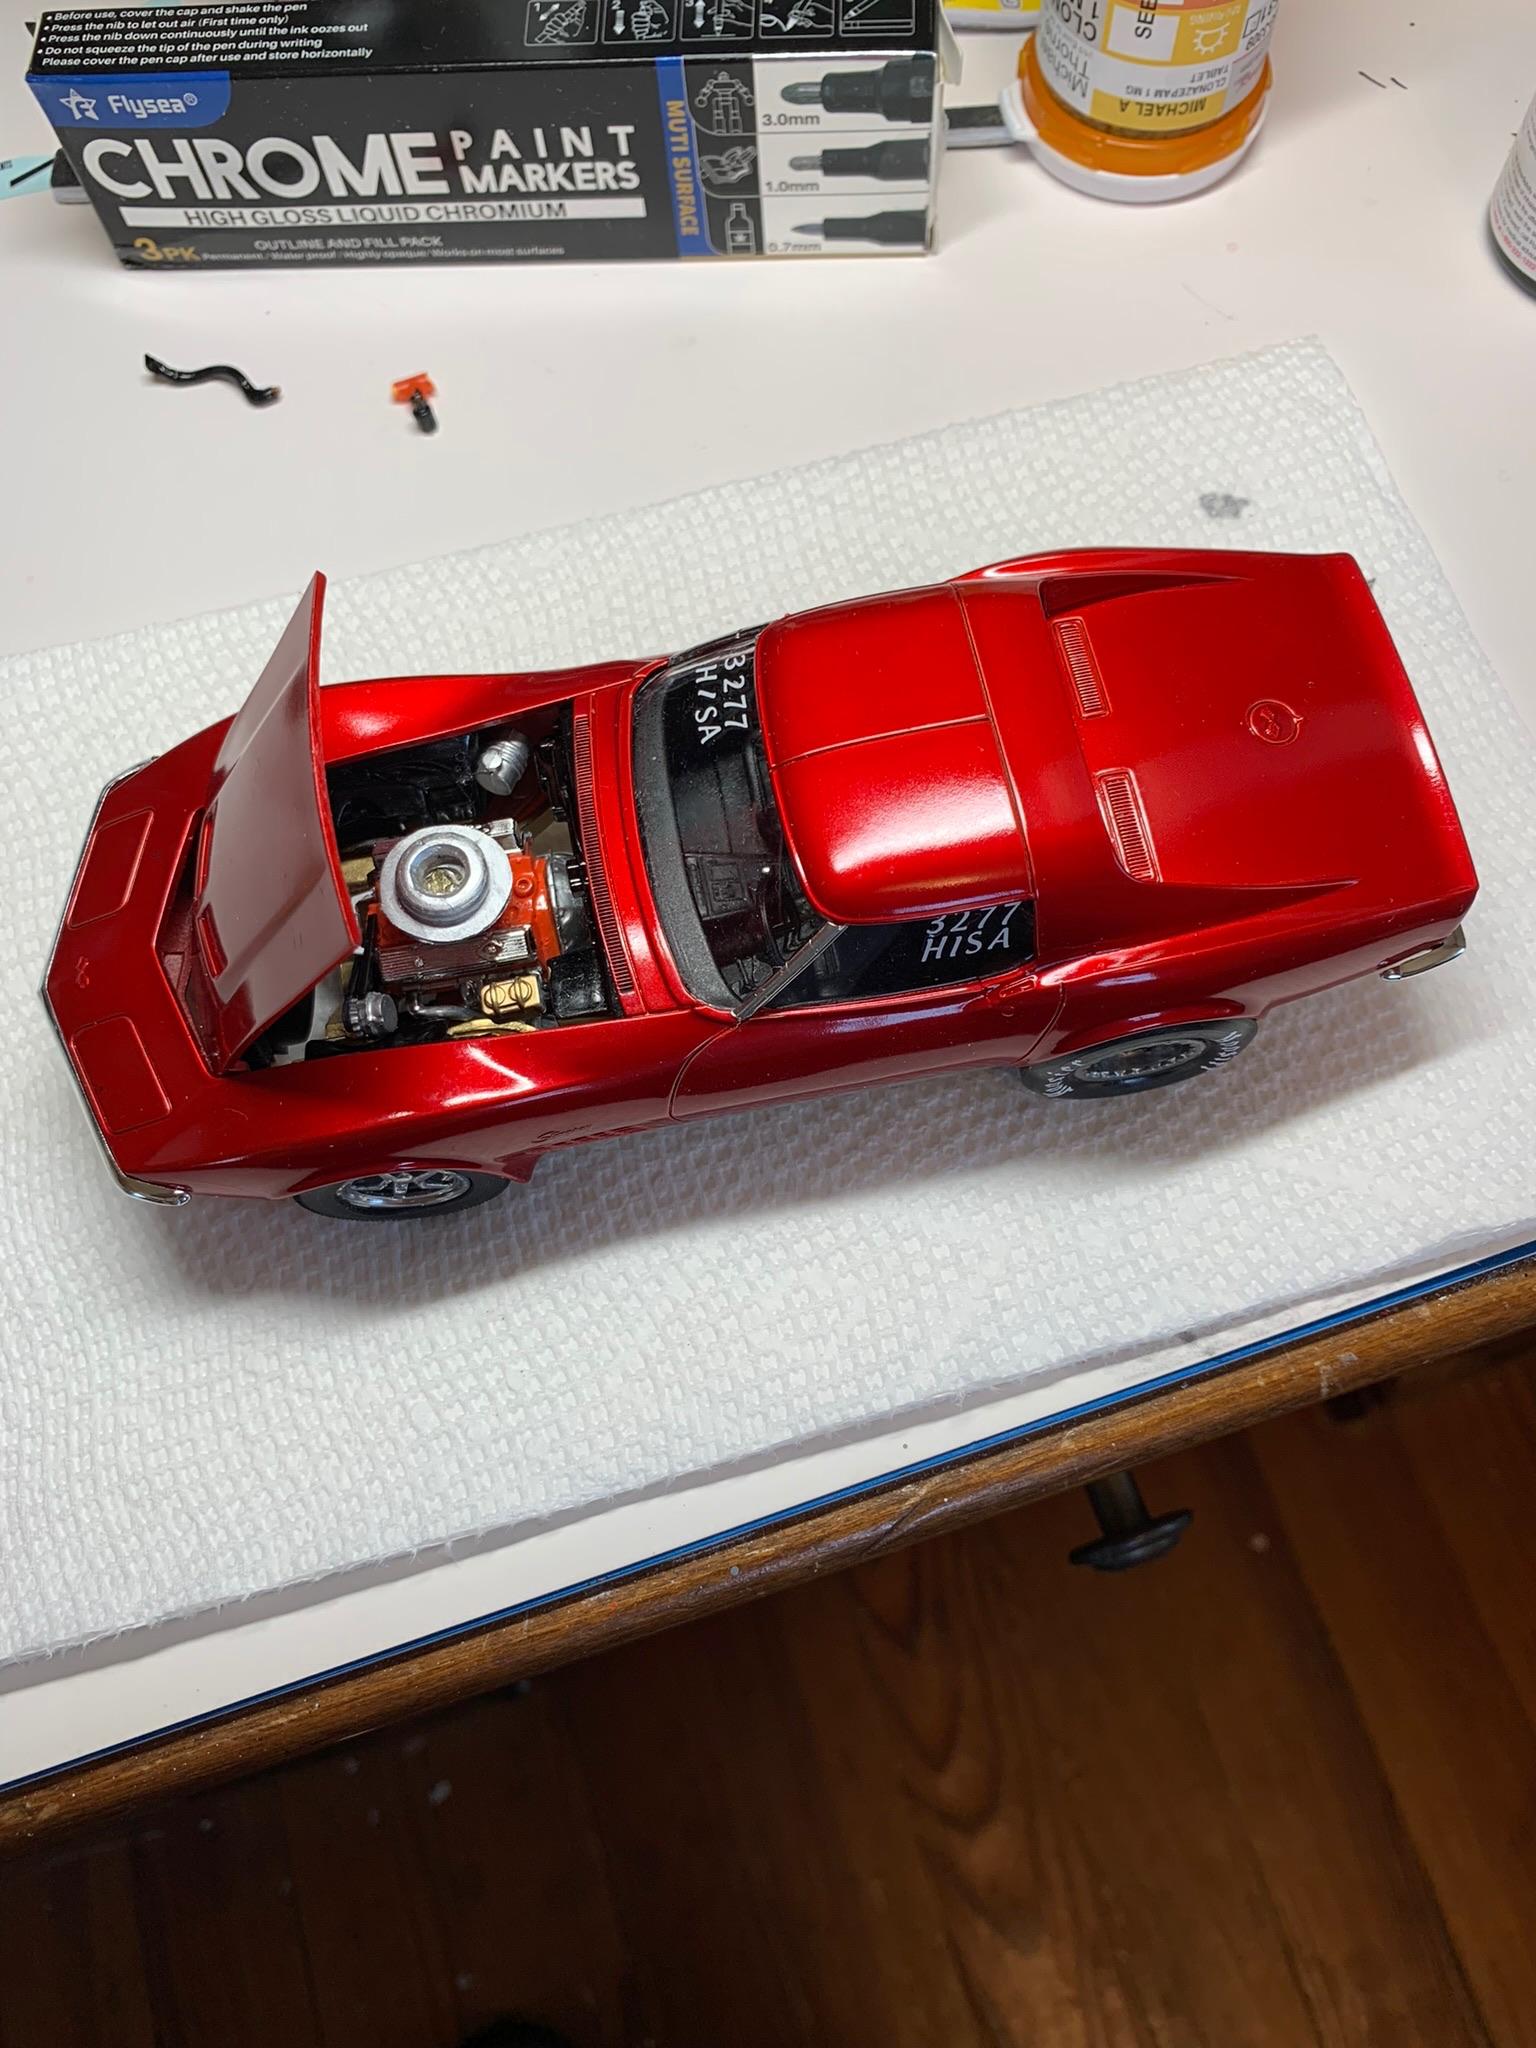
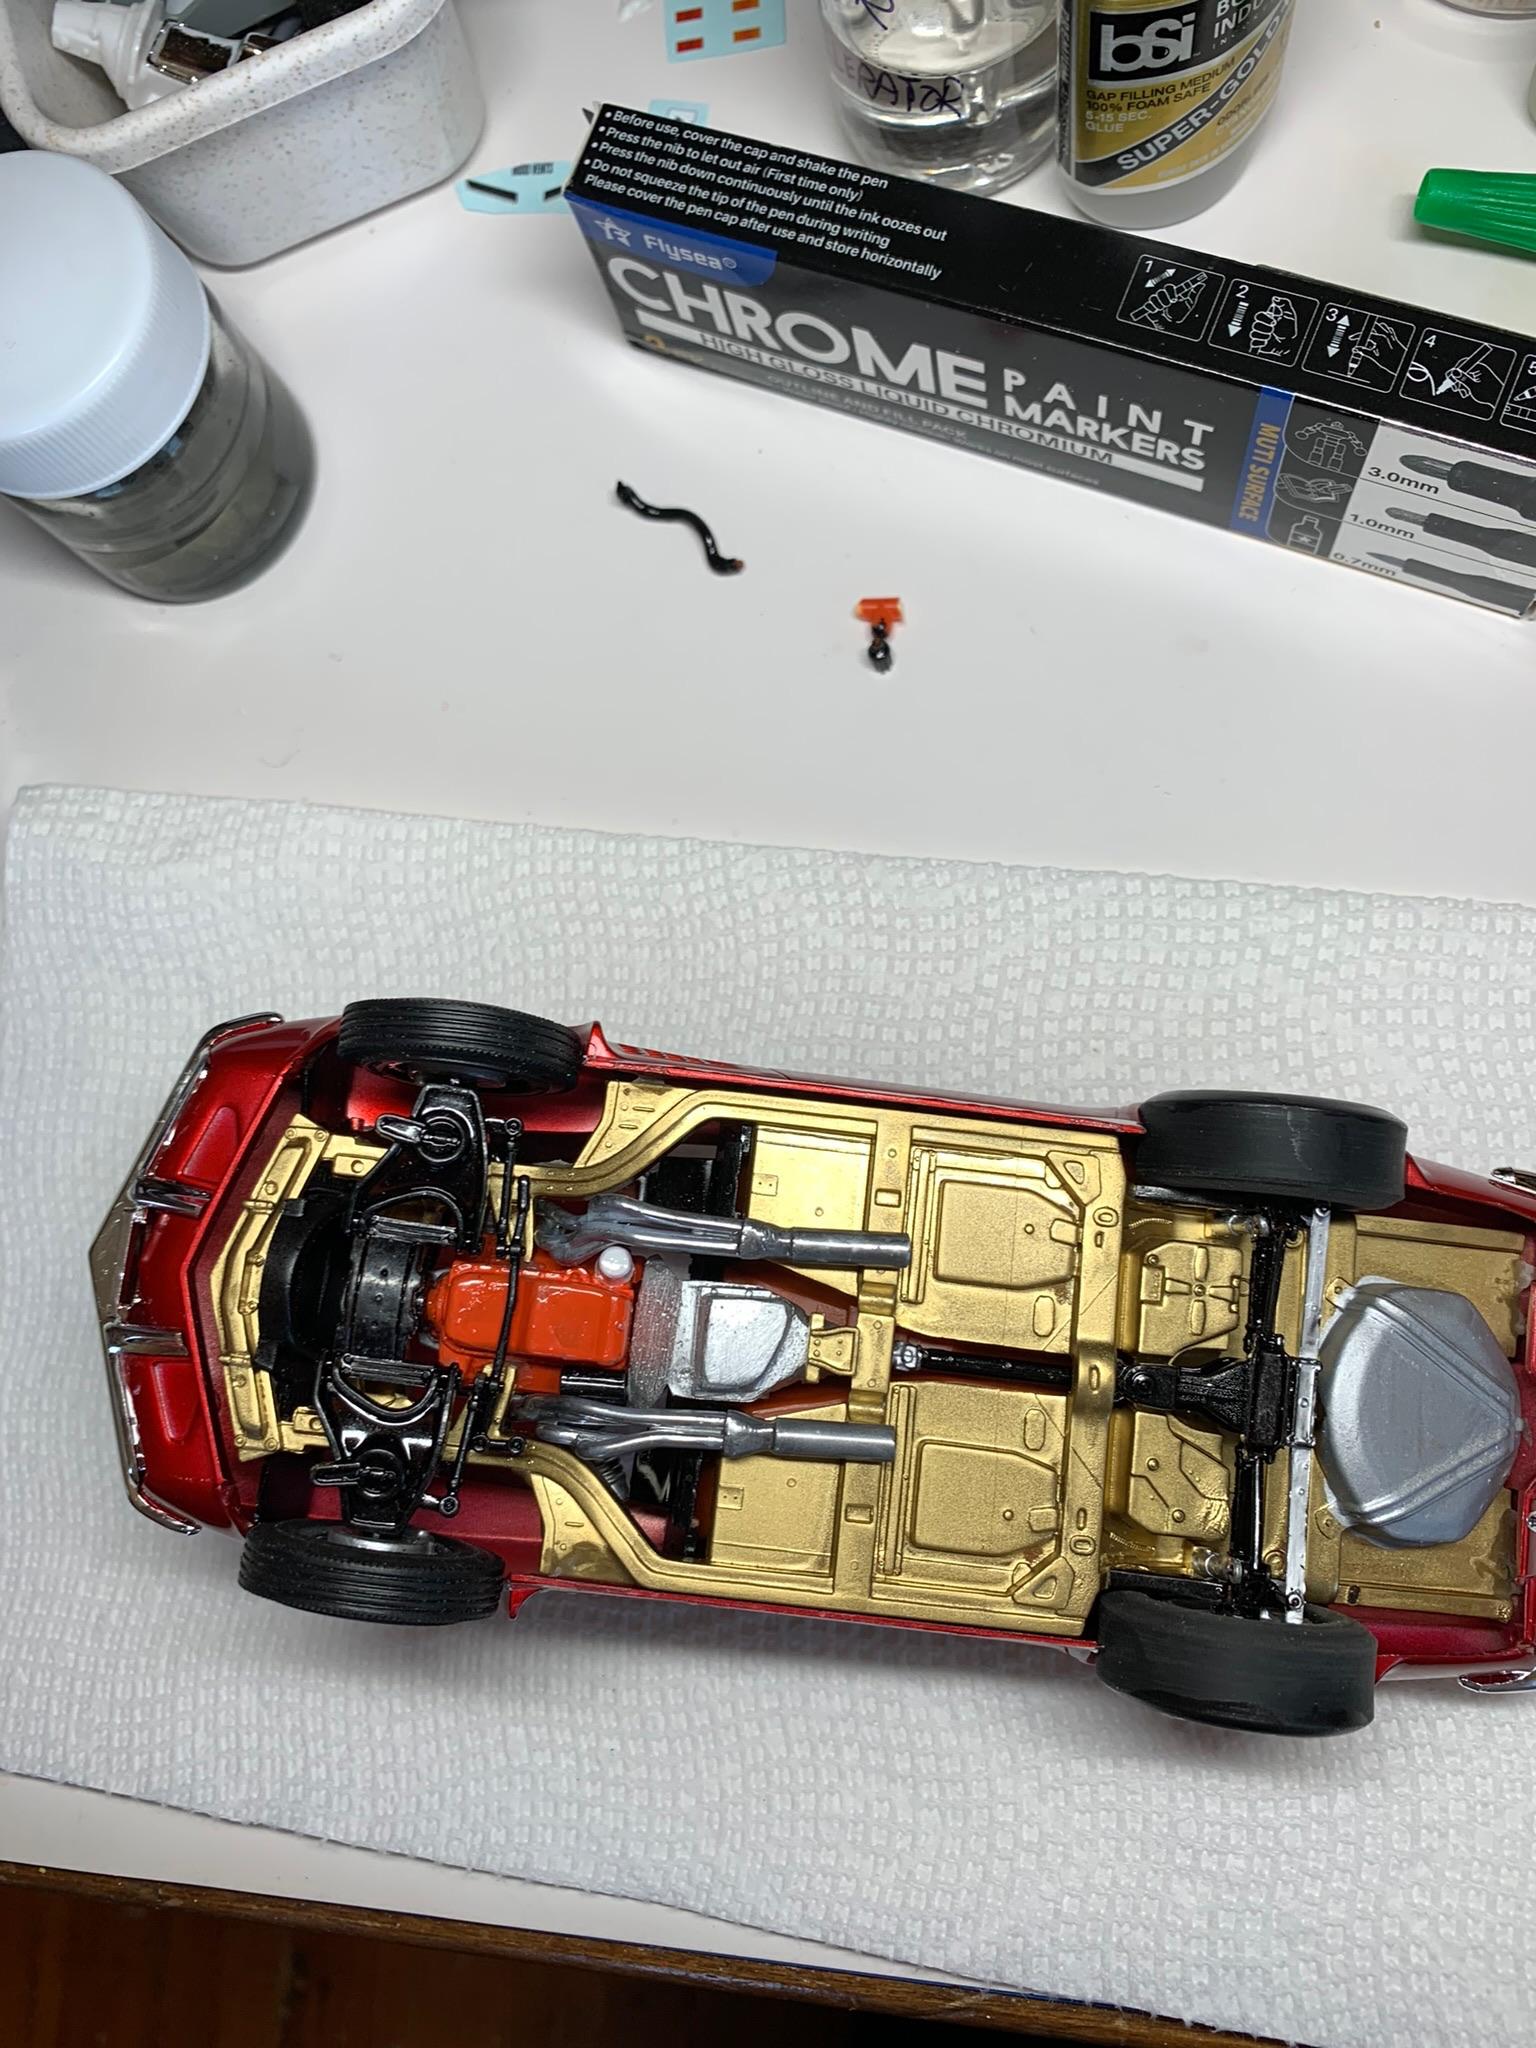
Still a few things to finish, like top radiator hose, etc. Talked myself out of the single wheelie bar, mainly because I would have to remove the fuel tank. Maybe I am just getting lazy or want to move on to the next 2 cars I have already started on. I really like the looks of this car, even though there were a few runs in the paint job (that clear red is very touchy). Anyway, this should wrap up the WIP thread and I will post some more pics in the under glass thread. I like the opening and shutting hood retaining method on this car and will try to include that in future builds.
-
10 hole wheels Monocoque
R. Thorne replied to R. Thorne's topic in Model Building Questions and Answers
I saw that kit, too. Also, a bit pricey. As for the width, that can be rectified.
-
10 hole wheels Monocoque
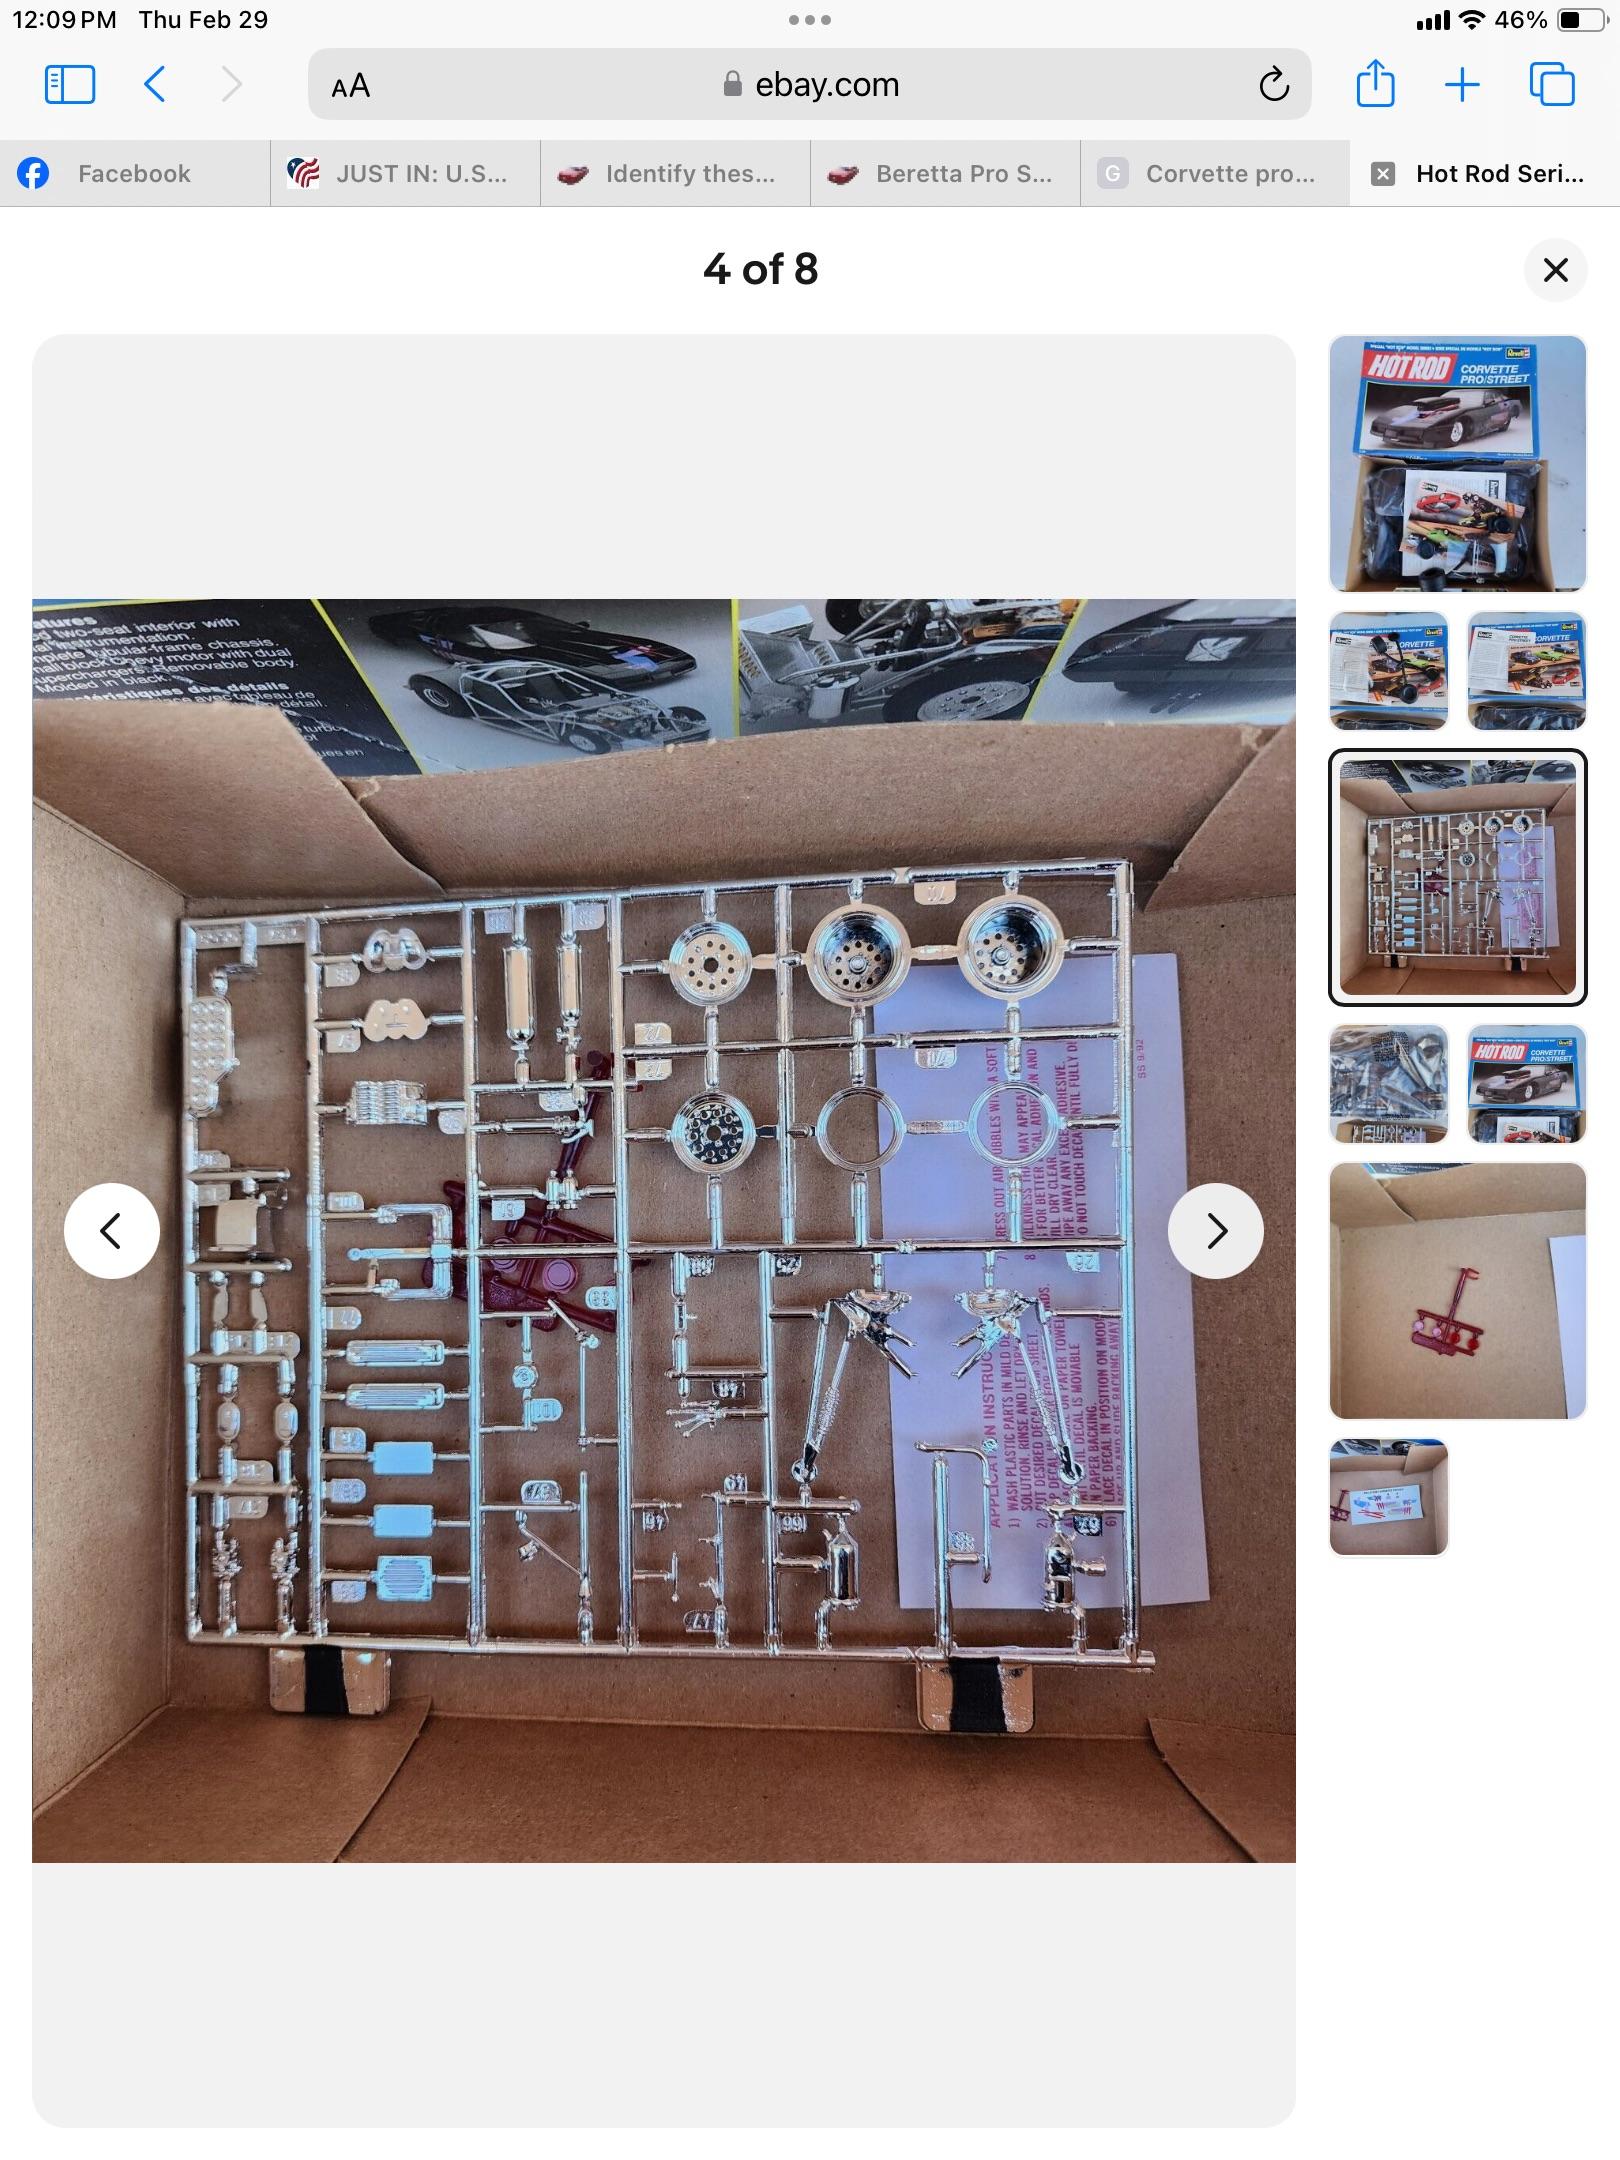
R. Thorne replied to R. Thorne's topic in Model Building Questions and Answers
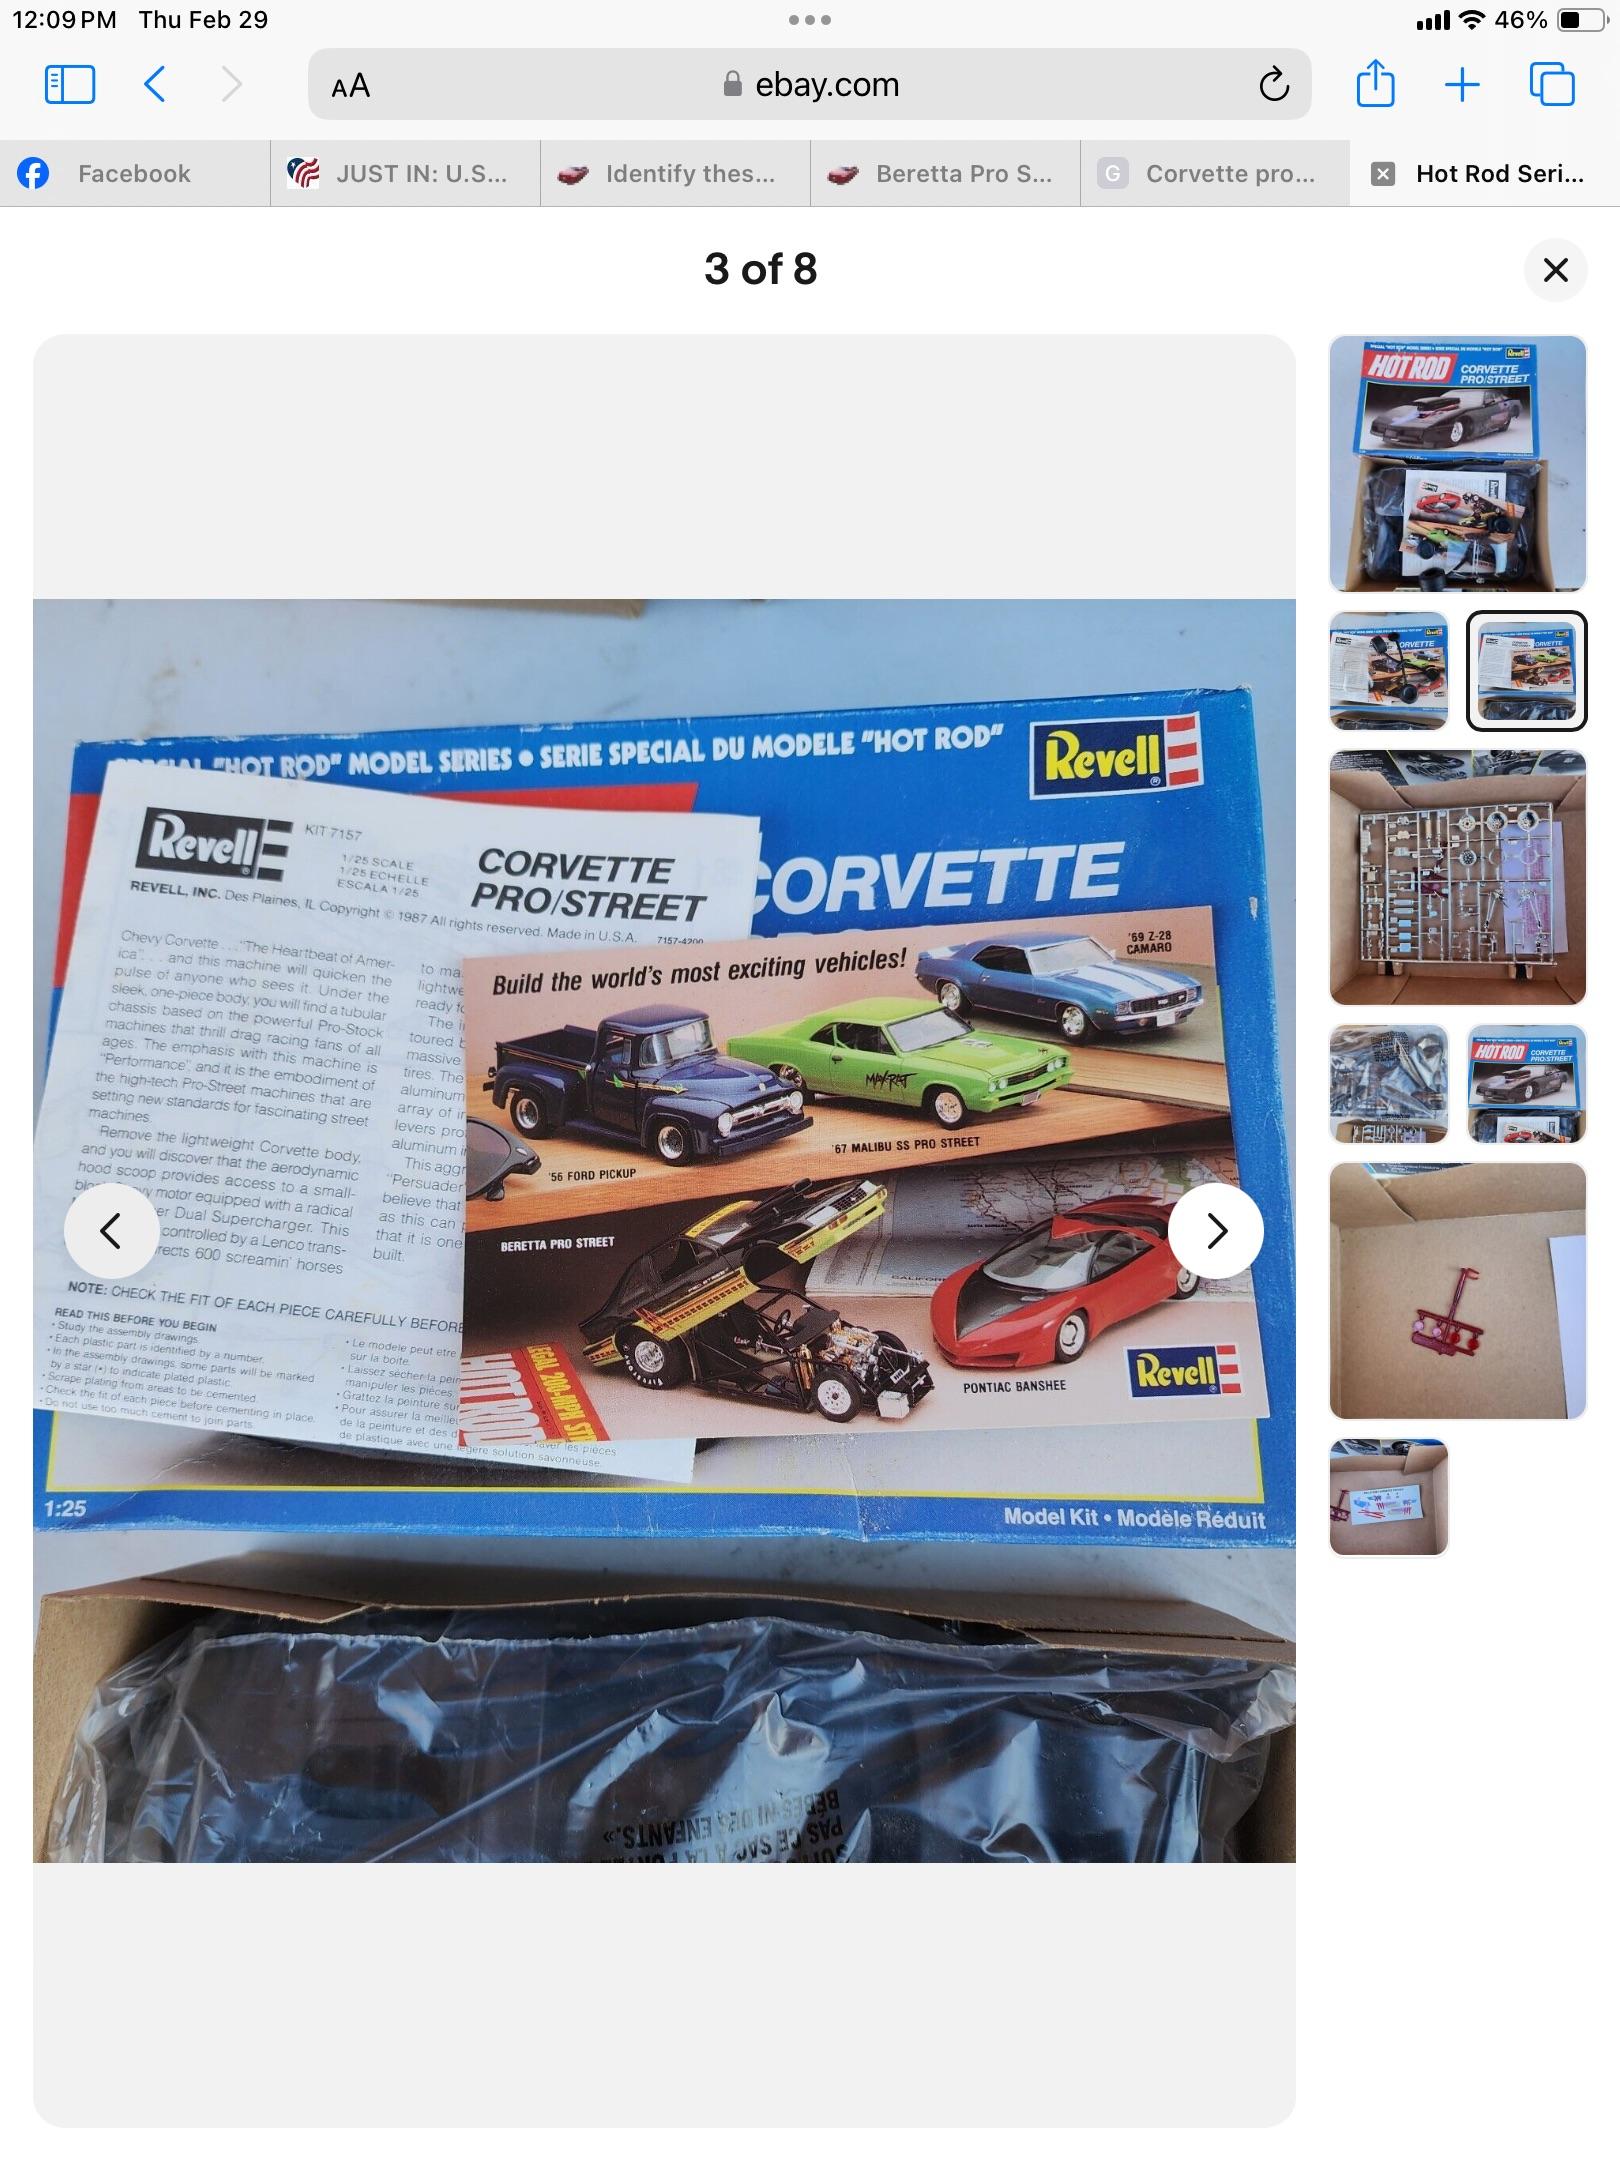
After some more research, these are Monocoque wheels and come in some Revell Pro Street kits like the Beretta and Corvette and some others. Unfortunately, they seem to be kind of high priced kits. Oh, well, I will keep my eyes open.
-
Holloman & McKinney 57 Chevy C/MP circa 1964
R. Thorne replied to R. Thorne's topic in WIP: Drag Racing Models
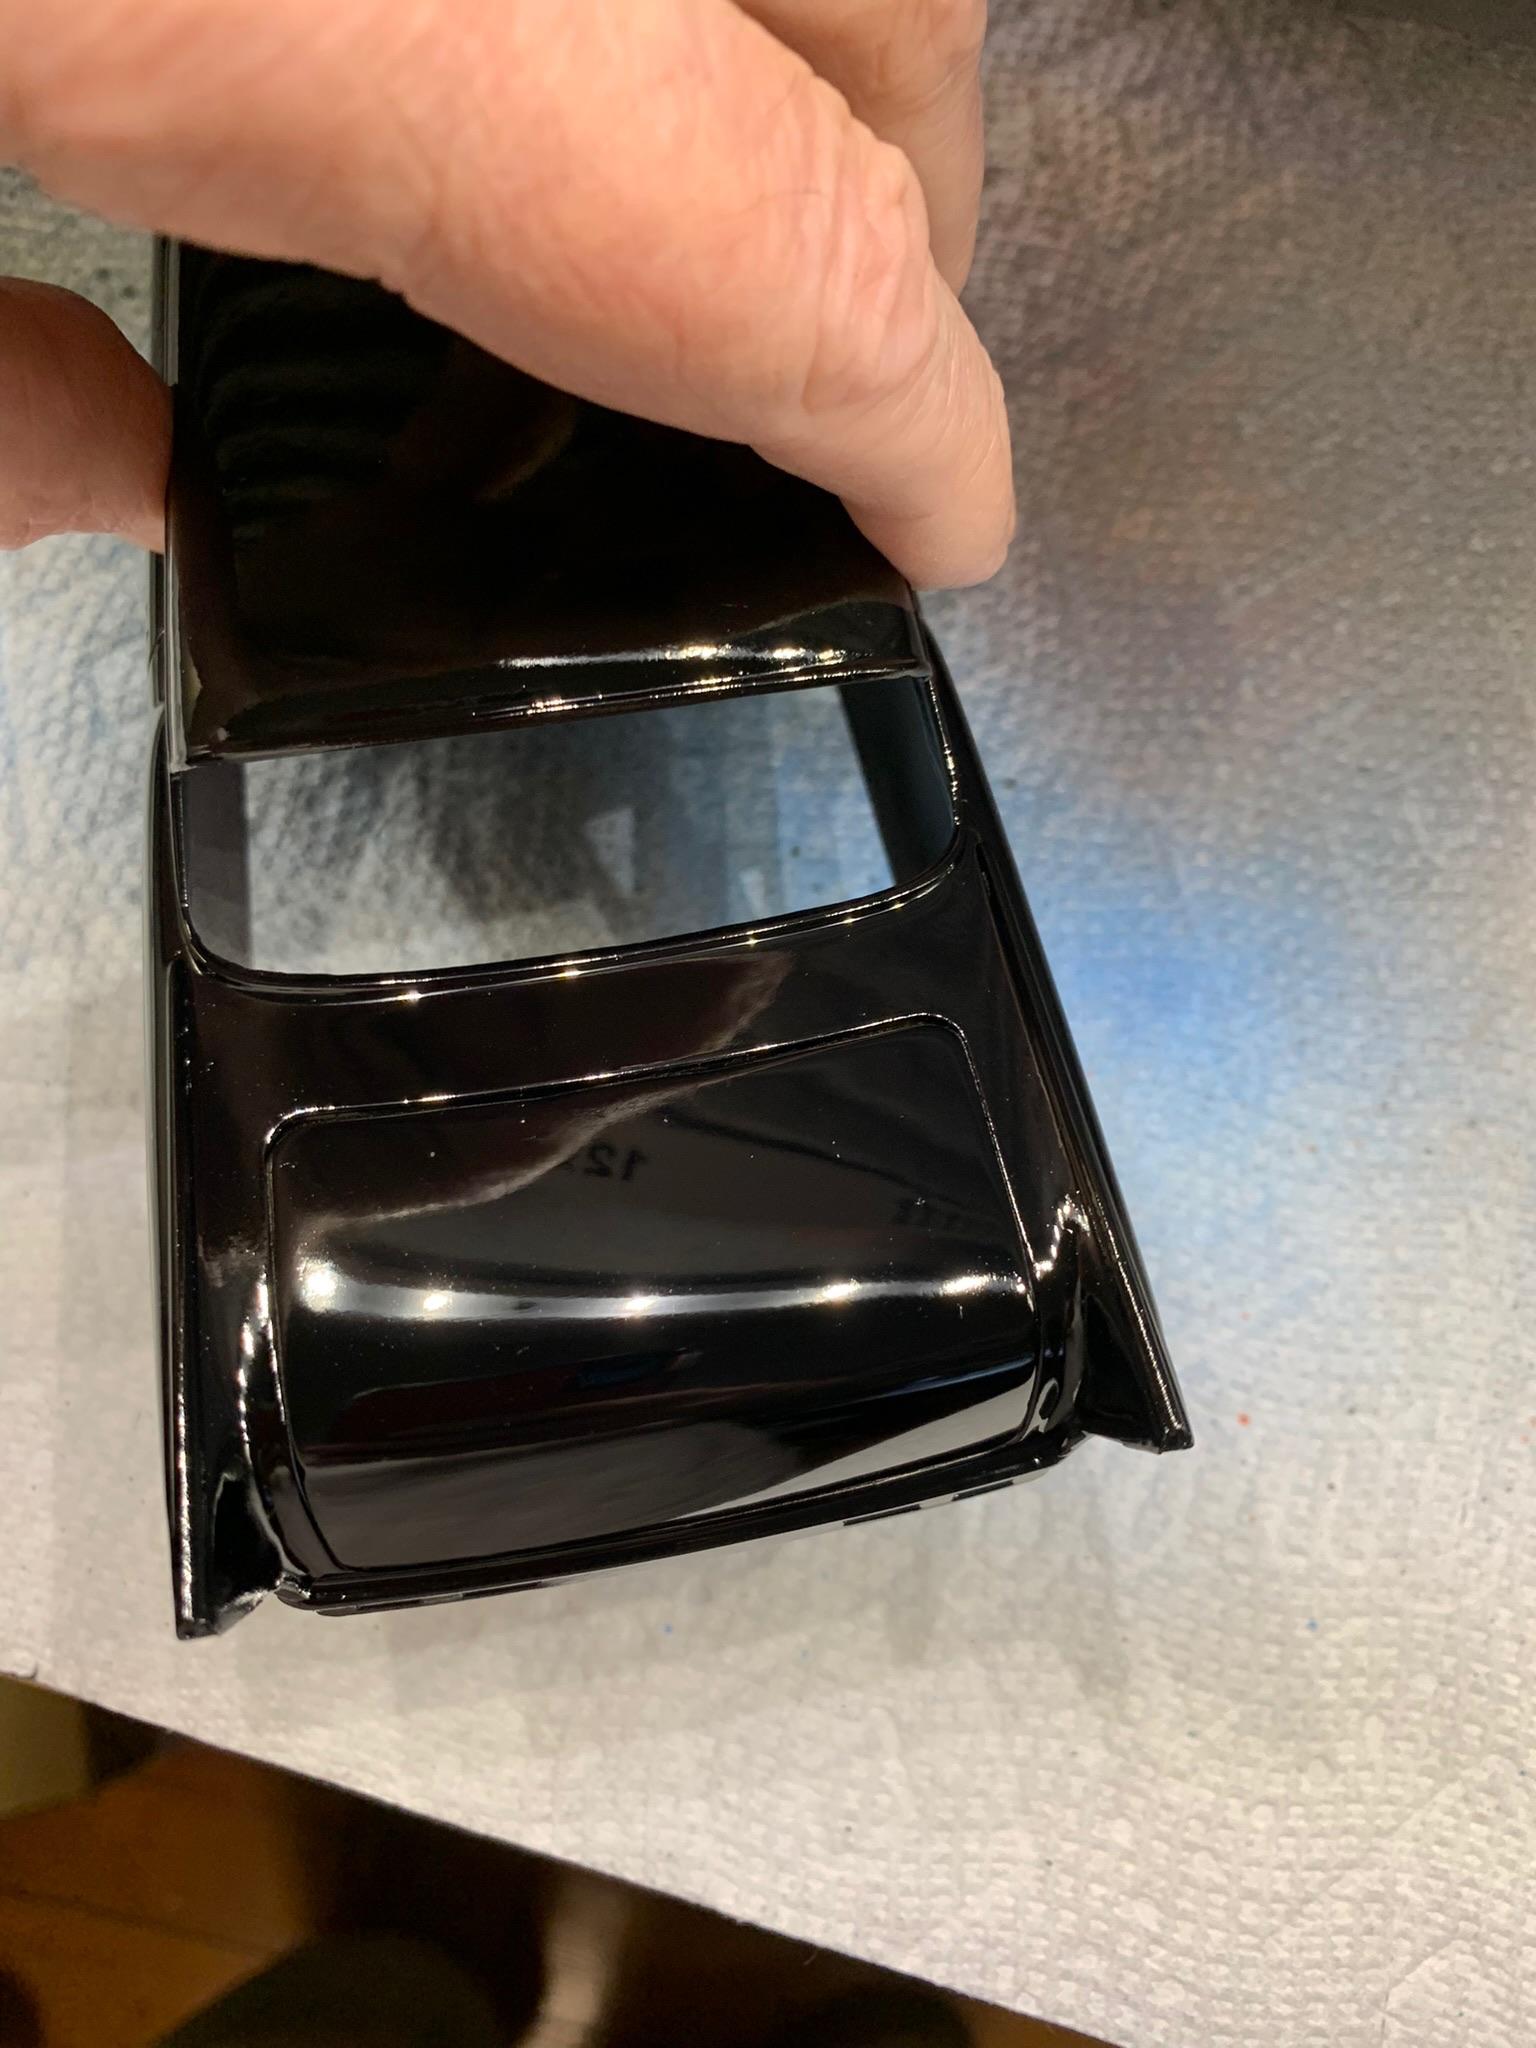
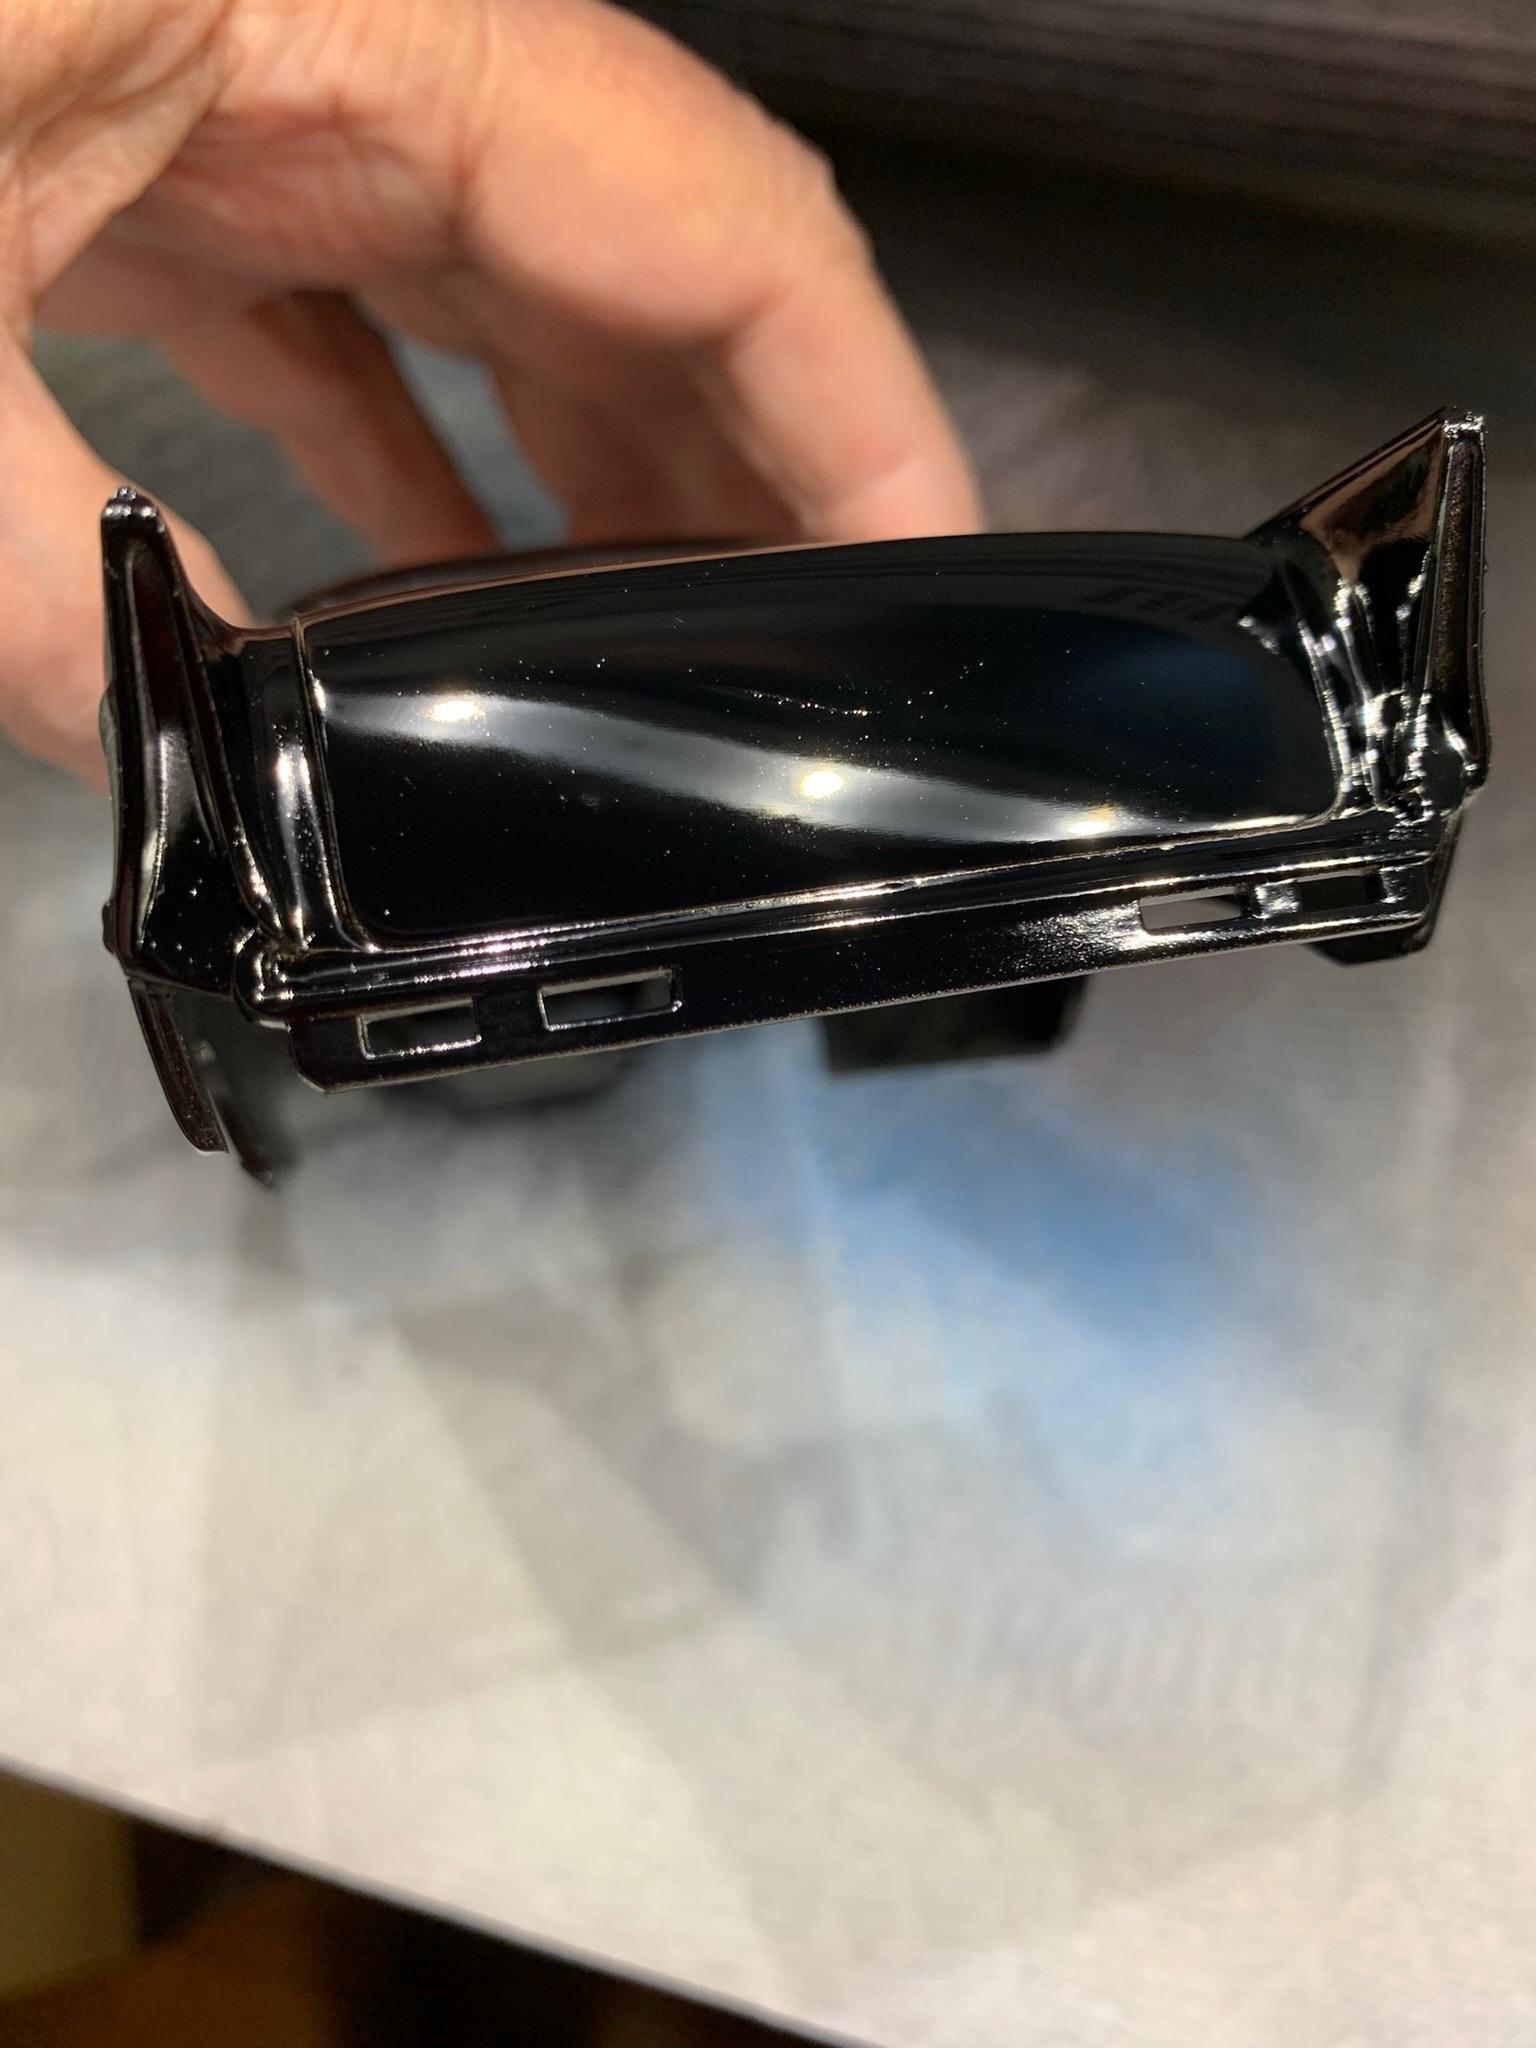
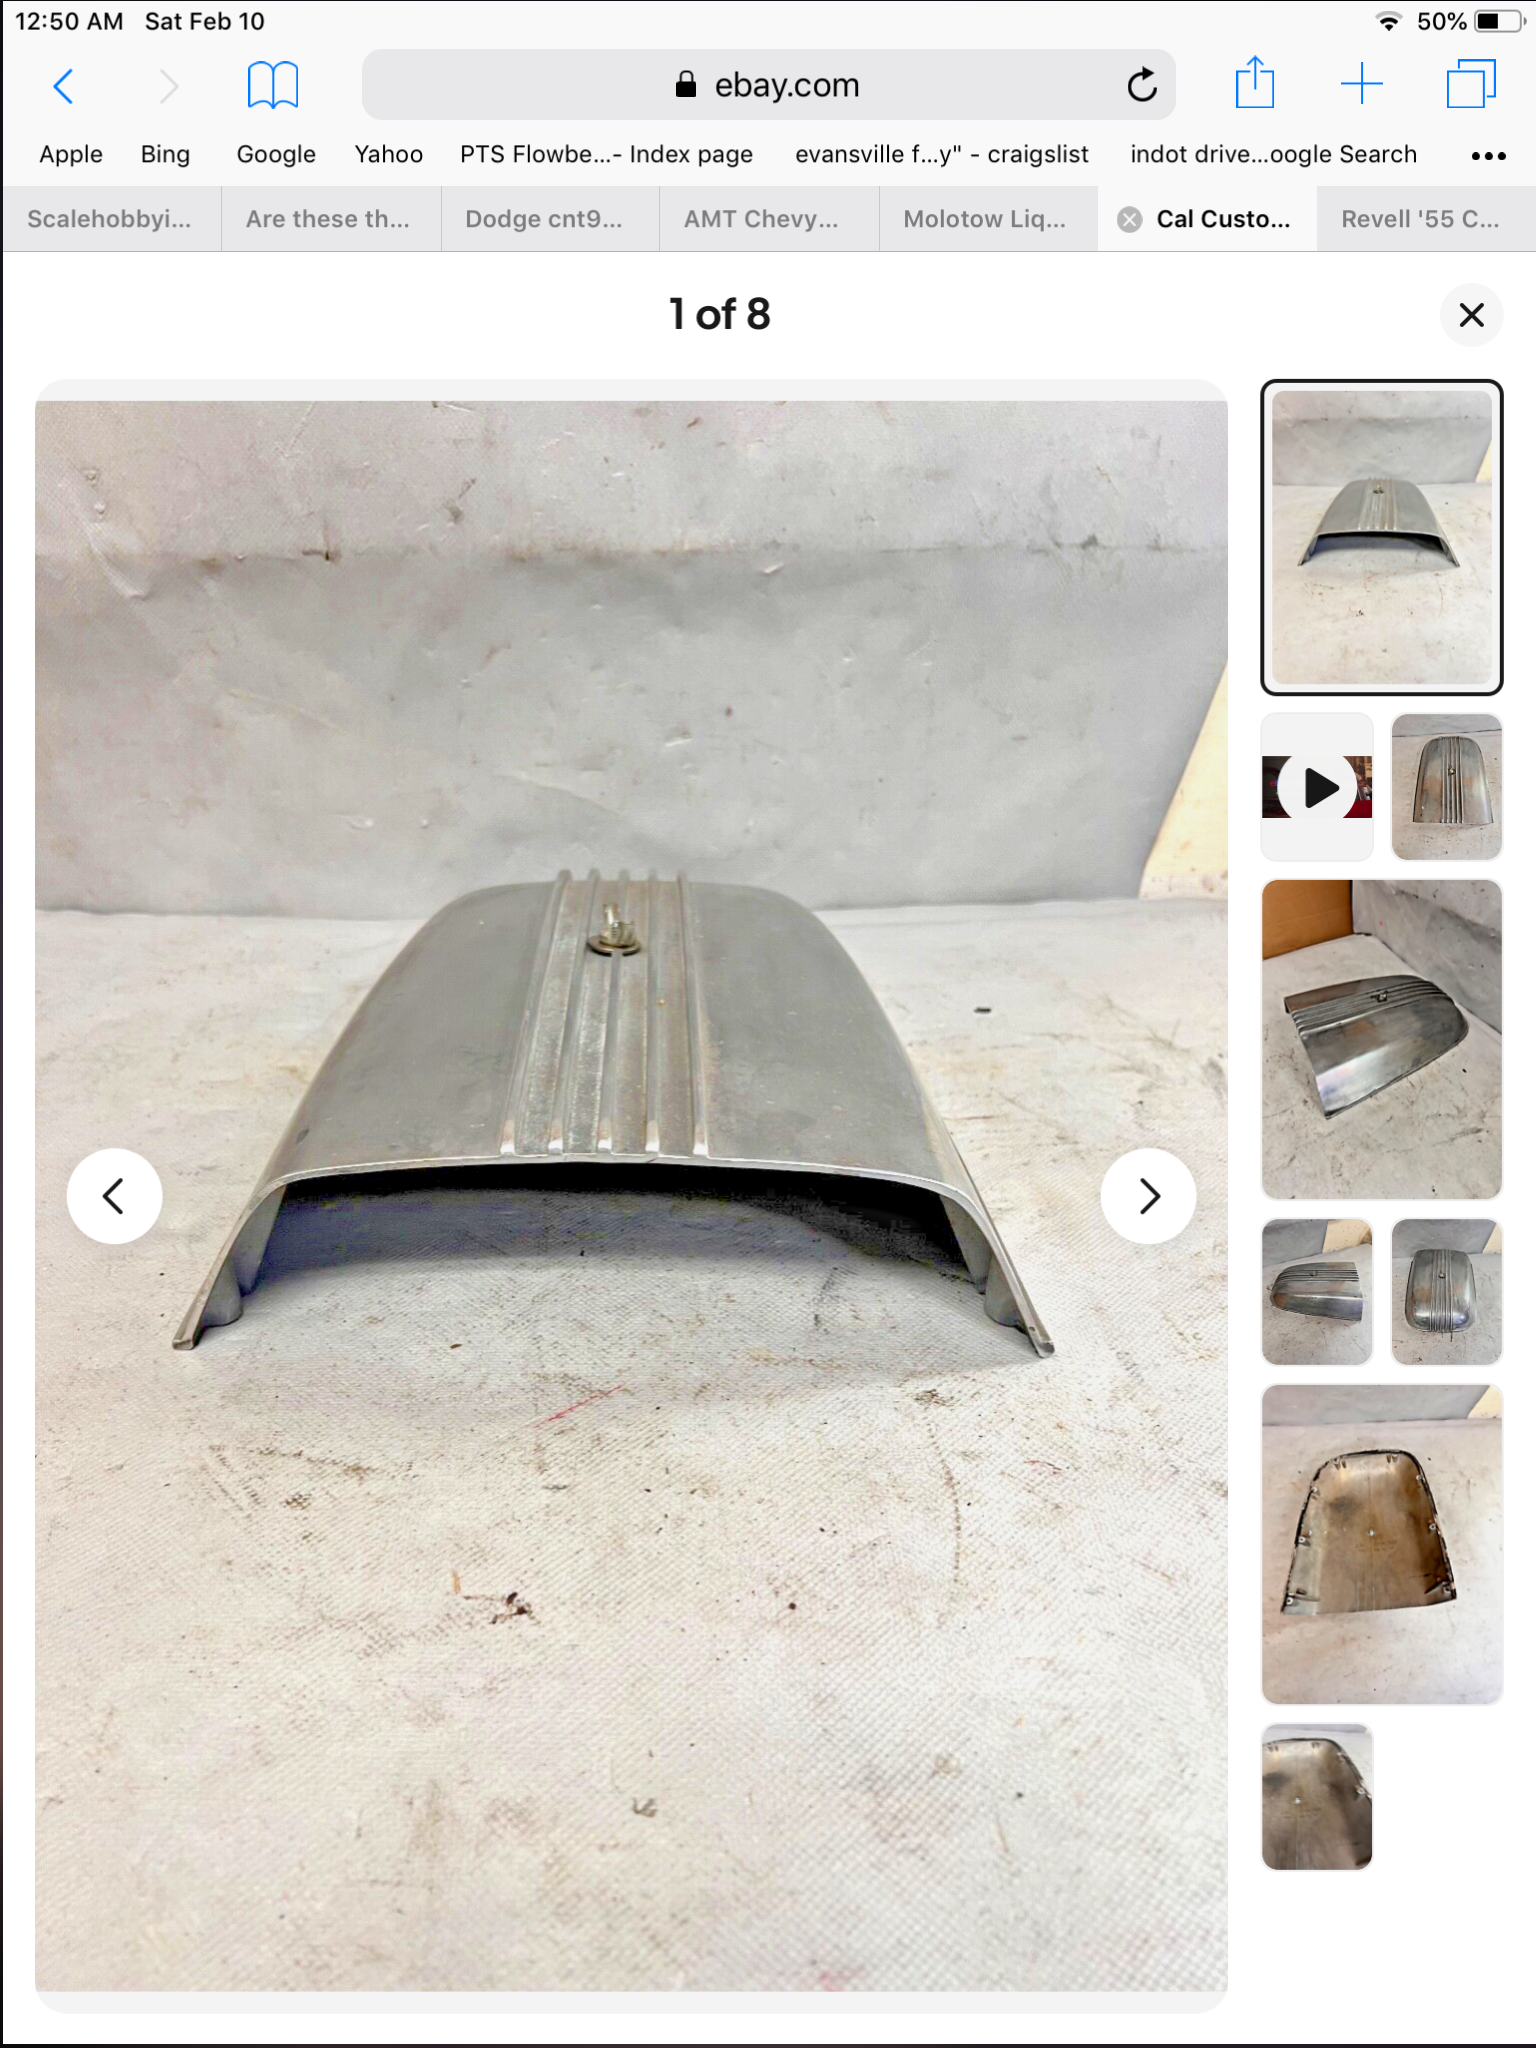
Thanks to this forum, I have the hood scoop I am going to use on this car and a future Gene Moody D/G car. I am going to make a mold and cast some with the part I got from Trevor. Thanks again, Trevor.
-
Holloman & McKinney 57 Chevy C/MP circa 1964
R. Thorne replied to R. Thorne's topic in WIP: Drag Racing Models
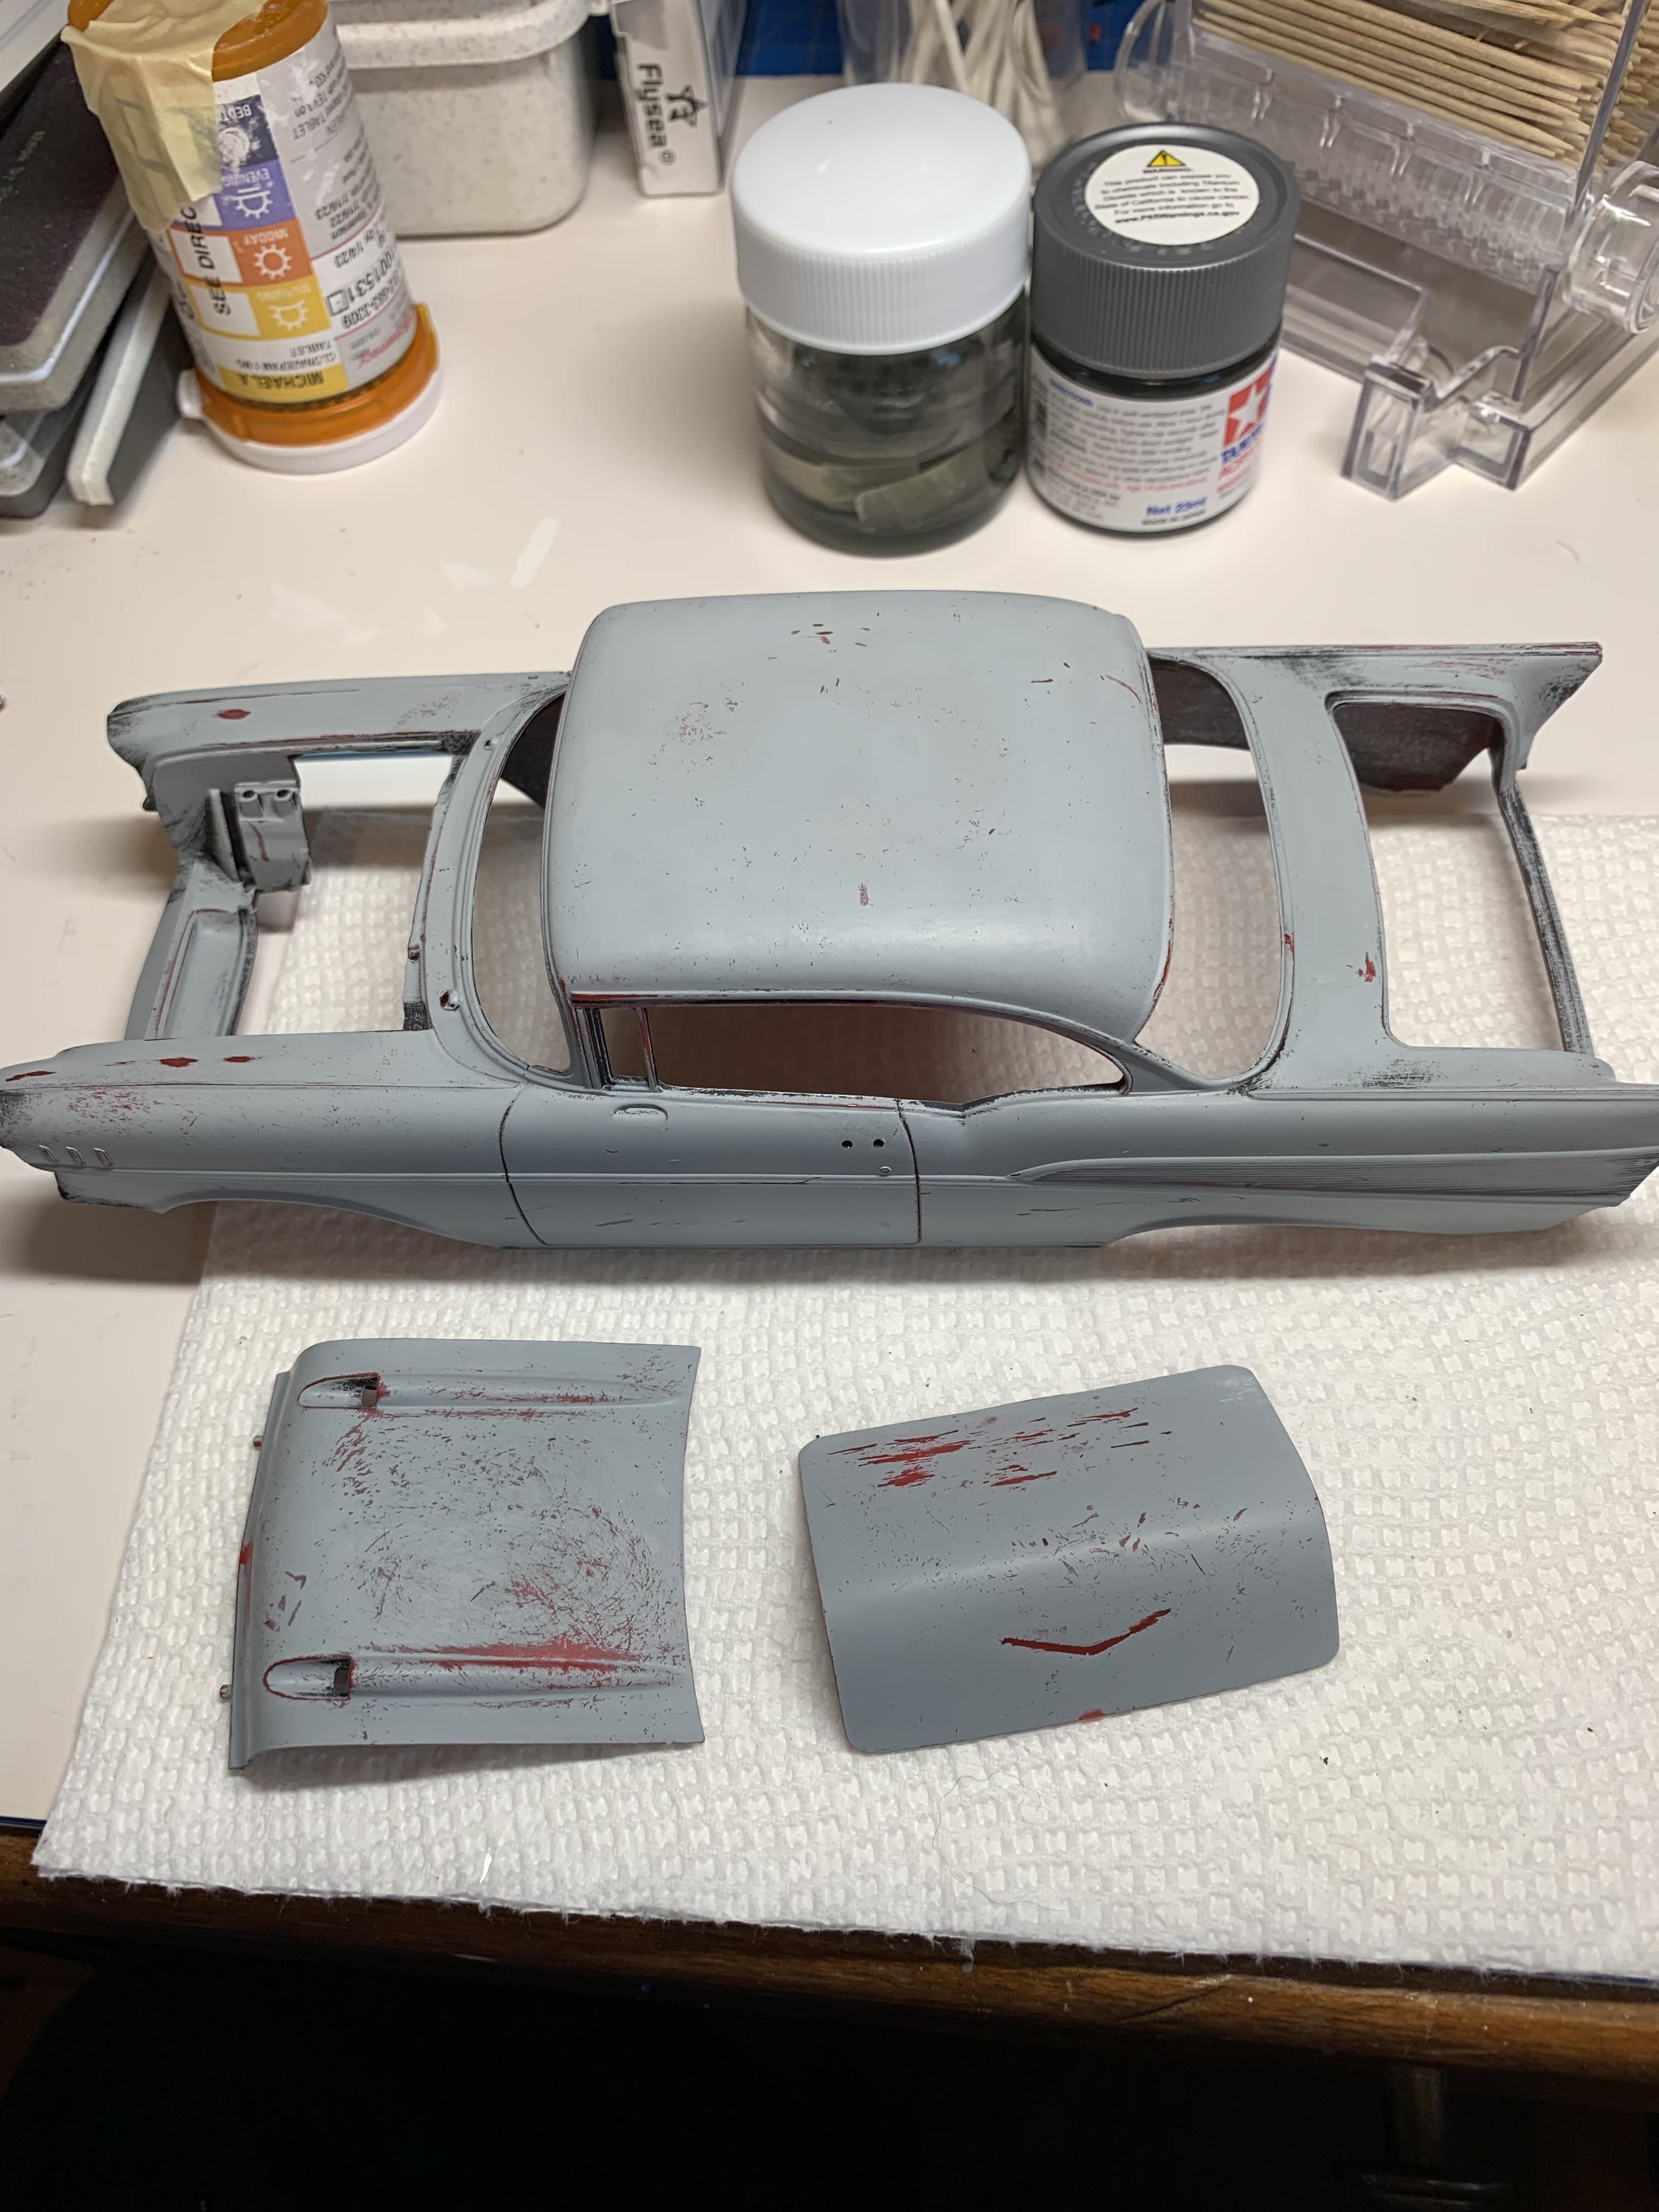
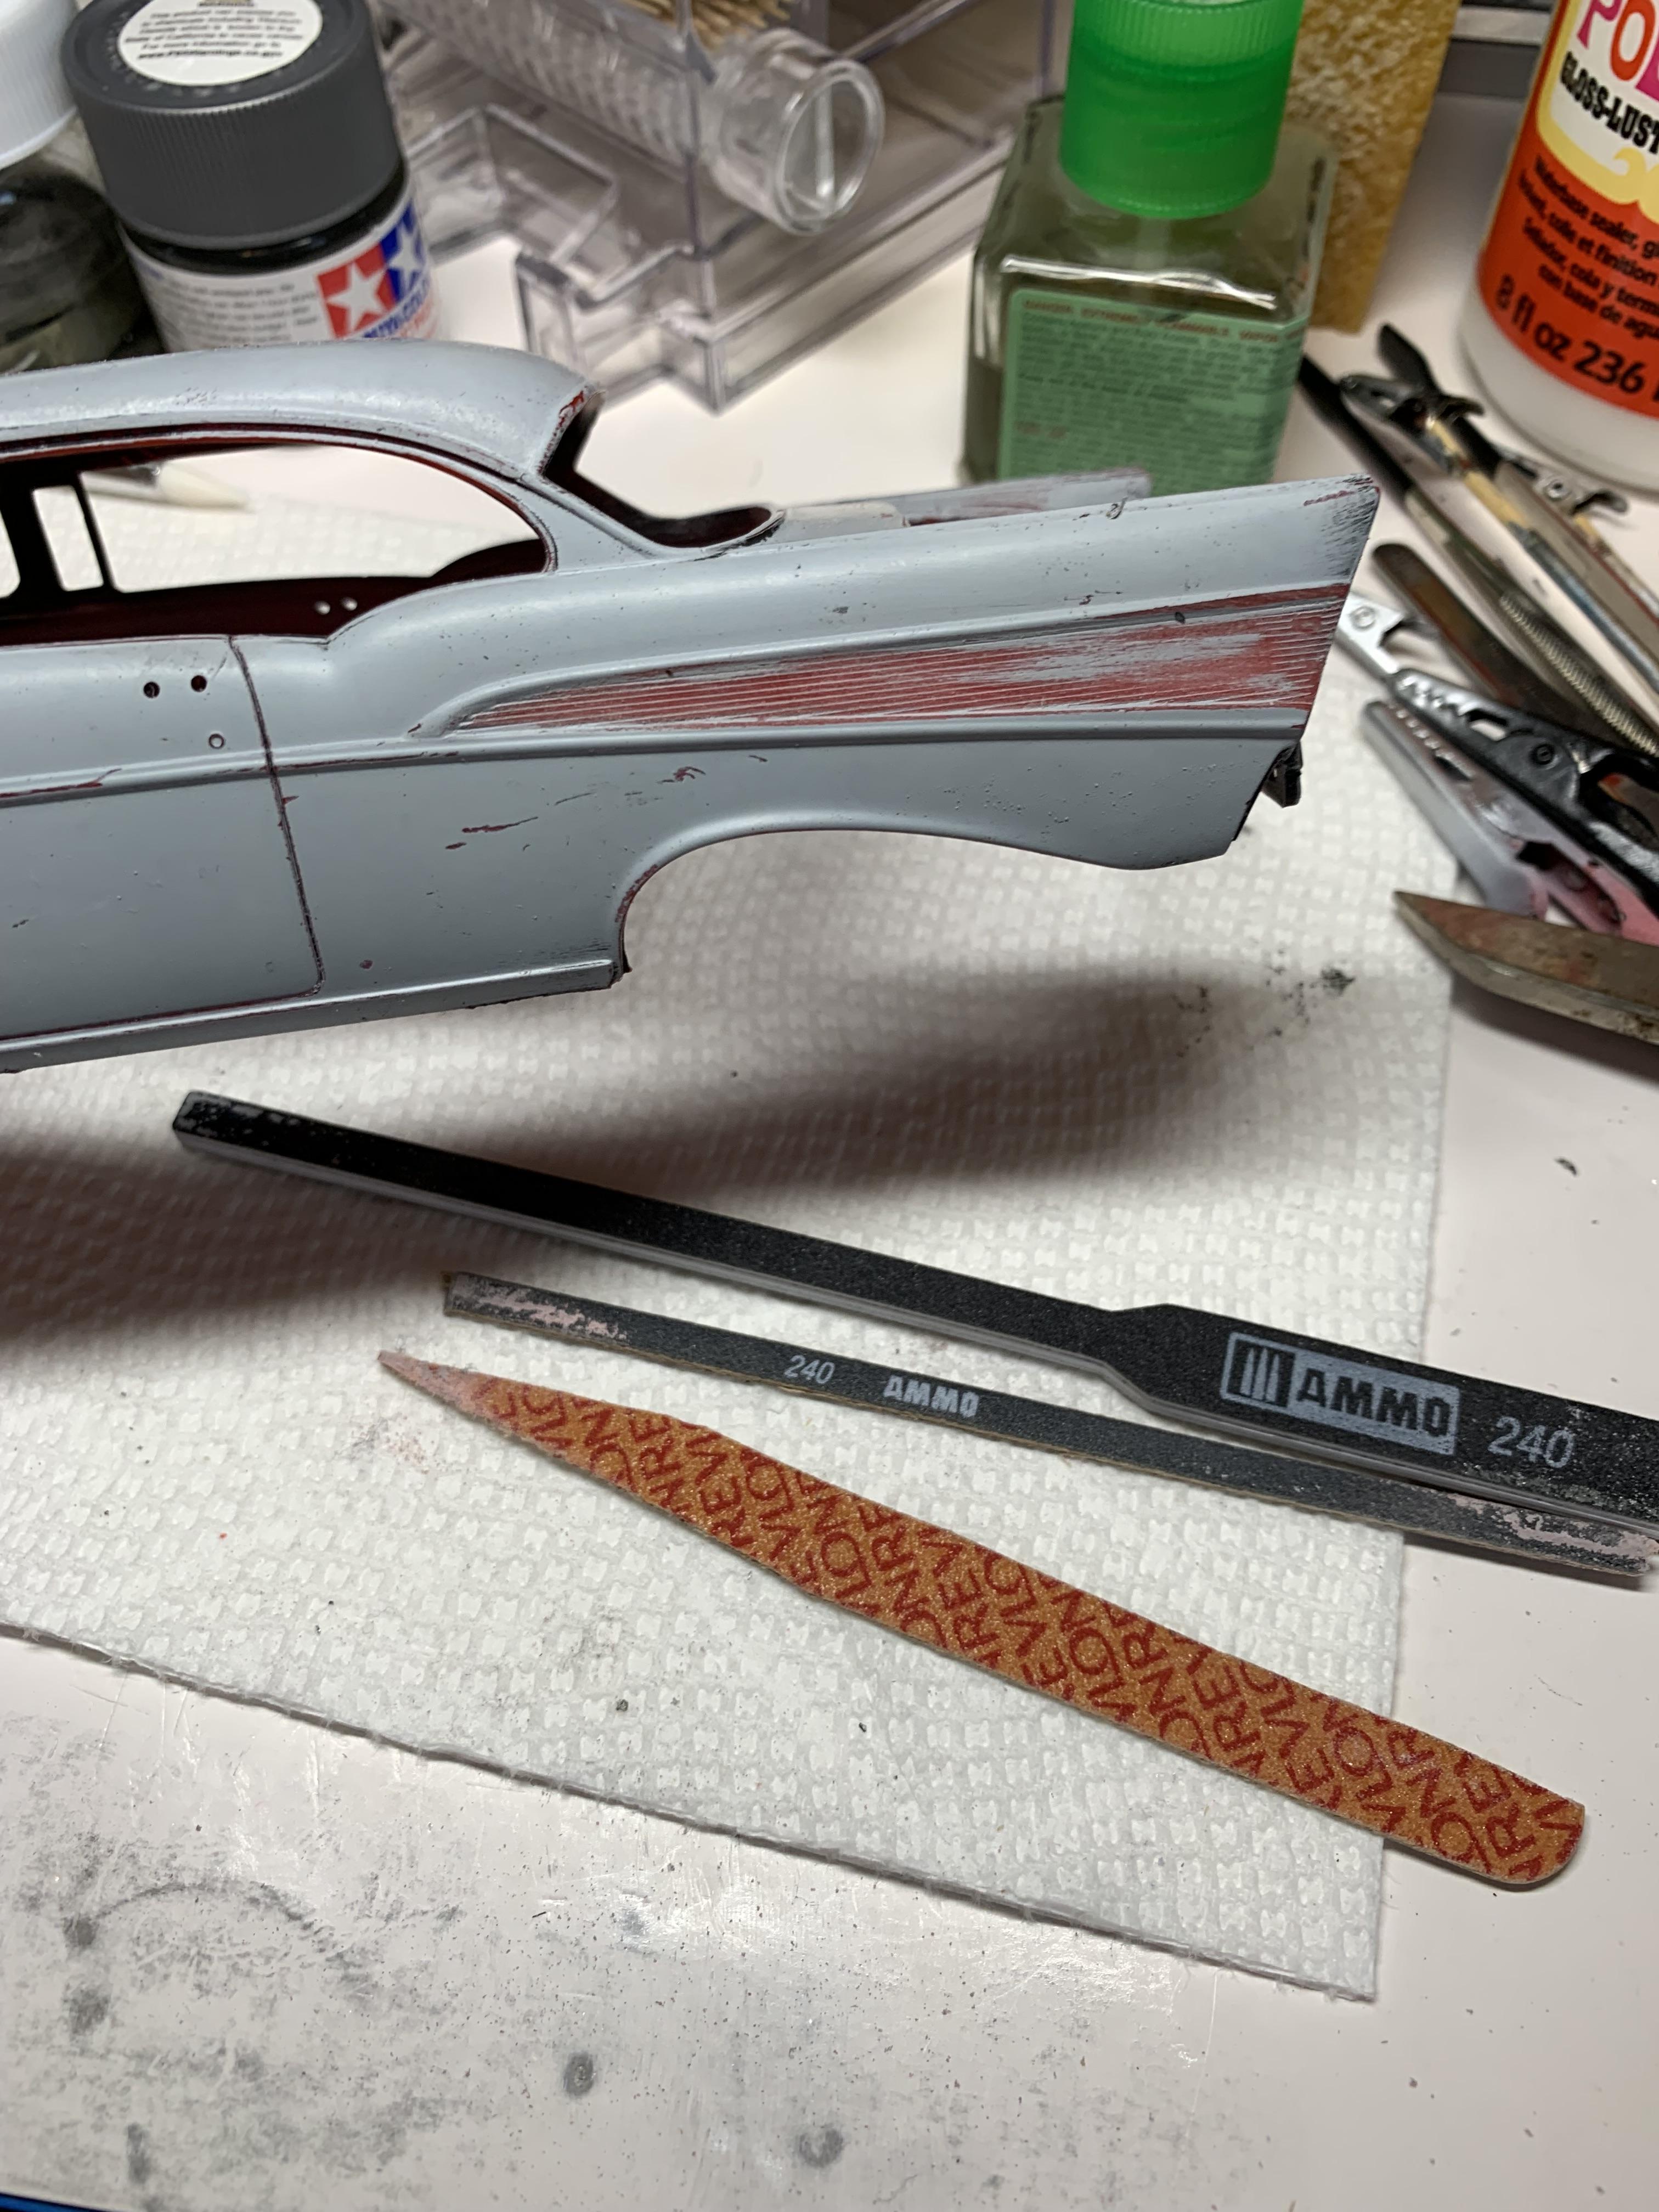
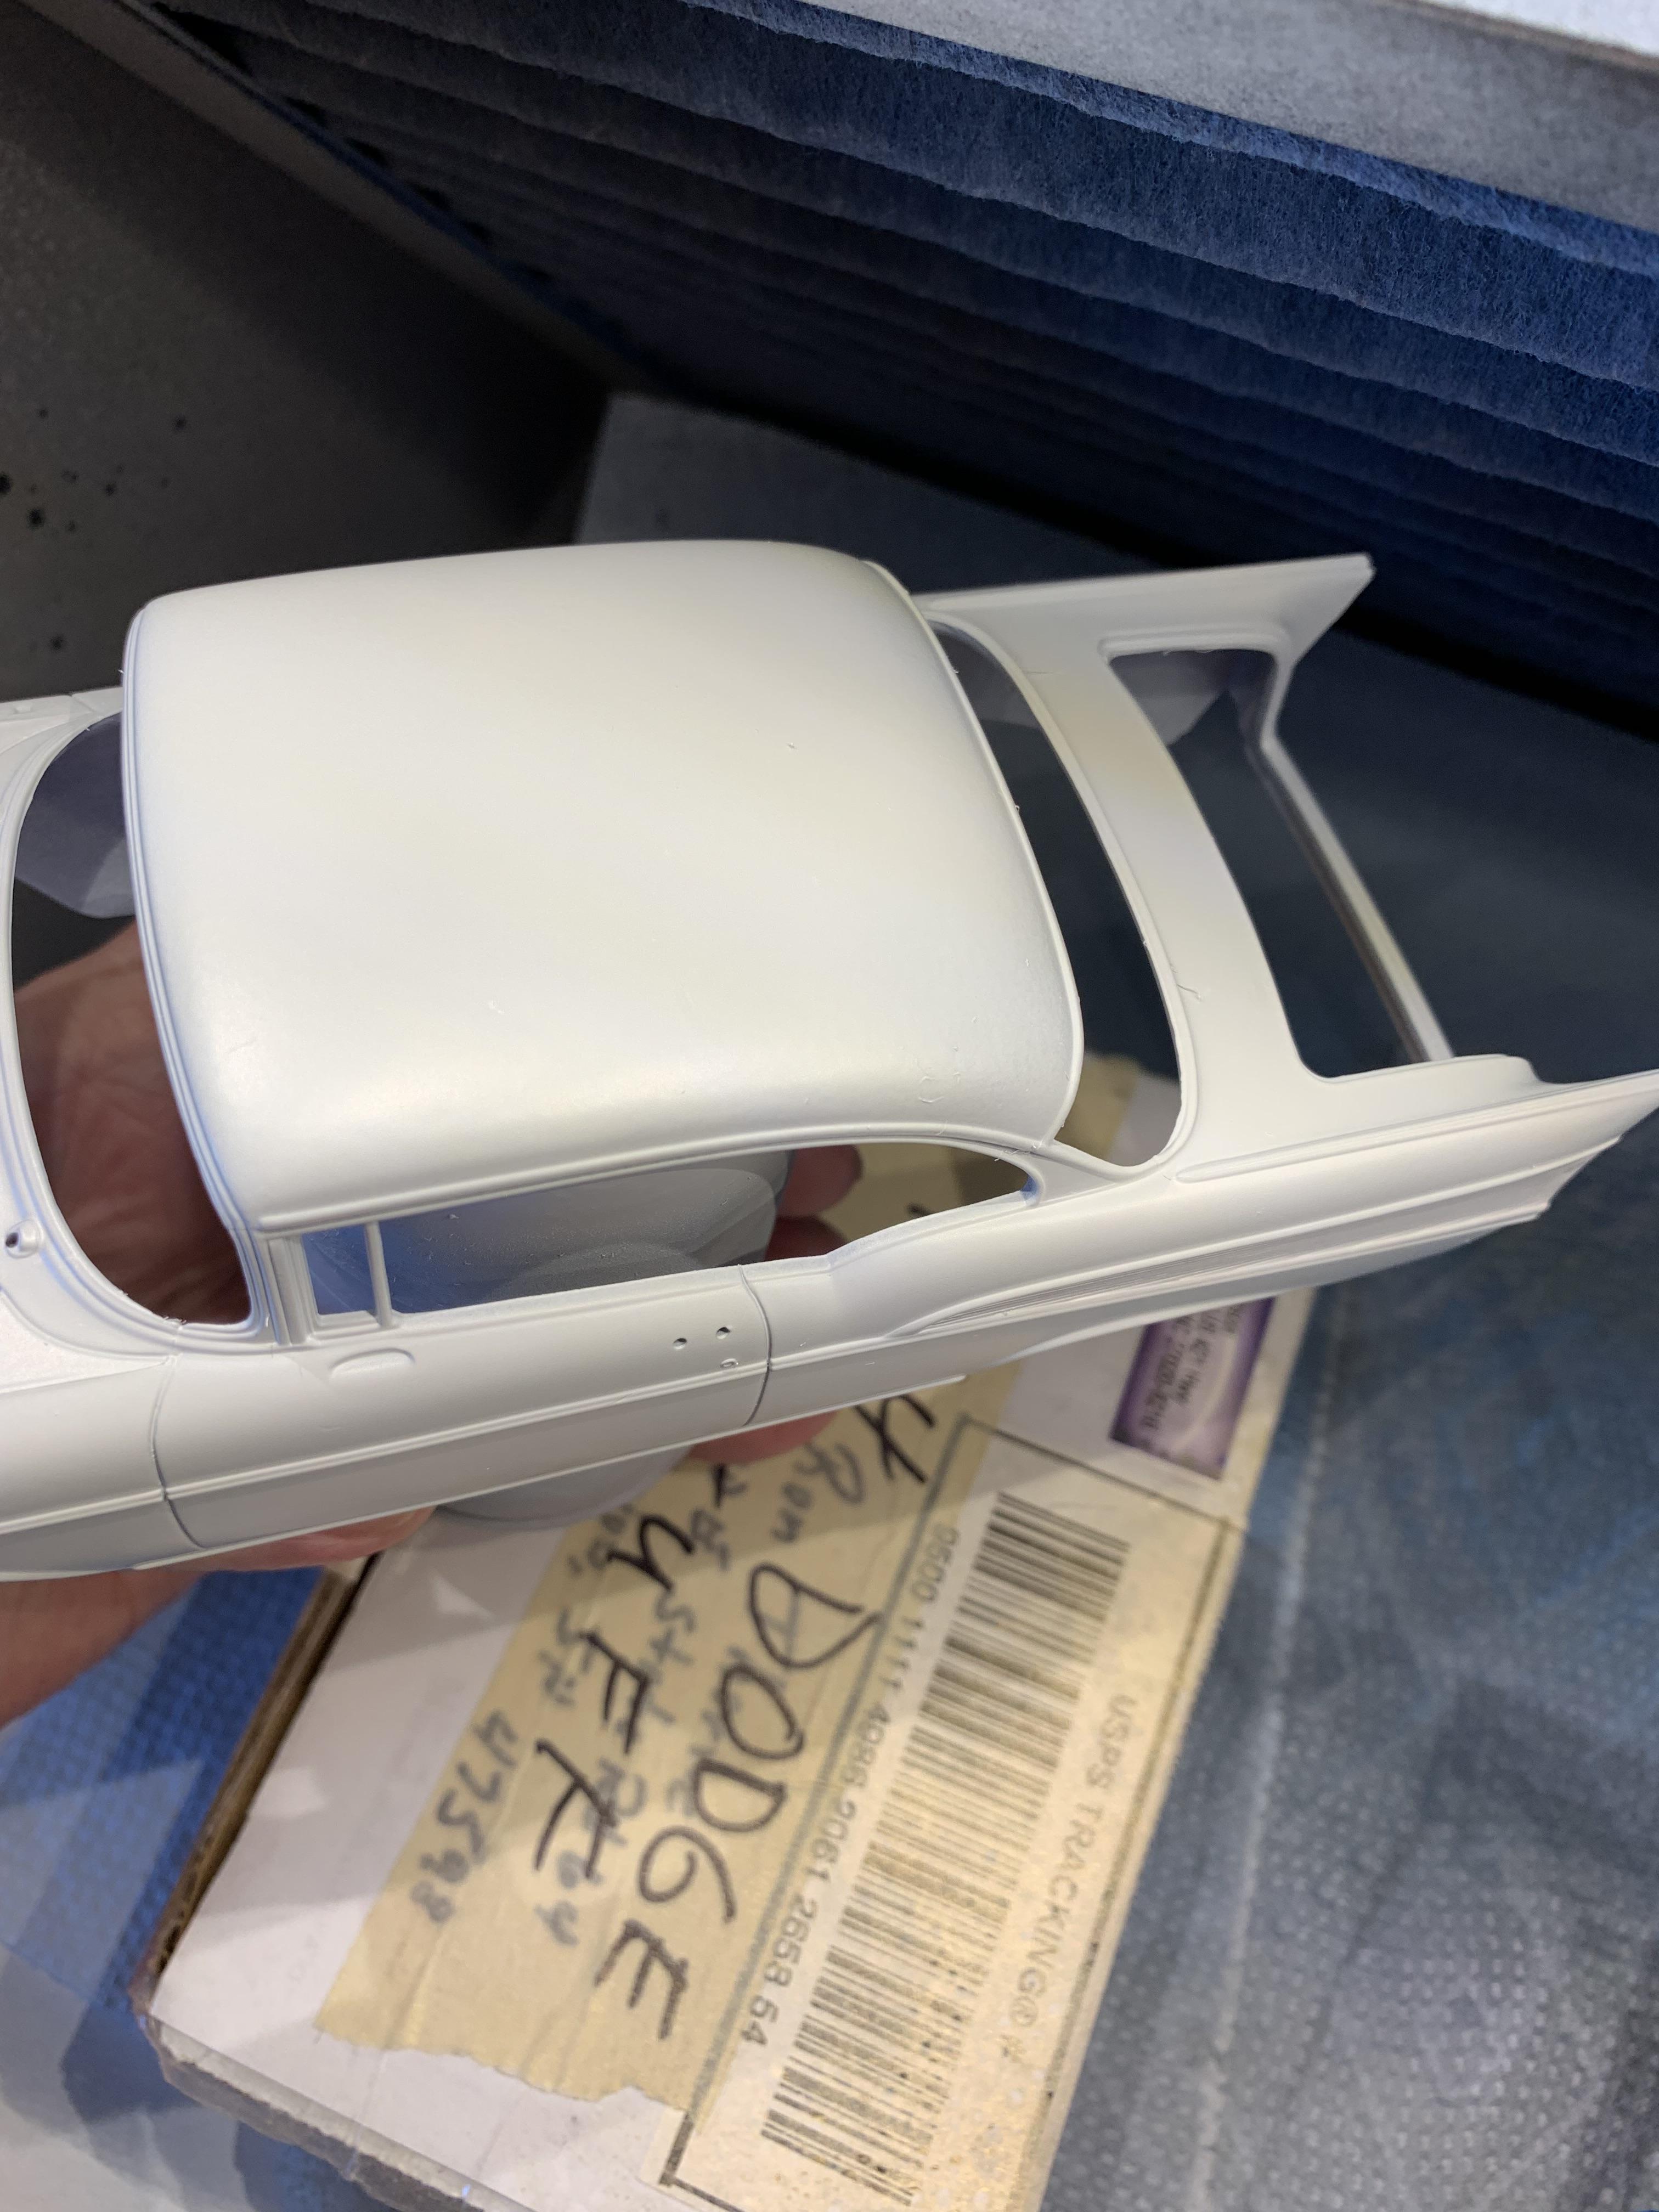
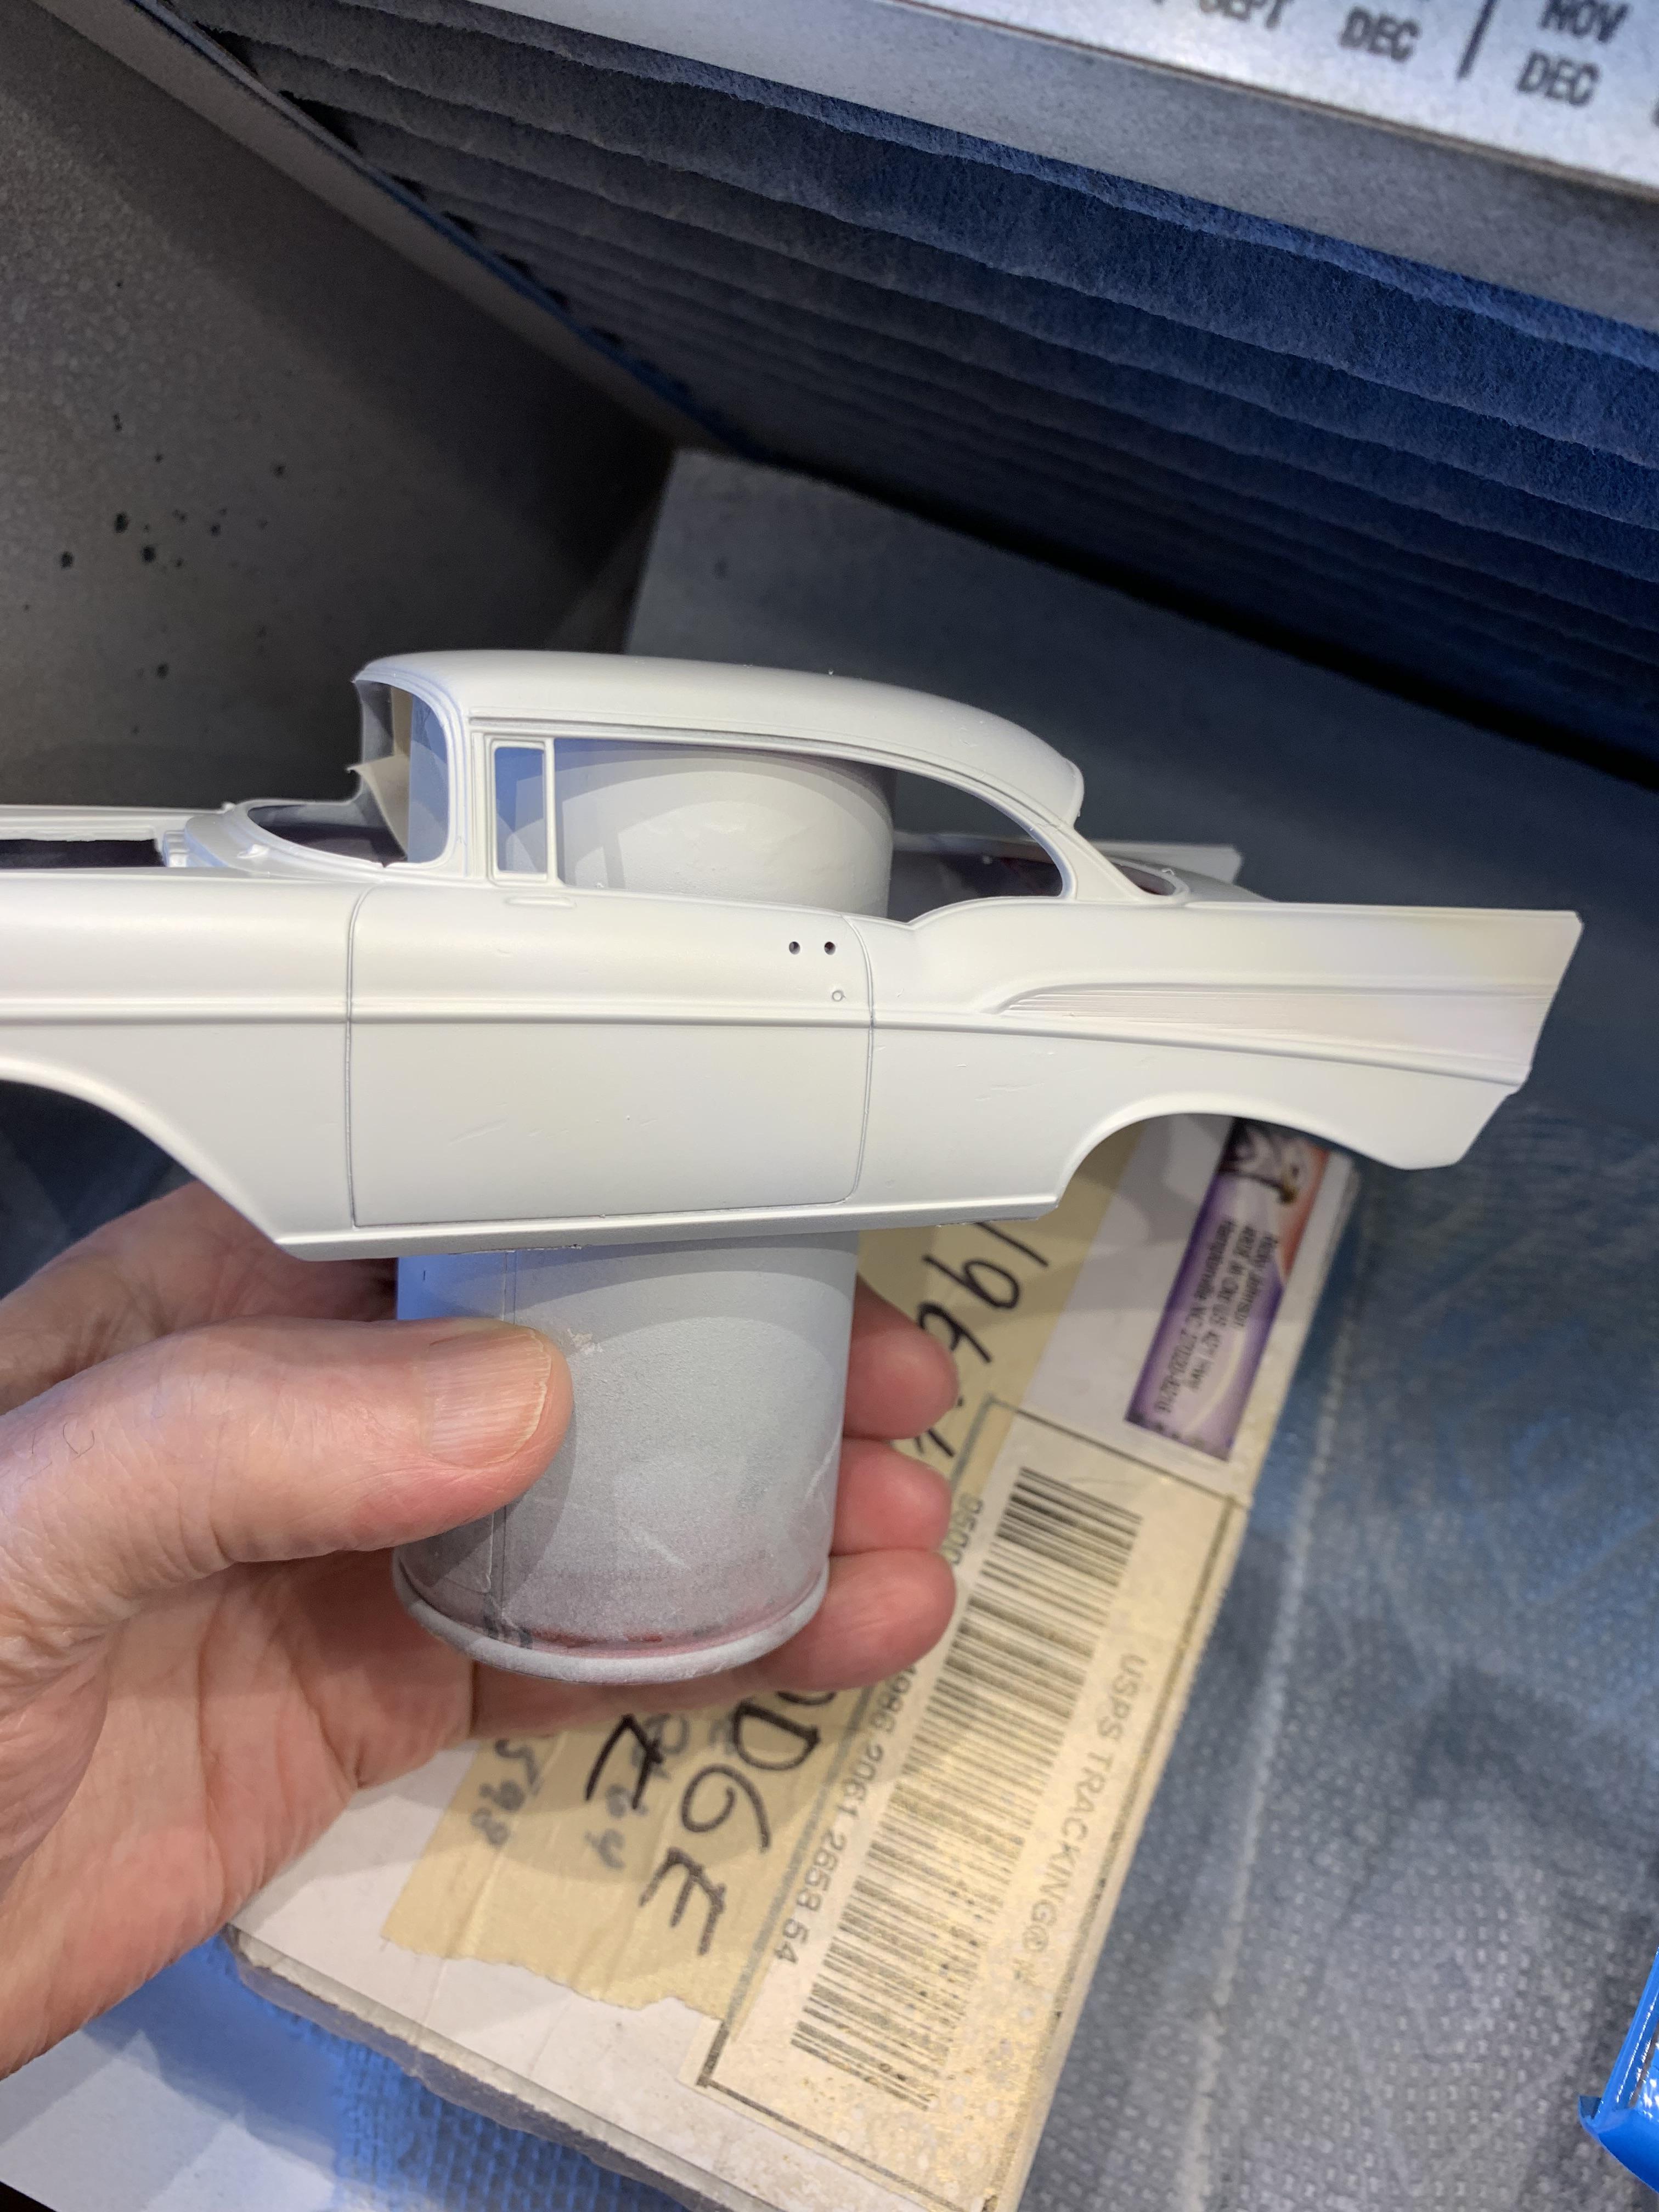
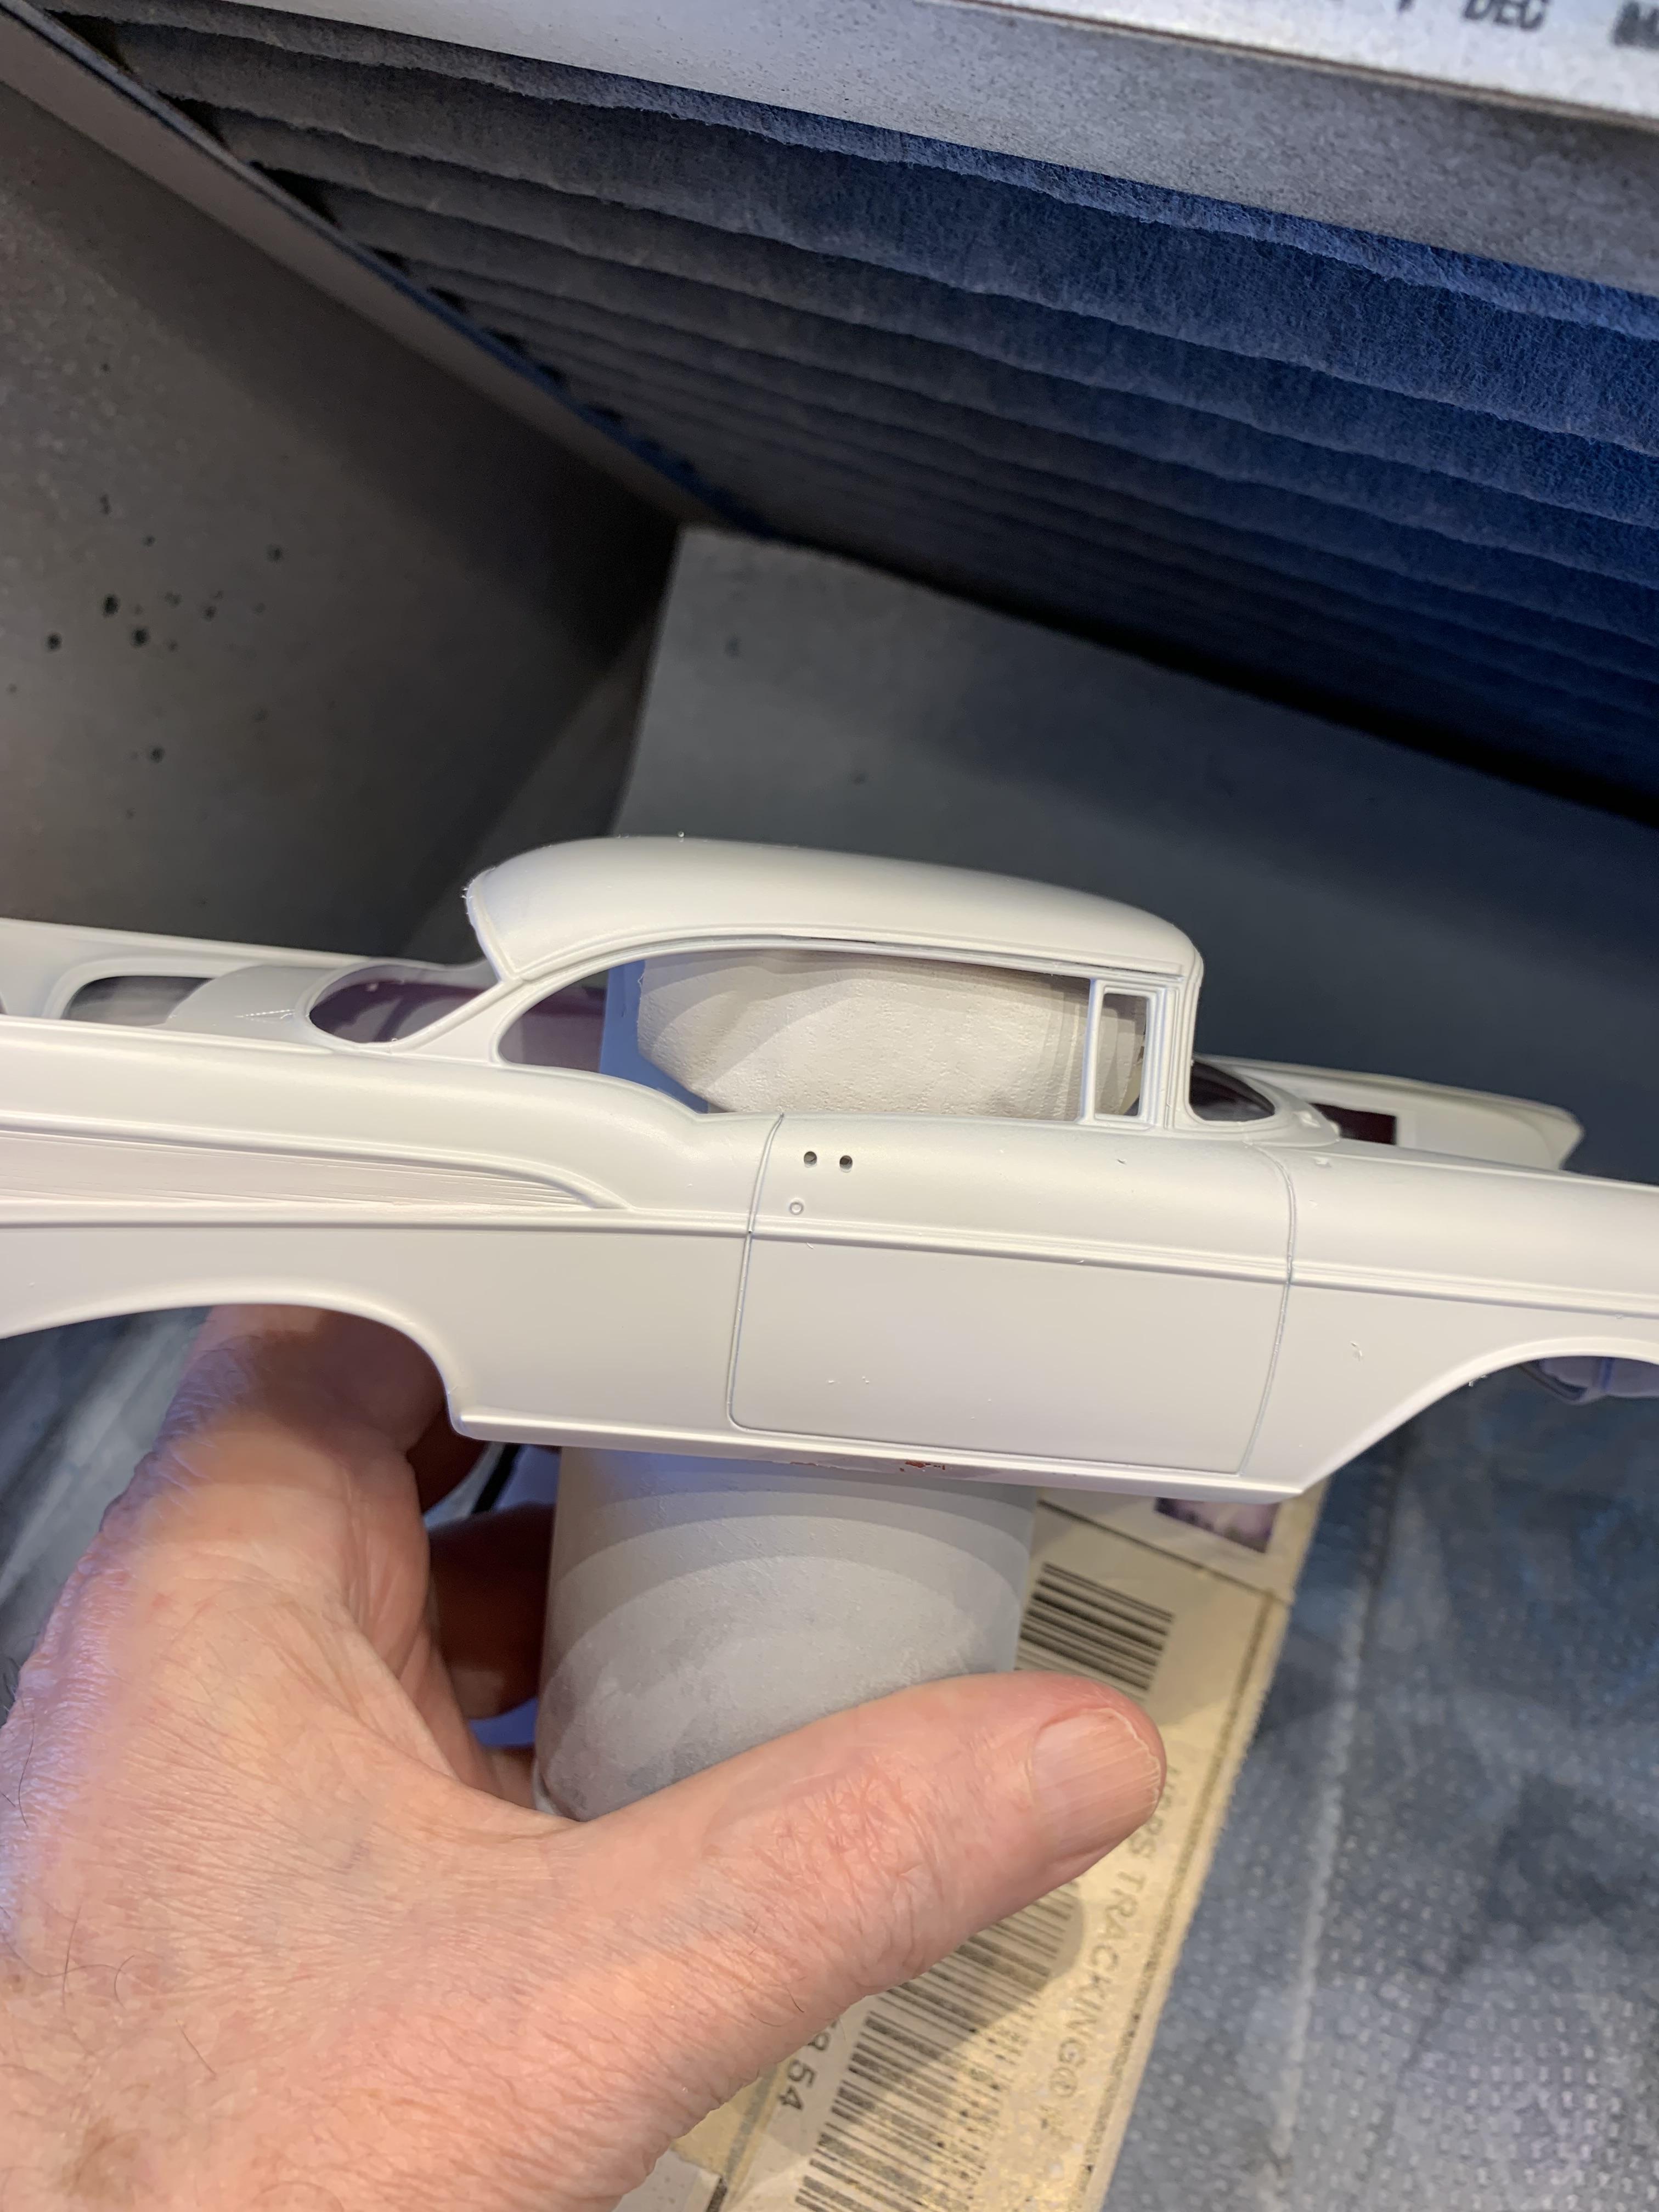
Put the body in my Castro Super Clean tank and let it soak overnight. Came out ok. Then sanded the ribs off the side molding to use the photo etch material included in kit. Also sanded the hood and trunk emblems off. Sprayed it with Tamiya white spray can primer.
-
Holloman & McKinney 57 Chevy C/MP circa 1964
R. Thorne replied to R. Thorne's topic in WIP: Drag Racing Models
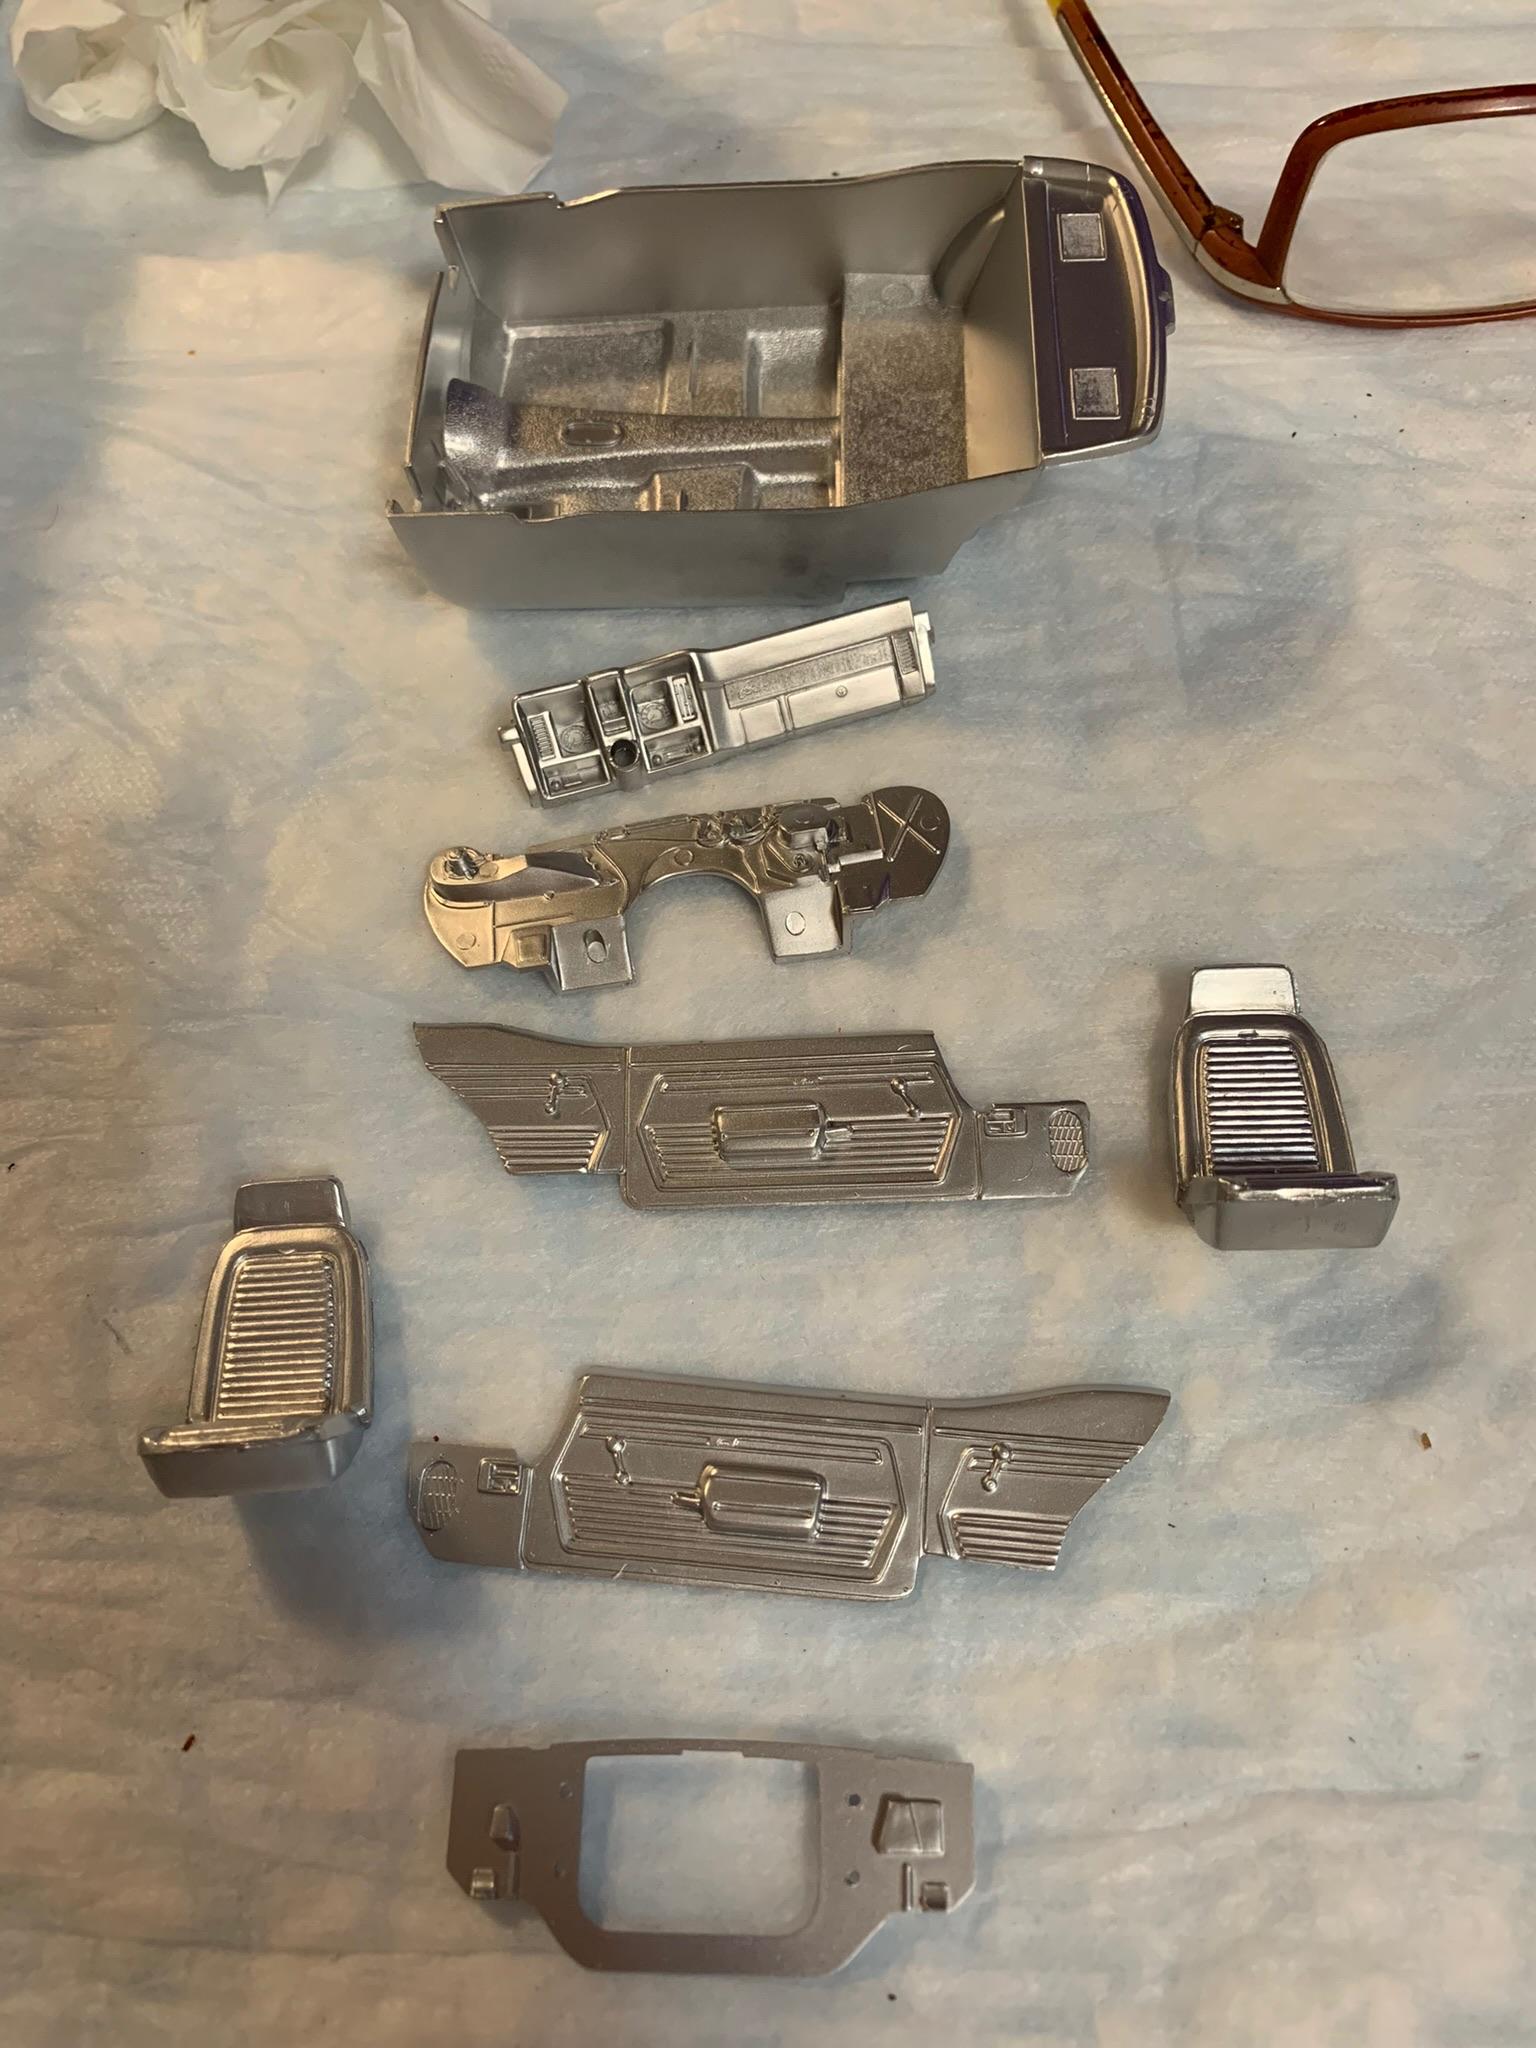
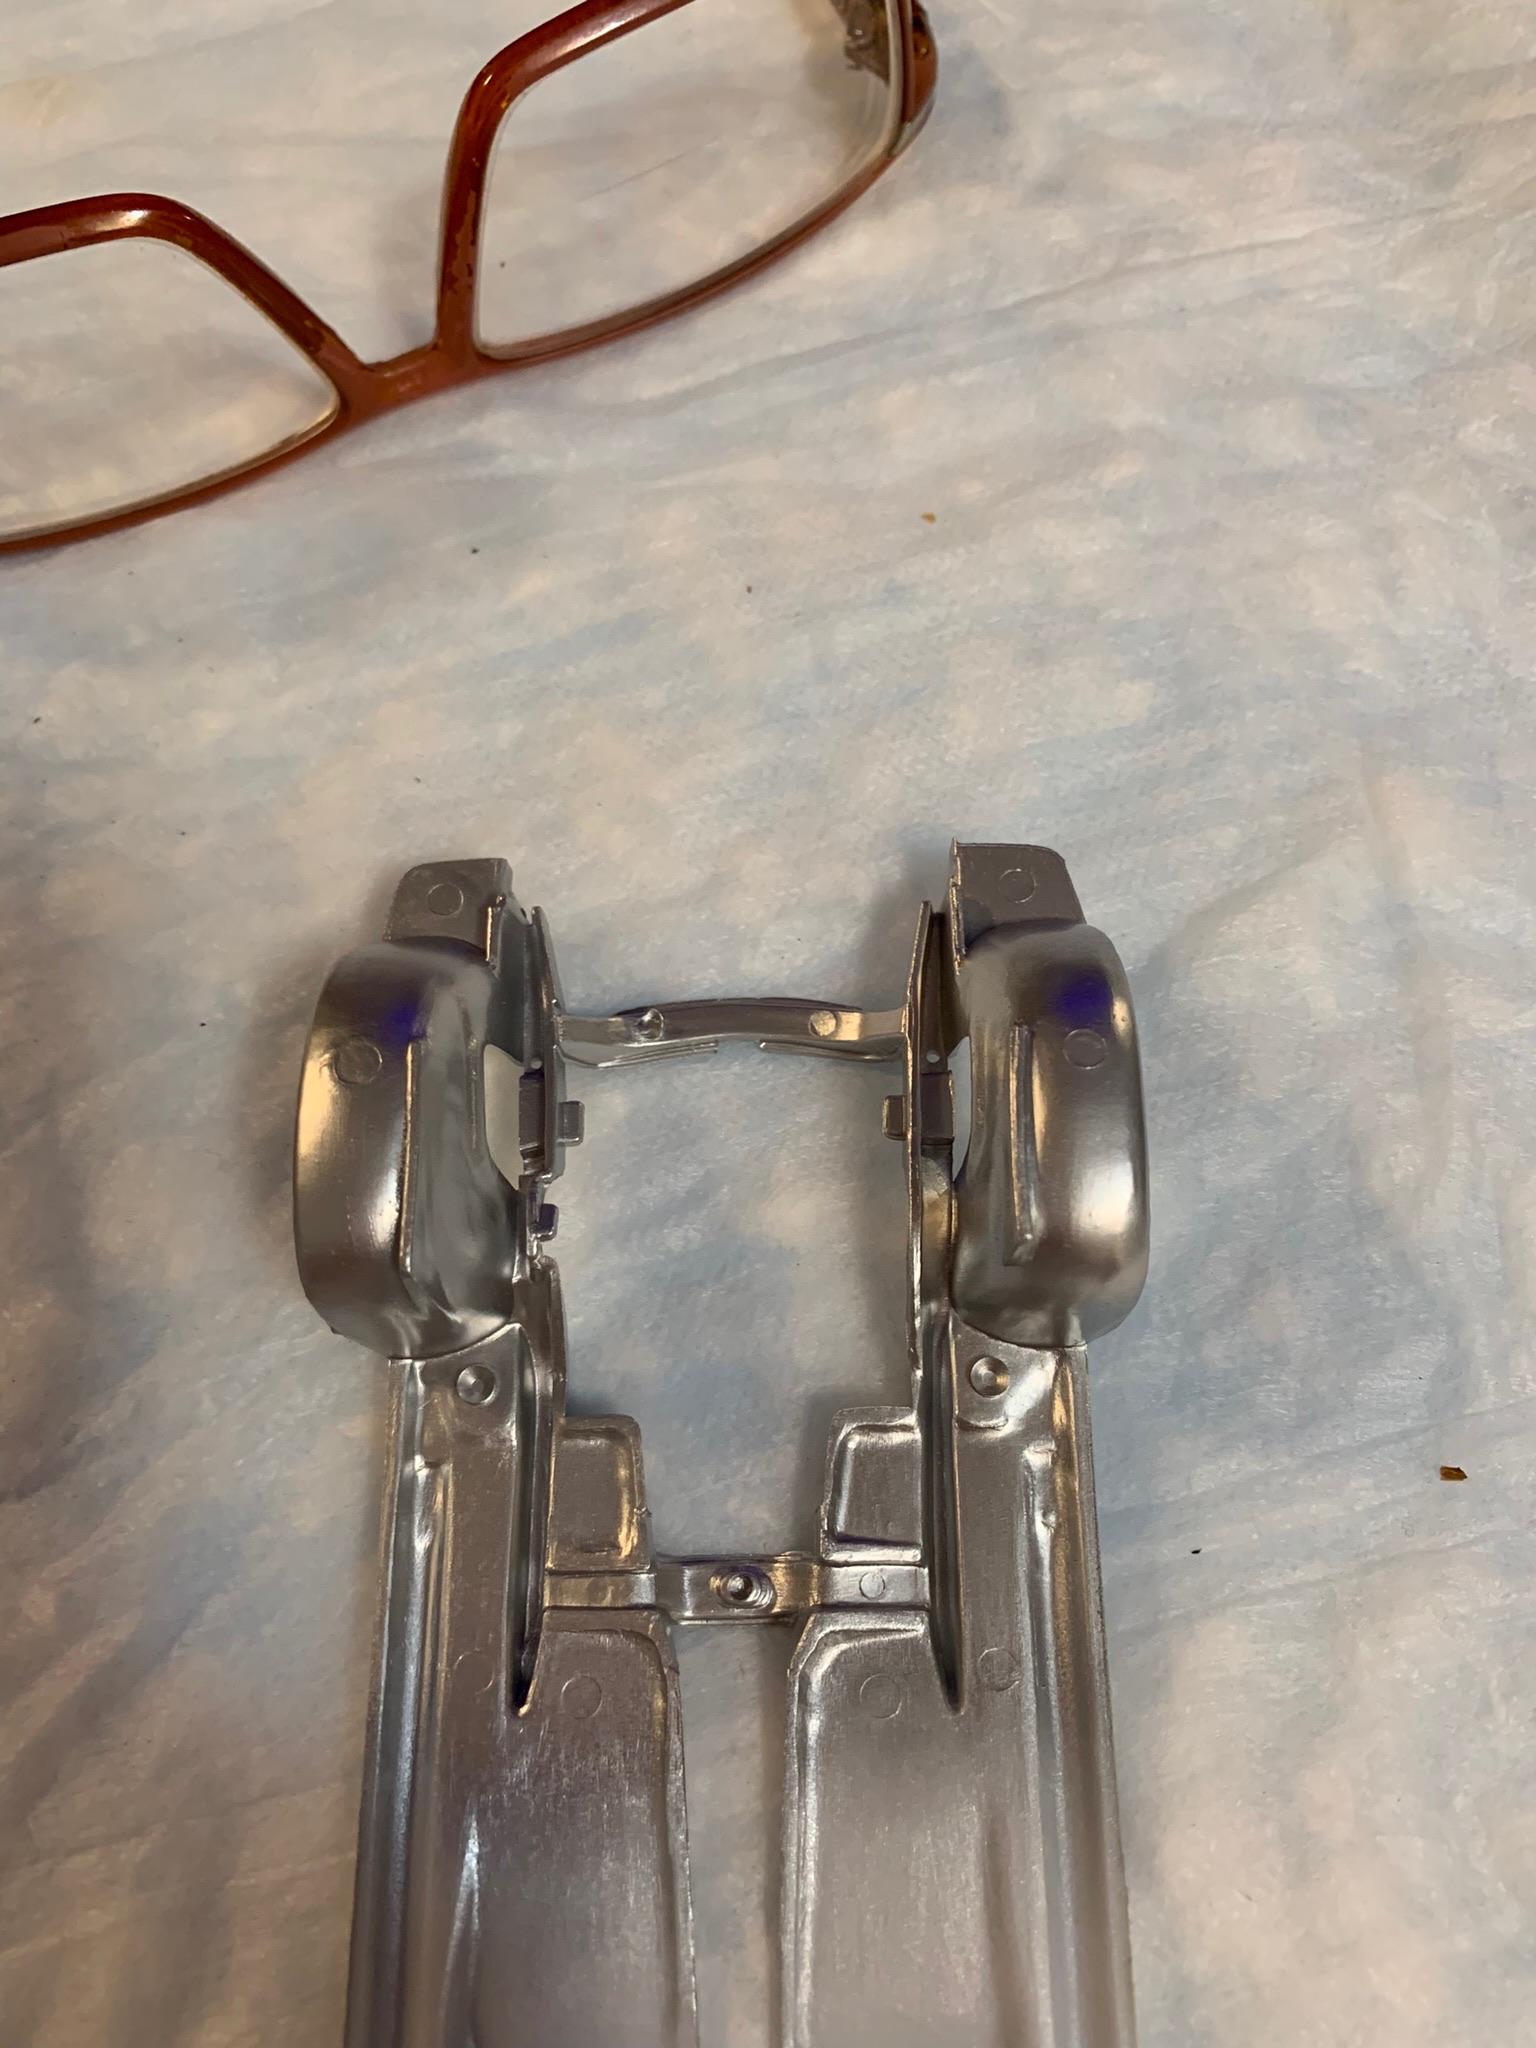
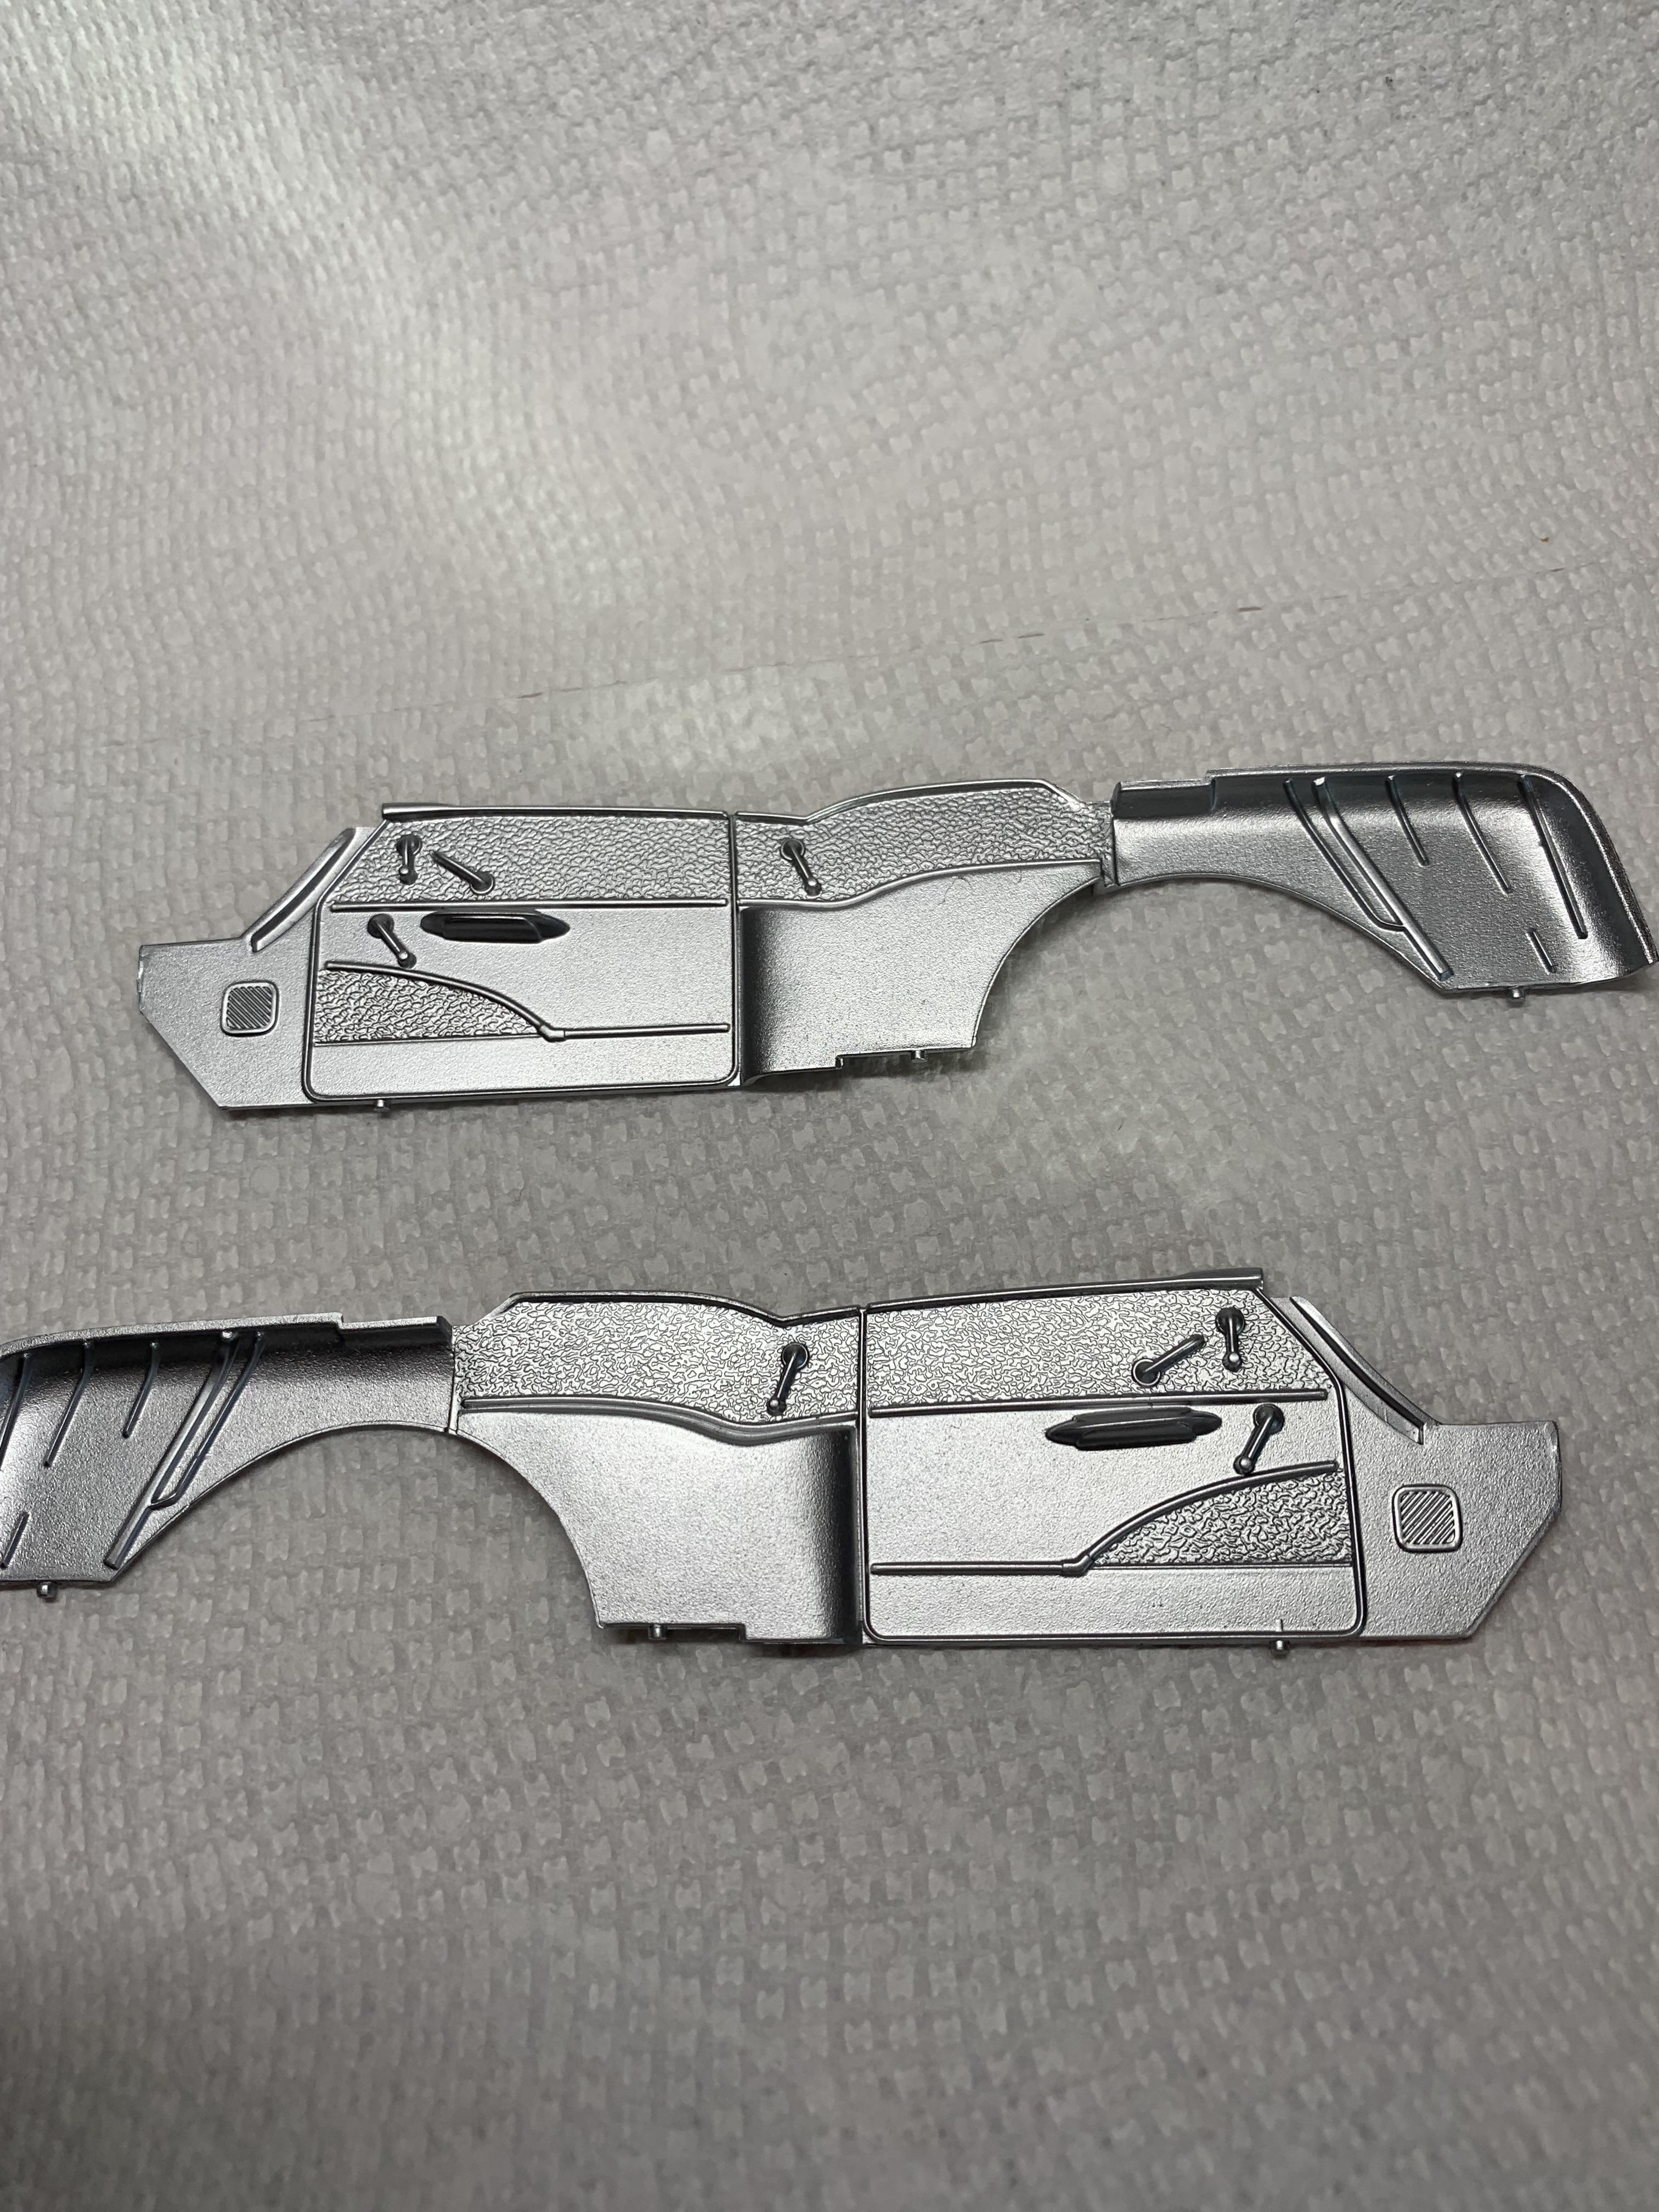
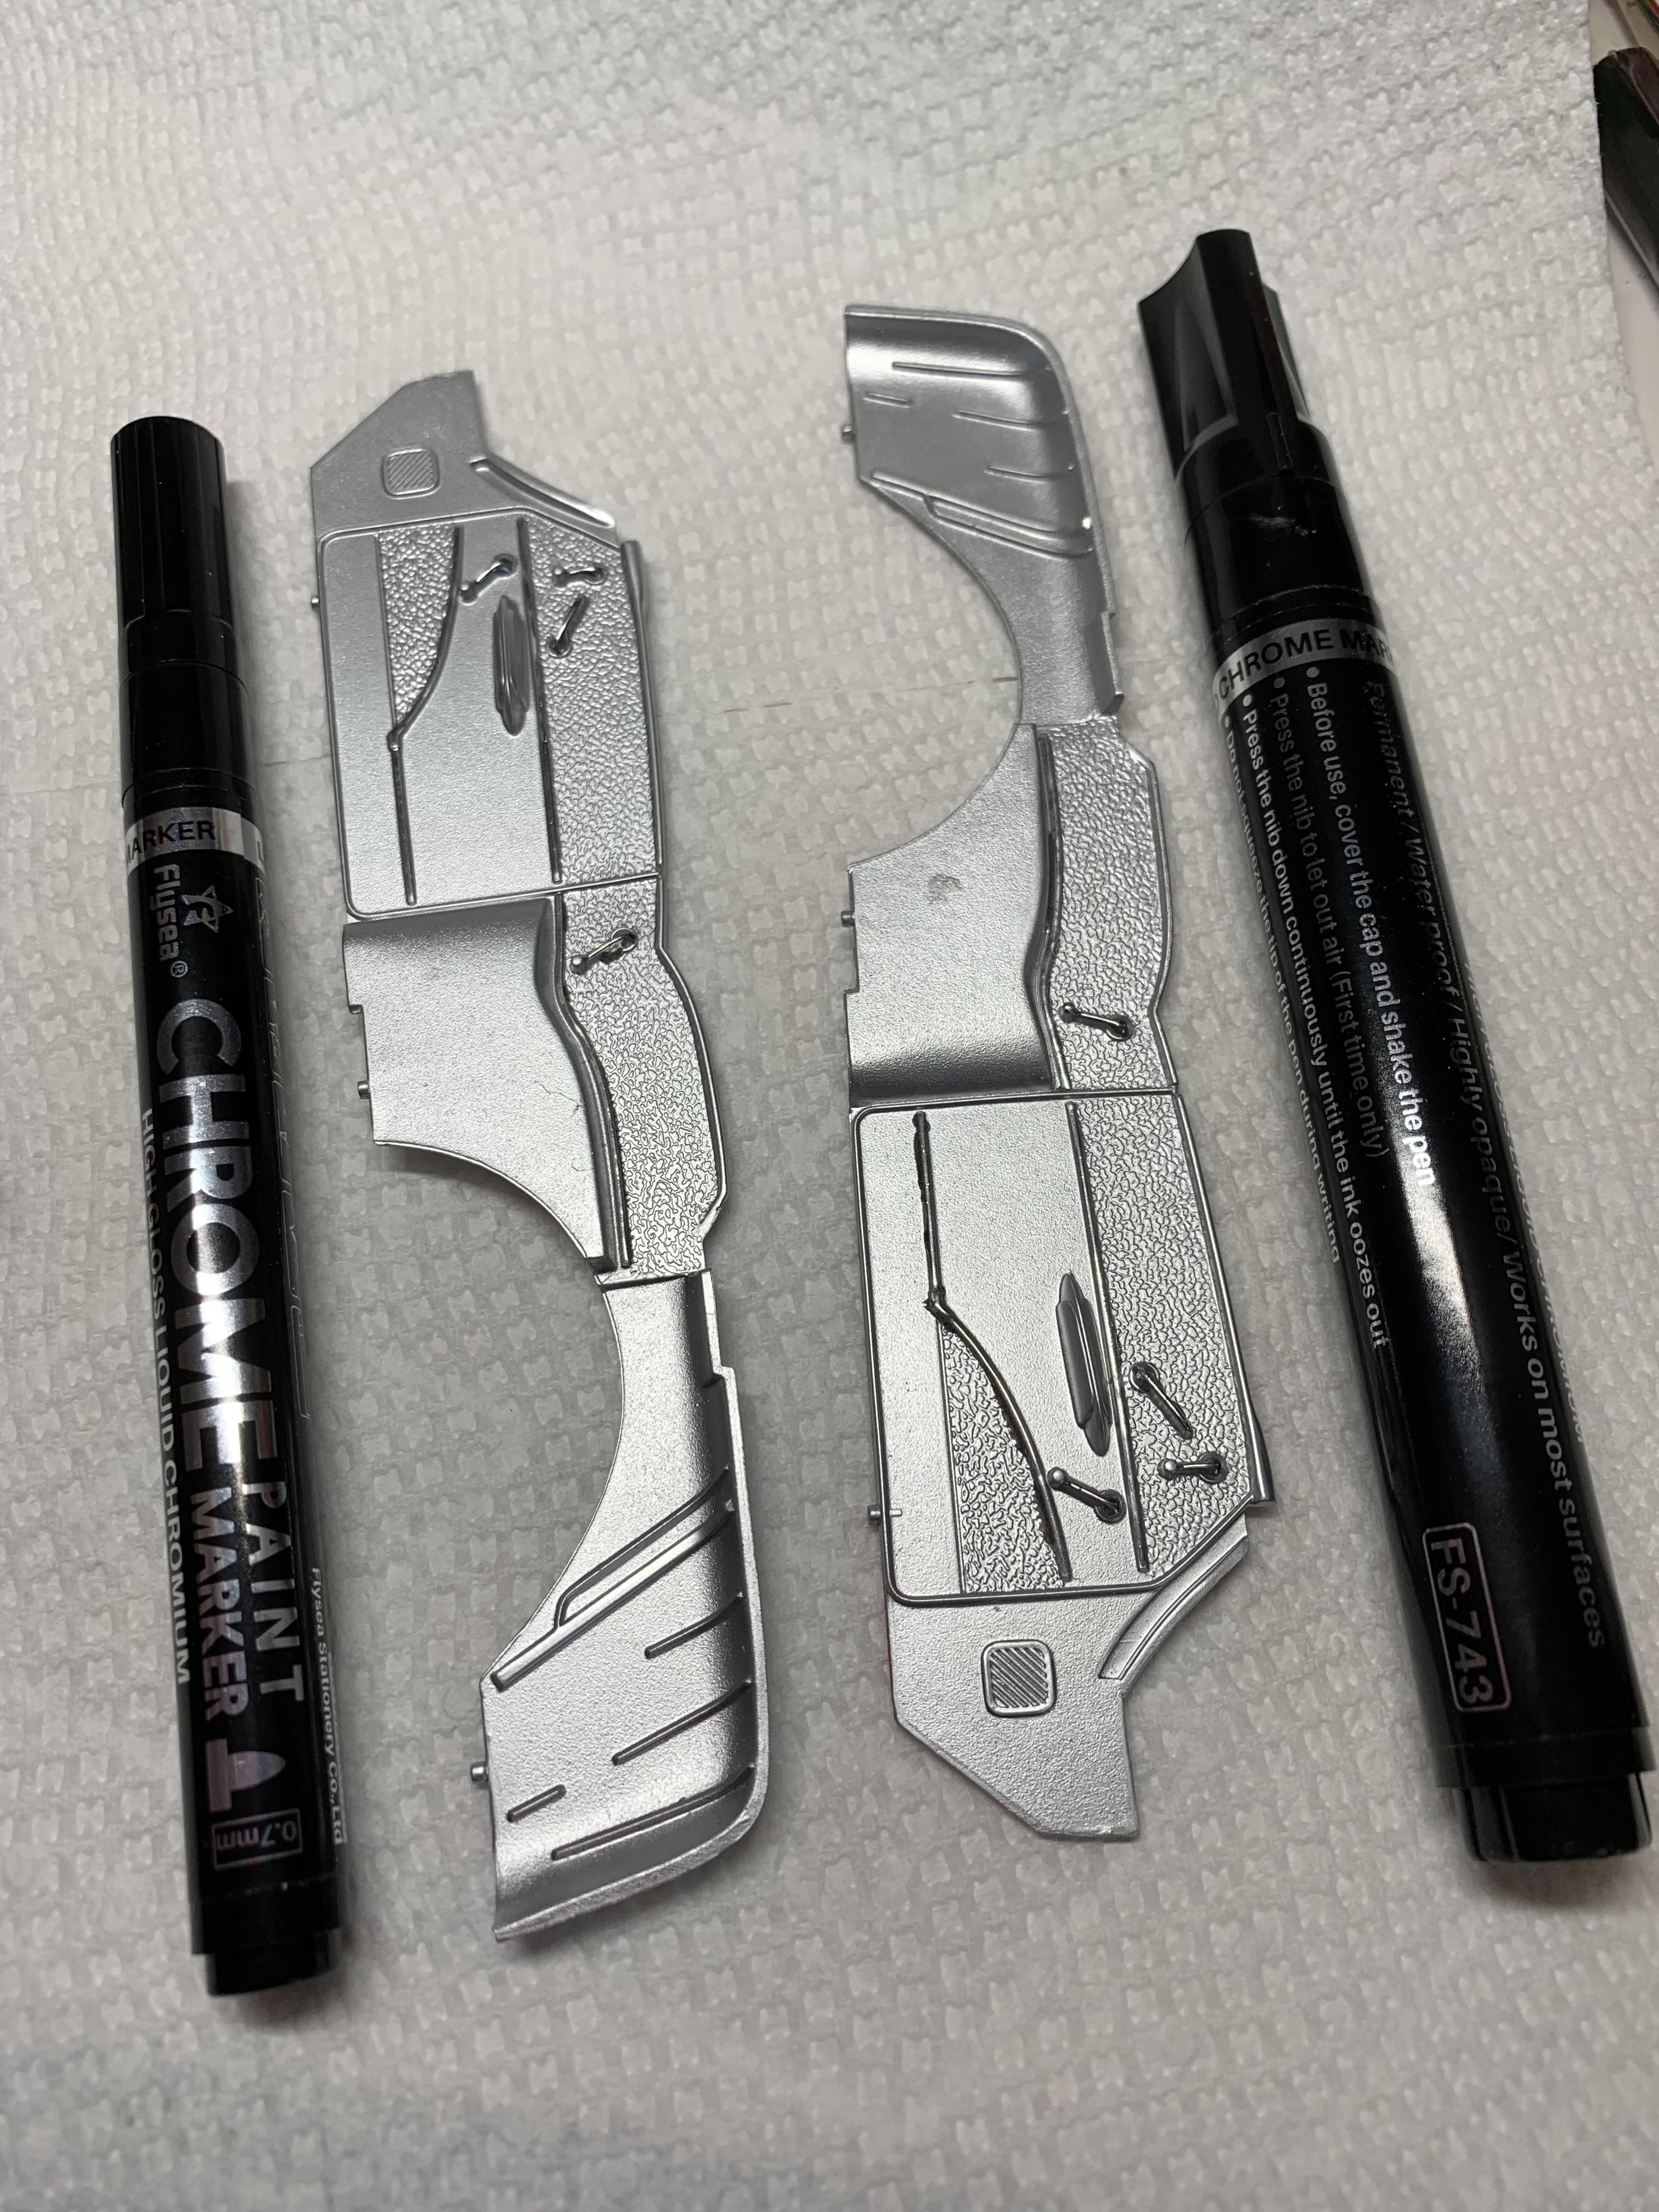
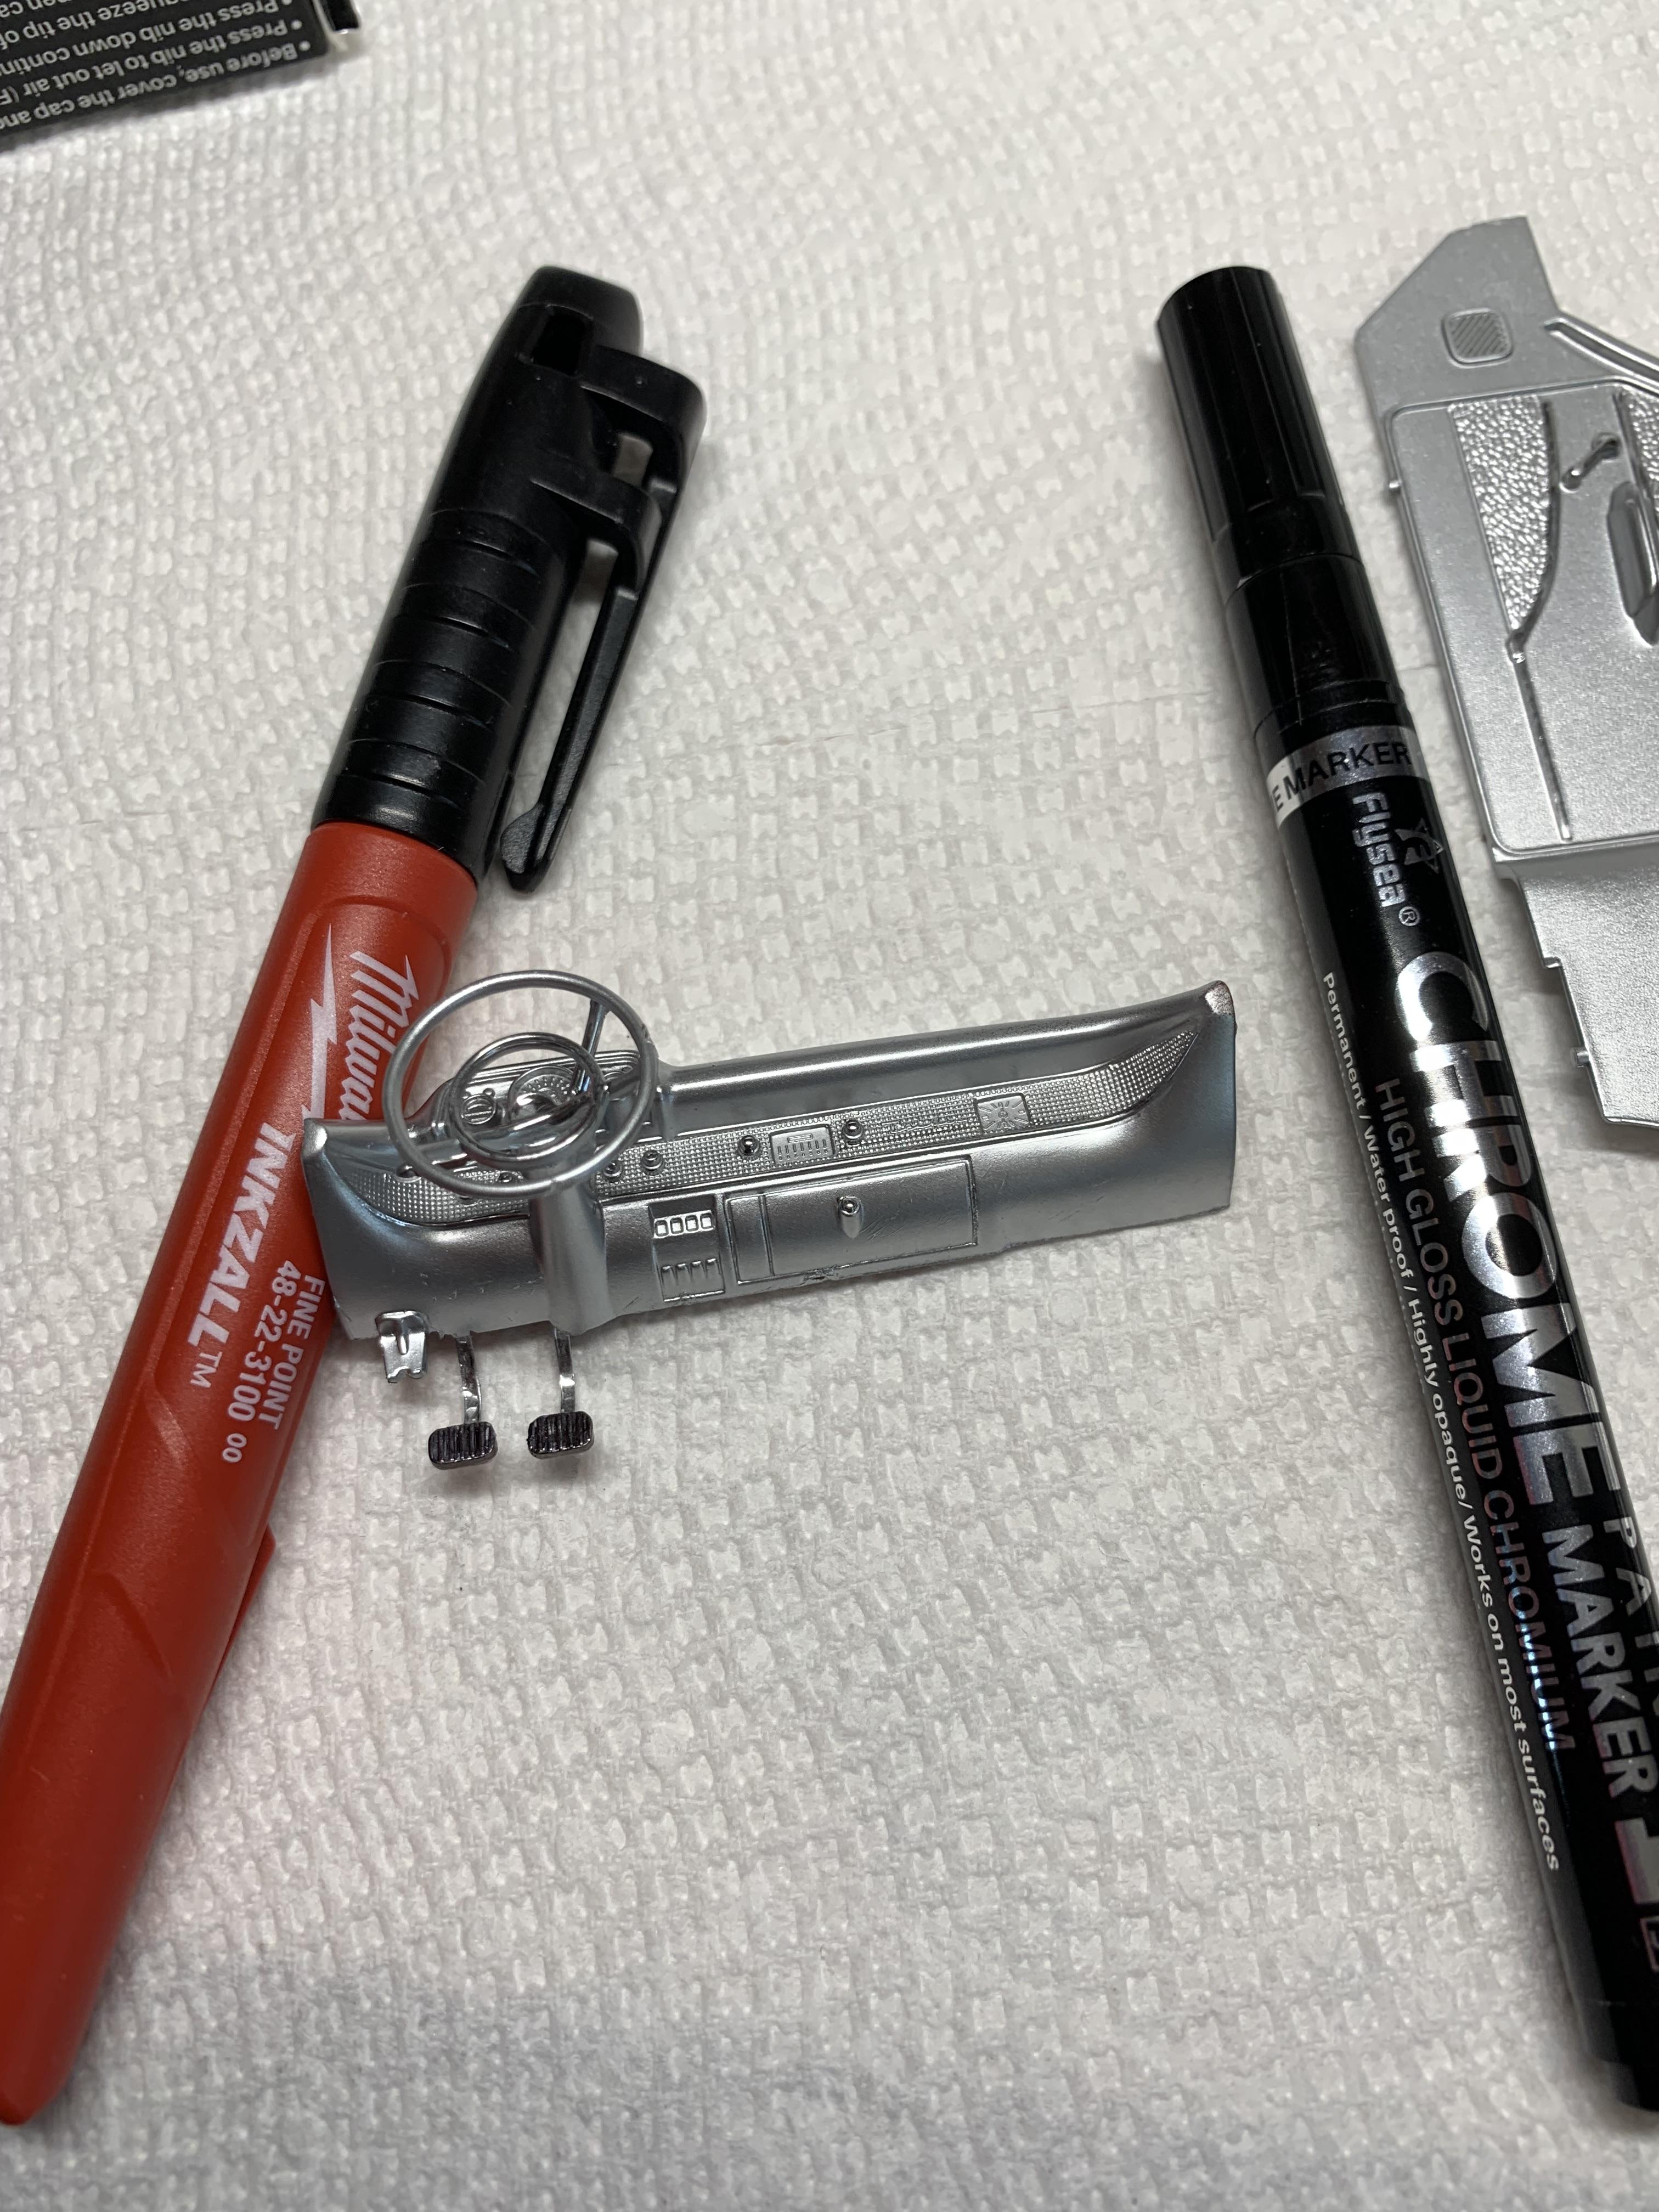
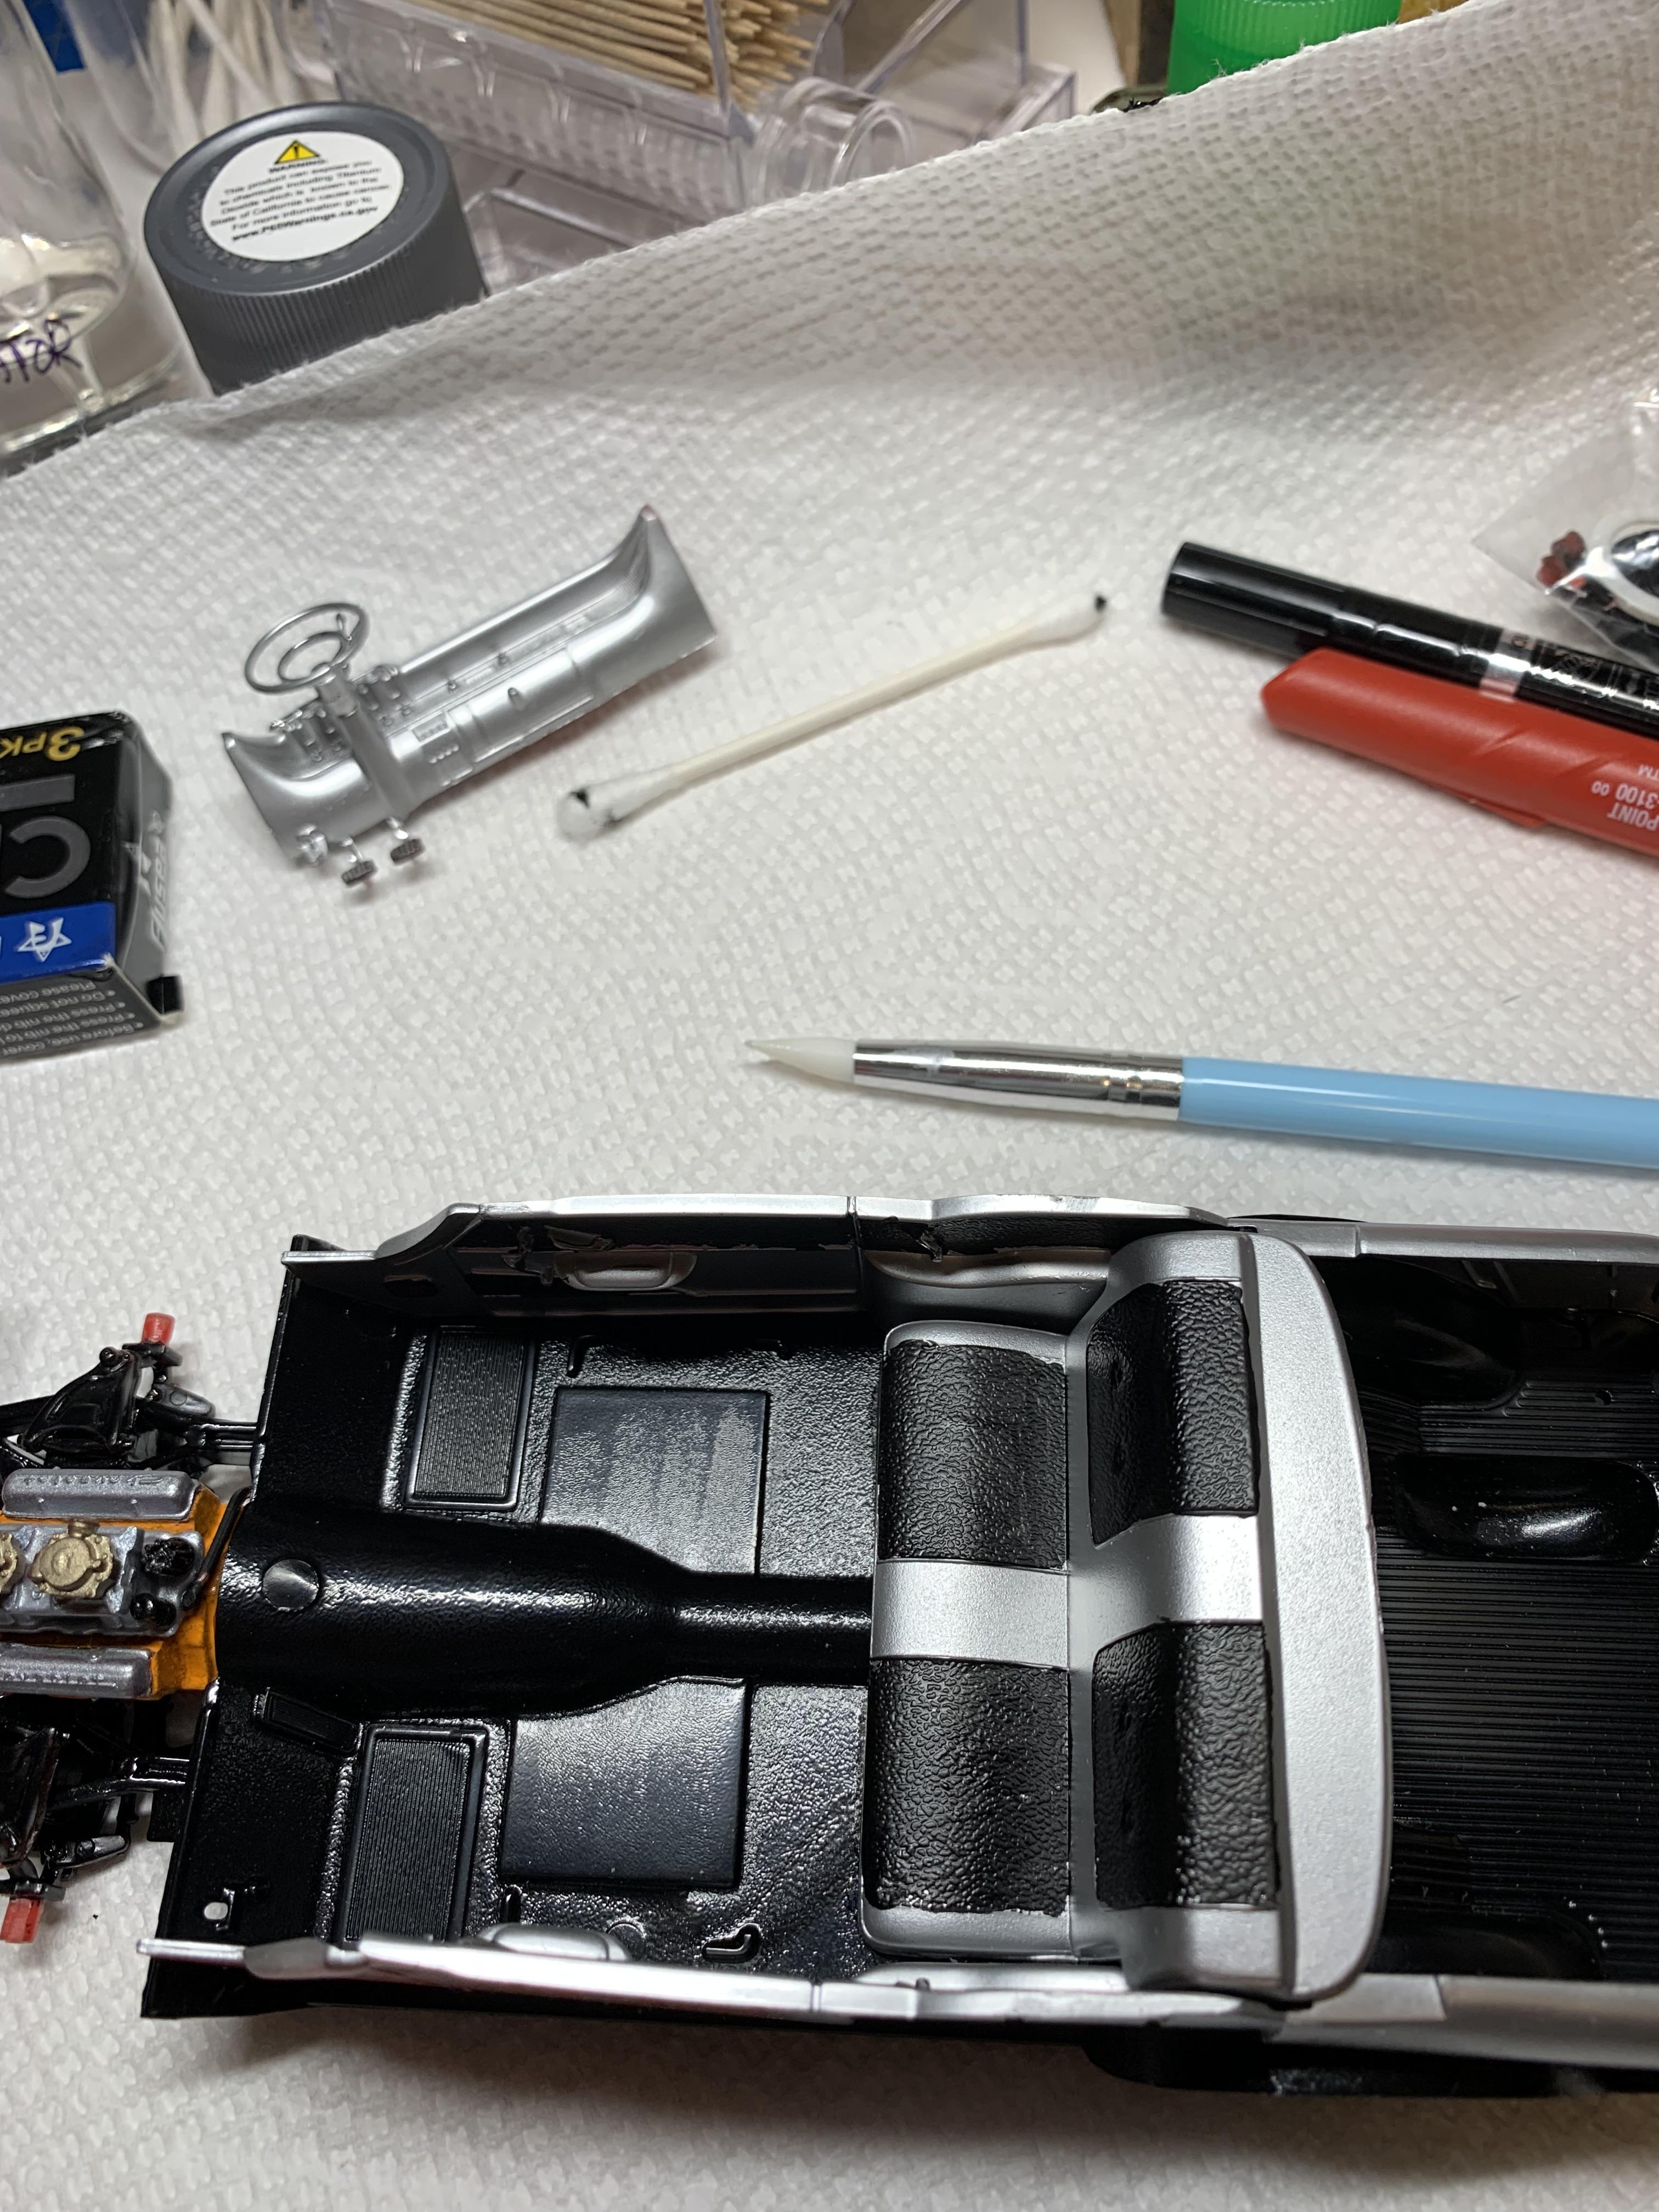
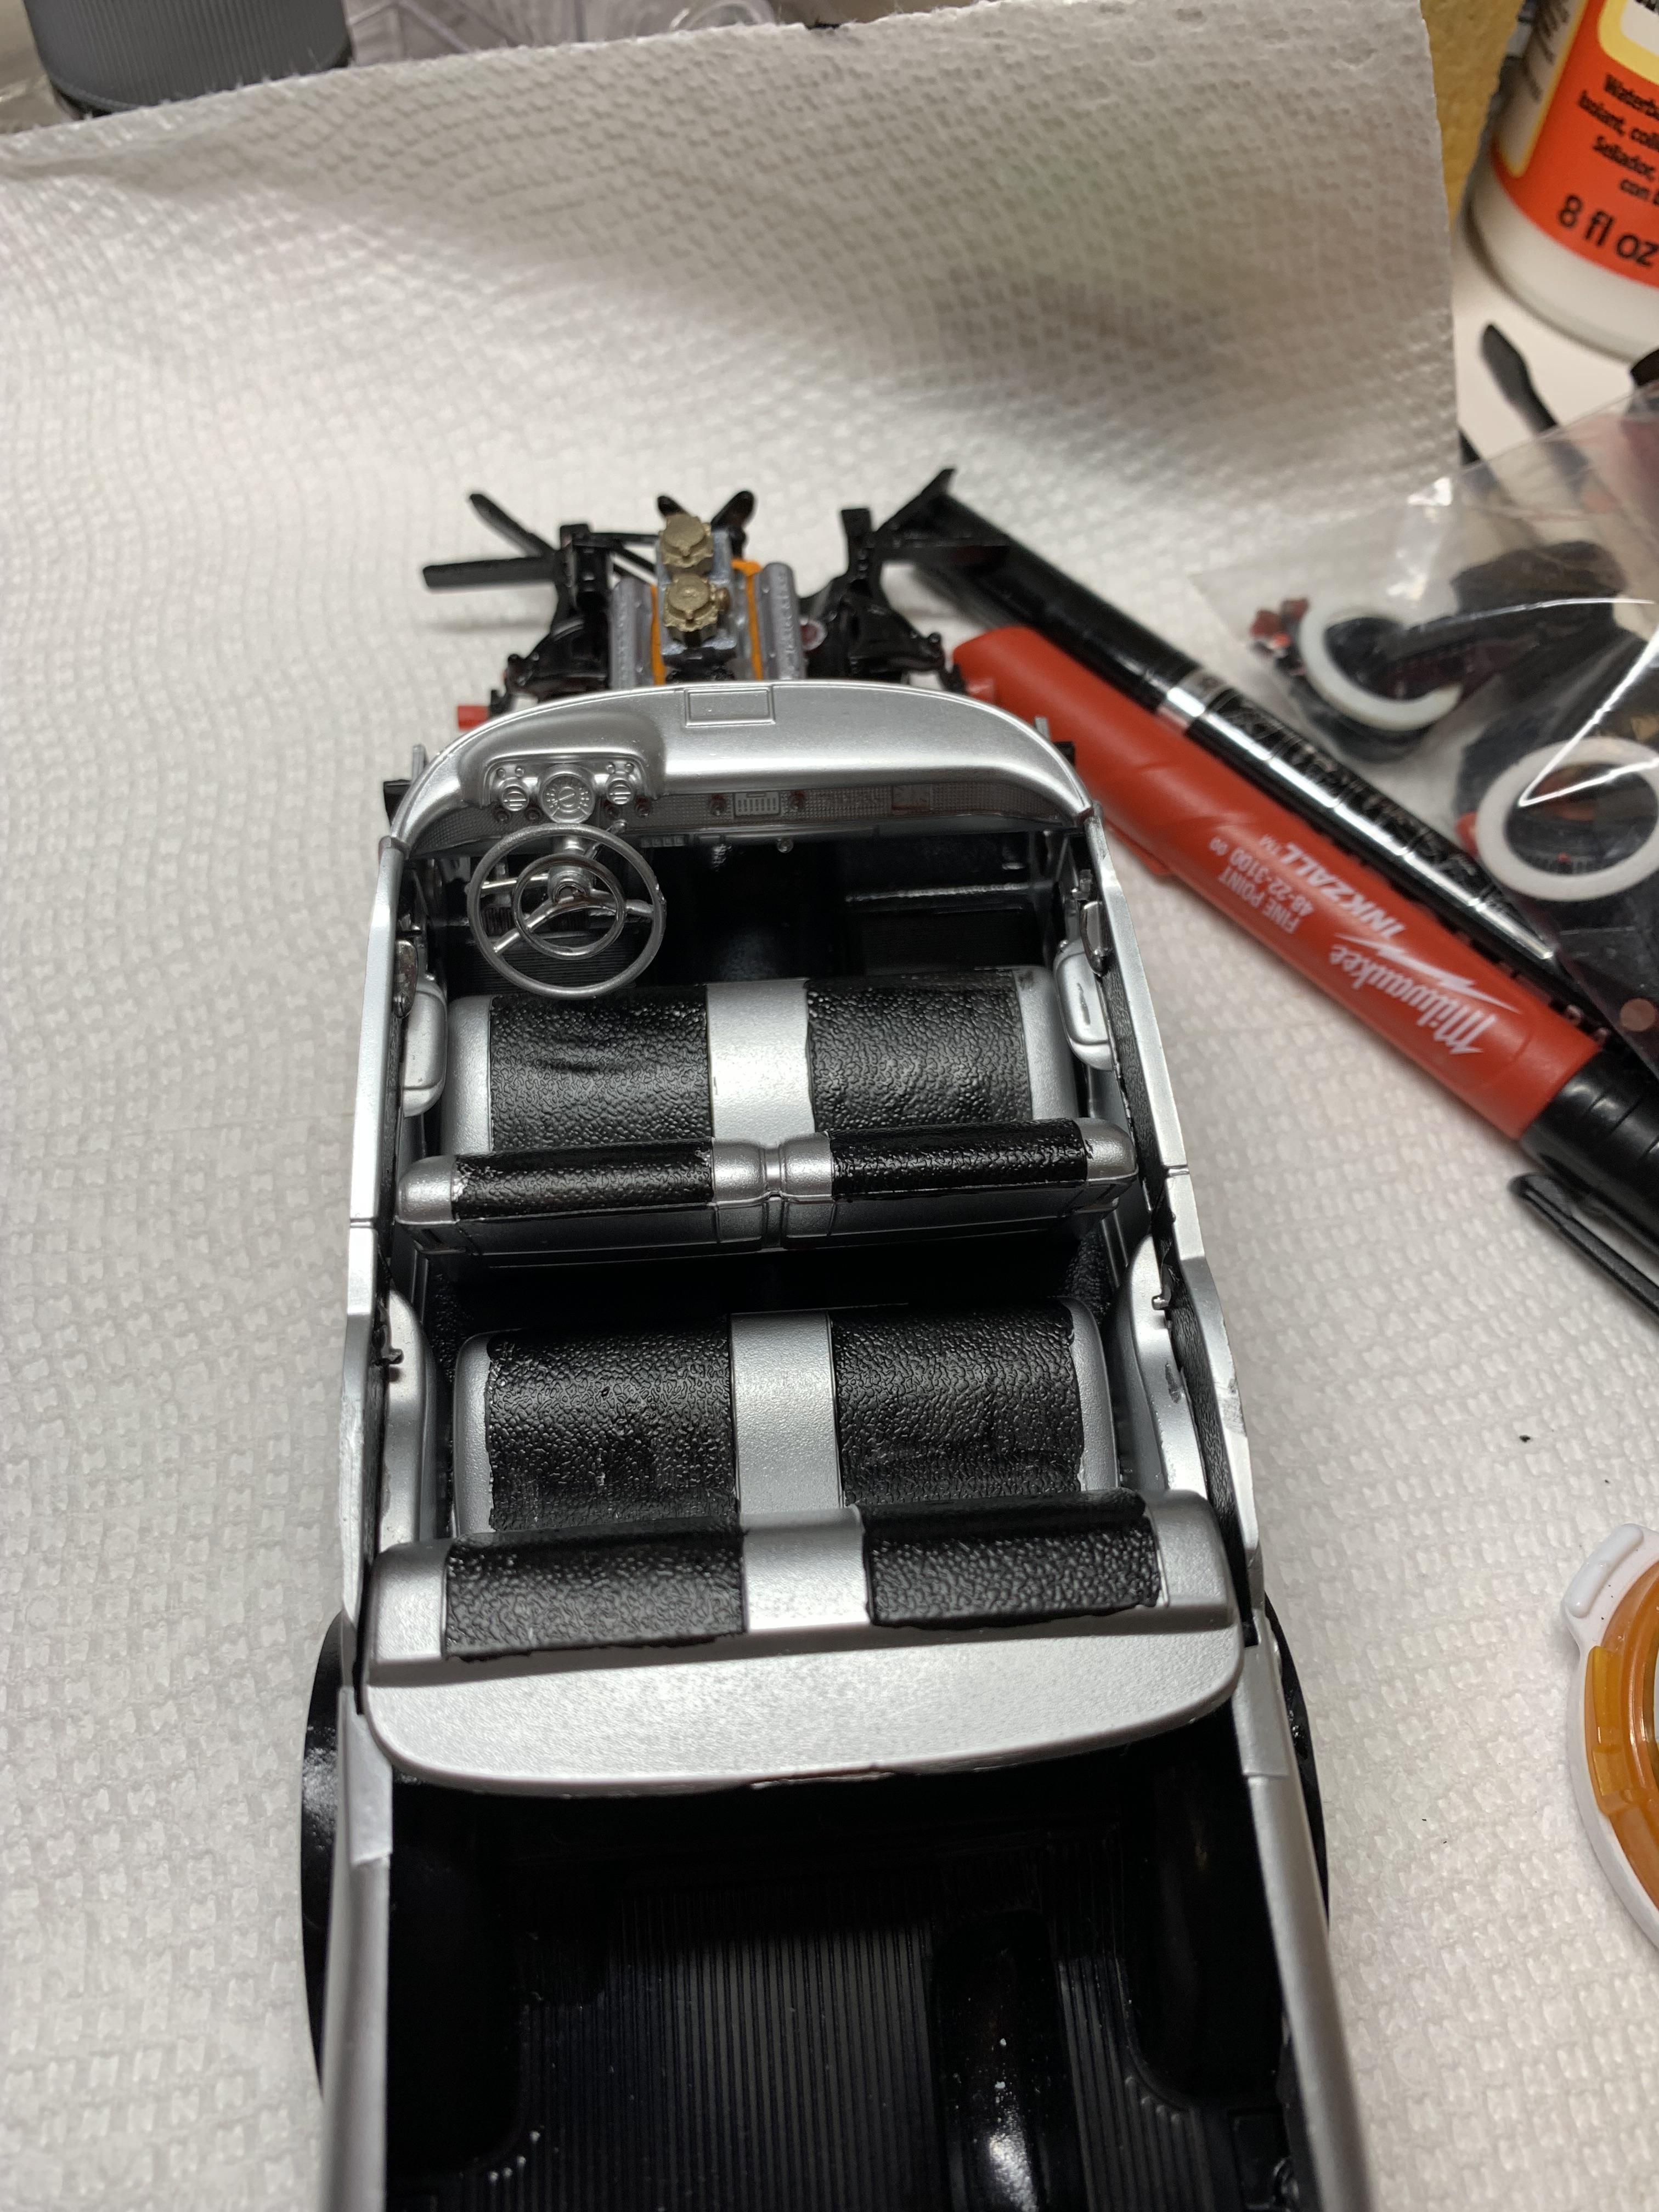
Did some interior work with good old ts30 Tamiya spray paint and some Mr. Hobby semi gloss.
-
Holloman & McKinney 57 Chevy C/MP circa 1964
R. Thorne replied to R. Thorne's topic in WIP: Drag Racing Models
Thanks, guys. Paper clips, huh, Michael? Sounds interesting. I have made some progress and will try to post some updates tomorrow. -
The [1971] Scrap Box Challenge[r R/T]...Update #3...
R. Thorne replied to tim boyd's topic in WIP: Model Cars
Just happen to have one of those, Scott. No chance of “debonding” the hood, I guess, Tim? Always a shame to hide a hemi. -
Thanks, guys.
-
10 hole wheels Monocoque
R. Thorne replied to R. Thorne's topic in Model Building Questions and Answers
Those are similar, but have 12 holes. Thanks for responding.