Crazybuilder
-
Posts
4 -
Joined
-
Last visited
Crazybuilder's Achievements
Looker (1/6)
-
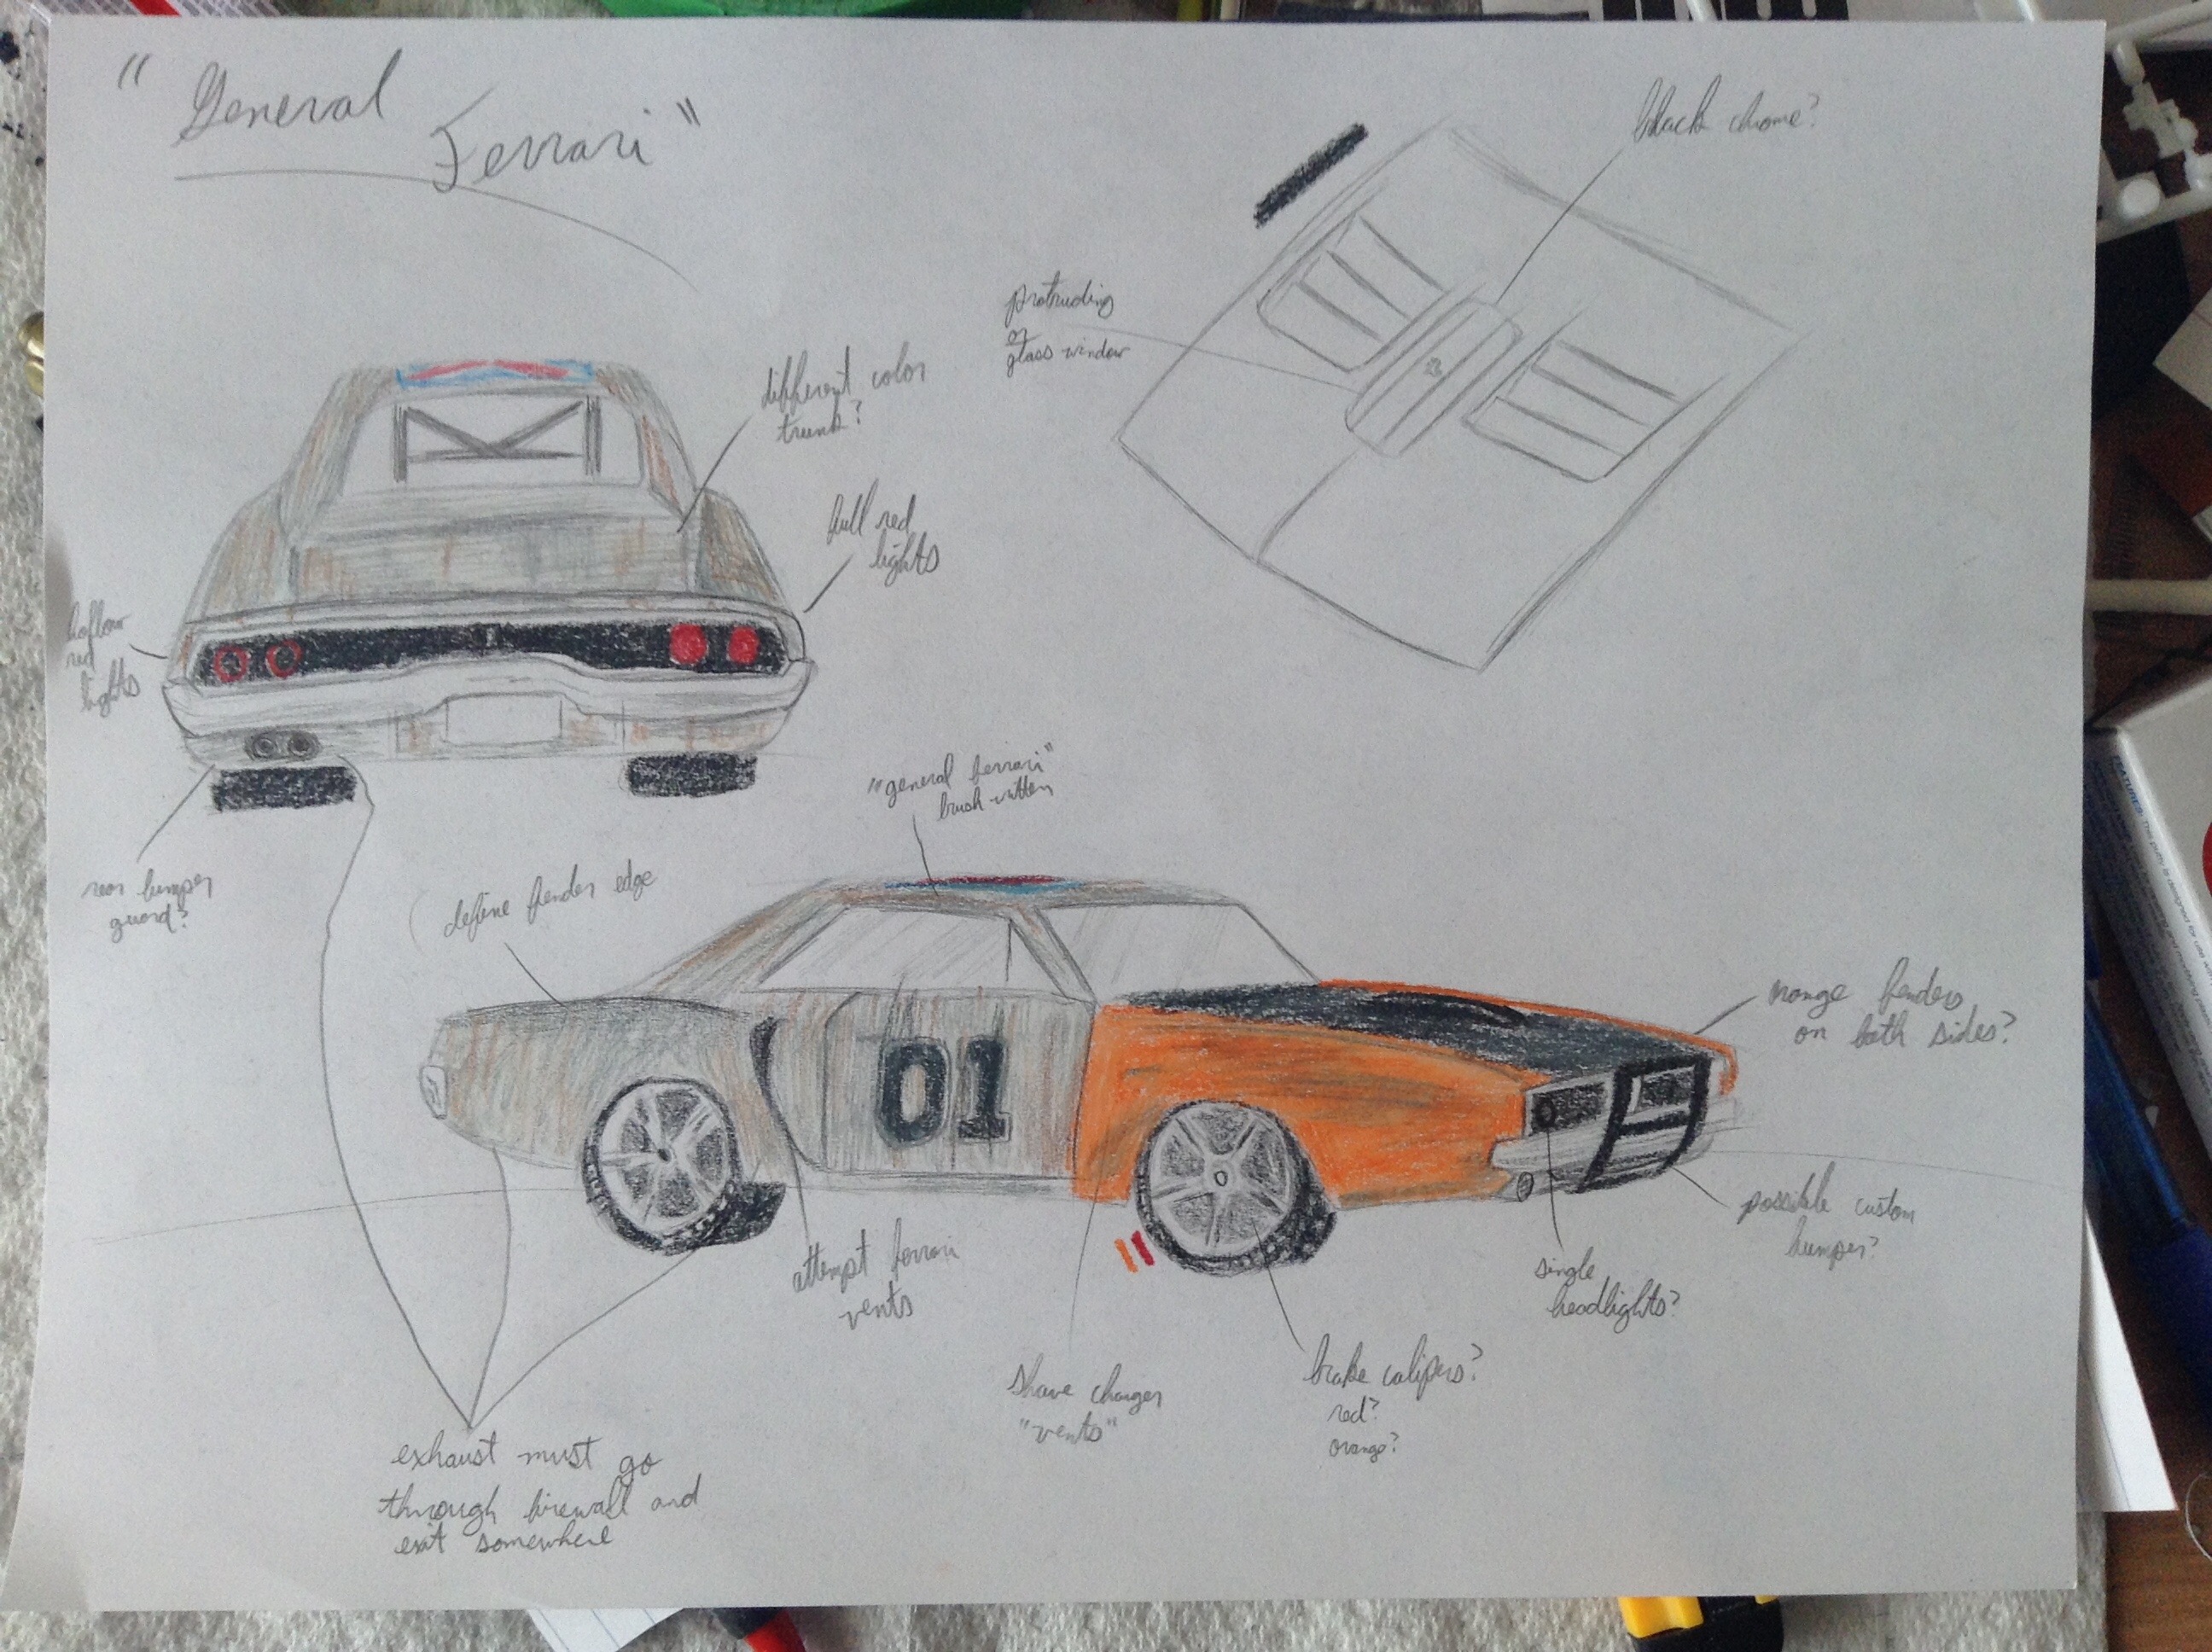
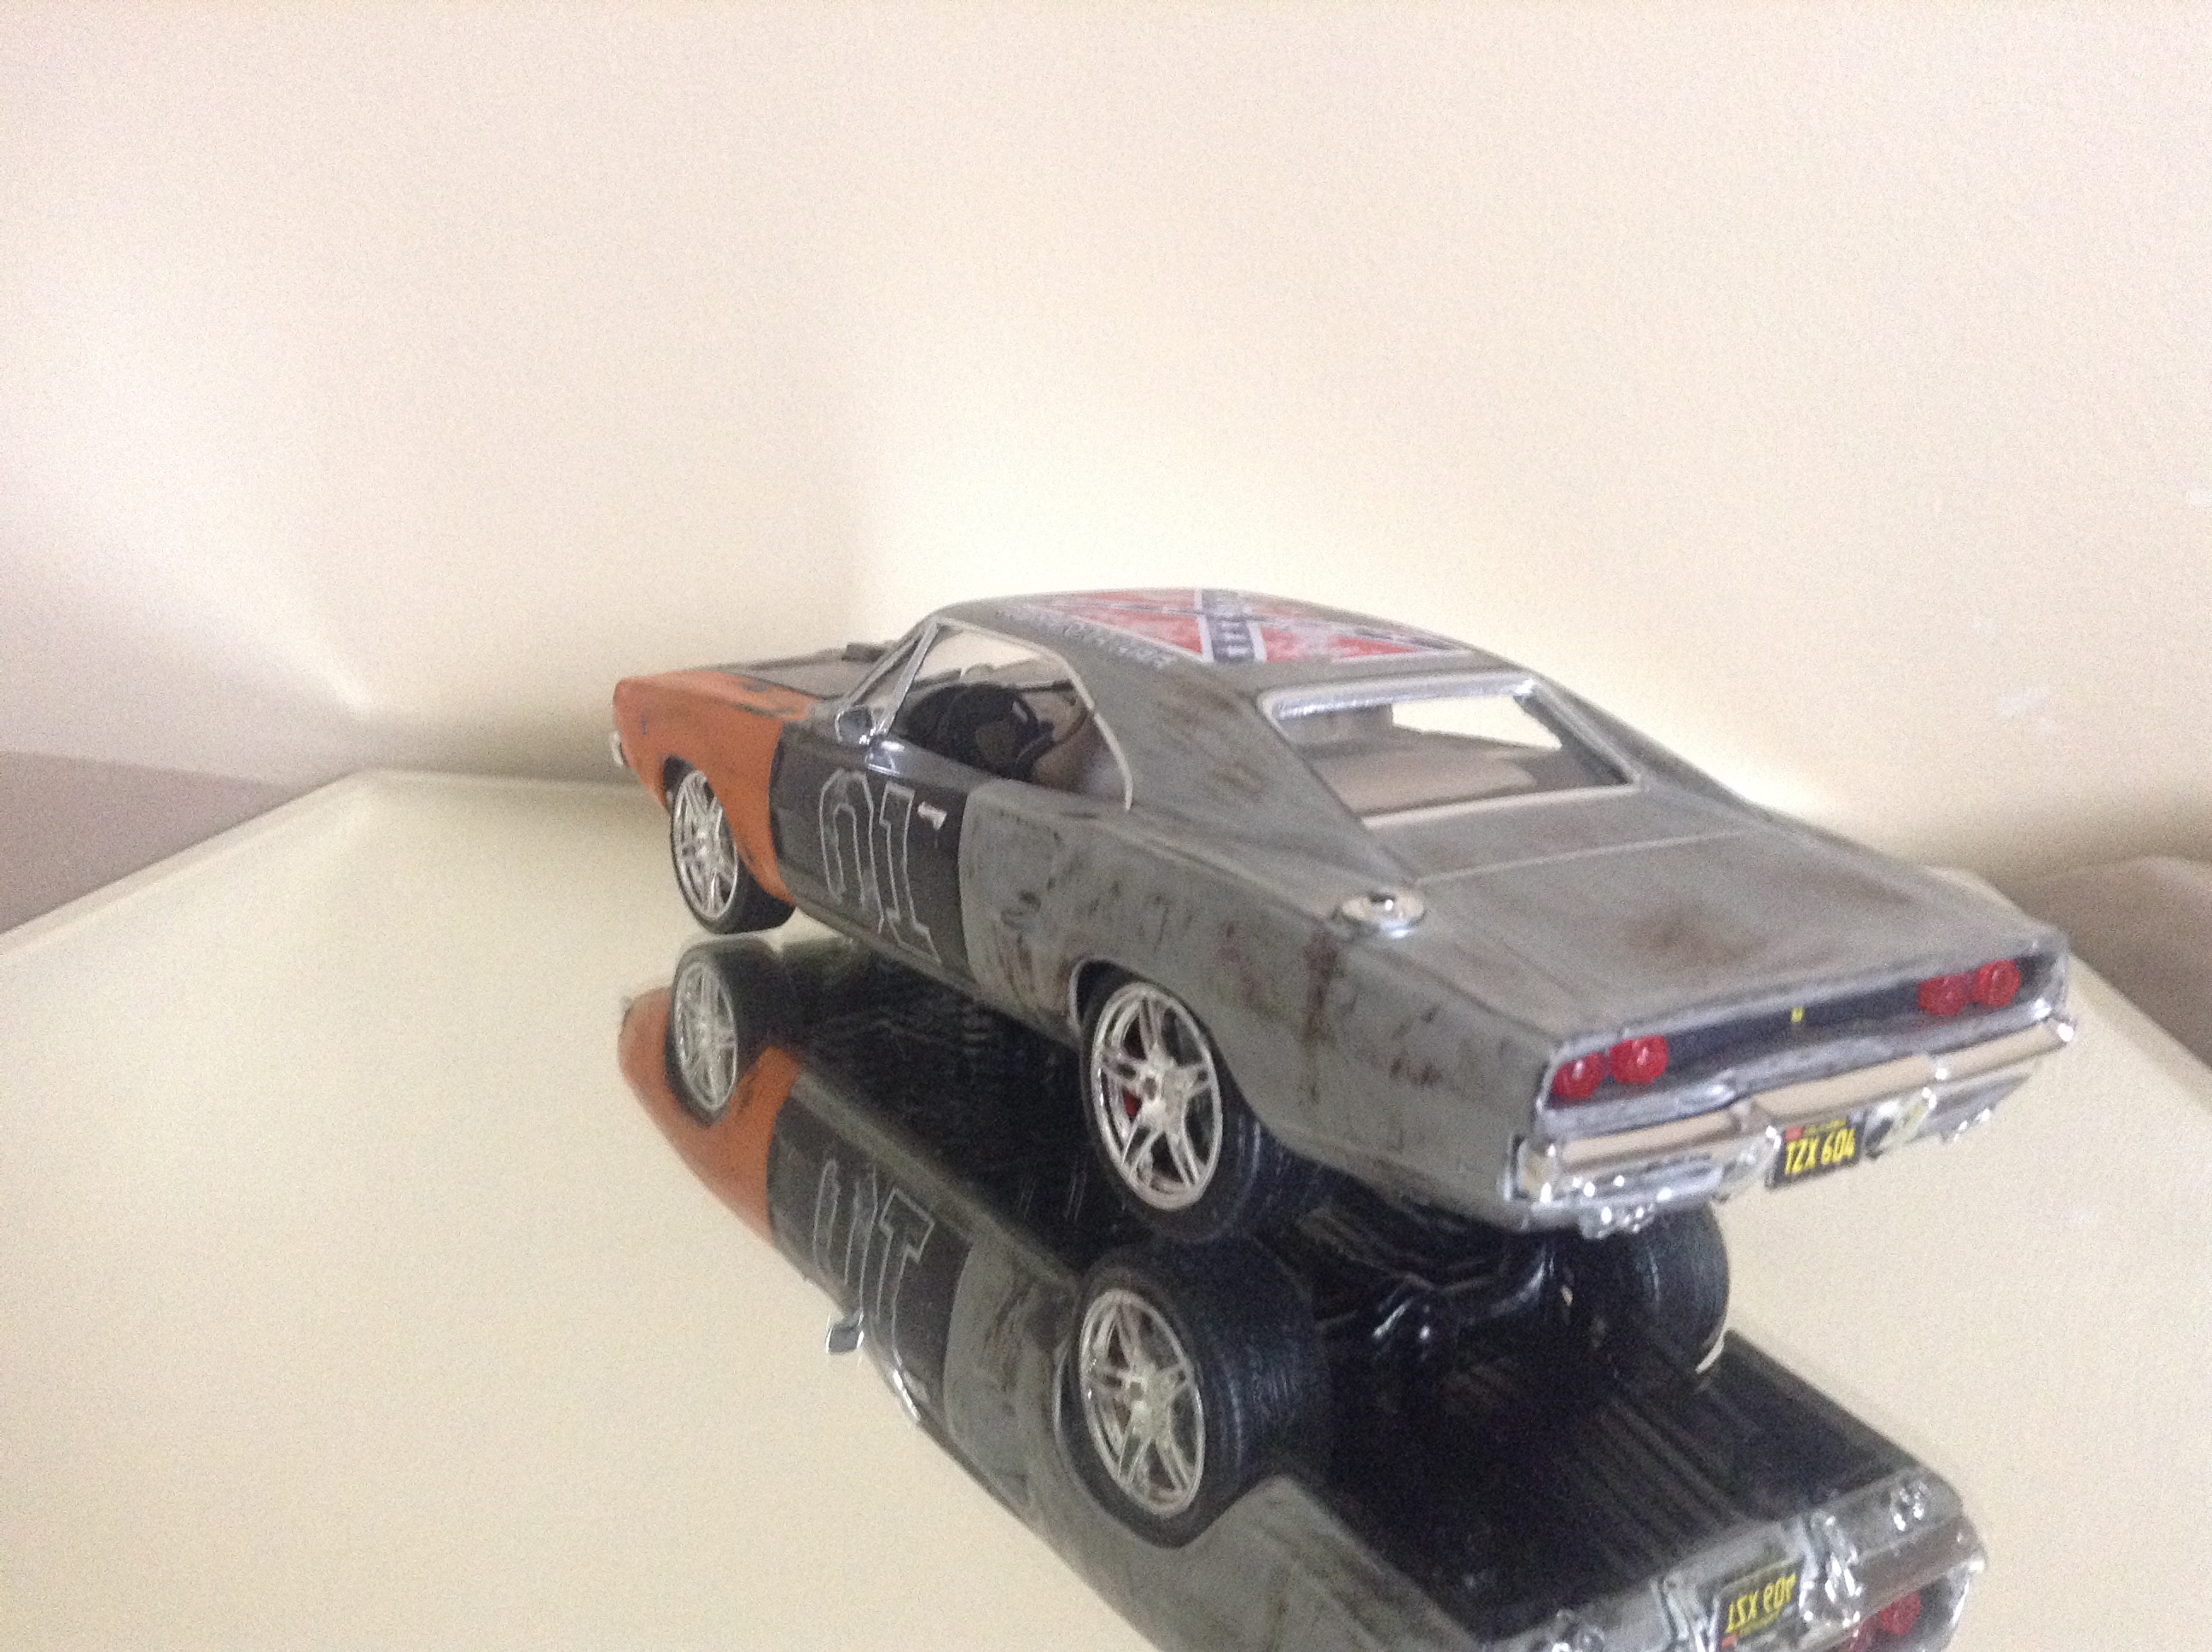
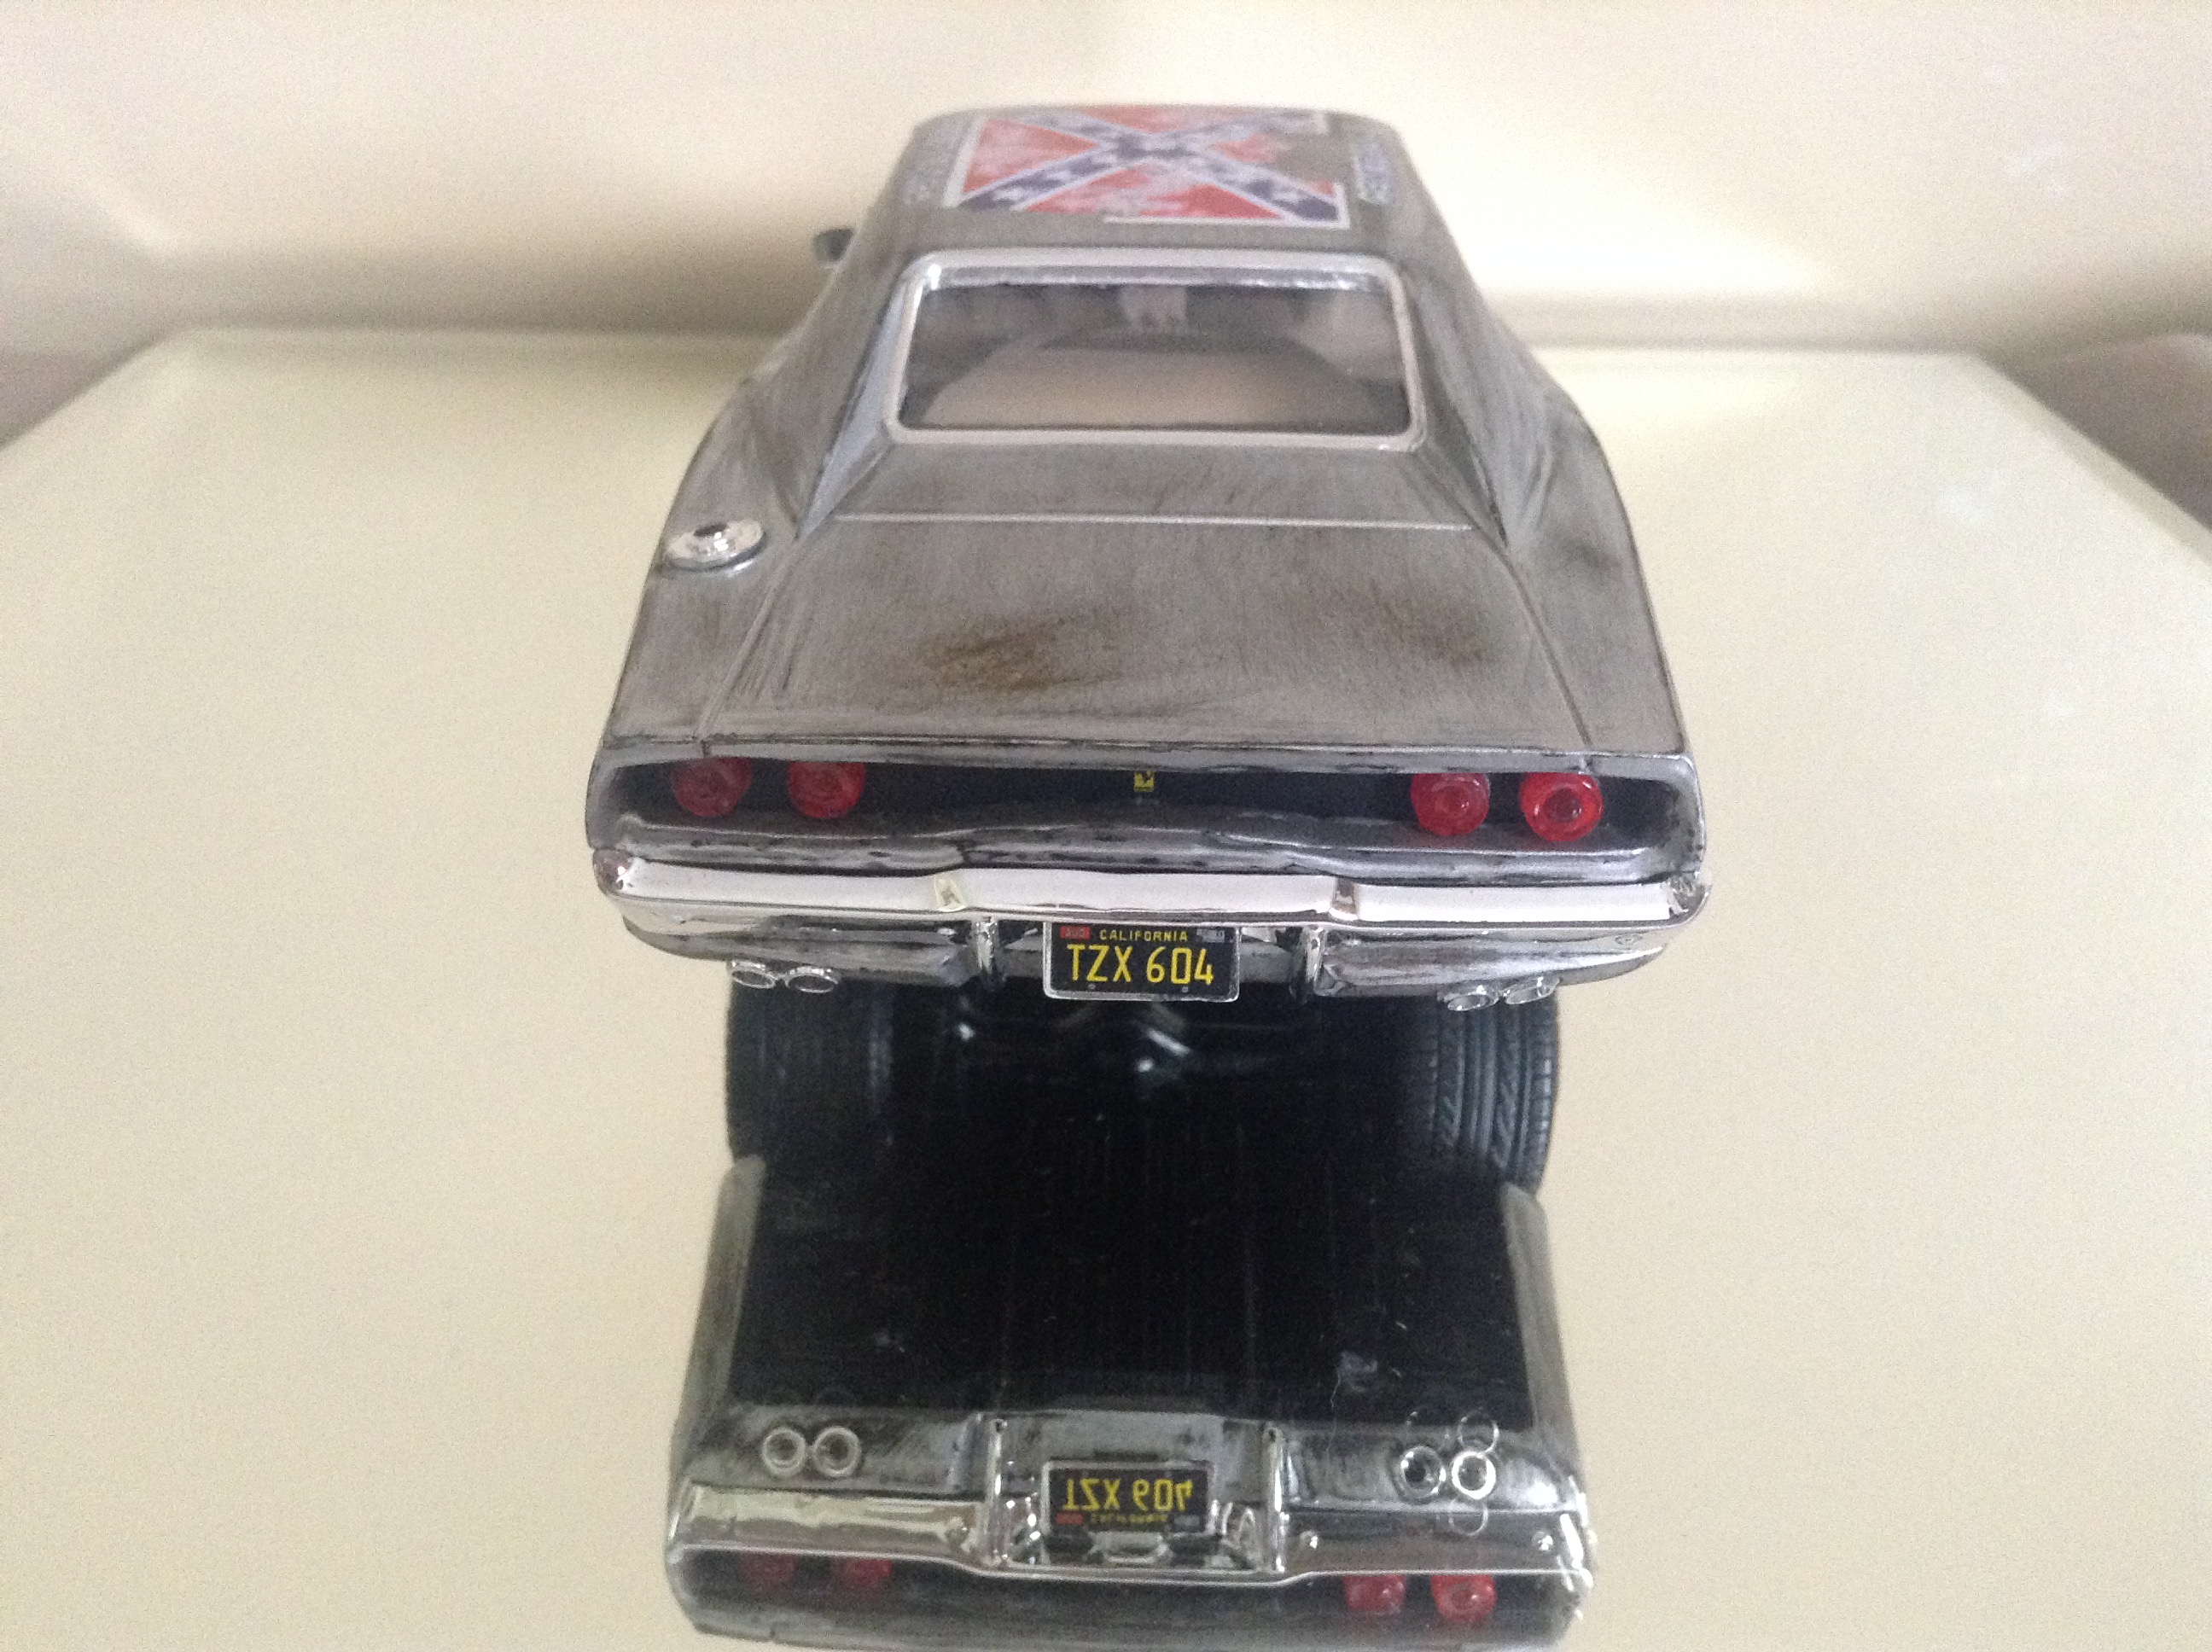
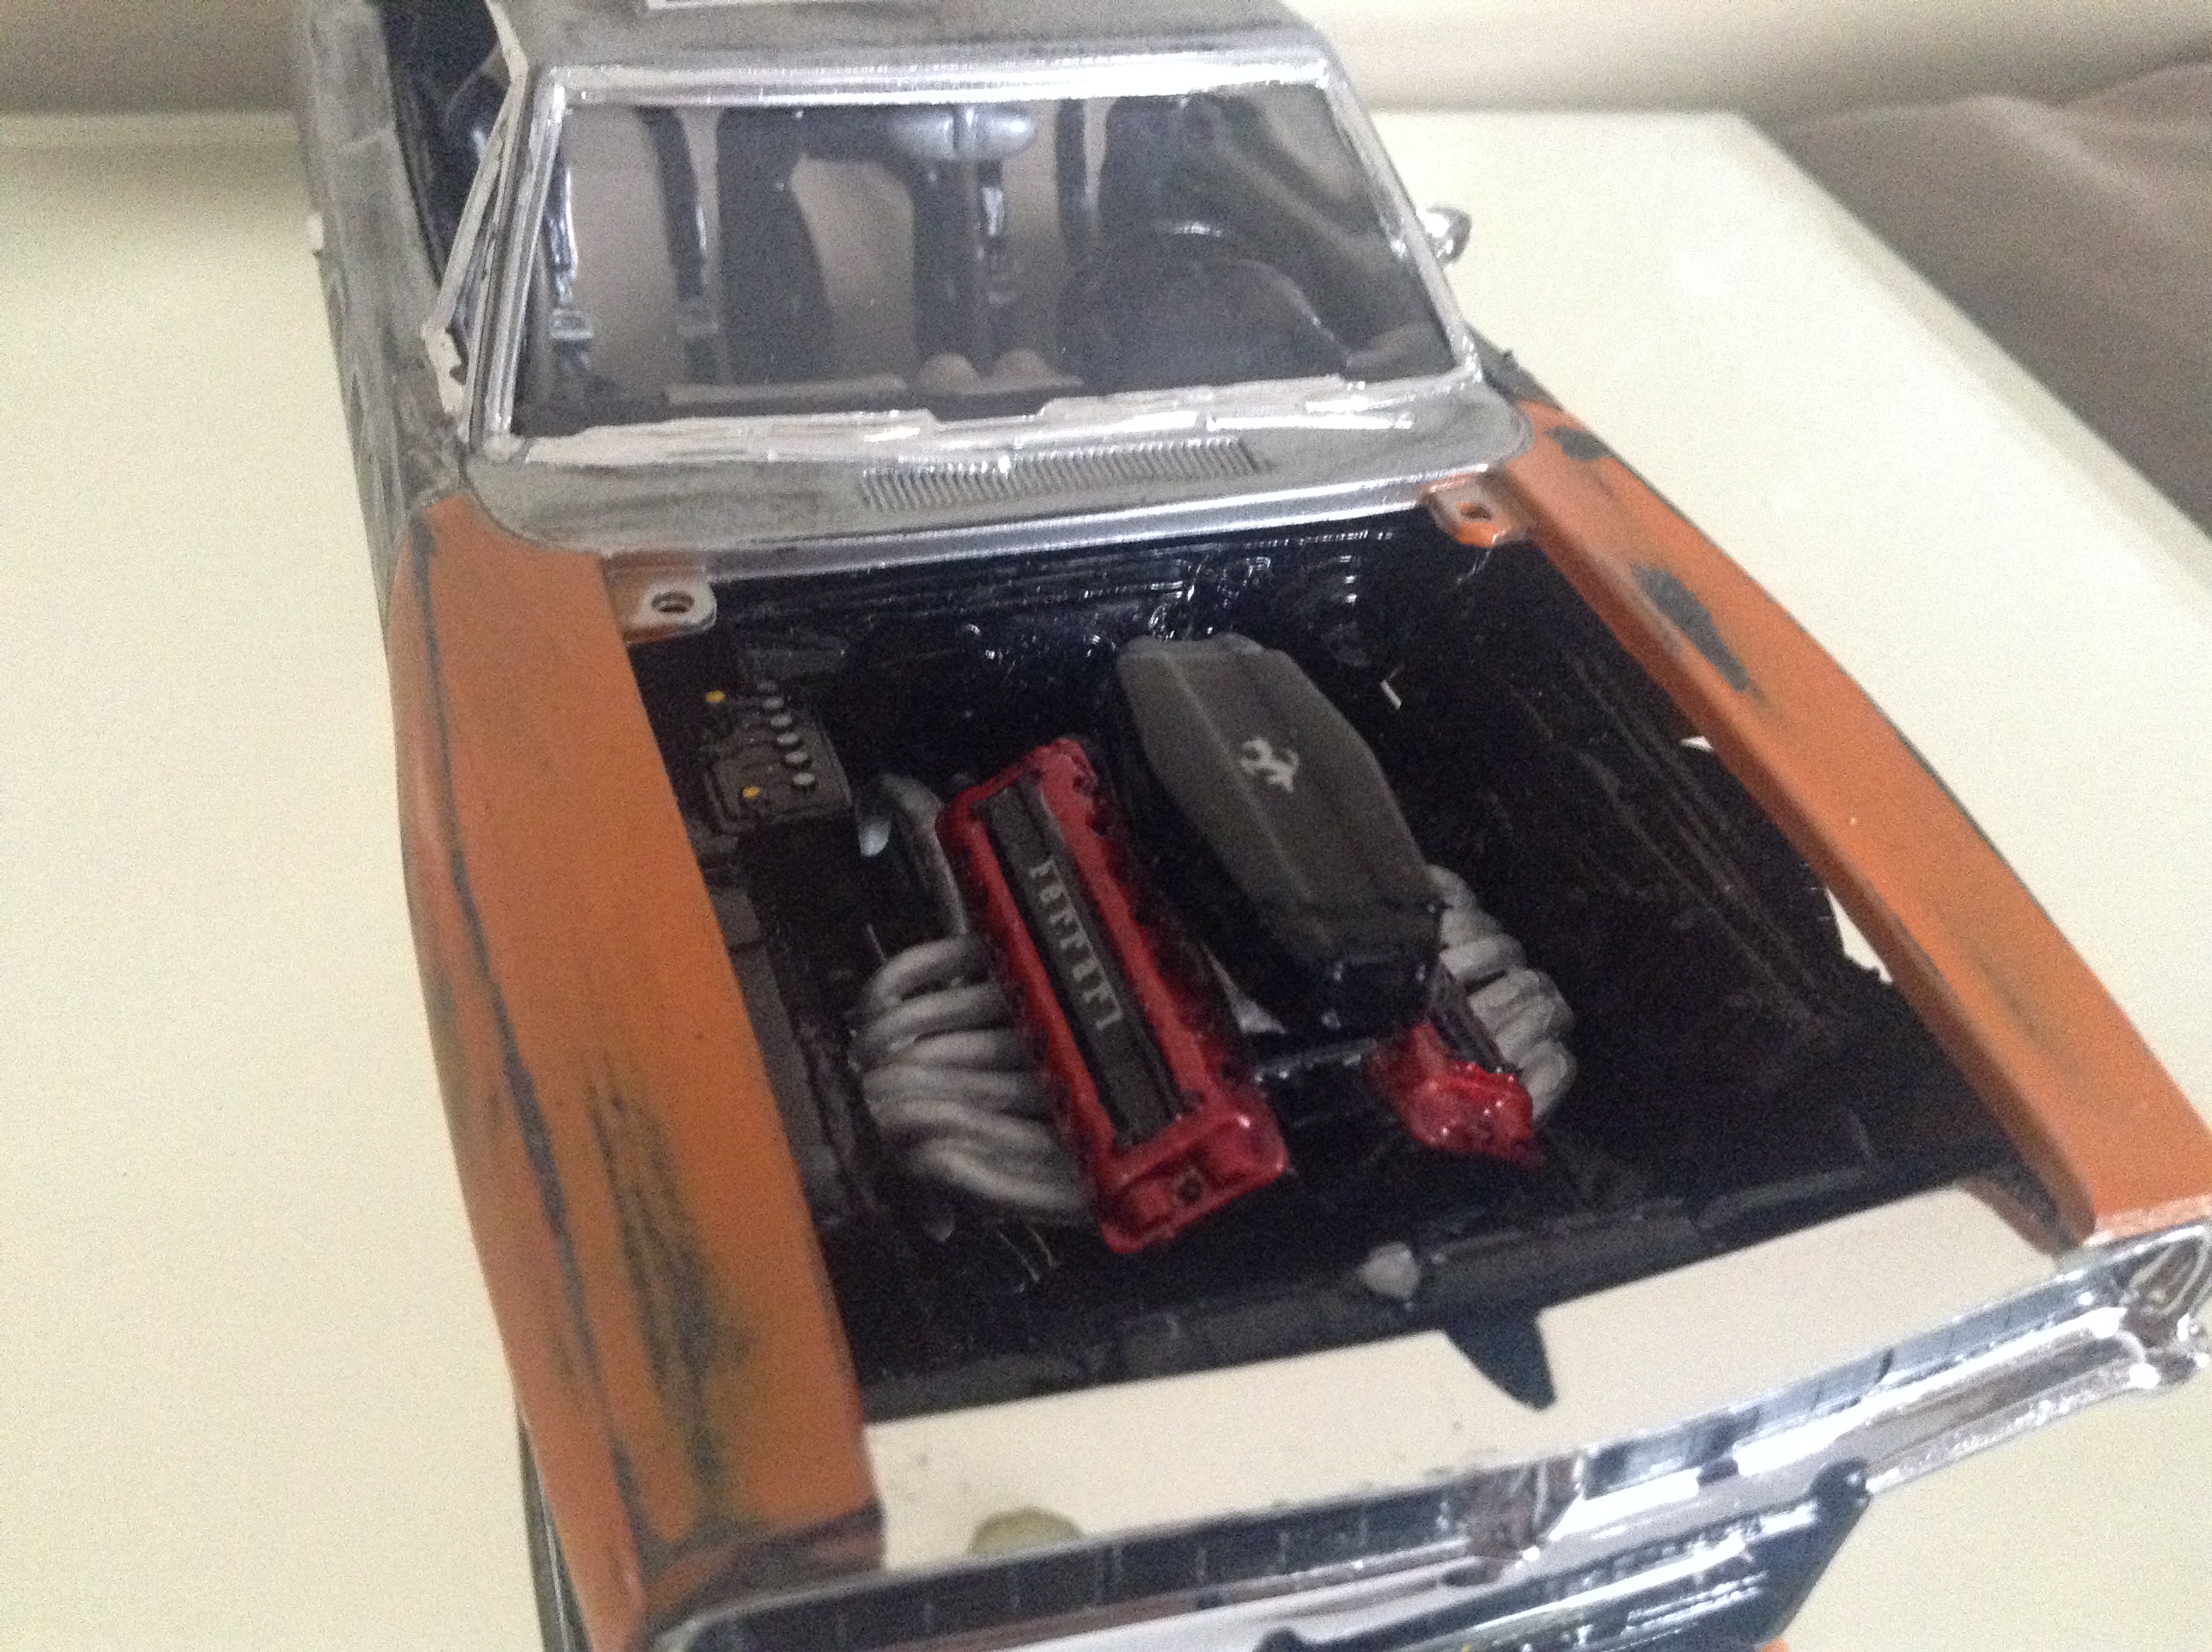
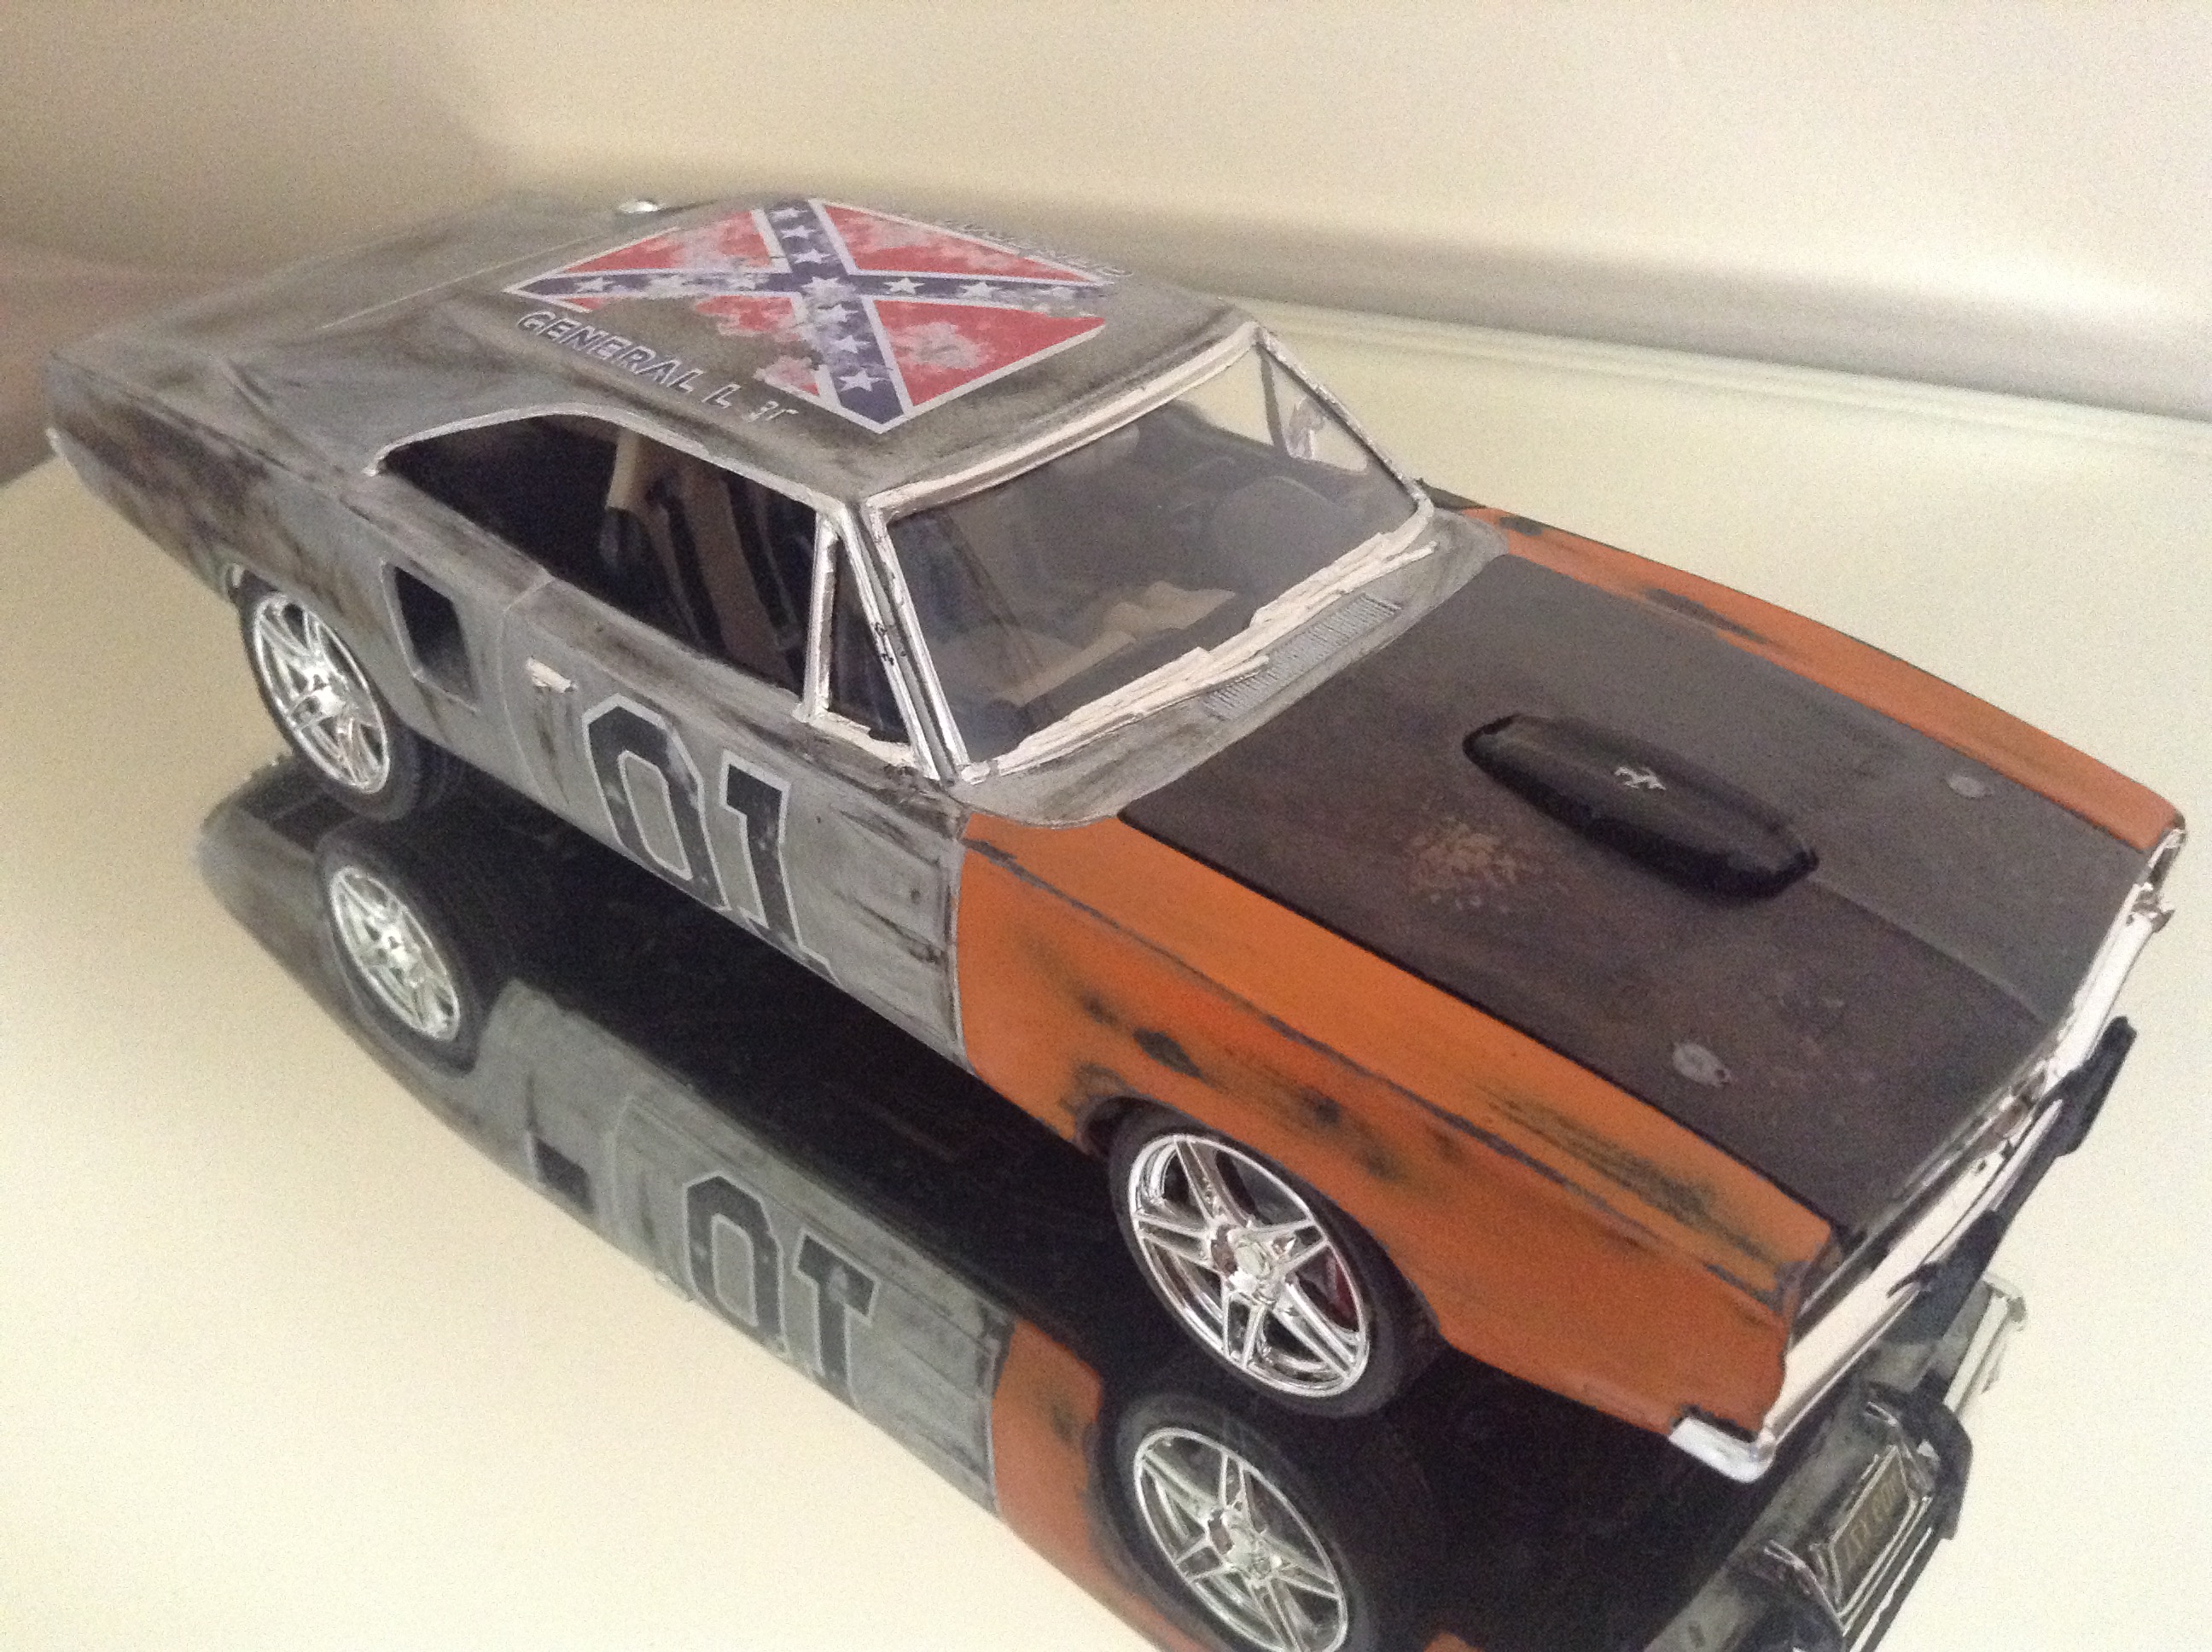
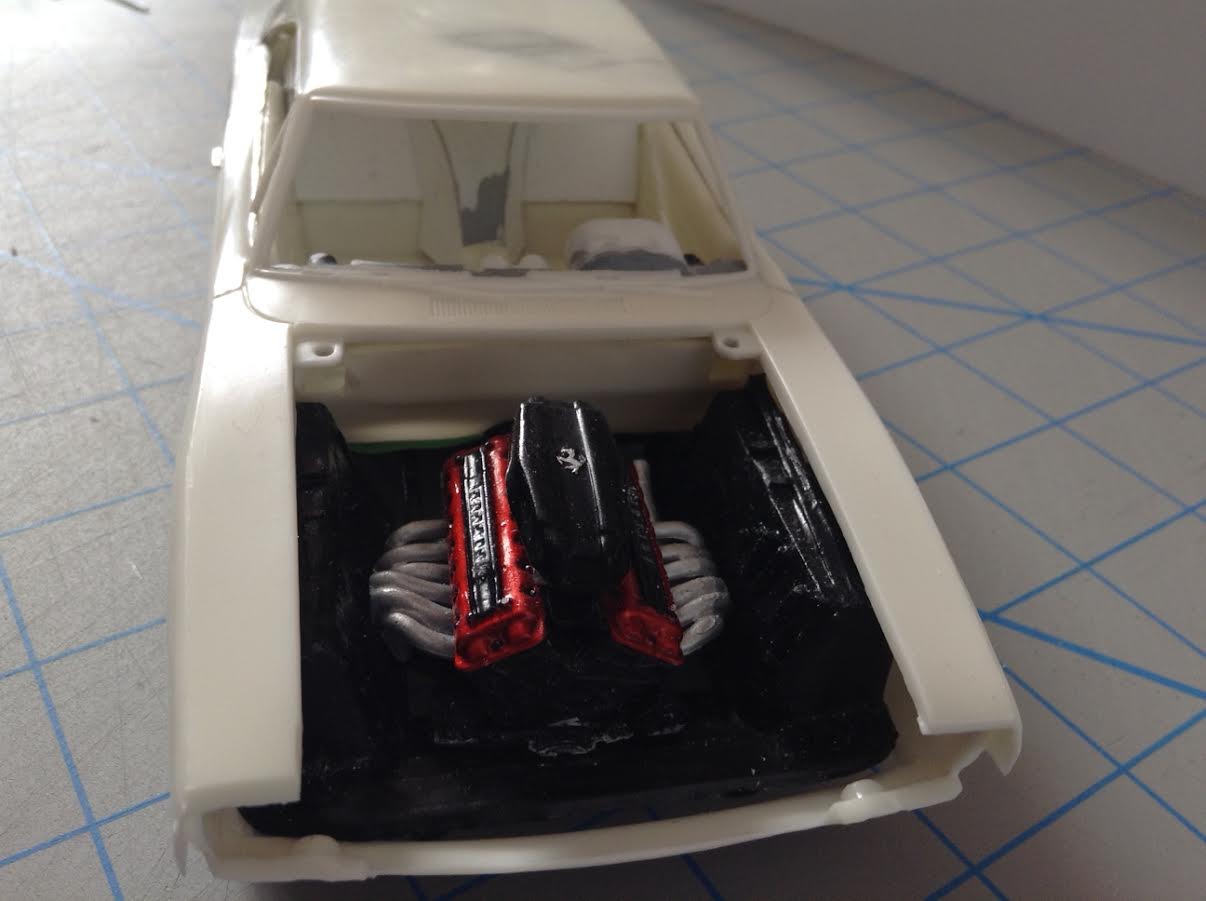
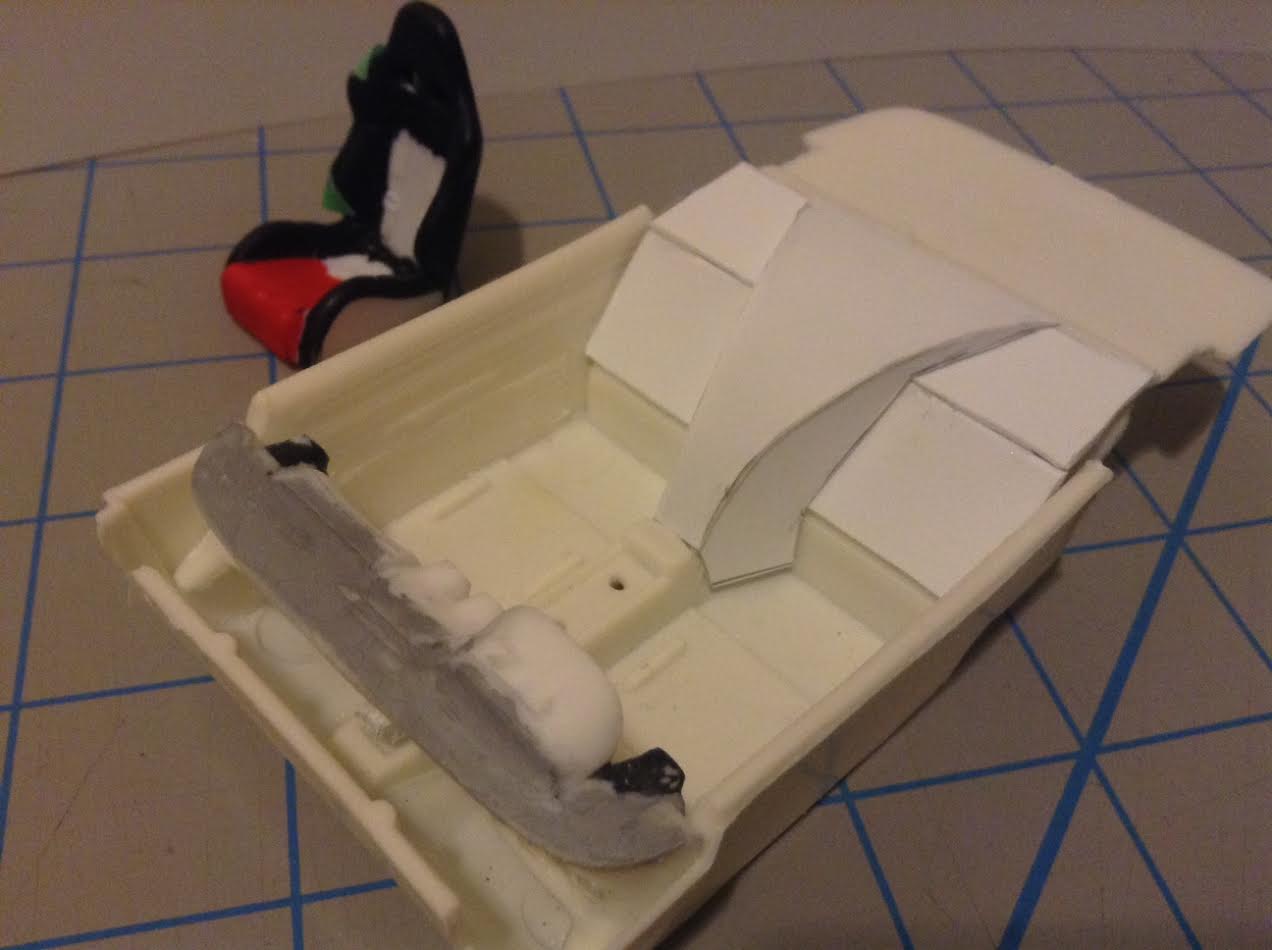
This build was inspired by two model kits that i had no idea what to do with. A General Lee kit, and a Ferrari Enzo kit. I decided to mix them together to make what we have here. A rat rod, Ferrari-powered General Lee. At first, I planned out the build with a sketch I made a custom Ferrari style taillight set up using the taillights from the Ferrari kit, and scratch building the rest. I also cut out the rear valence from the body of the charger and replaced it with a piece cut out from the Ferrari's rear bumper, and fit the Enzo's exhaust tips through the new valence.The engine was a hassle to make fit into the engine bay from the charger, which called for a lot of cutting and sanding on the Ferrari's parts. On top of just getting the engine into the car, i wanted it to poke out of the hood, somewhat like a shaker hood. This also caused a lot of trouble with getting the engine centred, and finding the right height so that the engine has just the right amount of poke through the hood.This was also the first patina i had ever done, but i am very pleased with the outcome. i wanted it to look like it was mostly bare metal, aside from some parts like the fenders, drivers door and hood, which i painted differently to get more of a "junkyard" look. for the weathering on the decals, i just sanded them down while they were still on the sheet until they looked faded enough, then put them on as usual. As for the paint, i first painted it black, then brown, then silver. Then i sanded away, revealing the colours to create a weathered effect. A big part of the Ferrari's design that i wanted to incorporate was the side vents, which was definitely an intimidating task, having to cut a hole in the body of the charger and all, but it turned out great. I also made the interior with a lot of pieces from the Ferrari kit. I cut up the charger's dashboard in order to fit the Ferrari's right into it, used the Ferrari steering wheel and seats, and scratch built panels to cover the back seats for more of a two-seater, supercar look. It's hard to get pictures of the interior now that its all assembled, but here it is while it was still a work in progress, along with the best shot i could get of it now that it's finished.This was a somewhat challenging build, but was also a lot of fun. Thanks for checking it out!

-
"General Ferrari" Charger/Enzo hybrid
Crazybuilder replied to Crazybuilder's topic in WIP: Model Cars
thank you! And yes, I will go with the function of the vents being to cool the rear brakes. I added the vents purely for style and to provide the car with a more noticeable Ferrari-ish style that I believe would be partially lost without the vents. -
"General Ferrari" Charger/Enzo hybrid
Crazybuilder replied to Crazybuilder's topic in WIP: Model Cars
I get what you're saying about the vents, that thought crossed my mind too, but it never was meant for function, only style. We will say it cools the rear brakes lol. -
For this build i decided to combine a General Lee Dodge charger kit and a Ferrari Enzo kit i received partially-assembled from my friend. This is my sketch of what i would like have for my finished product. I'll be going for a patina, which i've never done before, and a lot of customizing and scratch building, such as poking the Ferrari engine up through the hood, kind of like a shaker hood, and attempting to put some vents just behind the doors. I started by fitting the originally rear-mounted Ferrari engine into the charger engine bay. i had to do a lot of cutting and shaving to make it sit the way i wanted it to, and had to lower it to poke out of the hood the perfect amount. I also used the wheels from the Ferrari, which forced me to create my own suspension, which turned out great, until i realized that, while i was test fitting the chassis, interior and body together to check the stance, i had the interior sitting too far forward the entire time, which messed with the stance. By the time i realized this, however, i had already glued the suspension to the chassis, and couldn't remove it to adjust the stance. my solution to this problem was to make some spacers to put in between the interior and the chassis, which raised the body off of the chassis a little bit as you can see in the close up picture above. i will have to accommodate for some gaps that this caused, but any other solutions i could think of only caused more problems. This issue could have been avoided if i had noticed where the correct position for the interior was, but I like to think it was partially because of the quality of the kit. There aren't clear connection points as far as I've seen, so a lot of the gluing is basically just wherever the pieces make contact. The next step was to attempt to make some Ferrari style vents behind the doors. I cut holes in the side of the body and put some vent-like pieces from the Ferrari kit into them after I closed in the spaces and made the curved piece that connect to the body out of styrene. I then filled in the gaps with some putty and smoothed it out. The vents are a more basic shape than the Ferrari style i was thinking of, but if i wanted to make it the way i originally imagined i would have had to flare the rear fenders, which i don't think would be worth my time since just doing the way i did took quite a long time in itself. By making the vents go inwards into the car, they interfered with putting the interior in. I decided to cut some holes into the side of the interior to make it fit, and cover the holes by making a "backseat cover" type of thing, which also helps to give the interior a Ferrari-like look, and made it a two-seater. I then put a curved piece that connects to the center console onto the cover, to once again give a super car style. I still have one problem with this that i haven't solved yet. I covered the holes in the interior on the sides, but there is still a gap between the body and interior in the corners by the windows that has to be there in order to make the interior fit because of the vents. The only option i can think of is to somehow cover the gaps by attaching a piece to the inside of the body, above the vents instead of attaching it to the interior piece, but i'm open to any other ideas or suggestions. I also combined the dashboard of the Ferrari with the Charger's. I used the outside of the Charger's dash for it to fit into the interior piece, and with some cutting, gluing and gap filling, combined the Ferrari dash right into it. I had to scratch build the piece that connects to the center console as well, because the original piece that was there was accidentally cut too short when i was fitting the dash. That's all i have done so far, but i will soon be replacing part of the rear bumper with part of the Ferrari's, and probably dealing with other unforeseen problems. A lot of customizing = a lot of issues.