Lencor
-
Posts
19 -
Joined
-
Last visited
Lencor's Achievements
MCM Member (2/6)
-
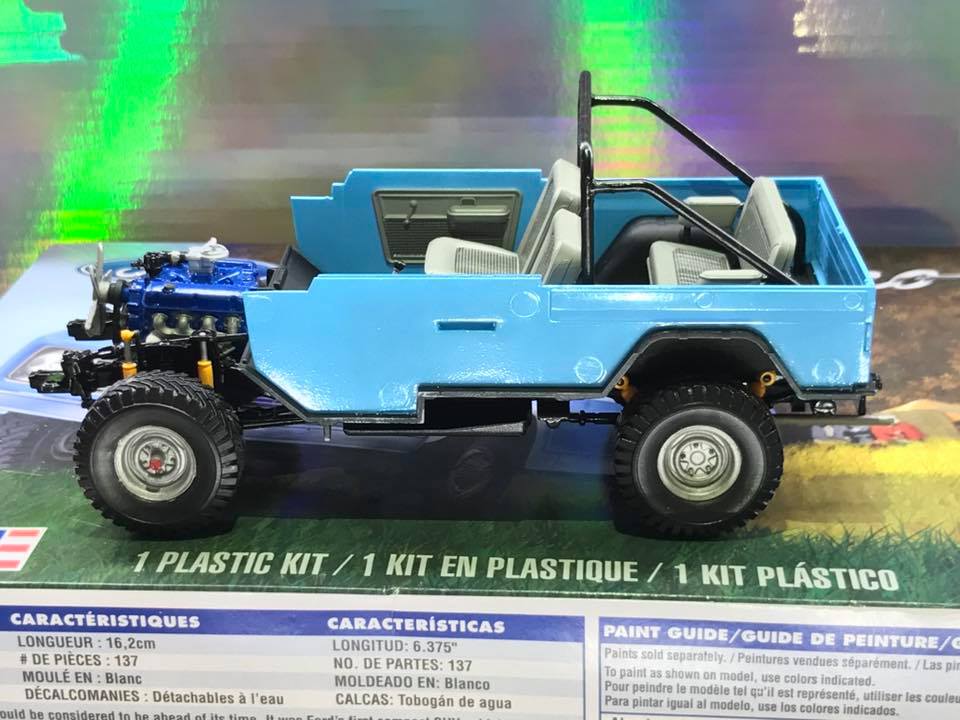
Revell 1:25 Early Bronco
Lencor replied to Lencor's topic in WIP: Model Trucks: Pickups, Vans, SUVs, Light Commercial
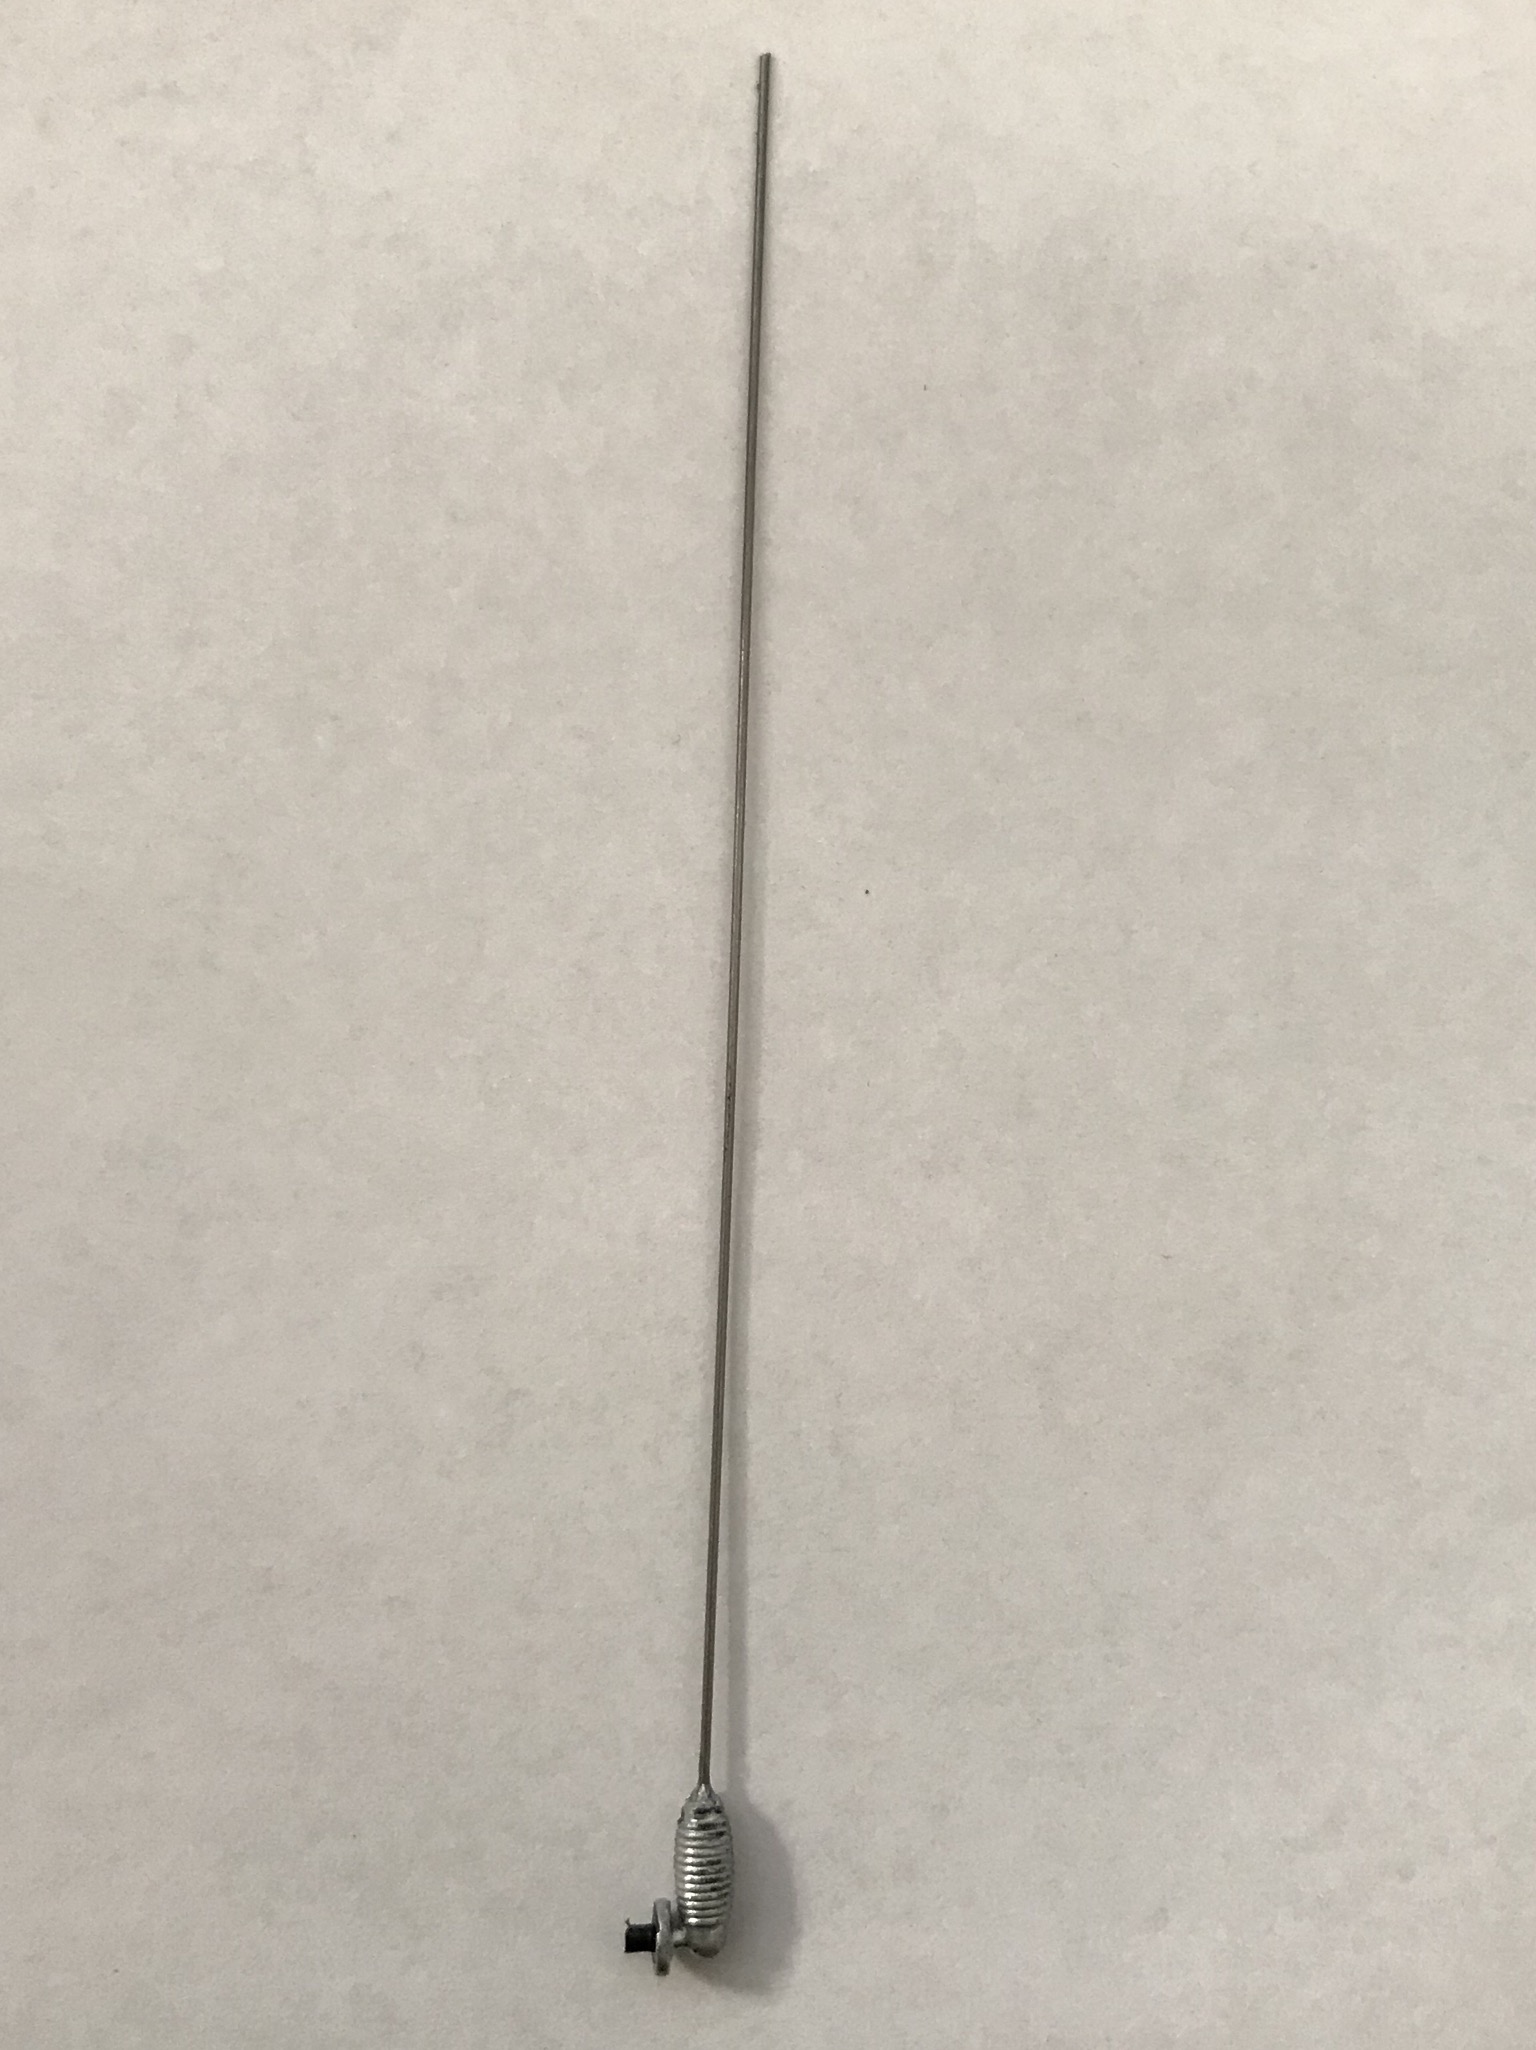
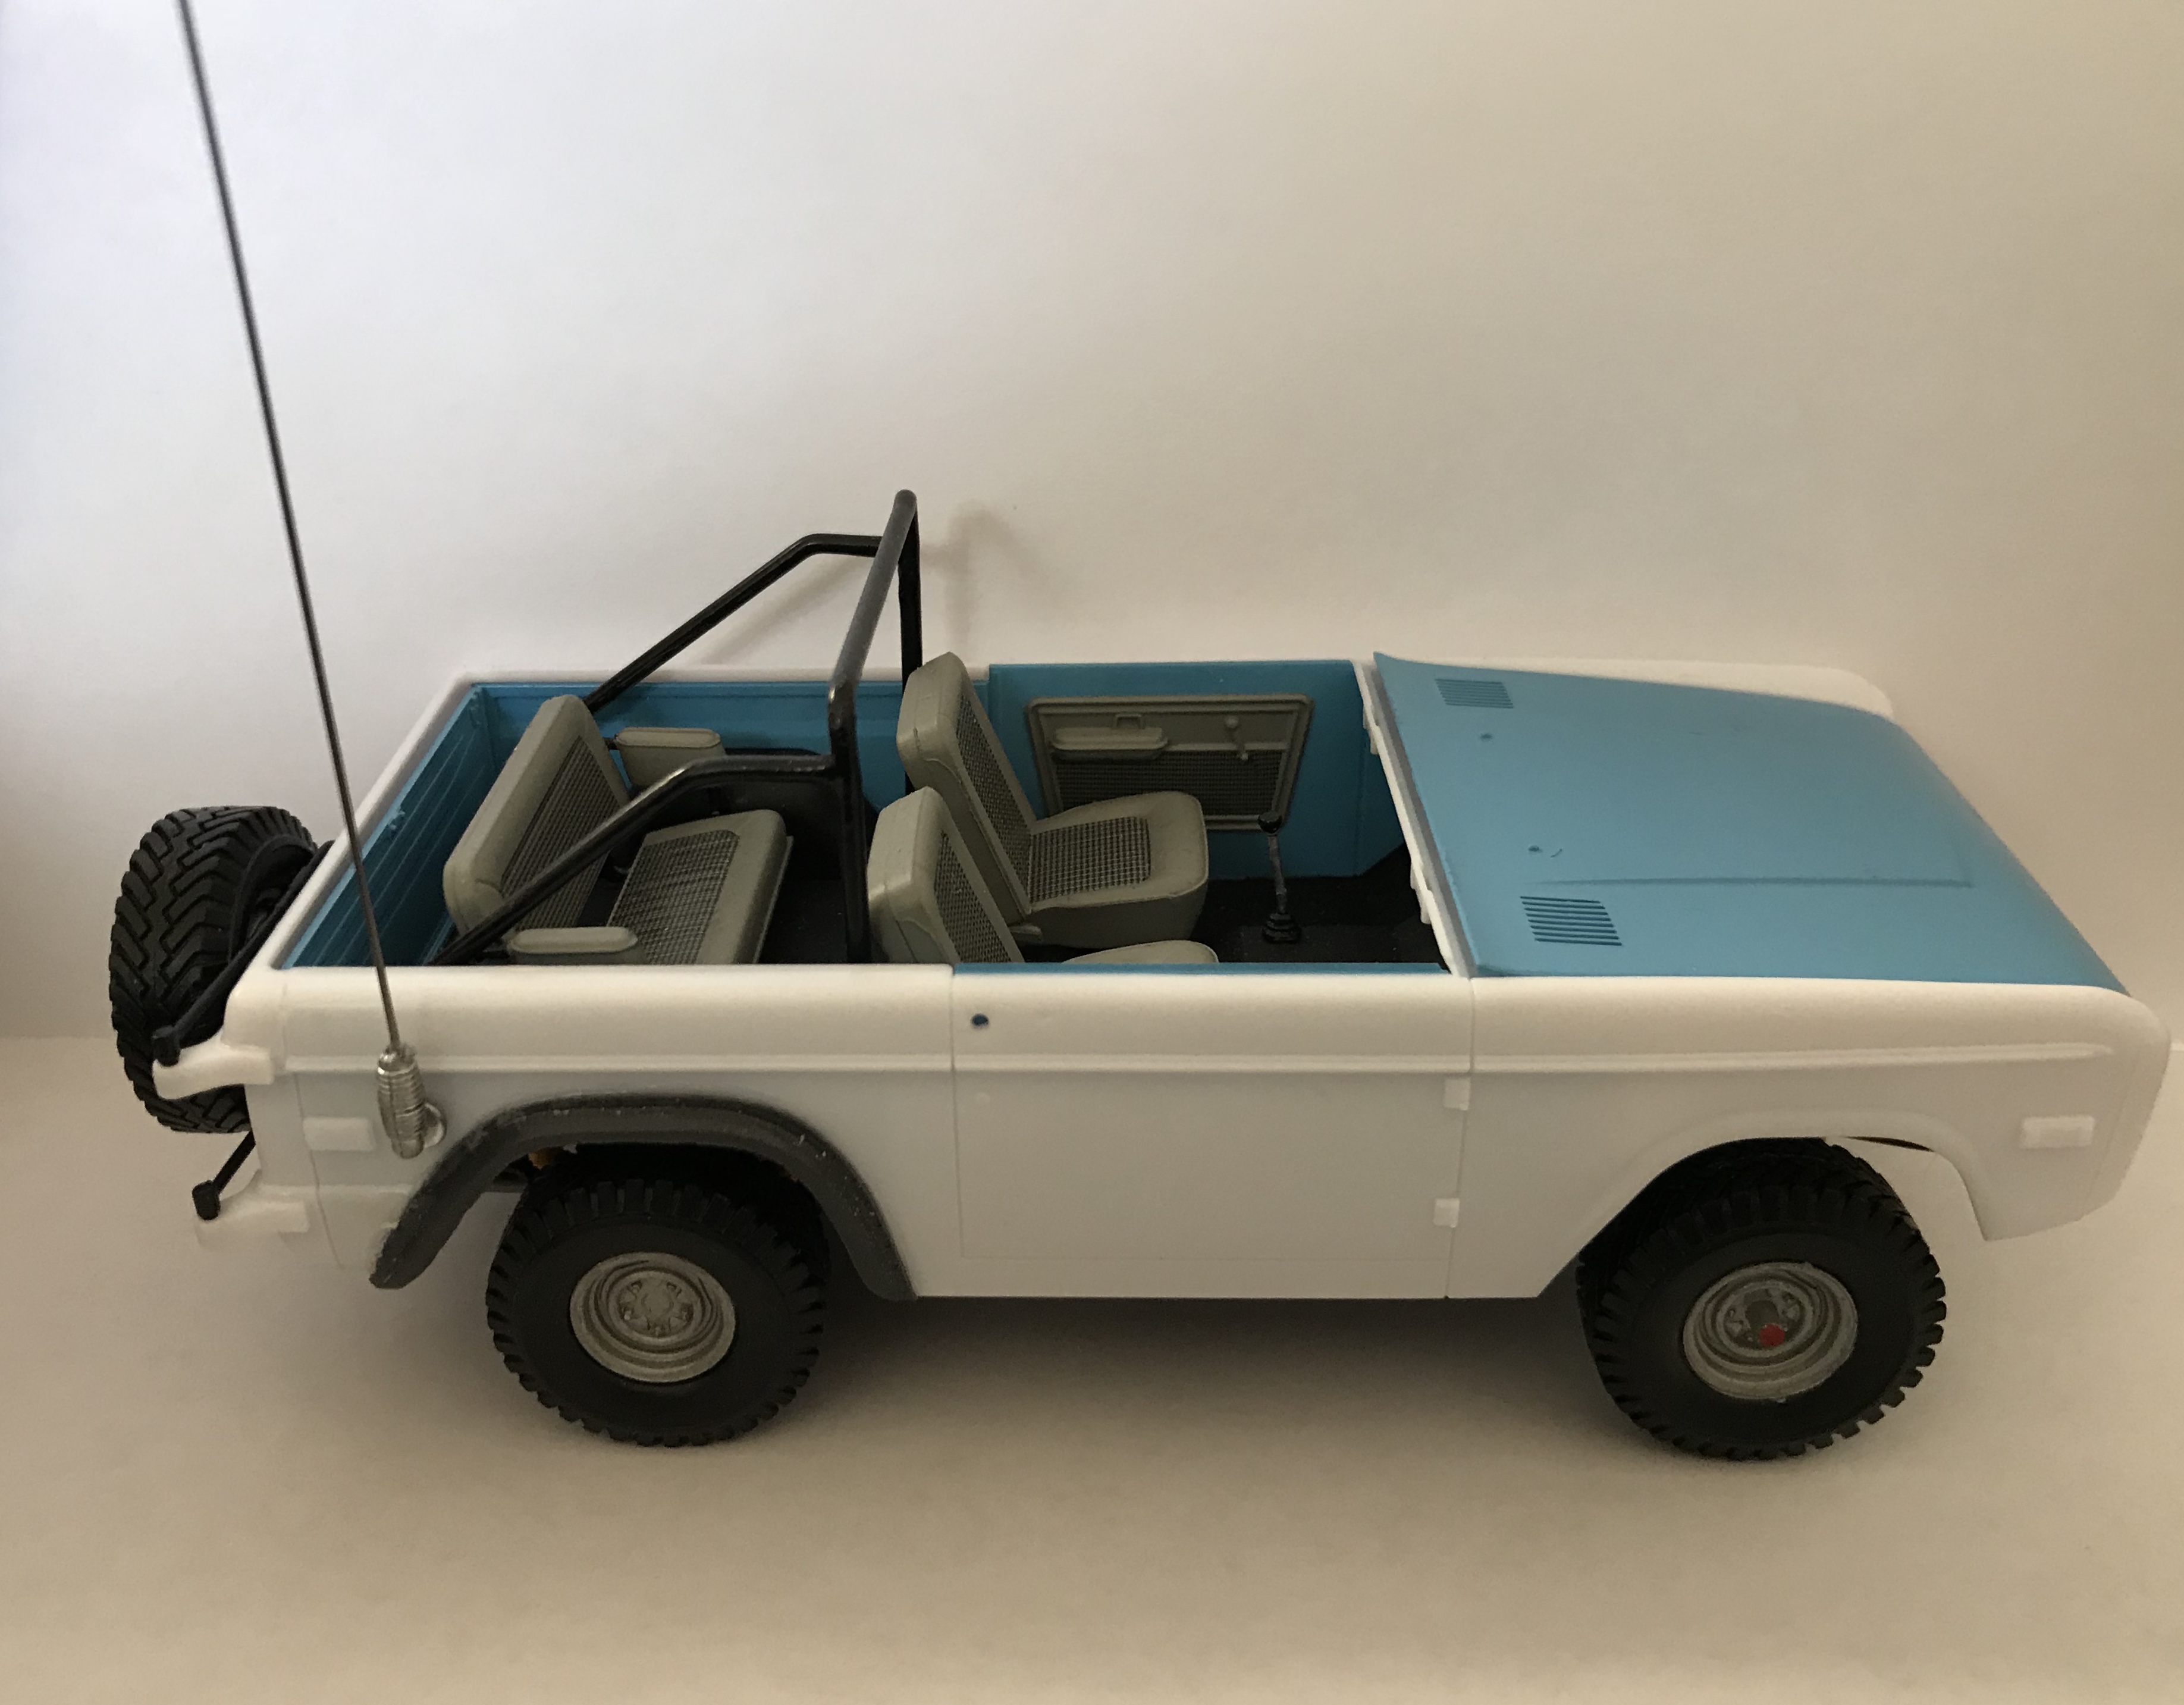
Haven’t posted in a while, I’ve been busy with other projects. Got to this a little today, in the ongoing build to make it stand out a little I decided to put on a classic CB antenna. My fathers Bronco had one so I thought it seemed like a good idea. I bought the ball & spring part from Policecarmodels.com and painted it silver, I then bought .025 music wire from Hobby Lobby. I created a small hole in the ball/spring part by heating up the end of the wire and sticking it in the top of the ball/spring, I then used a small amount of epoxy to set it. I then found an online scale conversion calculator so I can figure how long it needs to be, the equivalent to a 102 inch CB antenna.
-
Revell 1:25 Early Bronco
Lencor replied to Lencor's topic in WIP: Model Trucks: Pickups, Vans, SUVs, Light Commercial
Well I did it??, installed the fenders ????. Now I can move on to finally painting the body.
-
Awesome roll cage!!, wanna build me one to?, lol
-
Revell 1:25 Early Bronco
Lencor replied to Lencor's topic in WIP: Model Trucks: Pickups, Vans, SUVs, Light Commercial
I don't have a Dremel, I just used my basic Xacto knife and cut away the fender but sounds like it would have been easier. -
Revell 1:25 Early Bronco
Lencor replied to Lencor's topic in WIP: Model Trucks: Pickups, Vans, SUVs, Light Commercial
Well the drivers side rear fender is on. I took a long time looking at other model broncos as well as actual broncos to get it in the position that looks the closest to the real thing. After gluing it on then came the painstaking part of cutting out the fender, all I keep thinking was "man I hope I don't screw this up or cut myself". Now for the other side.
-
Revell 1:25 Early Bronco
Lencor replied to Lencor's topic in WIP: Model Trucks: Pickups, Vans, SUVs, Light Commercial
Finally got the front bumper finished after not working on it for a week, used Fireball Modelworks off-road lights. Took a little creativity engineering to get the lights in the perfect position to be glued.
-
Revell 1:25 Early Bronco
Lencor replied to Lencor's topic in WIP: Model Trucks: Pickups, Vans, SUVs, Light Commercial
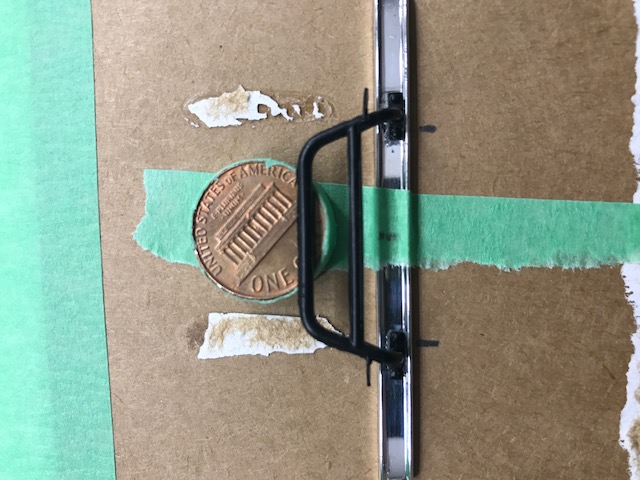
Finally got the push bar to adhere to the bumper using super glue this time. Then had to use a liquid chrome pen to fill in where the chrome plating came off. Then added Fireball Modelworks off-road lights to push bar for personal preference, this isn't complete yet, gonna add two more lights to the top of the bush bar then the KC Hilites decals to the light covers.
-
Thank you guys, it worked pretty good.
-
Trying to attach a cactus smasher push bar on my Revell early Bronco I've run into some problems. I first tried regular model glue, that failed, then tried epoxy but must have got the mixture wrong cause it failed, now I'm trying regular super glue. So in all of this my chrome bumper has now missing chrome around where it's been glued twice before and the super glue is turning the area around the joint white. SO, how do I fix it so it at least looks somewhat decent?
-
Revell 1:25 Early Bronco
Lencor replied to Lencor's topic in WIP: Model Trucks: Pickups, Vans, SUVs, Light Commercial
Worked on the Bronco a little today. 1. Finished the front windshield 2. Finished the dash, did make a mistake painting it. Where the steering column enters the dash is supposed to be semi gloss black but the directions don't point this out, it wasn't till I finished the dash did I realize it. 3. Adding another personal touch to the front bumper by adding a "cactus smasher" push bar from Fireball Modelworks.
-
Revell 1:25 Early Bronco
Lencor replied to Lencor's topic in WIP: Model Trucks: Pickups, Vans, SUVs, Light Commercial
I'm currently researching whats the best adhesive to use for windows. -
Revell 1:25 Early Bronco
Lencor replied to Lencor's topic in WIP: Model Trucks: Pickups, Vans, SUVs, Light Commercial
More test fitting, didn't like the plastic spare tire that came with the kit so I ordered another wheel & tire and mounted that on the movable spare tire carrier, hood painted final color.
-
Revell 1:25 Early Bronco
Lencor replied to Lencor's topic in WIP: Model Trucks: Pickups, Vans, SUVs, Light Commercial
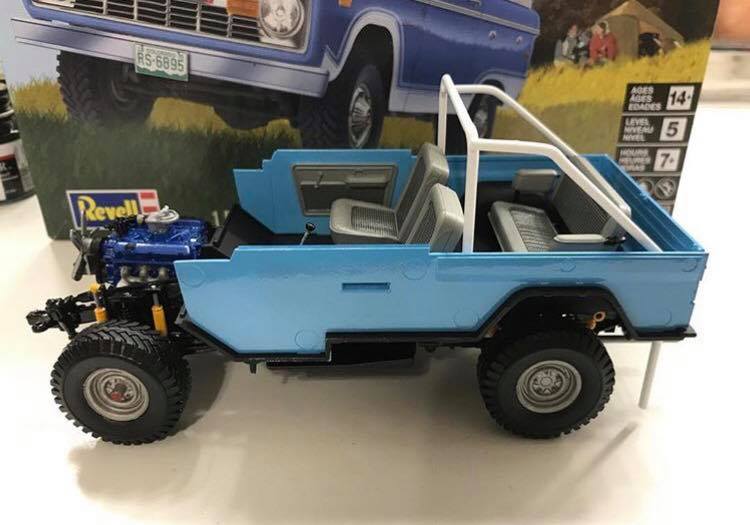
What else is there to do on a rainy day but do some work on the Bronco. So here's where I am now, custom fabricated roll bar is finished and looks pretty good for my first time fabricating anything for a model. It's not 100 percent perfect but close enough to the look I wanted.
-
Revell 1:25 Early Bronco
Lencor replied to Lencor's topic in WIP: Model Trucks: Pickups, Vans, SUVs, Light Commercial
Well, I'm still deciding on how to do the door windows, several options come to mind. 1st is the rolled up look which isn't my favorite, 2nd is leaving them out completely but then that isn't a true Bronco look (unless the doors are completely removed), 3rd and most likely is to cut out the window and just leave the window frame which is the closest to the original look of the Bronco with the top off. The 3rd option is going to be tough since I have no clue how to do it without breaking something. As for installation I'm gonna tape the windows to the top then glue the windshield frame to the side windows before installing the windshield frame to the body. -
Revell 1:25 Early Bronco
Lencor replied to Lencor's topic in WIP: Model Trucks: Pickups, Vans, SUVs, Light Commercial
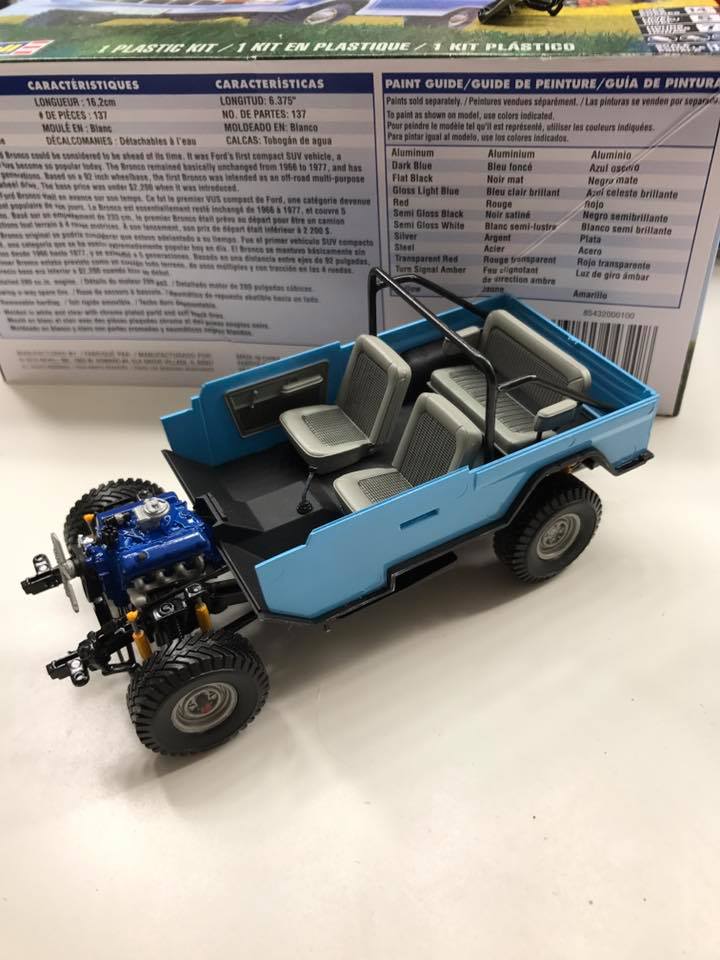
Finished the interior, went with more grayish color. I also didn't like the factory roll bar that came with it so I decided to fabricate one more to my liking (shown here being test fitted). That was a chore and a half plus going through a package of plastic rod just to get the roll bar somewhat close to what I envisioned.