Pico
-
Posts
441 -
Joined
-
Last visited
Content Type
Profiles
Forums
Events
Gallery
Everything posted by Pico
-
Time to shoot the fenders black. This much masking makes me nervous.

-
Nice work.
-
untilWe always have at least 500 car models and numerous vendors. For more information, including a printable flyer with host hotel info and online preregistration : http://www.acme-ipms.com/2018-acme-southern-nationals
-
You left out the gaskets.
-
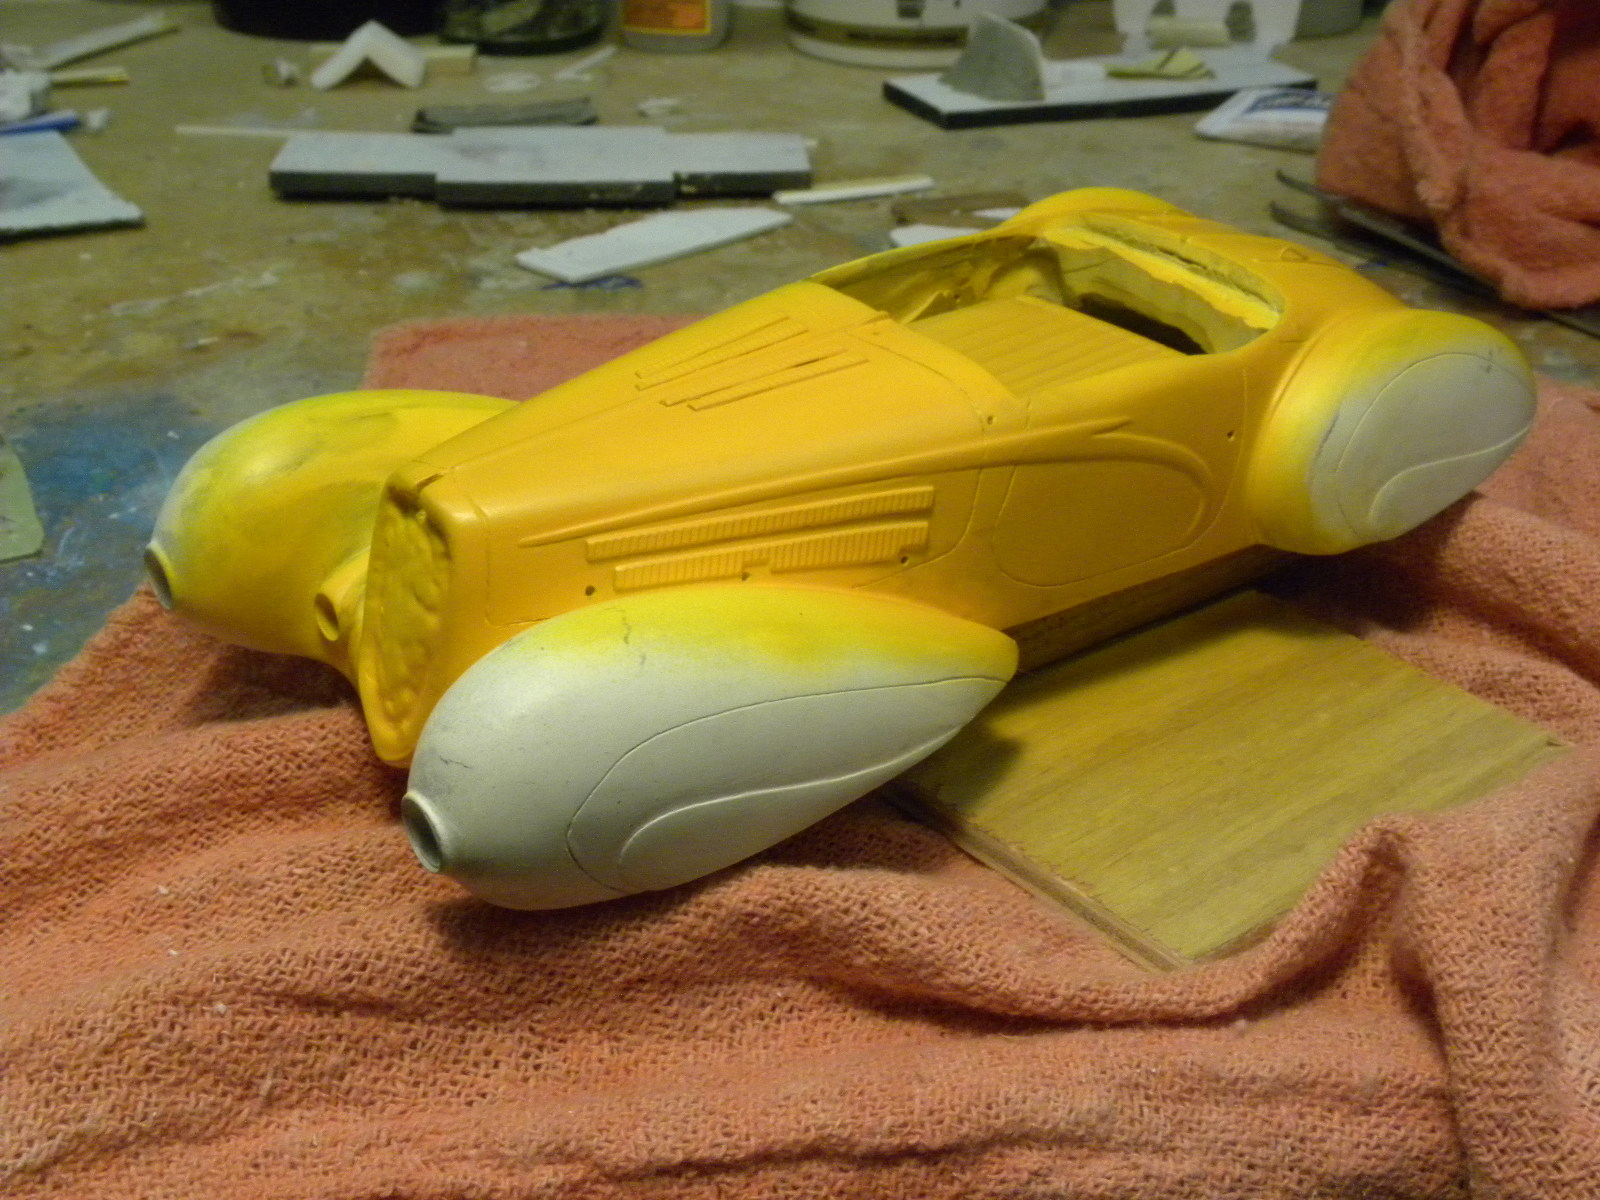
After several years work, off and on, but fairly concentrated since April, I beginning to feel I might be closing in on finishing this. Getting the color on is always a satisfying step. Gravity Color's Grabber Orange for the body, black for the fenders. Maybe a bit flashy but so is the car.
-
The template was taken from the two tone blue car.
-
Each of these cars are a bit different. The car I am modelling is a long wheel base car, because it "flows" better. The shorter wheelbase are tighter and fender shapes are different.
-
Bilingham has suggested using Cratex abrasives for the engine turning; which looks like a good idea: https://www.cratex.com/ .
-
After a several week break and massive workbench top cleaning, I'm at it again. Here carving the transmission hump from epoxy putty.
-
Ha! I am waiting to see how you engine turned the body.
-
Brass bumpers for strength.
-
I might be able to finish this thing some day...
-
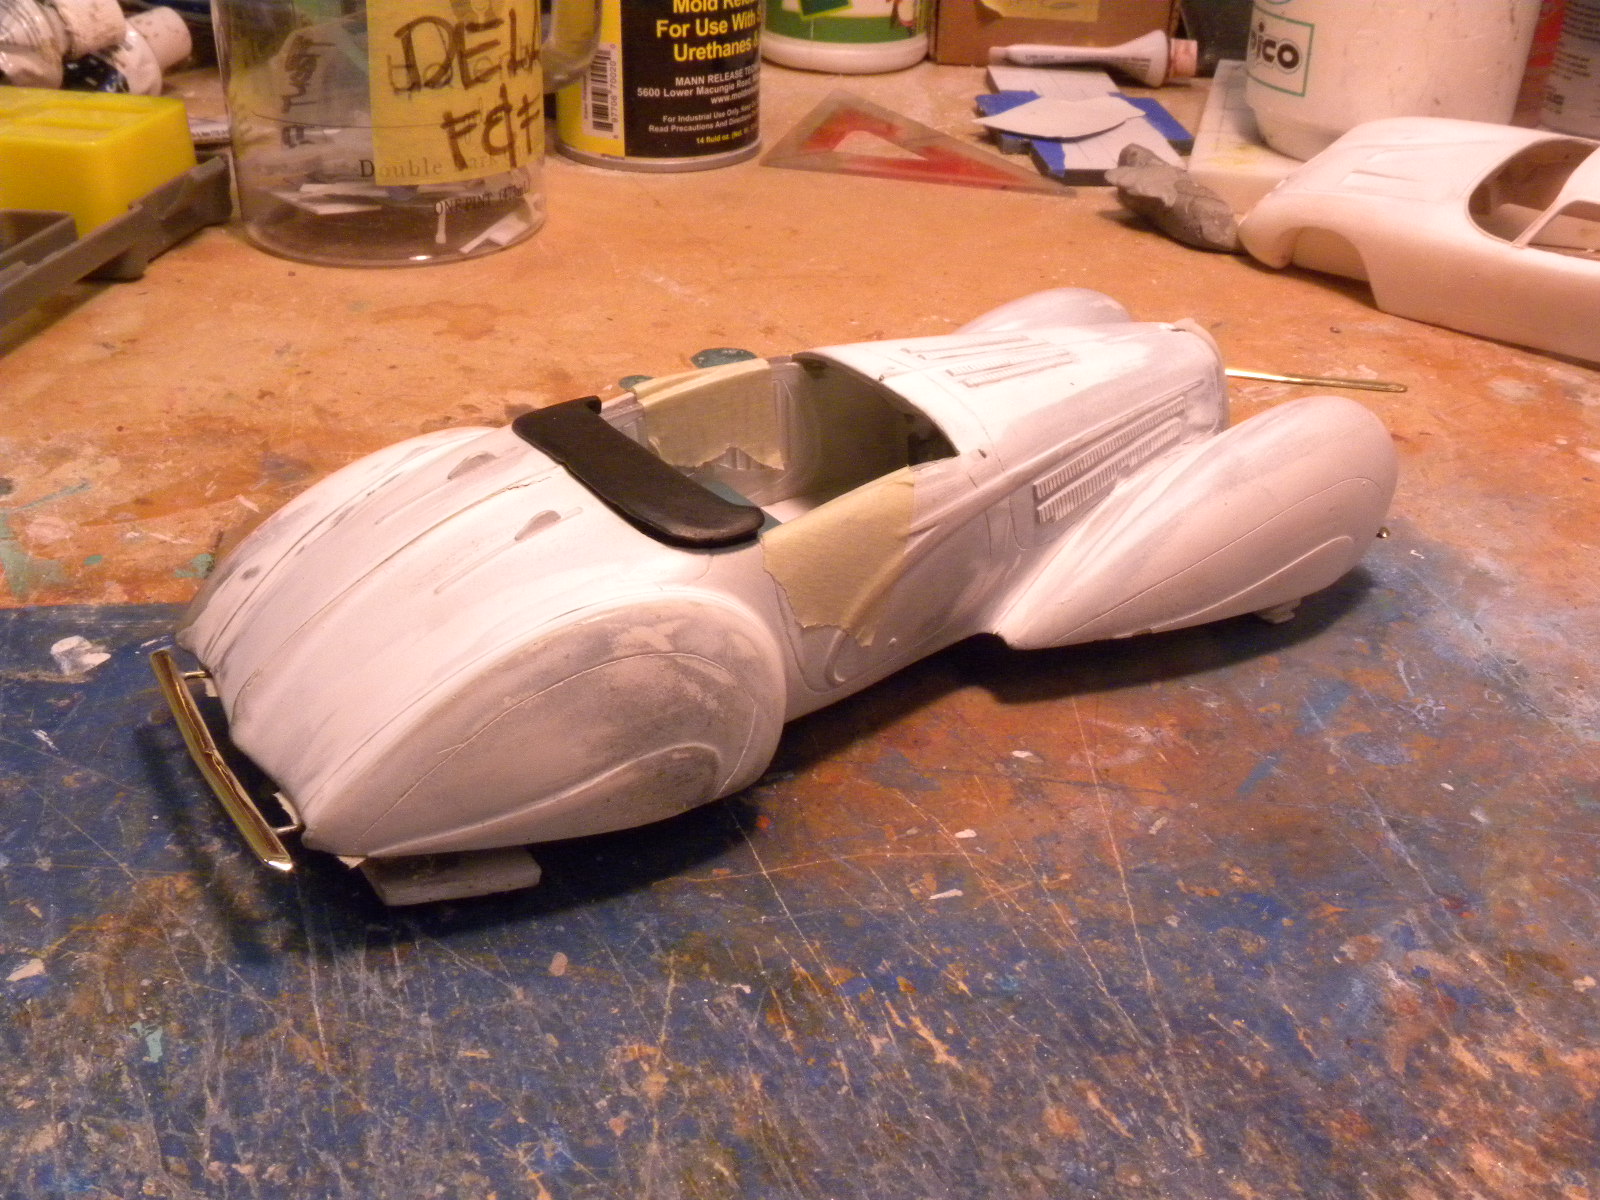
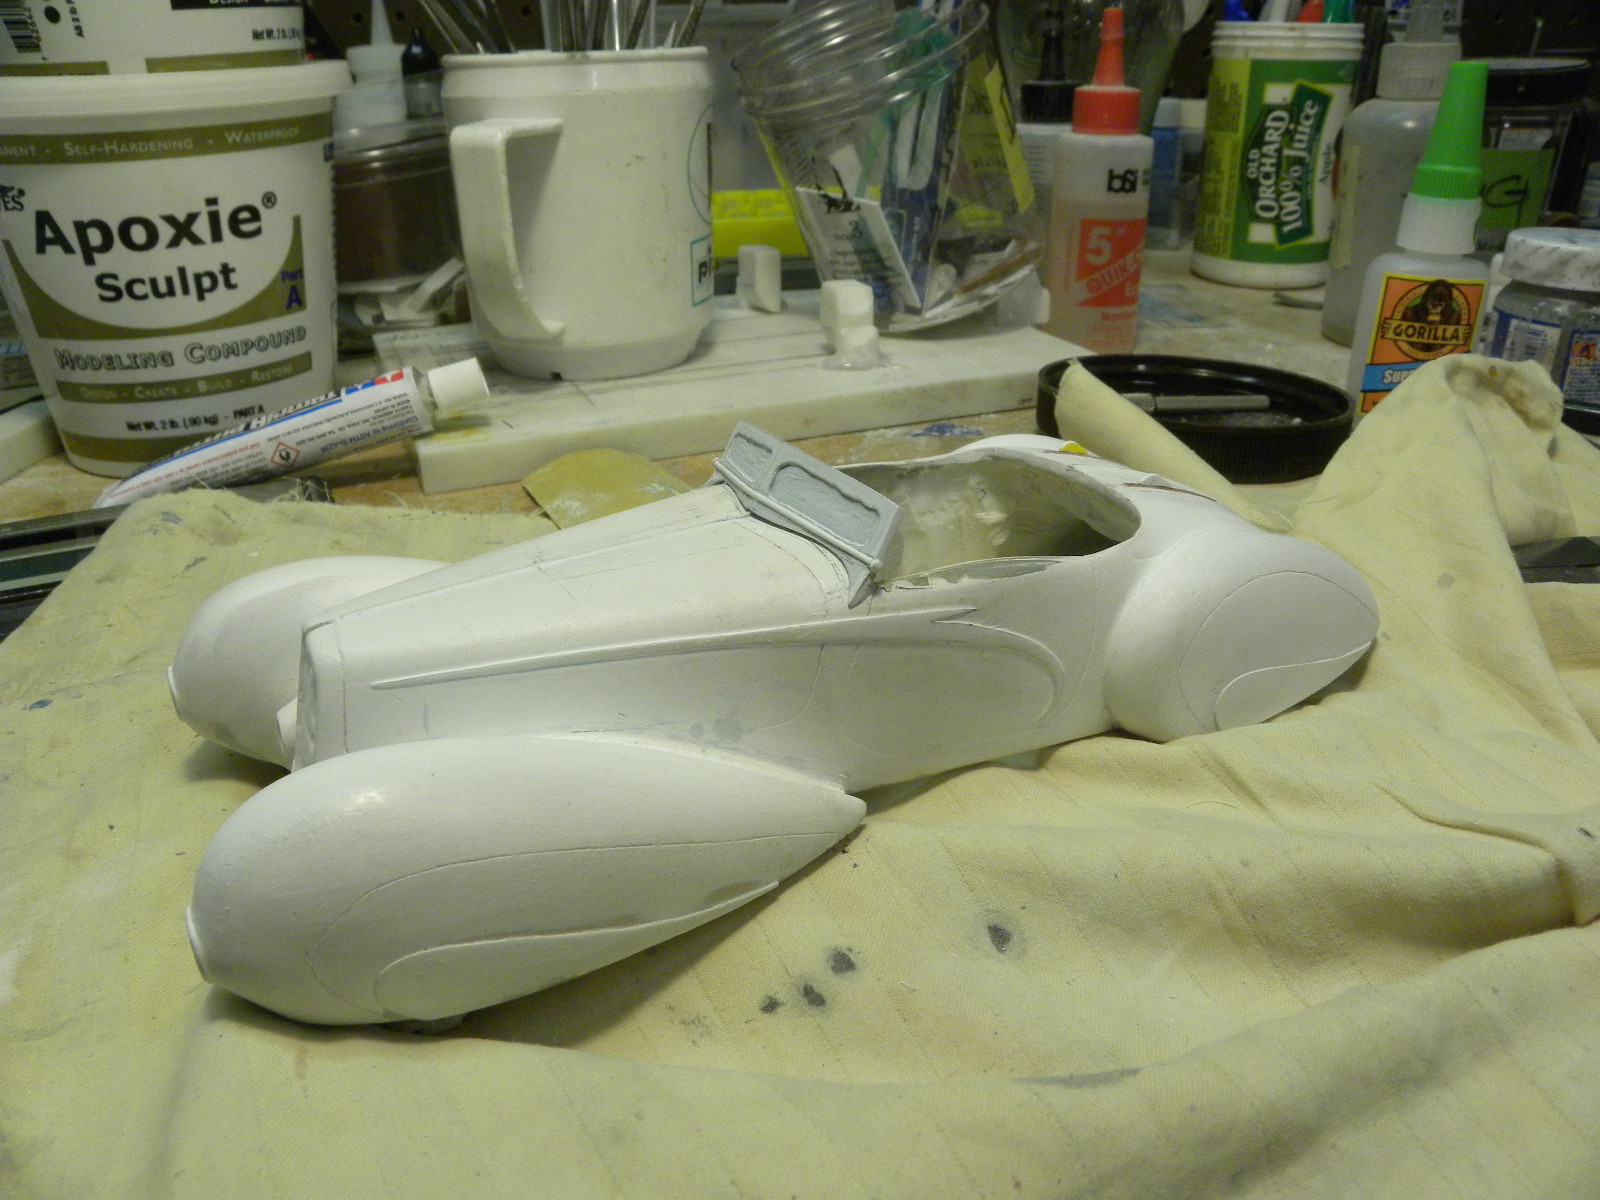
Work continues. I have put a wad of Ave's Apoxy on the model, let it set and am carving it to be a top cover. 3d printed seat and interior door panels are in place.
-
Building and using a centrifugal caster
Pico replied to Pico's topic in General Automotive Talk (Trucks and Cars)
You could but it's not necessary. Resin flows easily so you don't have to force it into the mold. The problem with molten metal in a non-spin cast mold is it cools quickly and may not fill the mold. In a spin caster the centrifugal force throws it into all parts of the mold. -
I have added a tutorial " Building and using a centrifugal caster" in the general section.
-
Building and using a centrifugal caster
Pico replied to Pico's topic in General Automotive Talk (Trucks and Cars)
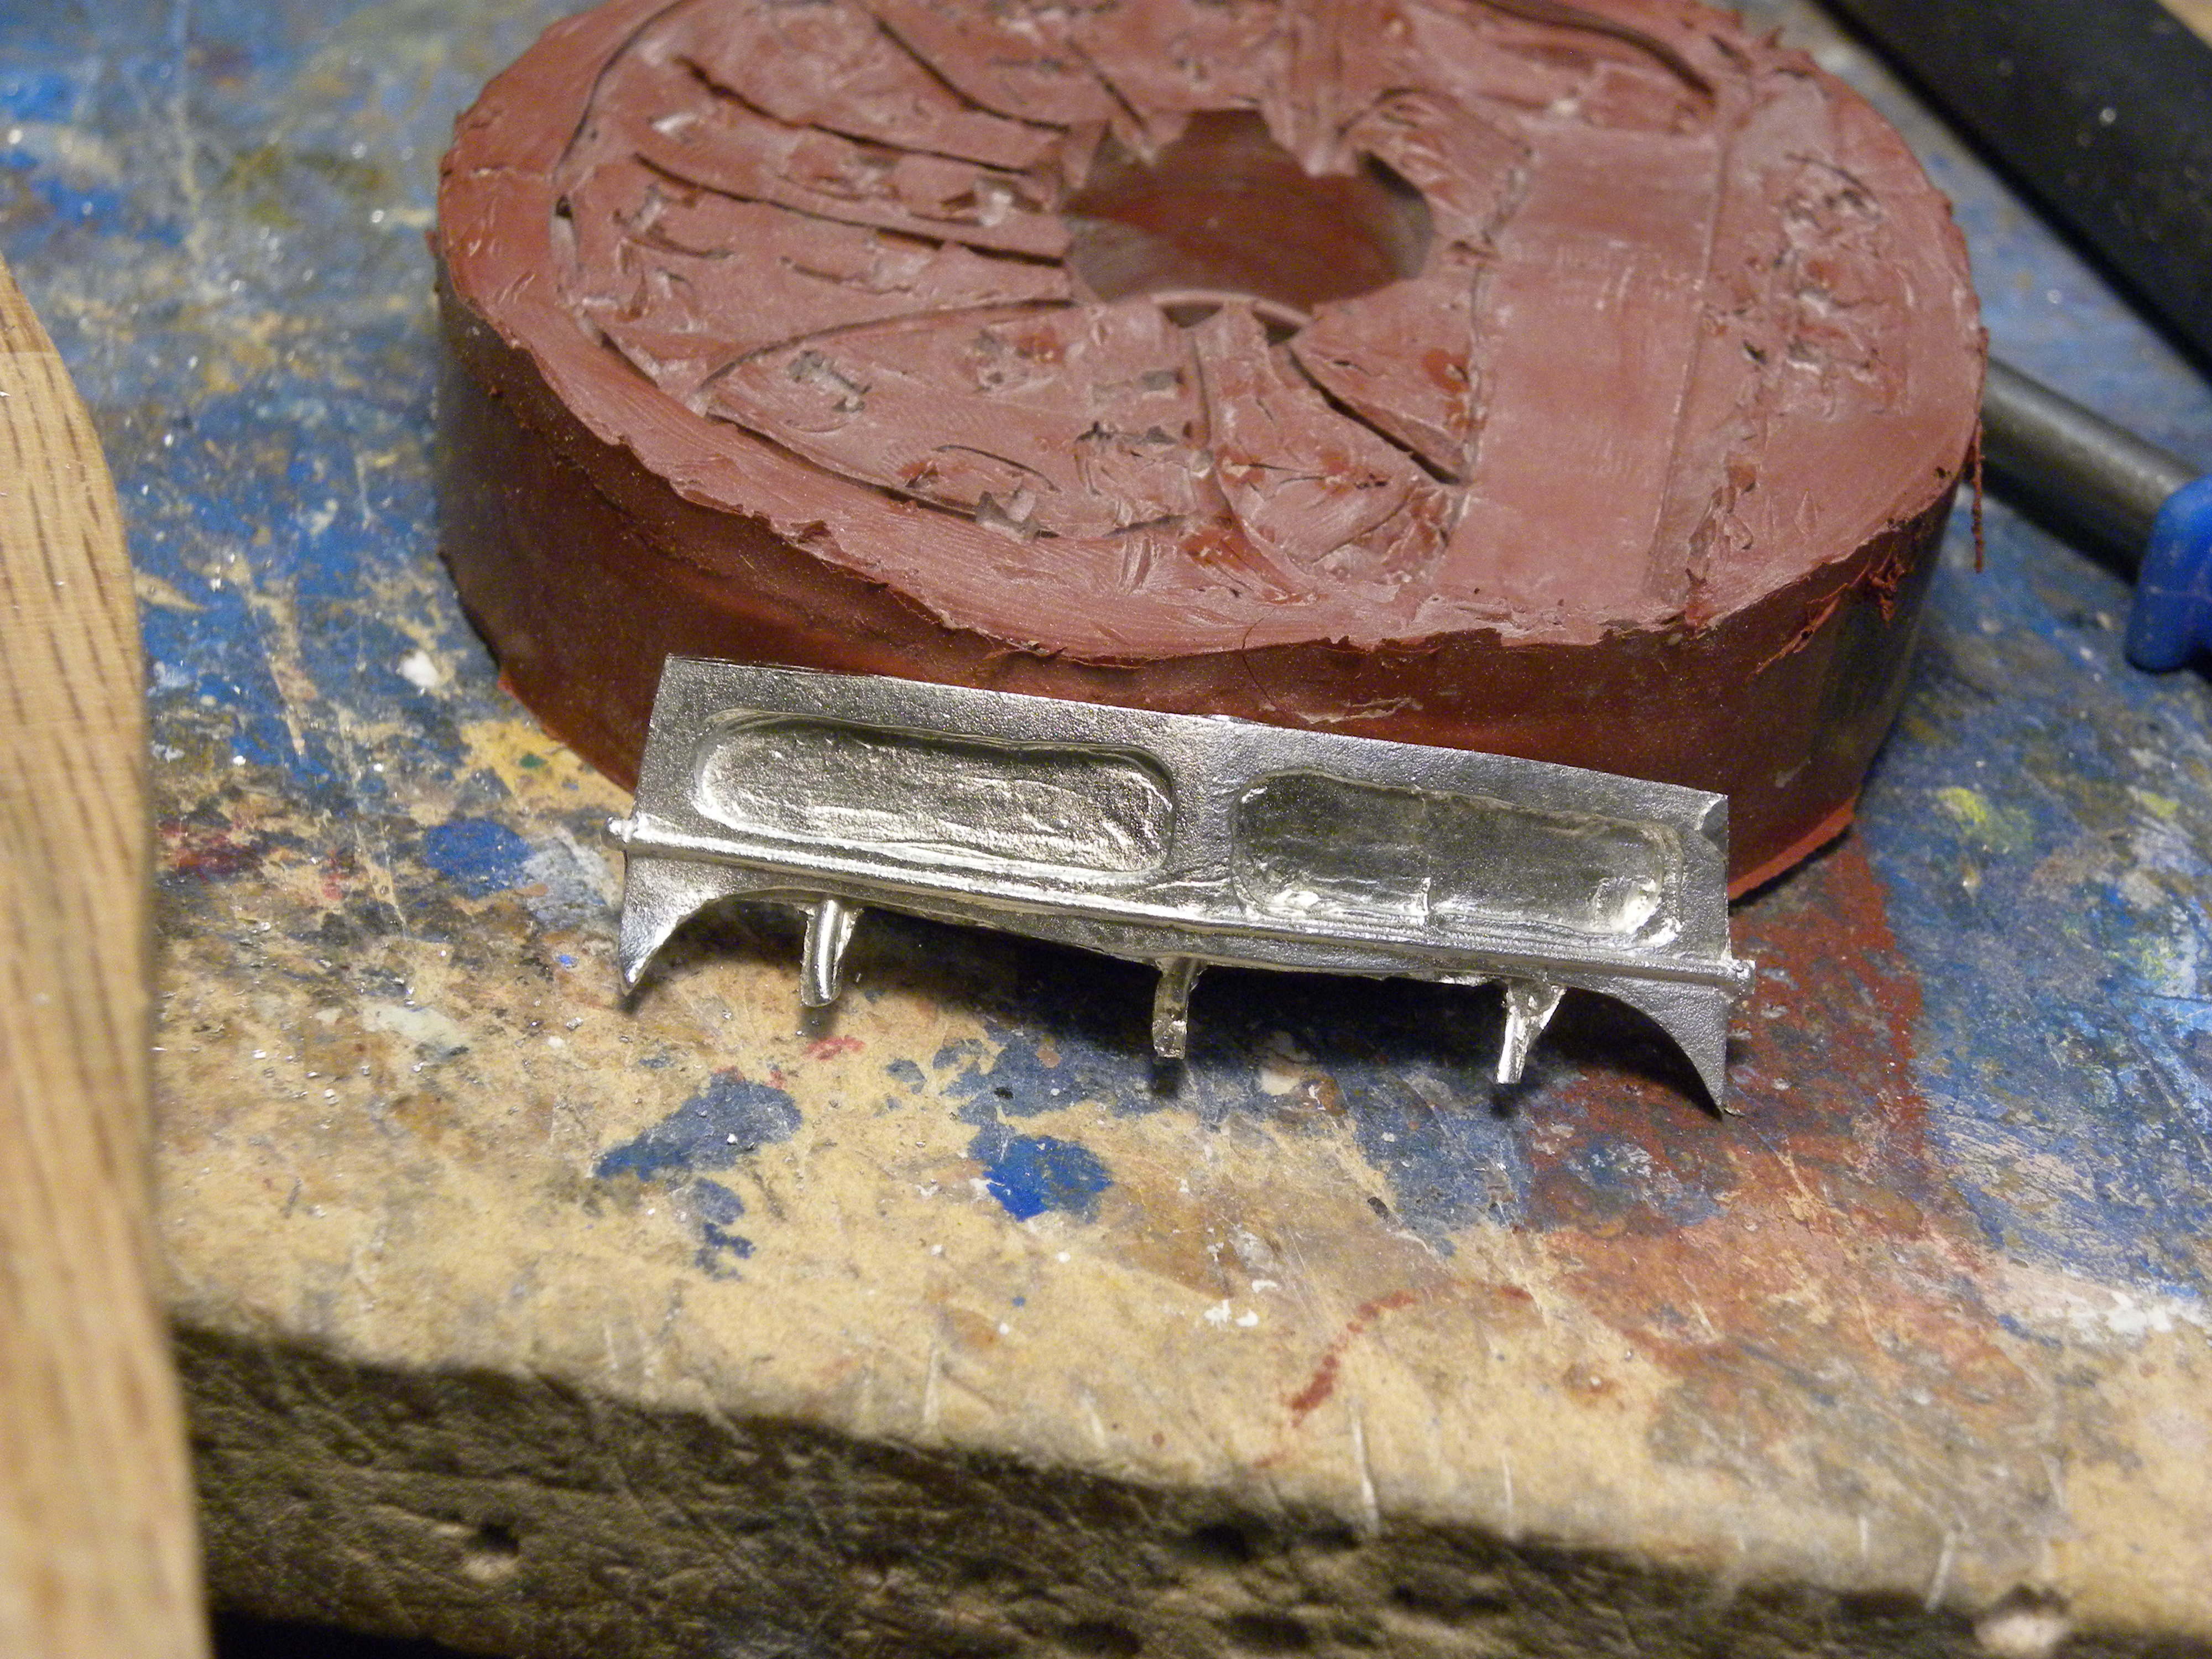
If you are casting smaller objects and don't want to use a large amount of Mold Max 60; make a plug of plaster of paris to fill the mold, then the two part rubber mold. Be certain the plaster of paris has set for several days and is dry before pouring in molten metal. The windshield is a success, I'll also use metal door handles on the outside of this model.
-
Building and using a centrifugal caster
Pico replied to Pico's topic in General Automotive Talk (Trucks and Cars)
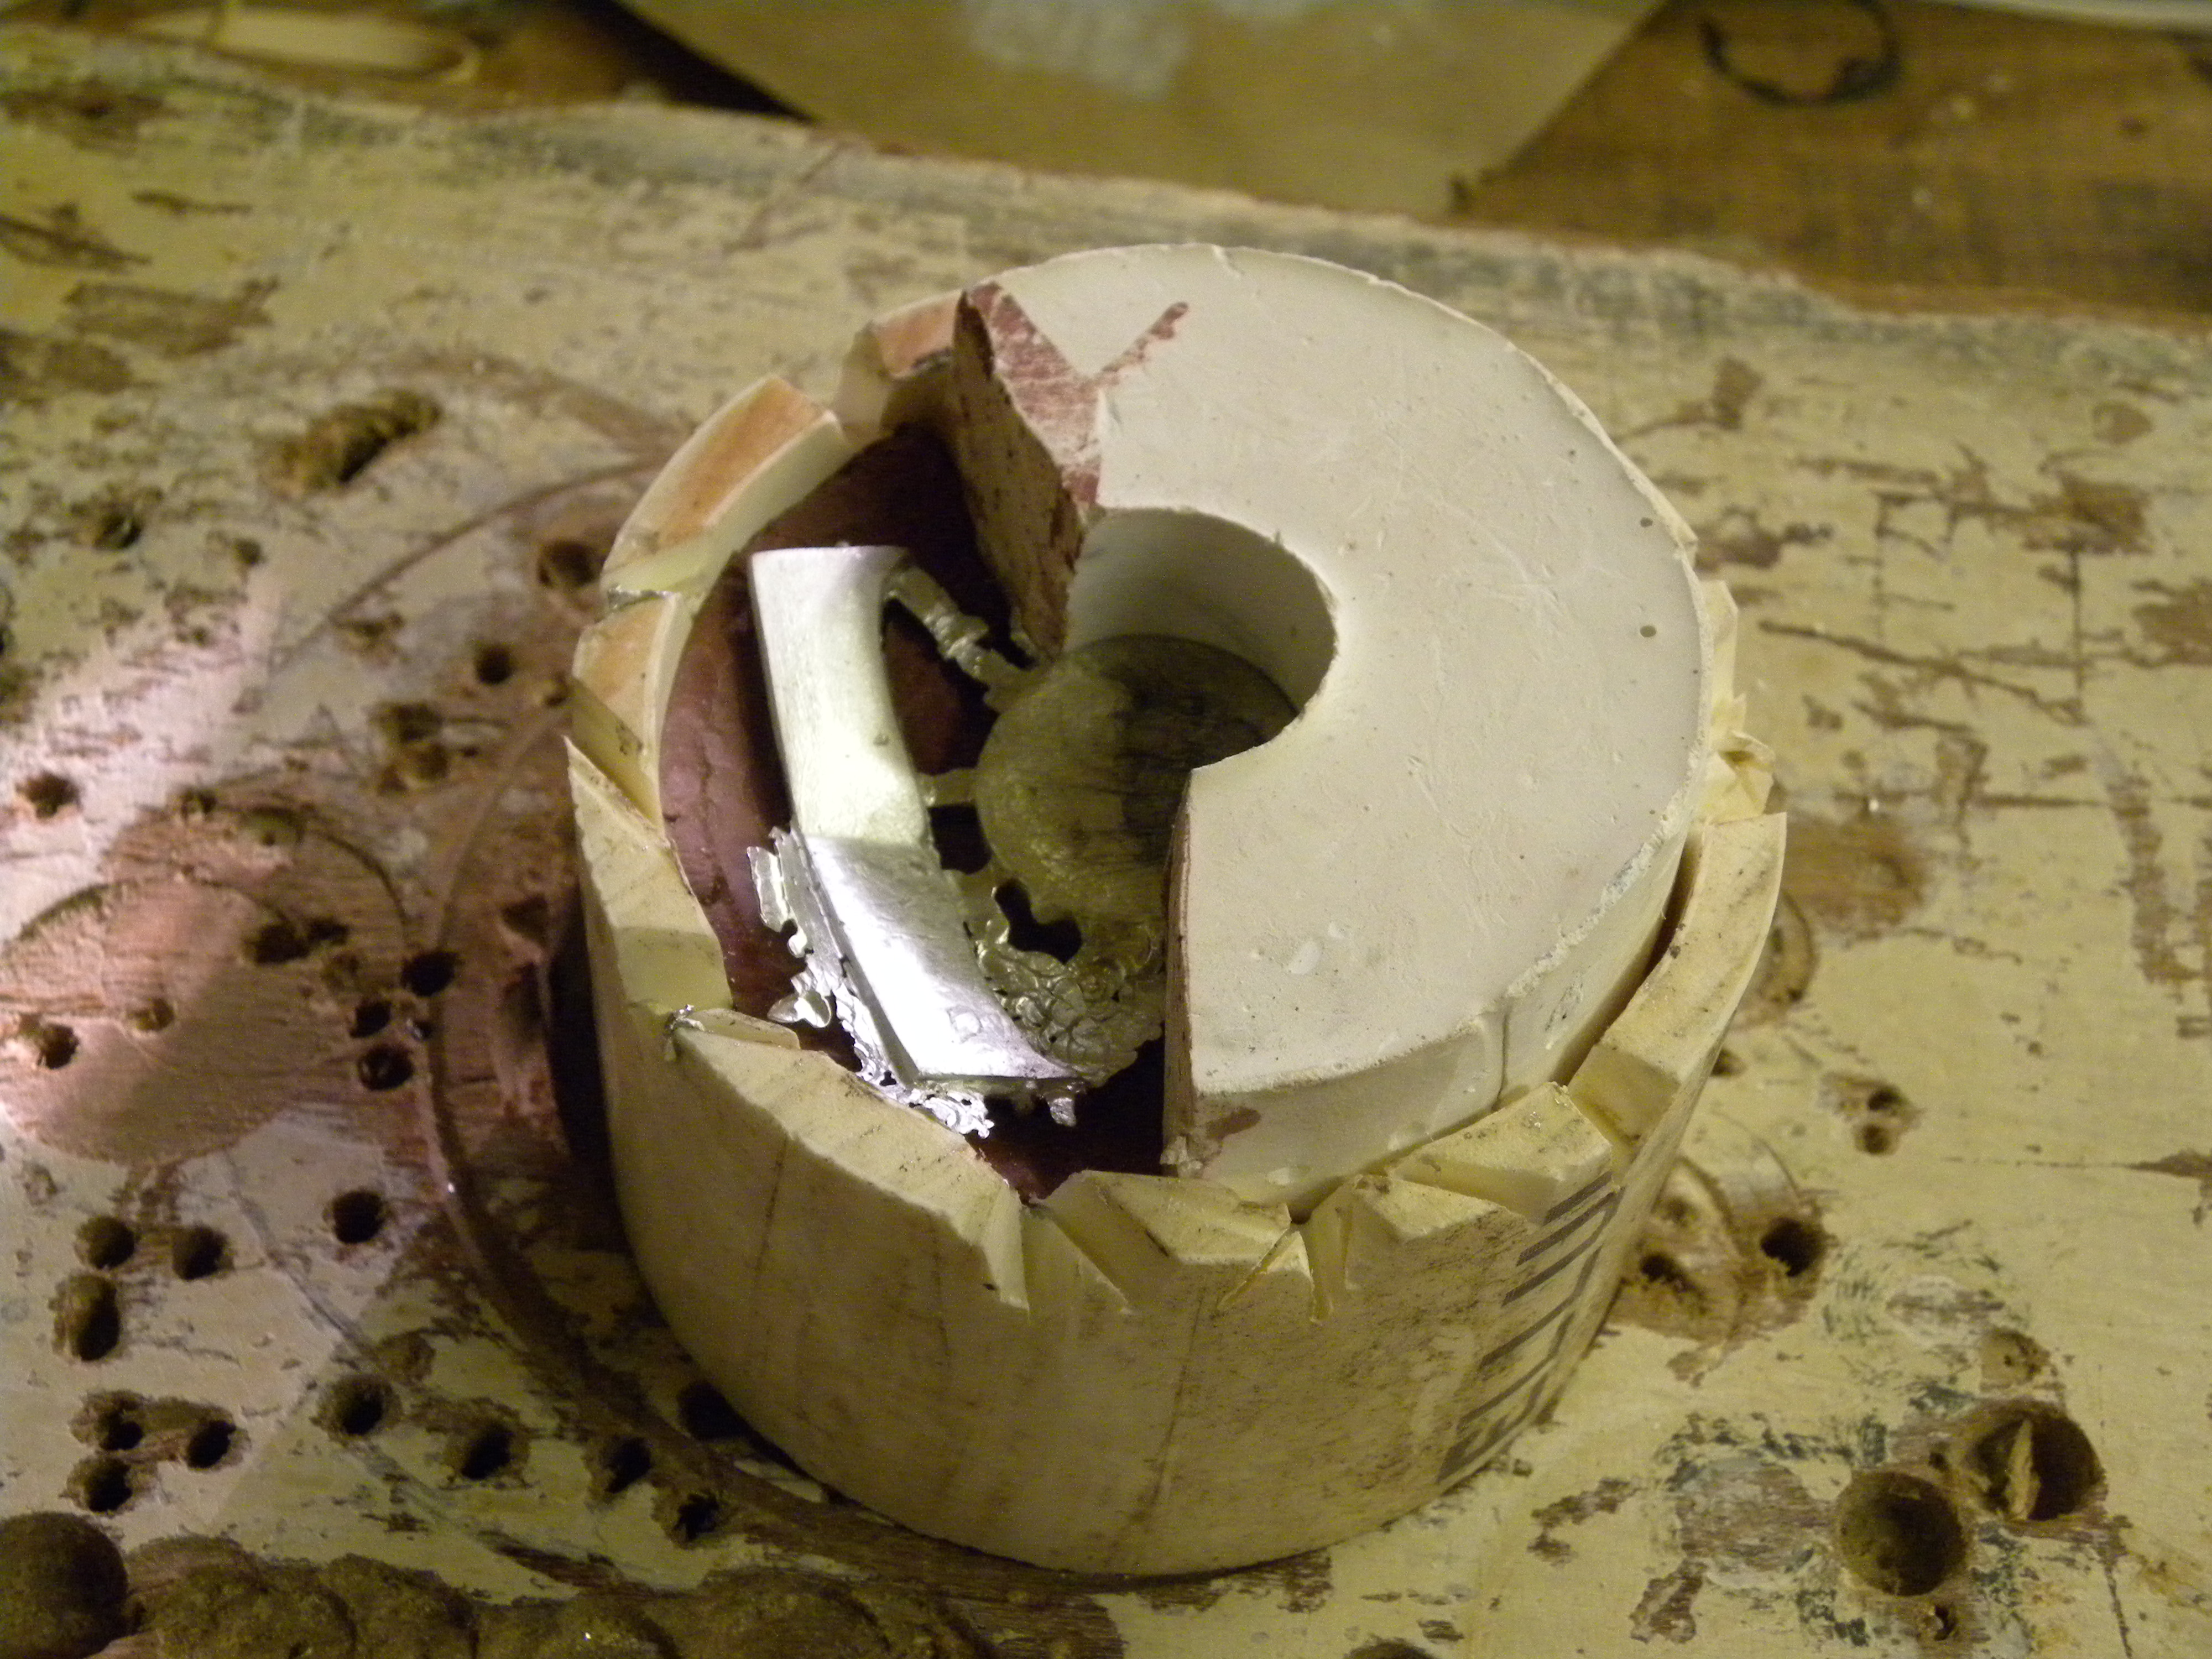
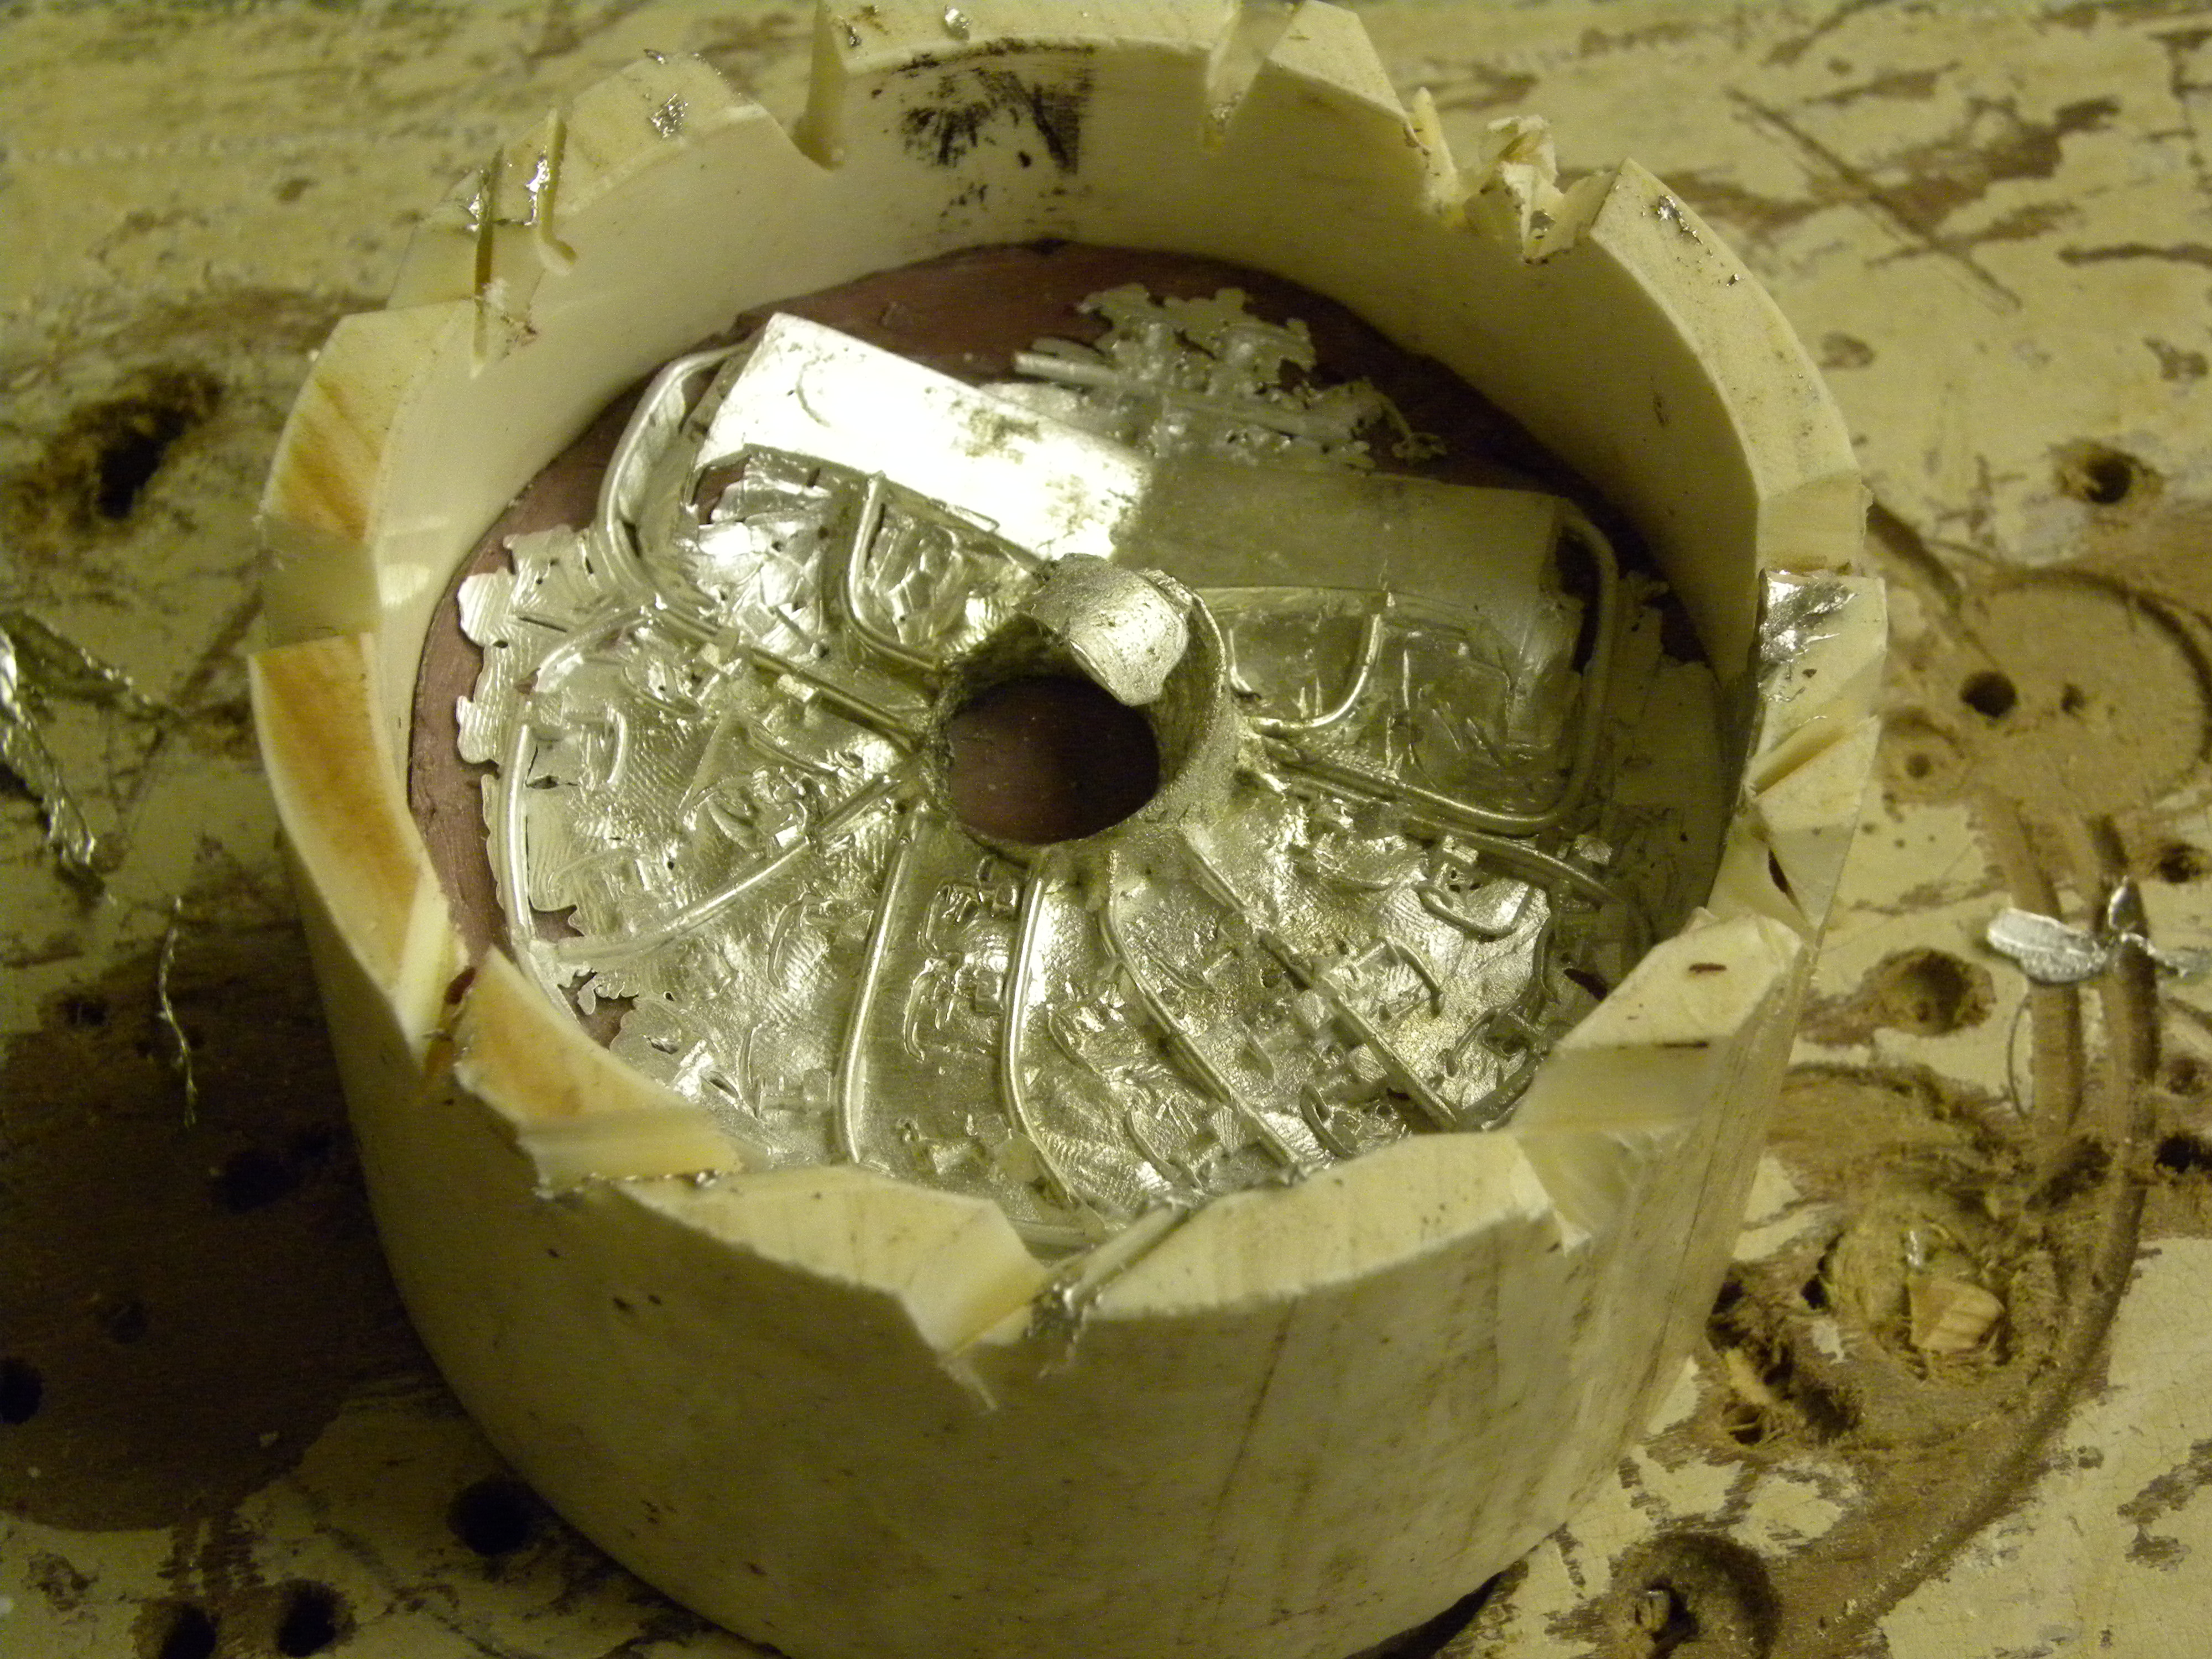
First photo: this is why you need a cover. I use lead free britannia metal, from ebay, I heat it in a ladle with a mapp gas torch to about 400 F, then carefully pour it in. Watch out with the standard safety precautions! The mold is a 3/16" under the cover so if you miss the hole some molten metal will be pitched out. Be careful and stand back! It cools fairly quickly but not fast enough if it's on you skin. This is the result of my first pour, which I think is a success.
-
Building and using a centrifugal caster
Pico replied to Pico's topic in General Automotive Talk (Trucks and Cars)
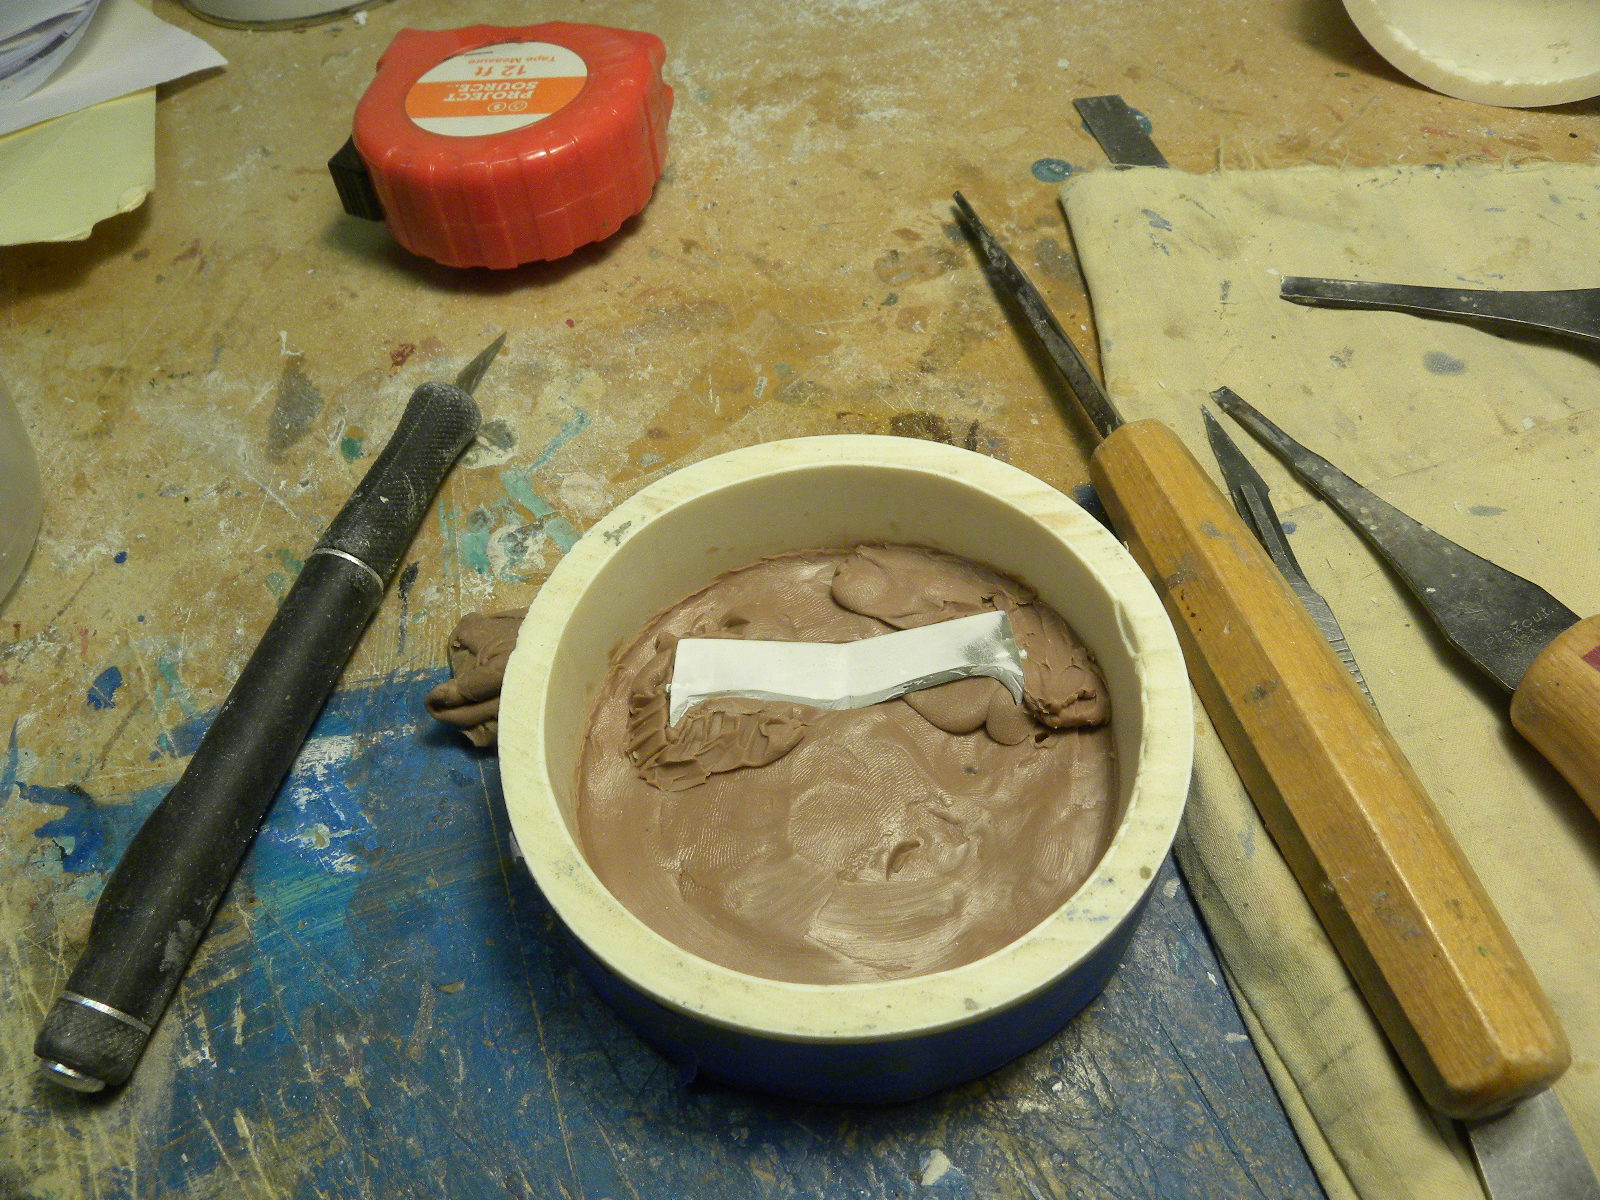
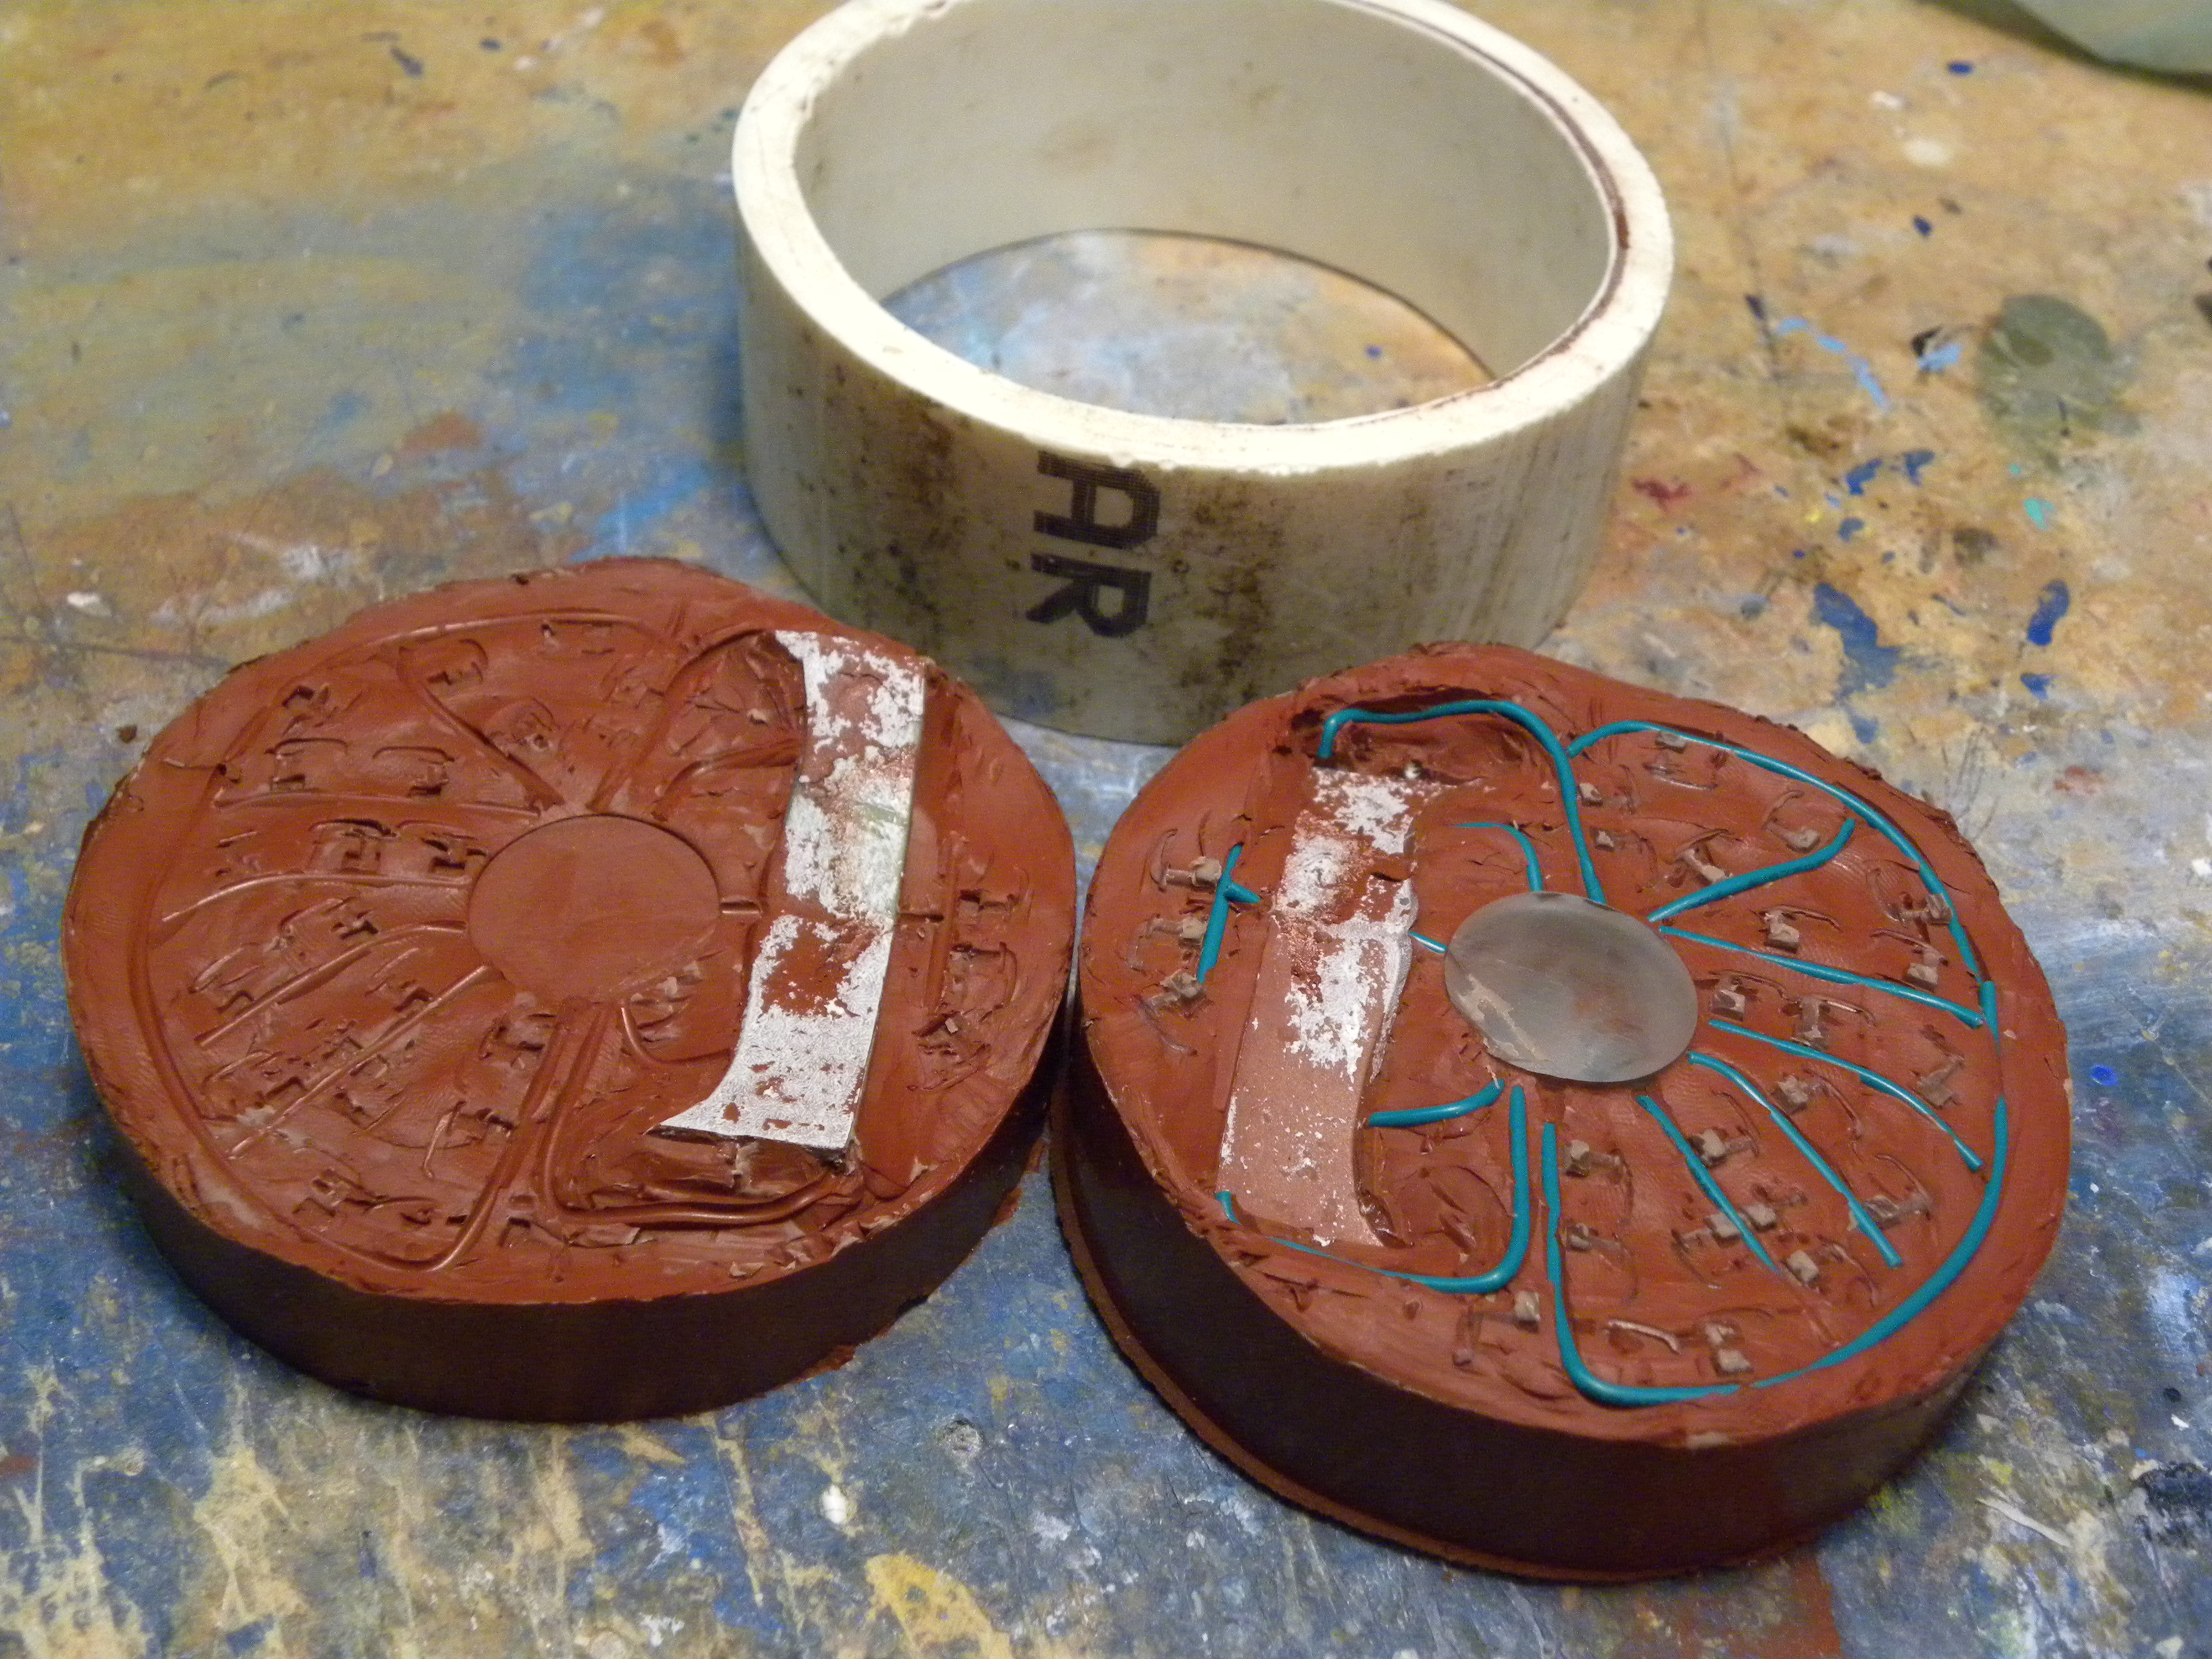
Next step, make the mold. Using another 3" pipe, fill halfway with clay. Then press the item to be cast into the clay. Build up underneath if the item is angled, like the windshield. In the center, place a conical shaped plug, that, when removed, will make the volume into which you will pour. Notice that the plug is wider at the bottom than at the top. This is because the molten metal will gather in the bottom and be thrown out through the sprues. If it is wider at the top, the molten metal will be thrown up and out the sides of the opening. If this happens, it will spoil your day. I have some 3d printed door handles to pour, also I've made sprue paths with electrical wire and impressed the handles into the clay. I use Smooth-on's Mold Max 60 as the molding material. It is a silicon rubber that will withstand heat up to 560 F. (284 C.). It's main drawback is the mix is 100 parts rubber to 3 parts hardener by weight. I got a small kitchen scale from Walmart for $20 that will weight down to 1 gram. It's necessary if you are casting small parts. It recommends a 24 hour cure but usually is faster than that. Carefully remove the clay, spray with mold release and cast the second half. Remove from the pipe and remove the items from the mold. Make certain the sprues are open to the items openings. Next I made a box to hold the fan and a cover with a center hole for it.
-
I've been thinking about this for a long time and finally decided on building a cheap and easy caster for white metal. I've cast in two piece molds but a centrifugal caster will force the molten metal into the mold so you get much finer detail. I decide to use a small fan ( $10 from Walmart) and make the mold from 3" plumbing waste pipe. Plywood bottom with a turned center to fit into the center of the fan. It will be held on by rubber bands.
-
I took photos of the centrifugal caster as I was making it and will post a tutorial about it in the "general" discussion soon.
-
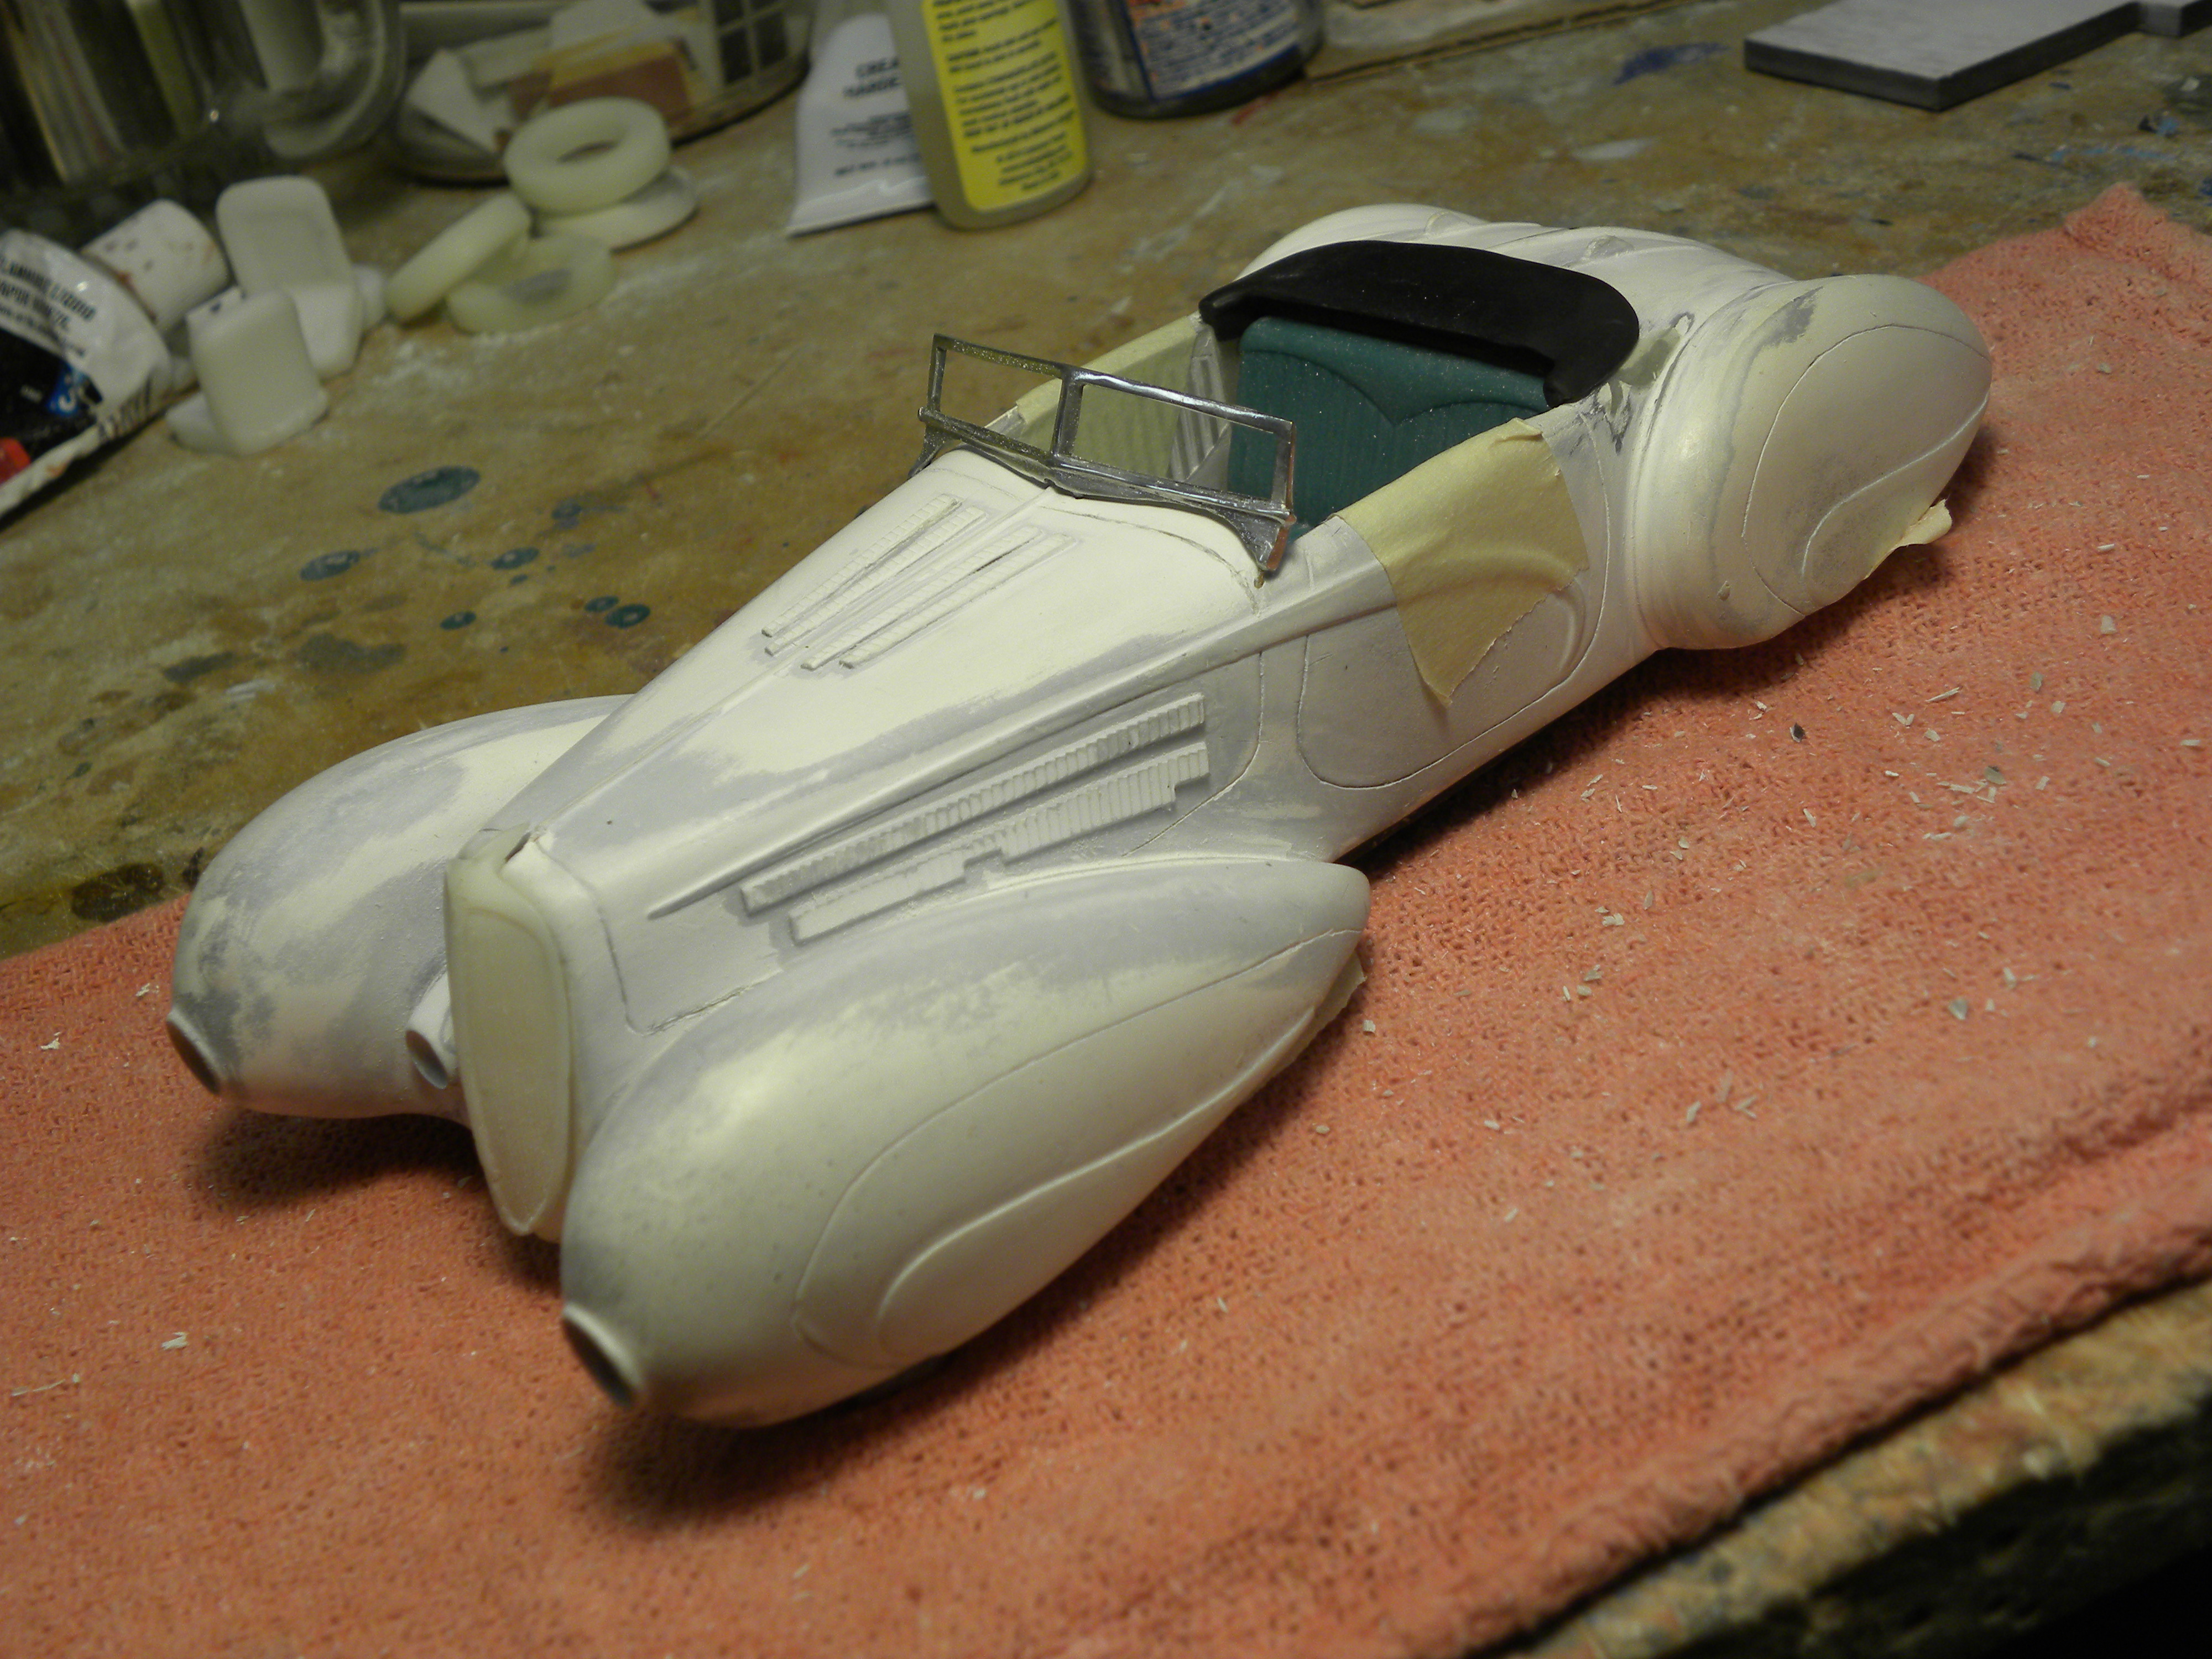
A decent result. I'll solder brass rods to the windshield frame to glue into the body.
-
It has taken several weeks to make the centrifugal caster and molds but it has worked well. This is britannia metal, a lead free white metal that I cast in a silicon mold material called Mold Max 60; that will withstand temperatures up to 560 degrees. I pour the metal about 400 degrees.
-
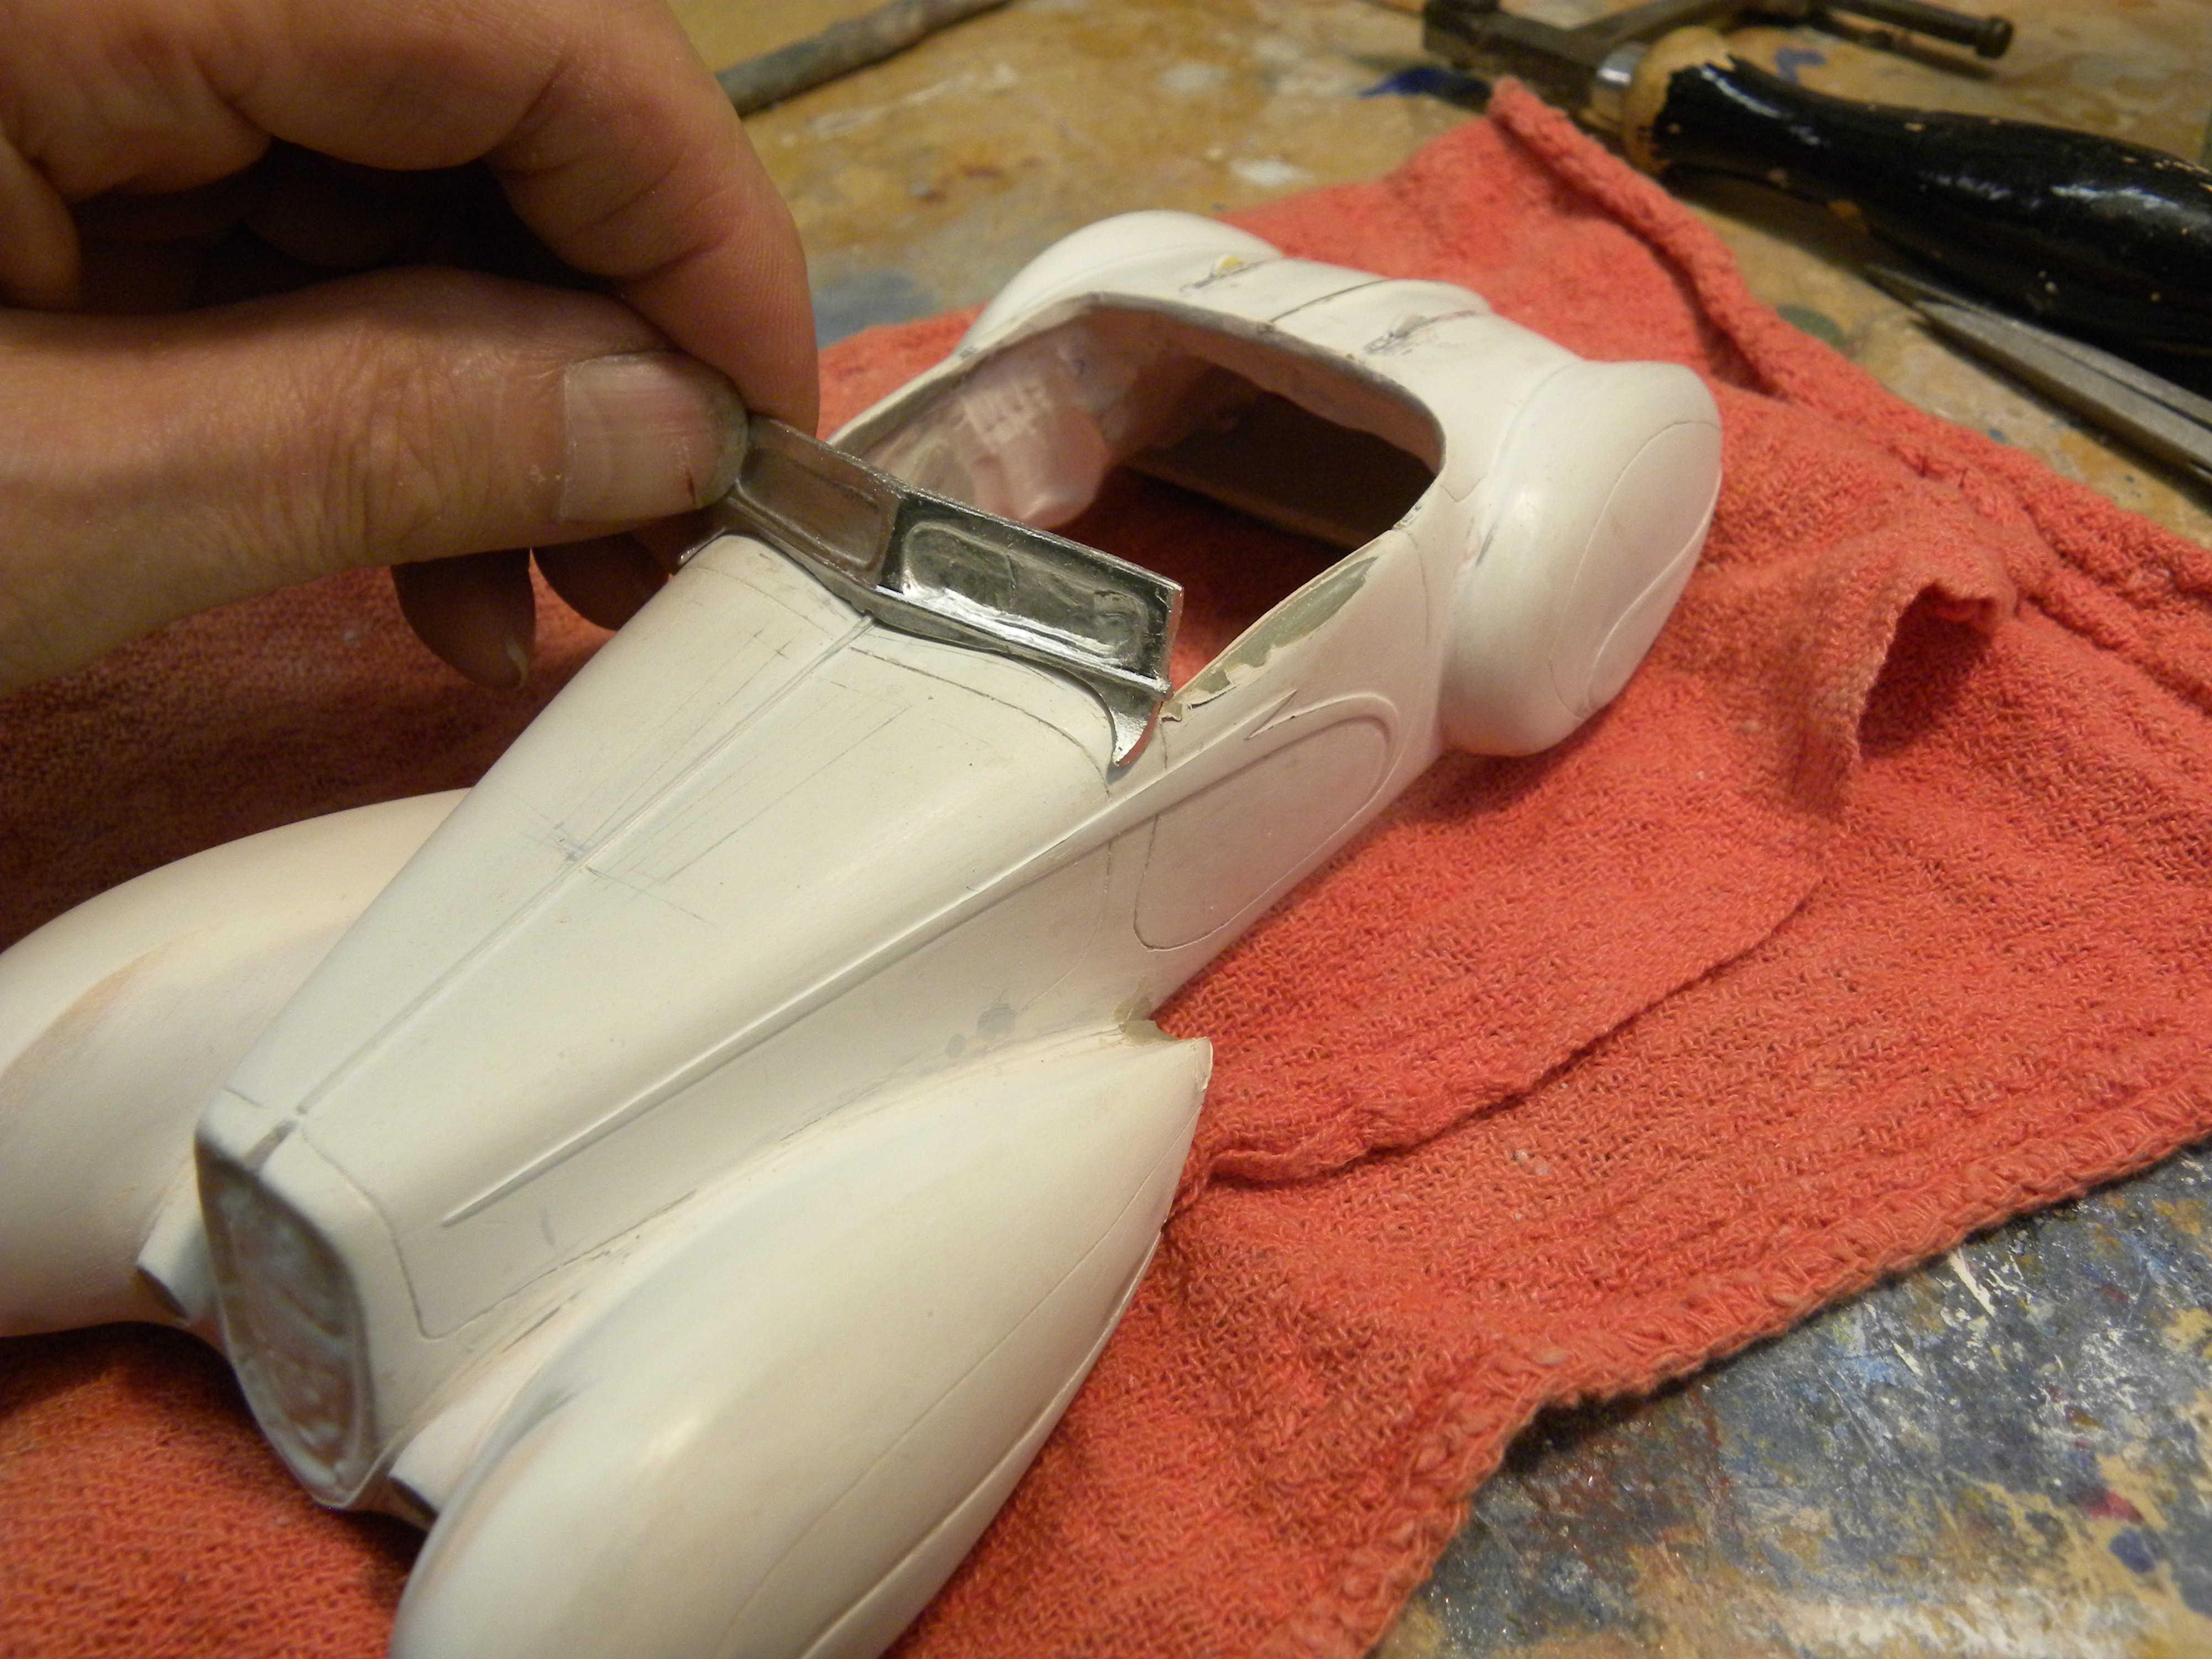
Because the windshield frame is so thin, I've decided to cast it in white metal. Mastering proved to be difficult, plastic was too floppy, brass did not work well, so I decided to use Ave's Apoxy Sclupt, an epxoy putty. Covered the cowl area with thin plastic so the material wouldn't stick and put a glob on. It's very slow setting at room temperature, about 6 hours, so I put it in a dehydrator. Usually takes 45 minutes there. Sanded it to shape and detailed with half rounds and small turned knobs. I did not cut all the way through, to retain strength. That will be done in the metal.
-
I have used Sketchup for about 9 years now and am sorry I am so good at it, because I look at the F360 videos and think "That would be sooooo much easier than what I do now!" But learning another software is a lot of work. I will eventually learn it, but I suggest learning F360 first. It's a professional software that you can get a job with and build your career on. And Bill isn't showing the best thing he's making with it. I think he's refining it. I'll let him unveil it when he's satisfied with it.
-
Download Fusion 360 - free for hobbyists - learn it, and you can make anything. Youtube has many videos and Udemy has courses, many are free: https://www.udemy.com/courses/search/?ref=home&src=ukw&q=Fusion 360 .