

retriever
-
Posts
83 -
Joined
-
Last visited
Content Type
Profiles
Forums
Events
Gallery
Posts posted by retriever
-
-
Thanks Richard.
I would have preferred to Monogram 1/24 pace car kit, but prices on those have gone sky high. I have other built Monogram Fox bodied models, so 1/24 would have been better suited to my collection.
Having said that. I have an unbuilt MPC 1987 Mustang GT kit, so I checked it to see how similar the parts were to my 1979 model. As I suspected, the kits are almost identical.... apart from some cosmetic upgrades to the 1987 body style, etc. So I'm now using the 1987 chassis, suspension and other components to put under the 1979 body. I can still build the 1987 kit later using the discarded parts from the 1979 car. Out of interest, you may already know that the three pace cars built for the Indycar race all had T-Tops but the replicars delivered to dealers were equipped with the sunroof.
Although I have solved my immediate problem by switching between the two MPC kits, I'm still interested in the possible trade suggested by Rex, especially the 1/25 pace car decal sheet.
Tony
-
That's definitely an interesting thought What type of models are you particularly interested in? I have a large stash so I'm sure there's something in there for you.
I'm particularly interested in the MPC Pace car and parts... but would also like the Café racer if we can find an interesting trade for you.
Tony
-
Every now and then I come across a build up glue bomb of one of my favourite late model cars.
A case in point is this Mustang which I picked up for $6.50 U.S. plus shipping (that's always the killer!). Viewed 11 times")
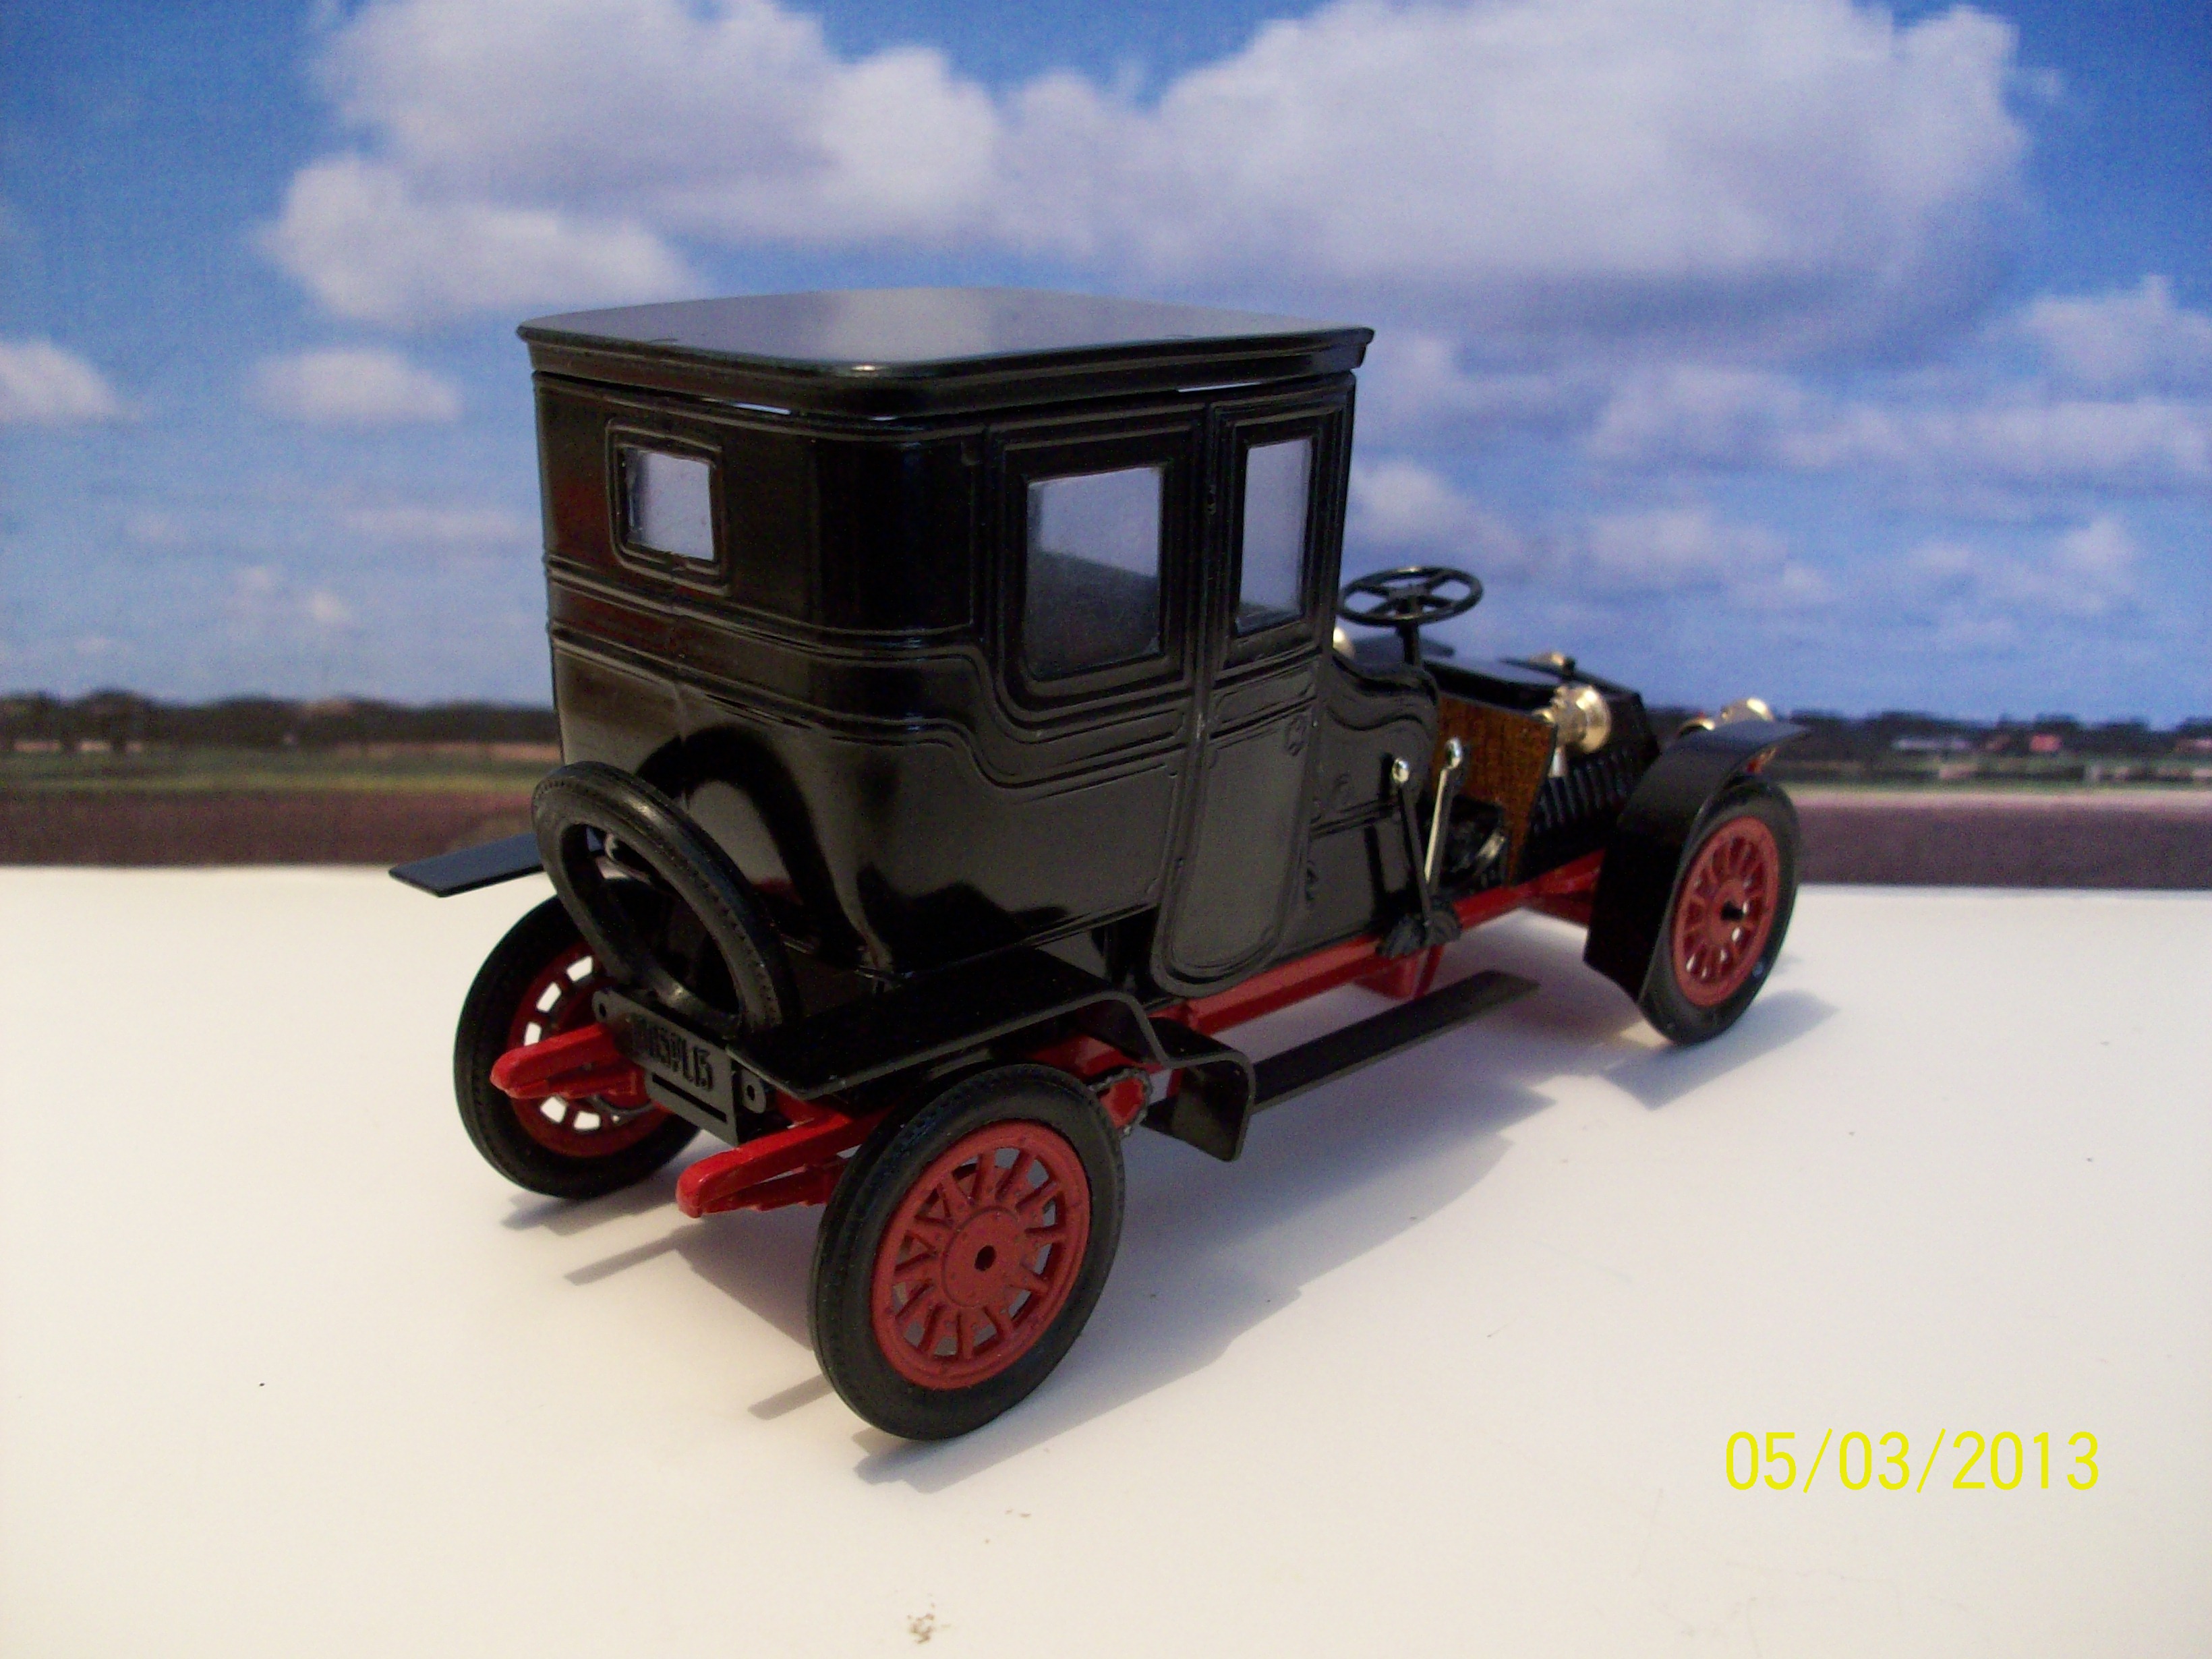
While not too bad. the assembly had been a little less than accurate as you can tell from the chassis picture above. However, as the model had not been painted and the only visible glue "blob" was a minor one on the roof(?) I figured it would be an interesting rebuild.
The first order of business was a total disassembly of the model. While this looked fairly simple, it wasn't until I got into the front and rear suspension that I realised that the glue monster had struck! Big globs of the stuff surrounded every mounting point. I had to take a razor saw to each one and then hack the rest of the way with an old trusty #11 blade as best I could. Fortunately I was able to carefully remove the "glass" pieces without cracking them. The front valance was on crooked, so I removed it and reset it properly,
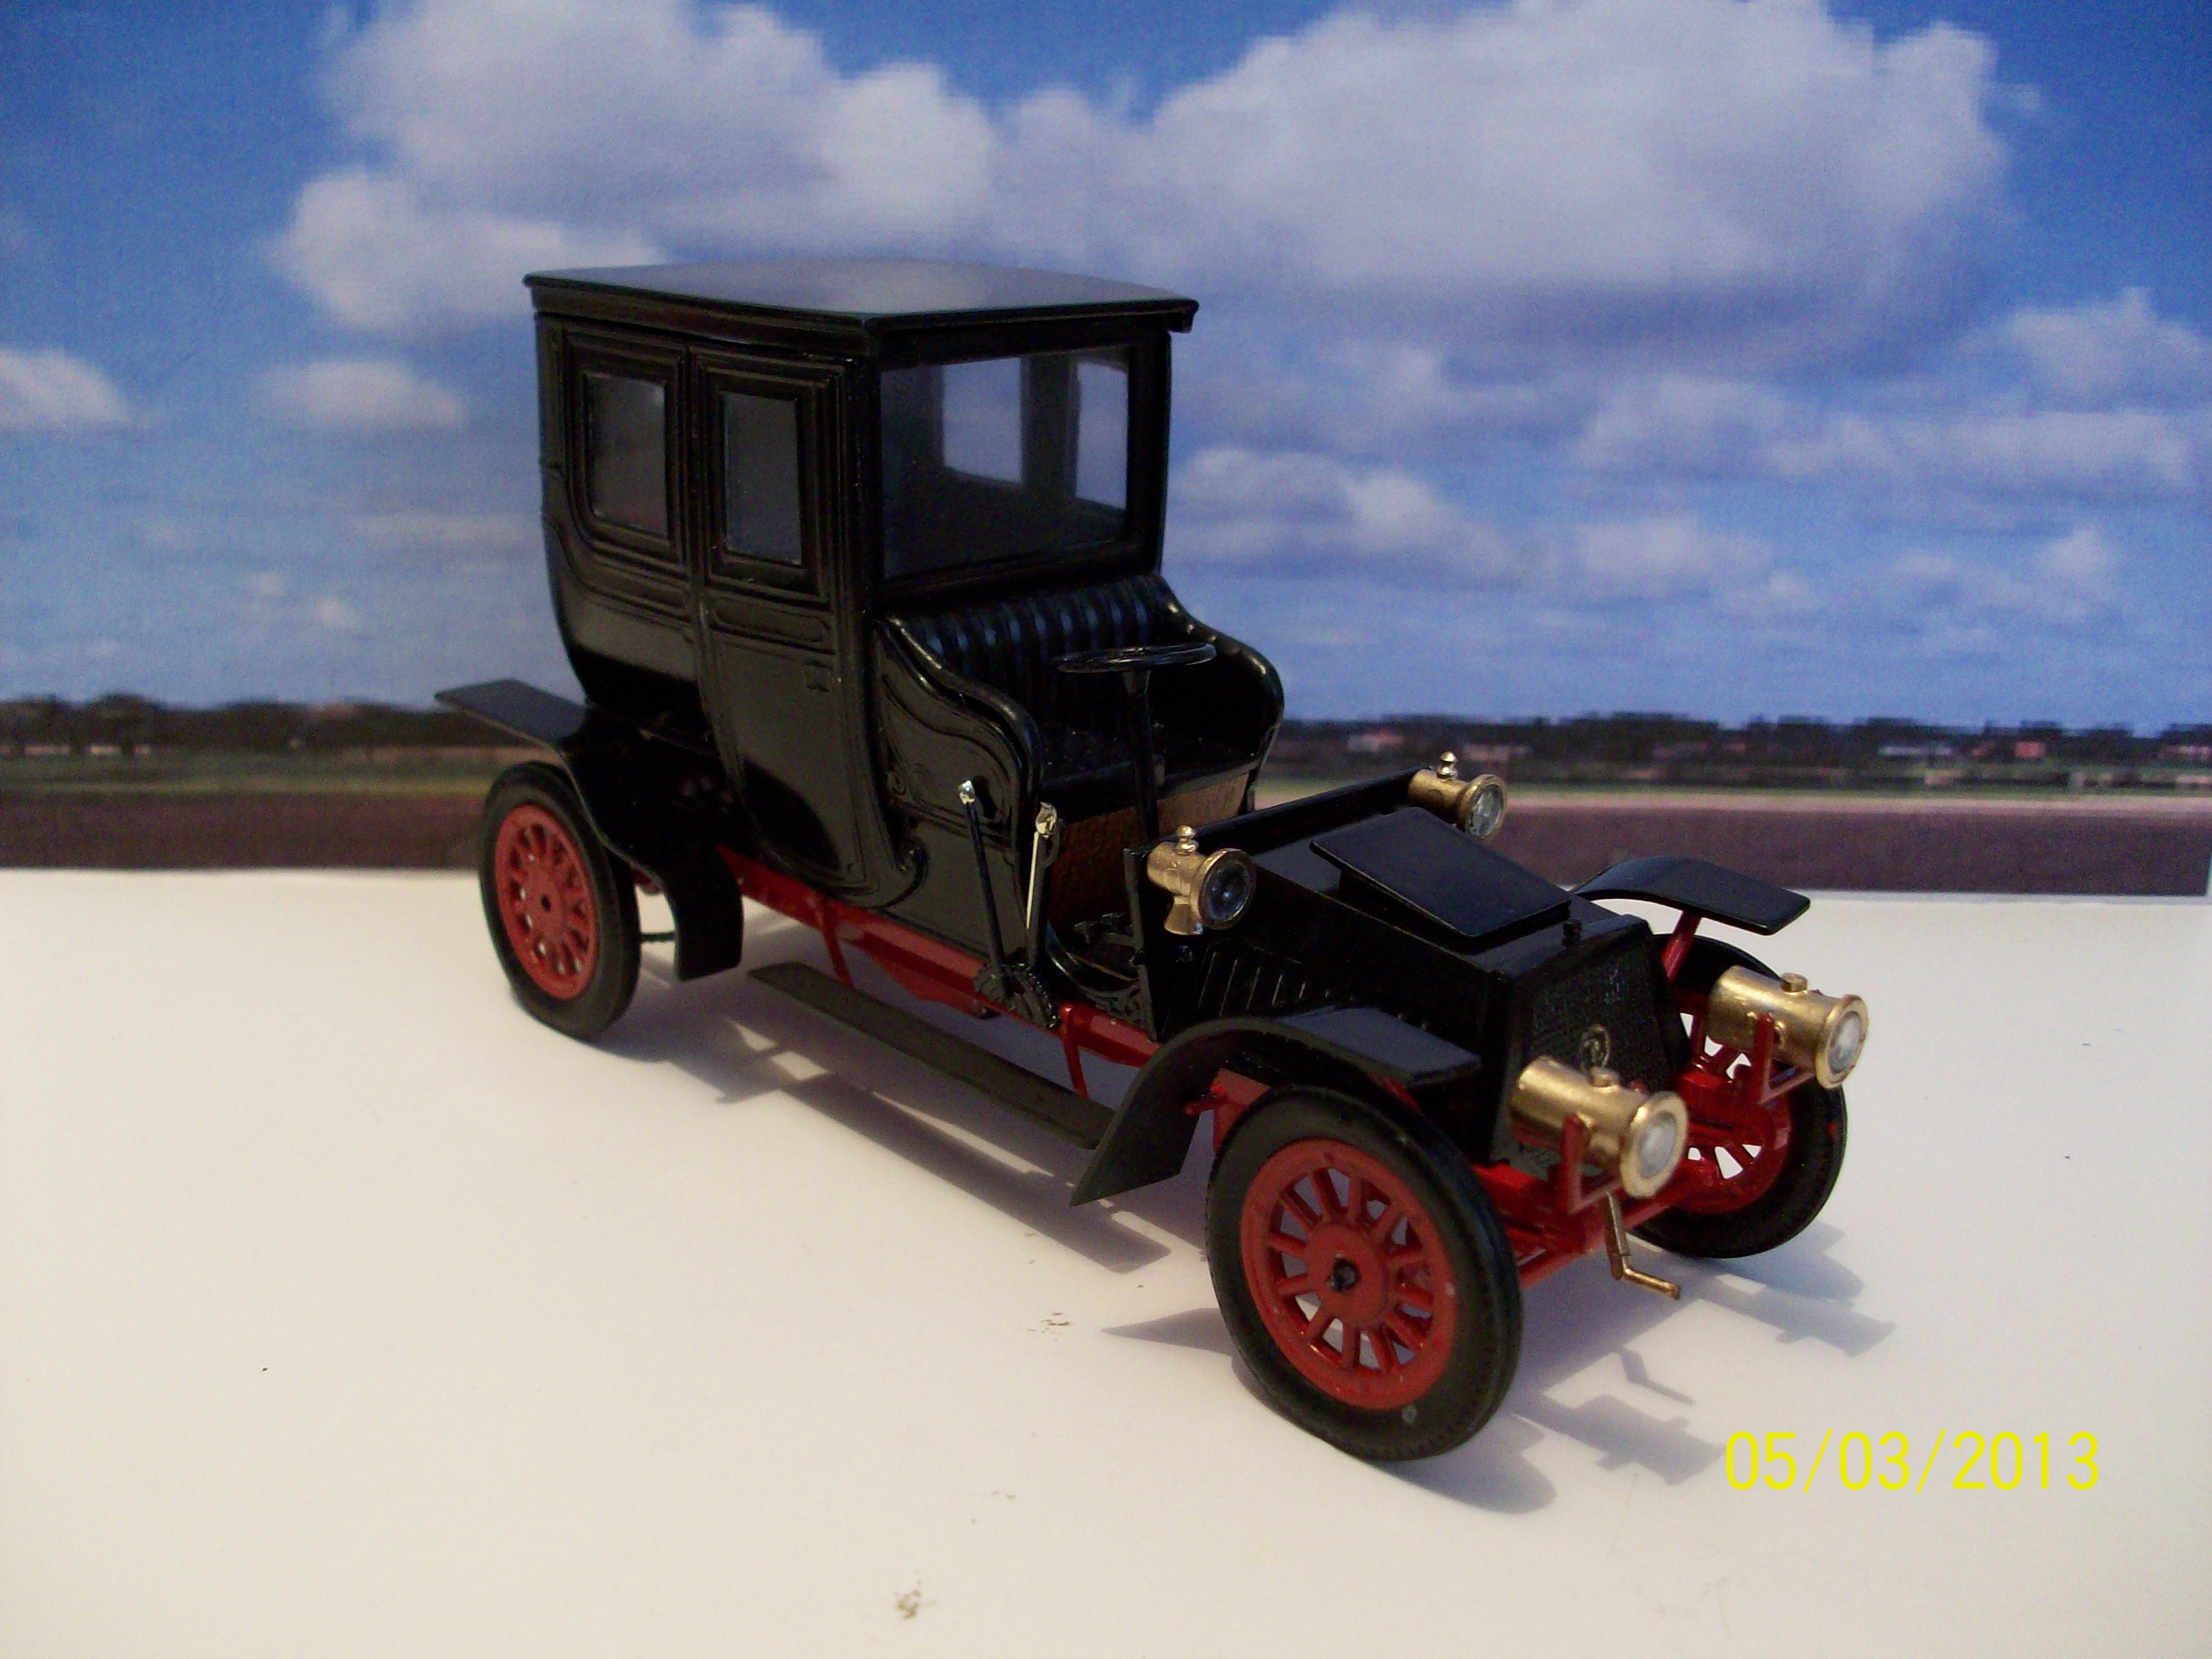
"Fox" bodied Mustangs with this style of grille were built between late 1978 (1979 models) and 1984. It is not easy to tell by looking at the body, which year specifically this model is. Fortunately, when I removed the chassis from the body, I found that the model was copyrighted in 1978 by "Fun Dimensions". I seem to remember that "Fun Dimensions" issued MPC models and were owned by one of the cereal companies. I'll have to look that up.
So this model is of a "1979" Mustang. That suits me down to the ground as I had been trying to obtain a model of the 1979 Mustang Indianapolis 500 pace car but price wise they were out of my league.. After some research I found that this is actually the MPC (Fun Dimensions) 1/25 scale 1979 pace car kit. All I need now is a set of Pace Car decals..... Help, anyone?
I have all the parts stored away the a Ziploc baggie. Some parts are missing... such as the exhaust system, fuel tank and rear seat, Hopefully I might find another parts car with those missing parts?
Tony -
After all your "trials and tribulations" with this kit. the finished result was well worth all the effort you had to put into it.
Congratulations on perseverance!
Tony
-
Magnificent work. I'm lovin' this....
Tony
-
6 hours ago, Richard Bartrop said:
Very nice! What did you use for the tires? The Pyro classics I ended up with always had these very basic vinyl tires with no sidewall detail of any kind, and never seemed to fit very well.
The wheel on these "classic" Pyro 1/32 kits come in two halves, with tires and wheels all molded as one. So the tires have to be painted... (very carefully!).
The Pyro 1/32 scale brass car models came with separate wheels and vinyl tires which were much easier to build, Those are probably the ones you are thinking of. But the vinyl over time can deteriorate and the tires split.
Here's an example of the vinyl tires on a Pyro 1/32 scale 1911 Mercer (slightly modified from the basic kit).
Tony
-
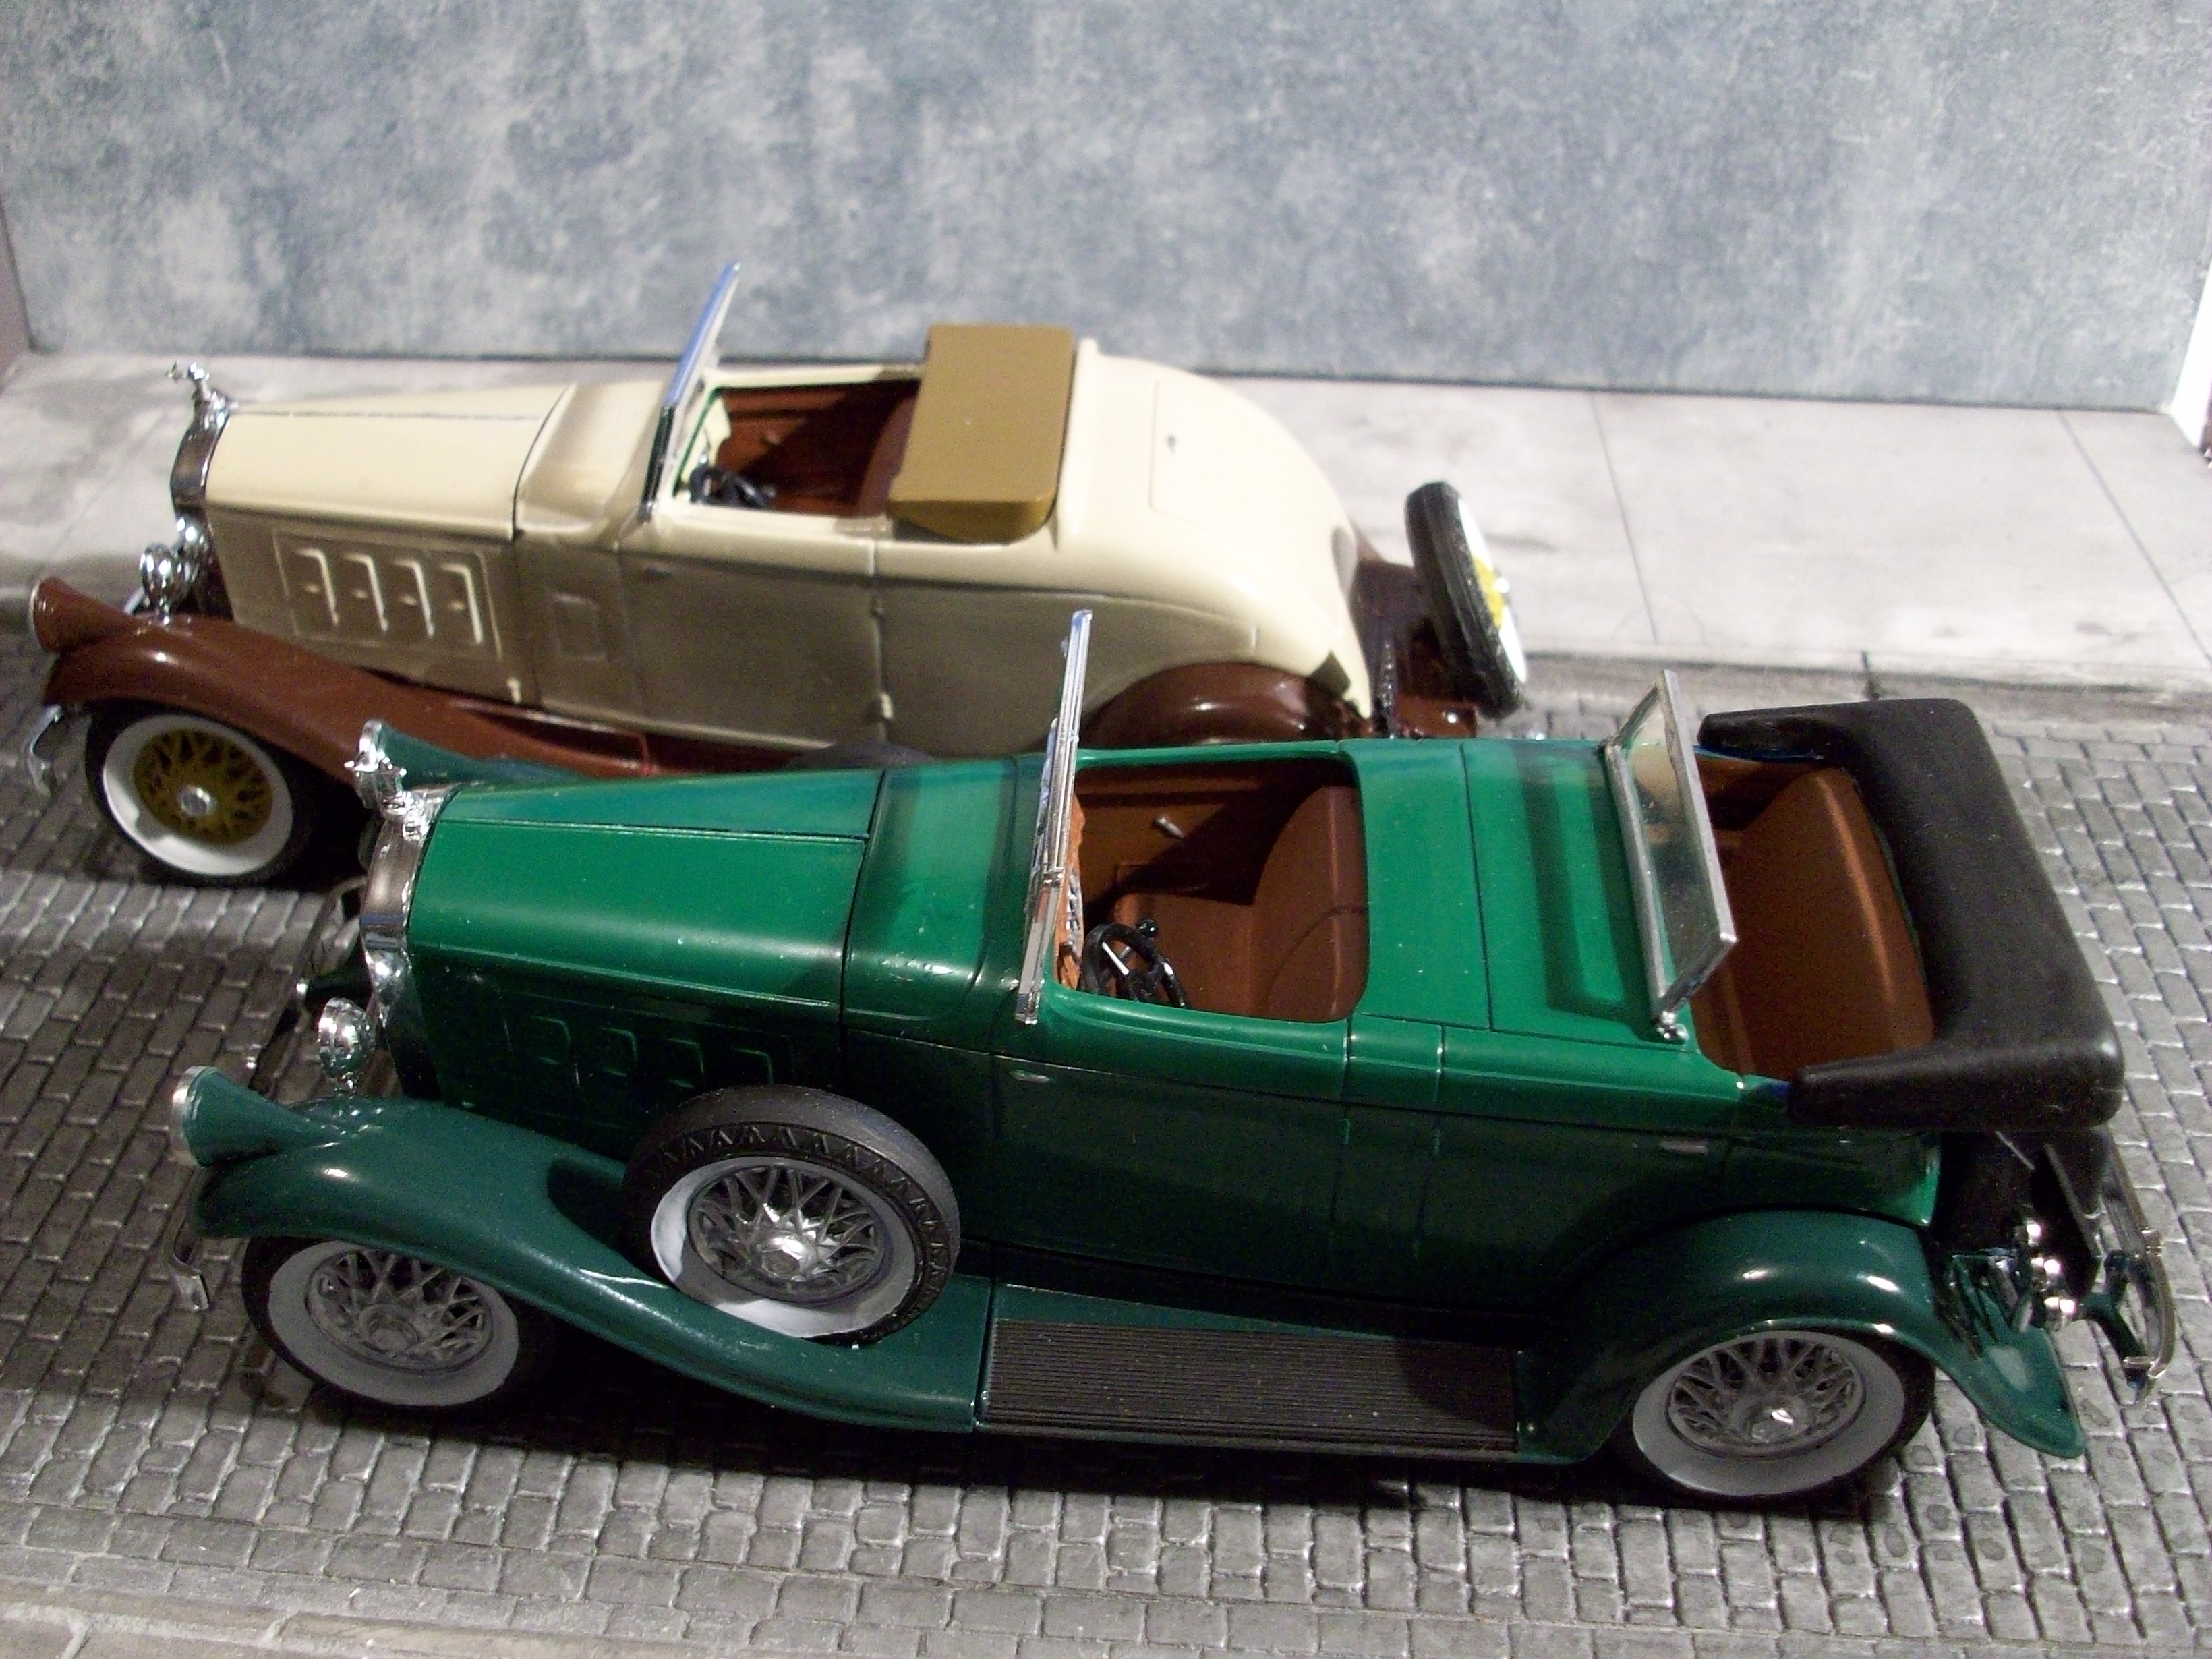
Finally got both finished and here they are together....
Tony
-
12 hours ago, doggie427 said:
Looking good so far ,but the ‘37 is 1/24th and the Revell ‘40 is 1/25th. The wheelbase might not quite line up.
I tried the same idea but they don't line up. It could be made to work but modifying the Revell frame won't be easy.
Tony
-
Thanks Eric.
Tony
-
5 hours ago, Eric Macleod said:
I like these models a lot. I built the phaeton maybe 20 years ago exactly matching the box art and did the Lincoln K as well. Its too bad the Pyro 1:24 cars were not as well proportioned as the 1:32 cars. They would have been magnificent. Yours is looking excellent.
I agree. The Pyro 1/25 scale kits (Auburn, Cord and Lincoln) leave a lot to be desired. I did finish an Auburn a short while ago after a lot of time modifying the basic kit and swapping some parts with the later Lindberg re-pop.
But I digress...
Here's the almost finished 1932 Pierce Arrow Convertible Phaeton. Just have to add the folded convertible top and take one more photo! (I always forget something.... however obvious!)
It's been along time since I started this model back in 2012/3 or thereabouts.
Tony
-
Here's the Custom Convertible pretty much completed: A little disappointed with the size of the spokes on the wheels, but not much I can do about t at this small scale.
With this one done (almost - just have to align the hood, paint the tail lights and the running boards, and add the radiator mascot - all things I didn't notice until I took the photos!). Then I can get back to the Convertible Phaeton.
Tony
-
Nice to see some good old cars from across the pond. Nice build.
Tony
-
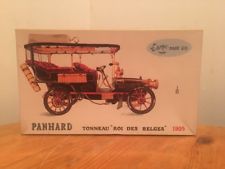
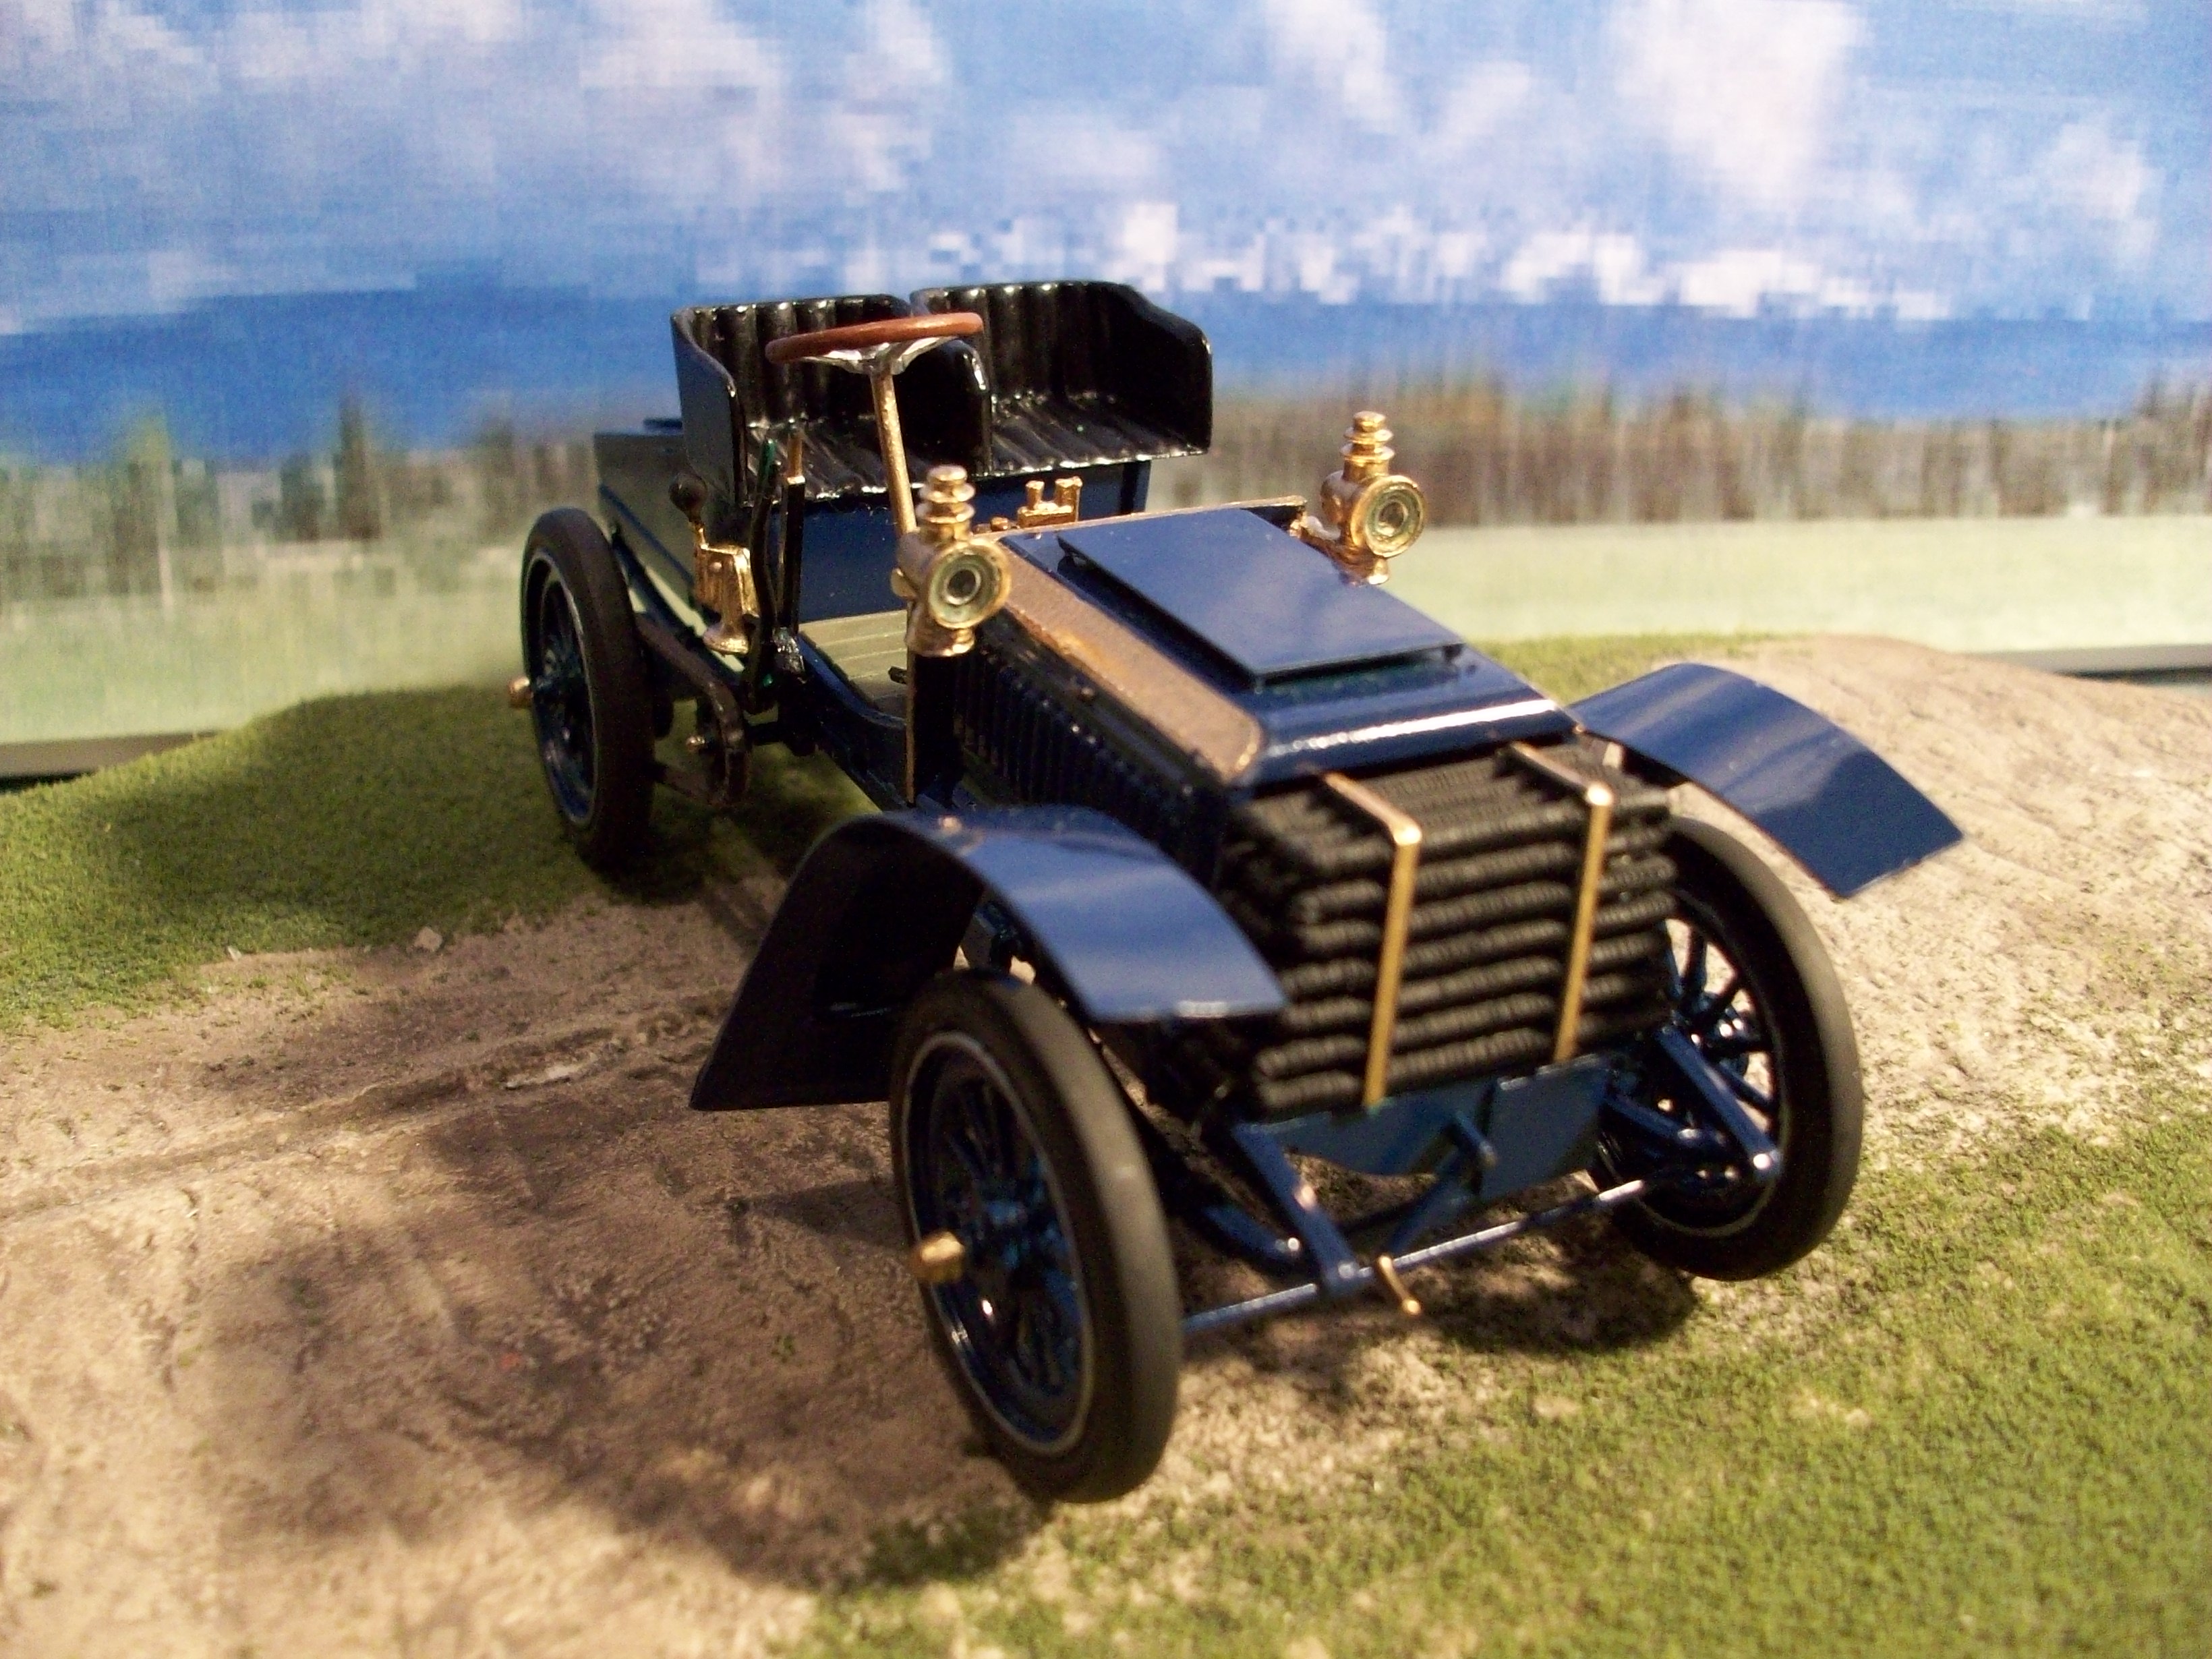
The third model in this "Europe" series of Panhards is the 1905 "Roi des Belge". This is the kit box:
Unfortunately this kit has some serious prototypical errors. As there was only one of these cars ever built, any attempt to build the model would not be anywhere near correct.
So I decided to convert this model into a Panhard "Towne Car" that could have been built. I used the kit chassis and engine cover, and substituted a Pyro Renault "Towne Car" body...... as well as some other parts box additions.
Did one like this really exist......... who knows??
Tony
-
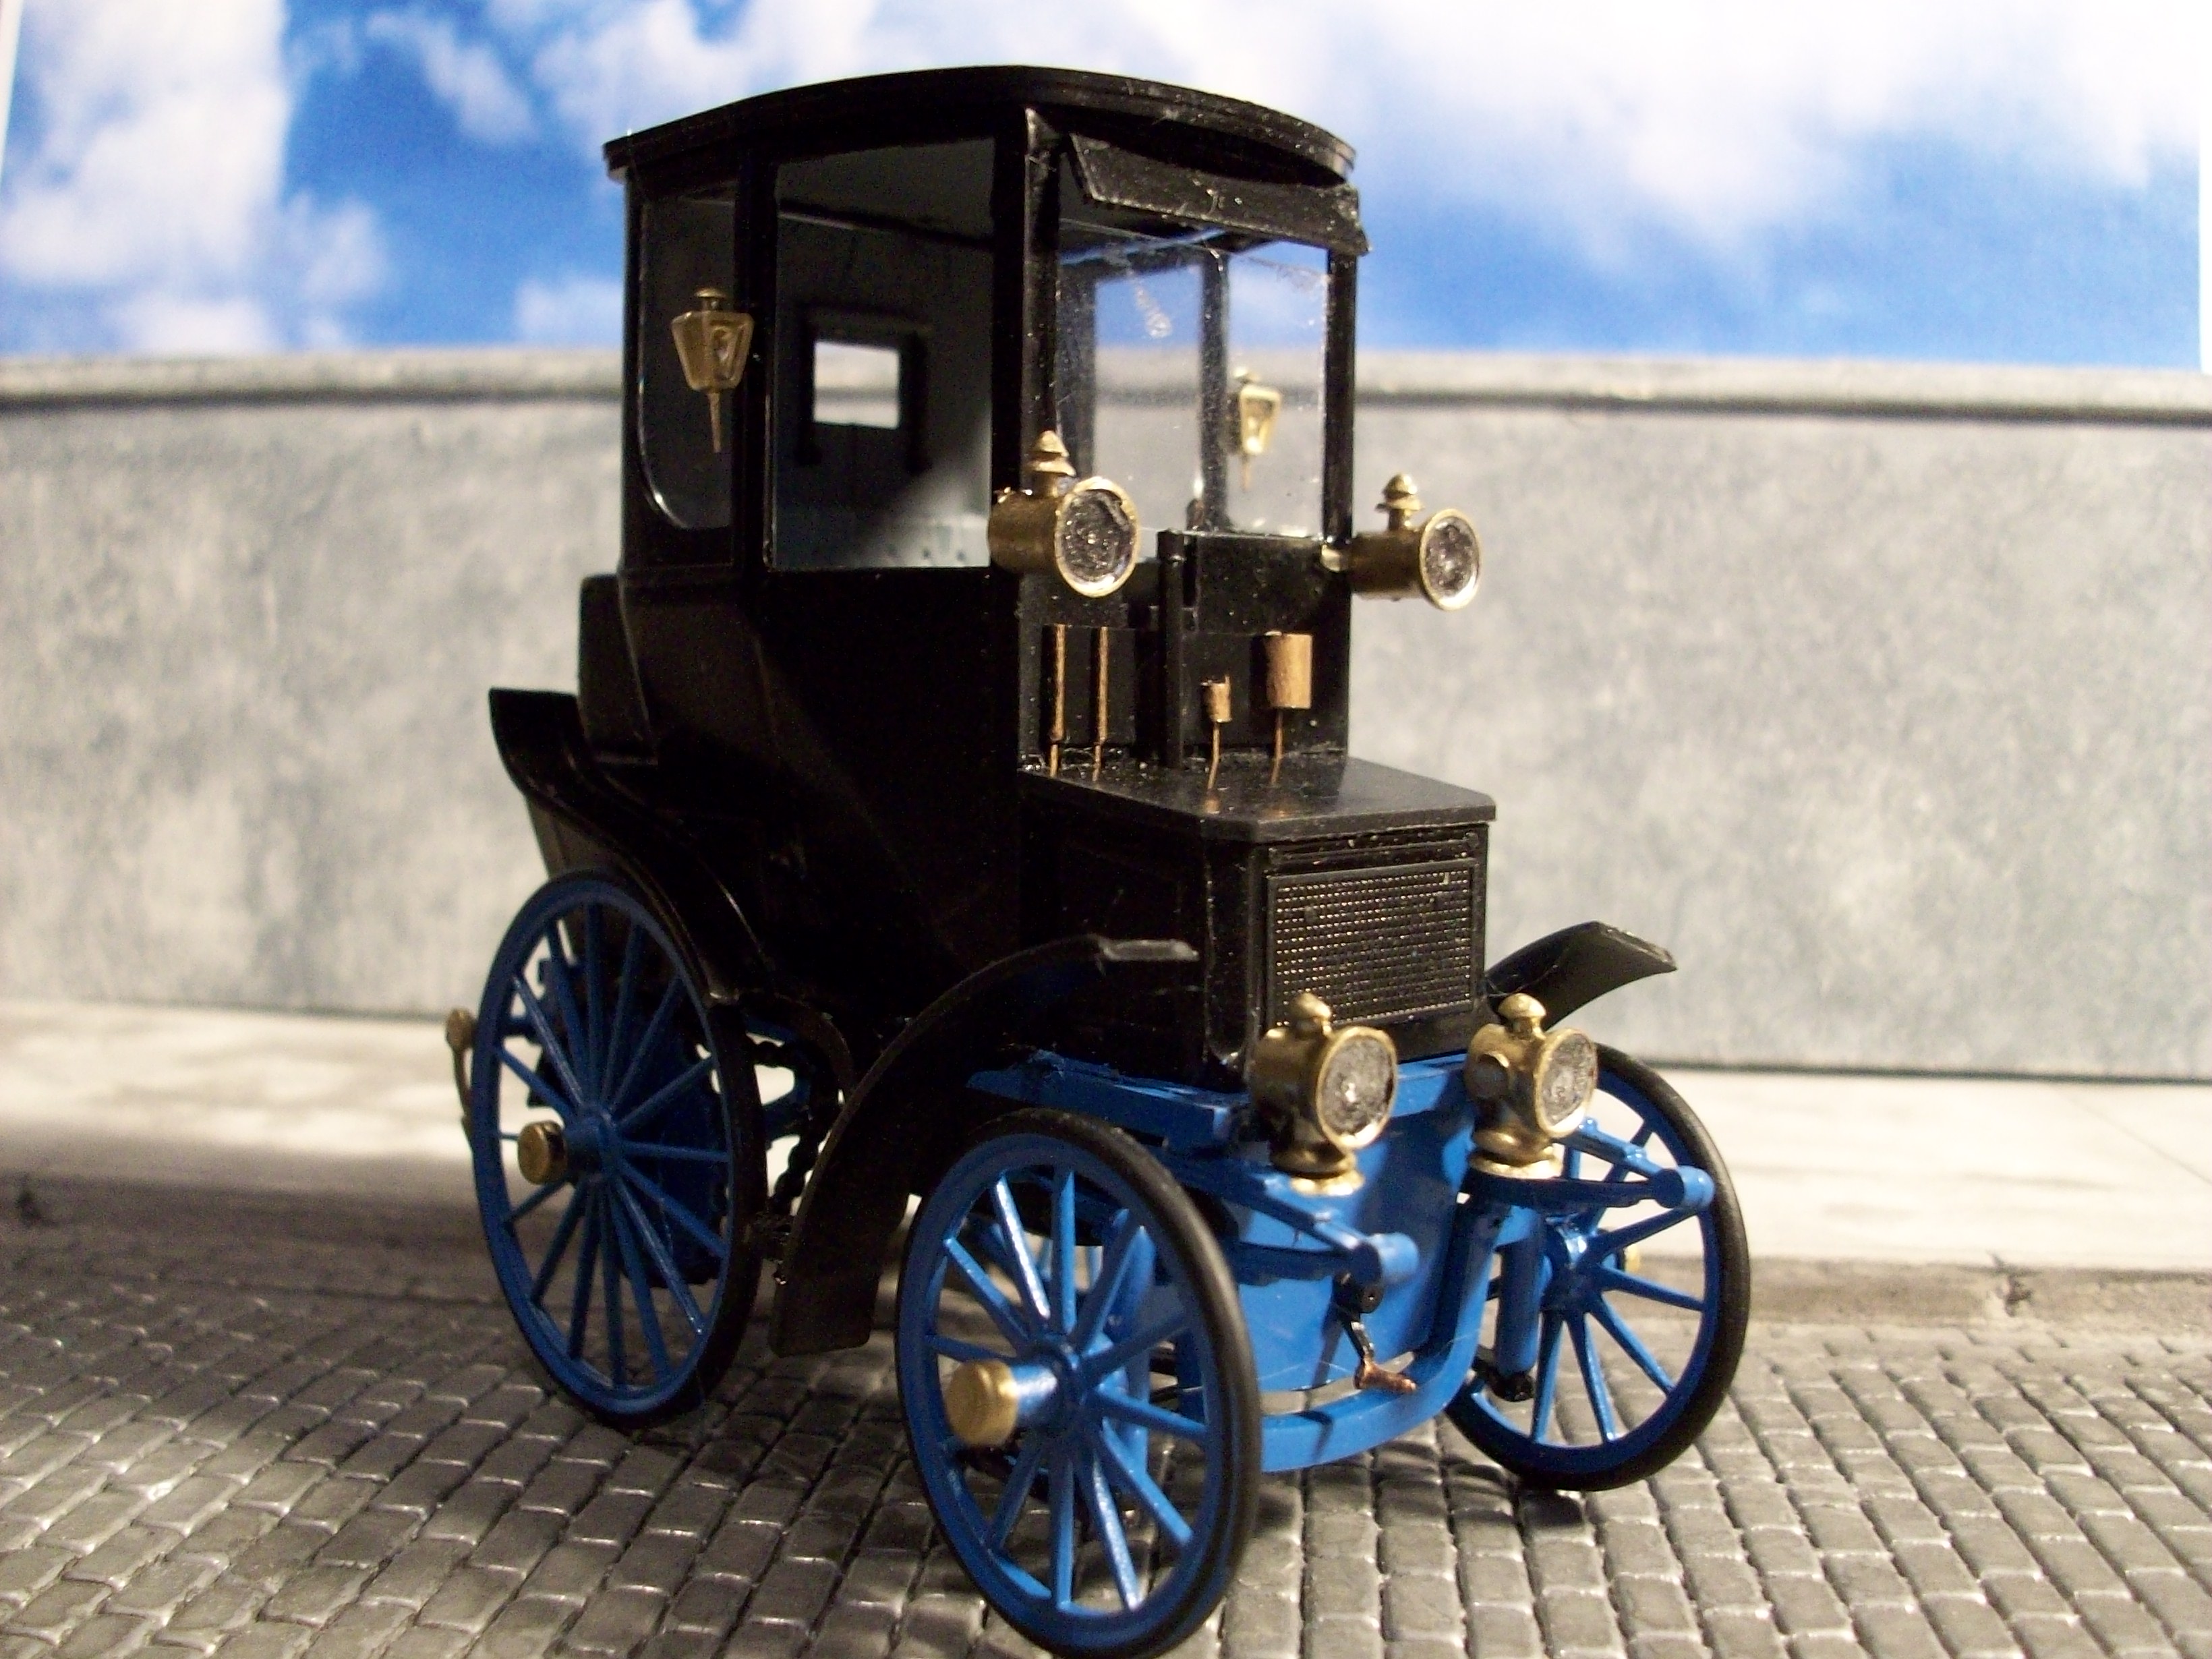
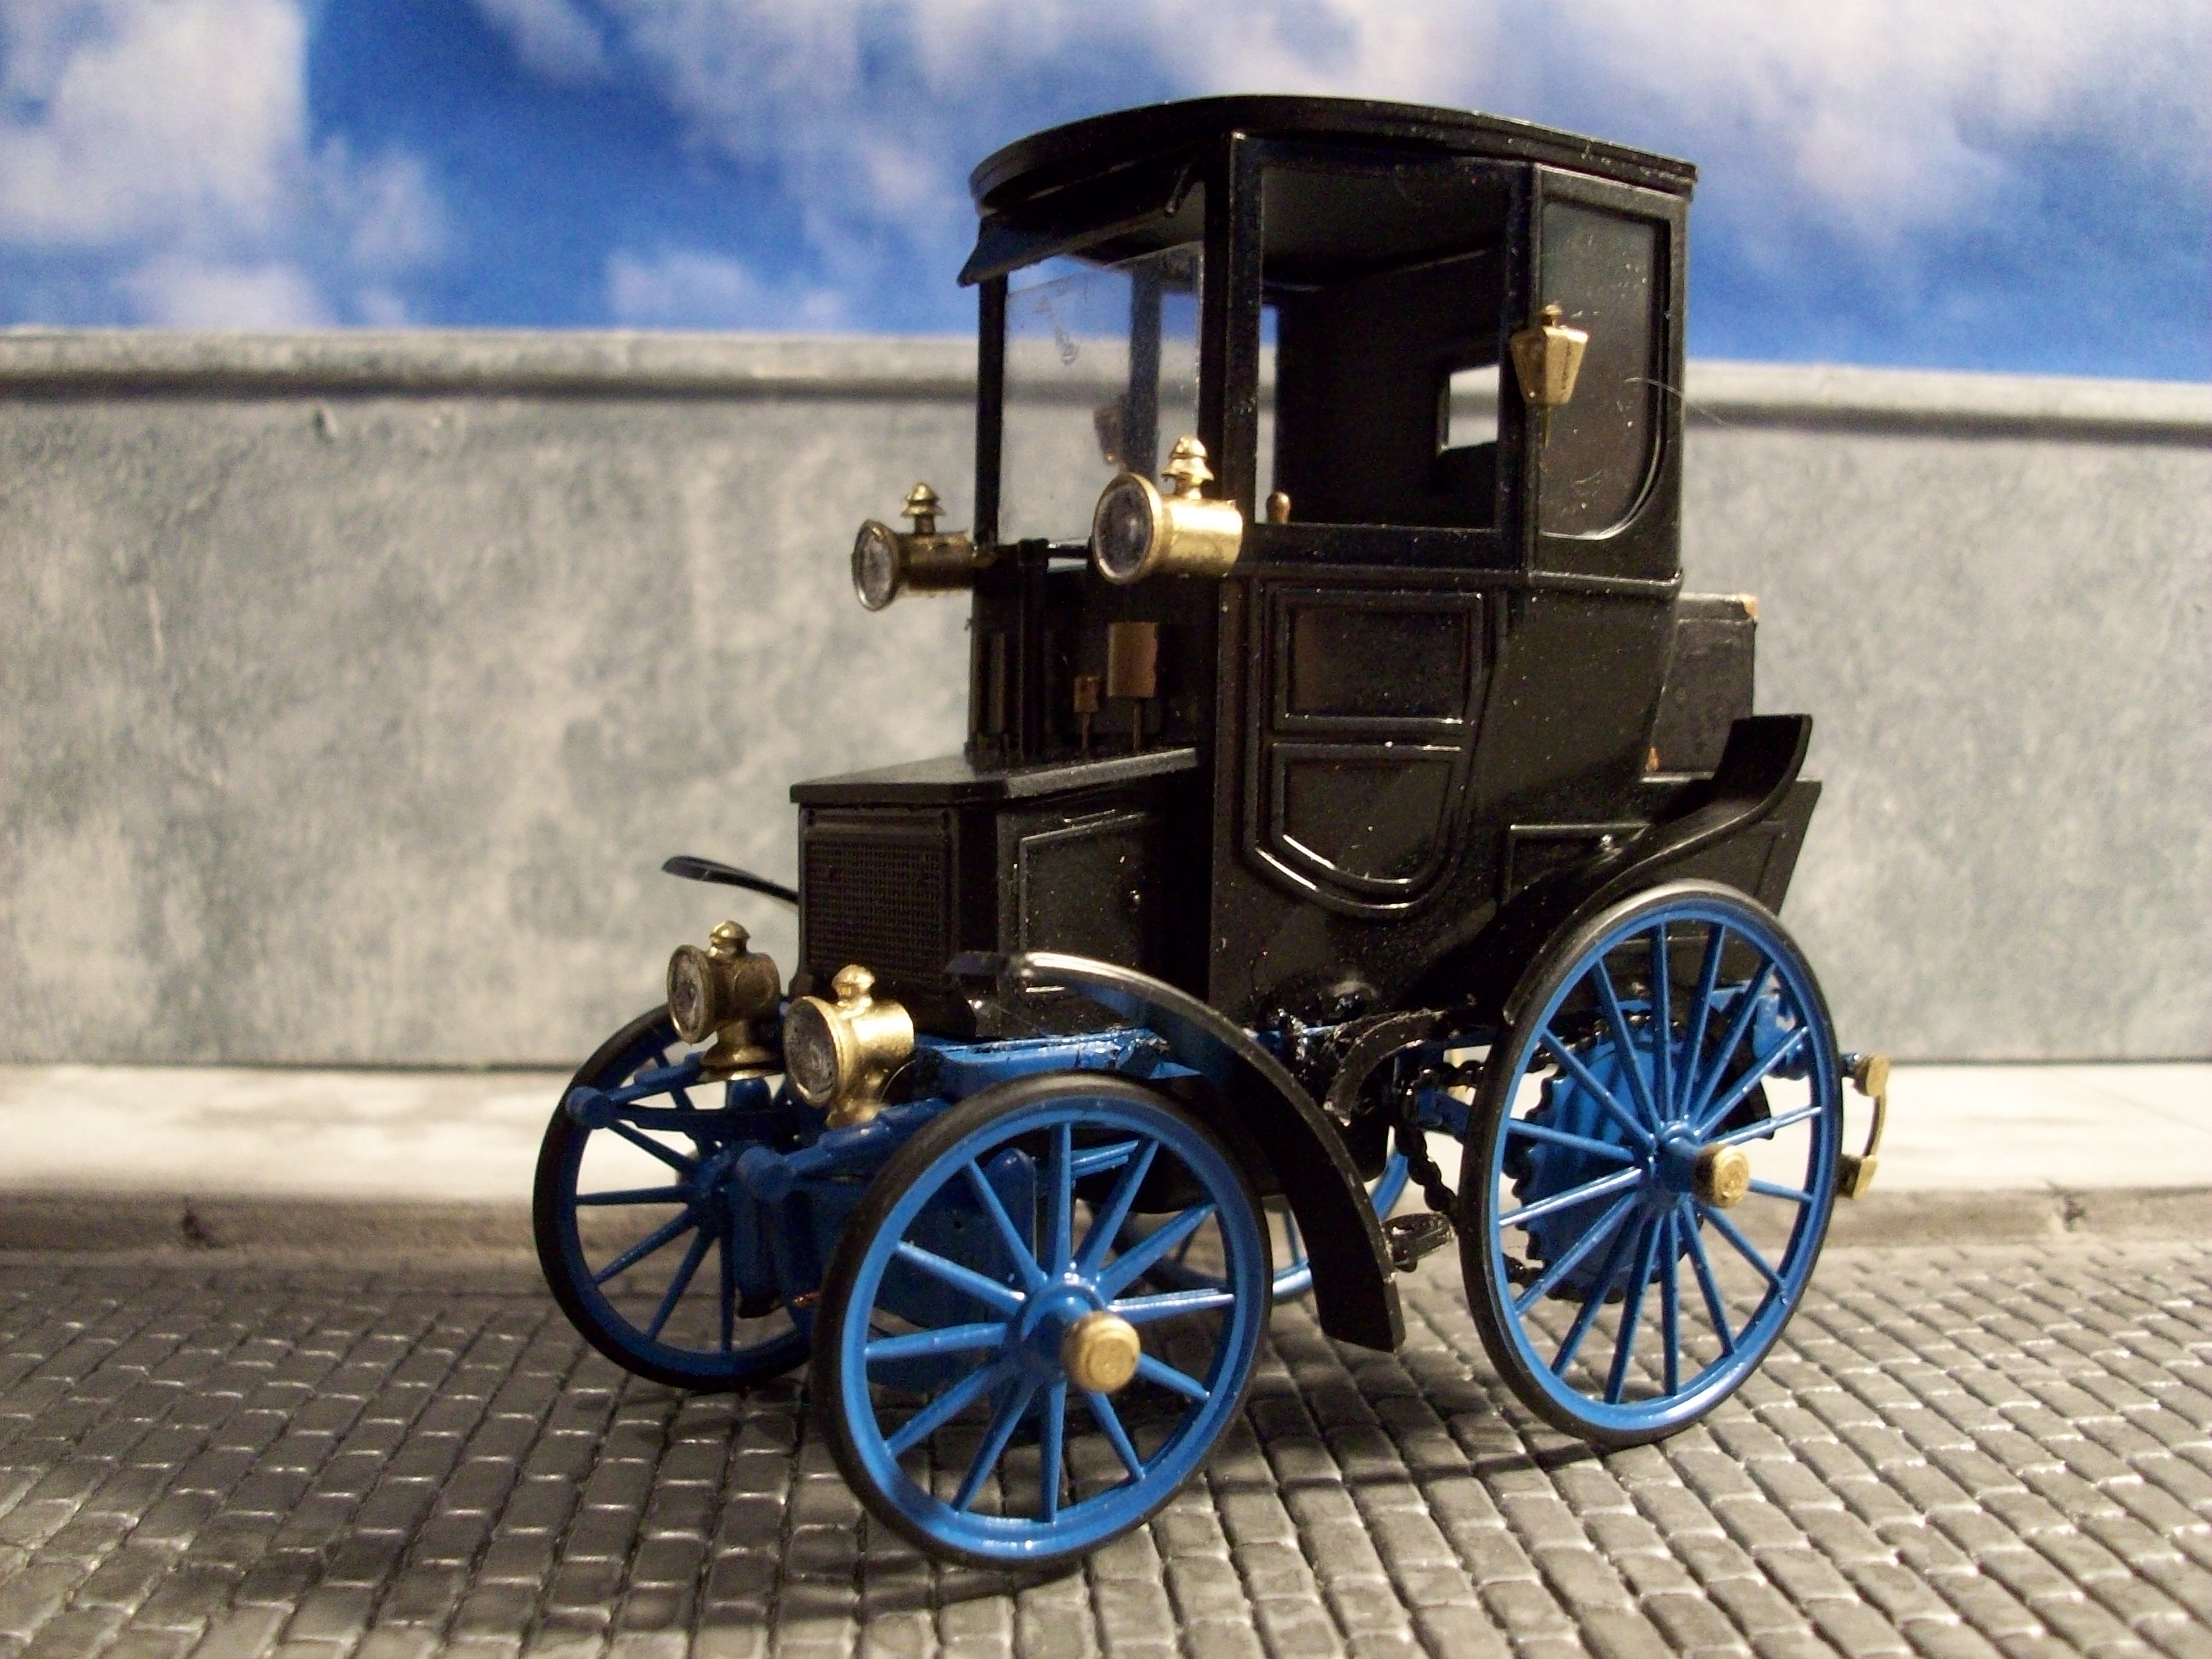
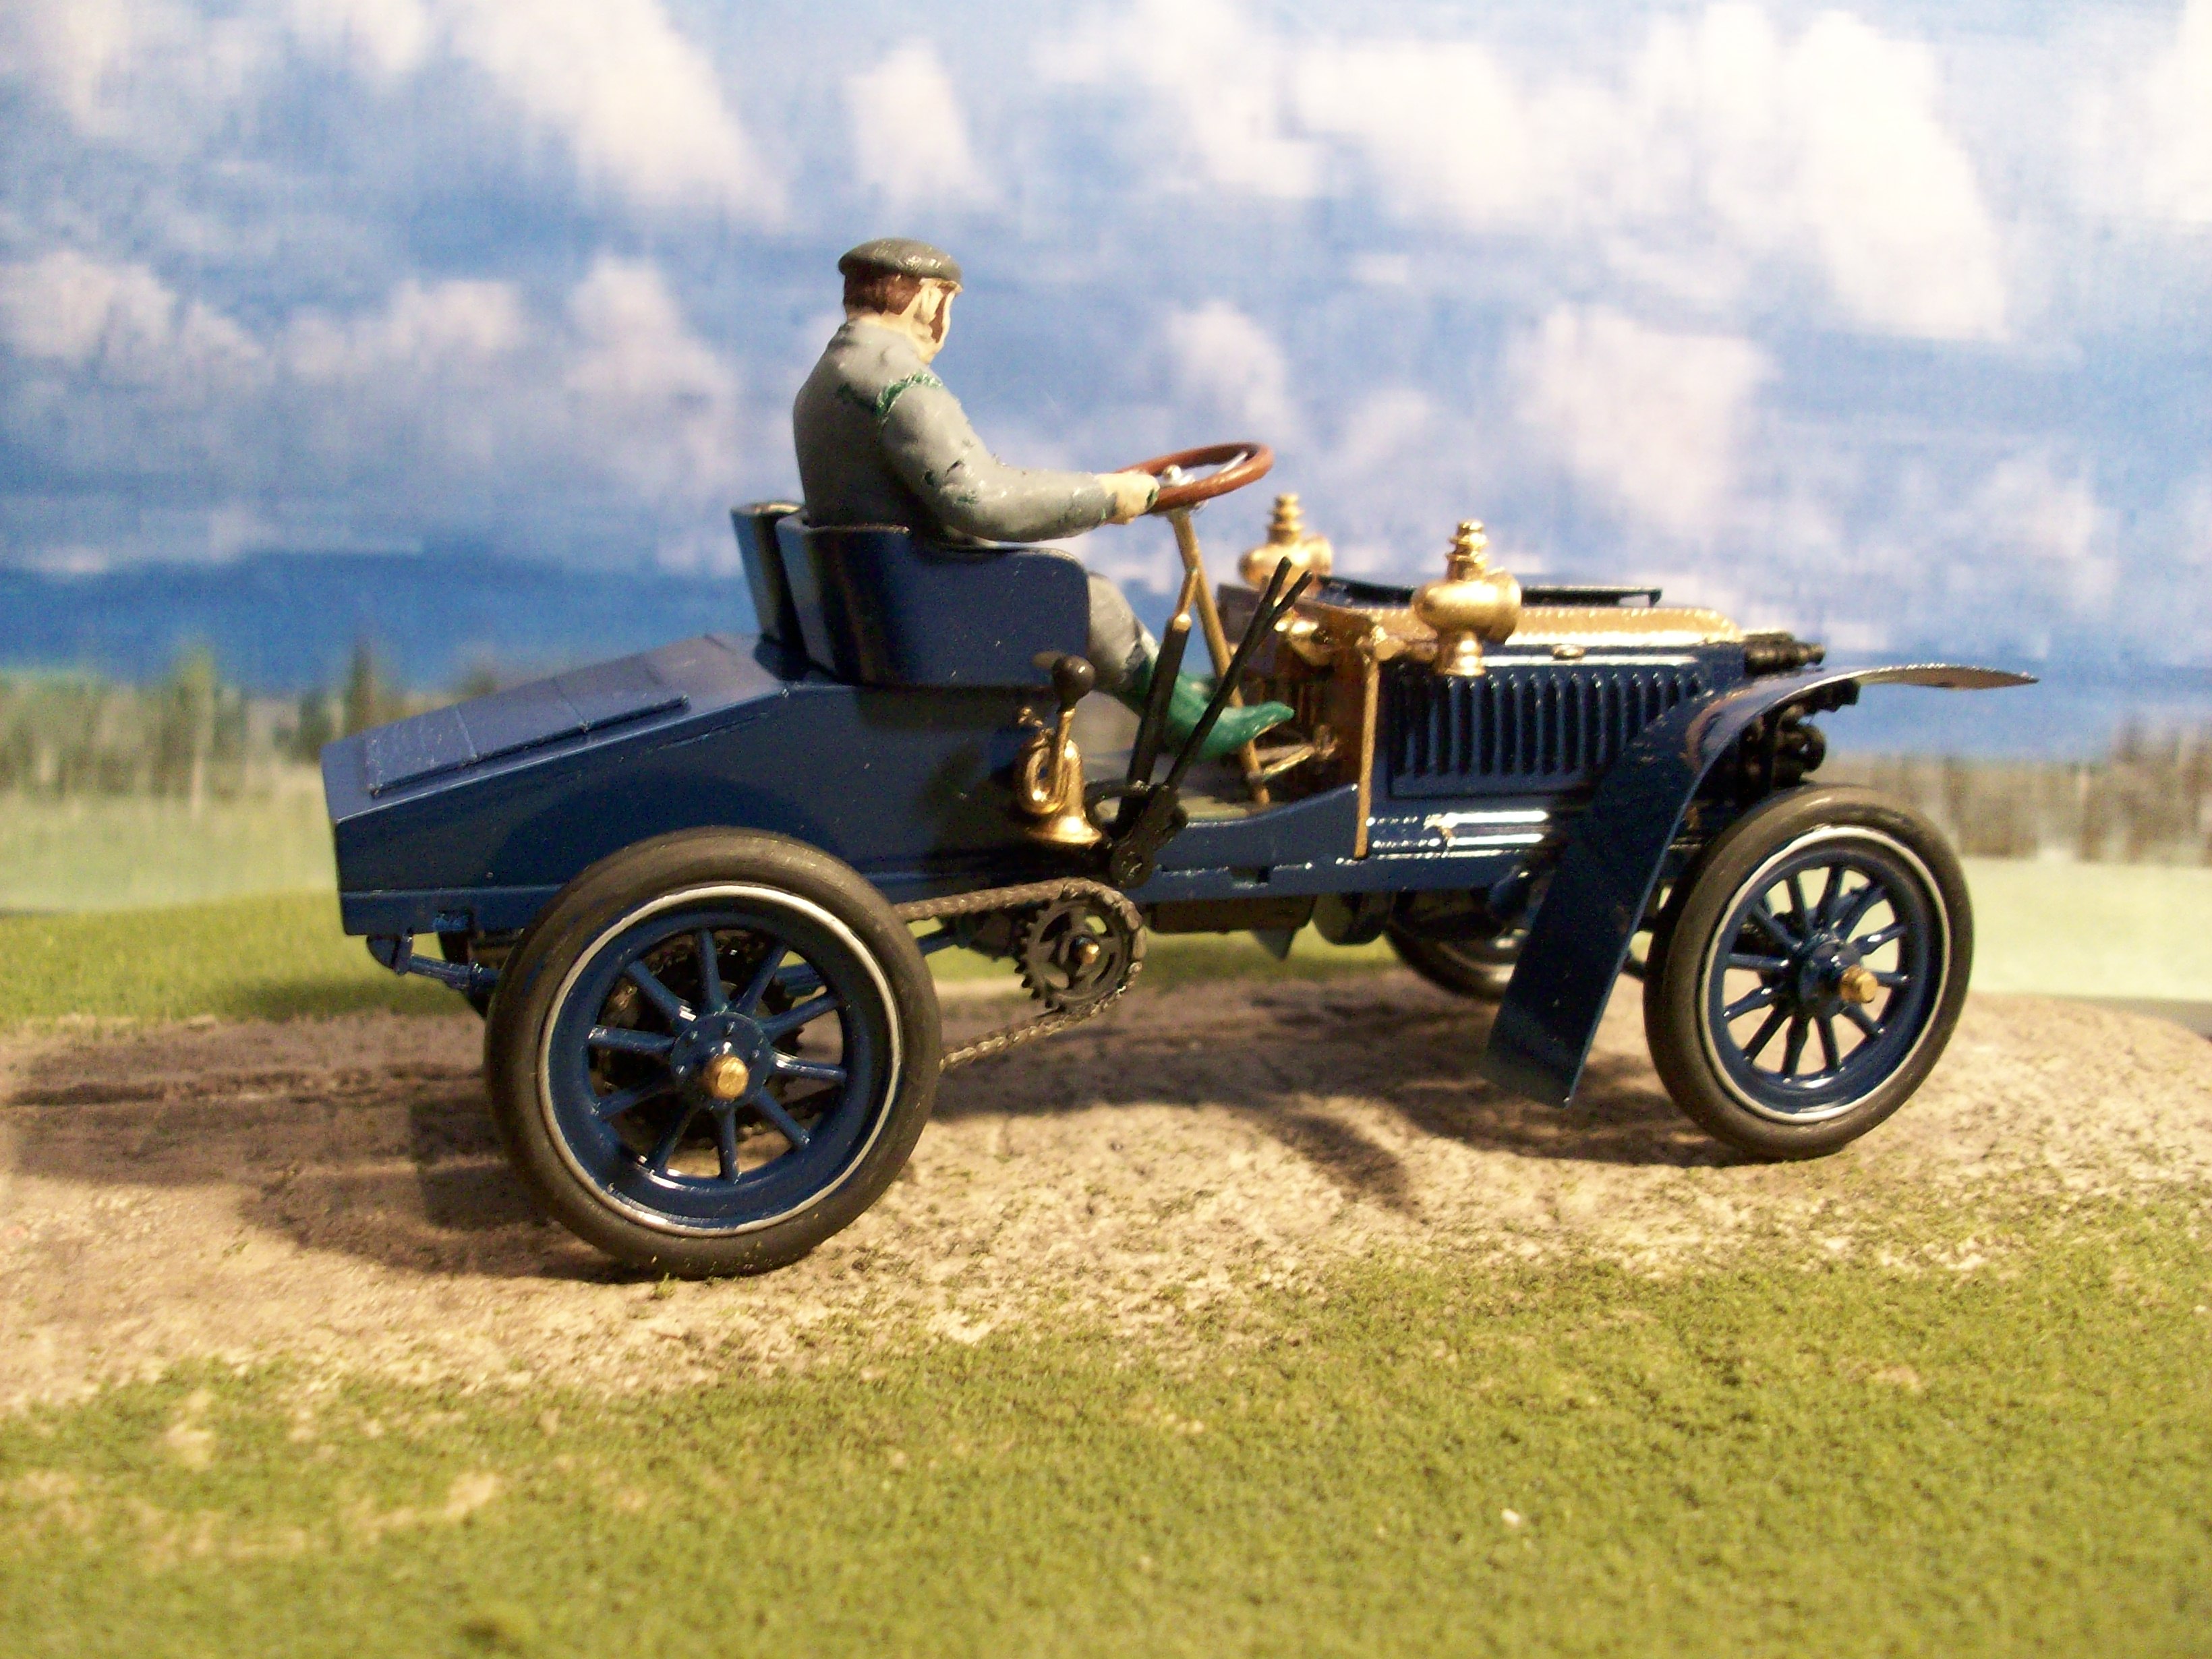
This is another one of those fairly rare 1/32 scale "Europe" kits, the 1895 coupe. I am only aware of three kits in this Panhard series, but there may be more.
I added the scratch built trunk to sit on the rear "shelf" as it looked kinda empty without something. Hope you like it.
Tony
-
Superb collection Eric. You've certainly cornered the Model T market! I'm greatly inspired to add to my Model T collection.
Tony
-
I have to admit, you've done a great job on this. I didn't expect you would be able to achieve the level of prototypical likeness that you have. Well done!!!
Tony
-
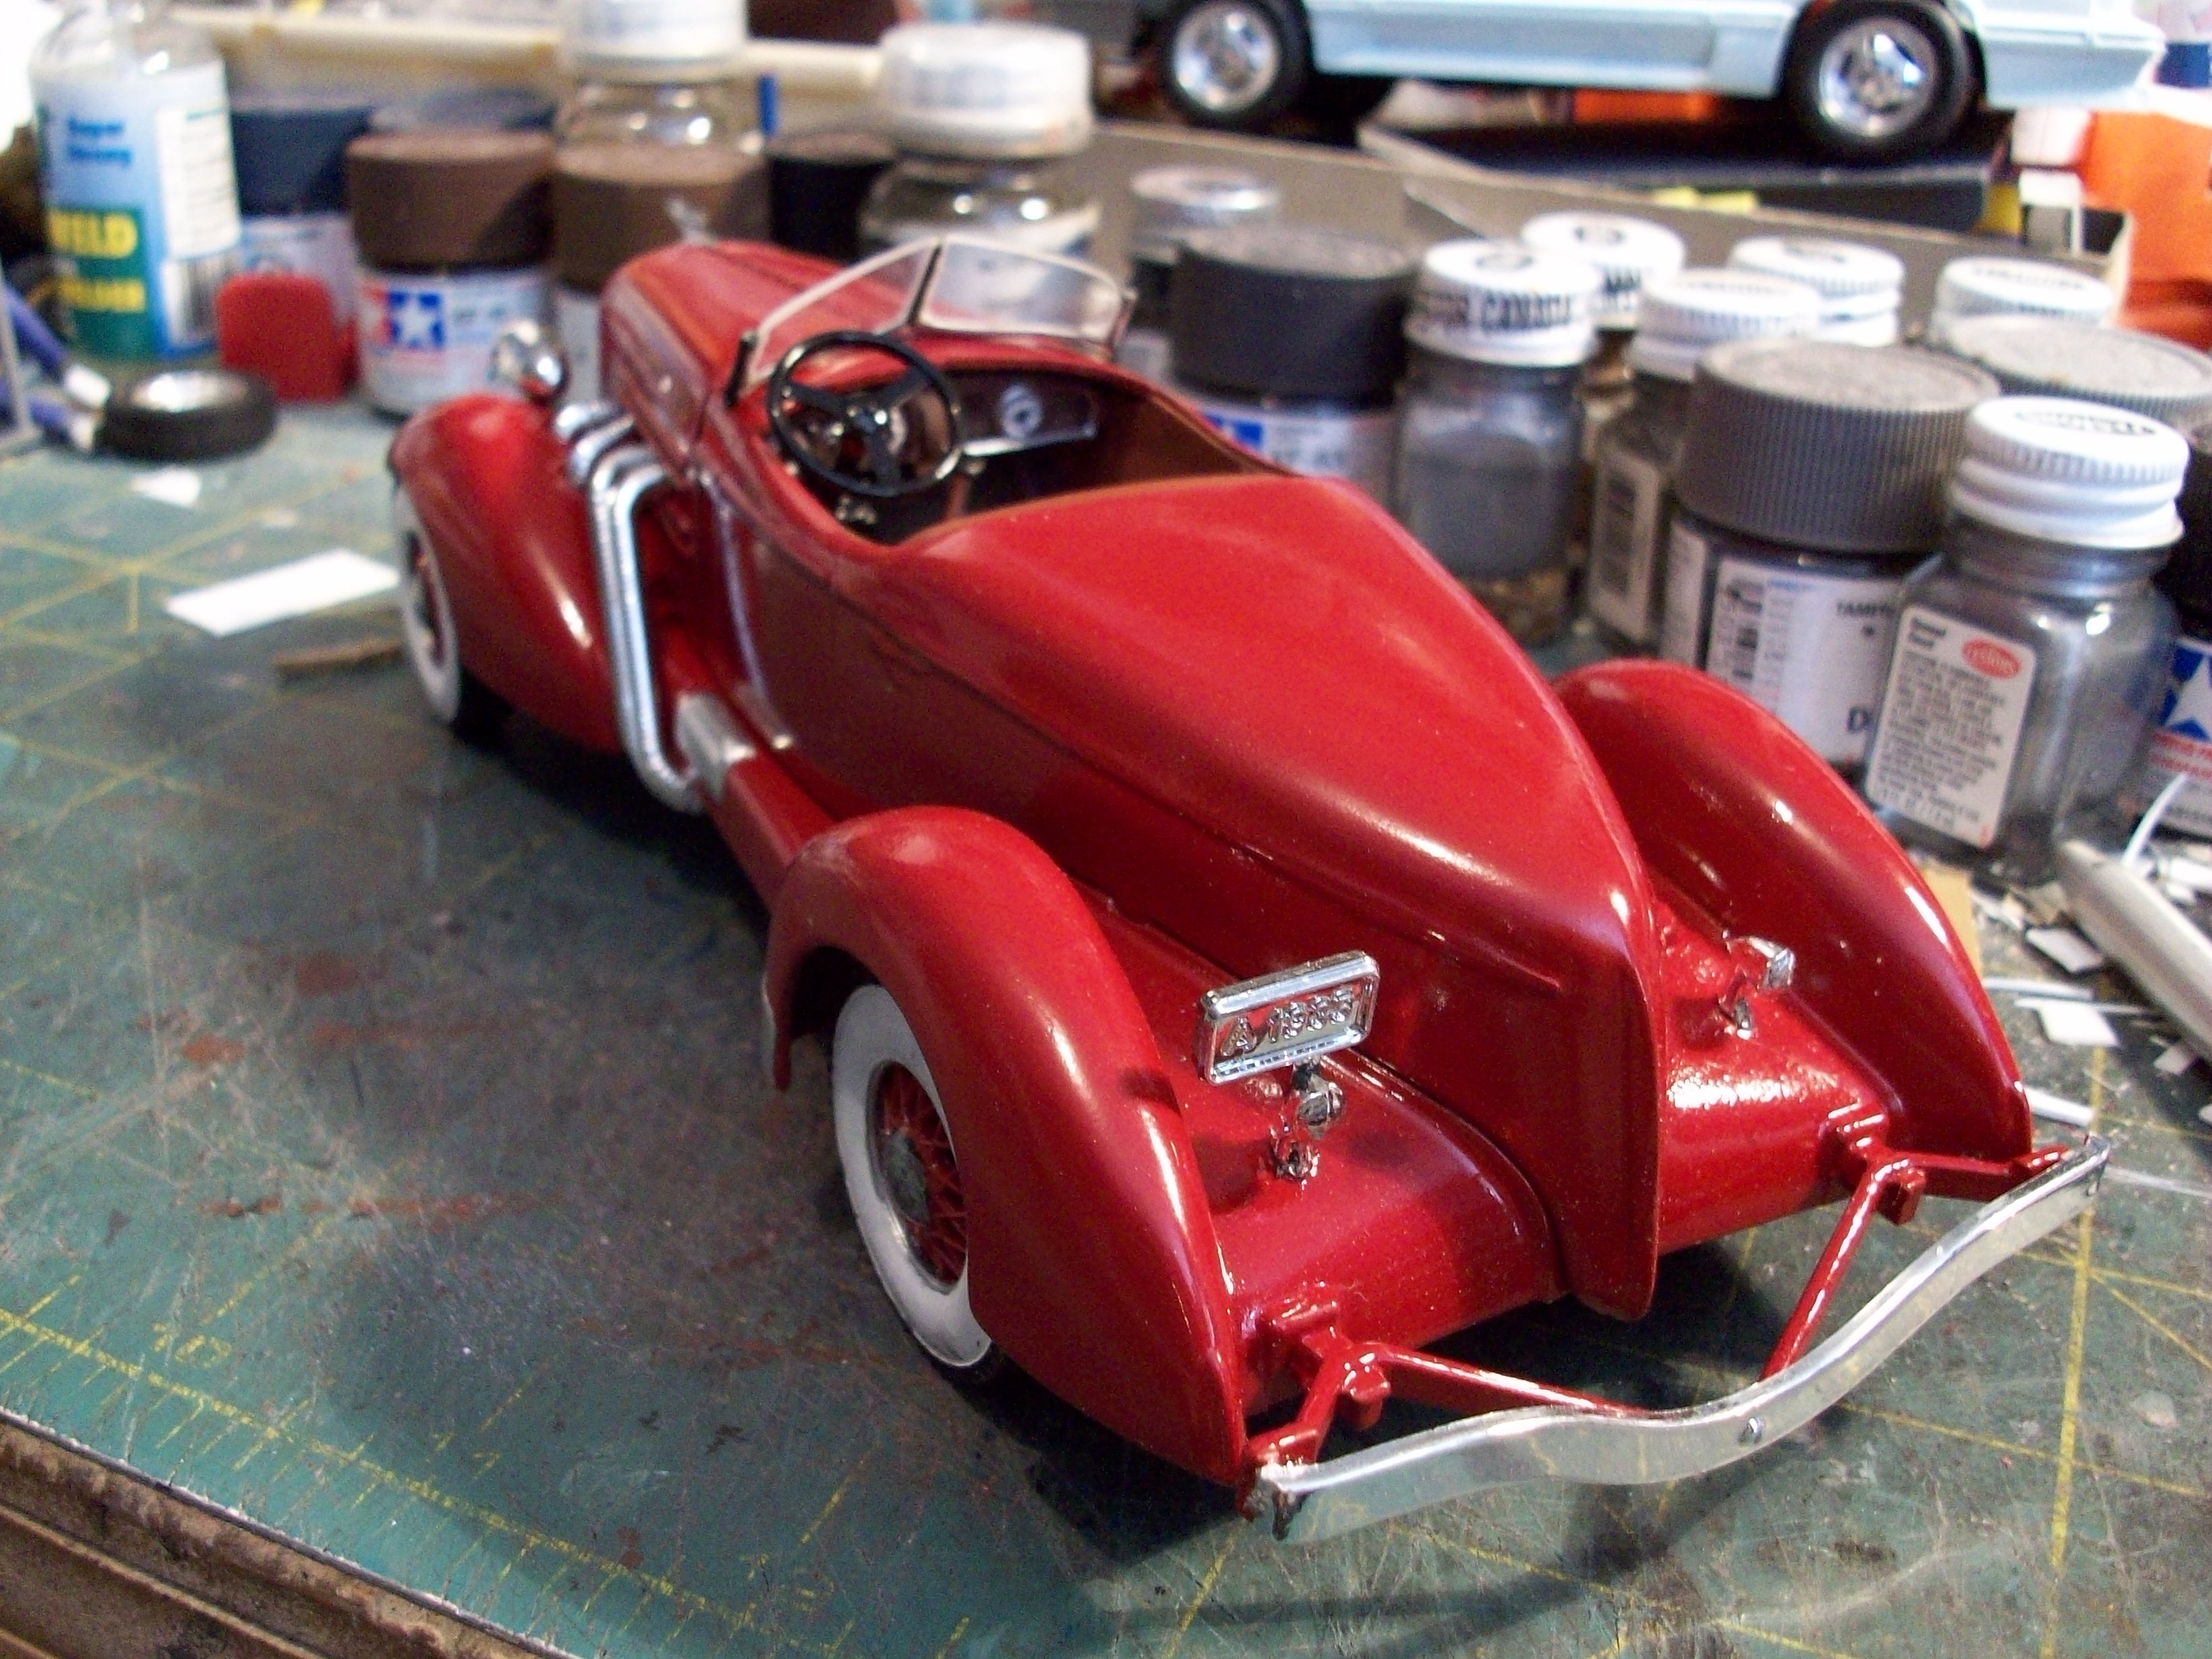
Many moons ago I started building the Pyro 1/32 scale 1932 Pierce Arrow kits, both the Convertible Phaeton and the Custom Convertible. For some reason I don't remember, I put them both back in their boxes barely started. With a resurgence in my interest in these Pyro classics, I dug them out and vowed to finish them both.
So here we go... starting with the Custom Convertible. The first picture shows my lack of progress when it went back in the box.
After some fine sanding to remove any "crud", today I got some paint on the fenders.
The second model is the Convertible Phaeton and it was pretty much in the same stage as the Custom Convertible
This is how it looked out of storage:
... and after adding paint to the body and installing the engine and most of the chrome parts today.
These classic Pyro kits are excellent for their age and go together extremely well with no fit problems. They are fun to build and represent some vintage and classic automobiles that are not available in any other scale.
More to come.
Tony
-
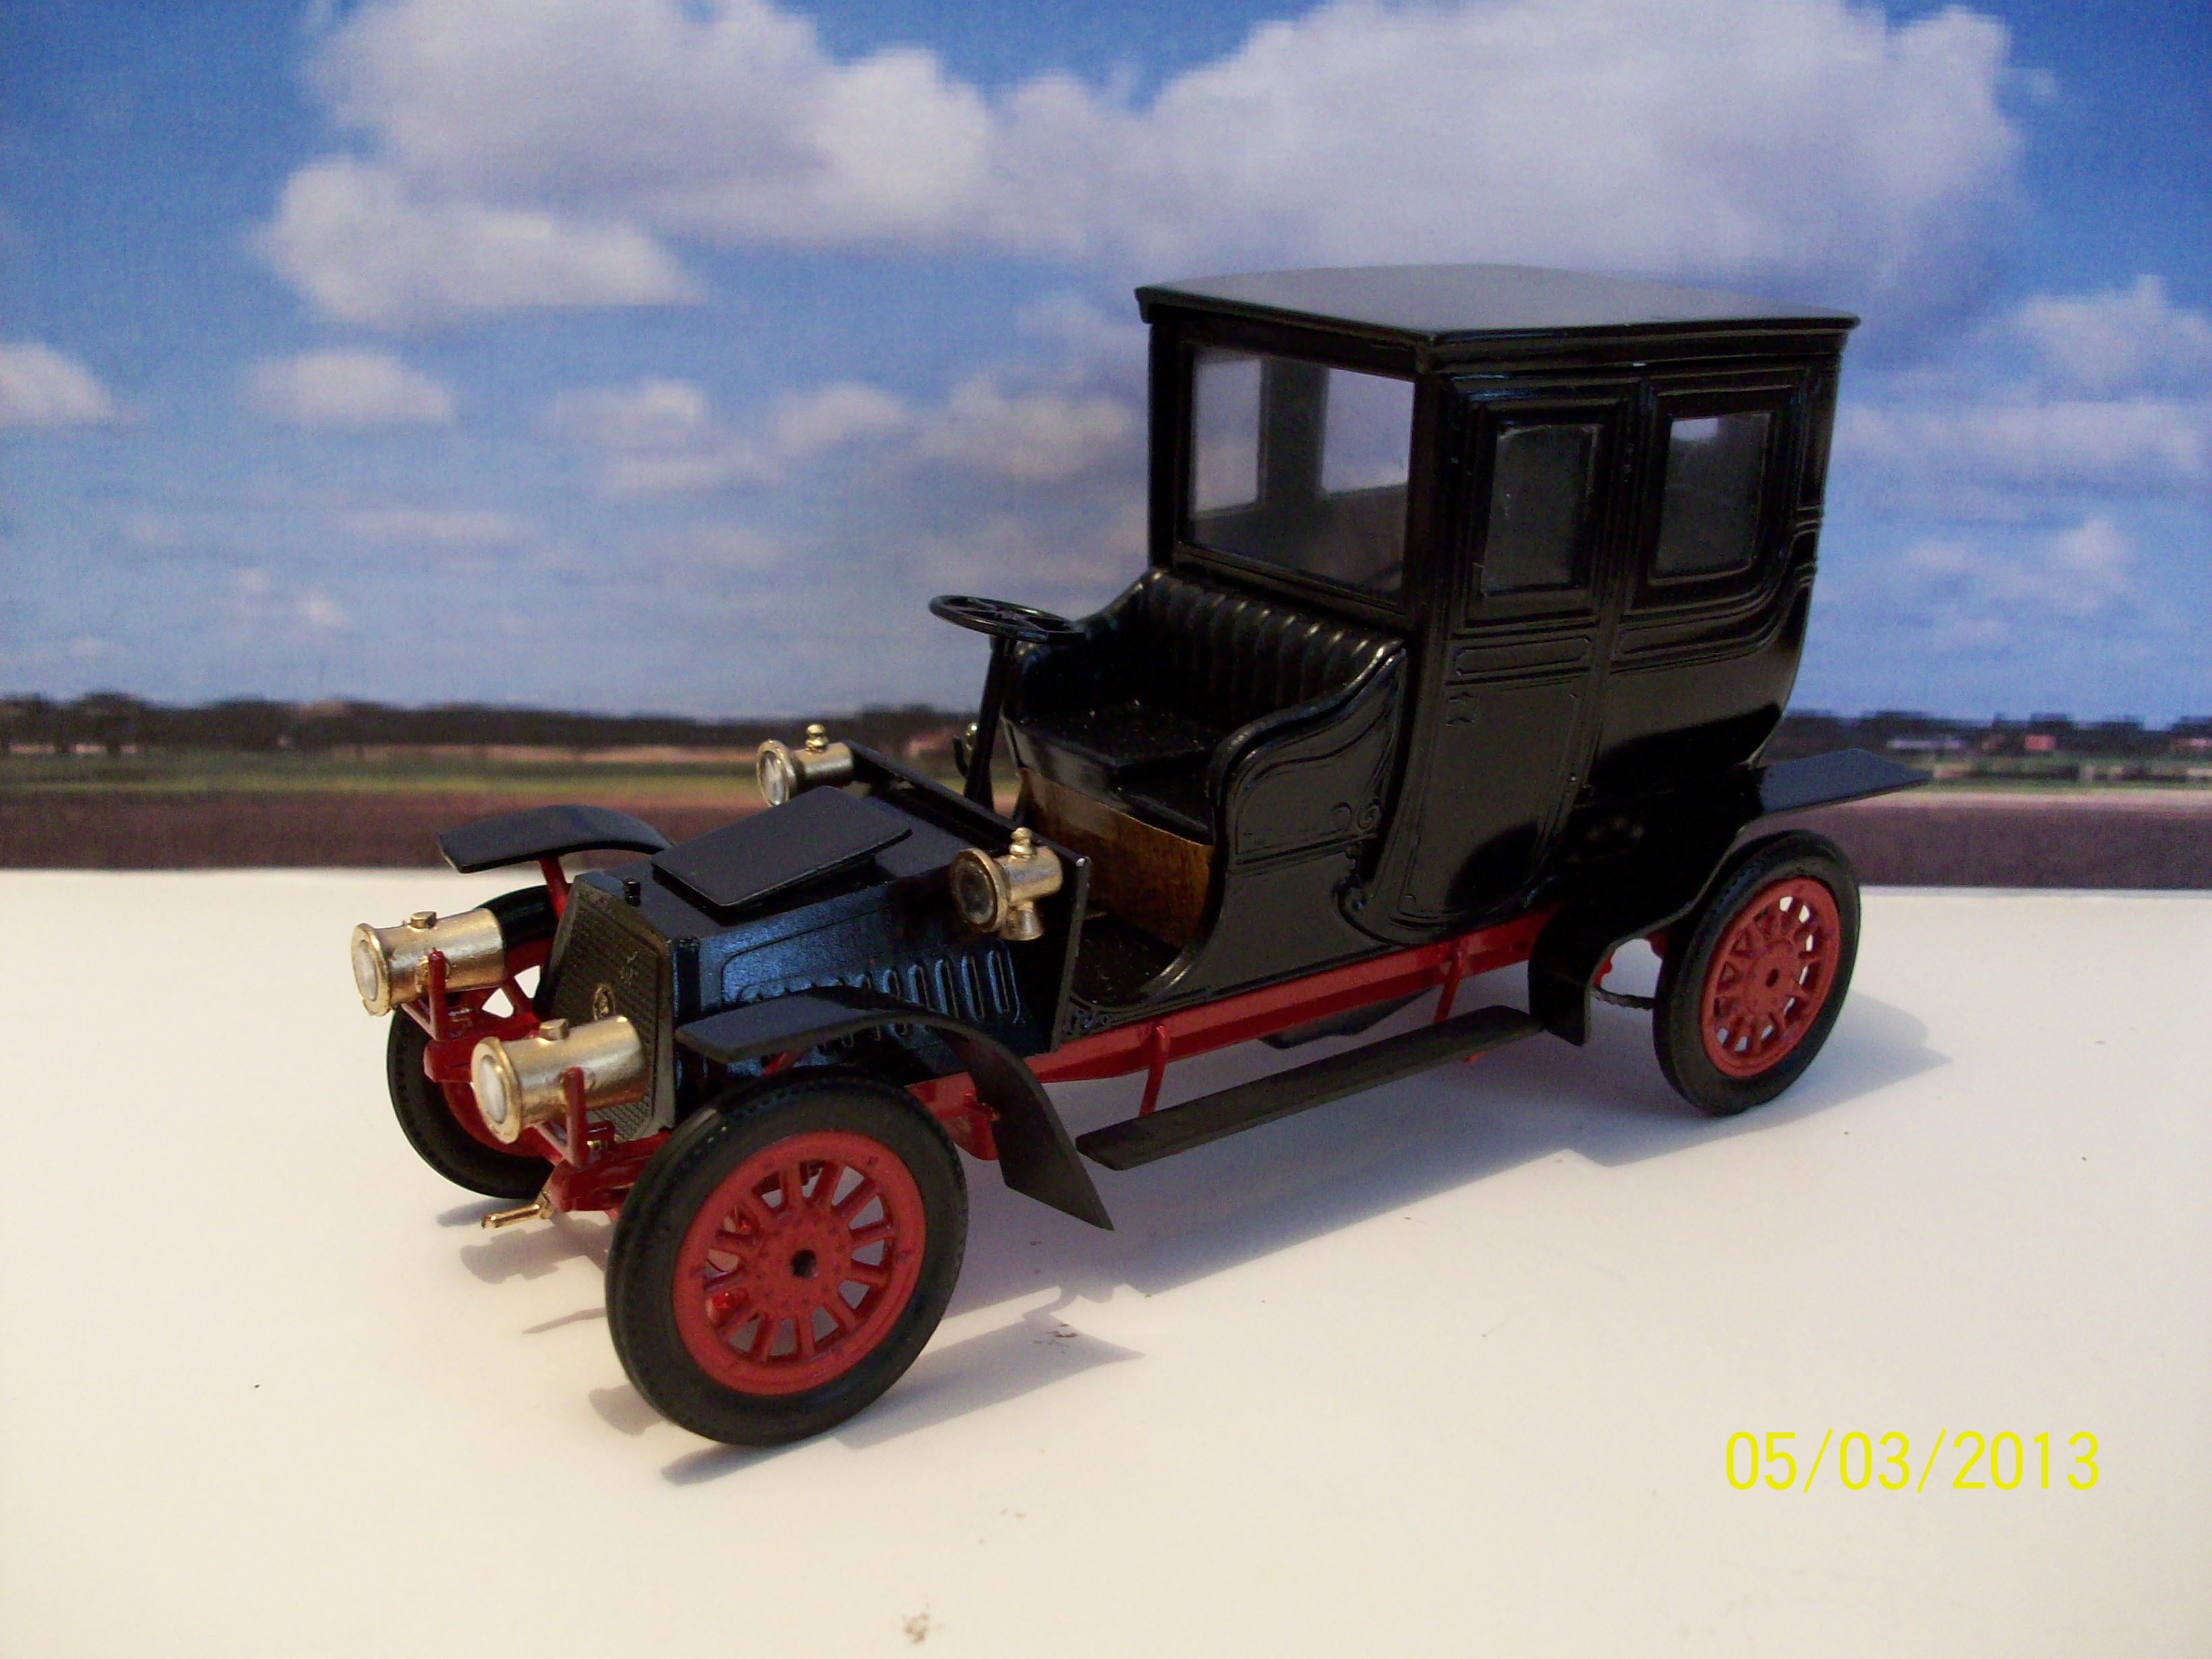
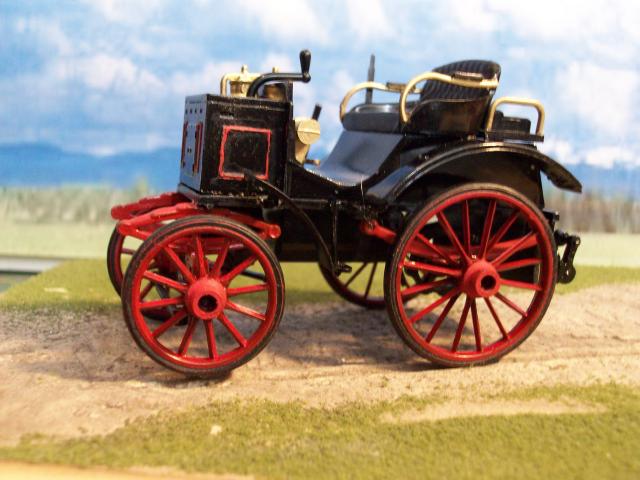
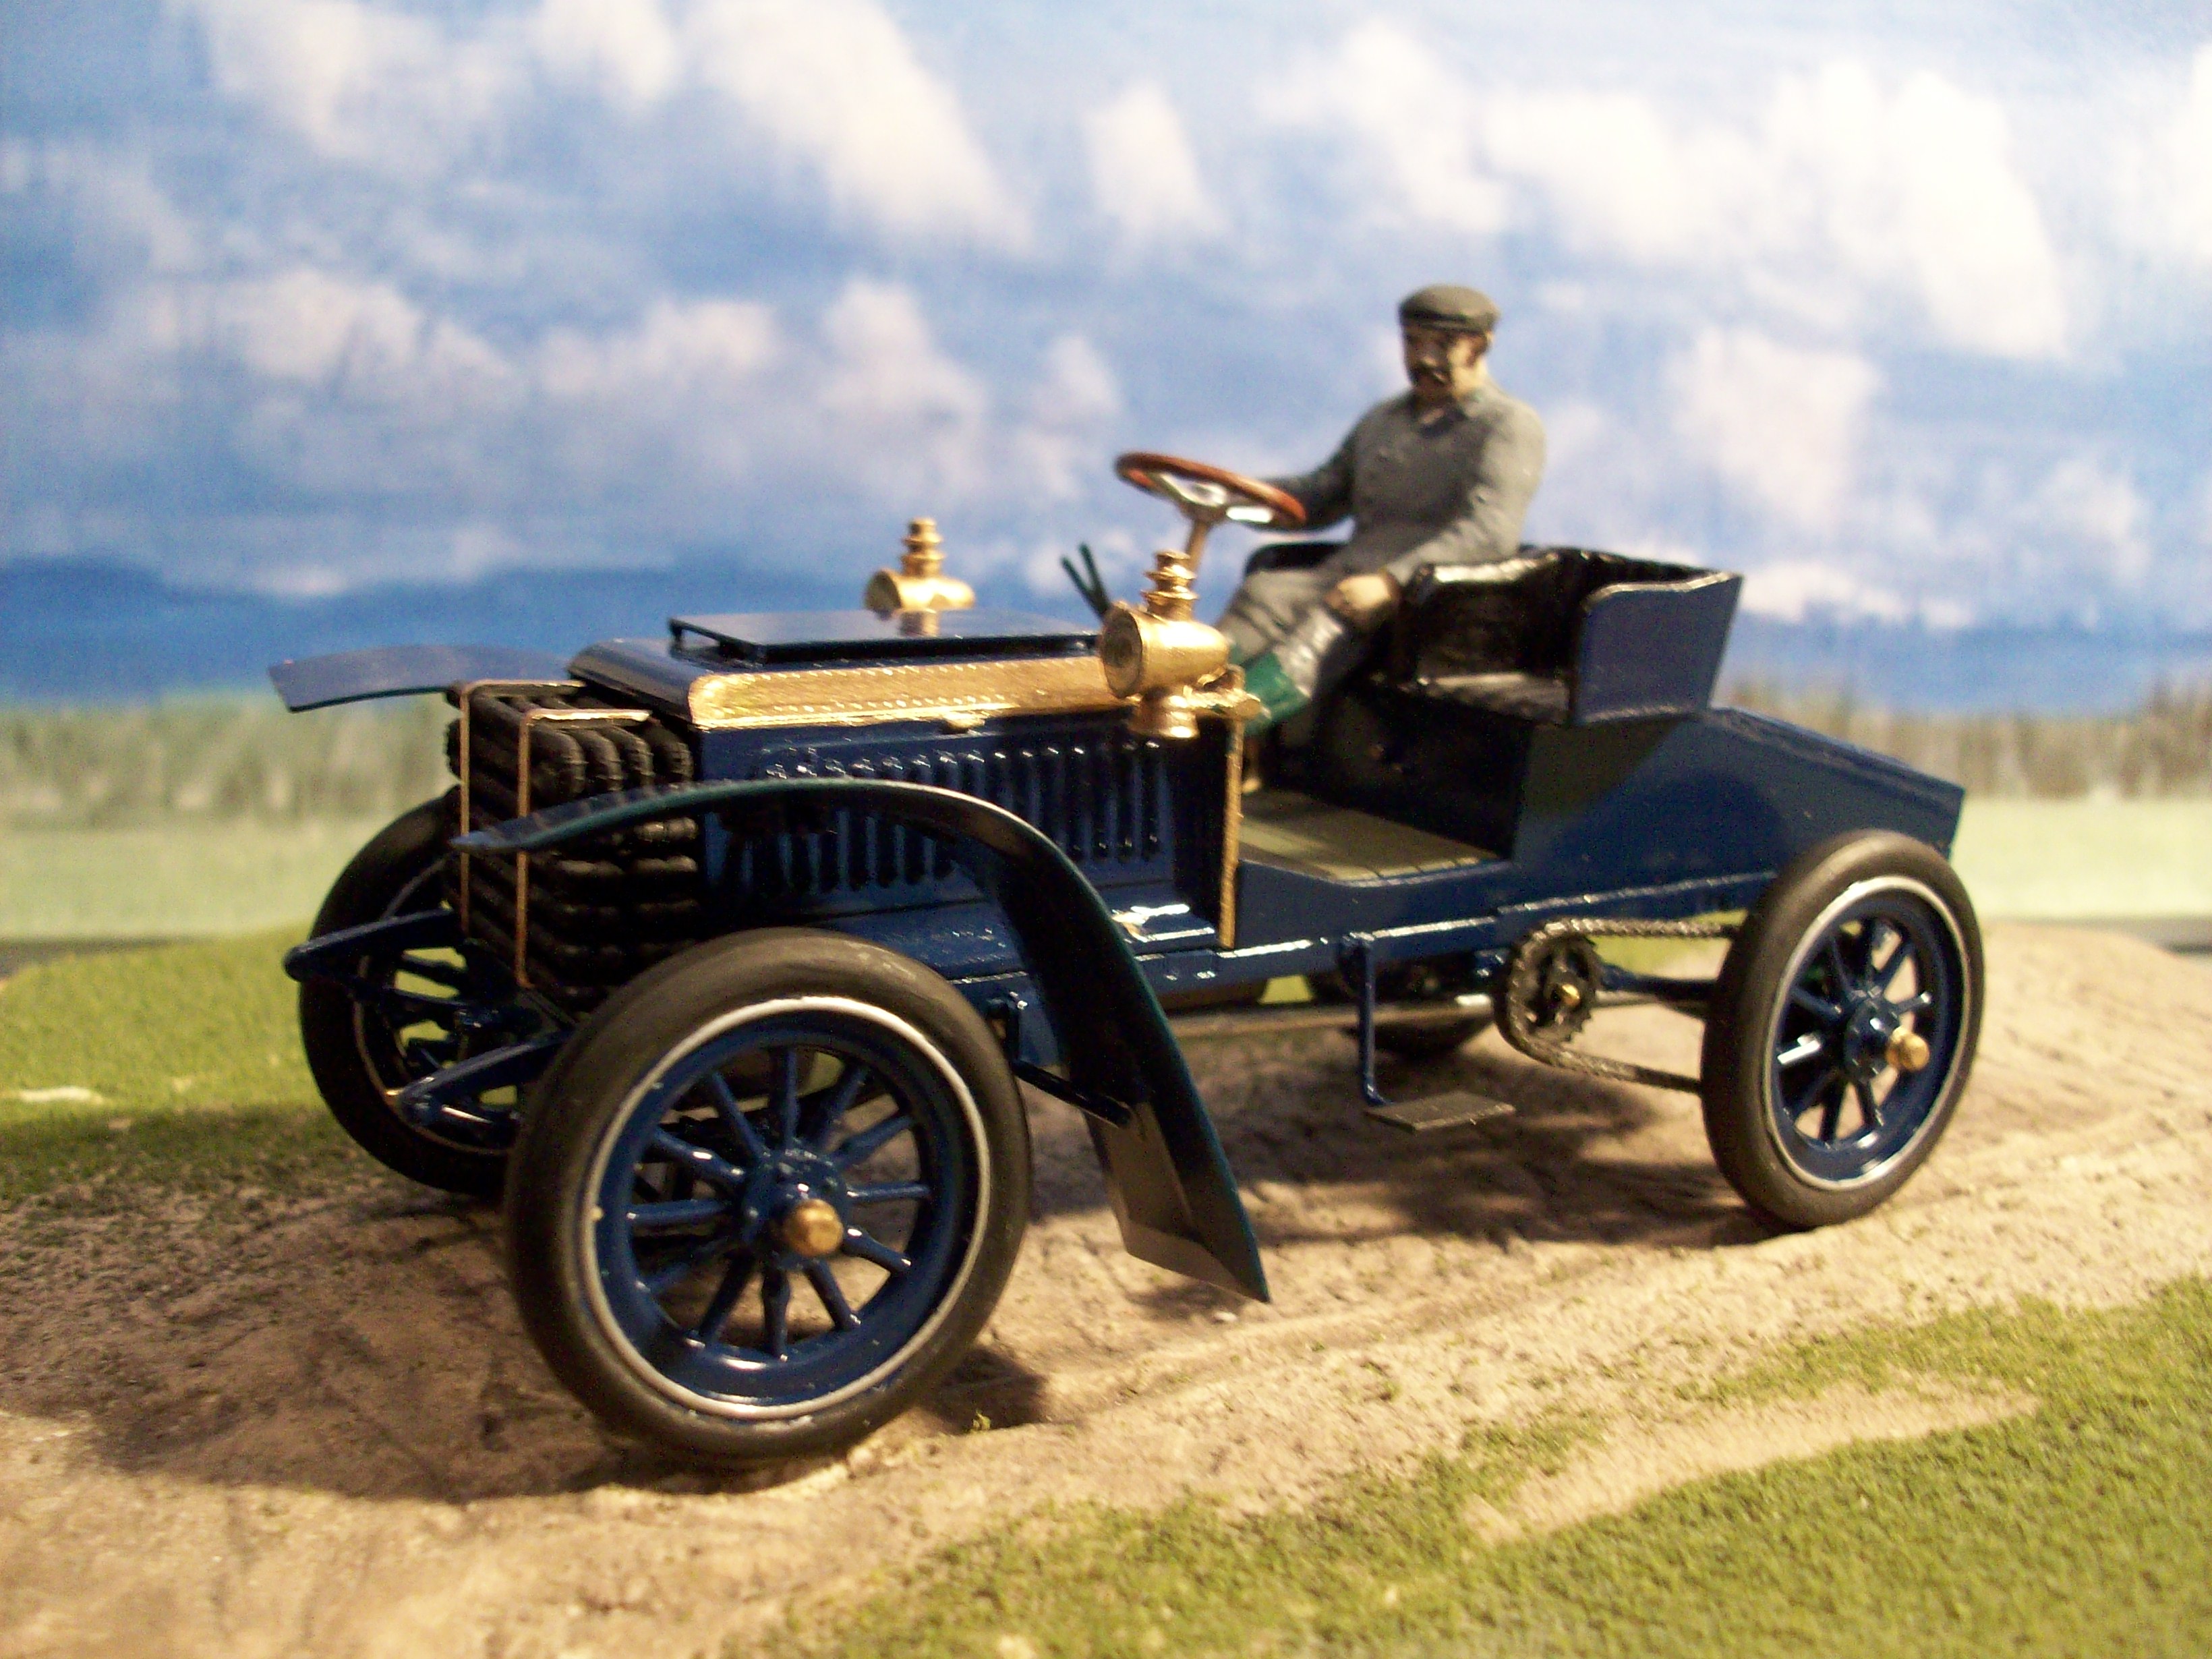
This is one of those fairly rare "Europe" 1/32 scale kits. There are a series of Panhards in the series and this 1891 model is the earliest of the set.
These "Europe" kits are not the easiest to build and I had a lot of tiny parts left over, with no idea where they went. But the model looks OK without them so I won't worry about it!
-
Thanks to all for the nice words.
Tony
-
17 hours ago, misterNNL said:
Did you lengthen the frame,or just shorten the cab?
The frame is the stock length. I just removed a portion of the van sides and top. Then used the rear doors to close off the cab.
Here's a progress shot:
-
How do I delete this duplicate post?
Tony
-
Thanks guys.
Tony
-
Whoops....! Somehow I managed to post this one twice while trying to edit the first one. I'd like to delete the first one, but can't figure out how to do it. Any suggestions?
Tony
-
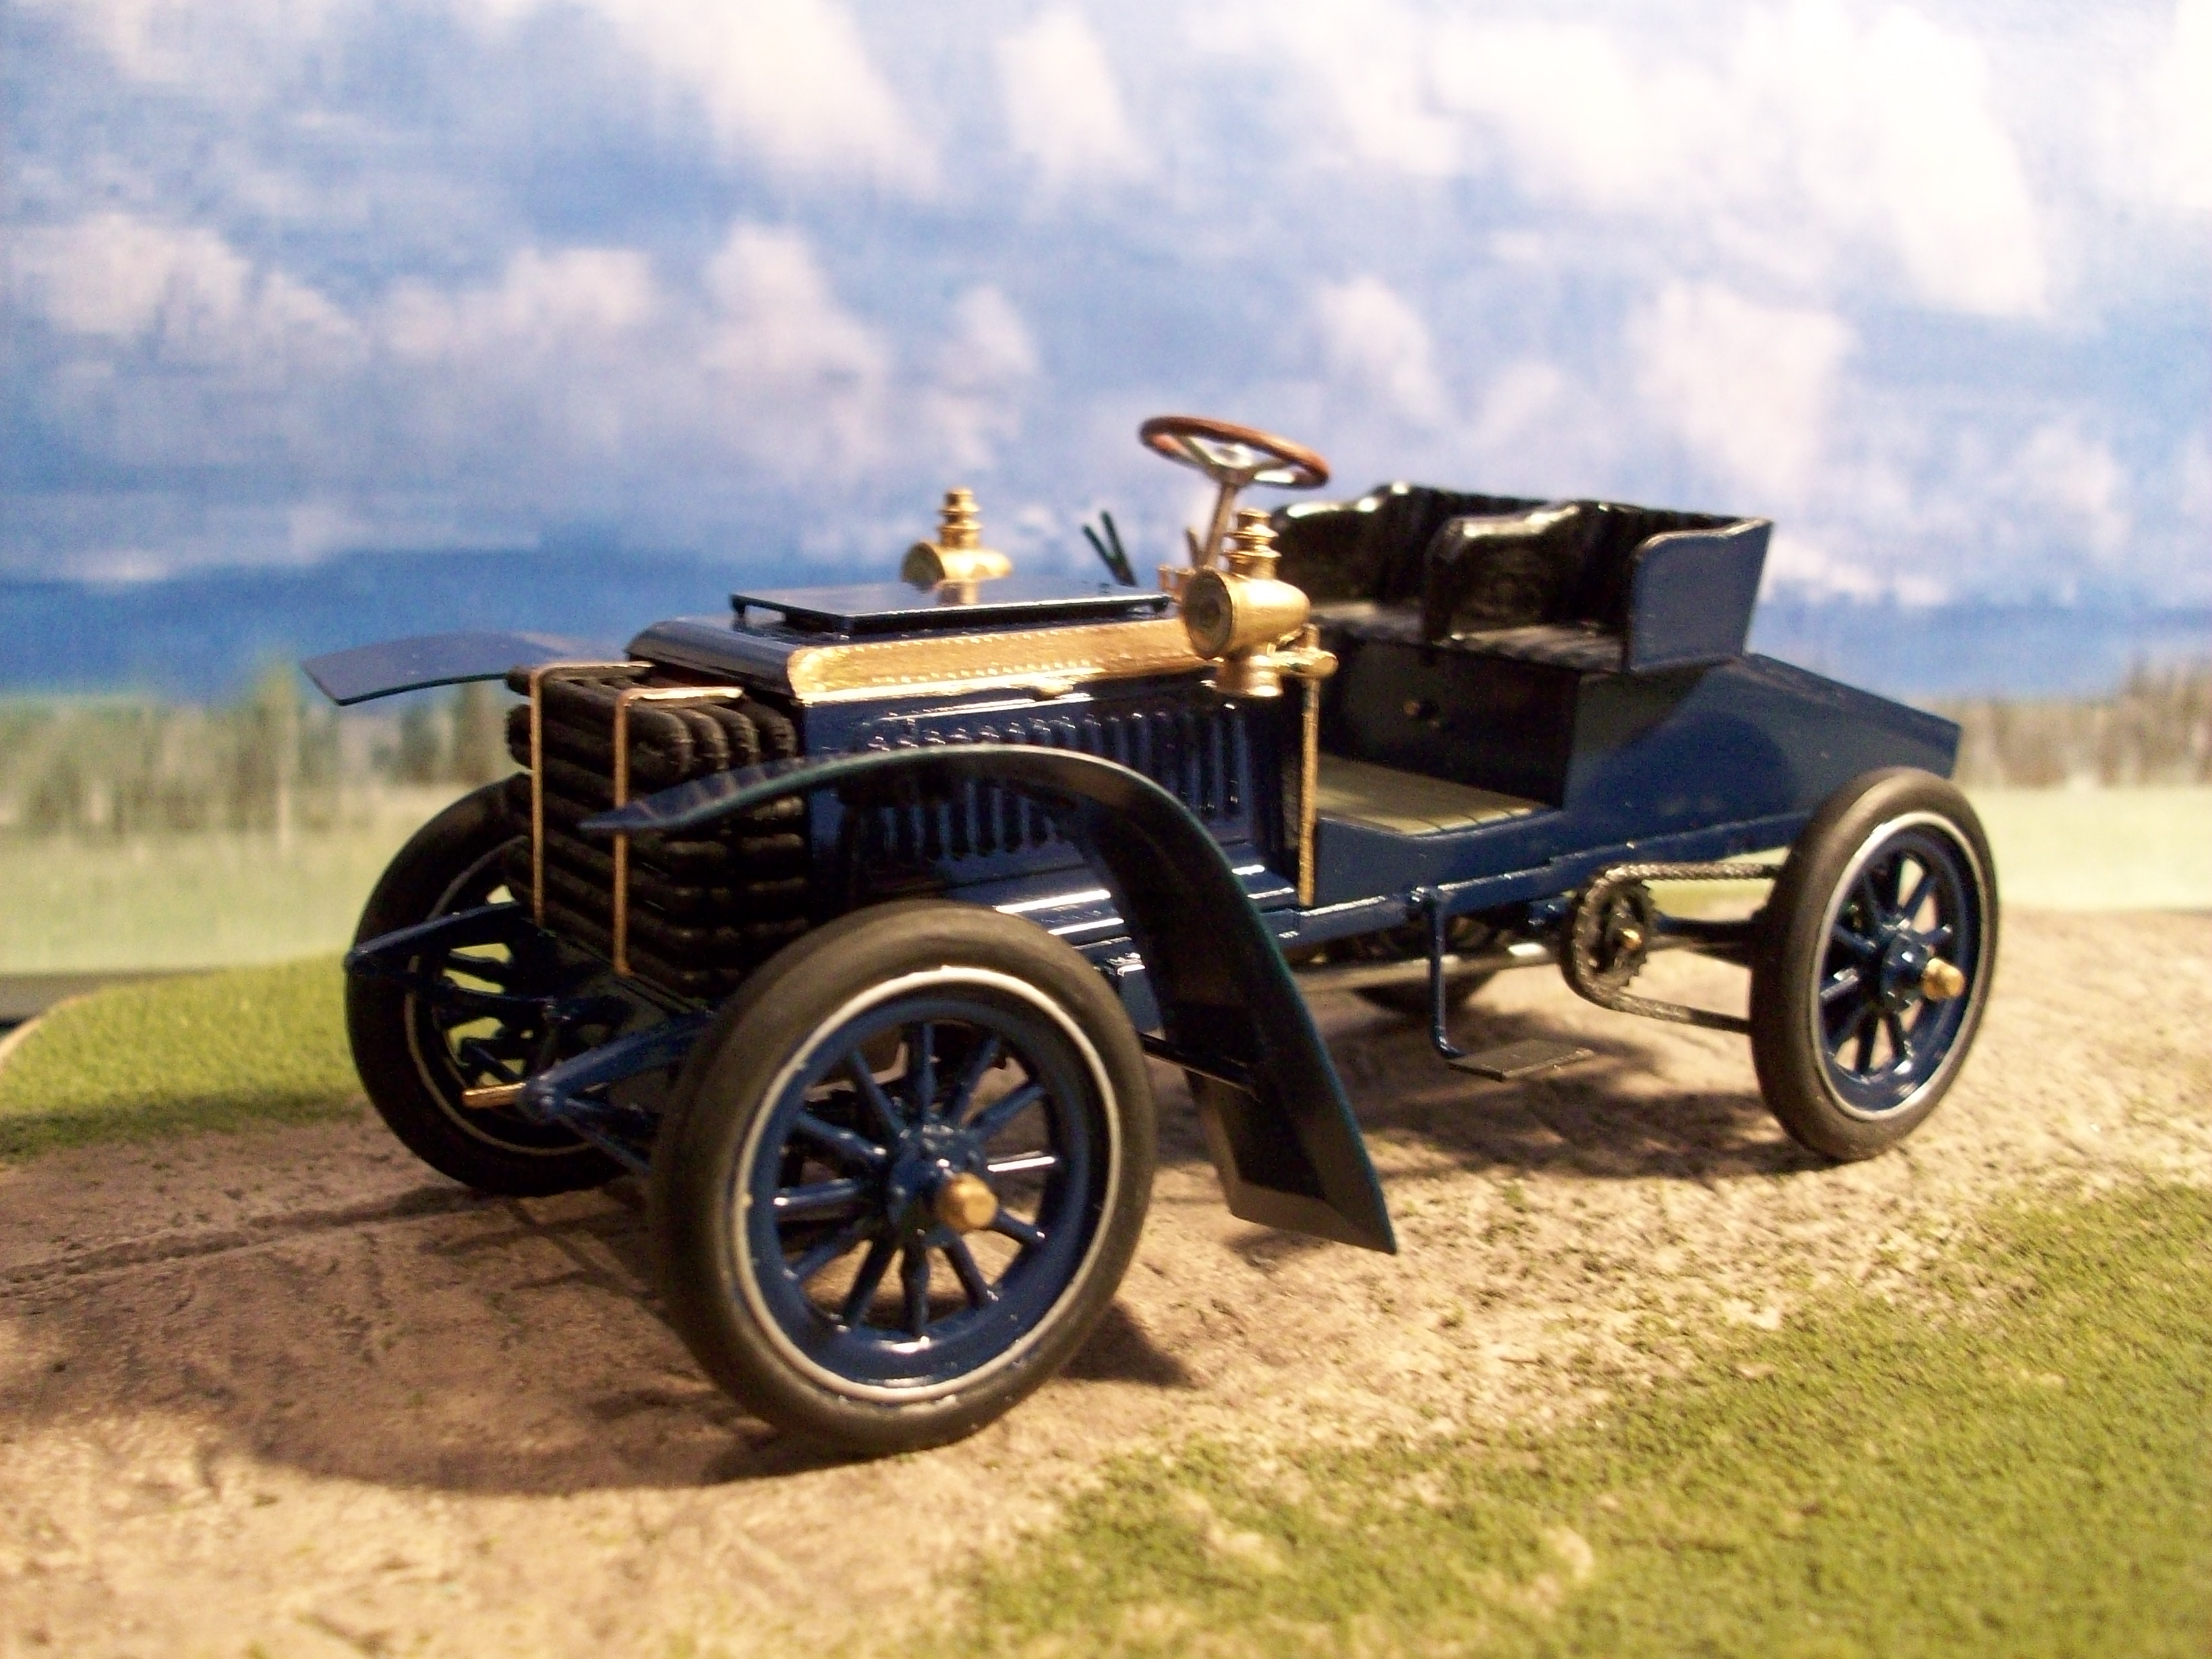
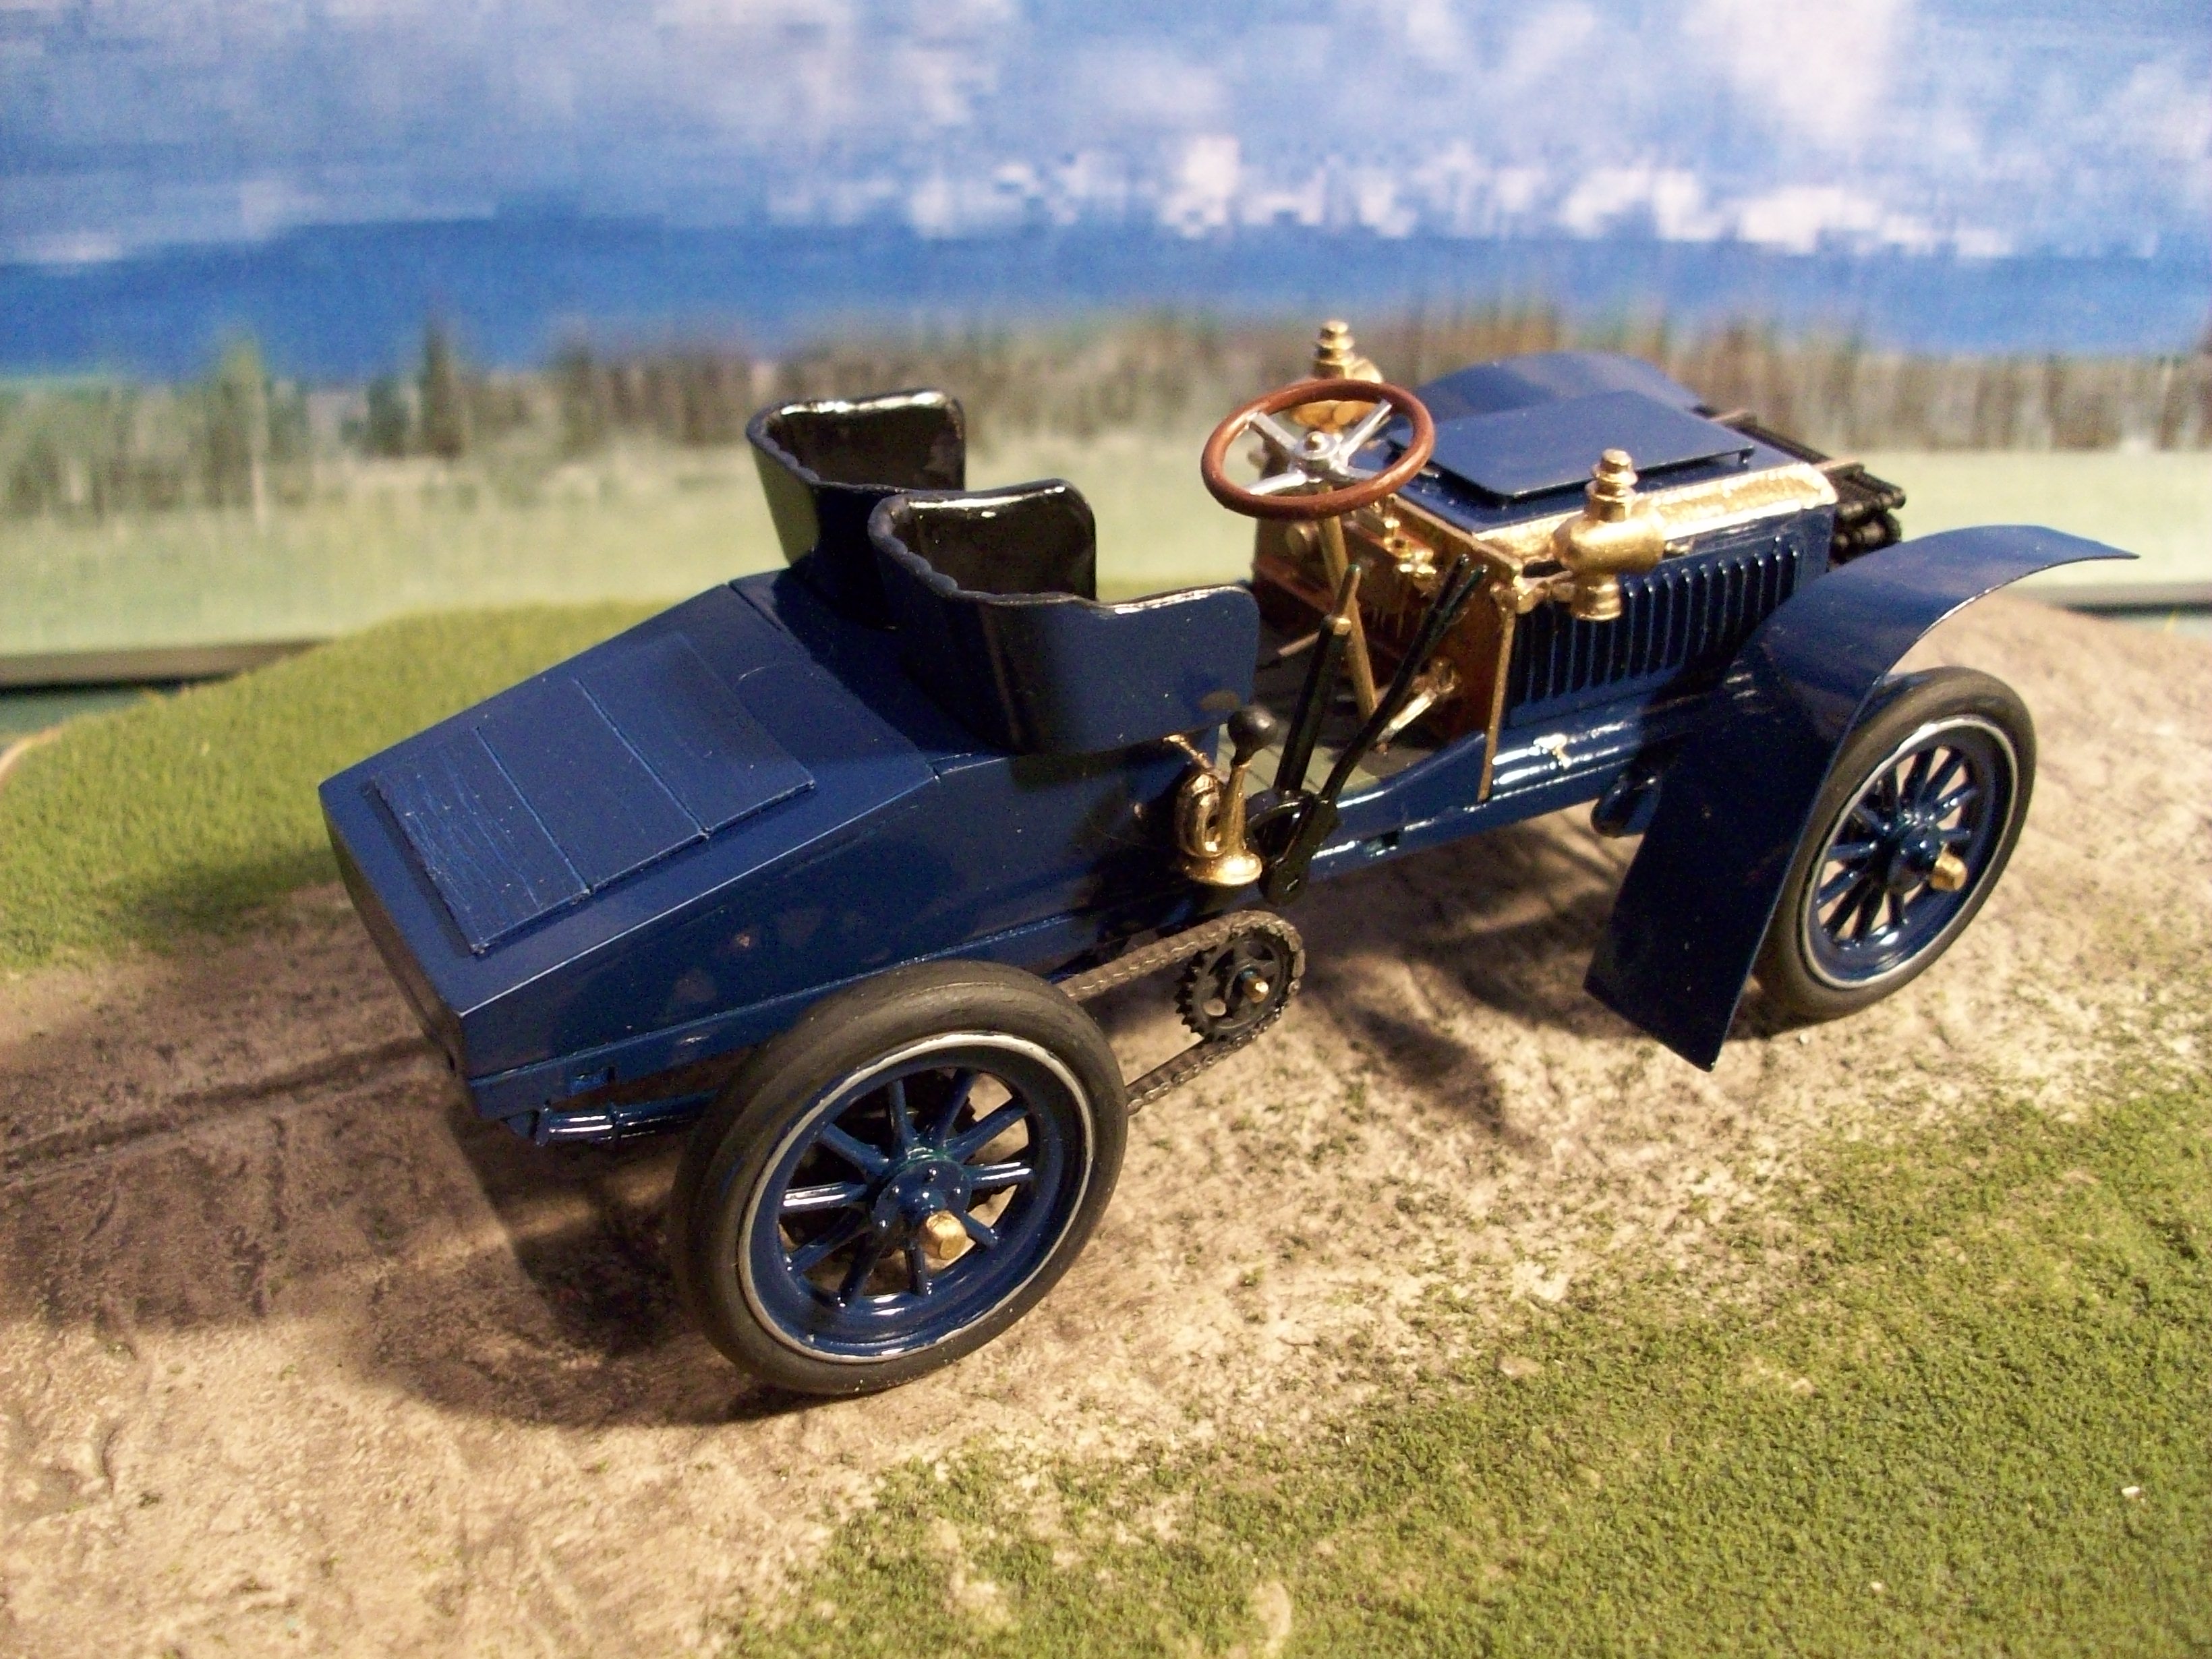
Using an Airfix 1/32 scale De Dietrich touring car as the basis, I built a model of a racing version, using the following picture as a guide:
This is my version......
Hope you like it
Tony
 Viewed 11 times")


Revell ‘66 Shelby GT350
in WIP: Model Cars
Posted
I'm a "Mustangman" from the day they were first released to the public. I owned many over the years.... my favourite being a '68 fastback in Highland green that I bought before the "Bullit" movie hit the screens. That guaranteed me a lot of looks as I drove around town!
I've built many models of 'stangs in all scales. The '66 Shelby Fastback is a great kit to get started on, fairly simple but with all kinds of potential for stock, racing or custom versions.
I'll hollow this build with interest.
Tony