Misha
-
Posts
969 -
Joined
-
Last visited
Content Type
Profiles
Forums
Events
Gallery
Everything posted by Misha
-
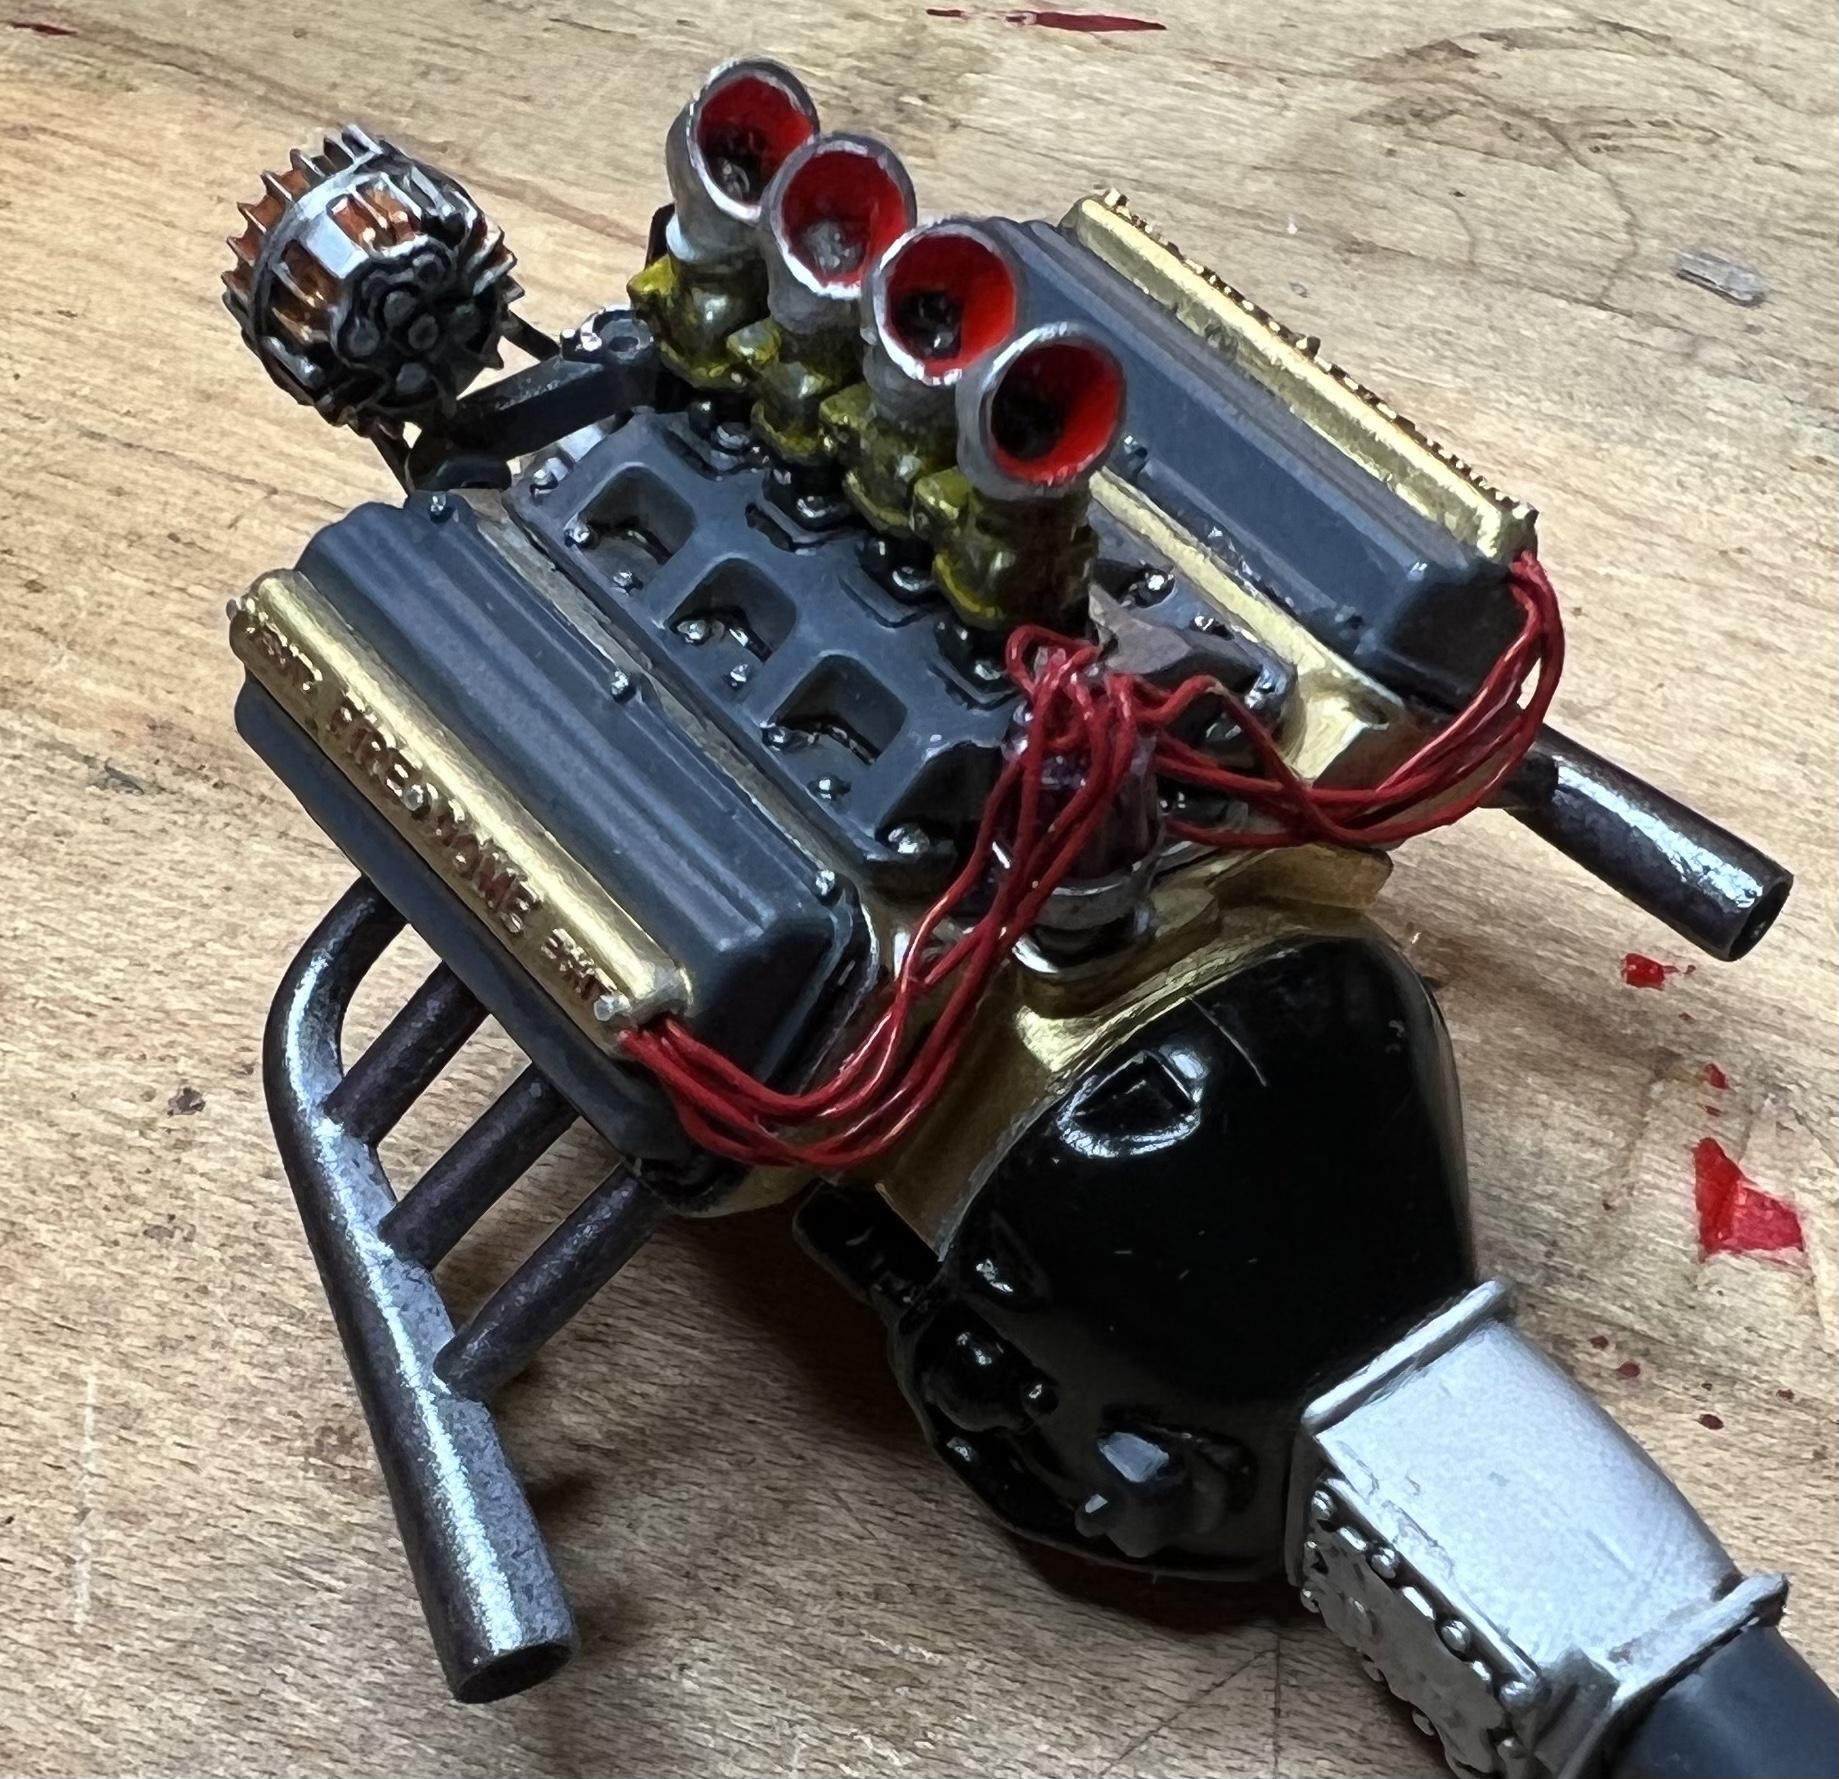
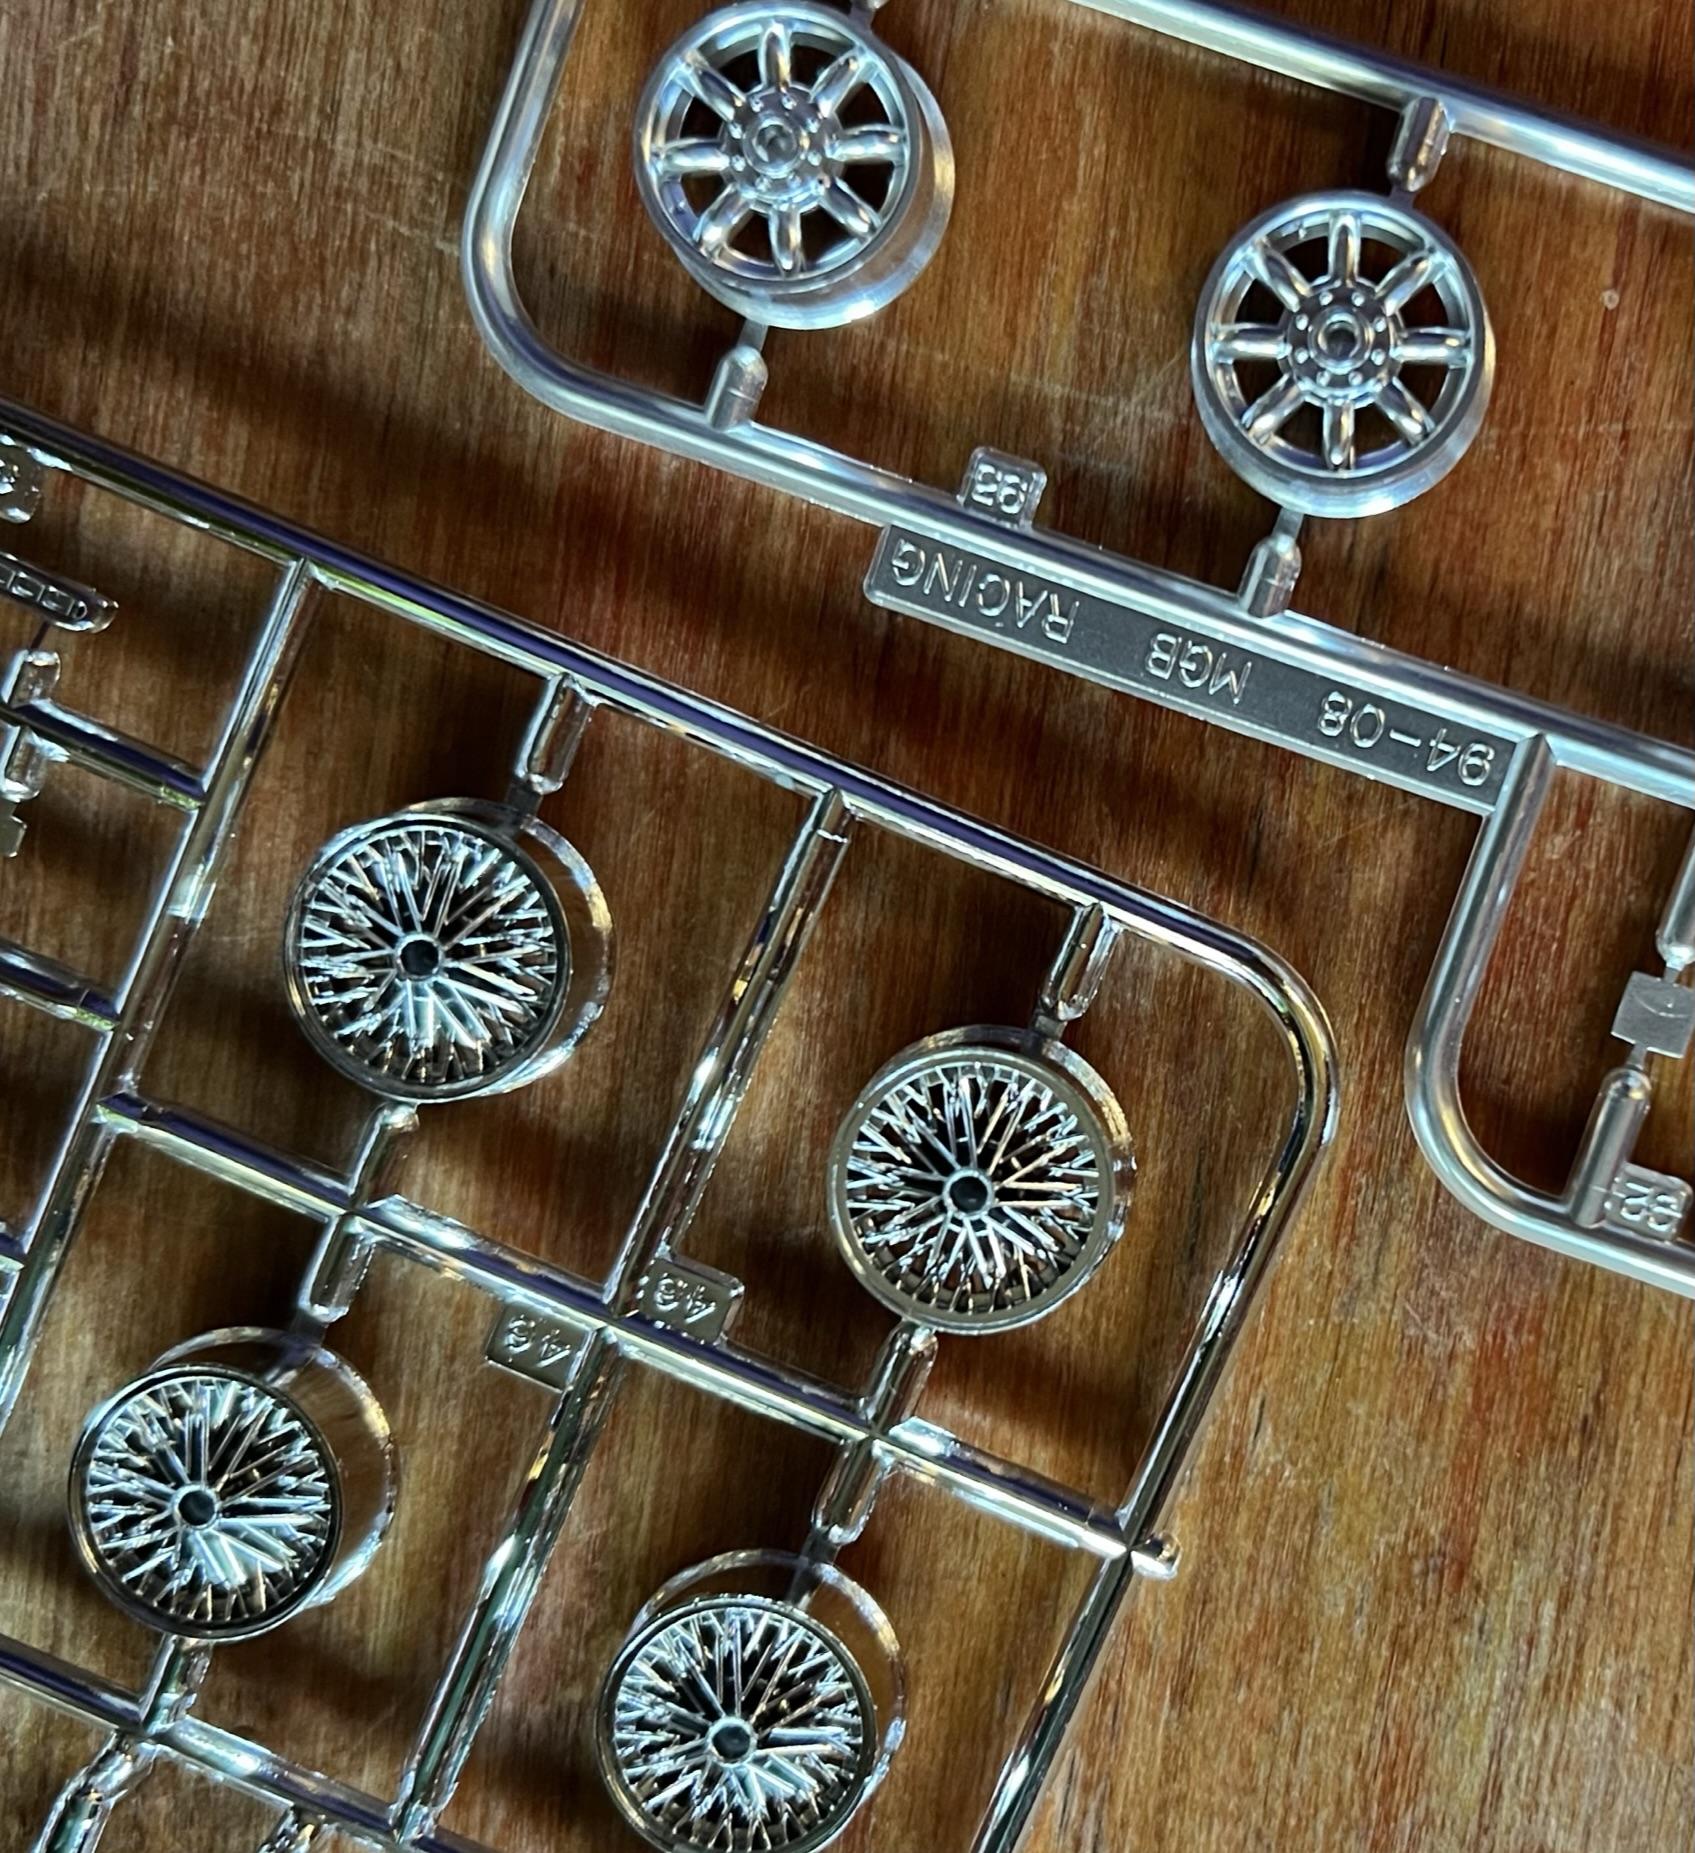
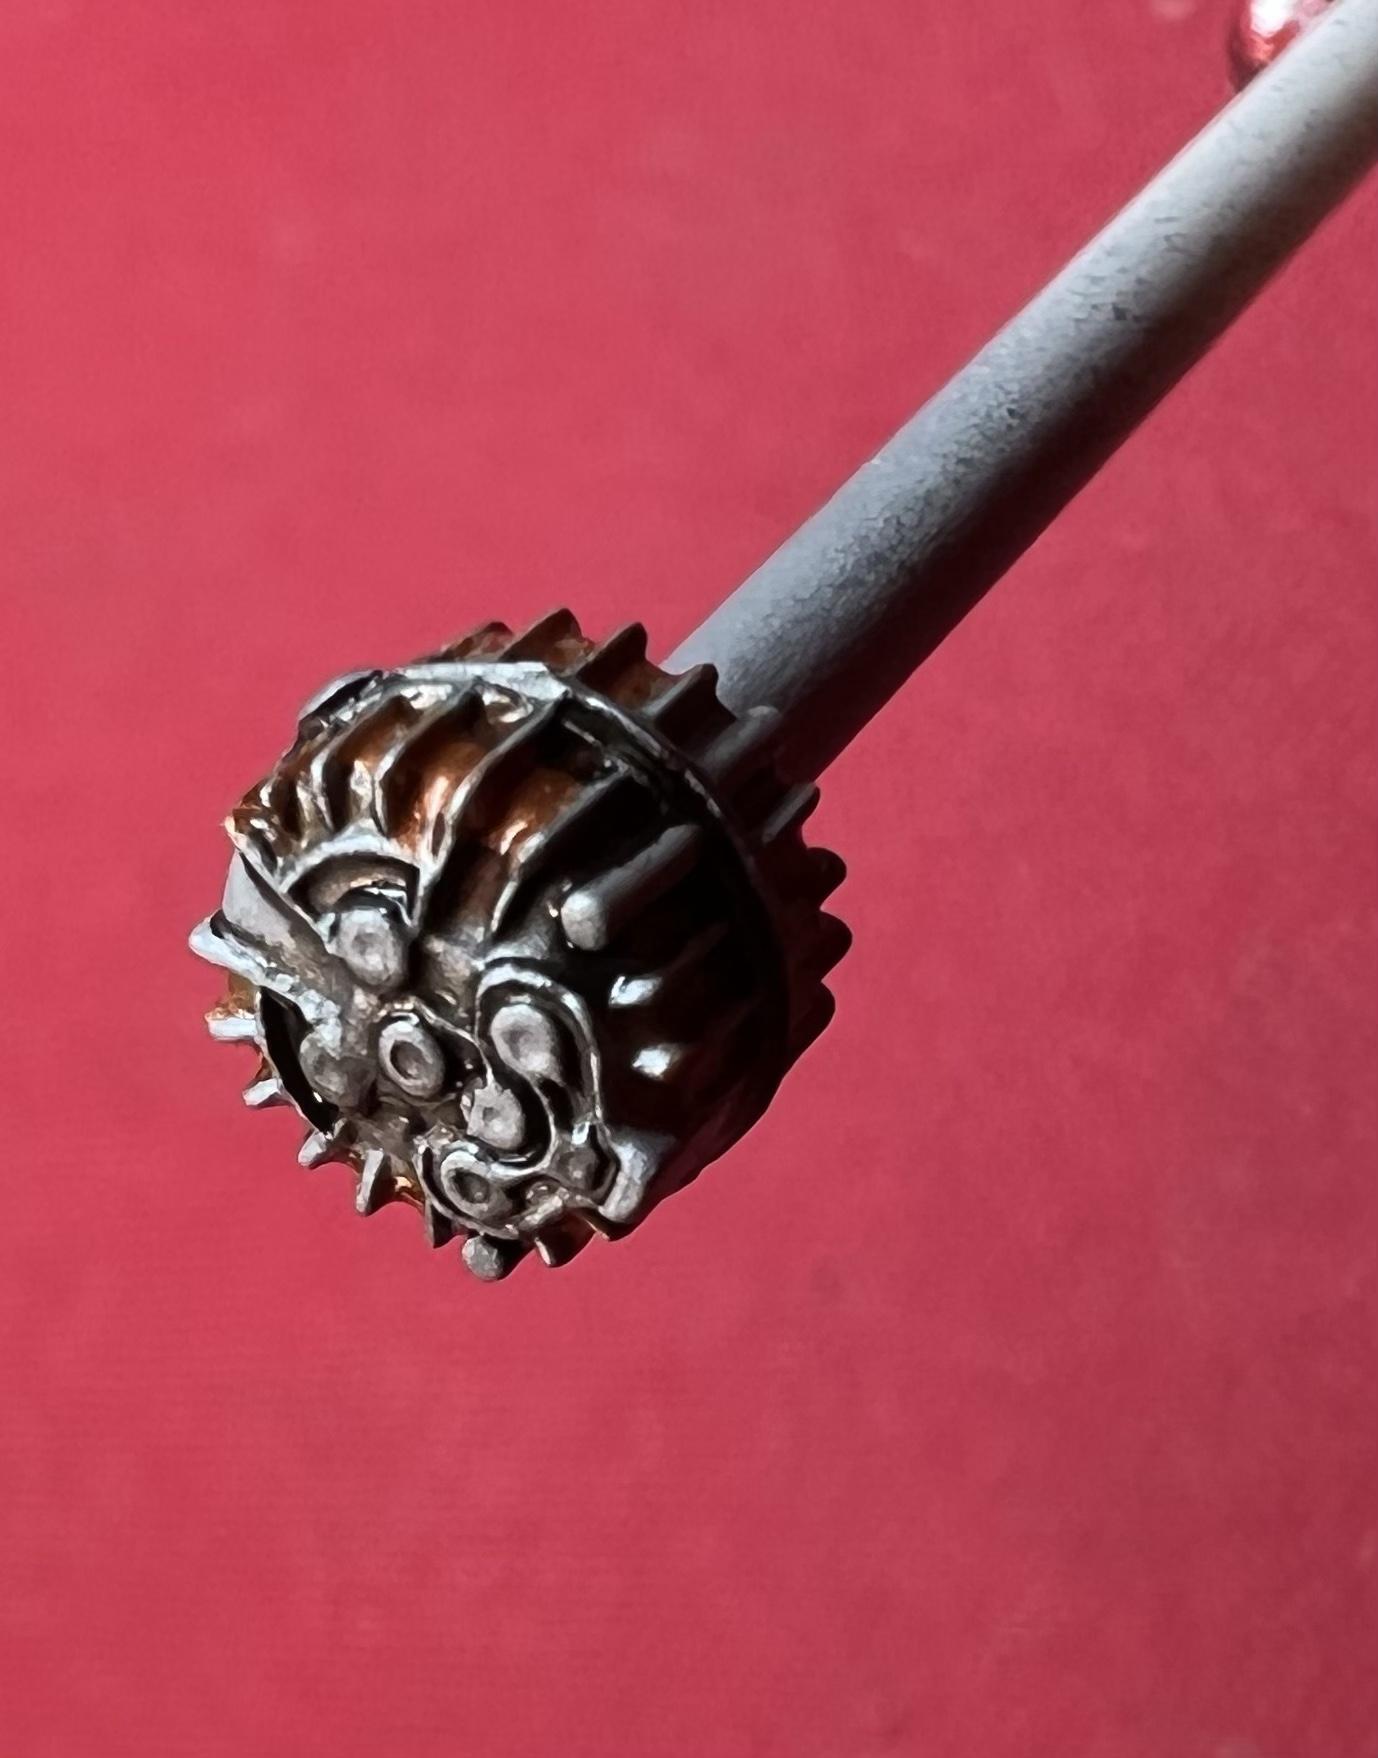
The entire intake system is from Norm, our club did a combined purchase awhile back so I still have a lot of little yellow bags to use 😊. The manifold is part # P-113 4-Carb Intake Manifold designed for the early Hemi from the Deuce 5 window kit. It includes the carbs and stacks.
-
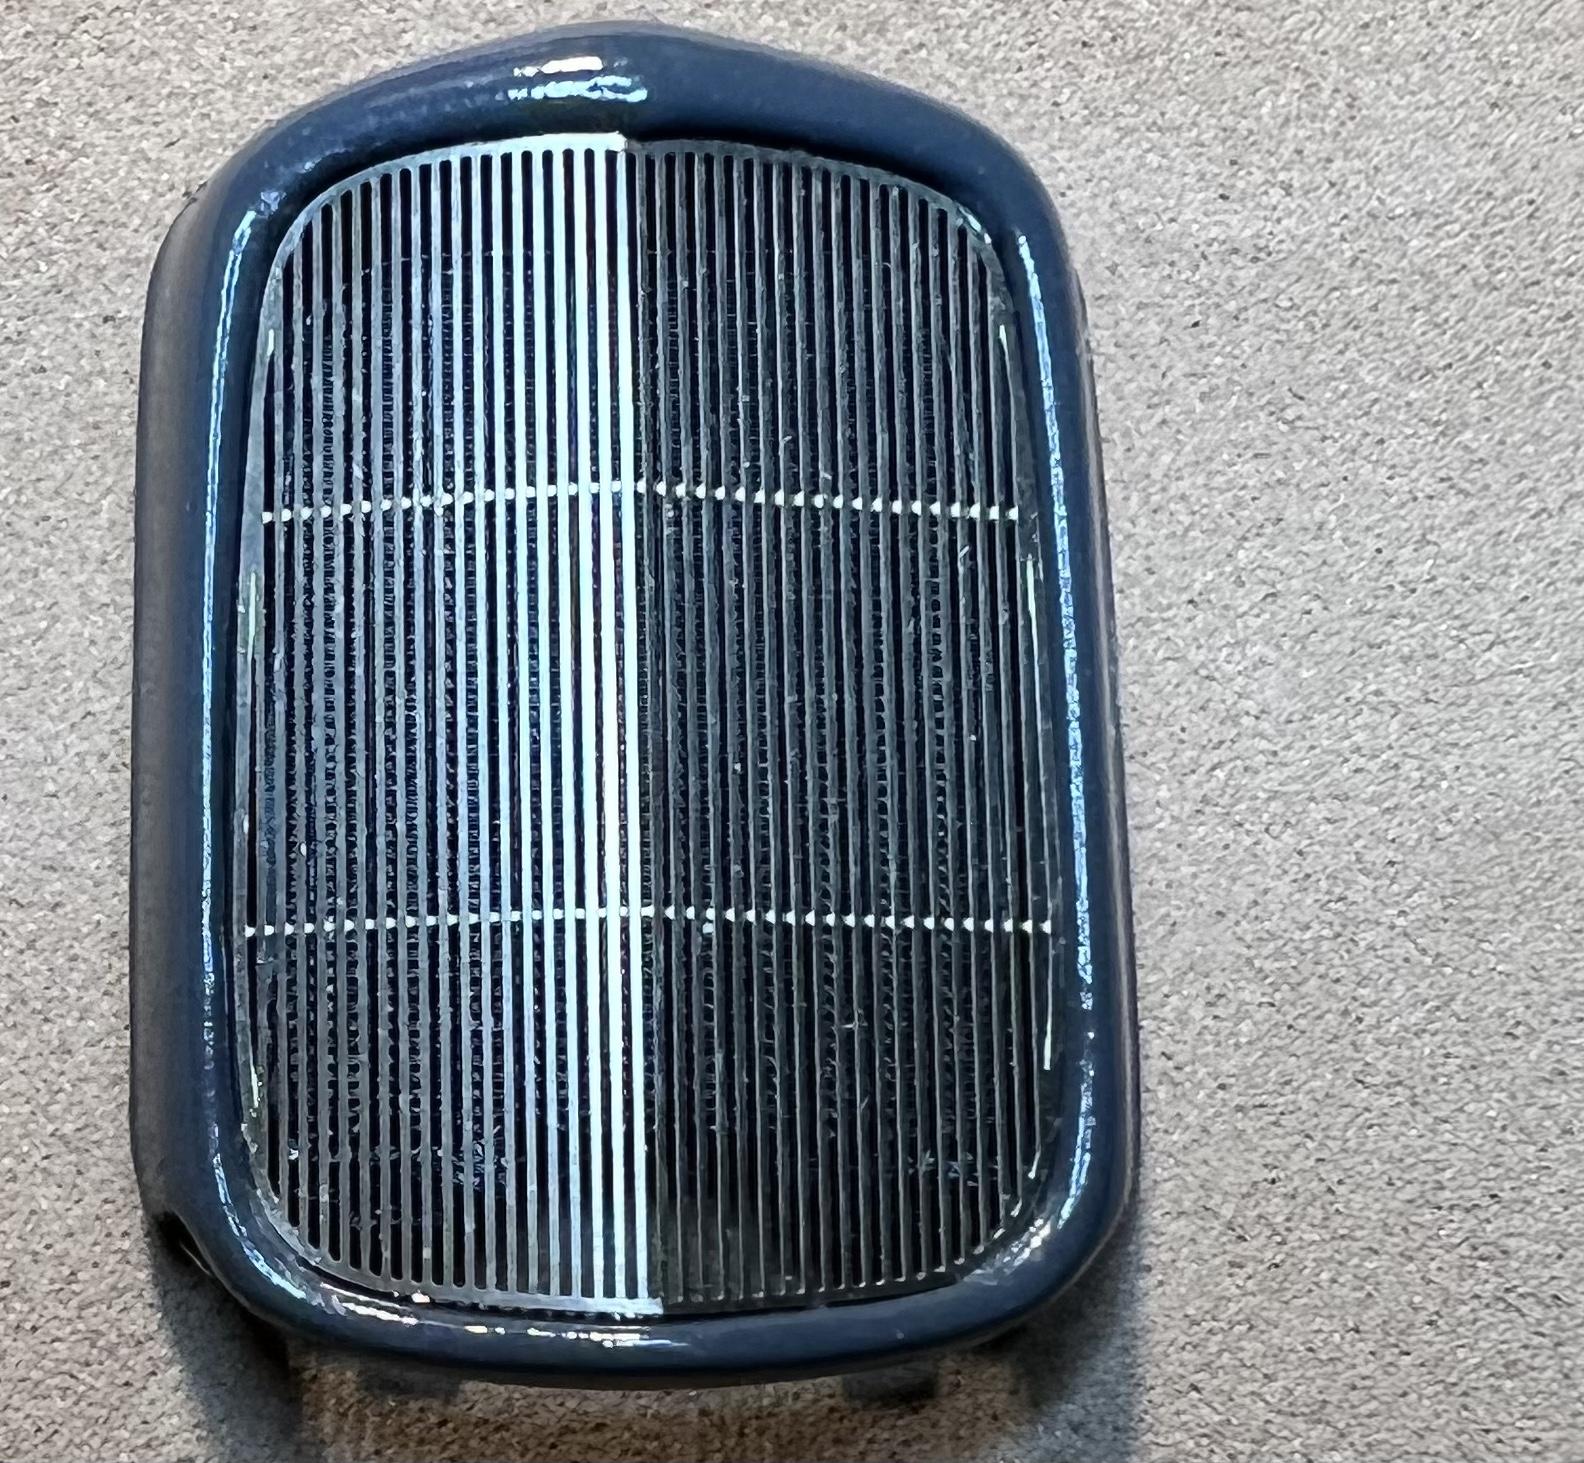
Hi Paul, I really like the look of vintage speed equipment and my go to source is R&D of M. For this build I used the Strombergs with the scoops, the sectioned rad, shell & PE grill and exhausts and the G-82 headlights from there. Norm Veber is highly skilled with his resin work and is worth having a look at. Thanks for your interest, cheers Misha

-

The 2022 Cannonball Run Year of Birth Build Thread
Misha replied to disconovaman's topic in Community Builds
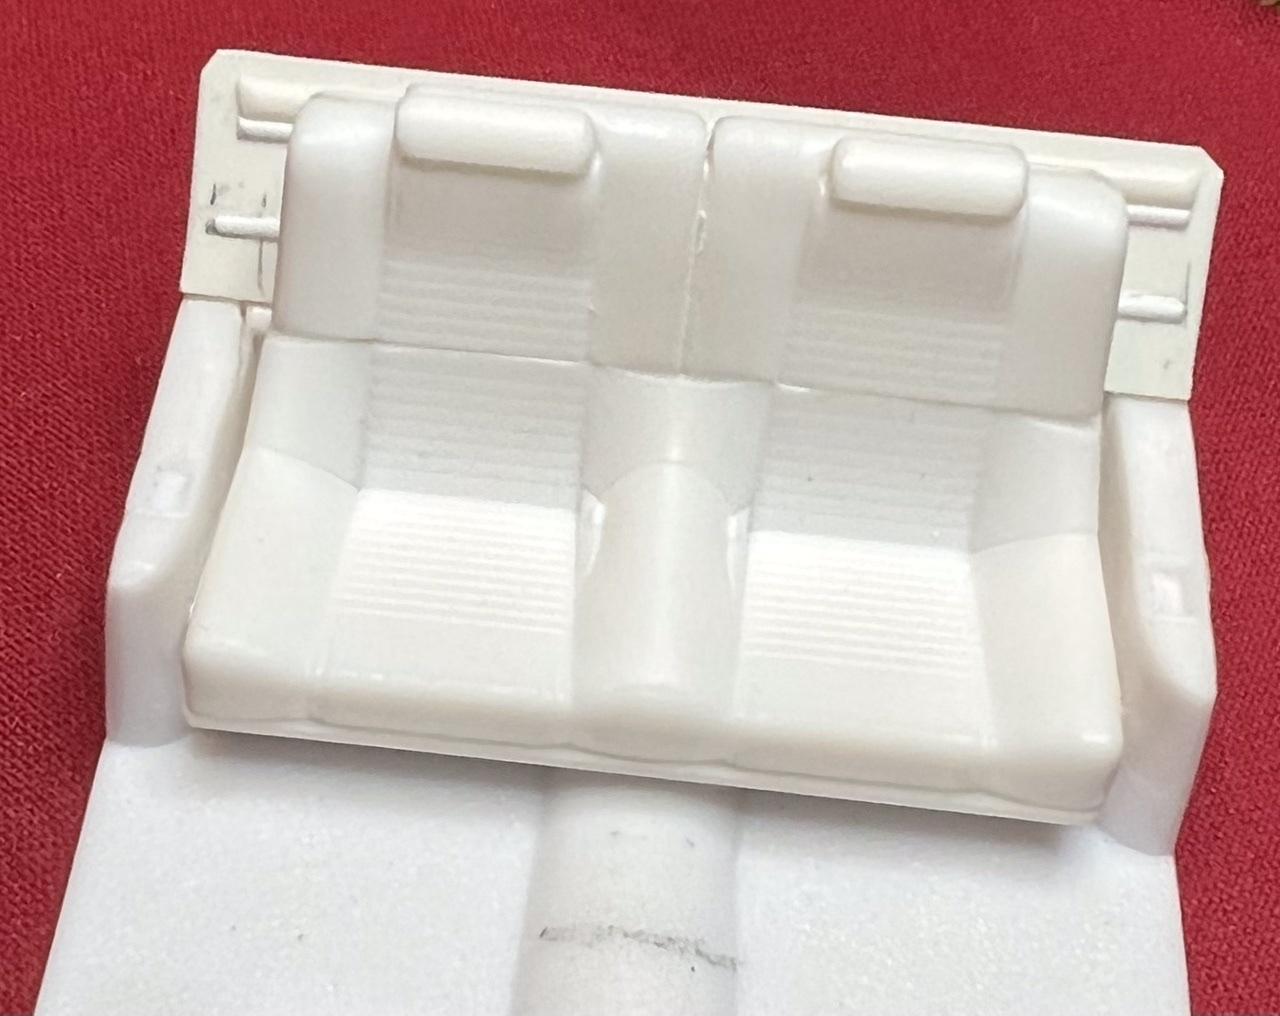
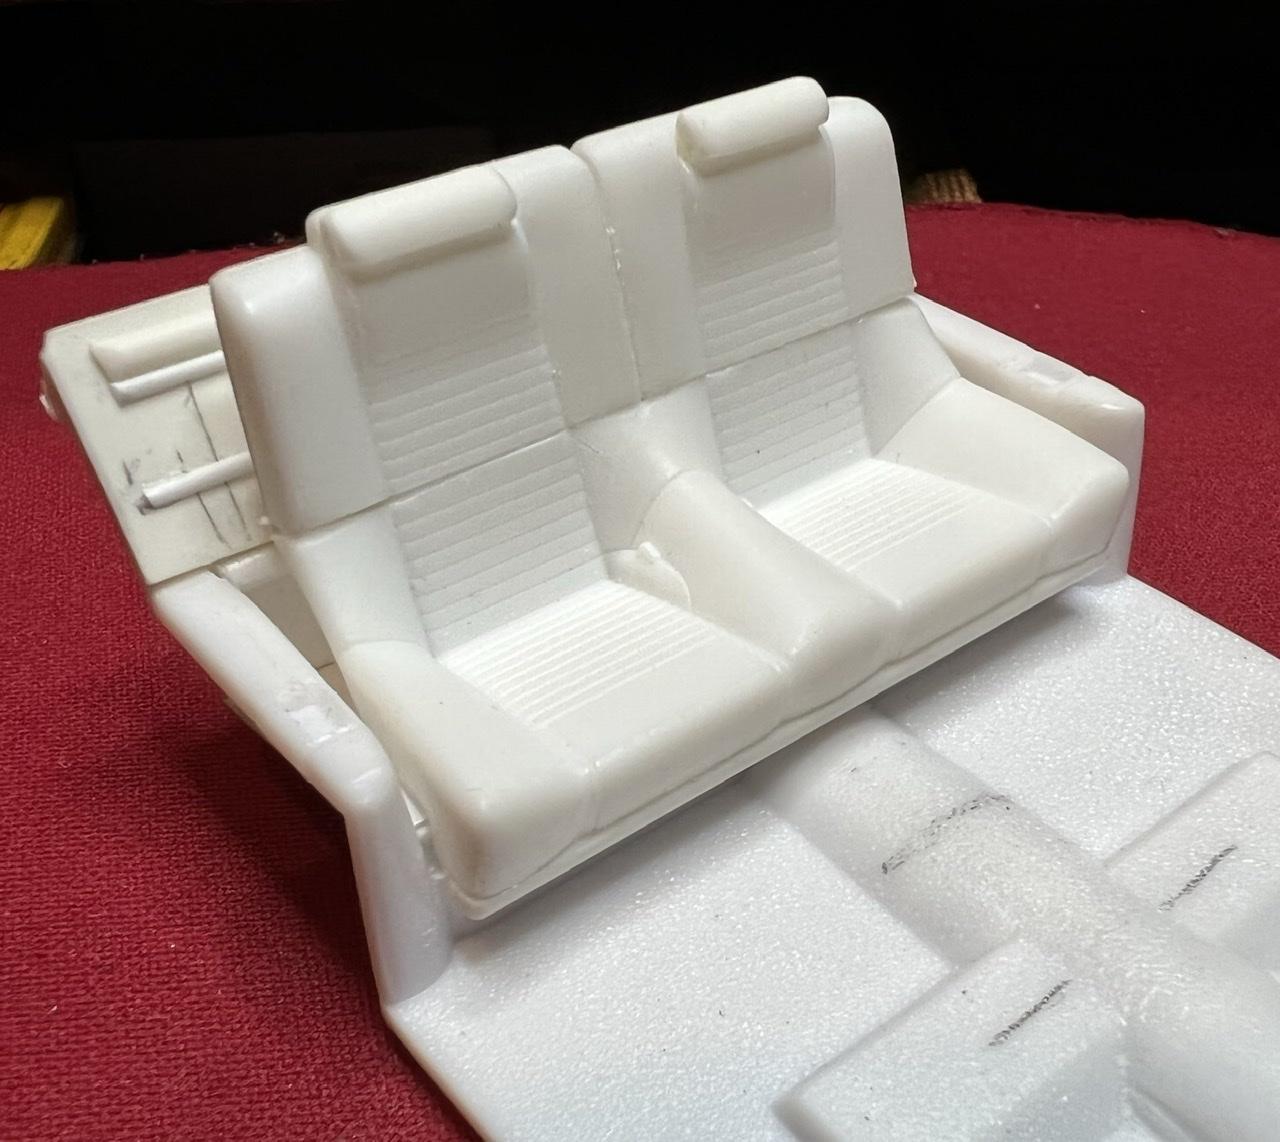
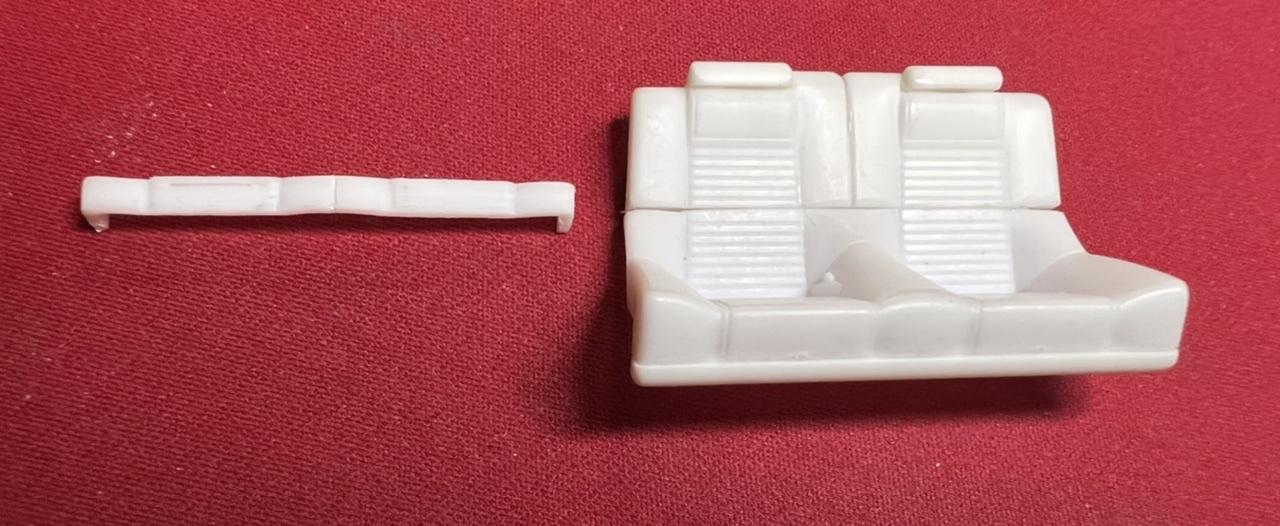
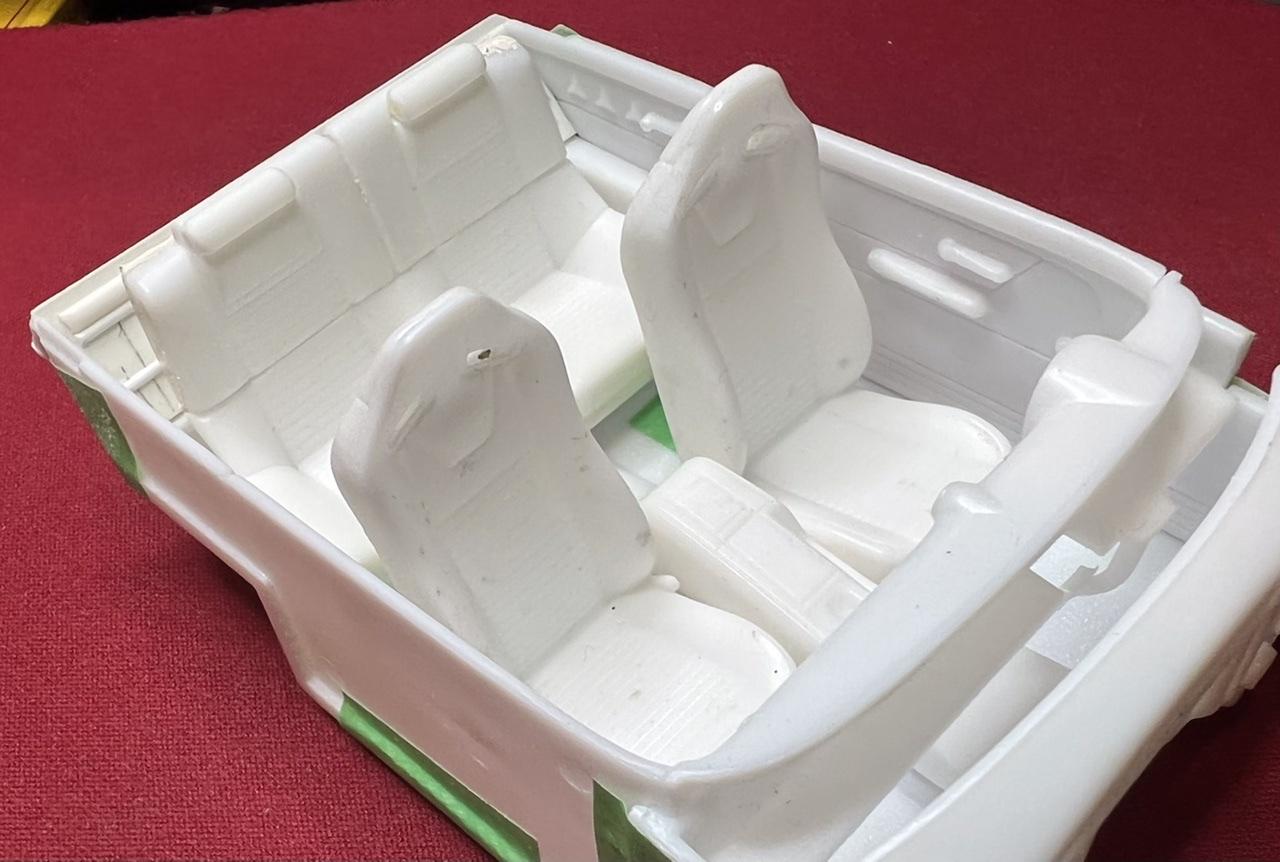
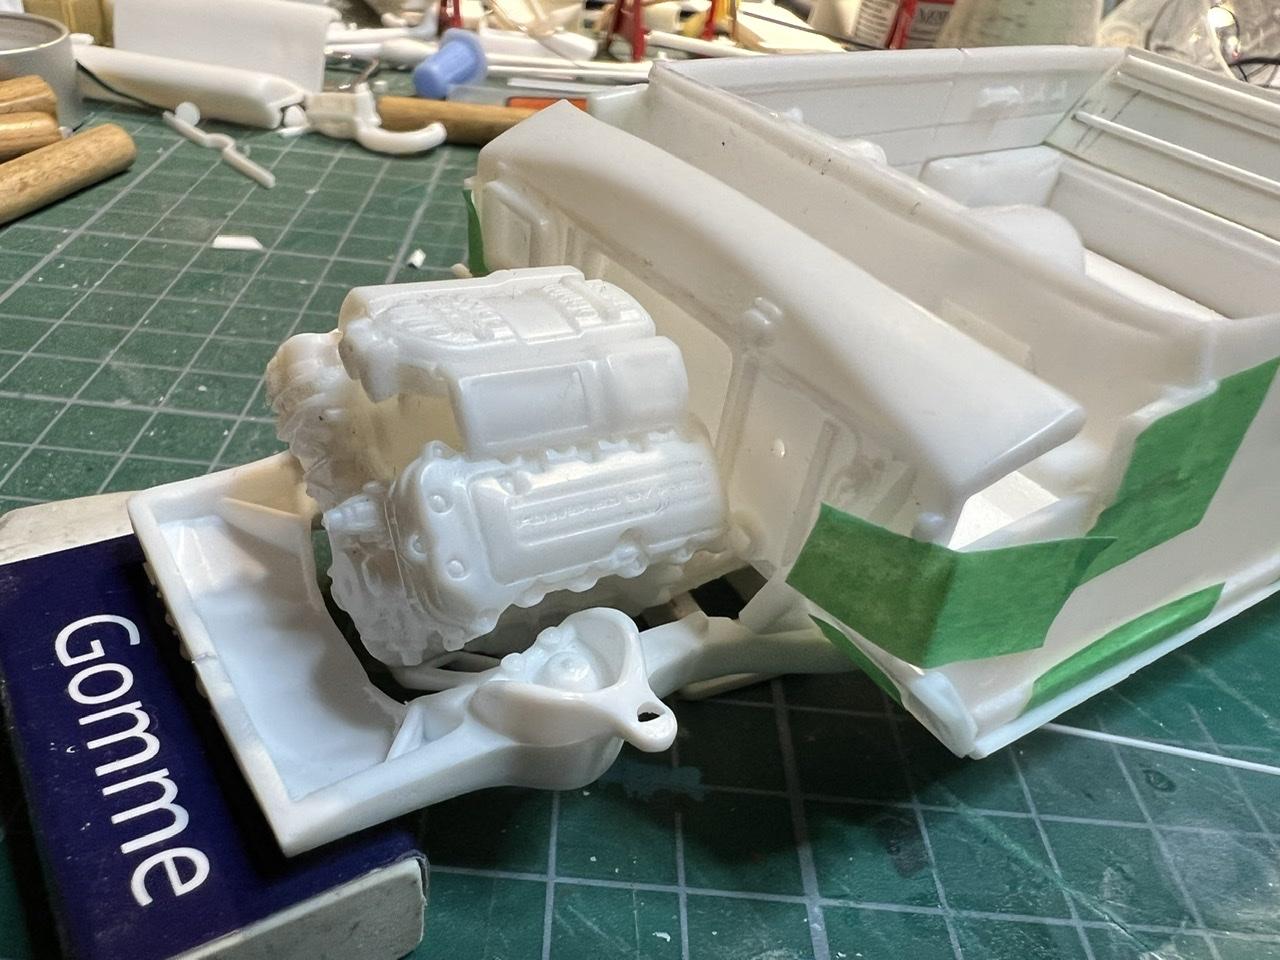
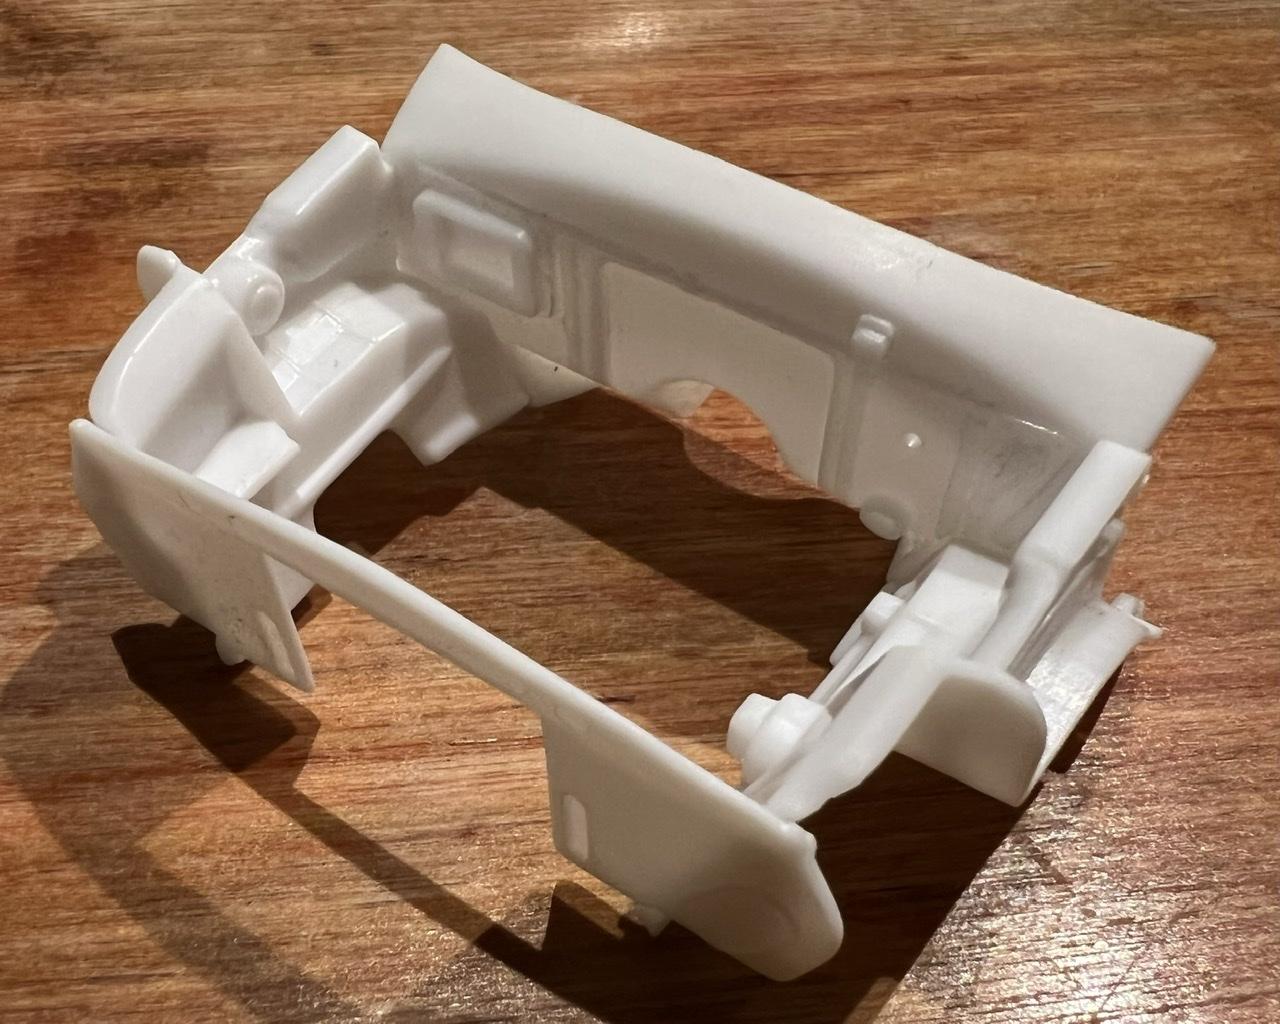
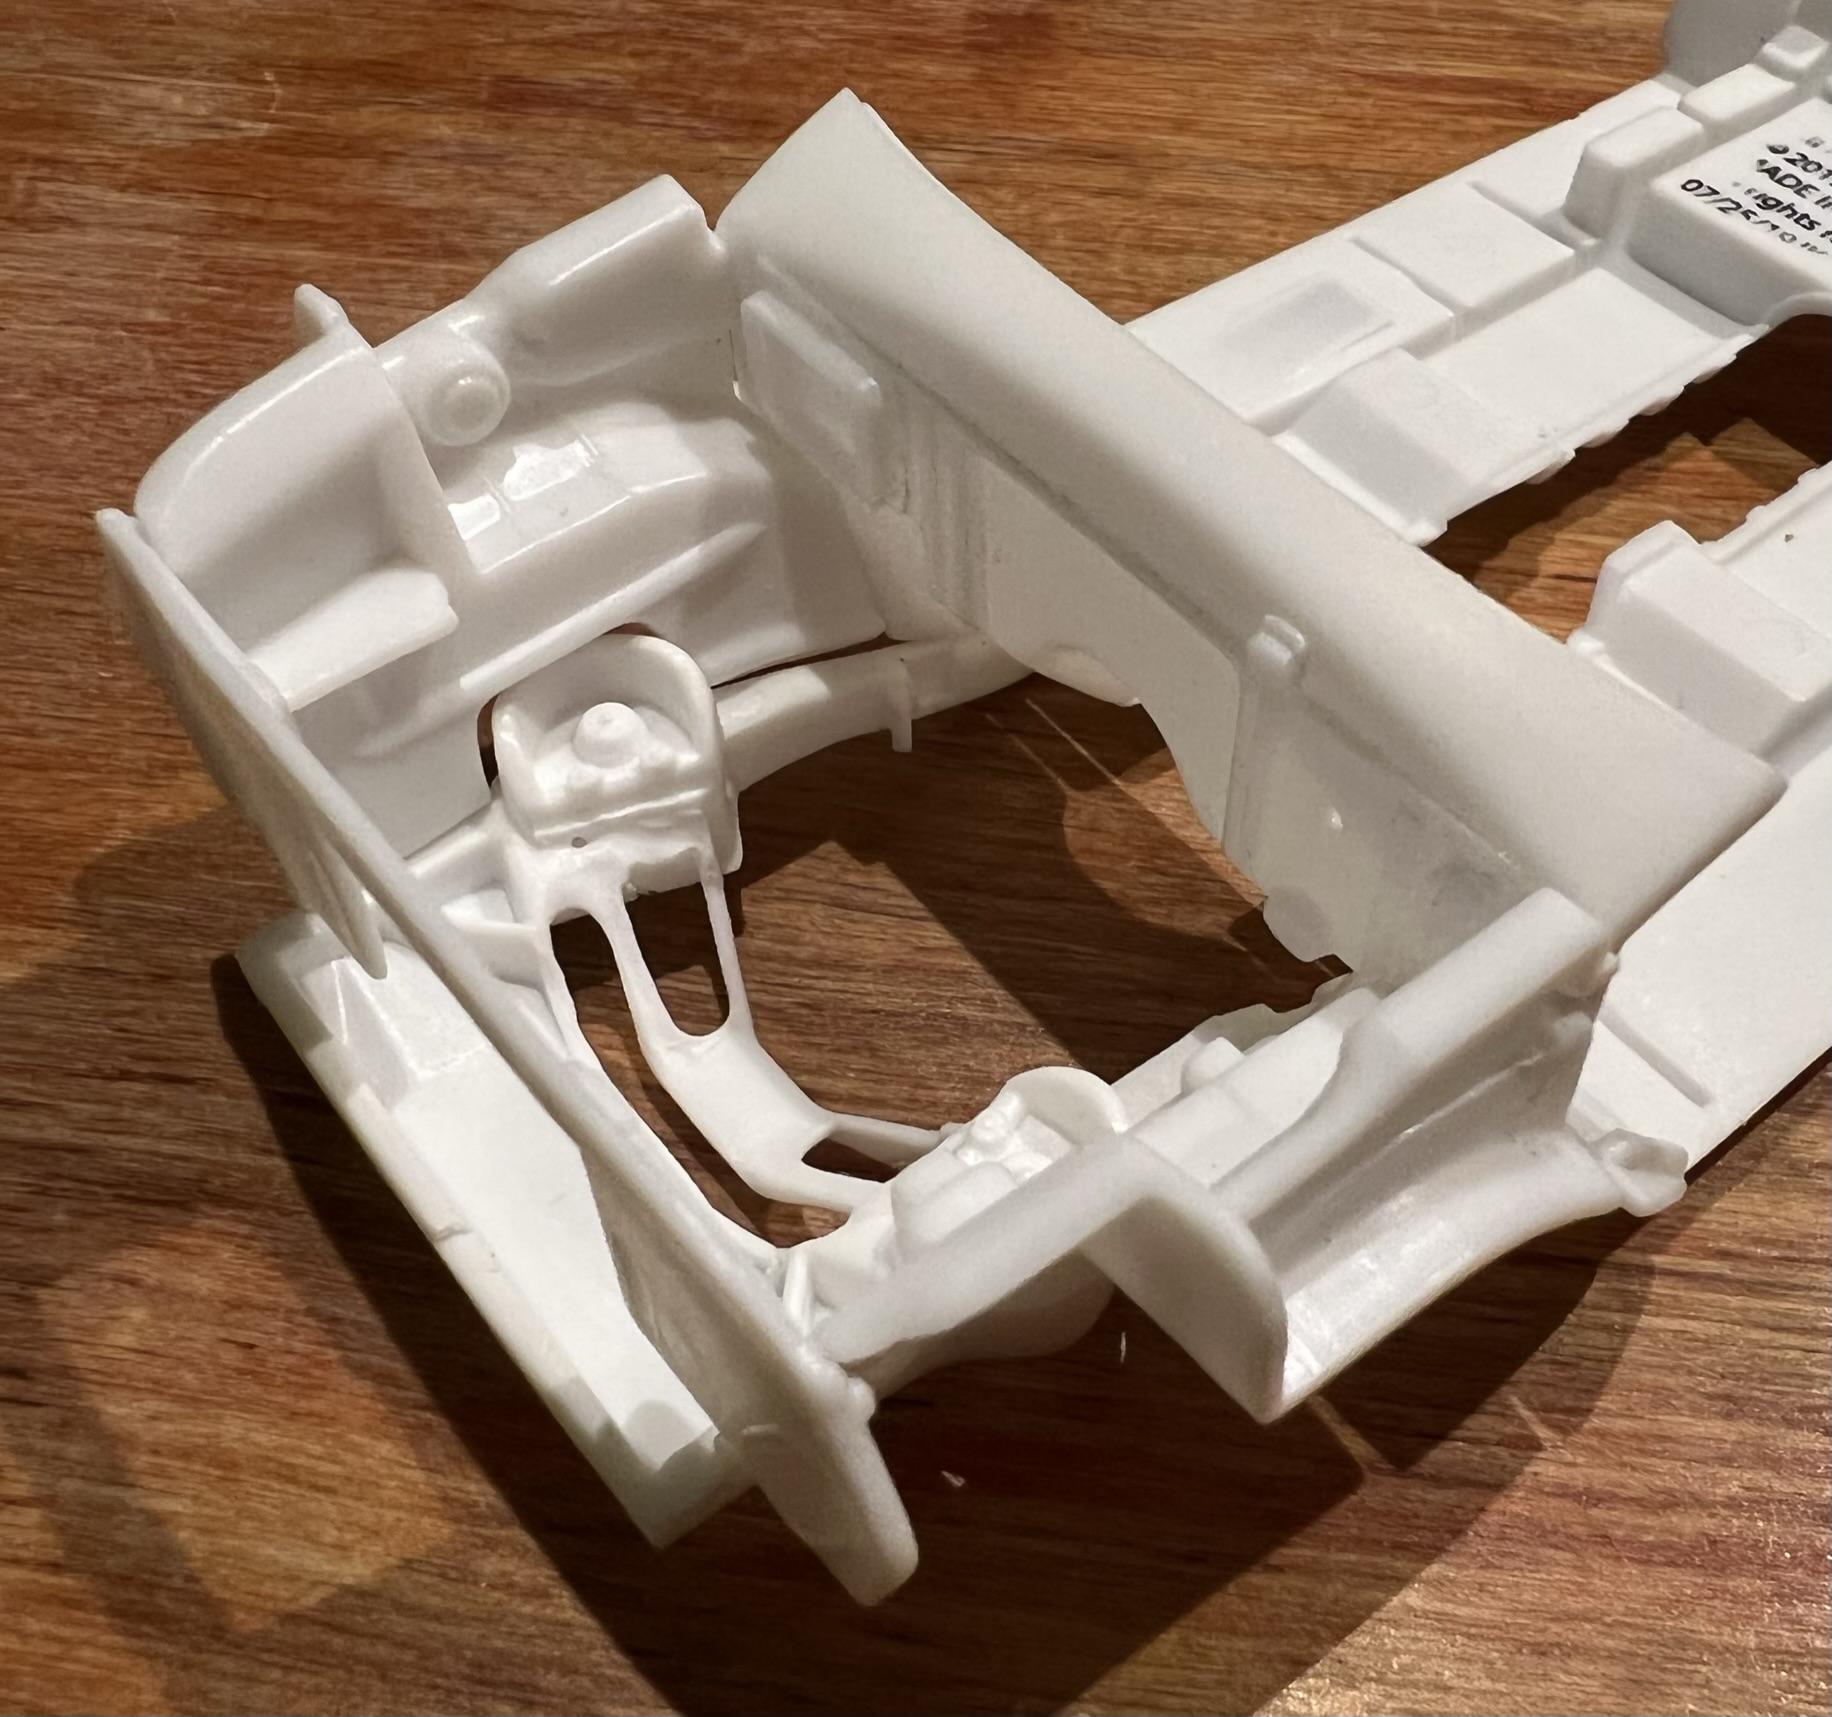
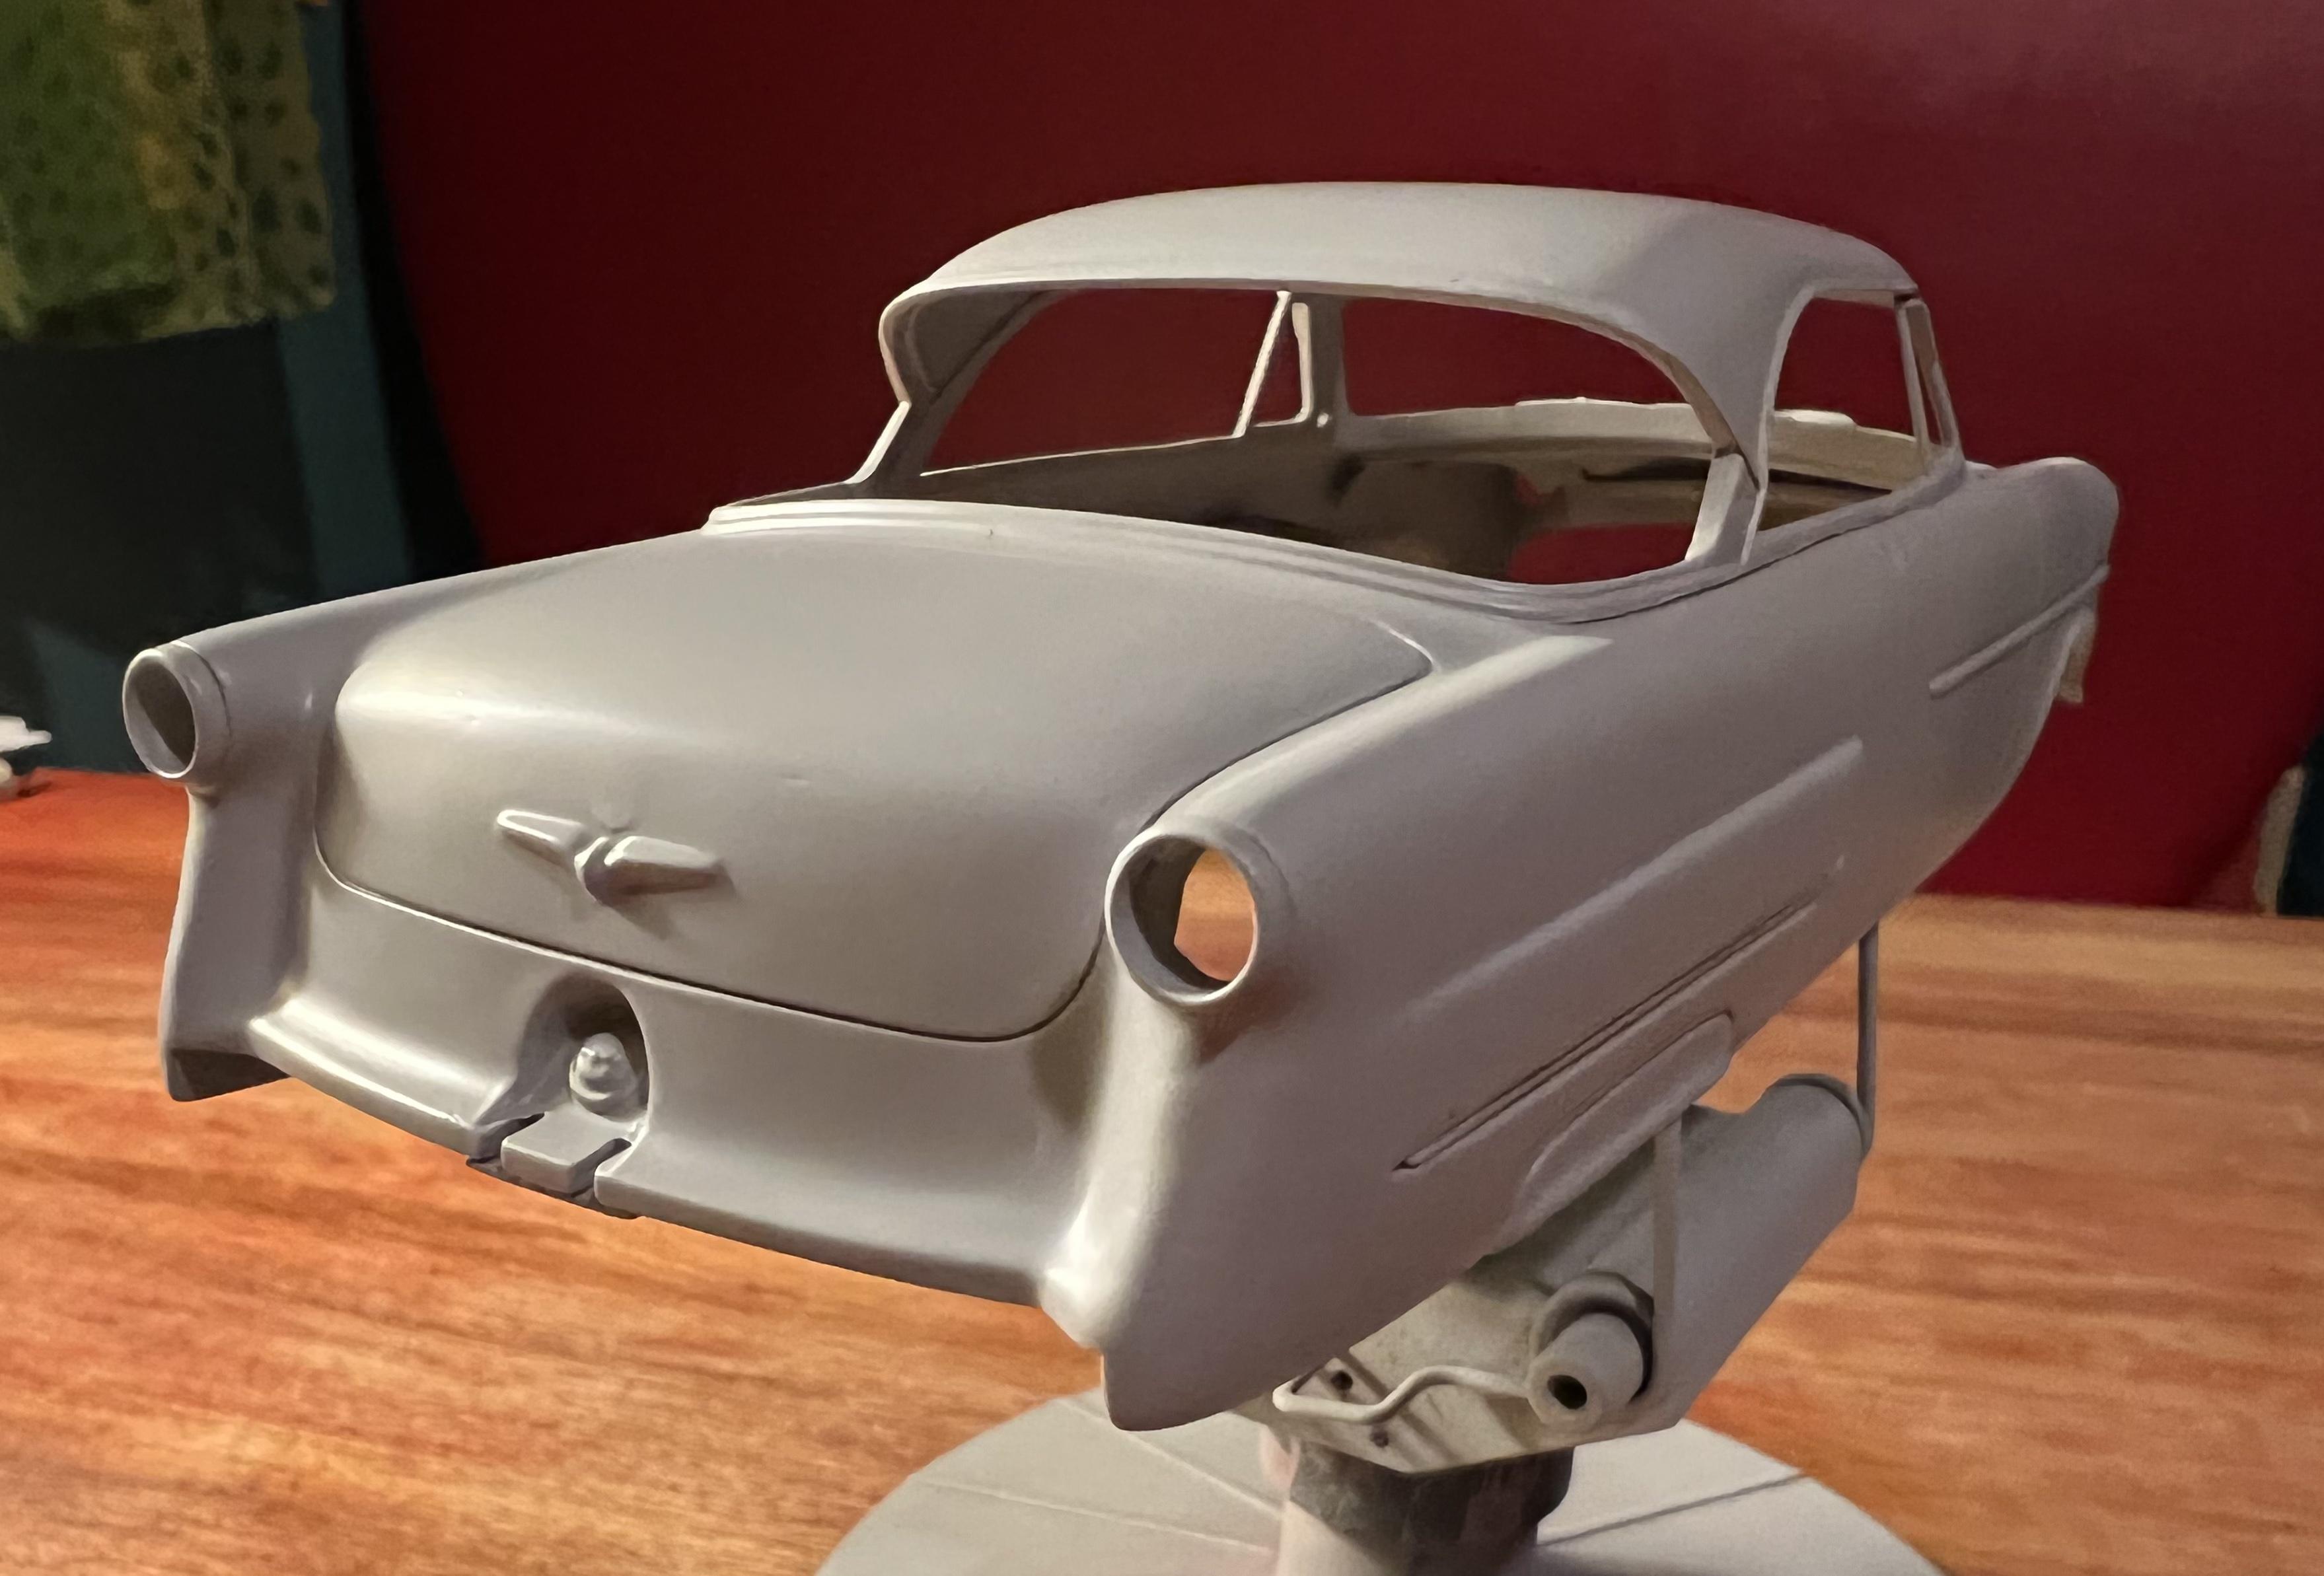
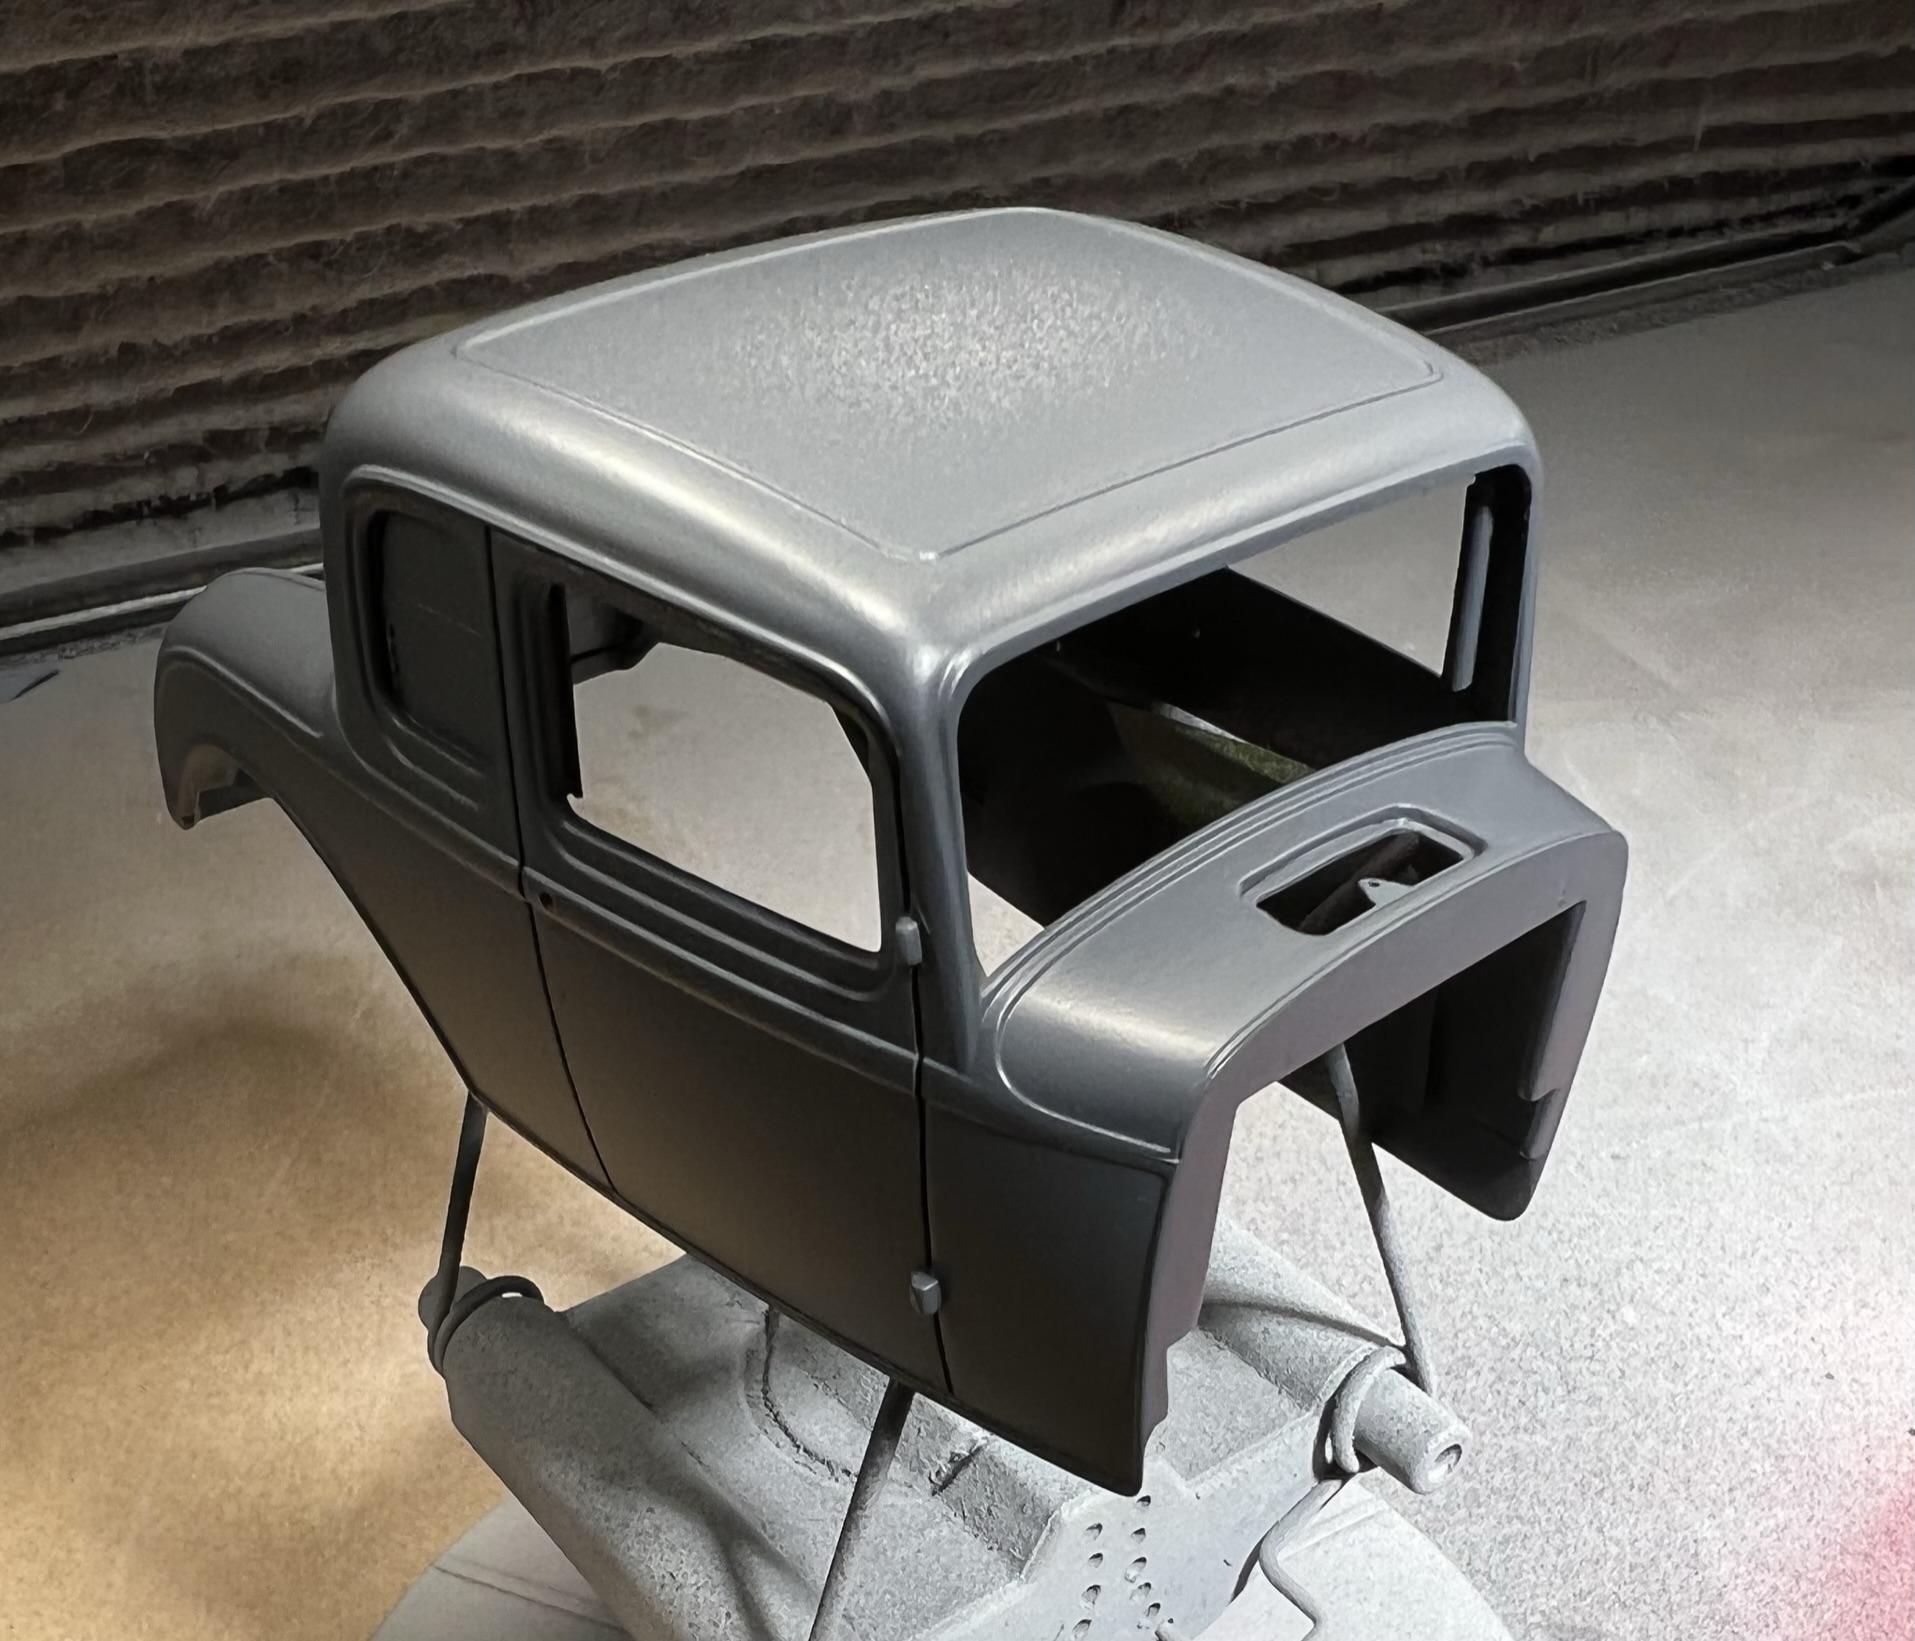
Ford 53-302 back on the Workbench! It has been awhile since my last update, though now with autumn in full swing I’ve been able to get to the workbench. Recent work has focused upon the interior, mocking up the 302 engine to fit the chassis, and finishing off the body work. Having decided on using the Mustang buckets and rear seat along with the console I had to modify the parts to fit. The buckets only required a simple notch at the base yet the rear seat was sectioned to reduce its overall height. The rear portion of the interior platform had to be rebuilt once the seat was removed to provide a background support for the Mustang folding rear bench. I also detailed the interior roof section with headliner braces and detailing the side window detailing as it is so prominent with the hardtop design allowing it to be seen readily. Luckily the 302 required very little work to fit with the only modification needed was to thin the interior tranny hump somewhat for greater clearance. The four part engine bay comes together easily by fitting it on the chassis and tacking the four pieces together while keeping any glue off the chassis. The body work in now complete with the final primer coat on it. The trickiest part has been the hood since shaving it the hood ornament indent had to be filled while still retaining its bull nose shape. Next step is beginning the two tone paint finish with an orange 🍊 metallic body with a cream coloured top. I’ve debated using the faux connie kit on the trunk and decided against it as ti interfered with the clean, more aerodynamic look I’m after (saving it for the rag top version). Cheers Misha
-
East Coast style 5 window built for this past summer’s Deuce Days held in Victoria, Vancouver Island… Cheers Misha
-
1949 Ford Four-Door Custom - Under Glass - Dec 22/22
Misha replied to Phildaupho's topic in WIP: Model Cars
That’s quite the project Phil! Be following your slice ‘n’ dice with great interest. Great to see another local replica build in your talented hands. Cheers Misha -
Great looking build Andrew! Your conversion is striking and the colour choice is bang on, and the Oregon plate is the finishing touch to your replica . Cheers Misha
-
That’s a great connection Phil! Memorabilia always enhances the build. The beginning shots are impressive with the progress towards the final finish. Cheers Misha
-
That’s quite stunning in black Rich. Great stablemate to the white livery. By the way, what is the source for the Martini stripes as I’m a fan! Congrats on a great build, cheers Misha
-
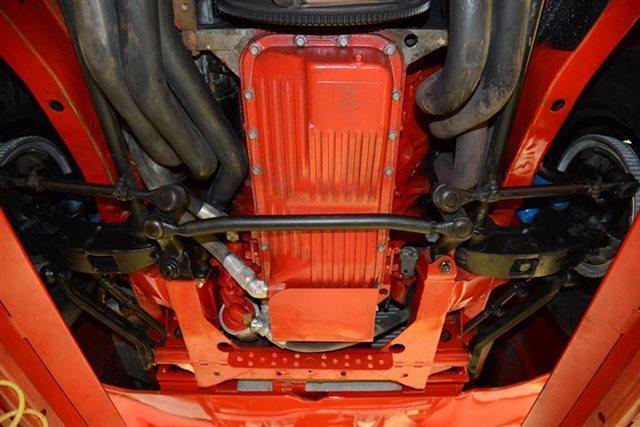
Checked thru my albums and came up with these shots of a Charger 500 undercarriage, tho’ not sure if it’s the K&K ride, suspect it is as I was searching for it at the time. Cheers Misha
-
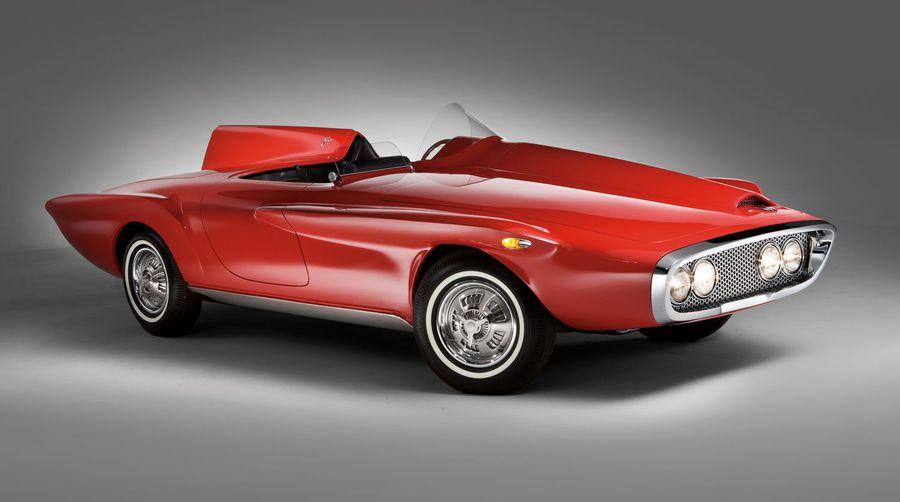
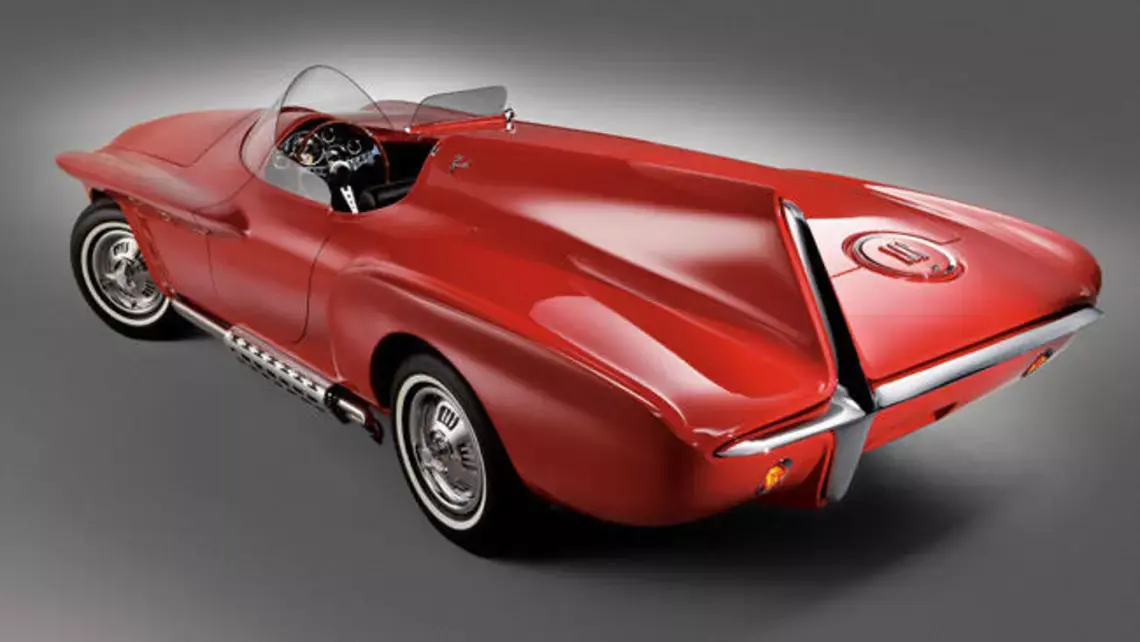
1960 Plymouth XNR market research
Misha replied to Pico's topic in Model Building Questions and Answers
I certainly would be interested in building Virgil Exner’s asymmetric concept roadster, hopefully there will be others to make it a viable project. It certainly is one of the significant “Forward Look” designs that Exner penned for Chrysler’s aerodynamic look of the late 50s into the early Cheers Misha
-
Really great detail Mike, the engine compartment and interior are stunning especially considering it’s 1:25 scale! Congrats, cheers Misha
-
That’s right, BMC didn’t have much success with the MGB in the 63 Sebring as a strictly works team. For the following season they broadened their team with personal from the racing world.
-
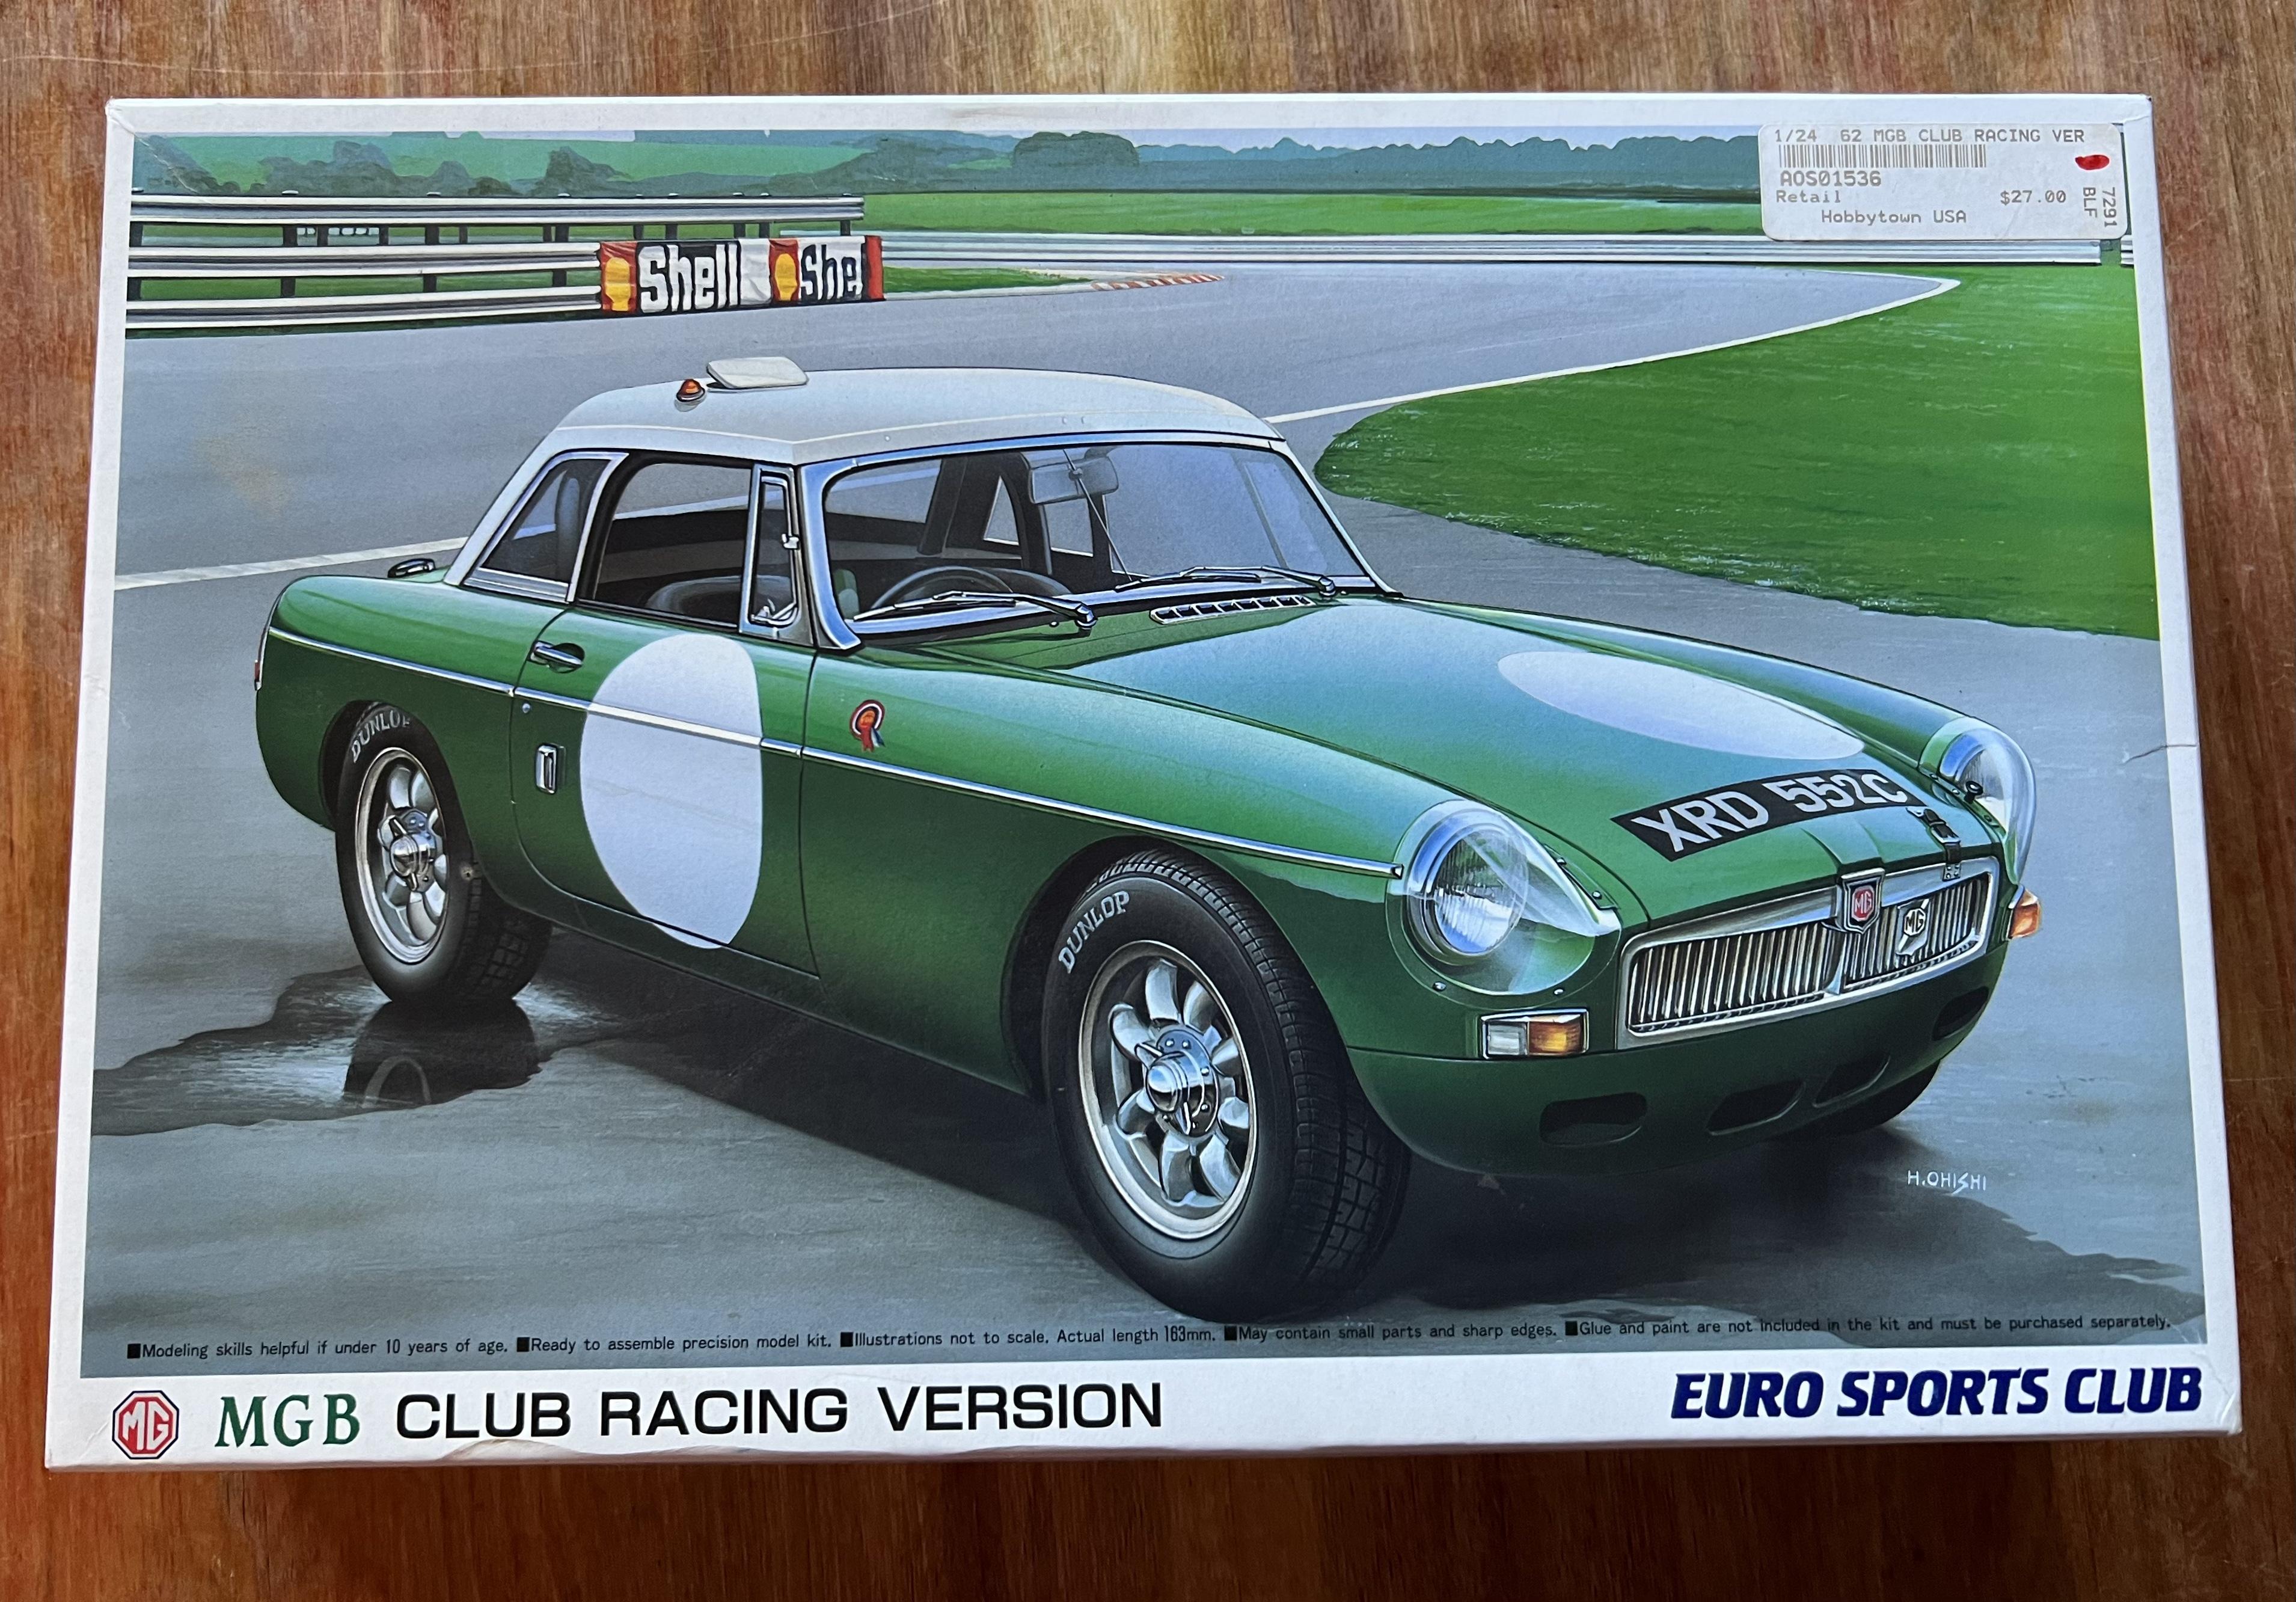
1964 MGB Sebring 12 Hour Over the weekend I pulled out the Aoshima kit of the MGB Club Racing version to have a look at it. This was a special edition that contained extra parts such as the hardtop for the race version in addition to the regular stock parts. I was especially glad that the wire laced wheels were there as well as the stock seats, as the Sebring racer only had the race seat for the driver. The only sticking point was the lack of a LHD dashboard, yet a bit of scratchbuilding will fix that up. Being a curbside will be a plus for me, as I often go down the rabbit hole with driveline detail. Let the build begin! Cheers Misha
-
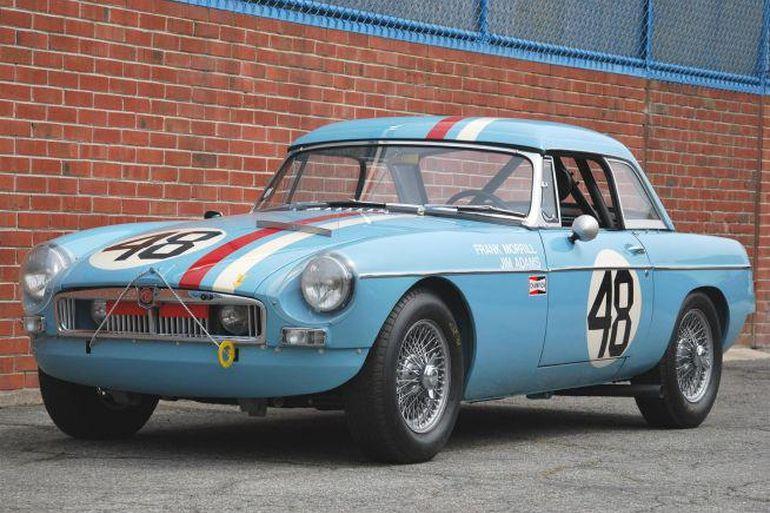
Great idea! Gary beat me to the Cunningham 904 by just over 16 hours, so I would like to take up the MGB # 48, one of three MG entered, it being the blue one. A shot of #48 during the 1964 Sebring 12 Hours A more current photo of #48 with additional mods for vintage racing added, such as tow hooks. I’ll be in the stash later today to pull out the kit and posting it. Cheers Misha
-
AMT Chaparral 2A
Misha replied to FordRodnKustom's topic in Other Racing: Road Racing, Salt Flat Racers
Bit of a goof on the copy above with the Chaparral and the McLaren-Elva being mislabeled. These were unique kits in that they offered then current racers, while being curbsides they do build up into decent replicas with a bit of extra detailing. I’m fortunate to have three with the Lola being the exception. Cheers Misha -
What did you see on the road today?
Misha replied to Harry P.'s topic in General Automotive Talk (Trucks and Cars)
Saturday in the Cowichan Valley, Blazer K-5 with the top off and laying low.
-
Wow, that really brings back the memories! I was a young teenager at that time and Dad always bought gas at the Esso station. 1967 was a very celebratory year for Canada and the promotion fitted in, especially being offered only here. There was talk of someone winning one north of Regina who promptly sold it, perhaps urban myth? It’s also great to see the pull up cards for the contest, I hung on to them for years afterward with a rubber band - no winners. Still have a couple of mint tiger tails that one would attach to the gas cap, now that one had “A Tiger in the Tank!” Thanks Steve and Richard for rekindling the memories! Cheers Misha
-
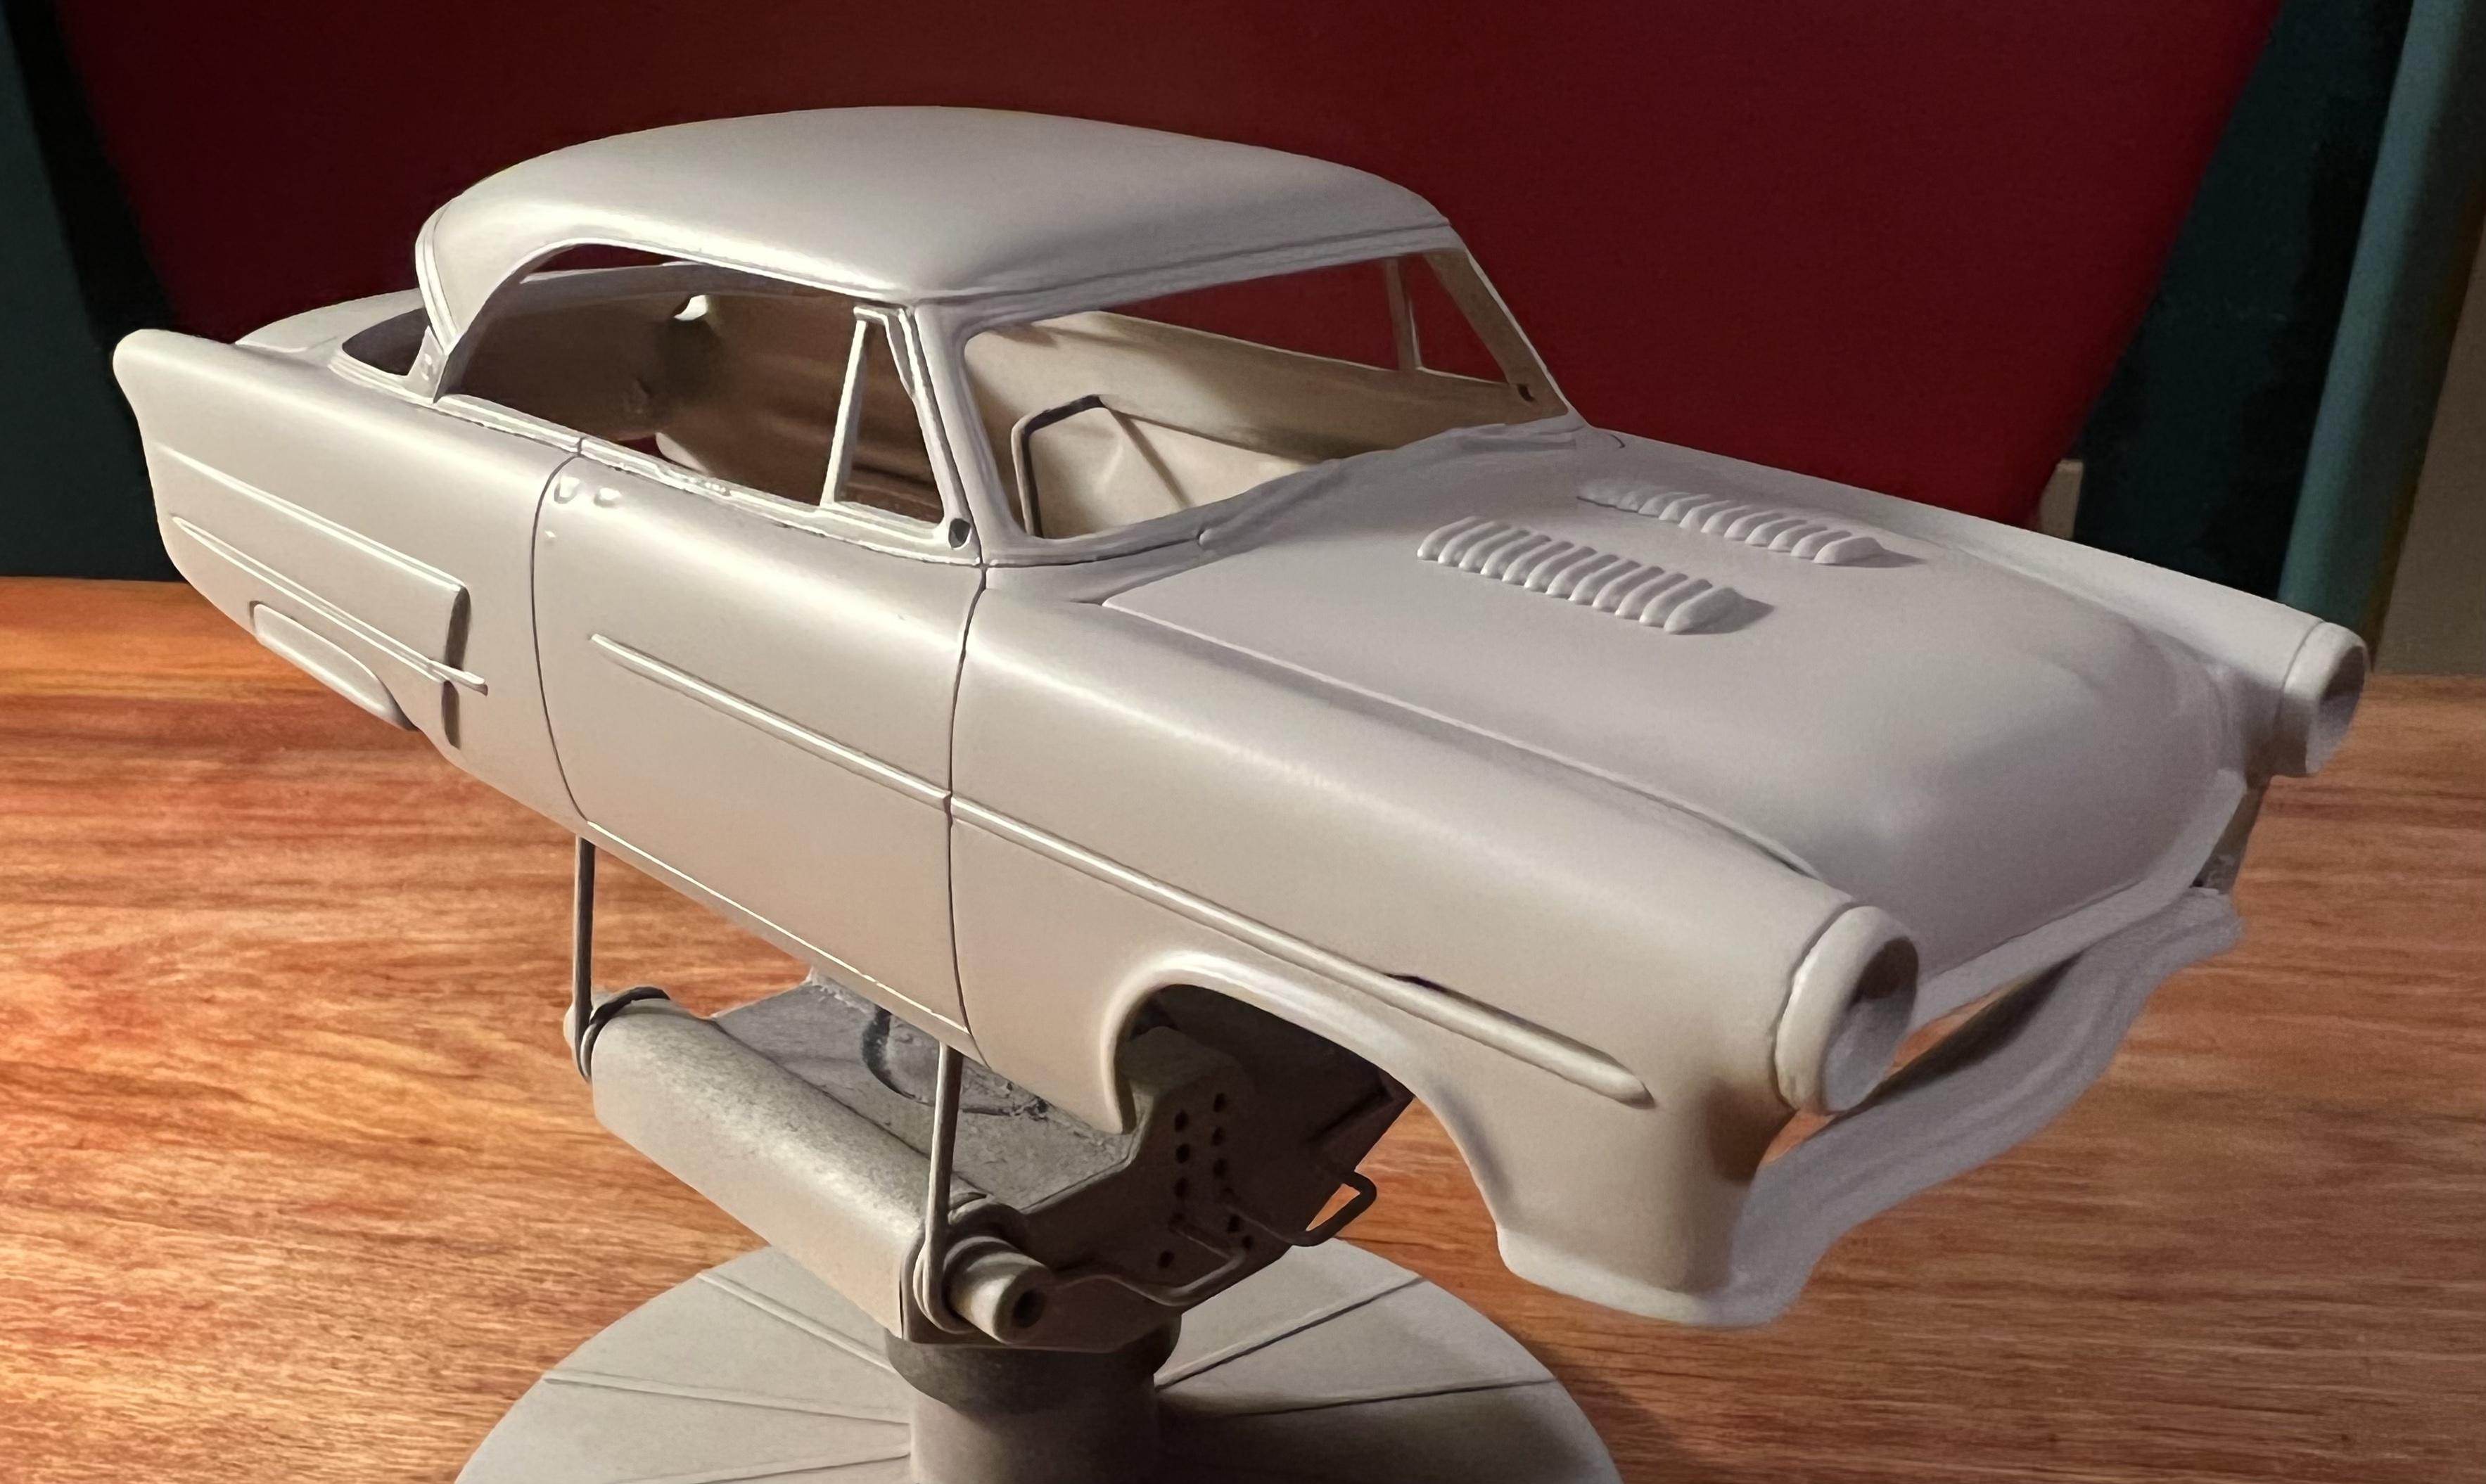
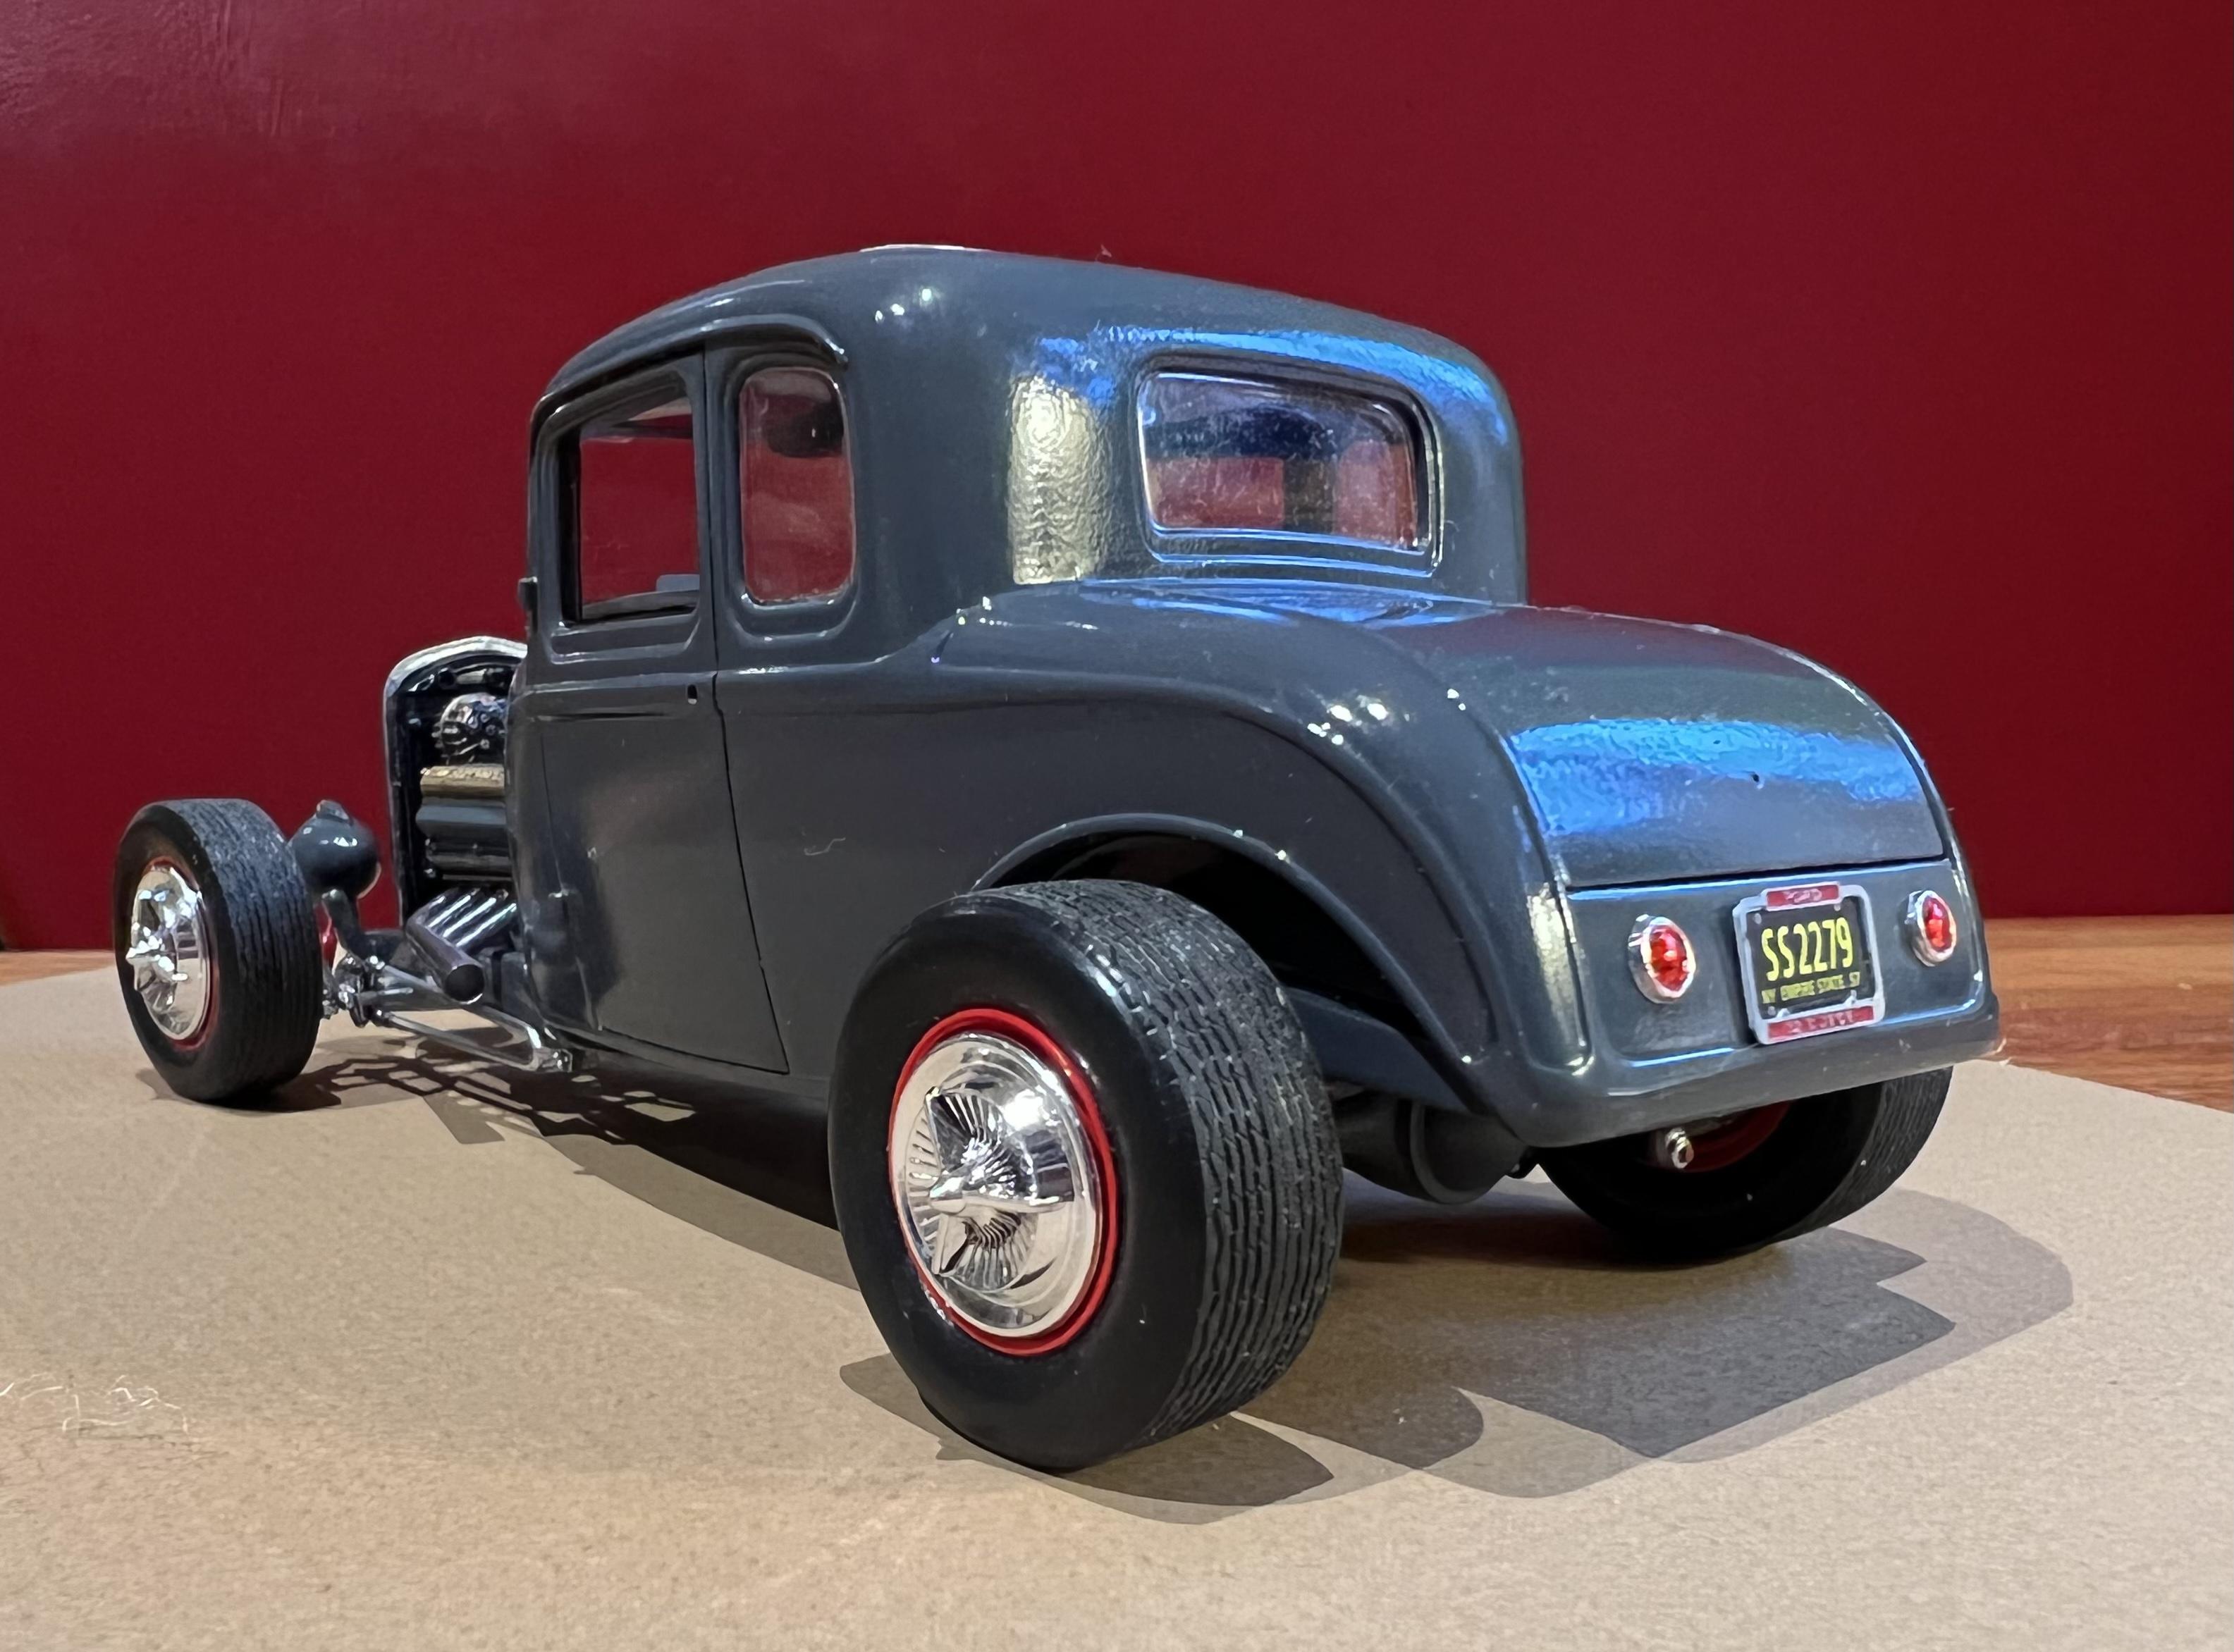
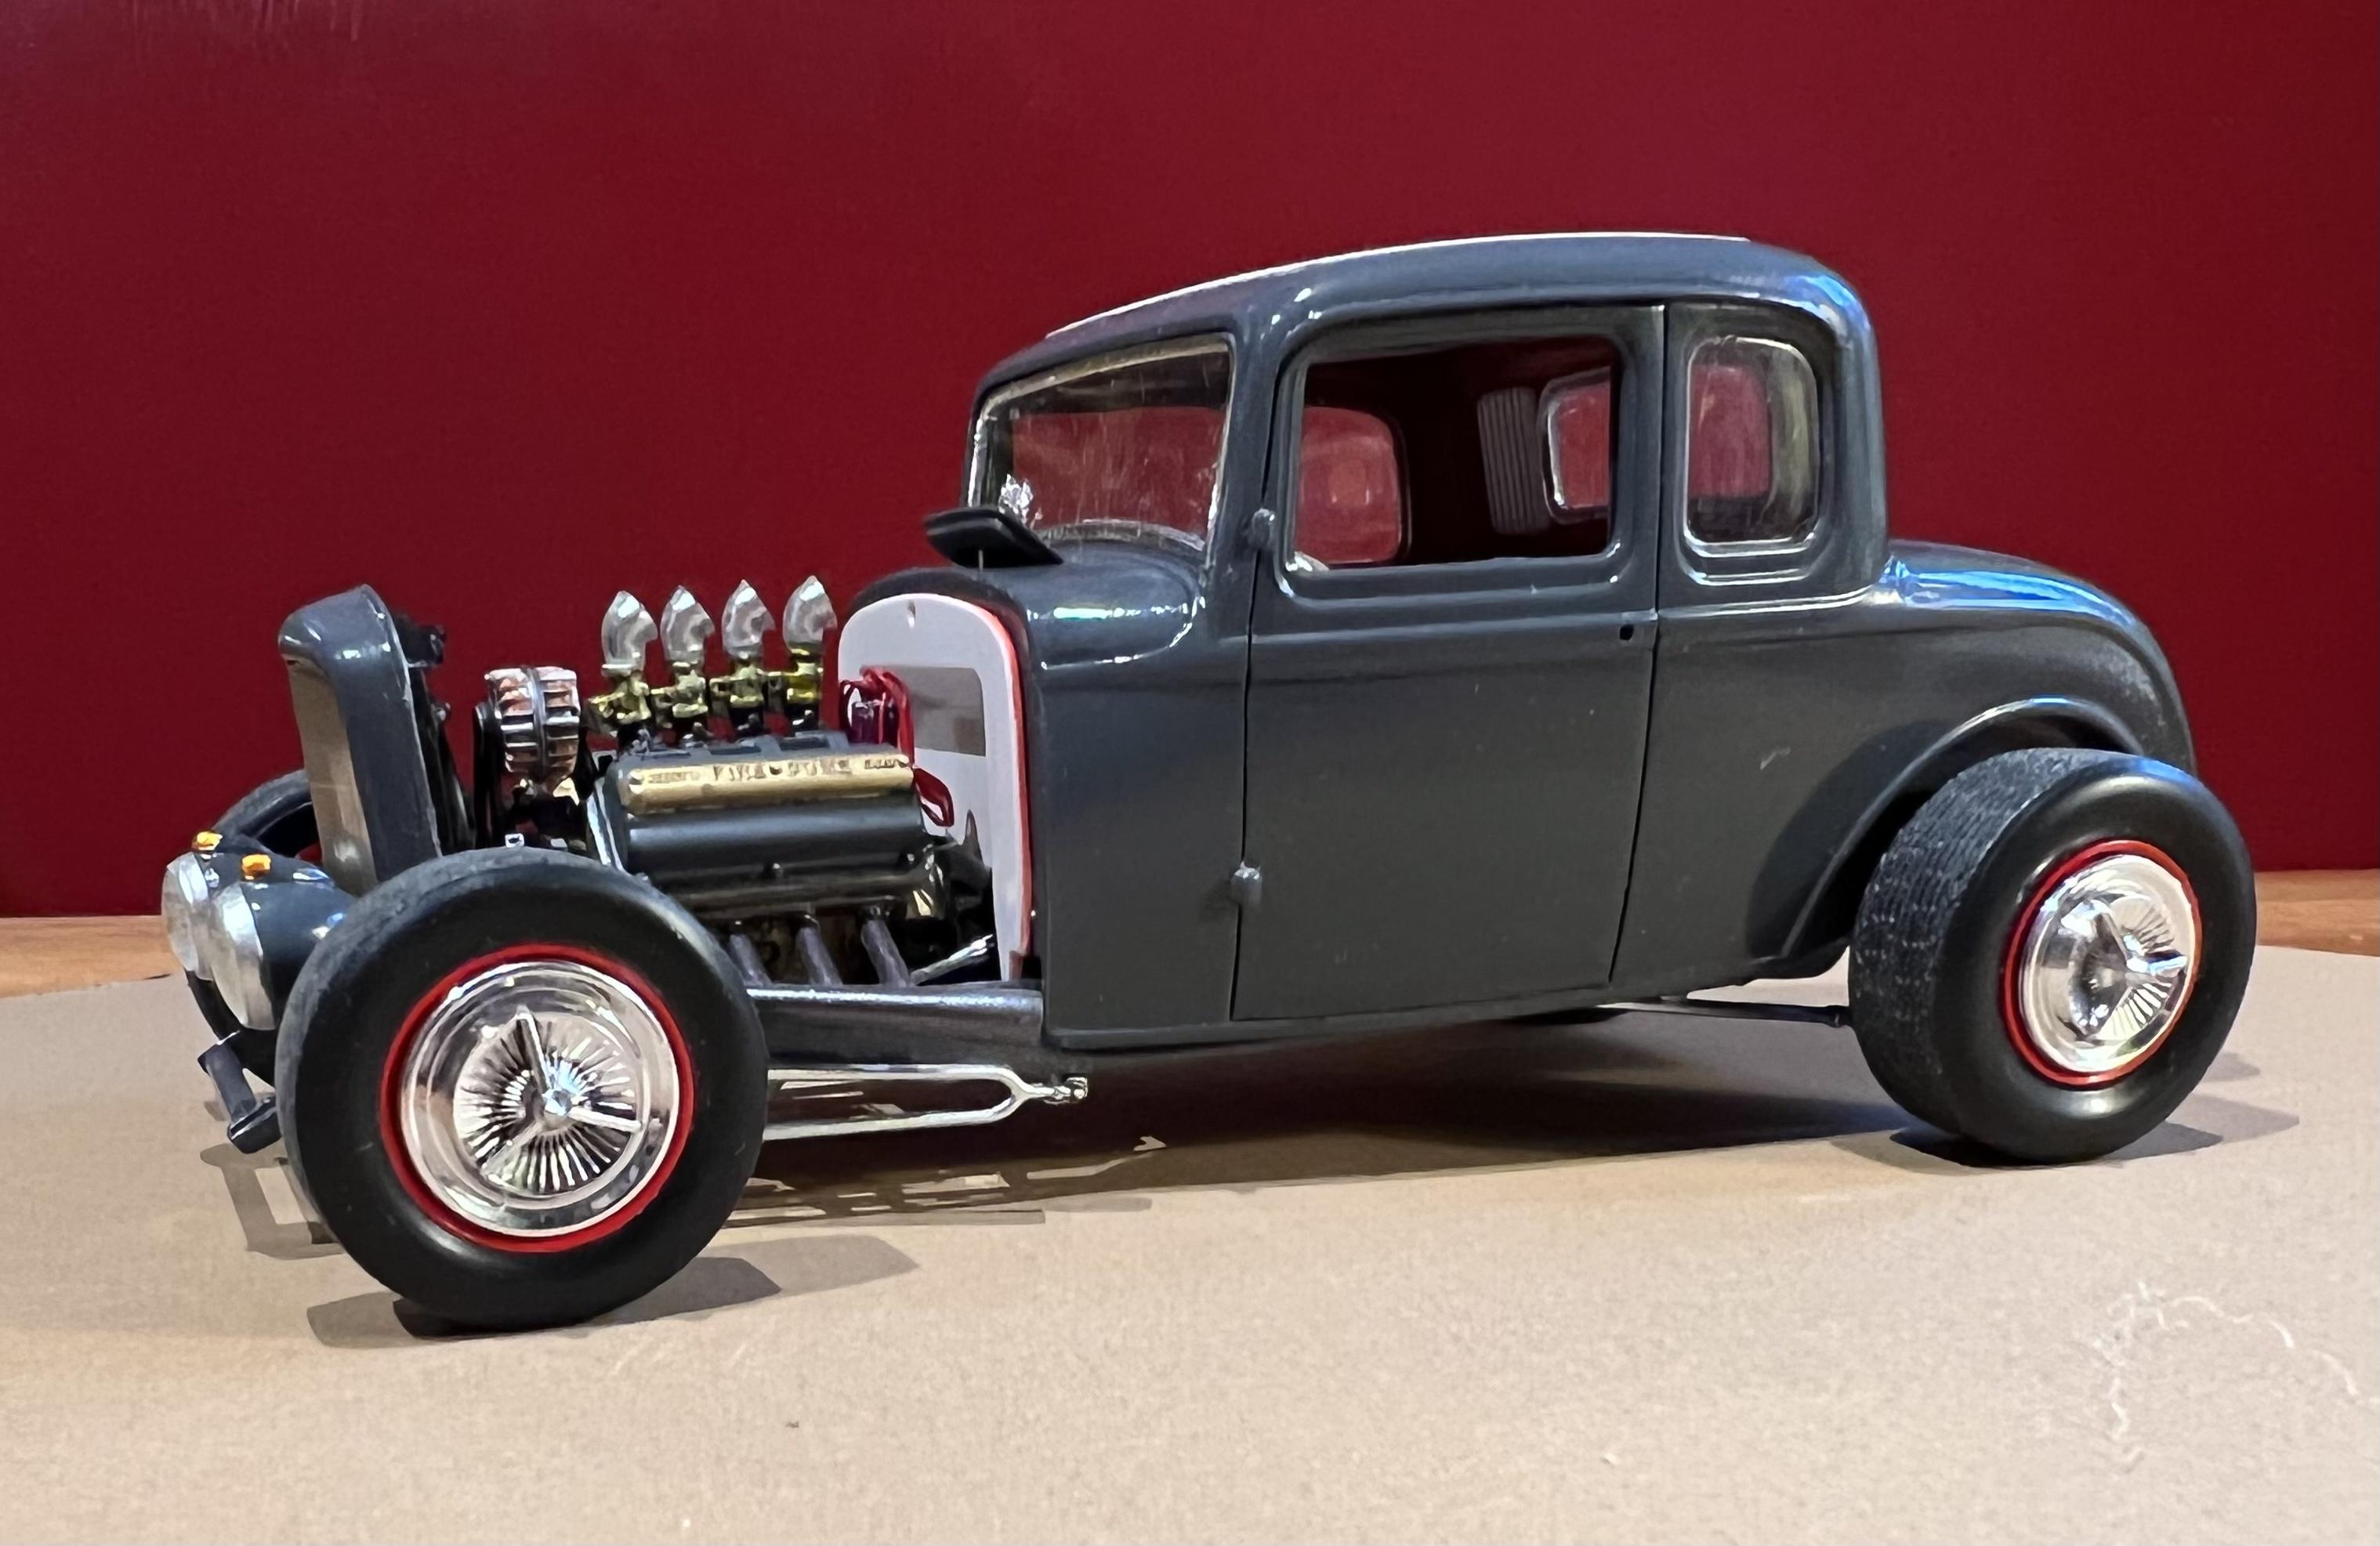
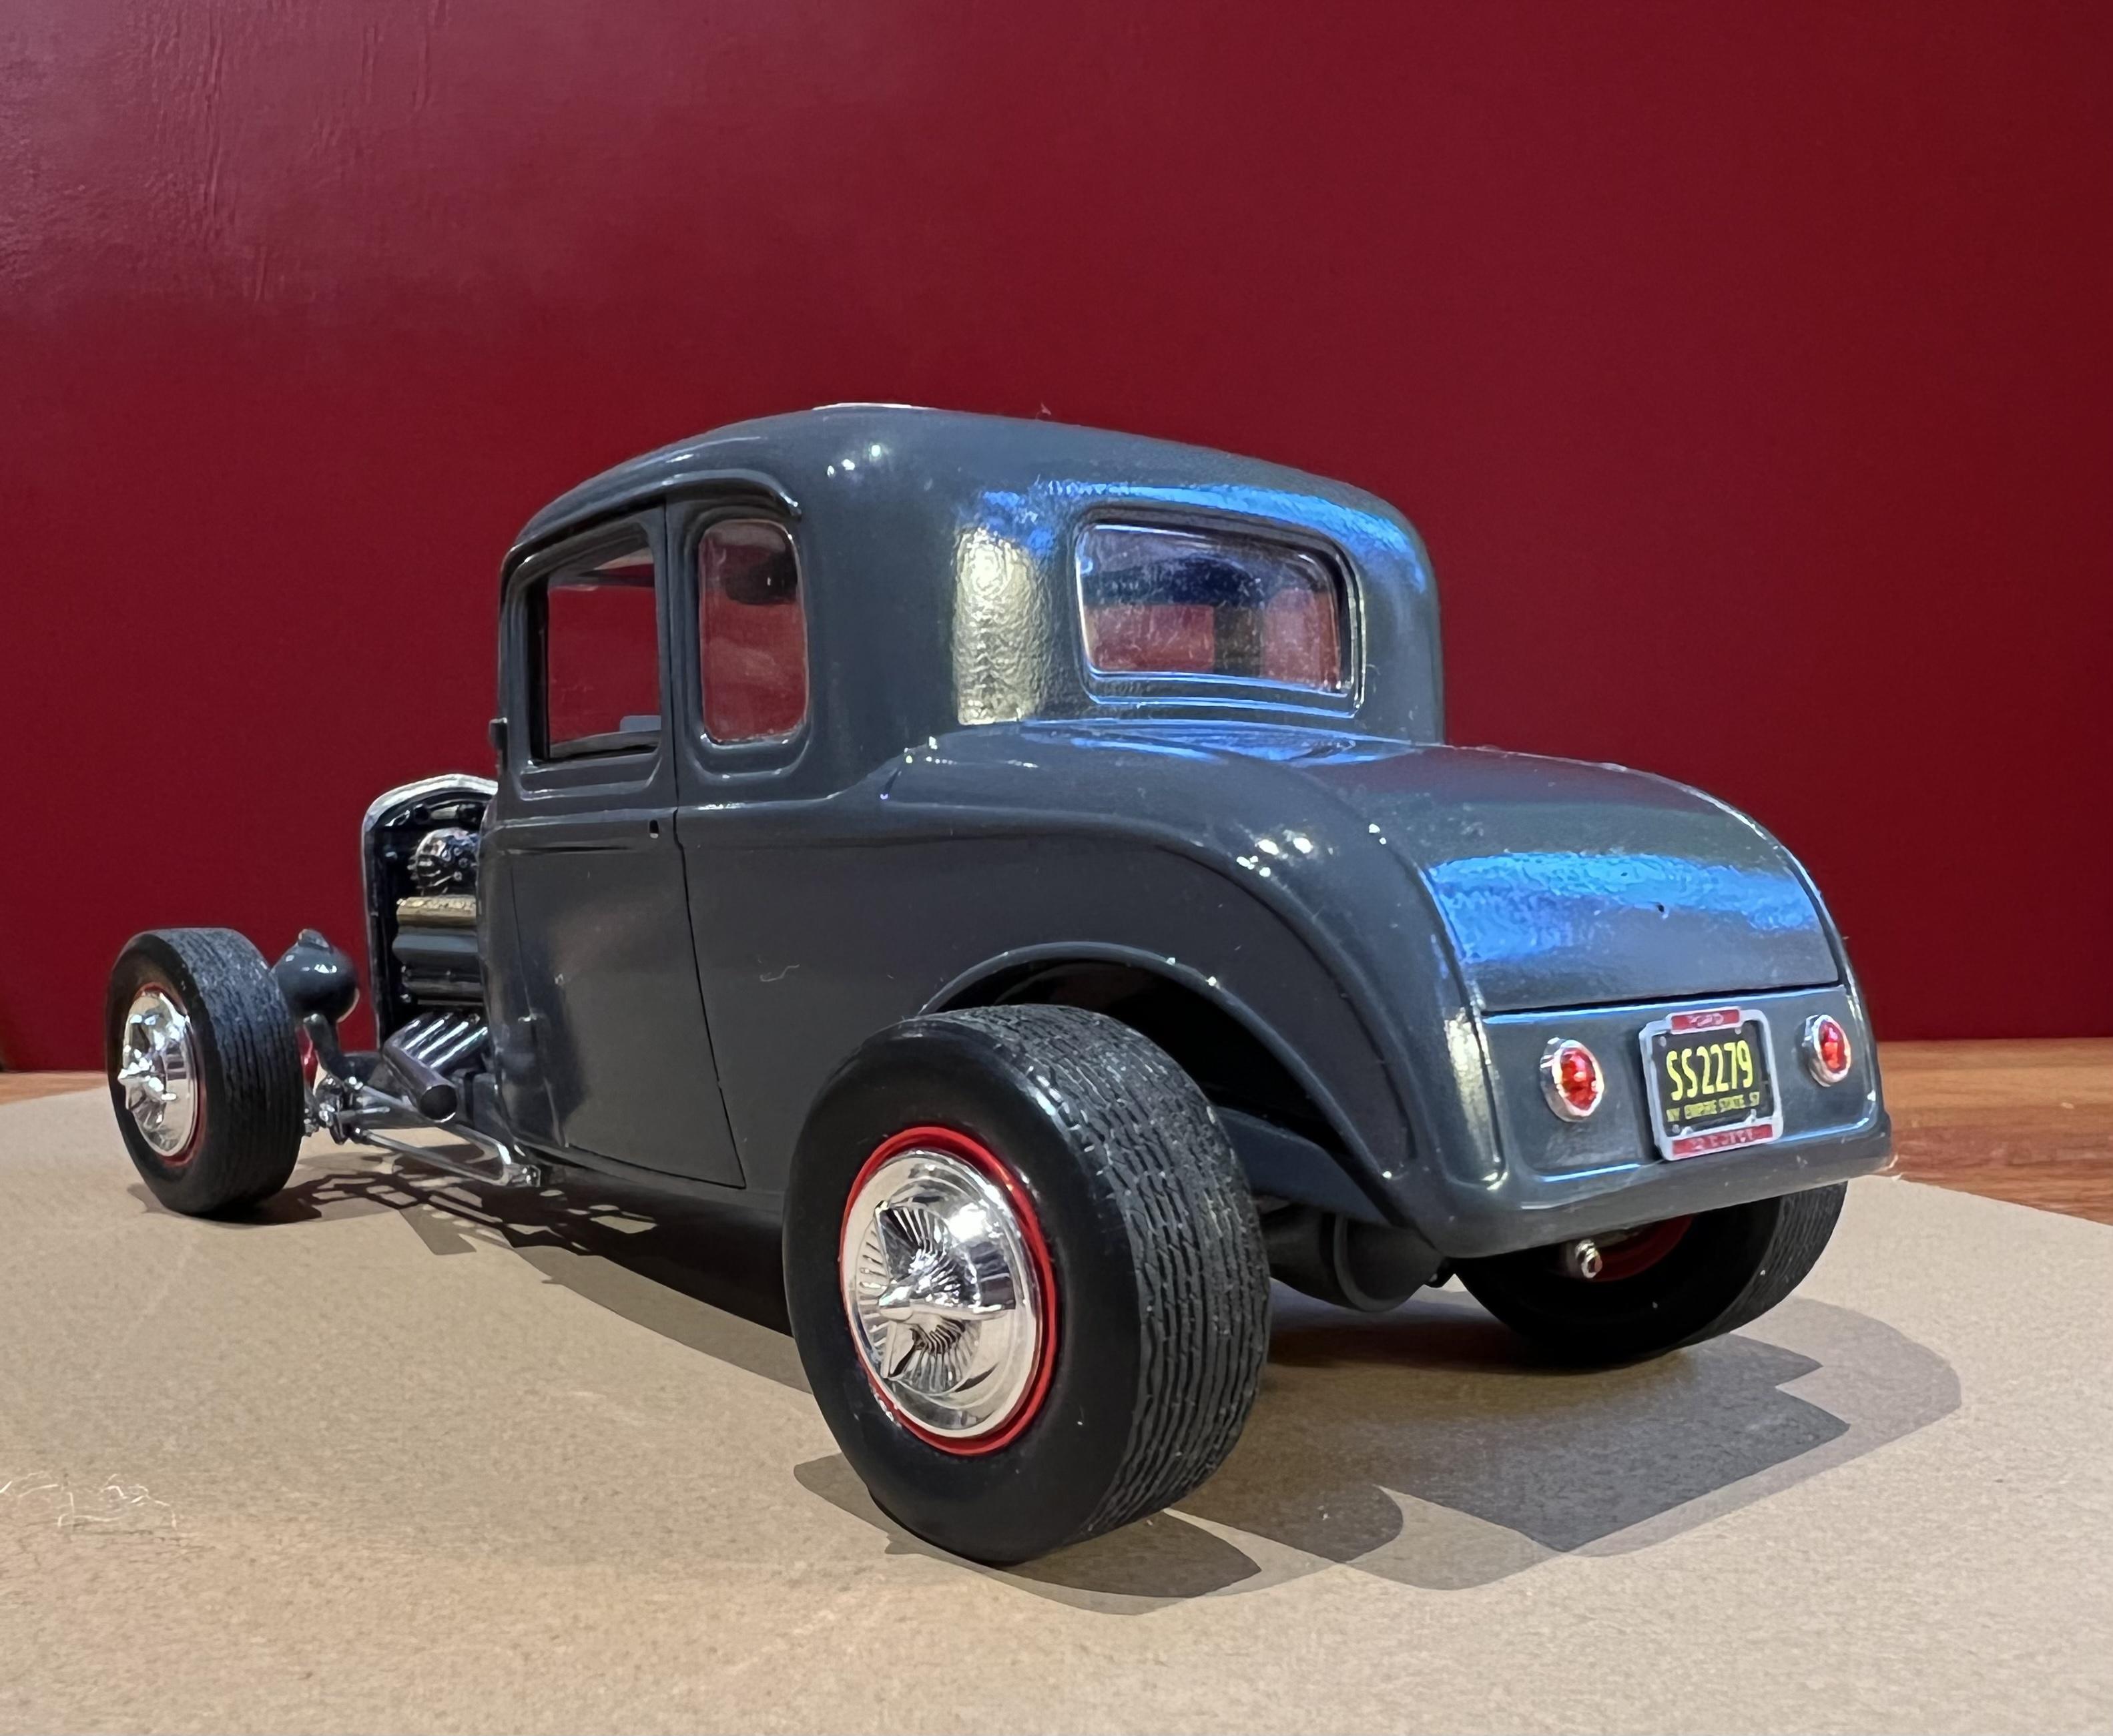
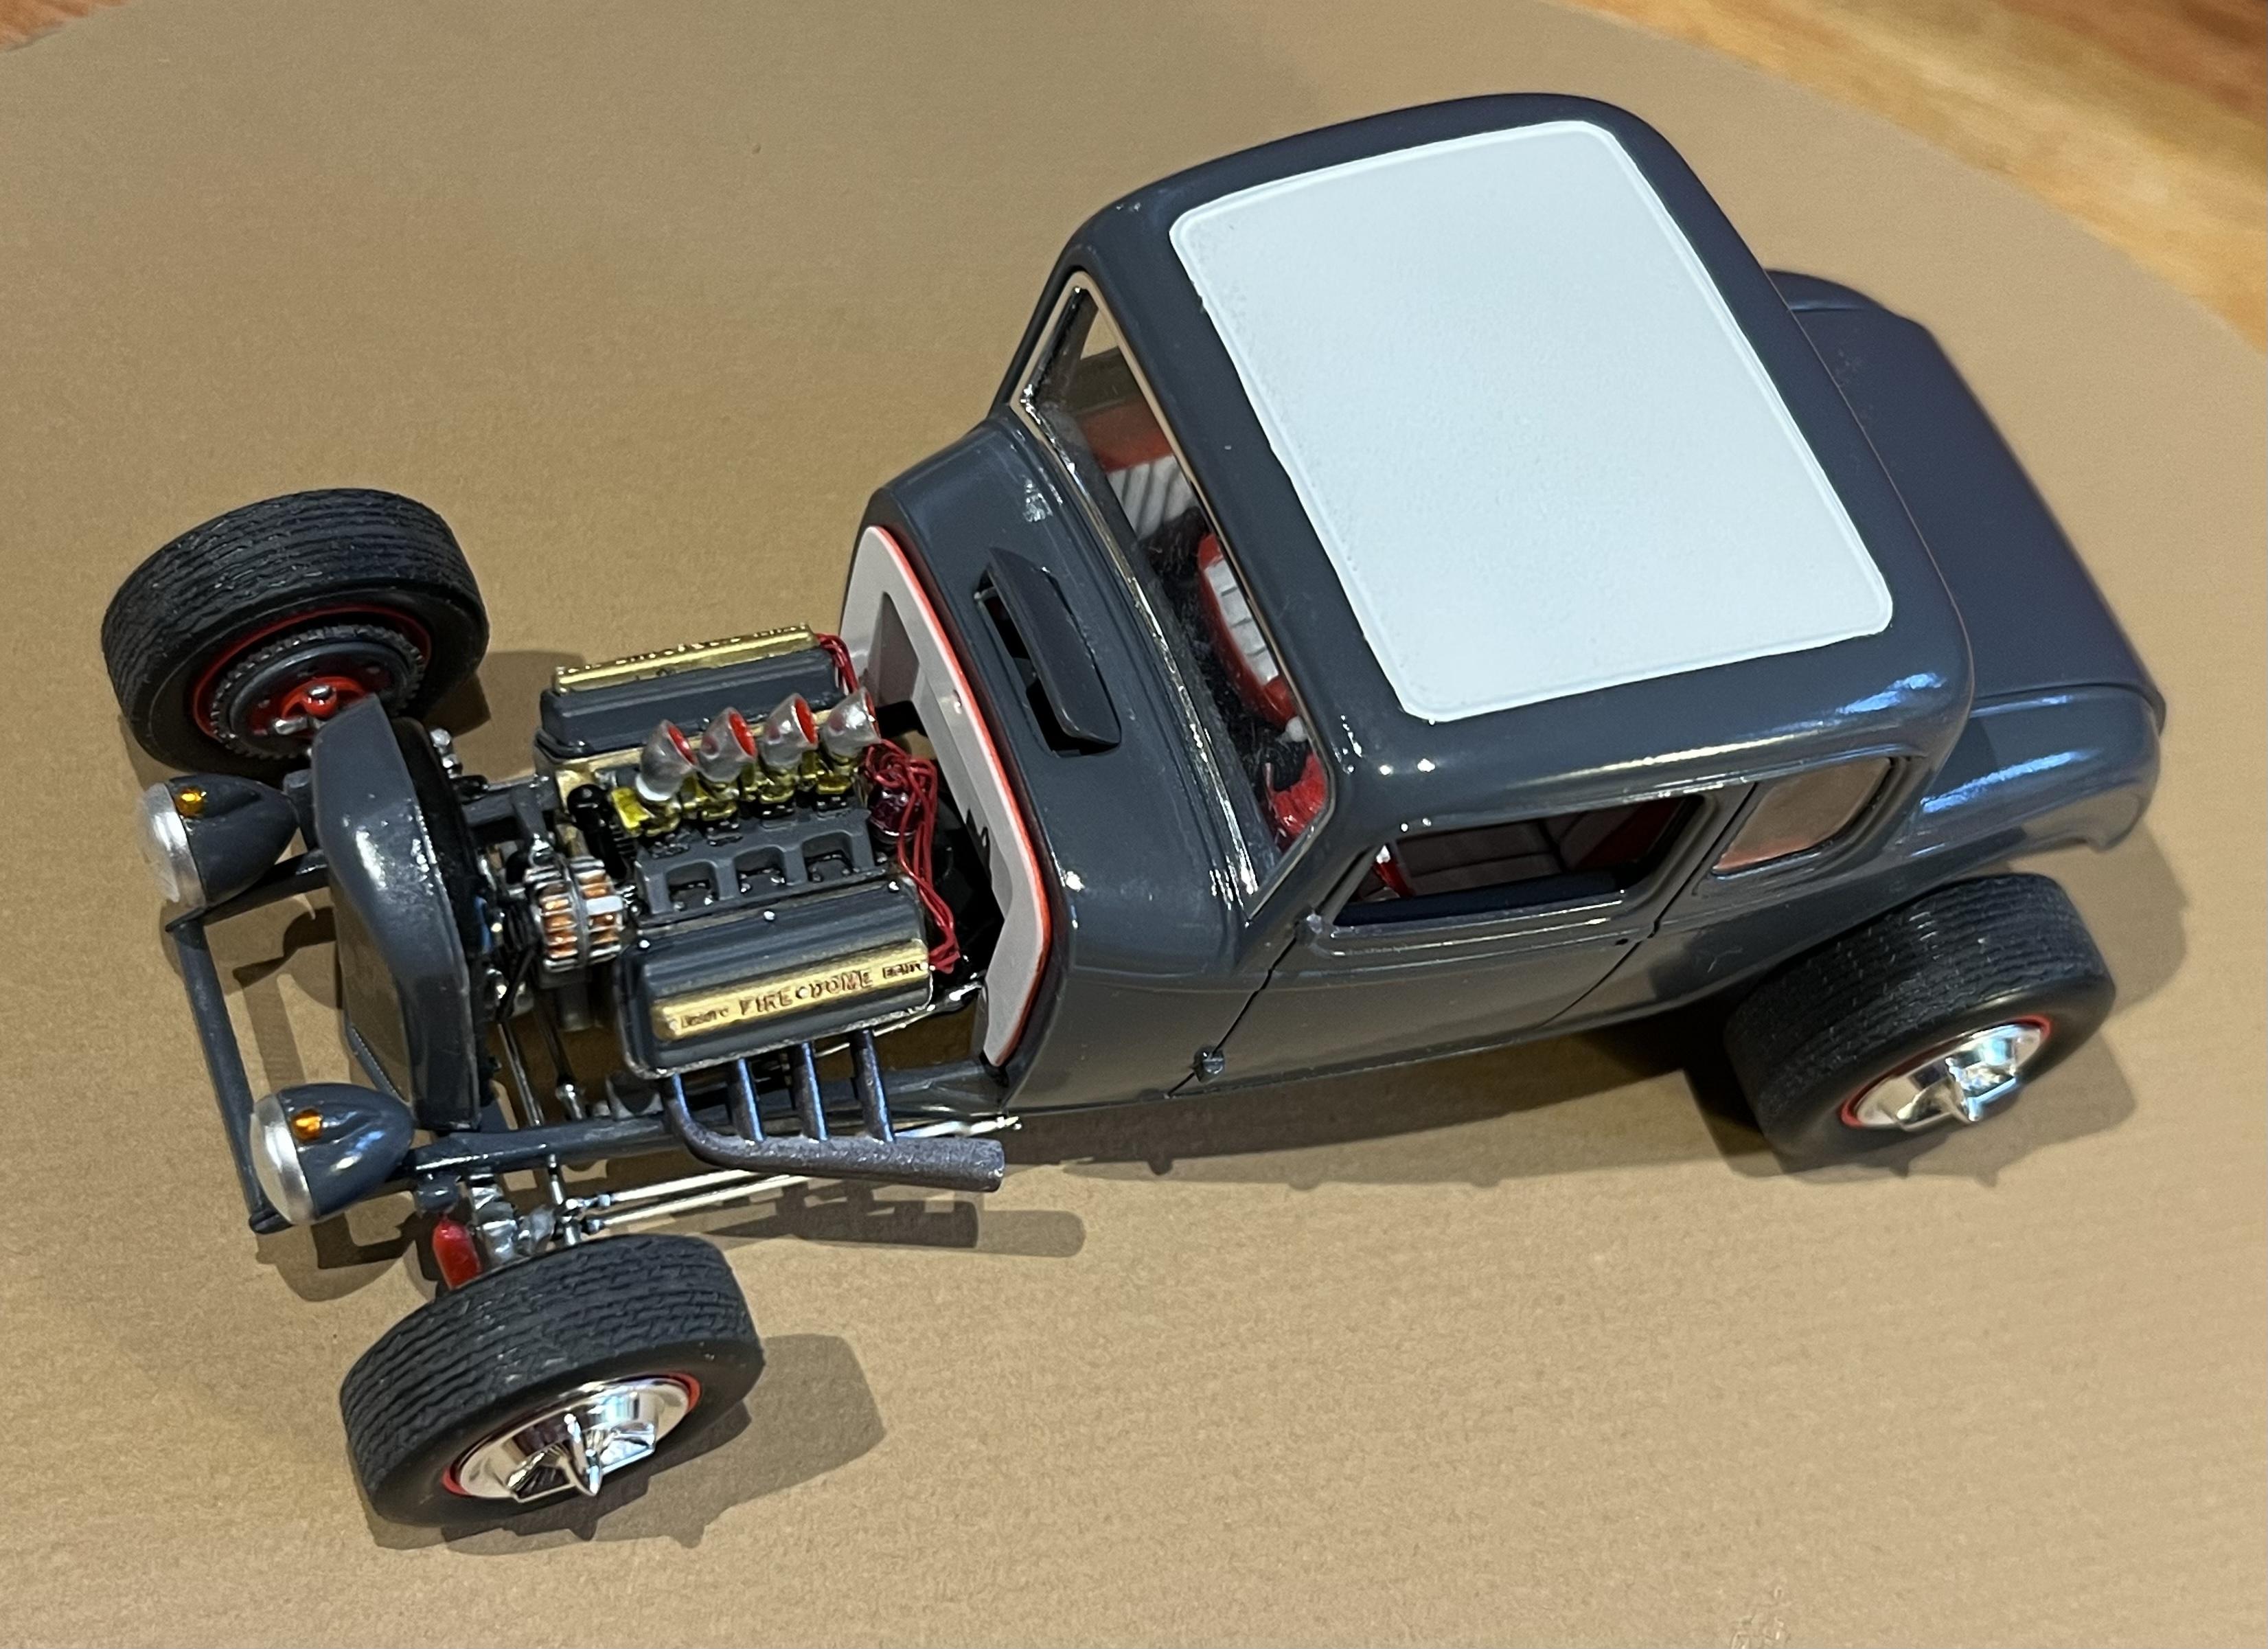
Off to Deuce Days! At 12:30 this morning the coupe was assembled and more or less ready for DD in Scale III. There are a few items still to complete such as nerf bars, door handles and, oh yes a driveshaft, yet that may happen after the display, at least the paint is dry😉. Overall I’m happy with the build’s fit as there were many alterations with the channeling for the interior and chassis. The grill has a forward rake to it that I’m unsure about. The electric fan bumps up against the water pump pulley, even after trimming as much as possible. The coupe certainly evokes the East Coast image while enjoying a modern suspension underneath. Off to Victoria! Cheers Misha
-
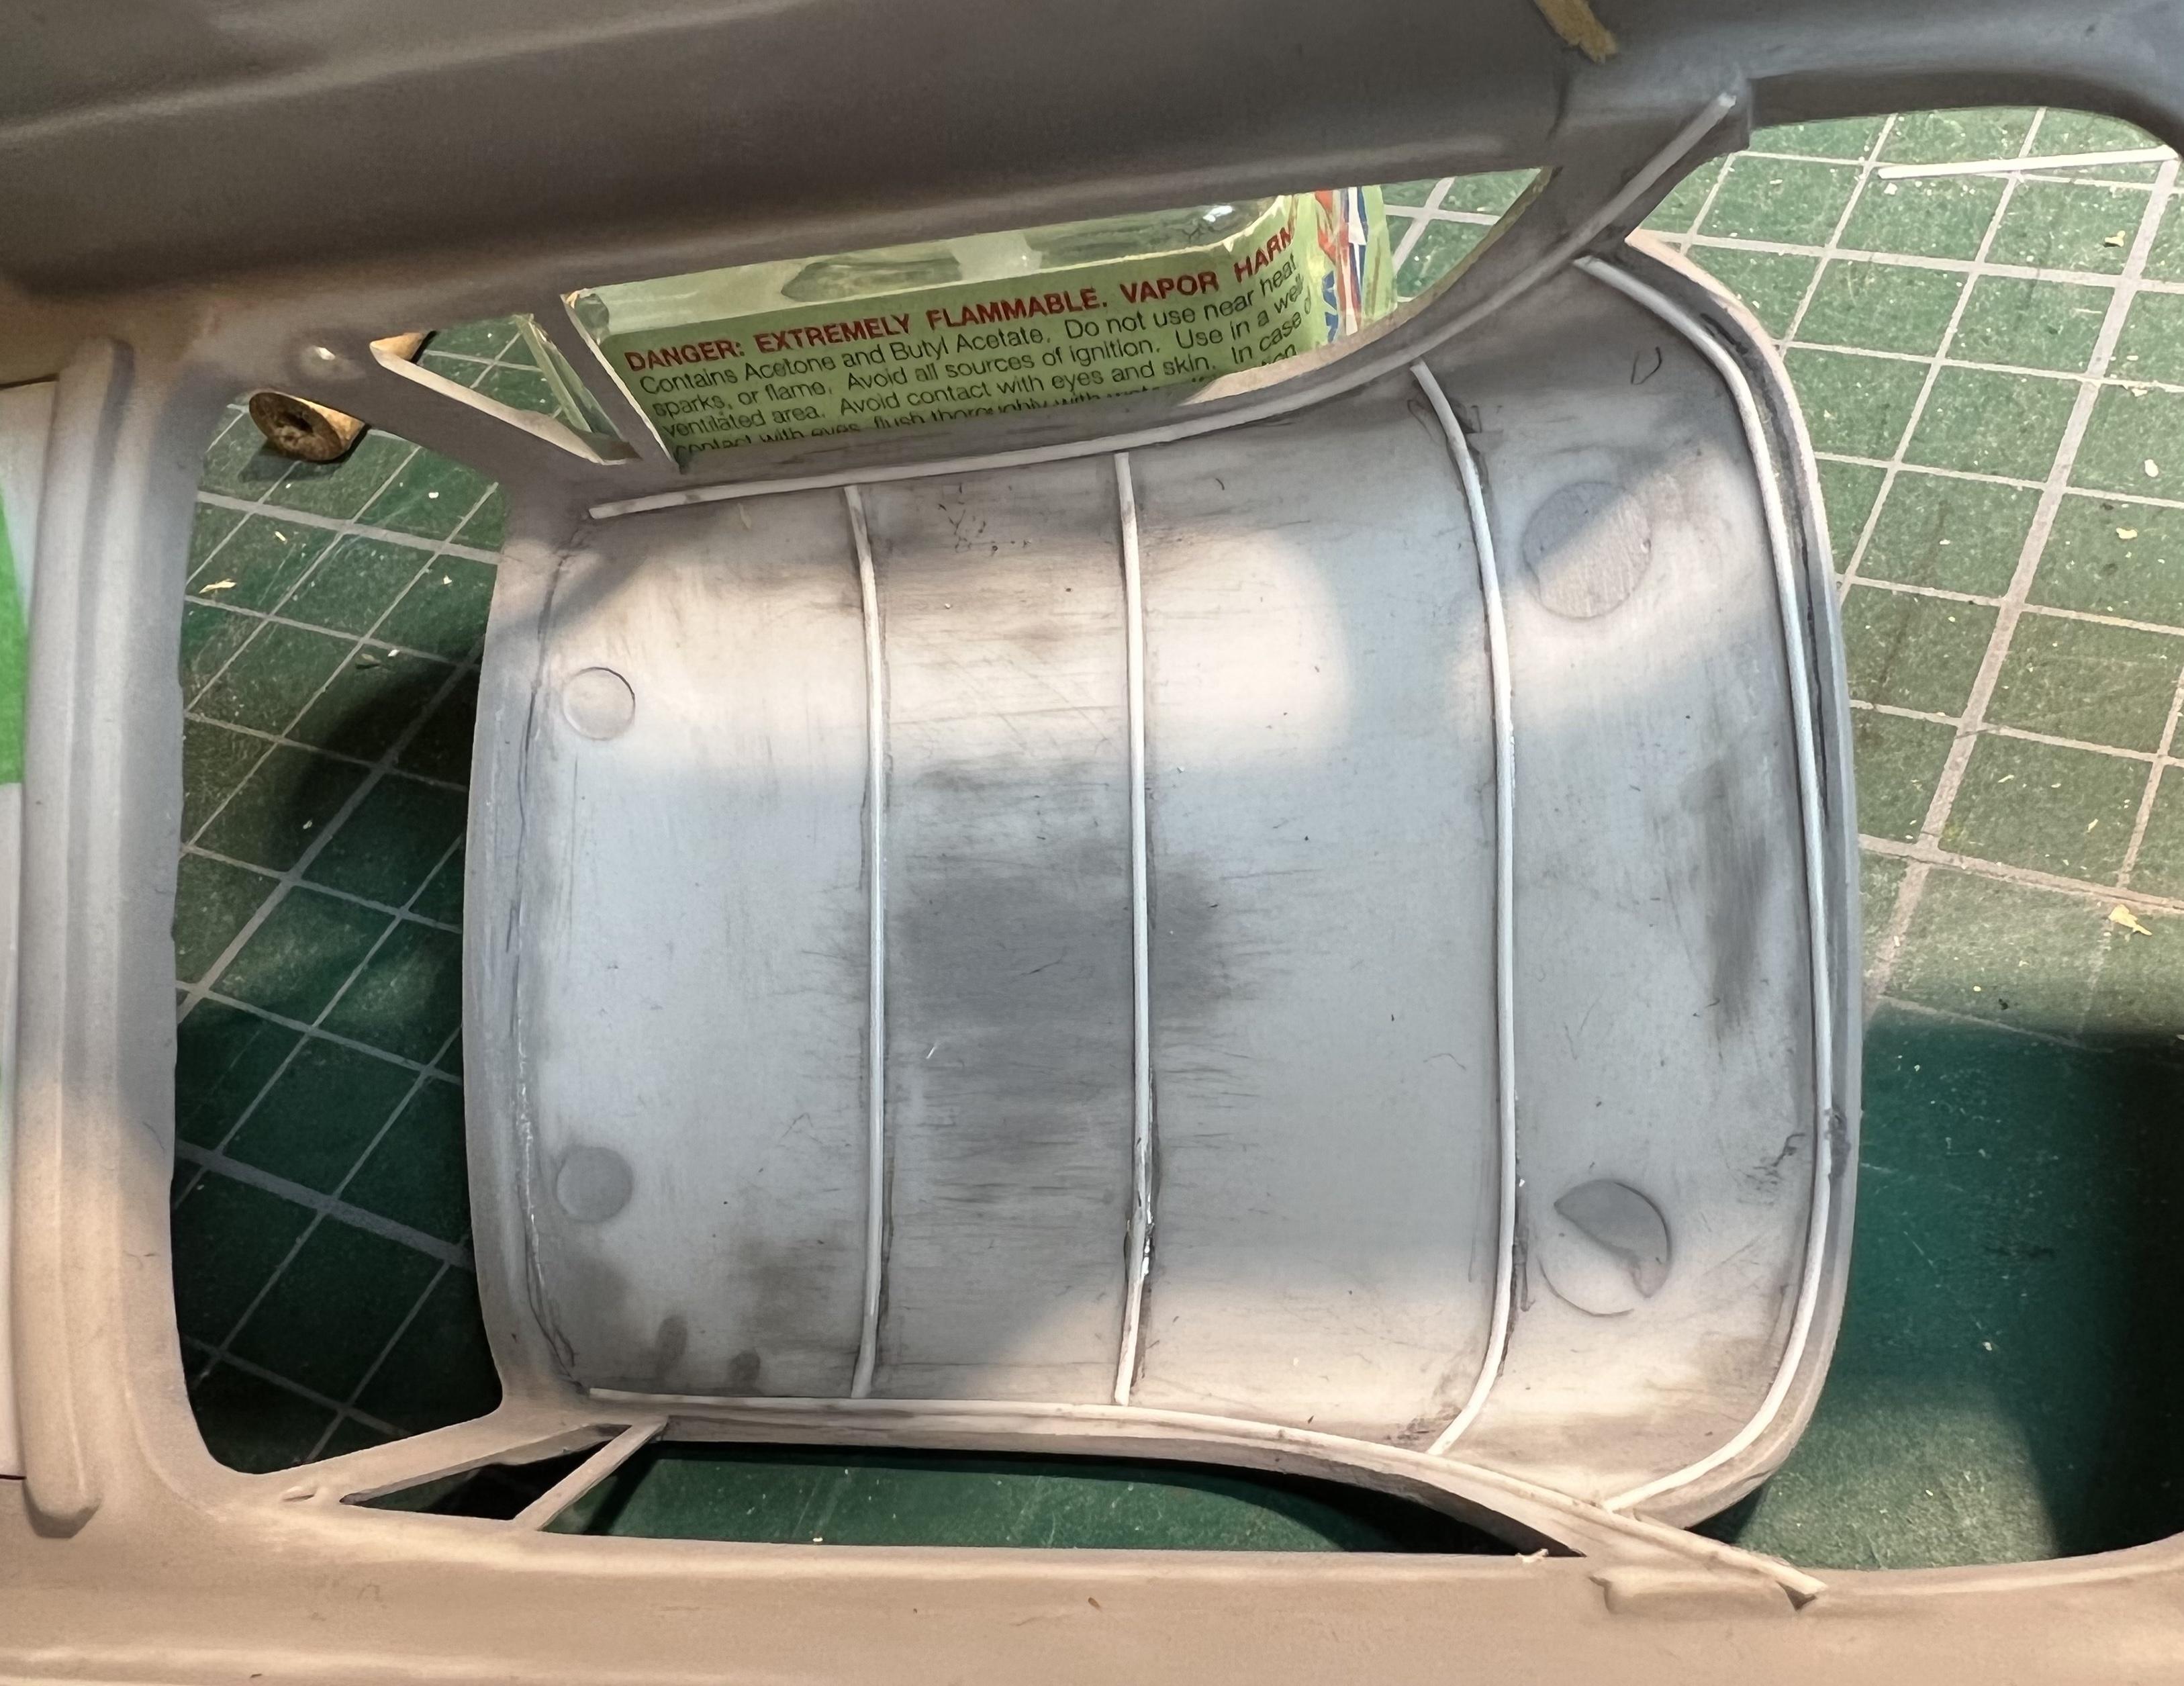
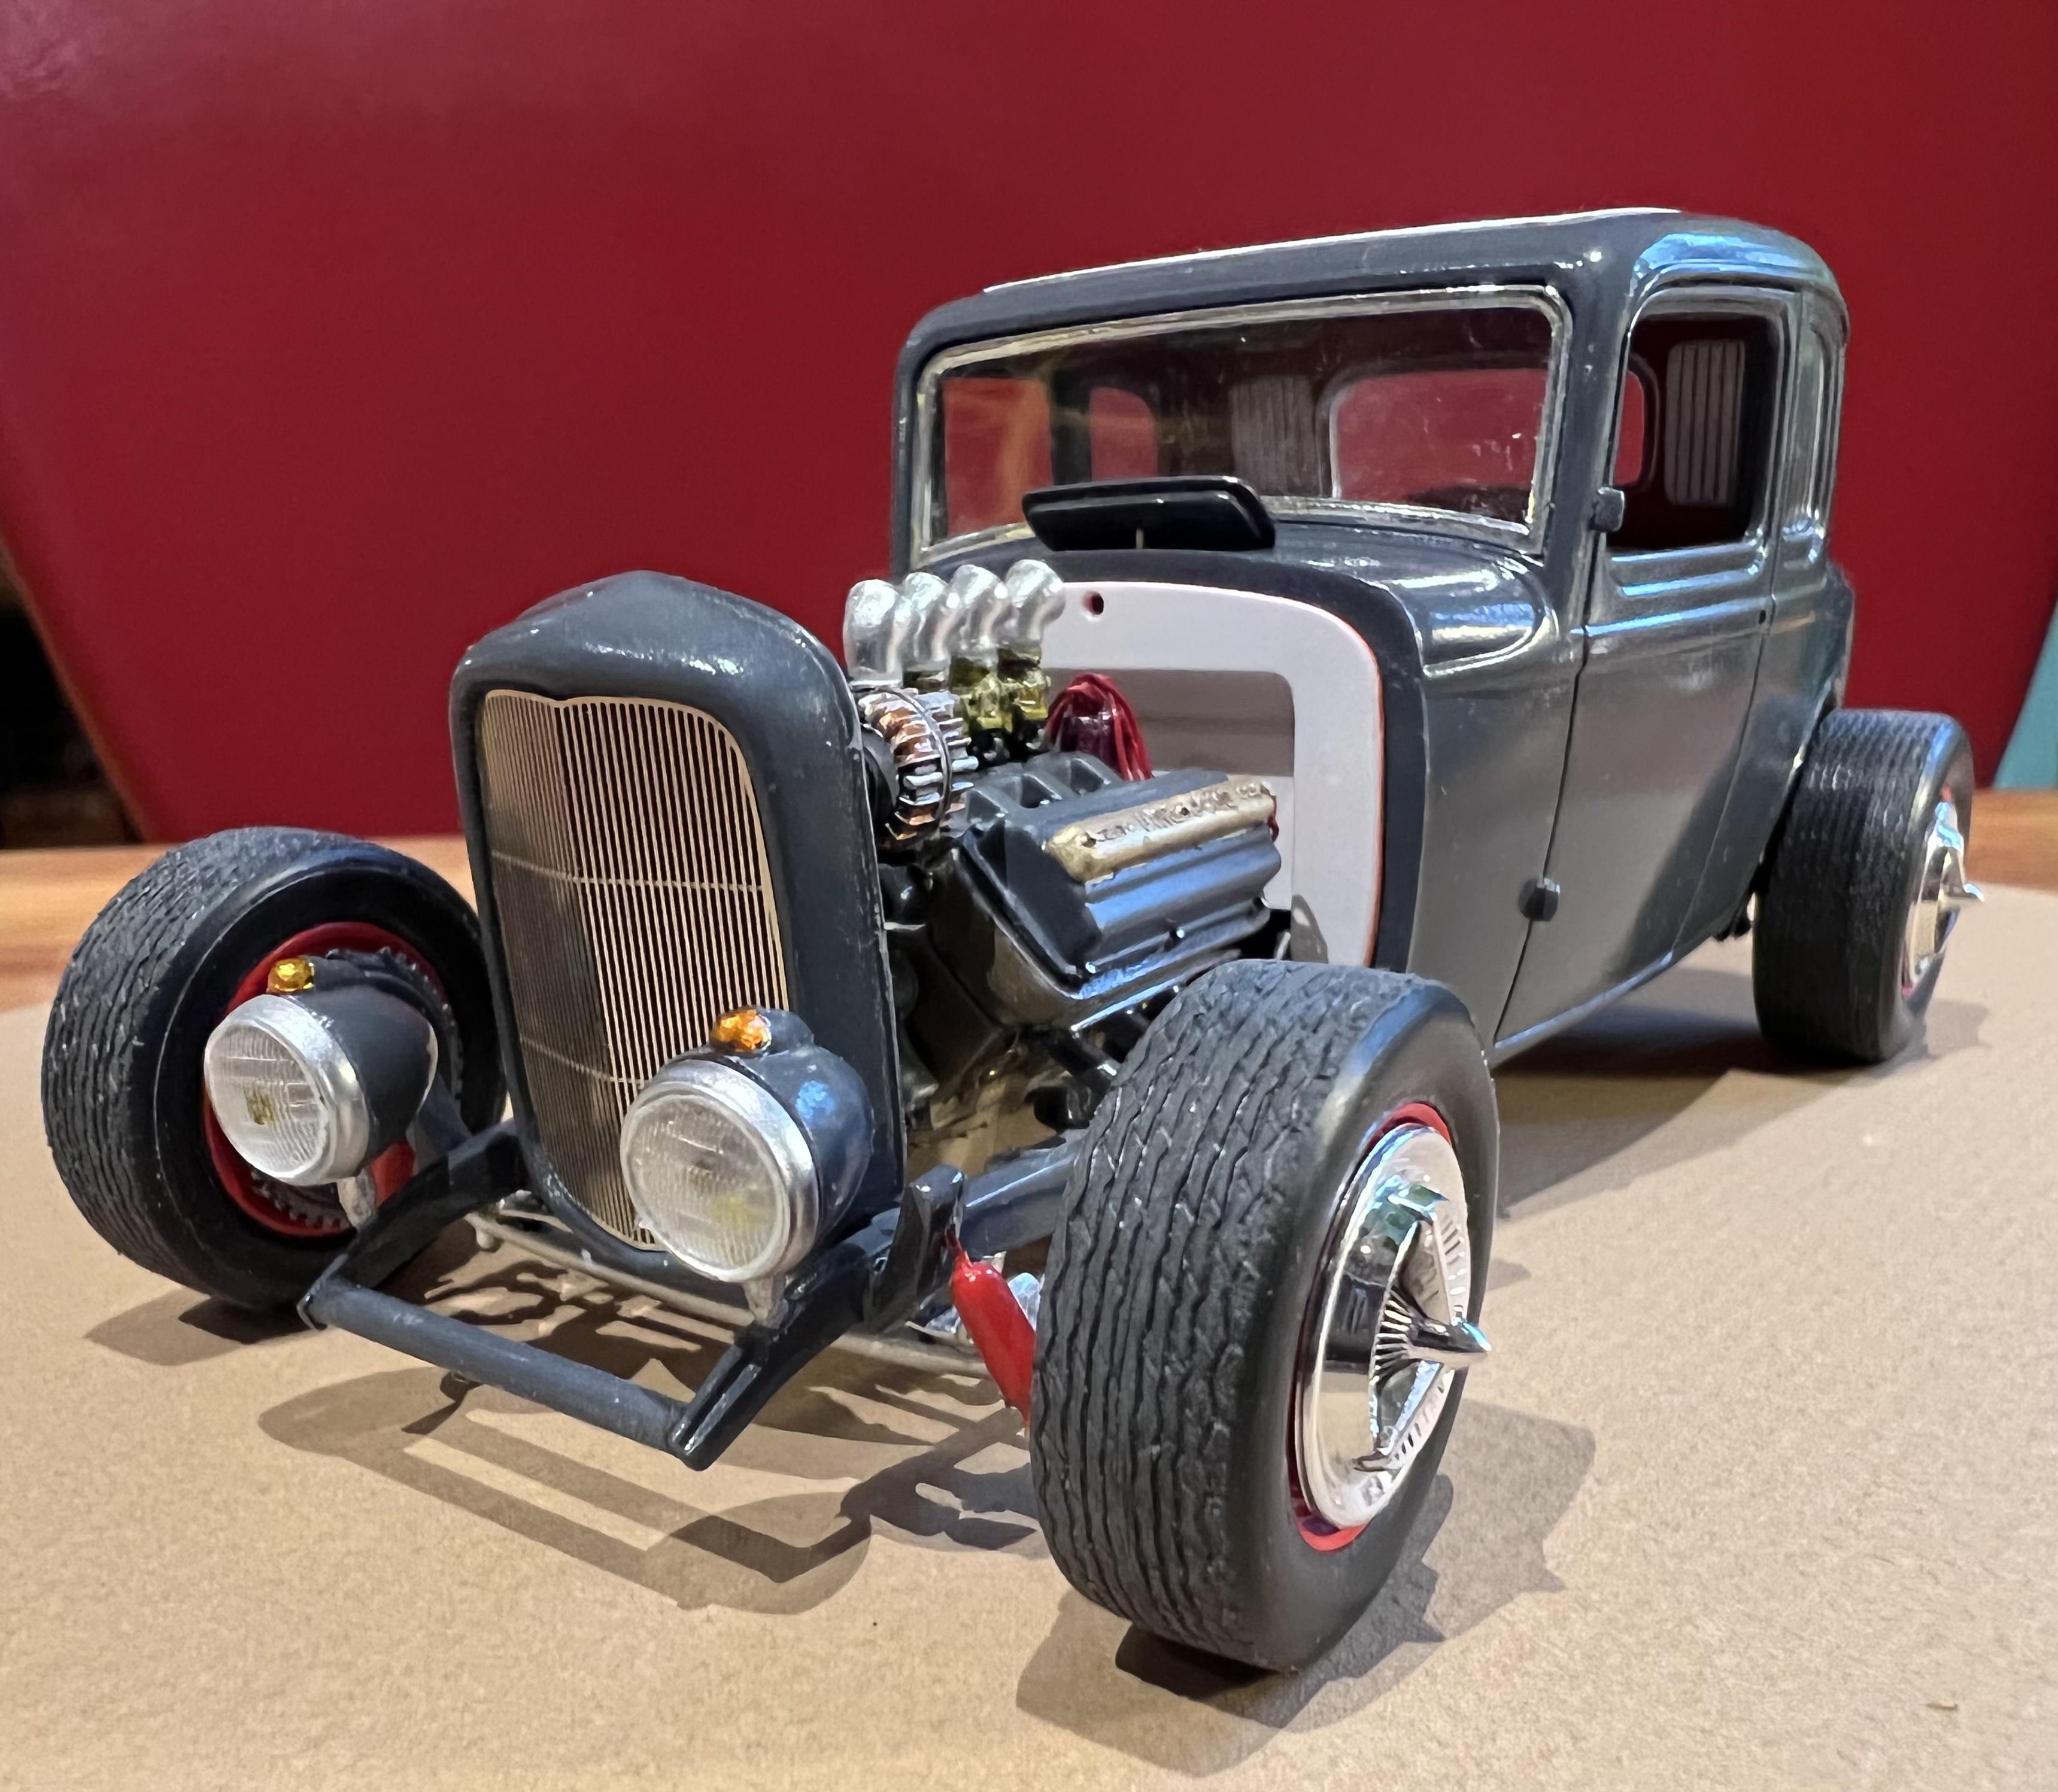
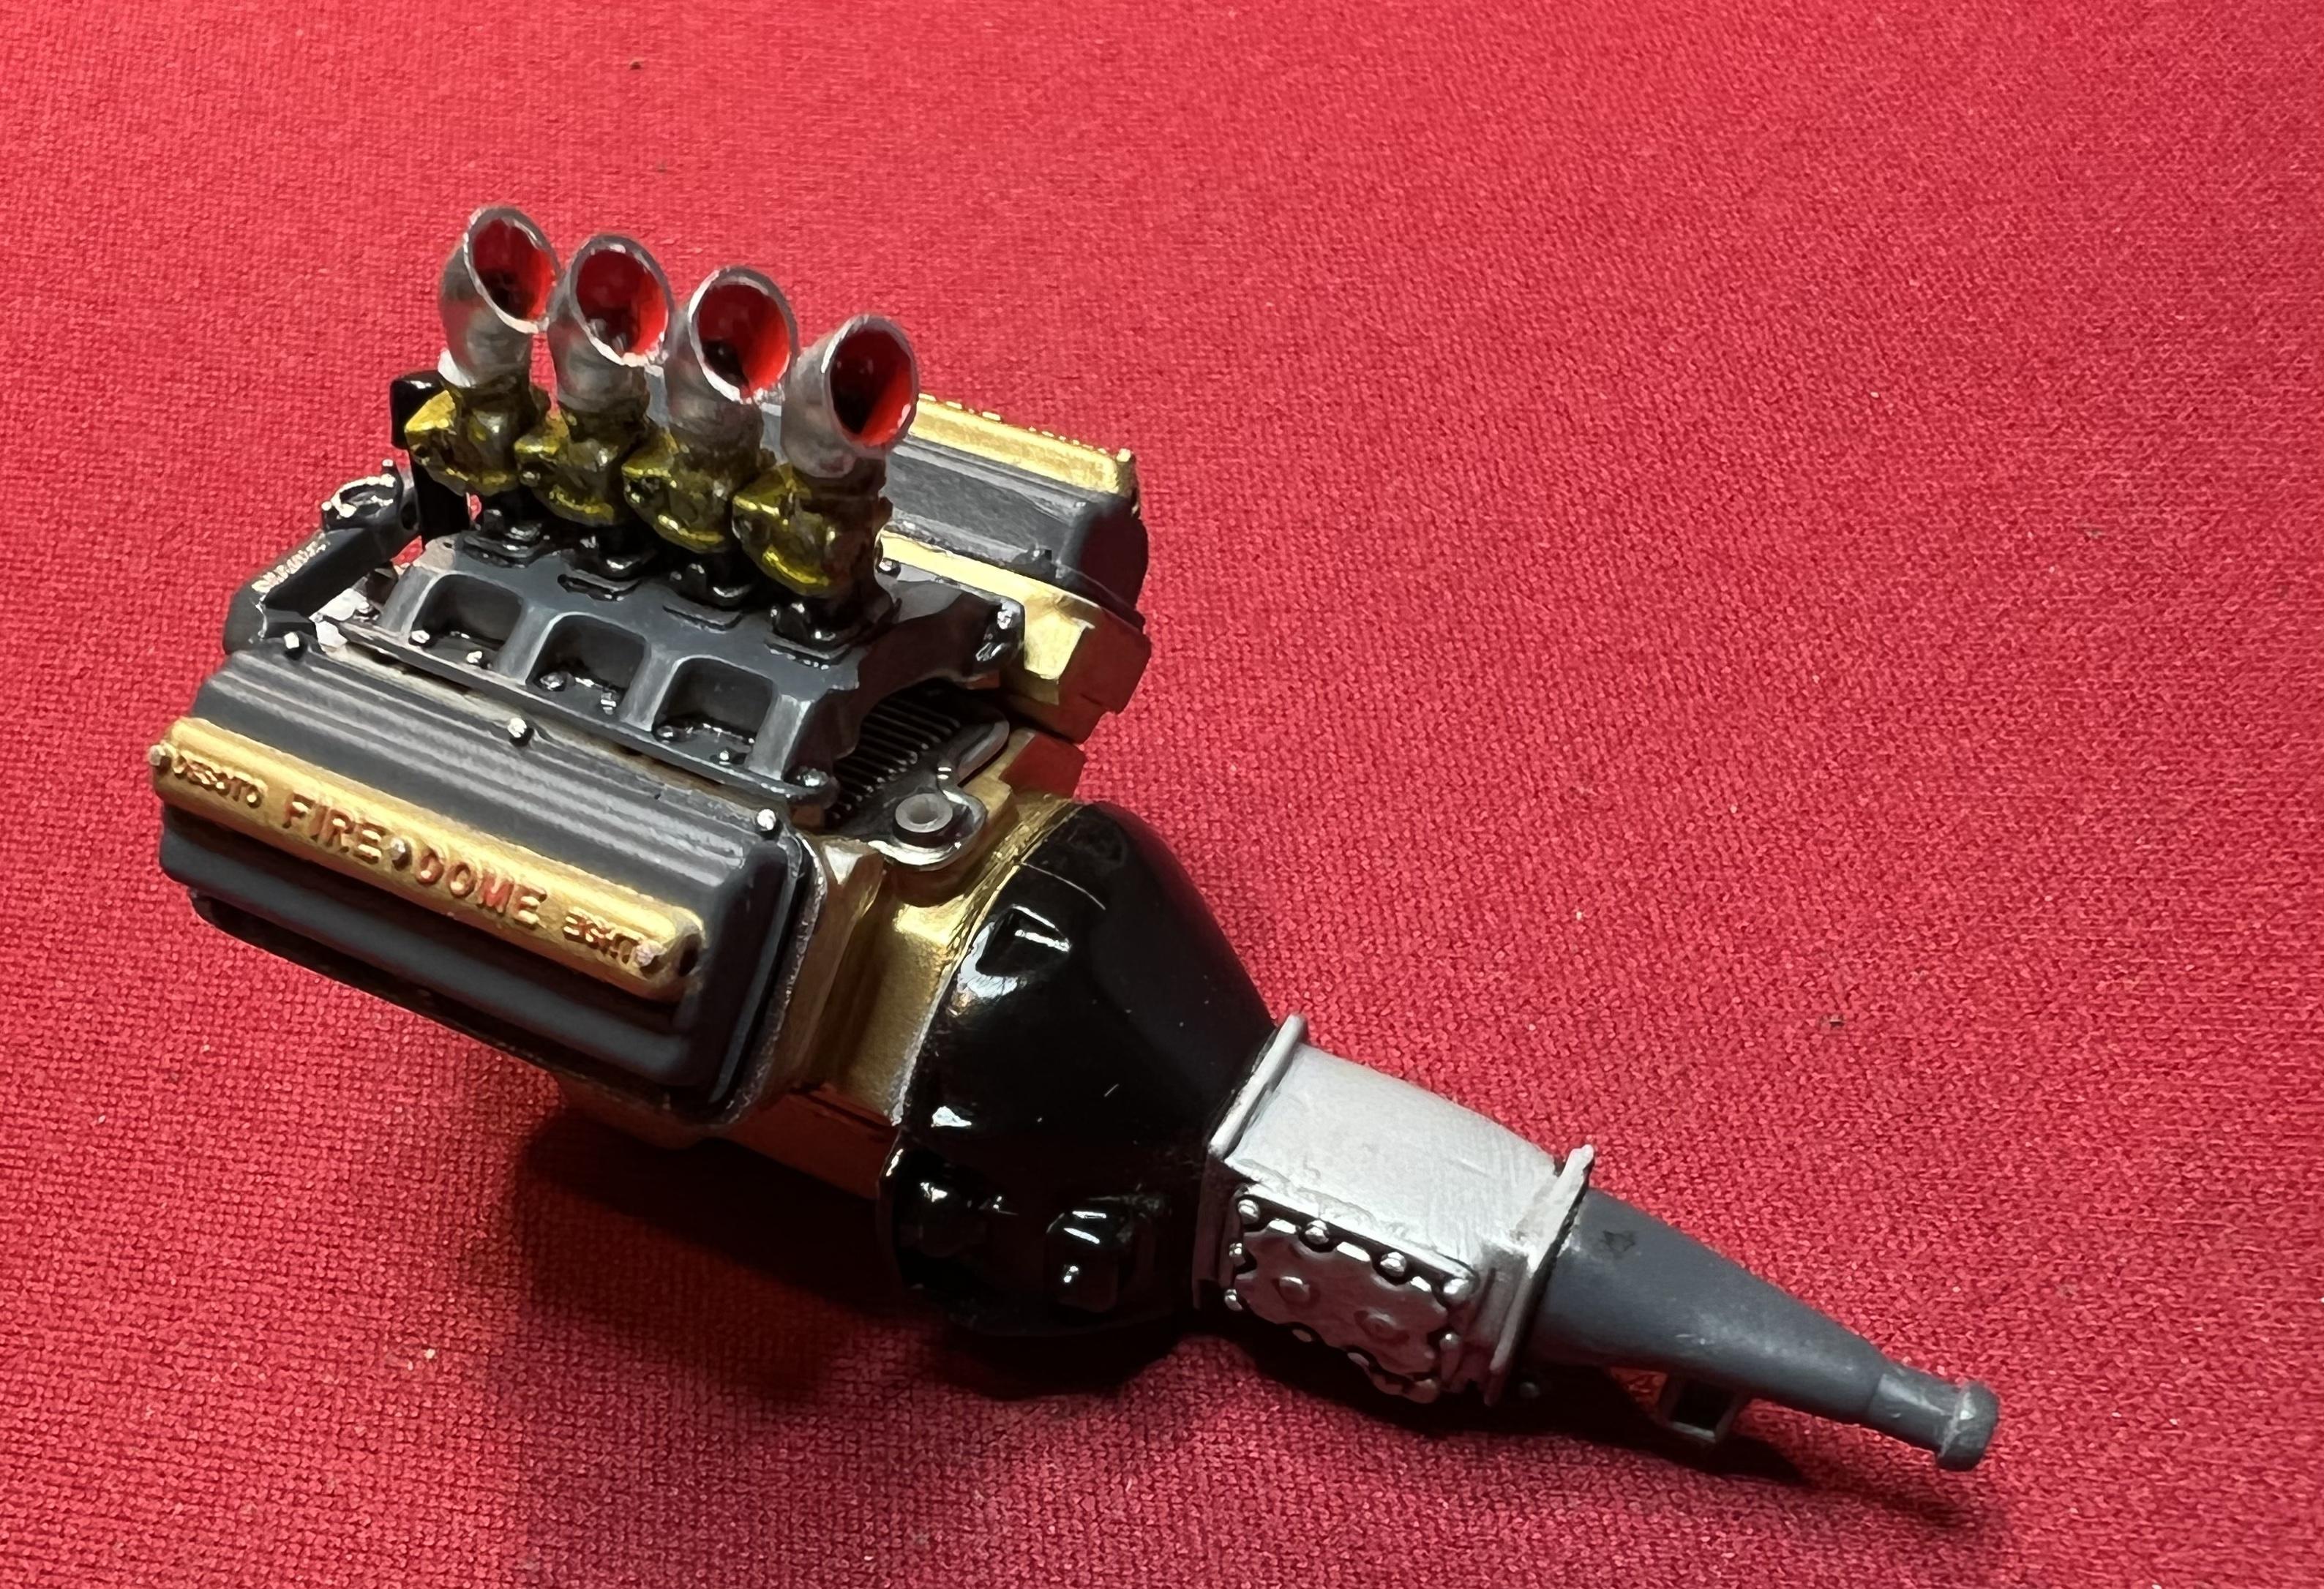
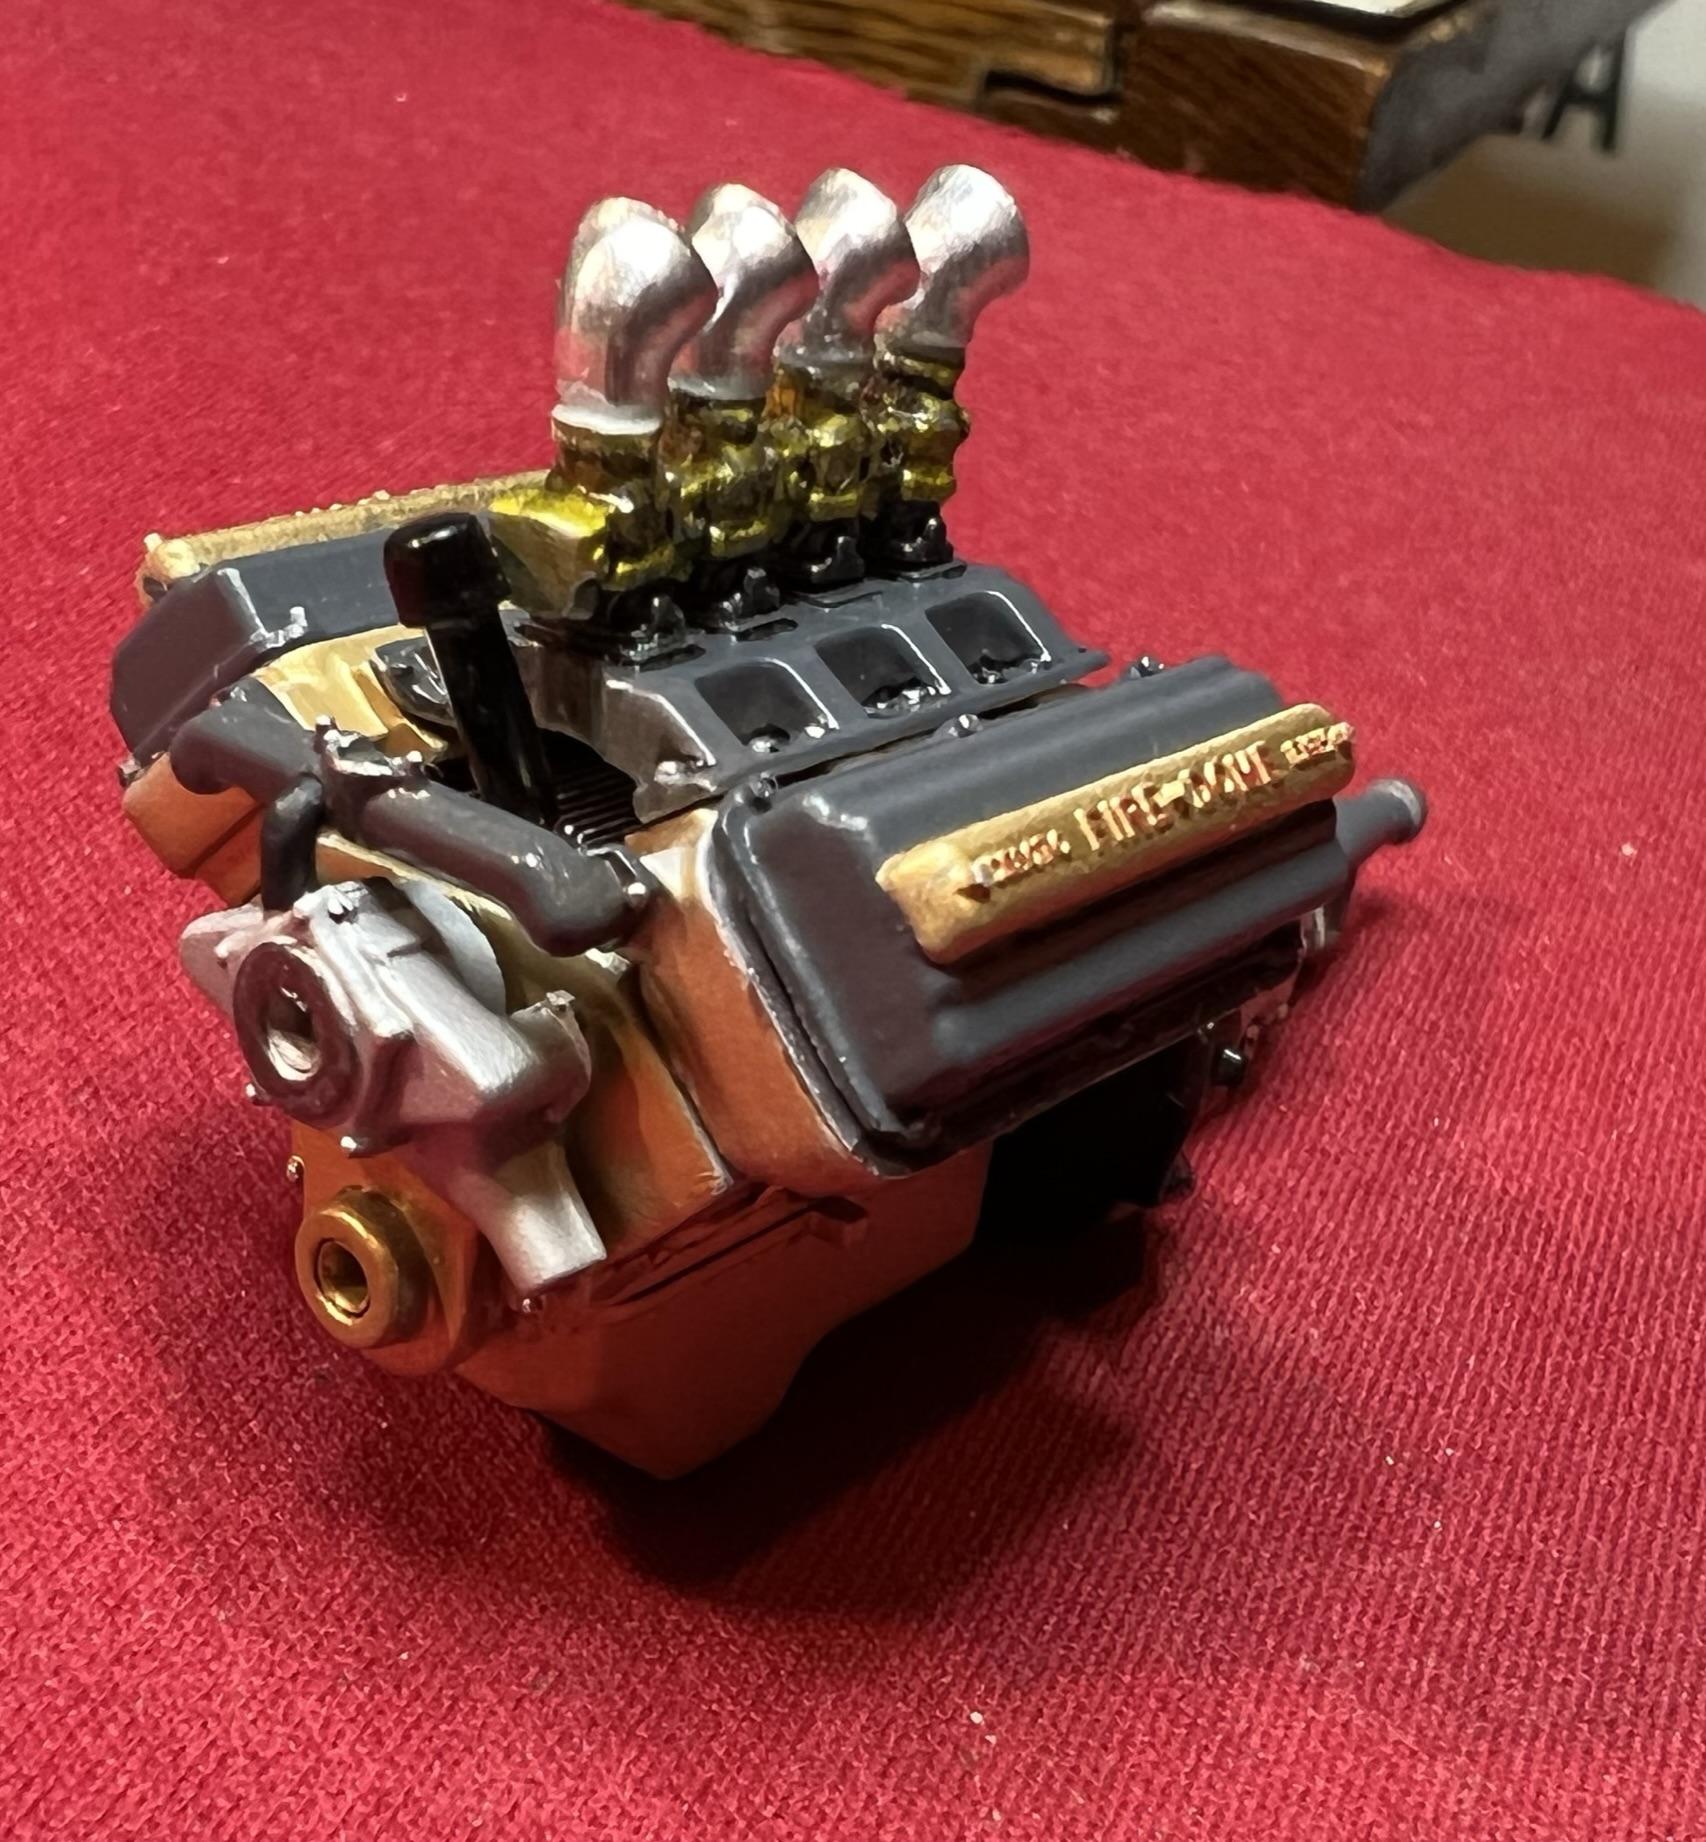
The Rods are arriving! The 1:1 Deuces have been making the crossing from the mainland, arriving at Victoria’s Inner Harbour off the Coho ferry. Meanwhile I have two days left to get my build into the show. Been making progress, nearly all the parts have been painted and major assemblies are on their way. Going to be tight! Main body parts are completed with a clear coat of TS 13, please excuse the dust particles which I missed swiping off. The chassis shows the difference between the gloss coated areas and the matte. The one piece axle responds well to detail painting after having the kit chrome stripped from it. The Hemi required a Mopar alternator that isn’t included in the kit. Fortunately the one from the 62 JoHan Plymouth kit has an exceptionally well detailed one, quite amazing for a kit over fifty years old! The 392 is near completion, some more wiring, front pulleys, headers and it’ll be ready to fire up! There is still a lot to do, so back to the bench! Thanks Michael and Phil for your comments above, Cheers Misha
-
Great weather, great shots! It all promises to be a knock out weekend. Thanks Phil for the photos, great variety which makes the Deuce such an iconic Hot Rod. Cheers Misha
-
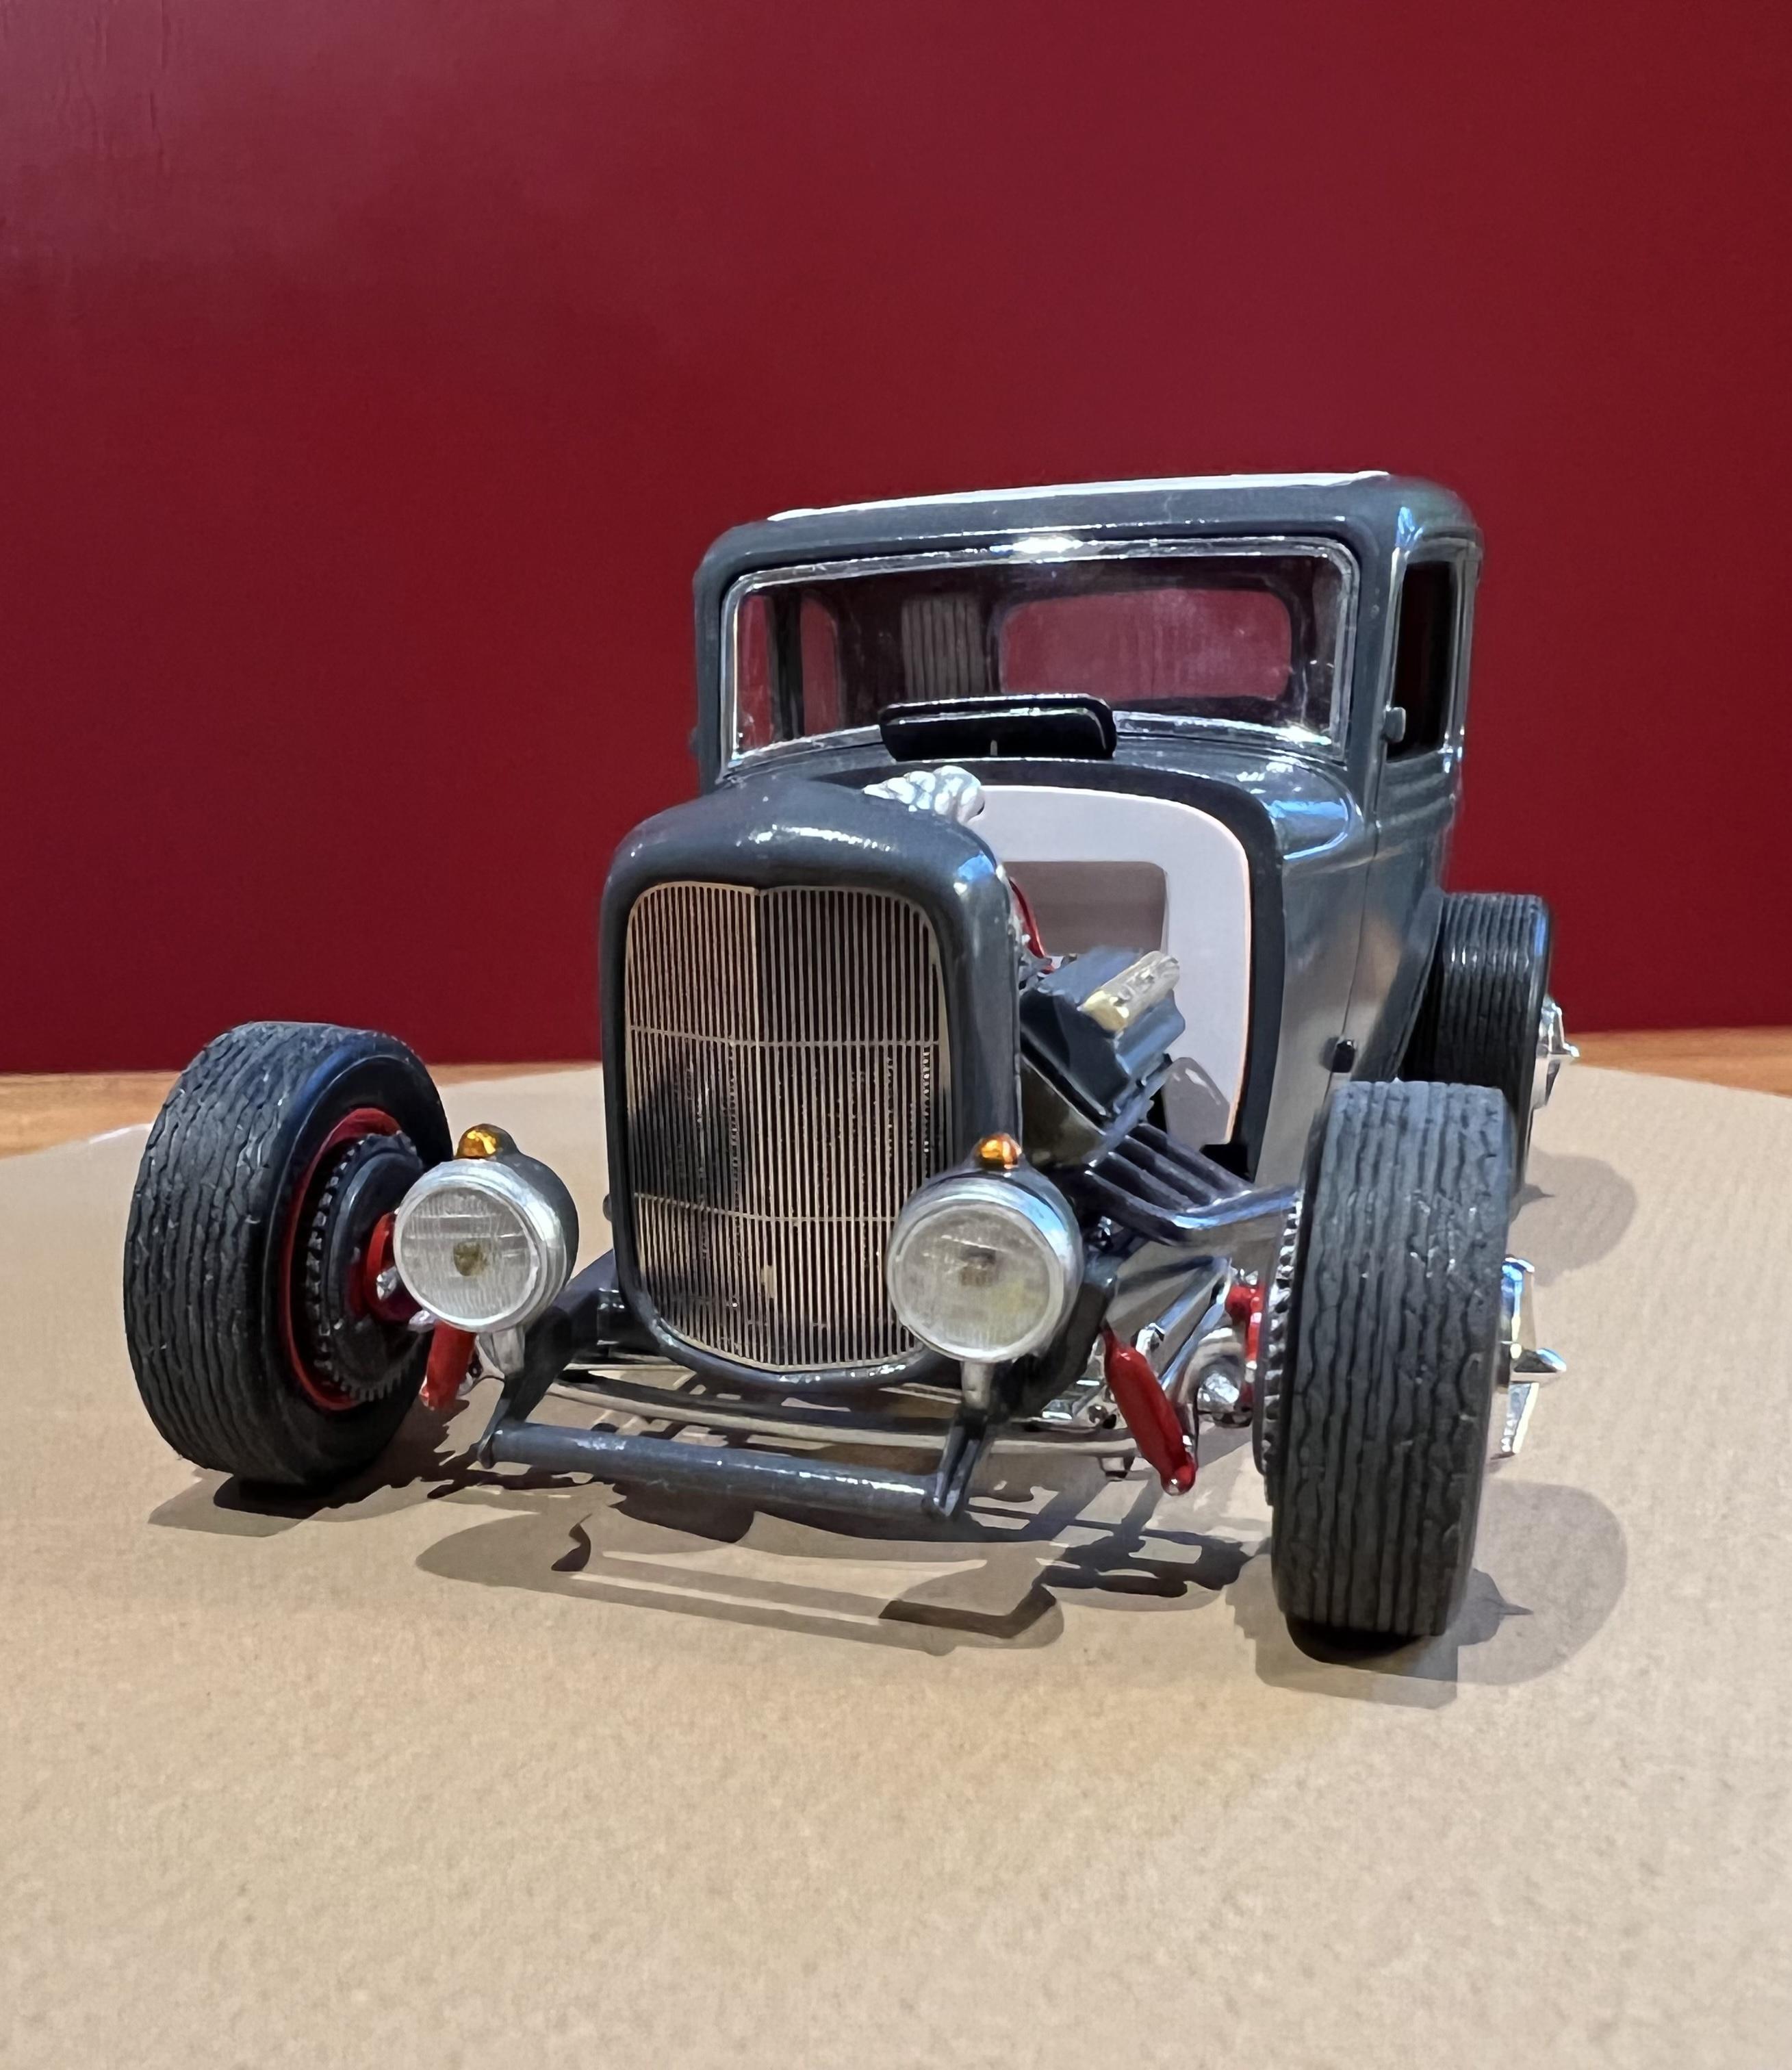
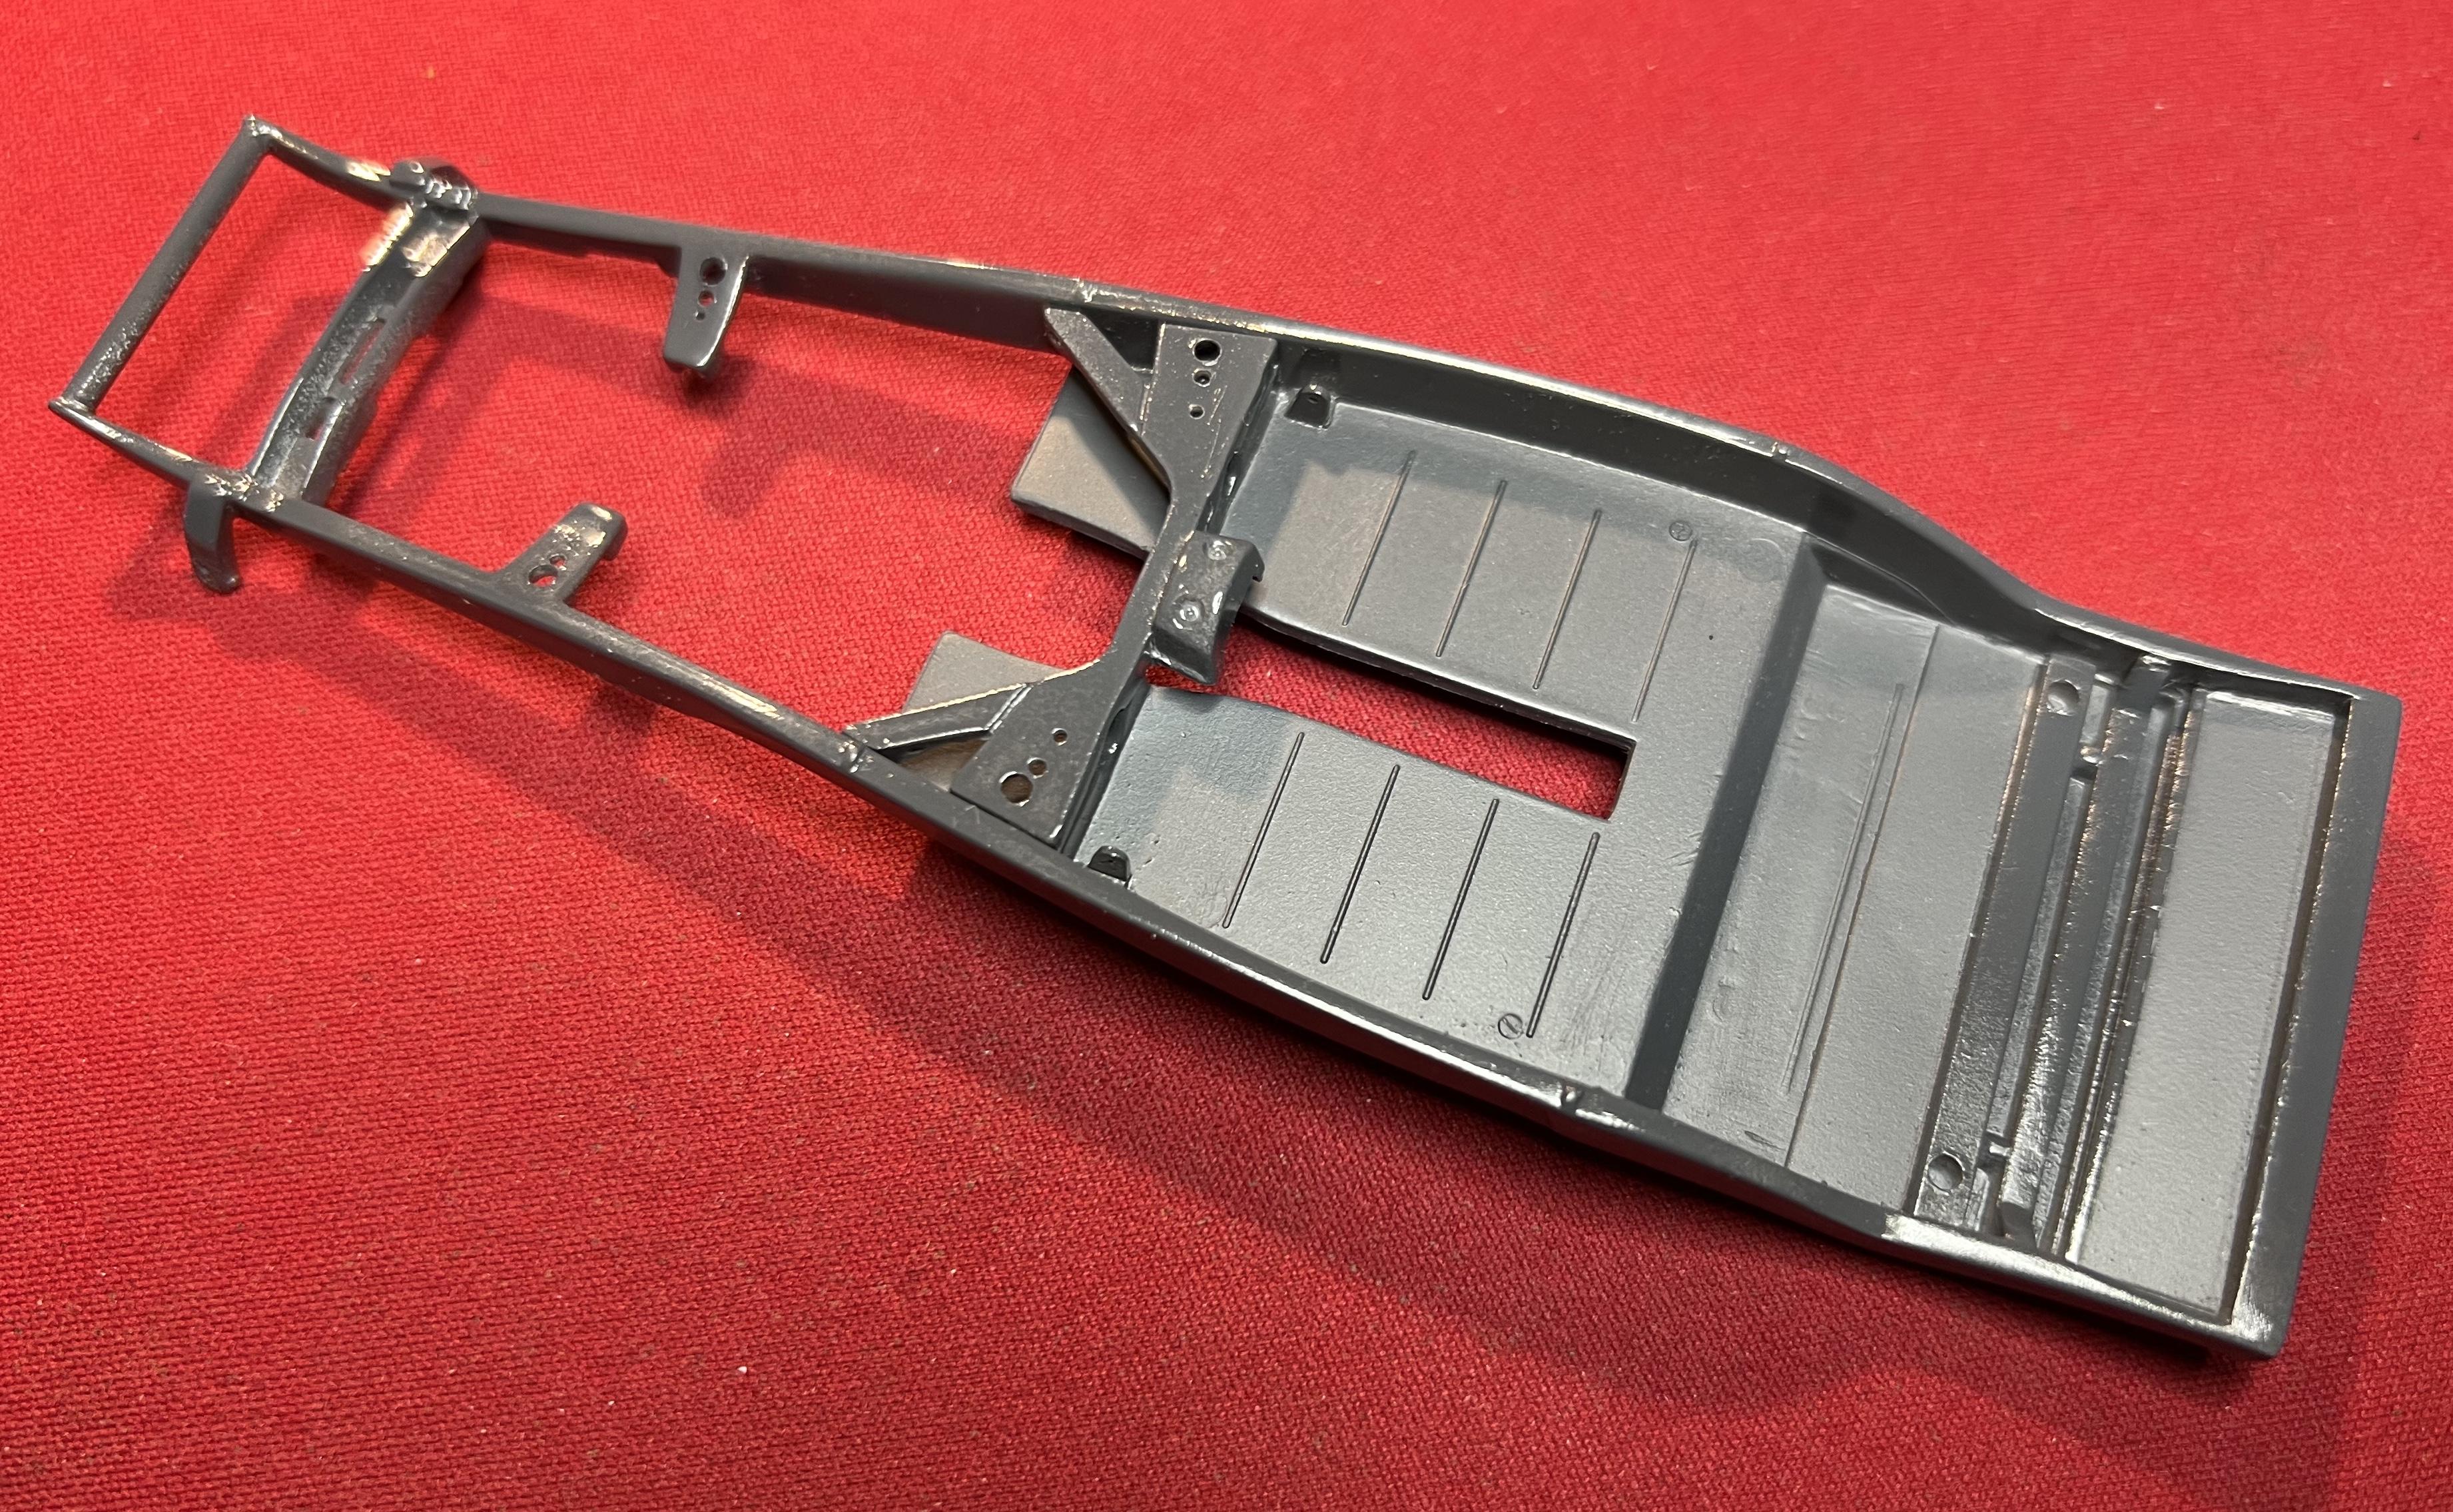
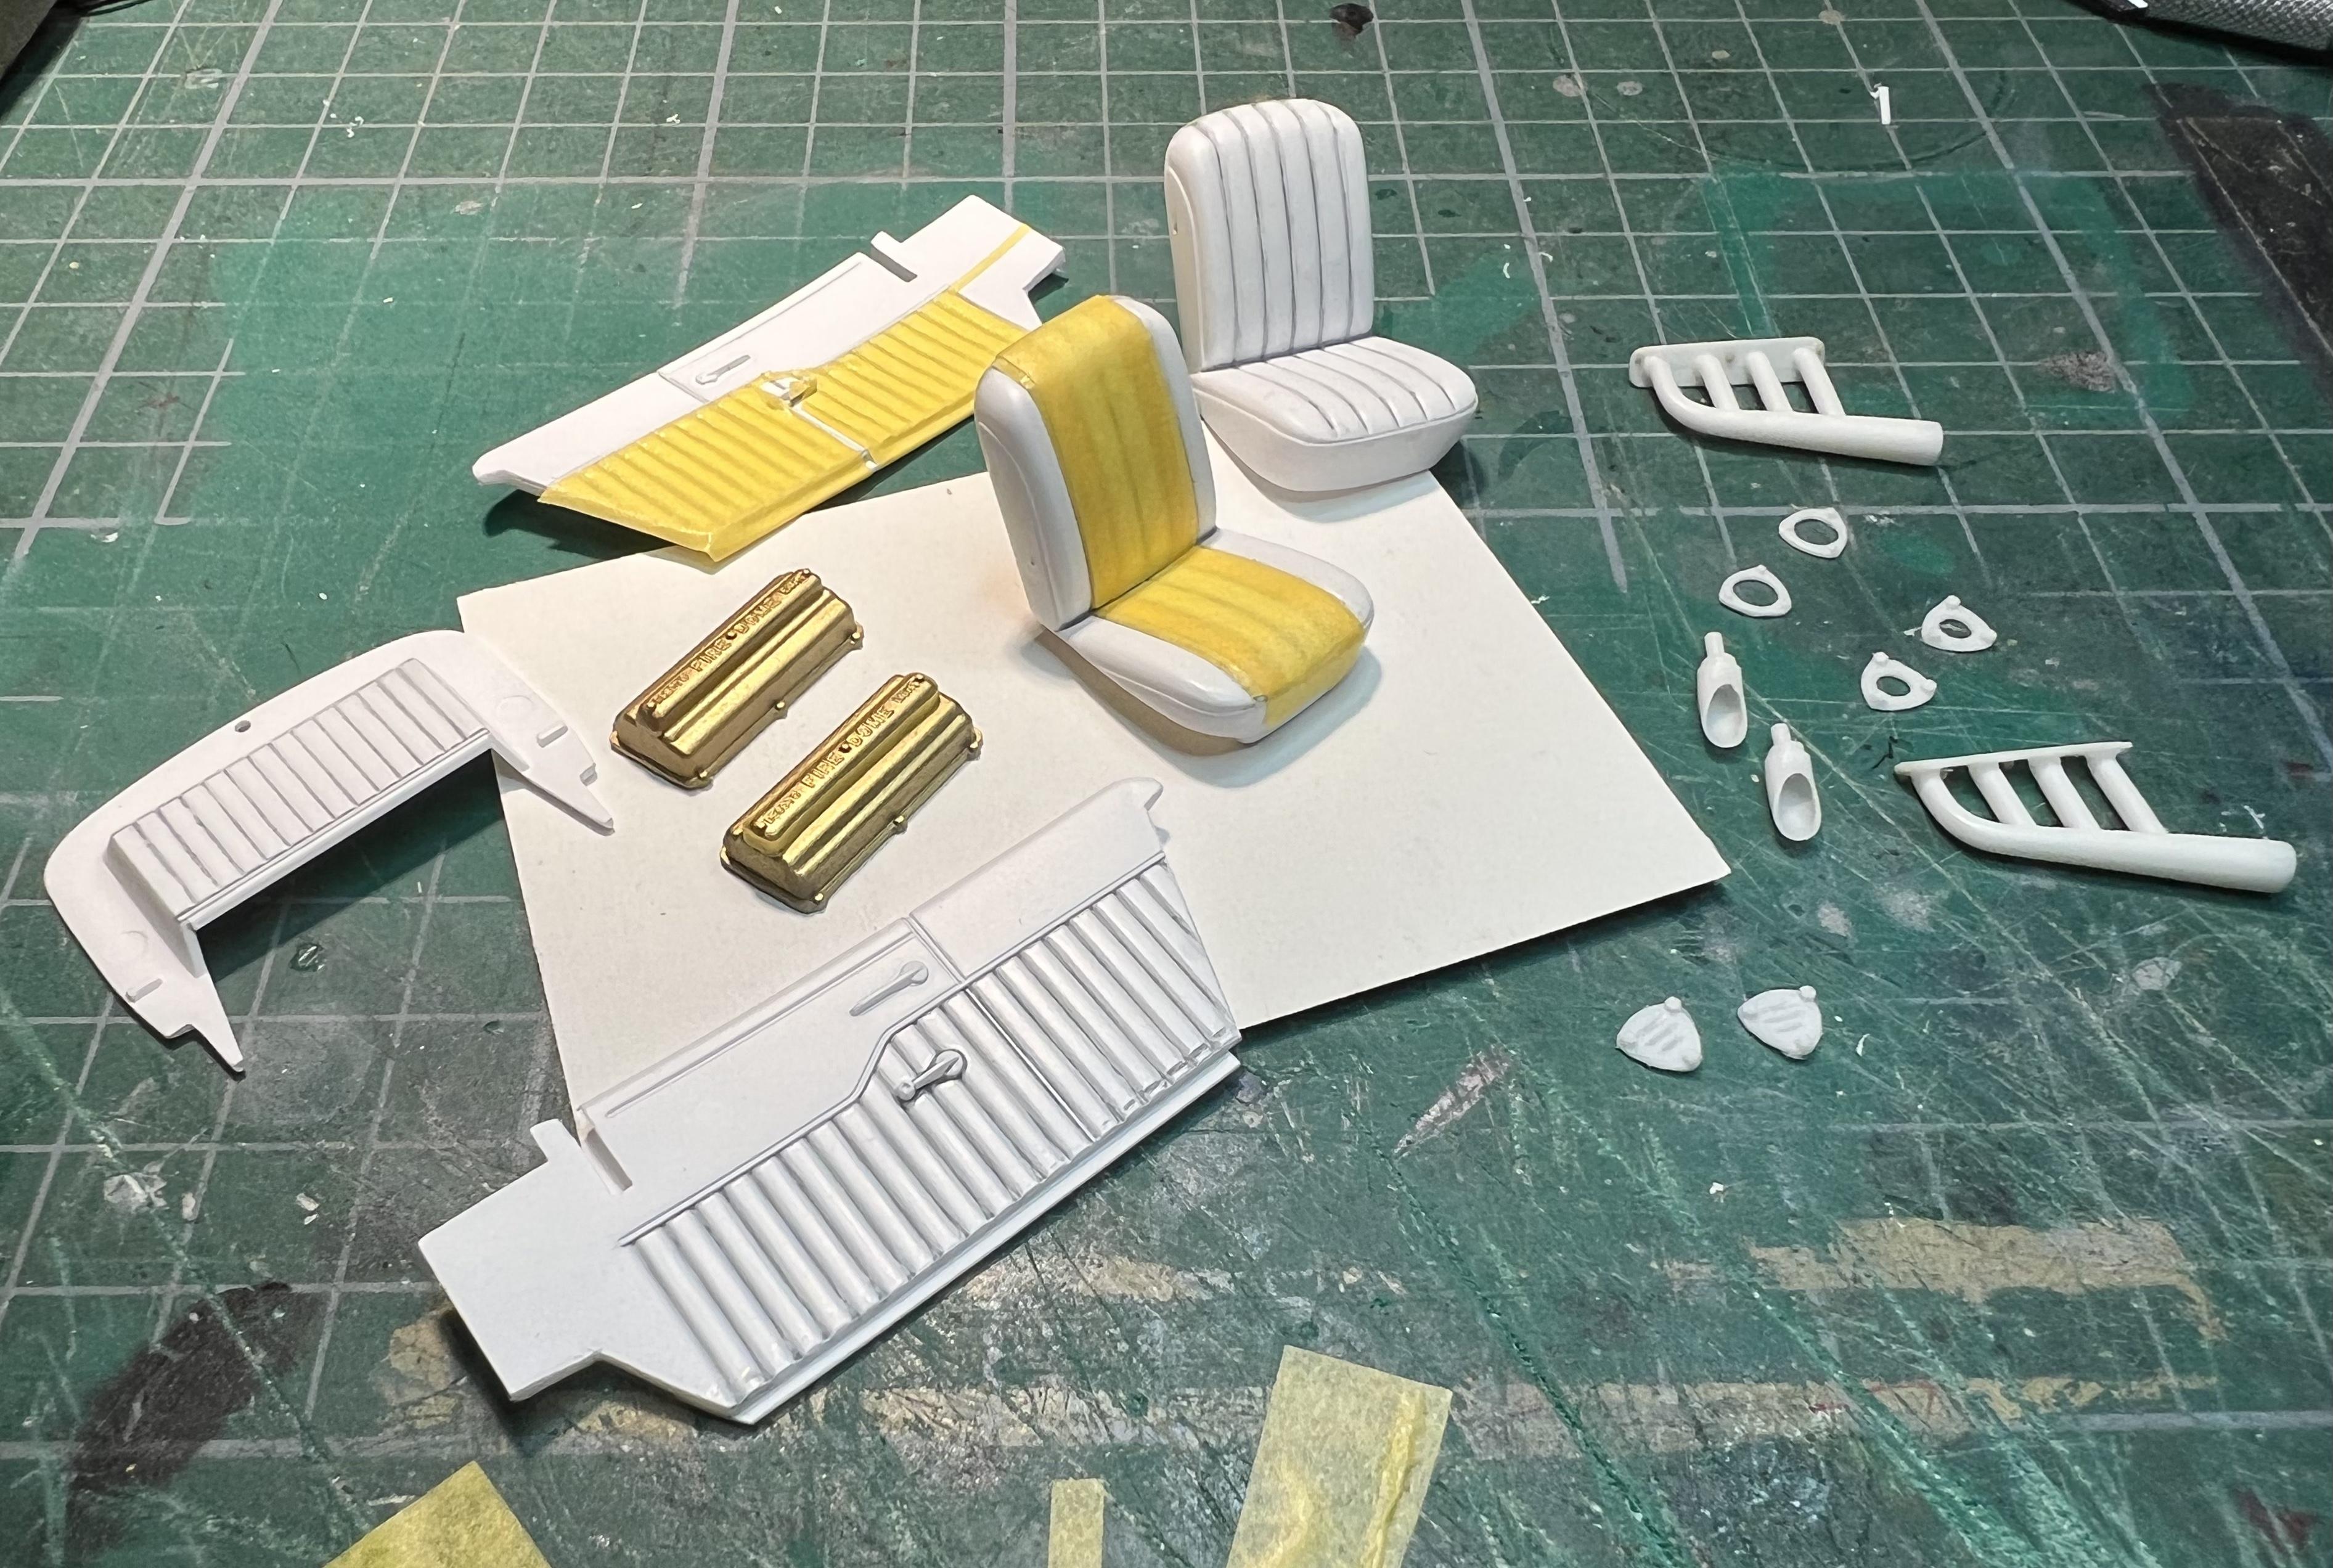
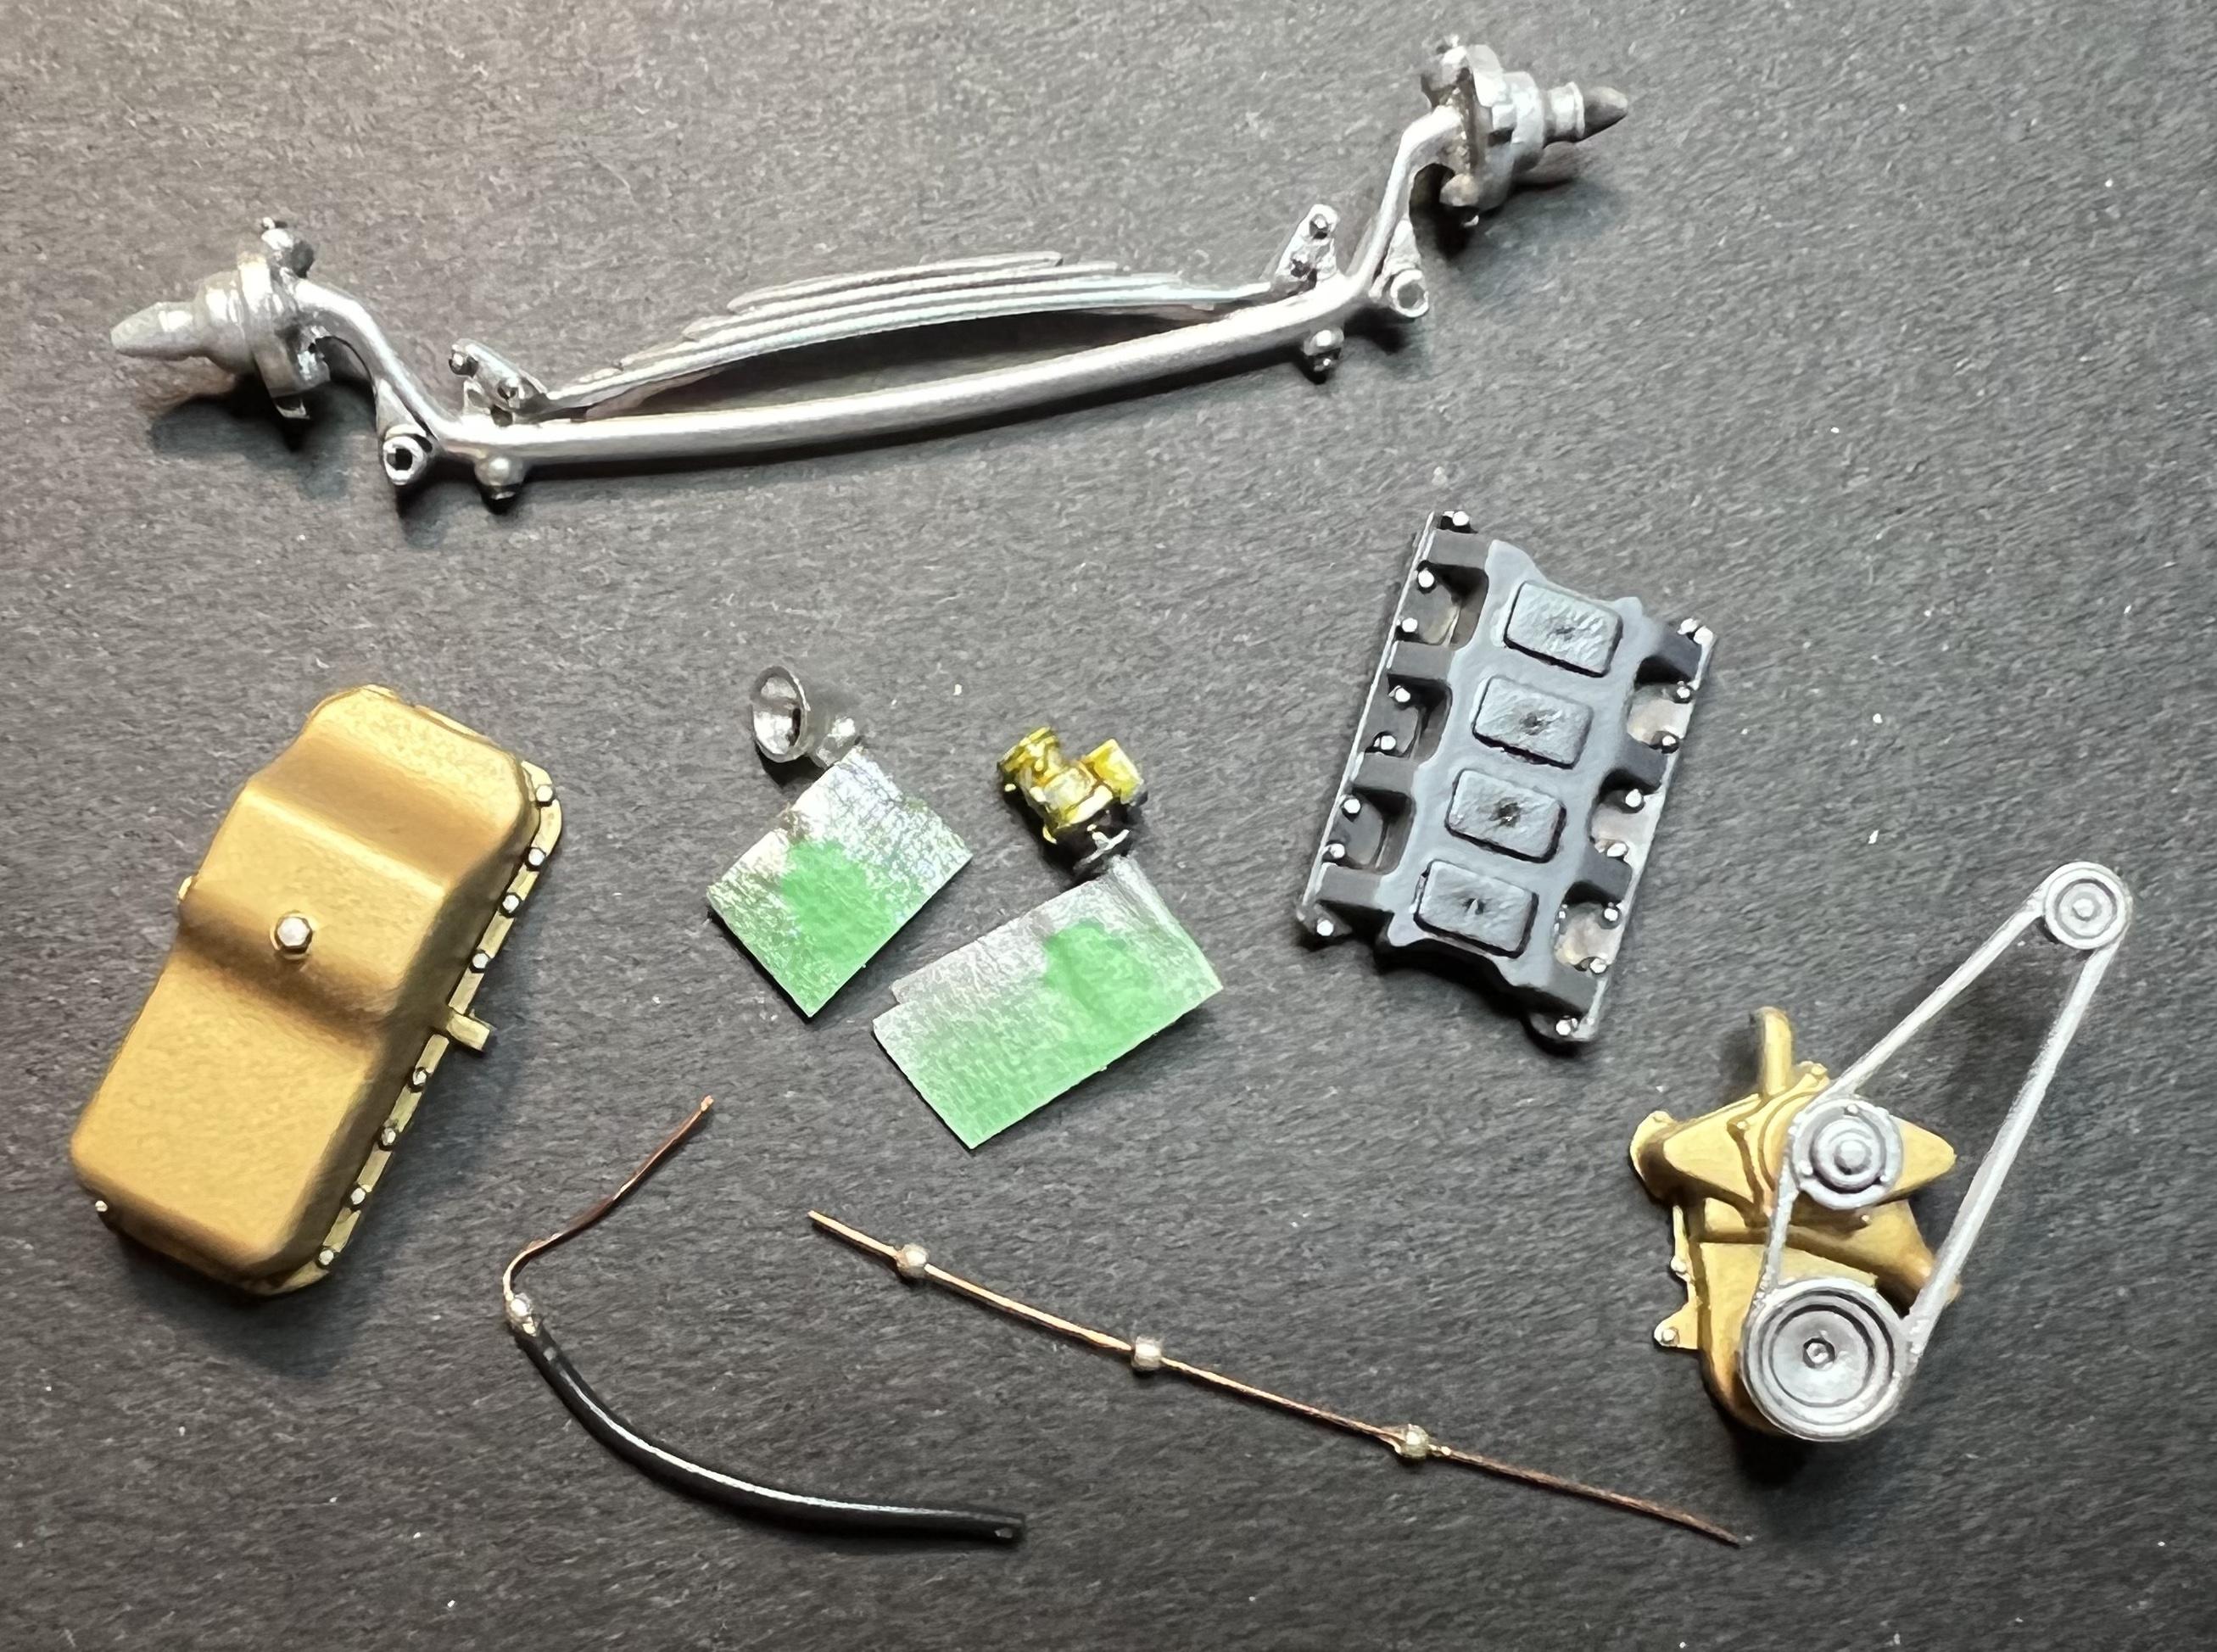
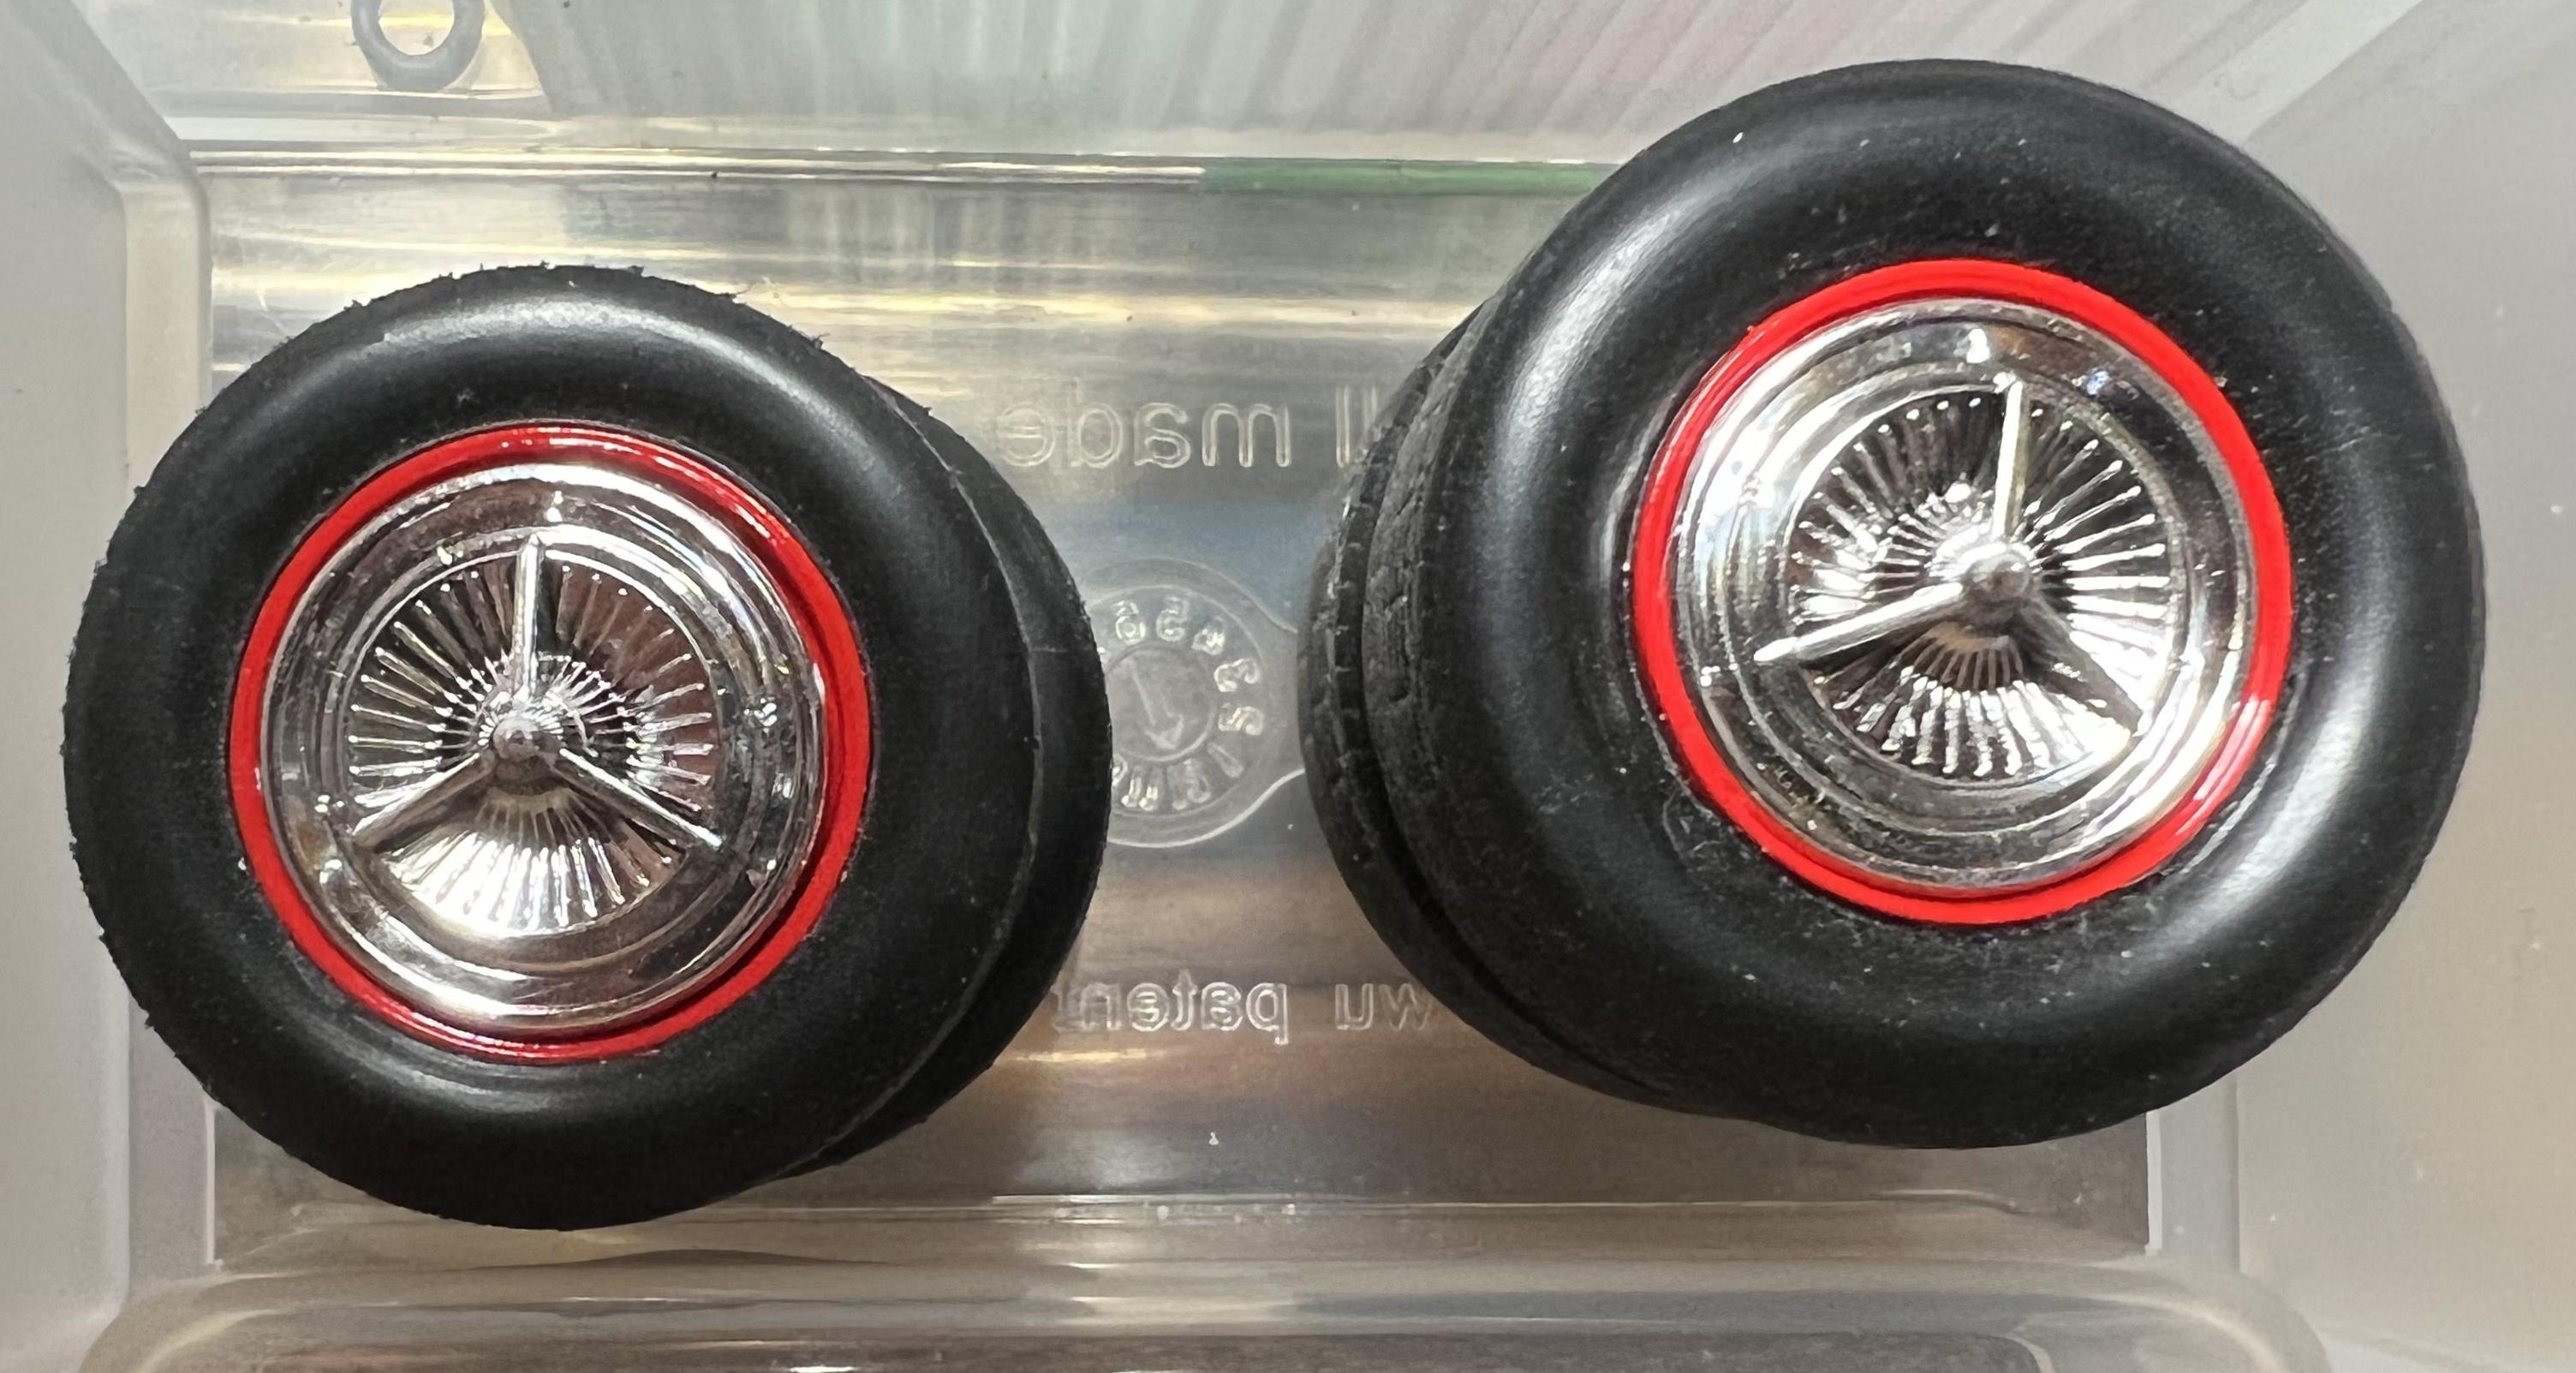
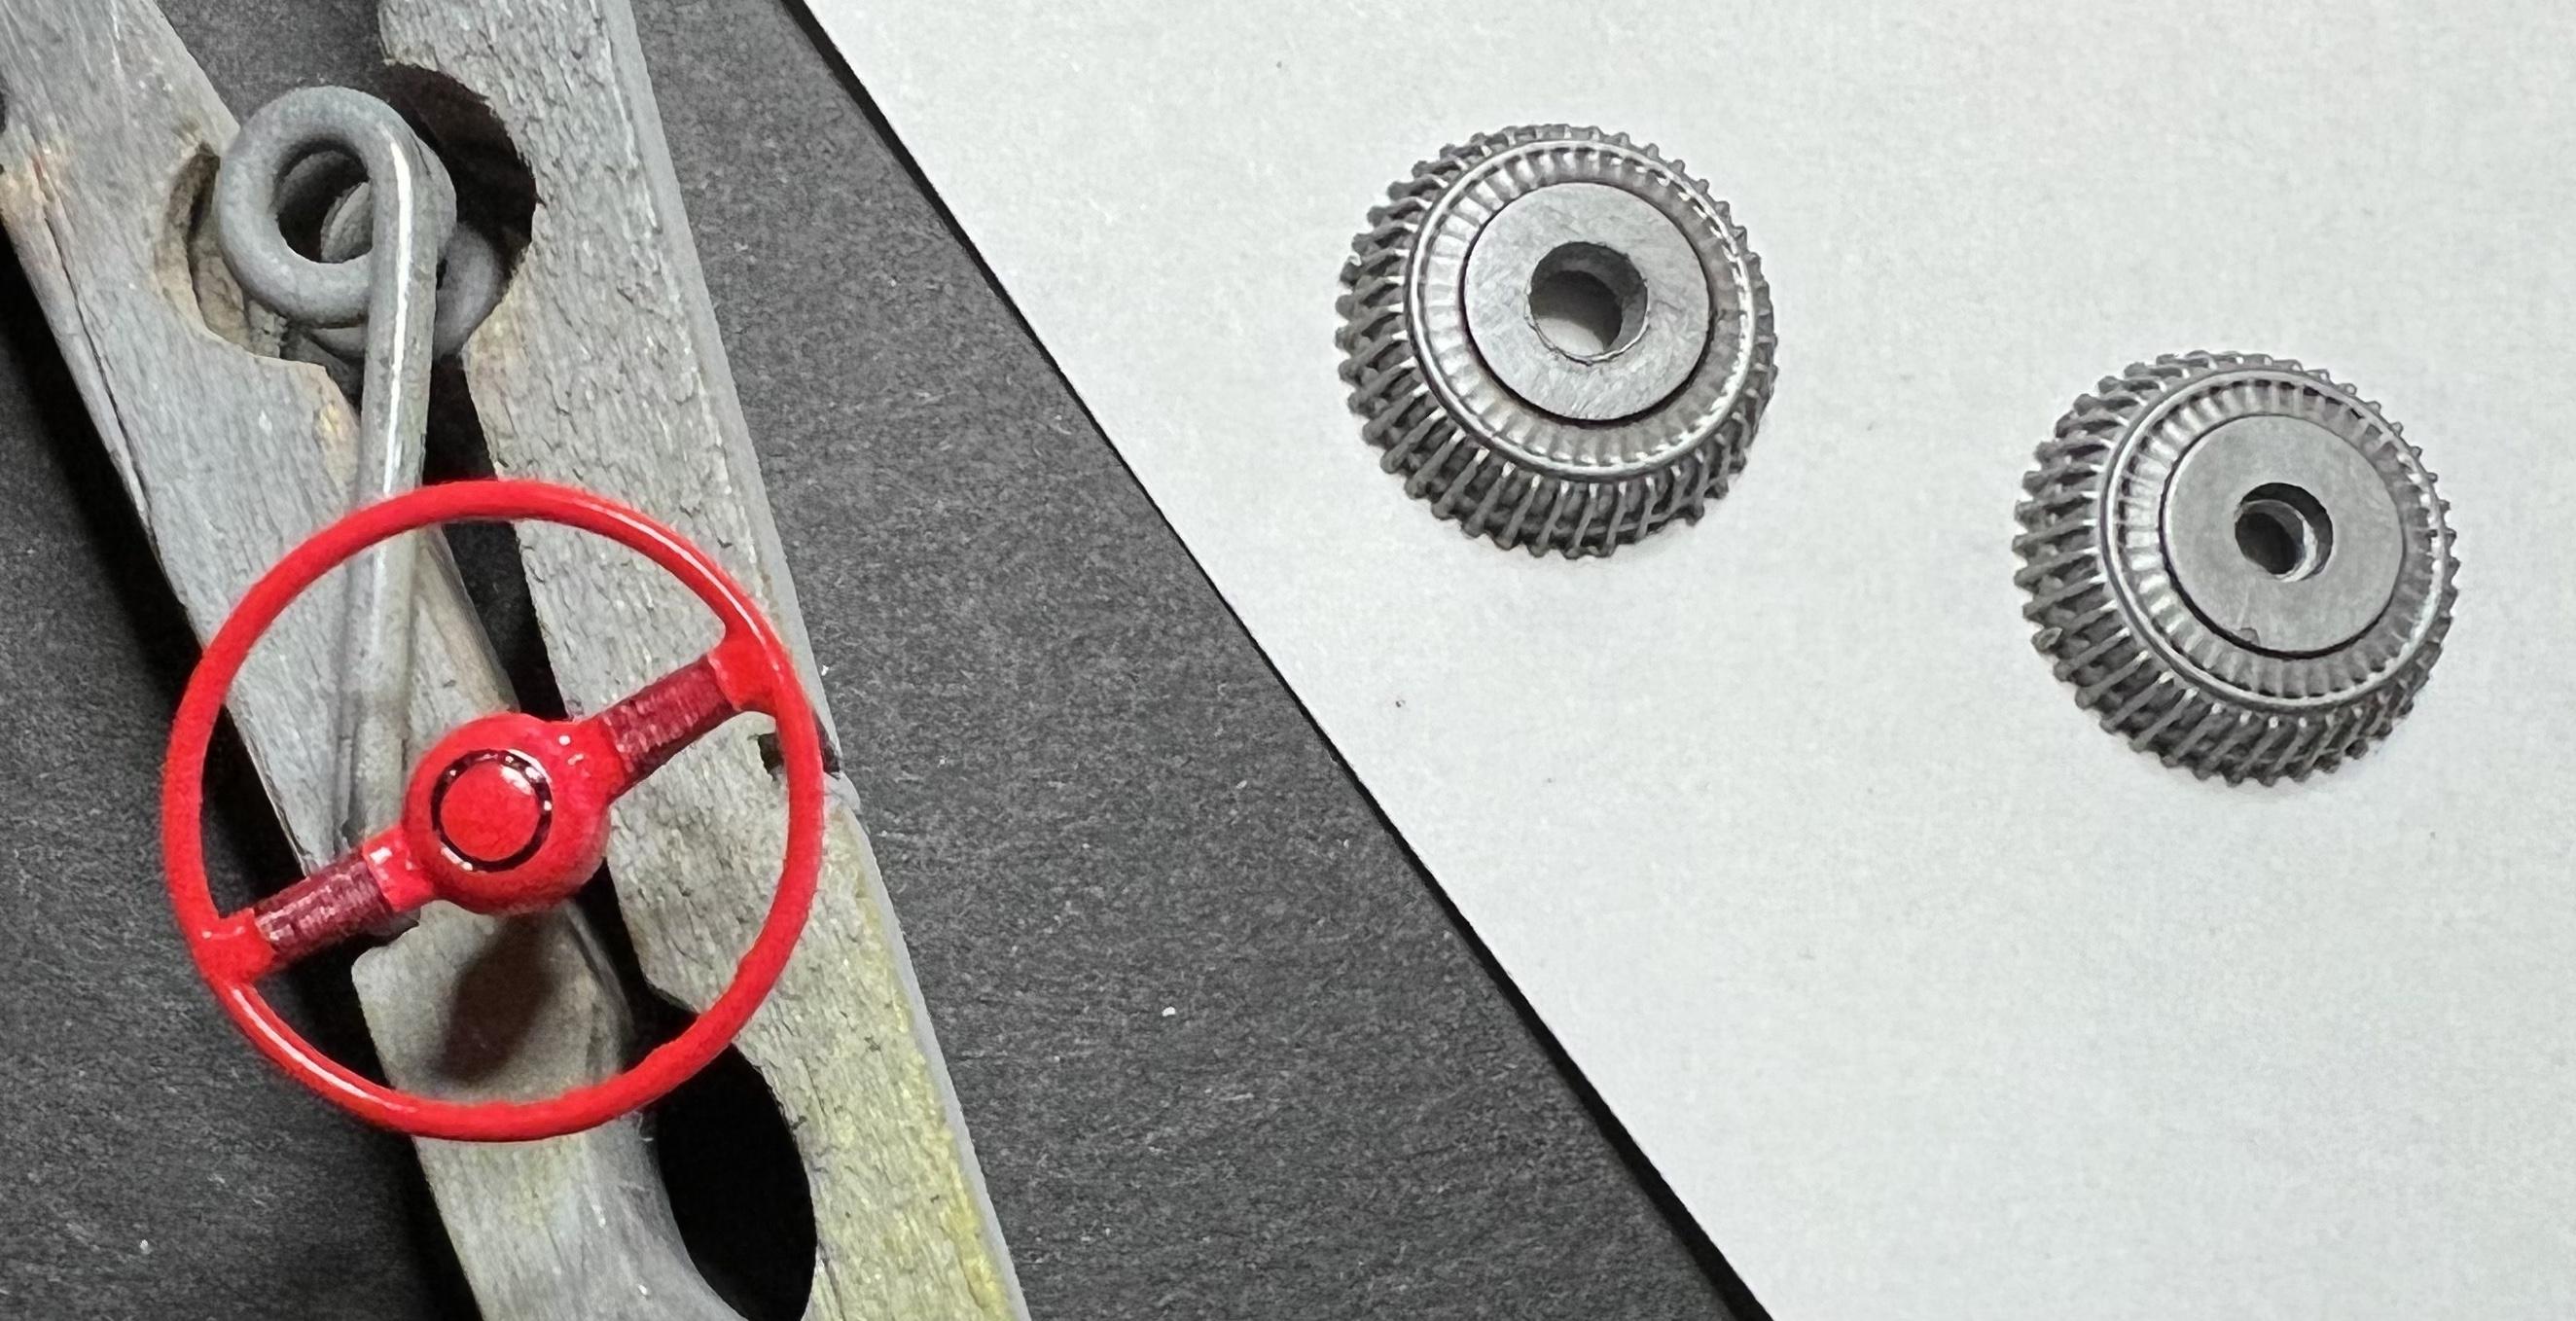
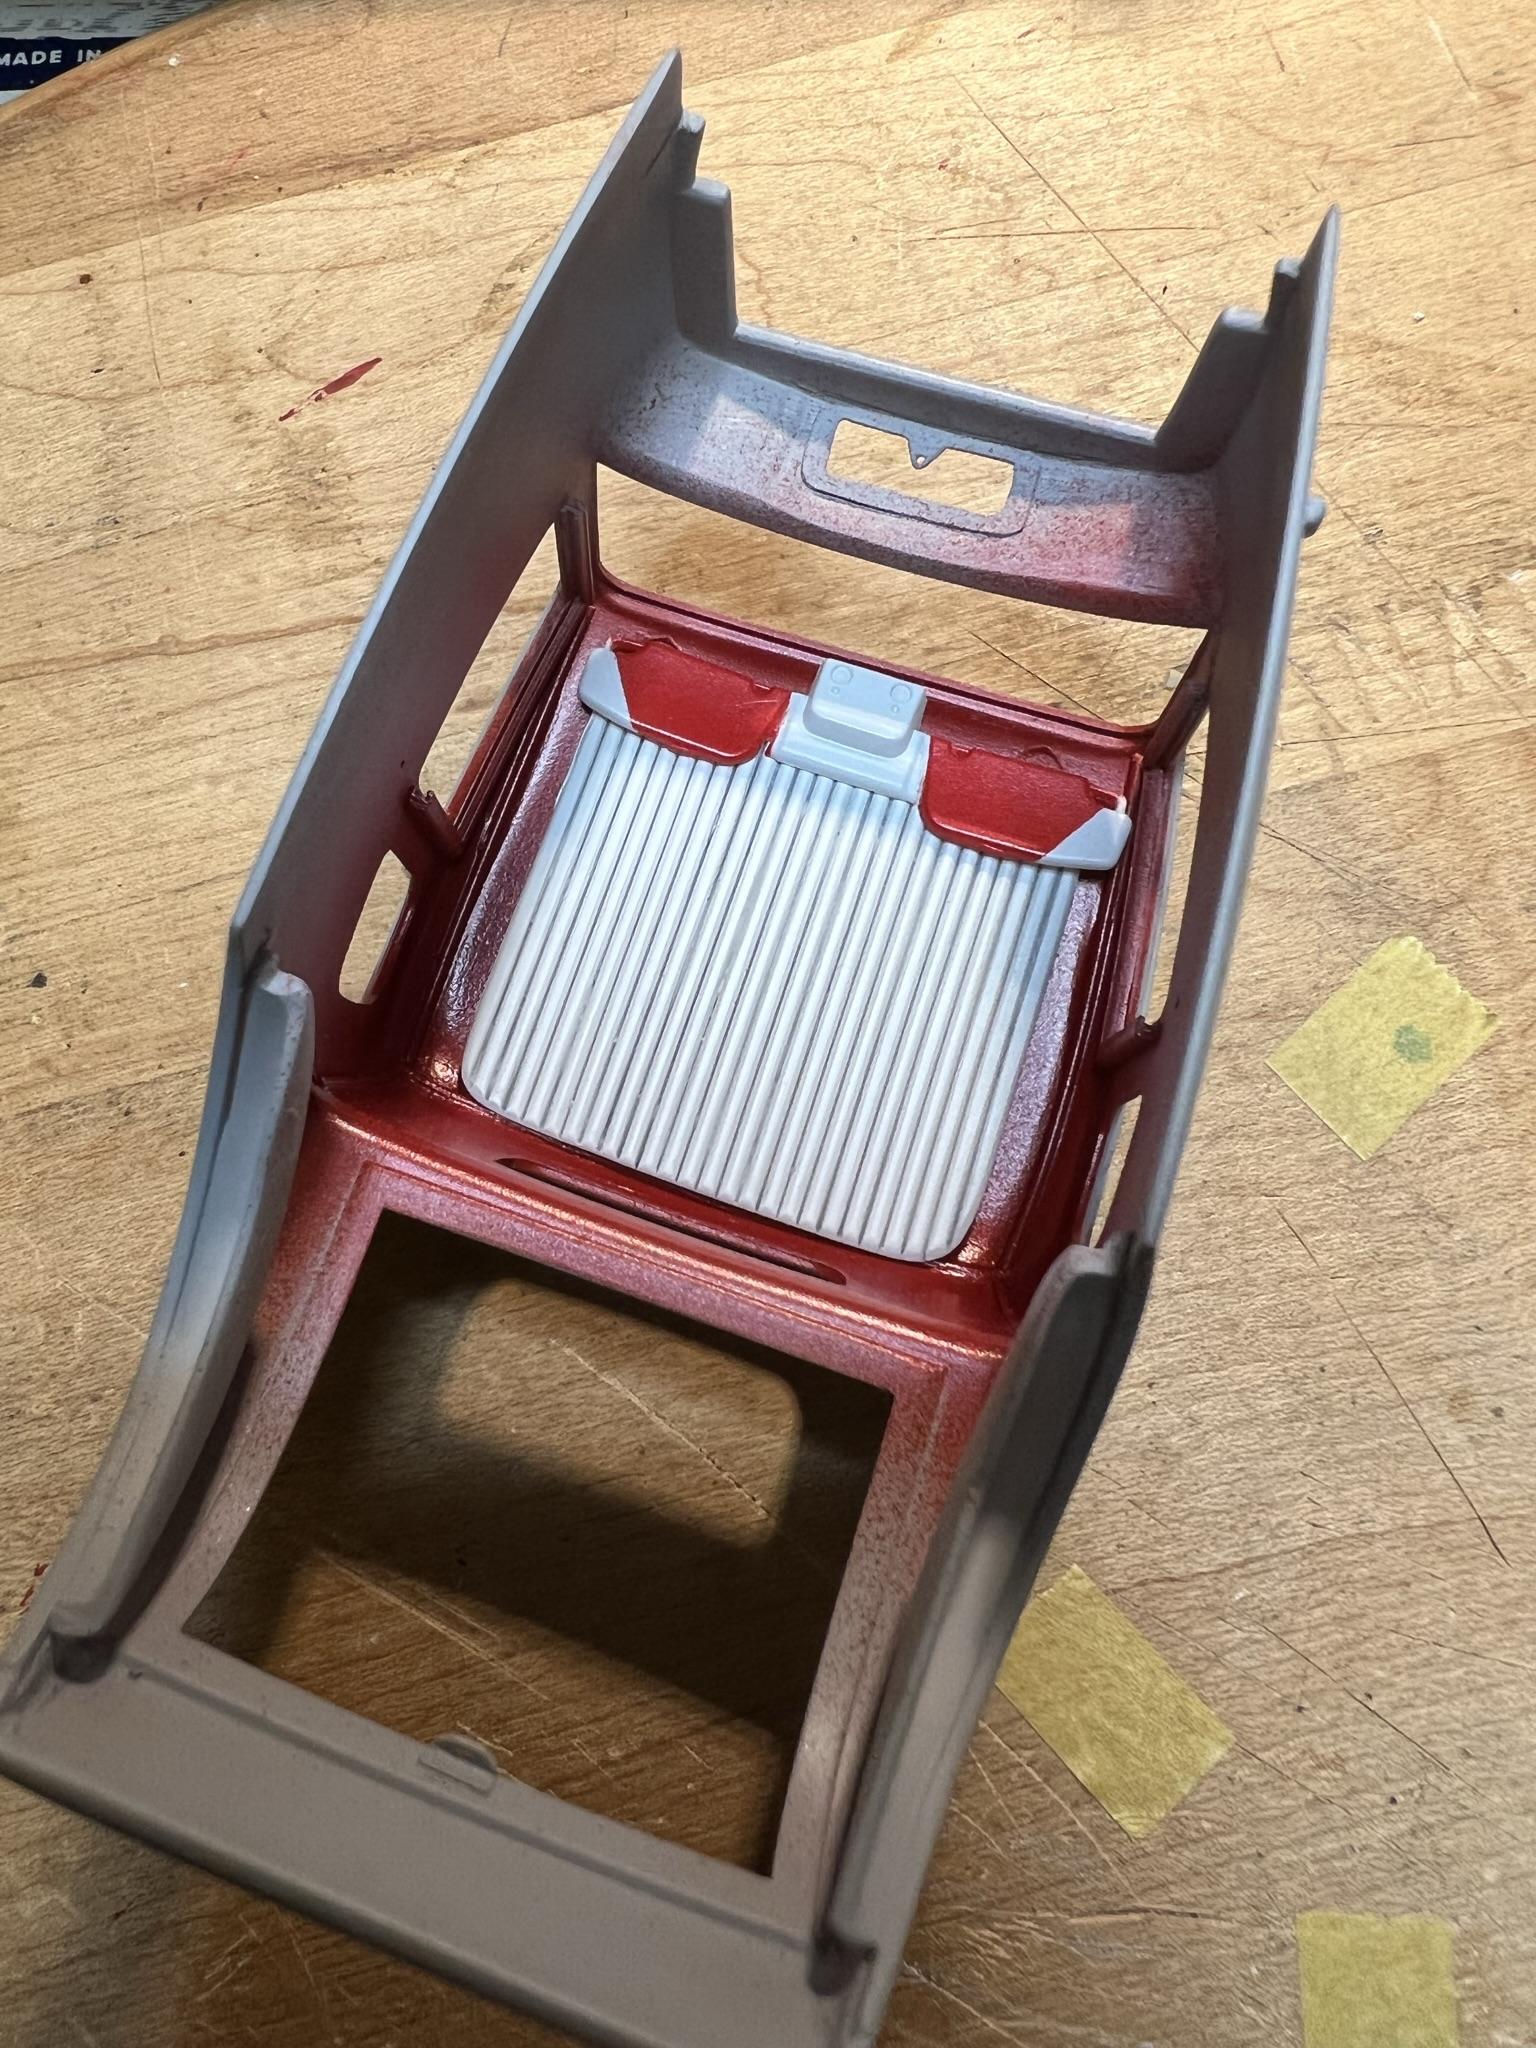
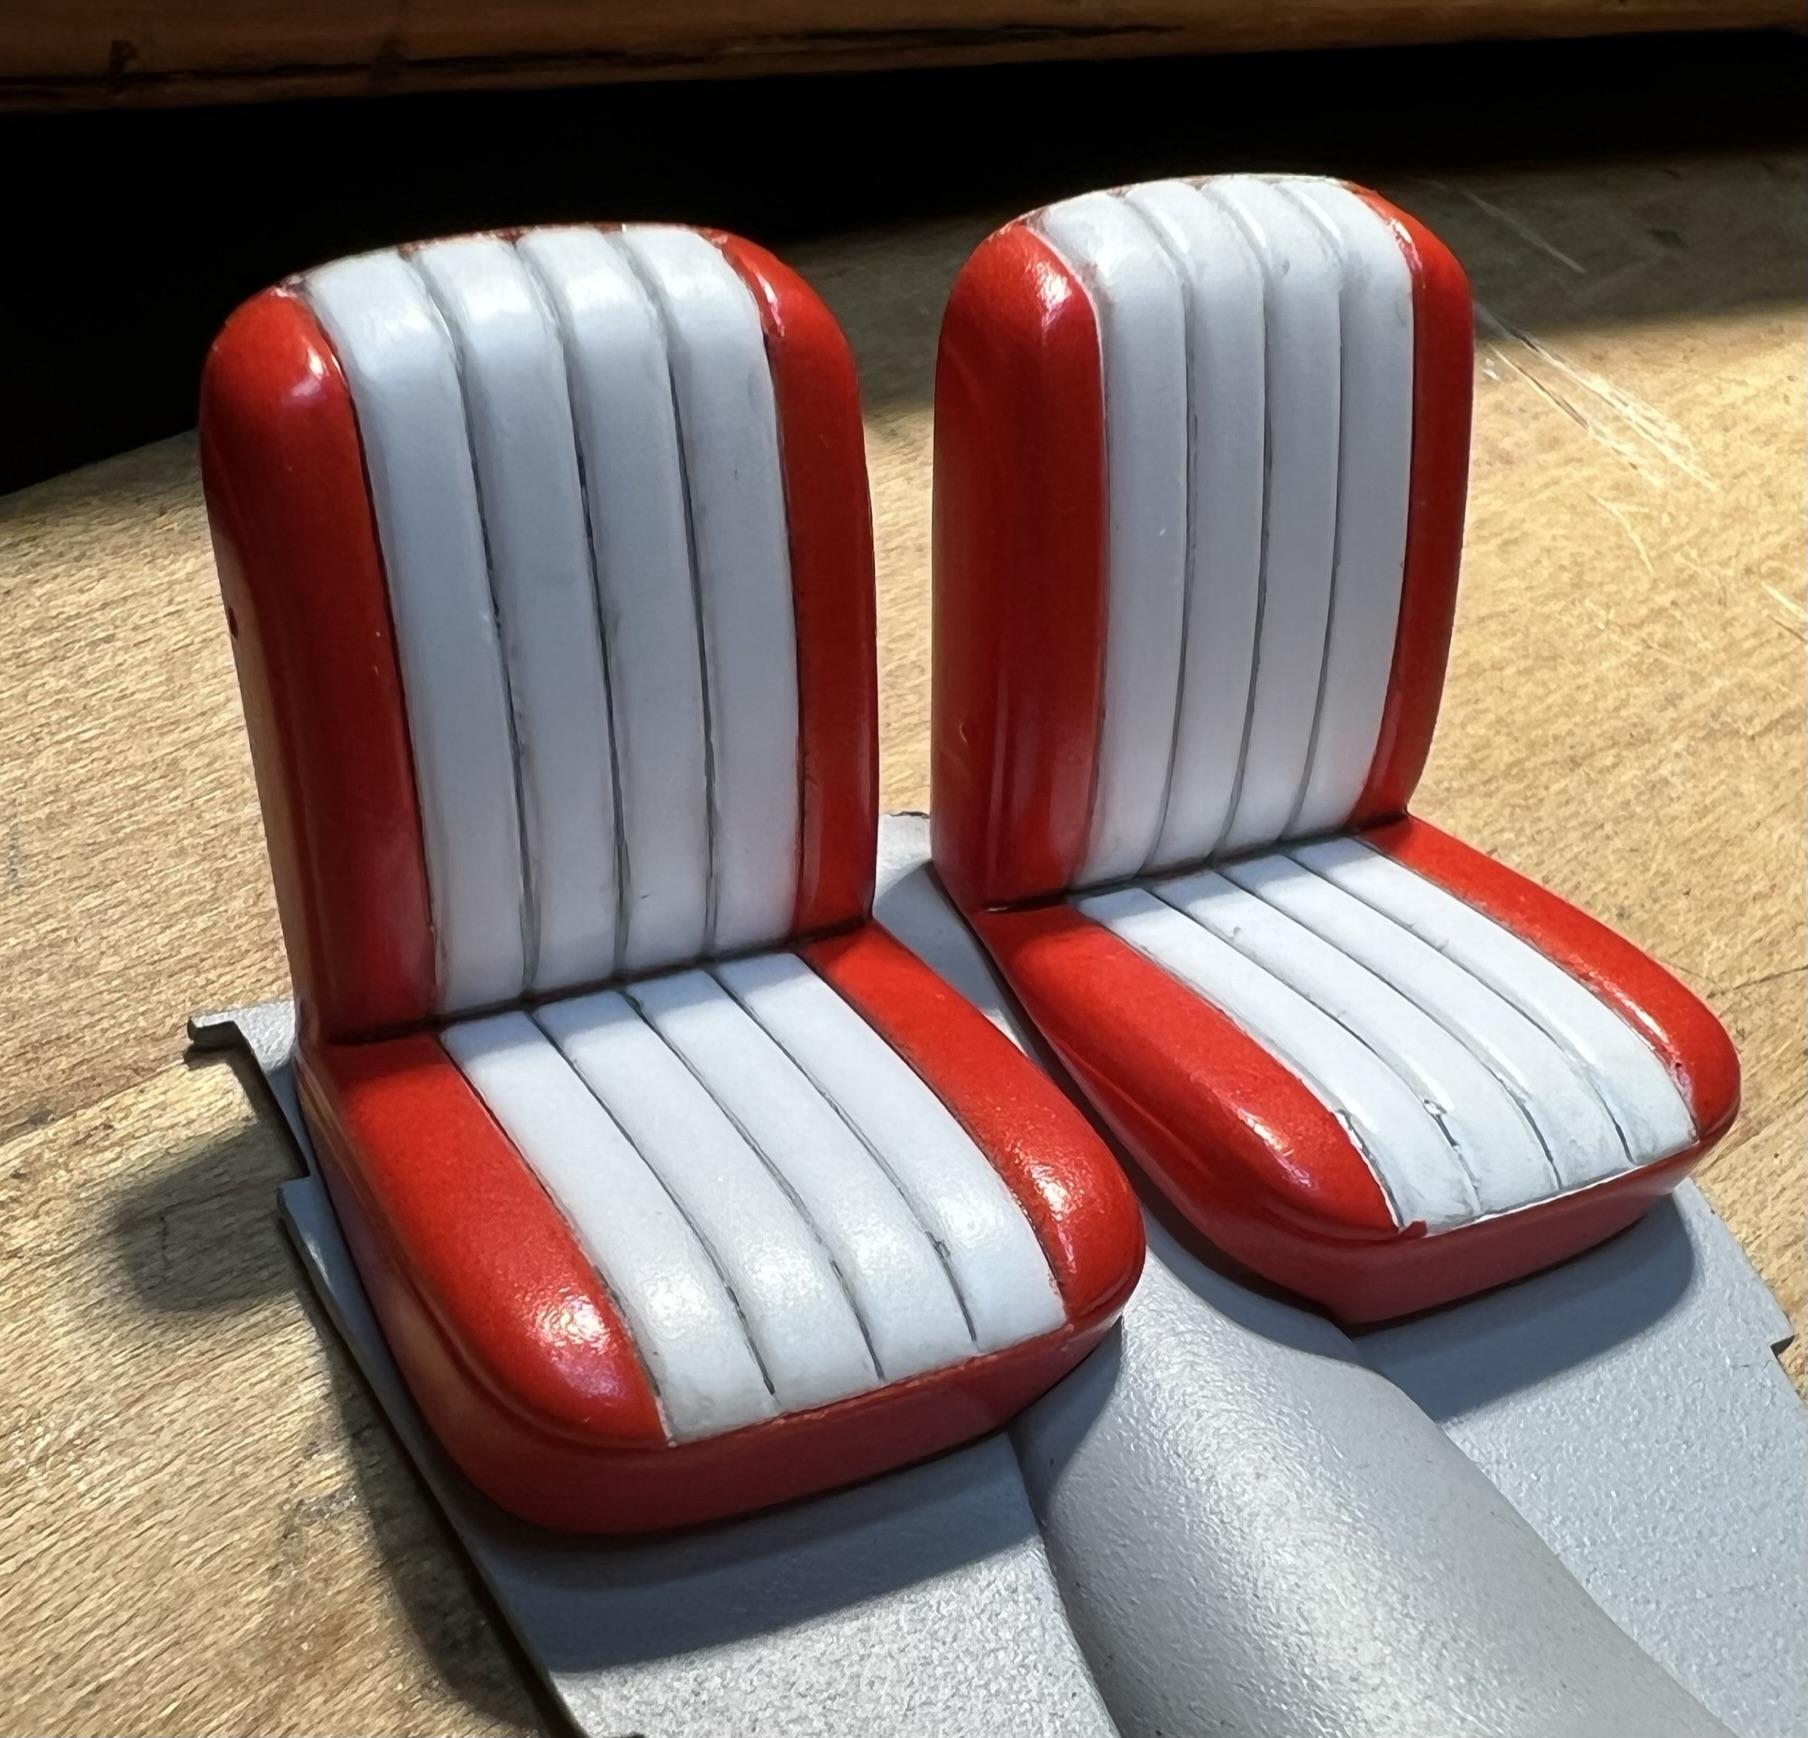
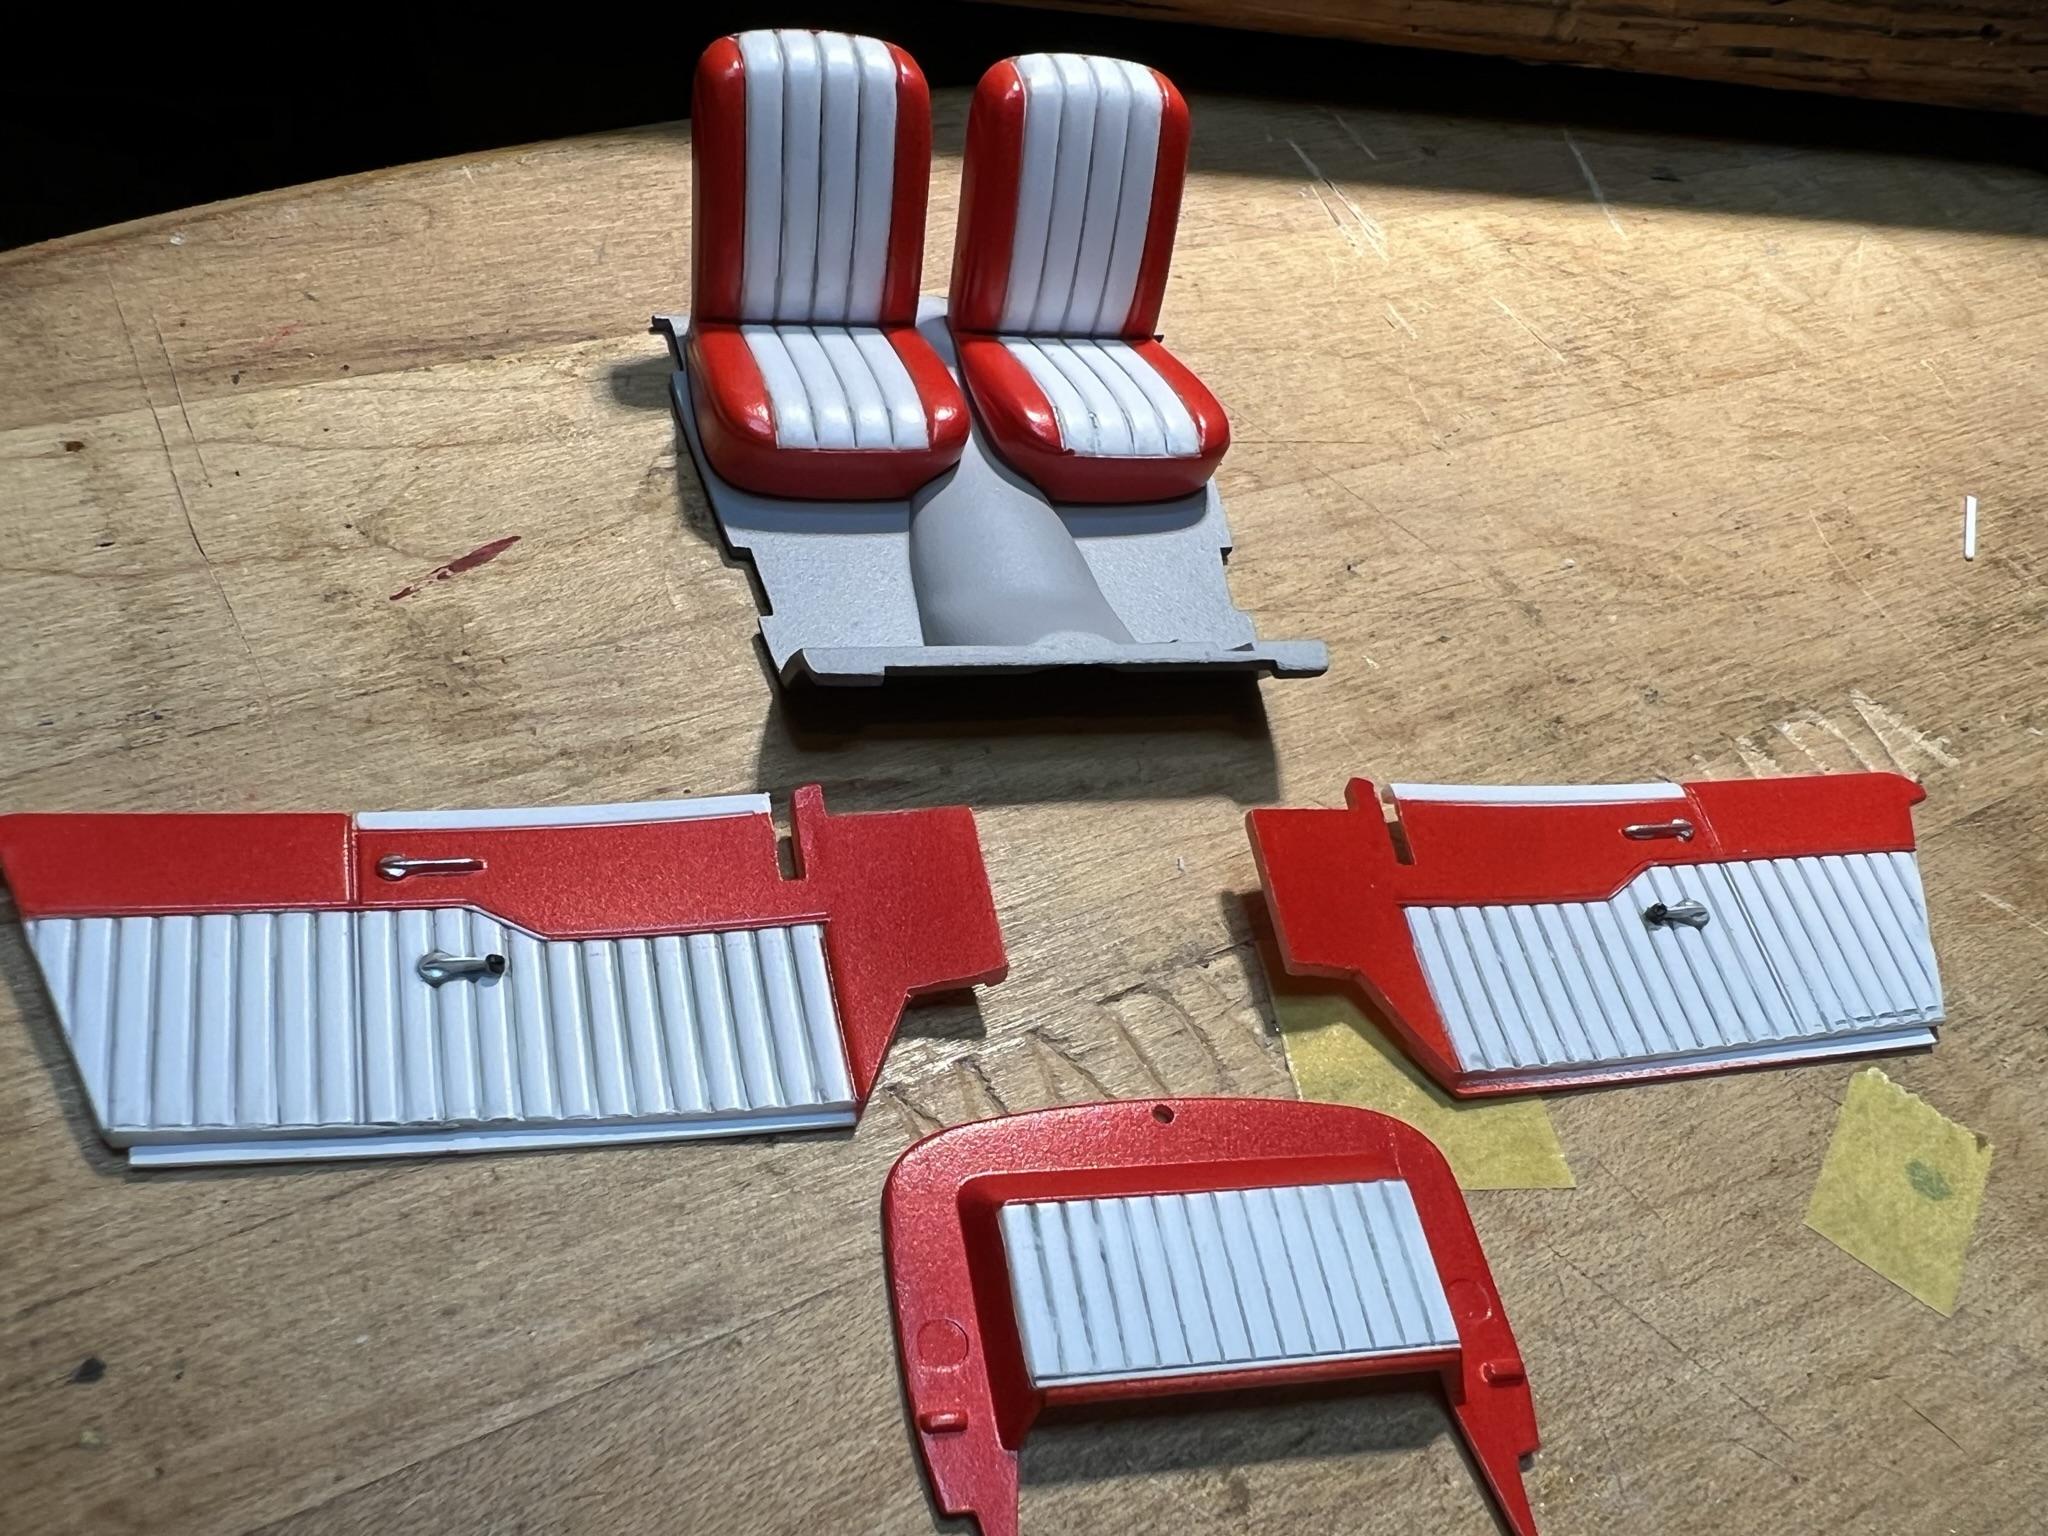
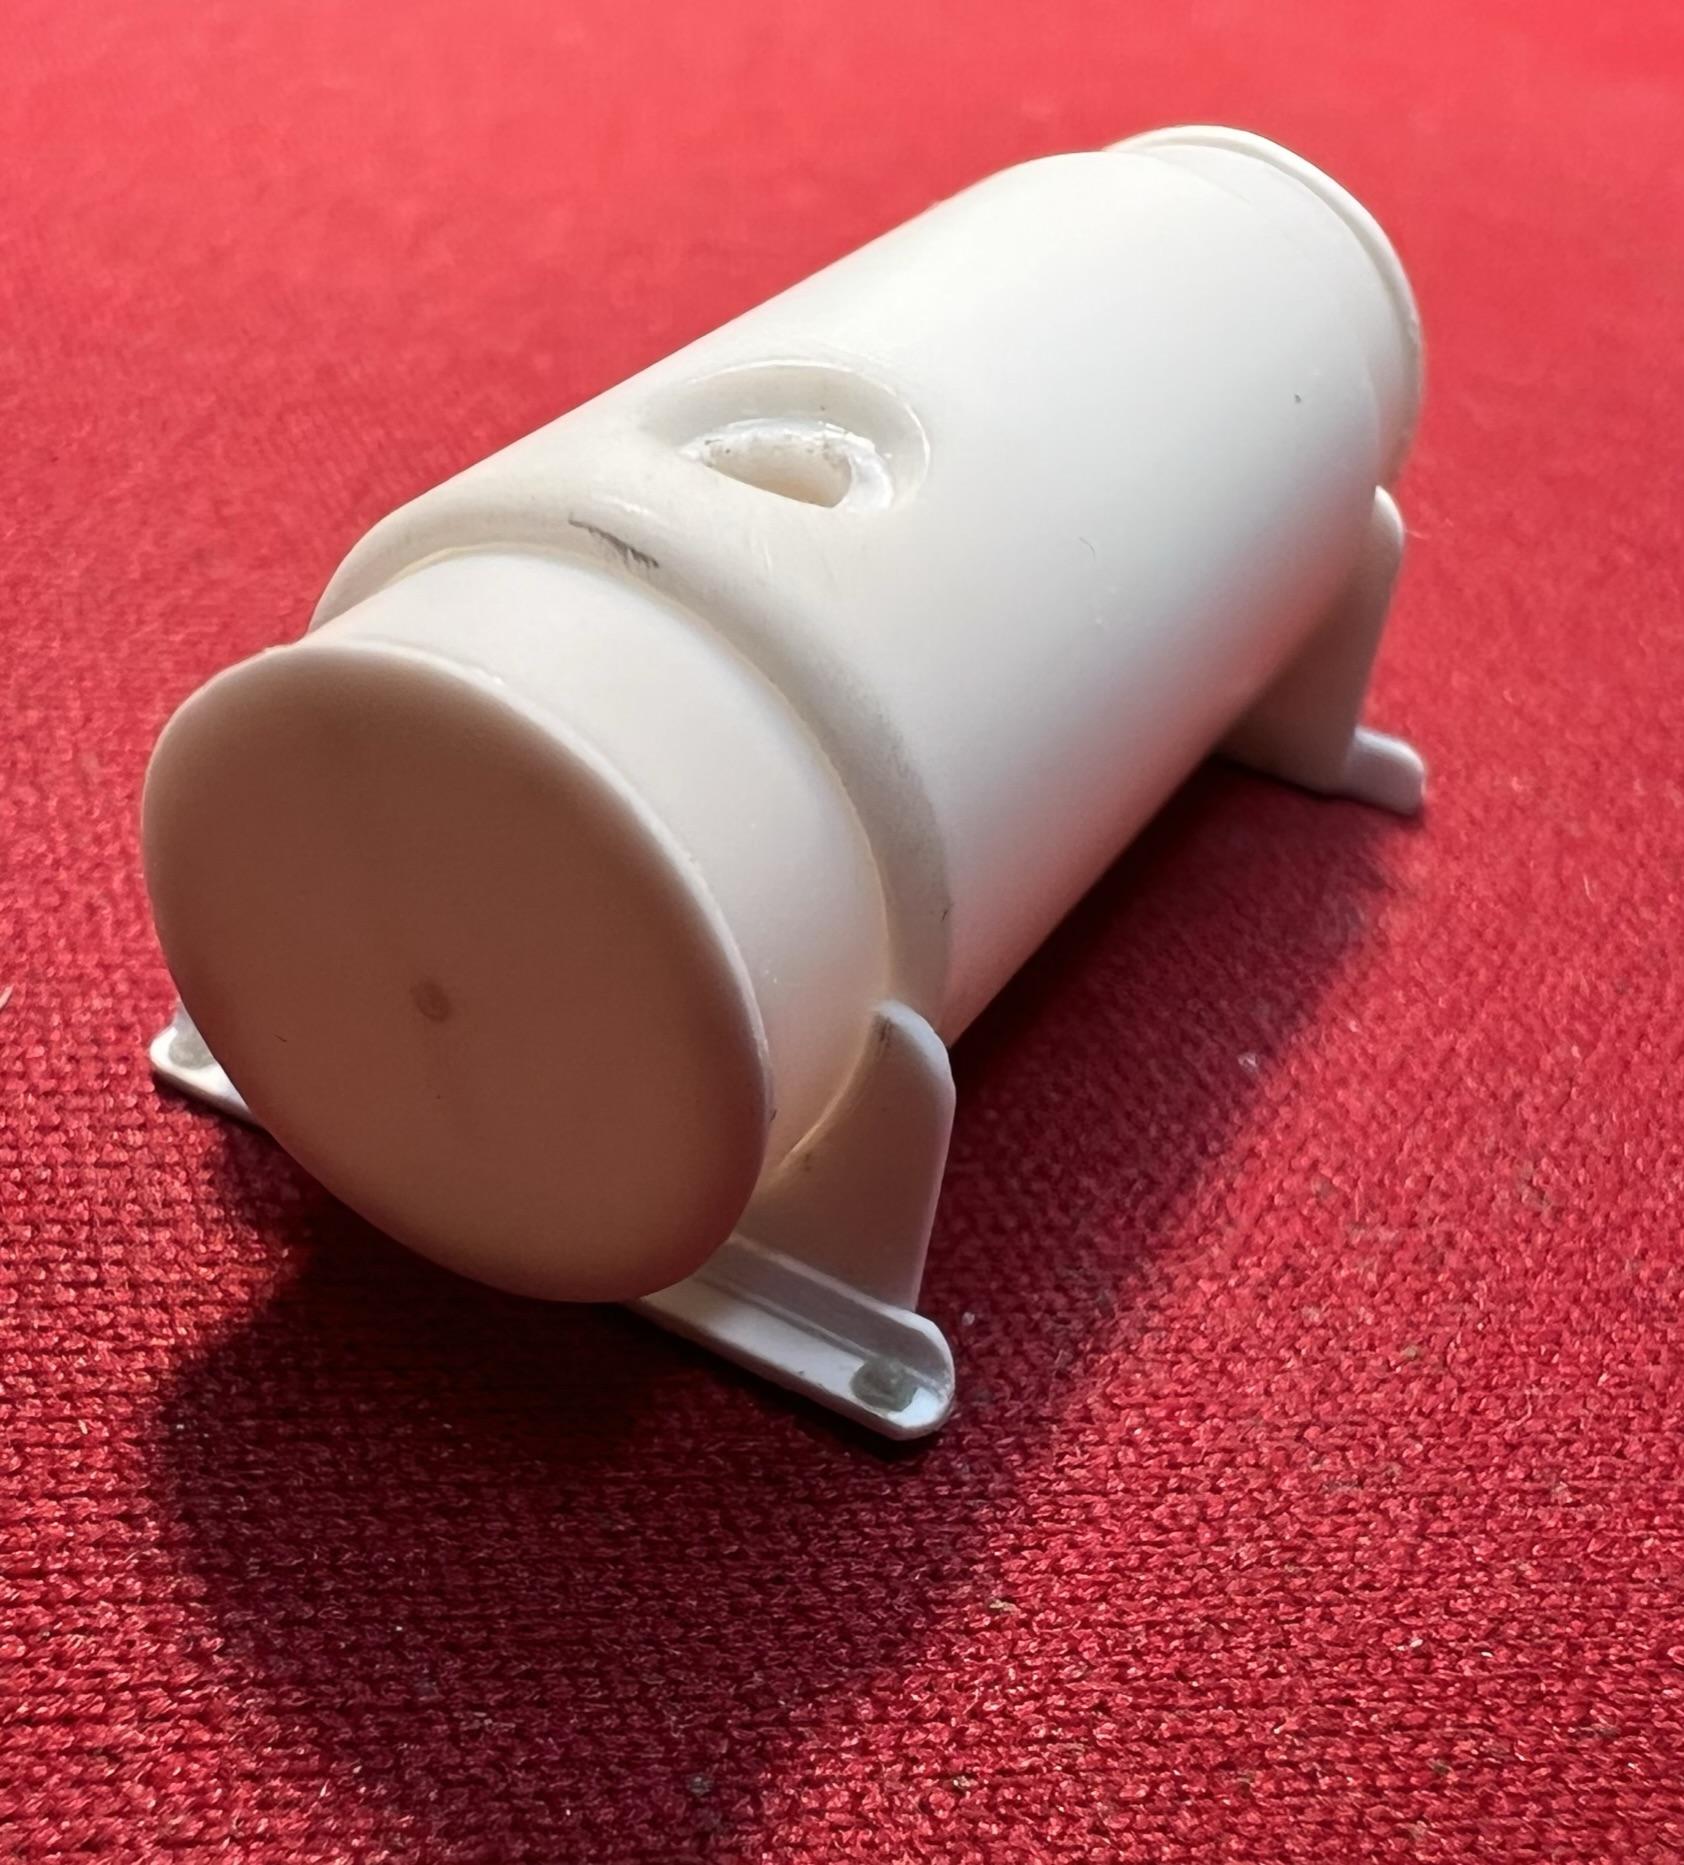
Since the last update I’ve been able to throw some colours onto the Deuce. I have less than a week to “git it done” so it might be one of those cases where the paint is still gassing out while on the display table! Began with a lot of masking of the parts. Depending on the final finish they were primed in either grey or white Tamiya rattle cans. The white portions of the interior were treated with light grey panel wash to add to the depth of the upholstery. I typically strip the chrome off in order to dress the parts, eliminating mold lines and the heavy chrome that tends to hide finer details. As an example the front axle has been stripped, detailed and refinished with LP 48 Sparkling Silver. The kit’s oil pan and timing cover have their gold engine block colour applied with a black wash and paint accents on the bolt heads. The Strombergs and air scoops along with the intake manifold are resin pieces from R&M Co. The carbs were treated with a dull aluminum, and detailed with a dark finish on the lower portion and with a clear yellow finish to suggest the patina that develops on them. The manifold is in body colour LP 27 Panzer Grey with bolt heads detailed. At the bottom are the parts for the fuel lines from the four carbs to the fuel log mounted on the fire wall. The lines are made from thin wire insulation that is very flexible combined with copper wire and crimps for the connectors. Pure Red, LP 7 is the accent colour for the build and is being used on the wheels and LP 46 Metallic Red for the inside upholstery to simulate the vinyl material used back then. For the interior the white primer and the red paint are over coated with LP 24 semi-gloss clear to blend the two finishes together. Overall I was quite pleased with the finish. The body parts received their first coat of the Panzer Grey to be followed by a clear gloss. The gas tank shows the colour much better than the body under the glare of the spray booth lighting. Combining the conservative outside colour with the interior upholstery will hopefully create an interesting contrast, much in the style of the East Coast Hot Rod community of the time. Now back to the bench! Cheers Misha
-
Two jewels 💎 💎 Michael! Beautiful execution on both coupes while completing two distinctive styles from one kit, difficult to pick a fav as both are so well built. Congrats, Misha
-
Great work RRR! I’m following your build closely as you have offered very practical solutions to improve this kit. As a kid I picked up the new Revell series of Thames, Anglia, Willys, yet the Henry J has eluded me until this recent release which I picked up couple of weeks ago. The interior changes look great with the rear seat removal. Gluing the doors shut is certainly the plan to follow I agree. The pulleys look great, what is the origin? (Haven’t looked closely at the kit yet). Always a pleasure to see your work, cheers Misha
-
Wow Michael, that is master craftsmanship you are achieving with this build. To finesse the interior while tackling the thick Flintstone body is quite an endeavour which you perfecting! I’ve often rebuilt the interiors of the early AMT releases that lacked detail, yet I would be hard pressed to thin down thick resin. This will be a worthy addition to your Deuce collection. Congrats Misha
-
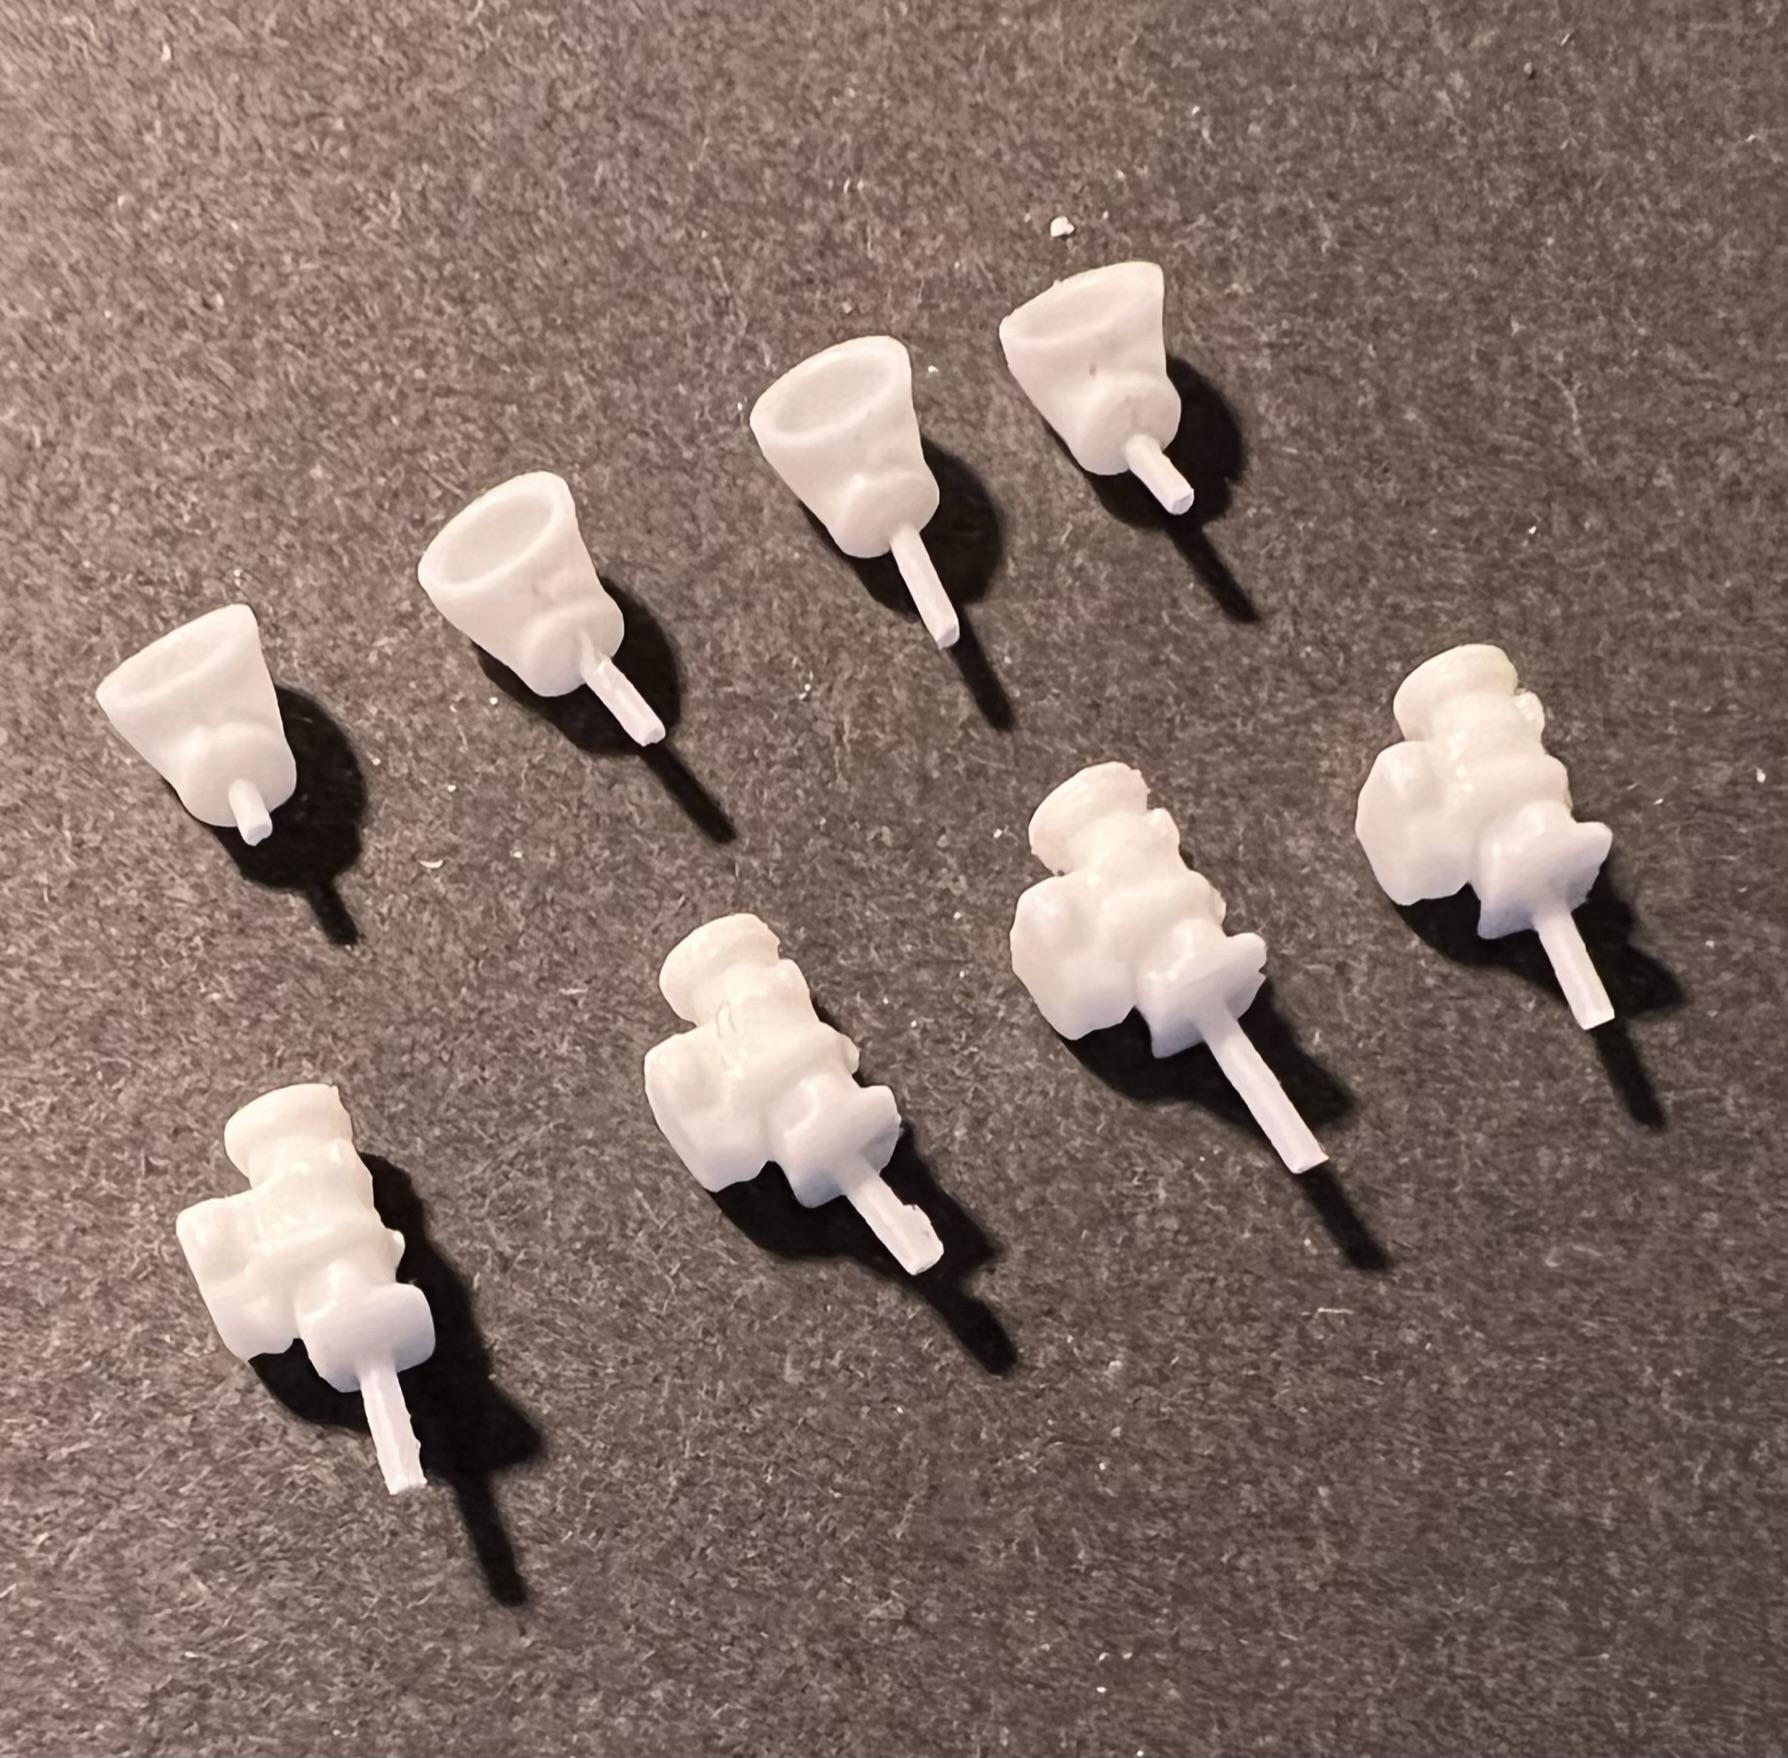
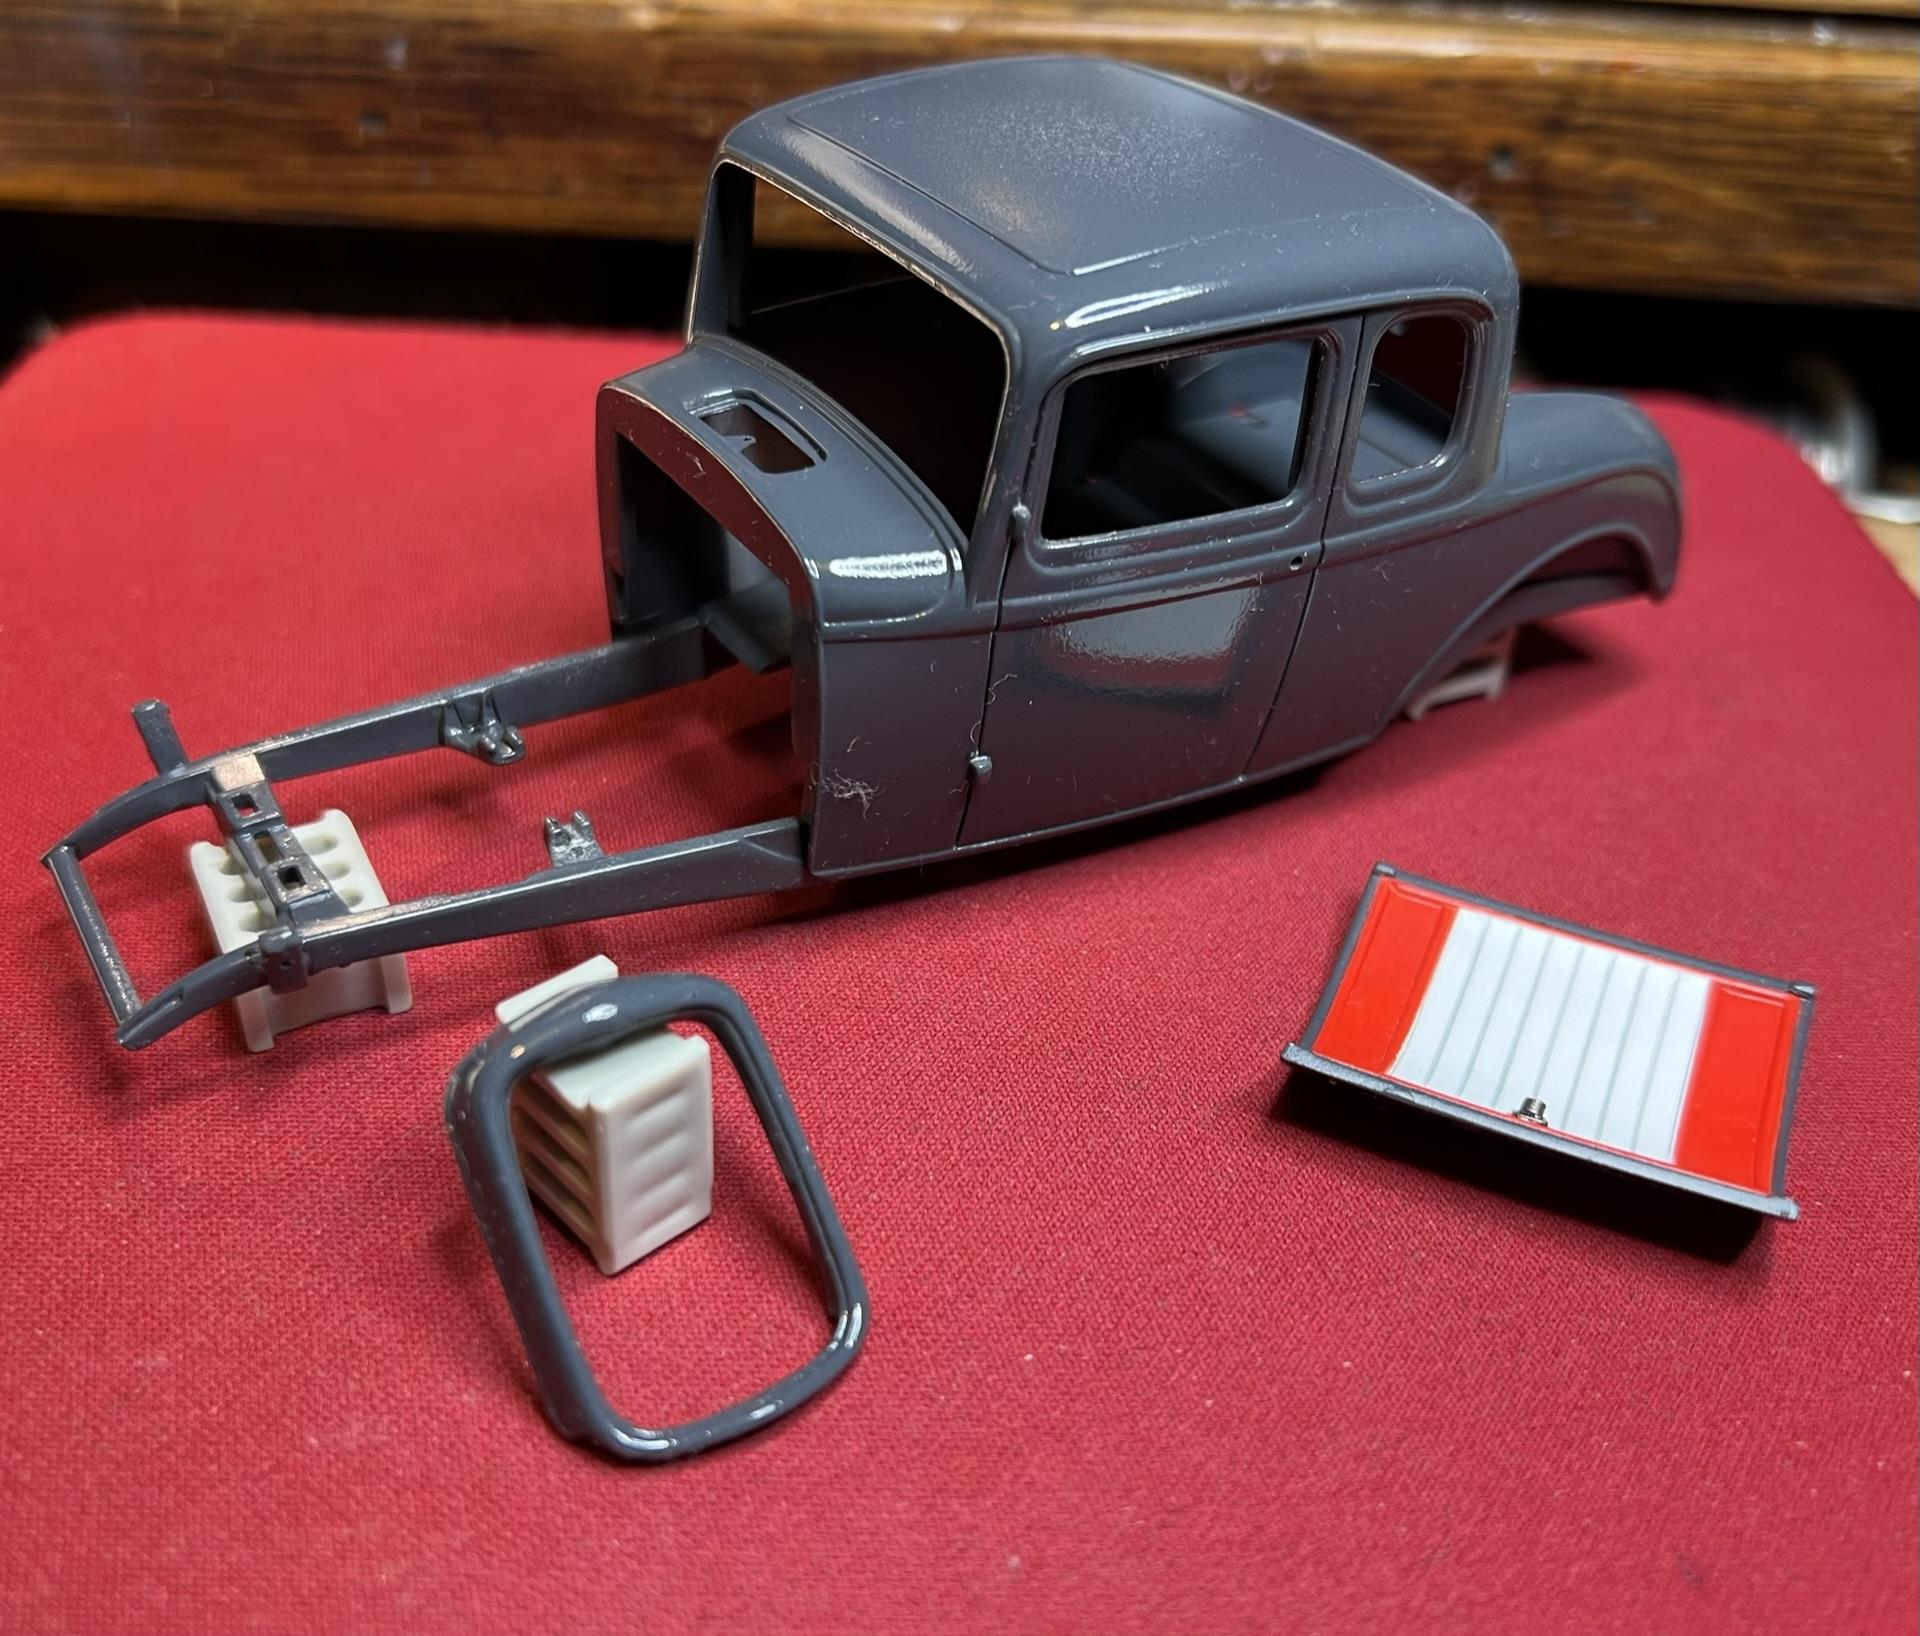
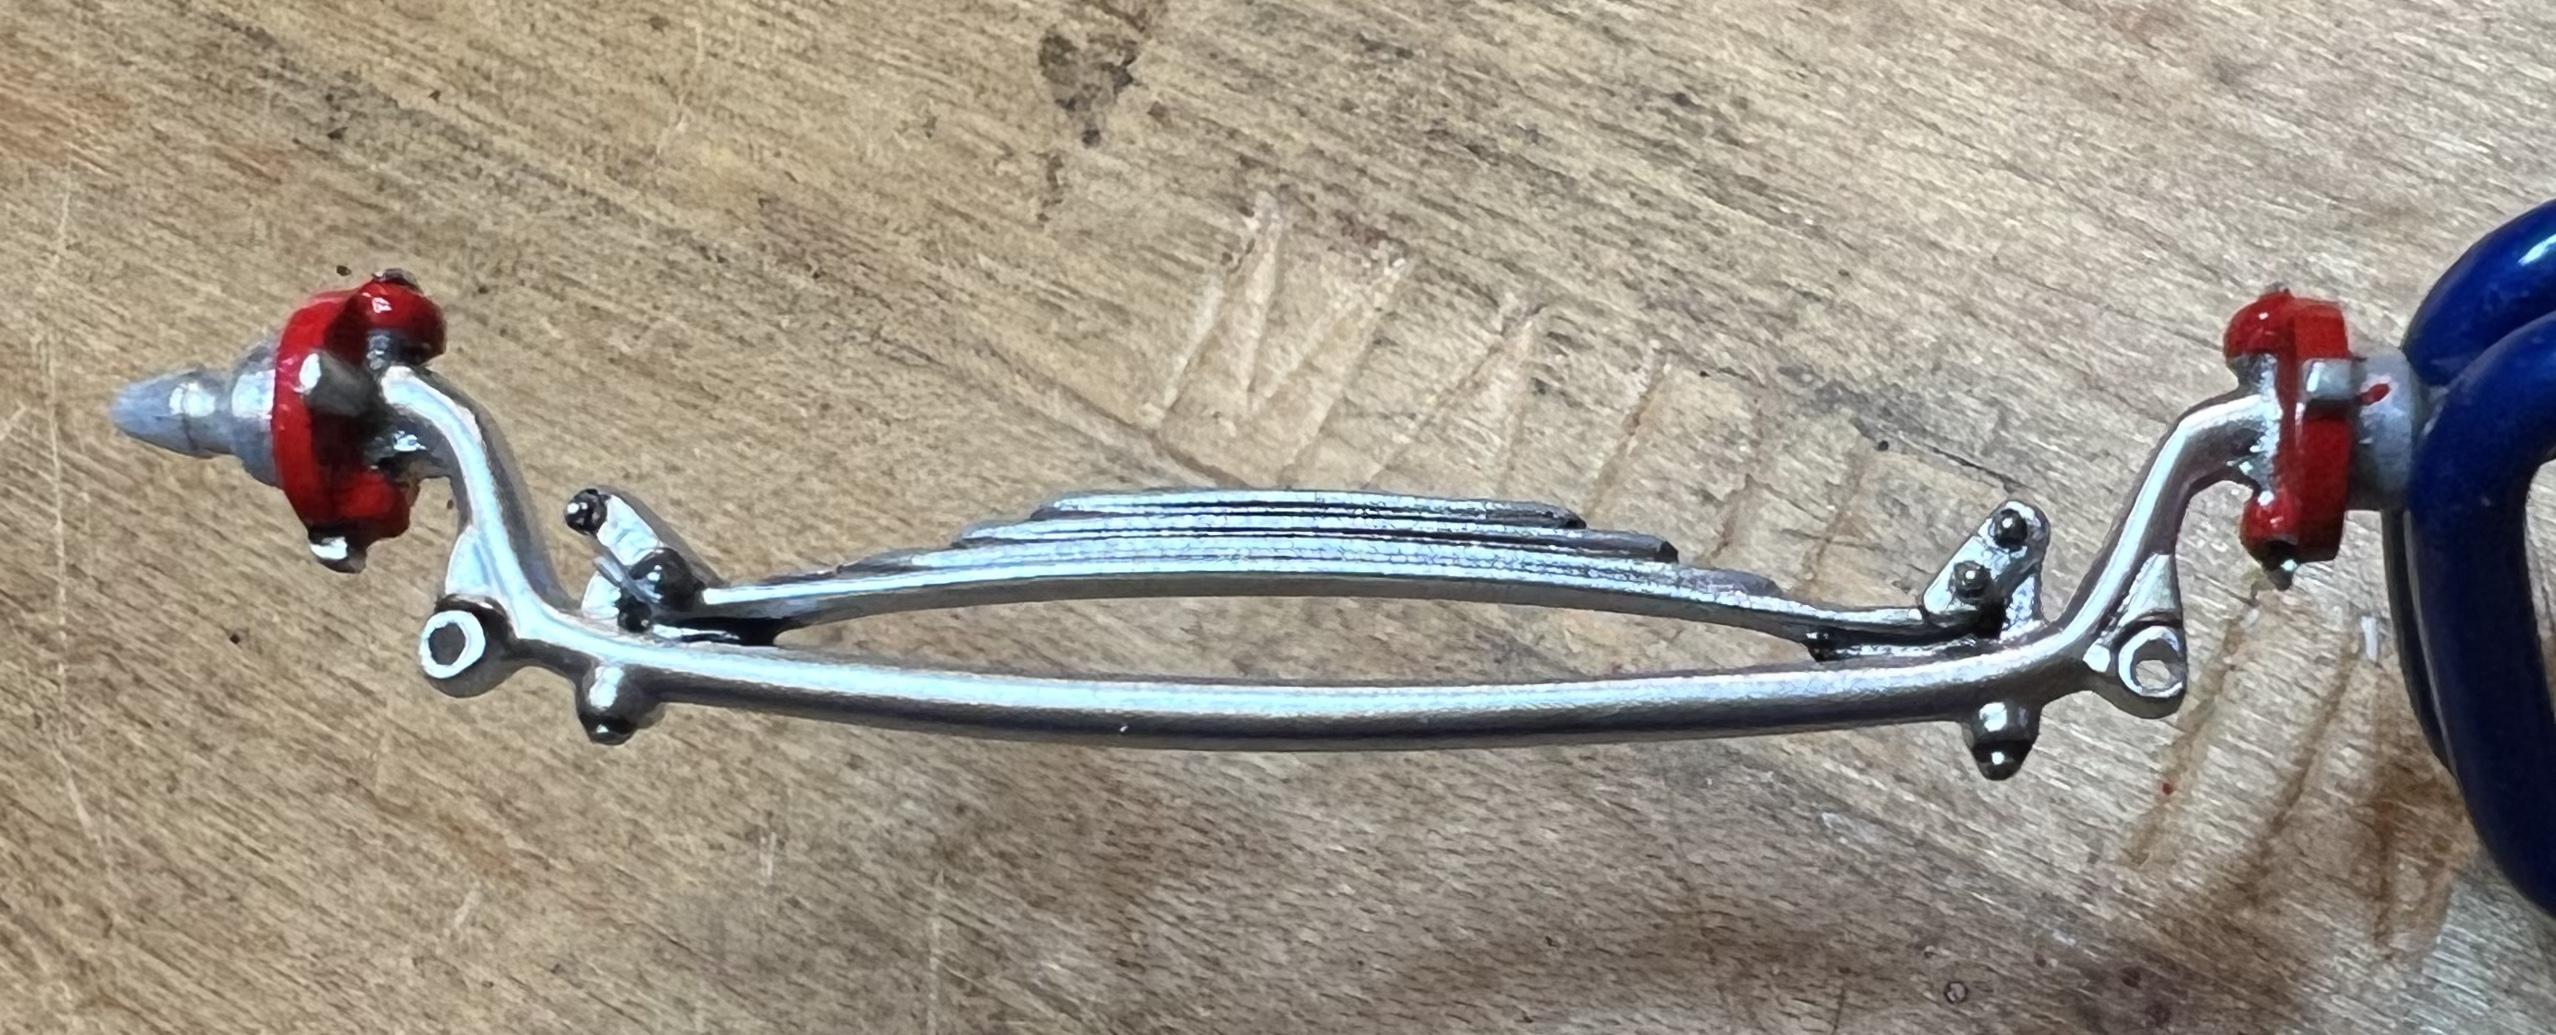
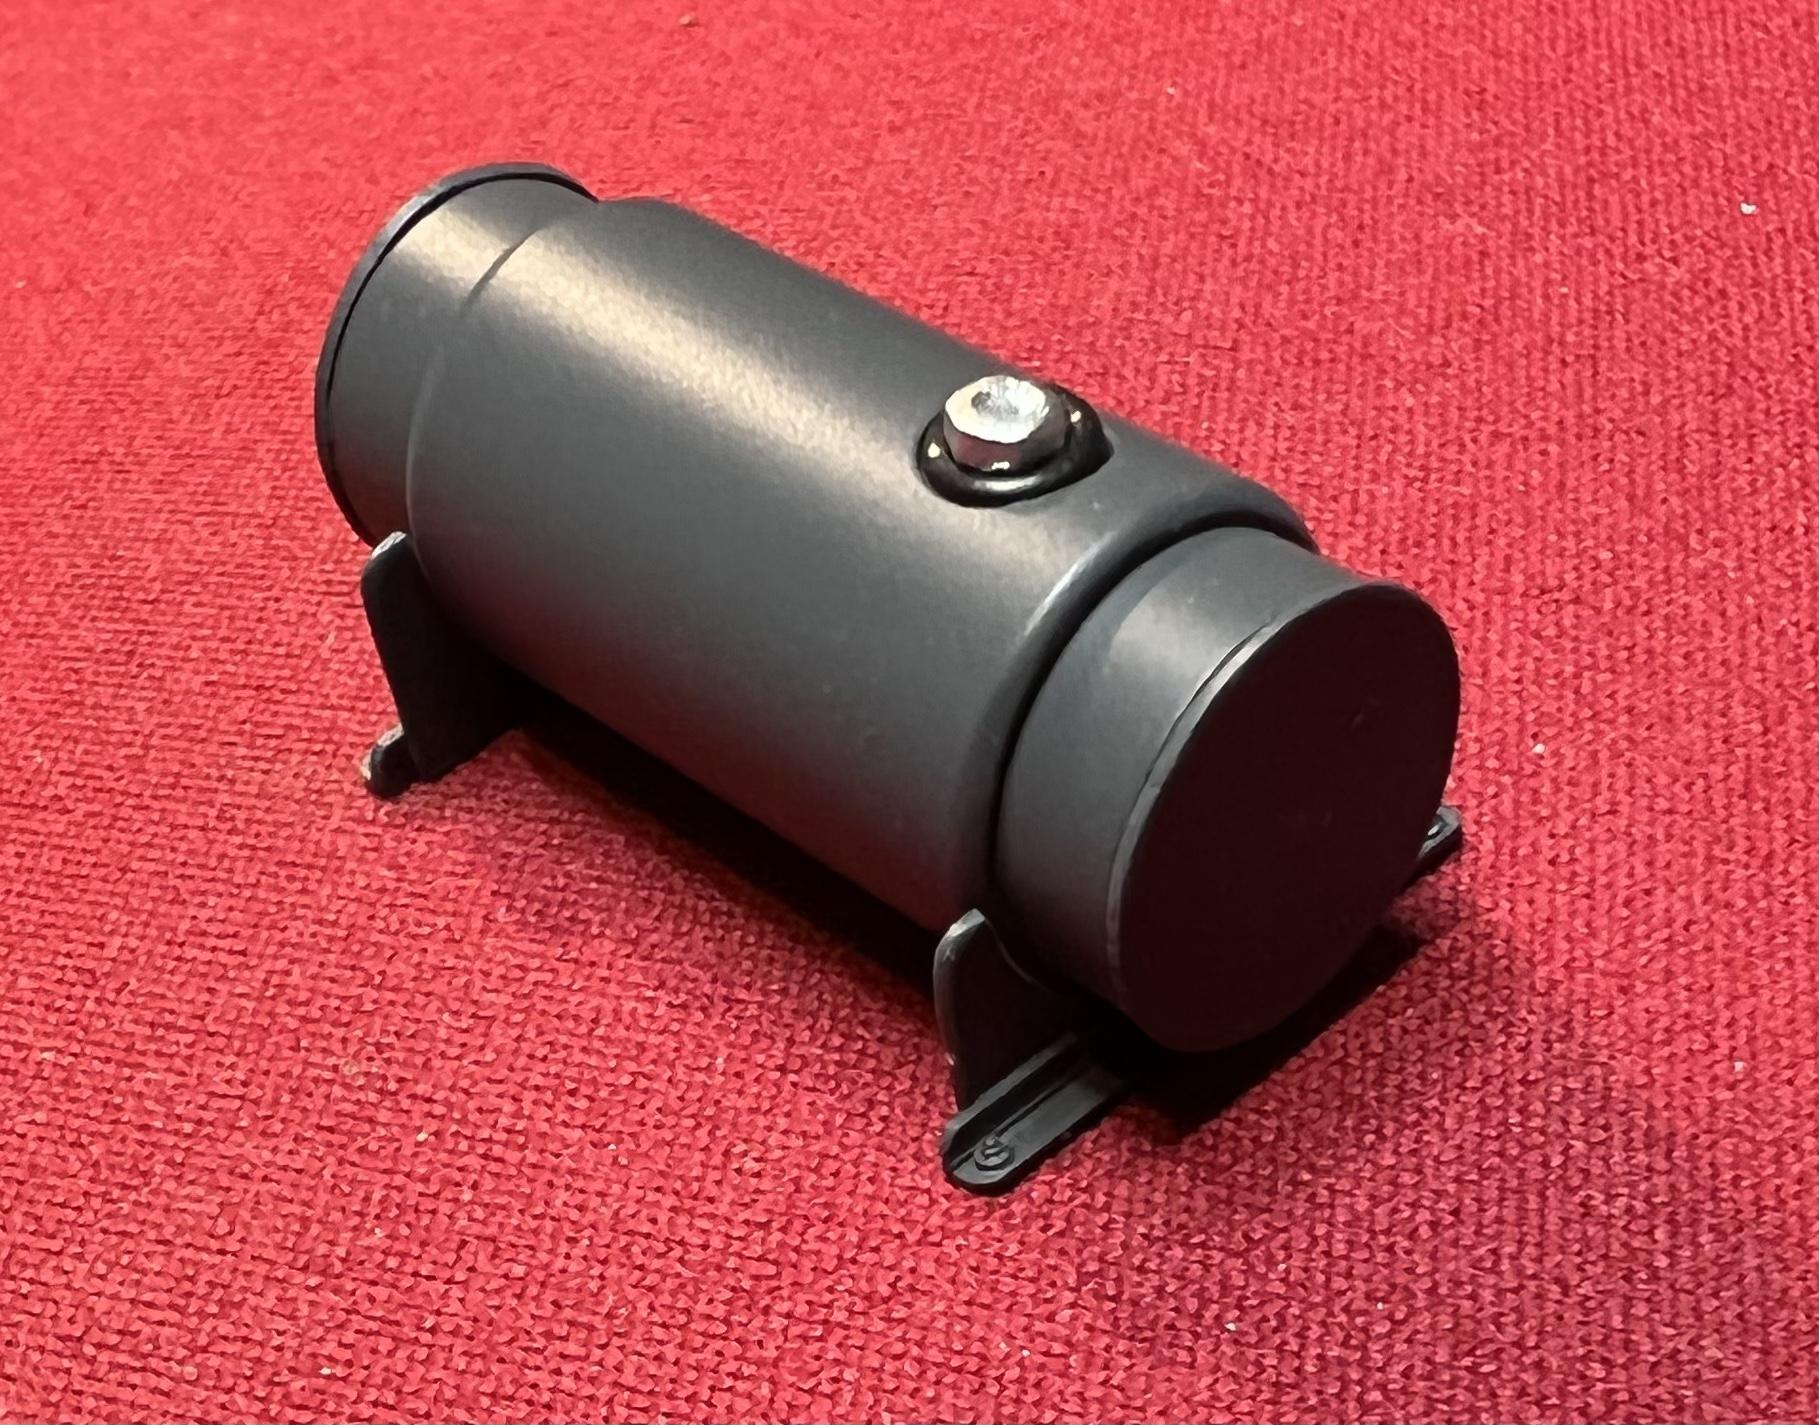
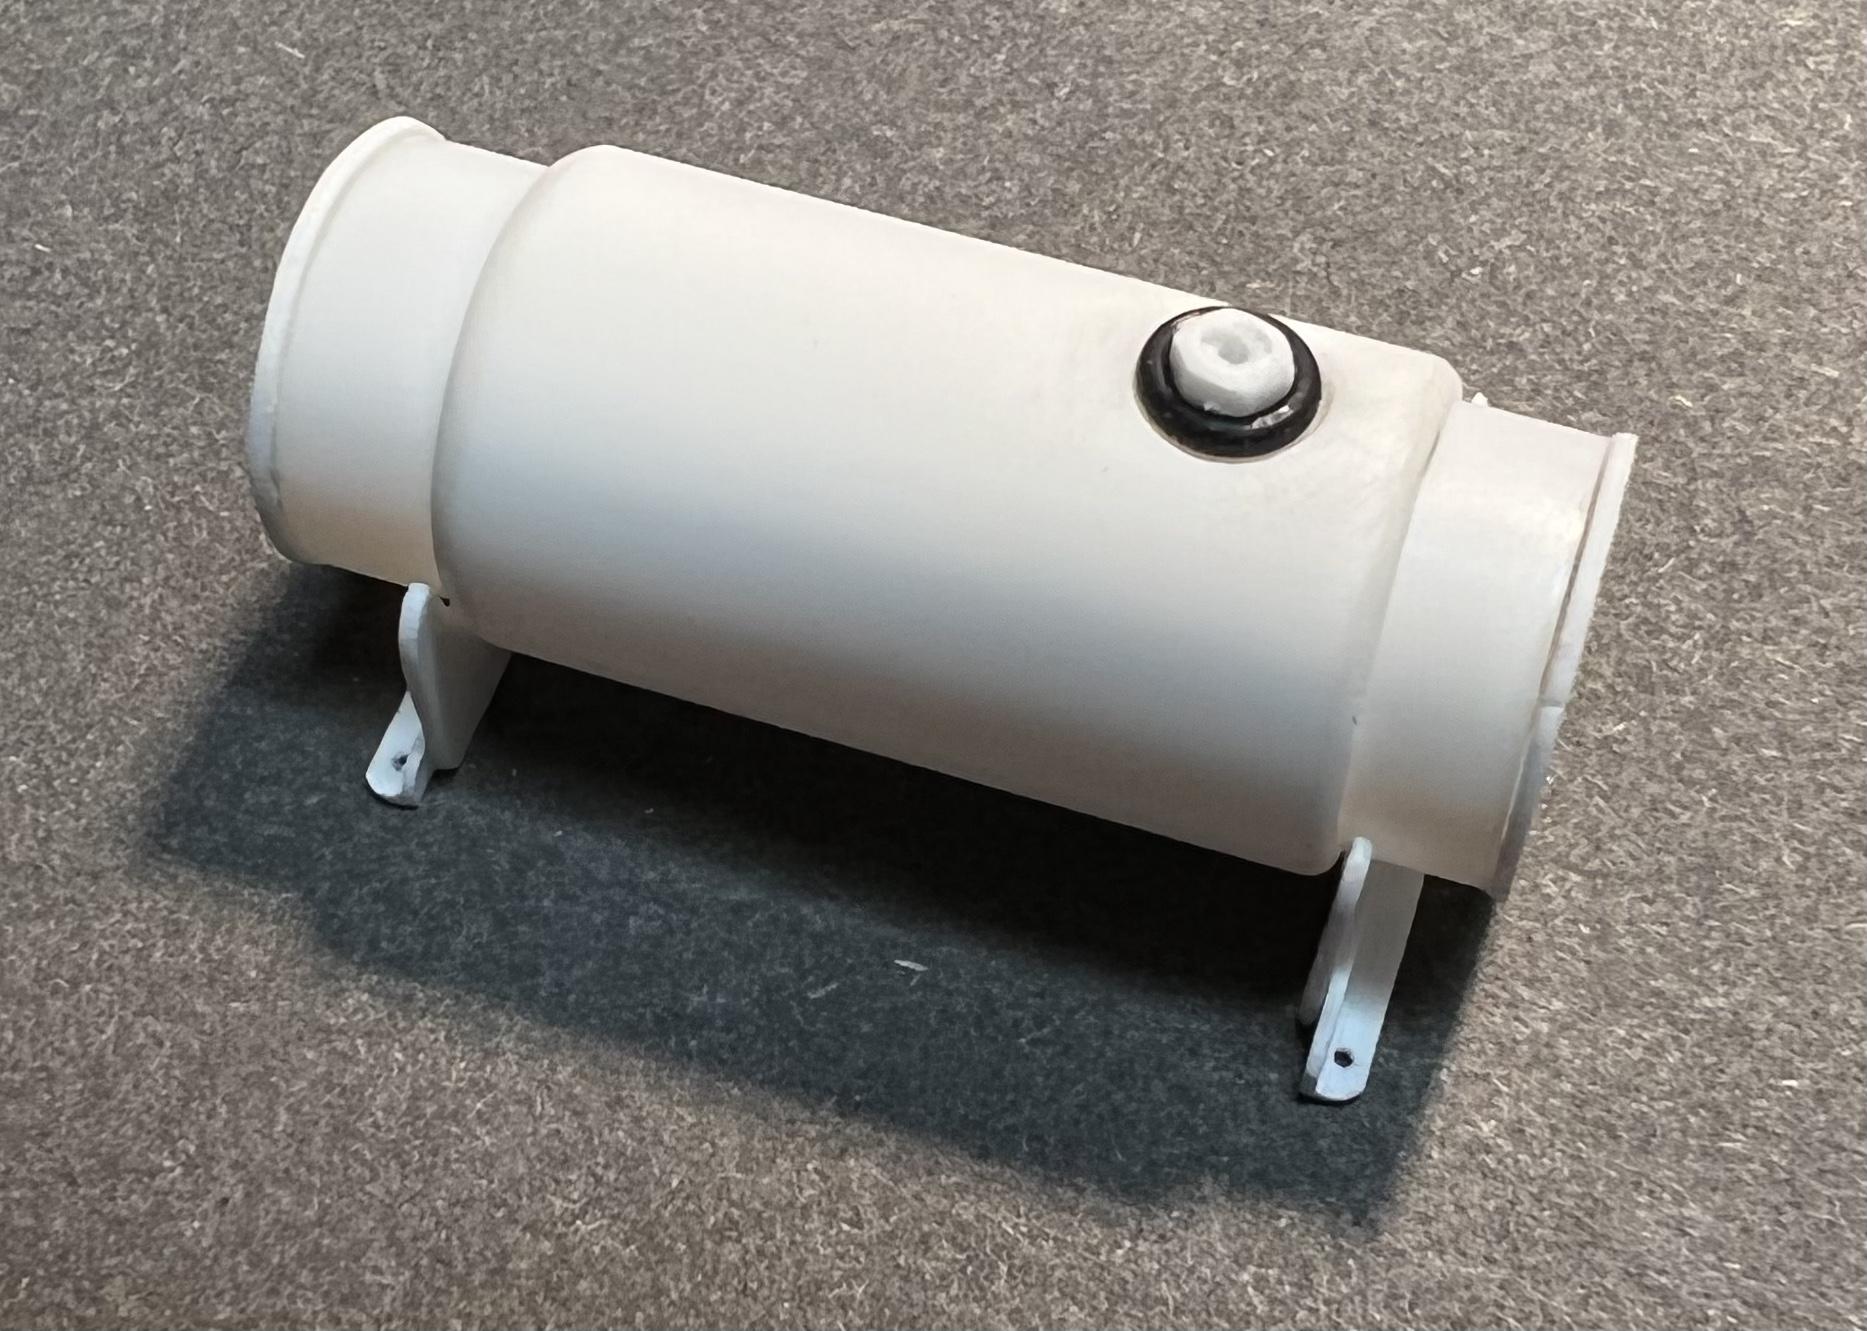
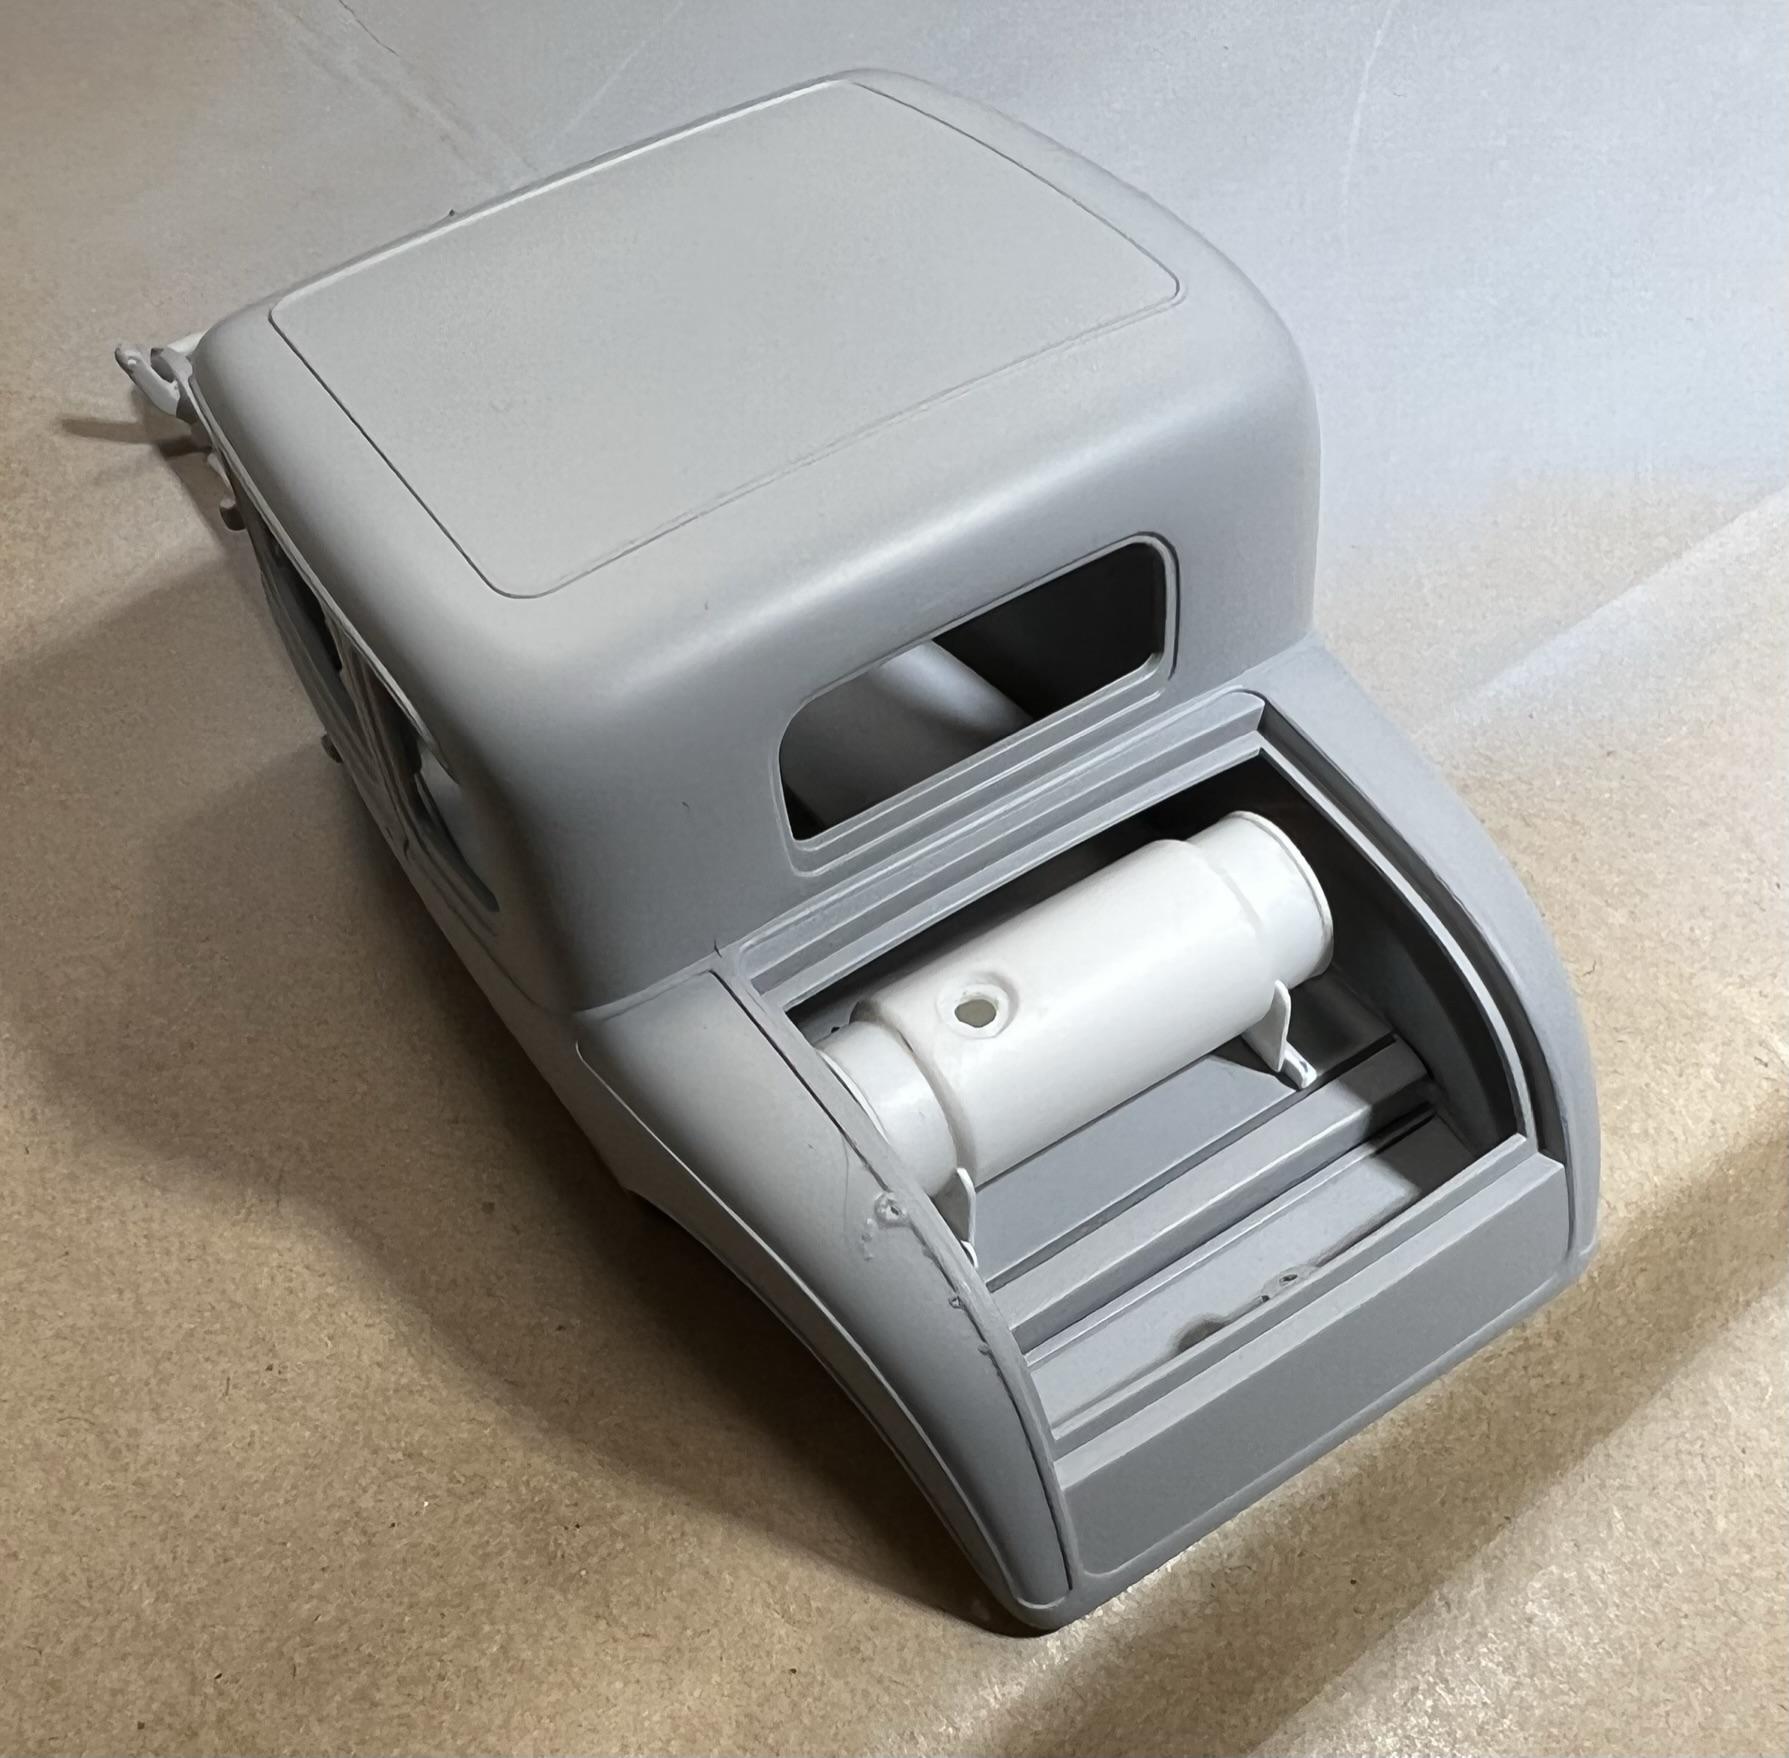
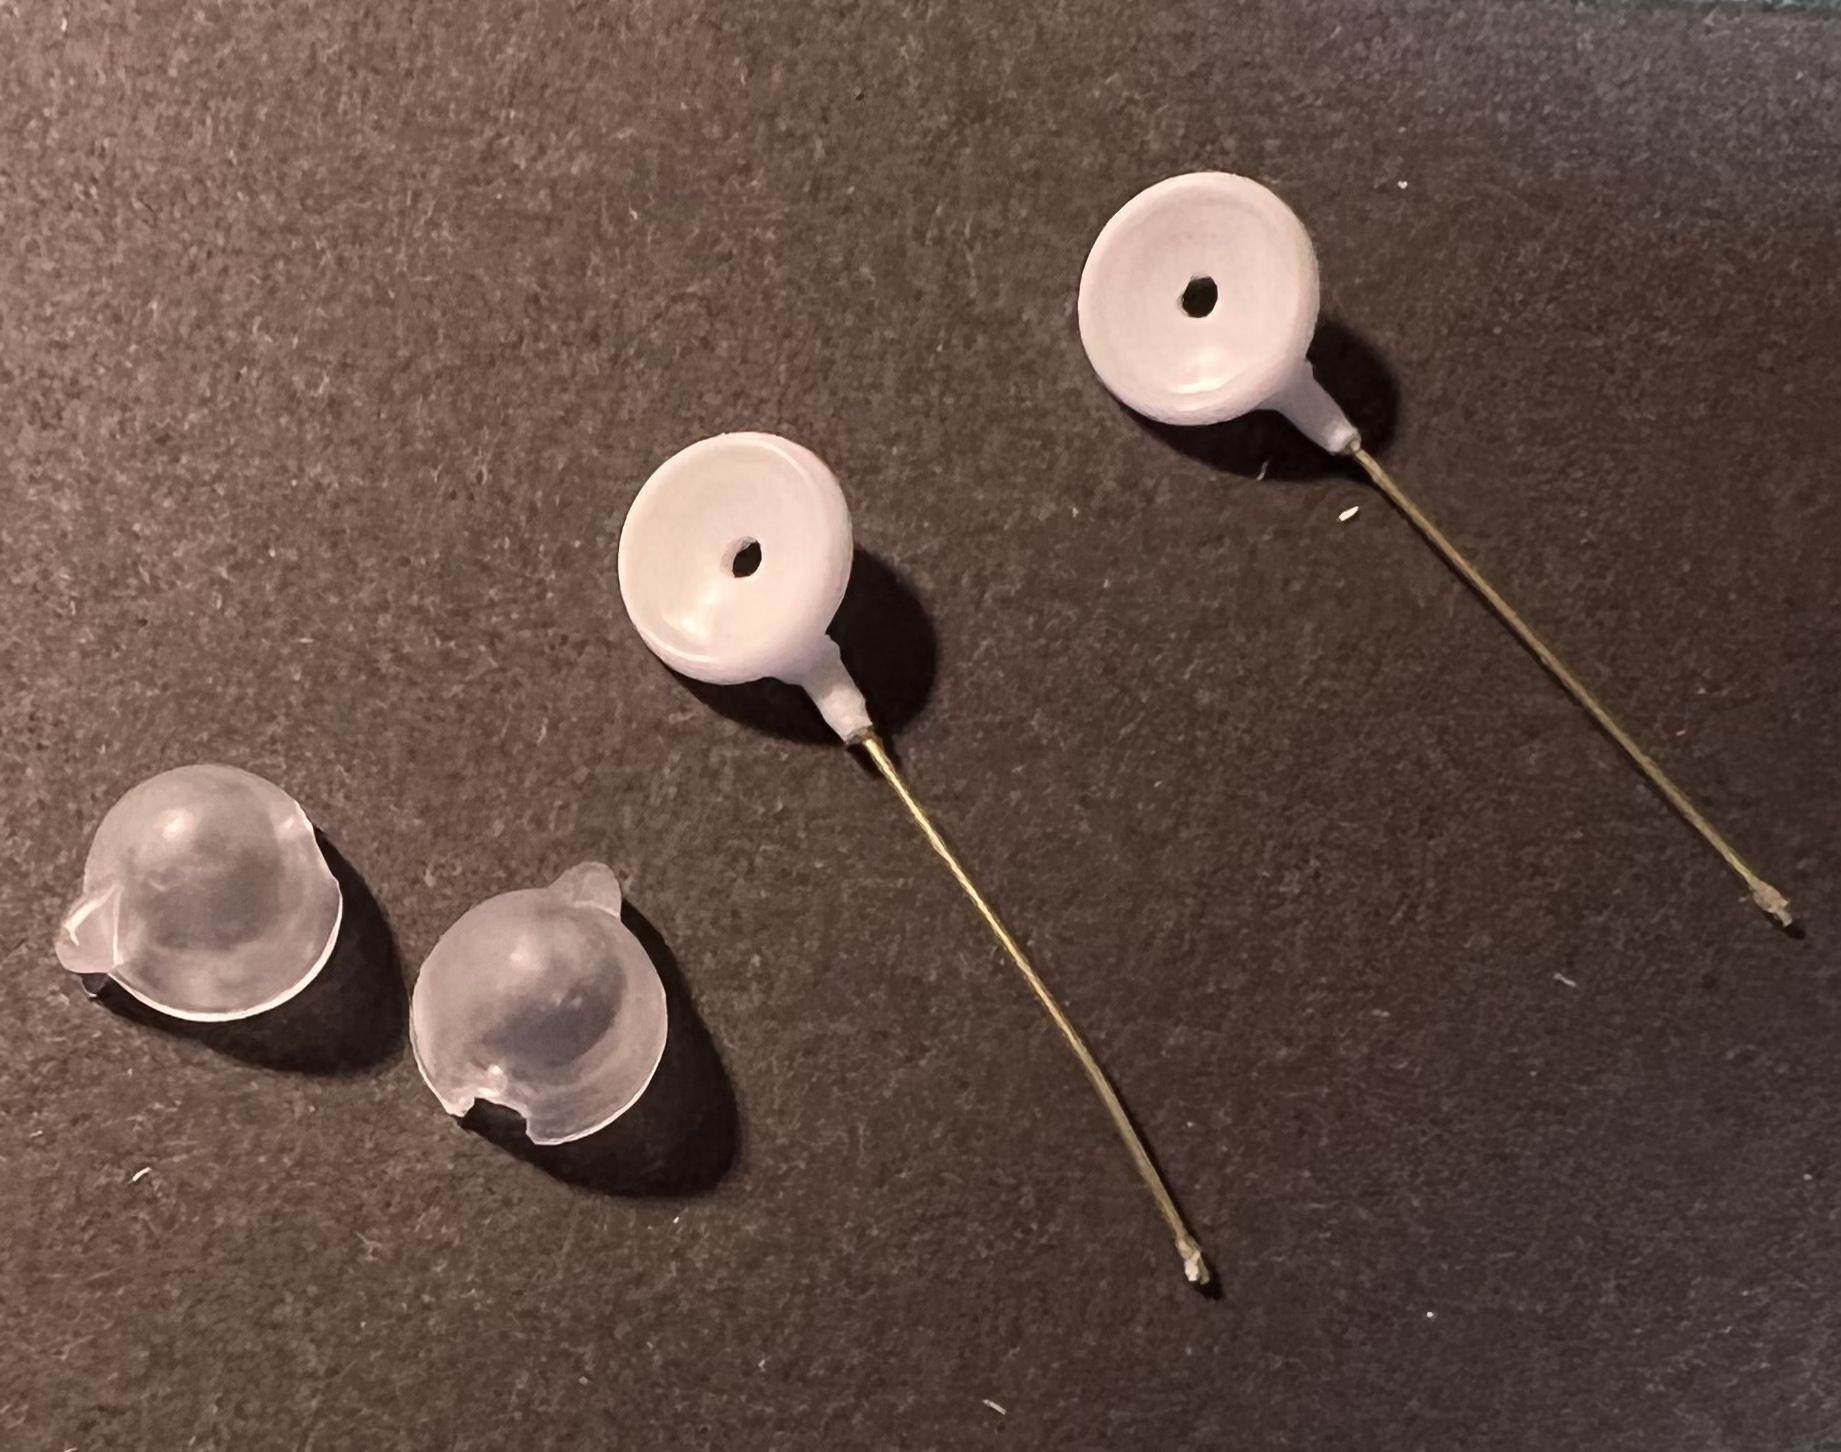
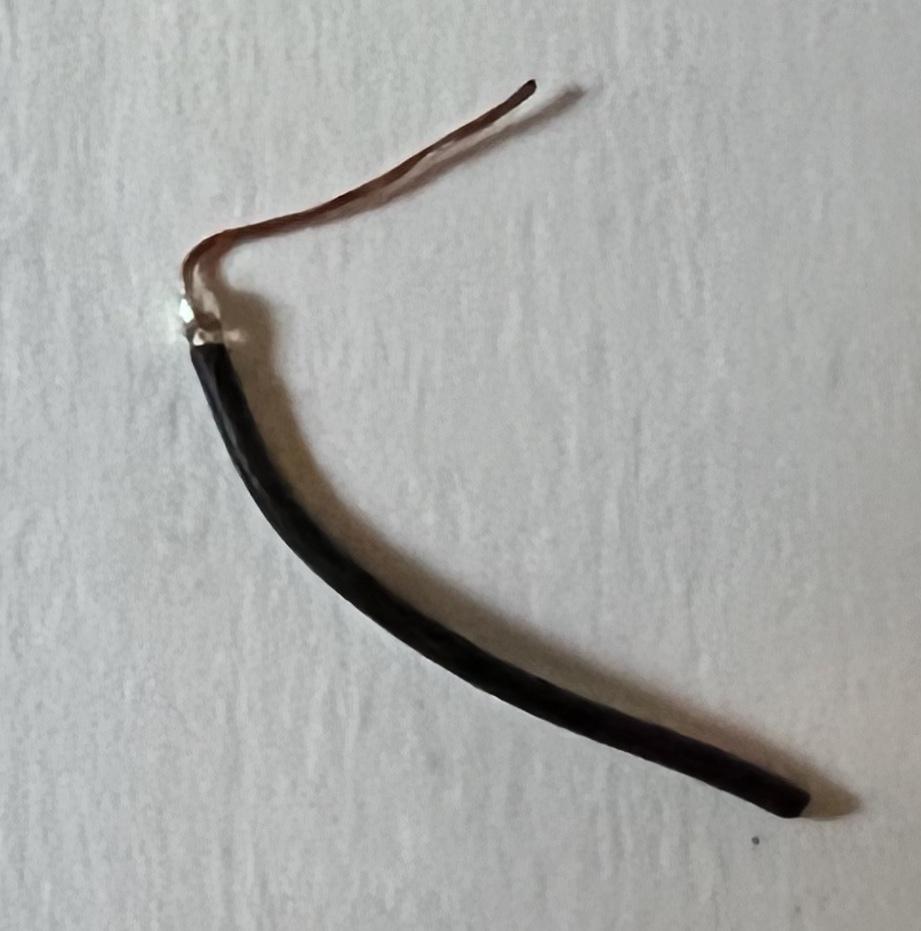
Yesterday tidied up the paint room, vacuumed, and lay down new paper in the spray booth to get it ready to roll today. Spent most of the day getting all the prepped pieces primed and further work on remaining parts. Had a great time finishing off the gas tank which will reside in the trunk. It was scratchbuilt using Evergreen tubes and shapes, including angle iron and sheet for the support bracing, round and hex rods for the filler cap & tube, and Grandt Line bolts to attach it to the trunk floor. (The photo showing the installation also shows a bit of primer blob on the right rear quarter that will be addressed.) My attention was next focussed upon the Stromberg 97s and the airscoops. These wonderful resin parts are from Replica & Miniatures Co. in their P-113 package of a 4 carb & intake manifold for the kit’s early Hemi. I drilled openings for the fuel lines in the carbs and deepened the air scoops throats with a drill bit. Also experimented with a prototype for the four fuel lines that will terminate at a fuel block on the firewall. Another item from R&M Co. is a set of vintage G 82-C headlights that are cast very cleverly with the rear bucket being separate from the chrome ring and with detailed lenses to complete the look. This allows the builder to have the housing either painted or chrome. I separated the headlights from the light bar as they will be mounted individually on the front chassis forks, drilled a hole in the rear for the housing for the cable, and drilled a hole in the reflector to mount a light bulb. Note that the housing are cast in a clear resin to help fashion the turn signal light atop it, a welcome touch.. That’s the update for today, perhaps it will rain tomorrow again and I’ll spend the day at the bench! Cheers Misha