

freddy_fo
-
Posts
41 -
Joined
-
Last visited
Content Type
Profiles
Forums
Events
Gallery
Posts posted by freddy_fo
-
-
That is top notch work on the engine there.
-
3 minutes ago, Tom Geiger said:
Thanks Freddy! Always glad to talk with people interested in the same kits!
I will finish mine, just for history's sake. If I was to build a nice one, I'd go to the latest Revell toolings of these cars. Take their newest '57 Chevy and mate it with their '56 Chevy nomad. That would allow for a modern detailed model!
I have the newer 57 chevy kit (California wheels)... I used it for the wheels on the nomad LOL. Was thinking to build that with my son after I finish my next project. Tooling is definitely a step up and the decal flames are very nice albeit only for the sides.
-
Looks very nice! Great job.
-
17 minutes ago, TarheelRick said:
As the others have said you really turned this sow's ear into a silk purse. The flames look good, maybe if they had been one or two shades lighter so they would be more pronounced may have worked better. Or another possibility is to outline them with a contrasting color, a real fine red line would work. Either way this is one beautiful build.
Thank you for the nice words. I think next time I'll just source some decals but most of what I build wouldn't look right in flames. I suppose if I get a desire to build the other donor kit I would definitely go the decal route.
-
36 minutes ago, Tom Geiger said:
It looks pretty good for the God awful kit you started with! ?
Be careful with the chrome spears that go on top of the back fenders. They have an awful fit, and if I was going to do it again, I'd mold them in prior to painting and just BMF 'em.

This was one of my favorite cars as a kid. And this box art got me into the model. As an 11-12-13 year old, I never actually got it all assembled. I'd always get stuck at some point and give it up. Then the next year I'd see the box and buy it again, reasoning I was a year older and up to the challenge. Um, nope!
So once I started building as an adult, I built the AMT '57 Ford and did fairly well on it. So I figured I'd build the Nomad as a shelf mate. I put a lot of earnest effort into it but still have it in parts, never finished. Recently I agreed to finish it up as part of the "Bring Out Your Dead" group. I have it out on my bench, but am finishing up two other projects before I dig in.
I met Bob Paeth at the GSL one year and he told me the story about releasing this car. We became friendly and for the next GSL, I folded up and packed this box top. Bob was kind enough to sign it for me (see in the sand). So I will always treasure this box!
Back when Dean Milano still worked at Revell, I had suggested to him that they release the kit but WITH the decals to do the Hollingsworth car's flames like on the box. And to use the original boxart! He said that Revell was so broke at that time that they couldn't even finance a decal sheet! So that never happened.
Later on Danbury Mint was going to do the Hollingsworth car about the same time the 1:1 recreation was built. That was right when their Chinese partner when kaput, which ended the entire vehicle program. Speaking with Rick Hanmore, he said the furthest they got for the project is that they had a completed prototype. And in the end they gave it to the car's owner as a gift for giving them access to the car. I definitely would've bought one of those!
Looking forward to seeing yours completed! Then maybe I'll work on mine!
Cool stories there. Thanks for sharing. I too had the nomad as a young teenager (mid 80s release) and loved that car although I really just slapped it together in raw form as was my modus operandi back then:D It met it's demise sitting on the rear deck of my Uncle's car on a hot sunny day while we were at the zoo.
-
Hmmm, I didn't notice that. With the different grill and it painted black that may create a bigger look on mine.
Is the 73 issue the root beer colored plastic? I believe it was re-issued in 78 which is what is on the box of the donor kit I wound up purchasing. I'd actually hoped to use the body from it but when it got to me some of the pillars were cracked. Those are very tricky to keep together once glued from all the flexing and manhandling I tend to do so I just stuck with my original body. Interestingly there was a casting issue with the dash where on the left side of the cluster there is hole. Same issue on both the 78 and 85 version.
Have you started on your nomad yet?
-
Thanks guys!
-
Well, I got busy with other things as happens when it gets warm then forgot about the nomad till a few weeks ago. Was bothering me that I had a box with an almost built car. One of the reasons I walked away for a bit is that I got a bit frustrated with re-chroming some of the bigger parts. The alclad base coat just wouldn't cure and even a year later was still tacky. Either I got a bad batch of the base coat or I did something wrong. So I went back to ebay to see if I could find a parts kit with chrome in good/decent condition and eventually found what I wanted. When I got the parts kit the chrome still had issues but not nearly as bad as what was in my original kit.
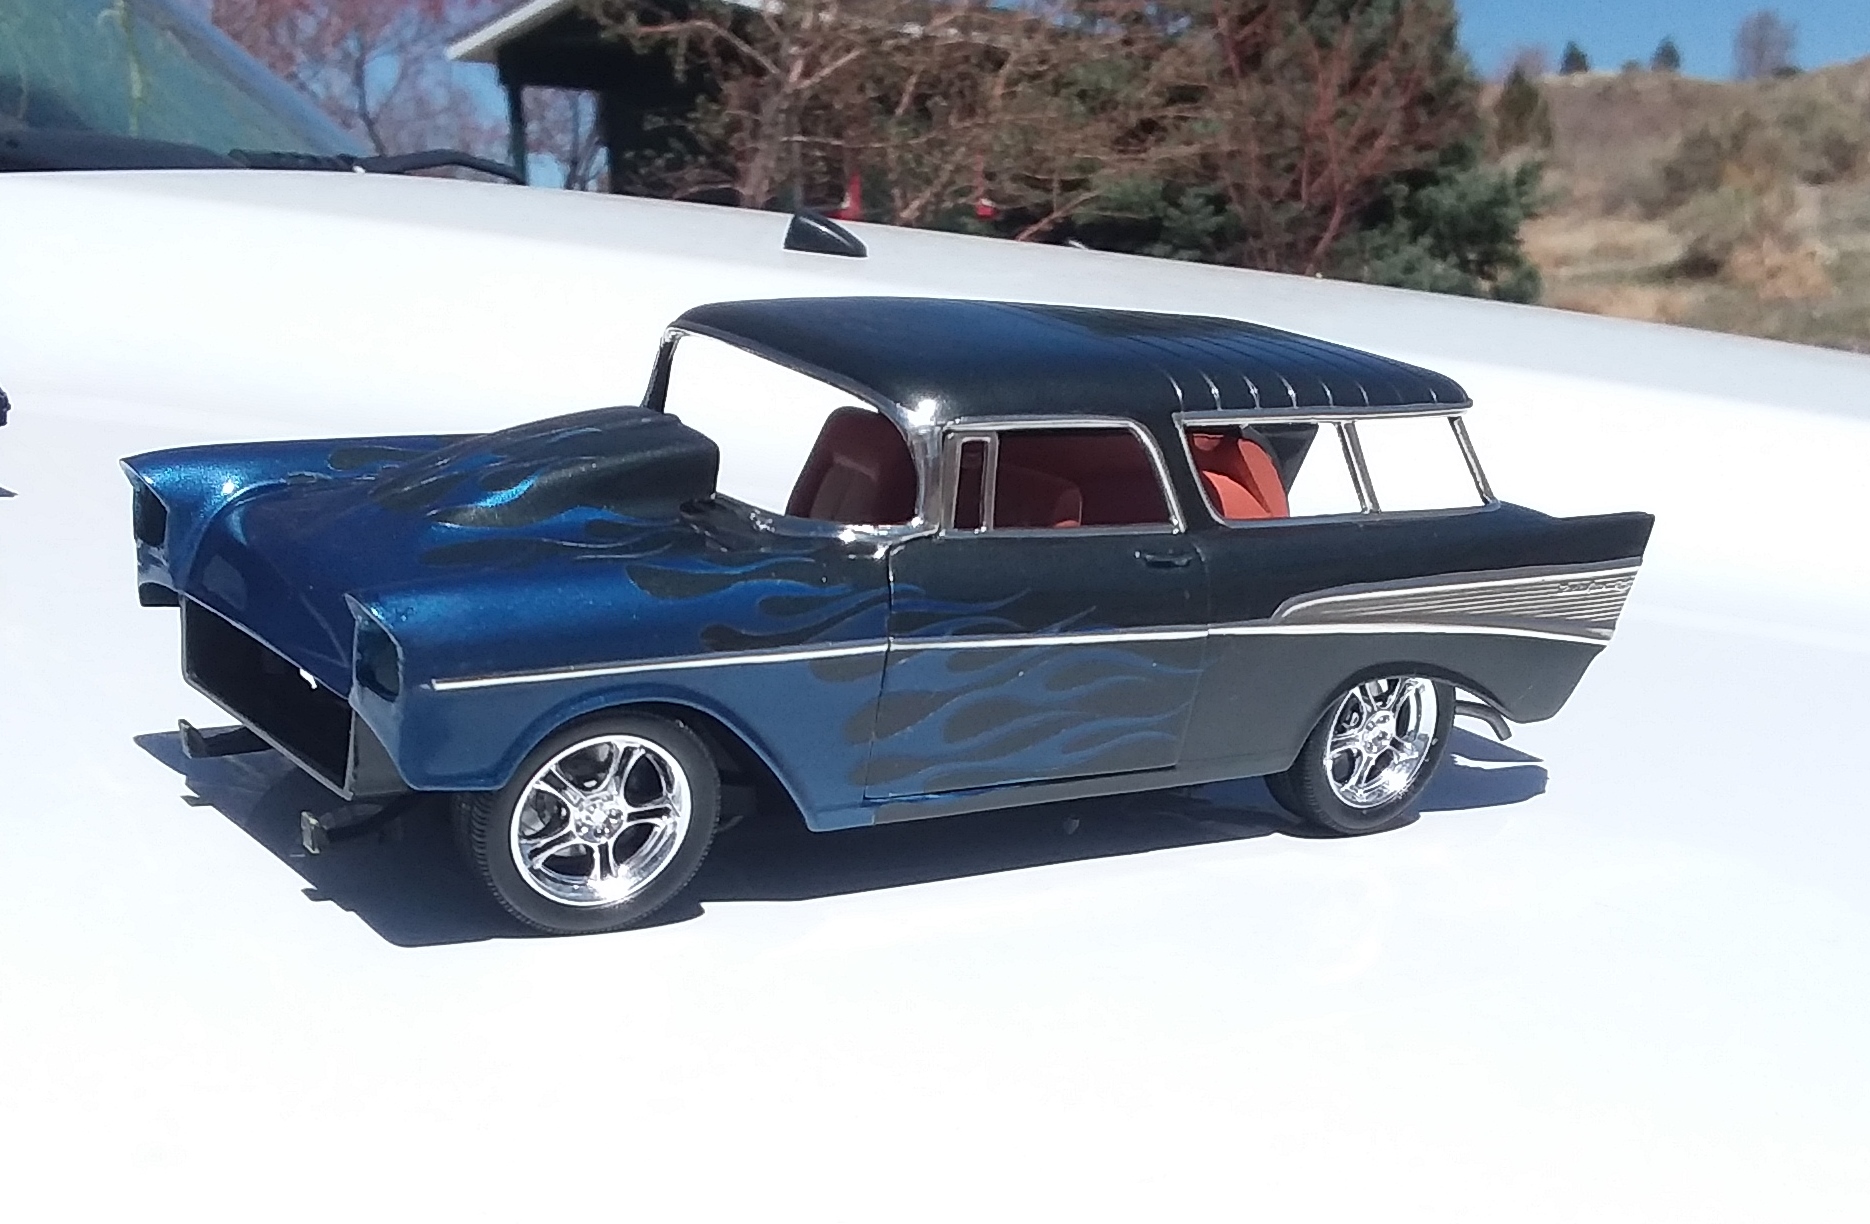
Masking and painting flames was a bad idea. Very difficult to smooth out the ridges and if one looks closely you can still see them in the finished product. Next time it's decals. Lastly I learned that foil gets dull if you gloss coat over it. Usually it's the last thing I put down but I also have issues with the foil lifting over time from handling so I thought I'd use the gloss to help keep it in place especially given the large amount of chrome trim unlike every other build I've done since I was a teenager.
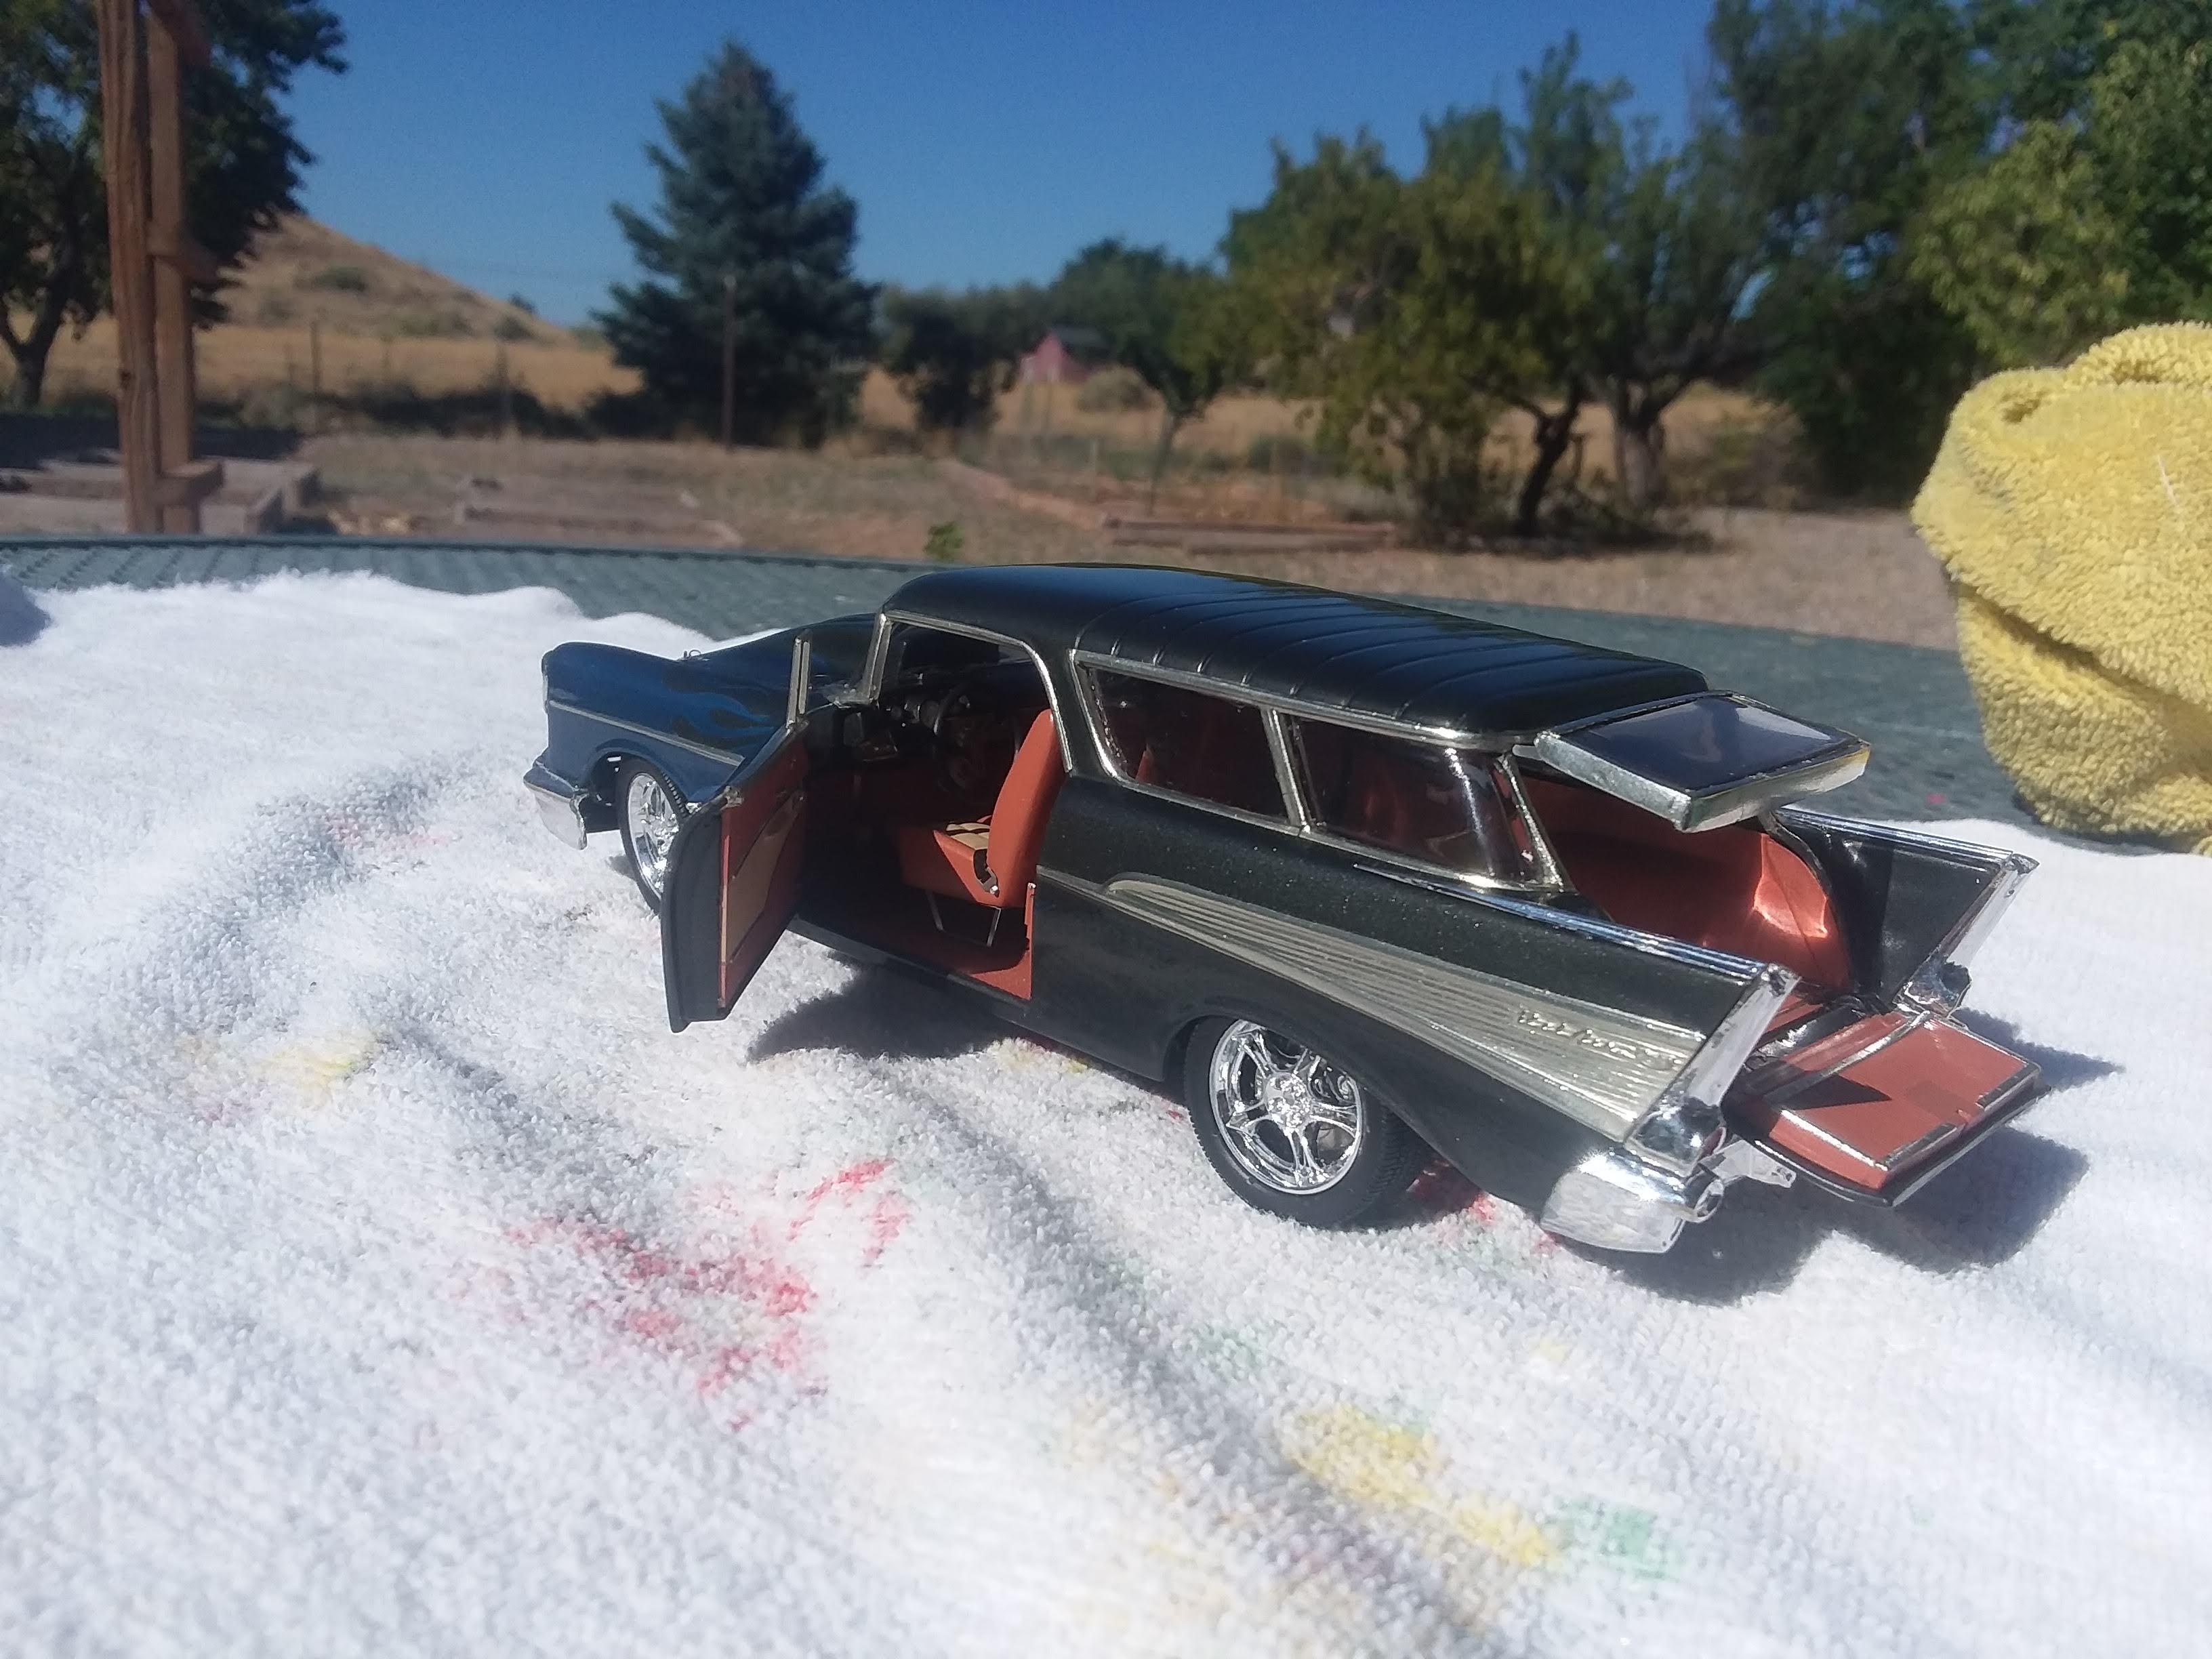
Anyways here is the final product. Pardon the dust but it's near impossible to get it all off for pics... believe me I tried.
-
Just an update. Paint finish is pretty raw as I scrubbed it with 12000 grit pads and have a few more foil/paint touch-ups before I apply the clear coat. I'm on the fence as to whether I did the right thing with the flames. I really liked the charcoal finish all the way around and the blue flames/front end isn't quite what I was hoping for. Maybe a few more weeks of staring at it and I'll come to like it.
A little nervous about final assembly. The frame is twisted and going to take a few glue sessions to get it aligned. I think the first best step is to glue the rear inside panels to the body so that the tailgate is aligned. Then once that is dried/set align, glue and clamp the front of the frame to the body and finally the rocker panels to the pan.
The molotow chrome I applied to the bumpers and other plastic trim pieces did not work out well. After 1 month of drying they still dulled to the touch so I've stripped those and am going to try the alclad method.
-
On 4/8/2018 at 9:08 AM, cobraman said:
Nice job. I could never get into one of those cars.
Yeah, lotus is not known to cater to us larger folk. I did have an elise for a while and almost wore my shoulders out trying to get in and out of that thing. Thank goodness the top came off though... I had to stretch and loosen up to get in it when the top was on although after a while I could ingress/egress with some dignity. I can imagine the europa was about the same.
-
Nice job Hugh. I really like that green finish. I built one but did it in white and now wish I'd done like you. I still have another sans windshield and decals (I bought it because I buggered up the windshield and decals from the original). Maybe I'll build this one and copy you.
-
Thank you everyone for the nice words.
David, I have a 1mm molotow pen but it's still too big for that emblem job. Some of the lettering almost blends into the body where it is only bumps. I've foiled the area and dropped paint over it to see if it will darken up the valleys and it looks a little better but still not great. Need to head to the art store to see if I can find a super fine paint brush to help with that.
Ruben, I saw a couple of the skip fiesta versions come up on ebay while I was looking for mine. None there at the moment but I'm sure one will pop up eventually.
-
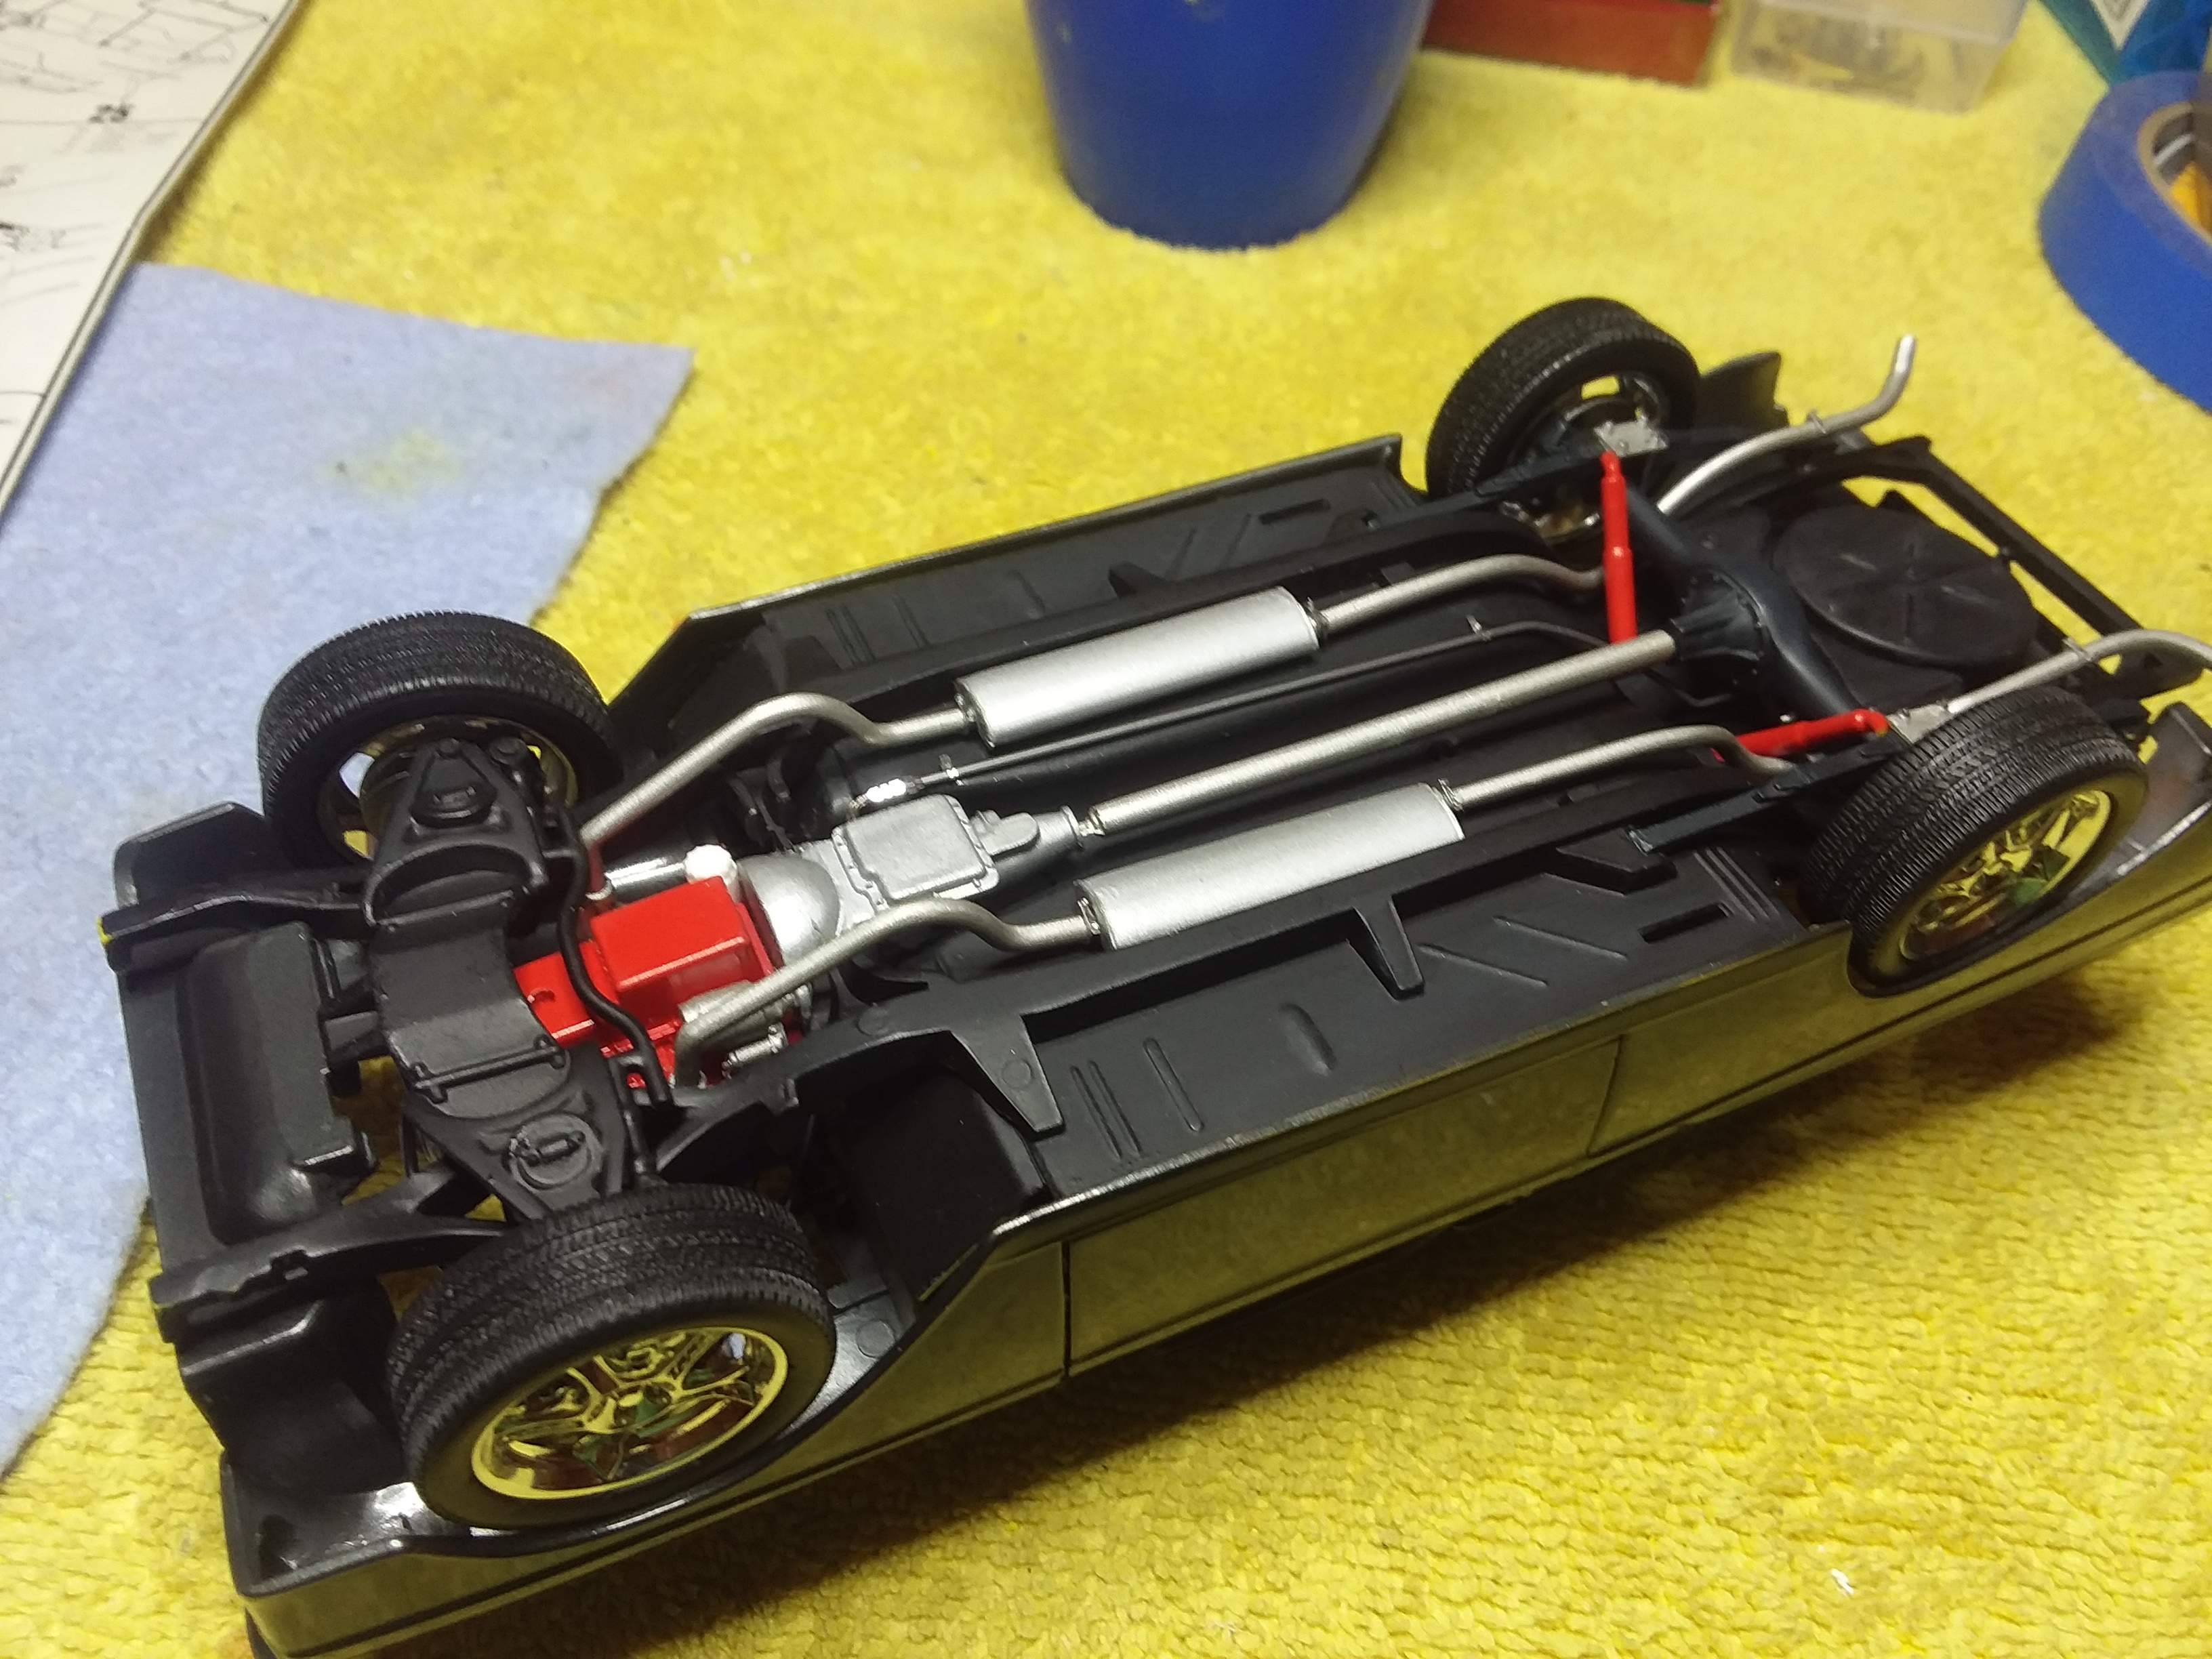
A little more work done.
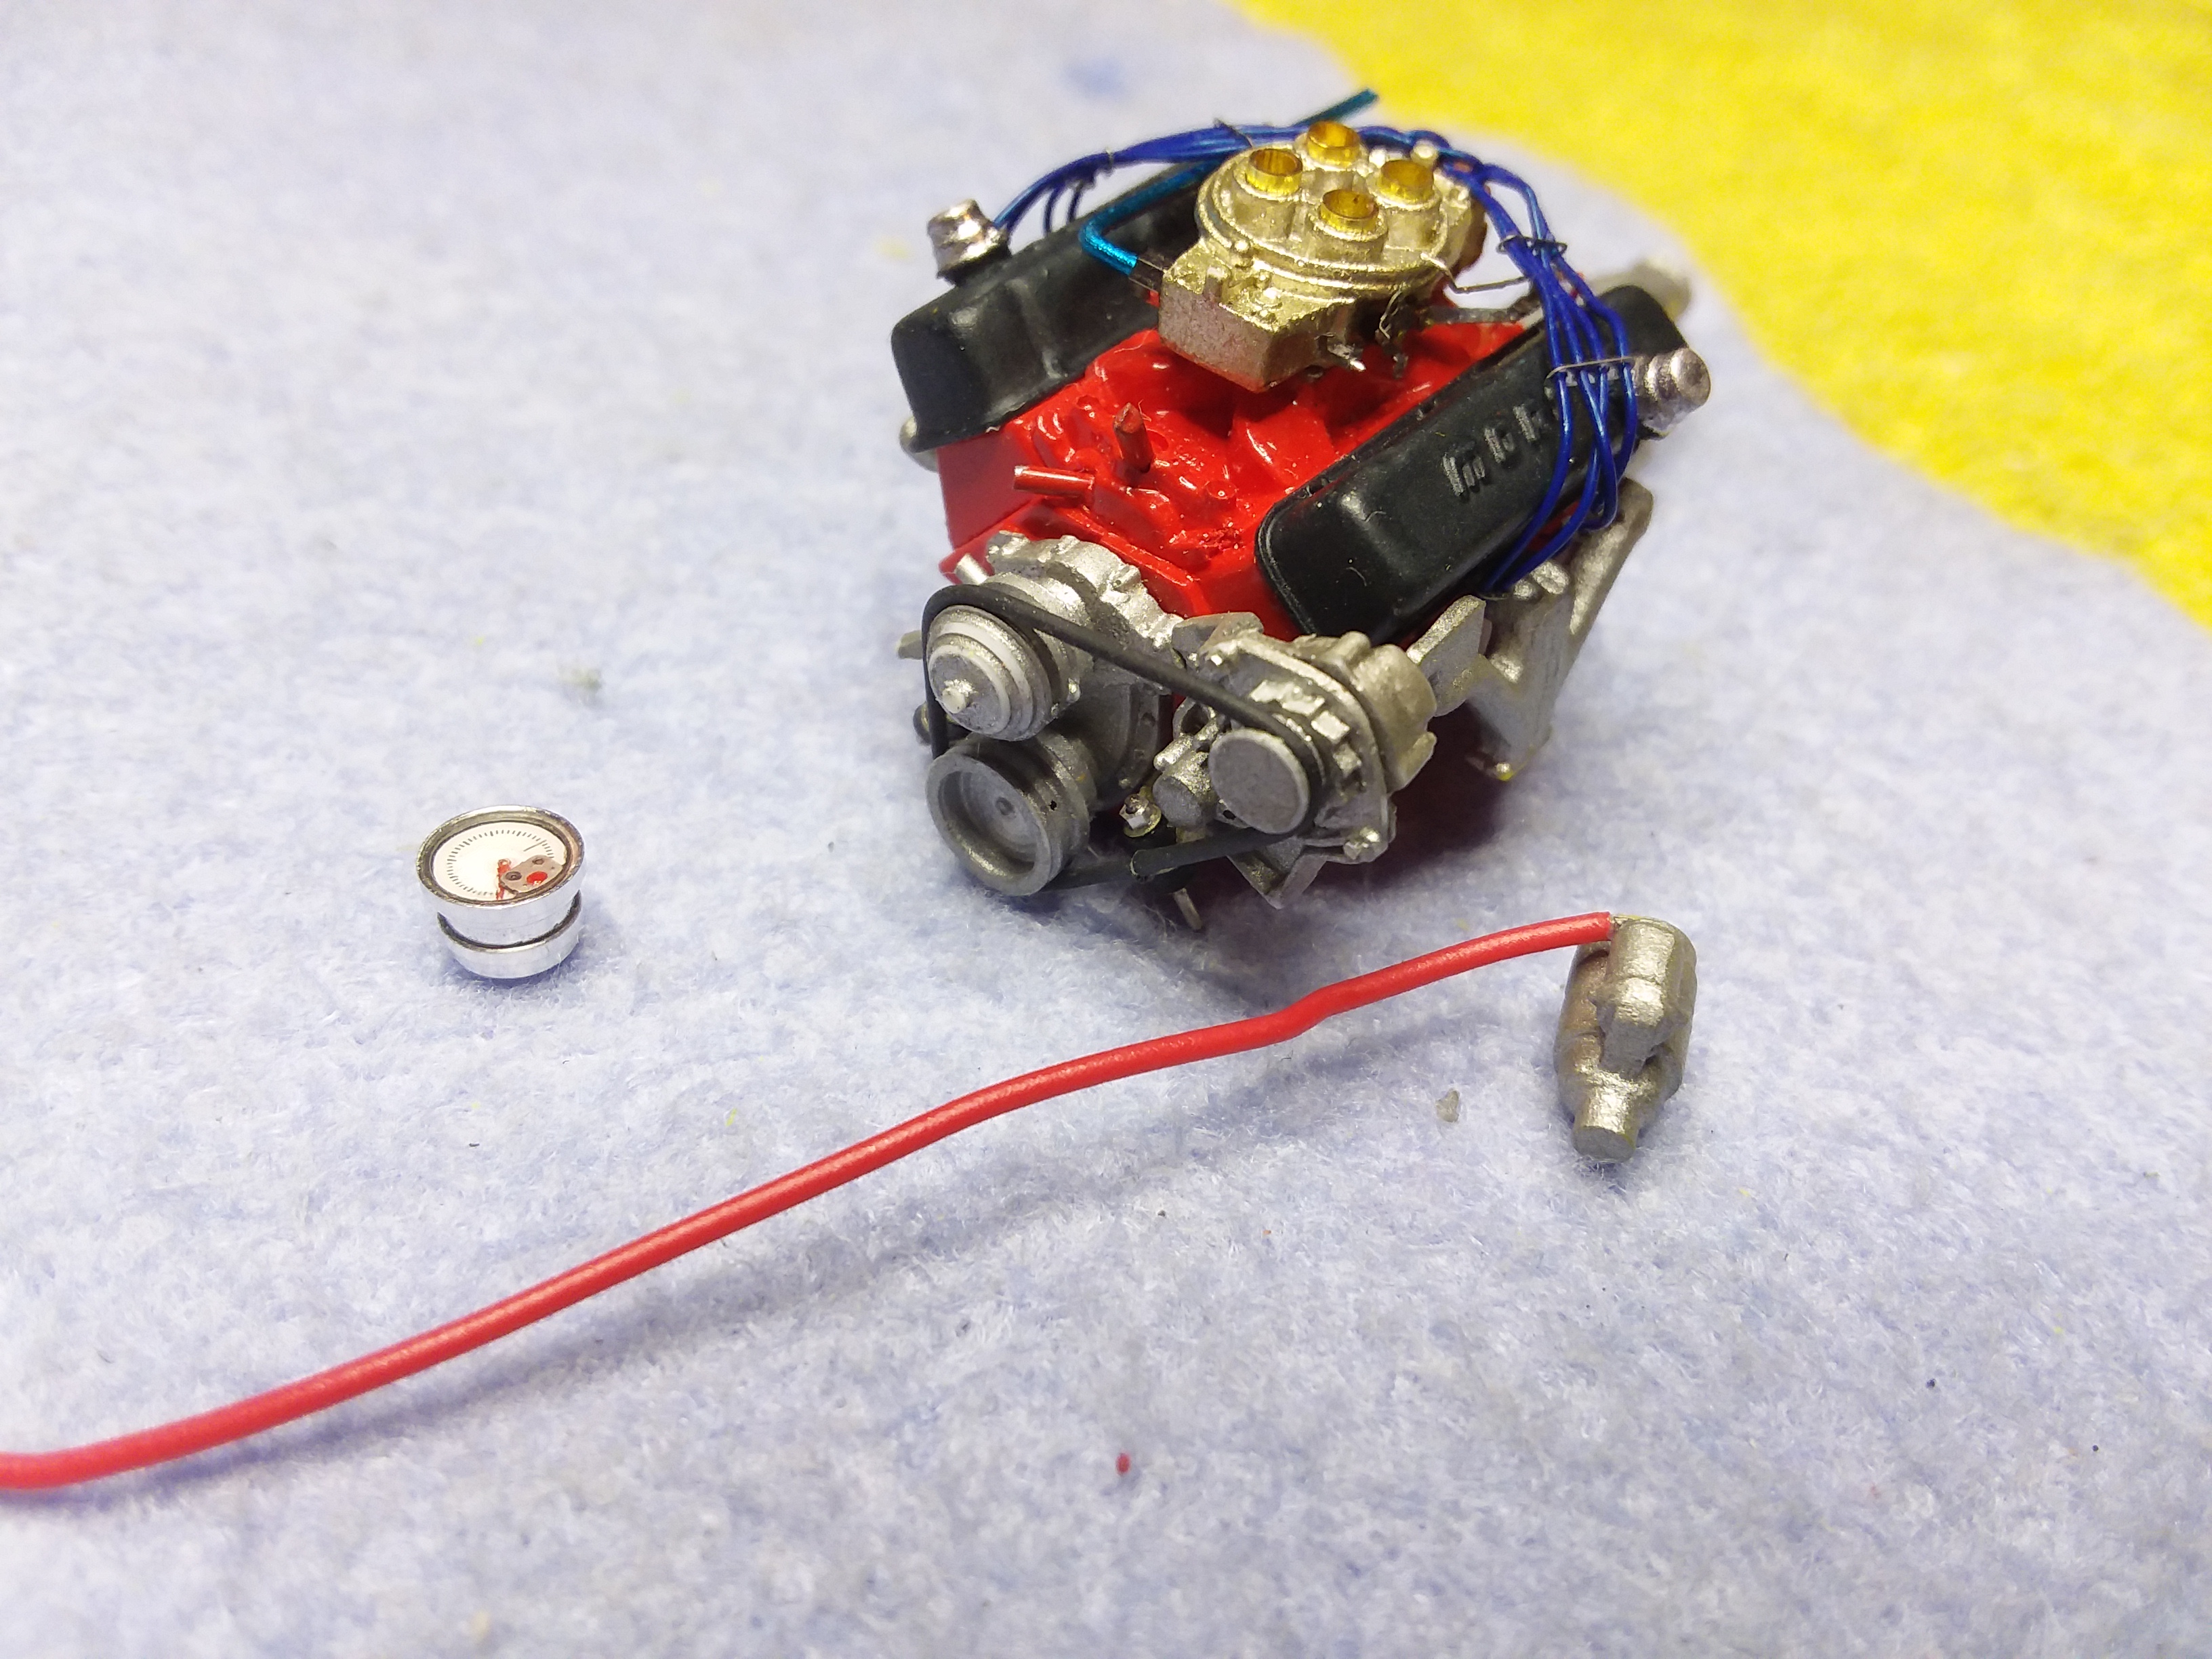
Underside is pretty much done. I took liberties with the fuel line since it's a custom build.
Final base coat on the hood. Two weeks it and the body should be ready for the flames.
Wrapped up the shifter and found a better brake pedal from my leftover metal etched parts.
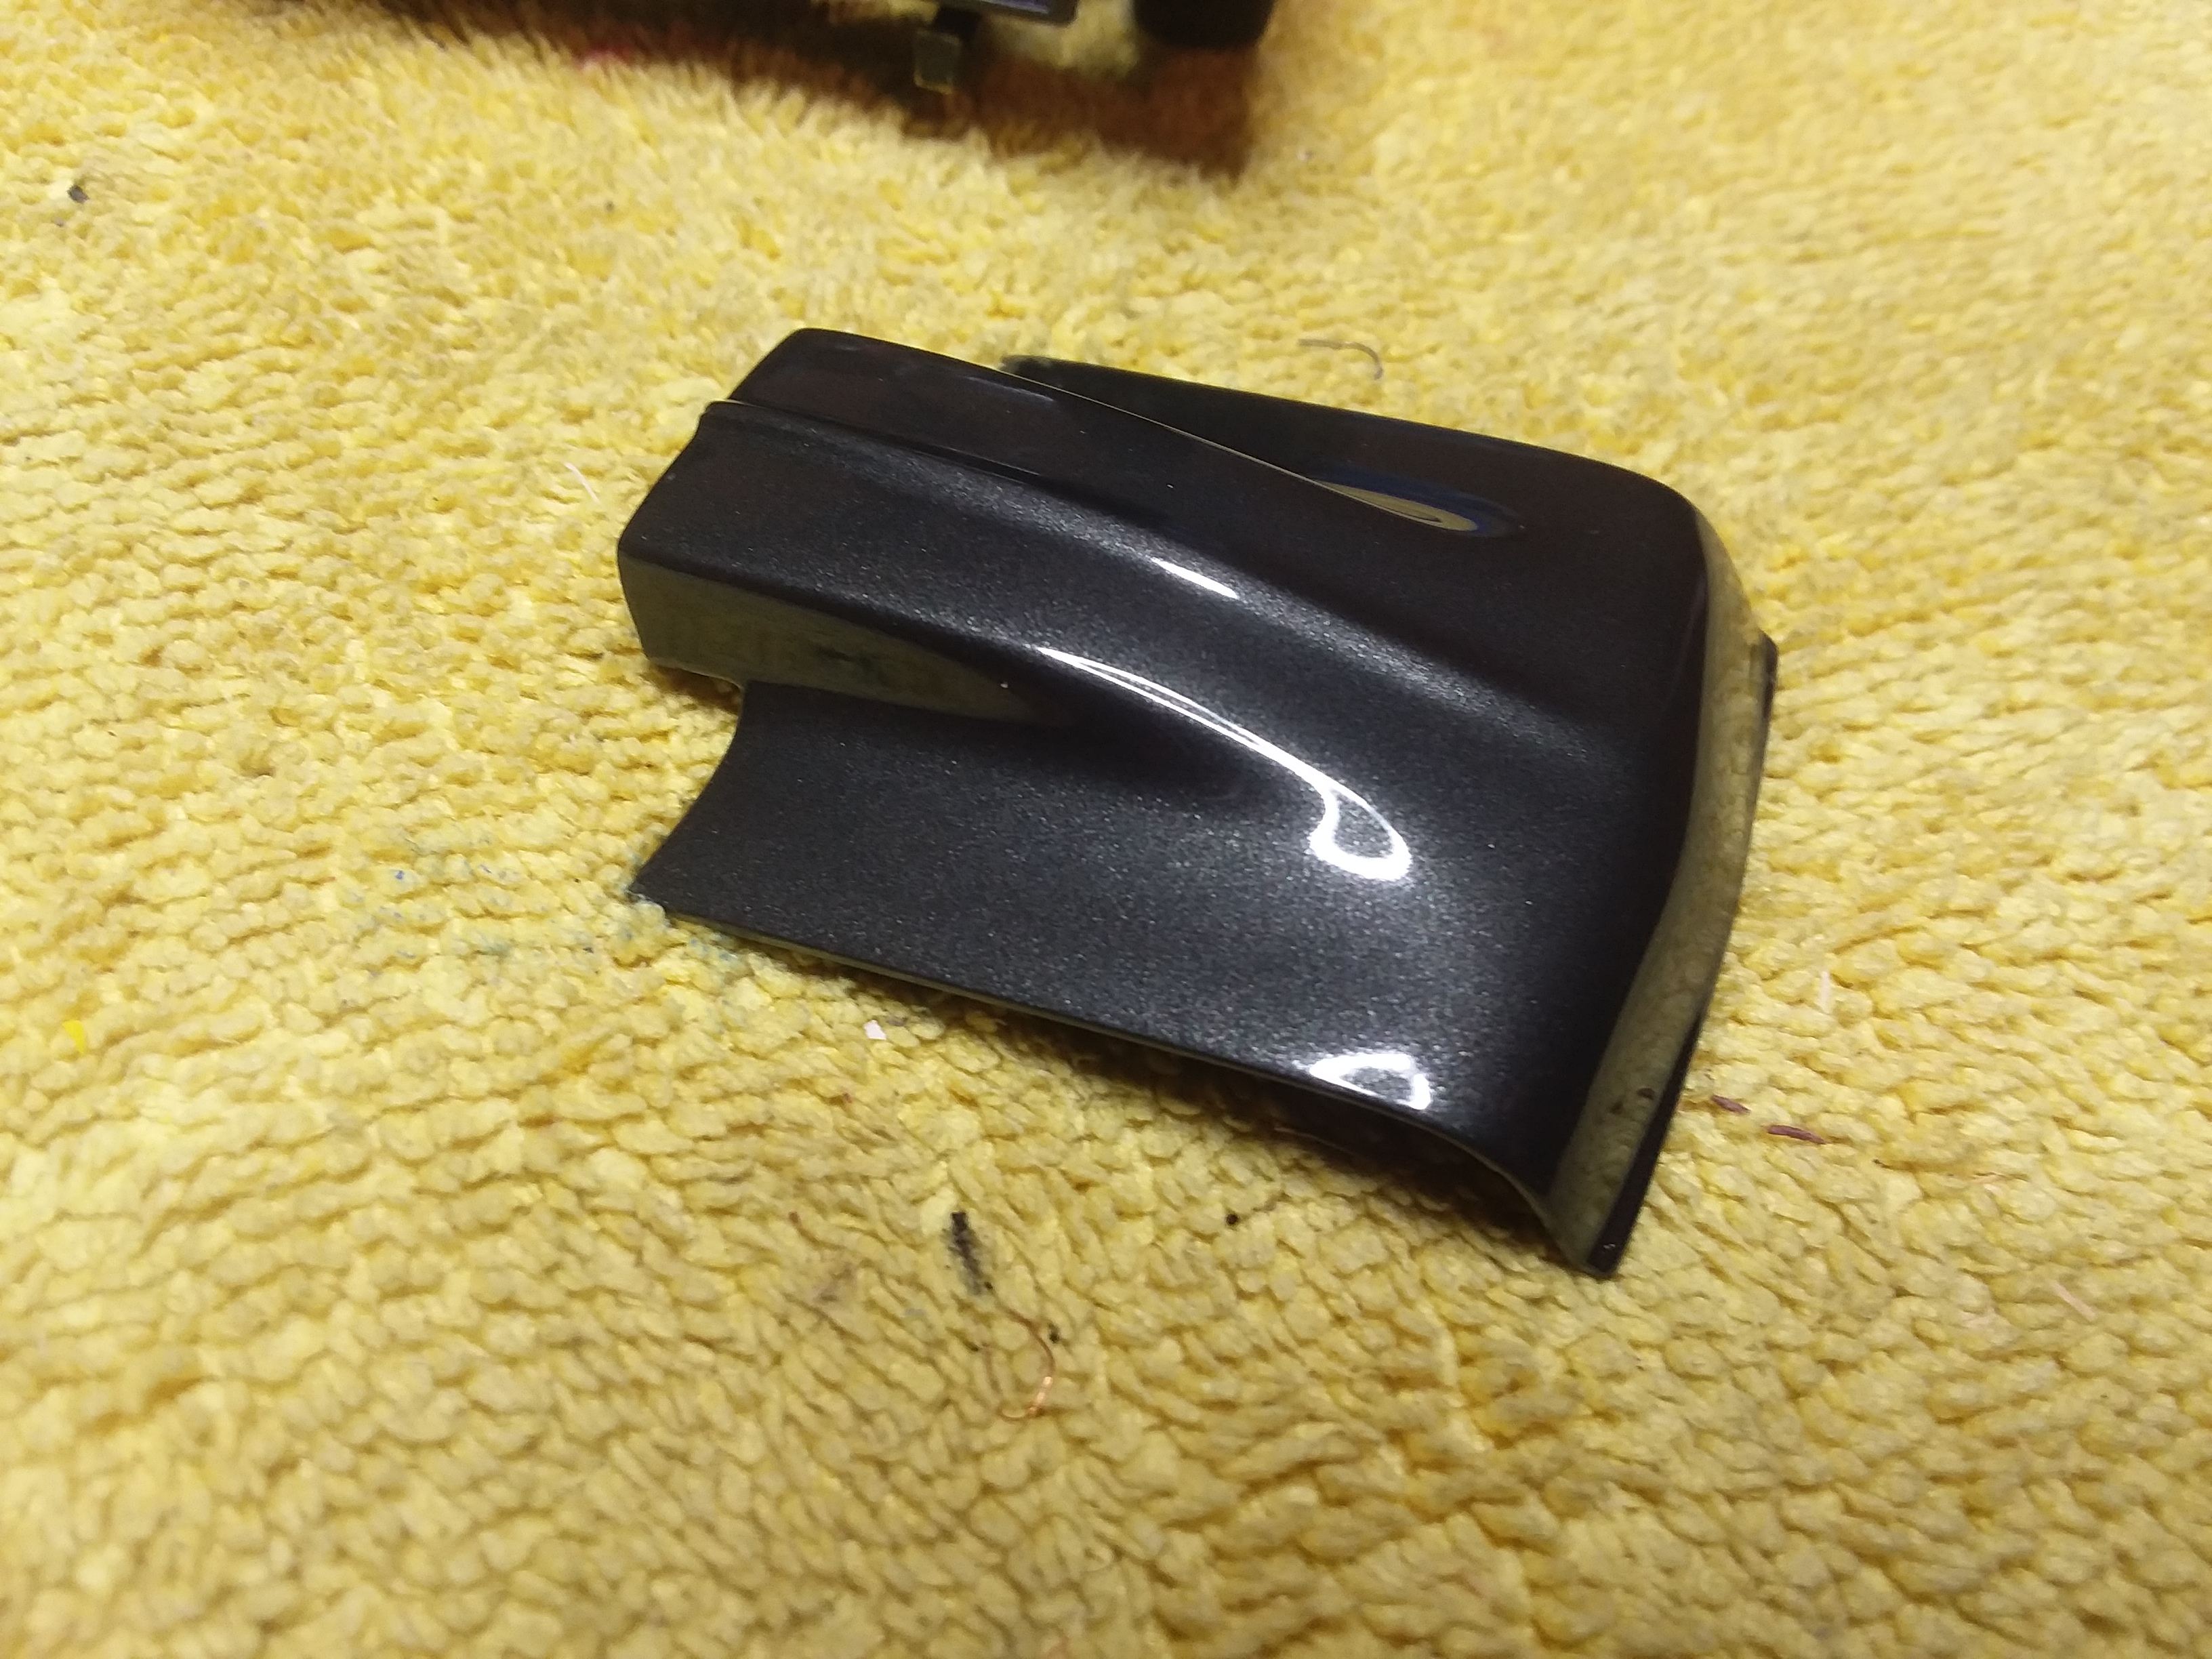
Experimented with foil on the tailgate and super pleased with the result. The only downside is the nomad emblem like a lot of the other emblems wasn't molded well. I wish someone made metal transfers... google search proved fruitless for me. I can save the V but the nomad part may be more effort than it's worth.
So now on to painting the seat insets, and fabbing up some floor mats.
-
On 3/19/2018 at 2:01 PM, ATHU said:
Awesome job so far. Nice attention to detail!!
Thanks!
-
What colors/brand/type did you use for the 365 spyder and f12?
-
Beautiful work. Pagani's have been one of my favorite cars since the zonda.
-
Thanks for the nice words. Funny now that I review my pics I start to find some little nagging issues I didn't catch in person. Need to thin the walls of the hood scoop to start and that seam in the passenger floor looks pretty substantial. For the latter I think I'll fix that with some floor mats
I didn't want to sand down the seam and remove the carpet texture but that is how the seam lines up on the top when the bottom side is lined up. Should have made the top line up and sand the underside but to the naked eye it's barely noticeable.
-
Very nice!
-
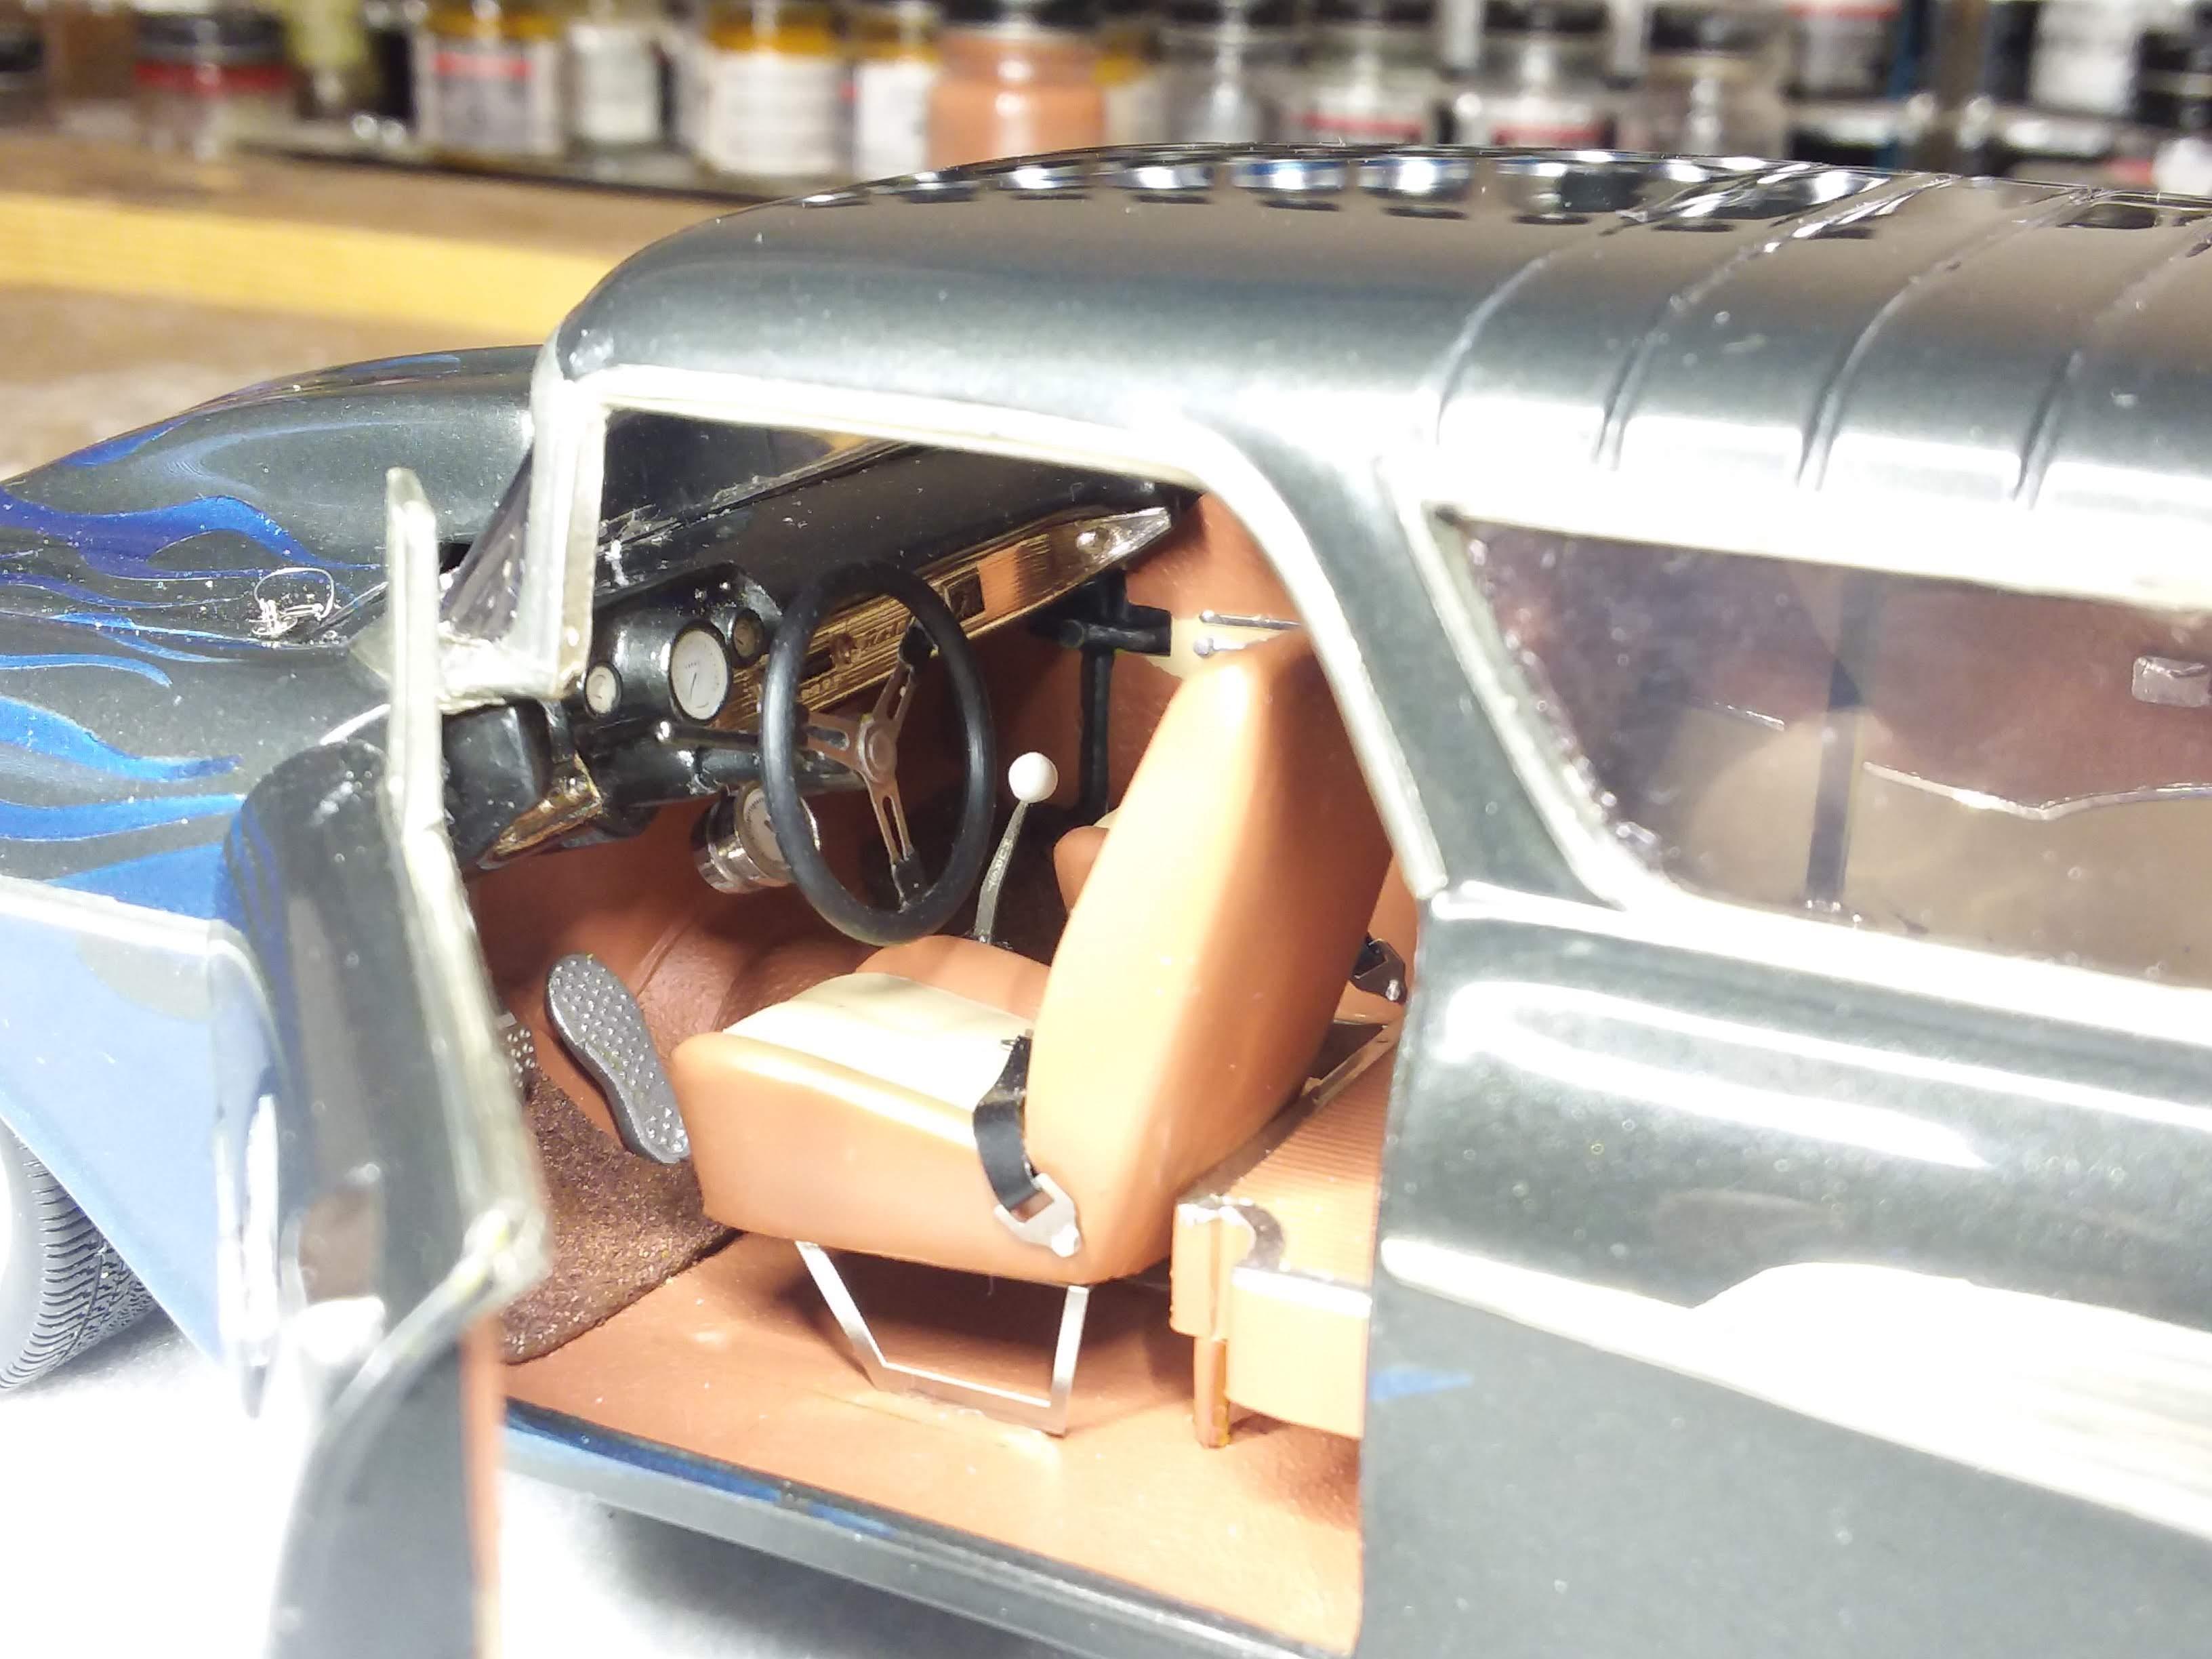
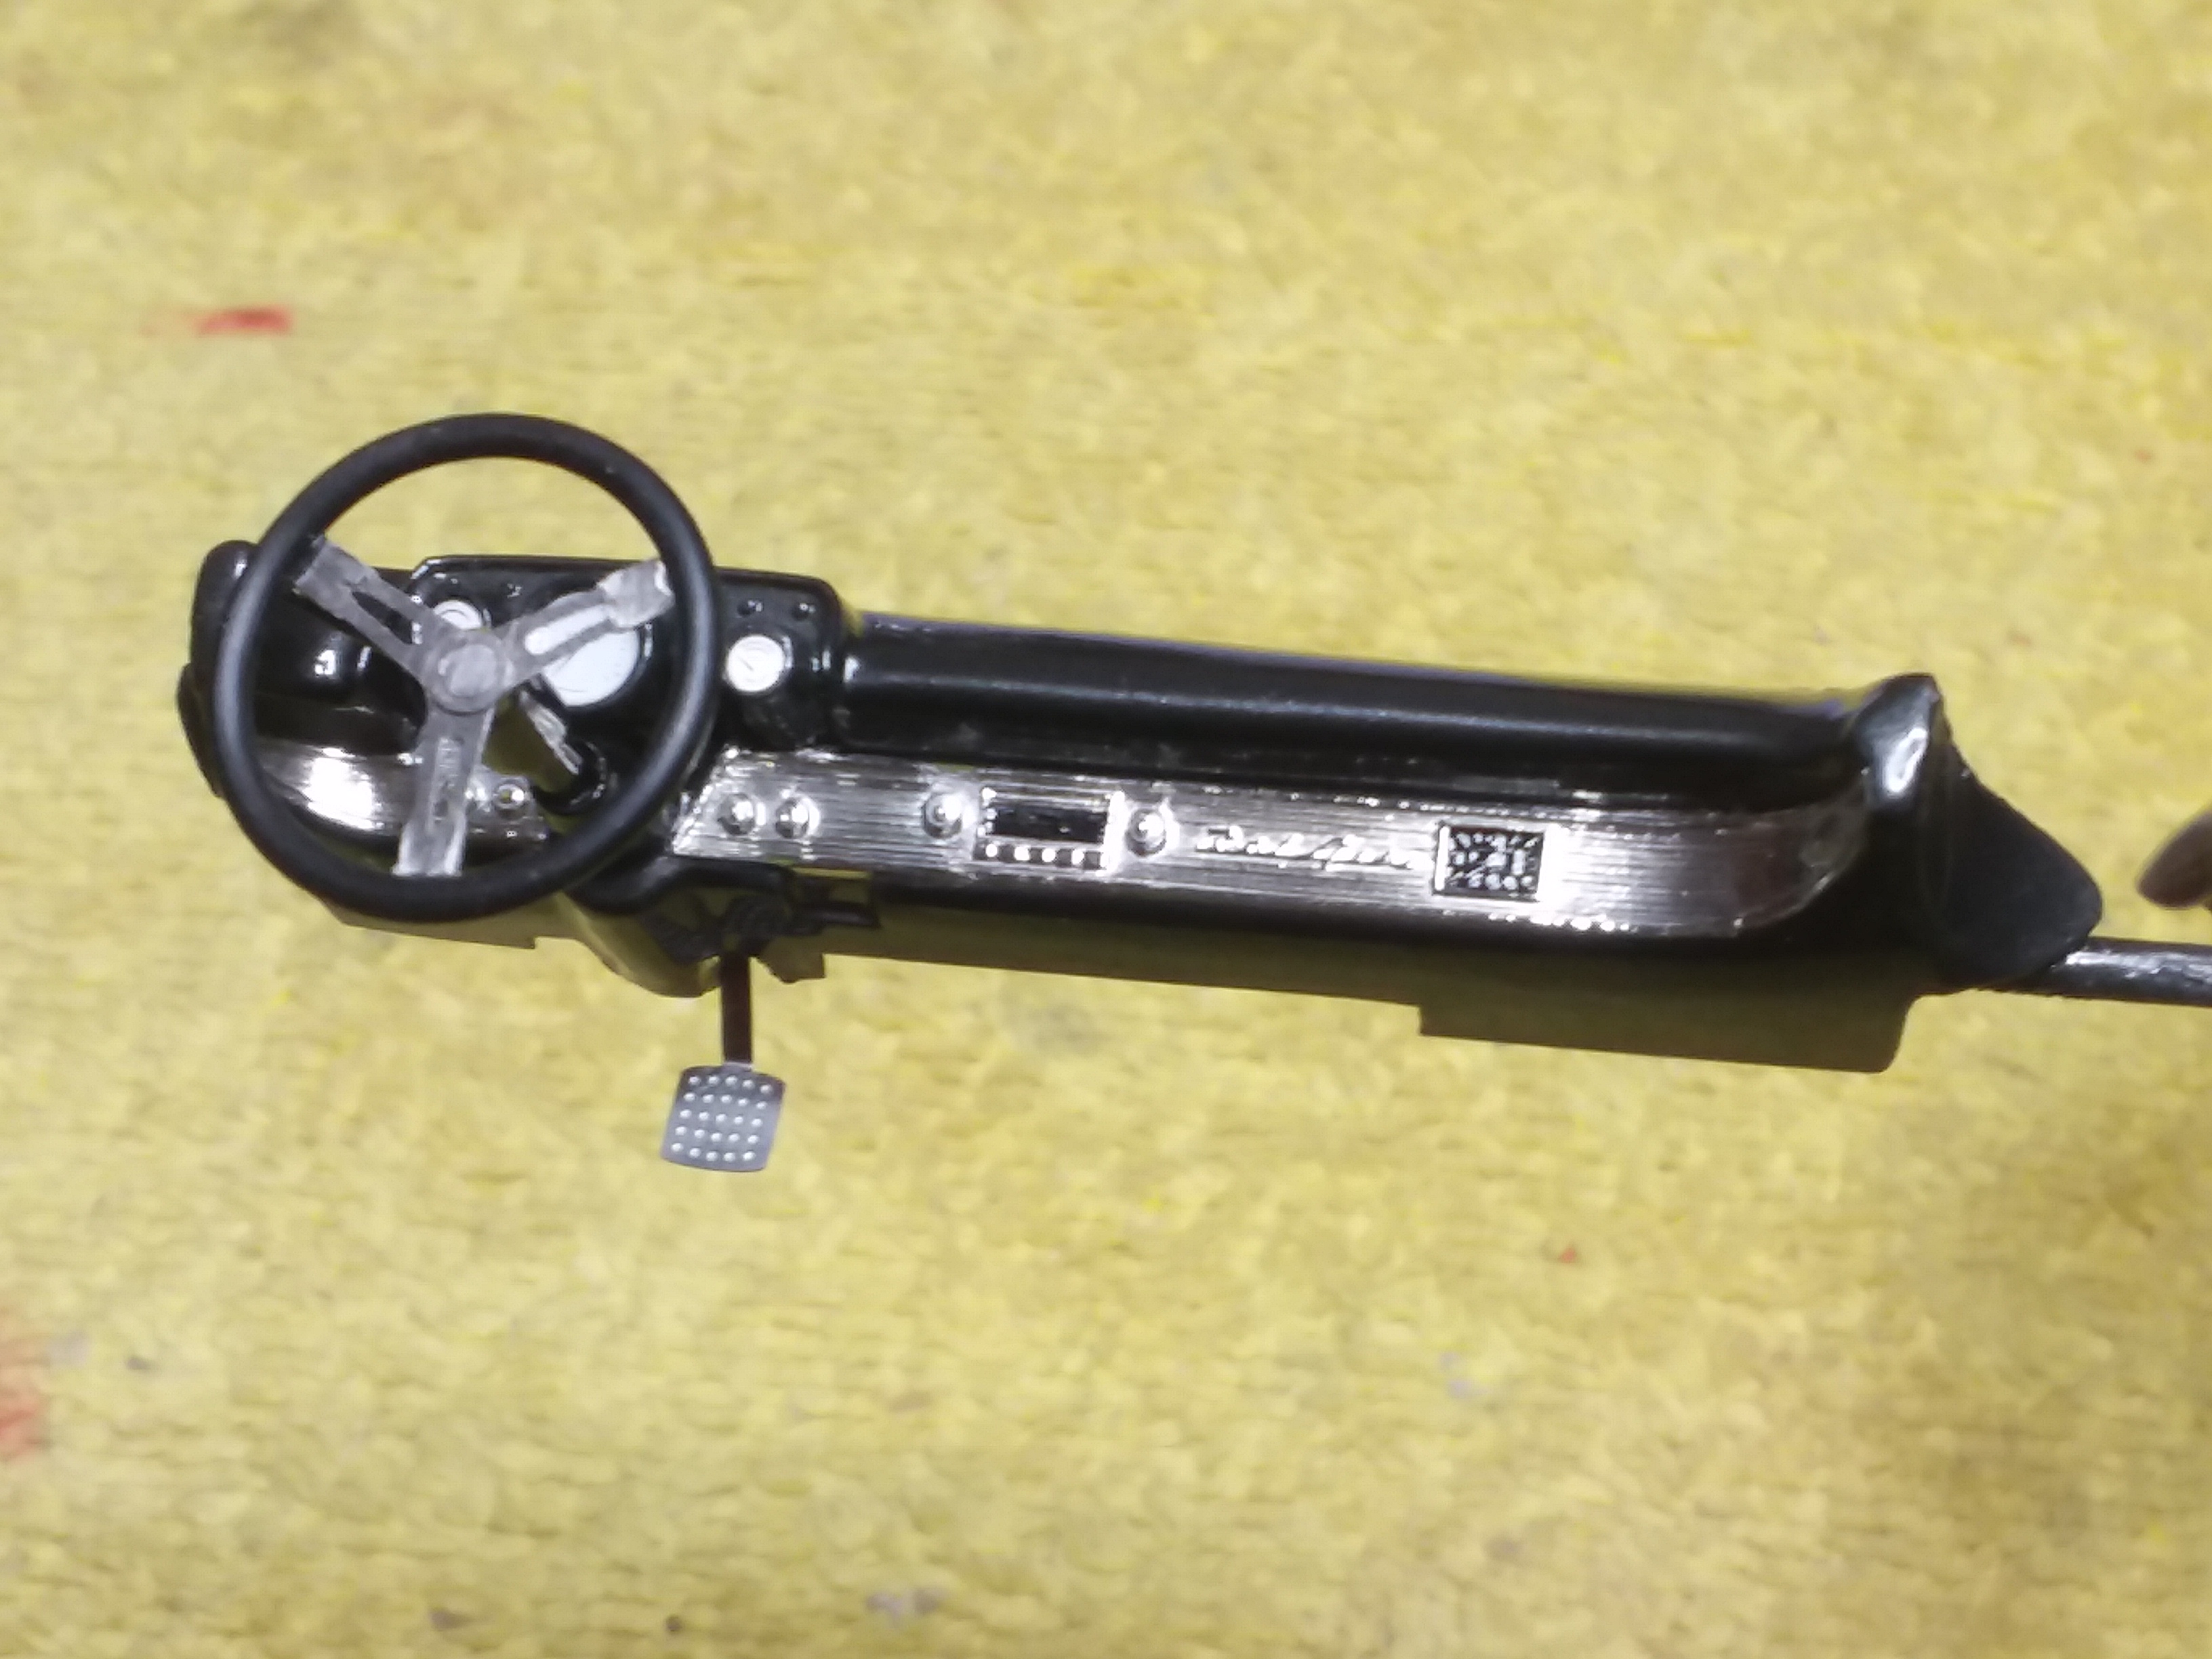
Some more progress. The dash required a bit of work. Was hoping to use the one that came with the 57 couple but it was too wide to work with the functional doors on this model so I built up the thin spots/holes around the gauges with epoxy and fortunately the natural surface tension of the uncured epoxy almost did a perfect job filling in the holes and keeping the contour. I had to drill out the fuel and temp gauges then shape a plastic dowel to go in the holes then applied decals. Was hoping to show a mounted tach but as I was working on the mount from a detail masters kit I walked away while almost done and when I came back the tiny little bugger was not where I remembered placing it. Somewhere in the carpet now I'm sure so moved on to other things.
Got the body base coat painted and applied foil to the trim pieces in the interior. Found the perfect bucket seat mounts from leftover parts of a revell 250 gto detail kit. Woo hoo! Then I needed a boot to go around the detail masters hurst shifter kit so I scratch built one by layering gradually smaller and beveled rectangles from a .030" inch styrene sheet.
Engine almost ready for install.
Dash temporarily glued into place with canopy glue normally used for RC airplanes but works great for glueing windows on models. I'm going to have to swap out the brake pedal with another I have that has a longer arm to get it lower and more to the left as this one sits almost over the gas pedal.
These are the wheels that came with the newer revell california 57 chevy.
-
Weather warmed up just right for shooting paint so that is what I did this weekend. Primer on the body showed up a few flaws so I need to do a little work there and hopefully be ready to shoot the body color next weekend. I still need to paint the interior panel insets once the brown dries. Thinking a light tan should work and planning on doing the insets on the bucket seats (pulled from a 68 camaro) the same.
I also stripped the original chrome and re-shot with molotow chrome. Looks more like polished aluminum but I'm good with that so I'll keep it.
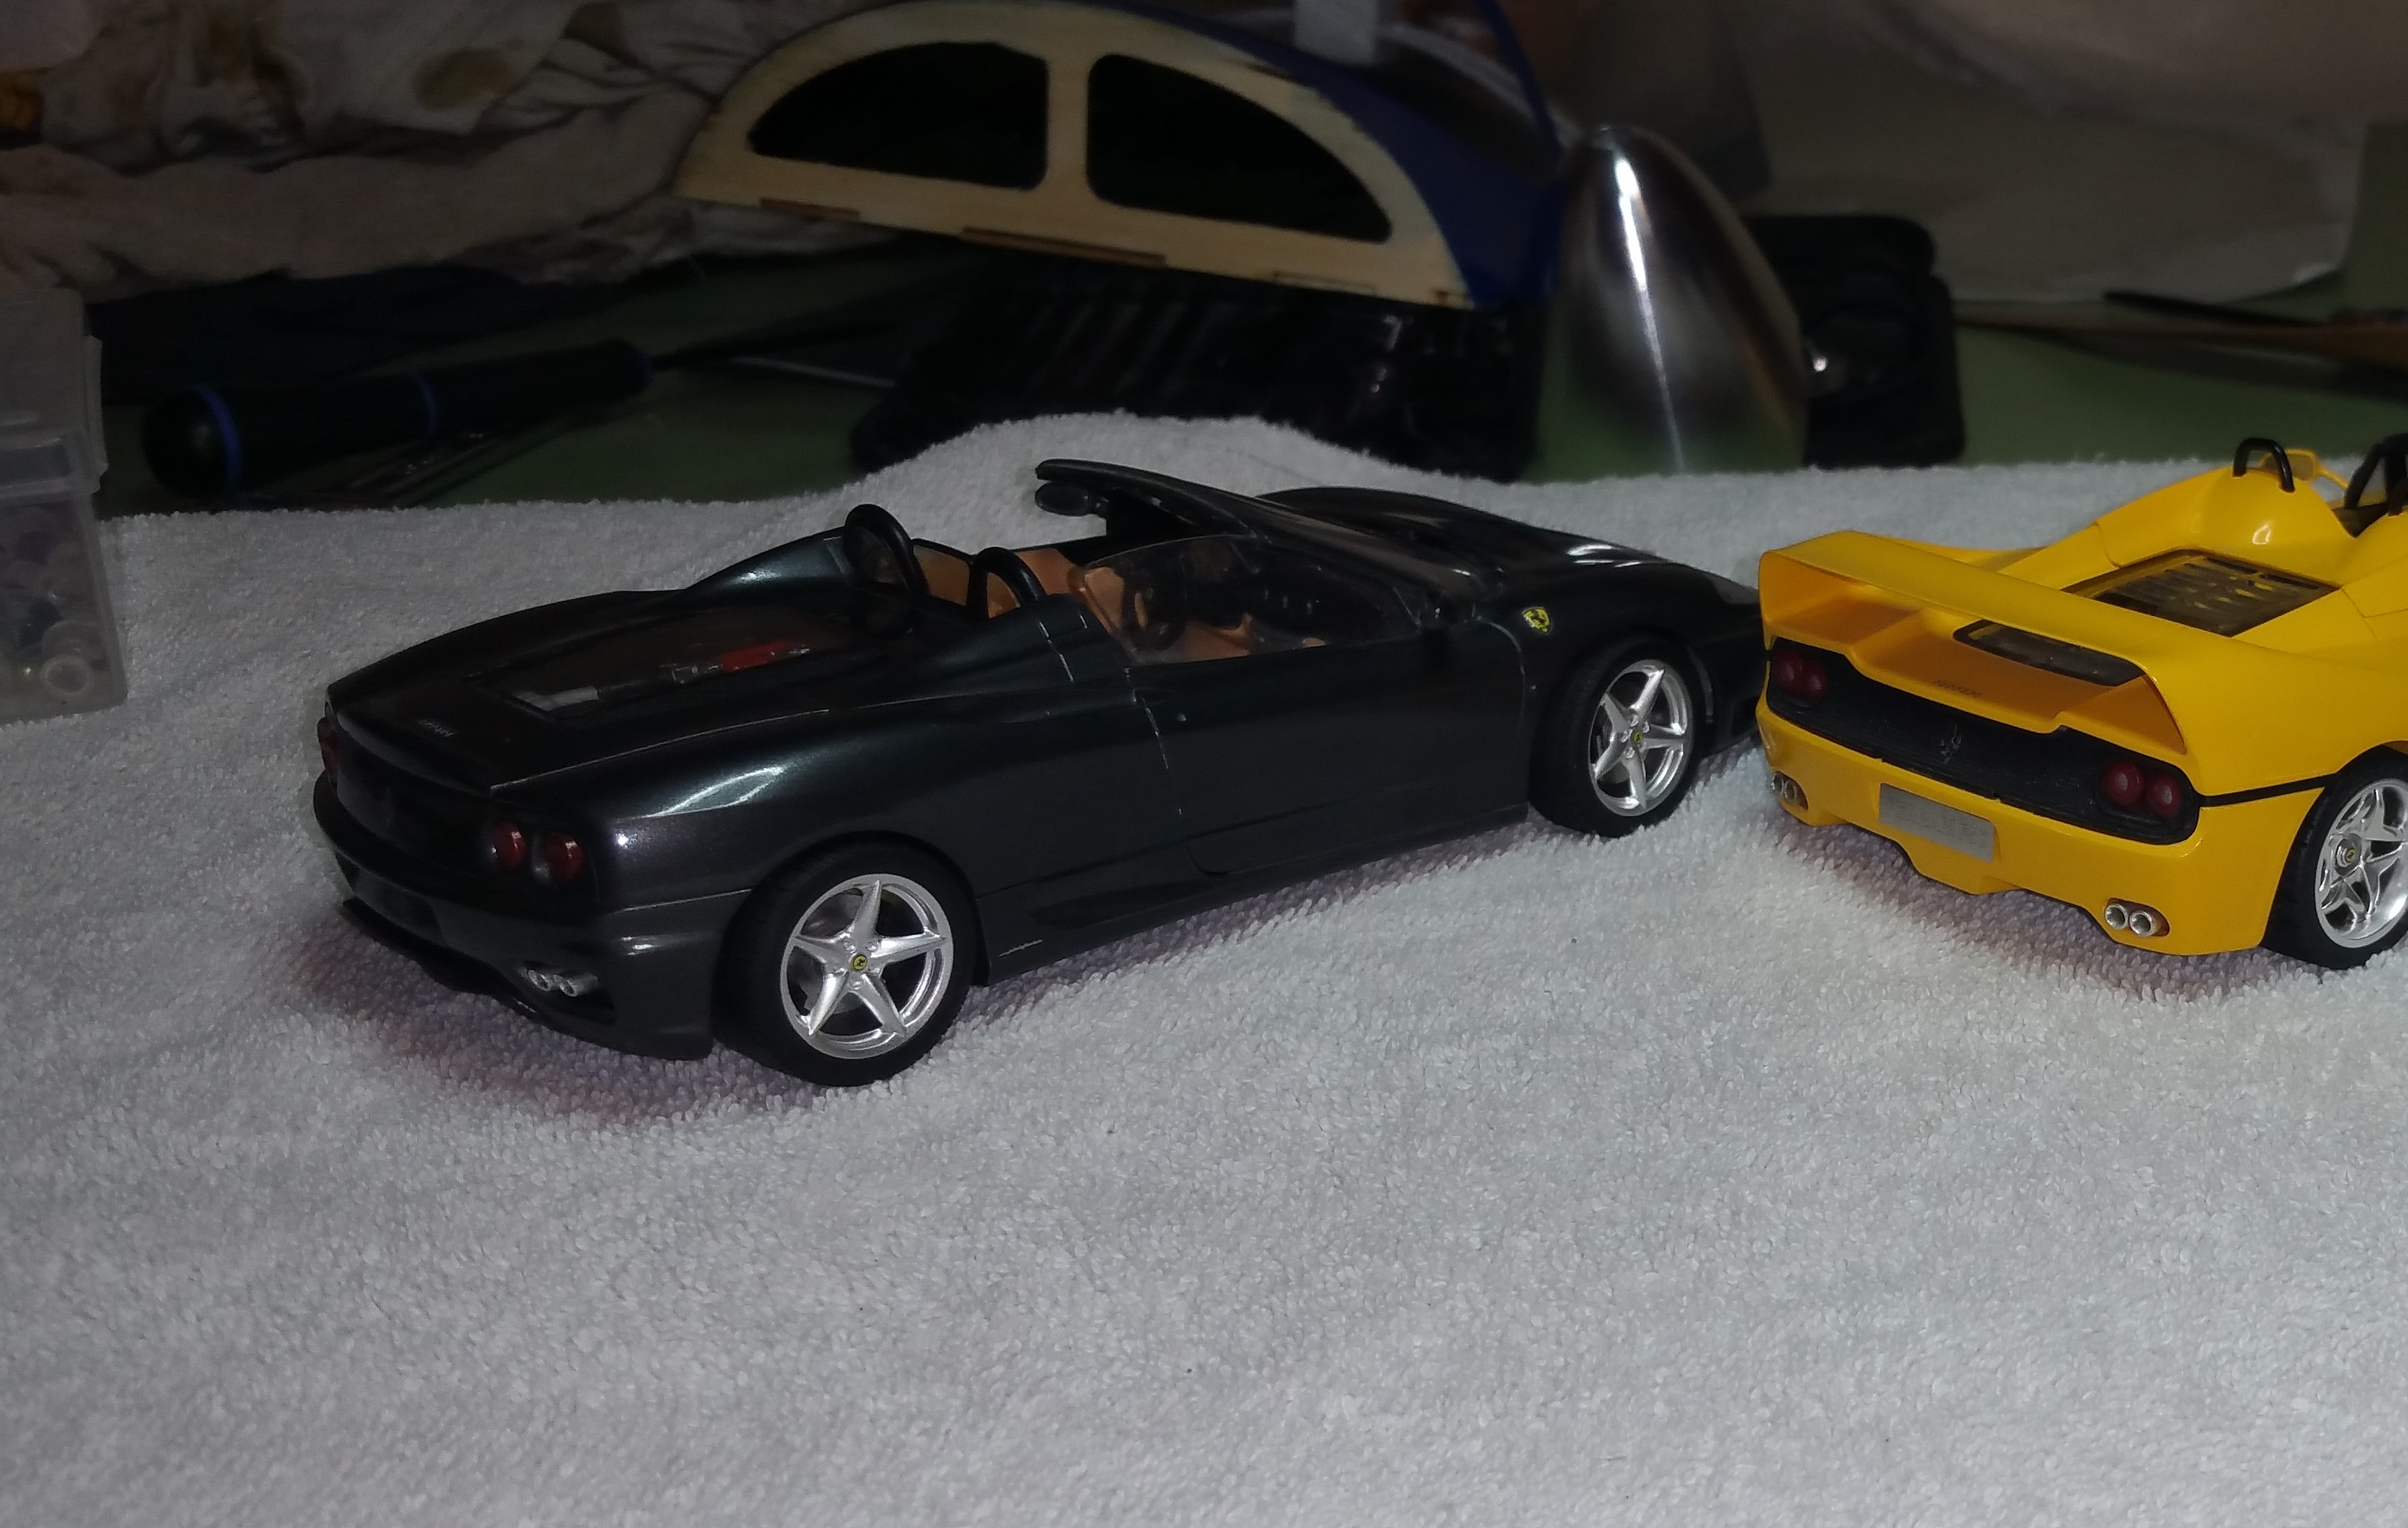
Final base body color will be graphite metallic like I used on my Ferrari 360 spyder.
-
Nice subject and your off to a good start. I have this version in the box still but have built the other two versions by tamiya.
-
Cold miserable weekend so a good time to dig into the build. I built the leaf springs for the rear using evergreen styrene strips .030 x .080 for the bottom two and .020 x .080 for the top two. Used some parts trees from a detail masters metal etched distributor kit for the baling.
Ordered a 400 CI small block from BNL resins and am getting that ready for paint. Used some canopy glue to temporarily join the transmission to the block so I could test the fit in the car and it looks like it will work well.
Did some detailing on the carb as well using the detail masters carb linkage kit and the fuel line kit that BNL also supplies.
-
Hmm, interesting espo. I was actually looking at getting an "updated" 57 kit just for the chrome. I like the wheels on this but not sure if I'd be buying the same problems chrome-wise or how well the parts would fit.
-
Great job!


#1 , 1970 Dodge Challenger
in WIP: Model Cars
Posted
Looking good. A few weeks back I decided to make the monogram 70 challenger one of my winter builds and with the same color LOL. Found a PE kit and awaiting it's arrival to see if the badging will work. If interested I'll update when I get it.