Turbo95187
-
Posts
33 -
Joined
-
Last visited
Content Type
Profiles
Forums
Events
Gallery
Everything posted by Turbo95187
-
Ferrari F-40 LM
Turbo95187 replied to Rich Chernosky's topic in Other Racing: Road Racing, Salt Flat Racers
Beautiful as always Rich. -
Superb as always Rich! Need to see it in person.
-
Donohue Sunoco Porsche 917-30
Turbo95187 replied to Rich Chernosky's topic in Other Racing: Road Racing, Salt Flat Racers
Gorgeous Rich!!!!! I need to get up to you and see it in person. Love this car, what a panzer!!!! -
Mark Donohue Sunoco Mclaren M6A
Turbo95187 replied to Rich Chernosky's topic in Other Racing: Road Racing, Salt Flat Racers
Gorgeous Rich! -
FIA 289 Cobra
Turbo95187 replied to Rich Chernosky's topic in Other Racing: Road Racing, Salt Flat Racers
Beautiful as always Rich. Will have to come up and see this beauty in person! -
Sauber C30 F-1
Turbo95187 replied to Rich Chernosky's topic in Other Racing: Road Racing, Salt Flat Racers
Beautiful as always Rich. I'm always impressed by your builds. Sometimes you make me want to hang up my airbrush and never touch it again! B -
Martini Porsche 934
Turbo95187 replied to Rich Chernosky's topic in Other Racing: Road Racing, Salt Flat Racers
Beautiful work Rich. I am always amazed at what you can do with a less than ideal kit. -
Sweet job Rich! Nice to see a build to match your real car and it looks just like the picture hanging on your store wall.
-
Beautiful Rich. Fantastic build as always.
-
Martini Porsche 936
Turbo95187 replied to Rich Chernosky's topic in Other Racing: Road Racing, Salt Flat Racers
Oh nice!!!!!! The original variant of the 936!!!! Very sweet Rich. Maybe you can do the all black version of this car 4aced in the first race the 936 ever ran? Beautiful work as always and love the LEDs -
Pescarolo Judd 01 LMP
Turbo95187 replied to Rich Chernosky's topic in Other Racing: Road Racing, Salt Flat Racers
Gorgeous as always Rich. Will have to come up and see it in the cabinet. Aren't those fan shaped louvers beside the cockpit pe parts? How did they fit? -
Martini Porsche 911GT3R
Turbo95187 replied to Rich Chernosky's topic in Other Racing: Road Racing, Salt Flat Racers
Beautiful job Rich! Love the Martini livery too. Will look great with all the other Martini cars. -
Beautiful job Rich!
-
Rich, Dang that is sweet! May motivate me to come up to see it in person! B
-
Lemans 2017 Ford GT
Turbo95187 replied to Rich Chernosky's topic in Other Racing: Road Racing, Salt Flat Racers
Beautiful Rich as always. I have this kit and the Wynn's decals to do the IMSA version. Will be paying attention to the rear window and scoop when I build. Thanks for the heads up. -
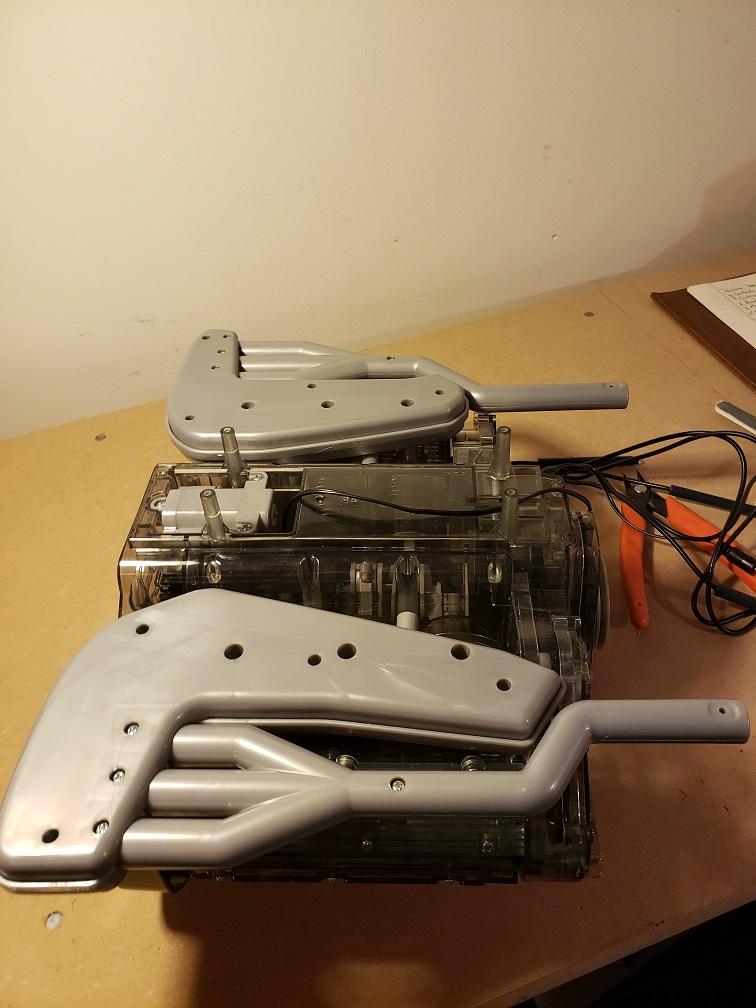
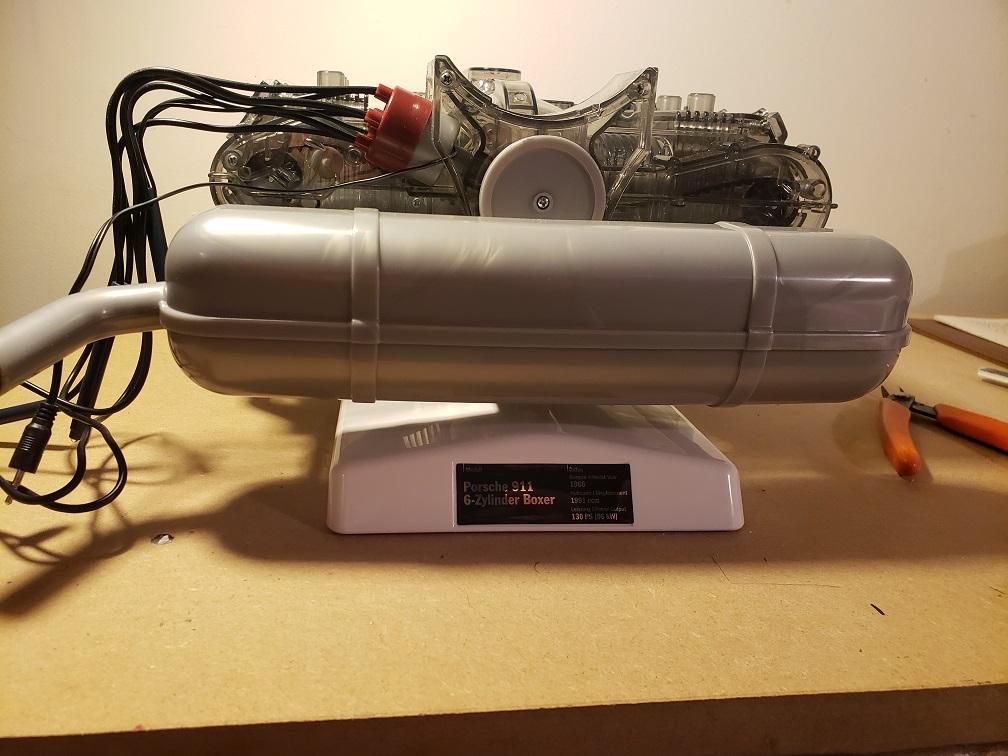
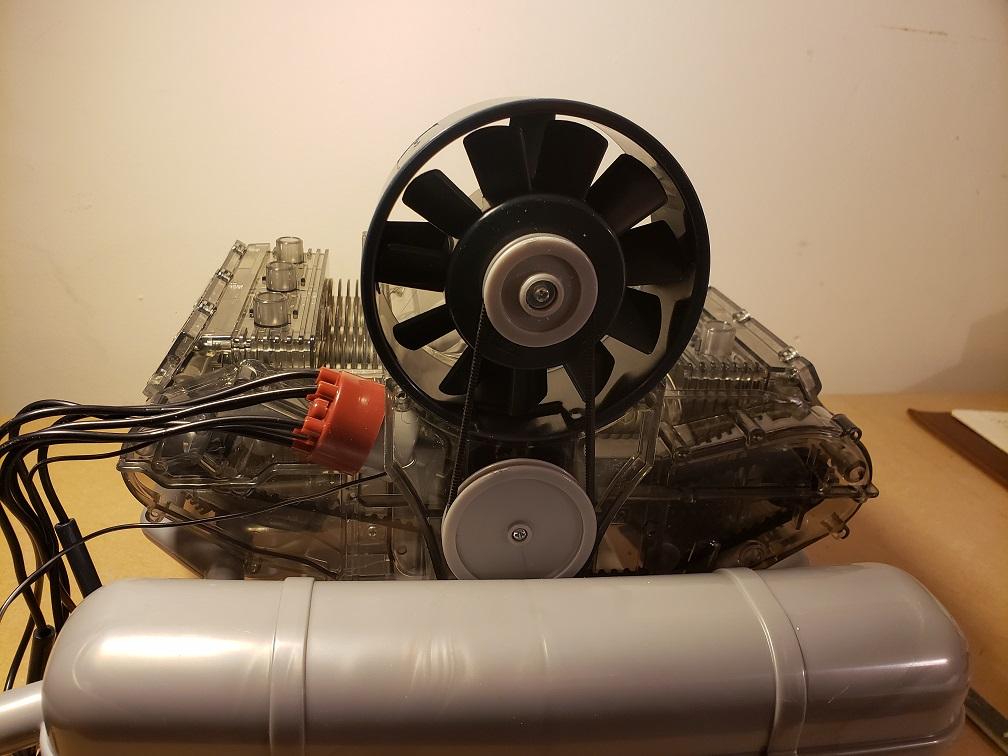
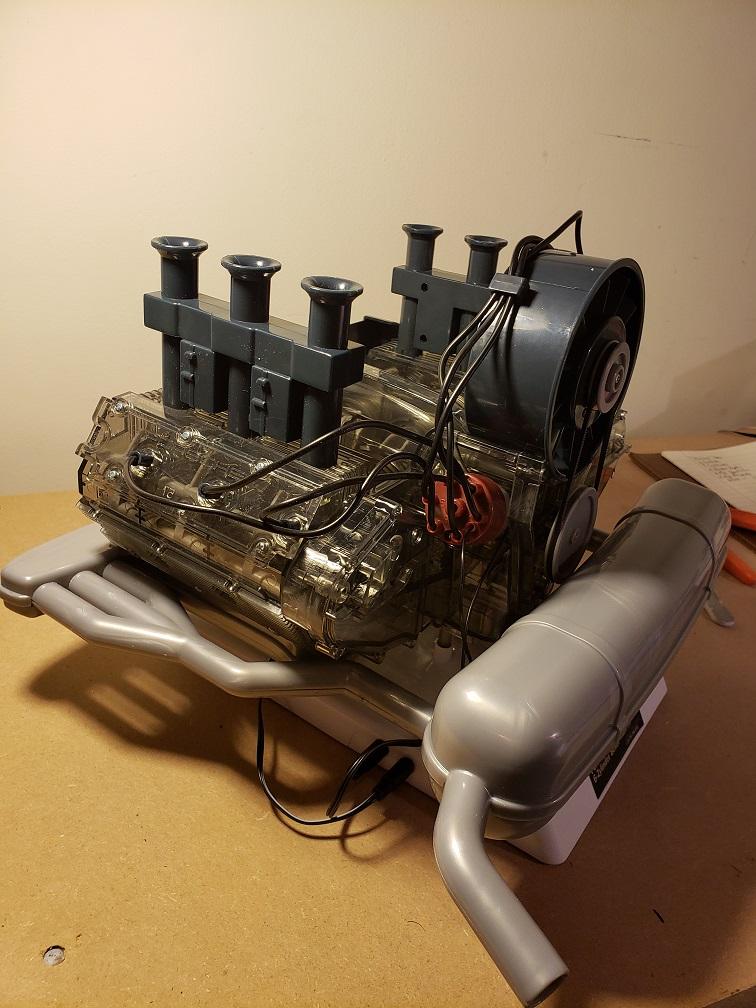
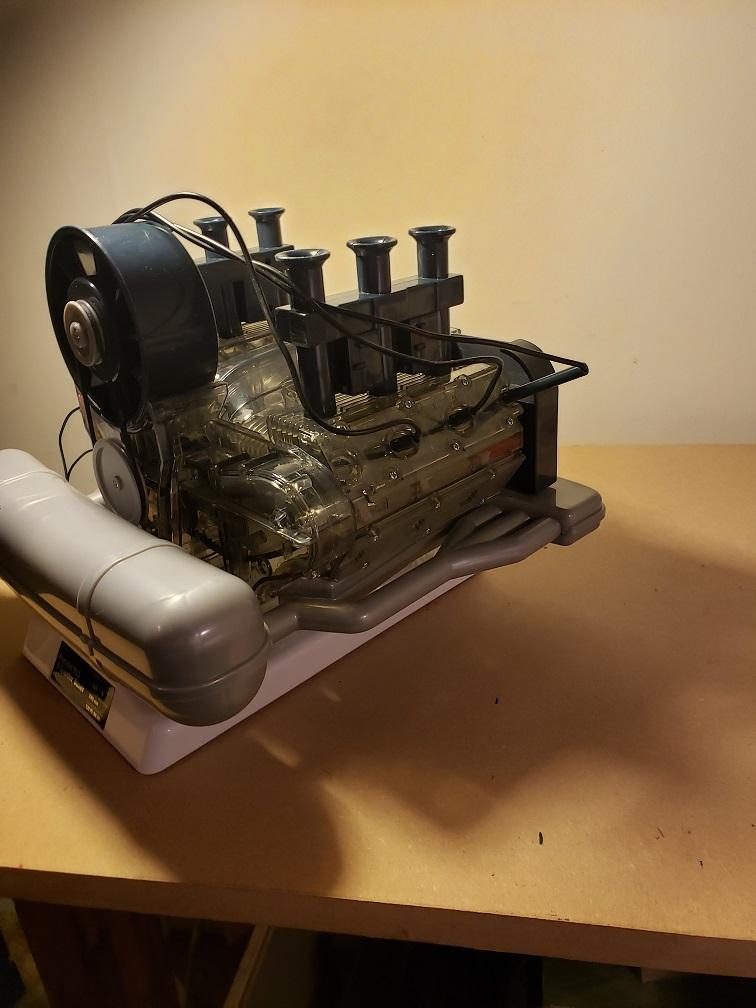
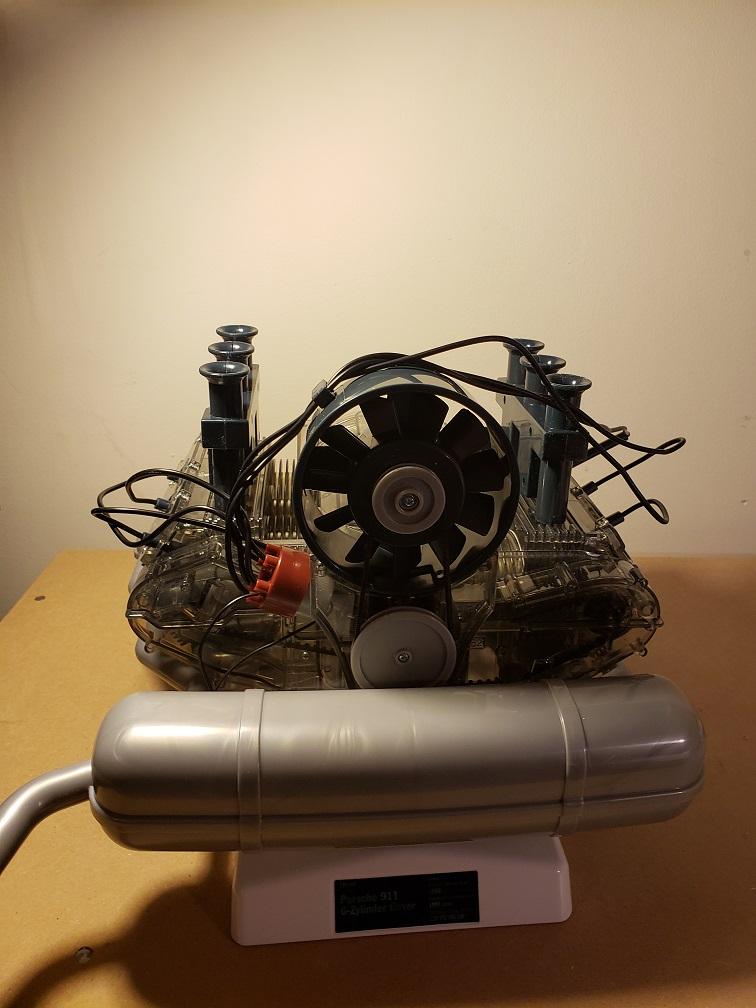
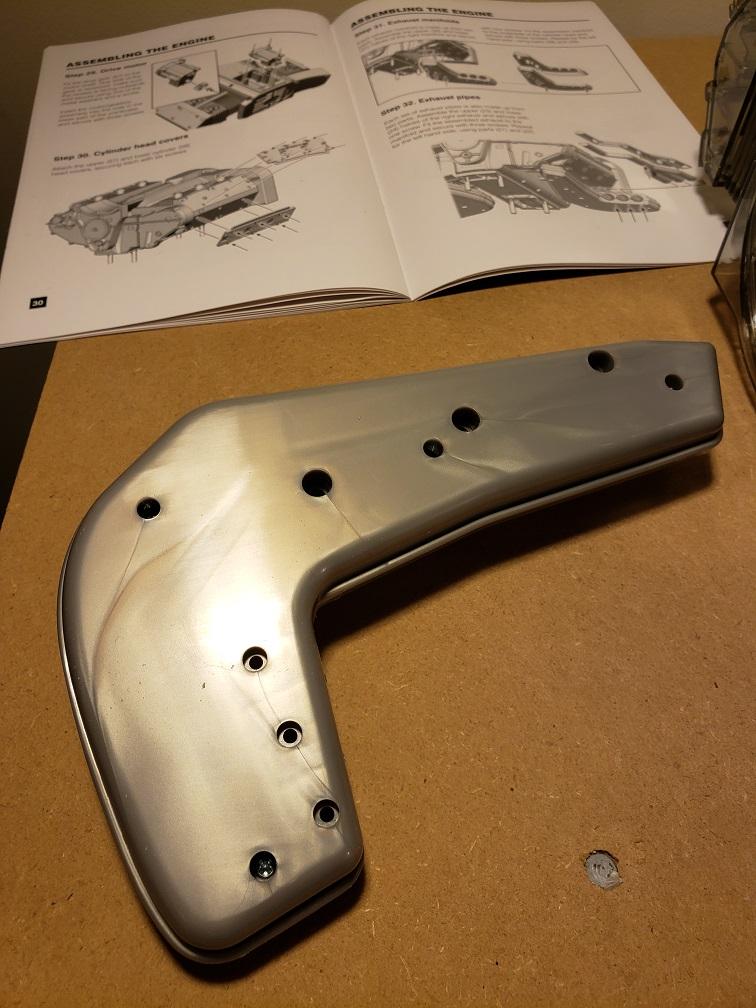
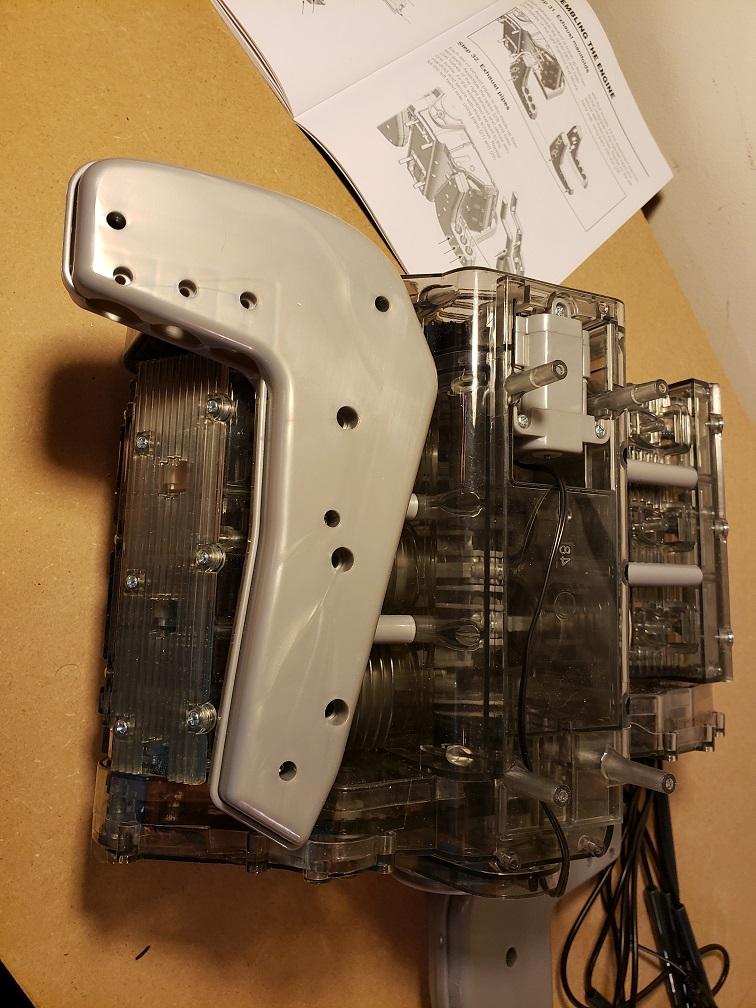
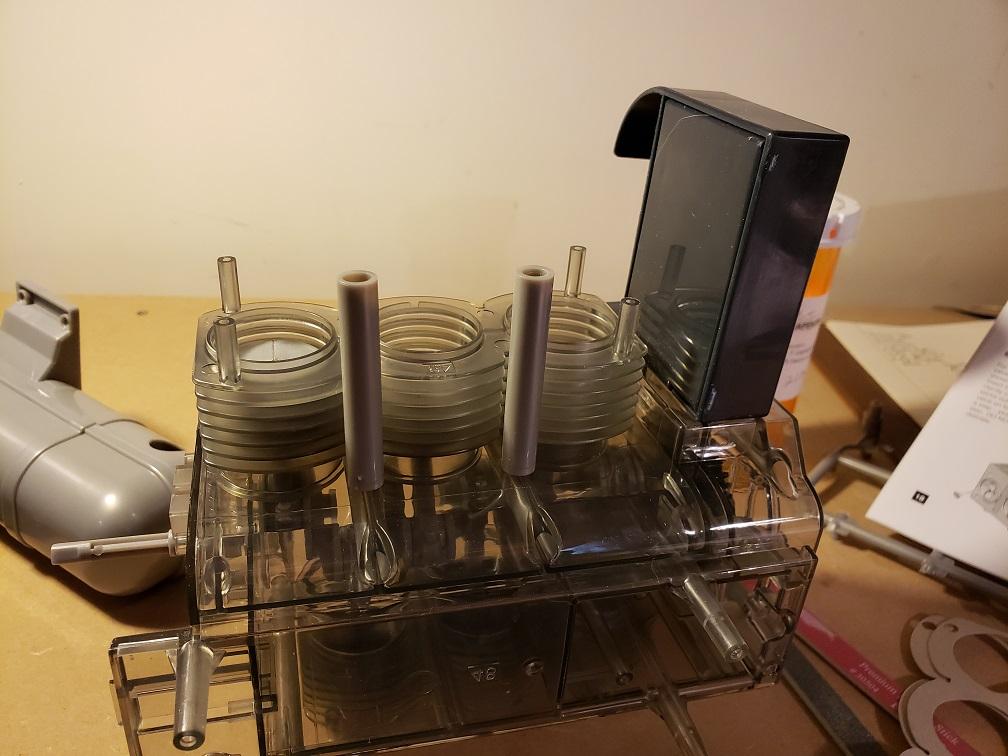
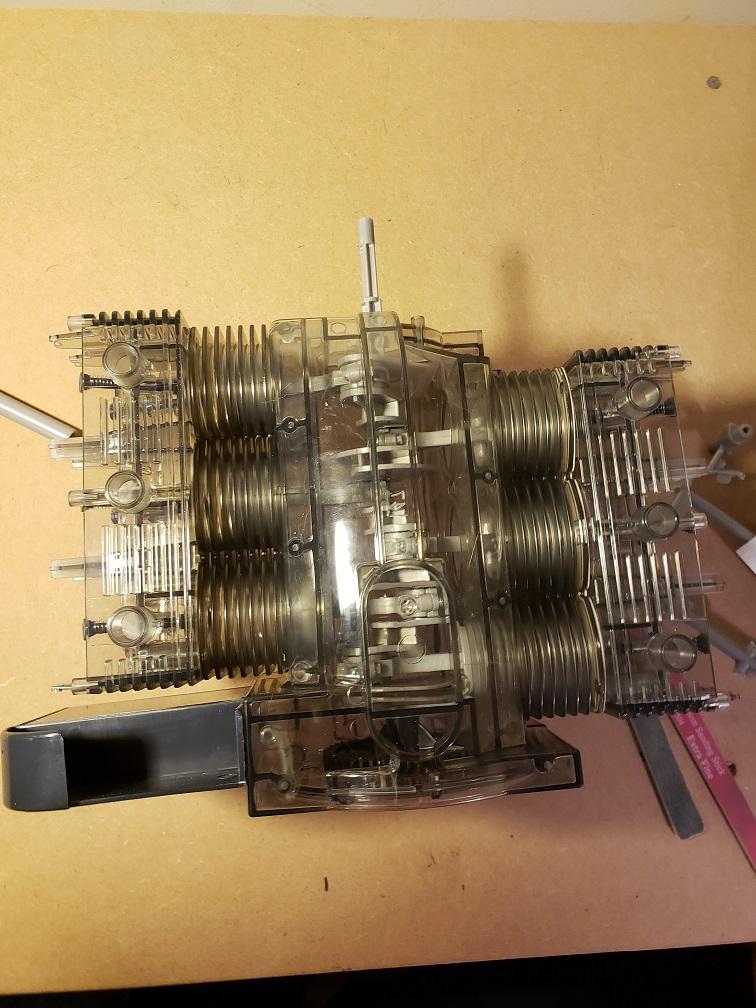
I finally finished this one last night. What a beautiful kit! First part was adding the exhaust pipes/collector. Then the exhaust/muffler. Finally the cooling fan went on and the LED spark plugs went home and it was complete.

-
I finally completed this bad boy. Great kit and loved working on it. Parts fit is wonderful and makes into a beautiful looking replica.
-
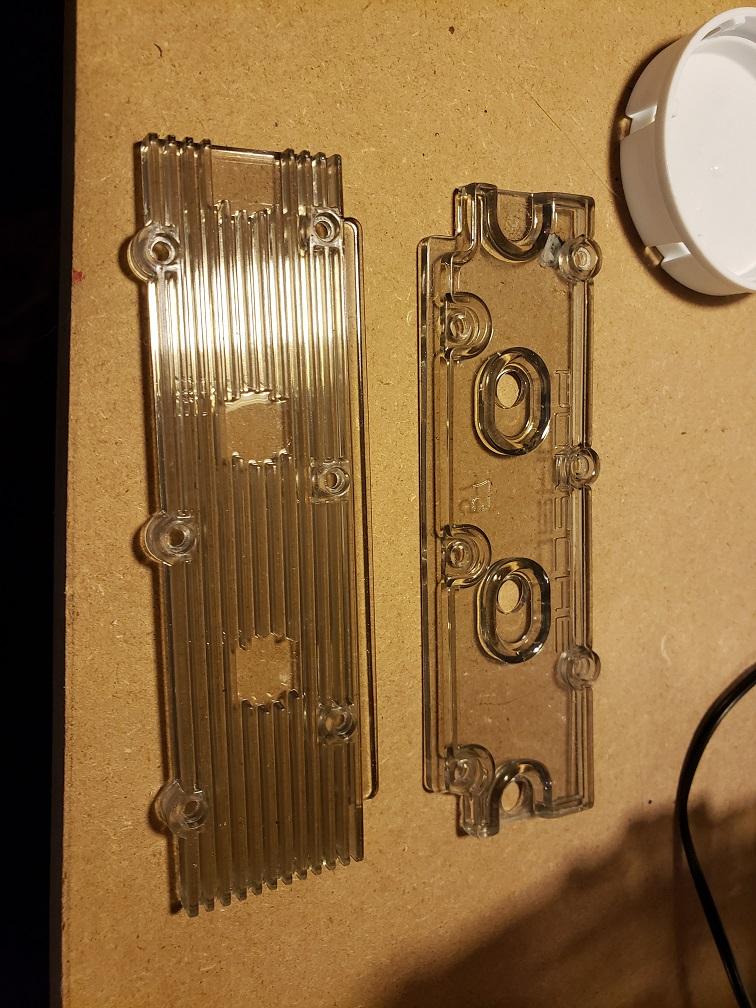
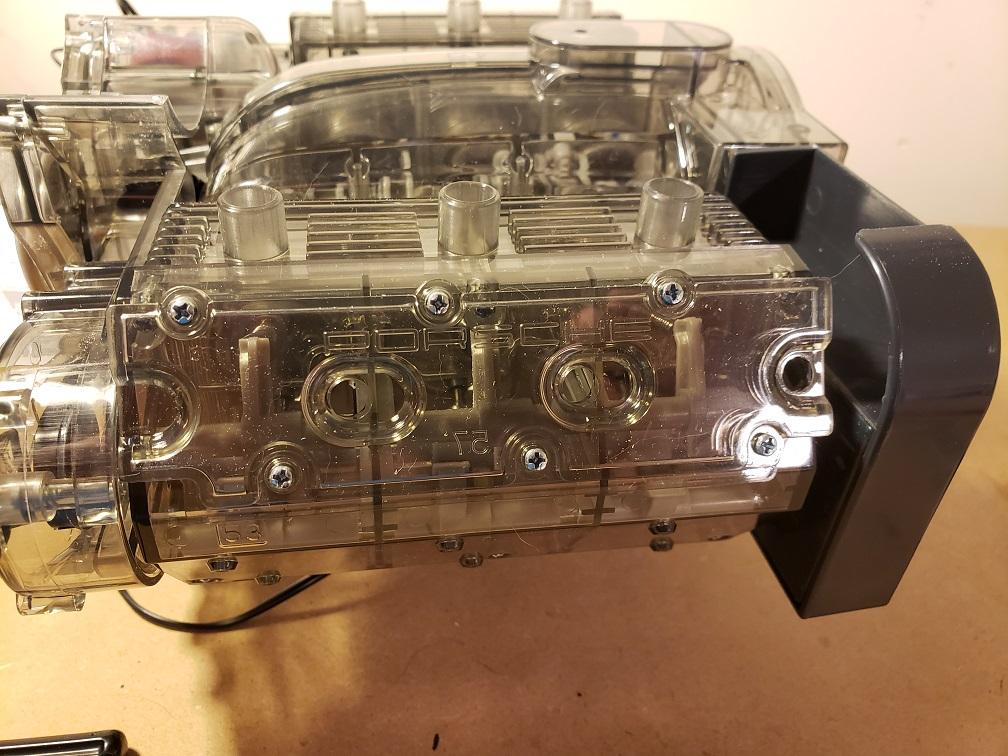
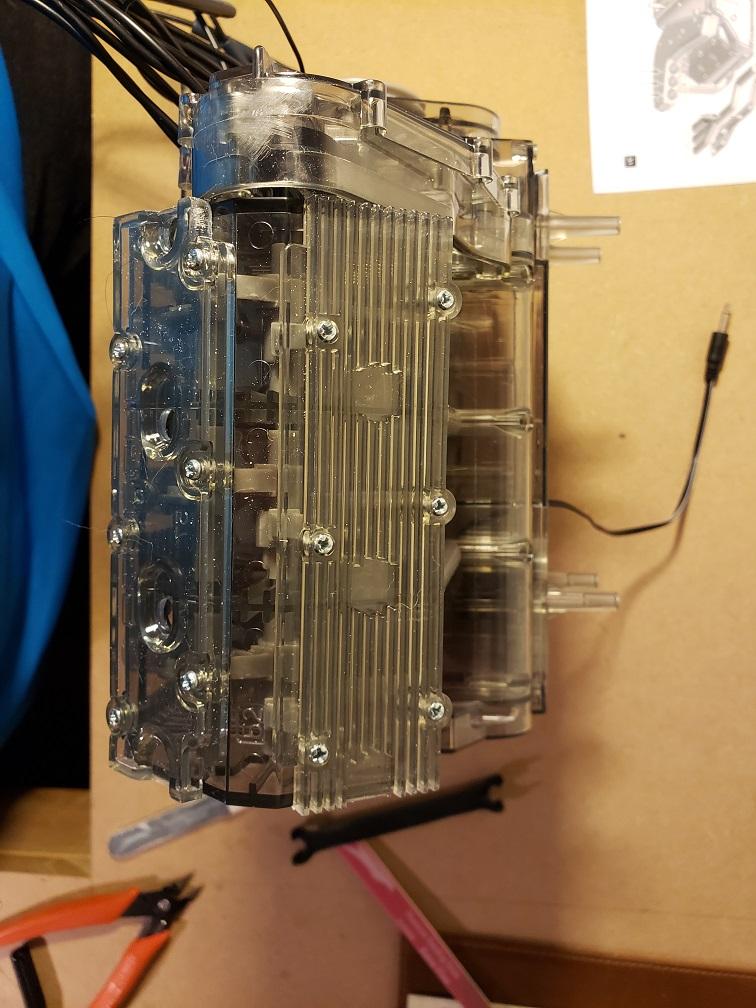
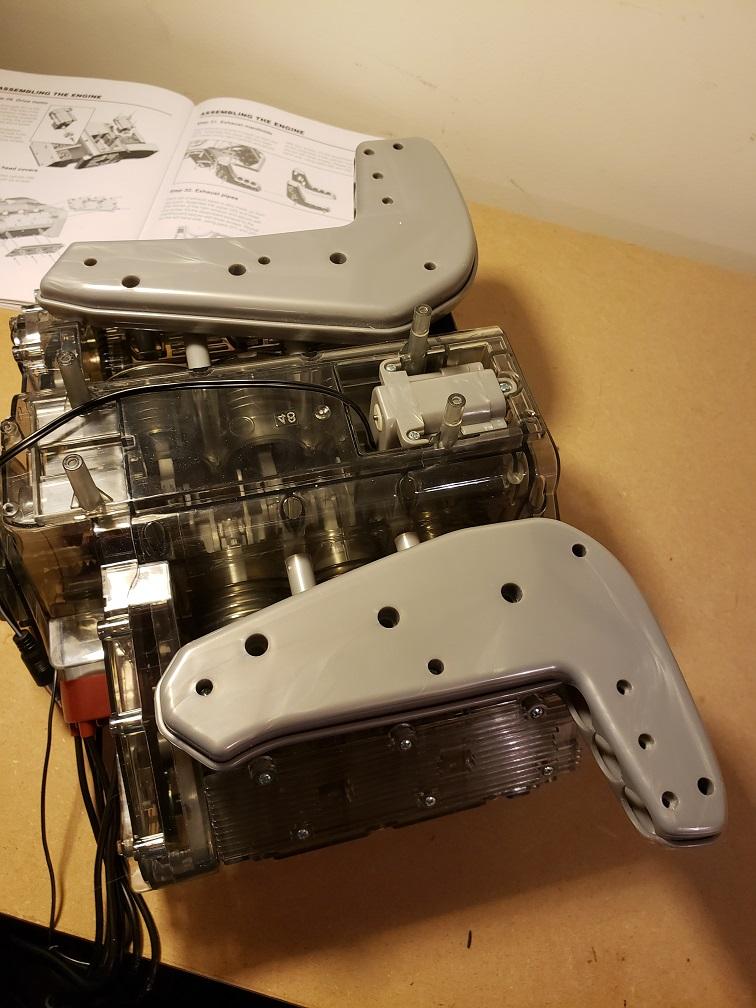
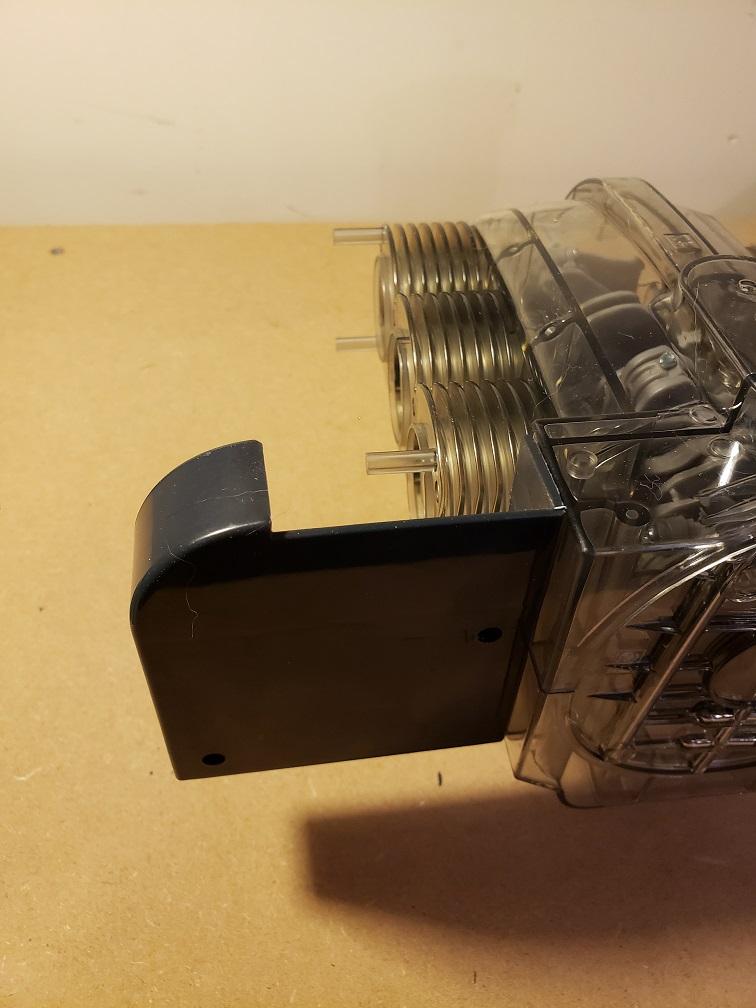
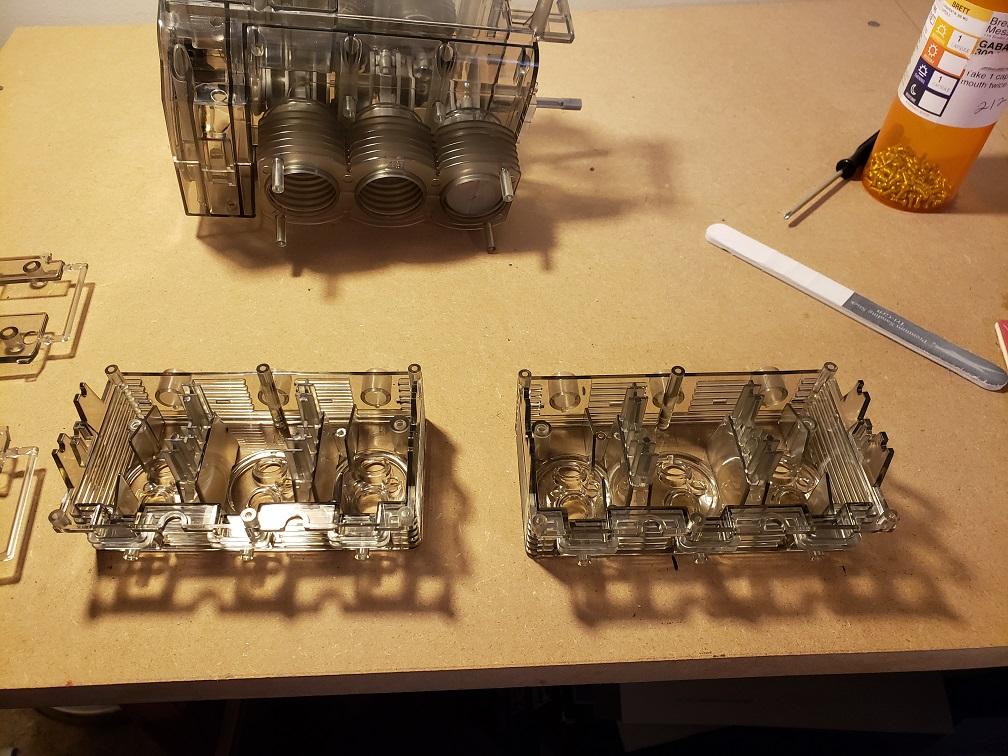
Now we need to finish the cam covers. These are in two part,s the top which just has the PORSCHE lettering and the bottom cover which is ribbed for heat dissipation. The top covers on. Bottoms. Cam covers finished. Now we build and add the heat exchangers. These covered the individual exhaust pipes. Here is the built up exchange. They are then installed on the bottom of the engine. Both installed now.
-
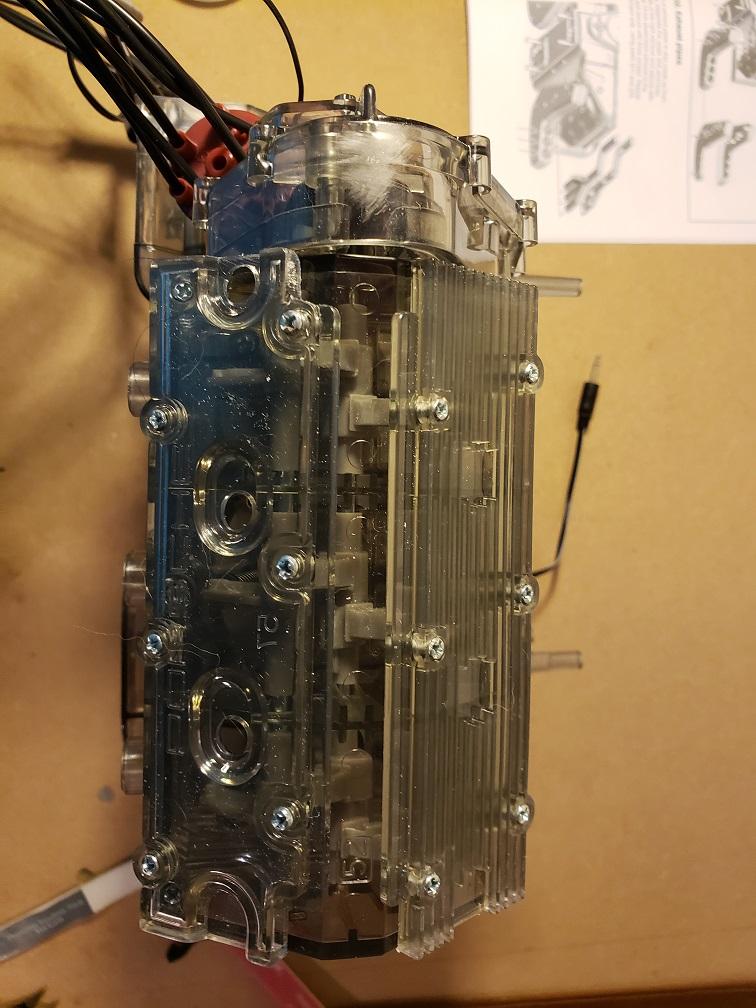
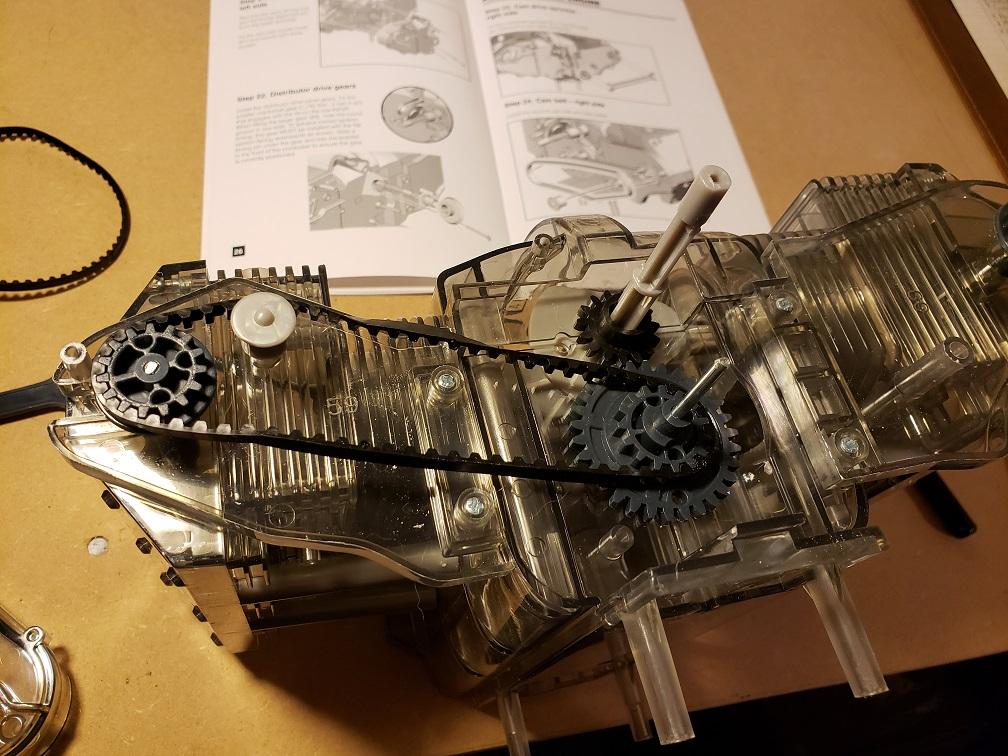
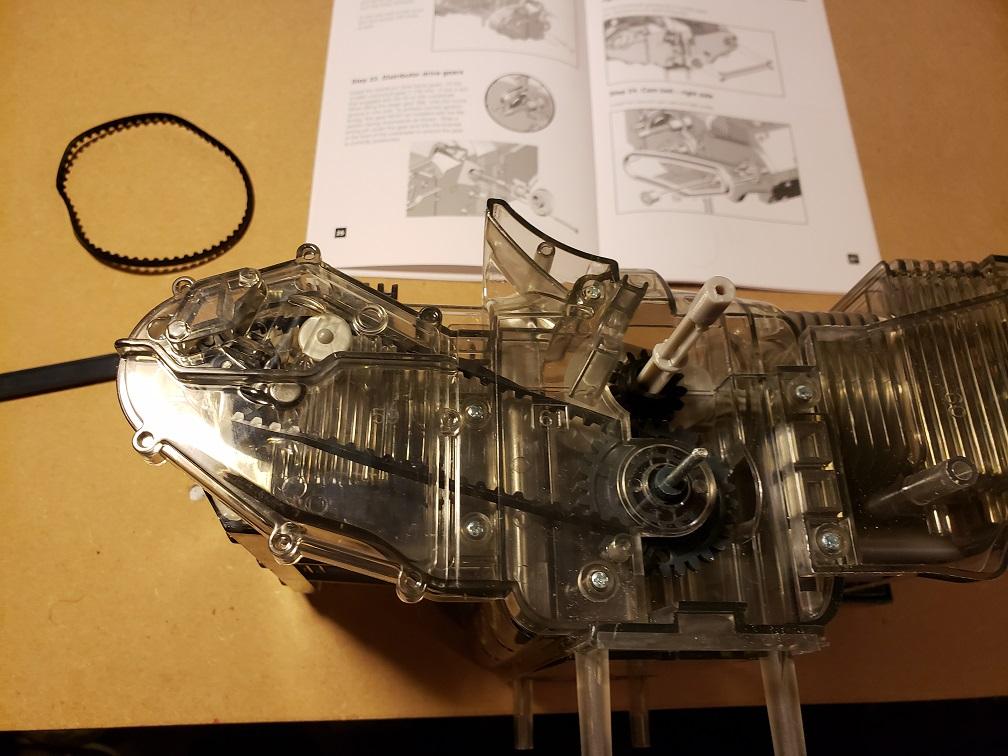
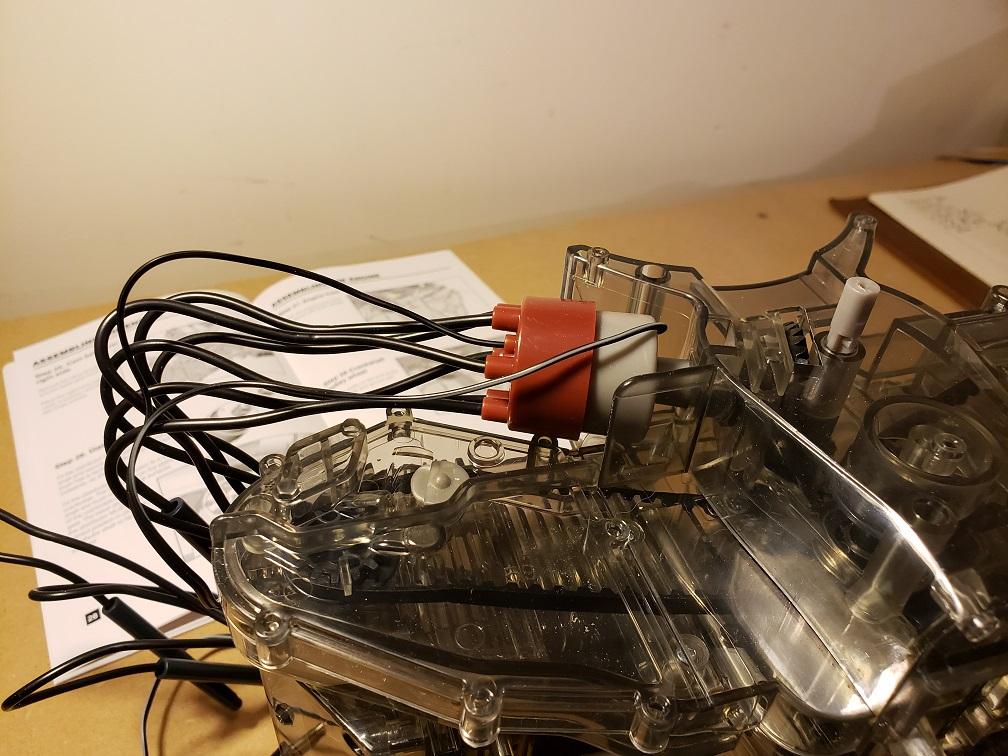
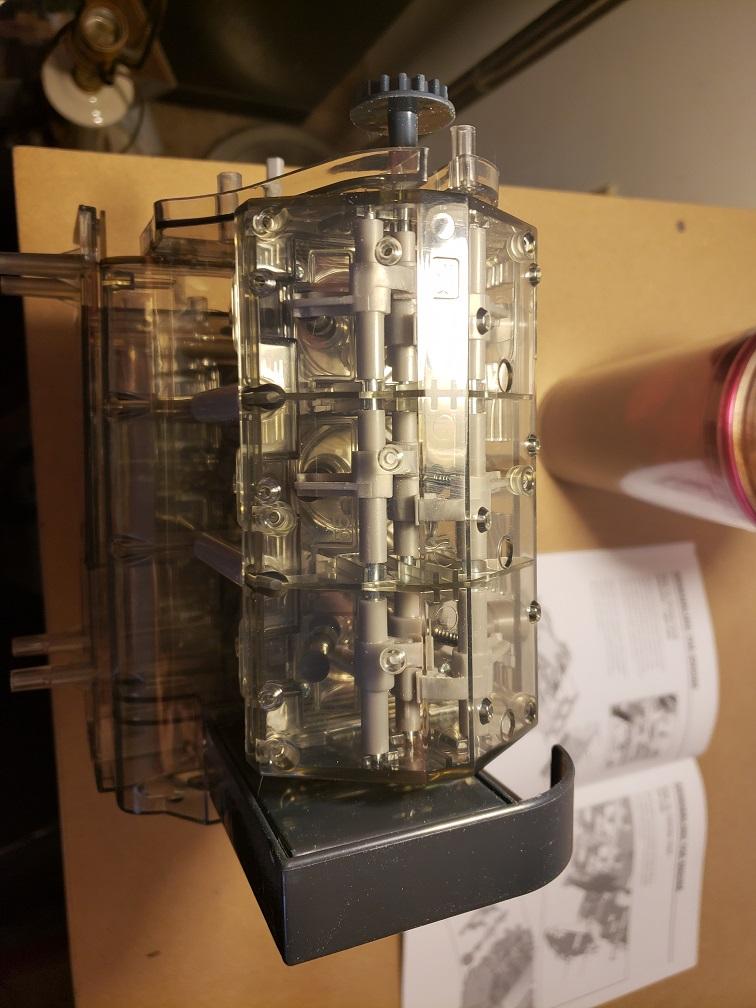
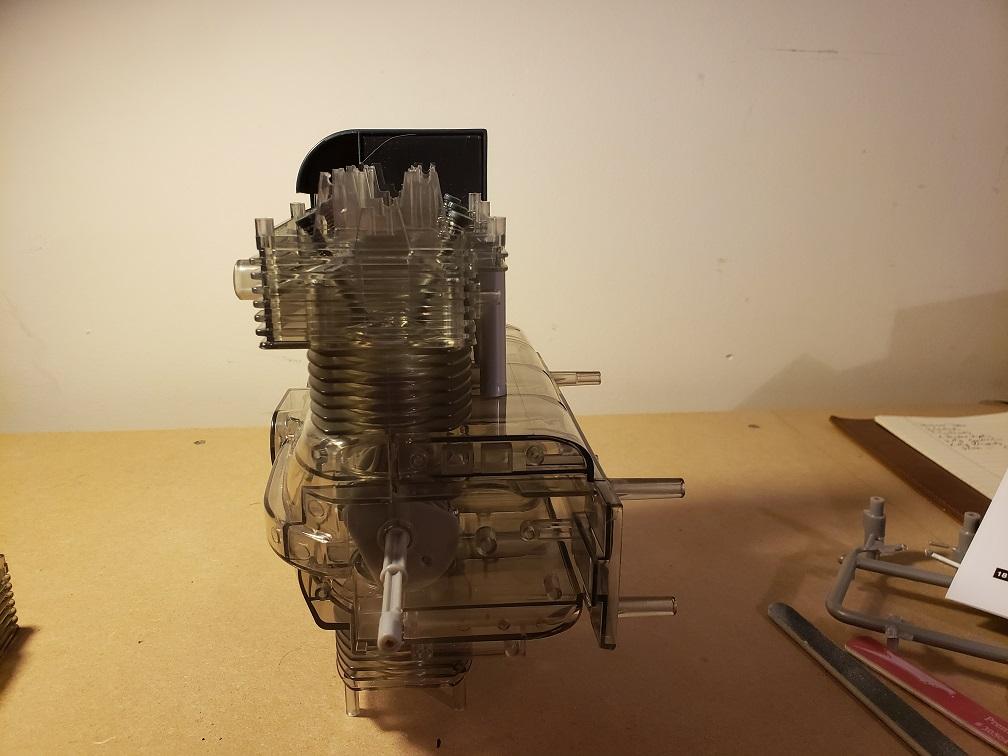
Time for cam belts. The kit has two pins used to lock the gears in the correct spot for the belts so they do not move during installation, as well as a lock bar to lock the crank and the cam you are working the belt over in place. Helpful but very loose fitting, so if you knock the bar while working the belt over the gears, it can come off. Once the belt is on, you put a follower on to keep the belt tightened. Once the first belt is on, then you put a cover on over the belt. Next the other belt goes on. The finished belts and covers. To finish up this part of the build, you add the distributor. This comes already wired with the leads to the 'spark plugs' which are red LEDs that will flash to simulate the spark plug firing.
-
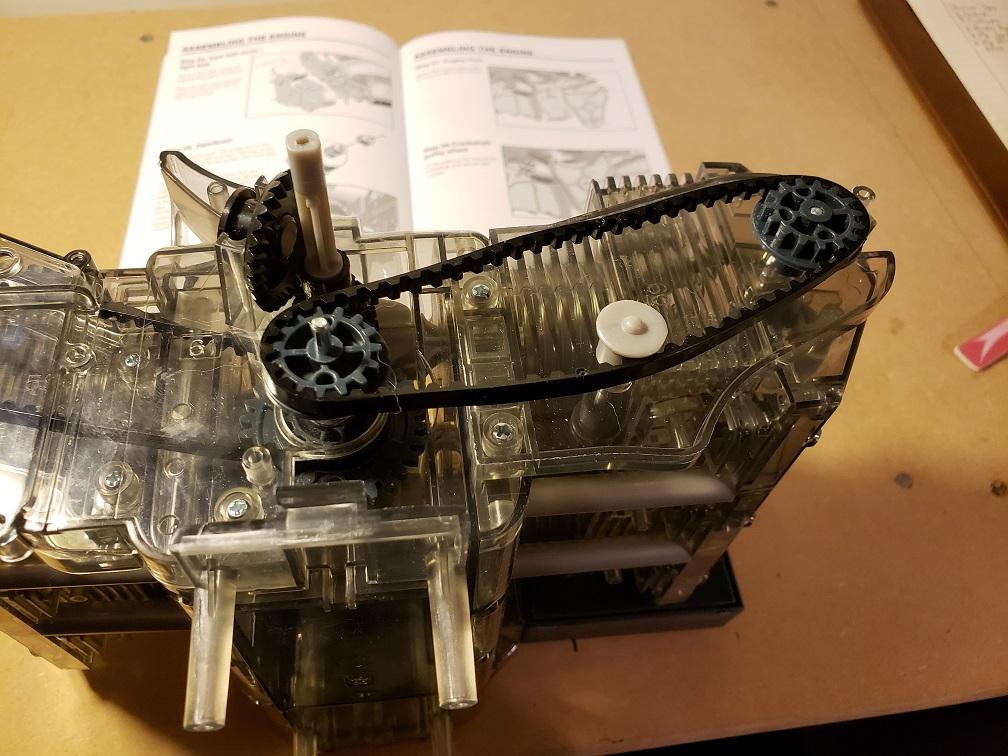
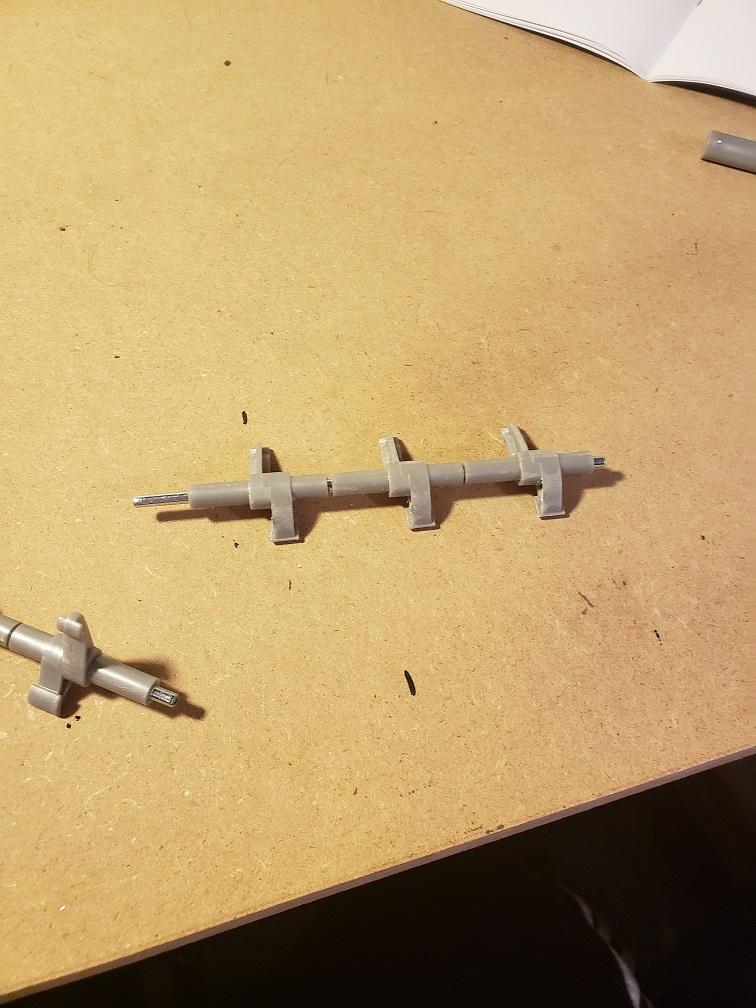
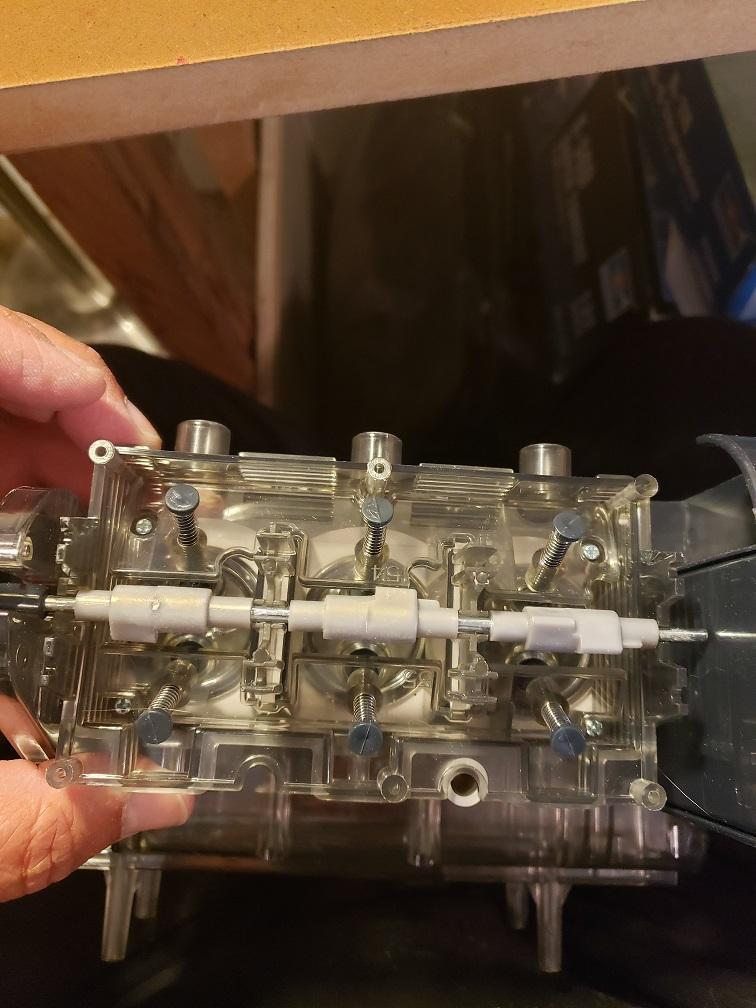
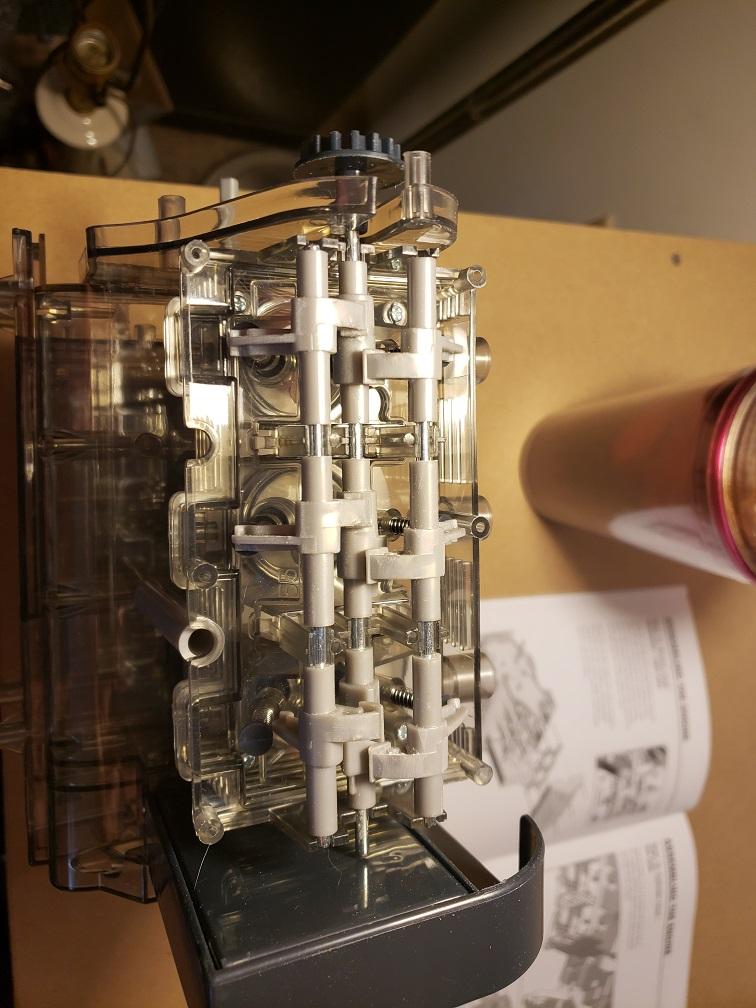
Ok, time to add some more here. I had to build up the cam and rocker shafts and they are composed of a metal shaft, cam lobes, gear, and rocker arms. First was the cam. Took me a bit to figure out I was trying to use the wrong metal shaft - the cam lobes had a D shaped opening in them and I was trying to use a circular shaft. Took me a bit to figure this out - the cam shaft was D shaped as well... so much for being smart!! Here is the built up cam. Next was the rocker shafts, with a circular shaft and rocker arms on it. Once I figured out I was using the wrong shaft for the cam, the rockers were easy. Now turn the engine so you can work with the cylinder head being horizontal, then place the cam shaft in the middle of the head. The rocker arms go on either side of the cam. Then the cam cover is attached. Next you have to attach the timing gear on the front of the engine and the timing belt. Very tricky to get the belt right over the different gears, so that will be the next update.
-
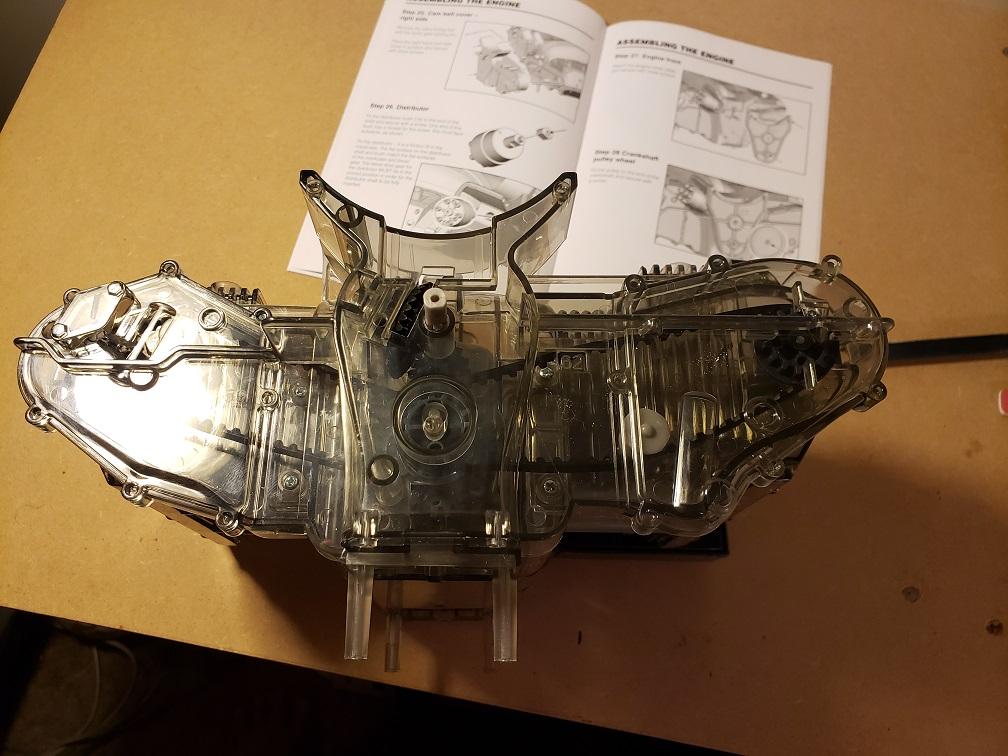
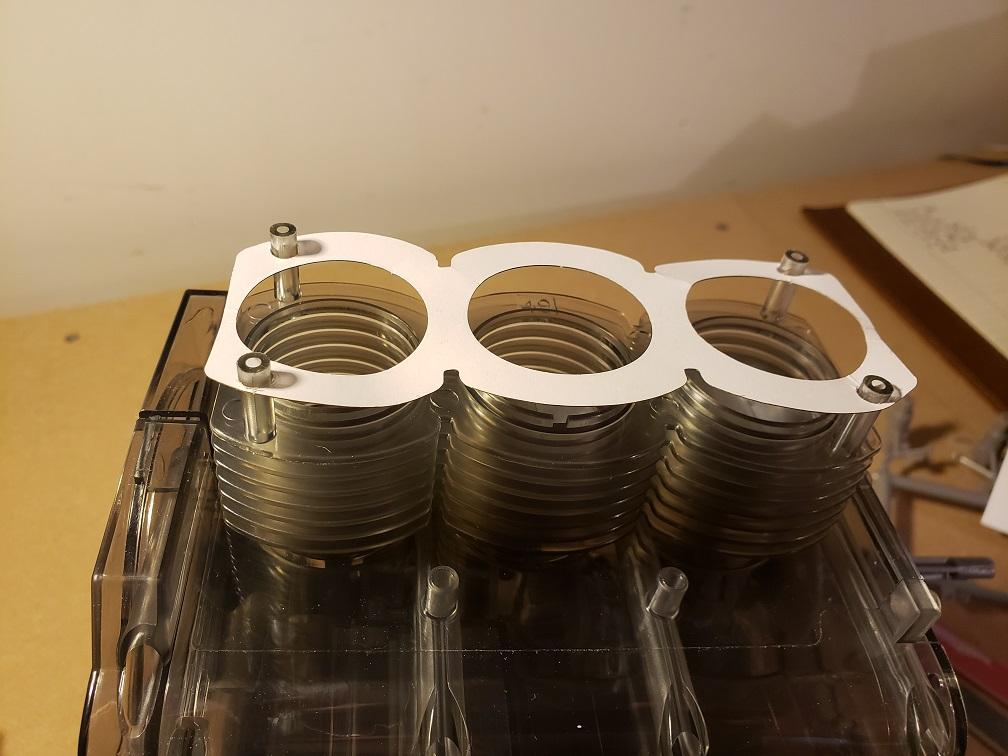
Time to attach the heads! First we put on the oil cooler. Next, the oil return pipes between the heads and crankcase are slipped on their mounting pegs. Now attach the head gasket... Finally, slip the head on and use screws to attach it to the cylinder barrels. Once again, for someone with sausages for fingers like me, getting the screws in the holes is a chore. After lots of cursing, the heads are now mounted. Next is to build up the cams.
-
Beautiful work Rich. Saw this still in the box/in pieces. Nice to see things getting done during the self isolation. As always, you make a superb model.
-
I am now thinking of the Carrera engine myself. While it was an important engine in the history of the early Porsches, race and road, I am not huge fan of the Furhman Typ 547 engine. But I think it would be a lot of fun to build. It is a very good kit, very little clean up needed of parts and the way it fits together without any issues is great. Very Tamiya like in quality and fit. While not cheap, I am willing to pay the price for such a great kit. I should have some more bench time tonight so there should be some more updates tomorrow.
-
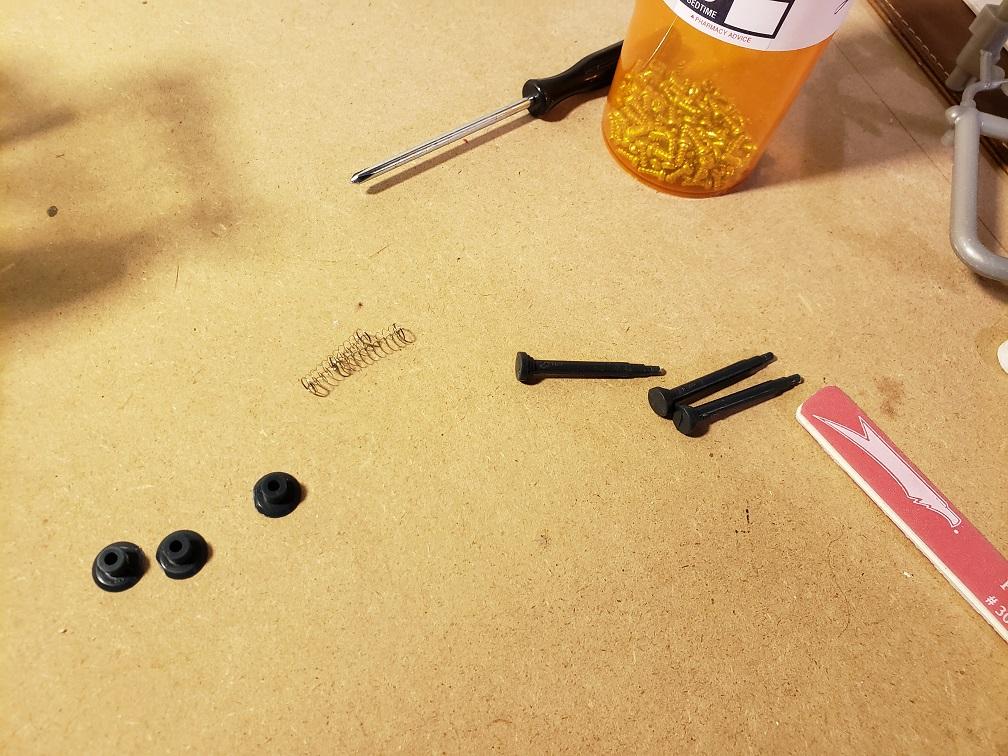
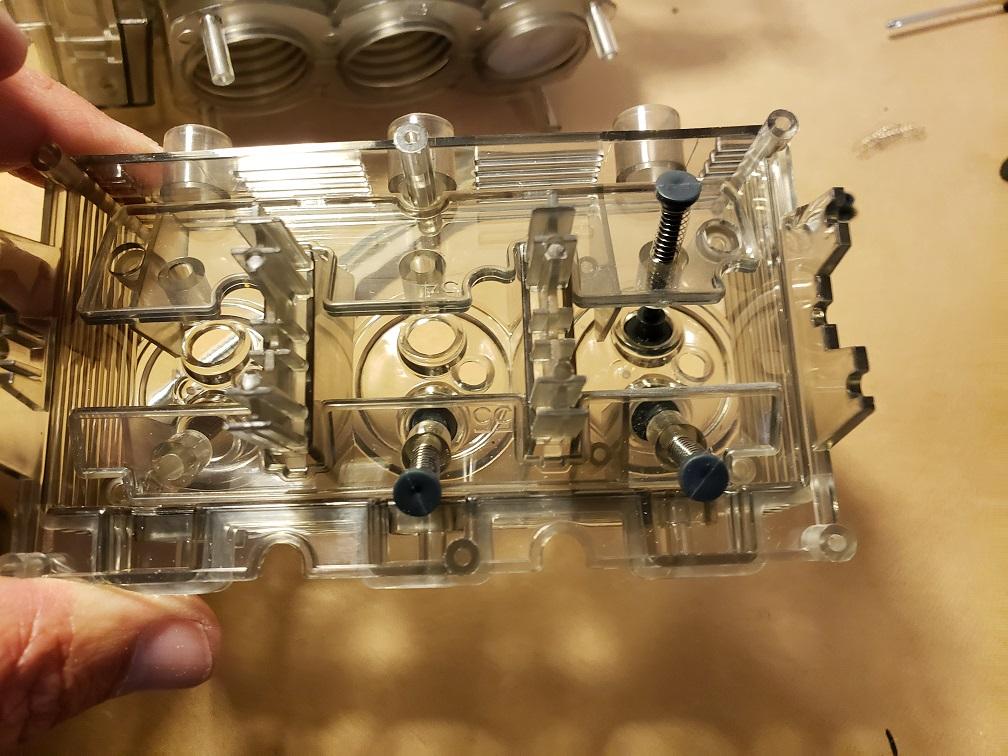
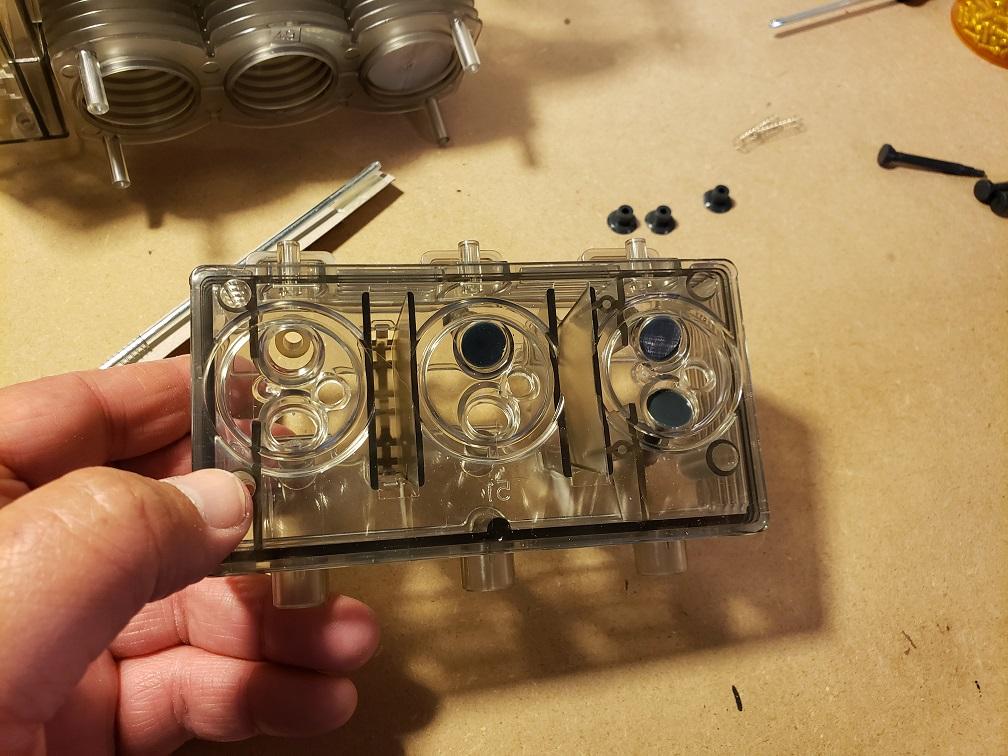
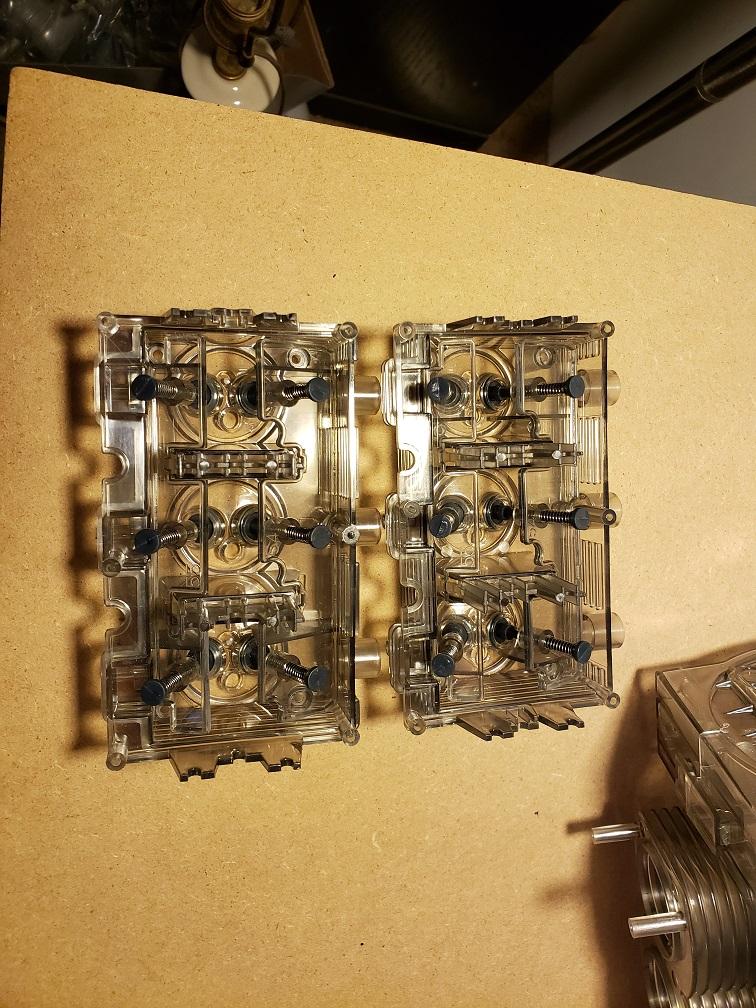
Now it is time to build up the cylinder heads. Each side has a clear head with valves you need to put in. Valves are made up of the valve stem, the valve it'self and a spring. The holes the stems go in have the proper angle so there is no fumbling around, trying to get the correct valve angle. Both finished.
-
Rich!!! It will be. I'm about ready to pack up the car with a few kits and hunker down in the shop with you! We could have a super model-a-thon!!!! I'm glad you like it Rich. I will bring it up once it's finished - I'm not going years without coming up again.