e30lover
-
Posts
336 -
Joined
-
Last visited
Content Type
Profiles
Forums
Events
Gallery
Everything posted by e30lover
-
Thank you so much! Appreciate the compliment! Thank you! Thank you so much! Thanks a lot! Thank you! Thank you! I always have issues finishing flat surface as it always seem to have some kind of minor distortion no matter how much I sand. This one was better but still have some weird surfacing issues on the front hood. Thank you! Thanks a lot! Thank you! Thank you! Thanks! Tamiya kit is impressive given it's 40+ year old mould. I mixed couple of different lacquer colors (red, yellow, tan and brown) for the interior. I wet sanded the bare plastic, sprayed the silver, sanded again to remove some deep scratches and laid another coat of silver as a base coat. I agree - LP400 is the best looking Countach period. Thank you very much! Thank you! They're too busy restoring 1:1! Thank you! I find transparent colour on top of silver always looks better. Thank you! Thanks a lot! It was surprisingly easy build - very little fitting issues and annoying masking! Thank you very much! I'm not there yet - one day! Thank you! Thanks a lot! Thank you very much! Thank you! There's no mechanism to hold the door in place so I decided to just leave it open!
-
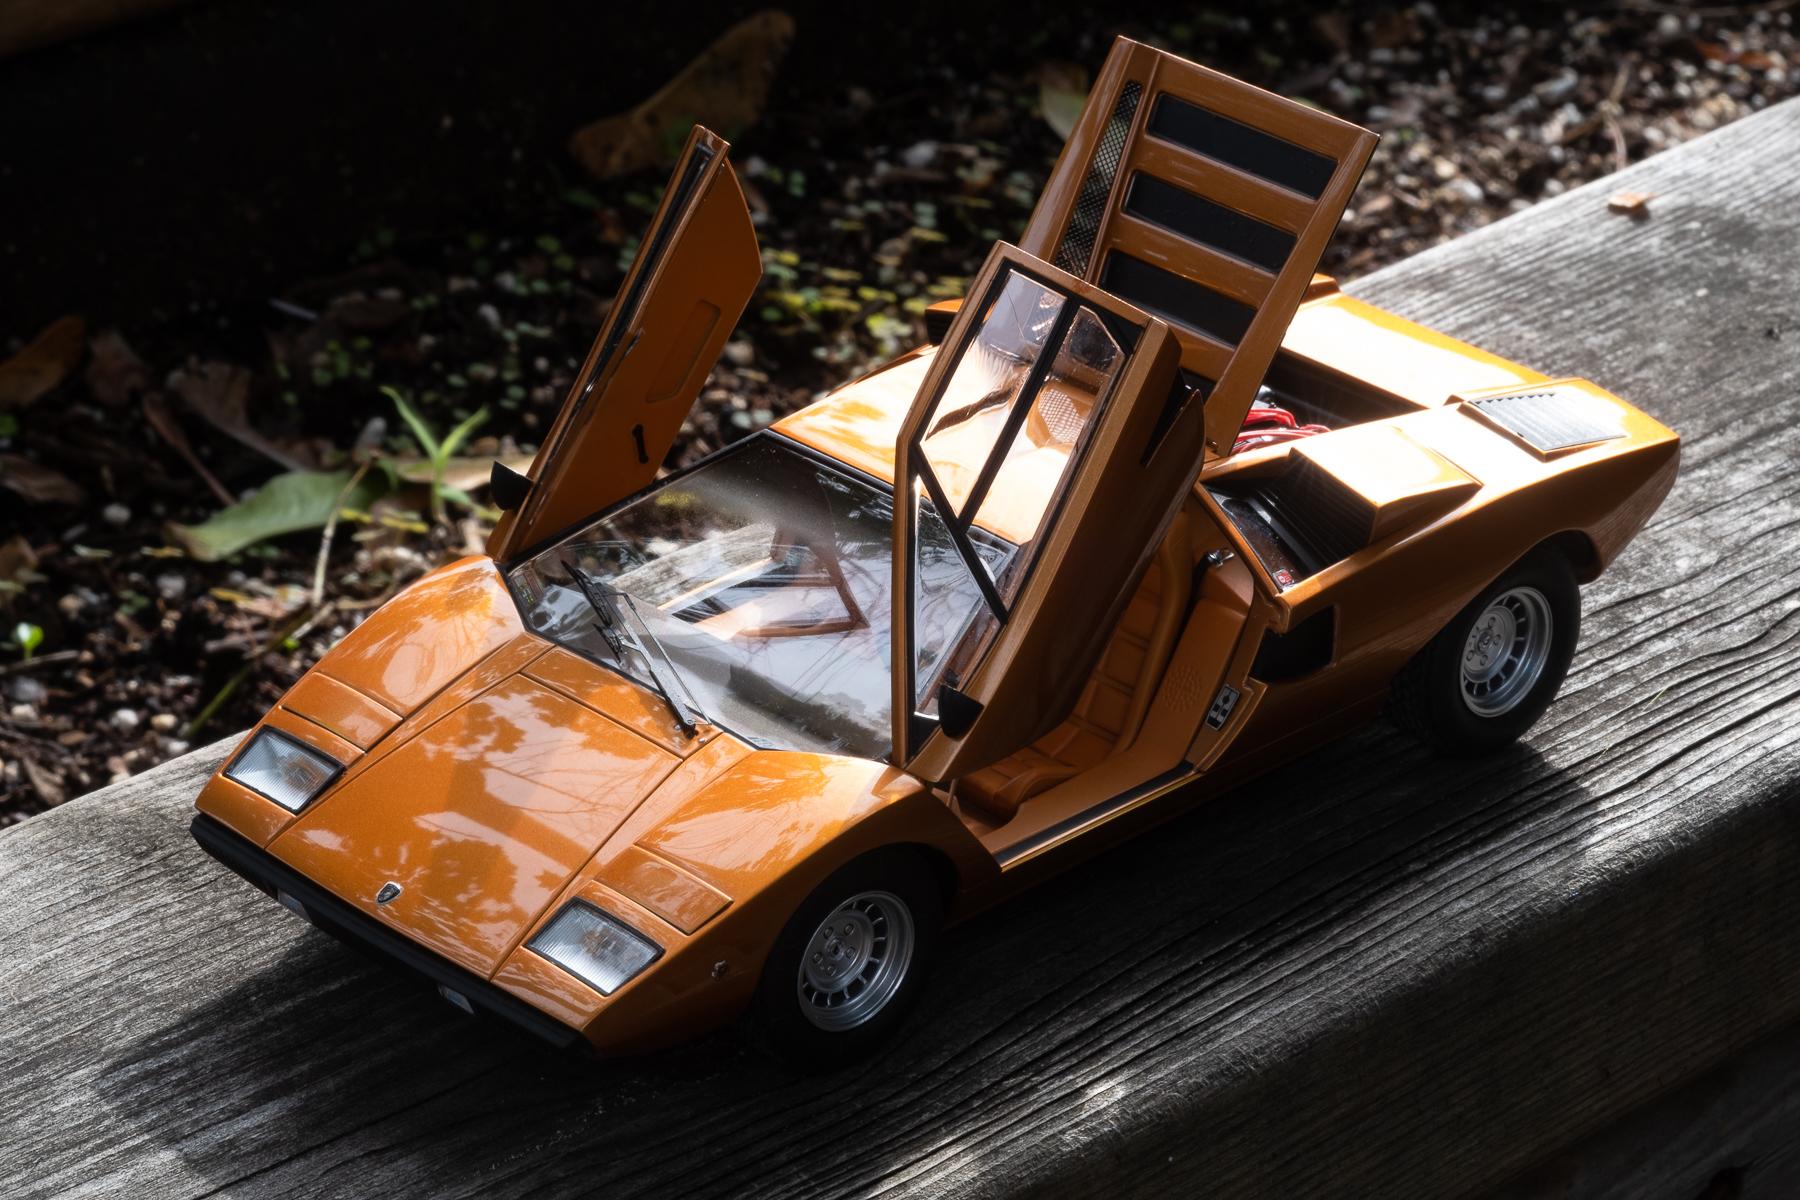
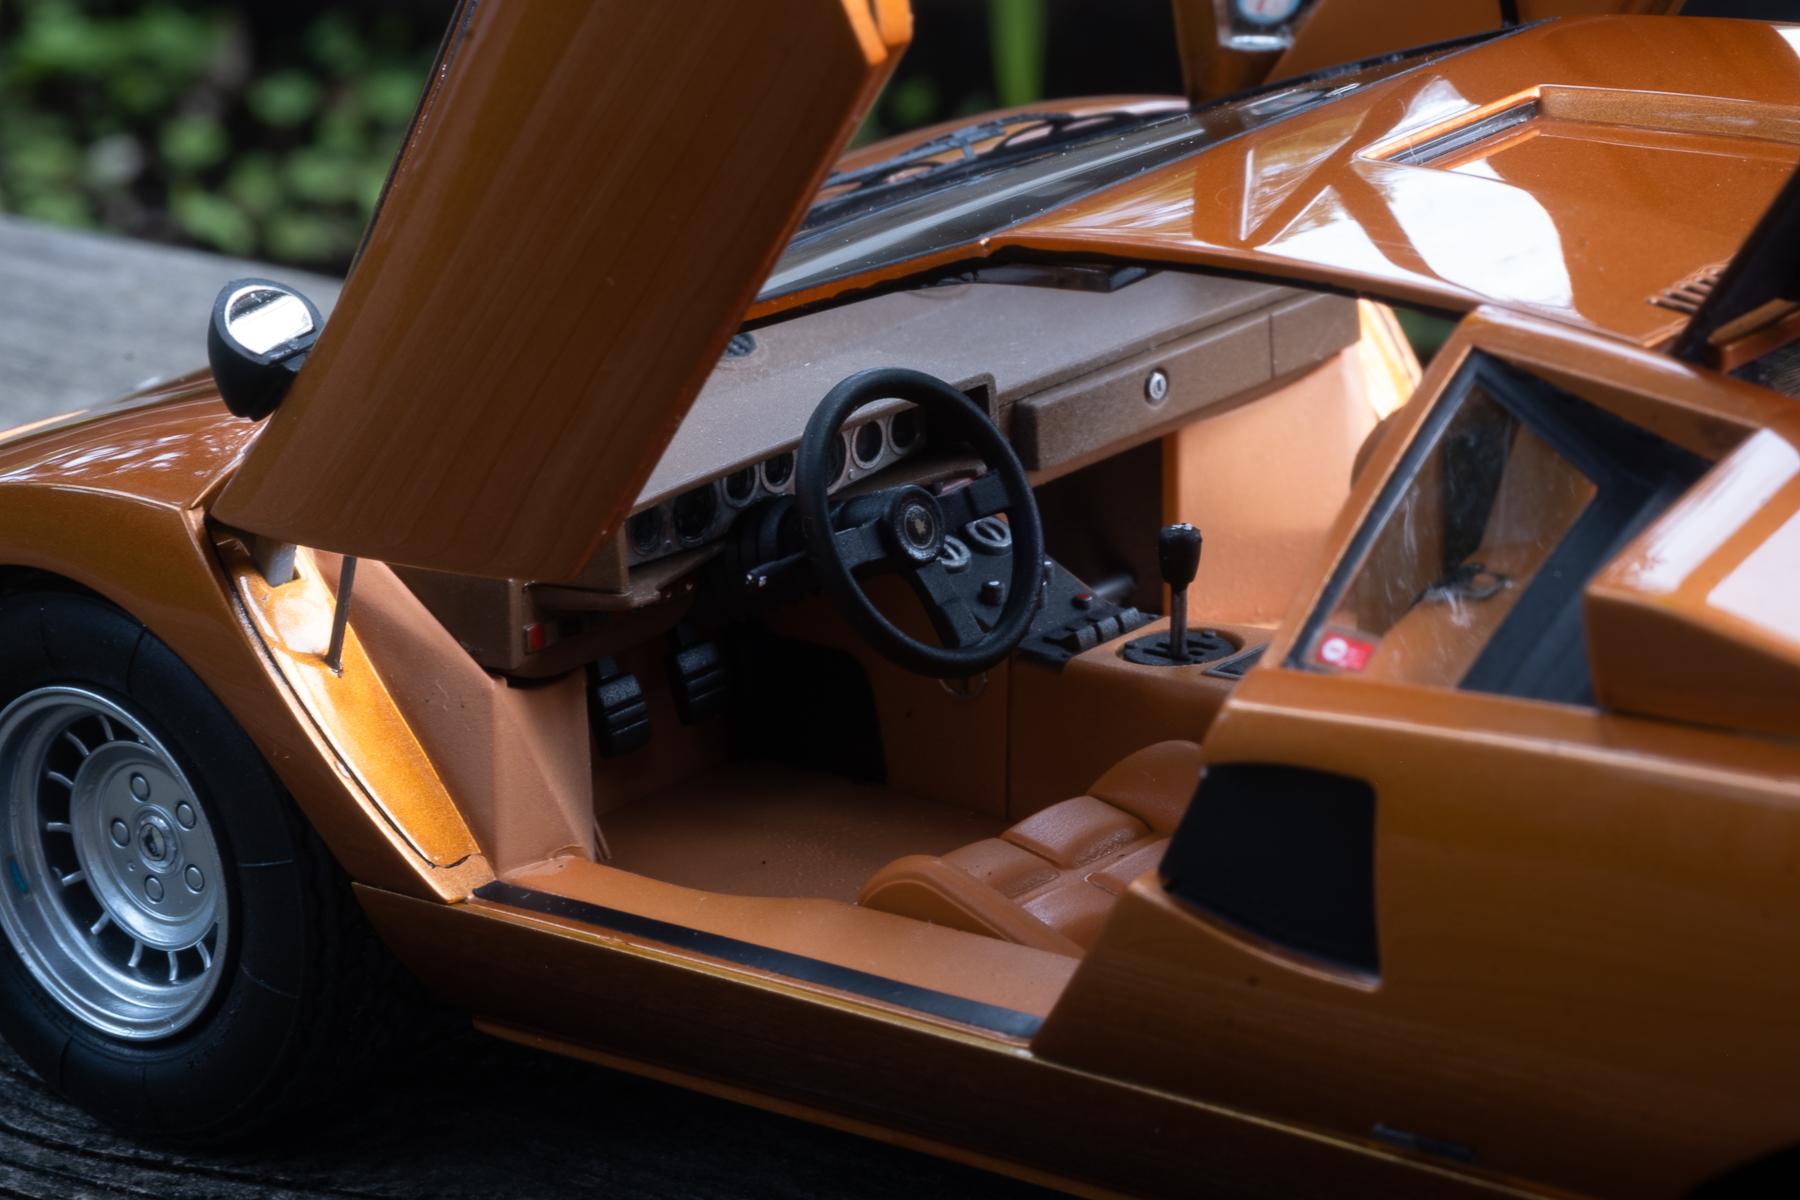
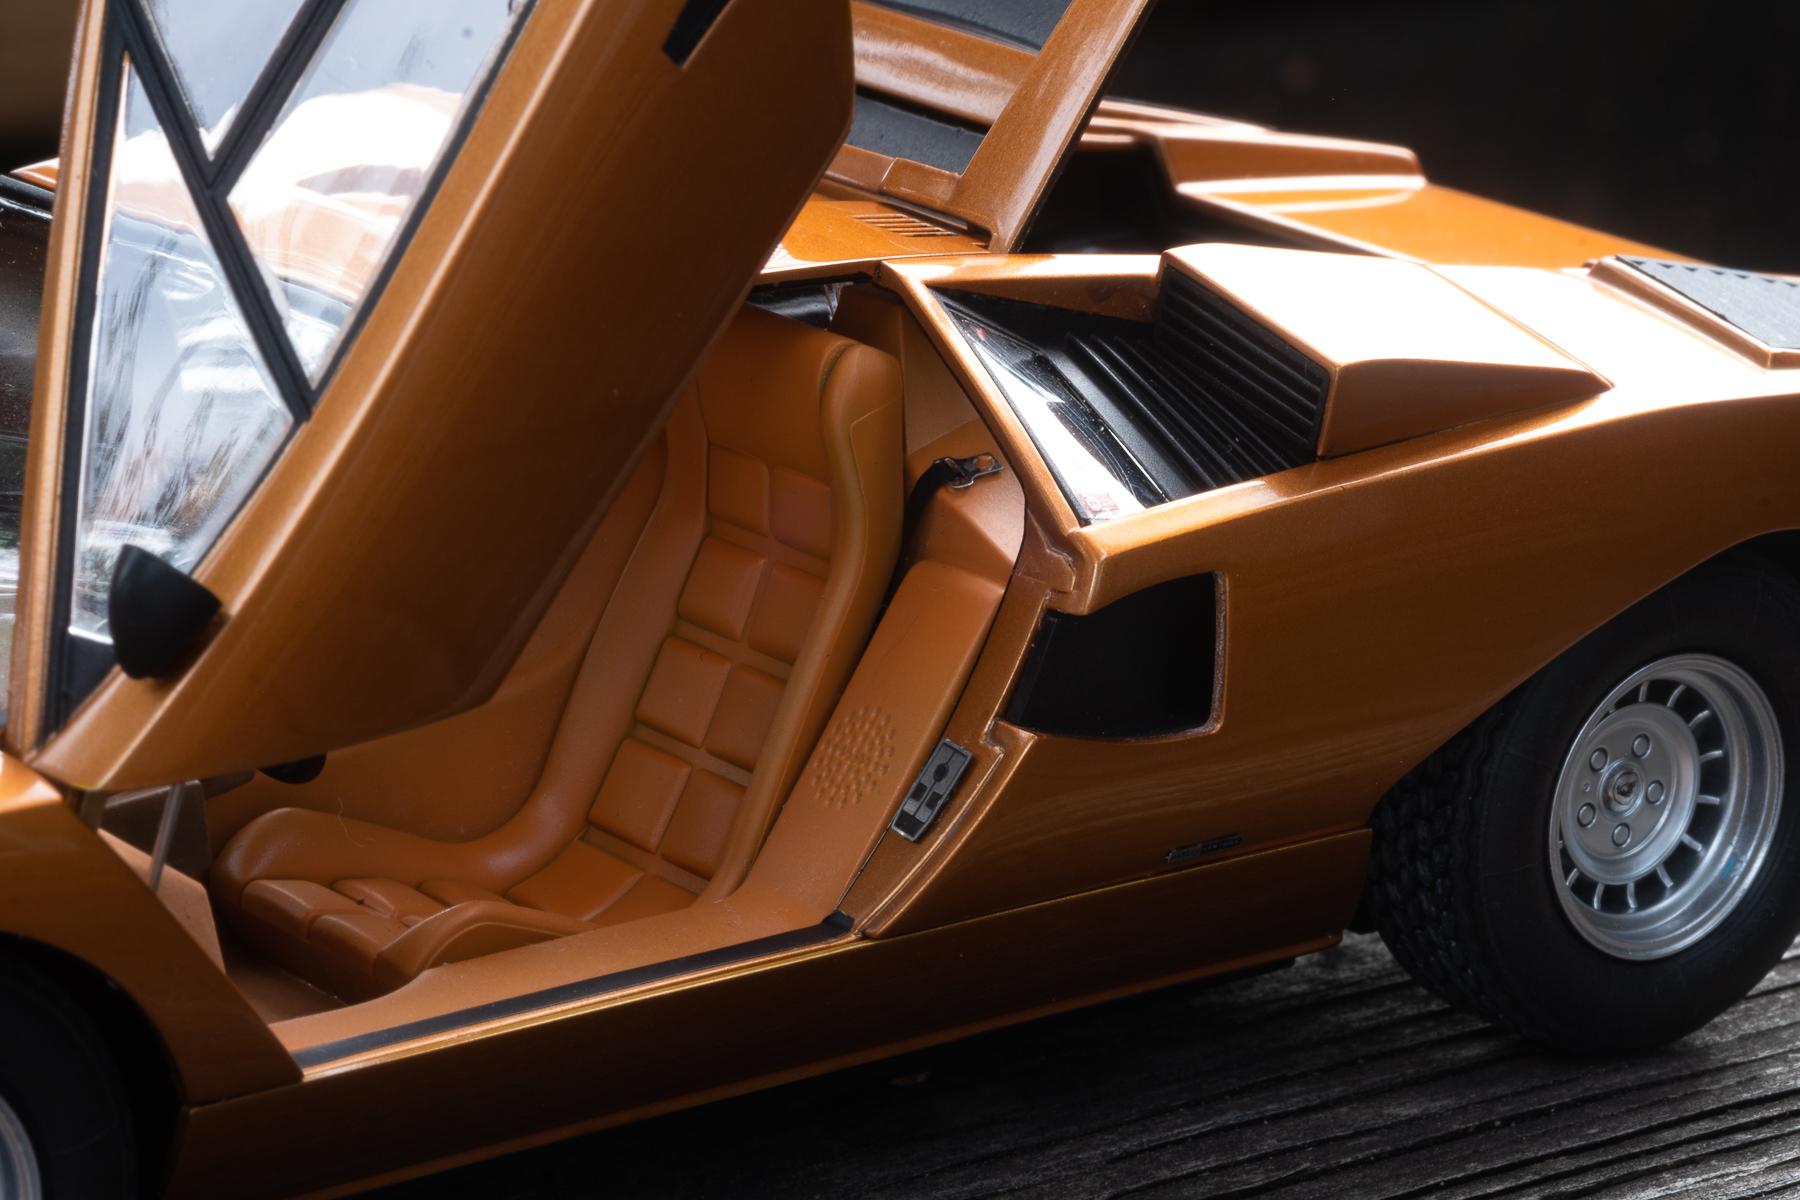
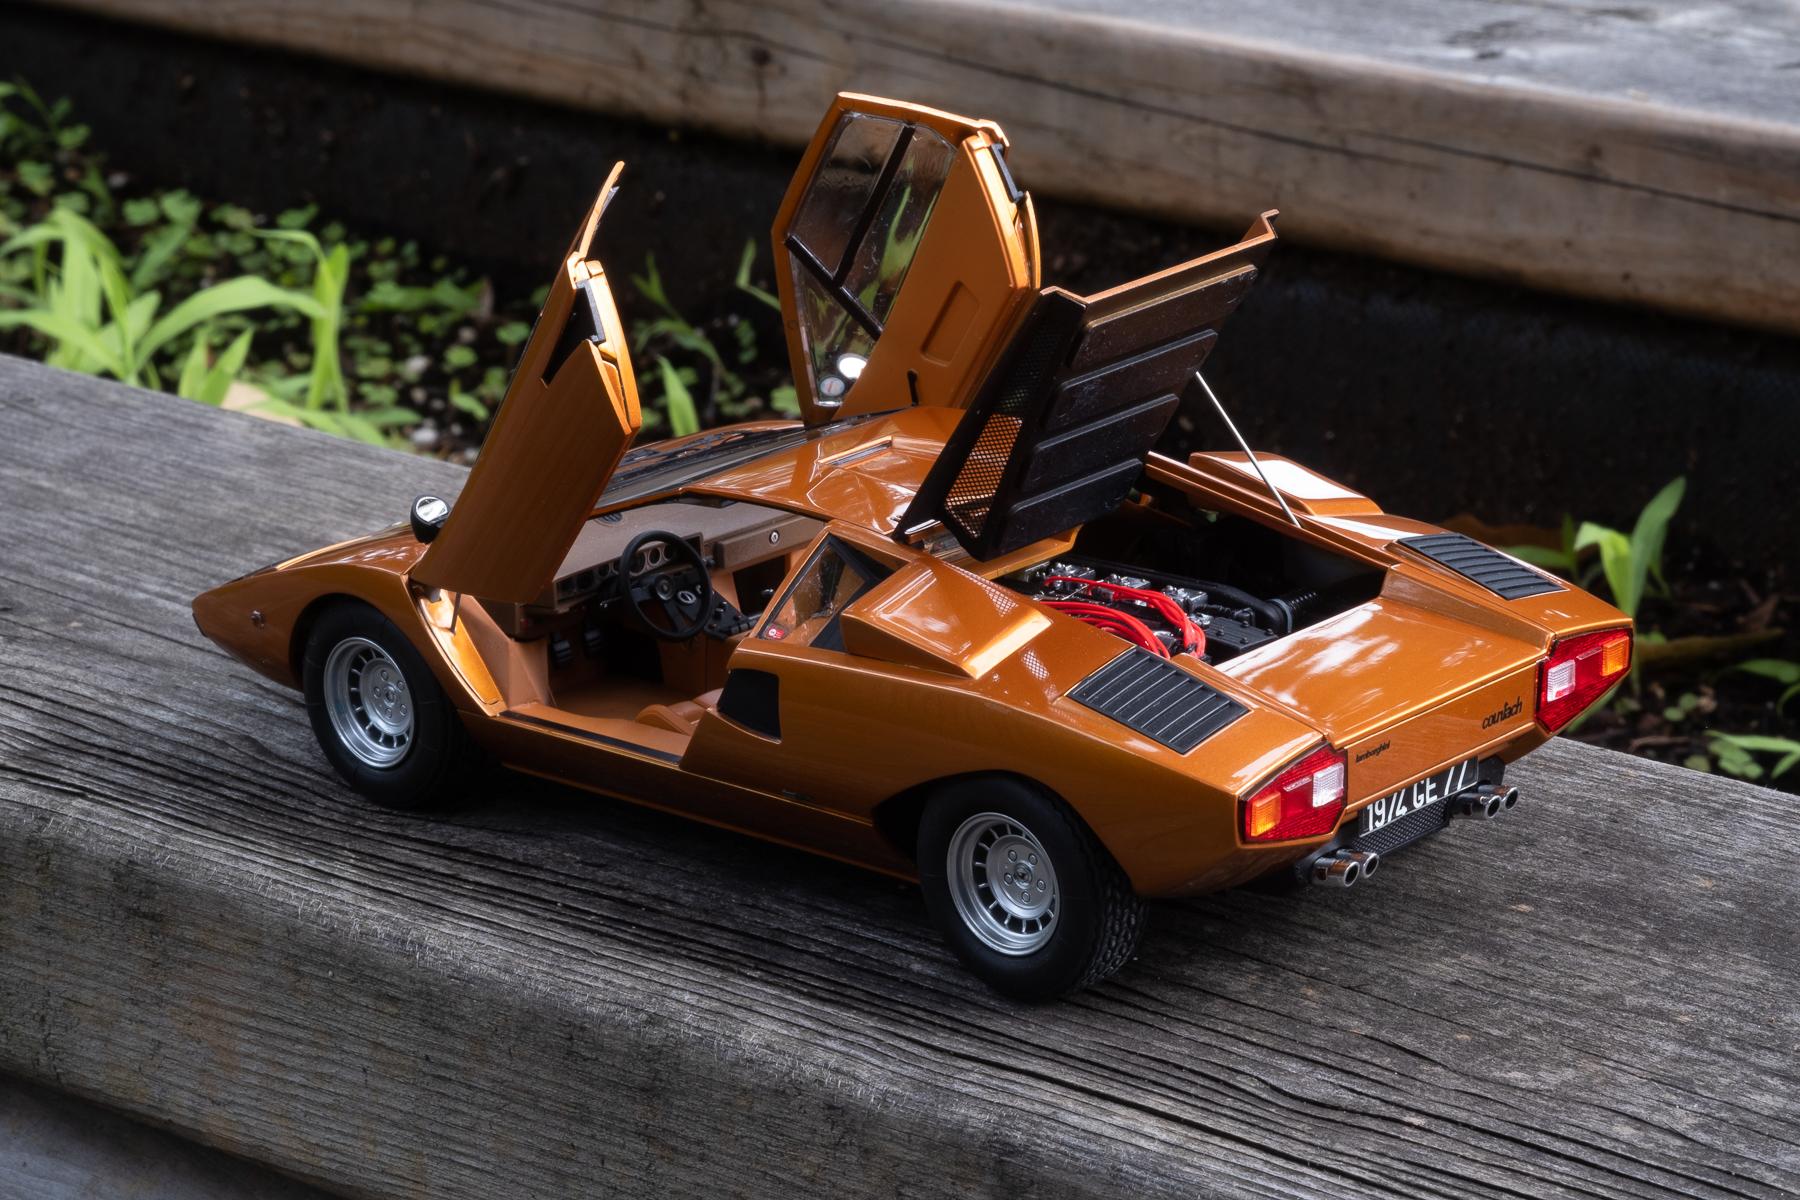
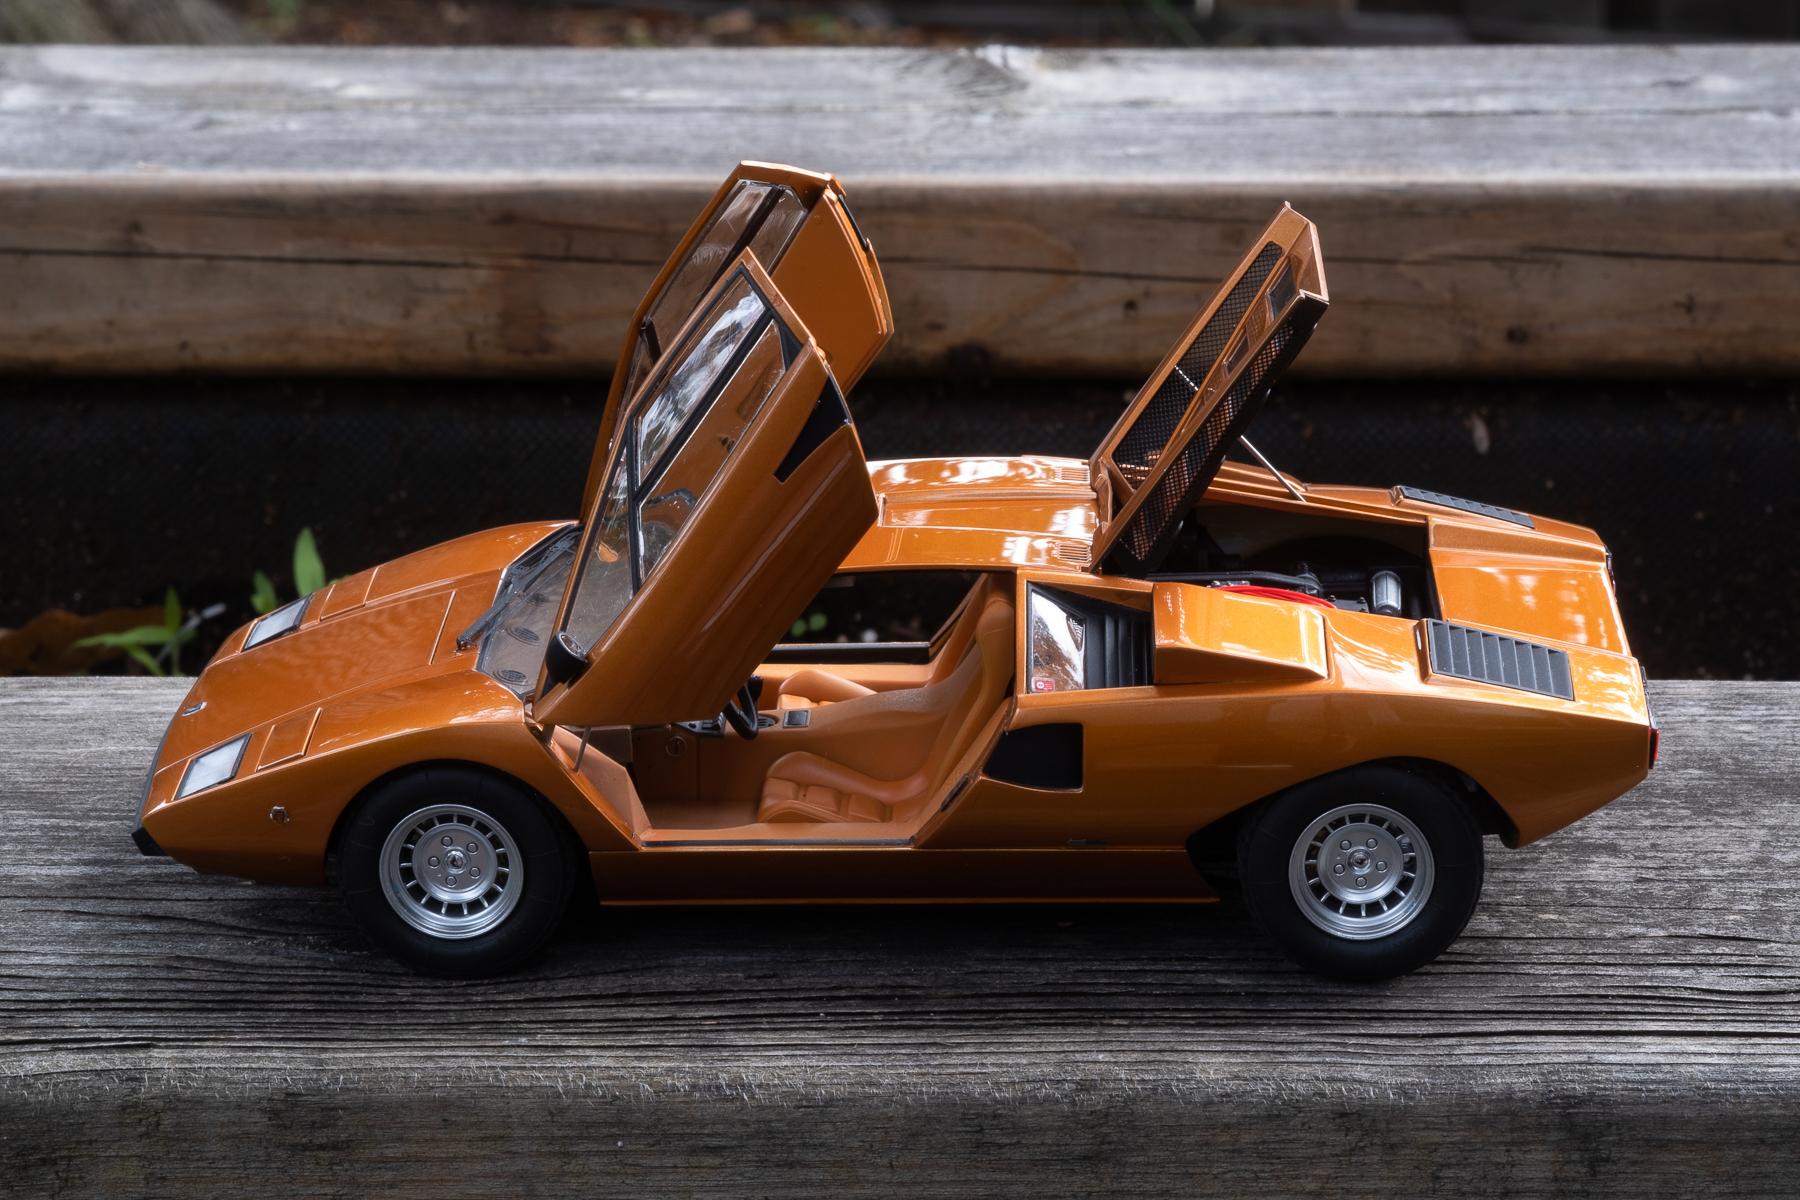
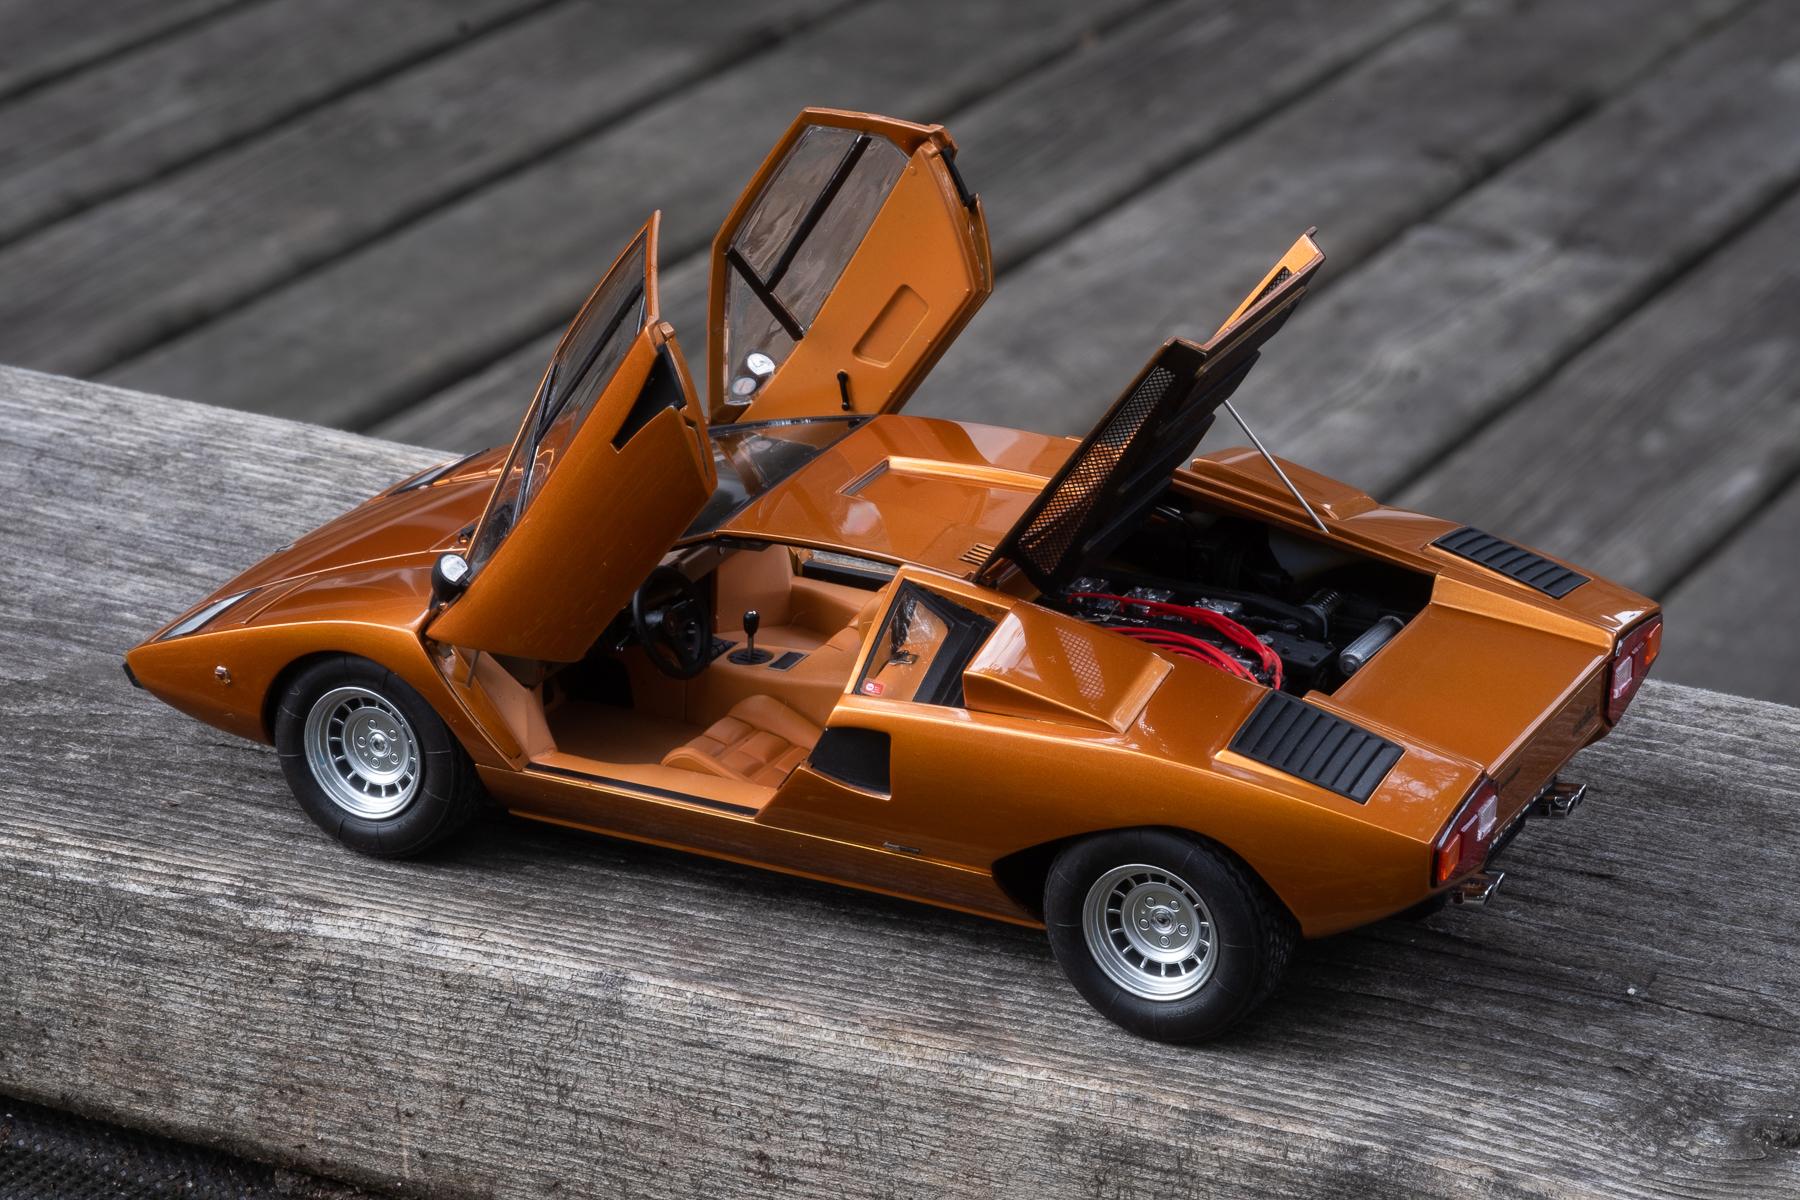
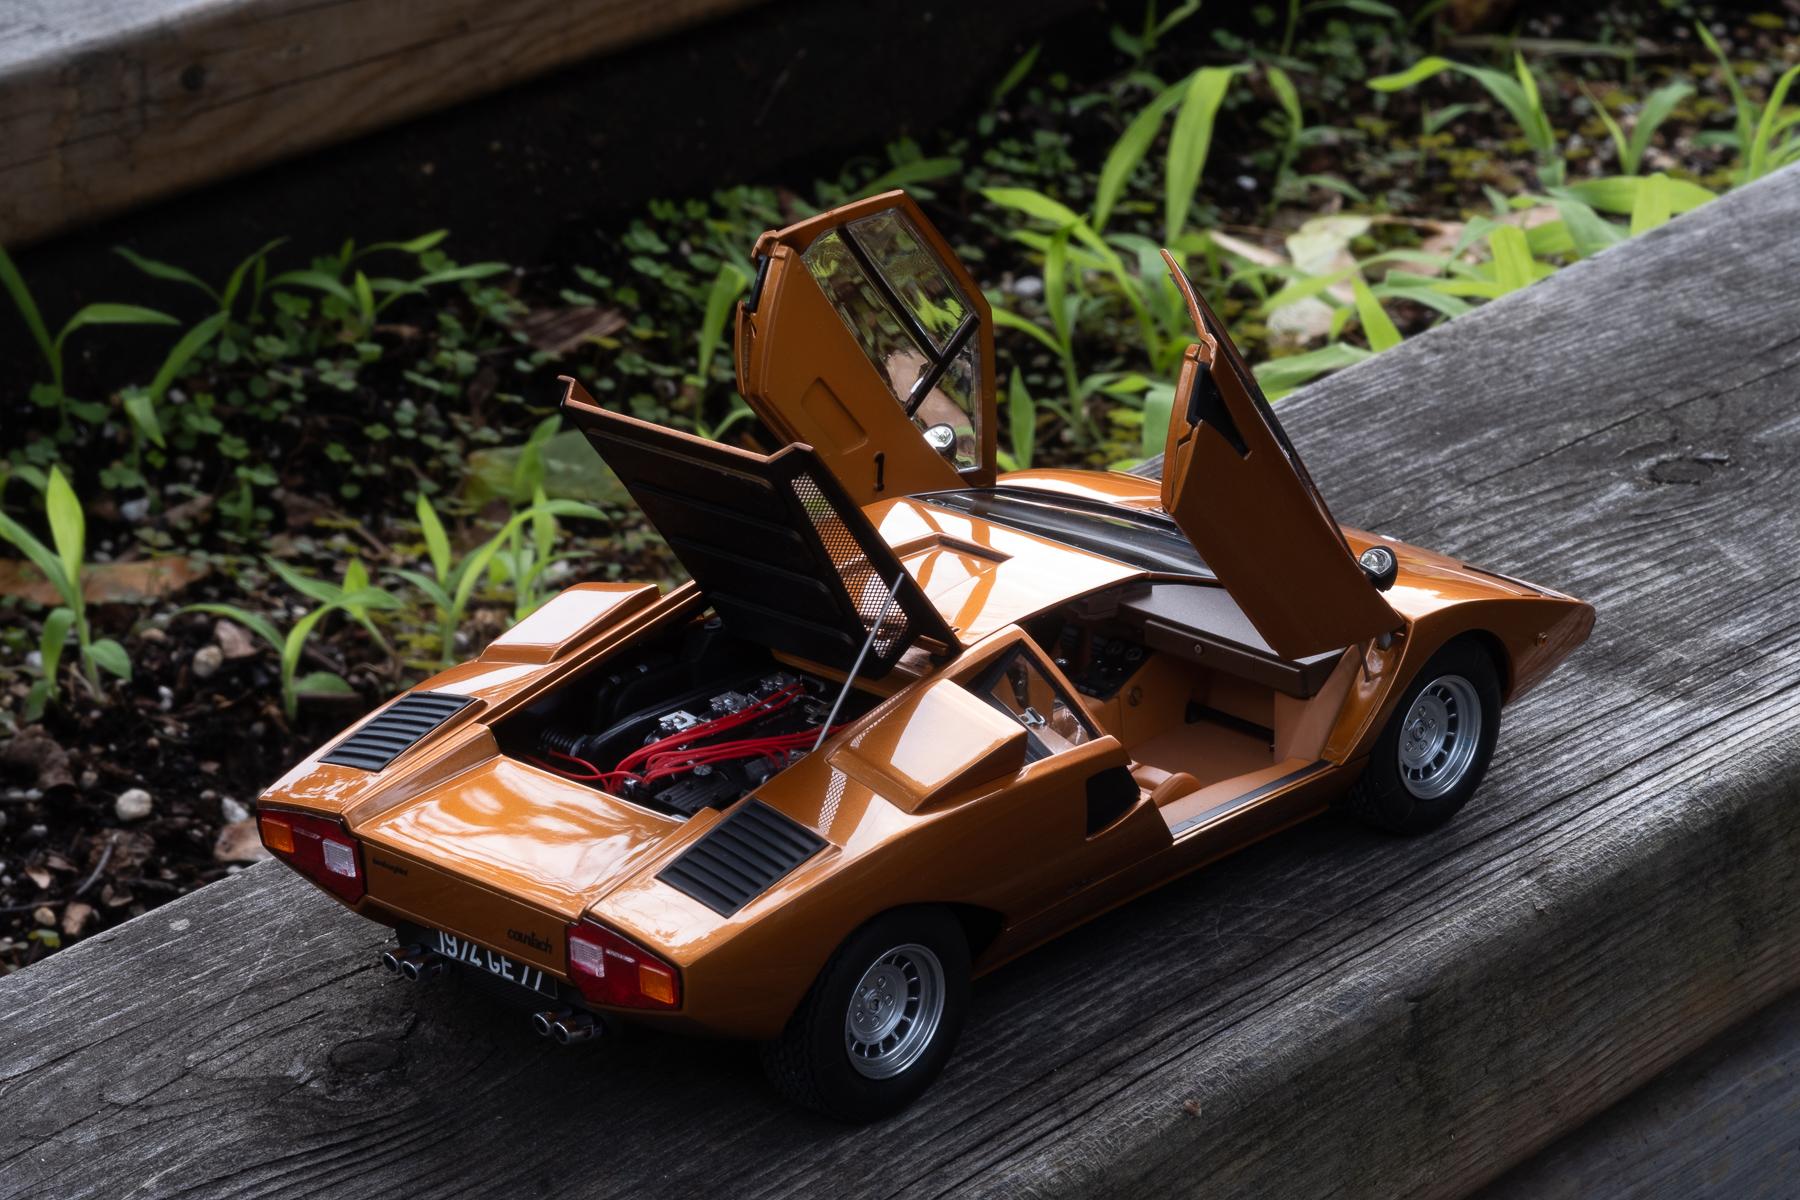
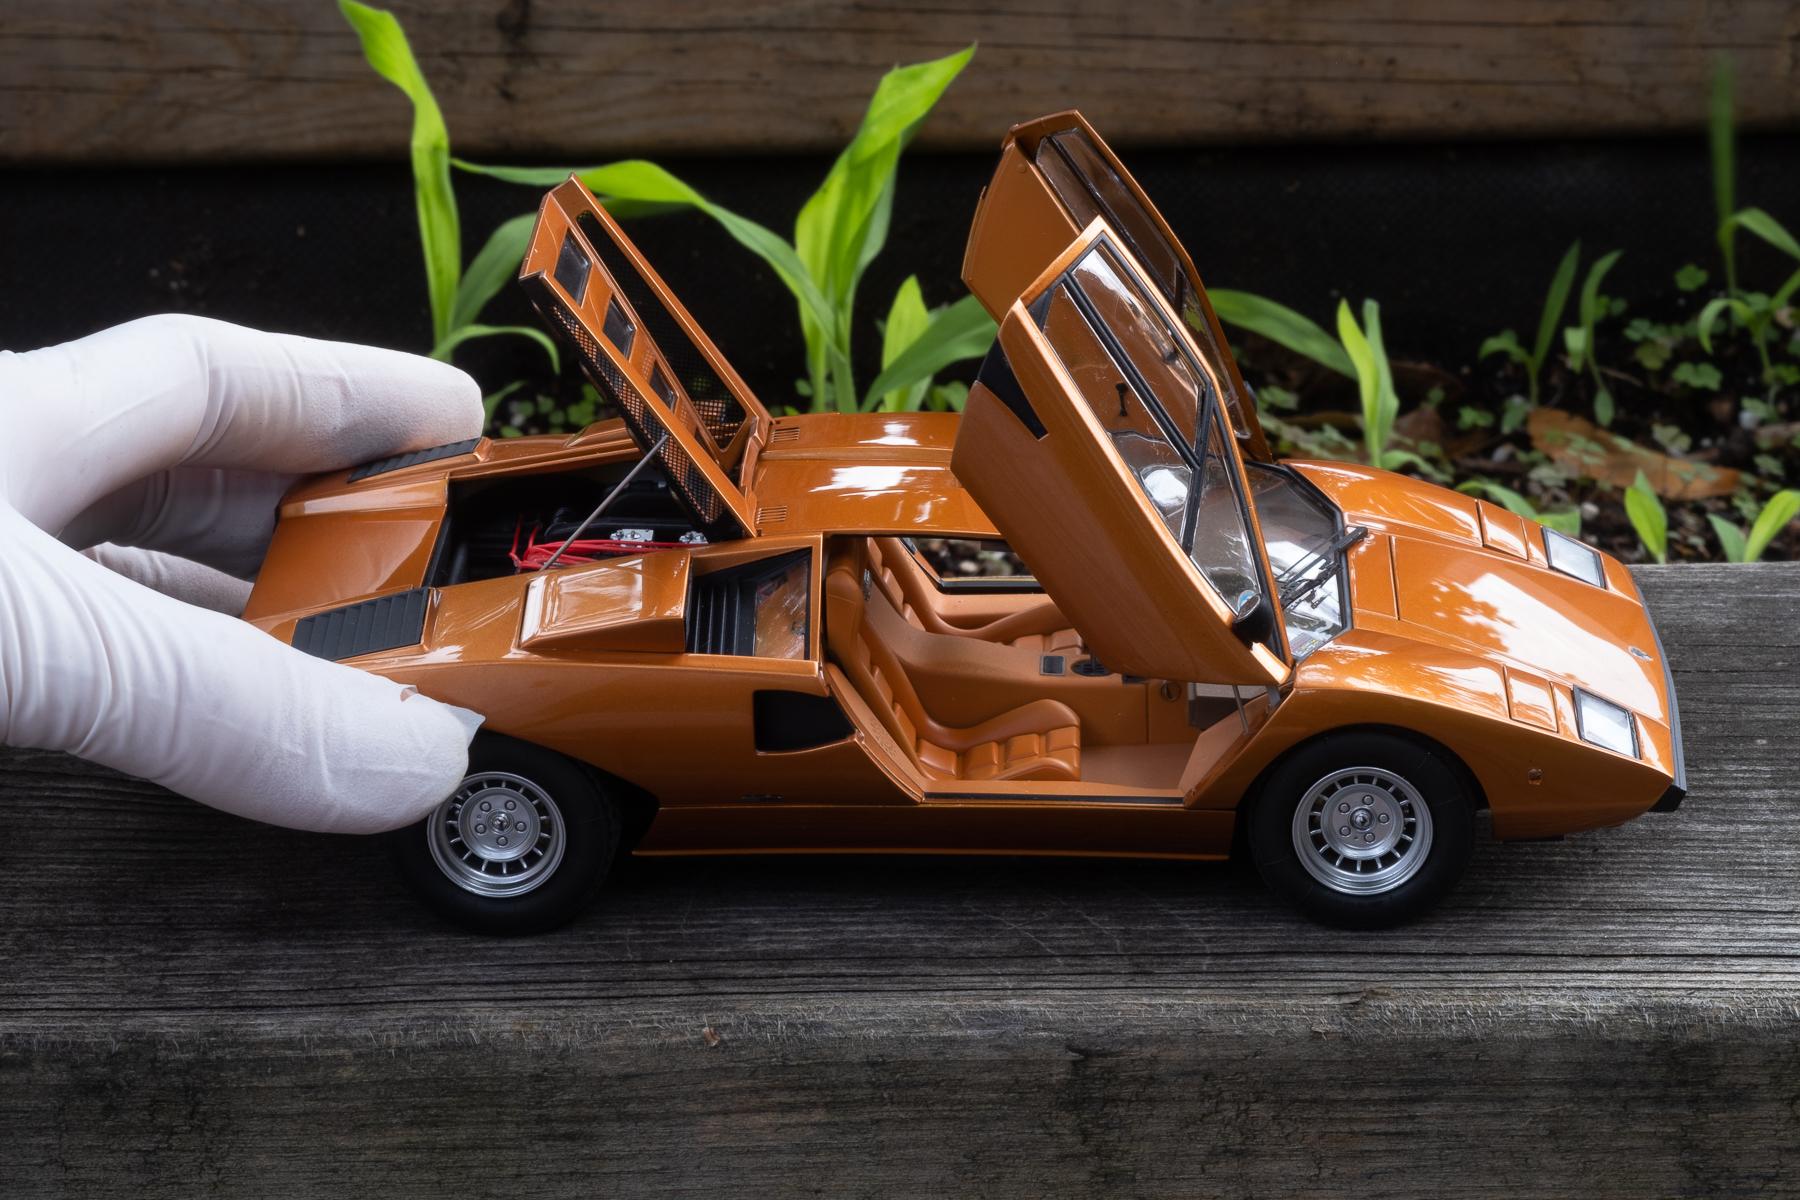
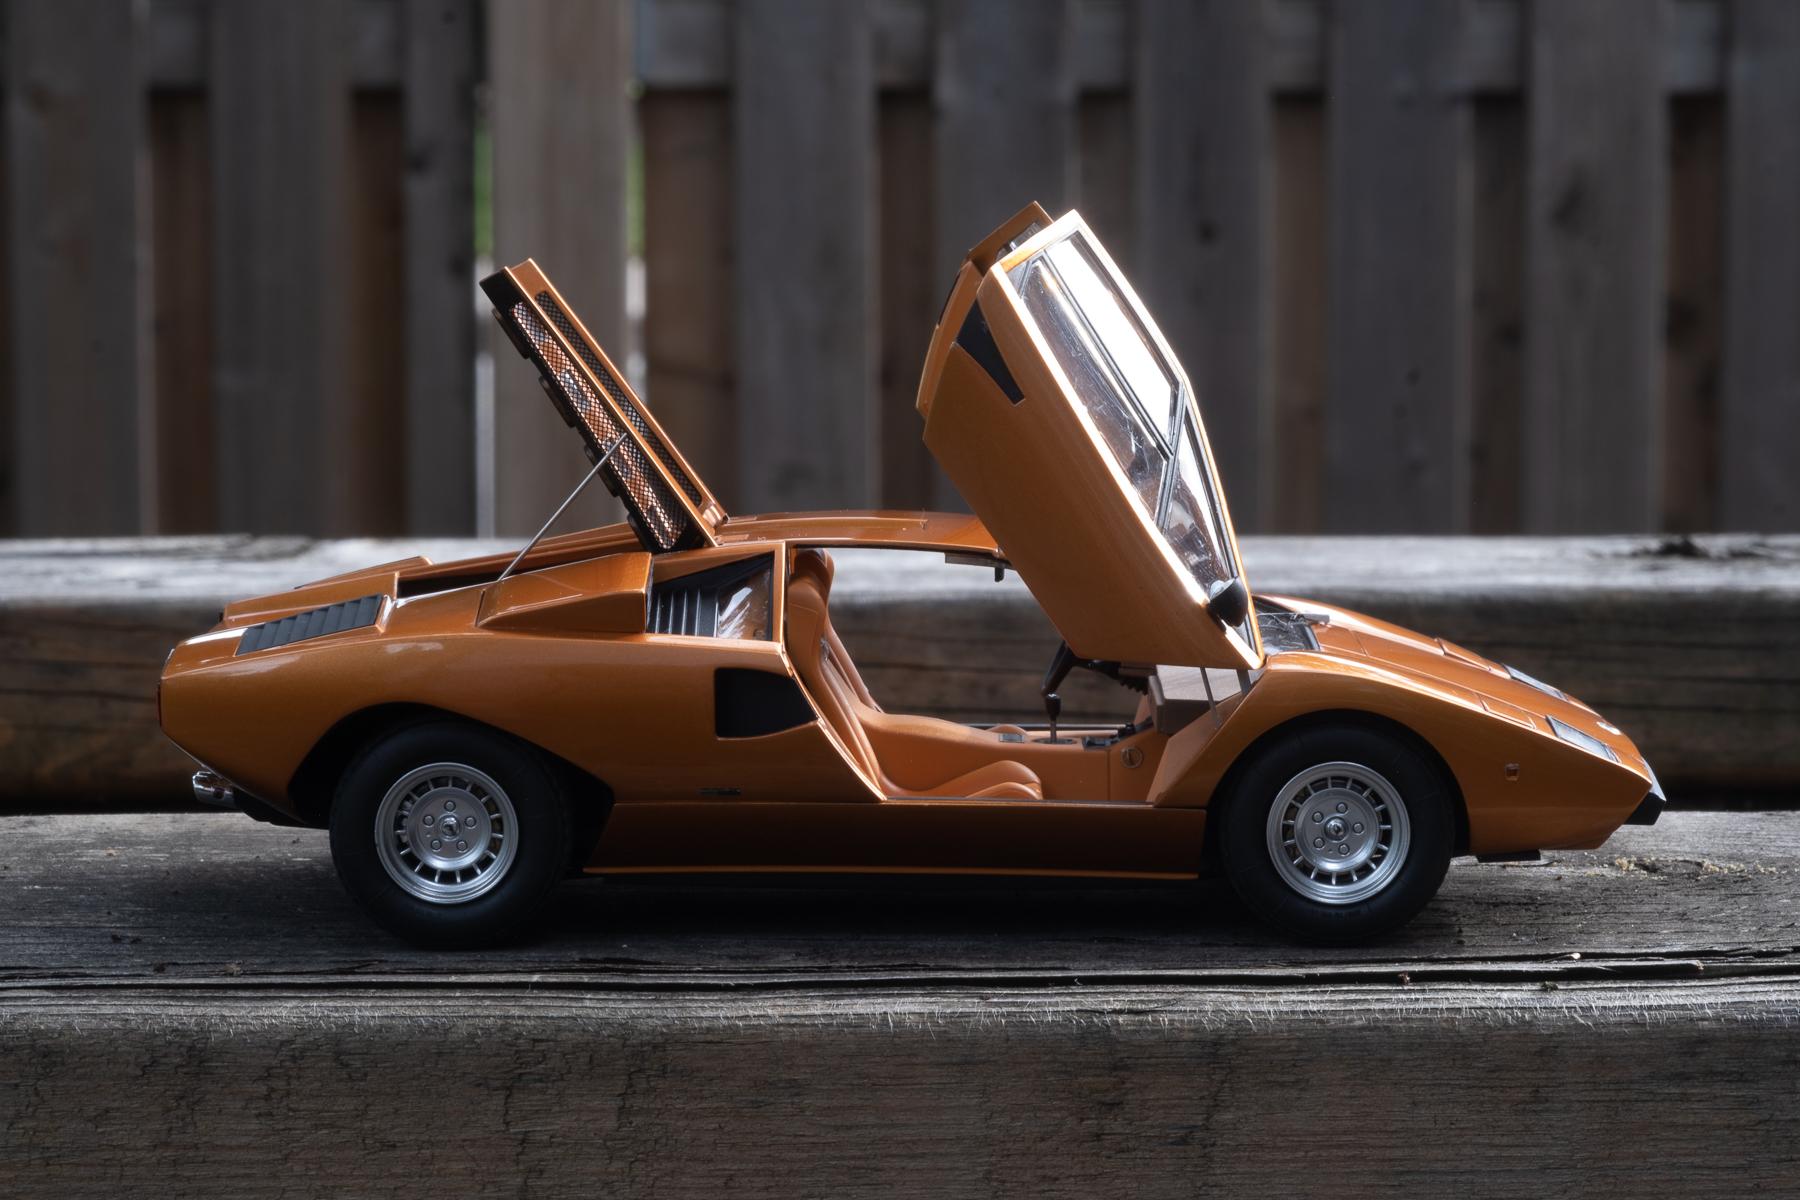
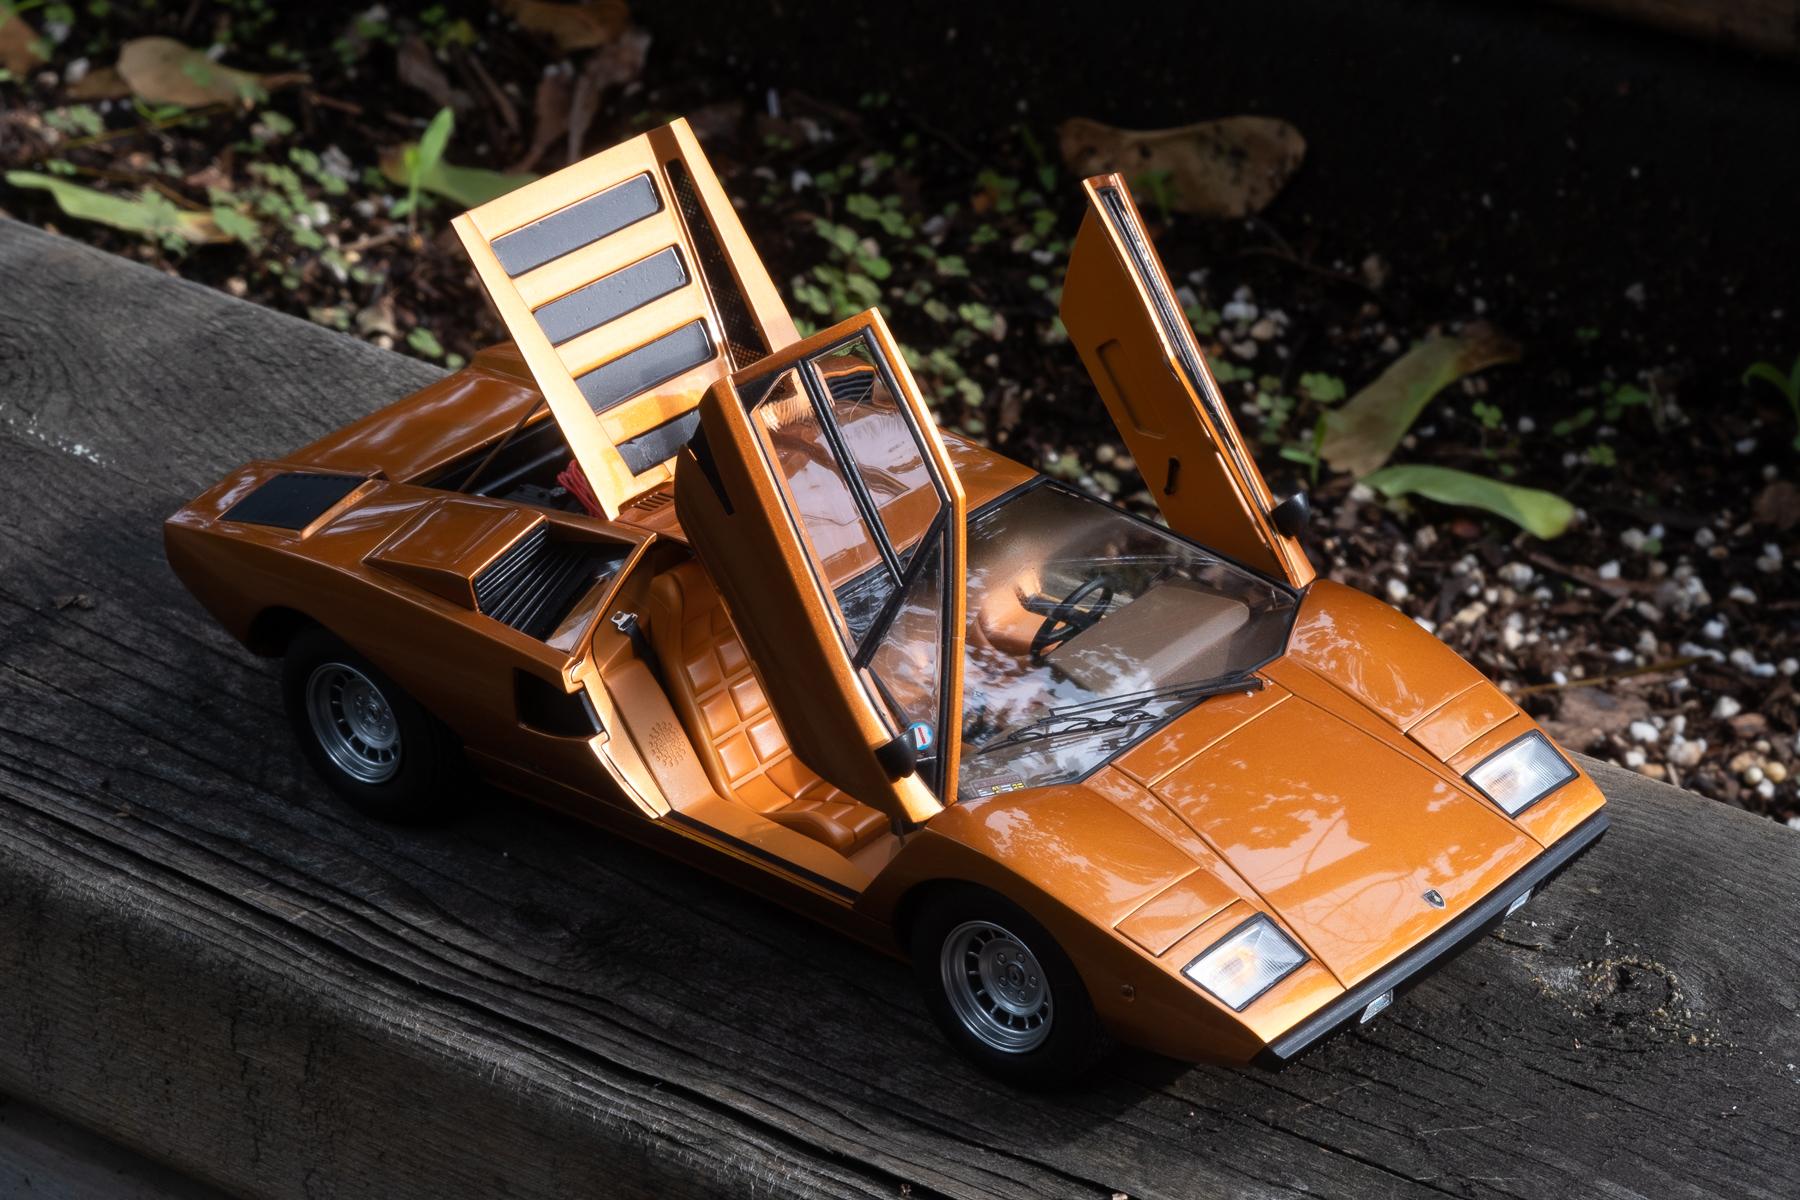
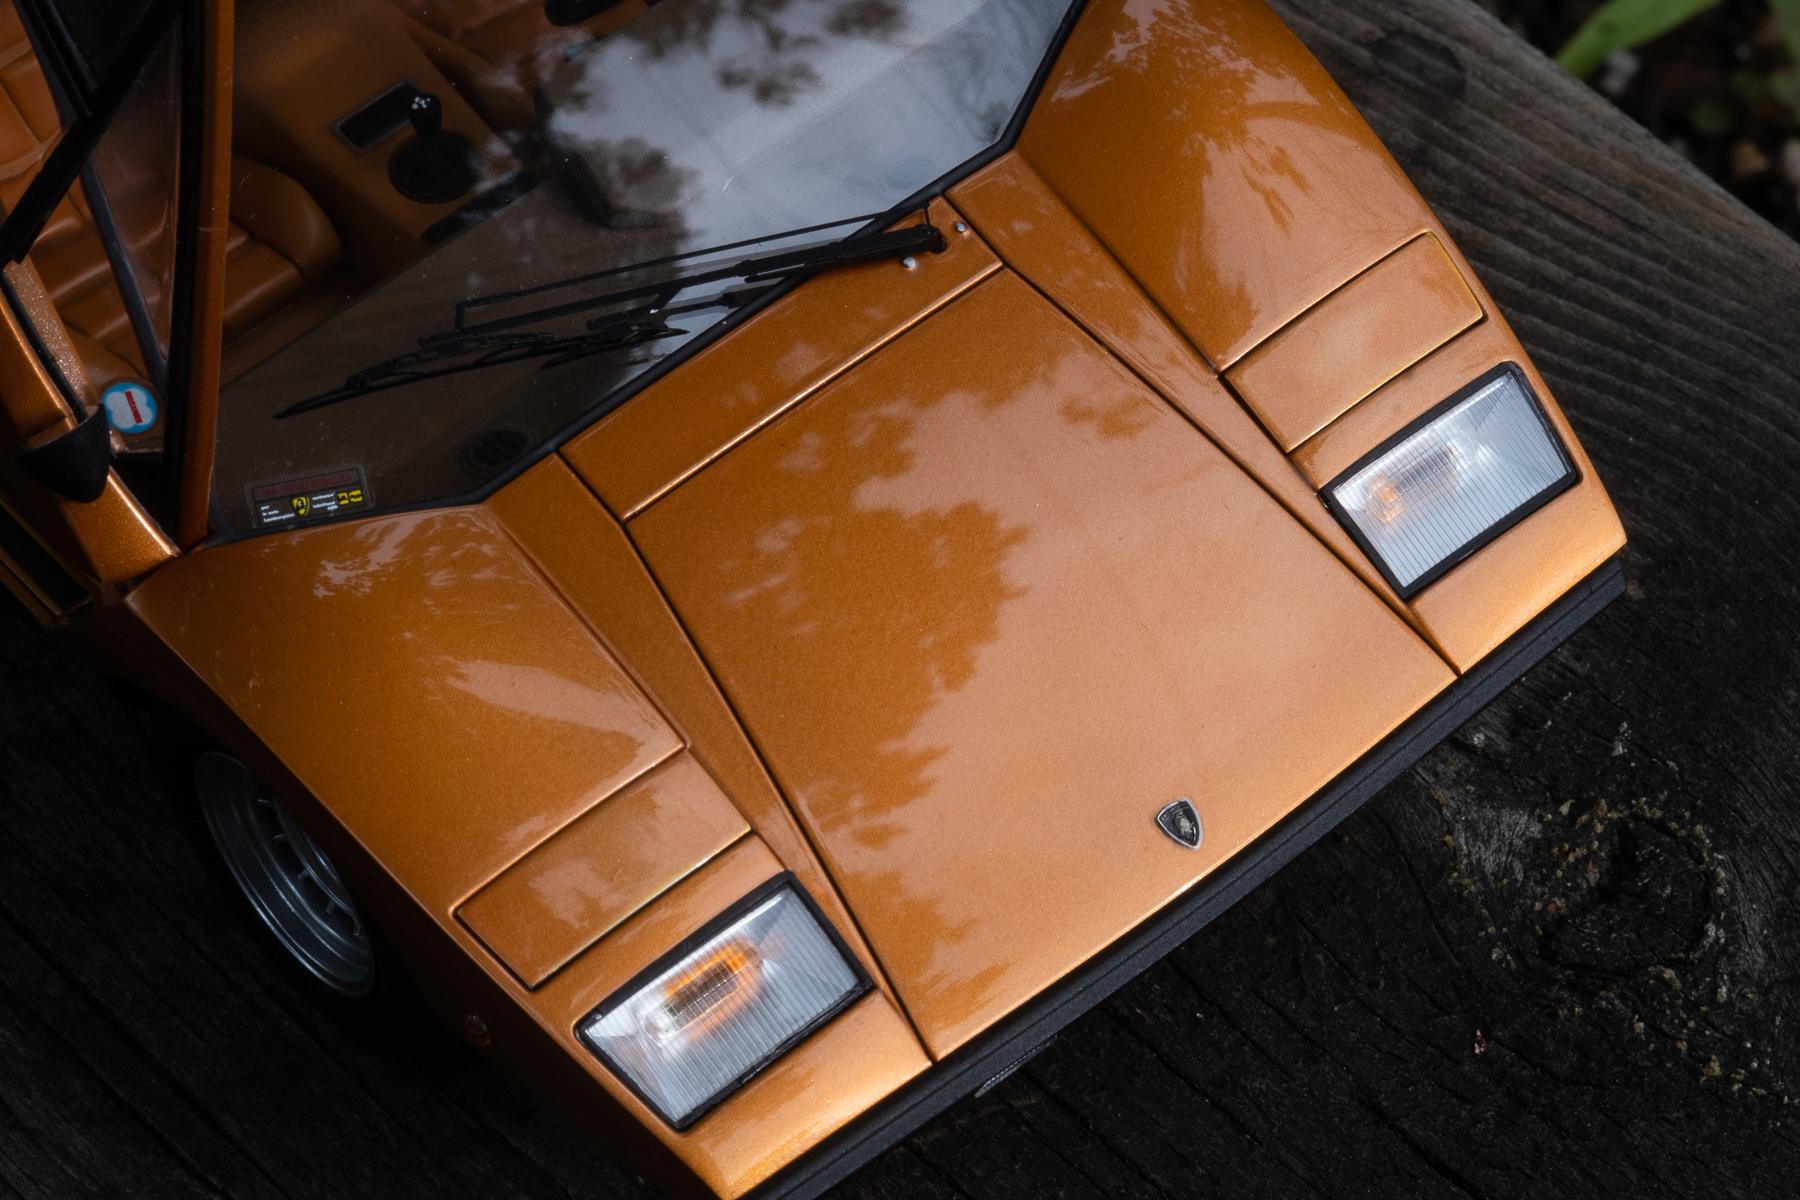
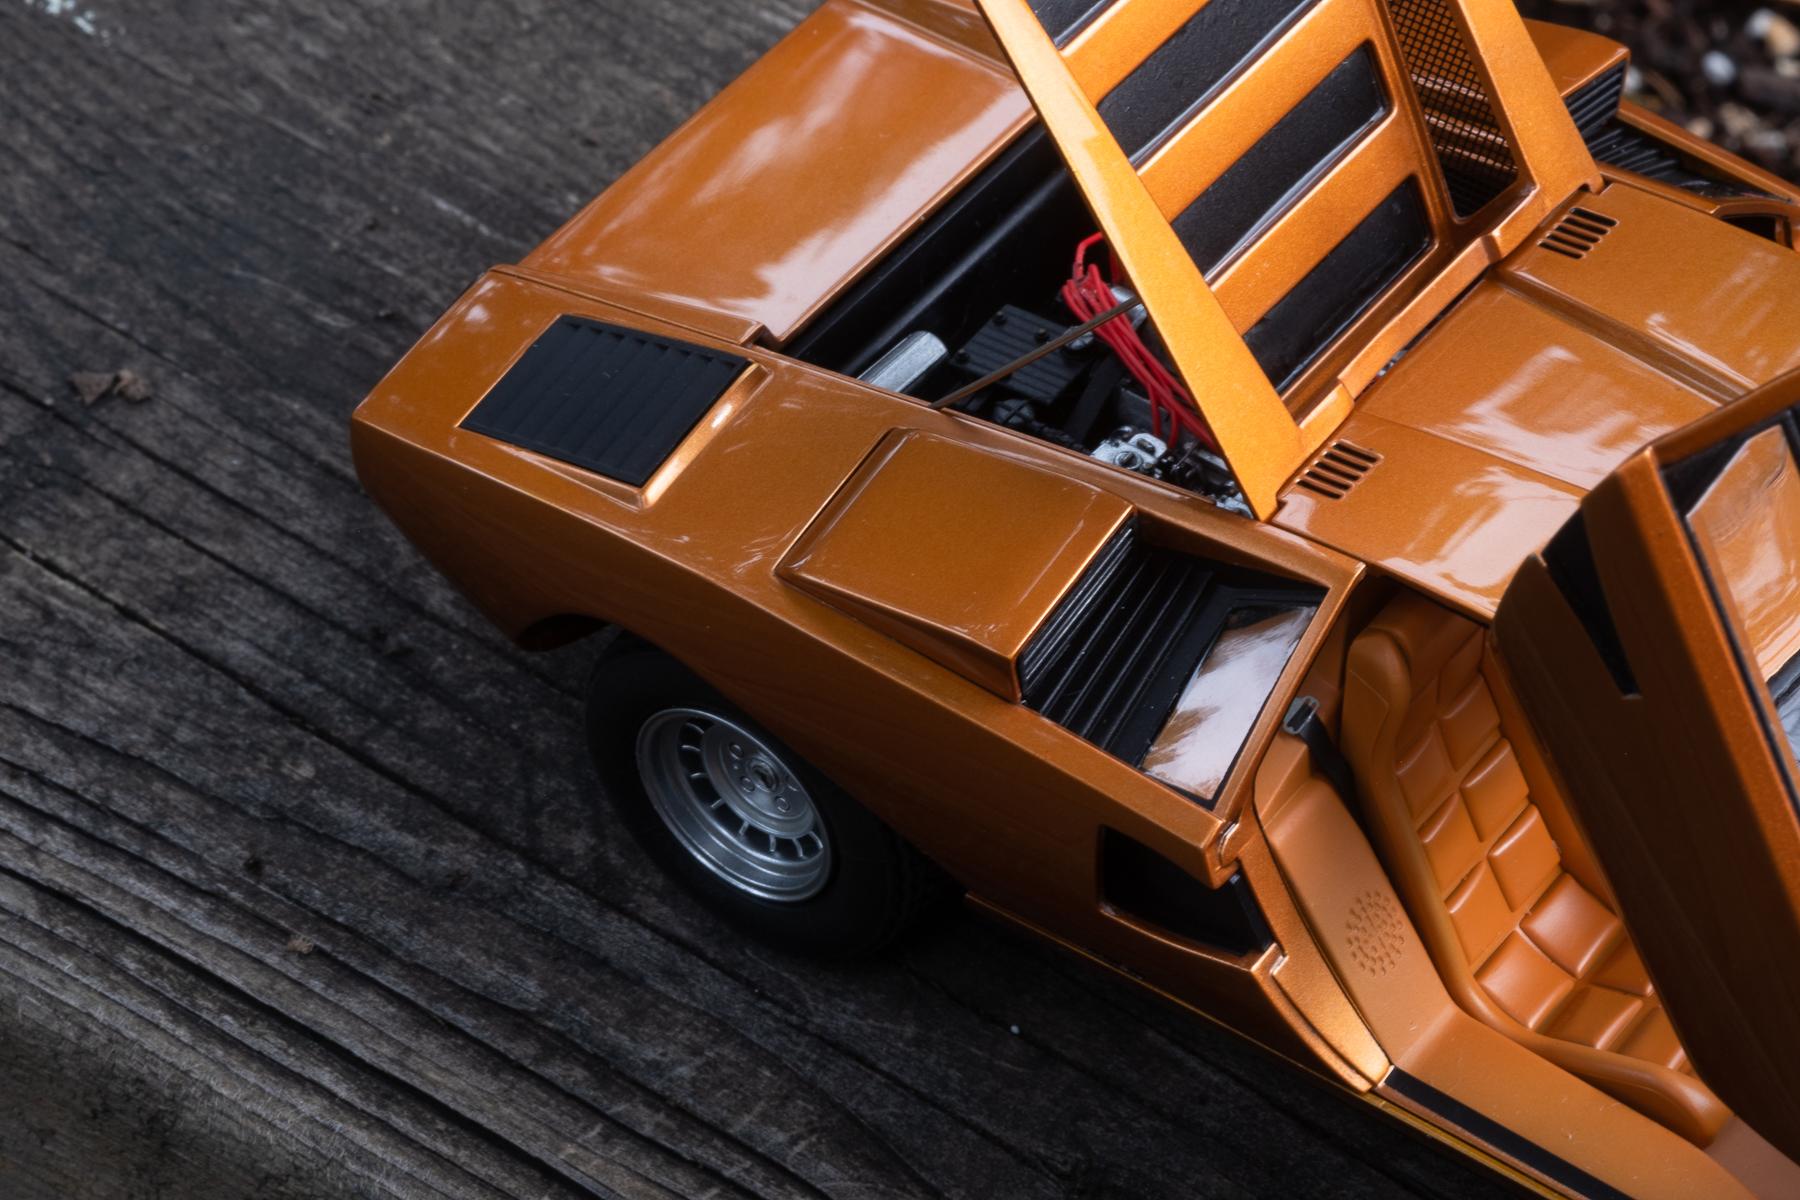
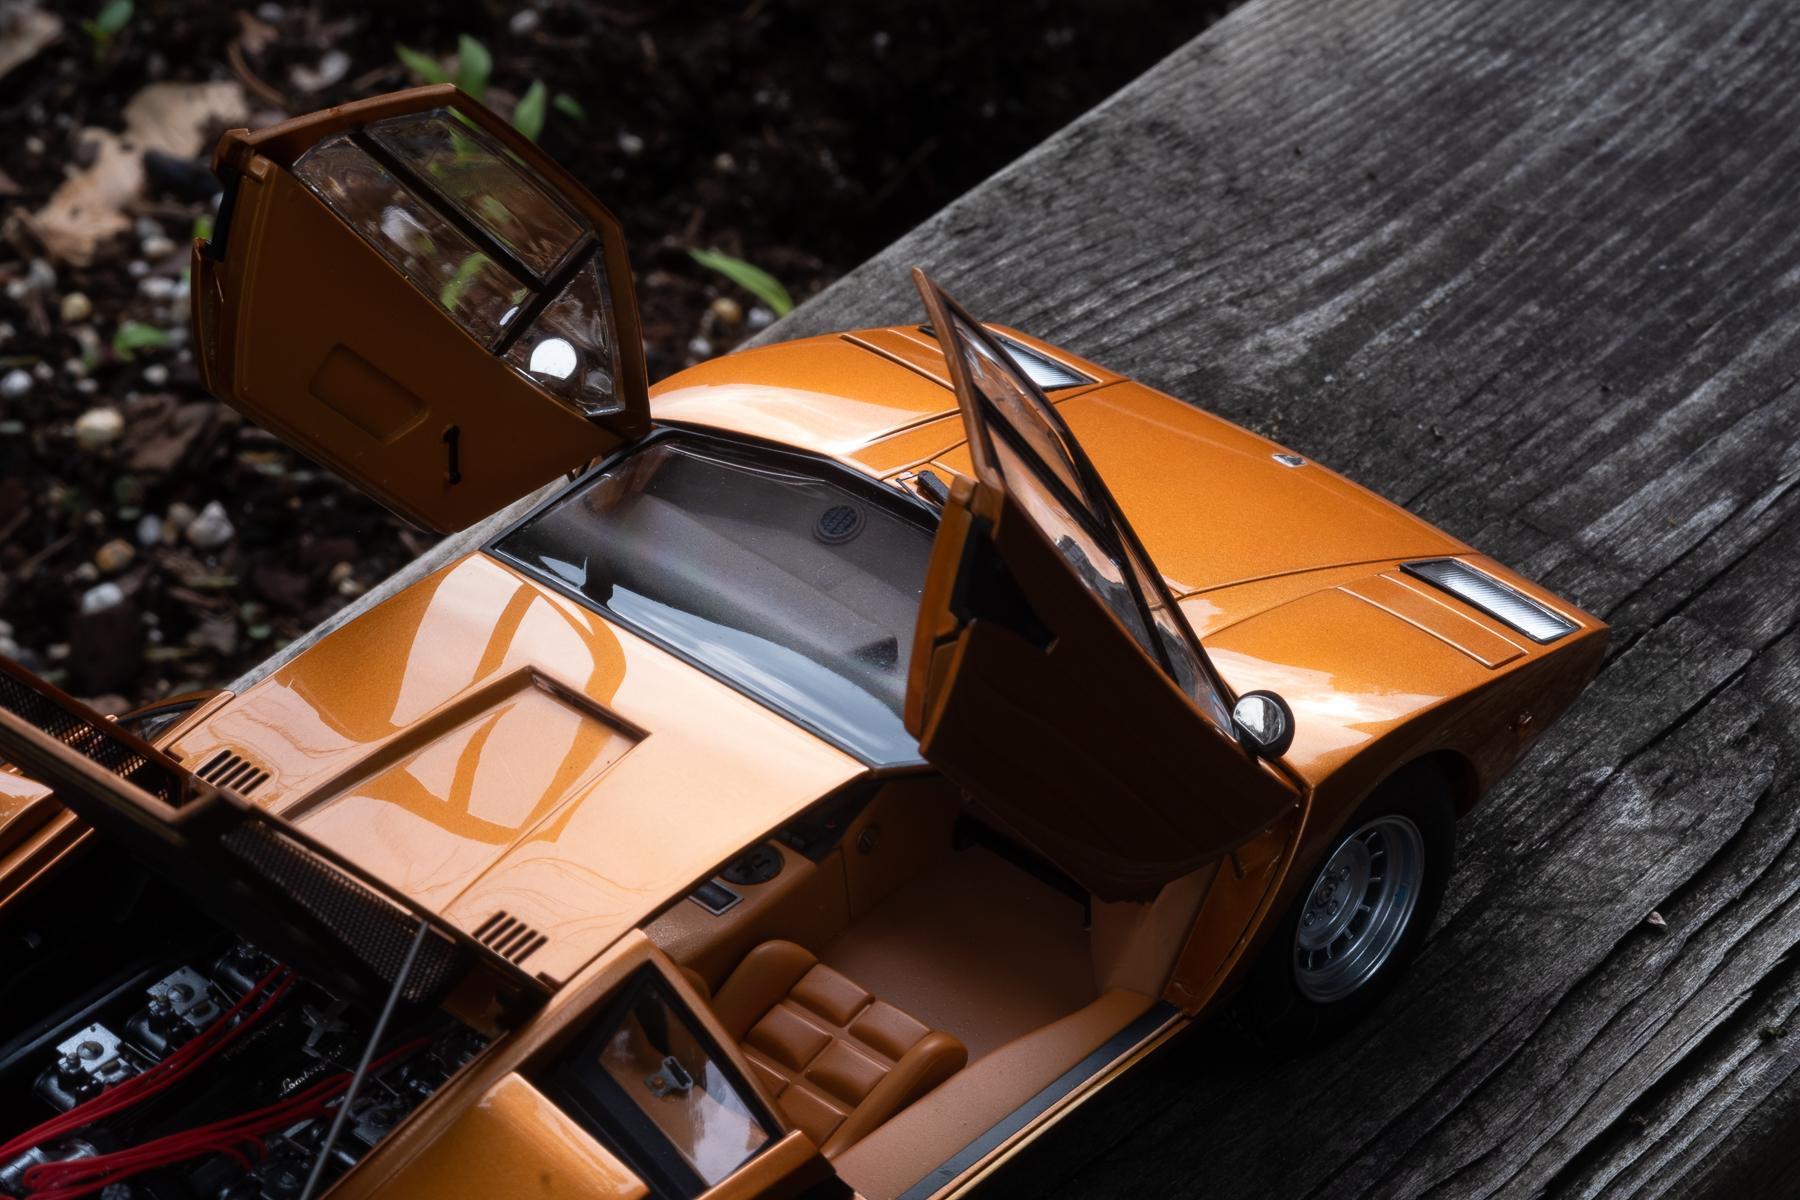
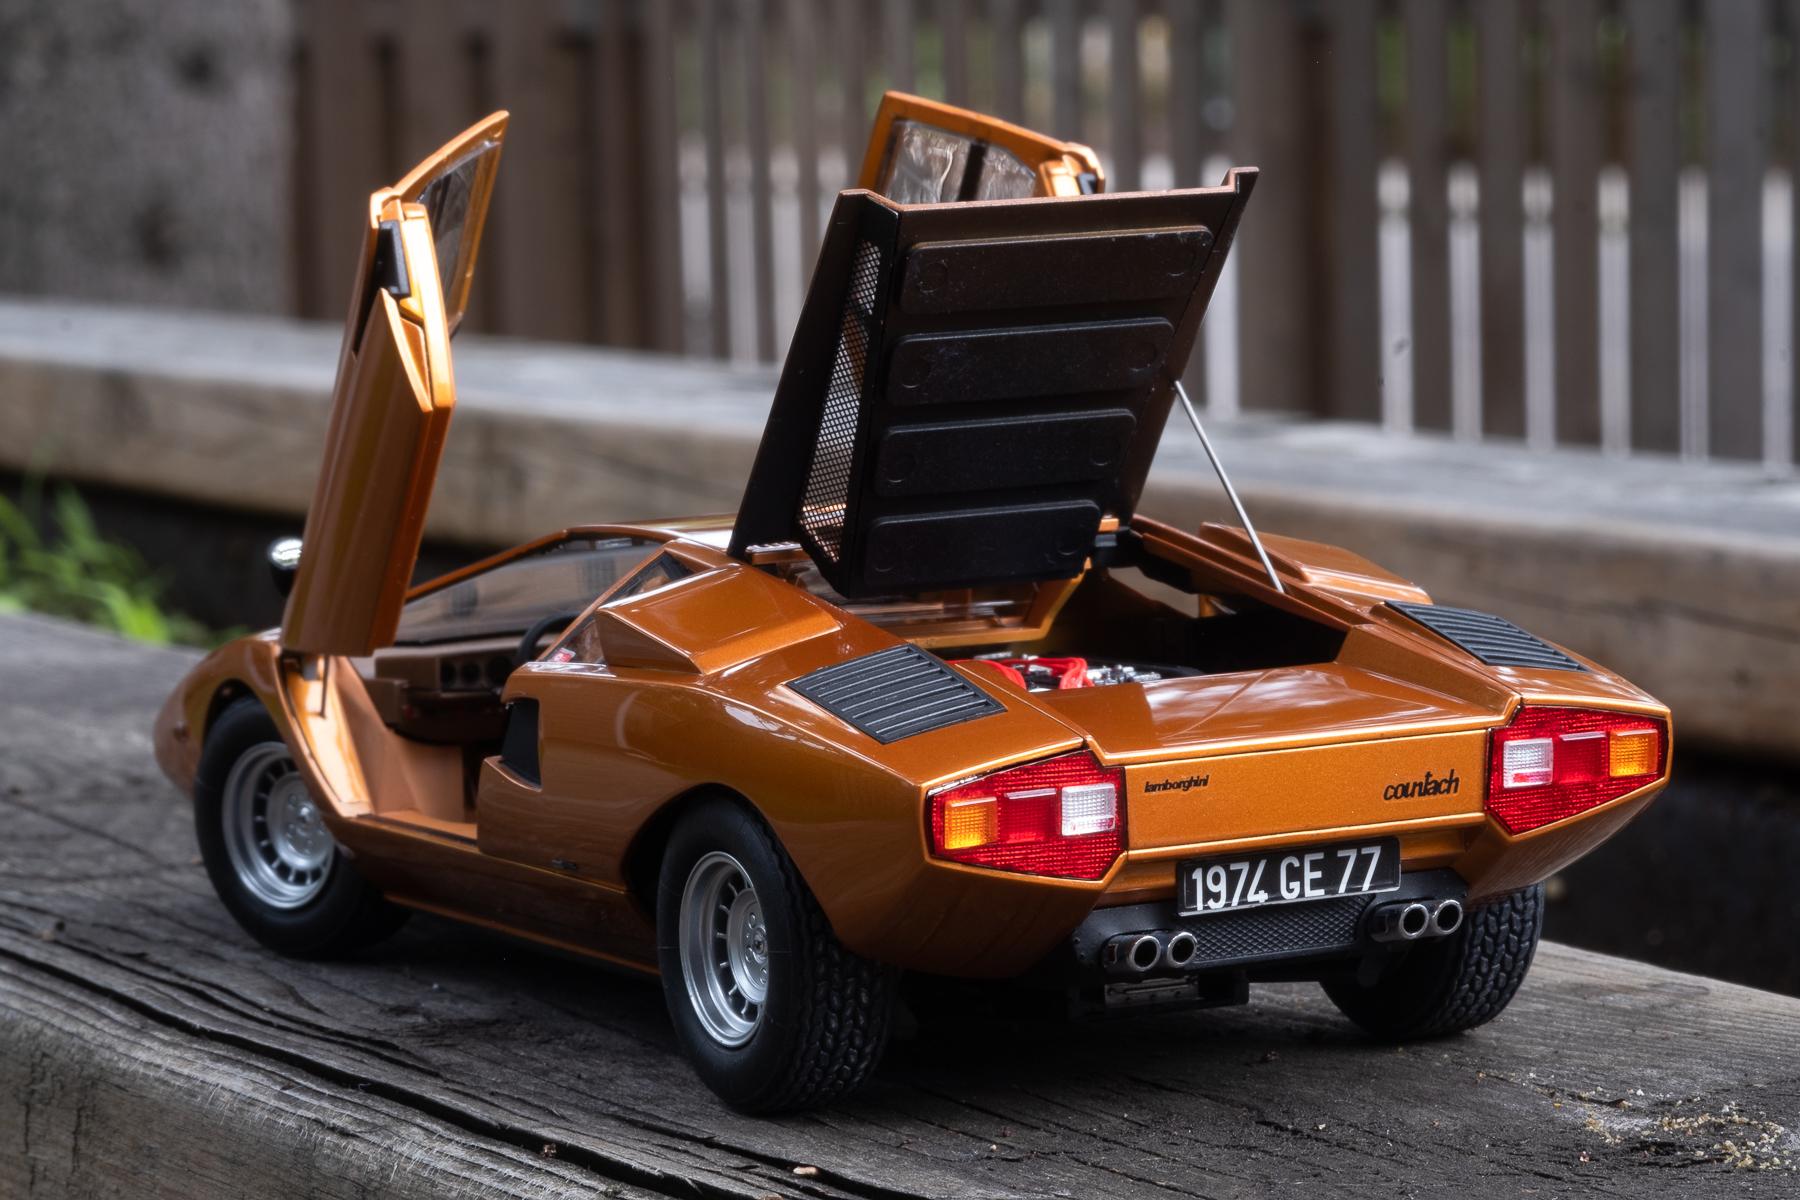
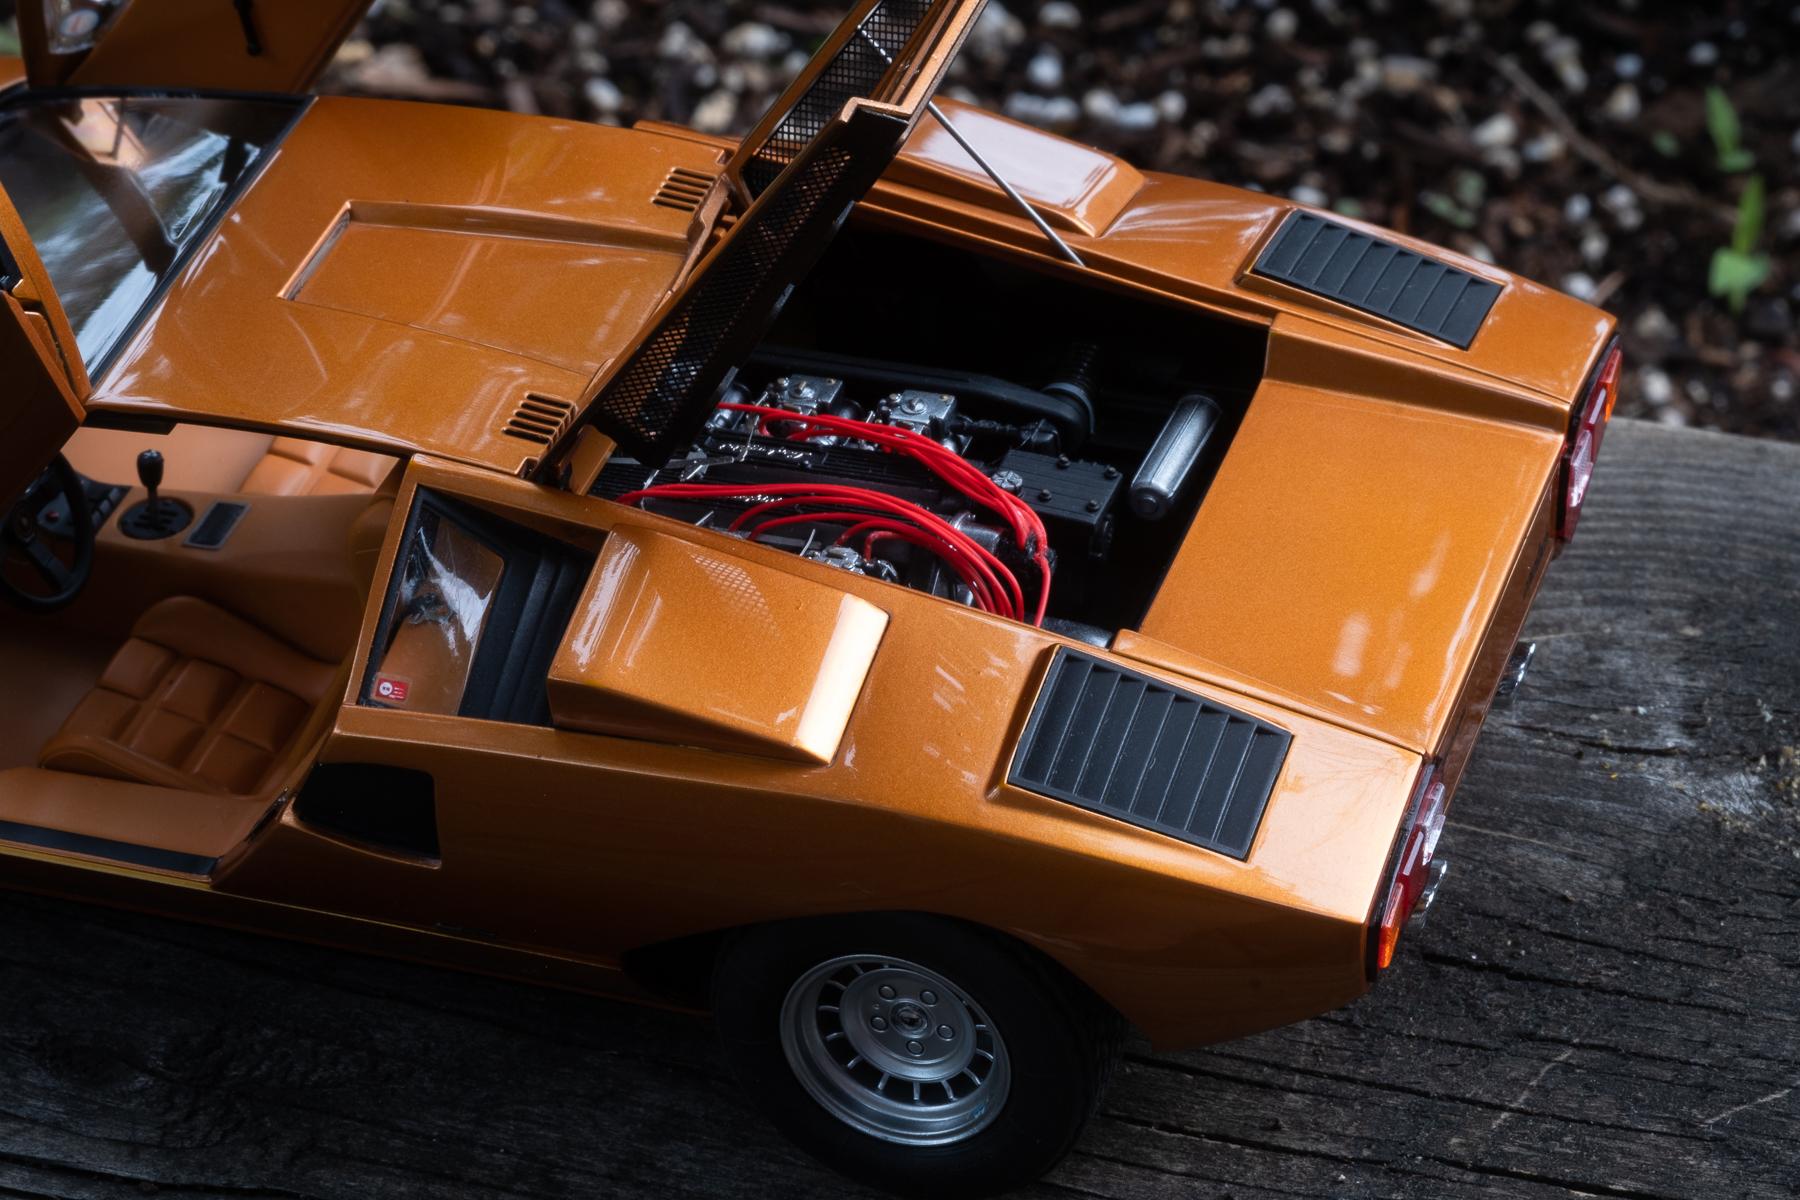
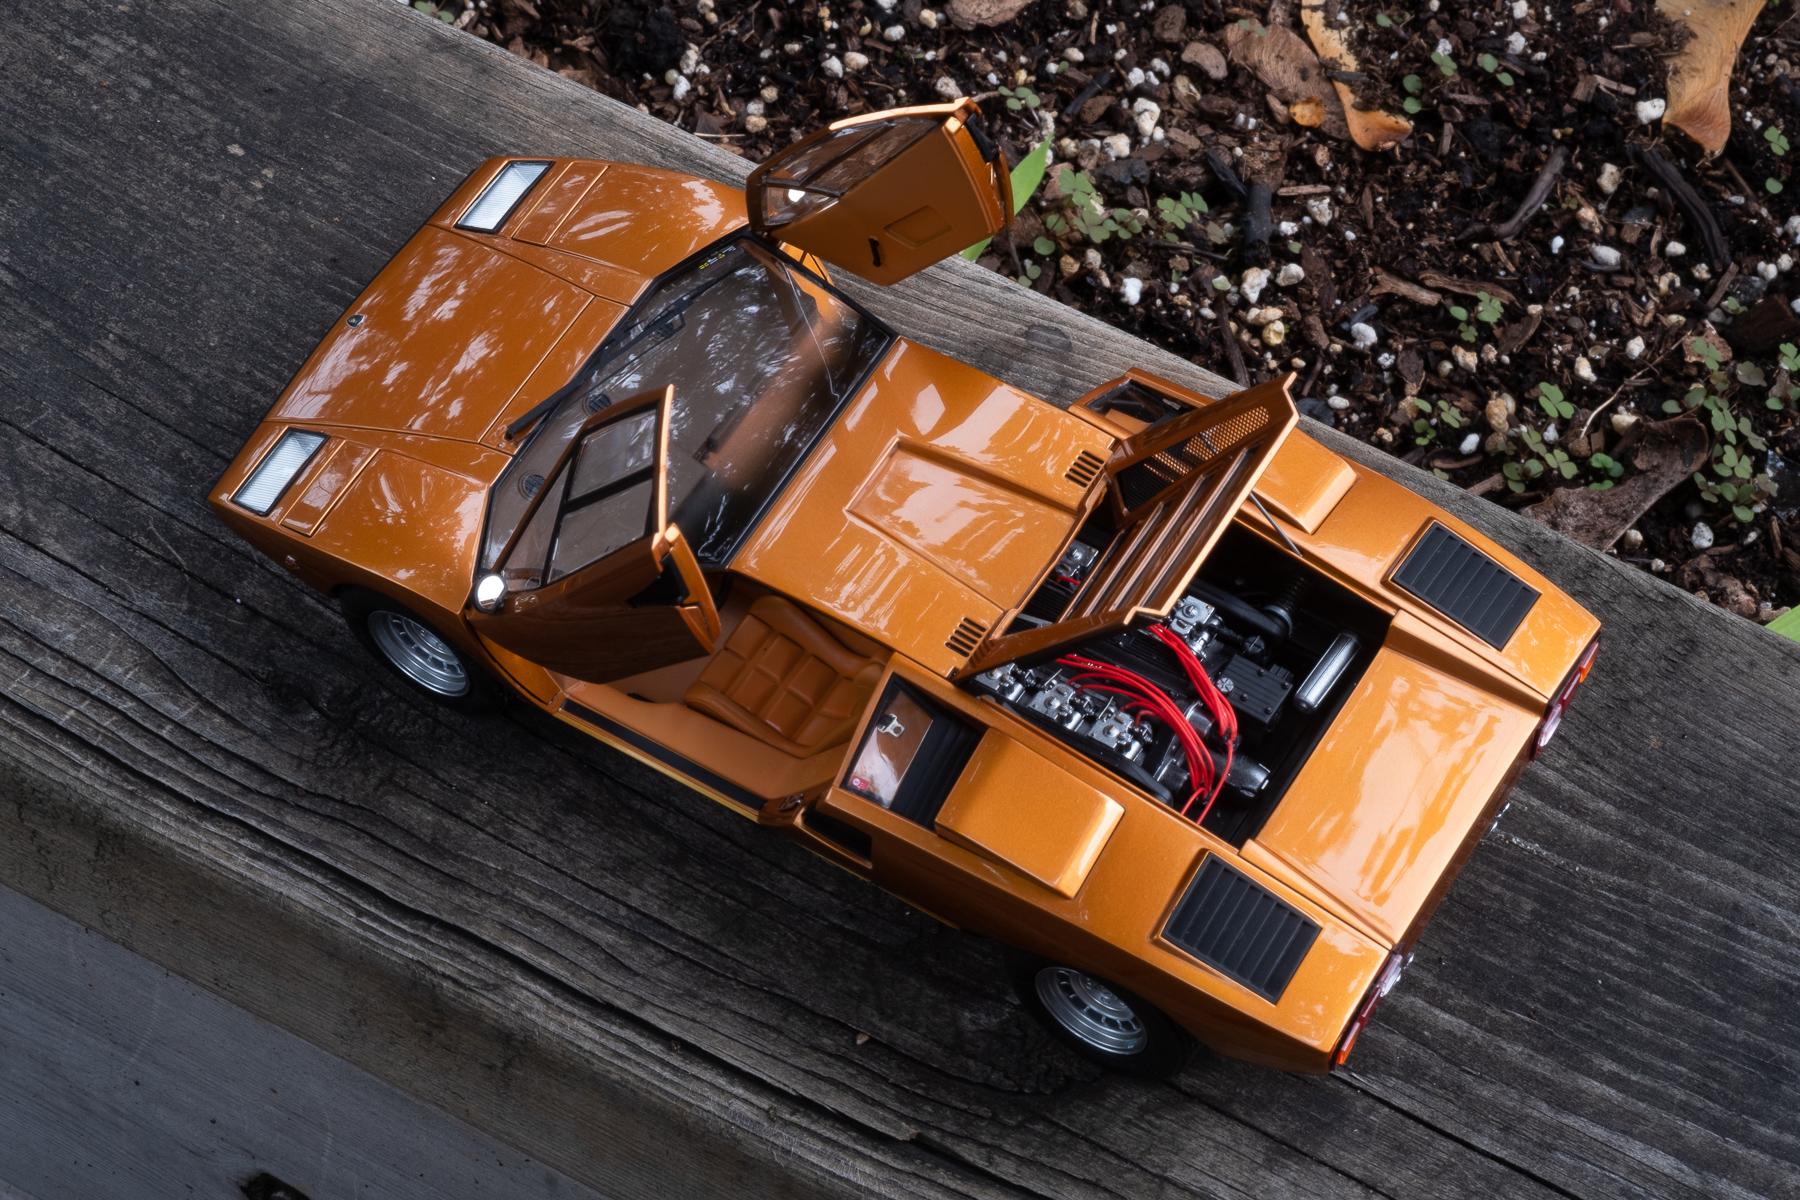
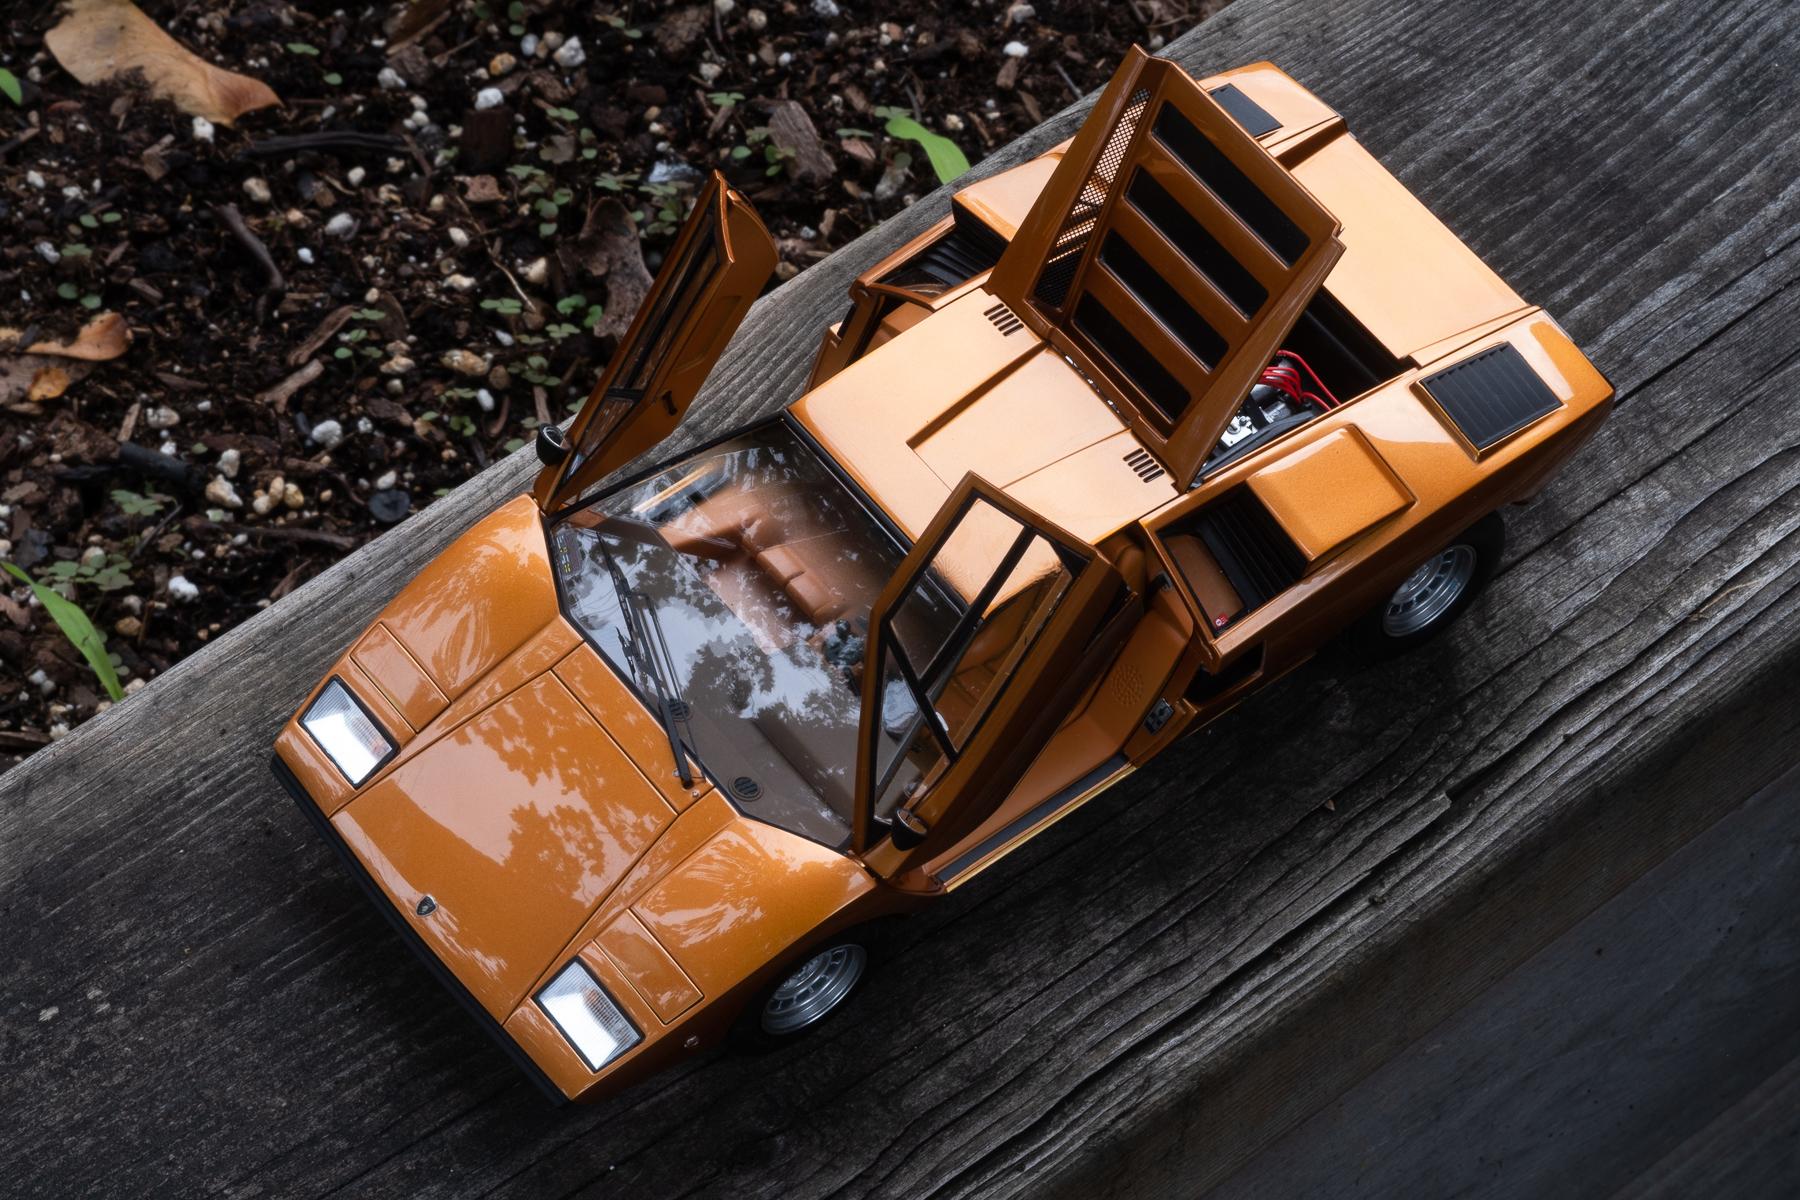
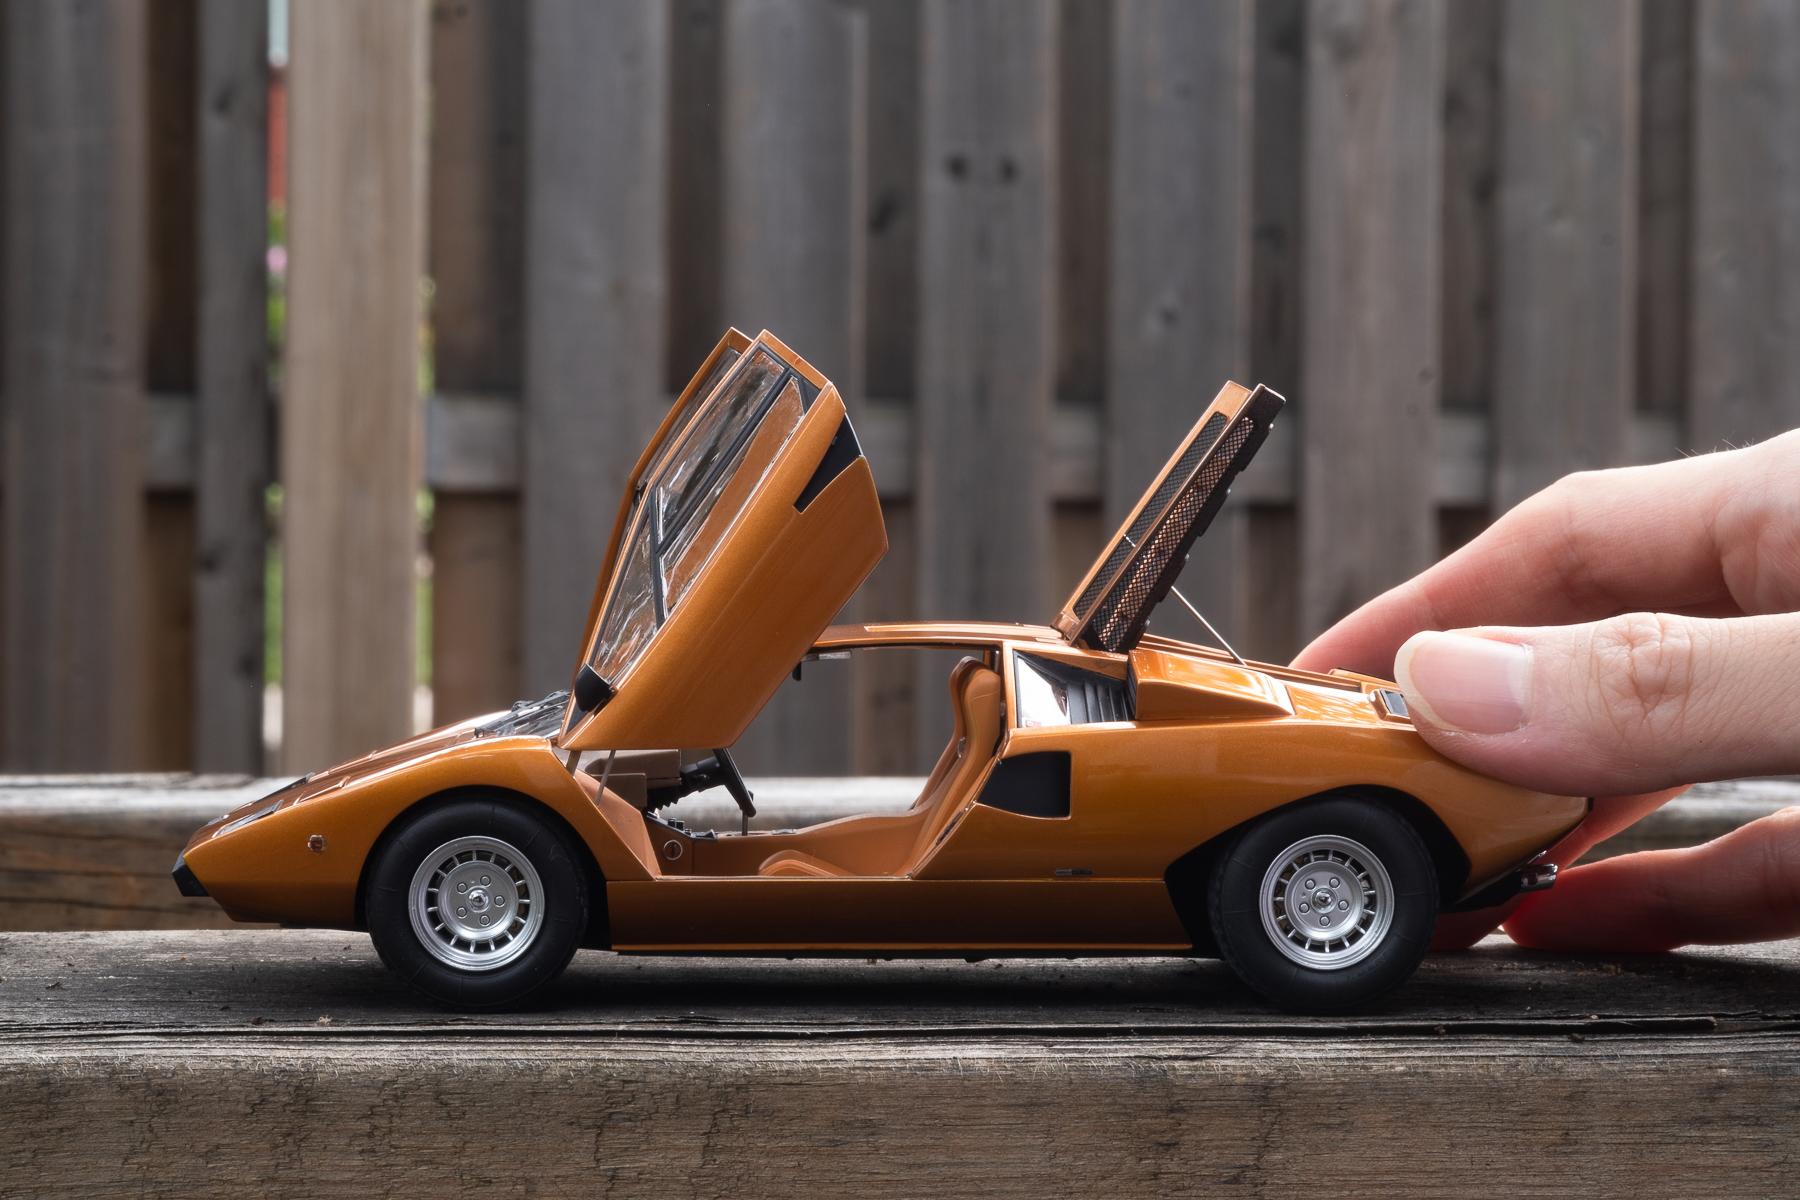
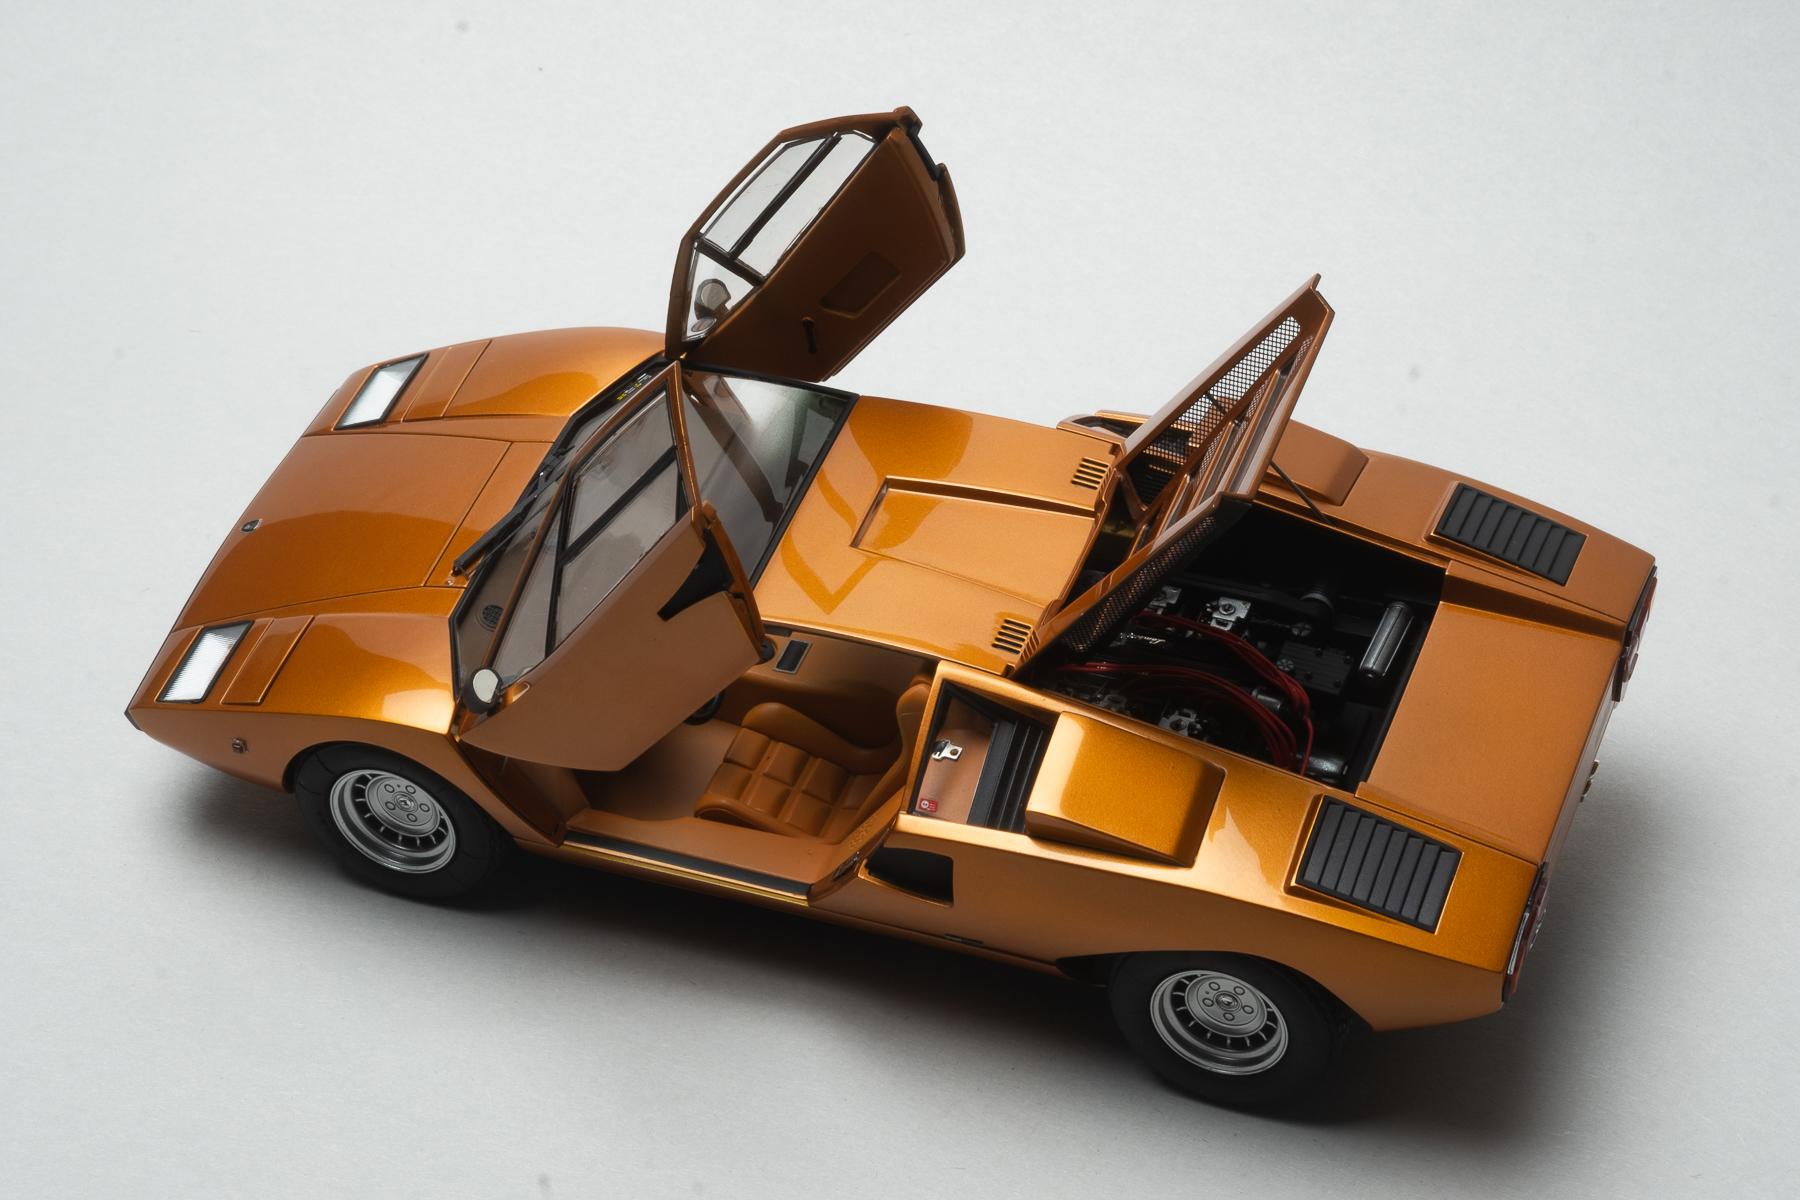
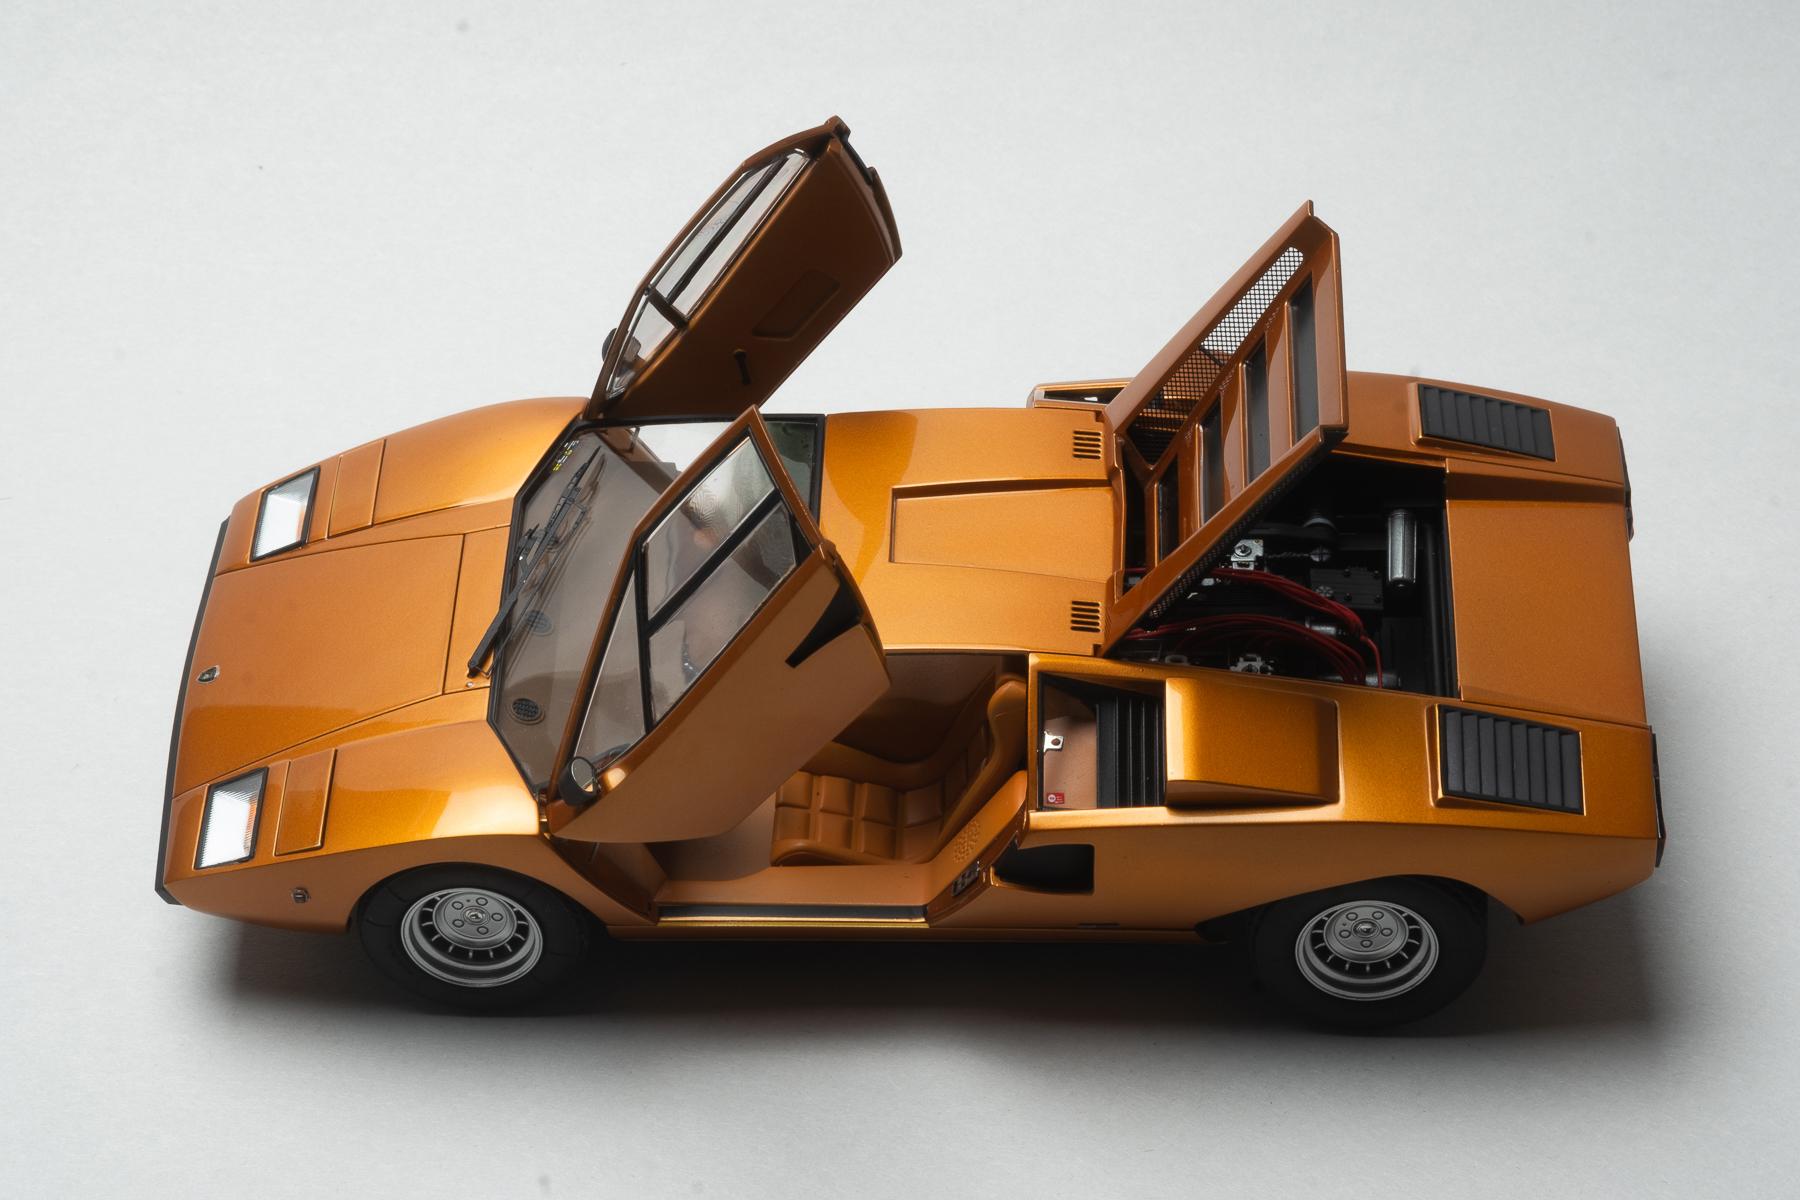
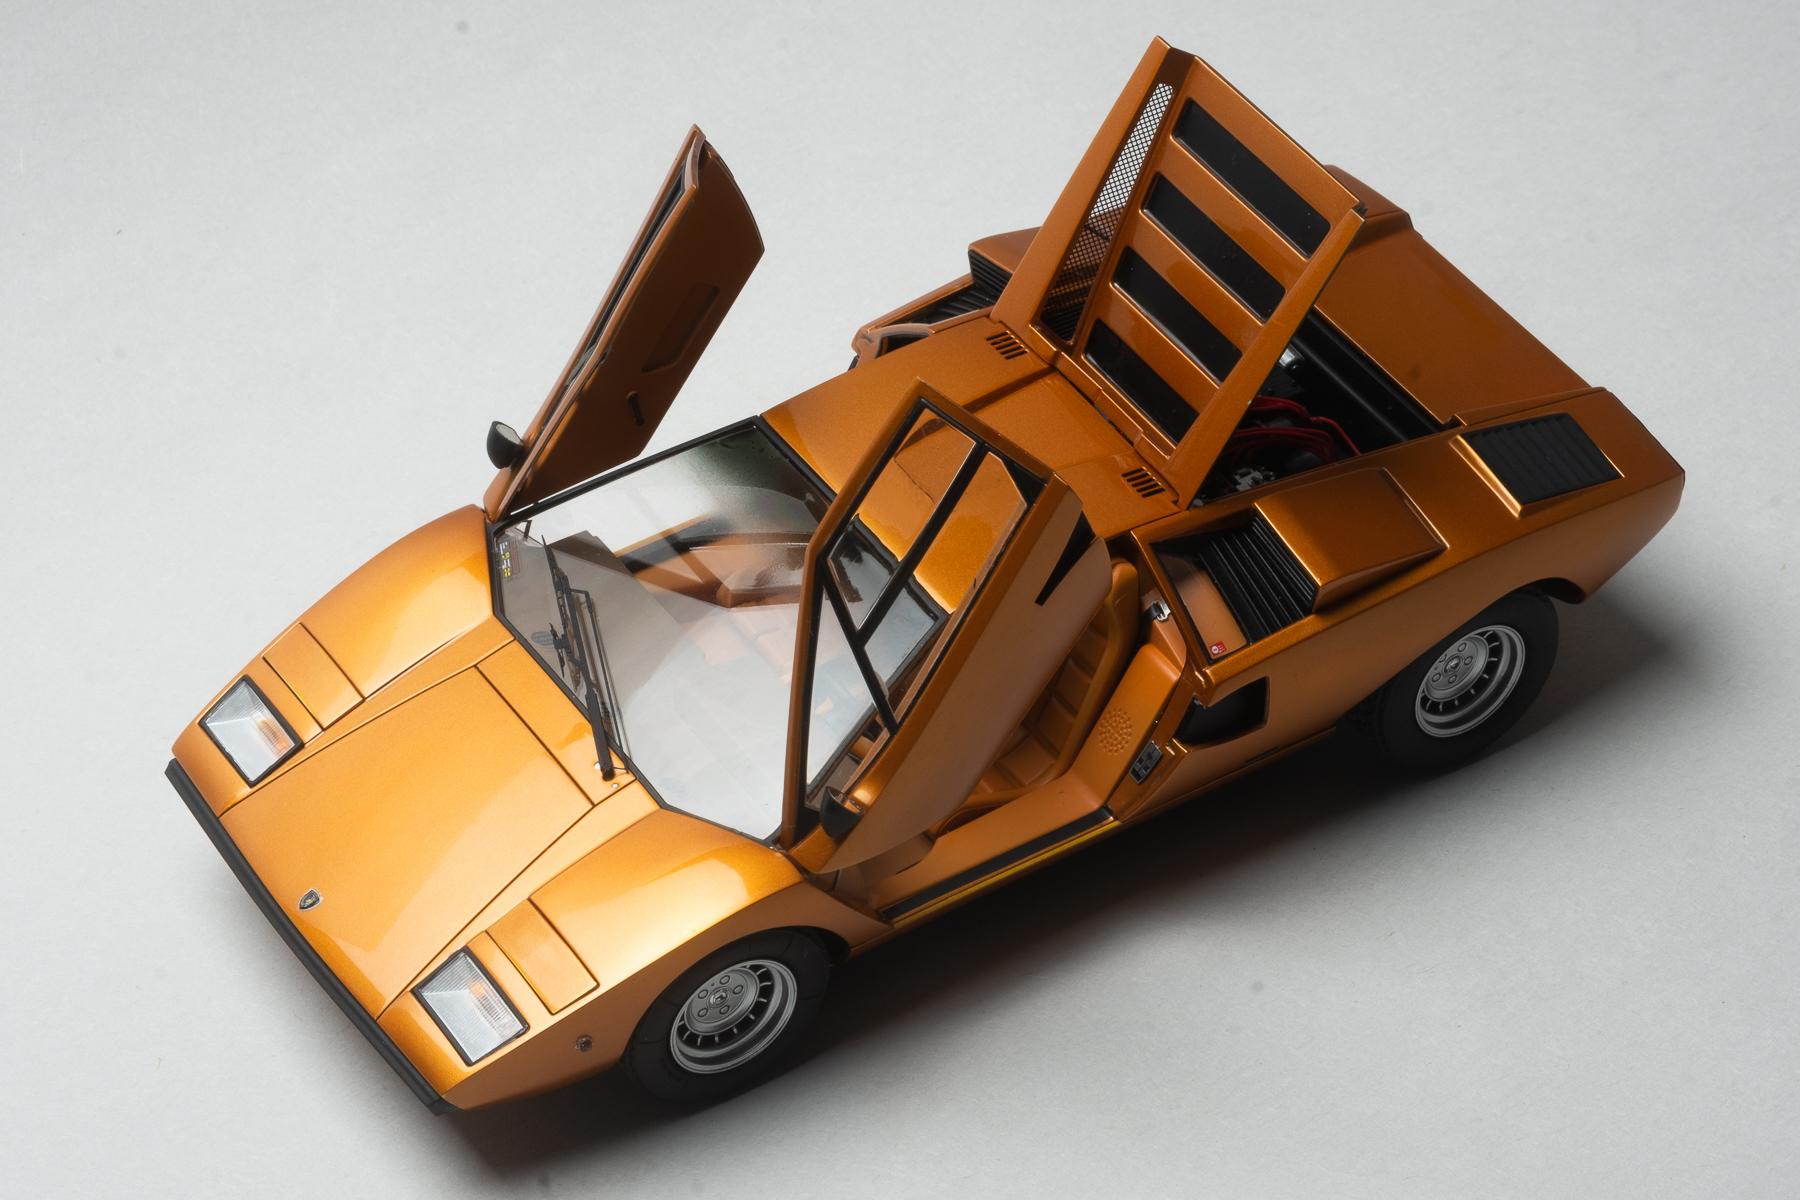
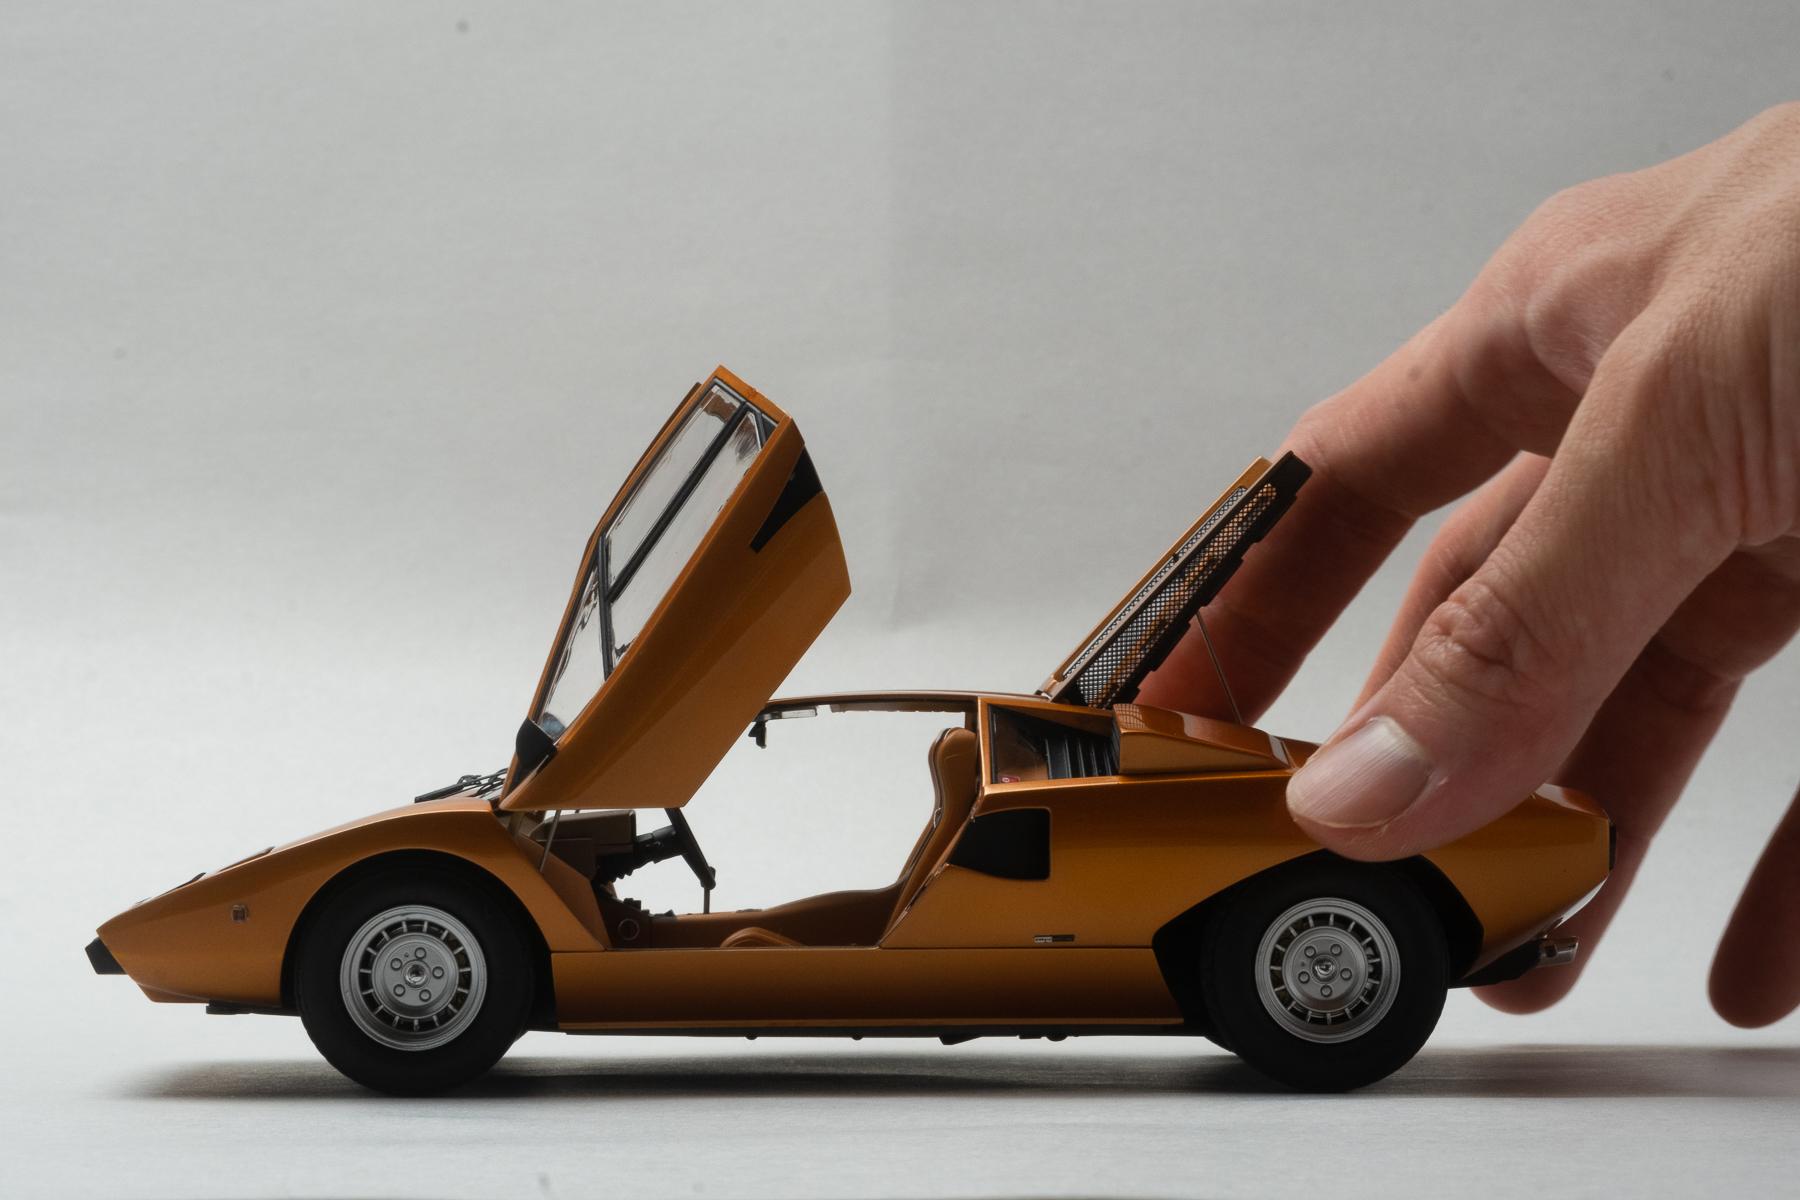
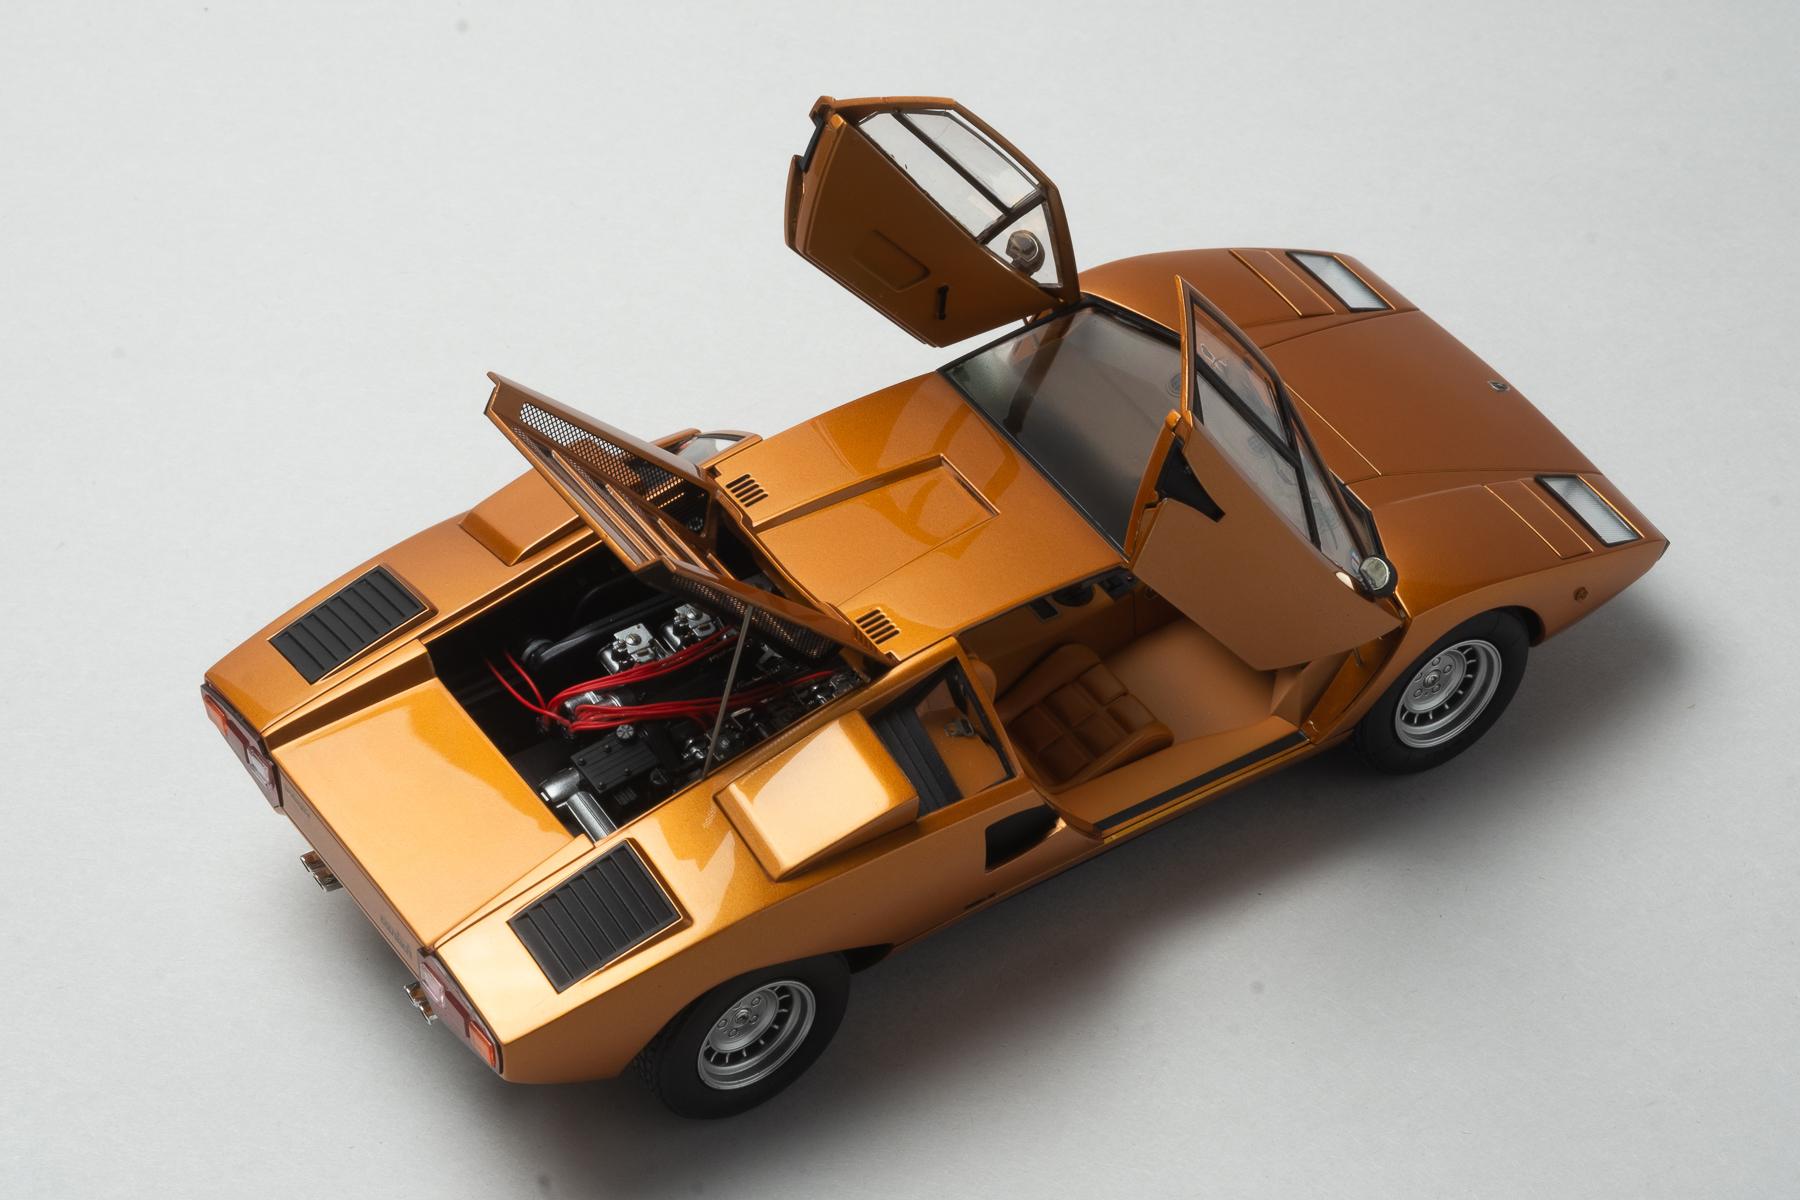
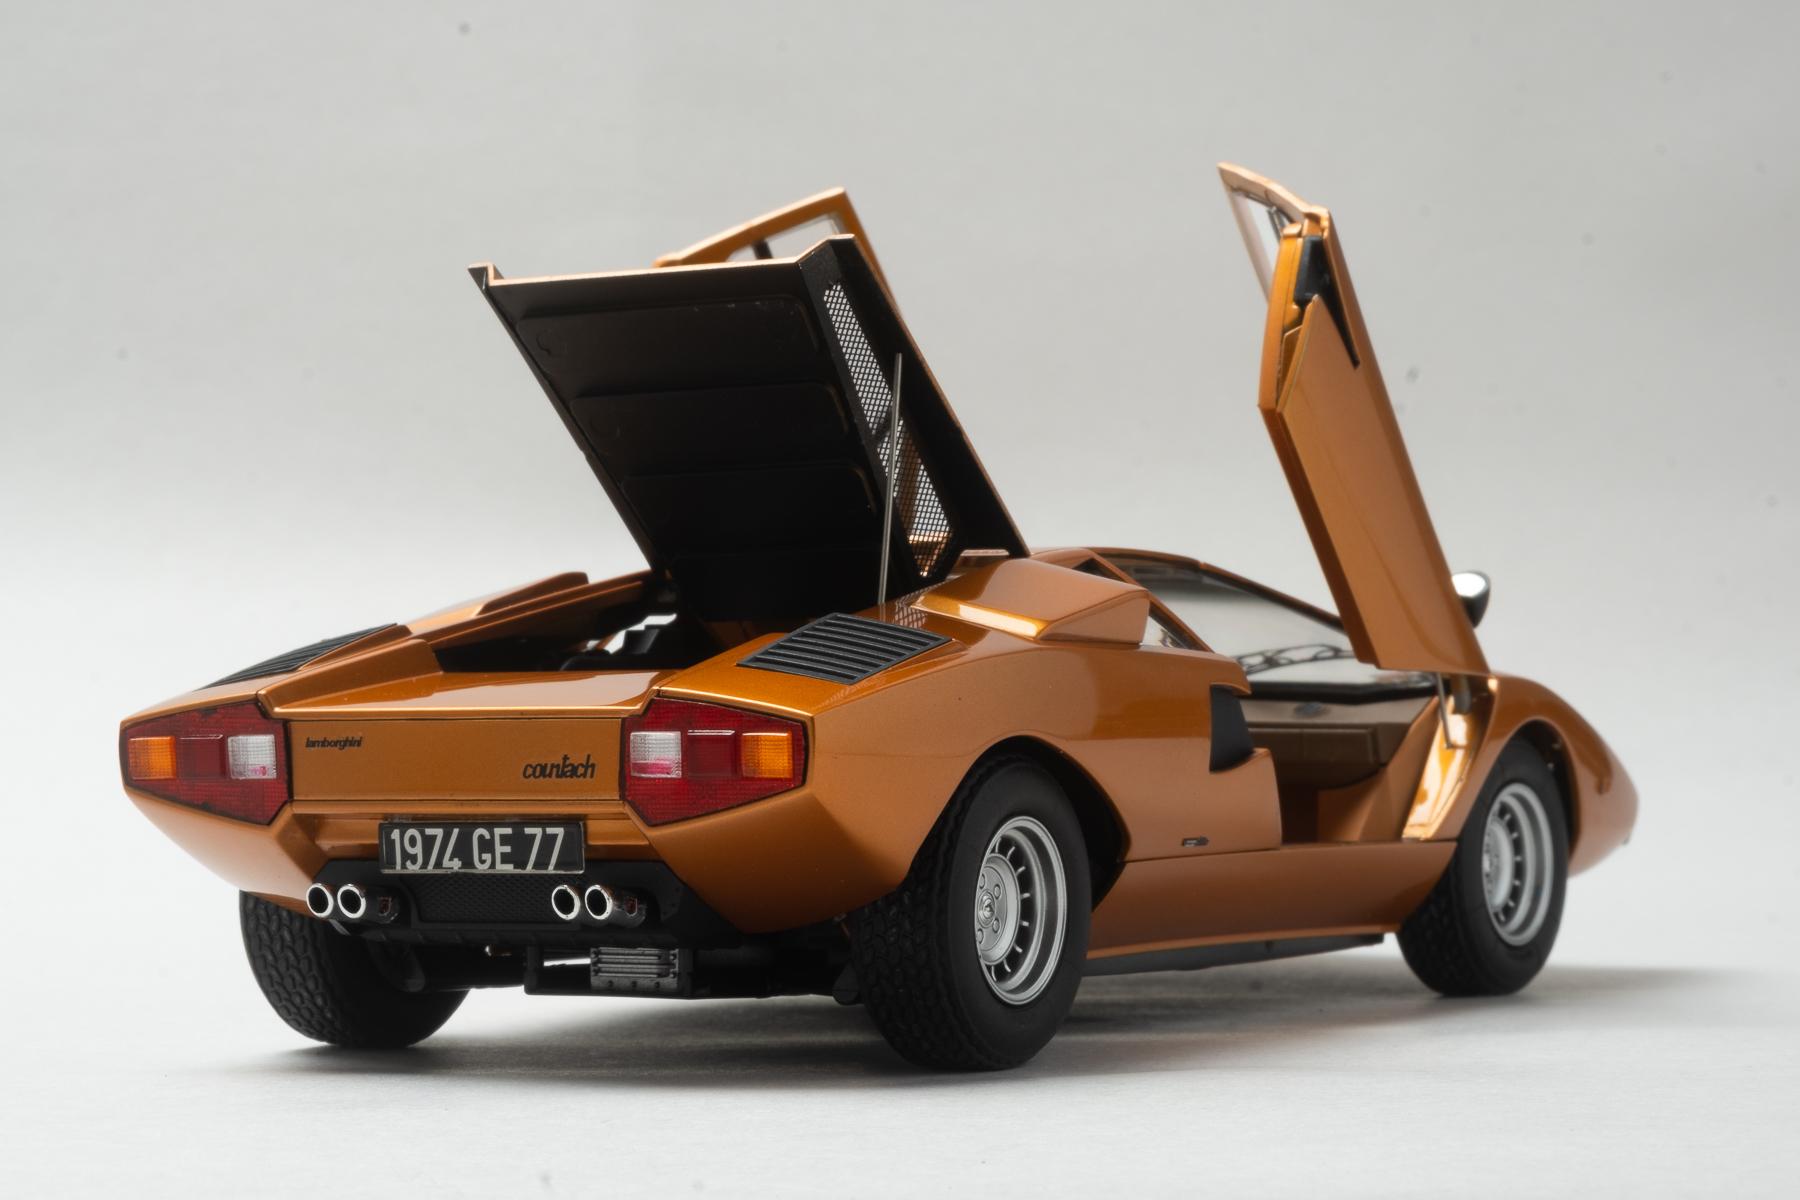
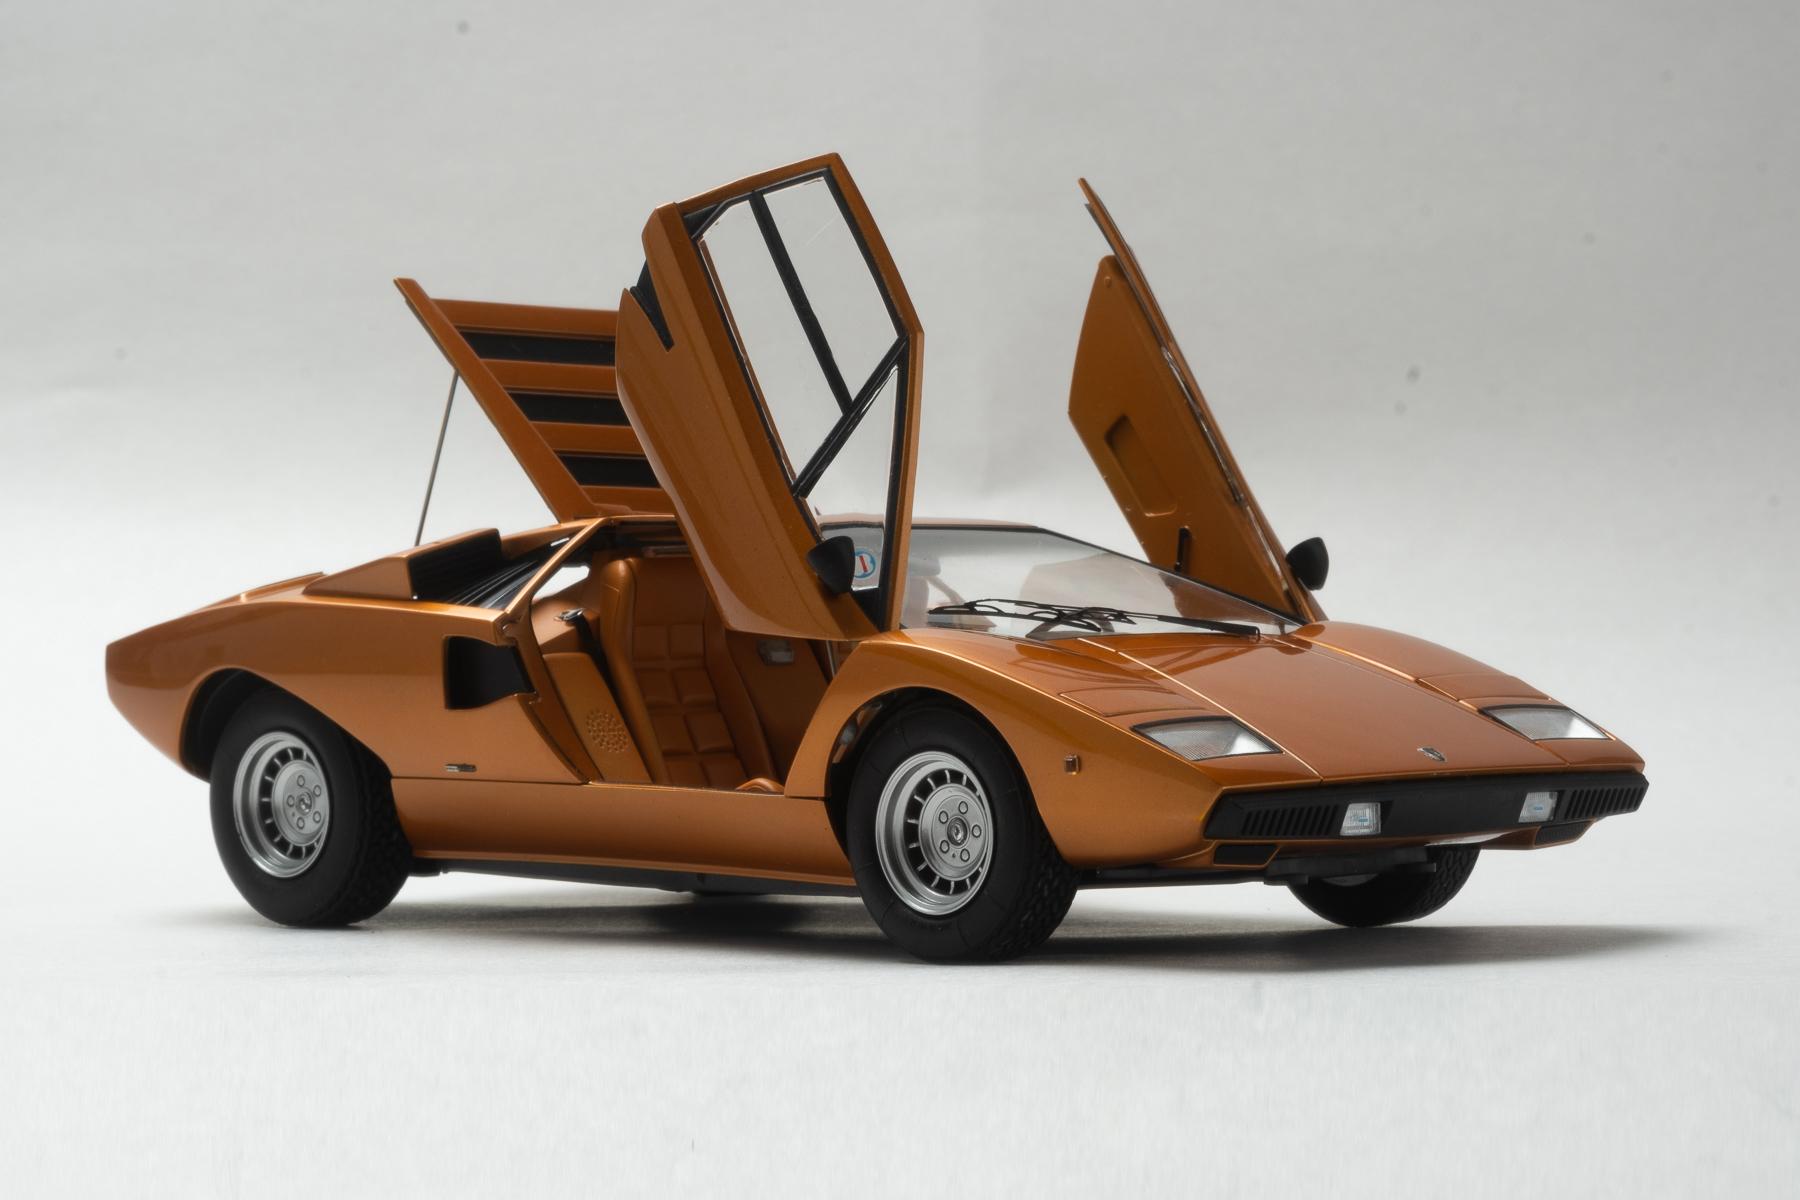
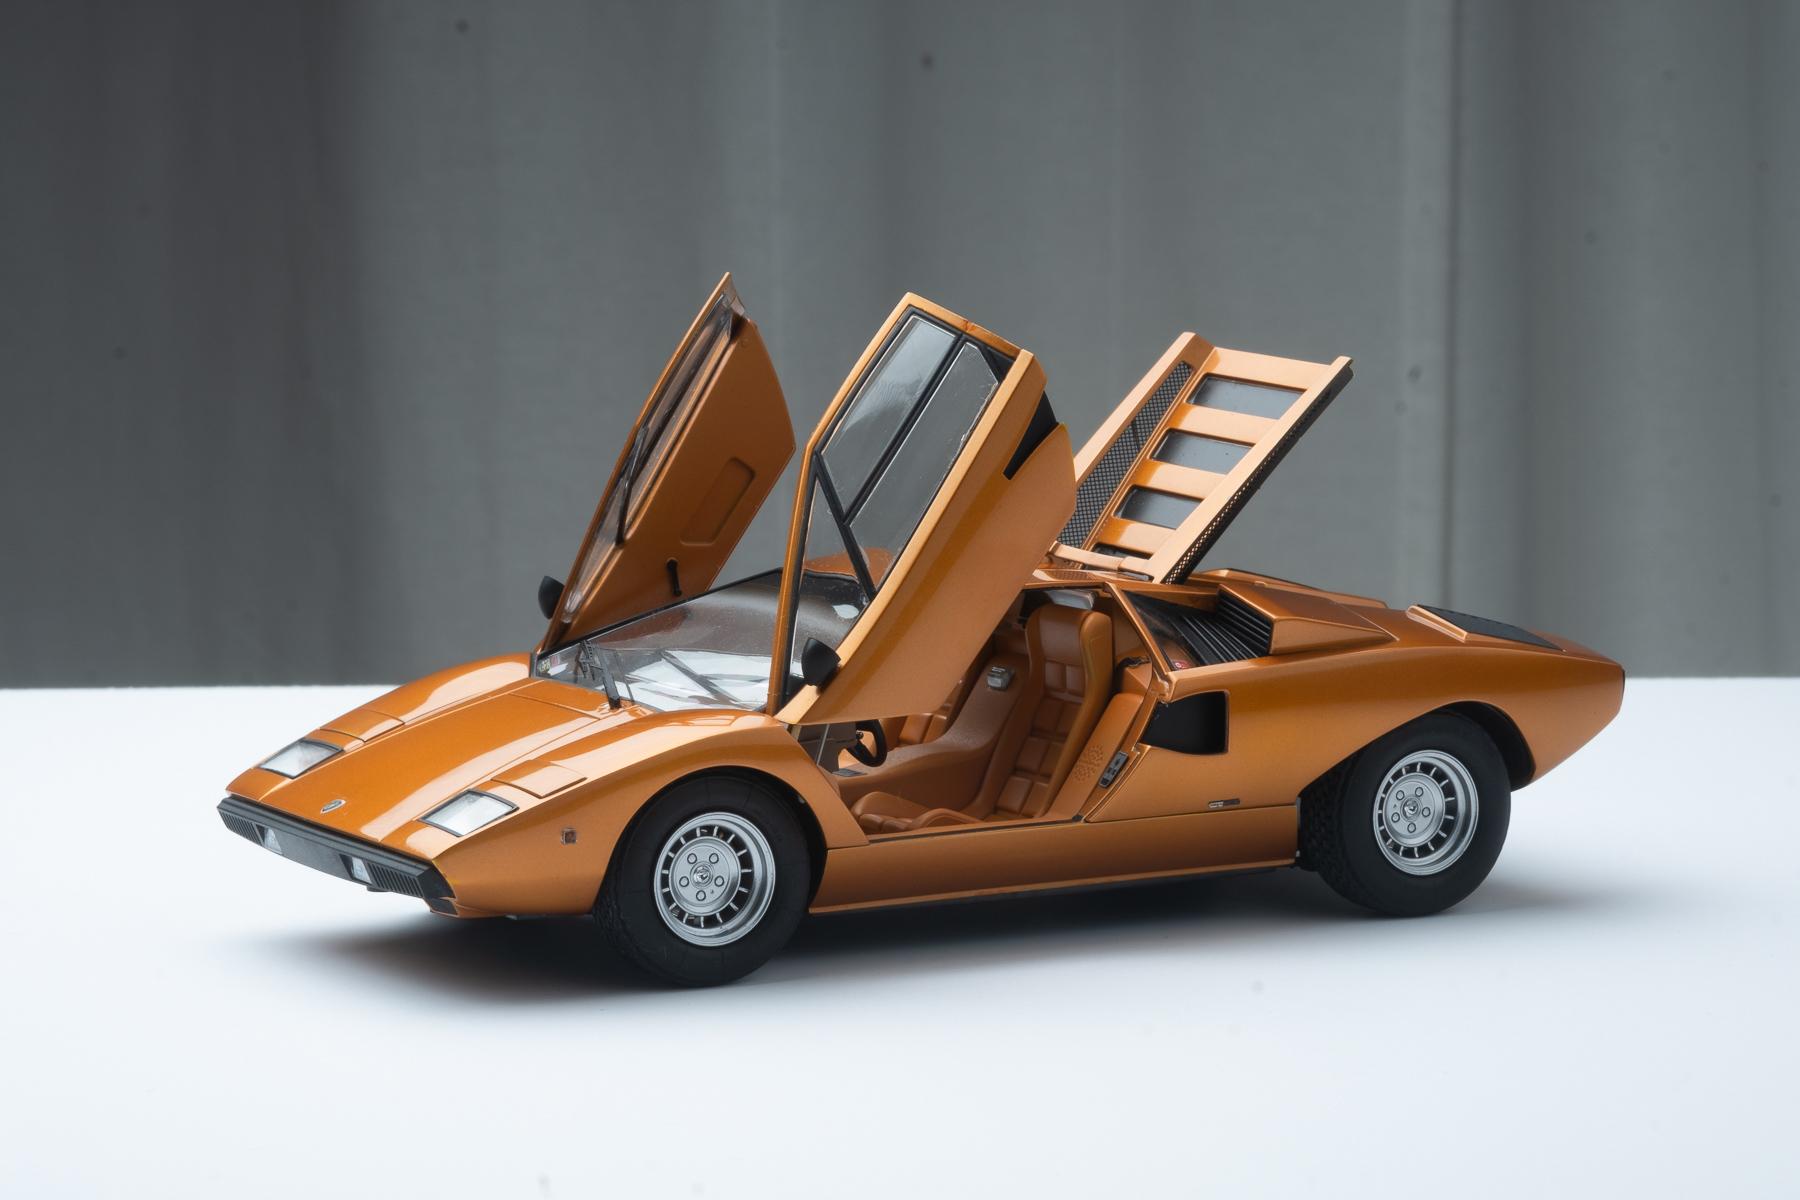
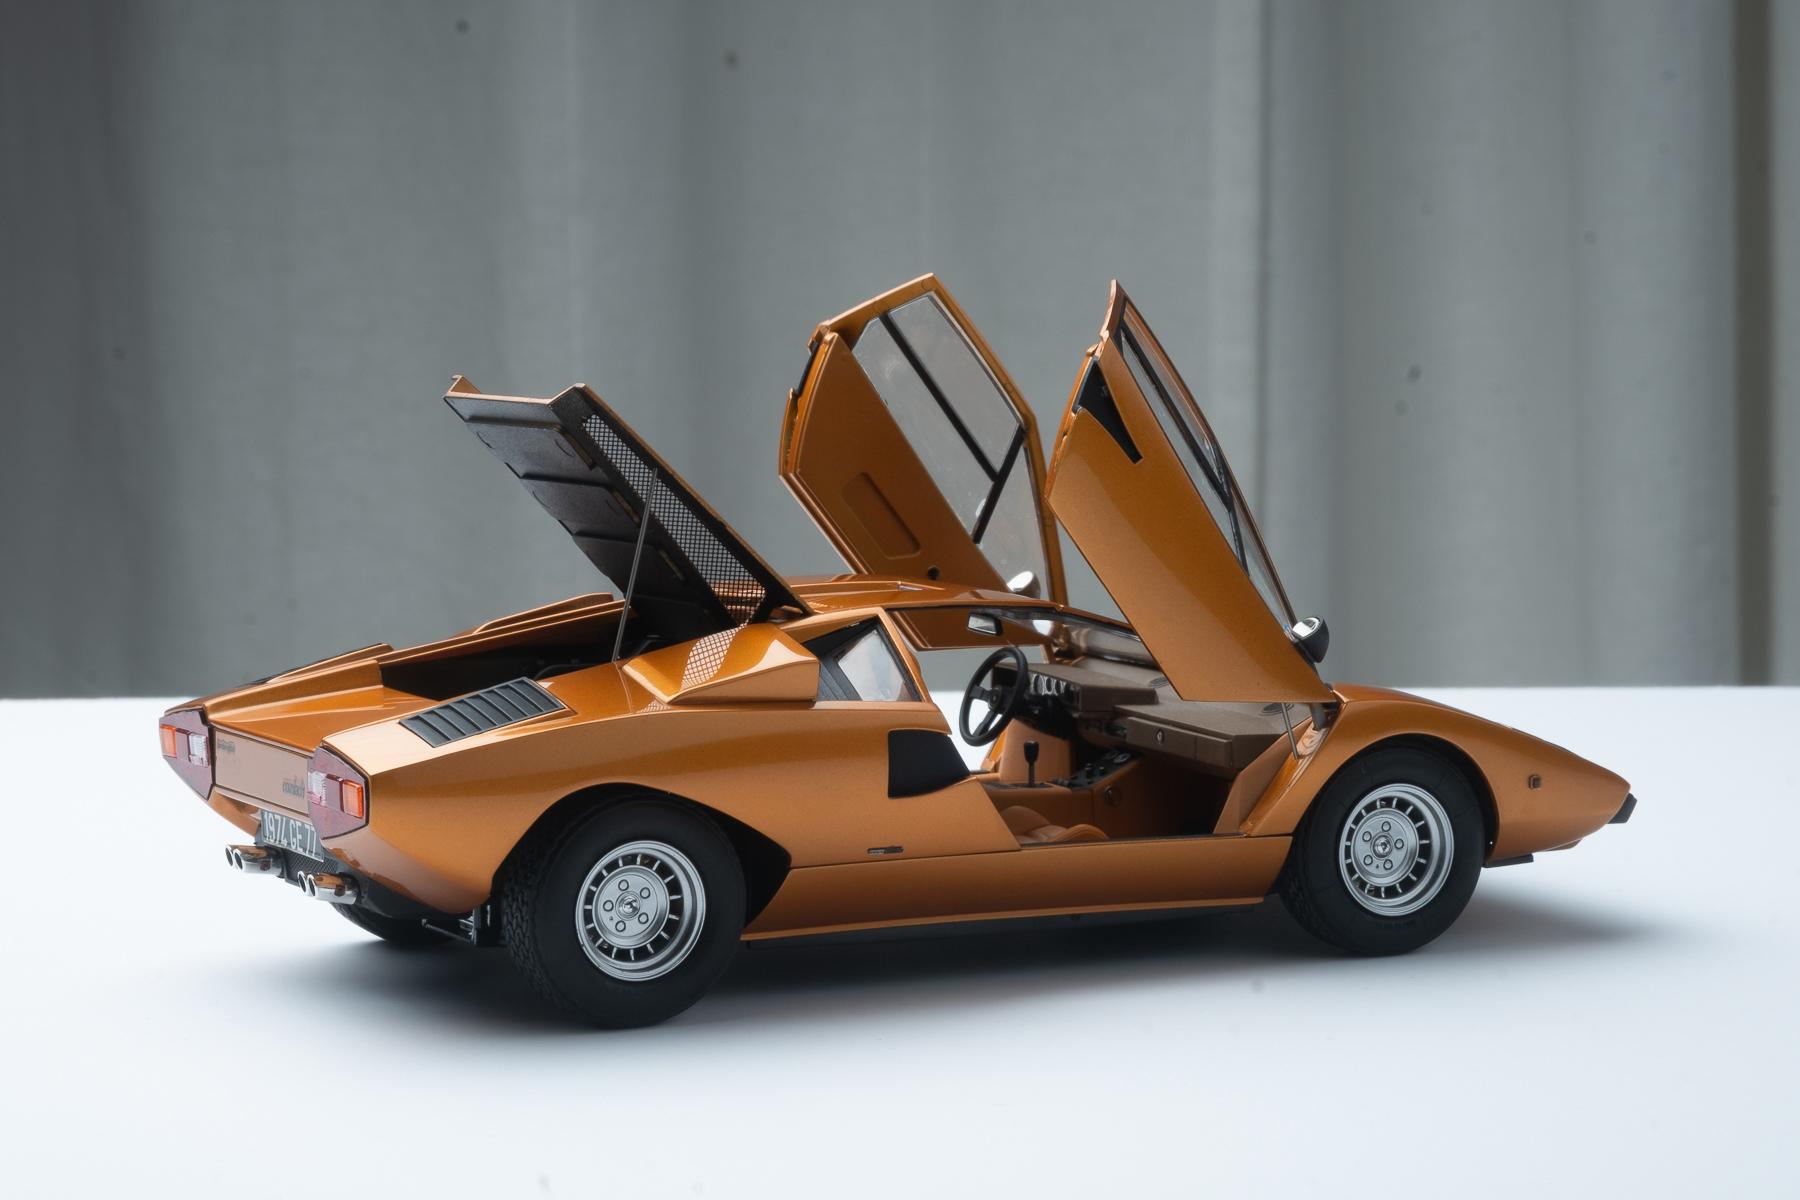
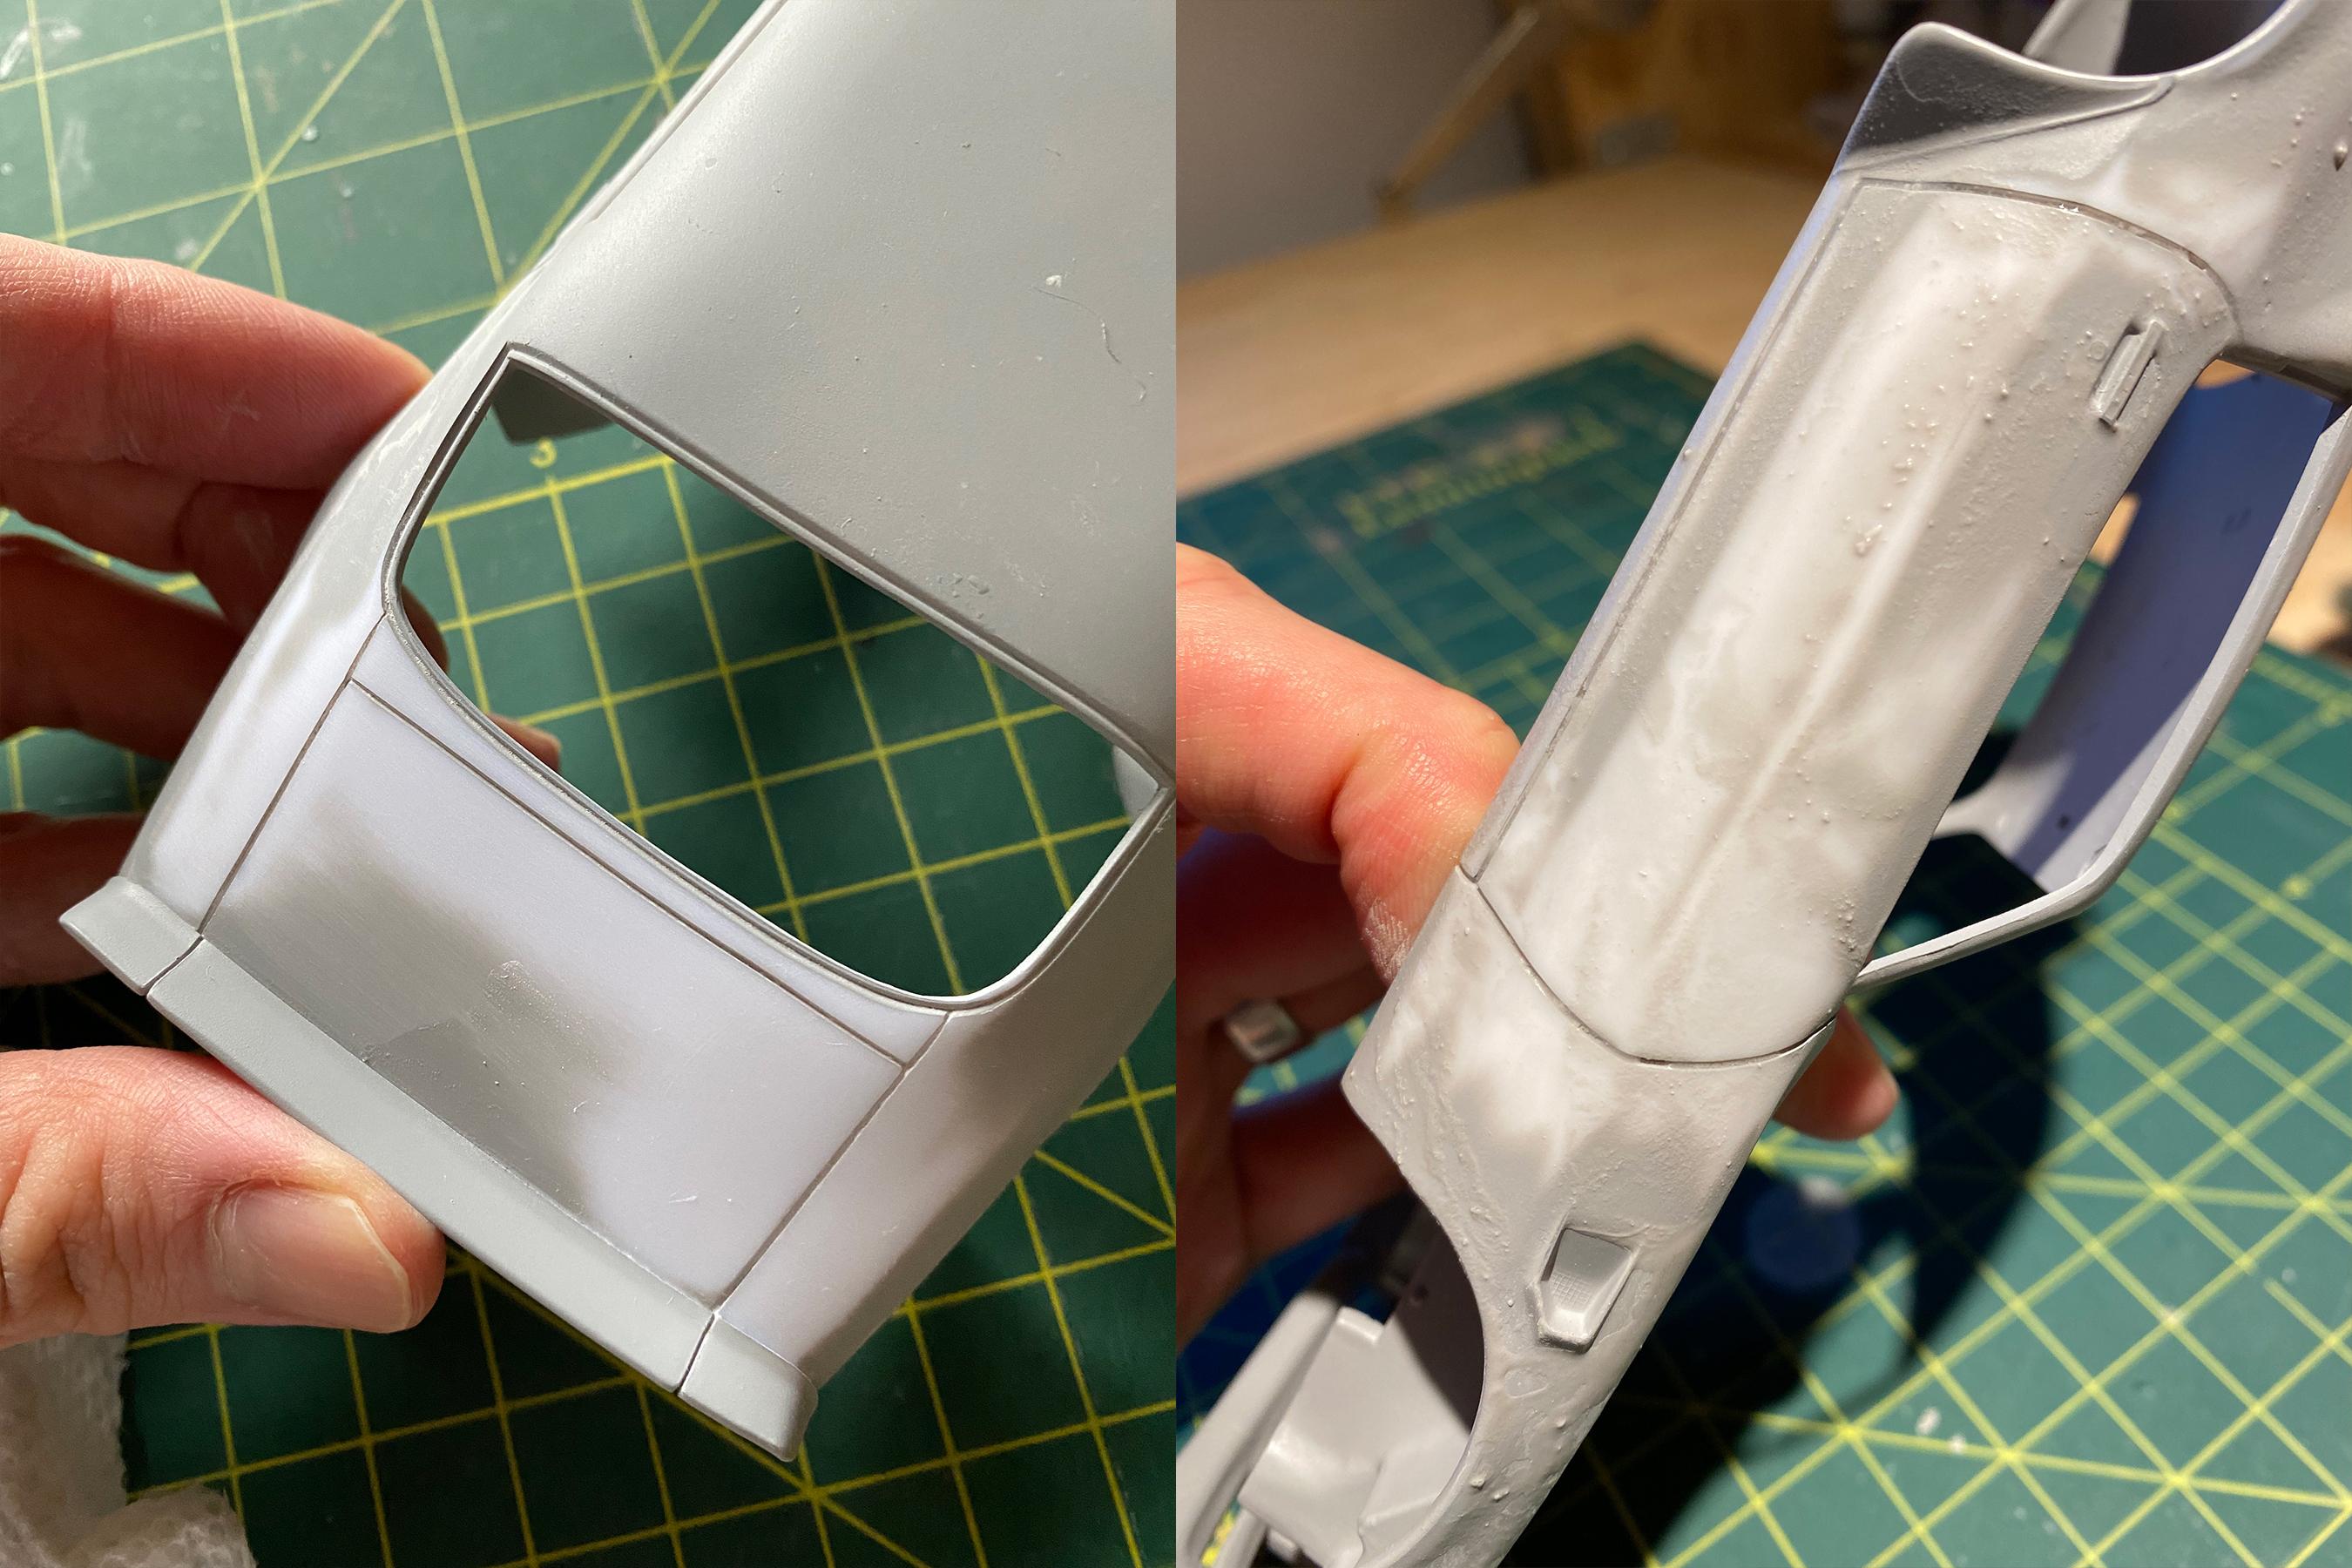
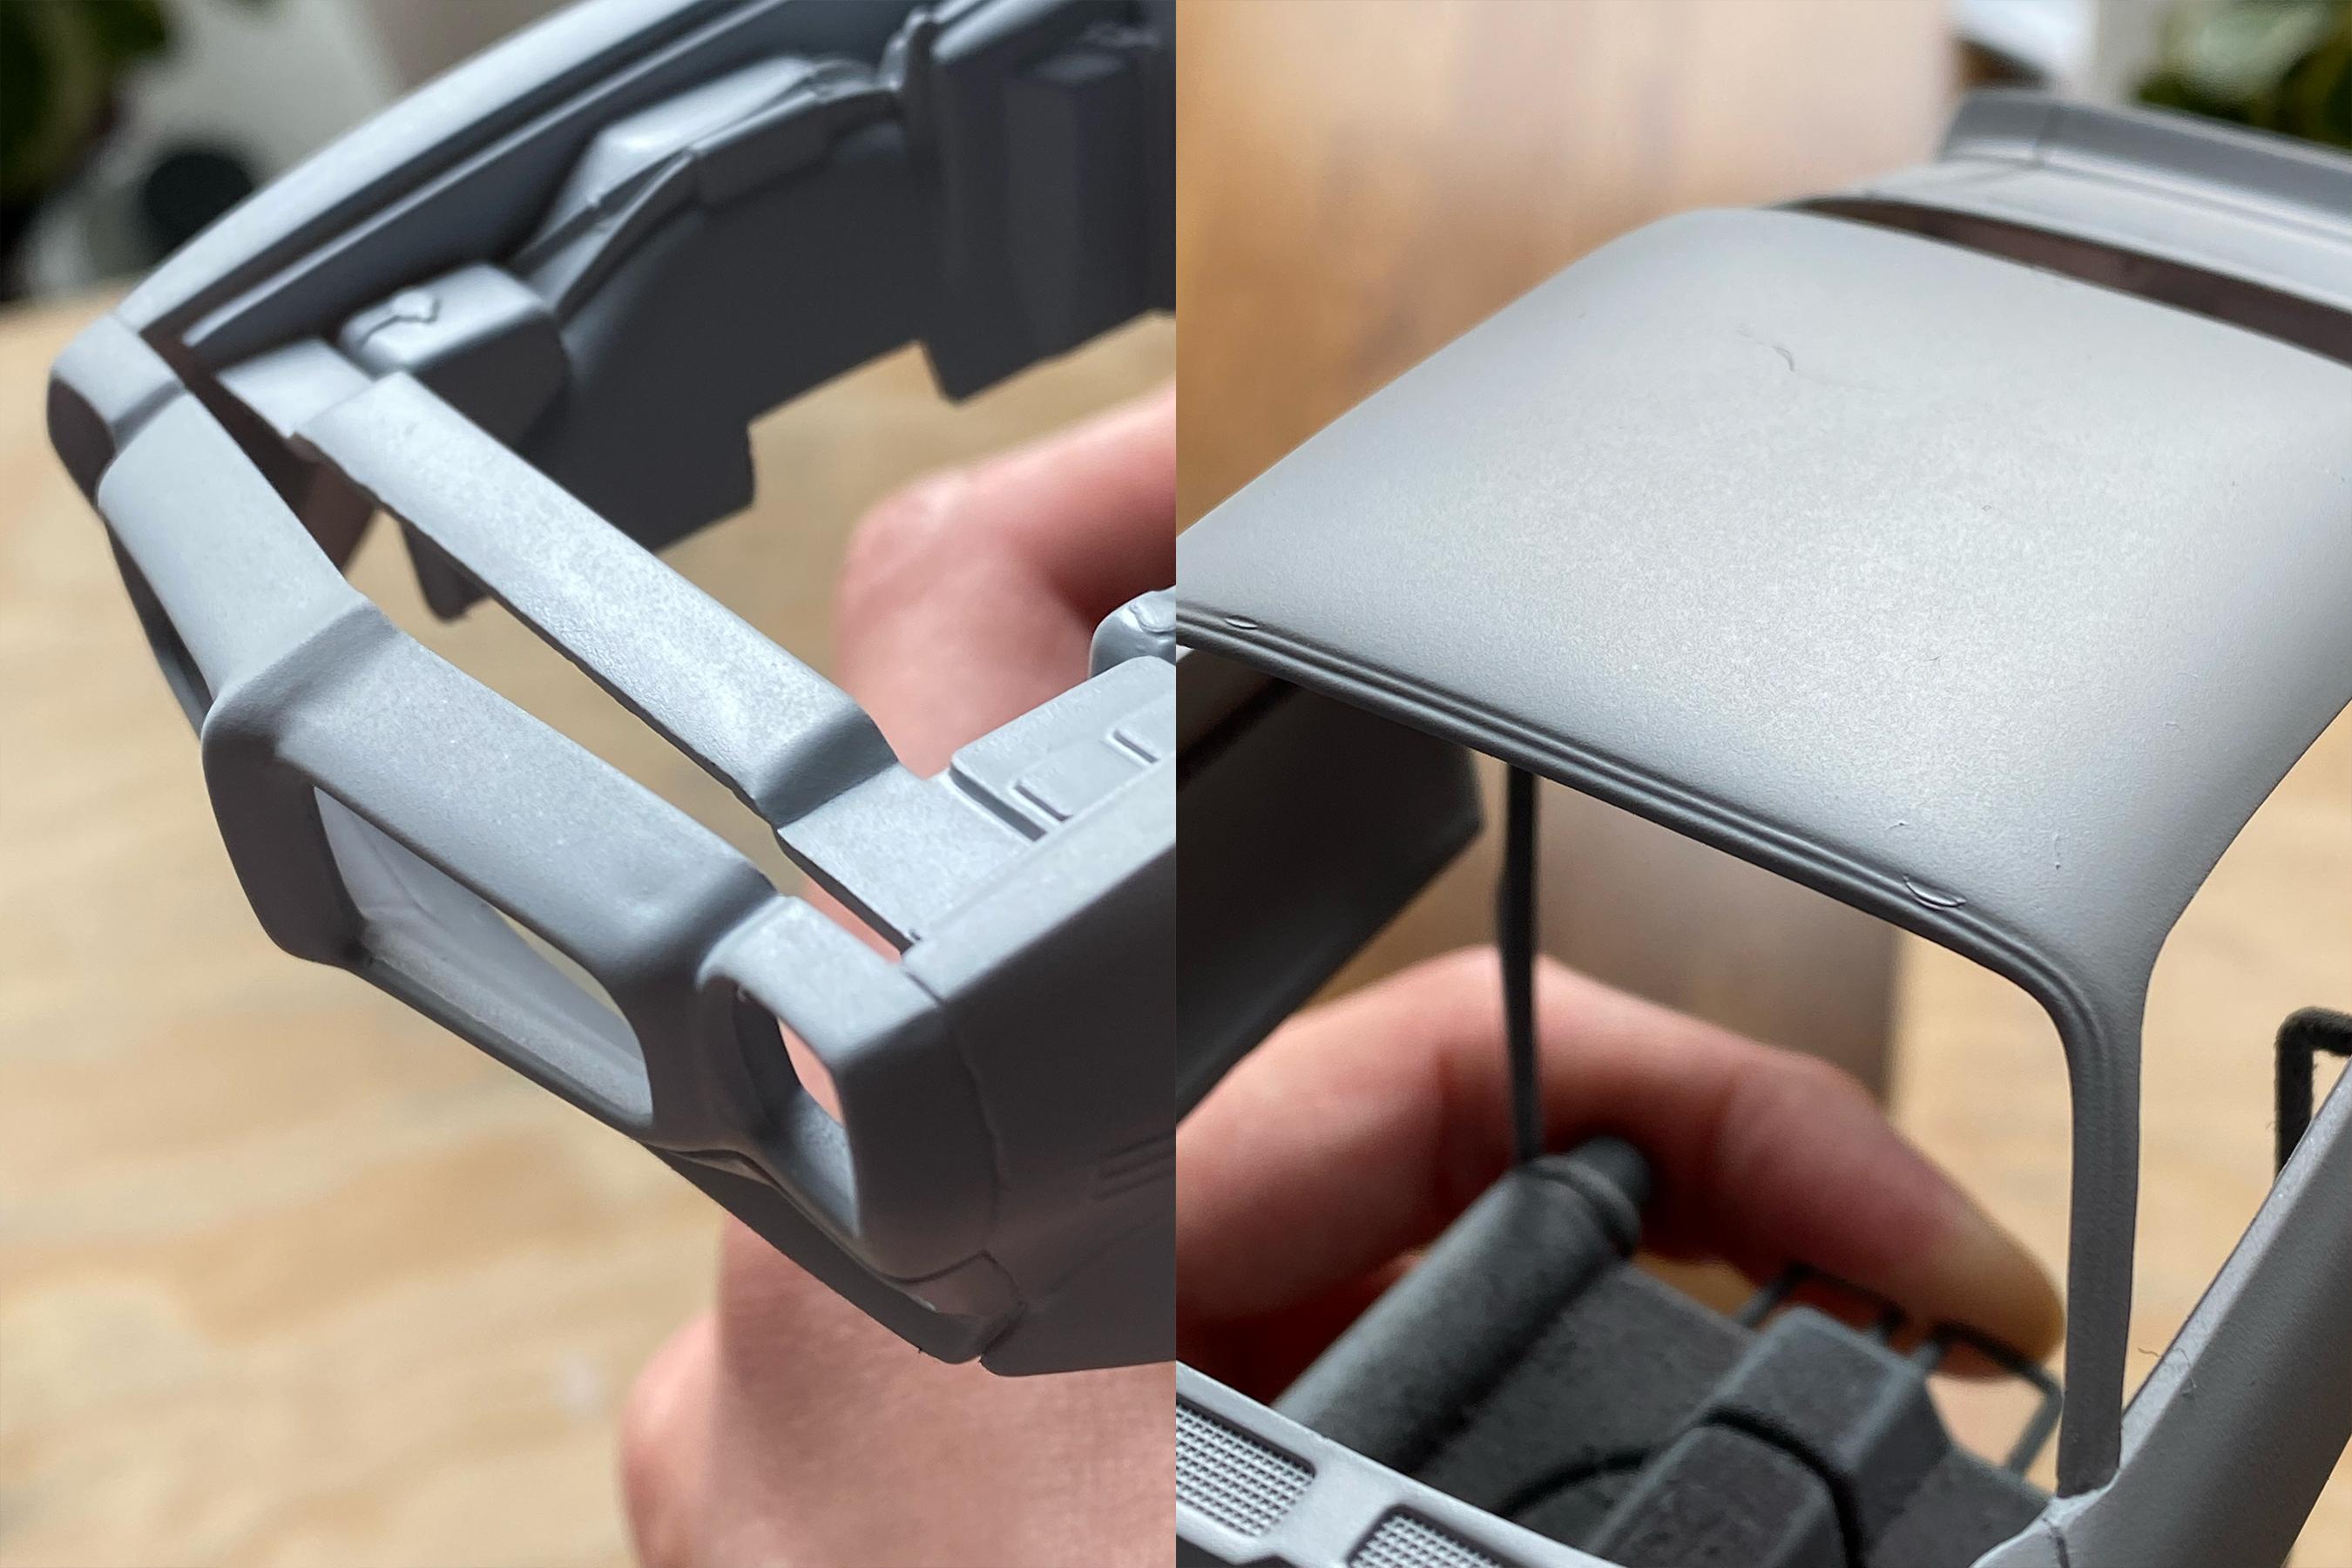
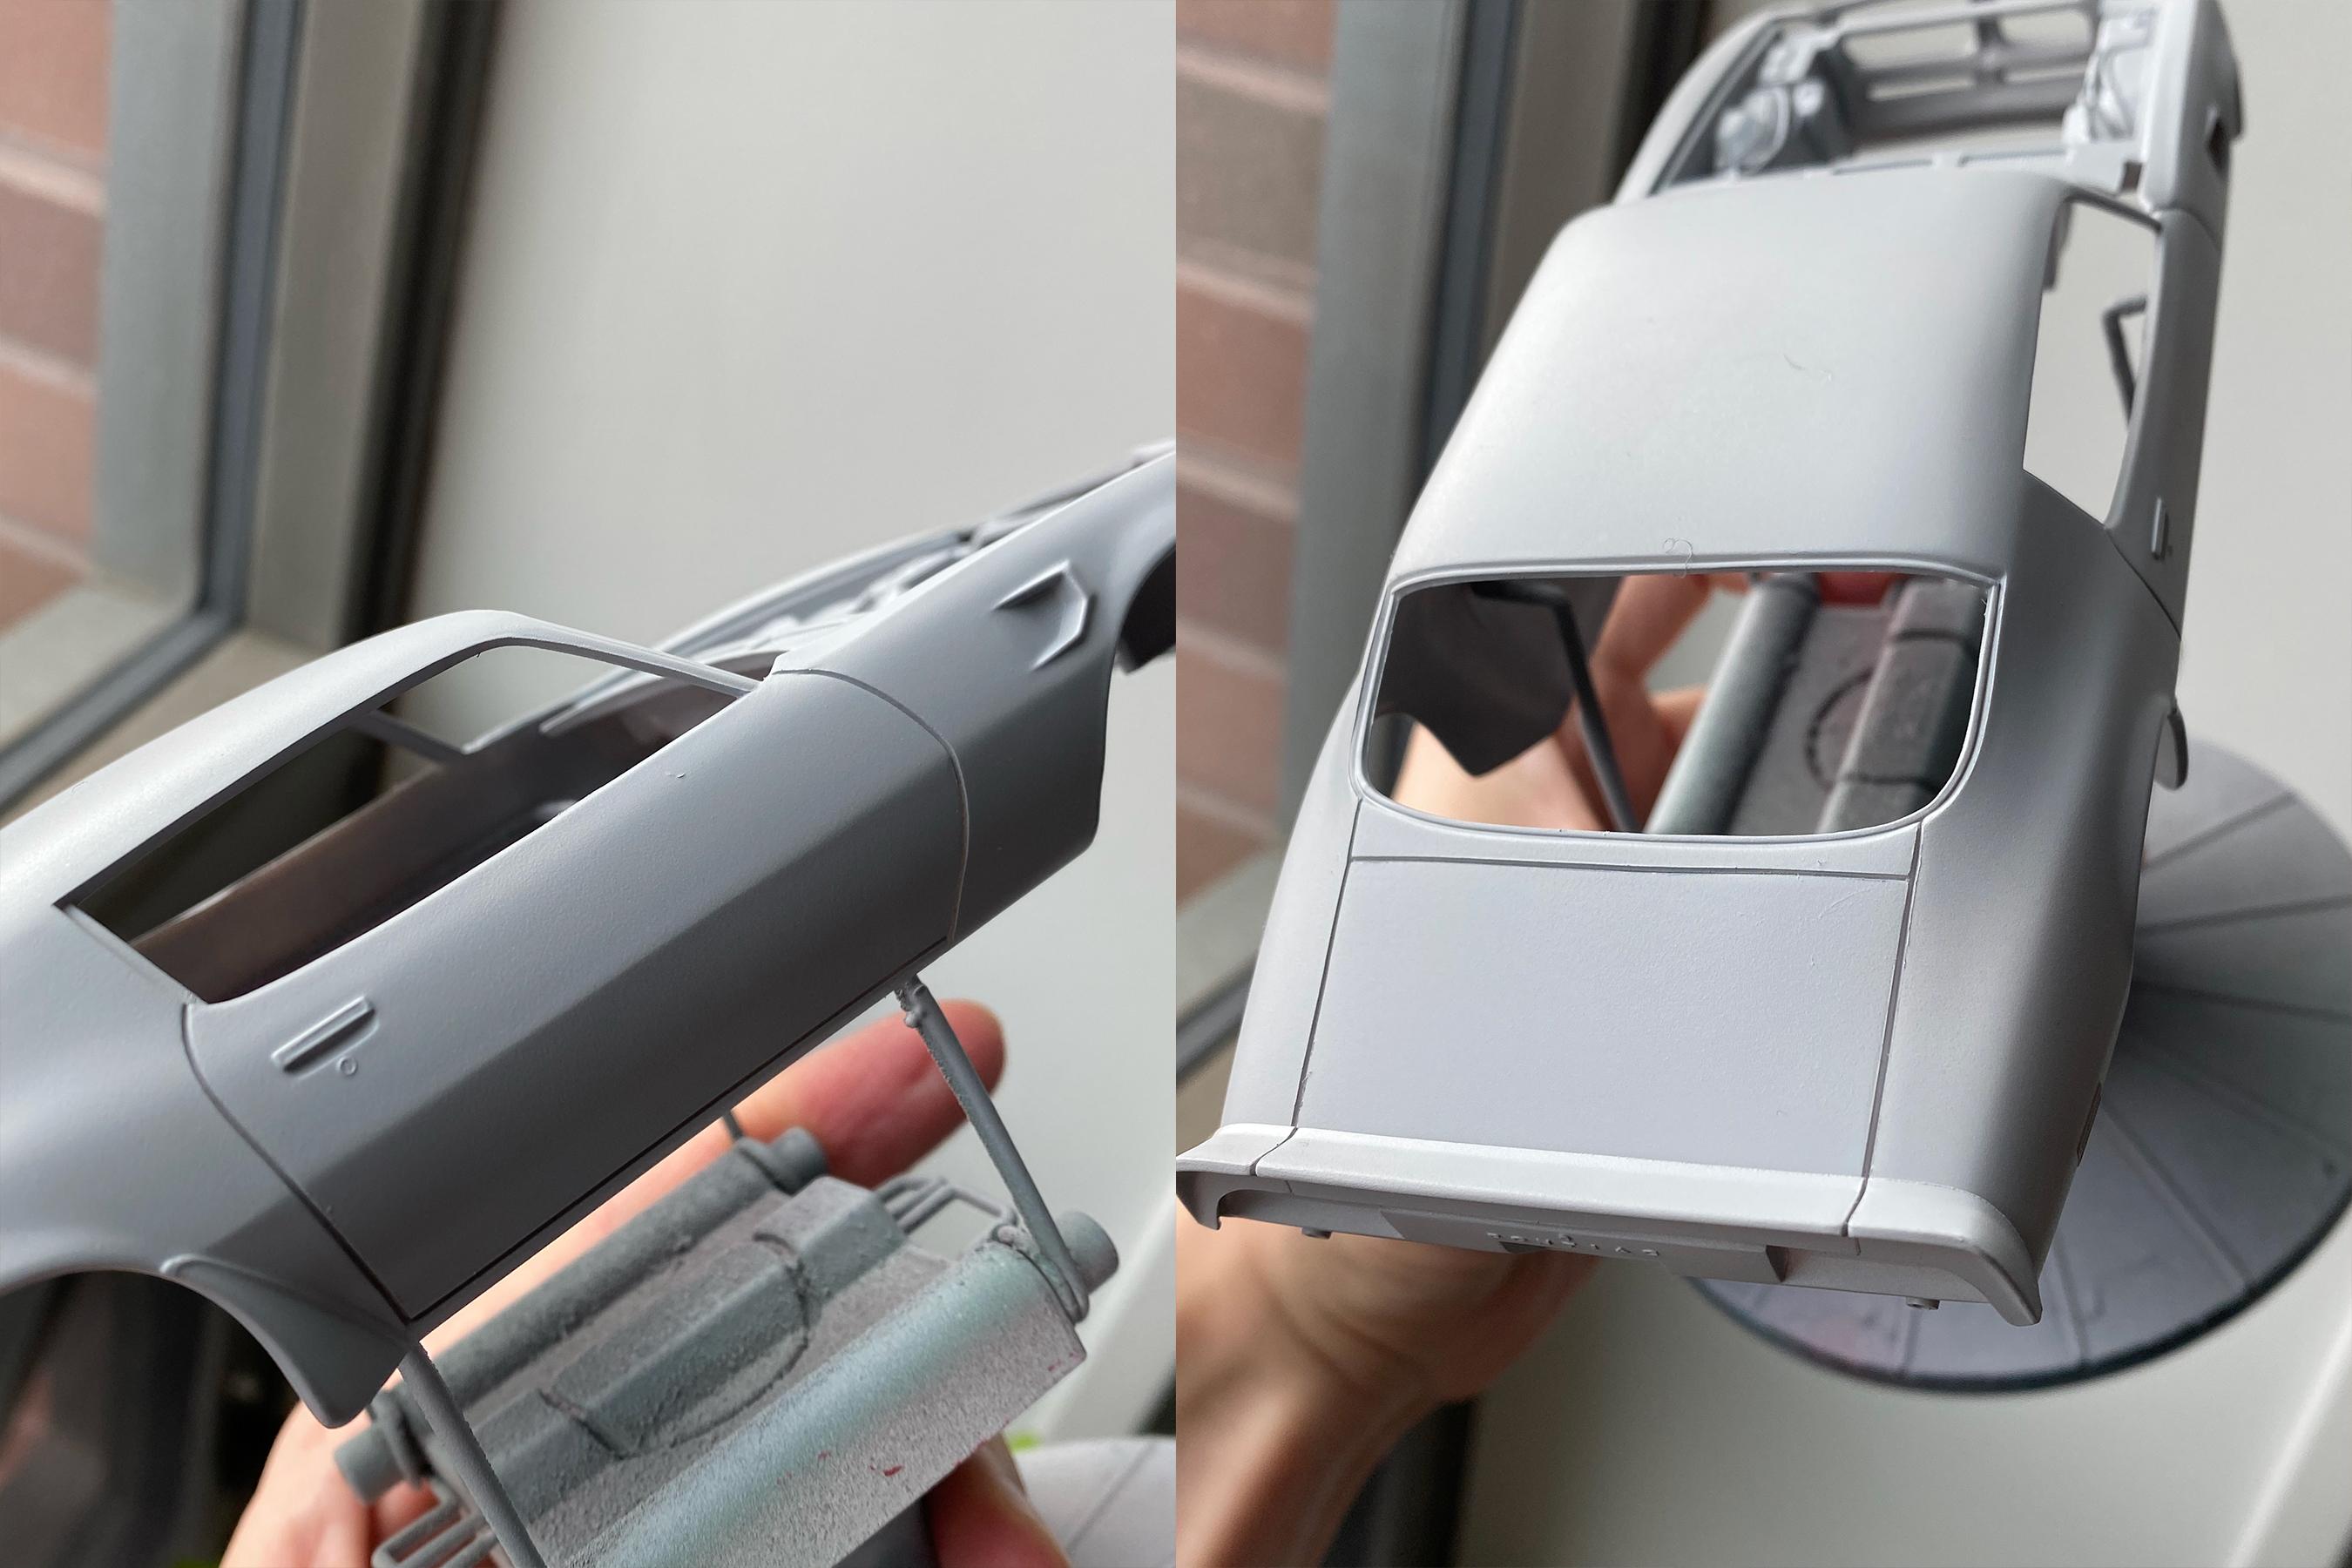
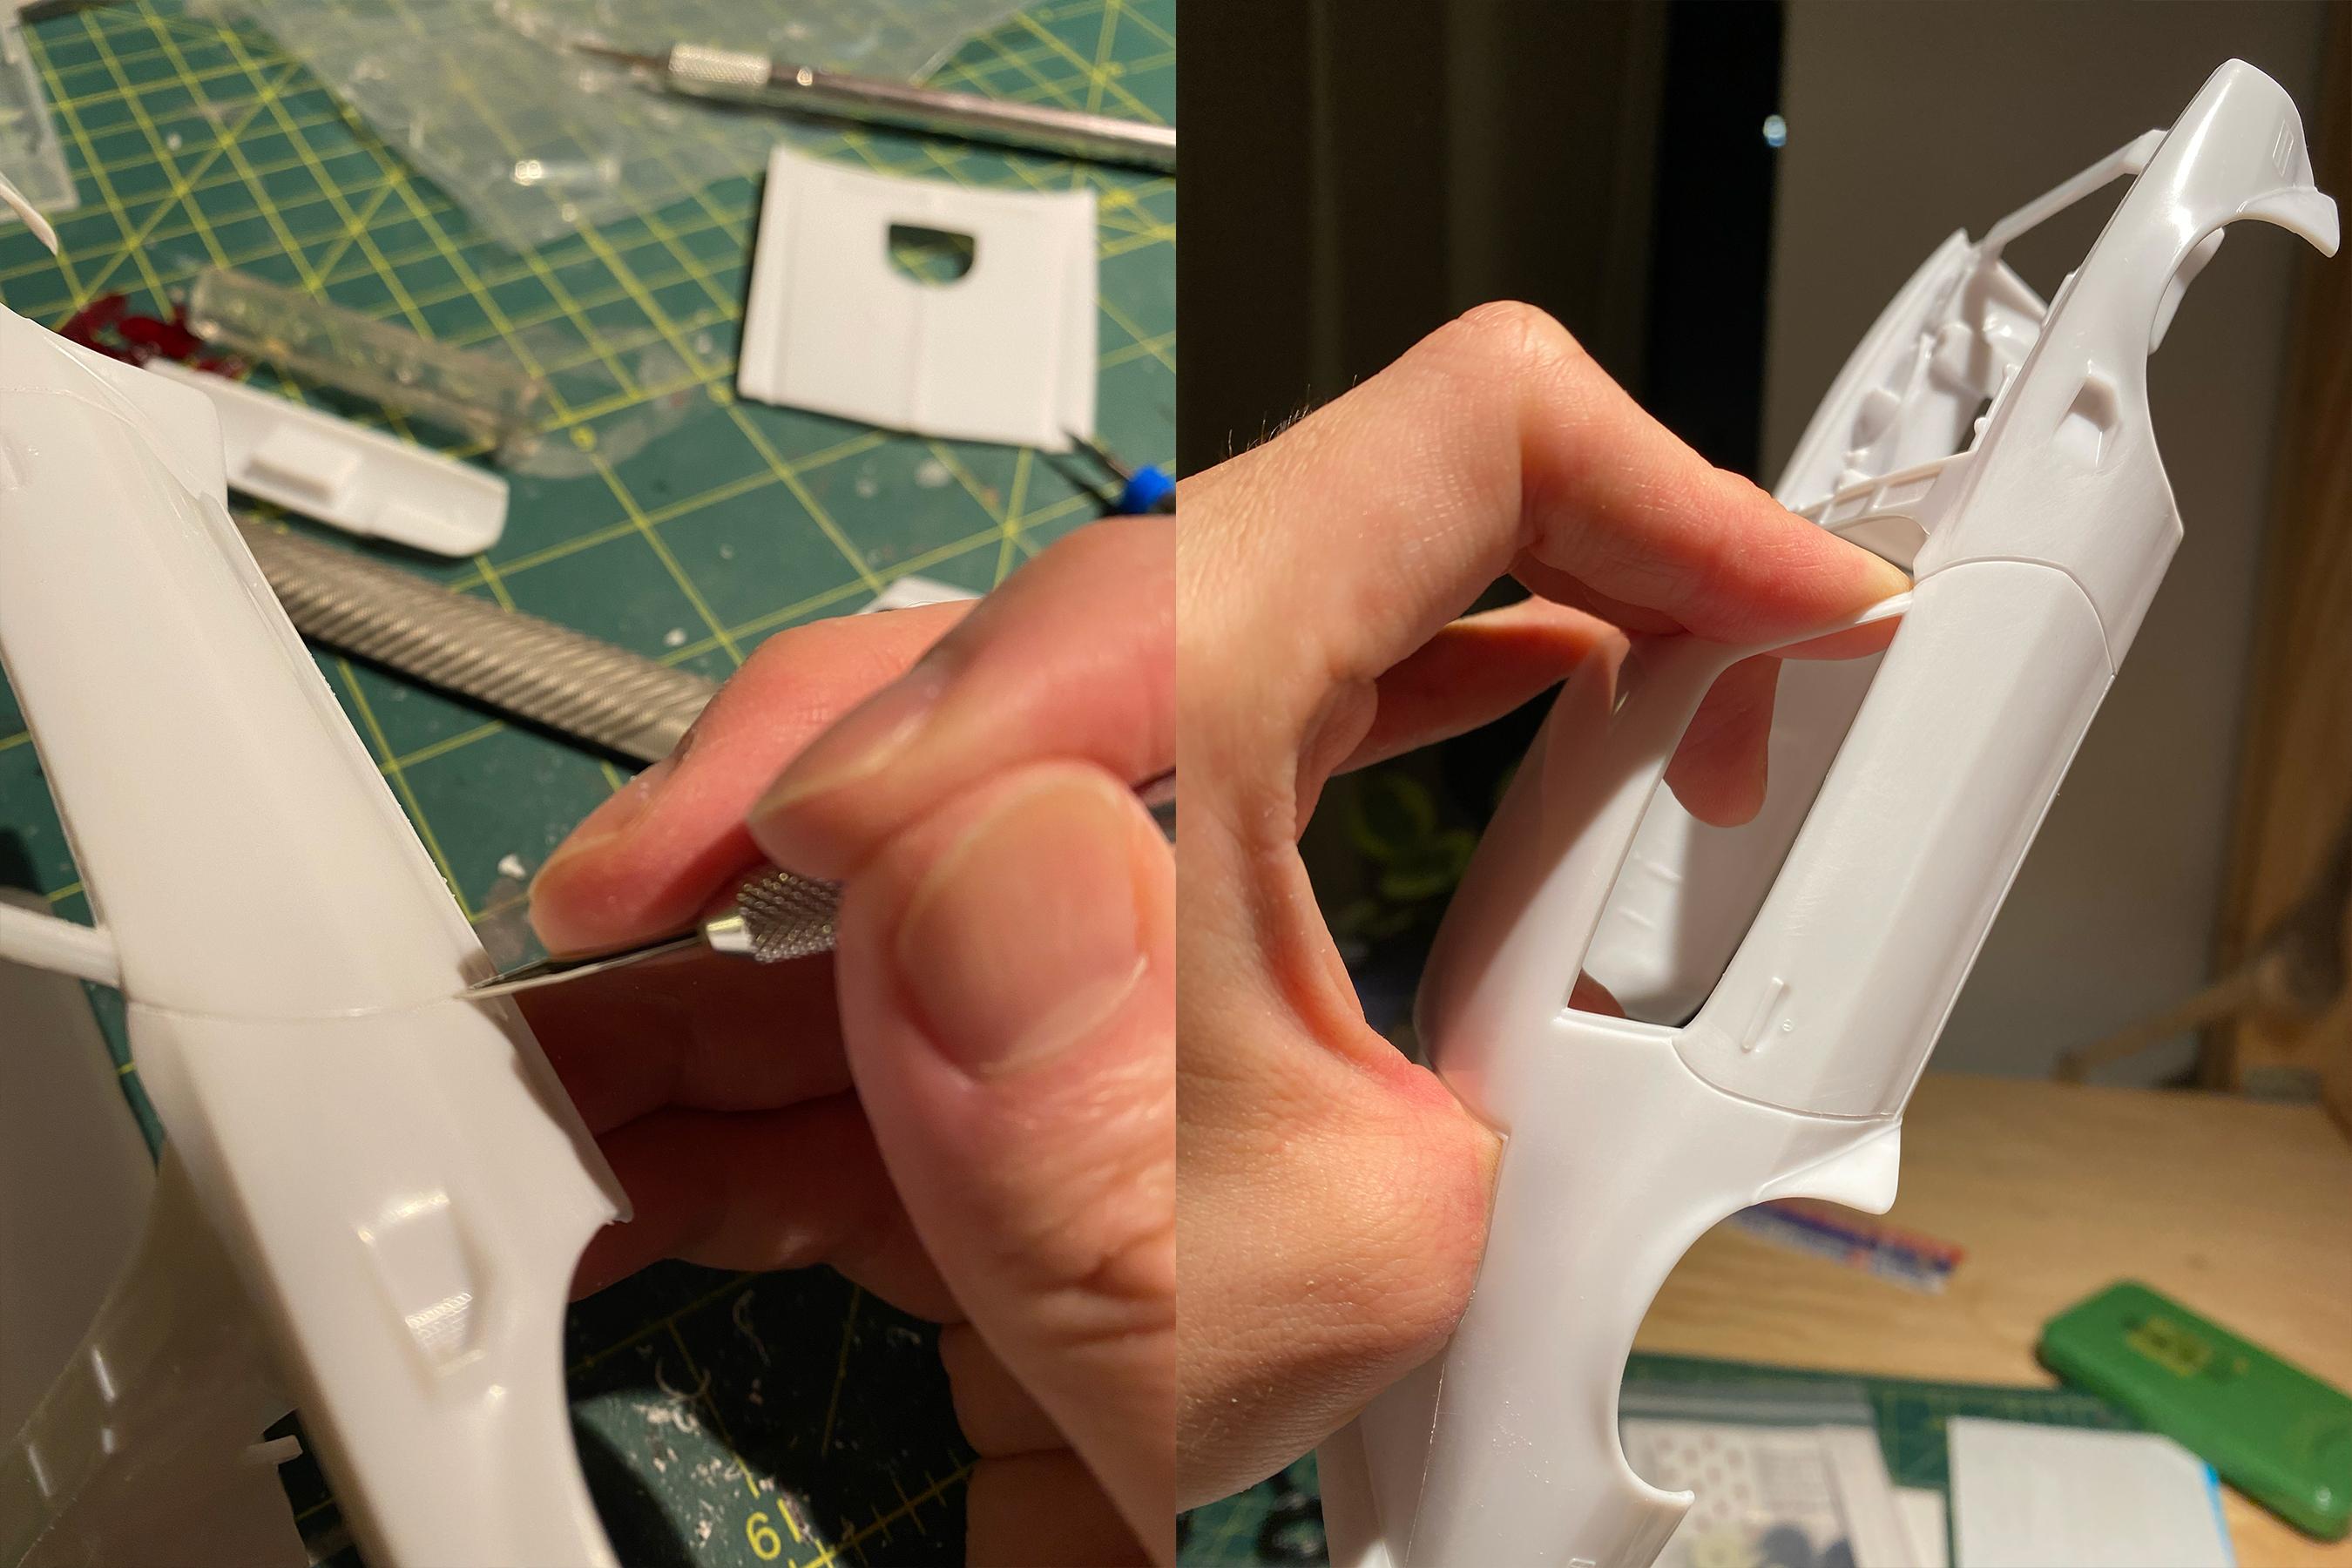
Hey all, Here’s my full build post in 2024 - Aoshima Lamborghini LP400! I wanted to simulate chassis #1120176 in Oro Metallizzato Longchamp, which has a unique metallic orange with a hint of copper hue. Here are the steps I took: wet sanded the body with 800 > 1000 > 1500 grit and painted silver instead of primer (I wanted to preserve the sharpness of the body by making the paint as thin as possible) mixed Mr Color’s GX red gold, clear gold, and clear orange and airbrushed on top of silver laid first clear (Mr Color’s super clear III) and wet sanded with 2000 grit laid two more clear coat and fully cured the paint wet-sanded the clear coat with 3000 > 6000 > 8000 grit polished the paint with tamiya three compounds, hasegawa ceramic compound and finished it off with hasegawa polymer coating mixed brown, red, yellow and white to simulate the tri-tone interior and laid flat clear to get some texture used PE parts and ignition wires for the engine bay removed silver plating from wheels and painted with black > chrome silver painted tires with mixture of brown and flat clear made the muffler tip thinner Overall the whole process went super smoothly - fit and finish on this kit is pretty great, and the parts are engineered to be put together relatively easily without ton of masking and other extra work. Thank you for reading and I'll come back with Moebius Belvedere build soon!

- 30 replies
-
- 16
-

-
Thanks! Check out my build post for detailed steps for painting and finishing: Thank you! Appreciate the compliment! Thanks a lot! Thank you! Thank you! Thanks! Appreciate it! Thank you! Thanks a lot! Thank you! Thanks a lot!
-
Here’s my 2023 build roundup! I didn’t build as many as I hoped this year: - Revell/Monogram XK120 - Revell/Monogram Trans AM - Tamiya Giulia with GTA 1300 Junior transkit I just finished another project and have 2 other builds in the bench - so 2024 should be a better one!
-
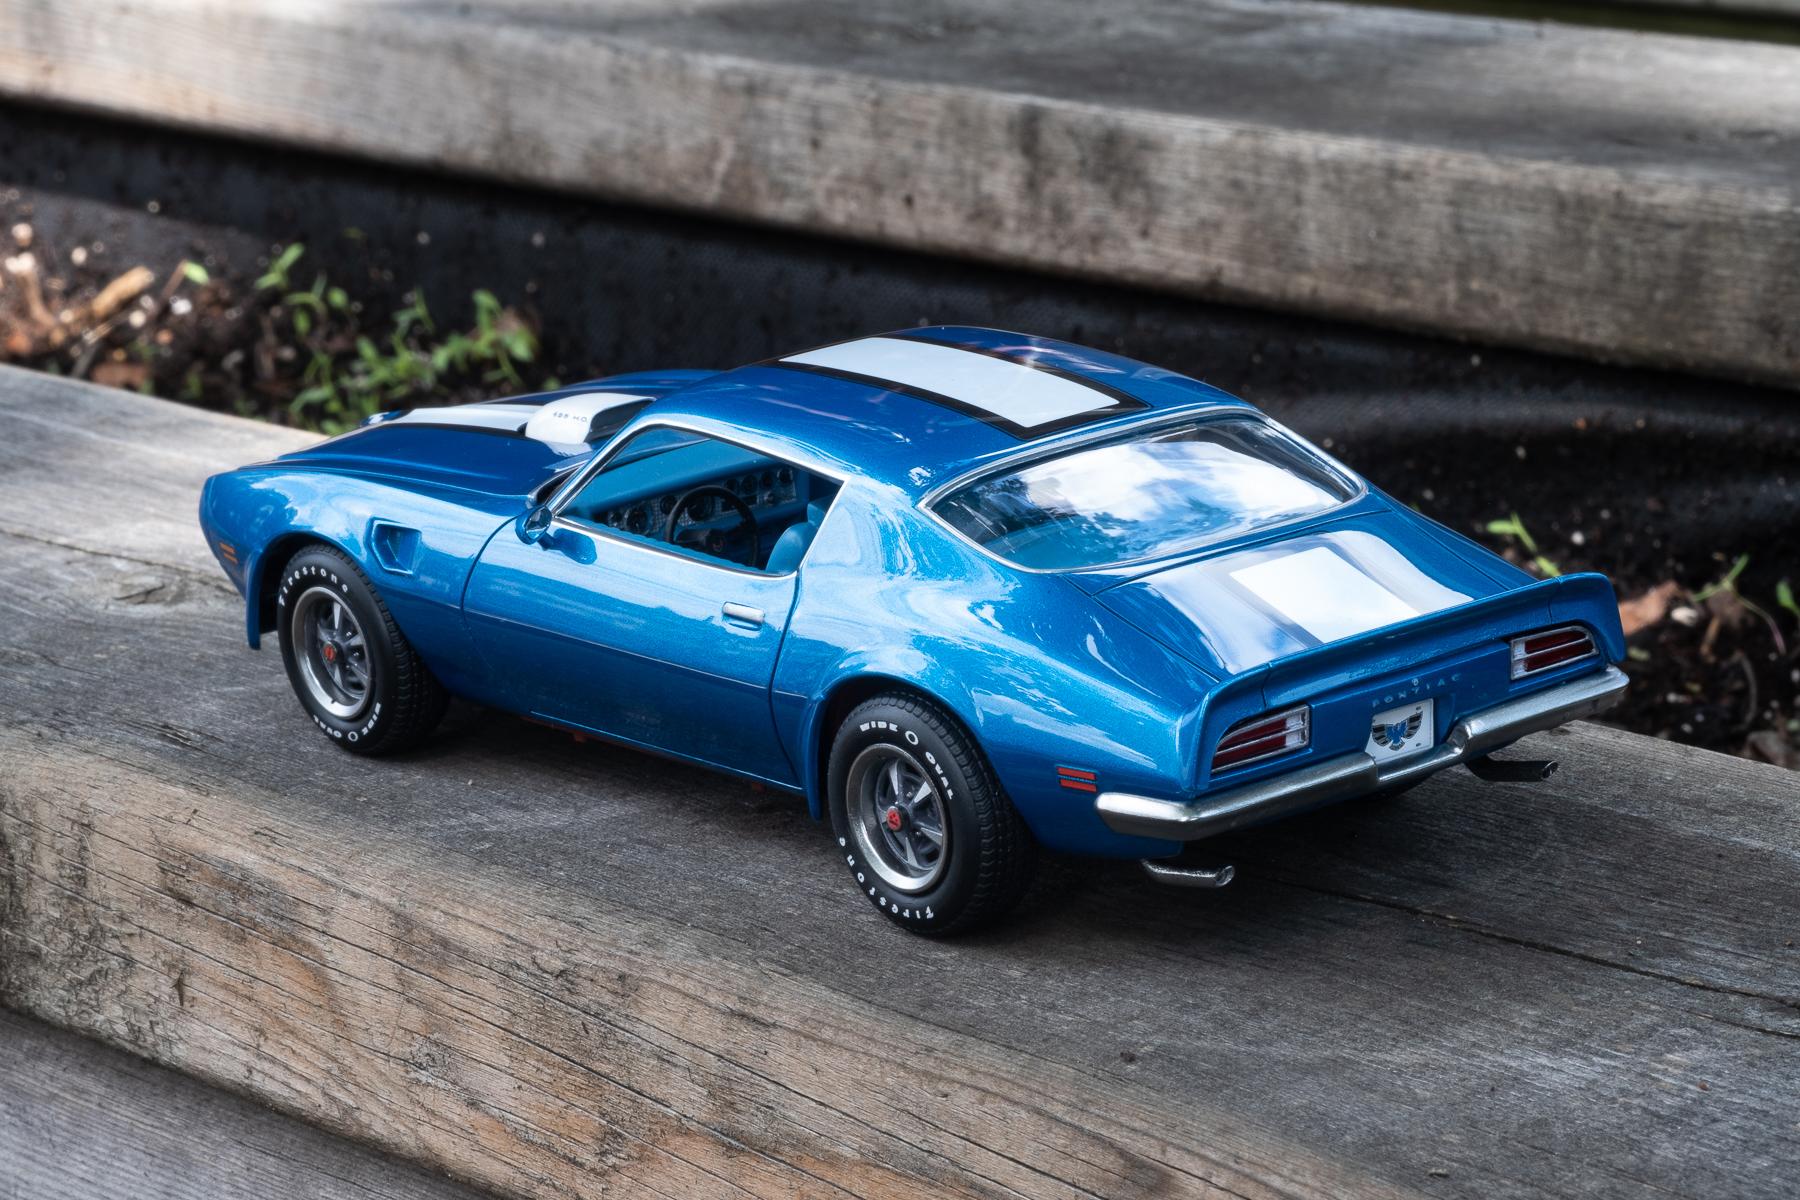
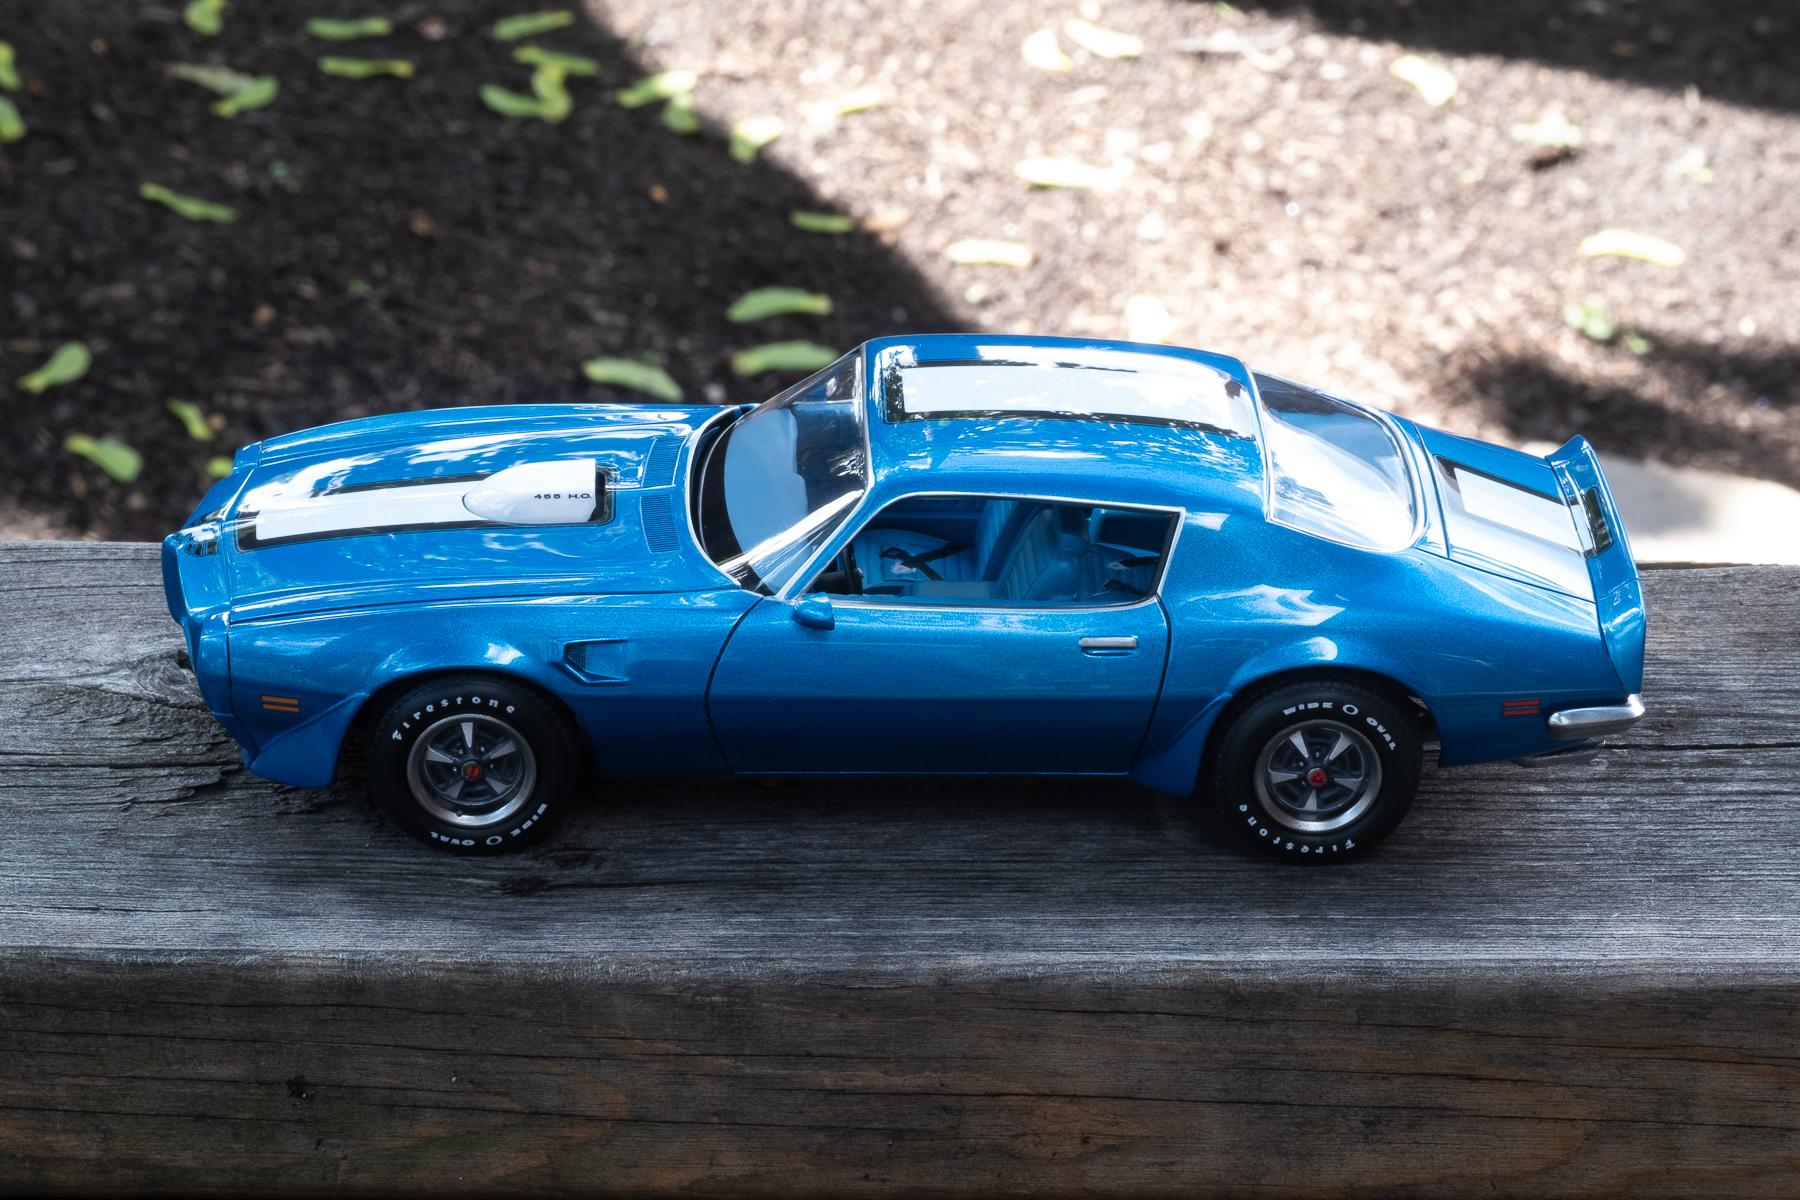
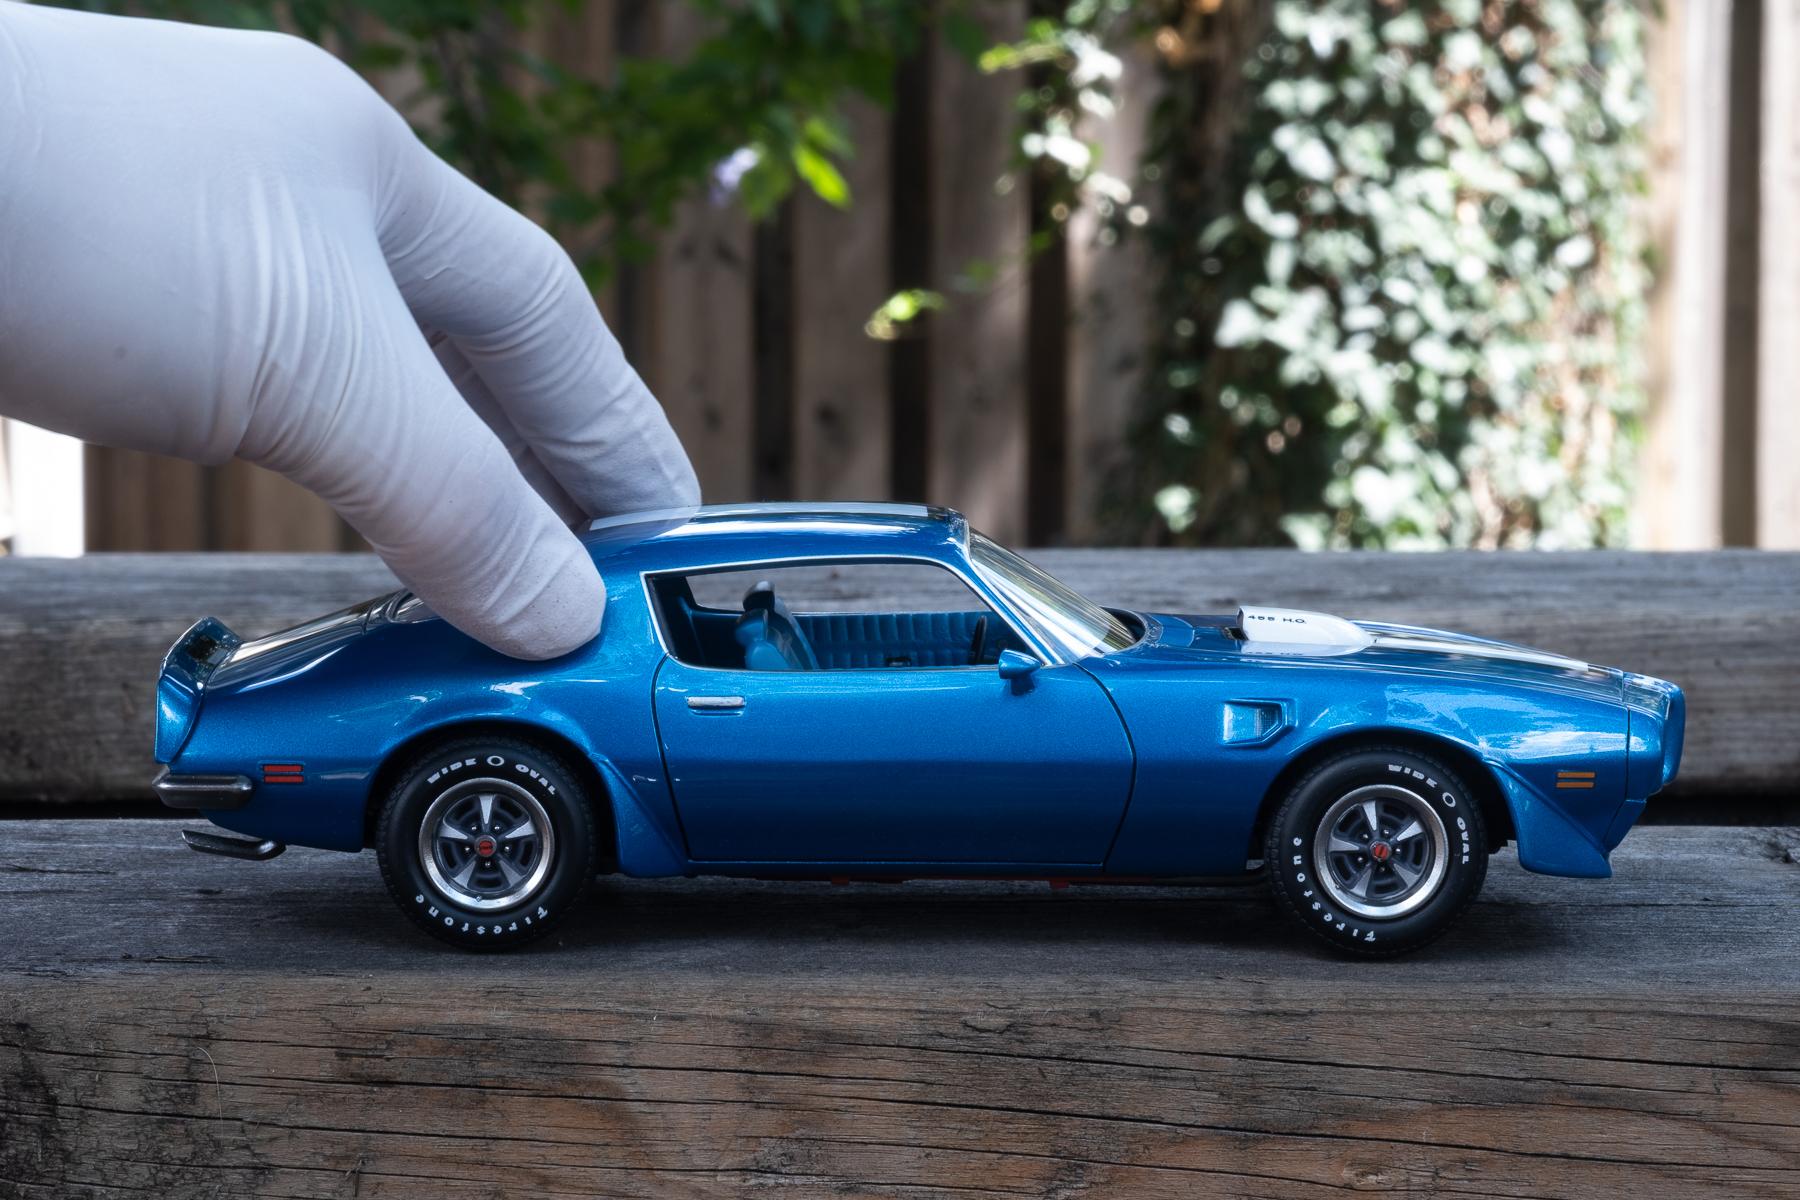
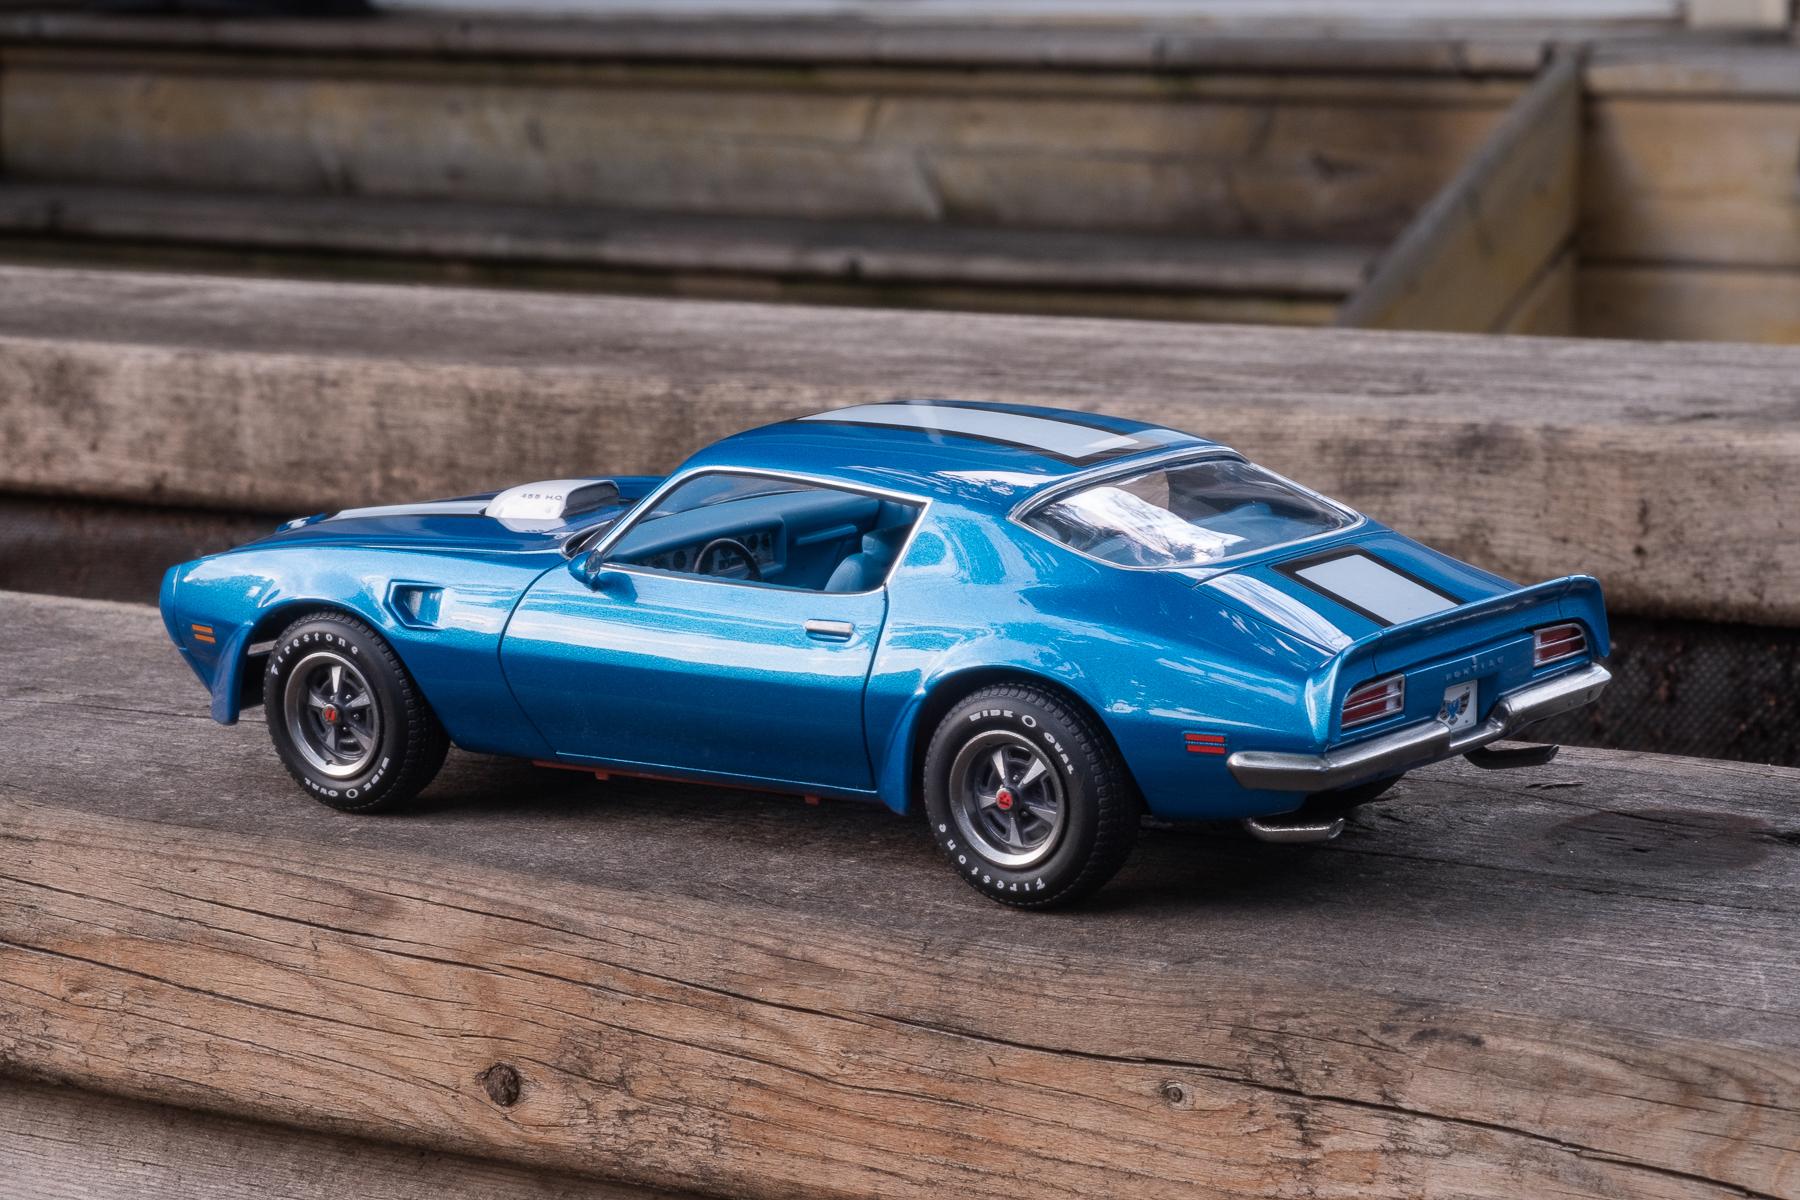
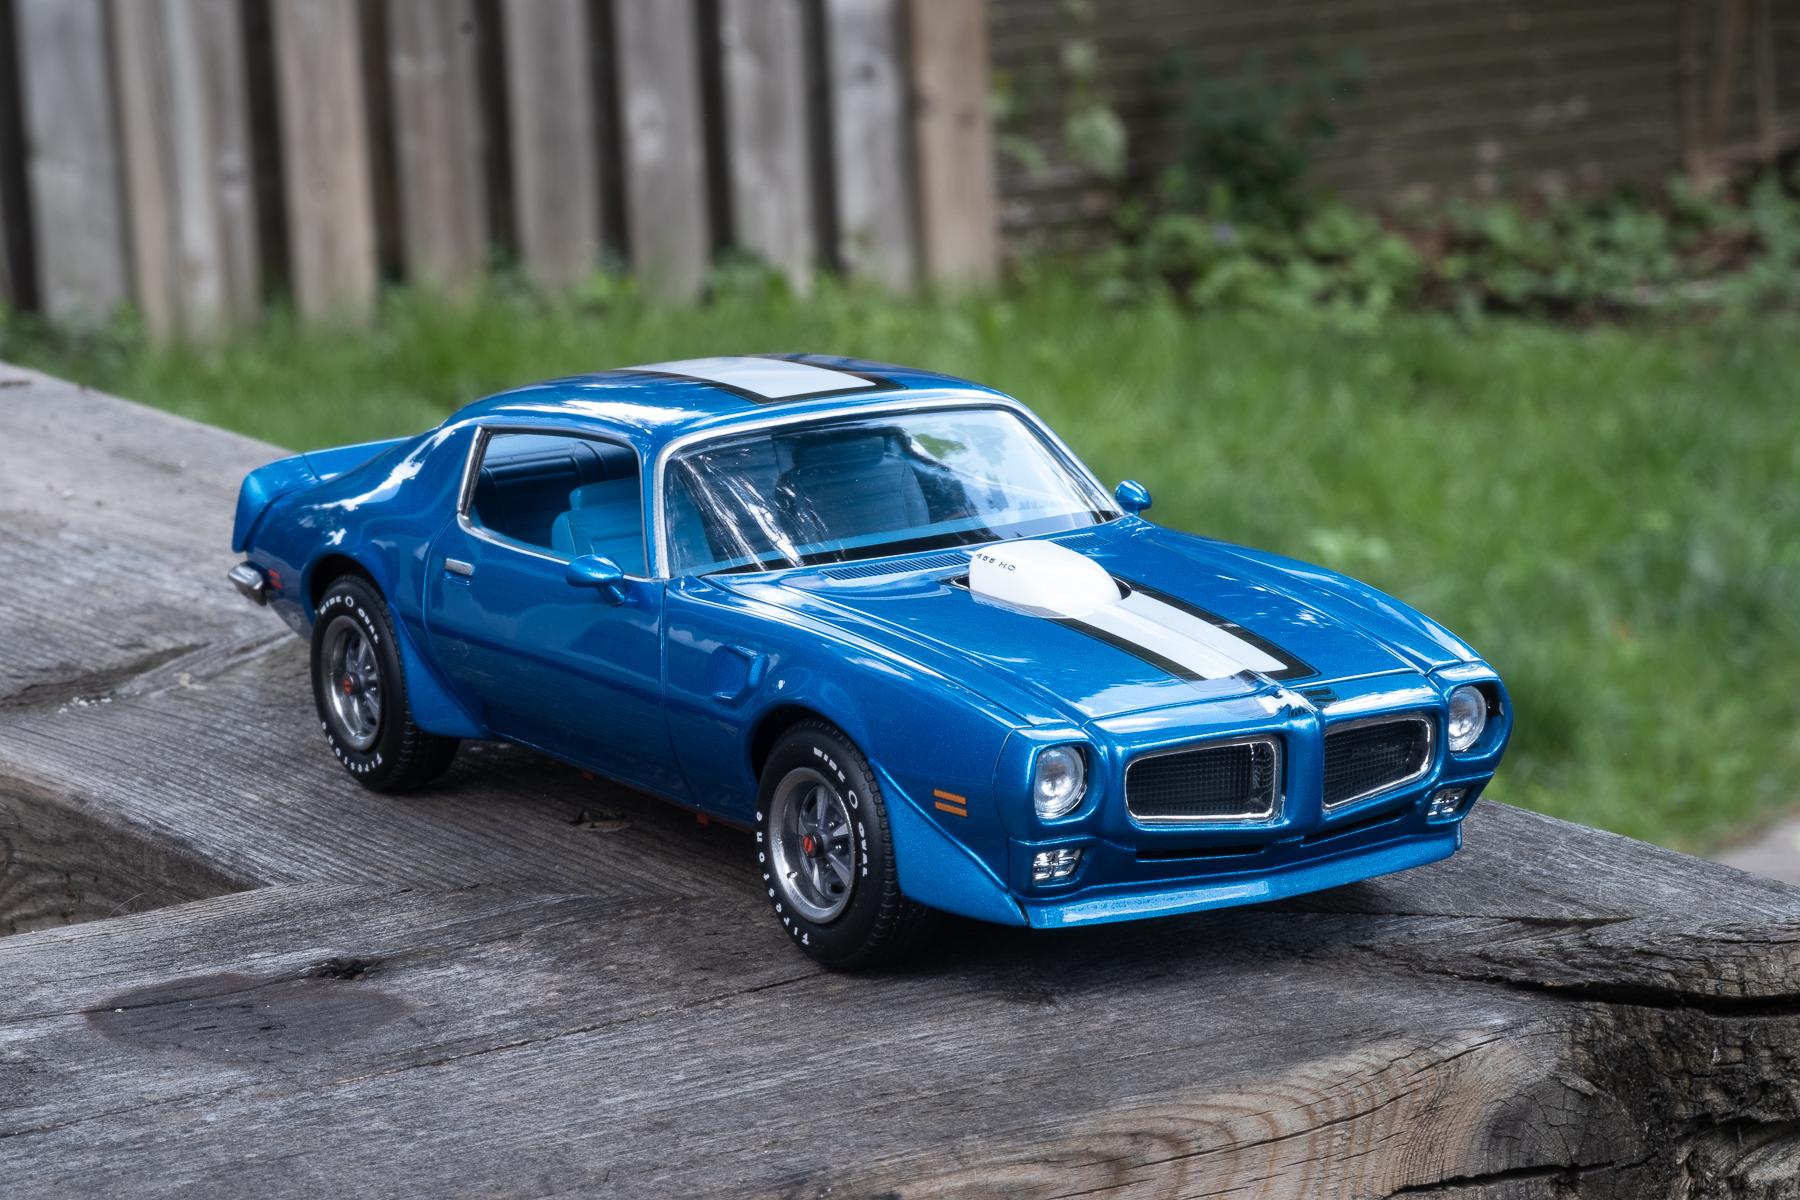
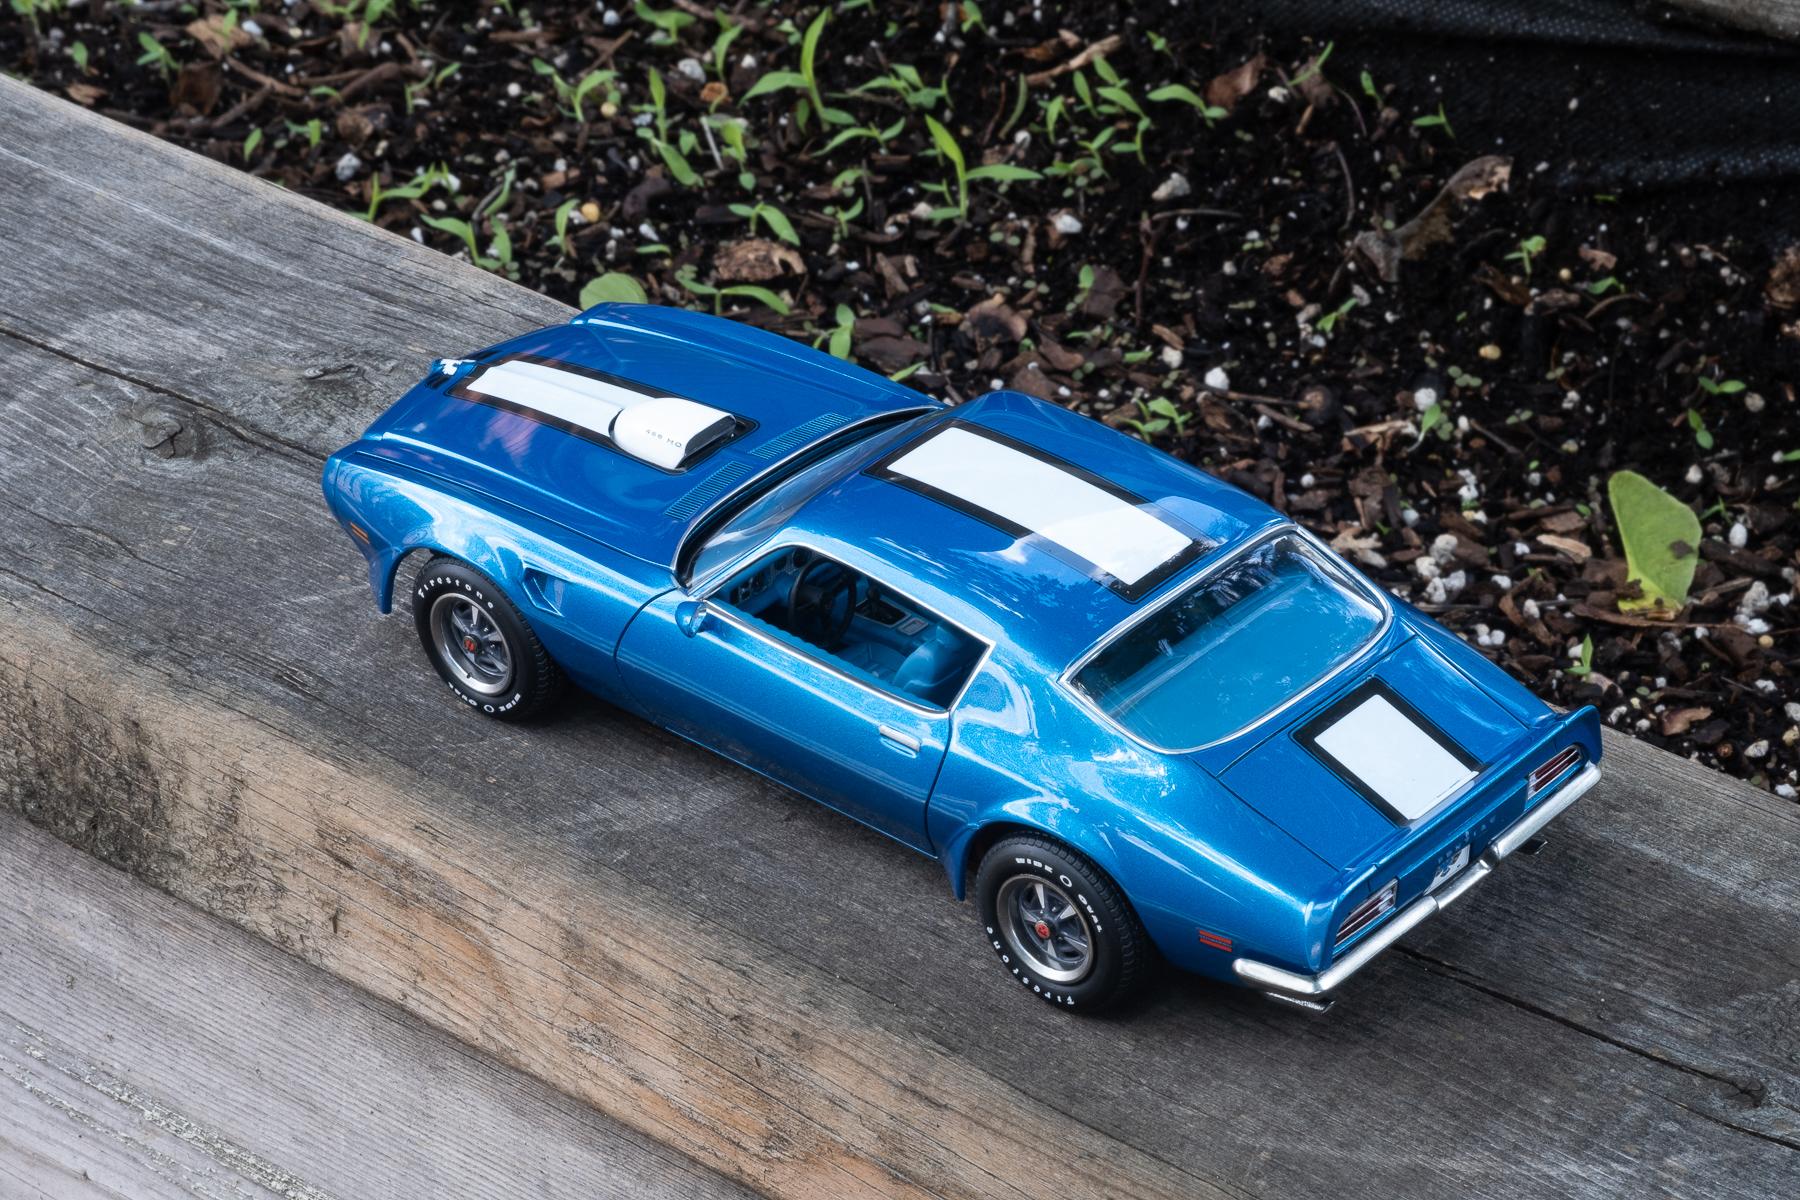
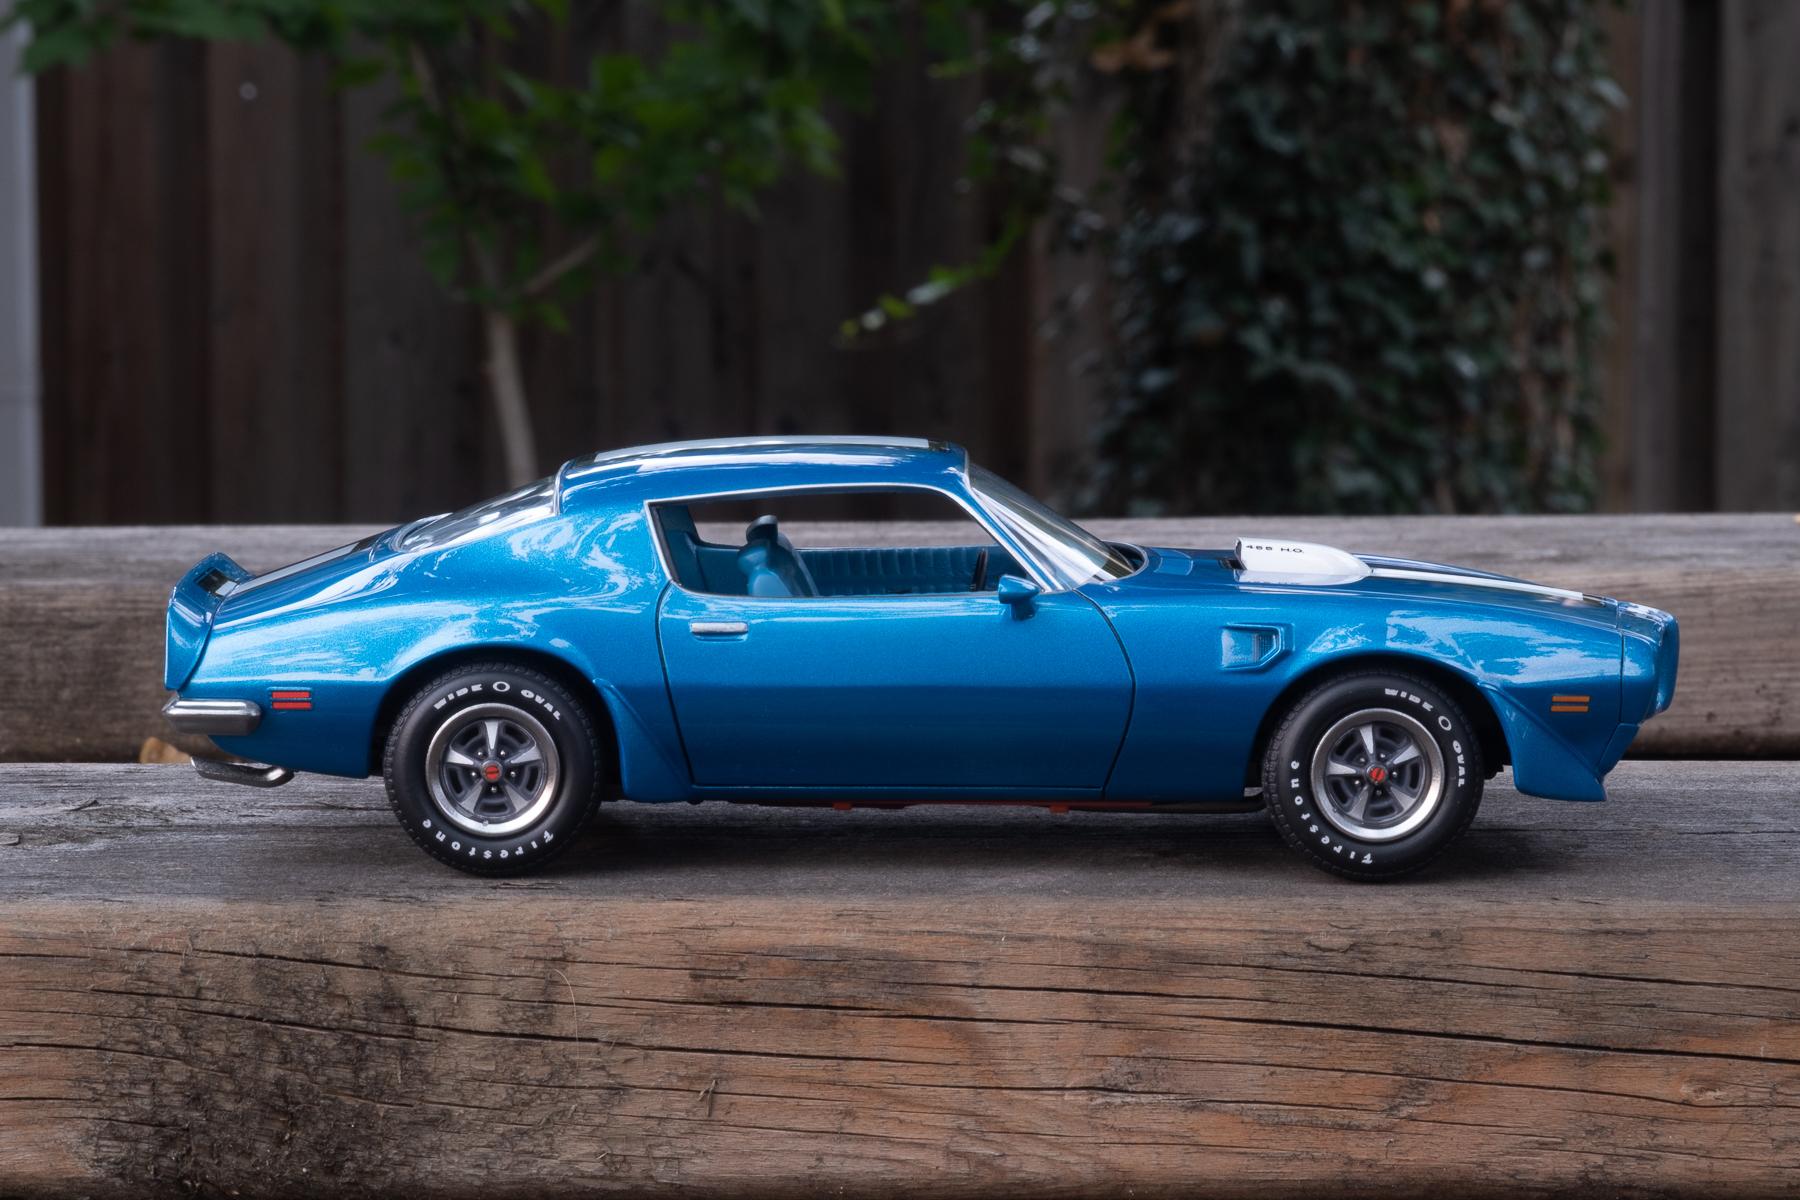
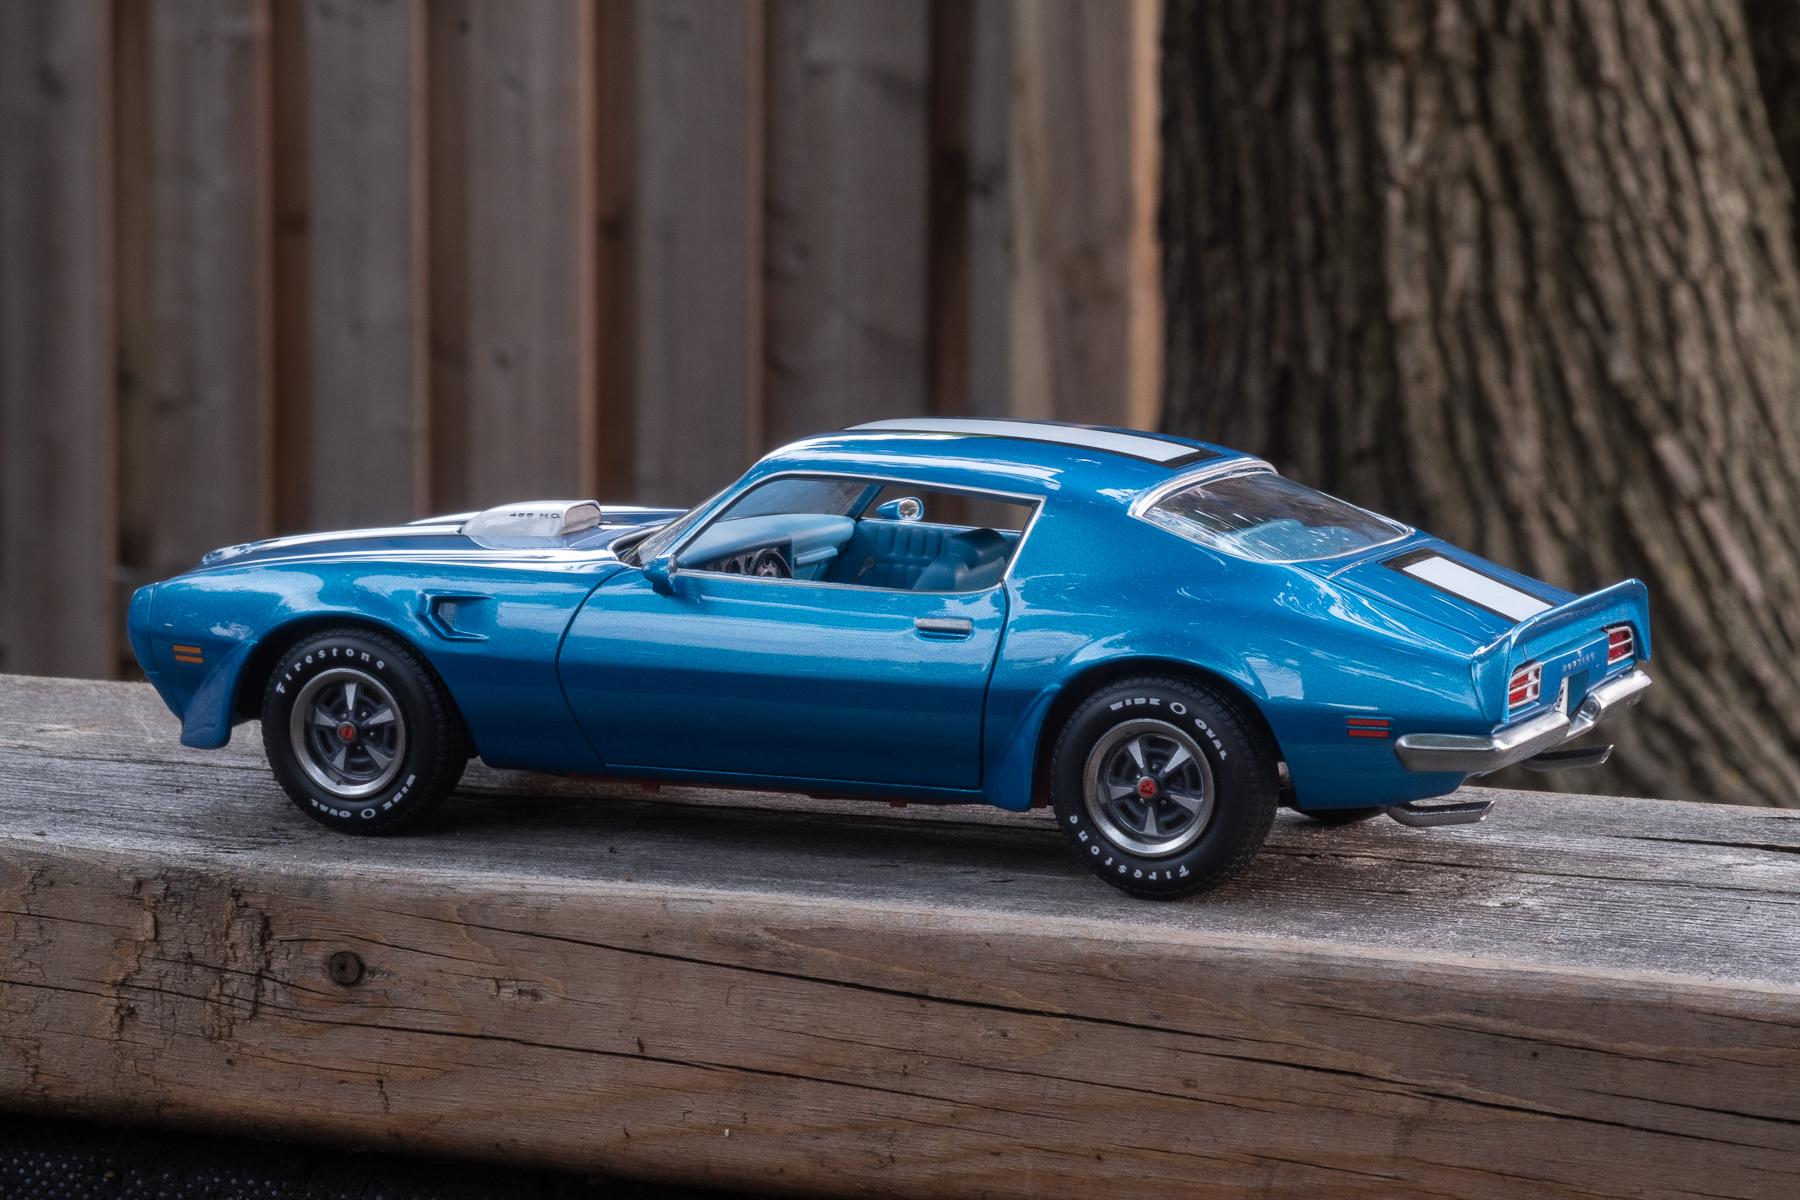
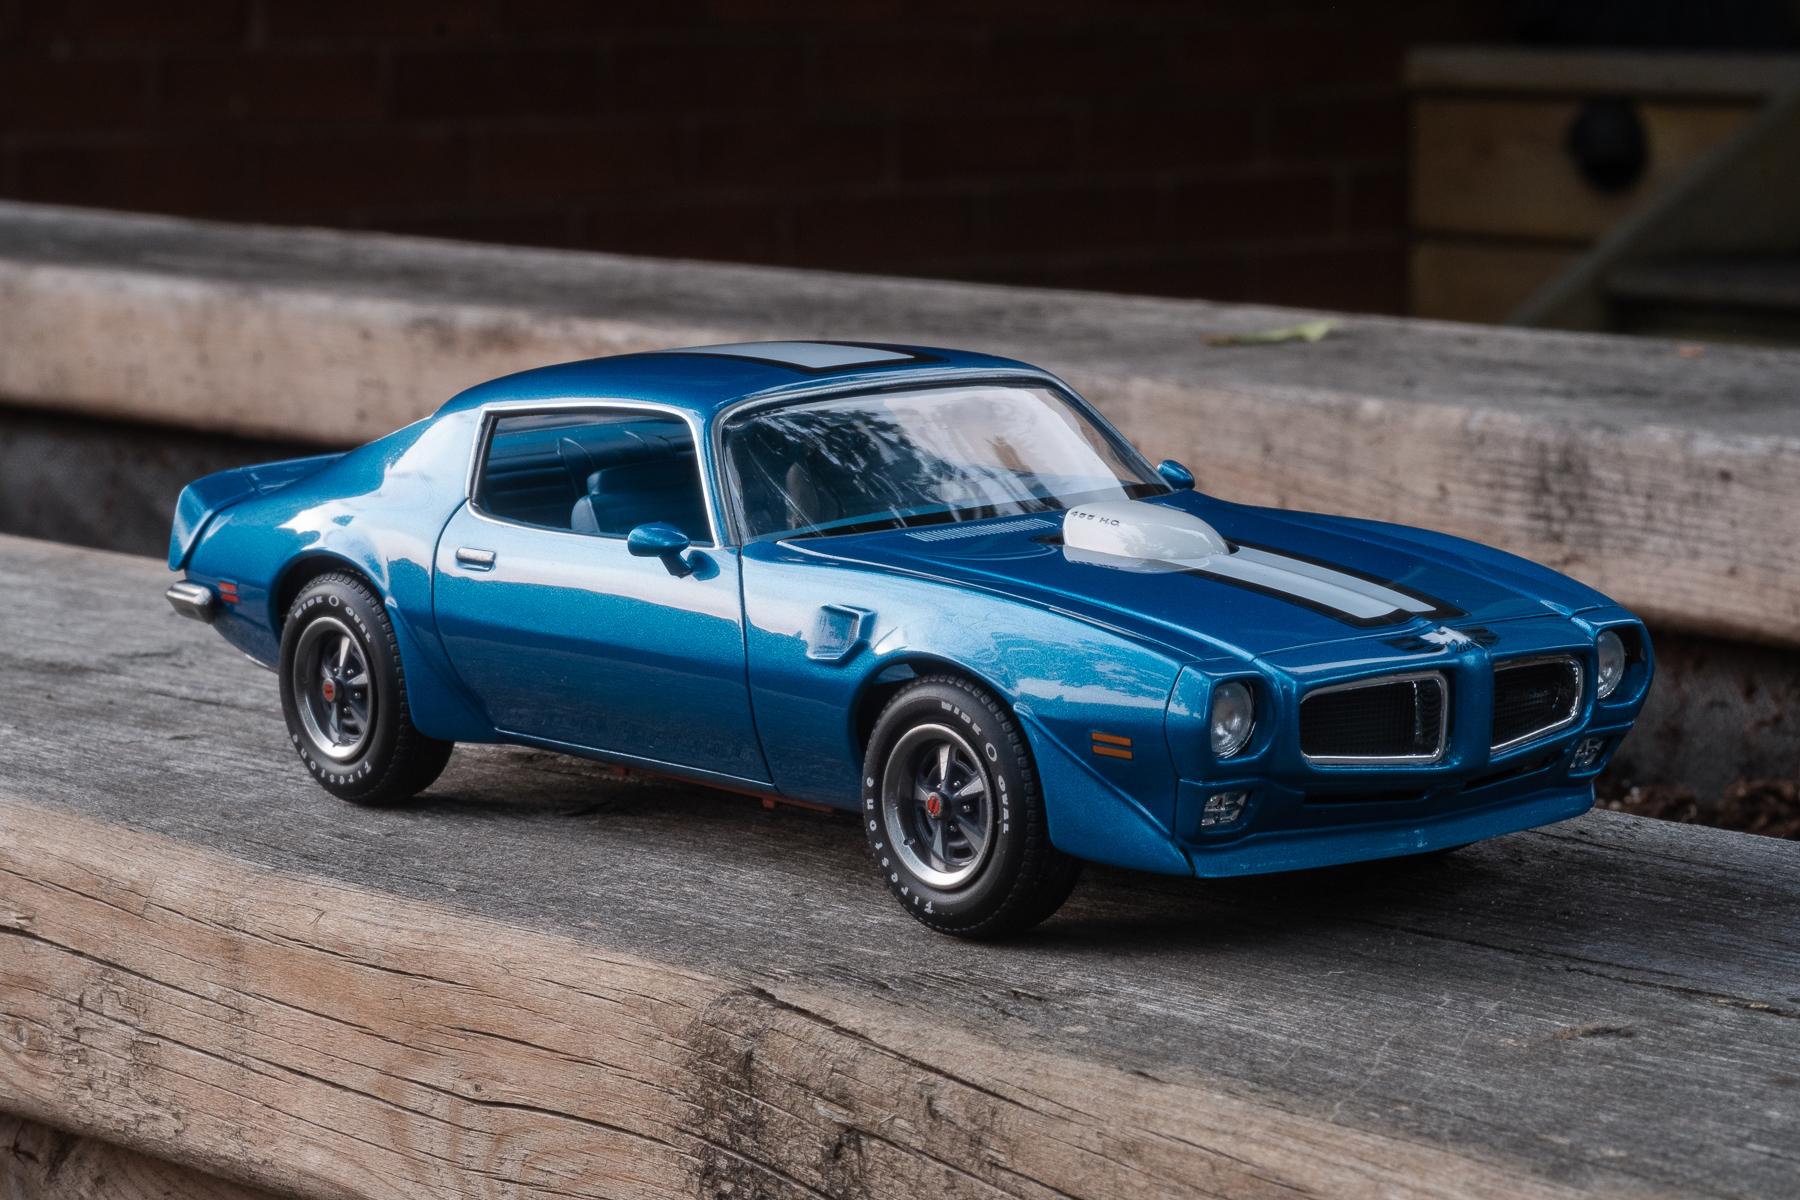
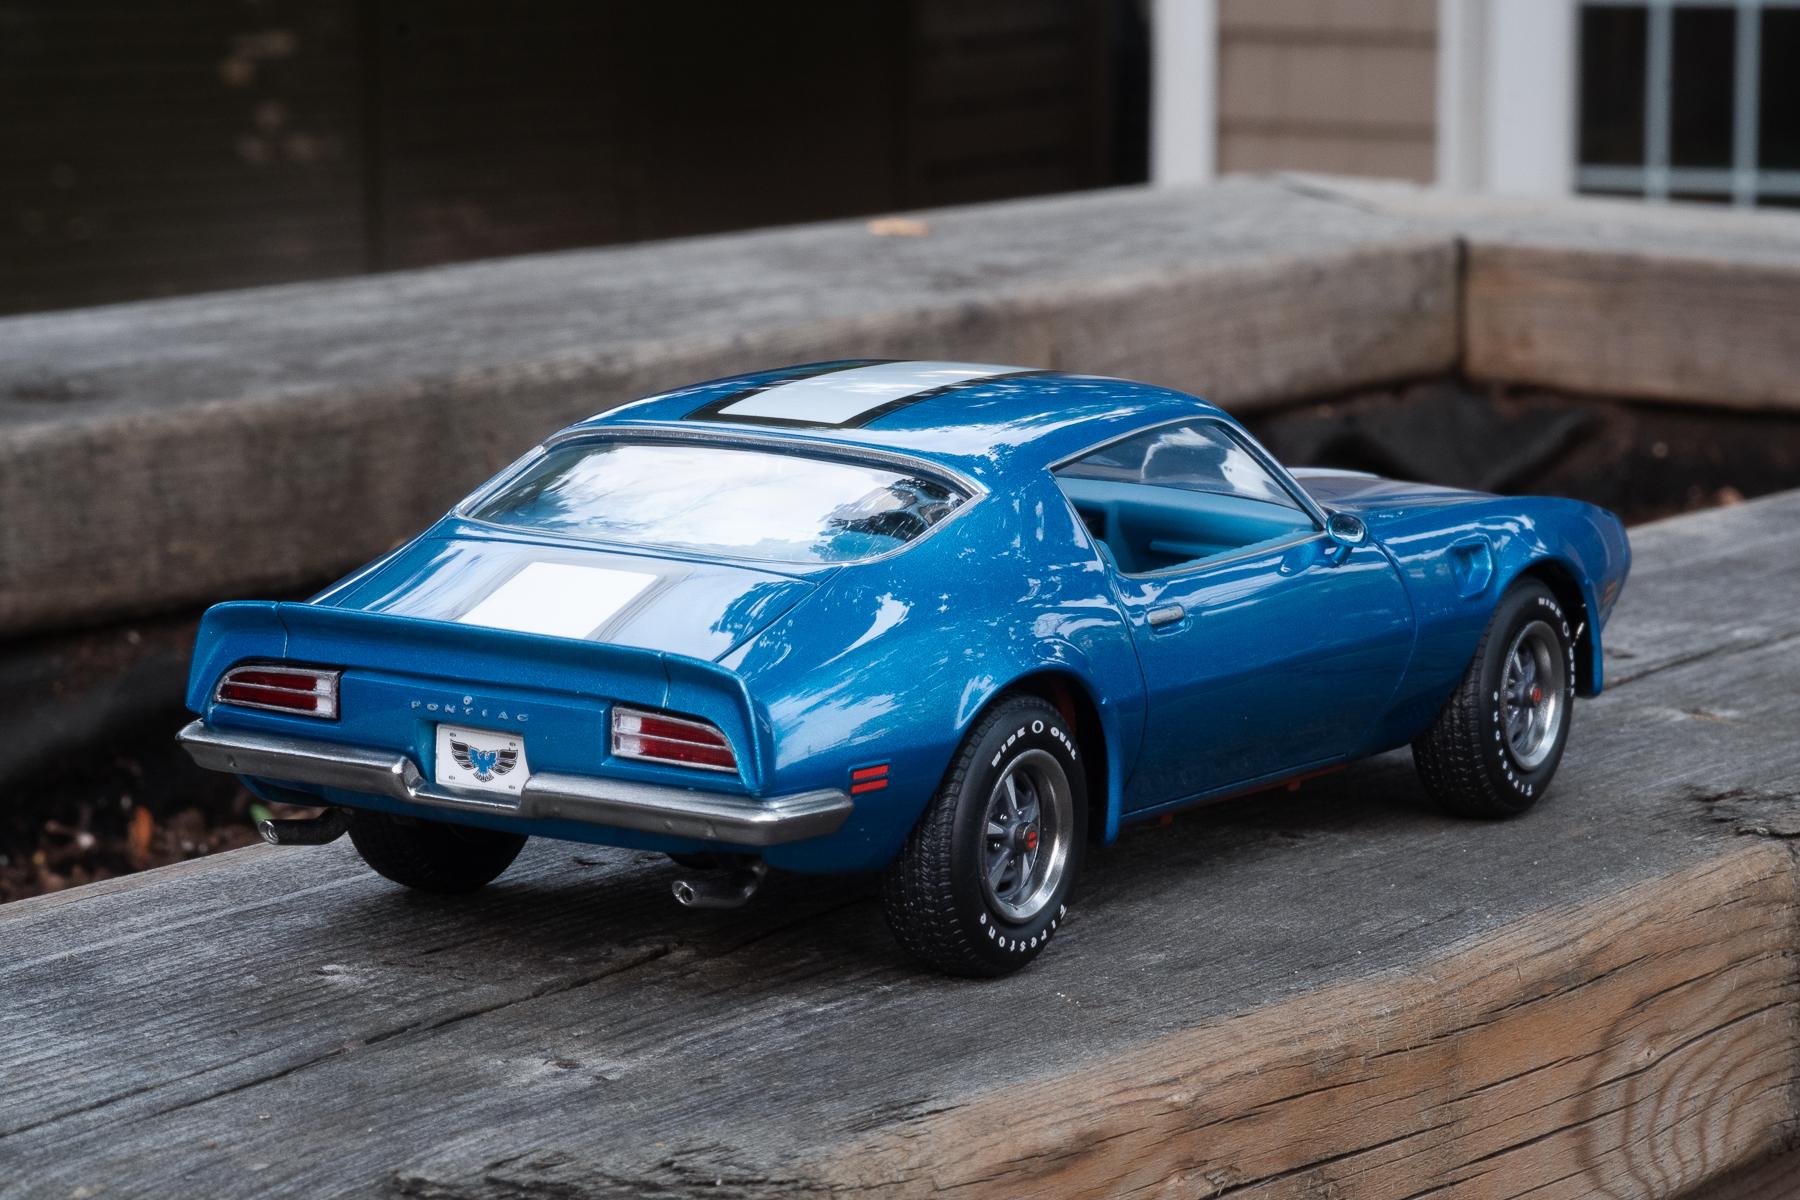
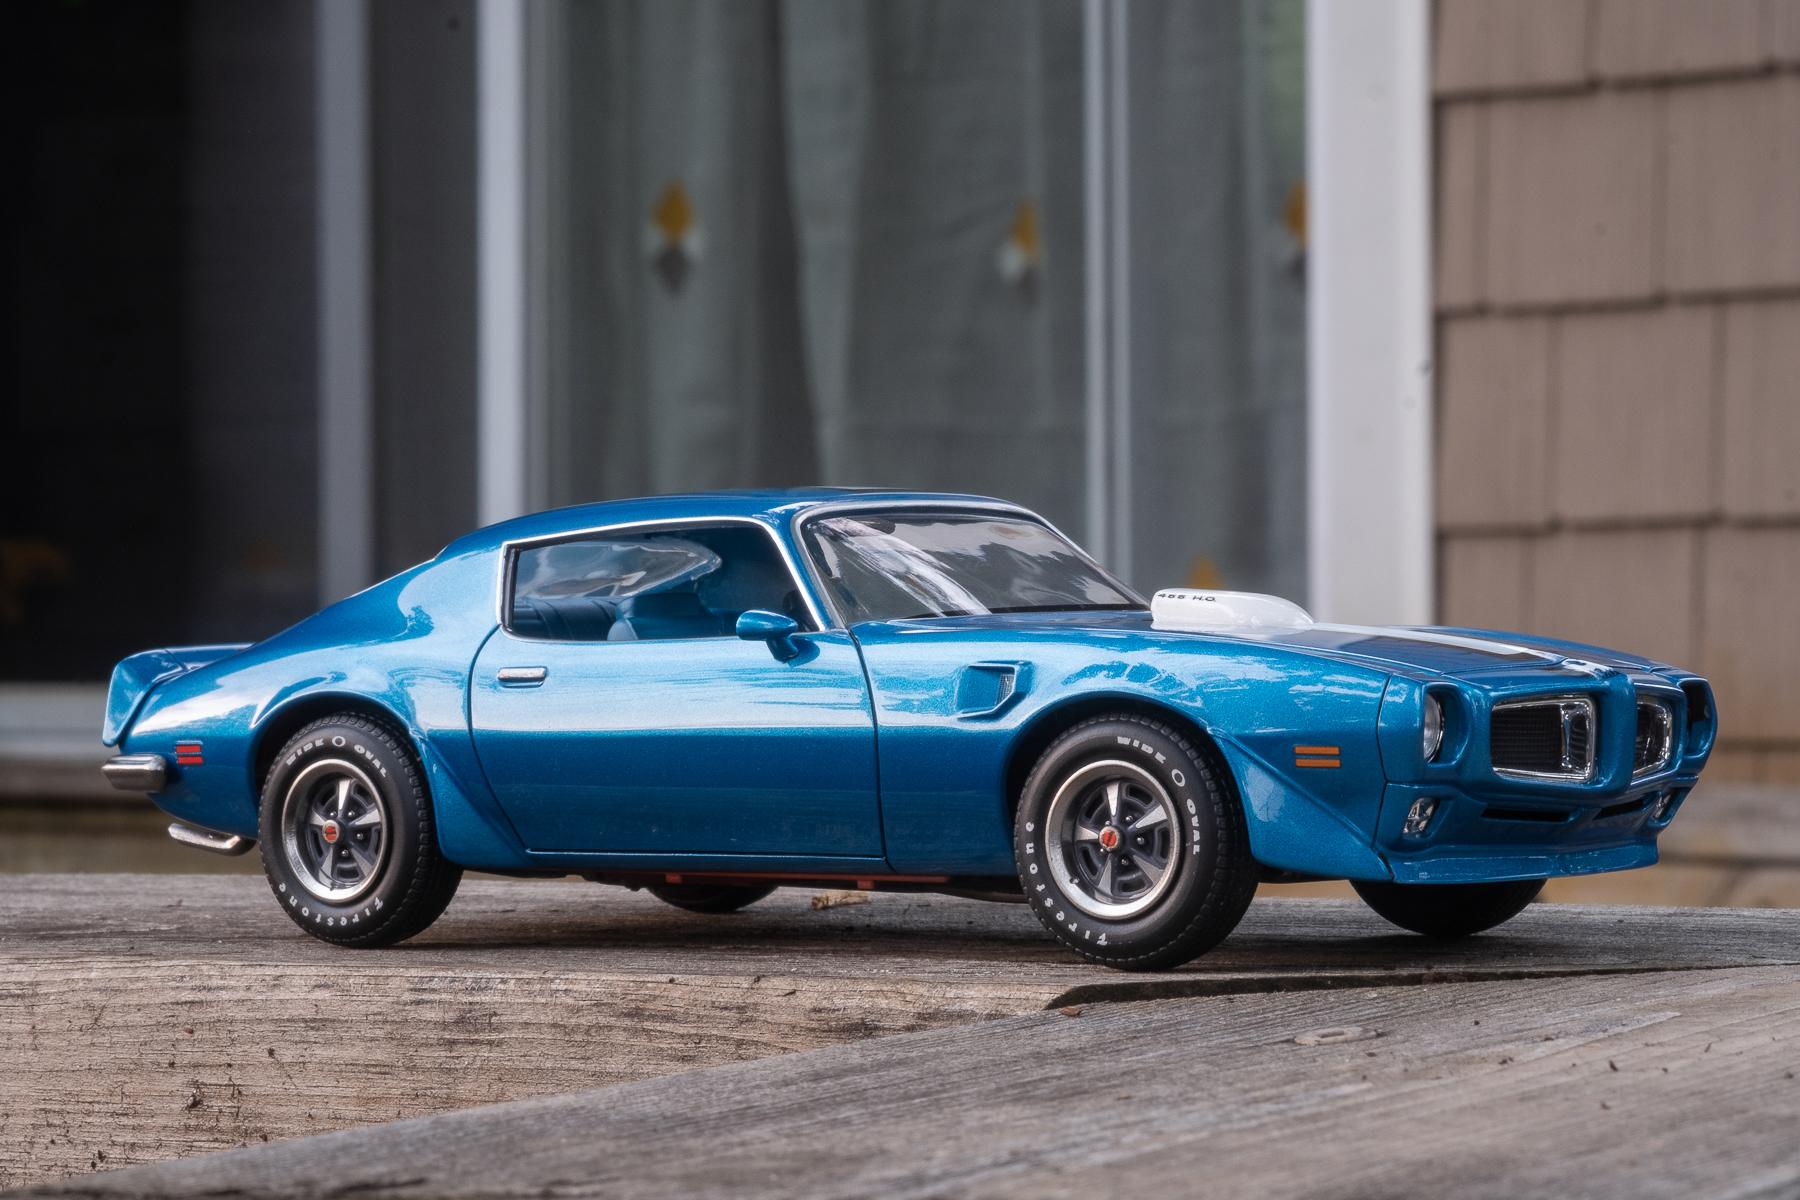
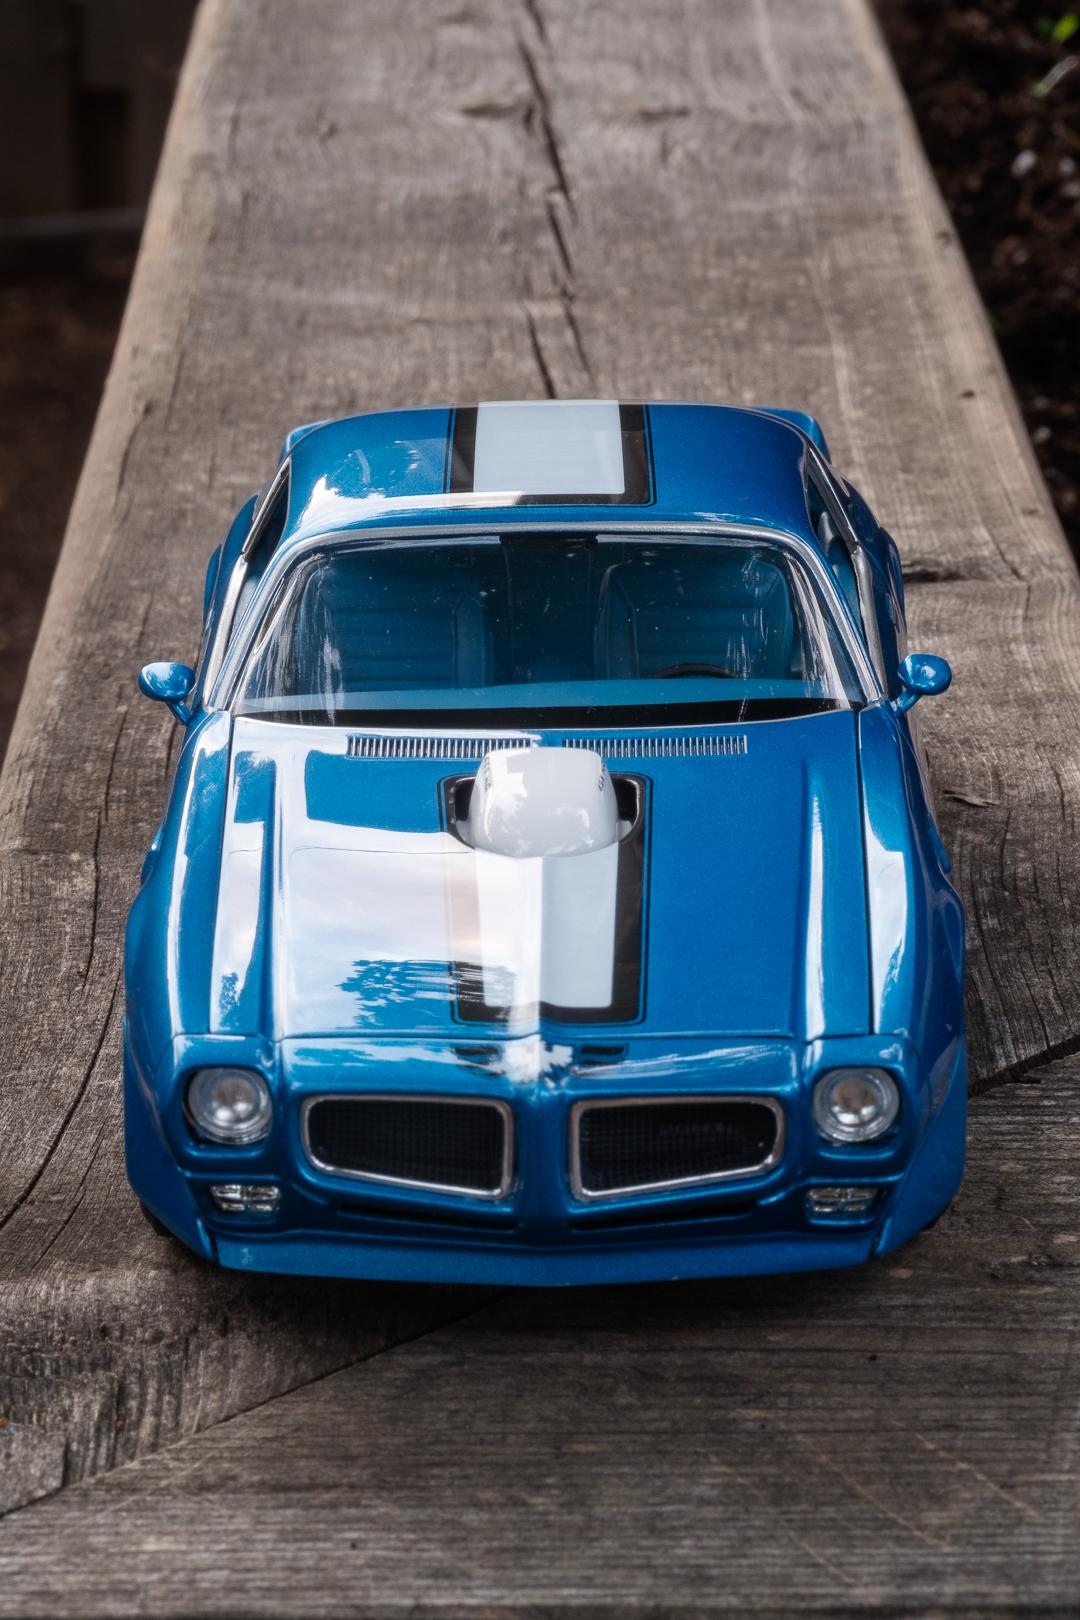
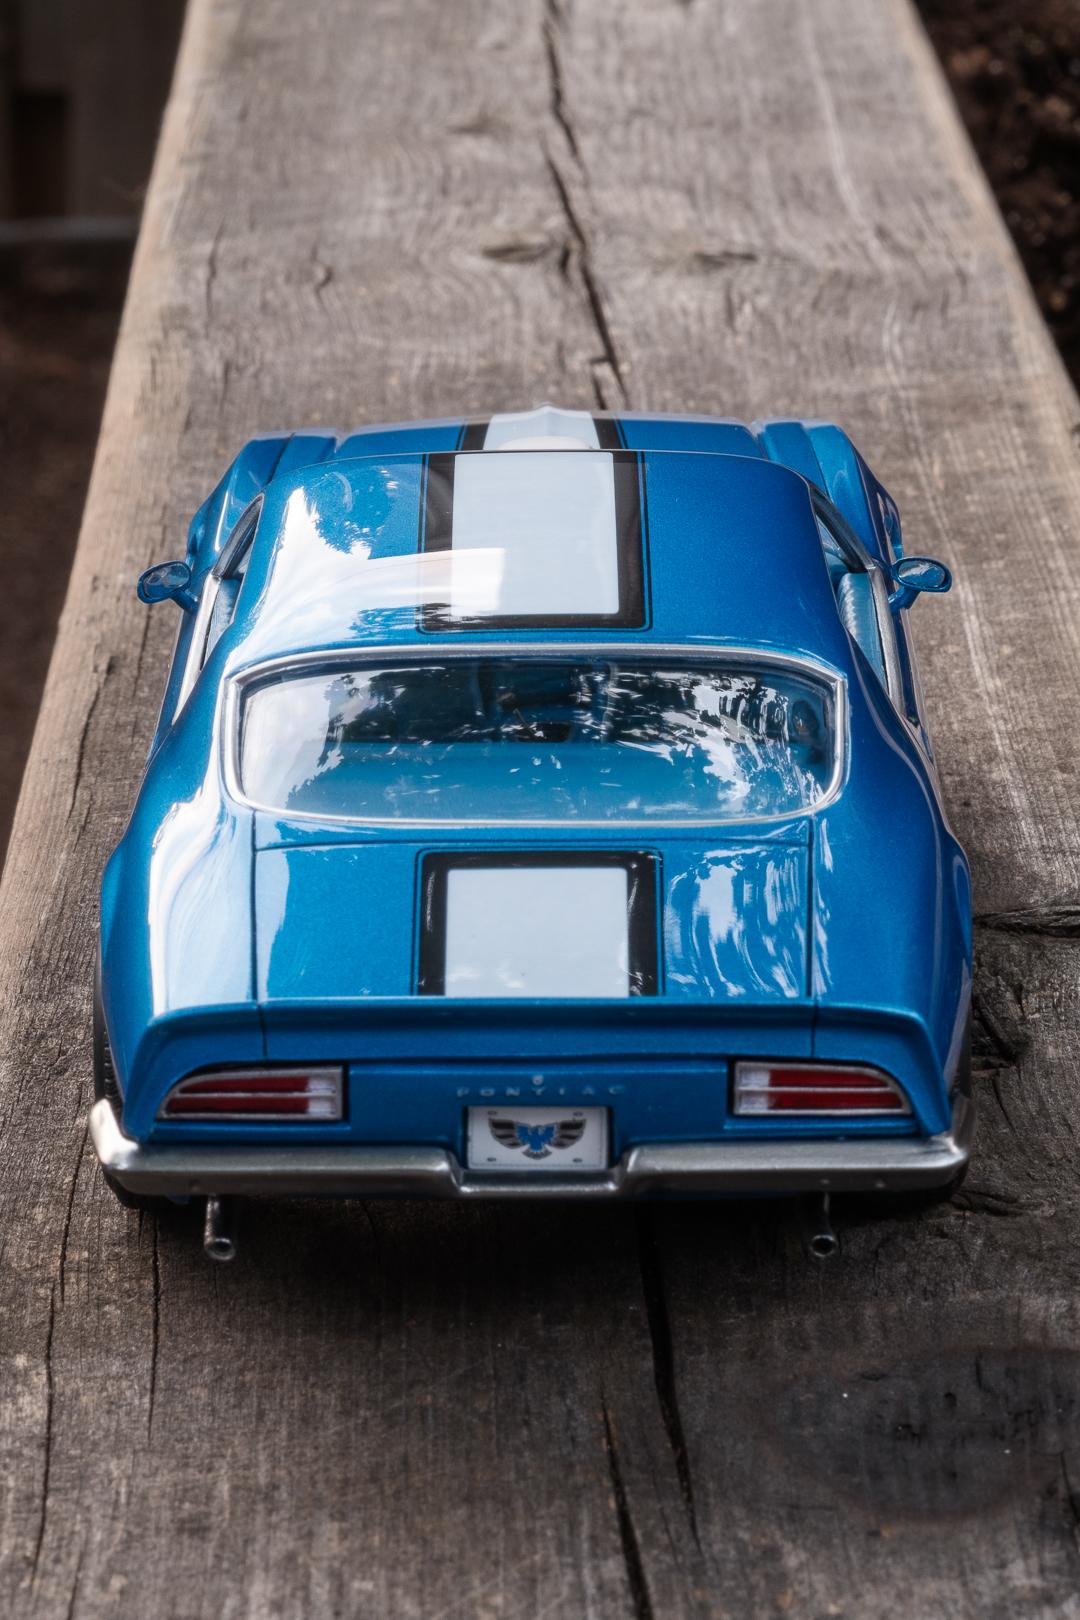
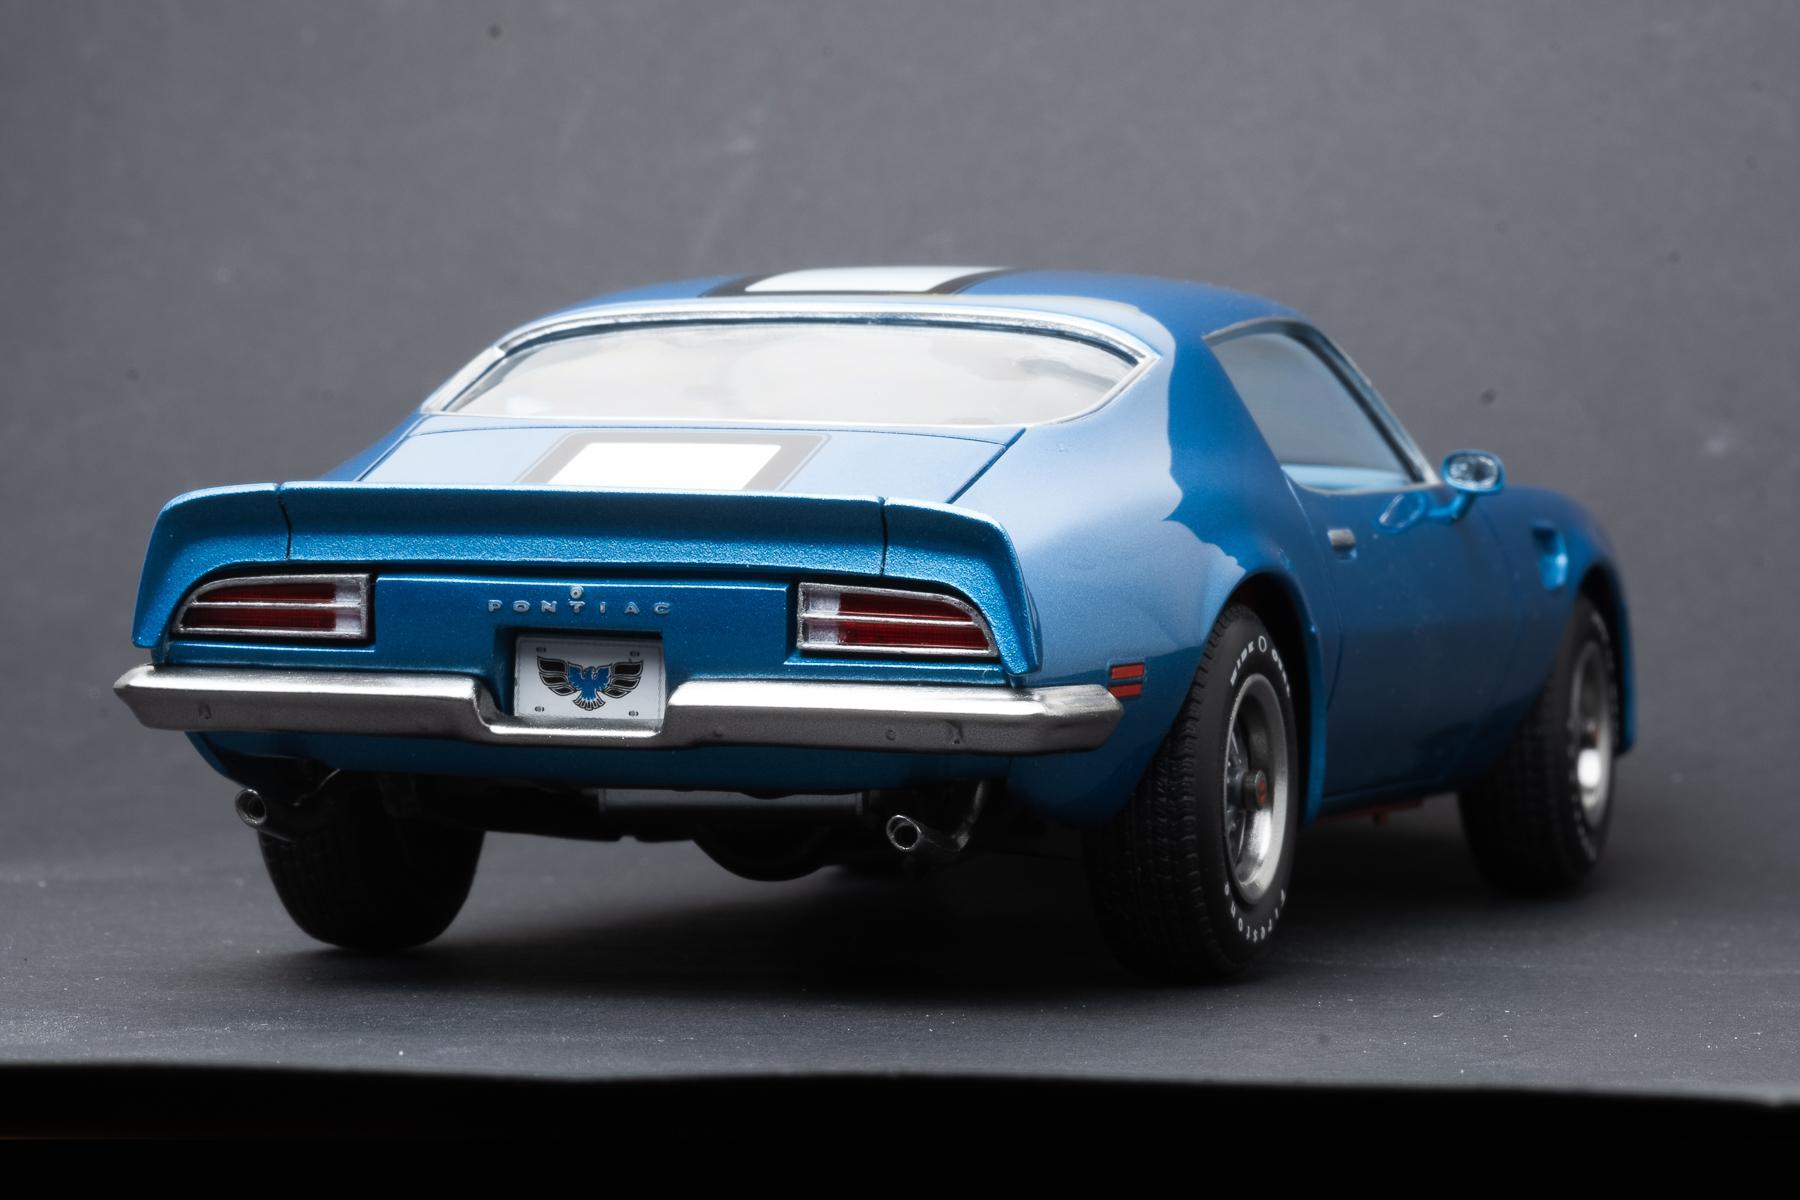
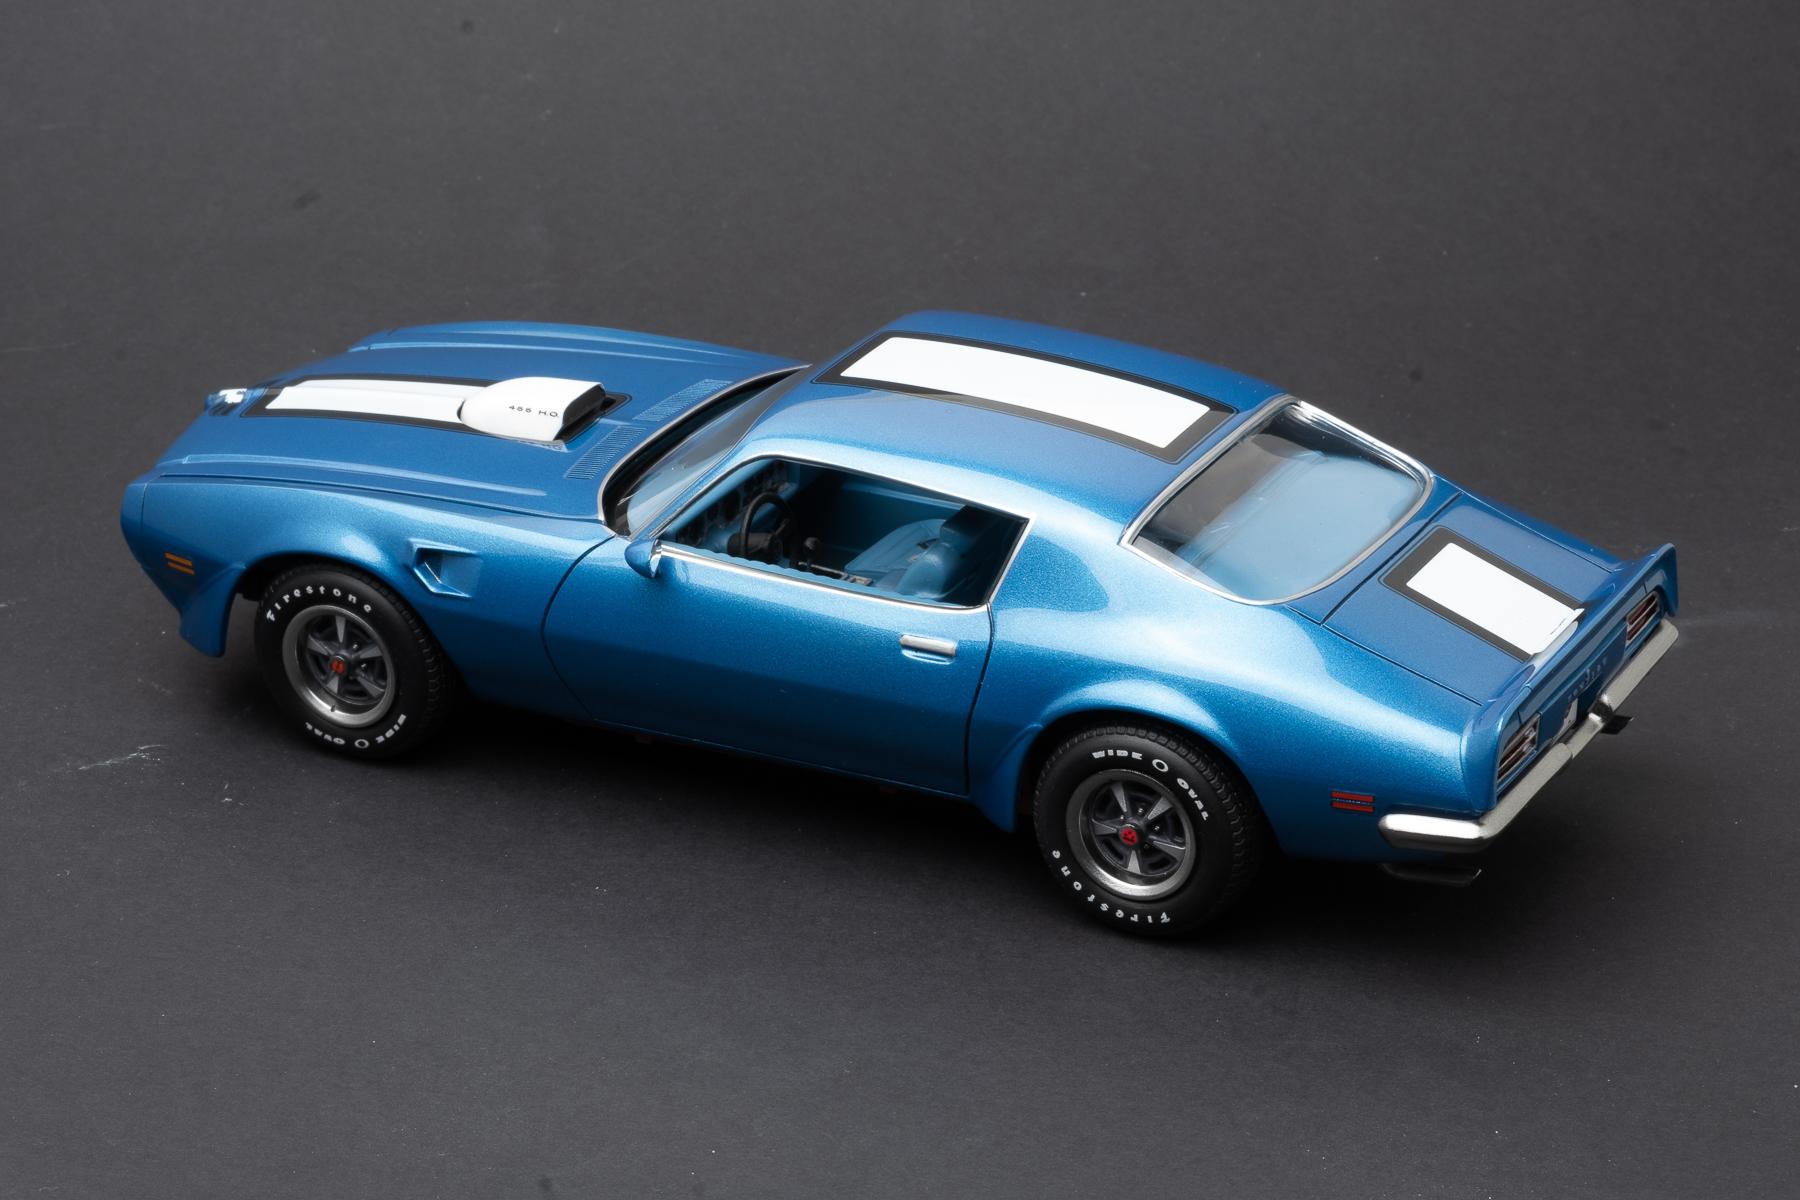
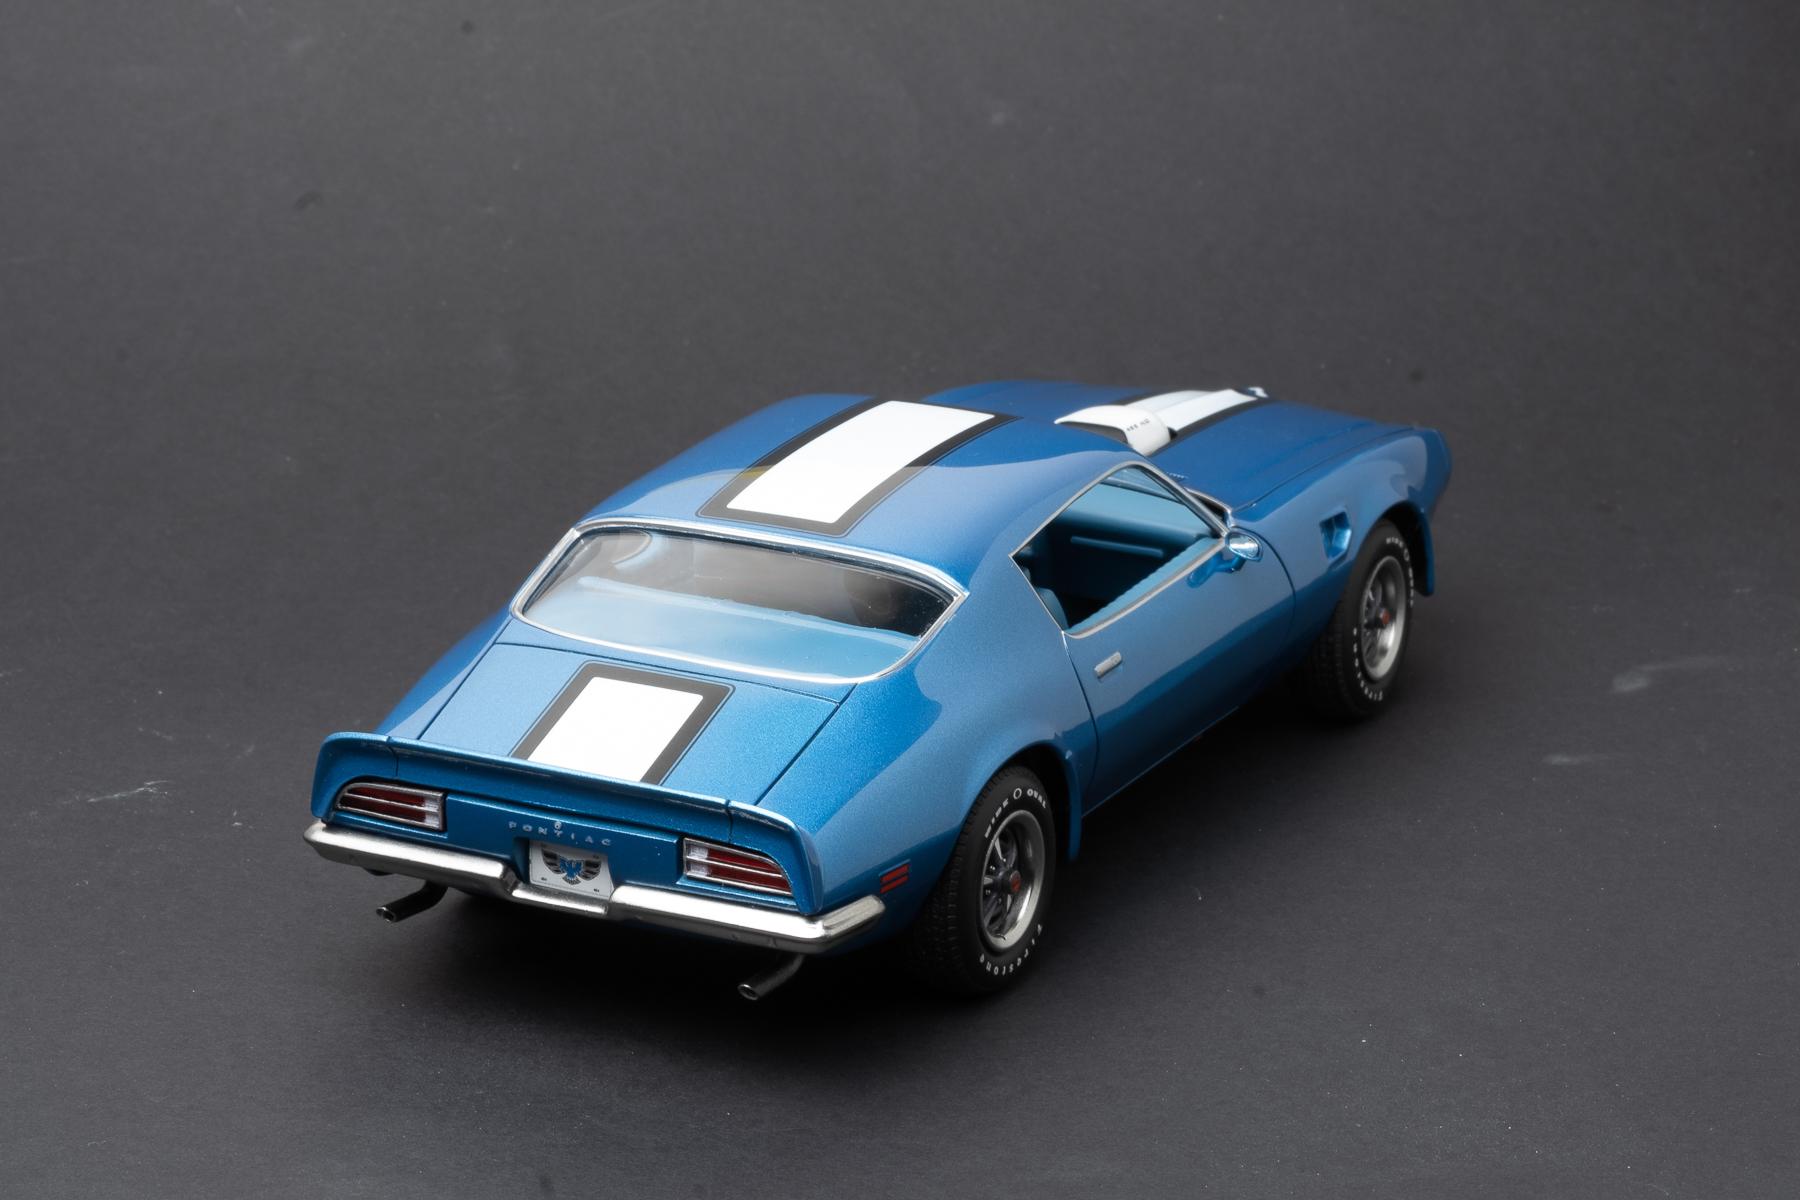
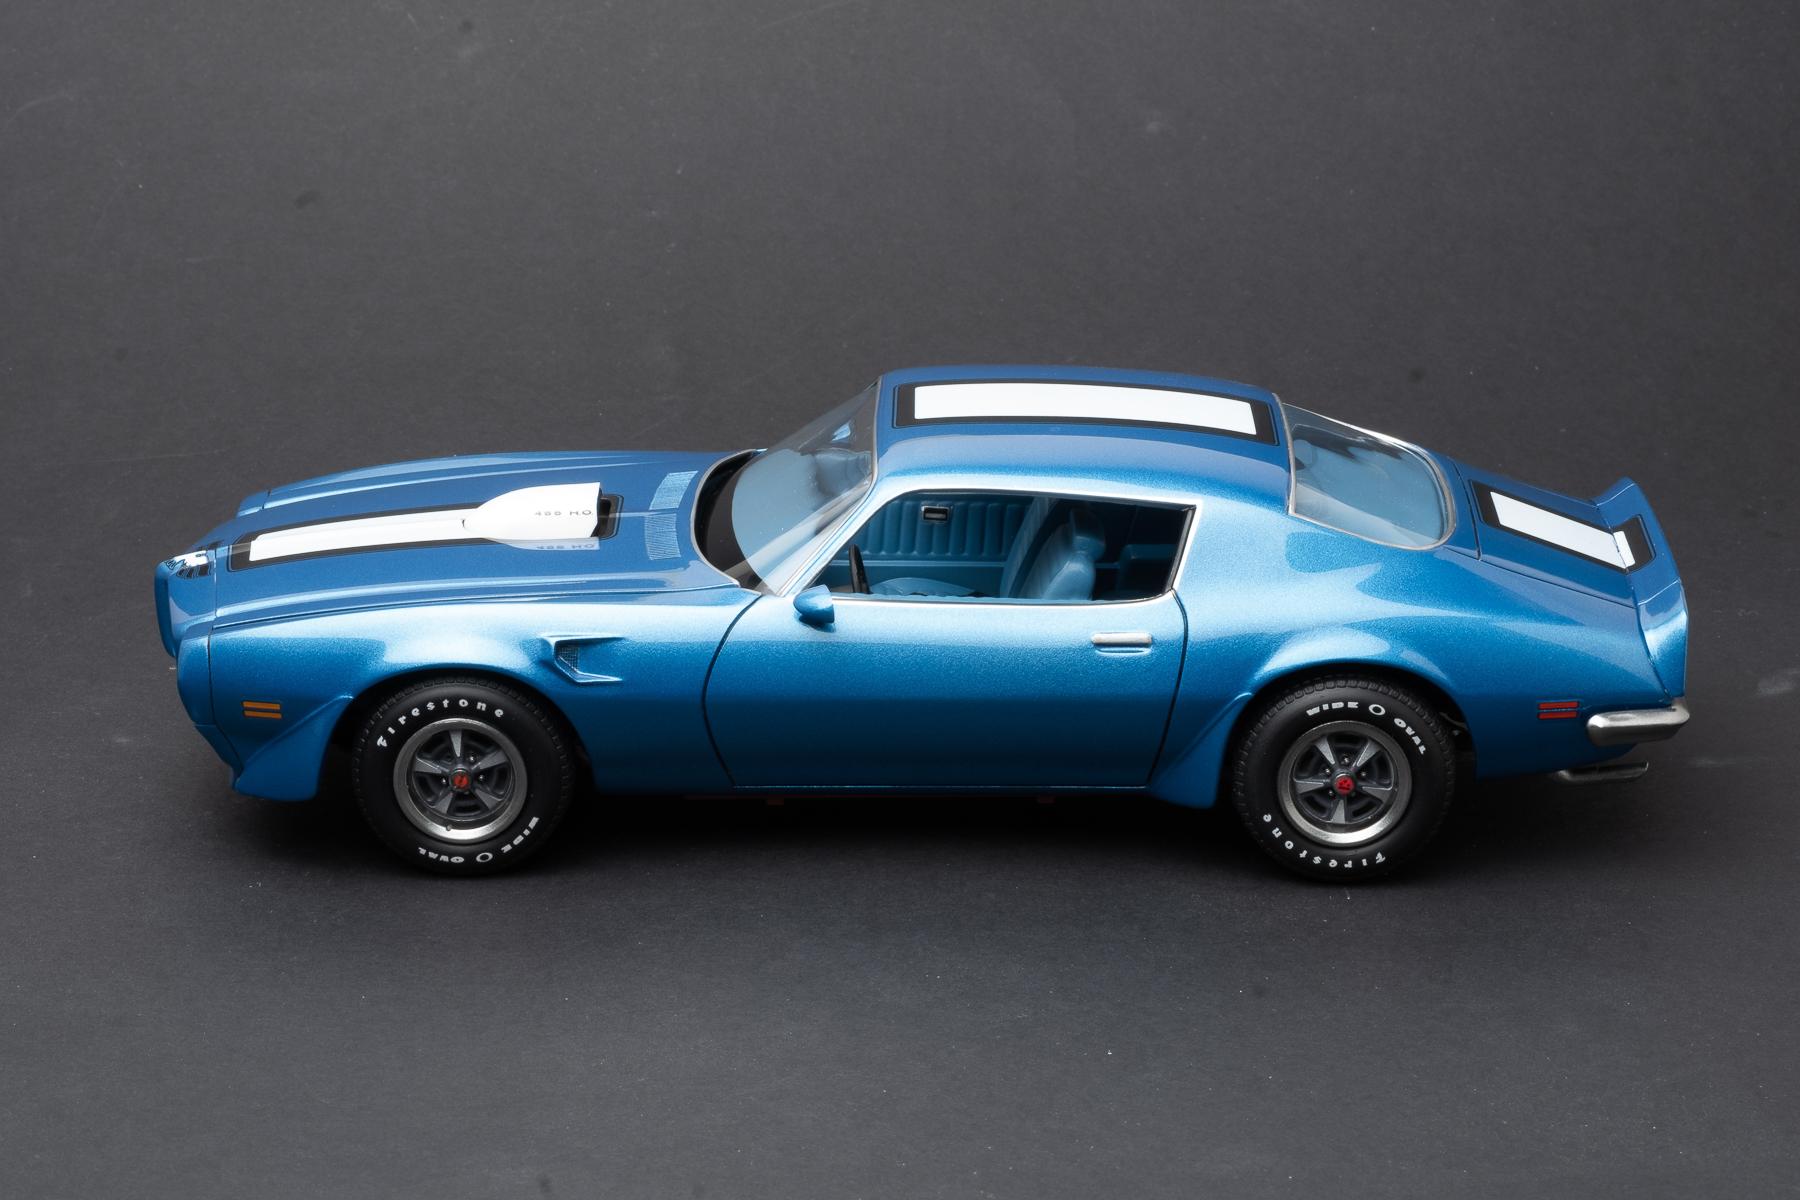
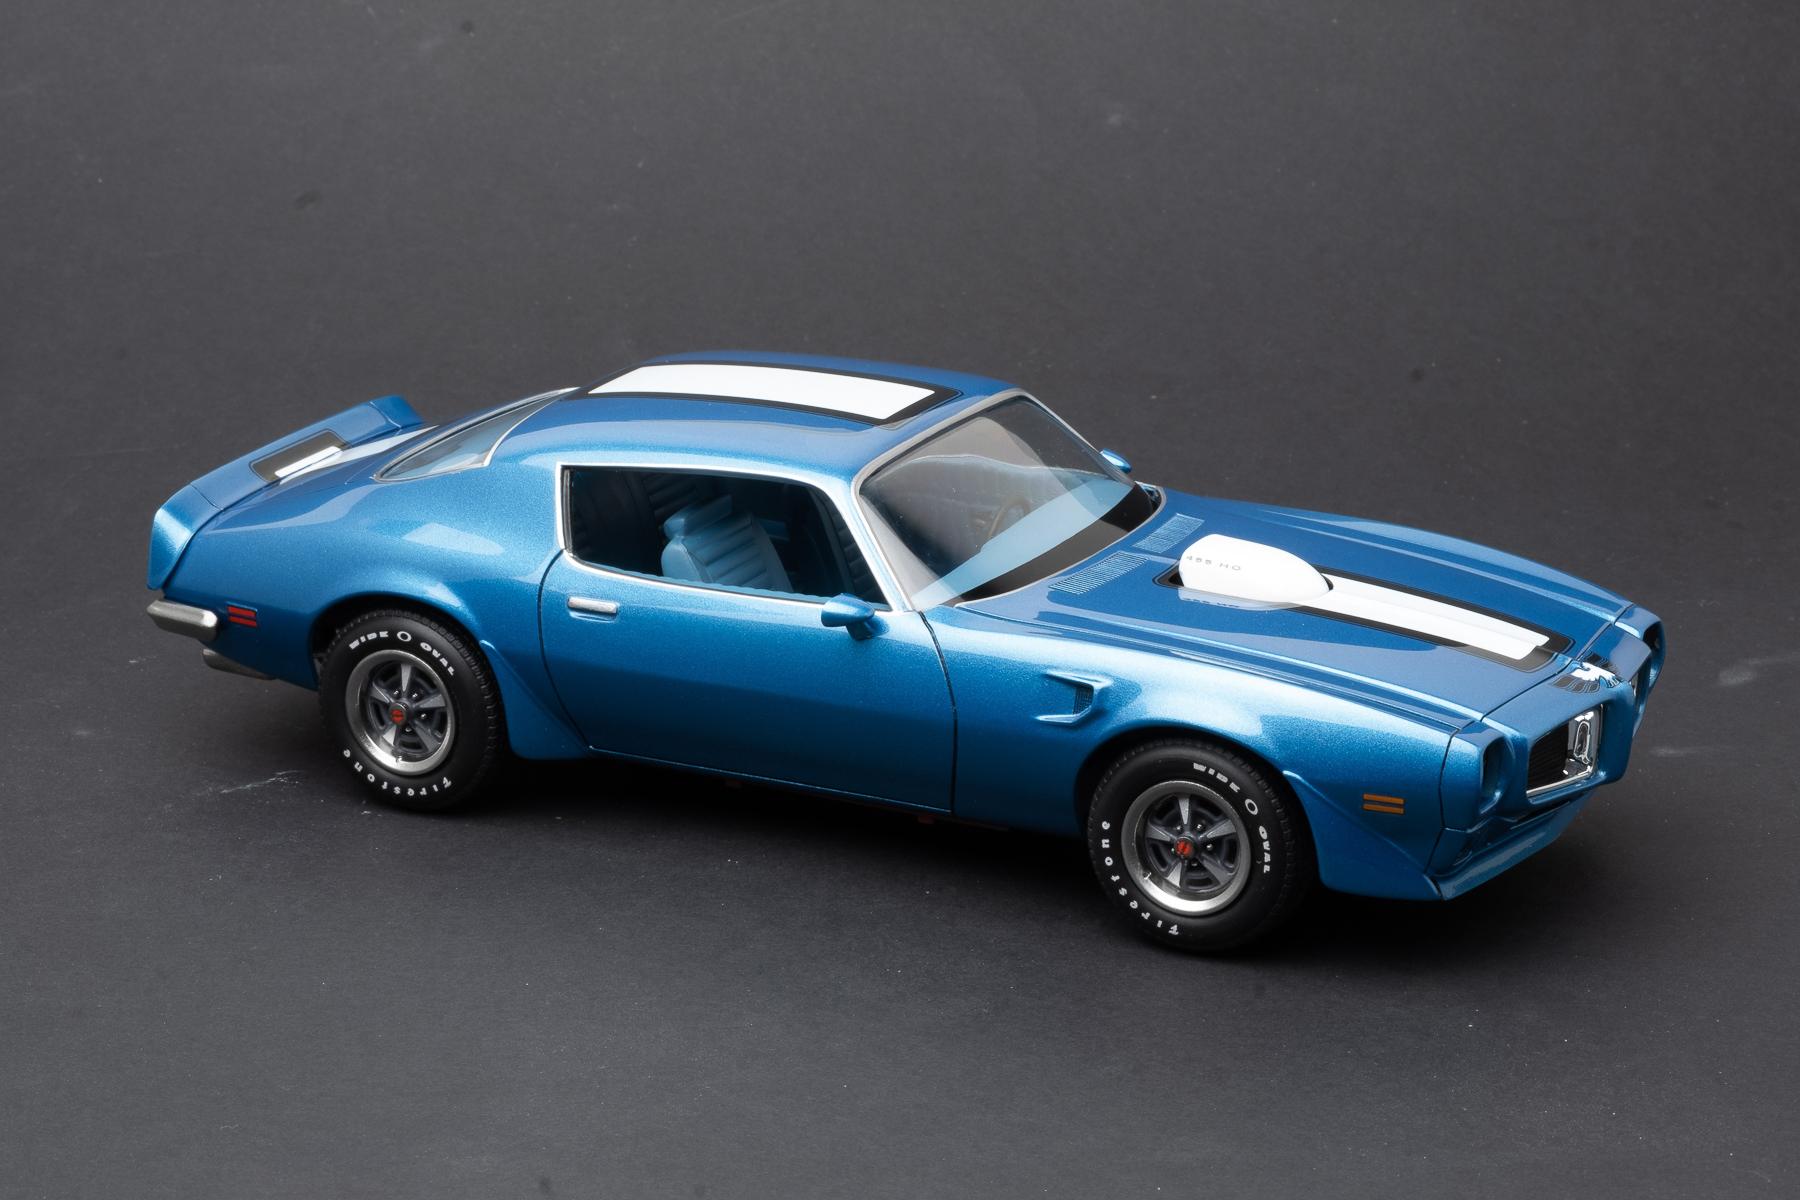
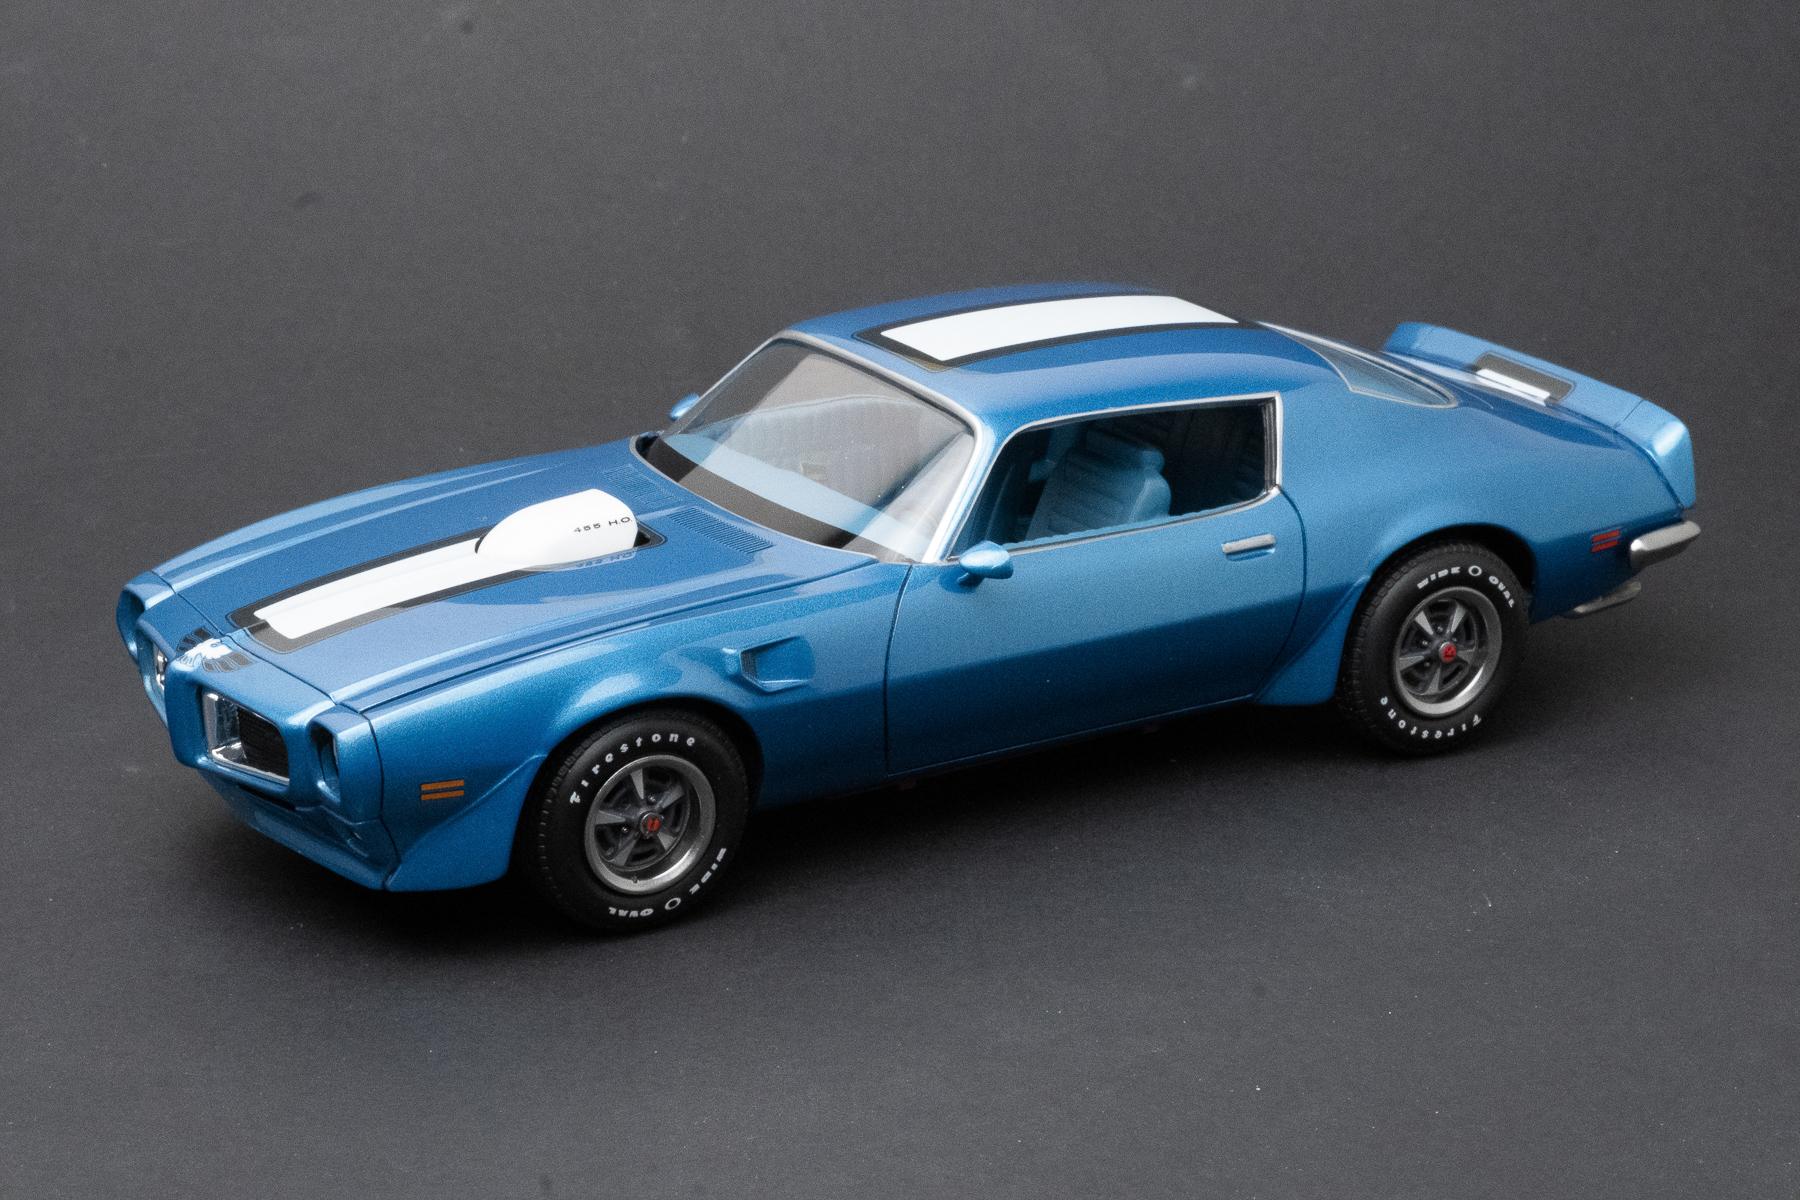
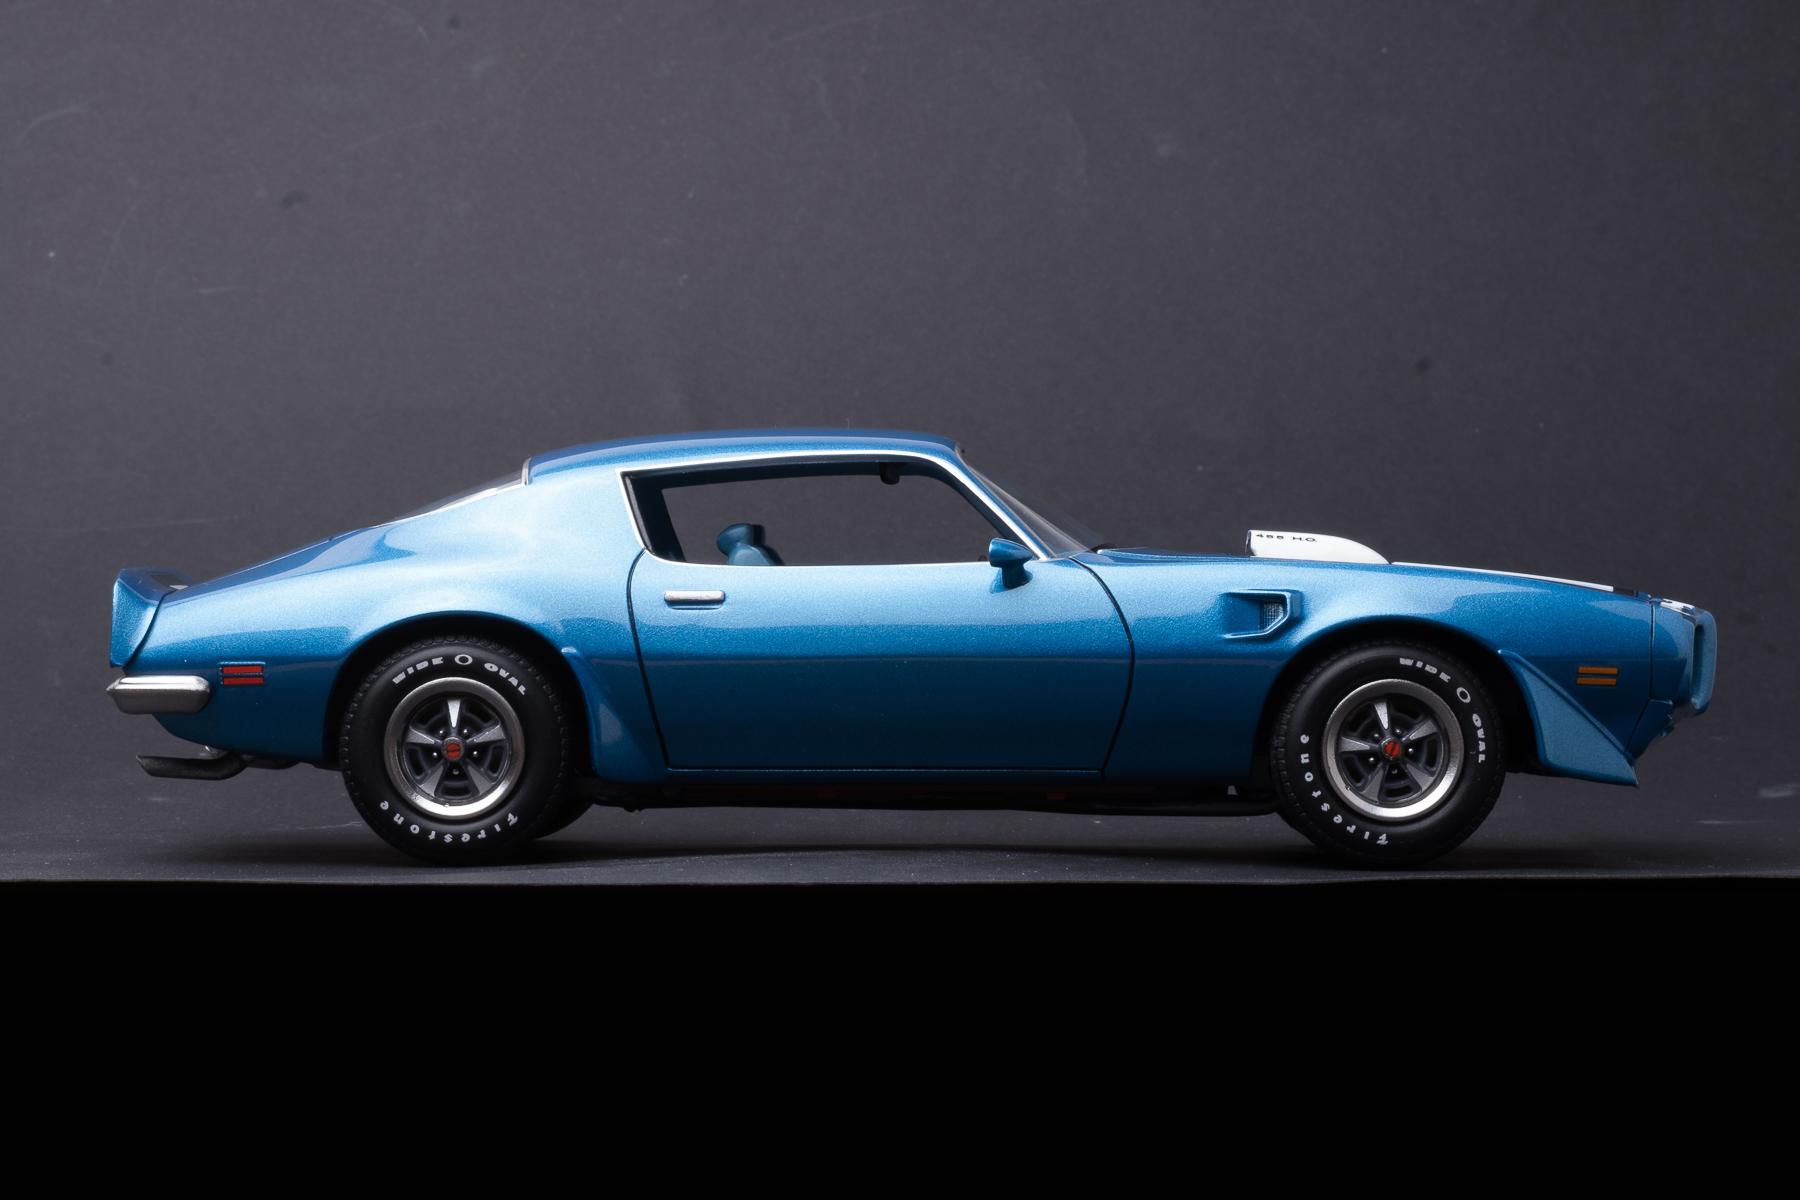
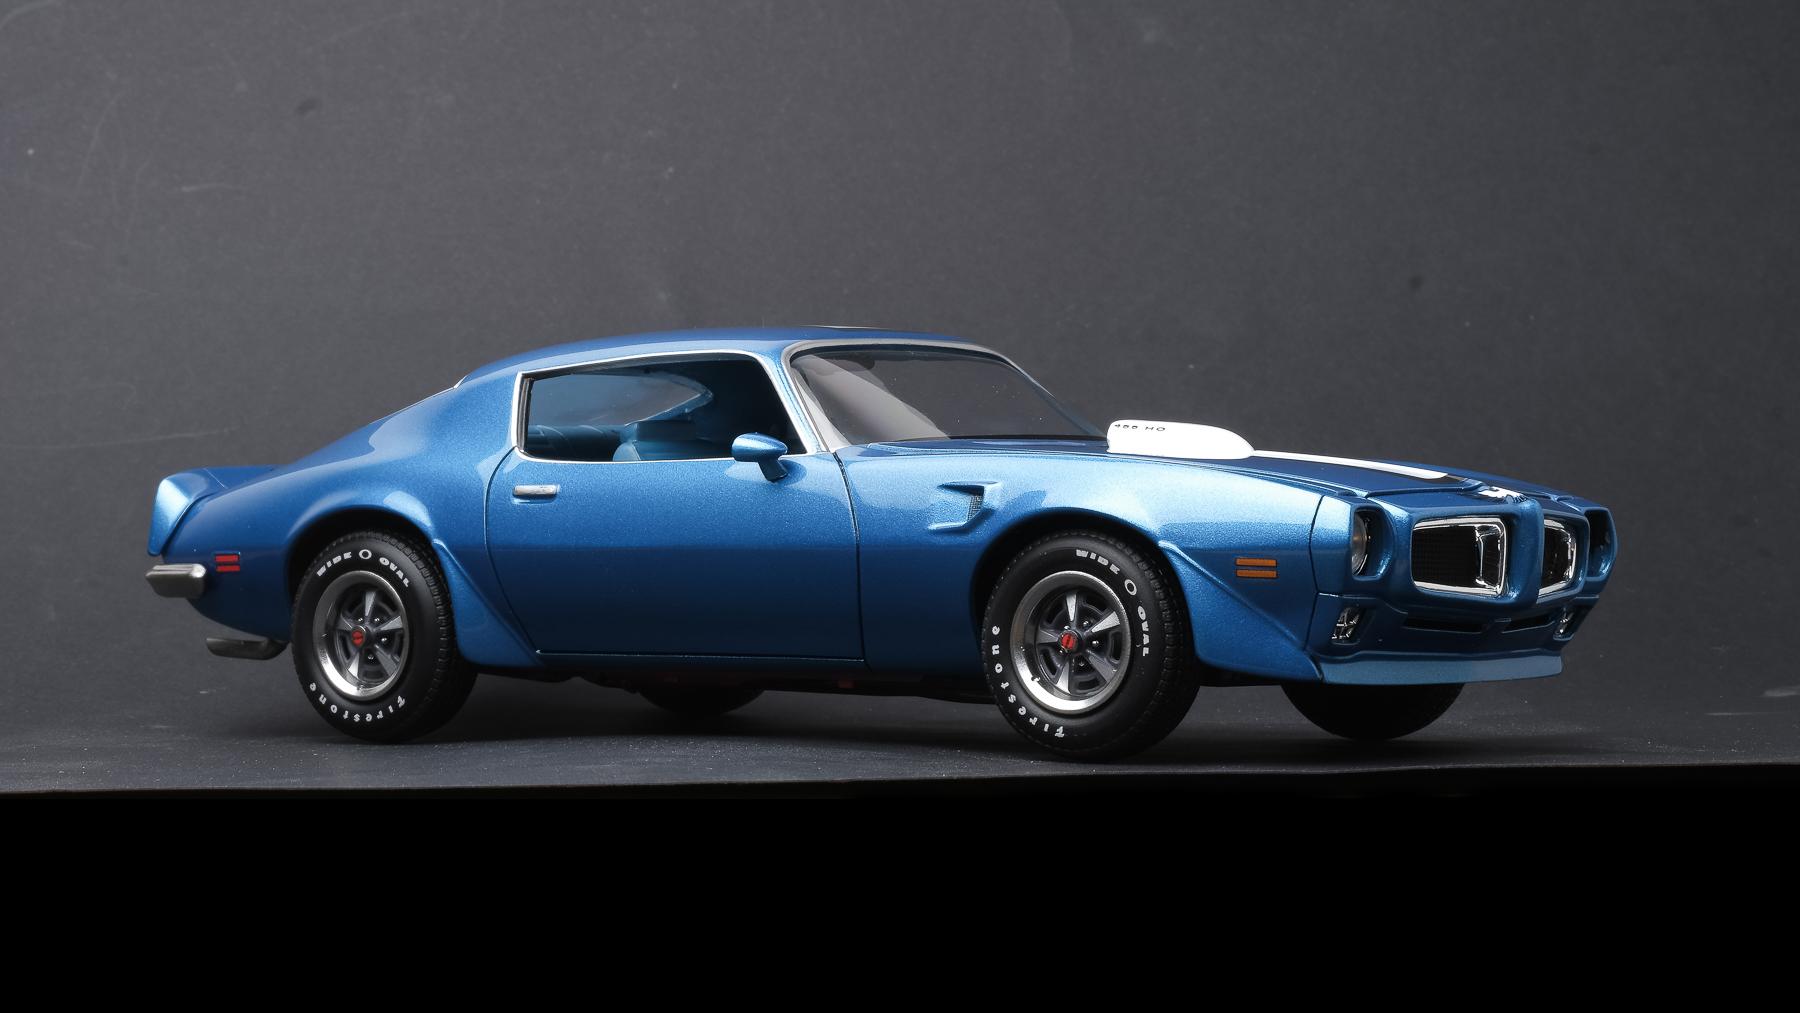
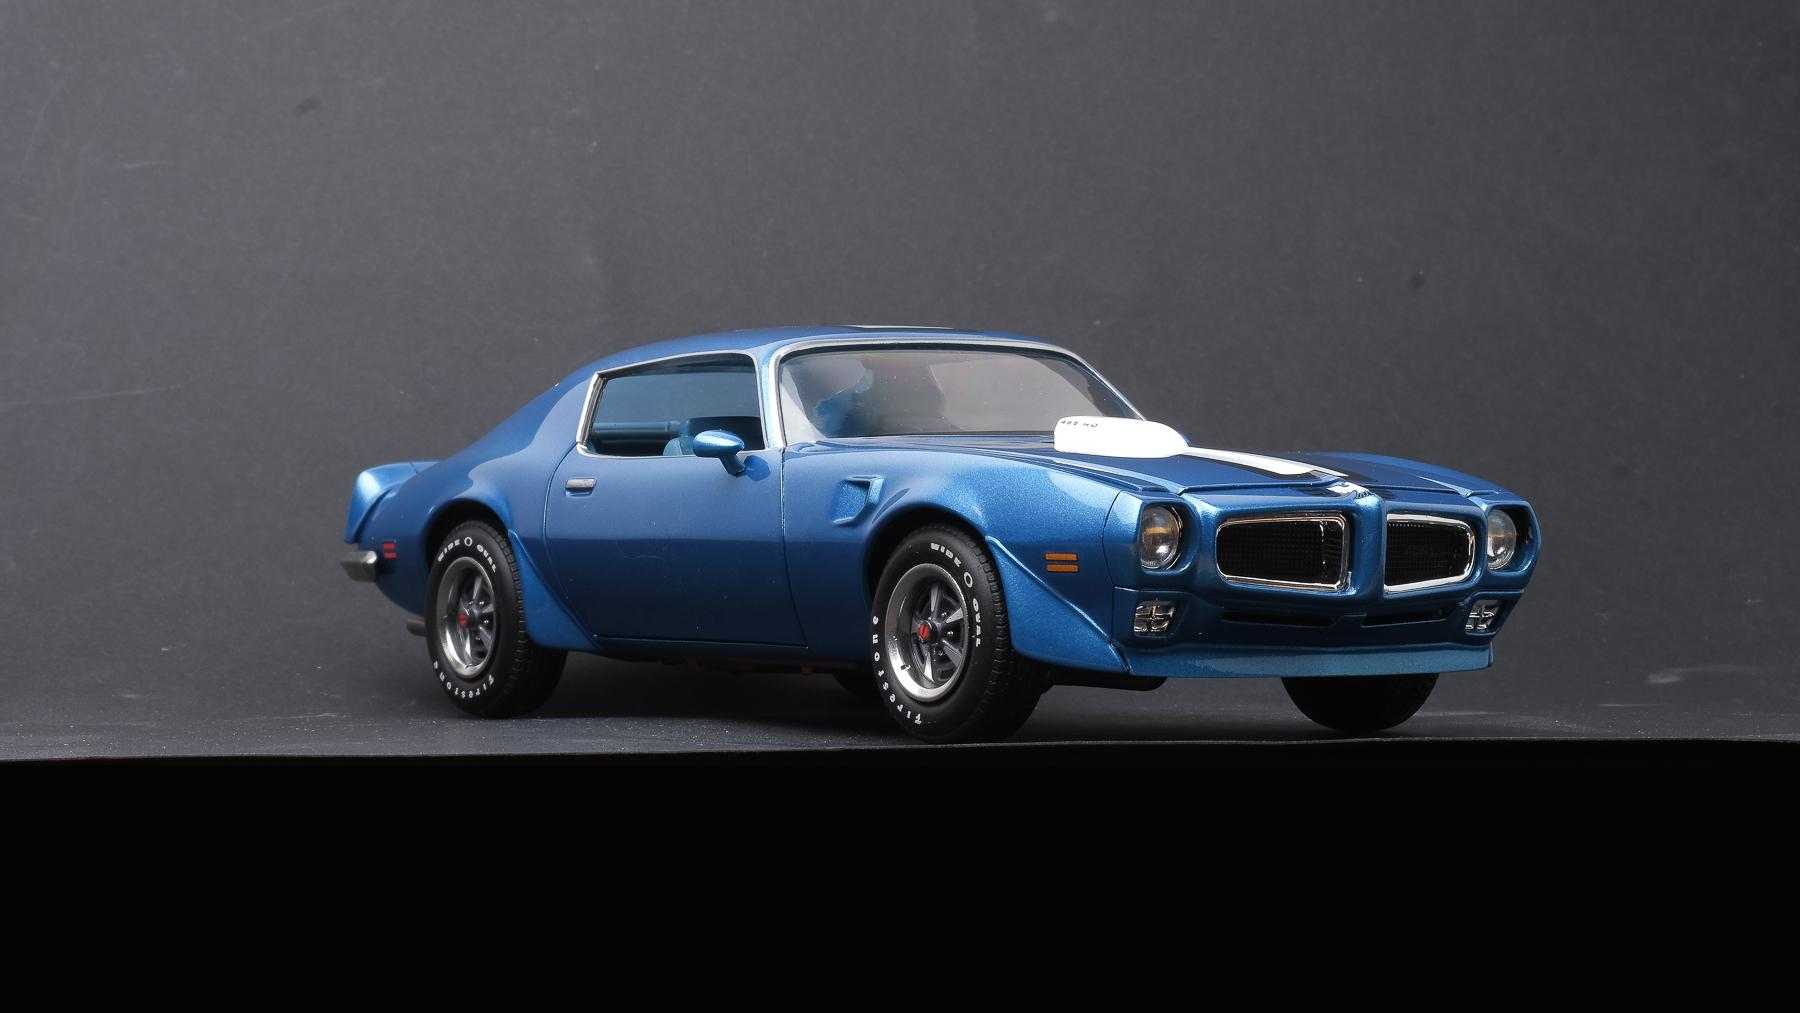
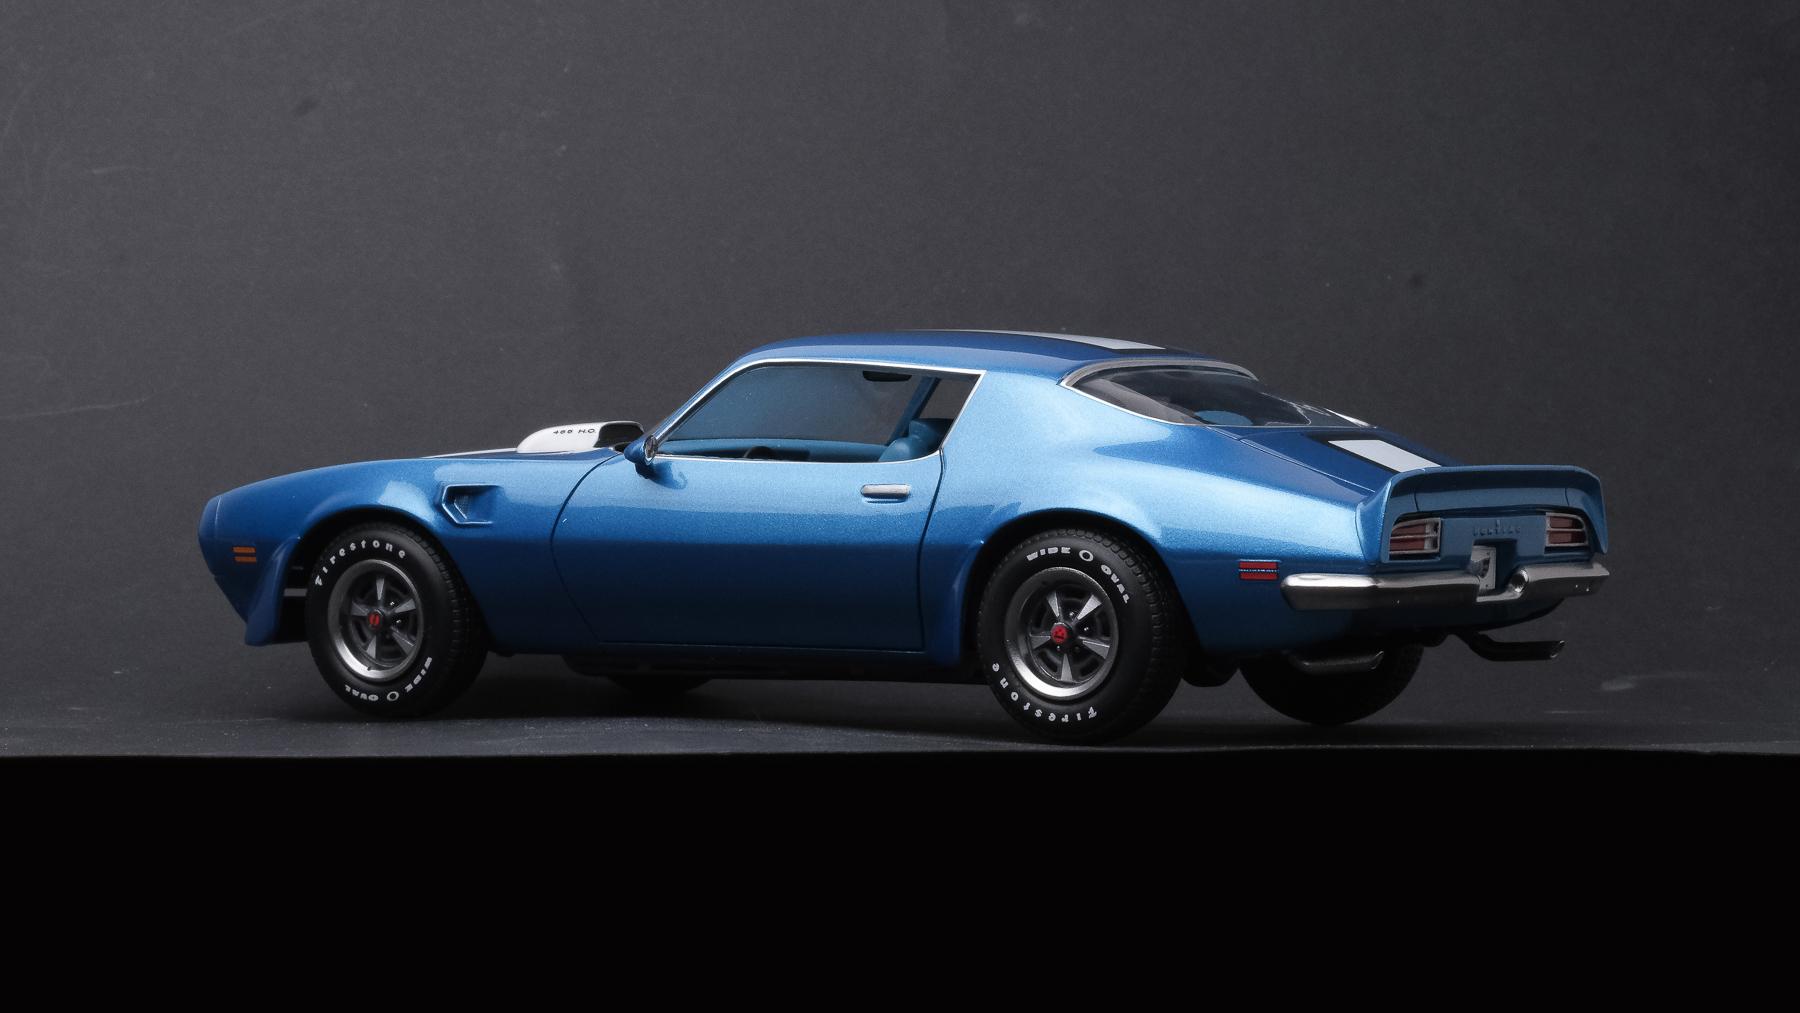
1970 Pontiac Firebird in Lucerne blue (1/24 Monogram/Revell)
e30lover replied to e30lover's topic in Model Cars
Thank you! Thanks a lot! Thank you! Thanks! Thank you! The wheels from Fireball really helped Thank you! I used to prefer the look of 1st gen but 2nd gen definitely has grown on me. Thanks! Thank you! That's what a lot of sanding would do - thank you! Good catch! I love the blue too - thanks! Thank you! Thanks a lot! Thank you! Thank you! Thanks a lot! I masked + airbrushed all the trims even though the texture wouldn't look as great as BMF. Thank you! I always chip away tiny bits at a time which help me to not make any big mistakes. Thanks a lot! Appreciate the compliment! Thank you! Thanks! Thank you sir! I thought the one nearby the radiator is the coolant overflow reservoir! Thank you! Thanks! Interesting location for washer bottle - I thought it was coolant overflow tank! Thank you! Thanks a lot! Thanks! Thank you! -
Beautiful Stratos build! The photos are equally fantastic. Everyone who built the Hasegawa Stratos know how scary it is to put the body in without breaking anything - and they all had some issues with wheel gap around the fenders.
-
1970 Pontiac Firebird in Lucerne blue build (1/24 Monogram/Revell)
e30lover replied to e30lover's topic in WIP: Model Cars
Thank you! Thanks a lot! Appreciate the compliment! Thank you! I learned that any kits with separate body panels need to be test fitted and glued as much as possible before paint. Thanks! Thank you! Thank you sir! Wheel masks came with the wheel kit! I stagger multiple builds so that I don't rush the paint job! Here's the finished build: http://www.modelcarsmag.com/forums/topic/184965-1970-pontiac-firebird-in-lucerne-blue-124-monogramrevell/ -
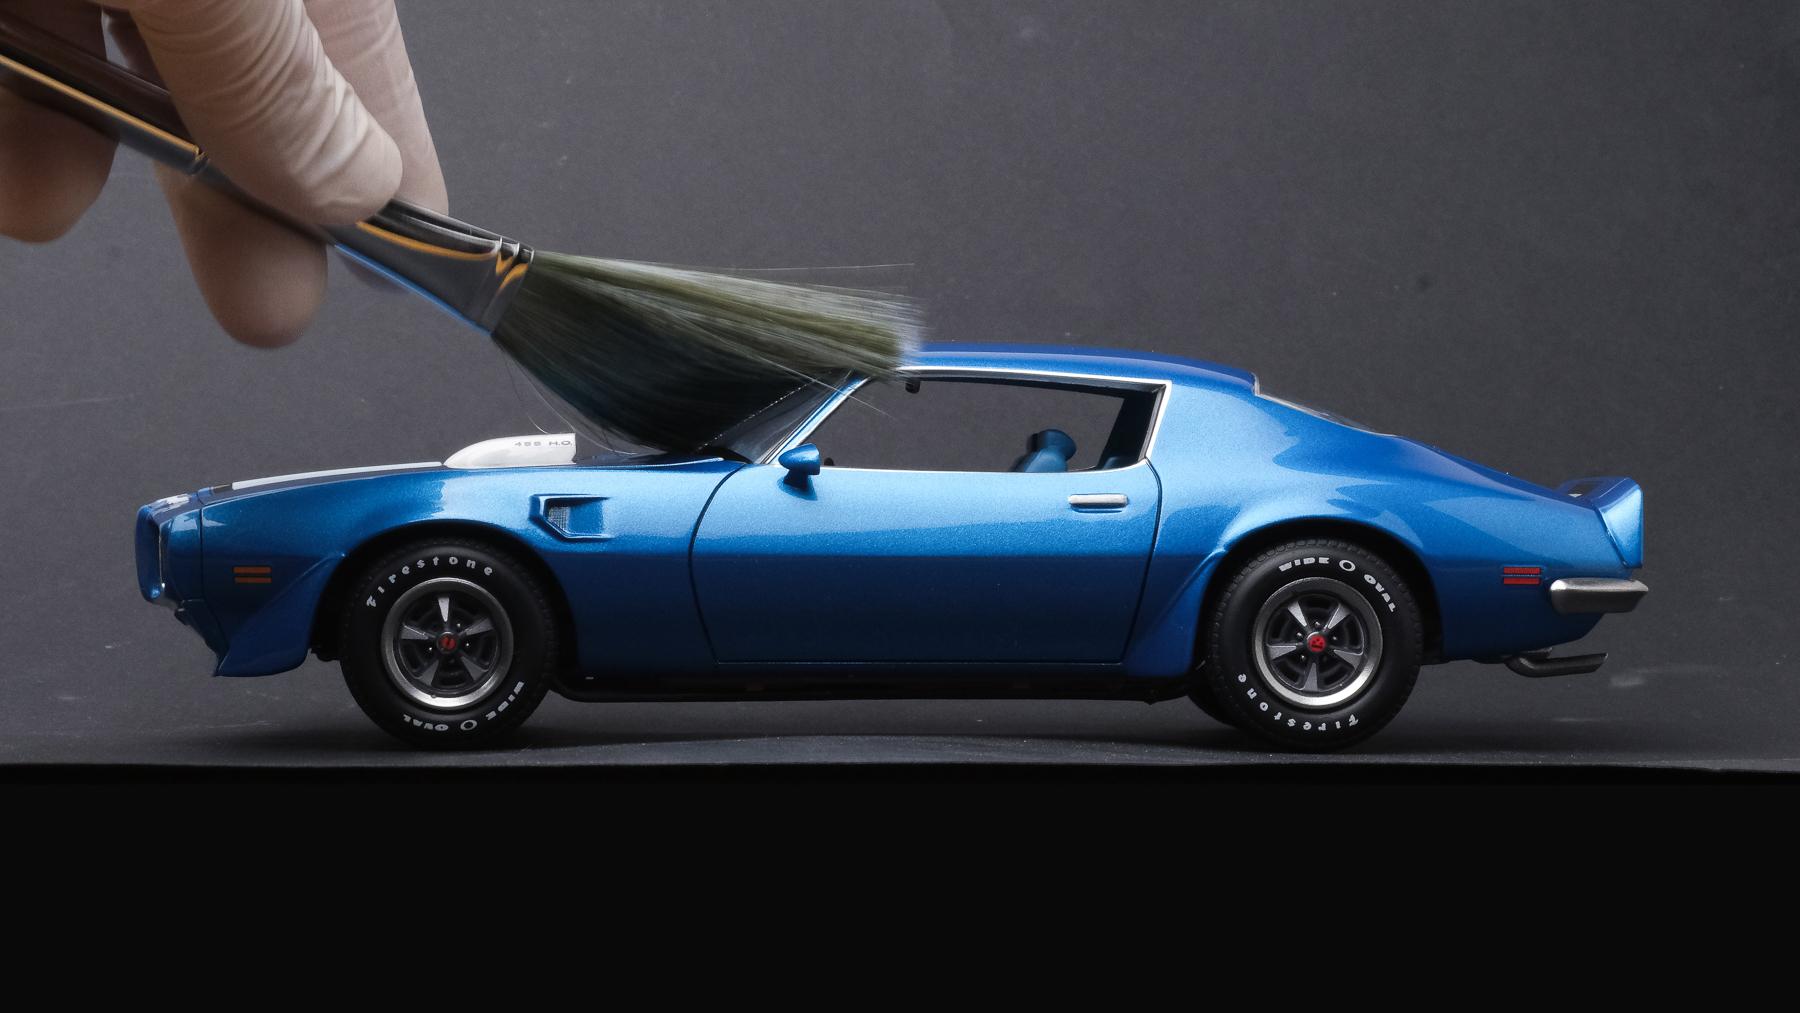
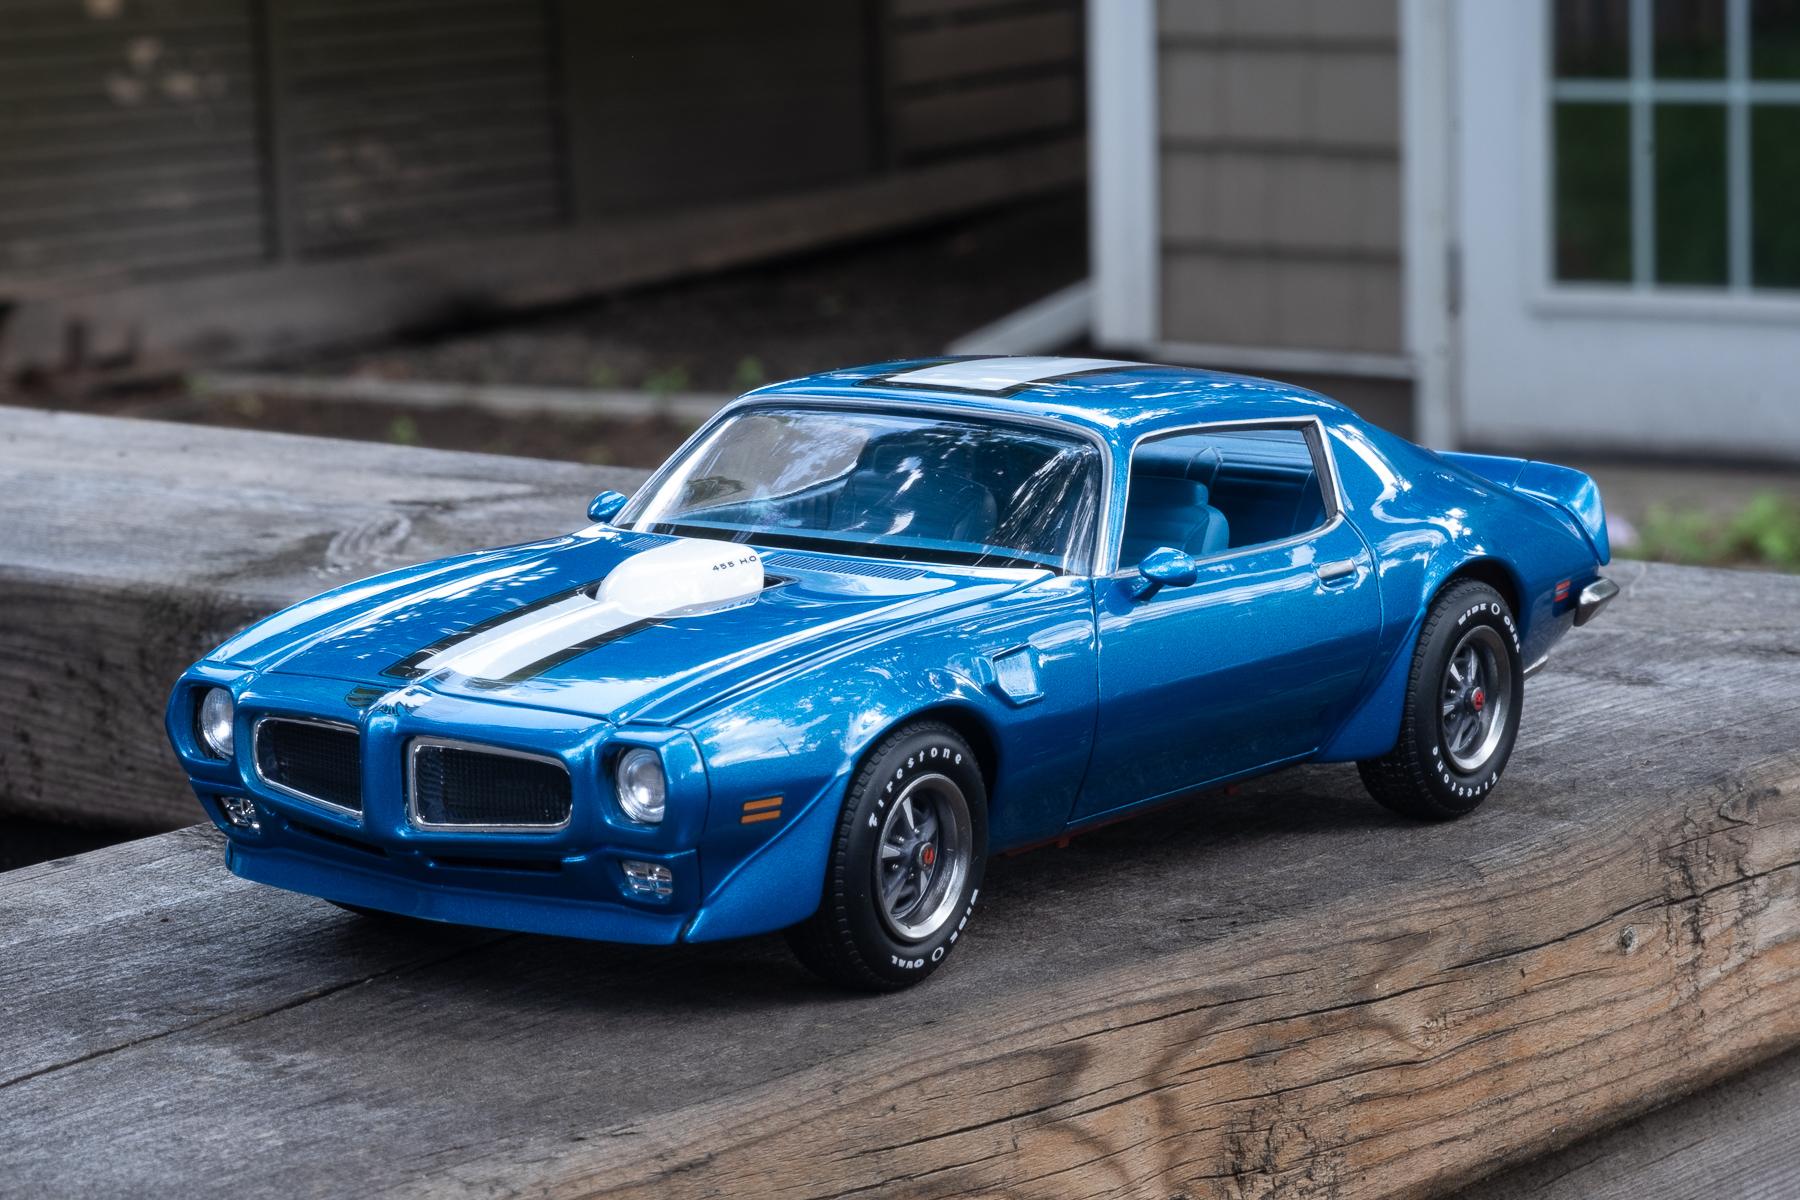
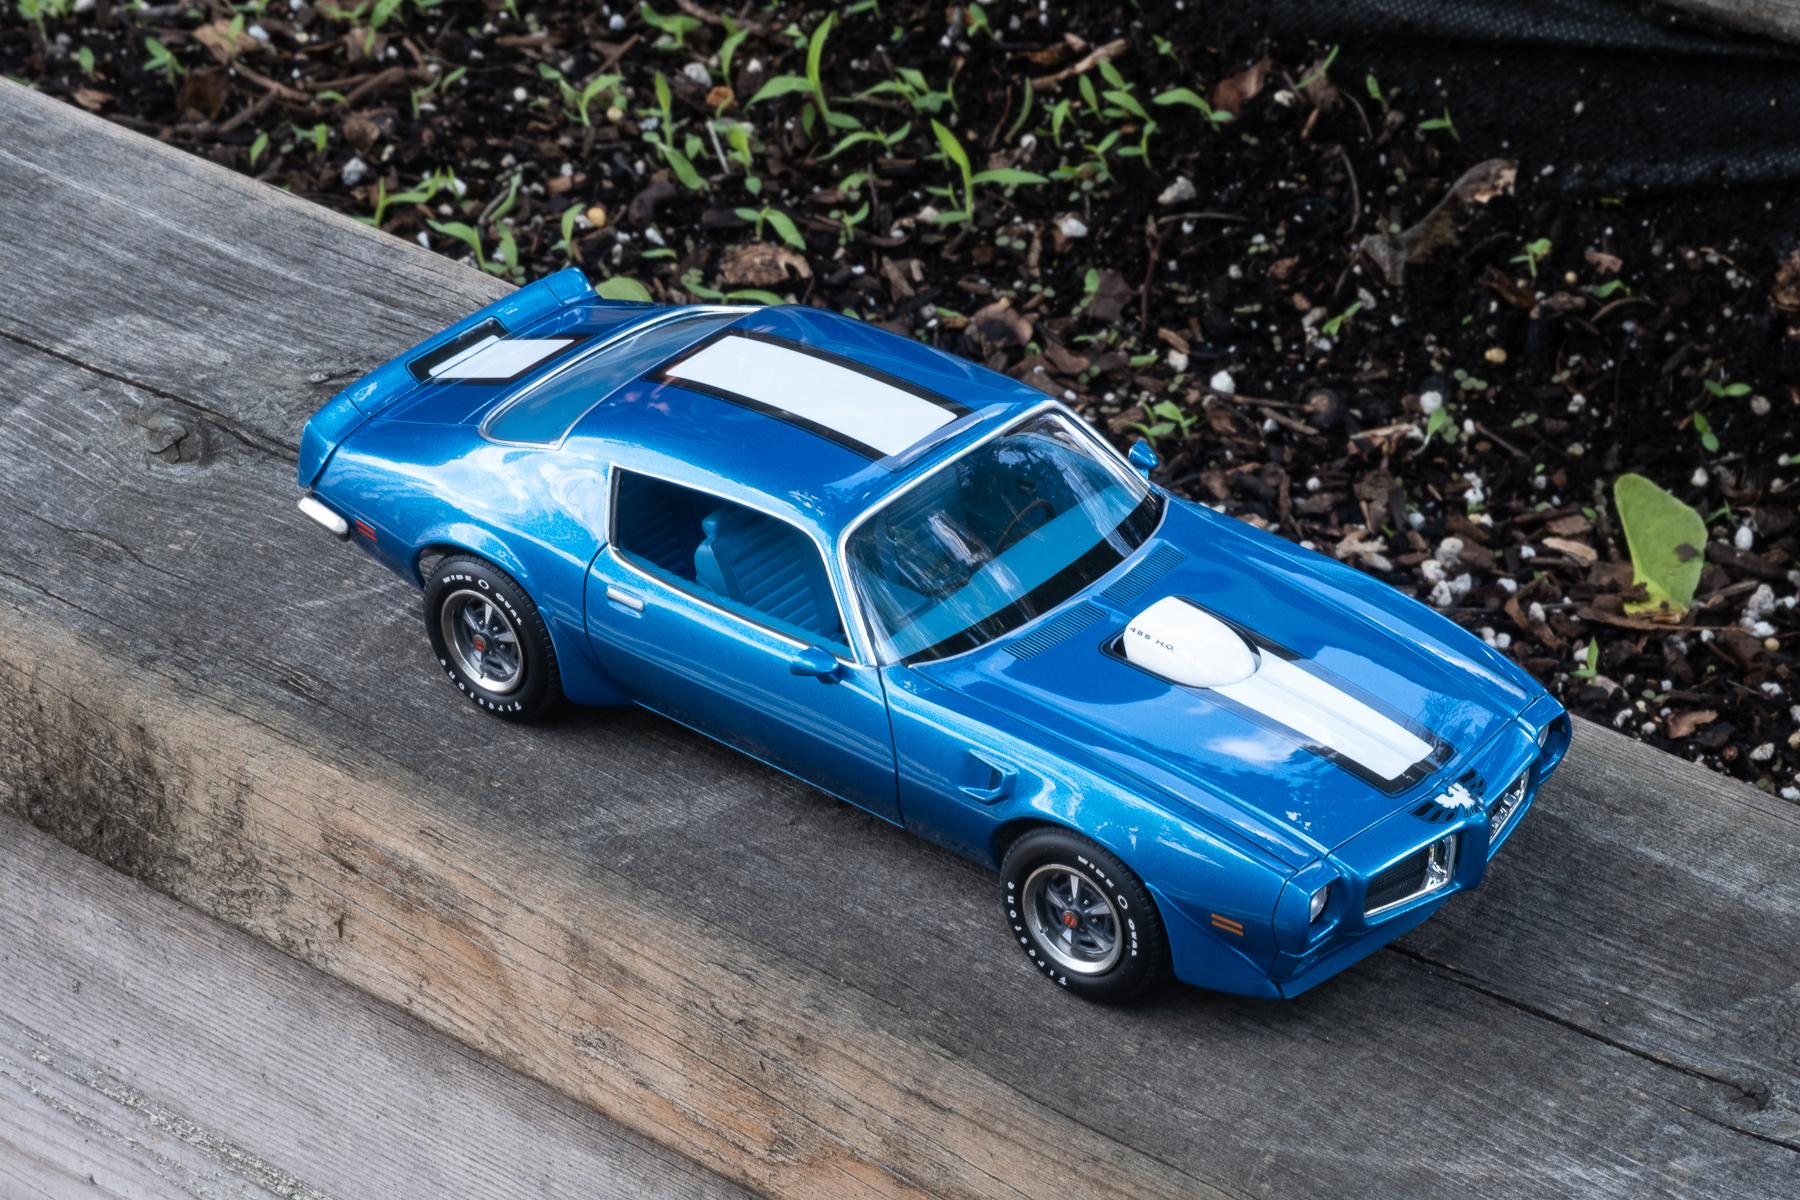
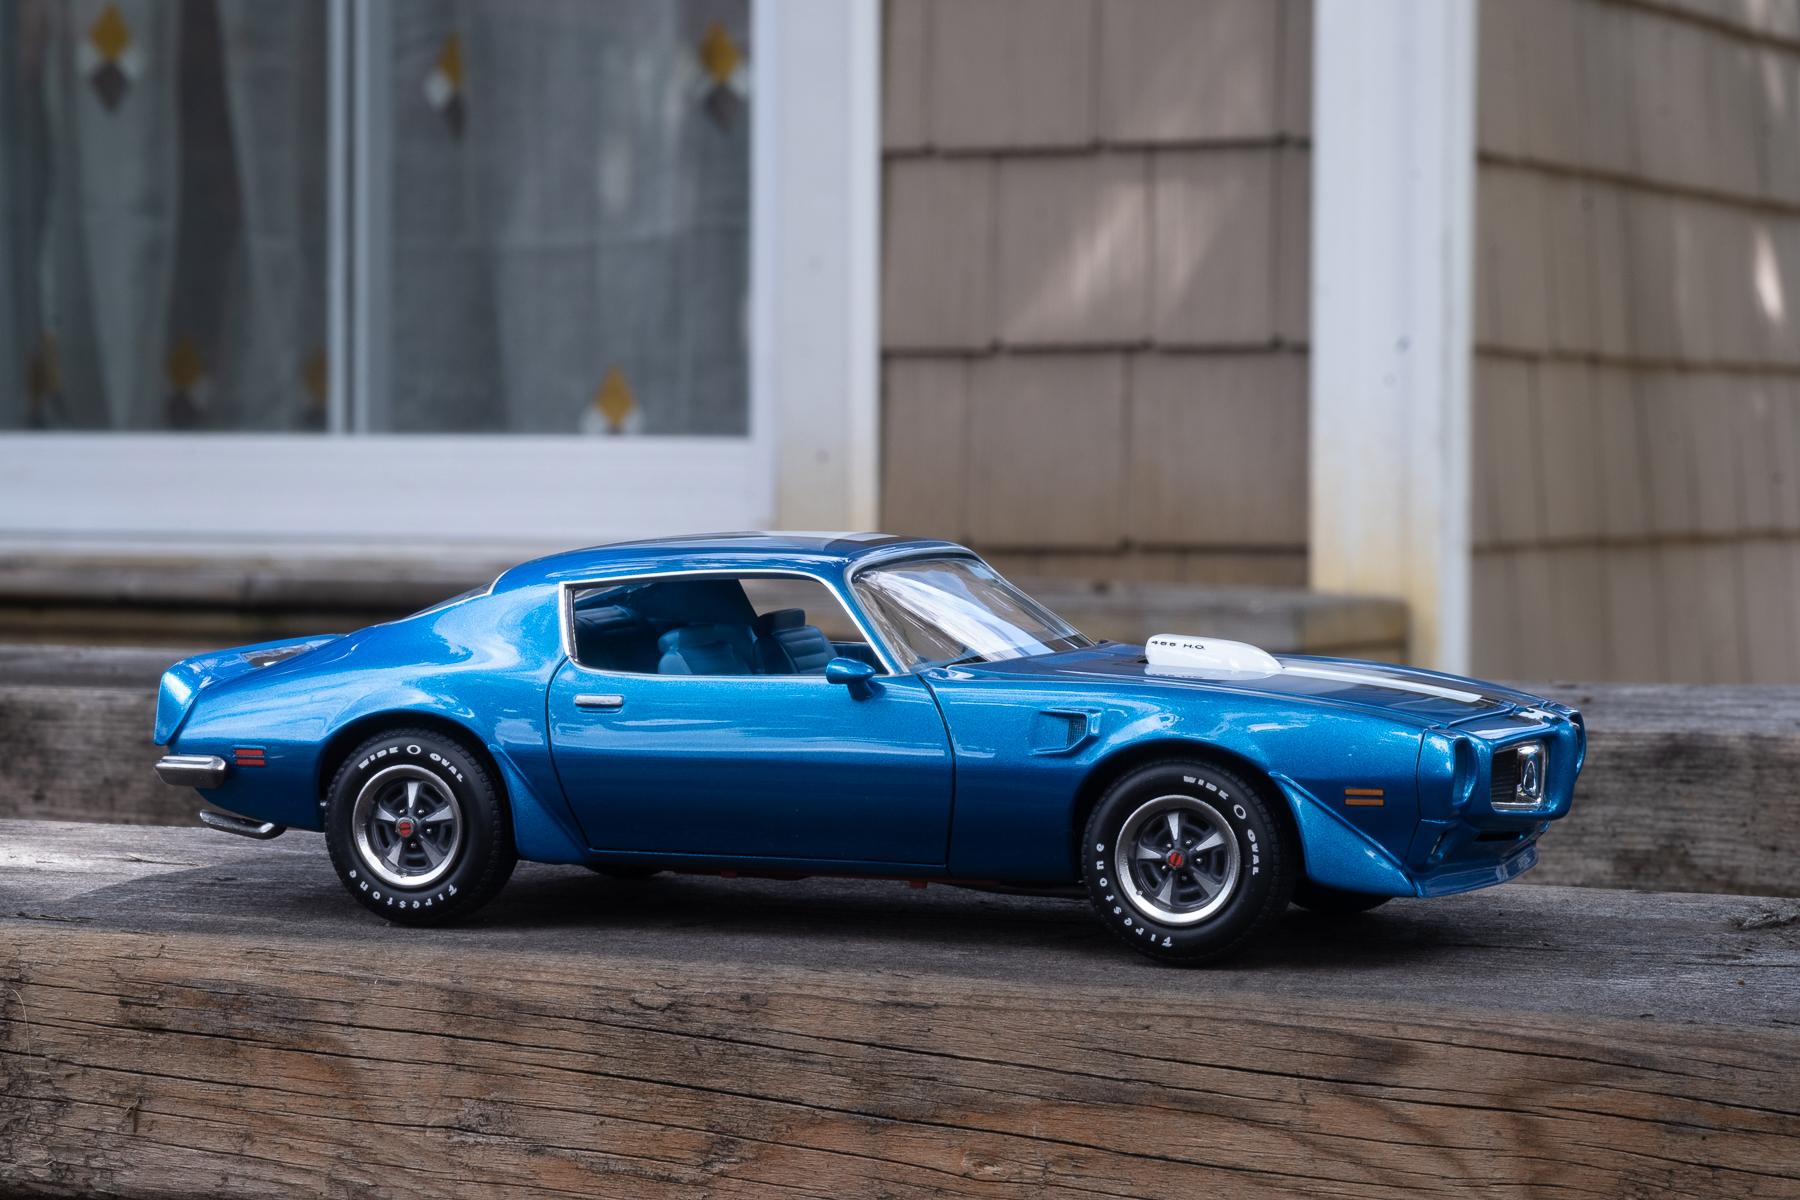
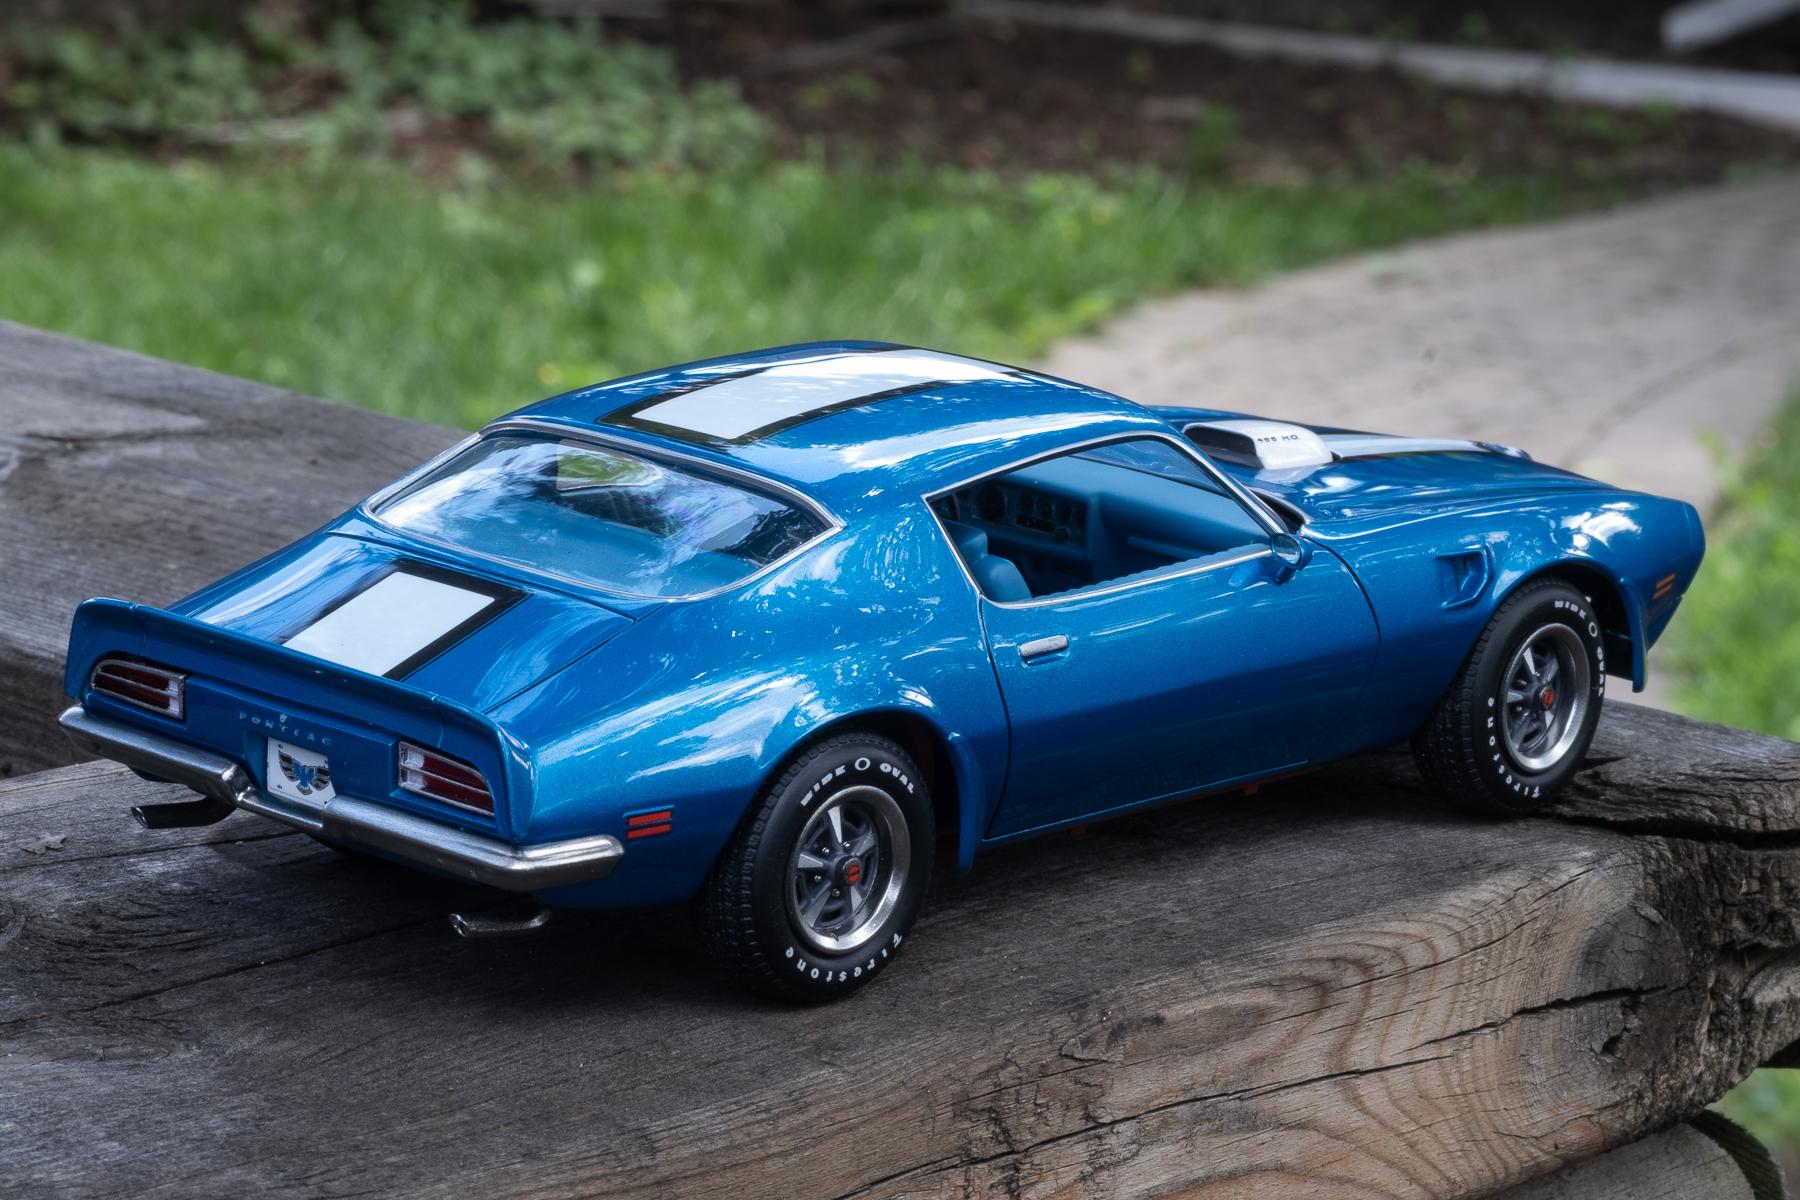
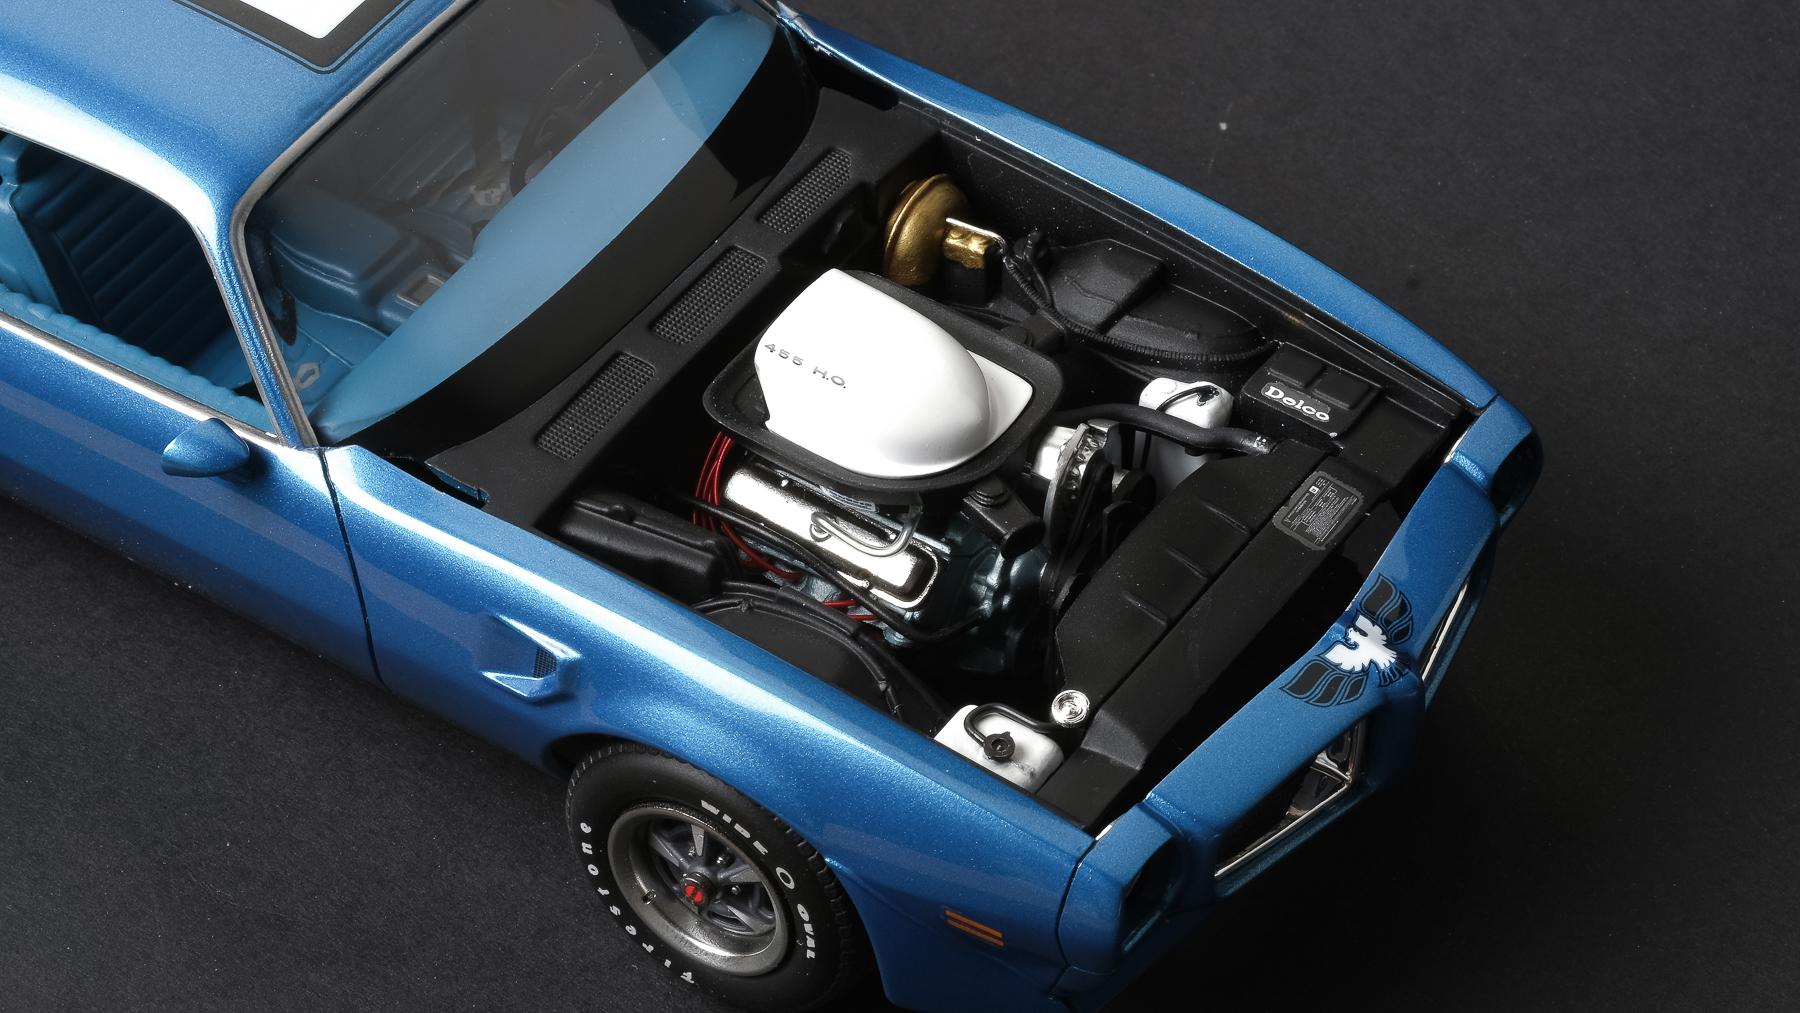
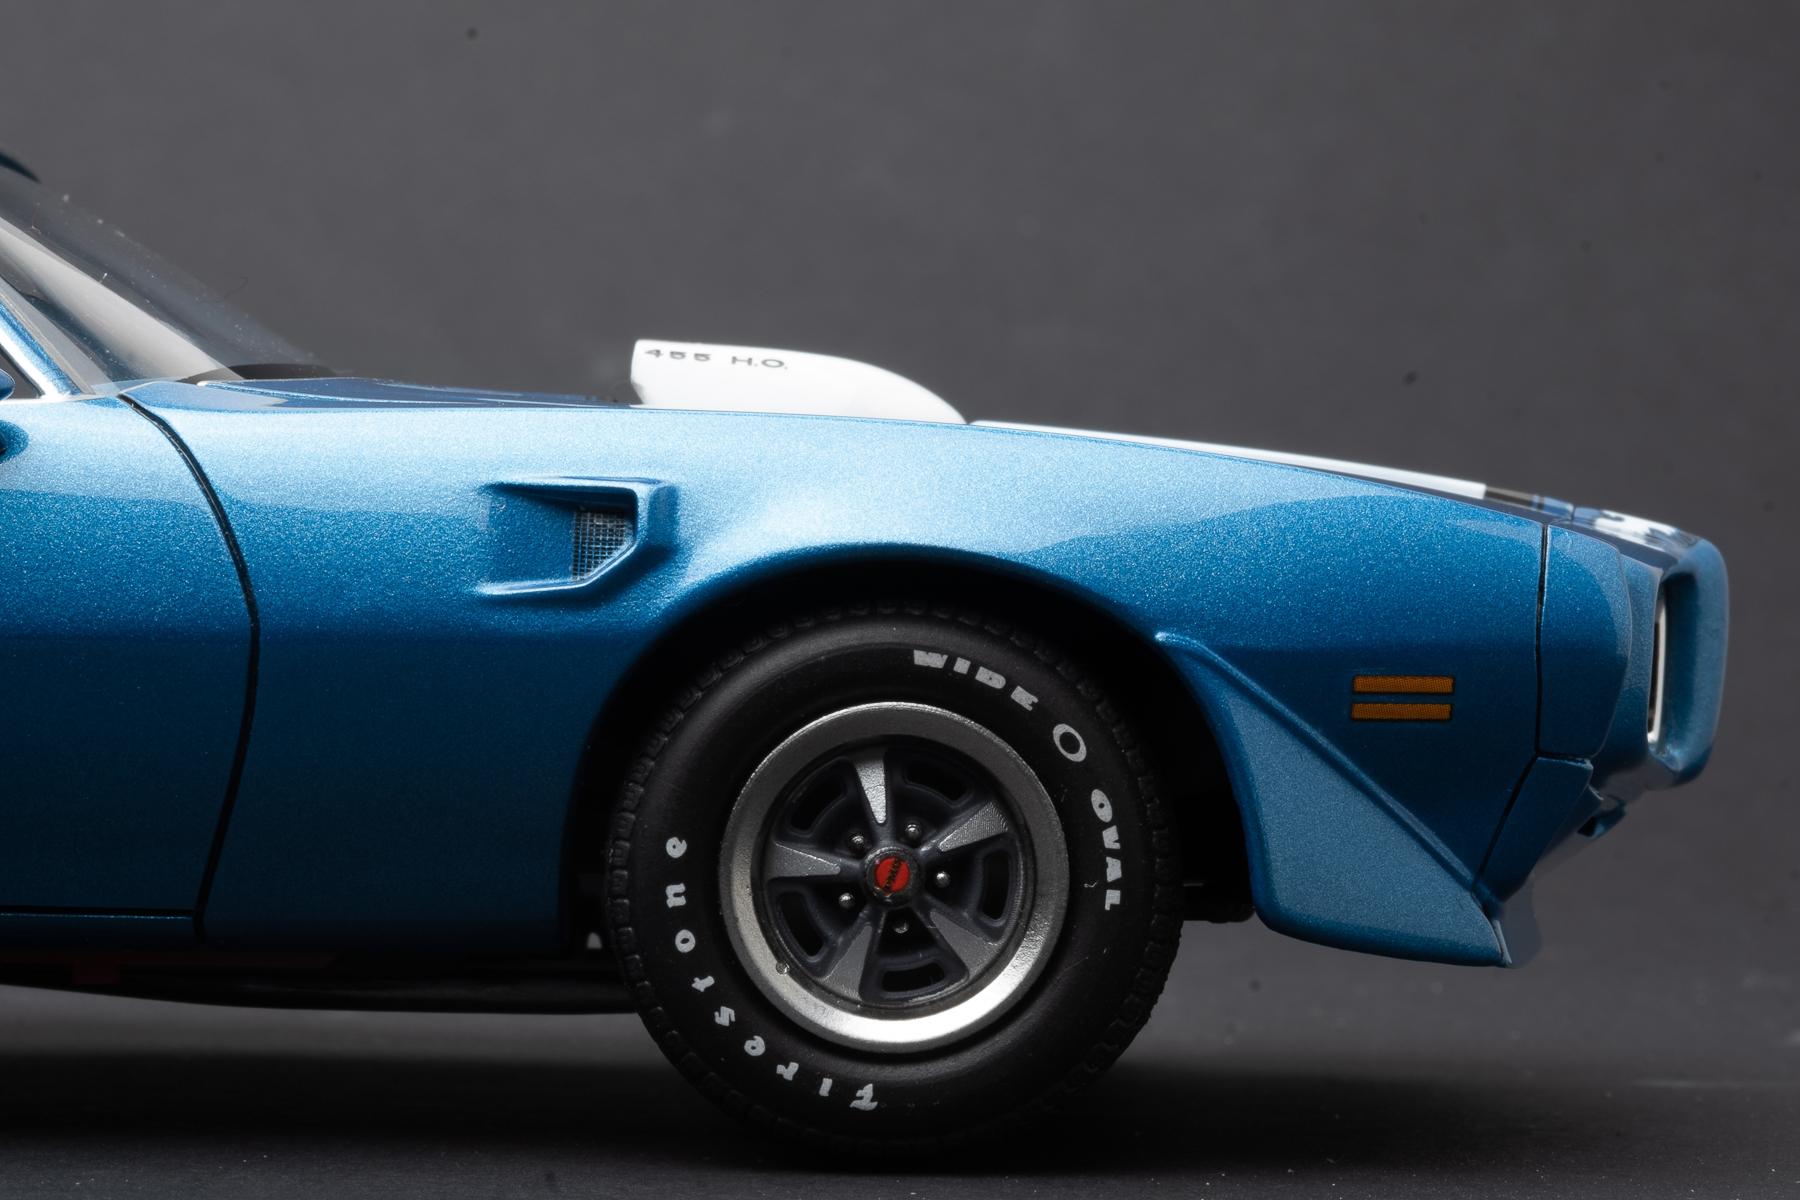
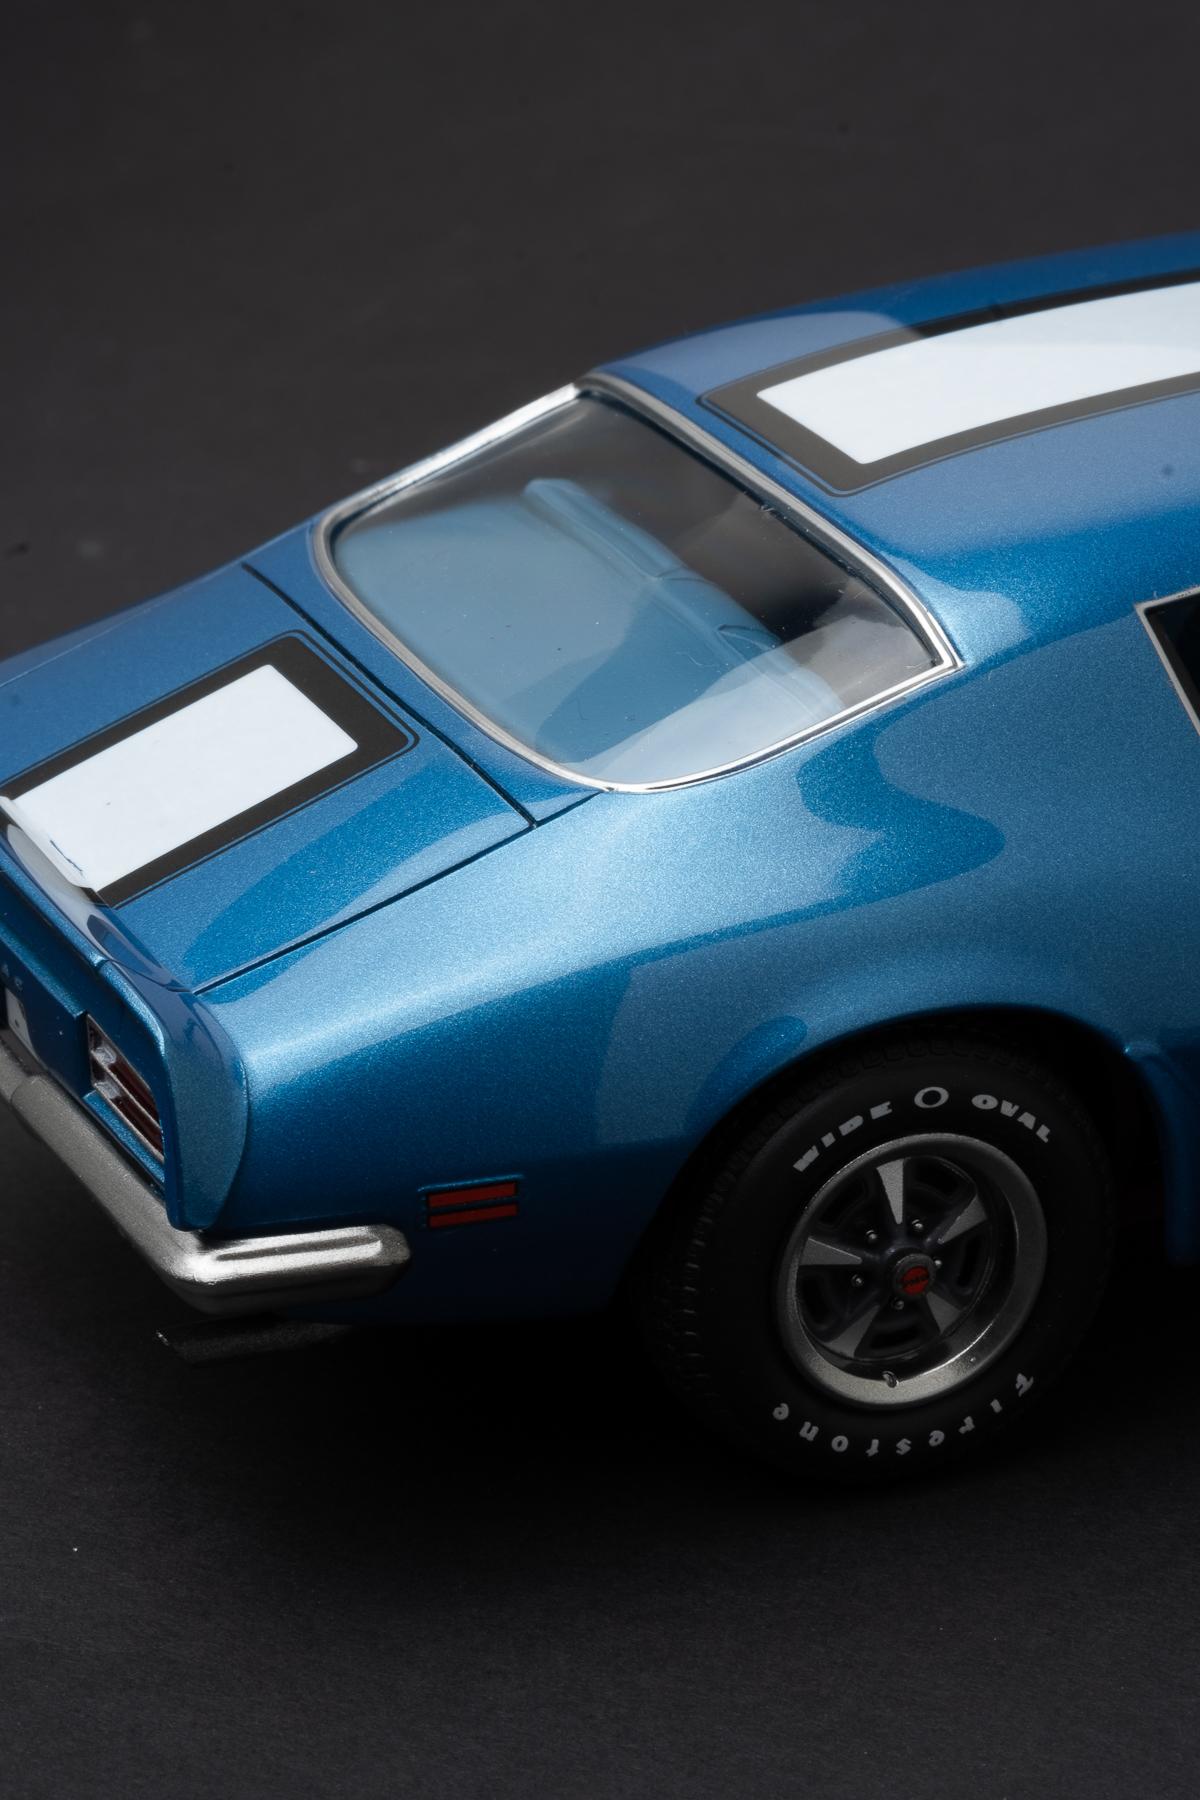
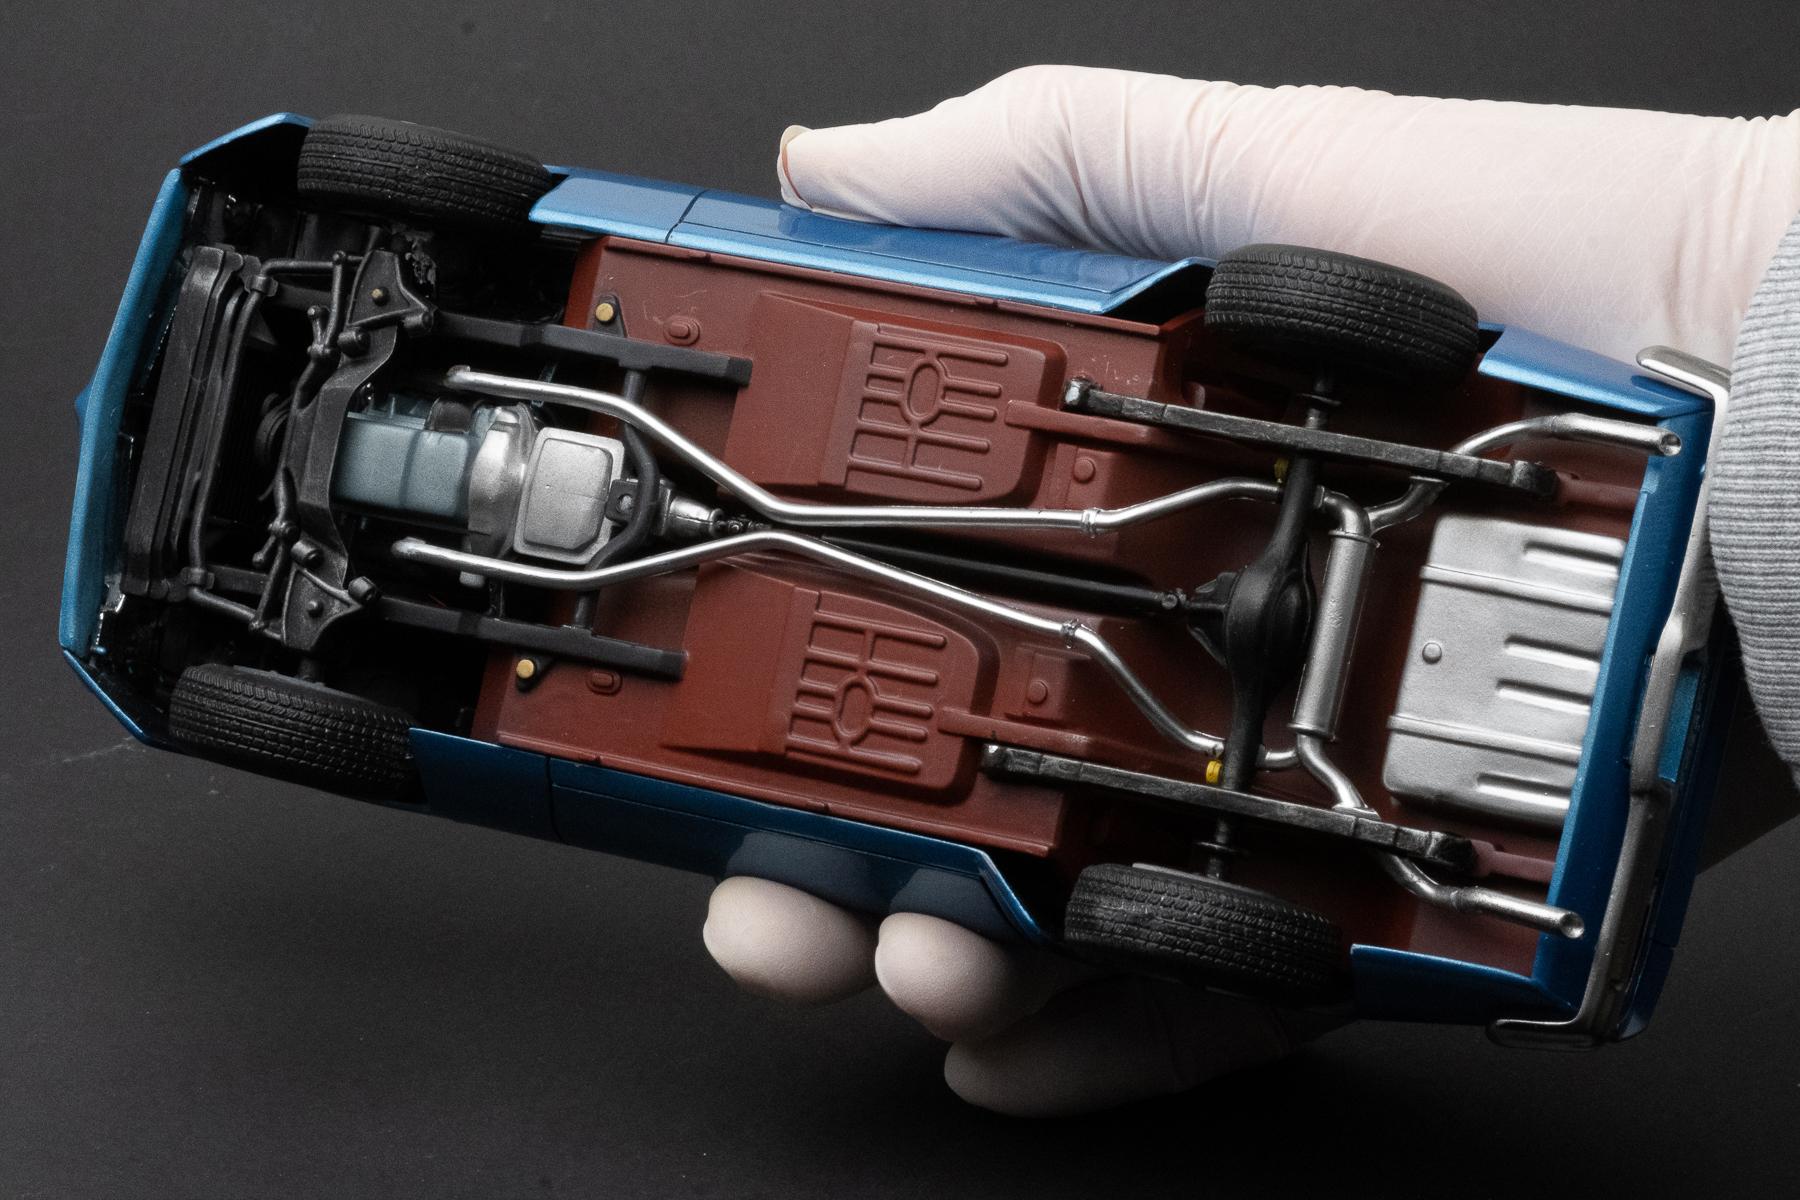
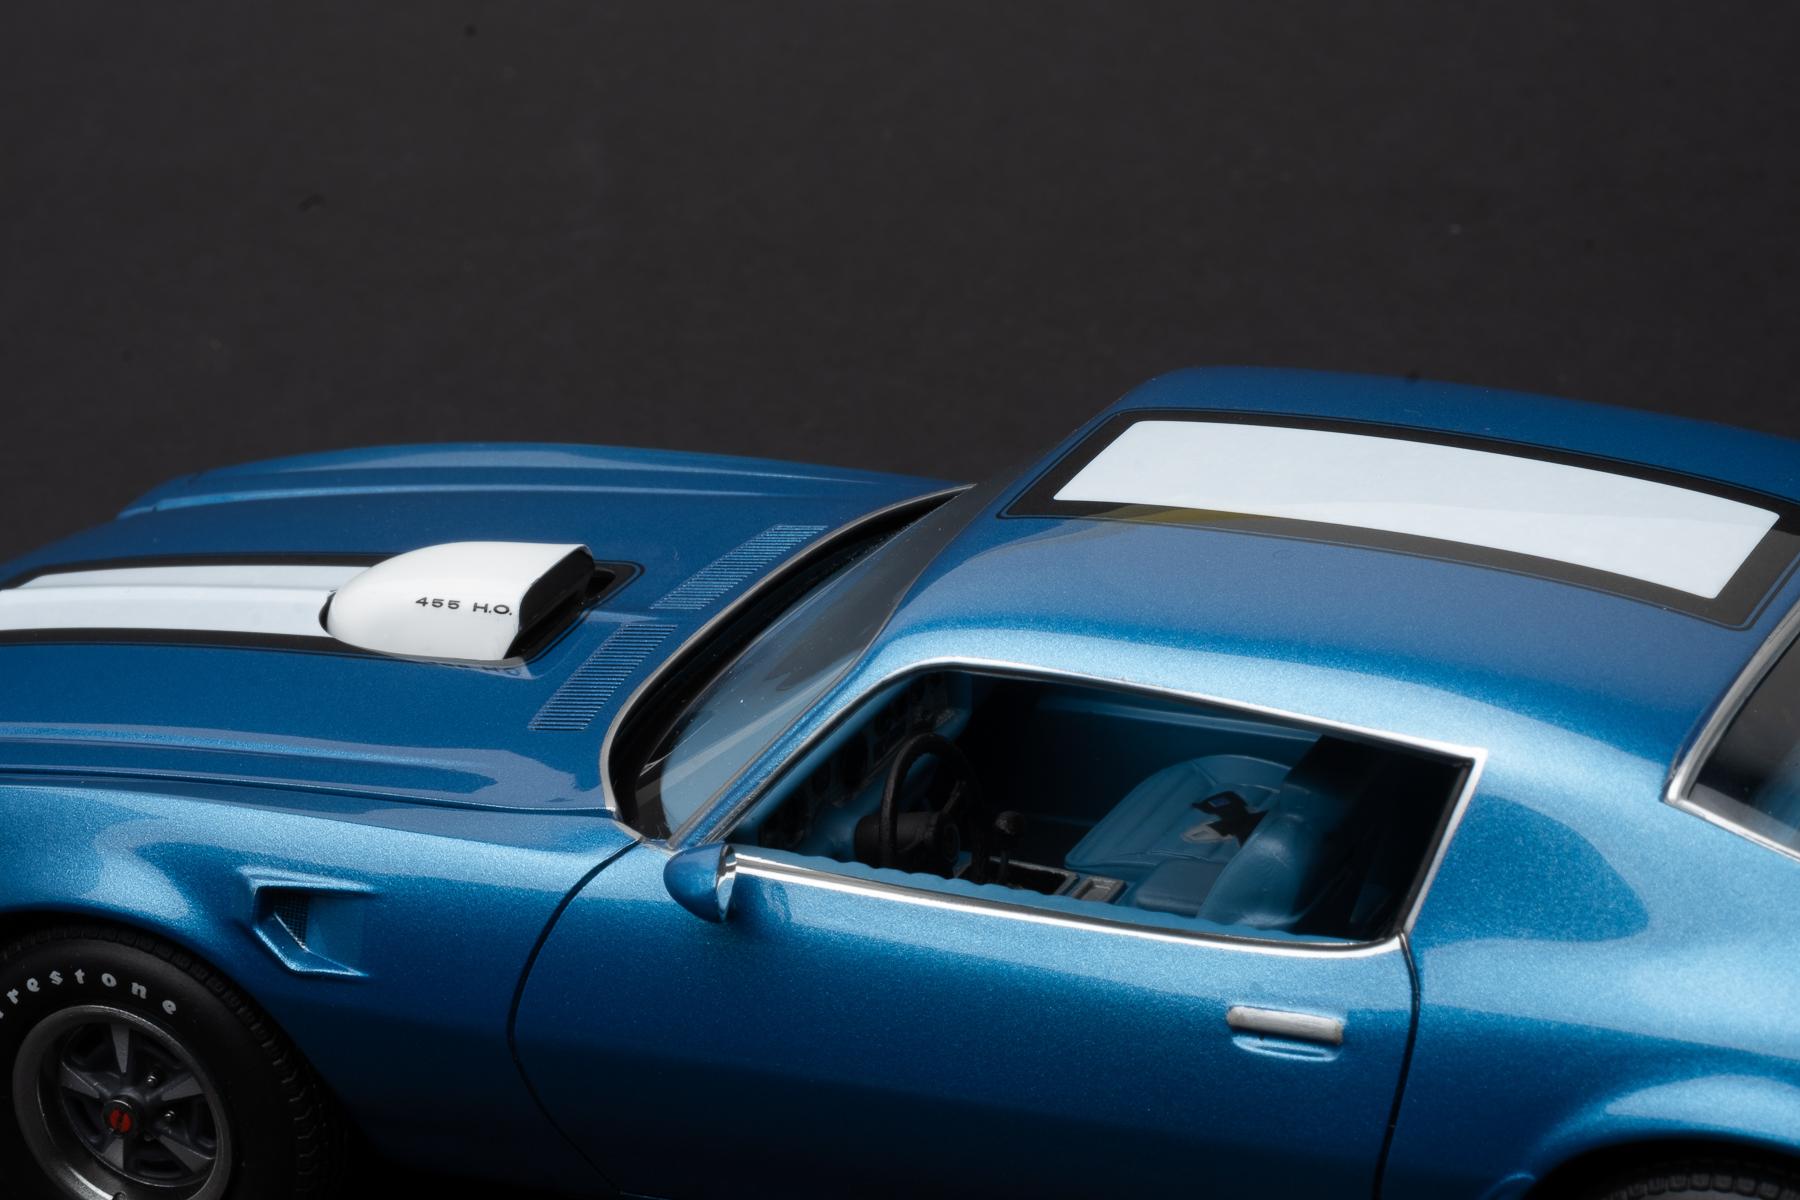
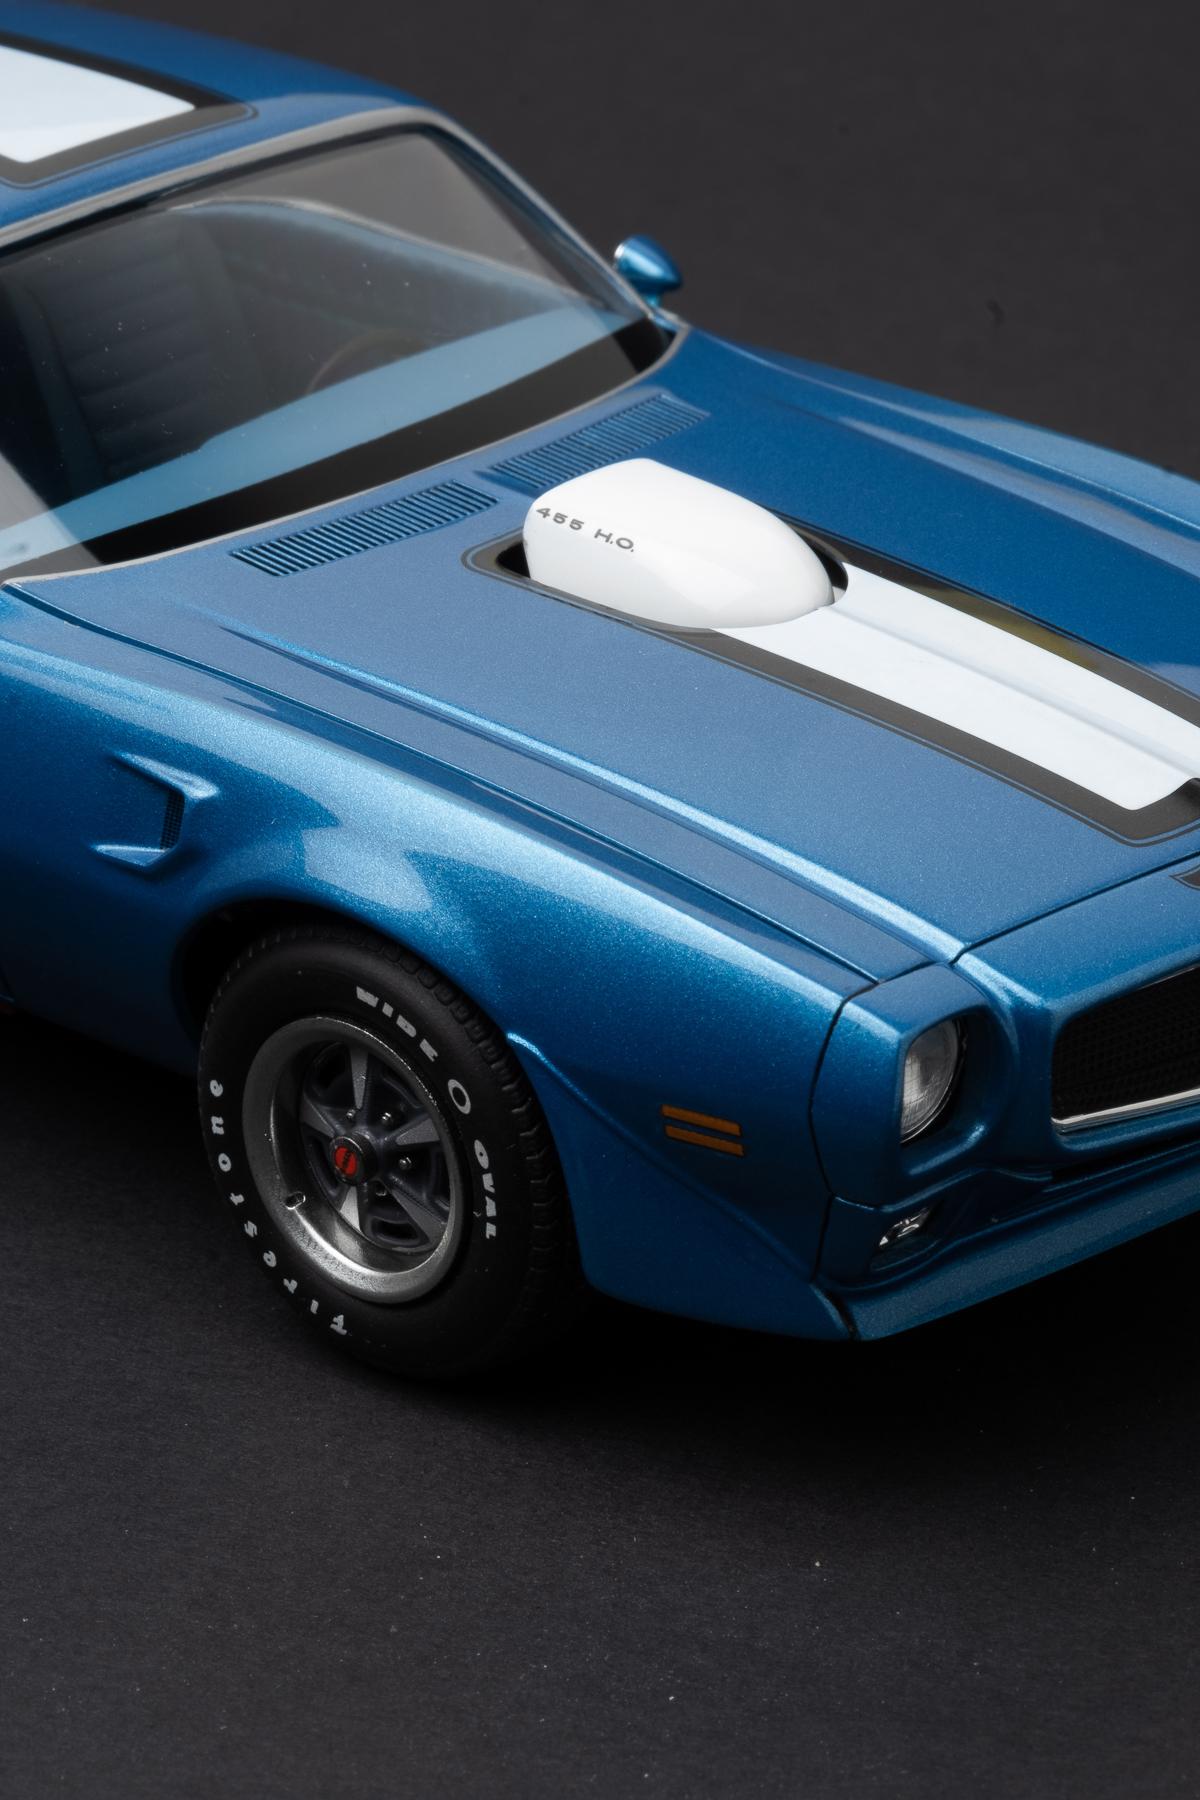
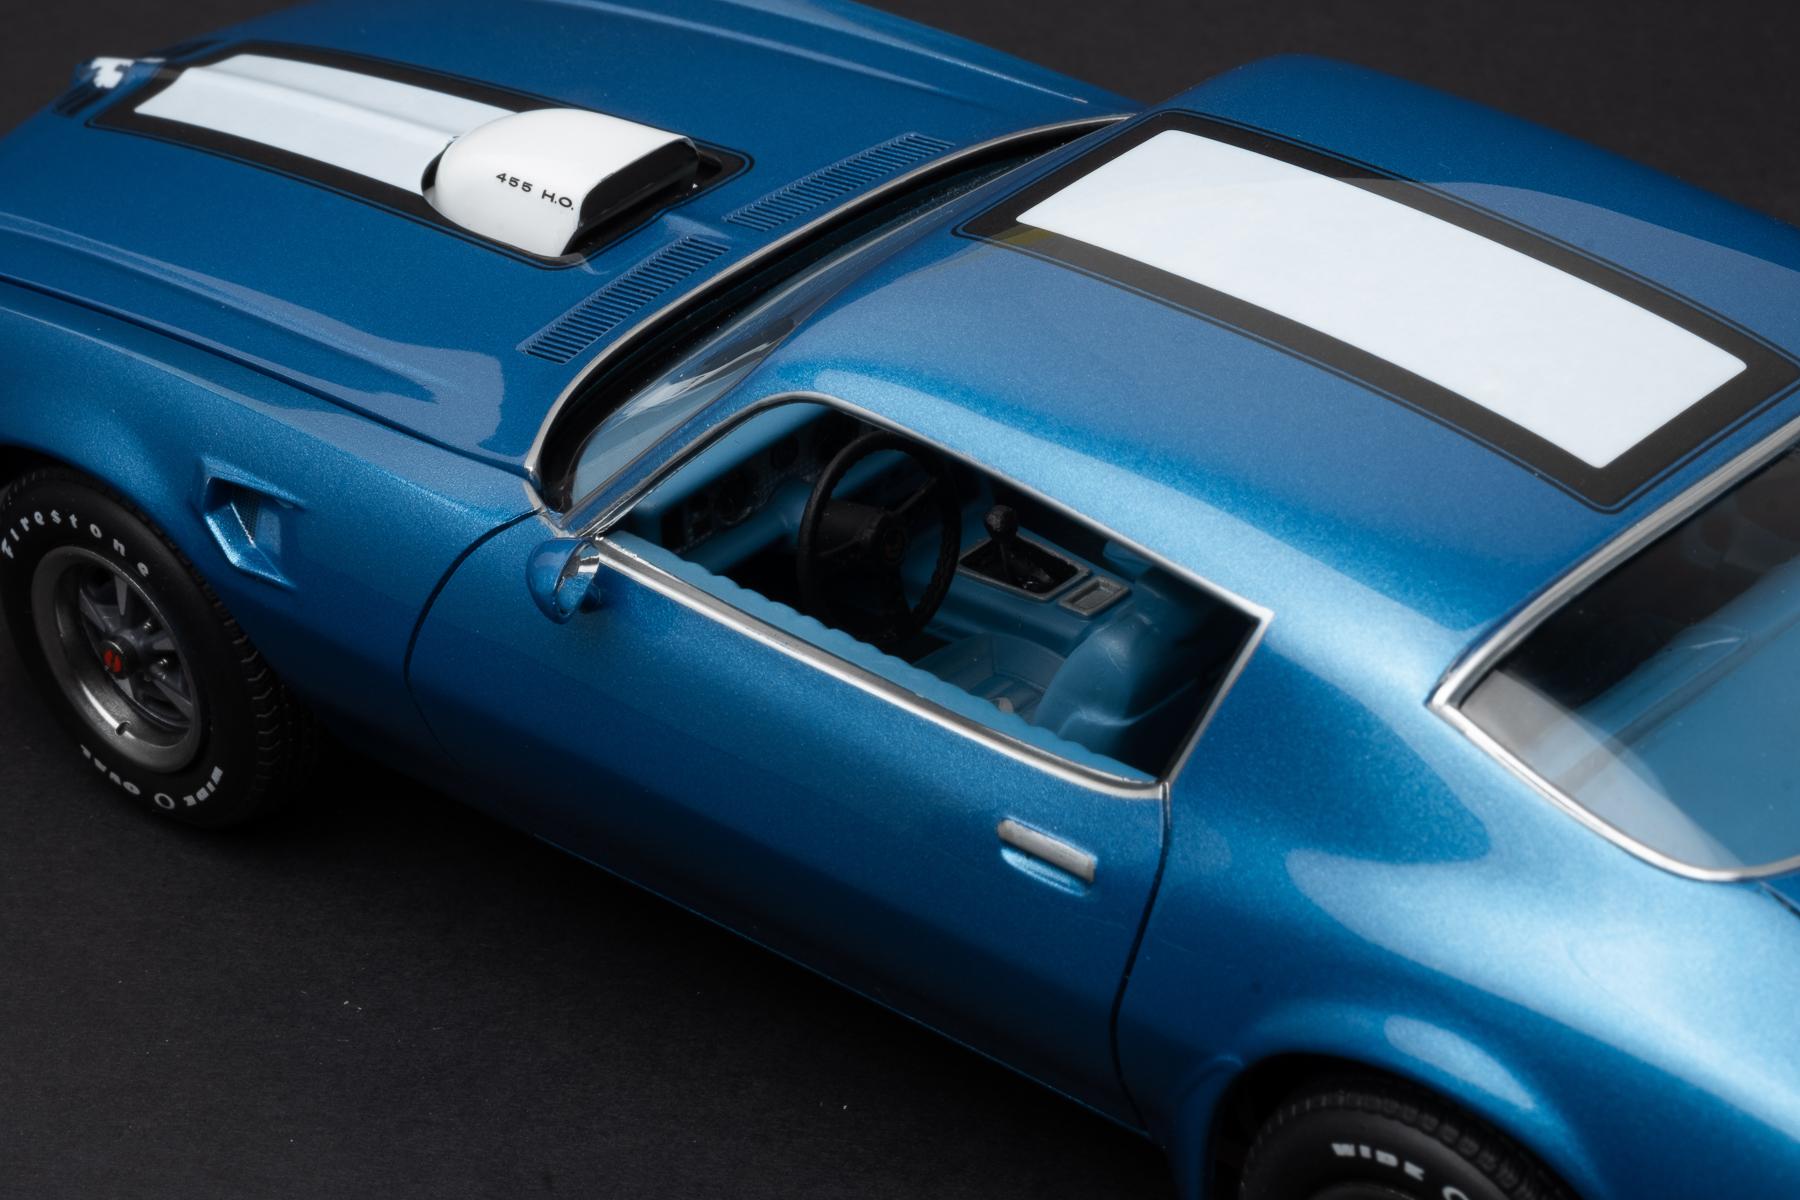
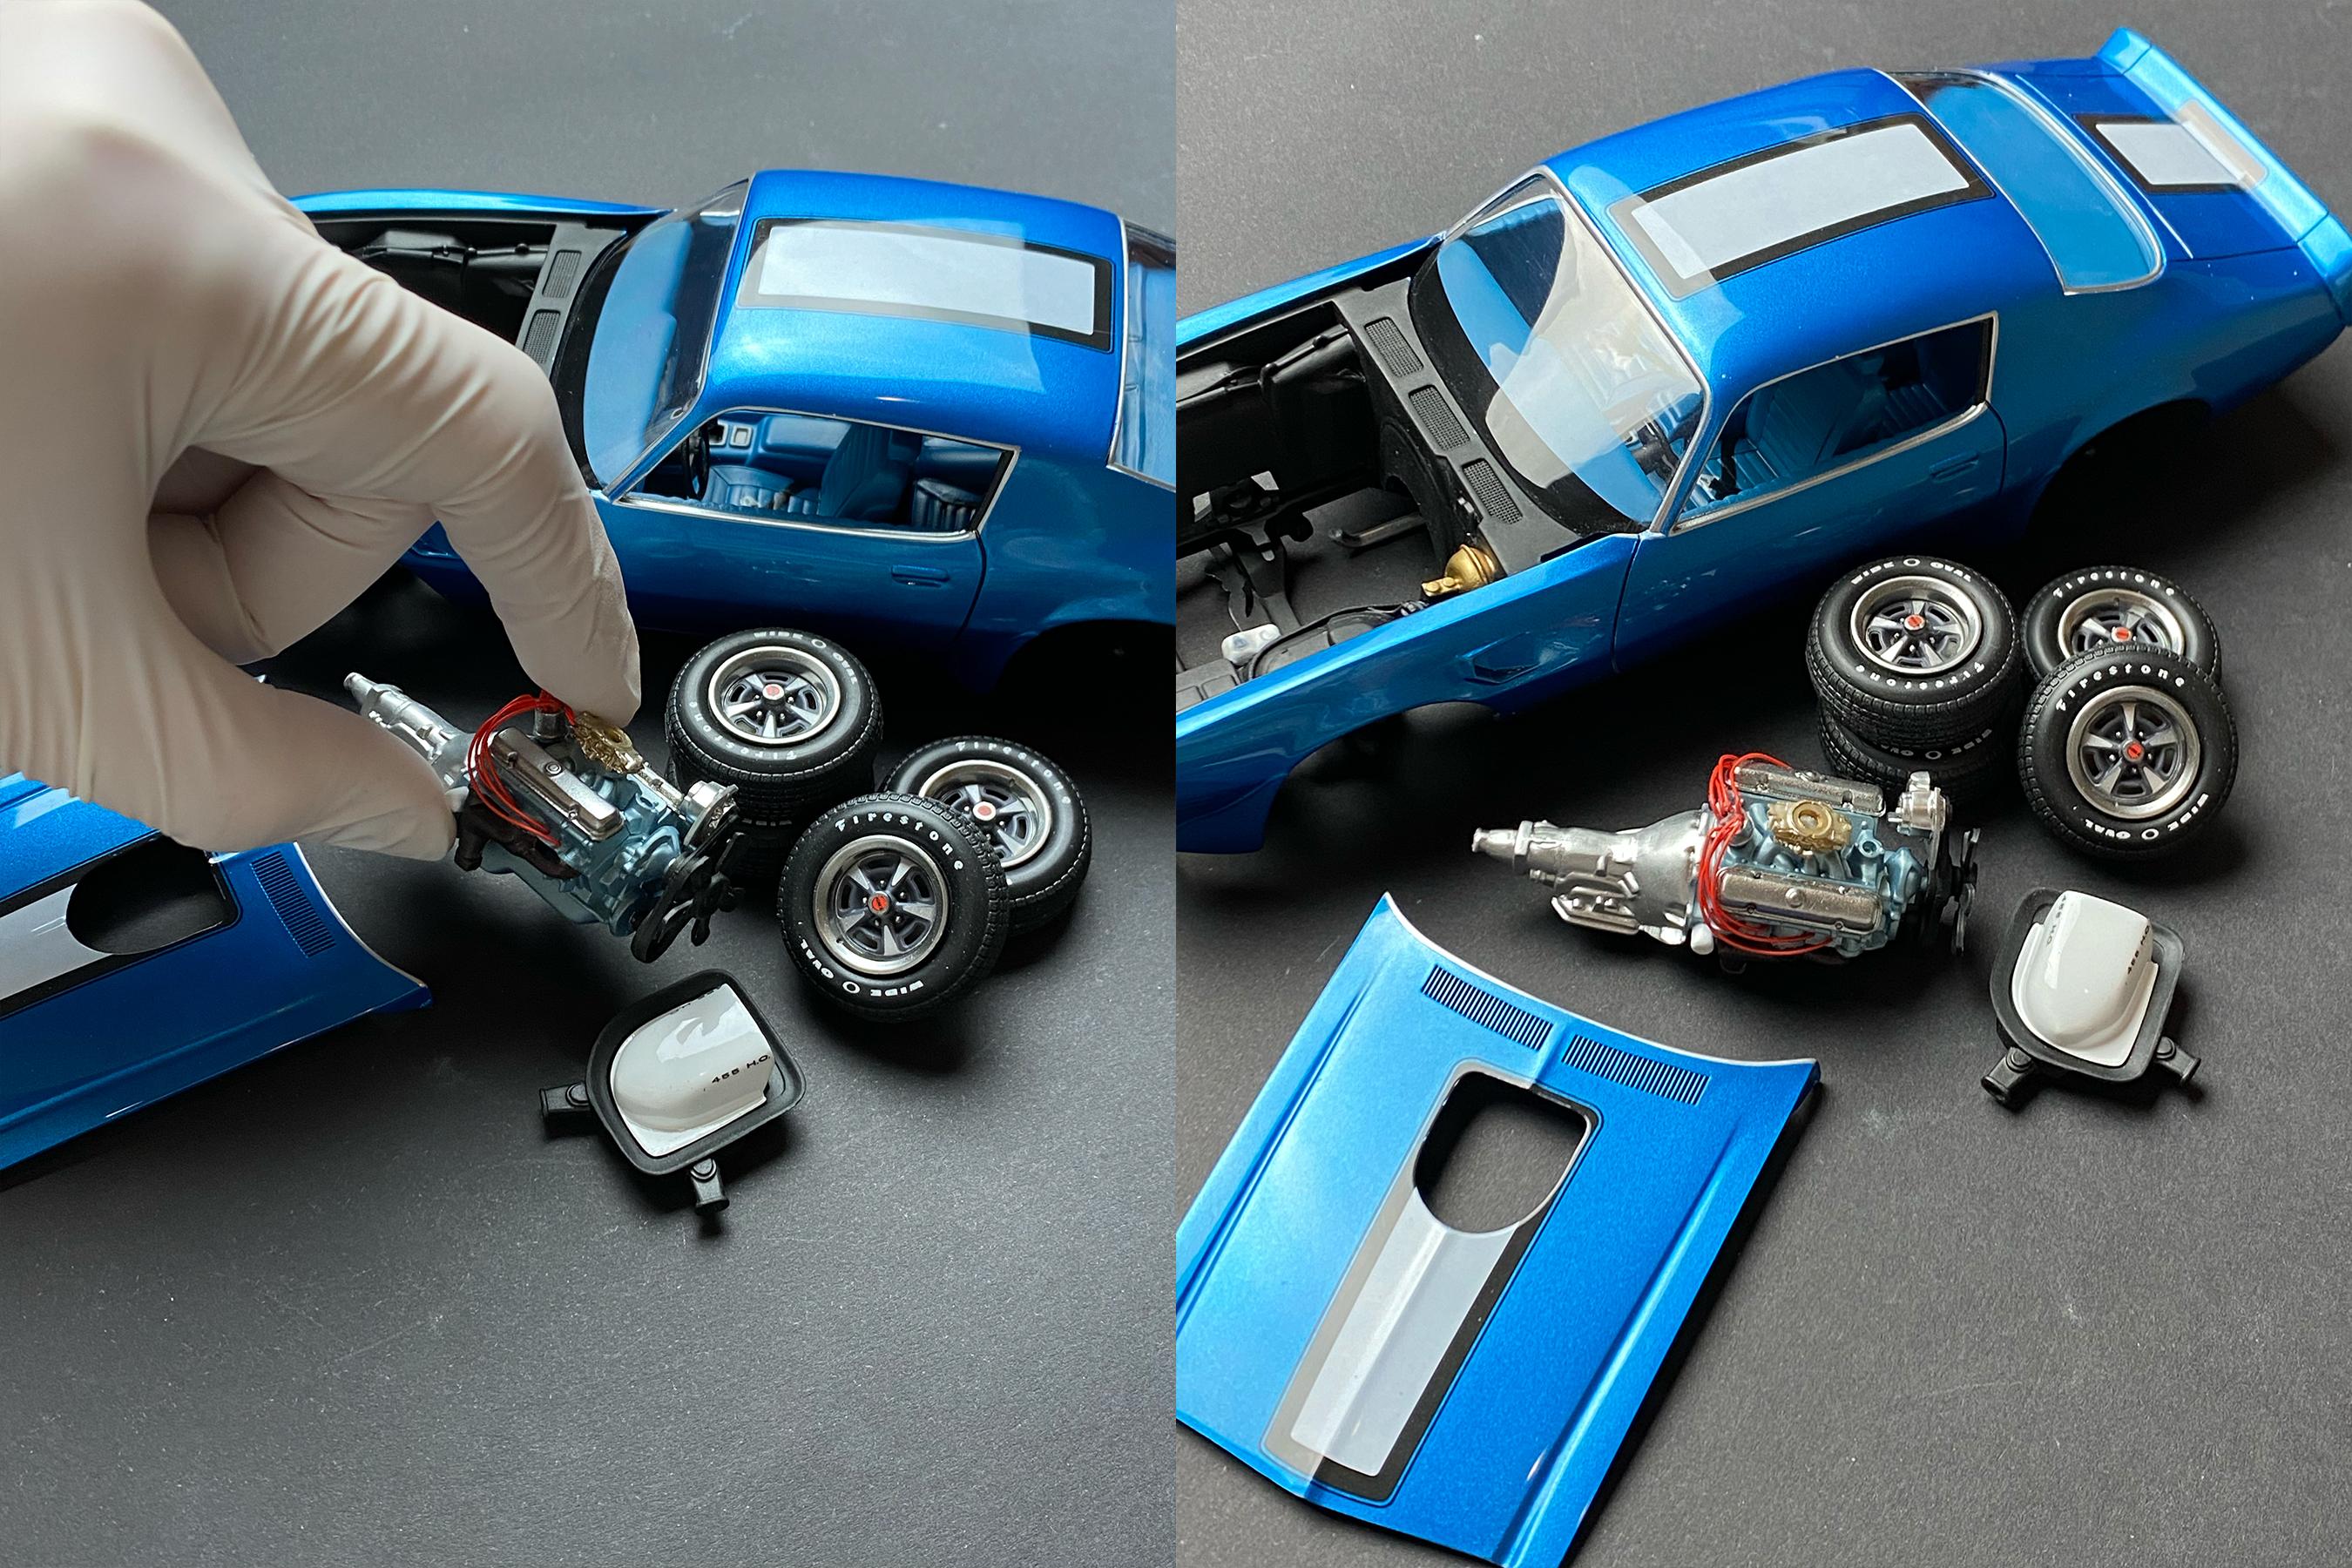
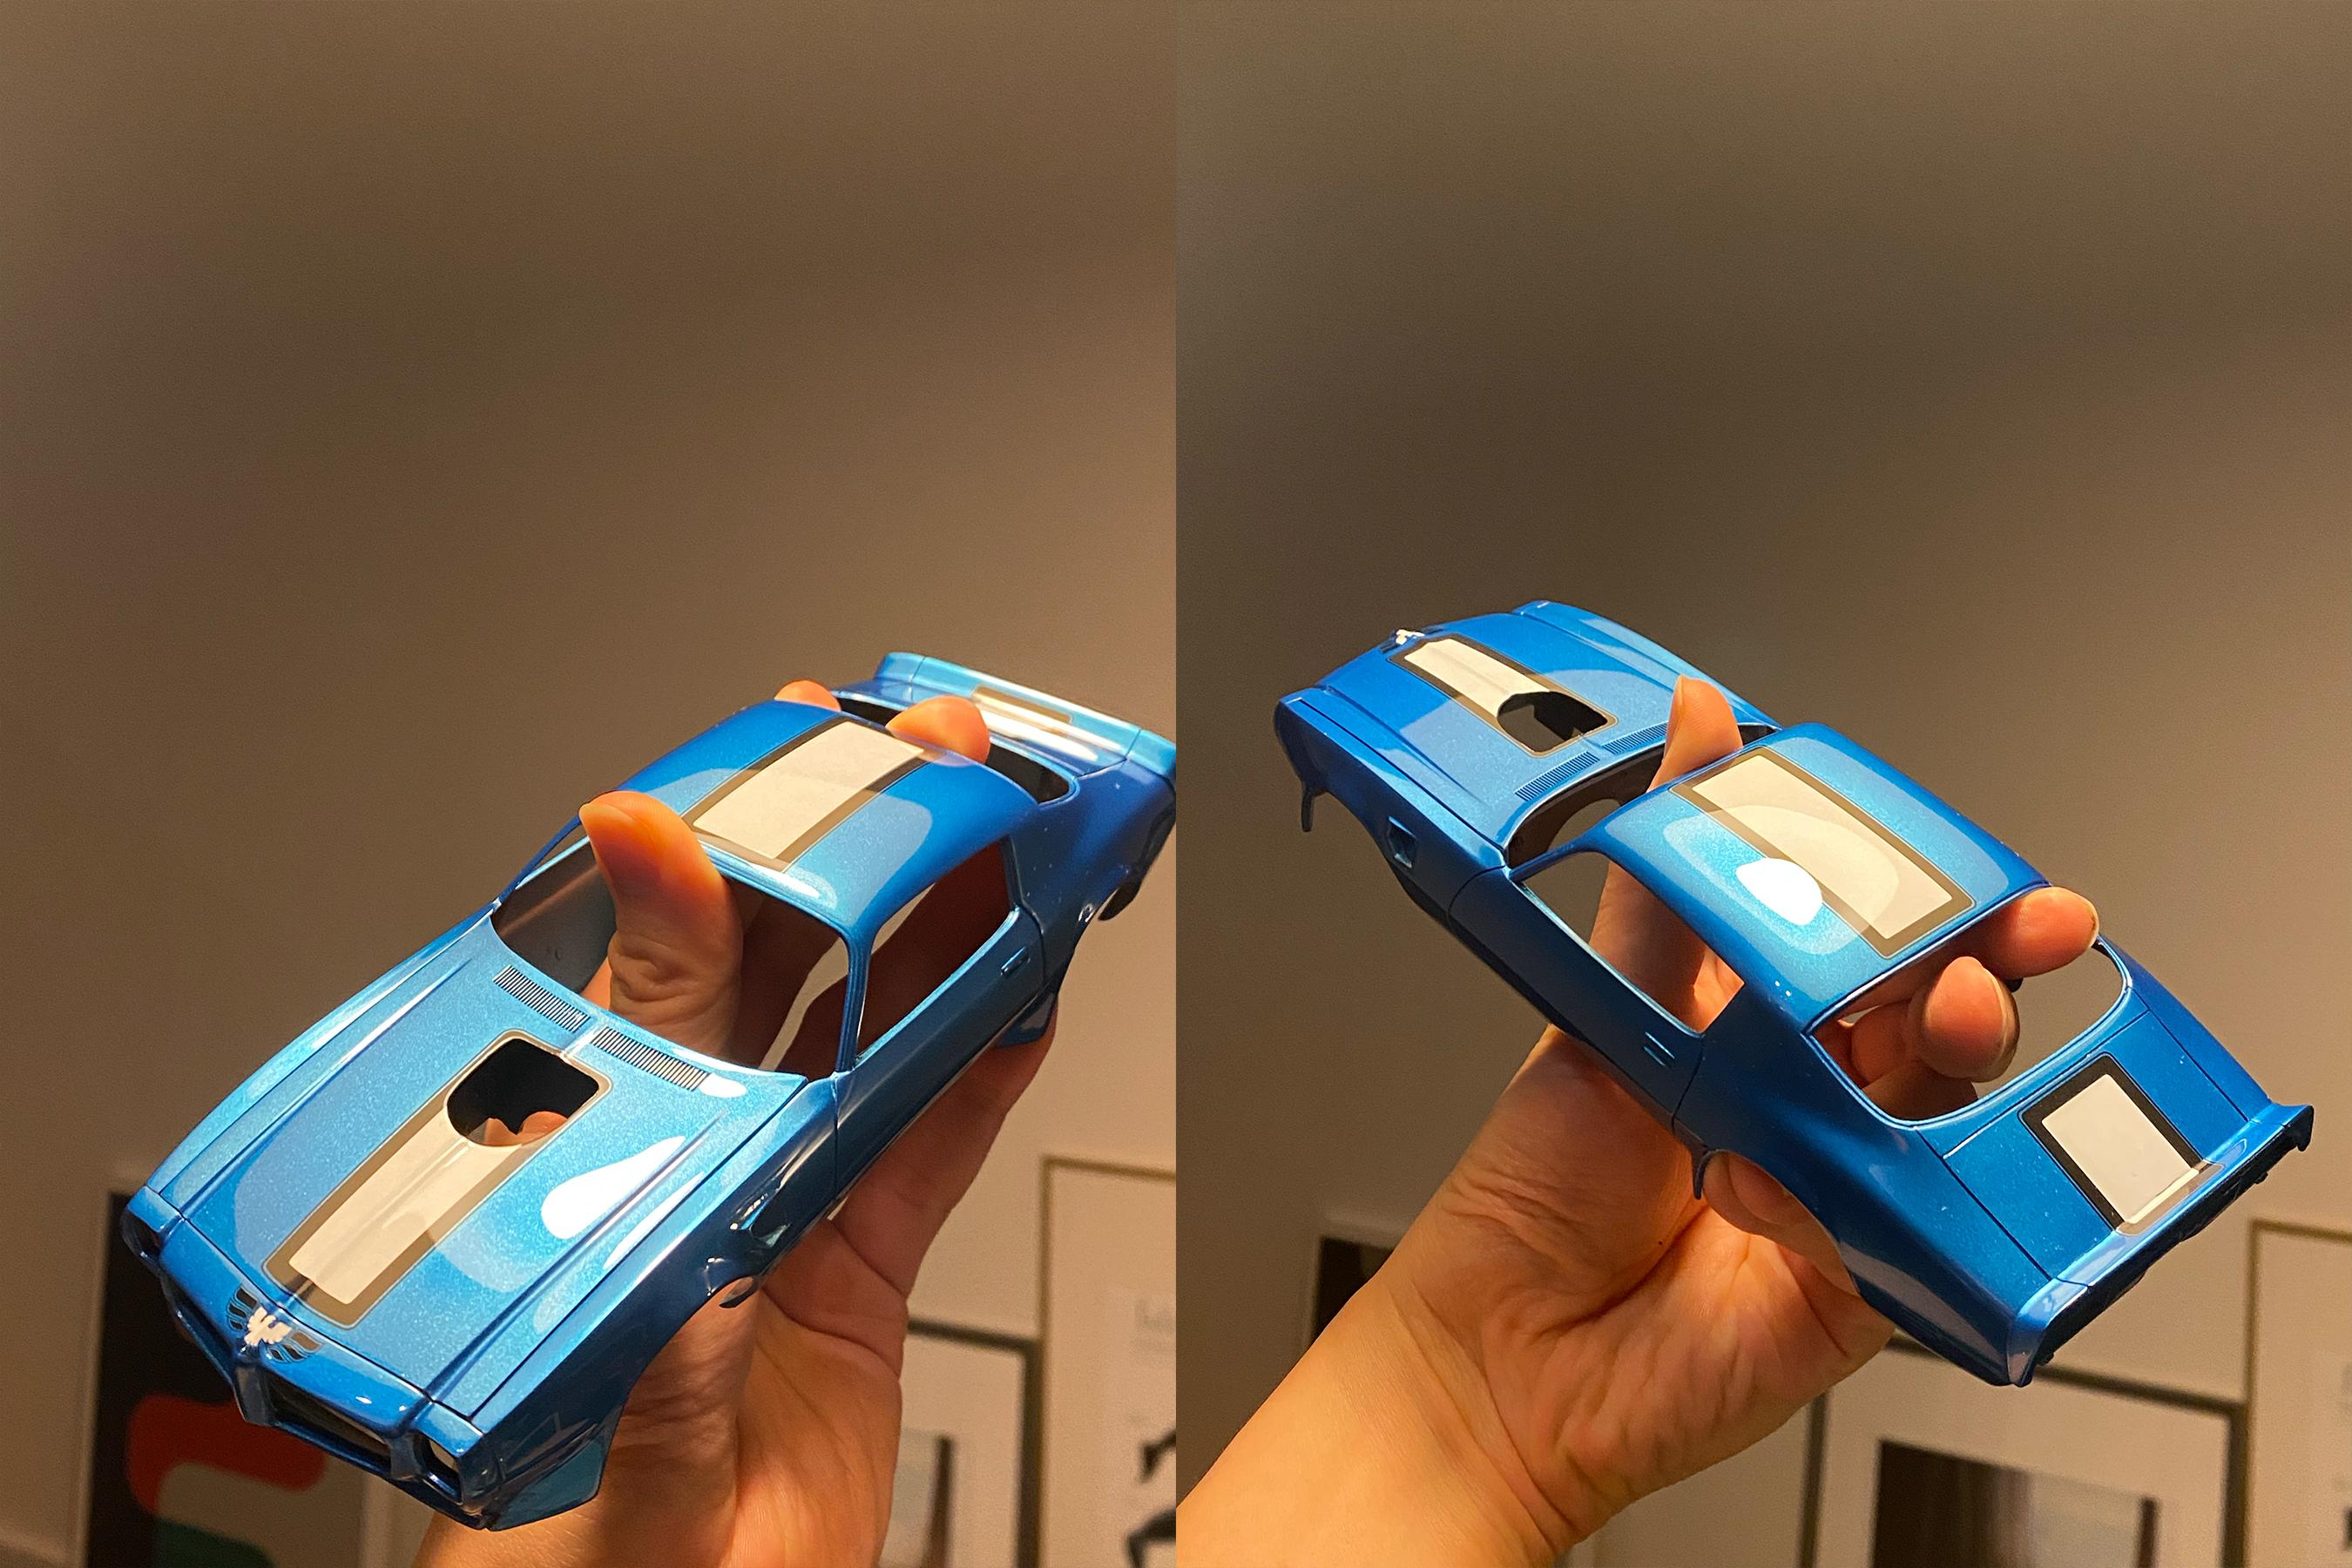
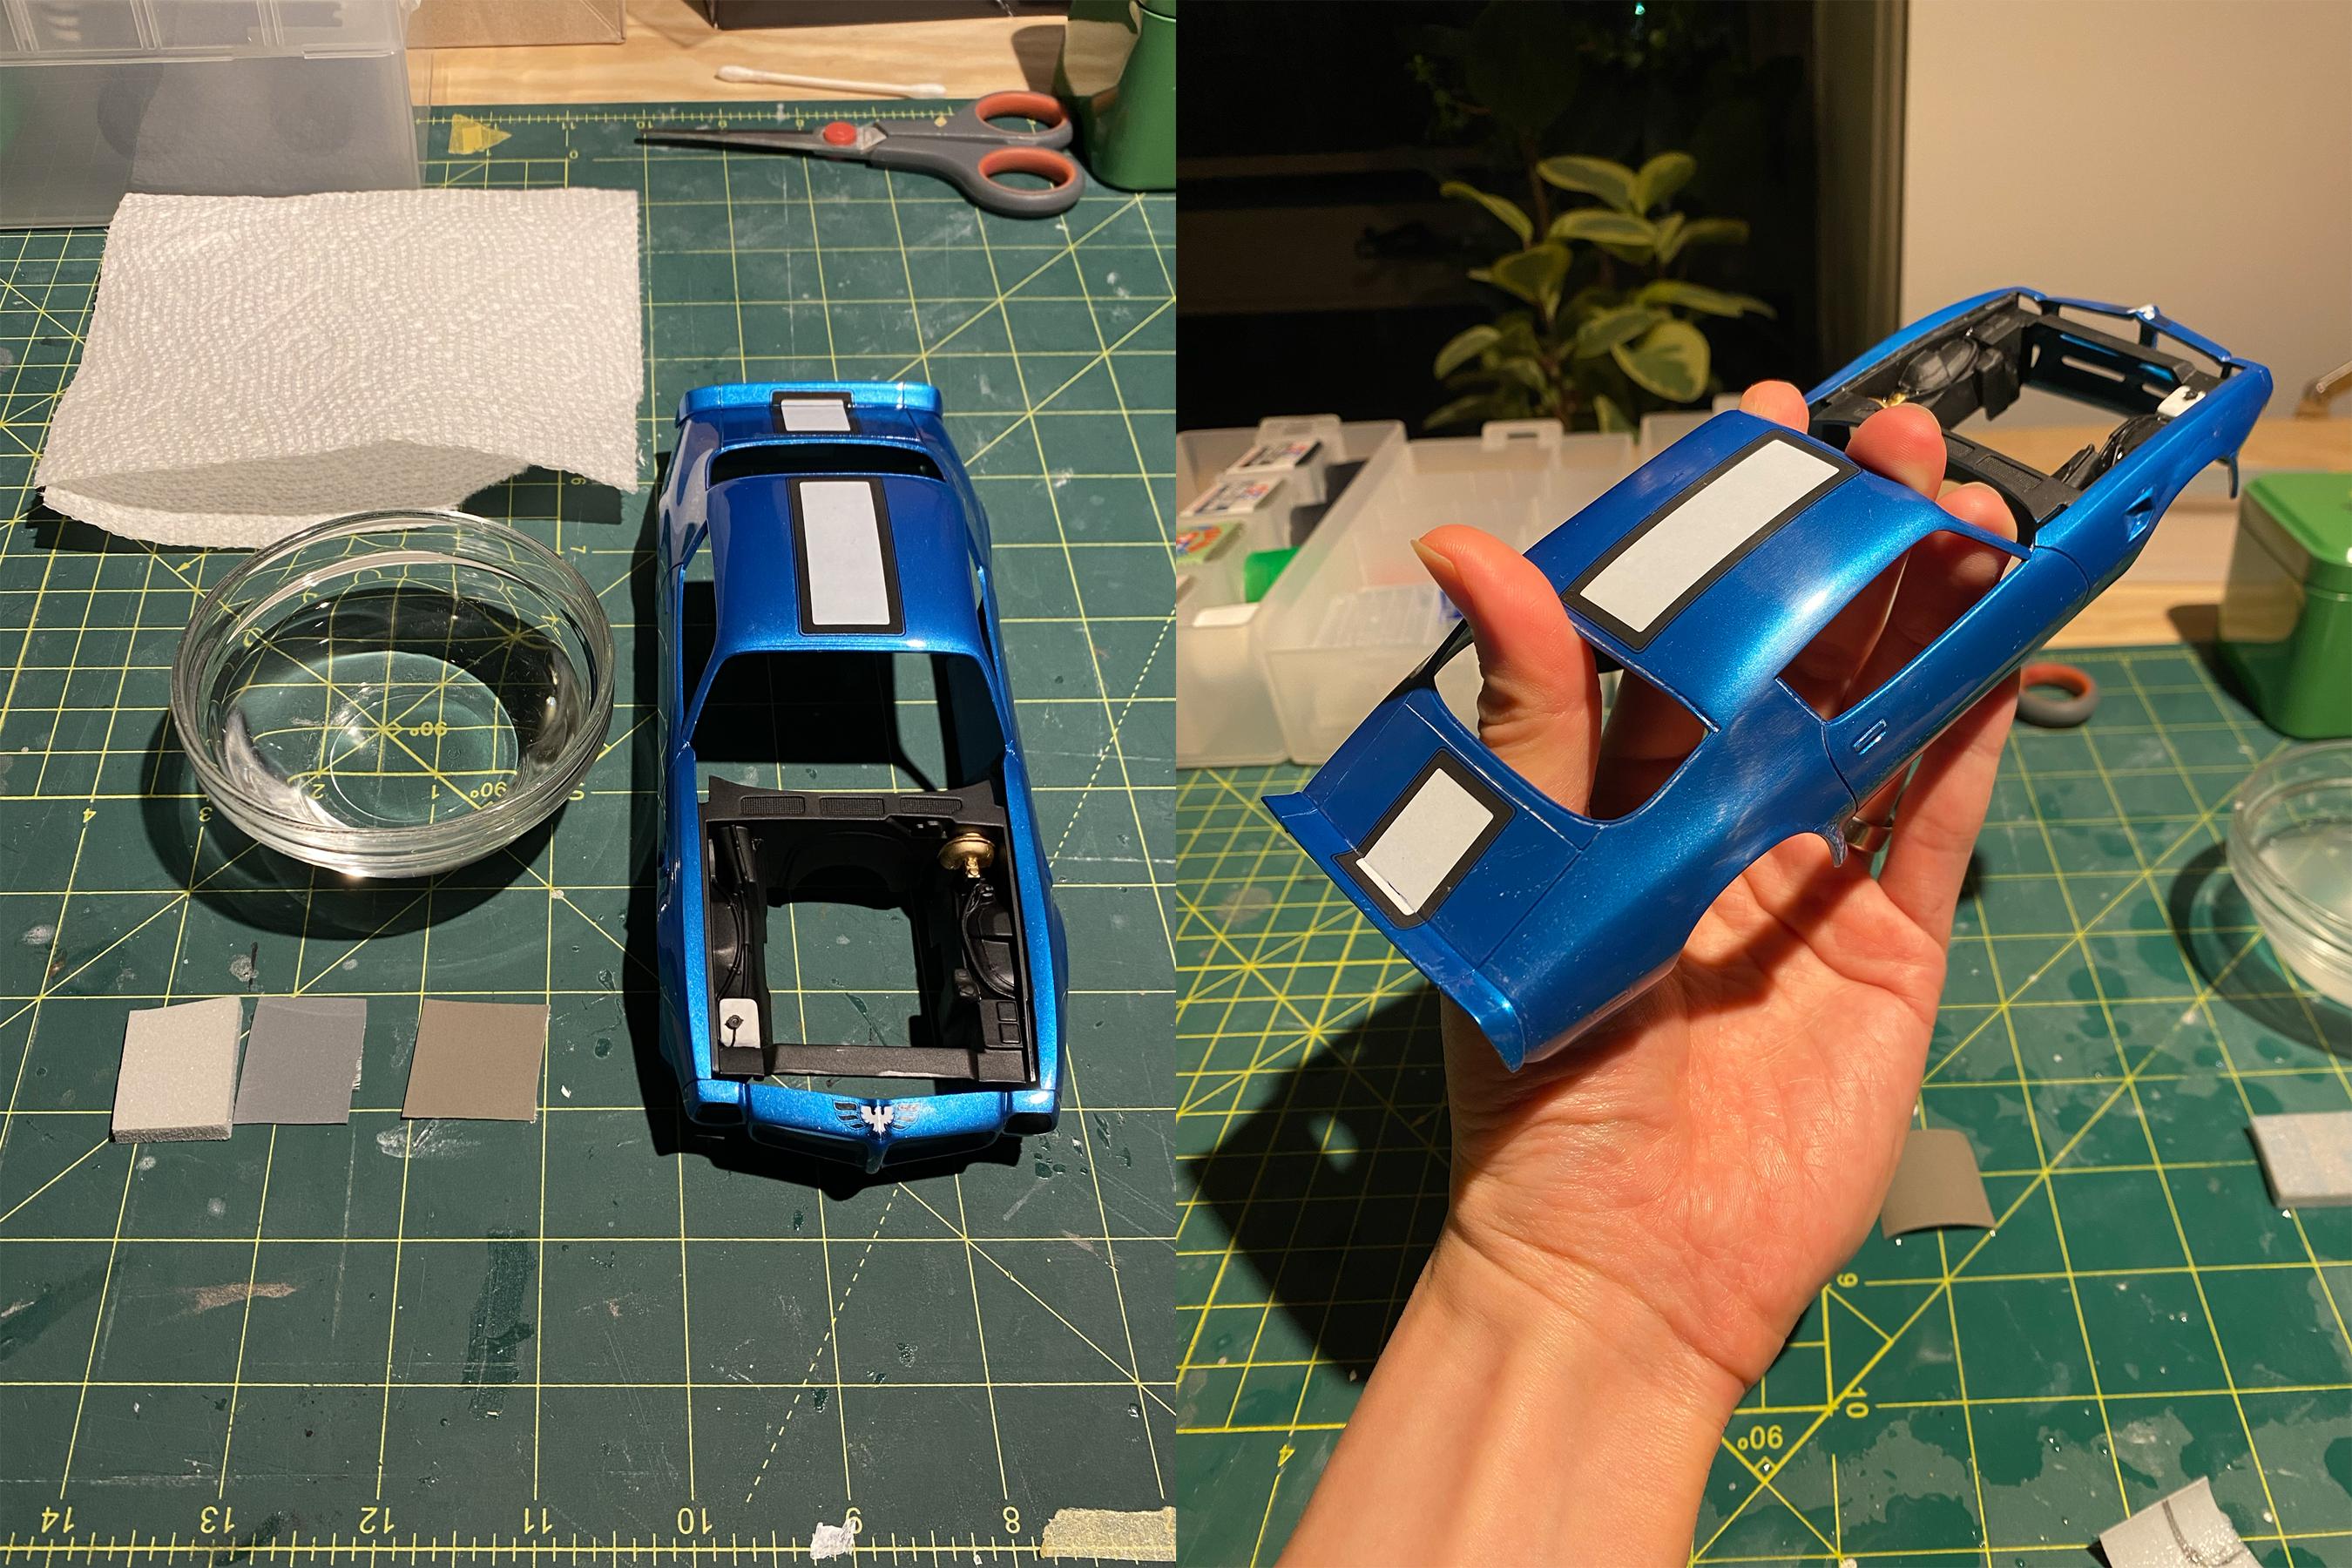
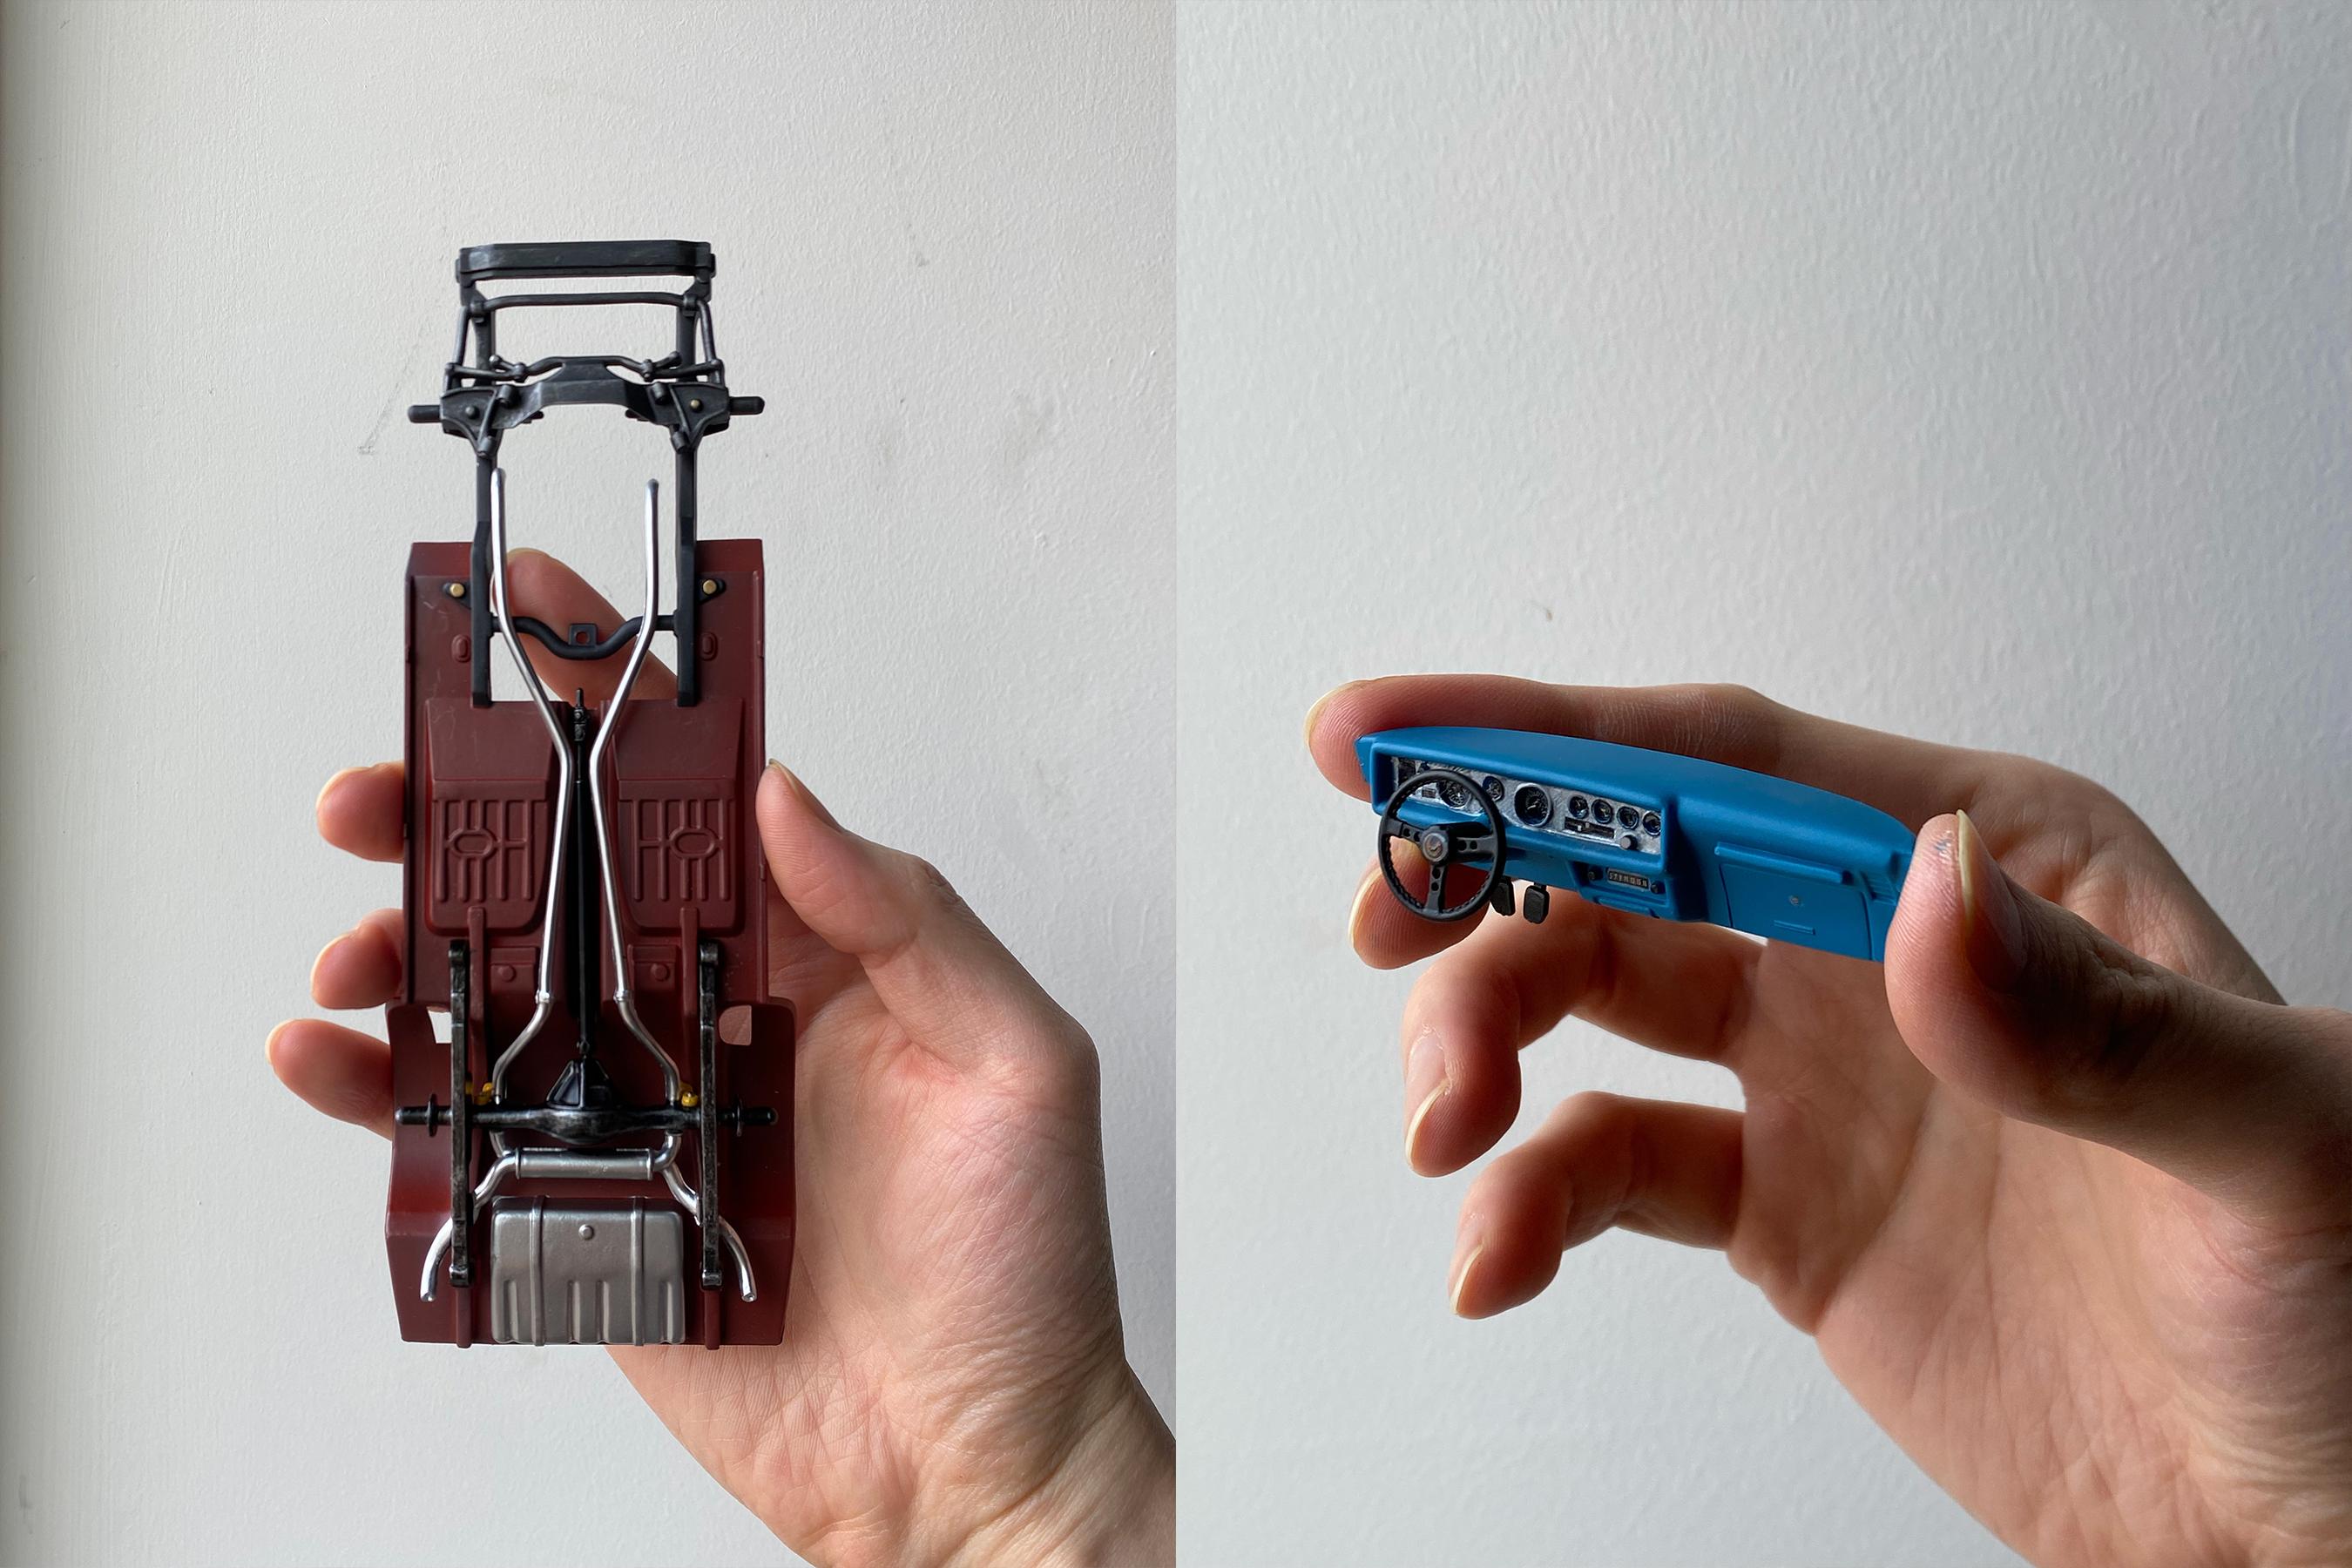
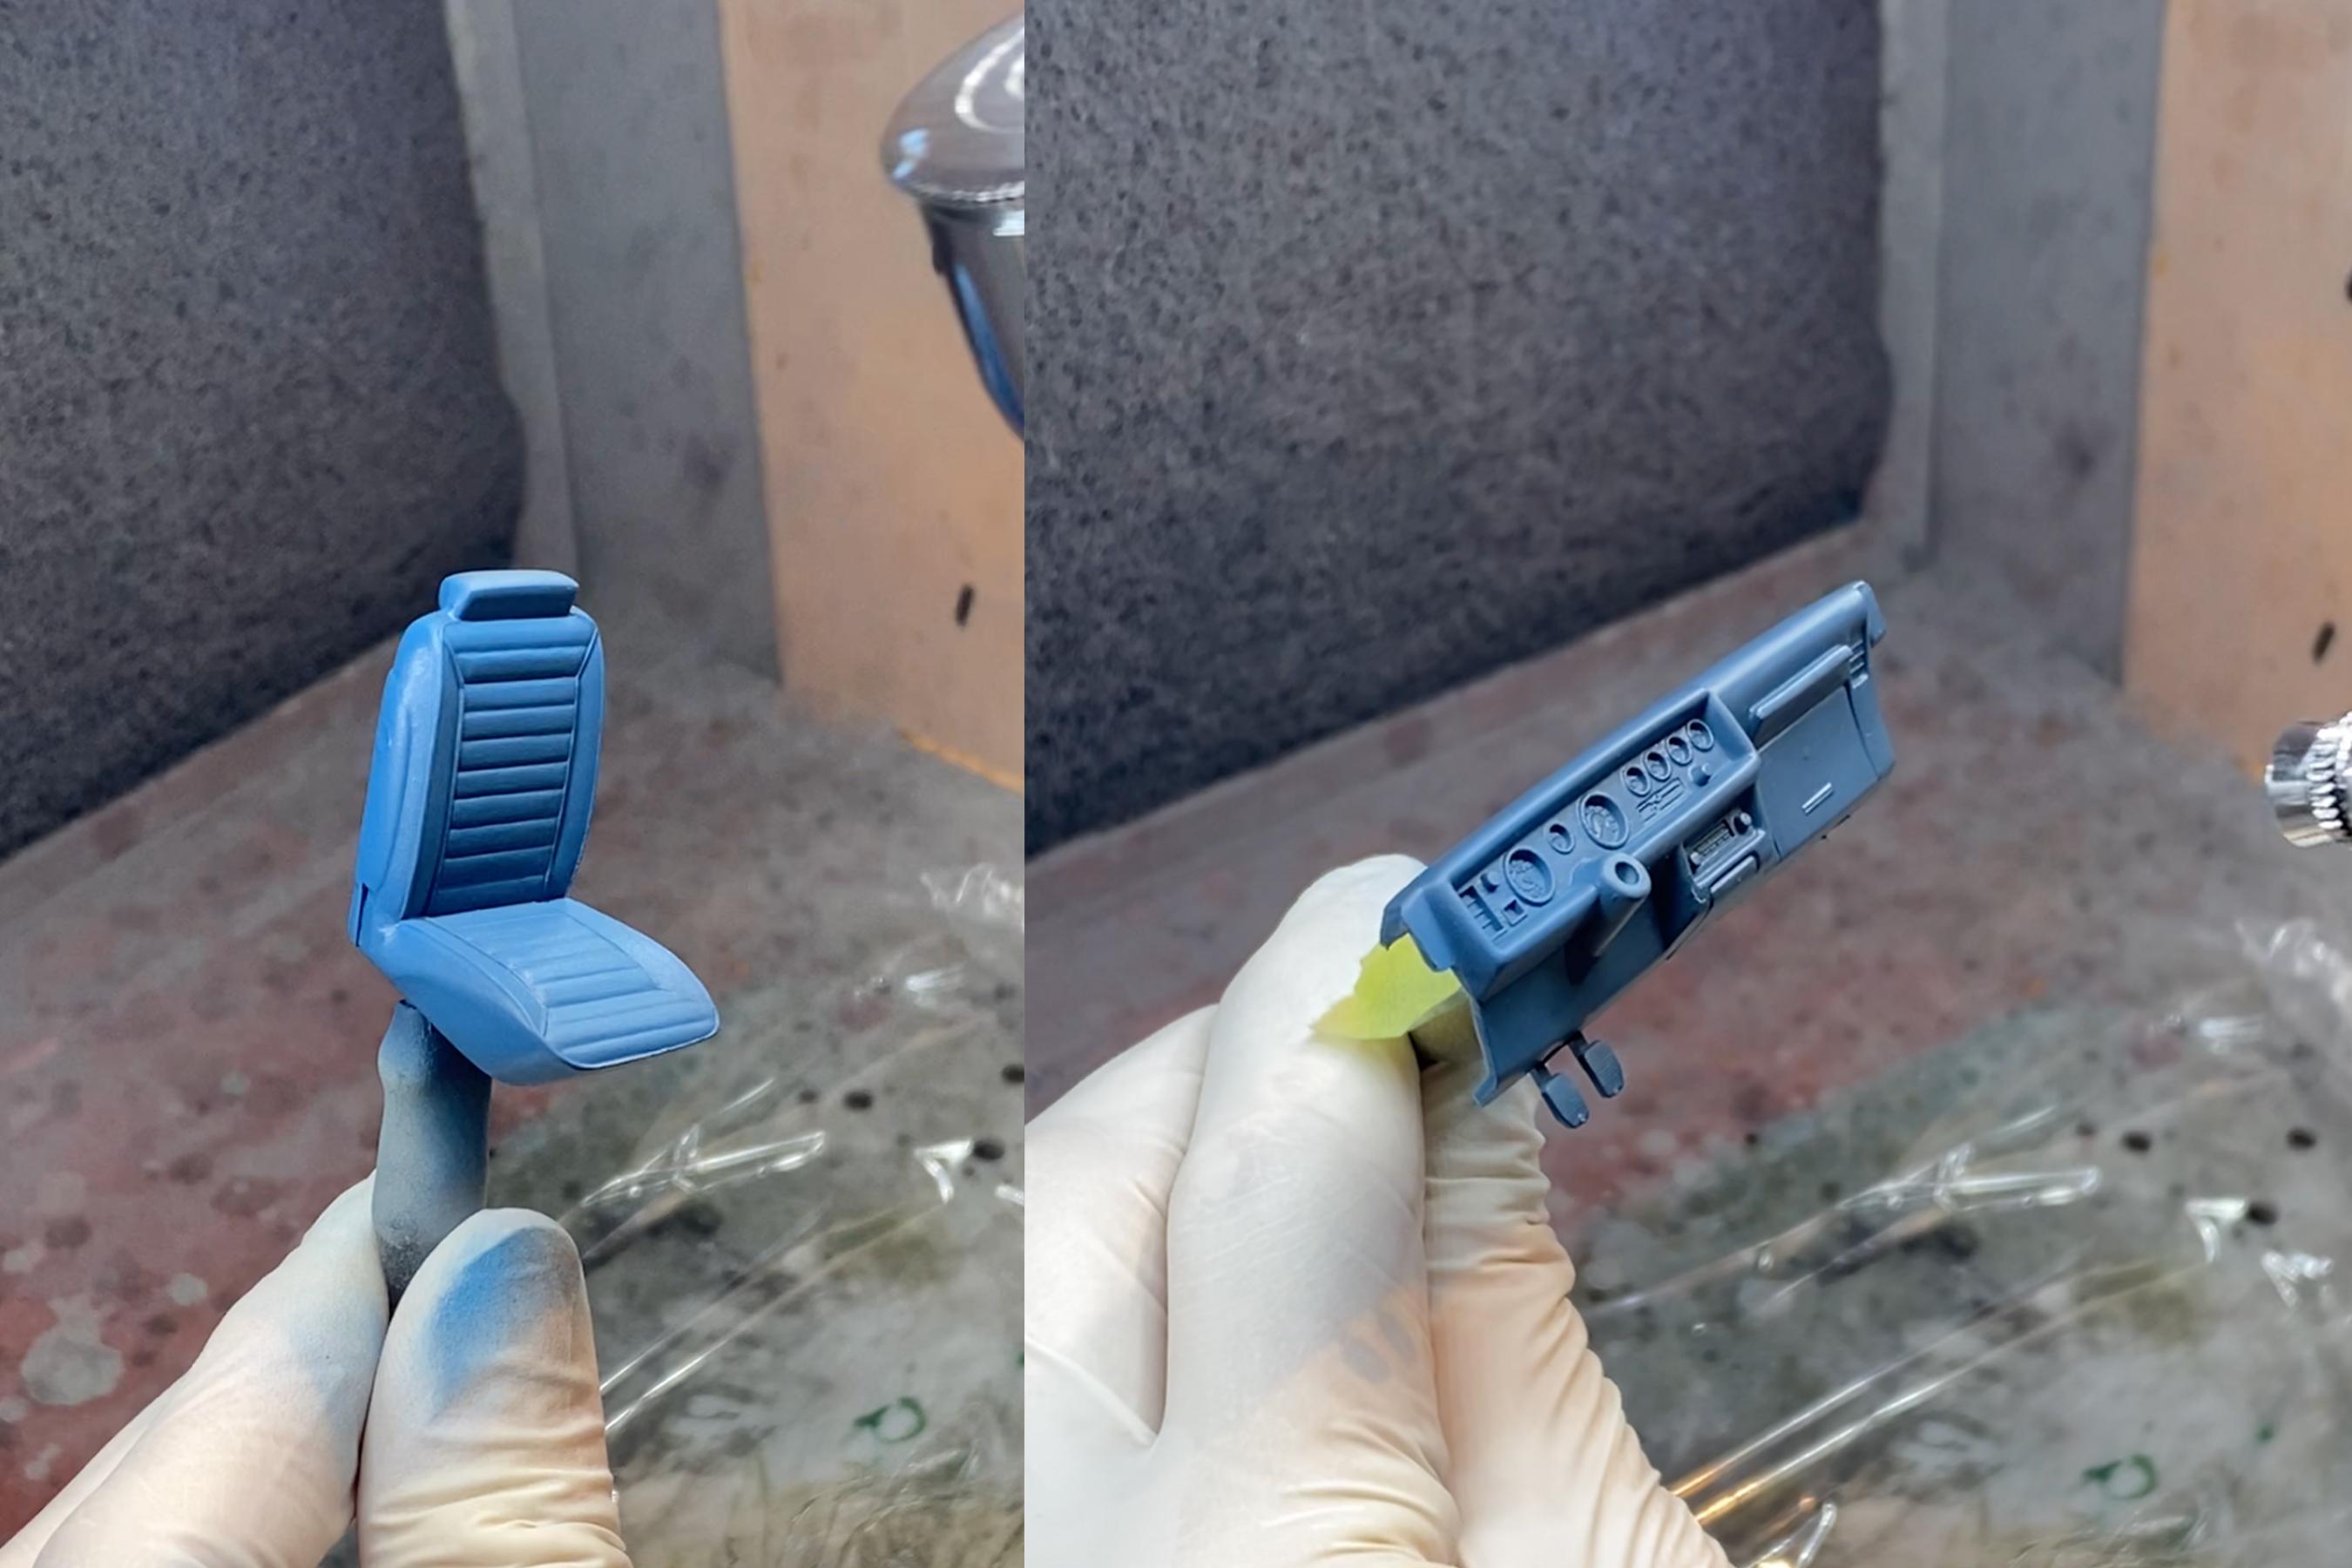
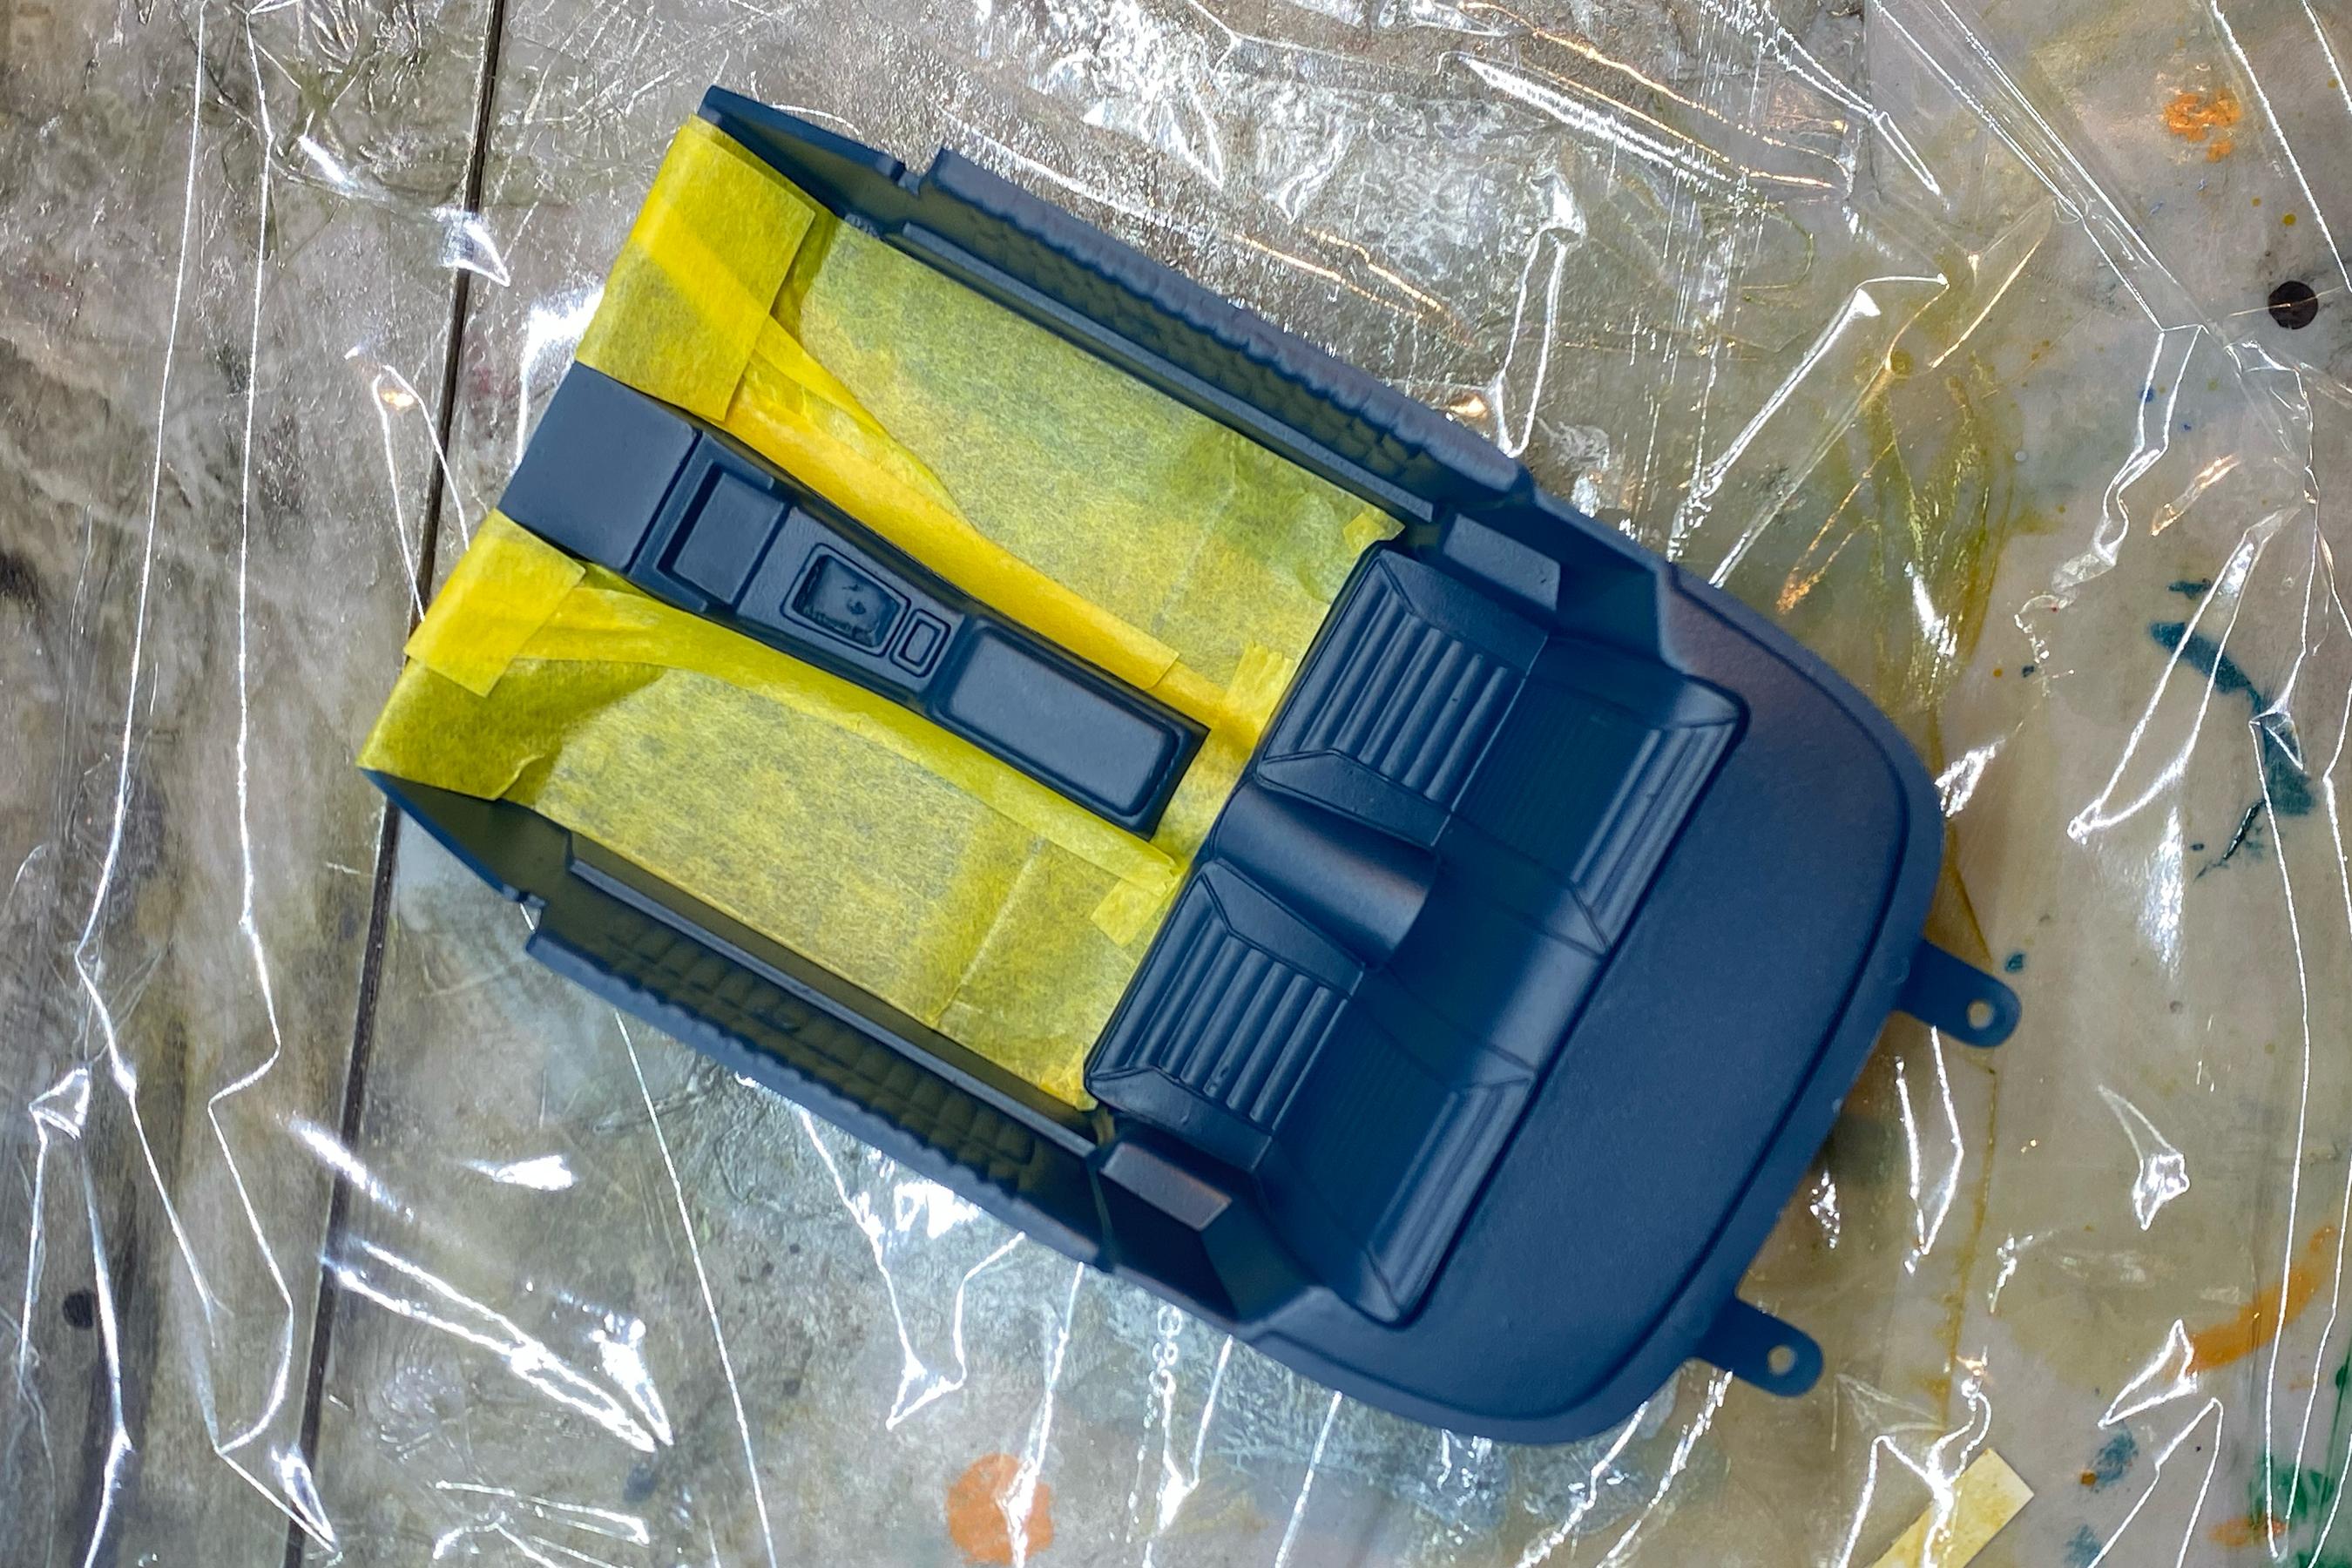
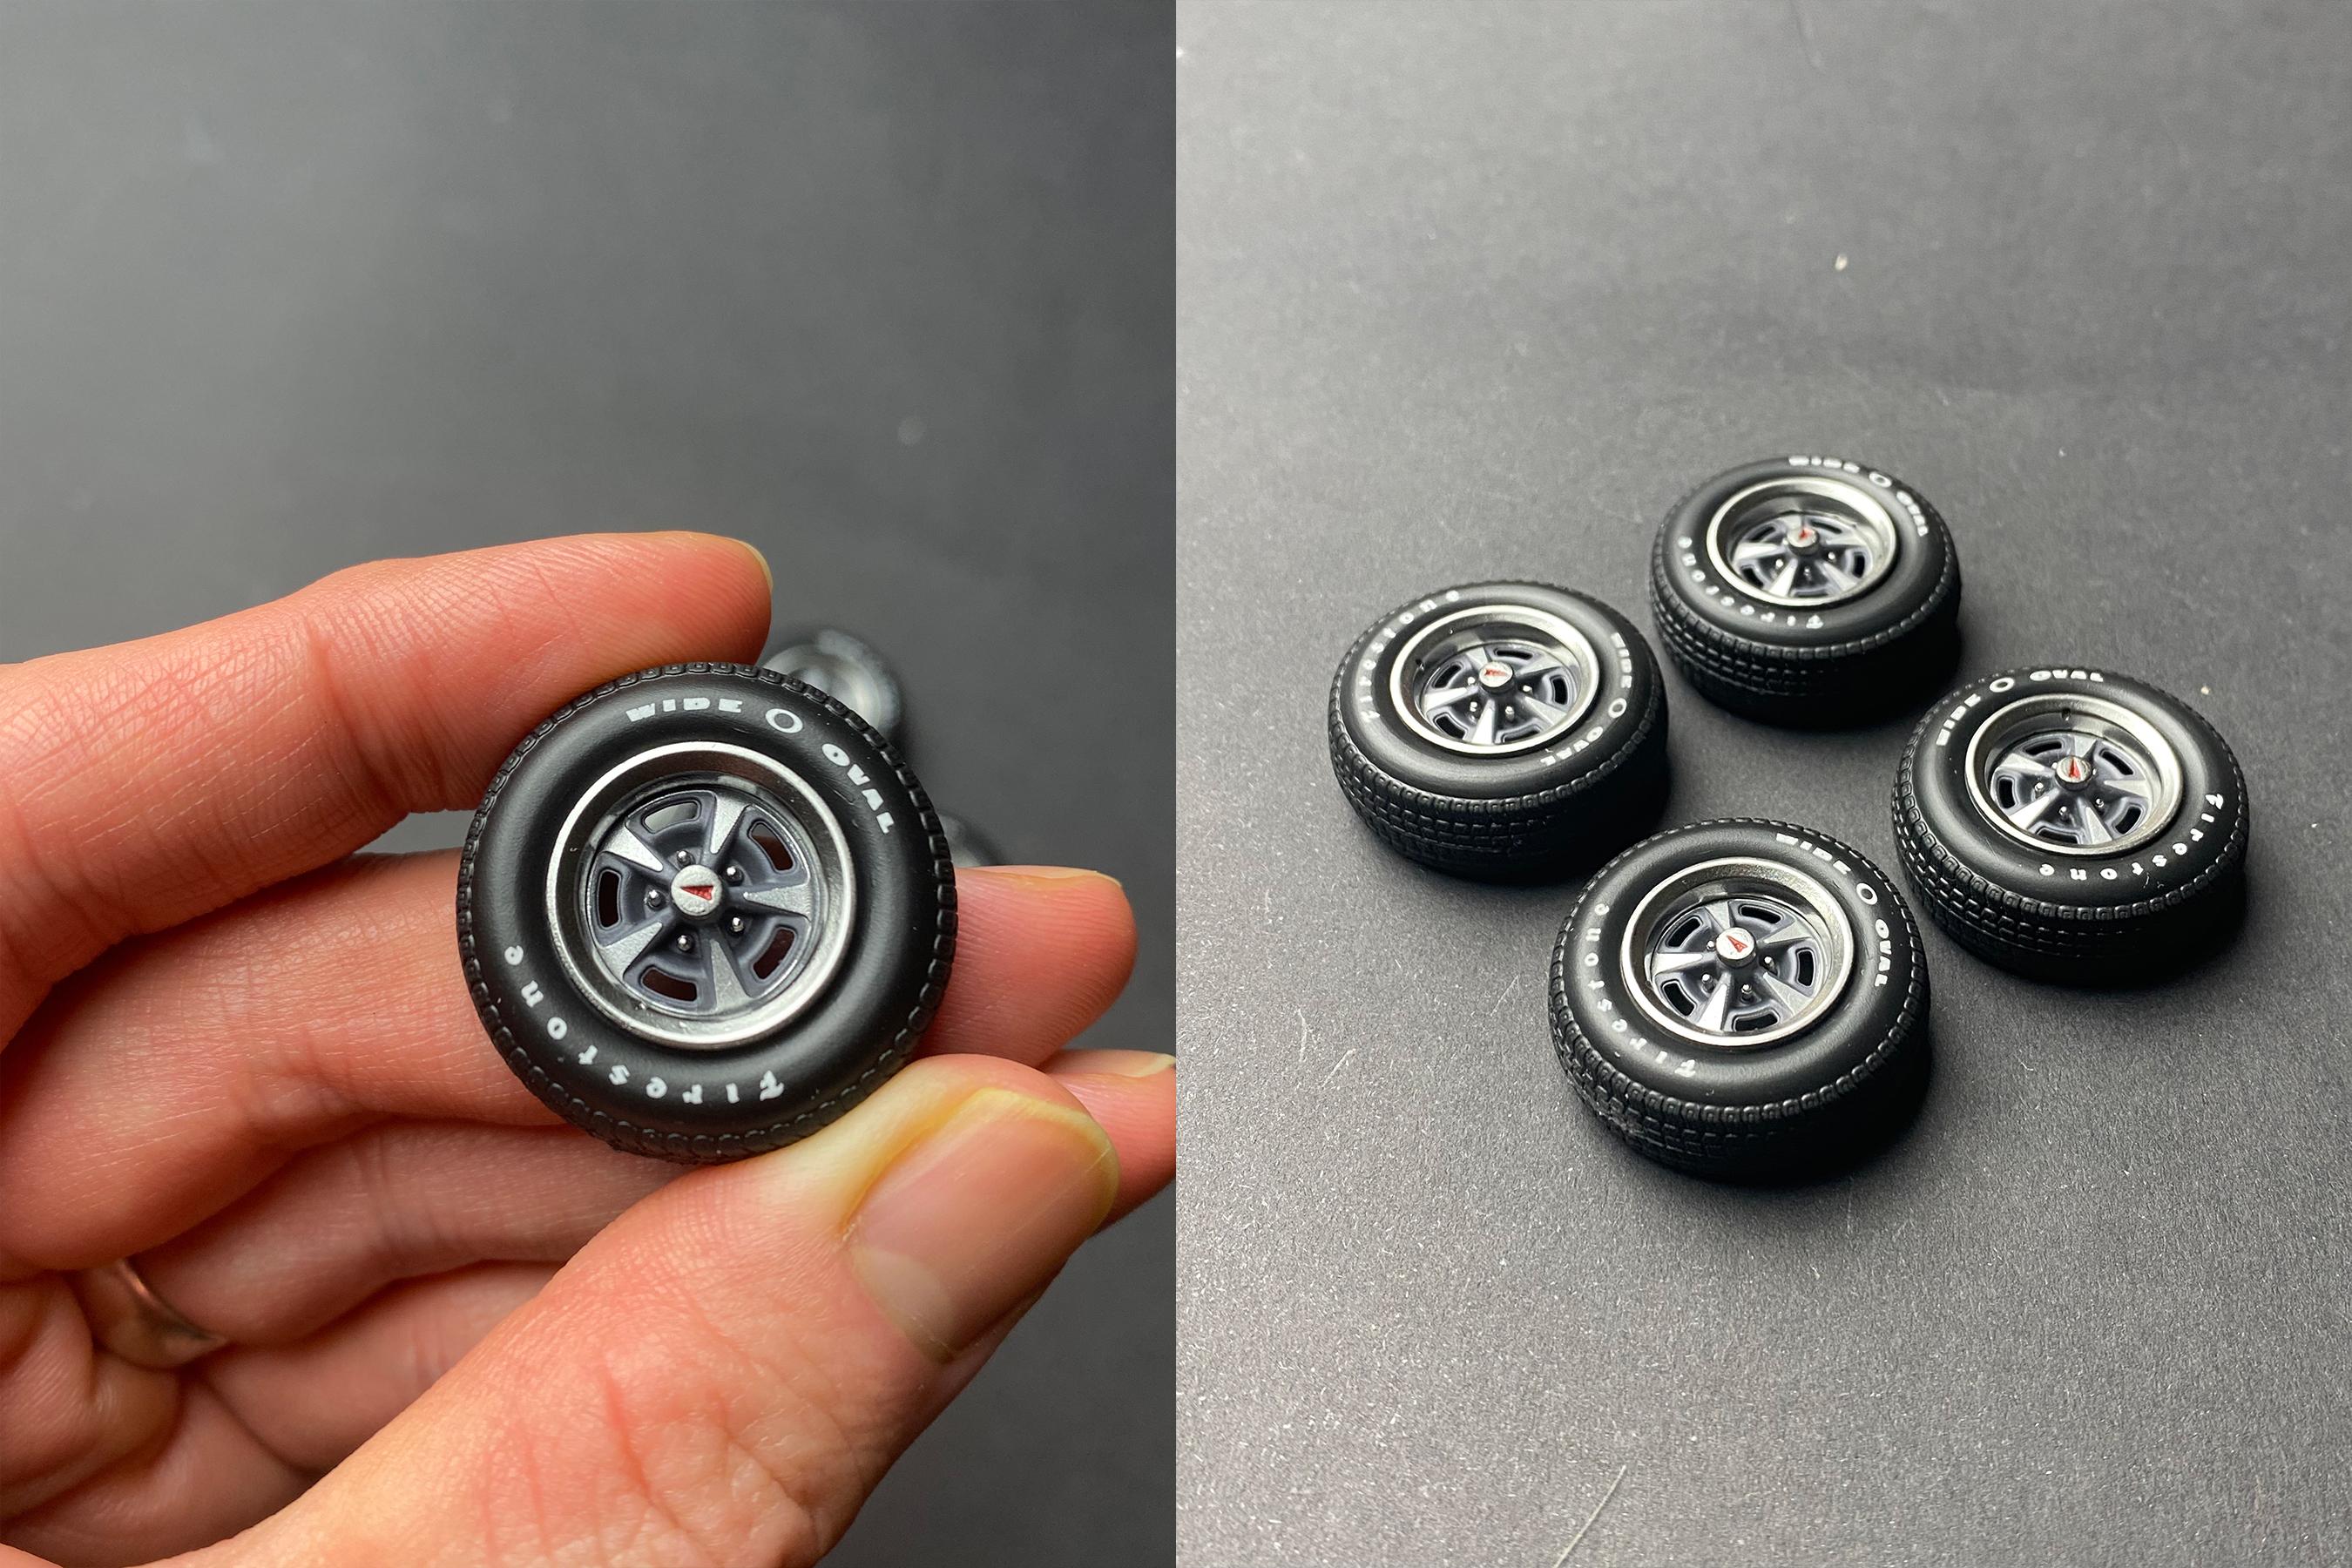
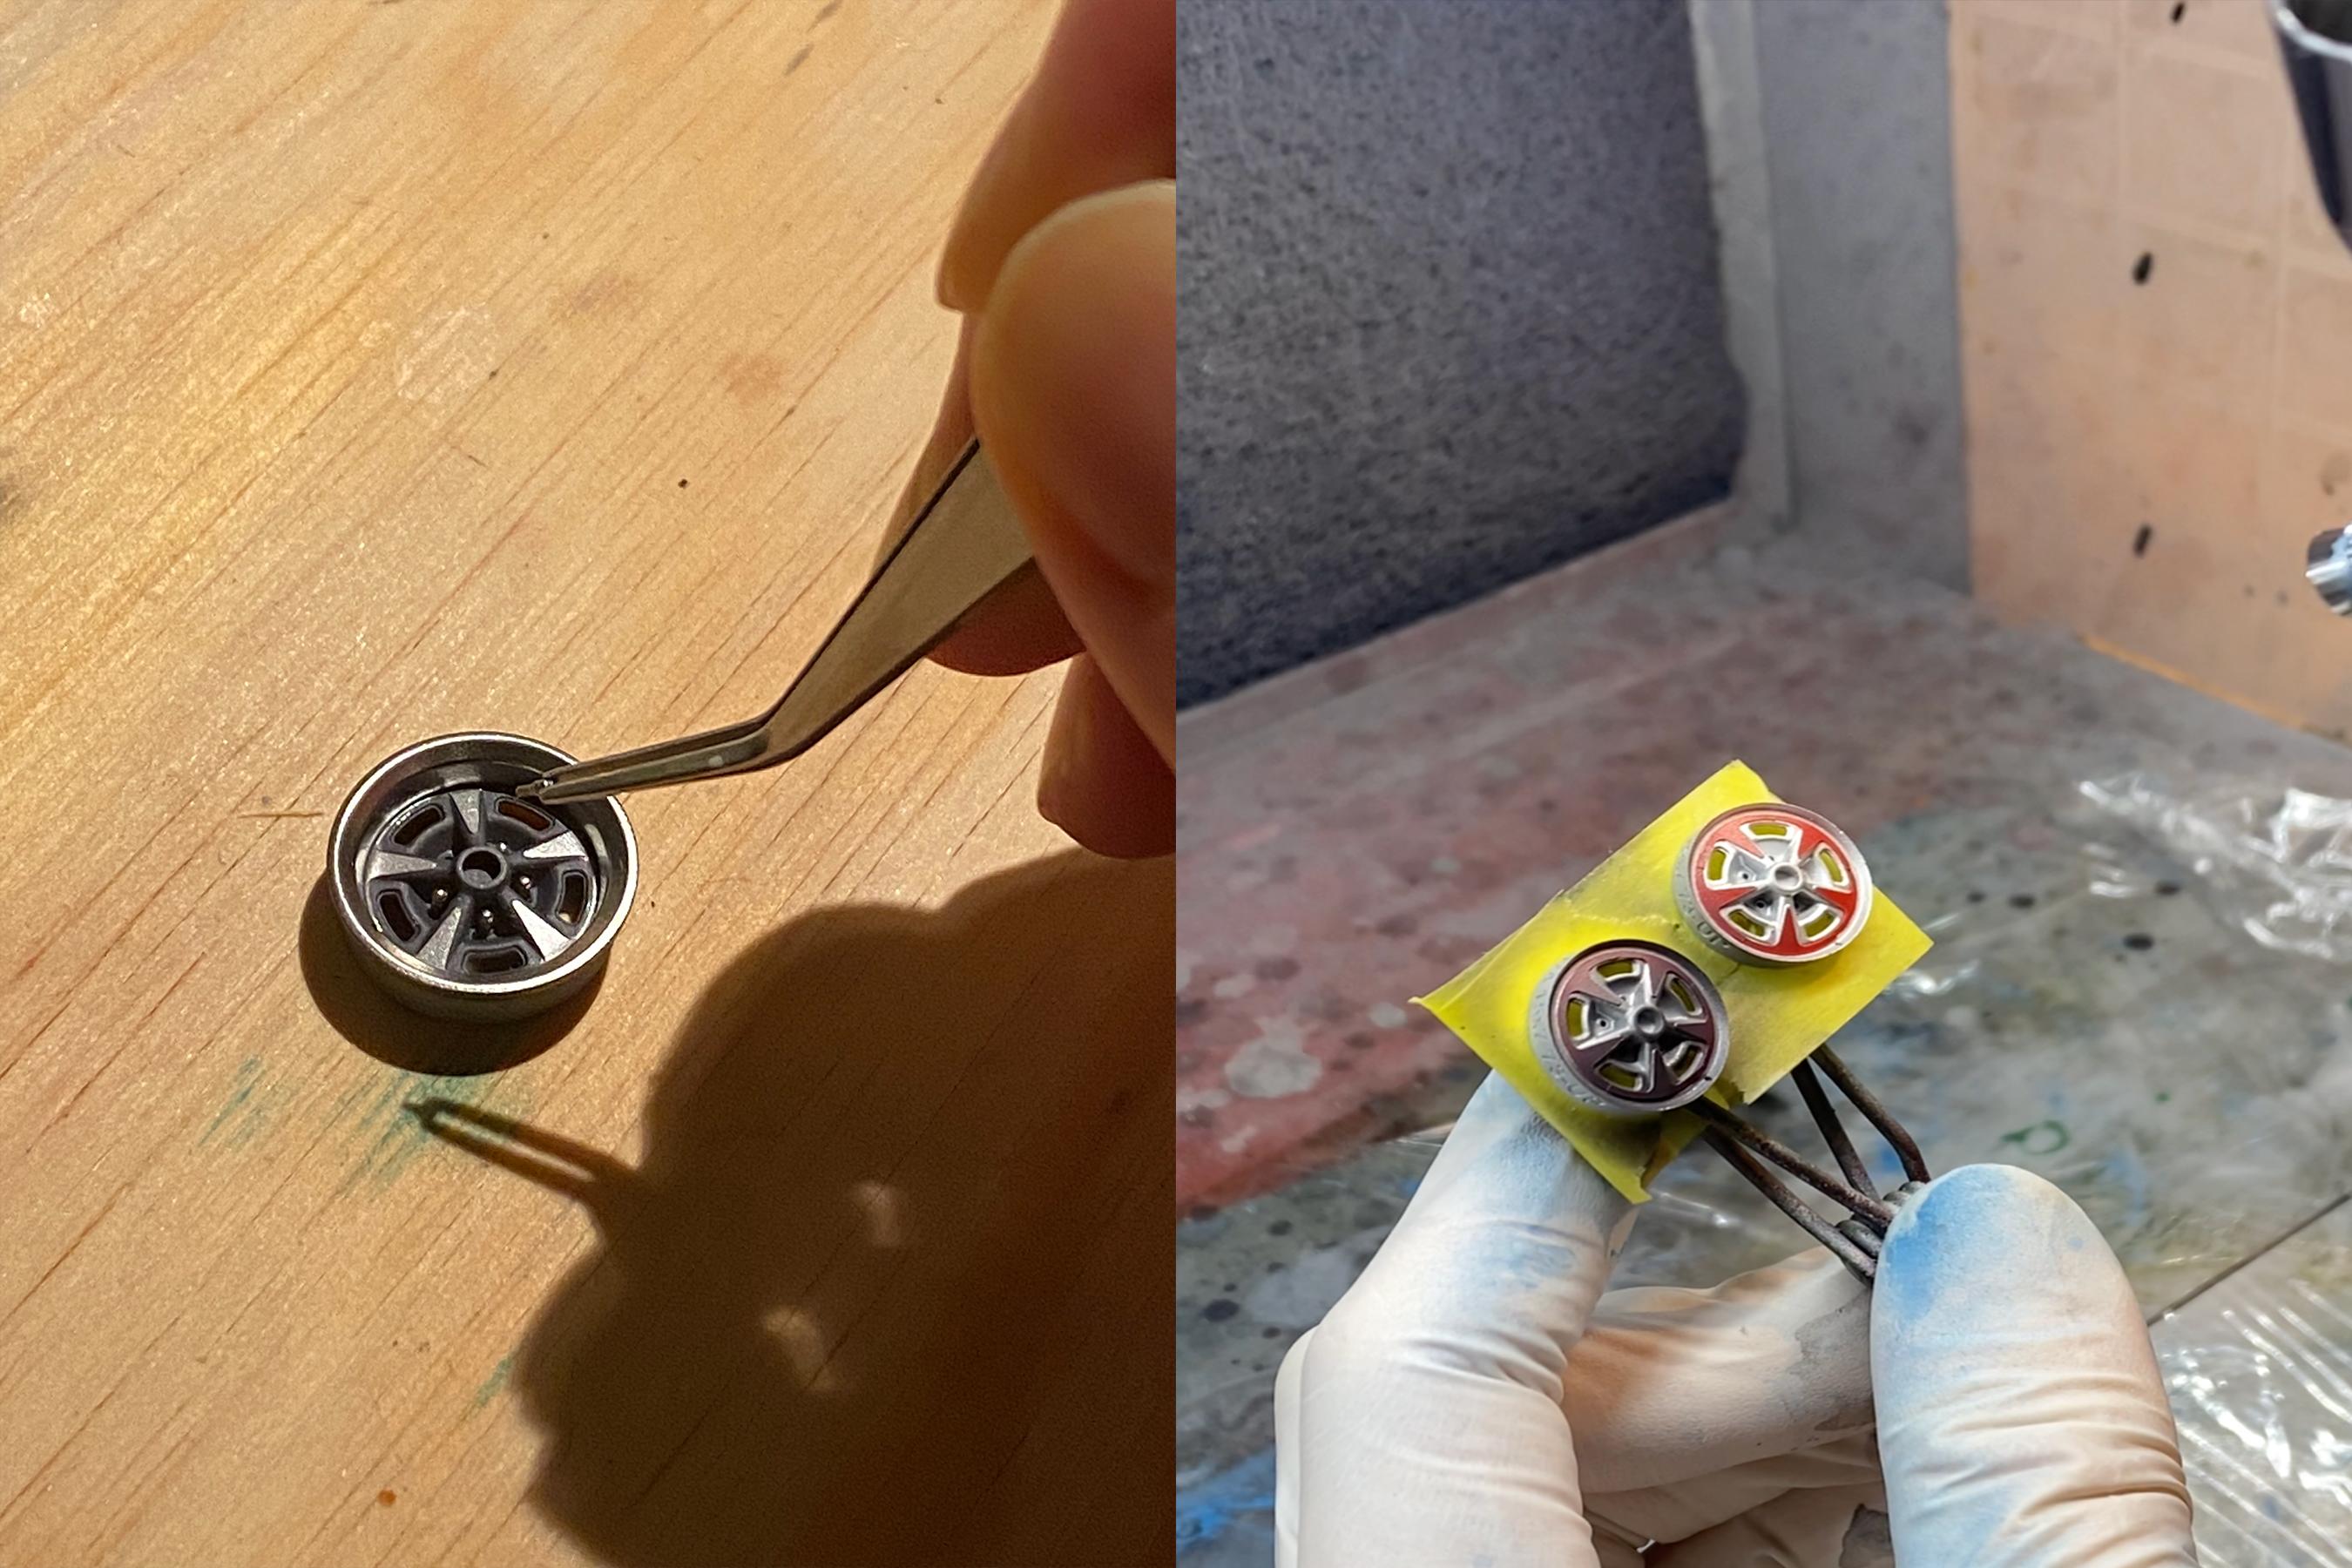
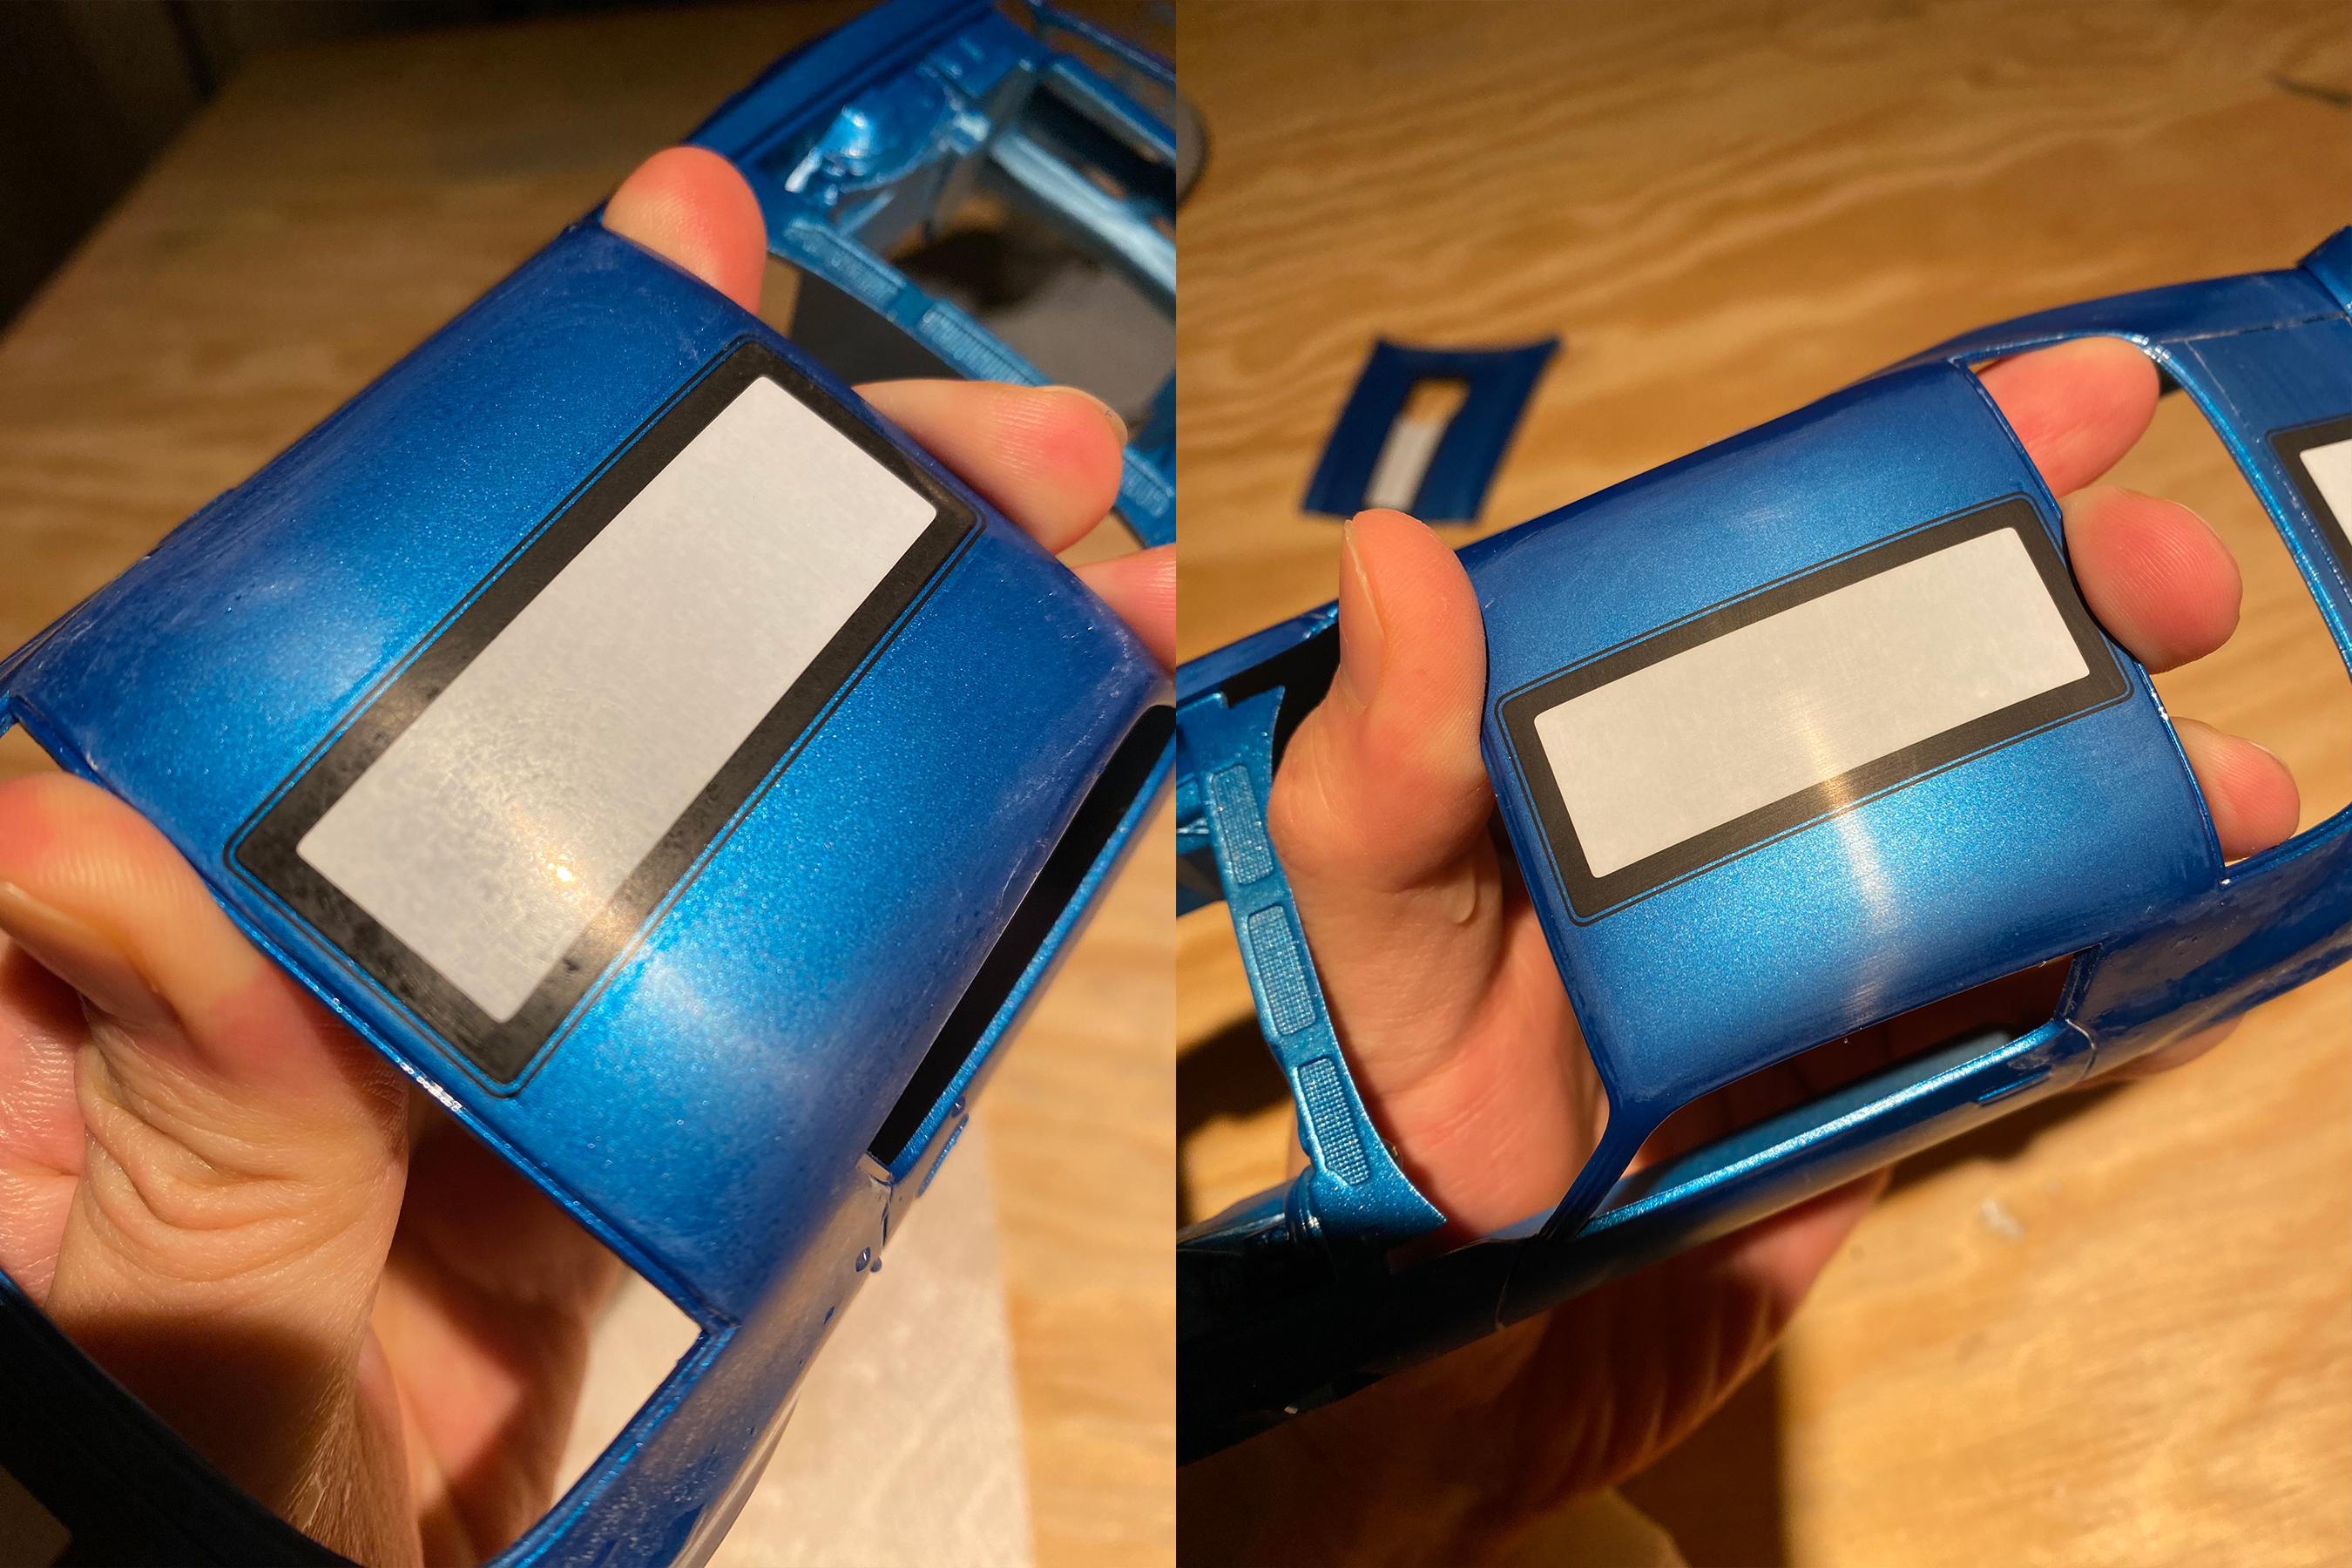
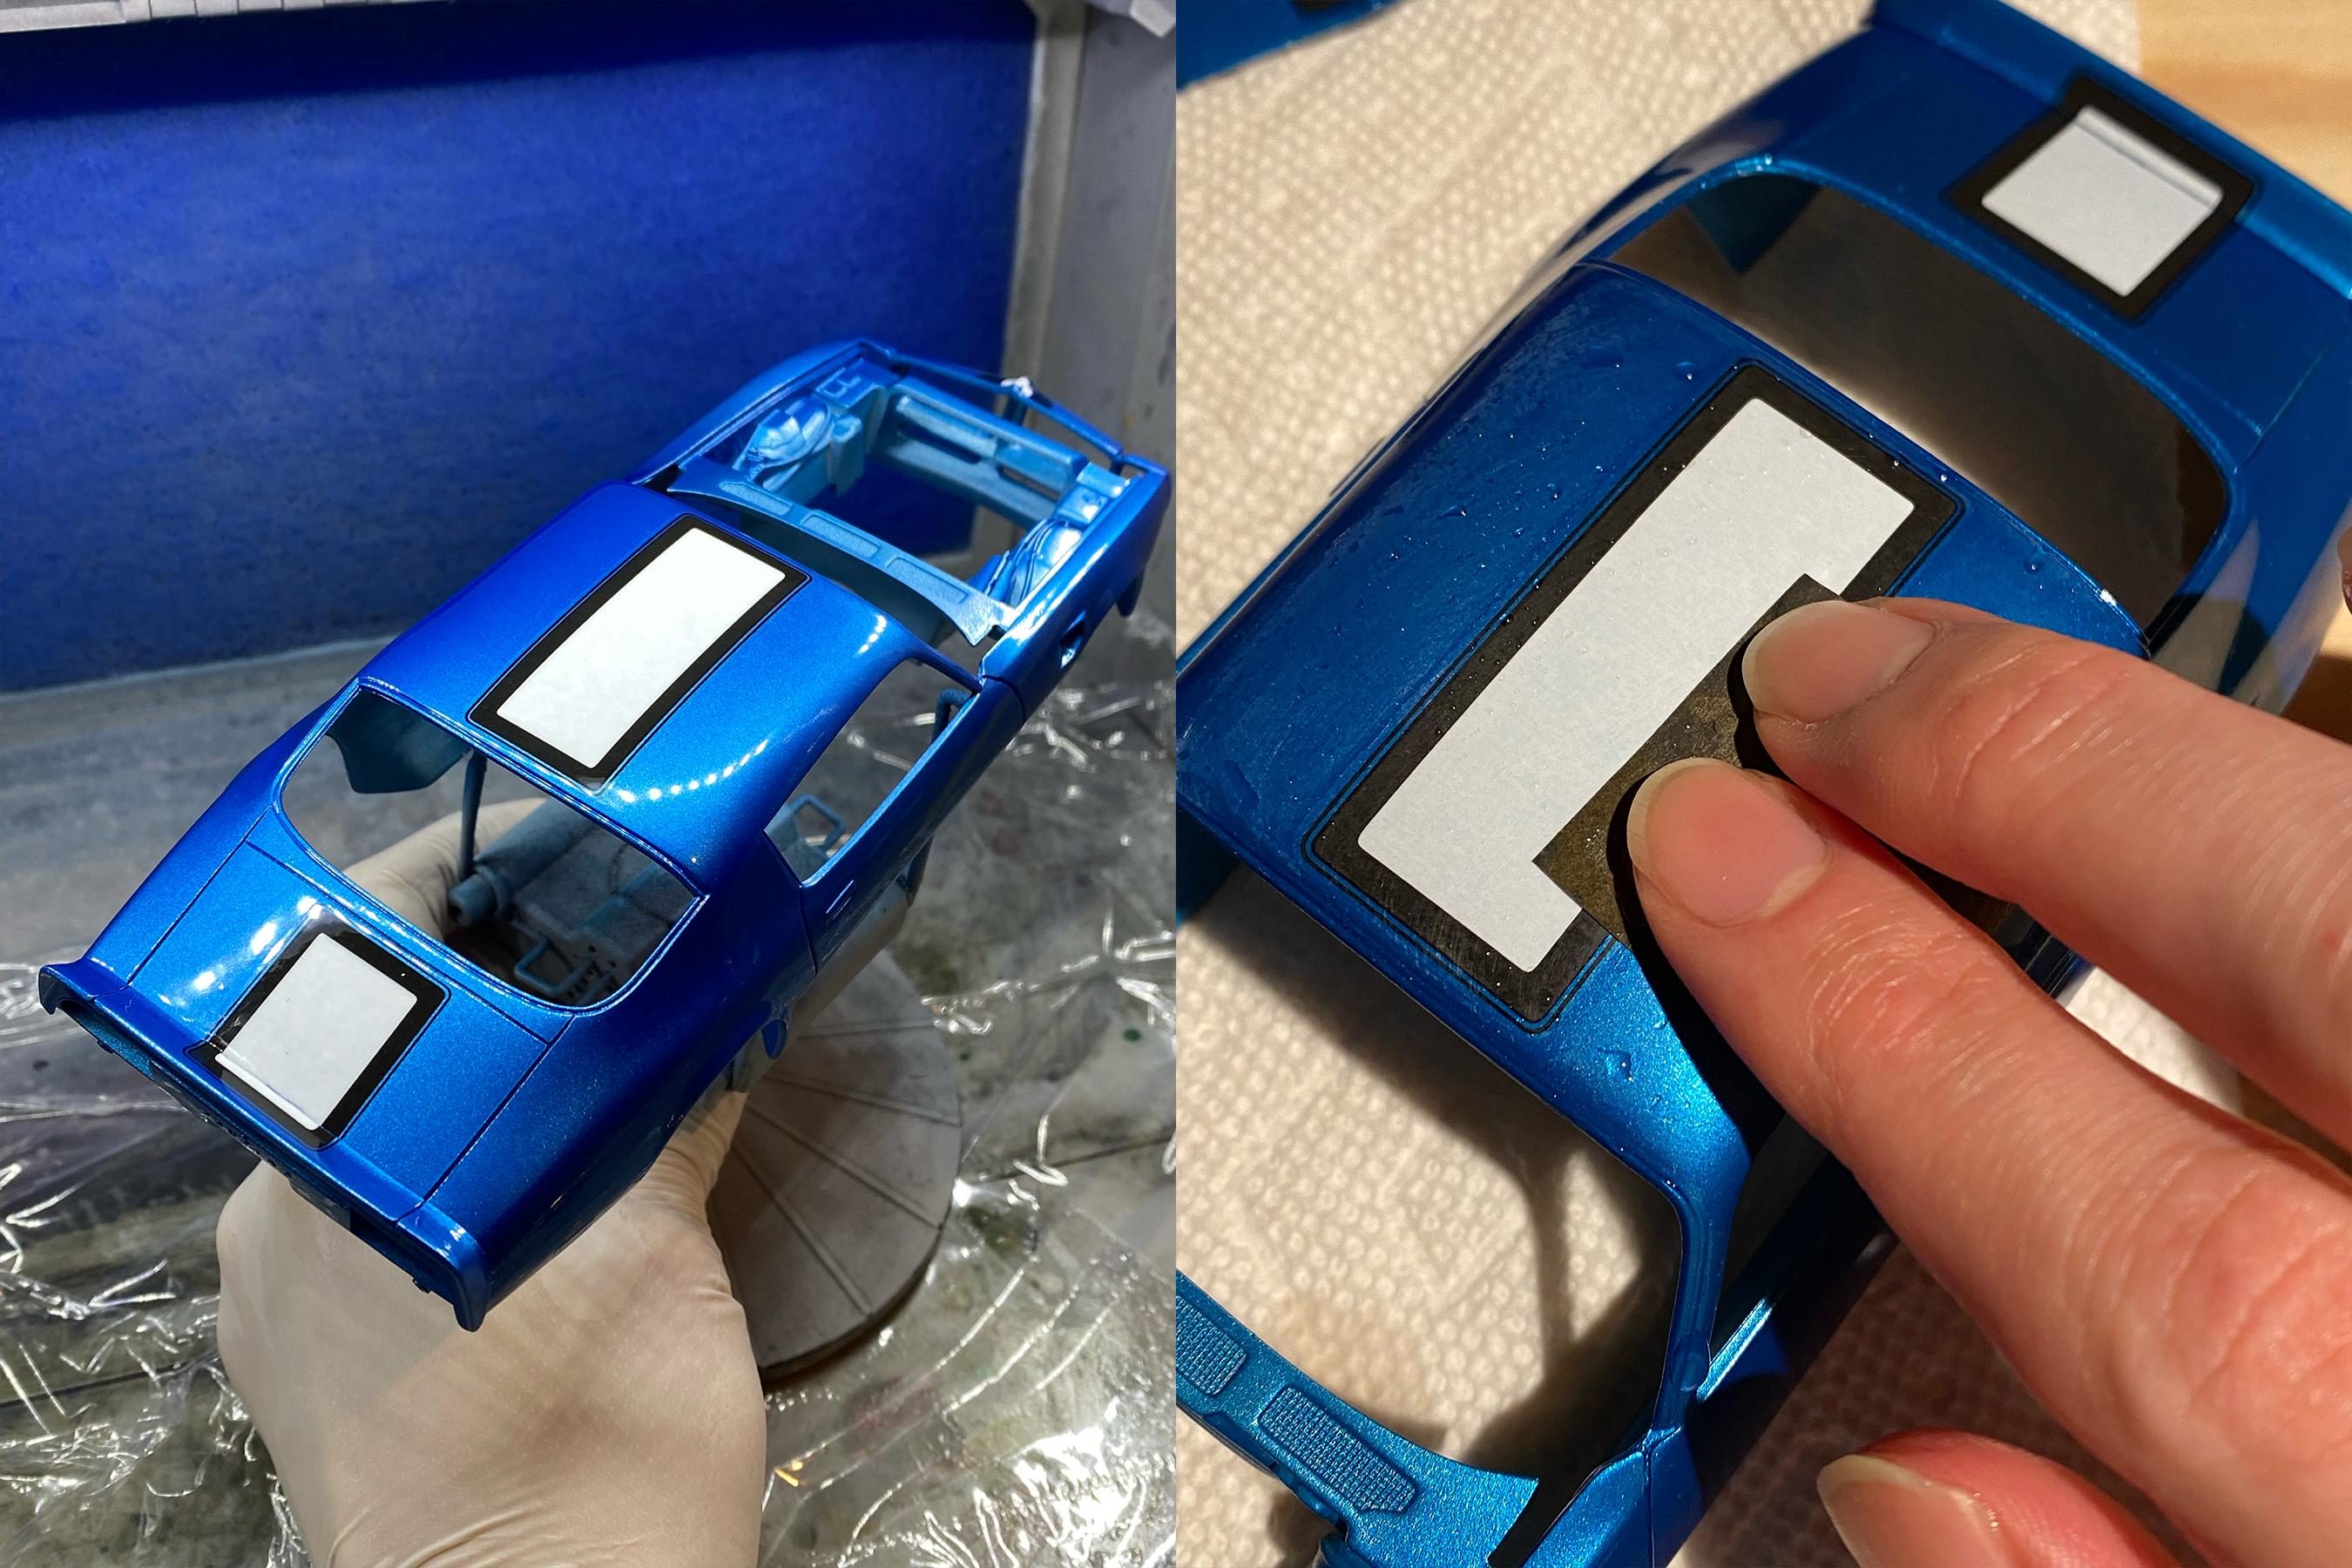
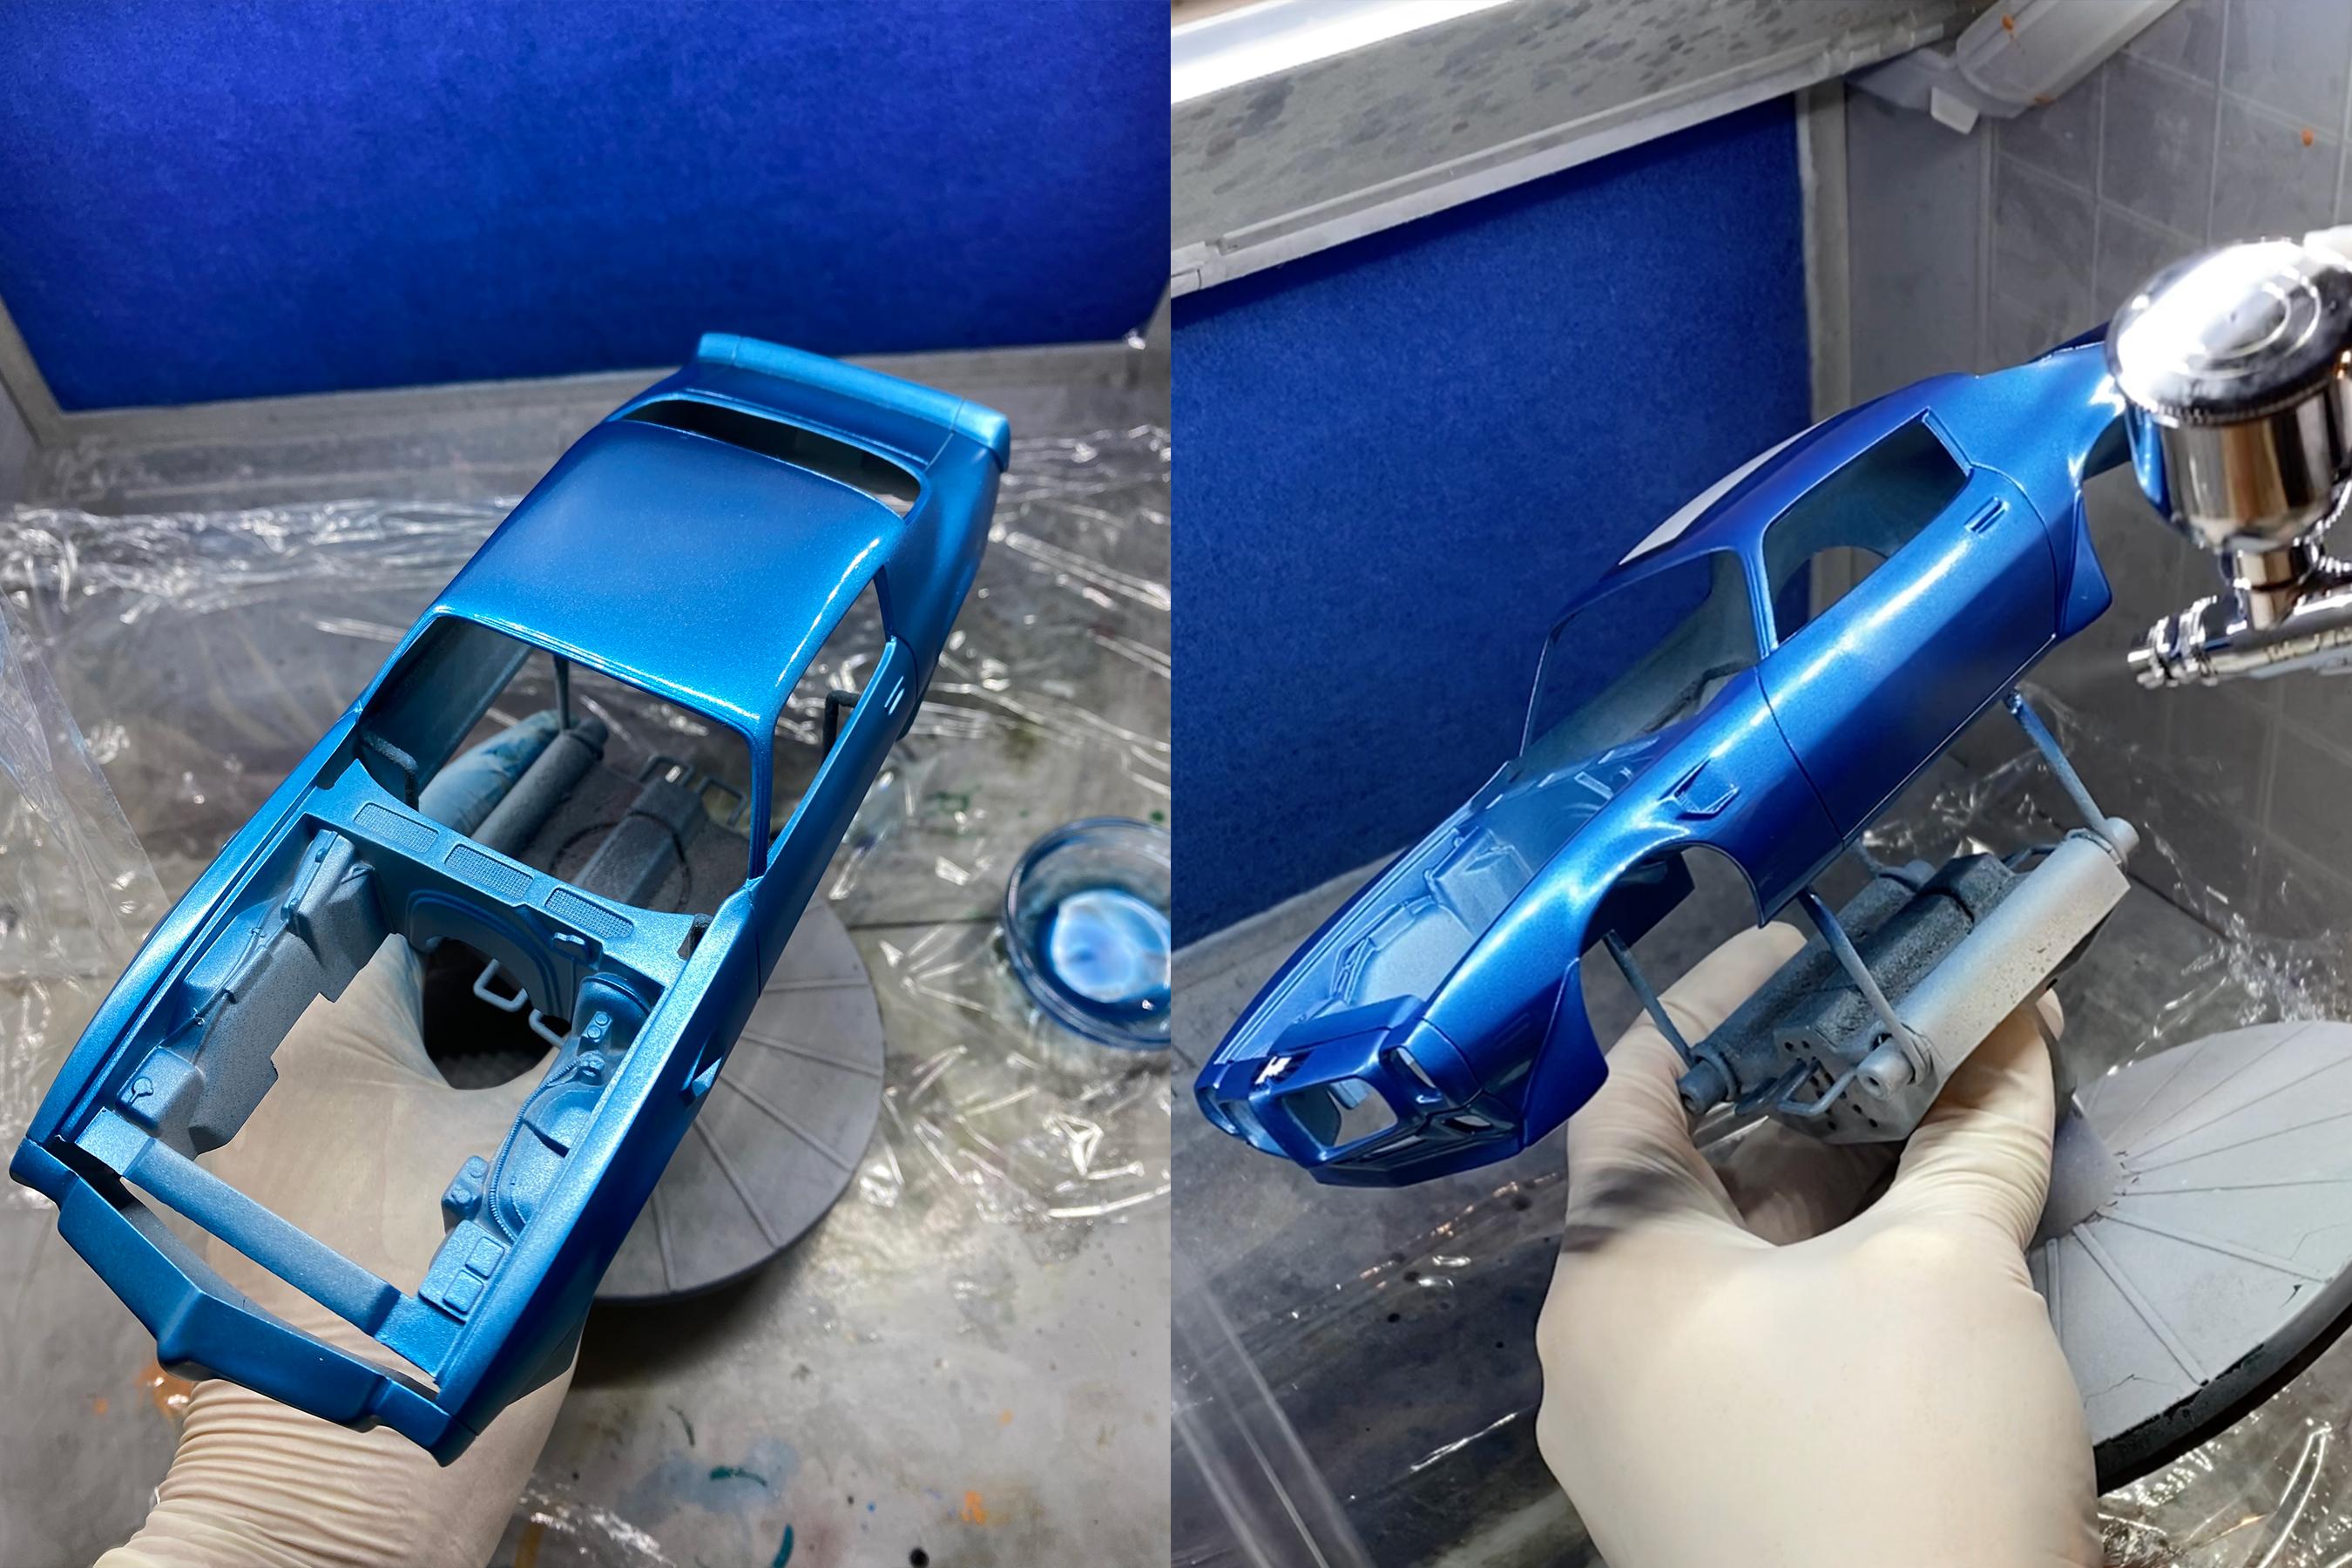
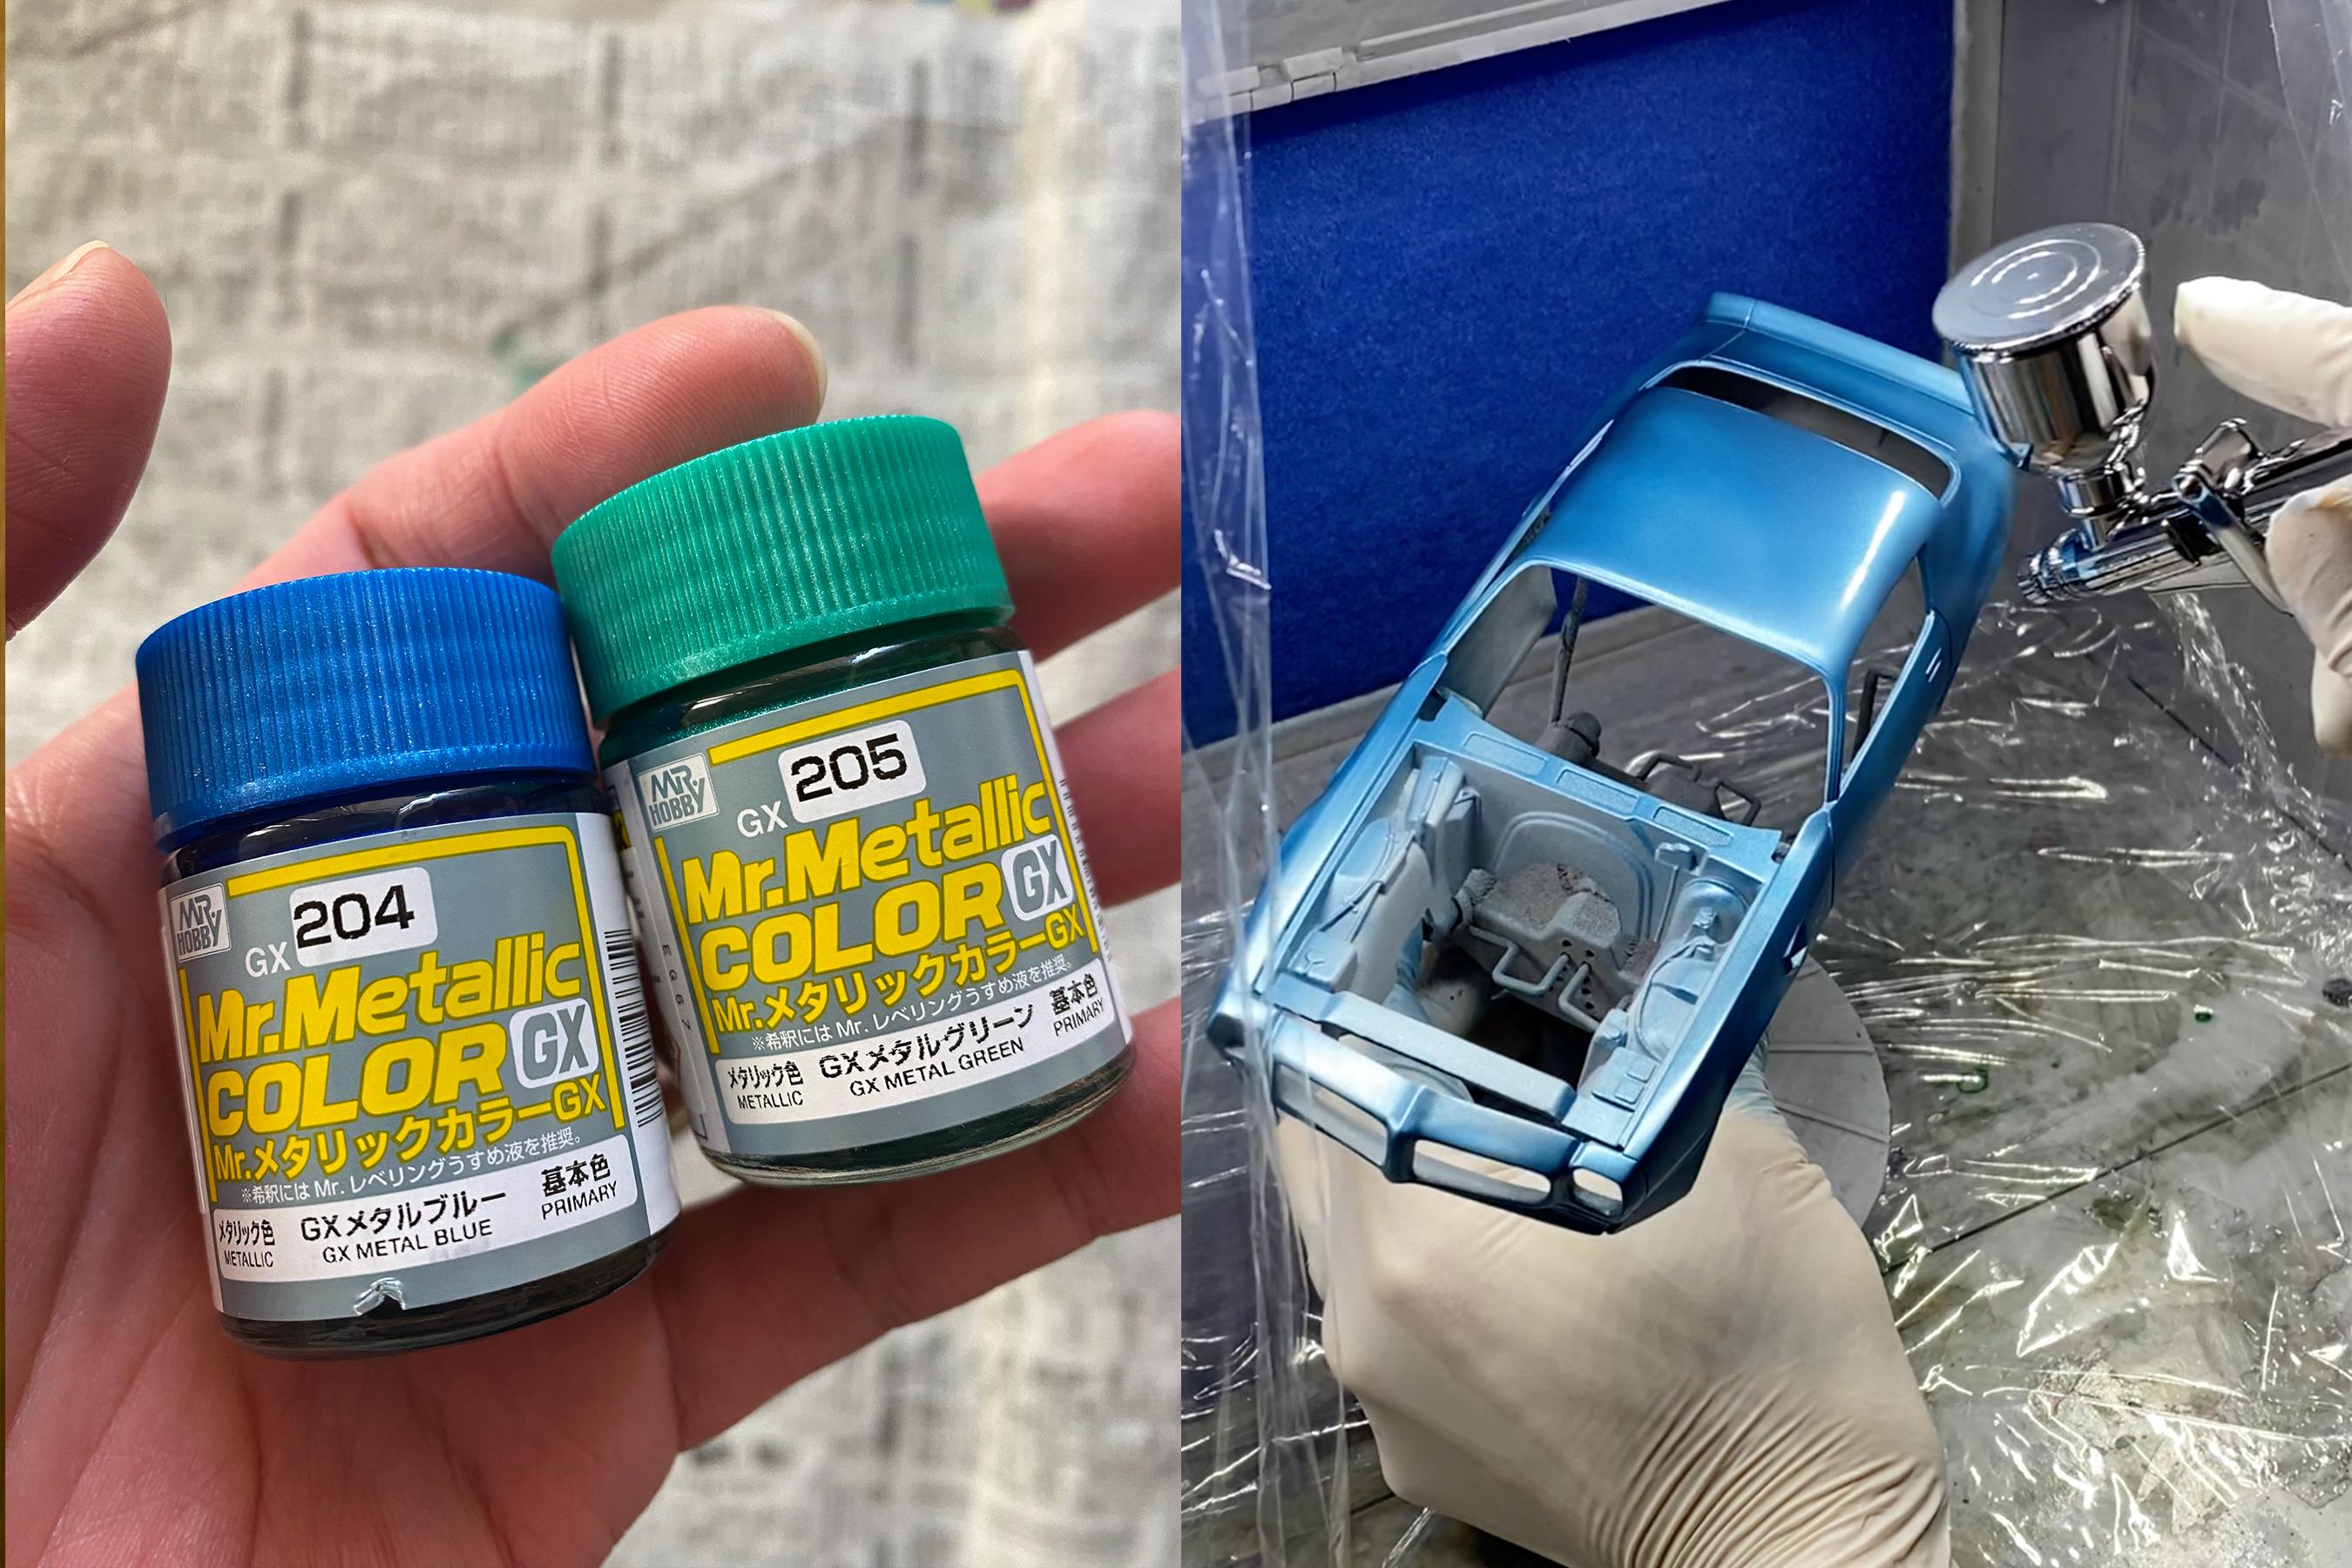
Hey all, Here’s the finished 1/24 Monogram/Revell 1970’ Firebird! For this I decided to build close to the stock - one of the biggest shortcomings of this kit (apart from lack of T/A decal) is how poorly the wheels look compared to the rest, so I used 1/24 Rallye II wheels from Fireball Modelworks and paired with stock tires. Here’s my full build detail: Scribed panel lines, wet-sanded whole body with 600 > 1000 grit Added primer, removed rest of uneven body panels with 1000 grit, added another primer and finished with 1500 grit Simulated Lucerne Blue with mixture of Mr Color’s metallic blue, metallic green and silver (2 base coats) Laid decal and applied Mr Color’s Super Clear II Once the first clear coat was cured, wet-sand with 2000 grit to flatten out the decal Applied second clear coat and repeated wet-sanding Applied third clear coat and cured it for more than a month Wet-sanded the body with 3000 grit, 6000 grit and 8000 grit then polished with Tamiya 3 compounds and Hasegawa ceramic compound Added panel lines and gave the whole body a light polish wht Hasegawa polymer coat Painted the engine block with body color mixed with additional silver and added ignition wires Painted interior with mixture of pure blue, green, black and grey, masked and painted the upper part, seats and dashboards with brighter blue Got rid of auto shifter and added manual shifter and third petal Remove pin marks on the underbody, painted with Tamiya dull red, masked & painted fuel tanks and frame rails, then lightly airbrushed flat black for subtle weathered effect De-chromed most of poor looking chrome plated parts except for the front bumper then painted them with Alclad Painted tires with mixture of flat black, brown and flat clear to get rid of shiny plasticky texture Maksed the body and painted engine bay flat black and trim in Mr color’s chrome silver Added coolant reservoir cap and cooling hose Masked the windshield, painted the inside and gave the outside a light polish with ceramic compound It was a pretty straightforward build without any drama - I love the older Monogram kit because they're 1/24 and they knew how to get the texture of different materials right (carpet, engine block, seats etc).
- 39 replies
-
- 13
-
-
1970 Pontiac Firebird in Lucerne blue build (1/24 Monogram/Revell)
e30lover replied to e30lover's topic in WIP: Model Cars
Once the paint dried, I started wet sanding the surface with 3000 grit sponge, 6000 grit and 8000 grit sandpapers. After that I polished with 3 tamiya compounds and hasegawa ceramic compound. I also added panel lines and finished it off with hasegawa polymer coat - not too shabby! I then masked the windows and airbrushed the trim with mr color's chrome silver. Almost ready for the final photoshoot!
-
1970 Pontiac Firebird in Lucerne blue build (1/24 Monogram/Revell)
e30lover replied to e30lover's topic in WIP: Model Cars
Thank you! It's my favourite Firebird as well. Thanks! Thank you! Thanks a lot! -
1970 Pontiac Firebird in Lucerne blue build (1/24 Monogram/Revell)
e30lover replied to e30lover's topic in WIP: Model Cars
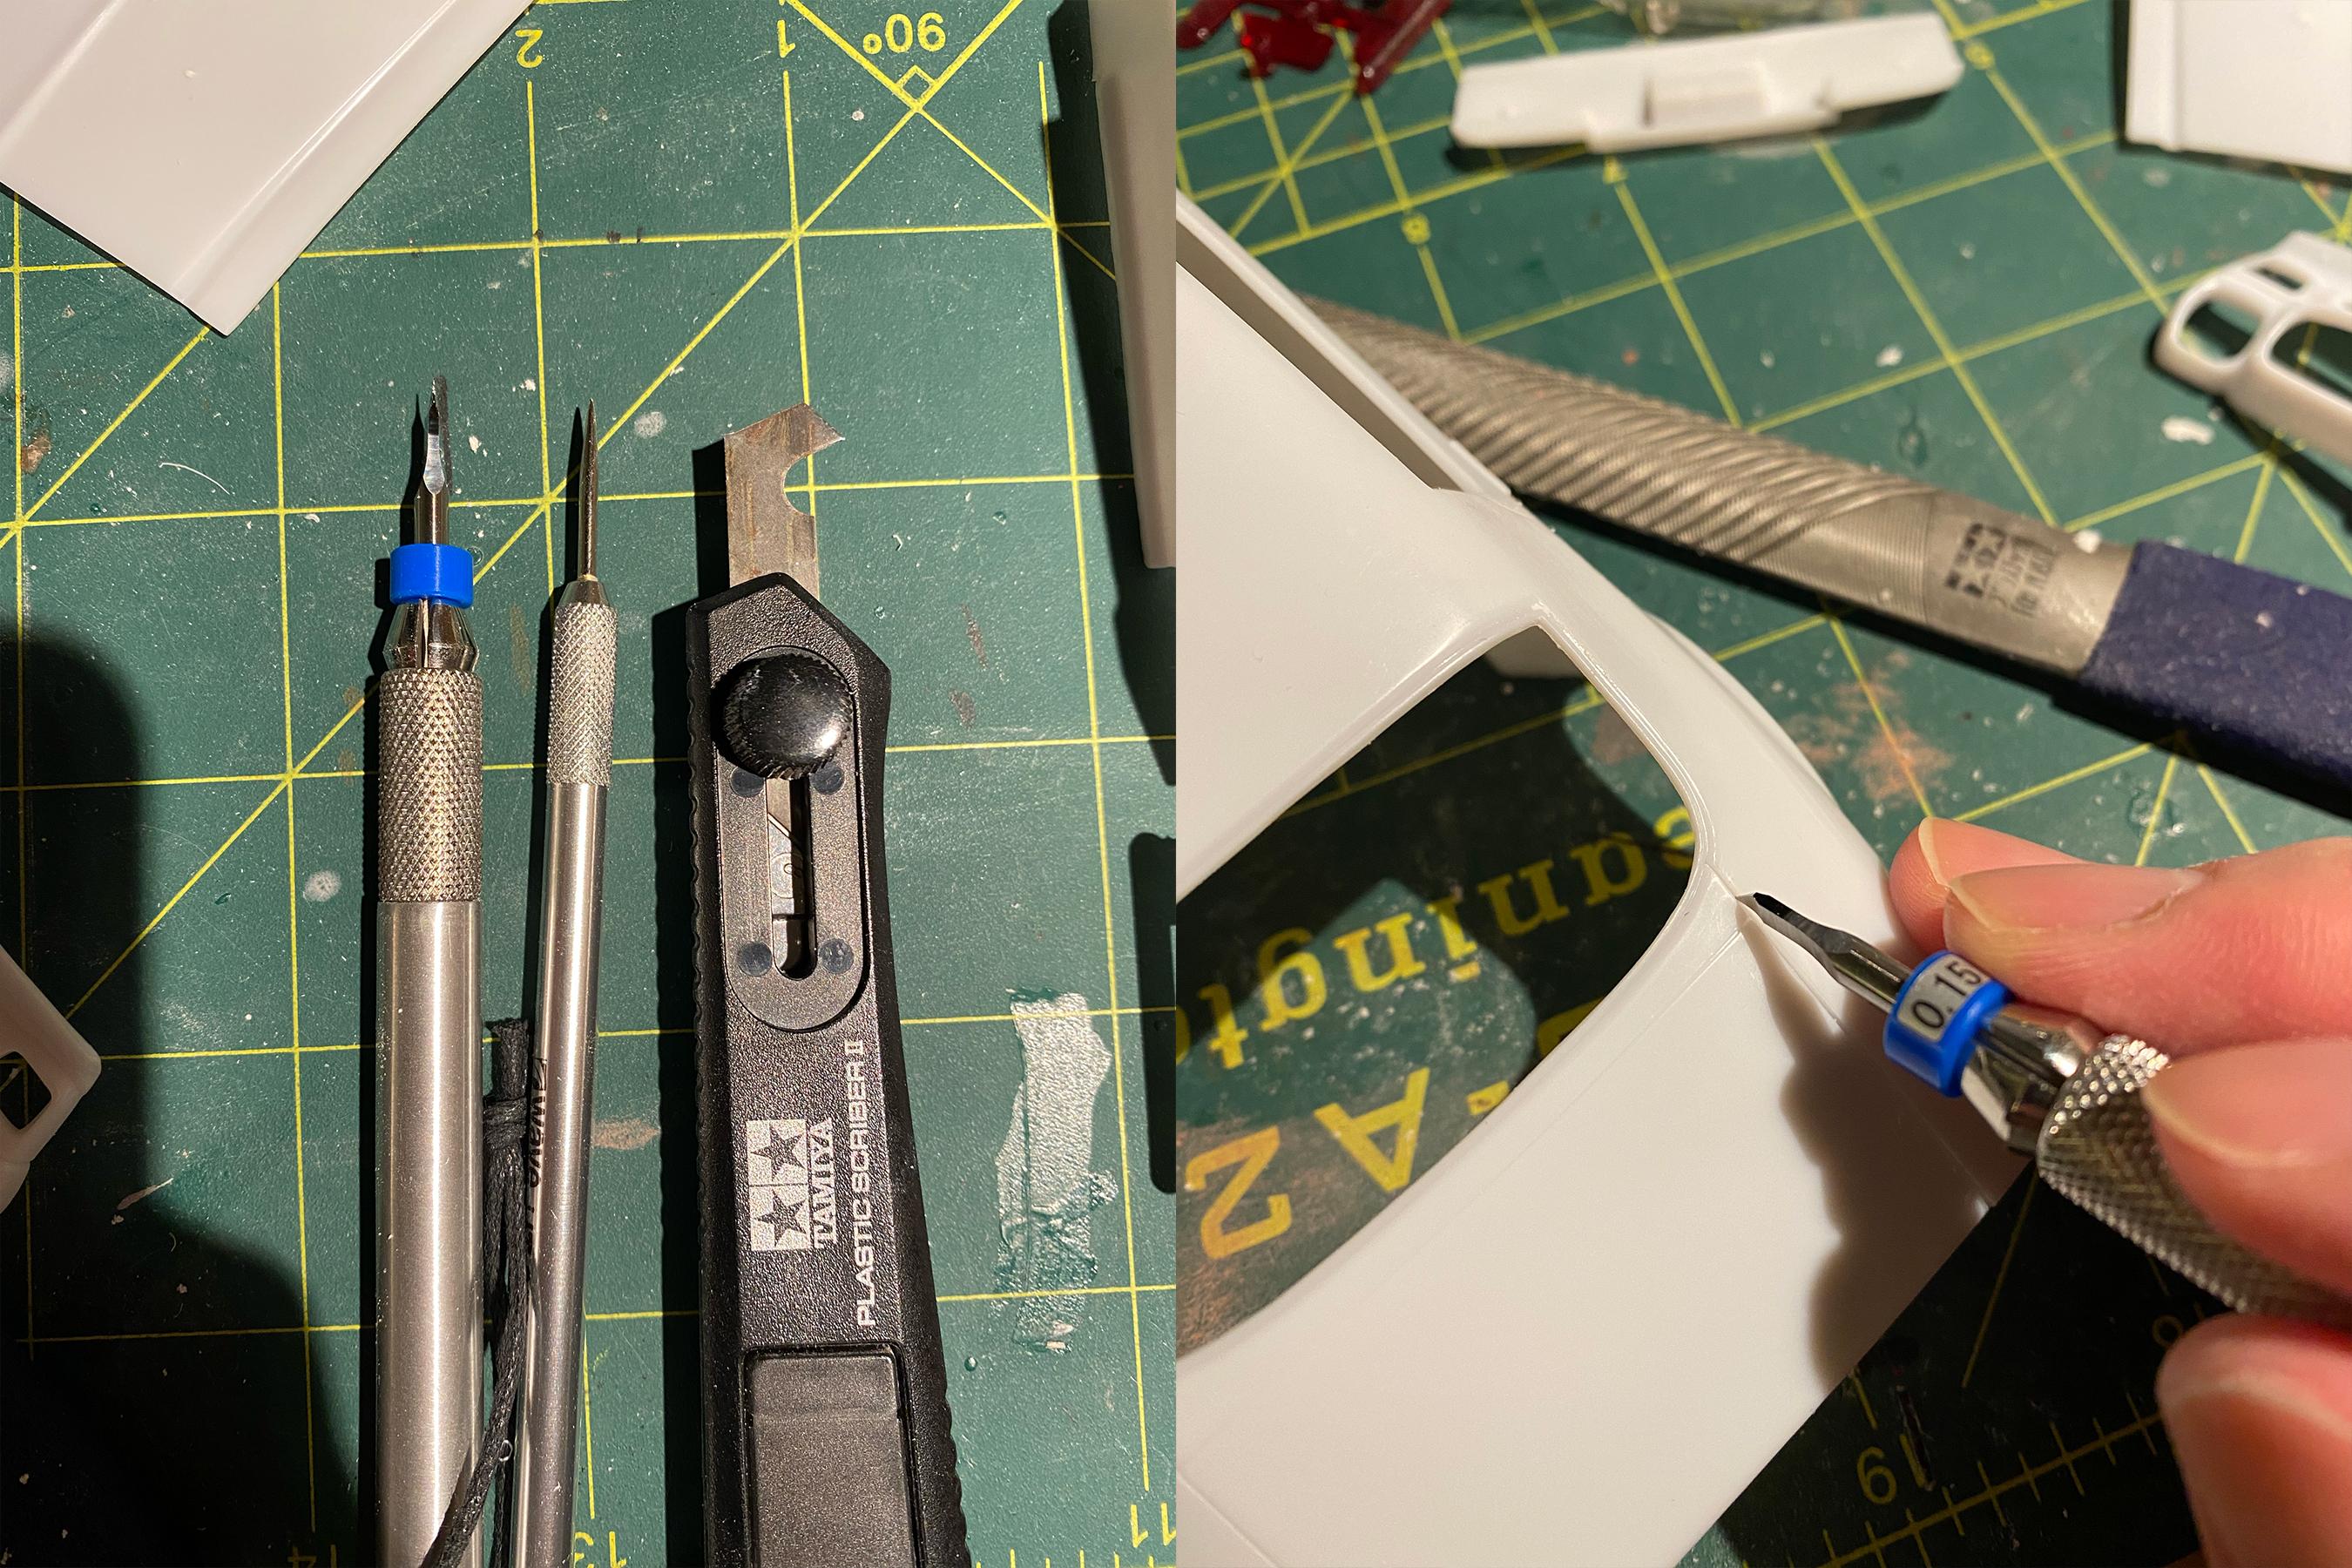
Thank you! I love high revving engines 🙏 Thanks a lot! Thank you! Thank you! It's Funtec line engraving tool - tips/blades are interchangeable and it comes with a nice case for the tip! The Fireball's wheel kit includes the masking decals for the center rim and I did buy tyres but I ended up using stock tyres that came with the kit! 100% - I use a lot of aftermarket wheels for my build and Fireball's products are top notch. Thank you! -
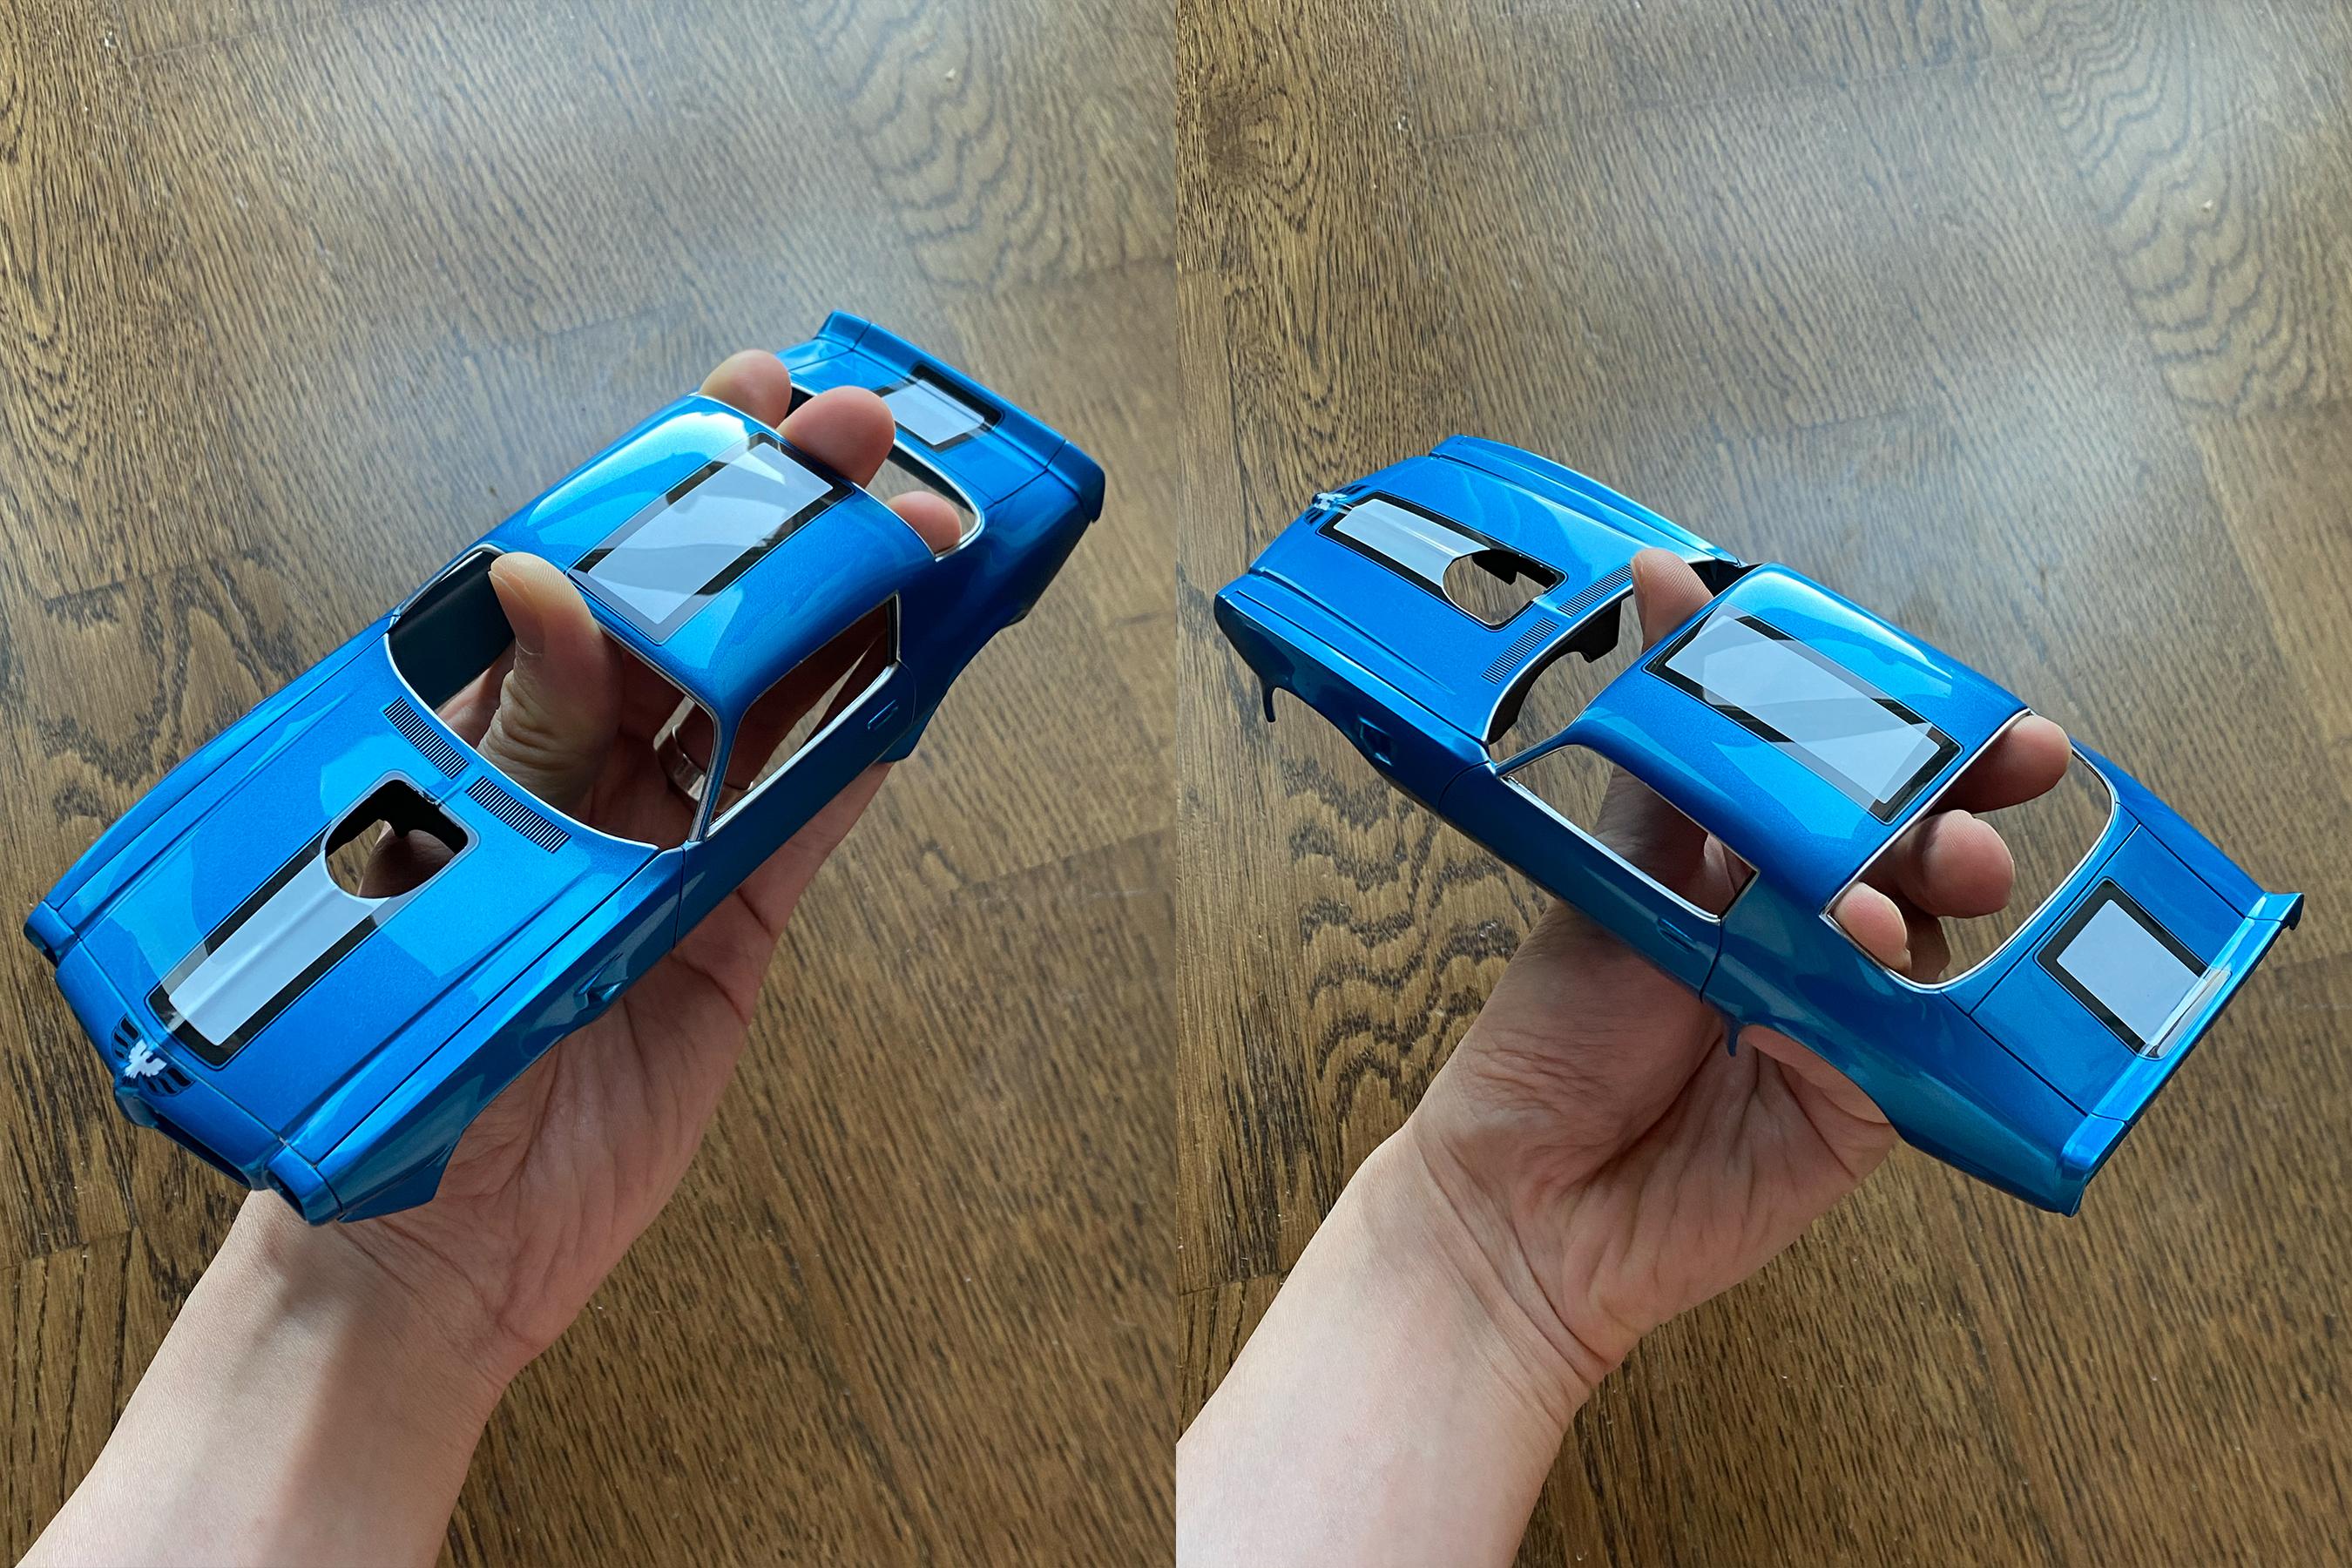
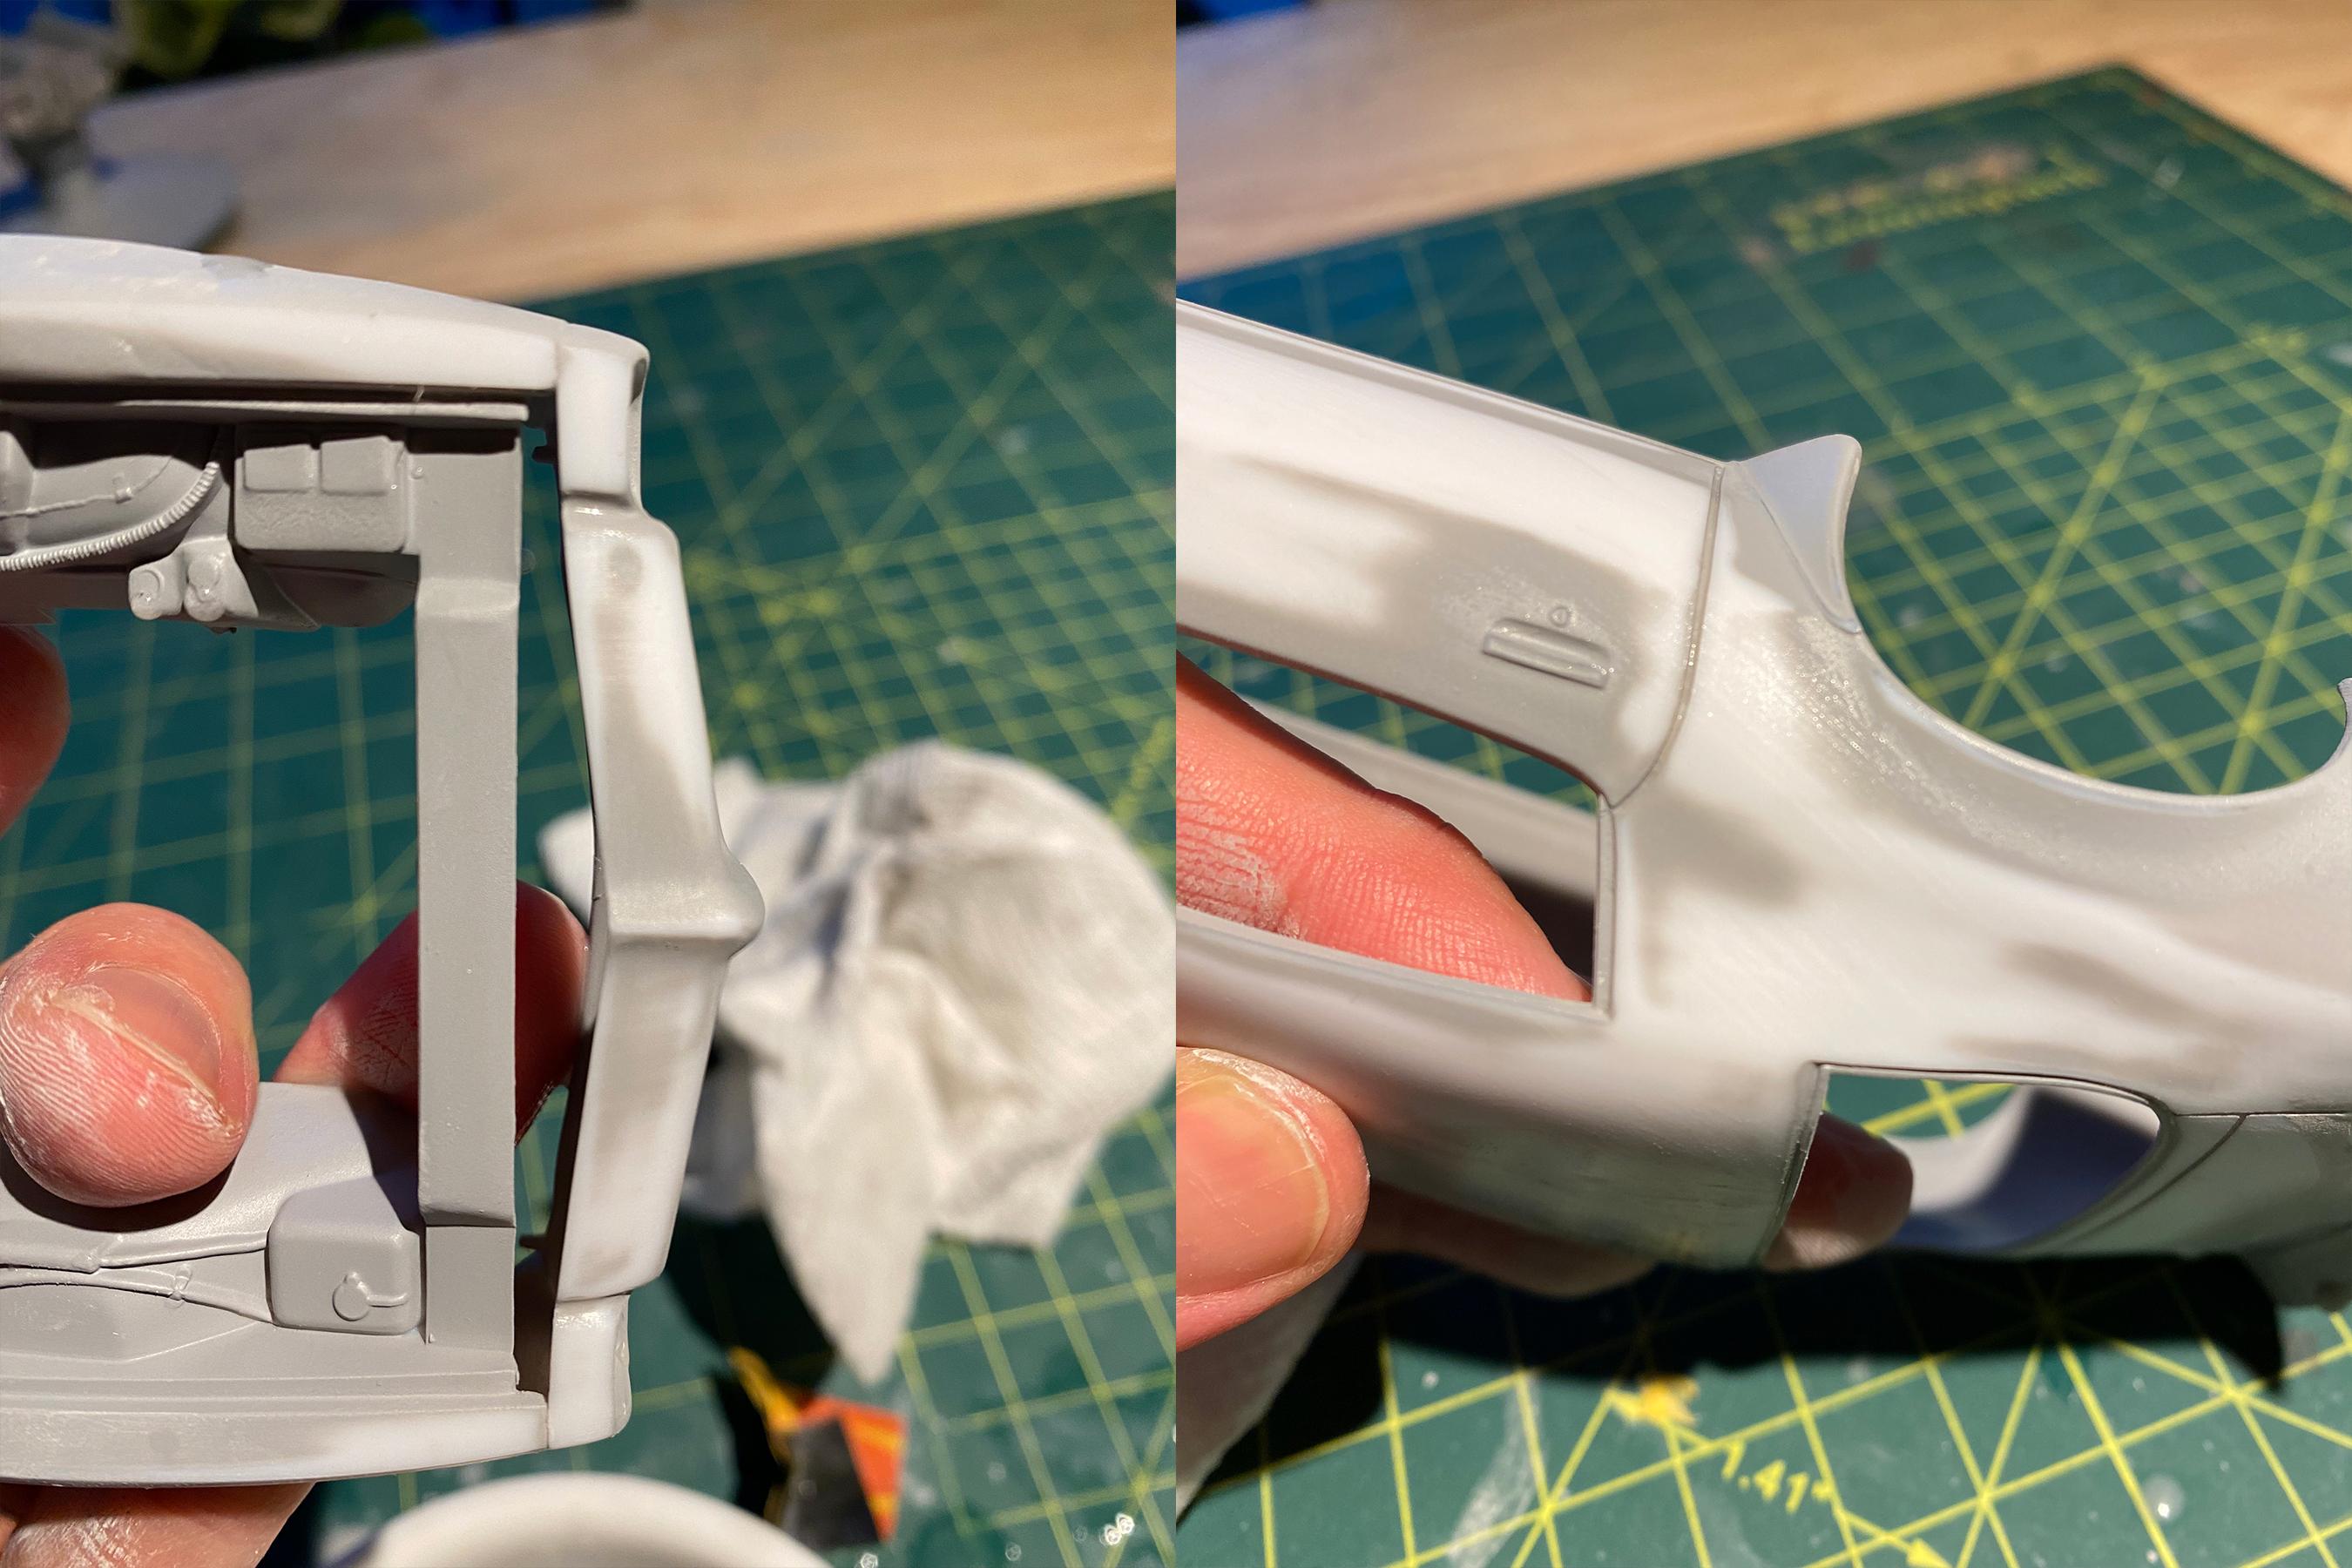
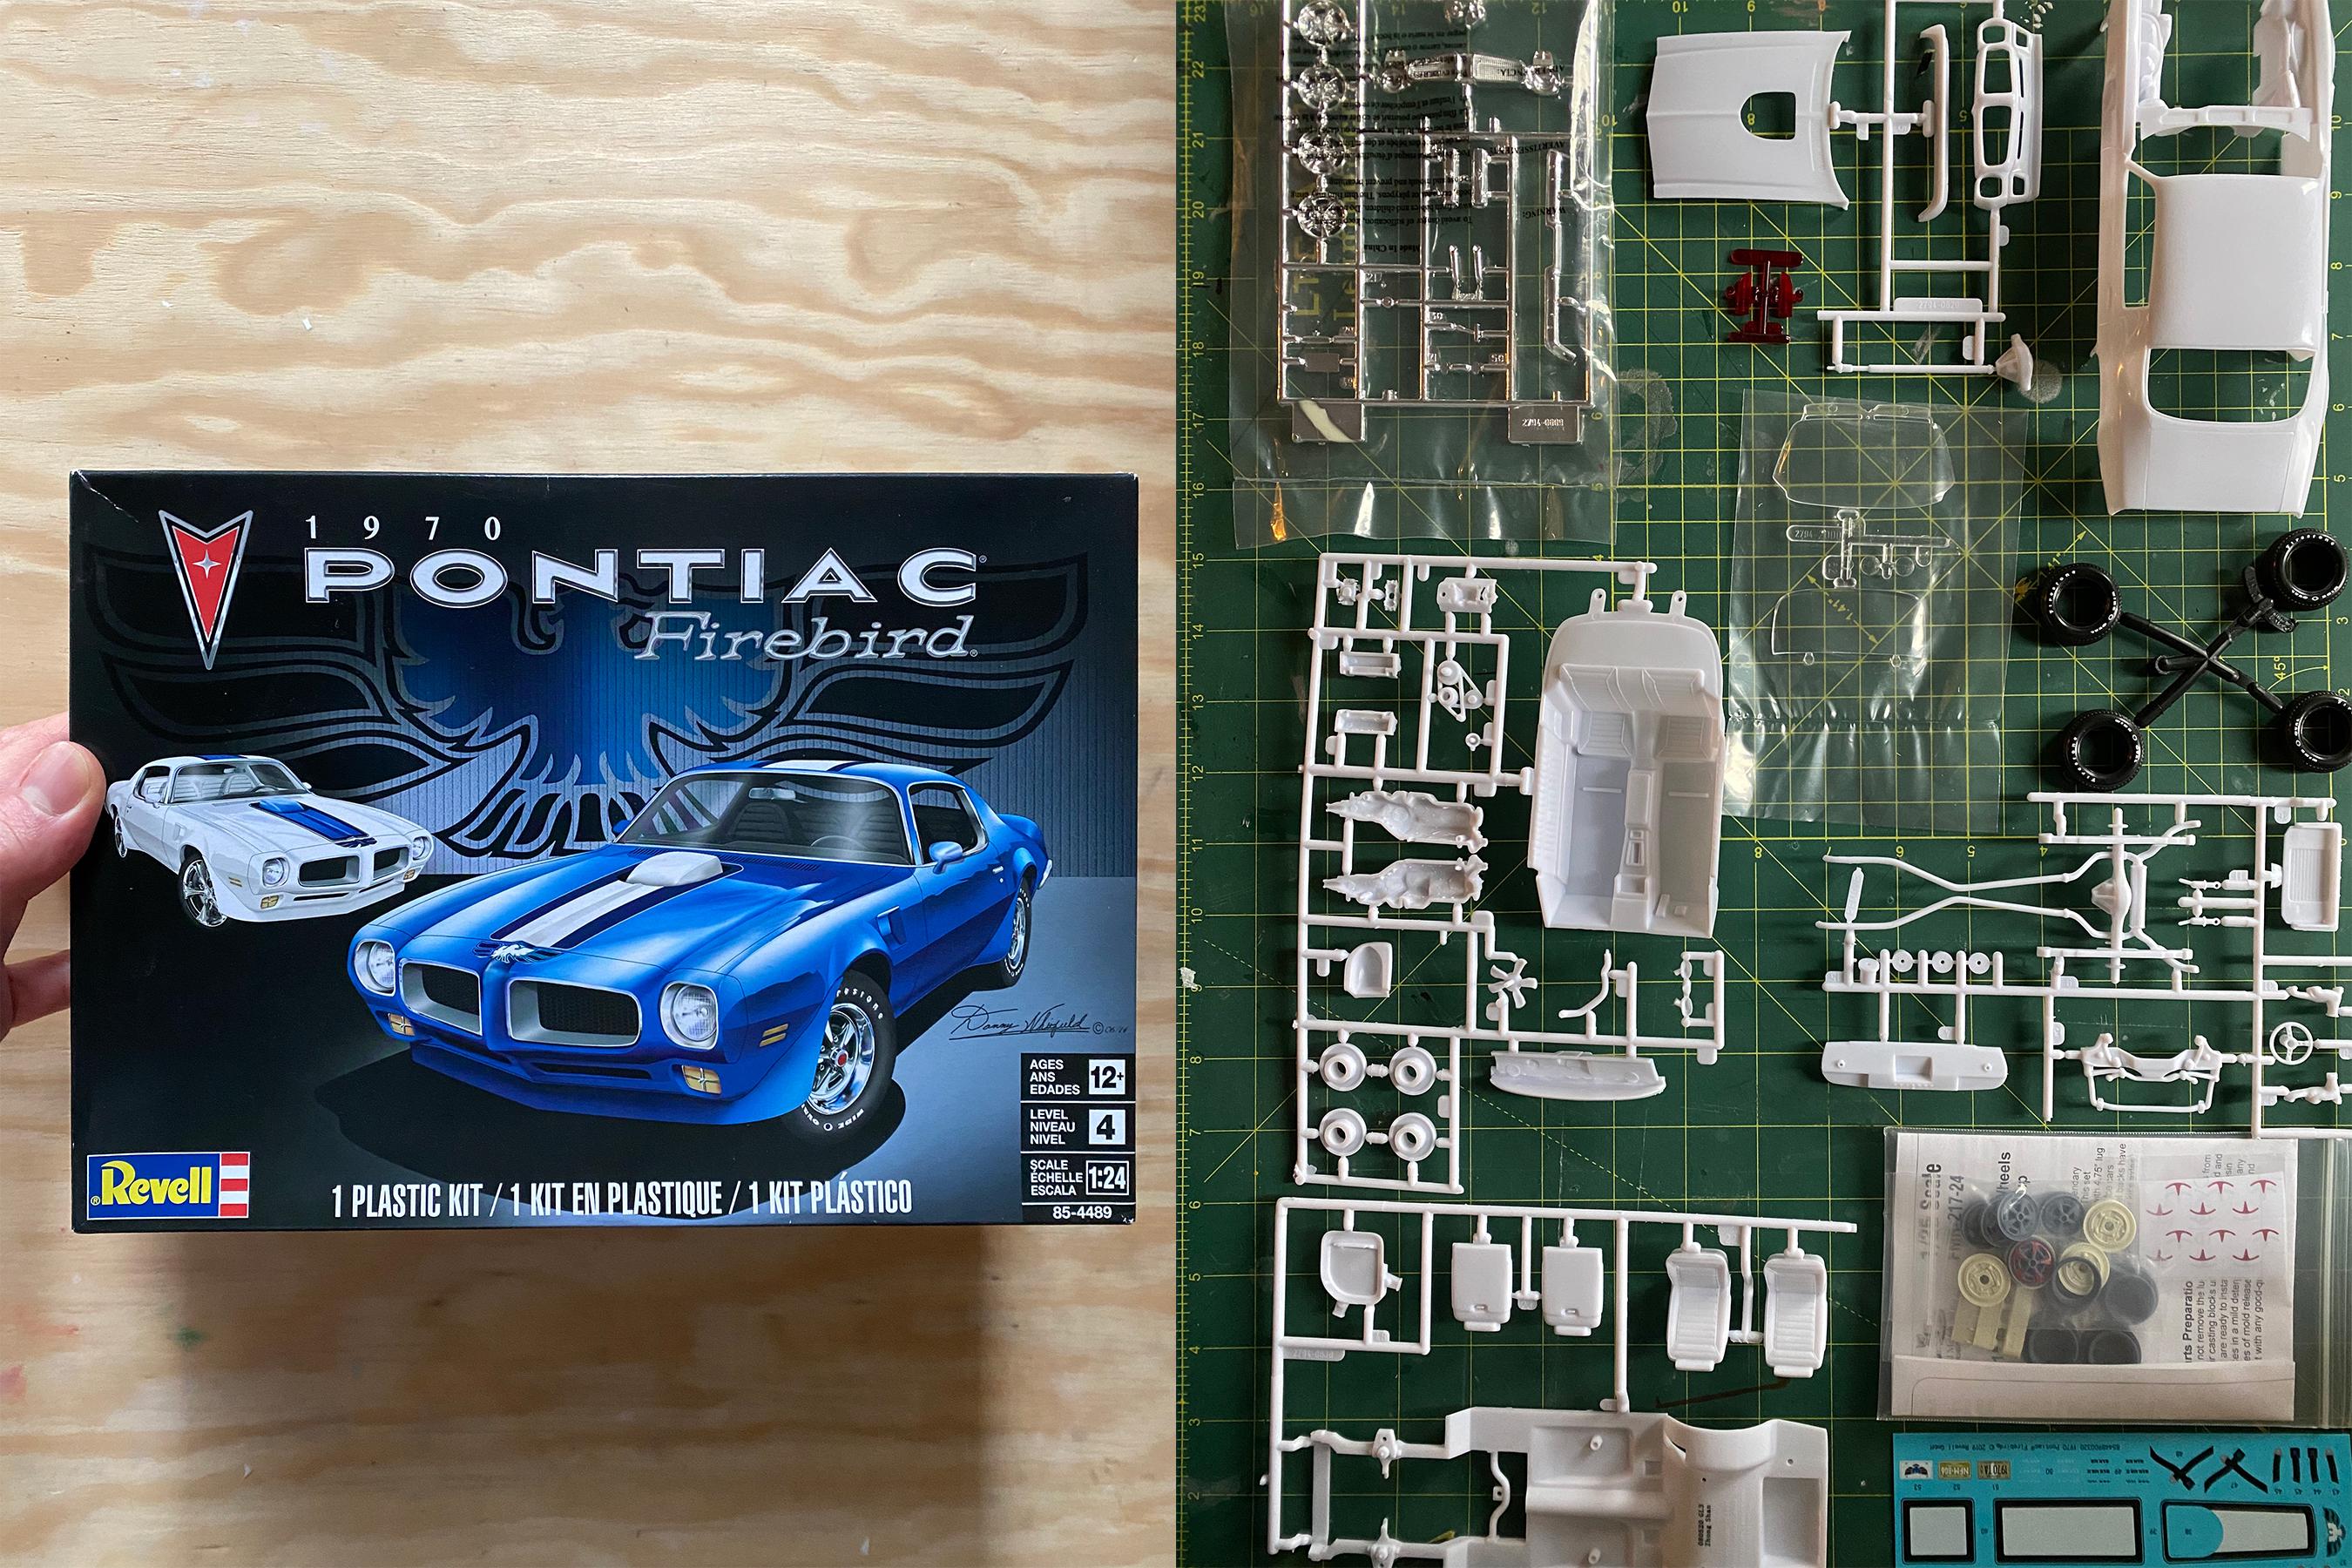
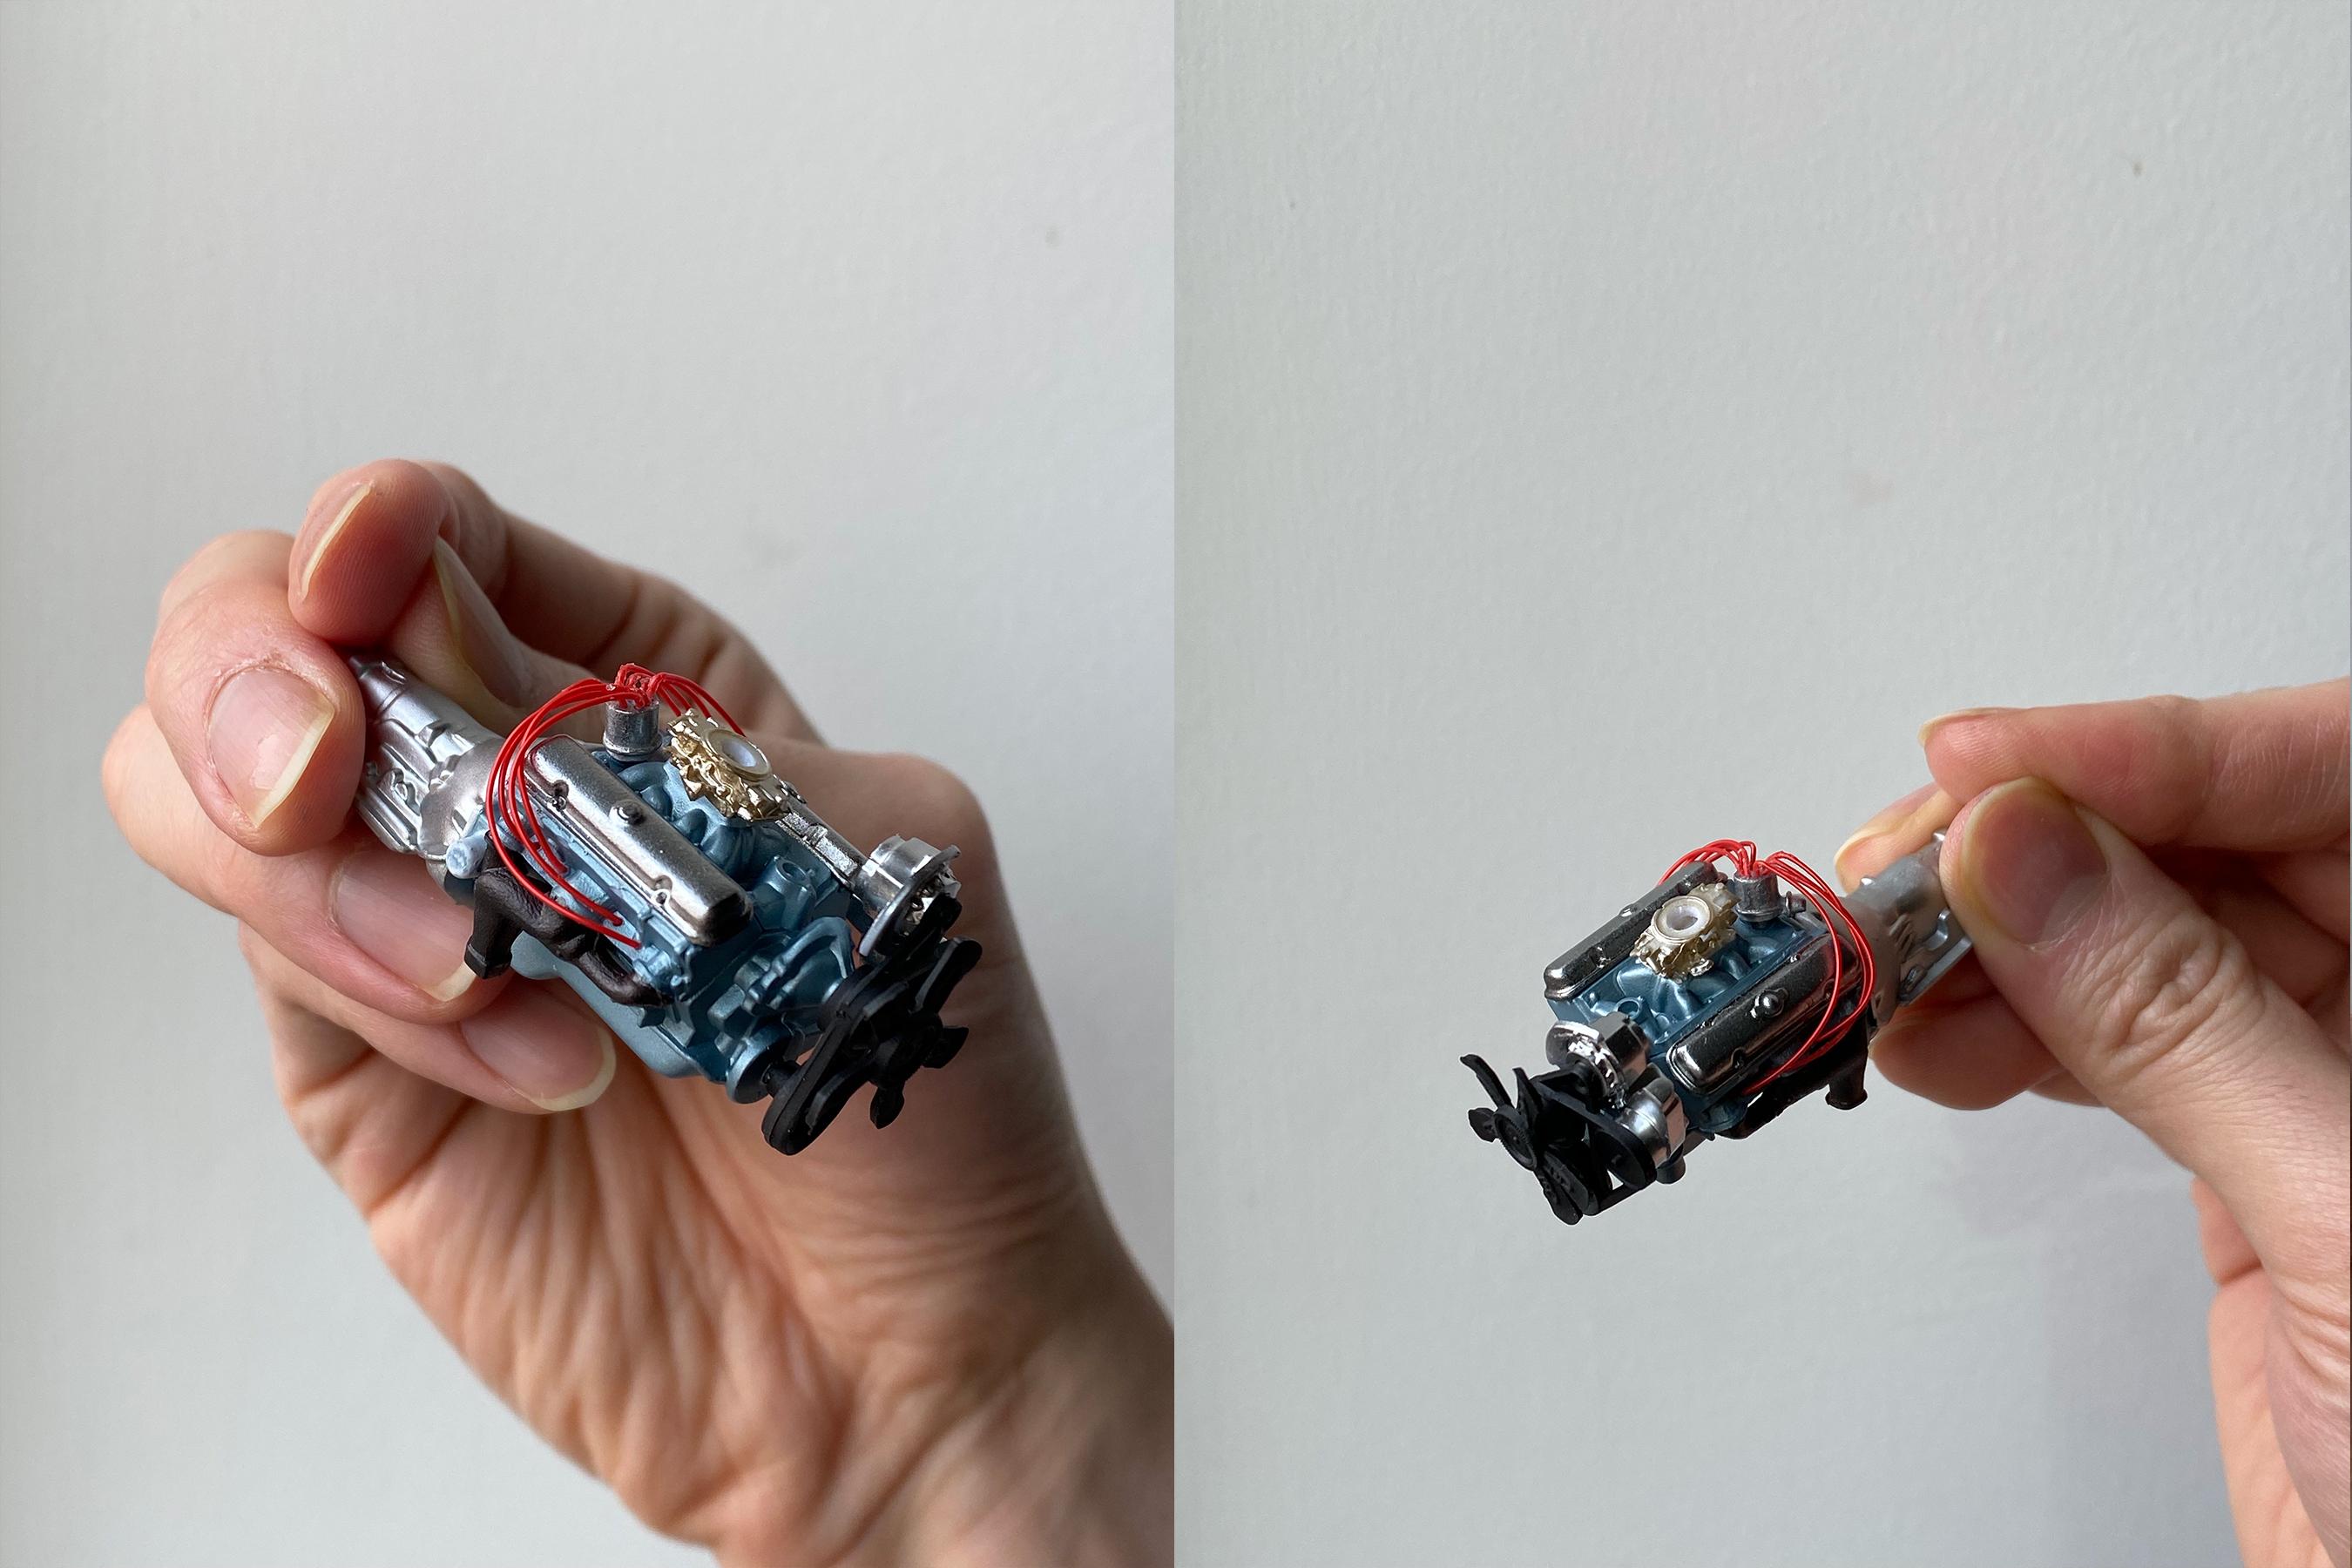
Hi all, My latest build is Revell/Monogram’s 1/24 Pontiac Firebird. It appears almost identical to 70’ Trans Am but unfortunately they got rid of the T/A decal in this release. For the build concept I wanted to keep it mostly stock - since the biggest downside of this kit is kit rims so I got the 15” Rallye II wheels from Fireball Modelworks. First I scribed all the panel lines, fixed hood gap and sanded the whole body with 600 grit. I then added 1000 grit surfacer to find out any other places I need to fix - here are some closeups that revealed funky spots. I wet sanded with 1000 grit to fix all the uneven surfaces especially around panel lines which will create bumpy surface when I lay the paint. Below pics are where I evened out all the uneven surfaces between the body panel. I laid 1500 grit surfacer and lightly sanded with 1500 grit to smooth out remaining uneven spots and deeper scratches. This will give me a clean surface to lay the base coat. To simulate Lucerne blue, I mixed GX metallic blue and metallic green and added small amount of silver to lighten up the colour. I laid 2 base coat (1 dry 1 wet) and applied kit decal. Once I applied the kit decal I laid clear coat, let it dry for few days and wet sanded with 2000 grit to even out the surface - I did that step twice and applied the final third clear coat. While paint is drying I started working on the wheel. I painted the rim in silver, applied masking decal and painted with mixture of grey, silver and black. I painted the lug nuts, center caps and trim rings with gloss black then painted them with Alclad chrome. I also lightly painted the tires with mixture of flat black, grey and flat clear to get the right sheen and texture. I mixed flat blue, little bit of green and flat black to get the darker shade of blue for carpet, masked off the carpet and painted all the interior with lighter shade of blue. As for the underbody, I sprayed Tamiya dull red, masked off the underpanel and painted frame rail in flat black. I also added some light weathering effect with airbrush. I screwed up the dashboard a bit b/c the kit comes with molded gauges and one big decal for the whole cluster trim - decal seemed pretty forgiving but in retrospect I should’ve masked and painted the trim, drill out wholes for all the gauges then apply decals on acetate. I painted the engine (silver first, masked off transmission and painted in light metallic blue), de-chromed all the chrome parts in bleach, sanded them, pained them in gloss black and applied alclad chrome. The other additions are aftermarket distributor and ignition wires.
-
That's amazing. Great idea creating a realistic scale "floor". I need to get on that! Thank you for sharing your tips and tricks!
-
Revell 1969 Chevy Nova Yenko in 1/25 Scale. Frost Green "Sleeper".
e30lover replied to Dragonhawk1066's topic in Model Cars
Green on green is my favourite combo. Good tires and wheels really elevate the build. It looks amazing! -
stunning build and equally stunning photography! I'd love to learn more about your setup.
-
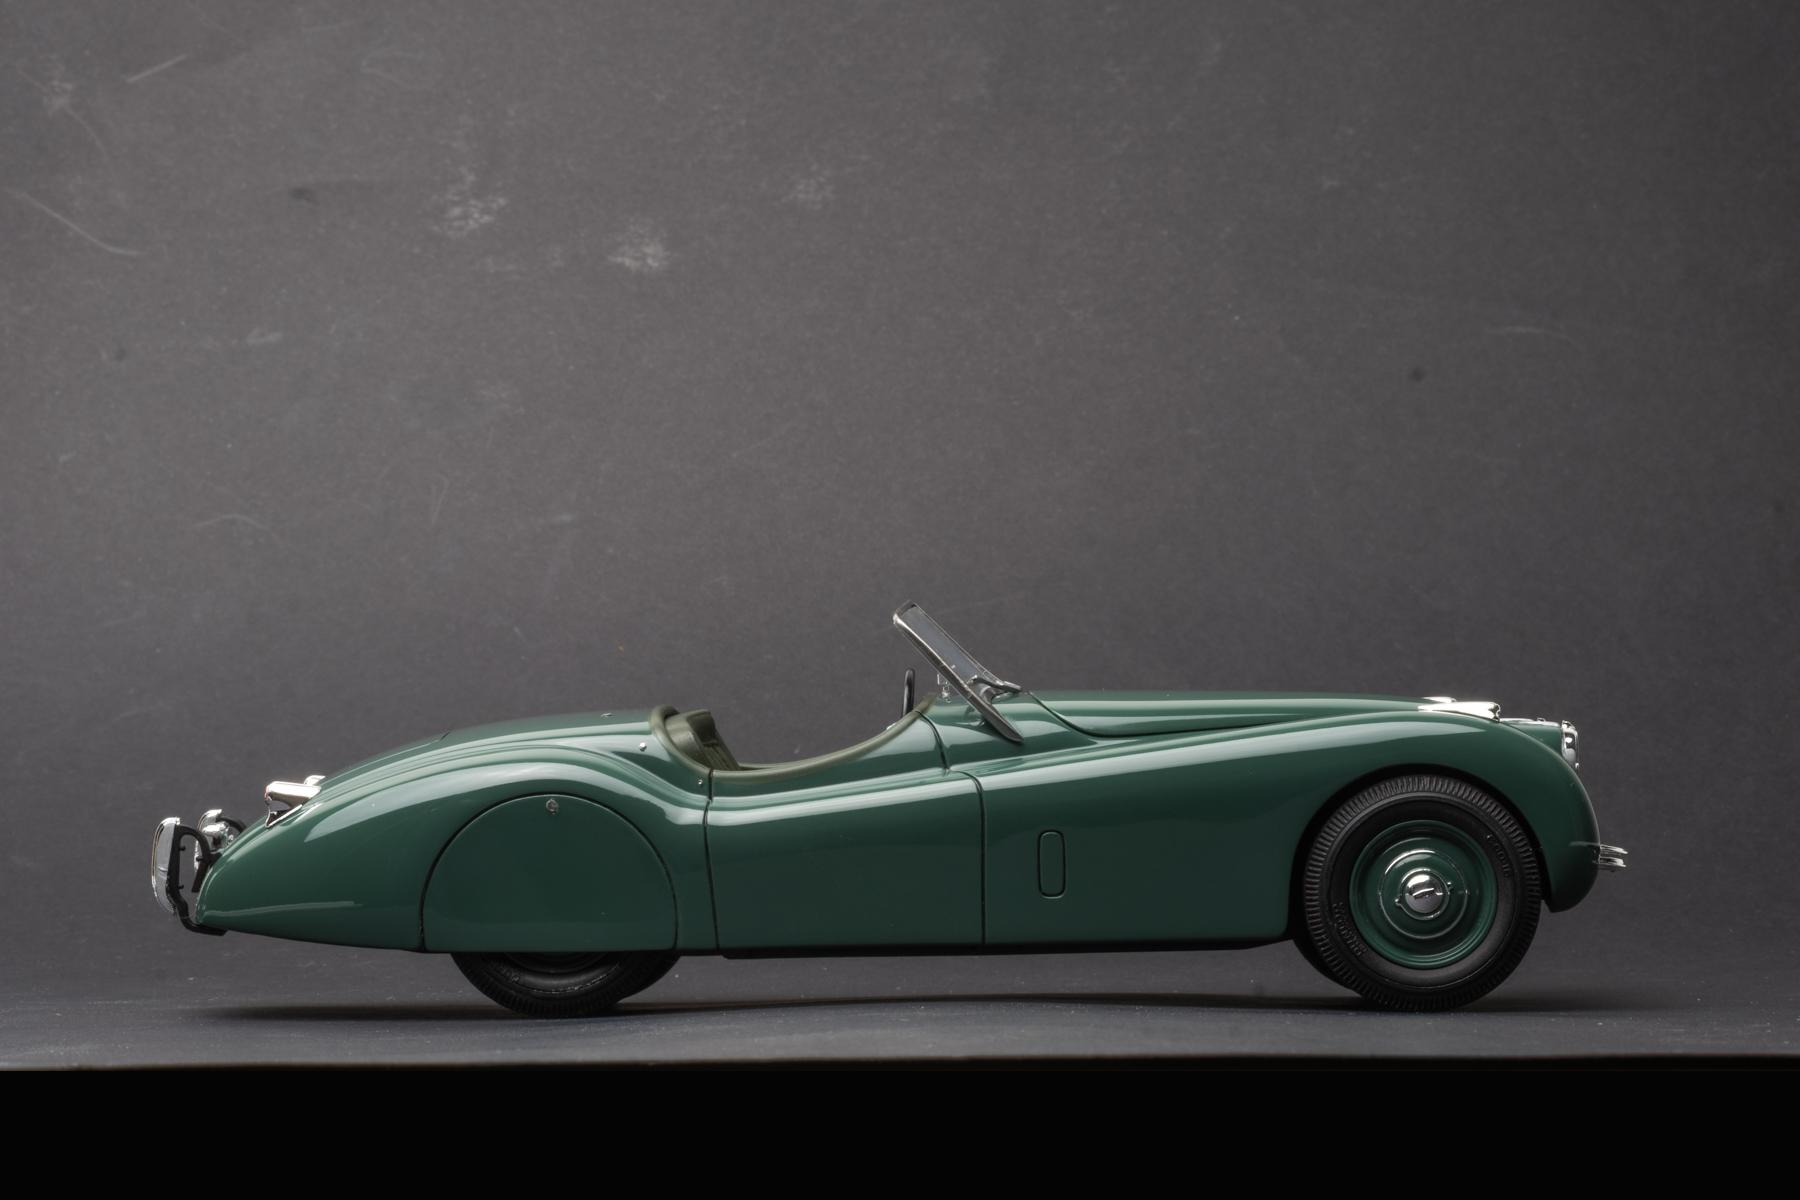
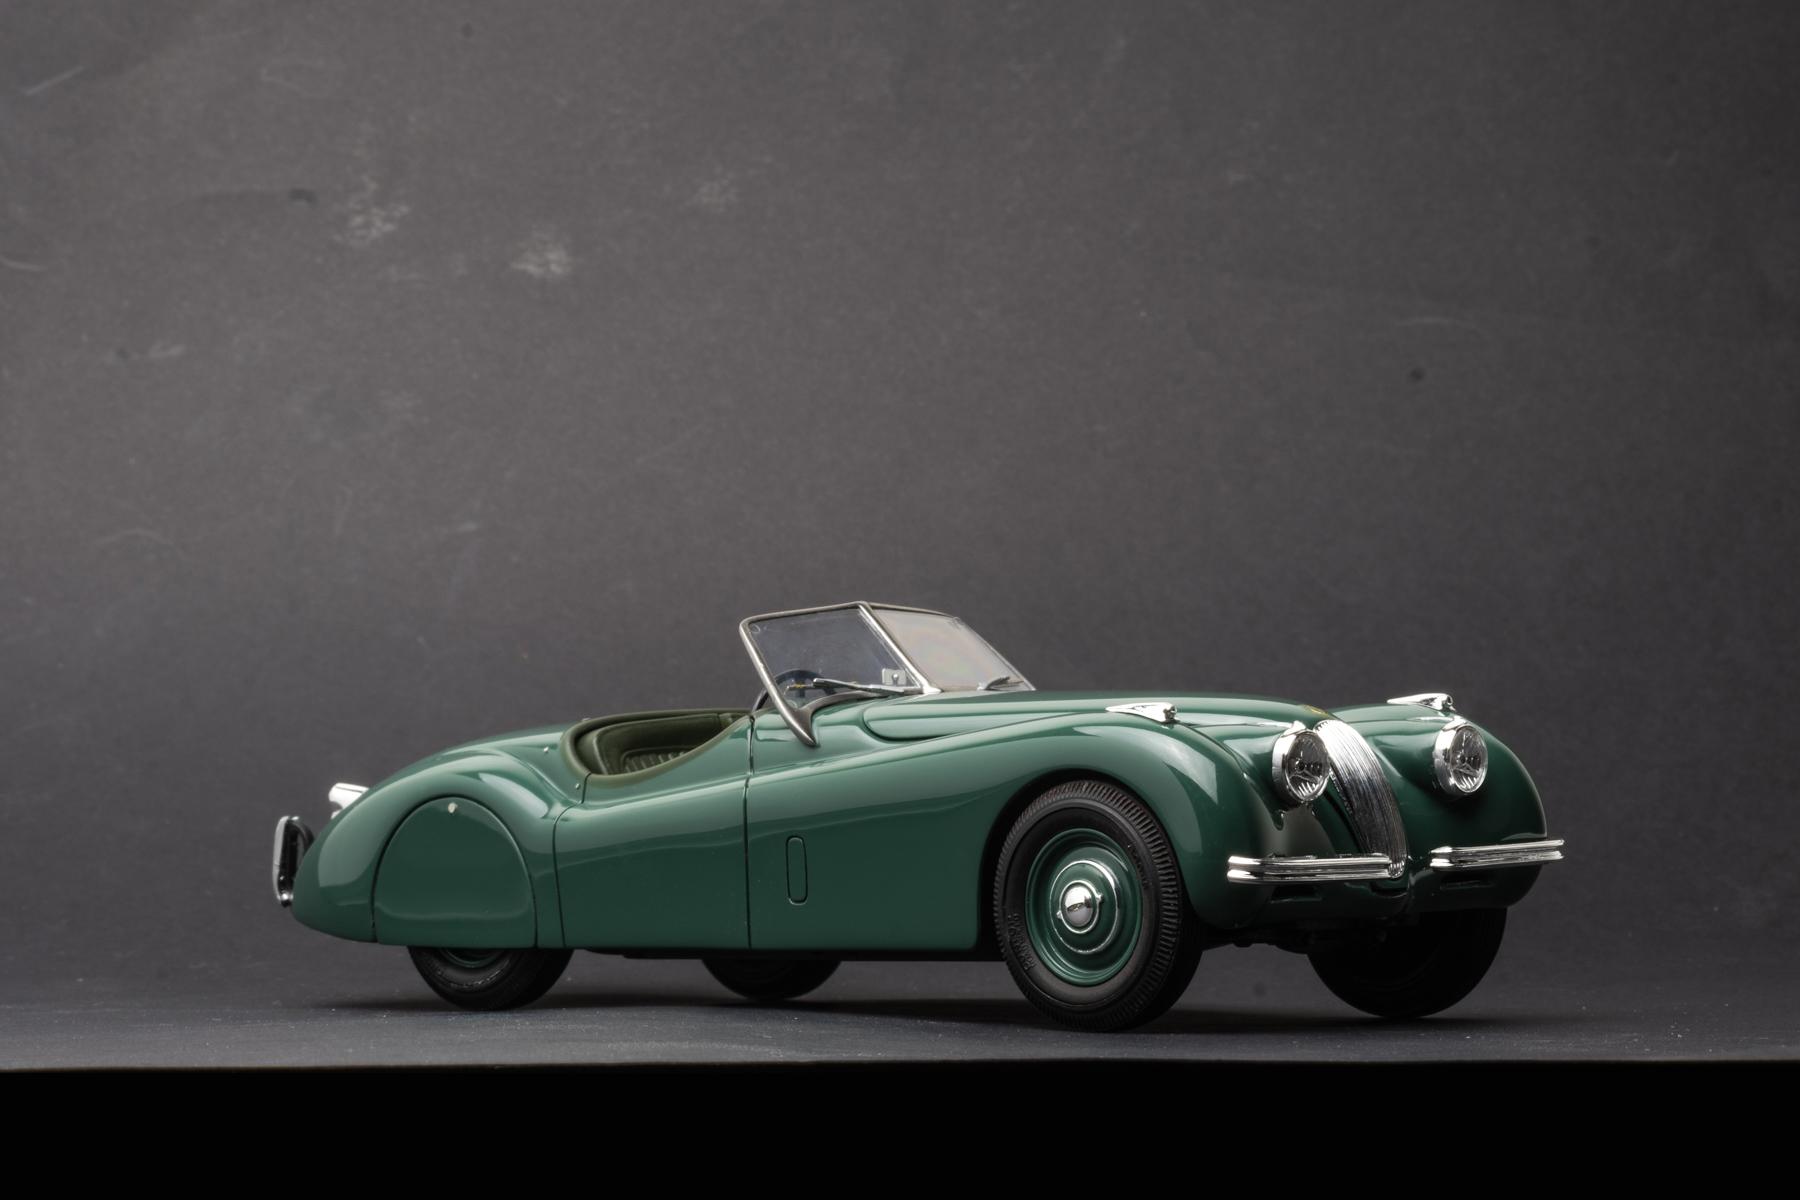
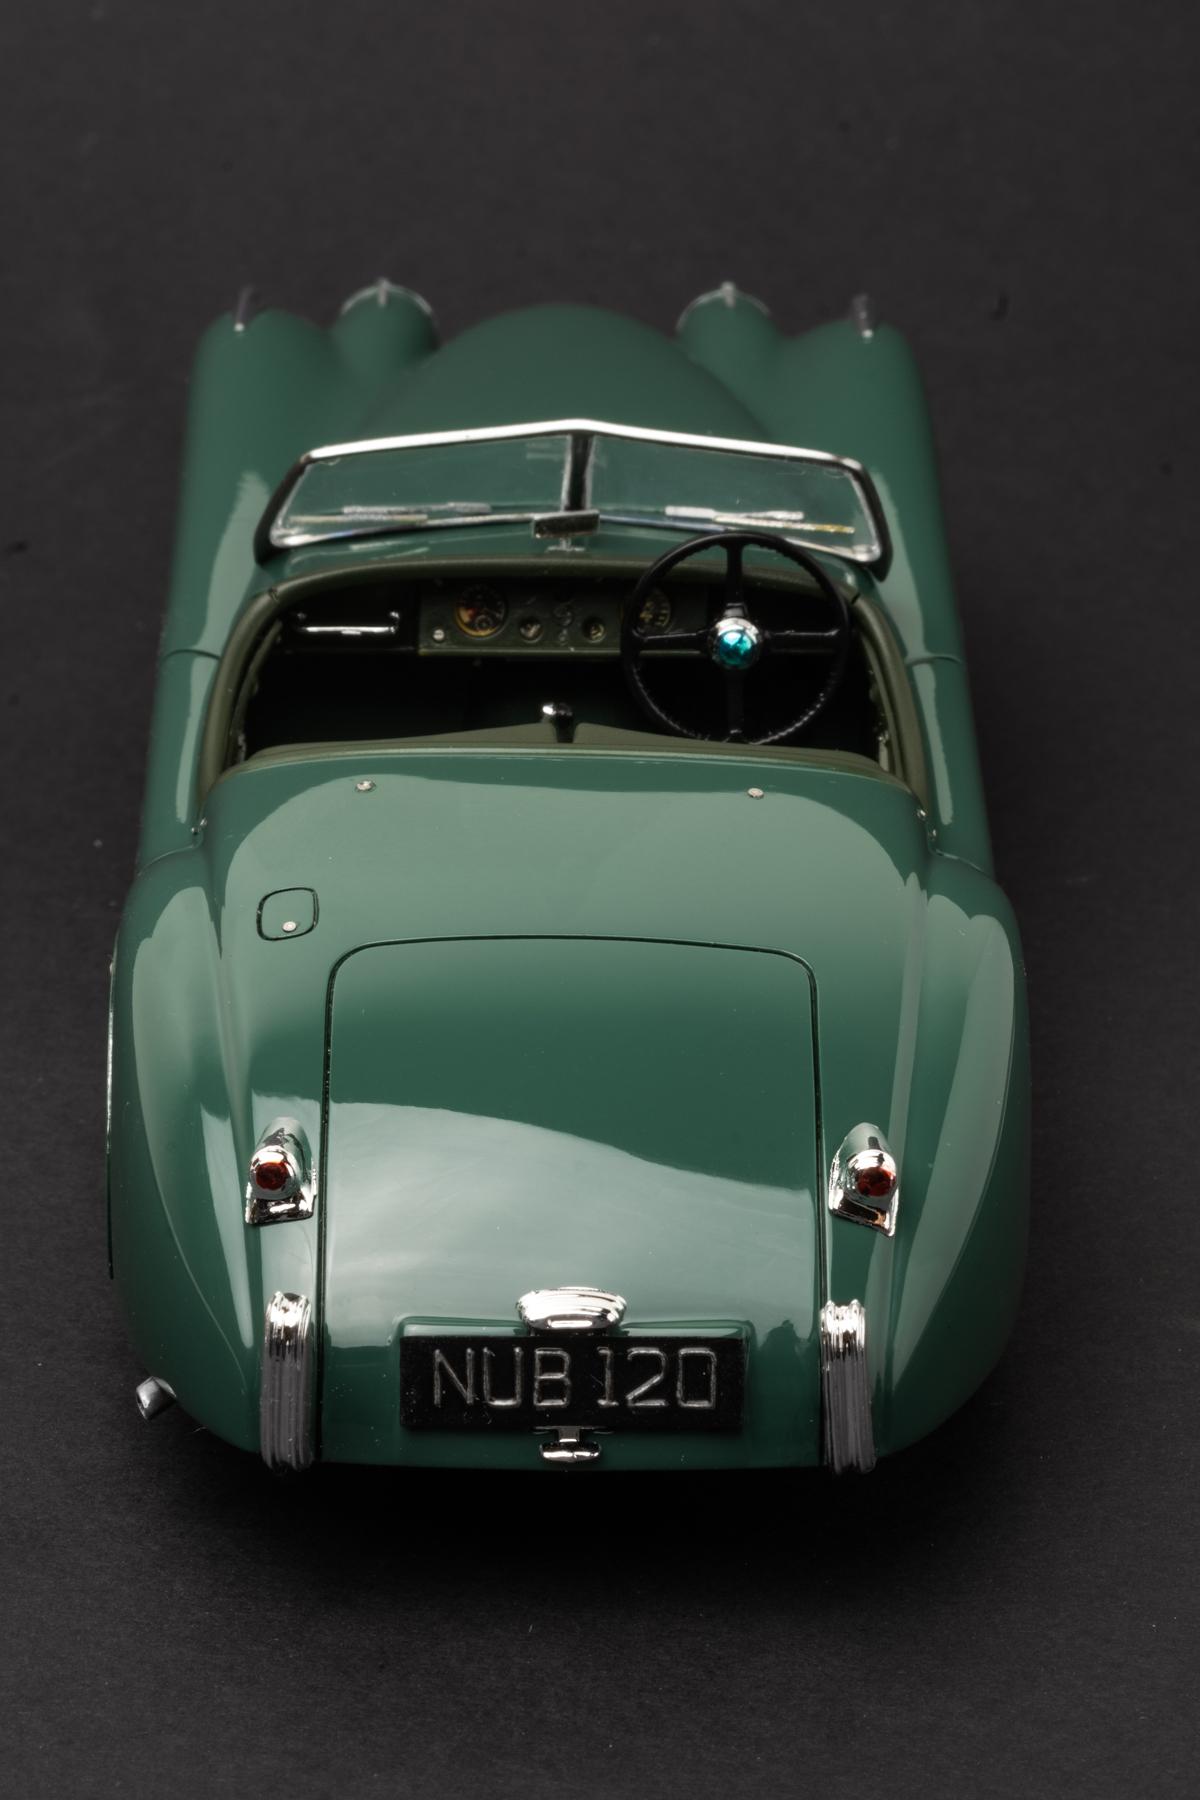
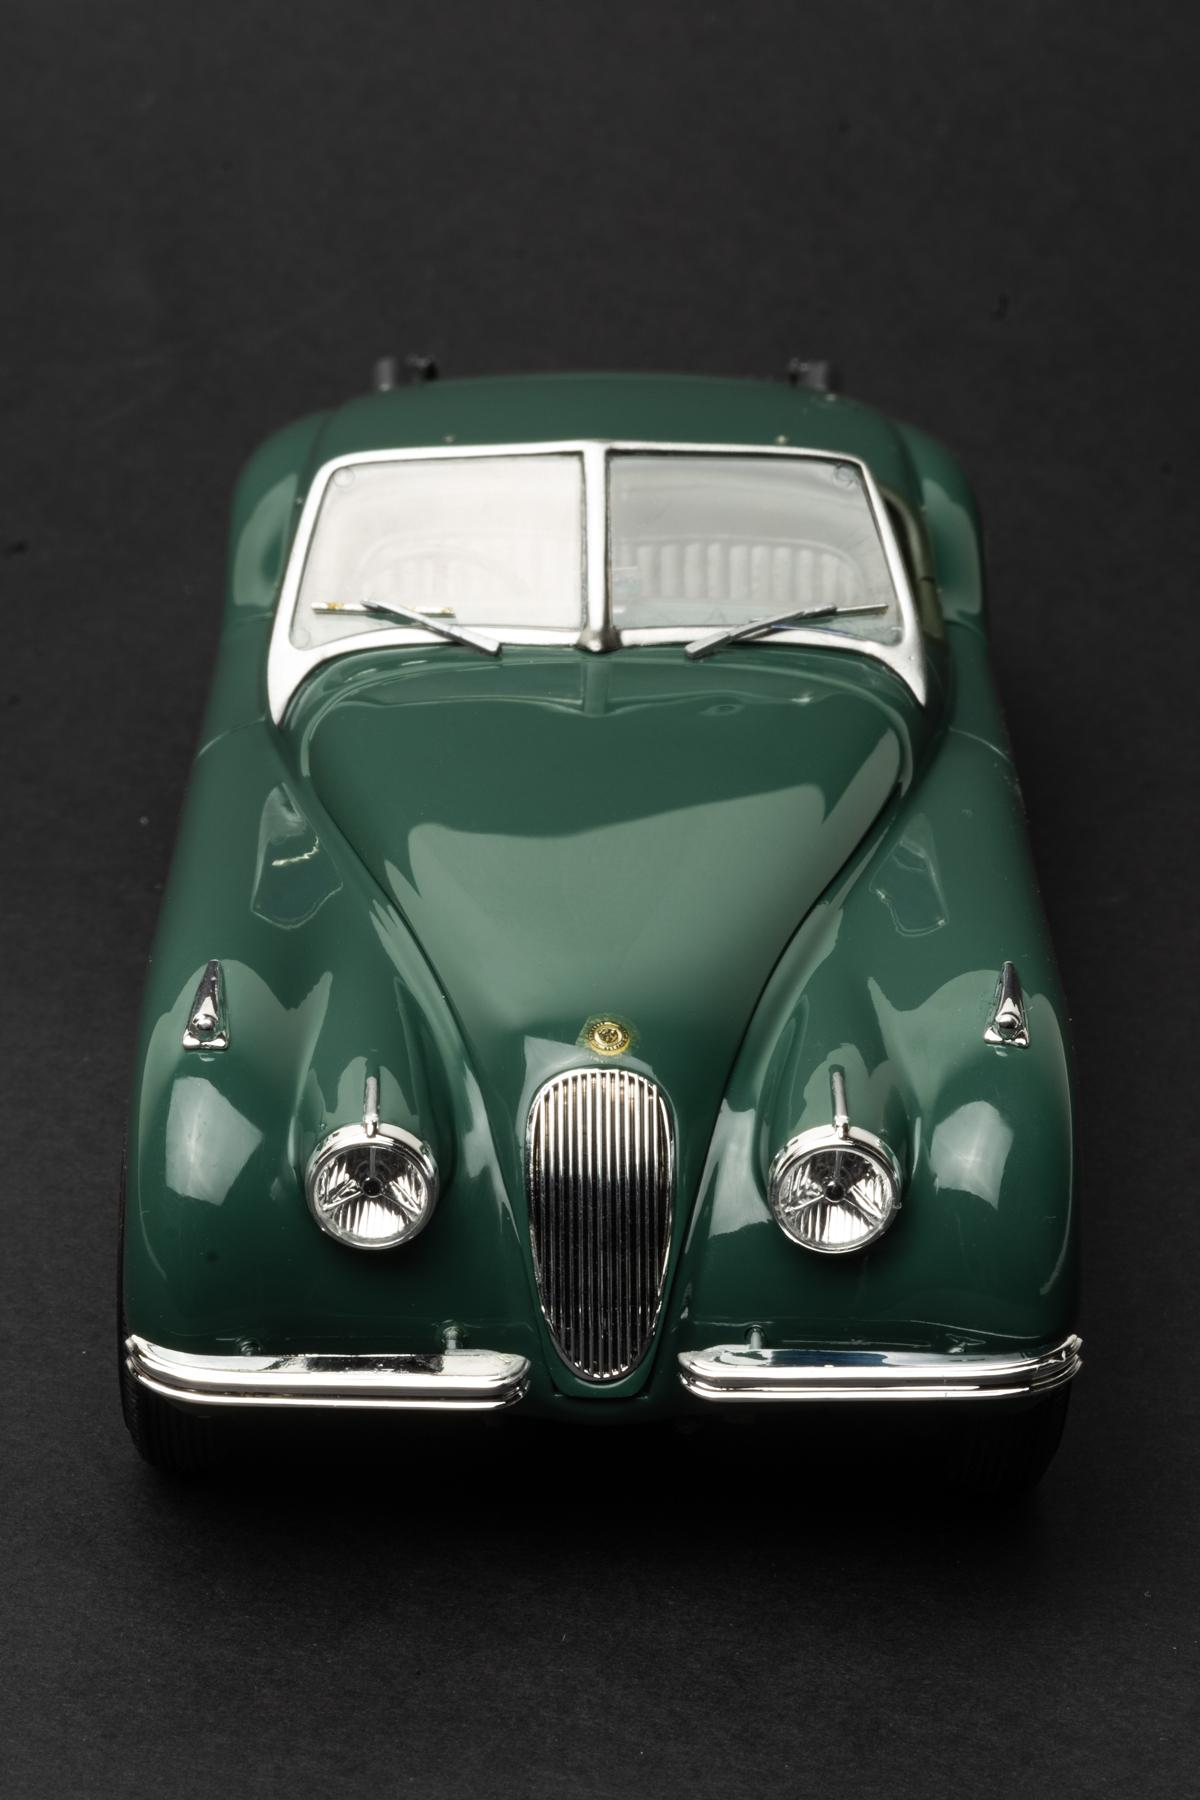
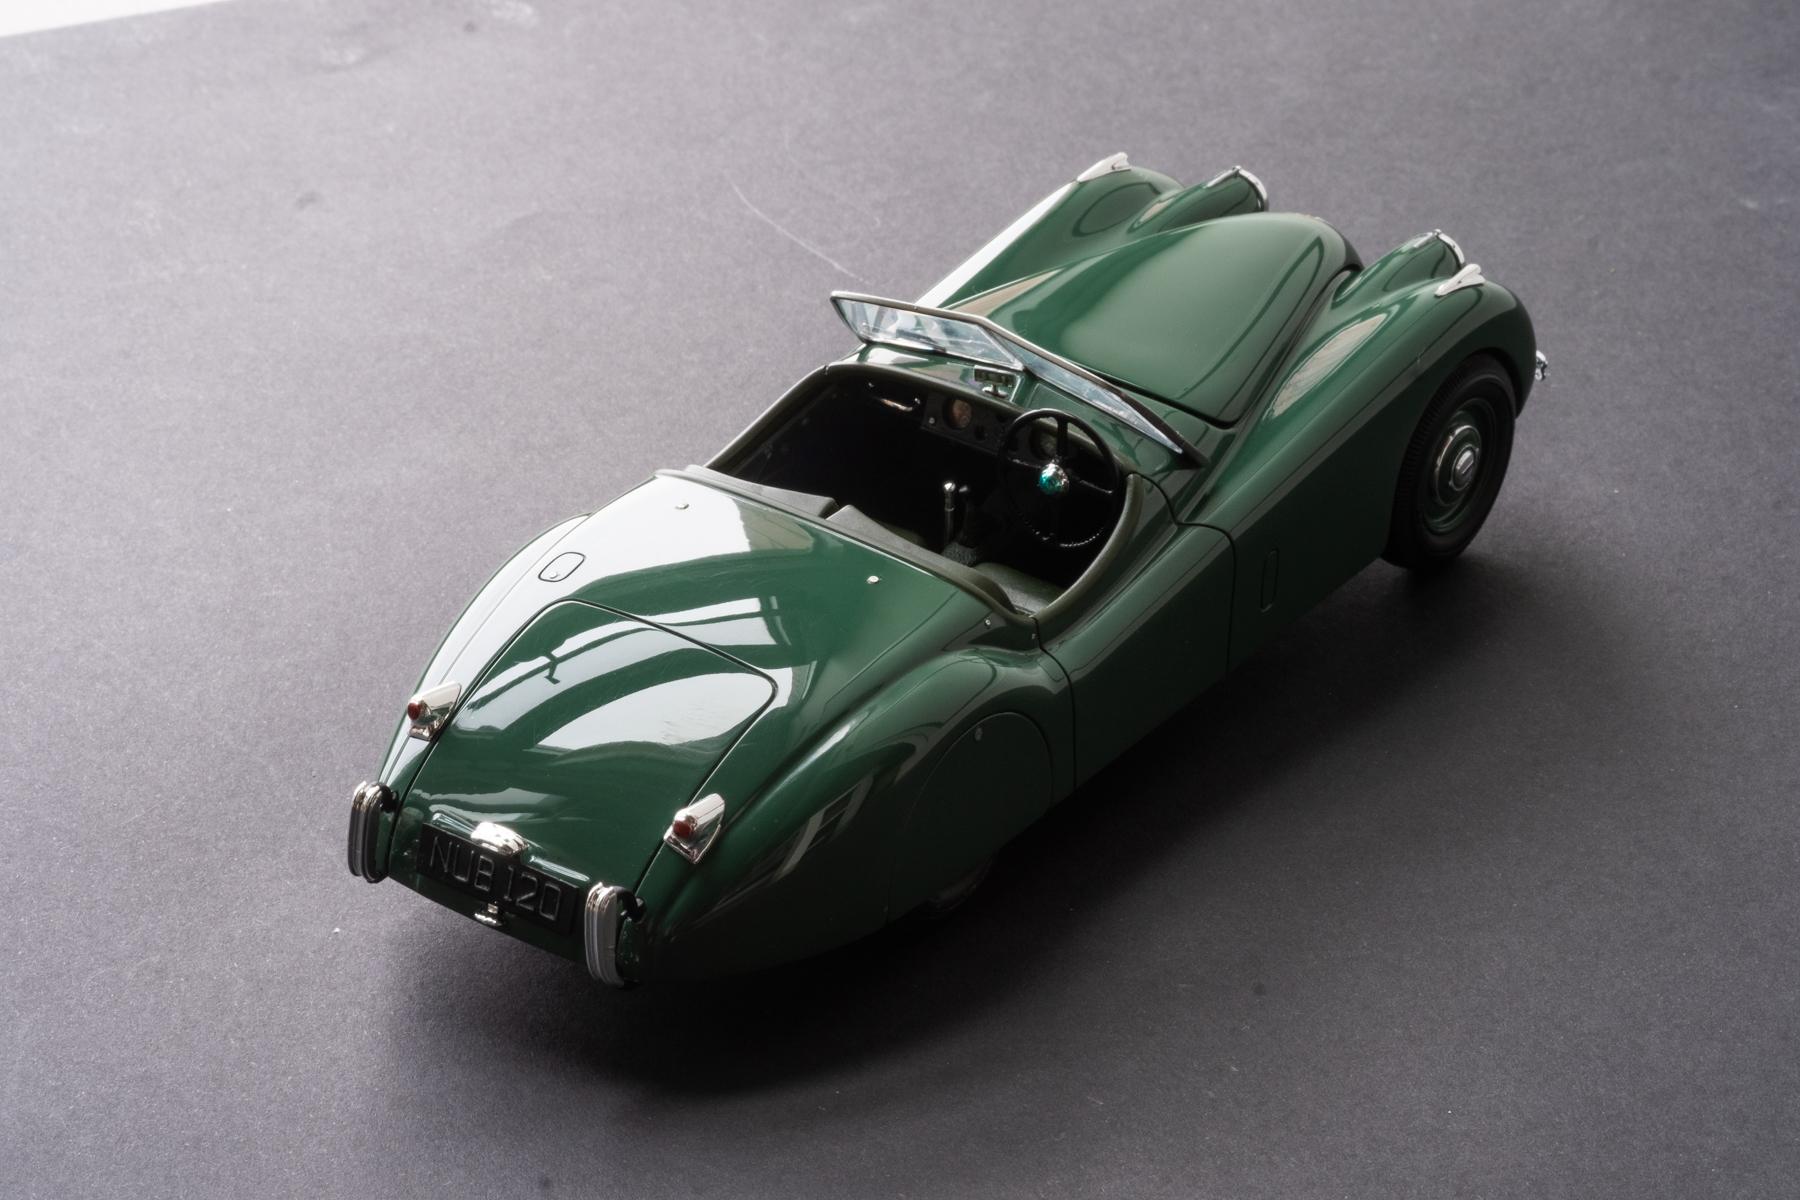
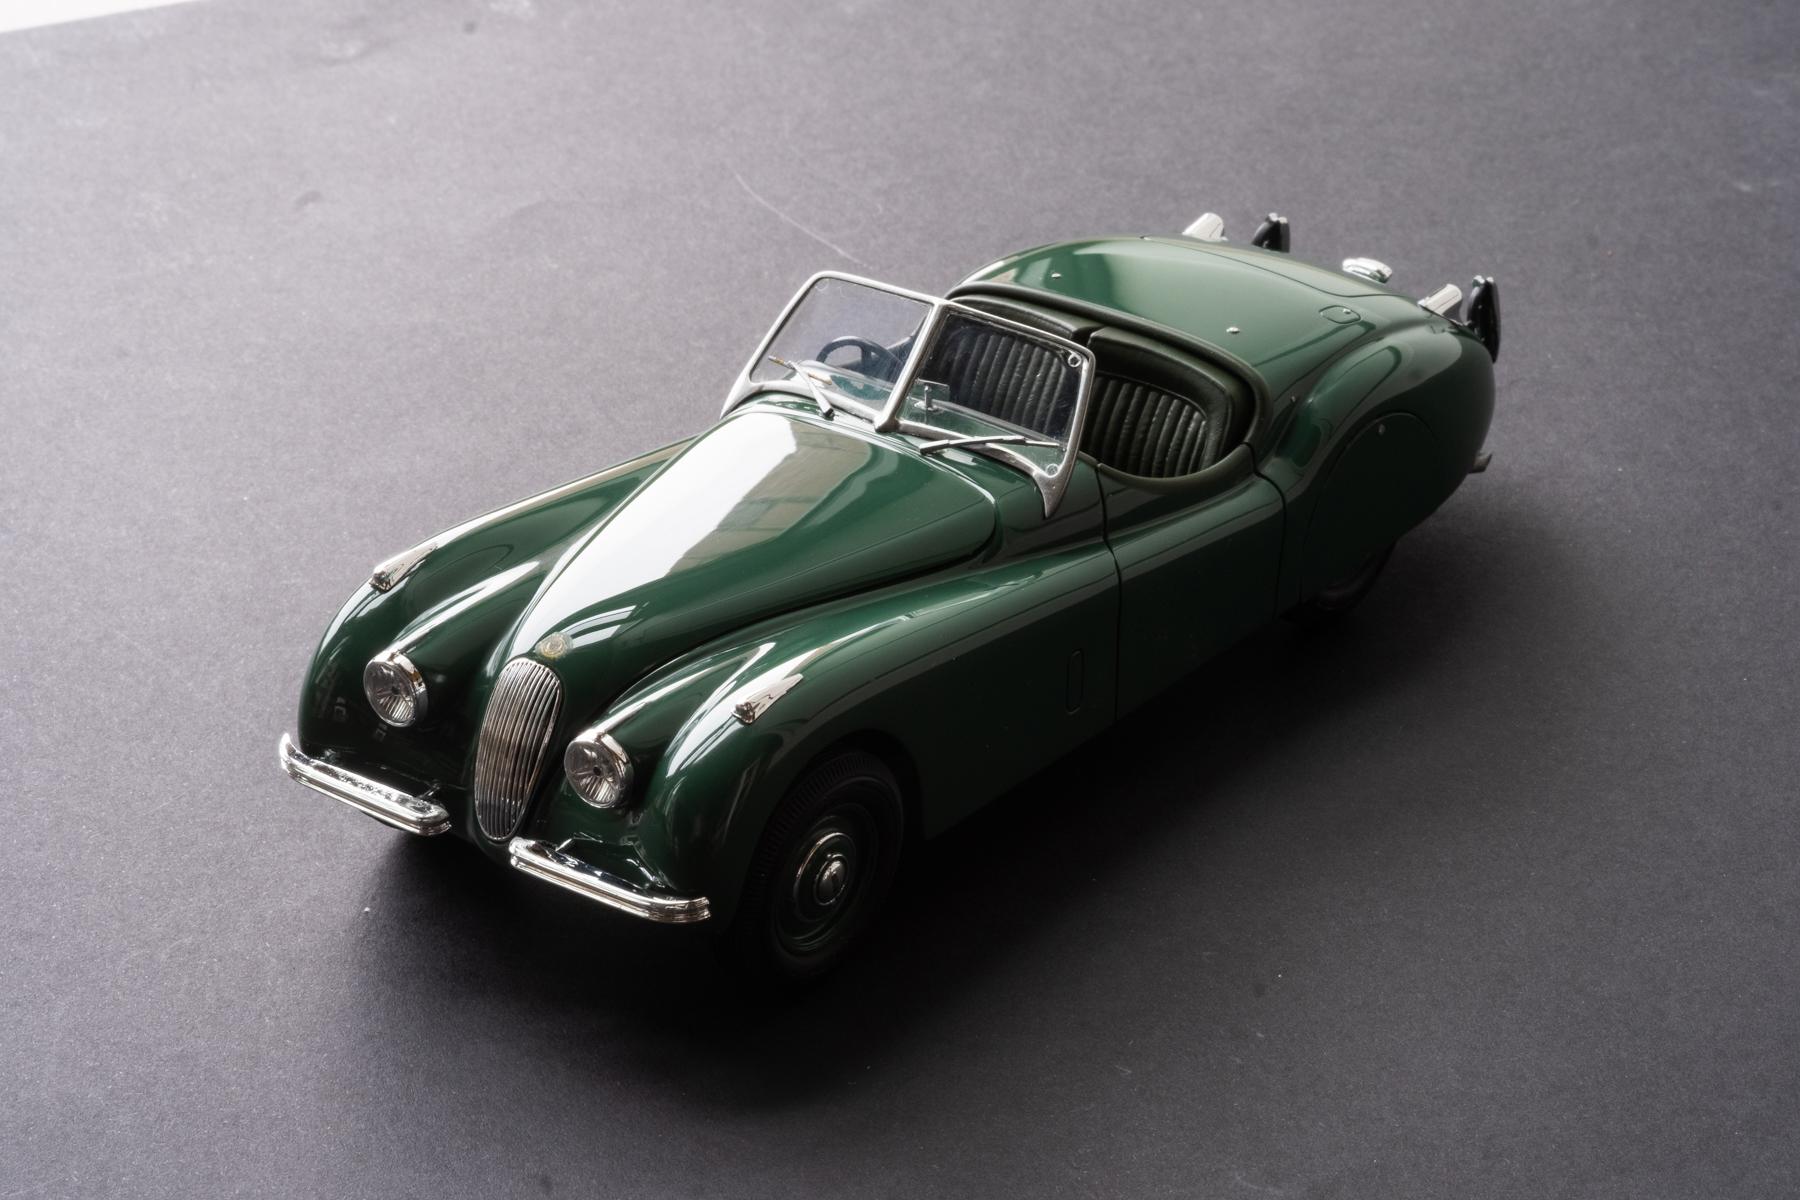
Thank you so much! I agree on XK120 being one of the most beautiful automobiles in the world! Thank you! This is definitely one of better Monogram kits I've encountered. Thank you! Thanks a lot! Thank you! Extra effort of correcting surface was worth it Appreciate the compliment! Thank you! I got inspiration from Amalgam collection - could use a white backdrop though! Thank you! Thanks! Thank you very much! Thank you!
-
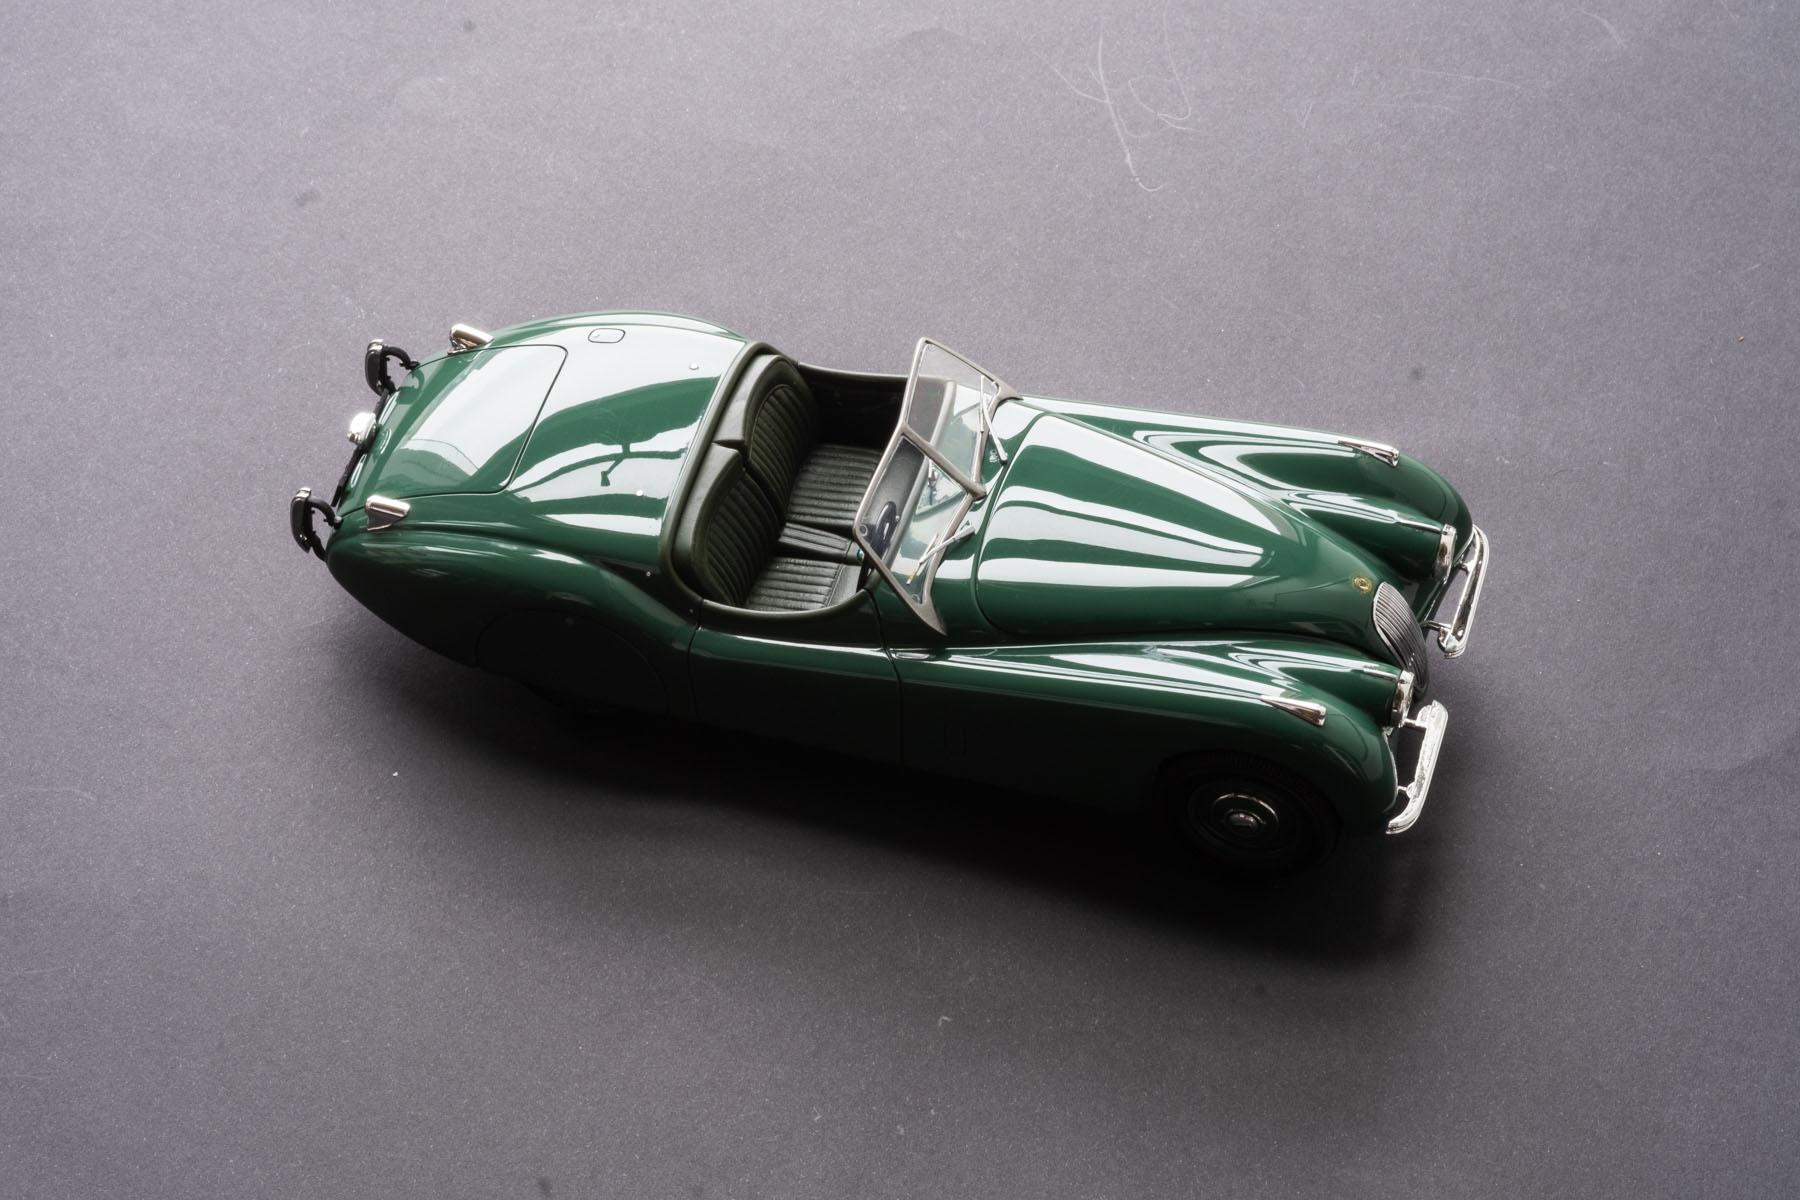
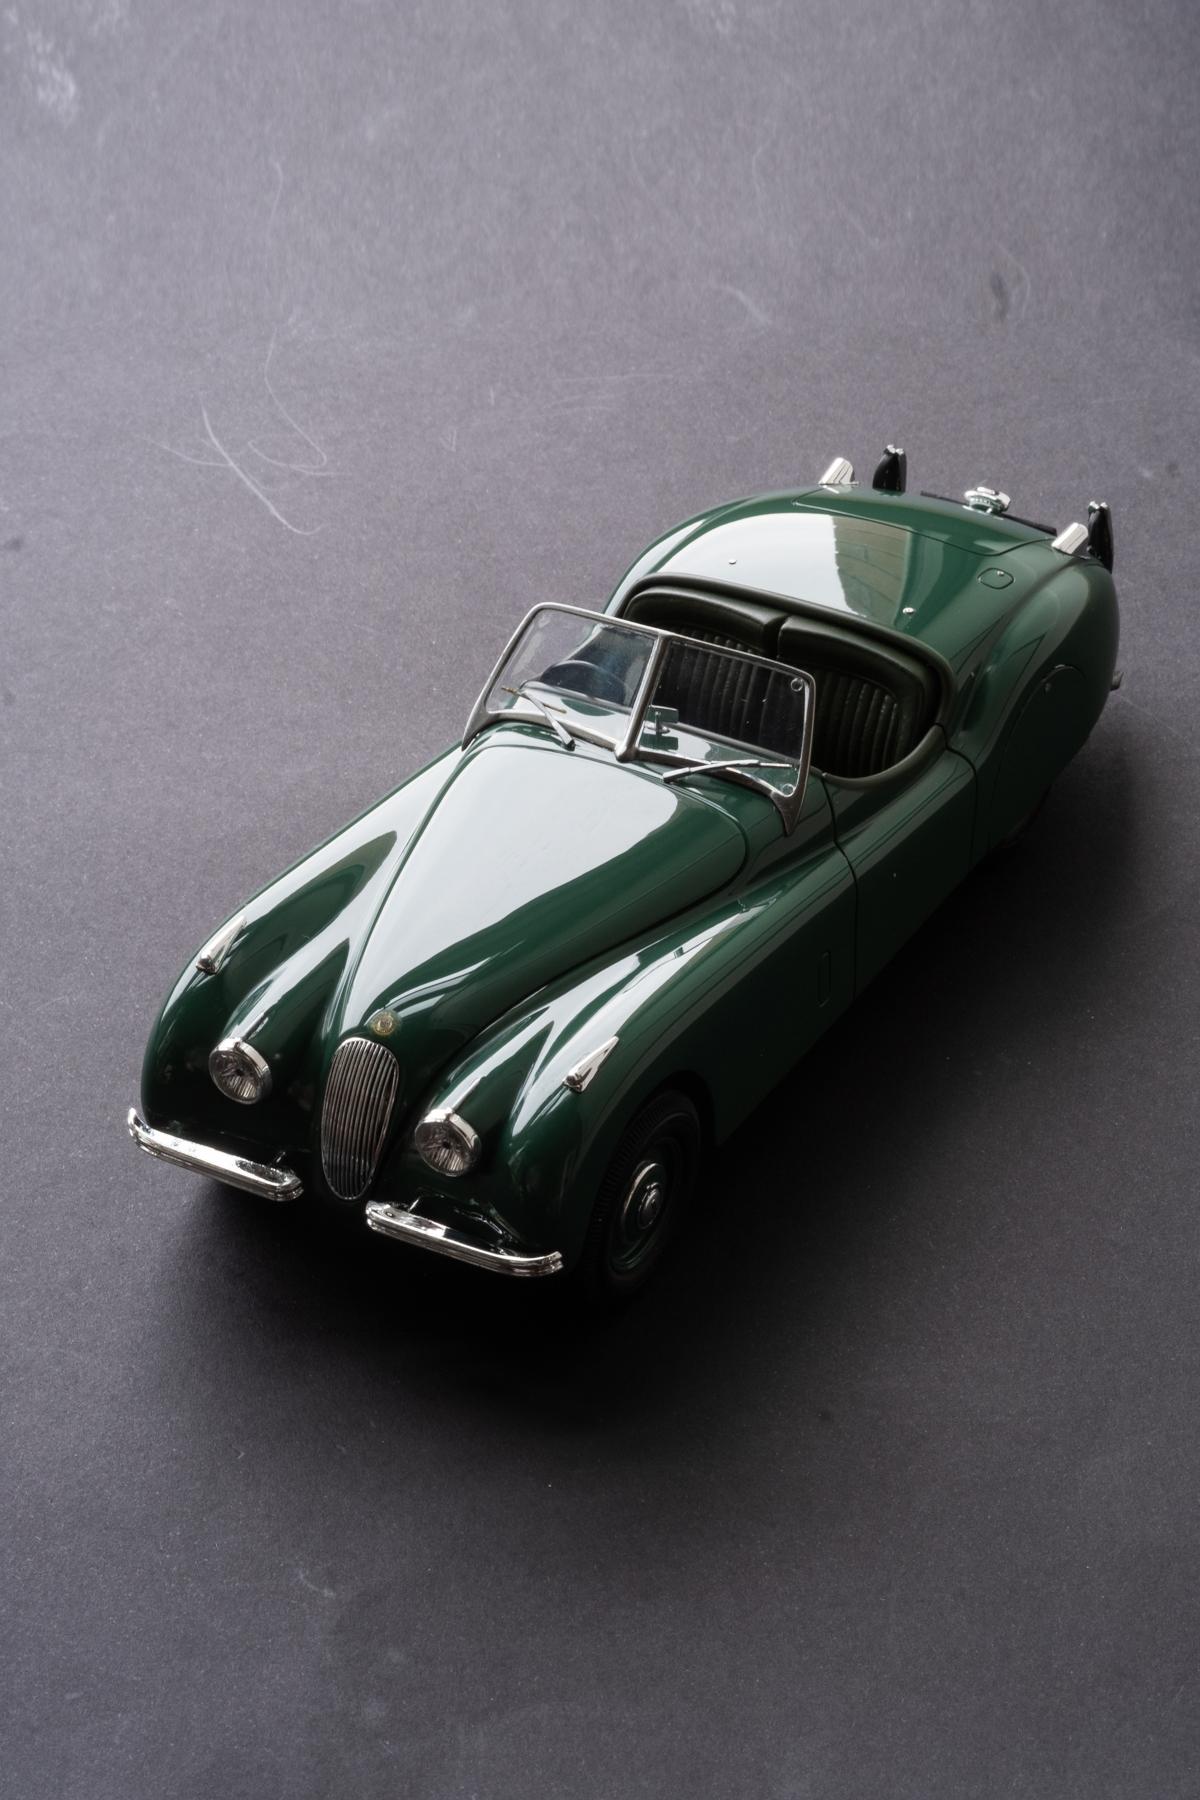
Thank you! Appreciate it! Thanks! Thanks! The hood fit wasn't great but luckily my fitment didn't look too bad. I definitely spent more time on this model prepping the surface to remove as much as waviness as possible. Thanks! Thank you! Thanks! Thank you! Thank you! Suede green is one of my favourites. Thank you! Thank you! Monogram kits always have great texture across the board. Thank you! Thanks! Thanks! Appreciate it! Thank you very much! Thank you! Thanks! Thank you! Thanks a lot! Thanks! I really had to shoot low to make it larger than it actually is! Some of these 50s cars have that aesthetics for sure! Thank you! Thanks! I need to get better at painting alclad! Thank you! I like DHC over FHC for XK120!
-
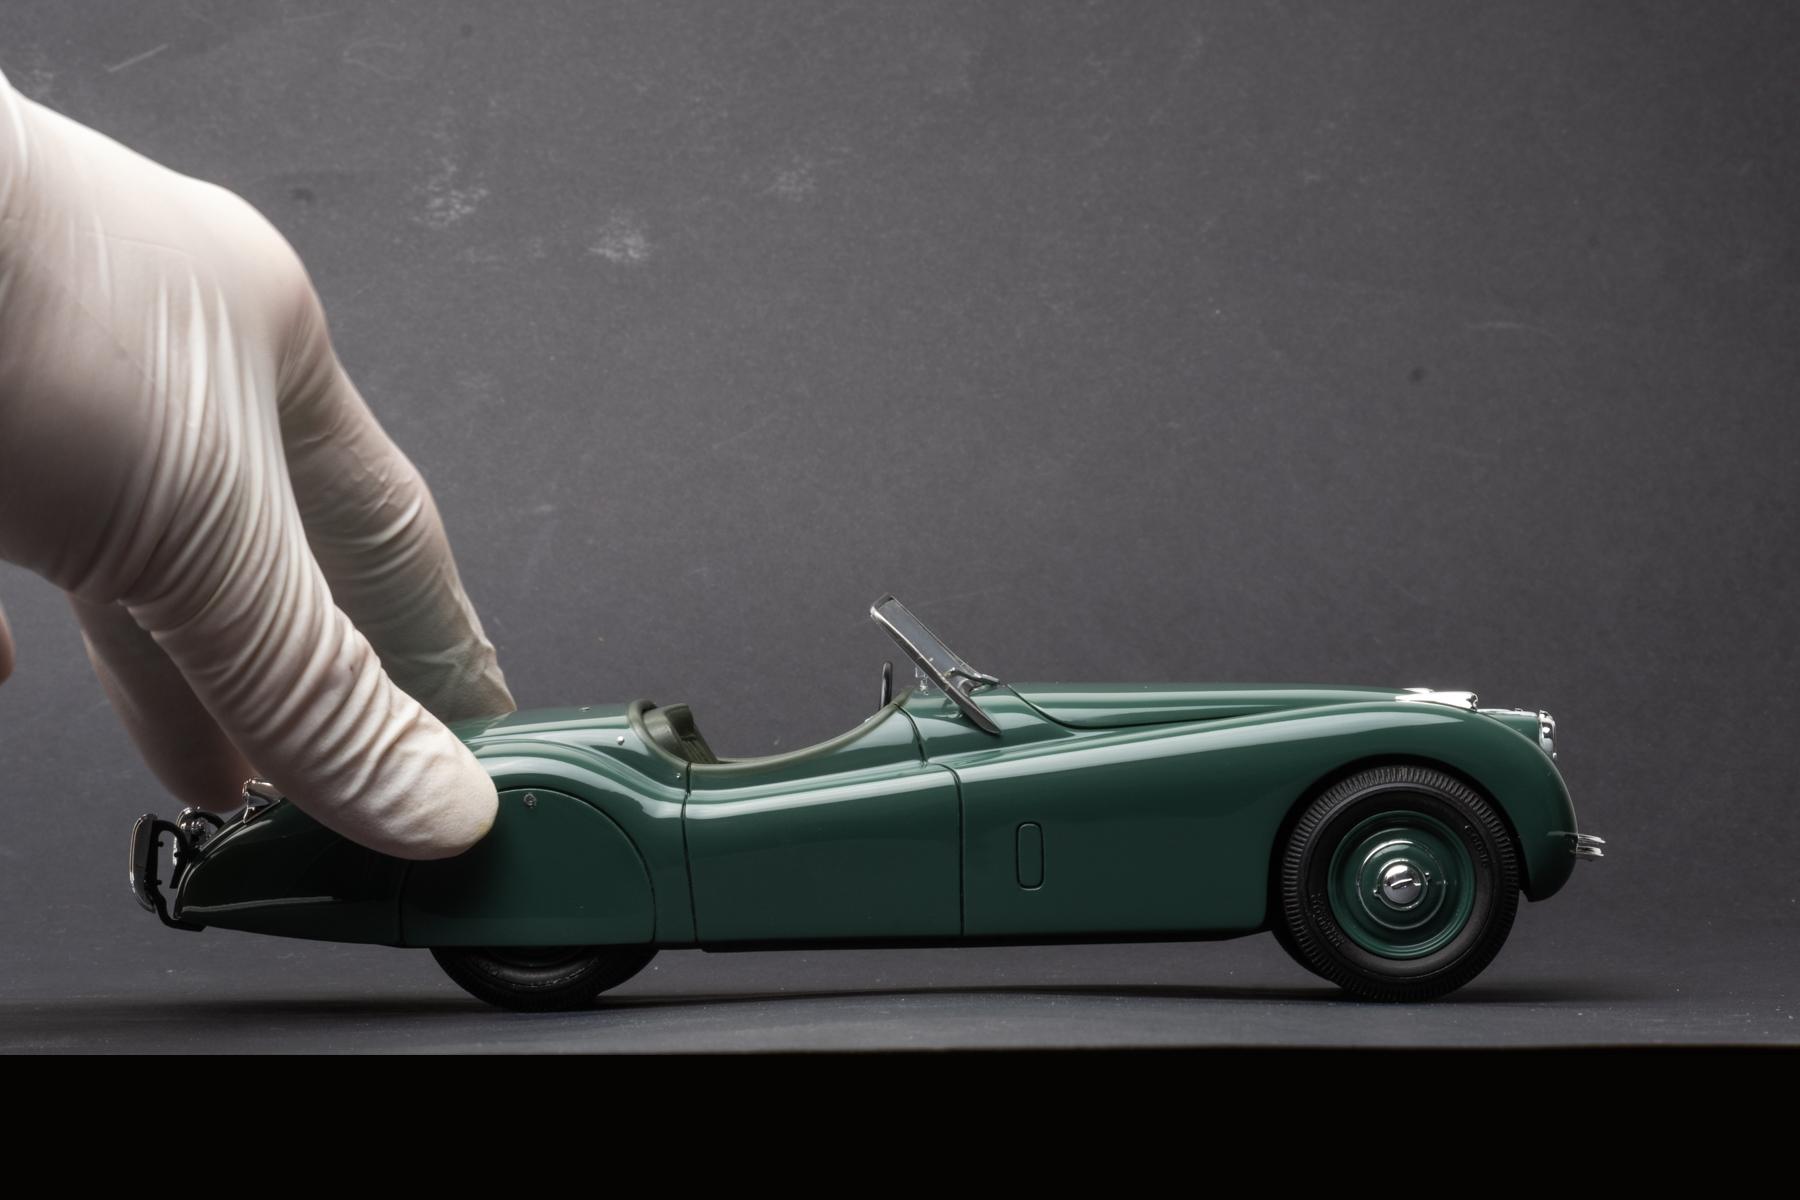
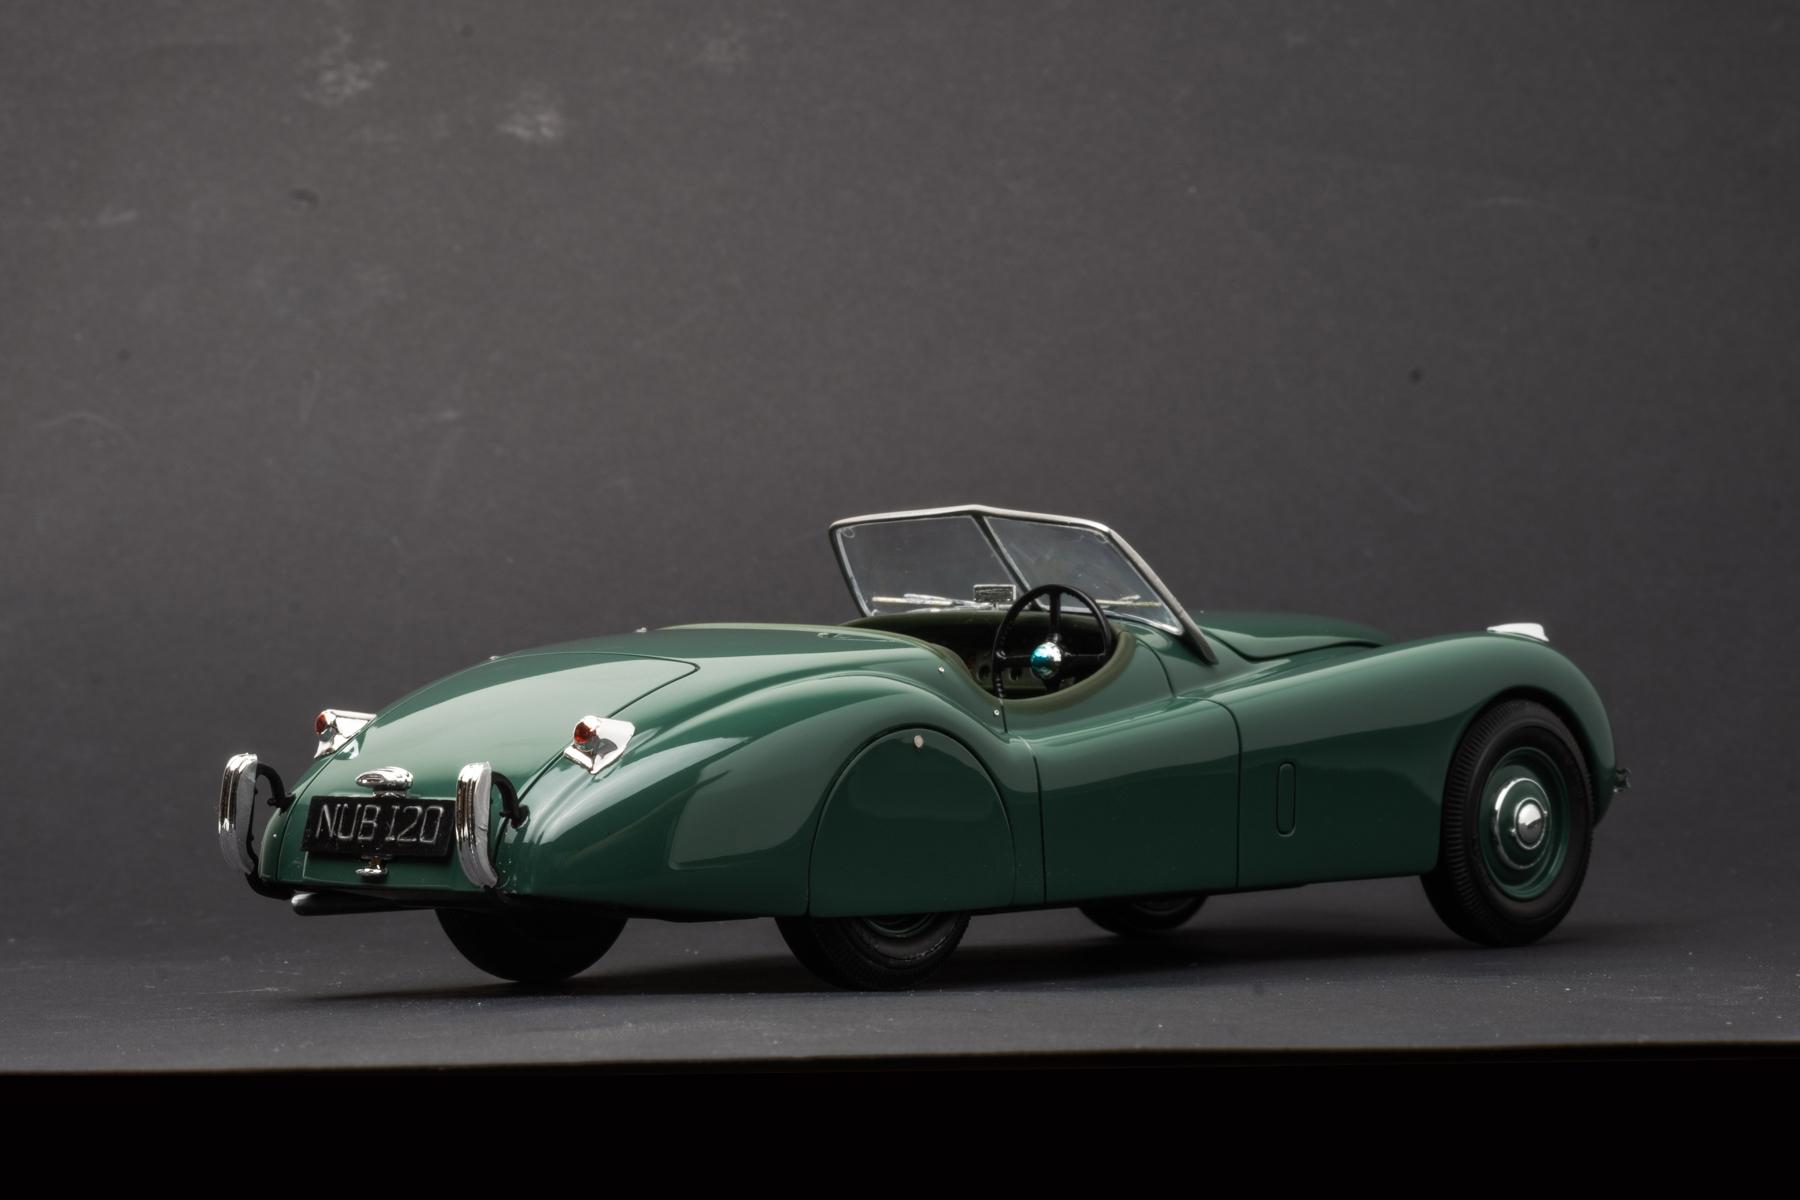
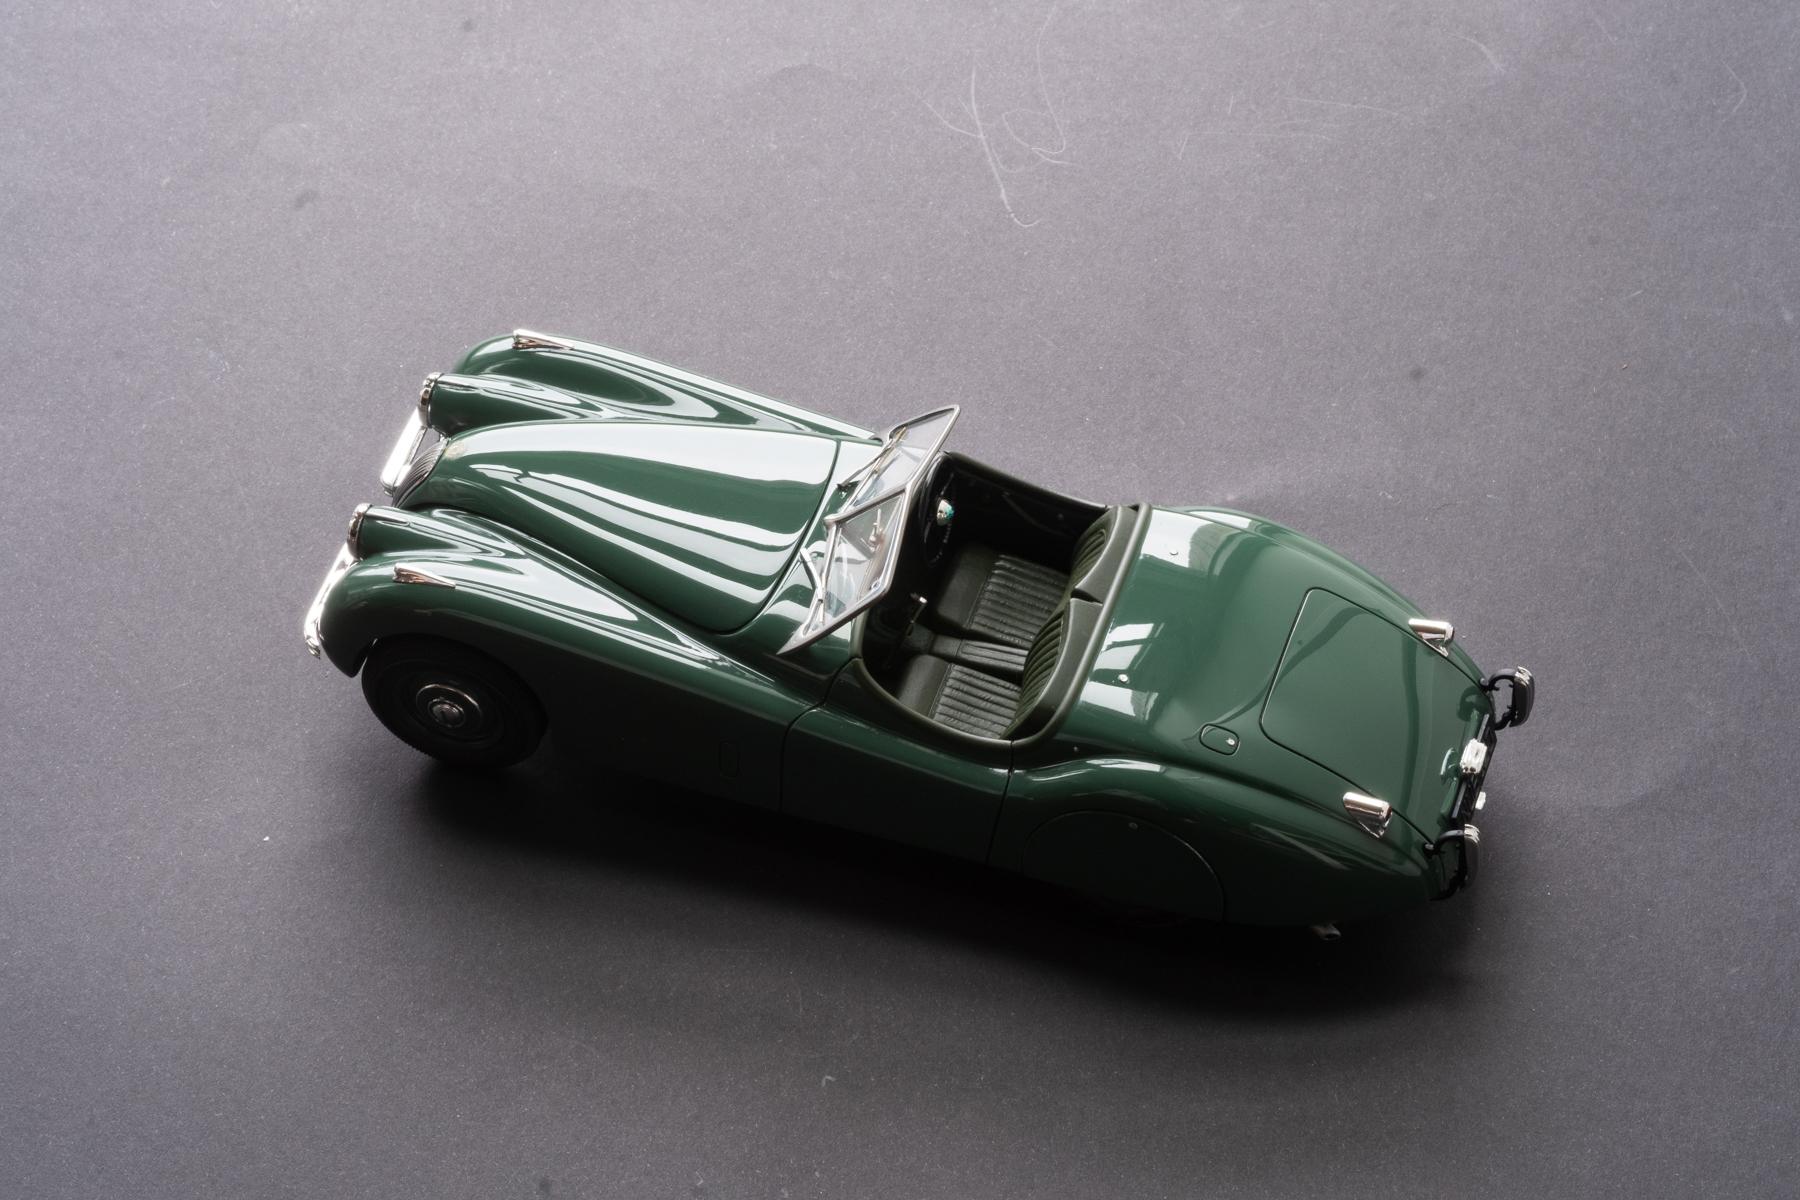
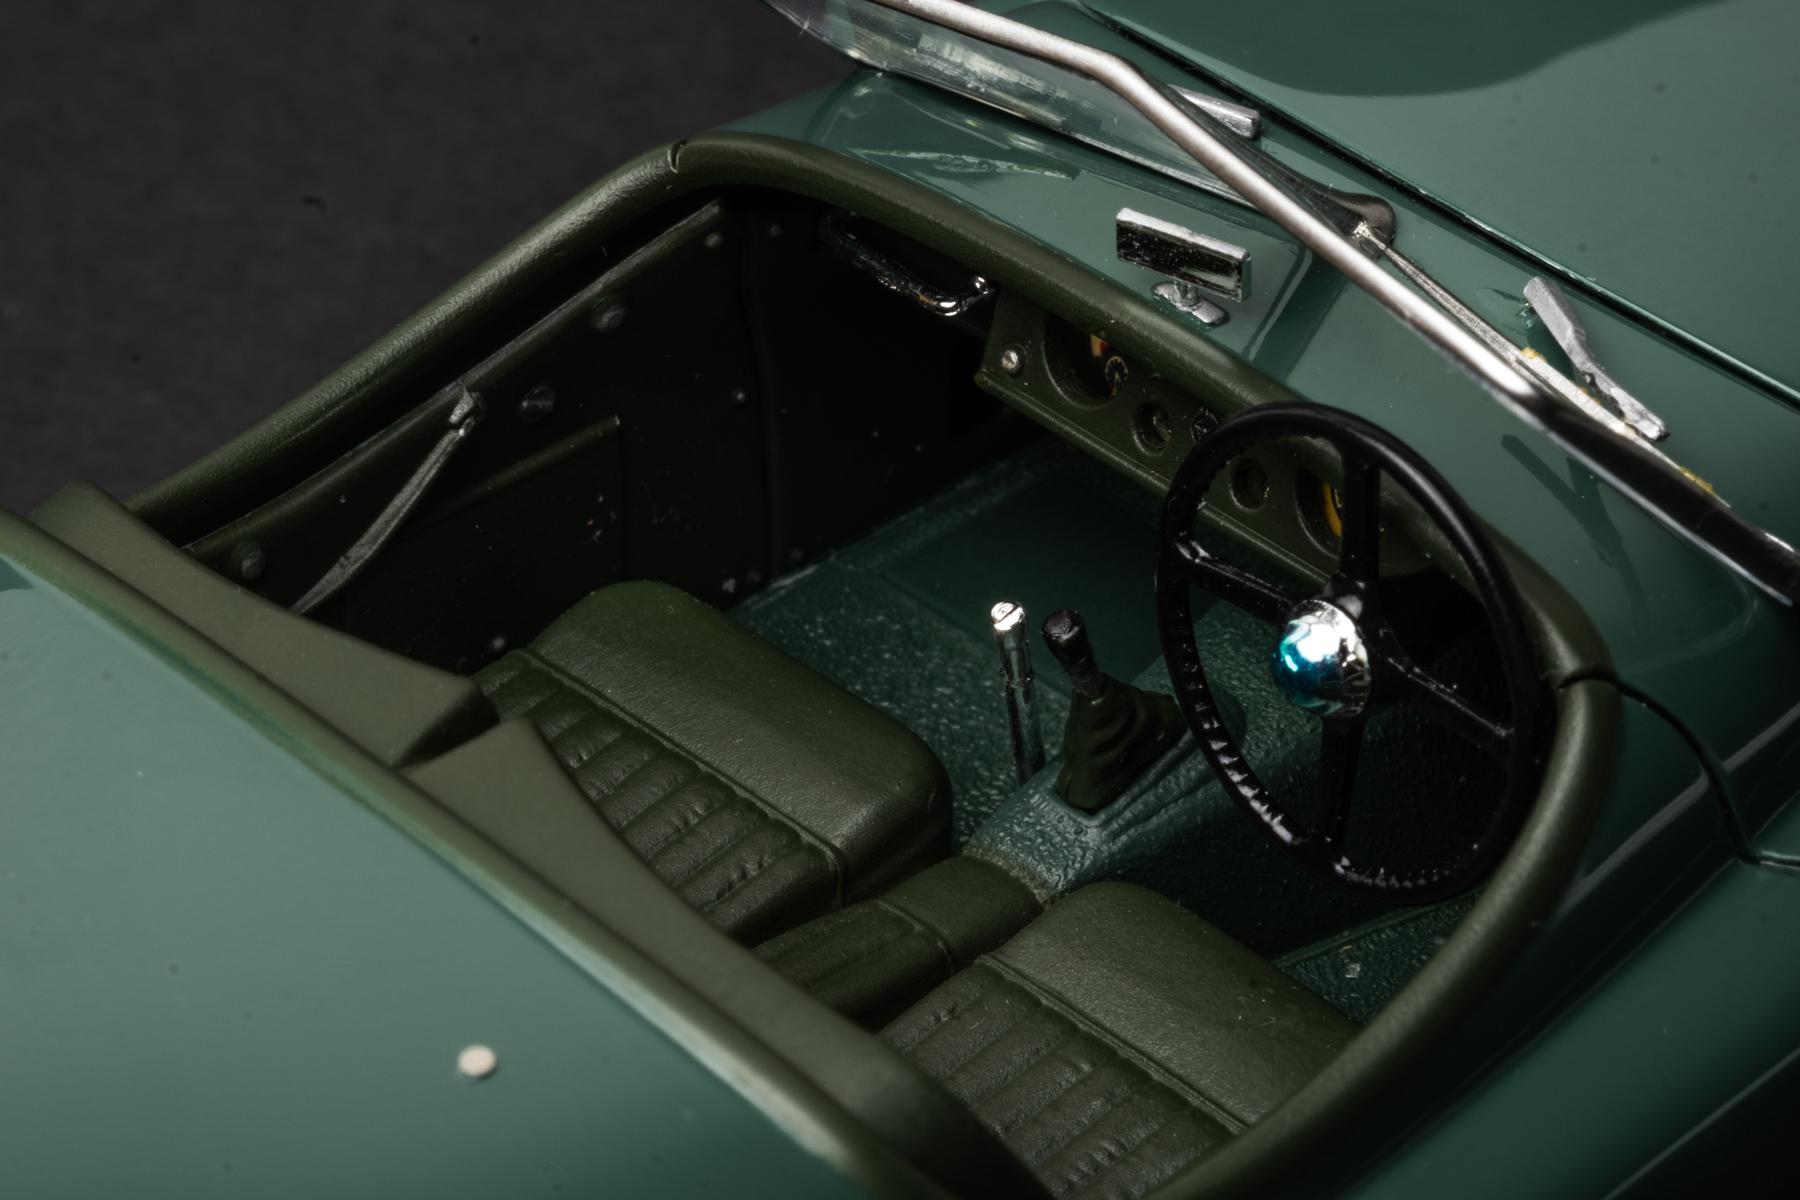
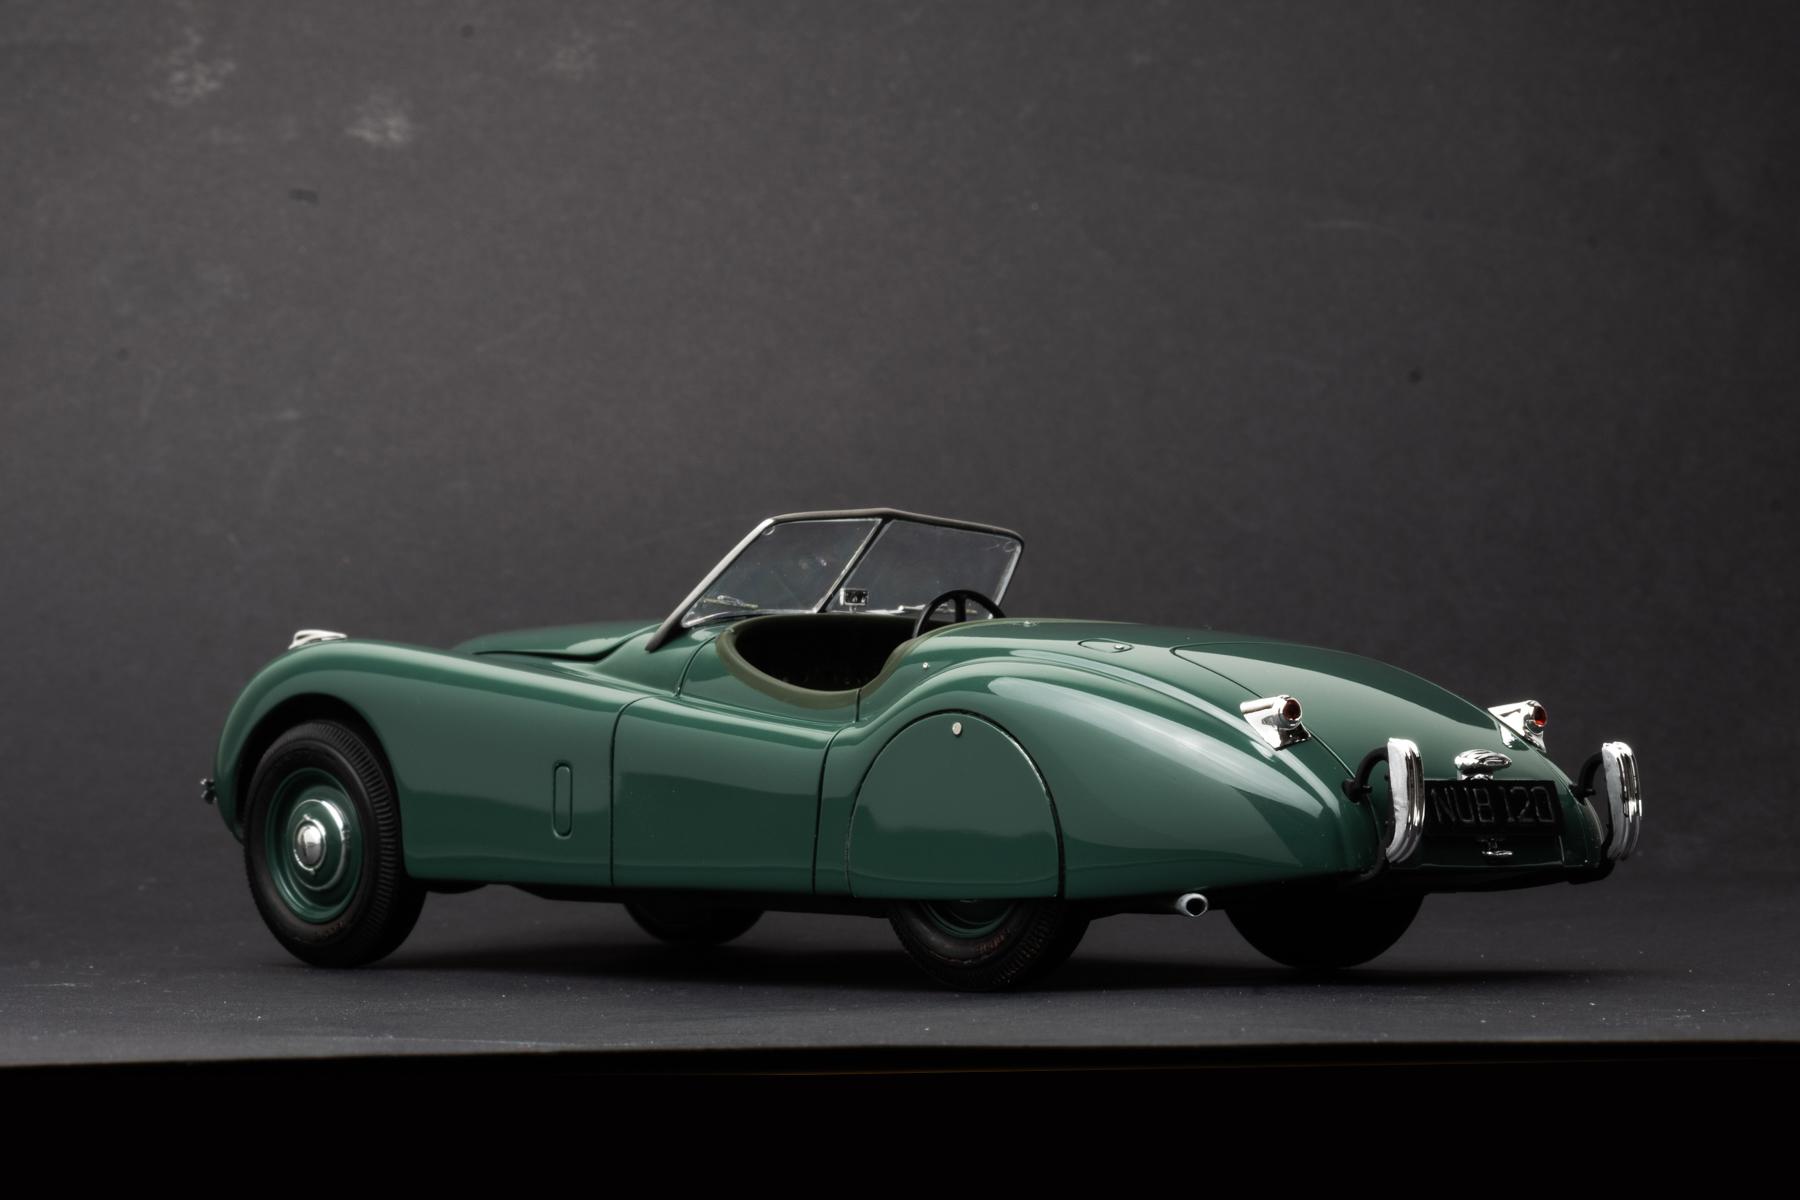
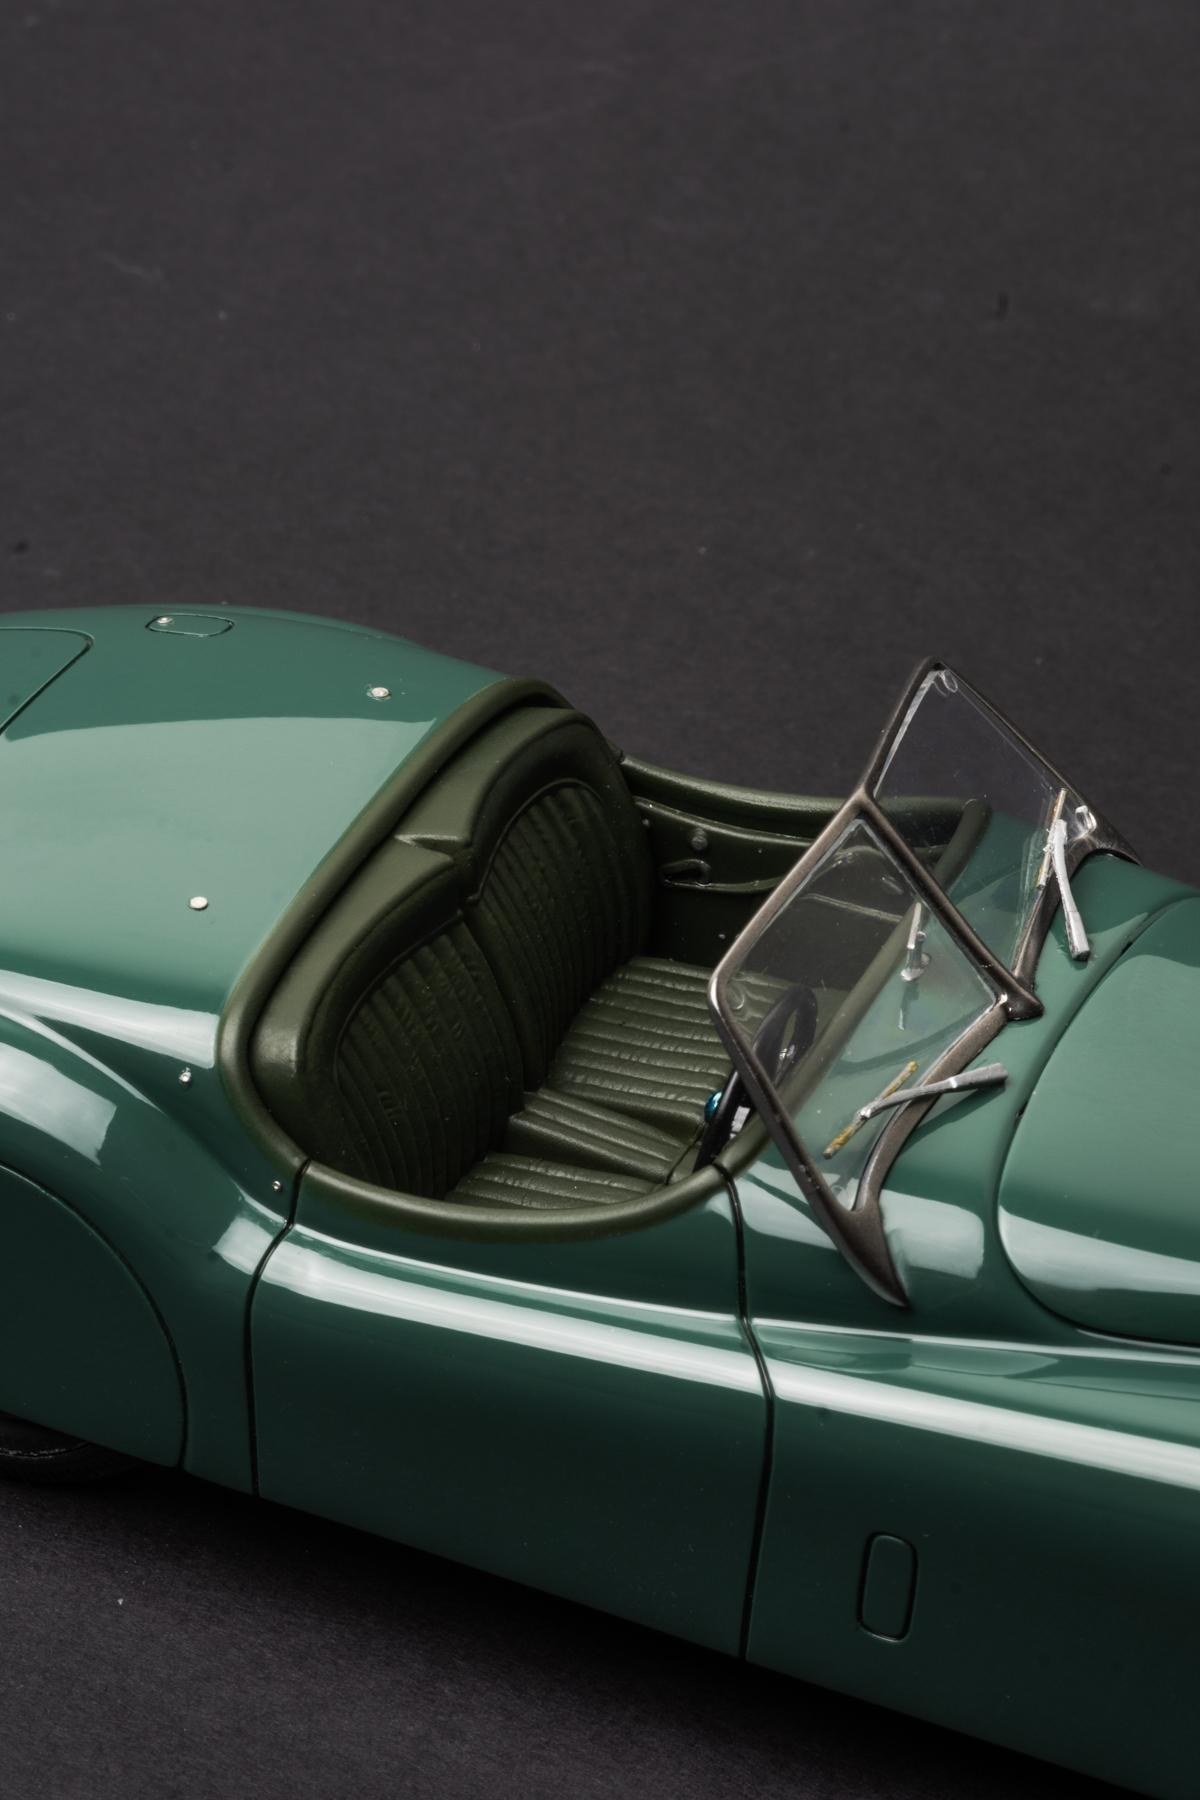
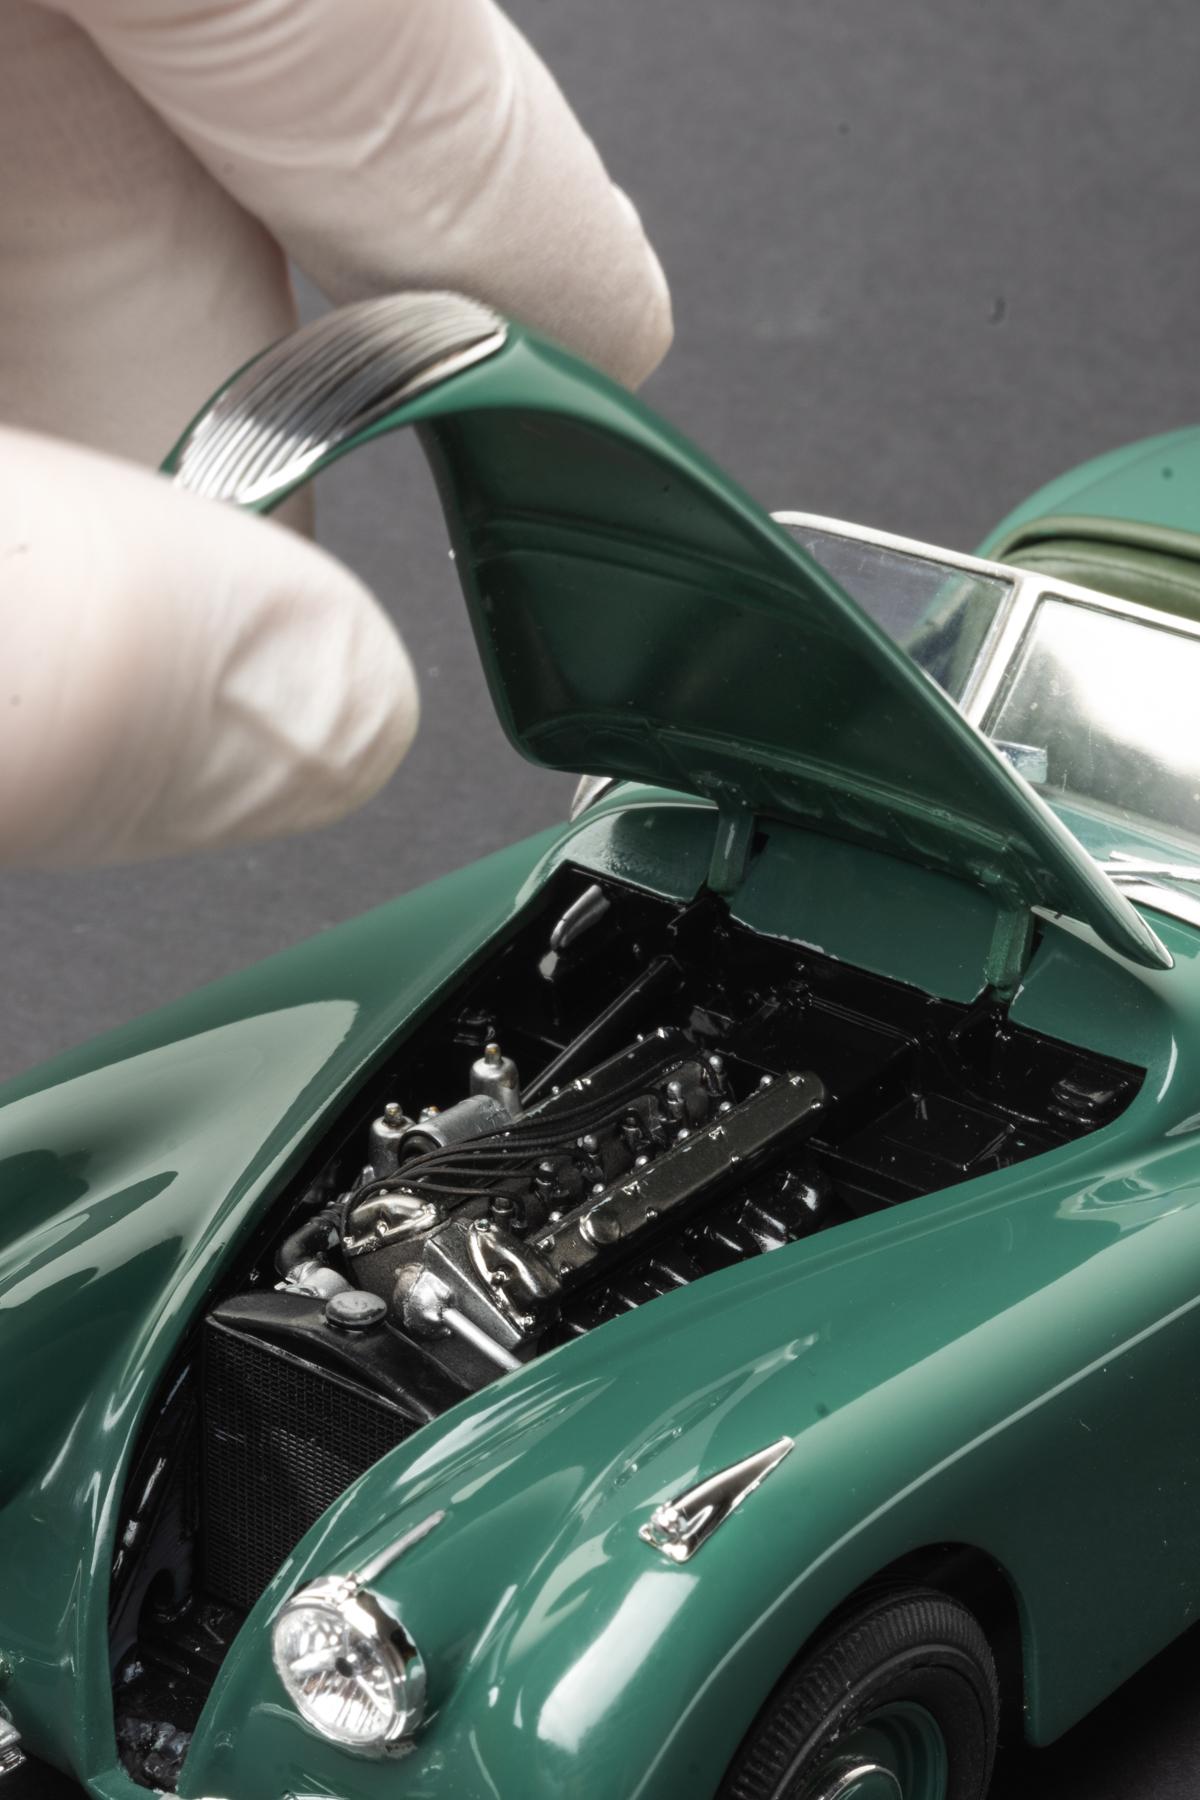
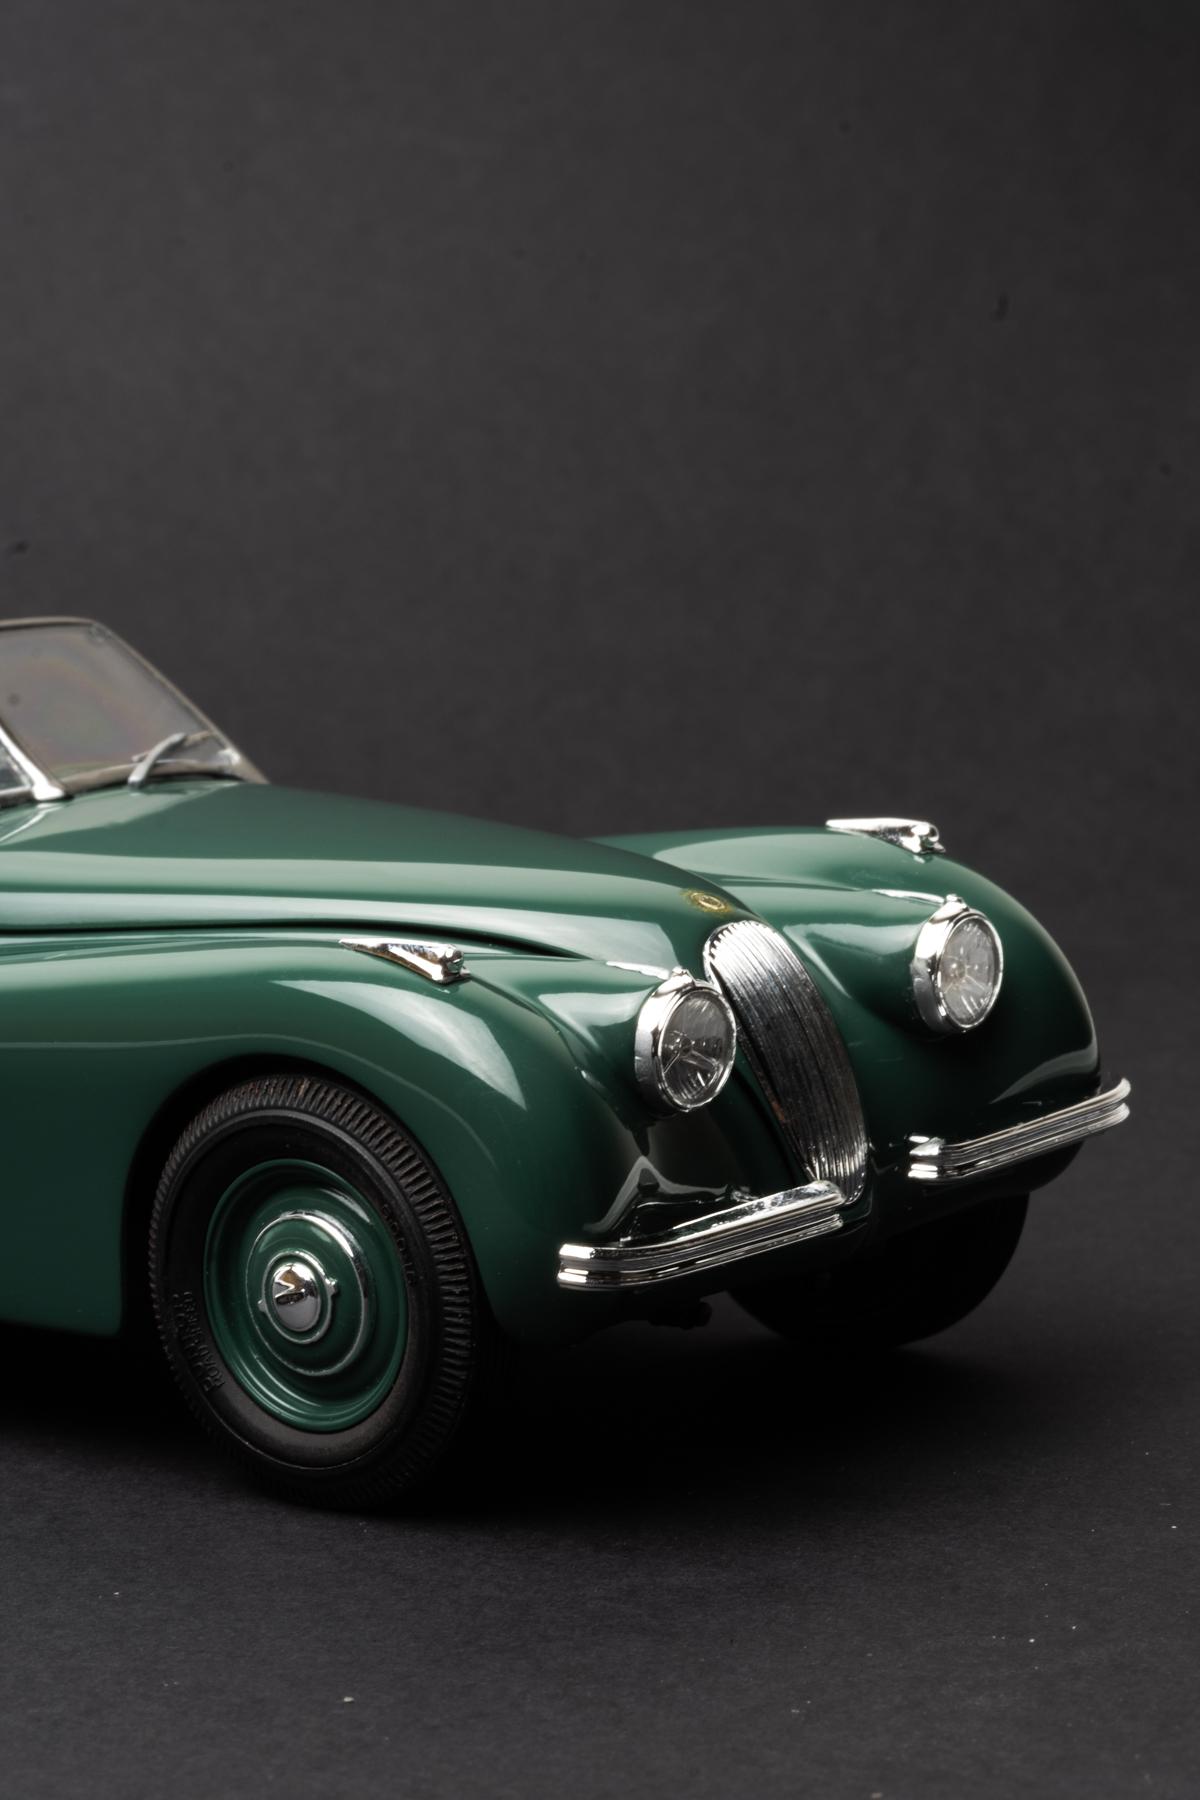
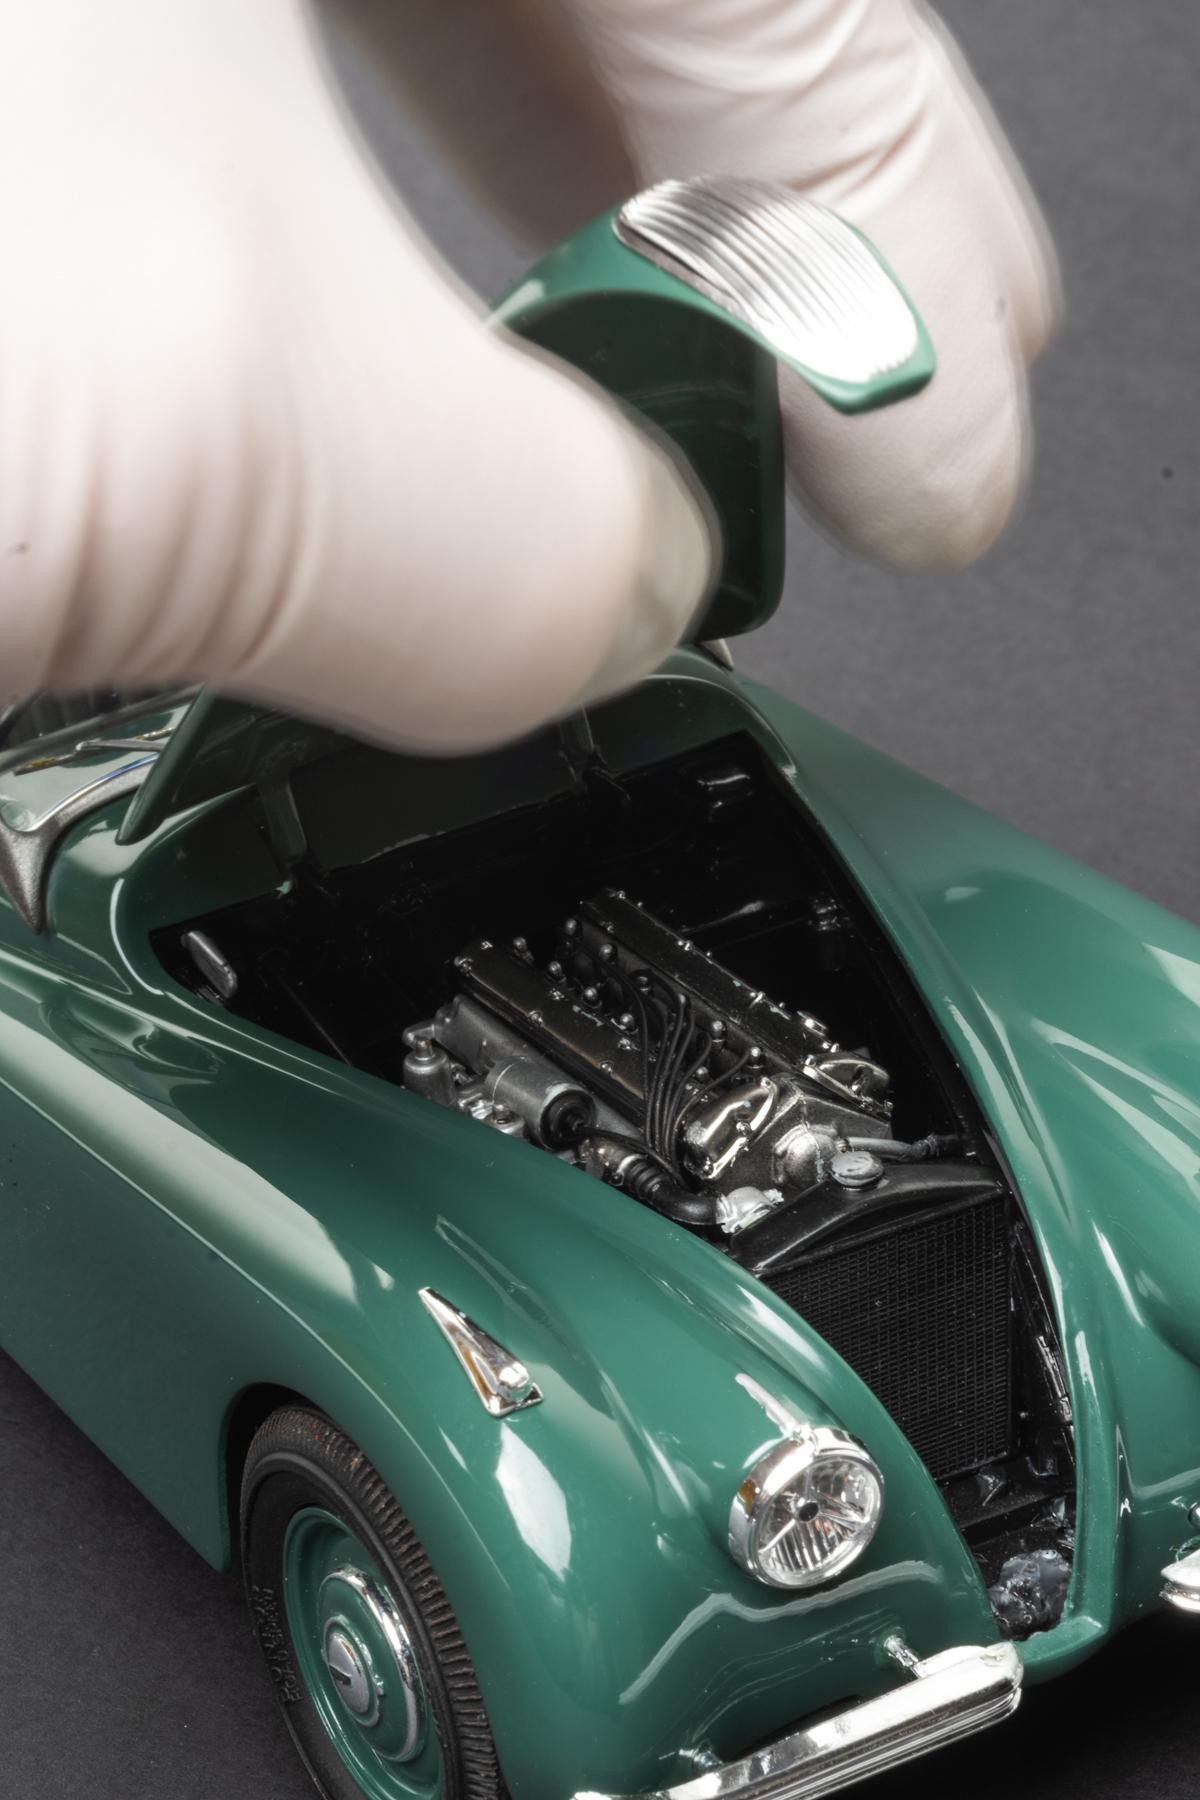
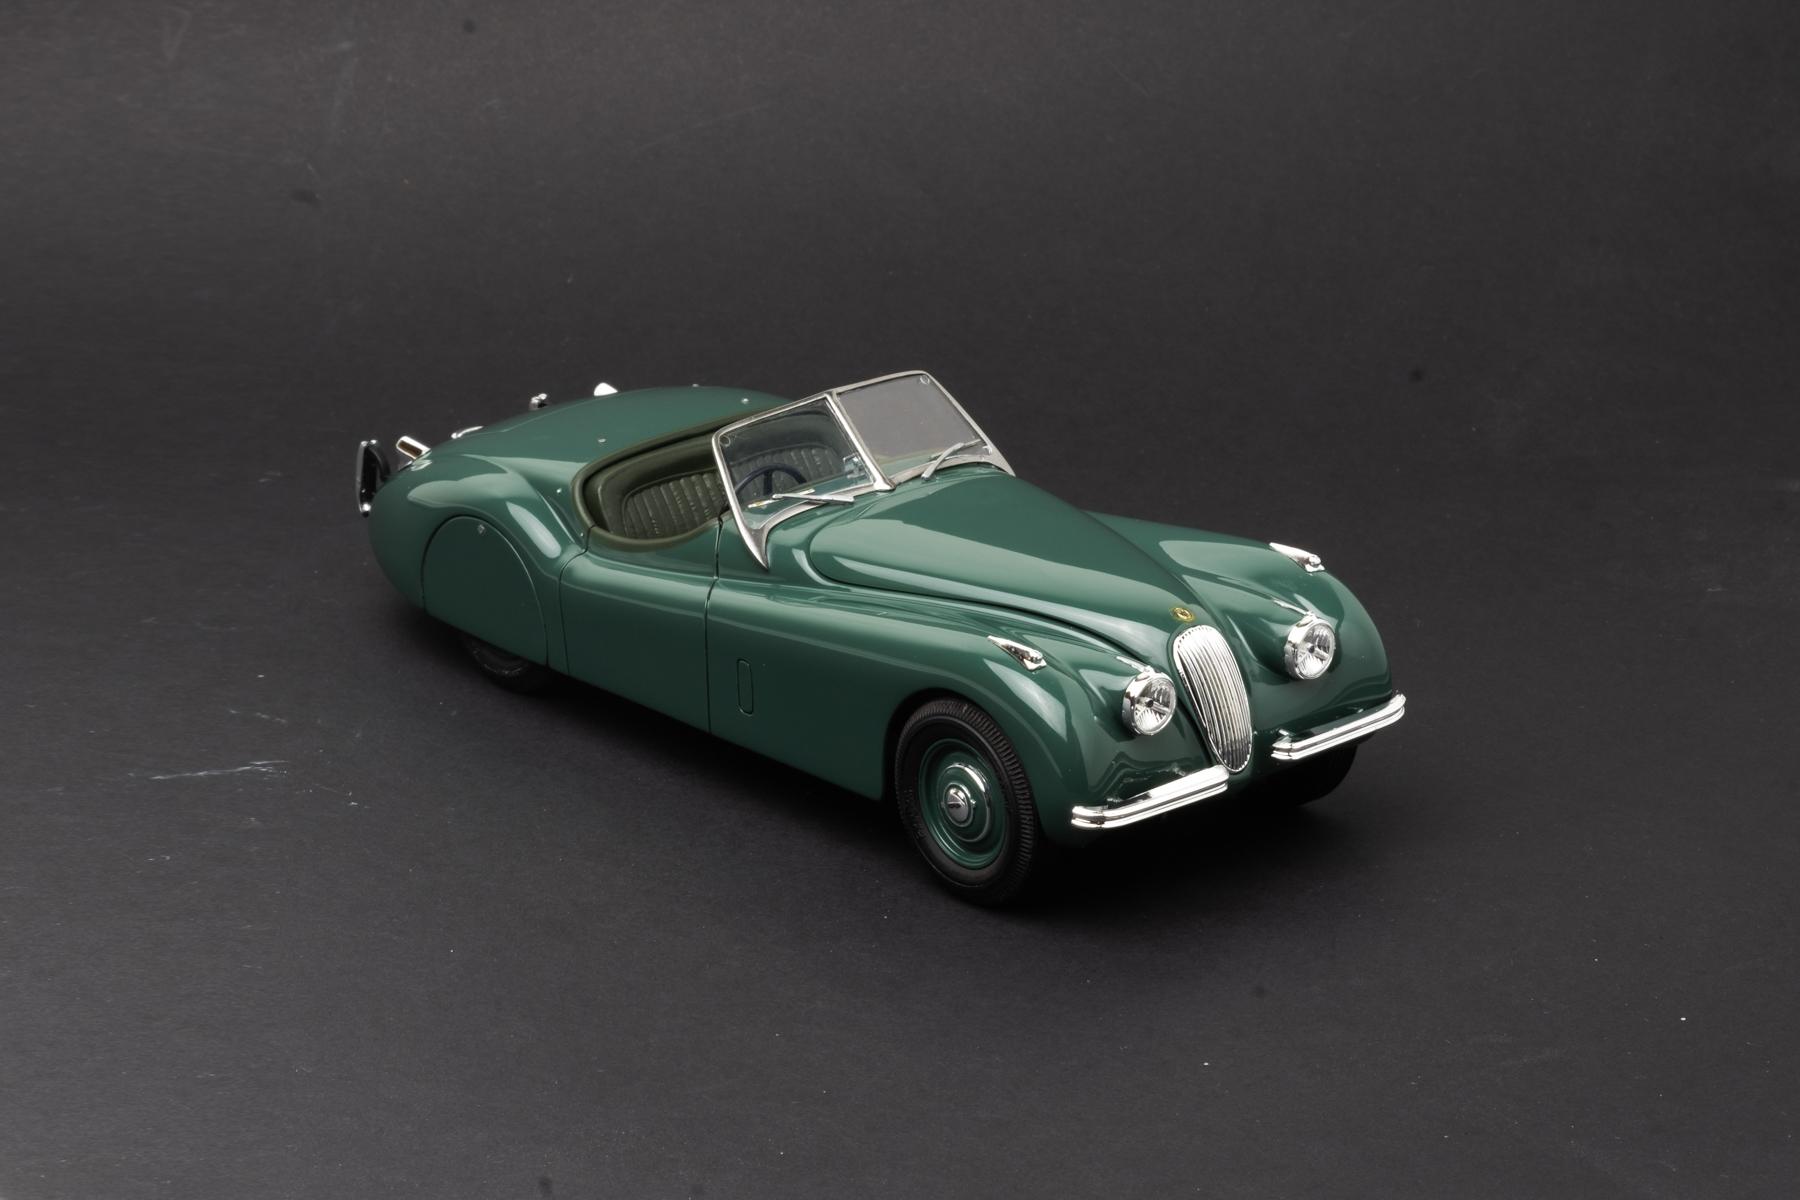
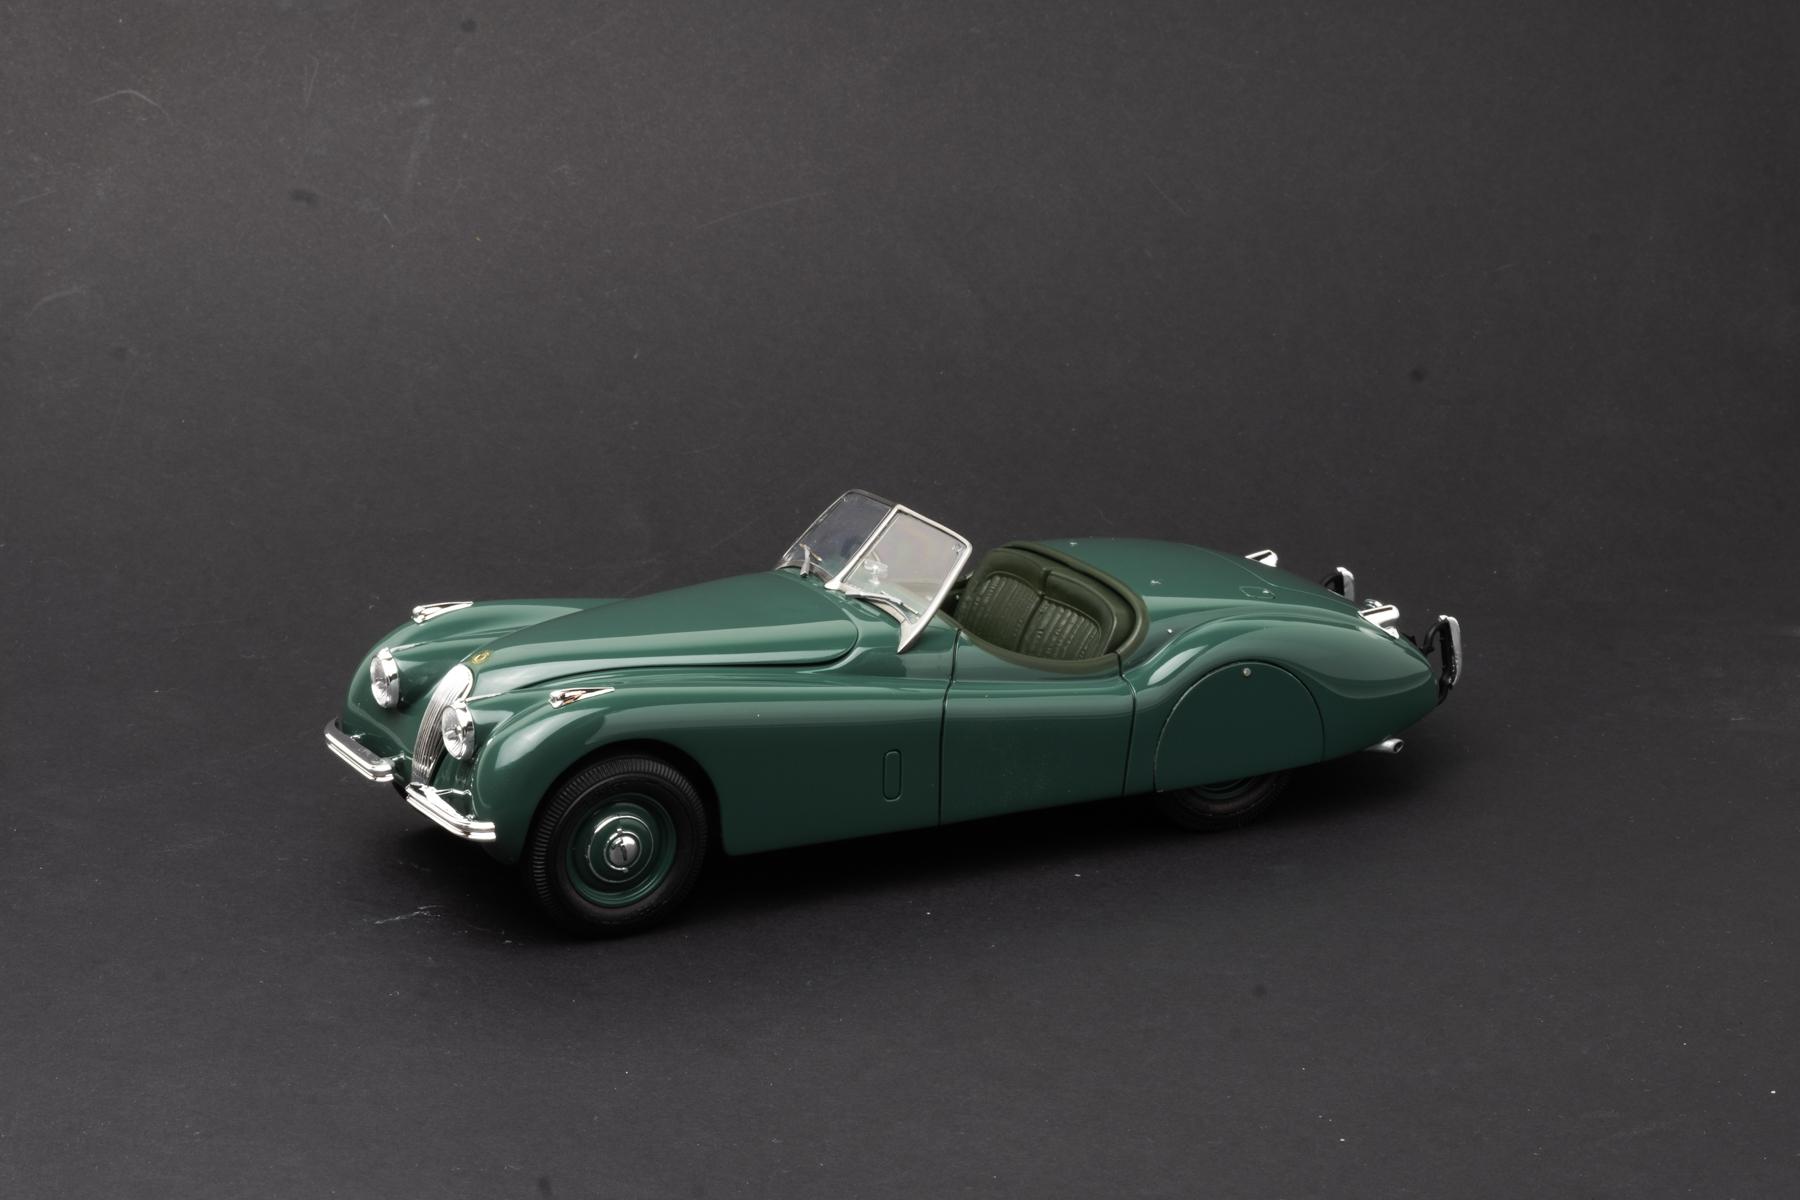
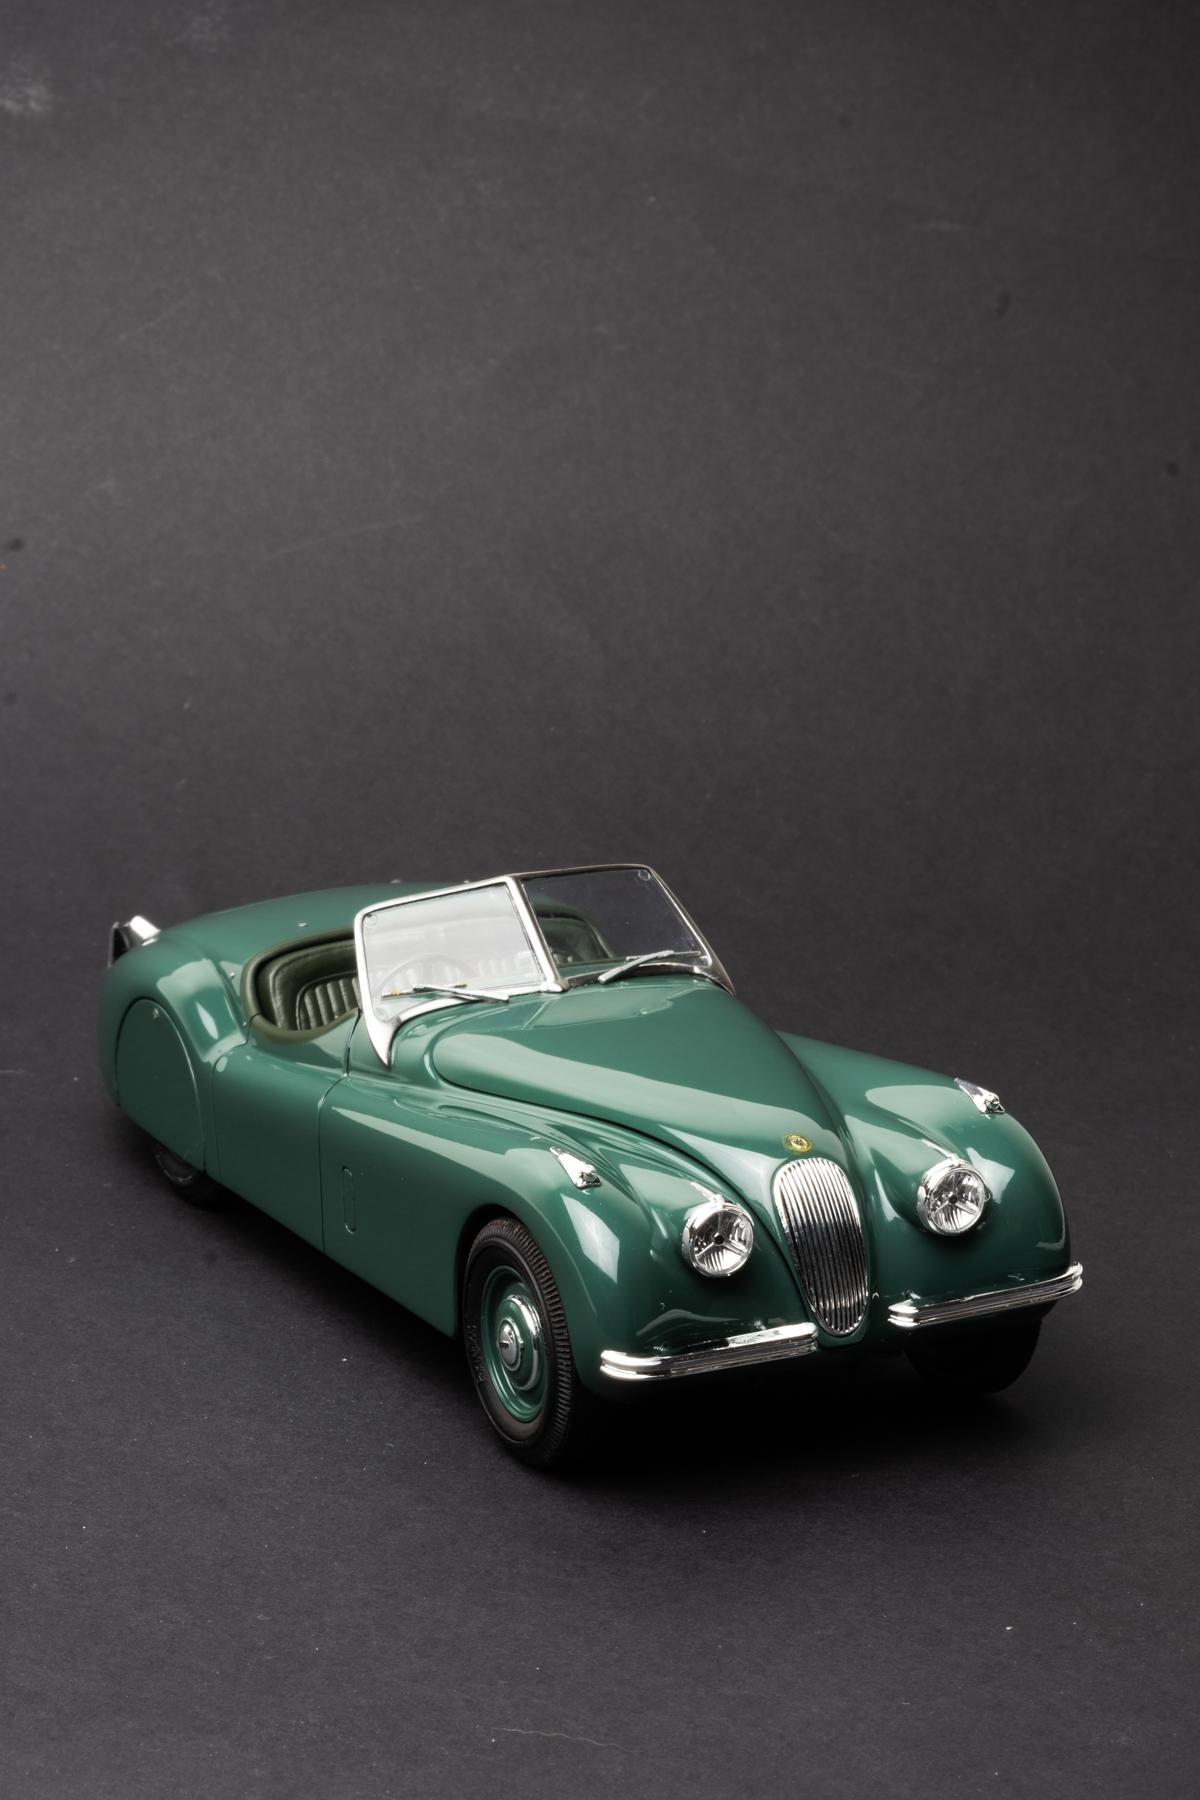
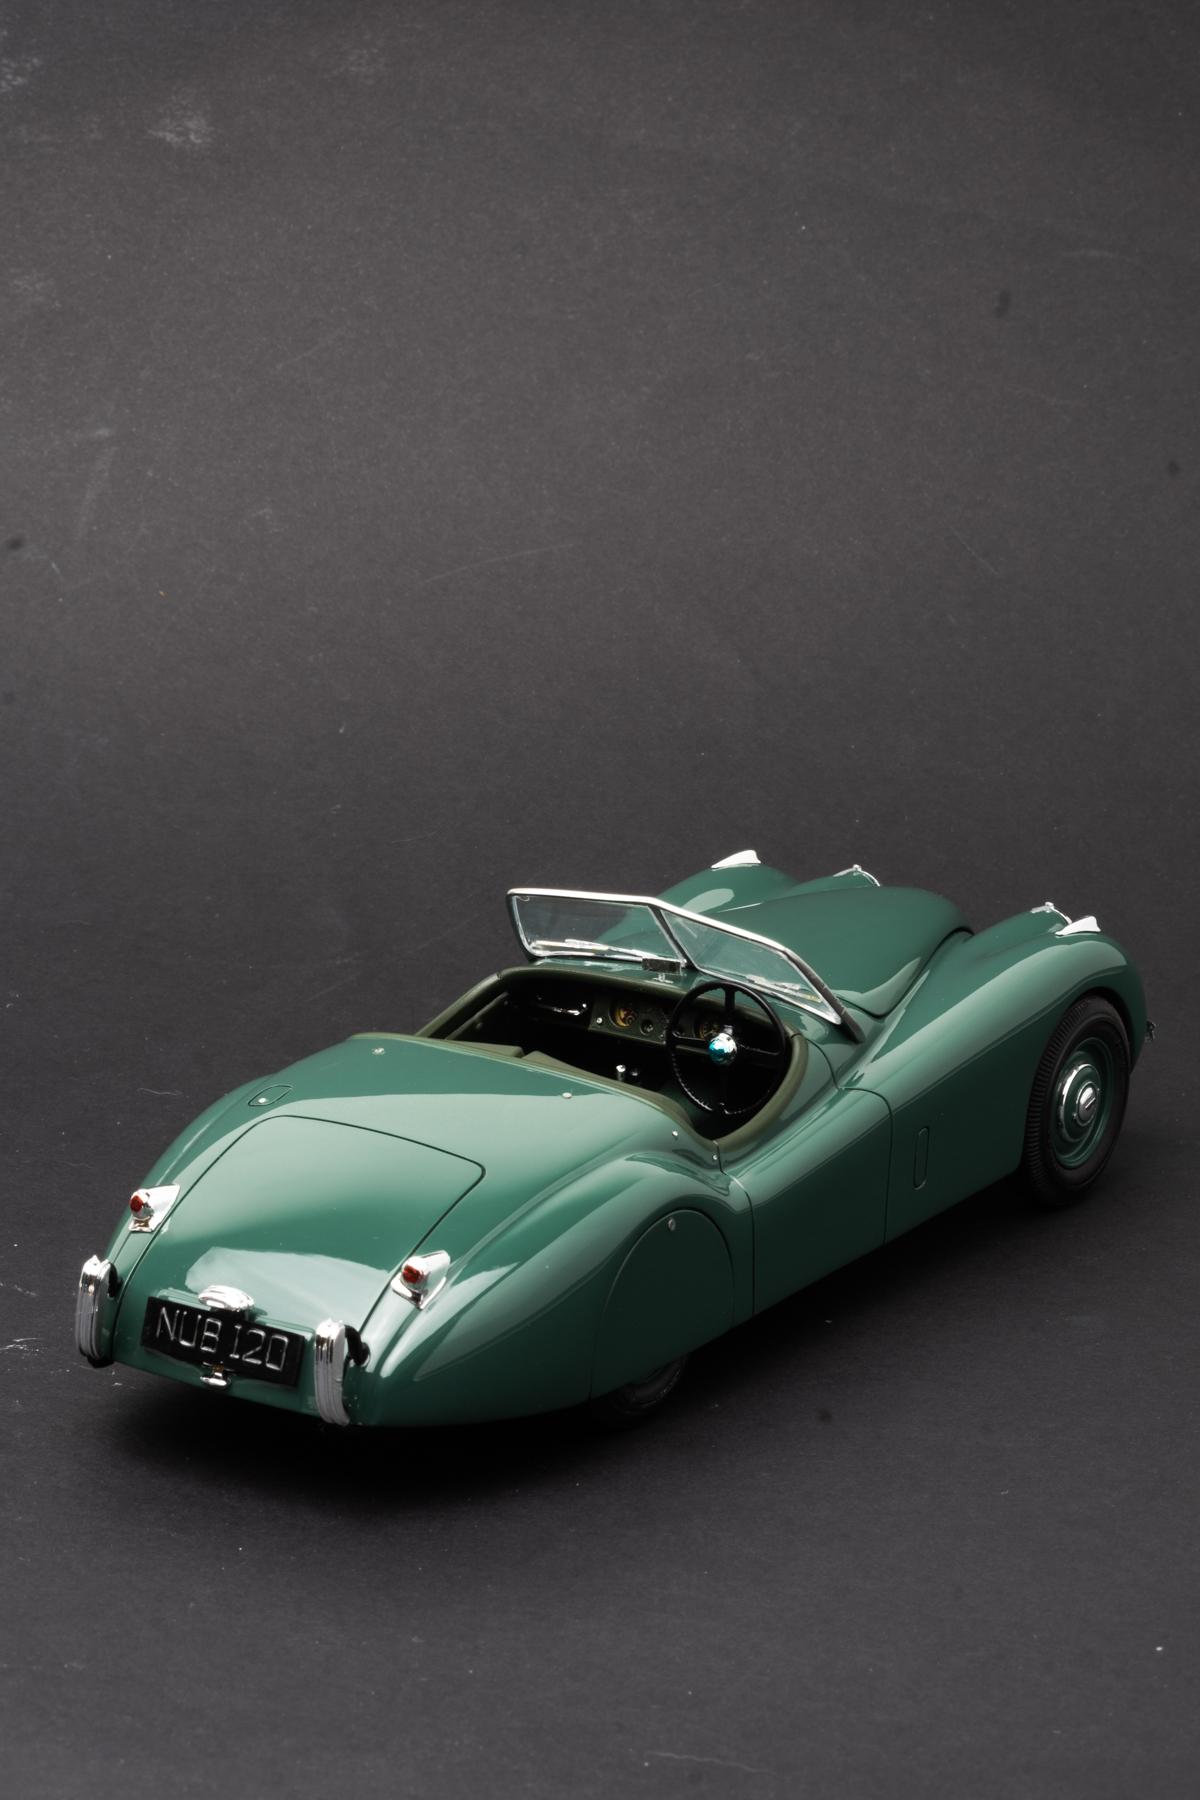
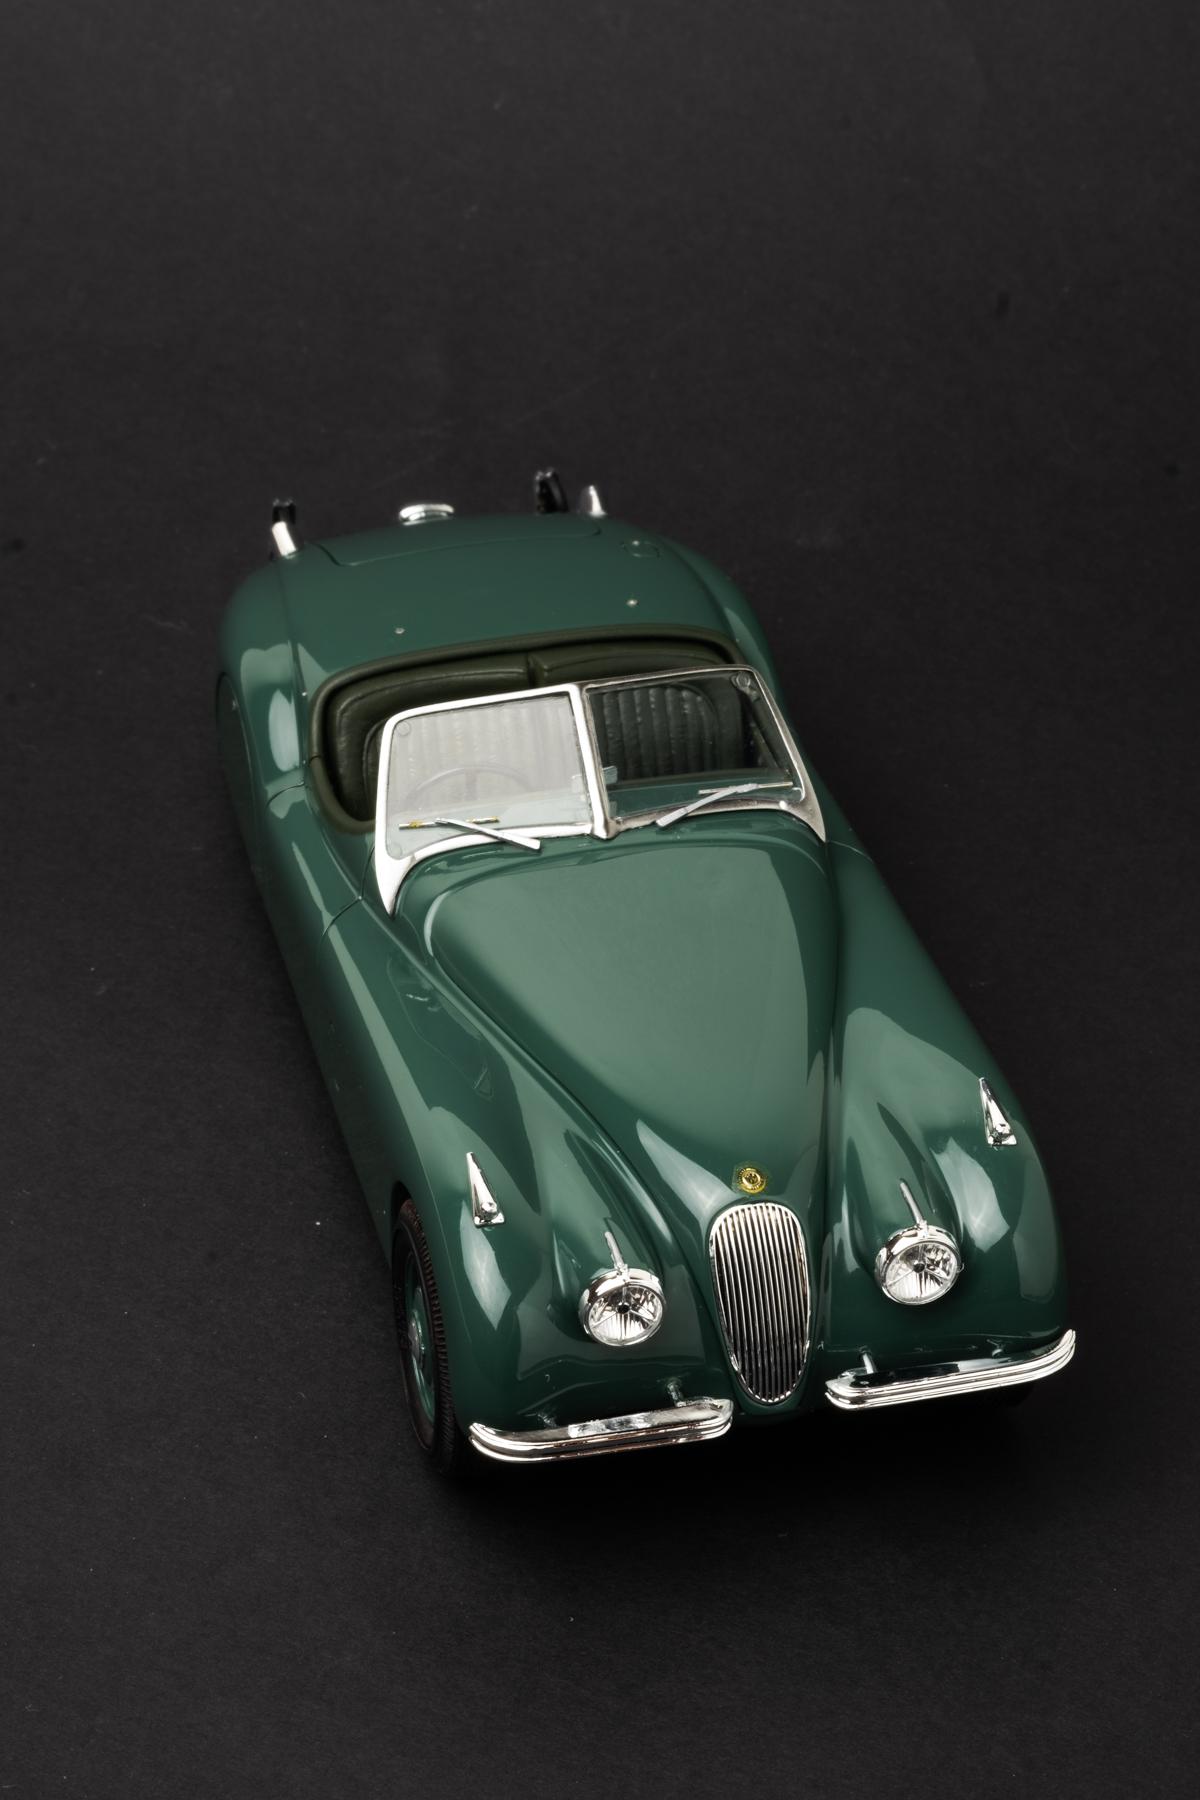
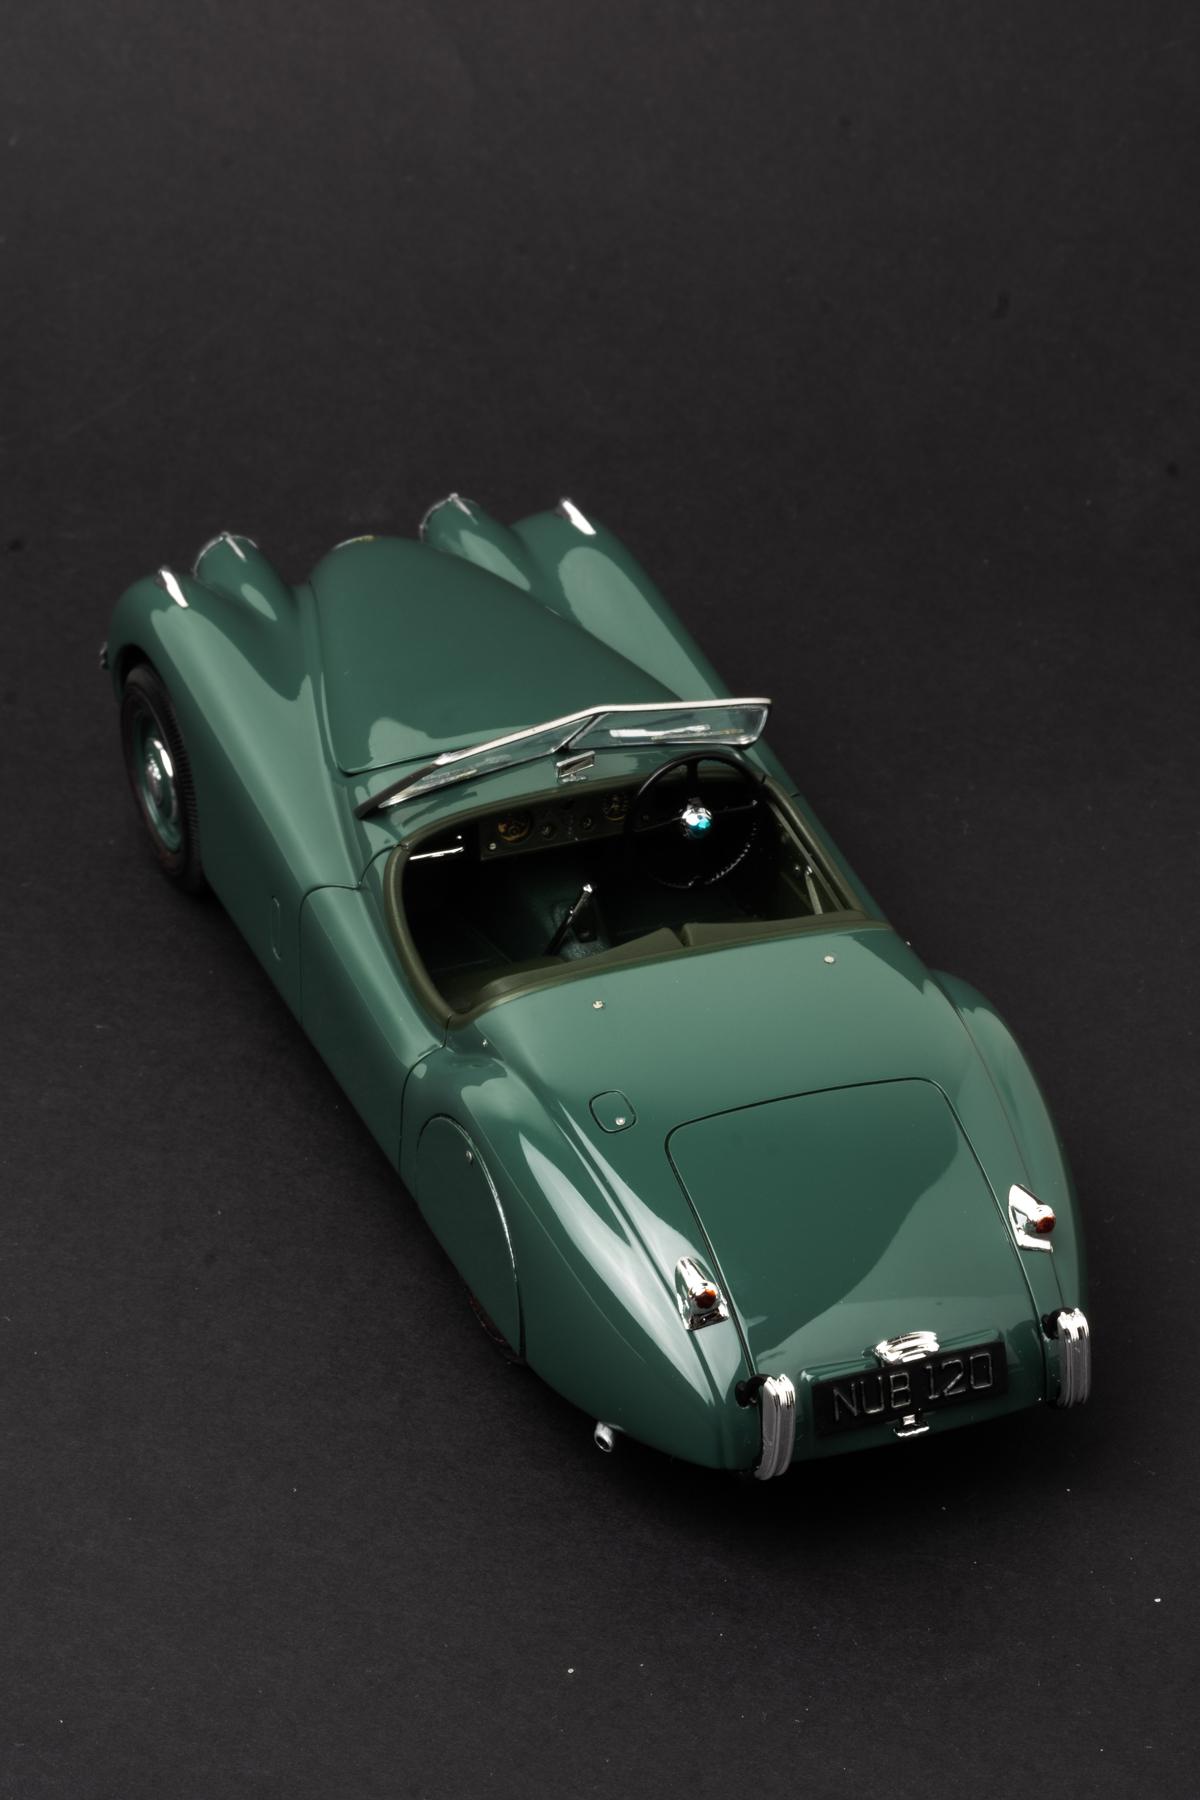
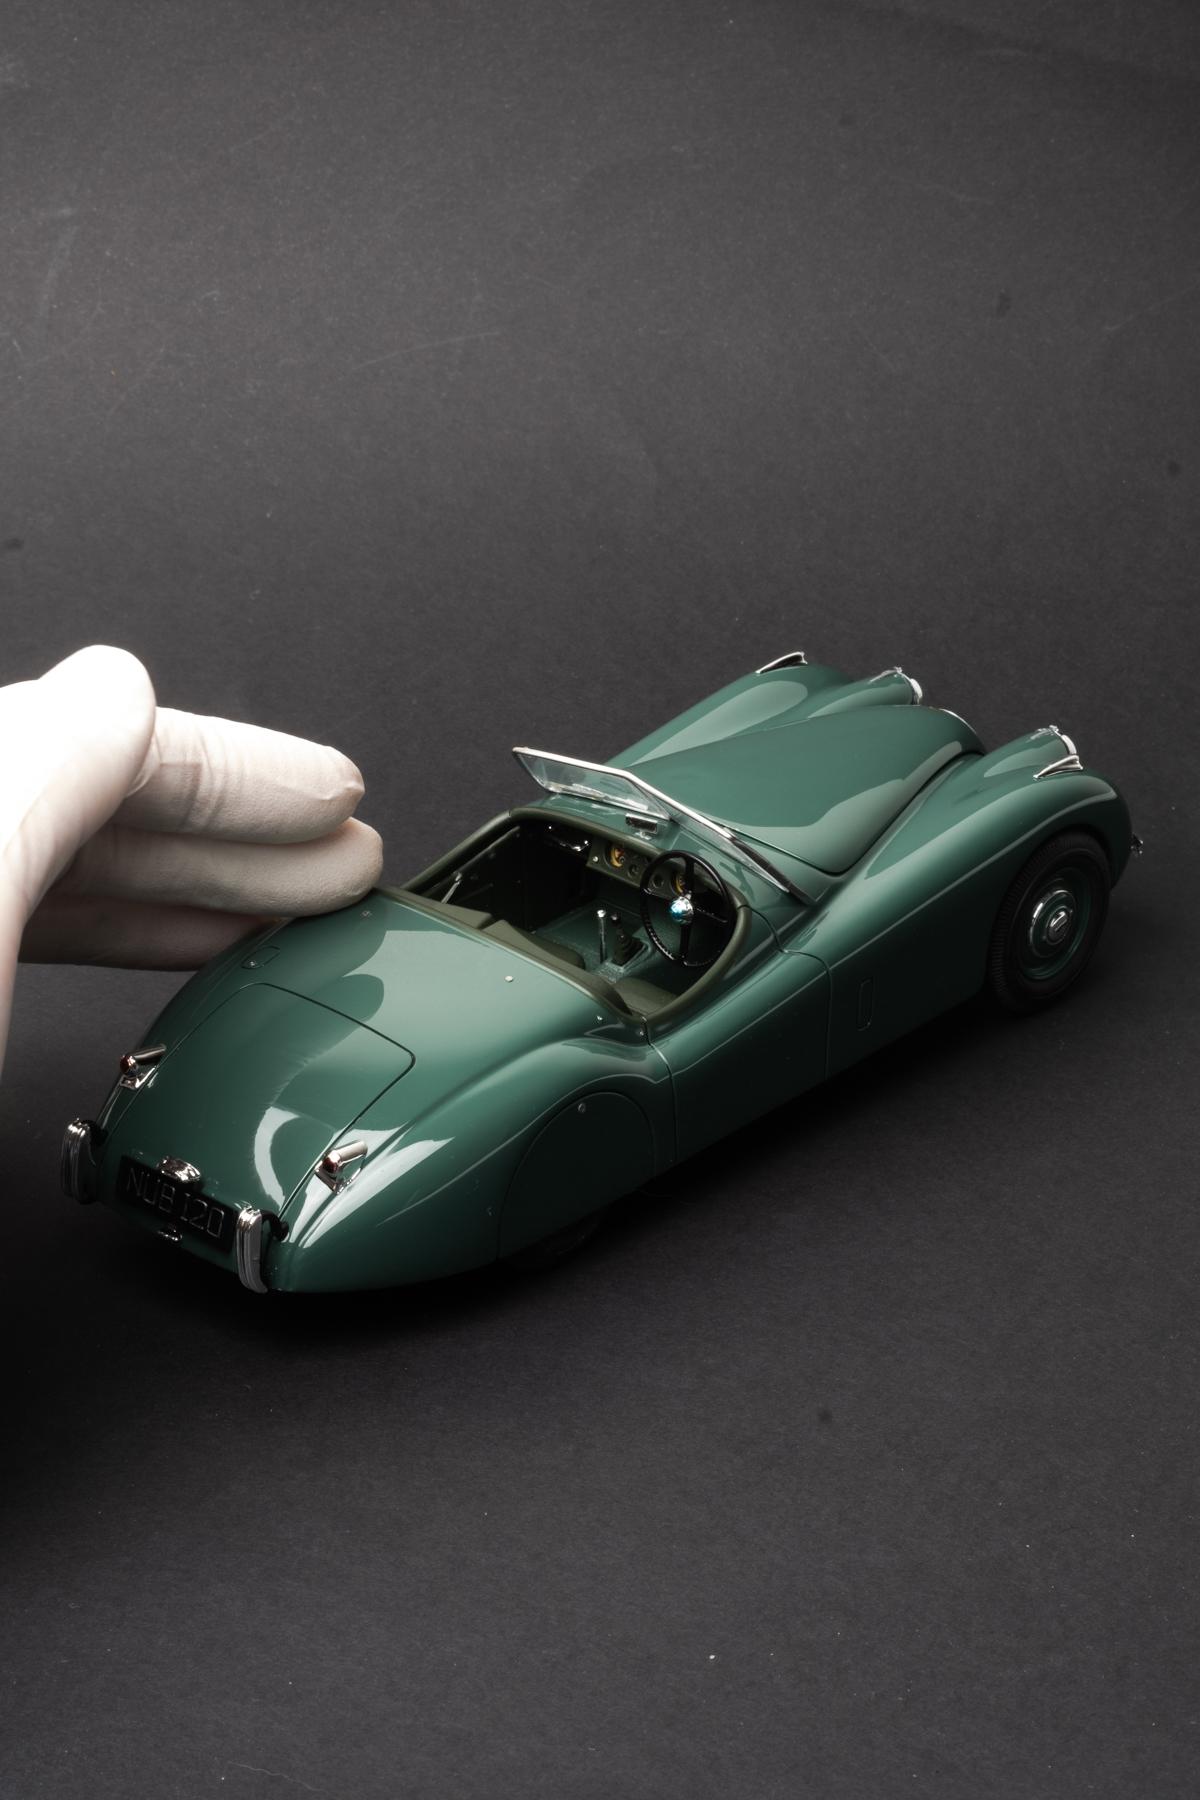
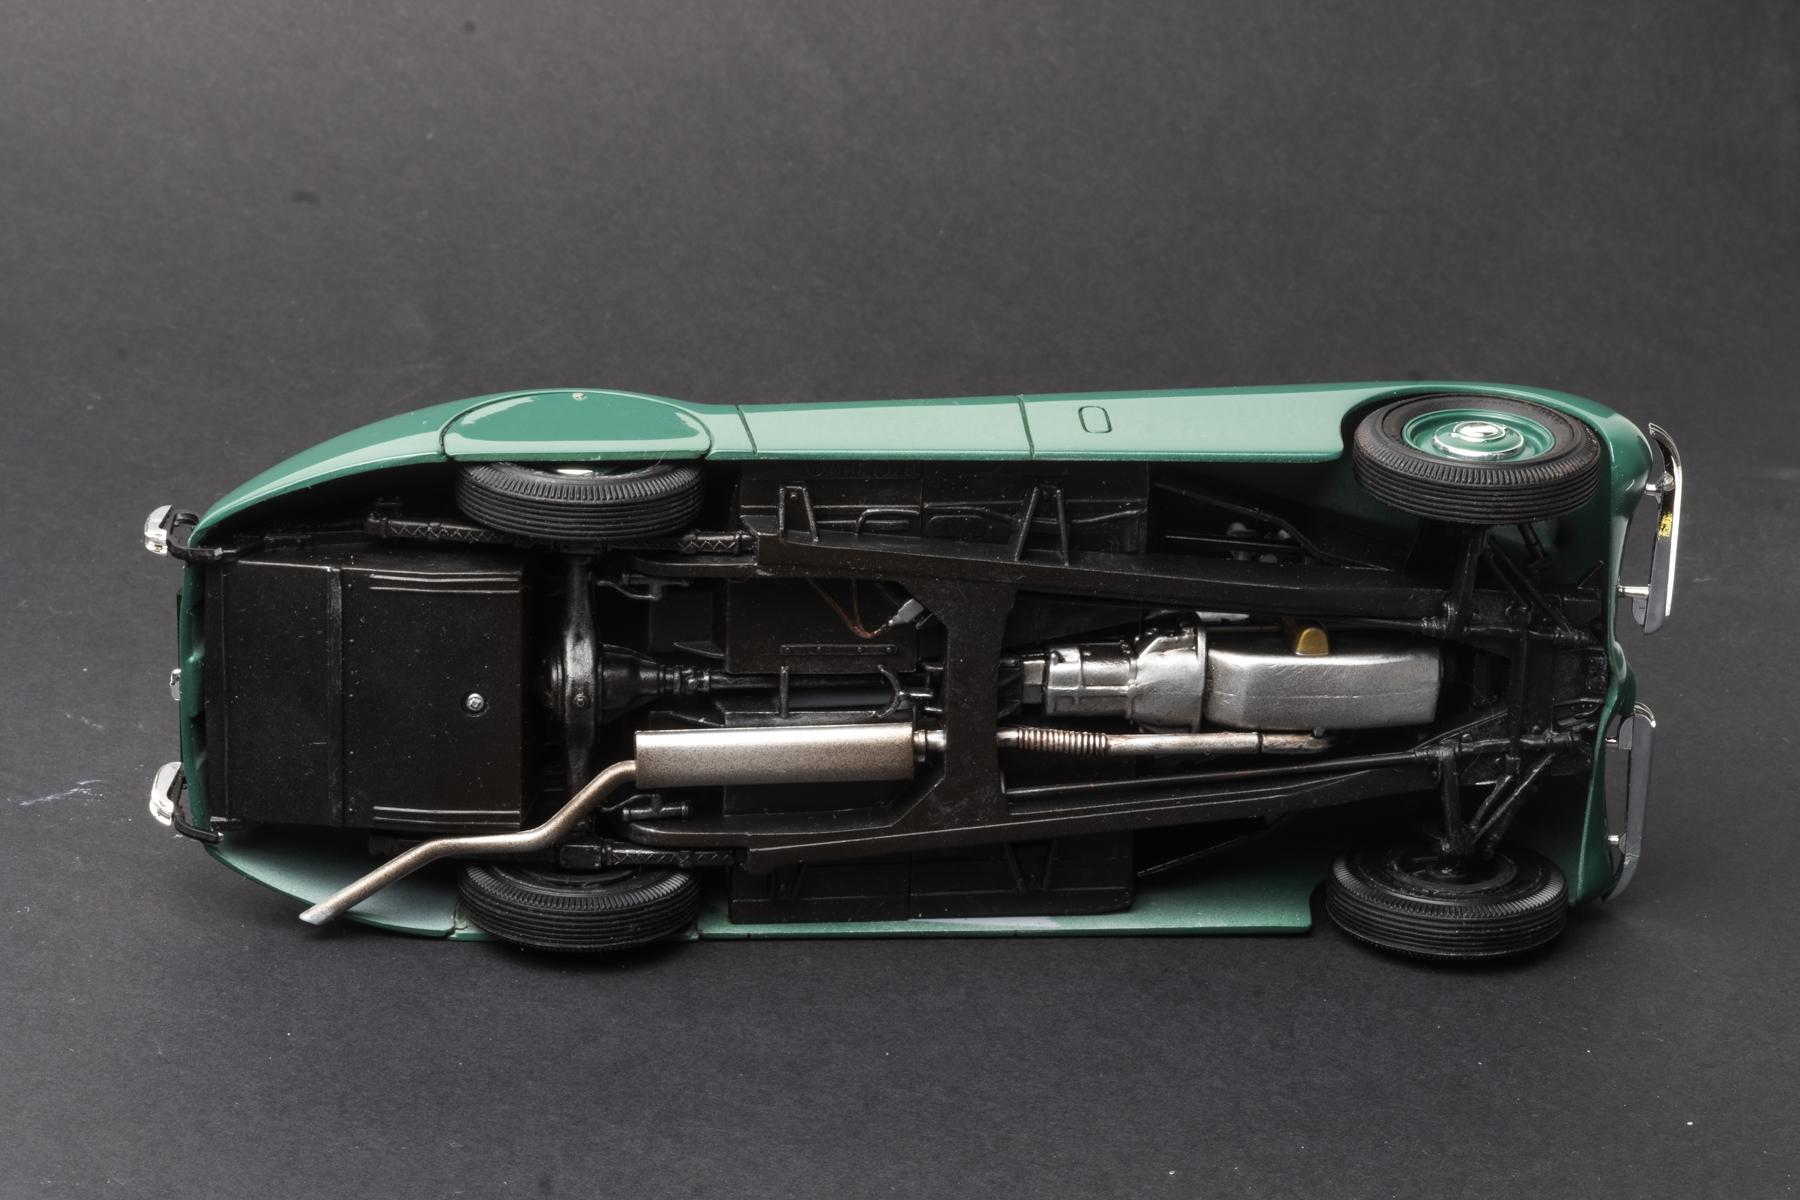
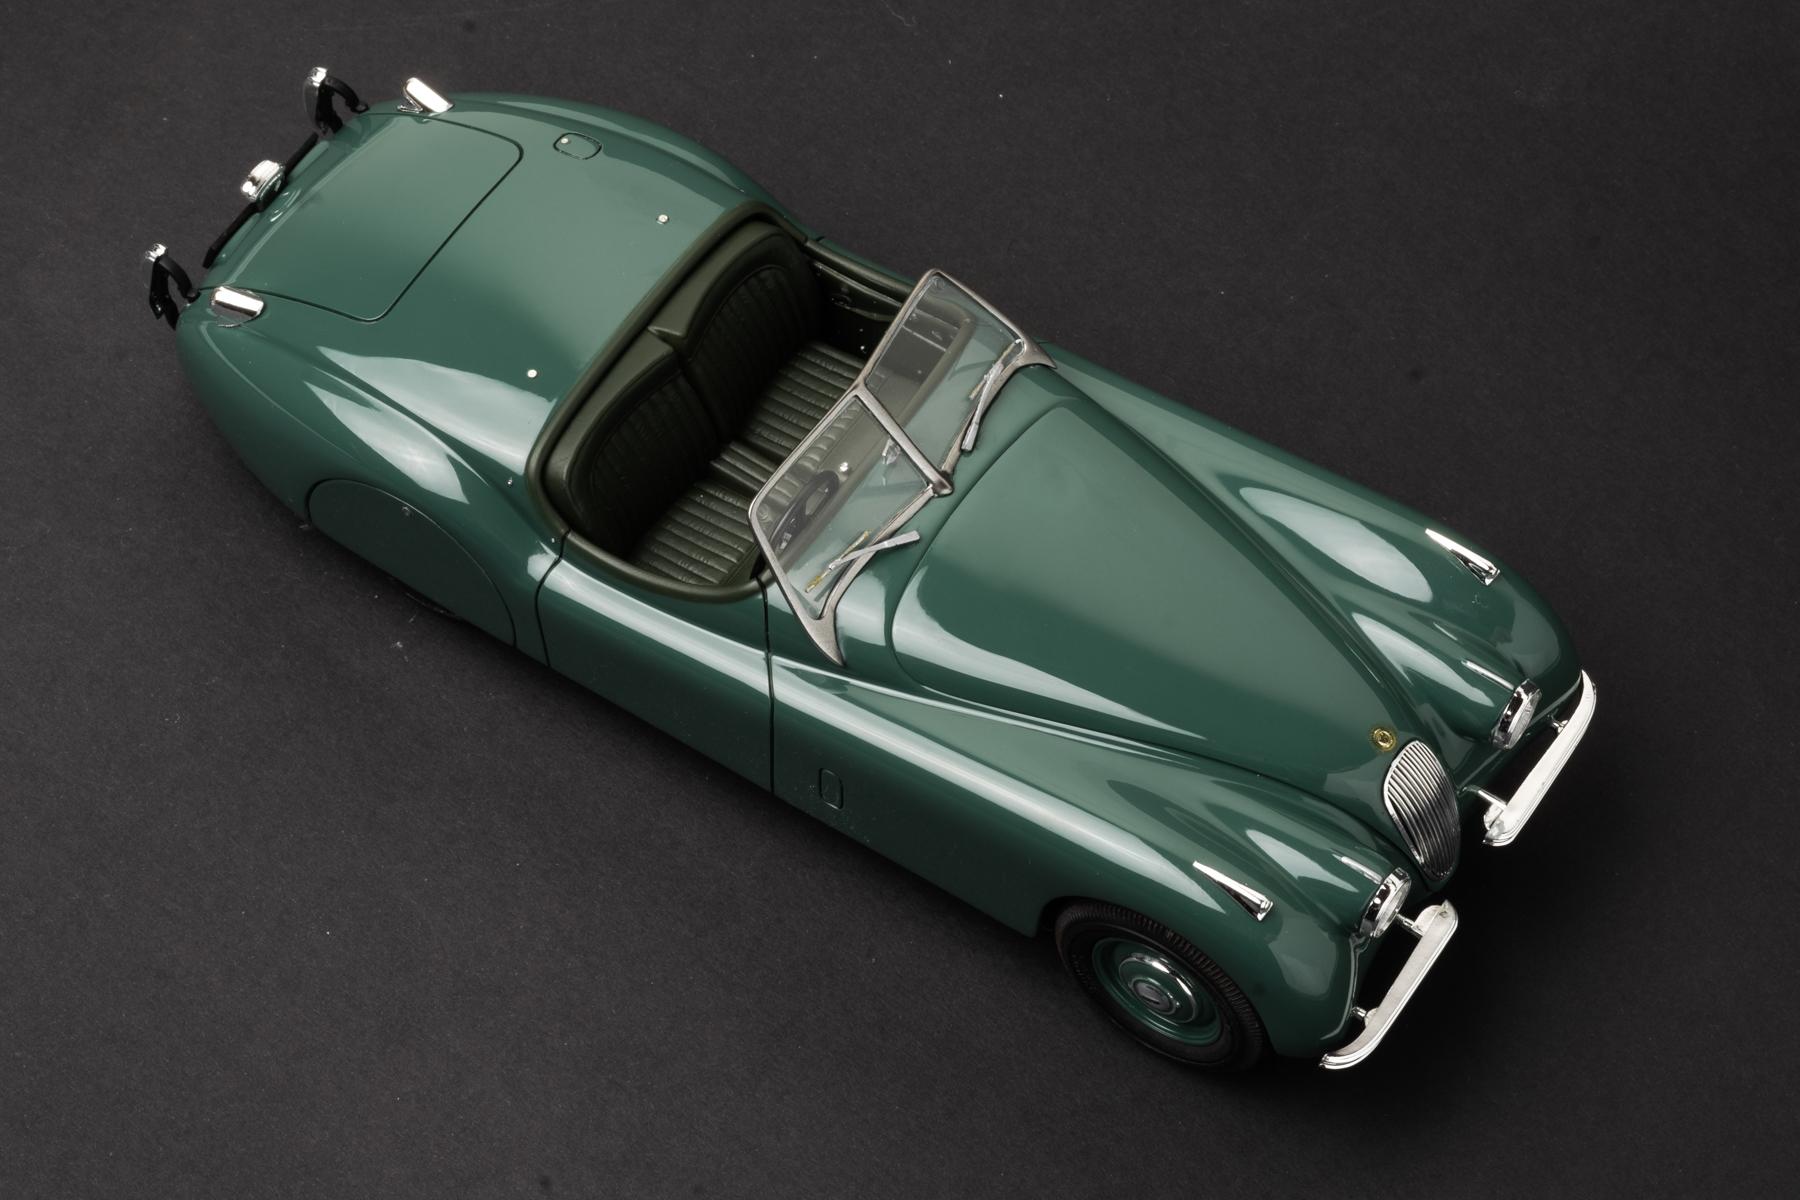
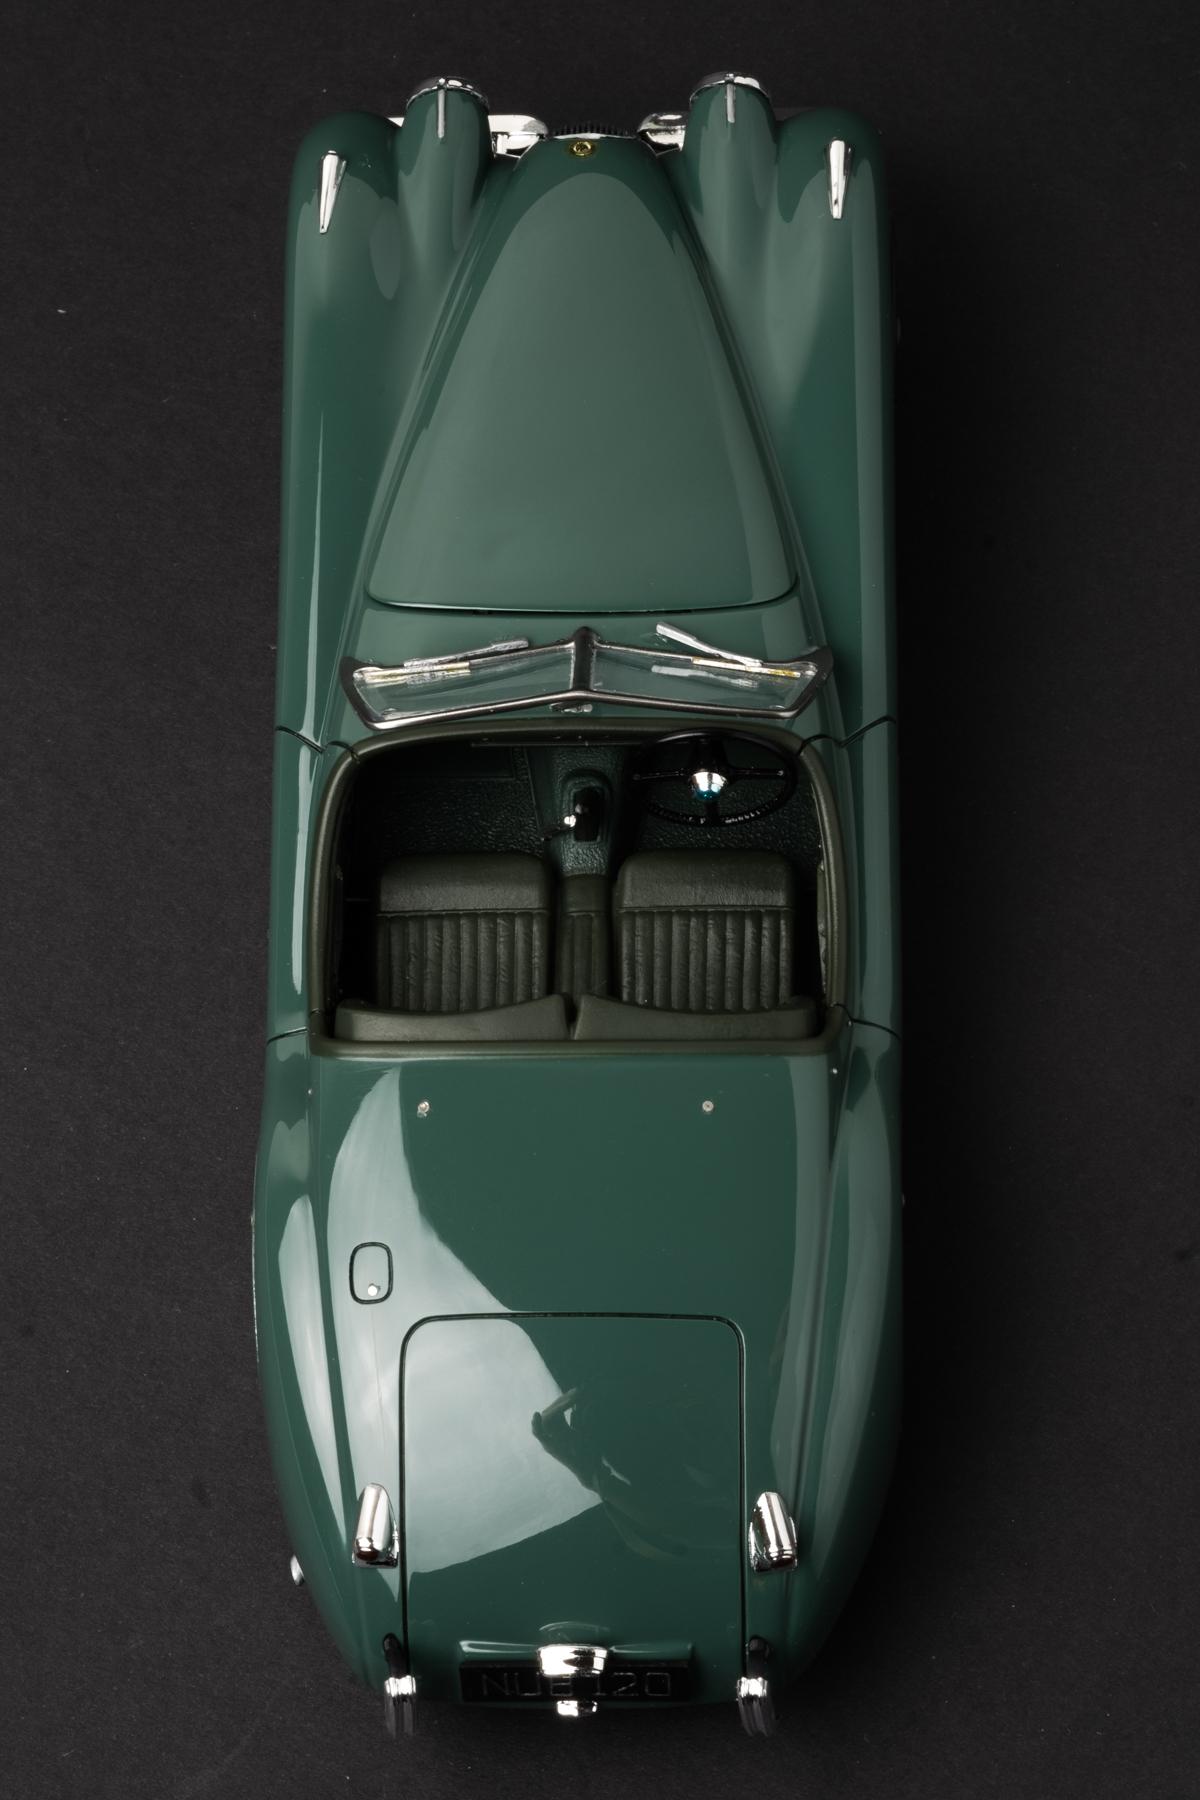
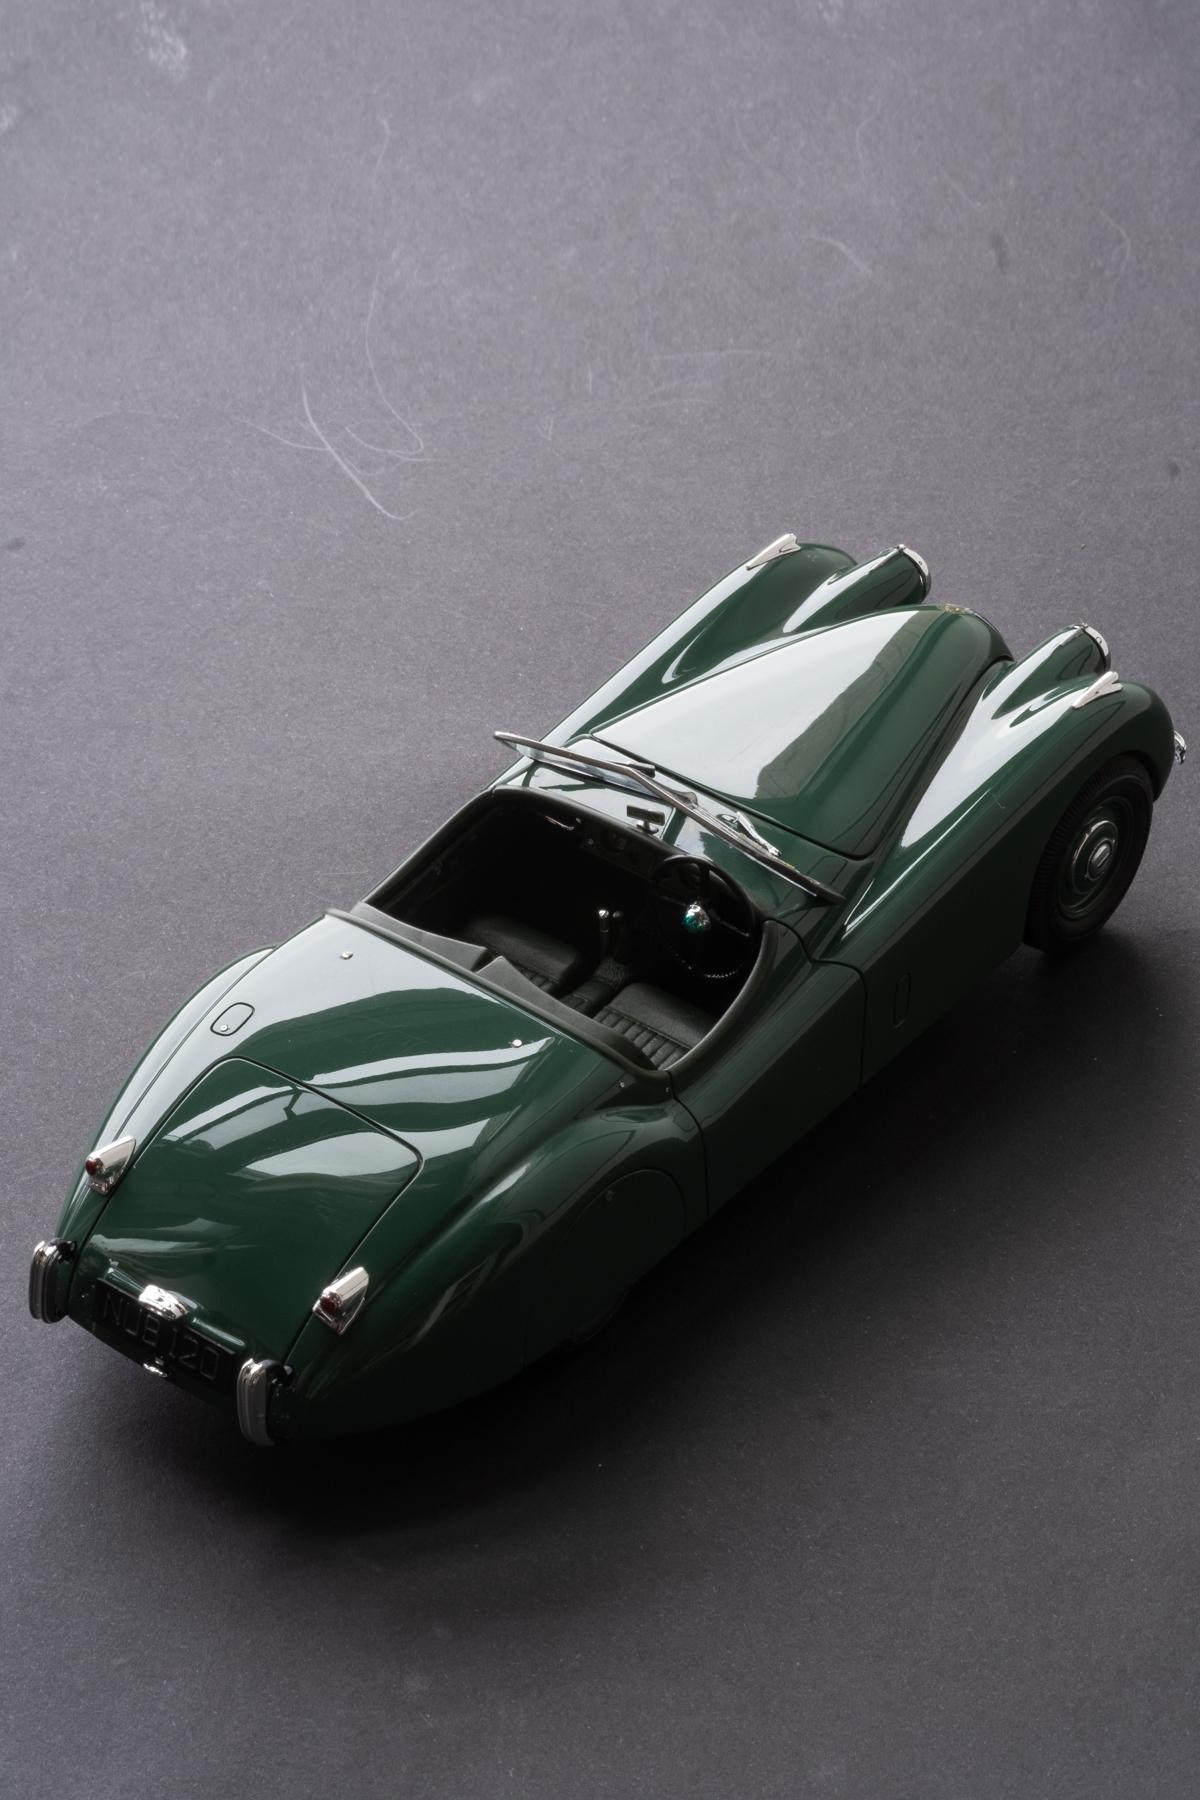
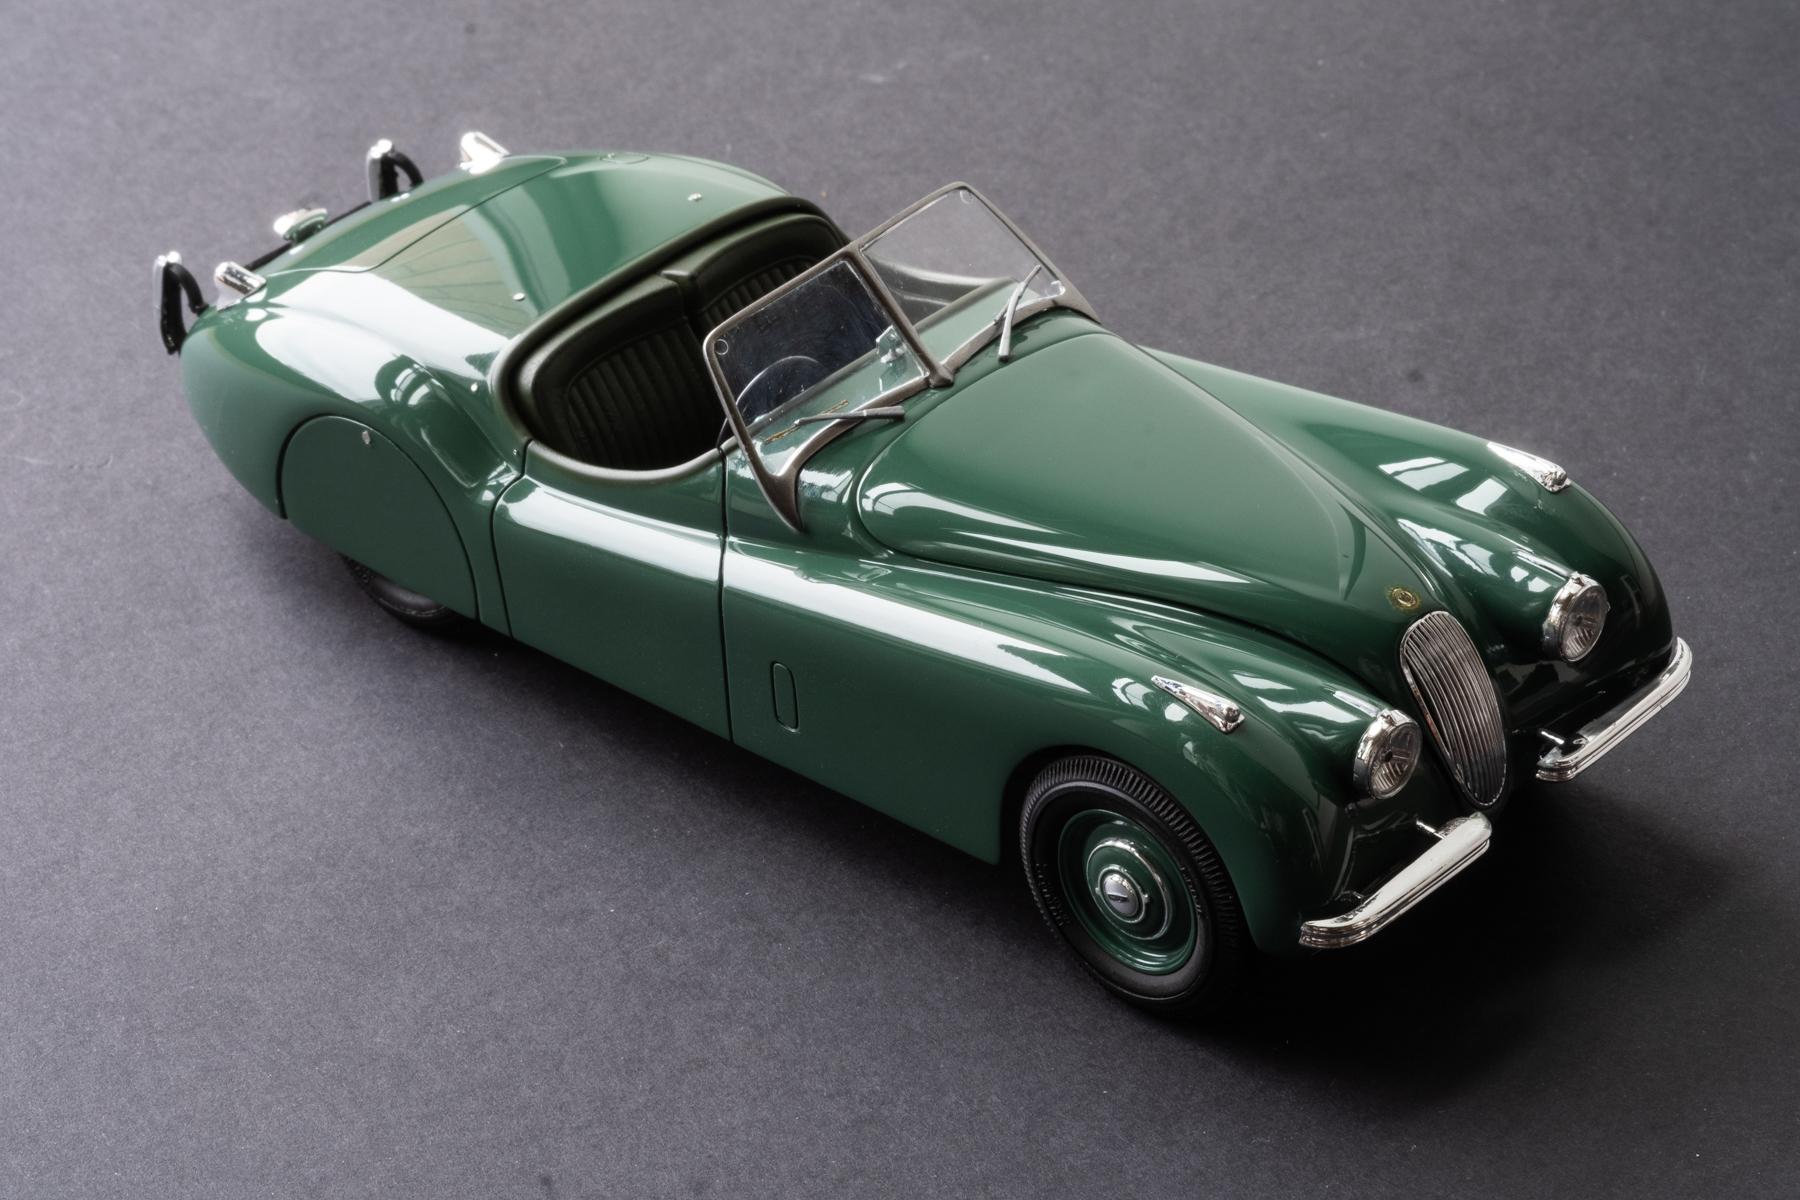
Hi all, Here’s my latest build - Revell/Monogram Jaguar XK120 build. My build concept was to simulate restored stock version and I picked Suede green for inside & out. Here’s my build process: - Scribed panel lines and wet sanded with 400 > 600 > 800 > 1000 grits - Added grey surfacer and wet sanded with 1500 grit - Mixed Mr color’s white, green, blue and black until I got the right tone - Applied 2 base colour coat > added super clear III > wet sanded with 2000 grit > added 2 other layers of super clear III > cured the paint for a month - Wet sanded the paint with 3000 grit > 6000 grit and polished with tamiya 3 strage compounds - Painted tires with flat clear and added weathering effect with pastel - Painted wheel cap with body color and carefully scratched off the paint from wheel cap - Painted two-tone interior with Mr color’s Ijin green and body colour - Trimmed windscreen frame thinner, de-chromed it and painted with Alclad - Made a pair of wipers from spare parts - Applied various size rivets across the body Considering this is a re-release of old Monogram metal kit from 70s, the fit and finish was great and I was able to assemble with minimal modification. As with most Monogram kits the textures are amazing, and this kit actually had good looking tires that just needed a different finish. Next up in my build is another Monogram kit - stay tuned!
- 41 replies
-
- 16
-
-
I've been looking for this kit but it's now rare to find - wonderful build! What wheel did you use? That doesn't look like stock academy wheels.
-
Lovely build! Tan interior really suits the paint color too.
-
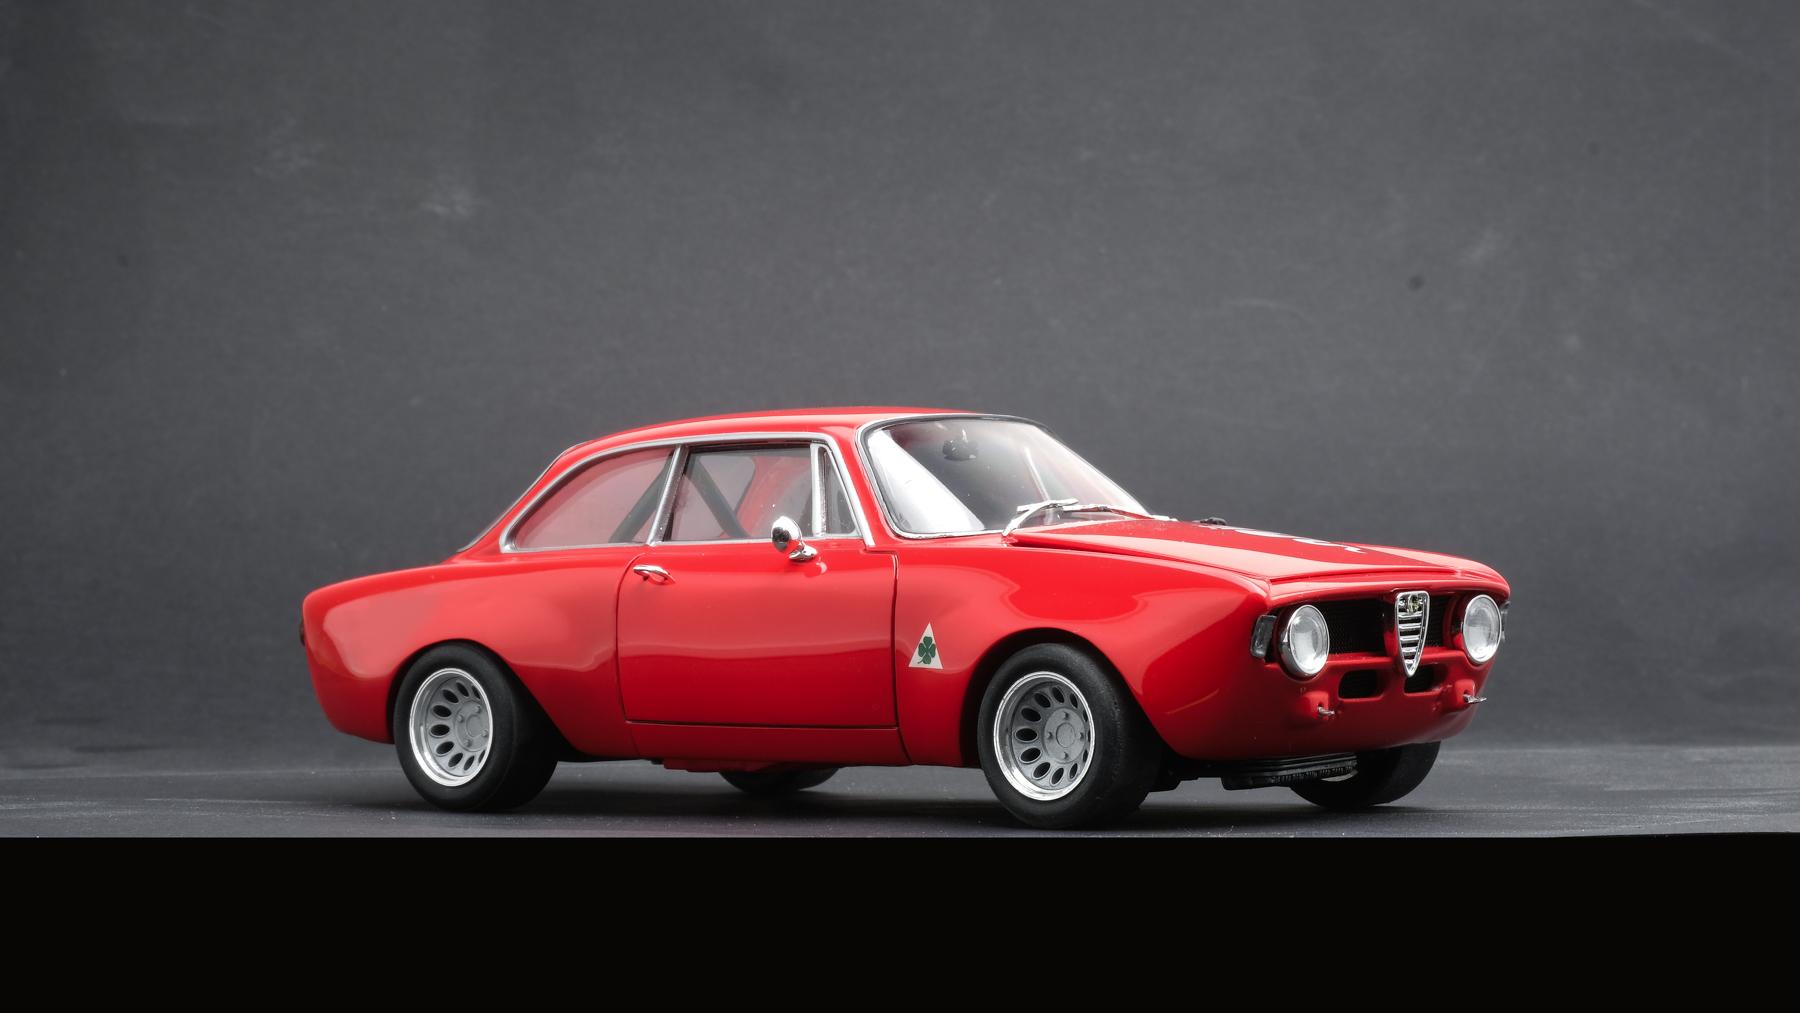
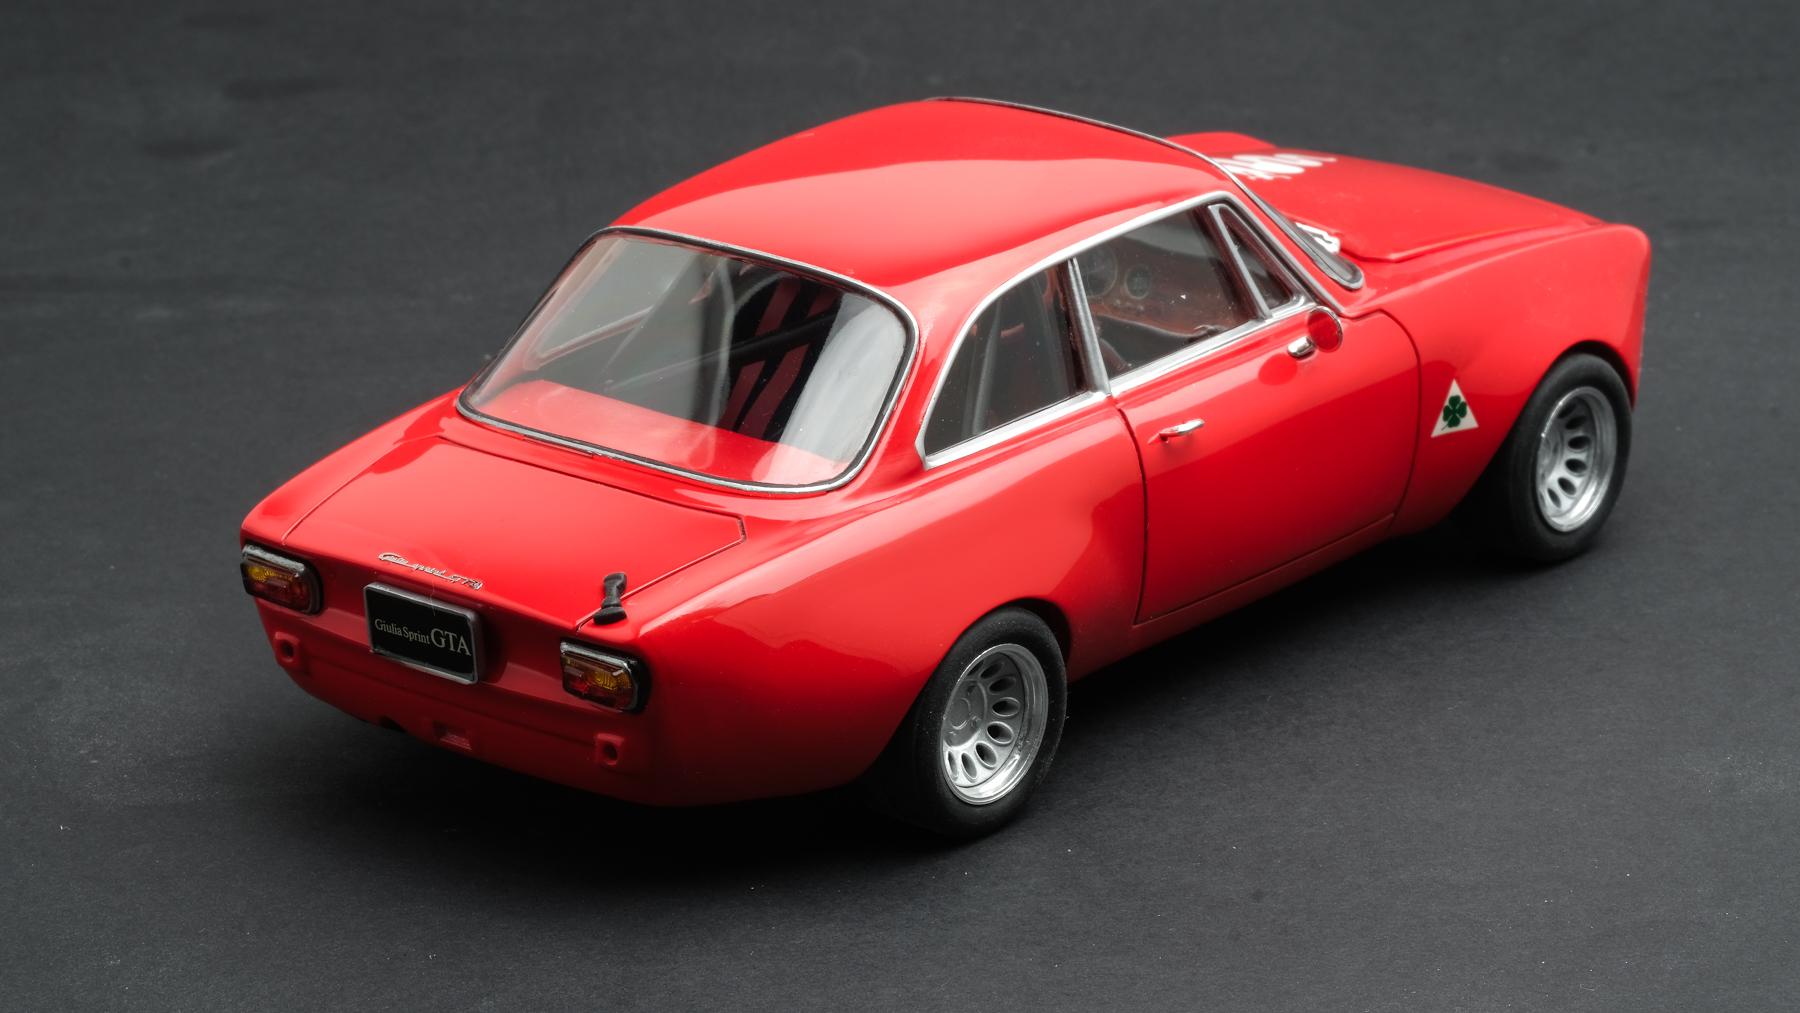
1970 Alfa Romeo Giulia GTA 1300 Junior (Tamiya + Scaleproduction transkit)
e30lover replied to e30lover's topic in Model Cars
Thank you! Thanks a lot! I dropped the body on my desk when I was polishing it and cracked the rear quarter fender so I had to do a partial respray! Thank you! Thanks! Thank you! It's a lovely kit to build. It was a lot of hassle to make fender flares but definitely worth it! Thanks! Thank you! Thanks a lot! Appreciate it! Thank you! Thanks! -
I really like your build! Love the clean paint and vibe!
-
Here's my finished build with photos:
-
Thank you! Me too! I love old Alfas. I totally agree. More kits need to be made like these. Thank you! Thanks a lot! Thank you! I wish I can get another one of these and build box stock! Thank you! Thanks! Tamiya does re-release some other Alfa kits and RCs in every couple of years.. one day! Thank you! That's gonna look very period correct! Thank you!
-
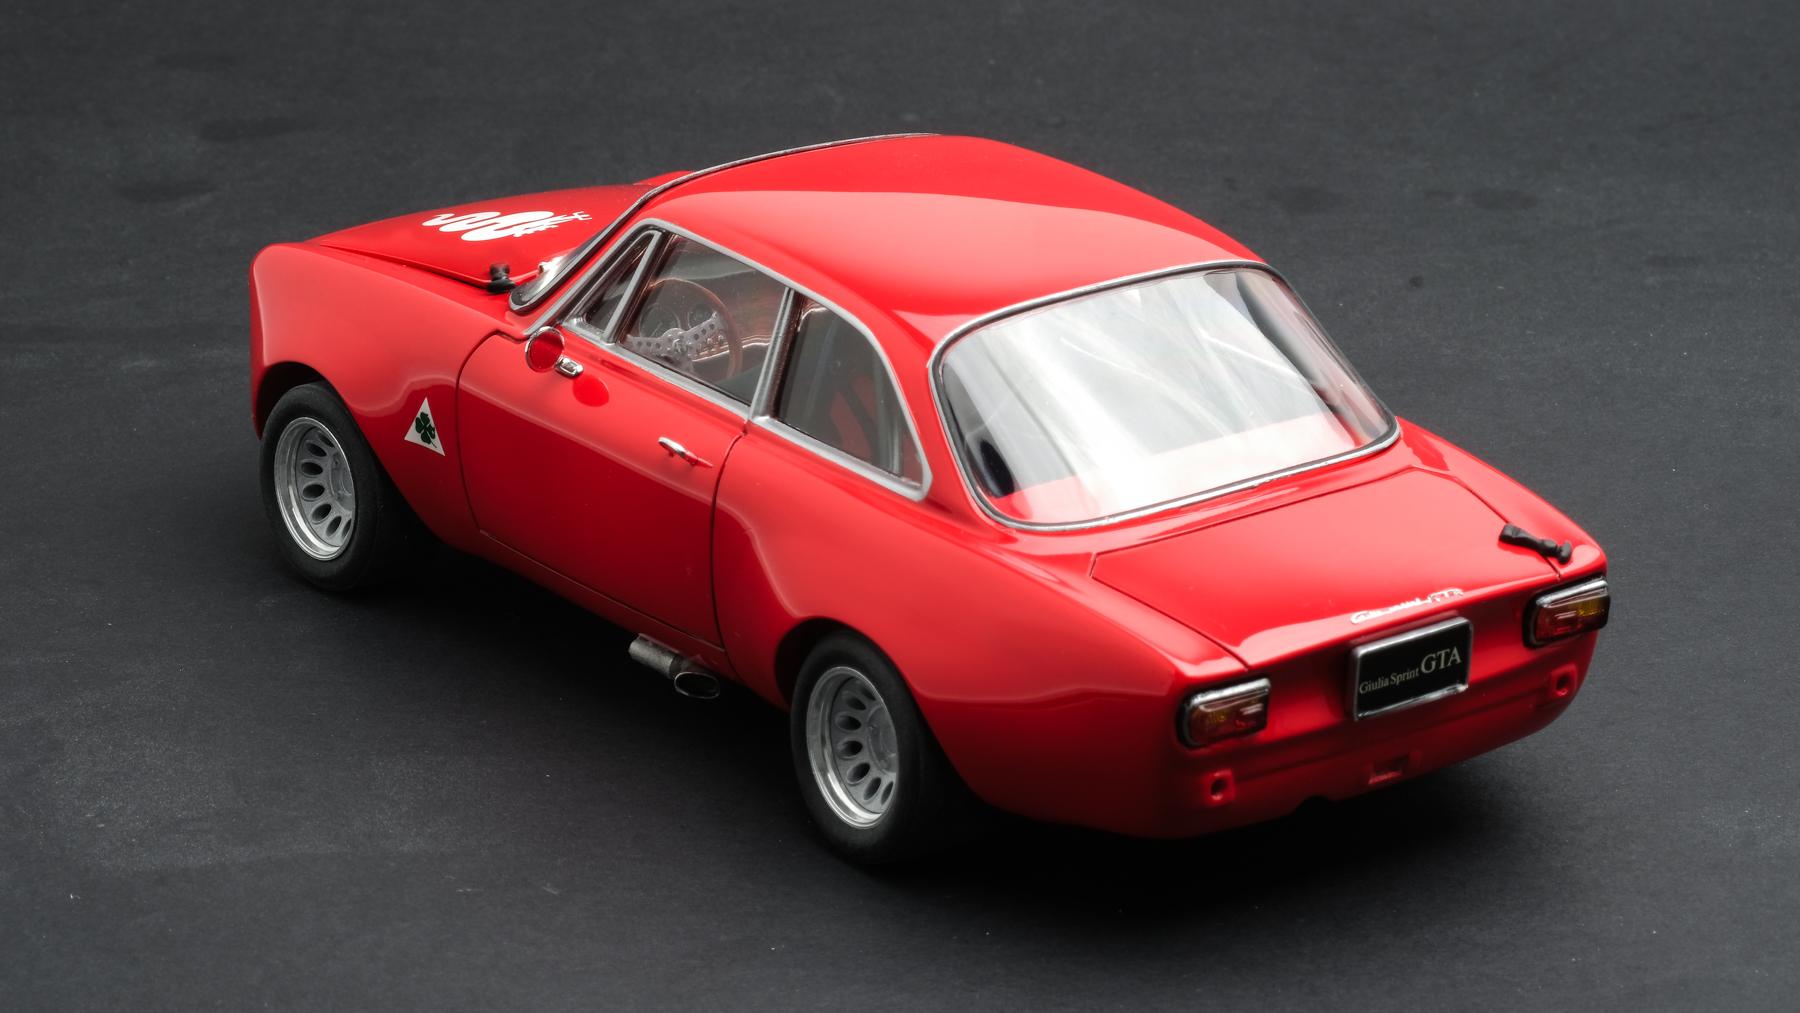
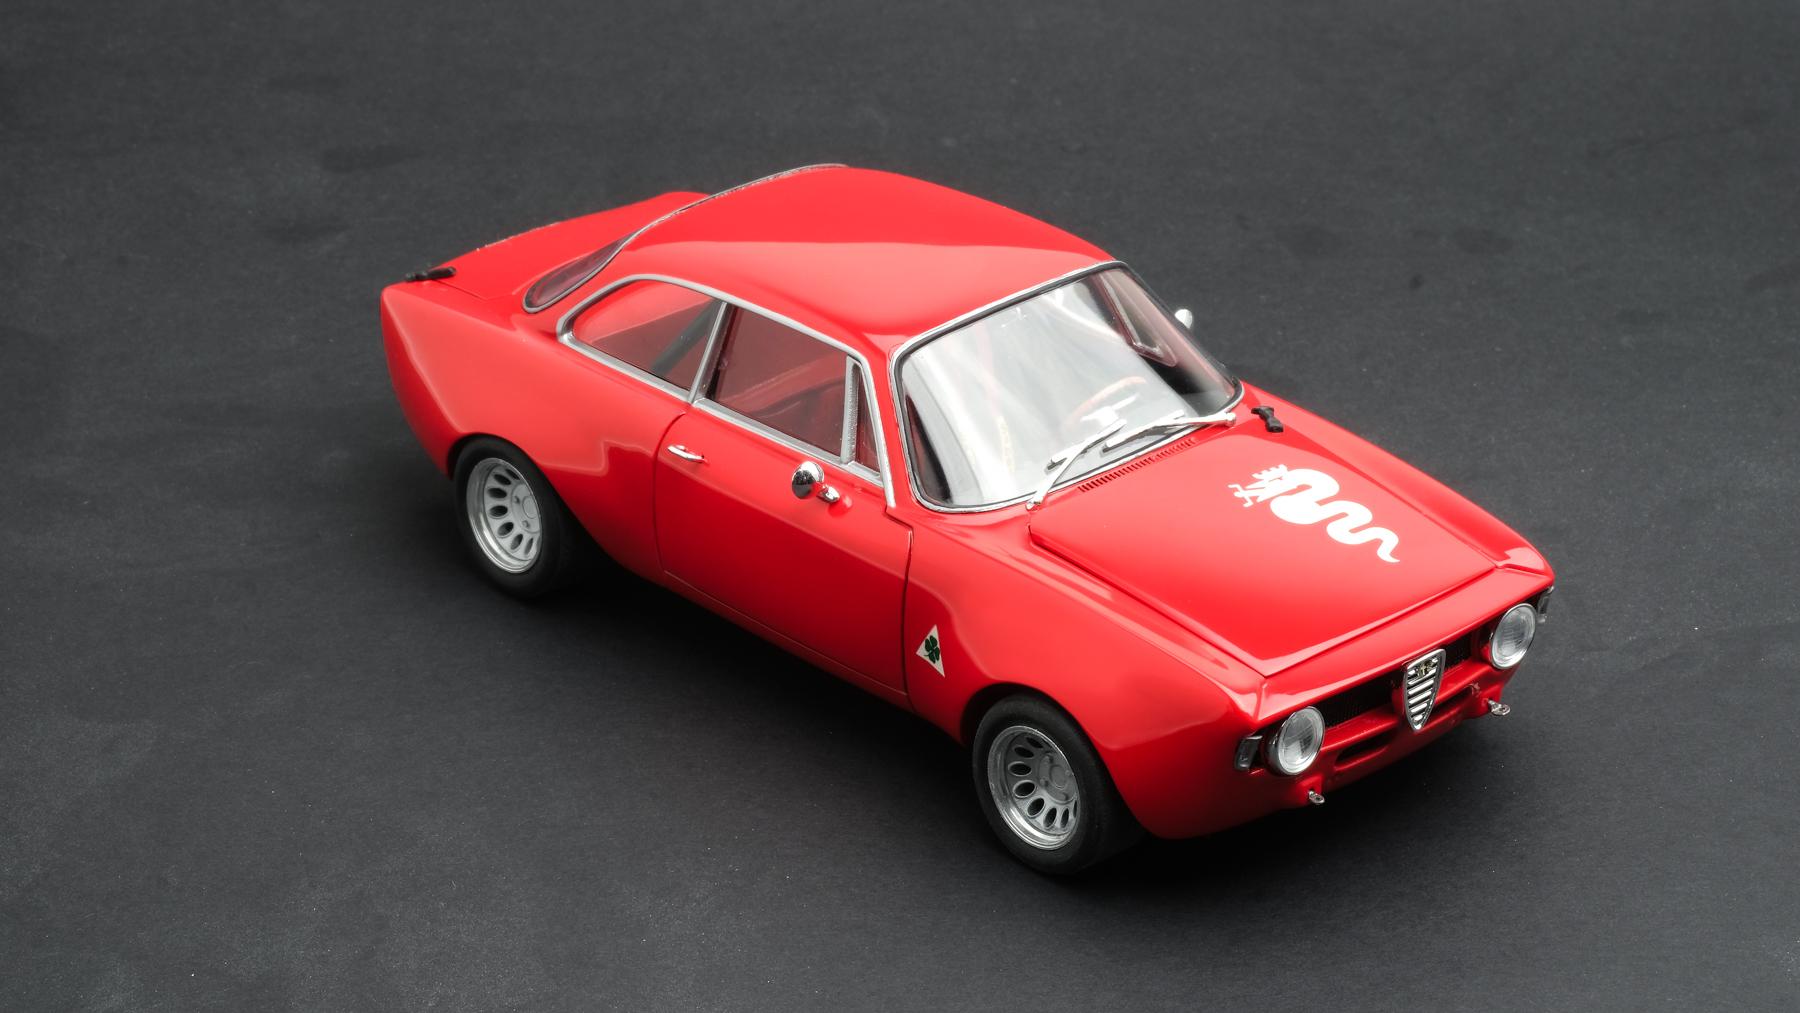
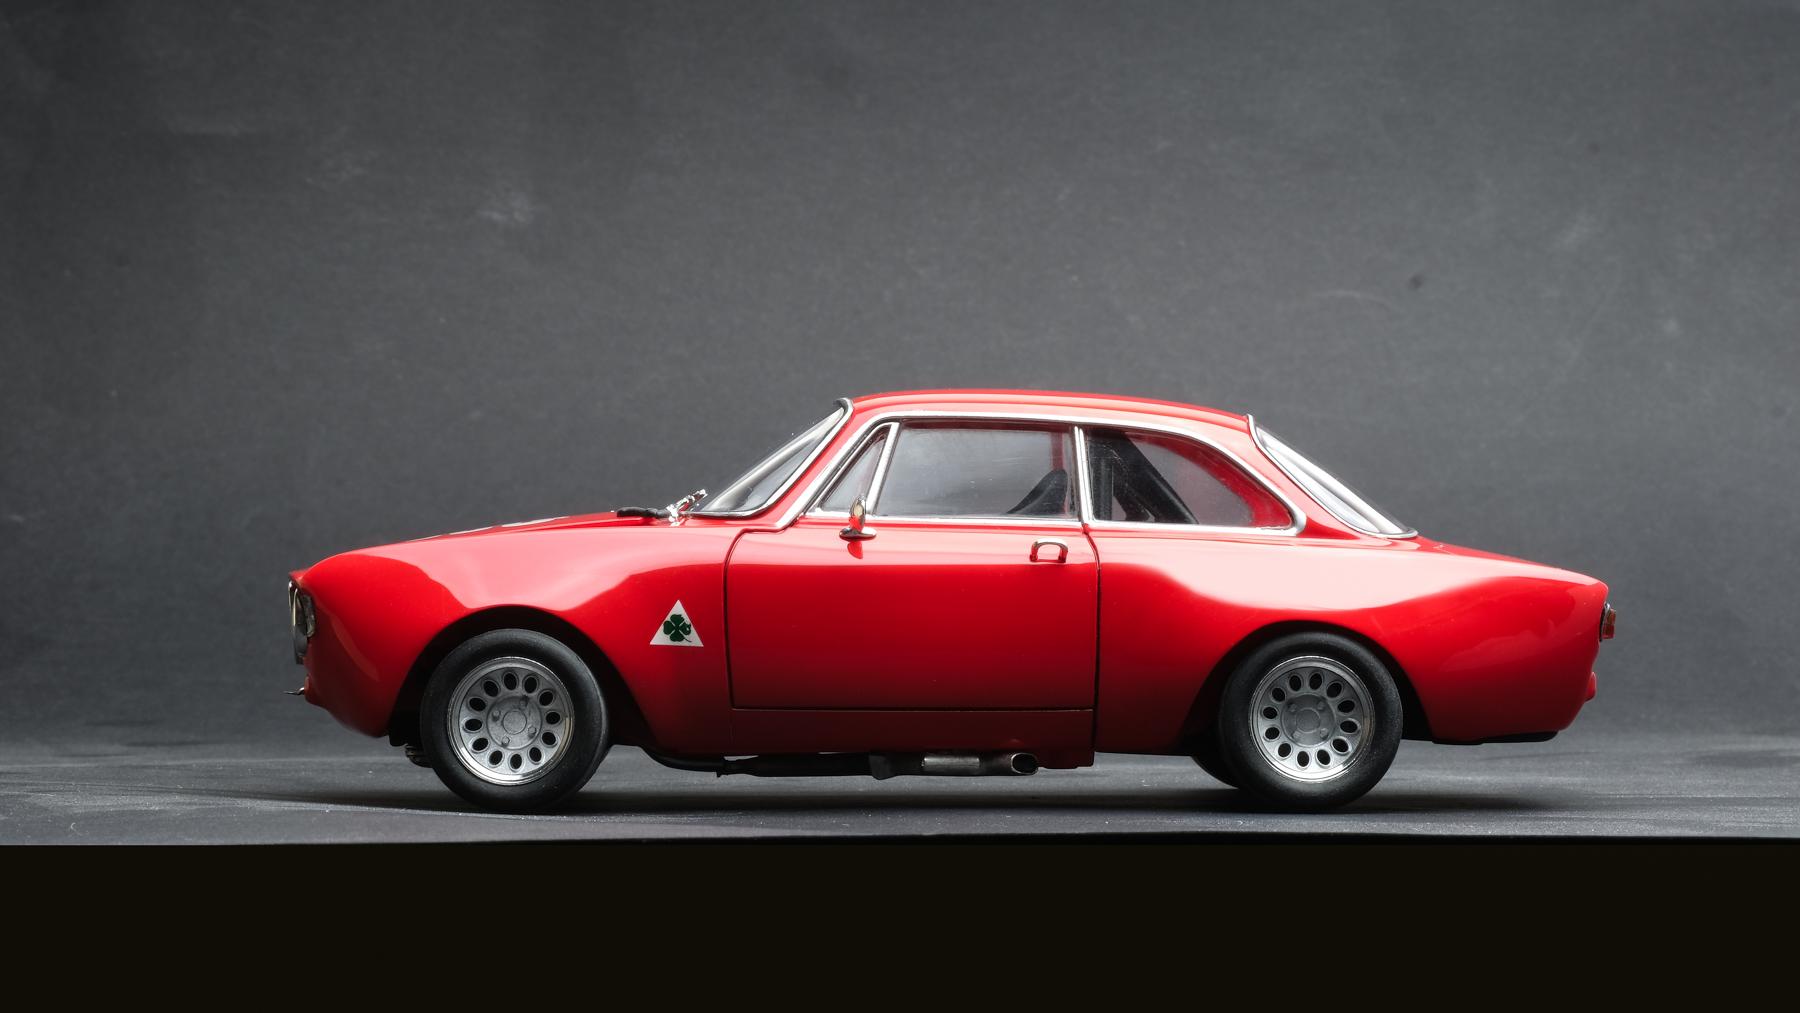
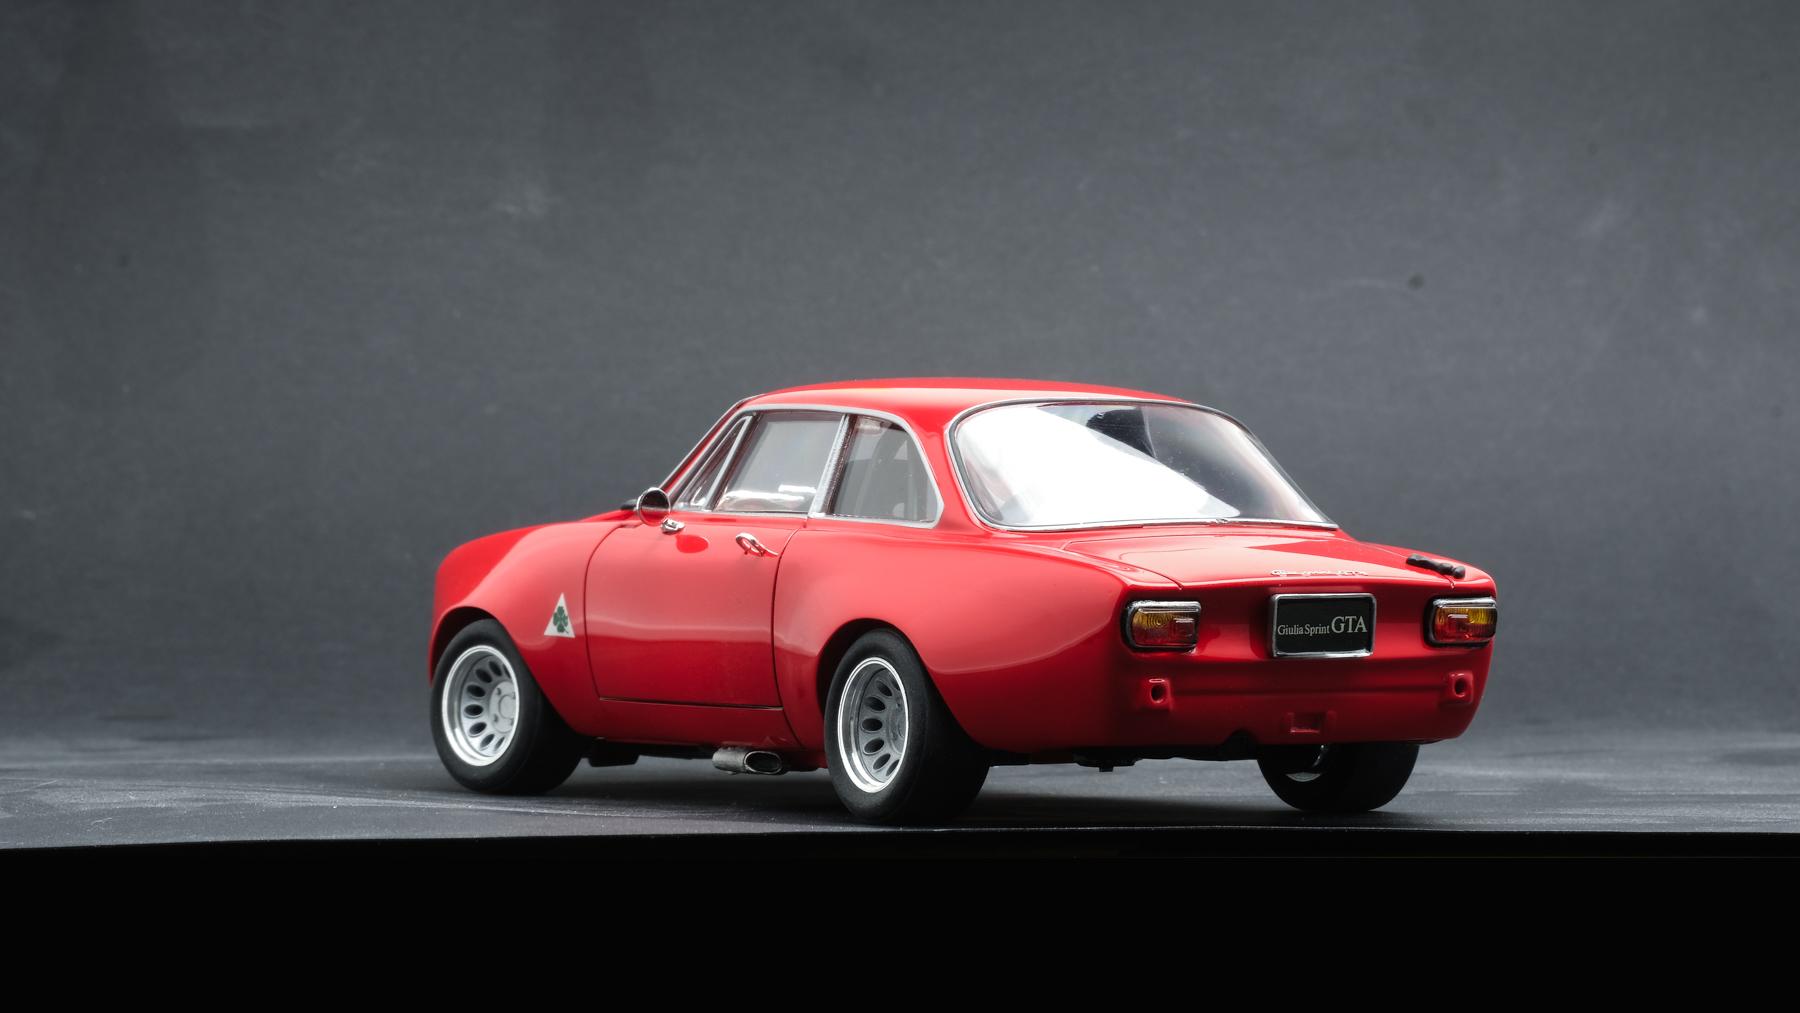
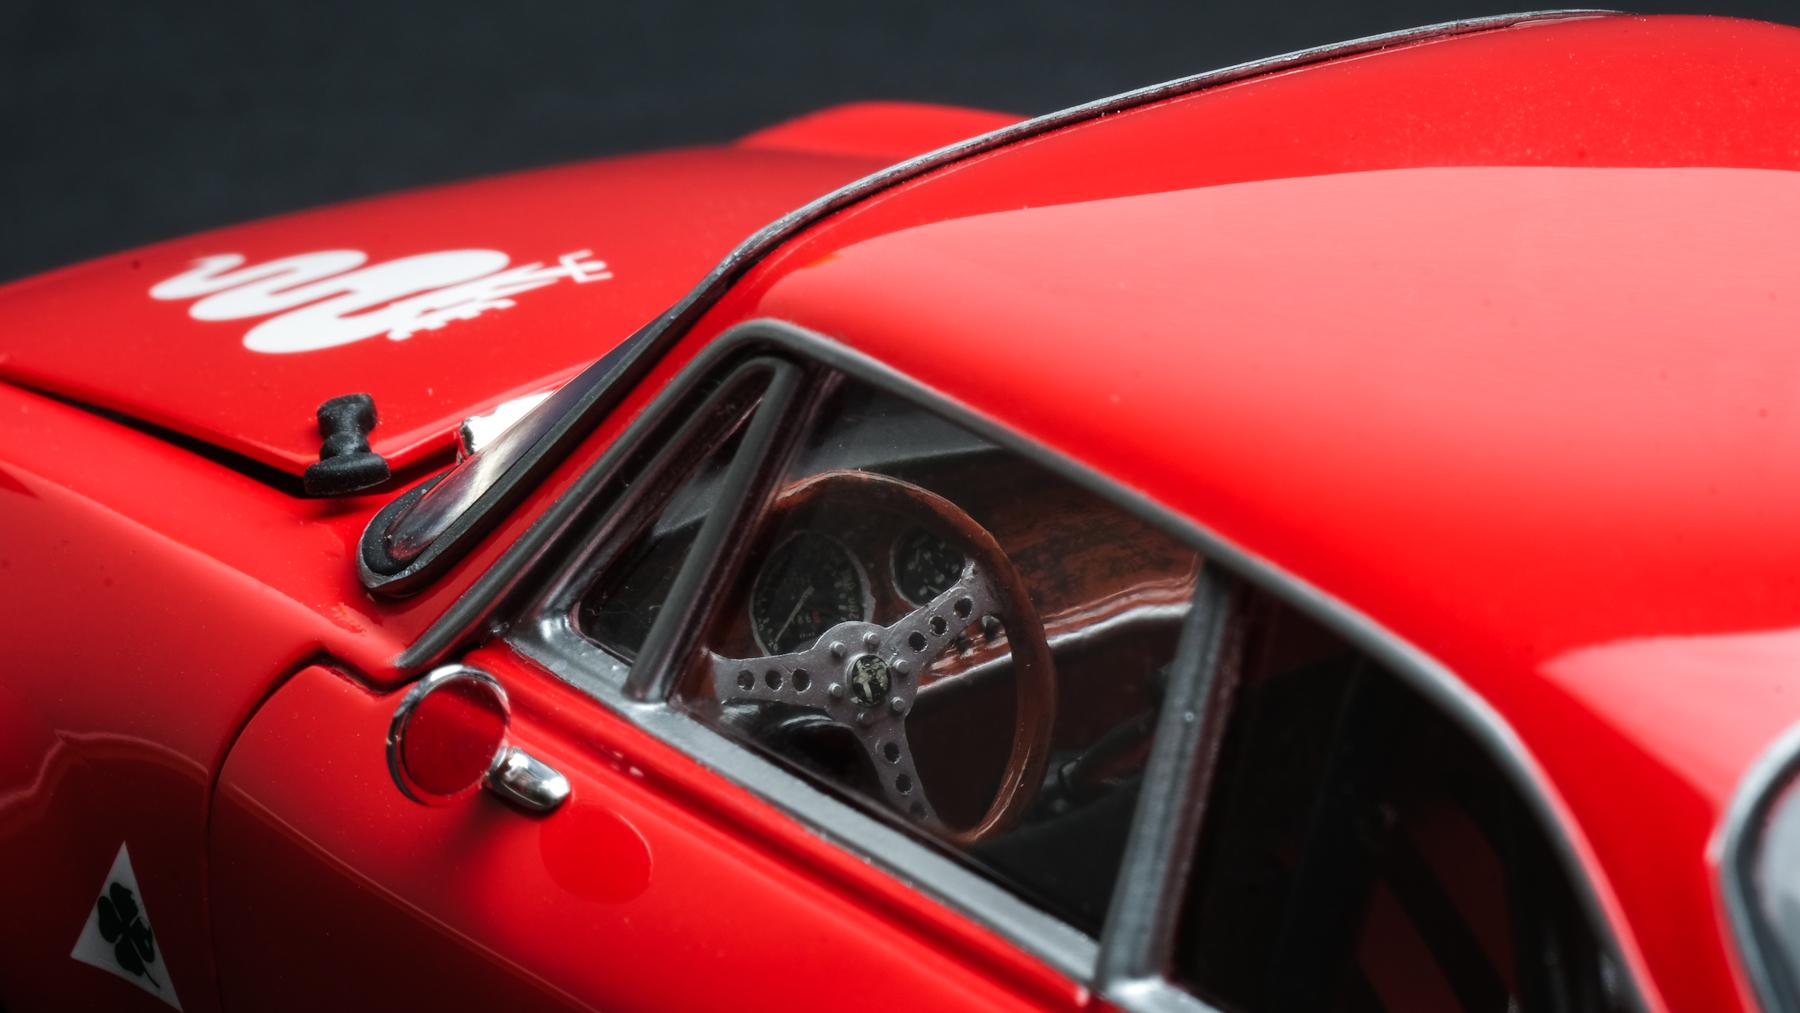
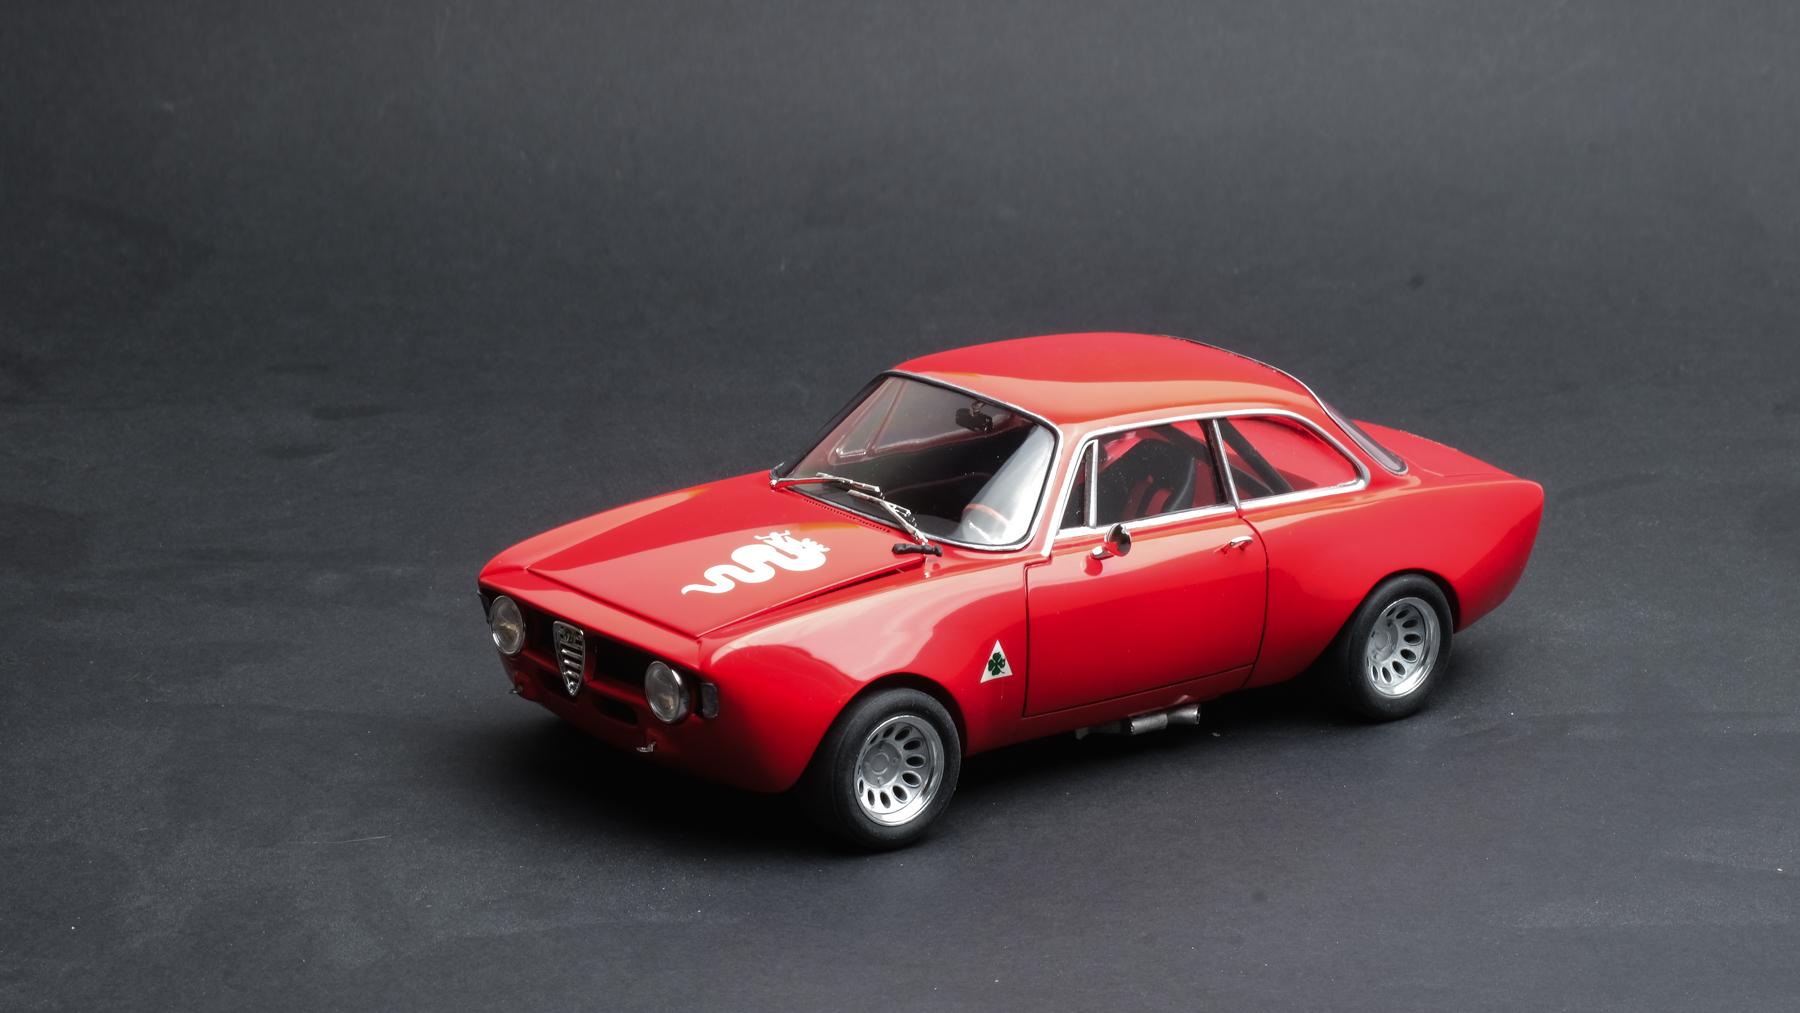
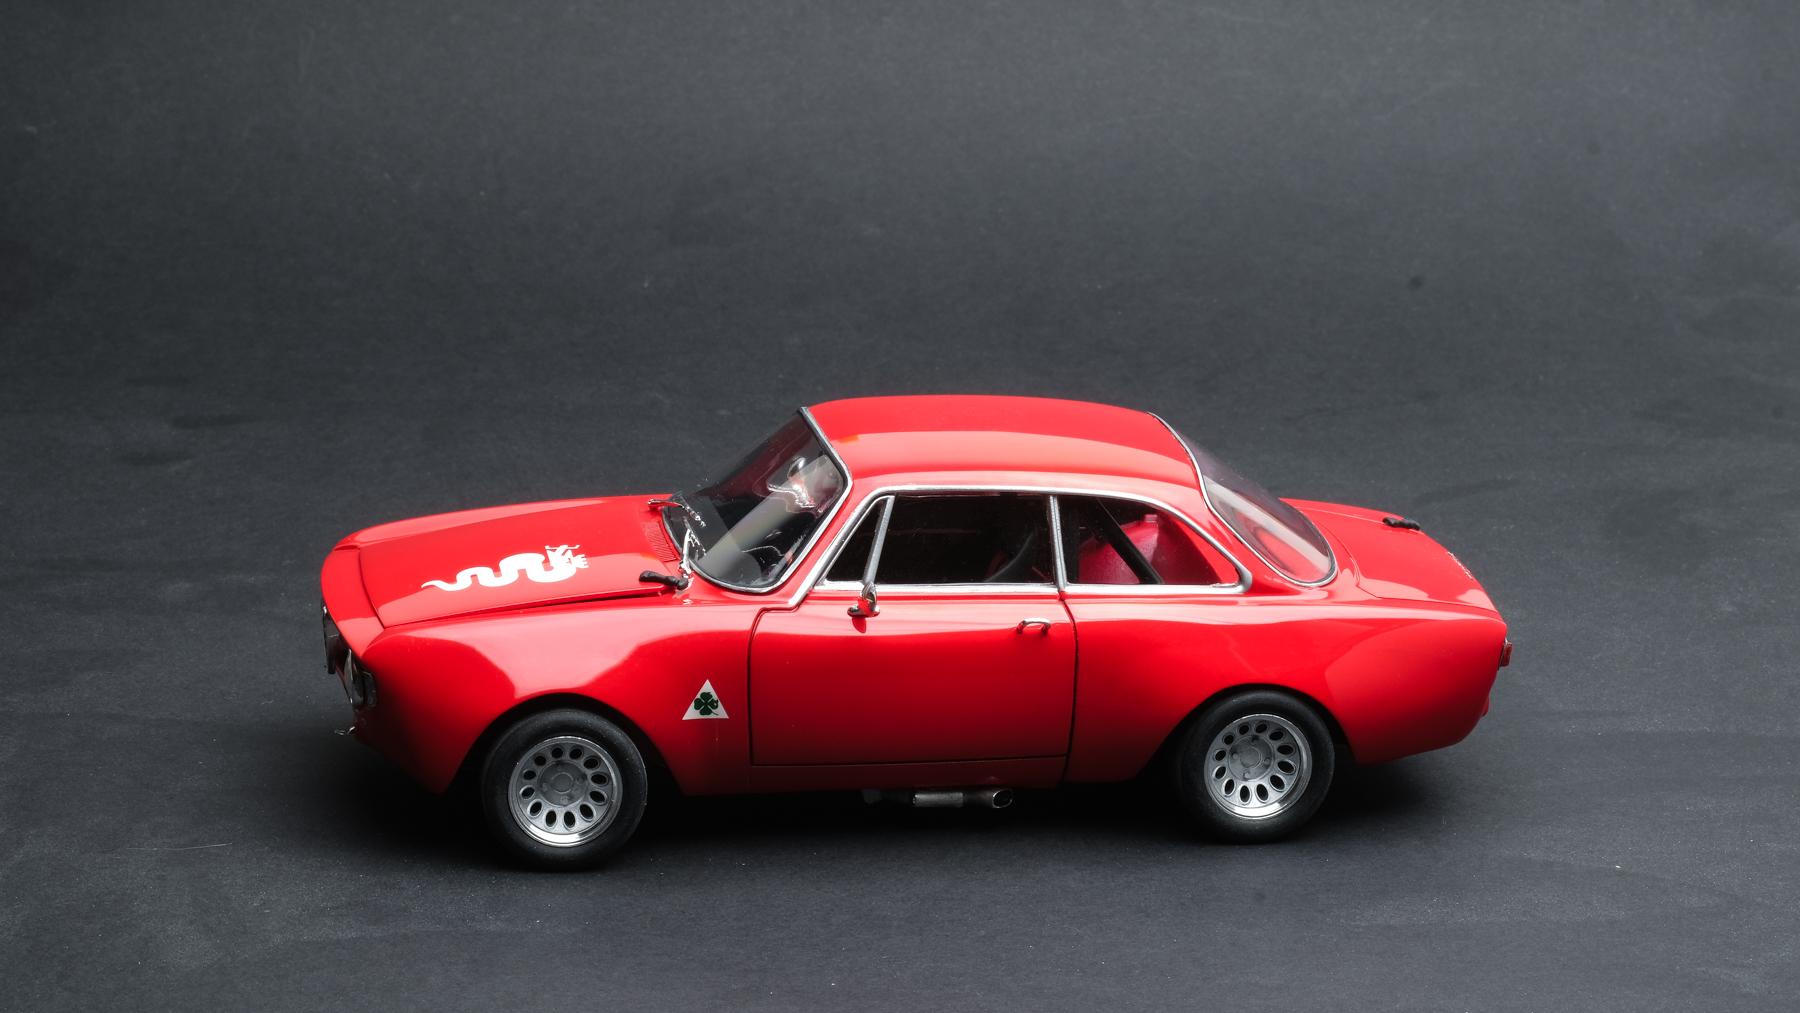
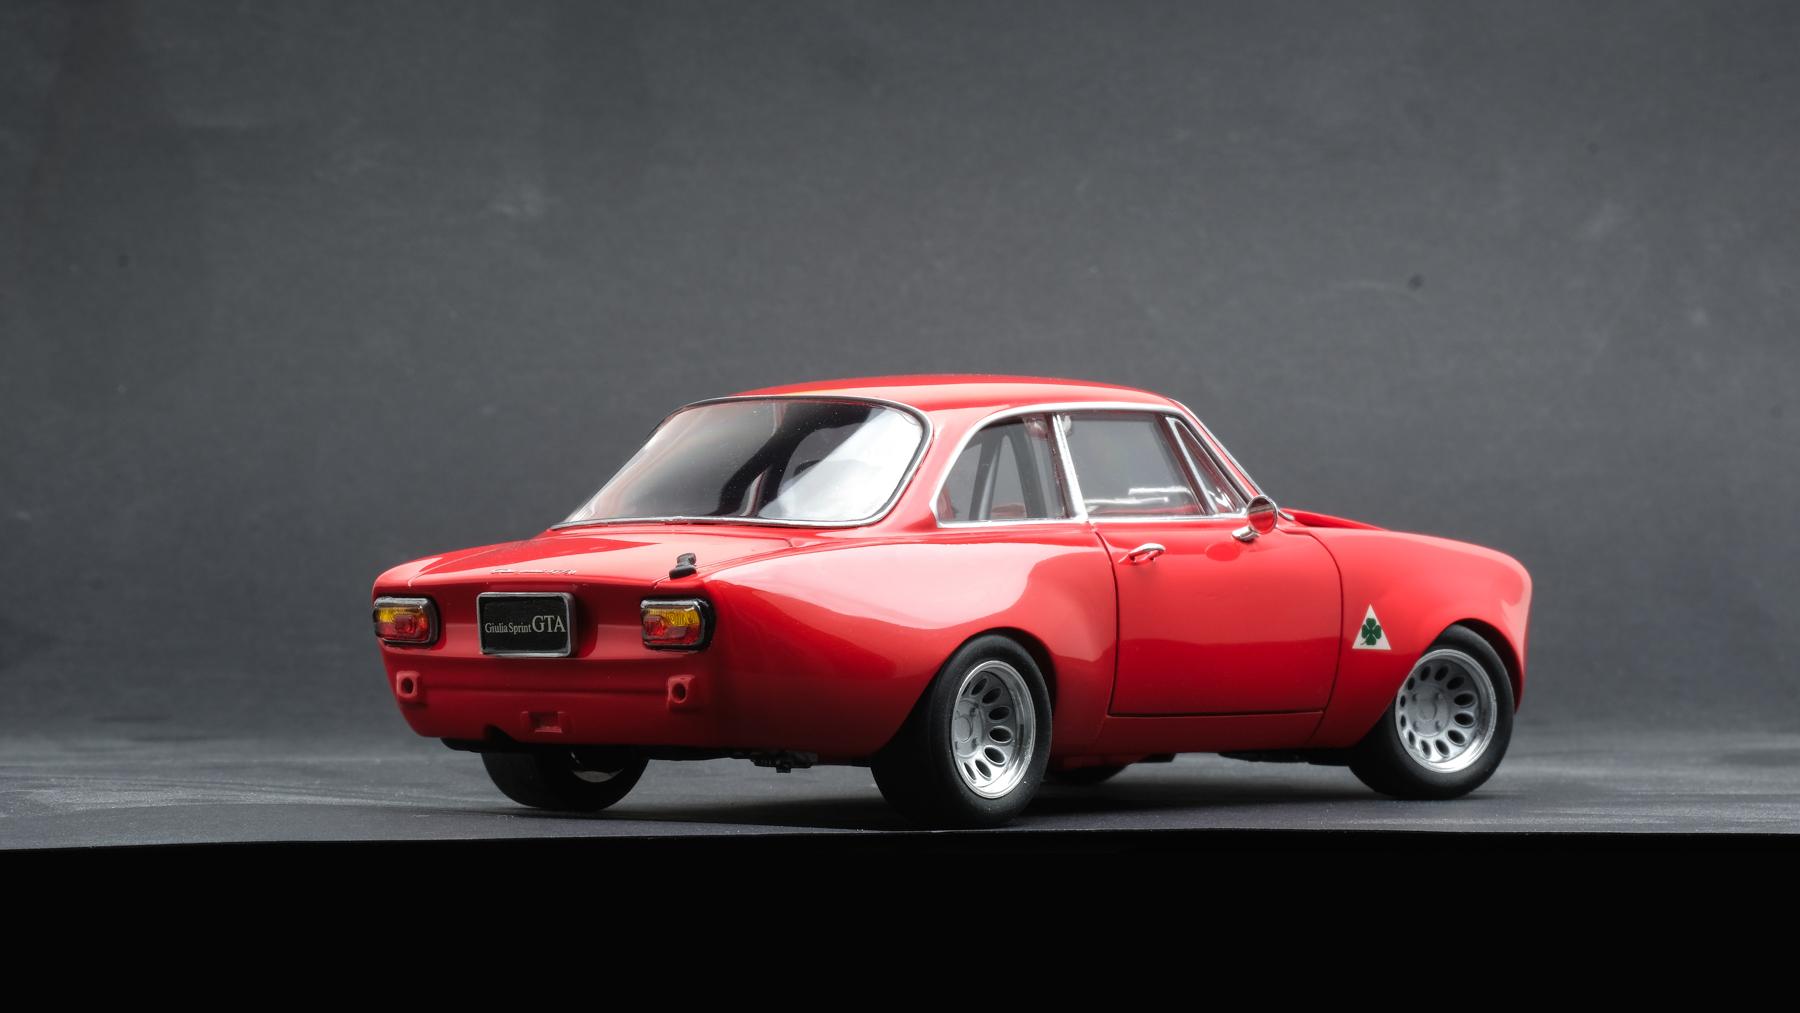
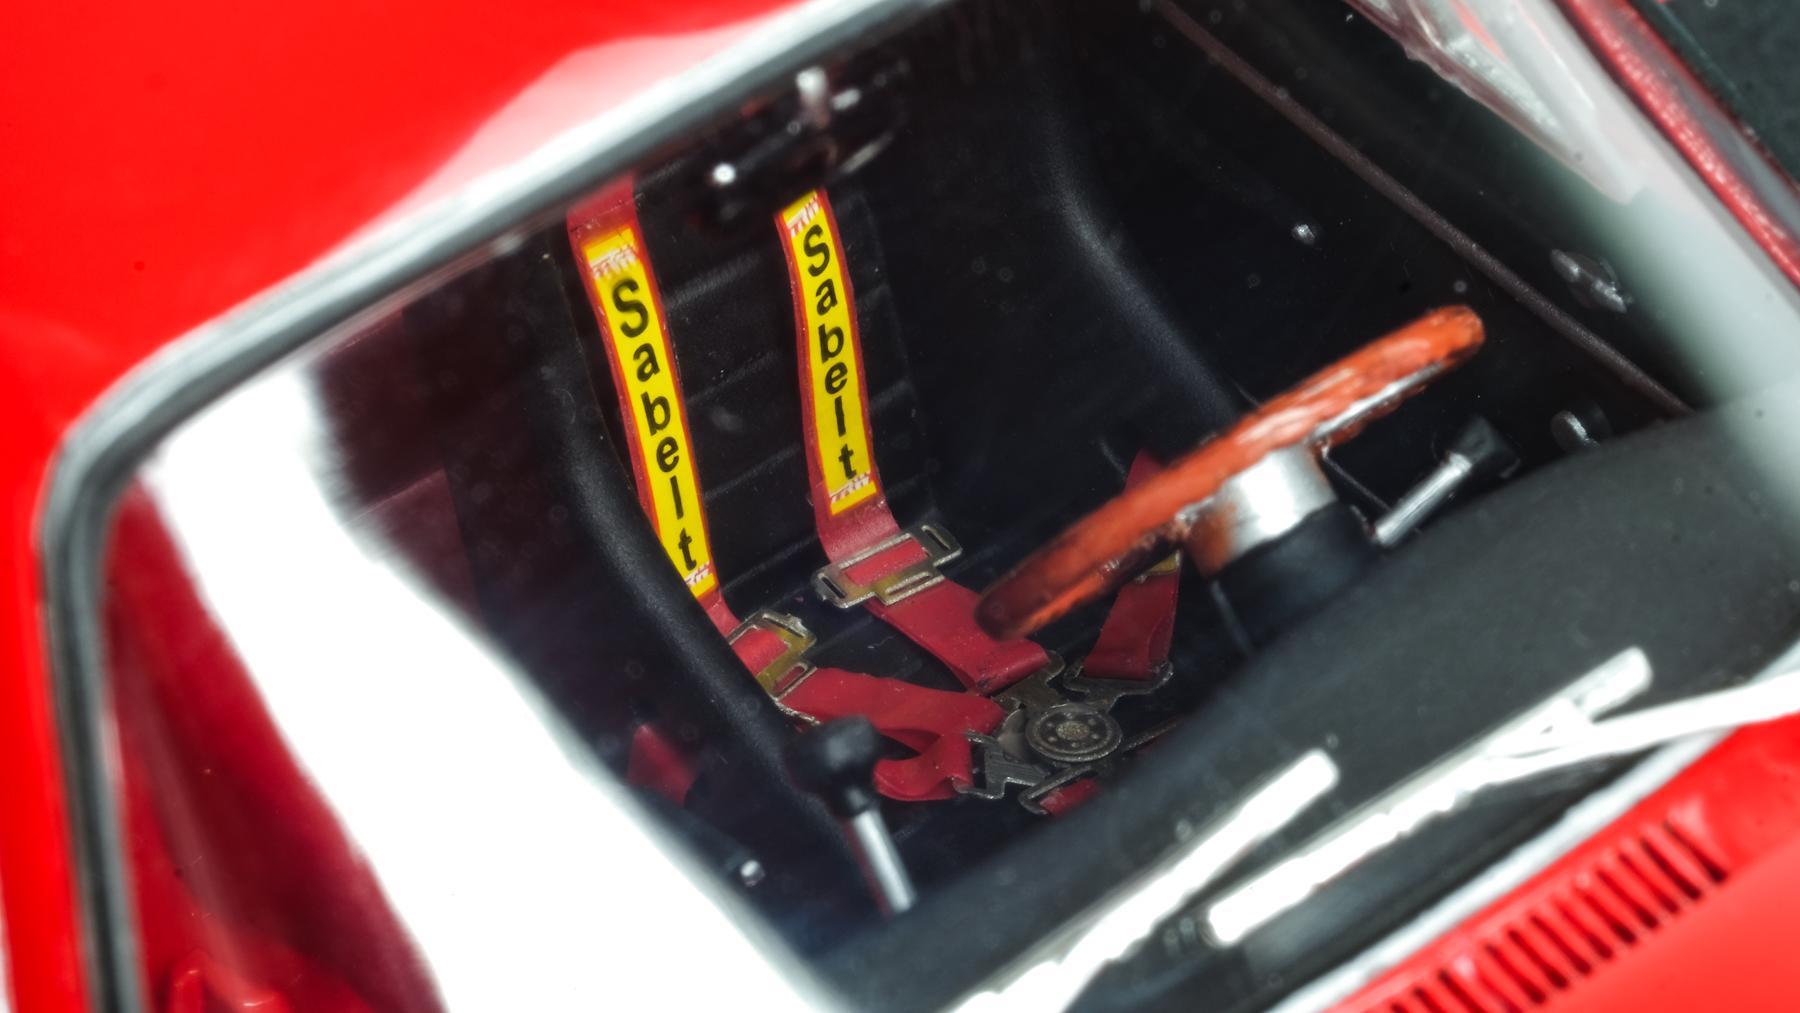
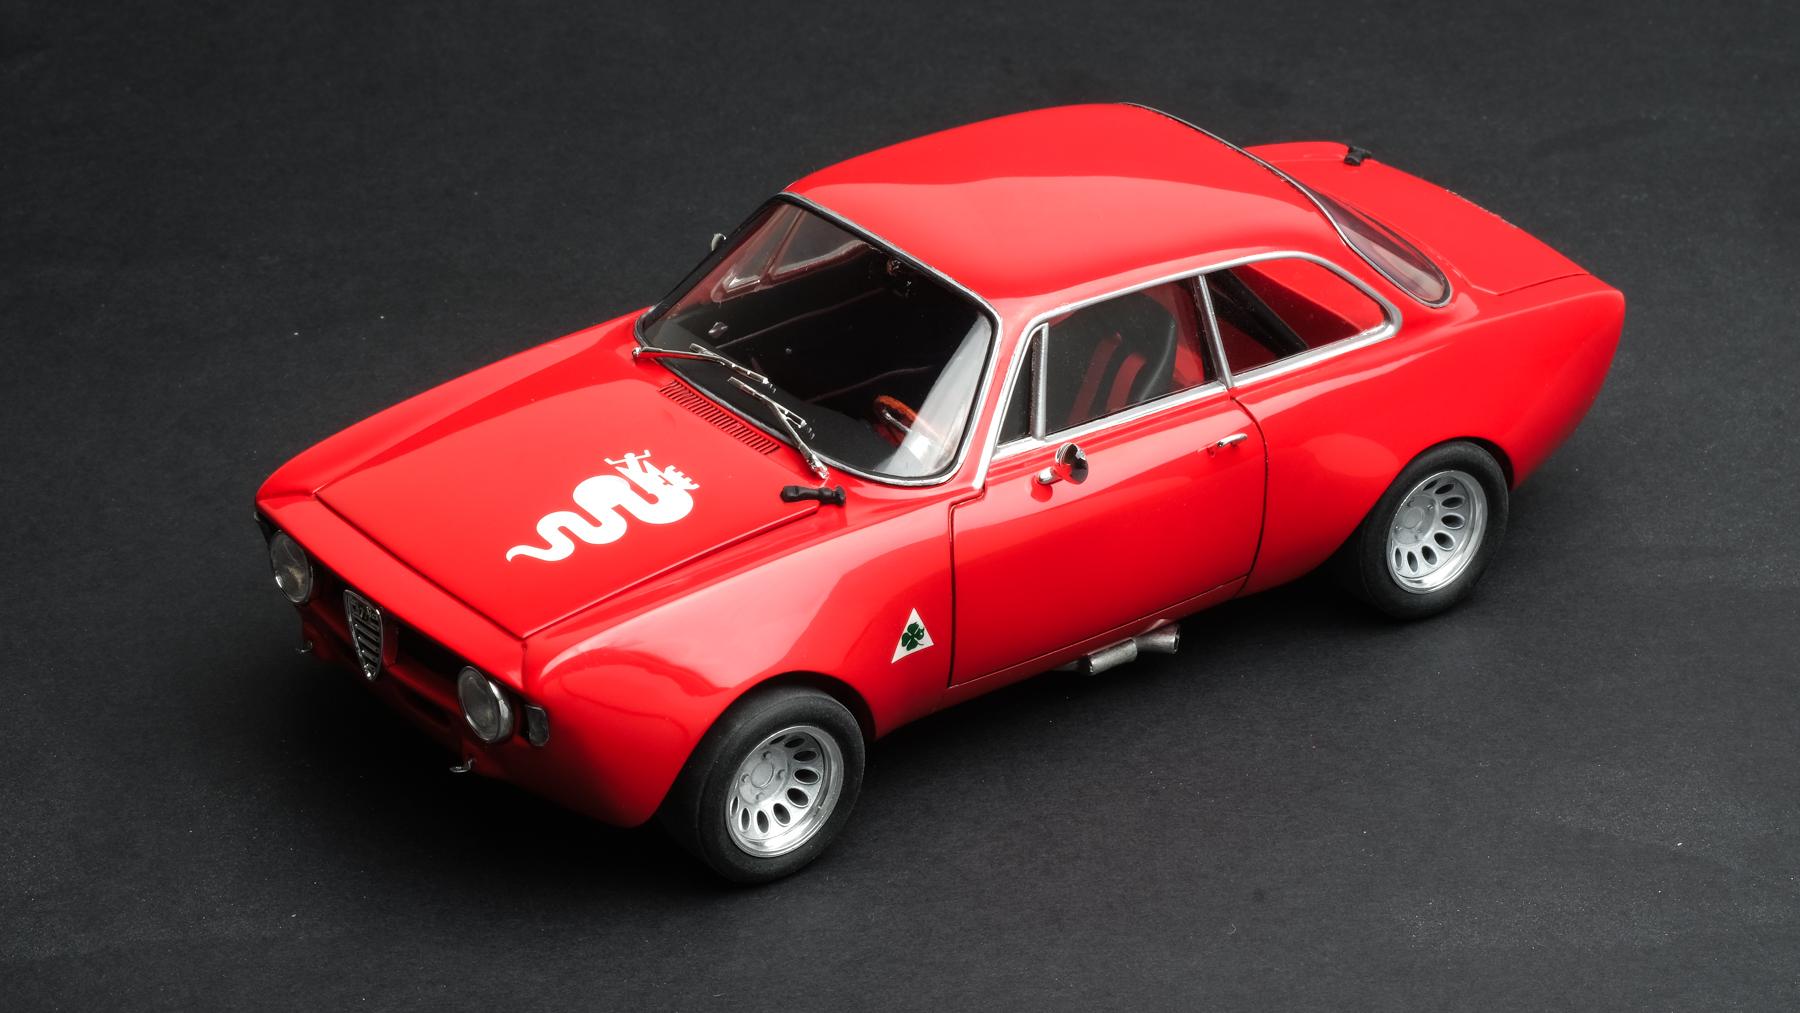
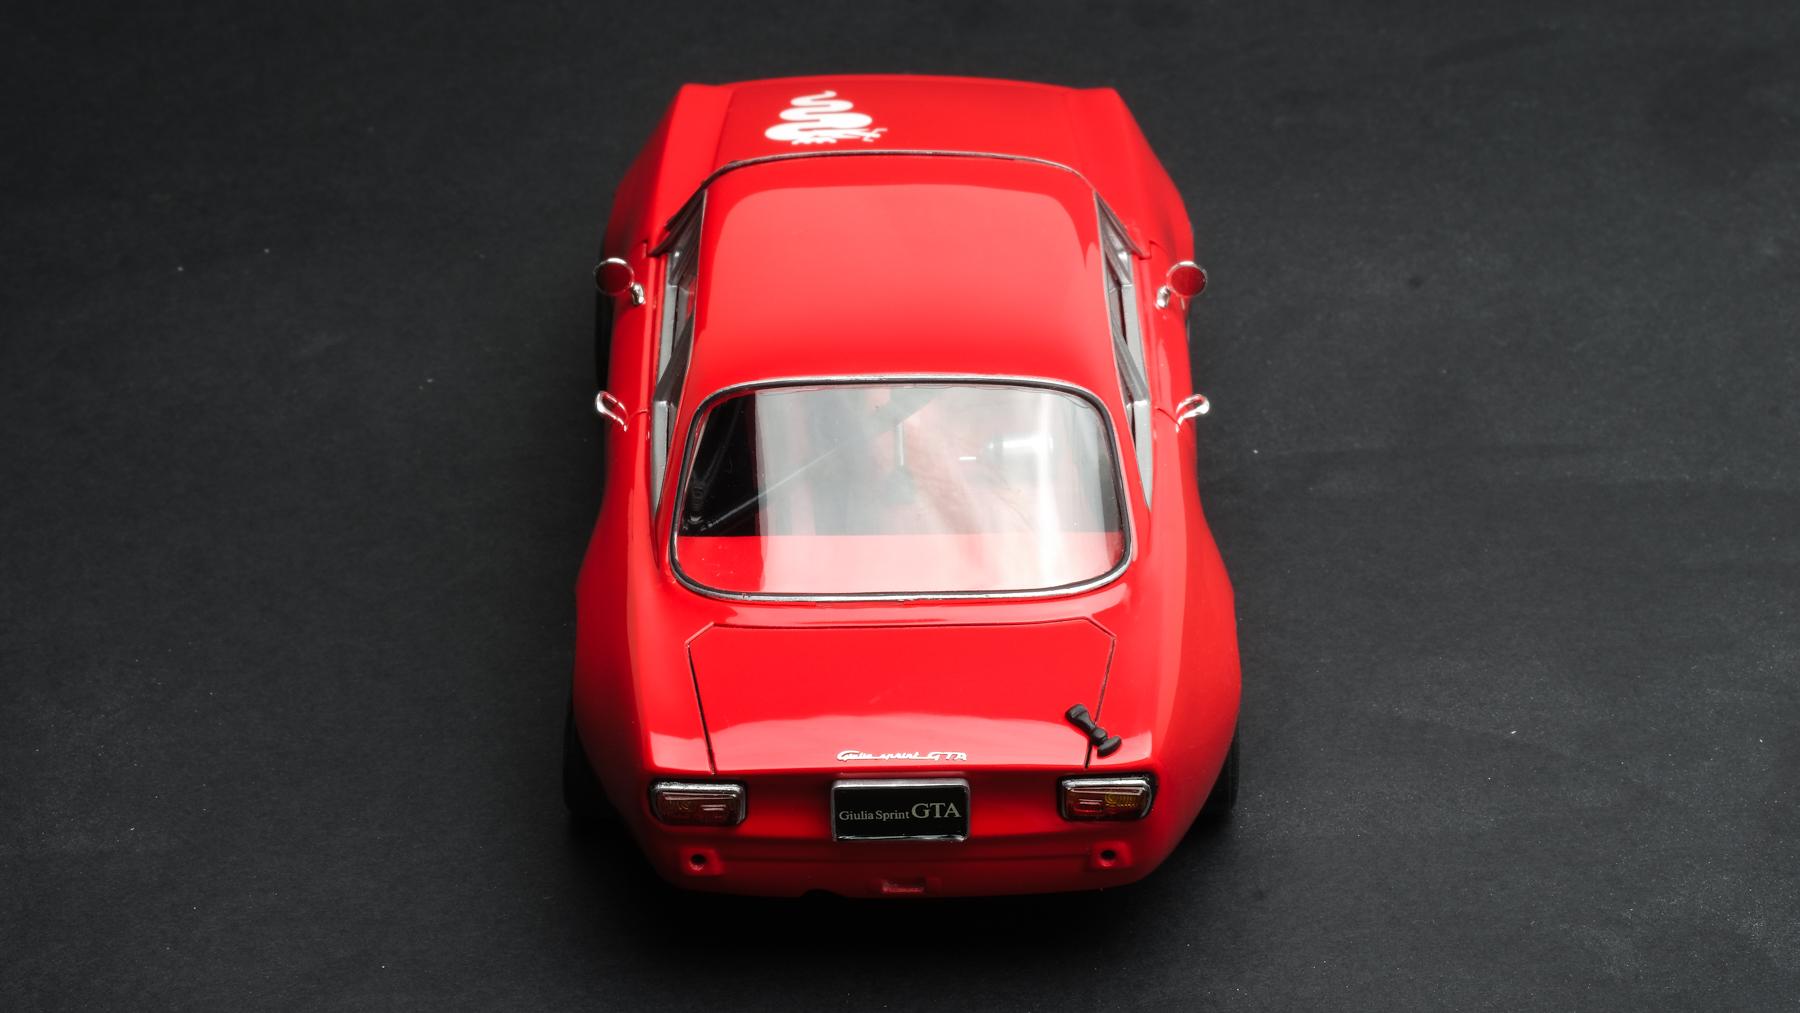
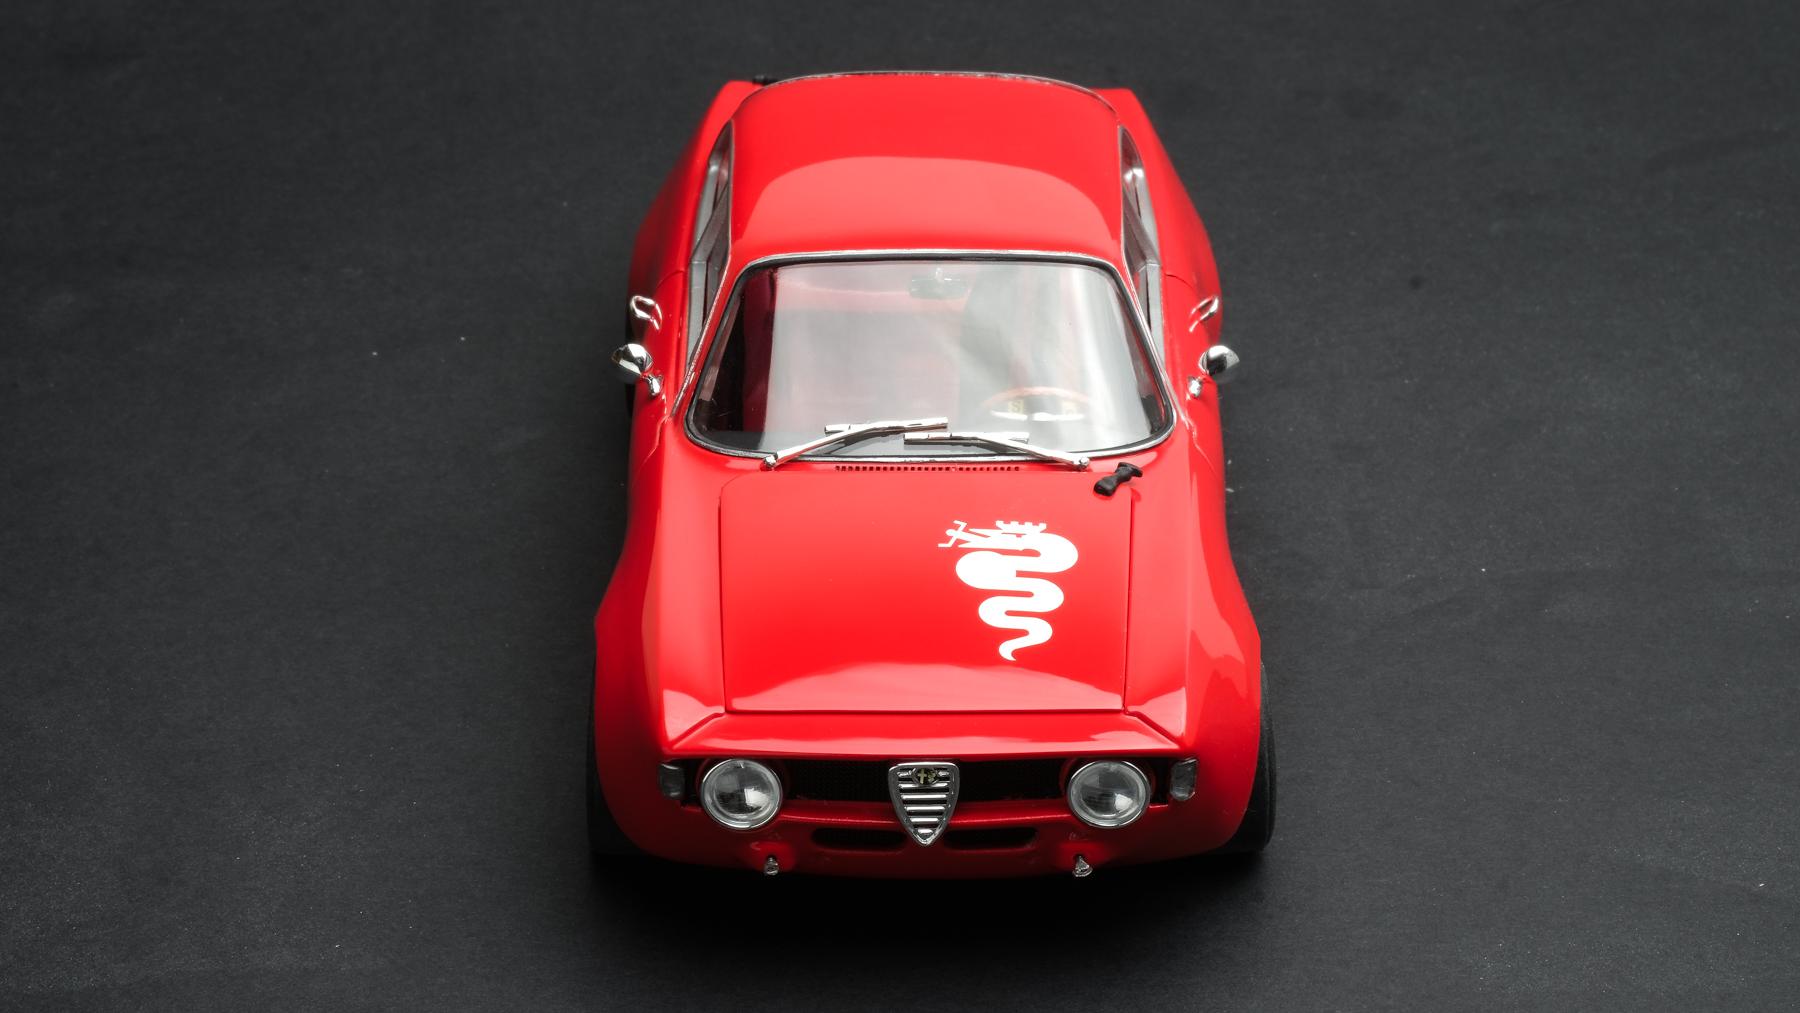
Hi all, Here’s my finished Alfa Romeo GTA 1300 Junior build! I bought the transkit from Scaleproduction long time ago and bought the Tamiya kit last year for almost $200. I had some ambitious plans but the resin fenders look quite different to the actual car, and it took too many correction to smooth out the part where the fender and body met, making the paint too thick with excessive use of primer. By the time I cracked the quarter panel, I just focused on getting it to the finish line. Here’s the full build detail: Glued resin fender > added putty > wet sanded with 800 and 1200 grit > added surfacer > inspected and repeated the process about 5 times Added Mr color’s Italian red > 1st clear coat > added decal > wet-sanded between 2~3rd clear coats to even out the decal with rest of surface Dried for 1 month > wet-sanded with 3000 and 5000 grit > polished with tamiya three-stage compounds Cracked the fender > maked the panel and did partial respray > dried for 3 weeks and re-polished the paint Made 5 point harness Painted woodgrain by airbrushing brown, dry-brushing with darker brown and finishing with clear coat Modified stock airbox to open type with putty and added ignition wires Used bucket seat, side exit muffler, and wheels from the transkit Made 5 point rollcage with styrene rods It’s definitely not my best work but I’m glad I finished it!
- 22 replies
-
- 13
-