nazdrave
-
Posts
18 -
Joined
-
Last visited
Content Type
Profiles
Forums
Events
Gallery
Everything posted by nazdrave
-
Congrats, Bruce! Well deserved accolades. Just a superior build, and as others have said, amazing paint work in black!
-
Well done, Bruce, congrats!! An excellent piece of work!! And, yes, that gas cap was a pain in the rump!
-
Excellent work, Bruce! They look fantastic! Did you use a flat white paint or just white primer?
-
Bruce, I have to tell you I'm glad I'm not the only one! Mine were off like that as well. I don't understand it. I ended up just not using the mounting brackets, but I have faith you'll come up with a good solution. And I think go with the flat white side pipes for sure. They give a real nice authentic vintage look espcecially on the 427s.
-
Looking amazing, Bruce! I noticed the same thing on the roll bar. Also, I'm curious to see how your side pipes fit. I had two issues with mine. The first was a slight downward (toward the rear) slant. I worked it as best I could to level it up without going too far. The second is that on my kit, the mounting points for the bracket that attaches the side pipe (about midway down the side pipe) to the frame rail were so out of line that I couldn't even use the bracket. I mean it wasn't even close, like it was some manufacturing error or something.
-
Excellent tips, thank you!
-
Bruce, a couple of things for you. First, I noticed when I built mine that the adhesive on the carpeting would slowly give up over the course of a few days. That could have just been my kit, but I brushed on some Krazy Glue (VERY thinly) before applying the carpet. Second, a question for you... What is your method for attaching braided lines to fittings. When I do it, I always end up with a bulge and stiffness at the ends. Otherwise, looking great!
-
Looking amazing, Bruce. The realism just blows my mind.
-
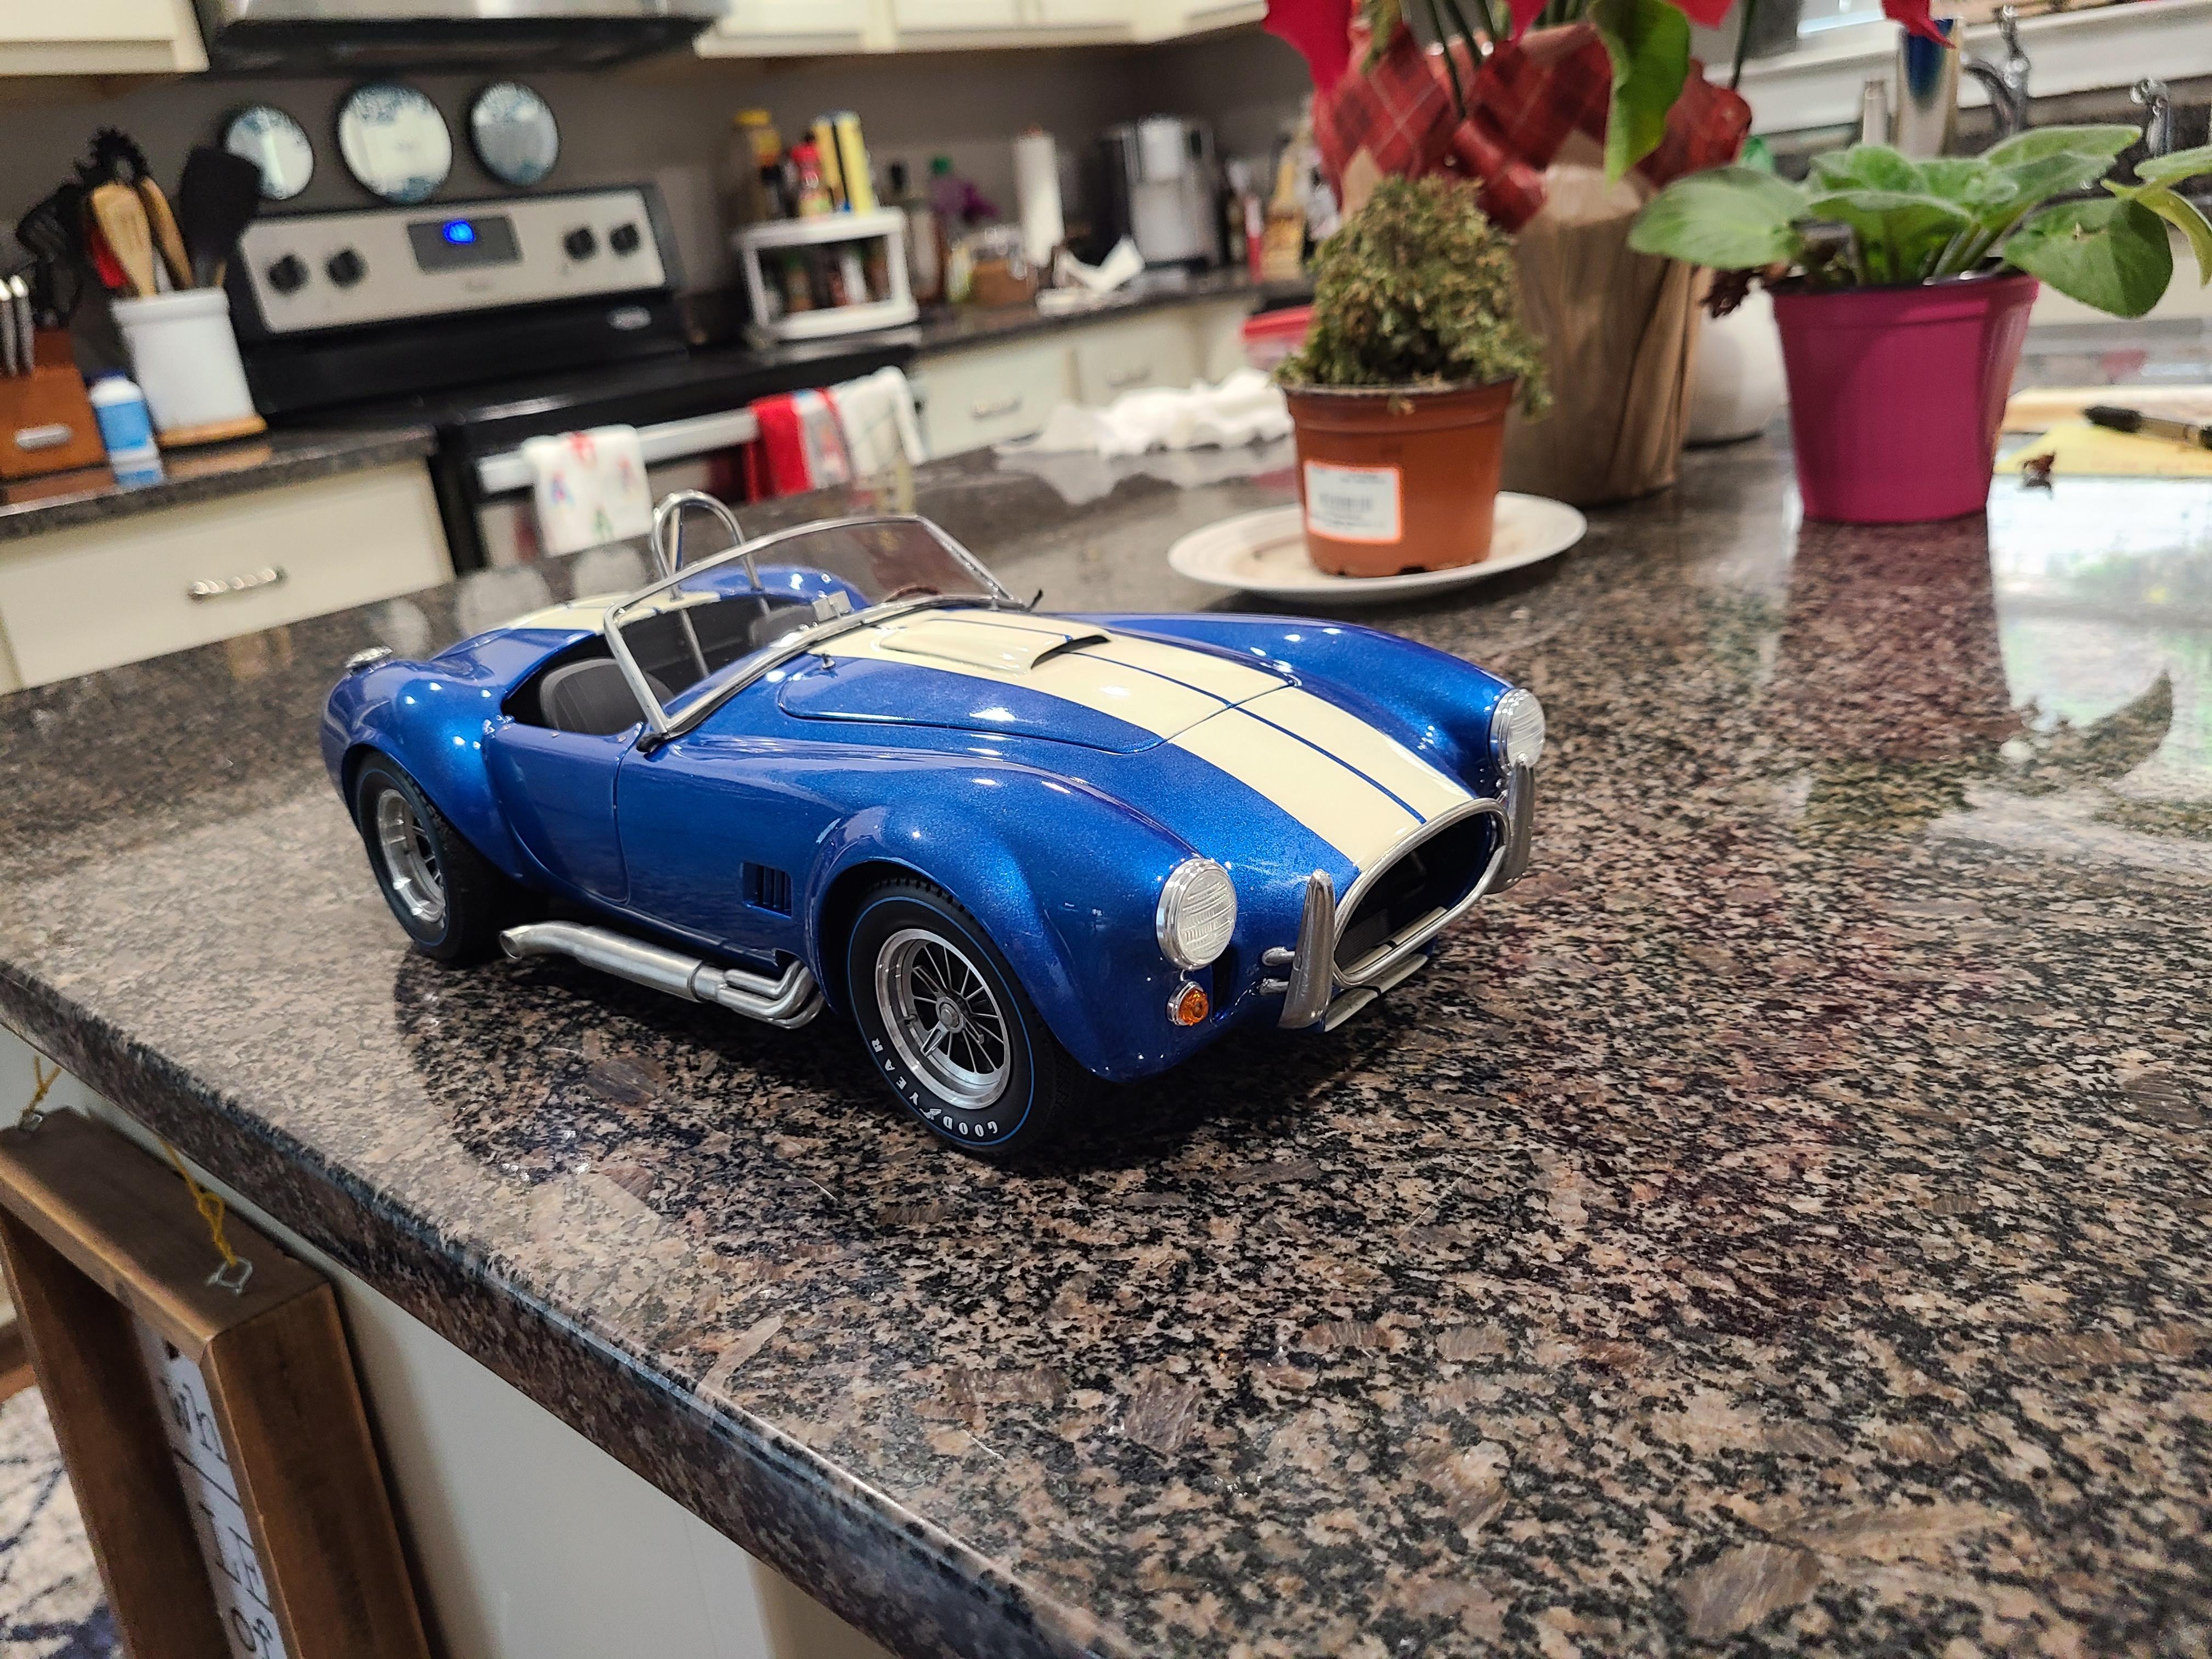
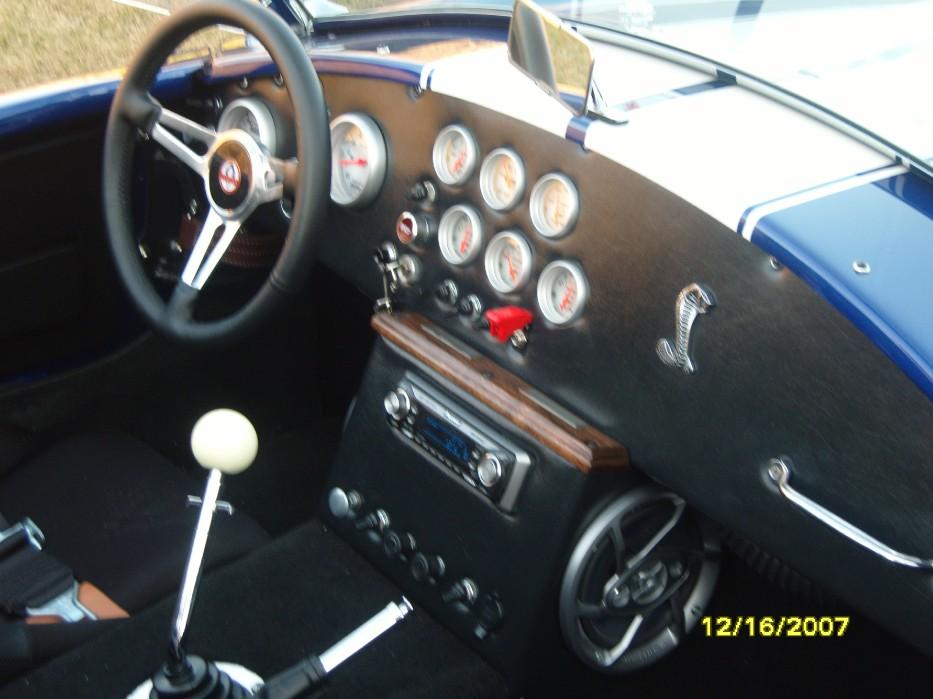
Gorgeous Shelby, Bruce! I love the Wimbledon White with blue stripes. Is that the stock 306 hp 289? By the way, my name is Mark.
-
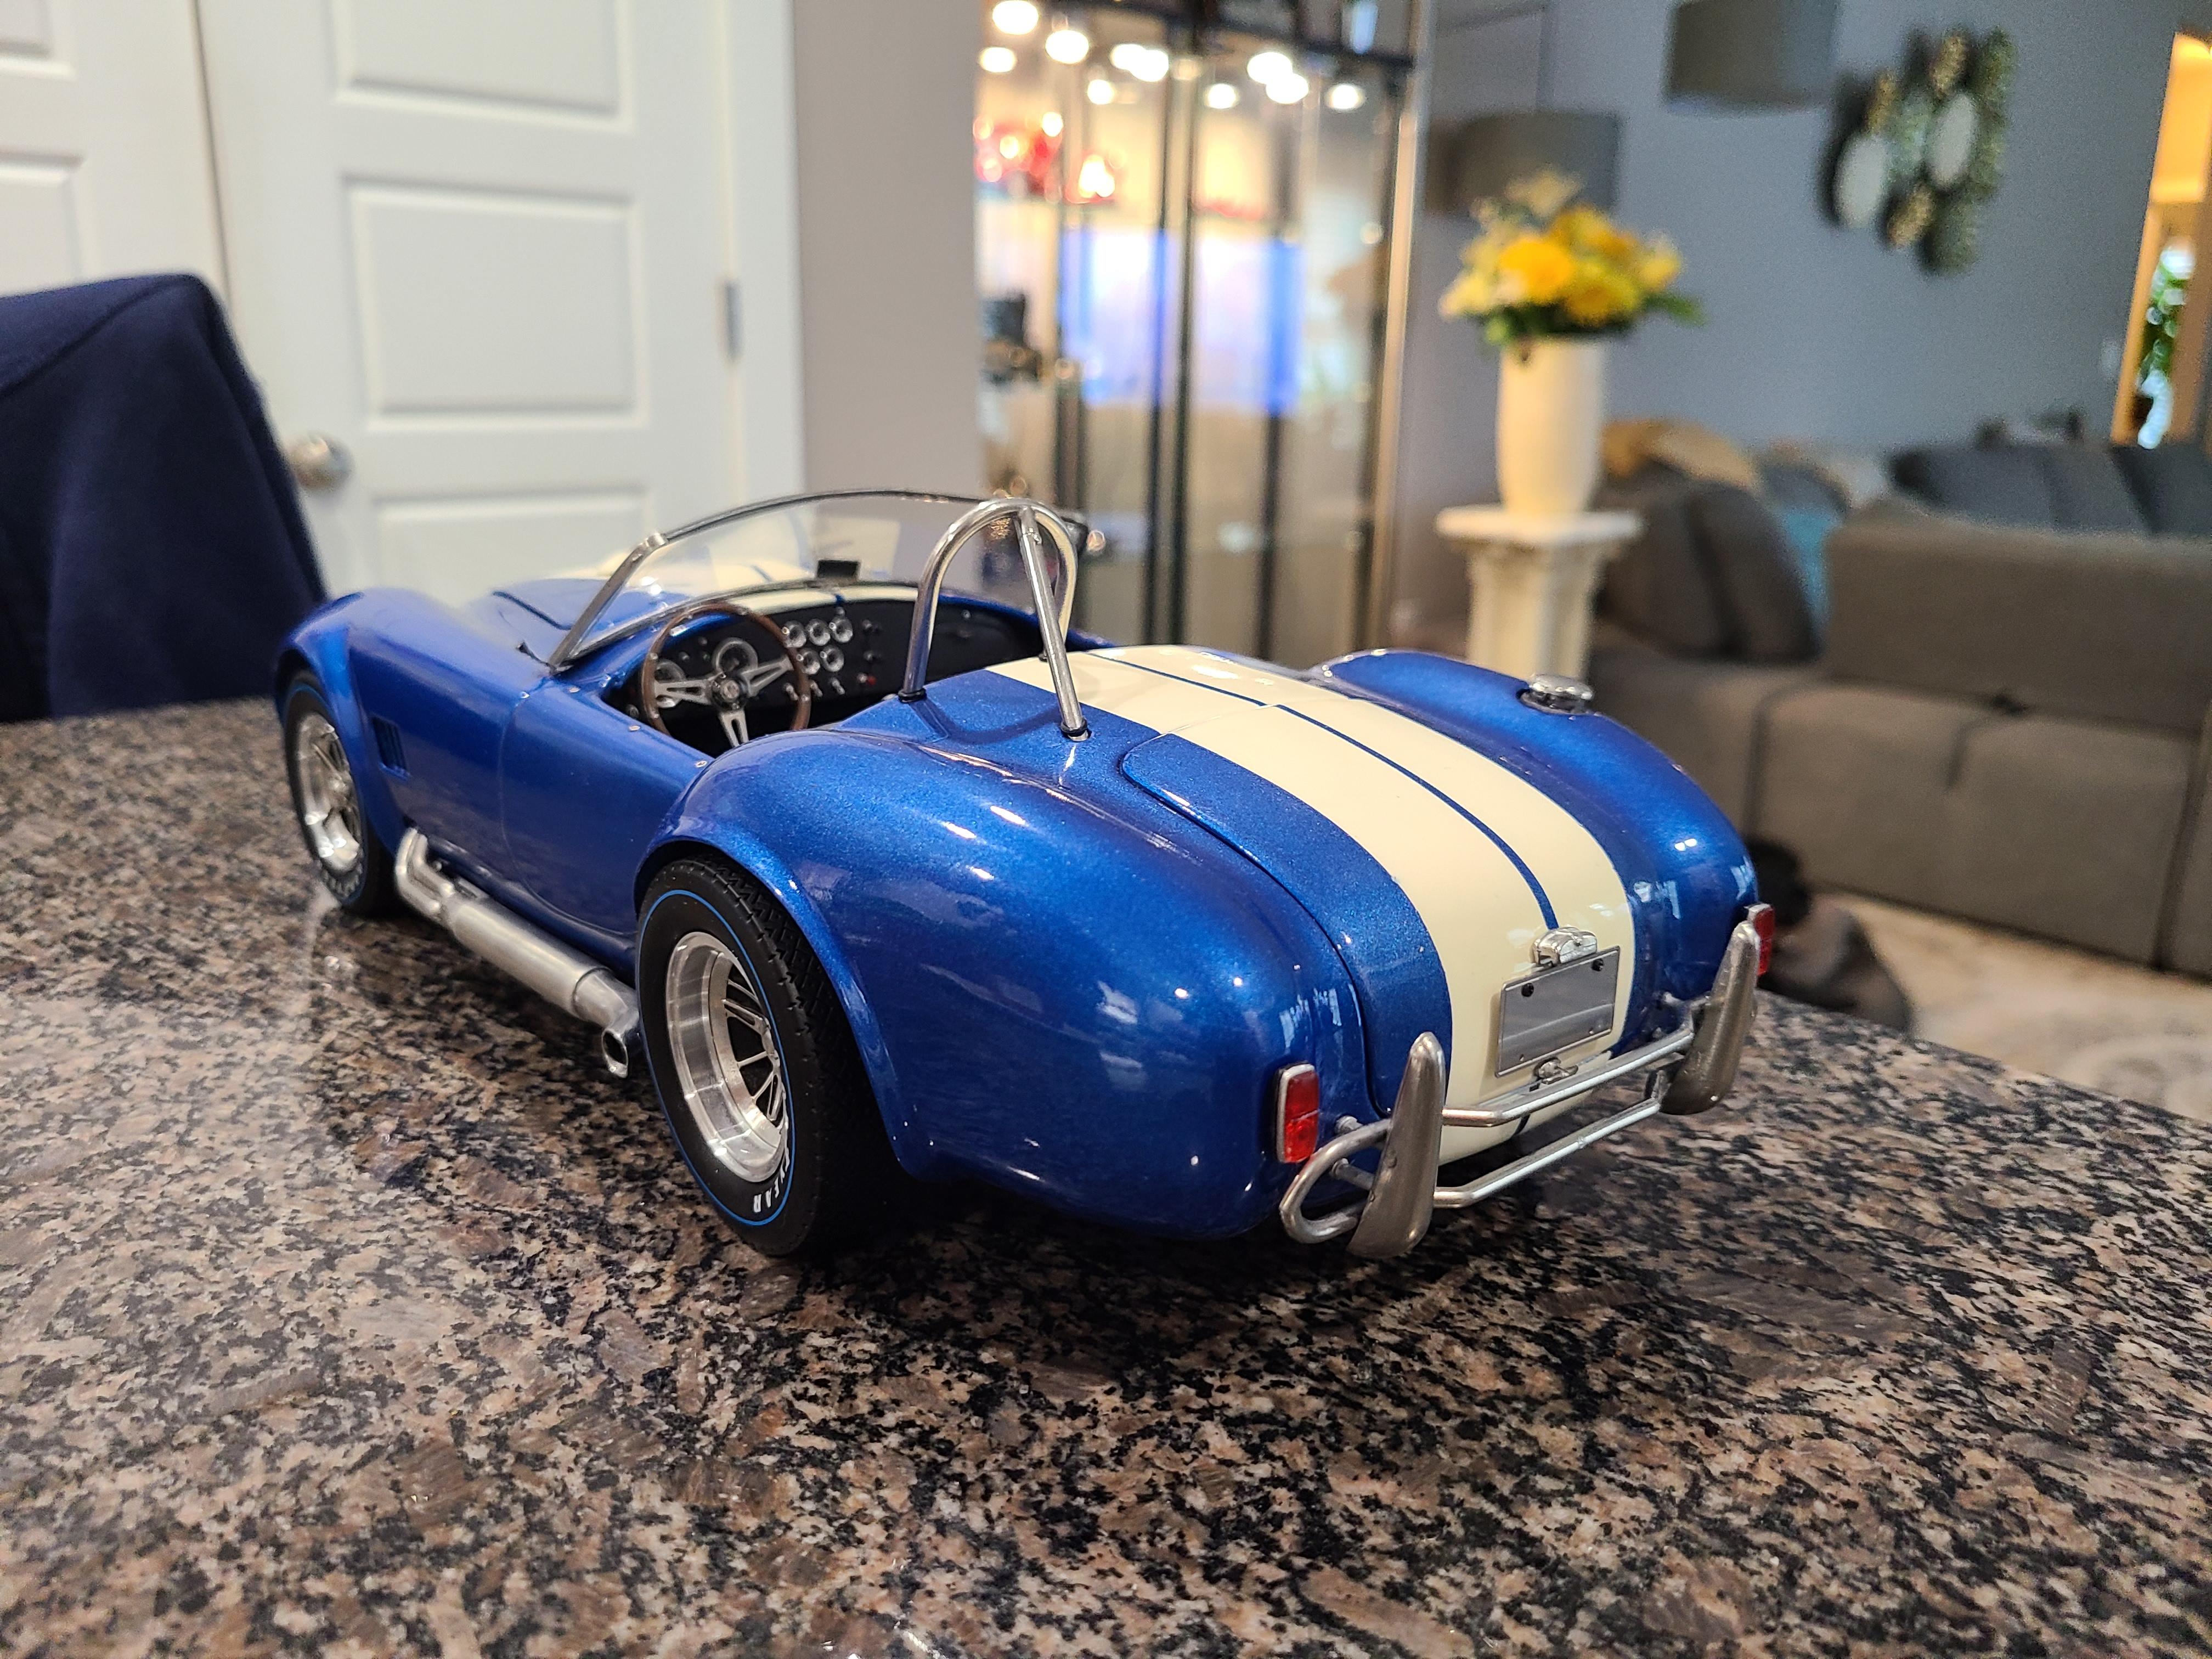
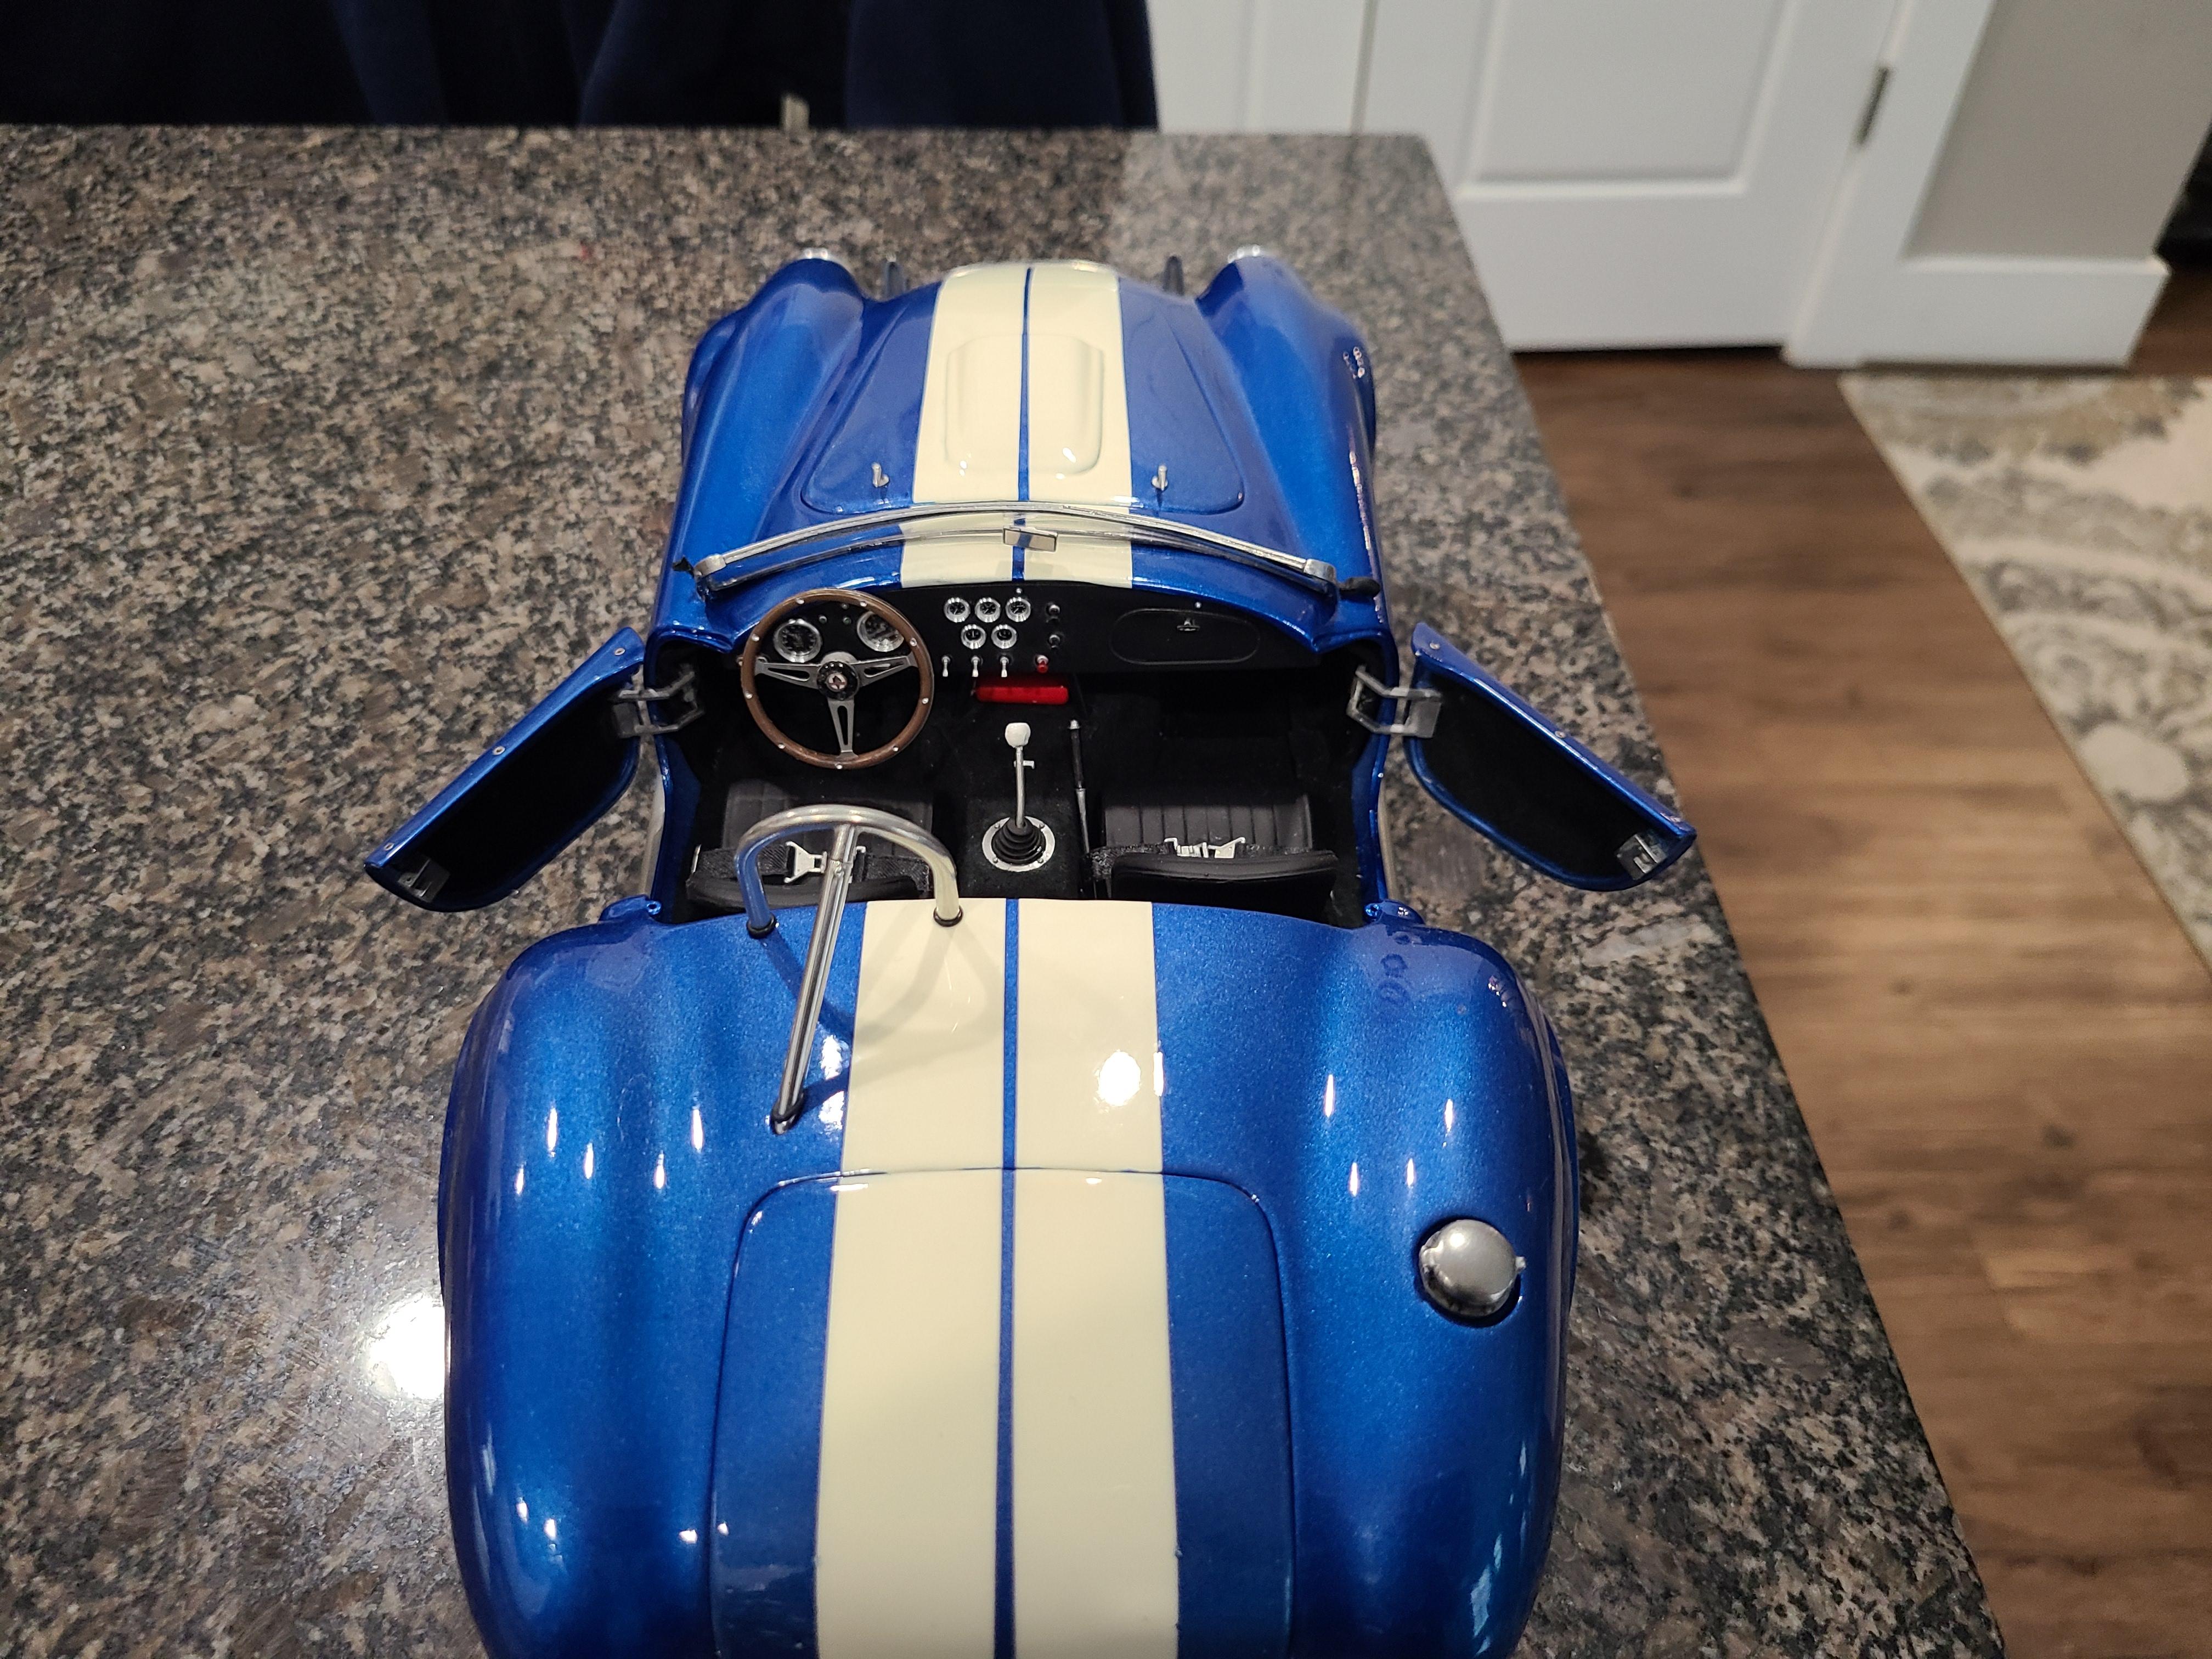
Here are more pictures of this Cobra build. The white stripes are not as "yellow" in person but more of an ivory like Wimbledon White from the old days.

-
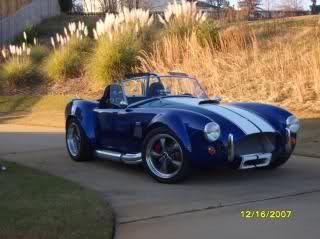
Thanks, Bruce! The body fitment was actually pretty good with one exception; I just couldn't get the sidepipe mounting bracket to line up properly with the chassis rail and it wasn't even close. Other than that, it went on pretty easily. I'd like to try a De Agostini kit one of these days. Right now, I've started on a Tamiya/EBBRO 1/12 1968 MS11 Matra F1 car and I have another MFH 1/20 Lotus 72C waiting in the wings. I will post more pics of this Cobra build in another post, but here I thought I would share some pictures of the Factory Five Cobra kit car I built a while back. I did everything on the car except the paint which a friend of mine did.
-
It's been quite a while since this thread has seen any activity. While Bruce was called away to other projects, I soldiered on and finished my build of the same kit. As I've mentioned elsewhere, my skill level is not even in the same galaxy as Bruce's, but I am proud of how my windshield turned out and I wanted to share the experience with the Forum so others will know. In the pictures you will see the finished product (except, I will come back to the side wings and visors). As most know, MFH kits are very detailed and very high quality. As such, I was shocked at how crappy the included windshield was and how flimsy the windshield frame is. The WS is a vacuum formed piece that's not even cut out and was flimsy junk. It was ruined on my first attempt at securing it to the frame. Here's what I ended up doing. I found a clear bottle of cleaner. I made a template from the WS frame and made a rough cut of this bottle. I then found a coffee can with approximately the right curvature and taped the plastic onto the can. I then VERY CAREFULLY used a heat gun on the opposite side (inside the can) to gently remold the plastic (it took three tries because I kept melting the plastic!). I then did some real careful trimming of the plastic on the WS frame - this took forever. I then carefully used super thin super glue on the top and bottom middle to secure the plastic to the frame and when use clear plastic parts glue to secure (and fill in) the corners. OK, here's the rub - the glue made several messes on the plastic because the frame is so flimsy and thin, it couldn't be helped. So, then... I VERY GENTLY used 1500 grit sanding sponges followed by successively finer sand papers and sanded to the entire plastic surface knowing I was going to try using Future (actually Pledge now) for the first time. I was nervous as the plastic was quite cloudy after all the sanding. Well... the Pledge worked!!! And amazingly well in my opinion! I was shocked because I had never used it before. It beautifully filled in all the sand marks and low spots. I dipped and let dry twice and I am amazed at the results. So there you go; if you ever need glass repair, just carefully sand and dip in Pledge and it works like a charm.
-
Excellent, Bruce! Very encouraging. I haven't started mine yet, but I'm getting close. I'm not sure if I misunderstood your post, but my kit came with a windshield (very thin film plastic and you have to cut it out of a larger stamped sheet) and the visors and side windows - those were in an accessory plastic bag.
-
Thanks! Yeah, I'm pretty happy with how the paint turned out - it should polish up real nice. I need to get a good coat of wax on there once it's cured. Wow! Your buddy Mark's work is extraordinary! Flawless. I'm very interested to hear more about that technique. As you've mentioned, my biggest concern on that windshield frame is twisting and/or bending it up too much. Oh, and then there's drilling the holes for the visors/side shields... very delicate work.
-
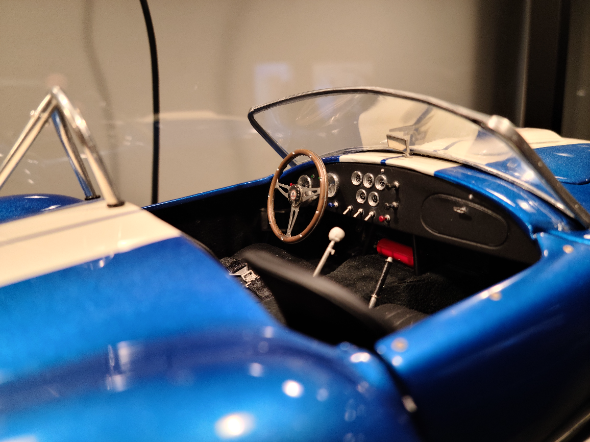
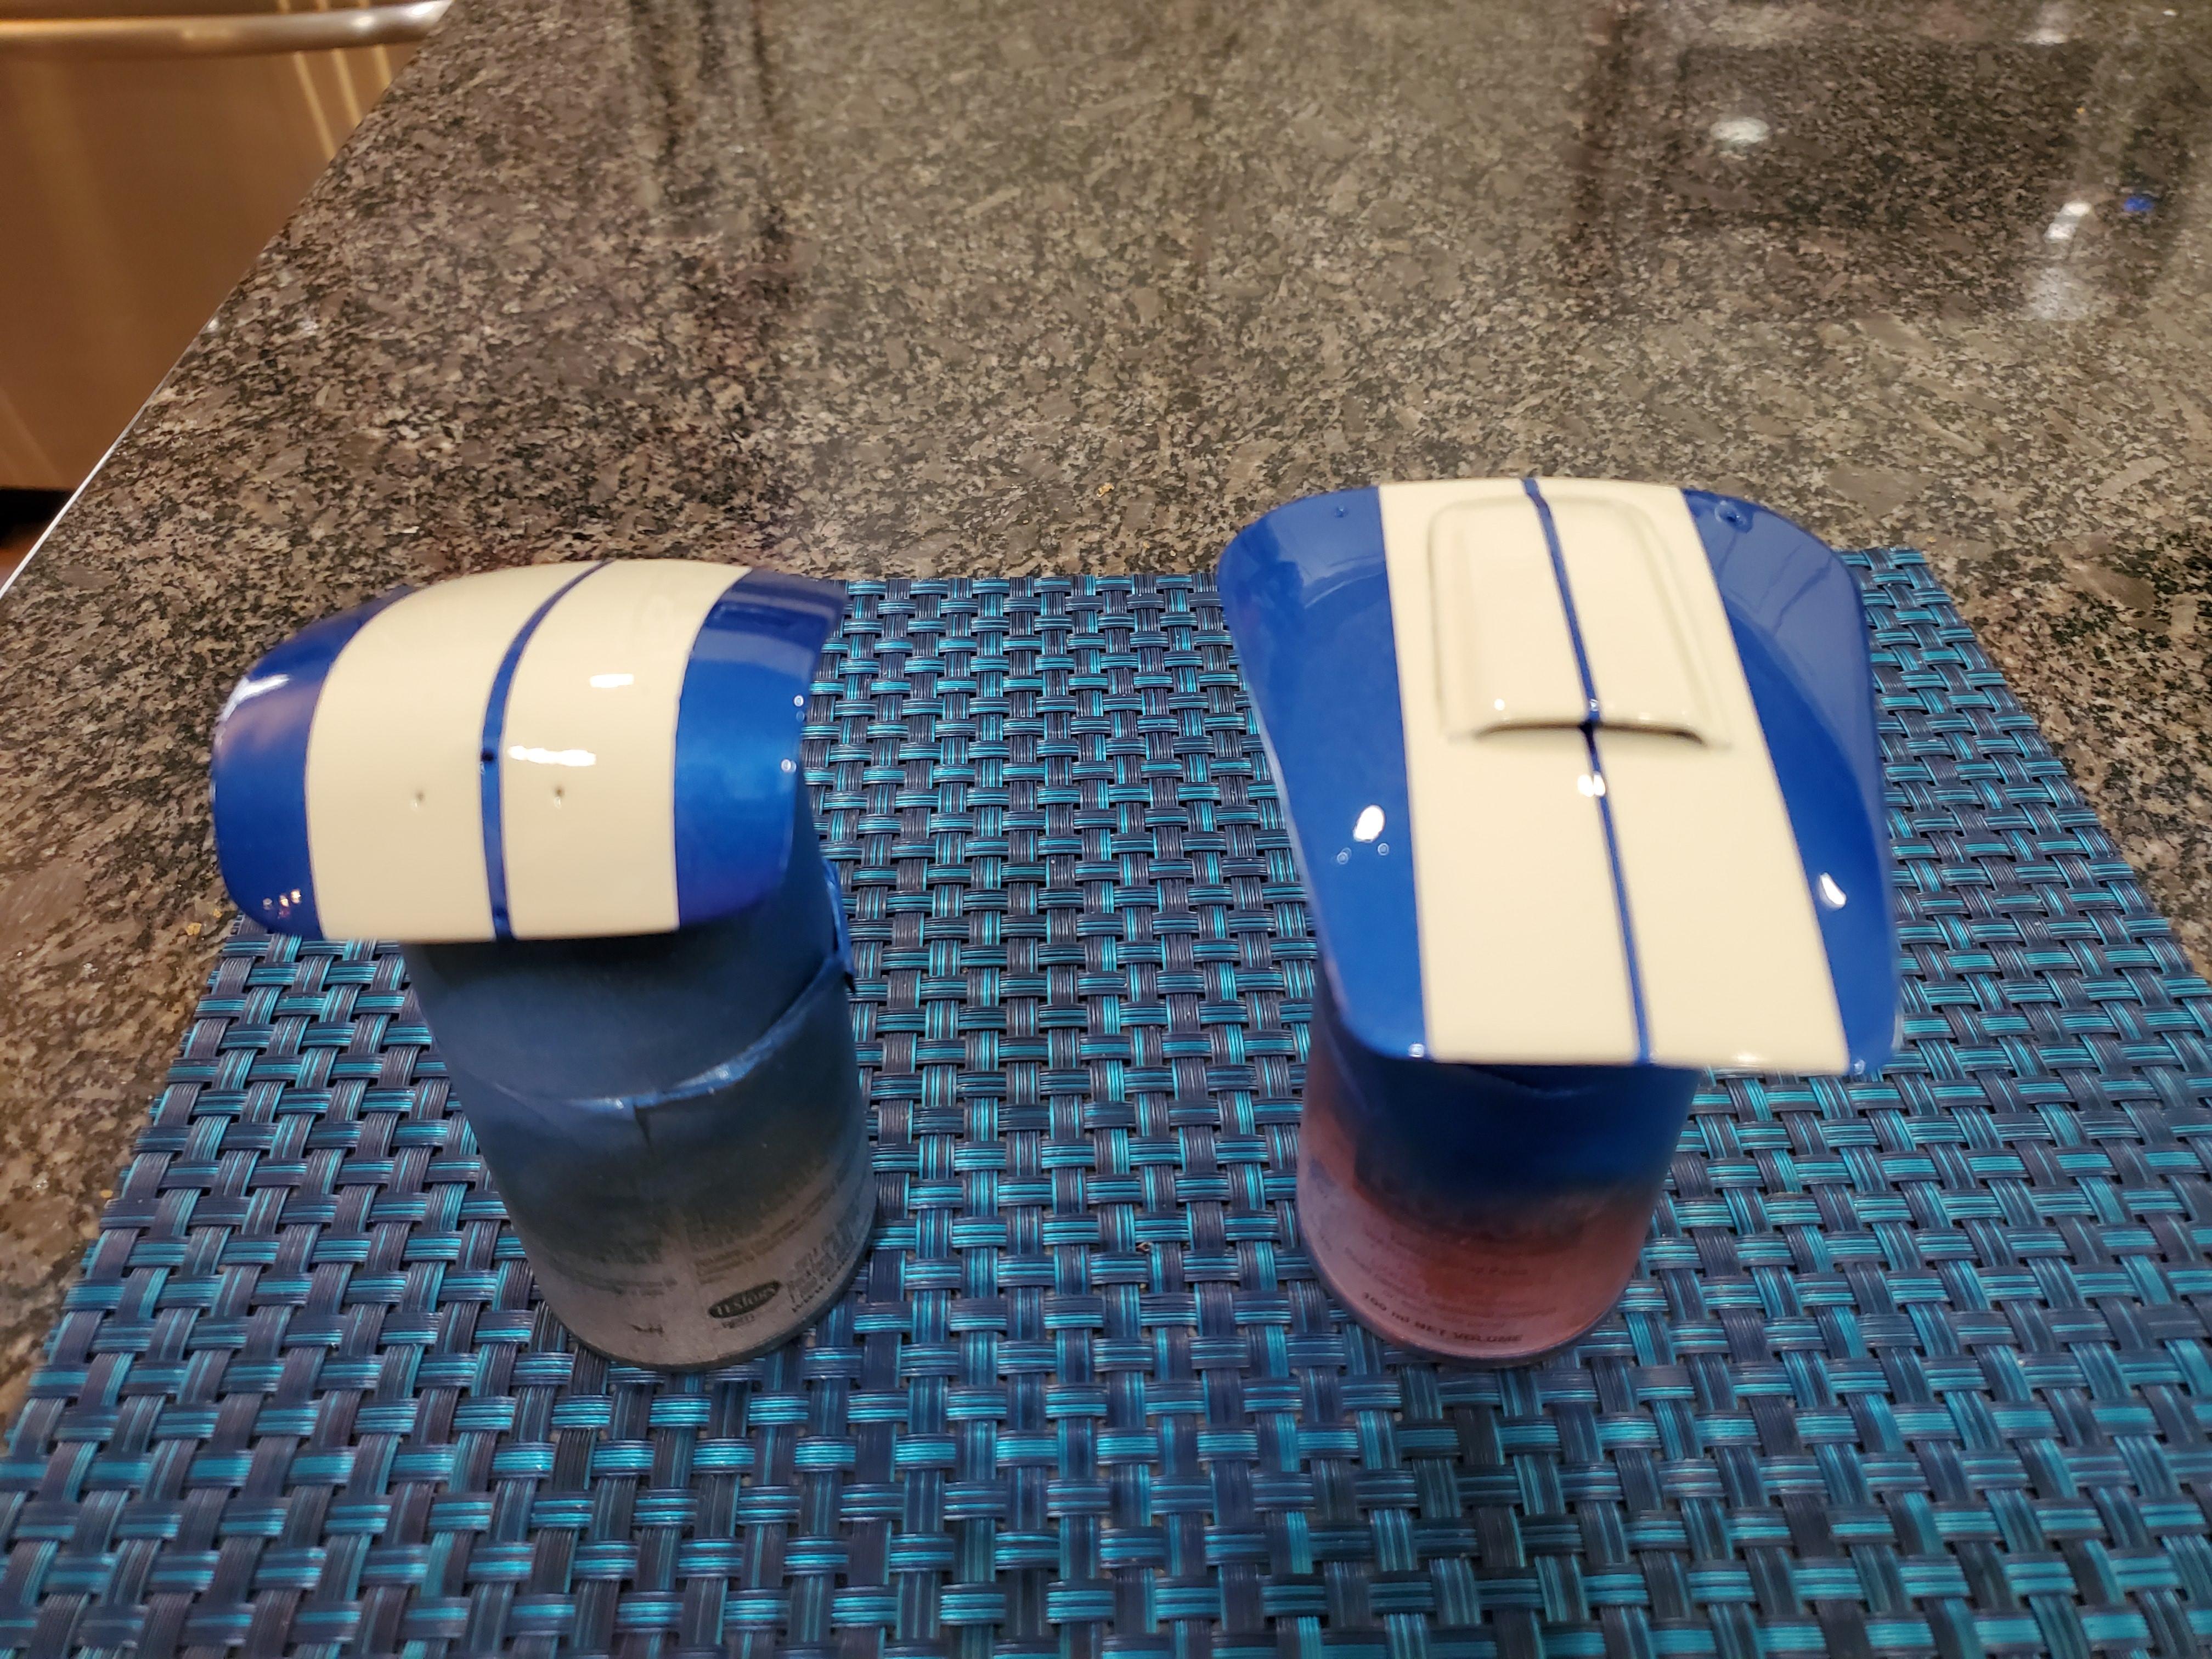
Thank you for your kind words, my friend. I agree completely - Tamiya is best bang for the buck and out-of-the-box fitment, but MFH is the best when it comes to accuracy and detail. They require a lot of finessing, but it's worth it! So, thanks for tip on the clear tape. I just ordered two rolls for myself. The headlight lenses on the Ferrari look perfect! You can't tell at all. I just finished spraying clear for the final time. Here are some pics of that - I have not yet started to wet sand and polish, but that will be next. The stripes look more yellow in the pictures than in real life. They are Tamiya Racing White which is an off-white/ivory shade.
-
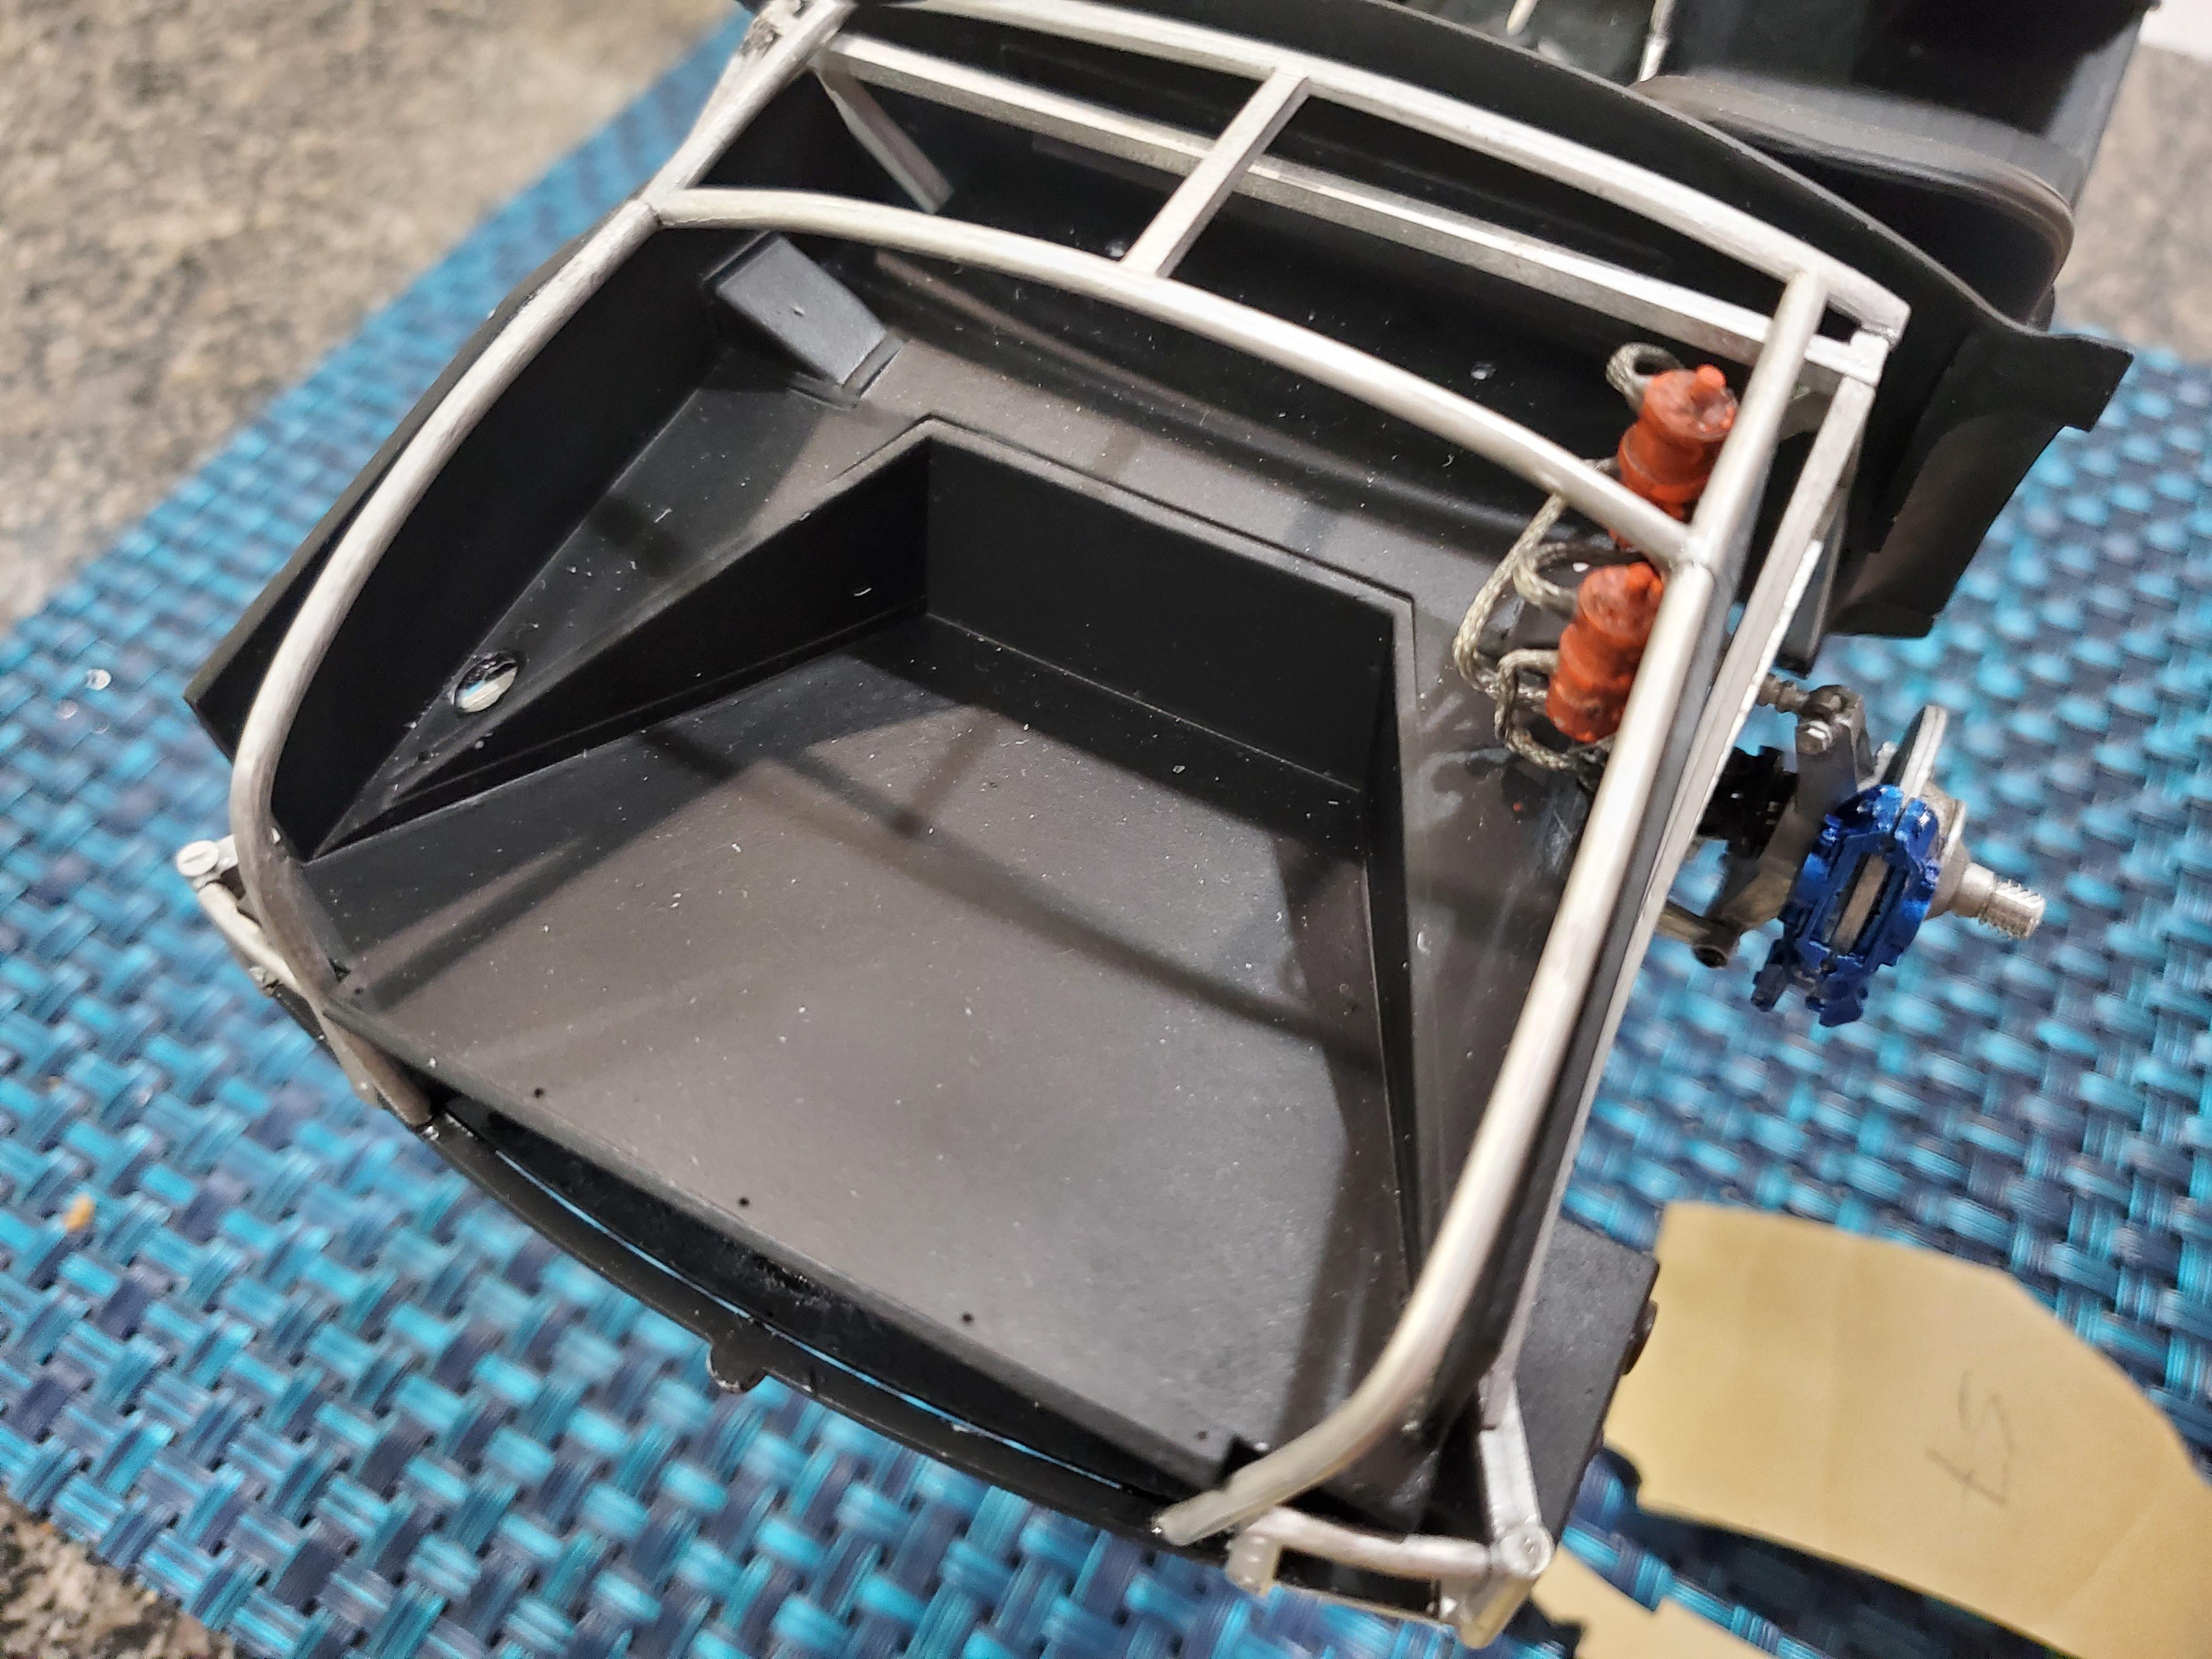
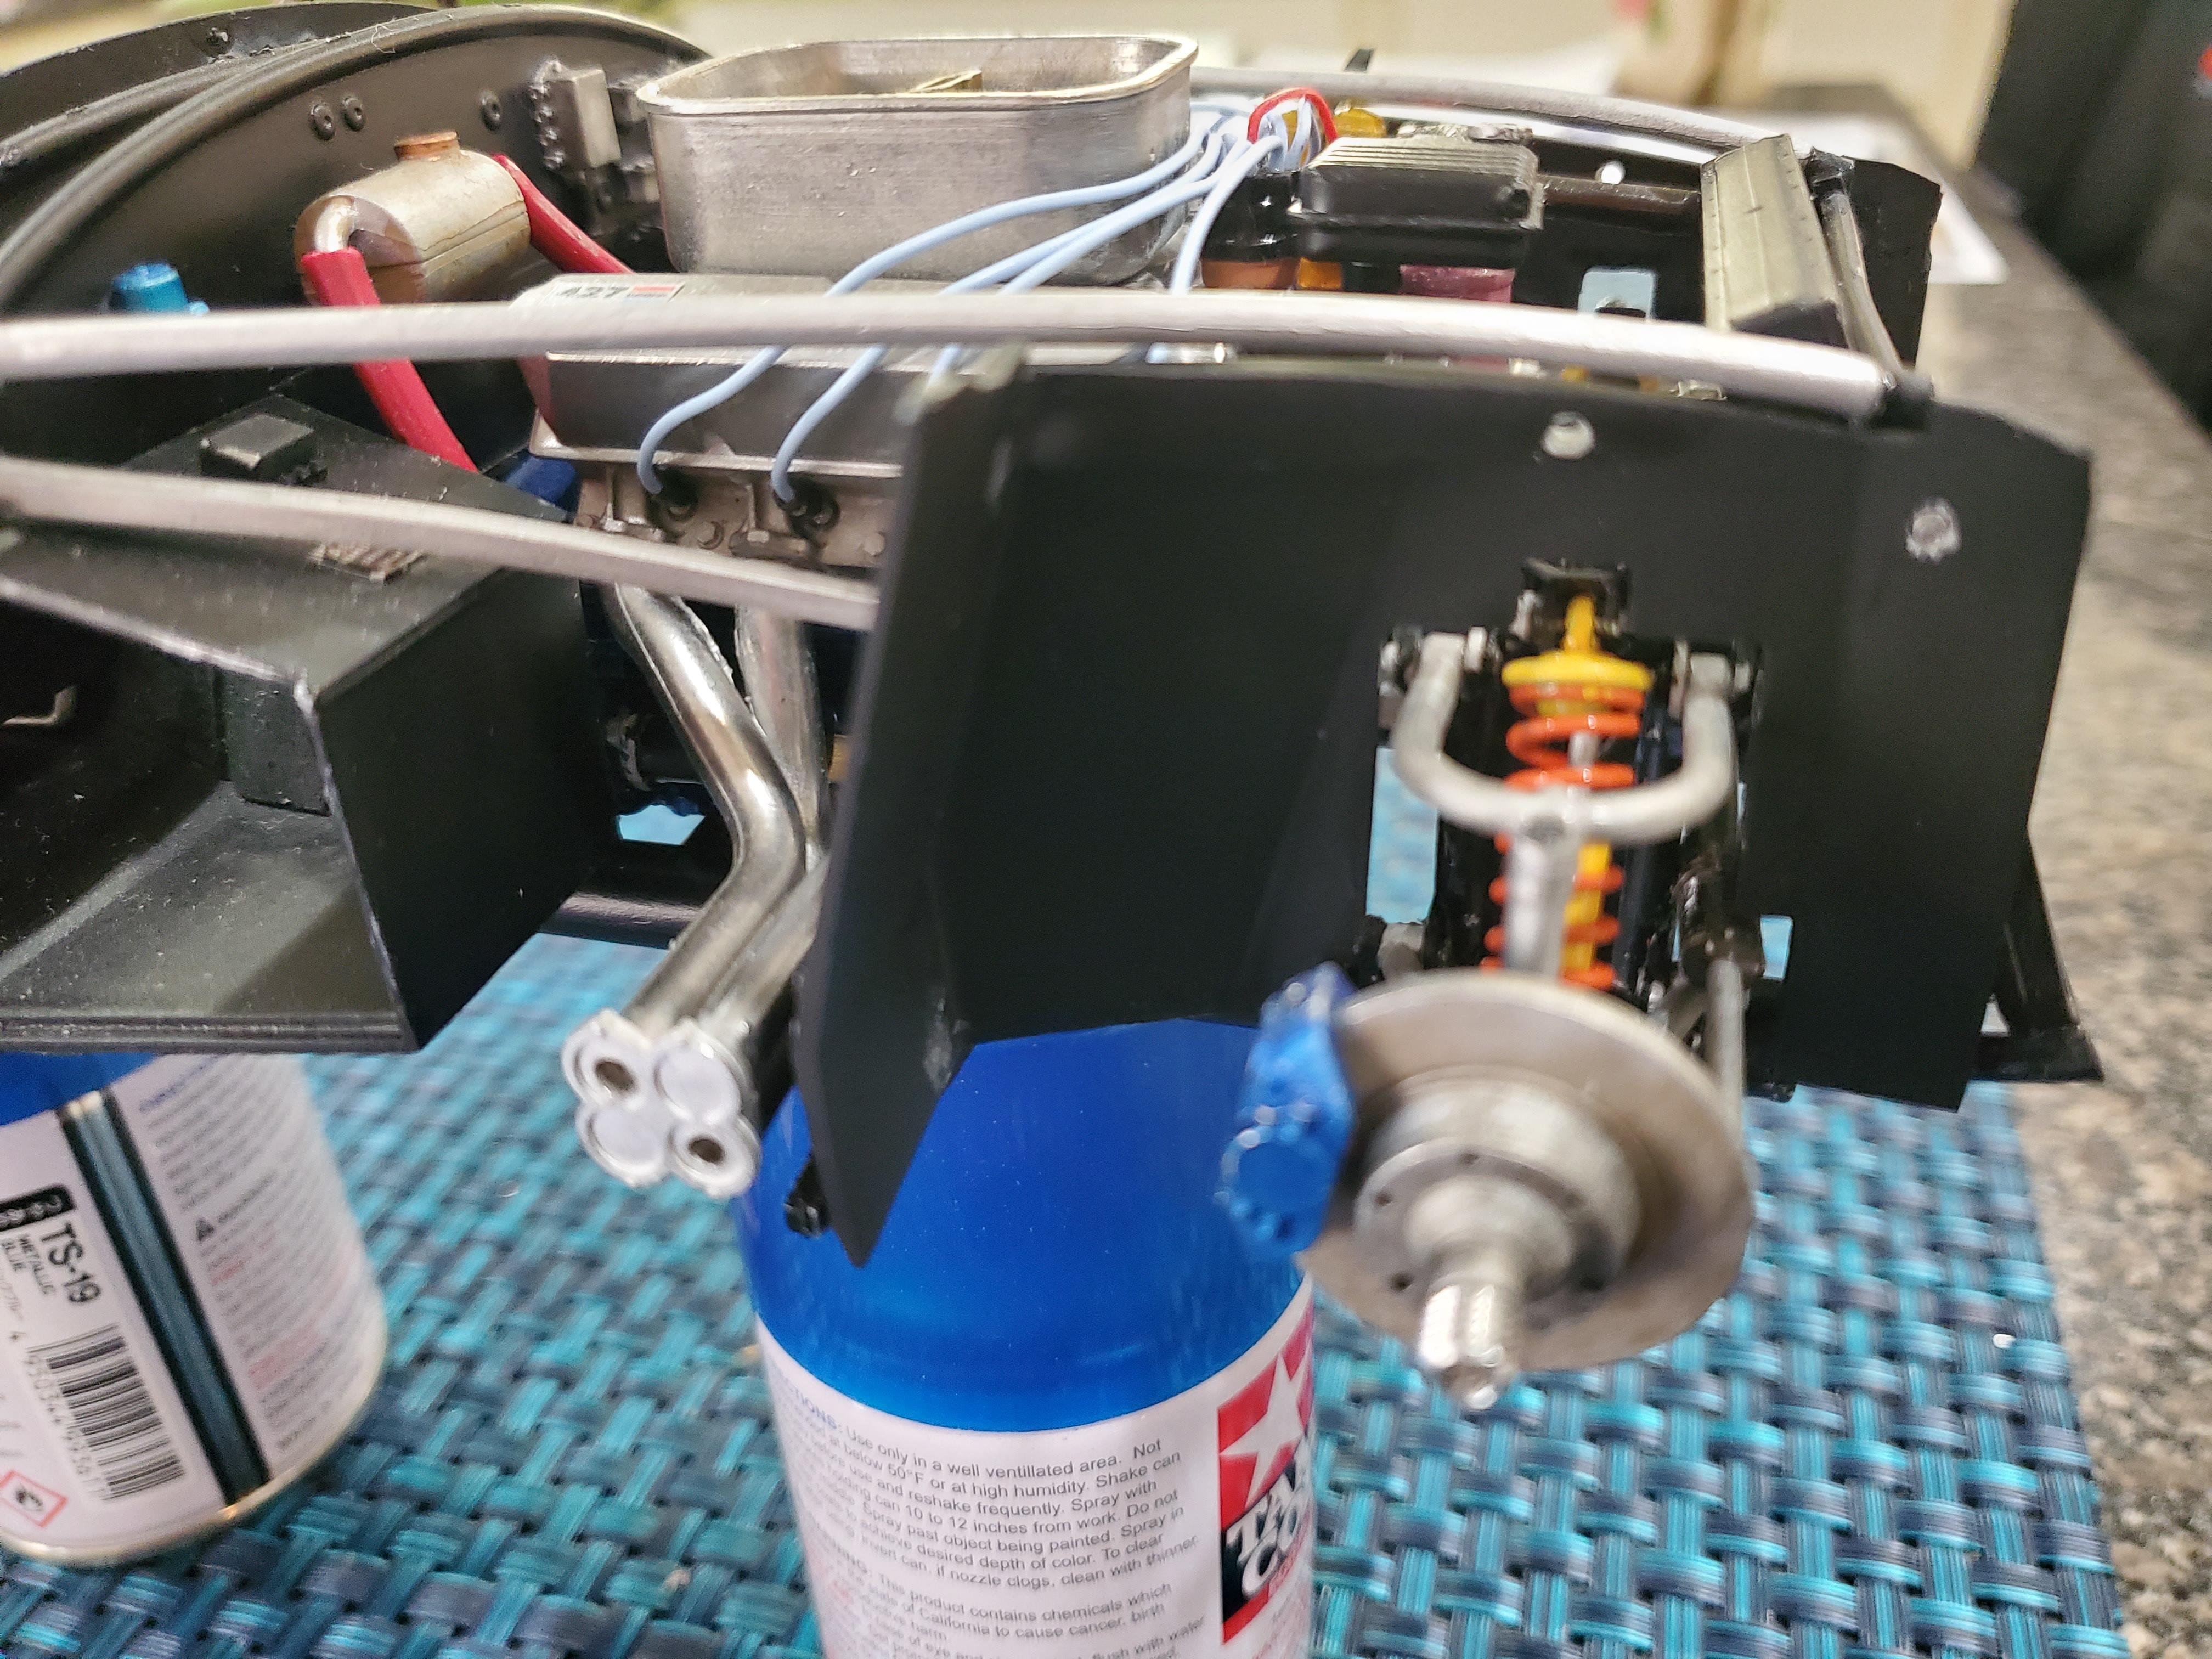
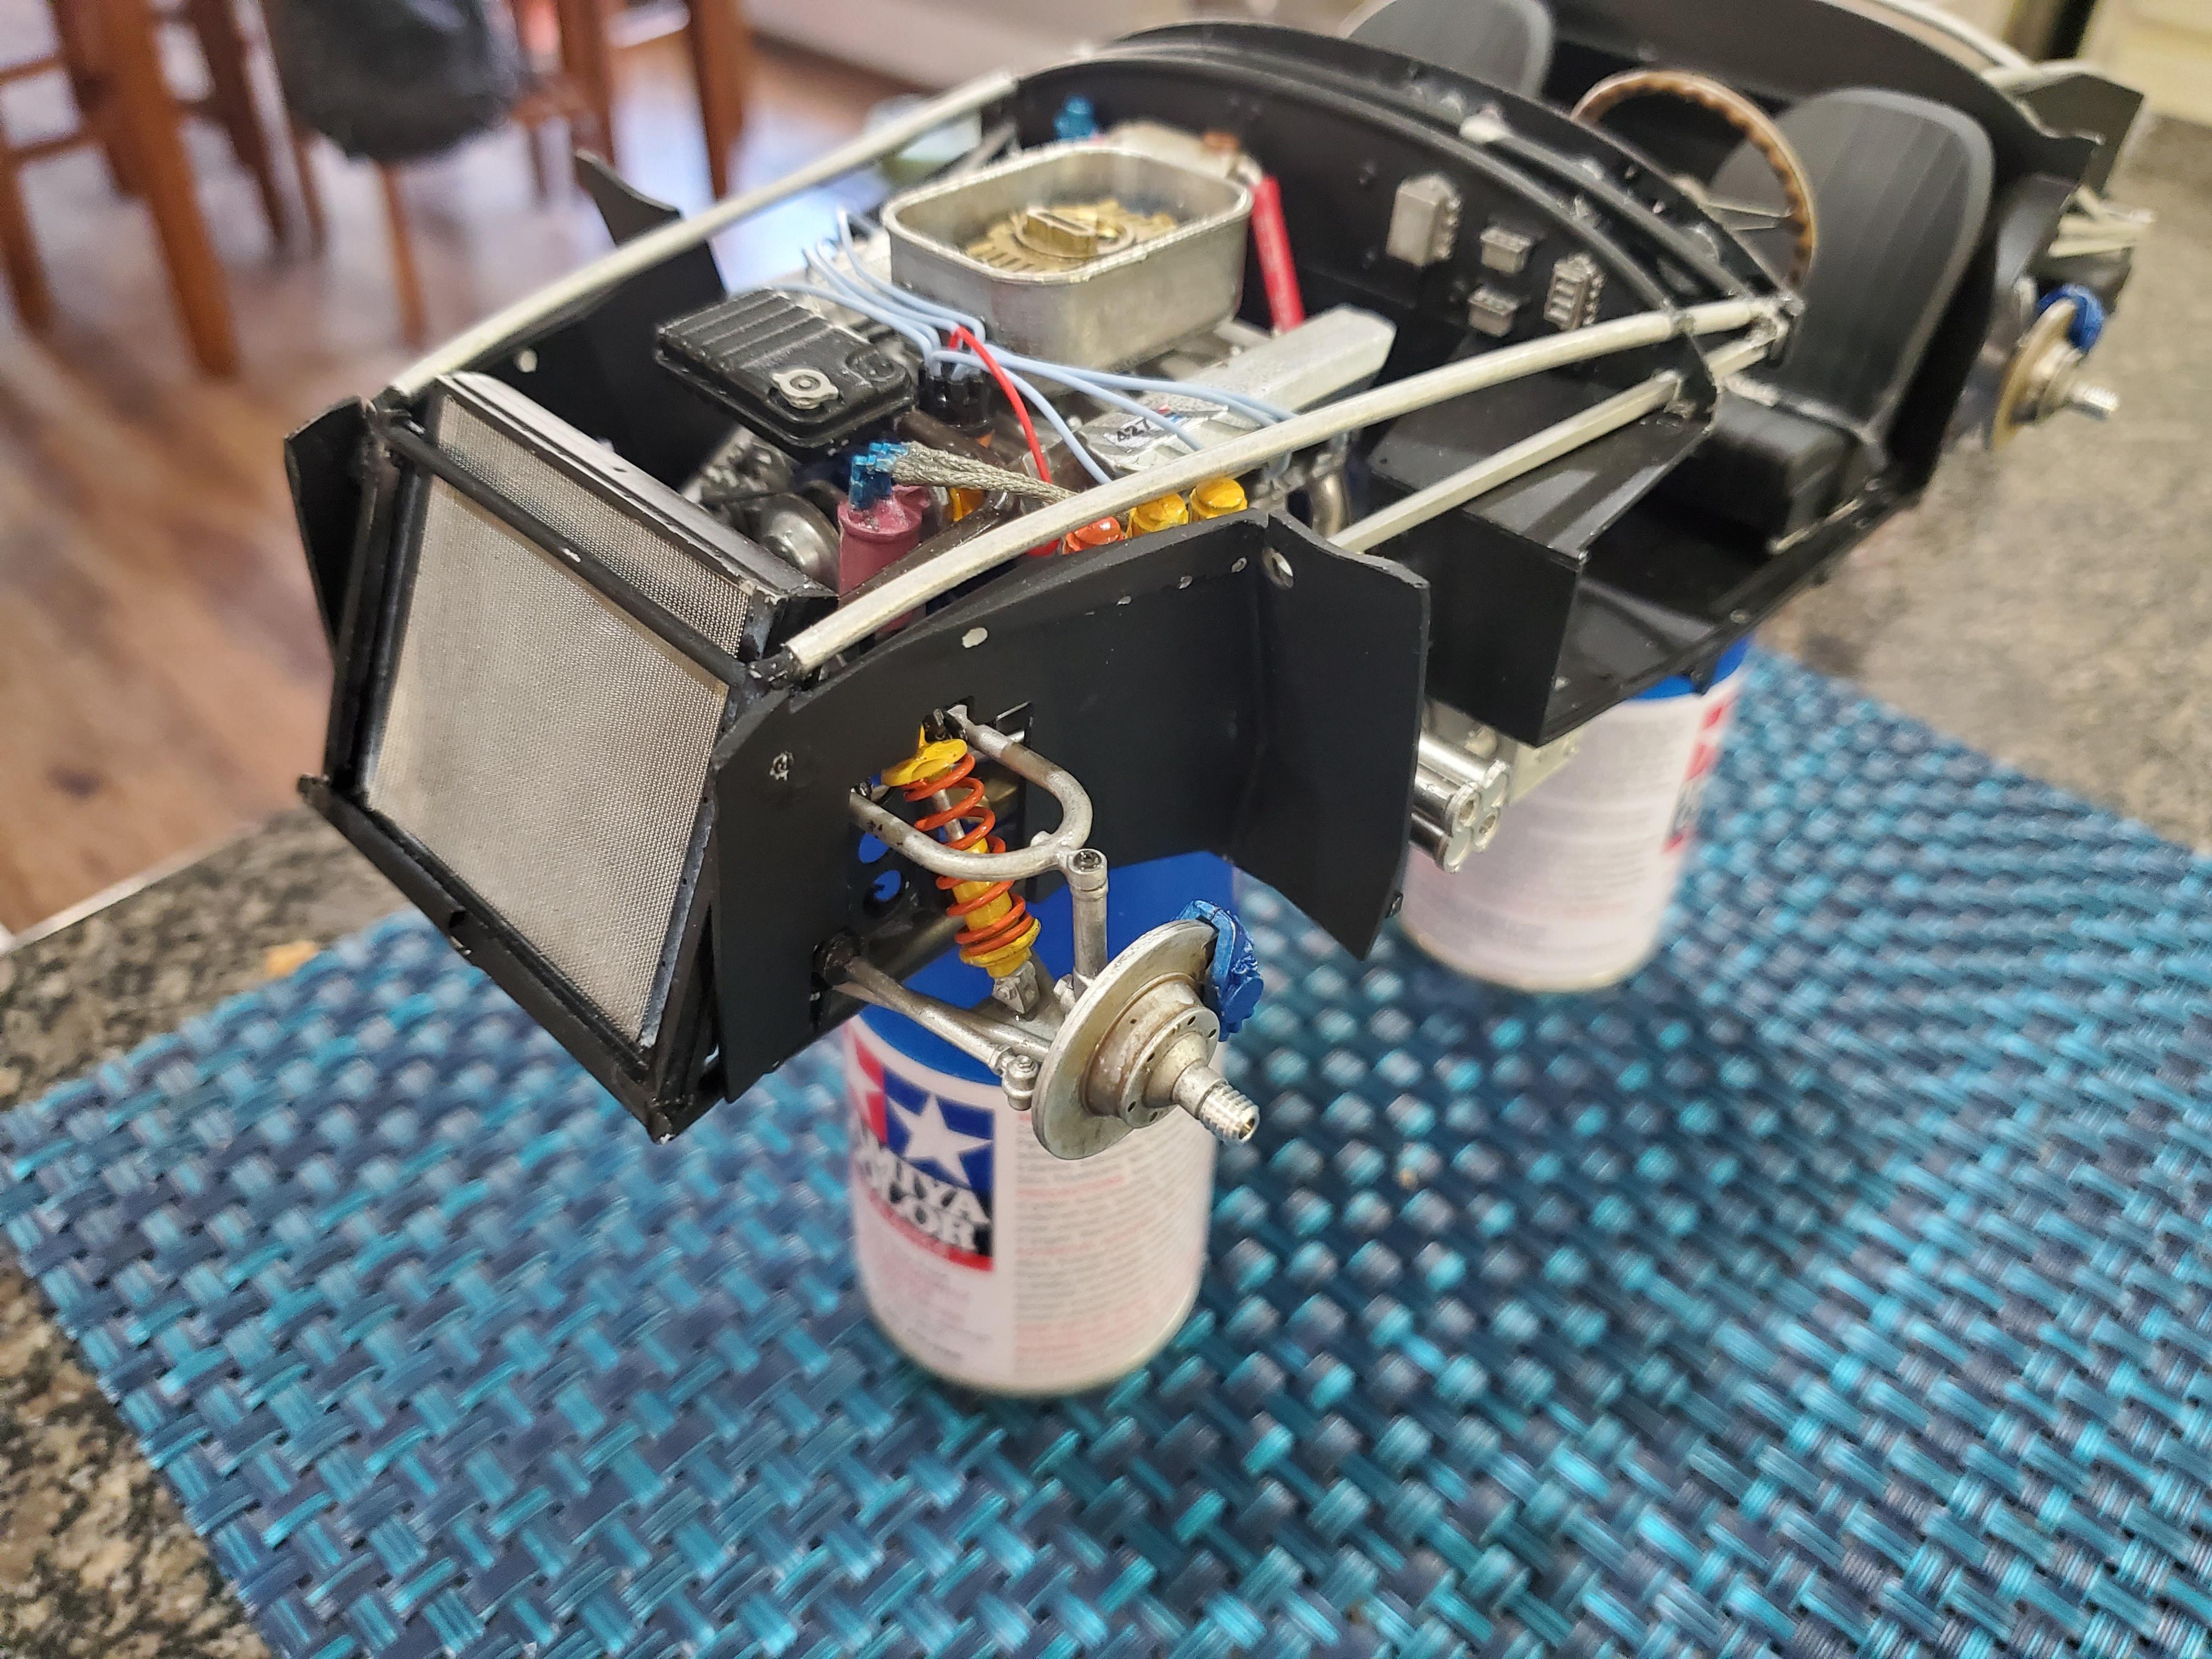
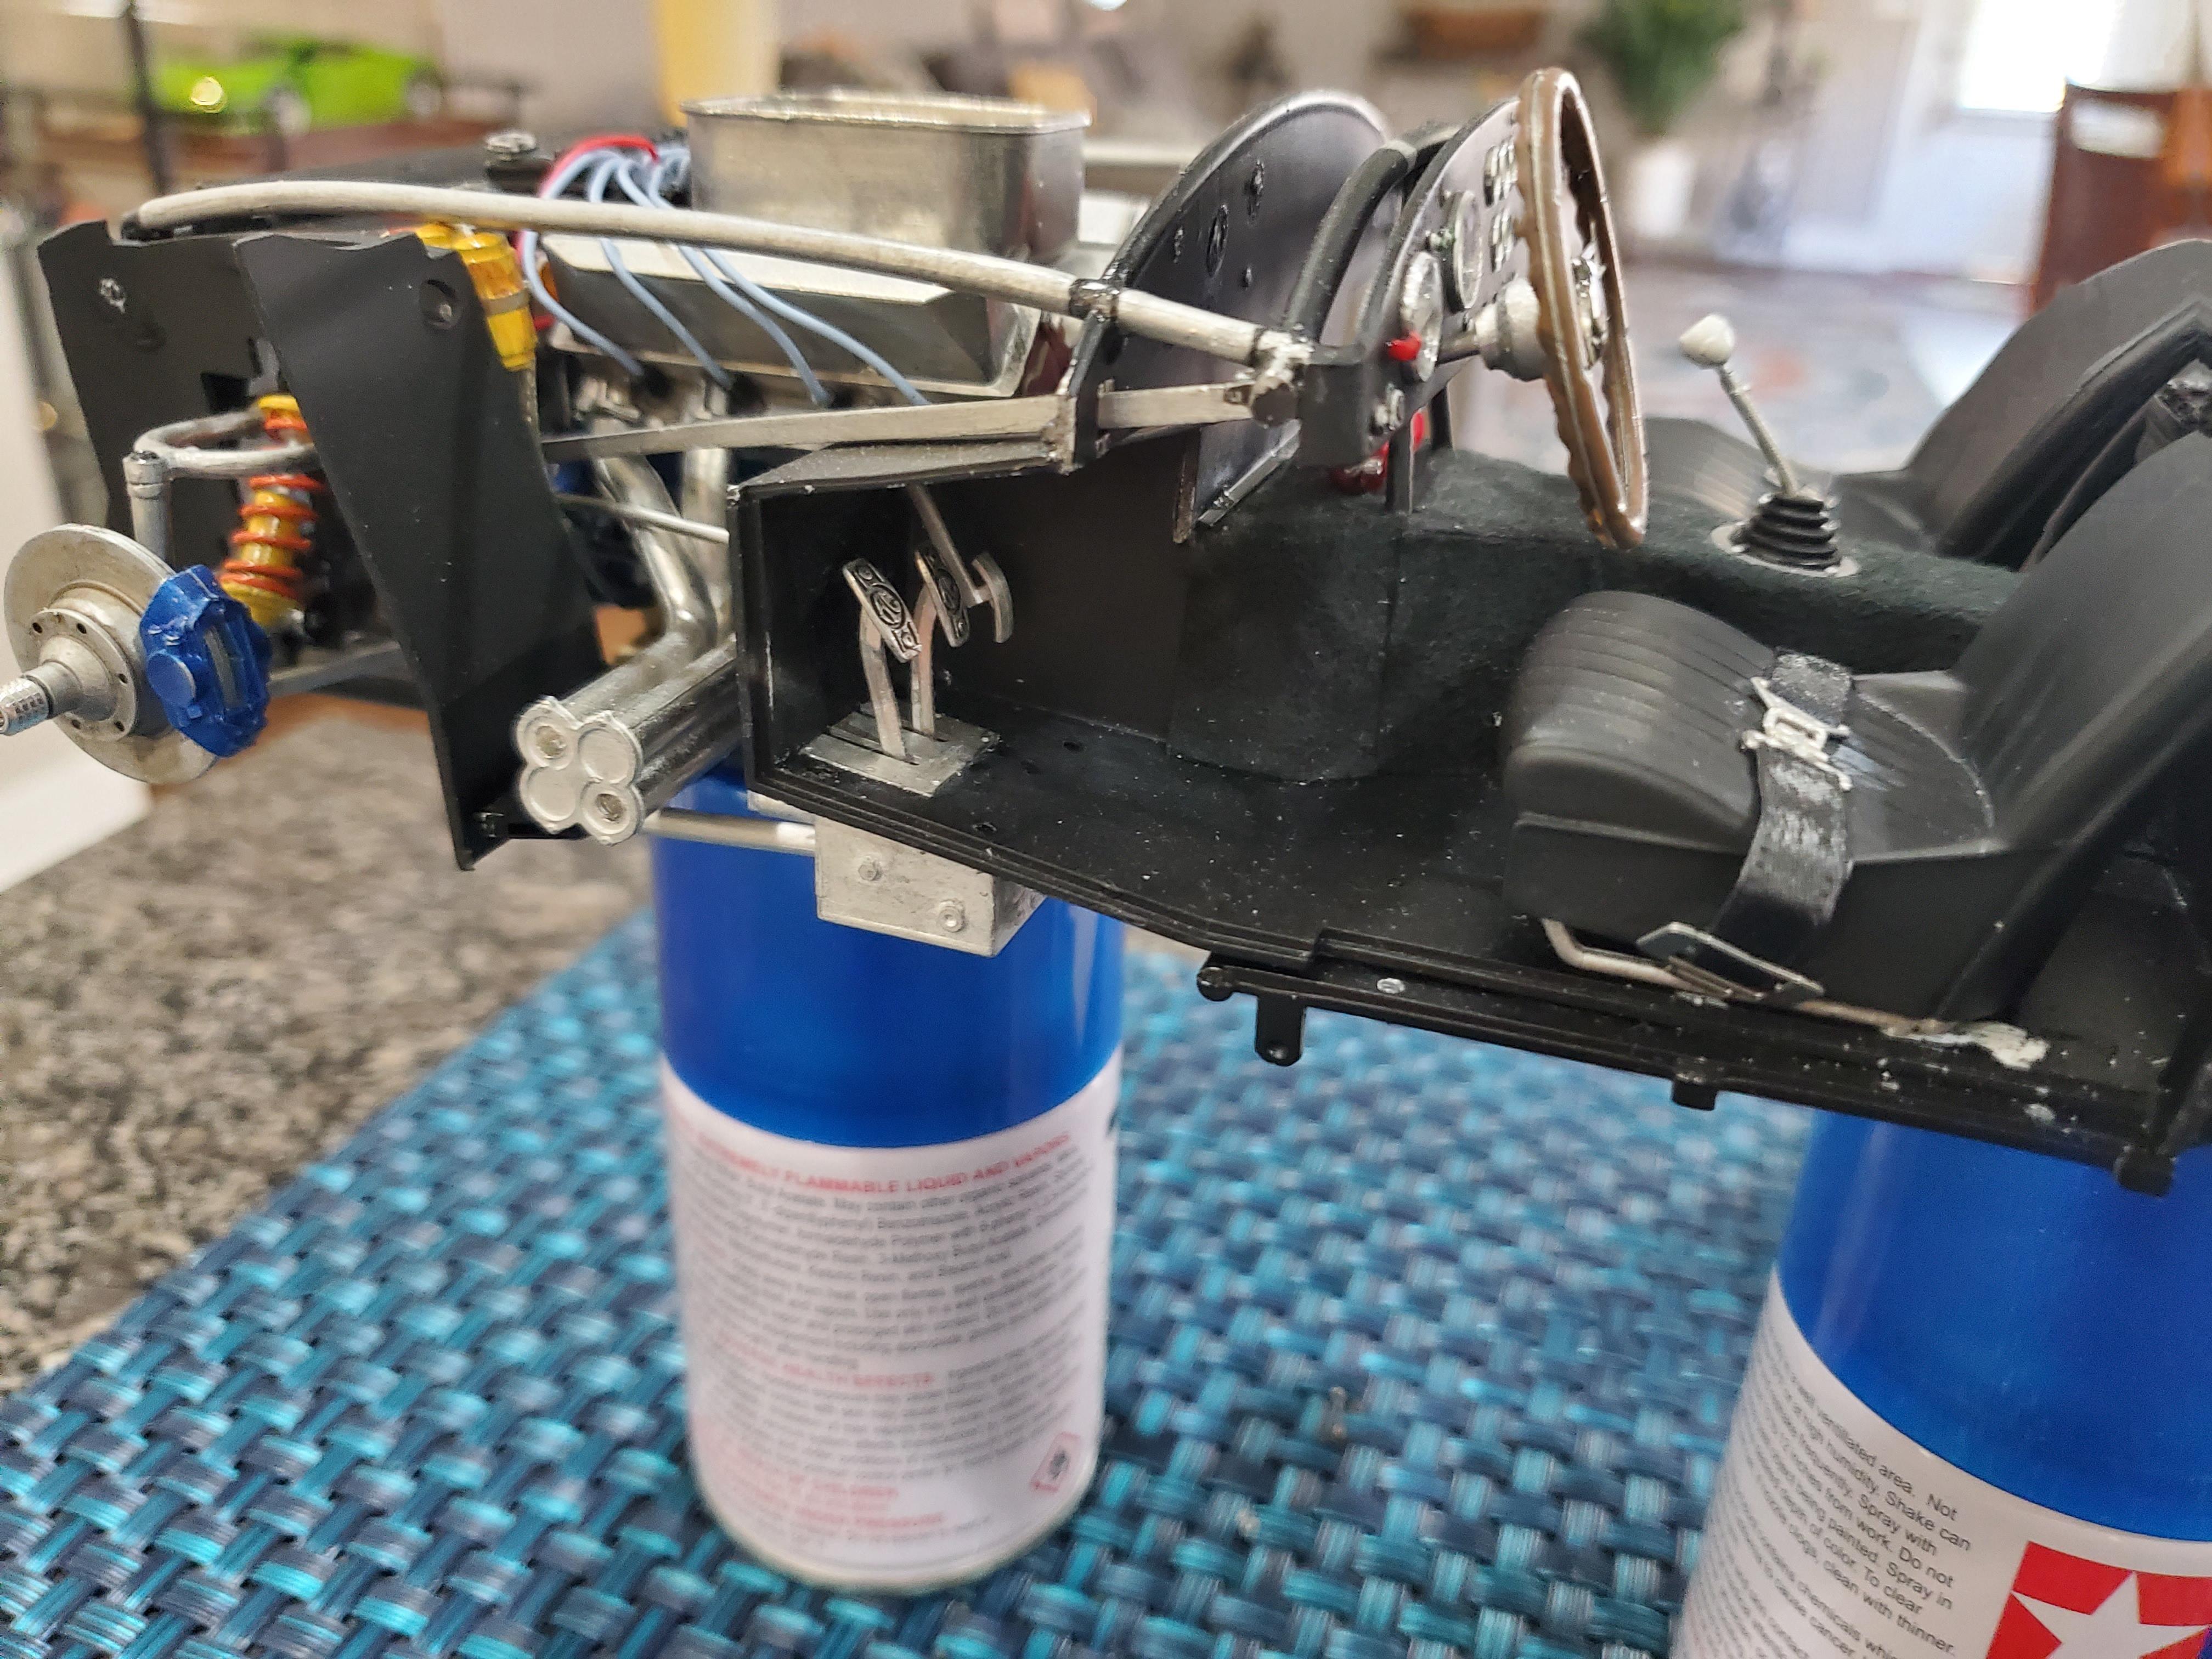
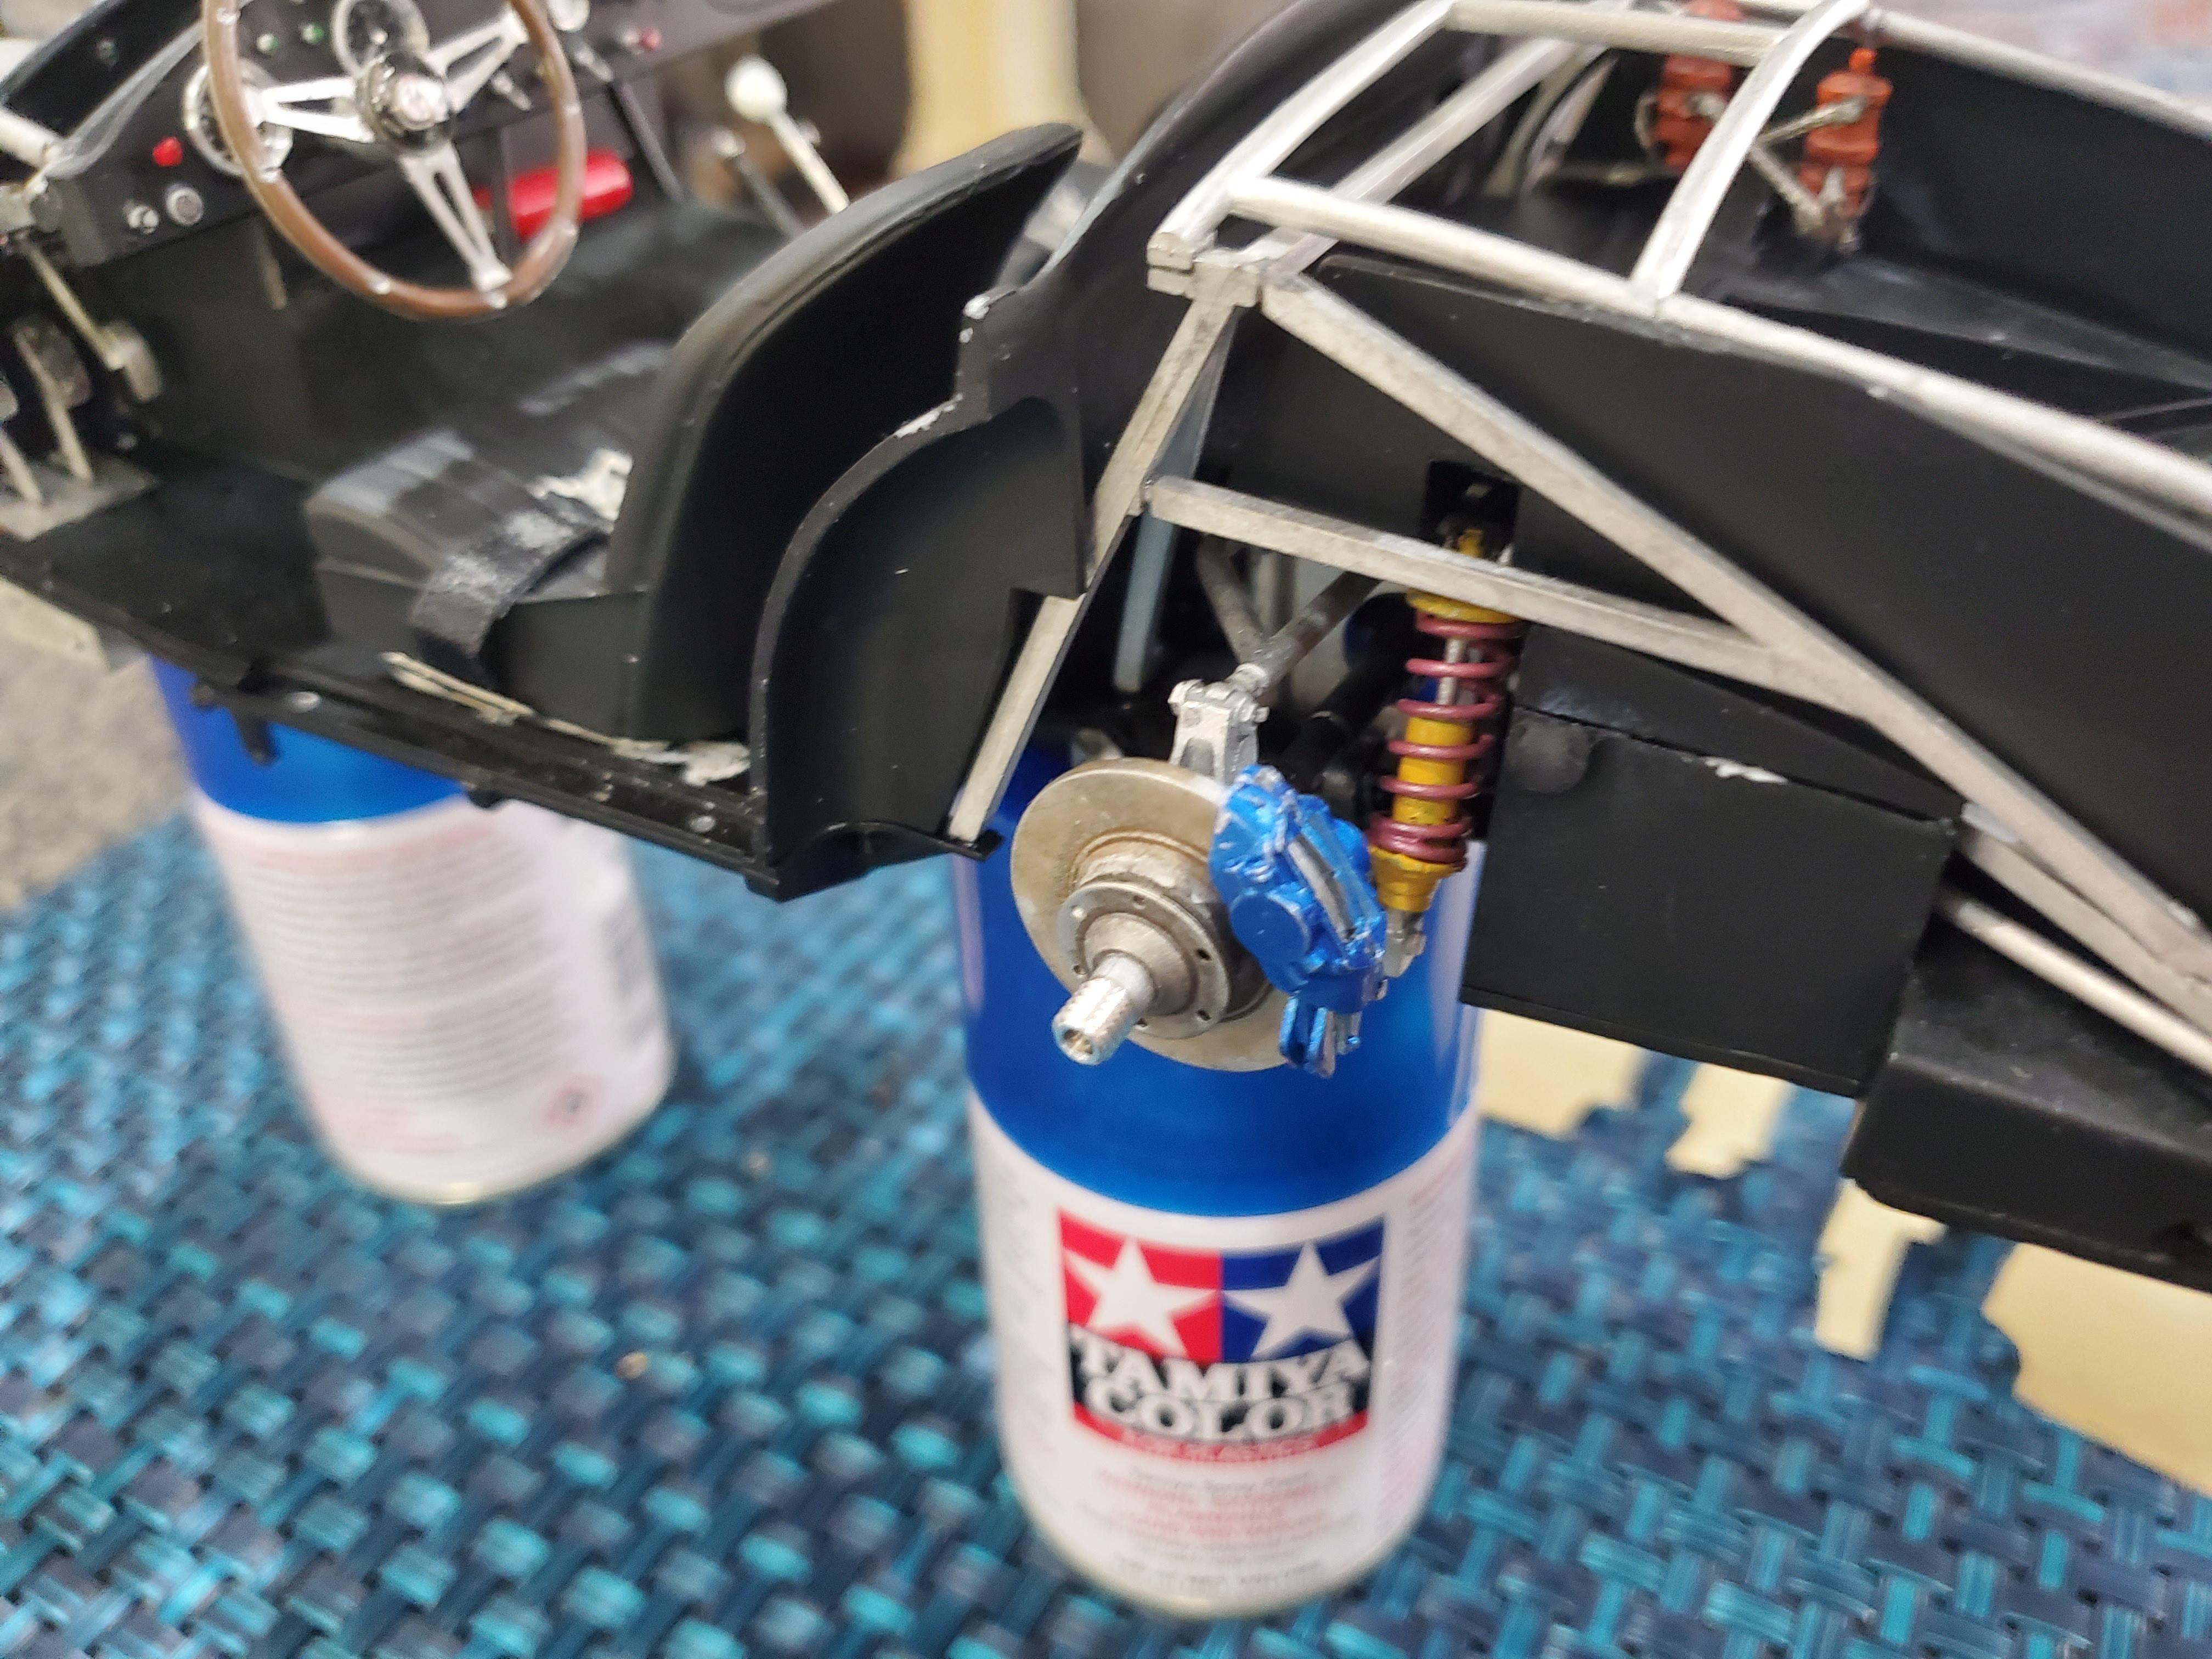
OK, here are some more pics of the chassis build so far - please pardon the dust, etc. The seats are only in place and are not finished yet or fixed. I also have to finish the carpeting. The biggest problem that I ran into was all the distortion in the white metal parts. I would estimate that at least 50% needed to be "fixed" so to speak - that is to say carefully bent/finessed to fit right. This was especially so in the rear. My main ladder chassis member was straight right out of the box. I also have been having a time getting the hood hinge to work without scraping paint. It's hard to tell from the pictures but the rear springs and front springs are different colors - I did this just like my Factory Five build and some race Cobras I've seen (Factory Five spec racers) that do that so it's easy to tell the different springs with slight different rates. Right now, I am just about to apply the final coats of clear on the main body, hood and trunklid. Brudda, what were you planning to do as it pertains to crafting some kind of inner door skins. I have some adhesive backed trim paper from another model and I was thinking about cutting that to size and sticking that on. Also, I am really concerned about how I am going to cut out the windshield to make it fit and look right with so little margin for error.
-
I am humbled by the quality of Brudda's build - that's why I am almost embarrassed to post pictures of my build. He is on a different level from me altogether. I can't wait to see his dashboard and interior details. I am building mine to resemble the Factory Five kit I built about 12 years ago. It is a very challenging kit for sure, but rewarding just the same. I am about to tackle mounting the doors and body and then I have to come up with strategy to build the windshield and frame. The frame is white metal and it gets deformed to some degree during boxing and shipping. The windshield "glass" is a very flimsy thin film that needs to be cut out. Fun!
-
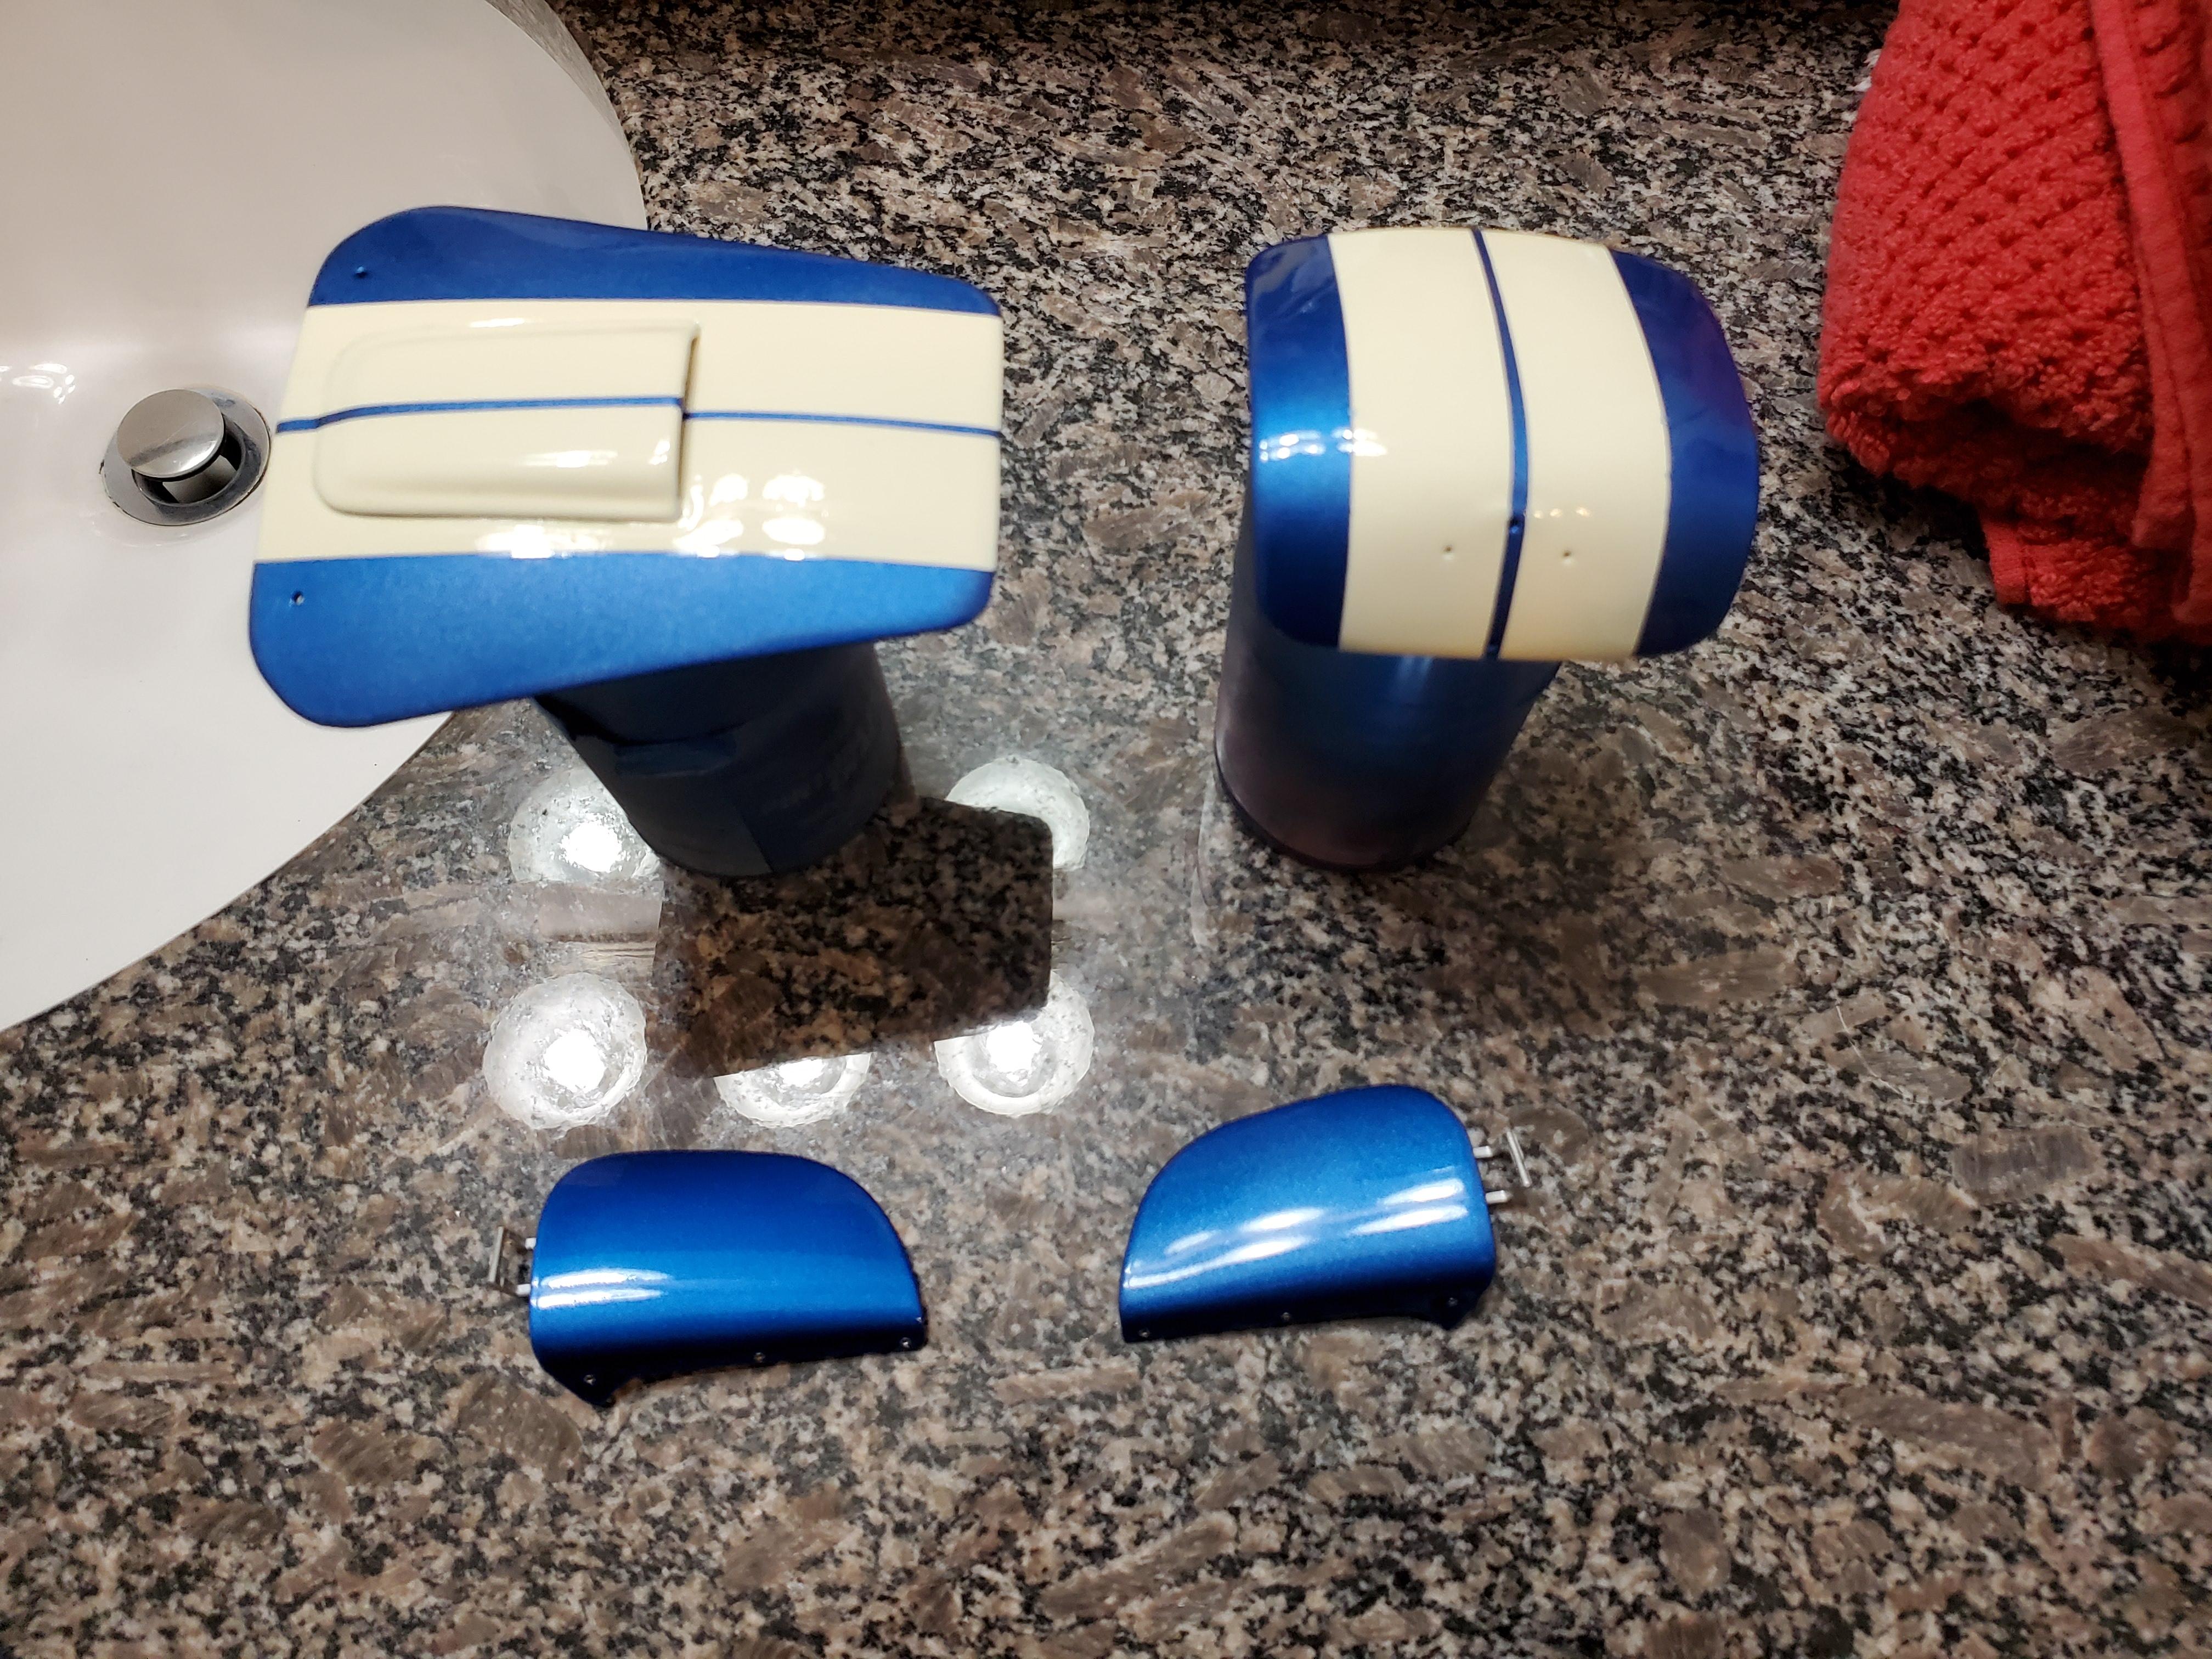
My highest compliments on your build - truly impressive work all around and especially the paint work. I am in the process of building the same kit right now, but I am not at your skill level by any means! Nonetheless, this is my second MFH kit (first was a 1/24 scale Ferrari F1 race car). I am a bit farther along on the engine and chassis, but I am still painting the body, hood, trunklid and doors. I went with Ford blue with cream colored racing stripes - this is the same color scheme for the Factory Five kit I build a few years ago. I am about to apply the first coats of clear on the body. The hood and trunklid have their first coats of clear and are awaiting sanding. The doors are done. I included a couple of pics. I decided to forego the rivets as I am trying to build this to resemble my finished Factory Five car. Please excuse the poor picture quality. I'd like to ask a couple of questions if you don't mind. How did you polish the edges of the wheels? Did you polish the windshield frame? It is so flimsy, I'm nervous about touching it too much. What brand/type of primer did you use? As I said, your skill level is substantially higher than mine, but I will offer a couple of suggestions... Be real careful drilling the holes for the suspension components - not much meat there. There are several places where those smaller (1.4mm) black screws only get one or two threads turned in and they strip the hole easily. I had to dig through my parts bags and find some screws that were just a bit longer. When carpeting, I had to apply a very, very thin layer of CA glue with a brush before applying so they don't peel up.