

Giovanni La Rosa
-
Posts
61 -
Joined
-
Last visited
Content Type
Profiles
Forums
Events
Gallery
Everything posted by Giovanni La Rosa
-
ROVER BRM Le Mans 1963
Giovanni La Rosa replied to Giovanni La Rosa's topic in Other Racing: Road Racing, Salt Flat Racers
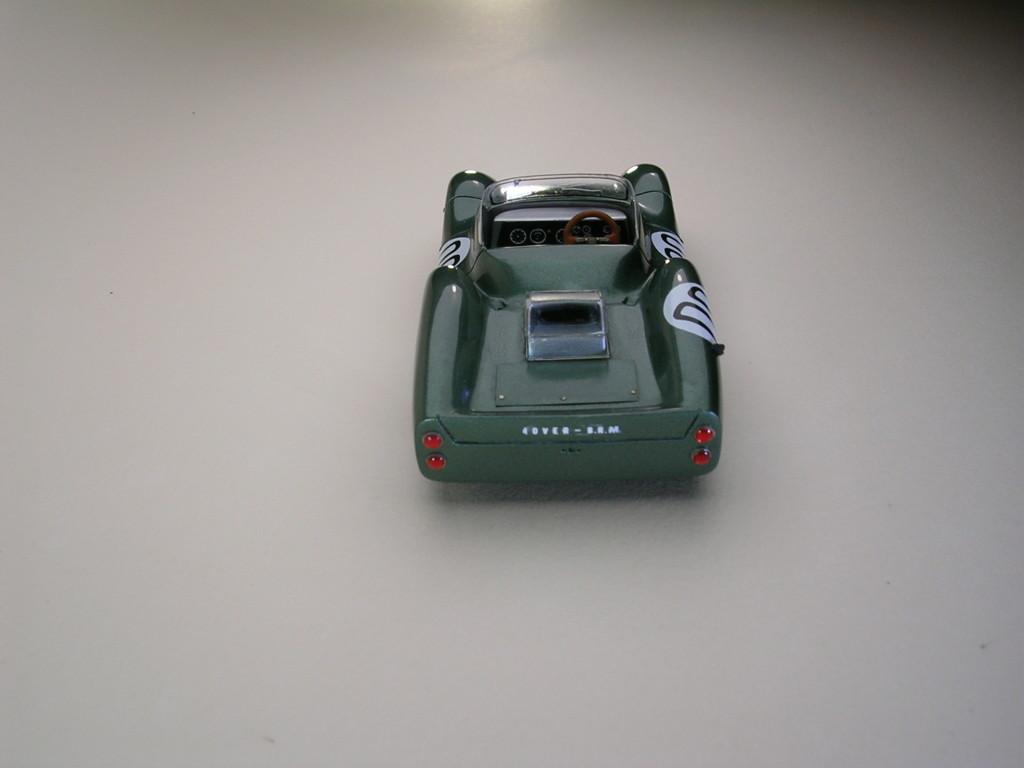
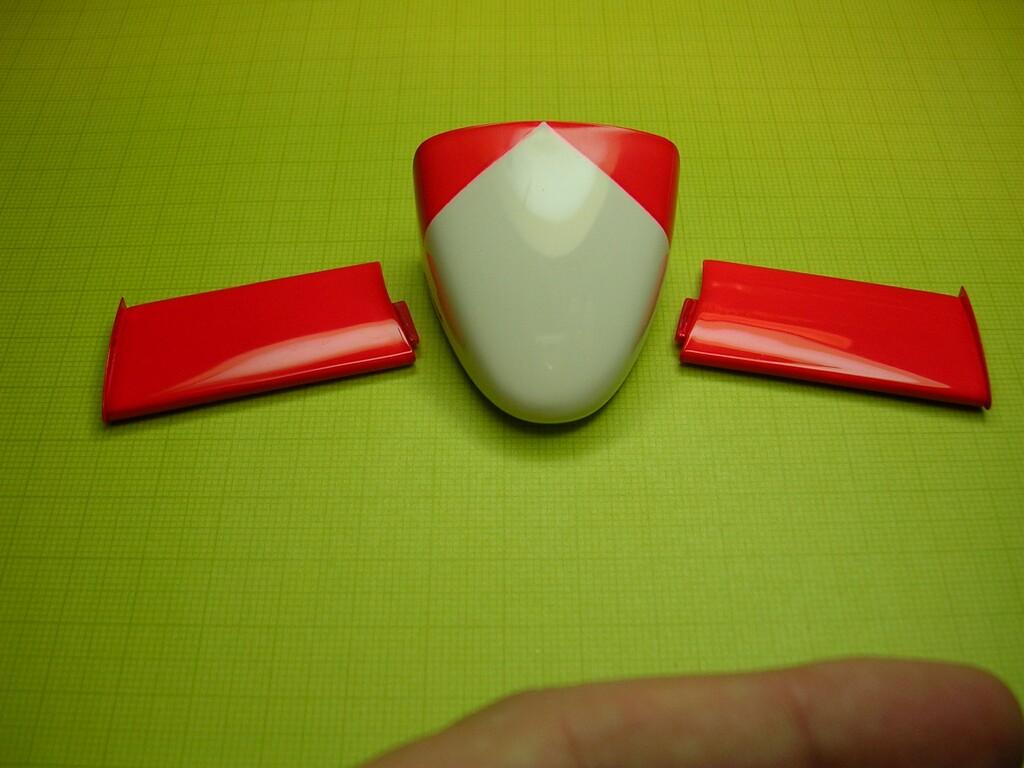
Hi at all, I wanted to thank Noel Smith, Bruce Scully and Pierre Rivard for the nice comments made on the photos of the Rover. I attach more photos of the assembly phases. Thank you, Giovanni La Rosa
-
ROVER BRM Le Mans 1963
Giovanni La Rosa replied to Giovanni La Rosa's topic in Other Racing: Road Racing, Salt Flat Racers
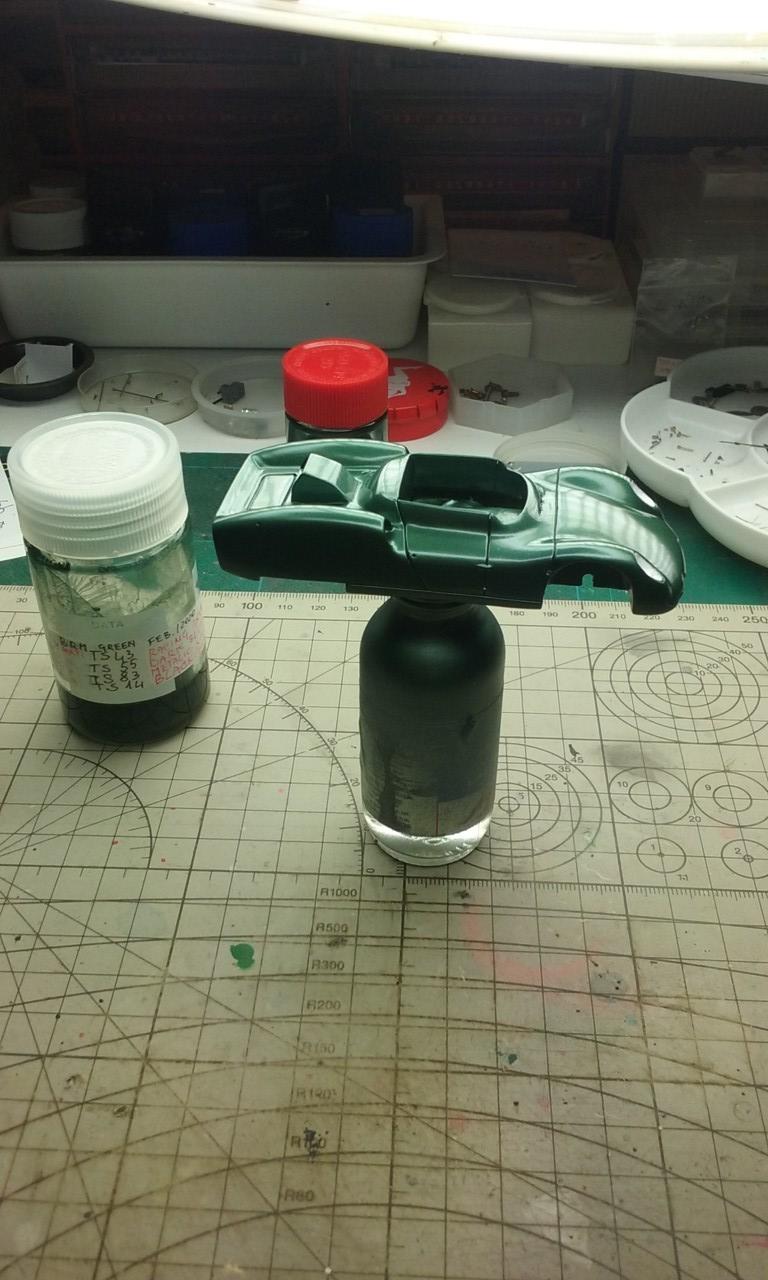
Hi at All, post some photos regarding the assembly phases of the Rover BRM. Greetings, Giovanni La Rosa
-
ROVER BRM Le Mans 1963
Giovanni La Rosa replied to Giovanni La Rosa's topic in Other Racing: Road Racing, Salt Flat Racers
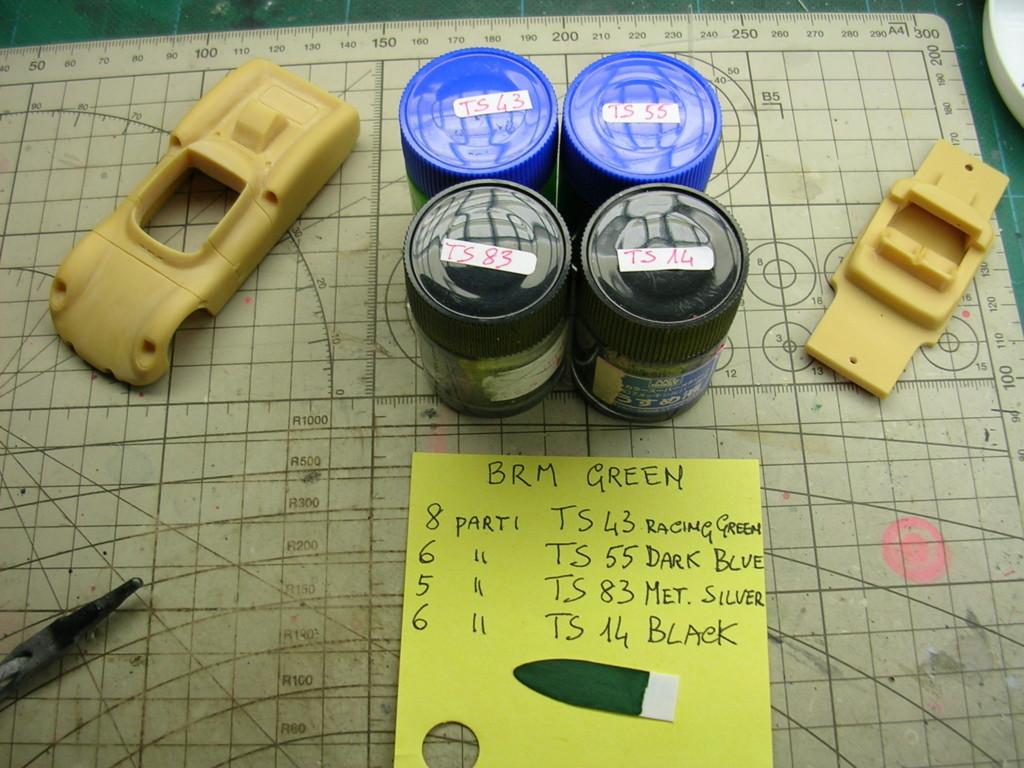
Hi, I'm really happy that you liked the Rover BRM and I would like to thank those who posted compliments on my work. Attached, I send you notes on the assembly of the model with additions of details that have been made and instructions on painting. Always keep me available for any clarification. Happy modeling everyone, Giovanni La Rosa giovanni@fratelli-larosa.com
-
ROVER BRM Le Mans 1963
Giovanni La Rosa replied to Giovanni La Rosa's topic in Other Racing: Road Racing, Salt Flat Racers
-
ROVER BRM Le Mans 1963
Giovanni La Rosa replied to Giovanni La Rosa's topic in Other Racing: Road Racing, Salt Flat Racers
-
ROVER BRM Le Mans 1963
Giovanni La Rosa replied to Giovanni La Rosa's topic in Other Racing: Road Racing, Salt Flat Racers
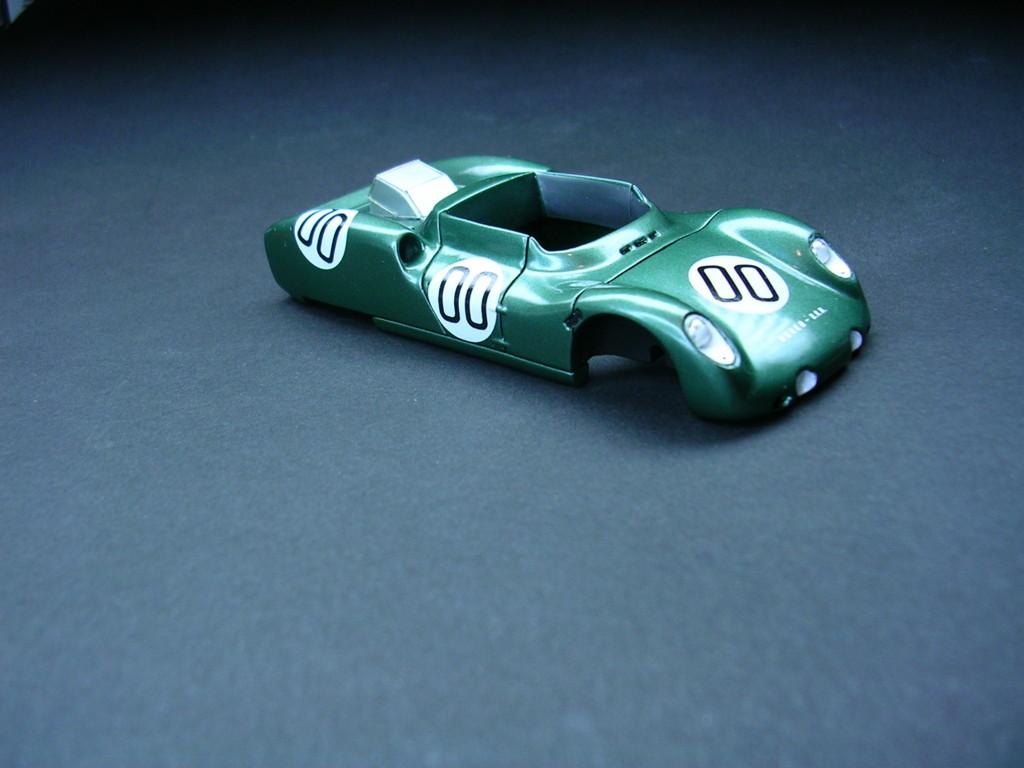
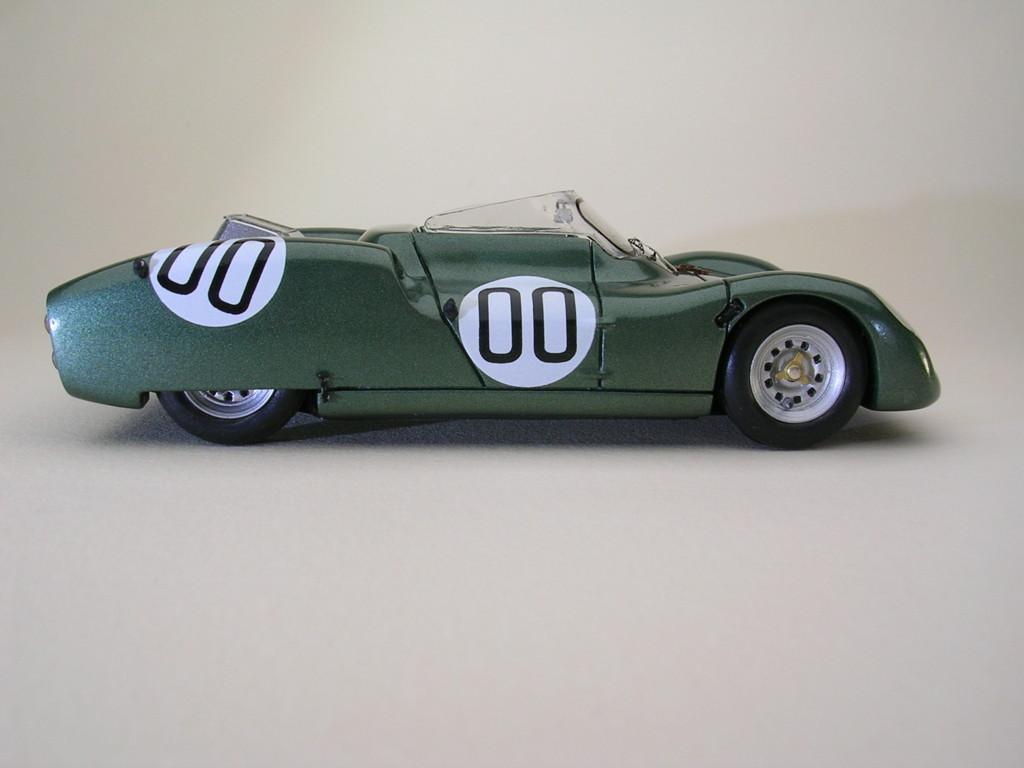
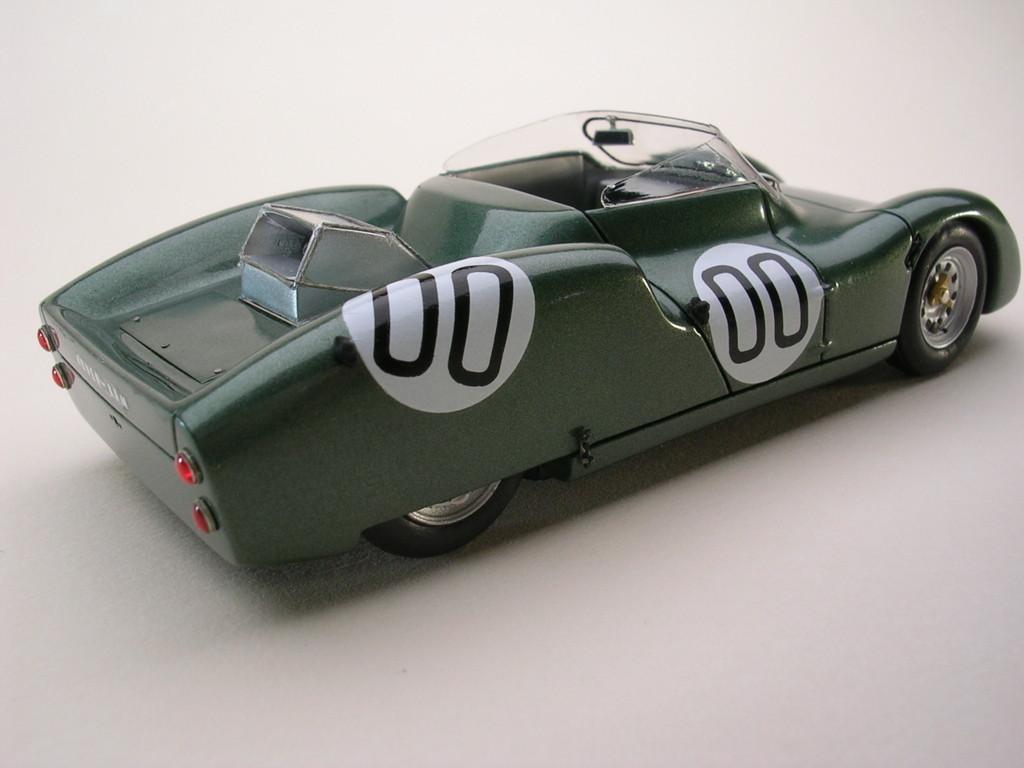
Hi, I'm posting photos of the 1/43 scale Rover BRM from Provence Moulage, built for a collector of this scale. I am at your disposal for any clarifications. Greetings, Giovanni La Rosa giovanni@fratelli-larosa.com -
ROVER BRM Le Mans 1963
Giovanni La Rosa replied to Giovanni La Rosa's topic in Other Racing: Road Racing, Salt Flat Racers
Hi, I'm posting photos of the 1/43 scale Rover BRM from Provence Moulage, built for a collector of this scale. I am at your disposal for any clarifications. Greetings, Giovanni La Rosa giovanni@fratelli-larosa.com -
-
Hi Steve, thank you for your congratulations !
-
Hi Patrick, thank you for ypur comments ! Yes, I too saw Alfa Romeo race live during the Monaco Montecarlo Grand Prix in 1980. I was on the grandstand after the tunnel and I was impressed by the noise of the engine, much louder than 12 cylinder Boxer Ferrario but, less shrill tha the 12 cylinder matra, wich ran in the same race !
-
Hi Larry, Thank you for your congratulations ! Since you appreciate the details, I am attaching two photos showing the rear wing, totally coveredwith 0,04 mm stainless steel sheet metal and with the side bulkheads replaces as , for the Austrian Grand Prix, a race in which refers to model I built, Alfa Romeo used the side bulk heads in bare metal sheet, not colored in fluorescent red as in the races preceding and following this one. I made them with 0,5 mm steel metal sheet and equipped with Adlers Nest rounded rivets.
-
Hi Rich, I'm glad you like my Alfa Romeo and that you own all Protar kits; of course, they need touch-ups and adjustments, but the final result can be excellent ! I enclose three photos of details of the 179 : one, shows the seat belts ,replaced with those of MFH, as far as the buckles are concerned, the fabric is that of Modeler's and the seams were obtained fron decals included in a seat belts set of T2M.The other two, show the engine exhausts, totally self constructed using a roll of welding alloy (St/Zn) which is used in thermo-hydraulics.
-
Hi Helmut, thanks for the compliments written in excellent italian ! I am attaching two photos , one showing the oil tank which is located behind the petro tank, behind the pilot. Naturally, this detail too was completed with the addition of braided hose , fittings, welding on the corners of the tank and painting , to give the typical roughness of its surface. The other, show the floor reinforcements , placed in the rear part, on the side of the engine , completely omitted from the kit and which I made by bending a 0,5 mm sheet metal, using the stapler for photo etched parts.
-
Thank you !
-
Thank you !
-
Thank you
-
Hi Philip, thank you for the compliments !
-
Hi Robert, the phase of defining the shade of fluorescent red to be used for the bodywork was long and laborious. In the end, I defined the mixture of Tamiya colors , decanted from the can, by going to see a 1981 Alfa Romeo 179B at the Carlo Biscaretti Automobile Museum in Turin (Italy) ,but which kept the same colors as the 1980 car. After placing various color tests , previously made, on the original bodywork , I decided on the final color : 6 parts of Tamiya TS 36 Fluo Red and 1 part of Tamiya TS 8 Italian red .
-
Hi Mike, thank you for your nice comment !
-
Hi Rich, from what you write I deduce that you know Protar/Italeri kits very well ! Indeed, they are not very easy to assemble but, with a lot of patience and research, beautiful models can be obtained from them. I am attaching two photos where you can see how I redid the oil cooler, positioned on the gearbox and the rear suspension arms. In these photos it is possible to see how the modified pieces have been improved in appearance compared to those supplied in the kit.
-
Hi Thomas, the kit has been revised and complted in all its sectors ! The aftermarkets used are innumerable and the self-built parts are numerous. I am attaching photos of particular sections of the model ; if you had specific questions about what I used in that build, please feel free to ask.
-
Hi Bruce, thank you for your compliments !
-
Hi at all, the basic kit is from Protar, an italian model company that has been out of the market for several years that produced car and motorcycle kits. A few years ago, Italeri, which acquired the Protar molds, reissued the kit, significantly improving the quality of the plastic and decals. The model I made is a reproduction of the car, in terms of aerodynamic configuration and thechnical solutions, which took part in the 1980 Austrian Grand Prix, driven by italian Bruno Giacomelli. The model refers precisely to that occasion since, in that Grand Prix the position of the air cooler, located above the gearbox, was in a vertical position (as supplied in the kit) for the first race as, up to by then, it had been mounted in a inclined position ; in addition, the side panel of the rear wing, in this race, were mounted in natural metal while , in the previous race, they were colored fluorescent red, as part of the bodywork. During this race, as well as almost all those of the entire 1980 World Championship, Giacomelli retired due to technical problems.
-
1972 Ferrari 312PB
Giovanni La Rosa replied to Chris Smith's topic in WIP: Other Racing: Road Racing, Land Speed Racers
Hi Chris, what type and brand of clear gloss did you use for the 312 PB body? Thanks and congratulations, Giovanni La Rosa -
Hi Andrew, Hideki Yoshida is a famous Japanese painter who has as subjects, production cars and racing cars (Ferrari in particular) that I like very much. You can find some of his paintings by doing a web search. Thanks for the information; I await your news on the availability of the engine of the 166 MM Barchetta. Hello, Giovanni La Rosa
.JPG.9c7e5bc0edcc52fdda28e7b40365ccd0.JPG)
.JPG.b9bdc6d29ddfe4f934274f071f9f5401.JPG)
.JPG.18835bfa03b07f9e9e26ca1ffe754c41.JPG)
.JPG.44d4c996ea80db709d2d4d41641af92d.JPG)


.JPG.820cb07ad80ffac599e103637e6dfbdc.JPG)
.jpg.984e366fb86e23de2556d2bca9590264.jpg)
.jpg.ade6fc8fa25da1c3b9d12ba57772df9f.jpg)


.JPG.d0cd4bd890e8c5a87c95be886c0d5ba2.JPG)
.JPG.728ebd8456af82d6acd421c30ca4a42d.JPG)
.JPG.2e3b4ab7213fddad79ba879de462d0a1.JPG)
.JPG.8a0036f26680c9fc520b56c7bfb8292e.JPG)
.JPG.2e80d2e7e2b89aac3fa3c887ff6c7e69.JPG)
.JPG.f1e11c334e5acc36491e2e0d06123a5b.JPG)

.JPG.d29f774d4191f44c823ab8a7038914c3.JPG)
.JPG.16ff15c5ffef6636dd3d0faa3561a816.JPG)
.JPG.390649e68a6de58fa59824903b7367b3.JPG)


Carenaturaant..JPG.79f3057bdb1f38d64563c7d2e9d3d480.JPG)
.JPG.481fda9799958b353b1d8fae37952bf4.JPG)

.JPG.c80ab7f6e46a9ed6e10e6f5382b2563c.JPG)
.JPG.a590252ef52f5ead34df1d1e932a92b0.JPG)
.JPG.d144d713115fb51e648f0ce9f8ae78fe.JPG)
.JPG.0ff8de6f2eb482f4aaa7f0d21896221b.JPG)
.JPG.1c3c0dabe2851c84ad35e6fbfe6ad62a.JPG)
.JPG.8b53b52101d55b3bb2bd0a20b273eaed.JPG)
.JPG.8a007e3ad1f27d4903b0ef057203694b.JPG)
.JPG.0288aabb766634e0db7101735f904579.JPG)
.JPG.e709b9d56a348caaf9c791112233cc2e.JPG)
.JPG.9d646d155f9982eec6148f0209f3b0a6.JPG)
.JPG.9a95a8f42356f5bff0176d627f5d61d7.JPG)
.JPG.03169e8345124ab21ea36f7a5cea298f.JPG)
.JPG.b1db17cc9f2c20ee58f218e070294871.JPG)
