
crazyjim
-
Posts
21,785 -
Joined
-
Last visited
Content Type
Profiles
Forums
Events
Gallery
Everything posted by crazyjim
-
Looks good W-409. I like the details in the engine compartment.
-
 I use the cheapest lacquer thinner I can find to clean brushes. The Old Man (Donn Yost) recommends thinning Model master paints with cheap lacquer thinner for airbrushing. It's in his video.
 -
Bryan/Stangman - WELCOME HOME little brother.
-
Newbie, stopping in to say Hi
crazyjim replied to CheaterSlick's topic in General Automotive Talk (Trucks and Cars)
Welcome to the forum Alex. Pretty decent place to post your builds and get tips. Like the '32 you posted. Where'd you get those wheels? -
Very cool. I like that you removed the spear - cleans the side up. What about making it shorter so there's no rear seat?
-
A fenderless '57 Vette. I gotta see that! have you given any thought to narrowing the body? The Bantam was a pretty small body as I recall.
-
Very interesting build you have going. Keep it up.
-
Looking excellent Gary.
-
Nothing like a Chevy bubbletop - and yours looks beautiful. Excellent paint!
-
Very good looking hot rod. The babe ain't bad either.
-
Love the details, Eero, especially the ski poles holding the trunk & hood open.
-
Hey Chuck, It's almost springtime.
-
Love the color and the paint job looks superb.
-
remove scratche`s from glass
crazyjim replied to boohoo's topic in Model Building Questions and Answers
I've used Novus #1 to polish out minor scratches. -
Yeah George! That's really cool - the interior details are fantasic. Any pics of the chassis you built?
-
Thanks fellas. I don't take any offense that George posted his pic. Shows the difference in the deck lids. Would that be the black/copper kit? I haven't opened the box yet. If it's the same SOHC engine, the kit is worth it right there. I have Revell's new '32 5 window going through some interior work (Del Sol buckets & console) have have the parts seperated on a Nova. Too cold to be out in the shop for long periods of time. It's supposed to warm up by the weekend.
-
Here you go Diymirage. It's not word for word but I think I caught the major points from the article. Let me know how it works out. Satisfy yourself with the large version of an image in high resloution jpg file. Open a blank Word document. At the top of the Word screen, click on "insert", which opens a box. in that box, click on "picture", which opens another box where you click on "from file" which pops open an "insert picture" window allowing you to choose from stored image files. Pick the image you want, click the "insert" box within that window, and the chosen image appears in the blank Word document. Right click on the image, which opens a box where you click on "format picture". That opens a new window where you go to the top and click "size", that allows precise re-sizing of an image without a reduction in nresolution. Test print on plain paper. If the image looks good and the size correct, you can duplicate the image as many times as you want on that page by right clicking on the picture and copying it. Printing on glossy photo paper at the maximum quality setting yeilds amazingly sharp detail - superior to decal paper.
-
Message to folks I'm trading with
crazyjim replied to VW Dave's topic in General Automotive Talk (Trucks and Cars)
Gotta smart. Get better soon. Hope you didn't fall shoveling snow. -
Buddy - that would be the AMT '33 Willys Coupe #2402 molded in baby blue. I think that's an older kit. I have another kit AMT 1933 Willys Coupe #6570. The box art shows a copper & black model. Maybe I'll try tubbing that one like George did. I want to get the body closer to the ground but still have wide tires. Or maybe extend the fender out to cover the tire. I don't like the look of tires sticking way out from the body.
-
Buddy - I tried getting a real close shot of the valve stem but it's all a blur. I drilled the wheel and using Micro Krystal Klear, glued a piece of 3/8" scale wire. When that dried, I used the Micro Krystal Klear again to form a drop on the end of the wire. I set the wheel with the stem at the top. When it dried I painted the glue - it turns clear when dry. I'll try more pics but can't promise anything.
-
What Kind Of Clear Gives The Best Shine?
crazyjim replied to doug2013's topic in General Automotive Talk (Trucks and Cars)
Christmas time brought me a set of HOK pearls and I've been playing with them. I've been getting excellent results from Plas-t-kote classic clear that I decant and shoot with a Badger 200. I let the clear dry and go over the body with Novus #2, Novus #1, and then a coat of Model Car Wax. Bing. Bang. Done. -
I was gonna say the same thing - first neat workbench I remember being posted. I like your idea with the corkboard for parts trees. Whenever I start a kit, I cut everything for the trees and seperate them into engine, chassis, interior, body.
-
Looks really neat. What a concept. So you're from Sunny Nodak - do you know Gary Stegmiller? I think he's Minot.
-
I was at the Dixie Art site before and saw the H set priced at $59.95. I guess there's the H that gives 1 tip and the H set that gives you the #1, 3, and 5 tips.
-
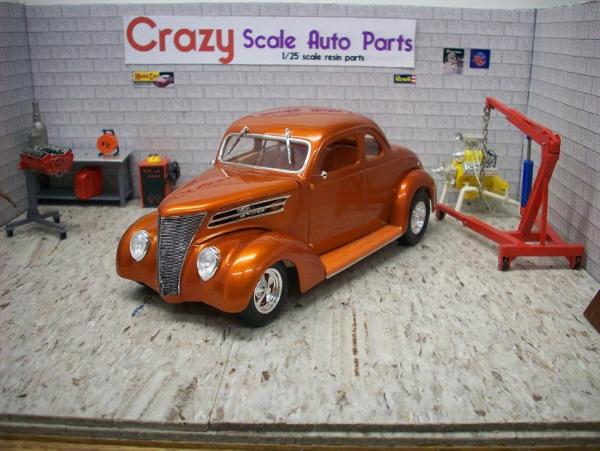
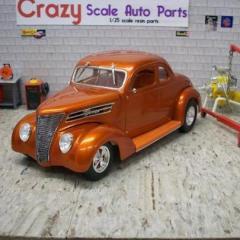
Thank you. The truck and flip front are kit items. I filled the trunk lid and put a hinge in it. After painting, the whole trunk interior was flocked. The color is rattle can but the clear was airbrushed (the second time for the airbrush) using Plas-t-kote classic clear that I decanted.