Dennis Lacy
-
Posts
2,357 -
Joined
-
Last visited
Content Type
Profiles
Forums
Events
Gallery
Everything posted by Dennis Lacy
-
Loved the finished model. Looking forward to seeing how it was built.
-
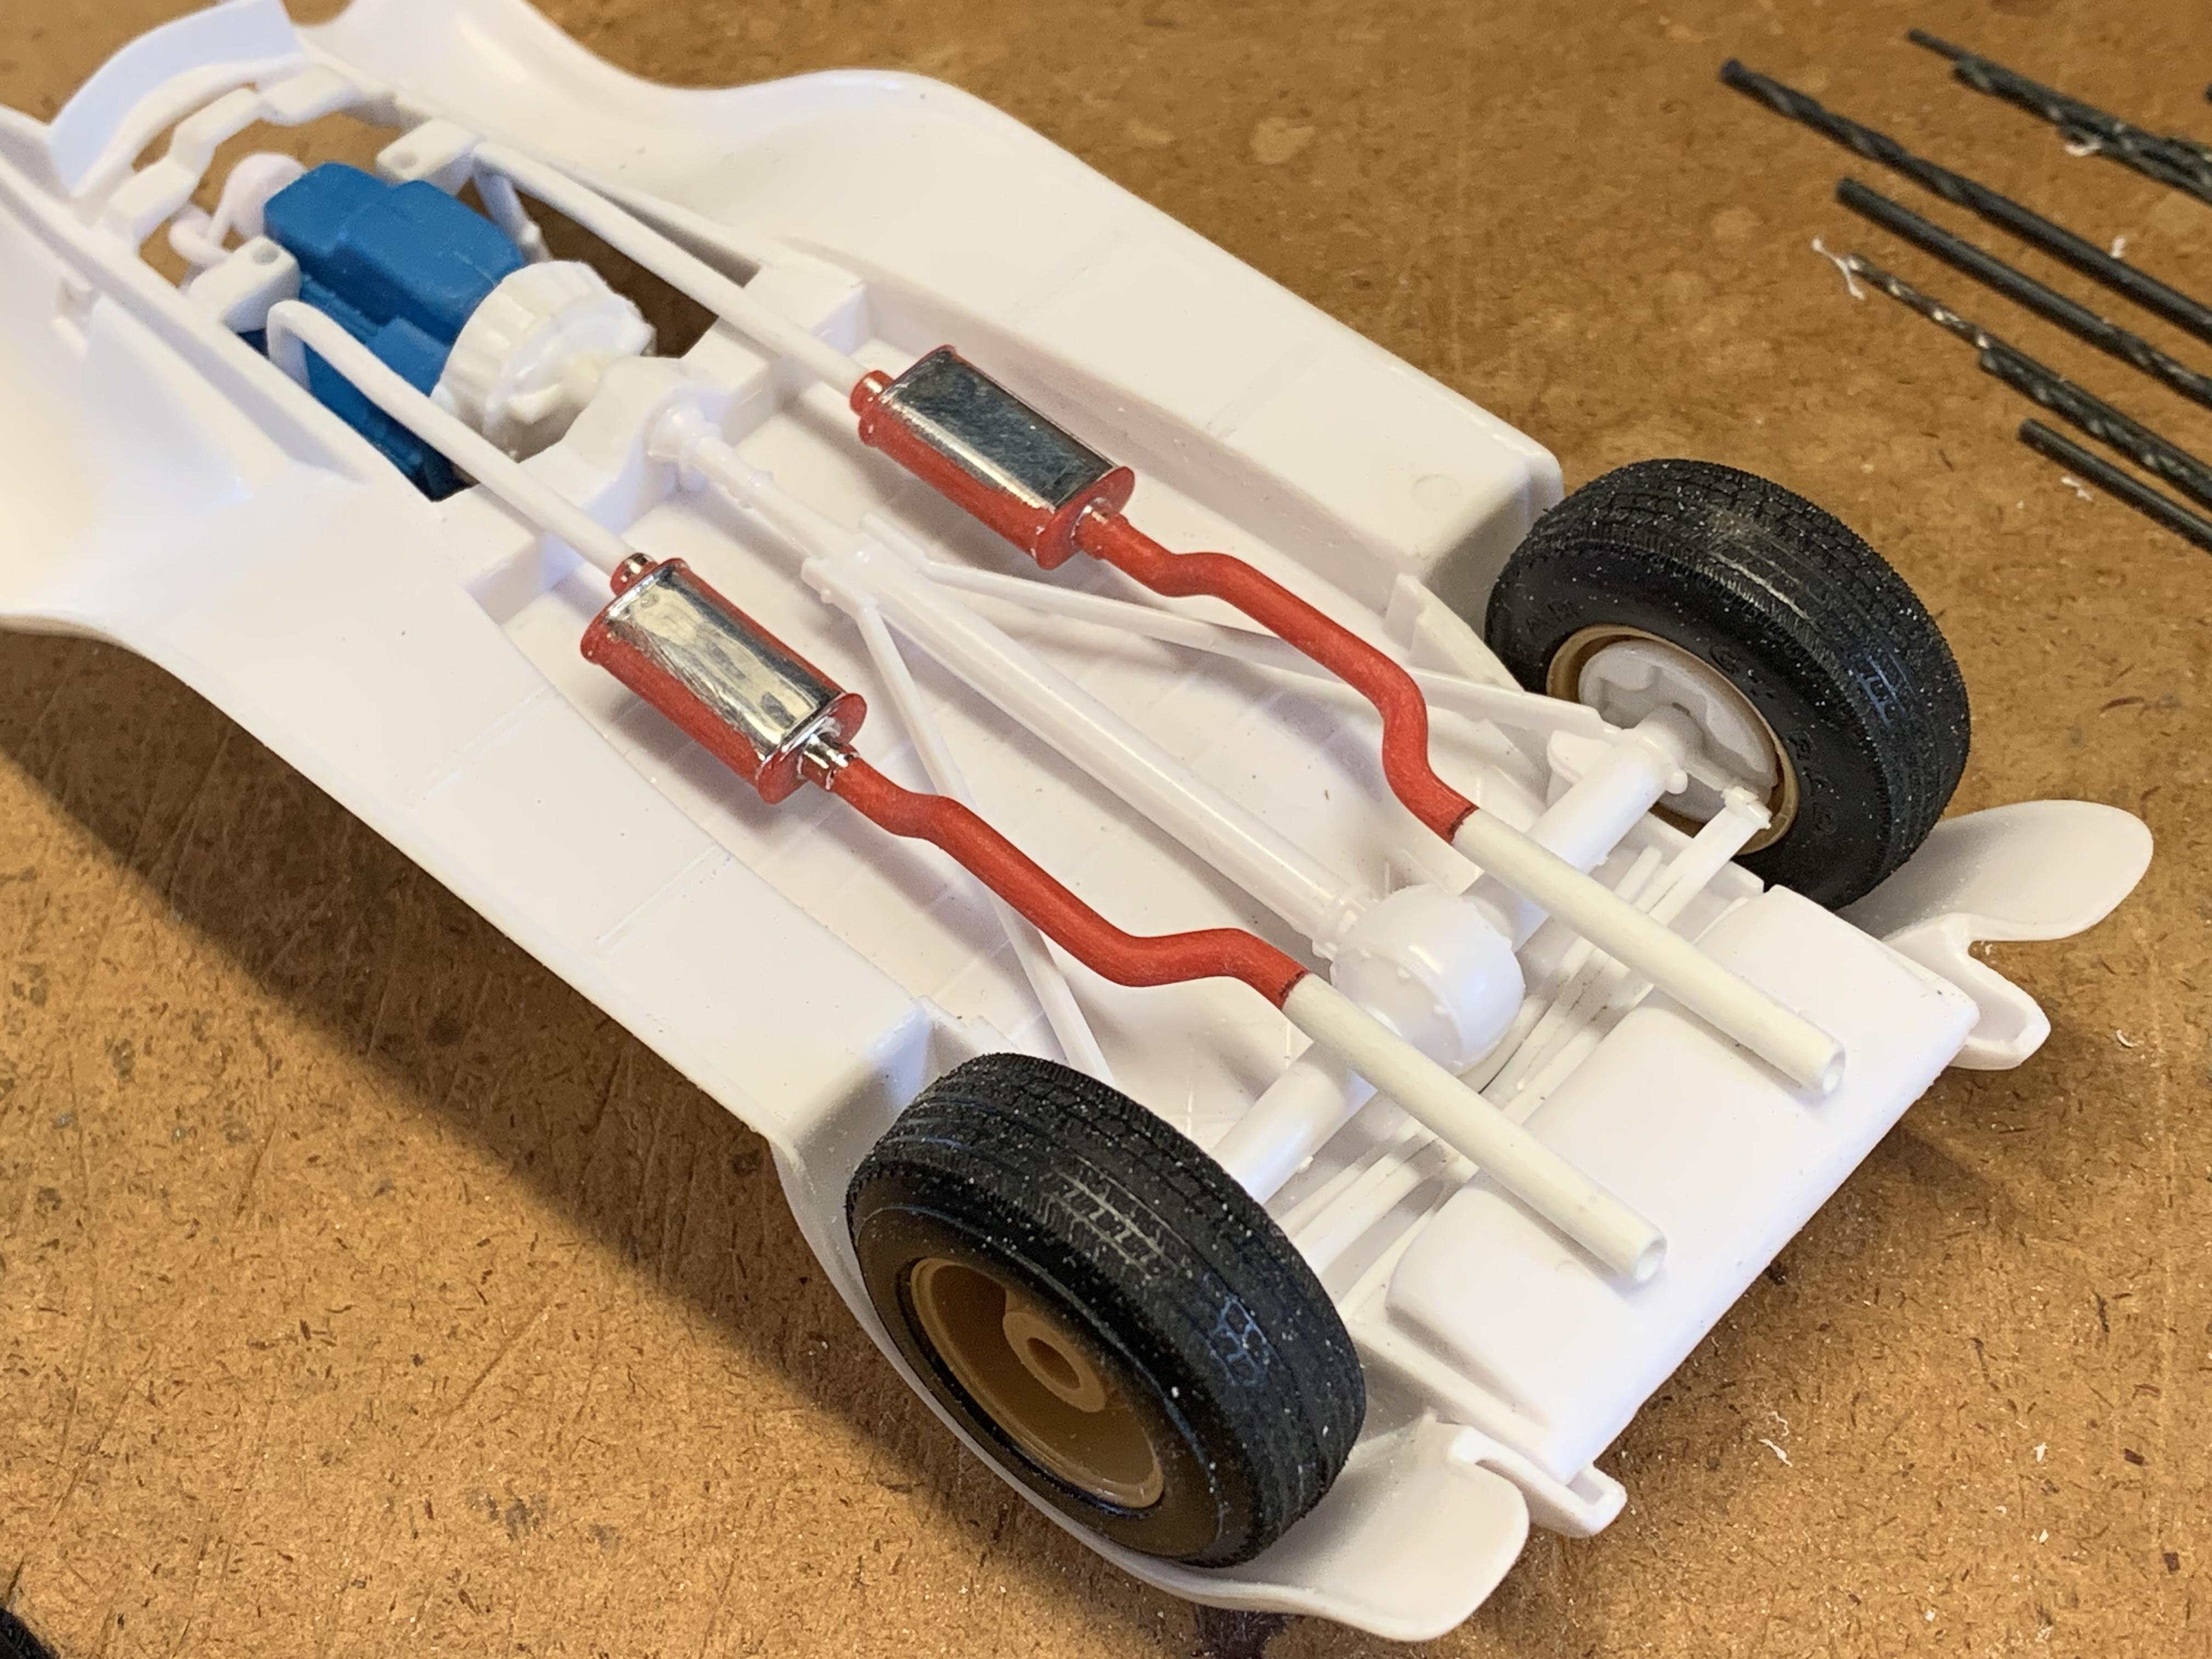
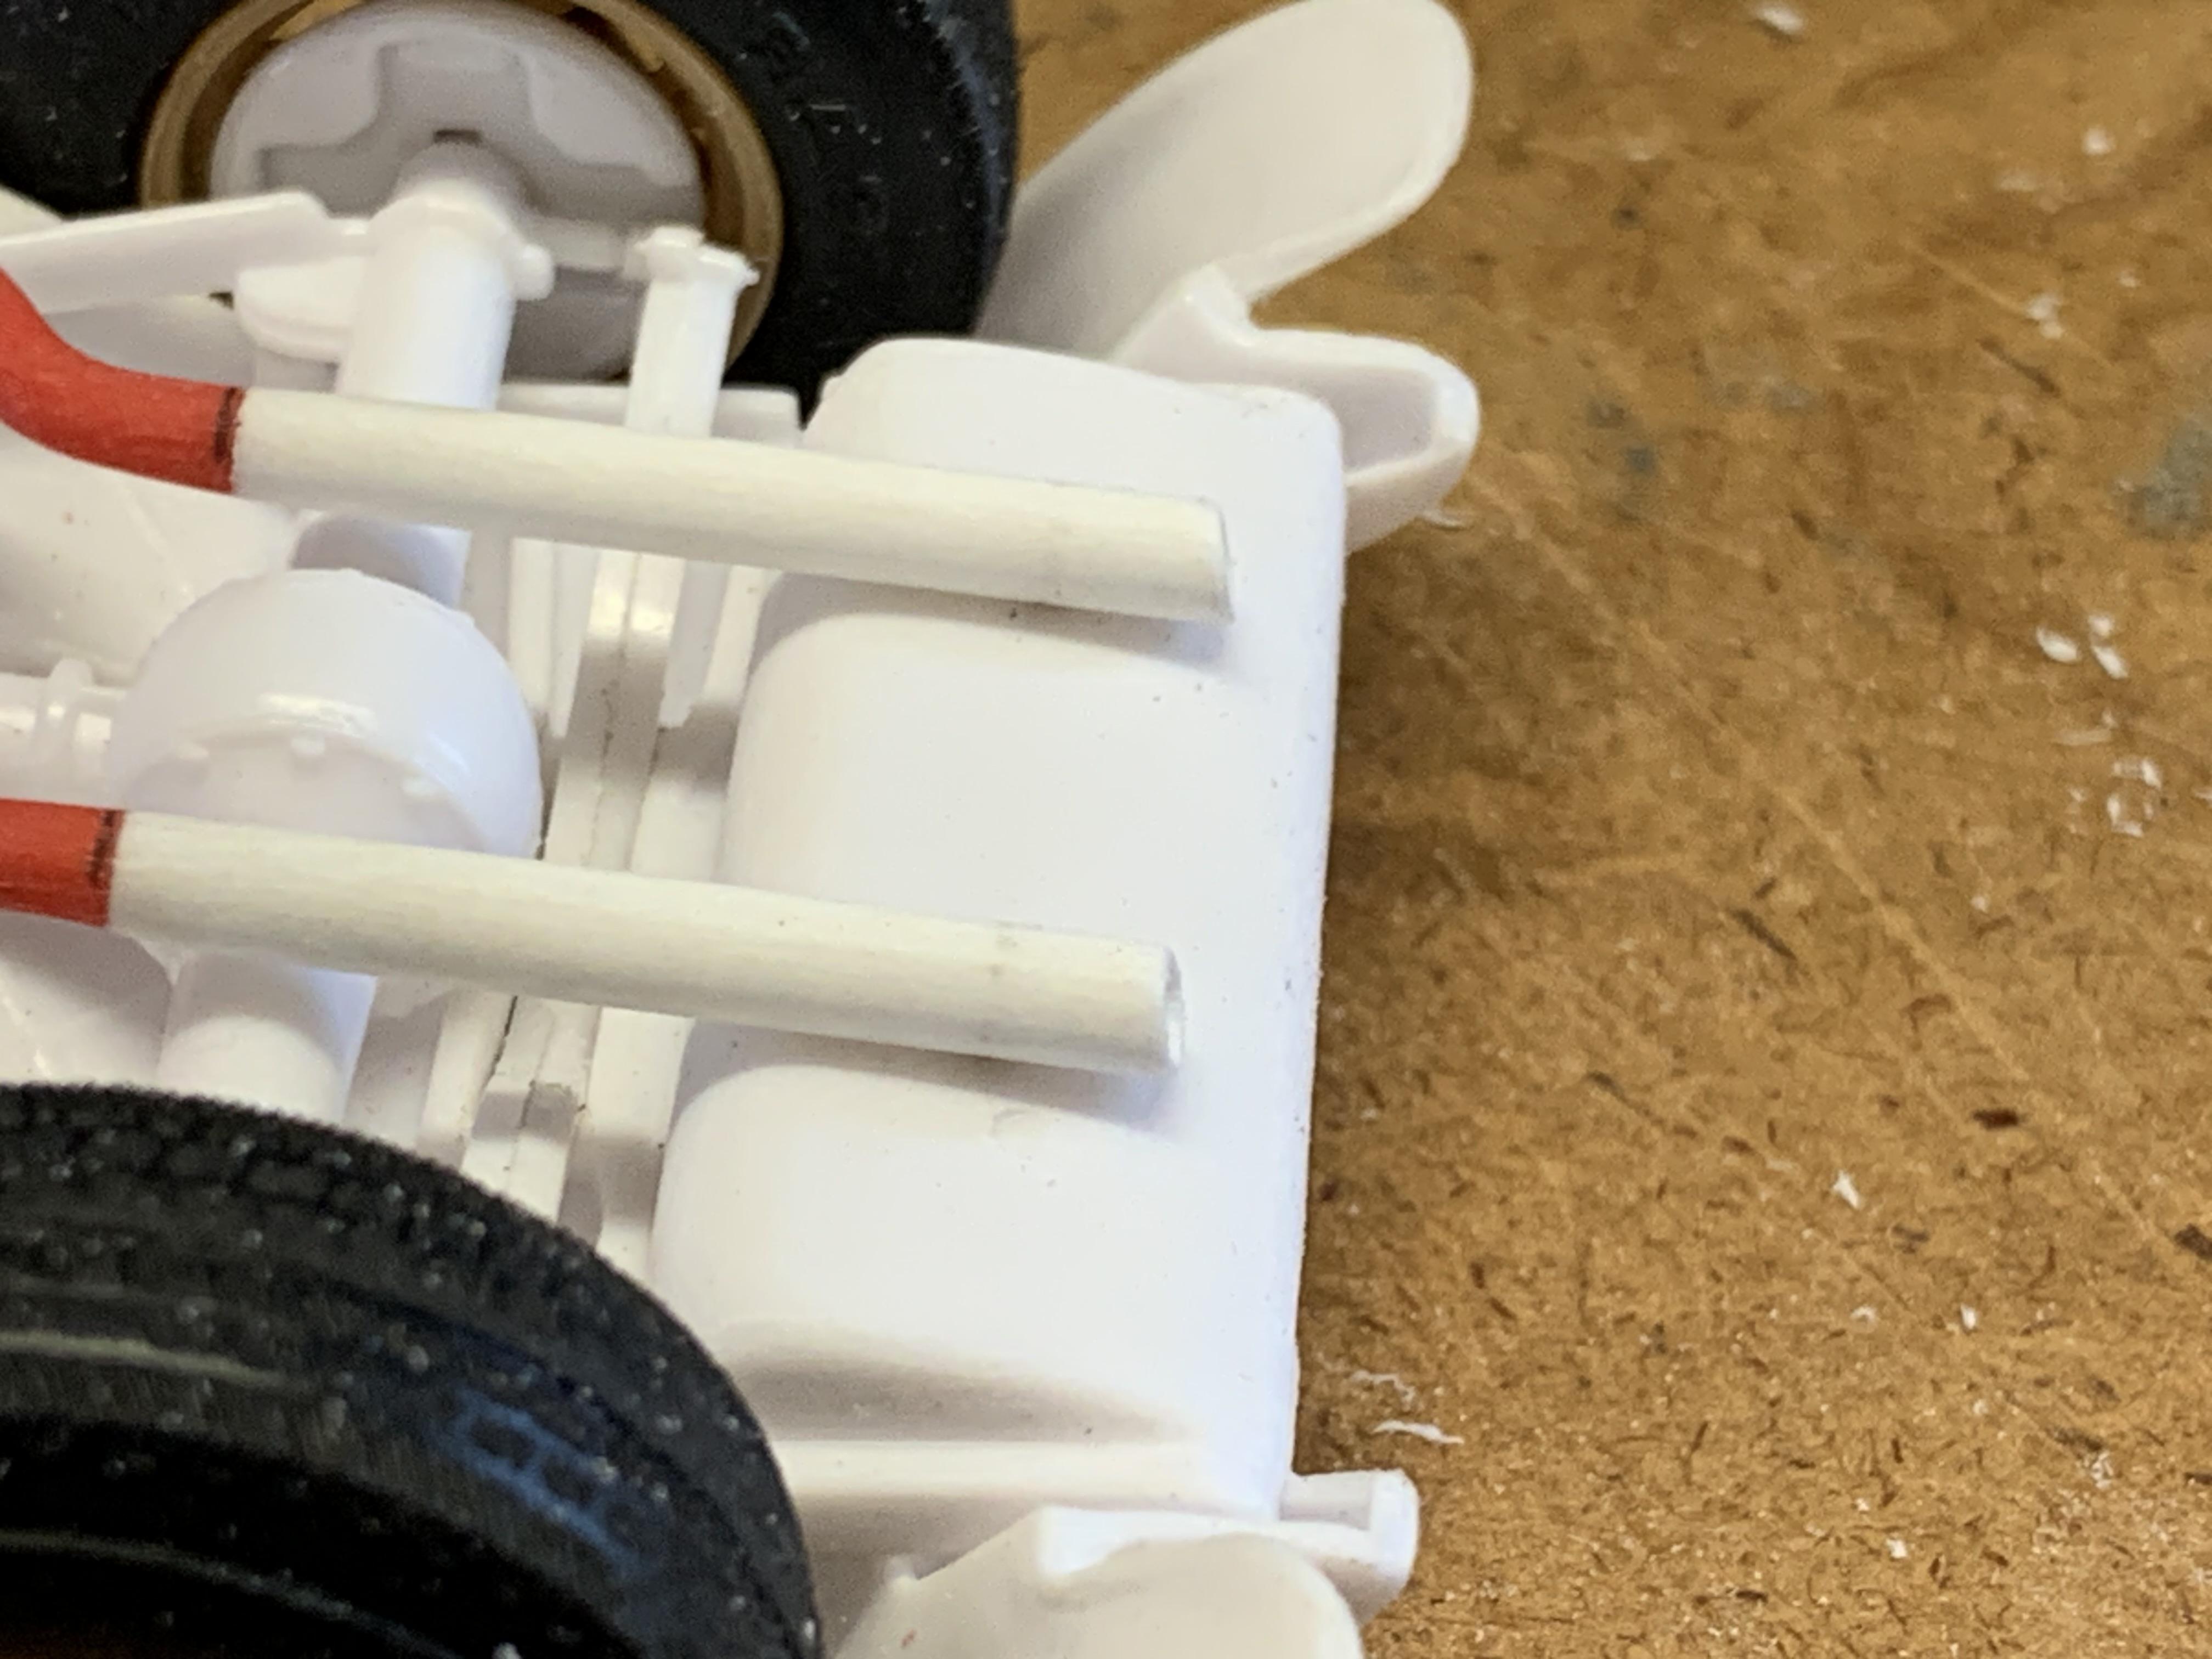
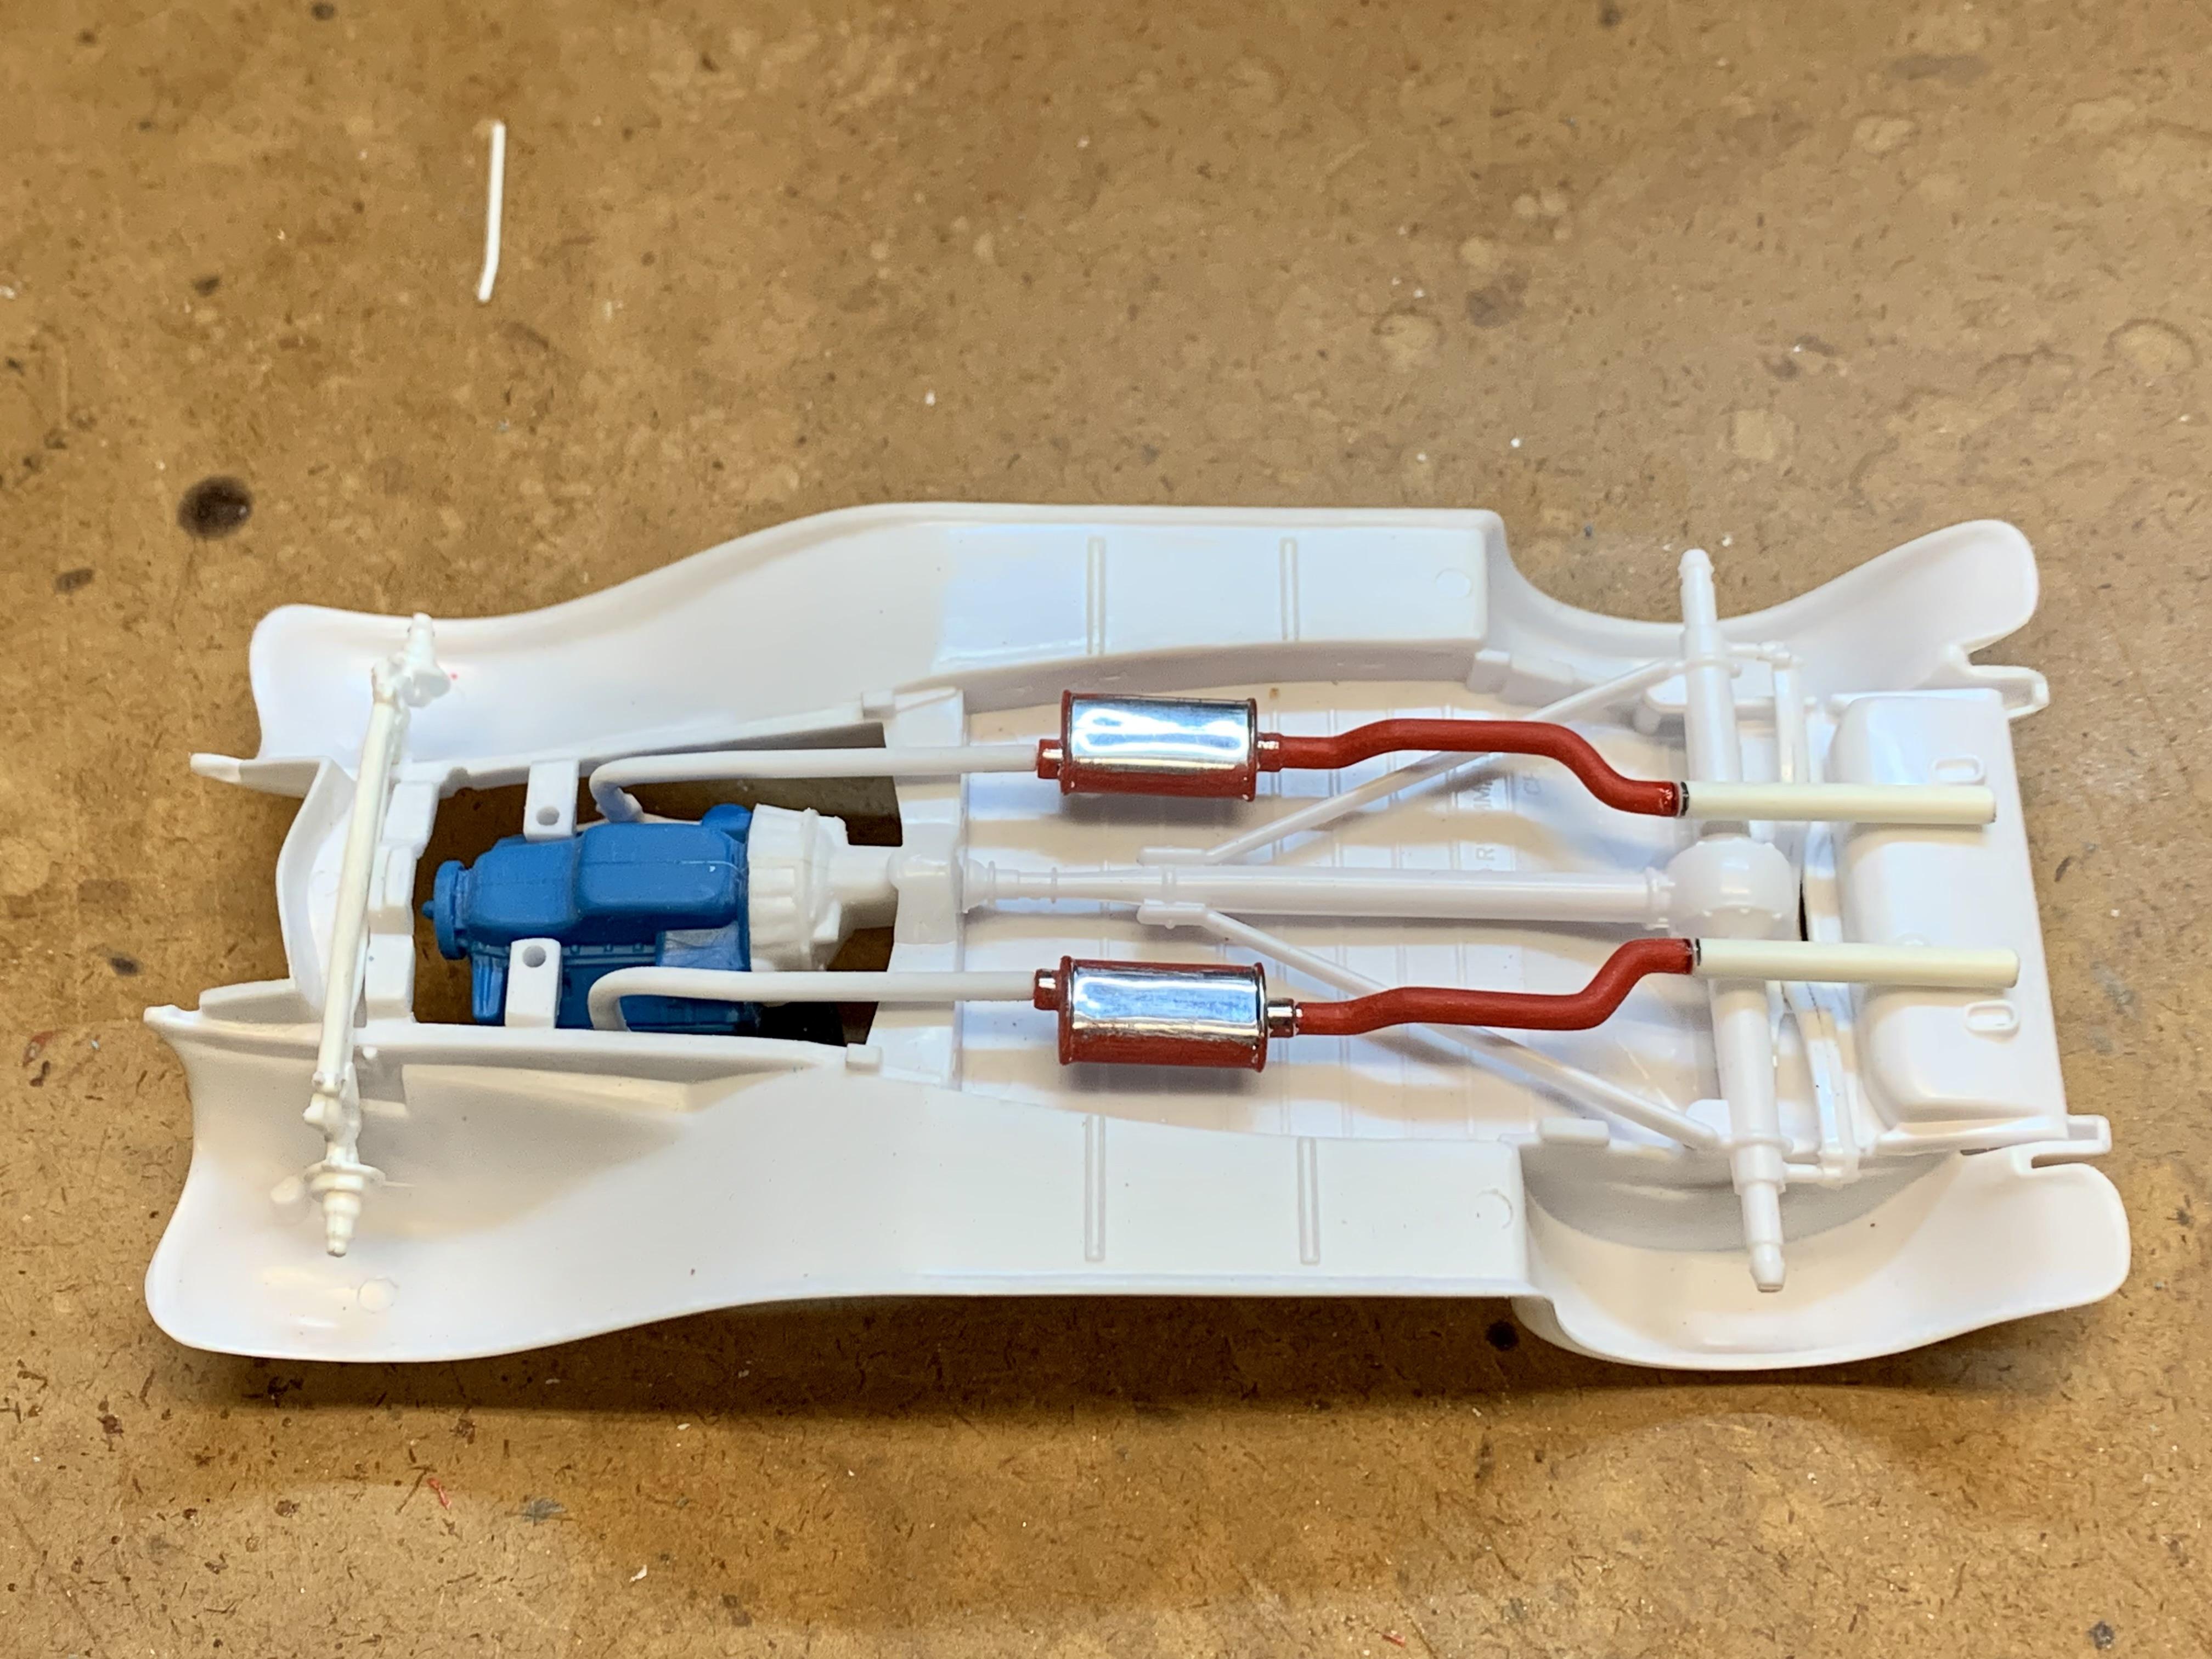
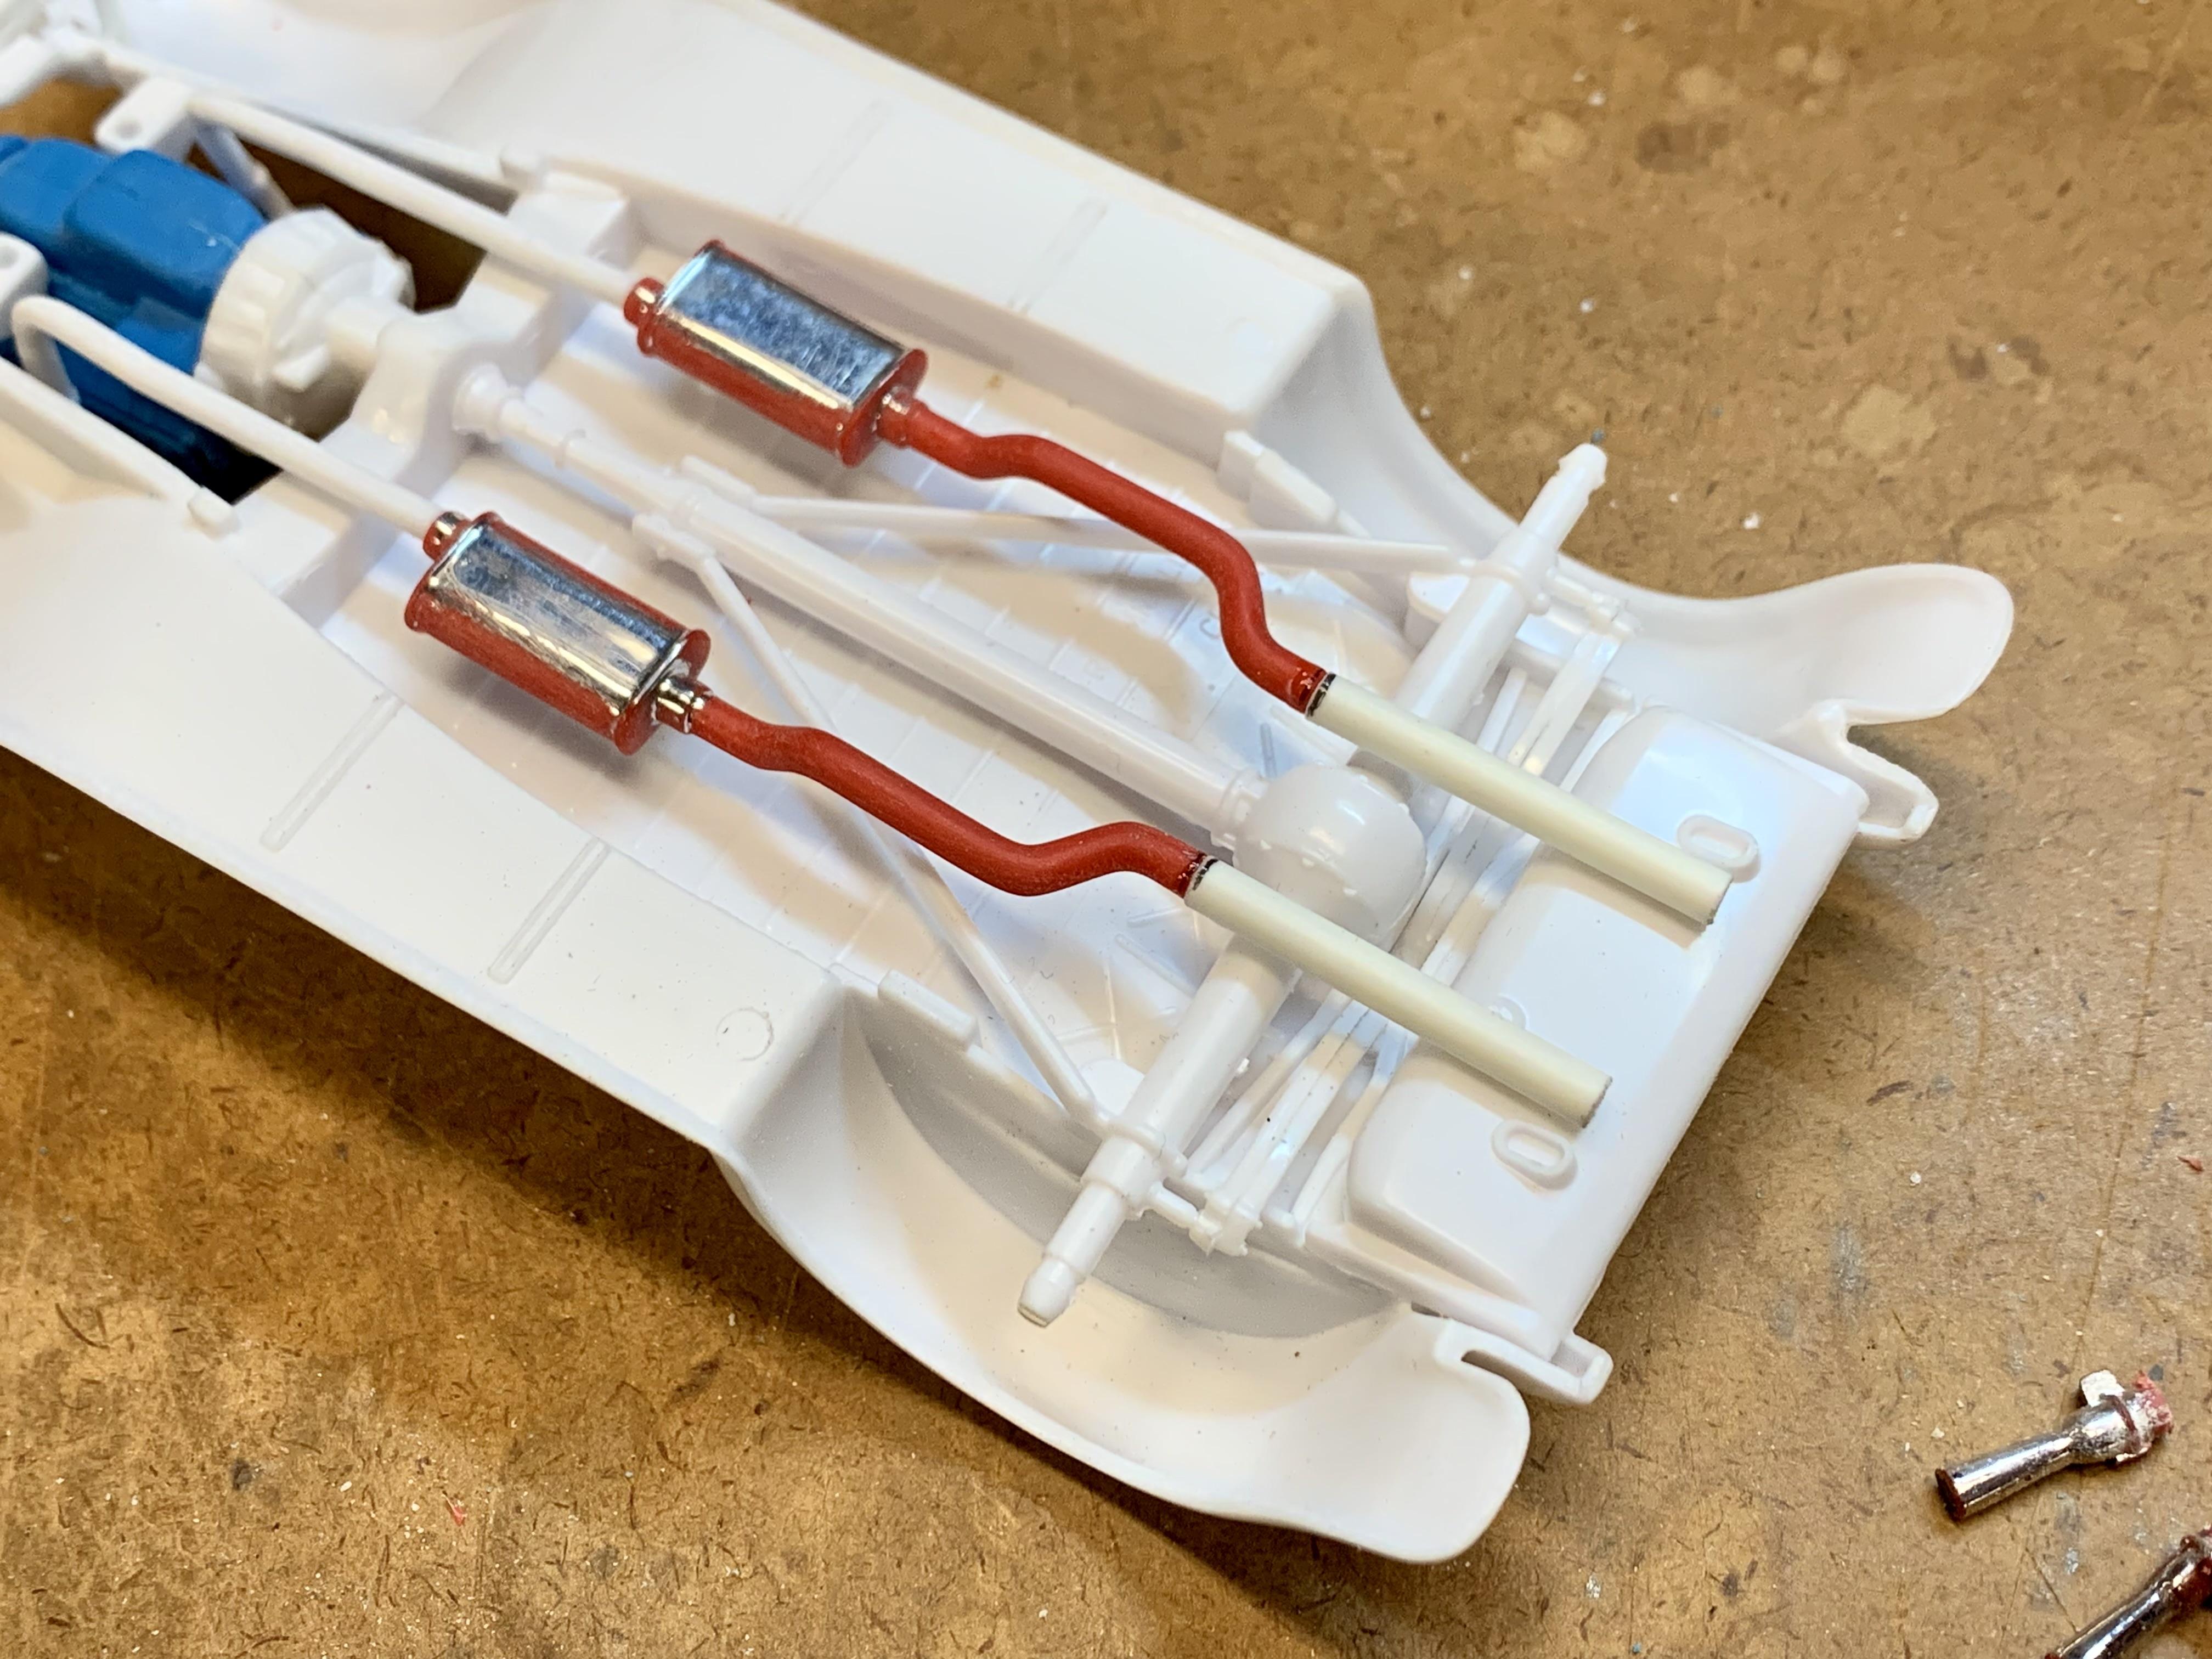
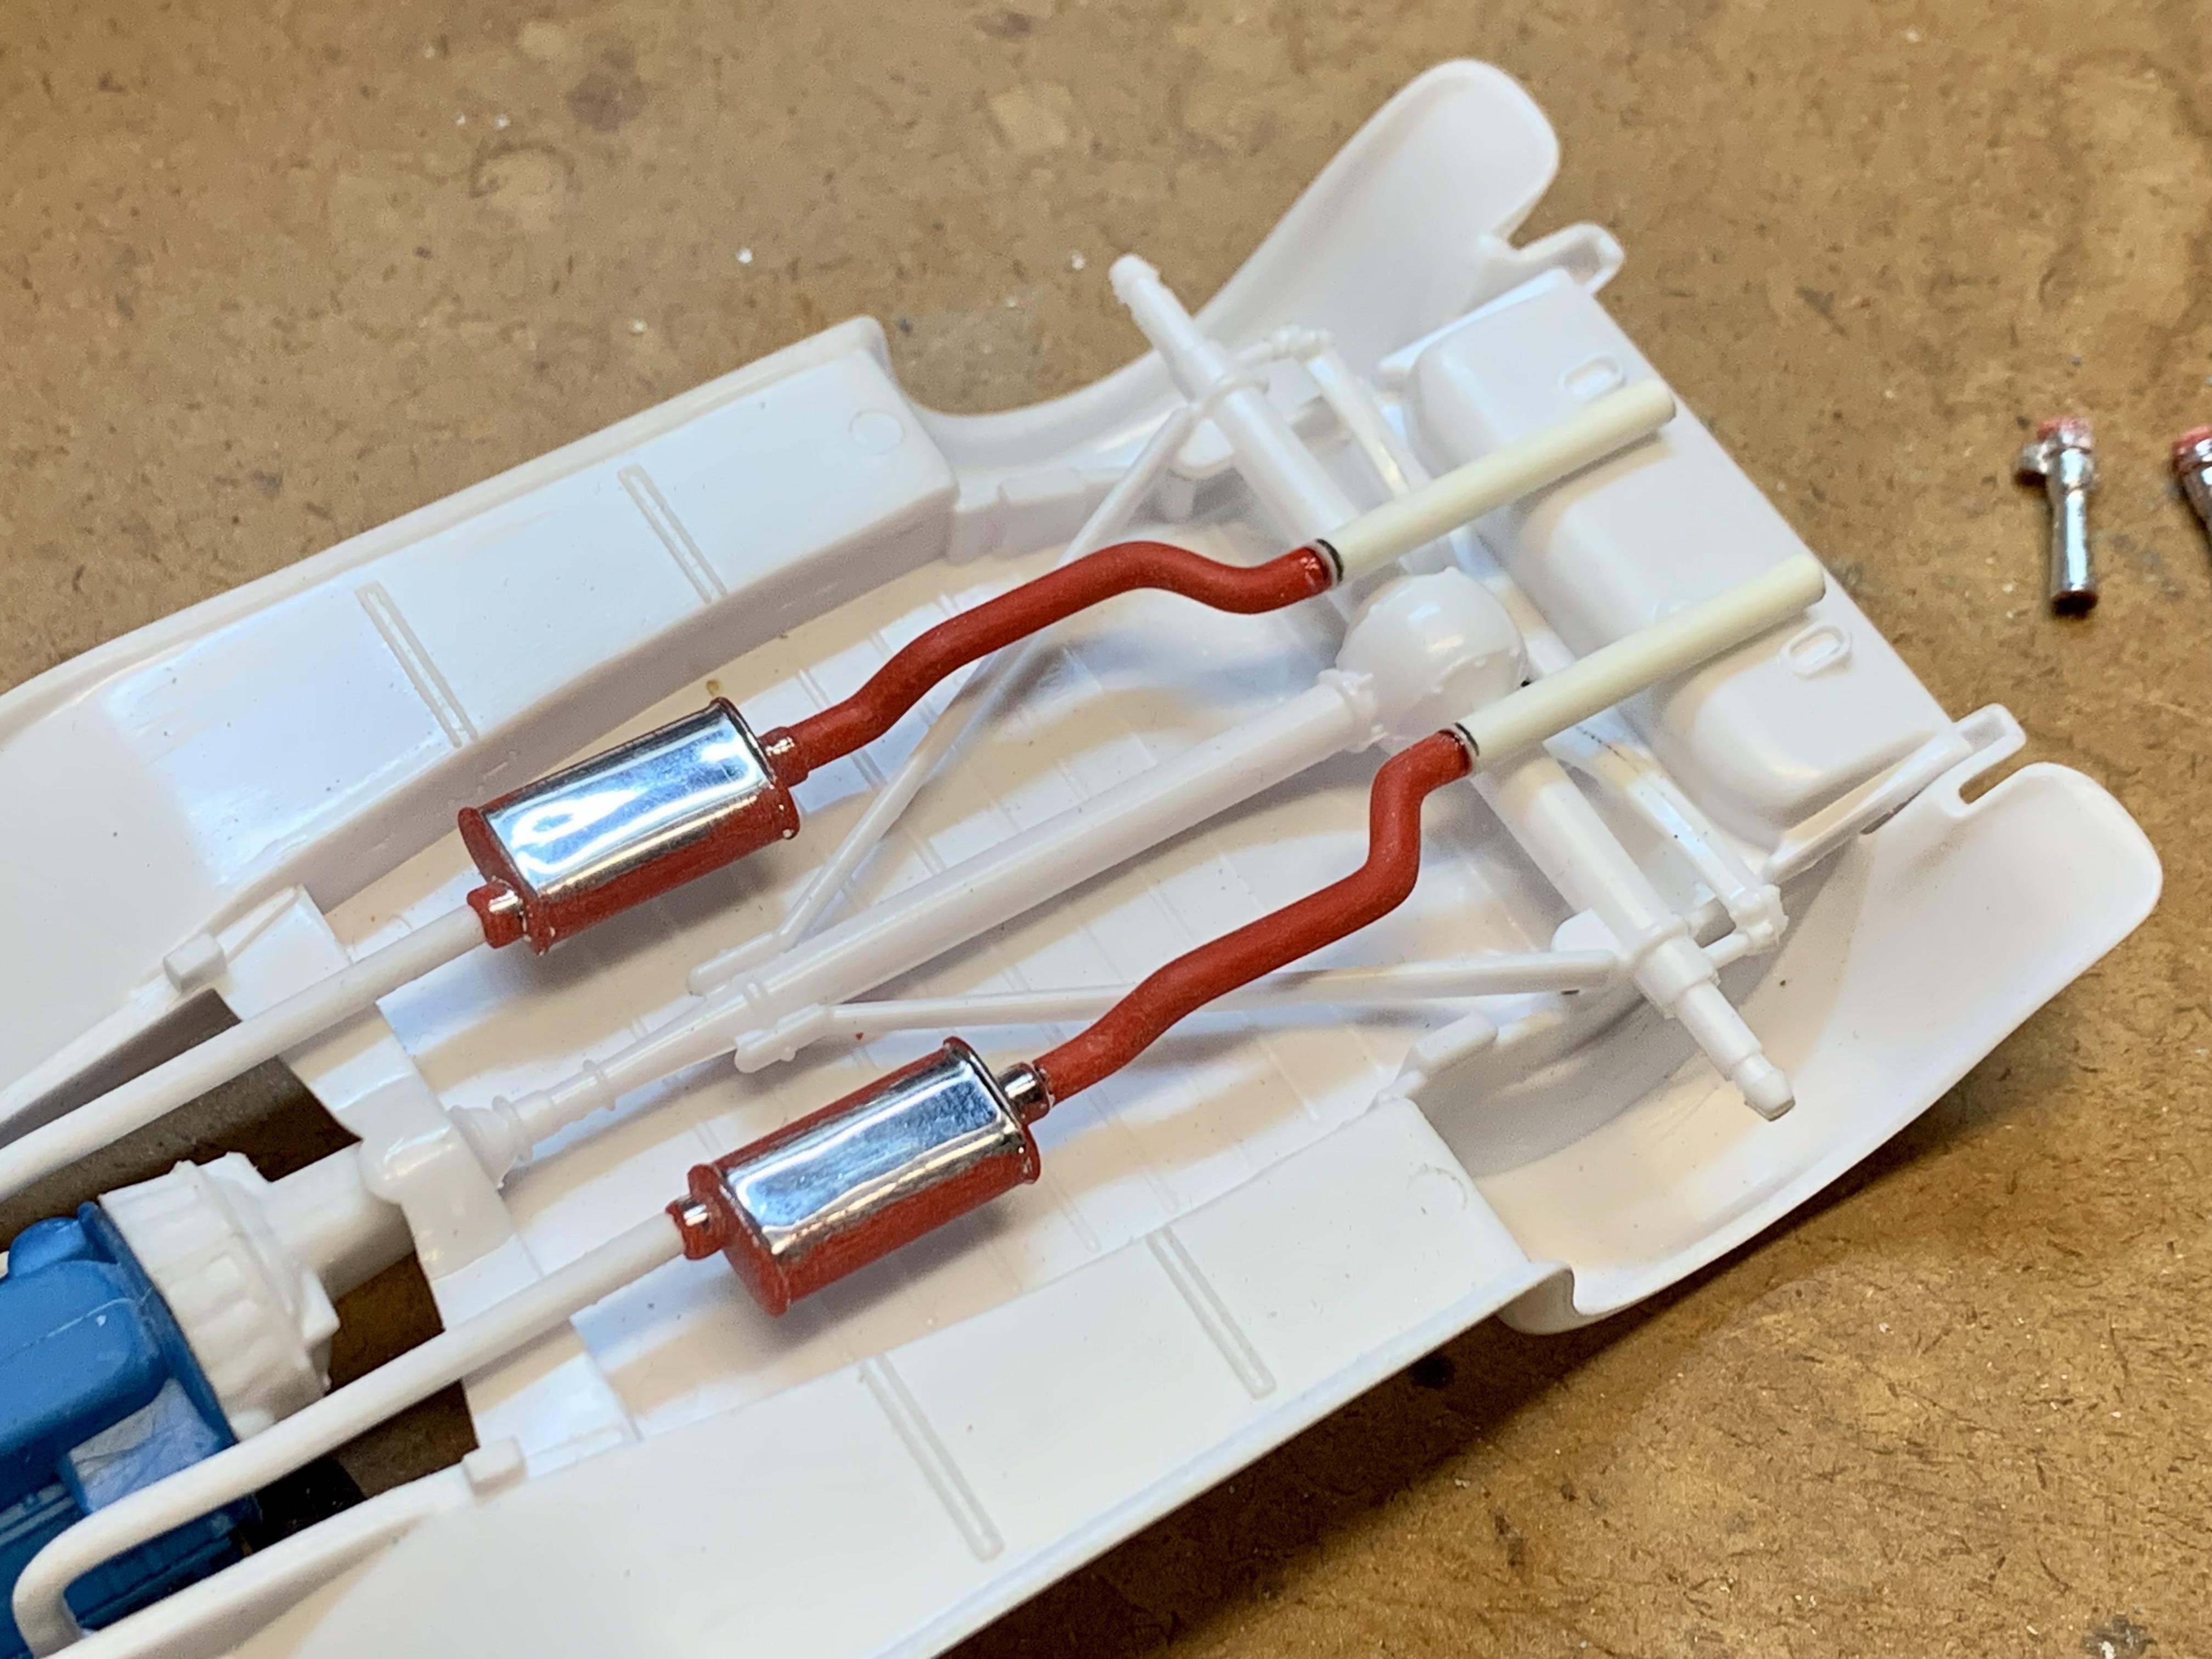
Finally found my way to the workbench for a few hours last Sunday. Previously I had roughed-in the exhaust but it needed finishing such as blending the glue joints on the tailpipes and smoothing all the mold seams. The tips were drilled out to make the tube thickness more realistic along with a shallow angle cut. The big mounting notches in the gas tank for the kit exhaust were smoothed and some discrete .040” mounting pins installed. Thats about it for the fab work so I spent the rest of the time starting to generally sand and get things cleaned up moving towards primer. It’s been unusually cold and wet this winter here in SoCal so hoping for some good paint weather soon! Still undecided on main and accent color, tossing around some ideas…

-
Nice start! Really like the Weld Rodlite wheels. Those were super popular in the 90’s.
-
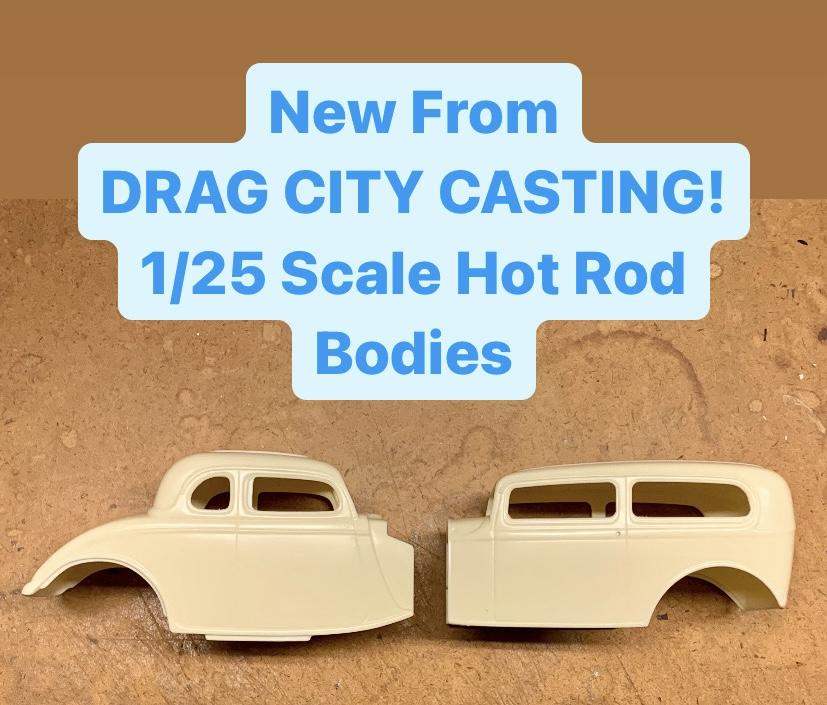
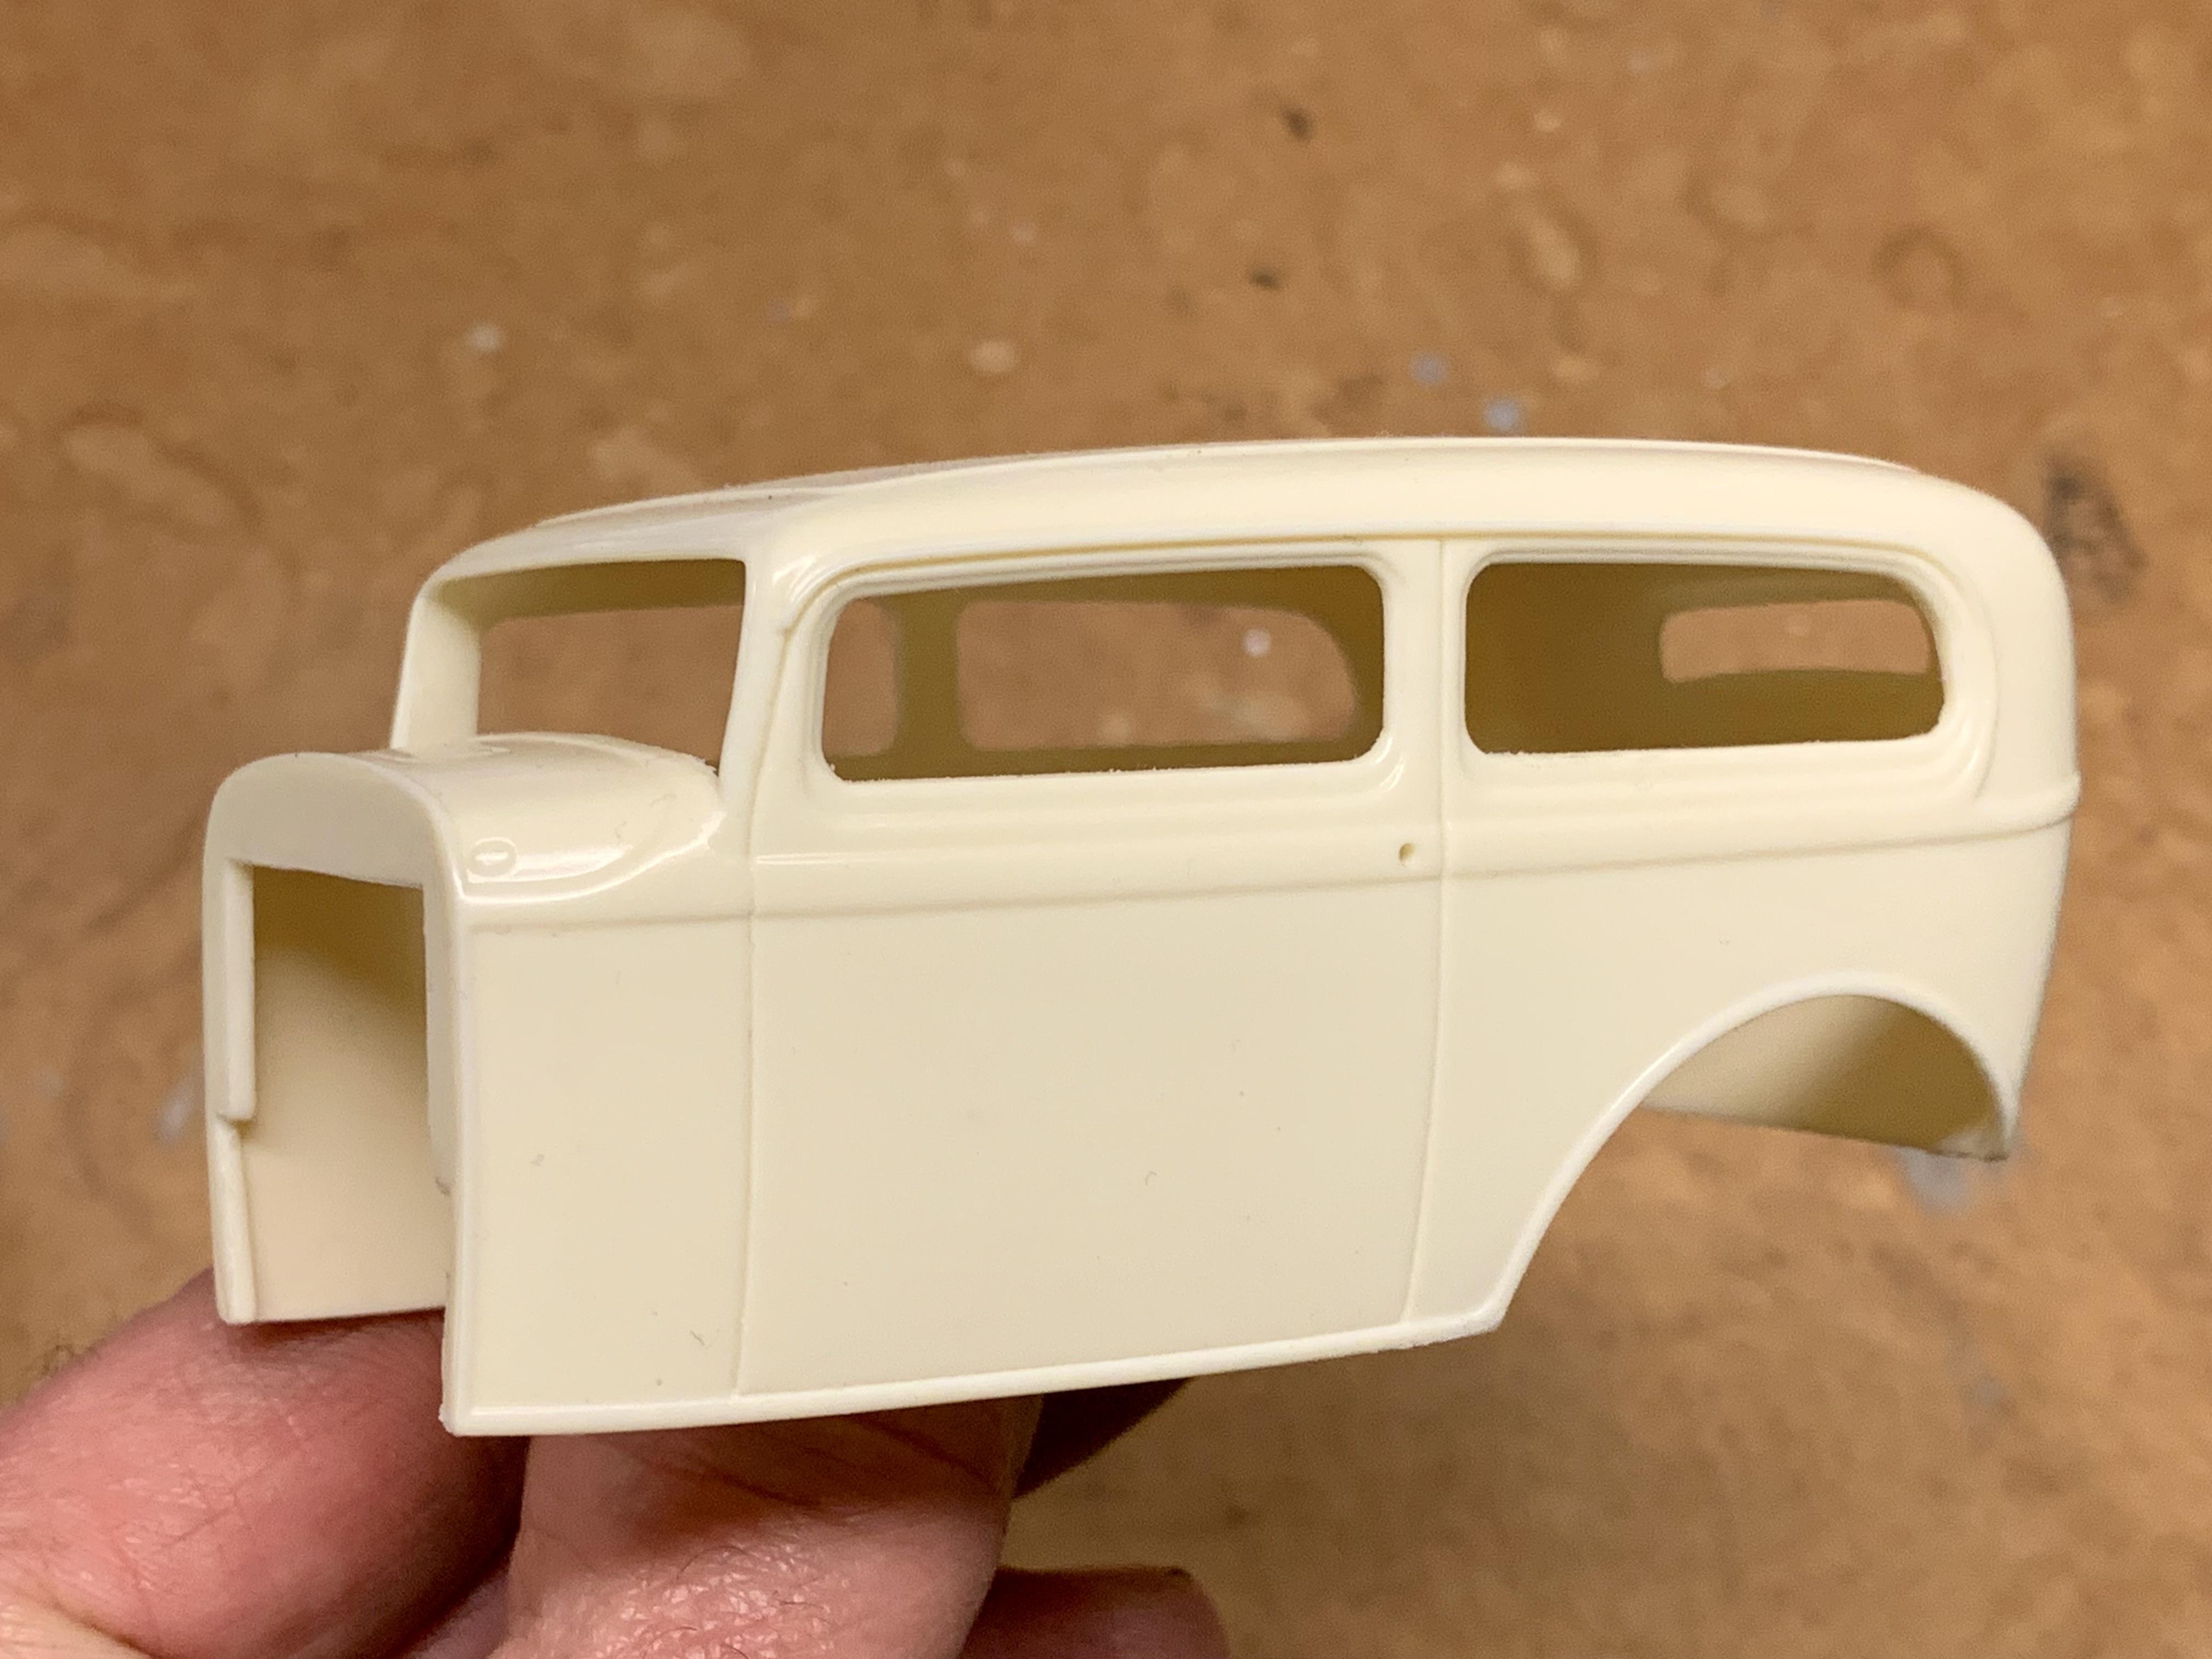
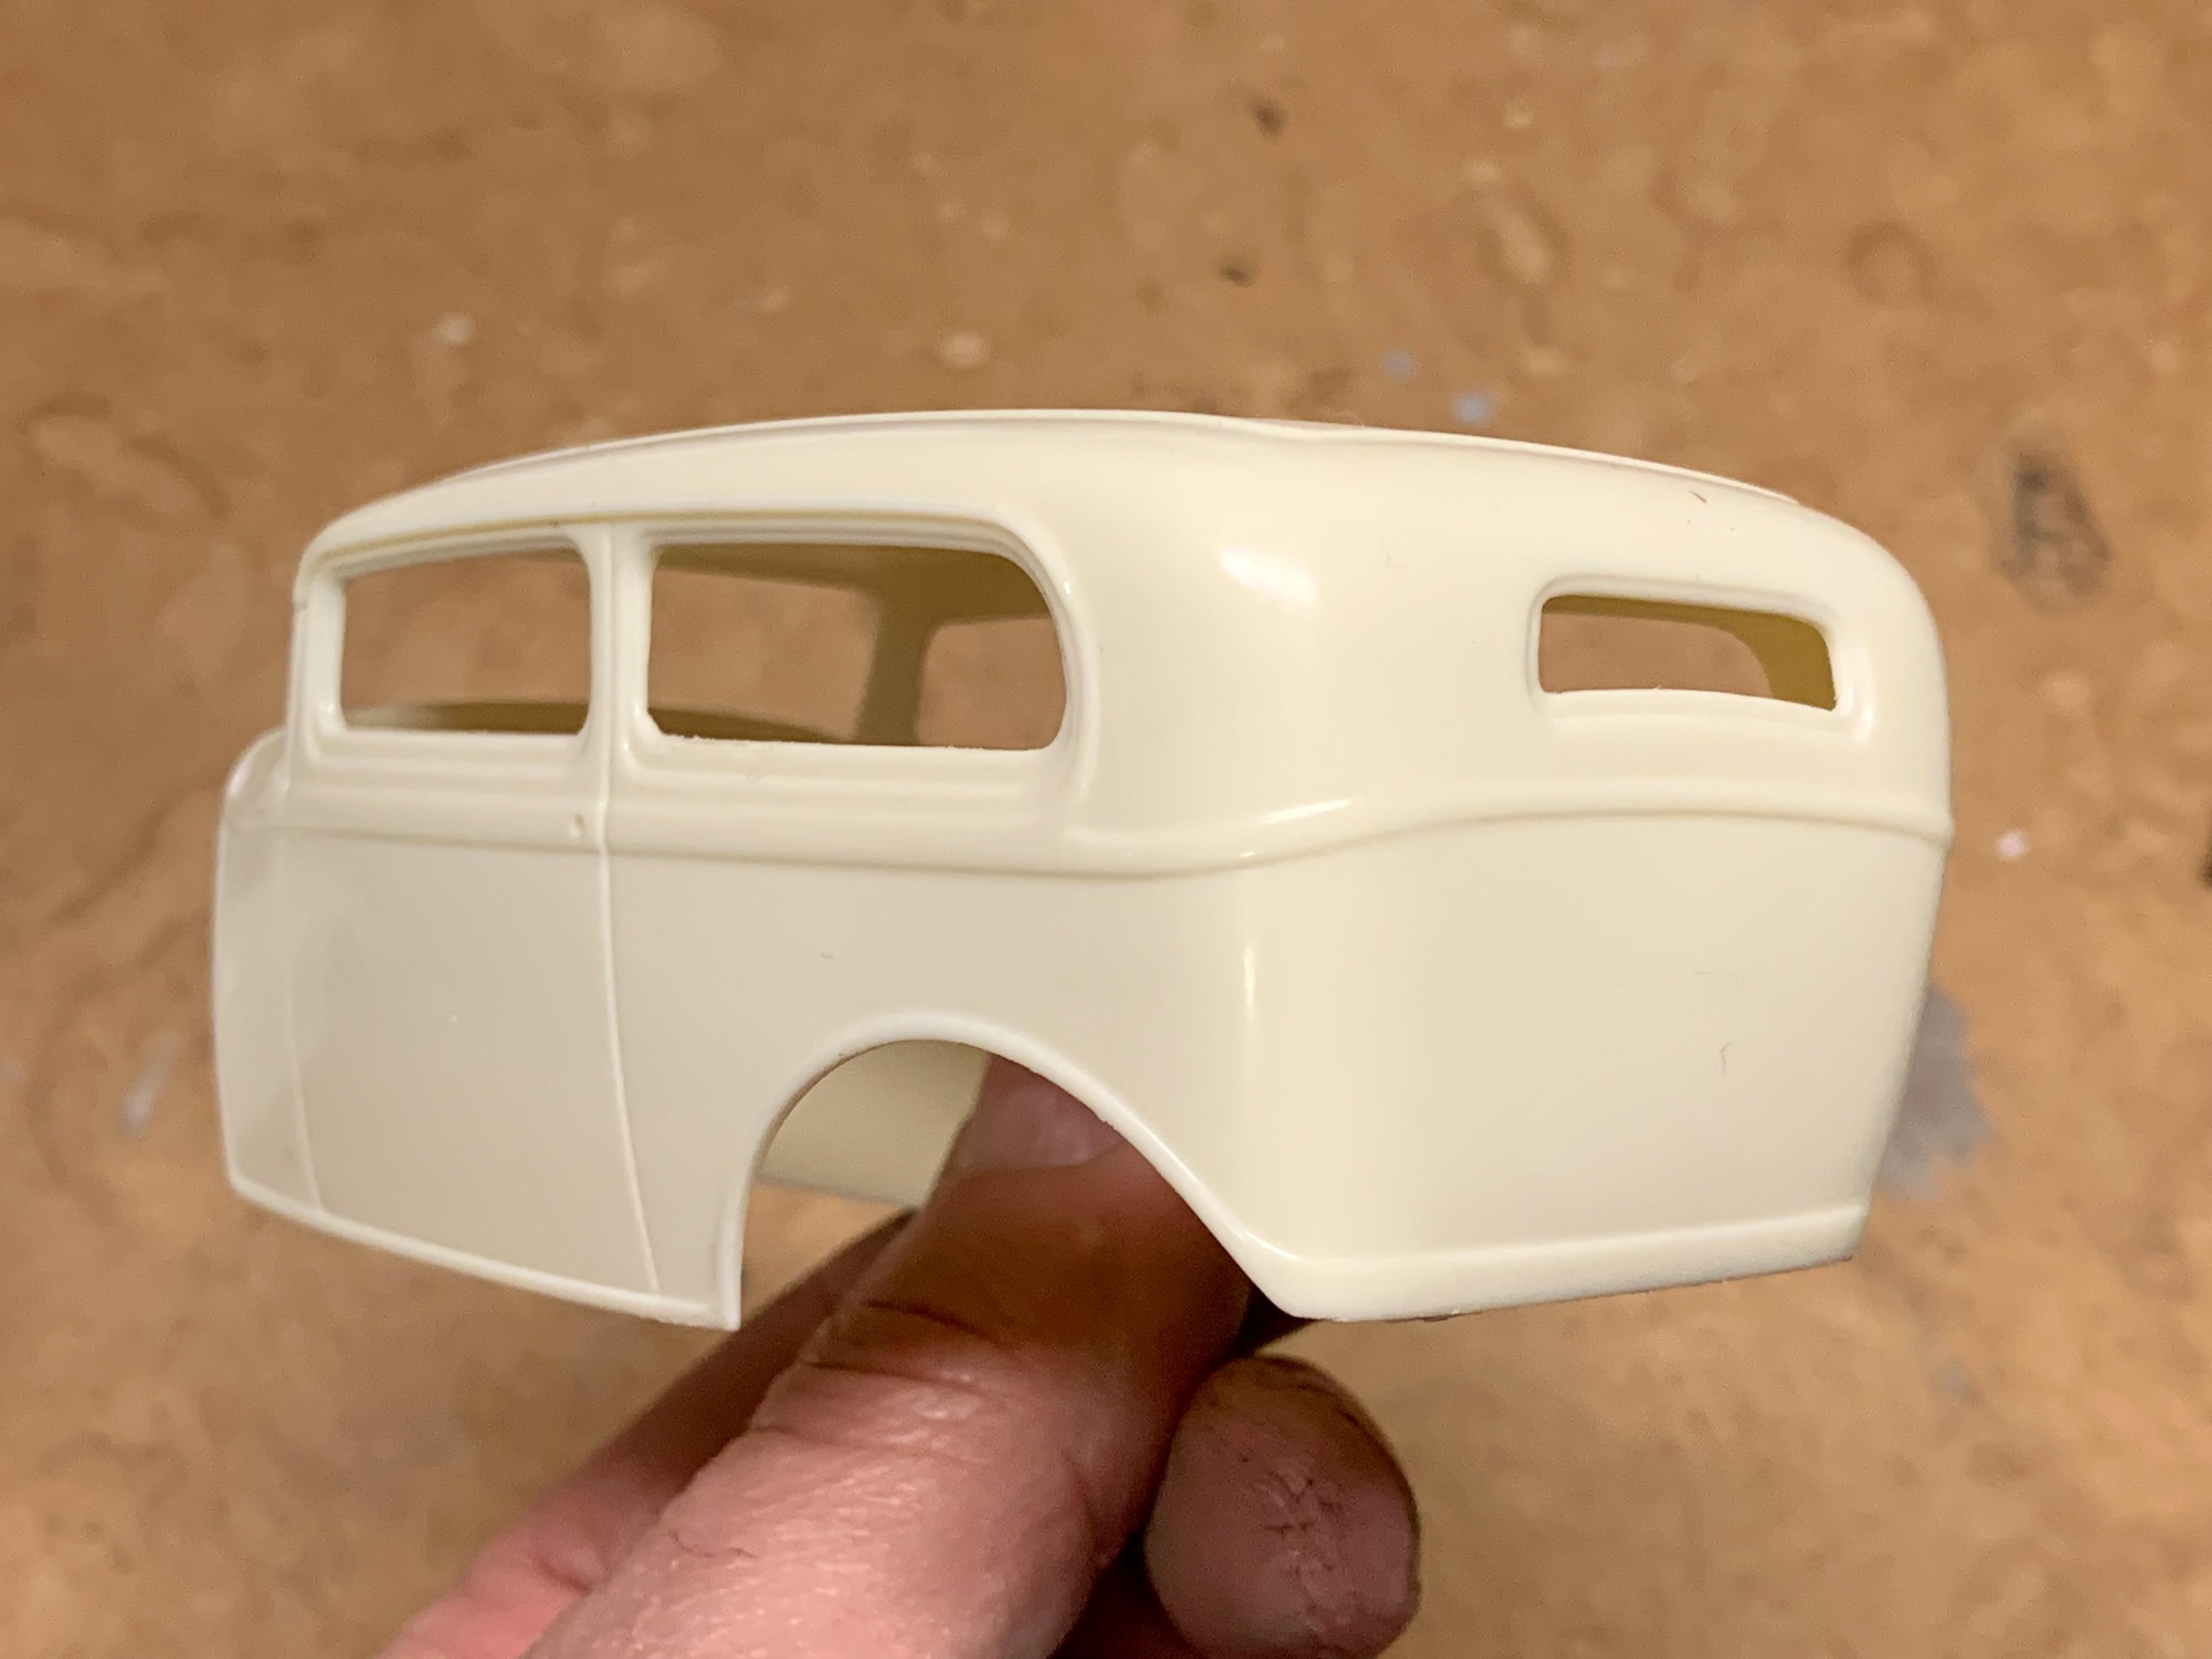
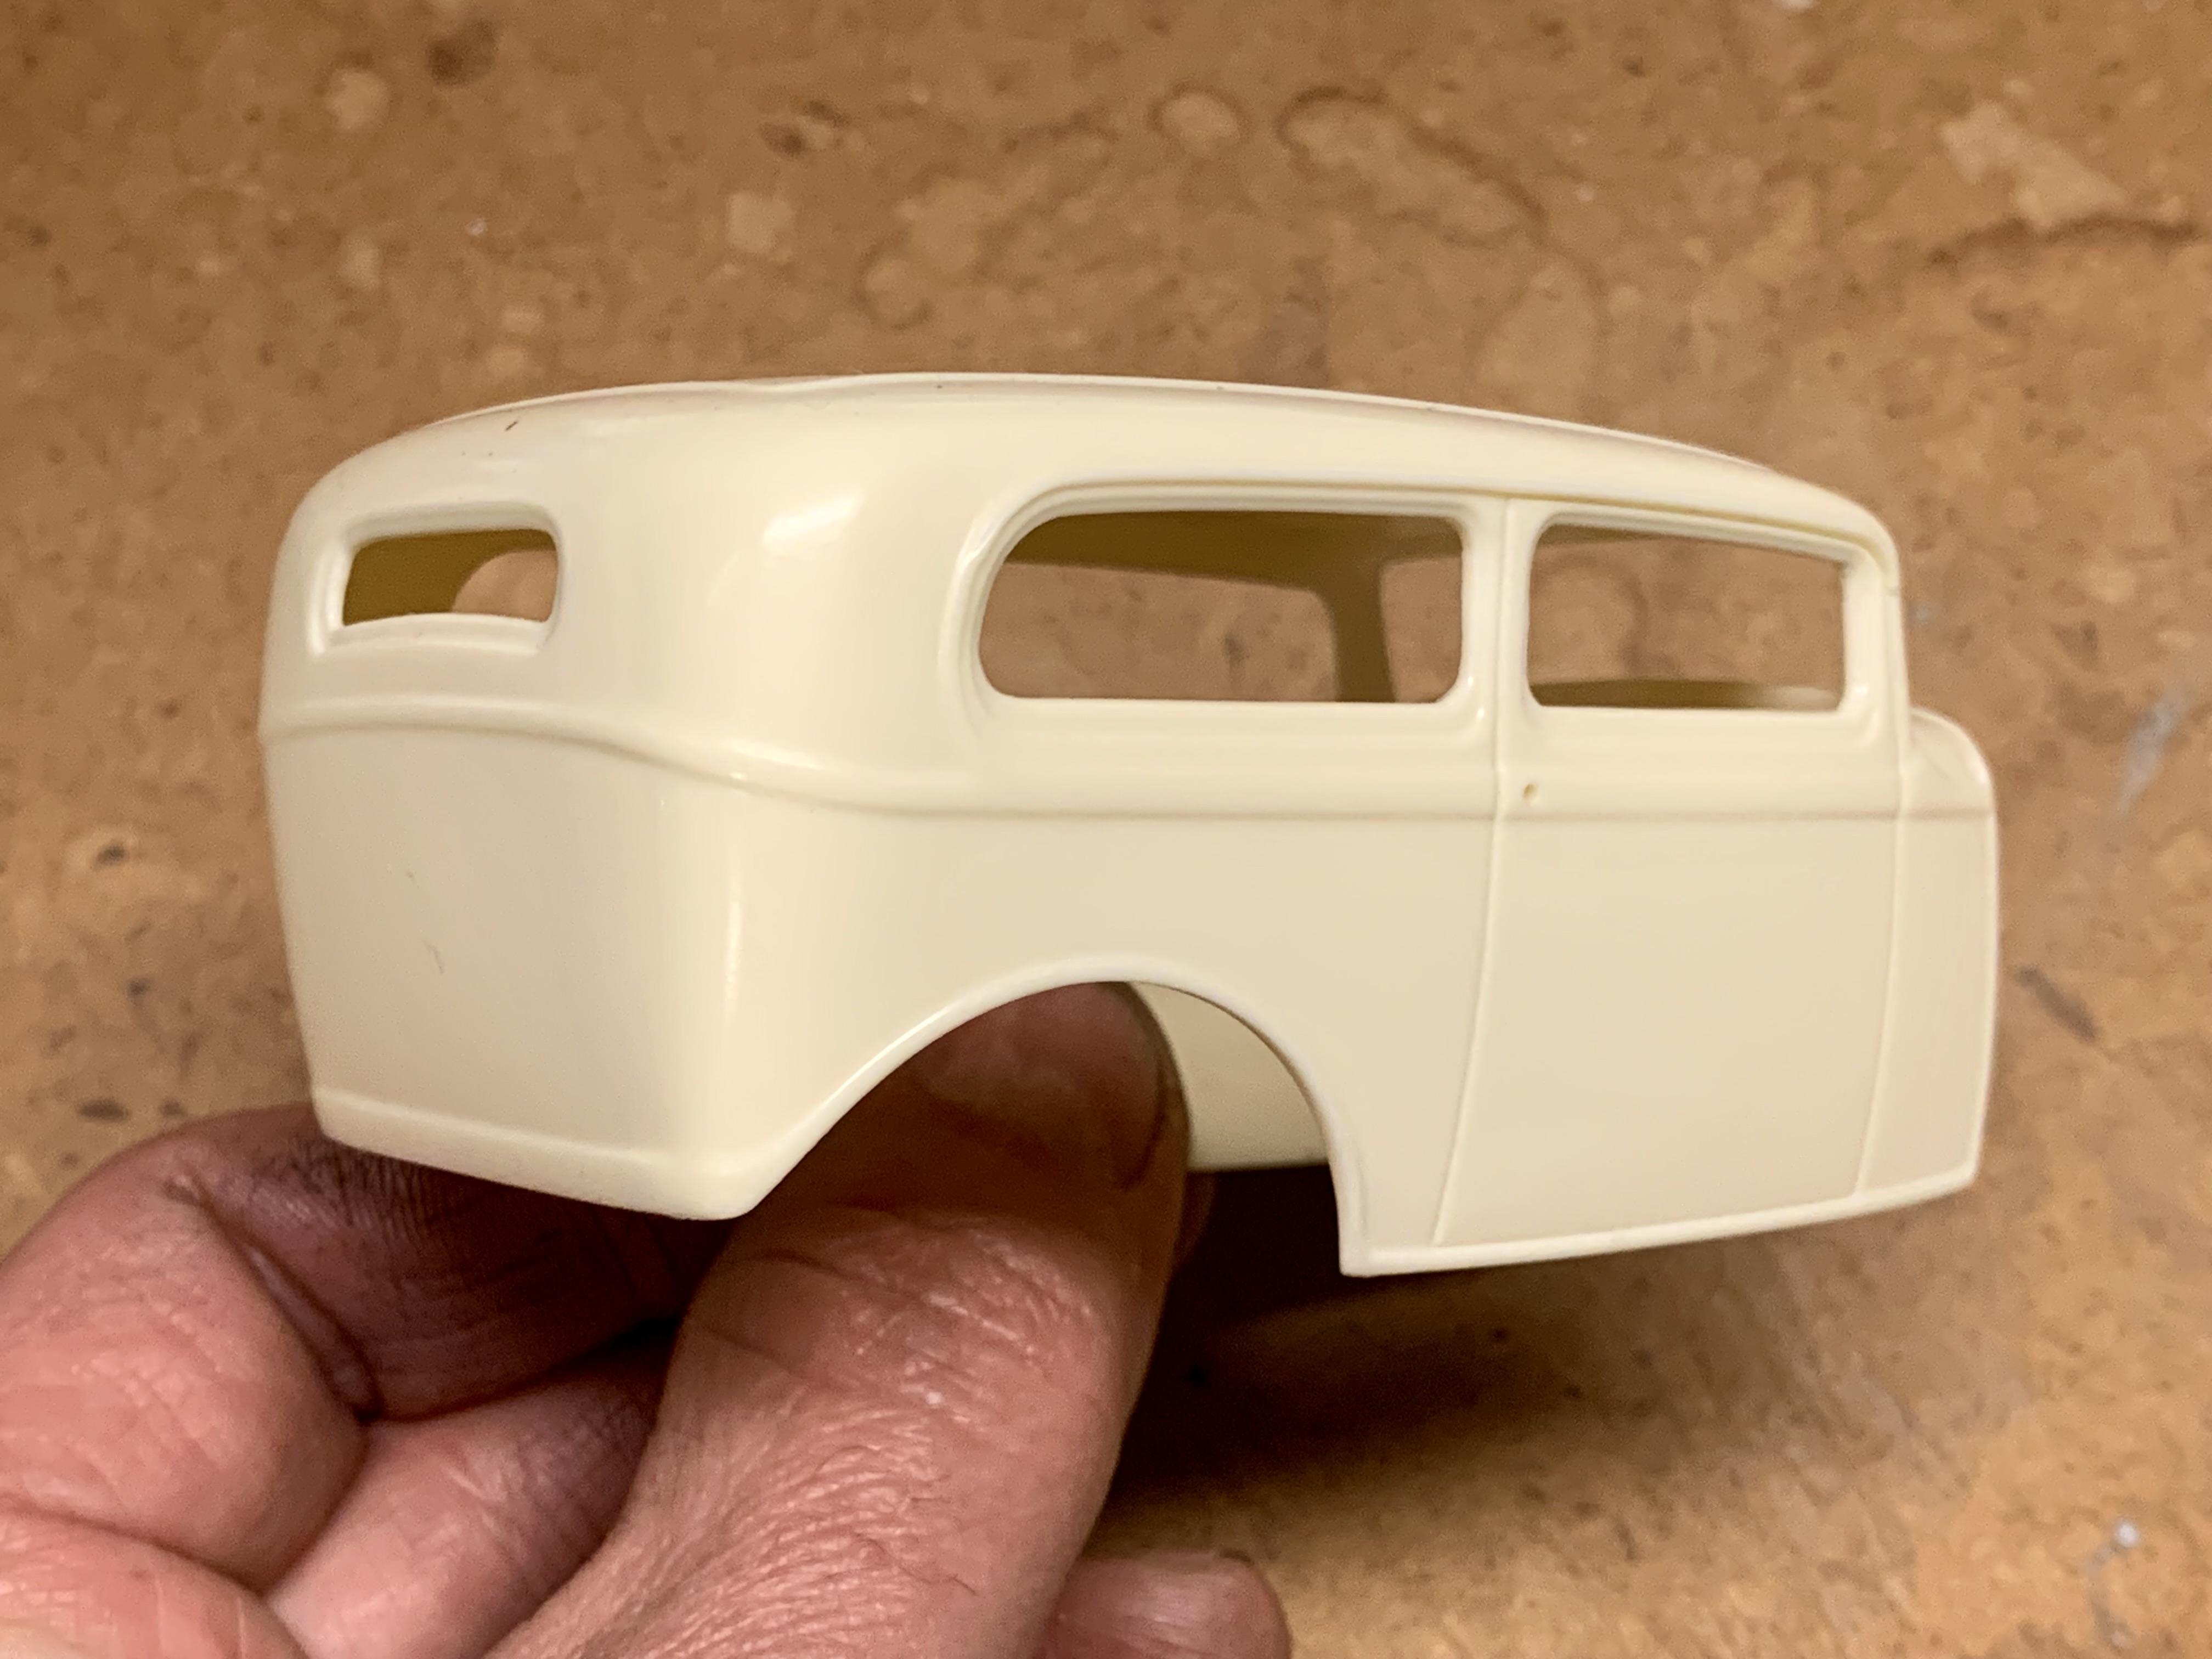
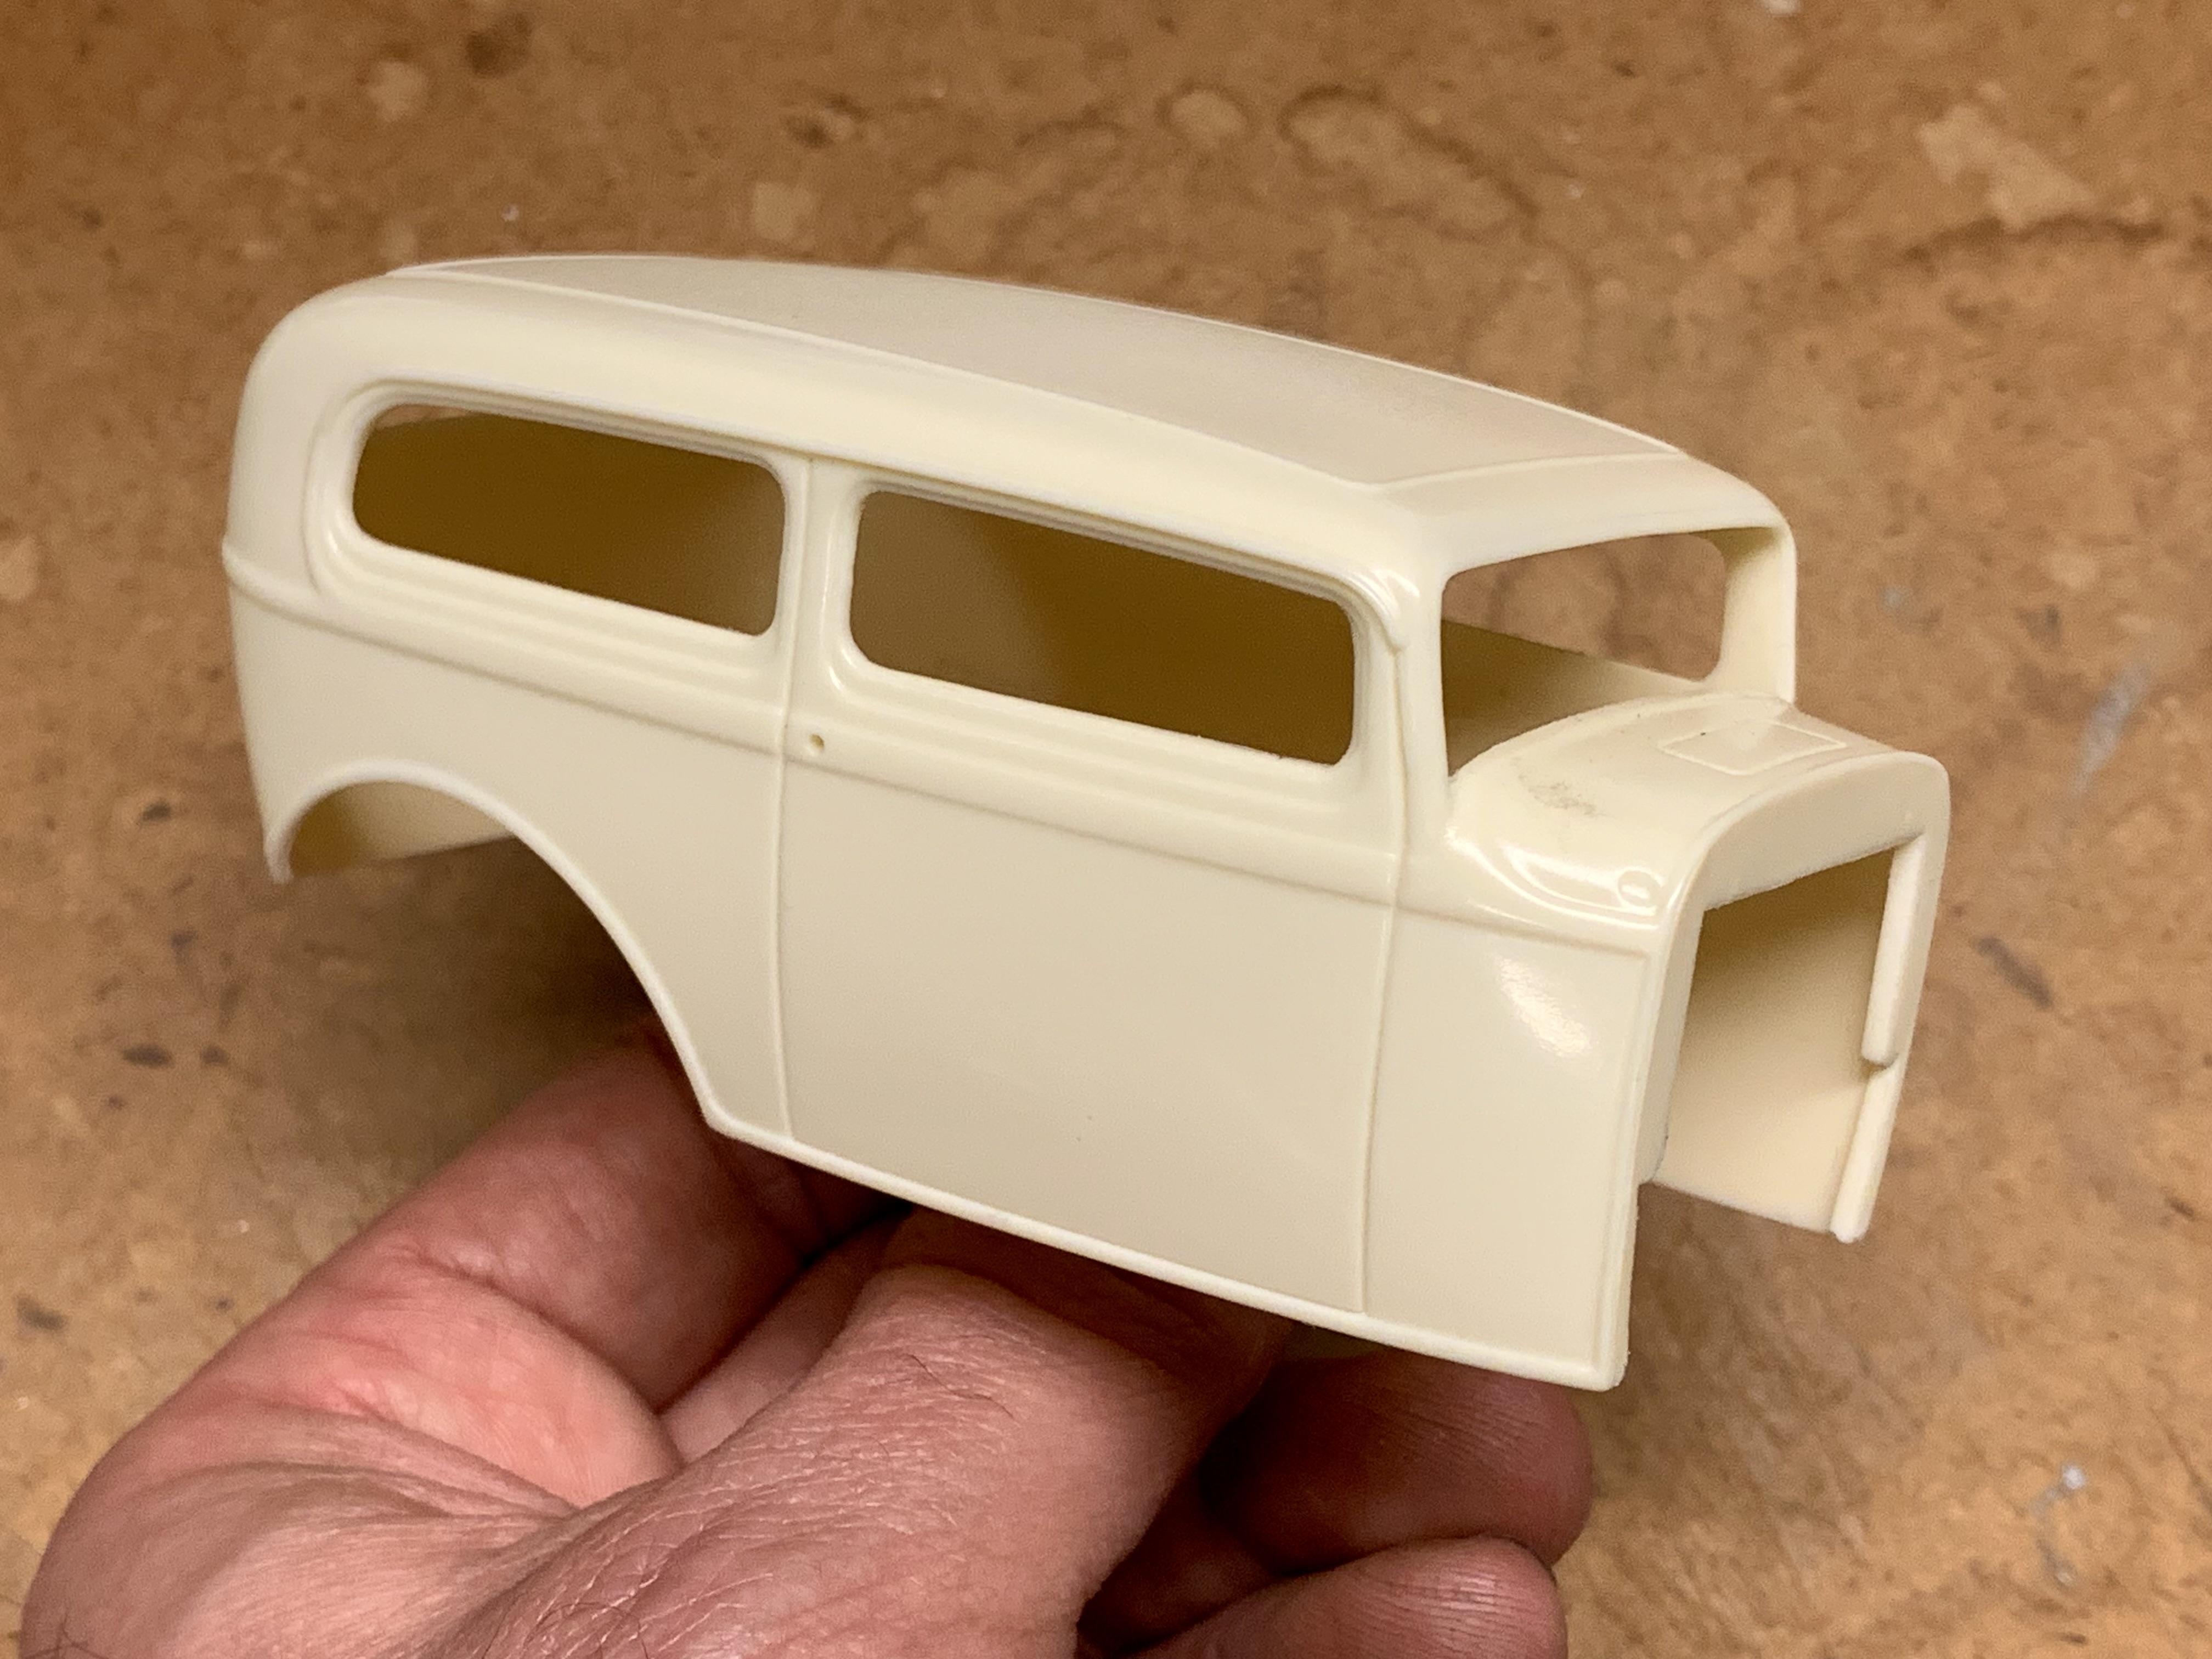
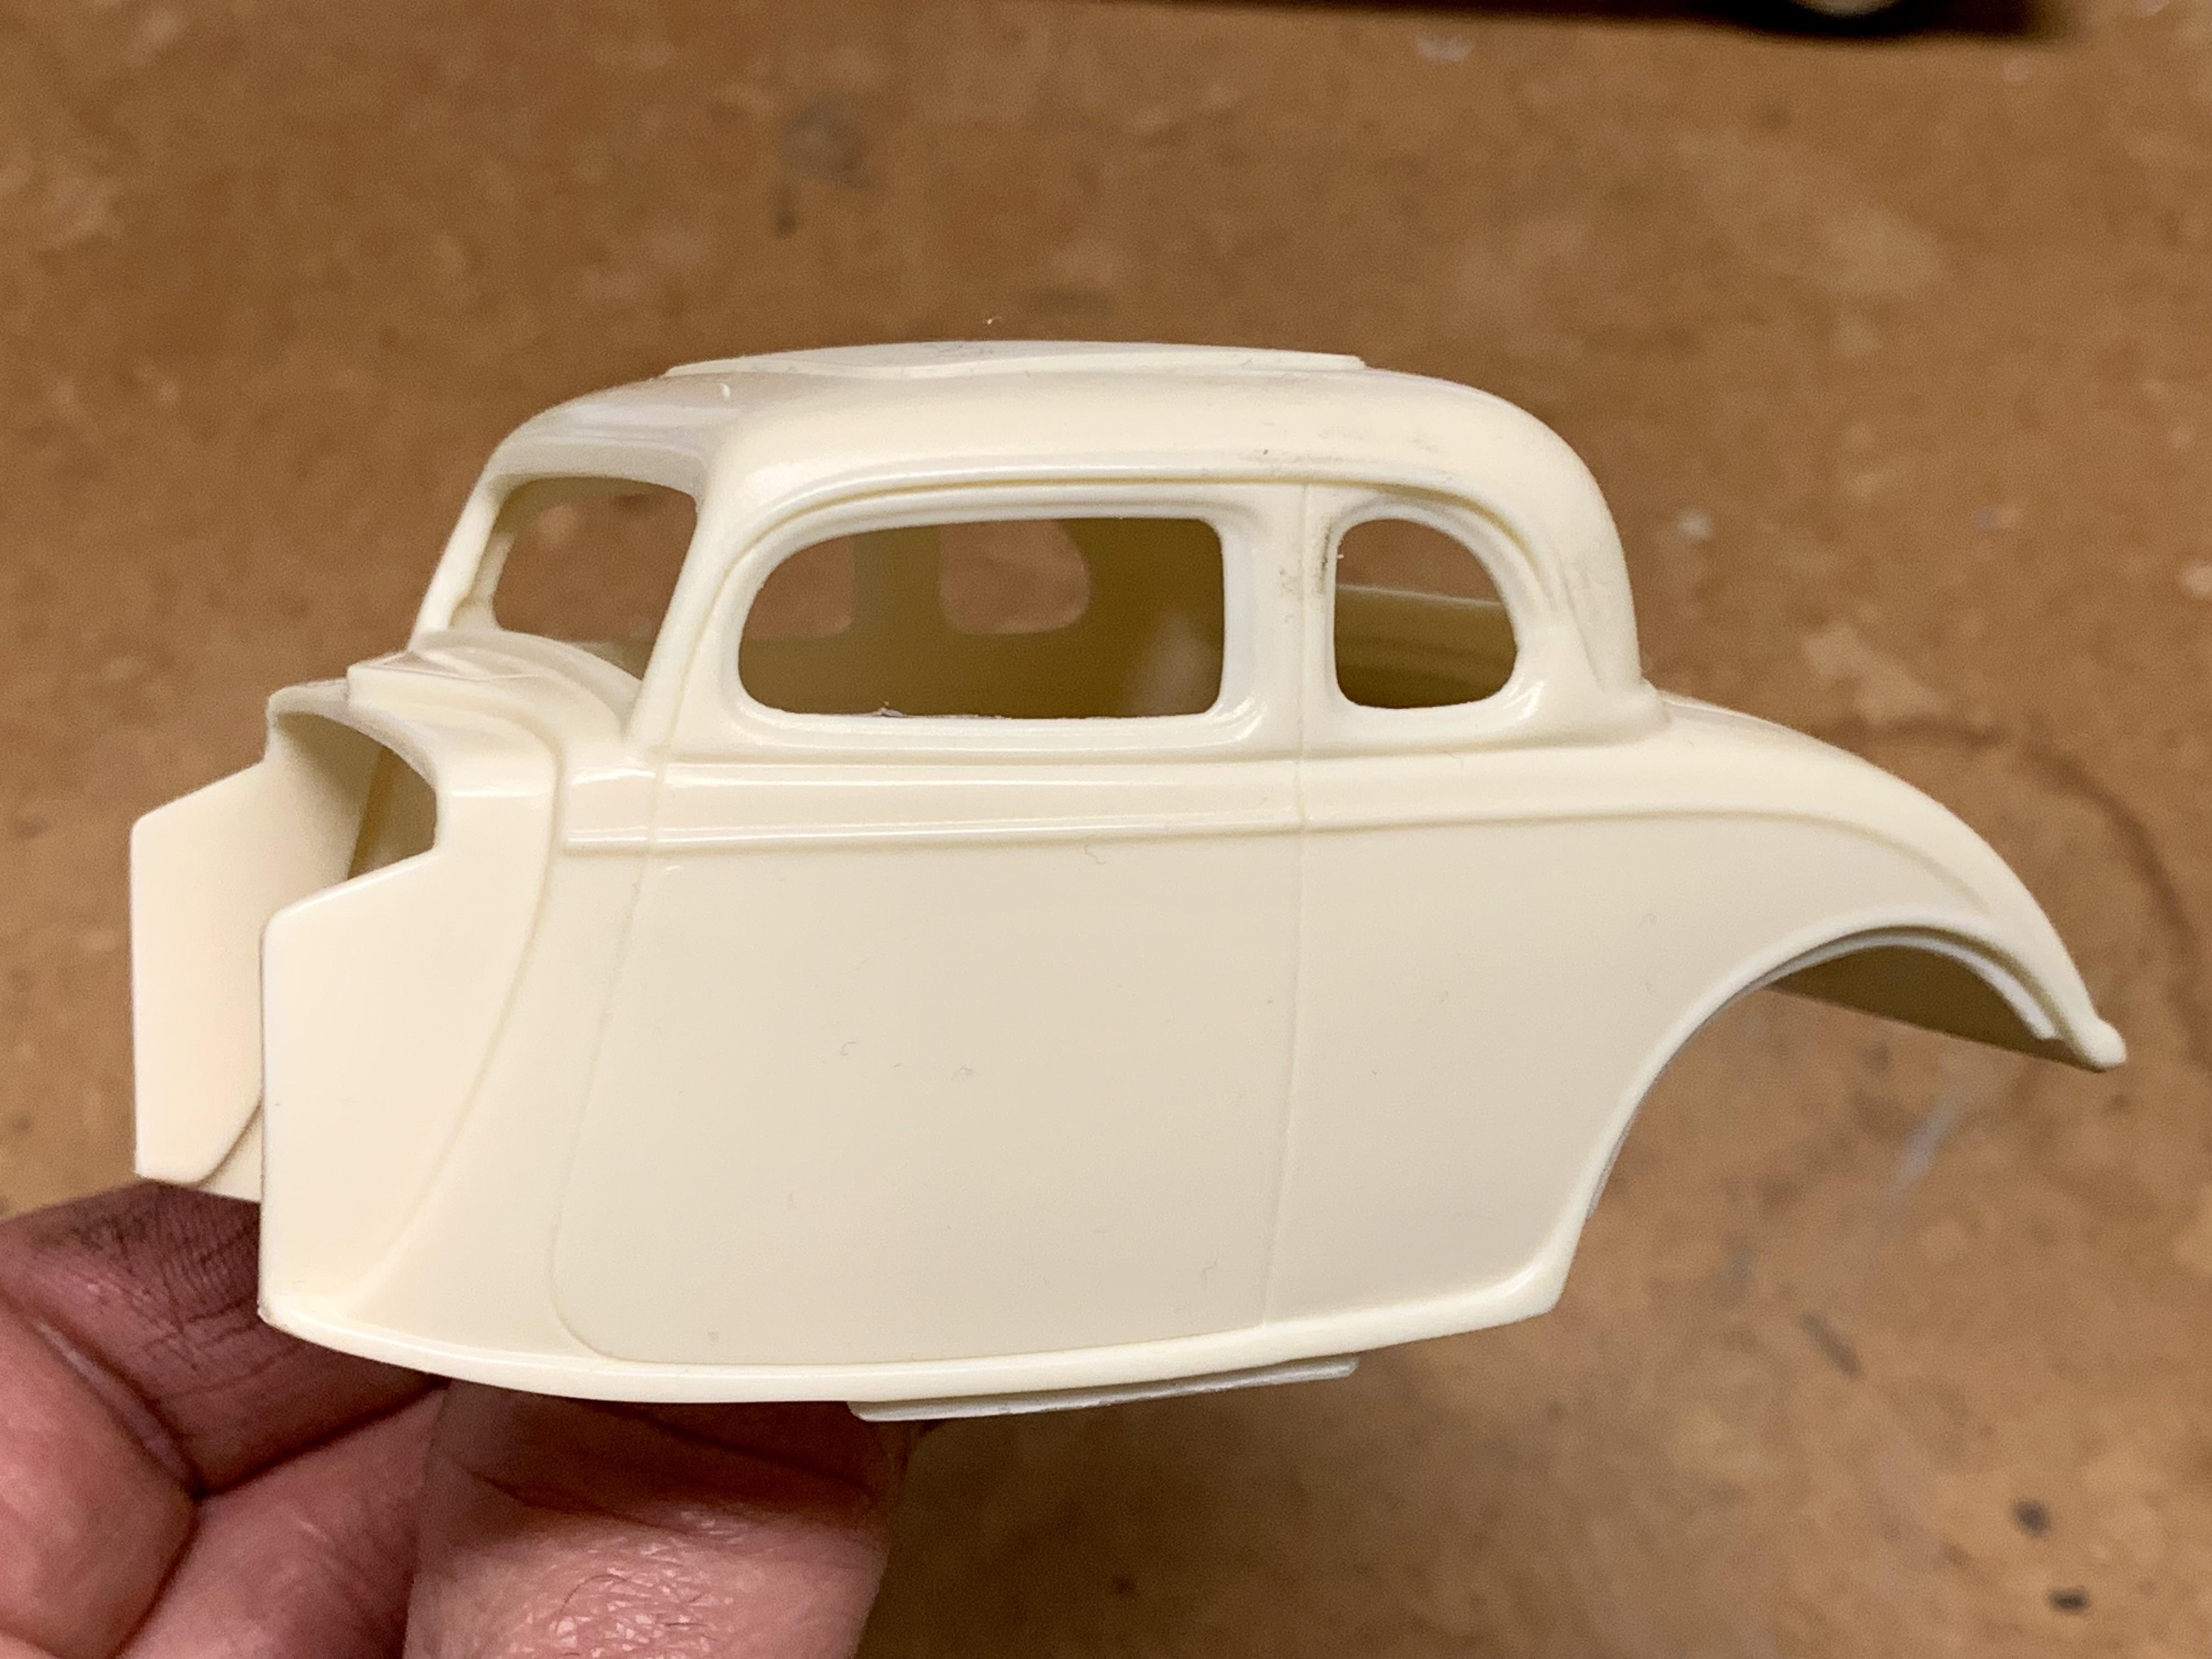
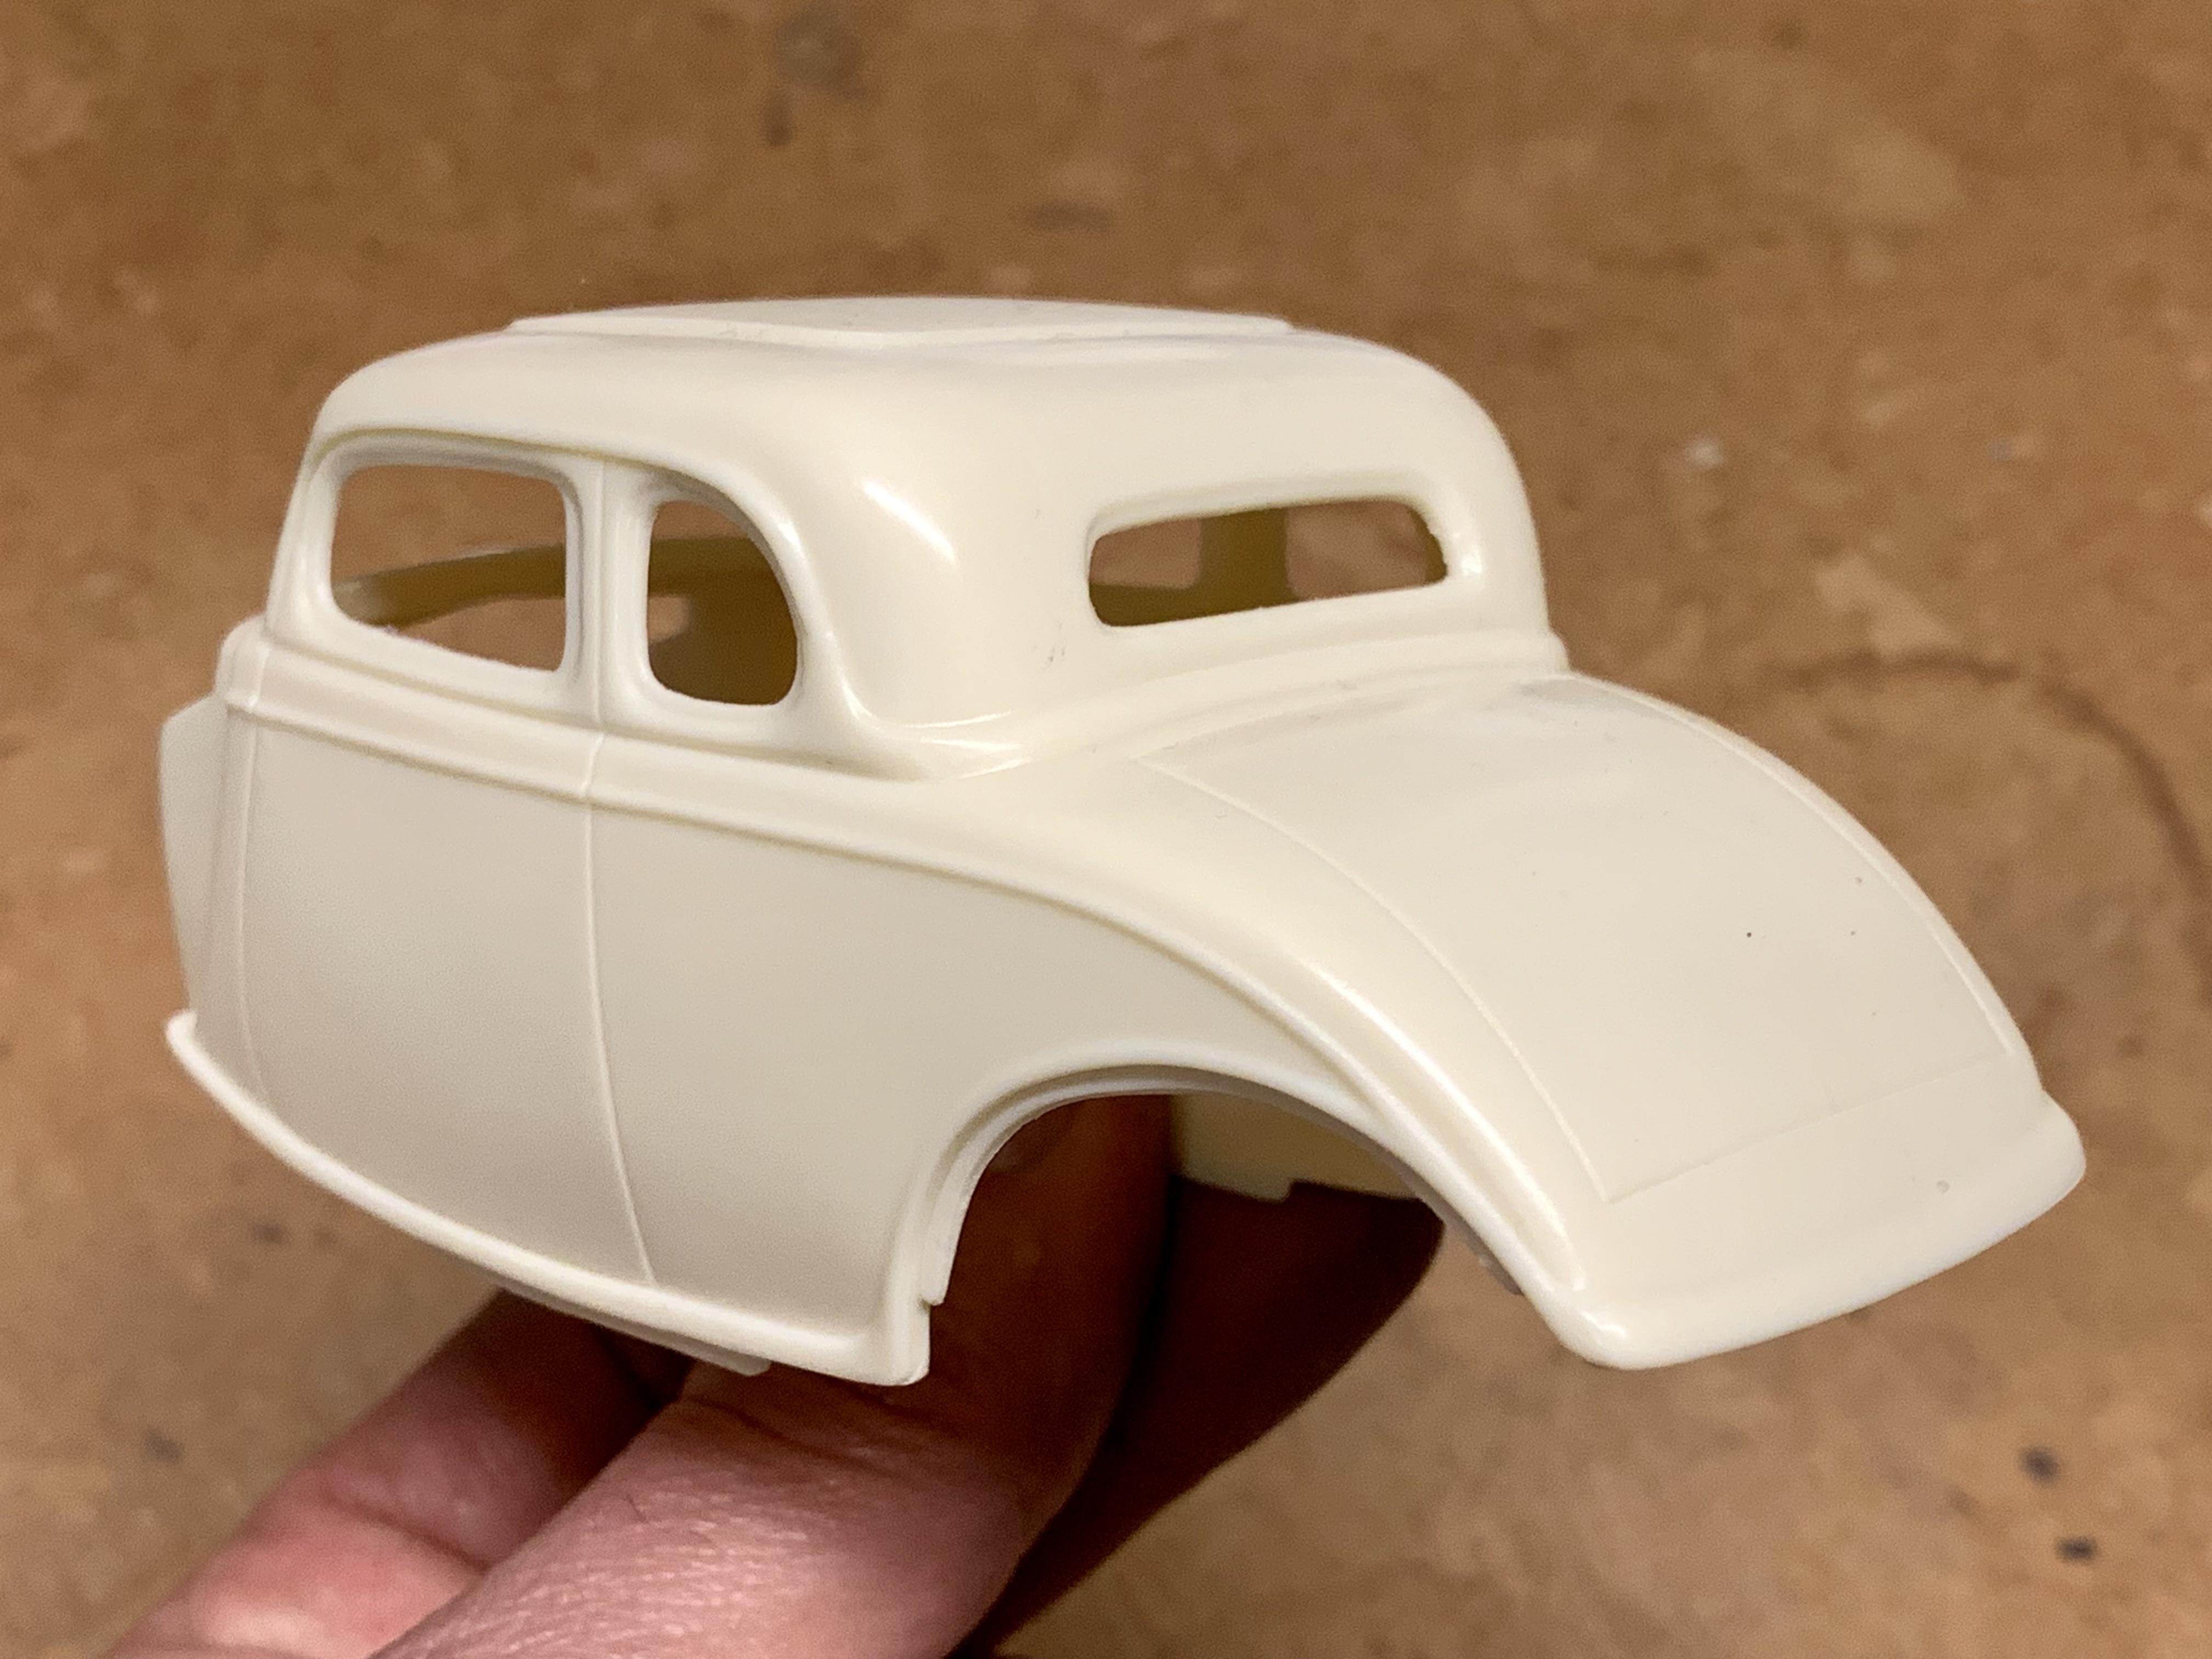
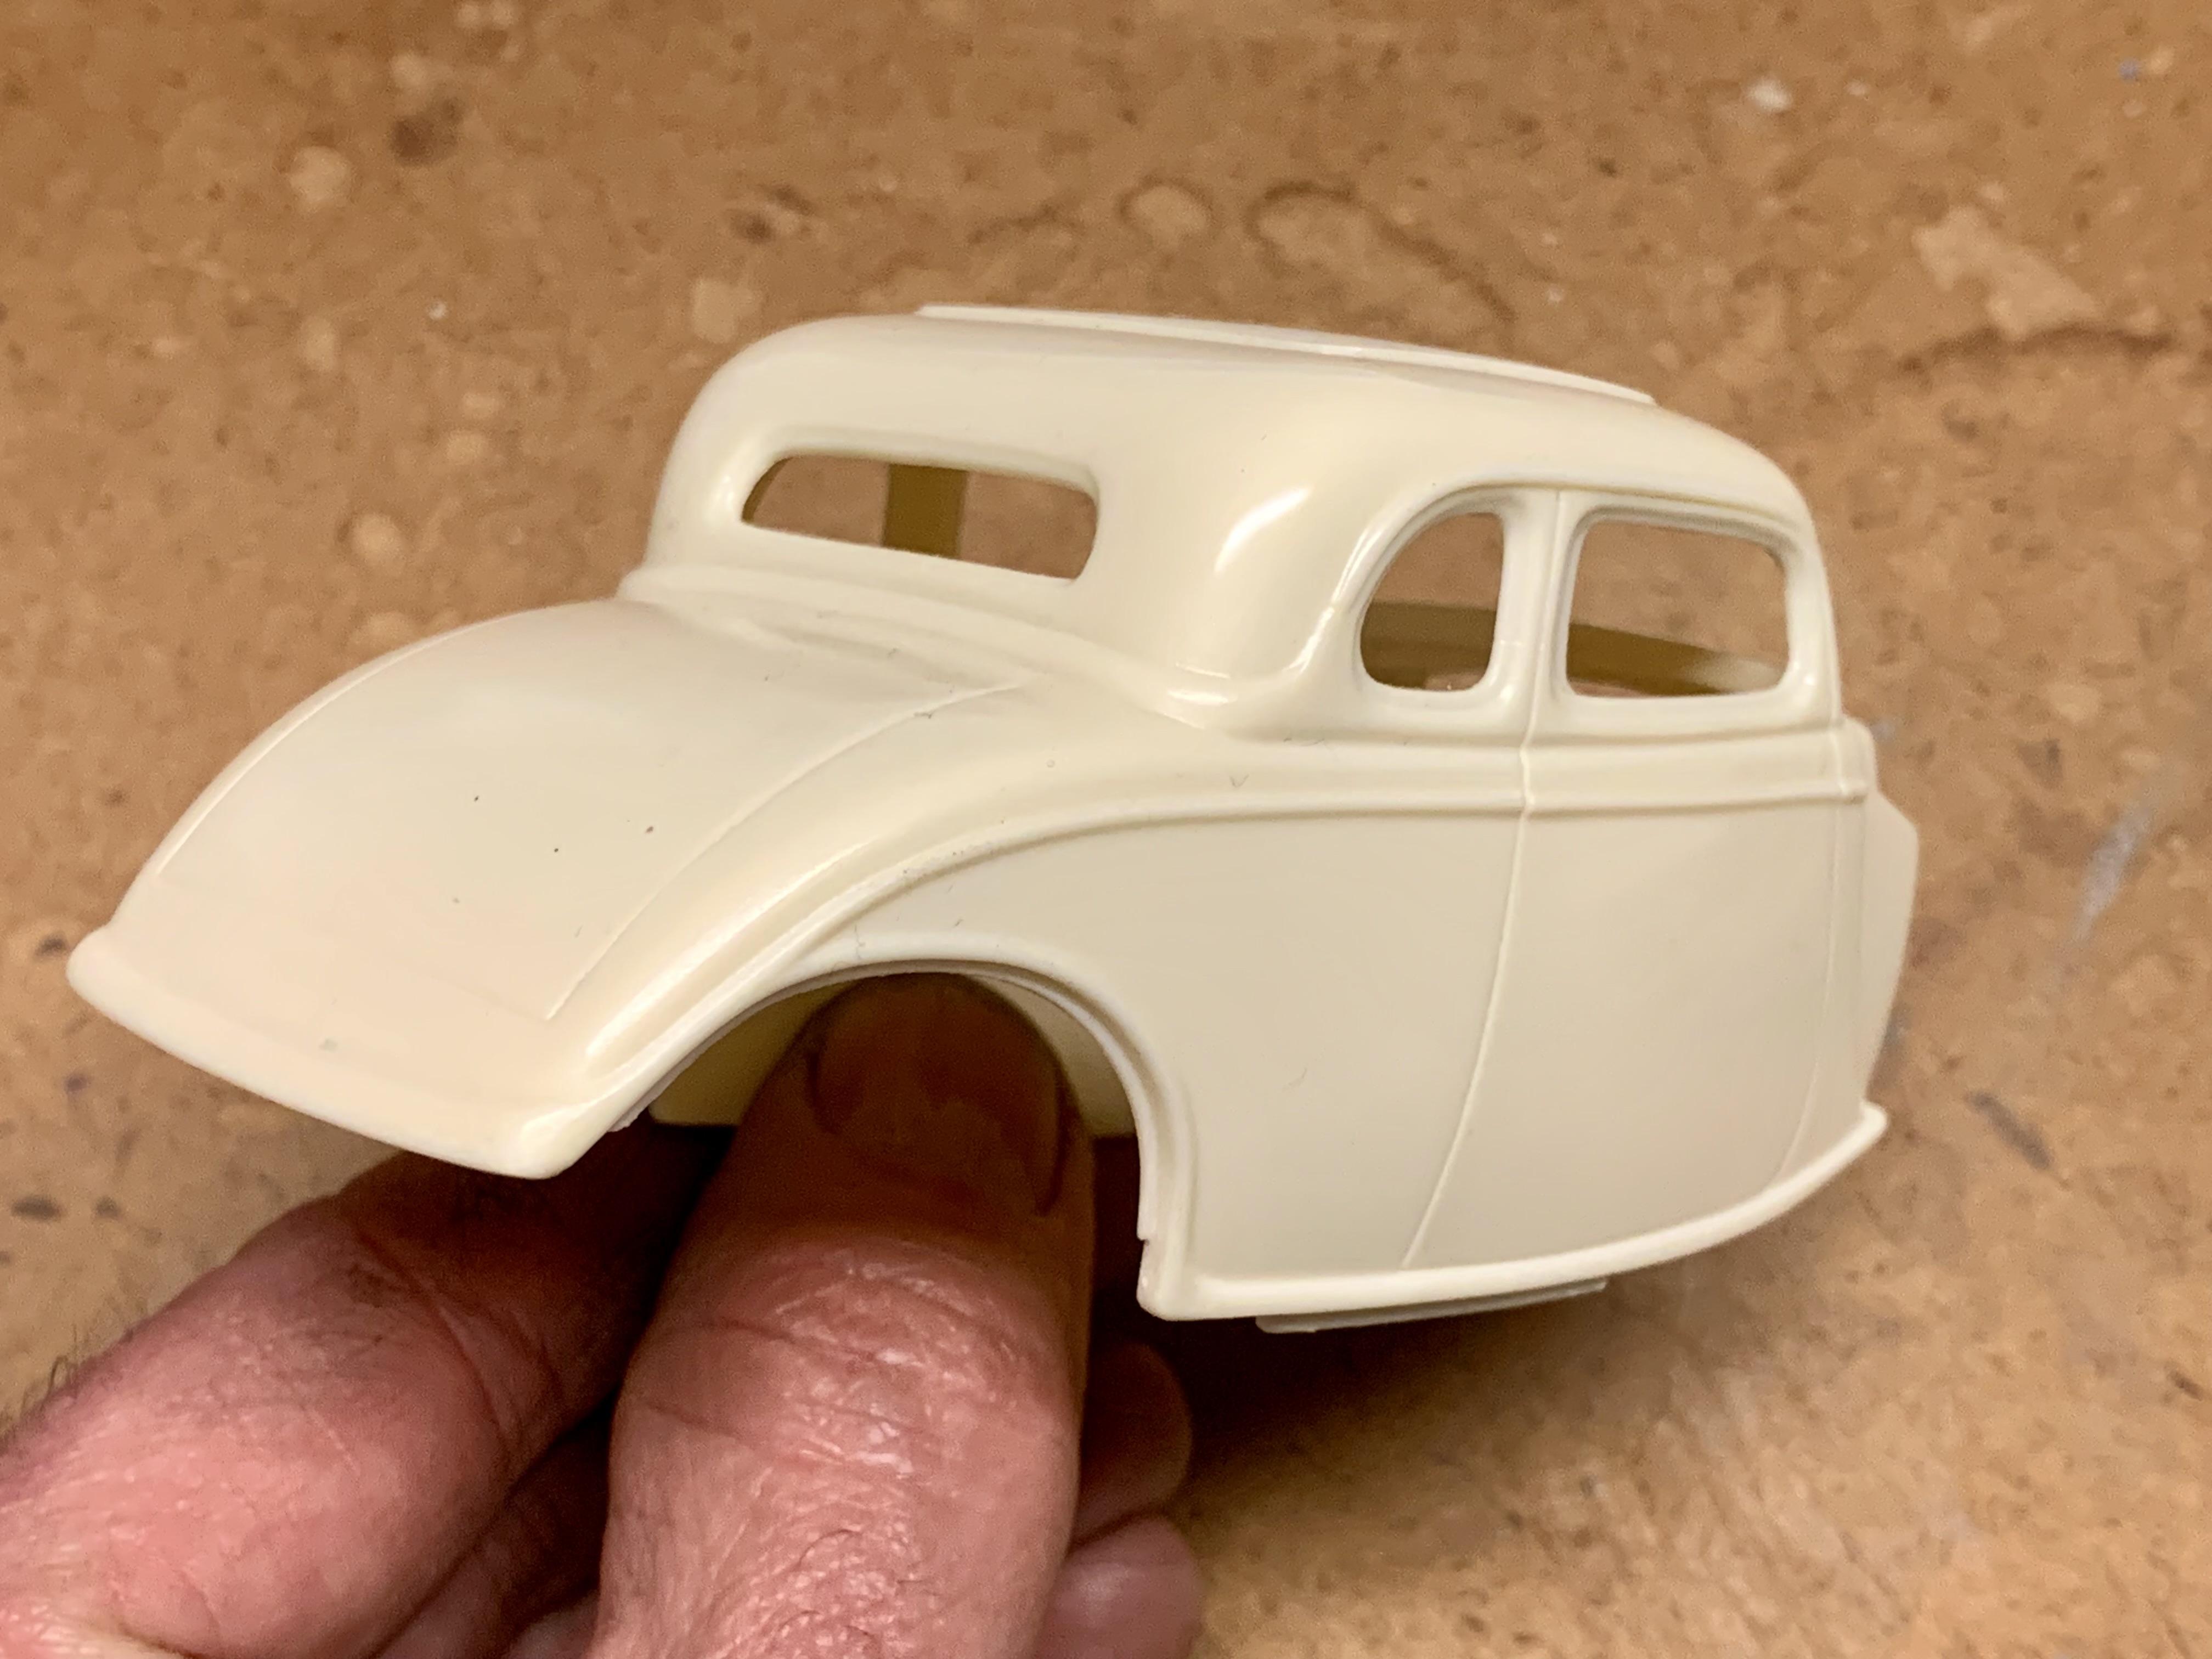
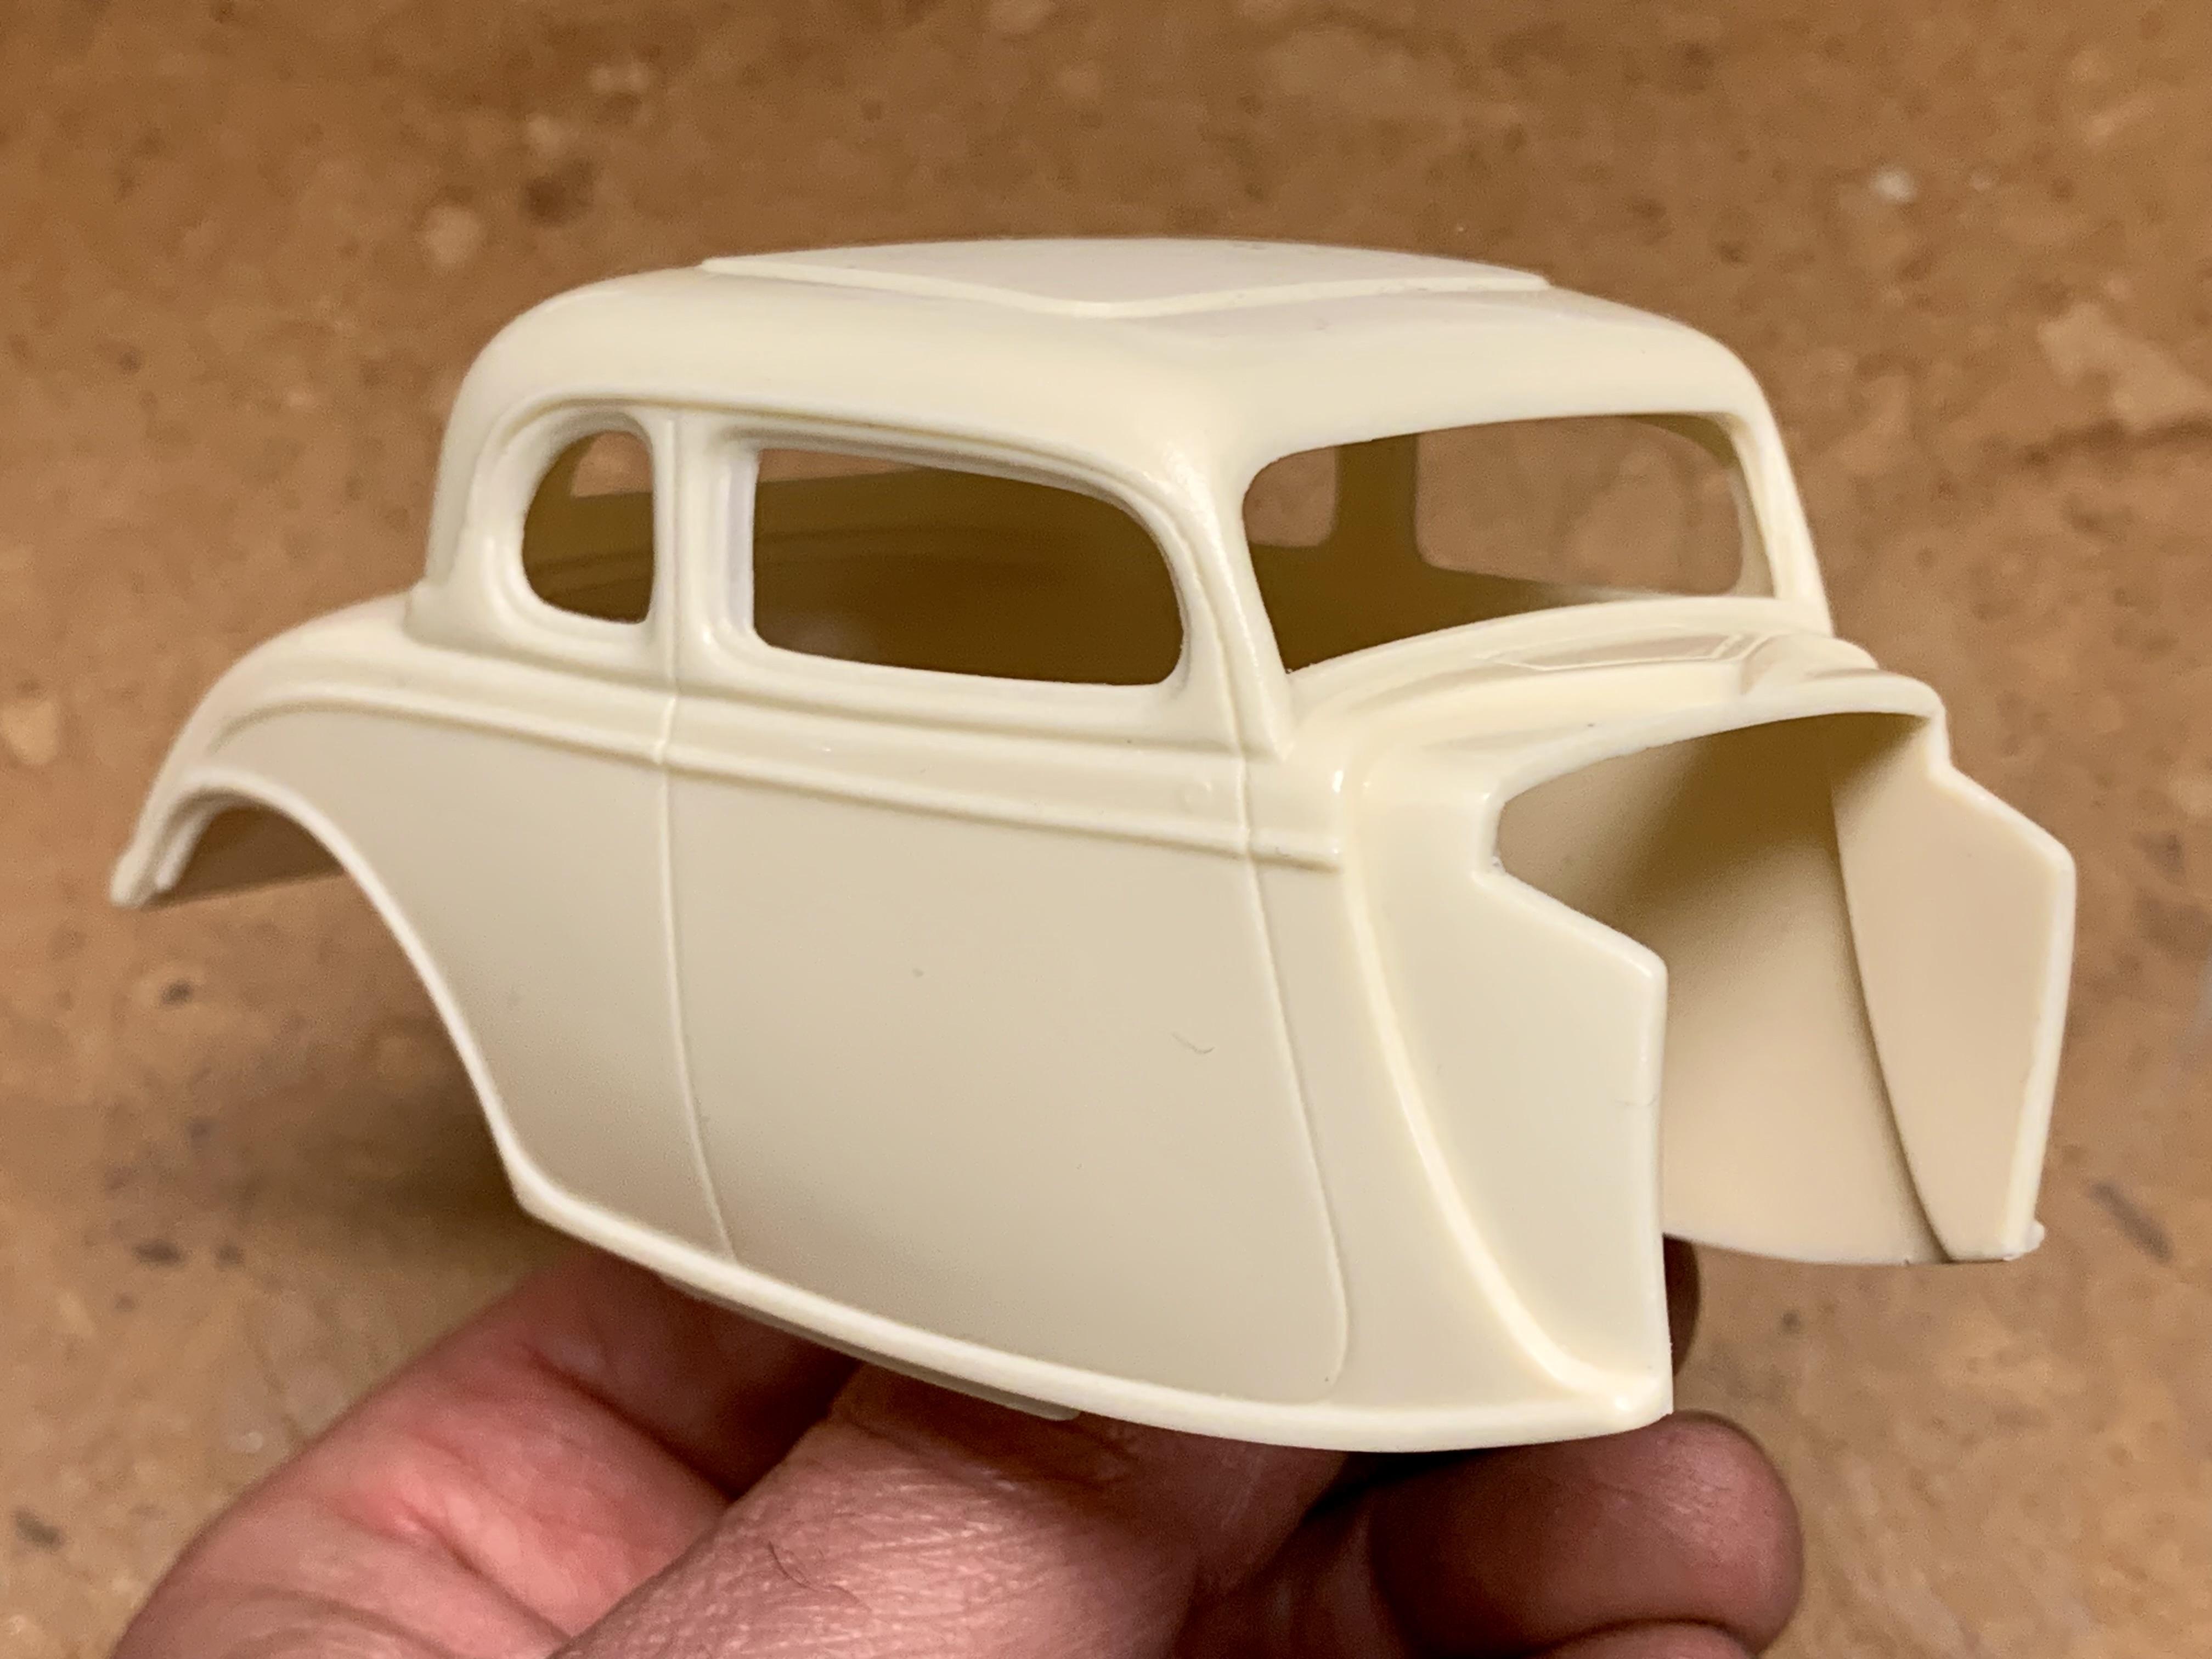
 I just received the first two new production bodies from my friend Ed at Drag City Casting. The quality is absolutely superb. The 1932 Sedan is chopped 4.5 scale inches and is a direct fit for Revell’s 32 Sedan. It includes a matching windshield frame (not pictured.) Thankfully this kit is on the horizon to be reissued after a very long time since its original release. $30 The 1934 5-Window is chopped 3.5 scale inches and is a direct fit for AMT’s 34 5-Window kit which is currently reissued and readily available. This is an improved and slightly more chopped version of the chopped 5-Window body he used to offer years ago. $30 Ed has also built fresh molds and will continue offering his other 3 chopped 1932 Ford bodies: 3-Window, 5-Window and 4-Door Sedan. Each one includes a matching chopped windshield frame. $30 each. Ed is one of the best casters in the business. His bodies come out the same exact thickness as the kit bodies meaning there will be no problems with interior fitment. He also highly polishes the body masters prior to molding so the production bodies come out as smooth as the kit bodies, have no mold seam lines and flash removed so there is no clean up necessary. He does not have a formal website but can be contacted by email at lowcab36@epix.net
-
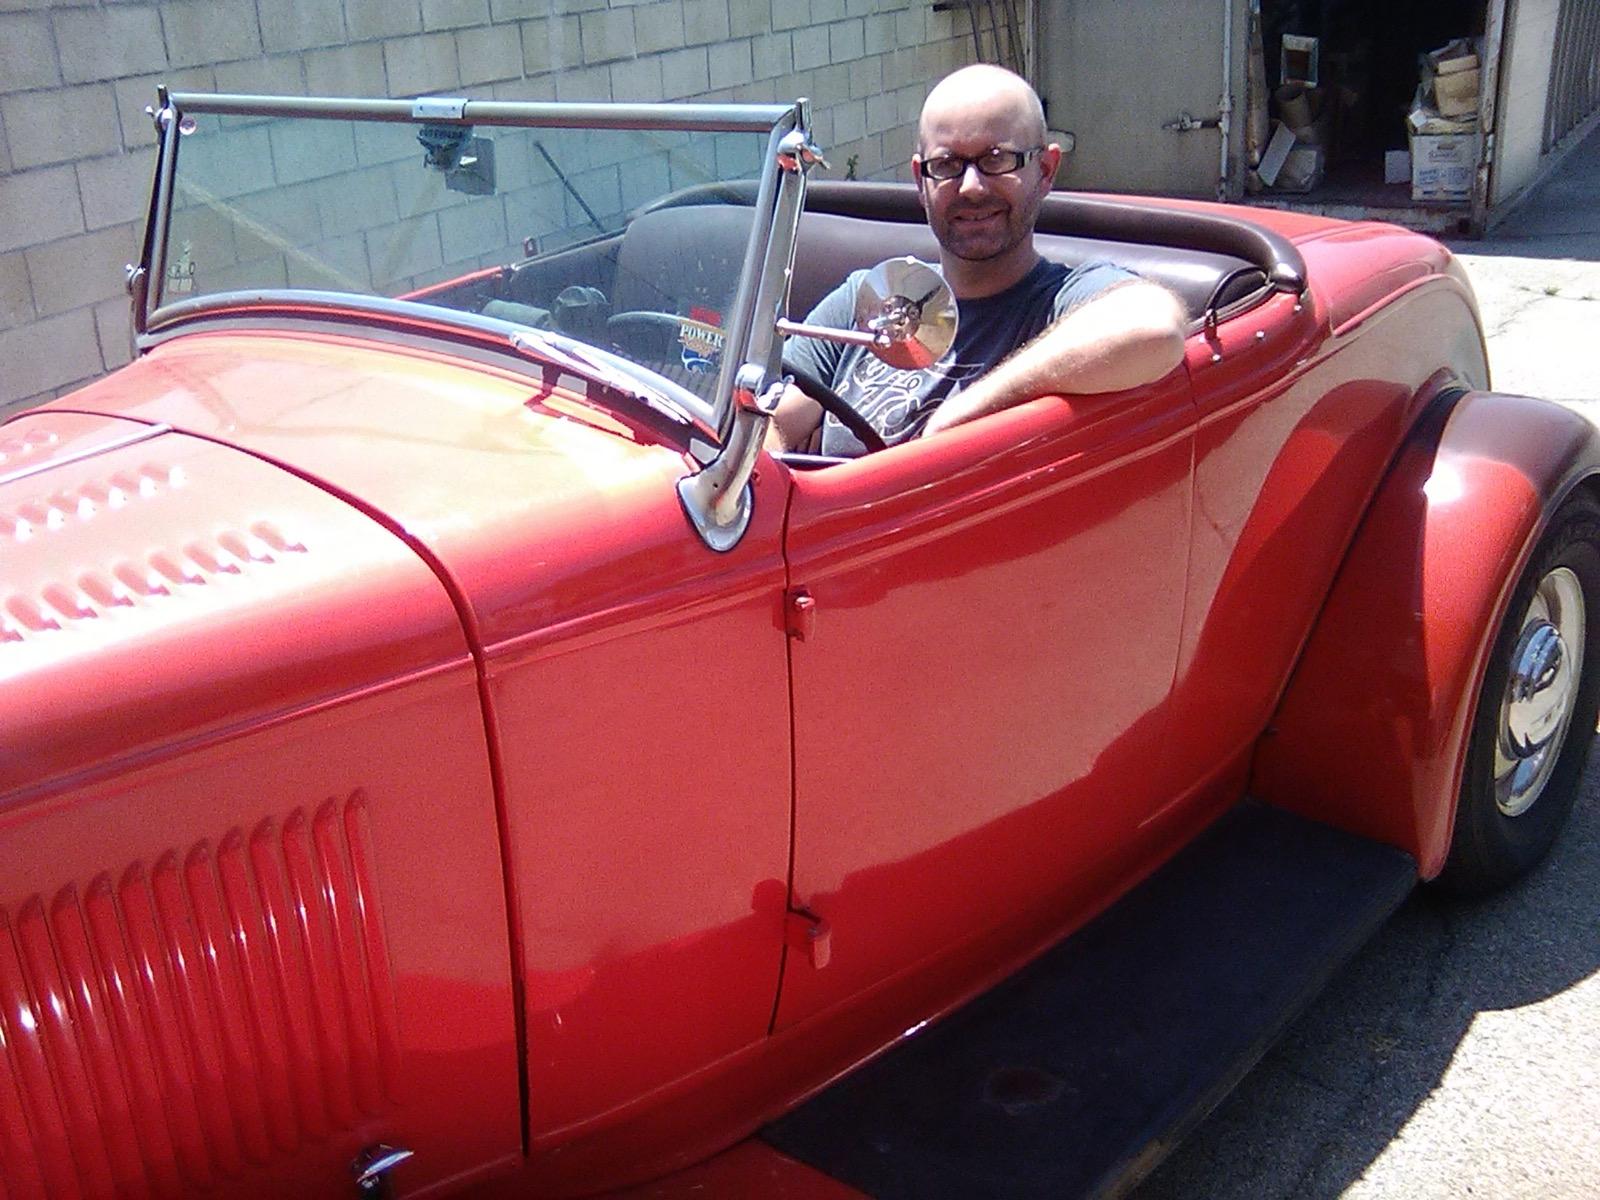
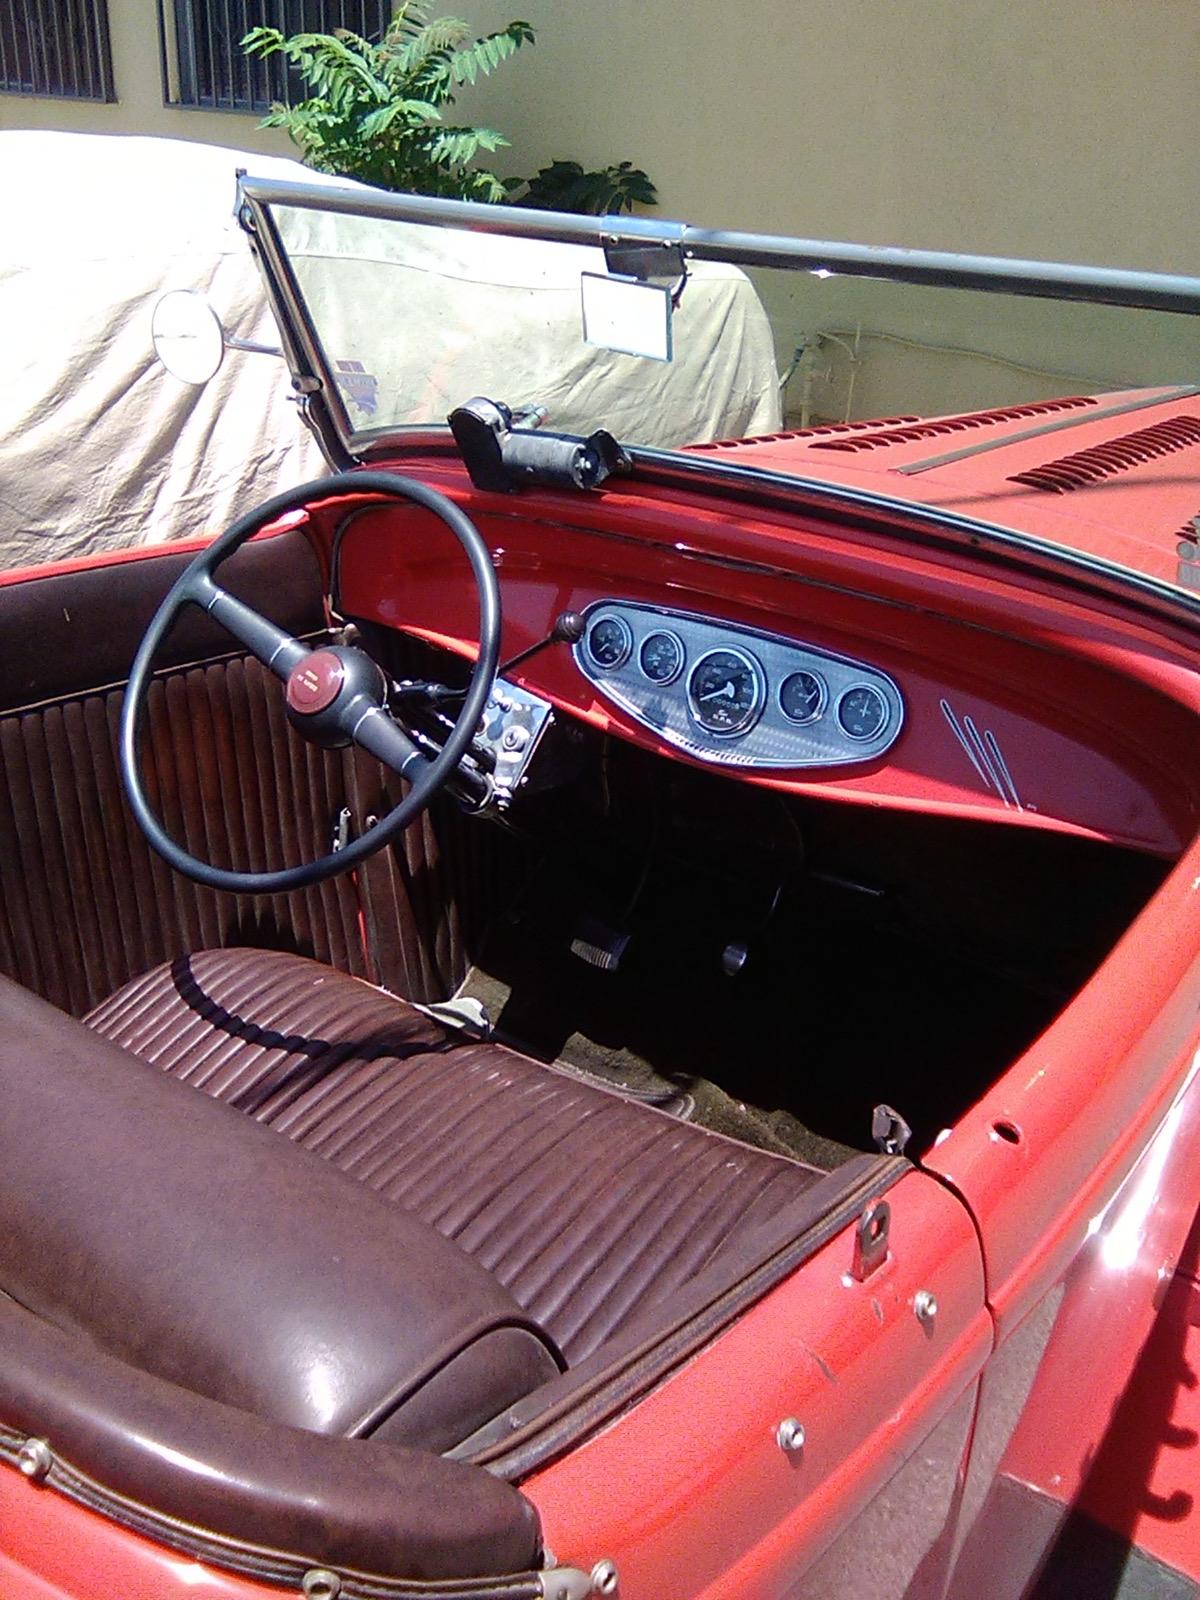
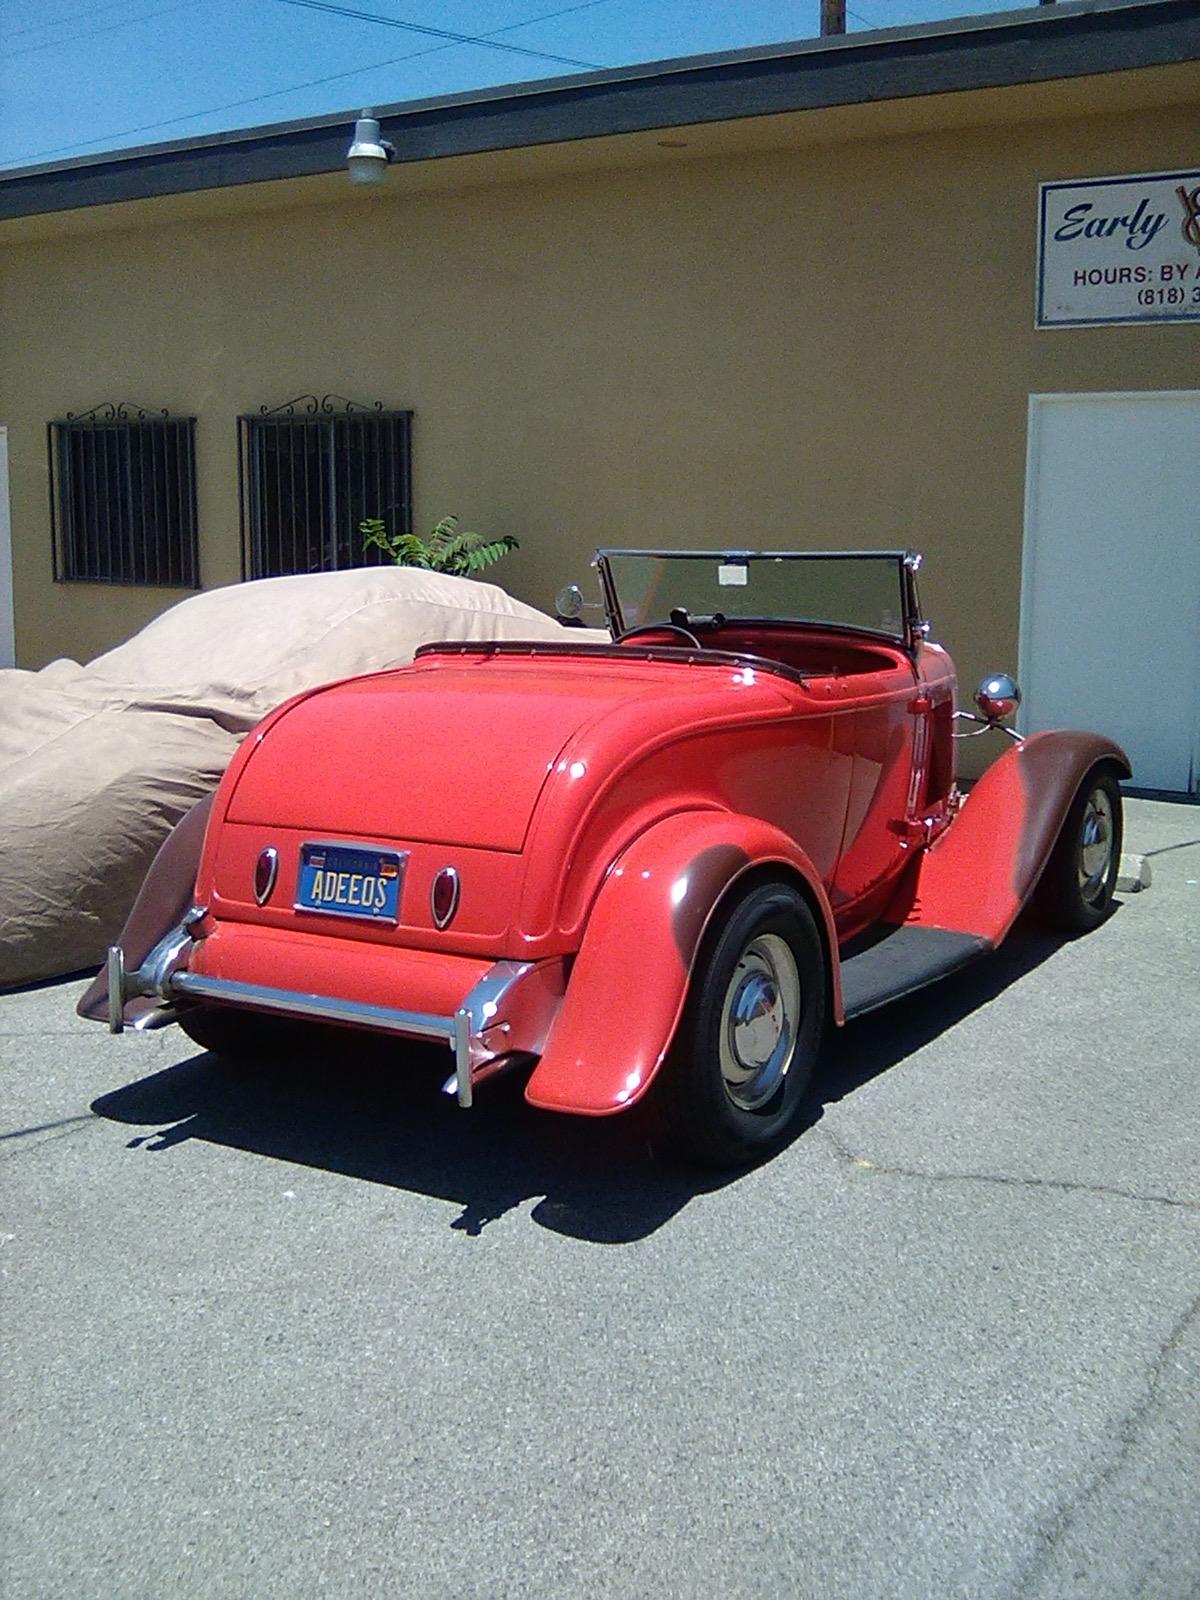
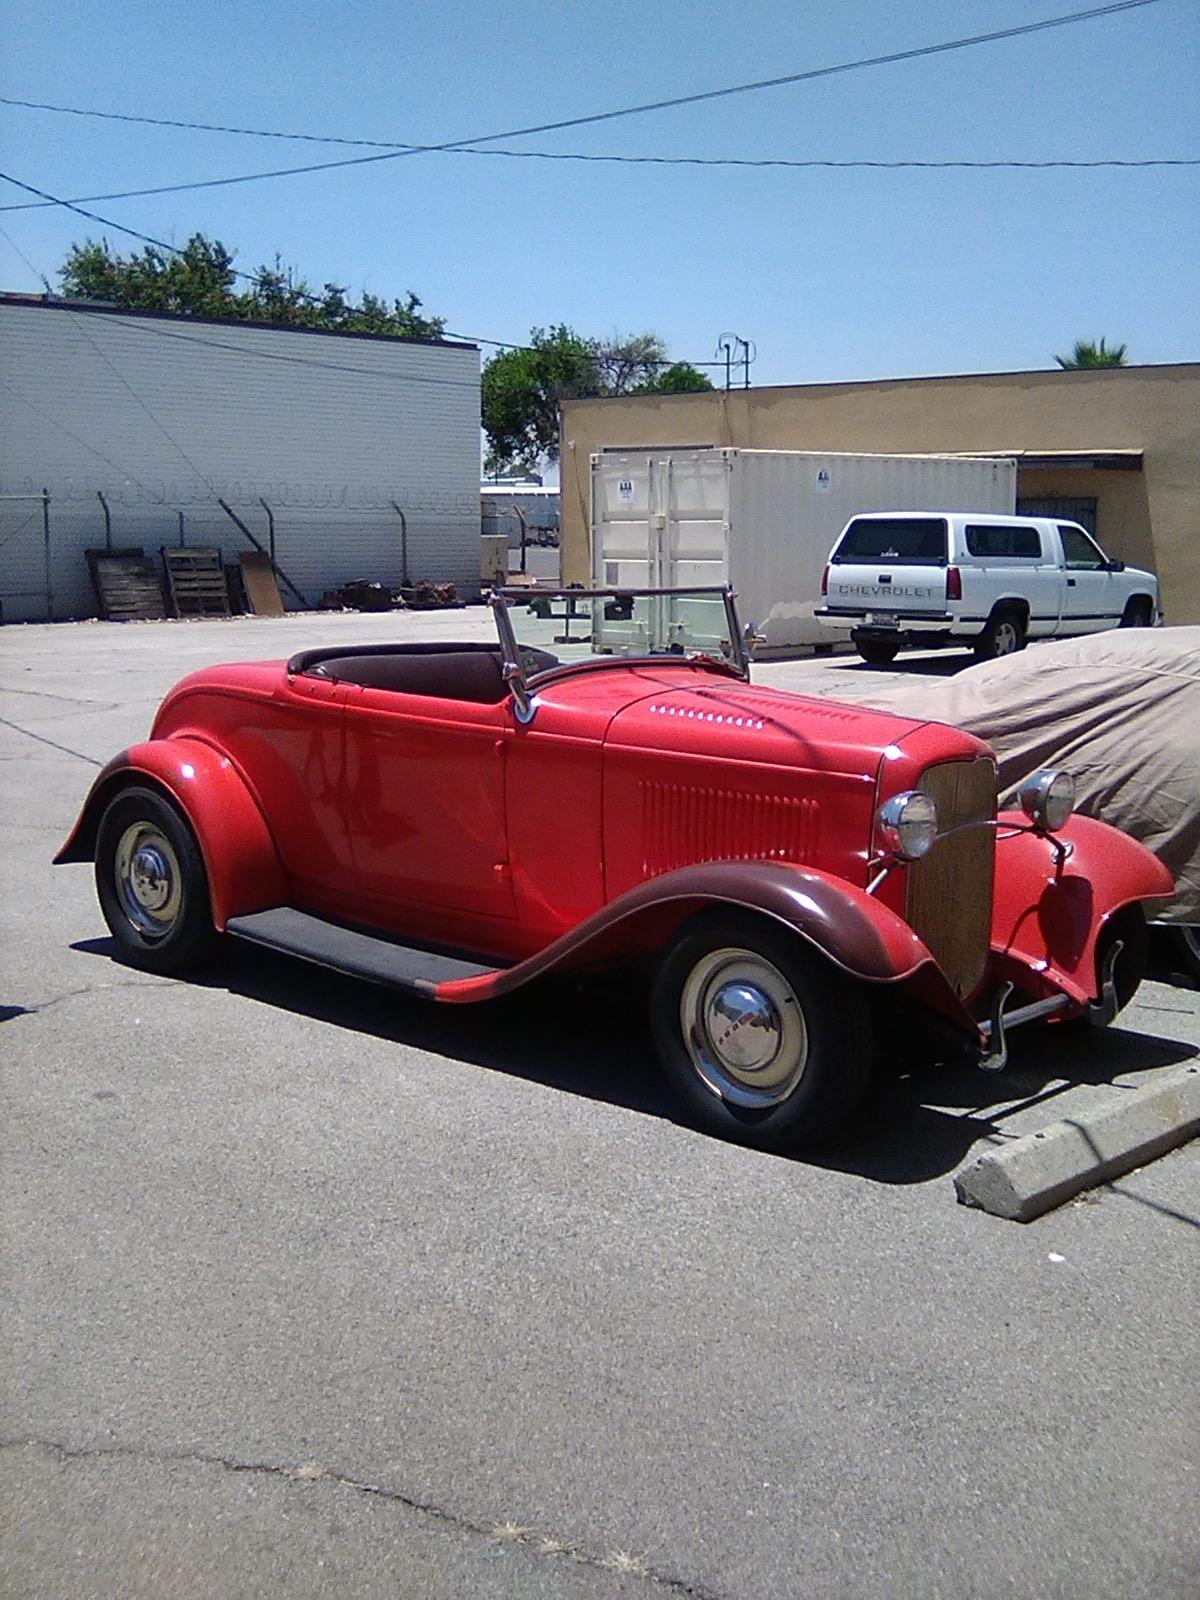
It was definitely worth revisiting this project and pushing it through. I was bummed when you boxed it. Turned out really cool. Like others have said the Baskerville inspiration is unmistakably there without being a full-on copy. Nice top! And not to brag (😁) but I’ve actually worked on and driven the real deal. Here it is at the shop. 😉
-
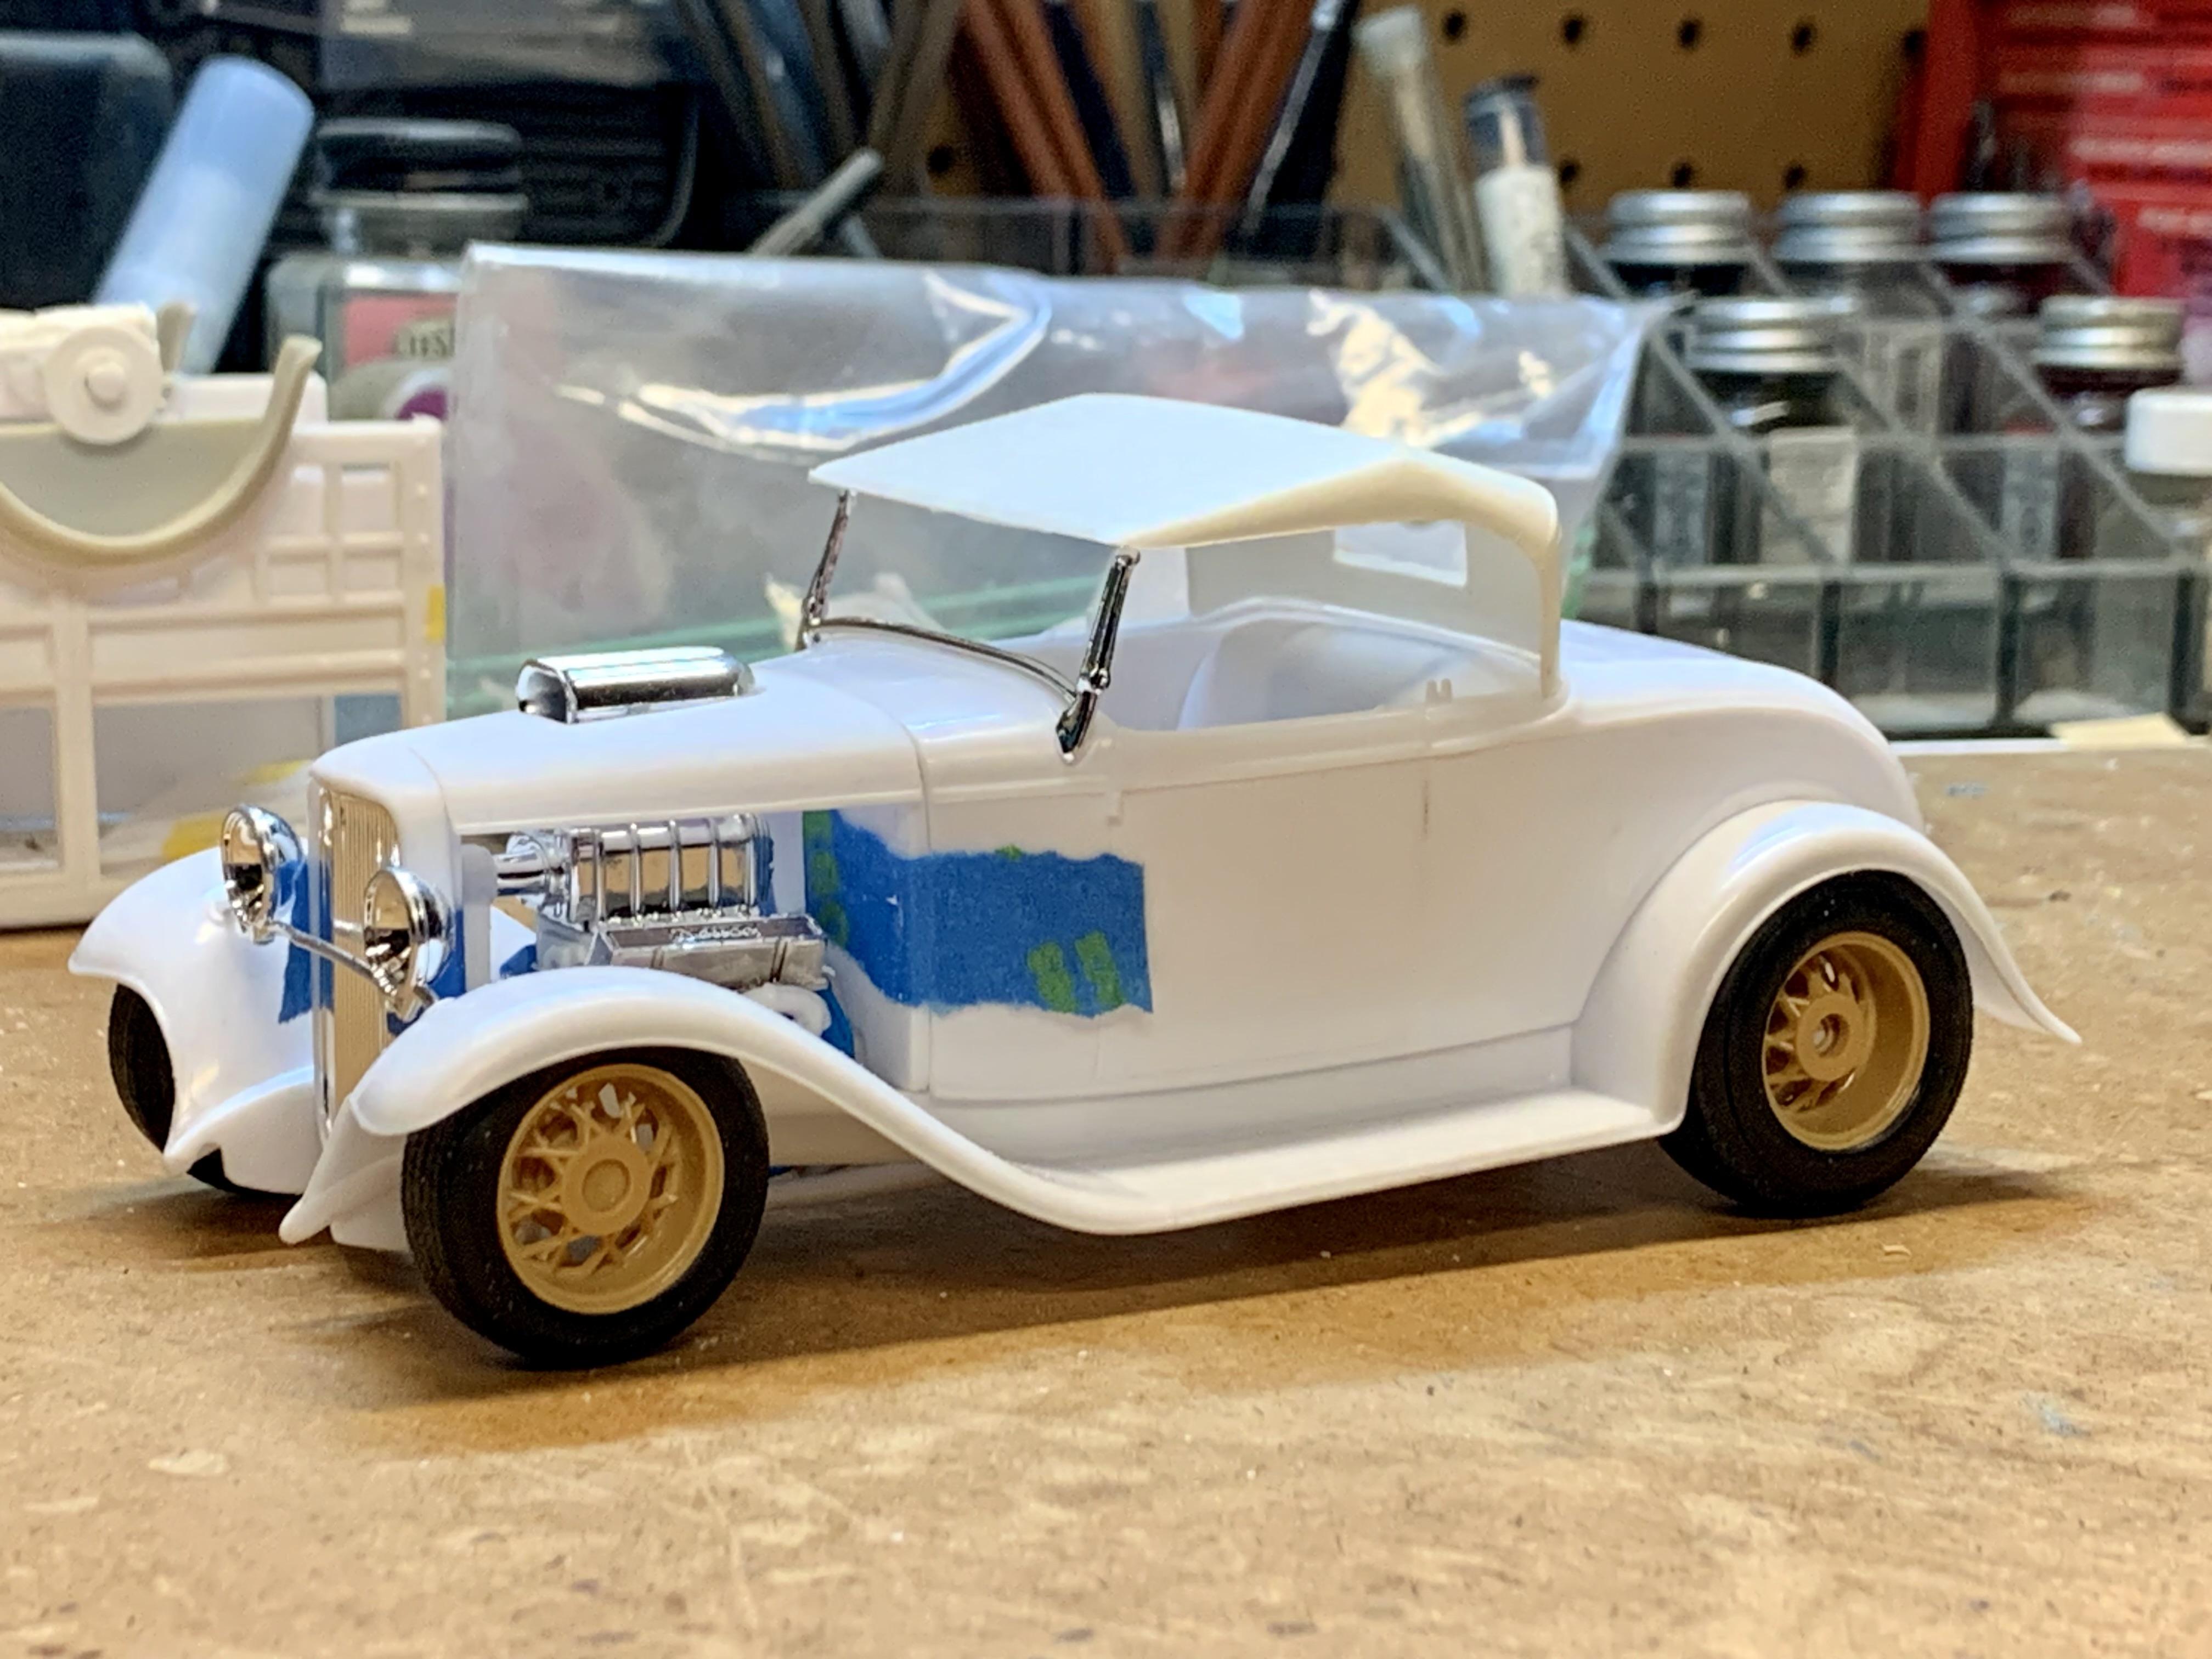
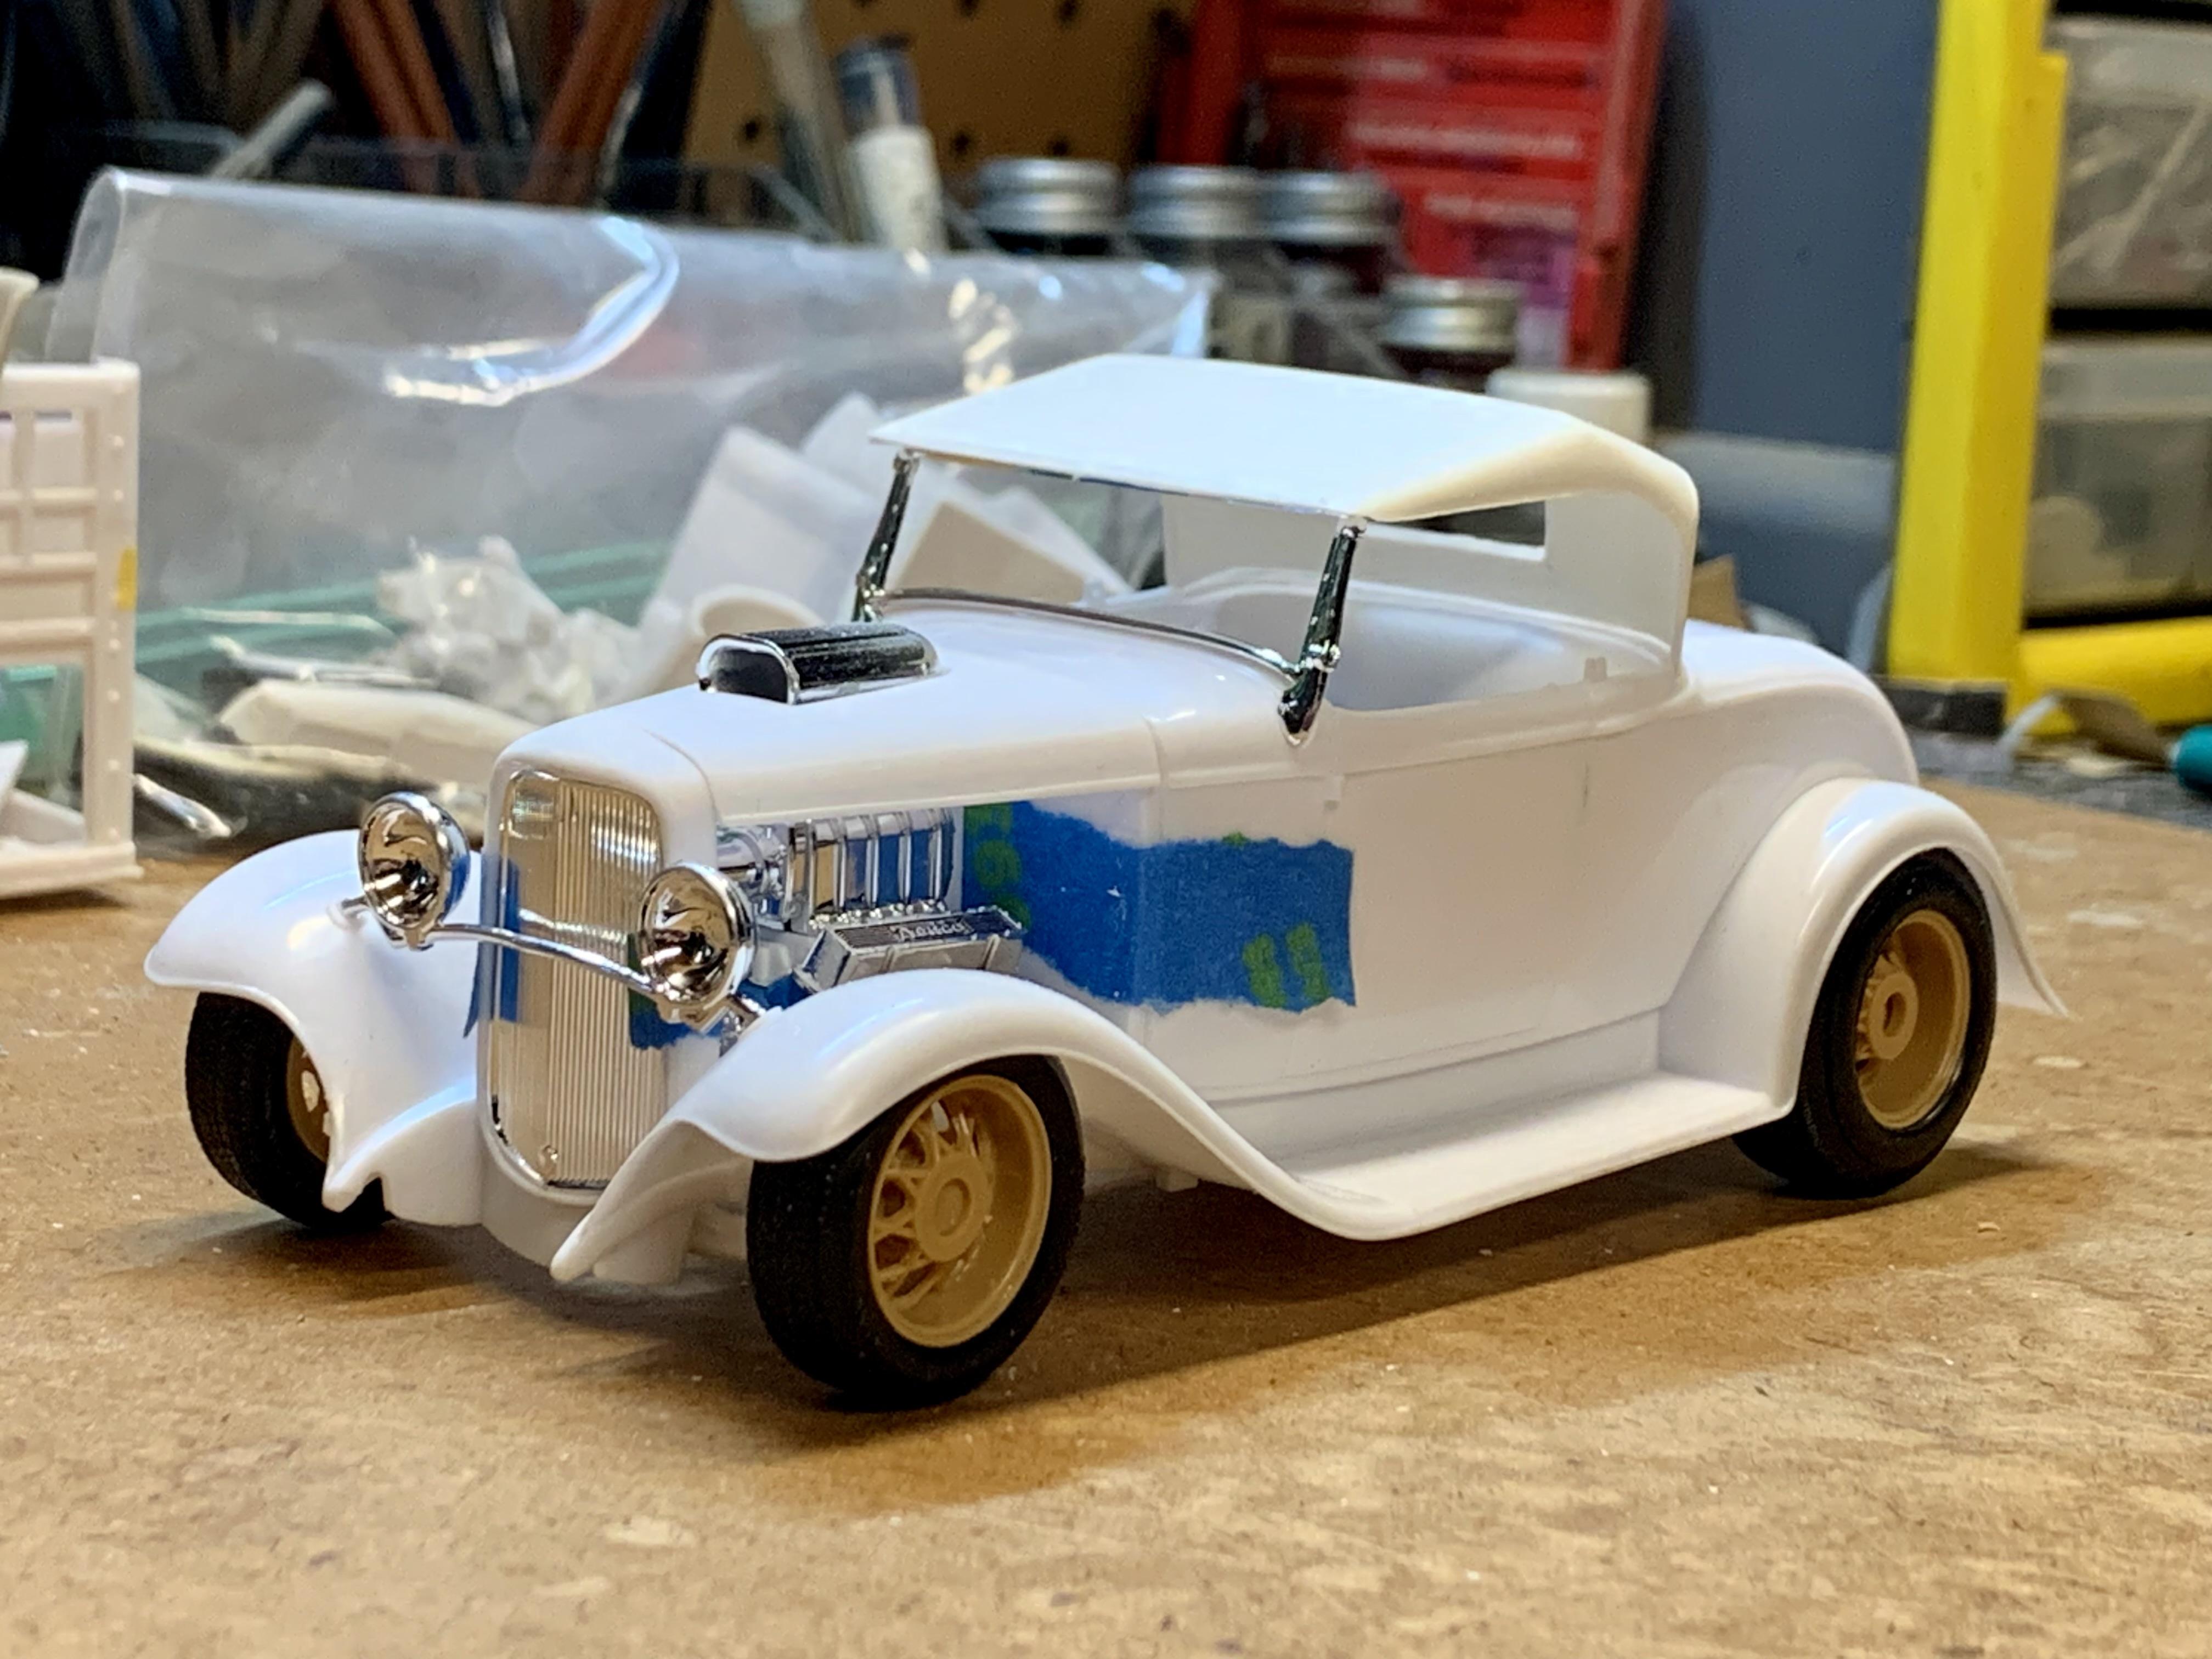
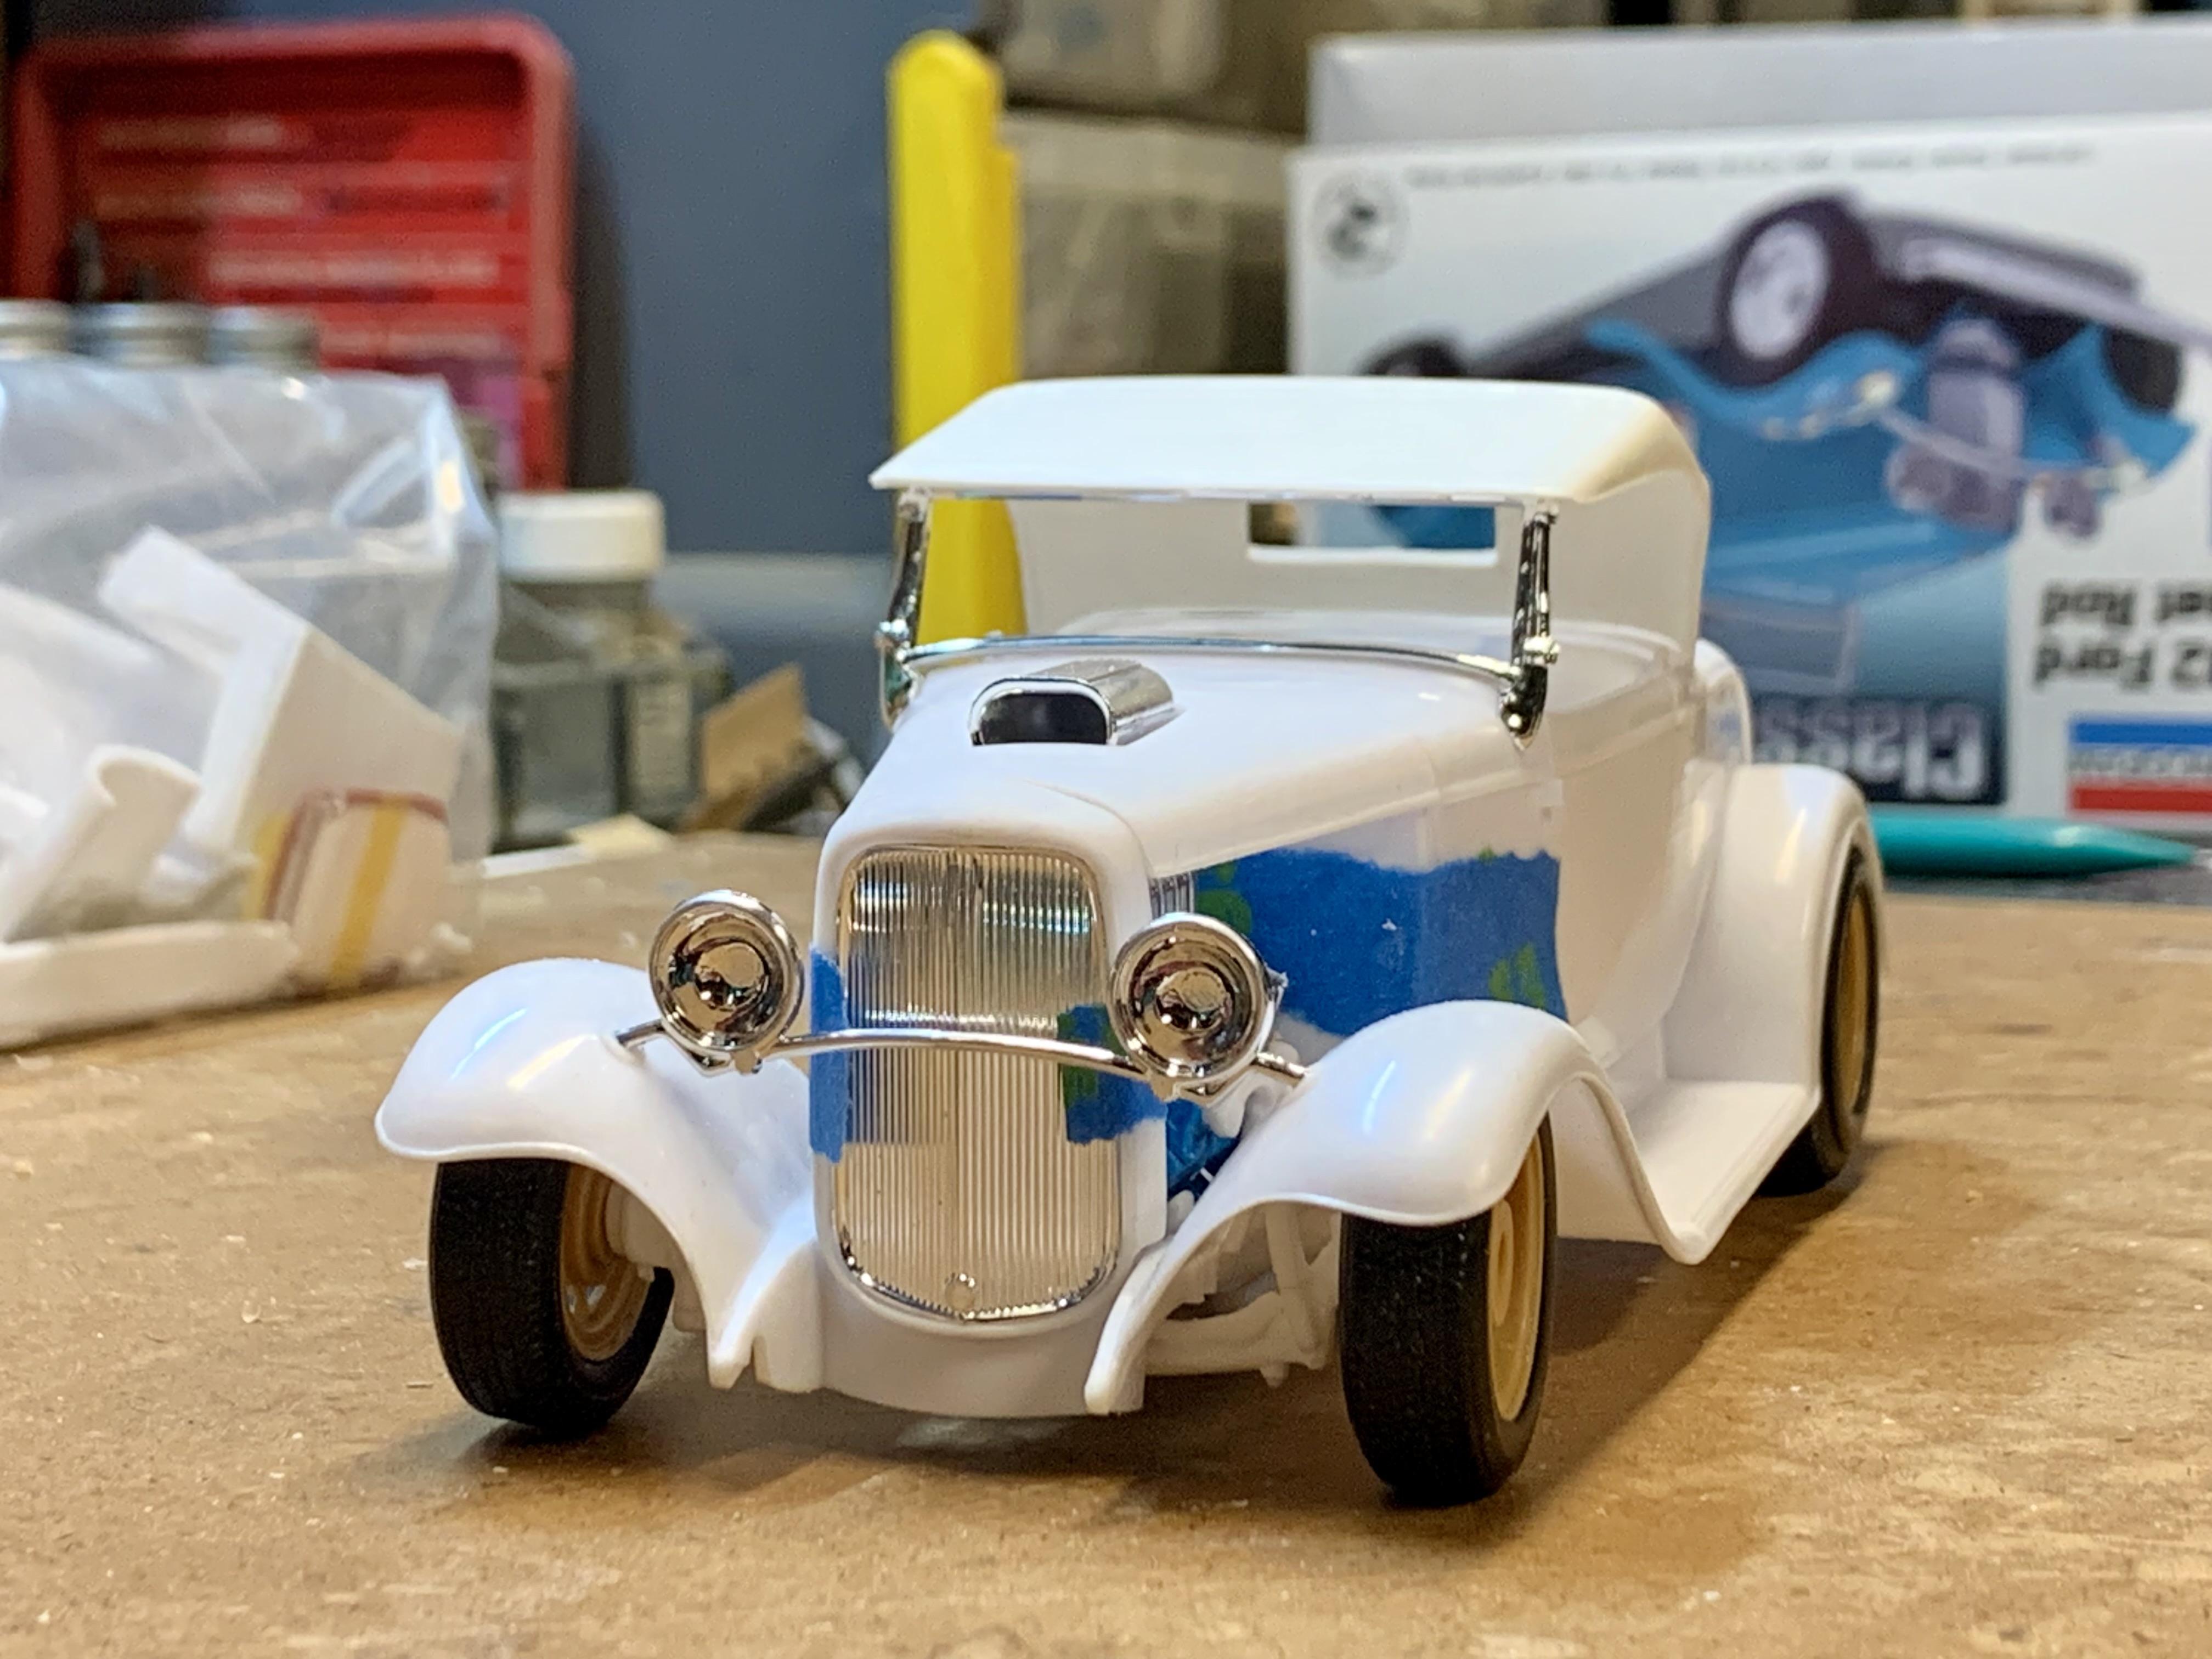
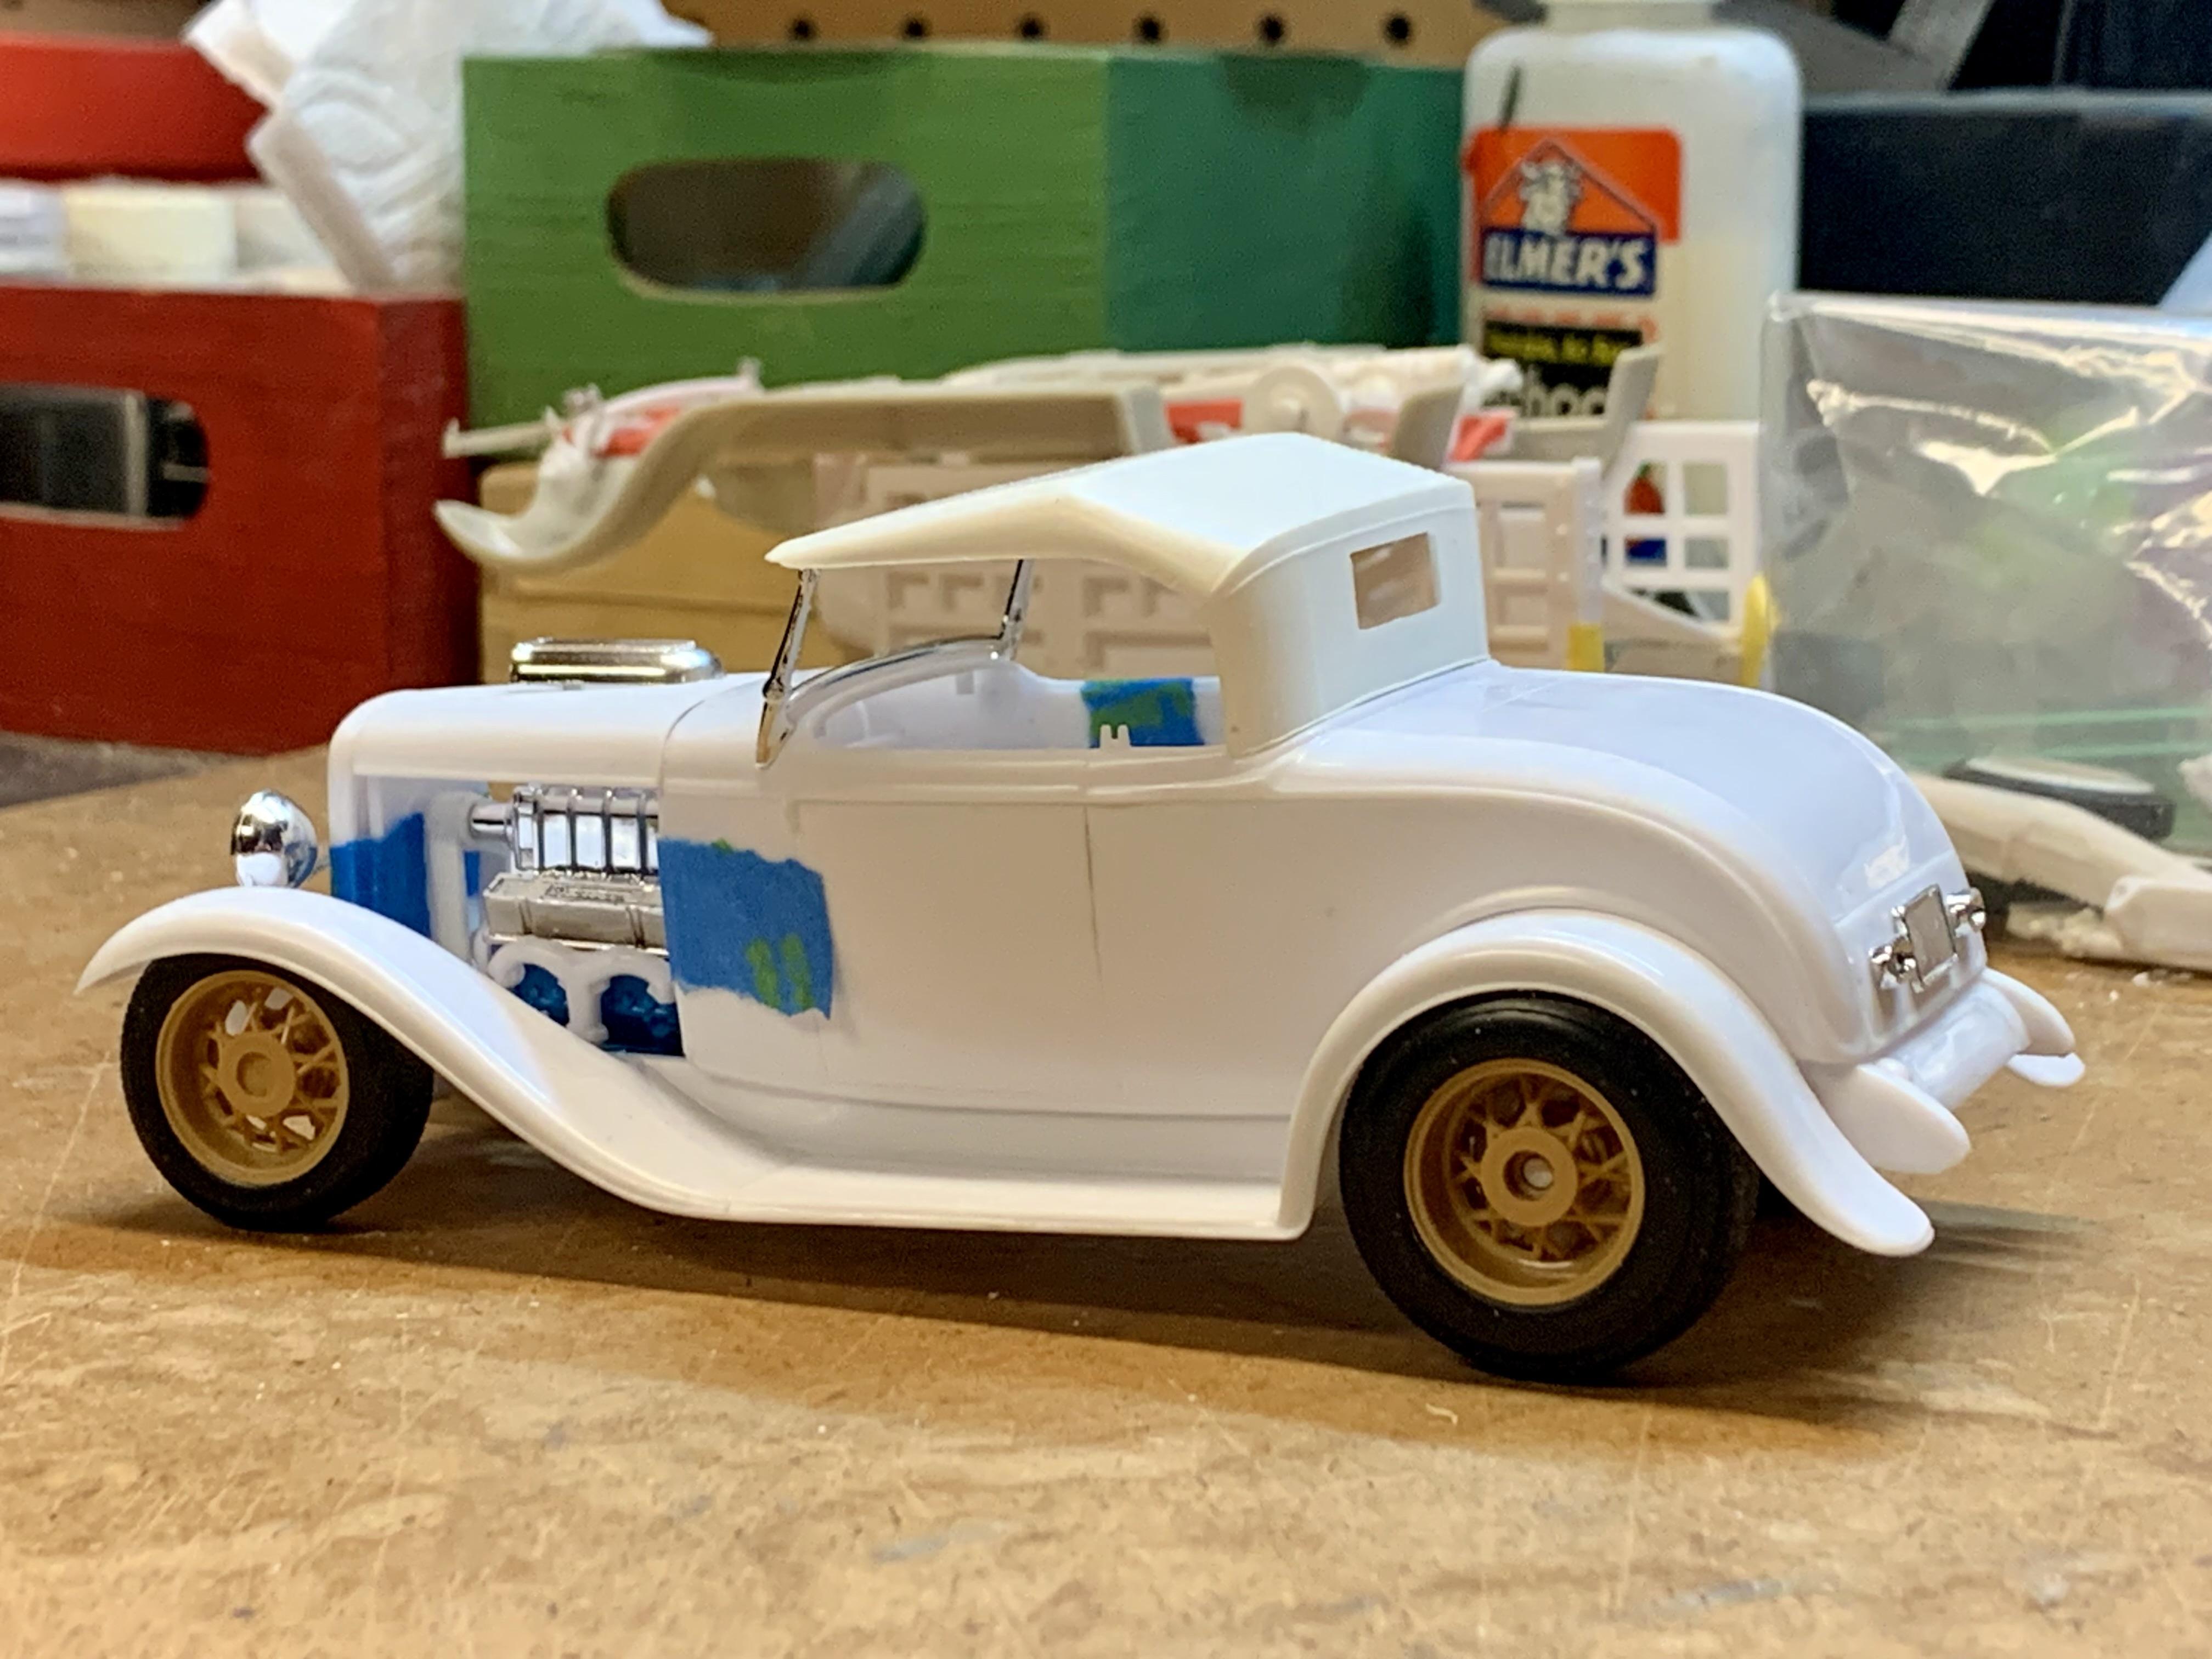
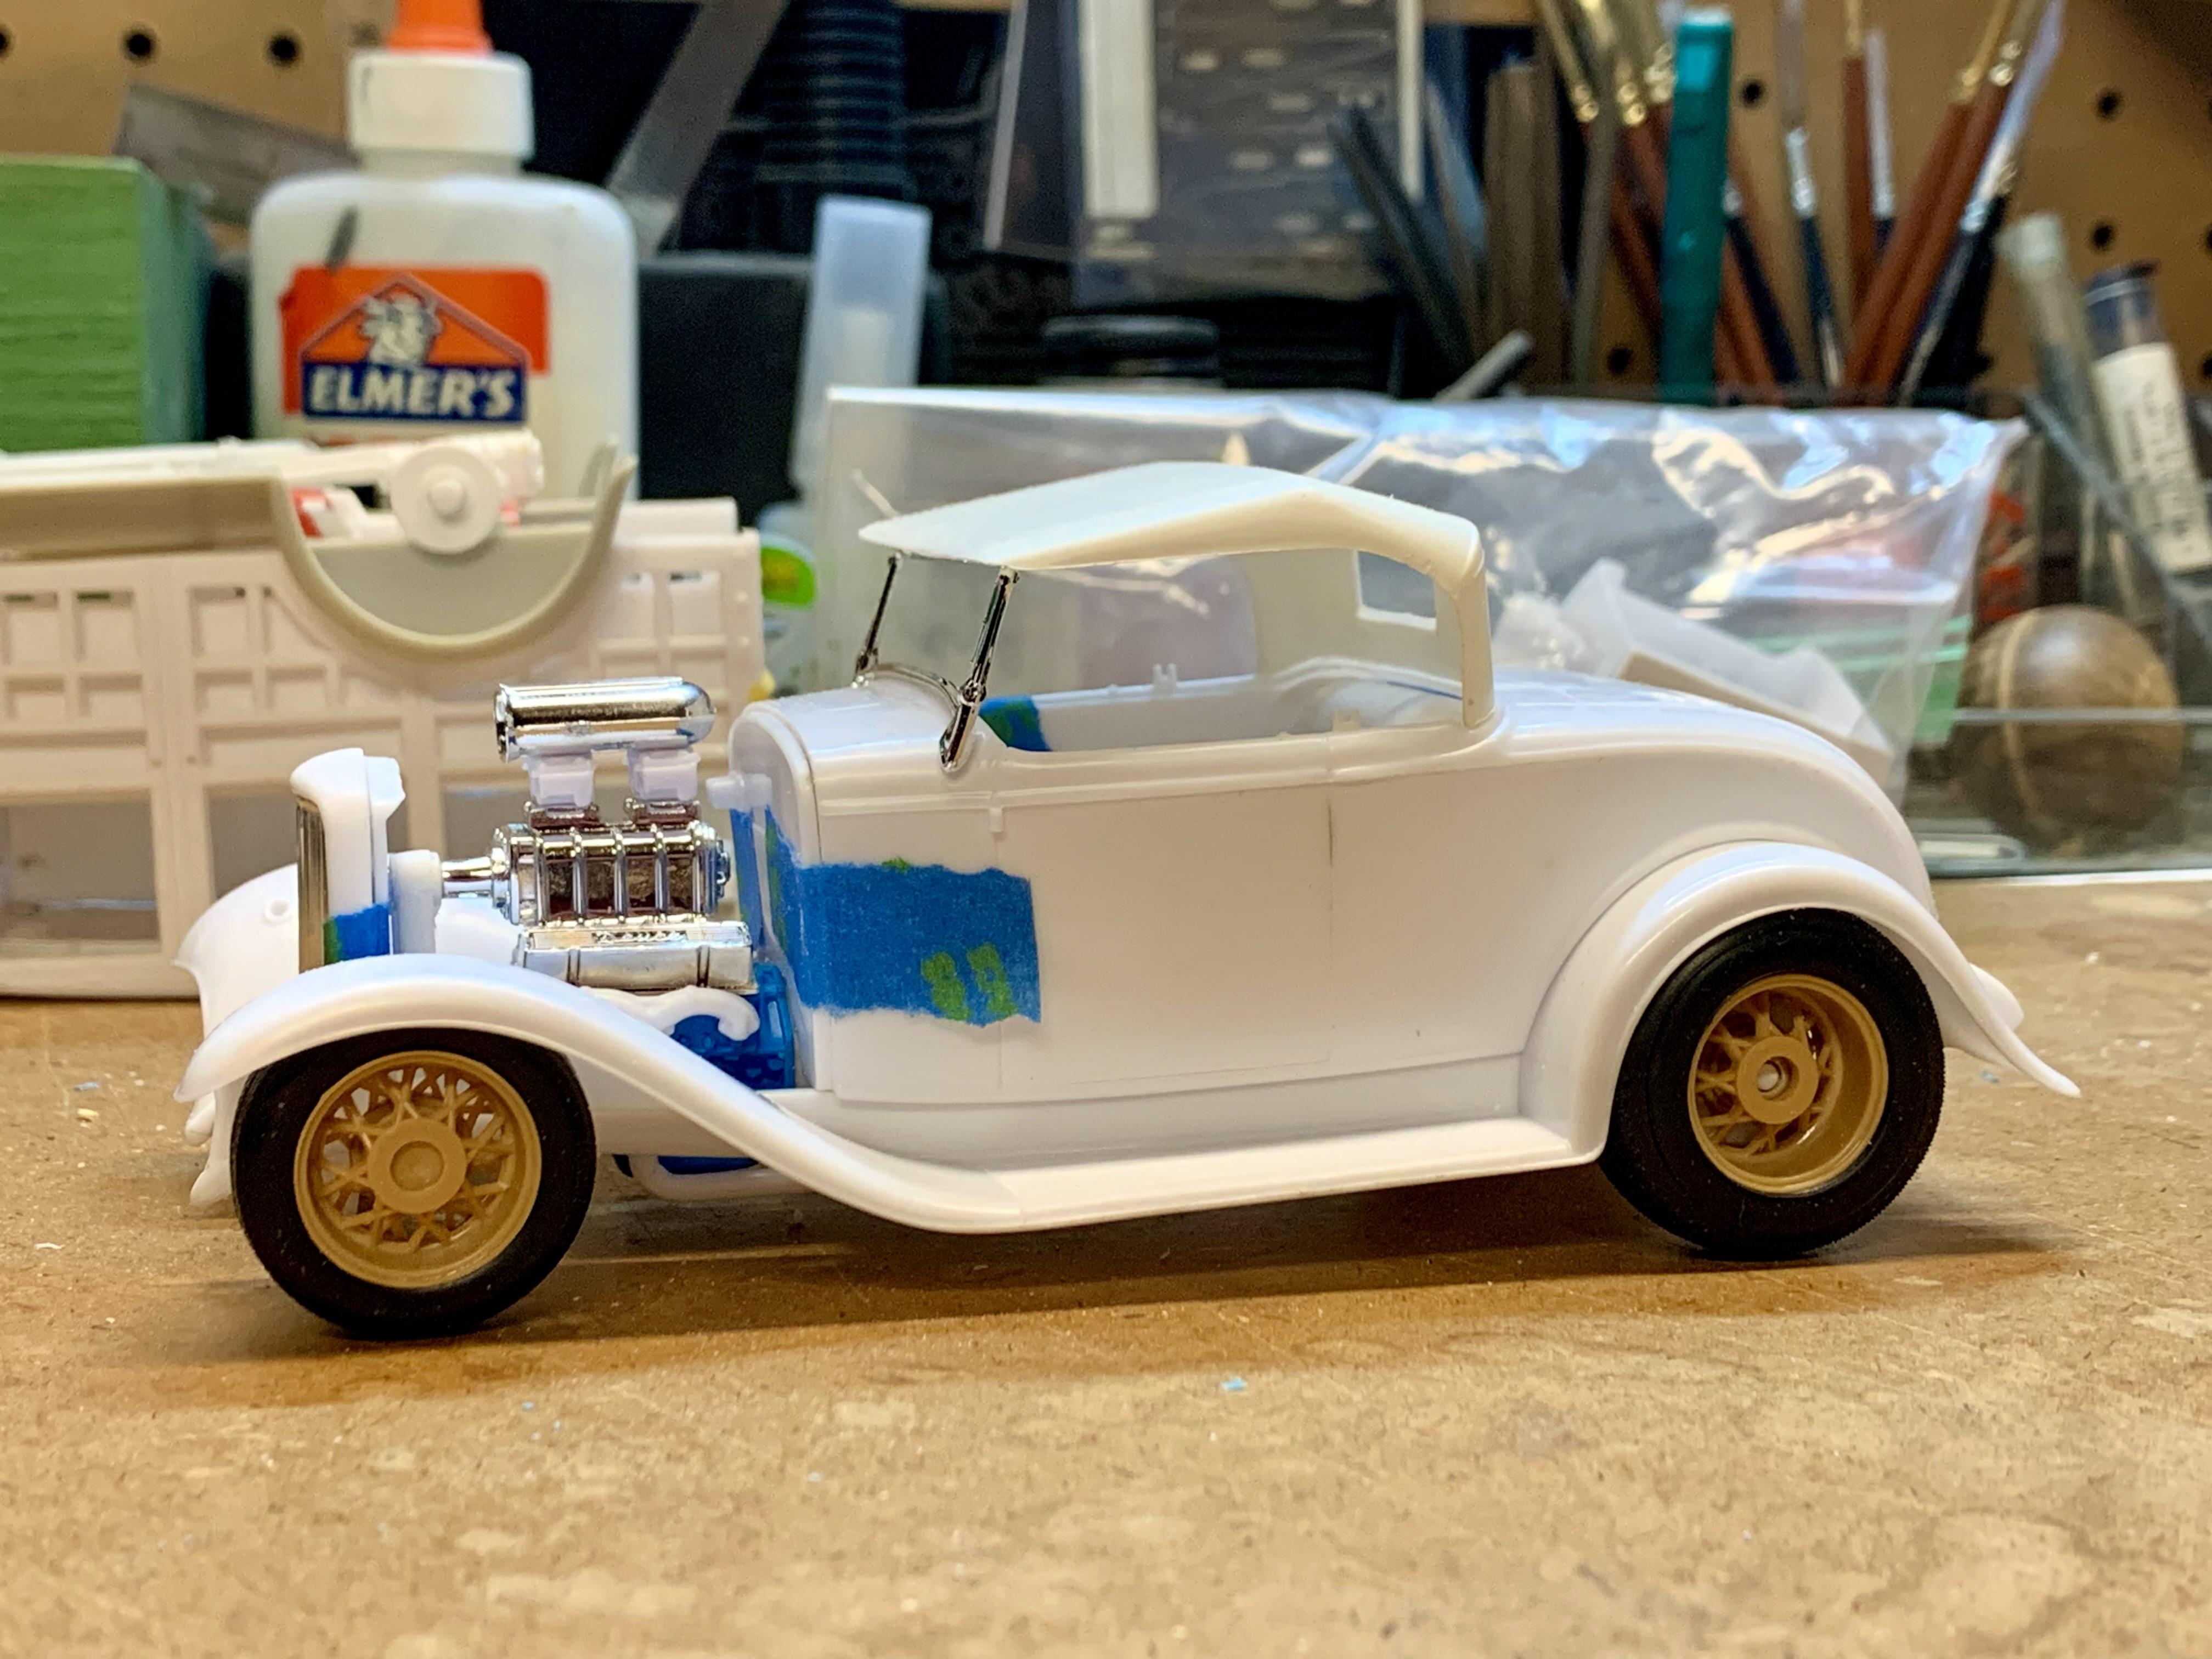
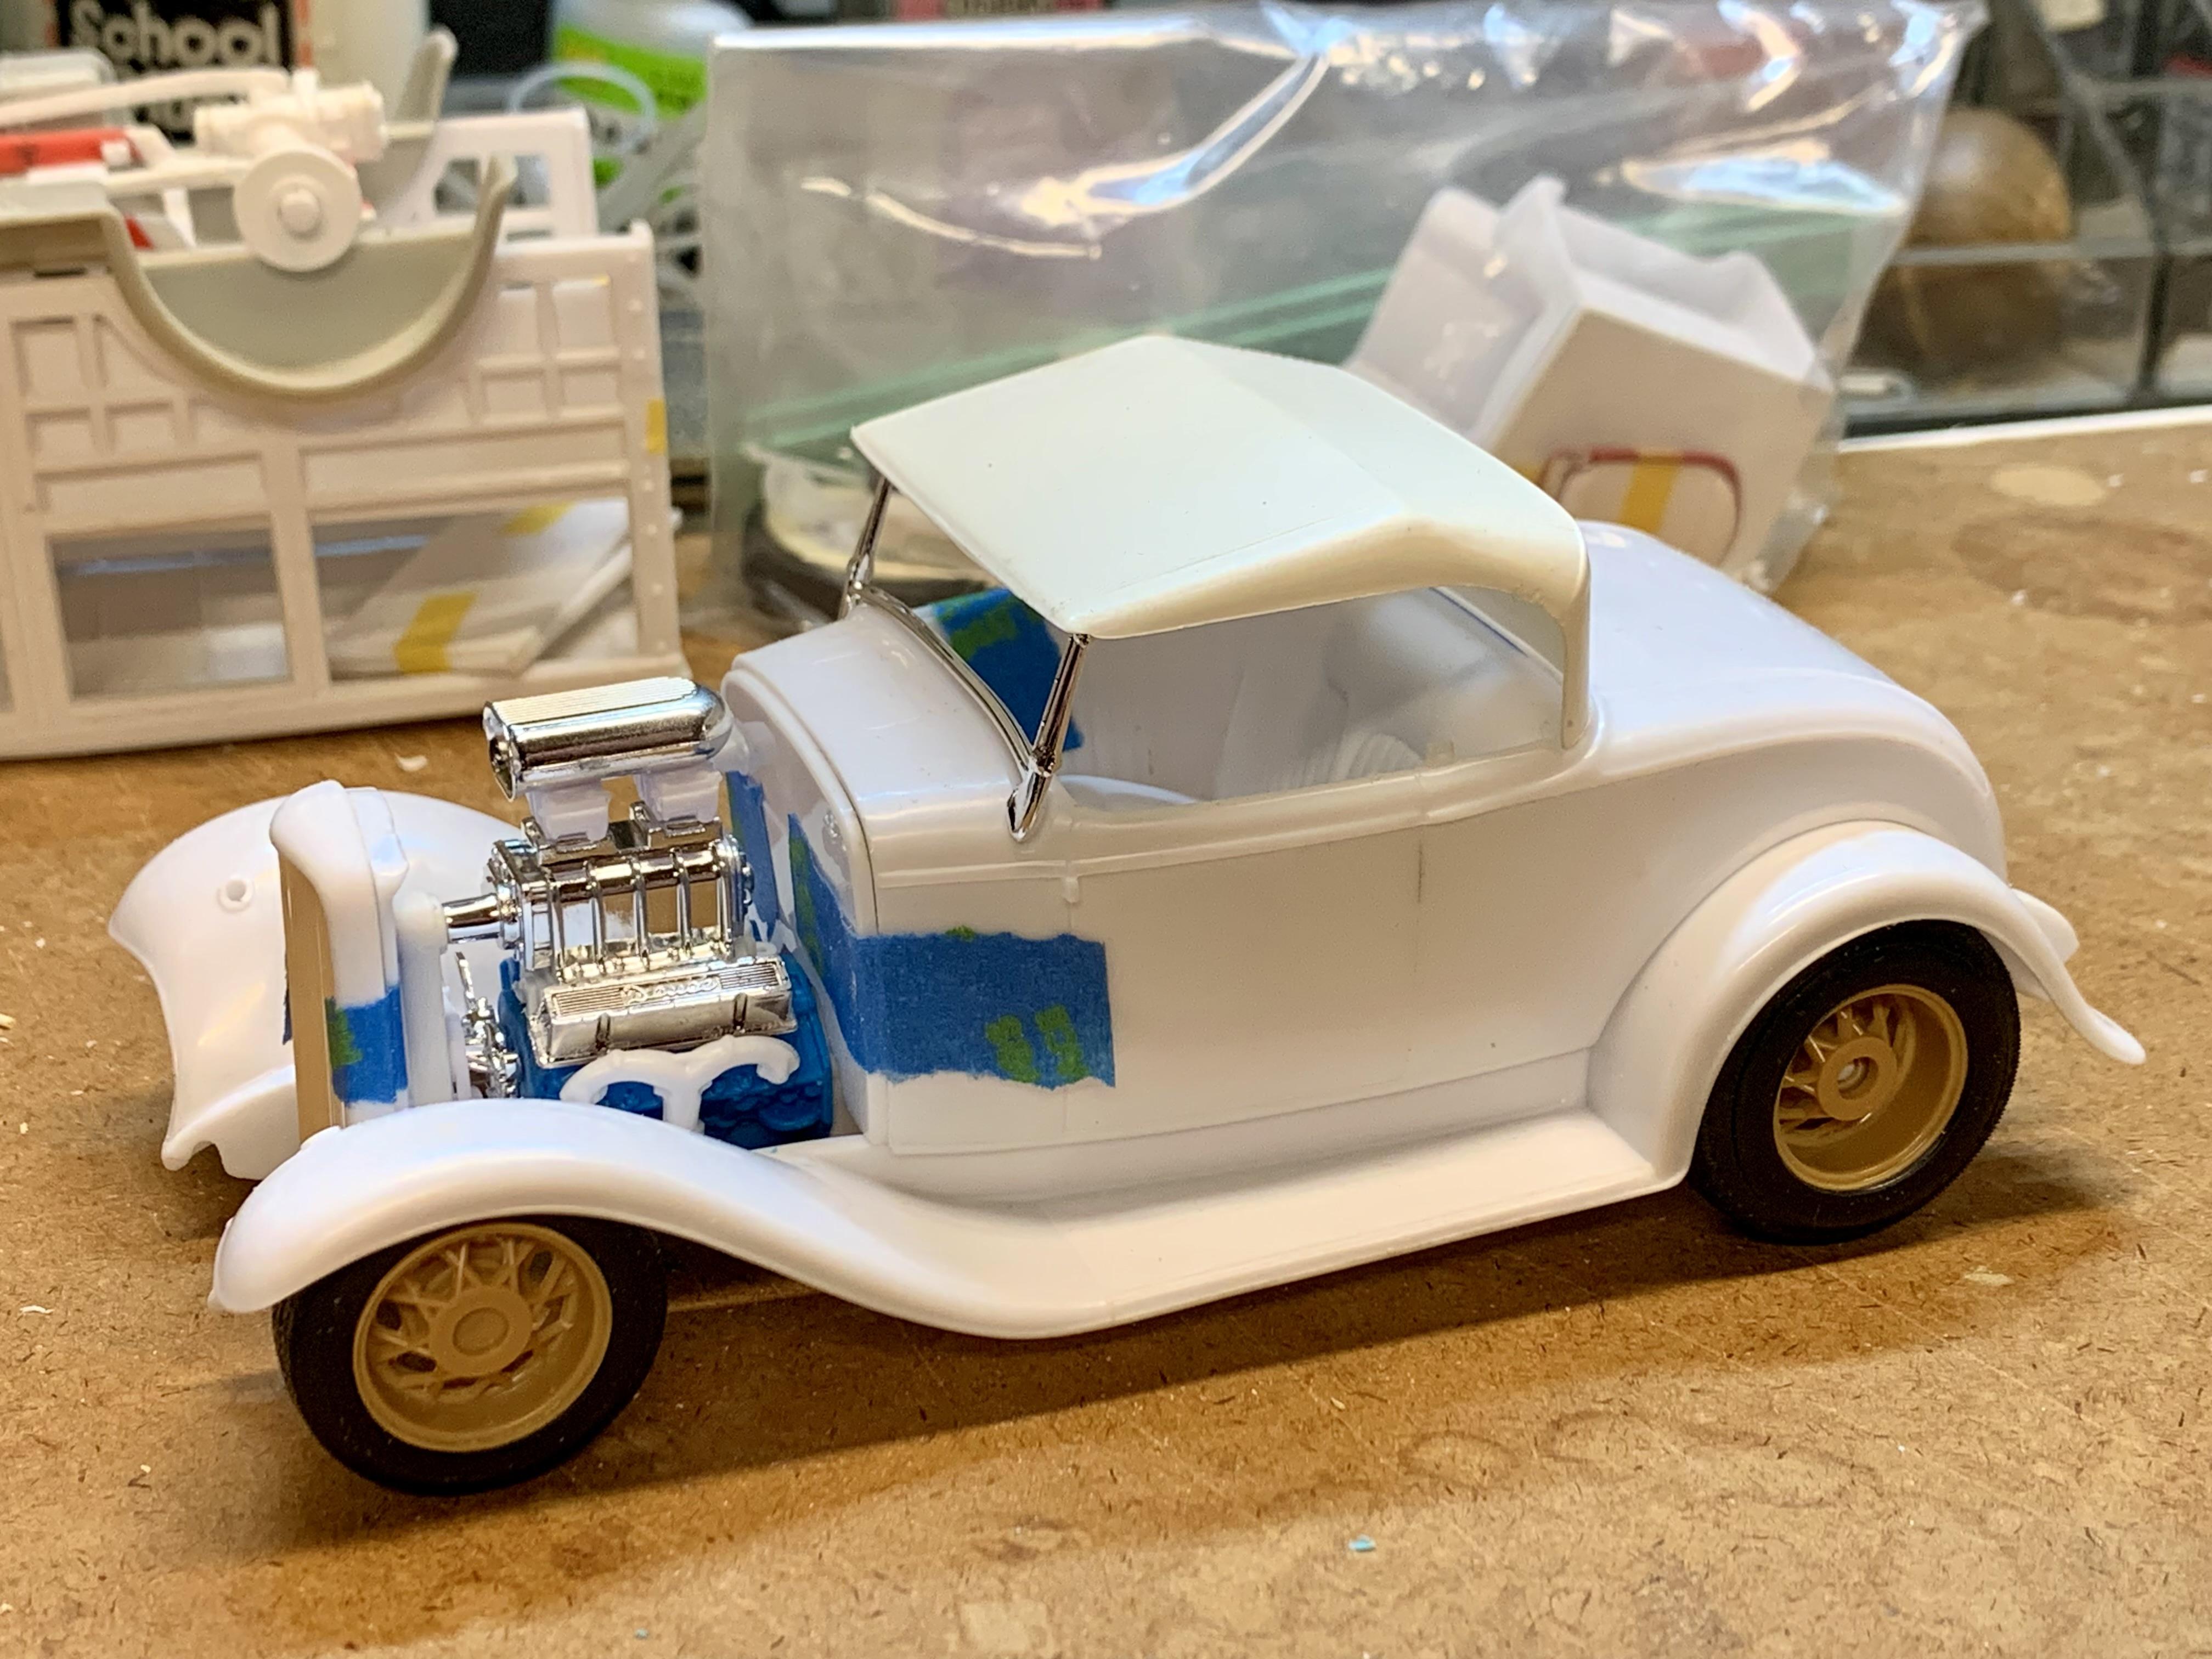
Only had a small sliver of time at the bench this weekend but I managed to handle most of the final details. The kit hood top was sanded smooth and then I cut a hole for the blower scoop to poke through. I was getting ready to adapt the dropped headlight bar from a Revell ‘32 Ford kit when I remembered there is one in the most recent issue of the Monogram / Revell ‘30 Woody and as luck would have it, it’s a good fit AND it doesn’t have fiddly separate headlights. Out back I drilled some holes in the back lower body panel to mount the license plate frame from a Revell ‘29 Roadster and the taillights from any of the Revell ‘32 Ford’s.
-
1971 Jeep Rod
Dennis Lacy replied to Chuck Most's topic in Model Trucks: Pickups, Vans, SUVs, Light Commercial
That’s so rad!!! -
A couple hot rod Jeep CJ-5s
Dennis Lacy replied to Chuck Most's topic in Model Trucks: Pickups, Vans, SUVs, Light Commercial
Totally bitchin! I especially like the rusty green one with the Rat Roaster wheels. -
Another T Hot Rod? Make it so!
-
Thanks for nice words, Craig. You know, you and your recent Monogram 1:24 hot rod builds are largely responsible for my desire to build this one. I loved this Roadster kit as a kid / teen. It’s proving quite difficult to draw the line on modifications and not going all-out as I typically do. The evolution of the engine is a perfect example. The slot wheels from the ‘29 Pickup are actually pretty nicely done if a person likes 70’s Ansen Sprints. Before I switched to the wires the idea was to paint them aluminum. Although they didn’t make the cut this time I’d like to put them on something. And, while I haven’t commented yet I’ve been keeping an eye on your T project!
-
It sure does! I’m going to run the top but it will be getting smoothed out with a hole in the middle.
-
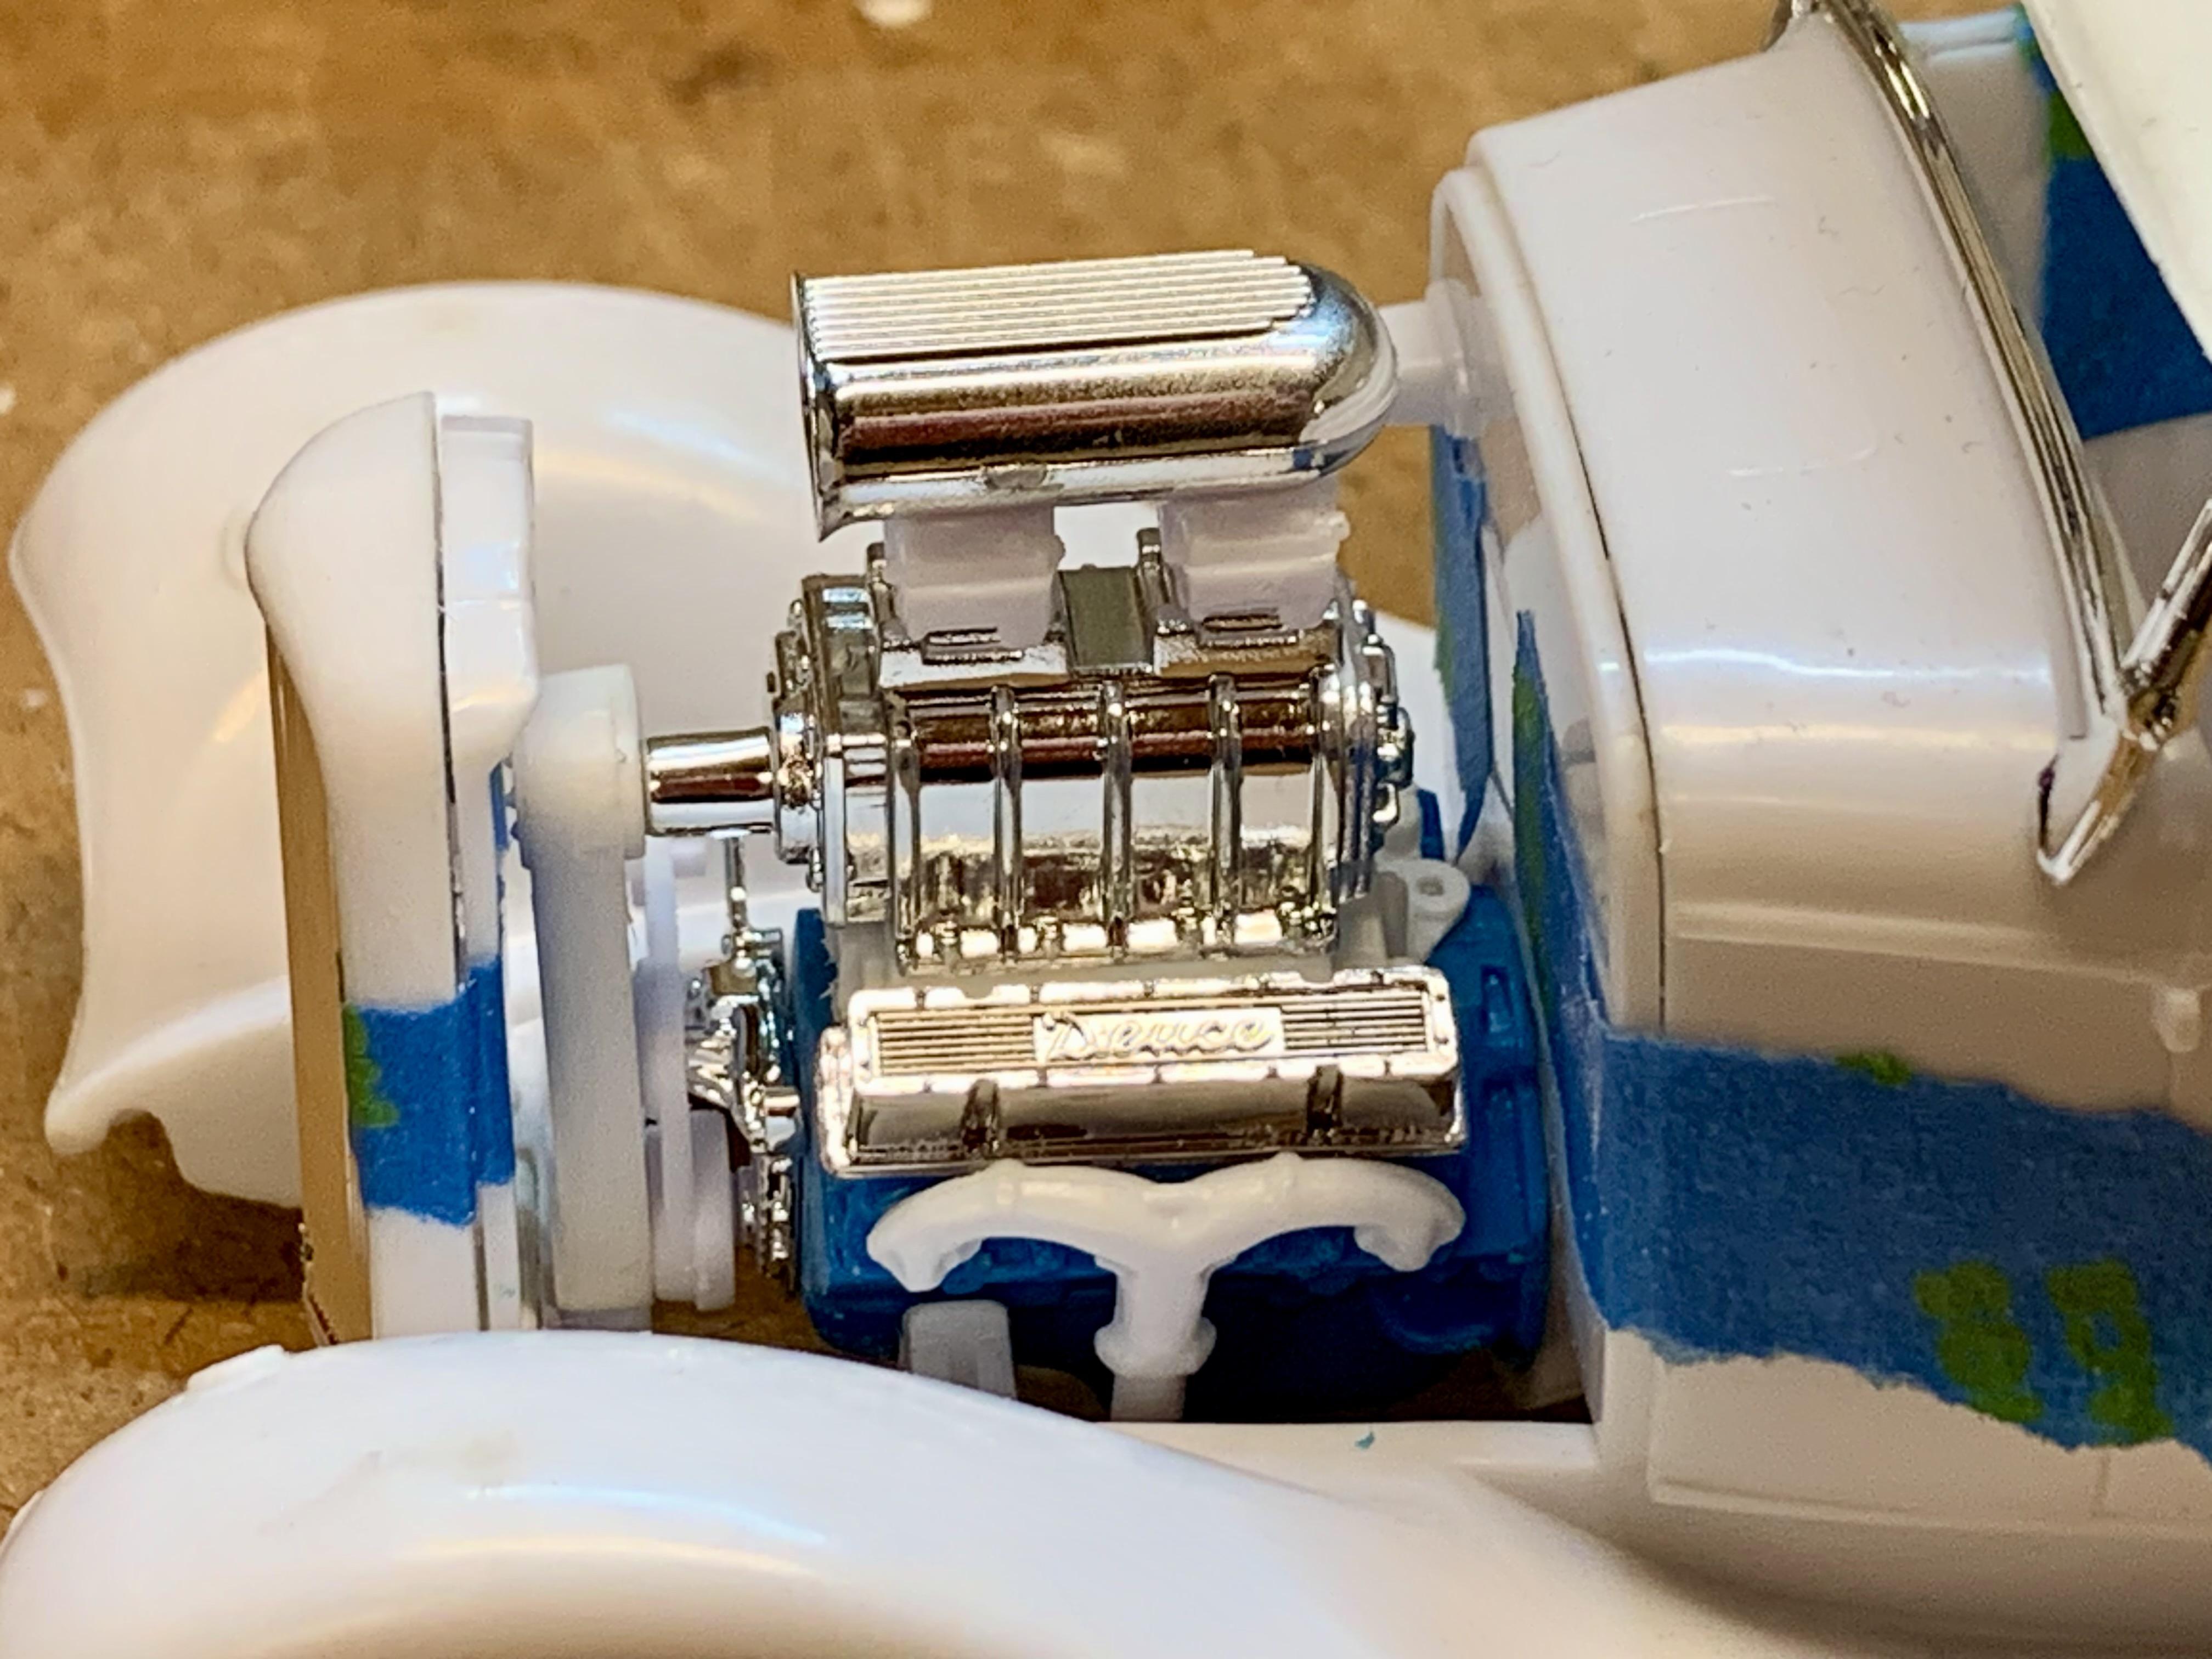
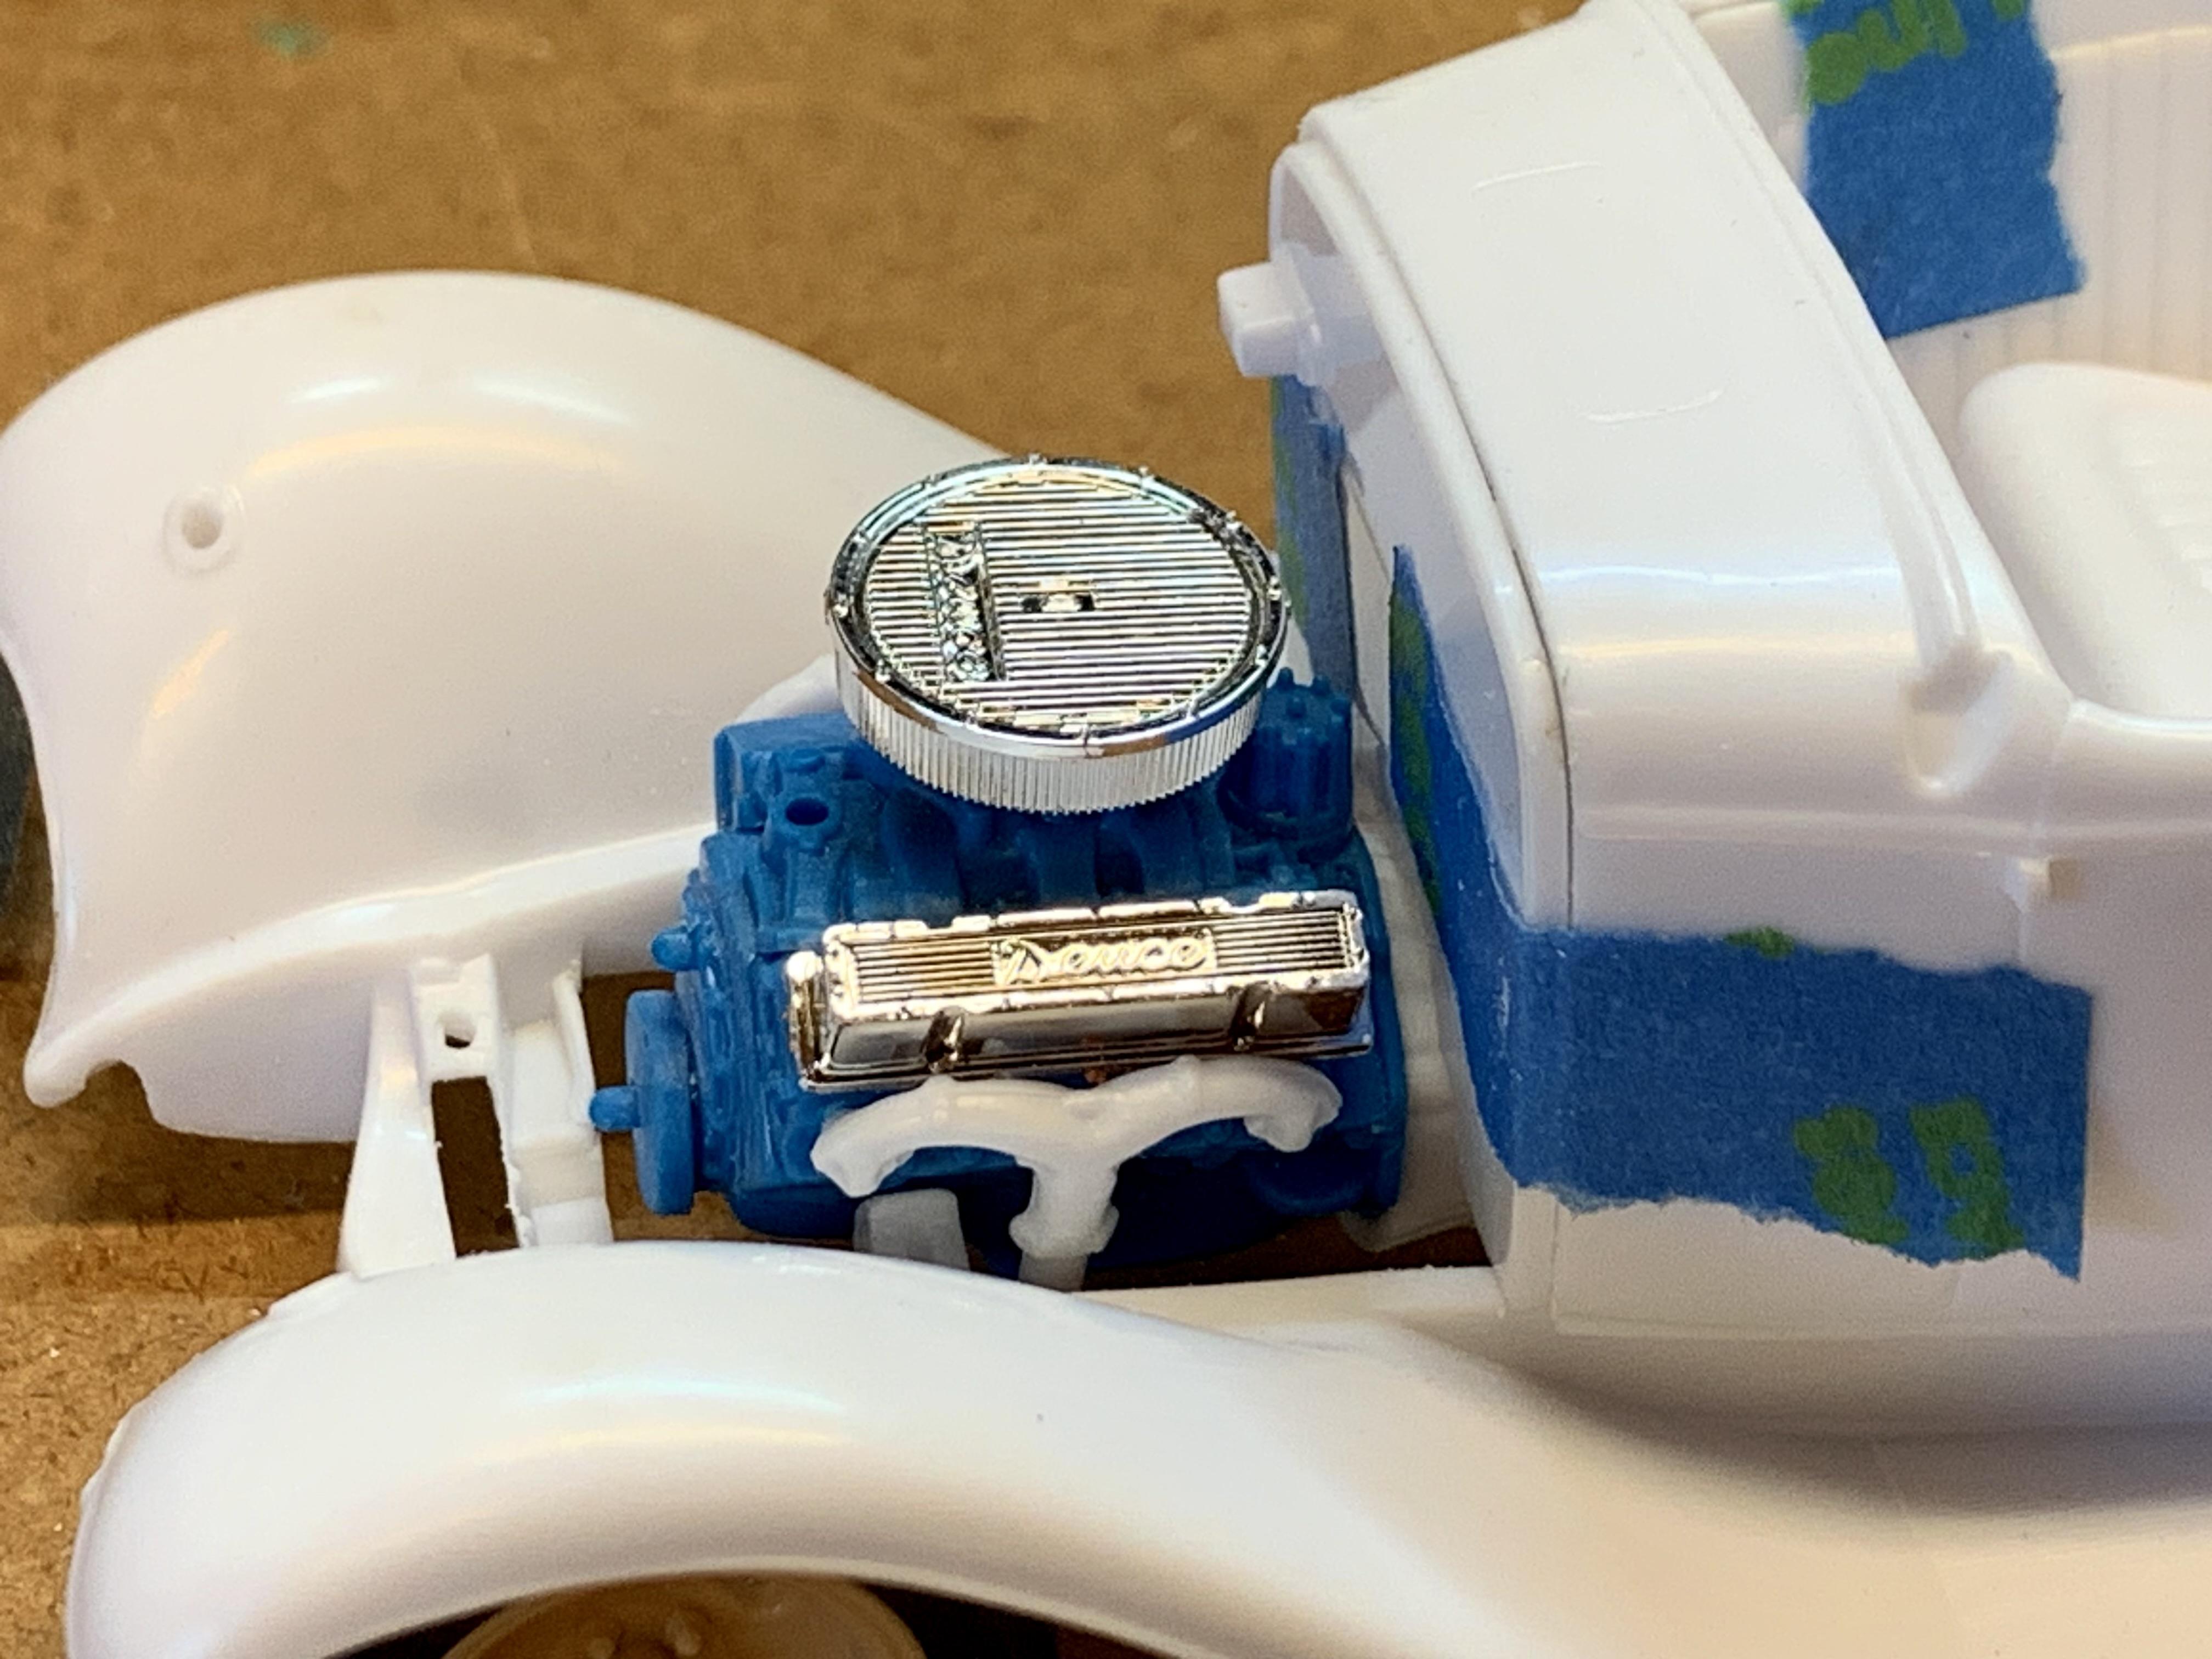
Found a little more bench time yesterday afternoon. I had left the Roadster mocked up and after sitting down I got to looking at it. I realized I wasn't totally feeling the engine setup. Part of it was that the 1:24 engine bay still looked a bit empty and after some trial and error I found a way to fill it up! I carved 1/16” off the back of the trans to move the engine back the same amount. I also carved the molded in timing cover / crank balancer off. To the engine I added the complete supercharger assembly, timing cover and belt drives from Revell’s ‘29 Roadster. I’m also back to the “Deuce” valve covers. Totally ridiculous with the fragile early driveline but it looks cool. So that’s it, final answer!
-
Hmm, I’ll have to give that some thought. I do plan on hood sides which have hot rod louvers like the tops. Smooth as well?
-
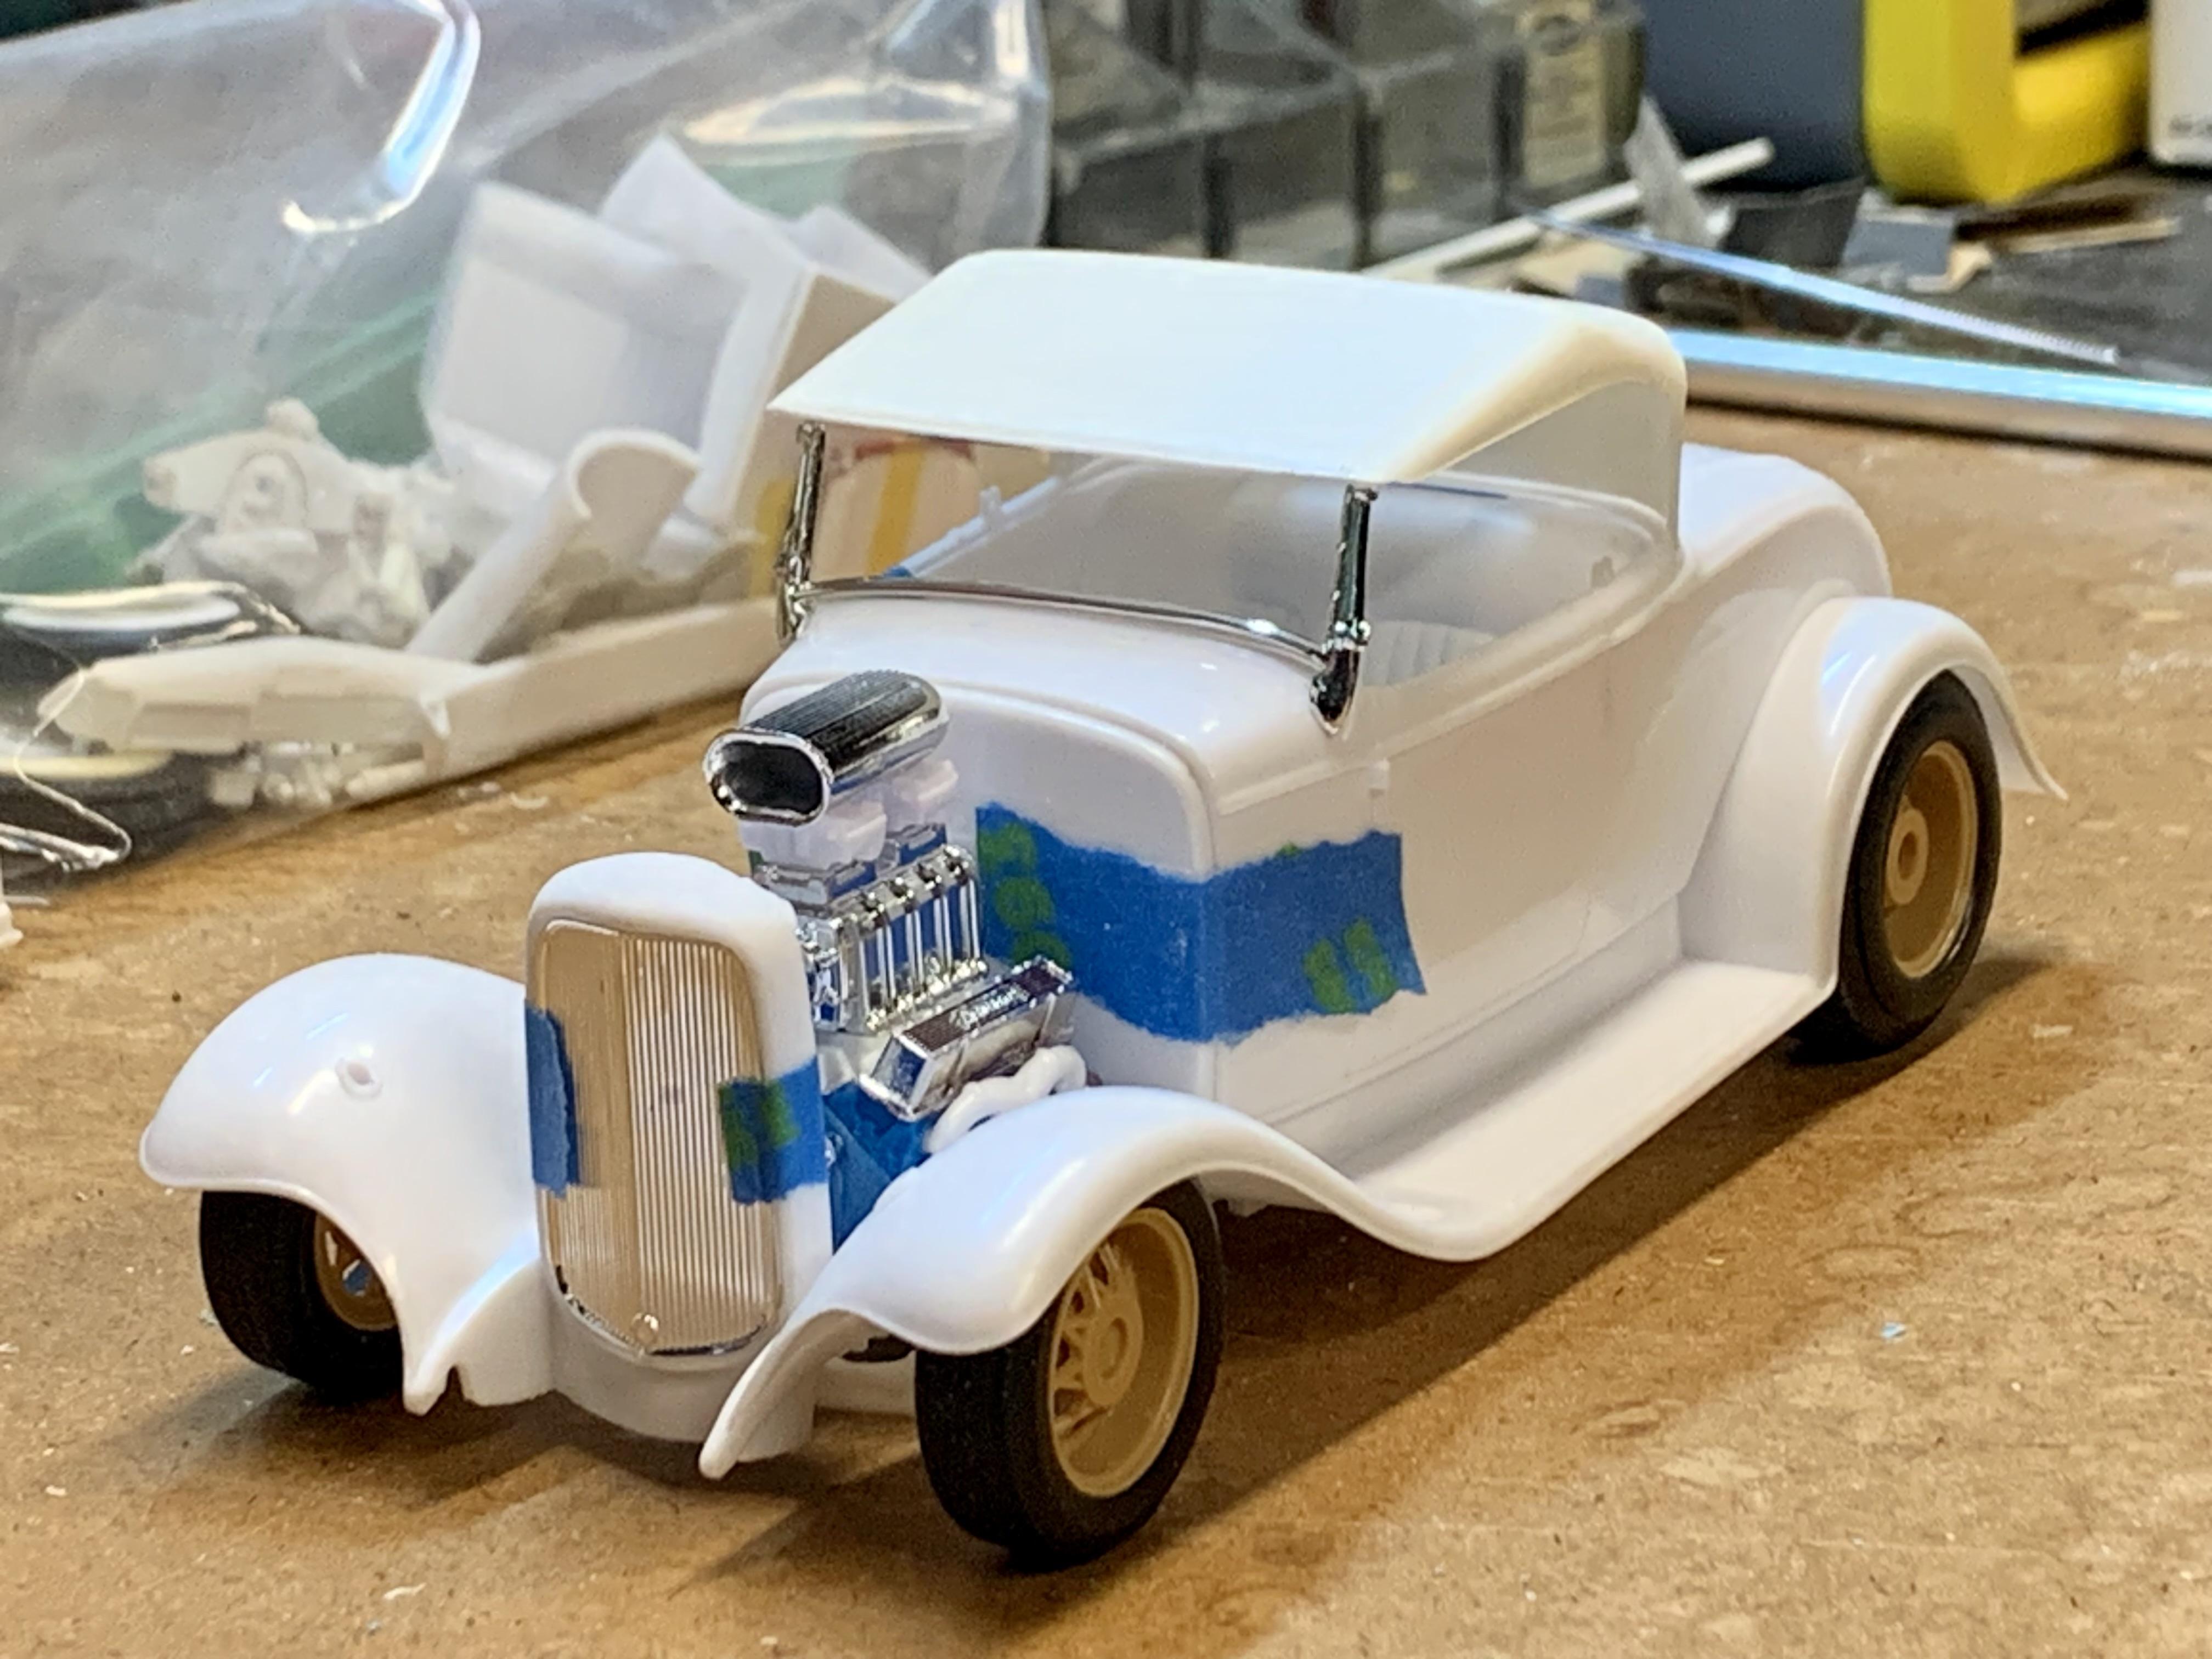
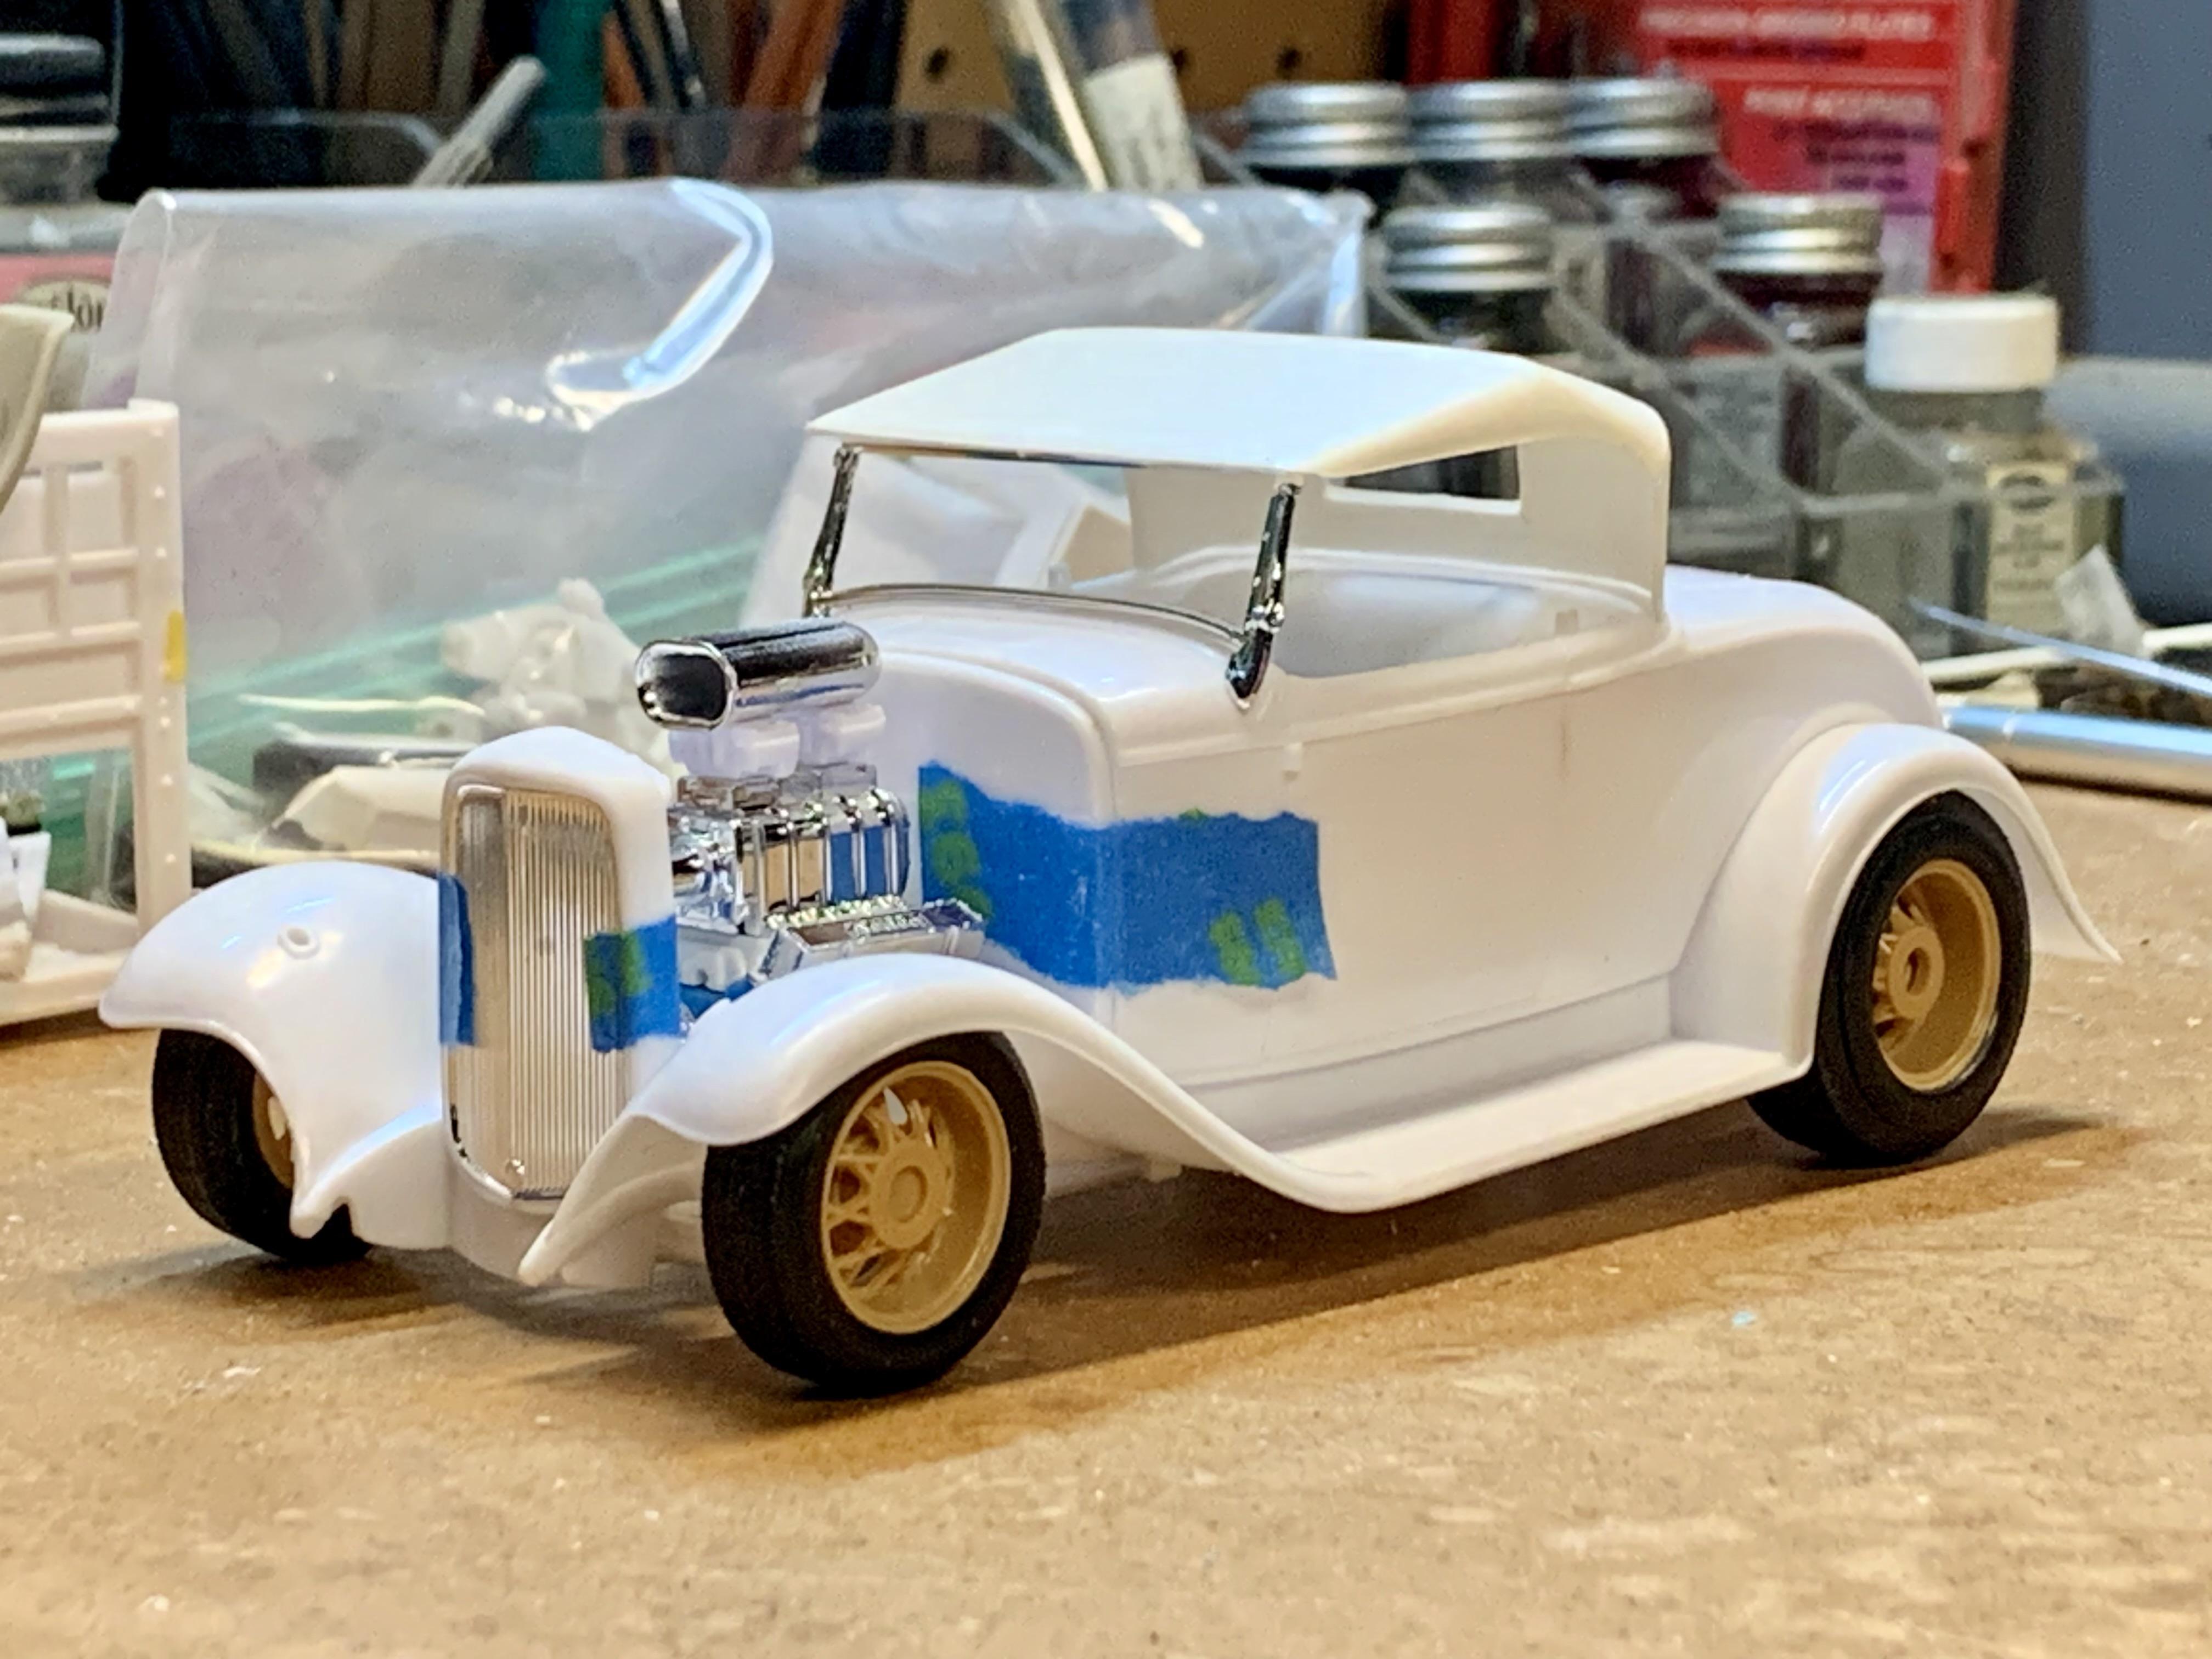
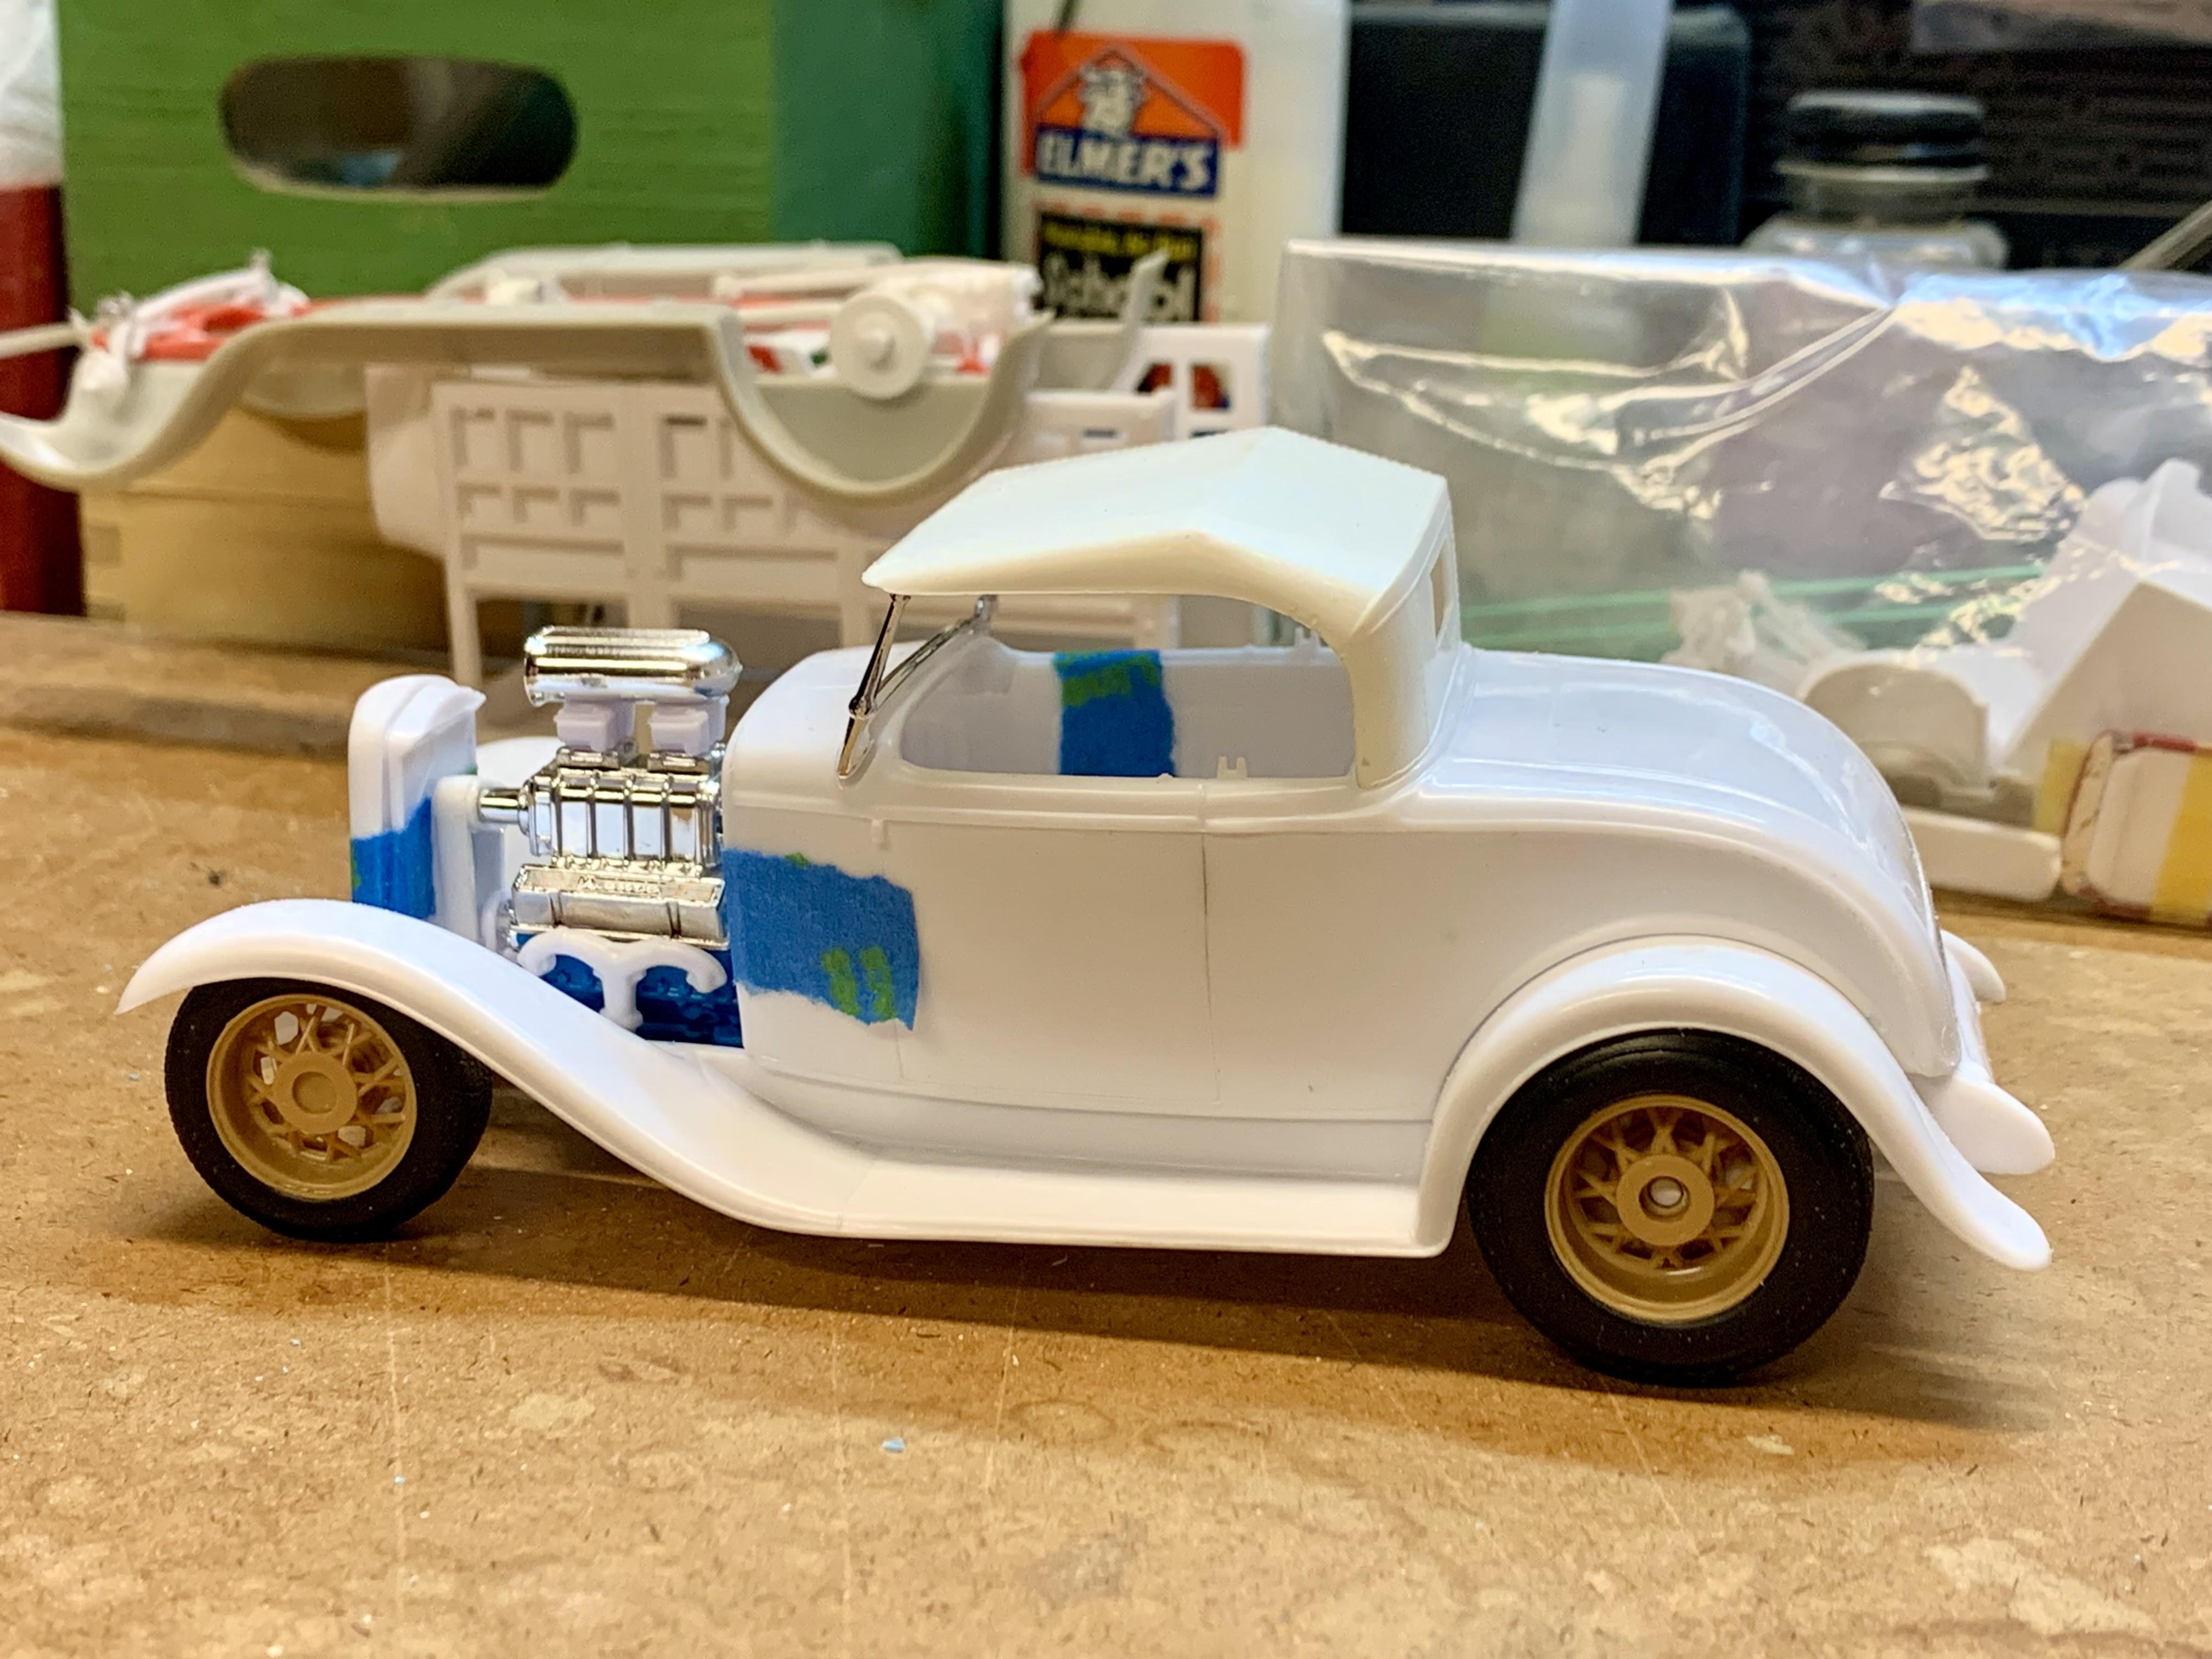
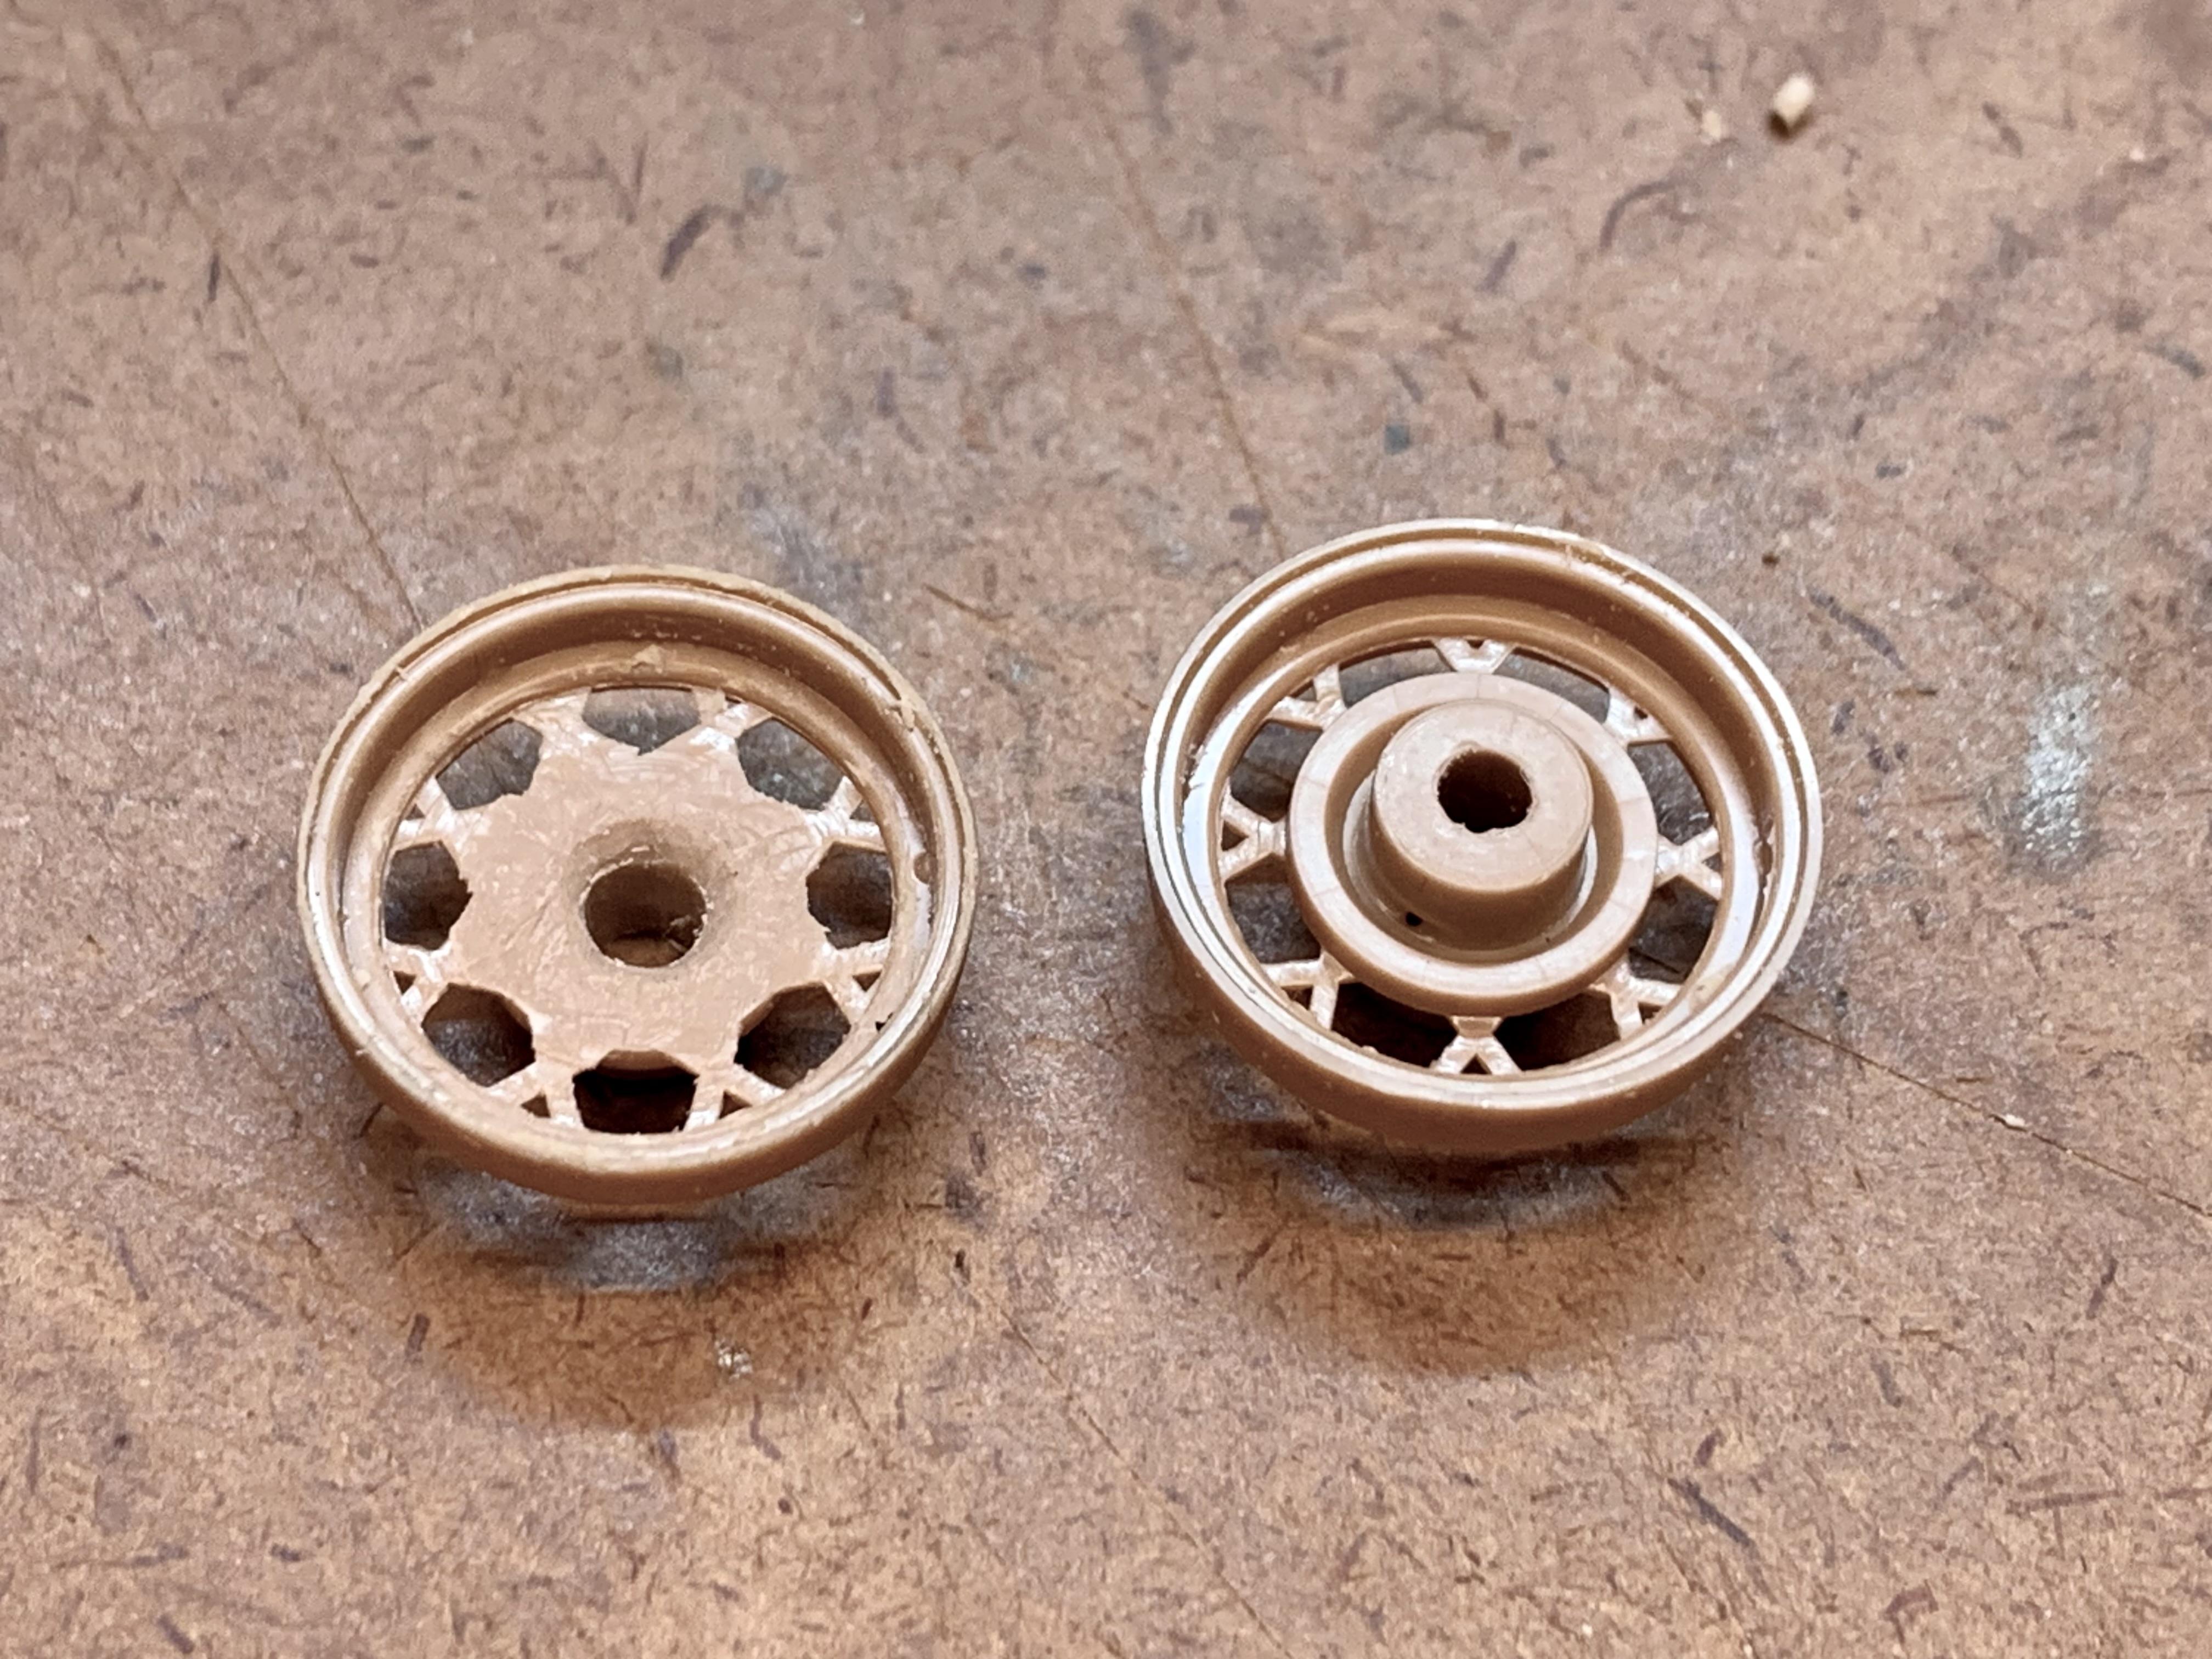
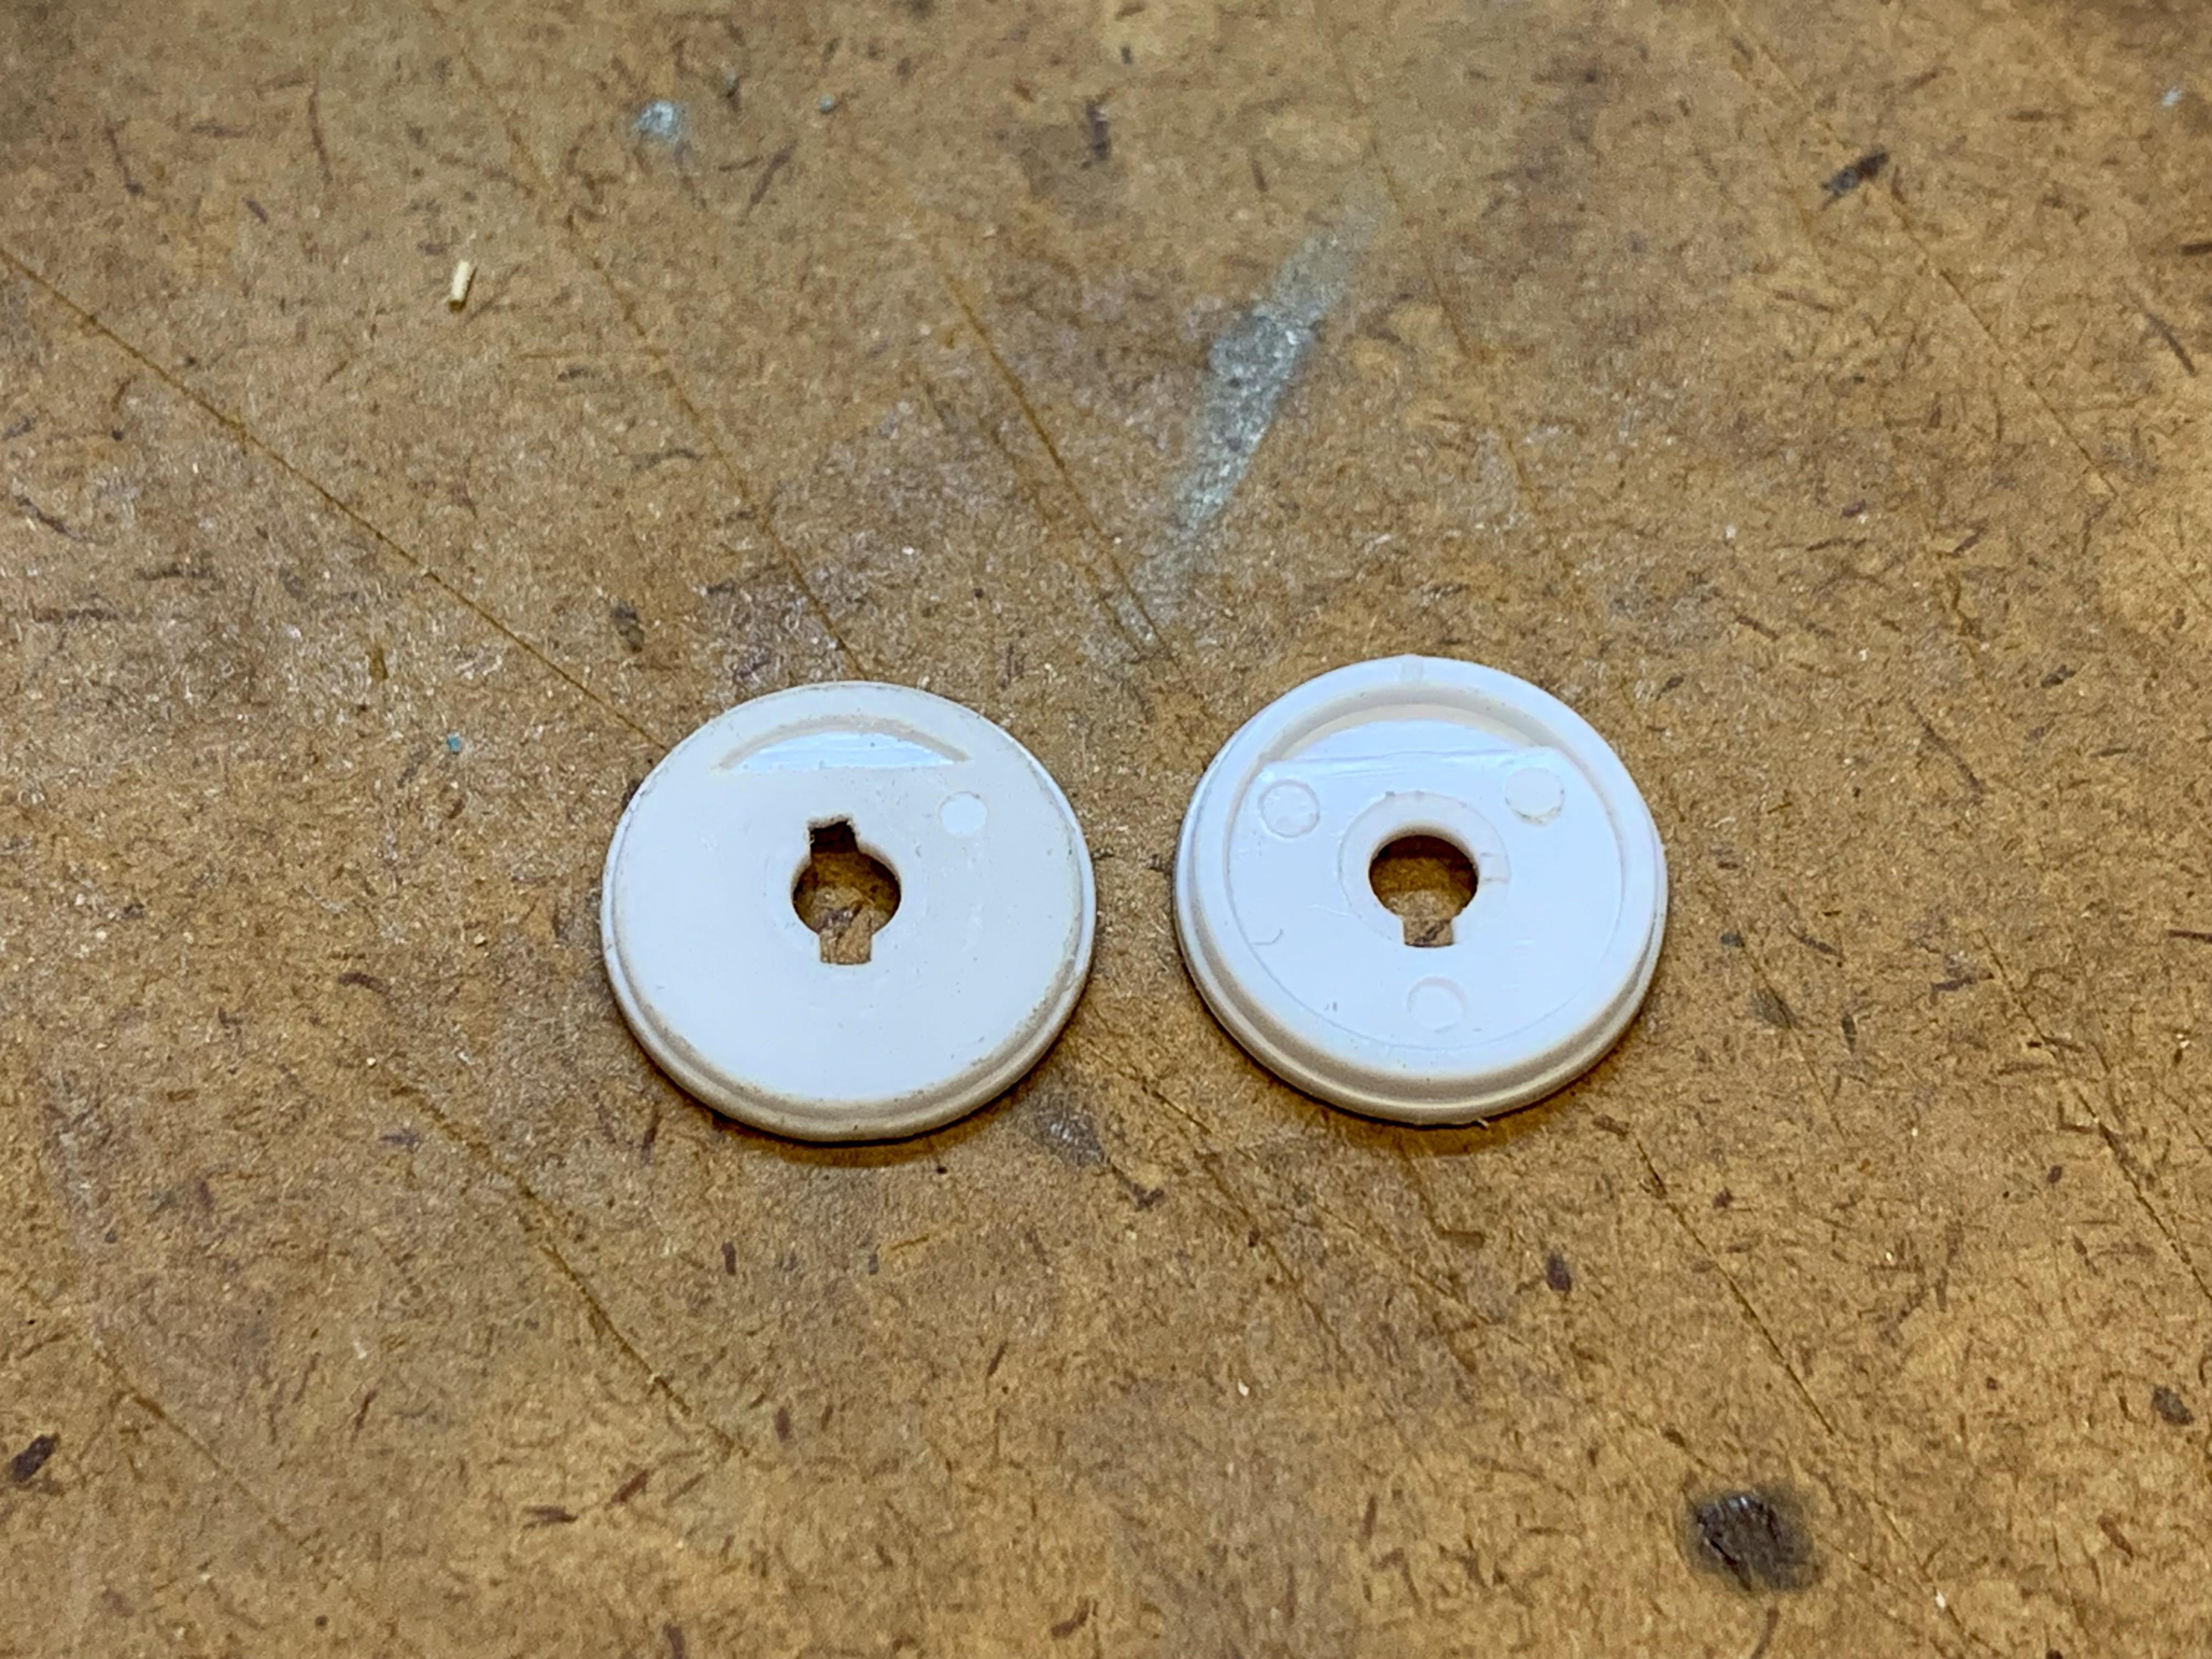
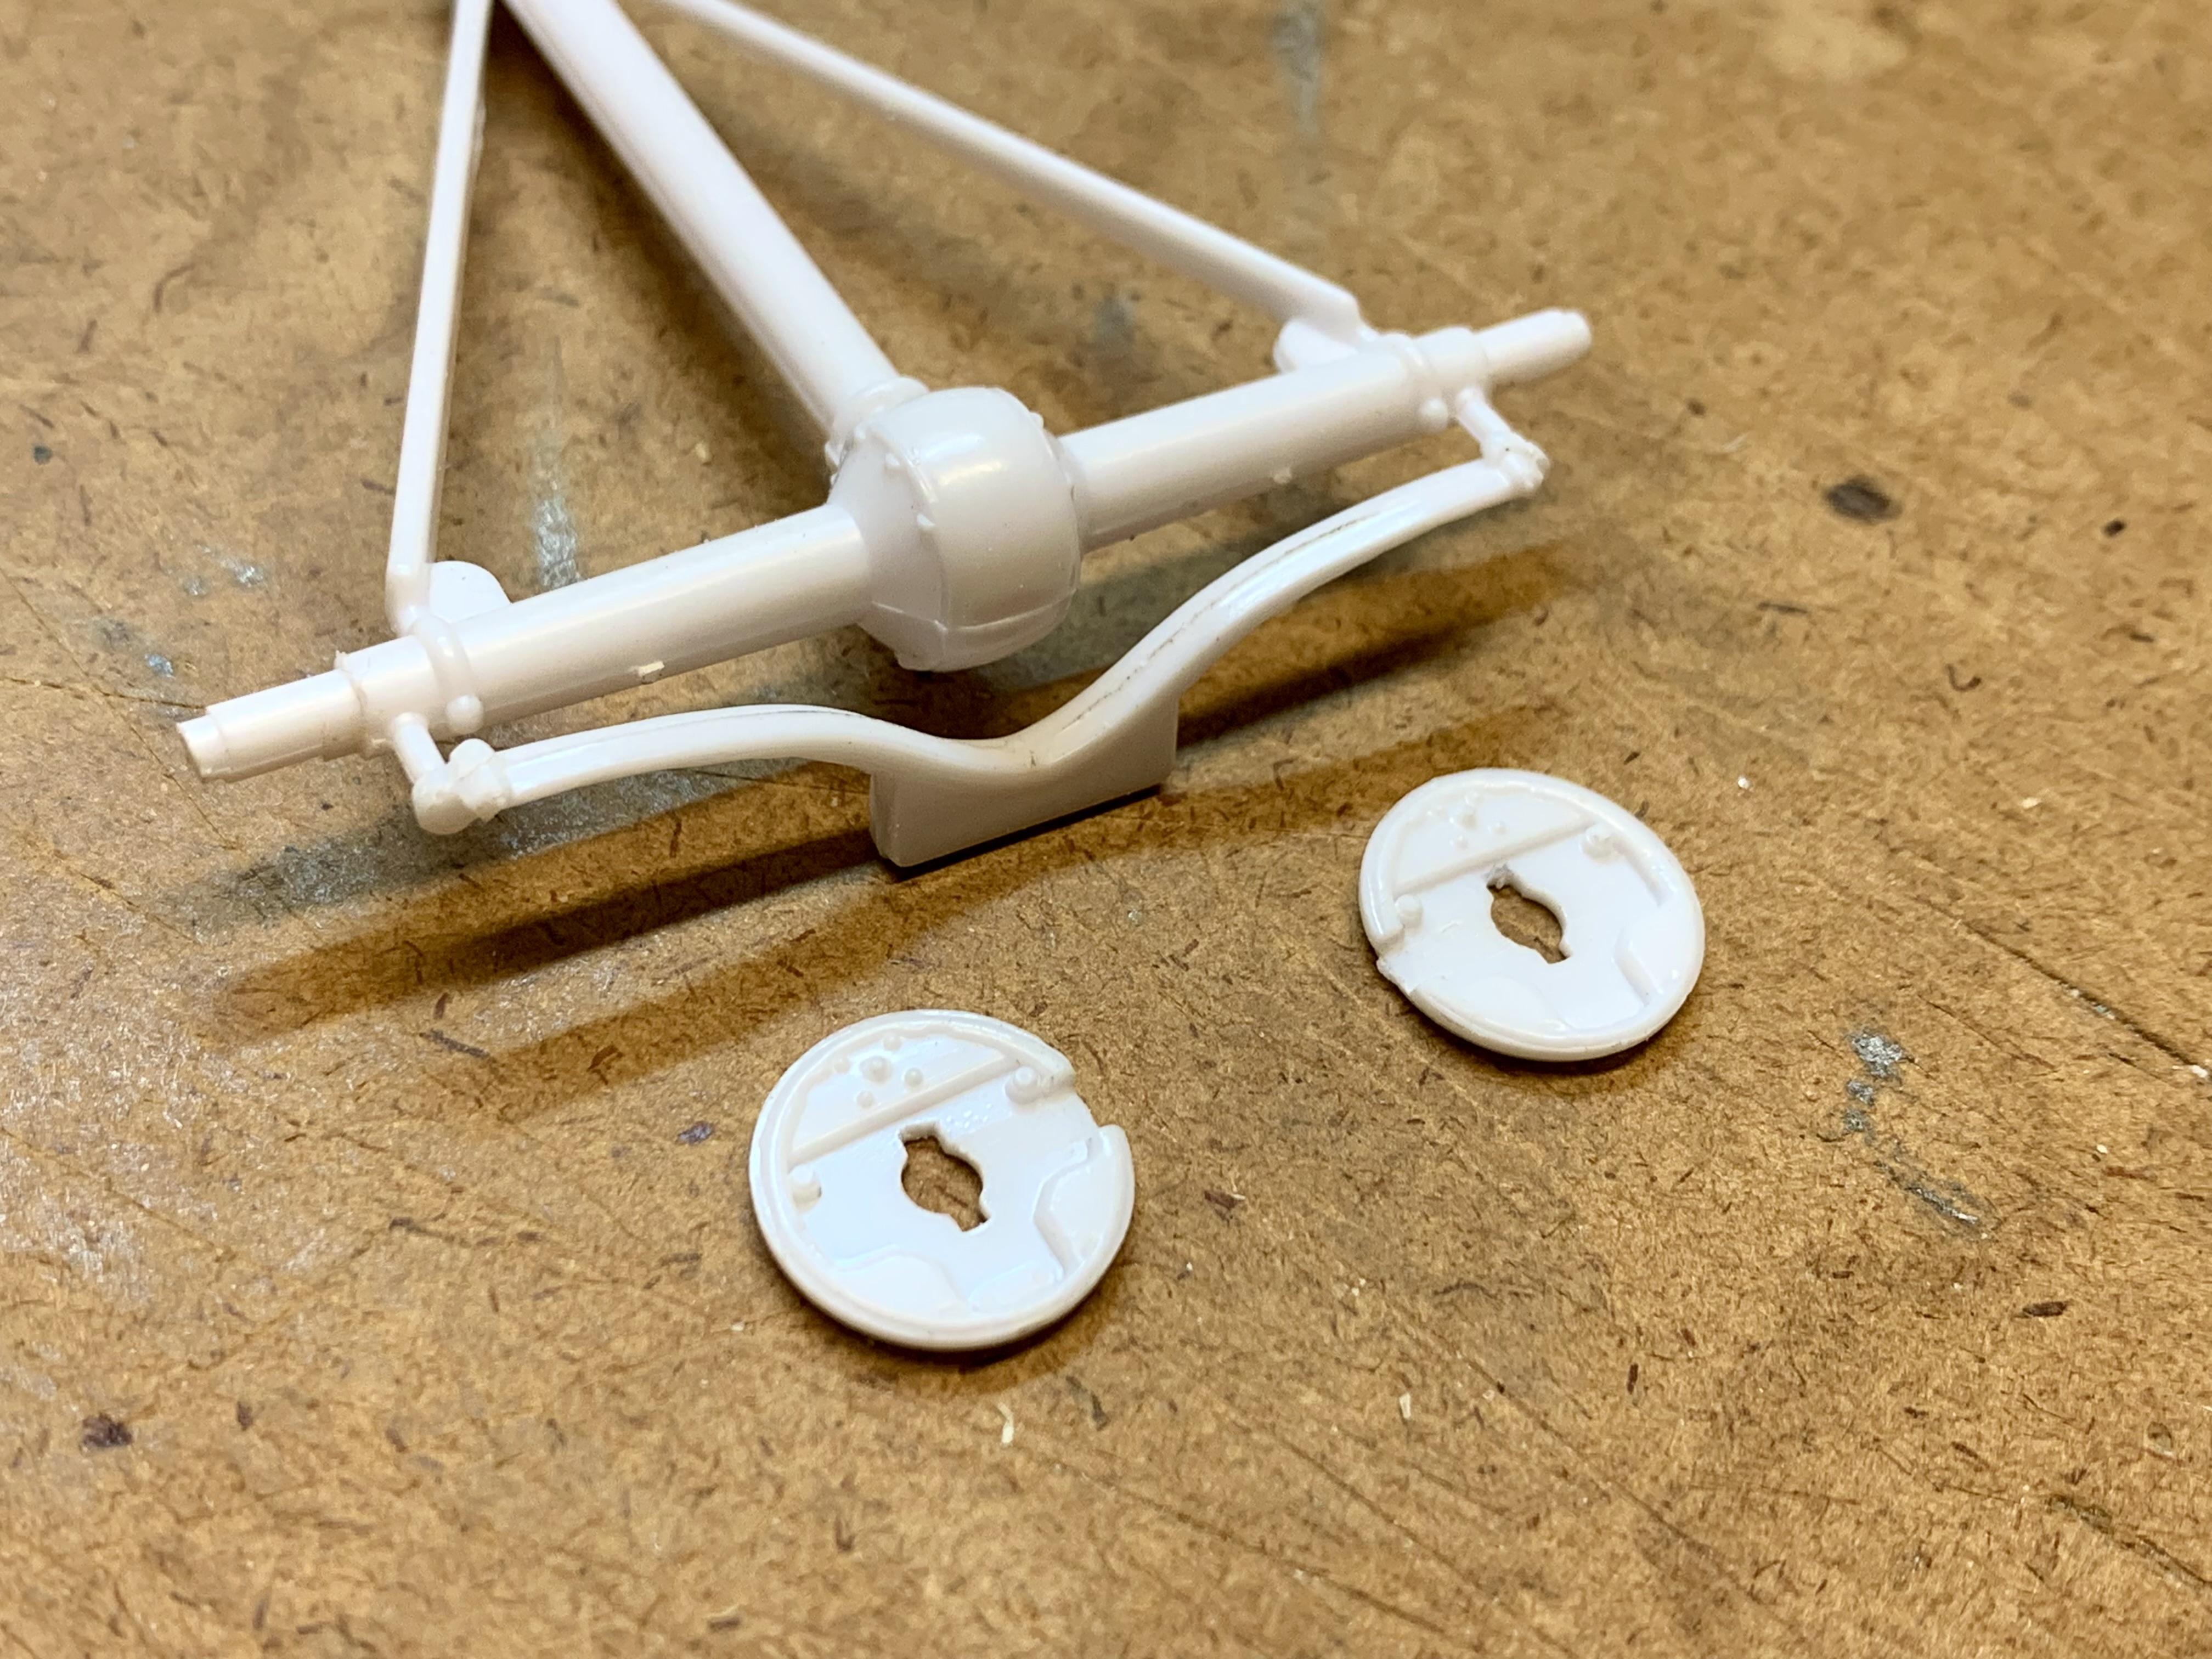
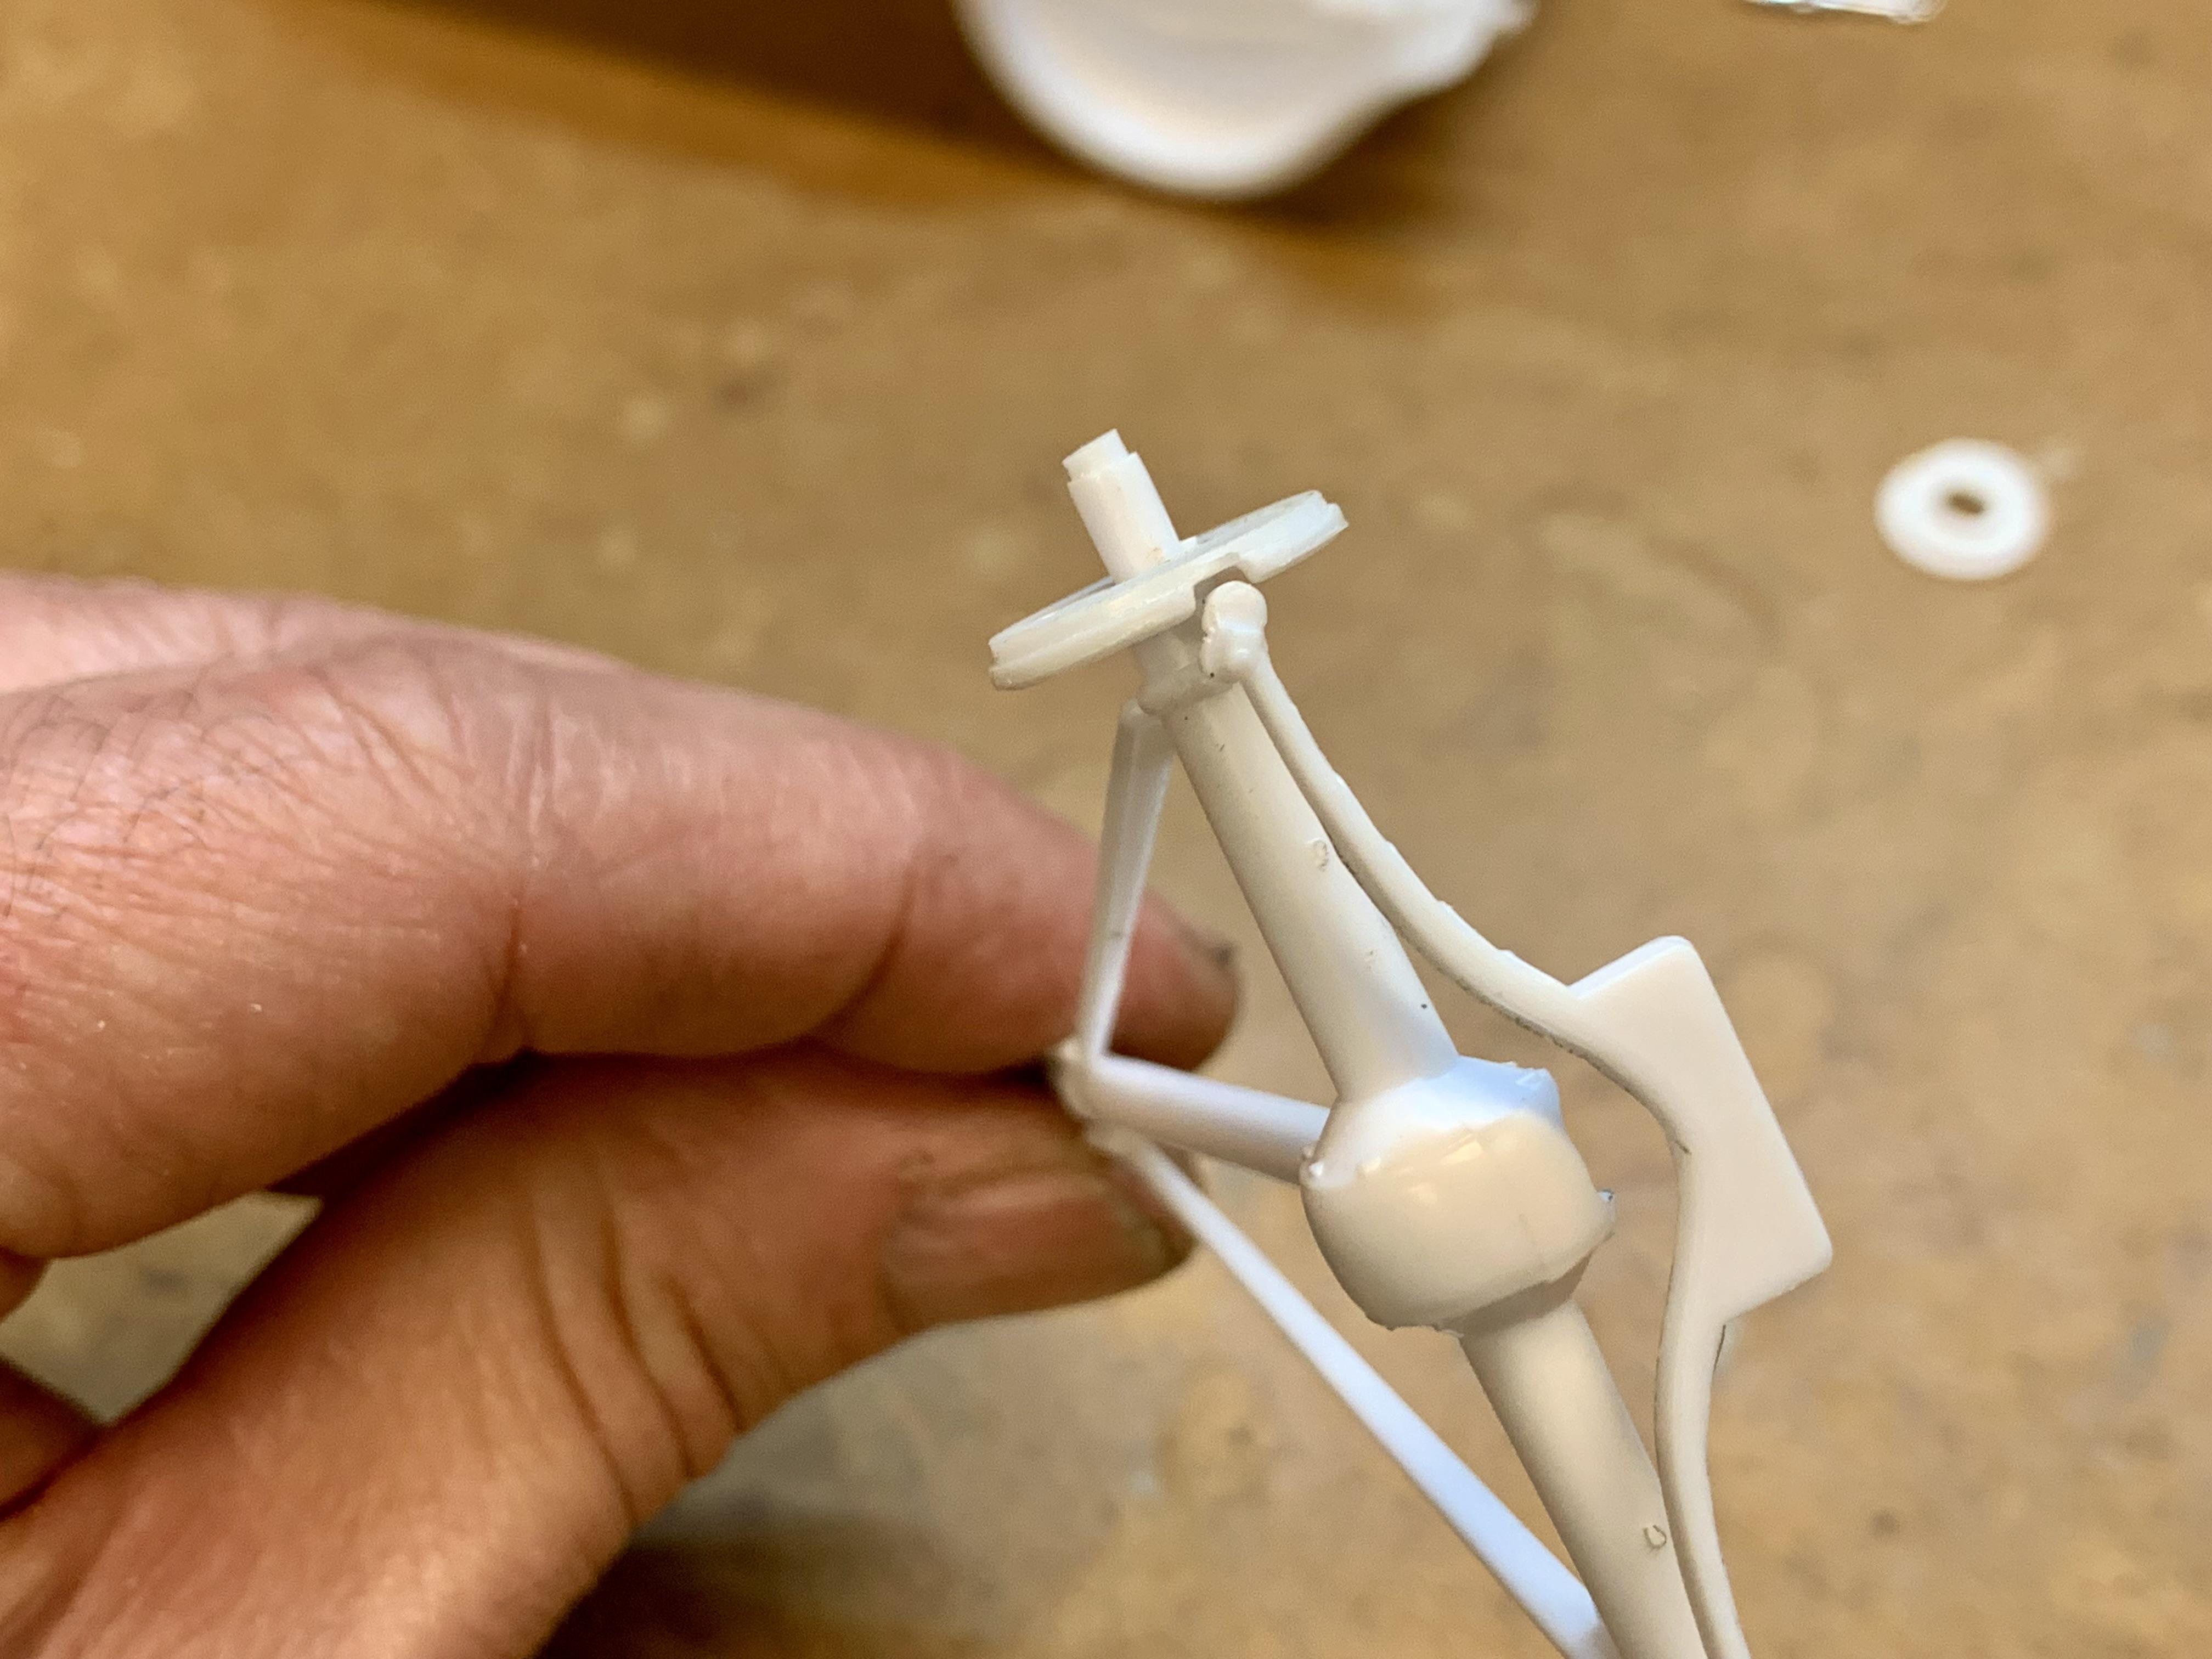
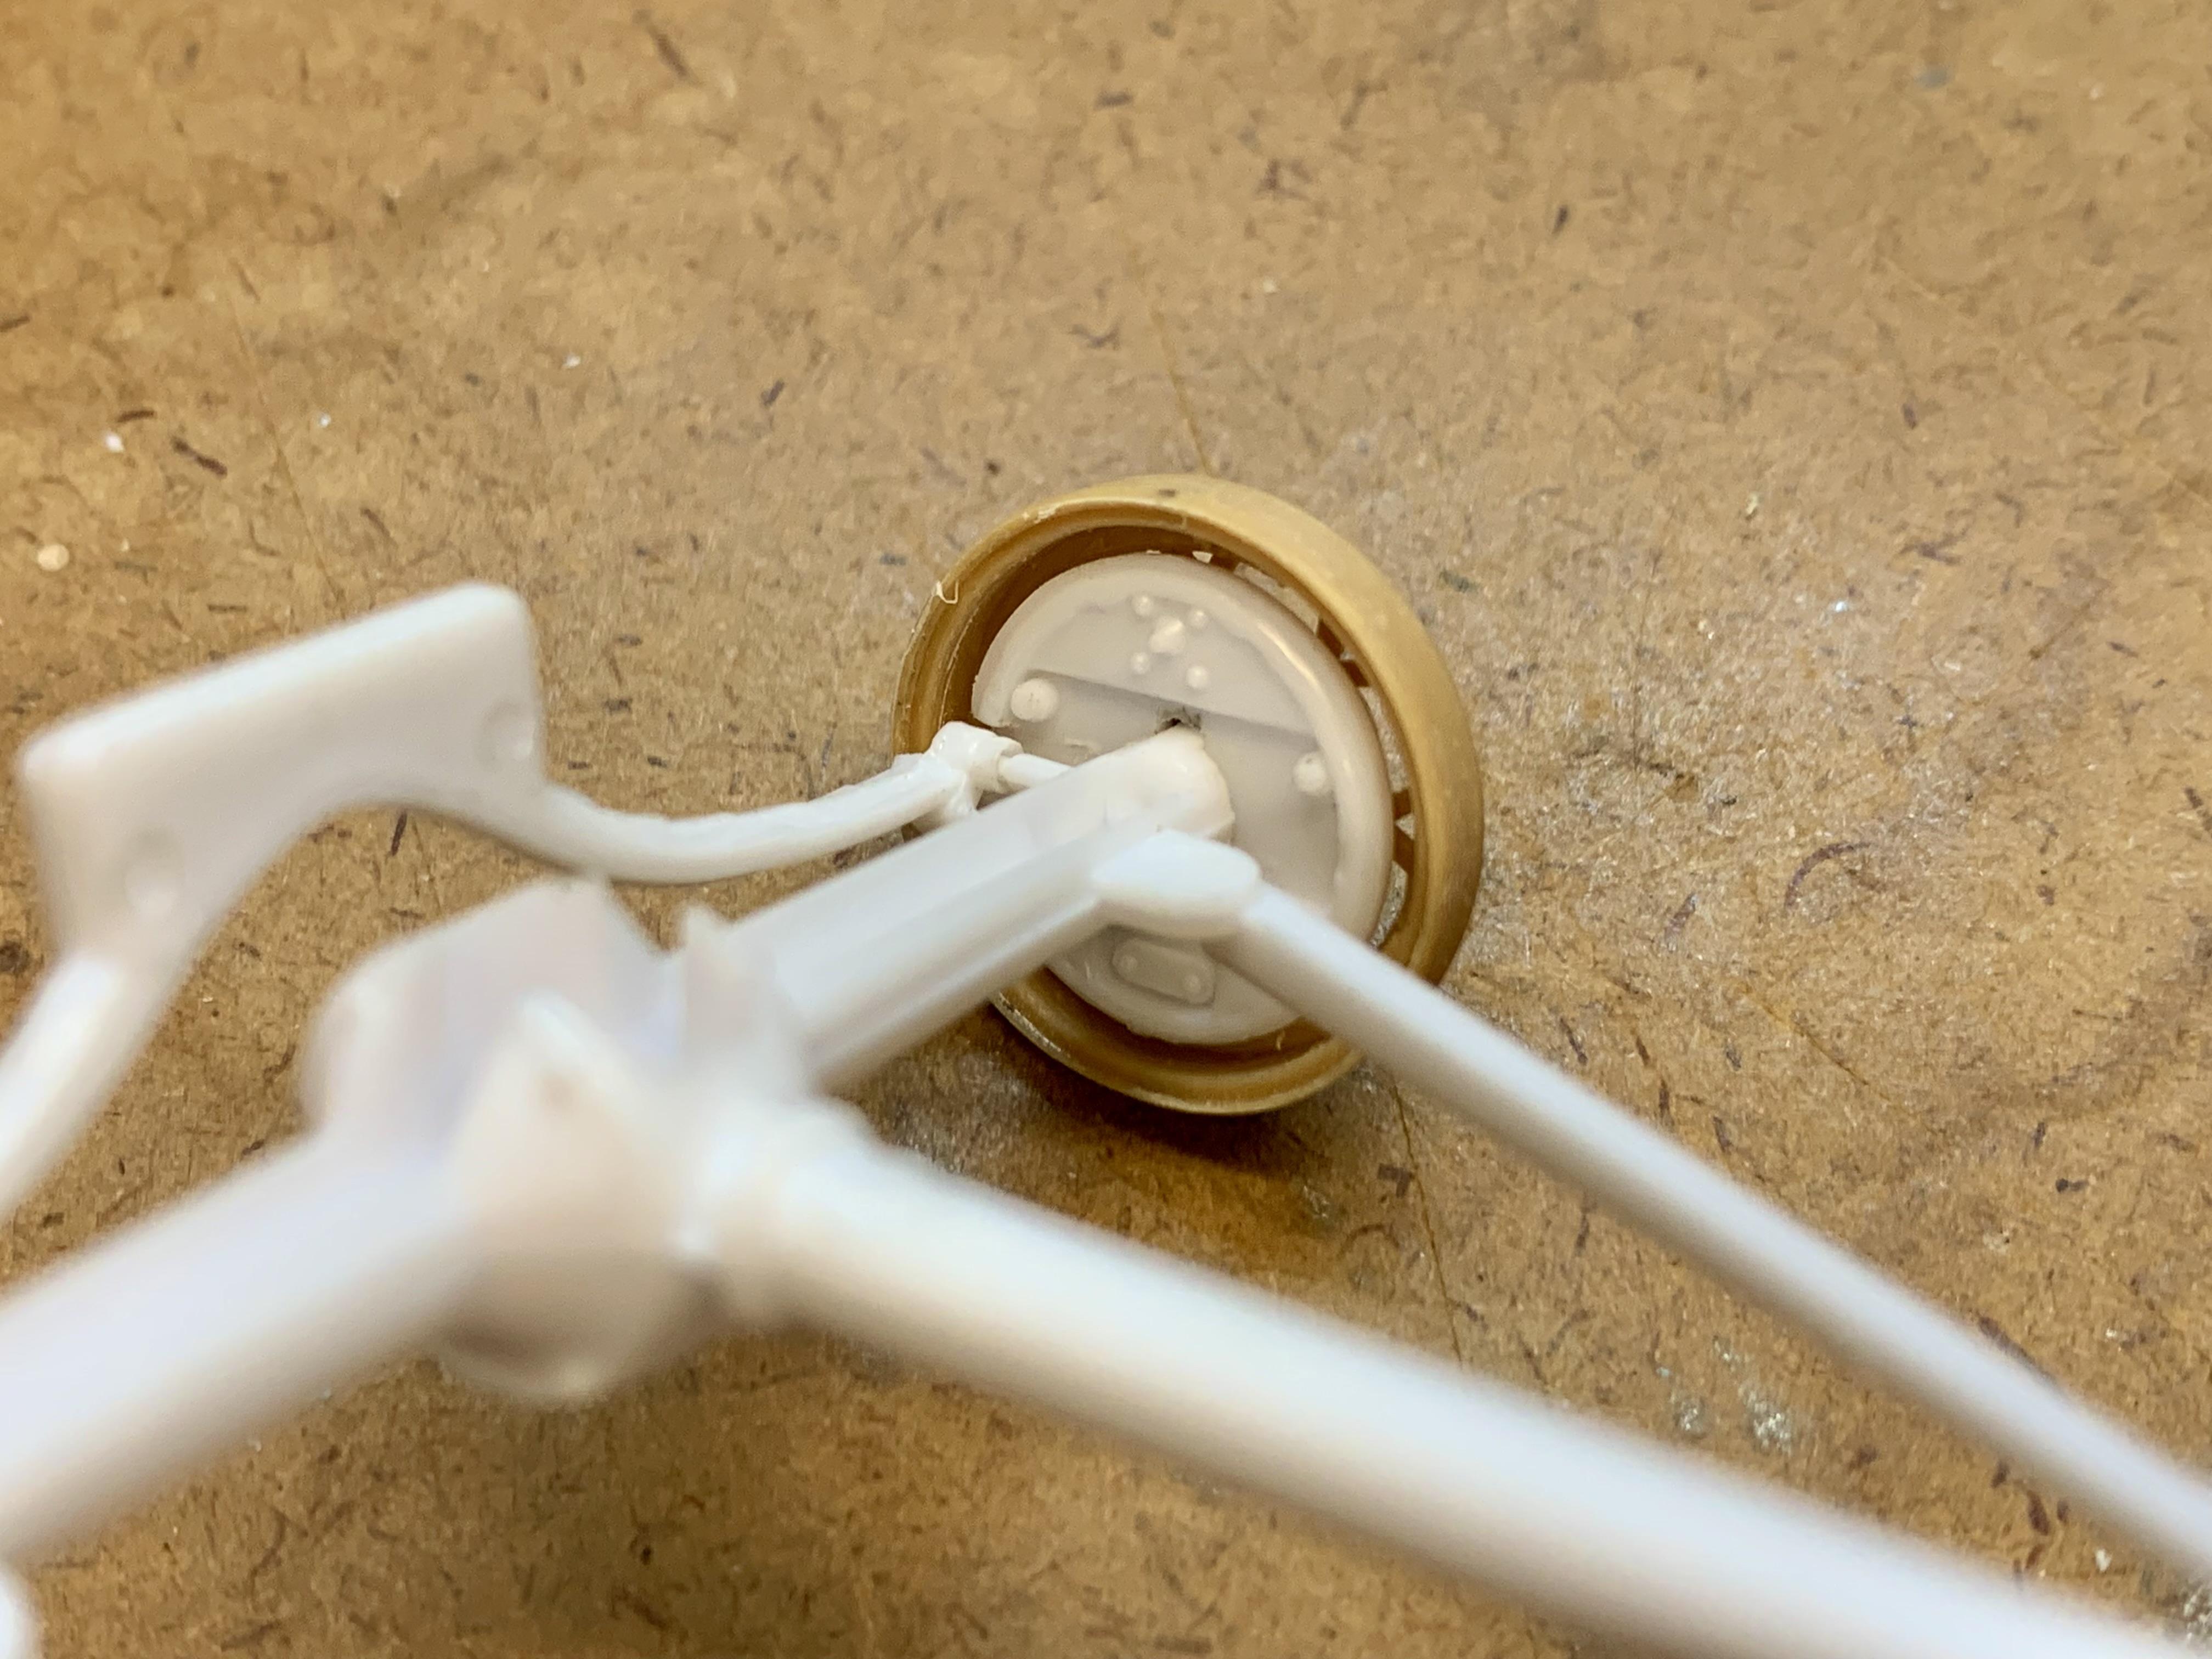
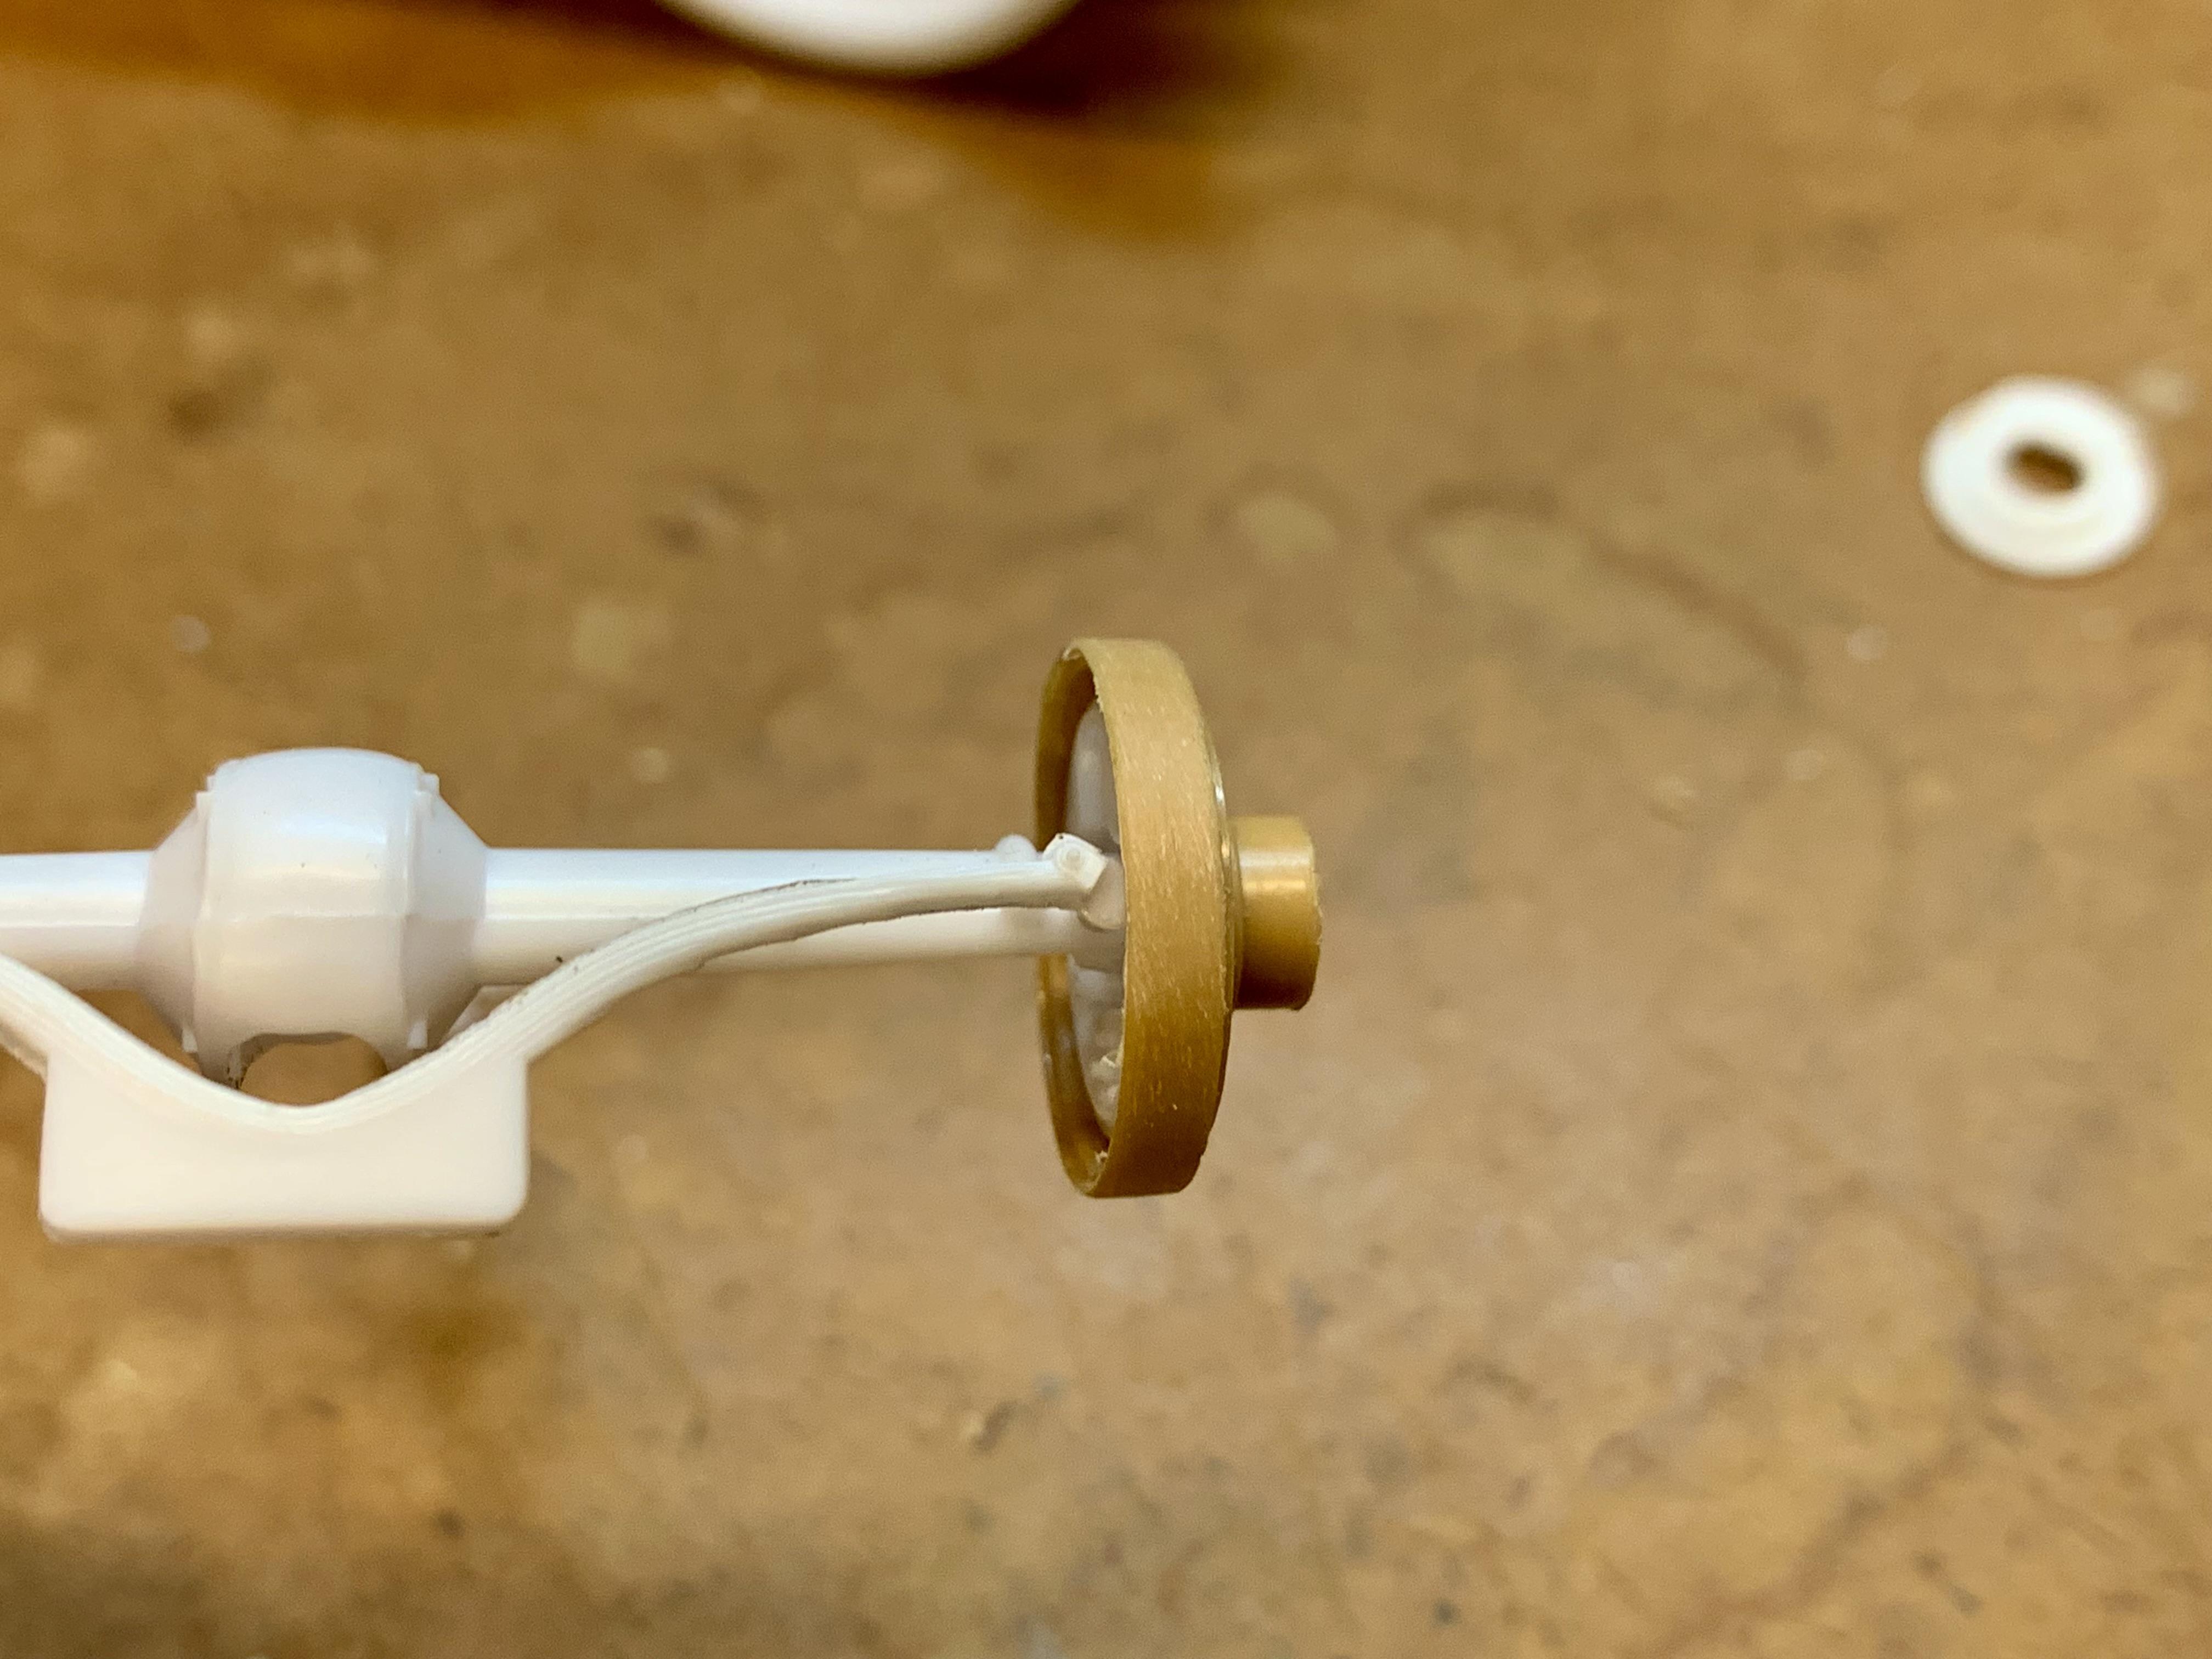
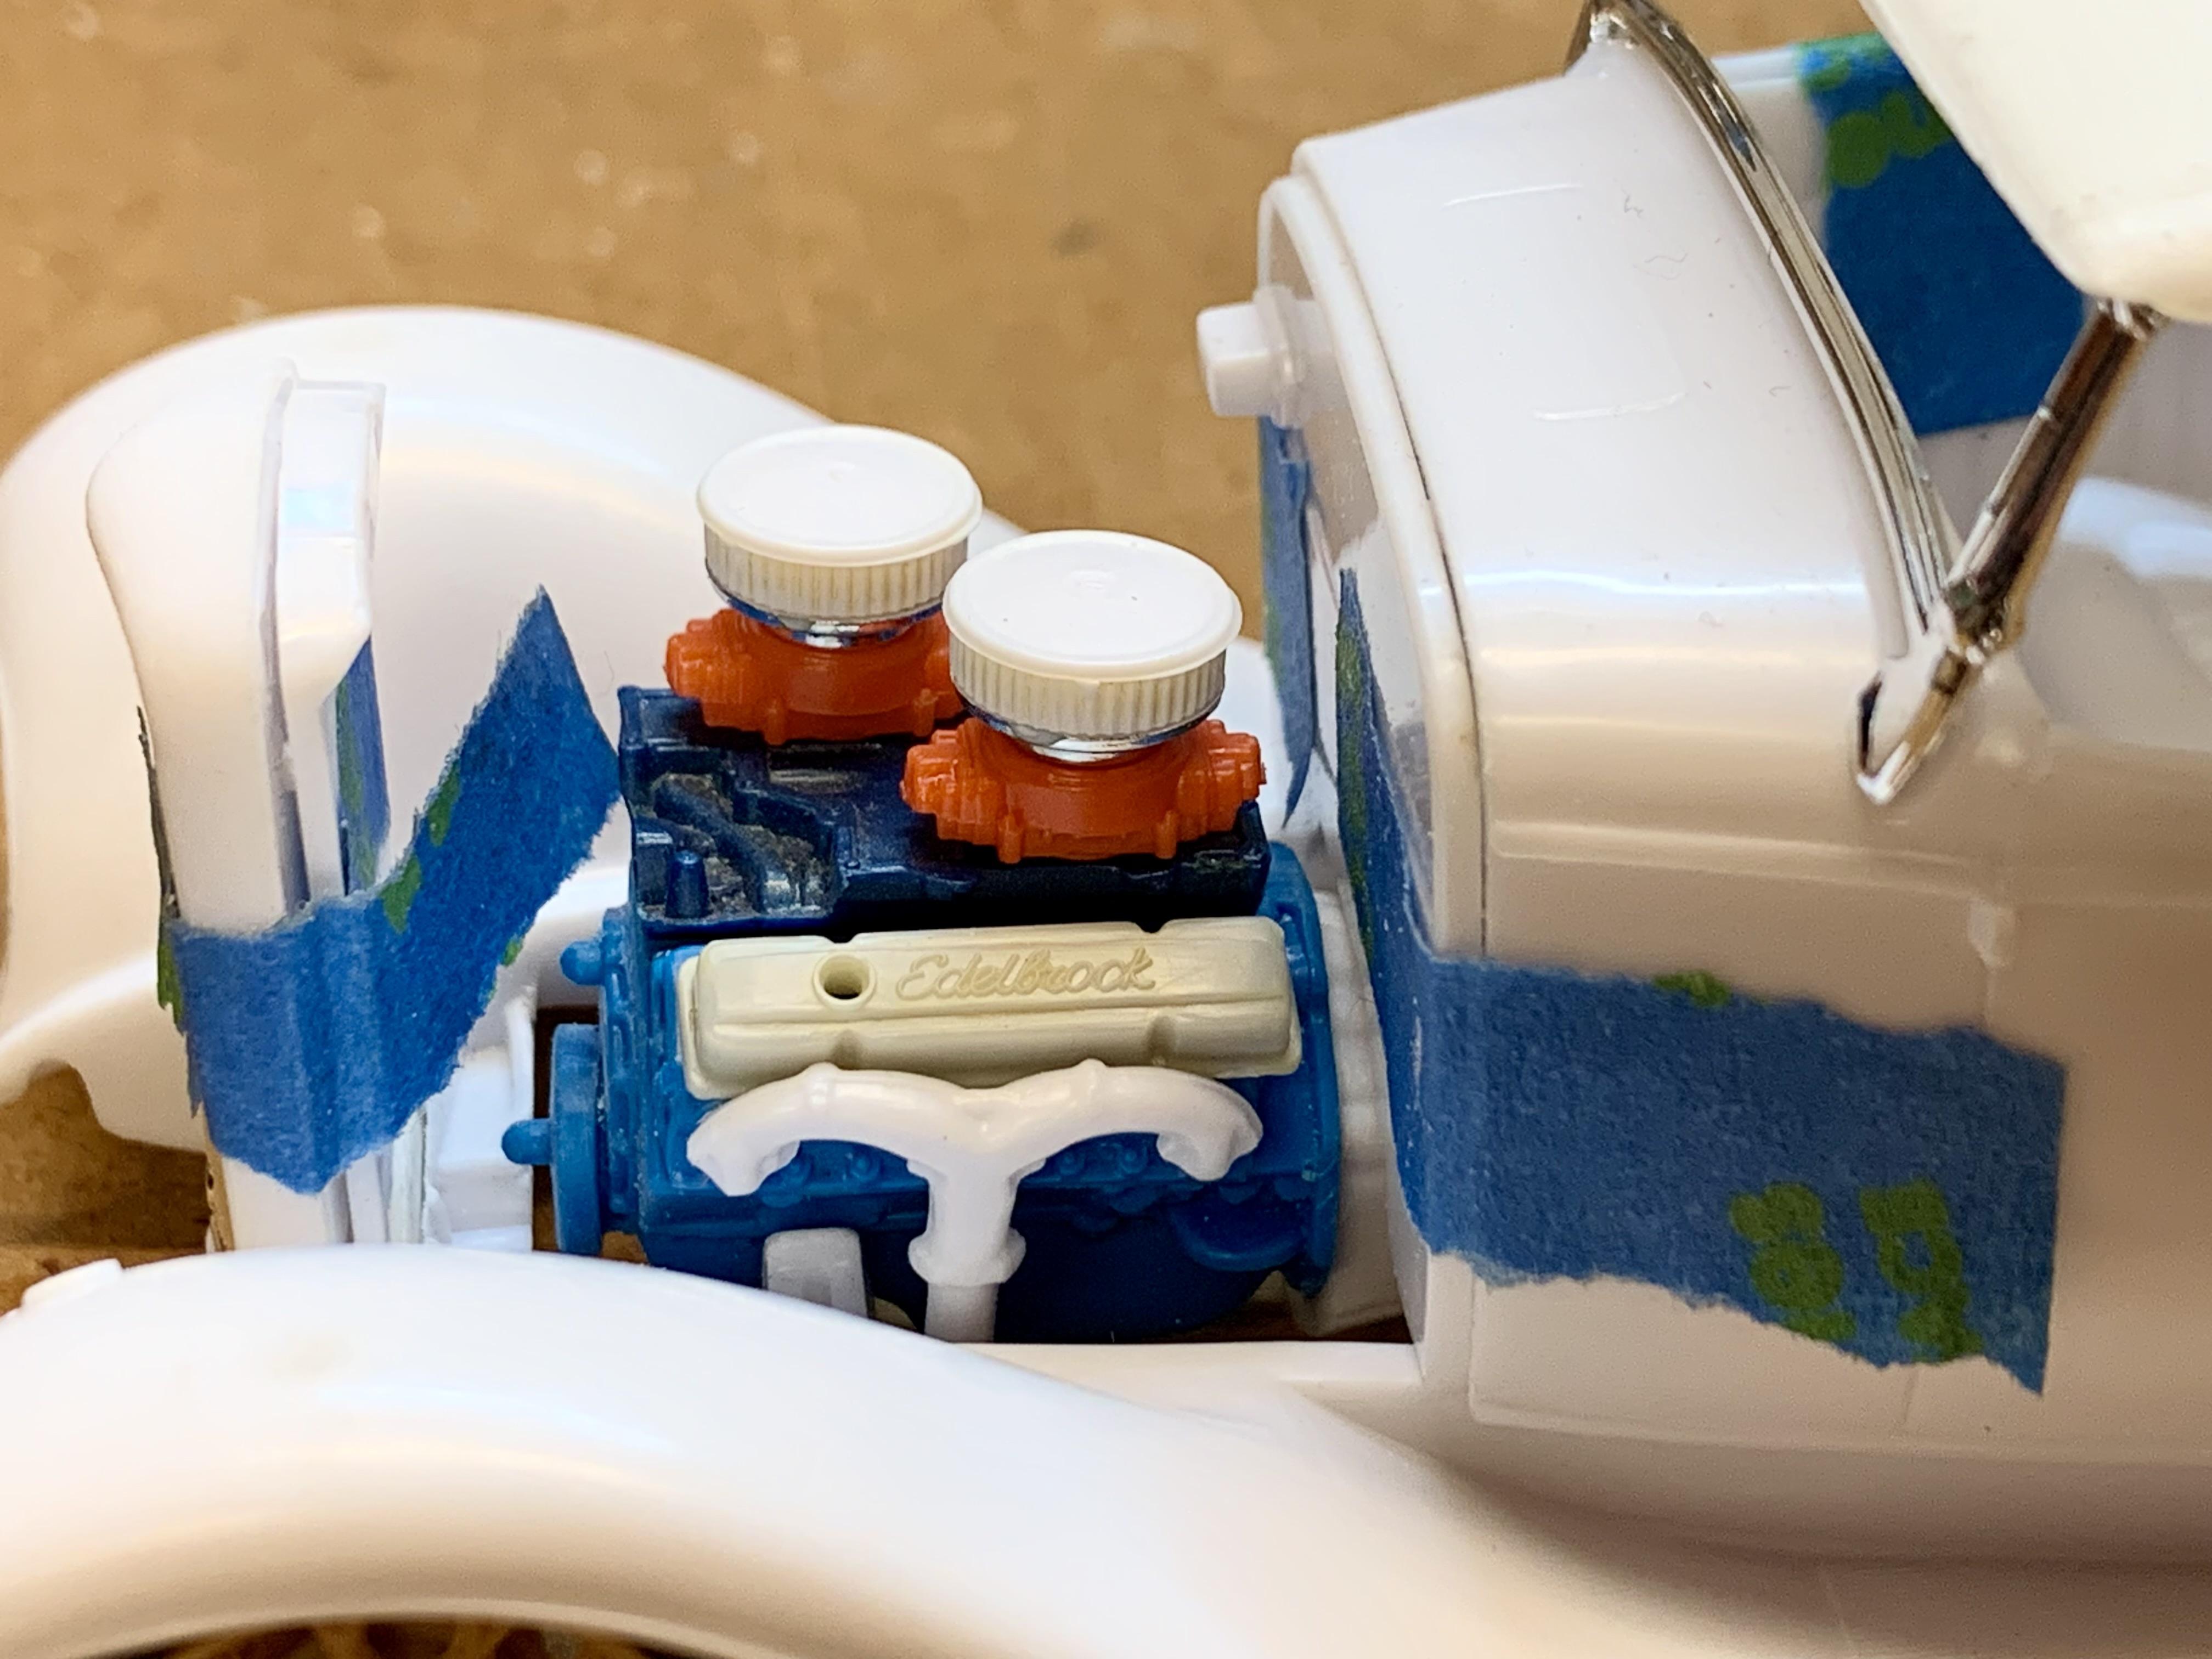
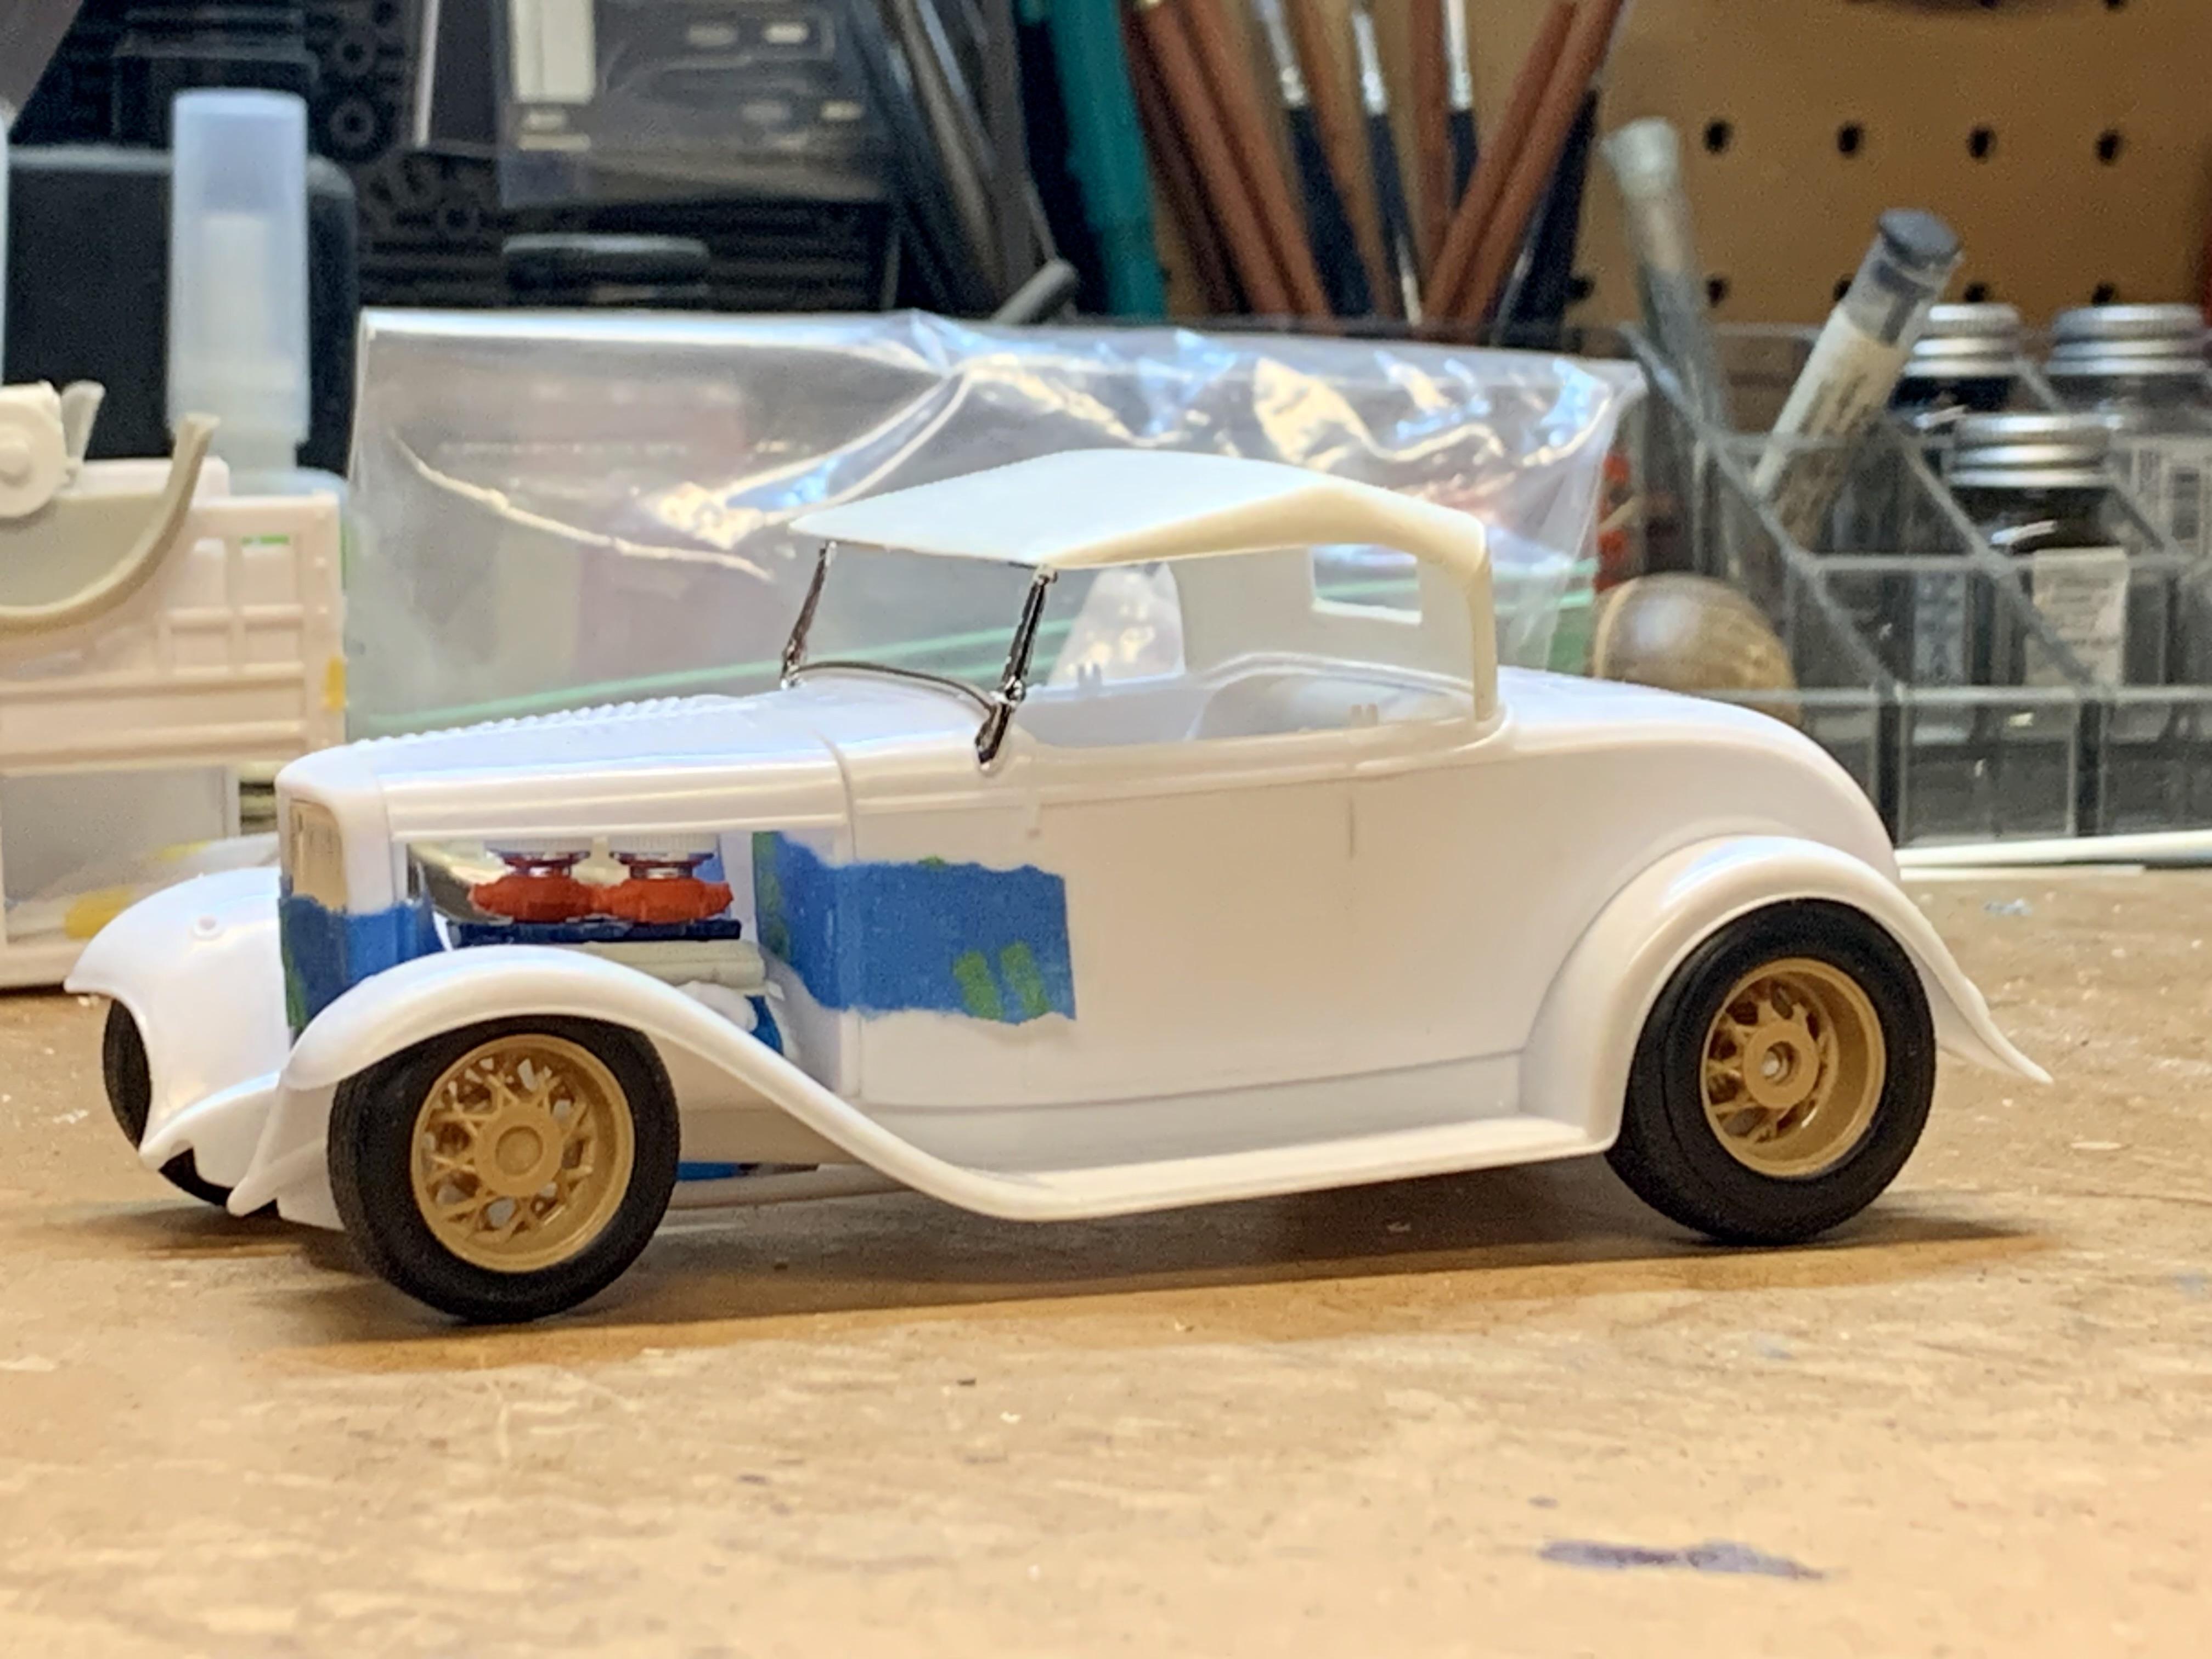
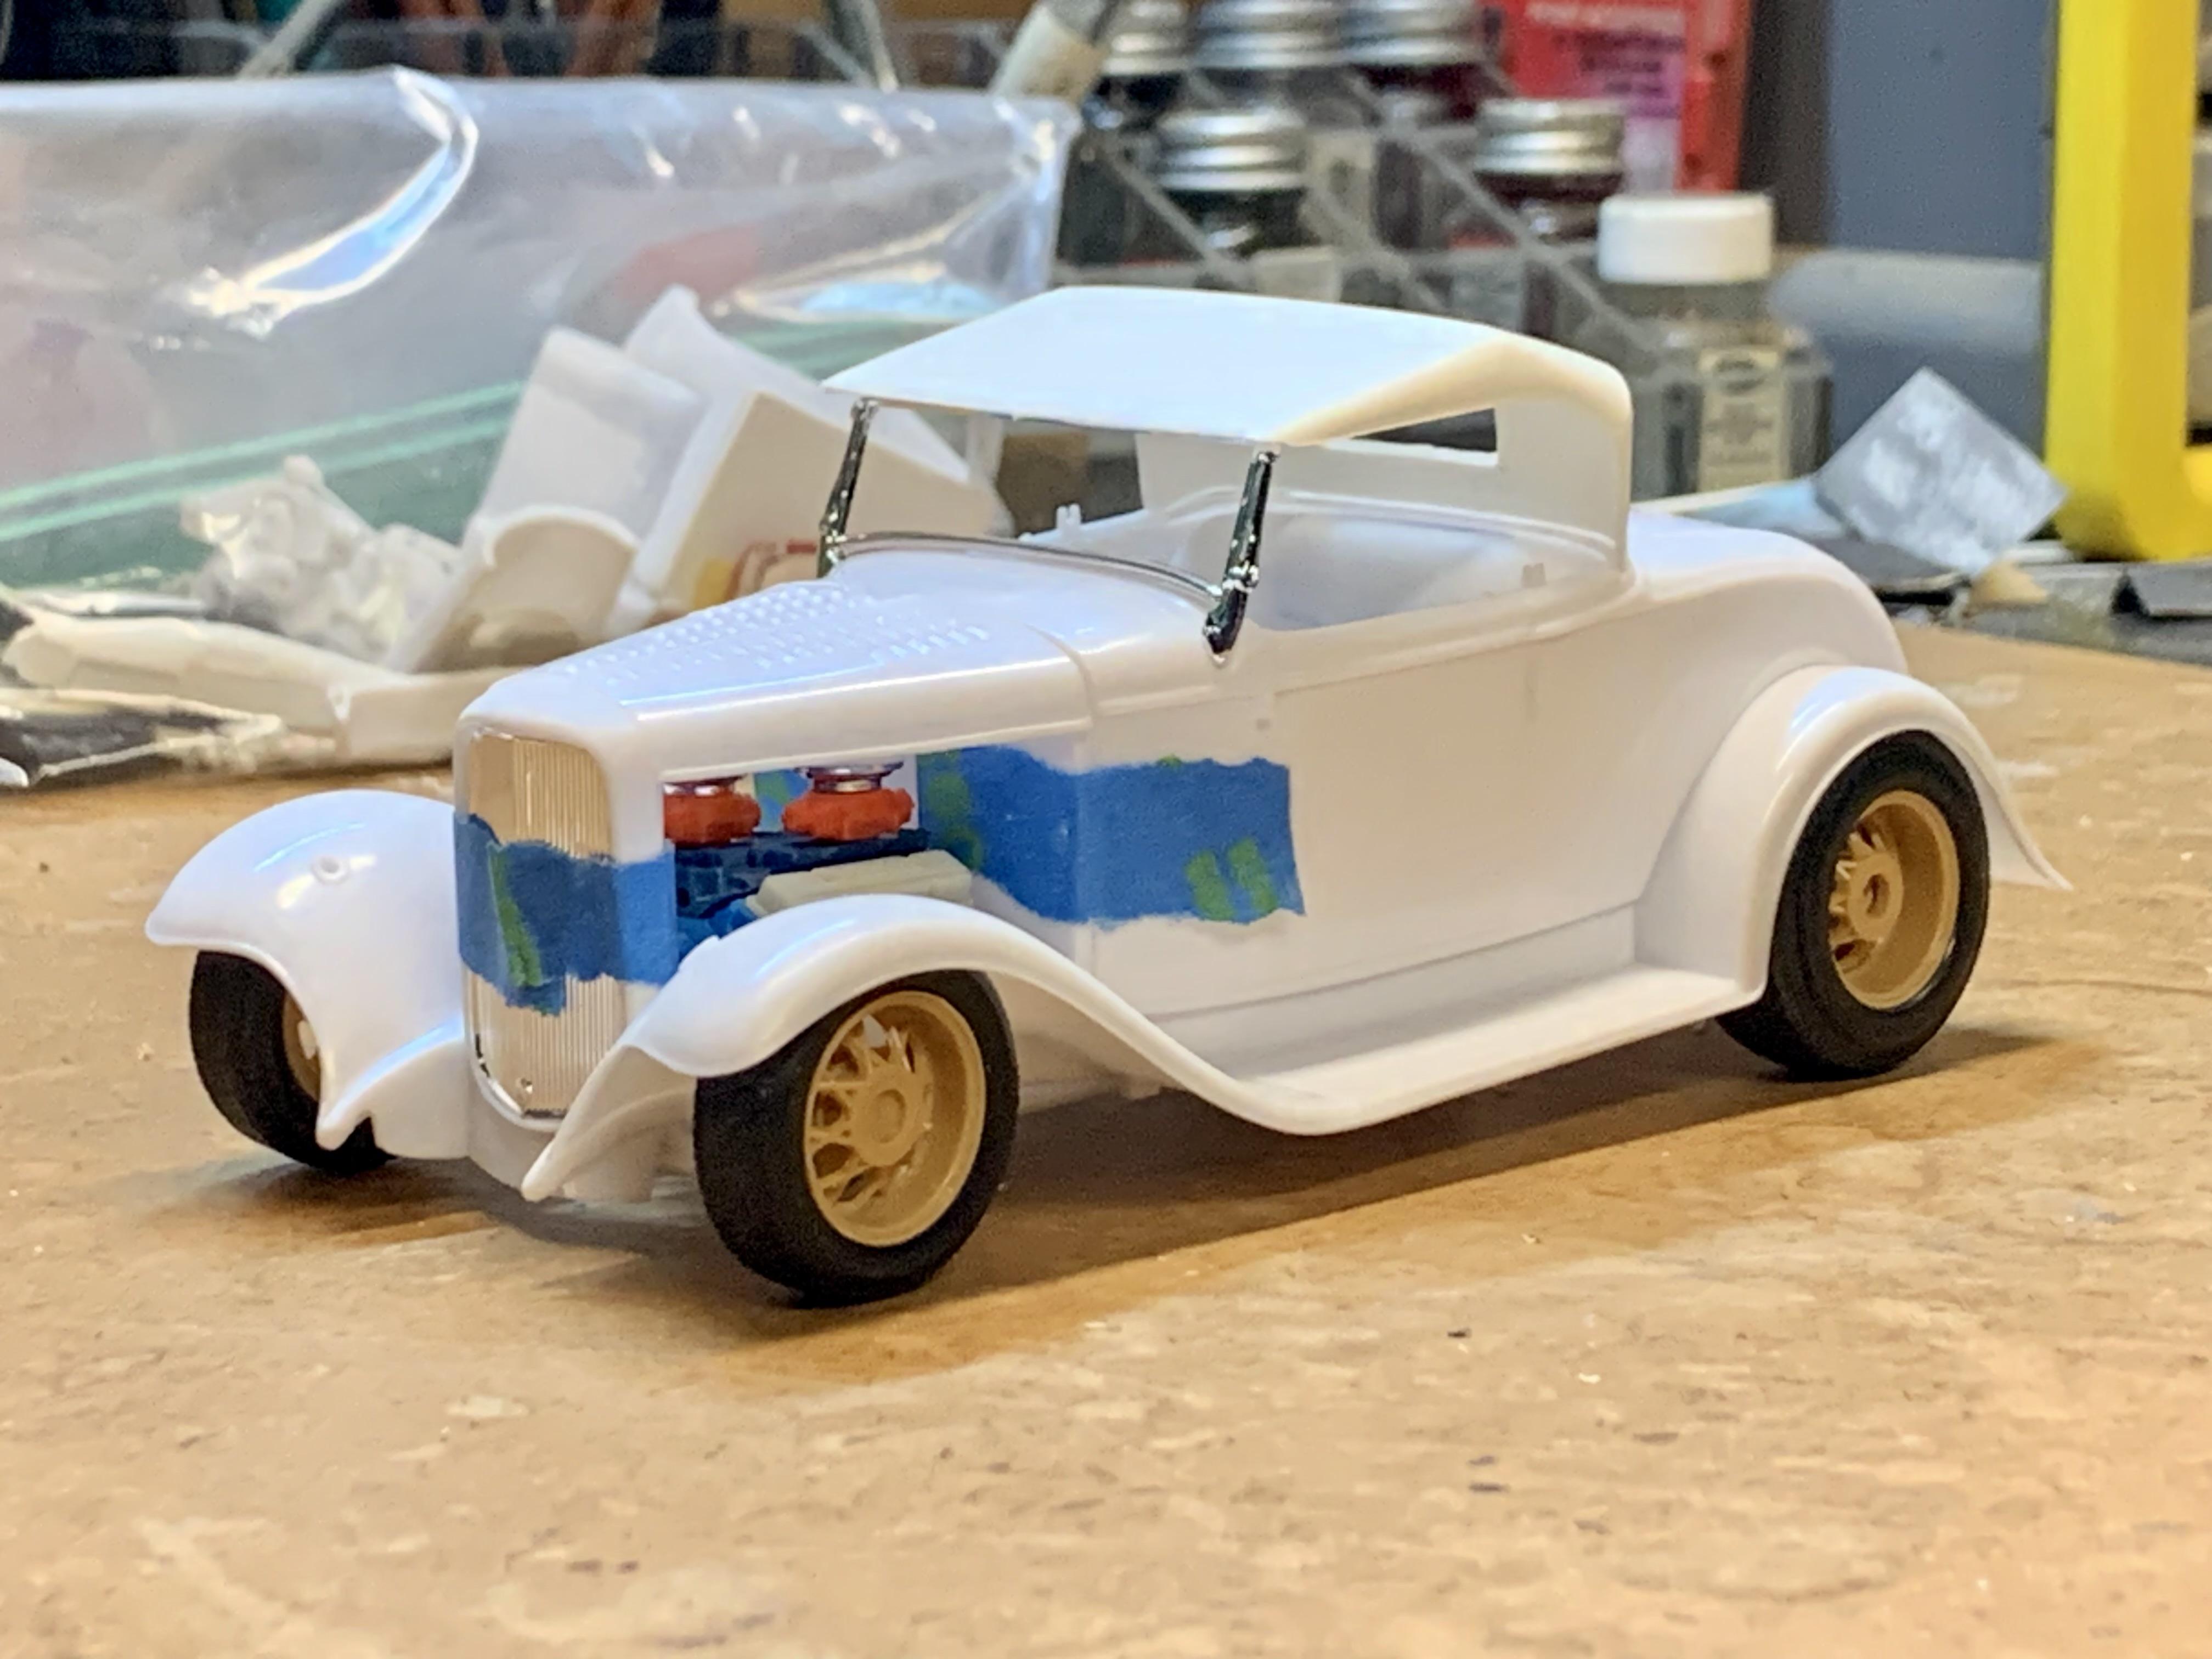
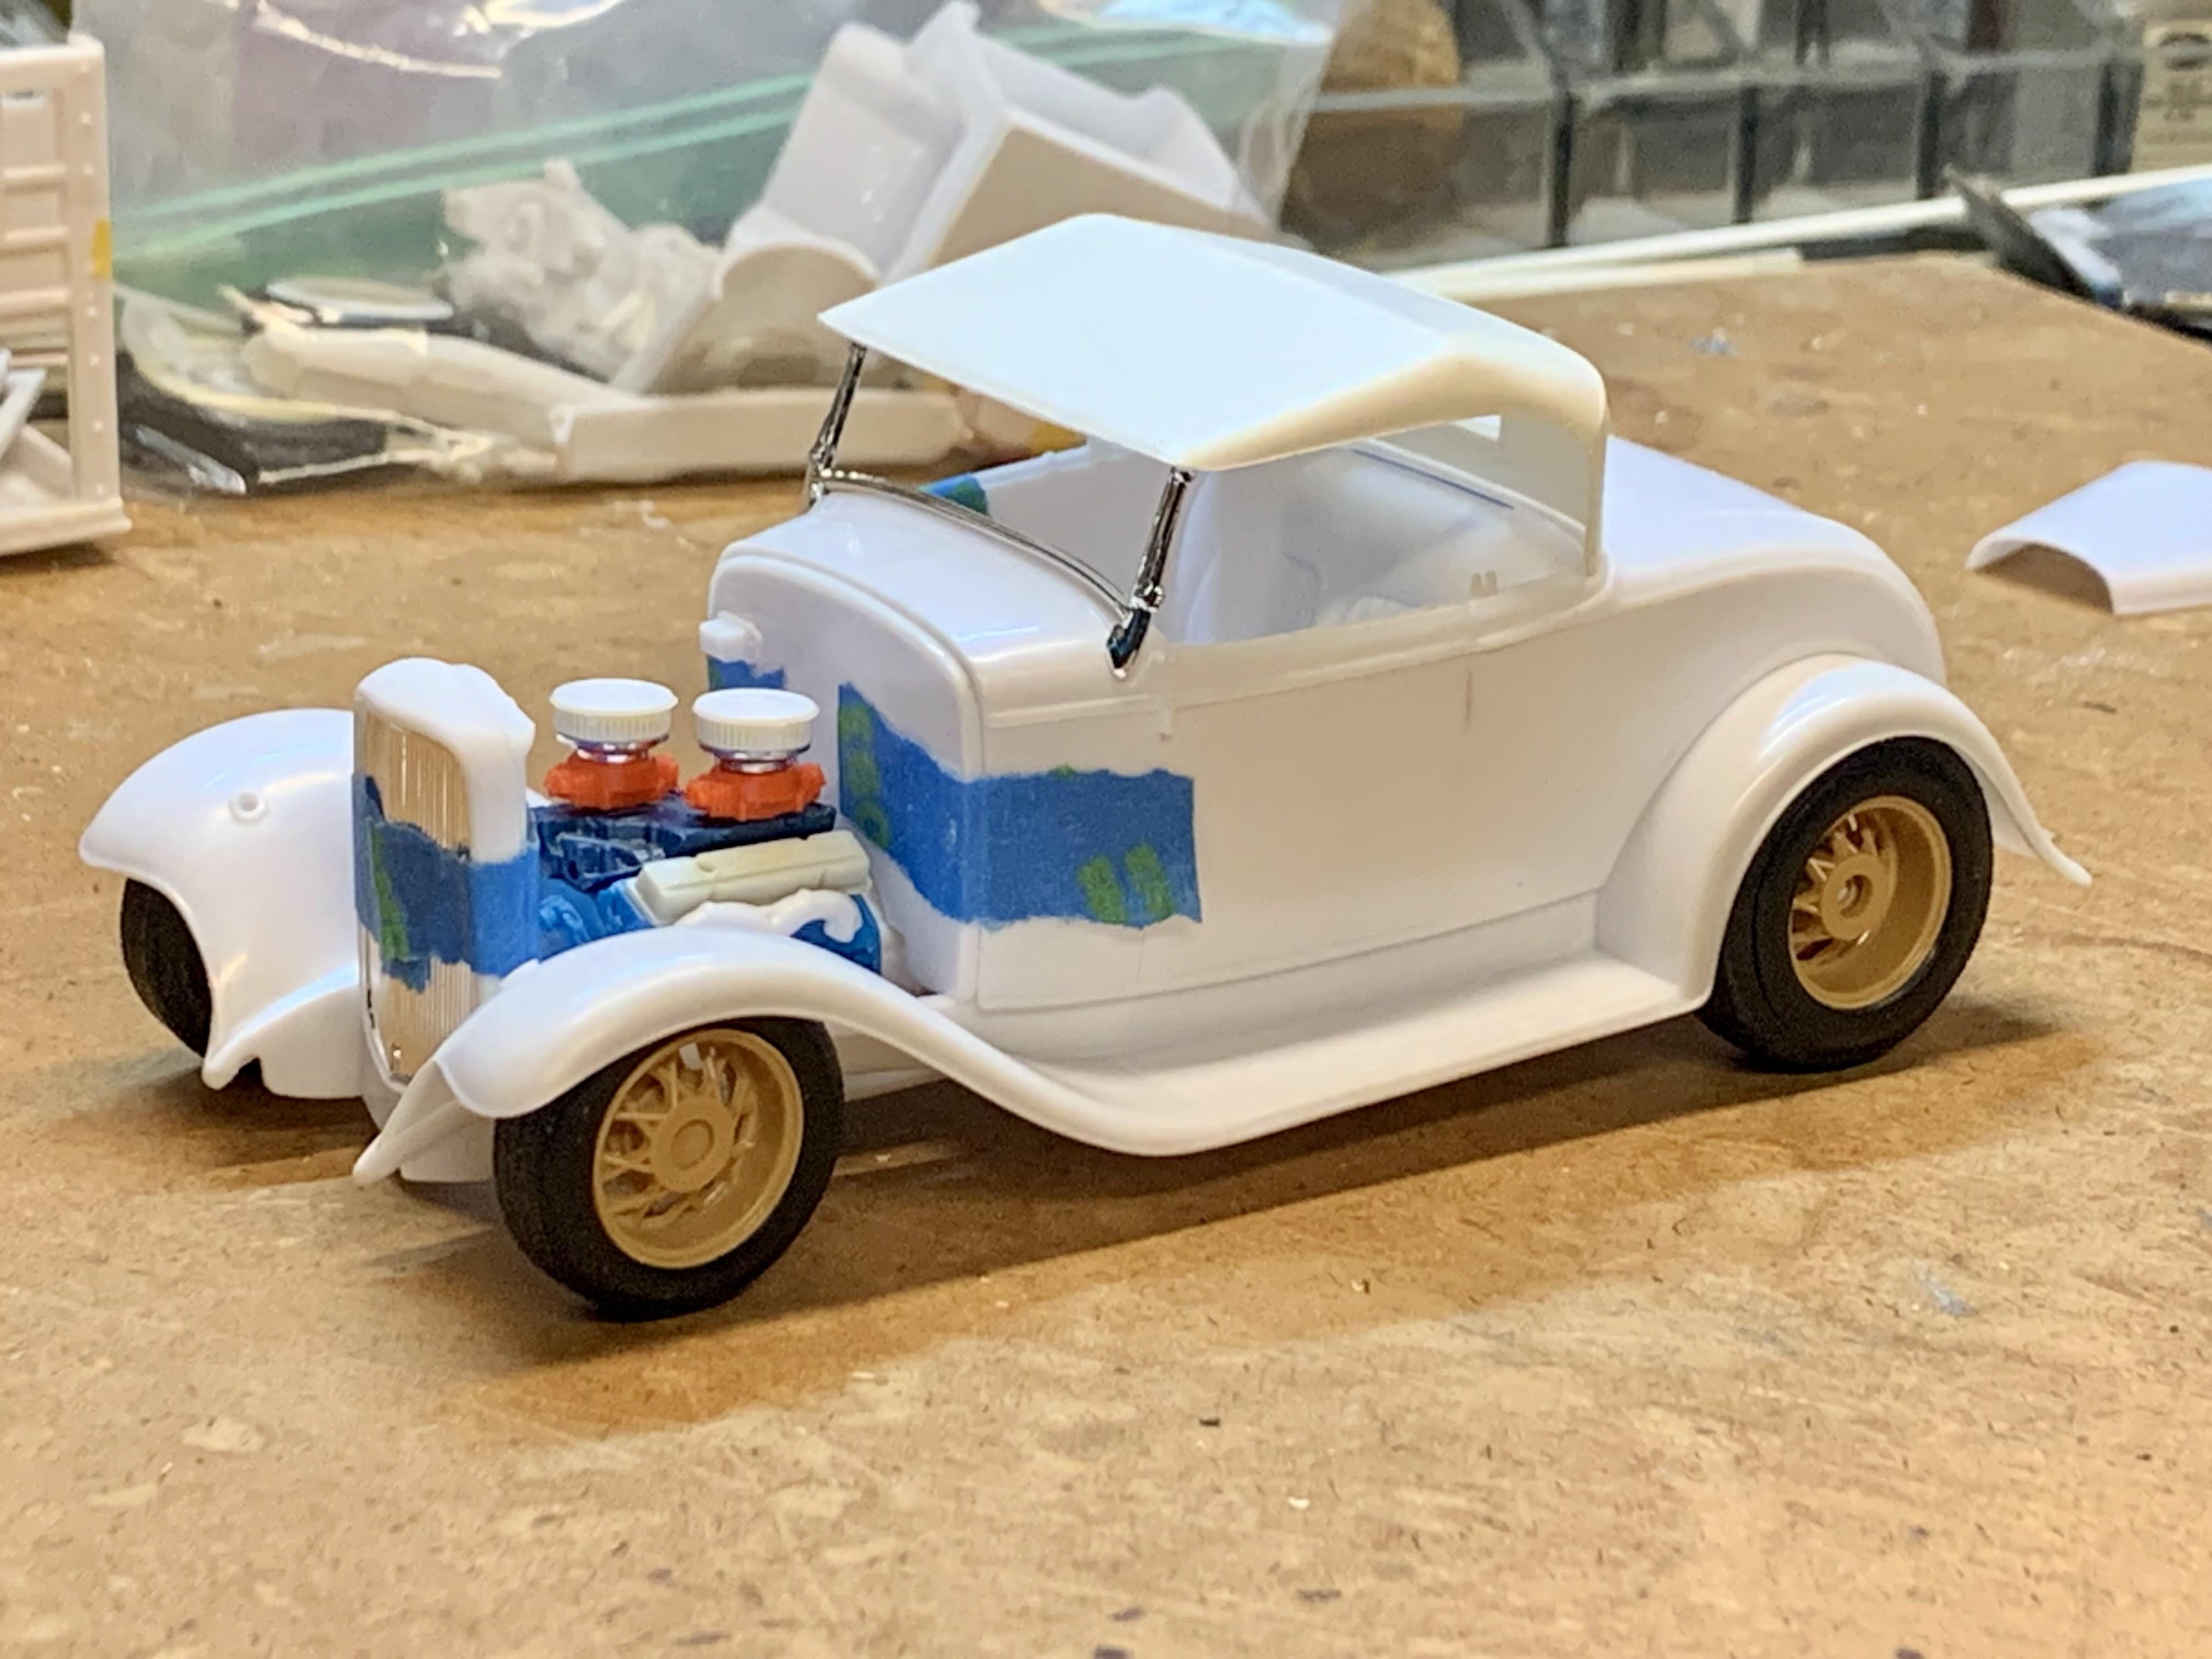
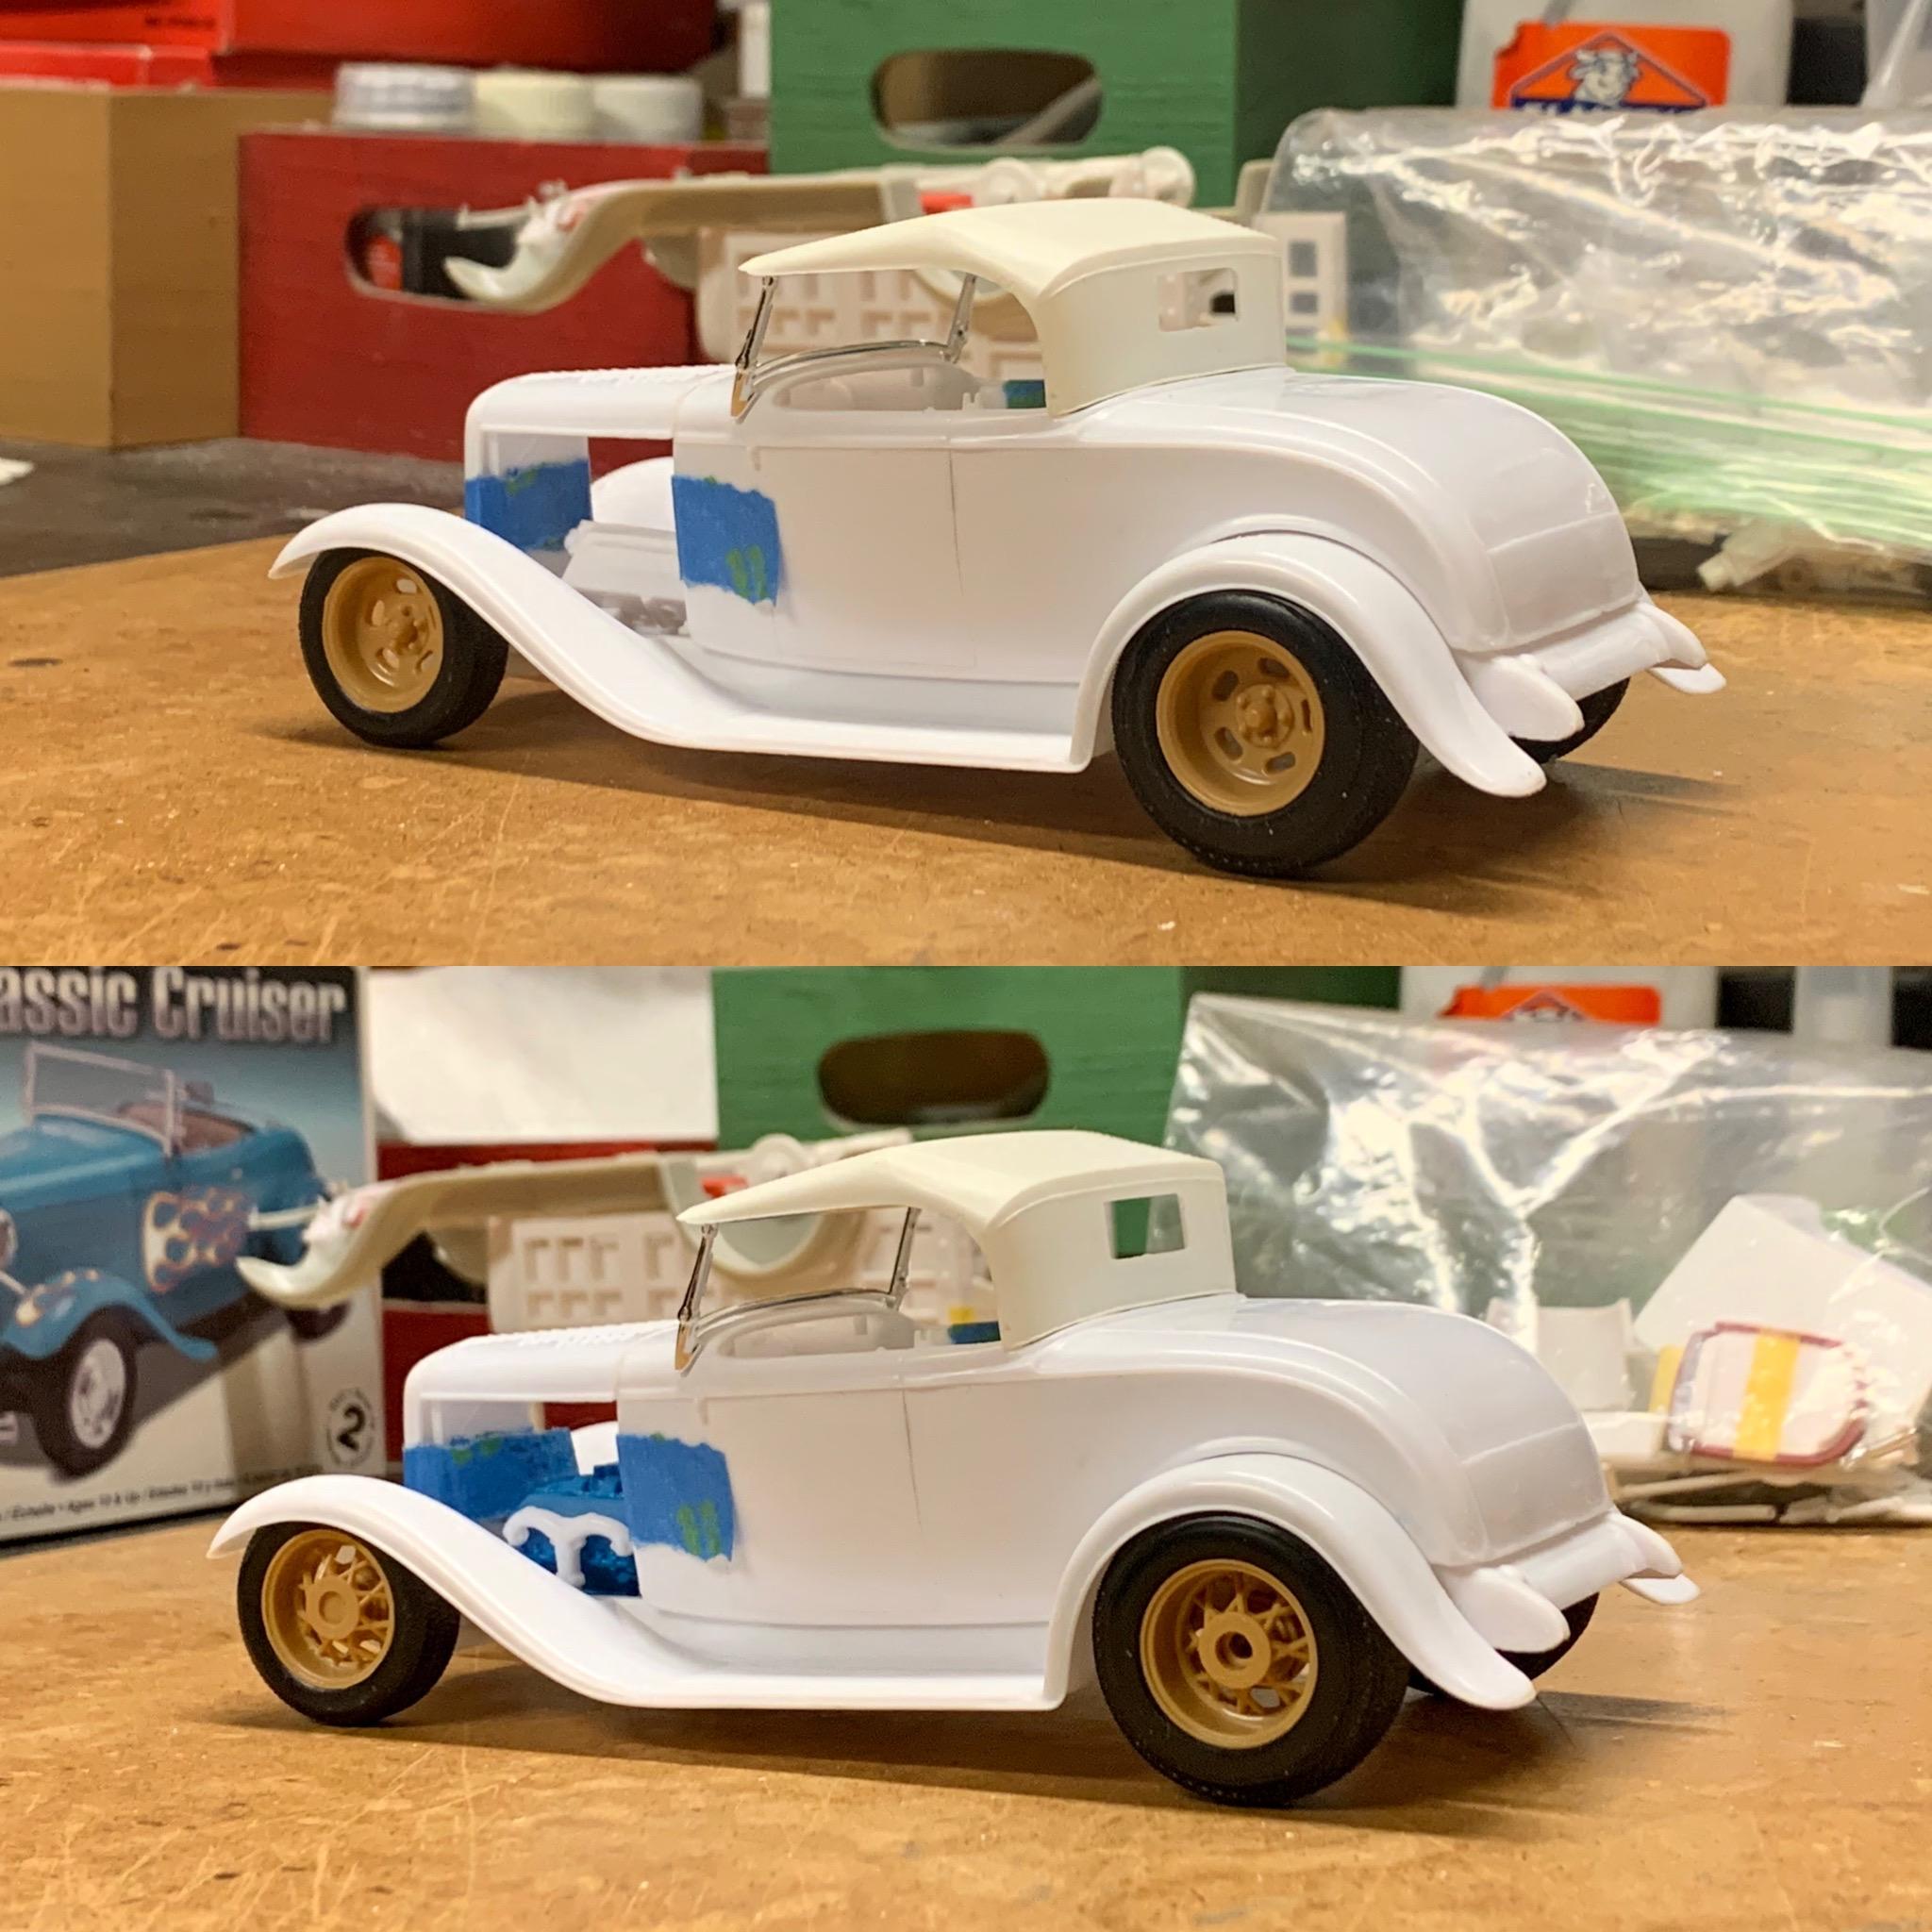
And, the winner is… The Kelsey Hayes wires! I was able to spend some time at the workbench this afternoon and decided to get the wheels adapted to the axles. The fronts were very easy only needing to slightly enlarge the holes in the wheels to fit over the axle stubs and sand the center area down, even with the edge of the rim. The rears, on the other hand, took a fair bit of work mixed with trial and error. The inner wheel halves ended requiring the whole raised center area be removed. The rear brake plates were replaced with front plates from the same kit because they are roughly half the thickness and don’t have a raised center area on the front which allowed them to suck in closer to the axle. Even then I needed all of the room I could get so I sanded the slight ridge down on the back sides of the plates. Because the plates are thinner it was necessary to notch them to clear the end of the spring. All of this to allow the rear wheels to suck in as much as possible to get the tires under the fenders. I mocked the Roadster back together and upon looking at it I just wasn’t feeling the engine dress. While a single 4-barrel is perfect for drive ability it’s kind of boring on a scale street rod. Digging through my small block Chevy parts I came across the dual 4-barrel cross-ram intake from Revell’s 1969 Camaro Z28, the only remaining piece I have since having the original issue back in the early 90’s. The carbs come from a couple of Monogram 1937 Ford Sedan original issues with air filters from a Revell ‘32 Roadster (Rat Roaster.) The Edelbrock valve covers come from AMT’s ‘34 Ford 5-Window Coupe. I’m liking this a lot better and it’s much more interesting to look at. And here’s the Roadster sitting properly on its axles with the updated engine dress. Very happy with the stance and wheel fit.
-
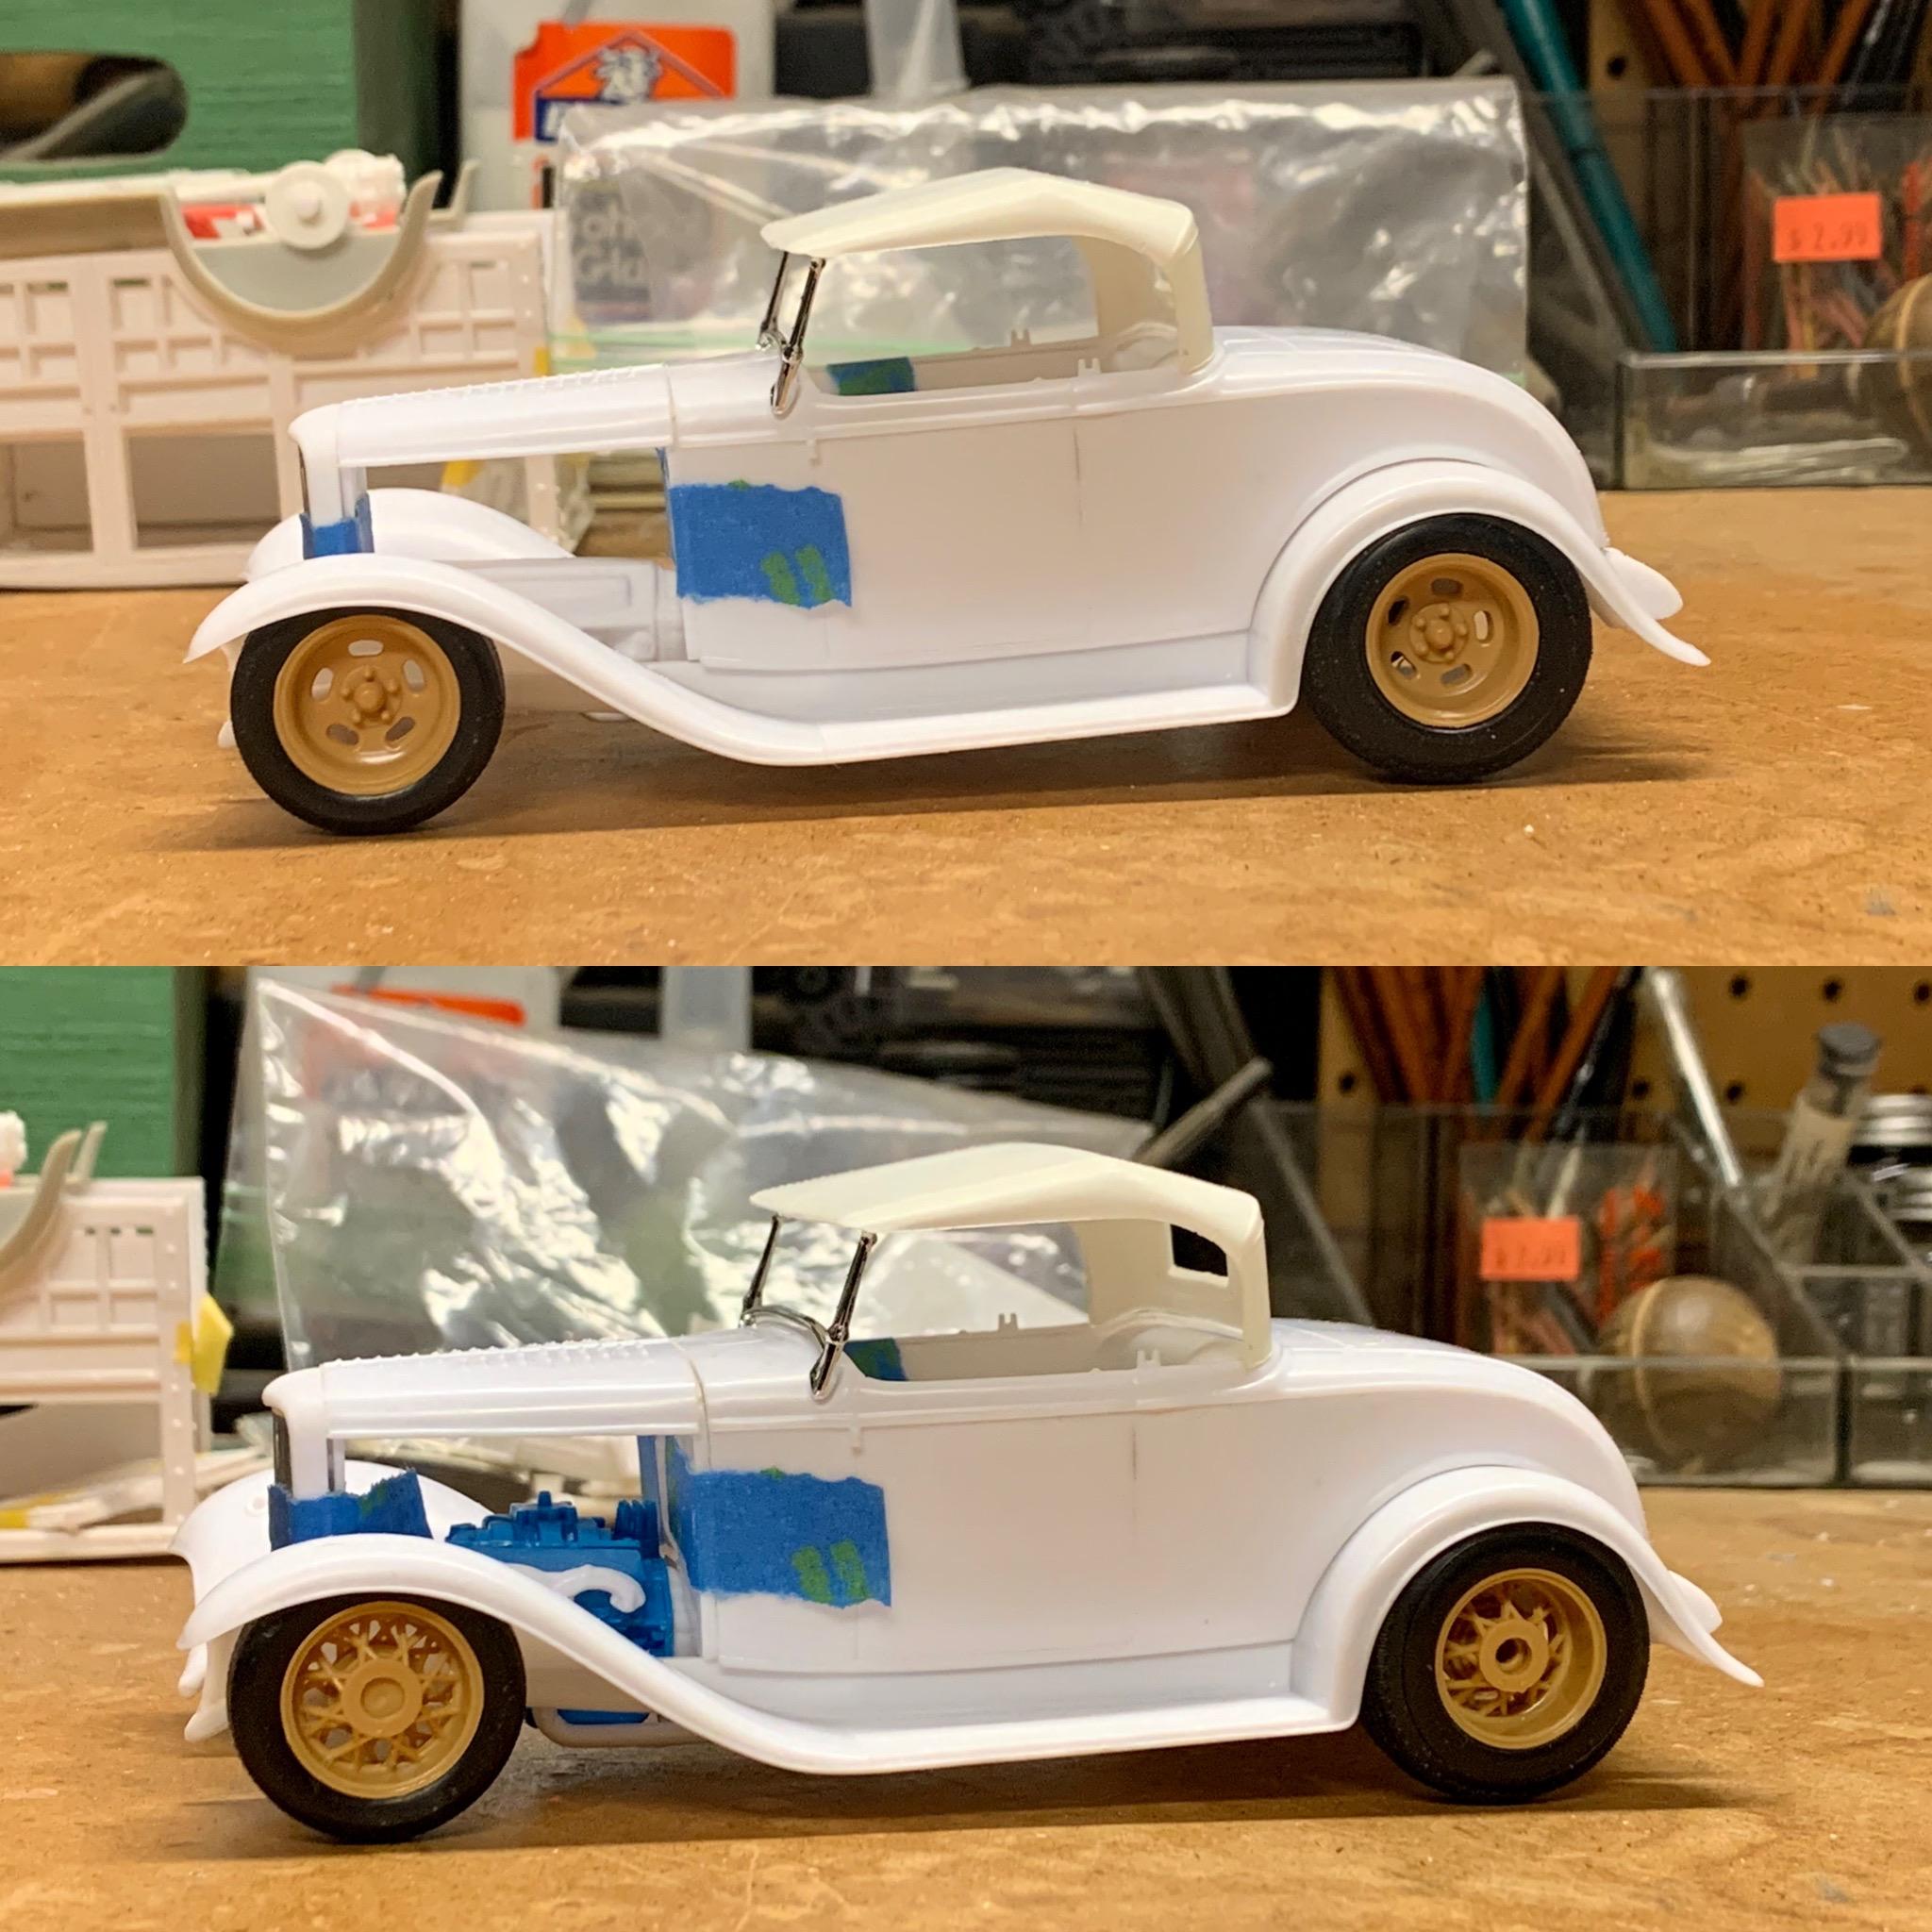
Last night I did a mock up with a different set of wheels, the Kelsey Hayes style wires from the Monogram ‘30 Woody. When I was first starting this project they were the first wheels I tried but I was not going to be able to modify them enough to tuck the under the front fenders using the kit dropped axle. Last night it occurred to me that I should try again since I changed the front axle and it’s quite a bit narrower. I haven’t started adapting the wheels yet so now I have to decide which way to go. I definitely like the wires and they will look much better with the chrome hubcaps. Thoughts?
-
Thanks! My friend Ed at Drag City Casting was reproducing the grill insert and he also had a kit for the Pontiac engine. He doesn’t have a website but if you email him he’ll take care of you. He’s a good guy. lowcab36@epix.net
-
That’s a nice solution you came up with. The consistent “pipe” size and fully enclosed mufflers look so much better. The thing about lowering this kit is that it also requires modifying (or changing) the wheels to tuck them in because the way the kit builds it puts the tires poked and under the fender edges. The front axle I changed to is a good bit narrower.
-
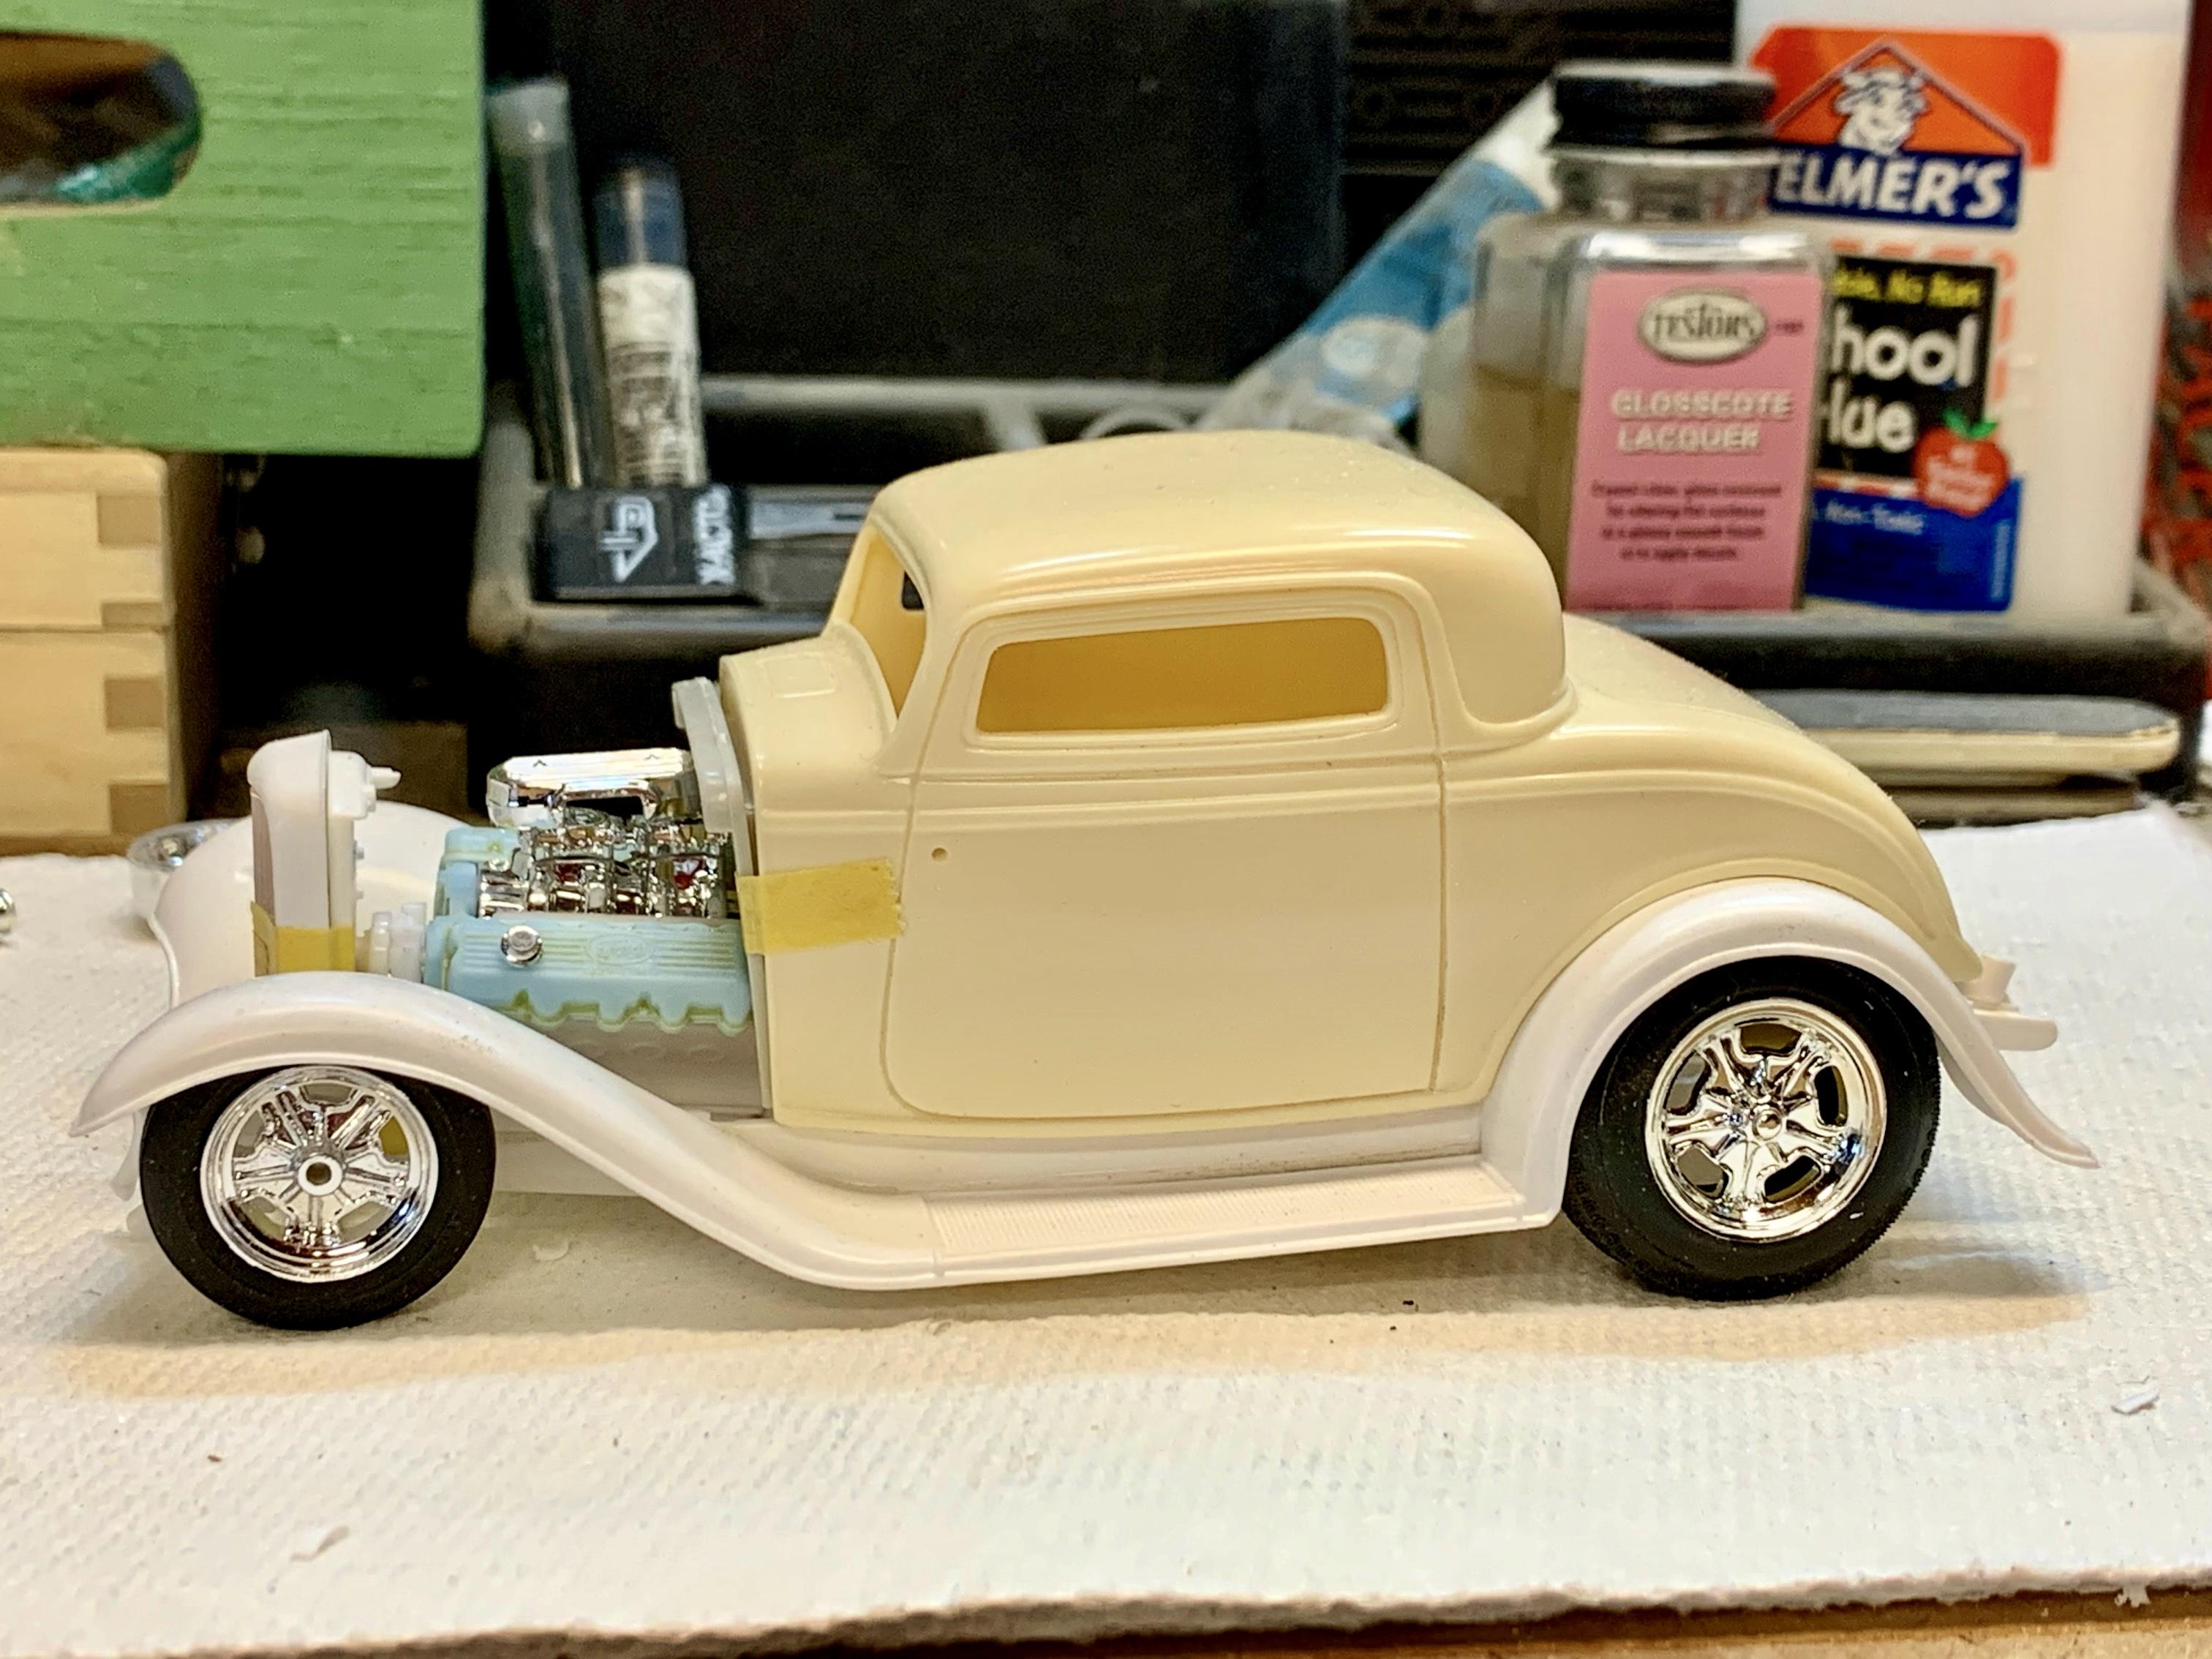
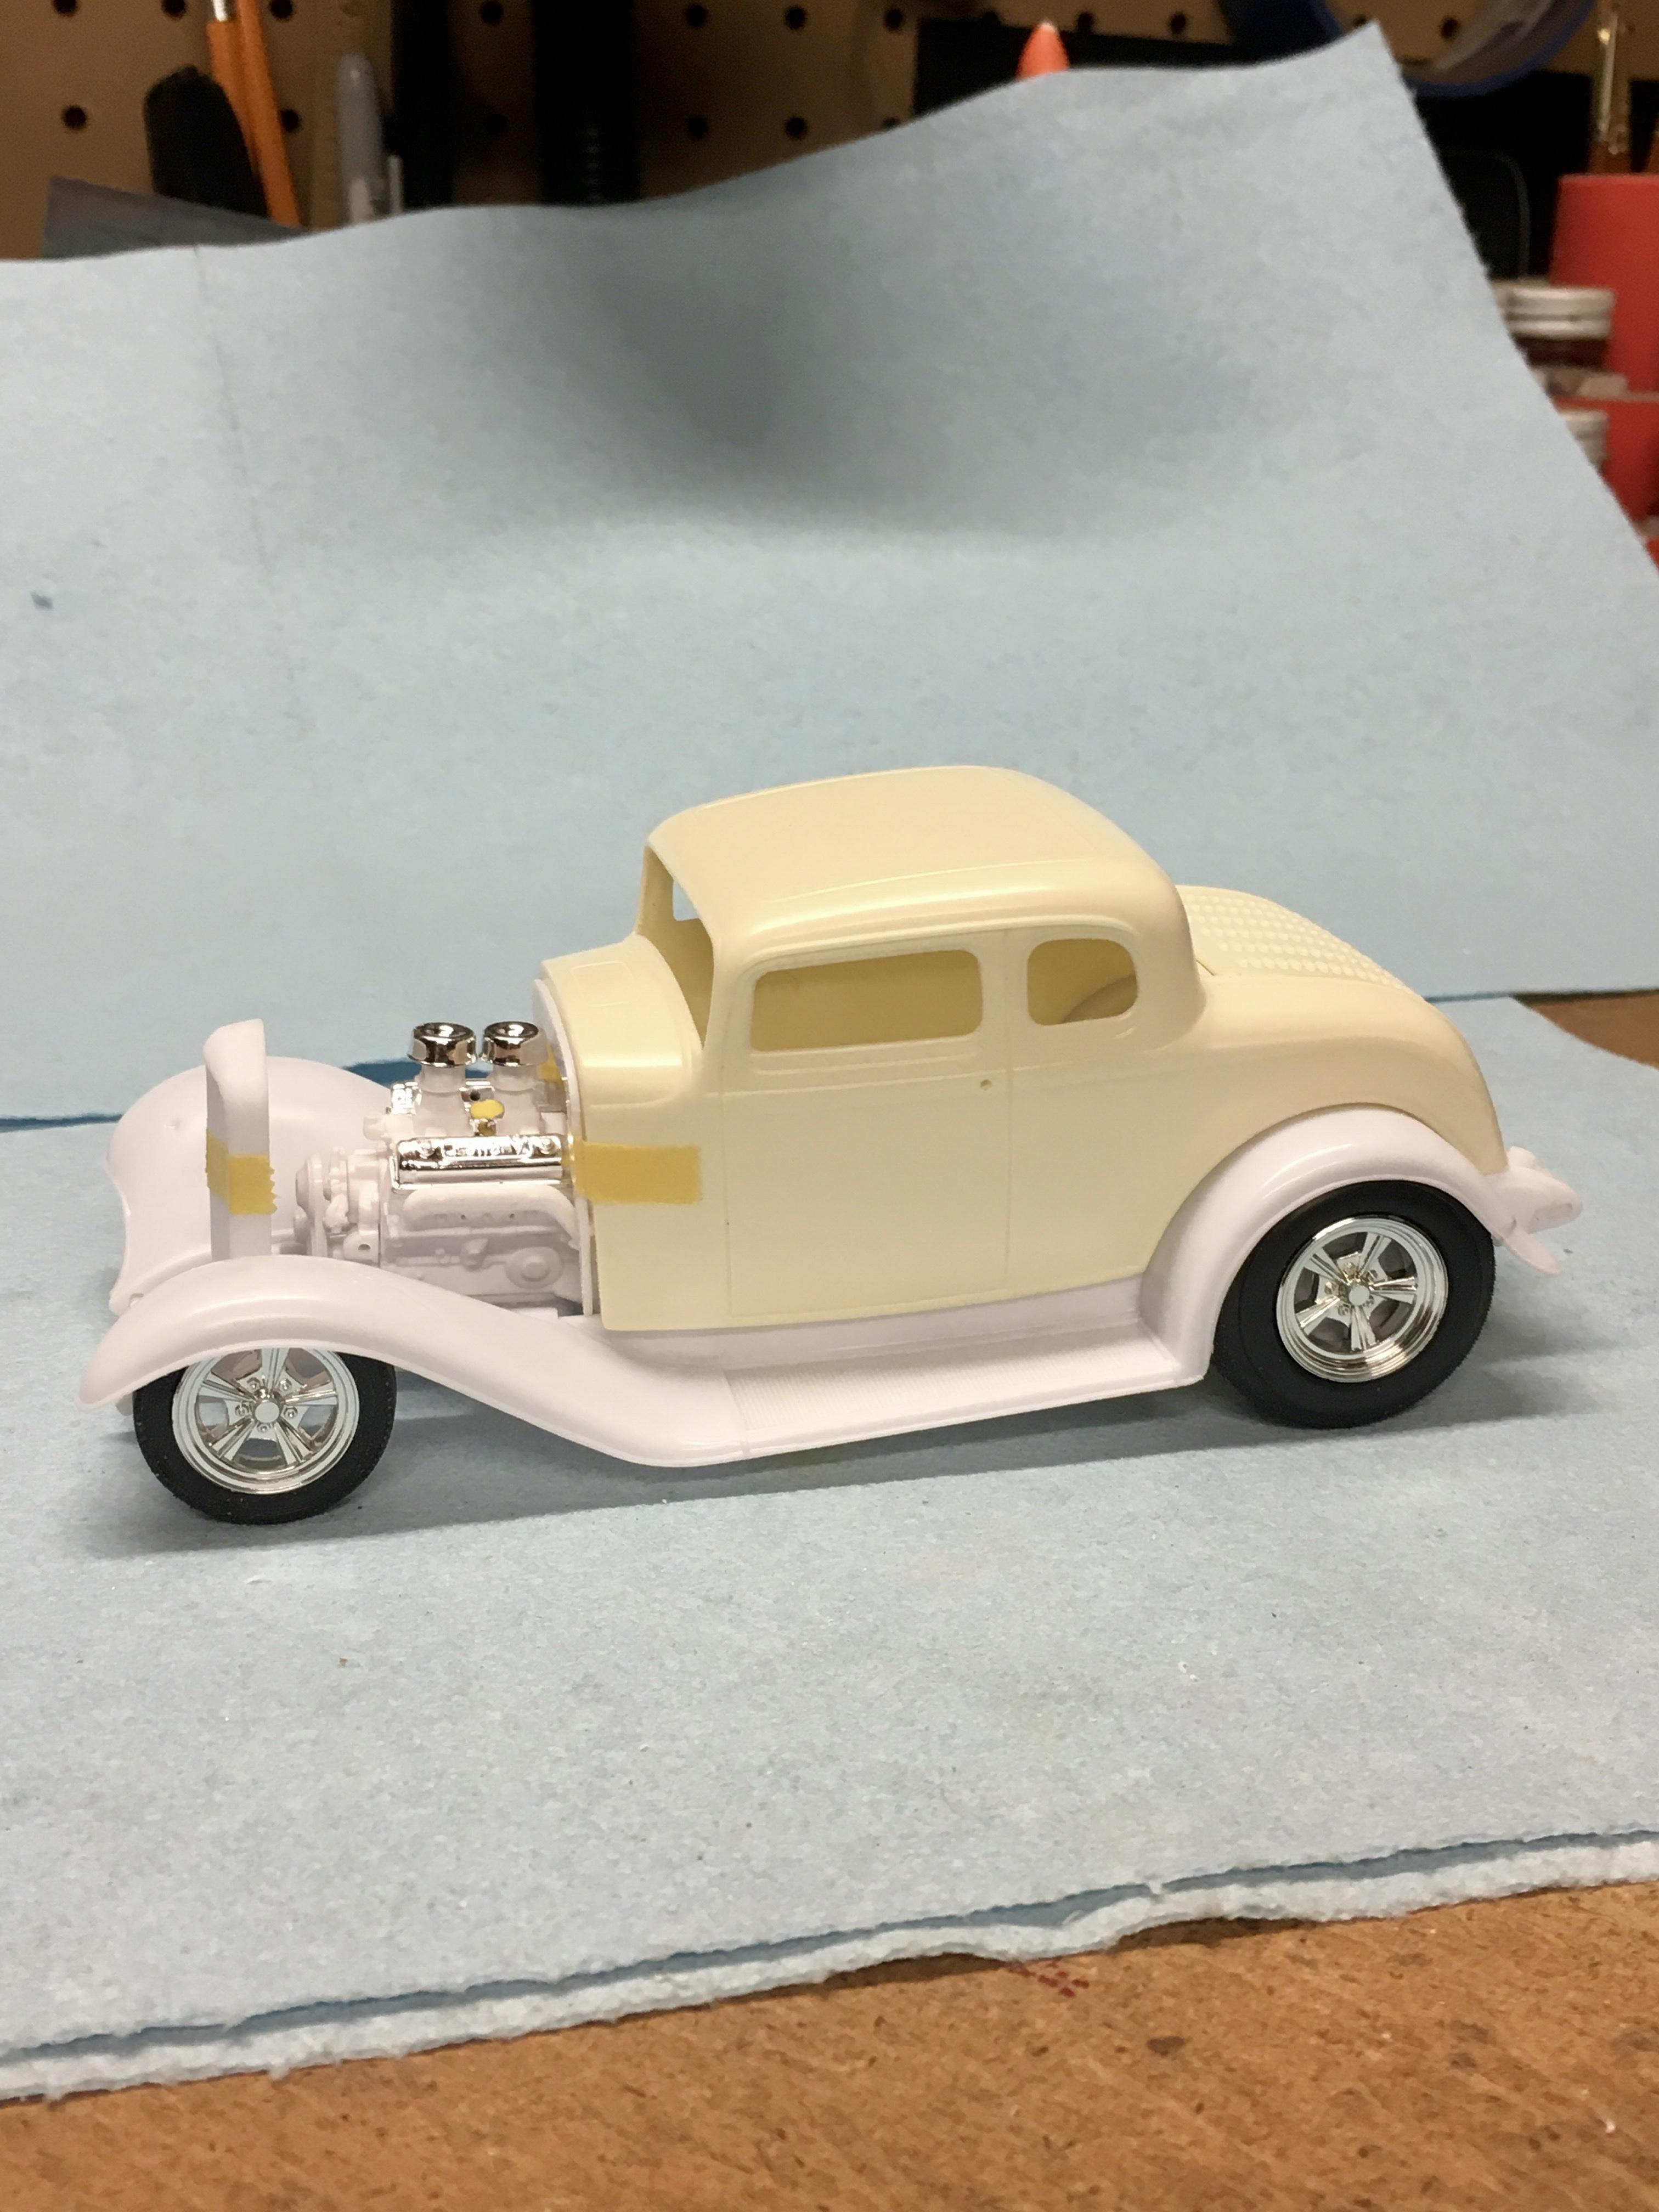
Like @Ace-Garageguy said, the proportions of the body in this kit look really right. I’ve always dug it. I did the same thing with one of mine back in the day, cutting all of the fenders off to make a hiboy. That model only survived a couple years but I can still picture it. I sprayed the body Testors Yellow with Light Green (like Apple Green) frame, suspension and engine, which was the Flathead from the ‘40 Pickup. Wheels were the chrome steelies from The Beach Boys 3-Window. I also remember it had a Full House cards decals on the cowl. That would have been around 1993 and I would have been 13. I’m actually tempted to do another but probably in a more tasteful color combo! 🤣
-
No surprise there, Phil! I imagine you’ve built your share over the years. Thanks, Jason. I hear ya on the wheels. IRL I don’t think I’d put them on anything but I thought some 70’s vibe might be cool in this case. I actually started with the same tires but the Kelsey Hayes style wires from the ‘30 Woody. Unfortunately the way they are made wouldn’t allow for tucking in under the fenders enough. Couldn’t modify for enough back-space. Hard to go wrong with Lil’ Deuce tribute. I’m sure it’ll be bitchin’ when you get to it.
-
HA! That’s because it can be a pain the ass! Most of the time my scale exhausts end up being made from a bunch of pieces cut, pasted and blended together, not to mention pinning every joint for strength. Then multiply x2 because most everything I build has dual exhaust. I tend to dread it. Not very different from scratch building full scale exhaust systems…
-
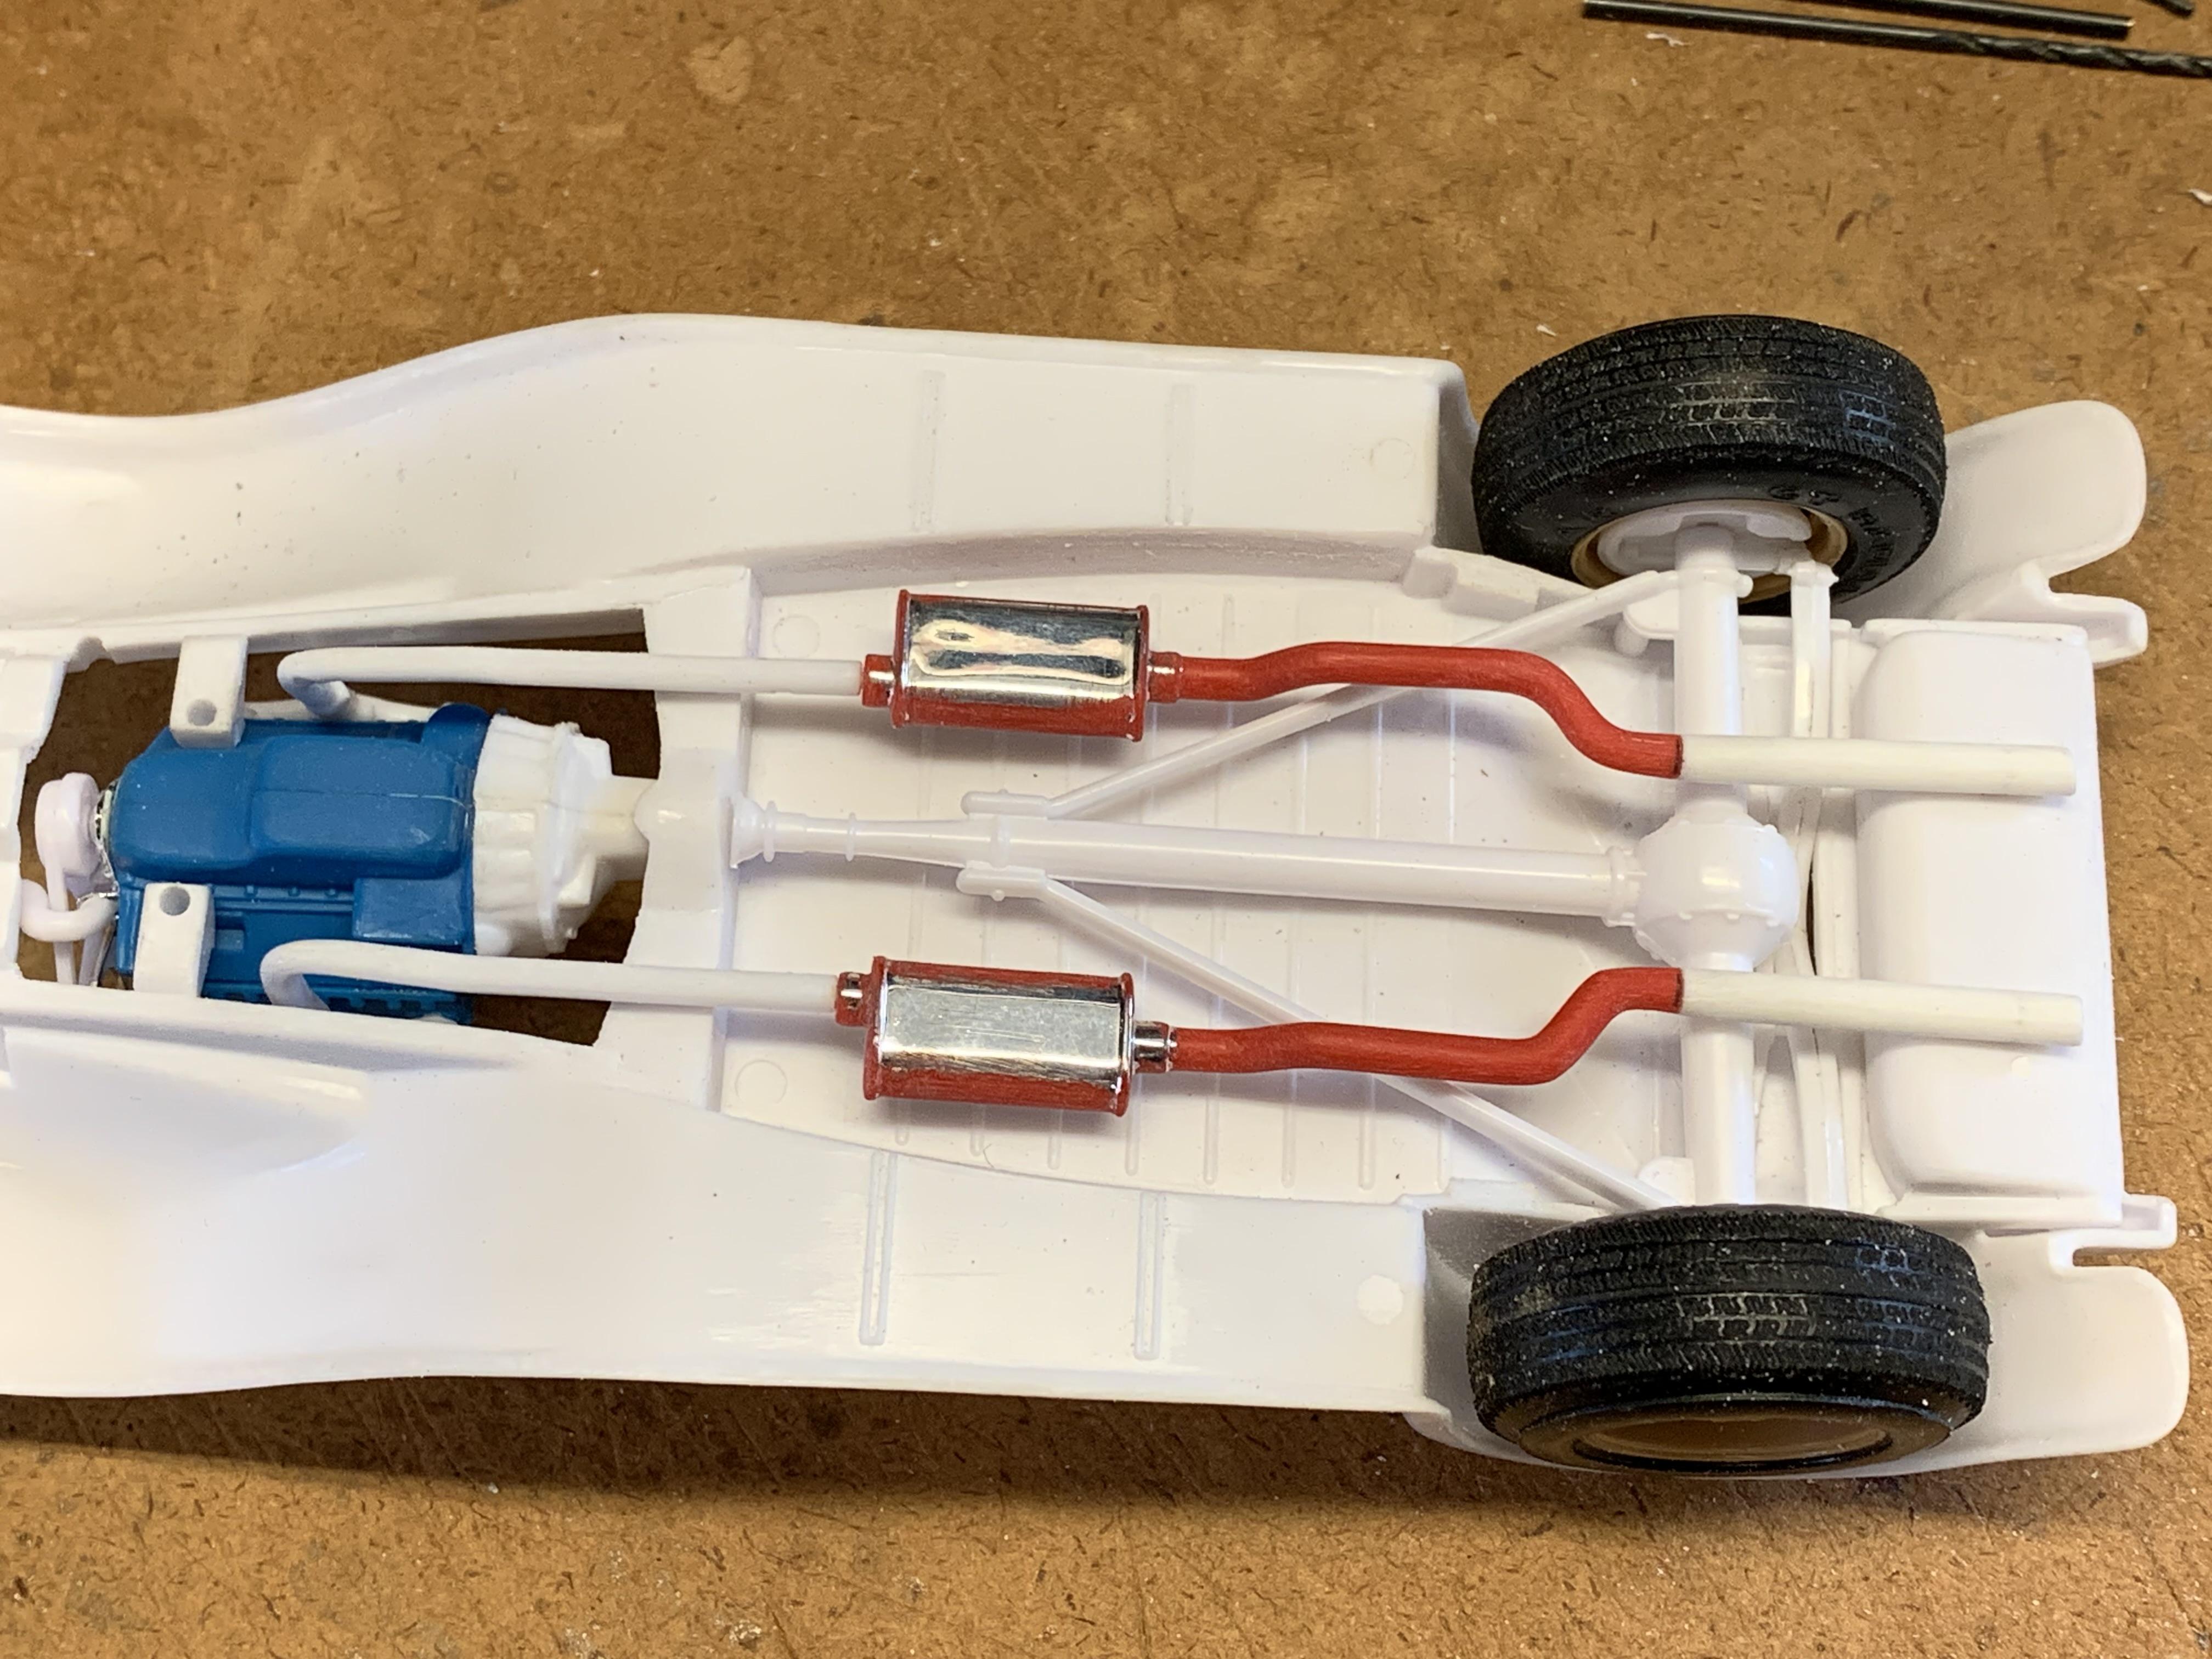
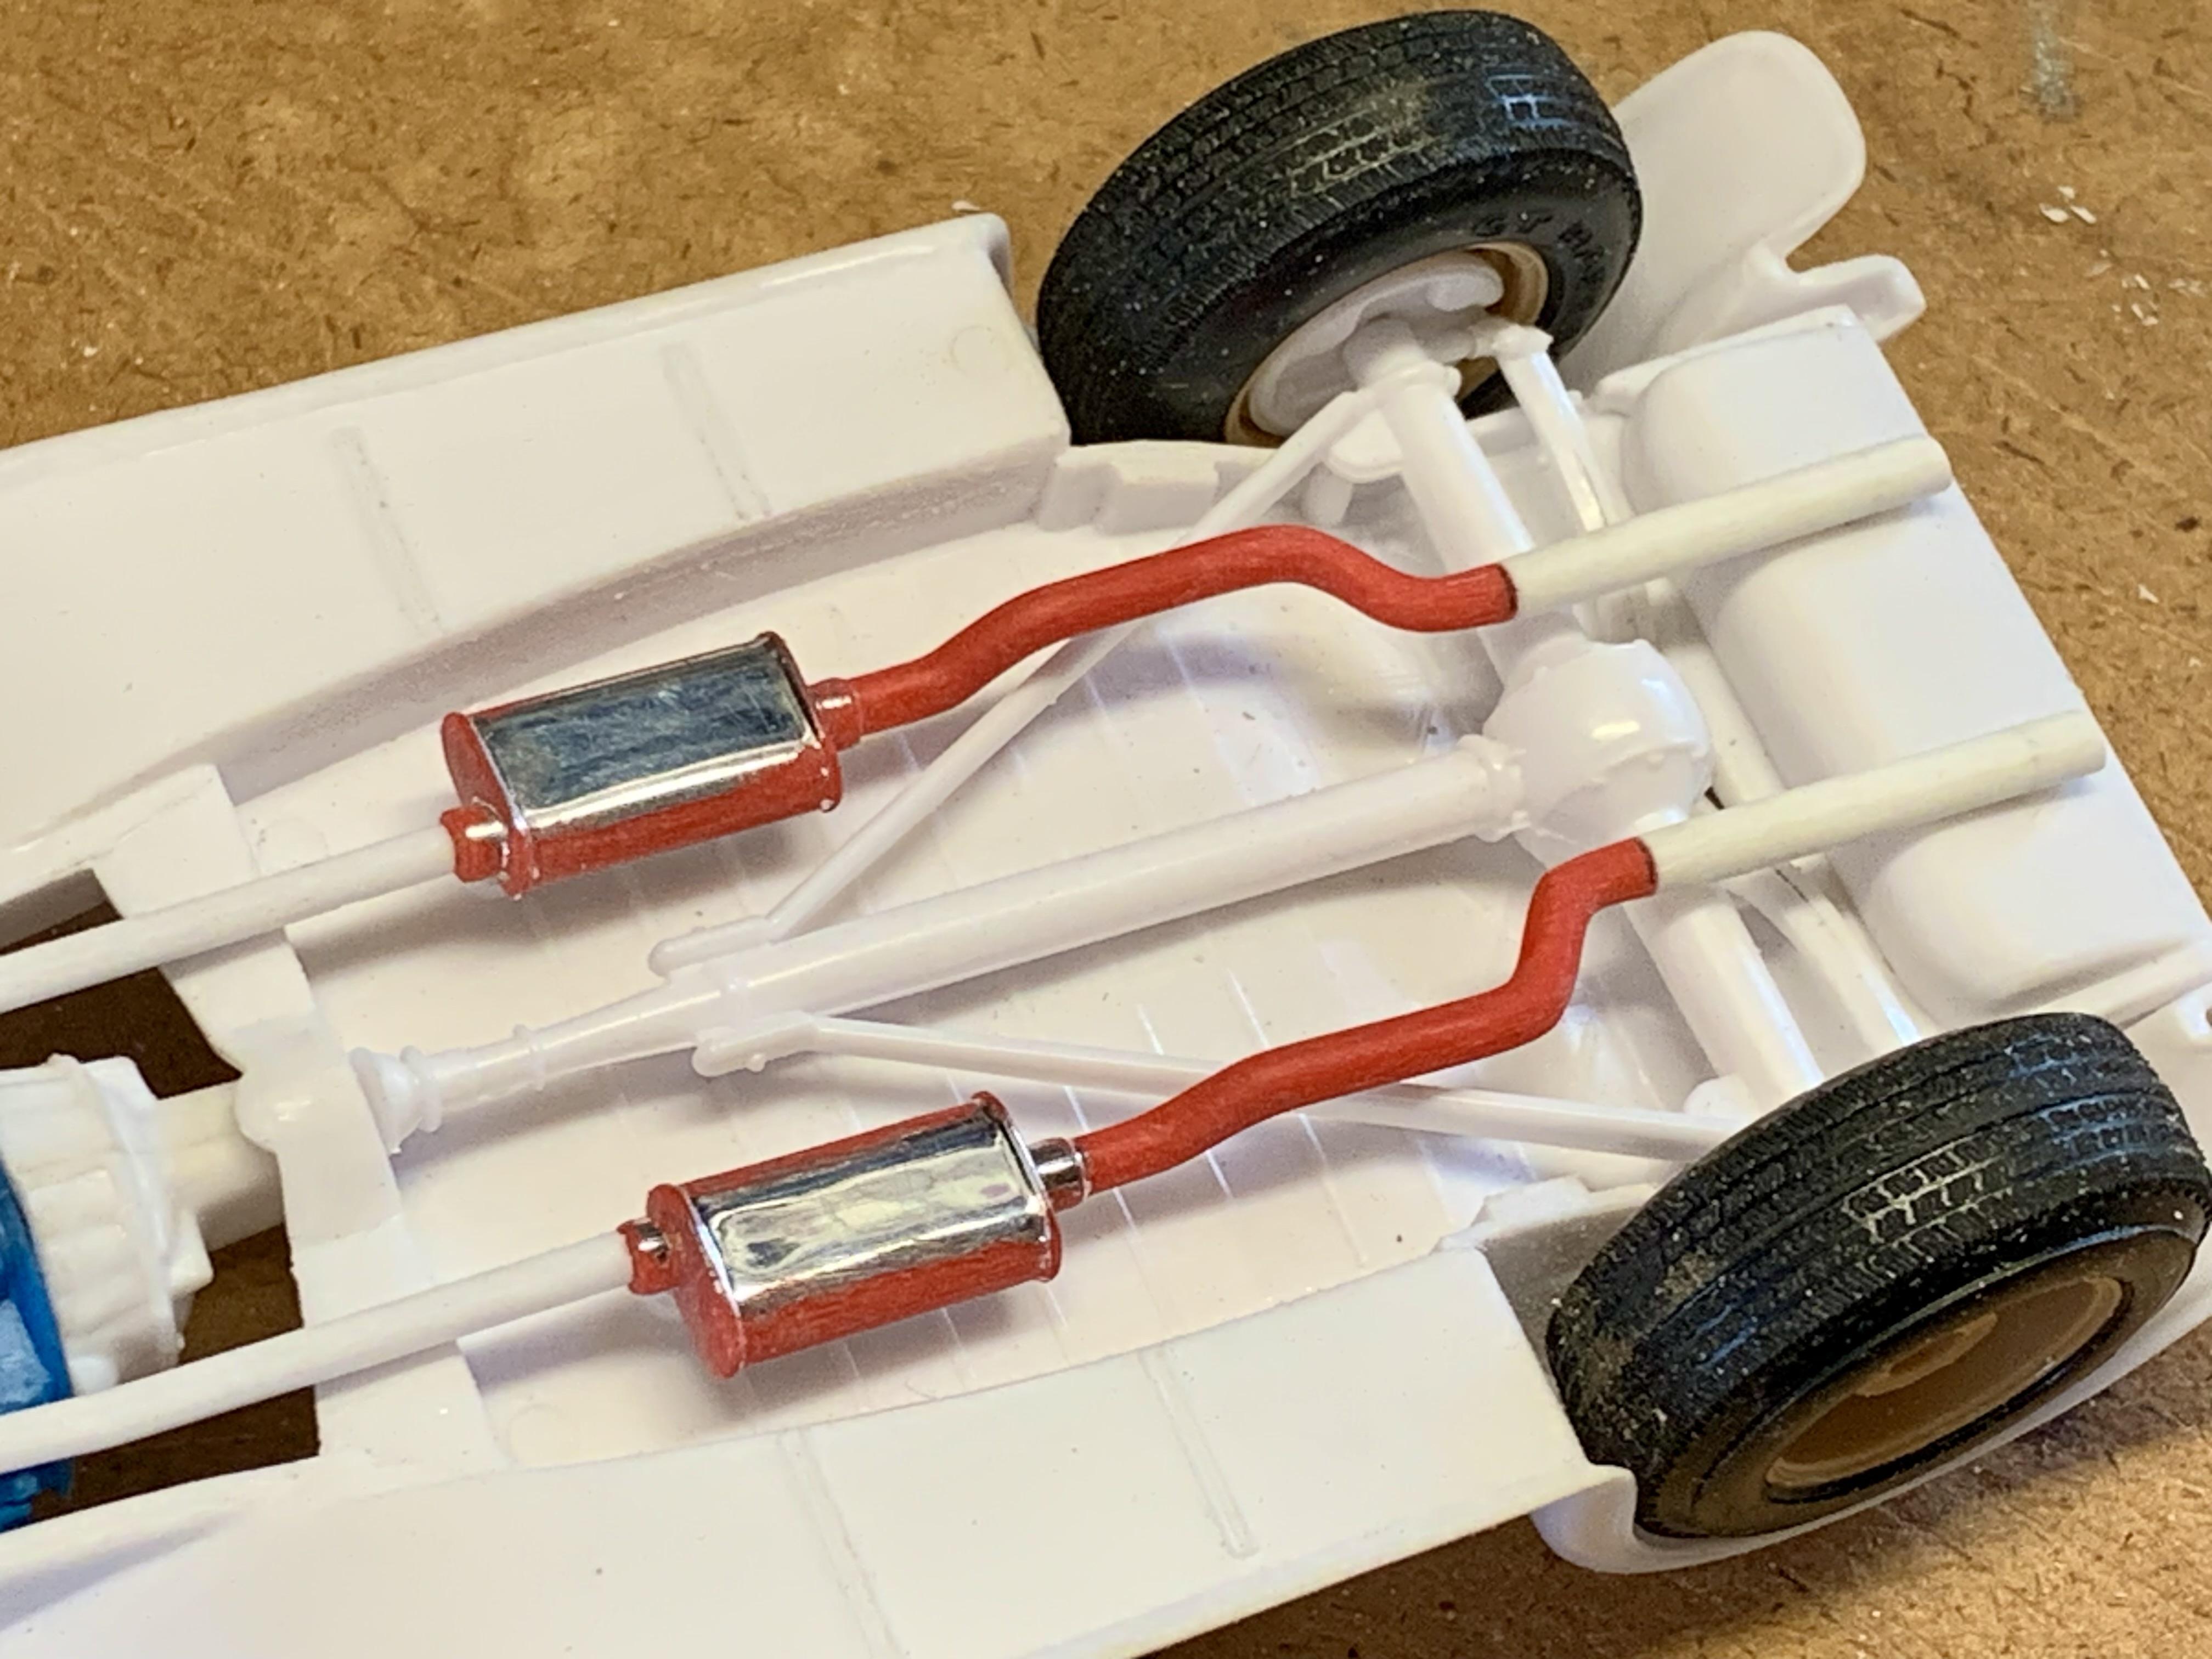
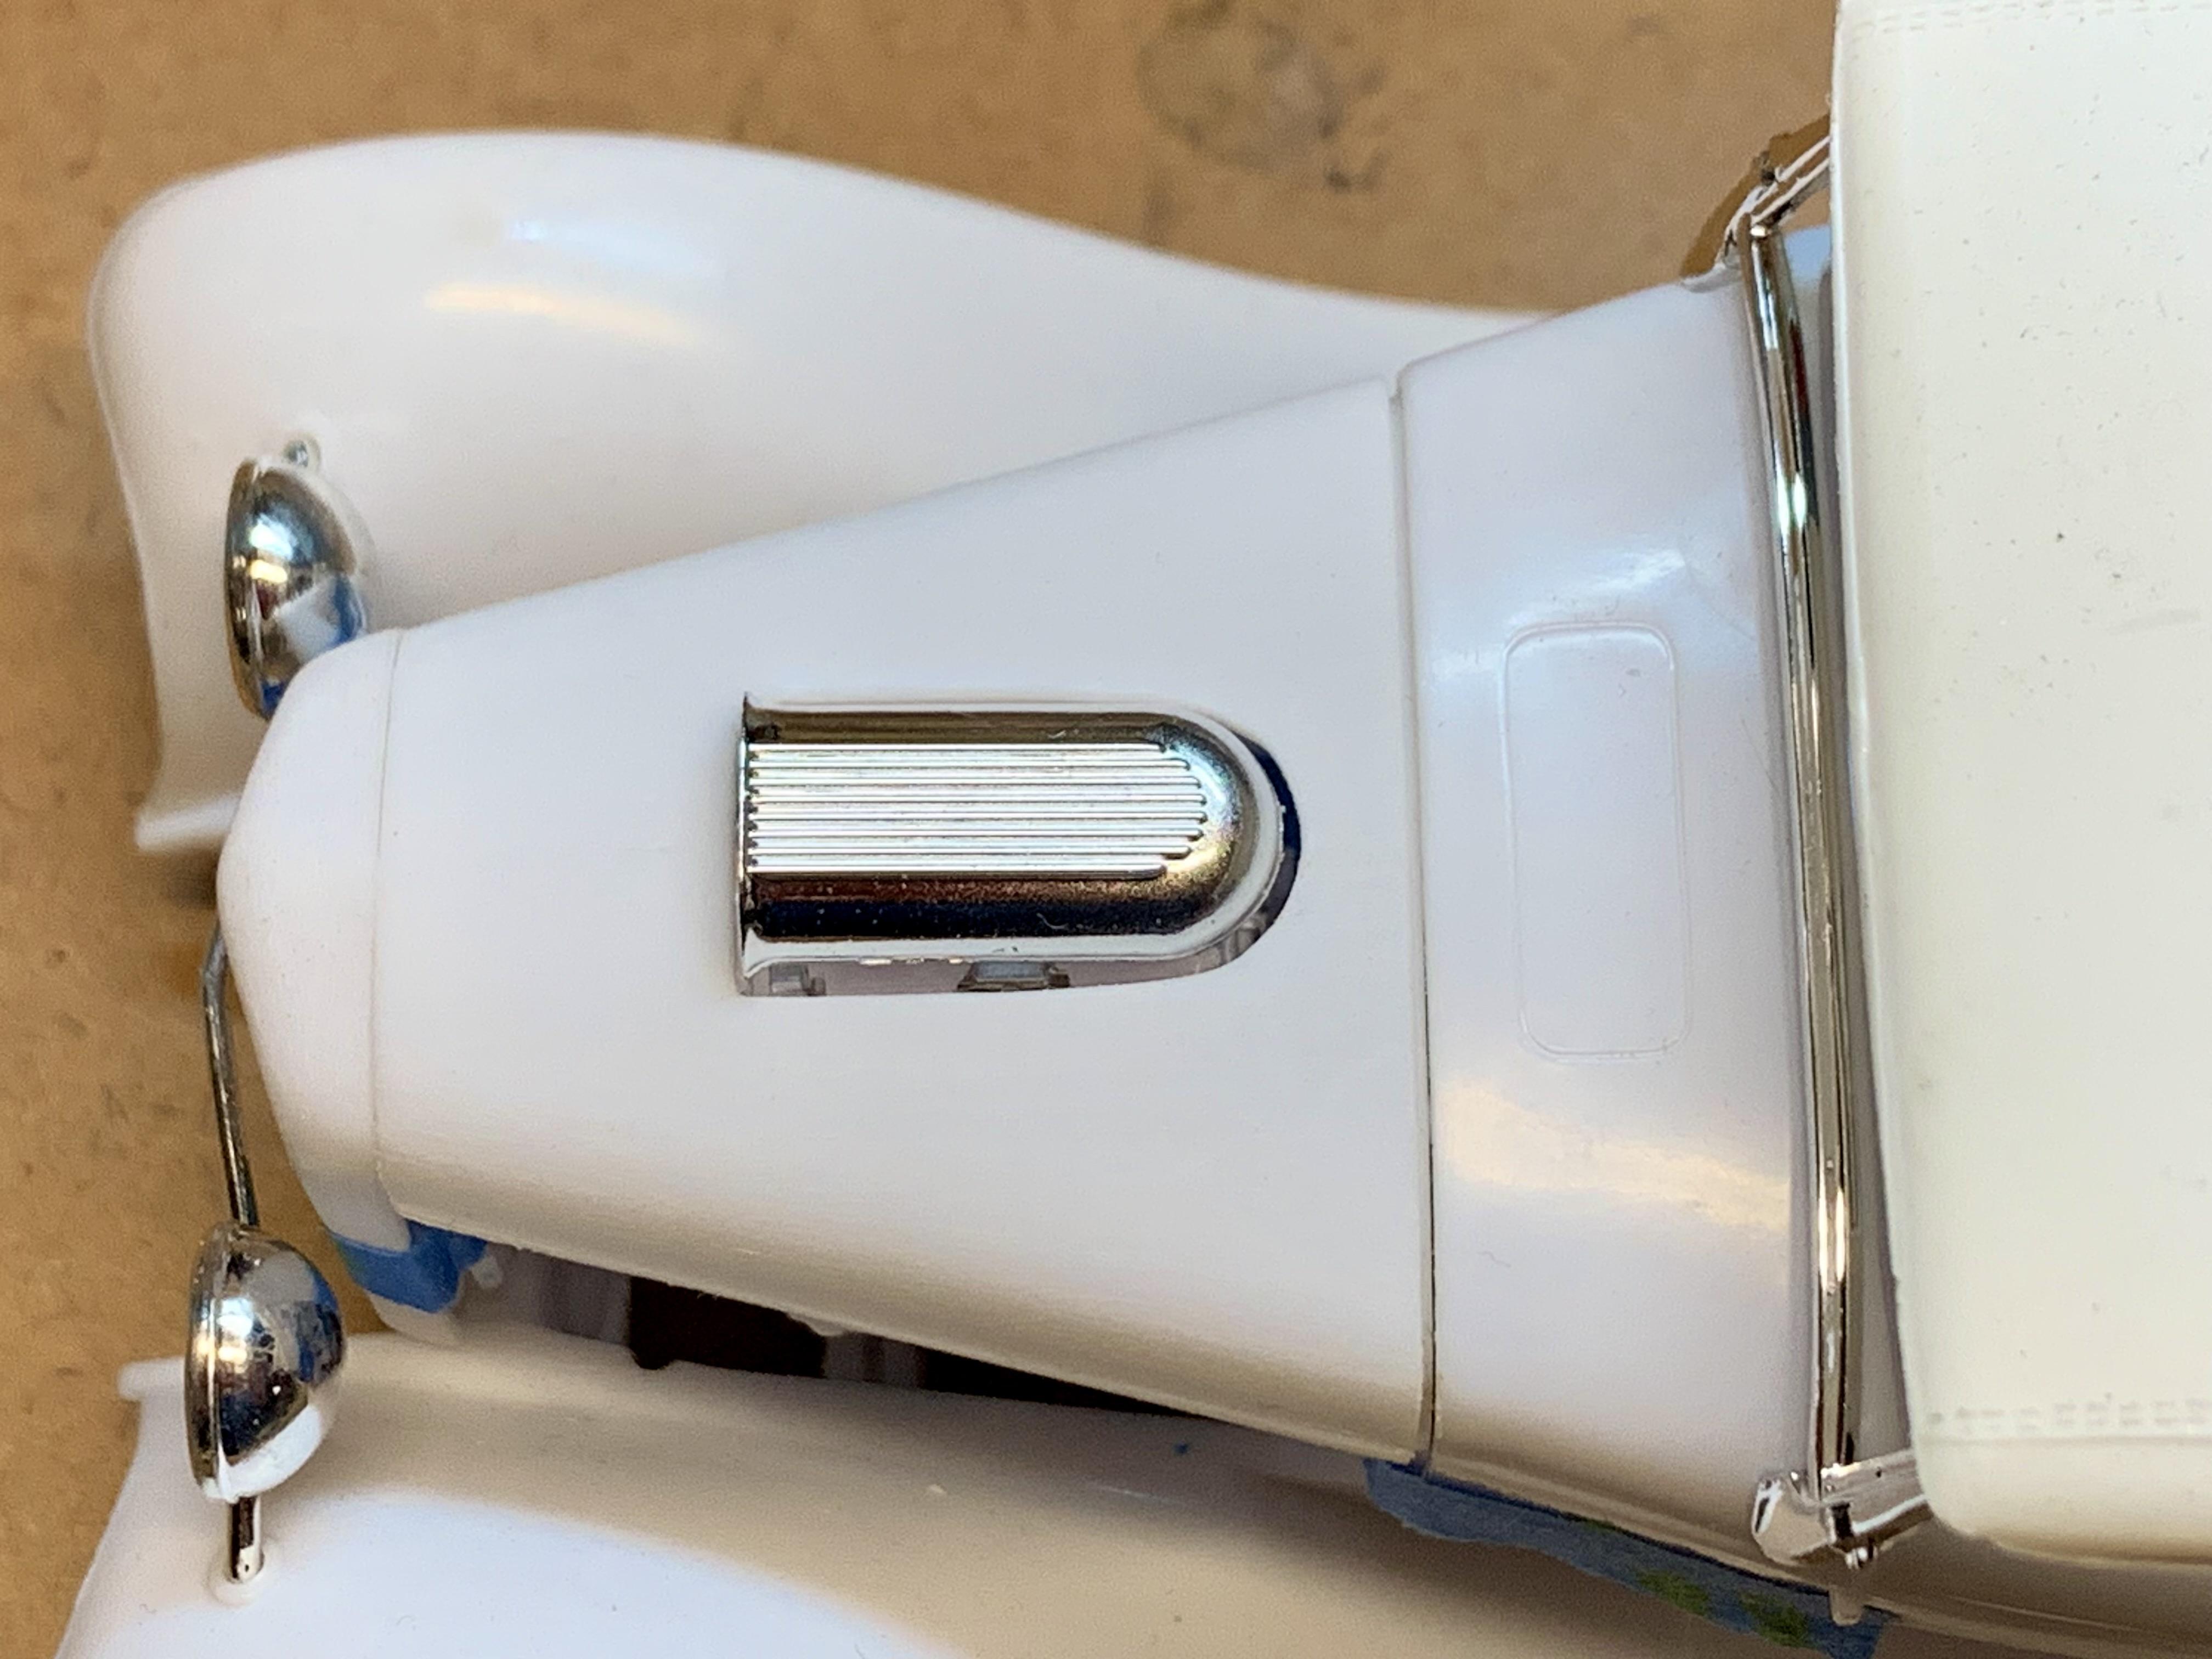
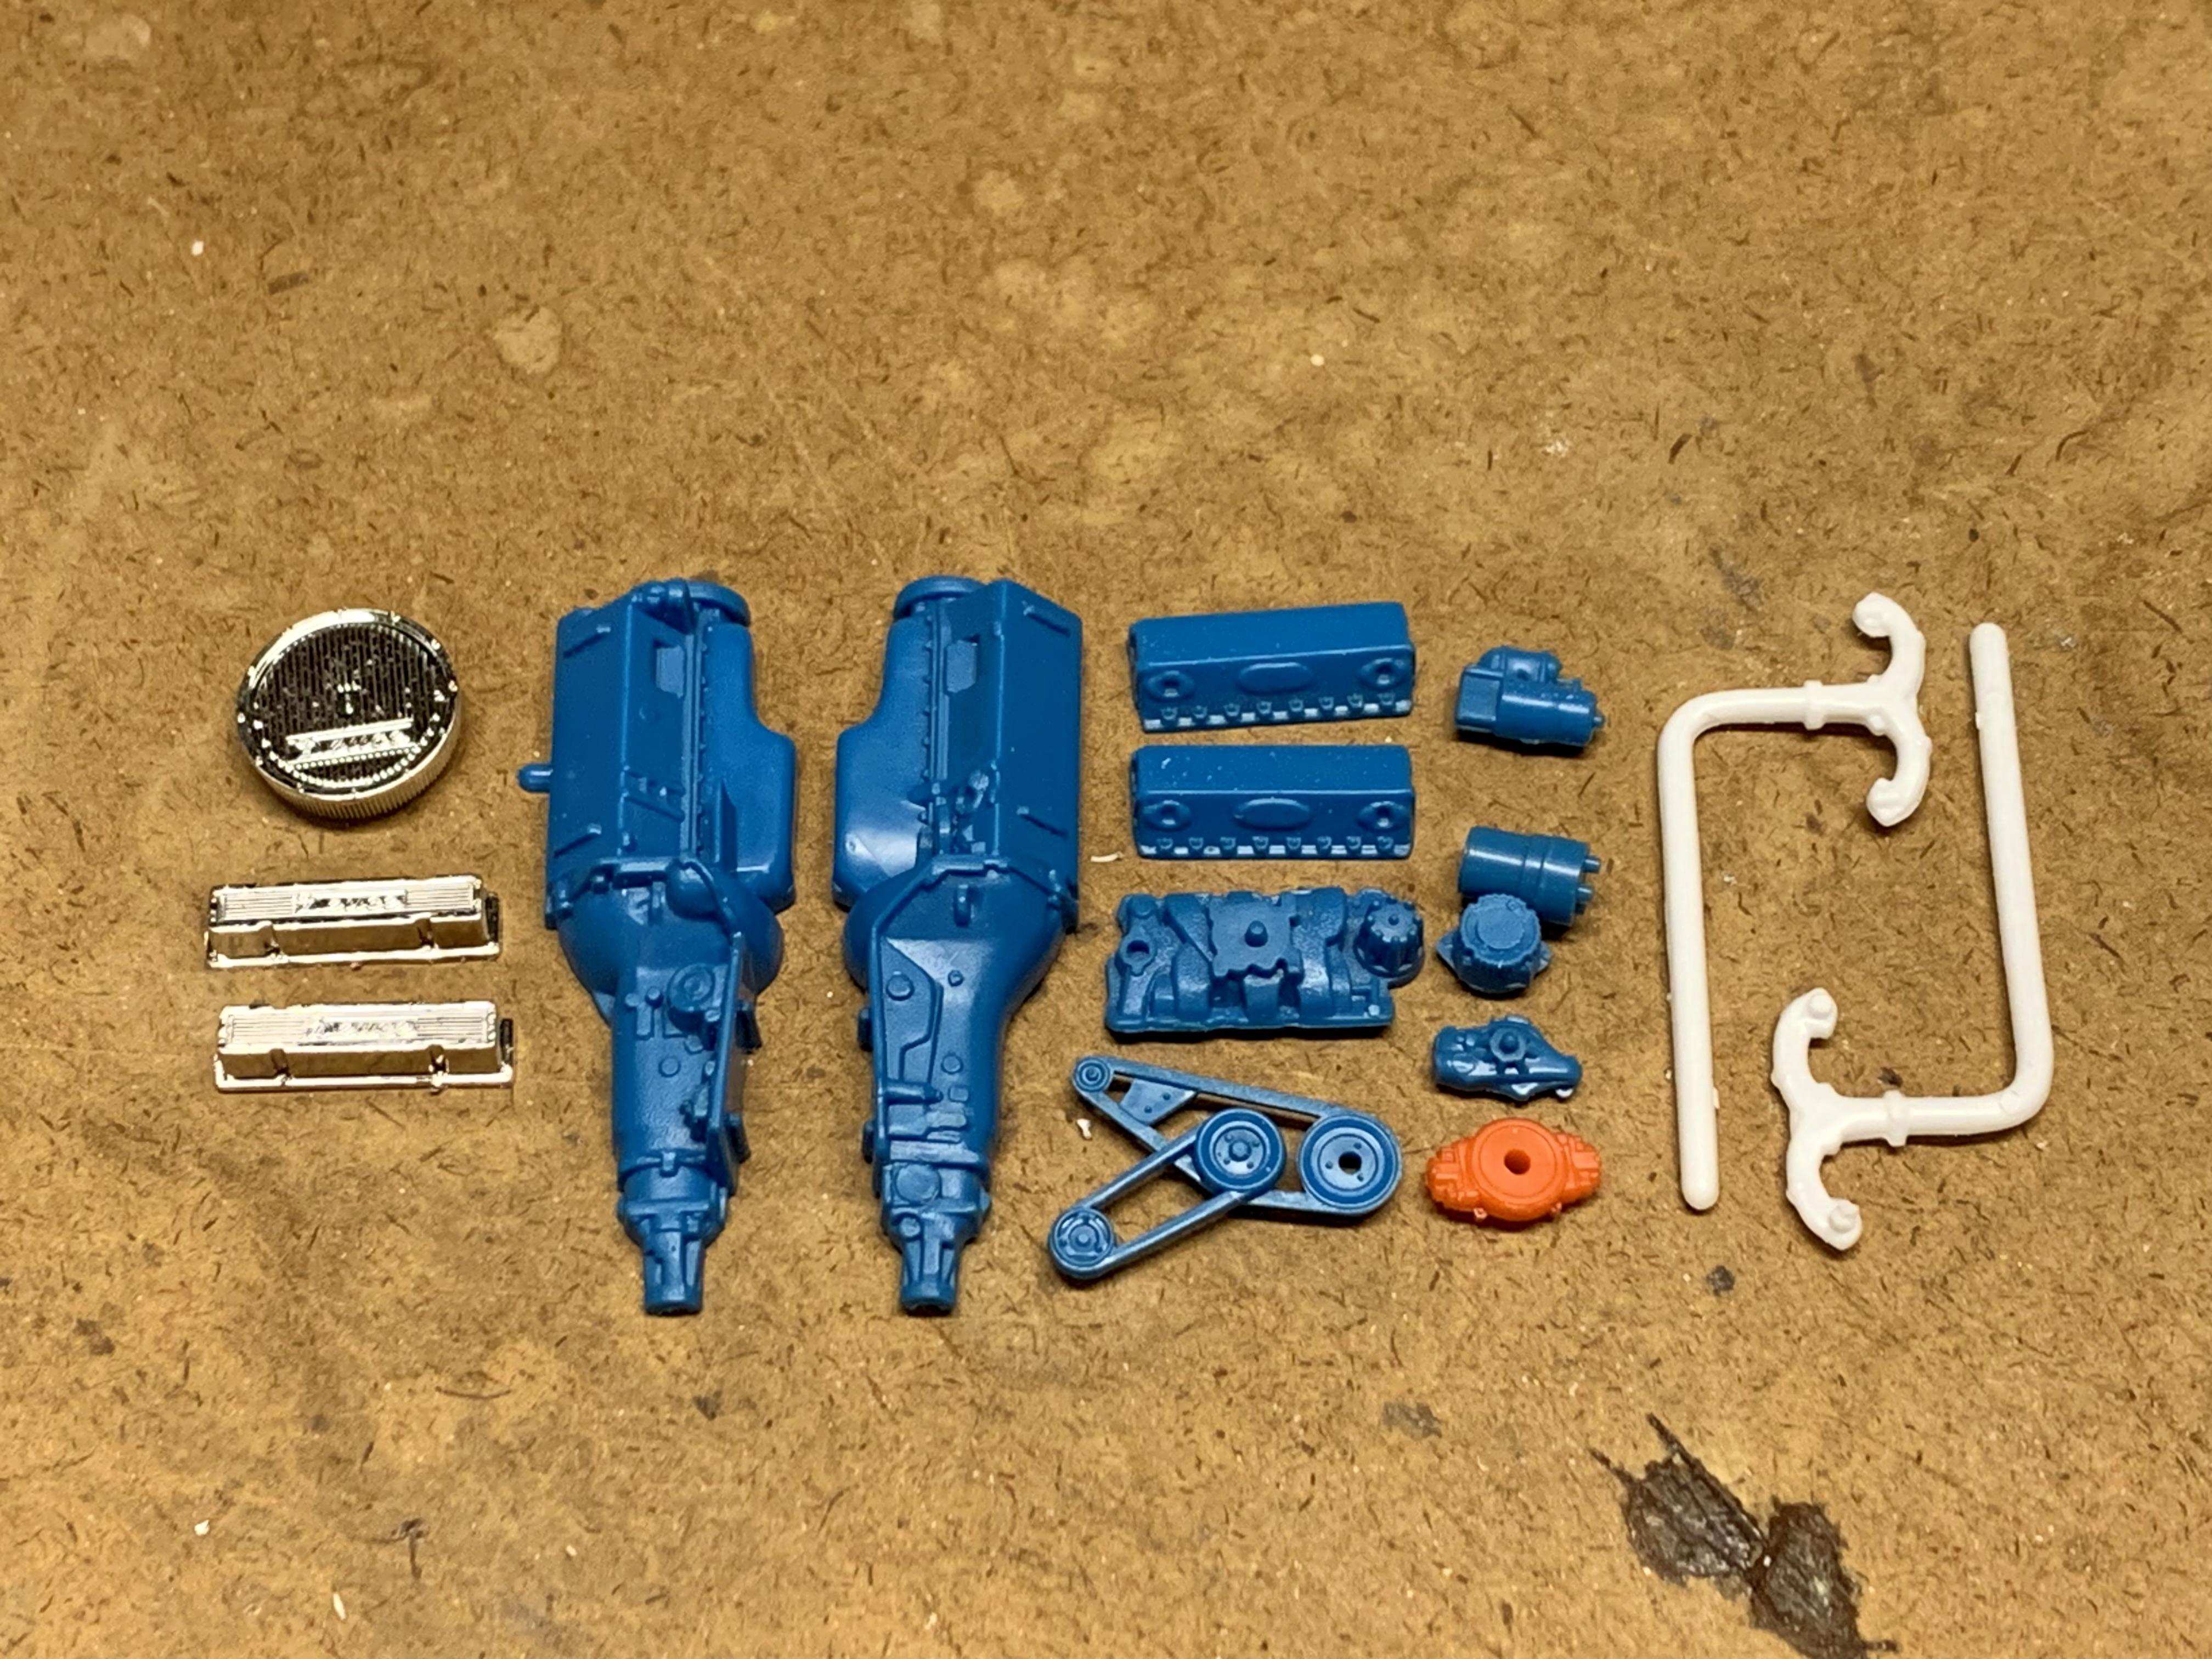
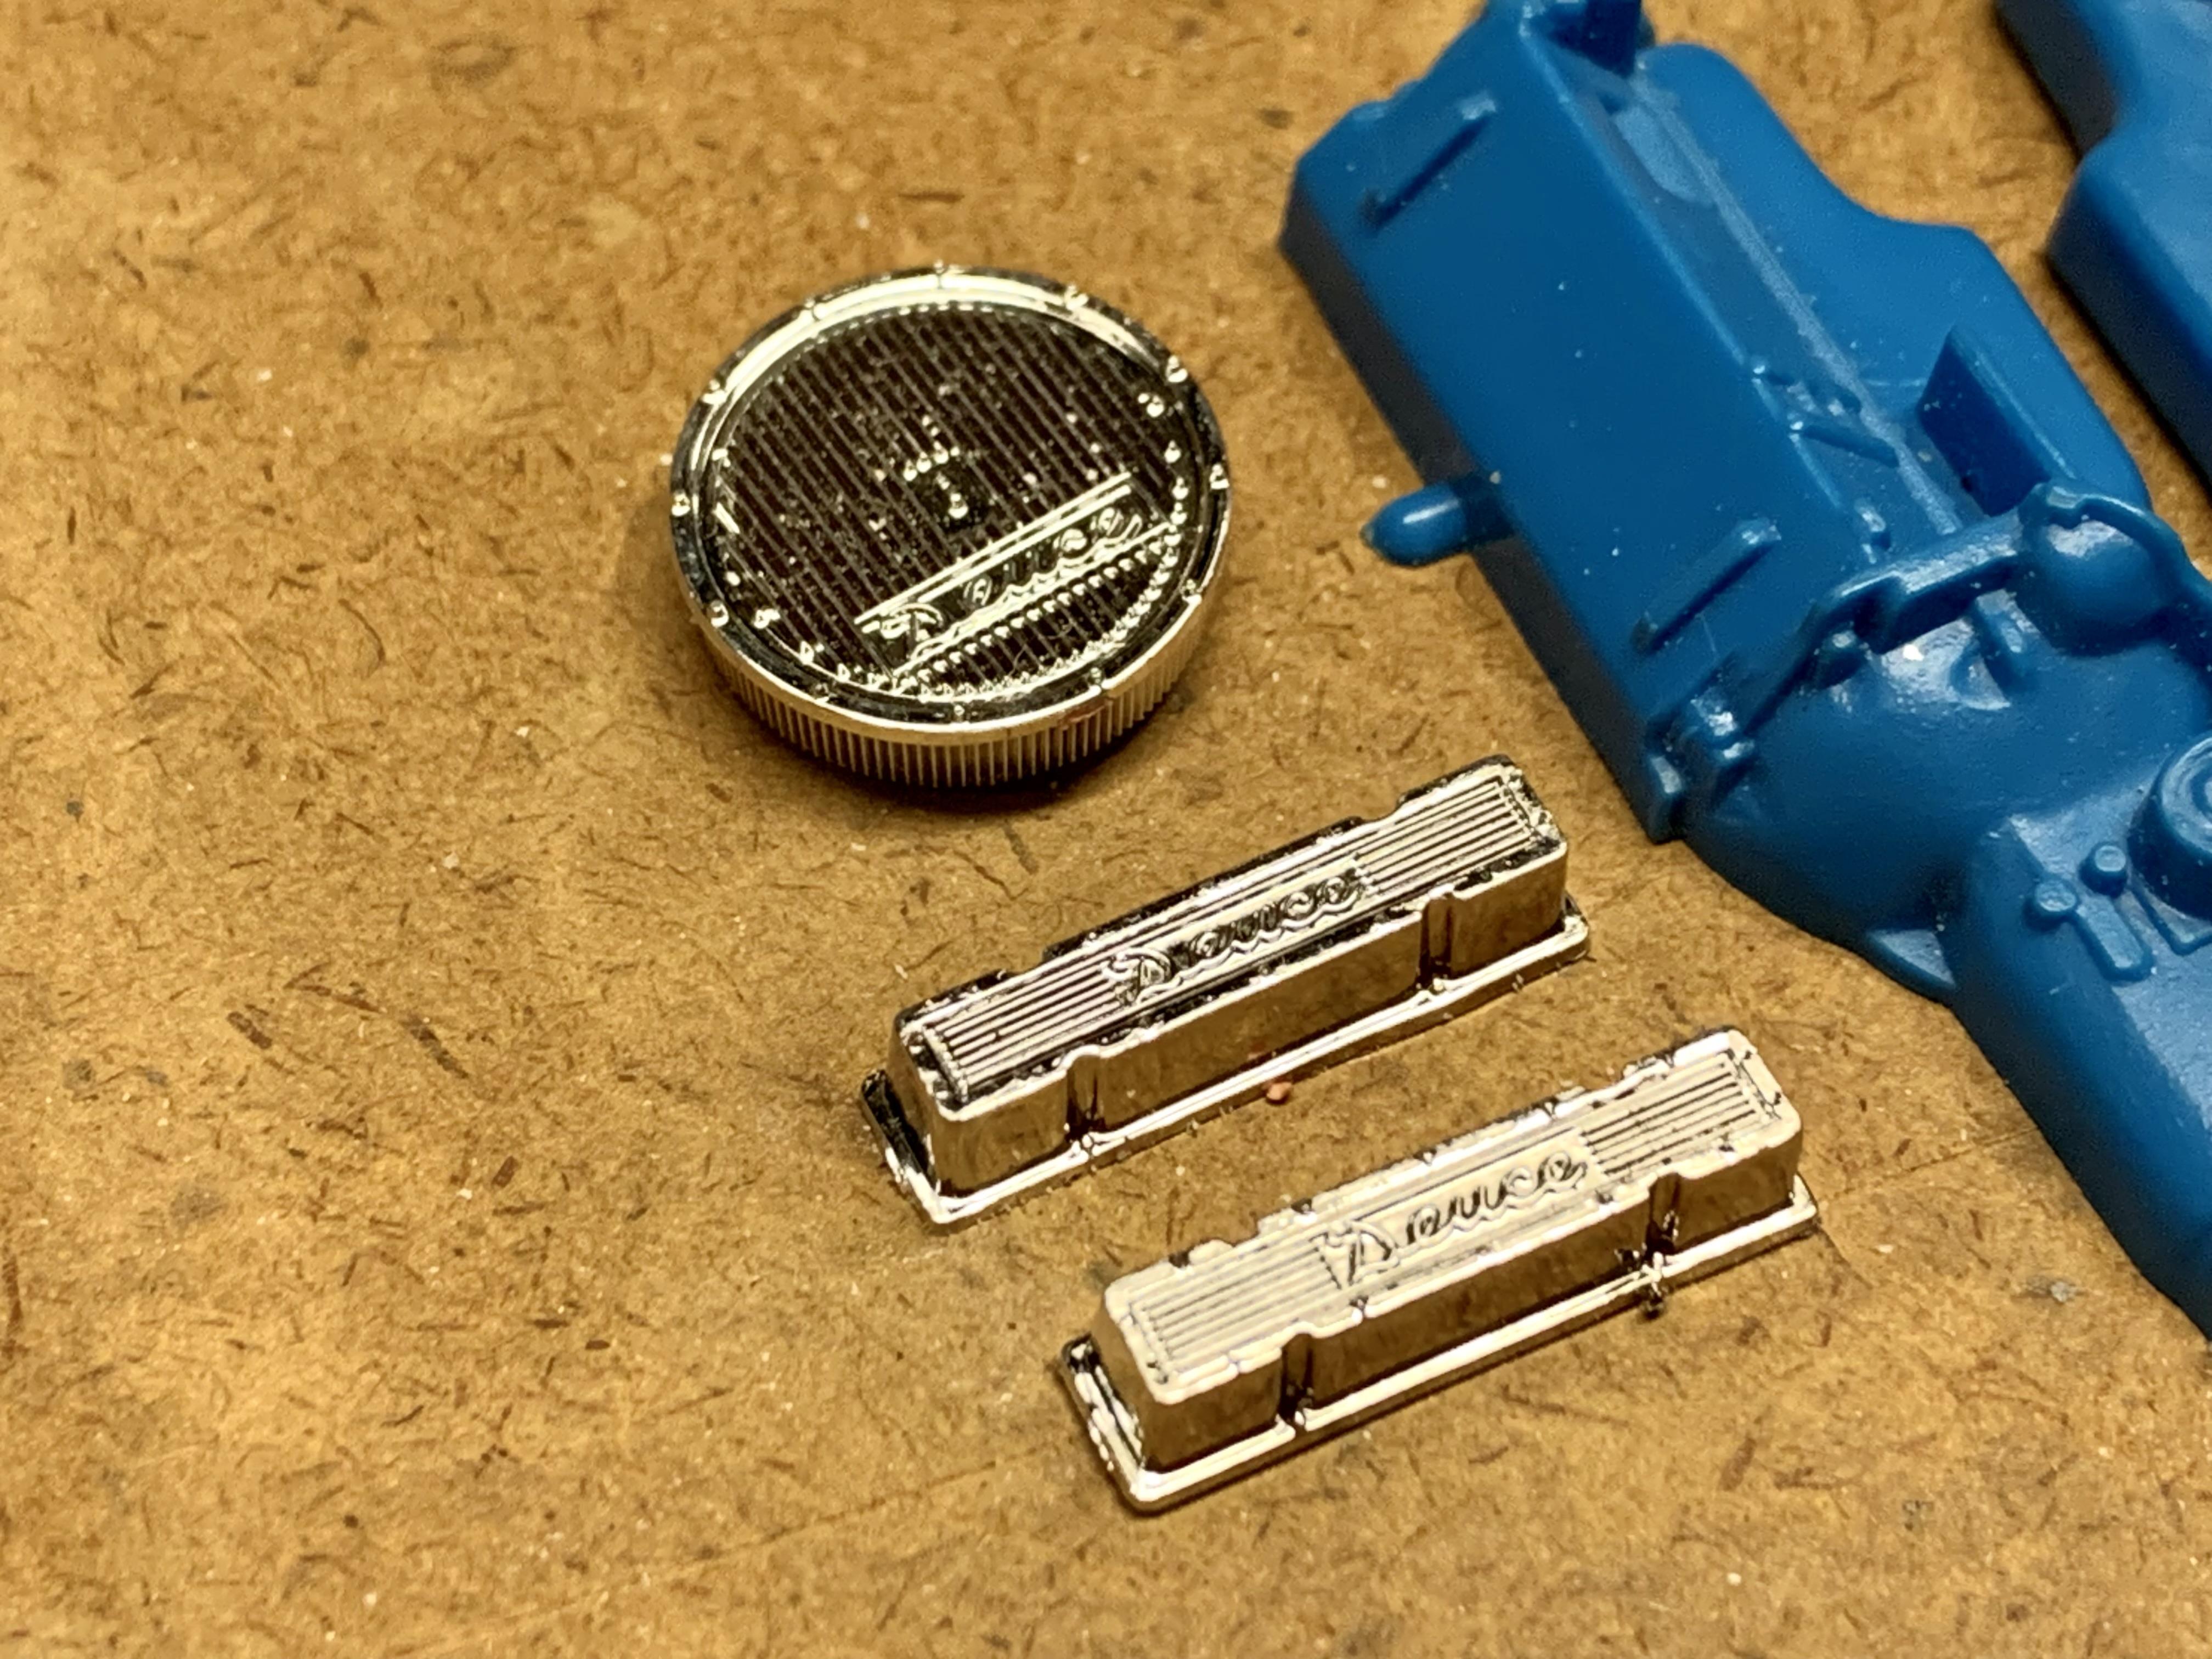
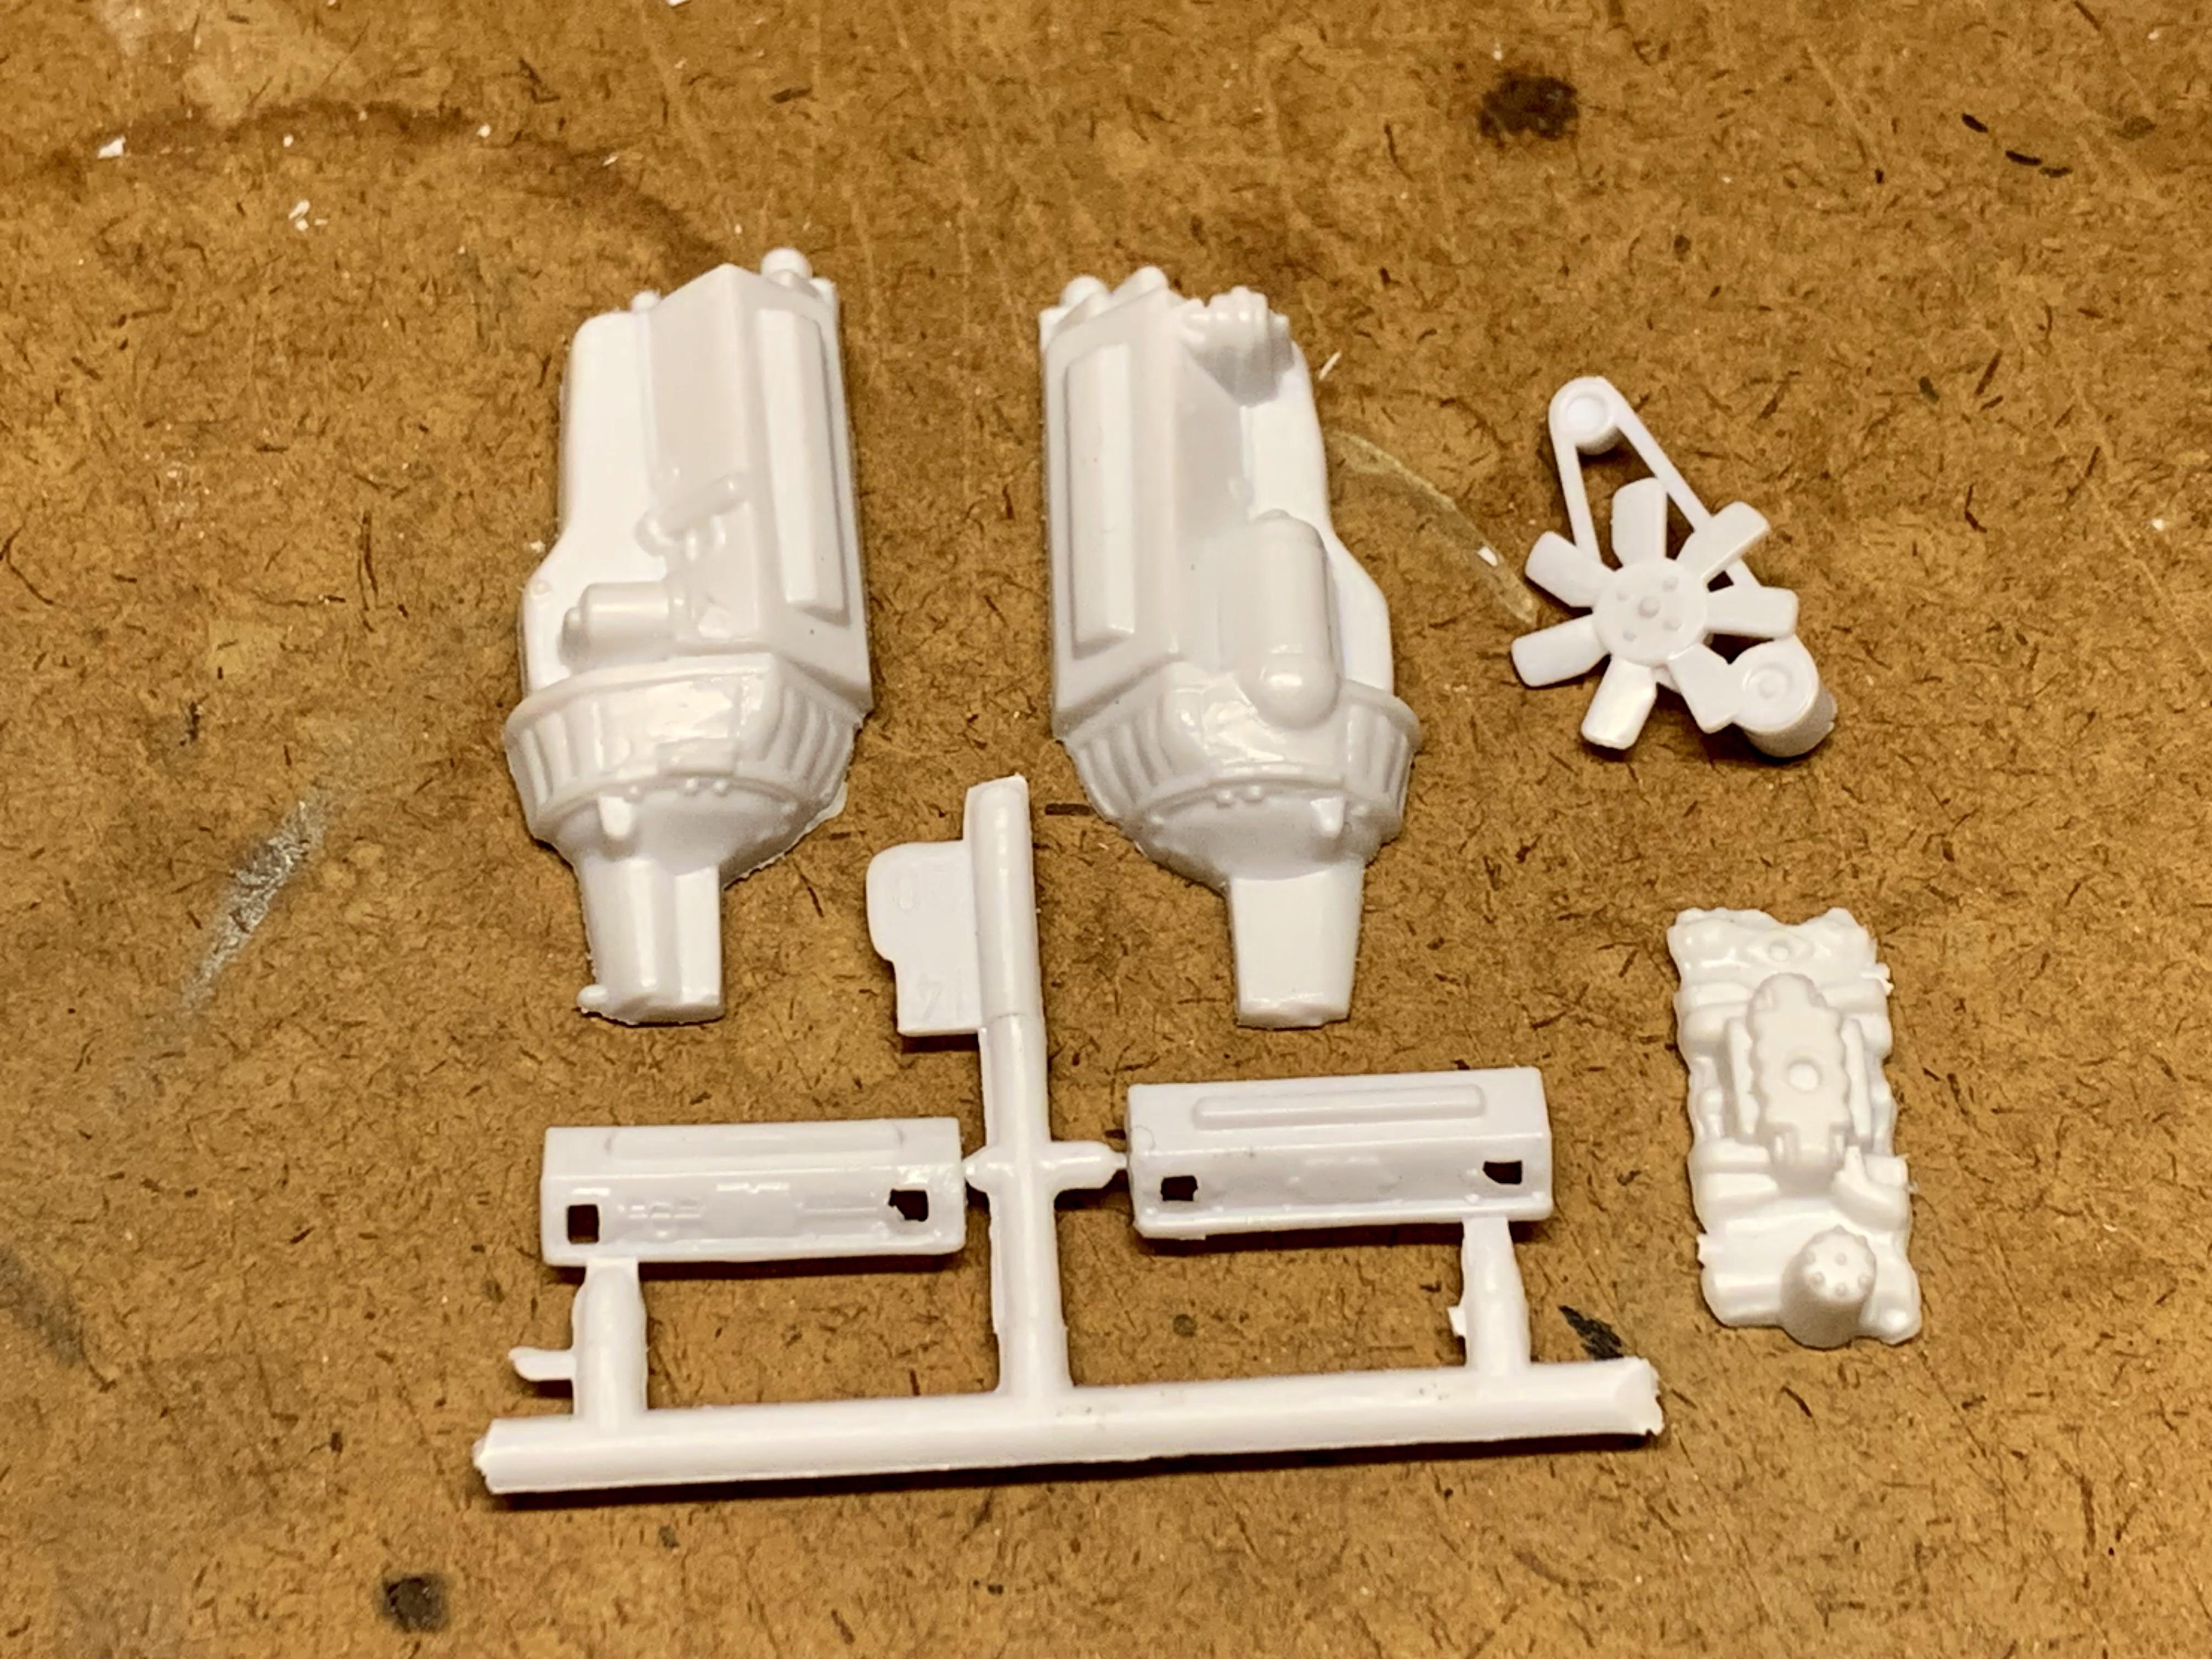
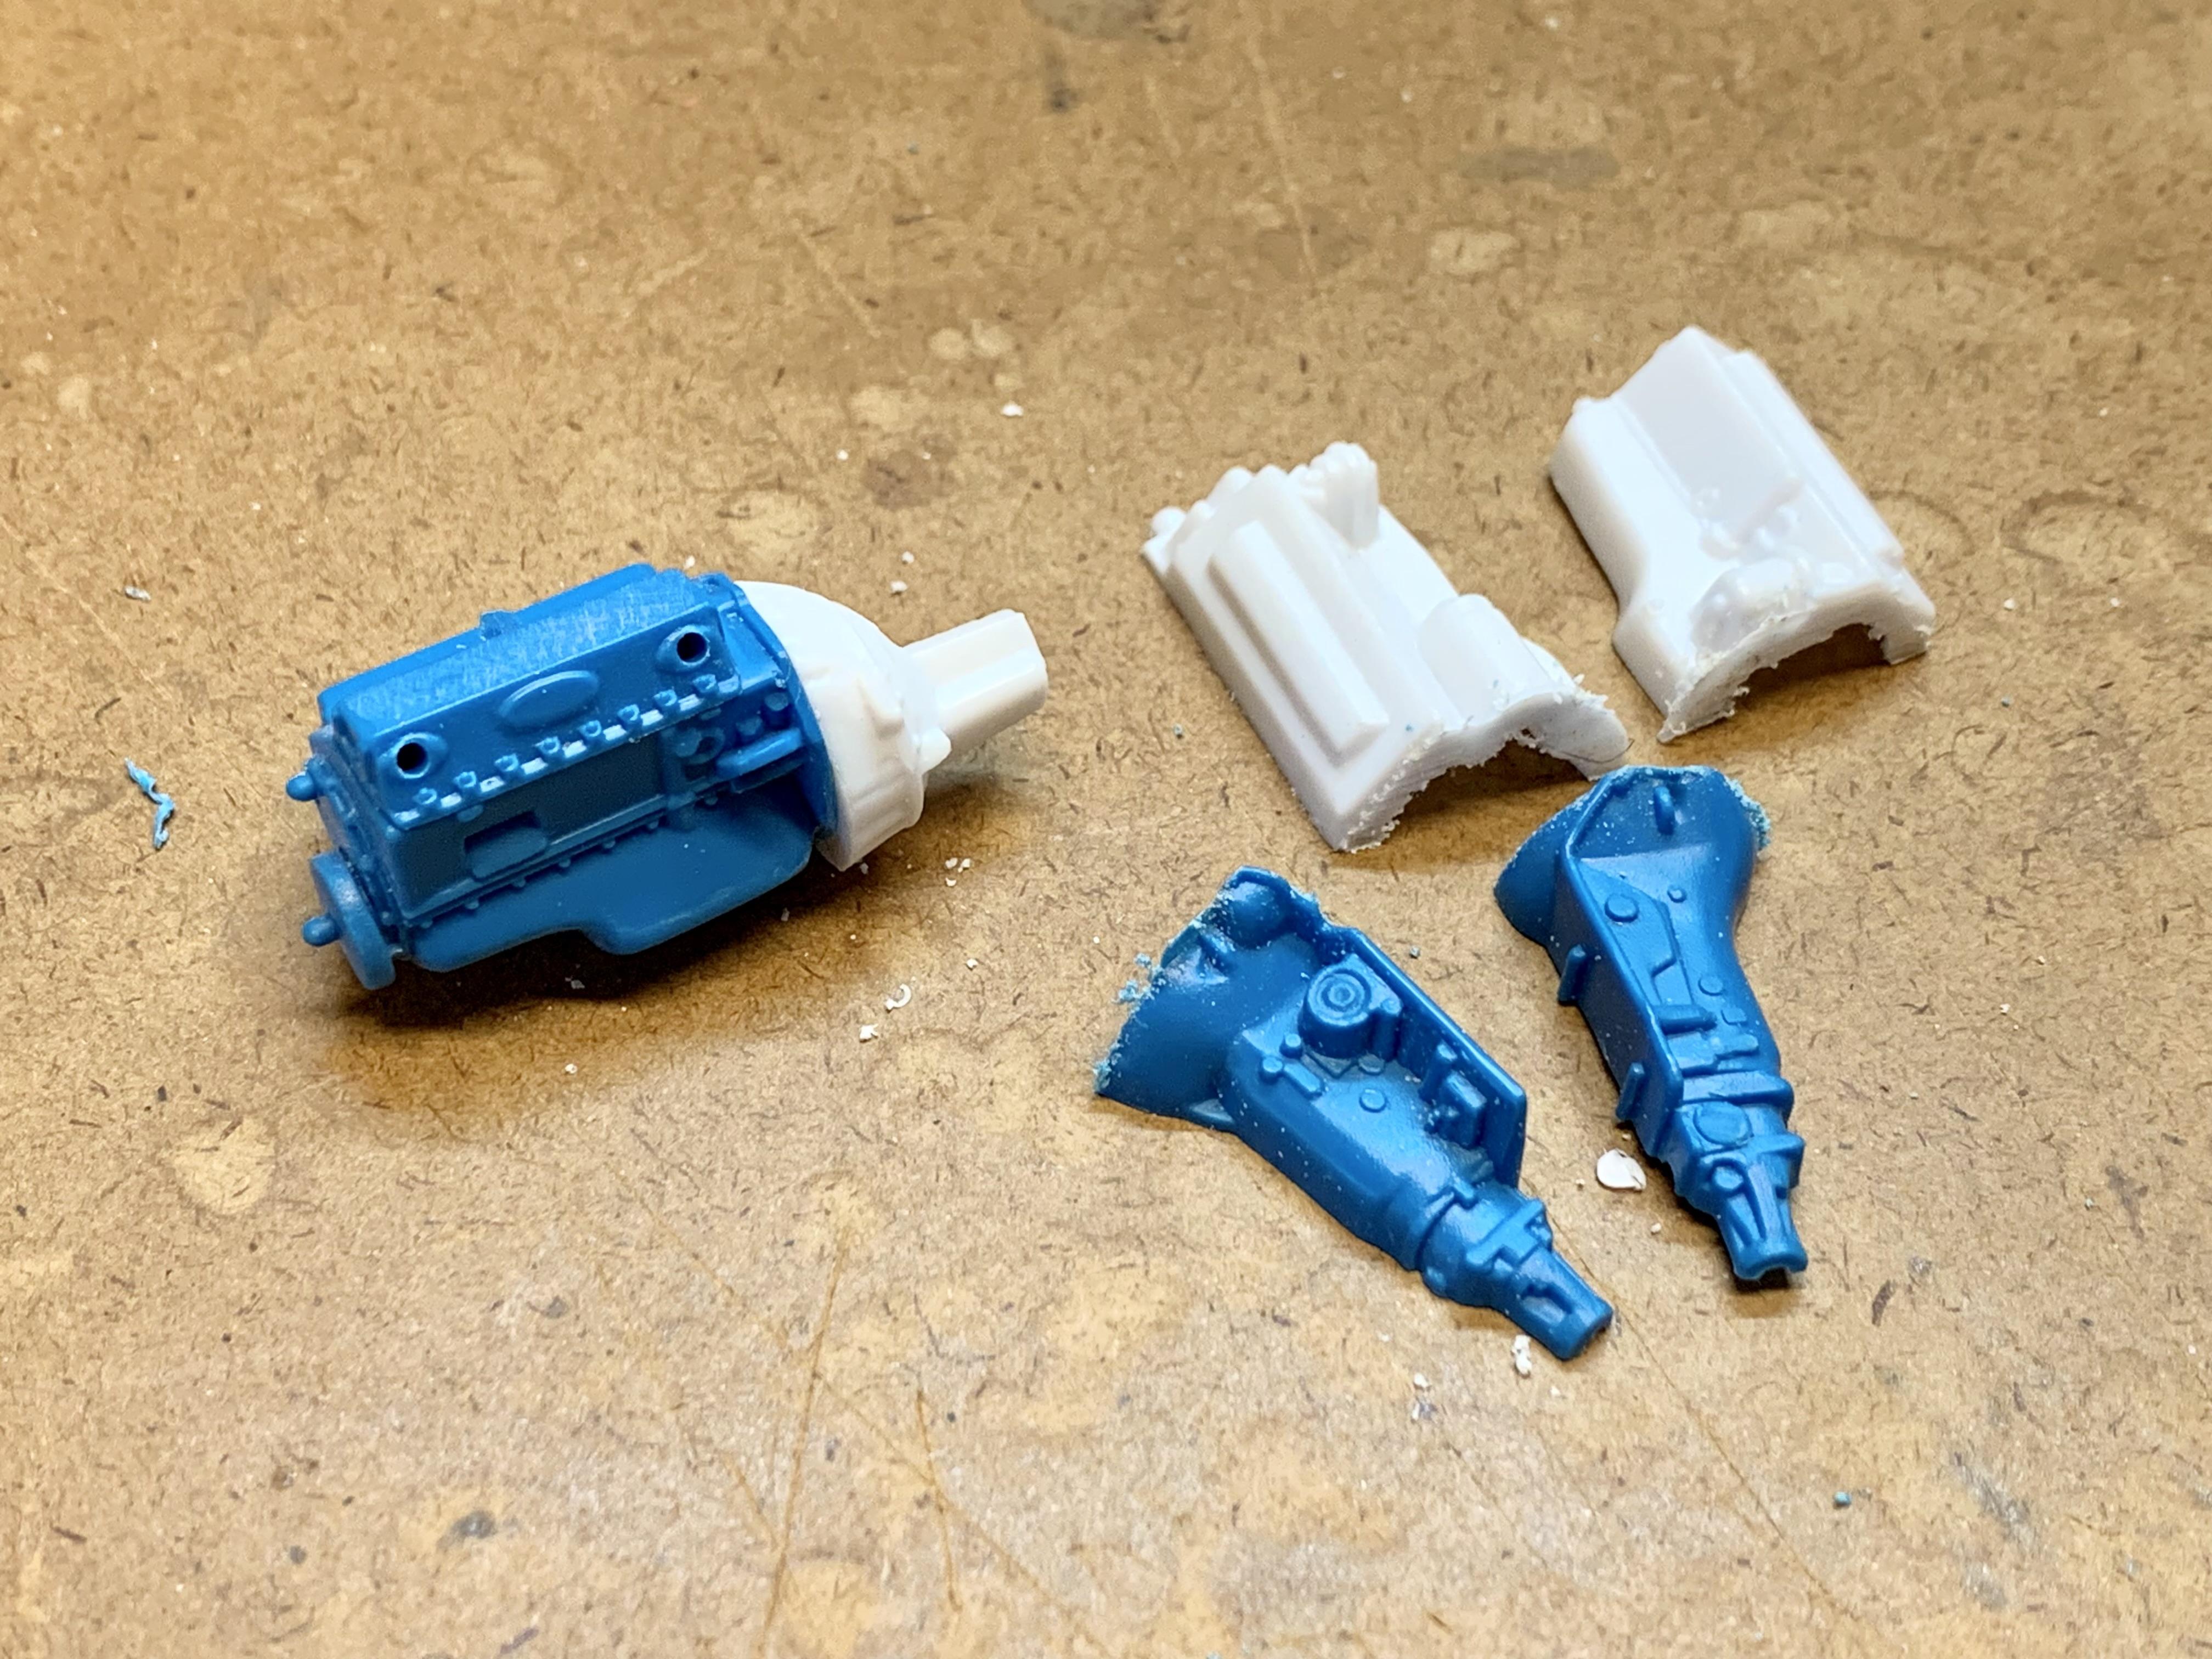
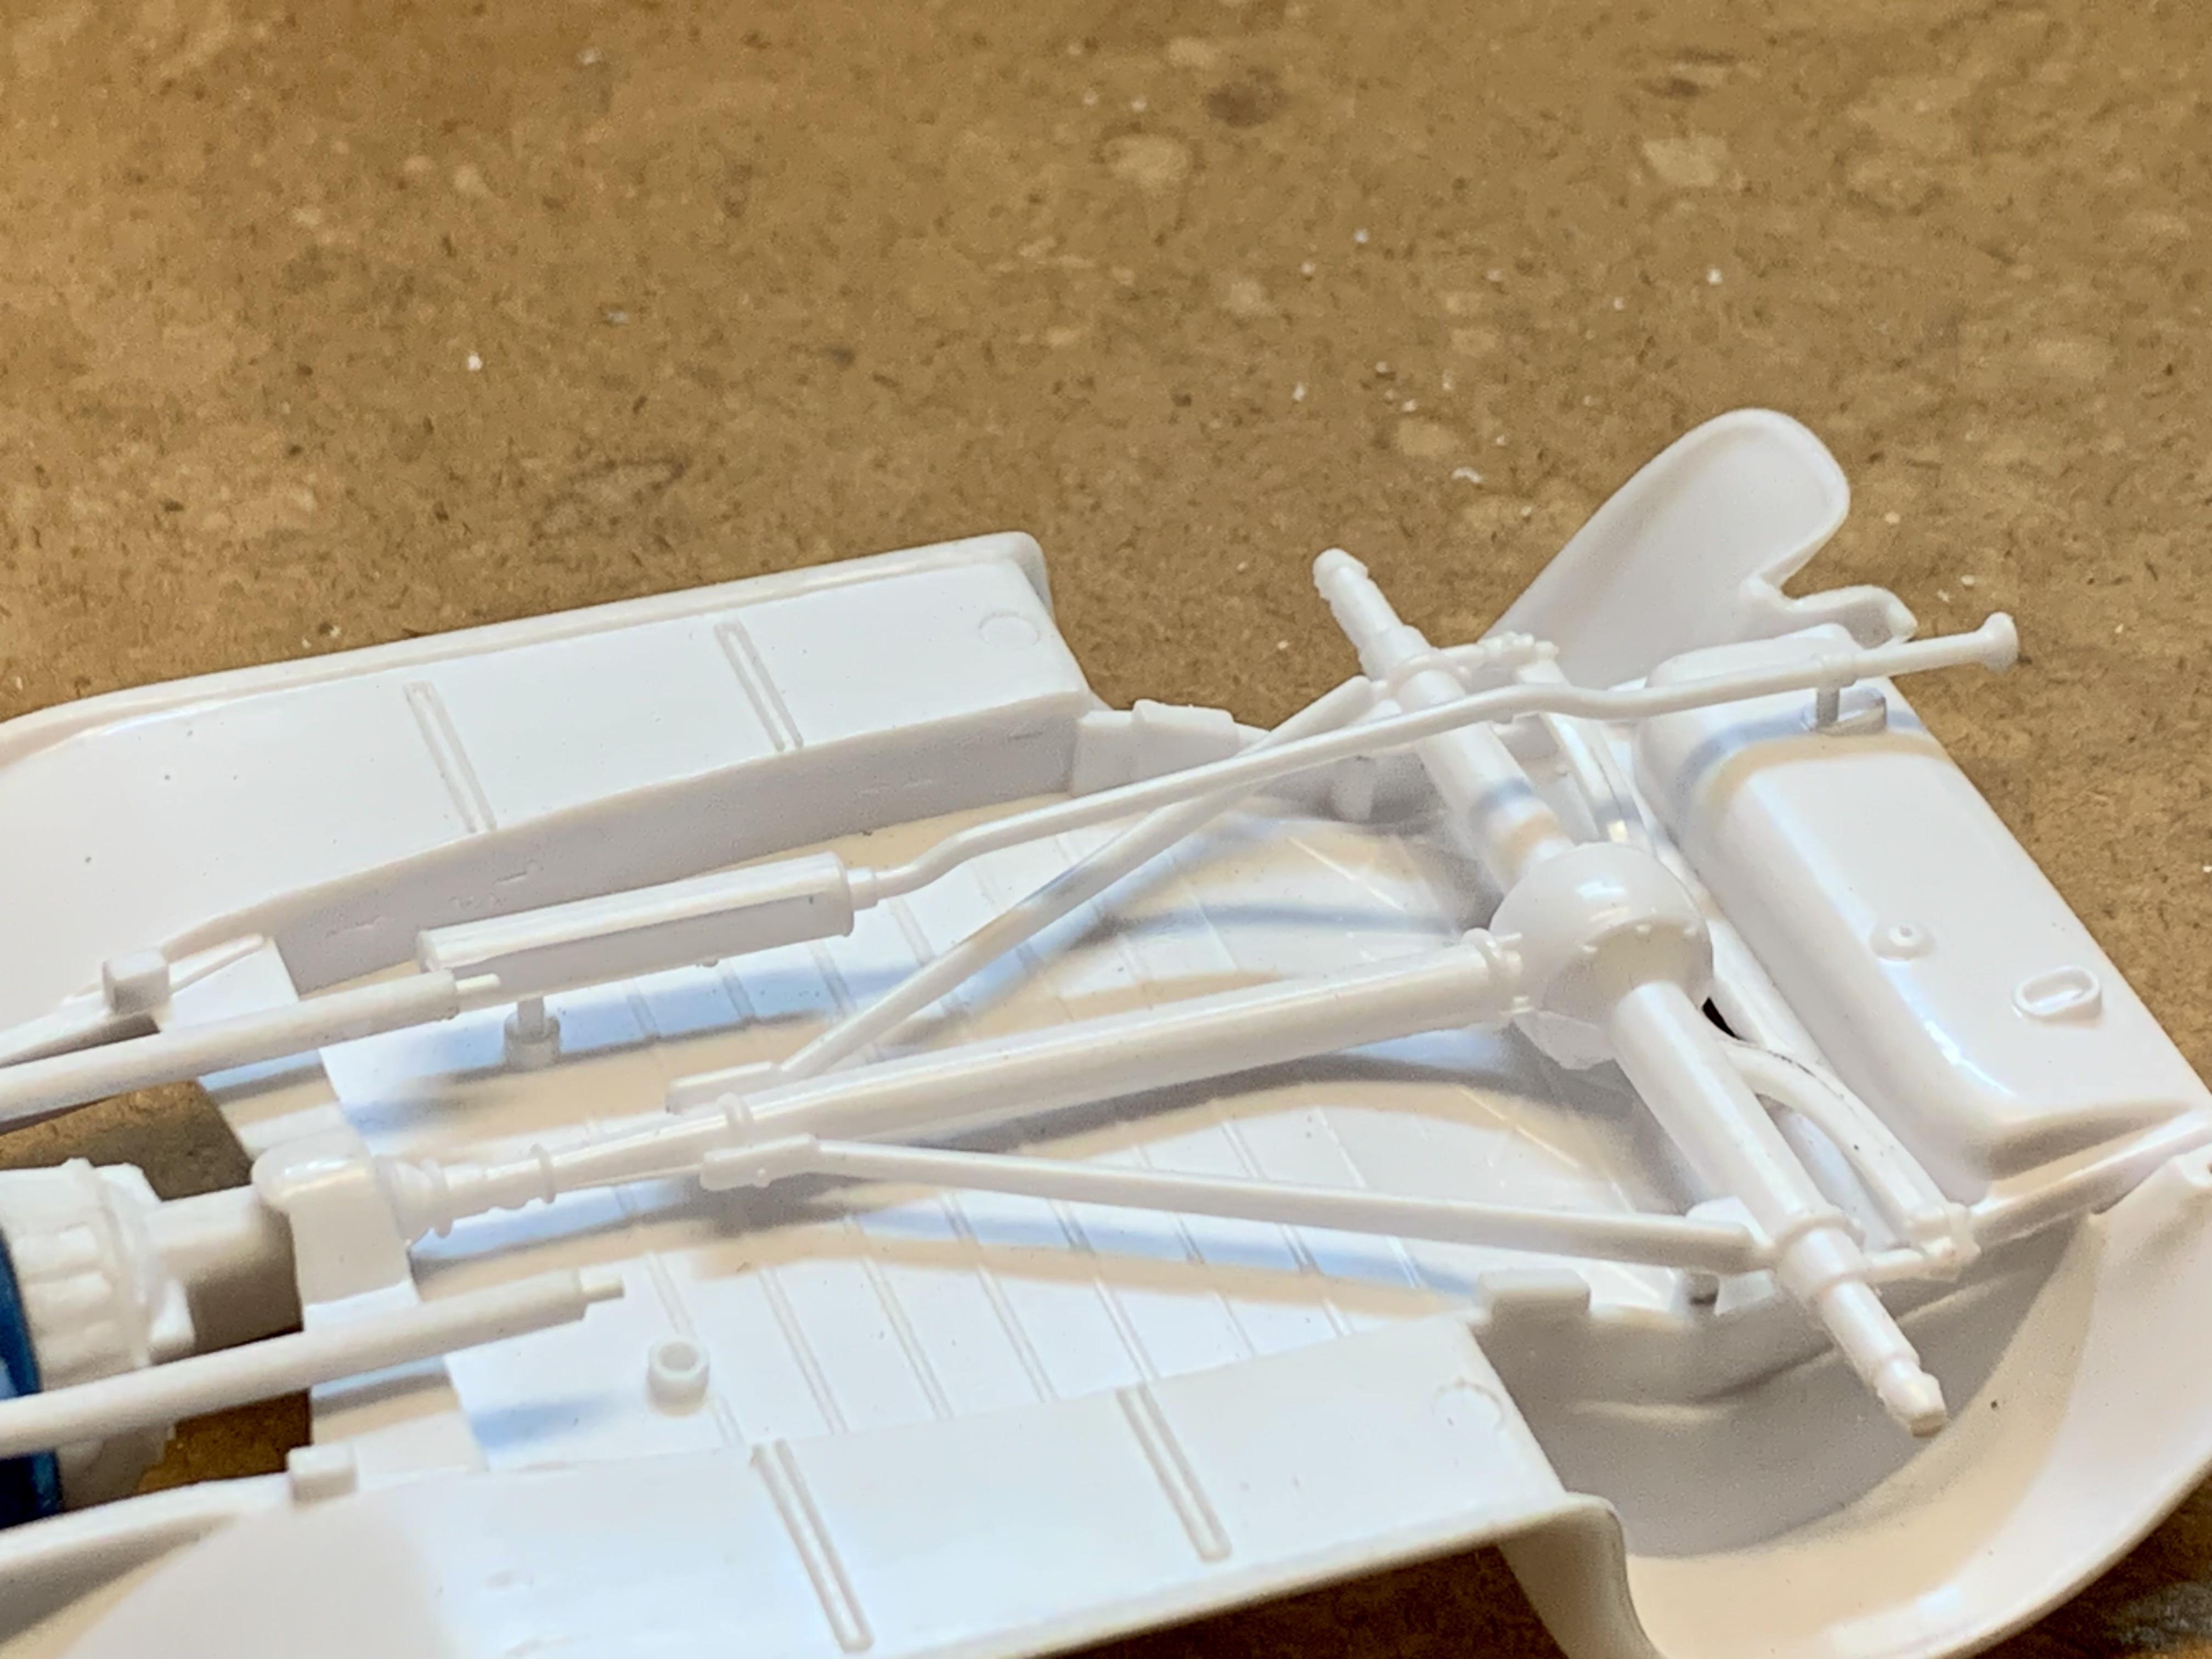
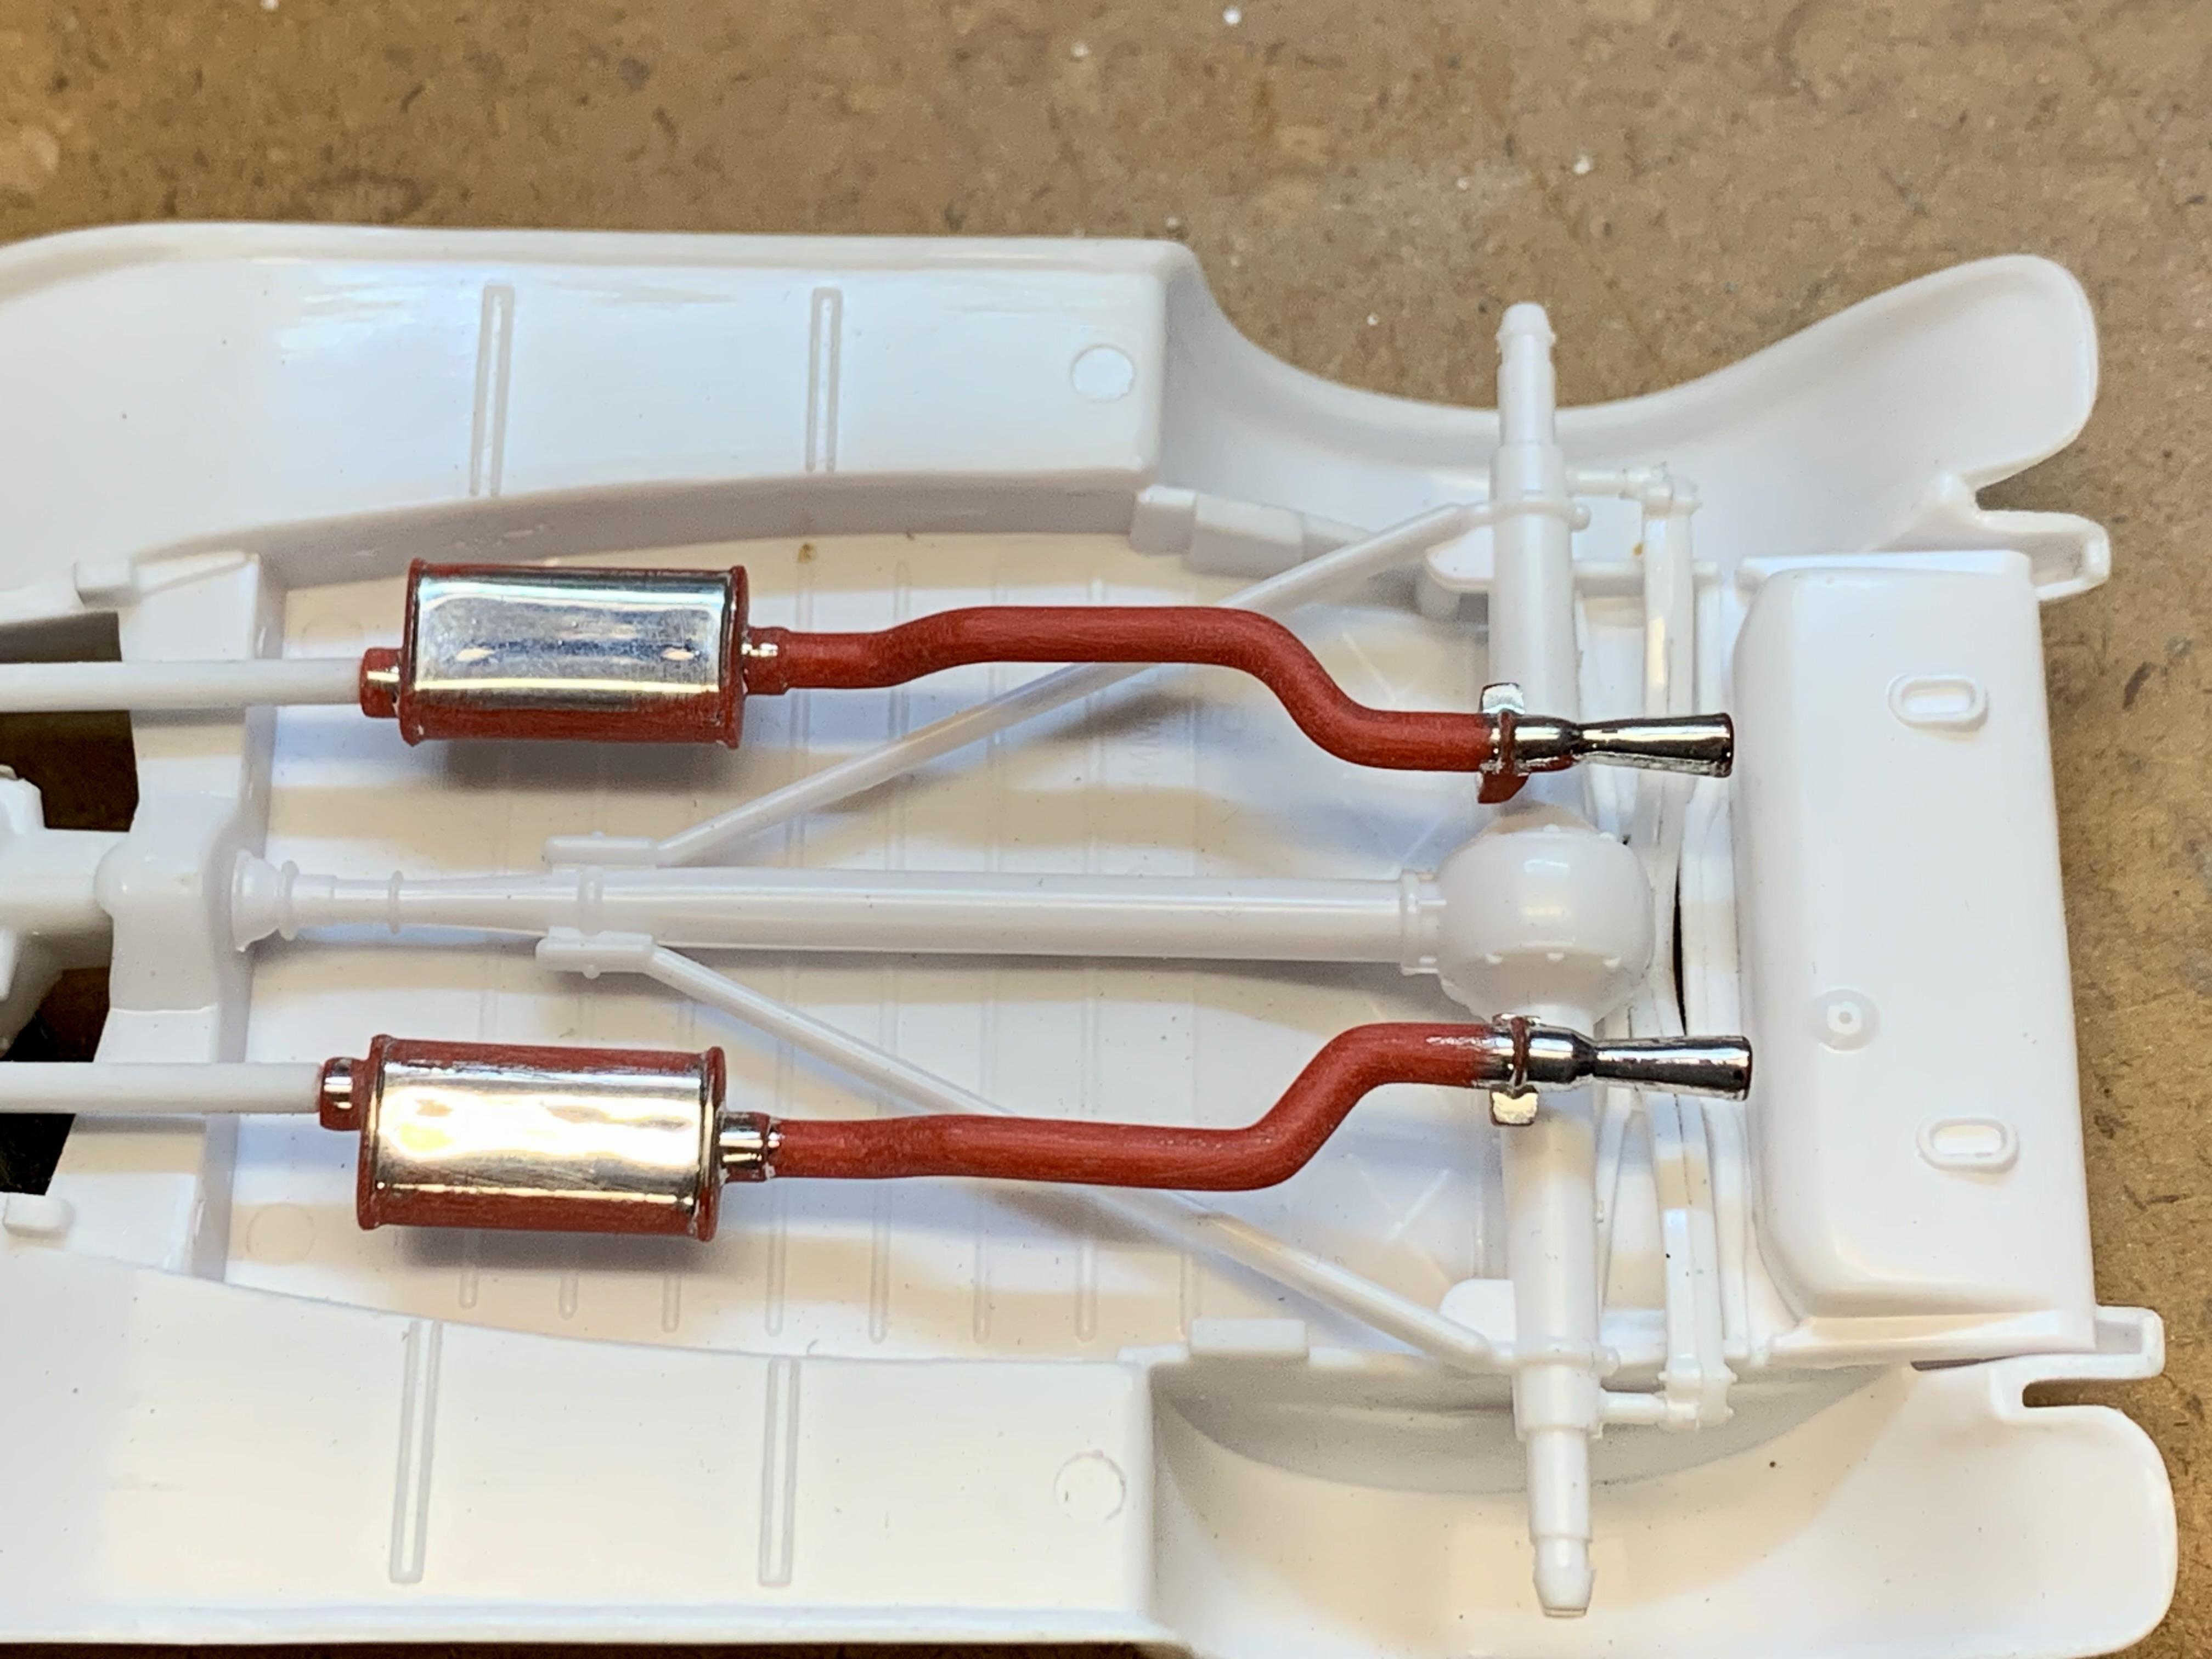
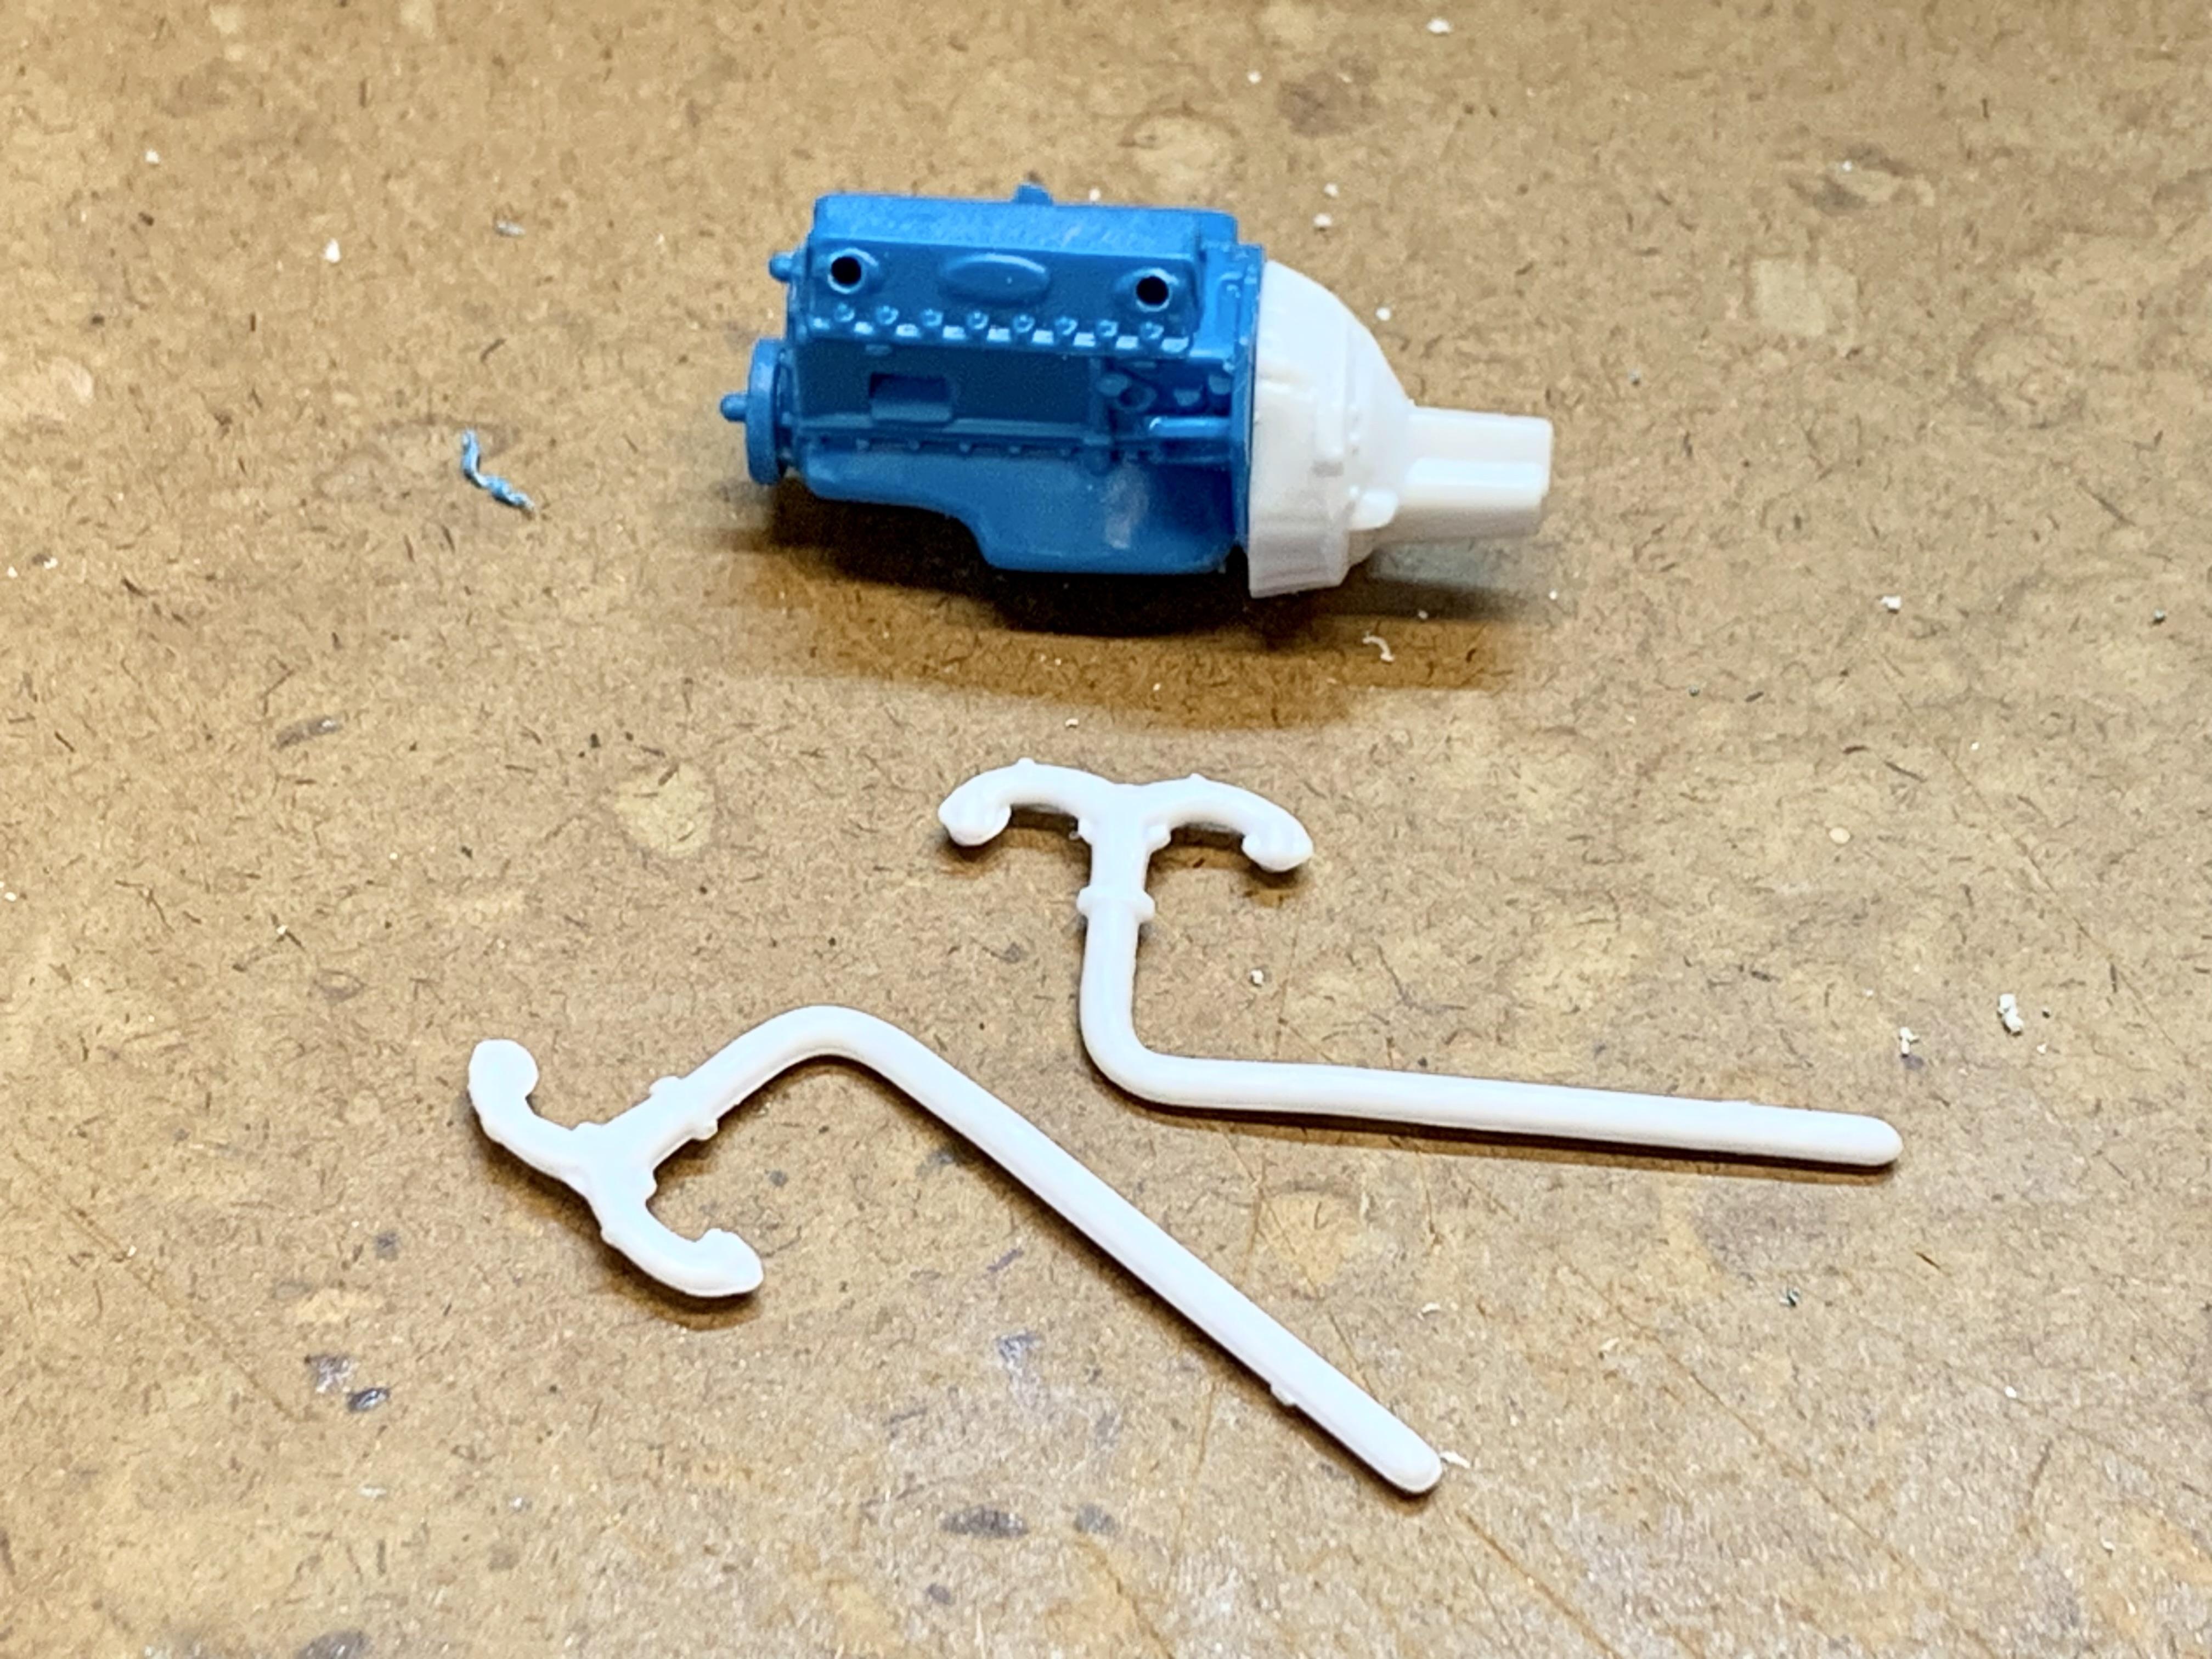
Thanks for the comments, everyone! Looks like there’s a few people that are fond of the old Monogram 32 Roadster. Very cool. Had some bench time this afternoon and decided to get moving on the engine. Below is the lump of a small block included in the kit. Minus the chrome dress parts it’s a whopping four pieces! Even though I’m on a mission to keep this model simple I’d really like a better detailed engine. Probably the best 1:24 hot rod kit Chevy small block of the 80’s & 90’s is from the Monogram 1937 Ford’s, this one being from the blue molded Convertible with Trailer. And while this engine comes with a very nice pair of Sanderson block-hugger headers I’m going to use the Roadster kit manifolds and head pipes. For dress up parts I’ve chosen the Edelbrock Elite-style air filter and valve covers with custom “Deuce” script taken from the maligned Monogram Beach Boys Lil’ Deuce Coupe kit of the late 80’s, which is actually the Roadster kit with a poorly rendered 3-Window body and some other updated parts (notably a Corvette IRS, 4-wheel disc brakes and the introduction of the chrome steel wheels & caps found in the last few reissues of the Roadster.) The blue engine has a big automatic transmission which obviously wouldn’t fit the Roadster without a bunch of surgery. The Roadster kits small block is rendered with an adapter to a 30’s Ford 3-speed trans so I chopped both transmissions off and mated the 3-speed to the blue small block The blue engine is a bit wider than the kit engine (more accurate) so the molded motor mounts needed some relief work to make room for it. With the new engine fit the kits exhaust manifolds and head pipes were adapted easily by drilling holes in the cylinder heads for the mounting studs on the manifolds. The improved small block in situ with induction and valve cover mocked up. The Roadster kits mufflers and tail pipes have always been my least favorite part of the kit. The mufflers are open to the inside and the tailpipes are dinky little things and look weird compared to the big head pipes. It’s like dropping from 2.5” to 1” pipes. Making exhaust systems can get tedious but sometimes you get lucky and find a set of pipes that are an easy fit. After digging through my Ziplock back of exhaust pipes I found a partial set of mufflers and pipes from an old Monogram ZZ Top Eliminator kit. Upon offering them up they were a great fit other than the tailpipes being a bit short. What I like so much is that they are thick like the head pipes. I trimmed the head pipes evenly then drilled and inserted .040” pins in the ends with matching holes in the mufflers. Happy with the look and fit I trimmed the tailpipe tips off and extended the pipes 1” using Evergreen tube of similar size. Still have some fine tuning to do but I’ll take it. Thats as far as I got today. So far, so good!
-
Funny, I had the same thought as I sat staring at the mock-up from all angles last Sunday. It looks right-on. The modern Revell 32 Roadsters are more technically accurate but the Monogram just has The Look. Perhaps that’s part of what drew me to it so strongly as a kid? As for this kit: I don’t think that many people are aware of the unique changes to it aside from the obvious severe chop and wheels. This kit post-dates the changes made to the old Monogram tool when it was modified in the early 80’s for the ZZ Top Eliminator. It shares the same interior and Pontiac engine with its attempted disguise as a Chevy small block as the ZZ Top kit but also features the front axle / suspension already shown above, molded stock exhaust pipes deleted and a 9” rear axle with coil overs and disc brakes, similar in appearance to the Revell ‘32 Ford’s. I was really hoping that when the ZZ Top Eliminator was reissued a few years ago that these updates would stay as they are actually a more accurate for the full-scale car but alas, the same old axles and suspension found it’s way back. The only of the Cabriolets upgrades that stuck was frame with molded exhaust deleted.
-
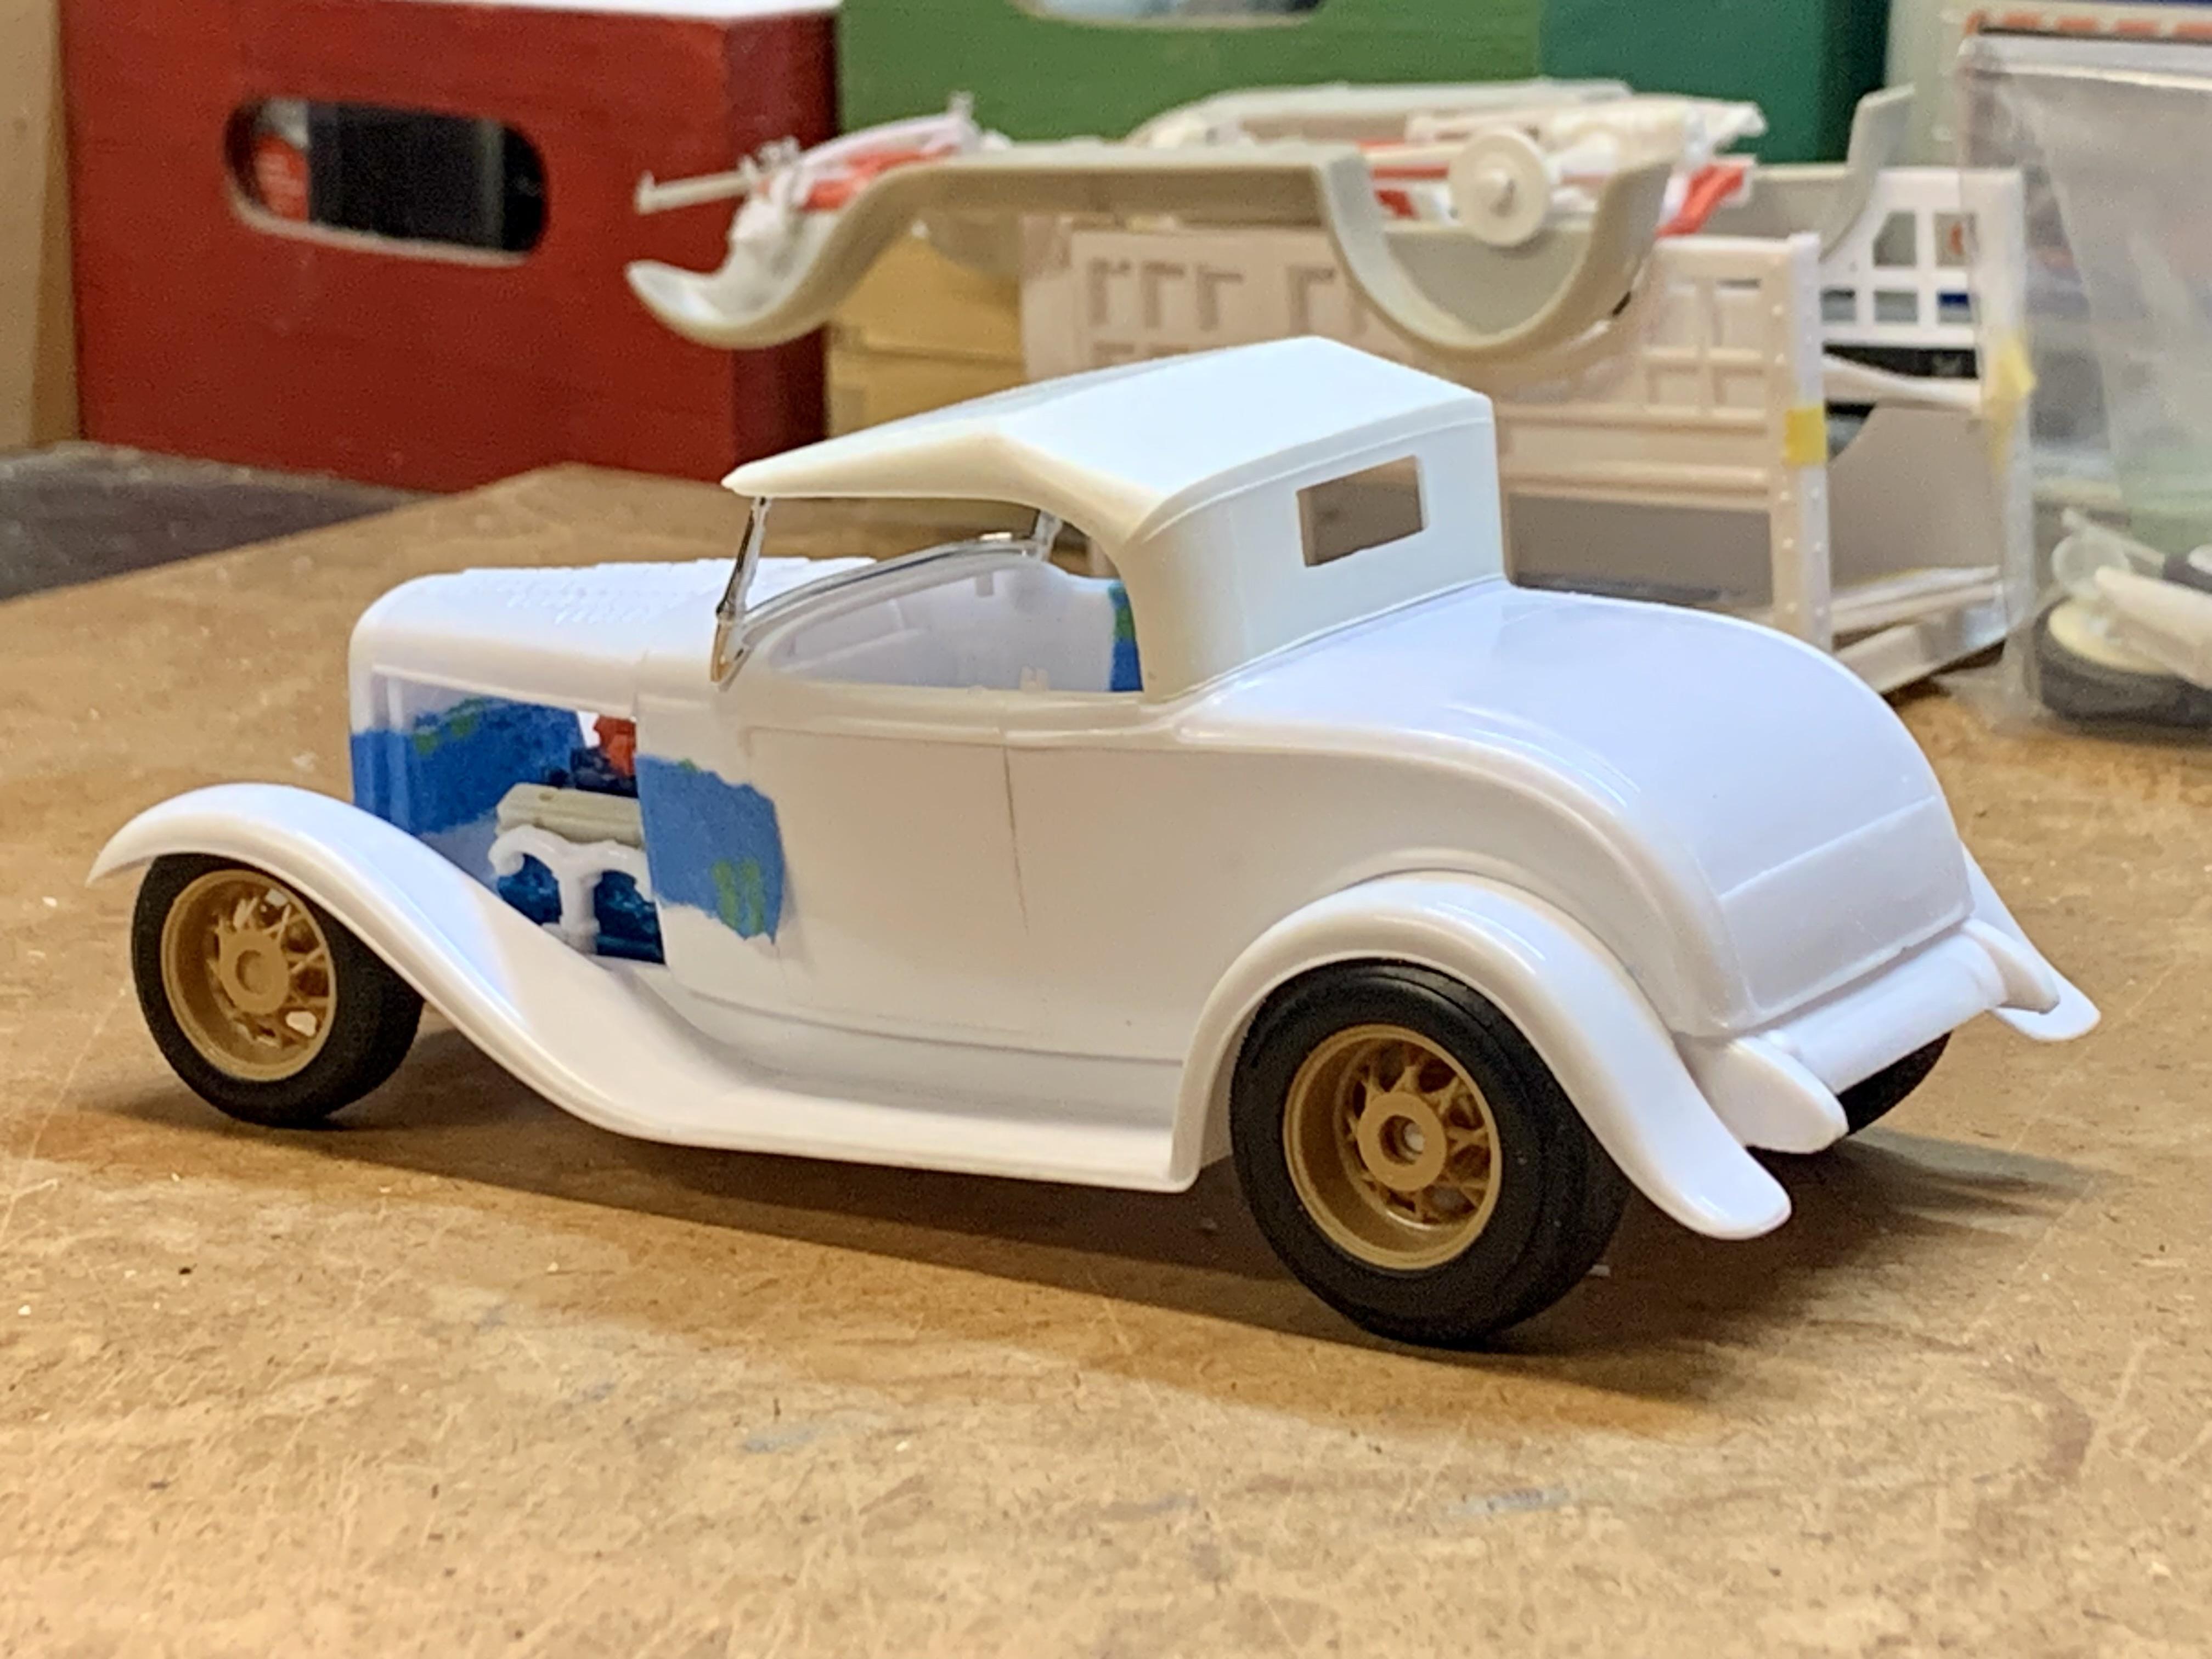
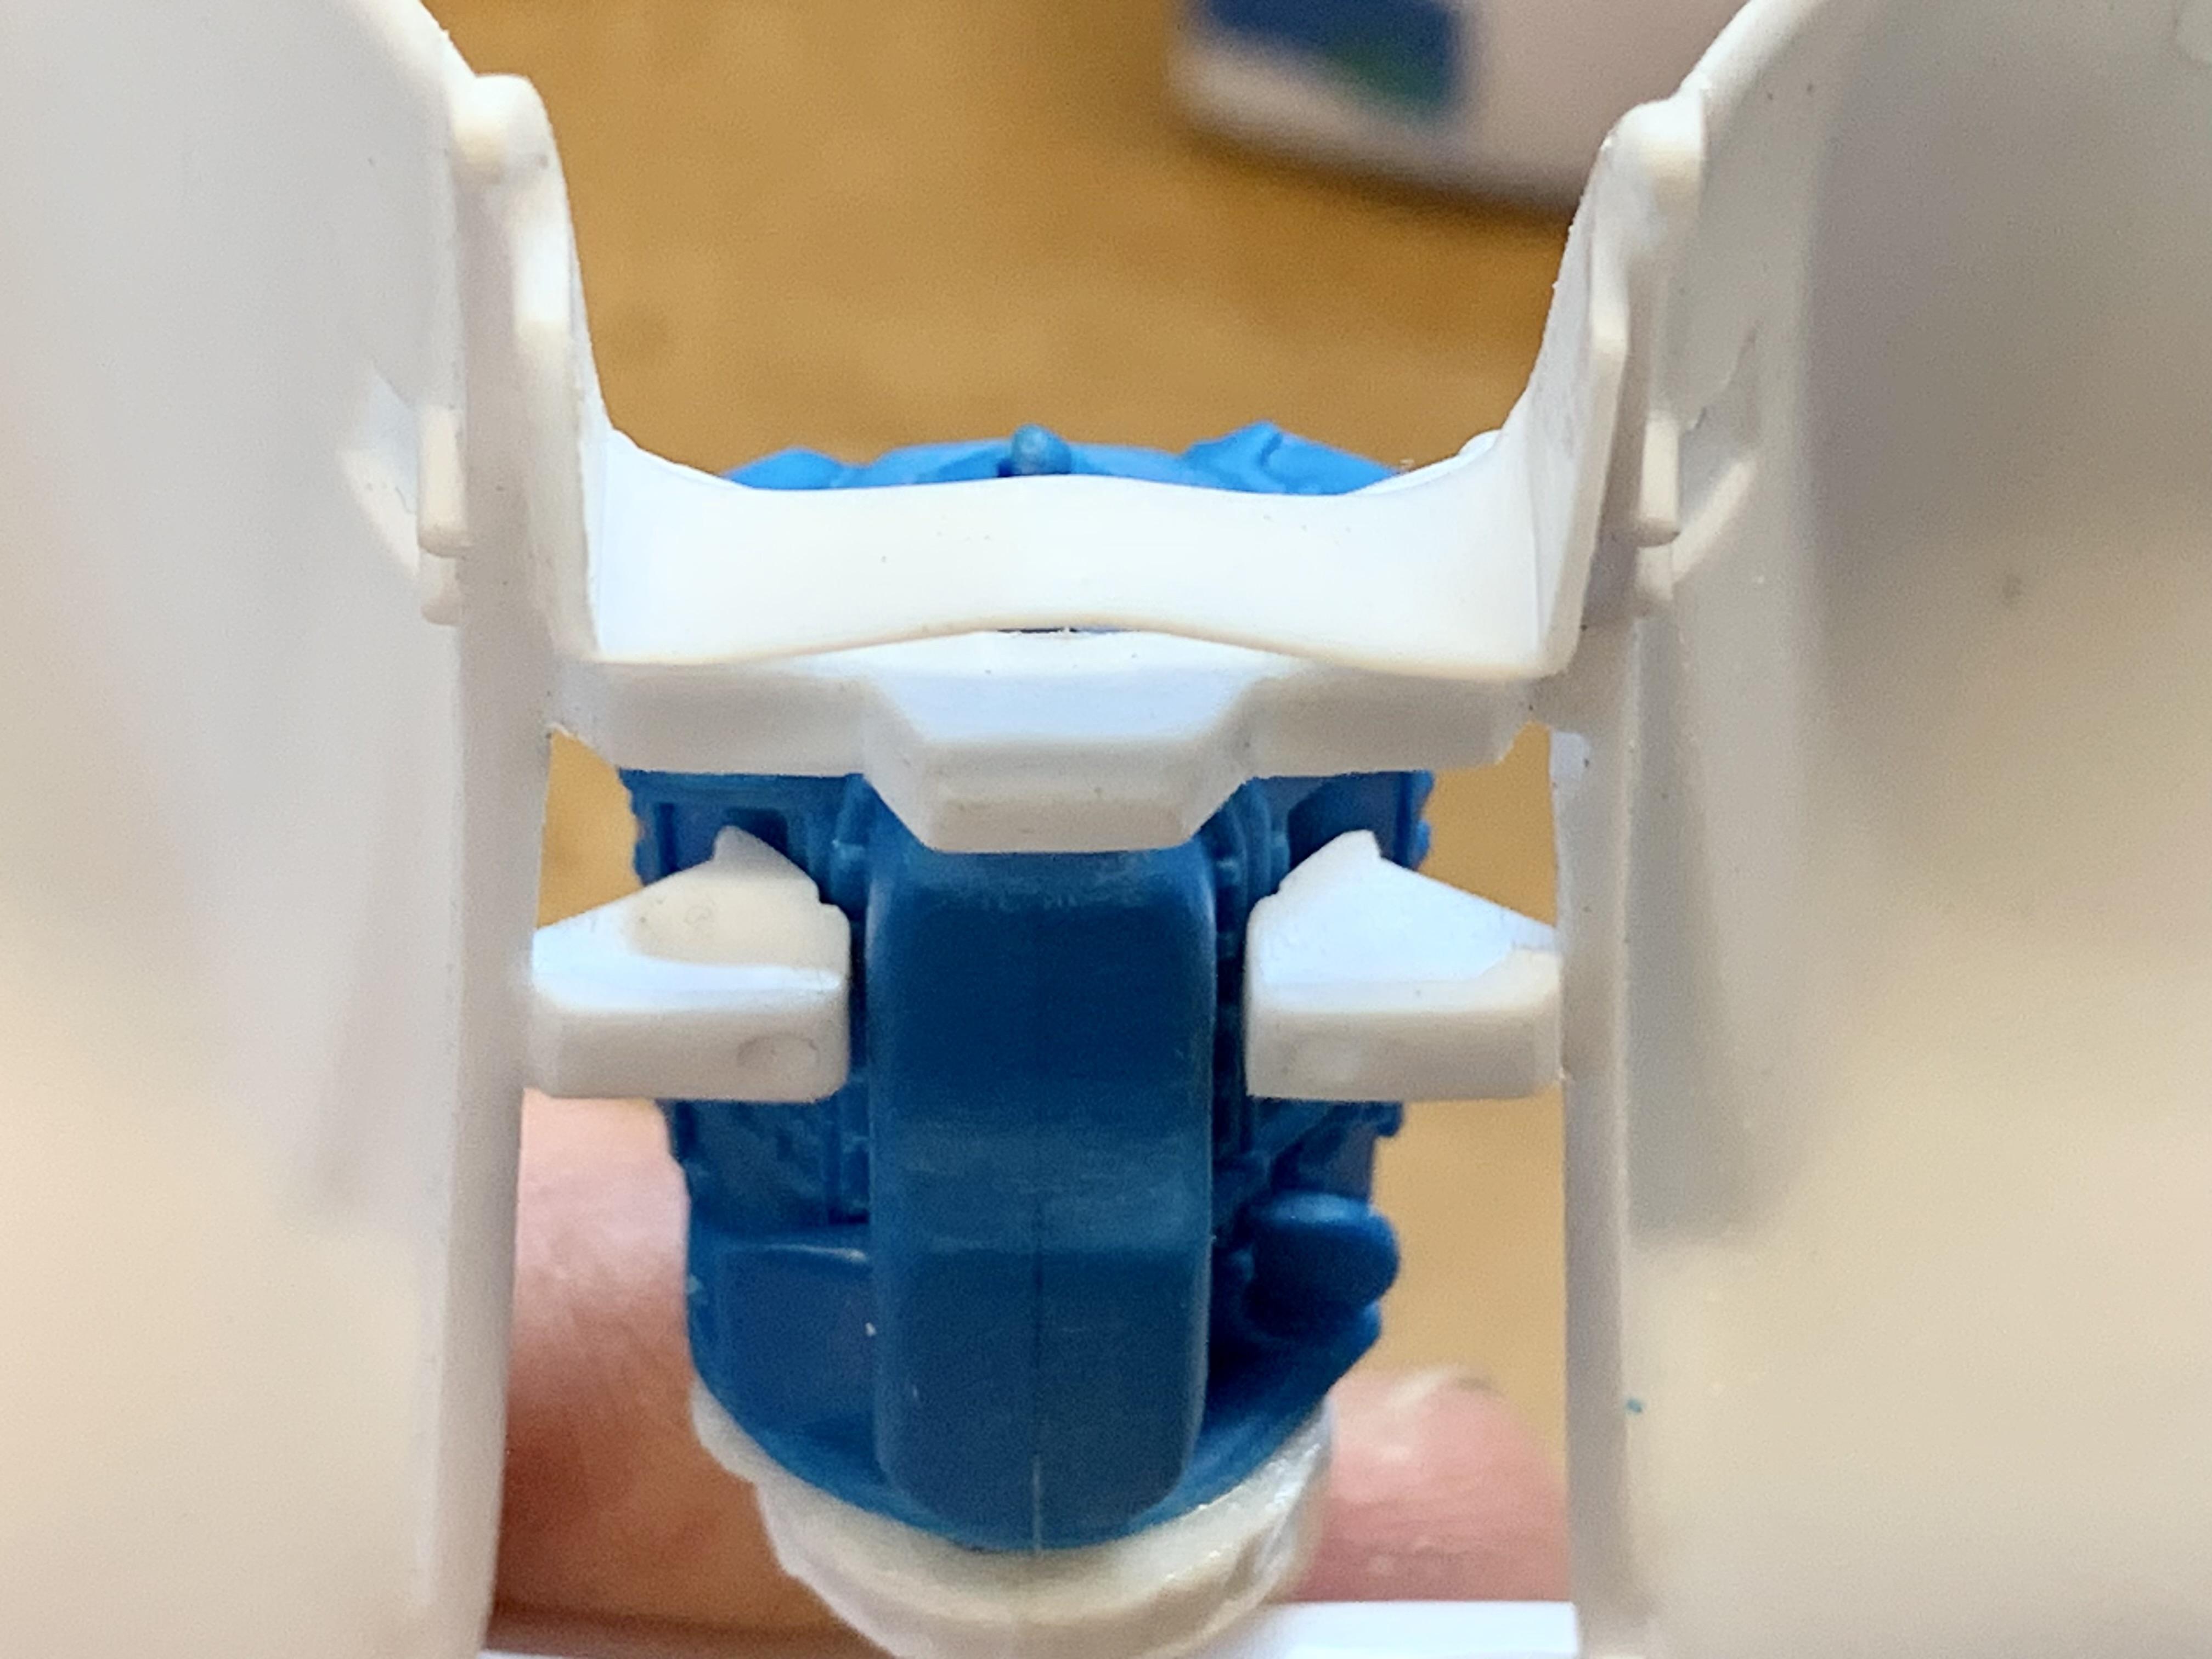
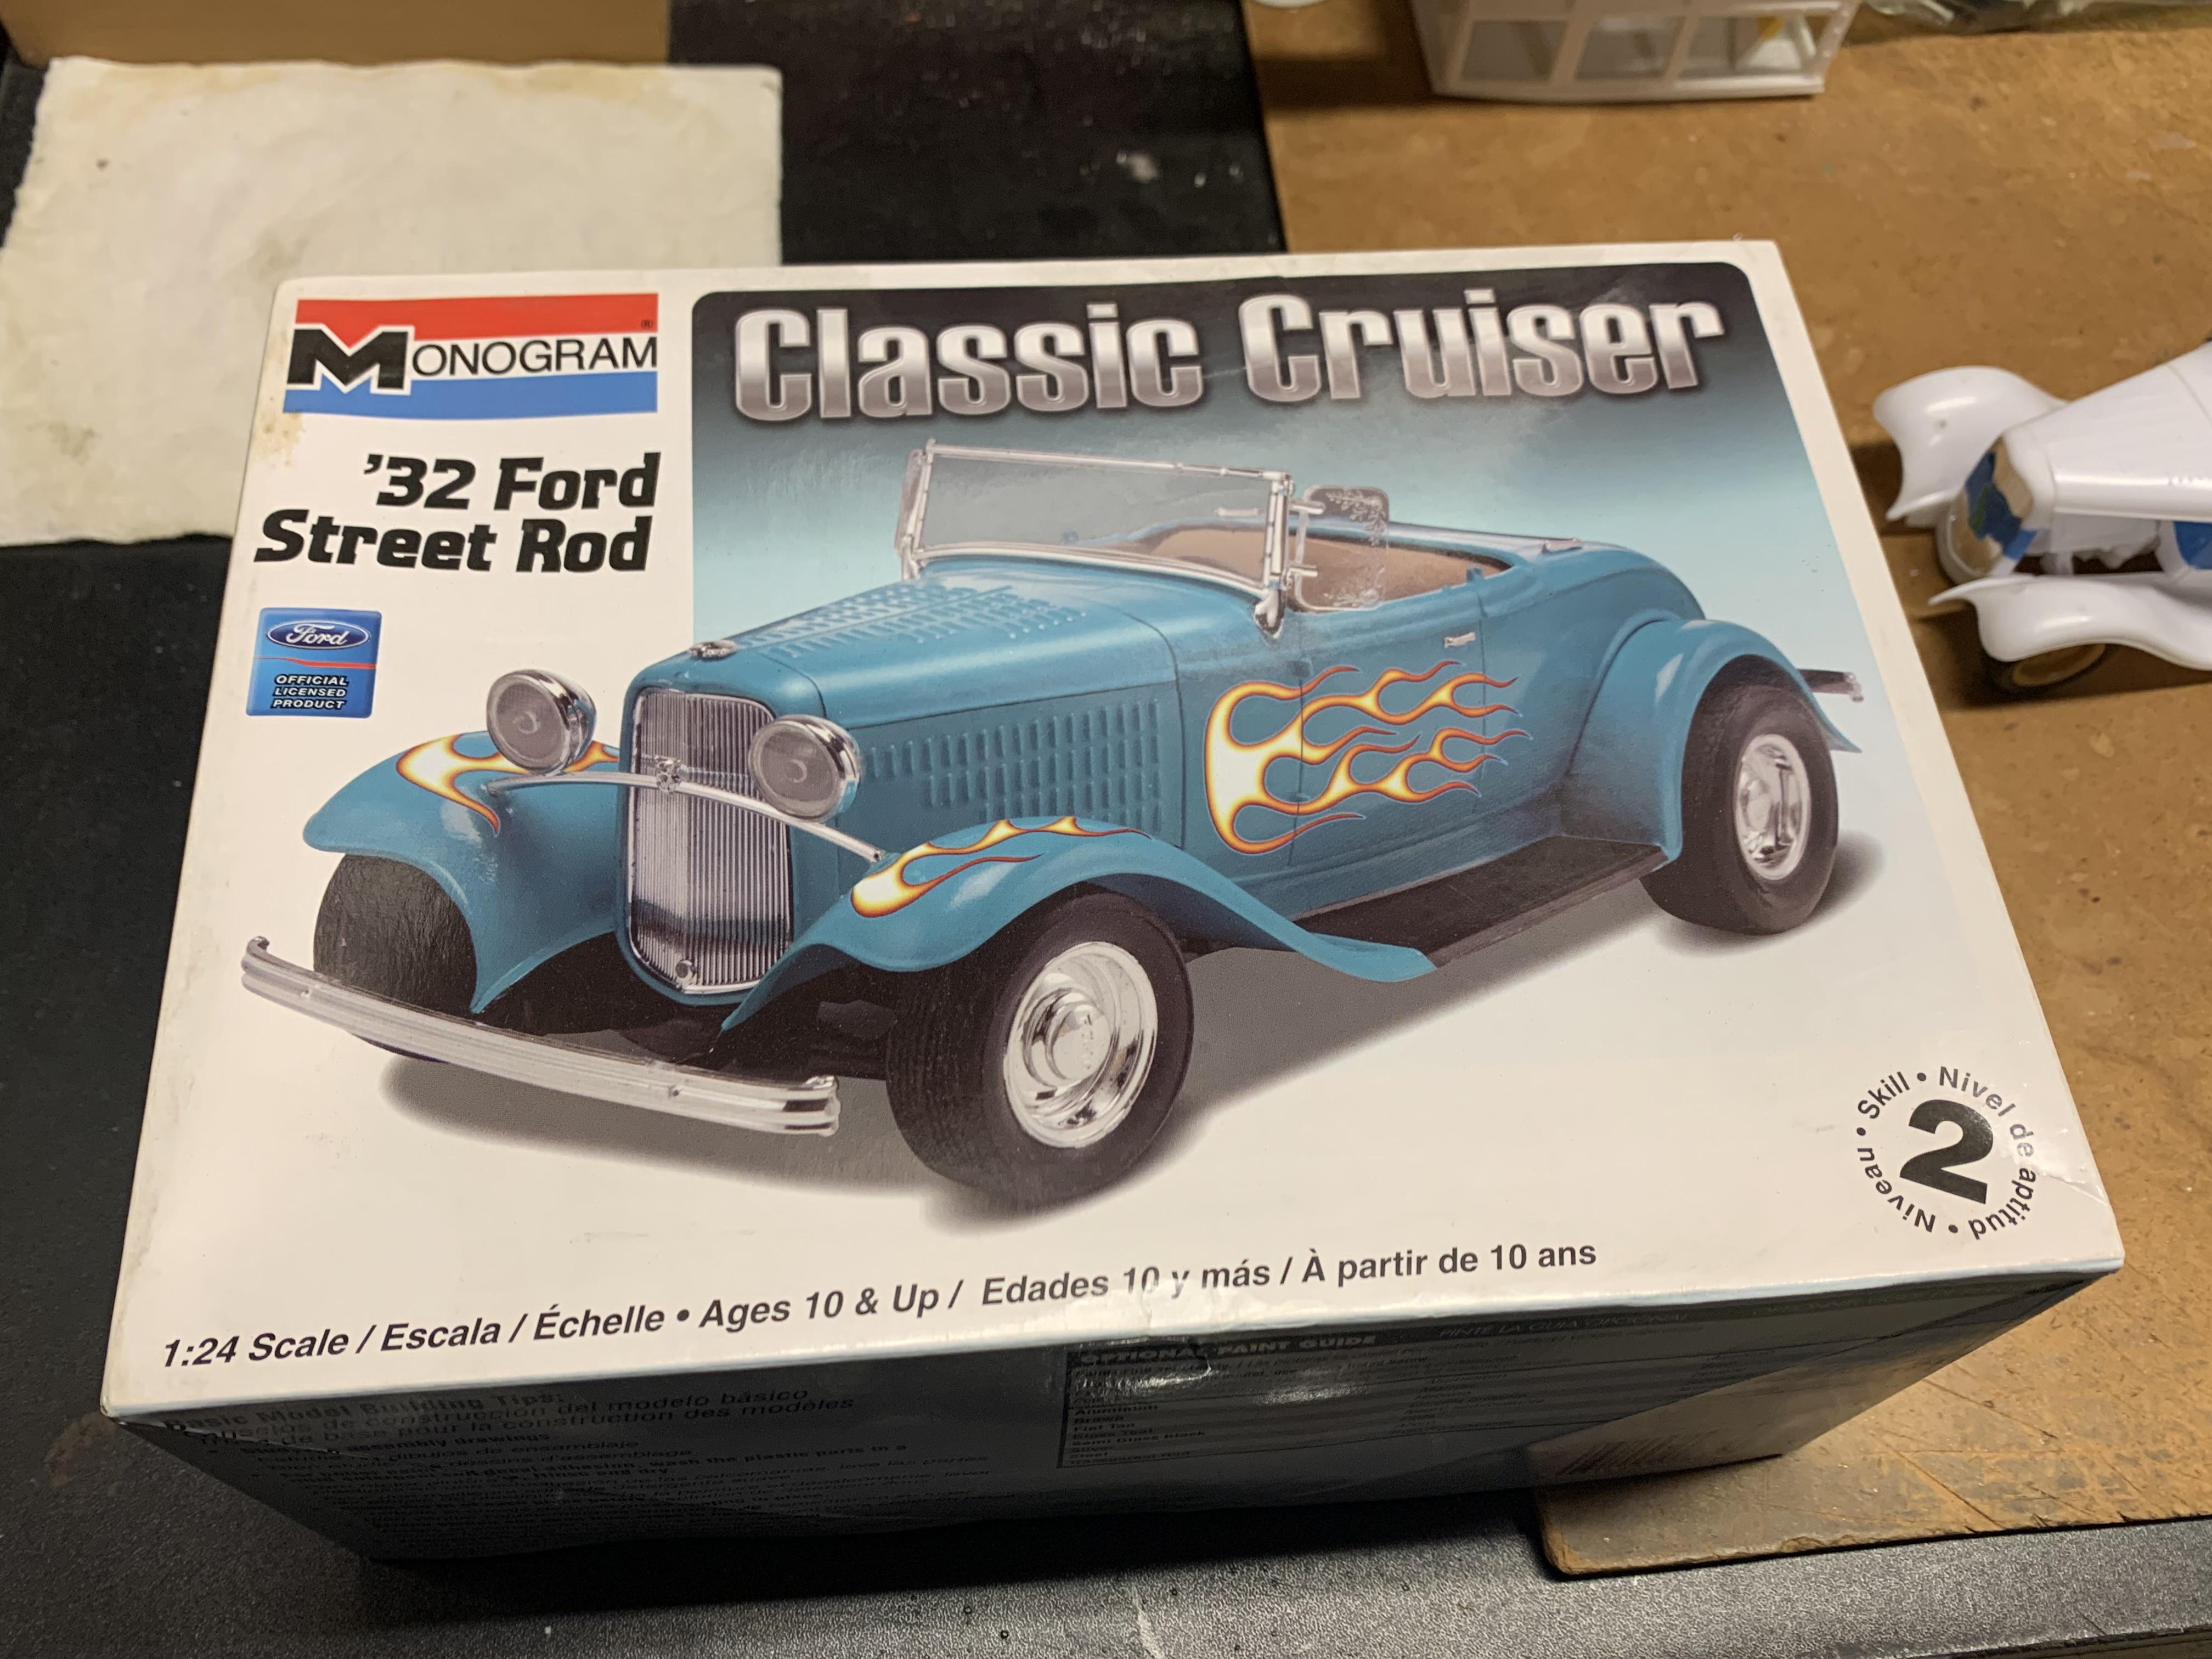
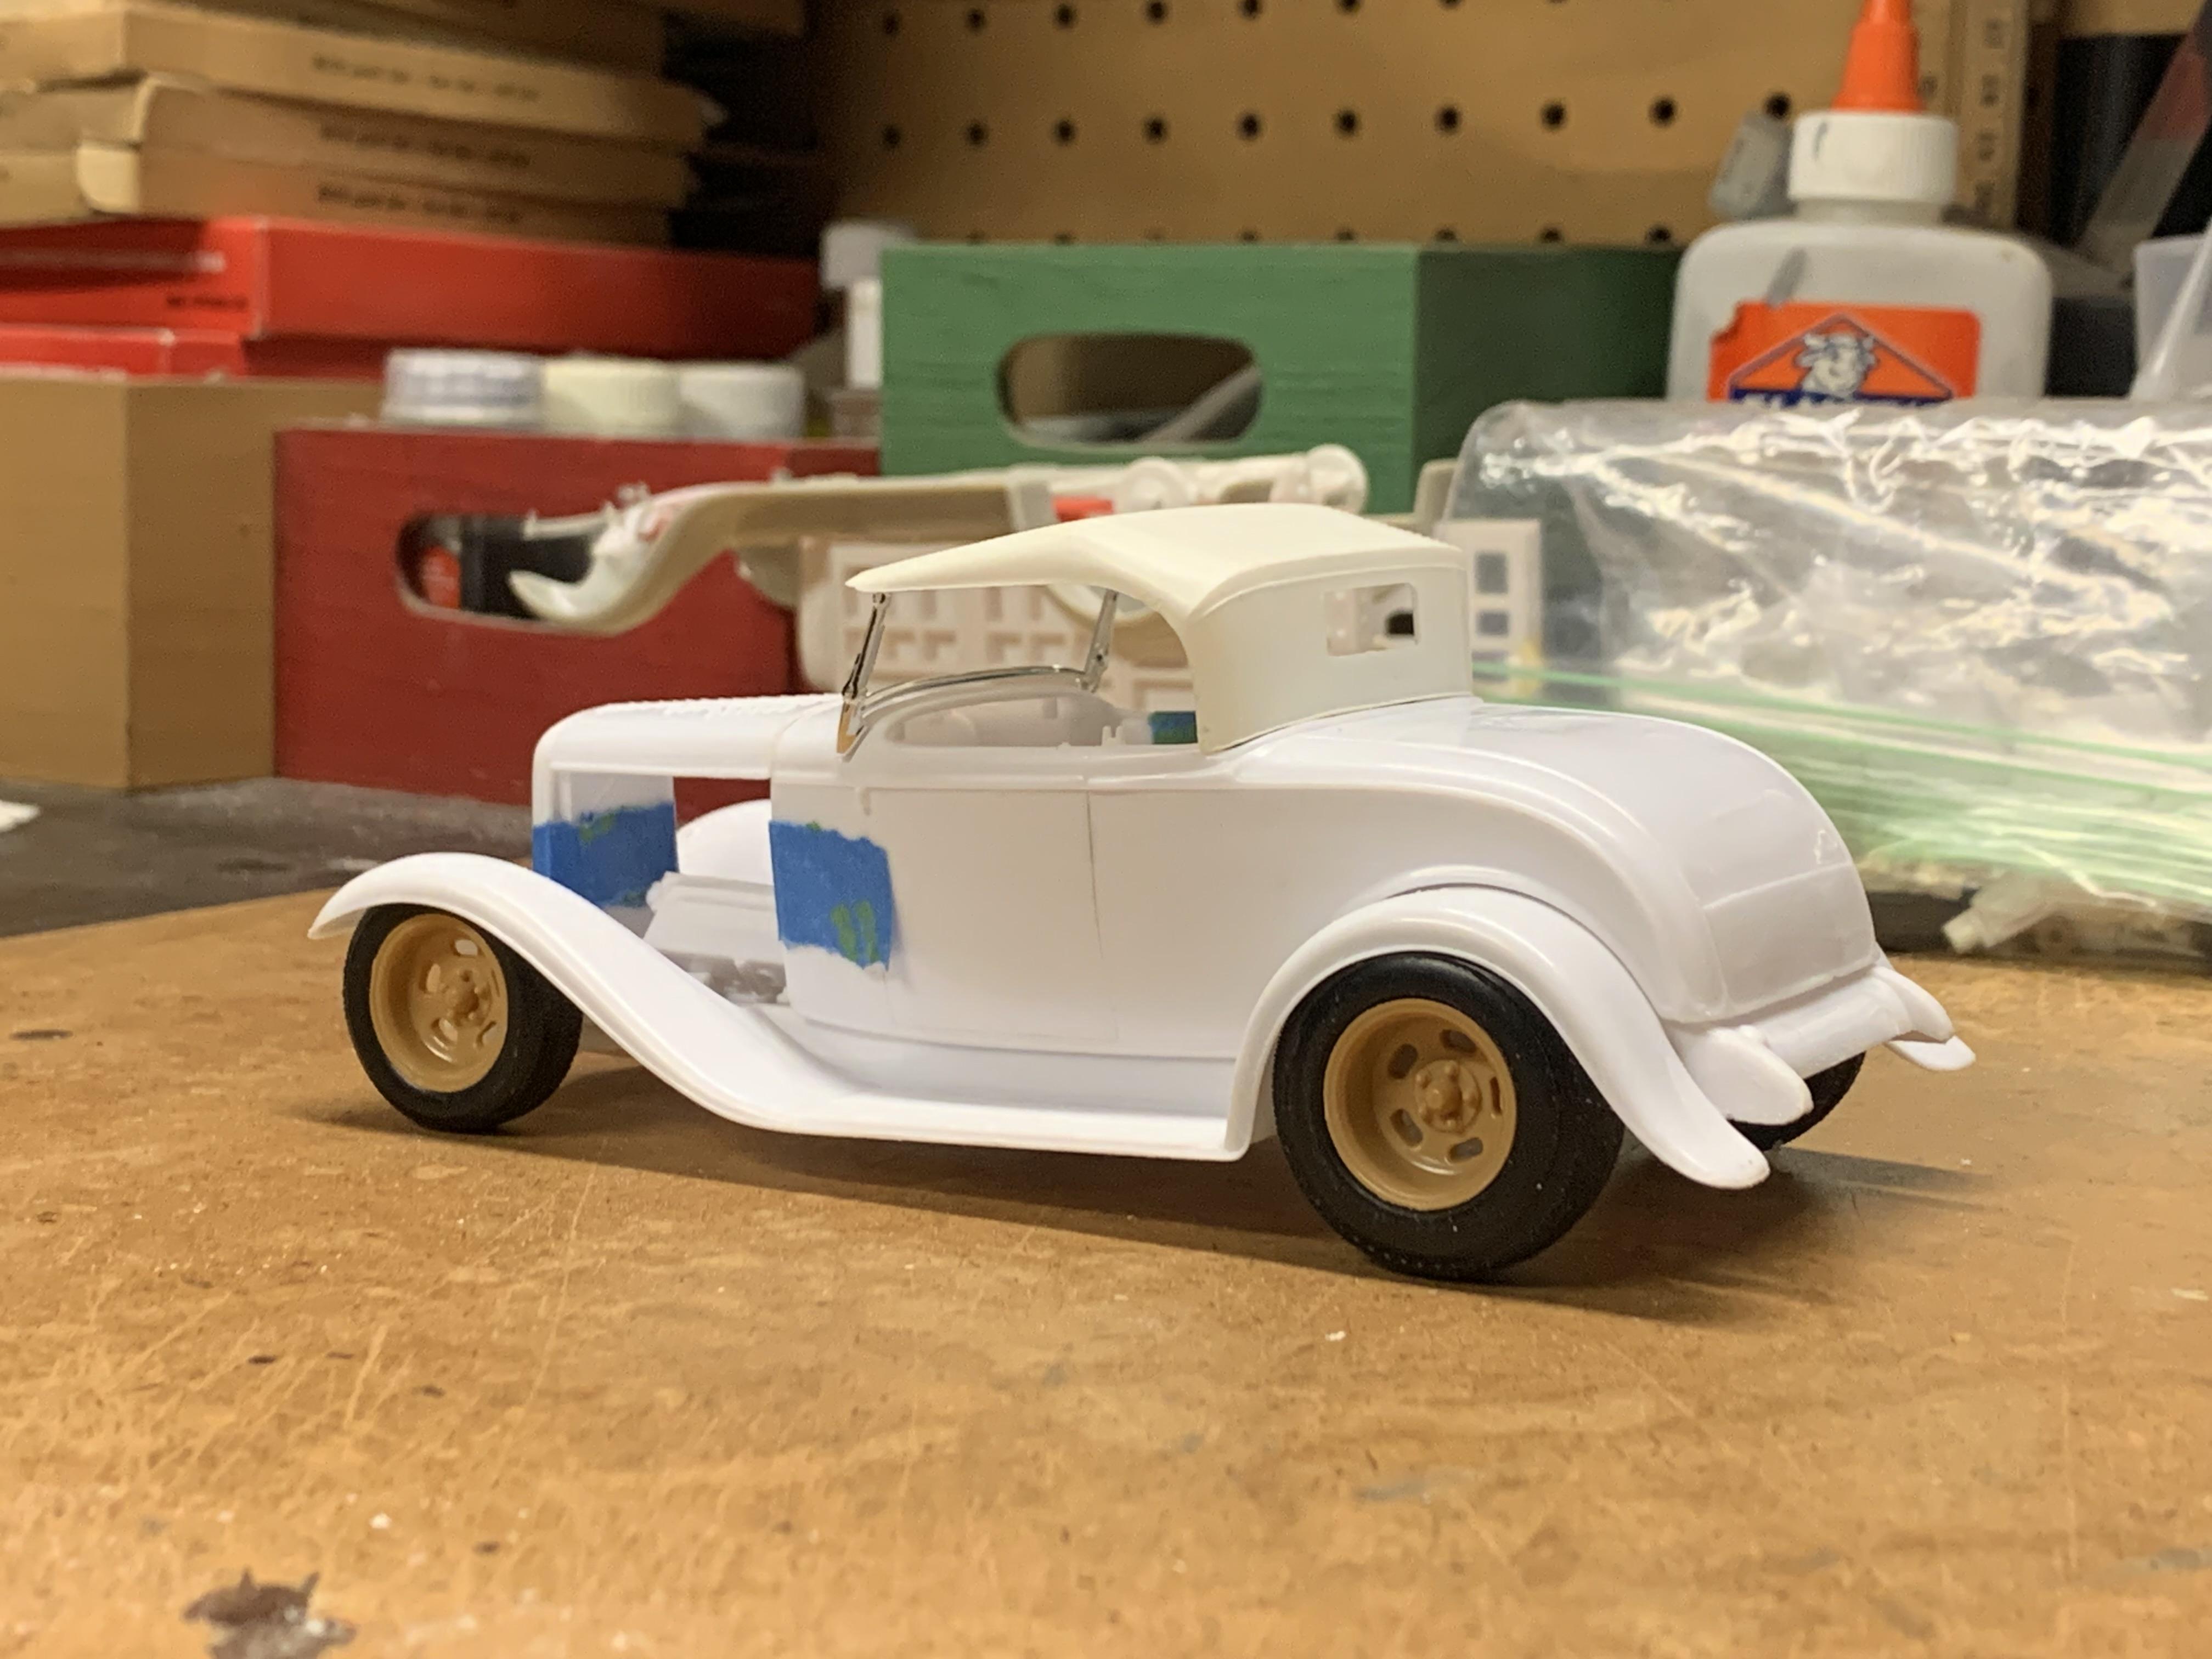
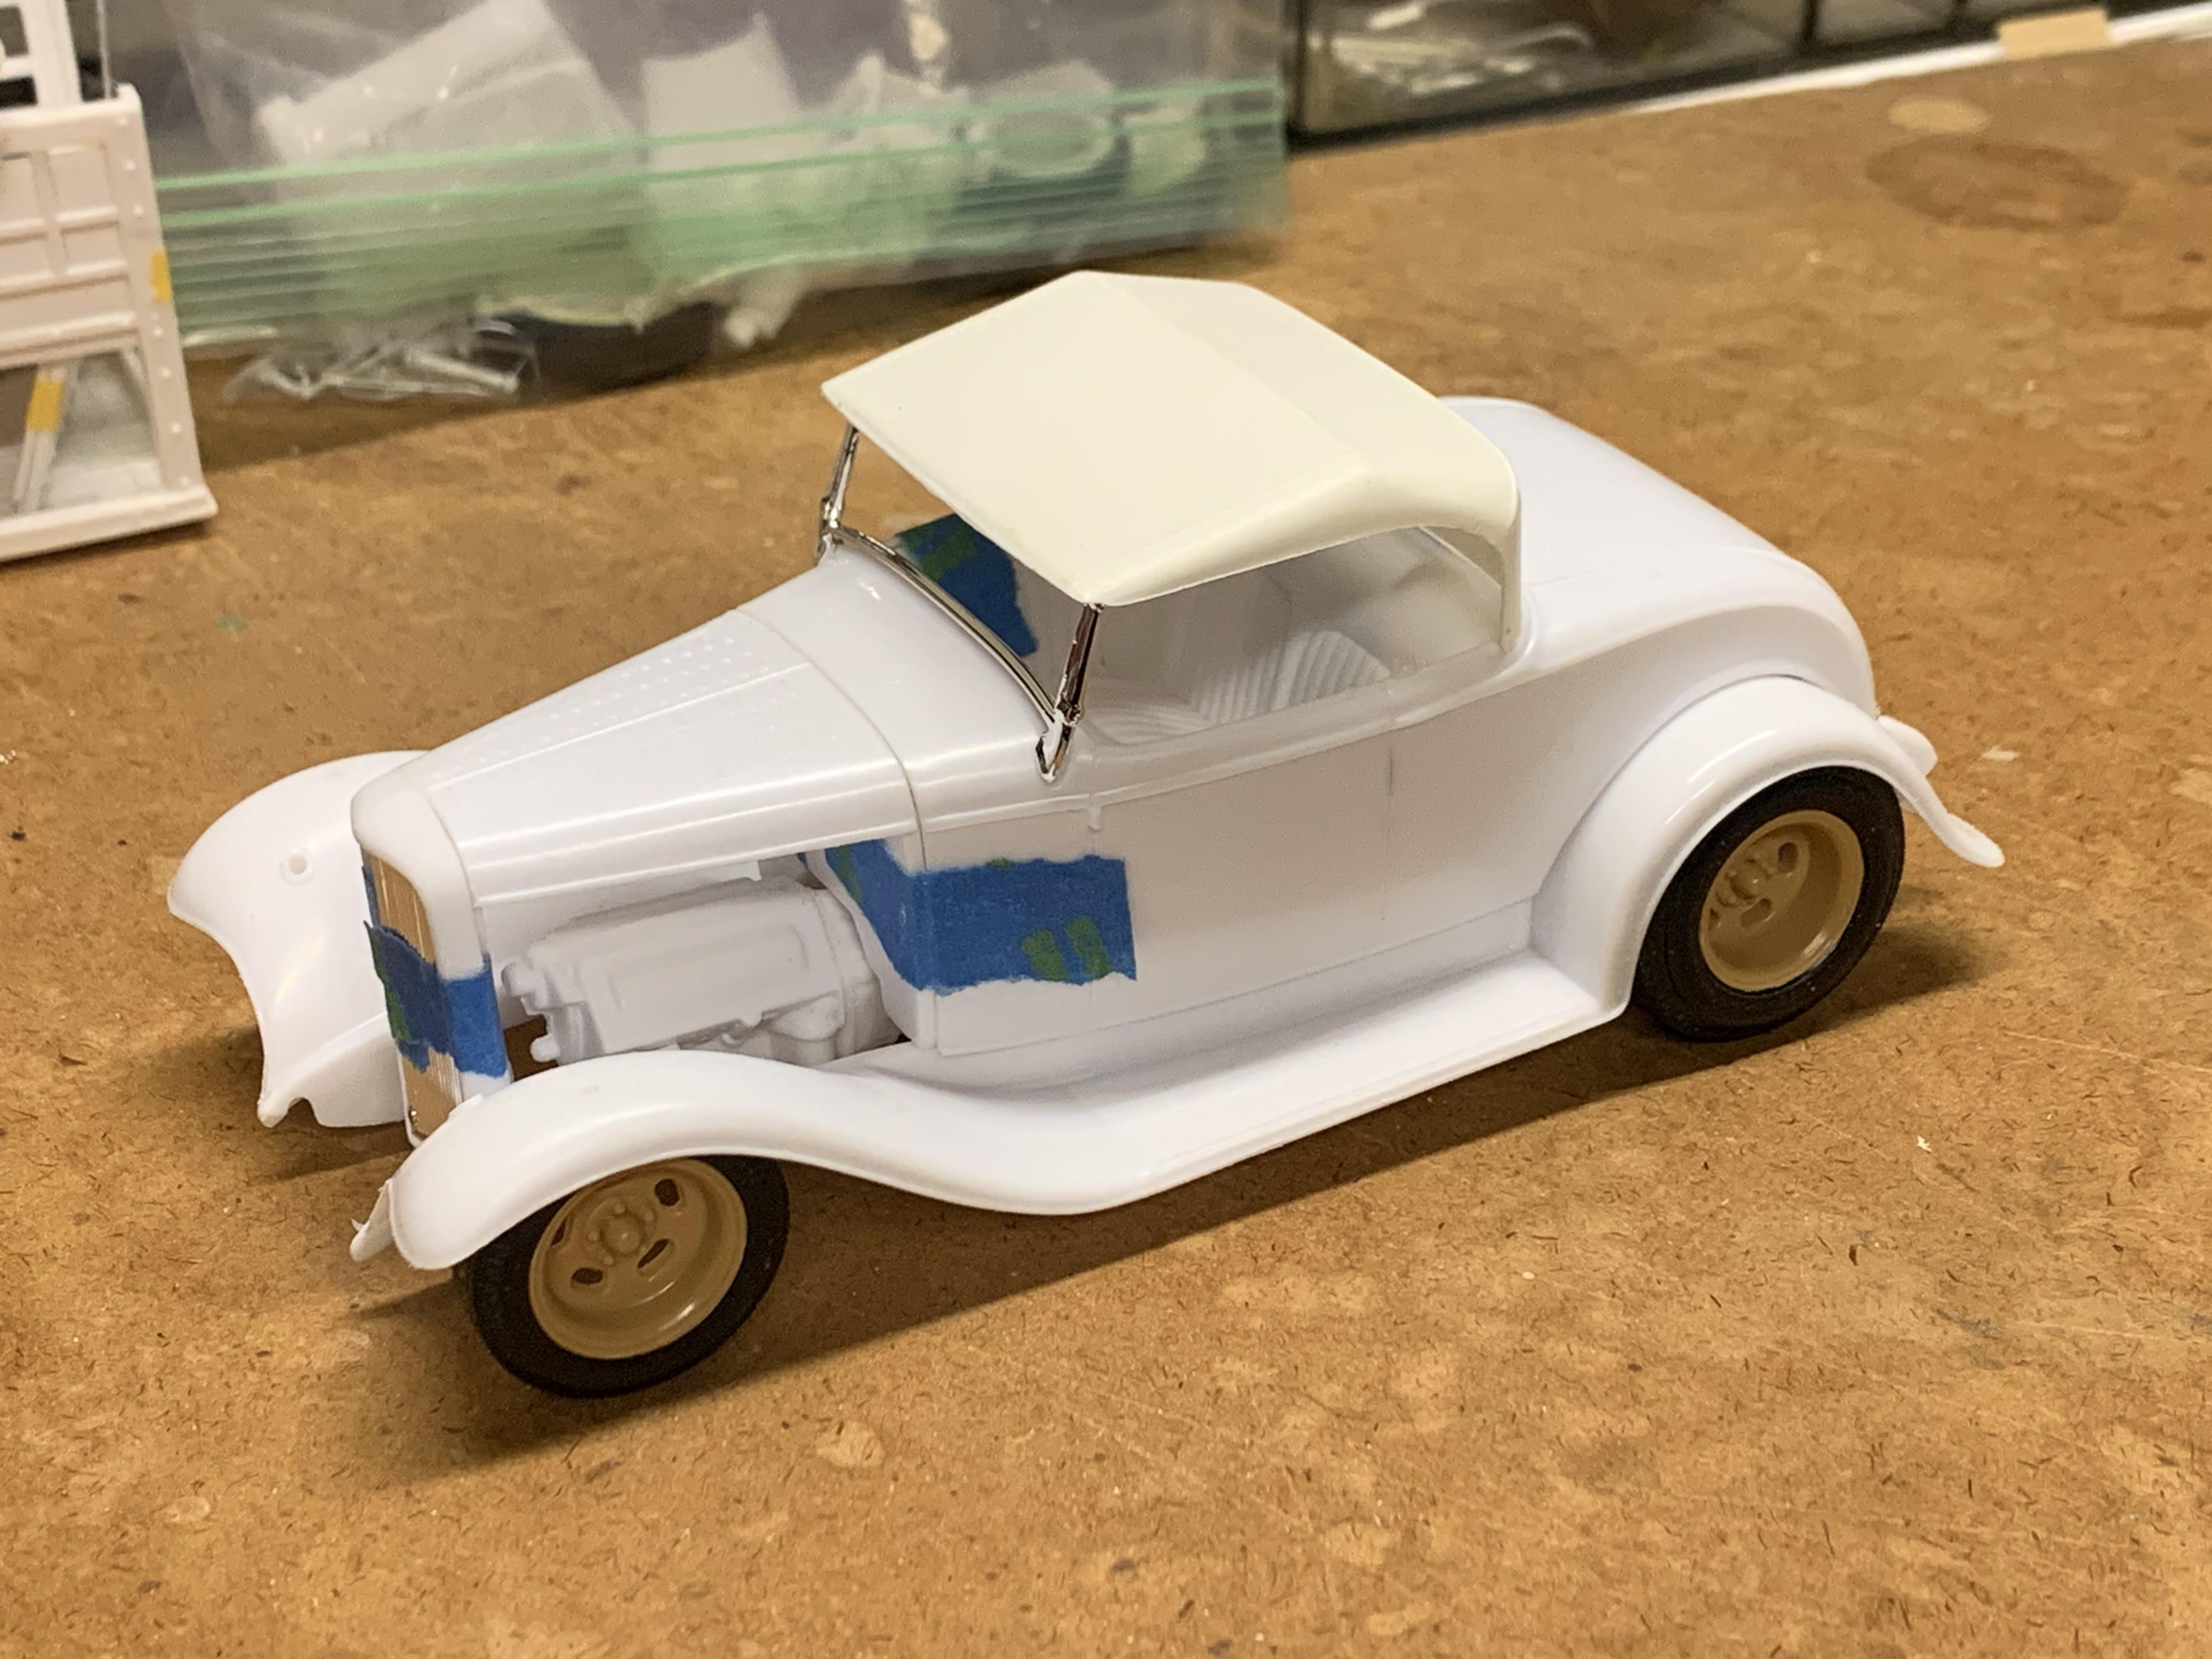
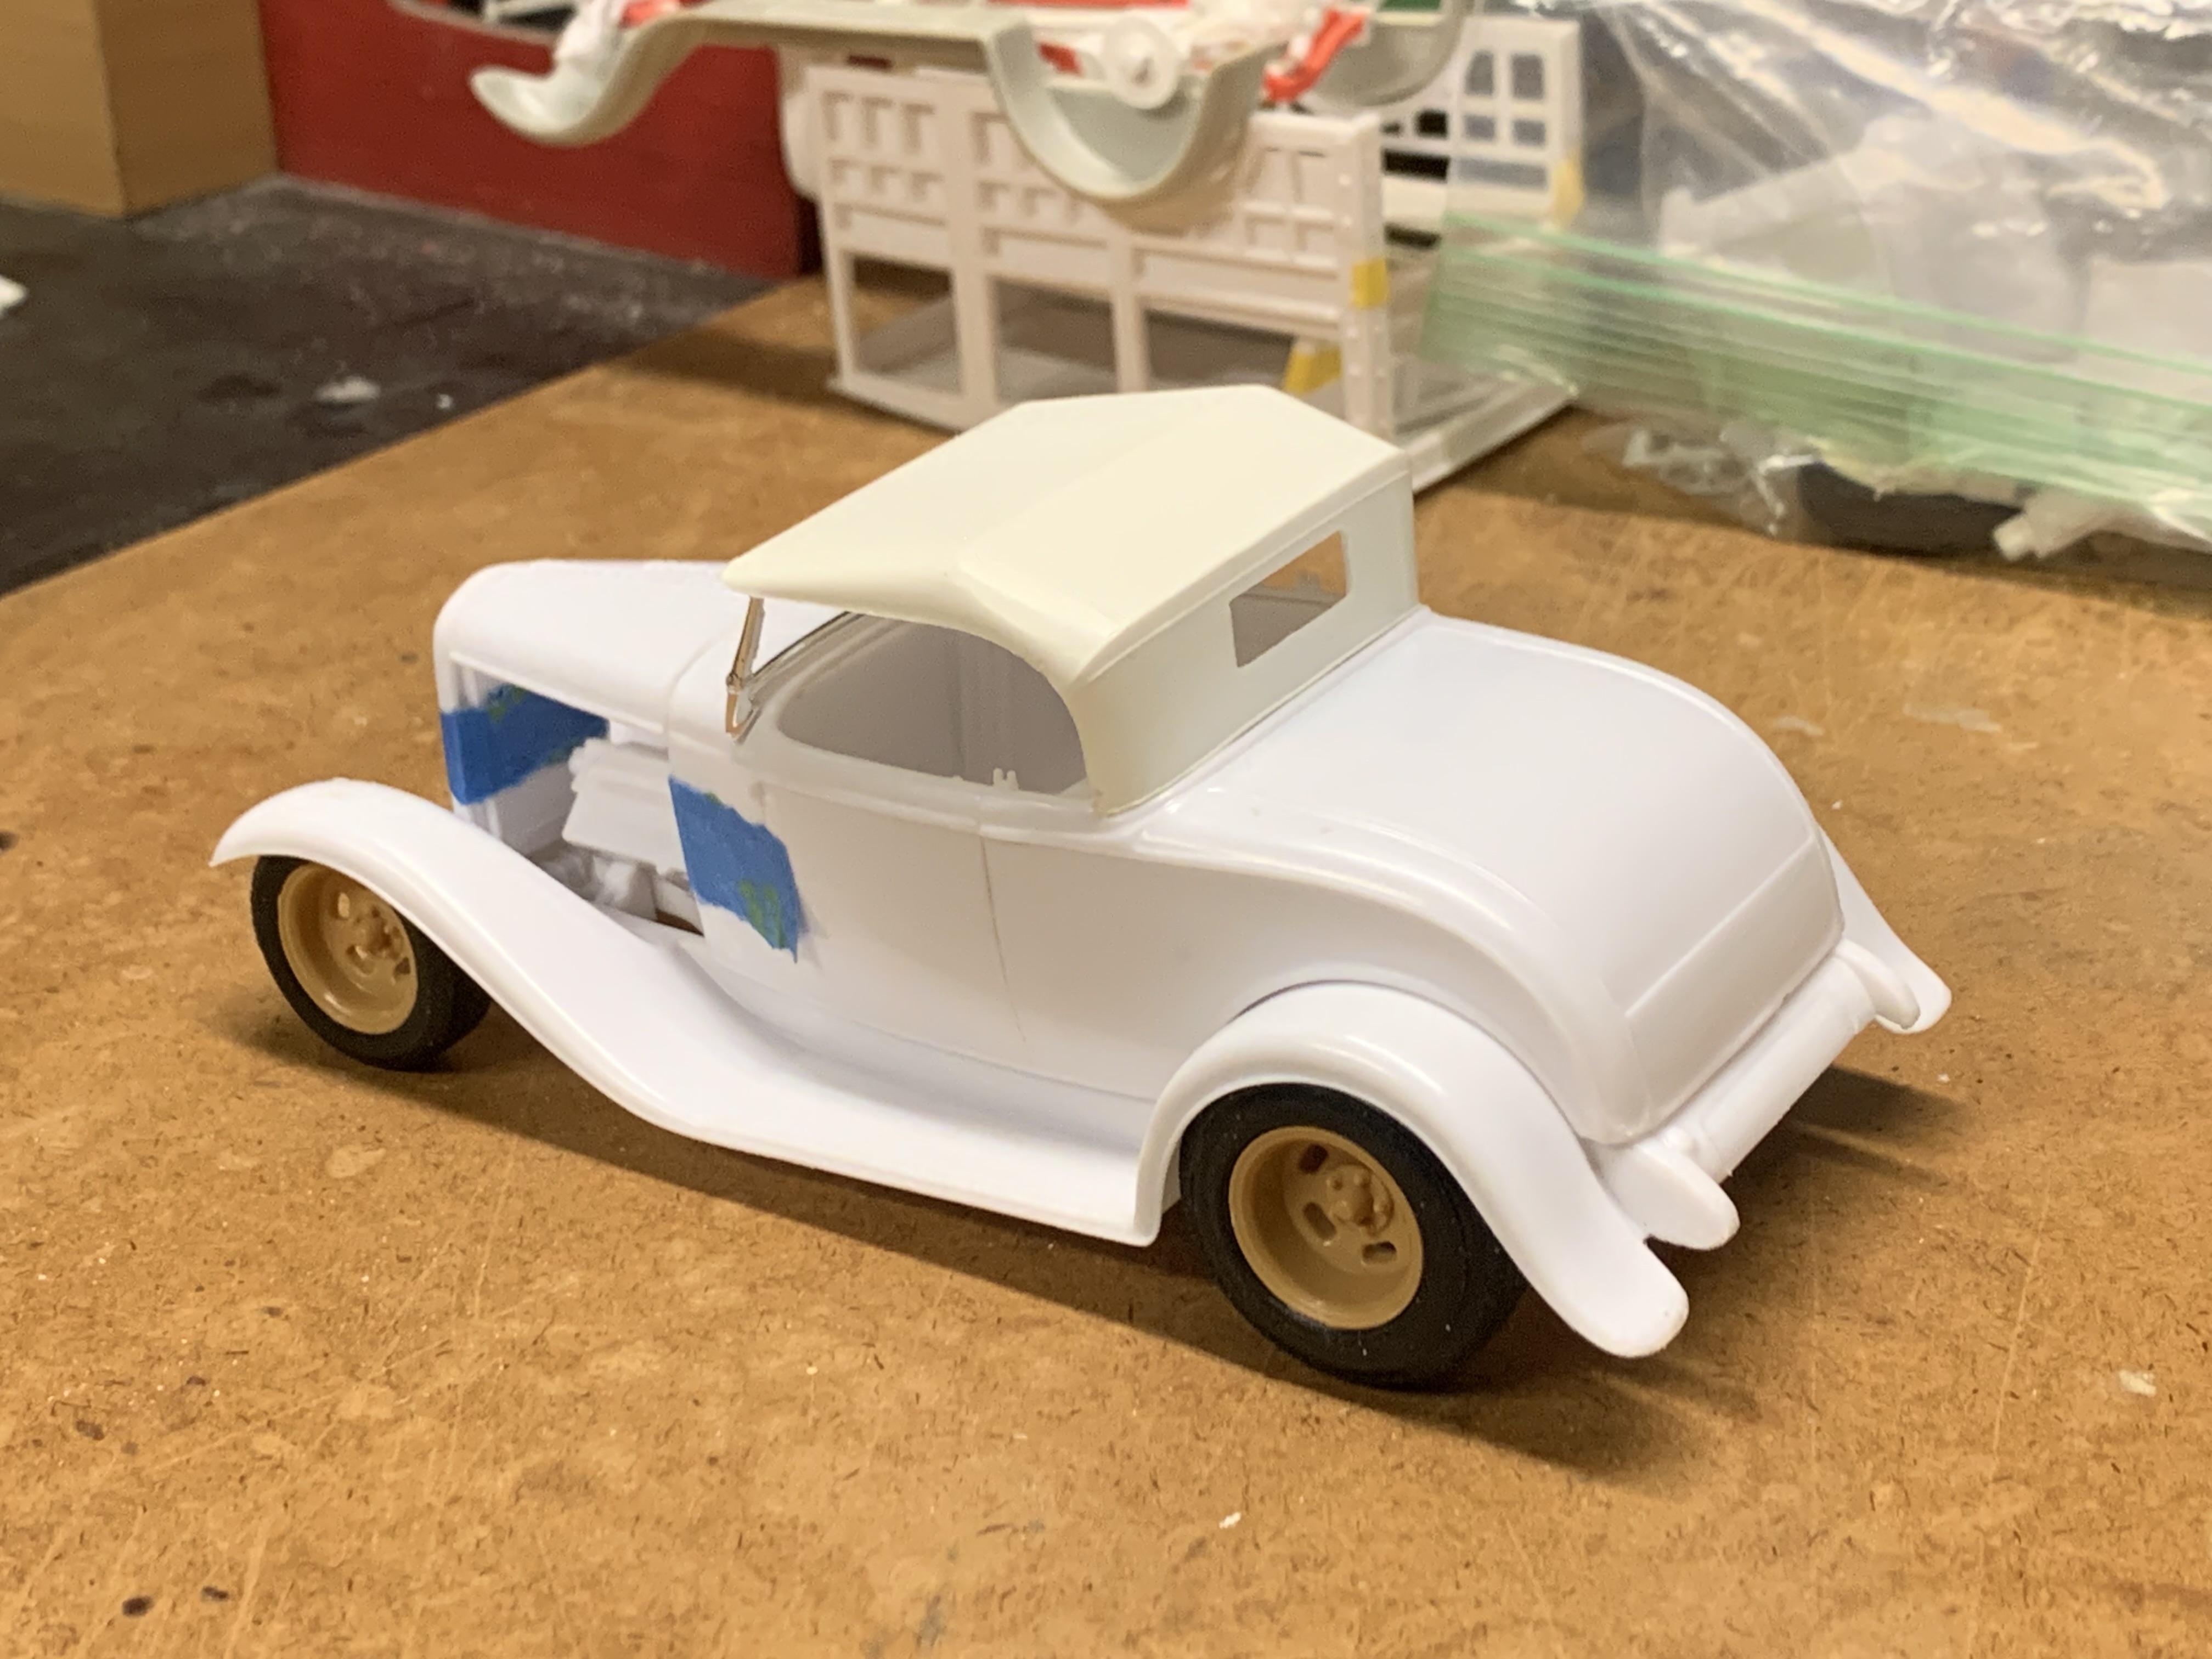
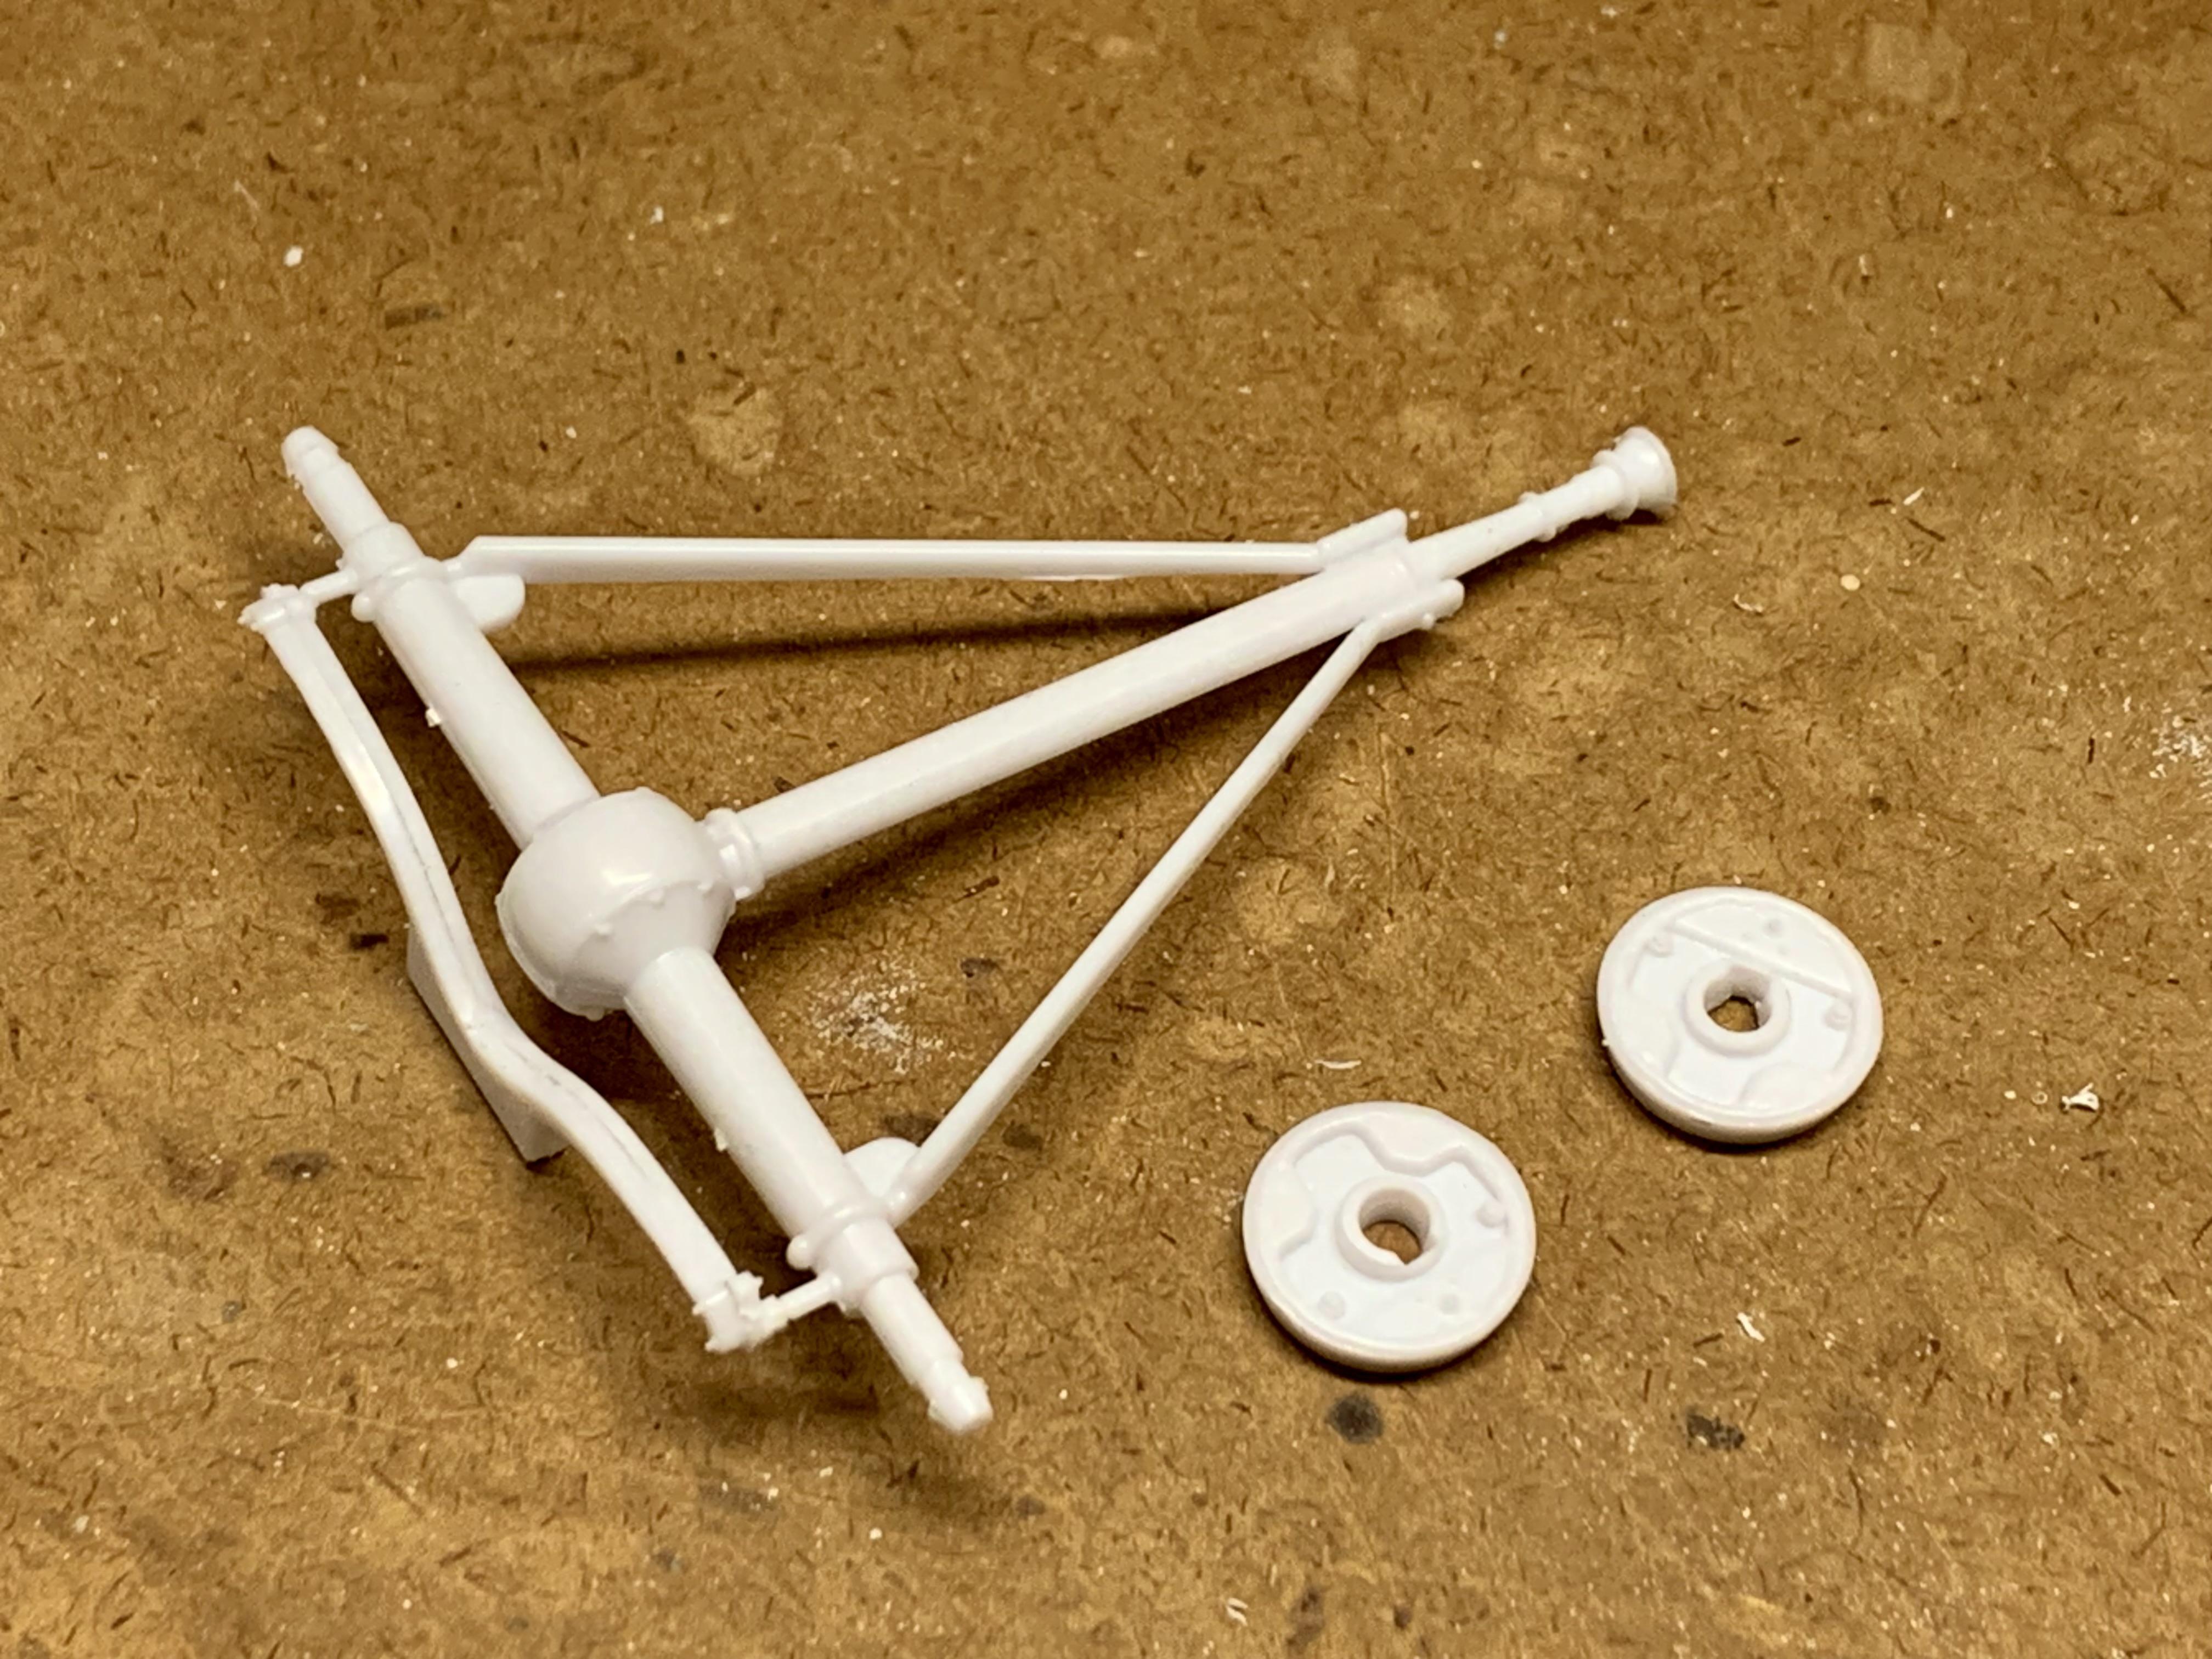
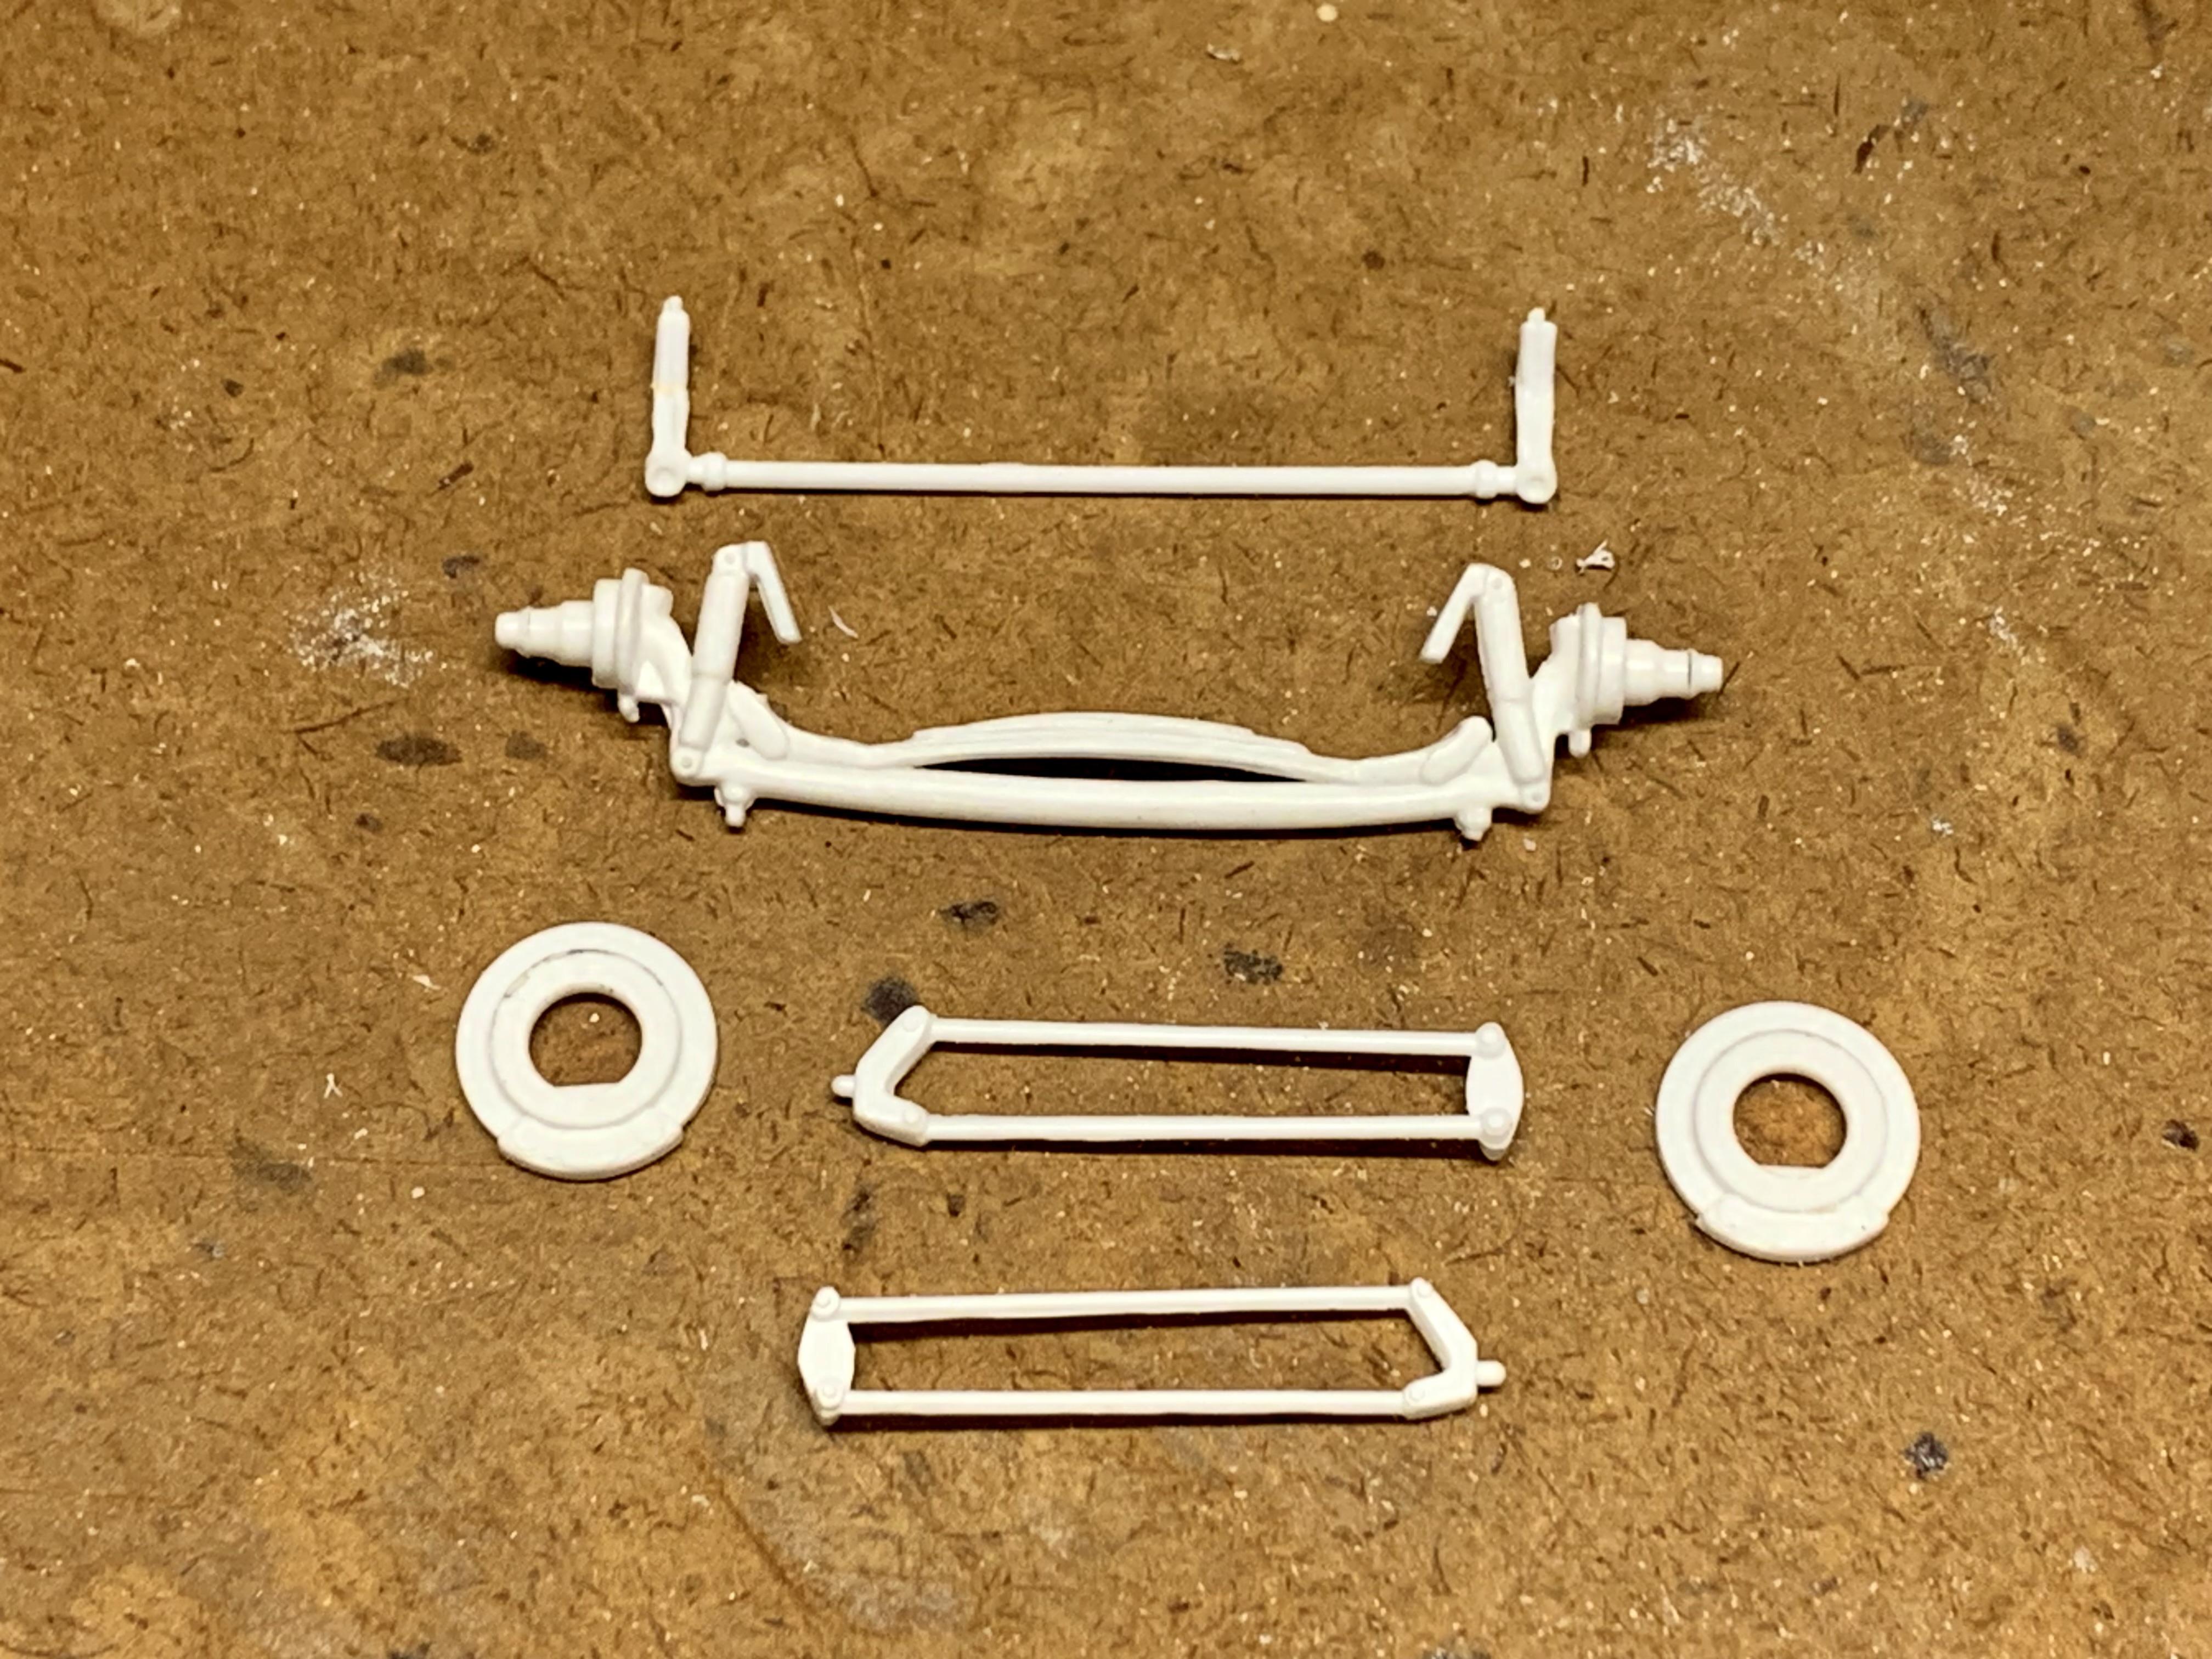
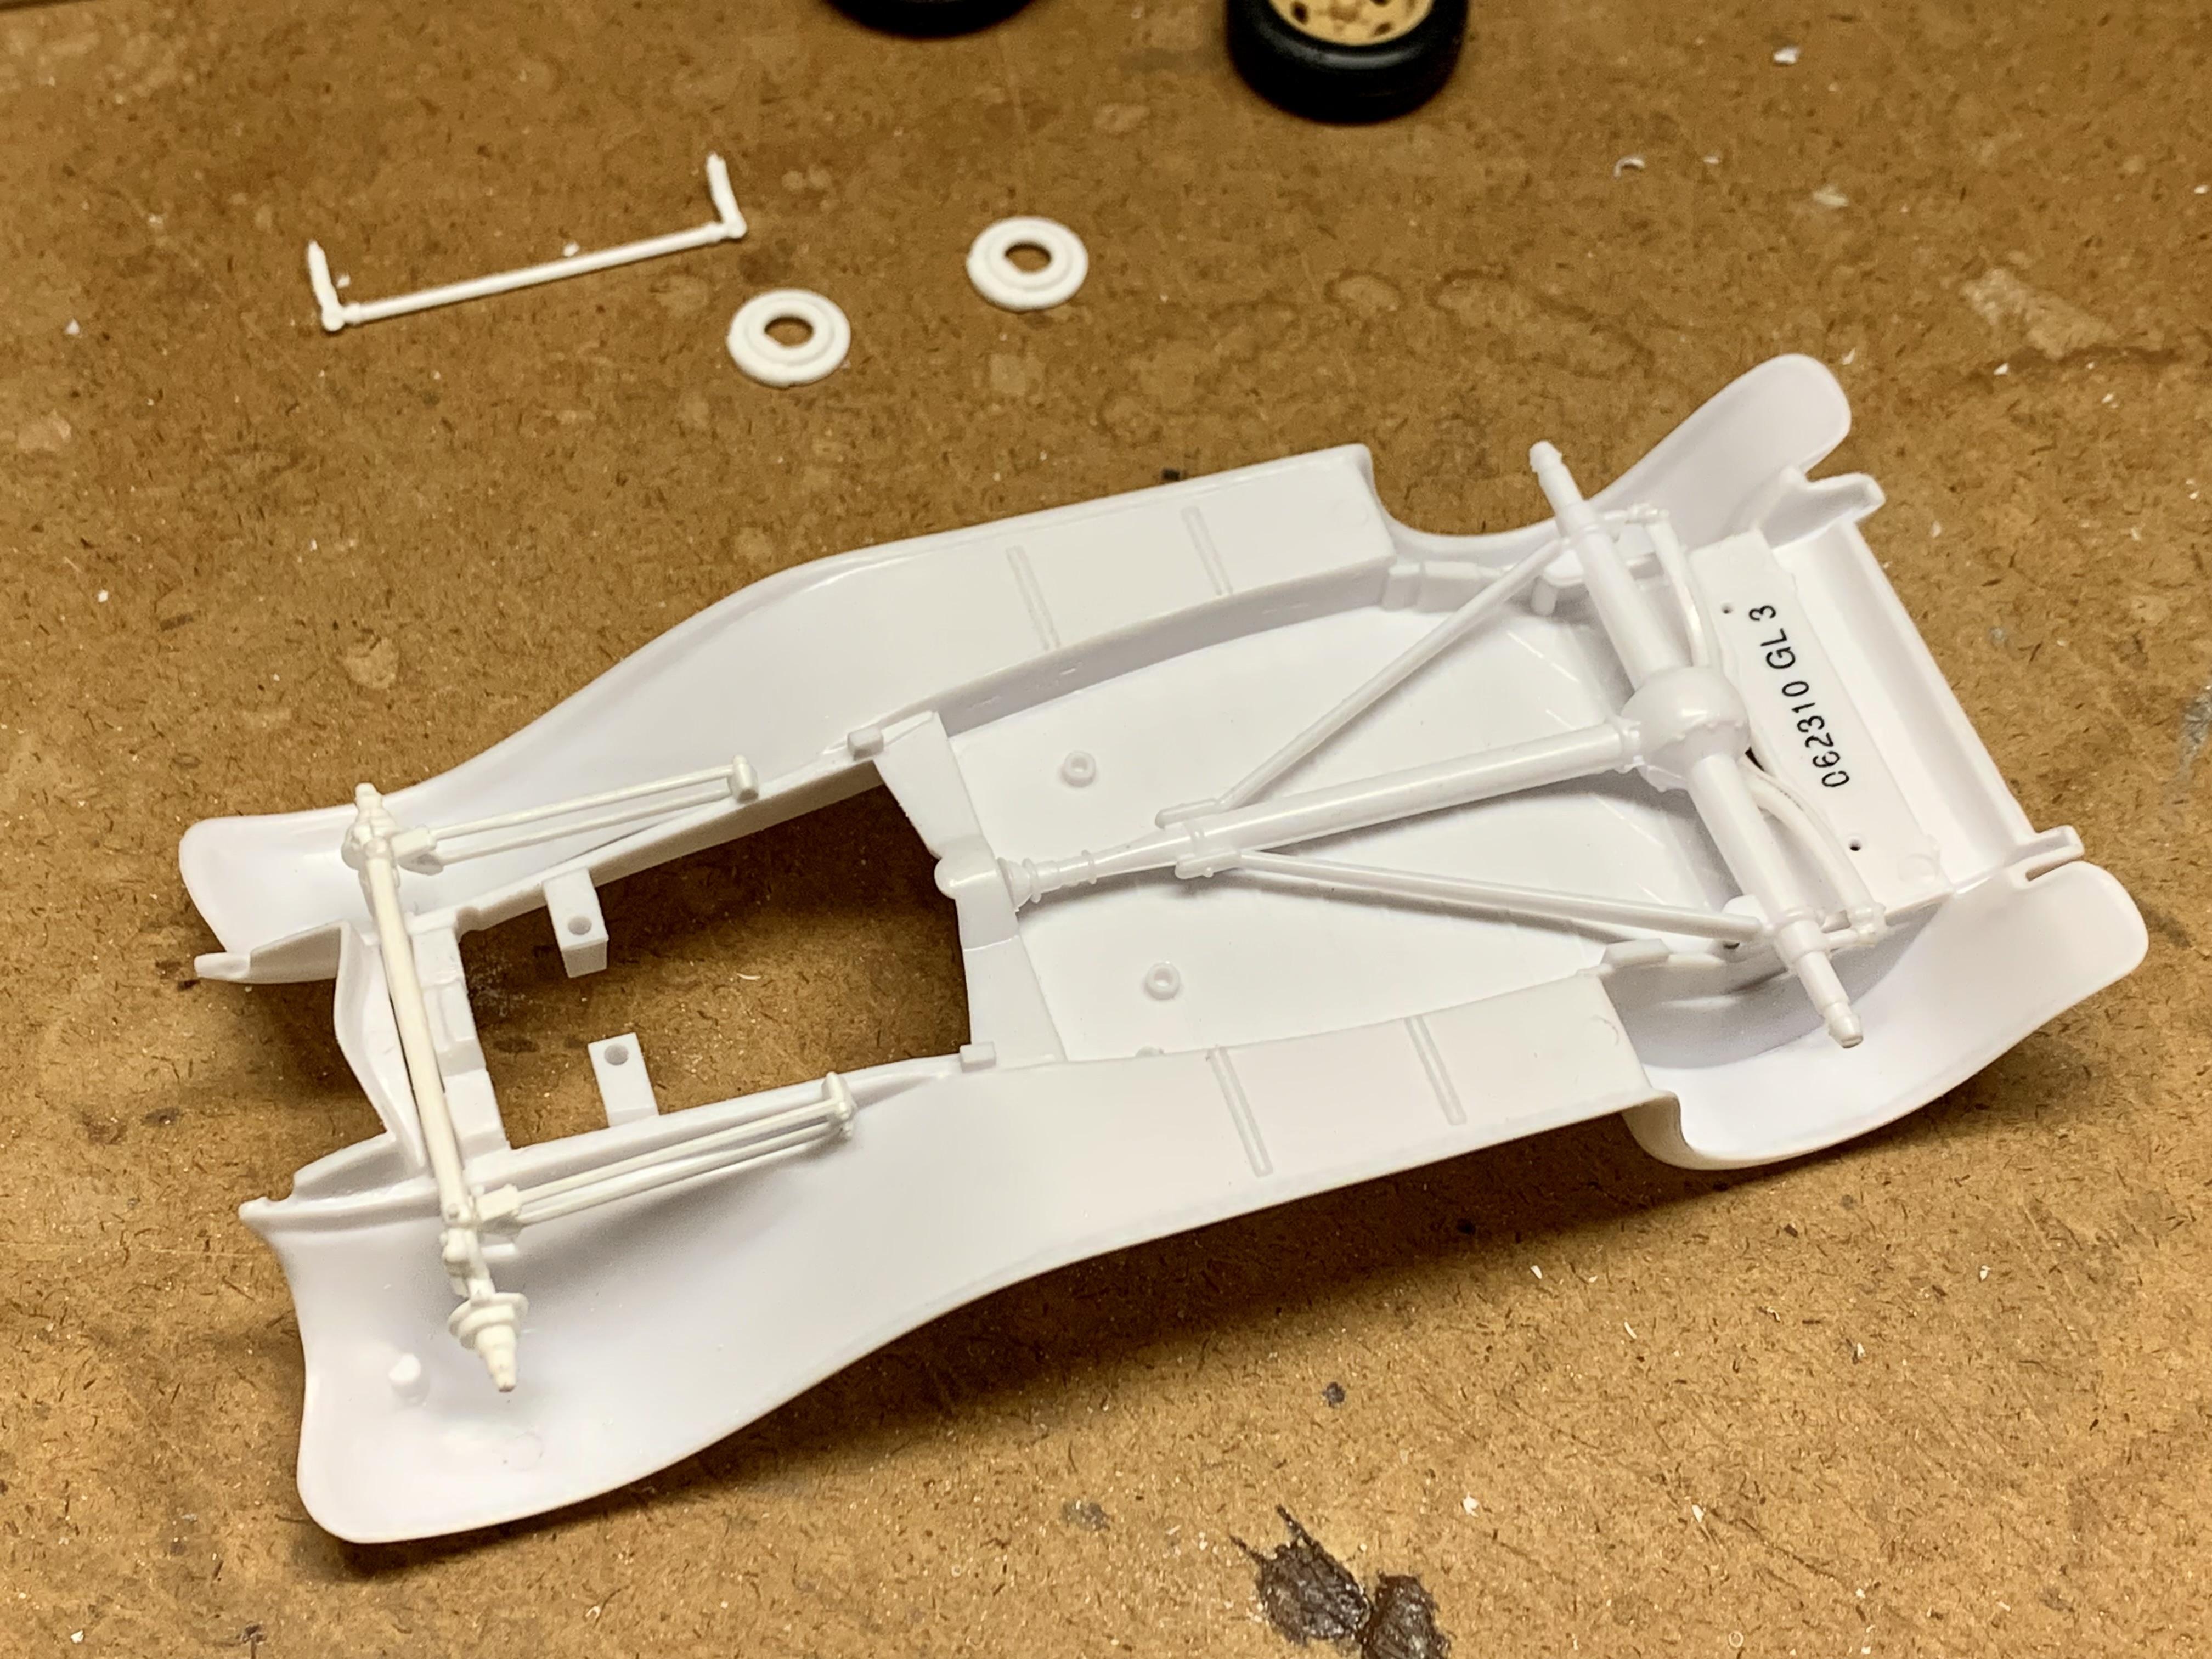
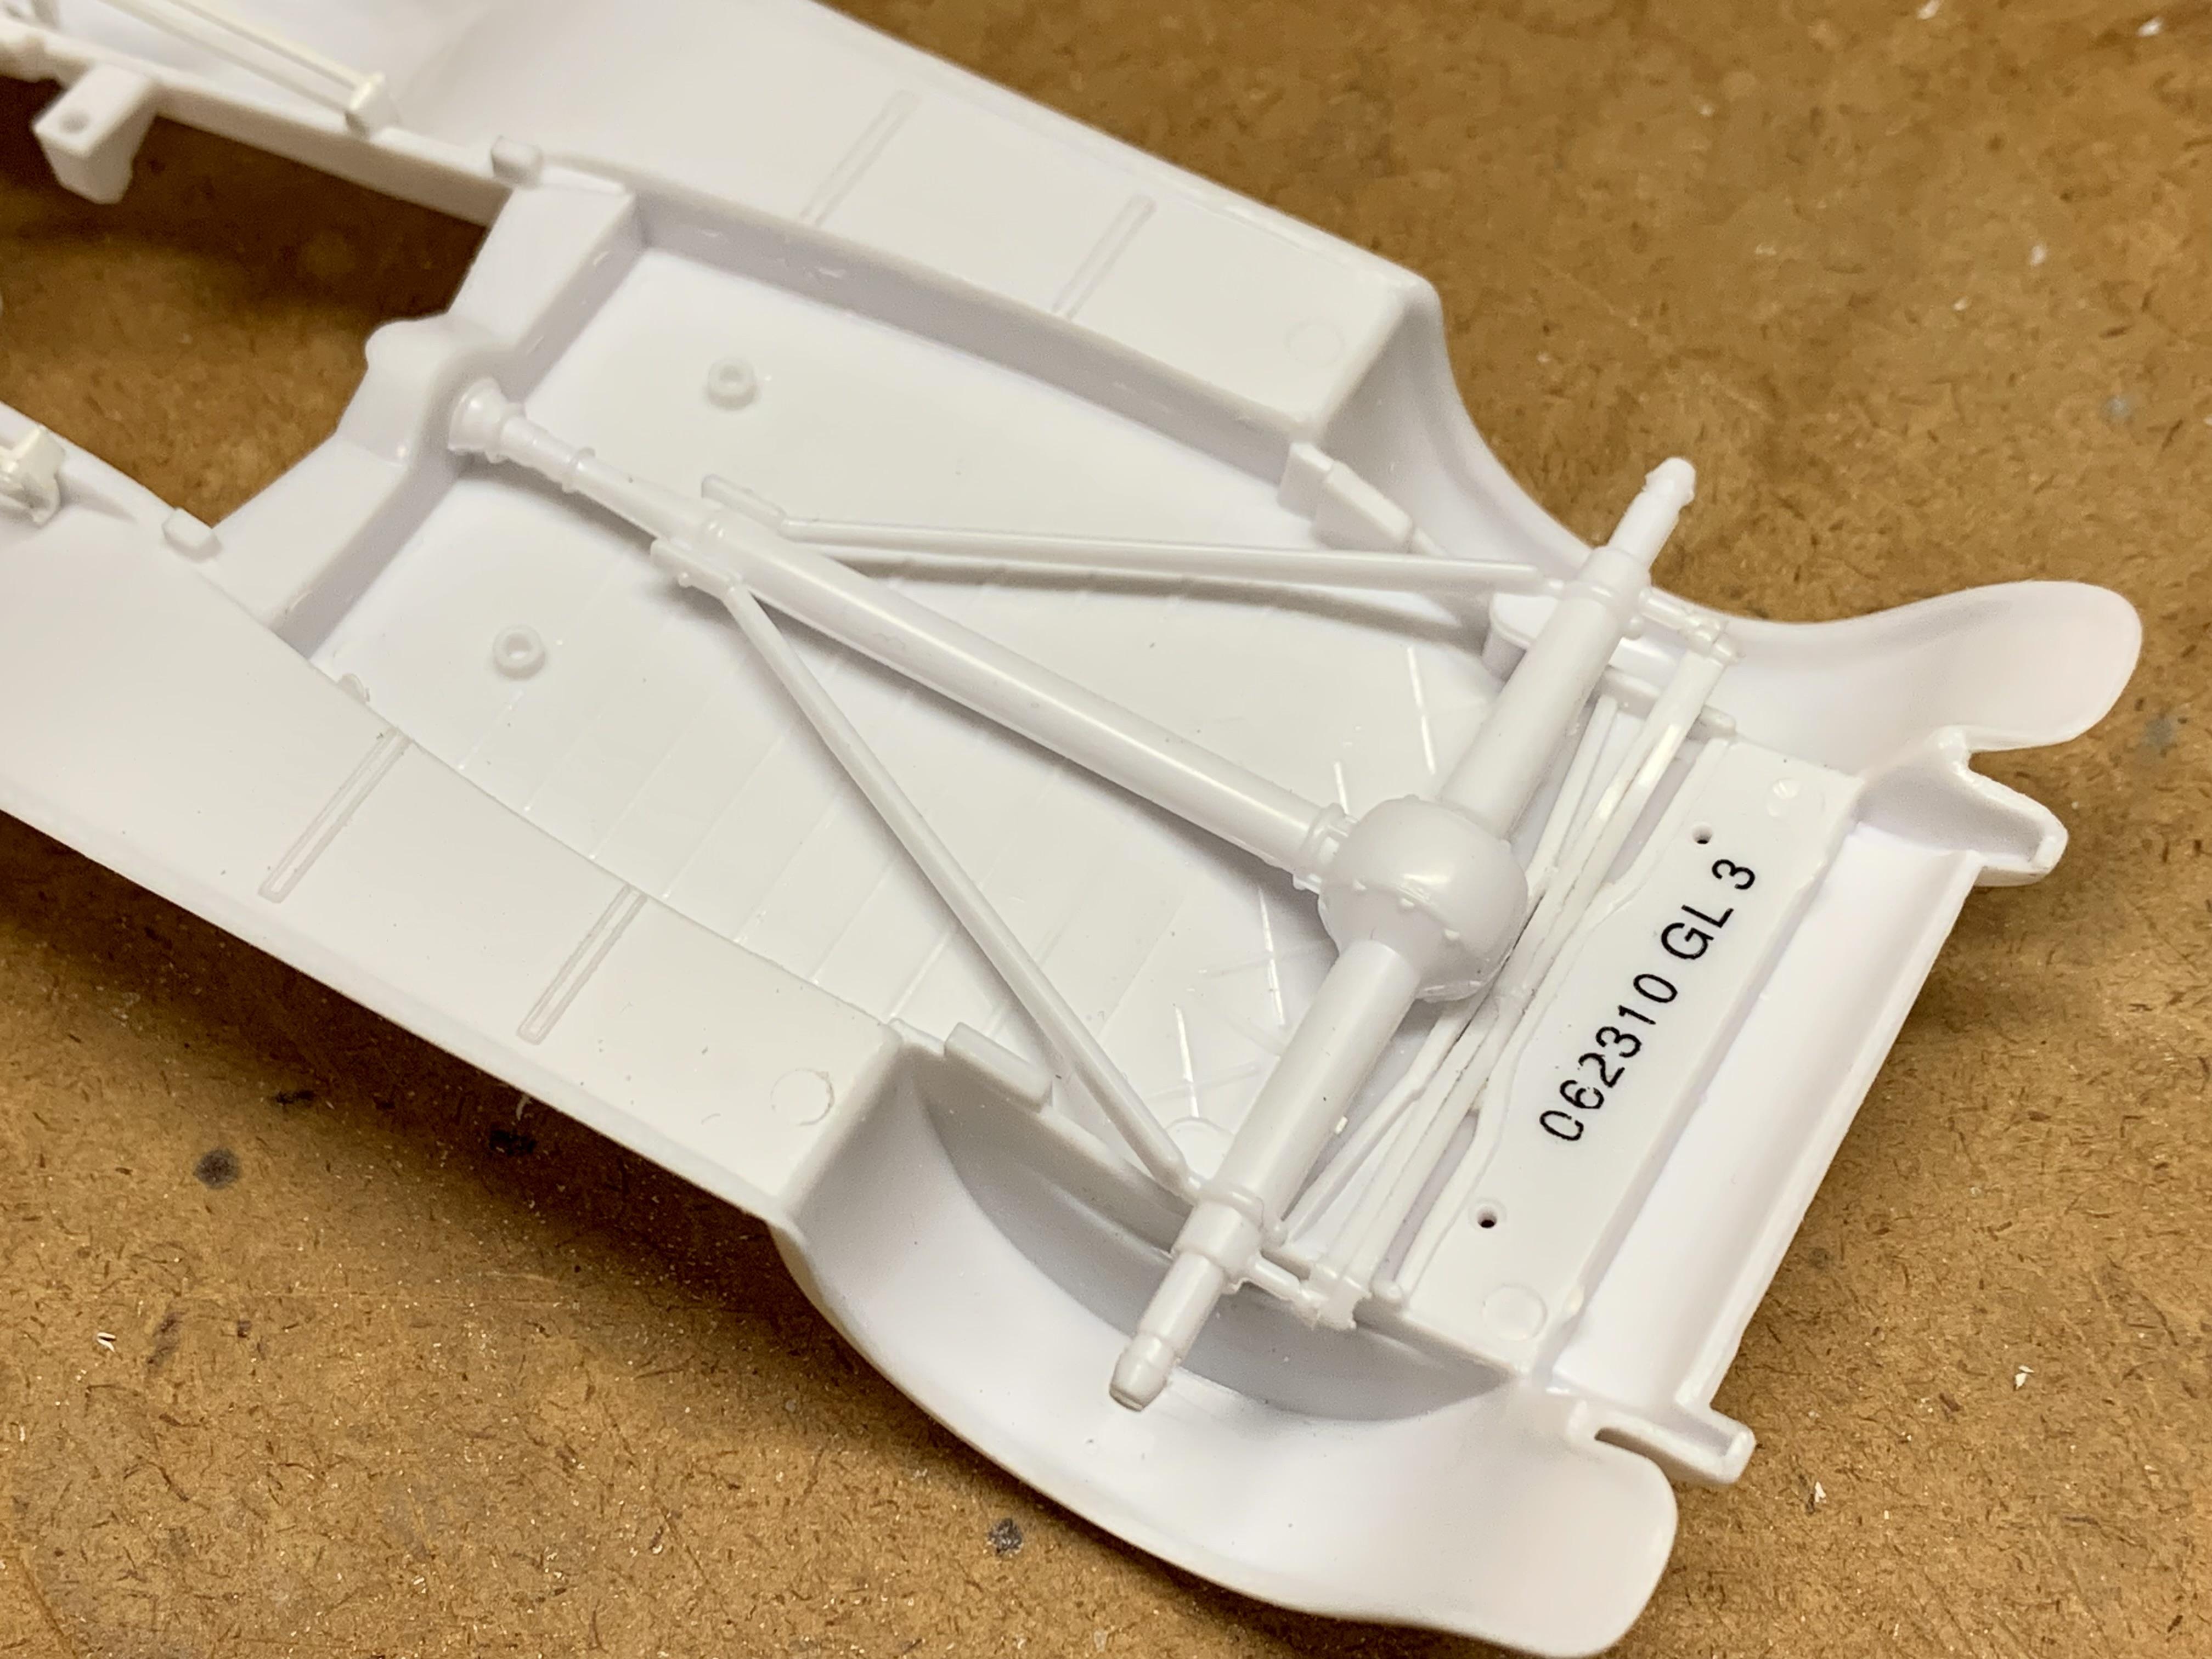
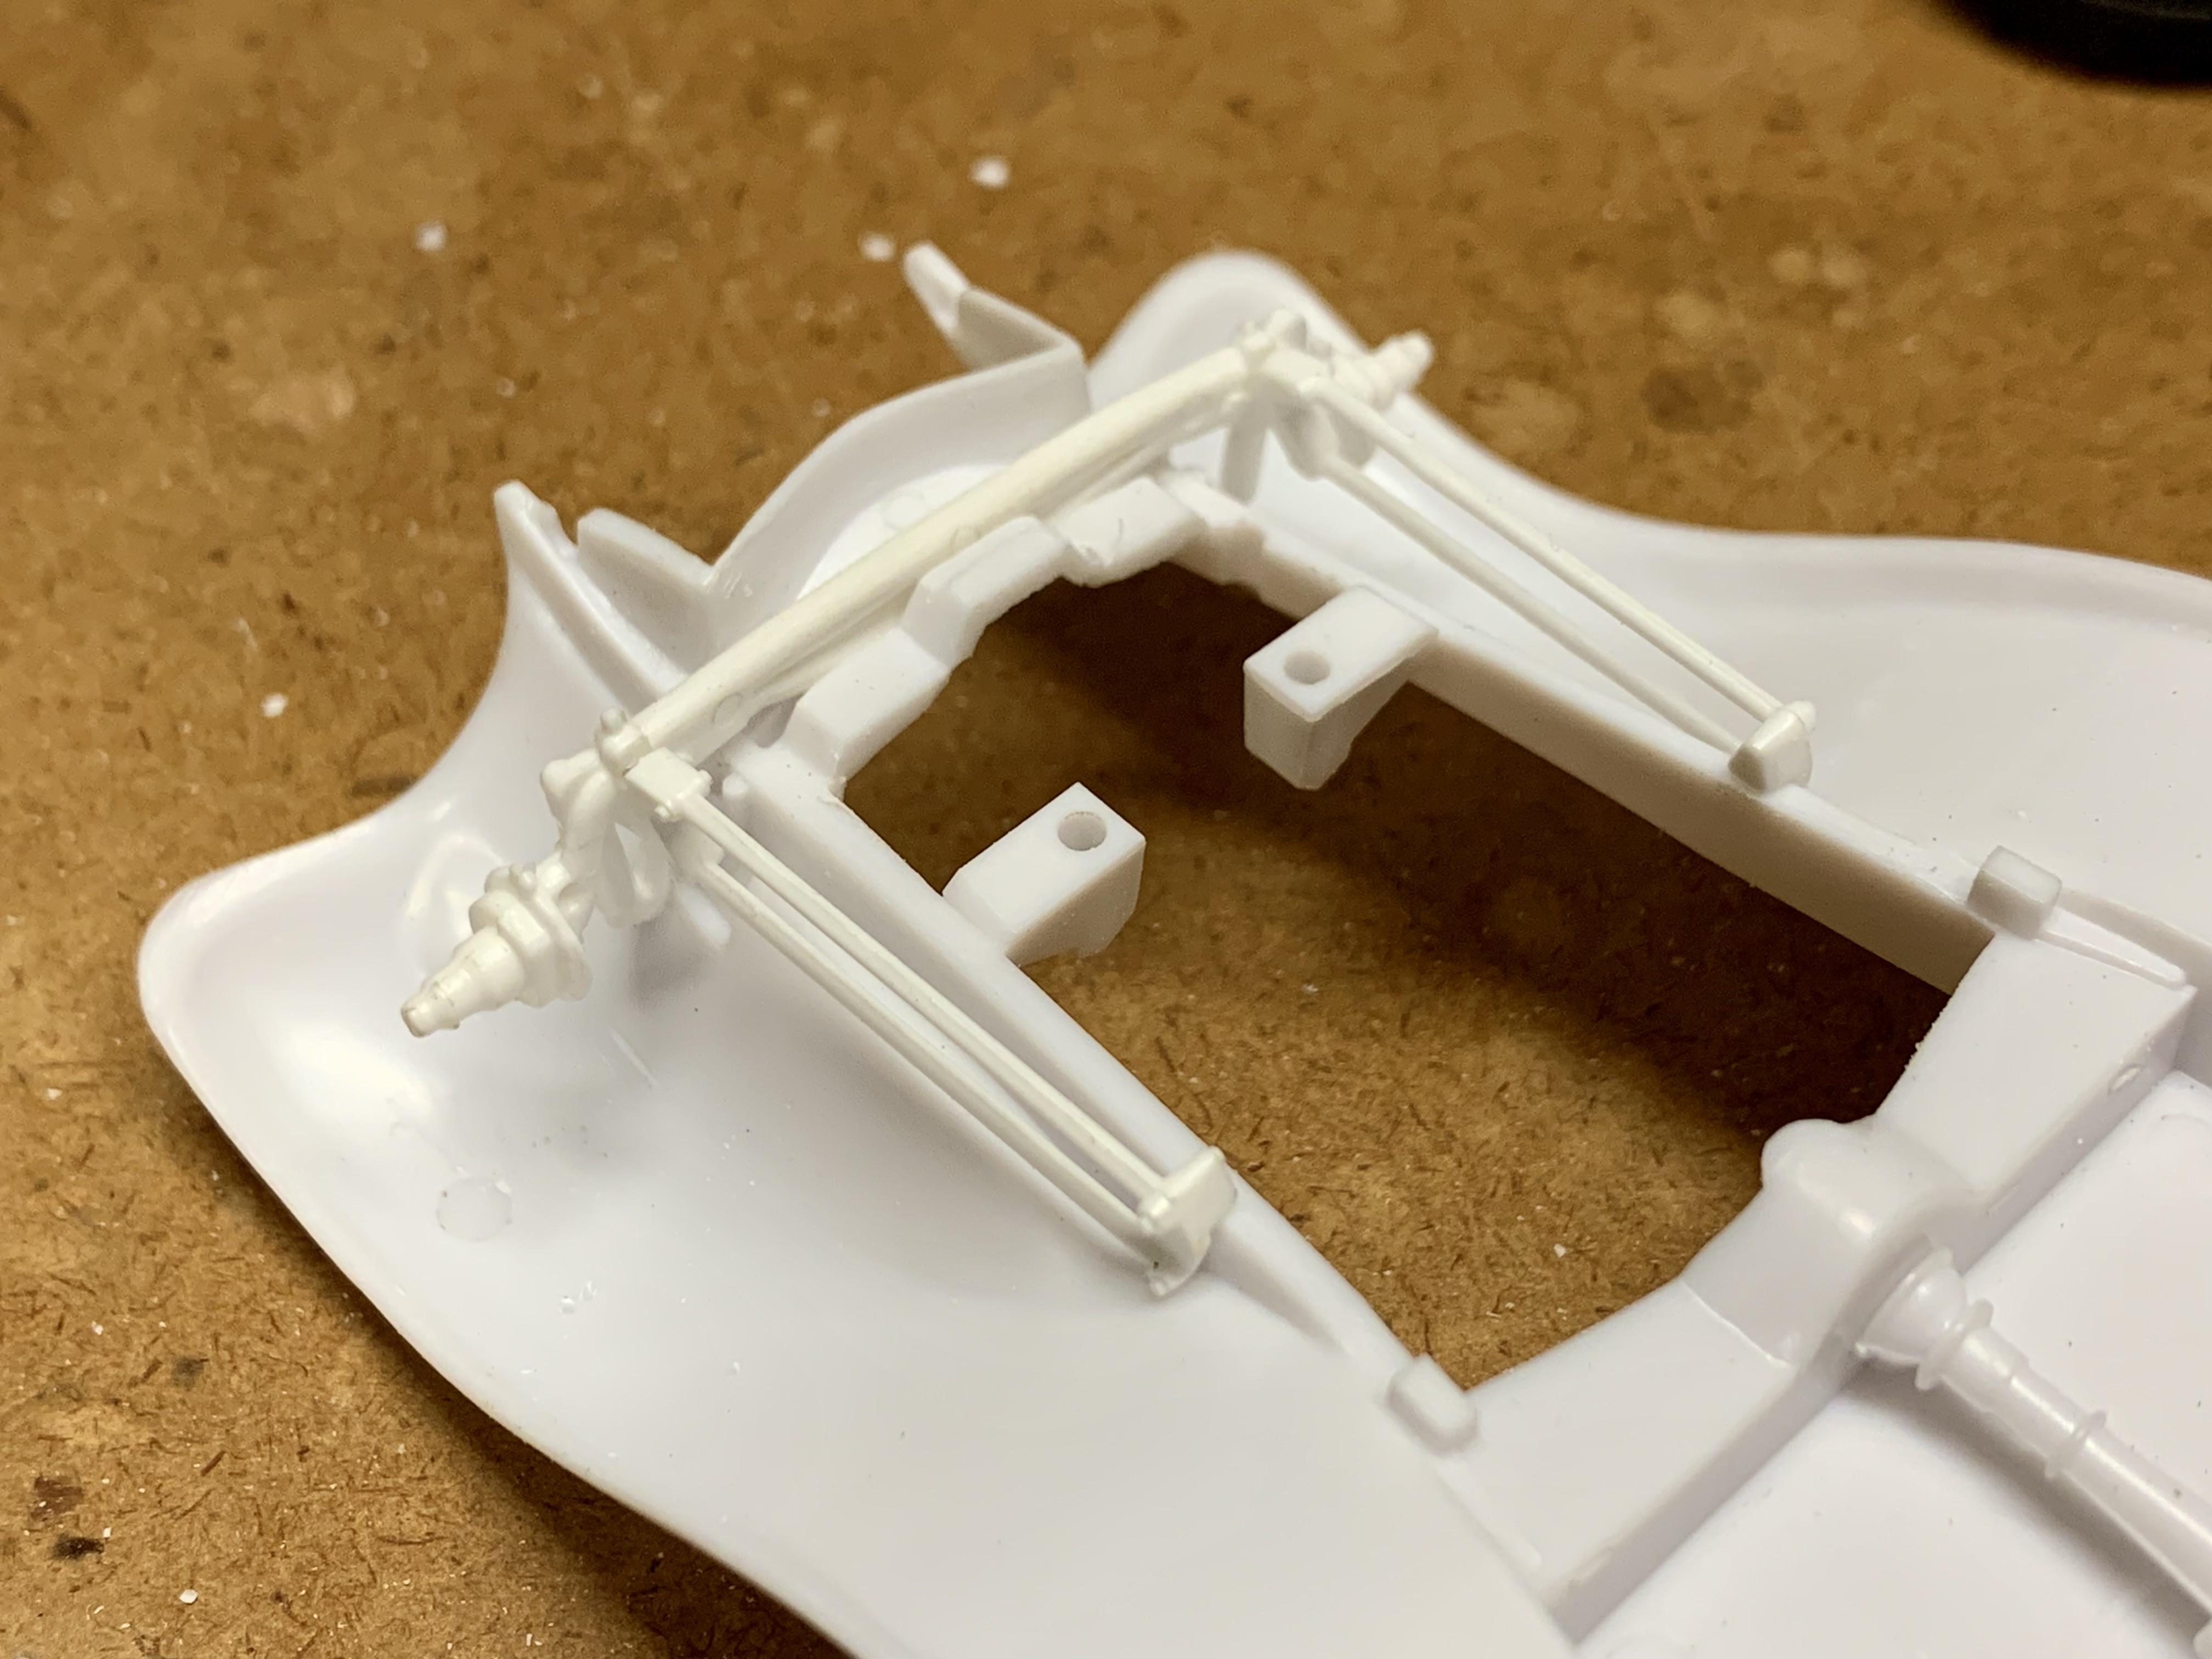
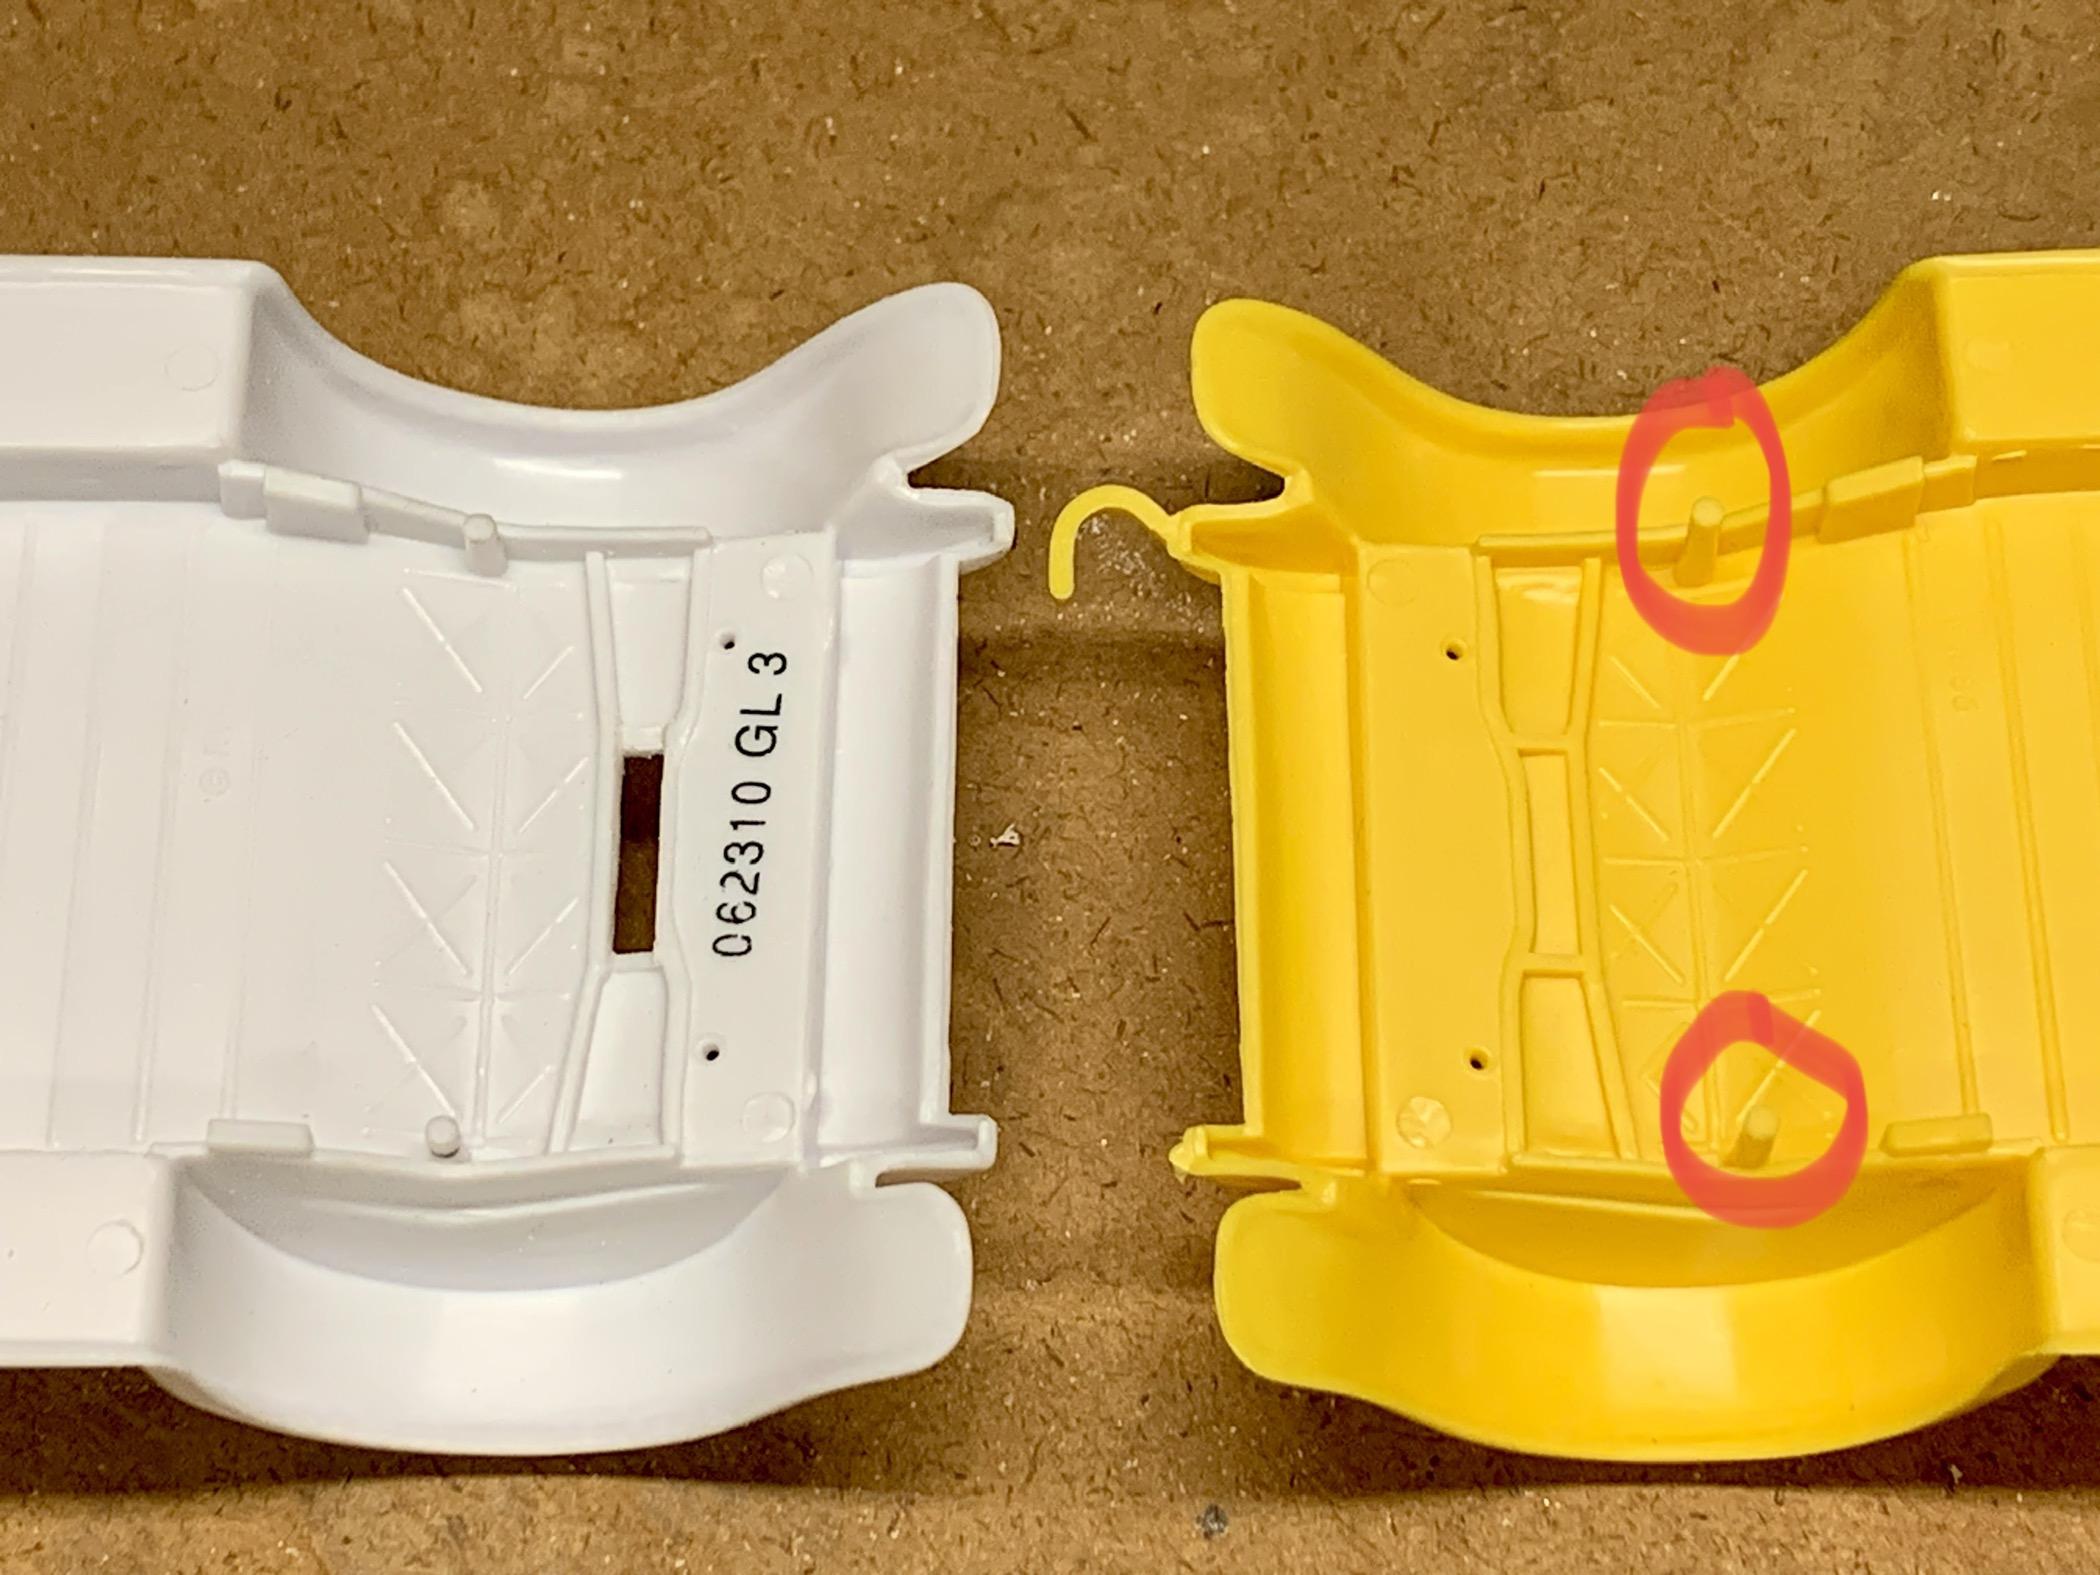
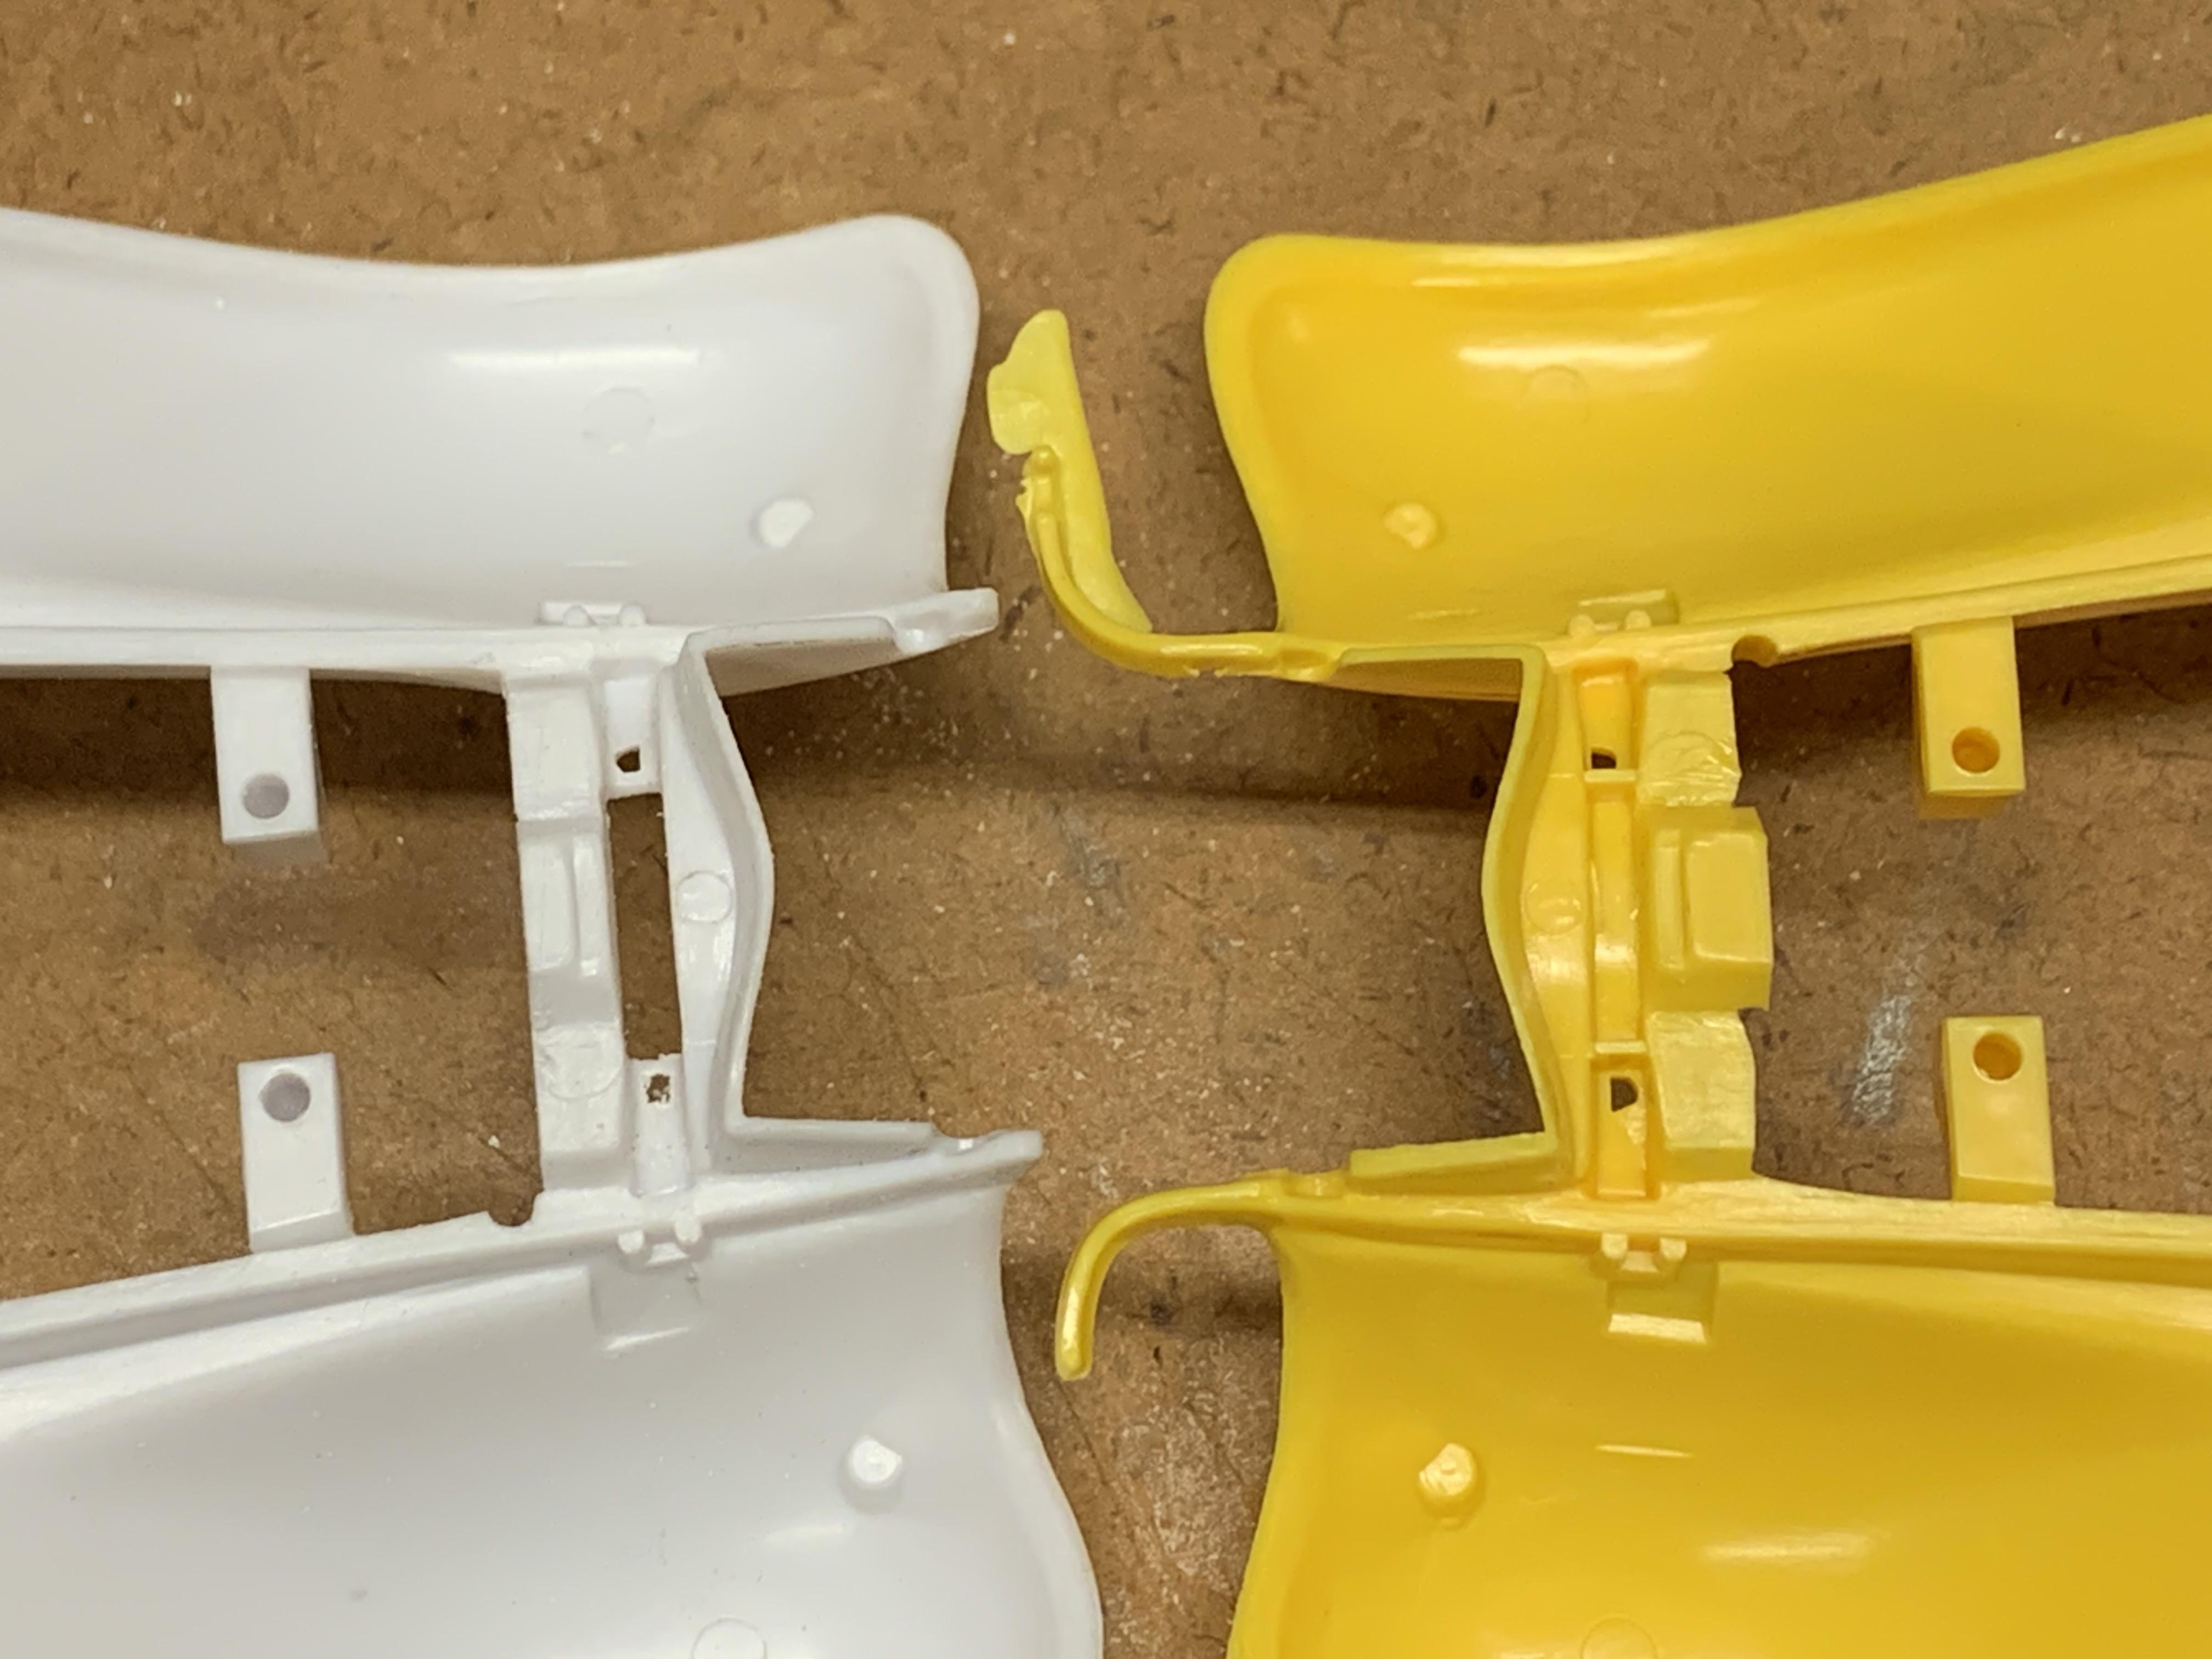
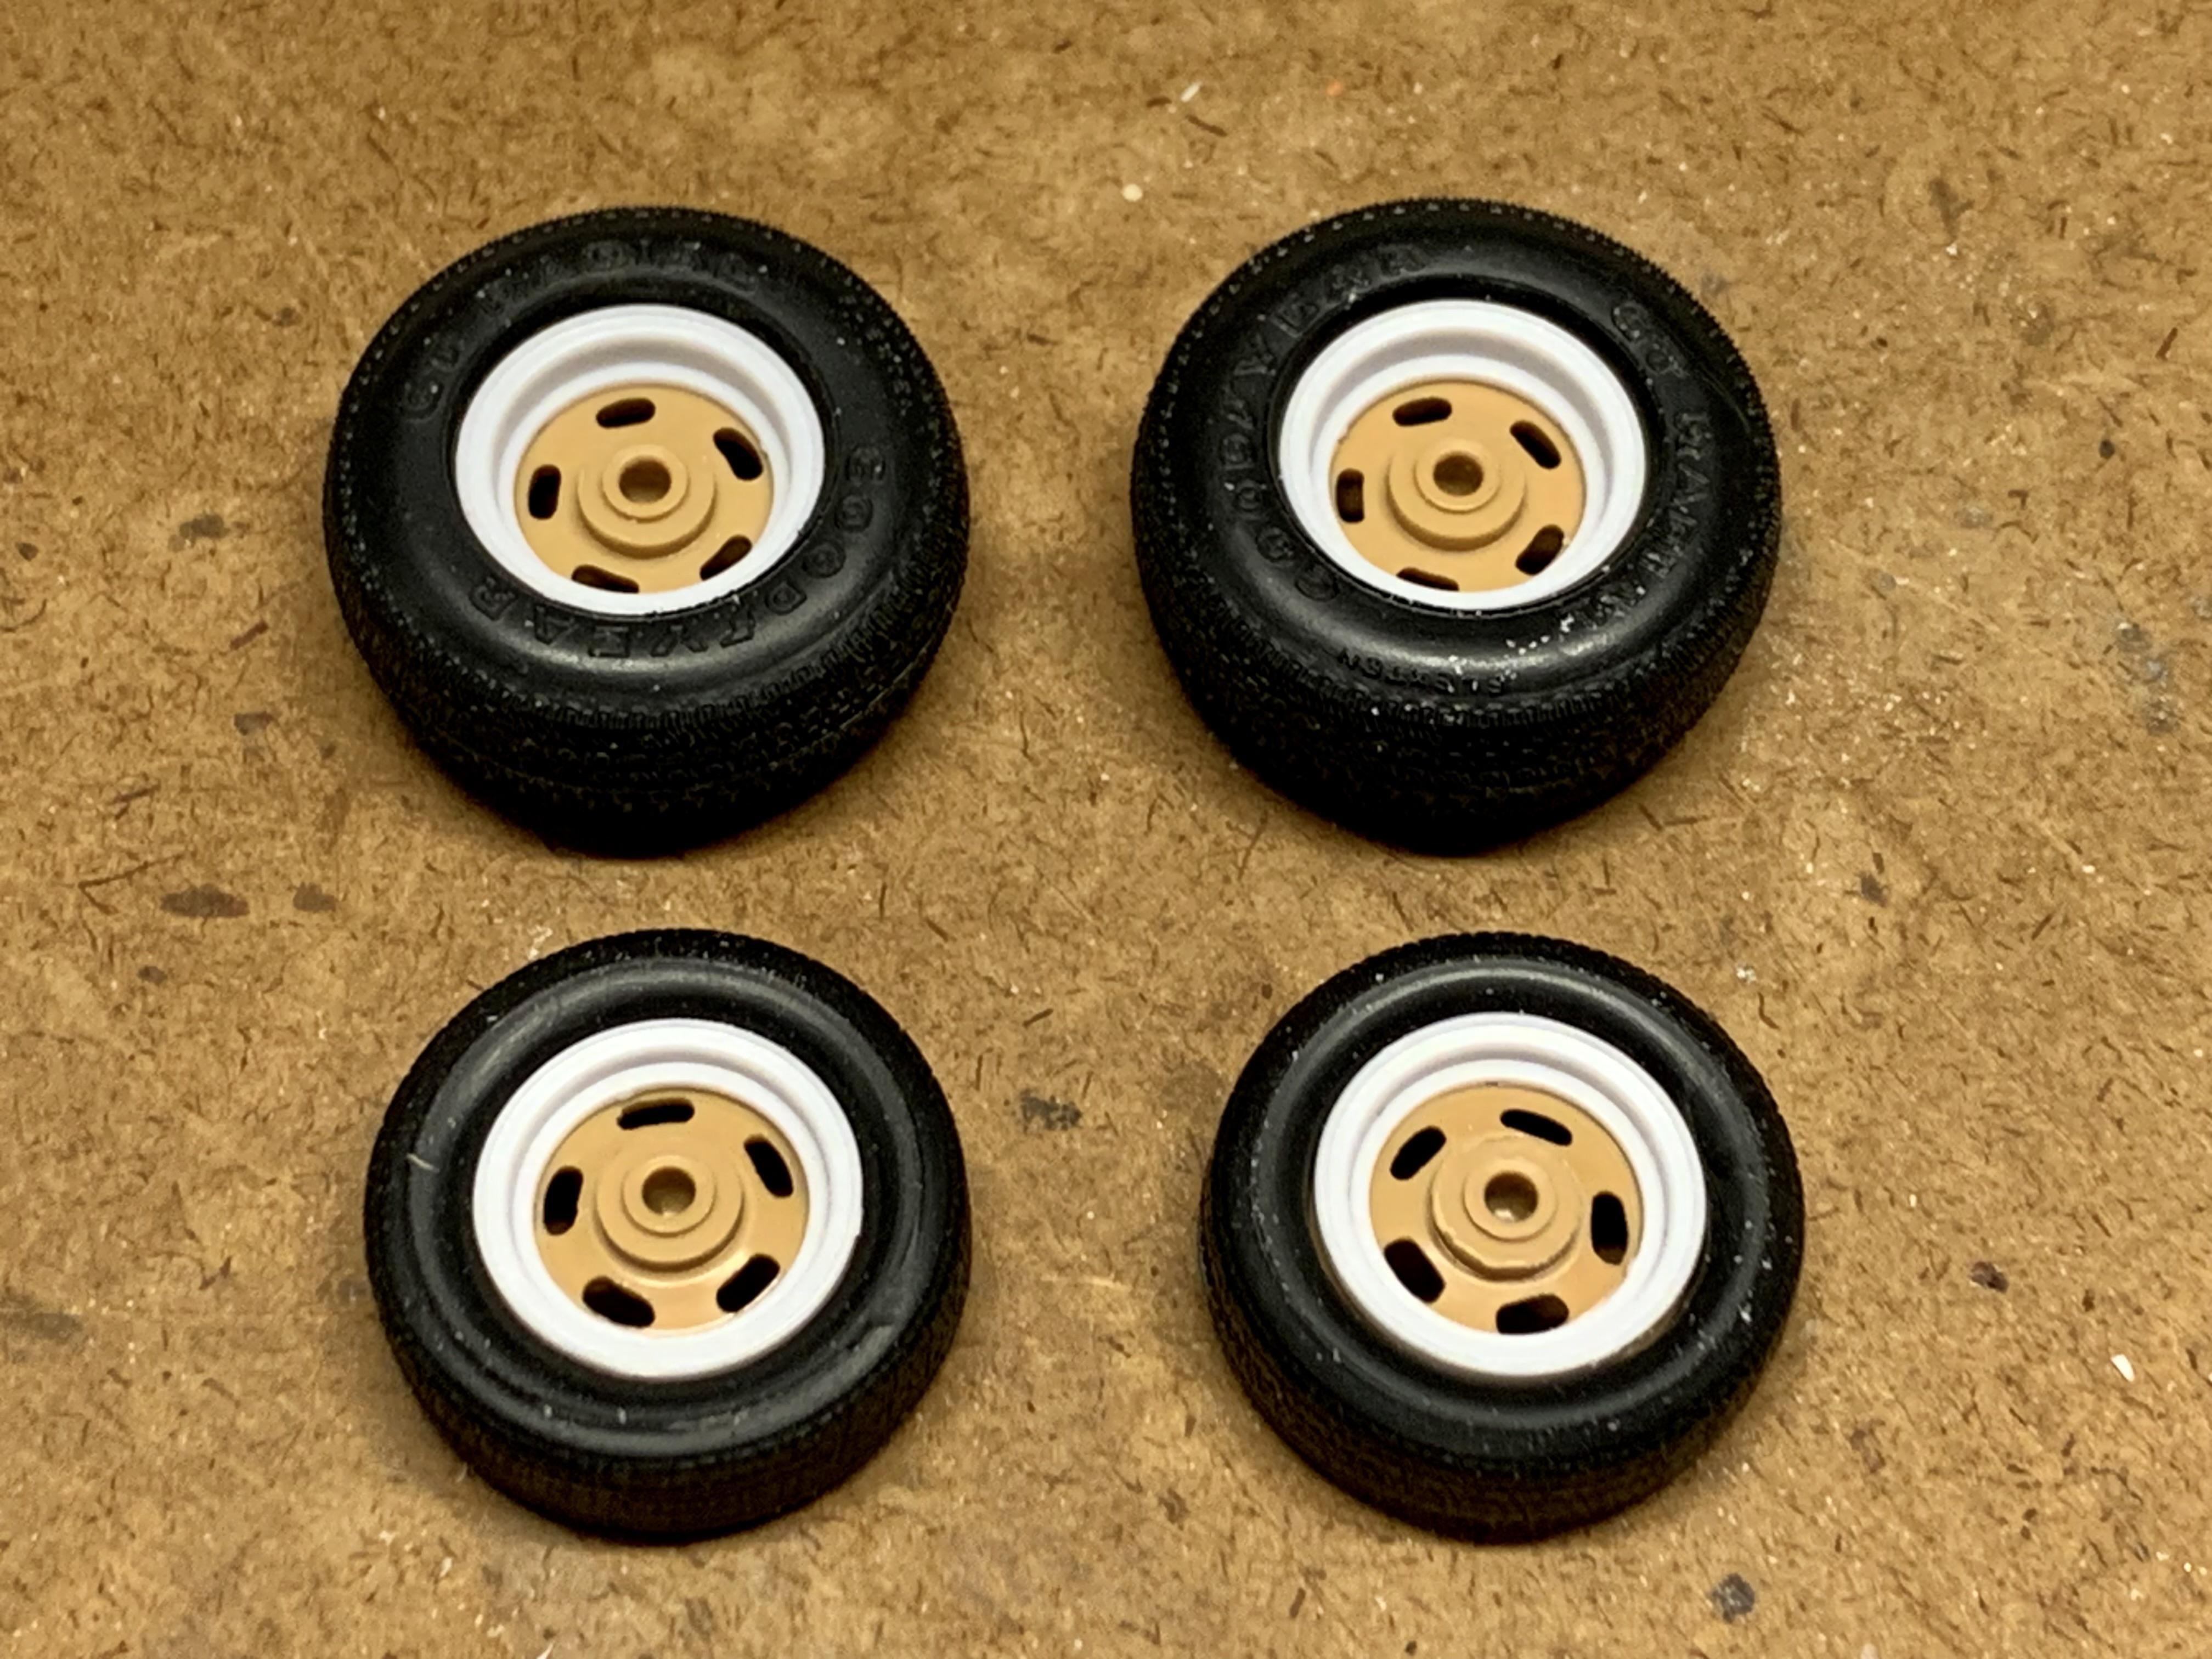
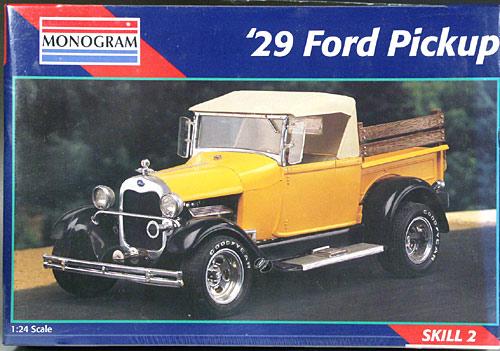
For the first time in forever I’ve found myself in a model building slump that’s gone on for about 6 months now. Not so much for lack of desire, mostly because life decided it hadn’t been busy enough and said, “Hold my beer!” While I have several good existing projects to choose from I thought it would be nice to do something simple to get the juices flowing again compared to my usual heavy kit-bashing, fabricating and detailing. As a kid and teen in the 80’s and 90’s some of my favorite kits to build were the Monogram 1:24 hot rods. They tend to be lower in parts count and softer on fine detail but with a little tweaking they always look good put together. For those reasons I shy away from them as an adult model builder but lately I’ve been feeling nostalgic about the good ol’ days. I am about to turn 44 so it must be a mid-life thing, hahaha. Of those Monogram 1:24 kits the ‘32 Roadster was my very favorite and I built 4 of them over the years with one still surviving. I pulled one from the pile and tore the wrap off it. While my fond memories are of the 80’s release molded in rock-hard yellow I opted to start with the most recent issue molded in softer, easier to work with white. Then I came up with a simple plan which was easier said than done, fighting my overwhelming usual tendency to reengineer the whole thing. What I’ve landed on is a stance and wheel adjustment along with some basic hot rod body mods such as shaving the bumpers, grill trim and door handles. The wheels are the aluminum slots from the Monogram Early Iron ‘29 Roadster Pickup. Front tires are from the kit but had to be relieved to fit the slightly larger diameter wheels. Rear tires are one size larger than the kit rears (found in many Monogram/Revell kits) and also had to be relieved to fit the wheels. The roadster top is not included in this issue but can be found older issues. The rear axle / suspension will be straight from the kit, representing a 1942-1948 Ford banjo axle, Model A spring and 1939-1948 brake plates. The front axle & suspension come from Revell’s Thom Taylor 1934 Cabriolet which was a 90’s styling update to Monogram’s original 1:24 1934 Coupe/Cabriolet kit from the 60’s. It represents a Super Bell dropped tube axle with Pete & Jakes 4-links, tube shocks and disc brakes and was only available in that issue. To lower the ride height I’ll be using the age-old trick for this kit which is to trim the cross members to sink the springs up into them. Out back the center of the rear “cross member” was cut out to allow the spring tab to sink in along with trimming down the 2 support studs circled in red. Up front the center of the front cross member was similarly trimmed and the back edge of the cross member filed down for tie rod clearance. The end results: Here are the wheels and tires fit together after relieving the inside diameter of the tires. As luck would have it, the kit inner wheel halves will work as is. Also, I’ve included a picture of the source kit for the wheels. Next steps are to fit the wheels to the axles and finalize the engine details. More to come…
-
Sometimes a simple, near out of the box project is what we need. Turned out awesome. Love the color choice!
-
I’ve seen quite a few Tweedy Pie’s built over the years and this one might be the nicest yet. Beautifully done!