alan barton
-
Posts
1,997 -
Joined
-
Last visited
Content Type
Profiles
Forums
Events
Gallery
Everything posted by alan barton
-
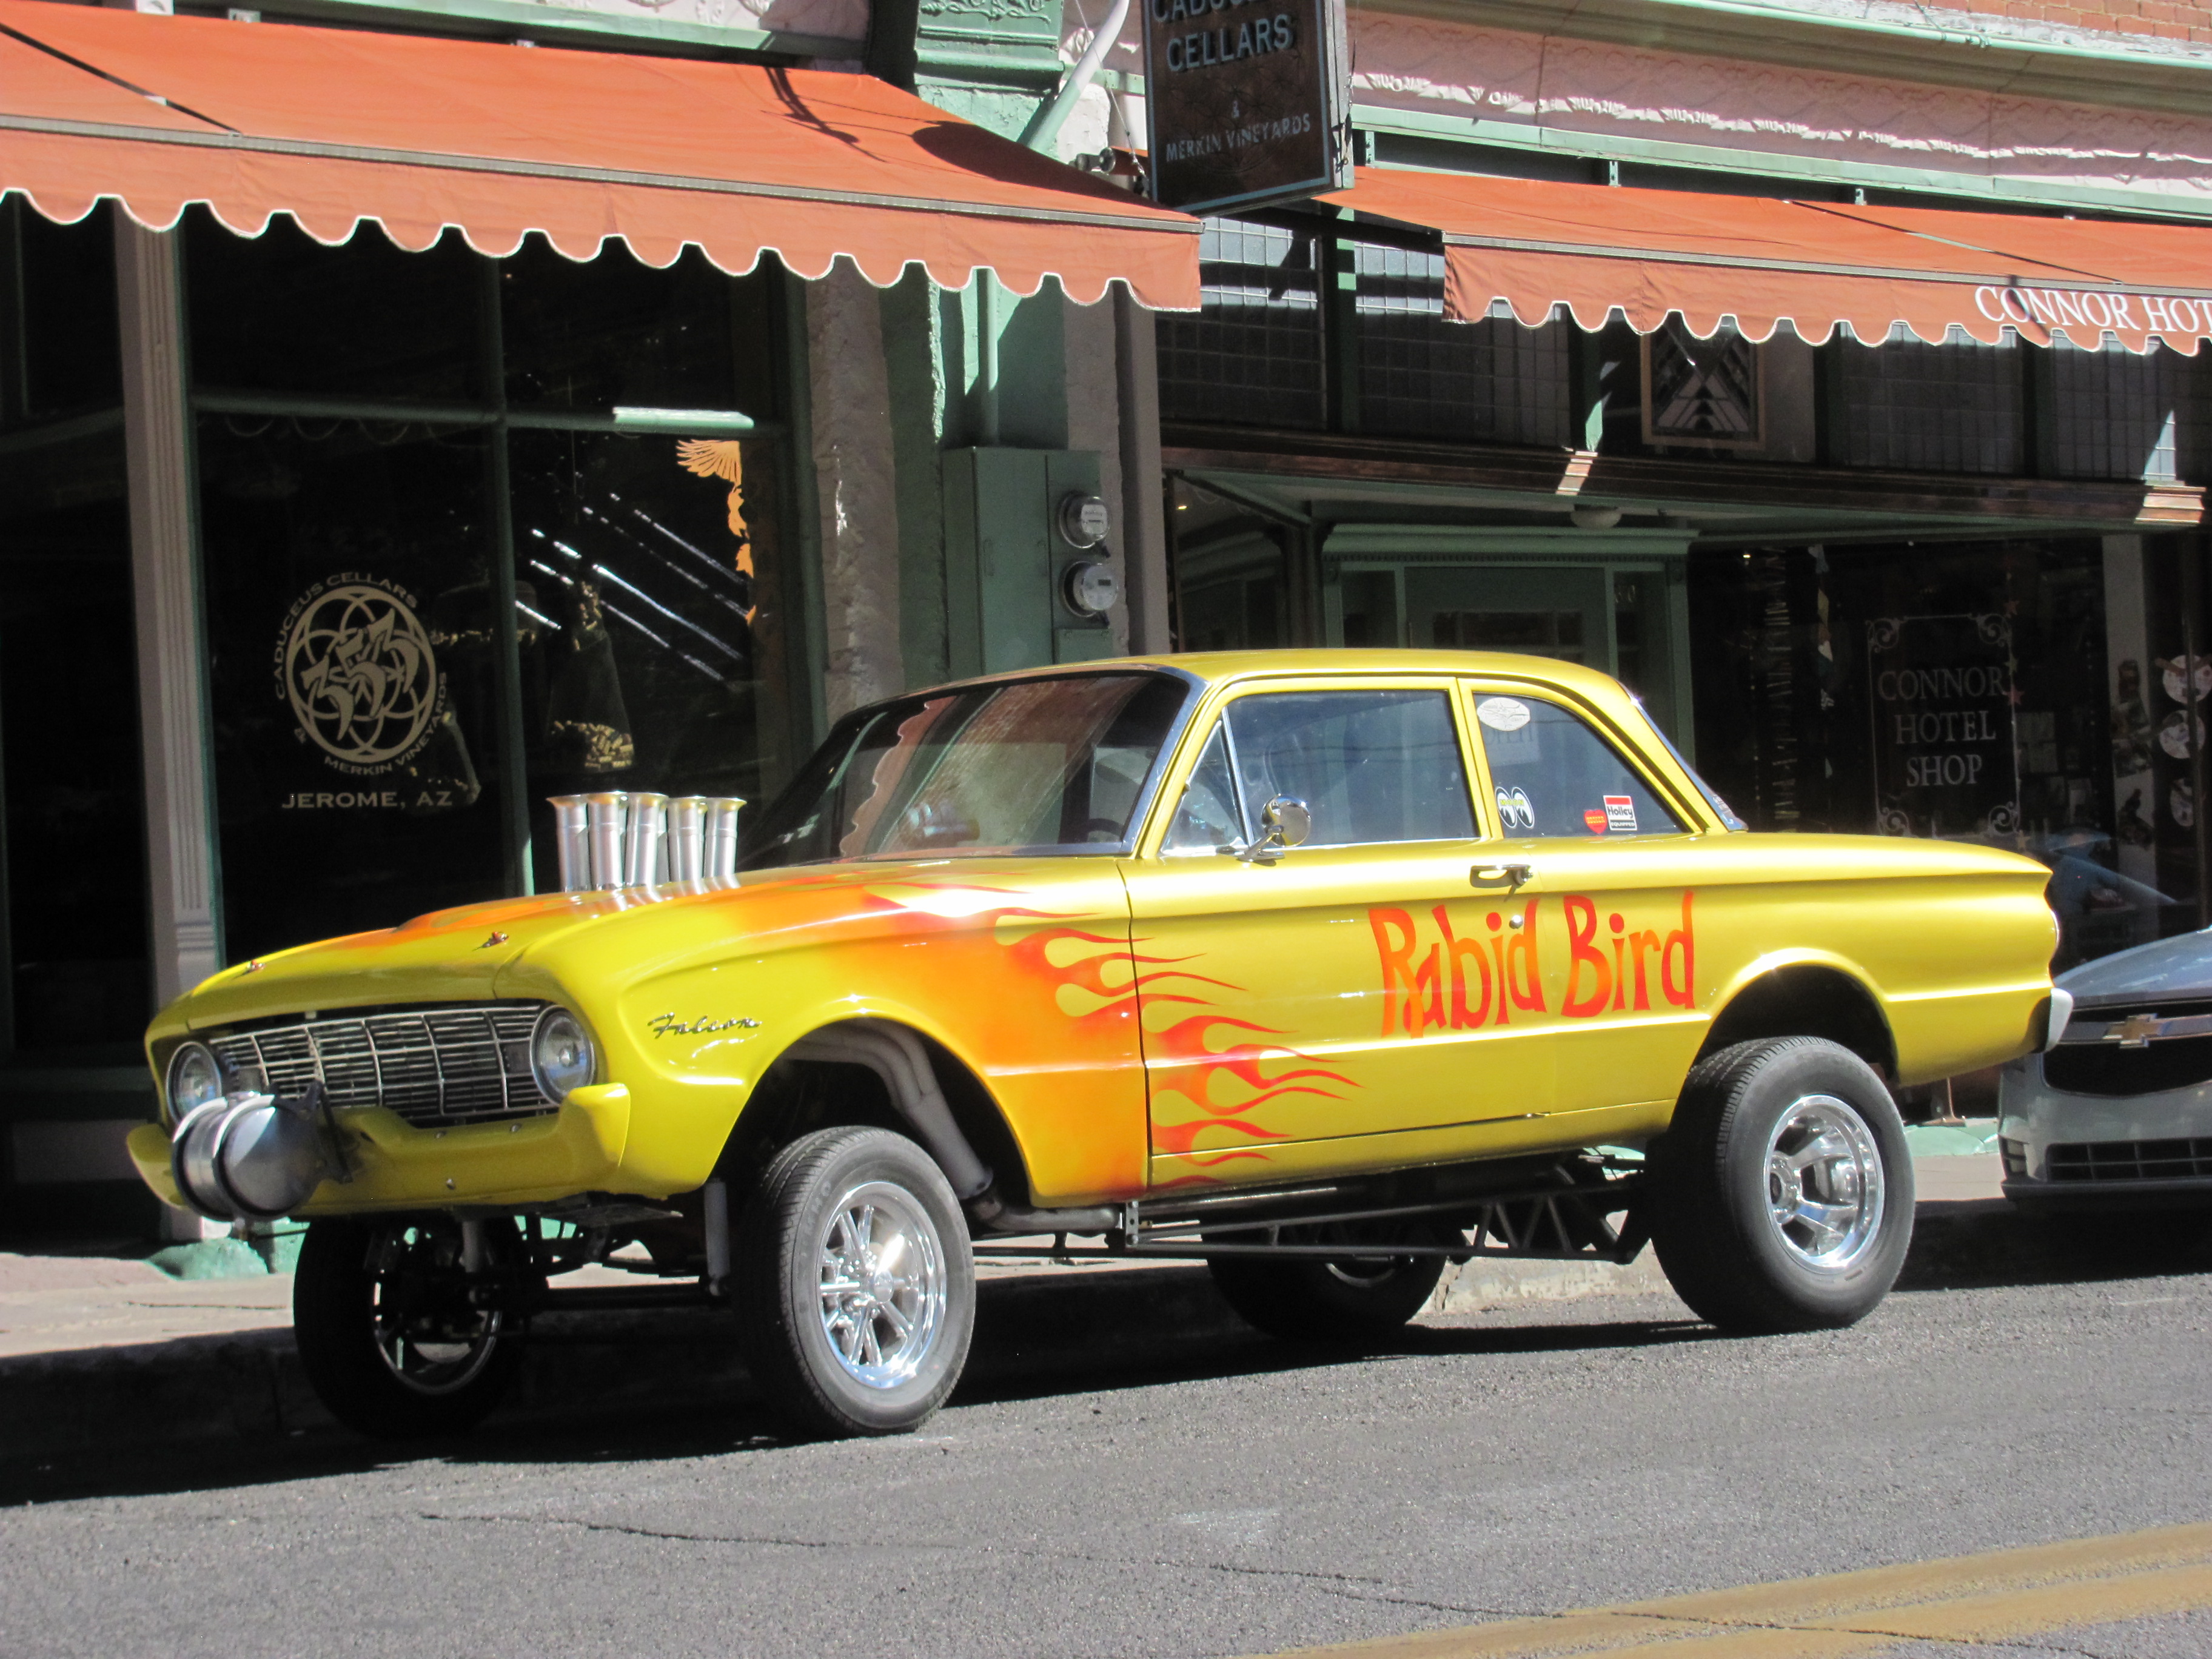
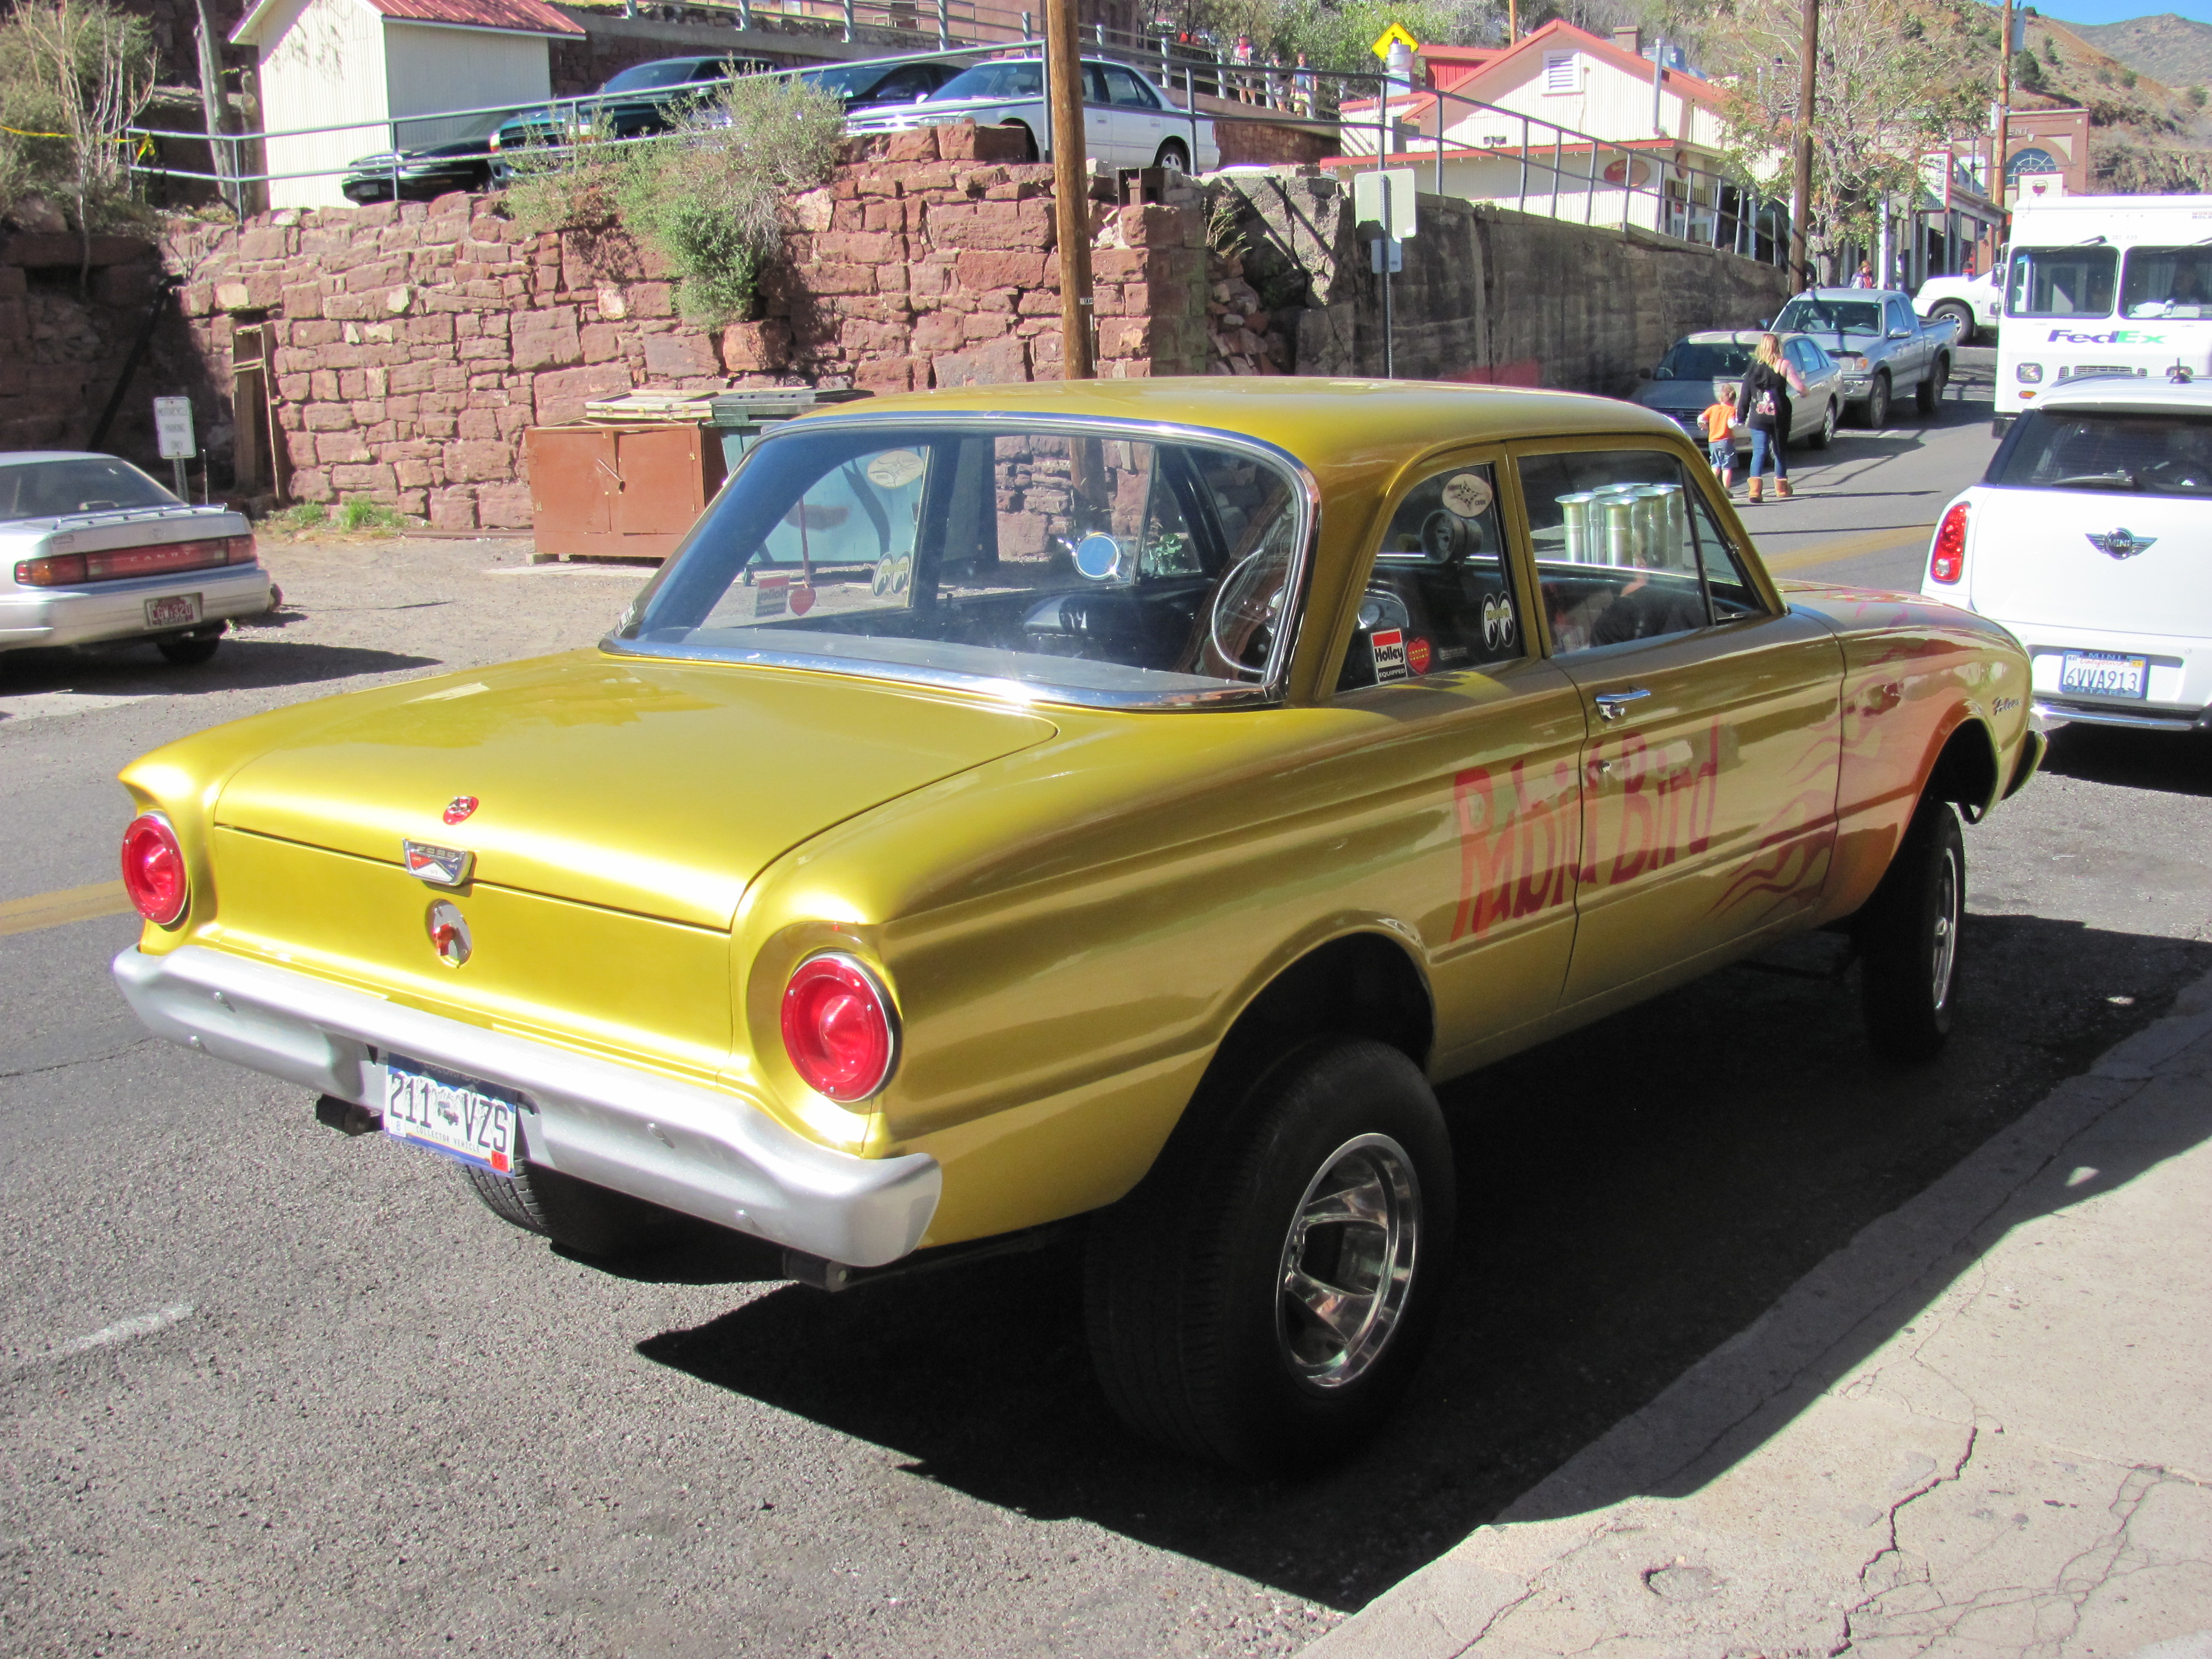
Hi JC, I've been very much enjoying the progress on this model so far. I have an early Falcon that had a front clip transplant sitting waaaaaay at the back of my bench,eventually to be a period high school custom. I thought you might like to see this 60 that I spotted in a tourist town just out of Phoenix back in 2014. I suspect it had a Chevy in it, you needed a stepladder to climb over the camshaft but he was already quite a distance from the suburbs high up a mountain and he wasn't afraid to drive it! The stance is remarkably similar to your project. Hope you enjoy it. Cheers Alan

-
My 1/12 scale 57 Chevy gasser build
alan barton replied to ShakyCraftsman's topic in WIP: Drag Racing Models
I have been enjoying your story so far Ron. As you know, the good news about 1/12 scale is you can add so much detail - the bad news is you HAVE to add so much detail! Obviously you are up to the challenge with the amount of awesome parts you have produced so far. Further to the comments about your floor and firewall, I have had a lot of success using printer's aluminium plate. It comes in at least two thicknesses and if you have an old school (not digital) style offset printer in your neighbourhood it shouldn't be too hard to scam up some left over sheets ( I am very fortunate to have a model making mate who has provided me with a lifetime supply!) It offers it's own challenges in construction but there is no paint in the world that looks as aluminiumy as aluminium! It will really set off the interior of your gasser! As an ex-draftsman< I too appreciate your clean drawing style. Cheers Alan -
The only version of the Switcher's 32s that I don't have is the roadster. Can you tell me if this roof is the stock one from the kit? It strikes me that for anyone wanting to build a 32 Sports coupe, this roof would be a great head start. Like everyone else said, i really like your subtle, not overdone weathering. It would look great in a barn scene diorama! Cheers Alan
-
A stunning finish and completely believable. I could see this running on the salt against that similalry styled early T -Bird from way back when. Cheers Alan
-
I'm really enjoying your methodical approach to the design of this coupe Justin. It will probably look so good in primer that you won't want to paint it! I know that a lot of people are going for track noses on 32 and 34 coupes these days but in my opinion you did the right thing leaving the 32 grille on it. I have a decent collection of really old rod magazines and frankly, most of them ran stock or filled grilles rather than full custom efforts. I think you are on the money with this one. I do admire your craftsmanship on the window reveals after your chop. I have quite a few unfinished chops on the bench simply because I can't seem to achieve the neatness around those mouldings that you display here Cheers Alan
-
Hey Chris, AB here, good to see another Perth modeller on this site! That is a very clean job you did on the T bucket. I'd love to hear about the way you did the rust on the Tudor as I have seen cars in the south-west on farms that looked that rusty. Are you aware that AMT did a beautiful kit of a 28 Model A Tudor many years ago? While rare they are still available on the usual auction sites for reasonable prices (especially compared to the prices we pay in Perth!) If you find a cheap tatty one, most of the trim pieces like bumpers, grille and headlights can be found in the current AMT Mod Rod kit which is still available. It would be great to see you do your family Tudor as a model. I can't for the life of me remember if your Dad put a Chevy or a Ford in it but if it is a Windsor I would be happy to give you a spare one out of the Revell 32 kit and you would be on your way. Cheers Alan
-
This is a really interesting combination of the Ala Kart with the stock A roadster body, Dan. The gold paint suits it perfectly. When you go to glue the windshield and dash in place, be sure to lay the windshield back a few degrees so that it is a nice match to the roof. The traditionalist in me can't help wondering how such a cool early sixties custom would look with cool early sixties wheels. Wide white walls, with Chromies, or thin whitewalls with Raiders would be interesting alternatives. Cheers Alan
-
Off topic I know but your roadster is looking slick as, Ace!
-
Hi Bernard, loved both of your TROGs! Like everyone has been saying, the Gilmore colour scheme looks so right. There has now been a beach race in Australia called Rattletrap, on the east coast and I believe there has also been one in the U.K. - Pendine Sands perhaps? Anyhow, it is obvious that this is a very popular back - to - our - roots movement right now that is capturing the imagination of 1:1 and 1: 25 rodders alike. I'm going to suggest our club looks at doing a beach racing theme diorama for our next public display. The cars are so easy to build and the accessories like pylons and control towers would also be straight forward constructions. I think this is a logical and sensible progression from the often caricature like "rat rods". I can't wait to see what others come up with! Cheers Alan
-
Hey, nice spots. I live about ten minutes from Scarborough Beach and used to work at the Pitstop Bookshop in St George's Terrace just a block or so from where you worked. Did you ever go in there? It was the best automotive bookshop in the world but sadly closed towards the end of 2013. Glad to hear you enjoyed your stay - it's my favourite place to come home to!!! I've got a lot of friends in the Bunbury Australind area - there is heaps of hot rodding activity down there! Cheers Alan
-
Hey Ted, where and when were you in Perth?
-
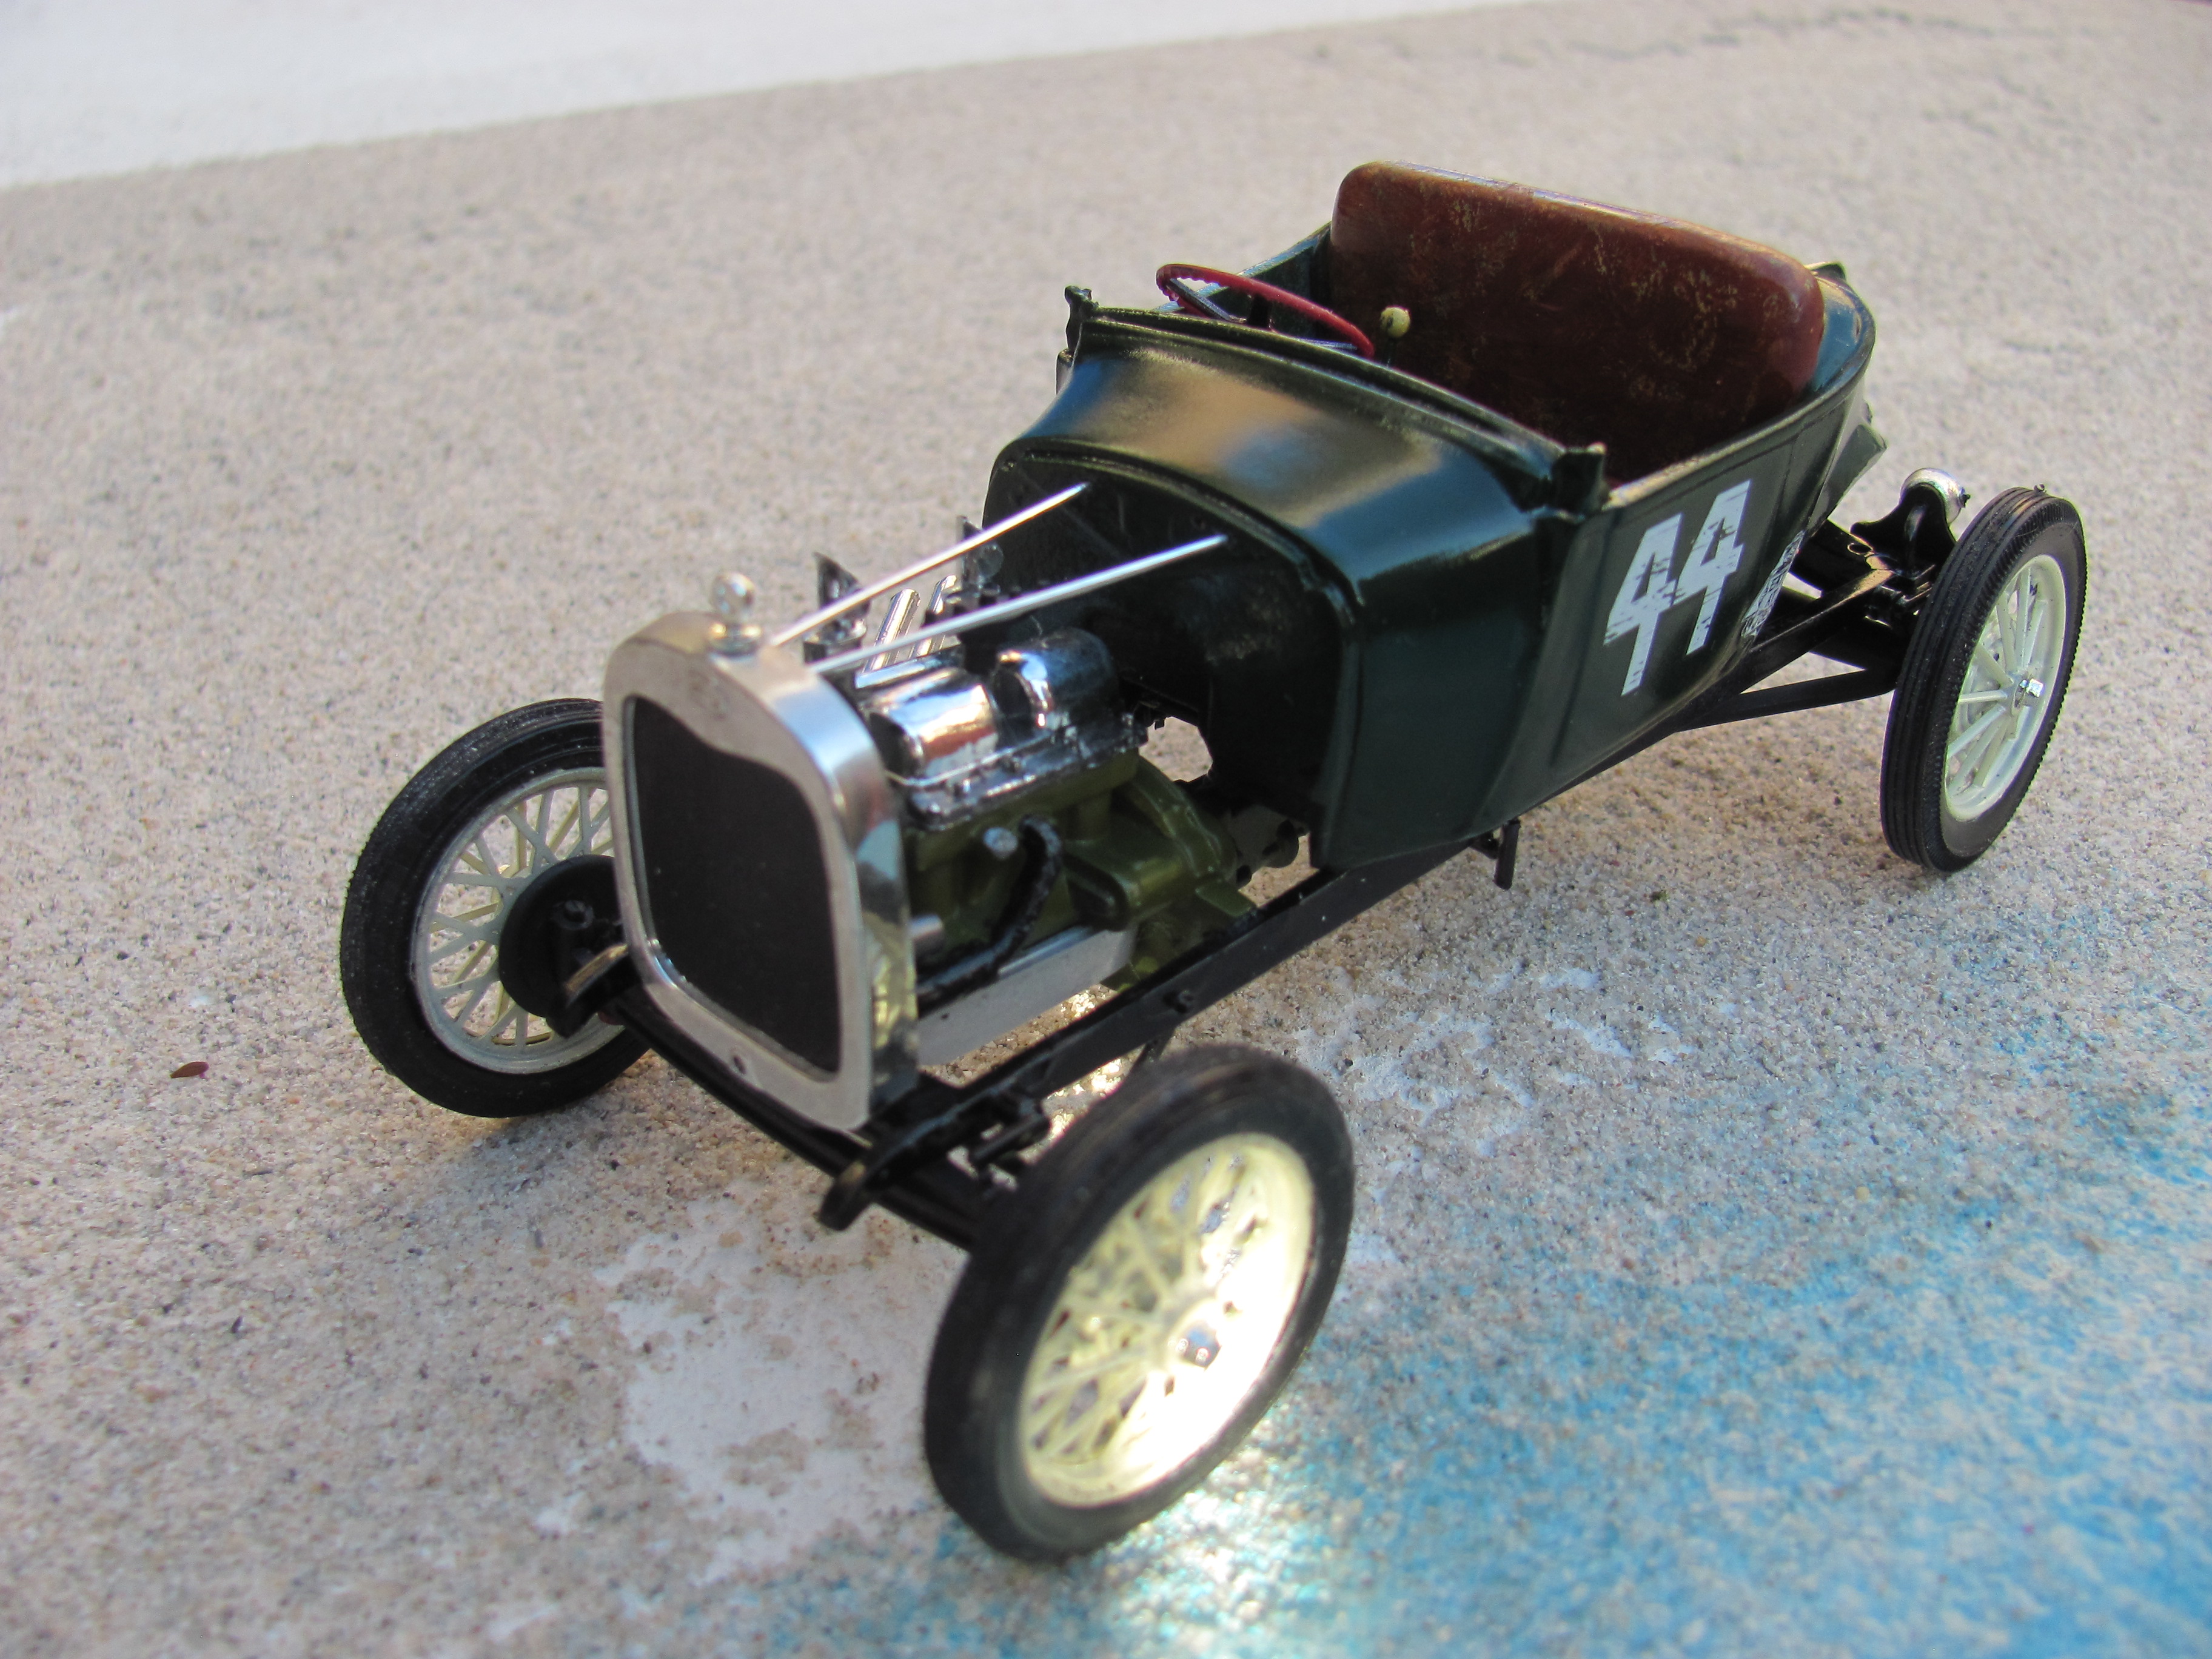
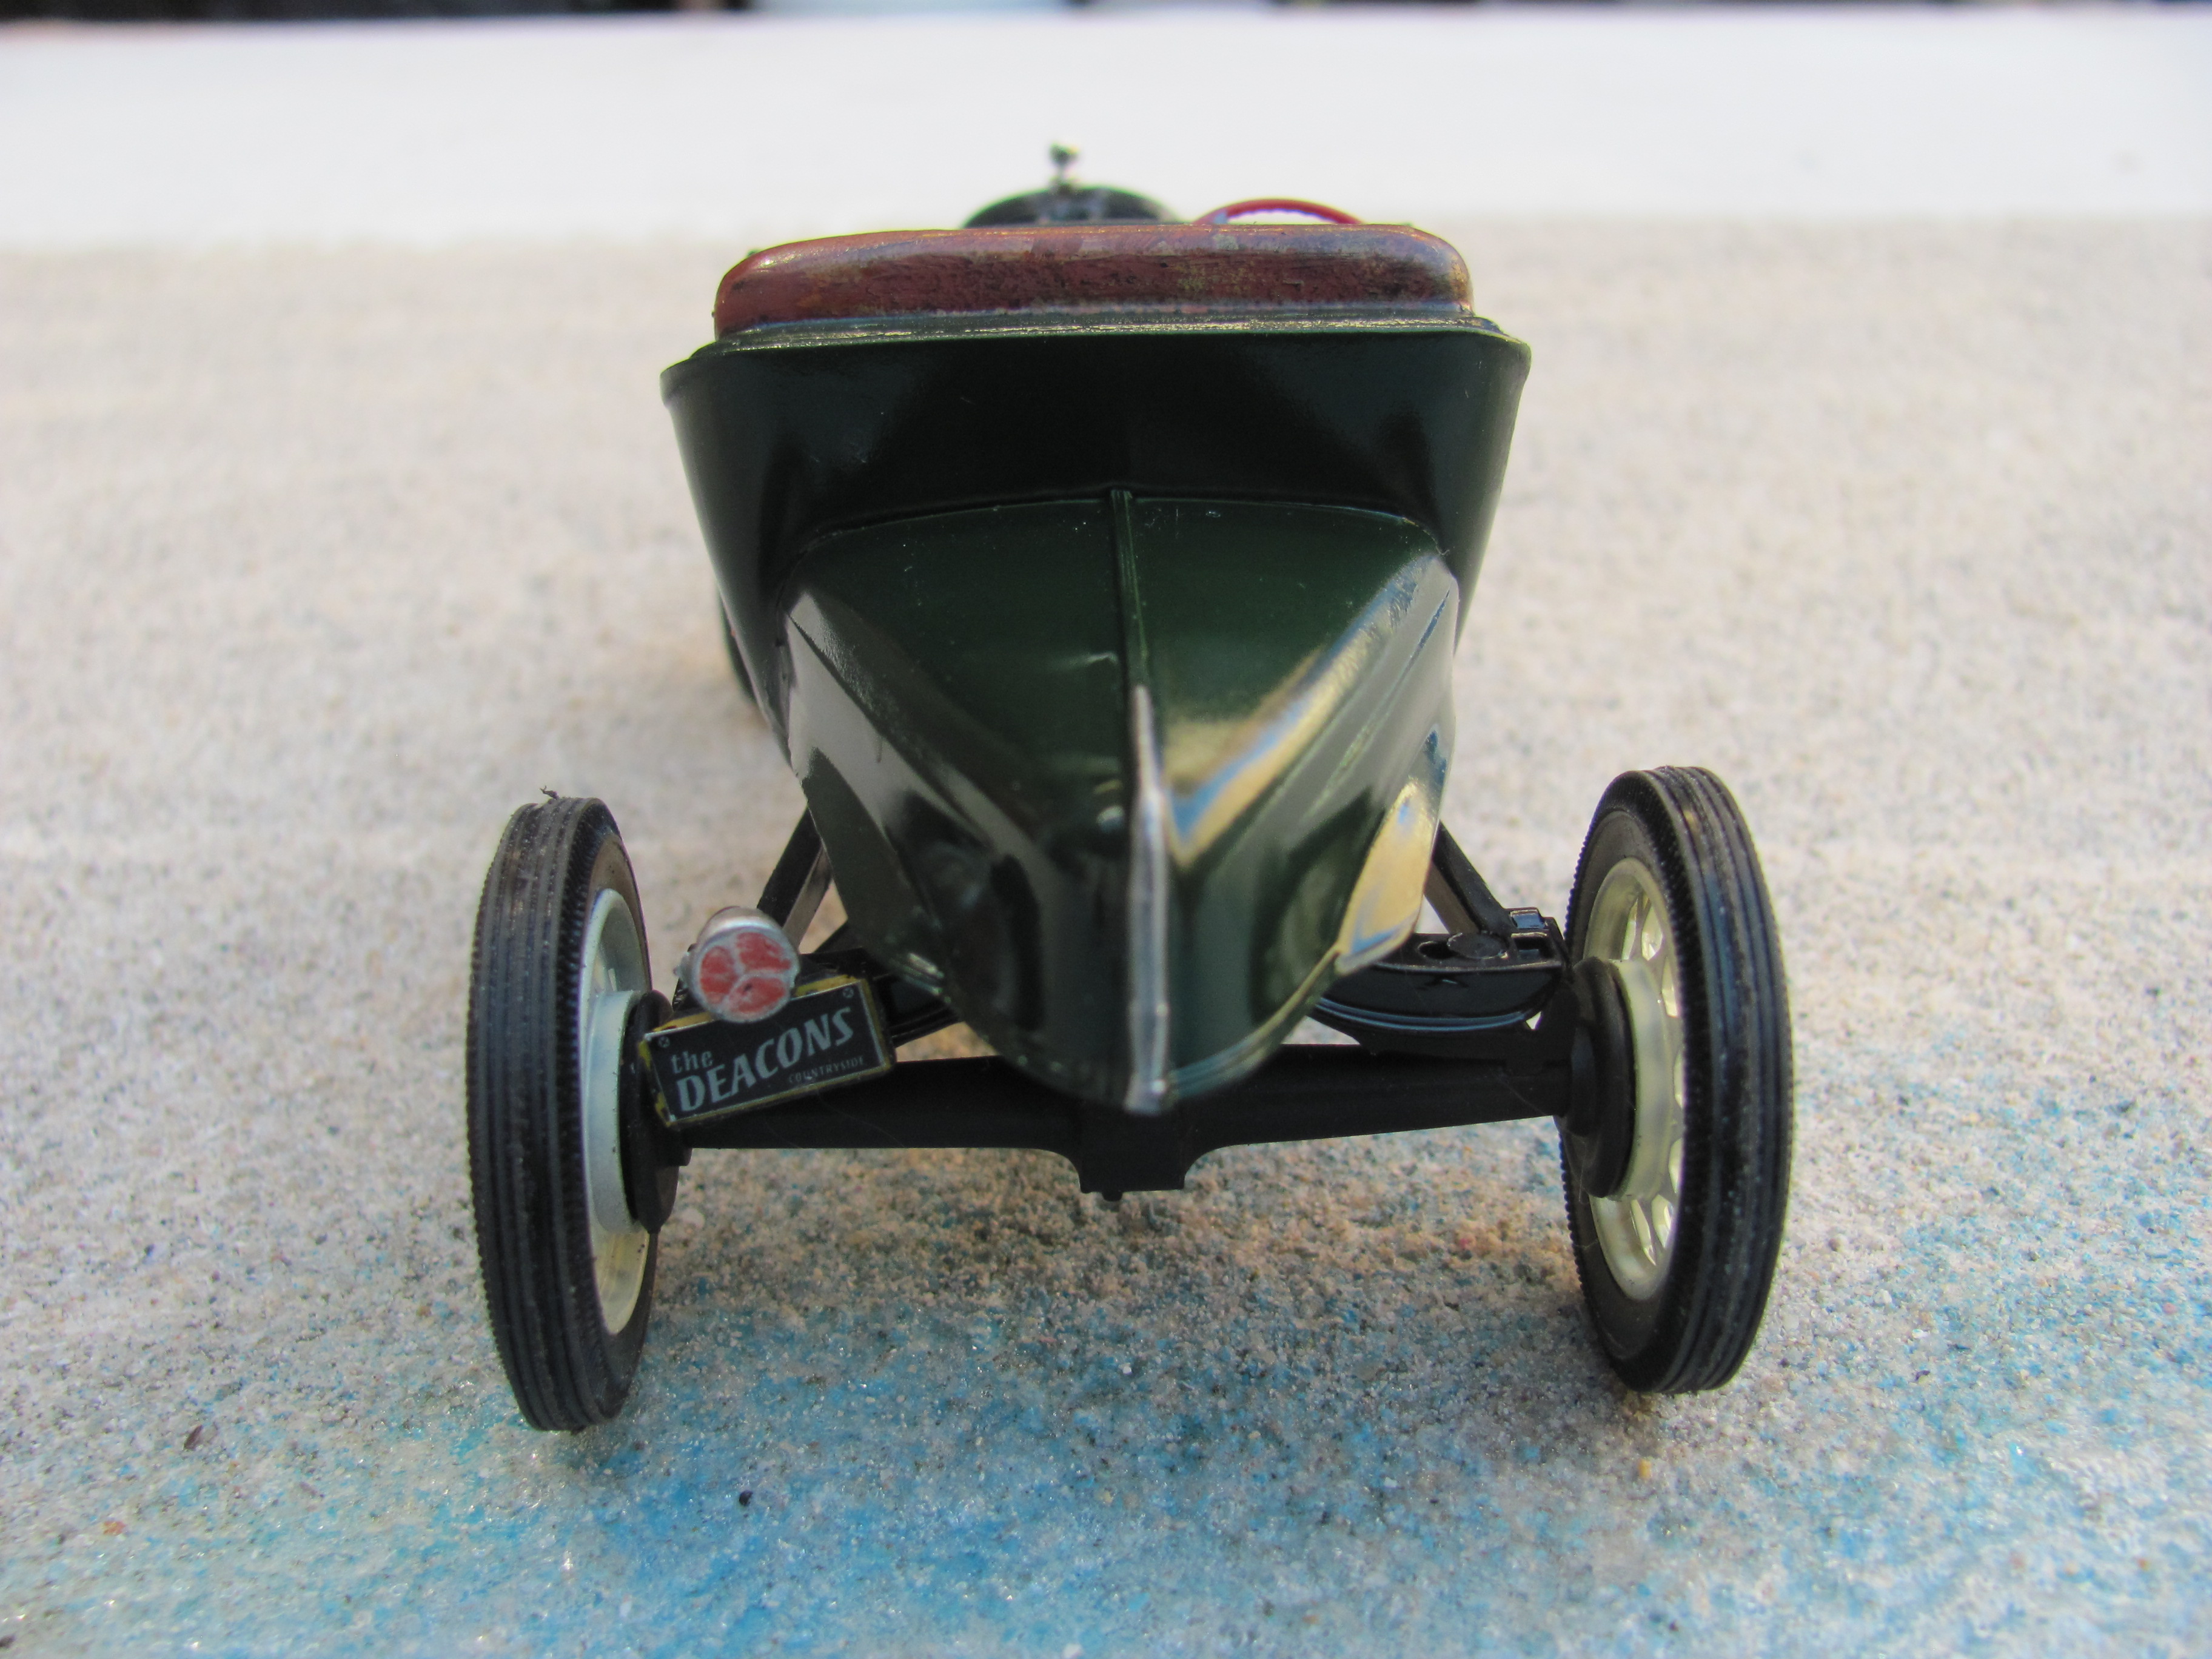
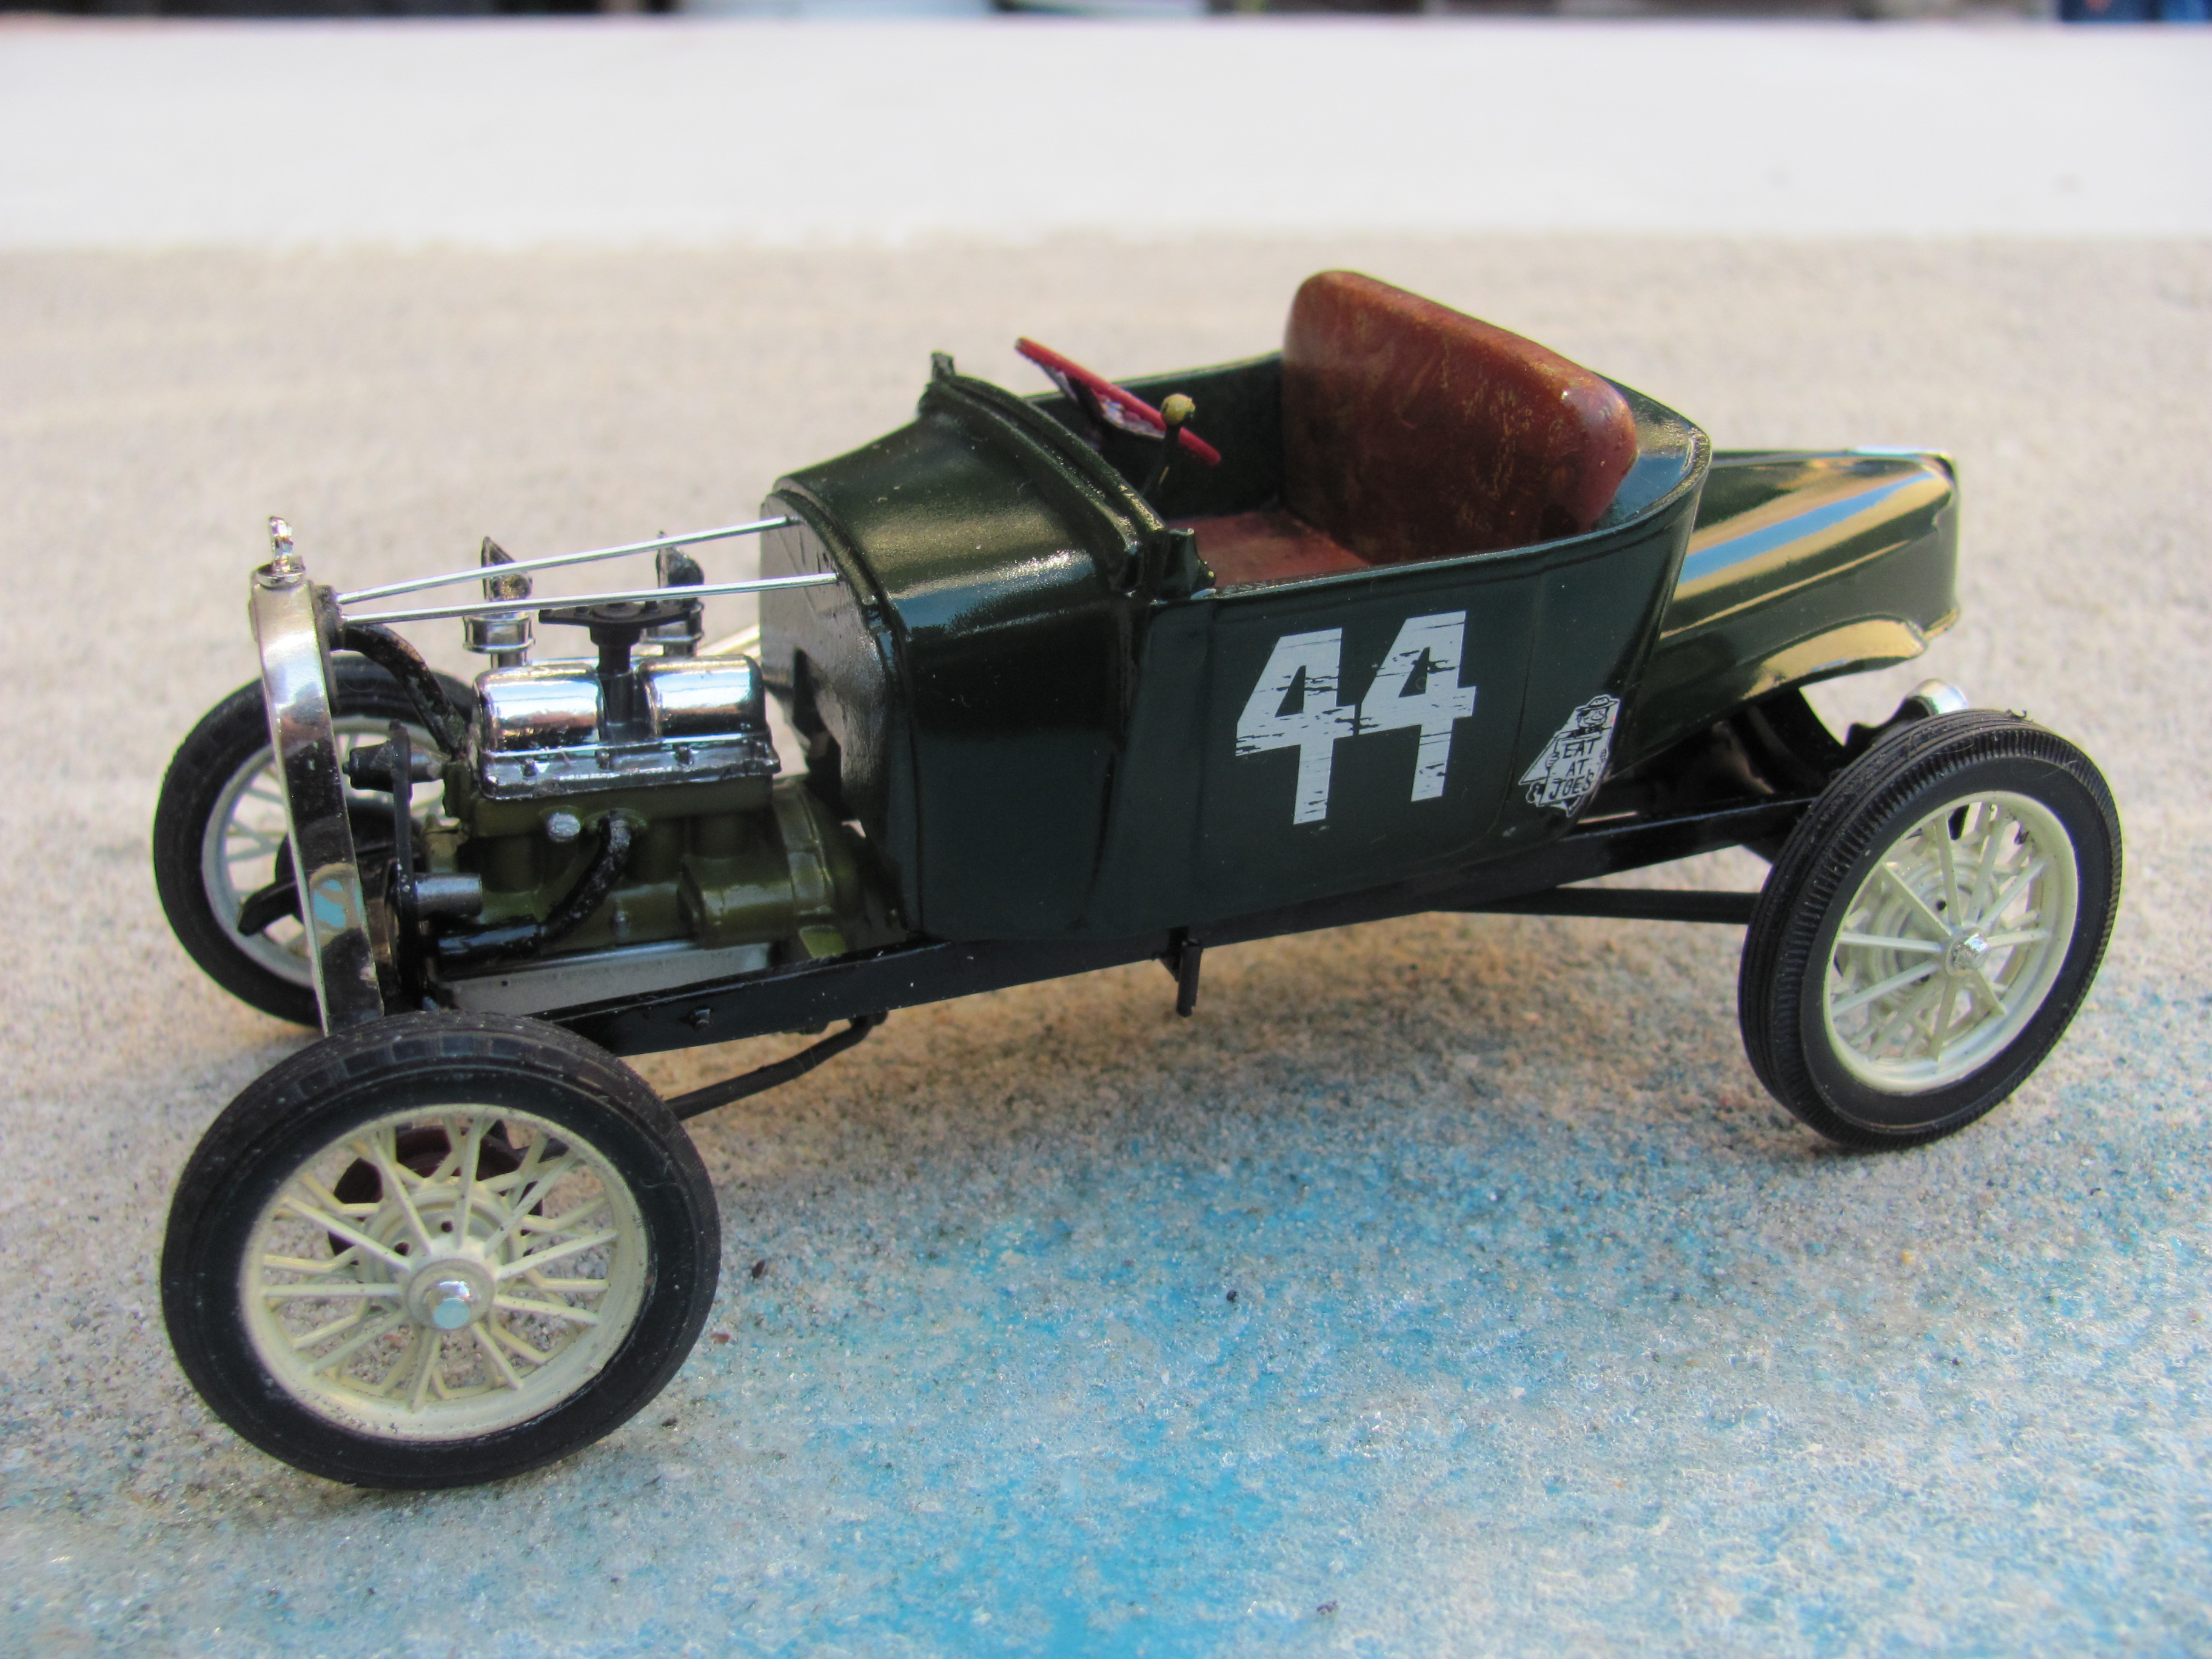
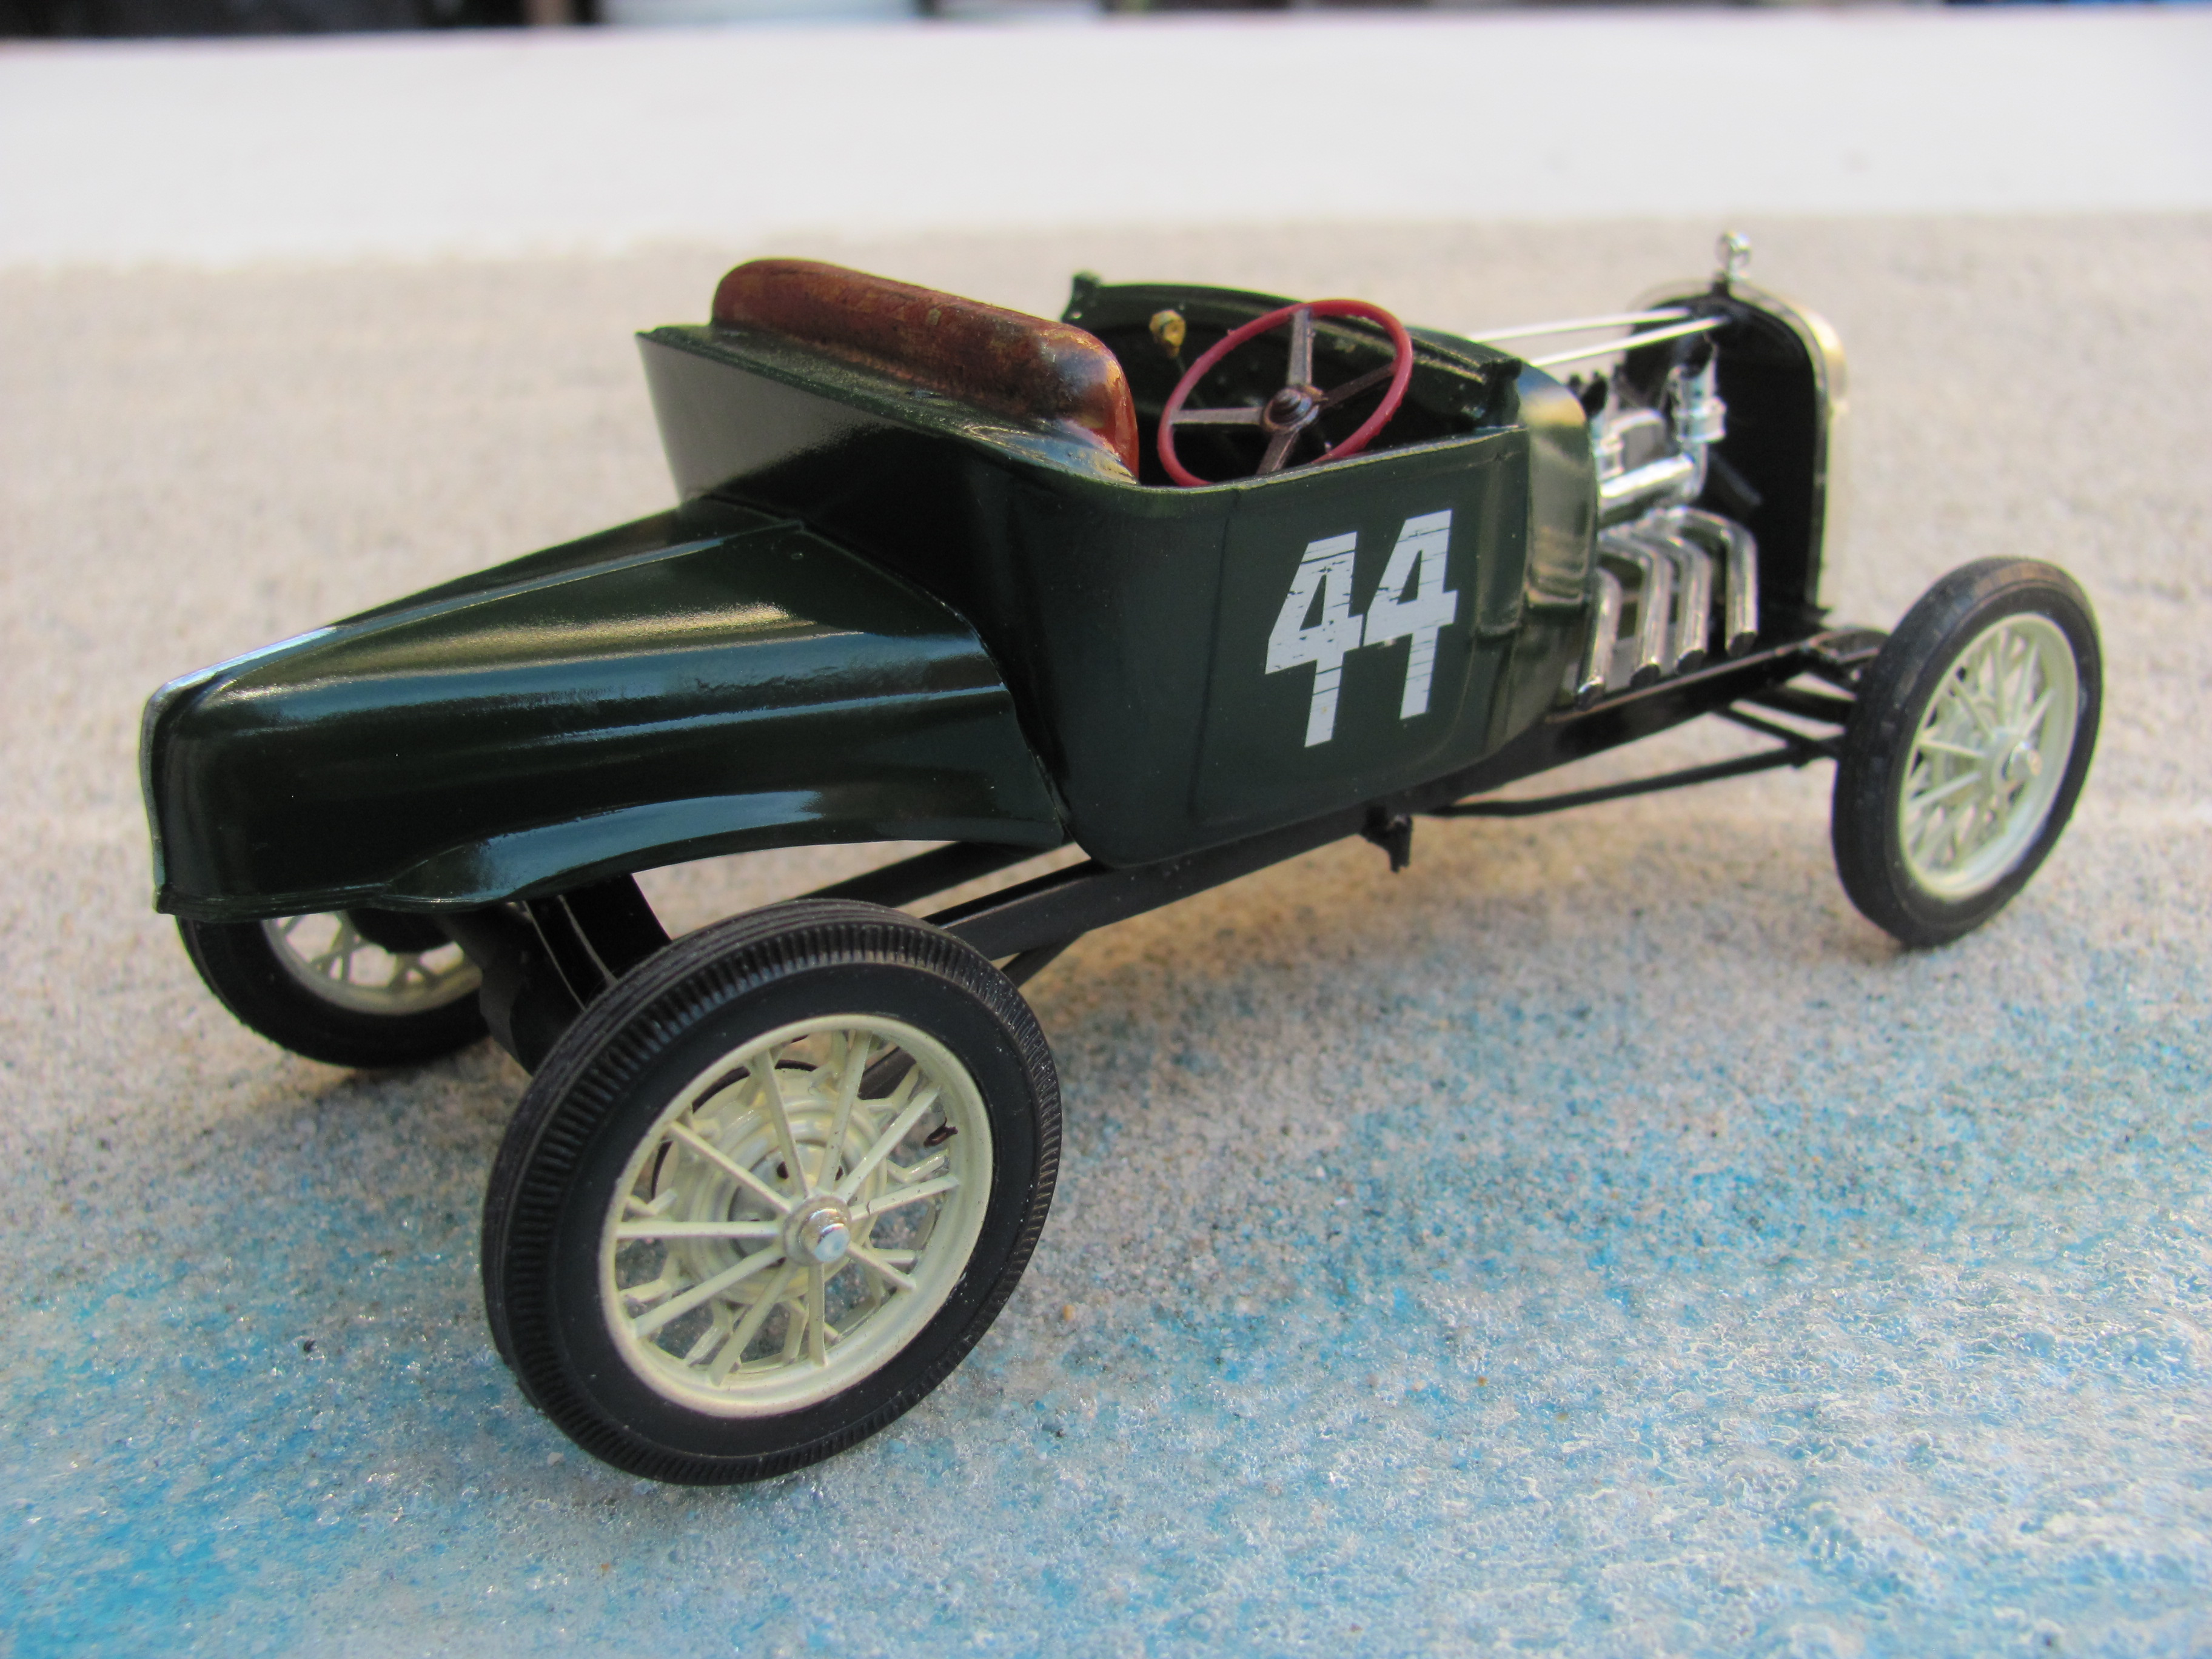
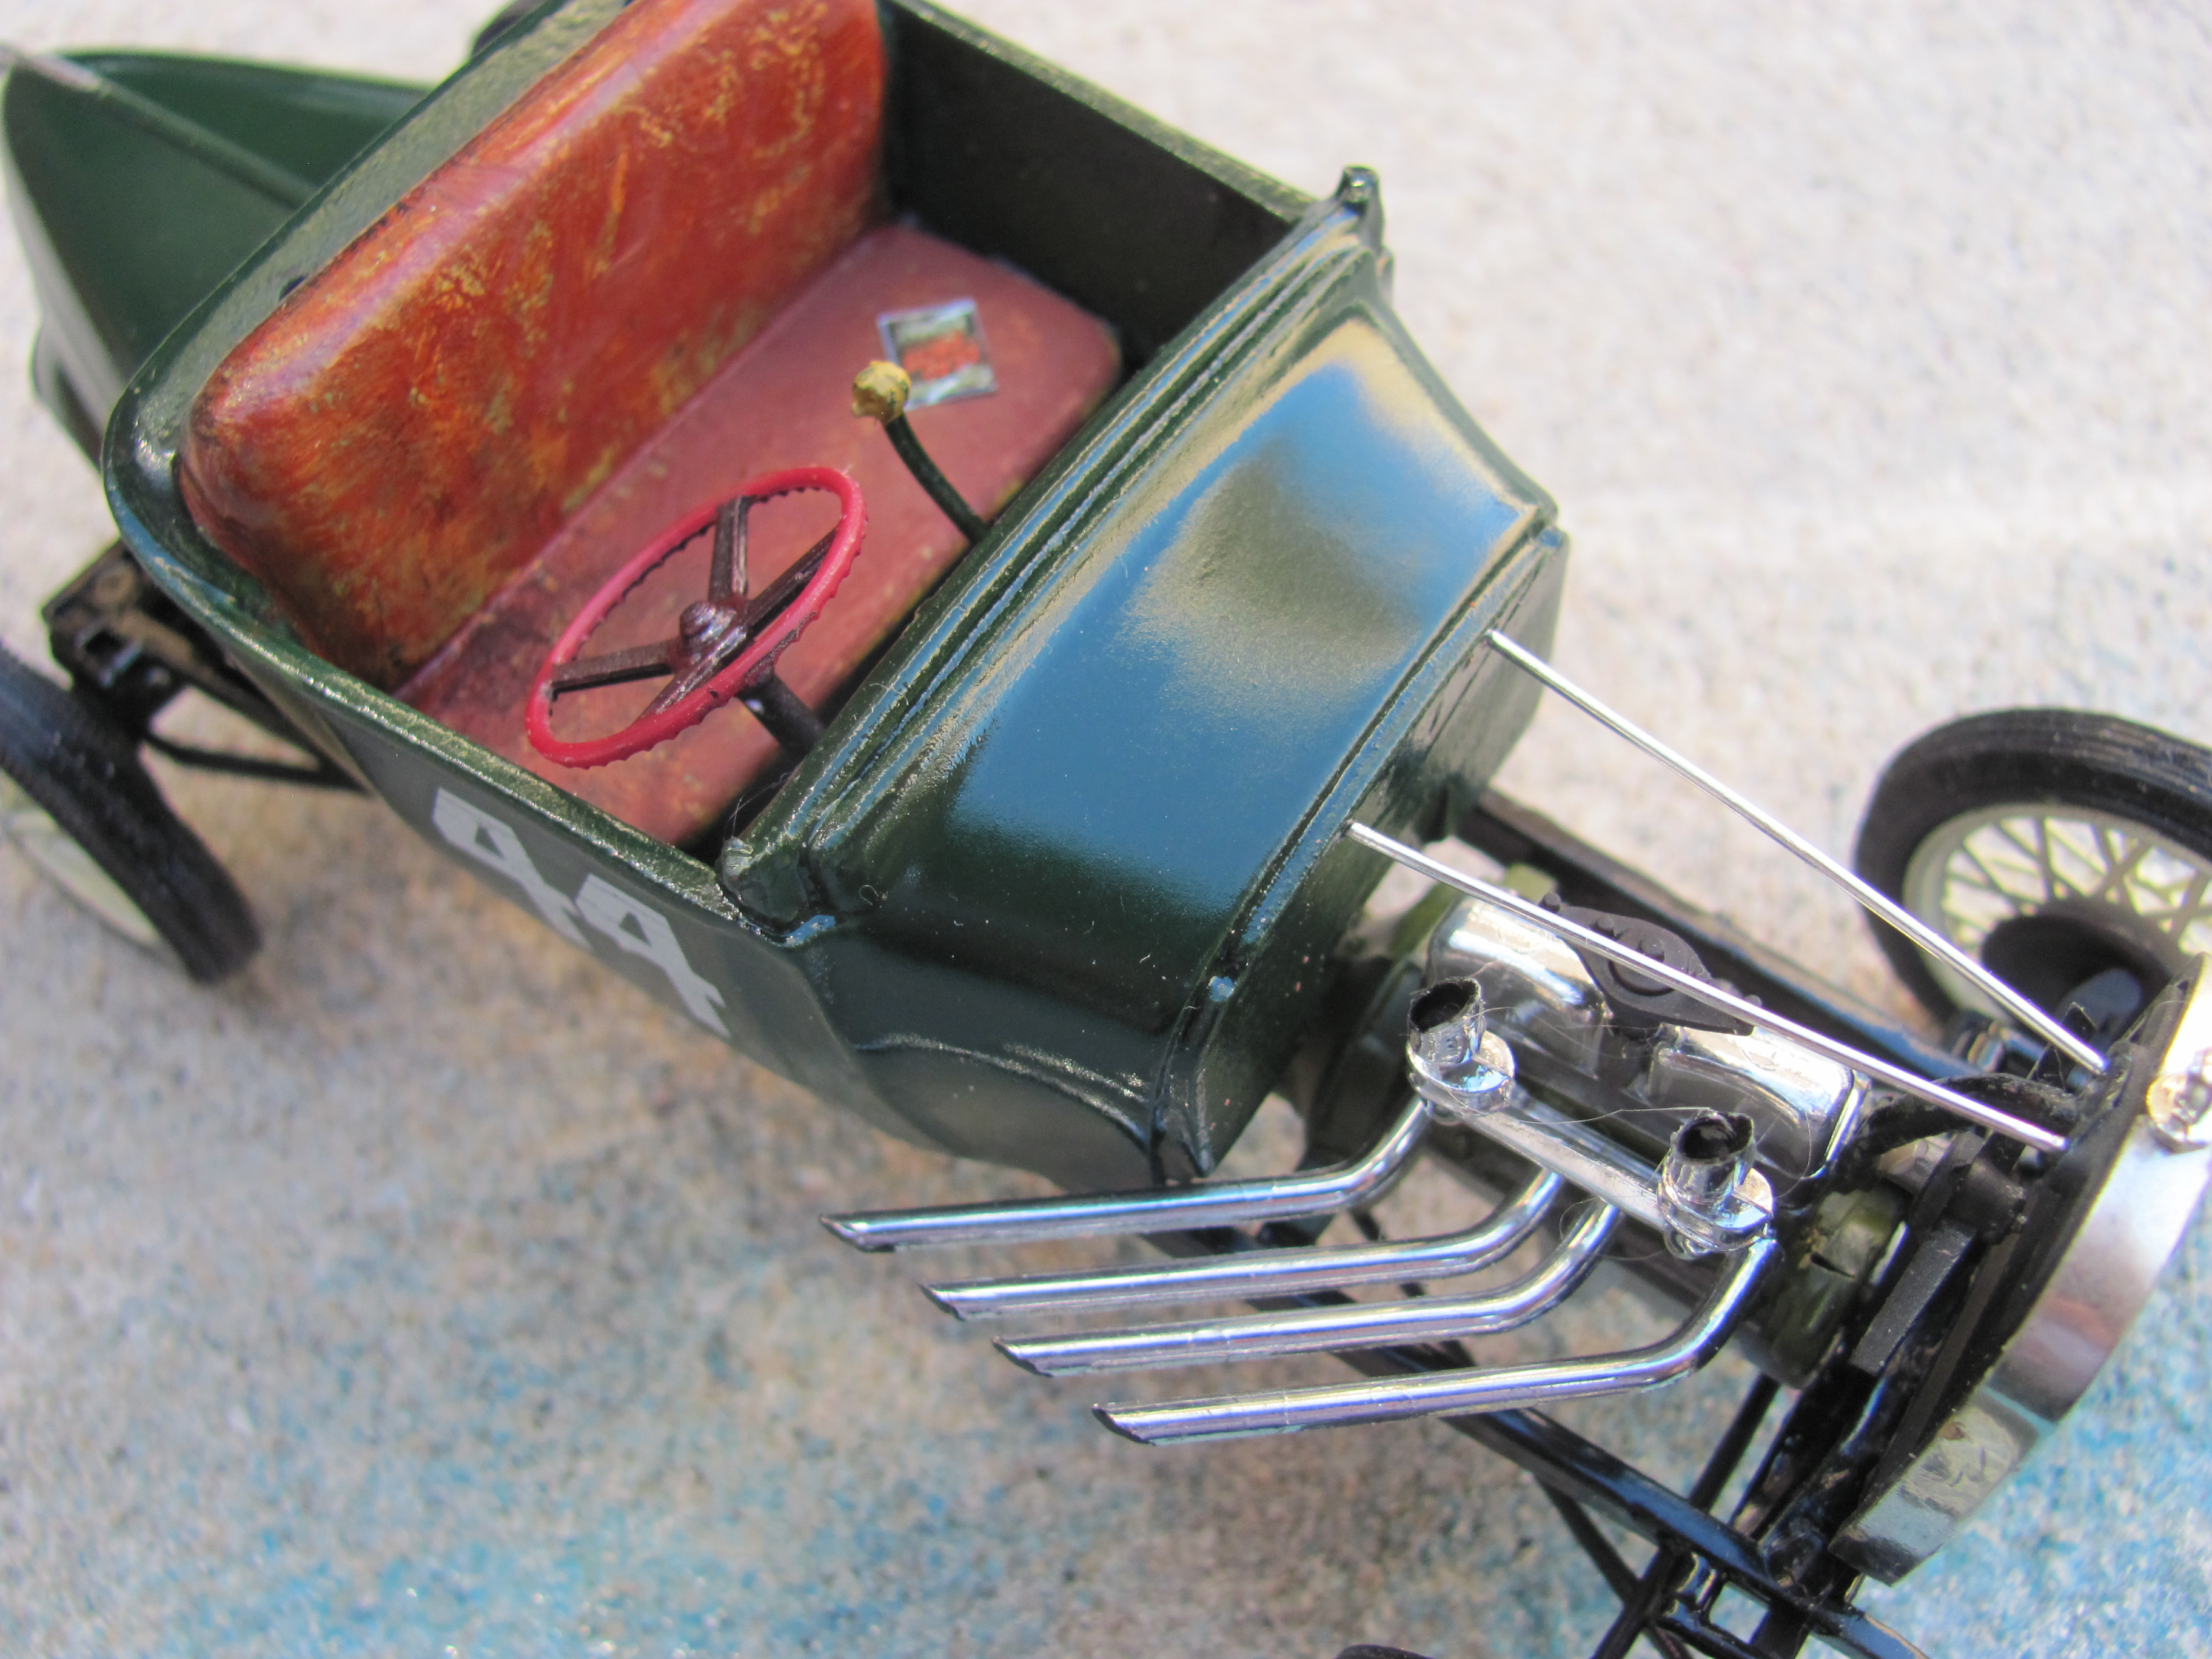
Thanks for the compliments guys, I'm really glad you like it. I can't take credit for the boat tail idea as, like Tom explained, I am sure I saw it on a T model speedster in maybe a late 60's or early 70's R&C magazine. Either way, this model nearly built itself - I just kept finding bits that looked the part and carried on from there. I think that helped with the "built it in a week before the event" flavour I was looking for. Ditto with the paint - I wanted it to look like a quickie enamel job (in Australia we call it a "coat of jam") so I did not spend much time on paint prep. It works for me! Cheers Alan
-
I admit to not being the tidiest of builders but about every two weeks or so I give the model bench a full clean and tidy up and start again. I can't remember why this Lindberg 29 T body (yeah, that's what they call it on the box) was out at all but as I put all my bits and pieces back in their right place it suddenly dawned on me that maybe I could build a Race of Gentlemen style car. It's pretty obvious that Lindberg seriously plagiarised the bucket style body of AMT's 29 A Ala Kart. Even the mould lines are in the same place. This one had been glue bombed and painted with a hot paint that had damaged the plastic so I really had nothing to lose if it didn't work out. I thought of running a gas tank out the back but then thought of a boattail speedster look. I had a really manky 40 Ford hood that some misguided soul had covered in a nasty type of contact cement. Most of it was at the back edge and that was where I was going to have to trim it to fit the bucket body so that worked out fine. The frame and suspension is an almost stock AMT 29 unit. The front wheels are Monogram 30 Model A while the rear are AMT 29s. There is a slight difference in diameter giving just a hint of "big n little" rubber rake without getting too carried away. (This is the first time in fifty years of modelling that I have ever used a stock set of Model A wires!)Likewise I sliced about 1 mm off the top of the front spring - just enough to give it some attitude. I used the organ pipes off a Revell banger along with the AMT grille shell, radiator and steering wheel. Paint is a Tamiya Dark Green with a Tamiya military green for the engine. The seat was drybrushed over the already rough plastic to give a distressed leather look. Decals came from the Revell 29 Hiboy. So I started it on a Sunday night when I was meant to be packing up and ended up completing it on the following Sunday. I was thinking of doing full brake rod detail and a bit of wiring but it was more fun to just concentrate on the look and not get stressed out with details. Maybe on the next one....
-
Belly Tank kit in styrene
alan barton replied to Greg Myers's topic in General Automotive Talk (Trucks and Cars)
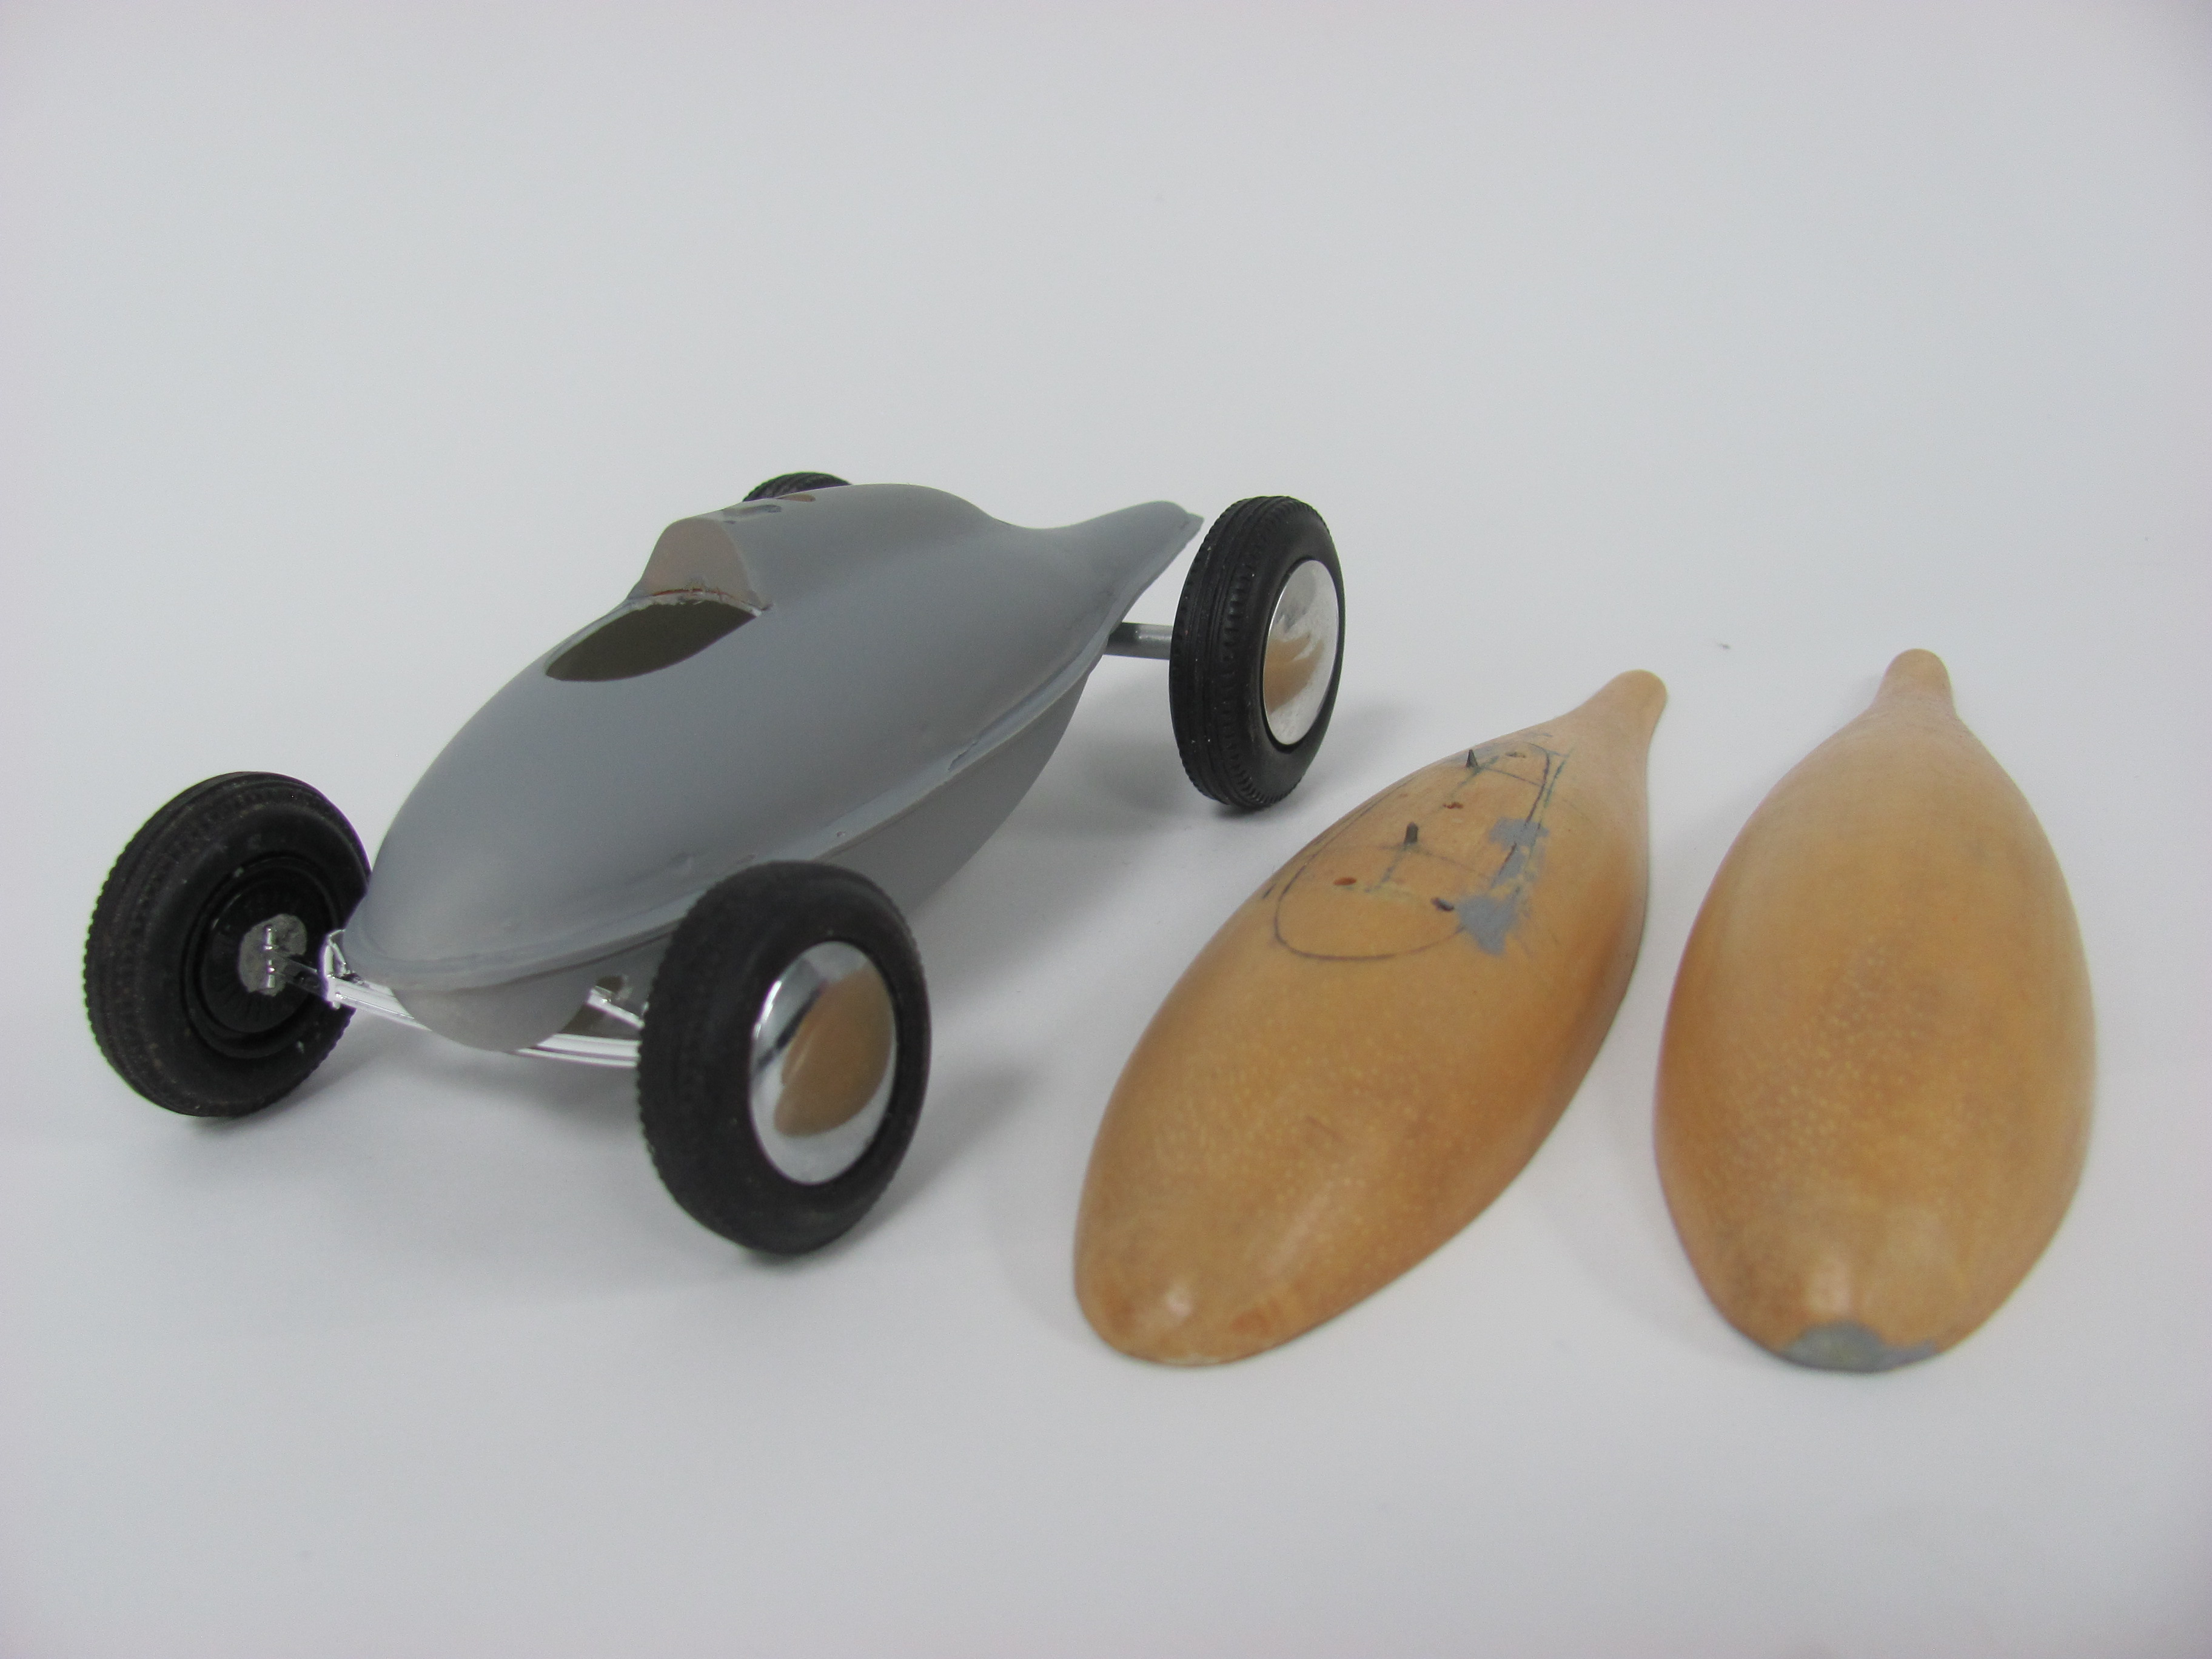
Wow, I really wasn't expecting anyone to say yes to having had my vacforms. The guy (I must hunt for some paperwork for his name) tracked me down through a photo that Roy Sorensen ran in his old Plastic Fanatic mag. This was all before the internet (1992 or 1993 I'm thinking) so the process using snail mail was quite drawn out but we got there. If you look closely at my grey primered example, you'll see it has no scoops next to the headrest. Once I sent a prototype off to the guy he pointed them out - the reflections on the photo of the real car had hidden them but I suspected they were there! I even discussed it with several mates and we ended up deciding they were an illusion! Turns out they weren't so I made some up from Bondo, as you can see on the moulds. That would be the version that you had. My vacformer has been a PITA for a while and I keep promising to buy new rubber for the seals in the hope of fixing the problem. Looks like I got a reason now. PM me and we will talk. And Bill, the biggest problem with the flange around the edge of the tank is that they are so very thin that most people's efforts to reproduce them turn out way too clunky. Not that I have done much fibreglassing, but if I were to tackle it I would simply lay one half of your tank on a greased flat surface and lay the glass over it, spilling out on the flat surface. When that cured I would just trim it by sanding and filing to the appropriate shape. Cheers Alan -
Belly Tank kit in styrene
alan barton replied to Greg Myers's topic in General Automotive Talk (Trucks and Cars)
Every time someone does a post on bellytankers I feel guilty because my vacforms have been a W.I.P. for WAYYYY too long. The tanker was scaled up from the dimensions quoted in the 1962(?) Hot Rod magazine article on the 360D car shown above. I also have a version with a flat bottom. Some cars seem to have done this to get the whole show a little closer to the ground. The Vesco - Nish streamliner was commissioned by a guy in the States who bought twenty off me. He was somehow associated with the team and provided me with a calendar that had enough photos and dimensions to work from. Kicking myself now that I never copied the calendar before returning it to him! Did anyone here ever buy one of these off him? Probably the thing that put this on the backburner was doing the clear parts. Anyone who has ever done any vacforming will know that the tiniest spec of dust on a clear vacform will look like a tennis ball in scale! Still, I know more now than I did then - it's at least 25 years since I made these moulds, so maybe it's time to drag them out and try again. Cheers Alan
-
Car Repair Ripoffs 1: Dealerships
alan barton replied to Ace-Garageguy's topic in General Automotive Talk (Trucks and Cars)
That's why I come here Bill, I learn so much! Thanks for taking the time to explain that (haven't got to watch the video yet as I have a glacially slow internet connection, company probably owned by the brother of the Honda dealer!). I didn't realise just how many ways there are to adjust OHC valve clearances. Mind you, it's academic really - I don't think they had any intention of inspecting them or adjusting them - and still cant believe they missed the opportunity to stiff me for an imaginary valve cover gasket while they were at it. Cheers Alan -
Car Repair Ripoffs 1: Dealerships
alan barton replied to Ace-Garageguy's topic in General Automotive Talk (Trucks and Cars)
My wife and I had never had a new car until in our early fifties so we were rather excited about it. That didn't last long. We bought a new 2009 Civic because we had an amazing run out of an 82 Accord that we finally retired at 535,00kms, (over 300K miles) simply because a carby kit, battery, tyres, rego and insurance that it needed was probably double the value of the twenty seven year old car. I seemed to be challenging the dealer at every service. The stuff they made up was amazing. Your power steering fluid is dirty - $25 for flushing fluid, $39 for PS fluid, which was over the twice the walk in price at any parts store. And this at 25000km. The price of oil at each change was chosen from a dart board. At one stage 3.7 litres of "Honda" oil was $2 cheaper than 5 litres of fully synthetic mineral racing oil at a Shell service station, surely the most expensive place to buy oil? You can't make this stuff up. At fifty thousand kms we were charged for checking valve clearances. Just how would you do anything about it on an overhead cam engine - machine the head? And if you really inspected them, how come you didn't charge me for a rocker cover gasket? Then they reckon they had detected carbon on the back of the valves. I challenged the service manager on this one. Just how did you see the carbon on the back of the valves? Did you feed a fibre optic cable down through the manifold? We have ways, was his answer. They would charge me $125 to "clean" the said valves. To which I asked, how can you remove and dismantle a head, clean the valves, reassemble it, refit it and tune the engine for $125? Yep, they were going to tip a can of magic down there. Morons. Then there was the A/C pollen filter. Fair enough, it needed to be serviced but $75 labour to change it? The owner's manual says open the glove box door, remove the filter, replace with a new filter, shut the glovebox. How could you spent 30-40 minutes doing that? But it gets better. When I finally finished the warranty period, I never returned to these professional rip off merchants but went to a friend's one man mechanical repair shop. On a recent service he said, hey, went to replace your pollen filter BUT THERE WASNT ONE IN IT'S TRAY! So I was majorly overcharged for nothing. While under warranty, the cigarette lighter fritzed out. Hopeless if you want to connect GPS, battery chargers etc. We asked them to check it at a service and they did and said it was fixed. About six weeks later I noticed our taillights were out. Seems like old cars always had the taillights on the dash lights fuse so that you knew when they went out - not anymore it seems (probably saves .25) So I get home, remove the cover on the cover on the cover of the fuse box, do Olympic level gymnastics under the dash and identify the fuse for the taillights, only to find it hasn't got one anymore. For $1,000,000 bucks and a trip for two to Disneyland, can you guess which fuse was alongside the taillight? Yep, the cigarette lighter....... My phone call was so, lets say animated, they sent a "mechanic" out to my workplace to replace the fuse. Yep, could have replaced it in five minutes myself but I felt better screwing them over for once - it was a 60 minute round trip from the dealer's shop. Then the cig lighter failed again. Waited three months for one to come from Japan. Just after warranty period ended, it fritzed, again. And keep in mind, I am only touching on the highlights here. Never mind, I will never buy another new car as long as I live and here in Perth, I make a point of telling EVERYONE I know the name of the dealer. Especially if they have a Honda! Not all the criminals are in prison or Parliament! Cheers Alan -
Door alignment is a massive issue with this kit! ( and that's if they're straight and not warped all over the place!) The only one I ever finished I tweaked a bit by filing a square notch into the back edge of the sunvisor ( which is moulded as part of the roof) This then allows the cowl to stand up vertically and gives you a fighting chance of getting the doors lined up. The tweak is not horribly noticeable and makes a big difference. Cheers Alan
-
BB Chevy Engine Question
alan barton replied to Snake45's topic in General Automotive Talk (Trucks and Cars)
Snake, I don't know if I can find it in my stash but one of those great big MPC Chevy Caprices that came with a trailer had a very cool turboed big block in it. I'm thinking 1975 or 76. I still have the motor somewhere. The car was moulded in a deep blue shade. If I can find it I will post a photo. Problem is, I can't remember if it stuck through the hood or not. Maybe one of the instruction sheet experts on here can track it down. Definitely MPC, definitely a Caprice, just don't recall the exact year. Cheers Alan -
I am going to go out on a limb here and say that this is the most important, the most significant model ever posted on this site, and probably any modelling site. Why? Because as a human being with two hands and an active brain, you scratchbuilt an entire car with the most basic of tools and materials to a standard that matches or exceeds most plastic manufacturers. On top of that, you shared every step along the way, including the problems, the mistakes, the accidents and even the lack of motivation. The entire build thread was just inspirational. I first started watching your amazing project on the Aussie Model Builders site and then was chuffed to see you post here as well so that everyone would see your skills. Thank you for being so gracious as to share this with the modelling world. The attention to detail in things like the dashboard, the upholstery pattern, the aircleaner, (never mind an entire engine!) and the simple and methodical ways in which you tackled them has given every one of us the greatest text book ever on how to build a model. Like the great modelling writers, Don Emmons and Tim Boyd, you have made your techniques accessible to all of us. There wouldn't be one person who read your posts that didn't think at some stage "That's a great idea, I could do that!" We could just about adopt a new catch-phrase ; "What would Shawn do?" Thank you sir, you make me proud to be Australian! Cheers Alan
-
'32 Channeled Nailhead Roadster UPDATED 11/7/18
alan barton replied to Dennis Lacy's topic in WIP: Model Cars
I don't want to butt in on Dennis' post but yeah, the Lil Coffin interior, floor pan and chassis is a great fit in this body, needs very little massaging at all. I've just got a bit of work ahead of me prettying up the front of the frame rails. Cheers Alan -
'32 Channeled Nailhead Roadster UPDATED 11/7/18
alan barton replied to Dennis Lacy's topic in WIP: Model Cars
Here ya go, Dennis. A long way from finished, like I said, but the juices are flowing to get this done in the New Year. I write a model column for Australian Street Rodding magazine these days and I have a column planned on the variations and potential of the Monogram 32 roadster - still by sentimental favourite hot rod model of all time. And yes, the stance is ALL wrong - this was a very quick mock-up for the photo. Cheers Alan
-
I've never seen this rod before but it looks like a great choice for a model subject. If you are not too hung up on duplicating it exactly, could I respectfully suggest losing the cowl lights ( I can't think of a good reason for them being there!) and swap out the four bars for hairpins so that you can reduce the visual barb of that lower four bar mount. I know four bars are far more sensible on a 1:1 but you won't be driving this anywhere so it would make sense to clean up an otherwise cool design. Cheers Alan
-
'26/'27 turtle deck T hot rod kits requested
alan barton replied to Phildaupho's topic in Car Kit News & Reviews
Ace, I couldn't agree more about the undersized Ala Kart hemi and the Buttera smallblock. Until the Revell 32 series arrived, the only one that looked right to me was the Windsor out of the Monogram 55 F100. The Buttera Windsor added a whole new meaning to the term "small-block" and you didn't need a tape measure to see it! Fortunately it looked bearable in a T or A but you could not use it in a larger car with a clear conscience. Same goes for the few V6s out there. I also build dirt tackers and bought quite a few ASA kits - when I could I picked the V6 version because it is such a nice sized engine to use in Anglias or track T's. The few that came out in stock kits had been put in the shrinkerator! Cheers Alan -
This has potential
alan barton replied to Richard Bartrop's topic in General Automotive Talk (Trucks and Cars)
Shame about the driver having to have his legs amputated! Just joking, but I drive a stock bodied Model A, I'm about 5'11" and it's kinda like being in economy class in a 737. Still, like me, he probably got used to it. That thing would make a serious impression on the street! Cheers Alan