-
Posts
2,718 -
Joined
-
Last visited
Content Type
Profiles
Forums
Events
Gallery
Posts posted by Greg Pugh
-
-
After looking closely at the body, I decided that, while savable, it would take me a heck of a lot of time to get this thing whipped back into shape. It seemed to make more sense to me to just start over with a fresh body. Even with having to redo all of the corrections I did to the first body, it would still be much less work. The good thing is, is that addressing things like the wing windows and whatnot a second time sure went by faster than the first time!
 I'll spare you the boredom of documenting those corrections again.
A fresh canvas...

Just like every review I've run across, I agree that the hood fits awfully tight to the body. It would be especially problematic once primer, paint, and clear are applied. So I sanded the edges of the hood until I had a nice sized gap all the way around. Something I ran into though that I have not seen anybody mention, is that the hood sits too high at the cowl. I ended up sanding the top of the back of the hood and also some from underneath the hood to get this to sit flush with the cowl.
Here is the hood while I was sanding. I used masking tape to protect the center ridge from being sanded...

And it's ready for some TAMIYA primer this time! Lol. Wish me luck!!

-
YESSSS!!! It's model building season again!!
So we're gonna kinda pick up where we left off. I determined that I wanted the frame to set about a popsicle stick's thickness off of the ground. So with that figured out, I then had a starting point to figure out front spindle and rear axle heights. As I mentioned back in May, after flipping the front spindles, the front was pretty much dialed in. The rear however, is a different story.
Here you can see the difference between the front and rear with the body on...

From the top, you can see how far we've got to go to reach the center of the wheel...

Time for some surgery on the frame. Using a razor saw, I cut a section out of the frame...

I didn't happen to have the correct size rectangular styrene laying around and because it's a 3-hour round trip to the LHS, we're just going to make our C-notched frame inserts. I cut and glued together 3 pieces of .040 styrene sheet.

I then cut, filed, and sanded til I had my desired shape...

I did that another time and I had these...


I know it looks a little crazy right now but wait until our next installment...

-
-
Using the extra test body that I had, I sprayed Tamiya primer on it and was then able to spray the Duplicolor over the top of it with no issues. Not sure if the problem is a newer type of plastic or that Duplicolor's formula has changed (gotten hotter) but I think I'll be switching over to Tamiya for primer. Thank you all for your help!
-
So you thin it with alcohol and shoot it through your airbrush?
-
I'm currently working on Moebius' 1965 Plymouth Satellite. Everything was going well and then...
It's kinda got me scratching my head. I've used the same primer (Duplicolor 1699 Primer/Sealer) for the last 15+ years and have NEVER had a problem! In fact, I even have used it on this same kit on everything that's been painted up until now with no problems!
So I broke out the body on the kit that I've been raiding parts from. I masked off half of the deck lid and shot it with the same can of primer, same result. I then masked off the other side of the deck lid and grabbed a brand new can of the same primer, same result. I then masked off half of the roof, and shot it with the color I'm going with (Duplicolor spray can) and it did not seem to have the same effect, not quite as bad anyways. I saw a post on Facebook where somebody had just finished building one of the Moebius Ford pickups and I asked him if he had any problems with primer crazing and he said that he did. So it's seeming to me like there's something up with the plastic in the bodies...? I guess I don't quite understand why everything else I've painted in this same kit didn't seem to have any reaction but the body did. And is this an issue with all of Moebius' kits? It's funny because I haven't heard anything about anybody having any issues until now and this is my first Moebius kit. Any ideas?
I've stripped the primer off the body but of course now I have a lot of clean-up to do. I'm going to try a Tamiya primer on it next. Of course I'll try it on the test body first. I just hope that the Duplicolor Acrylic Lacquer will get along with the Tamiya primer. I've been told it will. If anybody has any ideas, I'm all ears!
-
It's kinda got me scratching my head. I've used the same primer (Duplicolor 1699 Primer/Sealer) for the last 15+ years and have NEVER had a problem! In fact, I even have used it on this same kit on everything that's been painted up until now with no problems!
So I broke out the body on the kit that I've been raiding parts from. I masked off half of the deck lid and shot it with the same can of primer, same result. I then masked off the other side of the deck lid and grabbed a brand new can of the same primer, same result. I then masked off half of the roof, and shot it with the color I'm going with (Duplicolor spray can) and it did not seem to have the same effect, not quite as bad anyways. I saw a post on Facebook where somebody had just finished building one of the Moebius Ford pickups and I asked him if he had any problems with primer crazing and he said that he did. So it's seeming to me like there's something up with the plastic in the bodies...? I guess I don't quite understand why everything else I've painted in this same kit didn't seem to have any reaction but the body did. Any ideas?
I've stripped the primer off the body but of course now I have a lot of clean-up to do. I'm going to try a Tamiya primer on it next. Of course I'll try it on the test body first. I just hope that the Duplicolor Acrylic Lacquer will get along with the Tamiya primer. I've been told it will. If anybody has any ideas, I'm all ears!
-
Well POO!! Friday evening I washed the body in warm soapy water, rinsed it, wet sanded it, rinsed it again, and left it to dry overnight. Saturday morning I shot it in primer and...it crazed.

And check out this weirdness. Never seen this before...

-
GAWD thats some AWESOME Work! GREAT engine, nicely done detail on the body...... Can't wait to see 'er under glass!!!!
Thank you!!
-
You have an excellent eye for detail and a very clean building style. Love the engine, love the dash, love the interior... just love it all. Beautiful work.
Thank you Harry!!
-
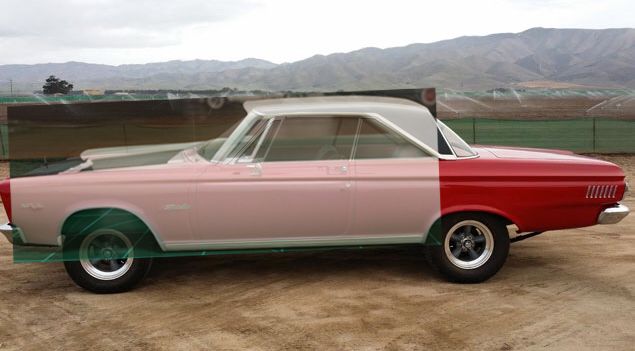
The kit is off a little bit as shown. I dropped your model picture over the top of the actual car photo. Not to bad.

Geez! Seeing that makes me want to throw it in the trash! Lol
-
Let me ask a question. When I peruse this kit, I'm thinking about building it as a non-removable hardtop. So I was planning to strip the chrome windshield frame and permanently mount the frame and top before paint. But it seems to me that you can't get the windshield glass in if you do that. Am I correct?
To answer your question, I'd say no. The glass has two locating pins that locate it to the cowl. The windshield frame then attaches to the back edge of the glass and the hardtop just rests on top of that. When I built mine, I attached the windshield frame to the glass and THEN attached them both to the cowl together. Anything of course is possible, but you'd have to get pretty darn creative here to make this a permanent hardtop by other means than just gluing the hardtop on after the model is done.
-
Overall, the body is pretty clean. Very minimal flash to address. The only other thing that I noticed on the body is where the fenders meet the cowl. On the real car, the fenders sweep up every-so-slightly to meet the cowl. On the model, it's kind of a mess. Easy fix though.

So as you can see, the fender is lower than the cowl and instead of making a slight "sweep up" to meet the cowl, it's almost like a glob. Lol. So what I did here was I first scribed out the fender to cowl and door to cowl gaps because I knew they'd disappear once the sanding started. Then, I just basically sanded the corner of the cowl down to make this transition less dramatic. Kinda hard to see with these photos but hopefully you get the idea.
Before:

After:

Still probably not perfect but I didn't want to take it much further because I knew by the time I applied primer, paint, and clear, this would be even less noticeable.
-
Now onto the body! I've seen a couple of different discussions about how correct/incorrect the windshield opening is. From what I've read, it seems almost split in the middle. Some say it's not right while others disagree. I have looked and looked at this thing and compared it to several different photos I've found. While I'll admit that it might just be a tad off, it's certainly not off enough that it would make it worth it (to me anyways) to modify the windshield opening and come up with a new glass solution, etc. So, I'll be leaving that alone.
However, the vent windows are another story. The top of the vent window post is too far back. So we'll be addressing that.
Here's what we're starting with:

Using a razor saw, I first made a cut right behind the post. Then, I made a cut right in front of it followed by a cut in front of that (about 1/16" roughly). I then ground out the area between the two cuts that I made in front of the post. This allowed me enough room to cut the top of the post free, coming in at it sideways. Using the razor saw again, I made a small cut at the bottom, right in front of the post so that it would swing forward/pivot easier. I also had to trim off just a little bit at the top of the post. Once I was happy with it's new position, I made it permanent with some glue:

I then used 040" styrene to fill the void in the upper part of the opening...

...and some .010" styrene to fill the cut at the bottom. A little trimming and sanding and...voila!

My reference photo:

-
Thank you Brad!
-
It's starting to look like a car!

-
With that done, I then turned my focus to getting the interior wrapped up. First thing I did was finish up the console. Now if you'll remember, this was originally an Automatic so I had to modify the console plate to make the change over to a 4-speed. Then, I had to scratch build a shifter and shifter boot. Once that was done, I shot it in Alclad, painted the boot Flat Black, and hit the shift knob in Gloss White.

I was just about to start assembling the interior when it dawned on me that the package tray is not supposed to be smooth vinyl like the seat covers are. My original Satellite had carpet in the package tray so I wasn't familiar with this situation. It was something I noticed at the last minute and I needed to come up with a plan. I first tried to mask off the seat and I painted the package tray in a flat black. When it wasn't flat enough, I tried scuffing it up with sand paper. When that didn't work, I had an idea. The package tray should have some texture anyways and I just happened to have some 600 grit sandpaper that was sitting in close proximity. I think it came out pretty good considering.

And here it is, all finished up. I also scratch built a column-mounted tach using a random piece I found out of the parts box. It was already chromed but was about three times as long as what you see. I cut this piece off, painted the gauge face, and installed it.


-
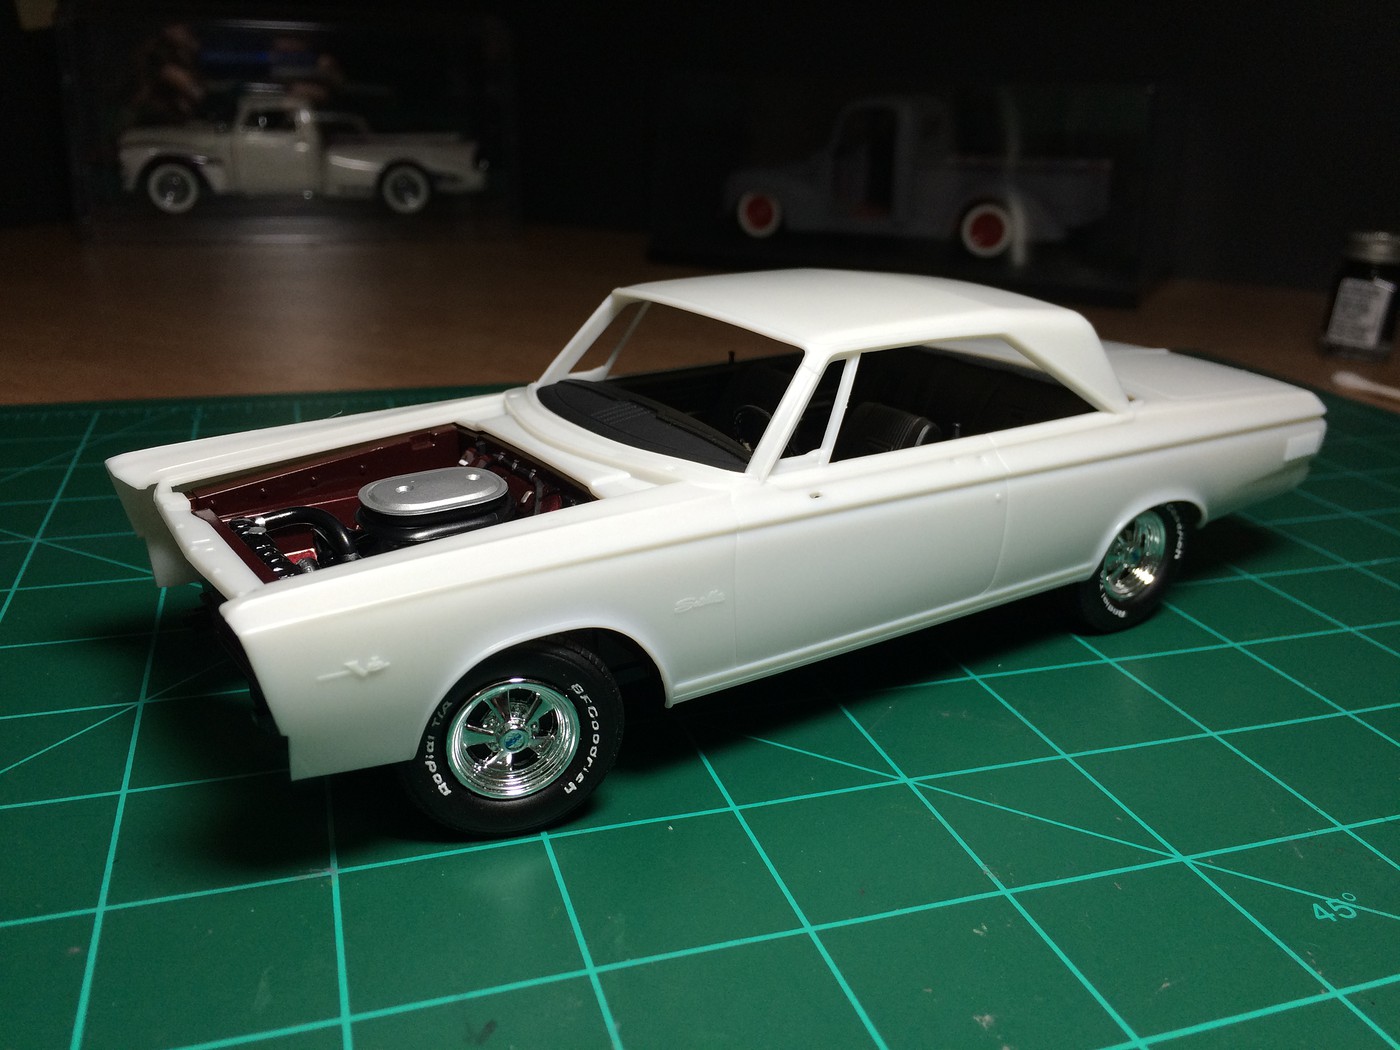
Spent some time at the desk yesterday. Got 'er up off the ground...

-
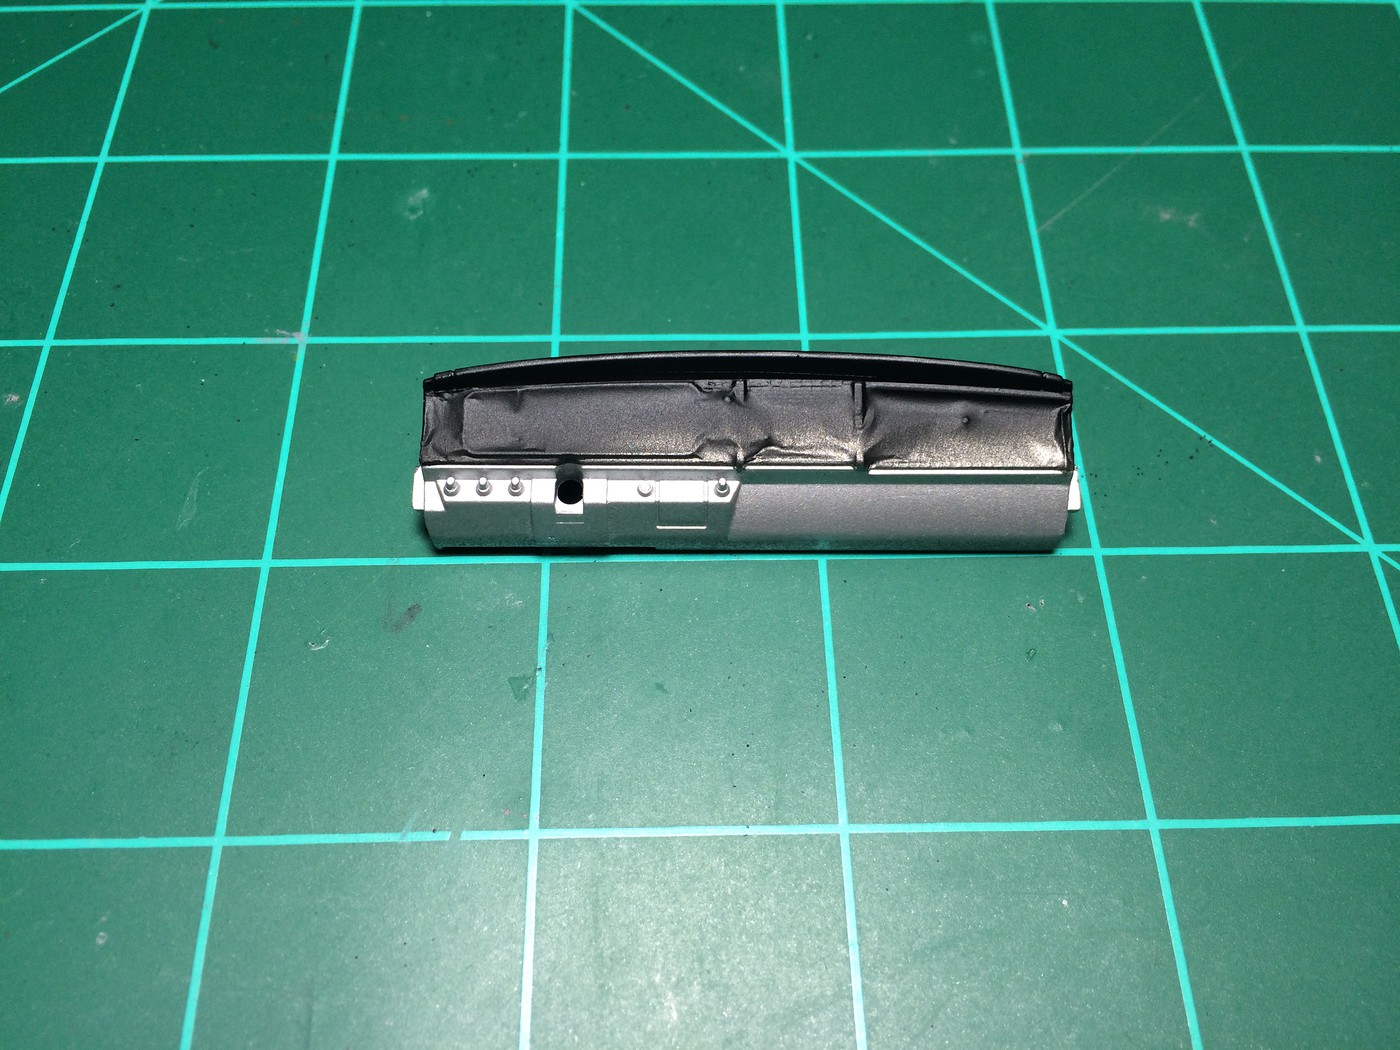
The only step that I didn't take a picture of was the gloss black for the lower metal portion of the dash but here it is all finished up.


-
Thank you all for your comments and compliments! I'm just so happy to be back at it!
So last night I finished up the dash. This required several steps, majority of which were done before I had to pack this one away for the summer. However, I took pictures as I went.
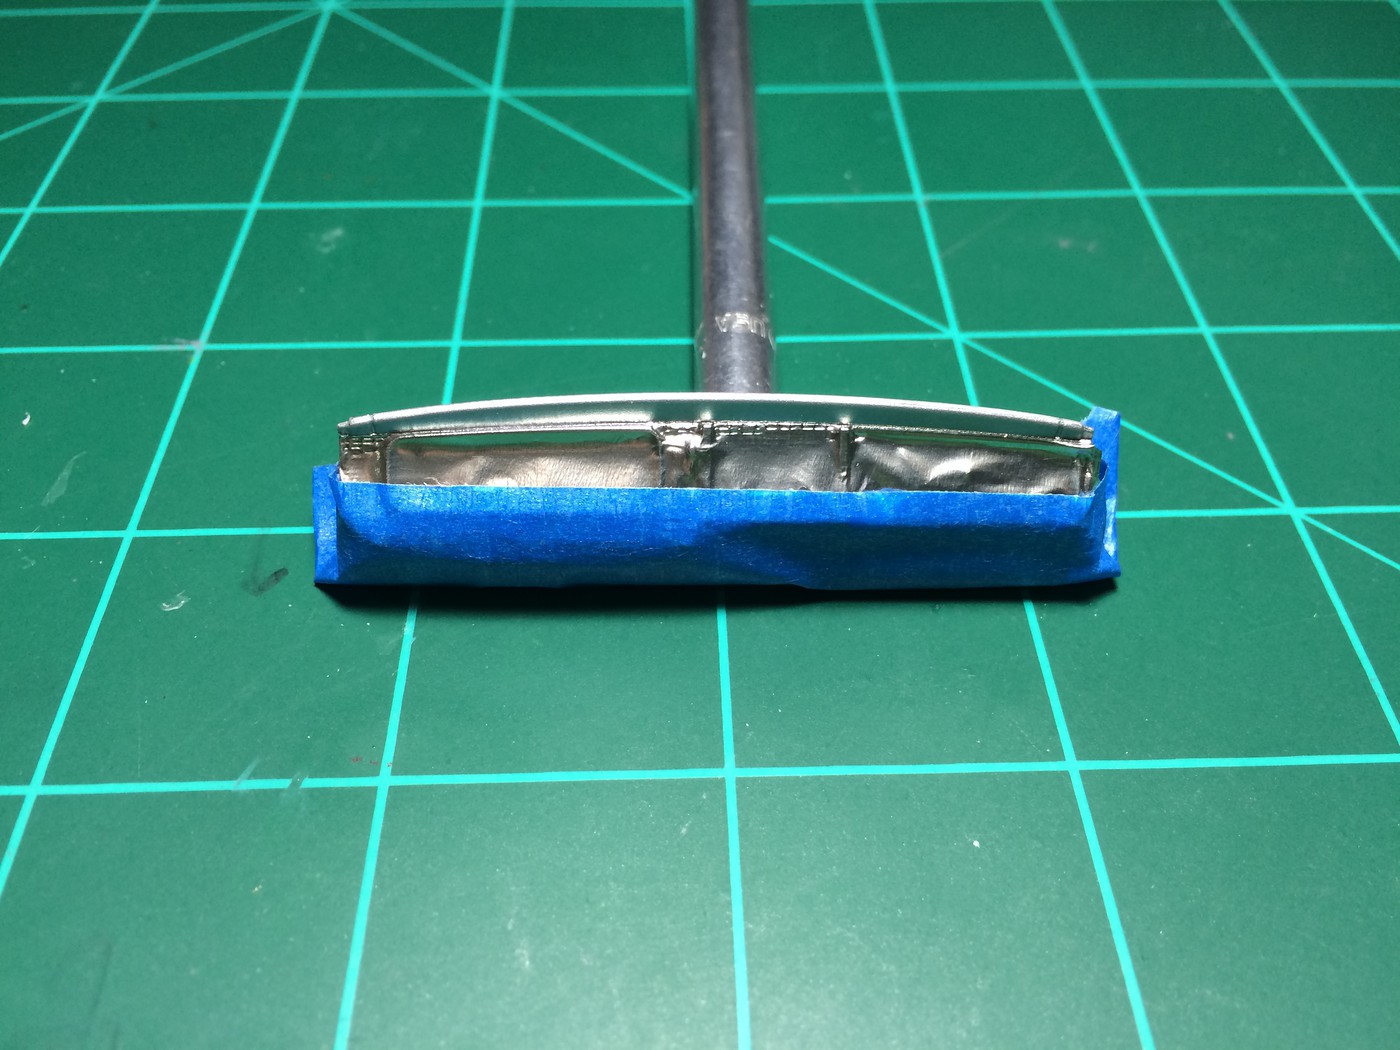
First, I painted the front of the dash Model Masters Aluminum Plate. I wasn't too worried about the overspray as I was just going to paint over the top of it anyways.

Then, I masked off all of the front dash pieces that I wanted to leave in Silver and also the lower metal portion of the dash.

I then painted the top of the dash flat black.

Then it was time to mask off the flat black part and leave the dash pad exposed.

That was then painted in a semi-flat black.


And here you can see the contrast between the flat black metal portion of the dash against the semi-flat black dash pad. It's something that might not even be noticed when looking through the windshield but like they say...it's the little things. Lol

-
Thank you Brad!
-
They came in white resin. I painted them and then painted the white letters.
-
-
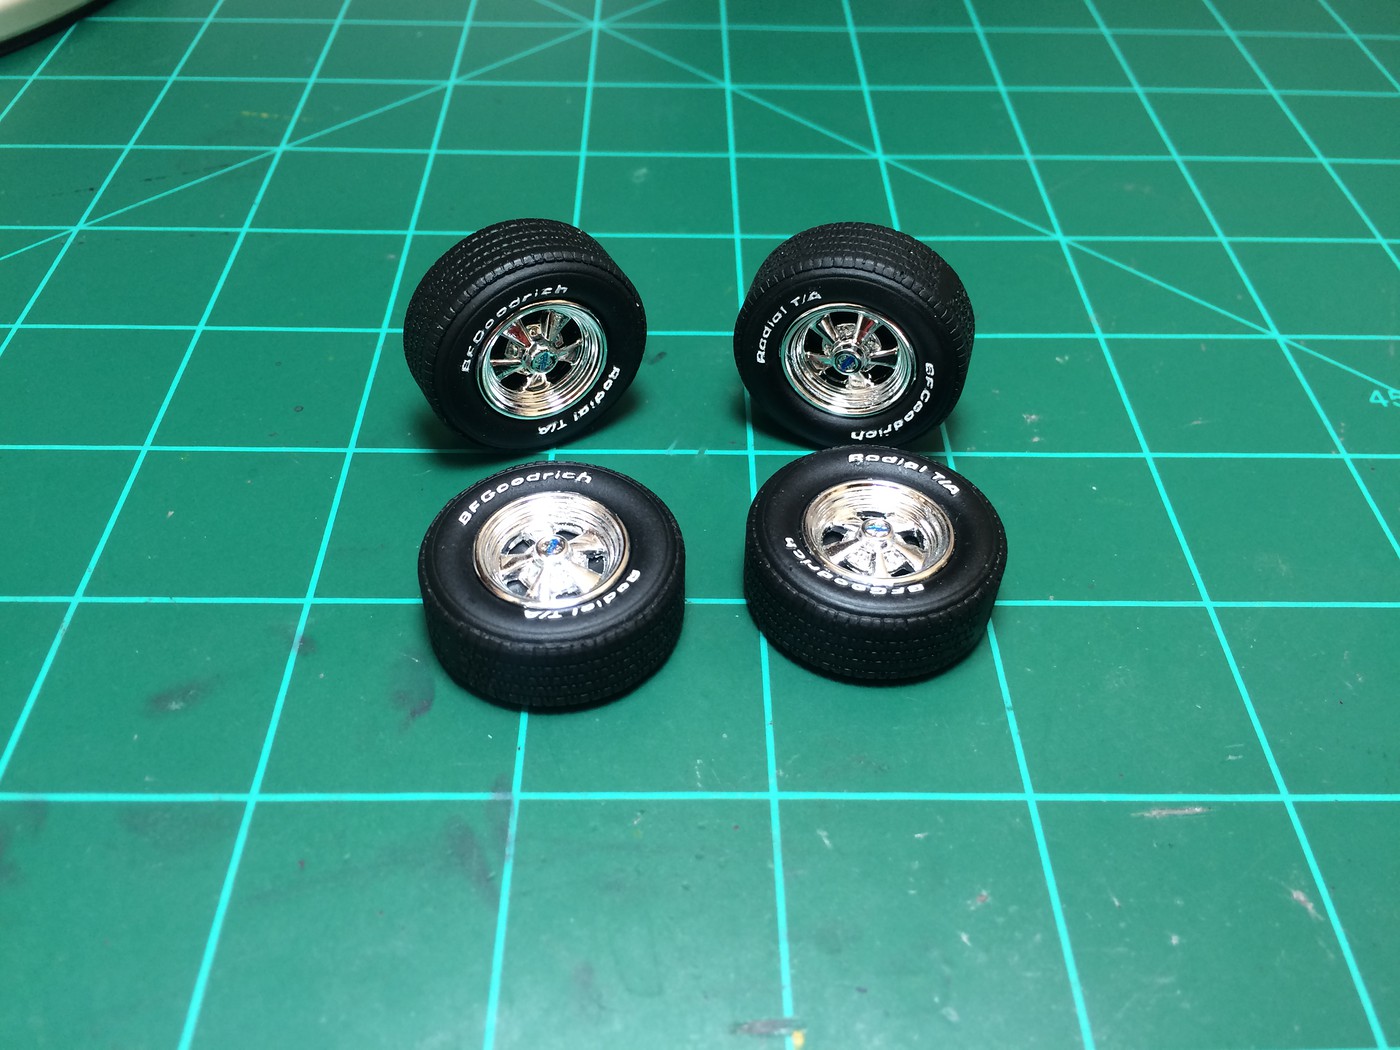
And in between mini projects on that last ordeal, I worked on the rolling stock. The Cragar S/S's came from the AMT '66 Nova SS and the BFG T/A's came from Fireball Modelworks.









'65 Plymouth Satellite...The One That Got Away
in WIP: Model Cars
Posted
Finally! Some forward progress again!