crowe-t
-
Posts
1,928 -
Joined
-
Last visited
Content Type
Profiles
Forums
Events
Gallery
Everything posted by crowe-t
-

1965 Oldsmobile 442(from an AMT '64 Olds 442) - FINISHED
crowe-t replied to crowe-t's topic in WIP: Model Cars
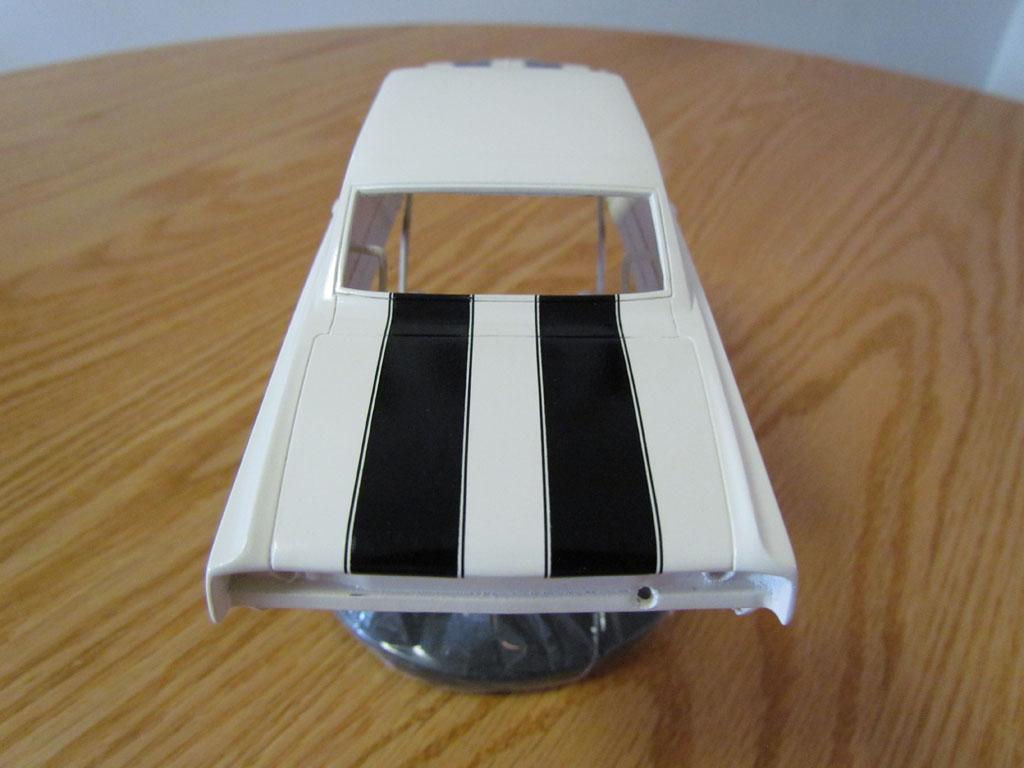
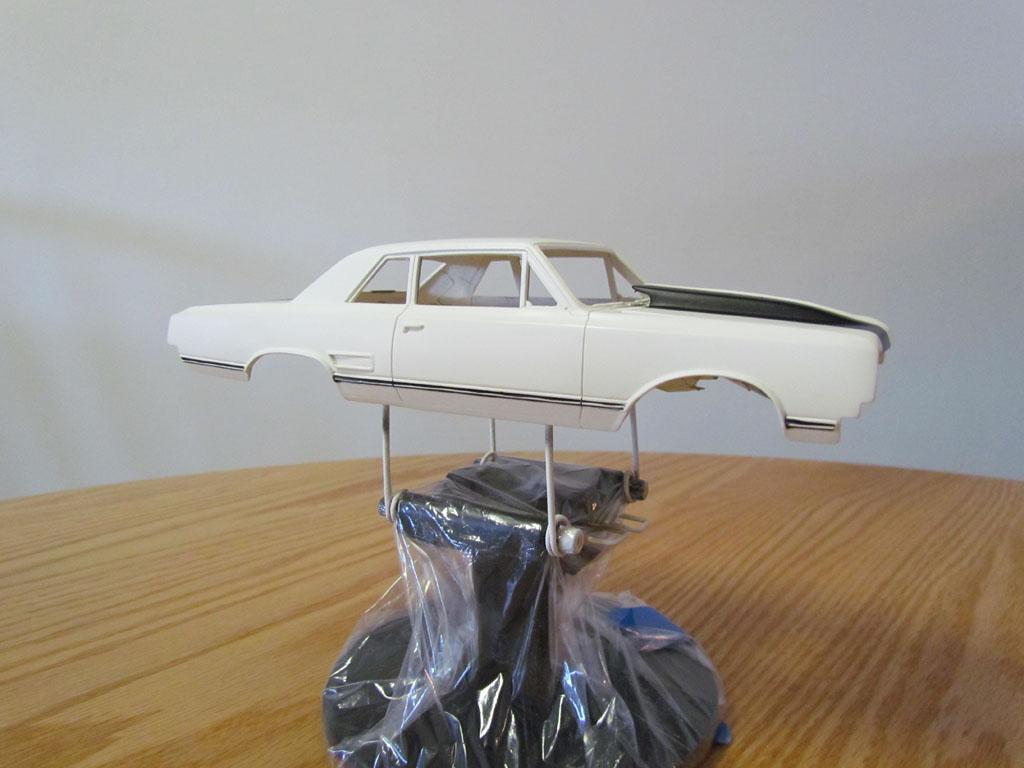
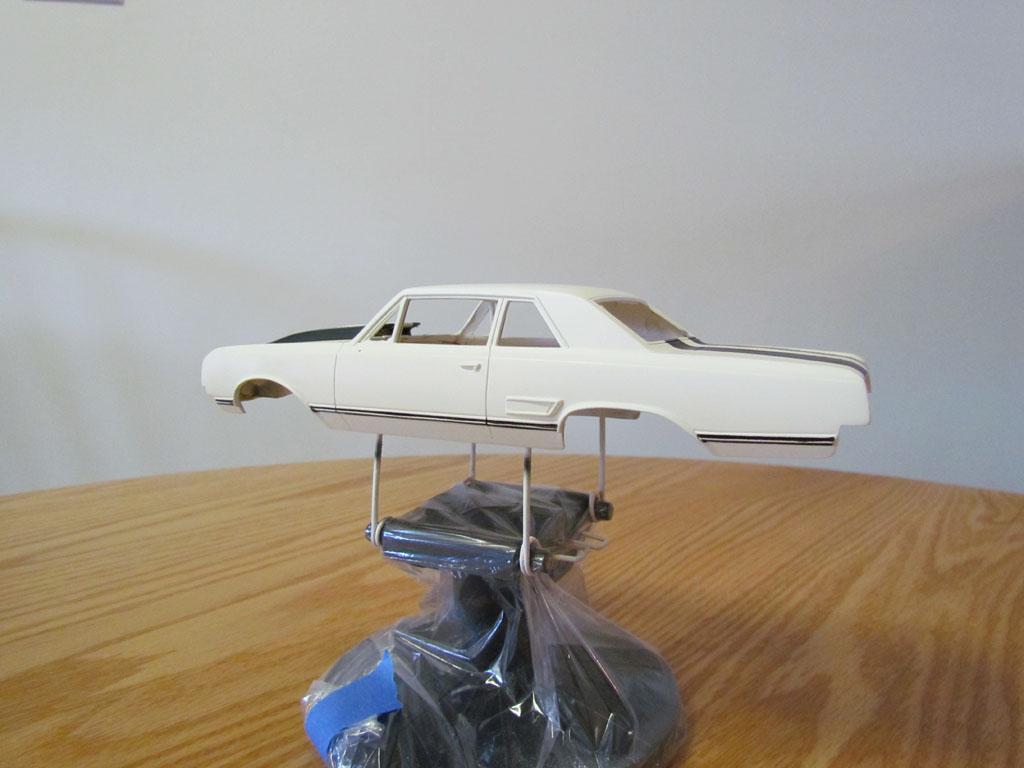
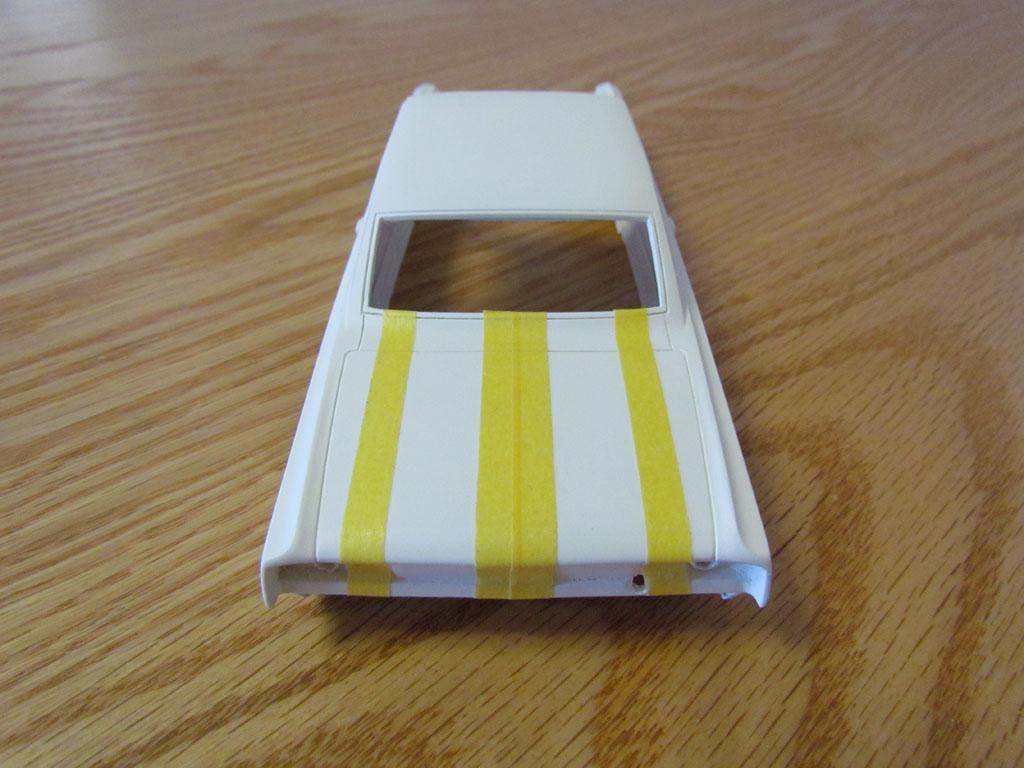
I applied the 1/64" black thin stripe decals next to the wide stripes on the hood and trunk lid today. I also put some 1/64" black stripes down the sides of the wide stripes to take care of any imperfections caused by the masking tape when I painted them. I put some small black decals in the rears of the quarter panel side scoops.
-
1965 Oldsmobile 442(from an AMT '64 Olds 442) - FINISHED
crowe-t replied to crowe-t's topic in WIP: Model Cars
Thanks Scott! -
Thanks David! I should be able to start painting it in a week or so.
-
1965 Oldsmobile 442(from an AMT '64 Olds 442) - FINISHED
crowe-t replied to crowe-t's topic in WIP: Model Cars
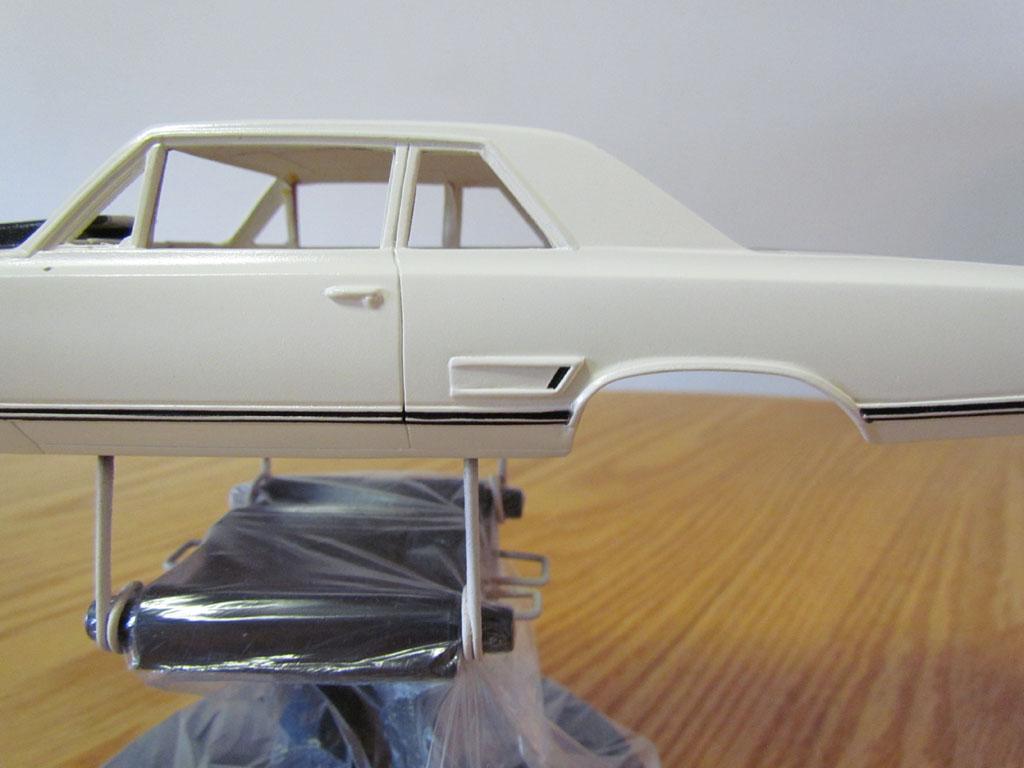
I masked the side molding to spray some black in the channels. When I apply the Bare Metal Foil I'll leave the black in the channels showing like the real car has. The wide stripes are painted and I sprayed some gloss clear on the body and hood. The thin stripes along side the wide stripes will be 1/64" stripe decals. I might also run some 1/64" black stripes down the sides of the wide stripes to take care of any imperfections. I also need to put small black decals in the rears of the side quarter panel scoops.
-
Food Dehydrators & Paint Dryers
crowe-t replied to JayVee's topic in Model Building Questions and Answers
How long after I spray clear on a body should I put it in the dehydrator? -
1965 Oldsmobile 442(from an AMT '64 Olds 442) - FINISHED
crowe-t replied to crowe-t's topic in WIP: Model Cars
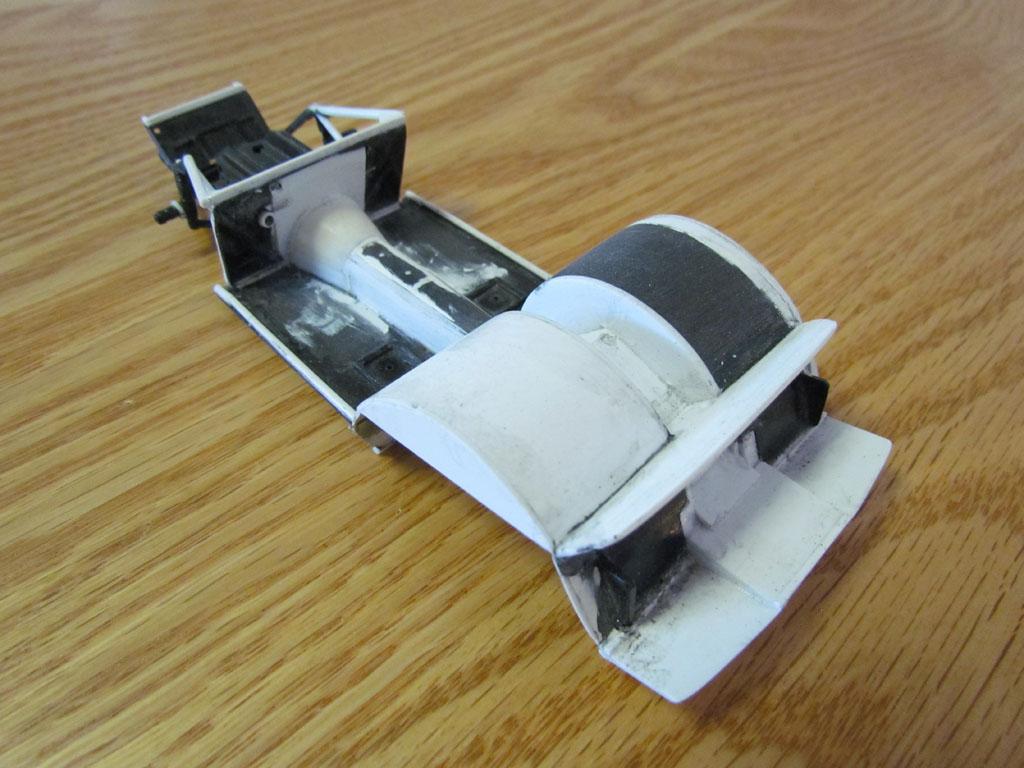
I re-built the rear floor where the fuel cell is. I had the 1mm x 1mm frame glued in and it was hard painting it. I cut it all out and made the 1mm x 1mm frame and fuel cell separate. They'll be glued in after it's all painted. I painted the floor/chassis Testors Acryl Aircraft Interior Black. The floor has flat clear and the 1mm x 1mm frame, rear end and transmission crossmember has a mix of semi-gloss and gloss clear. I also misted some of the mix of semi-gloss and gloss clear on the frame. The sheet metal under the 1mm x 1mm frame is painted with Alsa Easy Chrome over white. I sprayed the Alsa Easy Chrome a bit thicker so it doesn't look shiny like chrome and gives more of an aluminum look. I put printed gauges and bezels from The Model Car Garage on the dash and tach. Last night I started masking the hood and trunk lid stripes. The wide stripes will be painted and the outer thin stripes will be 1/64" wide black decal stripes from Microscale.
-
I had sent some files of Sci-Fi ships from the 1980's TV show V to someone to print in resin and he did a terrible job. The parts weren't cured so they were sticky and soft and warped. I don't think the guy knew what he was doing. I mentioned this in a post in this thread on August 9th. I'd still like to have these printed in resin but I don't have the space for a printer in my apartment. Is there anyone here who can help with this?
-
What does the Tamiya transparent yellow and orange work best over for a gold anodized look? Silver, chrome?
-
Yes this is a big help.
-
That's how my parts feel. They feel like rubber but feel firm. I washed them but they still feel like rubber. I'm going to put them in the sun and see what happens.
-
I sent some files to a guy to have printed in 3D resin. Some of the parts I received feel sticky. The parts all feel rubbery and are not hard like regular resin. Is there something wrong?
-
Should 3D printed resin be hard when cured or feel rubbery? I got some parts from someone and they feel like rubber. I don't think this is right.
-
Any Tips For Airbrushing 1:25 Scale Deep Dish Wheels?
crowe-t replied to crowe-t's topic in Tips, Tricks, and Tutorials
I'll test it using thinner paint and lower air pressure. -
I'm having trouble airbrushing 1:25 scale deep dish wheels. The inner rim area gets a lot of orange peel. It's hard getting the airbrush in there. Any tips or tricks will be appreciated.
-
I've been getting this ready for paint. I still have to finish the exhaust system and a couple of other small details. I noticed the rear wheel tubs got thin on the tops from shaping them. This week I cut the top section off the driver's side wheel tub and made a new section with .75mm Sheet styrene. This week I'll do the same on the passenger side wheel tub. The new wheel tub is sturdier and the shape is better. It's also slightly wider on top so the tire fits better.
-
Thanks Steve.
-
Thanks John.
-
Thanks JC.
-
1965 Oldsmobile 442(from an AMT '64 Olds 442) - FINISHED
crowe-t replied to crowe-t's topic in WIP: Model Cars
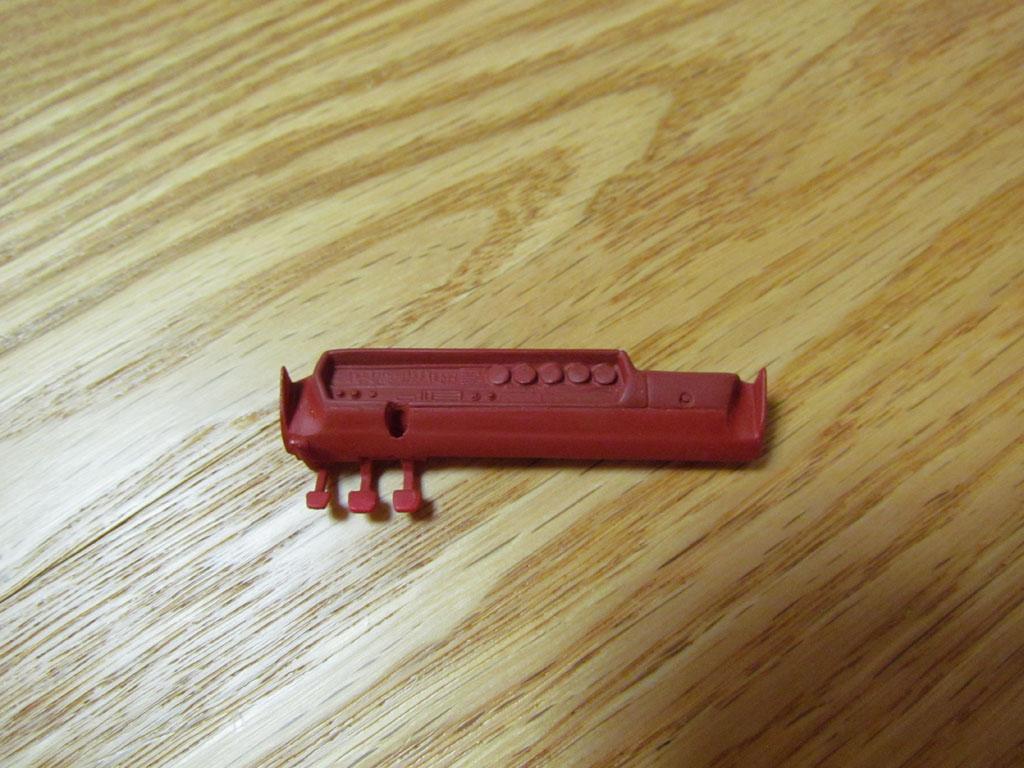
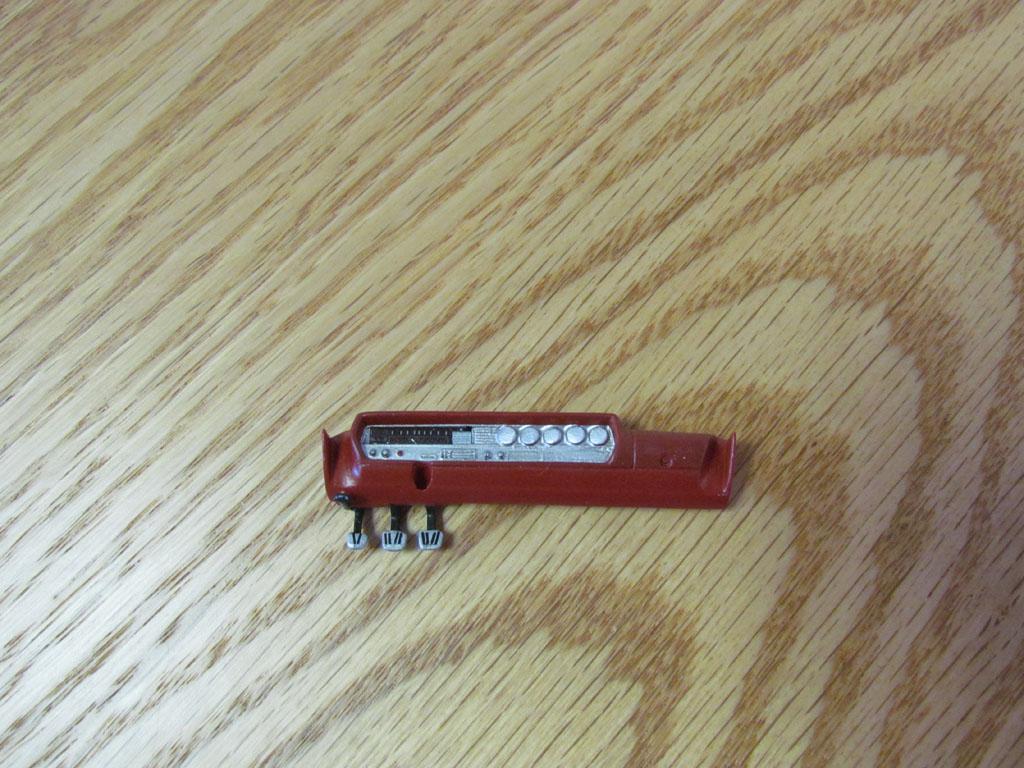
I started painting the interior. I used Testors Acryl Insignia Red. The rear package tray and front seats are slightly lighter like the real car. I added a drop of white to the Insignia Red for those. The dash pad is slightly darker. I added a drop of black to the Insignia Red. I sprayed Alclad White Aluminum on the dash face. For the carpeting I used WOW! Primary Apple Red Super Fine embossing powder. The apple red was a bit bright compared to the Insignia Red so I thinned some Insignia Red and misted it on the embossing powder to blend it more with the rest of the interior. I painted the MSD box that goes under the dash. I applied the decal to the MSD box but haven't taken a picture yet. Bare Metal Foil was added to the interior trim. The roll bar is painted with Testors Acryl Aircraft Interior Black with Gunze Mr. Super Clear Gloss. I have to finish painting the steering wheel and some of the other details and glue it all together. I'm getting the body ready for paint. I sprayed the headliner and sprayed some Testors Aircraft Interior Black inside the fenders and quarter panels. These will be masked when I spray the body.
-
Embossing Powder to match Insignia Red?
crowe-t replied to crowe-t's topic in Model Building Questions and Answers
Thanks, I'll check it out. -
Alternatives to Tamiya Fine Surface Primer?
crowe-t replied to DanR's topic in Model Building Questions and Answers
I use Duplicolor Sandable Primer. It goes on thin and sands easily. It's cheaper than Tamiya and is very close to it. https://www.duplicolor.com/product/sandable-primer/ -
I'm looking for a red embossing powder to match (Testors) Insignia Red. Insignia Red is a dark red. I haven't been able to find one that matches or is close.
-
72 Olds Cutlass Hartop/Missing Link Resin DONE 01/30
crowe-t replied to tomsheehy's topic in Model Cars
Beautiful job! The interior looks great. -
1965 Oldsmobile 442(from an AMT '64 Olds 442) - FINISHED
crowe-t replied to crowe-t's topic in WIP: Model Cars
Thanks David! I'm finishing the small details now and will be starting to paint it in the next few days. -
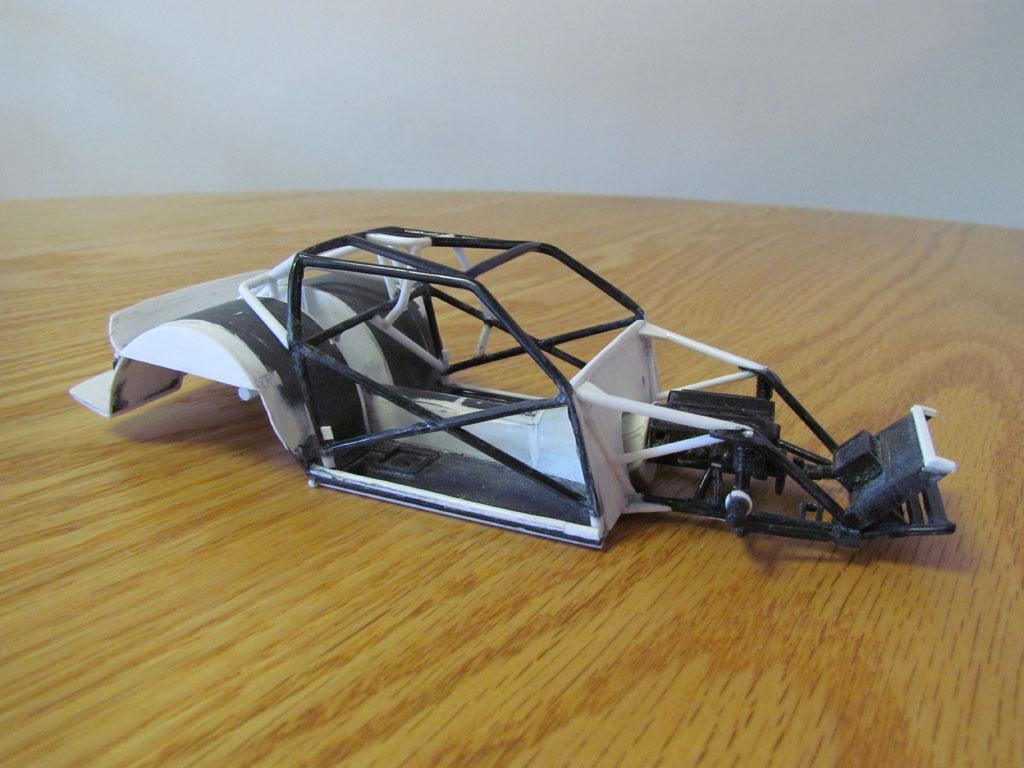
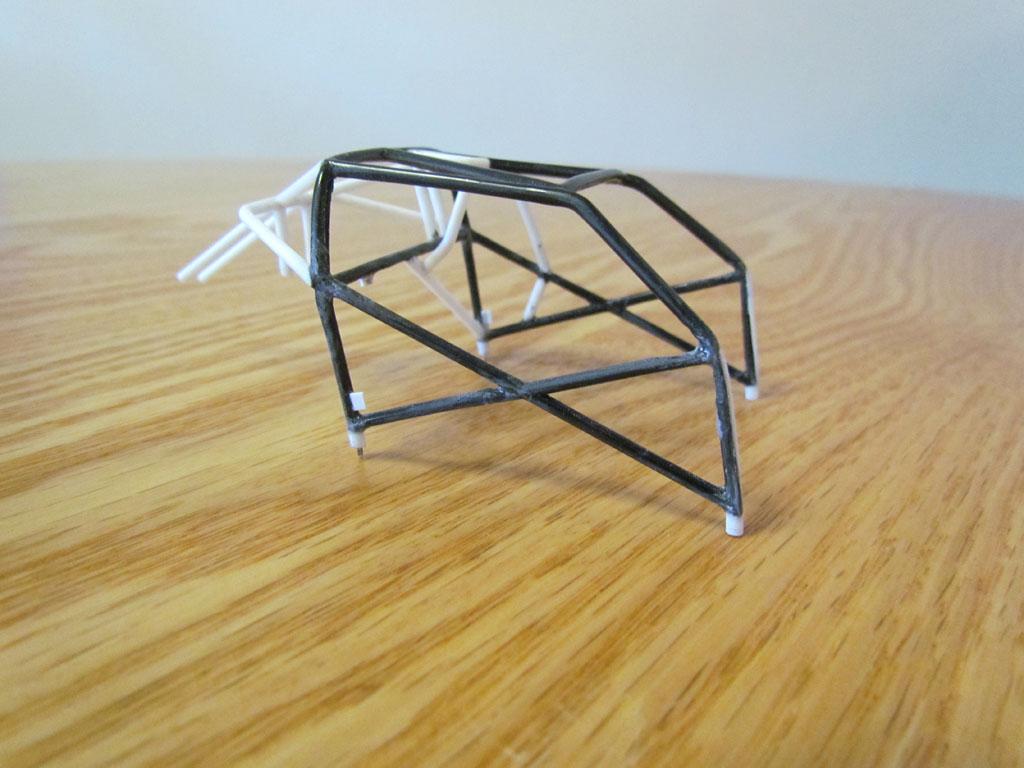
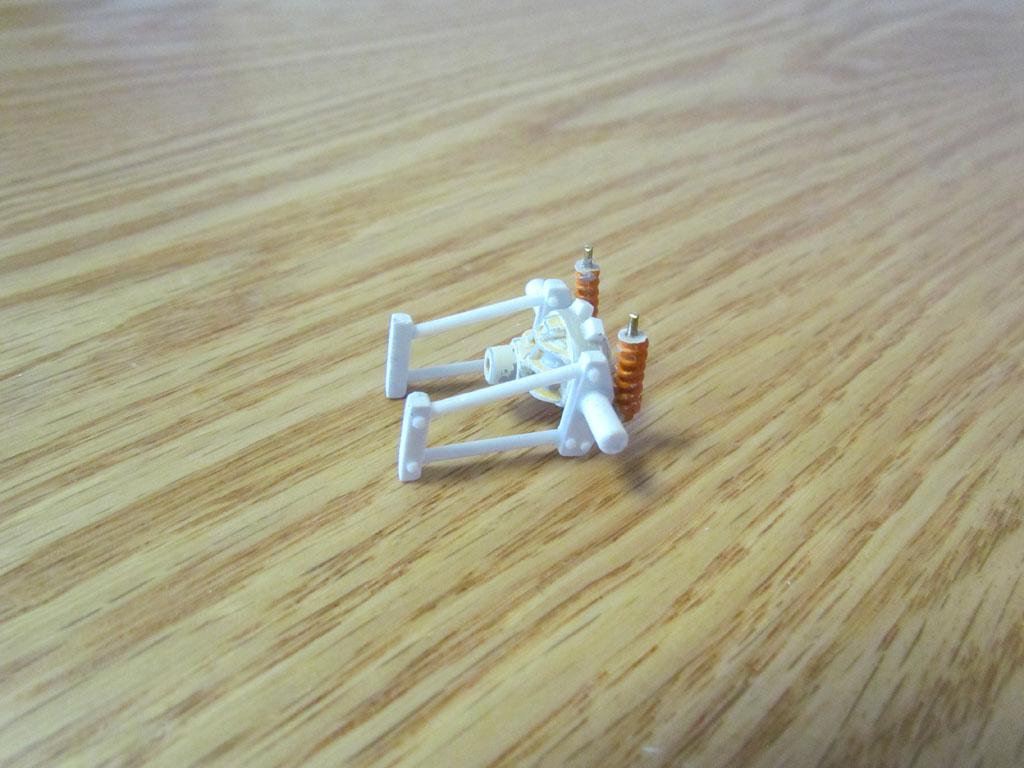
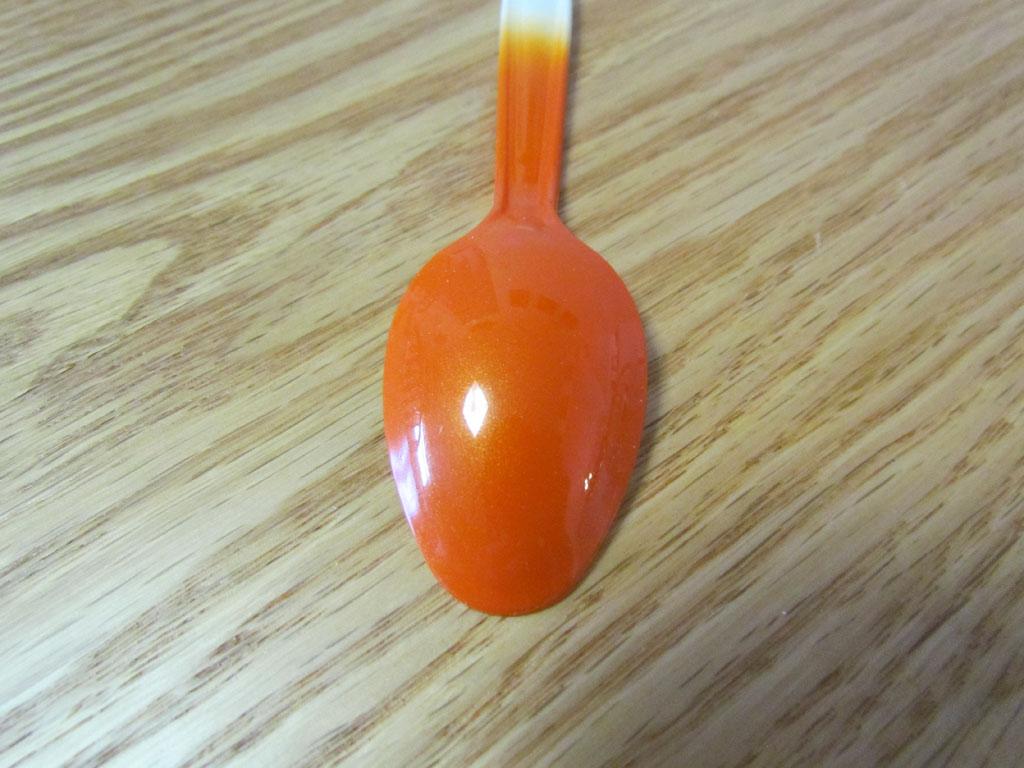
It's been a few weeks since my last update. Since then I raised the roll cage up about 2.5 mm. The top of the roll cage was sitting too low. I had to cheat it up but now the top of the roll cage is up by the roof. Due to raising the roll cage I had to raise up the top 2 bars in the engine compartment area to make it look right. I cut off the black plastic bars and replaced them with styrene rods. I rebuilt the 4 link and mounted the coil overs. The first 4 link I made had the rear housing in the wrong position. I have to strip the orange paint off the coil overs before re-painting them. I added some more of the rear underside framing. I tested a color for the body. The spoon is painted with a mix of Gravity Colors McLaren Mira Orange and Lamborghini Arancio Borrealis. The McLaren Mira Orange is basically a red color so I added some to the Lamborghini Arancio Borrealis which is a light orange color. This mixture is 7 parts Lamborghini Arancio Borrealis and 1 part McLaren Mira Orange. I might add some more of the McLaren Mira Orange to darken it but so far I really like the color. It's a red-orange color.