
truckabilly
-
Posts
785 -
Joined
-
Last visited
Content Type
Profiles
Forums
Events
Gallery
Posts posted by truckabilly
-
-
Pretty nice work on this one.
-
Wow, man. That´s something else and it sure looks good.
-
That´s great, as ususal. Fantastic weathering and wear. The details and interior junk is awesome.
-
I always thought that the enormous number of chrome parts is for those building a show truck. For a regular work truck an oven cleaner and different color is a way to go. Just more work for a poor model builder.
-
Very realistic build. My hat off to you.
-
That´s a big one. Cool!
-
Nice weathering and details.
-
Very nice!
-
Thanks for the tip, Richard. I sure will consider that.
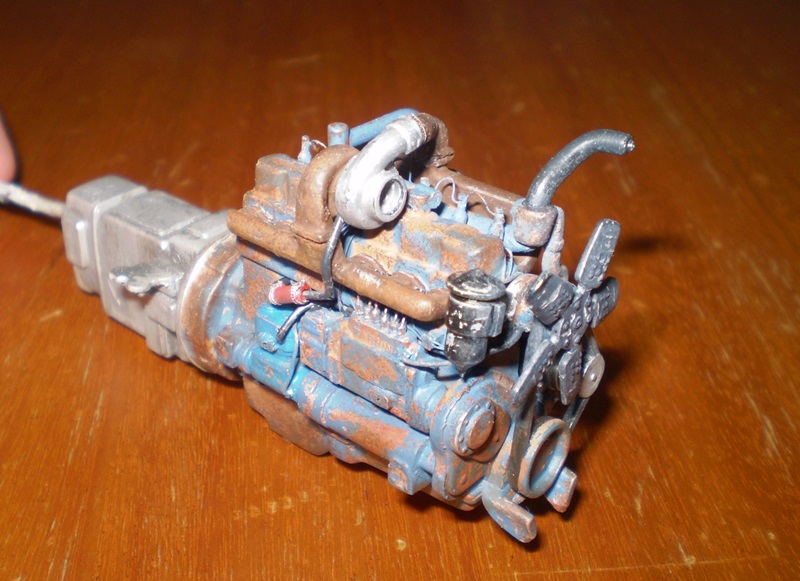
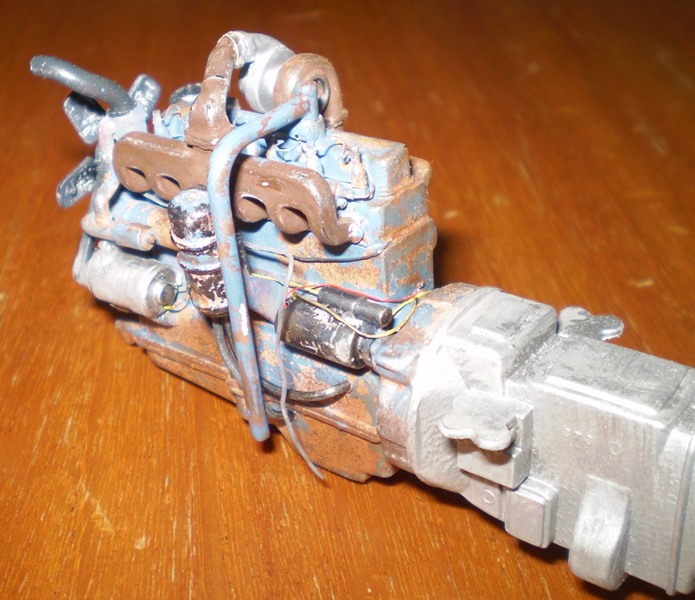
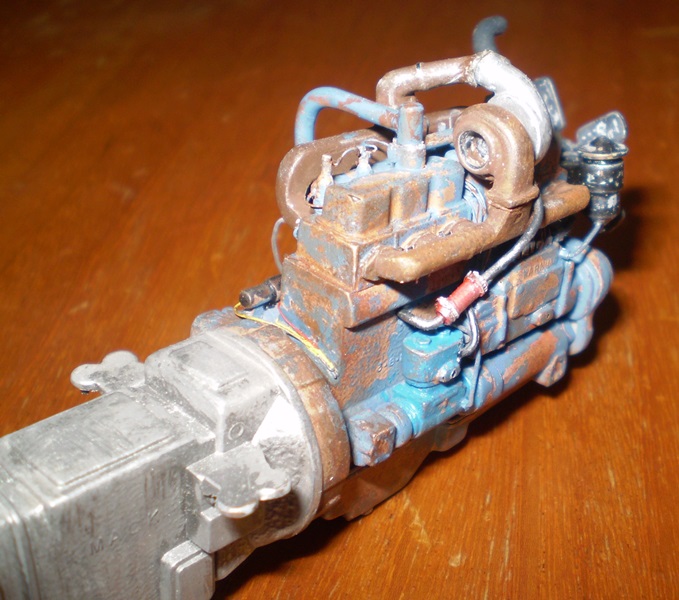
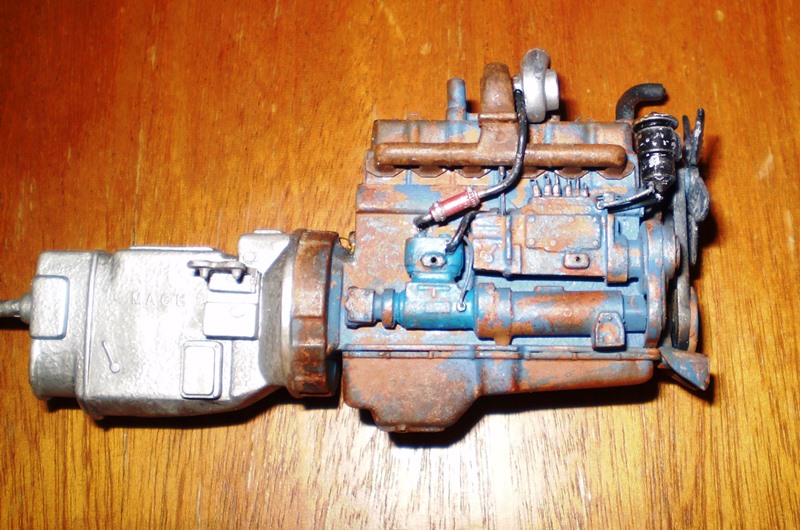
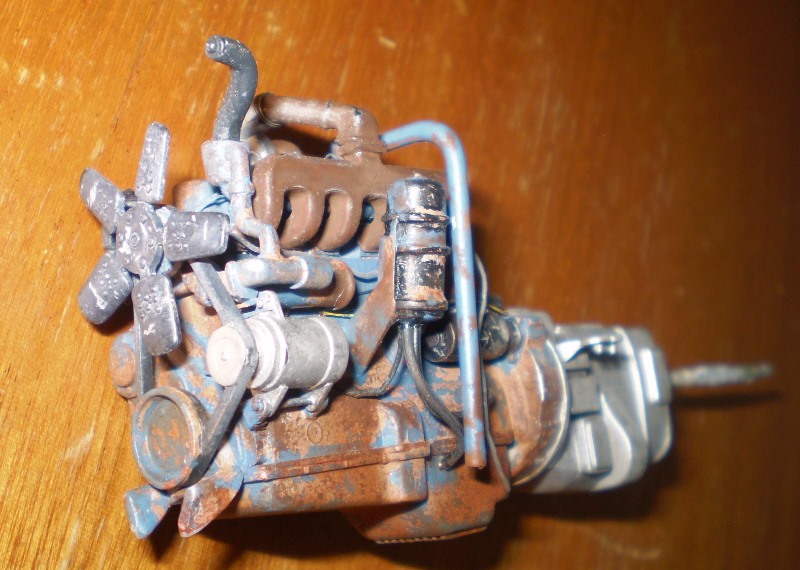
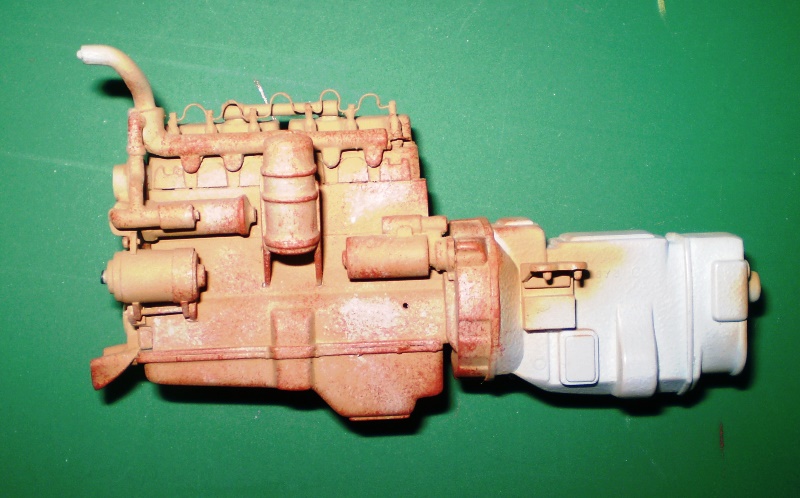
Using the HS method I rubbed the colour off and this is the tesult on the engine.

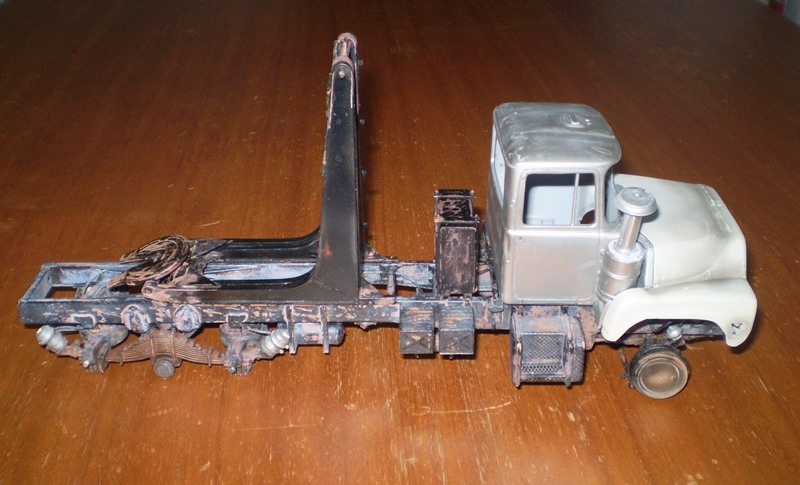
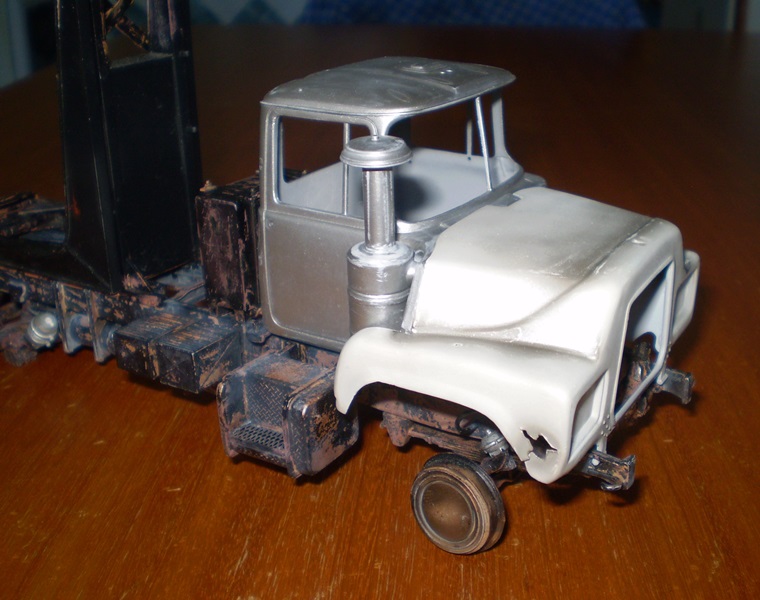
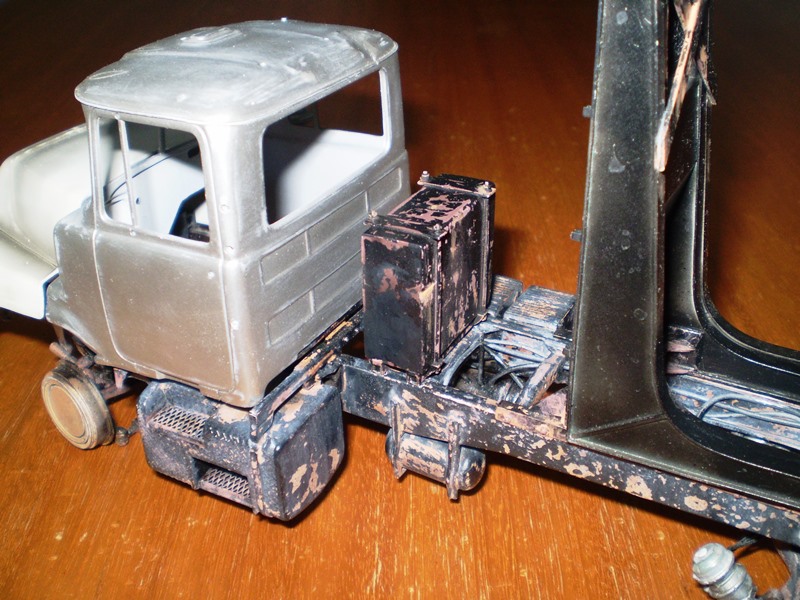
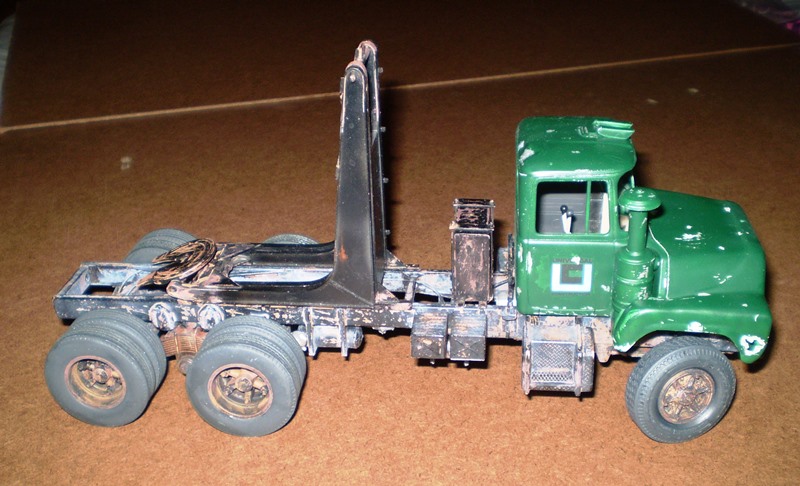
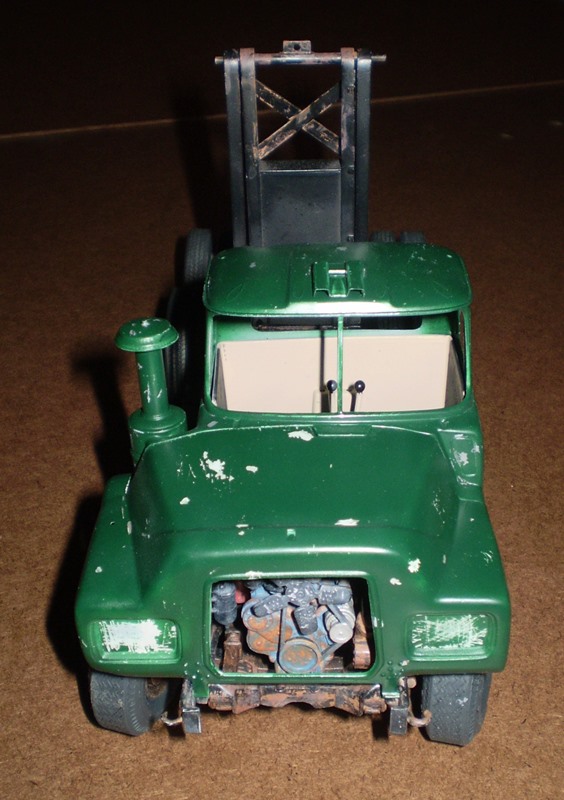
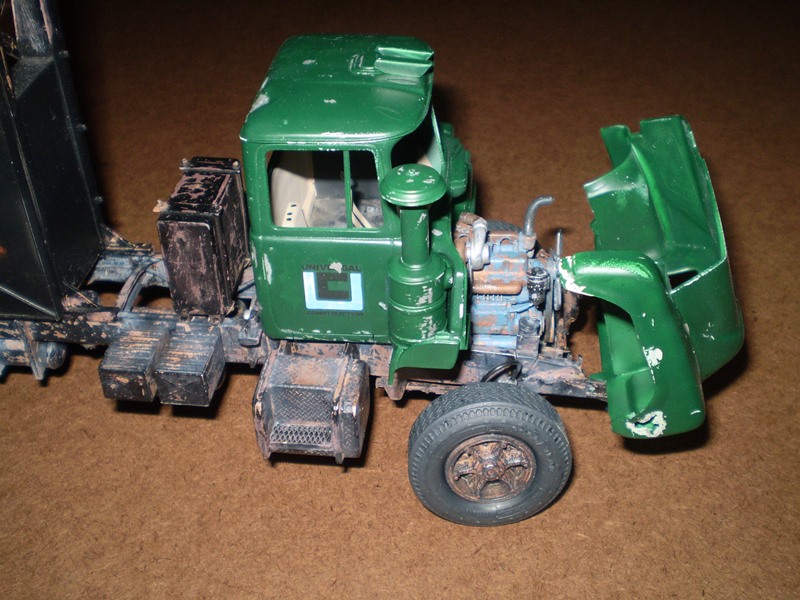
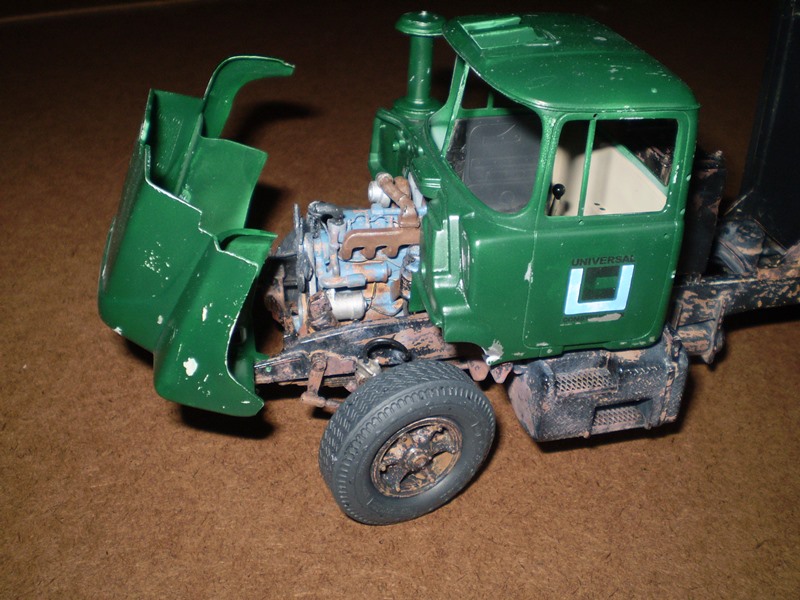
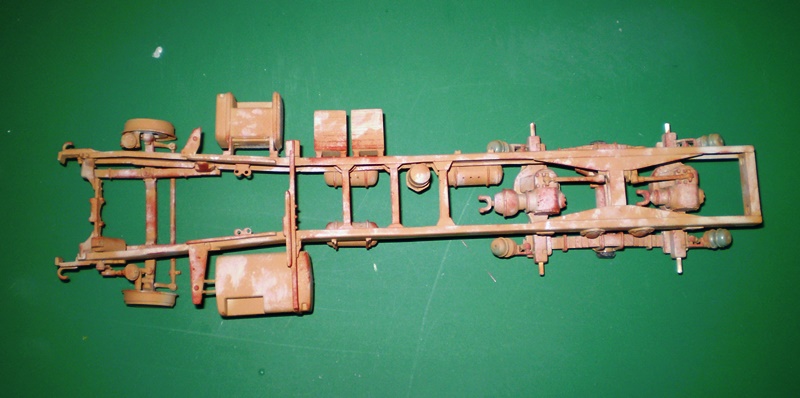
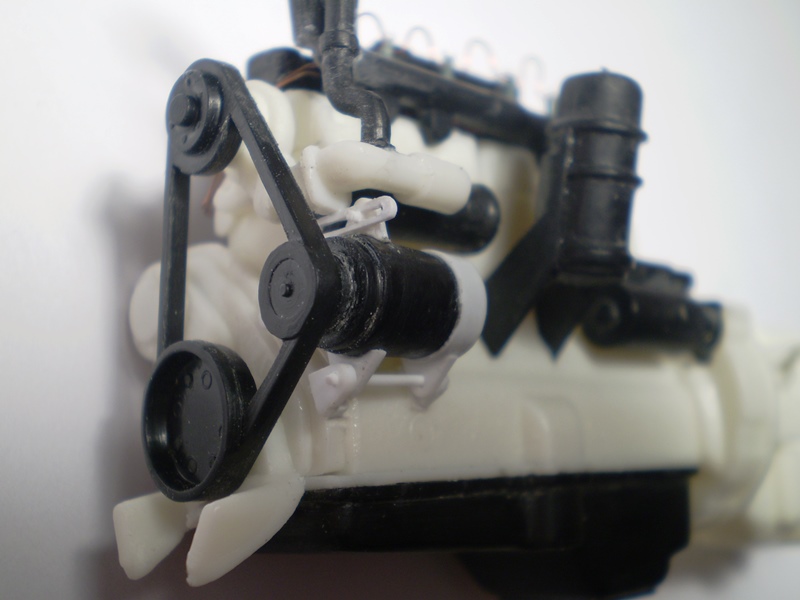
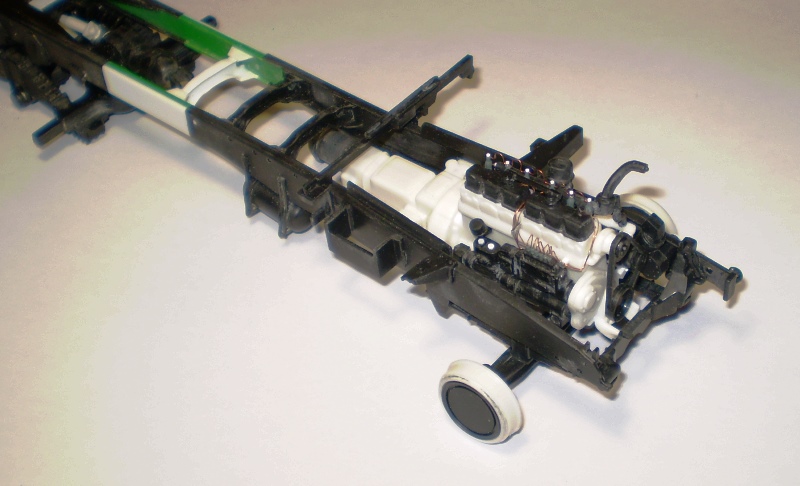
It still needs to add more life in it. I´ll see what I can do. I painted the frame black over rust and rubbed it too. For the cab I used an aluminium metalizer as a base and ligt grey for the hood, as it should represent the fiberglass.
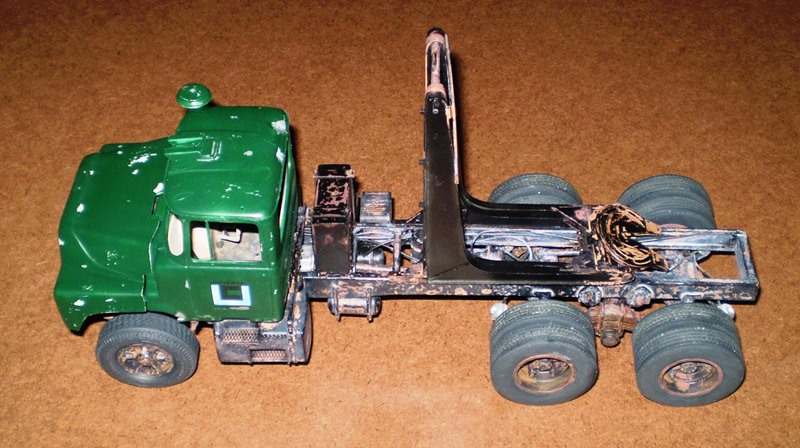
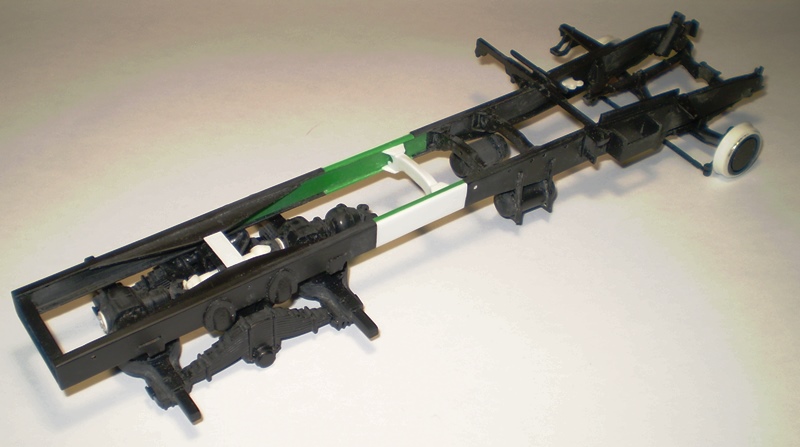
Since I´ve had extended the frame a bit too much, I added a hydraulic tank behind the cab. I have never painted any of my truck models green. This was a nice occasion to try one.
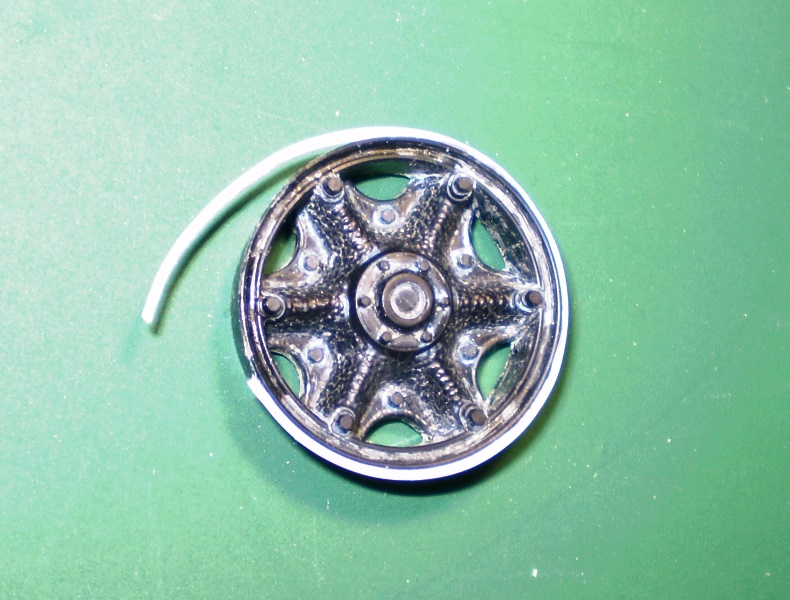
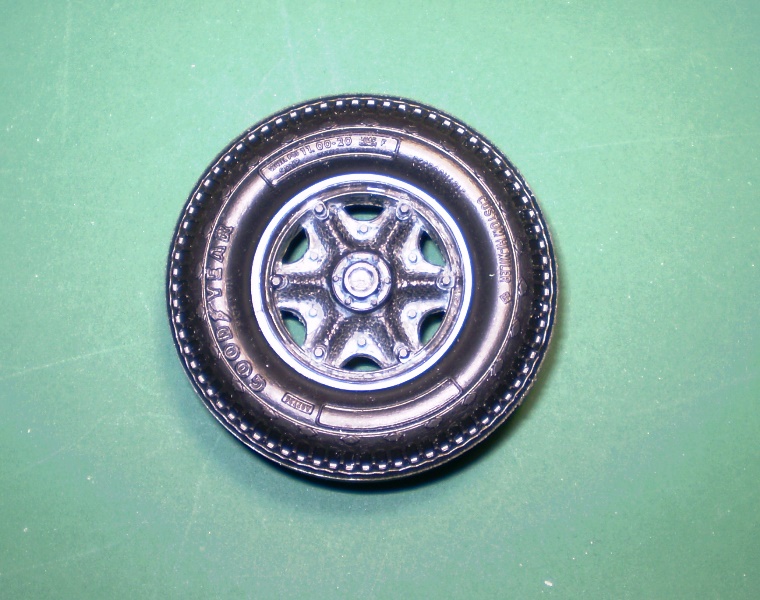
The front wheels are the kit originals. The drives come from a resin set with no lettering on the sides. The original wheels and tires were sticking out too much, making the model look too wide. I think these look better even without the lettering.
-
There´s probably no other reason for that than a custom style. So many countries, so many customs. I wouldn´t sit in anything like that. It´s really insane! I bet the local police is not happy about that. Just my two cents.
-
Top class work, as usual. The weathering is absolutely gorgeous.
-
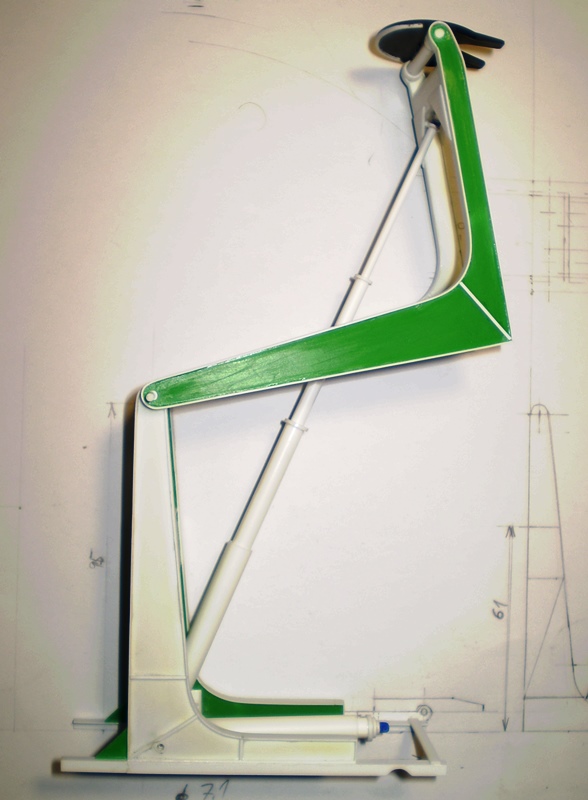
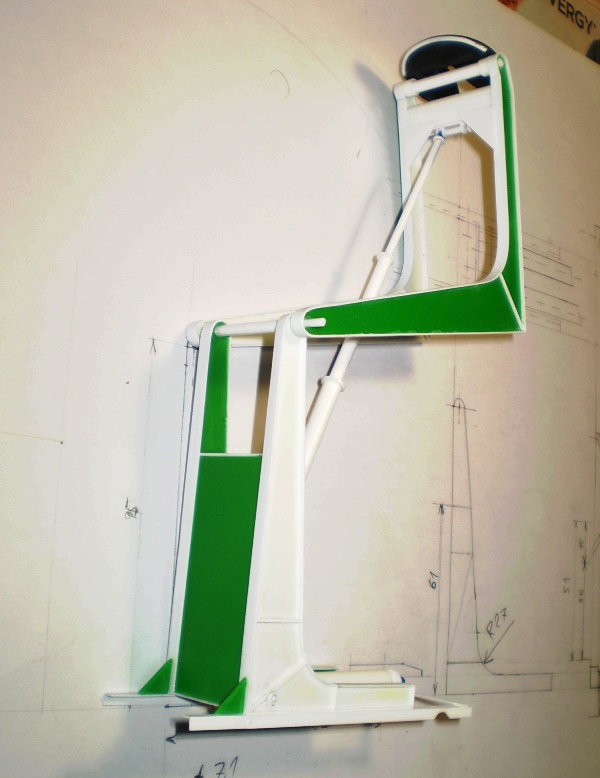
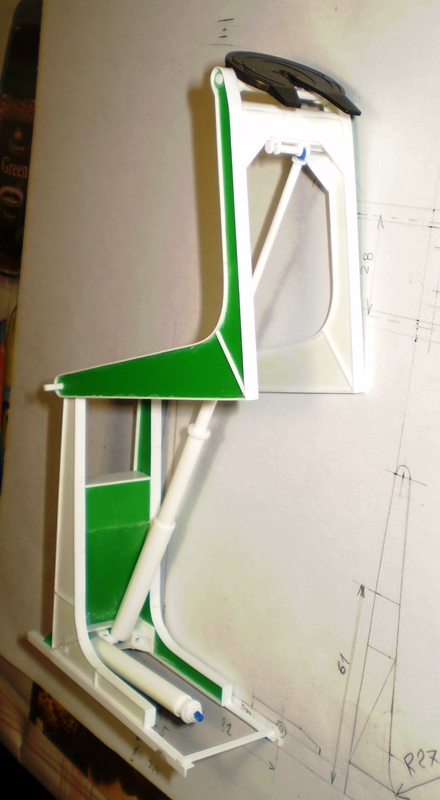
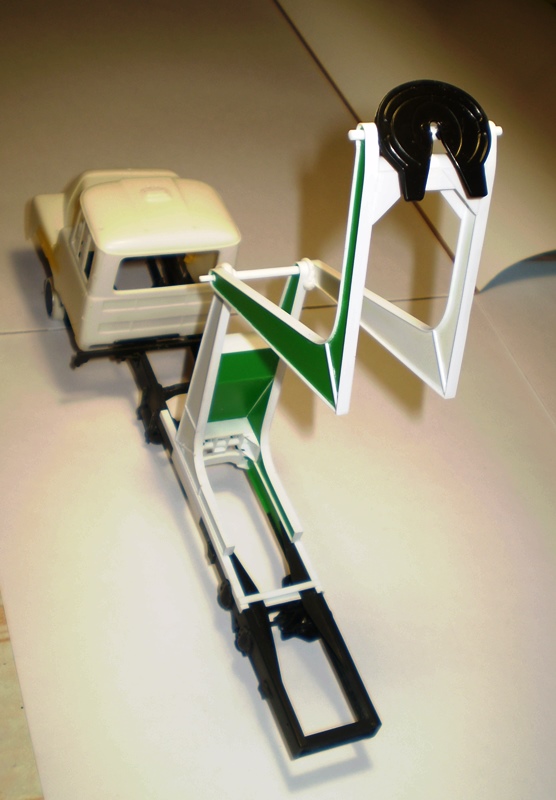
Thank you all for your interest. As I had no real dimension of the mechanism, I had to experiment with geometry a bit. The hardest part was the telescopic cylinders. Eyeballing is everything but a precise method and I must have done something not quite right. My 5-th wheel lifter doesn´t hoist as high as the real one does. But I think it´s okay for a model.
I said earlier that the tyres don´t fit the rims very well. I added a stripe of plastic around the rim and now the tyre sits on the rim much tighter.
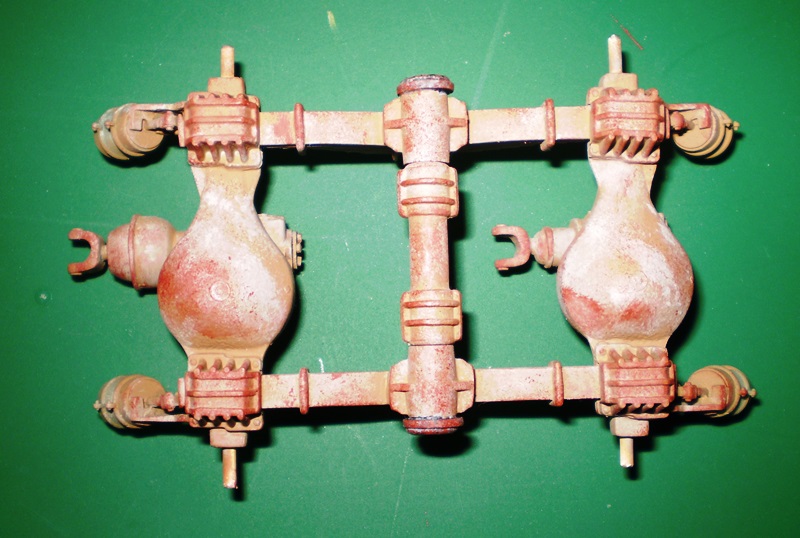
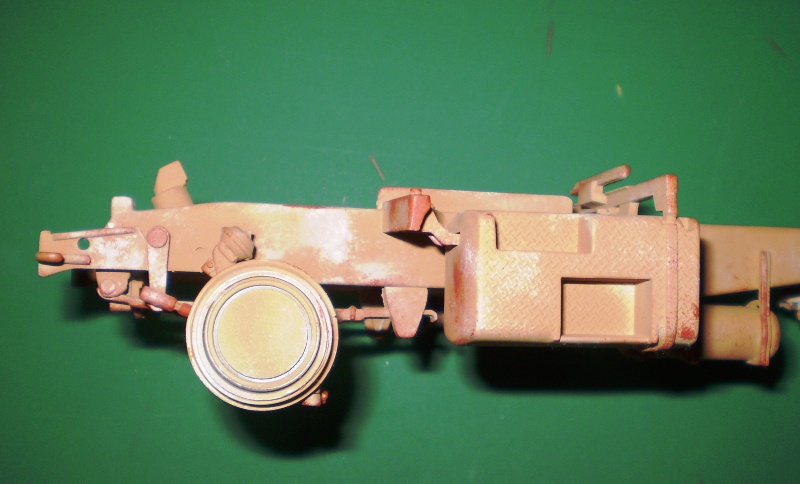
My plan is to make the model of a beaten up rig, sort of yard dog that had seen better days. This makes a great opportunity for me to try the hair spray method. I´ve never tried it on something this big. Here is the basic rust layer on the engine and frame.
As you can see I´ve added one more air tank, an air dryer and replaced the brake chambers. These come from a Peterbilt kit and are more detailed.
-
On 22.07.2018 at 6:03 PM, Mopar - D said:
What are you going to use for your trailer?
I wish I knew. Right now I cannot think of any suitable trailer produced by any mainstream kit manufacturer. I guess I will end up scratch building again. My idea is something like this:
-
19 hours ago, CRUSADER2 said:
I wonder what the benefits were, it looks like it wouldn't help towards the payload with all that extra fabrication, I suppose it was more stable when tipping?
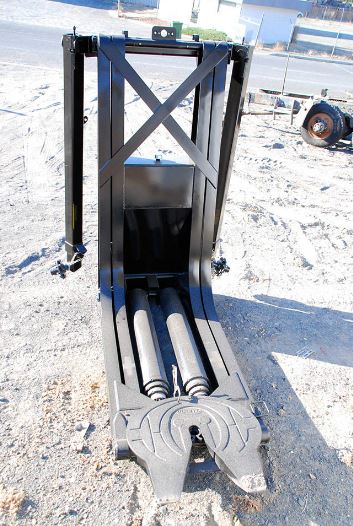
Here is some info on the system and its advantages compared to some others.
http://www.callahantipper.com/
-
This is absolutely gorgeous. Very realistic weathering, I think.
-
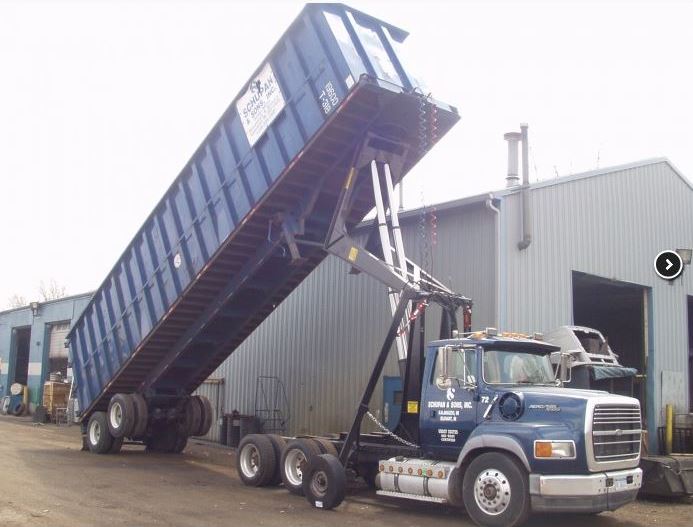
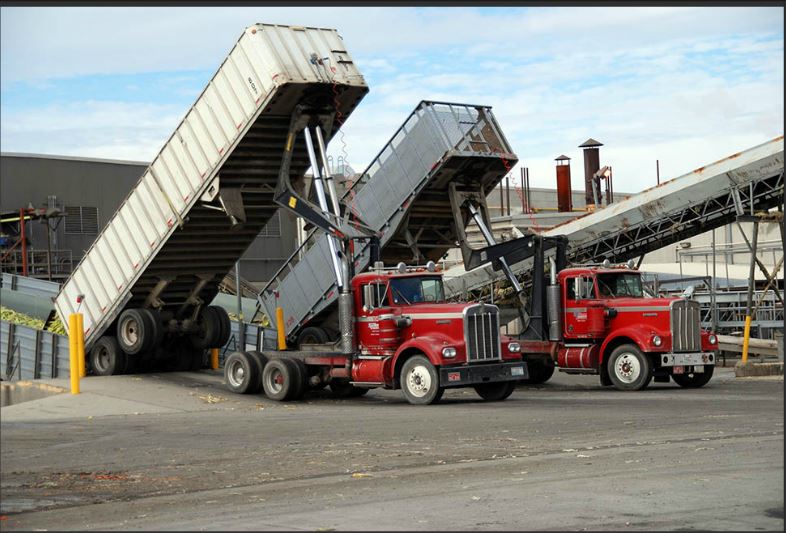
I thought I had introduced this model here already but I cannot find it. So, I probably never had.
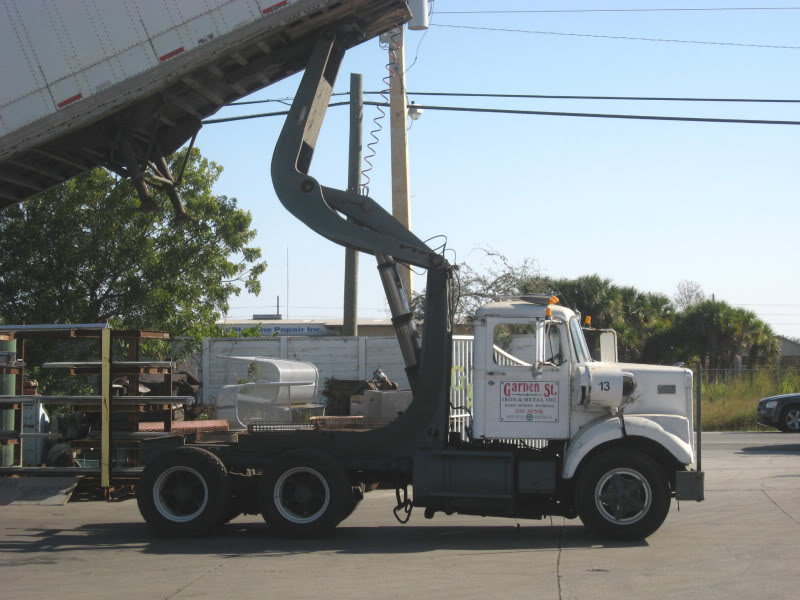
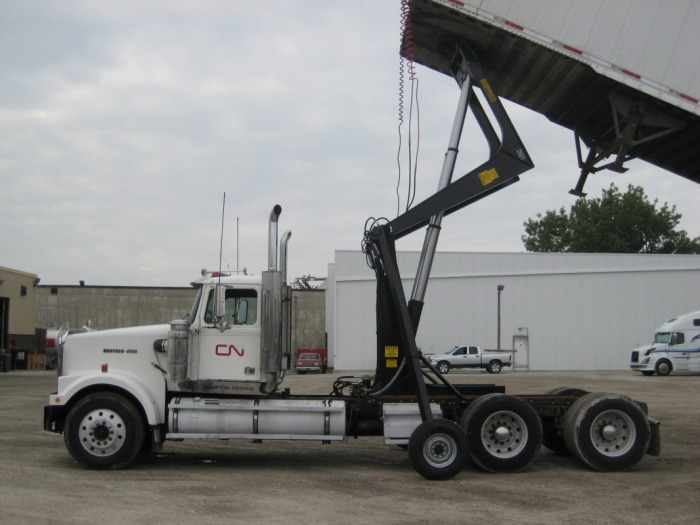
I first came across the fifth wheel dumper concept right here on this forum. I´ve never seen it before and I´ve never seen it on any European truck. I assume they are used only in the US.
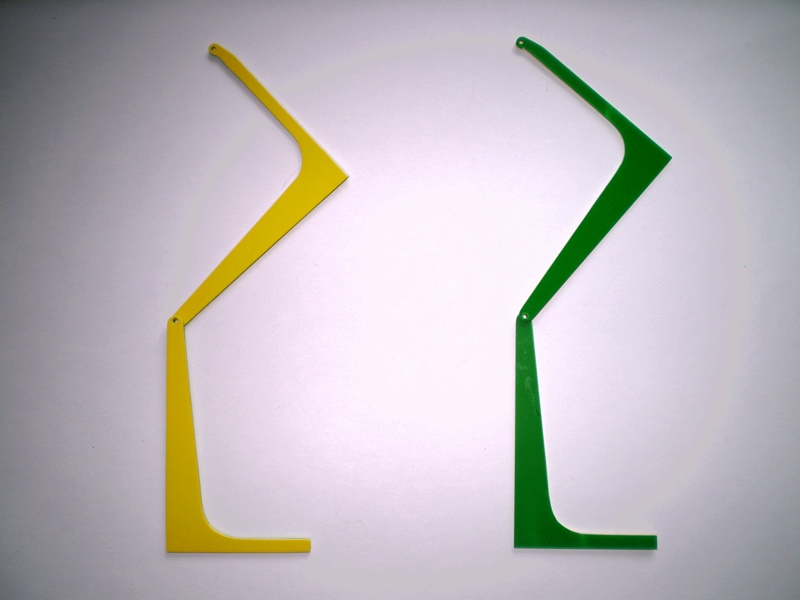
These are the two designes that I was able to find on the net.
Even though the one in the upper picture looks better to me, I decided to build the other one as it looks like a simpler thing to build.
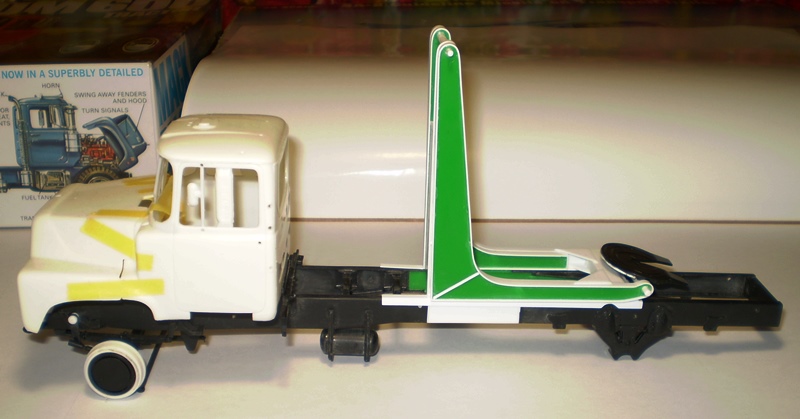
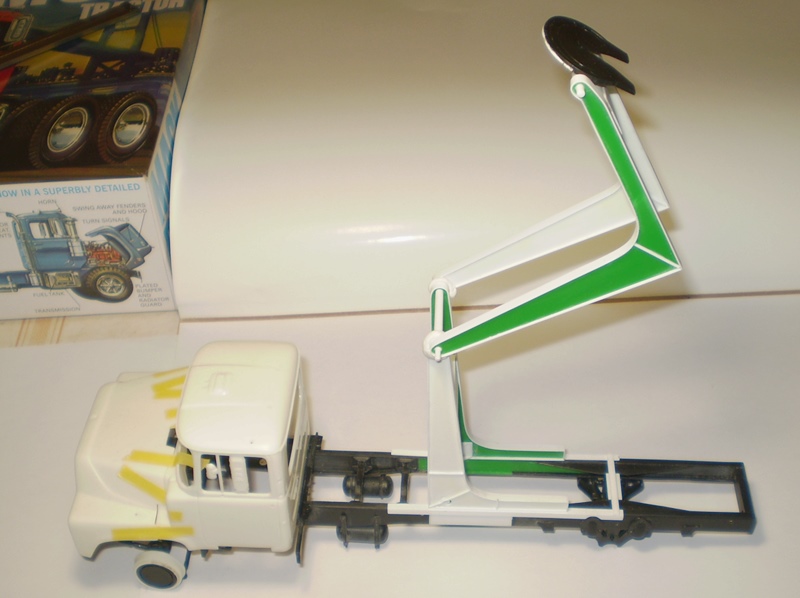
The truck that I chose as a platform for the 5-th wheel lifter is a reissued Mack DM600. The kit has some shortcomings that need to be addressed. Like the wrong position of the rear cab suppport, the rear wheels sticking out too much tyres, that don´t fit the rims very well, tabs that don´t match, etc.
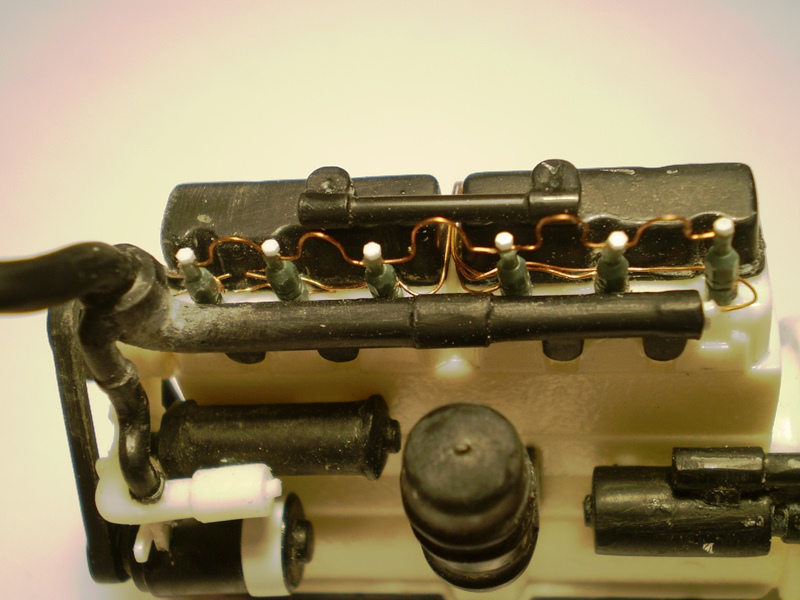
I started out with the engine as usual. I added the fuel pipes with injectors and the alternator holder.
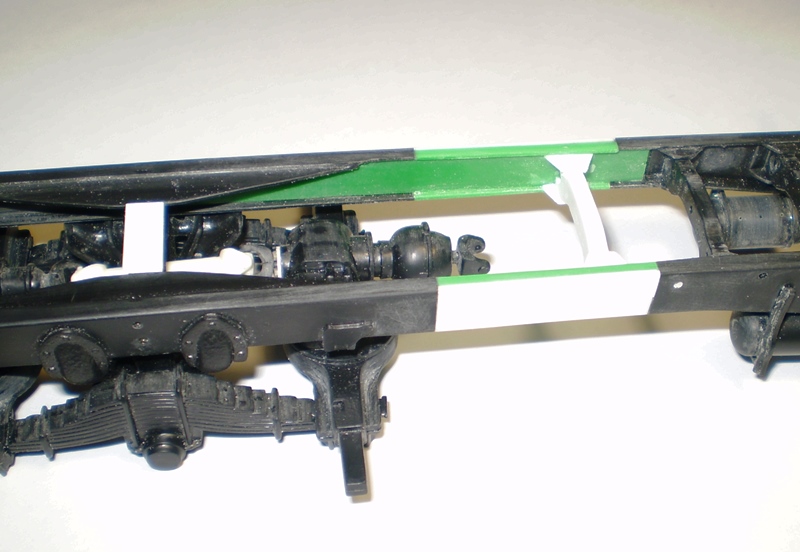
In order to accomodate the the 5-th wheel lifter I extended the chassis. A bit too long maybe but it doesn´t matter that much. With the longer frame a need for anther cross member arose. So, I scratch built one. It was easier than repositioning the existing cross member.
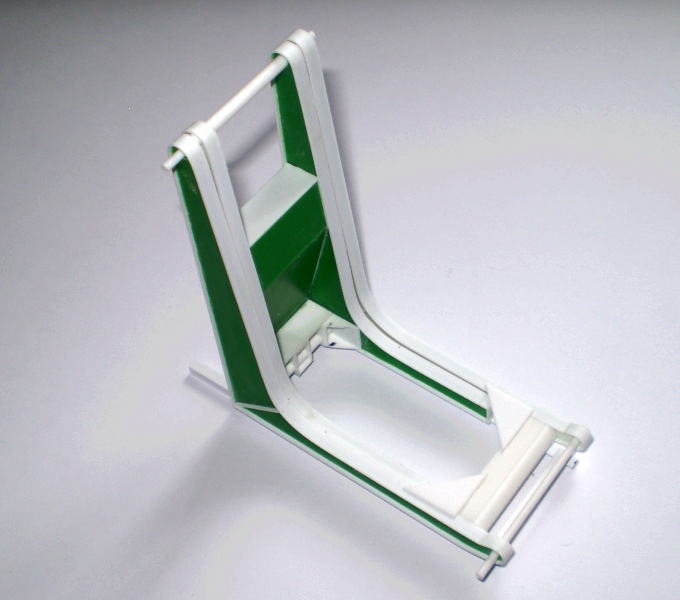
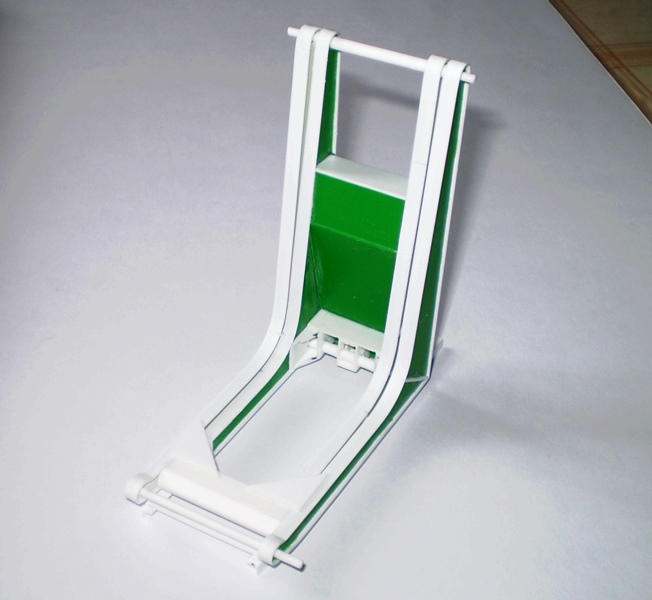
I cut out the 5-th wheel lifter main parts out of some plastic sheets and assembled them.
Here is the assembly and the cab resting on the frame.
I think that´s enough for the introduction. I will add more details next time.
-
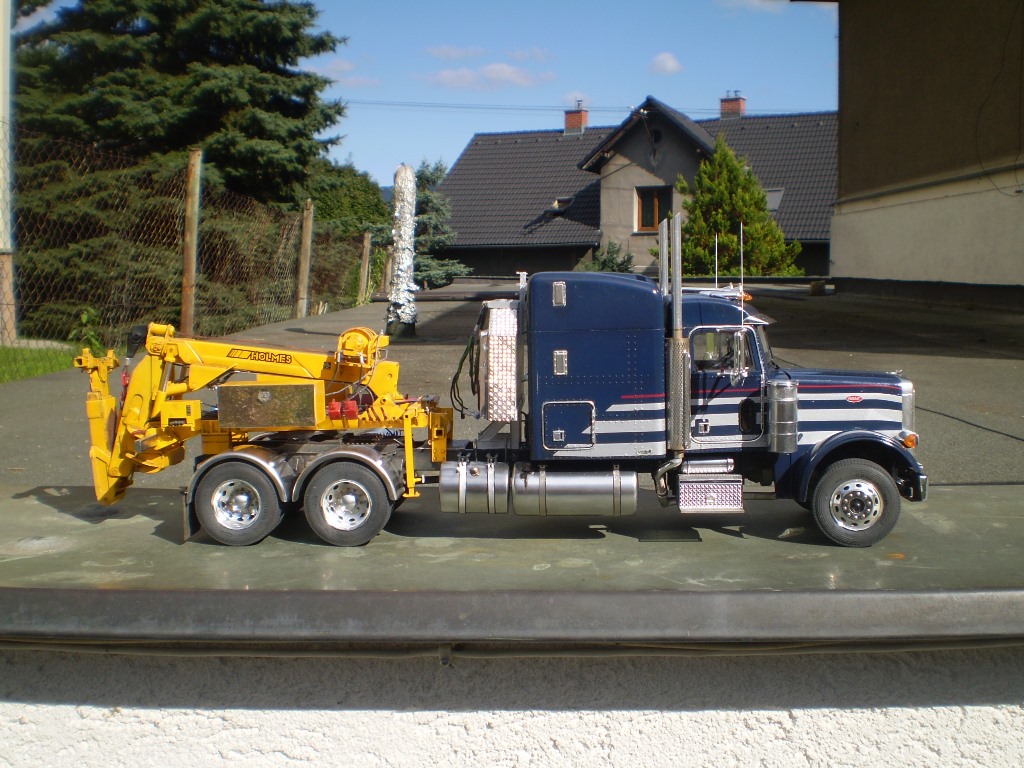
I don´t want to hijack the thread but I don´t want to keep anything as a secret either. This is the link to the original build thread:
And this is where I took some info from:
http://www.jige-international.com/recovery-vehicles,underlifts,bras-us,holmes-dtu,1,56,32.html
My D.T.U is not to scale, the dimensions are just eyeballed. When building the model I have been watching a lot of internet pictures.
-
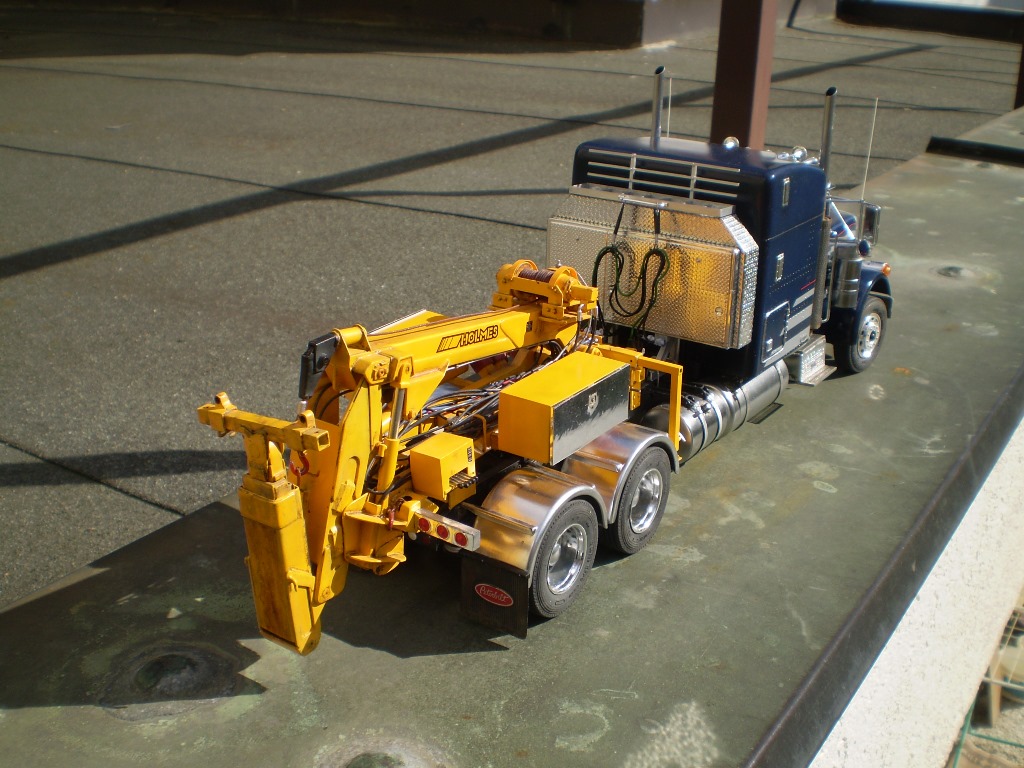
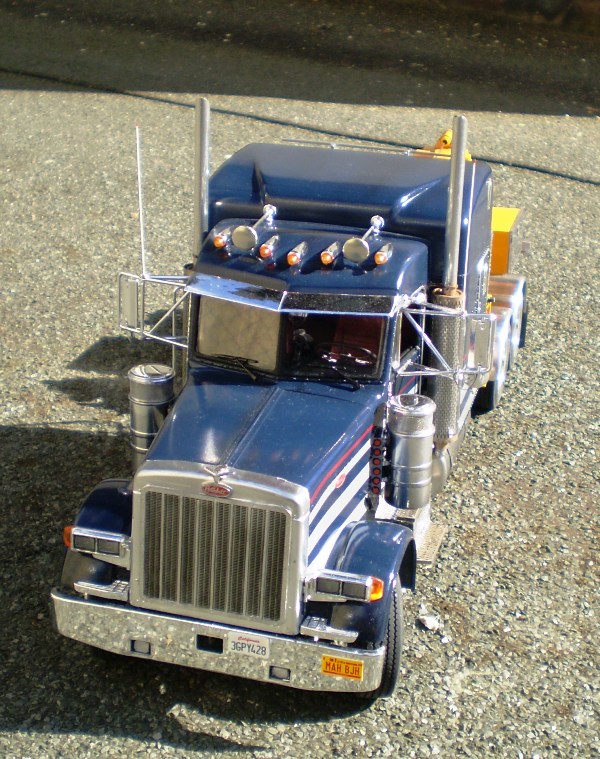
Peterbilt 378 of Italeri, scale 1/24, converted to a 379 according to the Tim Ahlborn recipe, plus resin high roof. Scratch built headache rack, rear fenders and the D.T.U. (detachable towing unit).
-
Nice build. The weathering is spot on. Was it made by using a hair spray method?
-
Very nice!
-
Awesome scratch building skills. And a nice project too. This is worth watching!!!
-
Nice rig. I like the grill.
-
Cool as always. Only the yellow straps are too clean. Maybe the driver´s got a new set. Other than that, perfect.
-
This sure looks nice!


Two D8H .
in Model Trucks: Big Rigs and Heavy Equipment
Posted
Nice pair of earthmovers. Only a subtle weathering, no heap of mud with something yellow underneath it. Cool!