lou s
-
Posts
197 -
Joined
-
Last visited
Content Type
Profiles
Forums
Events
Gallery
Everything posted by lou s
-
I give up.cant contact through shapeways.Won't let me in his Facebook group eather.
-
I got my parts through shapeways.how do yo get direct?
-
Just got drag parts from R.O. 3Dspecialties.they look great.has anyone used these parts and if so what do you use to clean them before you primer.they are small parts and I'm afraid if there is residue on them I'll have a mess on my hands.olso does anyone know how to contact Ron Olson.i have a question or two.On his shape ways page there is a contact but for some reason it will not allow me.thanks for your time
-
70.5 Pro Mod Camaro...updated 11/09/18
lou s replied to 1320wayne's topic in WIP: Drag Racing Models
Great looking color.it looks like a it needs clear coated.is that a phantom paint scheme? -
70.5 Pro Mod Camaro...updated 11/09/18
lou s replied to 1320wayne's topic in WIP: Drag Racing Models
Big Irish fan great job.chassis looks perfect. Love the color green looks good on anything.what company and color green is that? -
Update

-
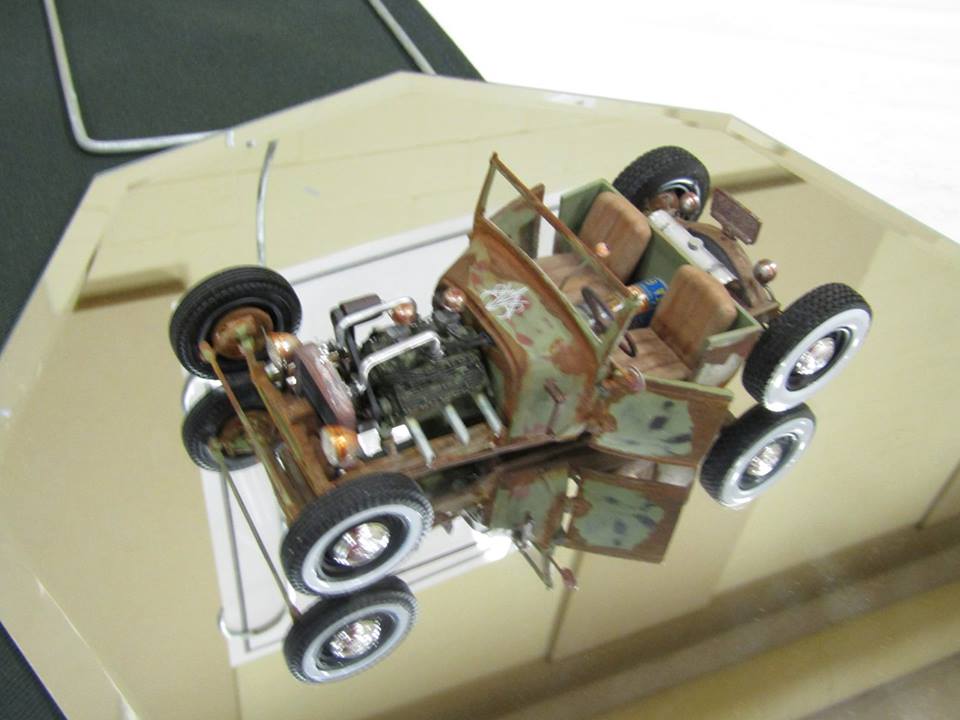
It's been awhile but I'm gaining some ground on this build.
-
Finished 34 ford pickup rat rod
lou s replied to lou s's topic in Model Trucks: Pickups, Vans, SUVs, Light Commercial
Just alot of lic plate decals.
-
34 rat rod pickup
lou s replied to lou s's topic in WIP: Model Trucks: Pickups, Vans, SUVs, Light Commercial
Thanks for the ideas for header. The wire wheels are from an amt kit sorry I can't remember which kit but I re strung them with guitar string -
34 rat rod pickup
lou s replied to lou s's topic in WIP: Model Trucks: Pickups, Vans, SUVs, Light Commercial
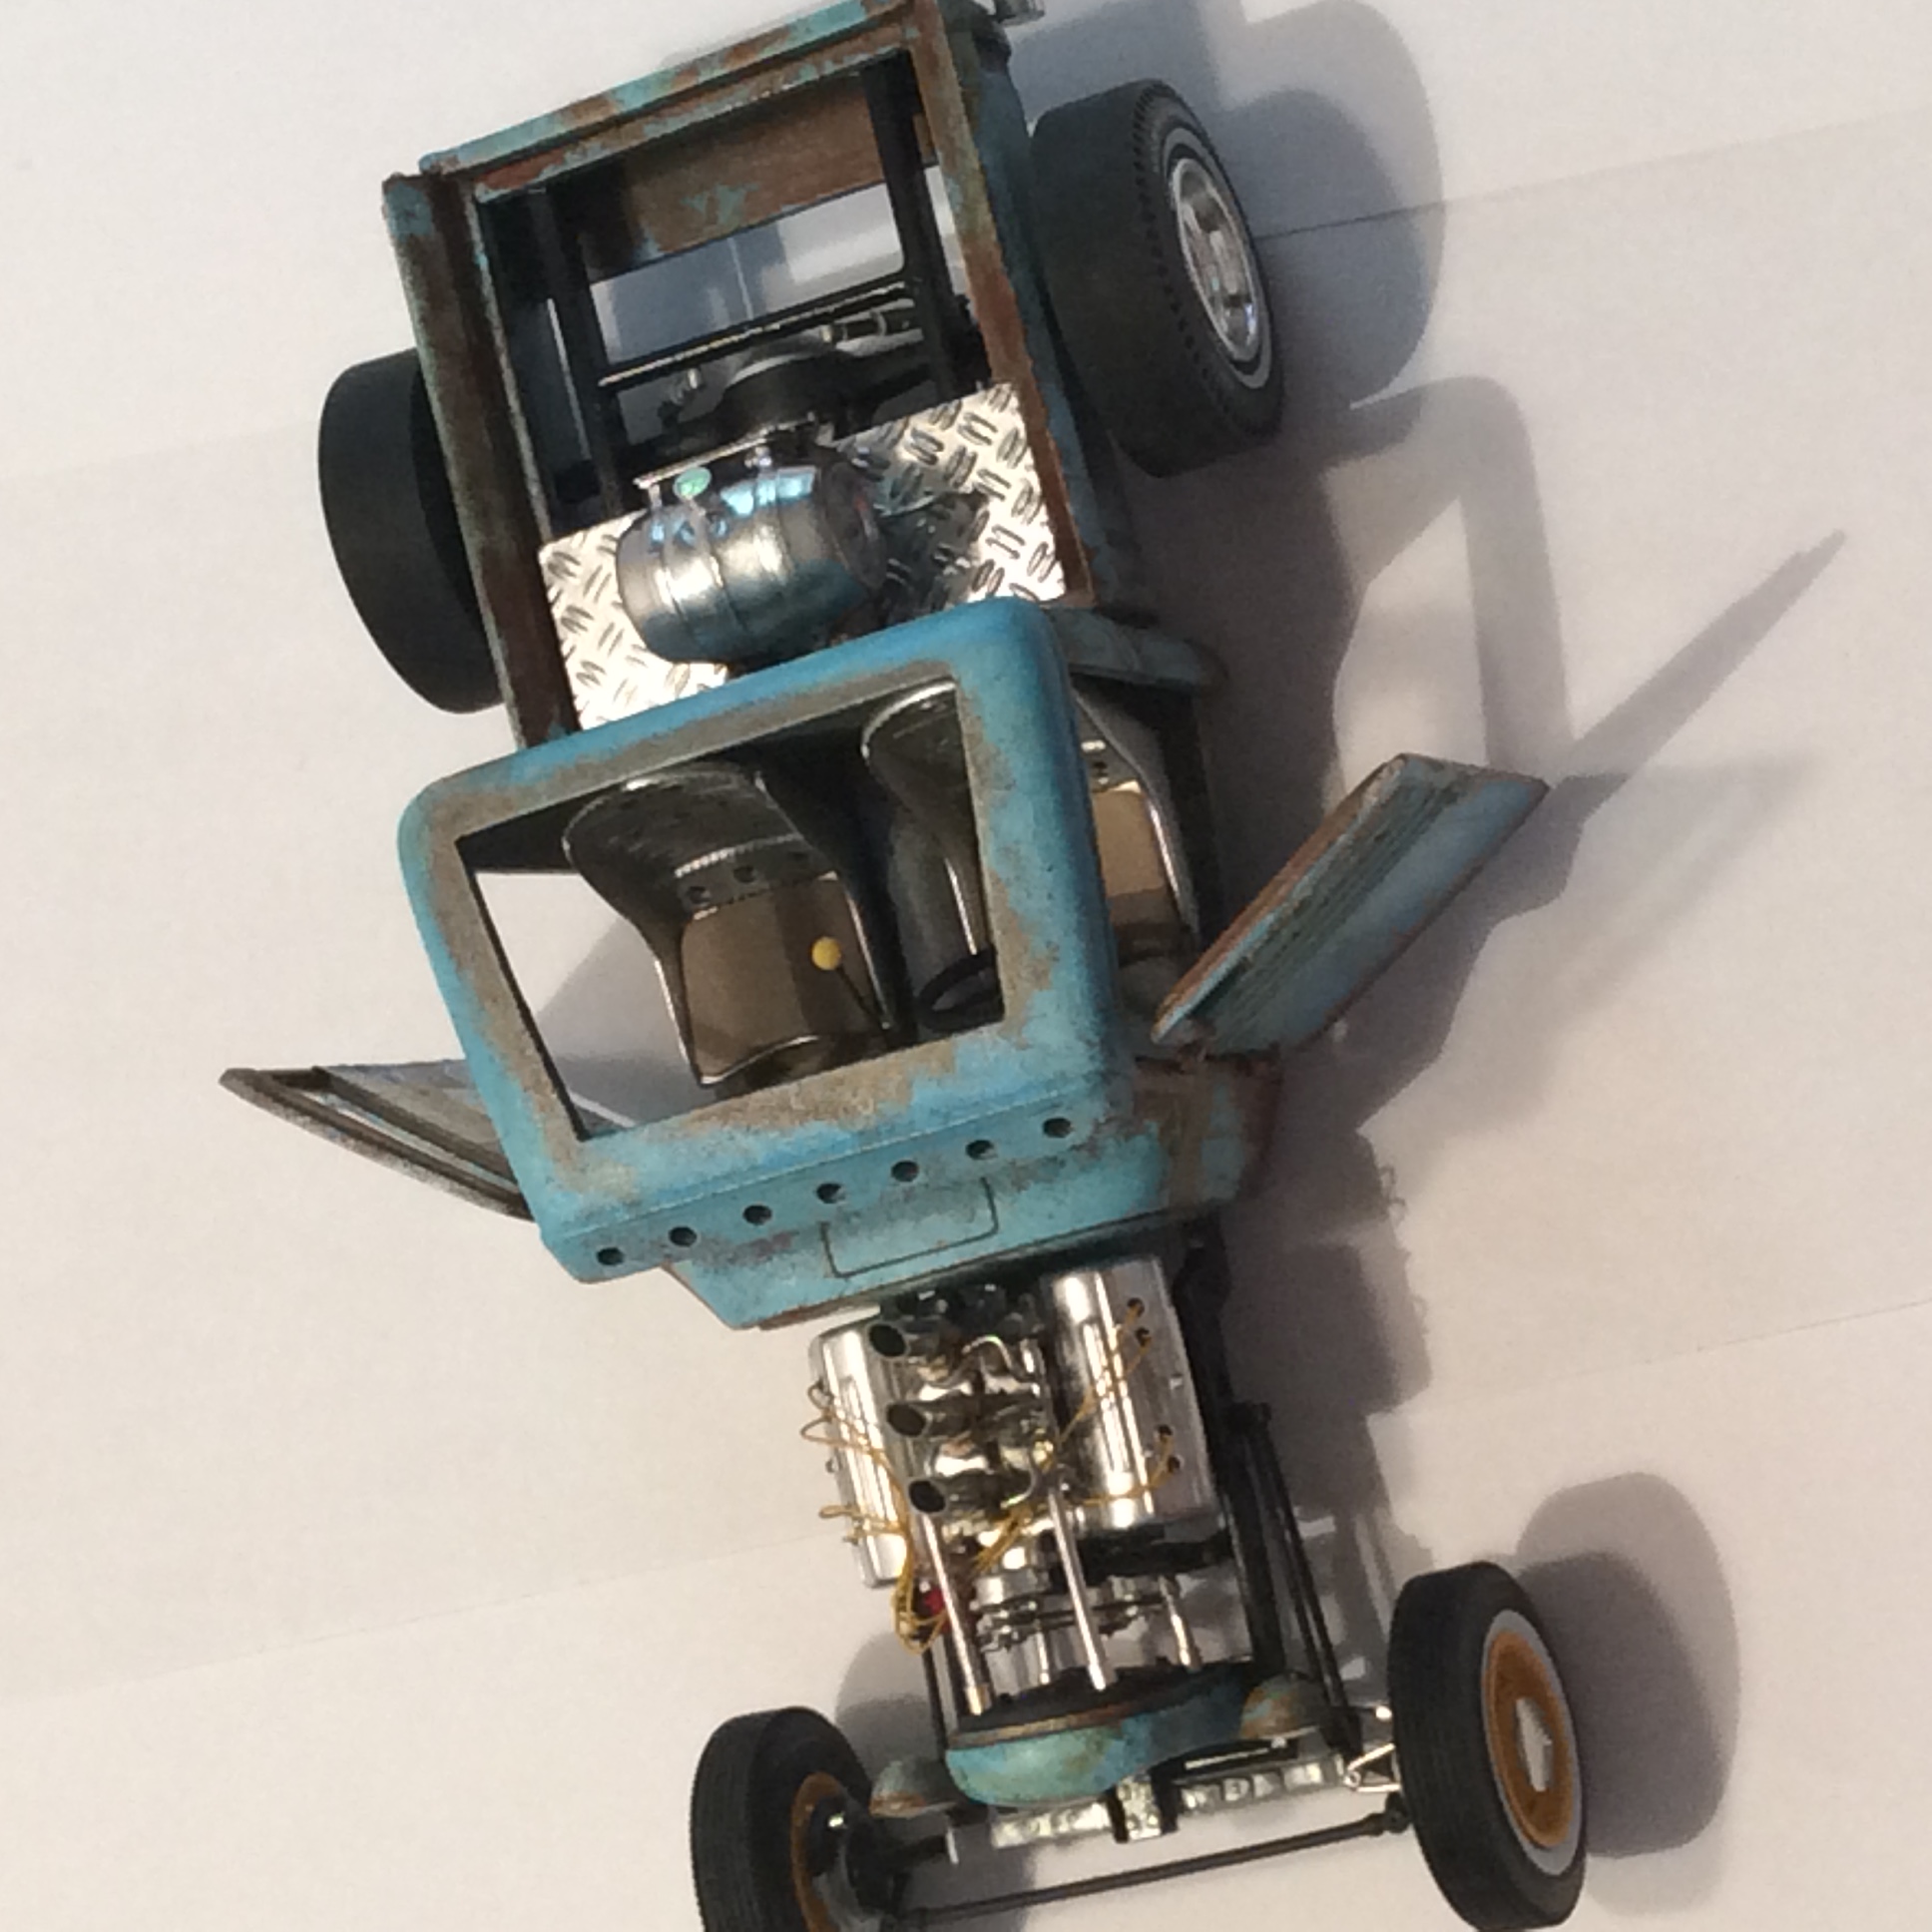
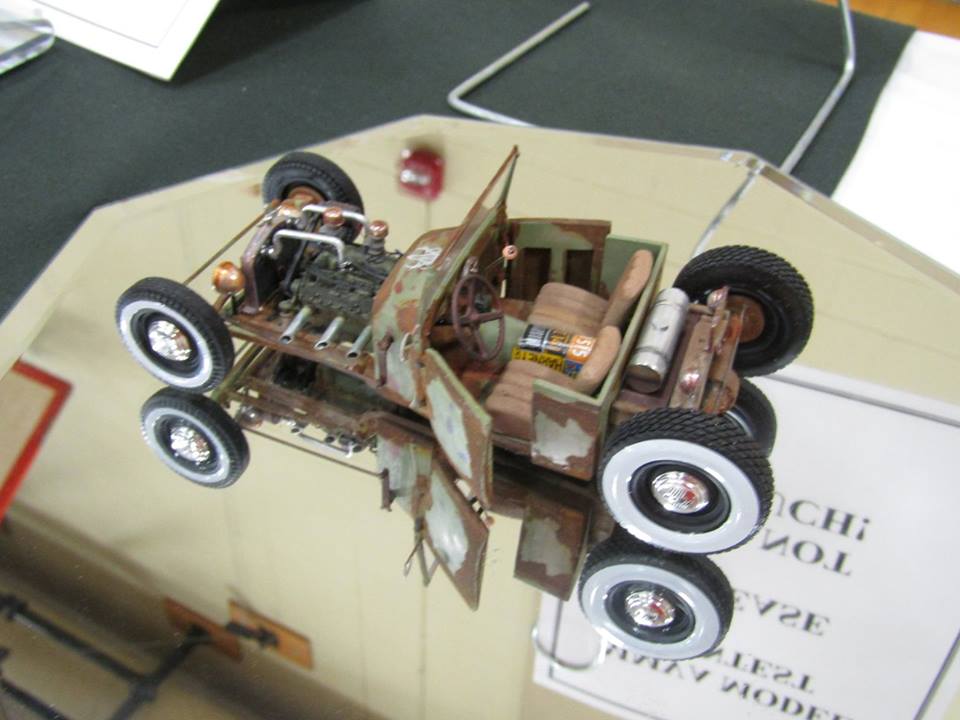
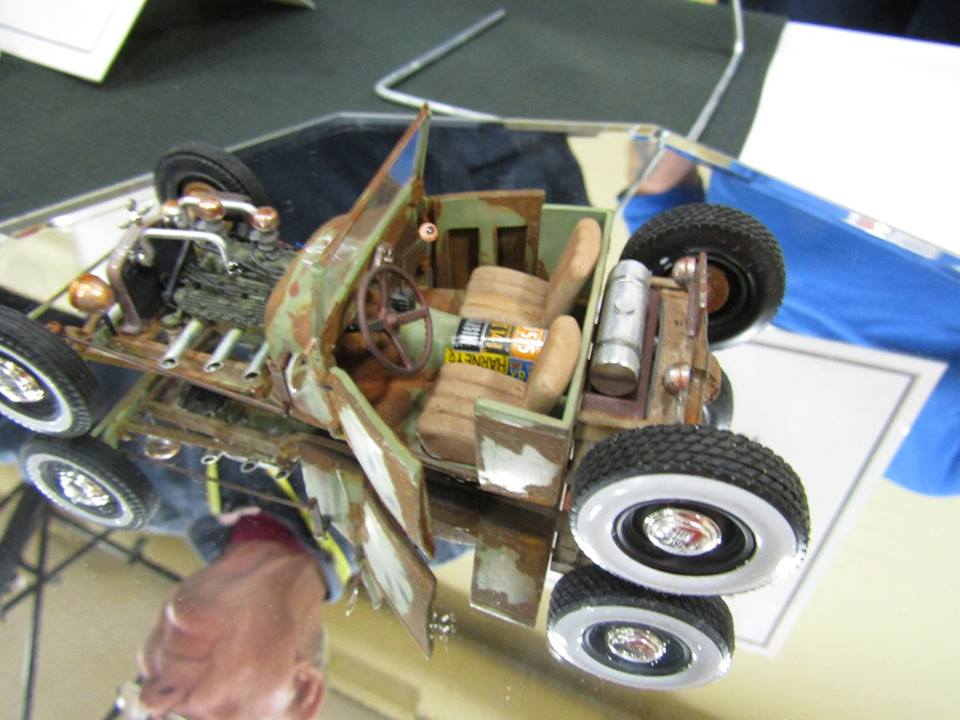
Getting close to finishing this one. I think I got the stance I was looking for, Low and meen. I'm needing input on headers. If I sling them back it will hit doors any ideas?
-
Looks great
-
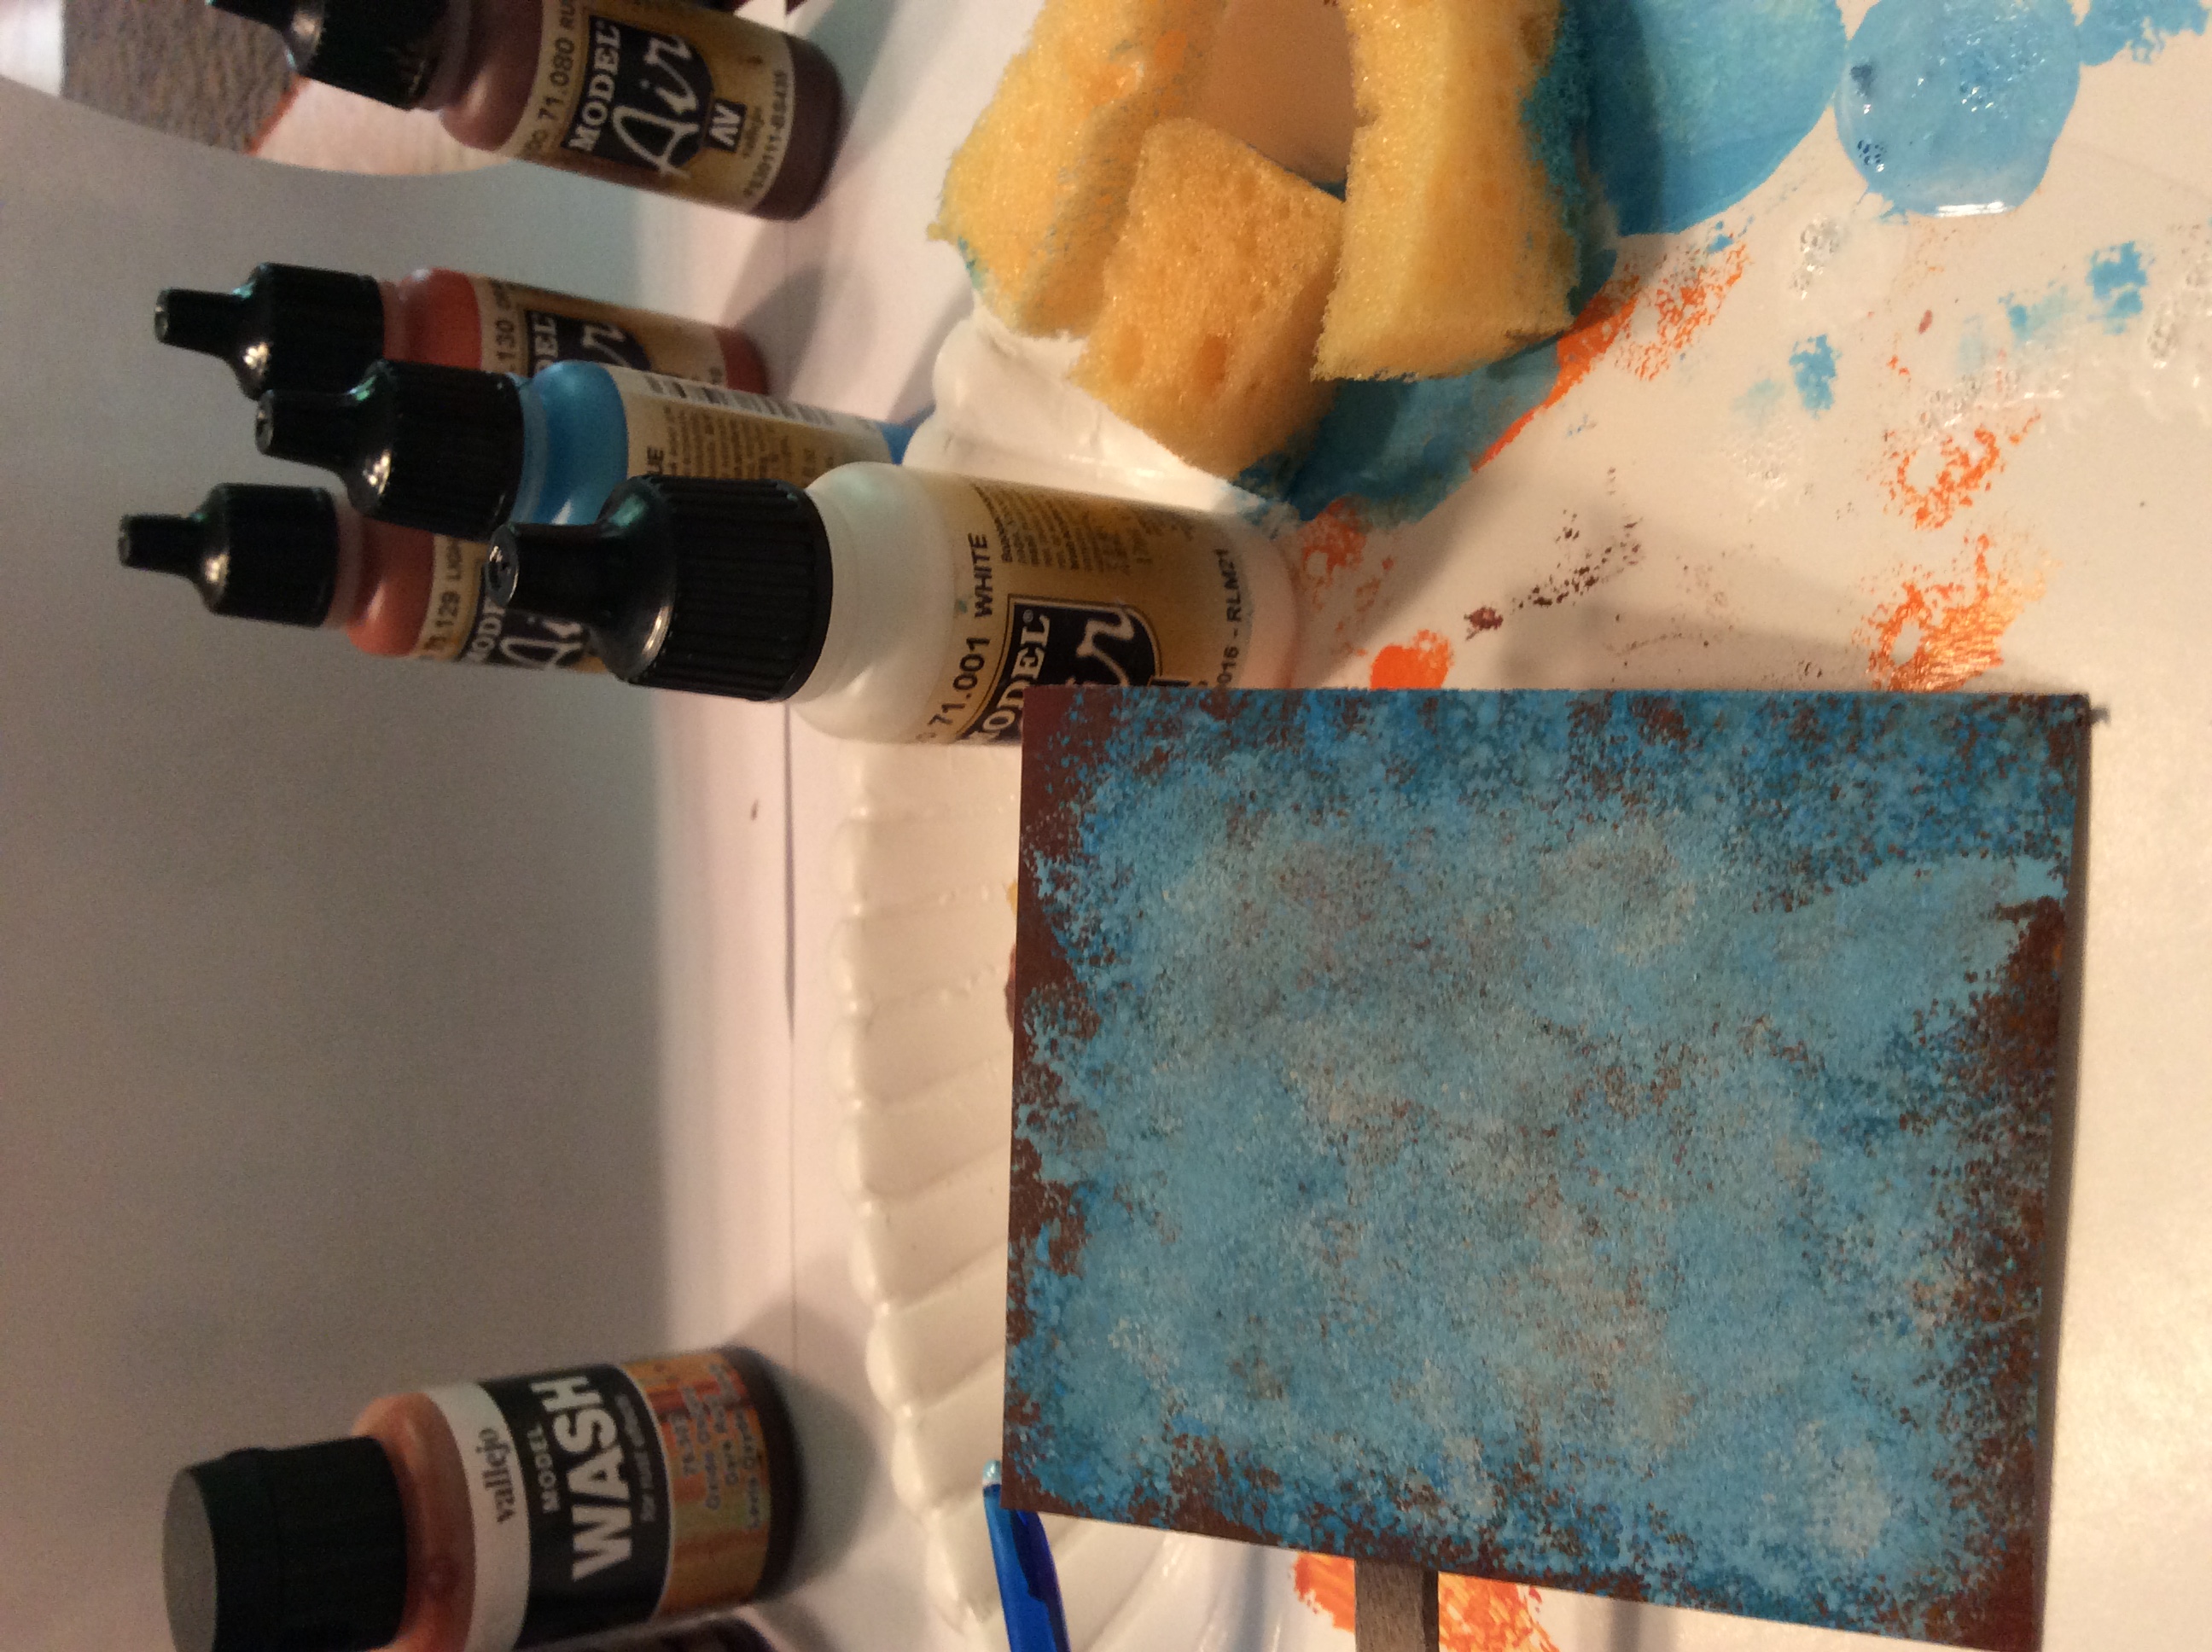
I used different shades of blue to try and duplicate fading and weathering of the oringinal blue paint job. If you wanted to use on another base color like yellow I think you would use the same proses .start with the yellow and then lighten it up or dilute the yellow as you go to replicate a sun/ weather beaten paint job.
-
34 rat rod pickup
lou s replied to lou s's topic in WIP: Model Trucks: Pickups, Vans, SUVs, Light Commercial
Thank you! glad to share it. The bomber seats are from the new revell 29 and 30 model a kits. -
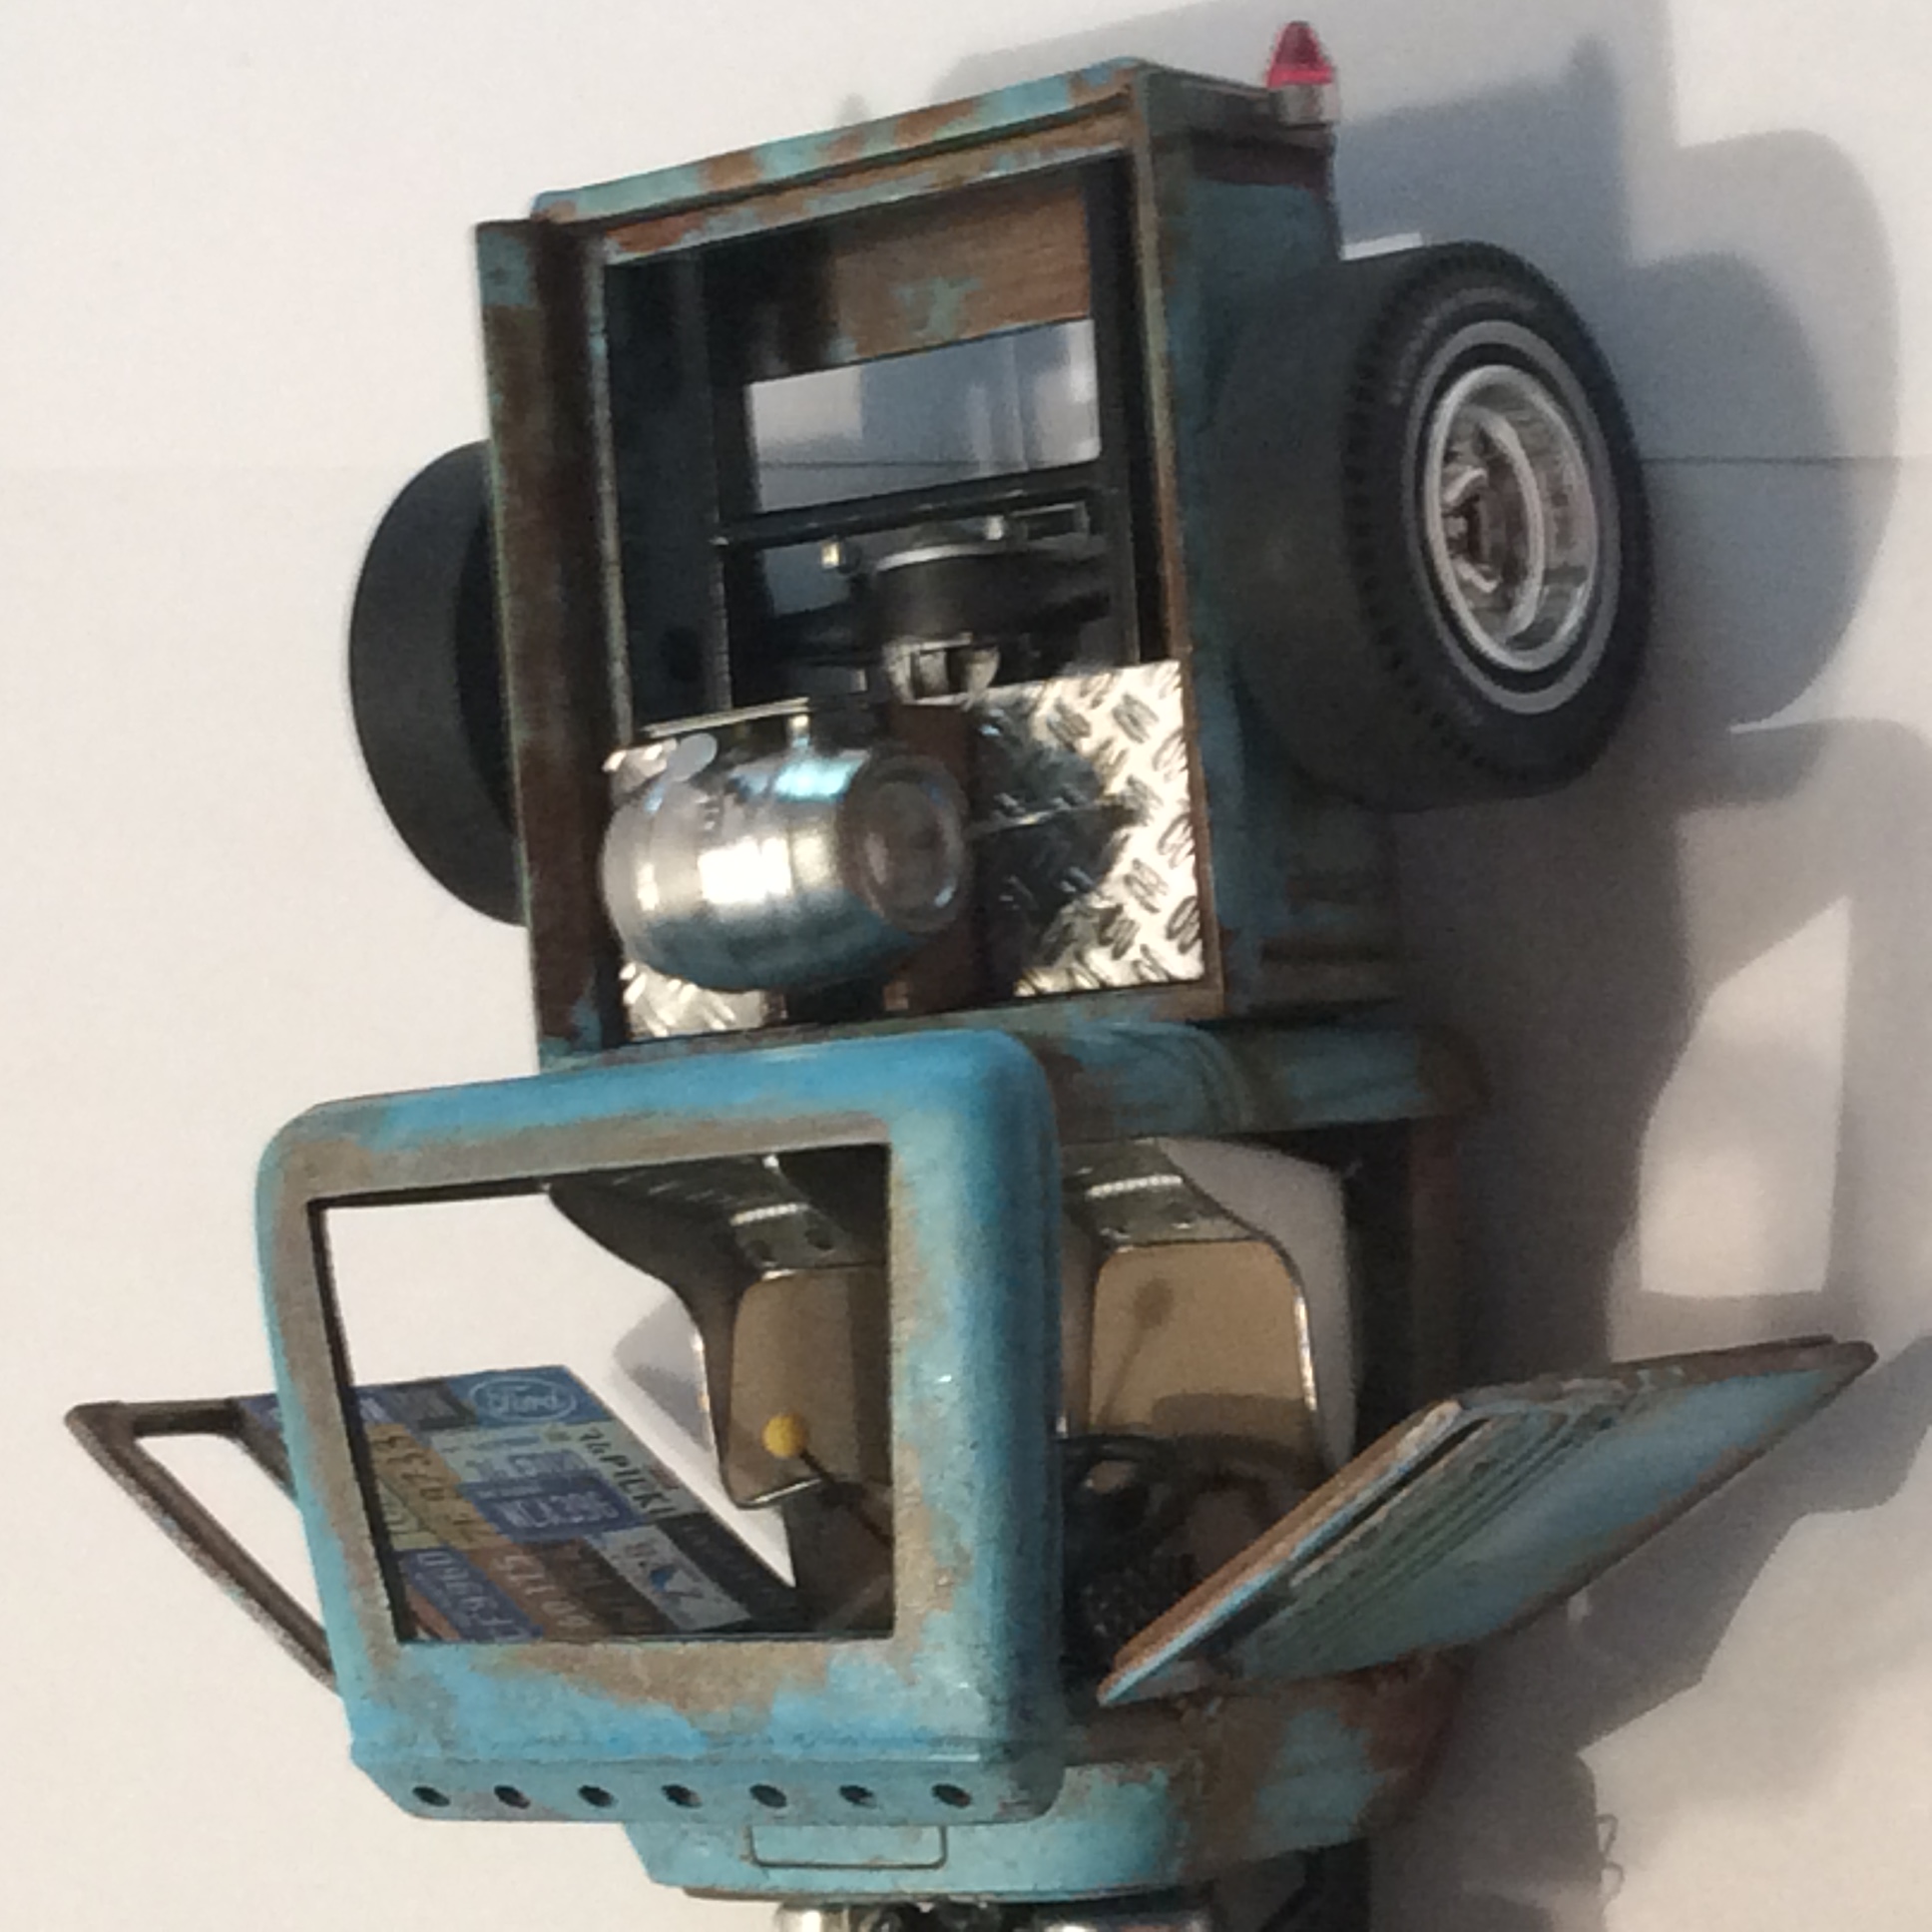
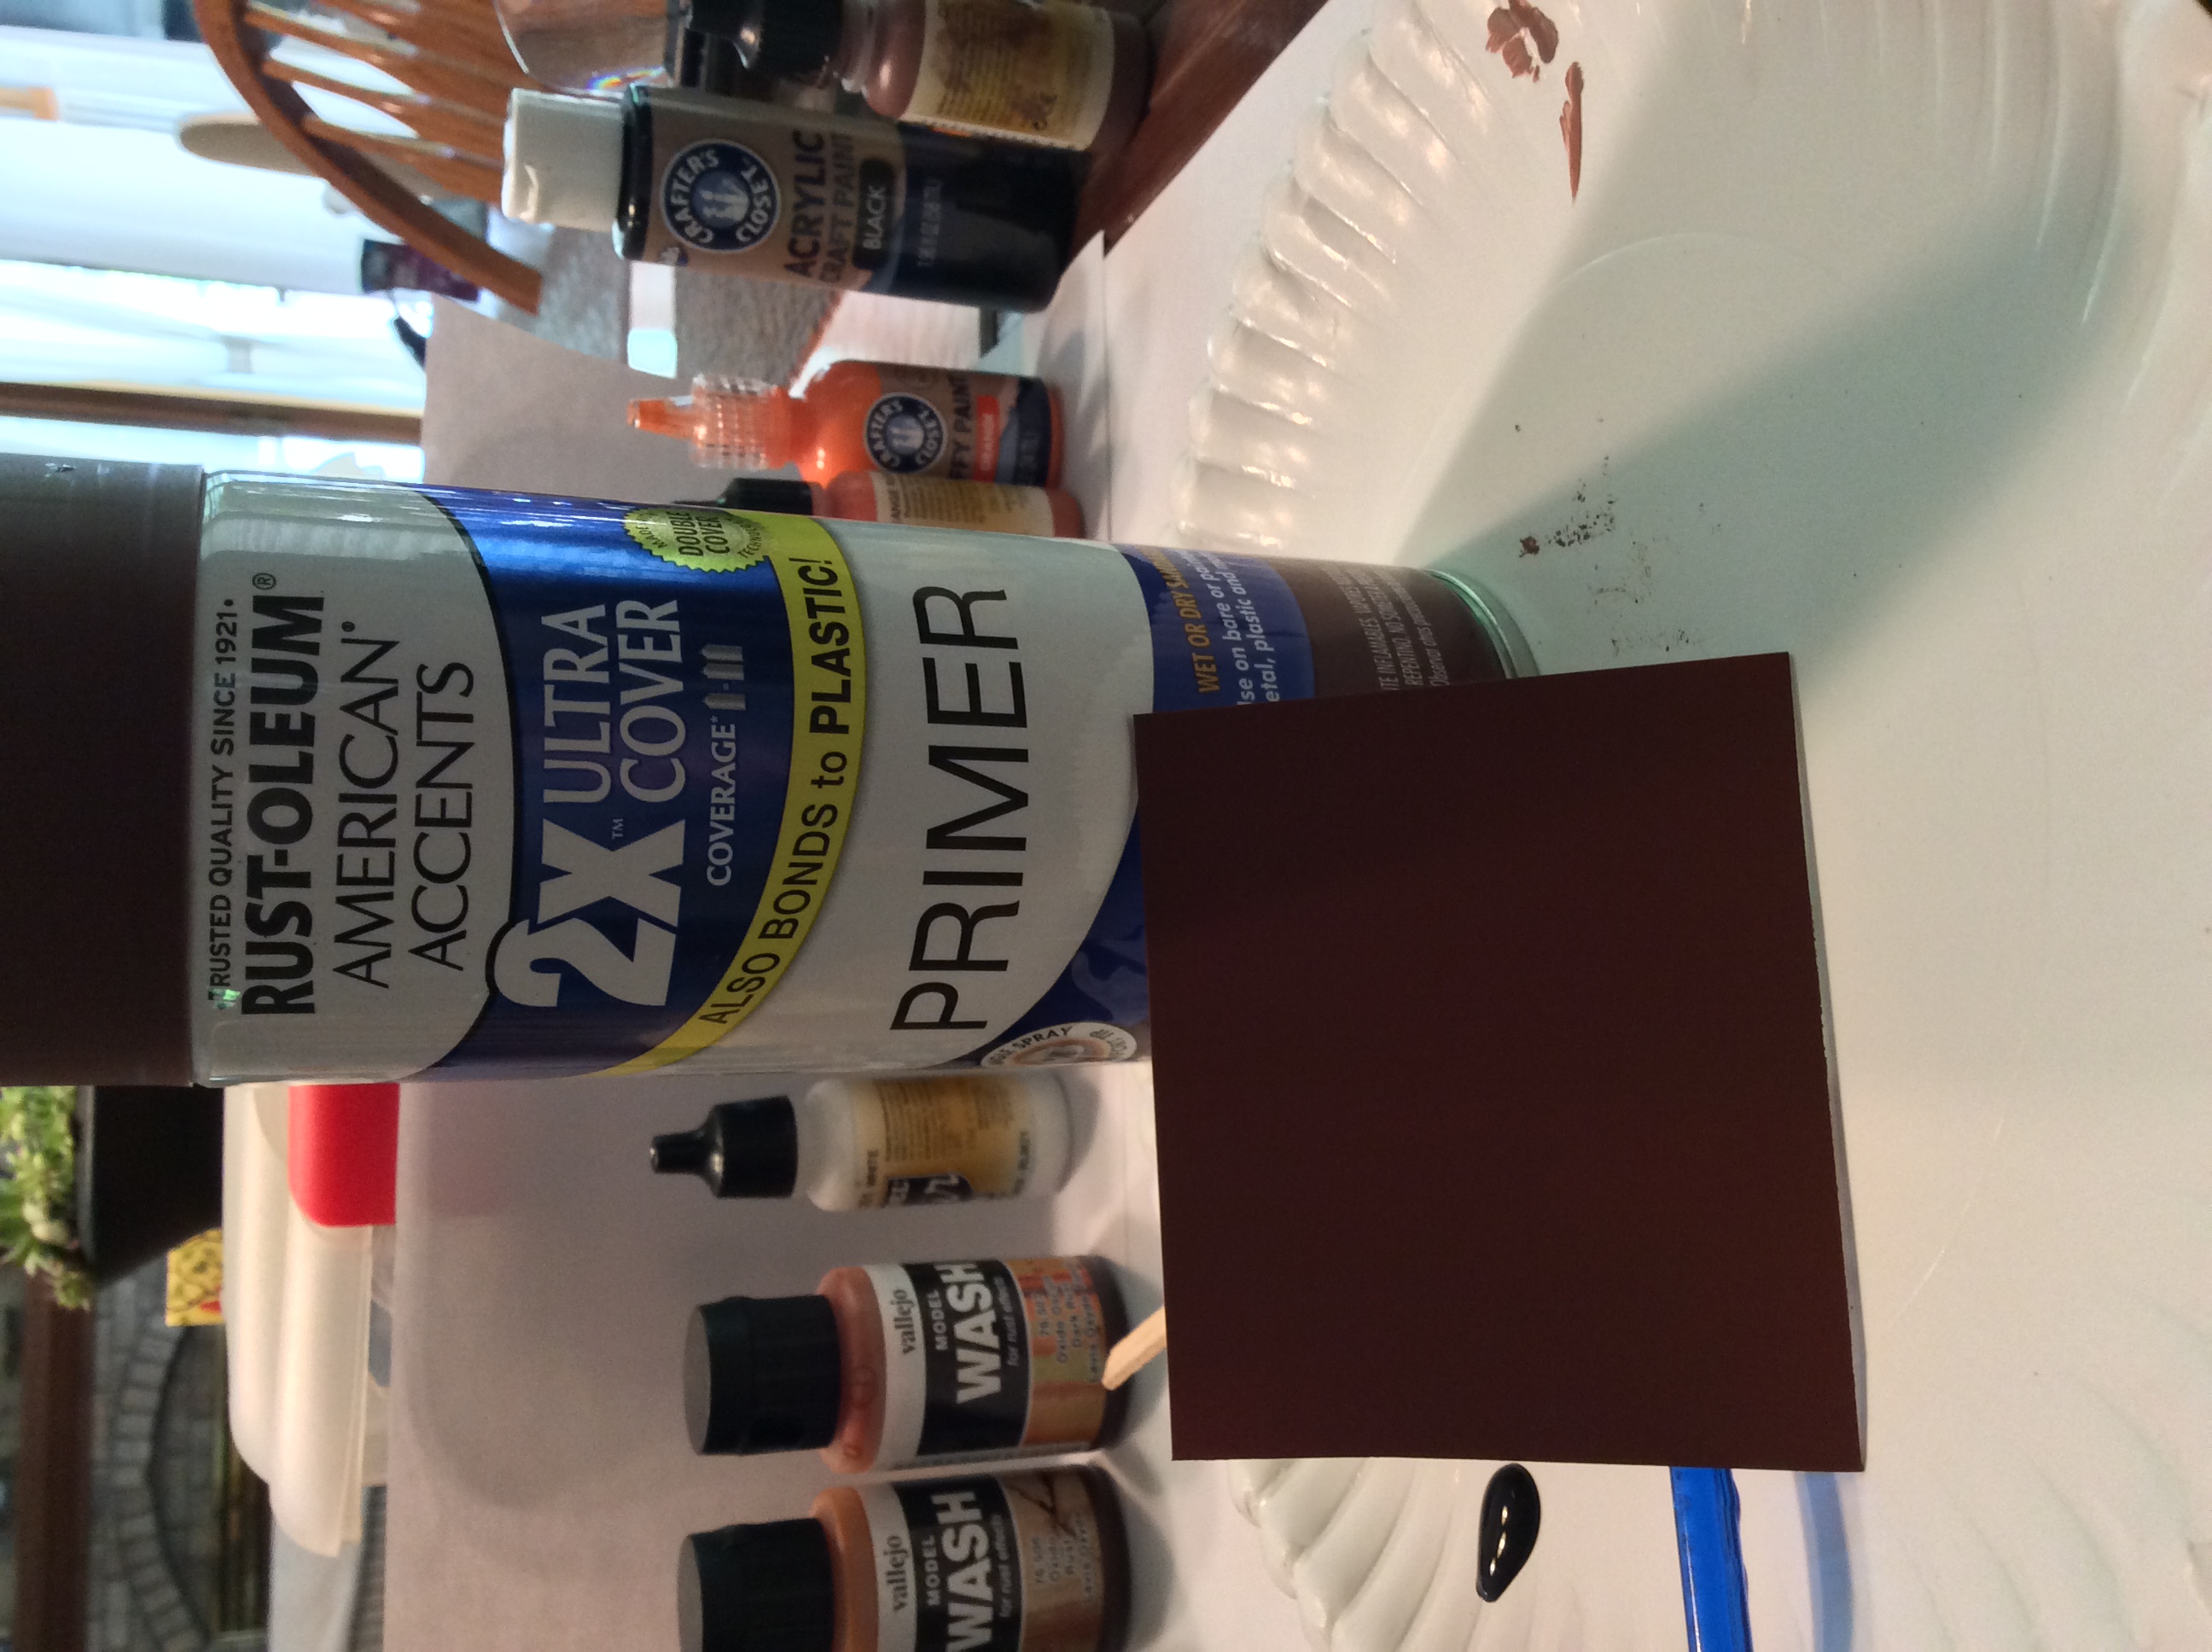
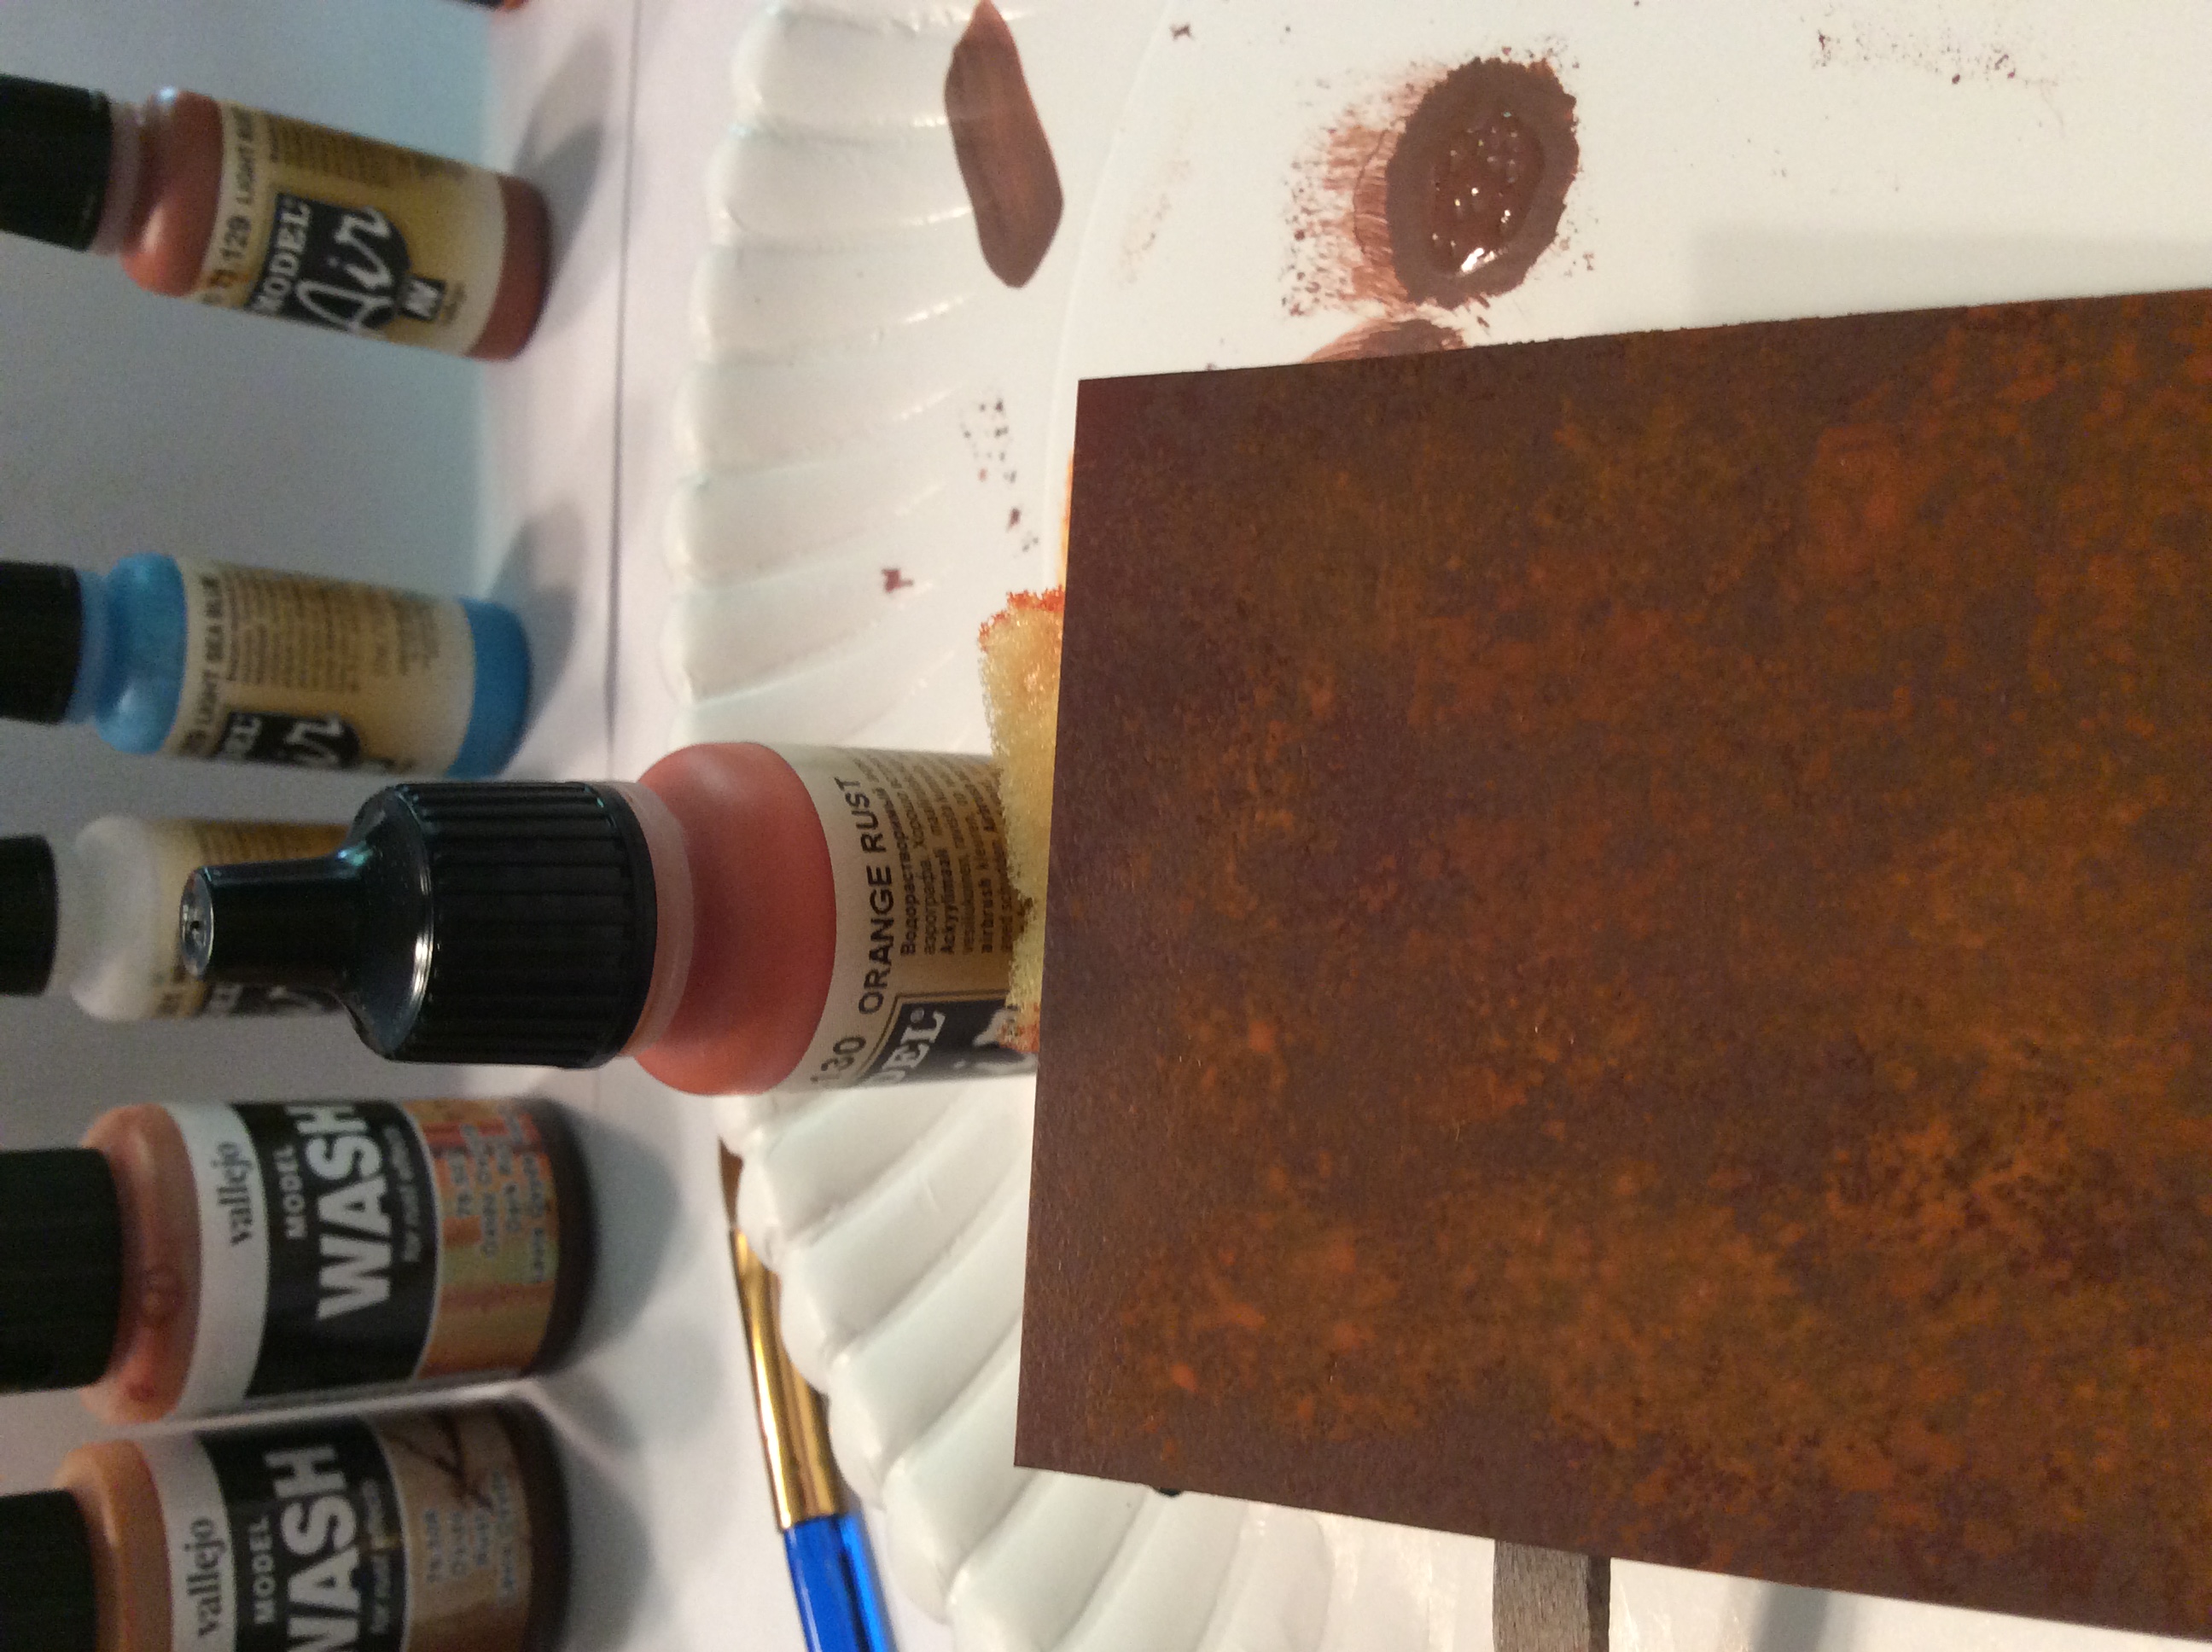
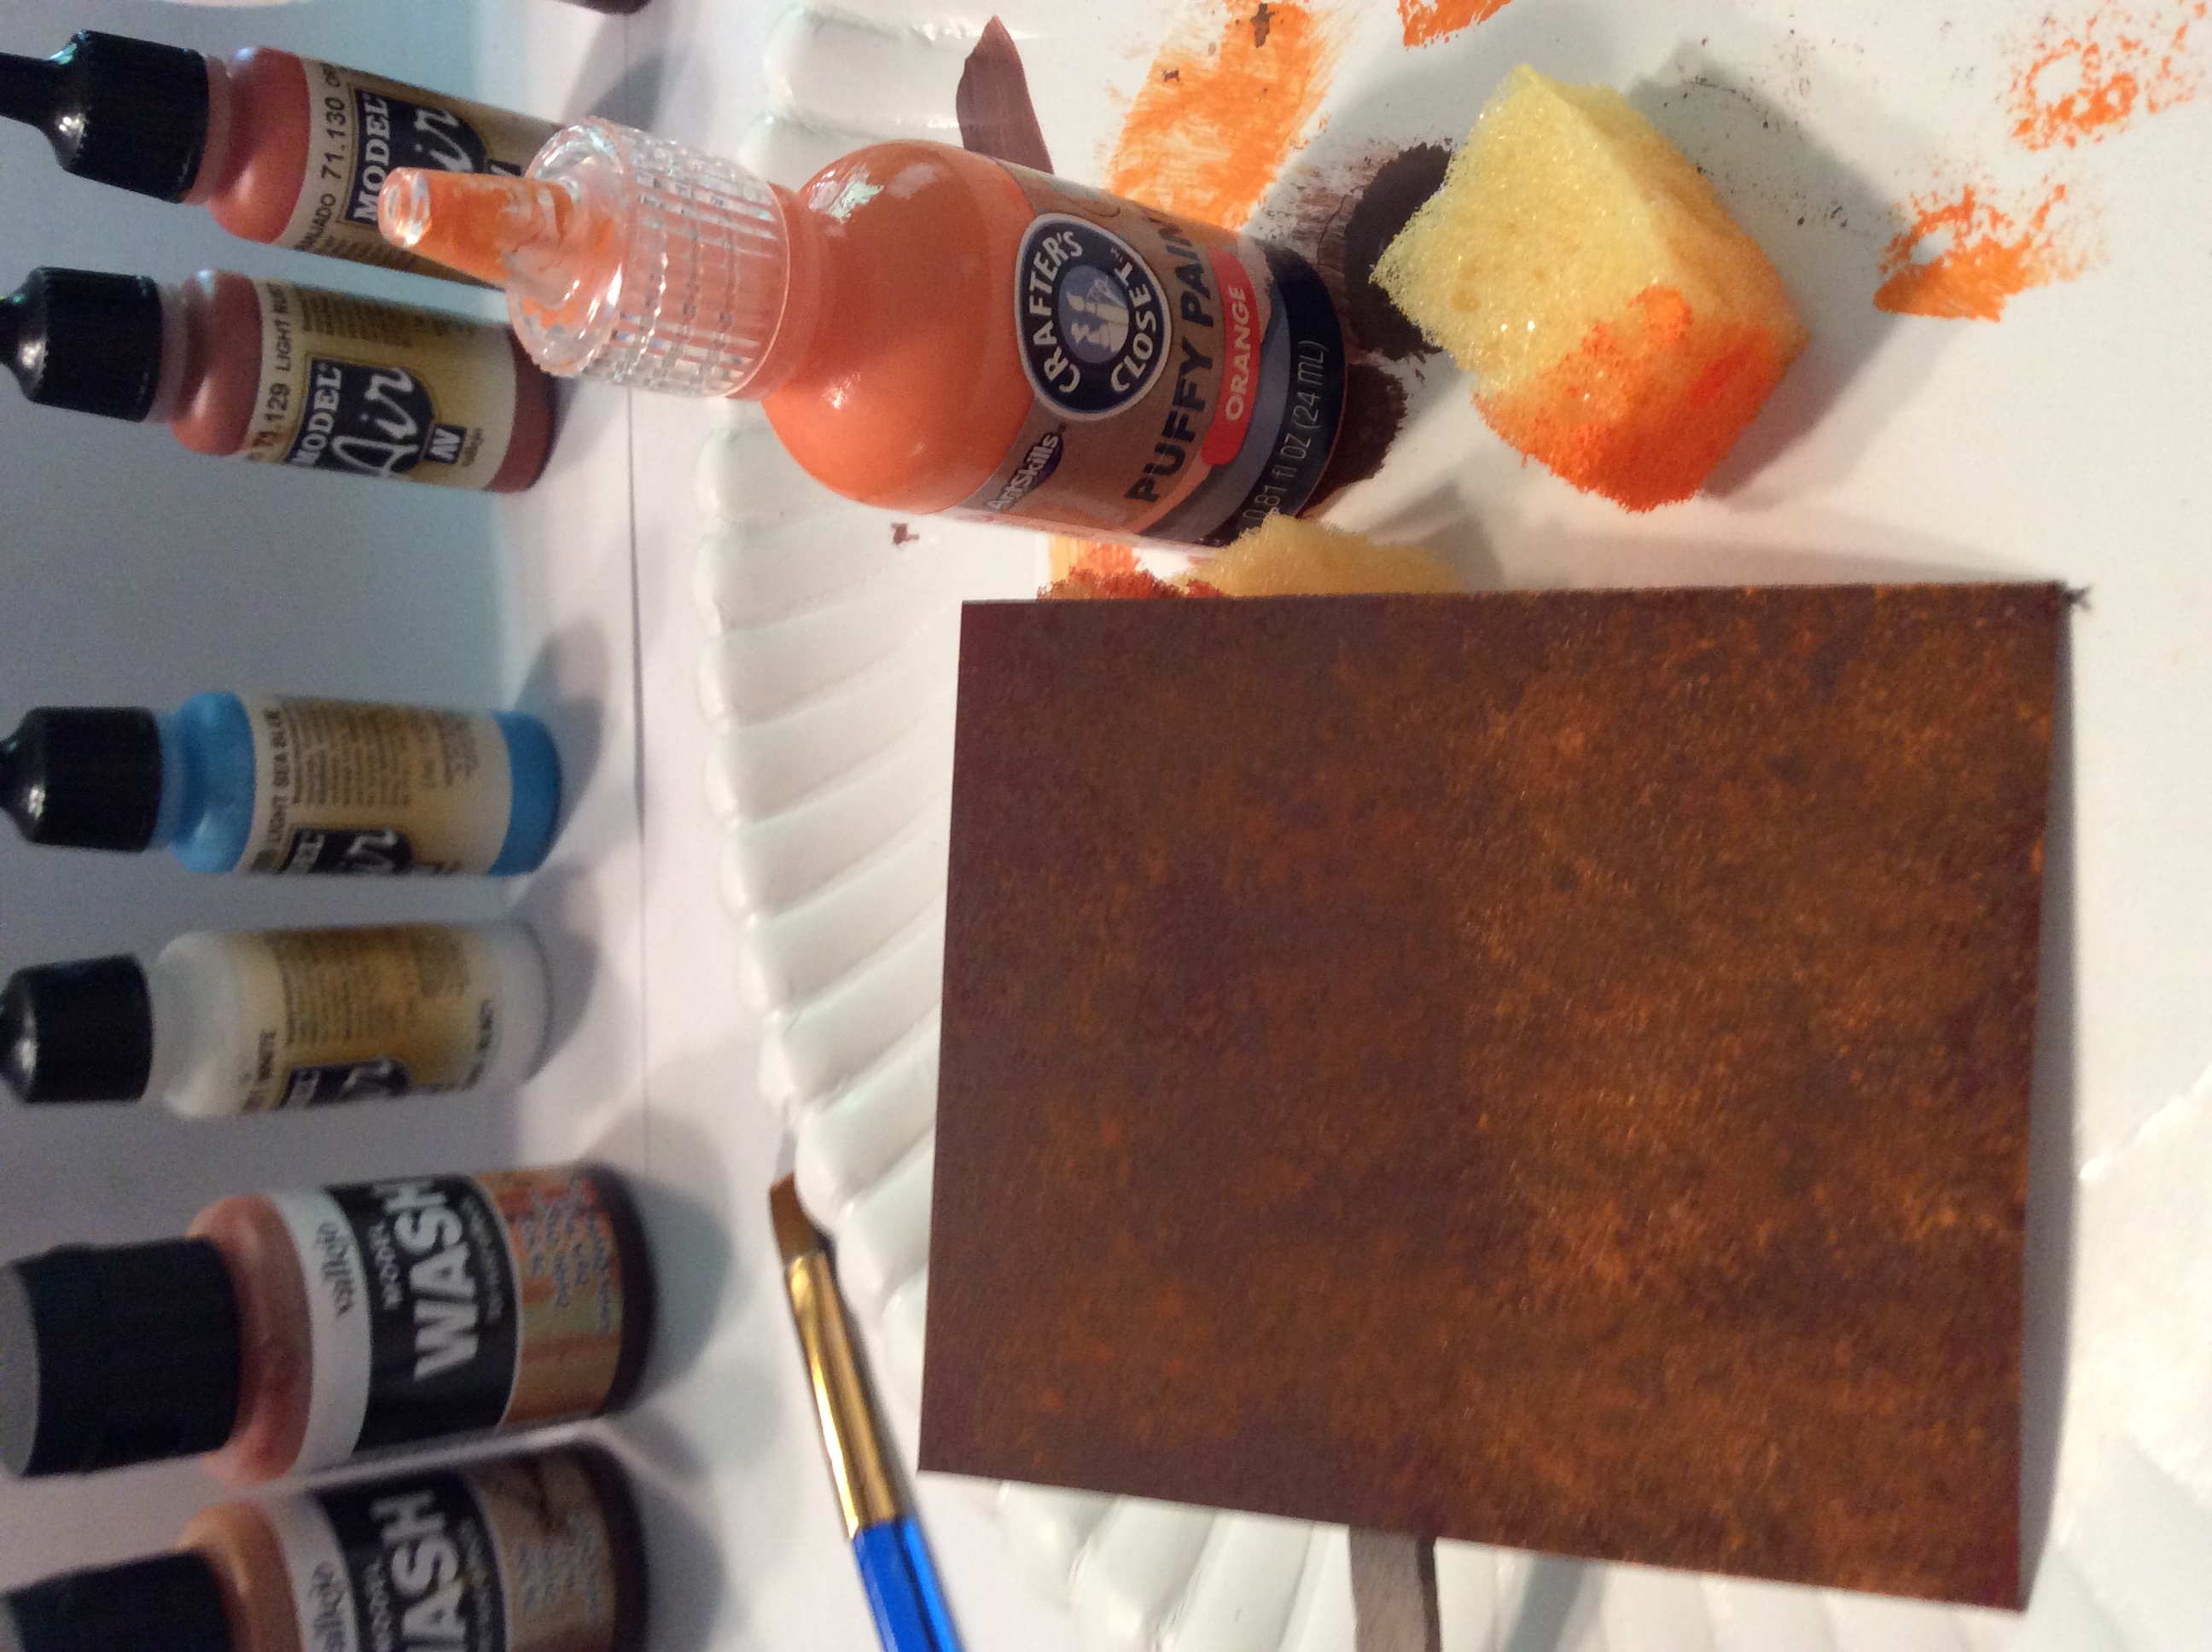
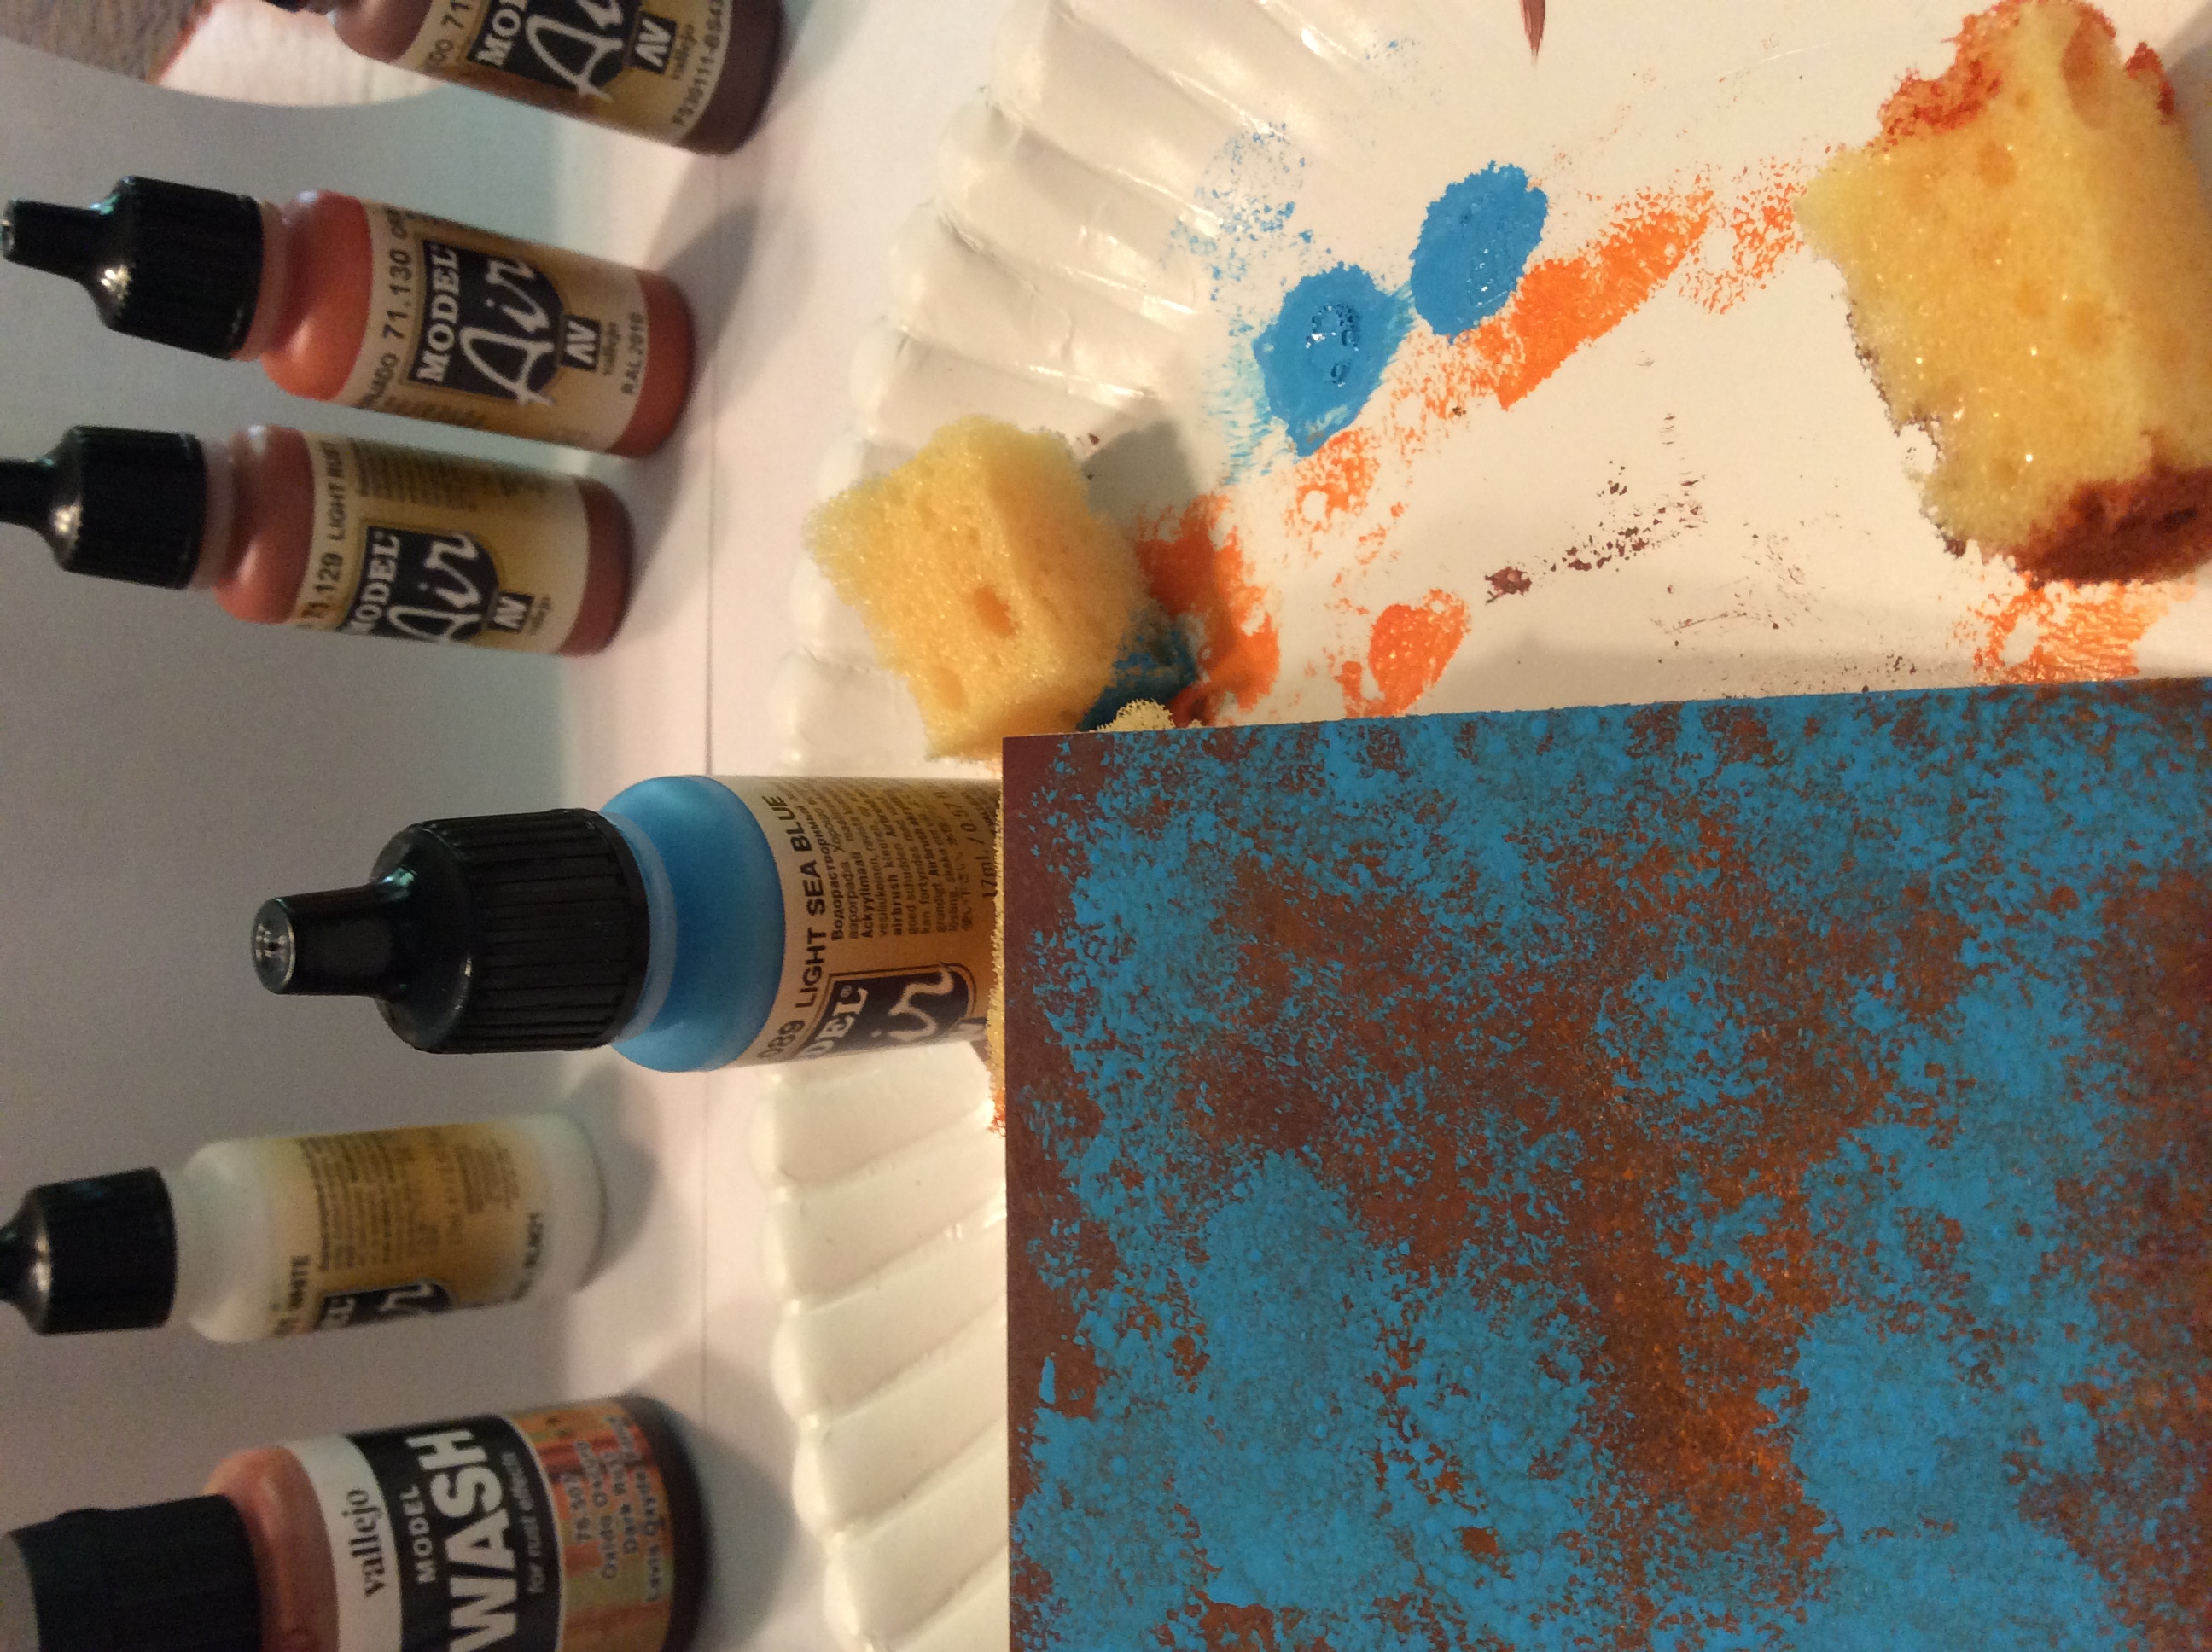
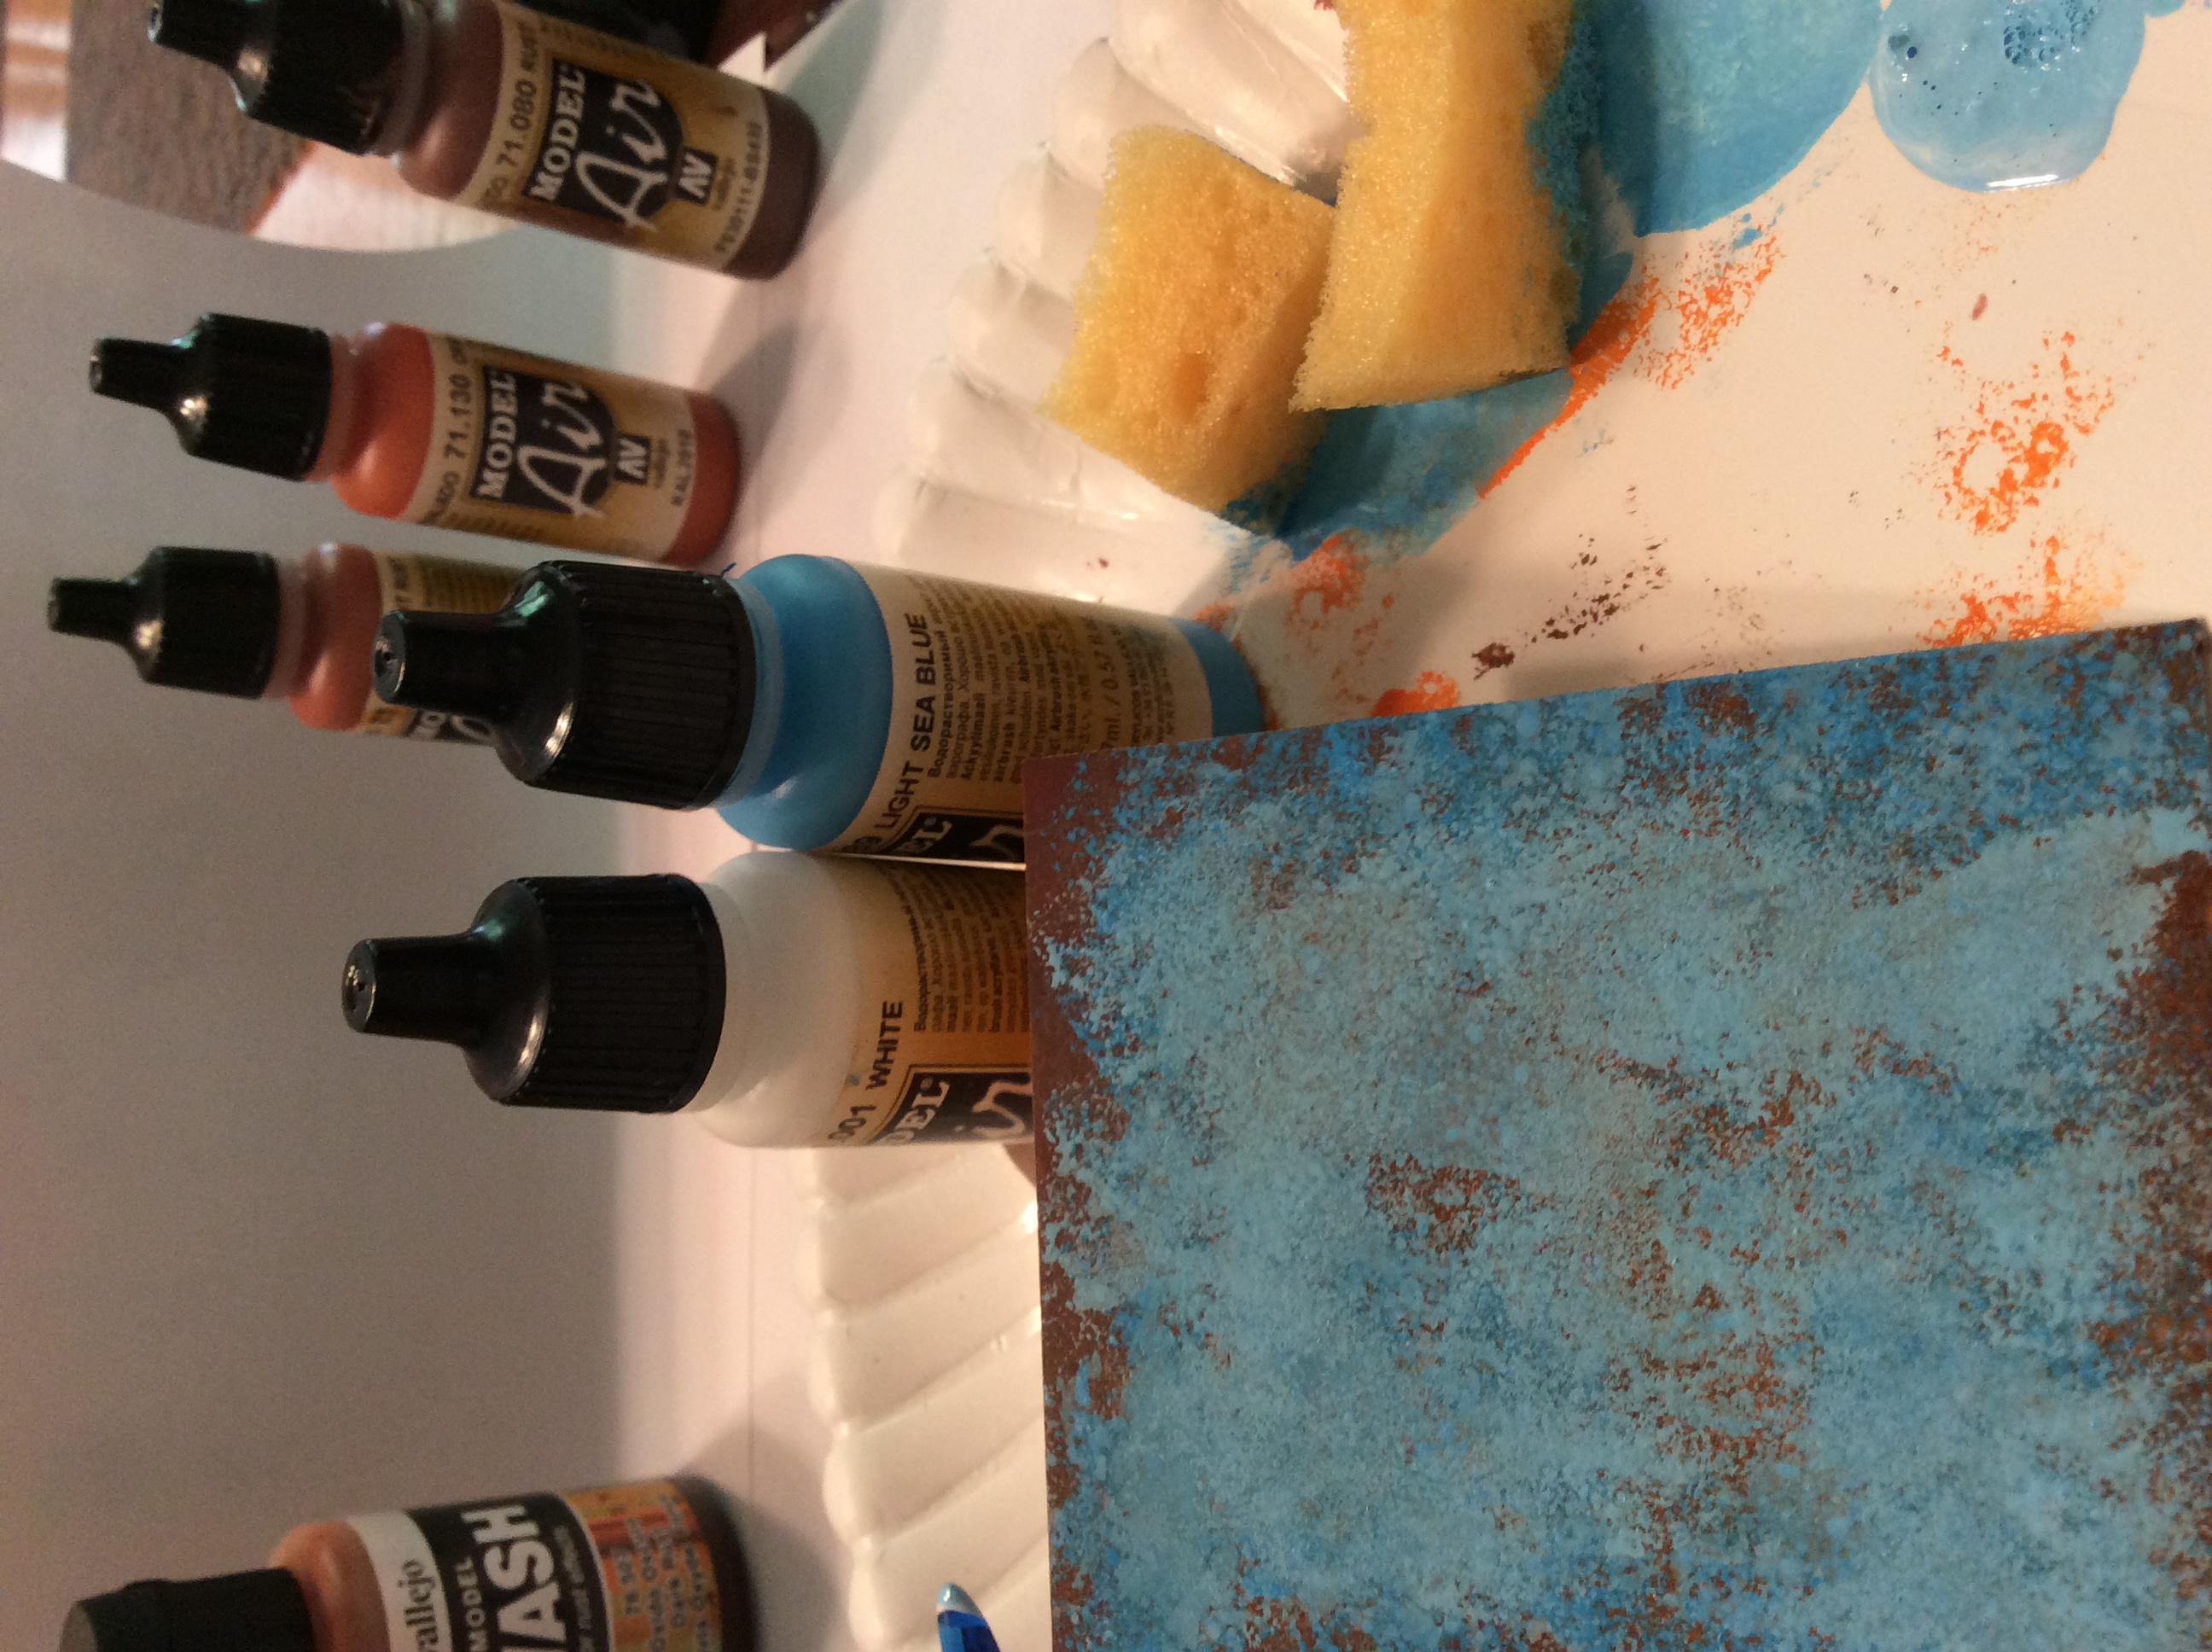
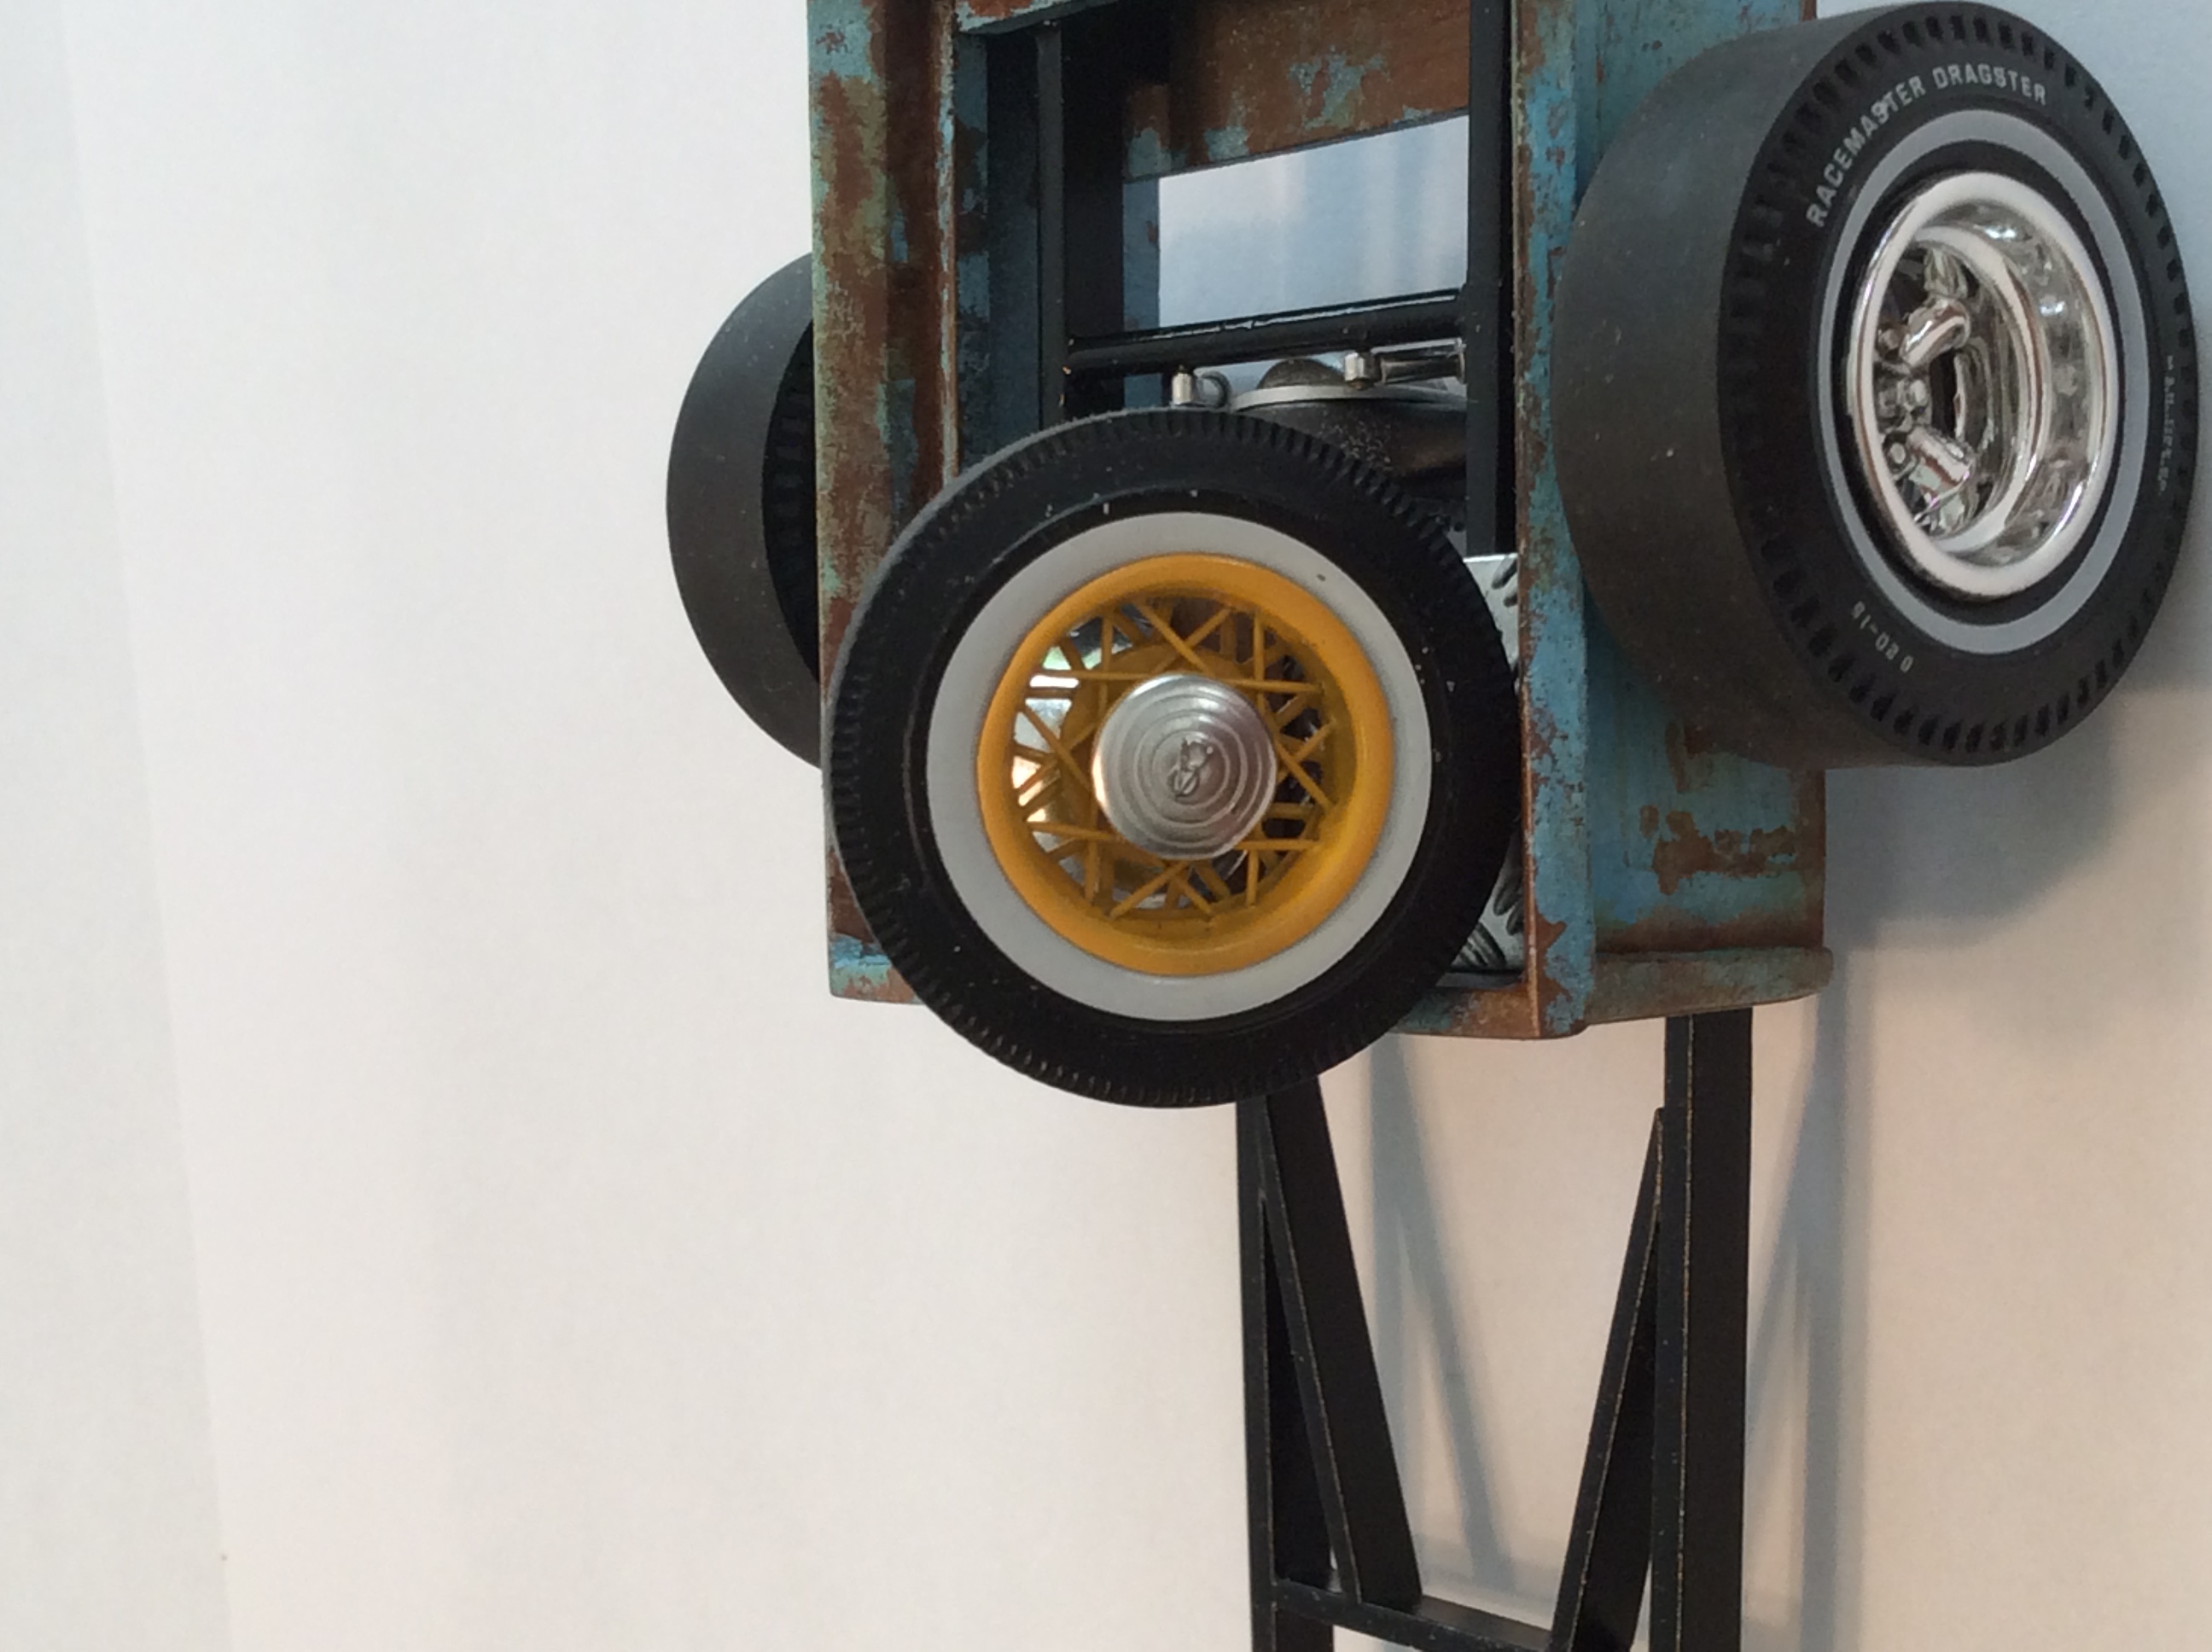
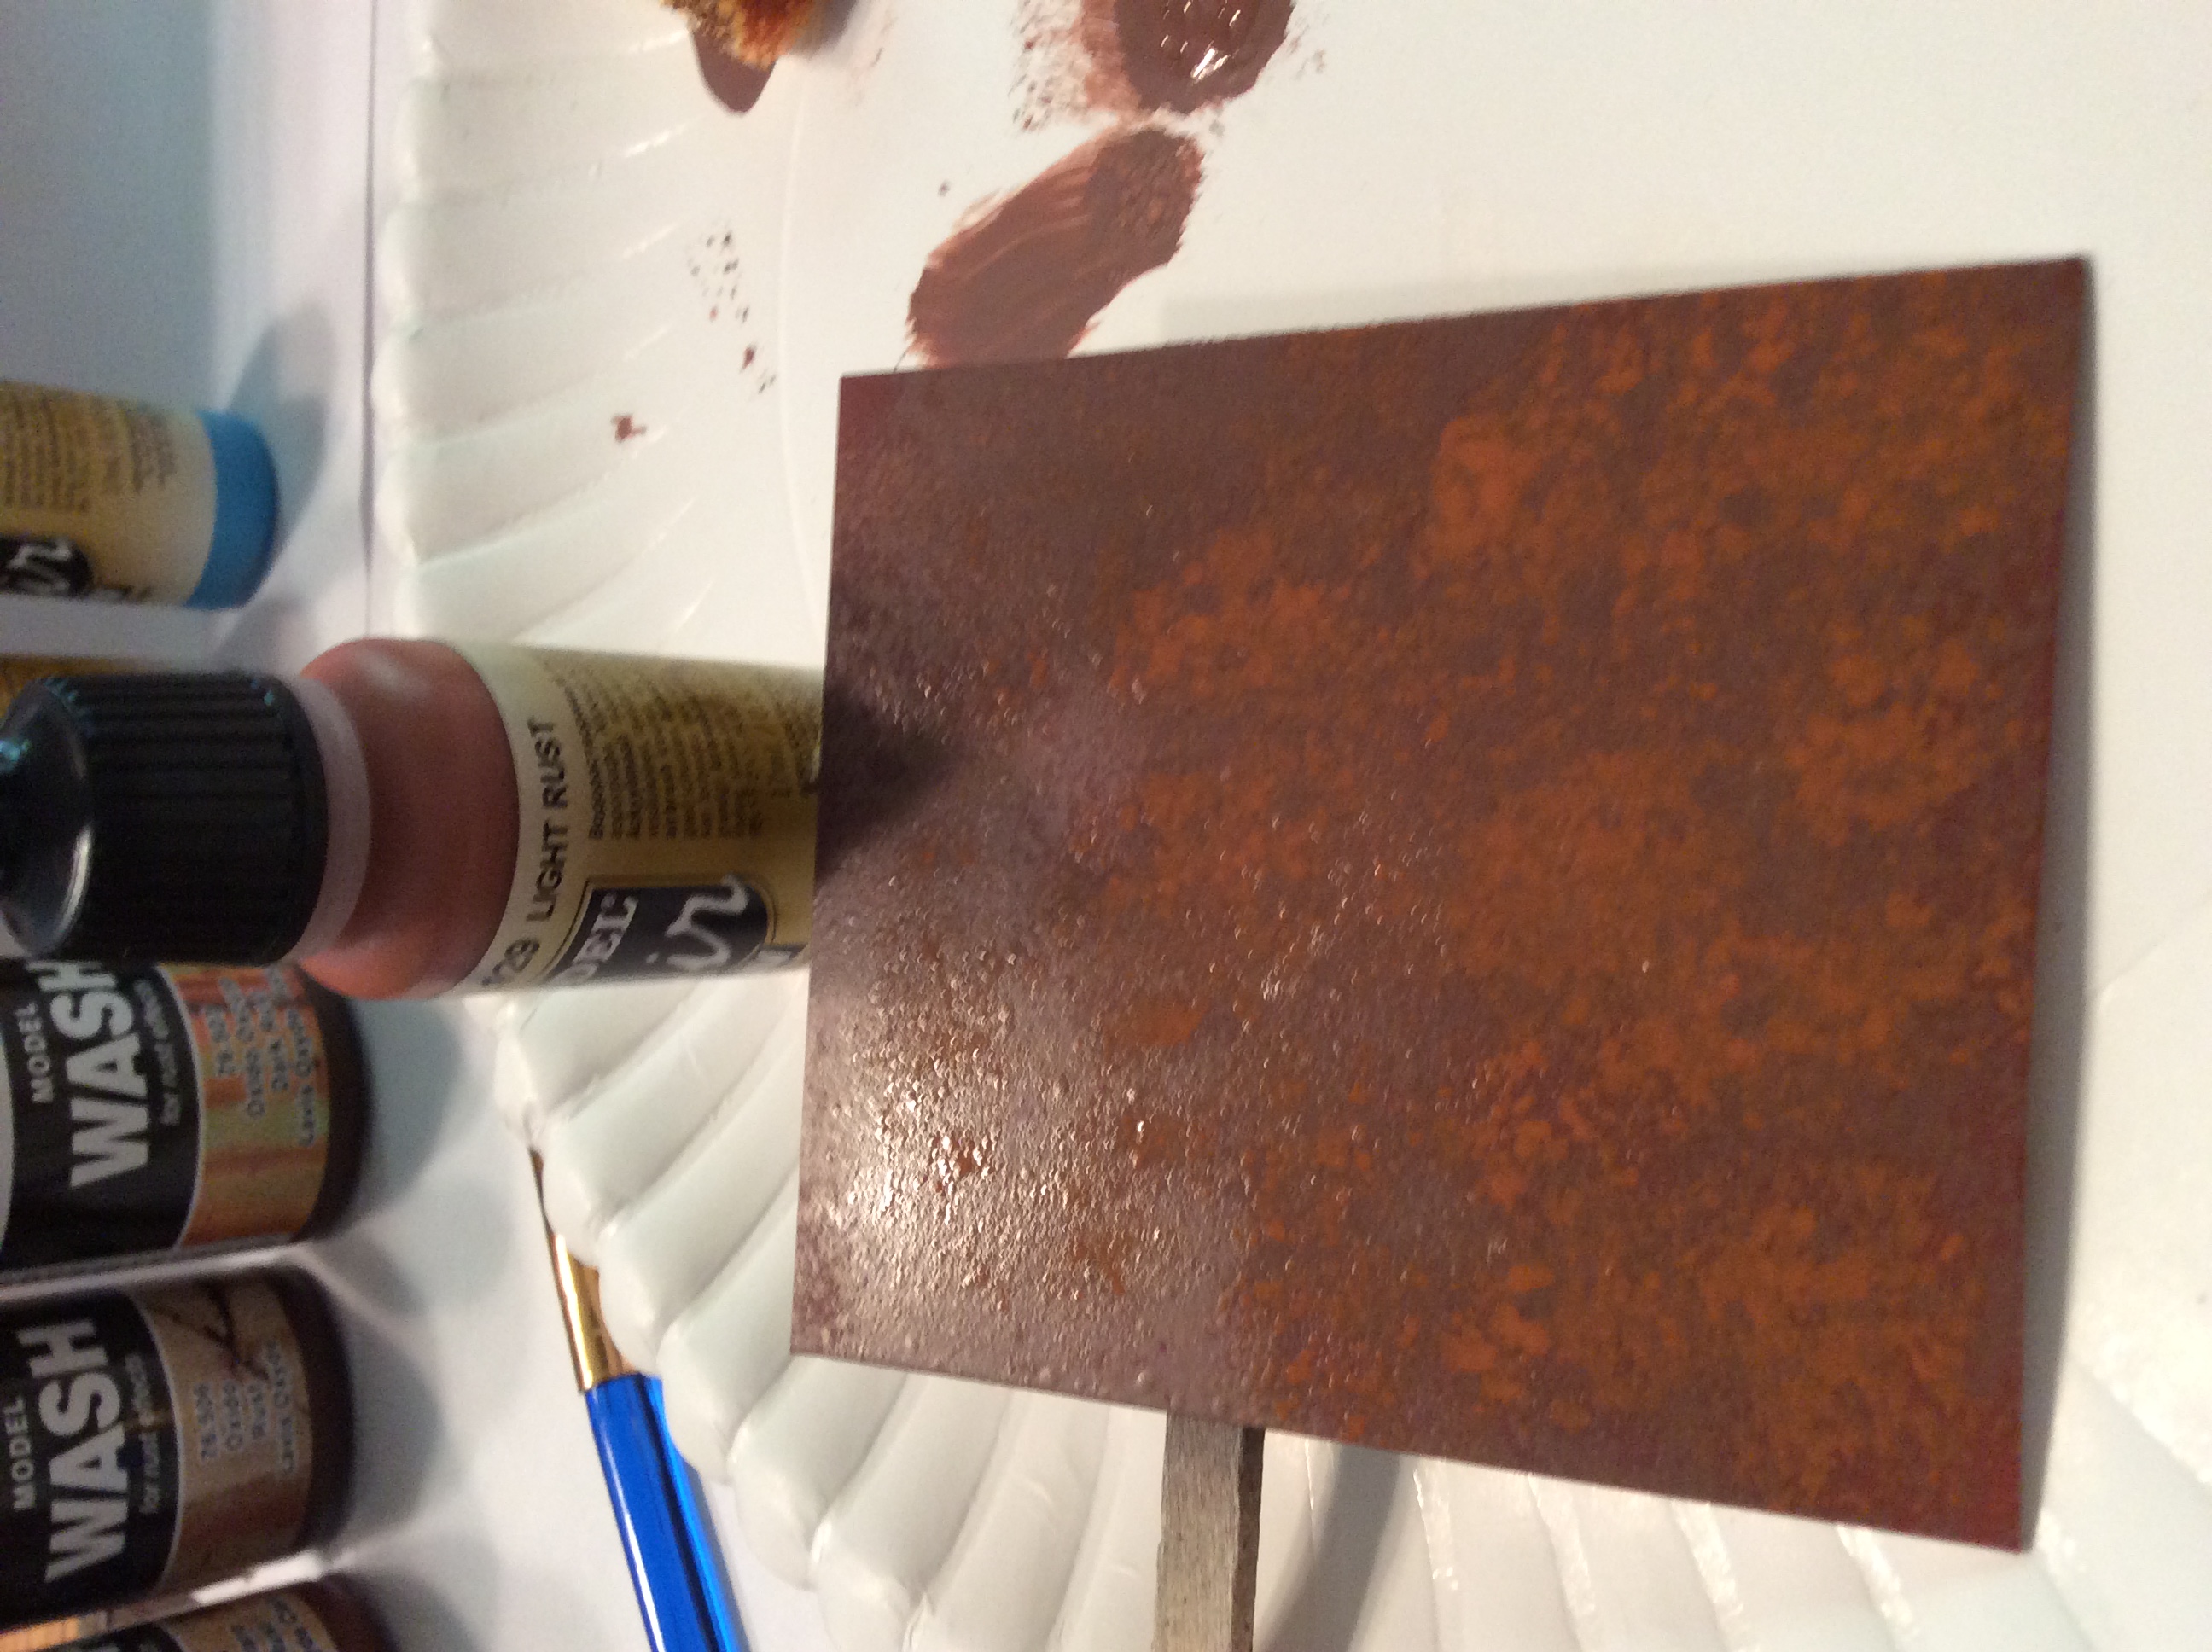
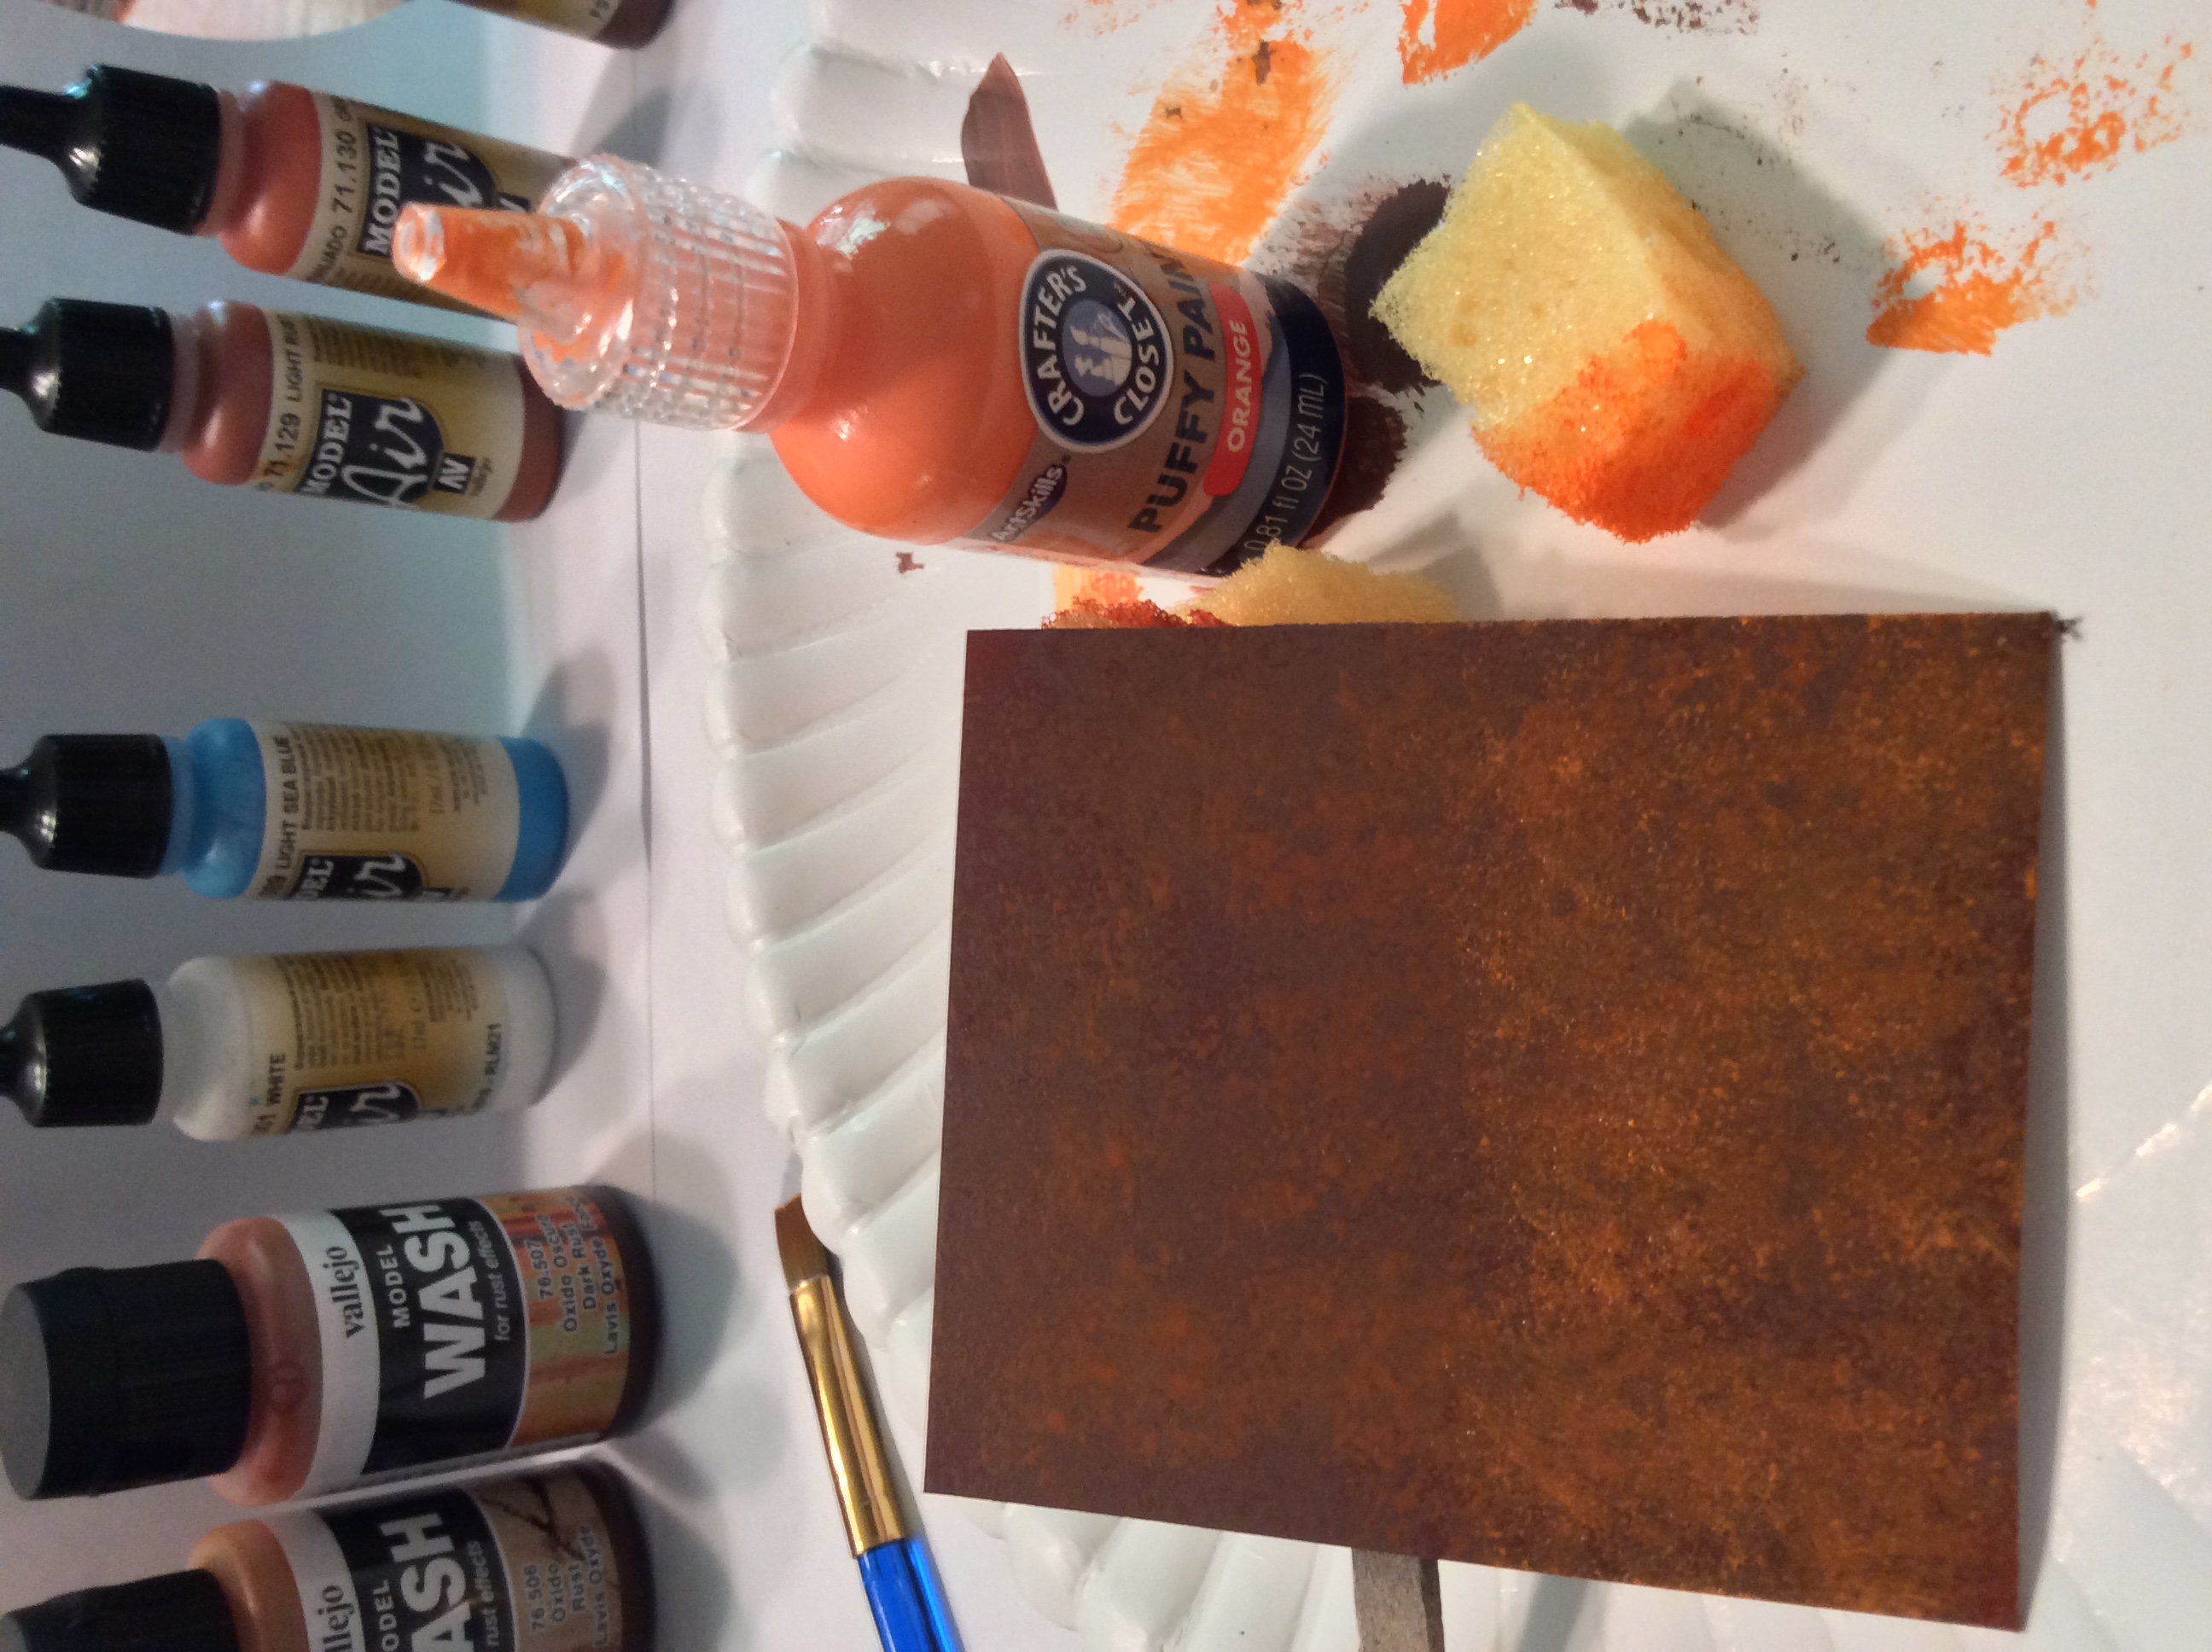
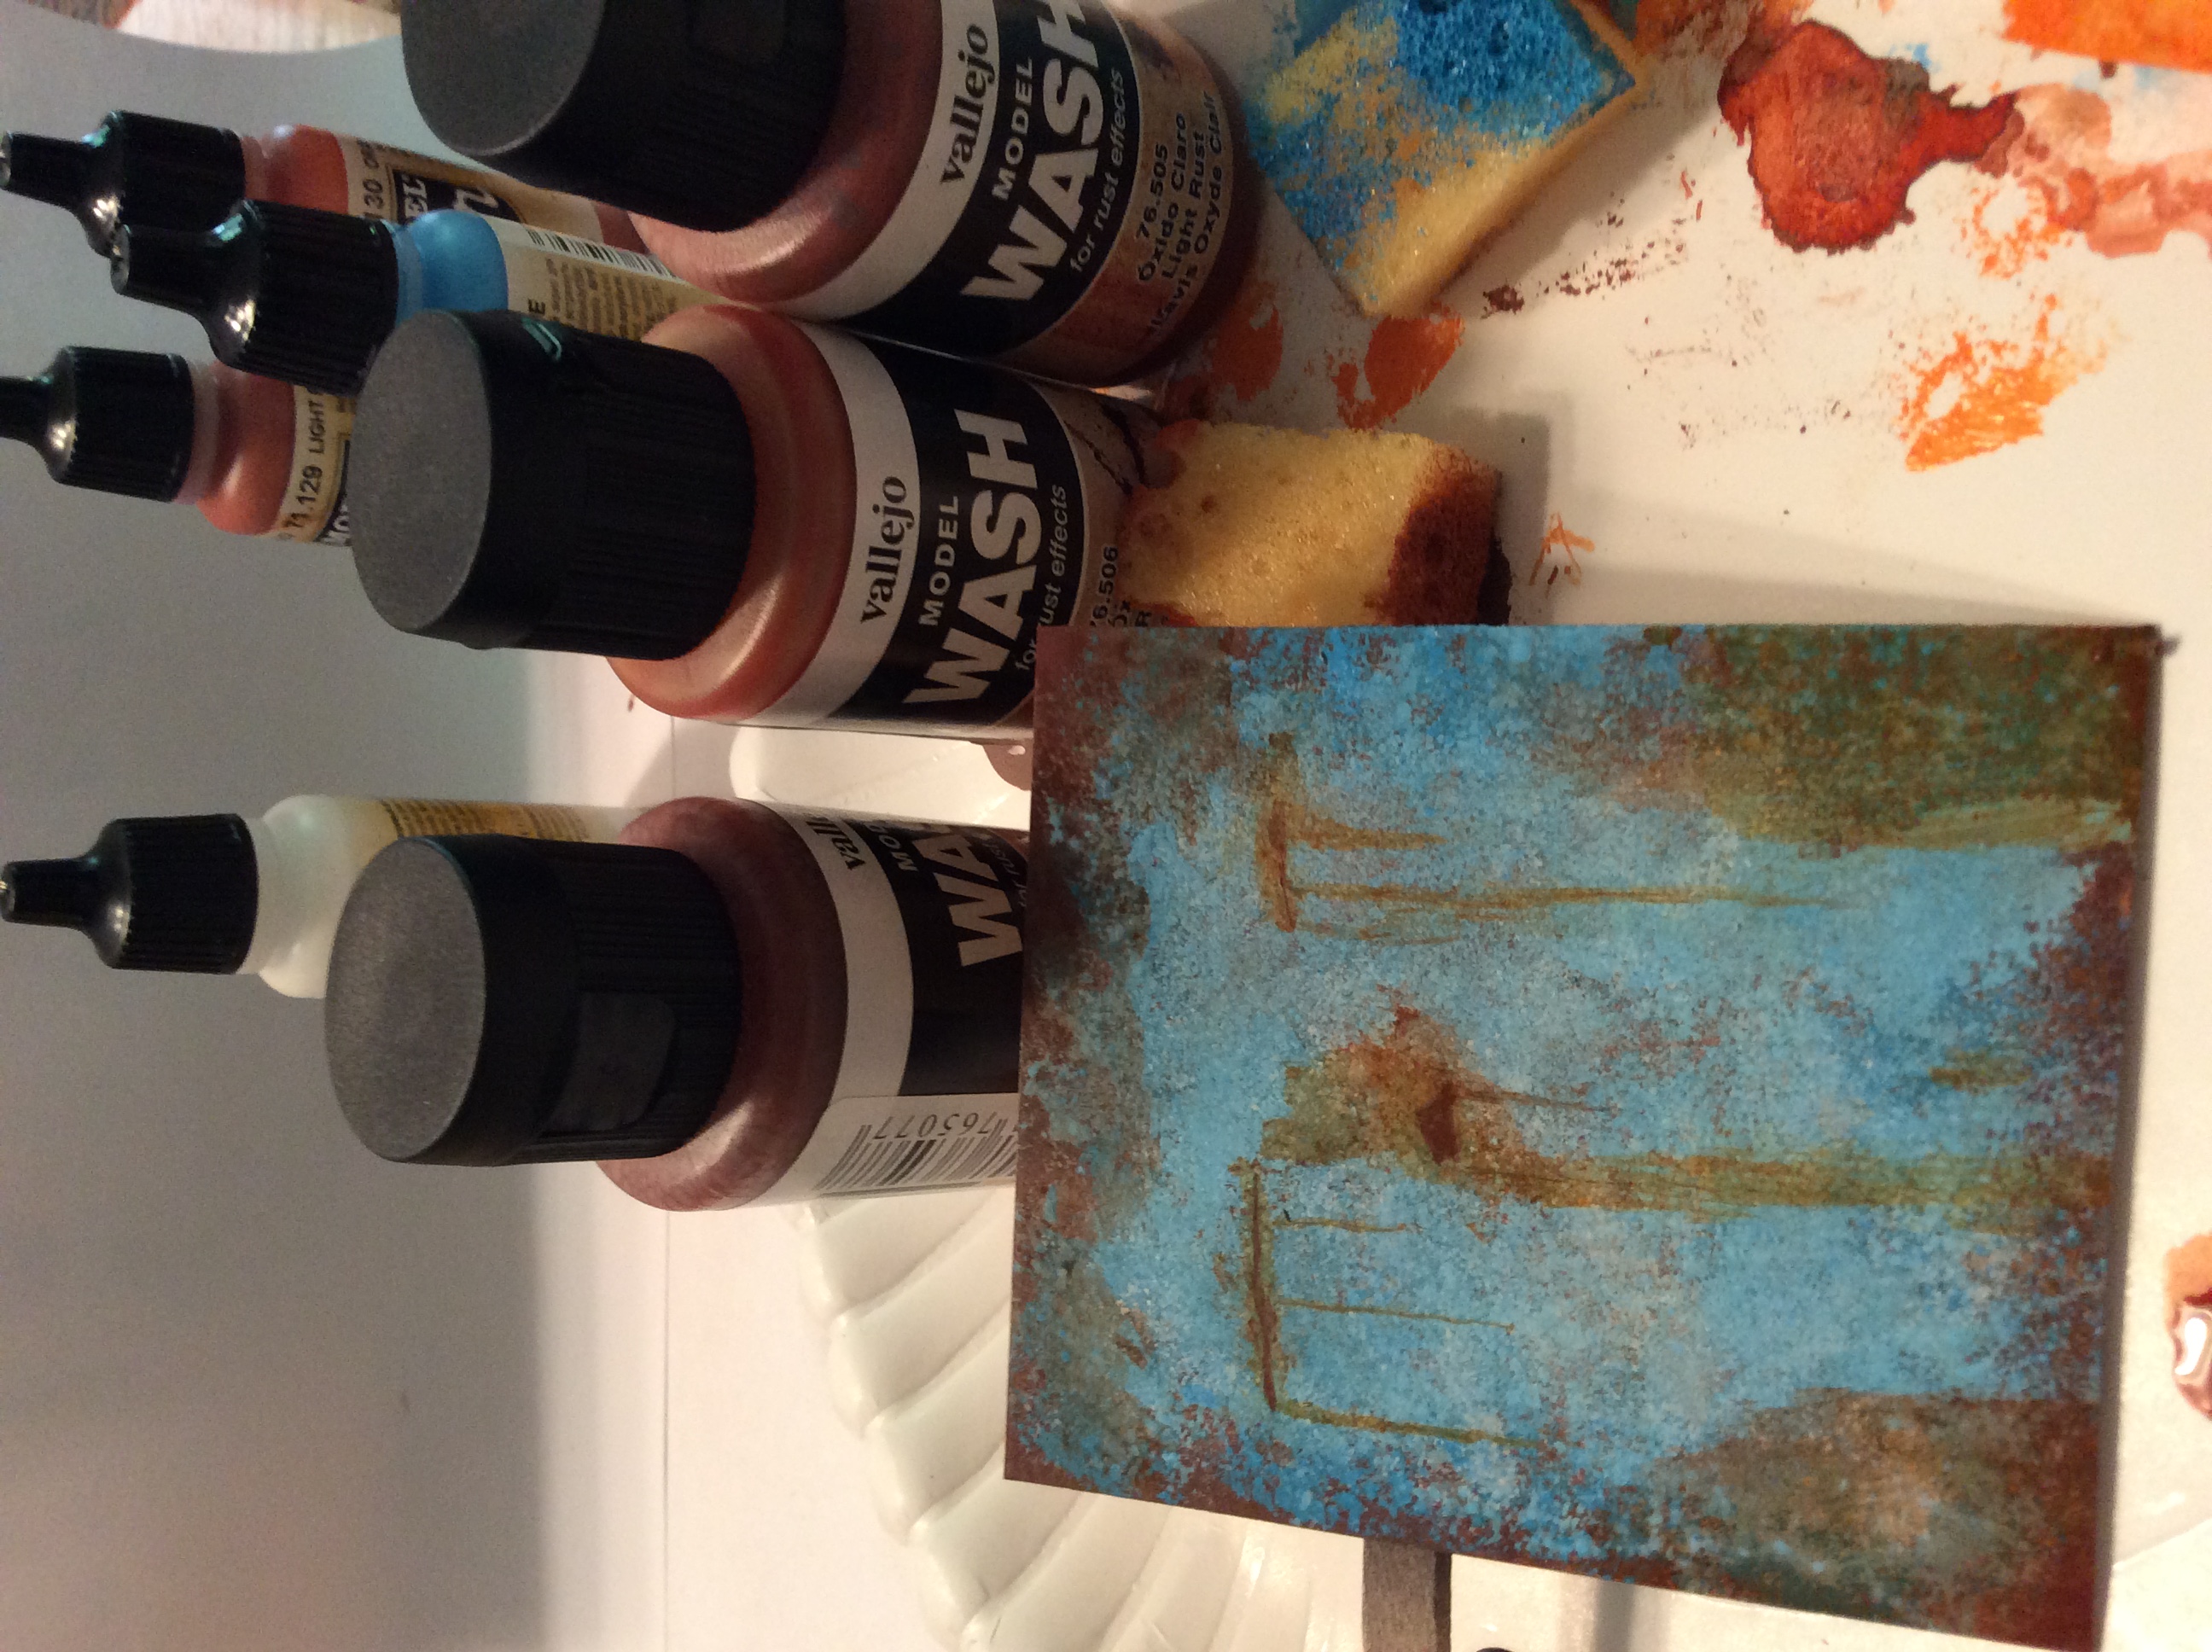
Rust paint job using water based paints and a sponge.easy to do with good results.never cover previous coat.if using a hair dryer it only takes about a half hour start to finish. Step 1 primer step 2 rust step 3 light rust step 4 orange rust step 5 orange step 6 blue step 7 50-50 blue white step 8 75-25 white blue step 9 white step 10 washes bottom left dark rust,bottom right light rust,top rust,and streaks light rust.
-
34 rat rod pickup
lou s replied to lou s's topic in WIP: Model Trucks: Pickups, Vans, SUVs, Light Commercial
-
34 rat rod pickup
lou s replied to lou s's topic in WIP: Model Trucks: Pickups, Vans, SUVs, Light Commercial
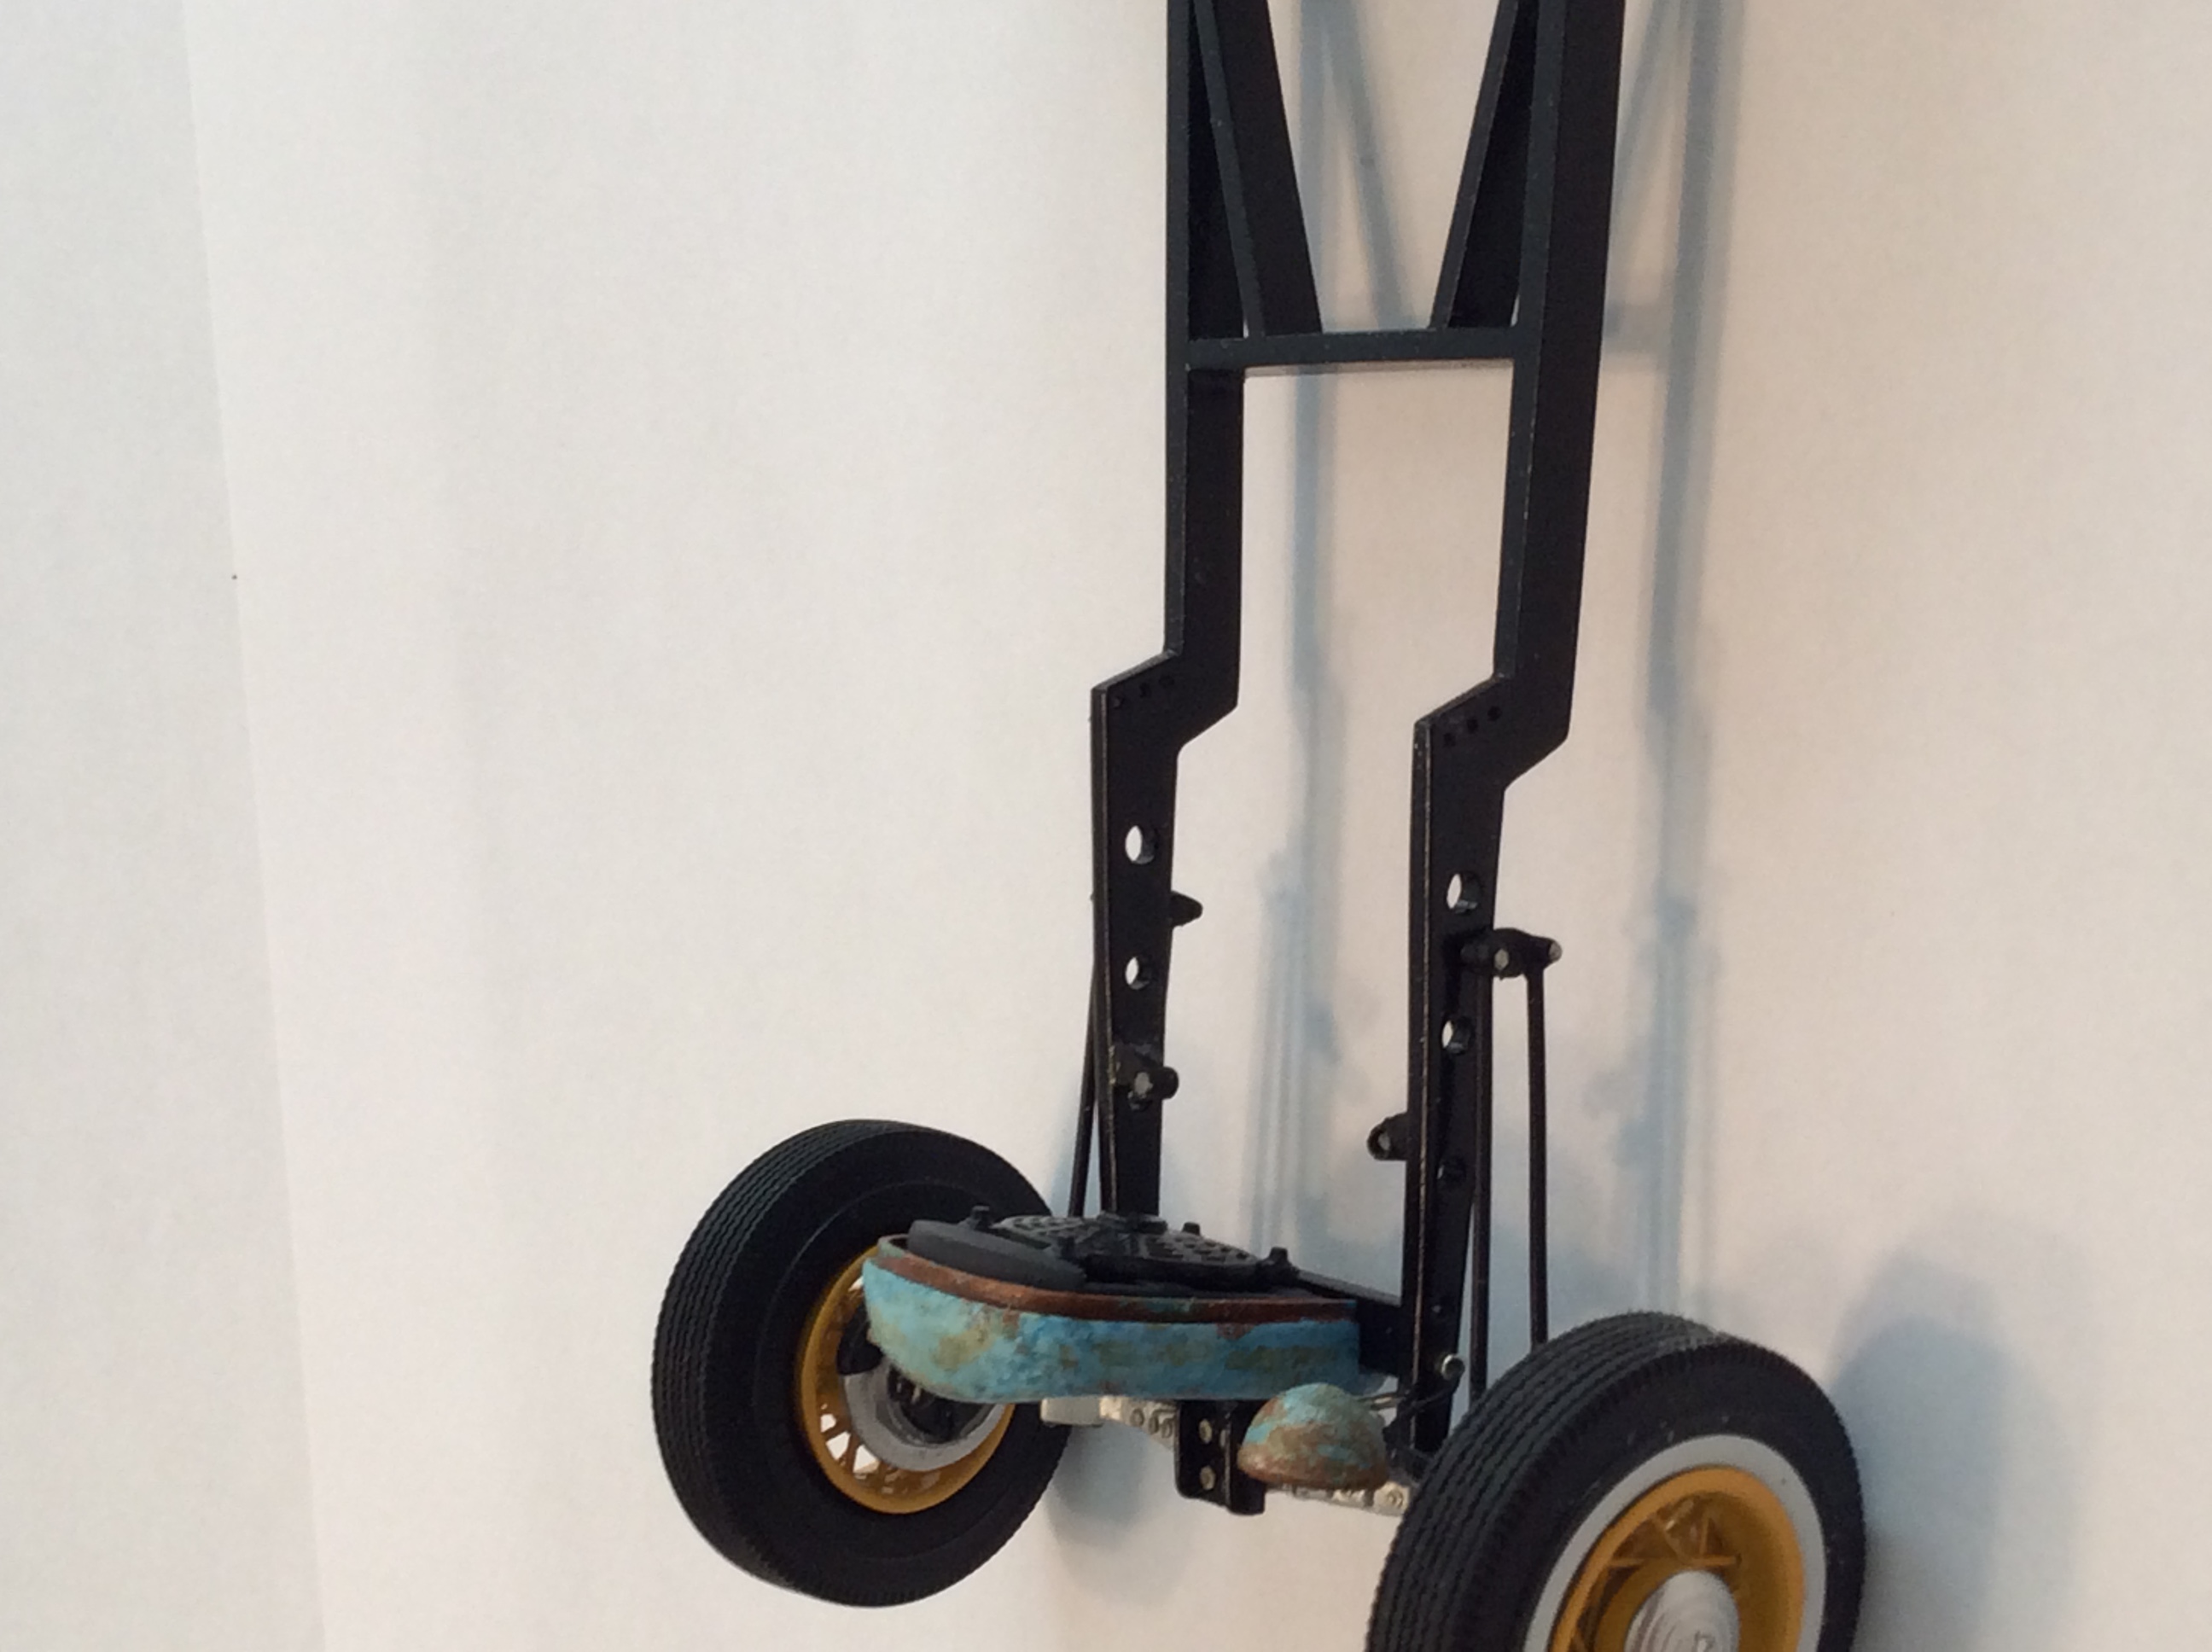
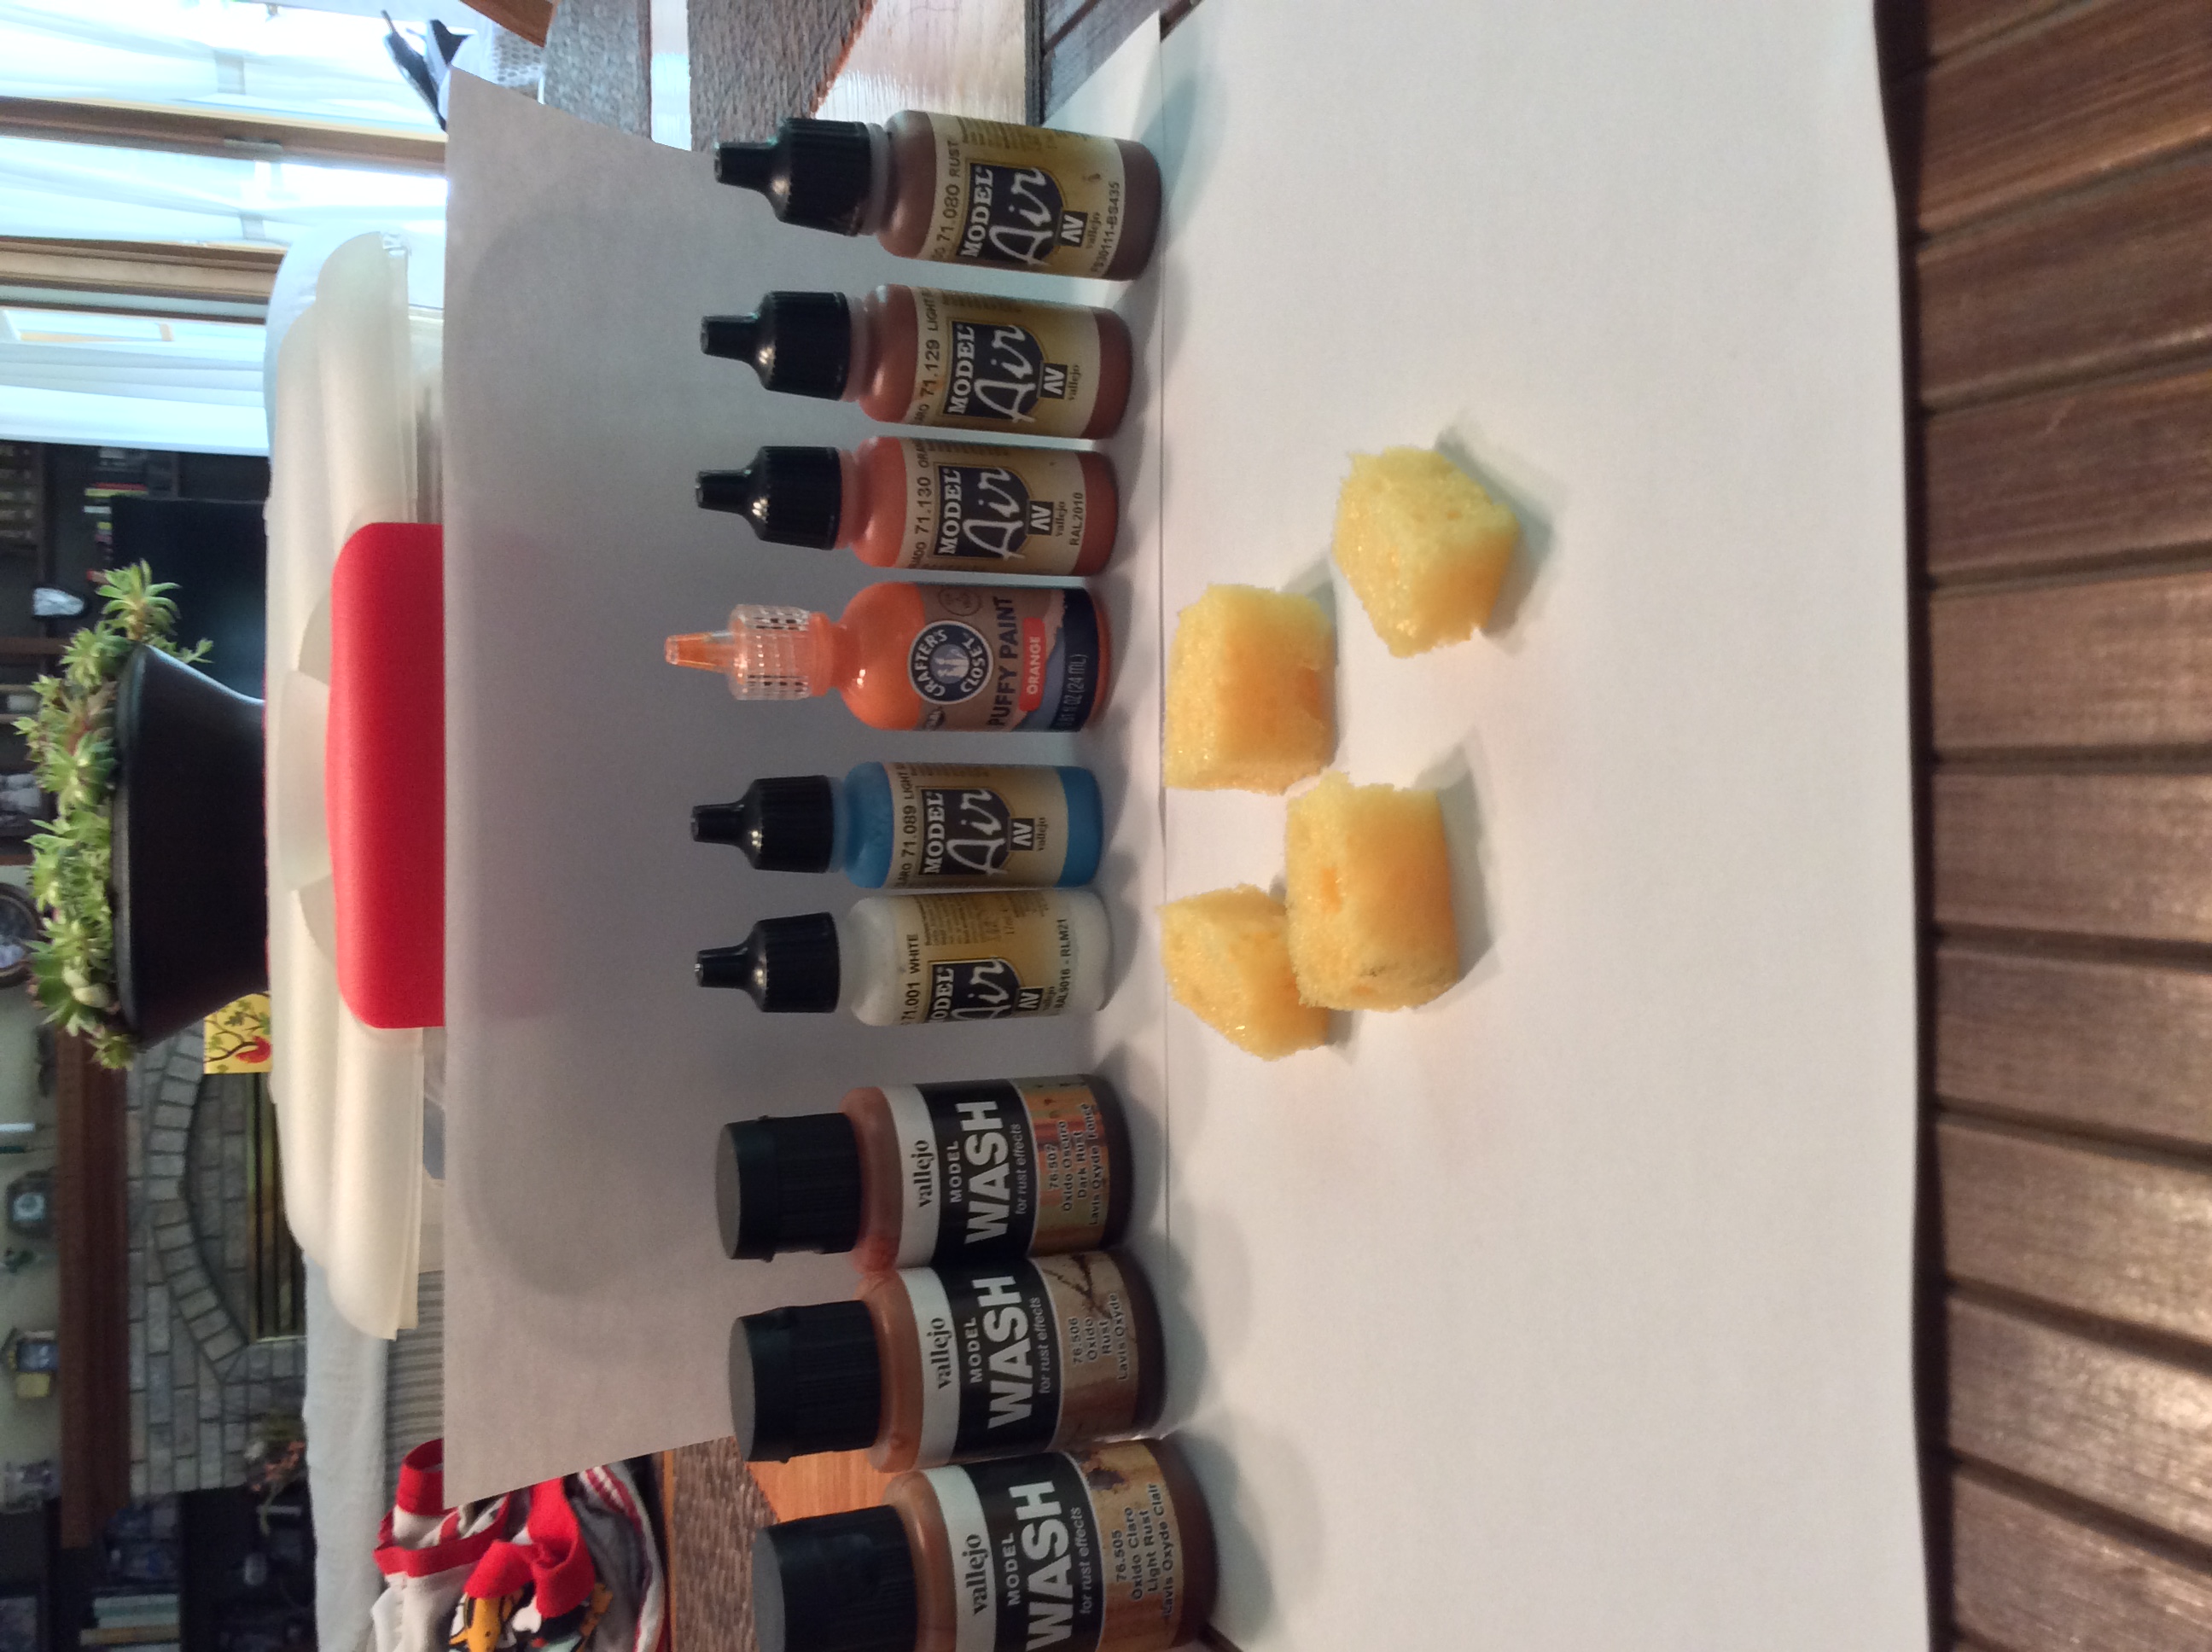
To my surprise I've had more than a few modelers contact me about my rust job. I thought it looked pretty good for as little work that it took but I didn't expect so many posatve comments.ive been modeling for a few years and I've never had so many ask me how I did something so I'm taking full advantage of this. Like it or not .?when i stated this build about 4 months ago I didn't know the first thing about creating a rusted rat rod so I started with dr cranky on you tube witch led to other modeler videos and then on to military modelers. When I was satisfied with what I learned I orders my Vallejo air paints and washes.got my salt hair spray and went to work.i air brushed all the rust colors salted and then AB the color.after about three hours of work and constantly cleaning out my AB I didn't like the result or color so I scrubbed it down with water and a tooth brush and stared over.my second attempt was just as bad so I stared over again.at some point in this proses I managed to get a leak in my AB hose ,tape didn't work so I gave up. About 2 weeks later I broke it all out again for another try.the problem was I didn't have a working air AB so I thought I'd just apply it with a paint brush.bad idea didn't work.then I remembered I saw a short video were they used a sponge as part of there tech..........so here is my step by step tutorial on how I did it.keep in mind that this is a flat surface so it mite not look as good. This technique Also adds texture you don't get from an airbrush.I would also like to ad that this process took about a half hour and I didn't have to clean an air brush. Step 1 primer (all steps after this is applied with a sponge) never completely cover the step before. step 2 dark rust step 3 light rust step 4 orange rust step 5 orange step 6 blue step 7 50-50 blue white step 8 75-25 white blue step 9 white step 10 washes bottom left dark rust wash,bottom right light rust wash,top rust wash,and streaks light rust wash
-
´29 Ford Pickup.
lou s replied to Toni L.'s topic in Model Trucks: Pickups, Vans, SUVs, Light Commercial
Nice! -
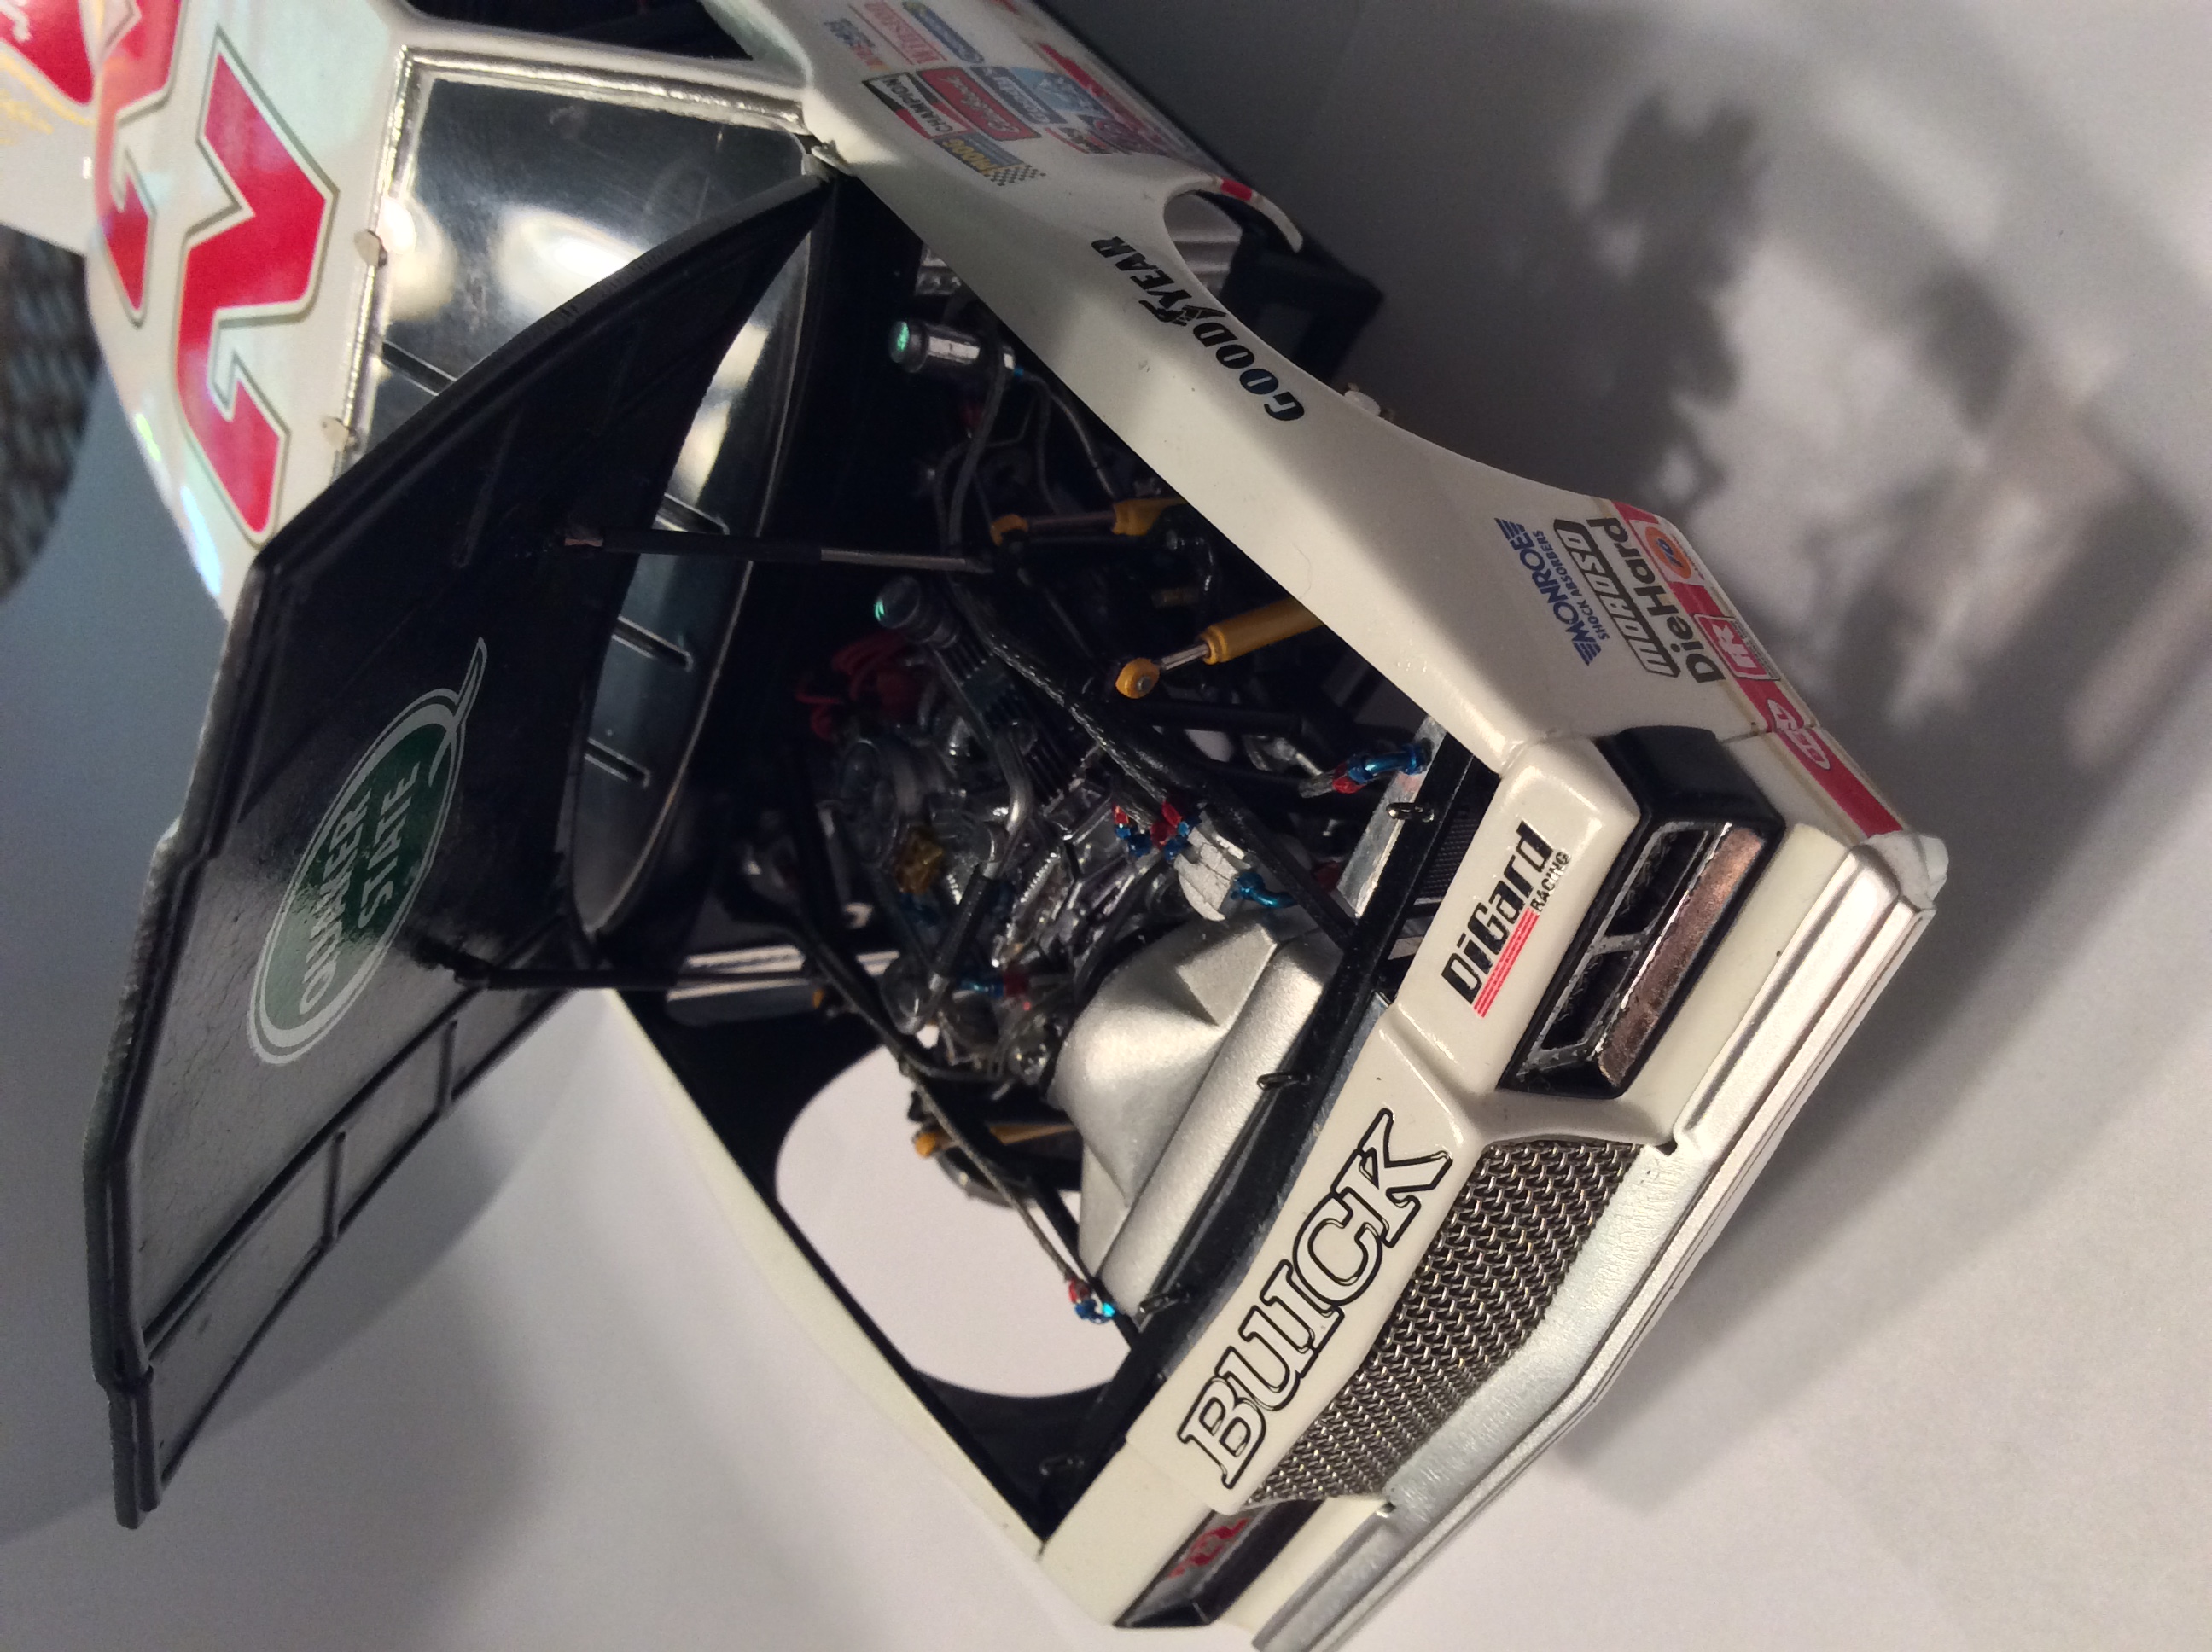
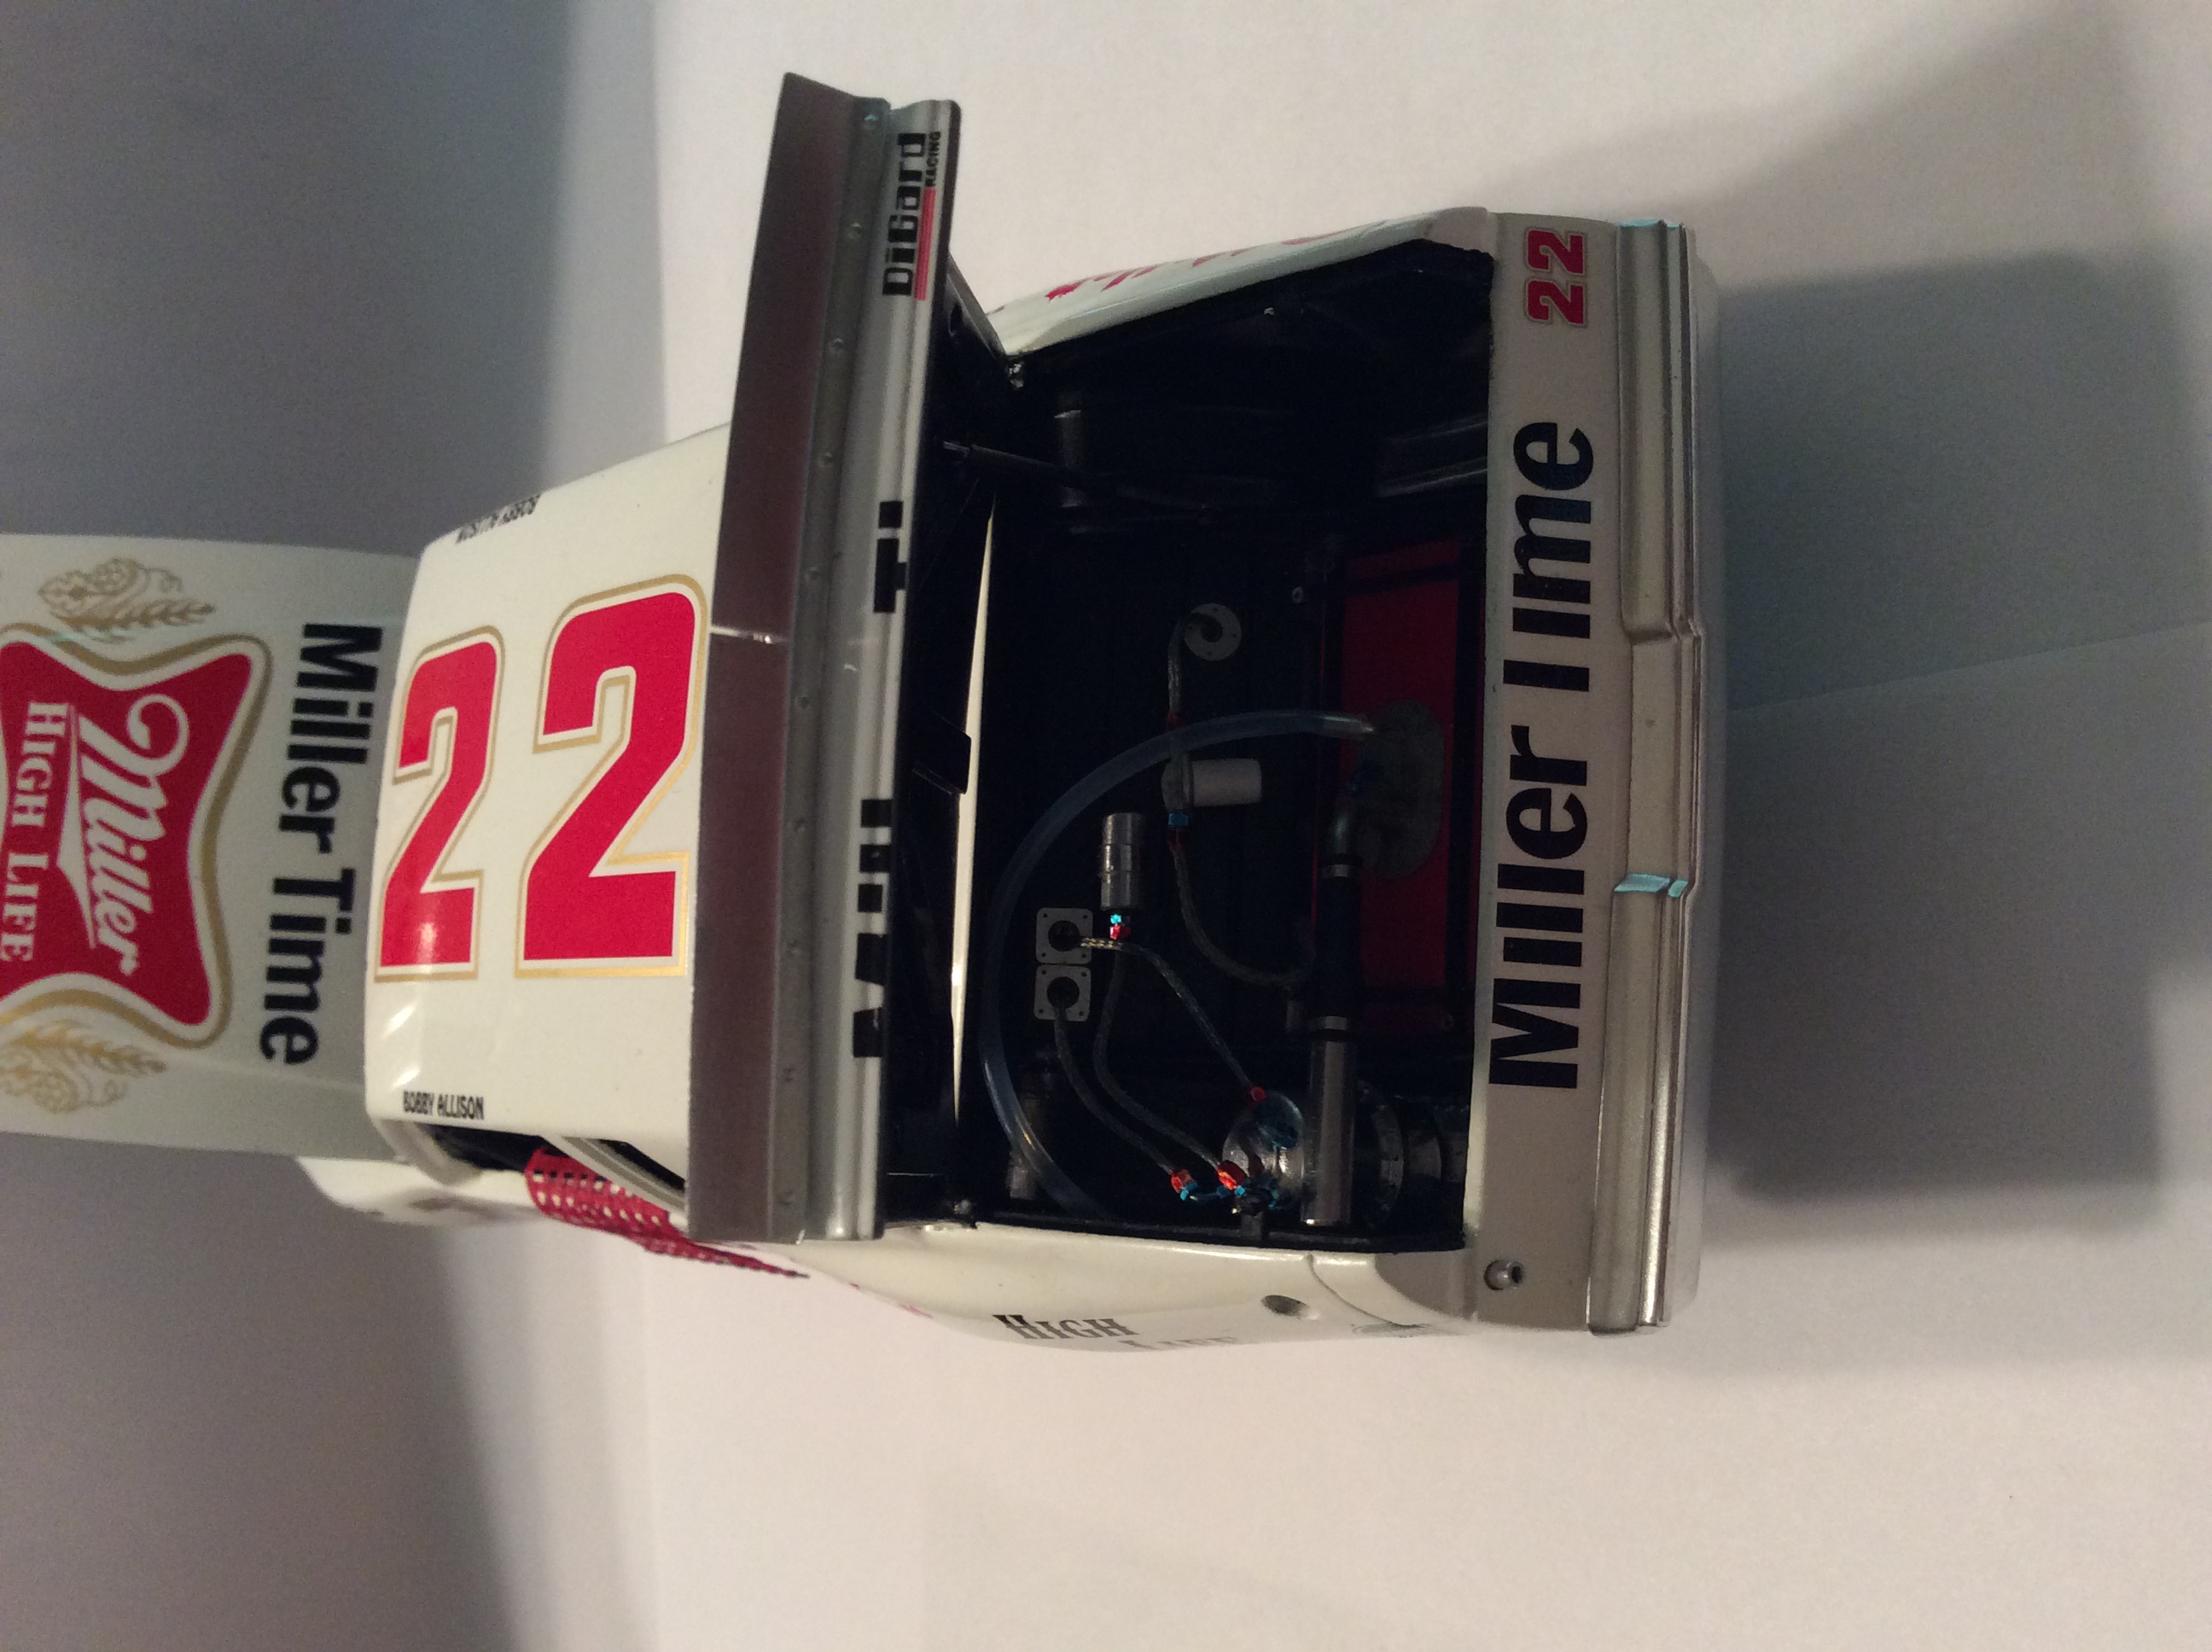
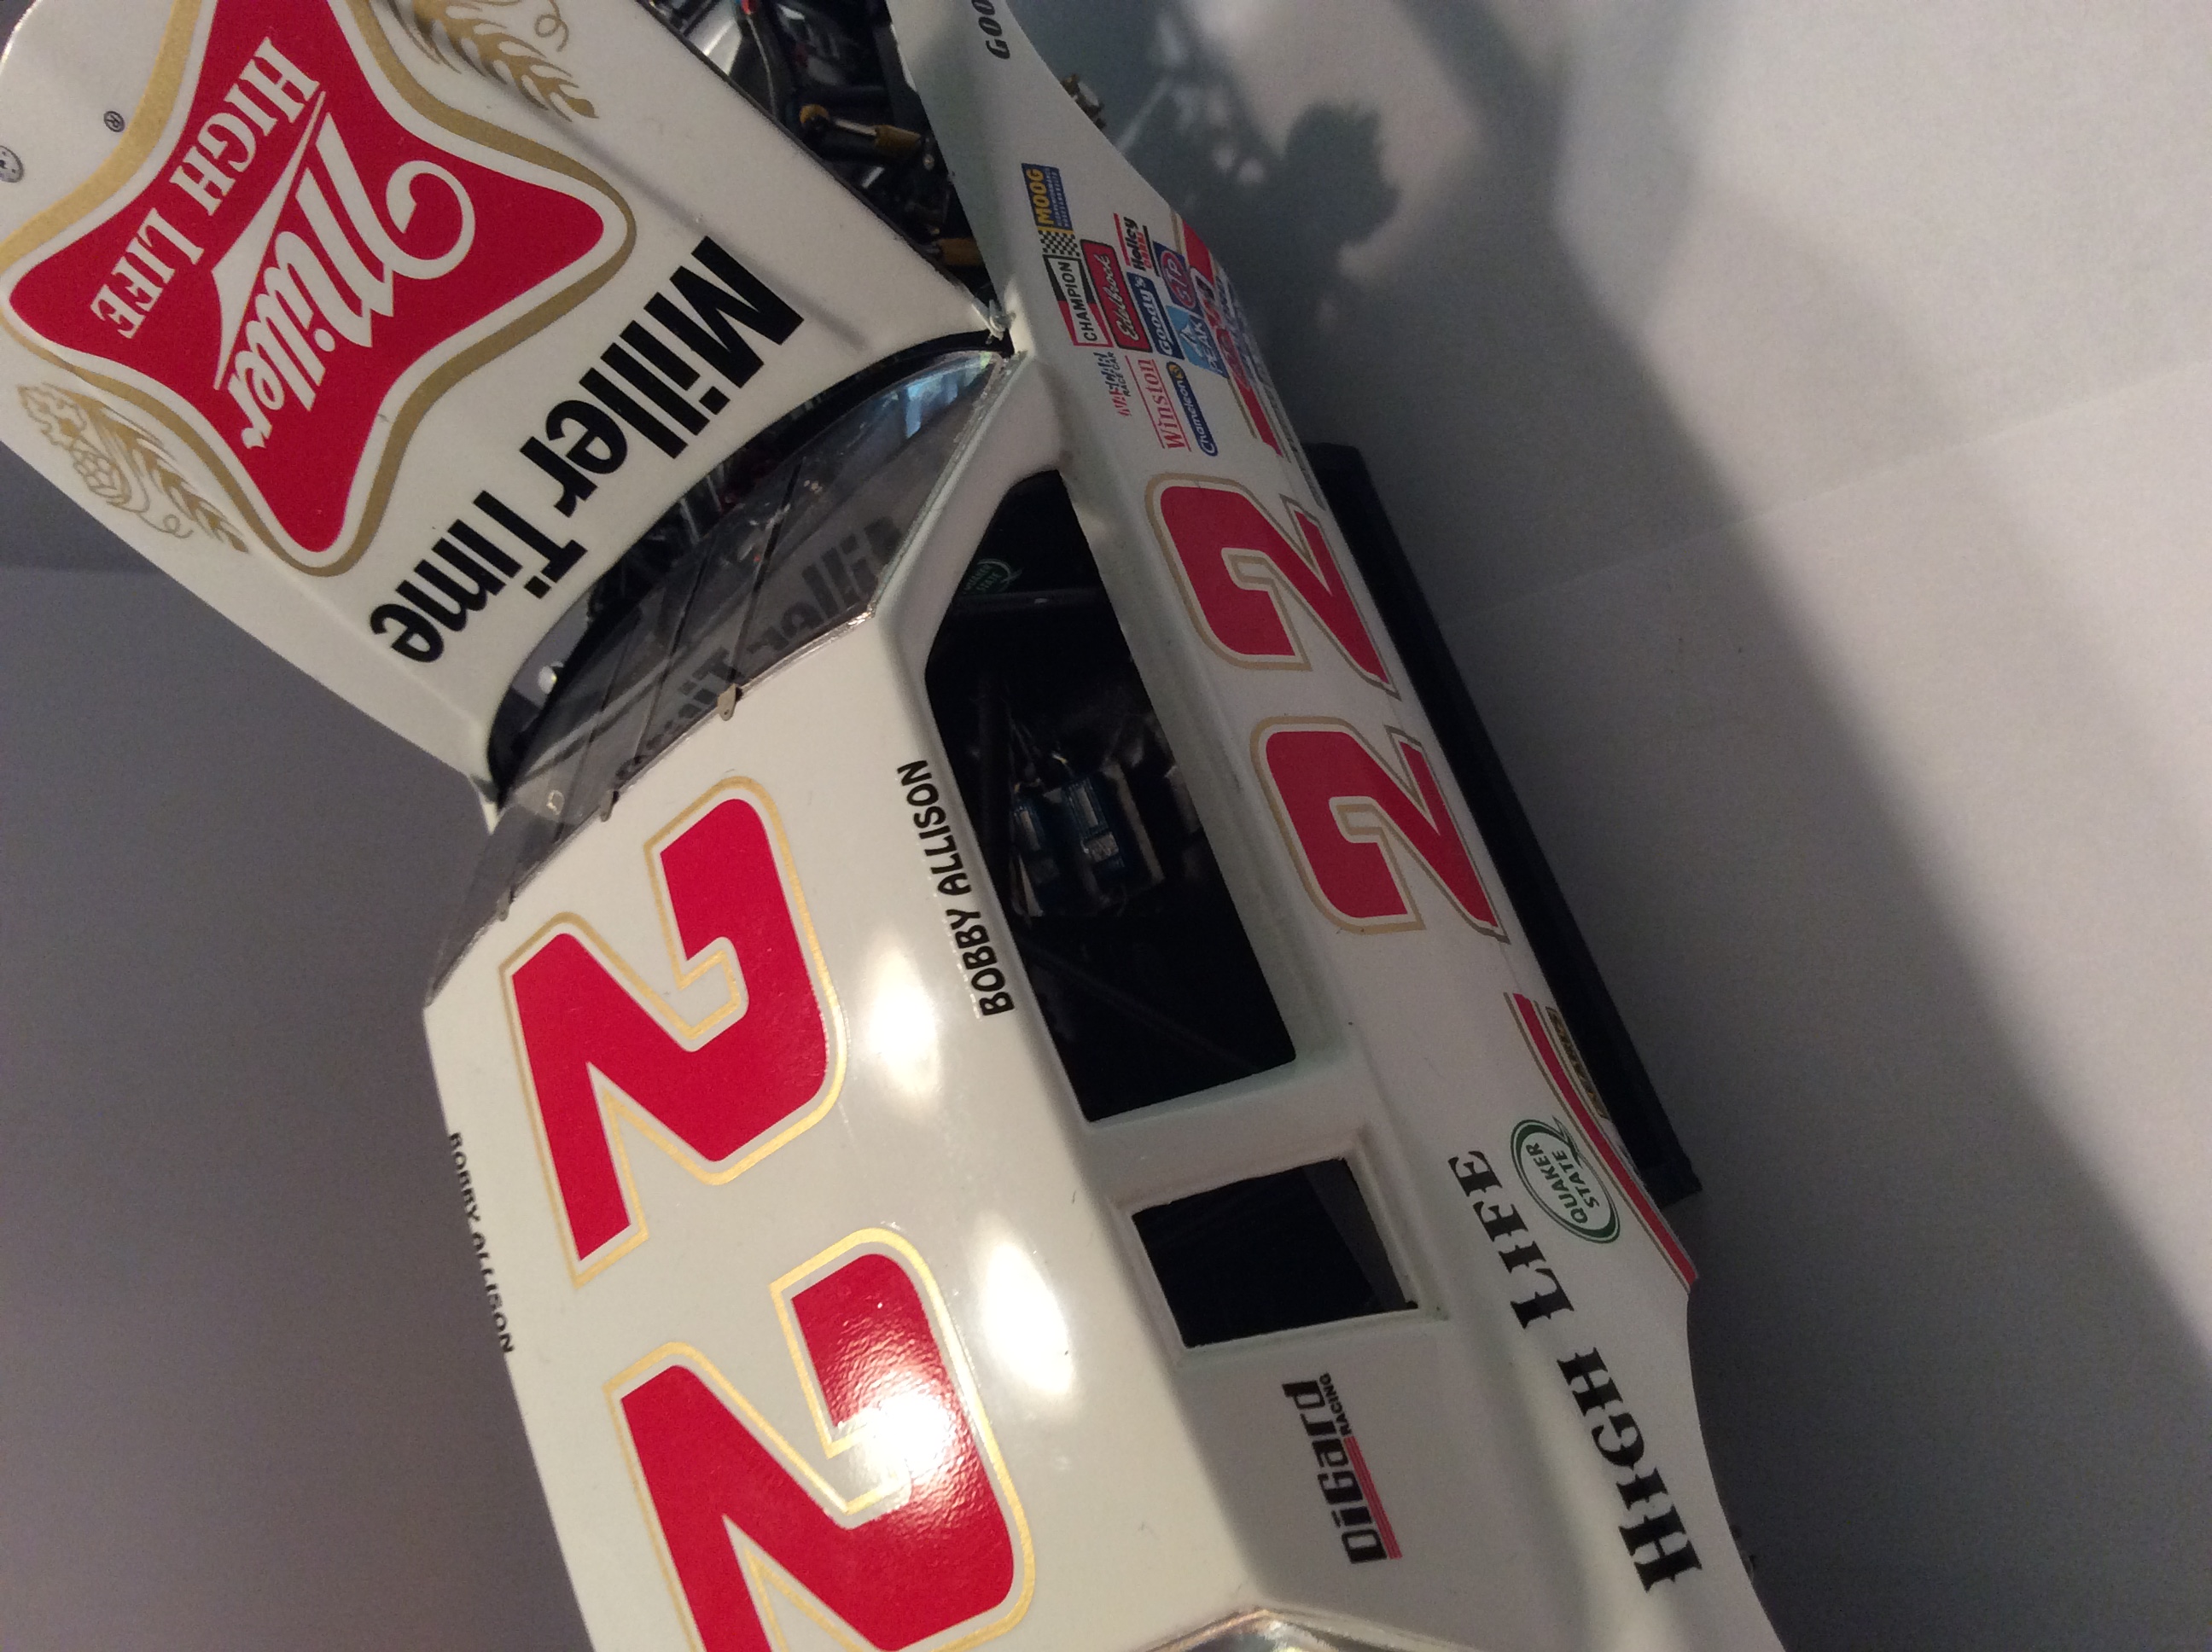
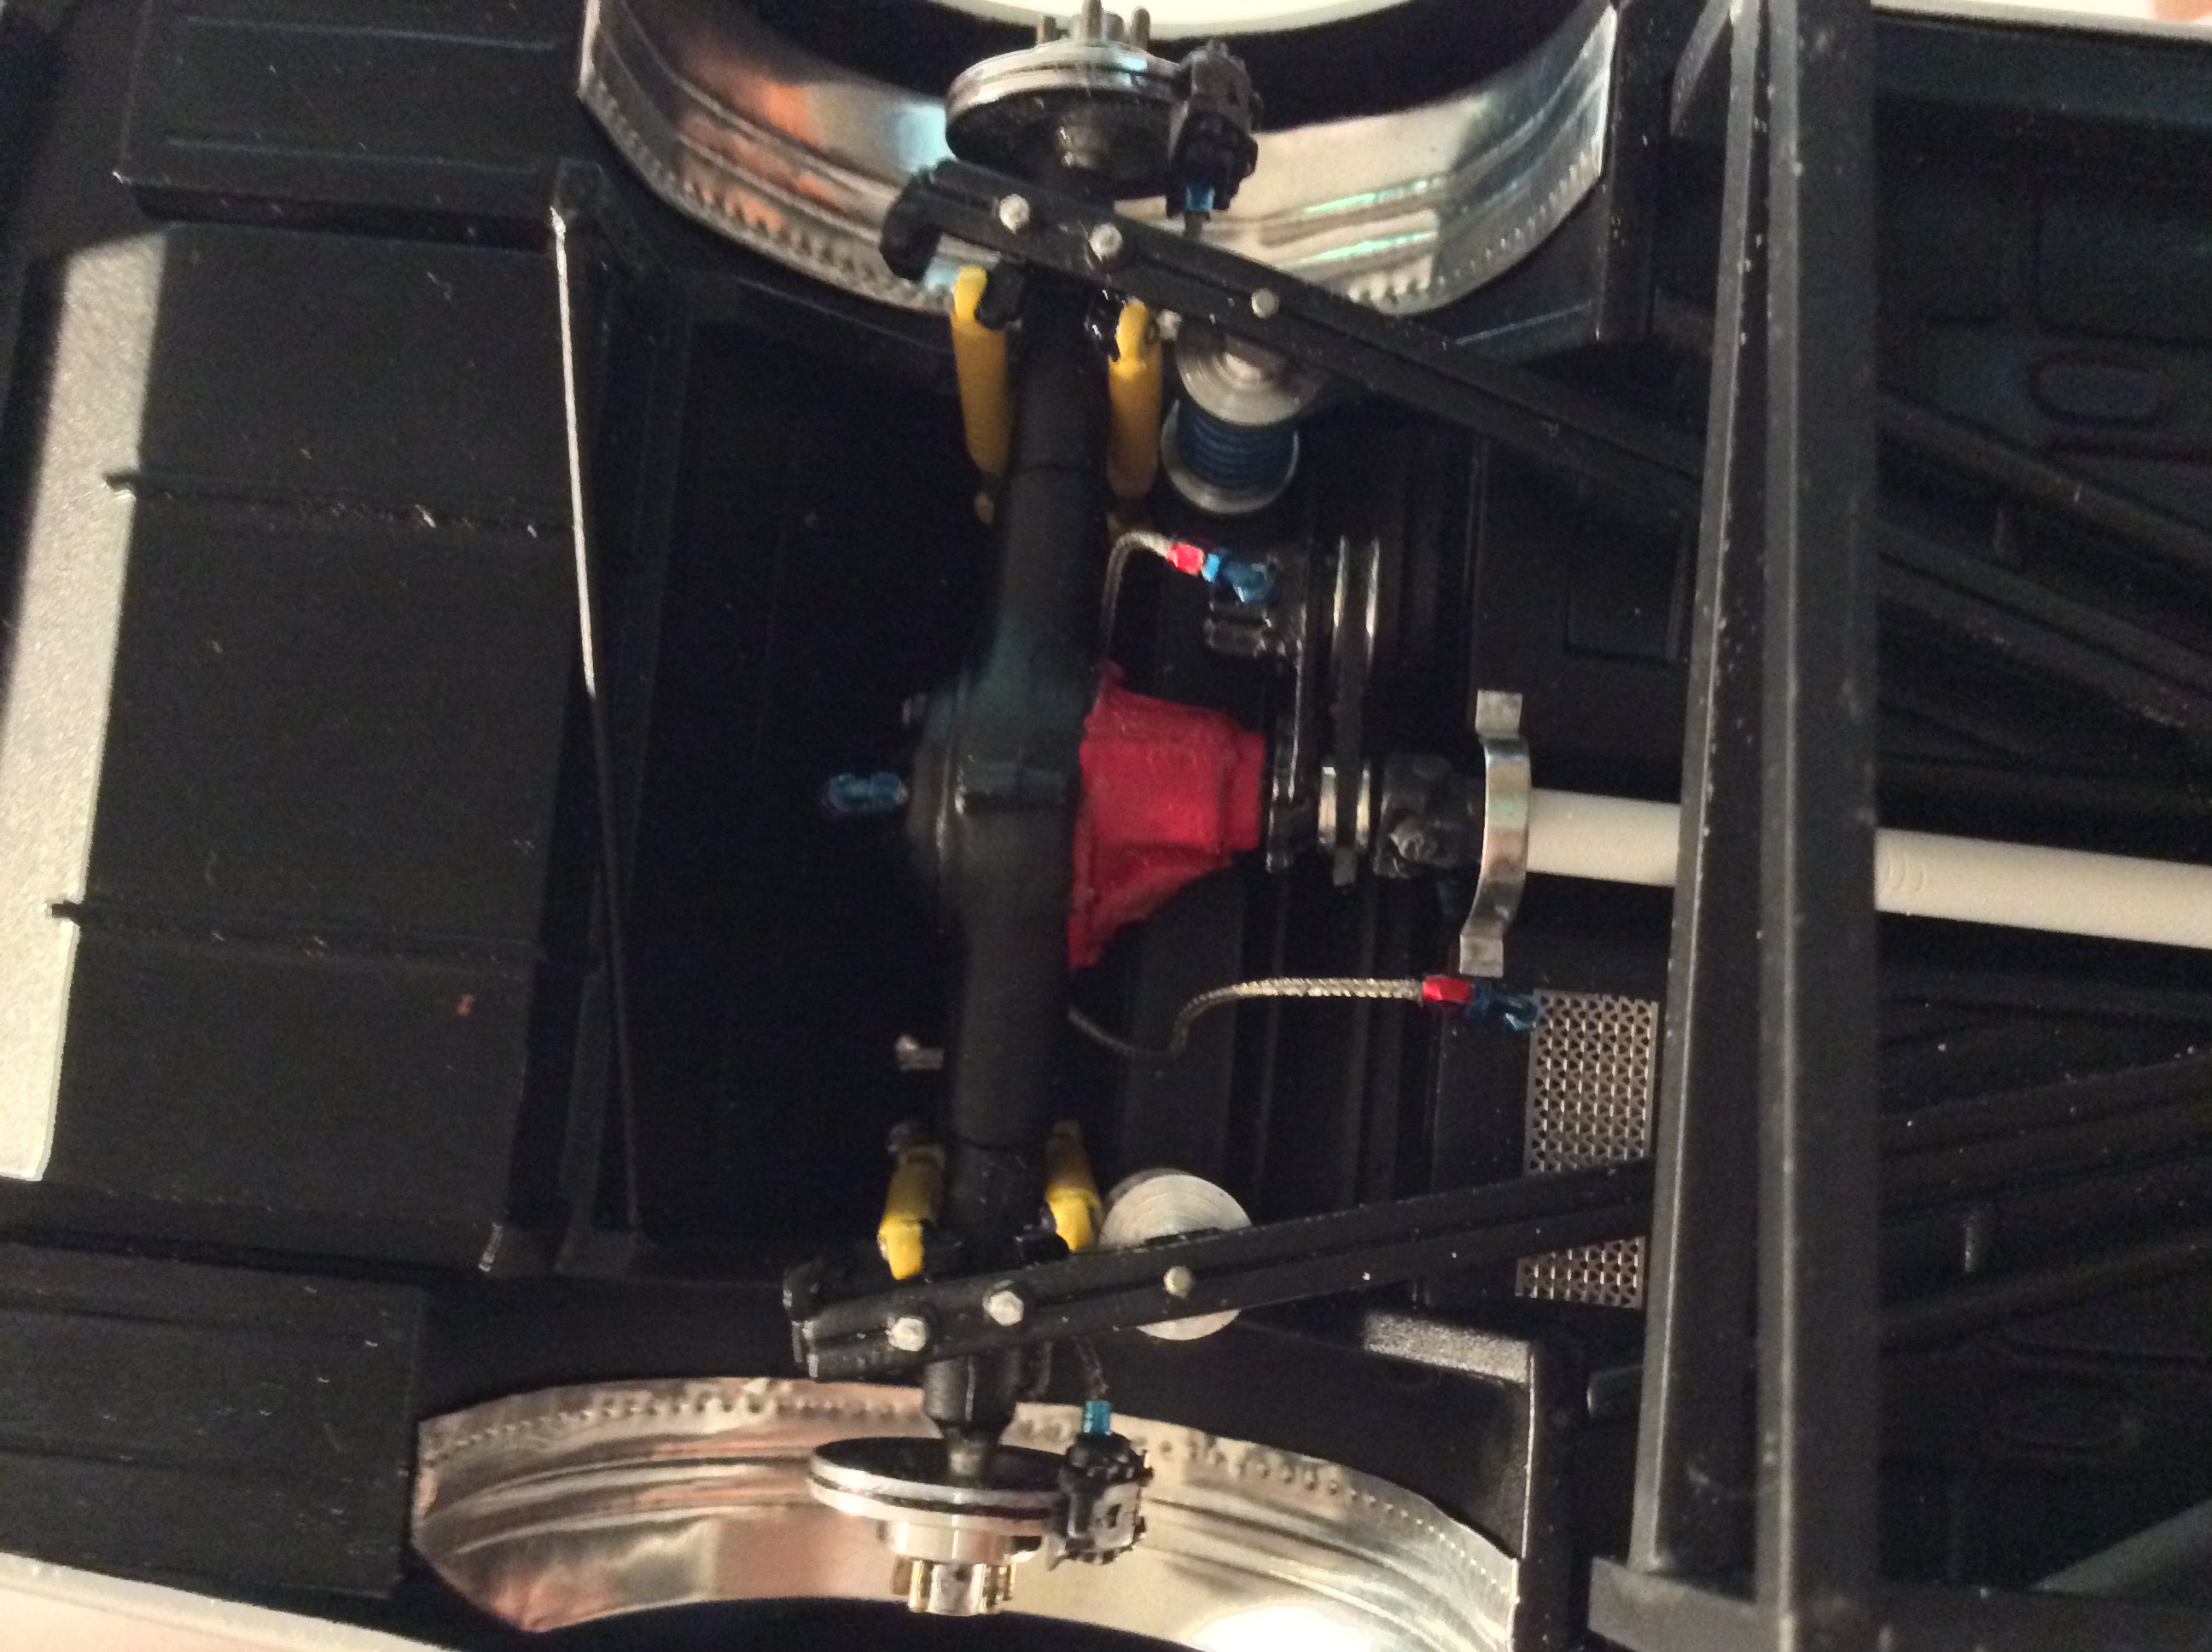
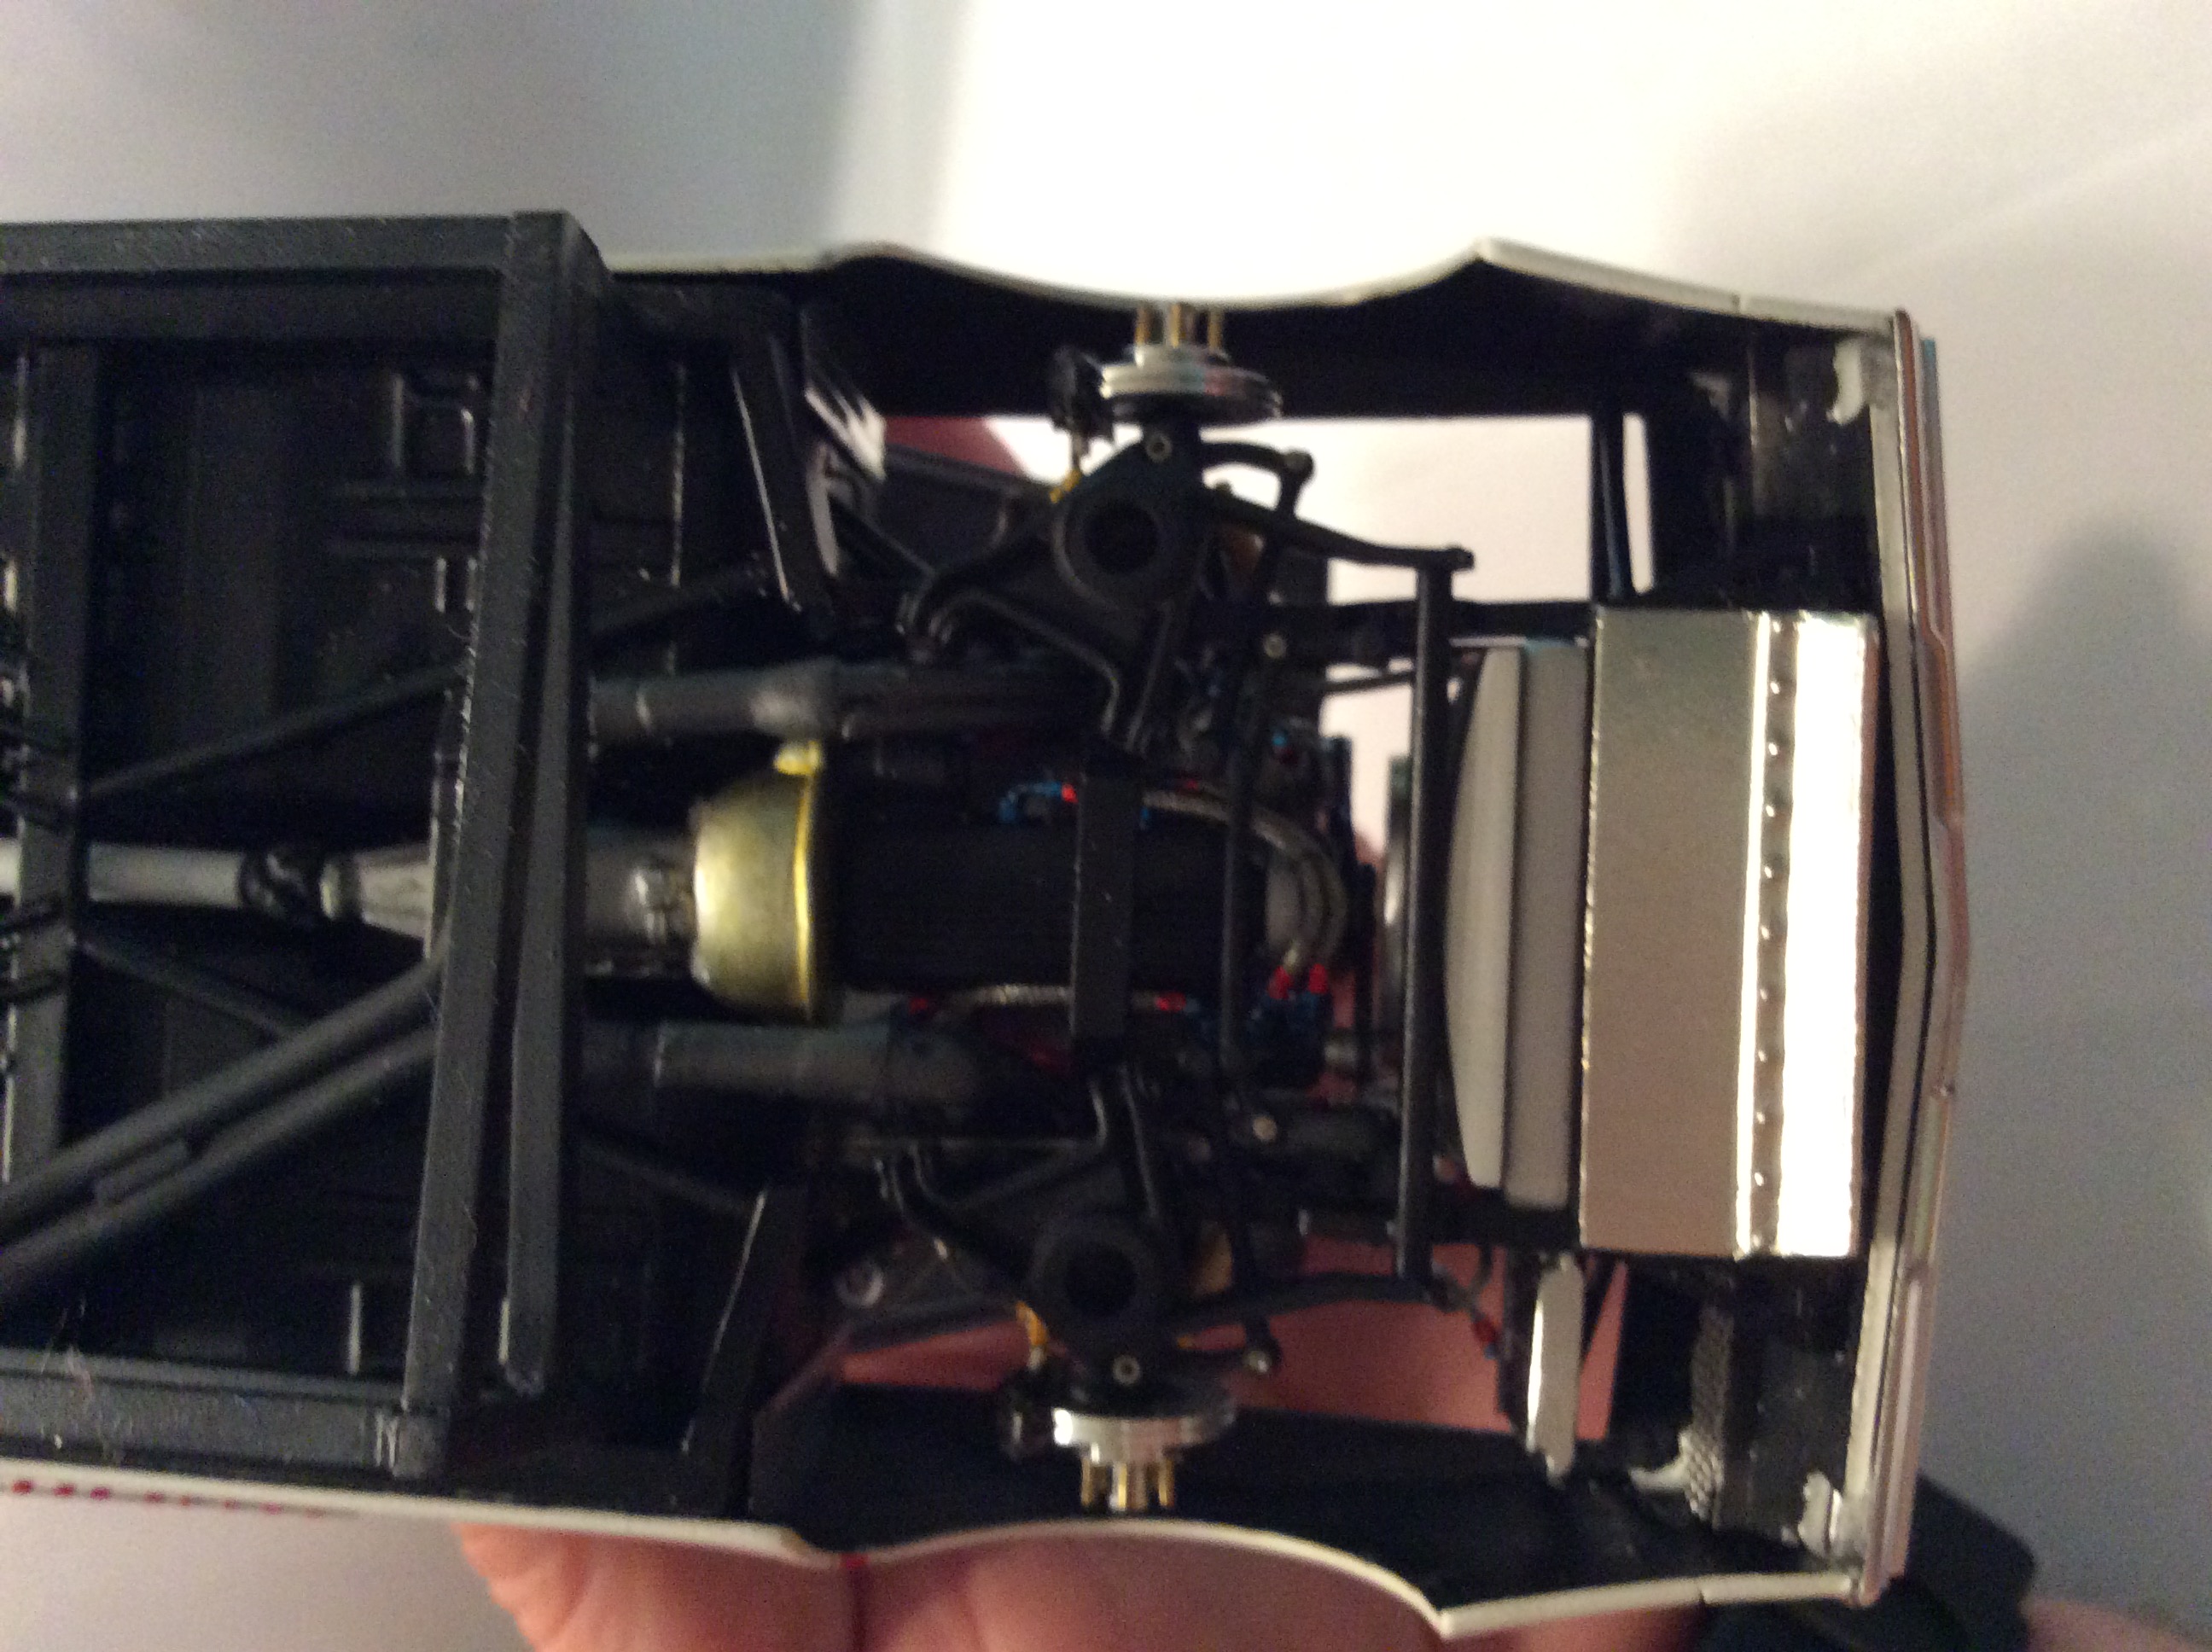
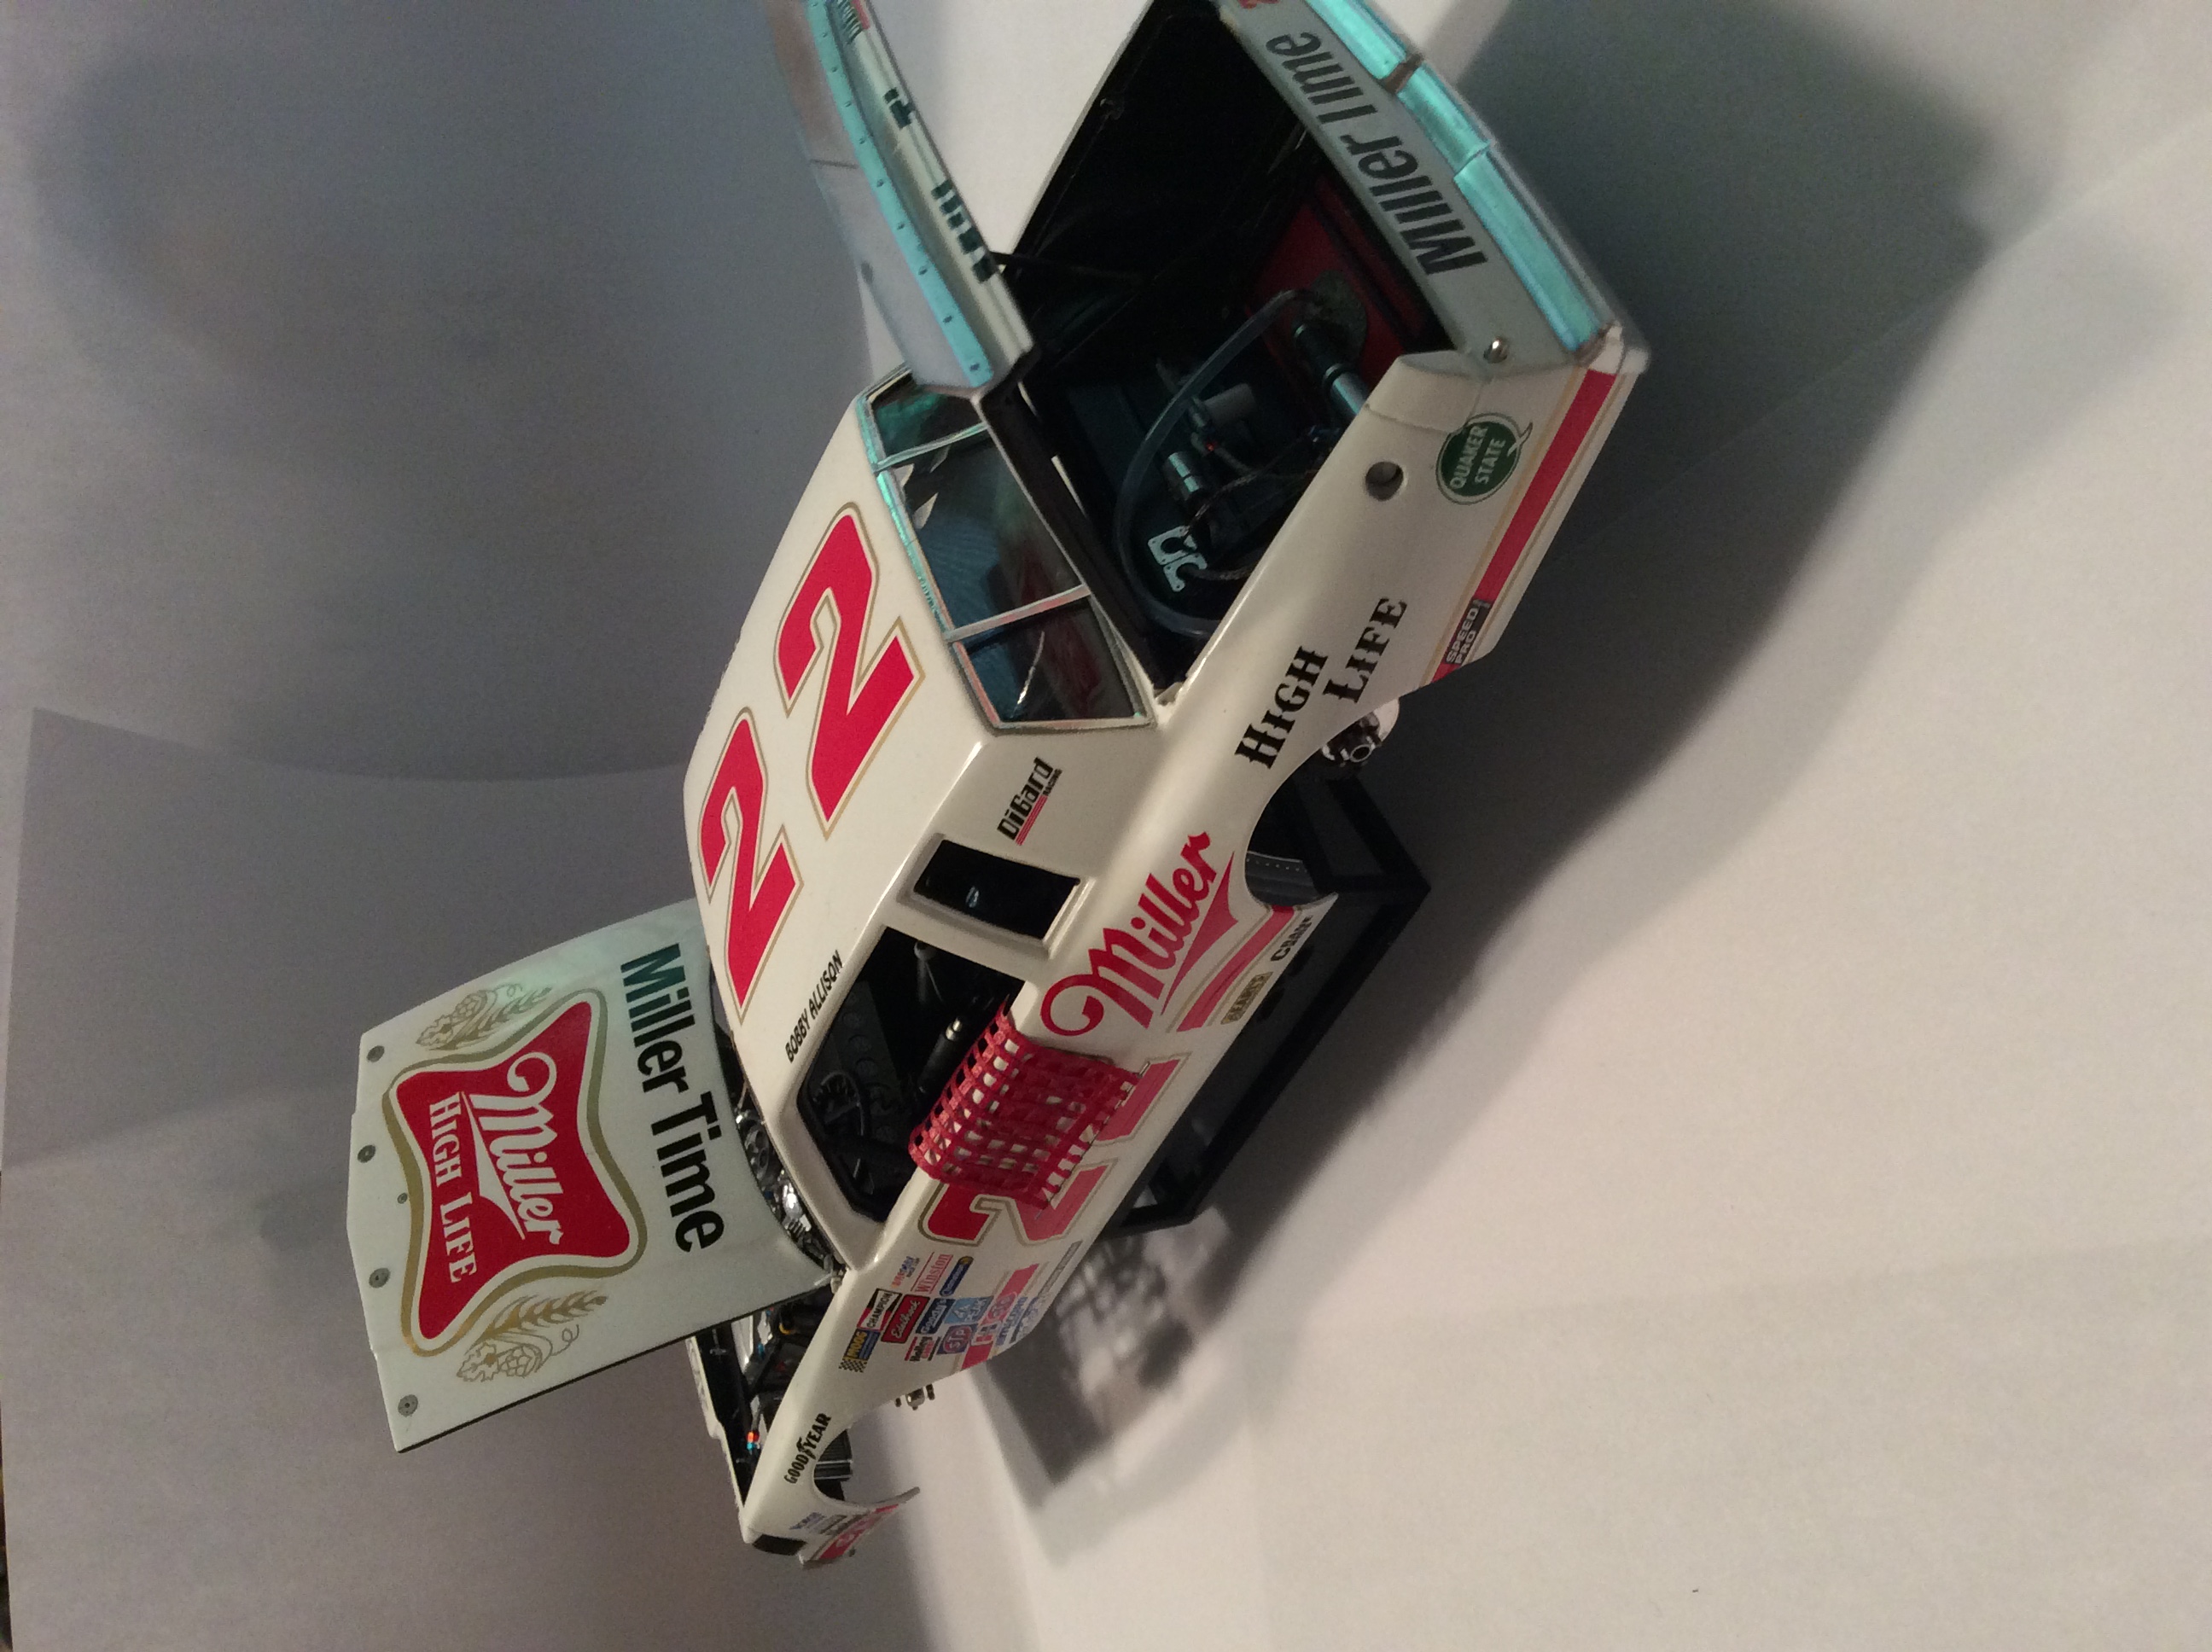
Finally finished my first NASCAR project.i think I've been building this car 3 years.not my favorite form of racing but look cool in scale when finished.
-
34 rat rod pickup
lou s replied to lou s's topic in WIP: Model Trucks: Pickups, Vans, SUVs, Light Commercial
Thanks a lot for all the comments. The z 28 plate is on there because when my son who is 7 was cutting out plate decals wanted the Florida plate on because that is were we are going on vacation.? -
34 rat rod pickup
lou s replied to lou s's topic in WIP: Model Trucks: Pickups, Vans, SUVs, Light Commercial
-
34 rat rod pickup
lou s replied to lou s's topic in WIP: Model Trucks: Pickups, Vans, SUVs, Light Commercial
Spex87 I've have a library of rat picks I'm looking to build.here is a pick of a 37 ford that would look great as is or rusted.its got the perfect stance.
-
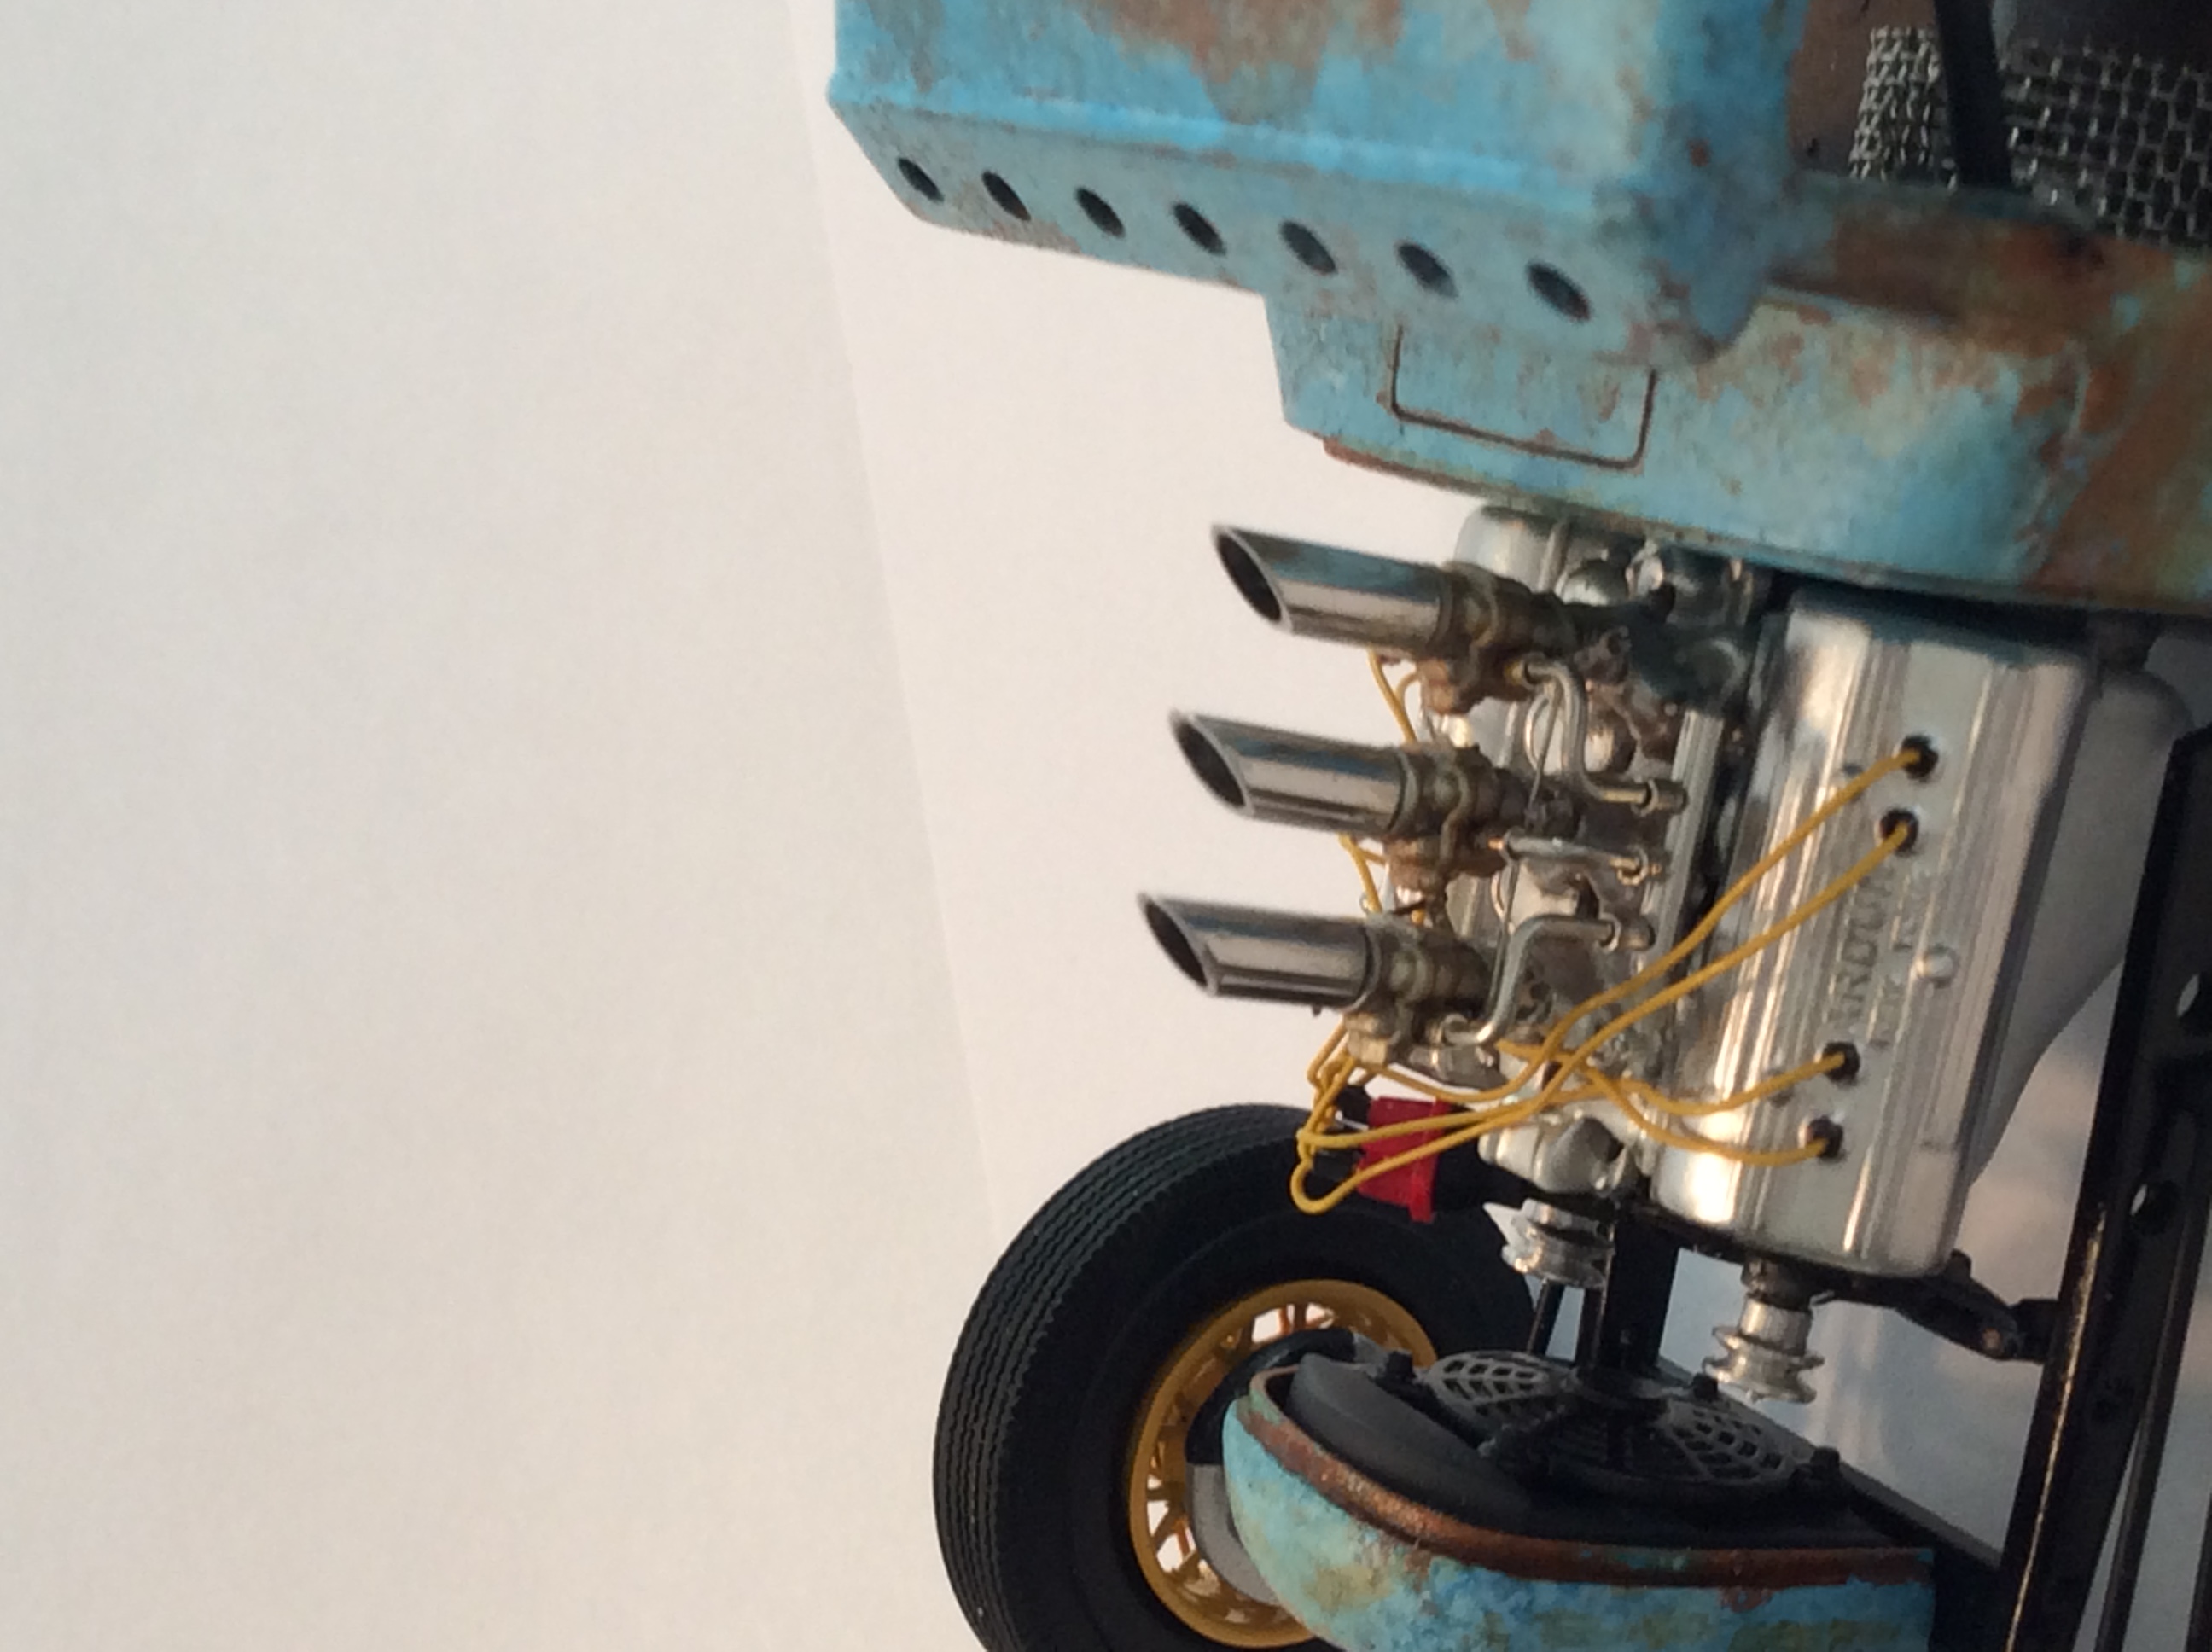
this car was modeled after a build I seen on you tube about a year ago.its a much cooler set up and detailed build than mine.at first I thought it was real.they gave great instructions on how to build and rust up a rat rod.until I saw that video I had no idea how they were done or interest in building one but I had all the parts so I started tinkering around with it.the rust on this one was made just like it was explained on the video 3 coats of paint sanded and then rust all. The 34 pickup i posted on the work bench I used several different tech i seen dr cranky demonstrate along with some military modeler.
-
2nd rat rod attempt.work in progress.so far my favorite rat rod out there is dr cranky blues rod.i just think its perfect.the stance ,colors.theres nothing I don't like about it.i didn't want to try to copy an original custom but I couldn't help myself from trying something close.i scratched a chassis,chopped the top etc.l did try to go with another color but the blue looked the best.hope it don't affend.
-
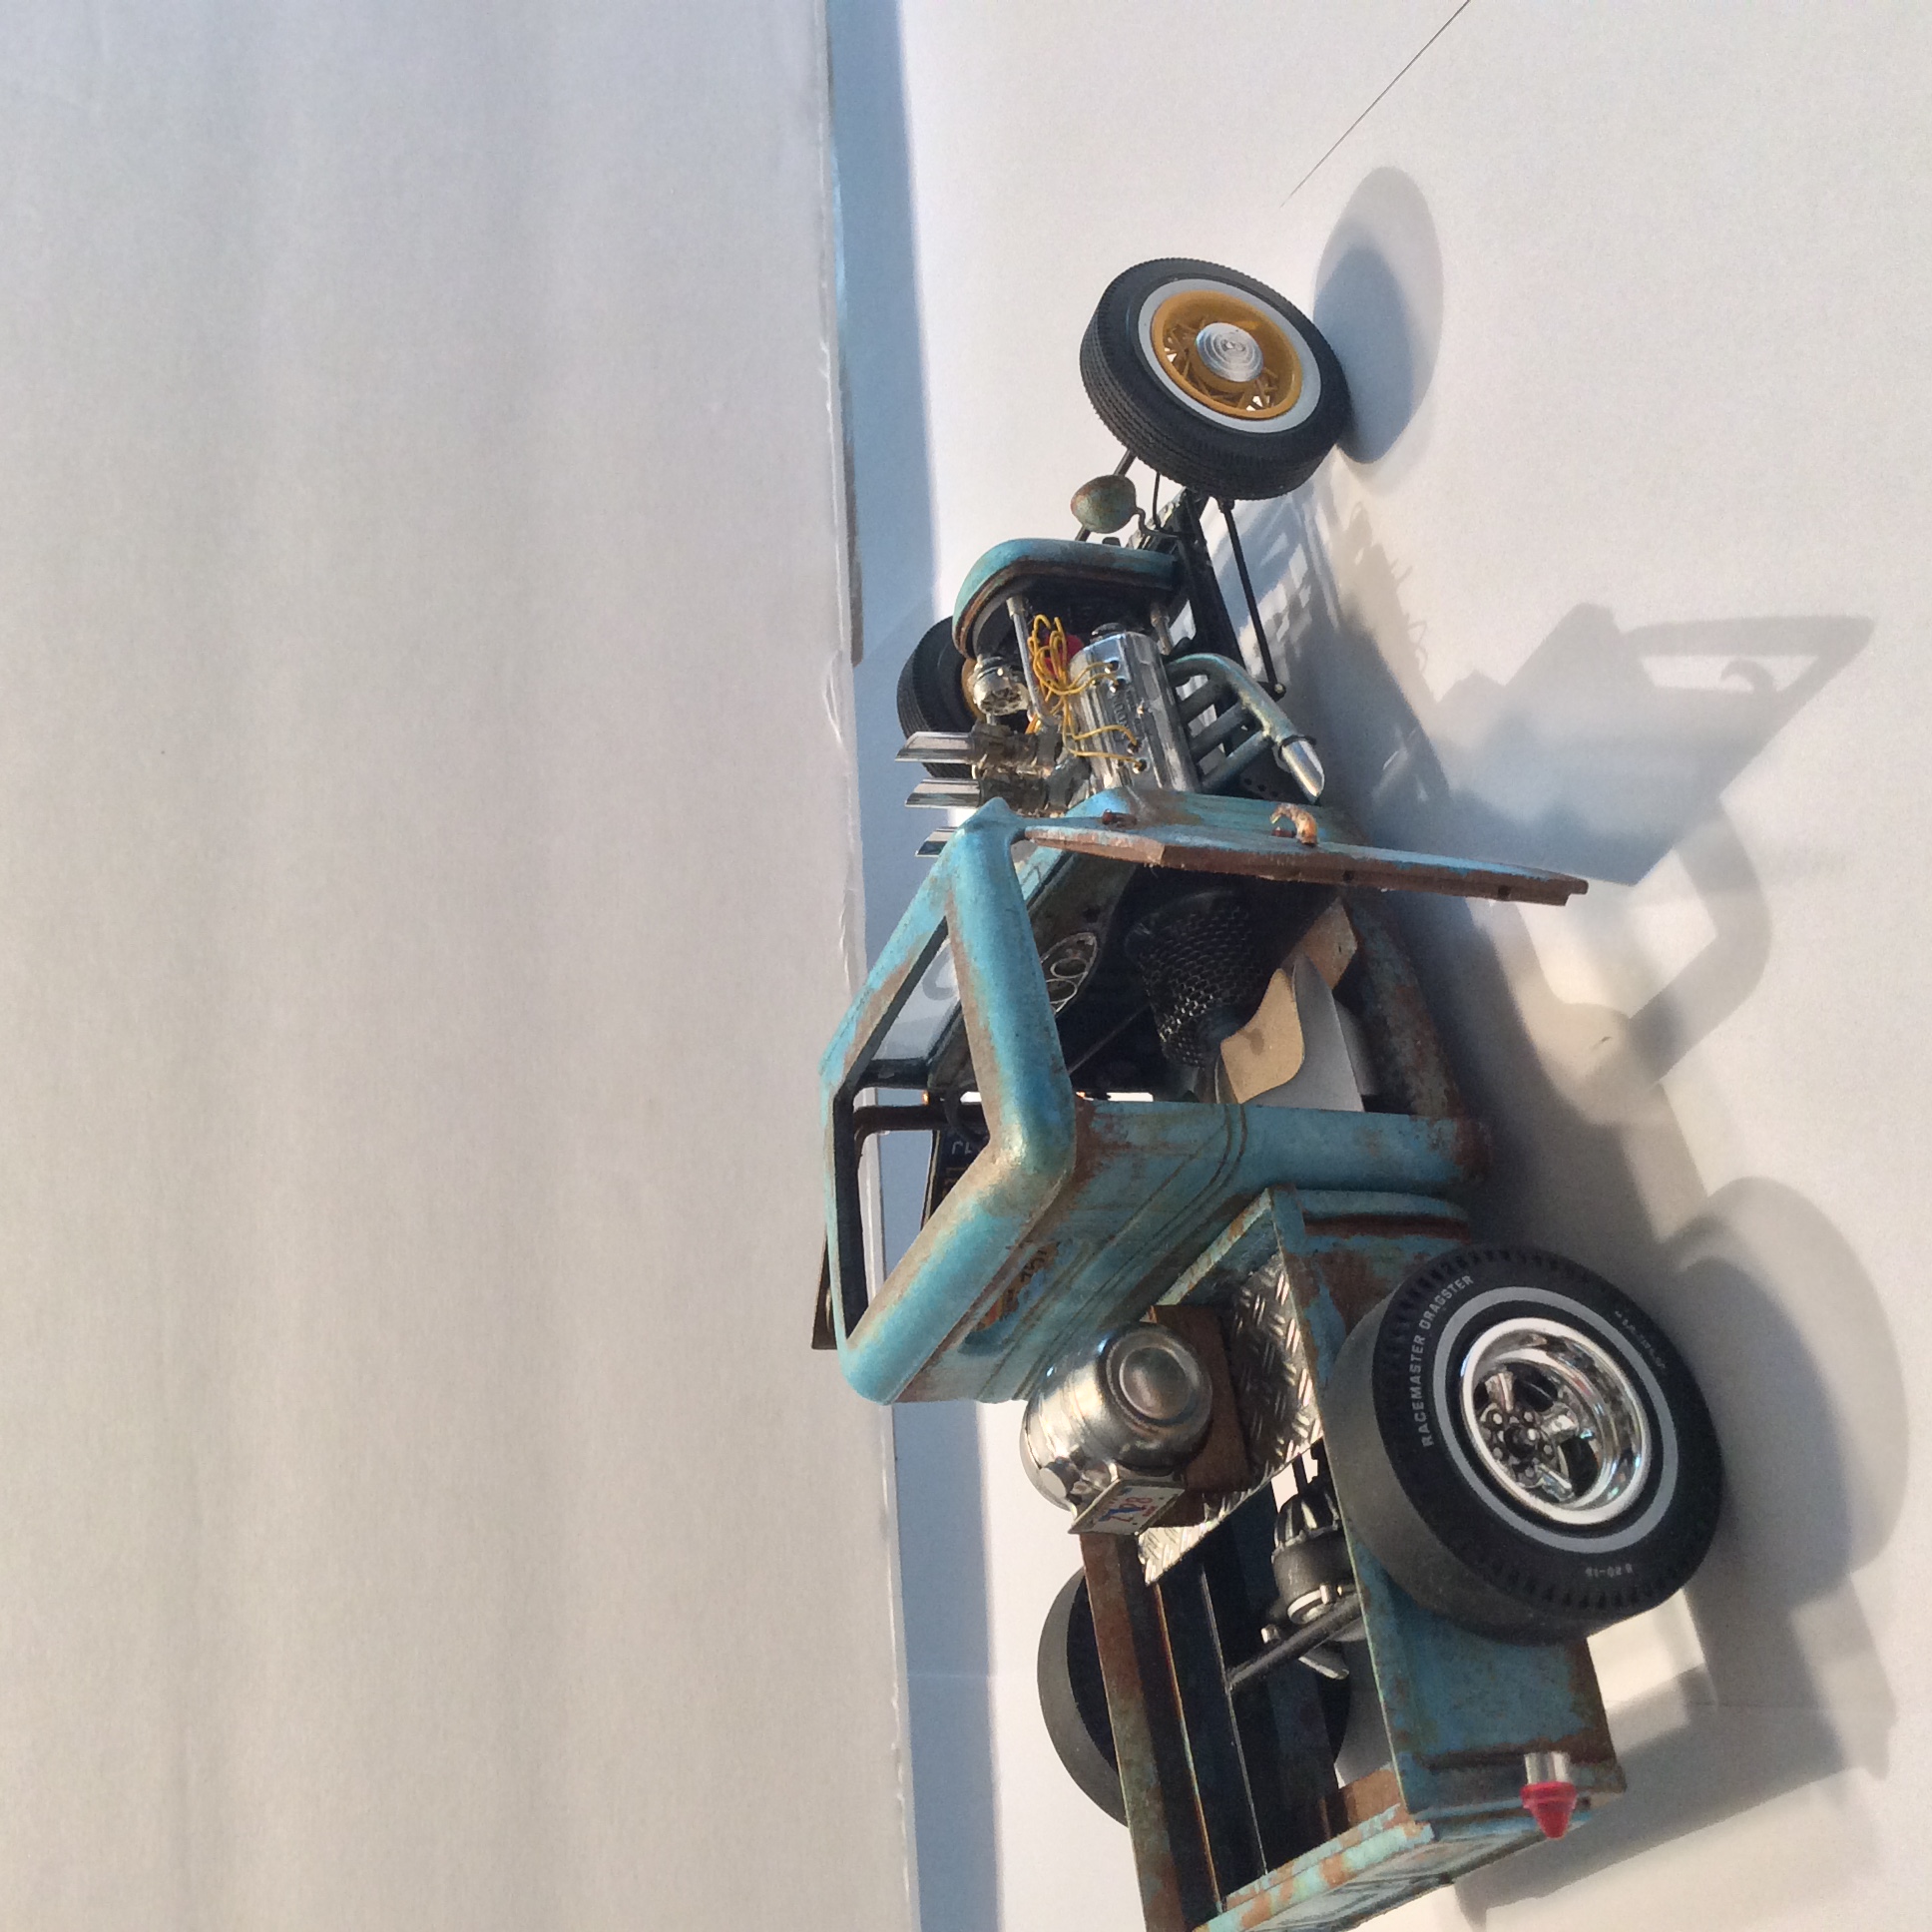
My first rat rod. Inspired by dr cranky and many others. Enjoyed the build so much I've stared another. Best part is you mess up just cover it with rust.