Search the Community
Showing results for tags 'Corvette'.
-
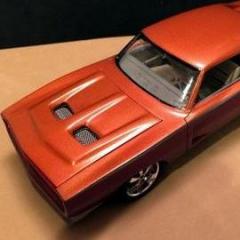
Started back in 2015, this AMT kit is an adventure. The front and rear bumpers did not fit well so there was a lot of sanding and puttying done to correct it. Painted Testors Fiery Orange with wet look clear, interior is Tamiya TS-69 linoleum deck brown. The 454 has the single 4bbl intake. Tires are from the new release MPC 70 Bonneville kit. I still have some fitment issues to deal with. I also have an MPC 74 Corvette convertible painted the same color that I am building as a companion piece to this one.
-
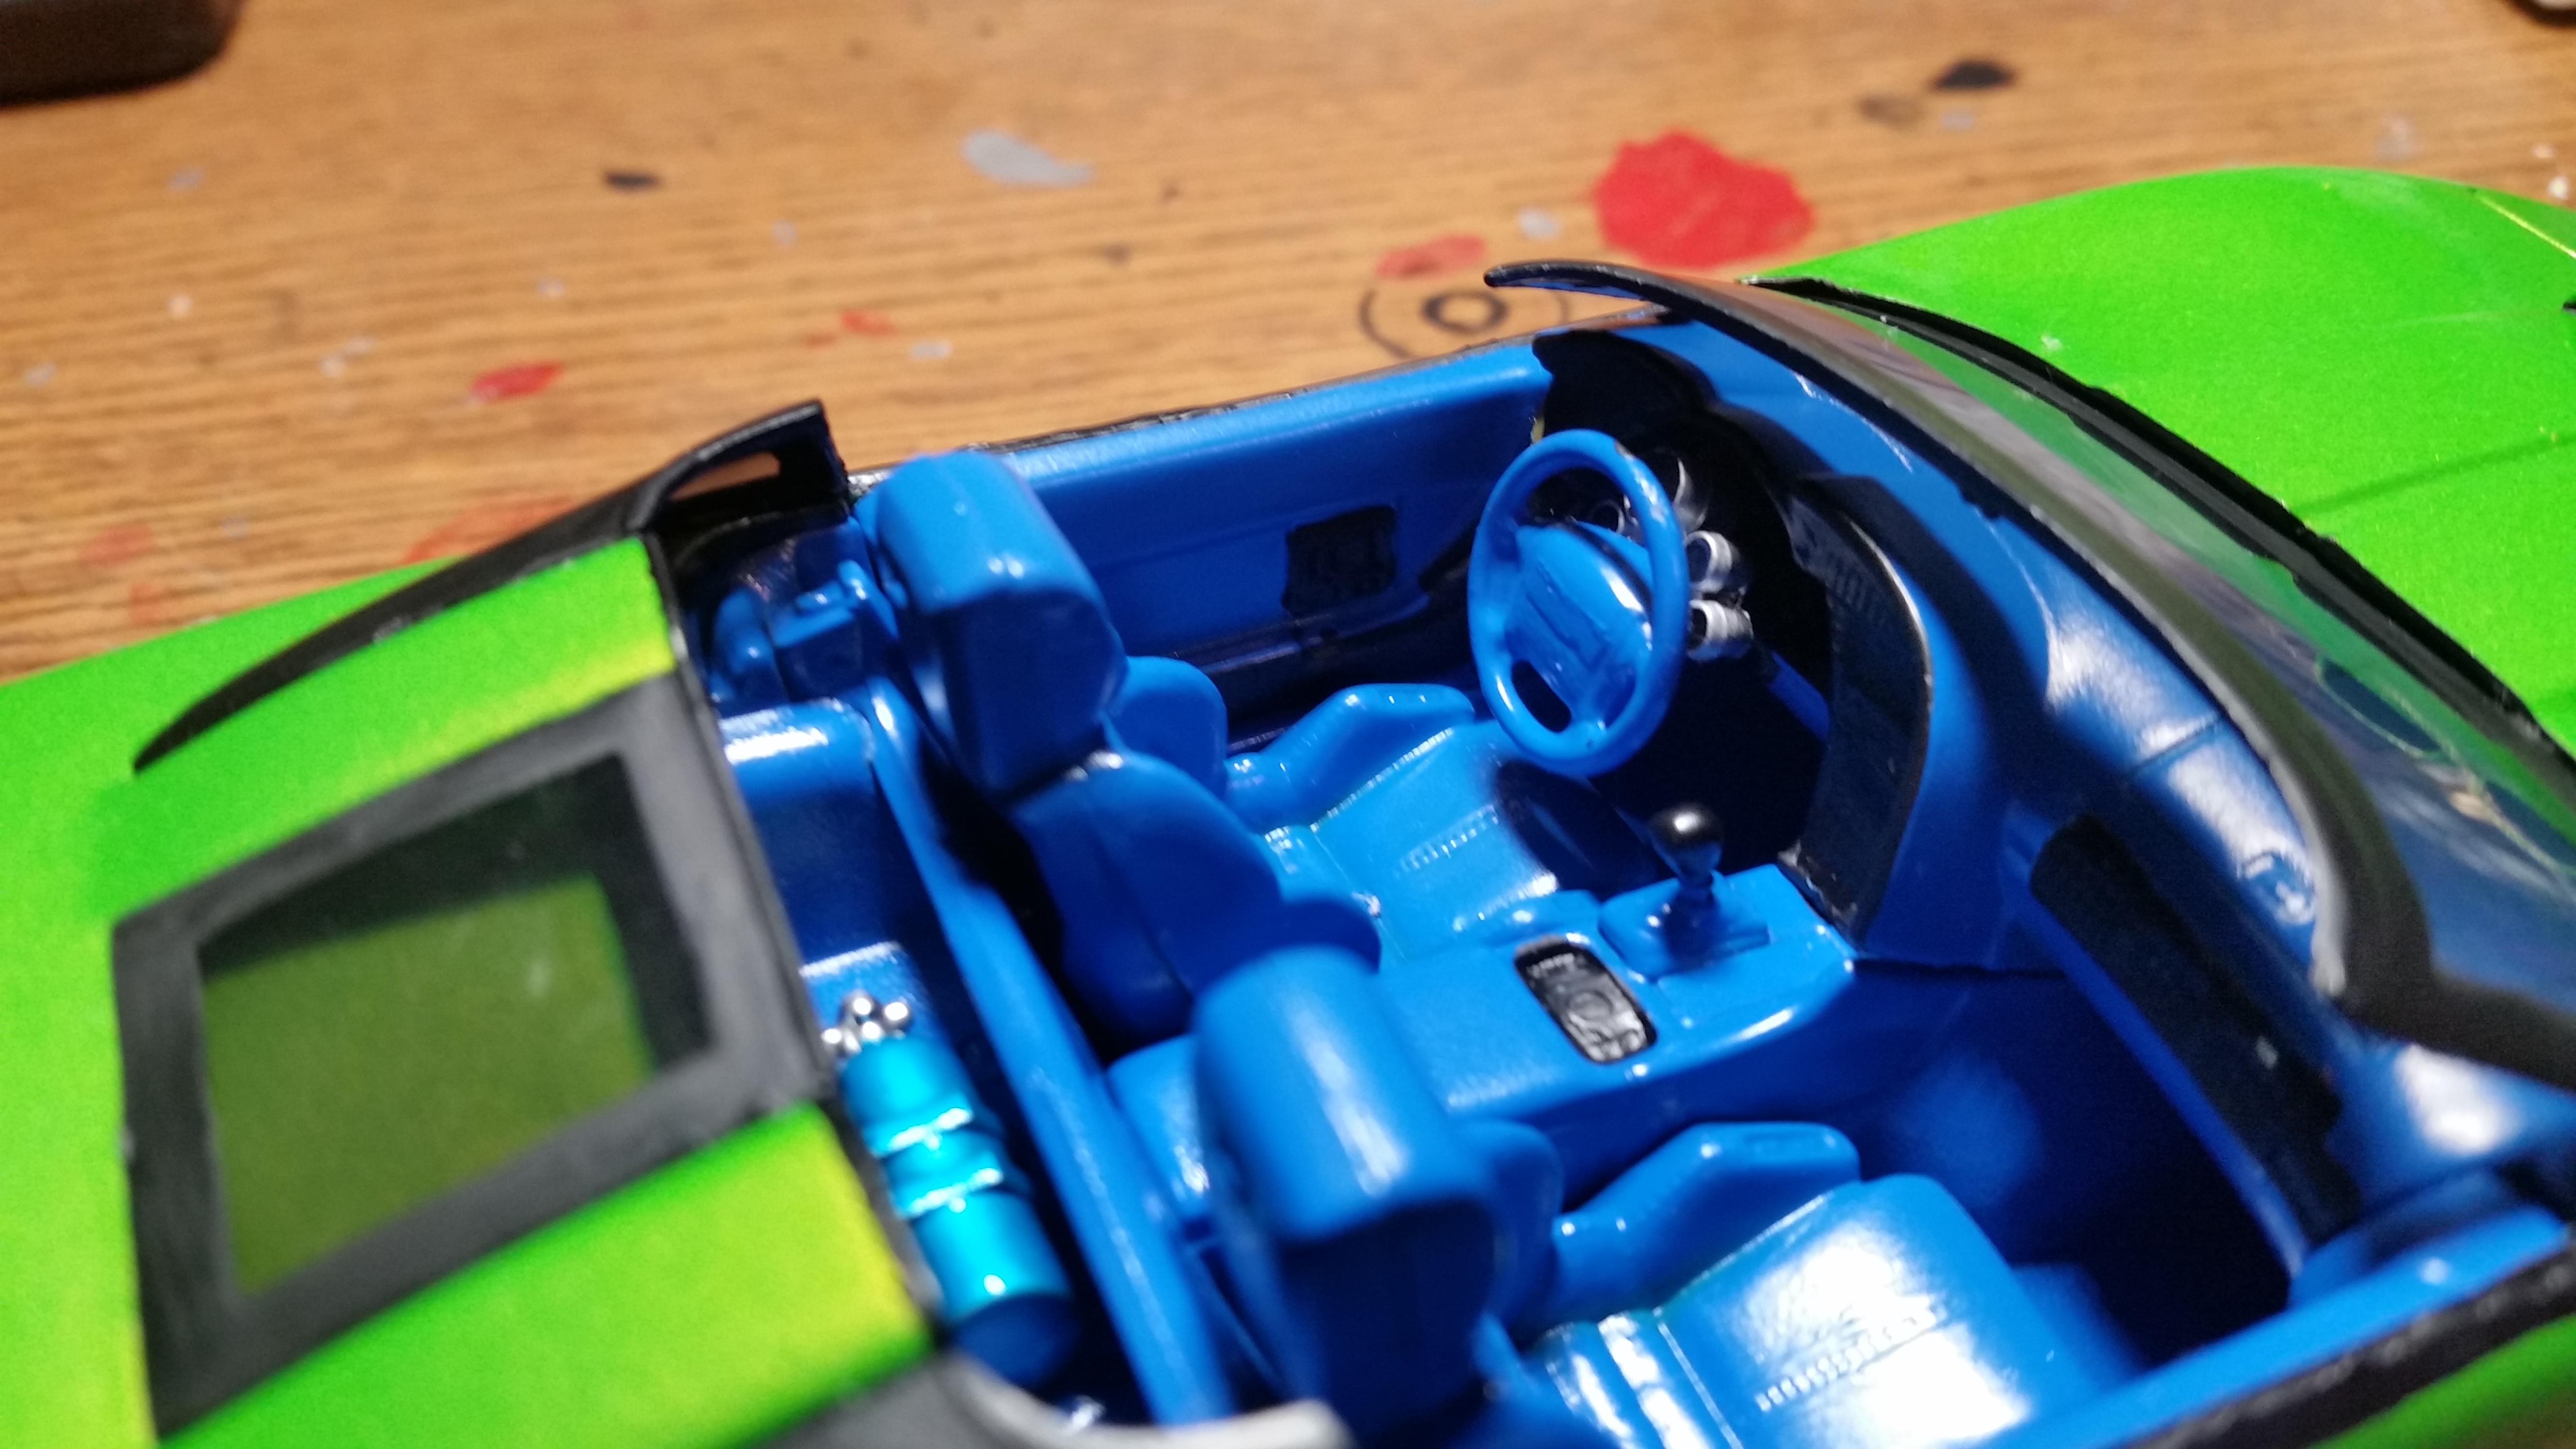
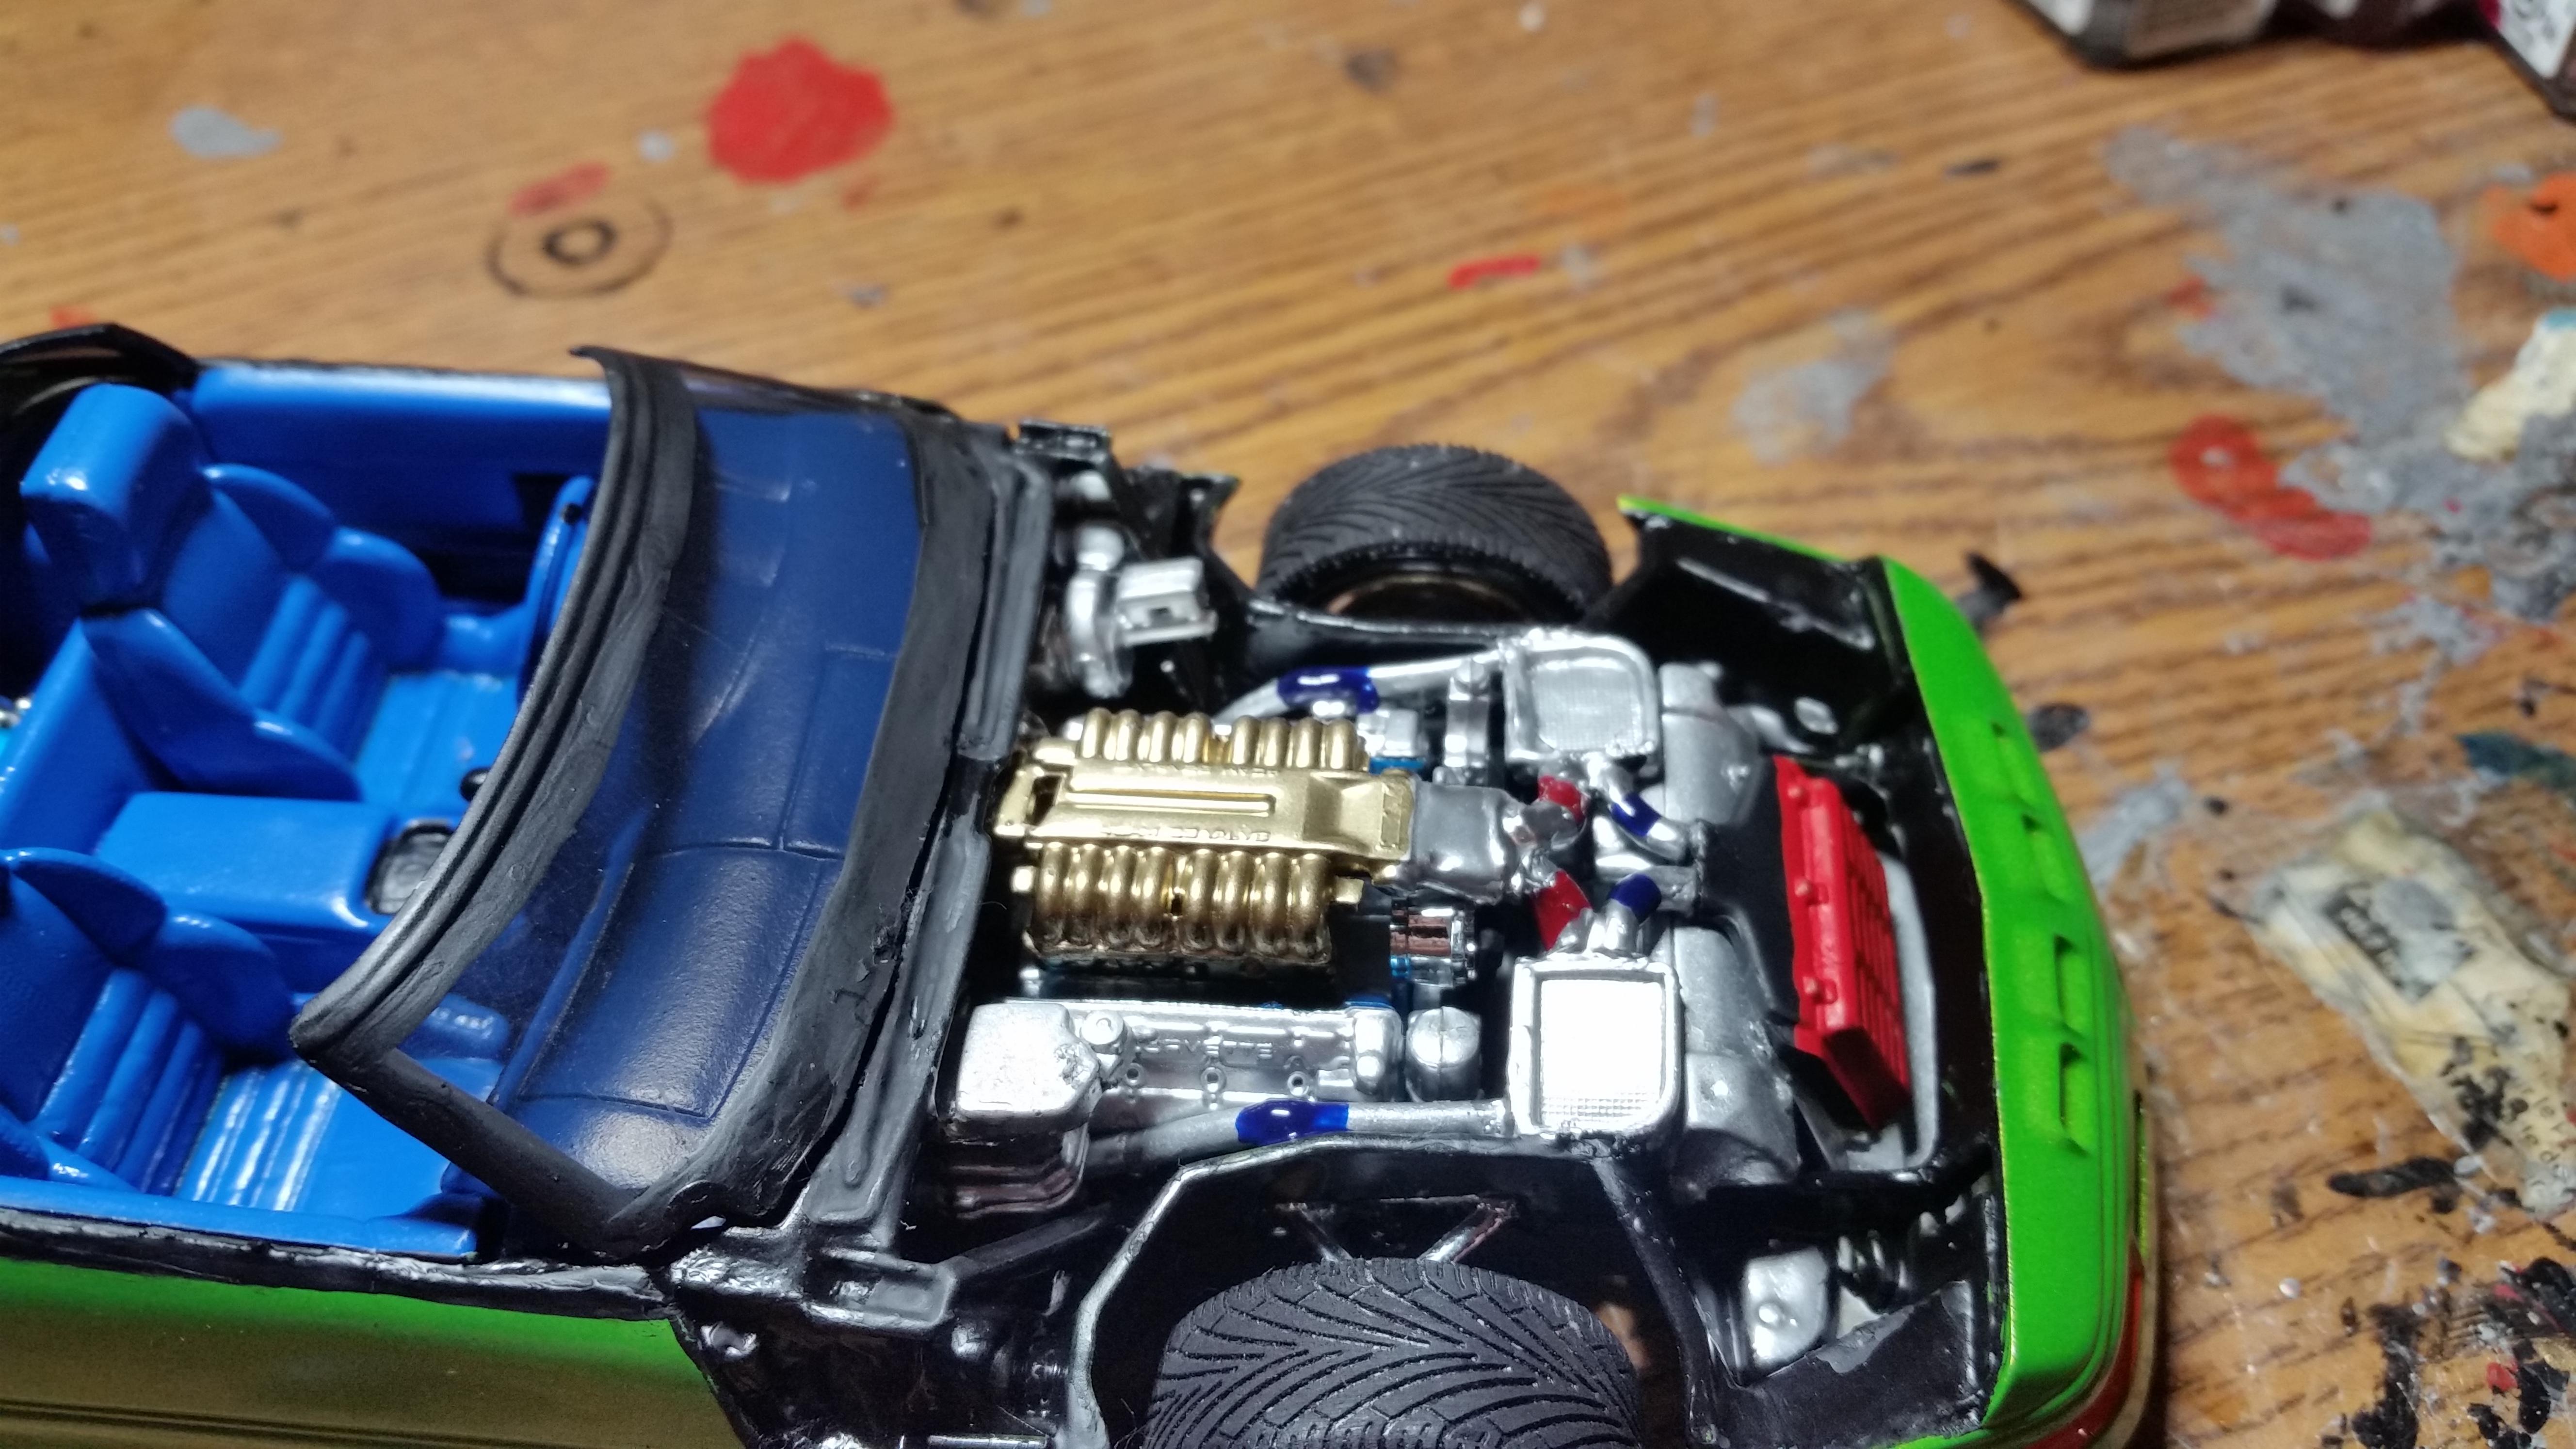
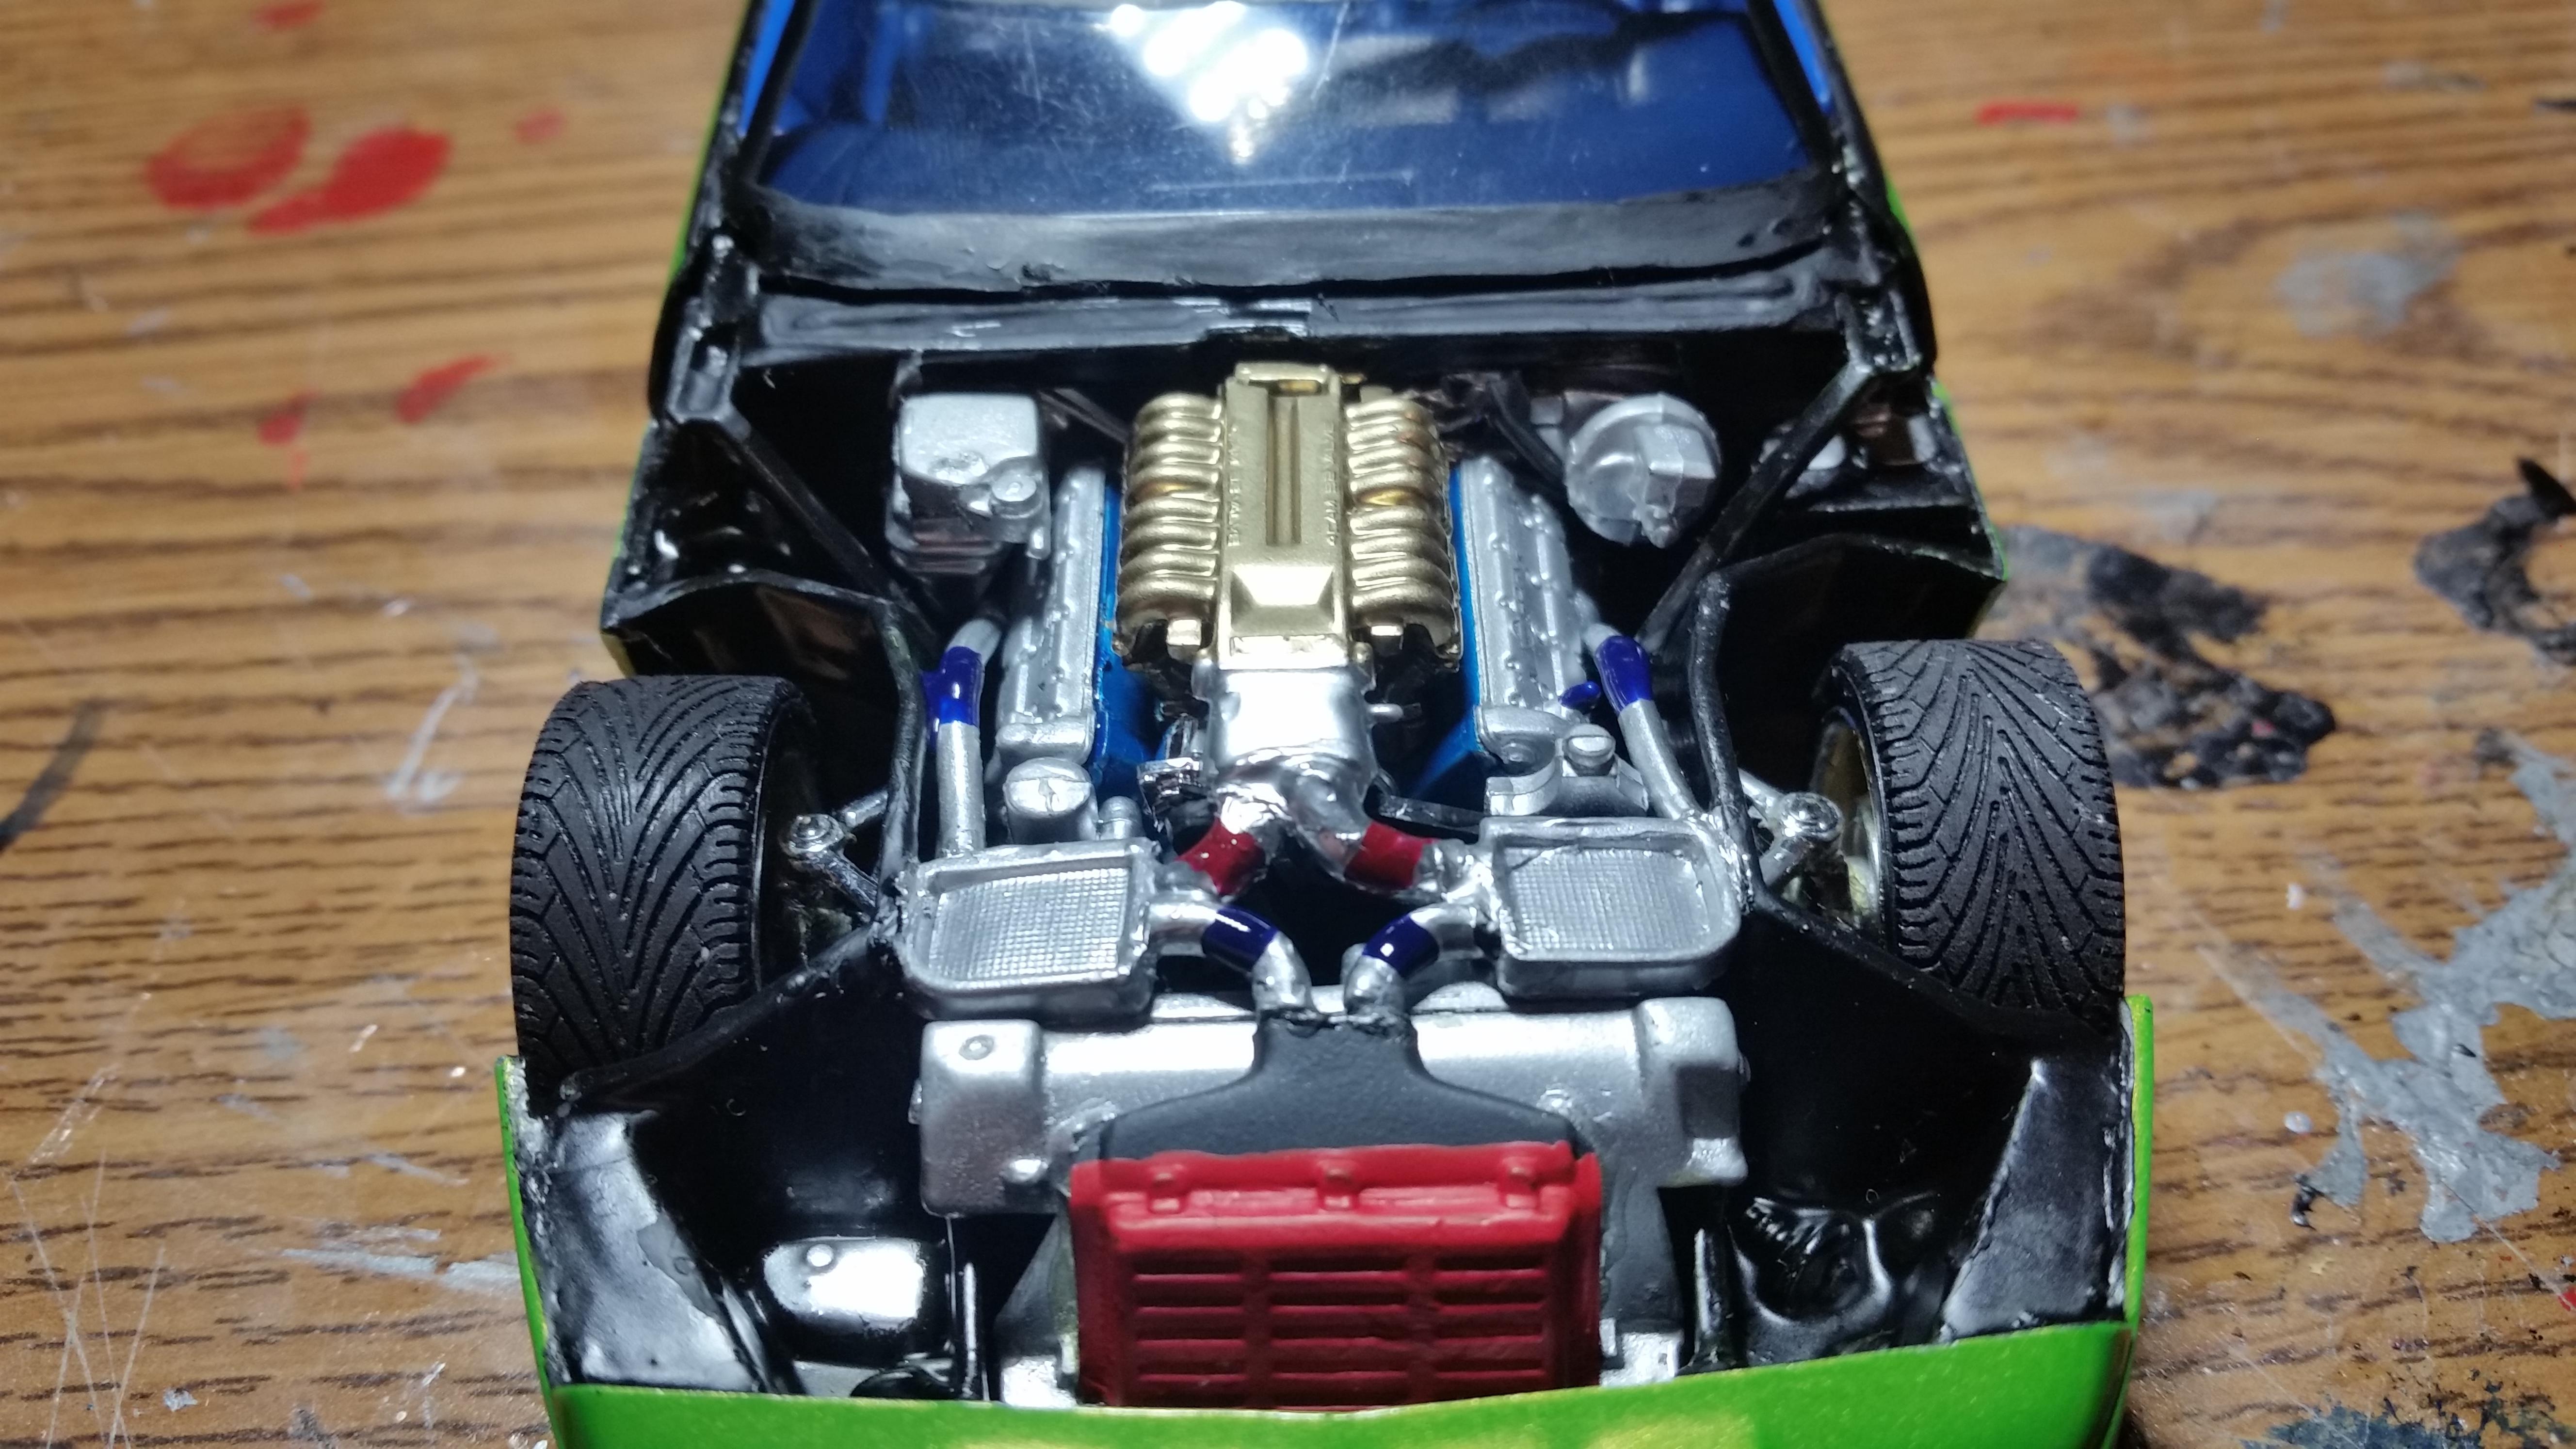
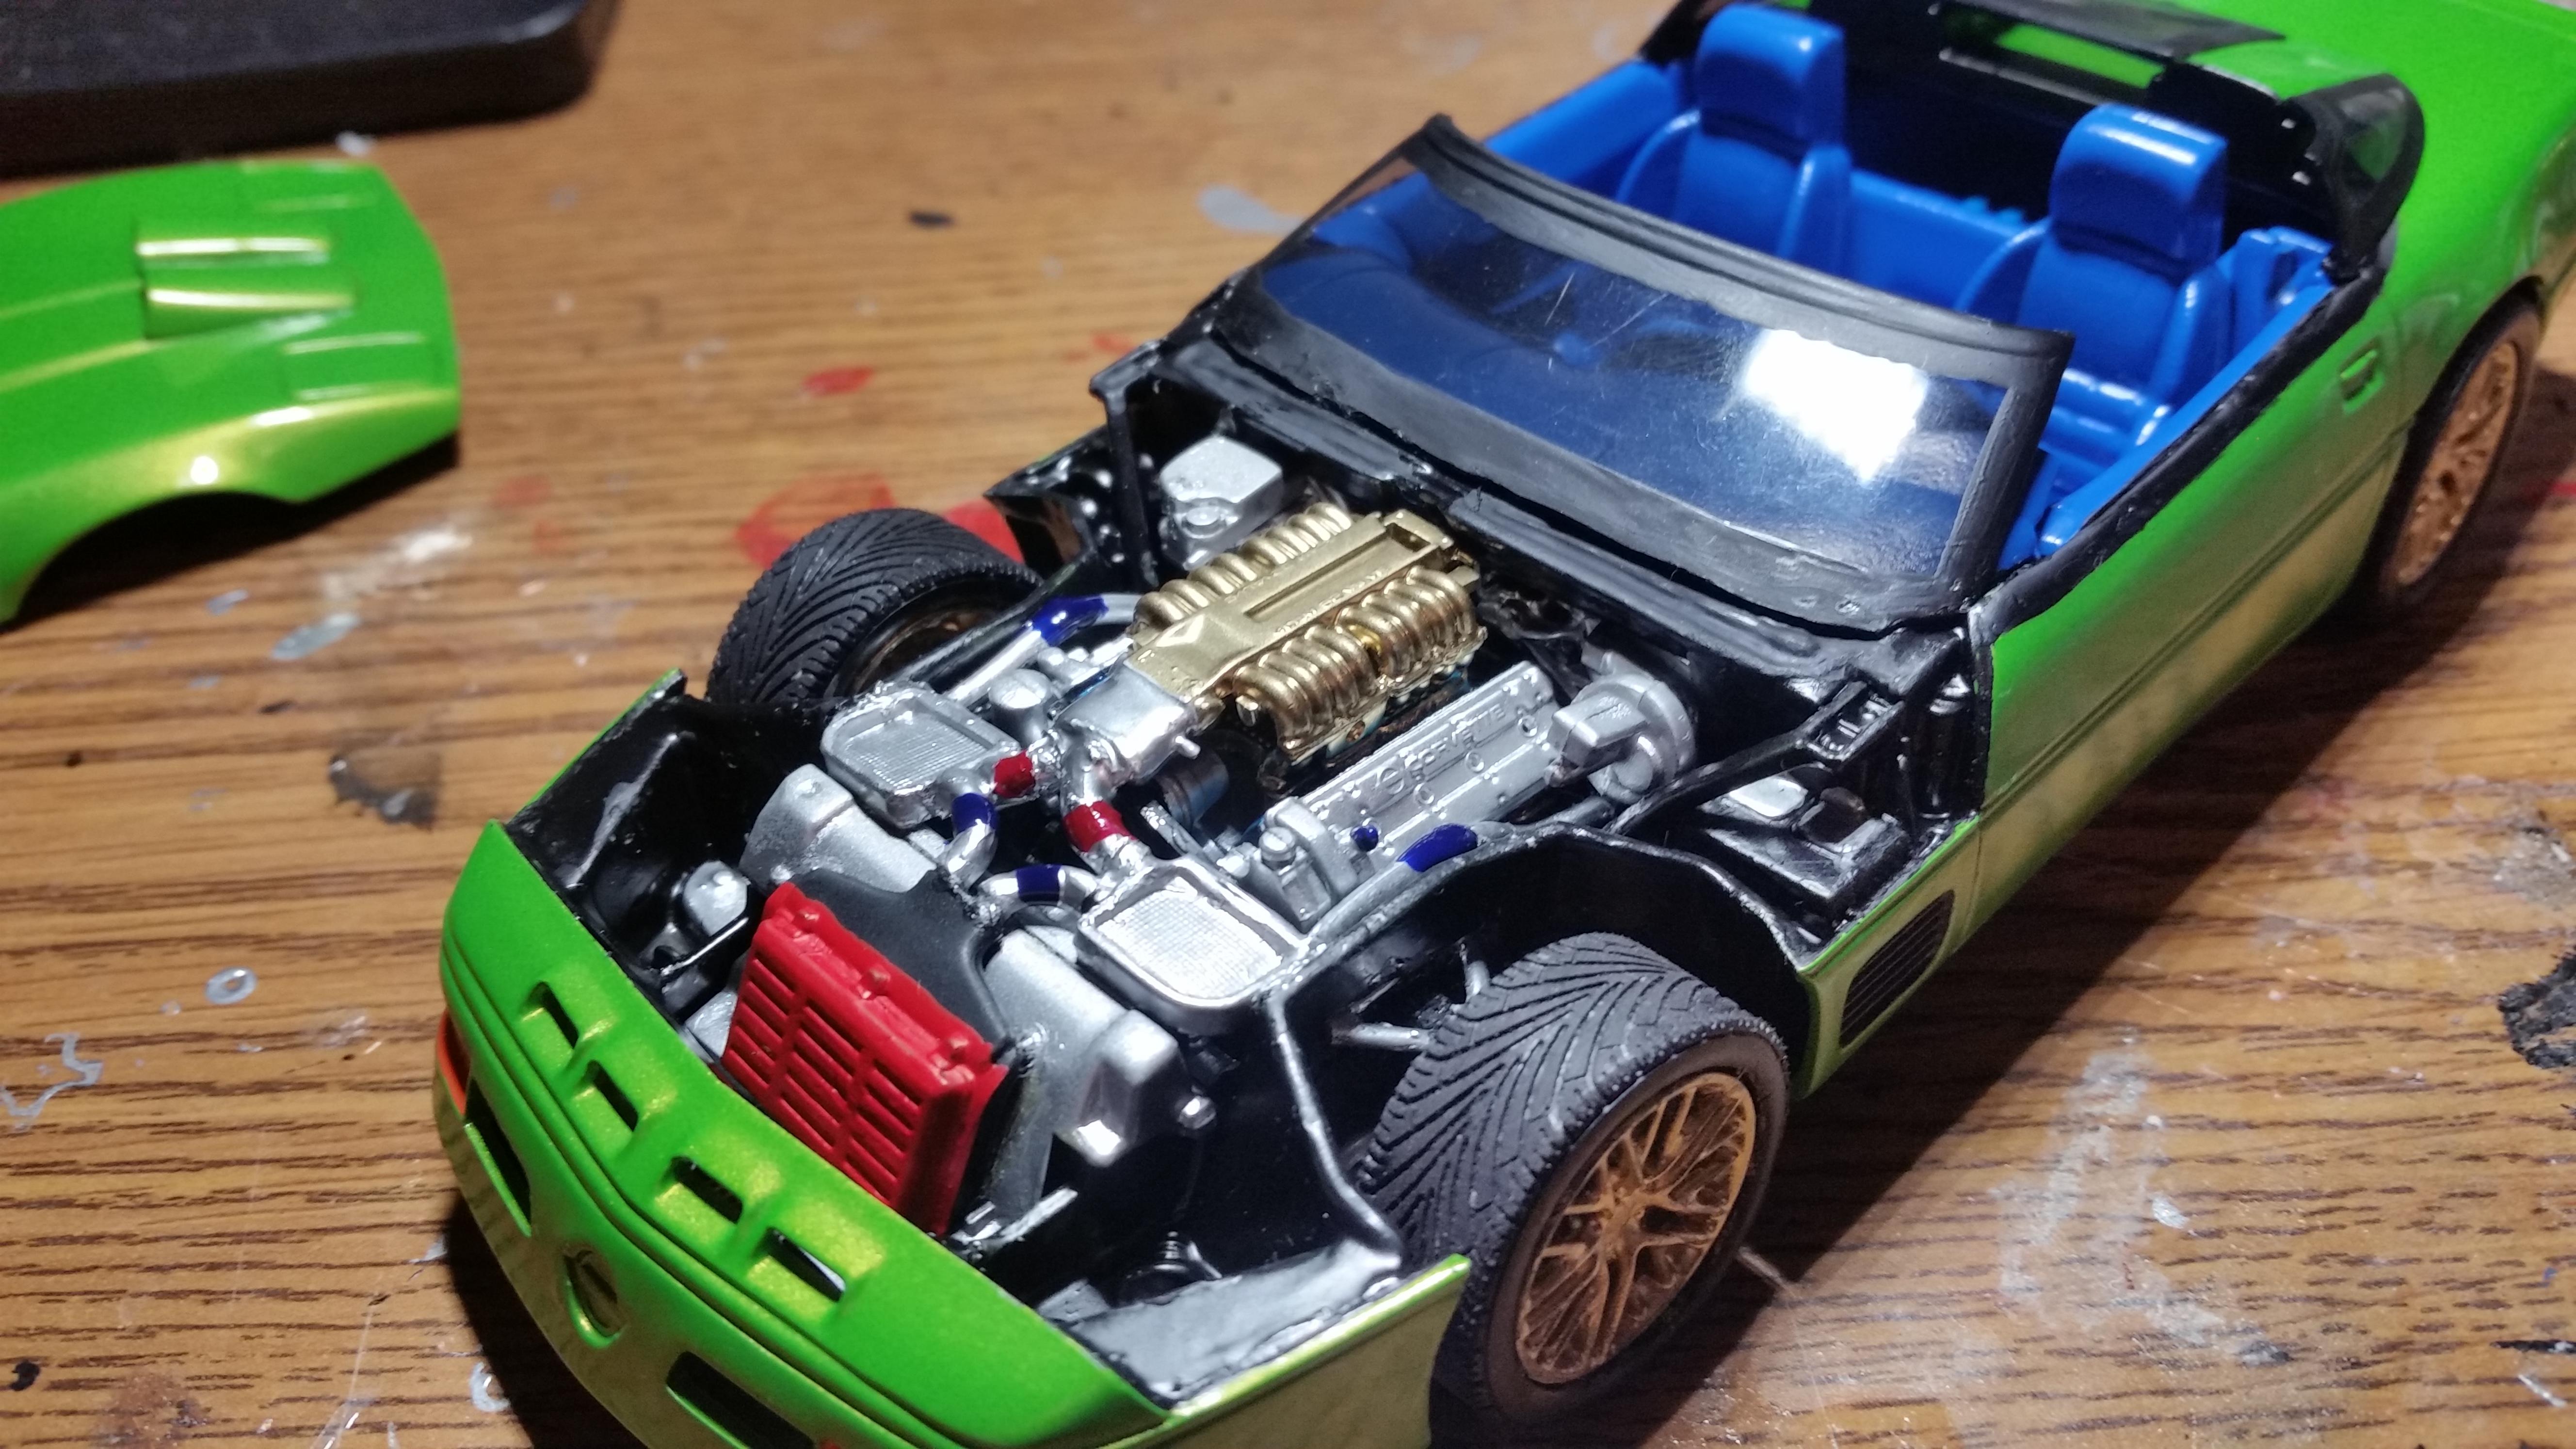
Somewhat of a partial kit, I started this one in 2015. Tires/wheels and brakes (I think) are from a Revell 59 Corvette kit, painted Tamiya TS-20 metallic green. This will have the "bag of snakes" side pipes and a tri-power 454 big block.
-
Started in 2015, painted Tamiya TS-97 pearl yellow with TS-69 linoleum deck brown interior. This one has a singe 4bbl big block and kit supplied custom mags, tires are from Model Haus.
-
Got this one finished Friday, Testors' flame red with Tamiya TS-65 pearl clear, MPC open corvette wheels, parts pack AMT tires. Thanks for looking, all comments welcomed.
-
Finished today, painted Testors' Hugger Orange with Tamiya TS-13 clear, box stock except for the Firestone tires from an MRC tire/wheel combo. Thank you for looking, all comments welcomed.
-
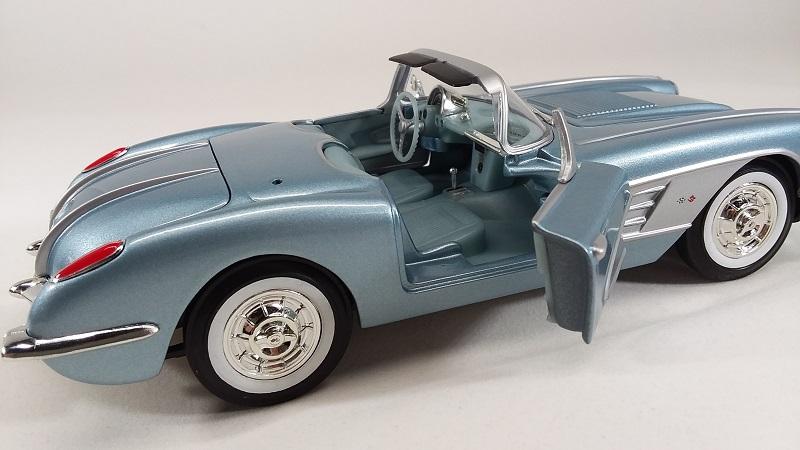
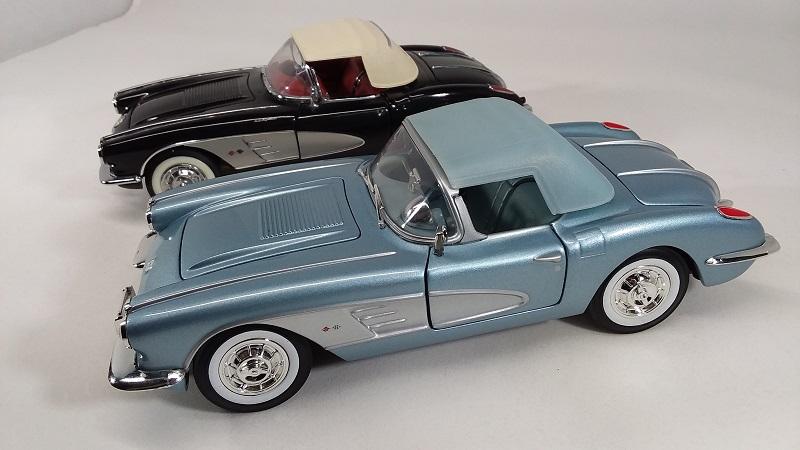
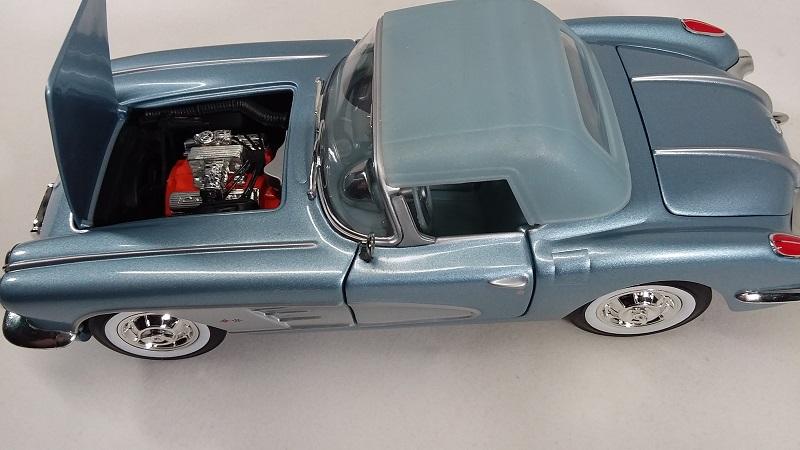
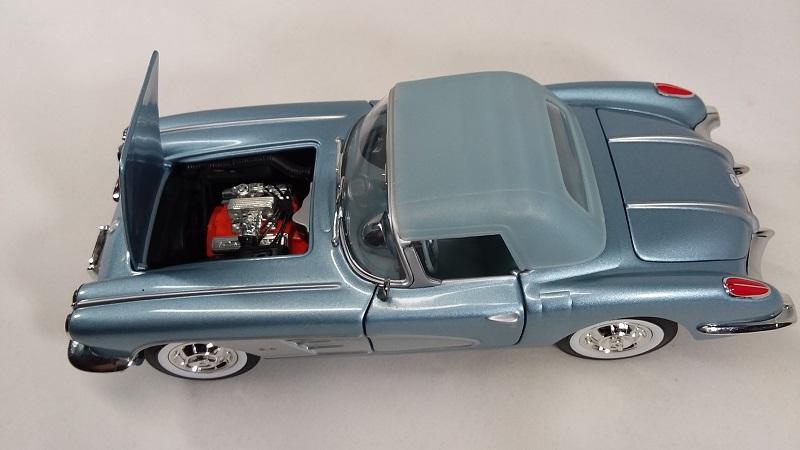
Started in February 22, 2015, completed August 10, 2020. Painted Tamiya TS-54 light metallic blue, interior is Testors Nassau blue. Thanks for looking, all comments welcomed.
-
I started a lot of these back in 2015, this one hit the bench February 22 of that year. Got the engine done, frame modified, then put it in the box. Today I gave it a couple coats of Tamiya TS-54 Light metallic blue and shot the interior with Testors Nassau blue. I'm hoping I'll get this one done in a few days, thank you for looking, all comments welcomed.
-
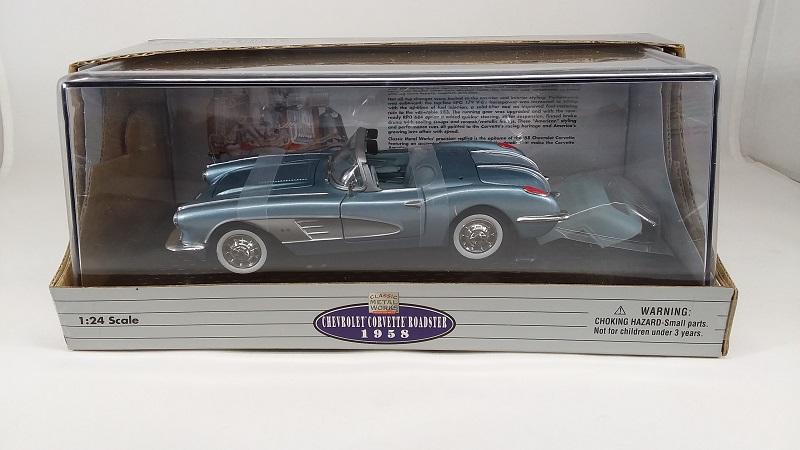
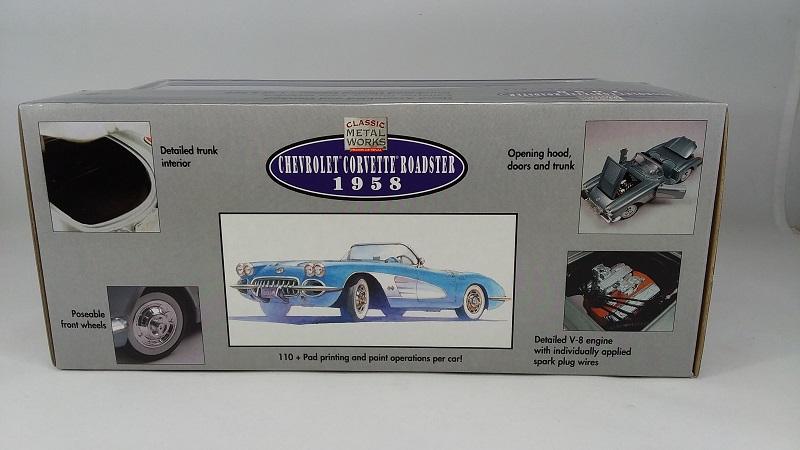
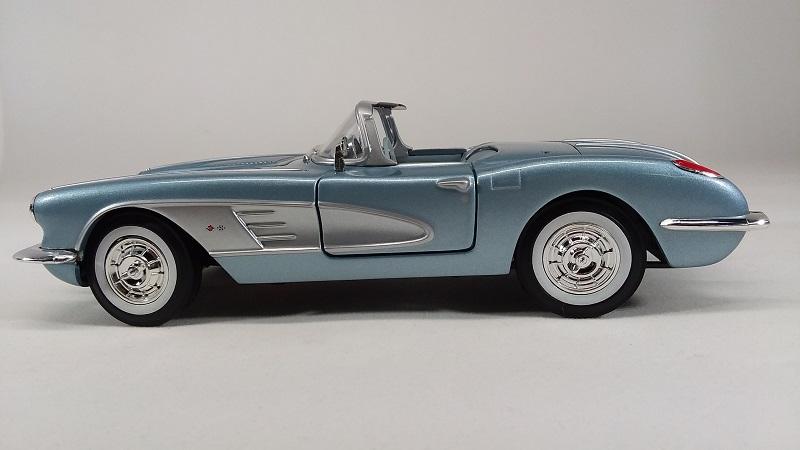
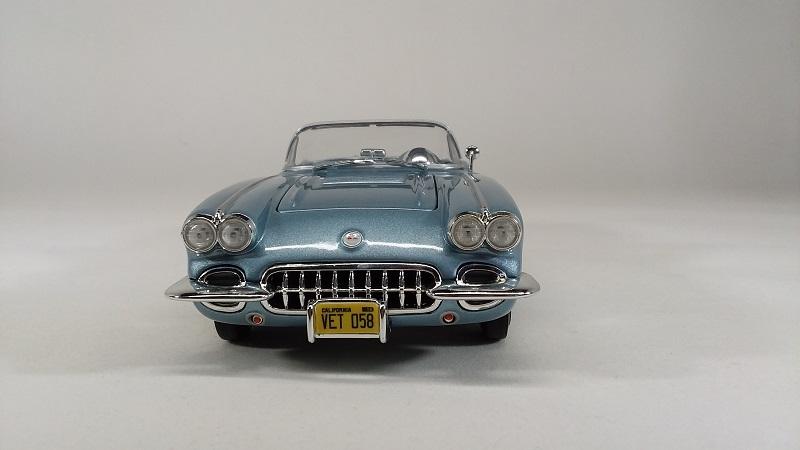
I was aware of the Mint 1958 Corvettes but was surprised to find a Classic Metal Works '58 in 1/24 scale. It turned out to be an affordable model with almost all the feature of the Mint cars. It was 1958 at Dusty Rhoads Chevrolet.

-
Thanks for looking, all comments welcomed.
-
Started July 24, 2015 and finished yesterday, July 19th. Color is (I think) Tamiya TS-50 blue. Silver interior and a luggage rack from an AMT 70 Corvette. AMT RWL tires with the kit supplied factory rally wheels. Air cleaner is the custom unit from the Revell 64 Impala. This was a fun little kit to put together. A mystery big block, as 1975 Corvettes came from the factory with 350 small blocks! Thanks for looking, all comments welcomed.
-
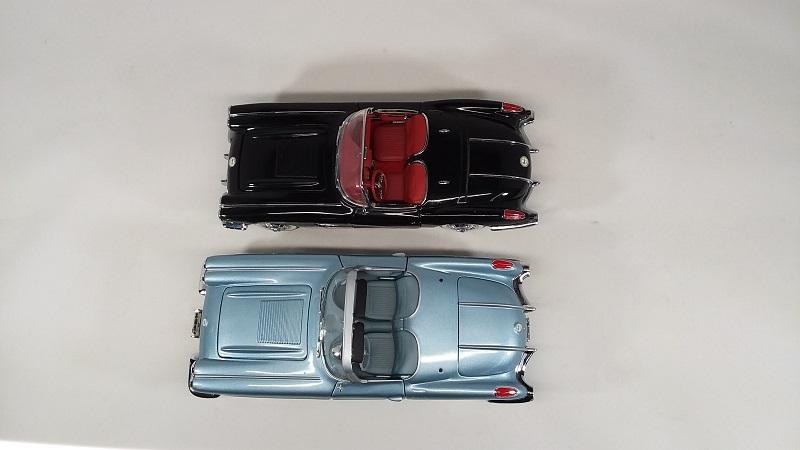
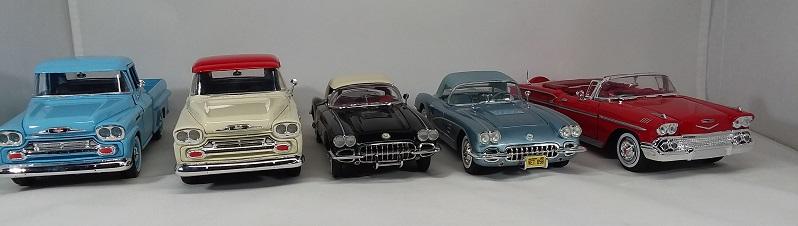
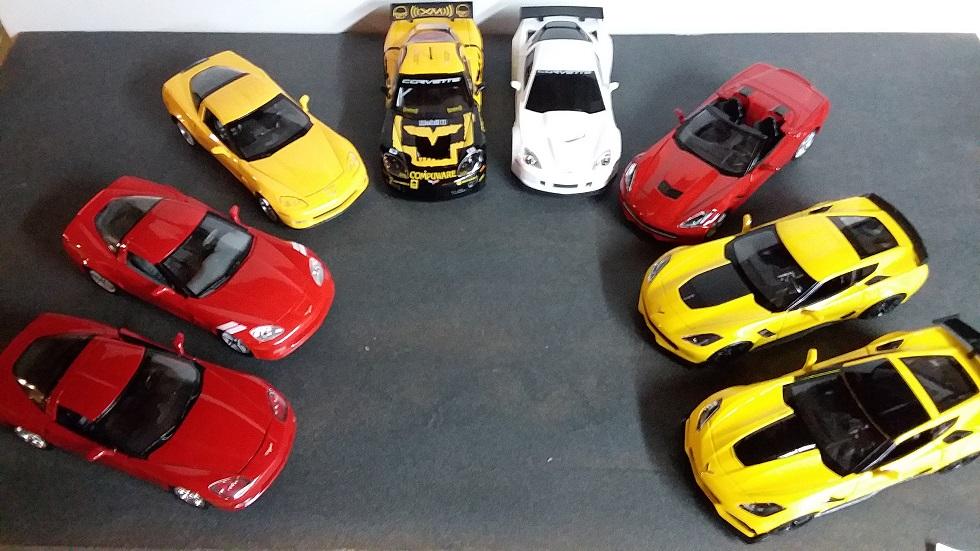
Started in December of 2015, I finished it up today. Glad this one is done! I don't remember what color it is painted, I think it was a testors auto lacquer teal but am not sure. Box stock with modifications to the frame to get the suspension sitting a bit lower, it's now almost stock height :-) Simple all black interior, hence the lack of interior shots. Below is a group shot of the ones I've gotten done this month, all except for the 2012 silver kit, that one was done a few years ago. Thanks for looking, all comments welcomed.
-
After five years, this one is finally off the bench and on the shelf. Painted with Tamiya TS-64 dark mica blue with testors Nassau blue interior. AMT RWL tires from somewhere. I really need to learn how to use those Molotov pens! I know tri-power big blocks were not available in 1975. But, this one had a crate motor 502 installed sometime in it's life :-) Thanks for looking, all comments welcomed.
-
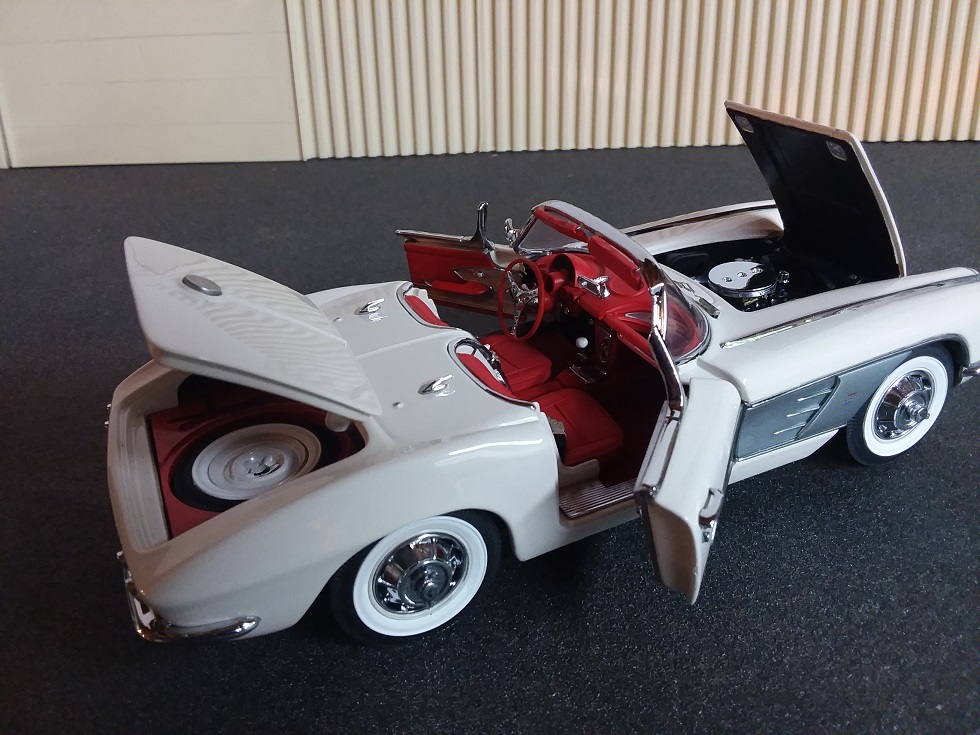
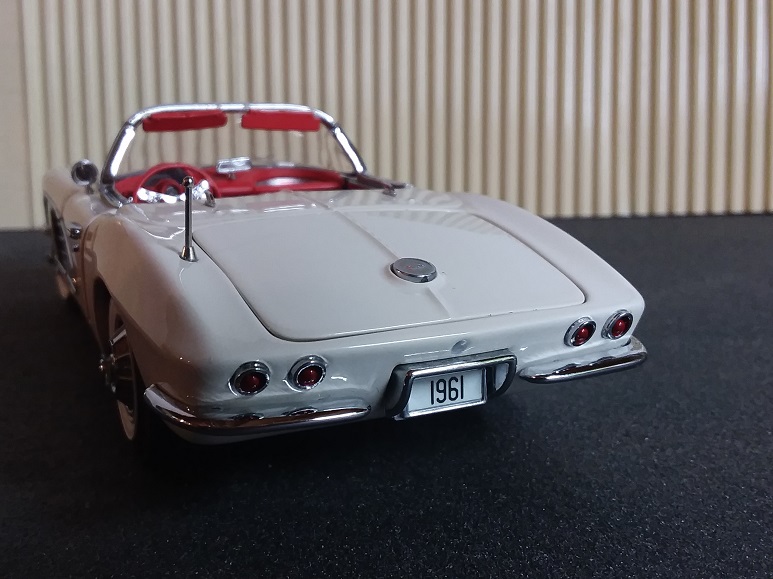
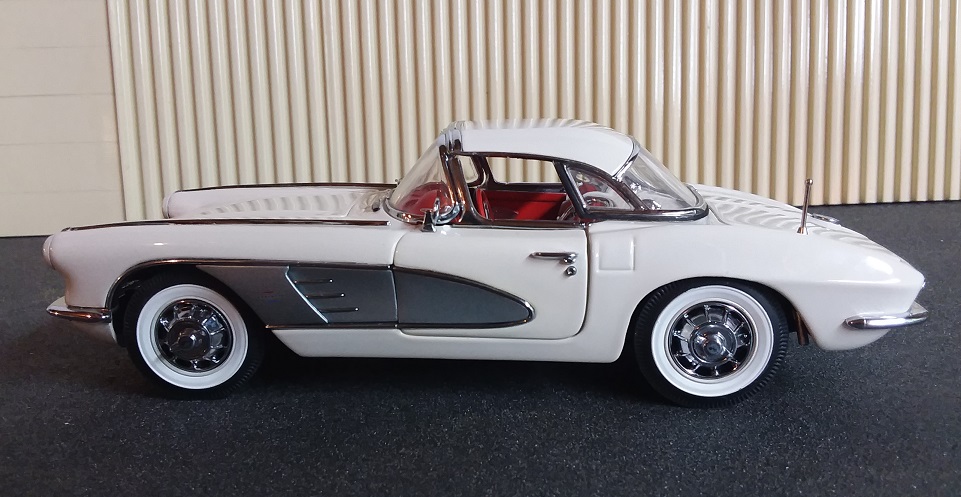
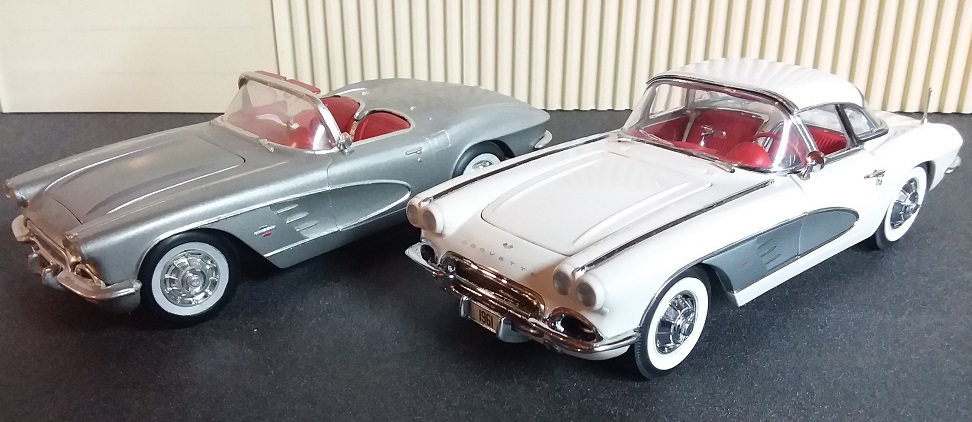
I have been on the look out for an affordable Danbury Mint 1961 Corvette for quite awhile because it is kind of special for me. My cousin was a draftsman at Molded Fiber Glass Co. in Ashtabula, Ohio where the first Corvette fiberglass bodies were produced. Molded Fiber Glass still had some connection with Chevrolet because well prior to the release of the remodeled 1961 Corvette my cousin was able to draw a sketch for me of what it was going to look like. That plus just like the first Corvette bodies I was born in Ashtabula too. So here is my recently acquired Danbury Mint 1961 Corvette. And here it is with its original plastic SMP cousin.
-
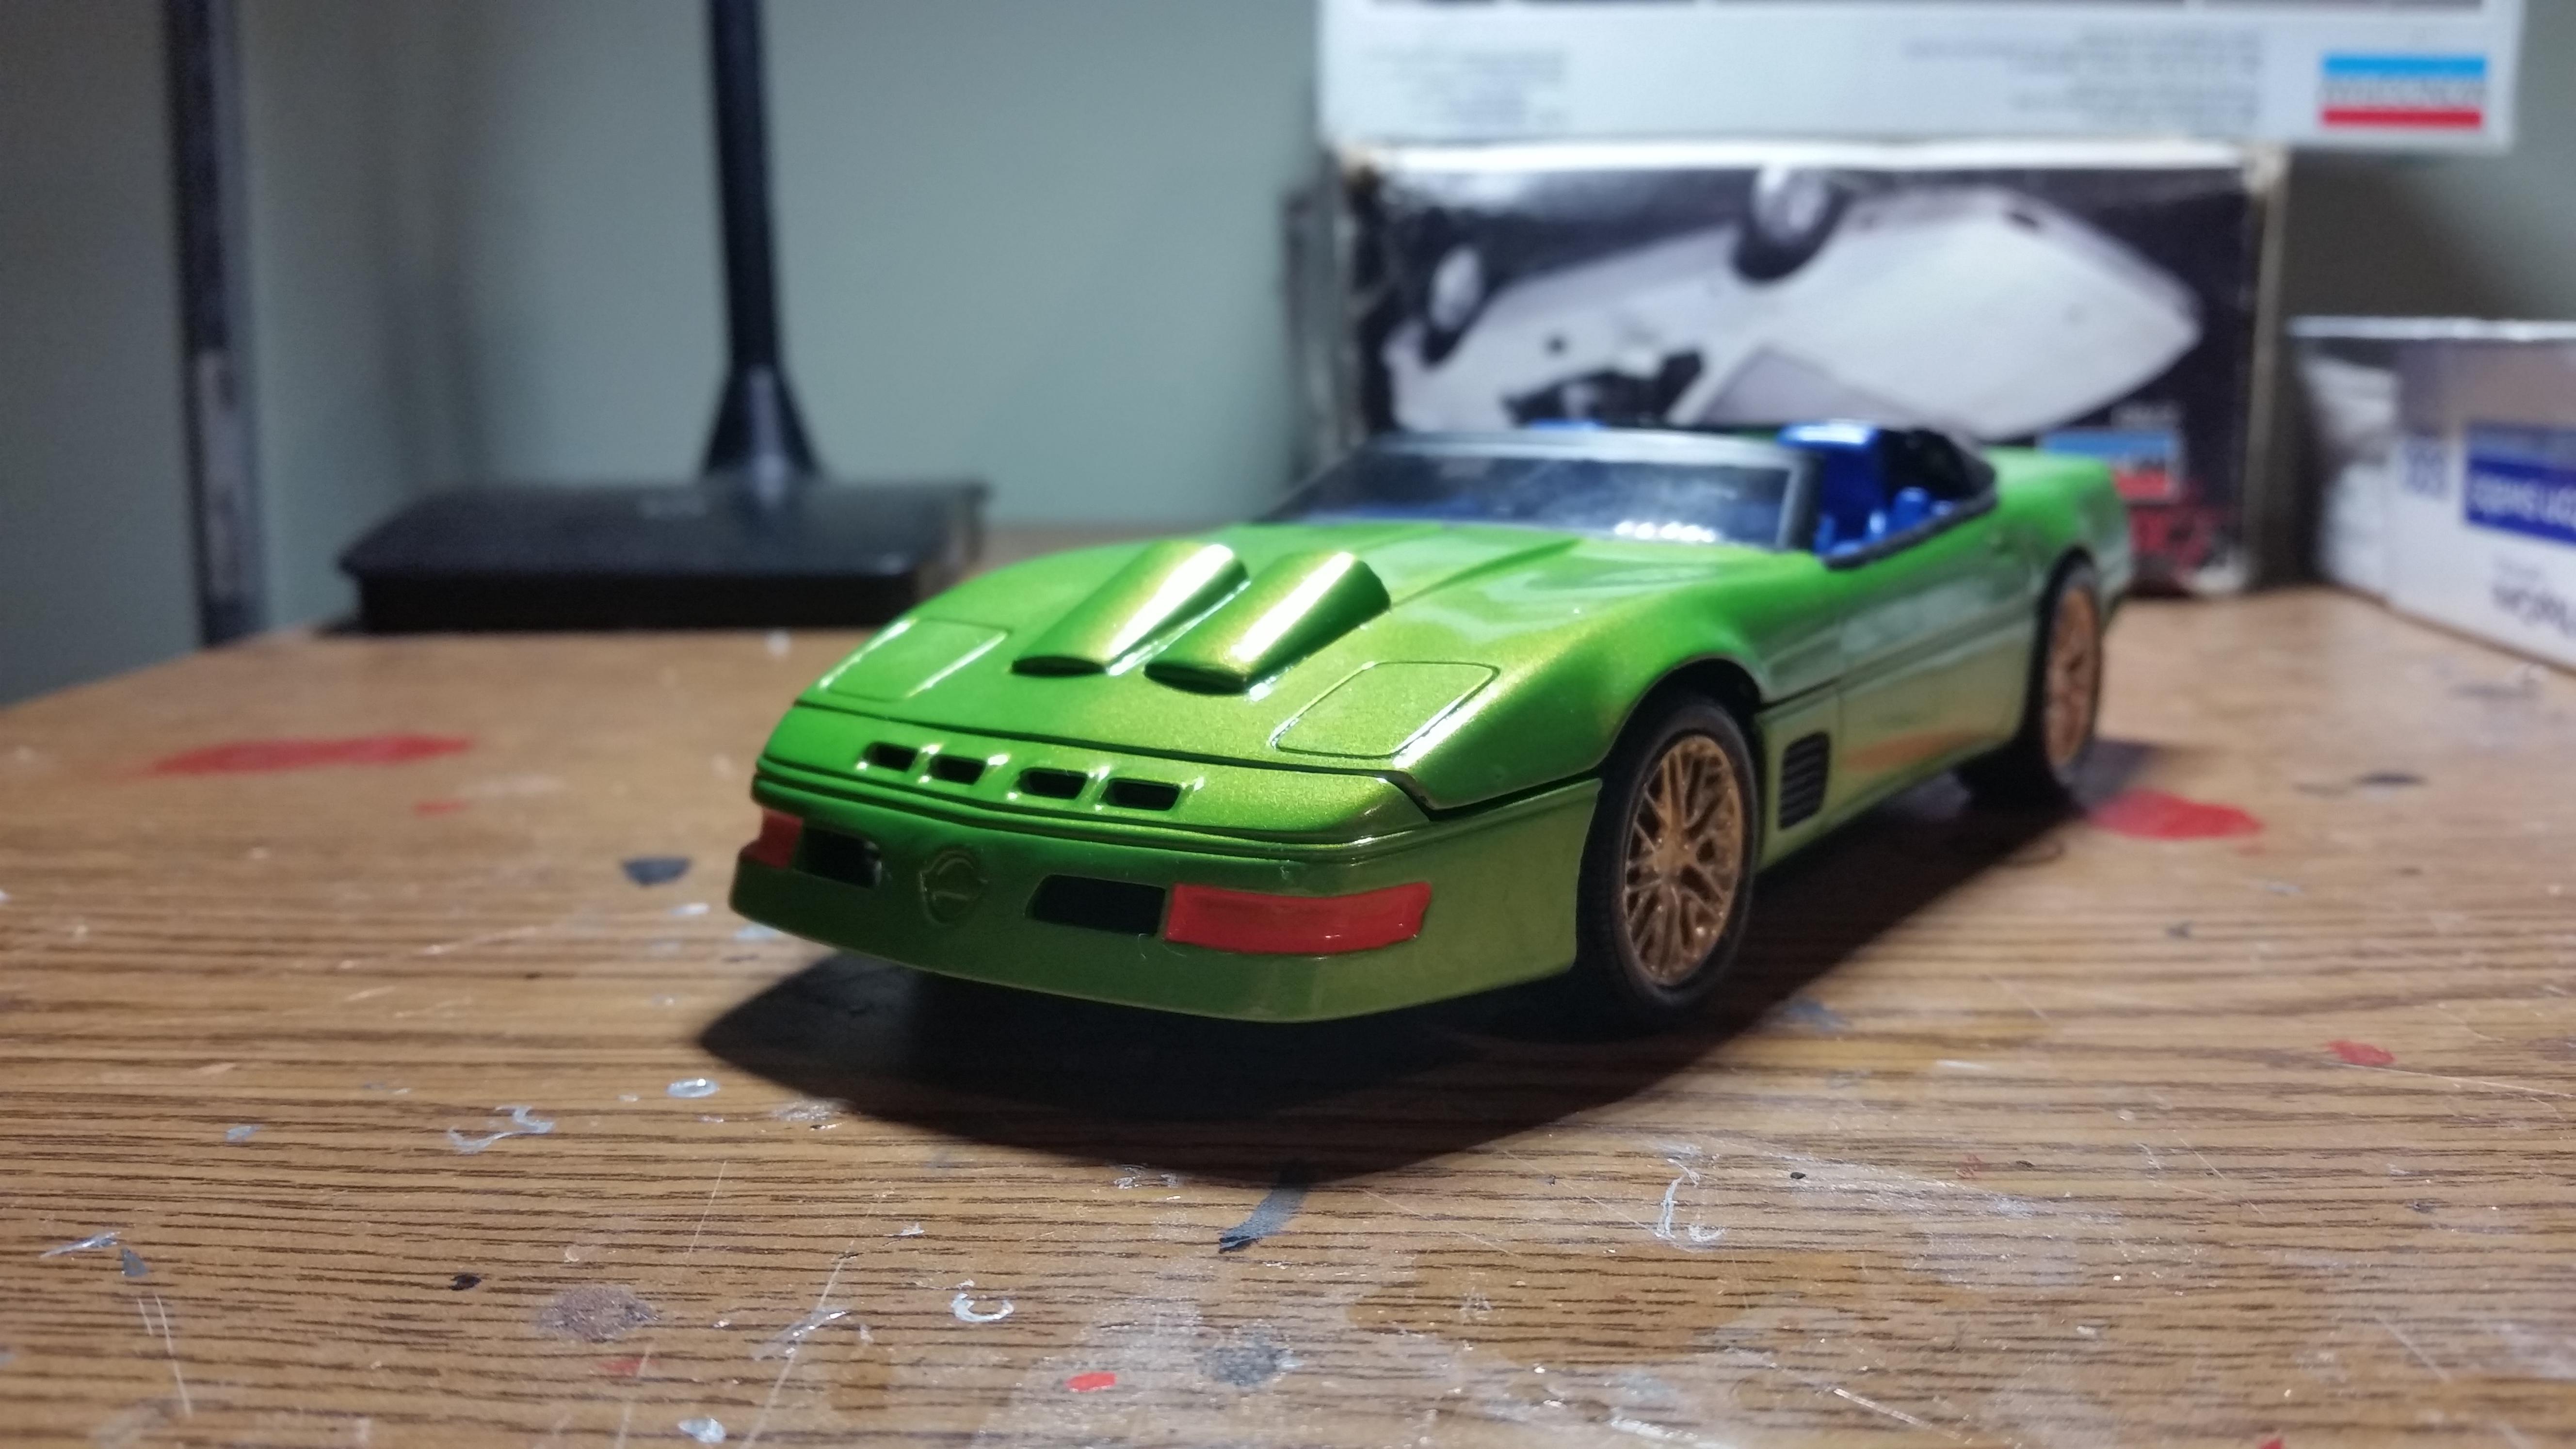
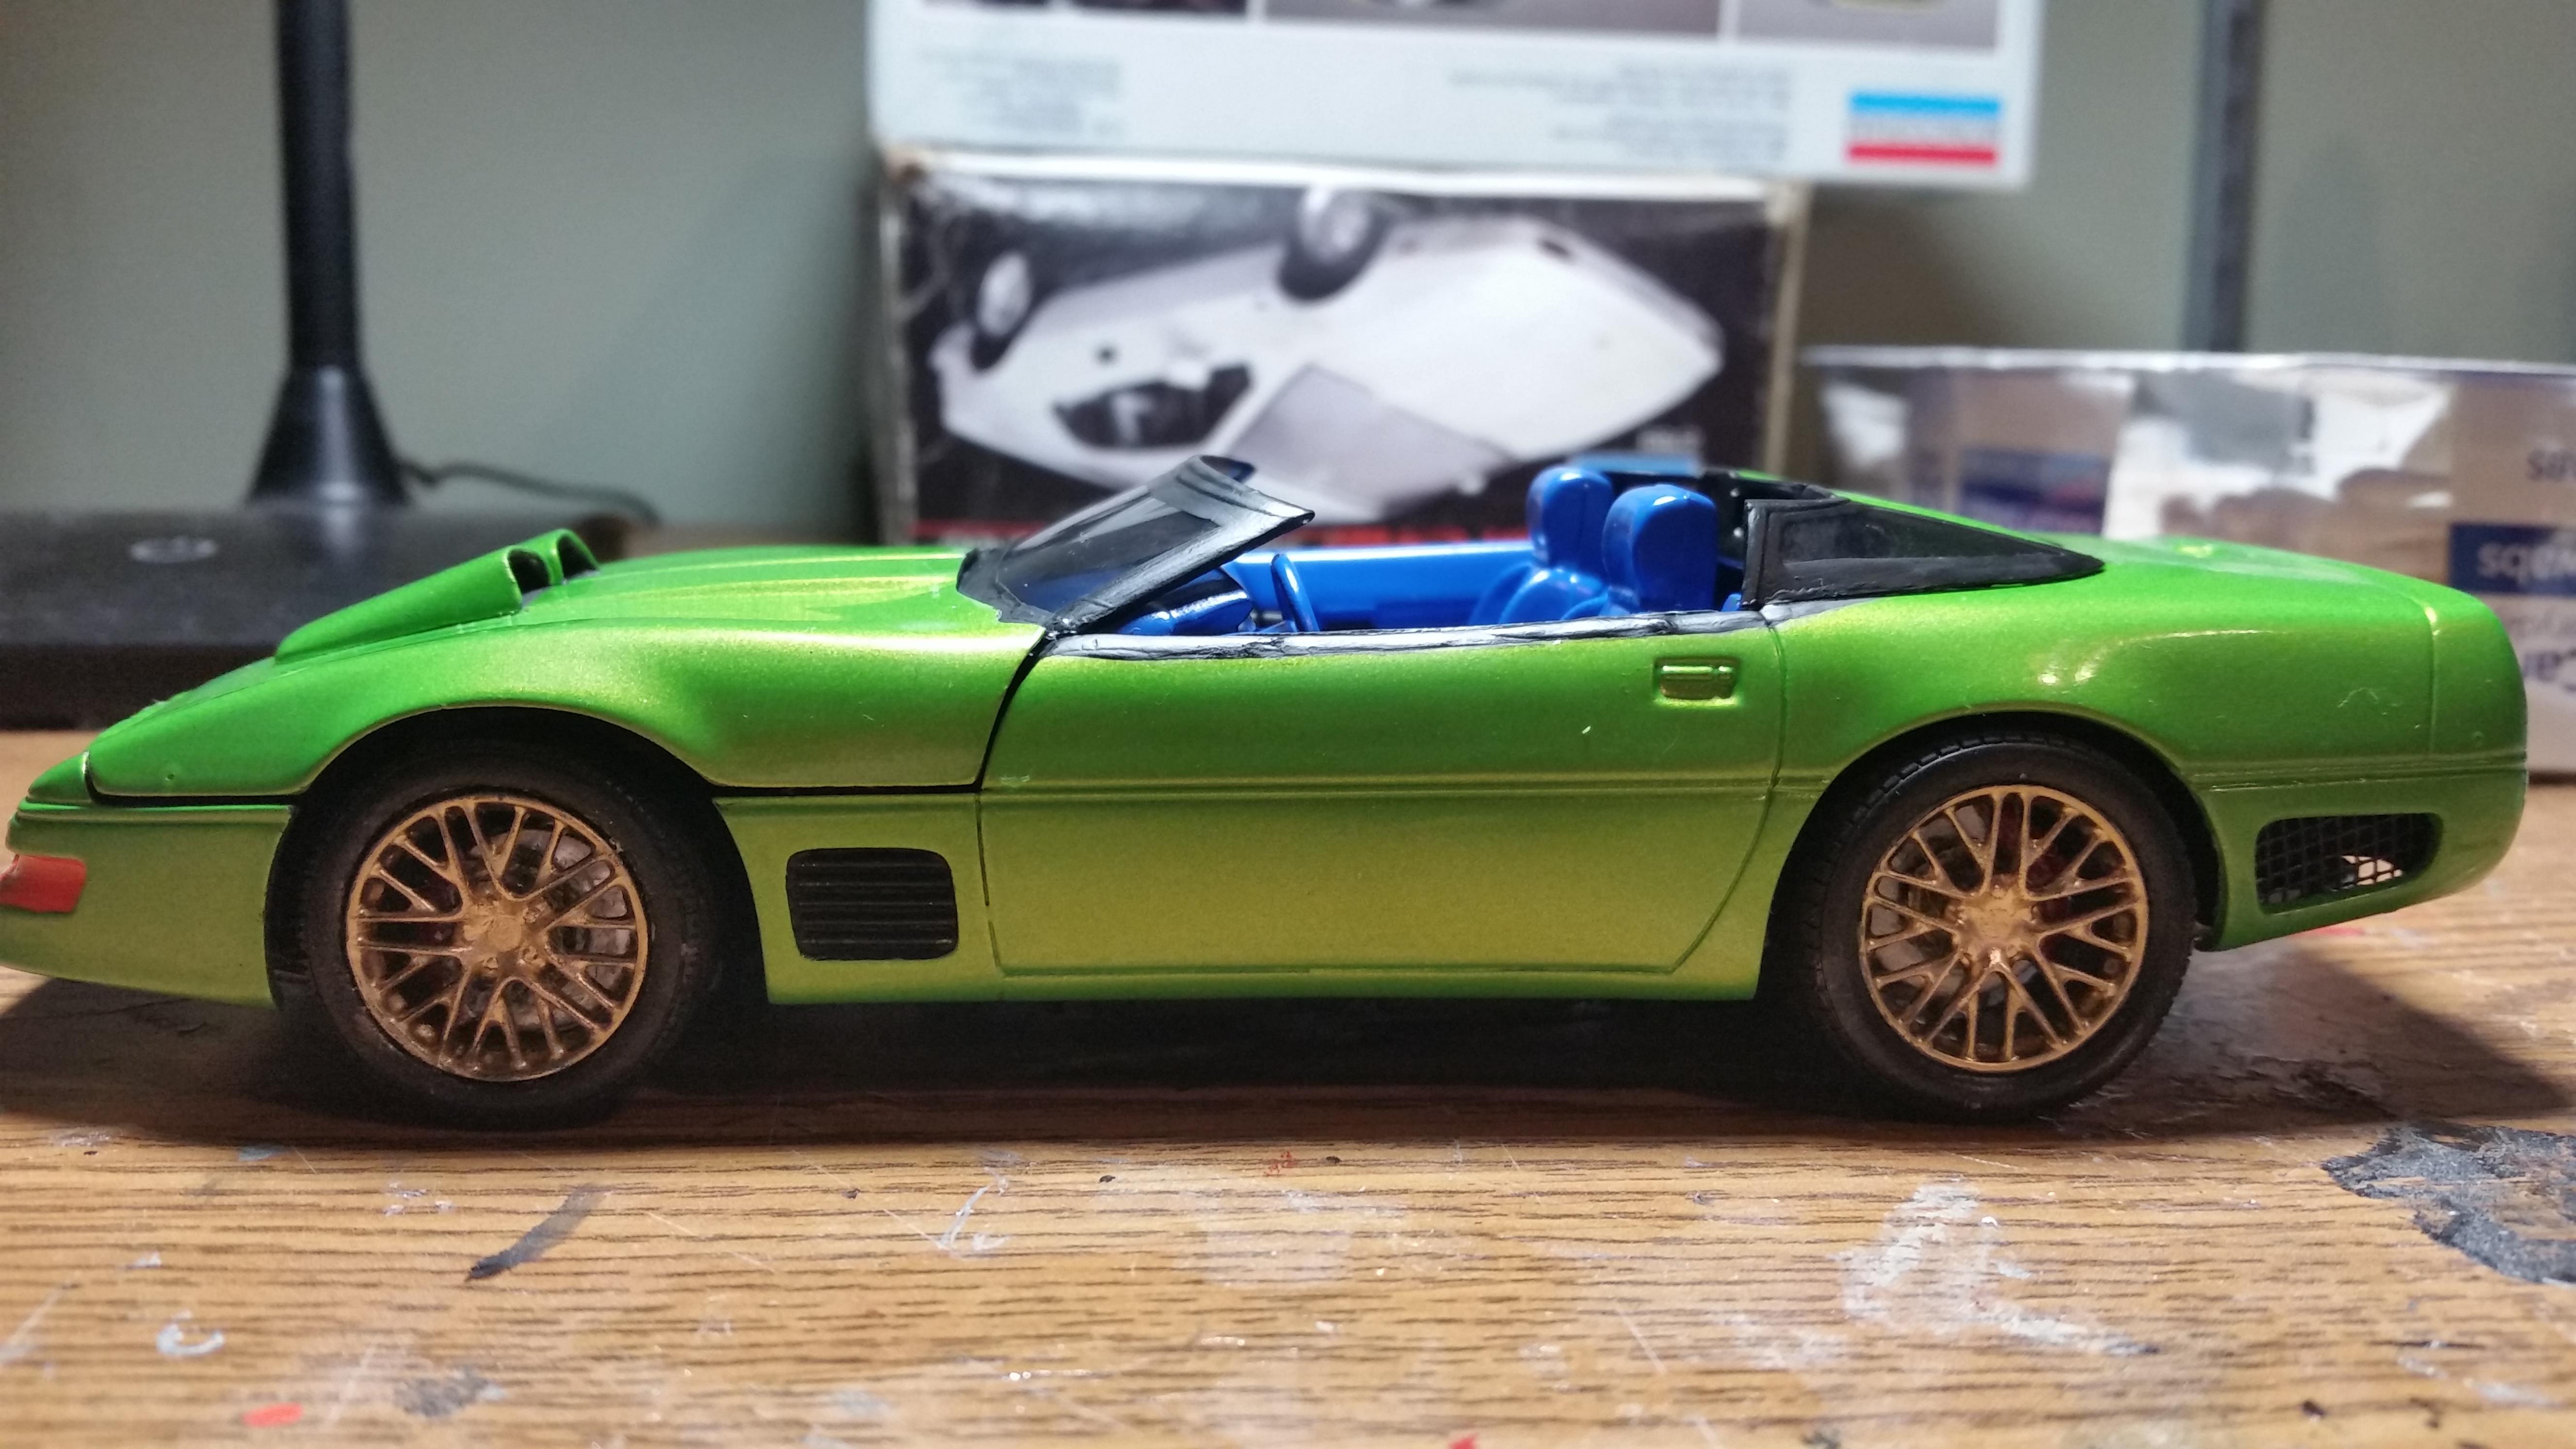
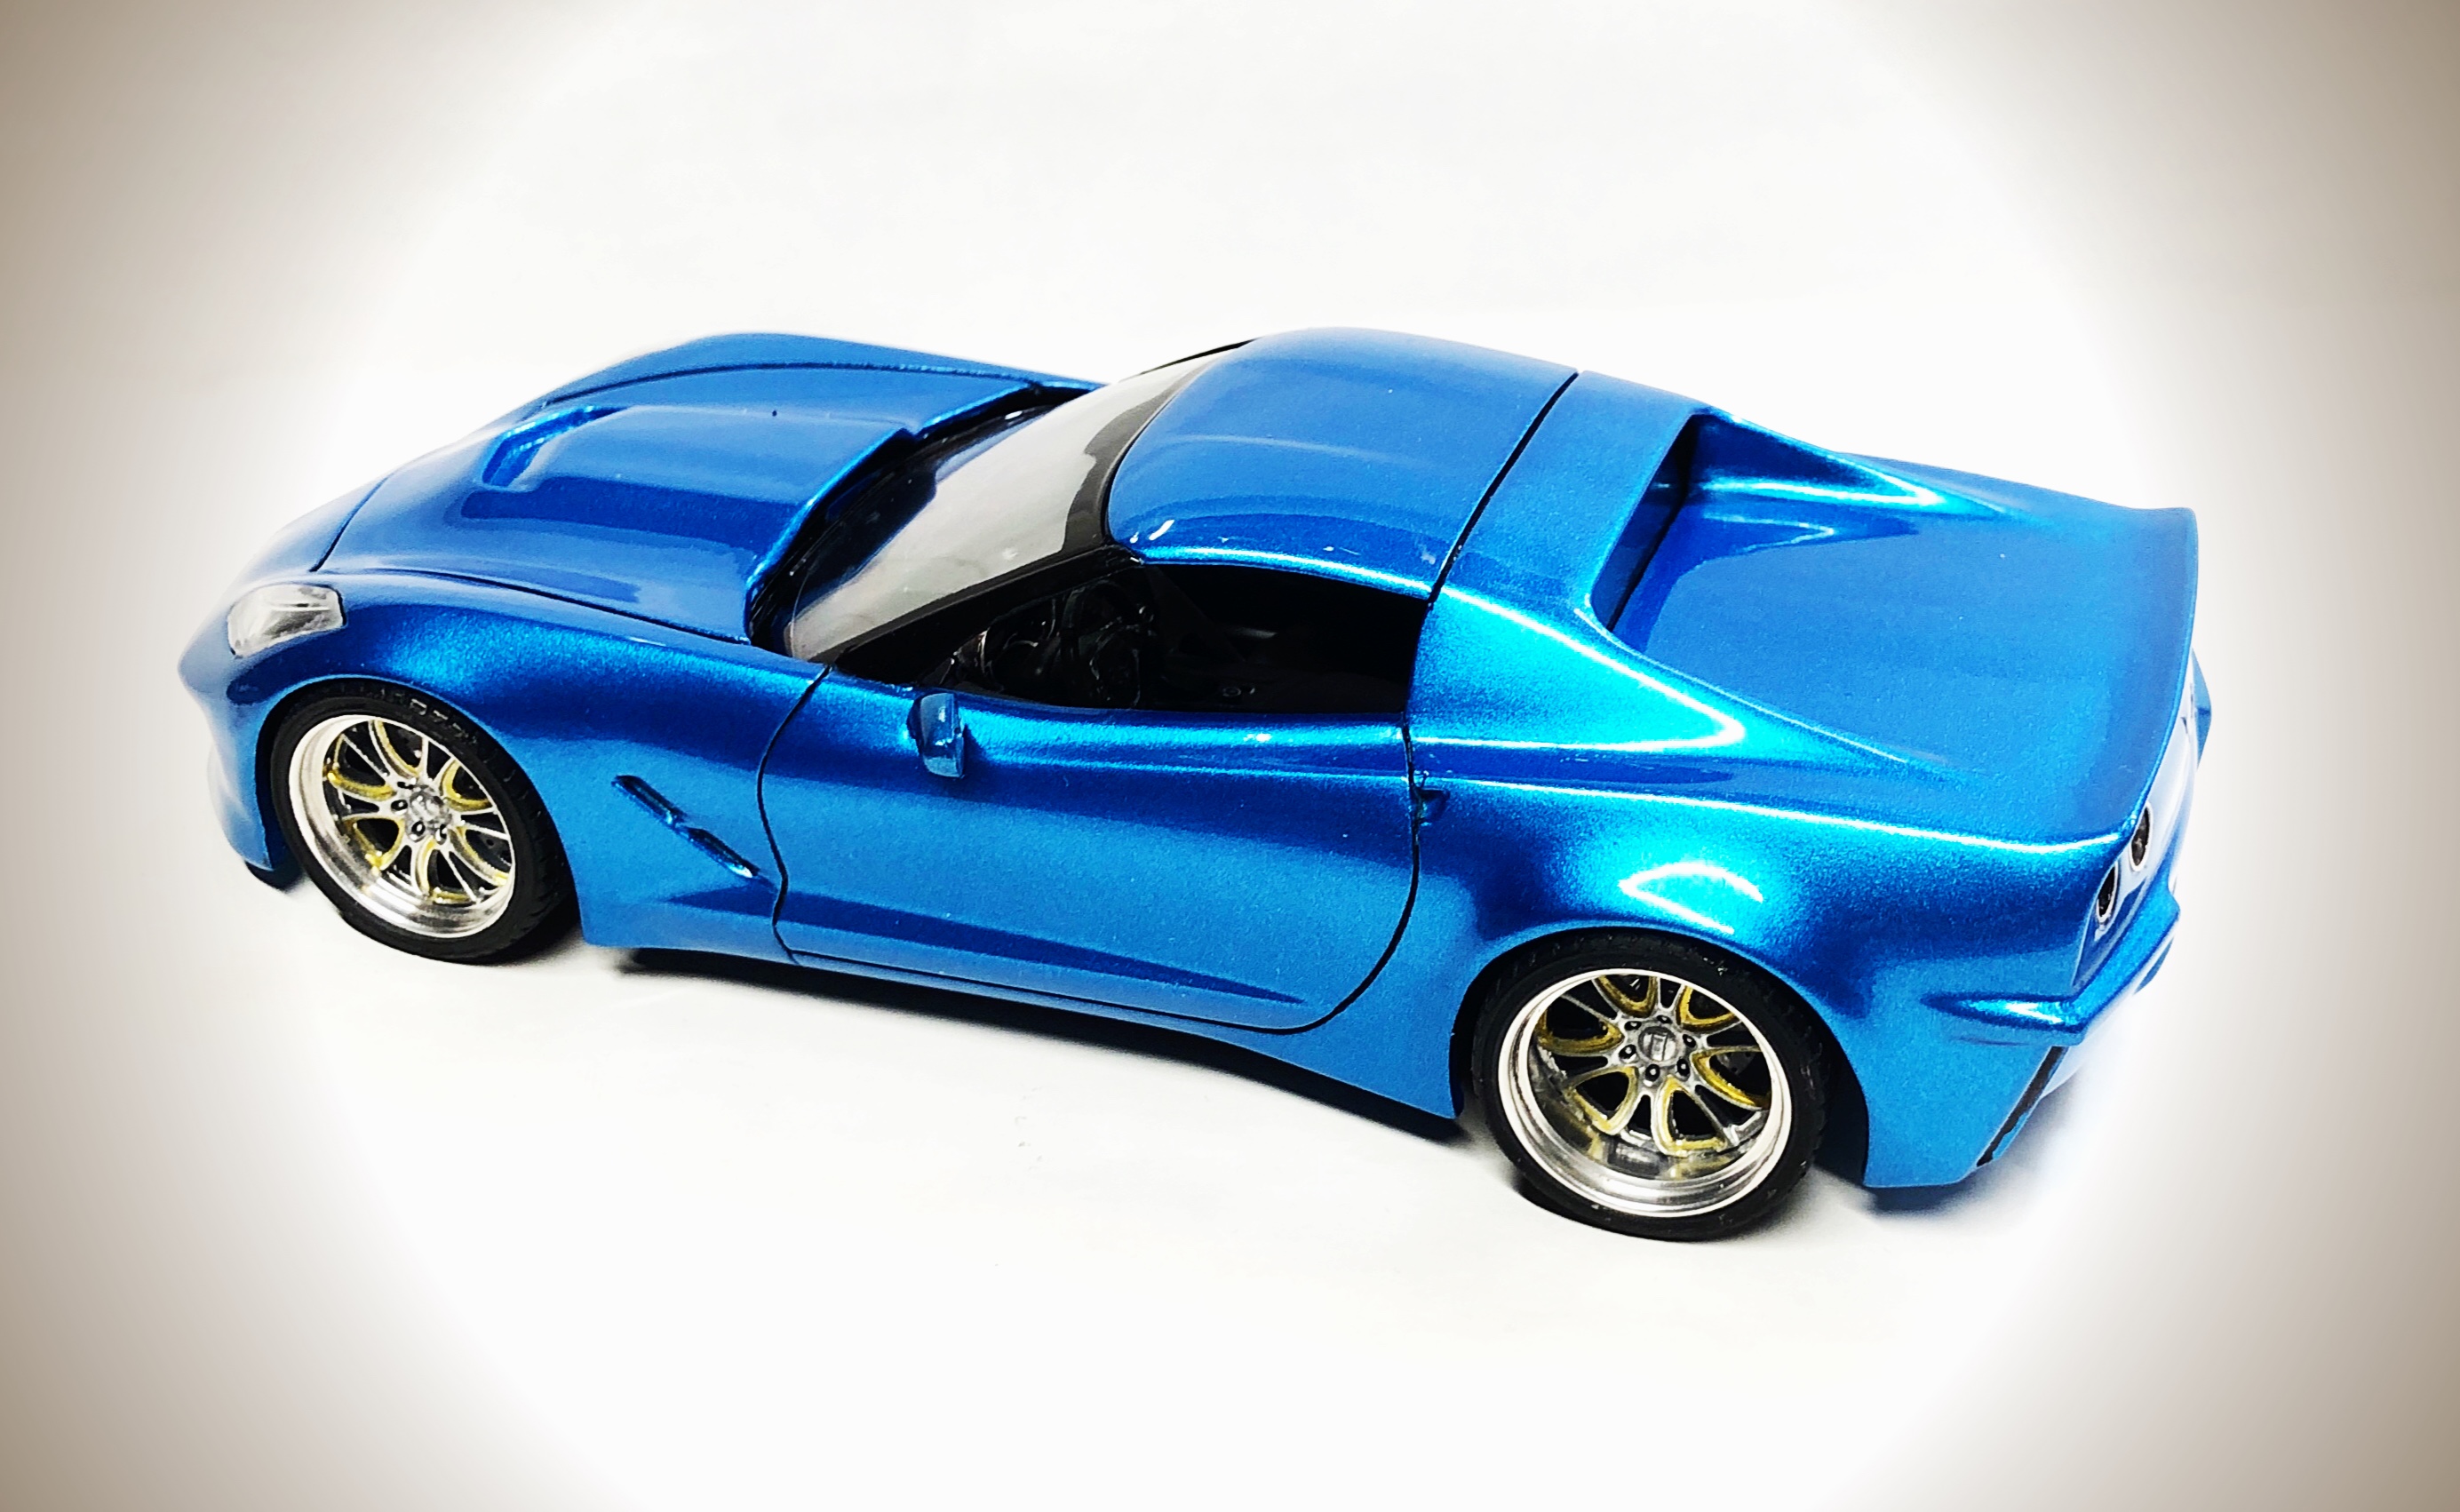
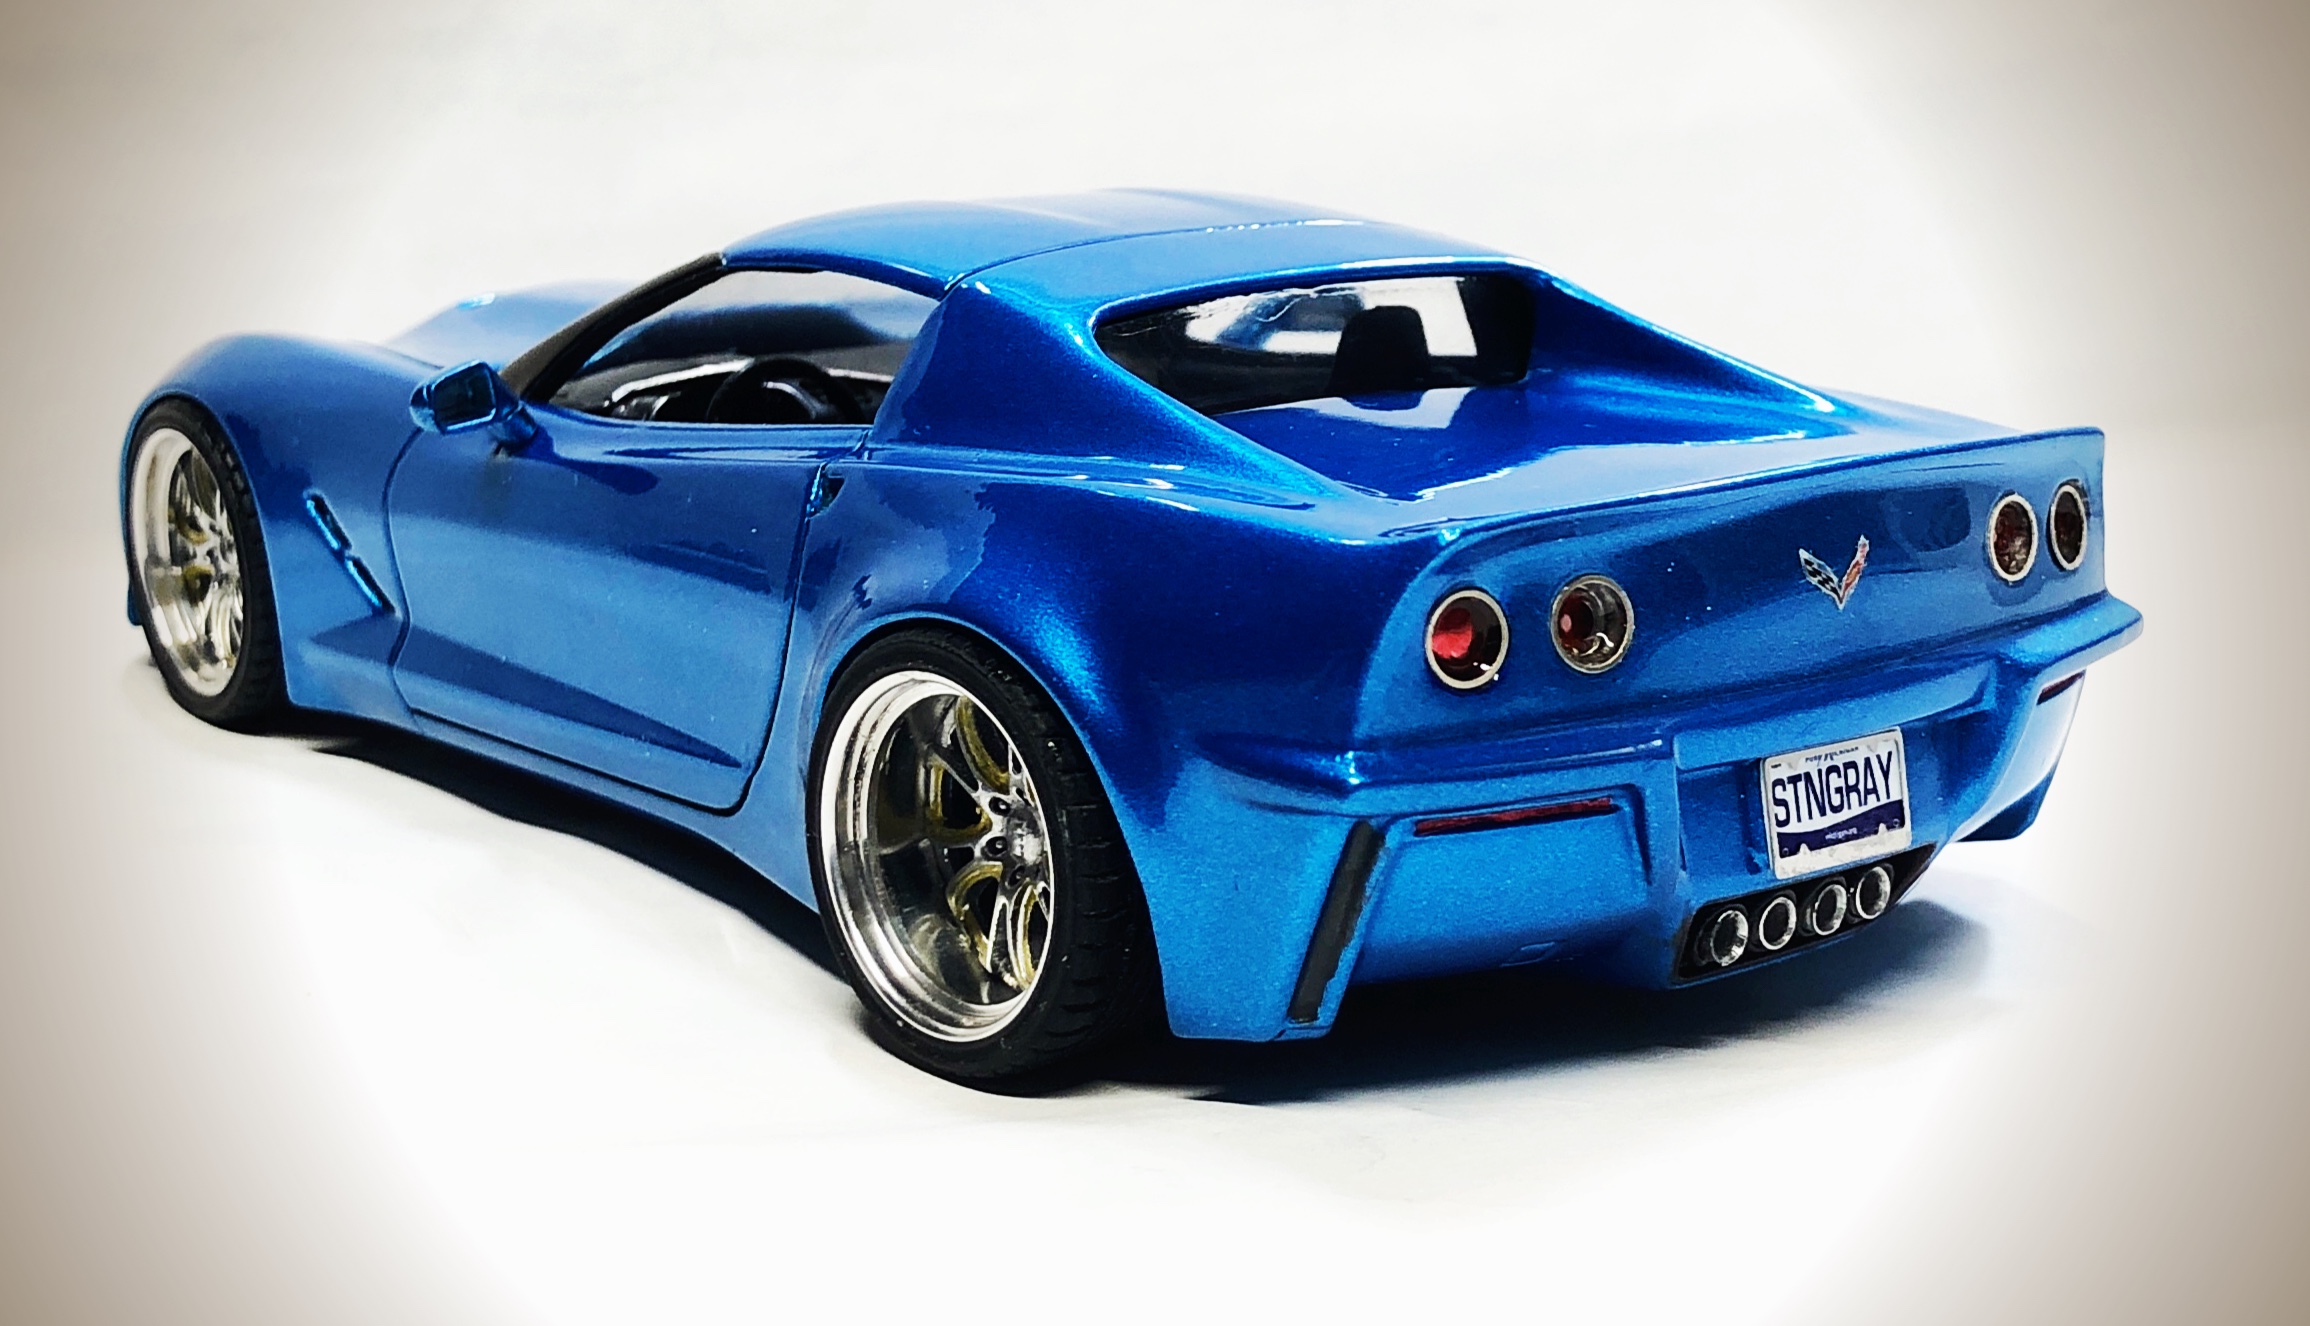
This is a rebuild of a failed attempt from about 12 years ago. It was so warped and bent on top of the poor hood and glass fit, that it got scrapped and recycled for other projects at some point. A few years back, I acquired a Monogram '92 ZR1 (molded in red) cheap in a club auction that not only had a horribly gluebombed body, but was also badly twisted with a broken section near the trunk area that made it unusable for anything else. However, the rest of the ZR1's contents were untouched and still on it's trees, and that inspired me to locate the body, front bumper, and glass glass of the Callaway for a possible restoration. I didn't have the Callaway's original hood, and the ZR1's warped and messy body had the hood heavily glued shut. But I recalled having a unpainted yellow molded ZR1 hood from a parts box I was given at a club meeting. I tracked that down and added trimmed side scoops from the AMT '69 Covair's custom parts as hood scoops. The Callaway's one piece glass snapped on the drivers and passengers side windows, but the rest was salvageable by making it with a windows down look. I also didn't have the Callaway's original taillights, so I made custom two piece ones cut from sheet styrene and painted transparent red over silver. Callaway's body was still warped, but I did the best I could with correcting some of it's horrible fit it as it would probably break and snap further after it's purple bath. Otherwise, the bulk of the Red '92 ZR1 filled in for the interior, motor, chassis, and suspension stuff. I also did other modifications as followed: Custom twin turbo setup using resin turbos, intercoolers from Mustang Mach II, and styrene scrap trees bent as intake tubes ZR1's exhaust was used with slight modifications to where it connects to the turbos and fabricating the rear exhaust to exit out the center of the Callaway's body NOS tank and steering wheel gagues were leftover parts from a Revell Mathew and Debby Heys Thunderbird Pro Street Mesh screening was used to replace molded rear bumper vents that were broken from storage Revell '09 ZR1 wheels, disc brakes, and rear tires were used with front tires from the AMT F&F Supra Interior paint is Rustoluem Painters Touch True Blue dullcoated with Rustoluem Matte Clear. Exterior is Tamiya TS-52 Candy Lime Green over Rustoluem Silver cleared with Pledge
-
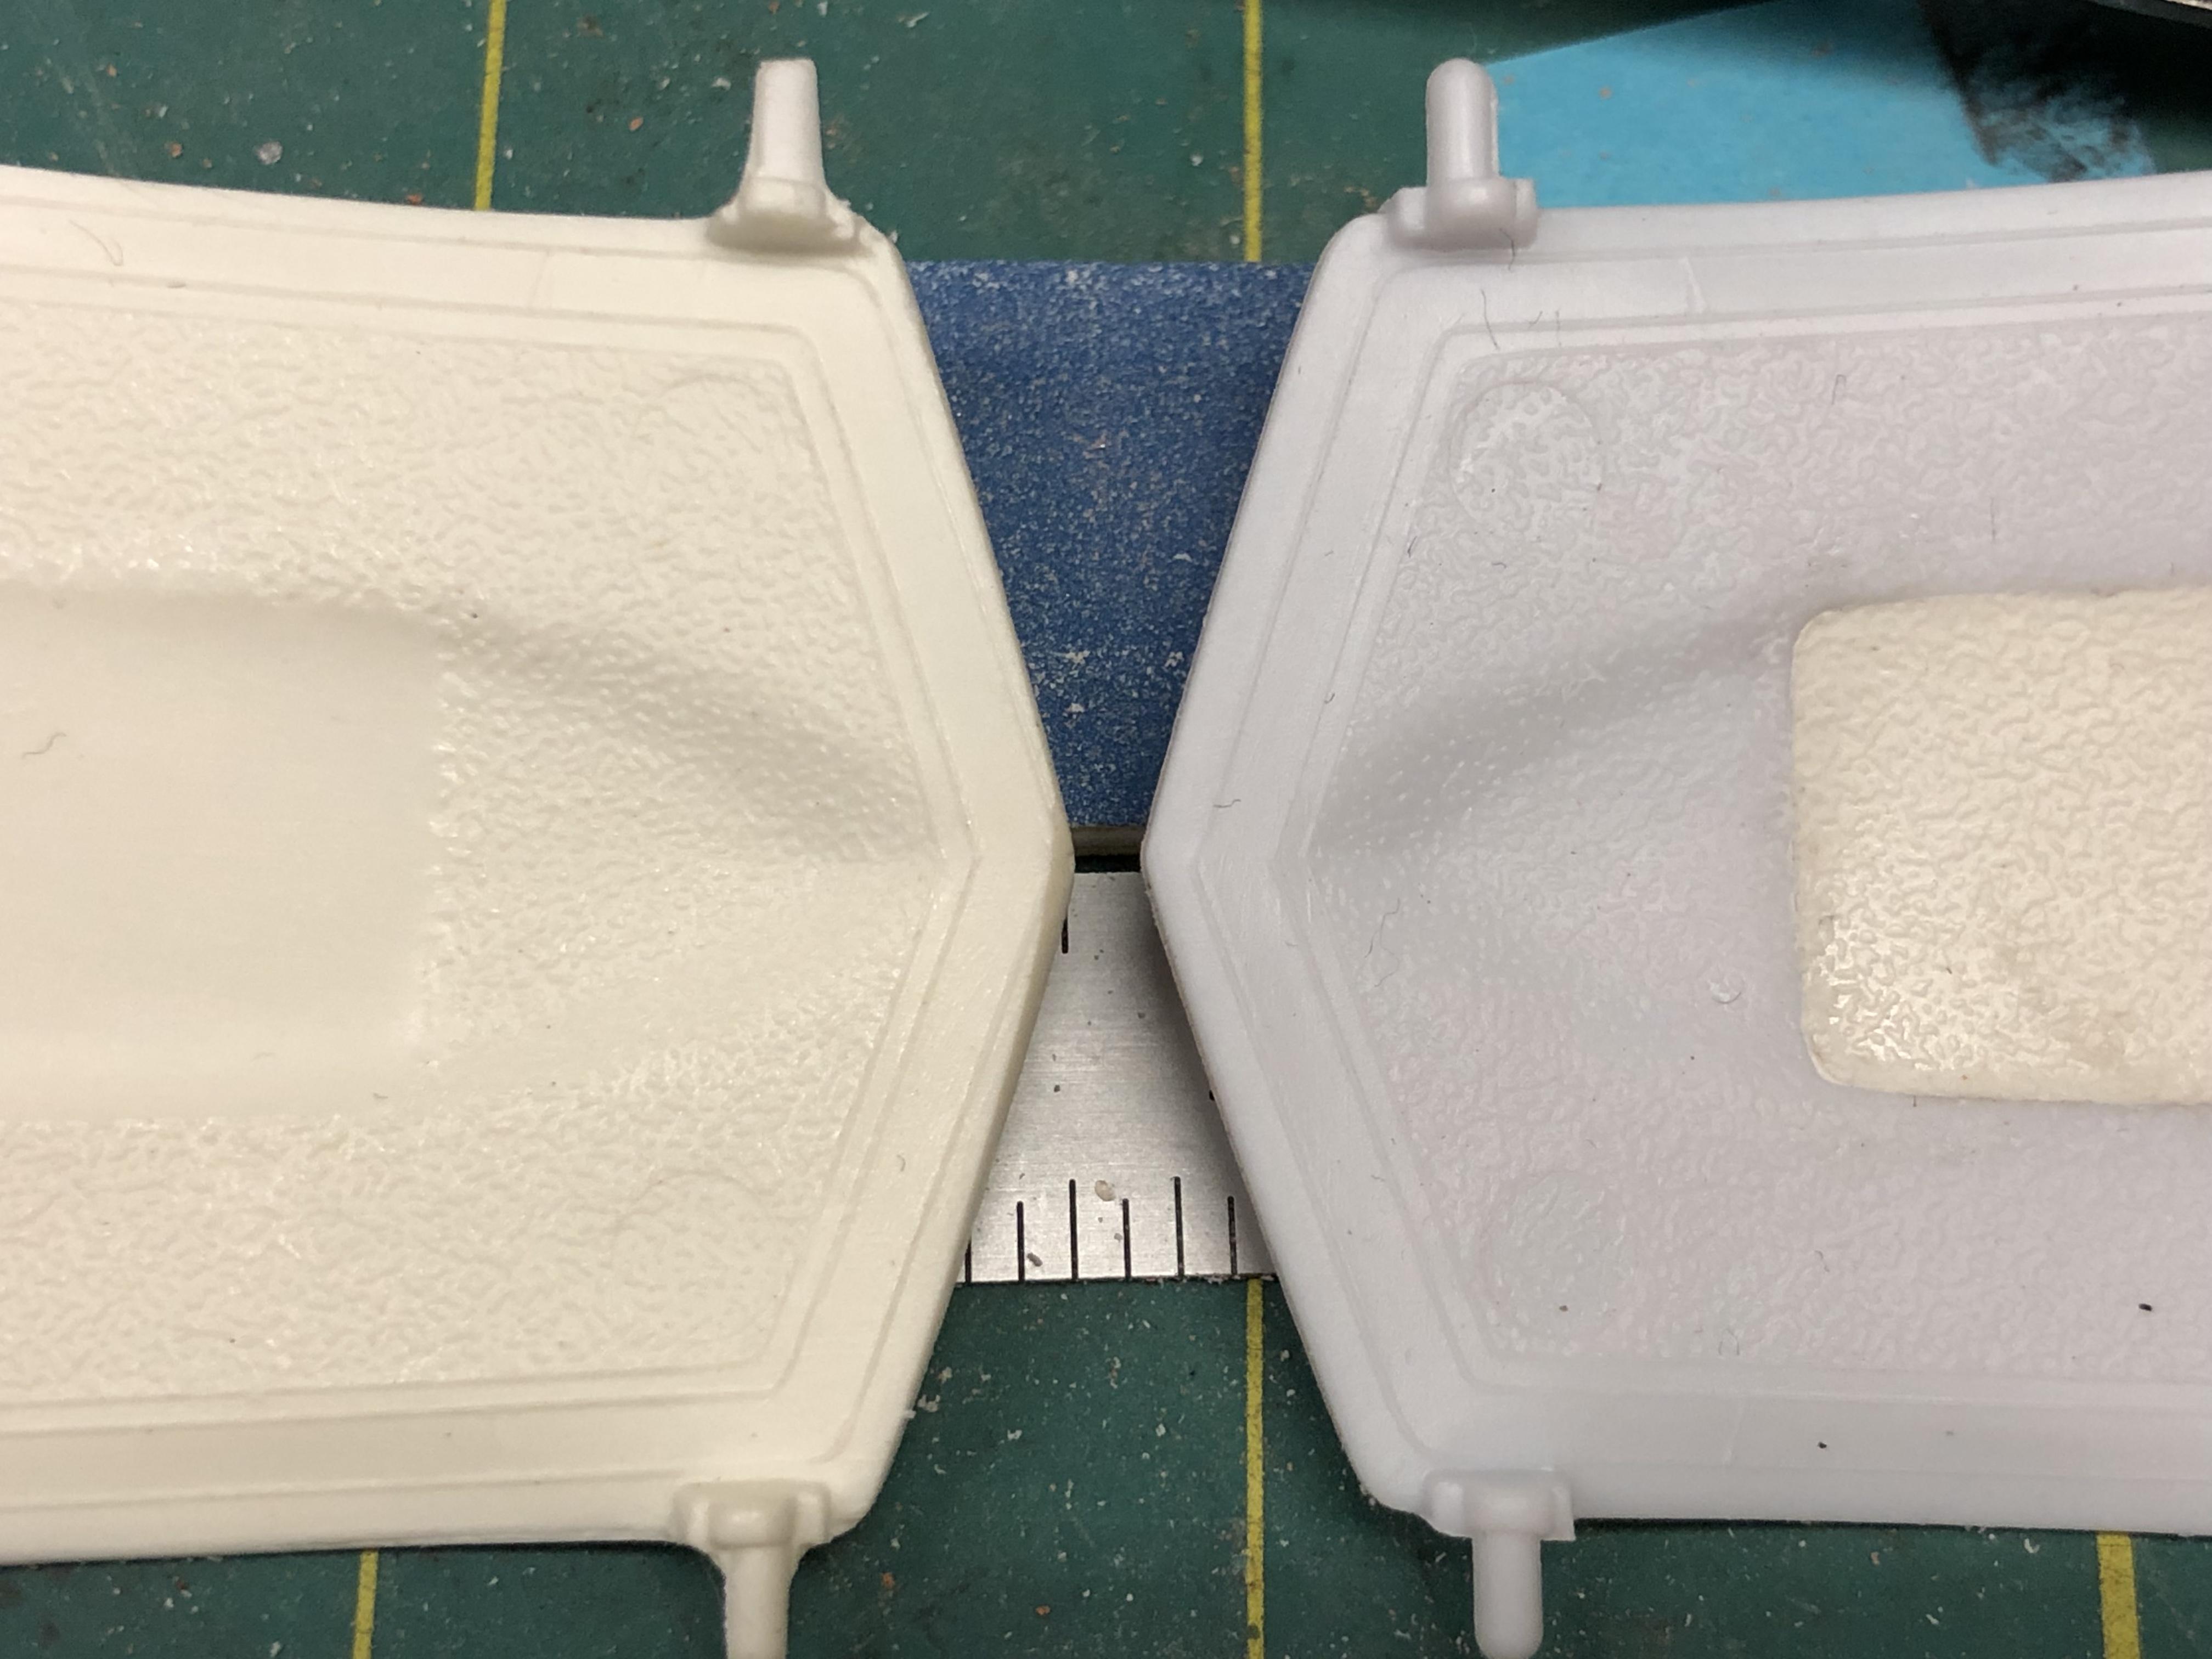
Hello, While working on the C7R and planning on another C6R and another C5R, somehow, this random thing came up and sneaked into my workbench. Let me explain: Dick Guldstrand was called "Mr. Corvette". The accomplished and very successful multiple championships winner race car driver was also a gifted engineer with a deep understanding of how cars work. A friend to Zora Arkus Duntov, he was a big contributor to the early Corvette racing success. He drove the original Grand Sport for Roger Penske as well as many other winning cars of his own creation throughout several decades . His company, Guldstrand Engineering Inc. built racing Lolas, Corvettes and many other competition vehicles to be raced worldwide. He also helped in the development of early racing C4s. He was a chassis/suspension genius. In 1986 he made his first special edition car, the GS80 Corvette. Then in 1995, he unveiled his Grand Sport 90 or GS90. Using the ZR1 as a starting point, it had a carbon fiber body designed by Steve Winter, a Doug Rippie tuned LT-5 producing 475 HP, and of course Guldstrand worked his magic on the suspension with special coilovers, special anti-roll bars, Brembo brakes and many other goodies. Dick Guldstrand himself drove it to over 190 MPH while retaining everyday driveability. GM supported him at first, with the idea of offering the GS90 as a dealer option, but backed out soon after since the C5 project was well underway. The pricey endeavor costed him a lot of money. At the end only 6 cars were made. There was also a convertible version named Nassau Roadster based on the C4 convertible with a supercharged LT-1. I have always liked the car, ever since seeing it on my May-1995 copy of Corvette Fever magazine. It still looks great even after almost 25 years. Unfortunately, Dick Guldstrand passed away in 2015. Here is a video of the car: https://www.youtube.com/watch?v=aPswPoQ9IsA Fortunately, there is a scale model of this car. However, it is from AMT. I don't like AMT at all, but this is the only game in town for this car. The model was released in the late 90's and has never been reissued as far as I know. My plan is to build it as a curbside since I suspect fit will be a problem. Dry fitting the body immediately showed fitting issues and very thick molded body parts, making the curbside idea more appealing. So this has become an exercise in body fitment. My goal: Proper fit of all body panels to pay homage to the original masterpiece. Here are some pictures of the progress so far: Heavy mold lines were addressed Yikes! This will take some serious fitting. Out comes the lumber to stretch the body slightly so the rear bumper can fit a bit better while the glue dries. Much better. Still more work is needed but going in the right direction. Hood fit is lousy to say the least The worst fit is the nose My "body/chassis jig" showed a slight warp in the nose. After careful studying, a precise cut was made so I could wedge some styrene to correct the warp. Disregard the brass tubes in the firewall. It was an unsuccessful attempt to pin the hood down. And nothing happened here! Lots of filler... ...and slowly getting there The model calls for installation of the nose and rear bumper after the chassis is installed. Yeah right. That ain't gonna happen! I modified the chassis for easier installation and made some templates for covering the reworked areas. That is where we are now. Still working on the C7R and starting another C6R (its own thread coming soon) but I suppose this will take center stage after the C7R is done. Of course that is if nothing else randomly lands on the workbench What do you think? Thanks,
-
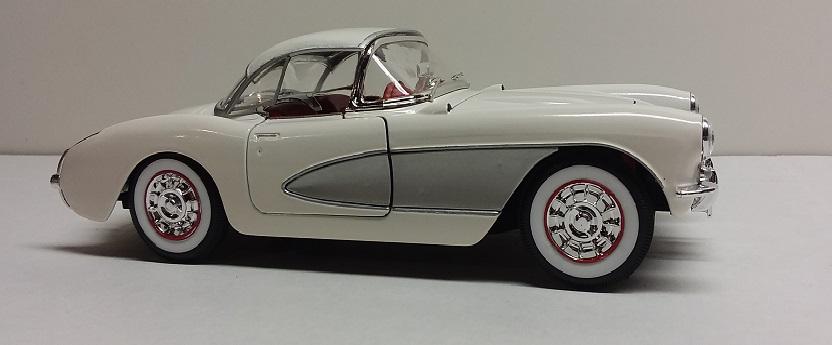
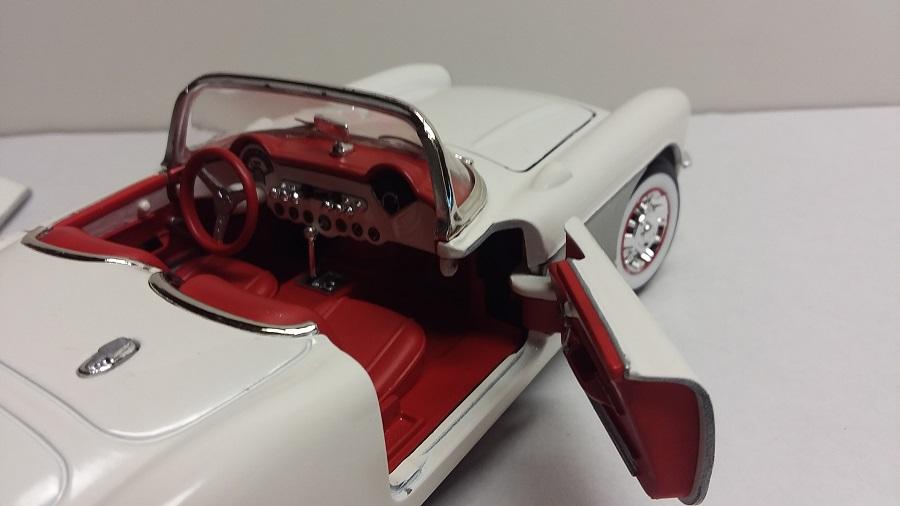
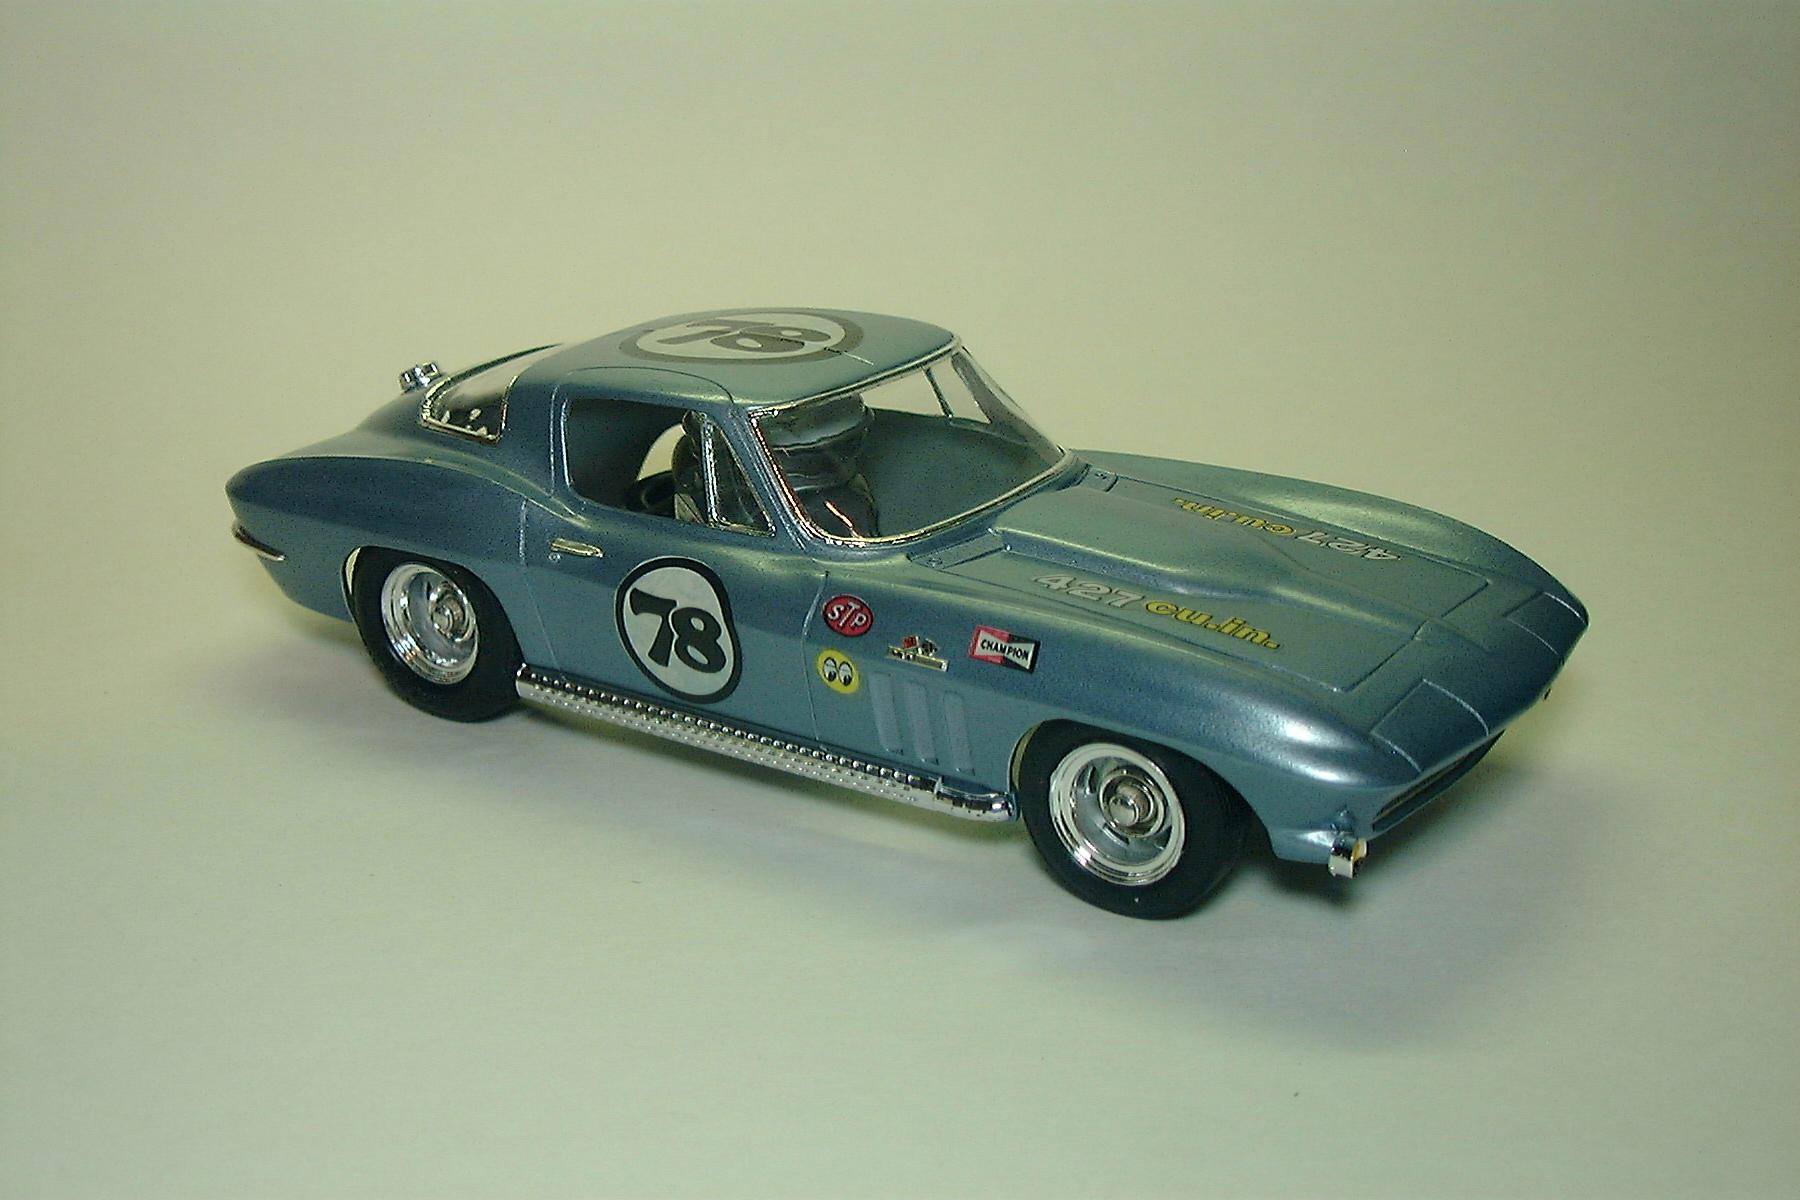
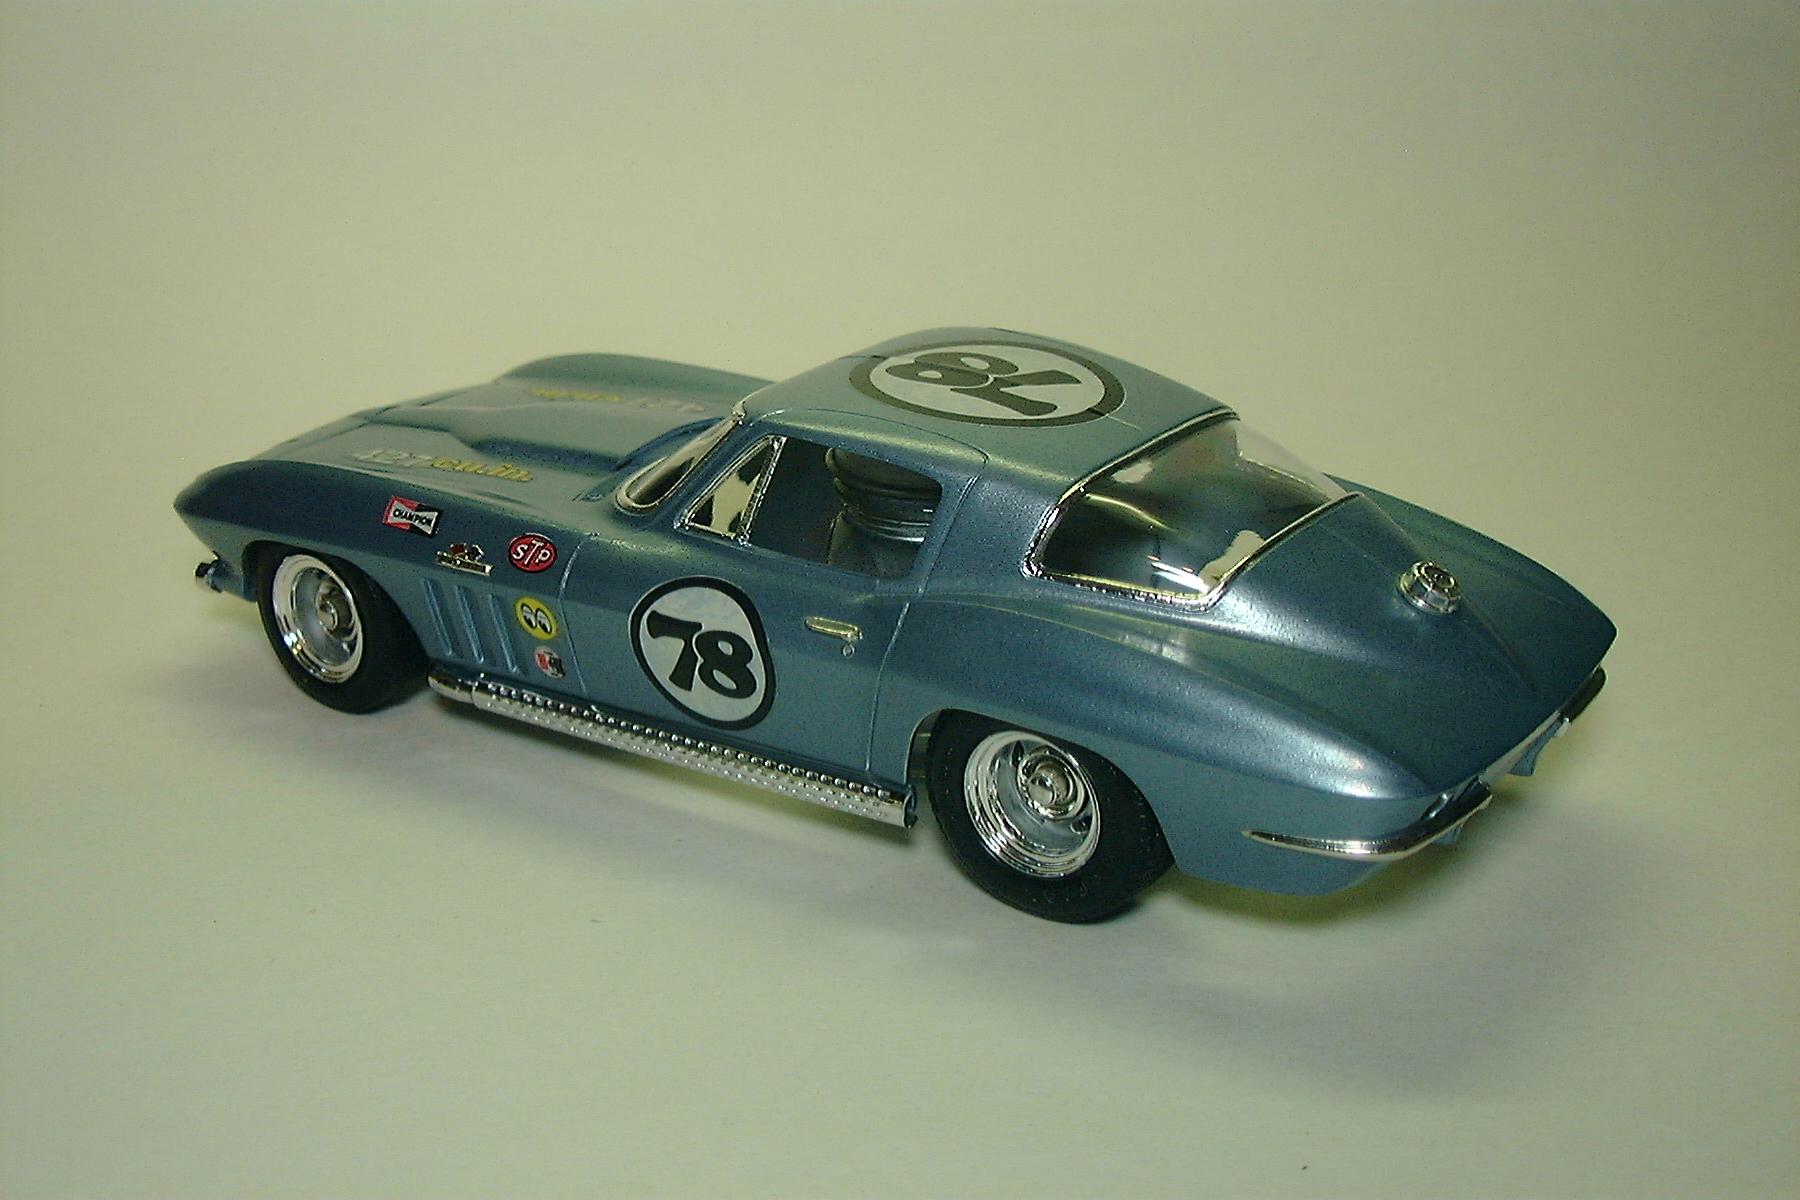
Snake Fu is a term coined here on the Forum by Richard “Snake” Mesner for minor improvements and upgrades to usually inexpensive diecast models. This example acquired from an estate is a vintage Italian made BBurago 1957 Corvette in a form that was new to me with a top and nice details and seemed to beg for some Snake Fu treatment. In typical BBurago fashion for the time (and unfortunately adopted by Jada) the model is a bit larger than 1/24 and the wheels are oversized too and needed to go. Fortunately the wheels and tires from the Monogram 1/24 scale Corvette are a perfect match and as Snake has reminded us from time to time the rims should be painted. I looked at many photos on the web of white ’57 Corvettes and the vast majority had red interiors and rims. I removed the chassis from the body to get a good grip on the wheels and with a healthy tug they came off and the Monogram wheels went on without modification. A note of caution here, the wheel backs of the early Monogram kits (2227) are different from the latter versions and do not work, only the later releases (2924) work without changes. I did use Elmers glue though to attach the wheels in case I ever wanted to change them back. Overall IMO this is one of the best of the vintage BBuragos and seems to be fairly rare on the market.
-
Revell-Monogram 1/25th kit circa 1998. Kit was missing quite a few pieces, but regardless modifications are as followed: Kit's dashboard was lacking instrument gauges, ones were added using unused Revell Datsun 240z decals Kit's side glass pieces were missing, so mesh screening pieces were used in their place Custom LT1 style fuel injection setup made from an AMT 94 Camaro manifold and a 67 Impala Prostreet 427 intake Edlebrock valve covers from AMT '34 Ford 350 V8. Air Filter is unknown piece from parts bin. Kit was missing headers, so ones were gathered using stock headers from a Revell '57 Ford motor, which give it a custom look and fit the ports on the heads nicely. To accommodate the new headers, a new exhaust system was made. Plastic spruce pieces were cut and bent to route to the kit's rear muffler Wheels are from an old Radioshack Xmods wheel set, which look about 1/24th and resemble OZ BBS style wheels. Brakes are from an old AMT grey molded source of an unknown subject (Fast and Furious Monte Carlo?). Front tires are from a Revell Acura RSX, and the wider rears come from what could be an AMT Fast and Furious Veilside Toyota Supra. Interior paint is Rustoluem Advance Formula Flat Brown, and the frame is Rustoluem Universal Aluminum. Exterior paint is Tamiya TS-58 Pearl Light Blue over Rustoluem Silver, cleared with Pledge. Ignore that the valve cover had lettering upside down. I thought they were installed correctly but the engine was faced a different way before it got panted. Oh well, should still run fine!
-
The idea came afer finishing the 1958 Corvette C1 by Revell. A very nice kit. I wanted to paint it unusual because it's a kind of boring to see another red with white Corvette. I was looking for something different. So I tumbled over a light gold with black C1. This is what I wanted to paint. Black inserts on Gold. Afterwards I'm glad, that my paint wasn't enough for it. So I decided to paint it silver. The fact, that I hat teh Foose C7 already in my shelf, it would fit perfectly to it. A good plan! Aditionaly to that, I was thinking about to build each Generation in silver with black. That was the start of the ides to my "Silver Corvette Collection". A look into my shelf was disapointing: only one kit was there - and that was the 4 door C3 by Monogram. No way. I went on to buy a lot of kits in January till March 2019 (34). Now I was able to built my 7 Generations One main Point is, to Show the Evolution of the design of the Corvette. For that reason I decided, to paint them the same Color all over. Nothing has to be different. The design is in the foregroung. I did the same with the Pontiac Firebird/Trans Am in red. Another Information: they all are painted with the same Color: Revell email #99 to be on the safe side. Every model kit is protected by 2K clear cote. Everything made by airbrush. The kits, which are already done, will be in order of the "real" year of built. The kits, which will be built this year will be added whether in order they are built or at the end ot the year. I don't know so far. Definitely I'll add the convertibles this year. The 1975 C3 and 1998 C5 are in Progress.
-
 HI all Does anyone know if there are photoetch/detail parts out there for the Revell Corvette C7R? I see that Scale Motorsport makes a pricey set (https://scalemotorsport.com/products/corvette-c7r-super-detail-kit) but what about a standard small etch sheet? Can't find one anywhere, which surprises me. Curious...
 -
Below are some slot car bodies I made for a friend. He had a pretty good stash so we worked out a deal where I got a kit of MY choosing and he would select a kit for the body. I would detail out the body for him and get to keep all the rest of the kit for parts. The silver Super Bee turned out really nice. Note: the wheels shown were only for mock up pics.
-
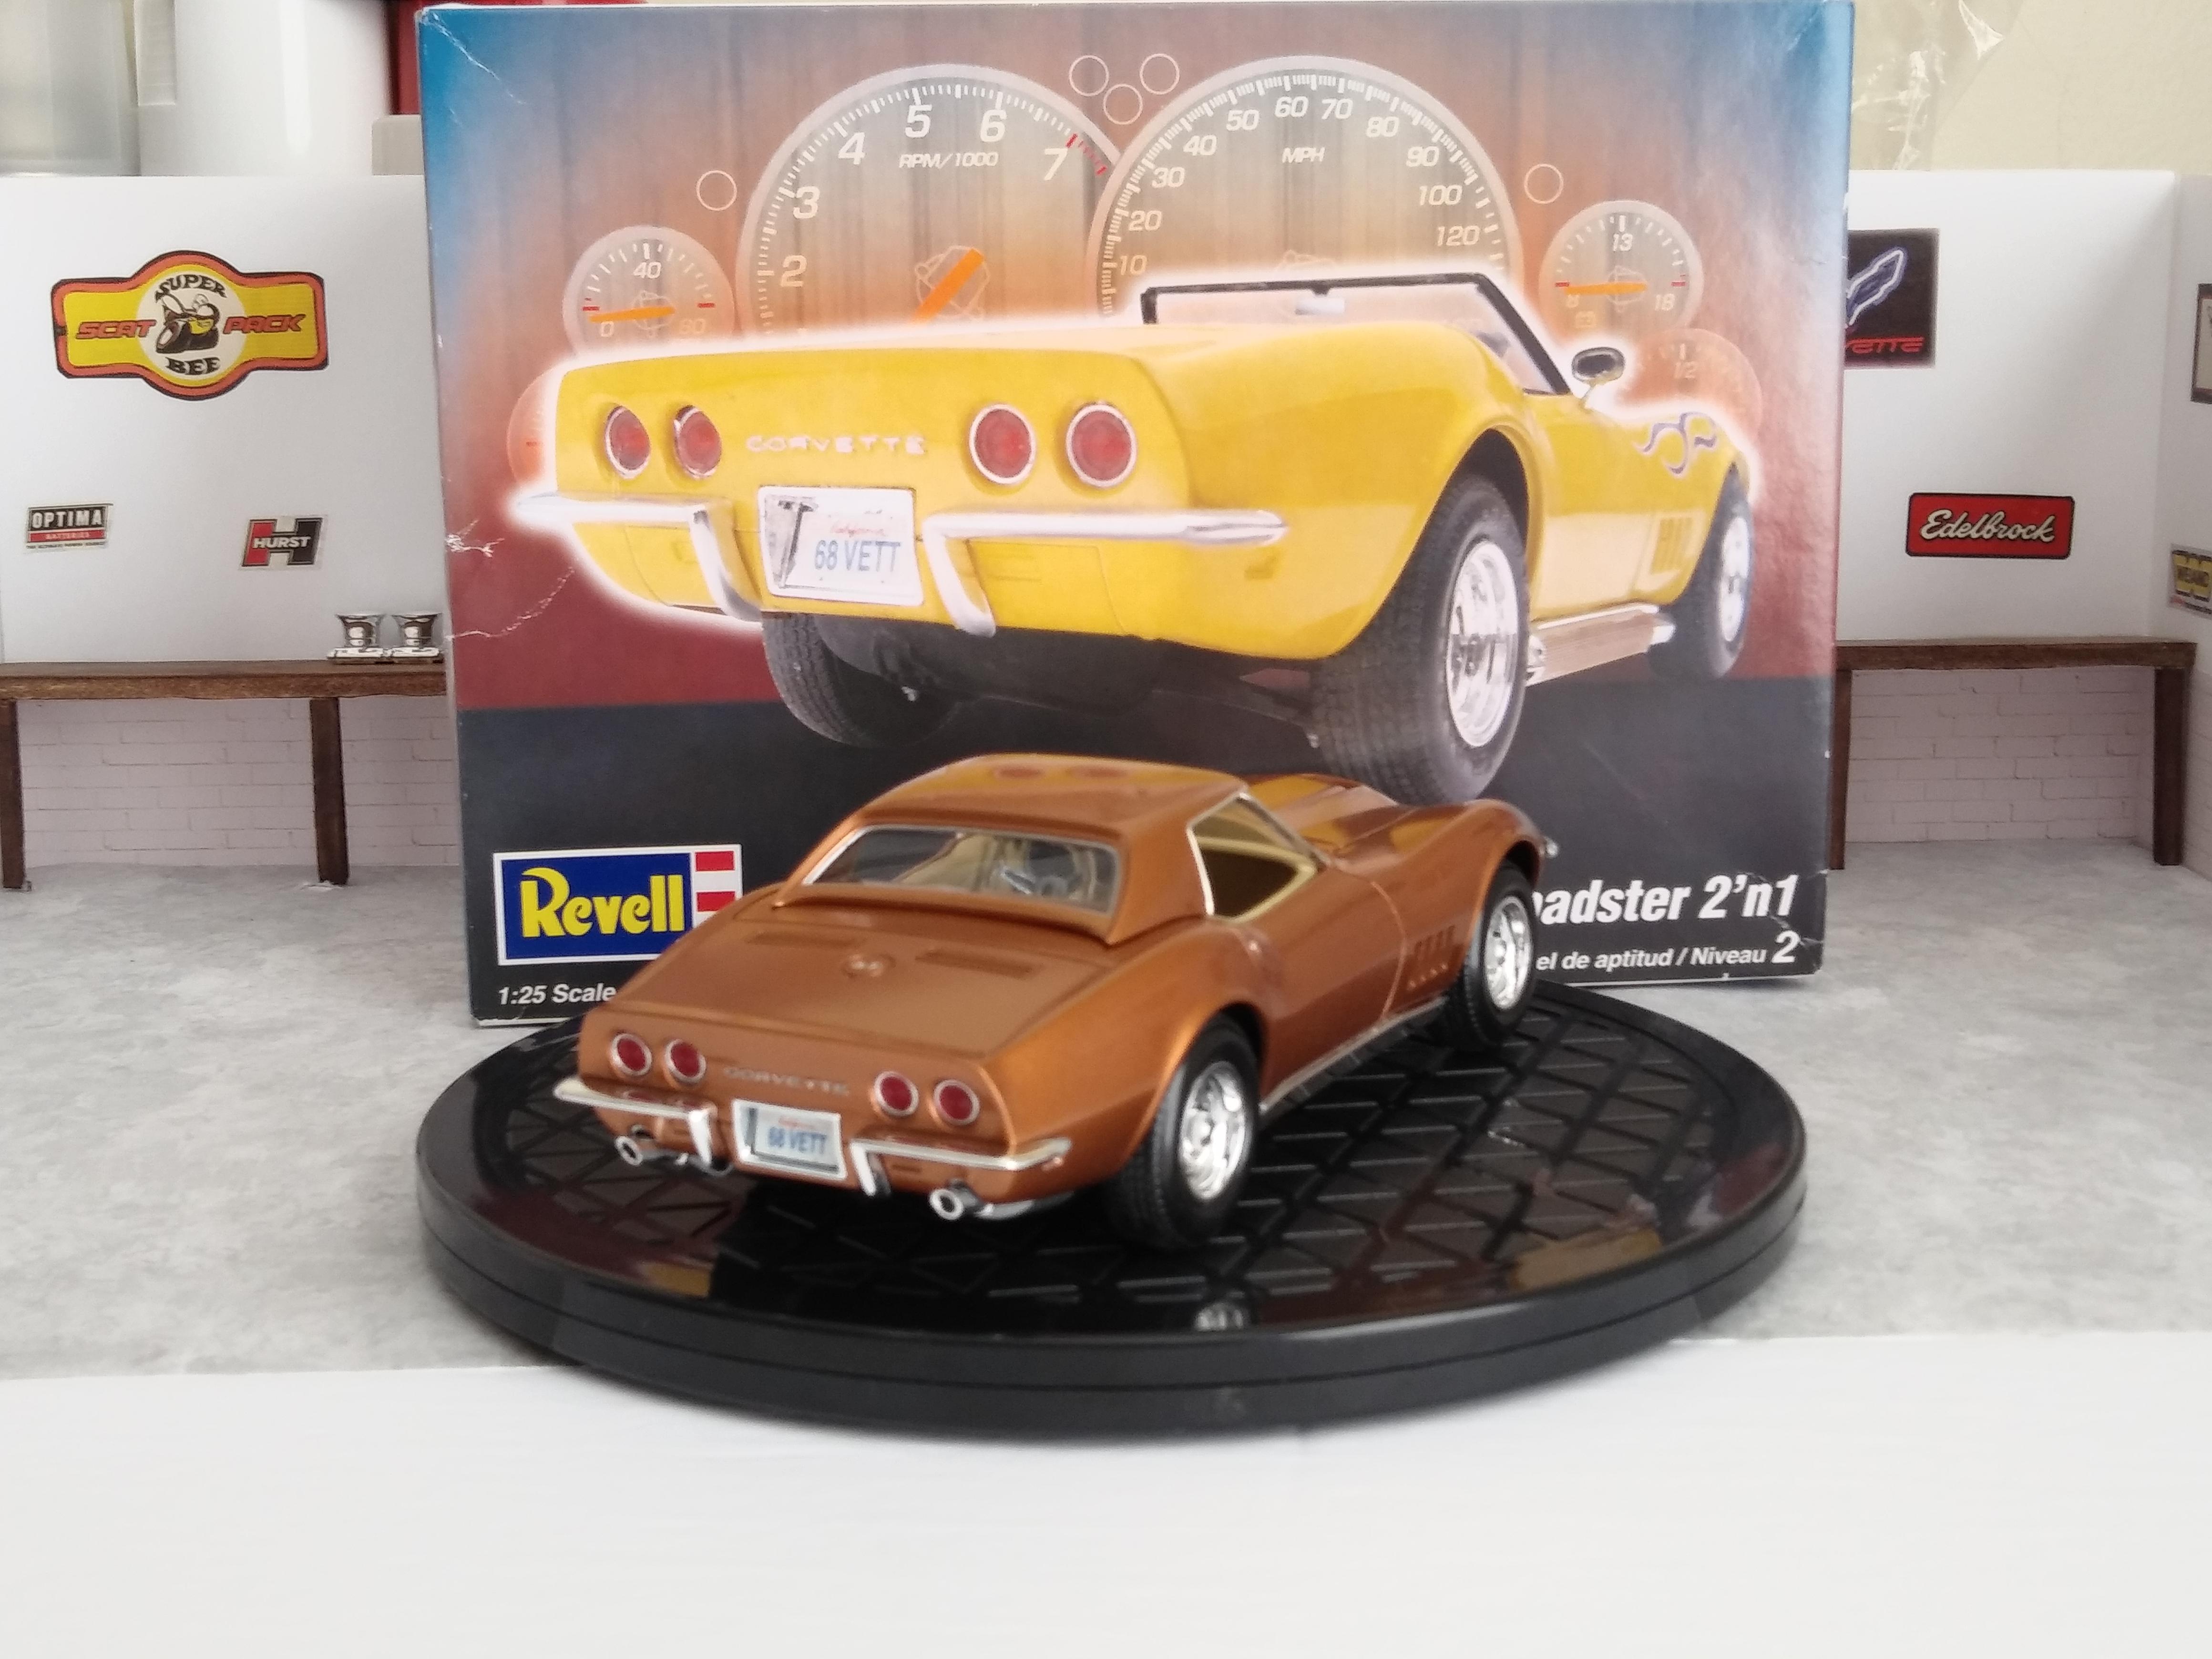
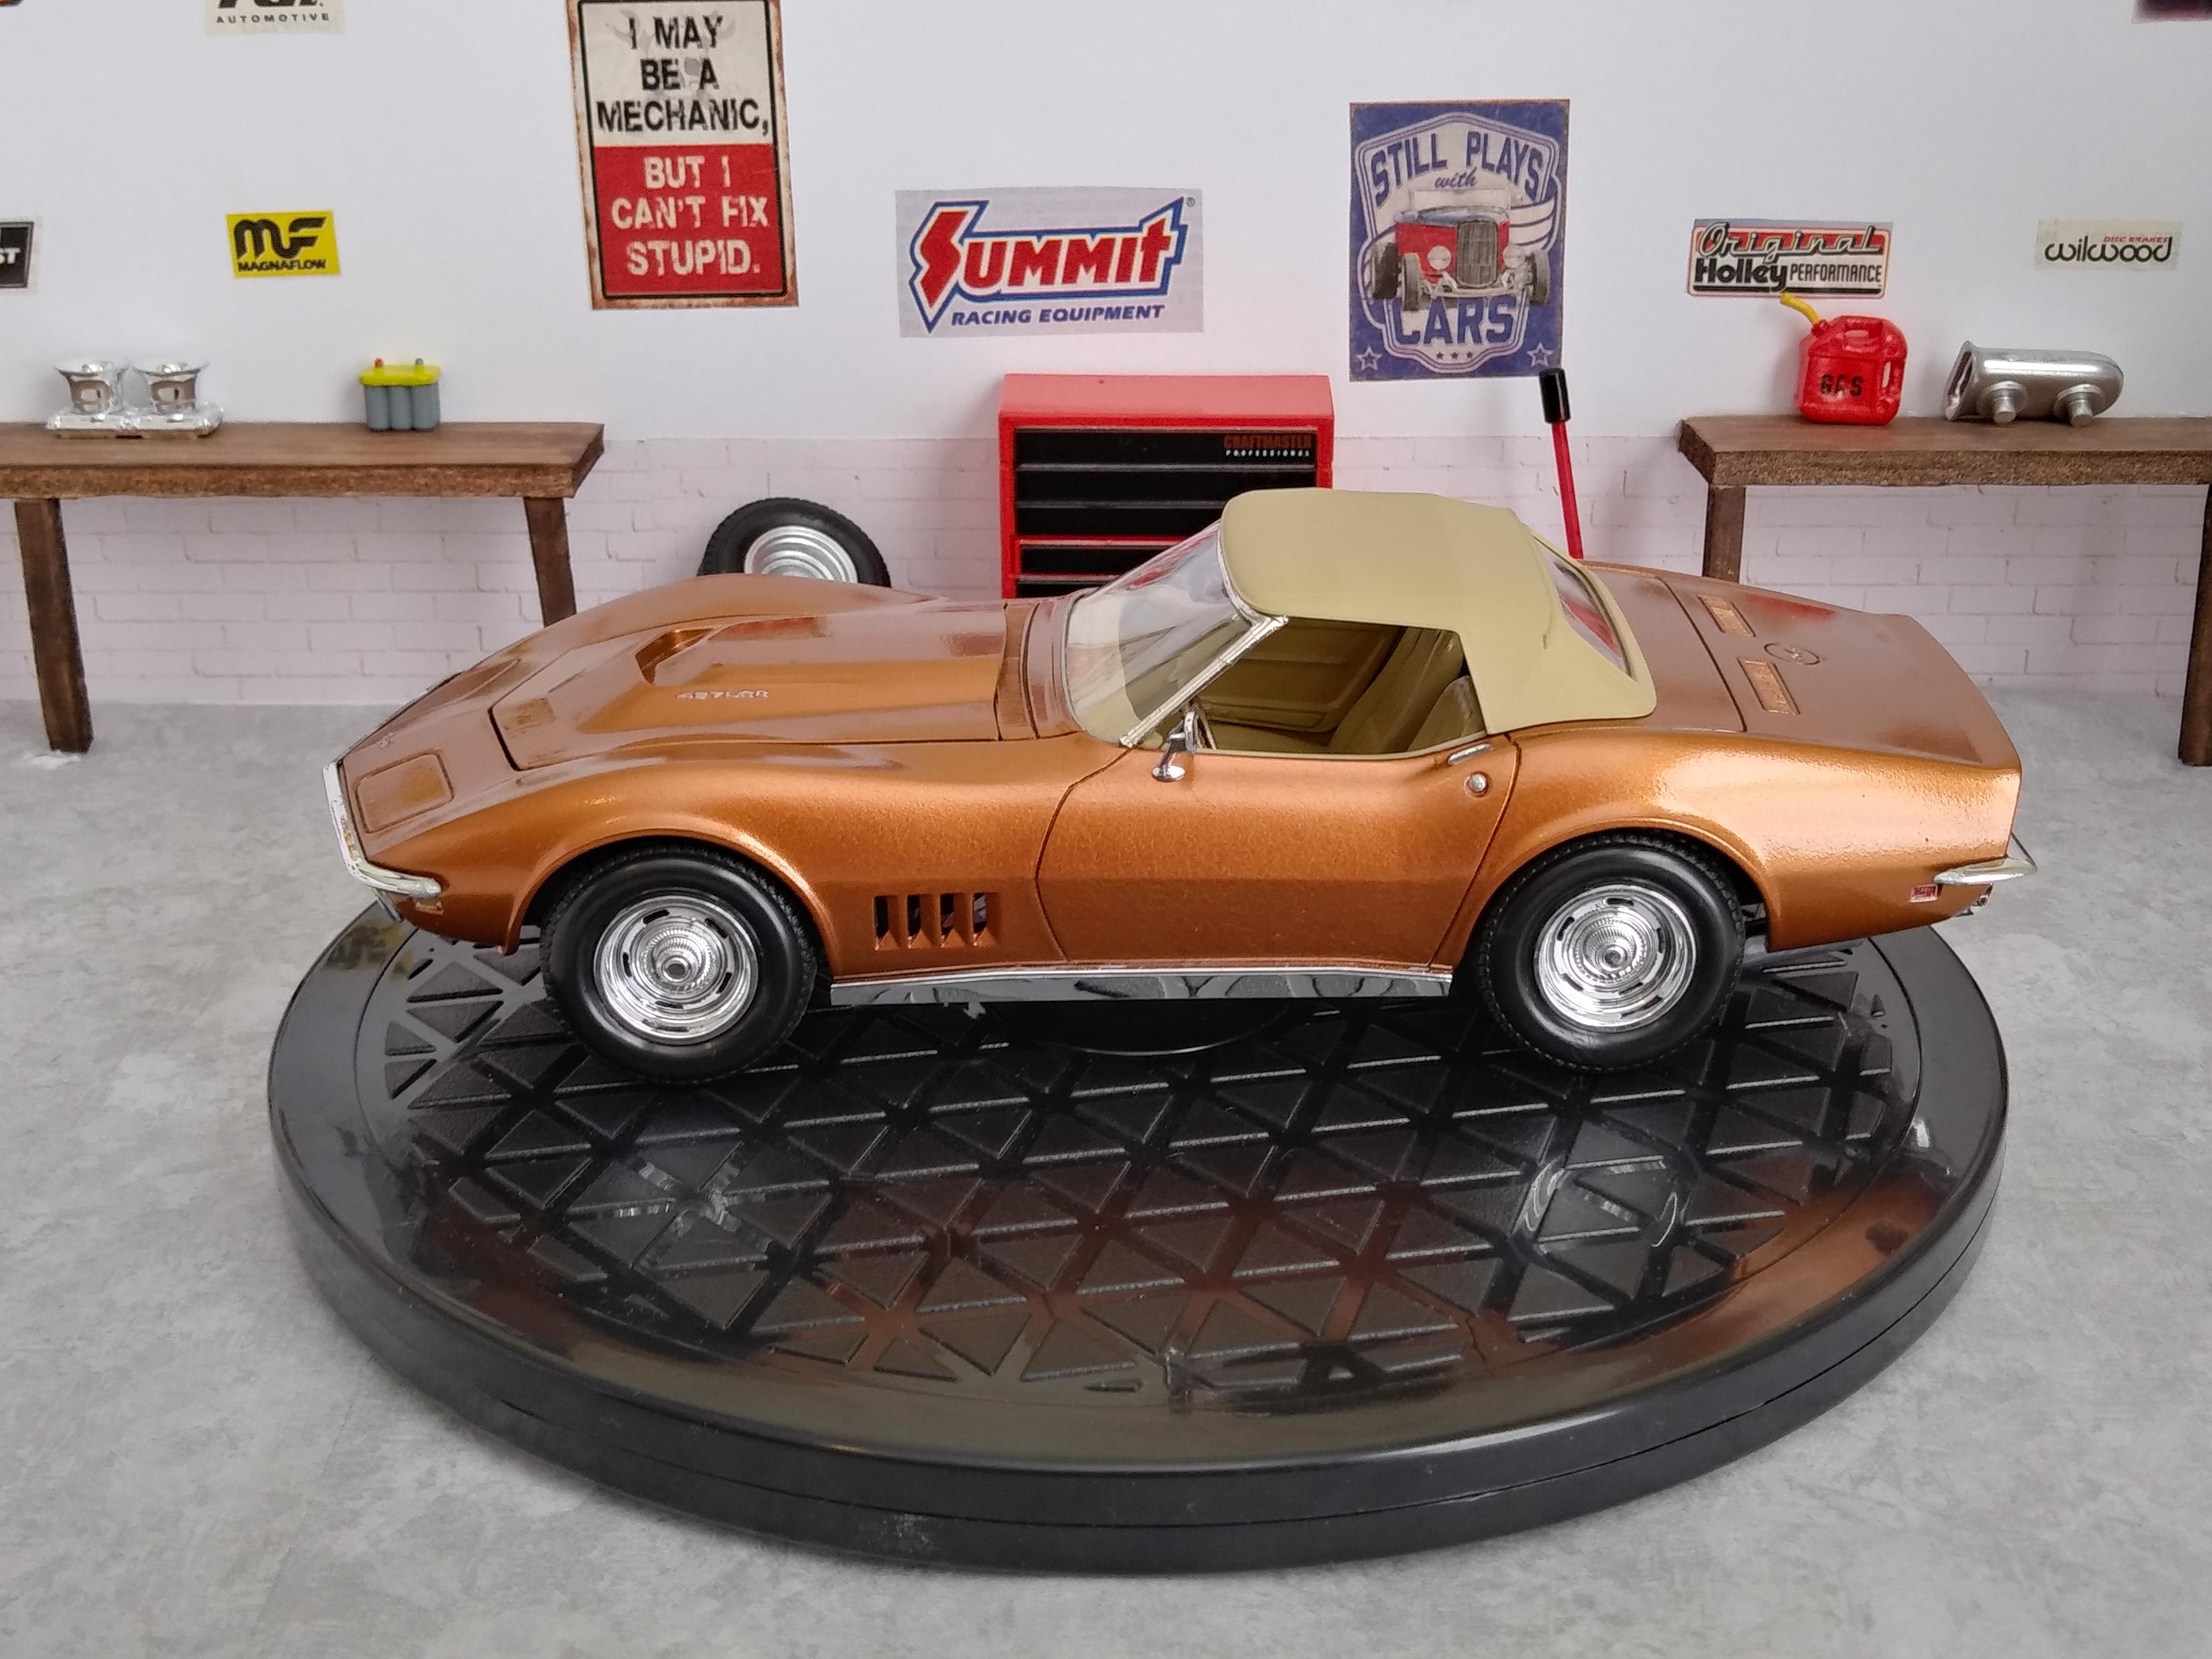
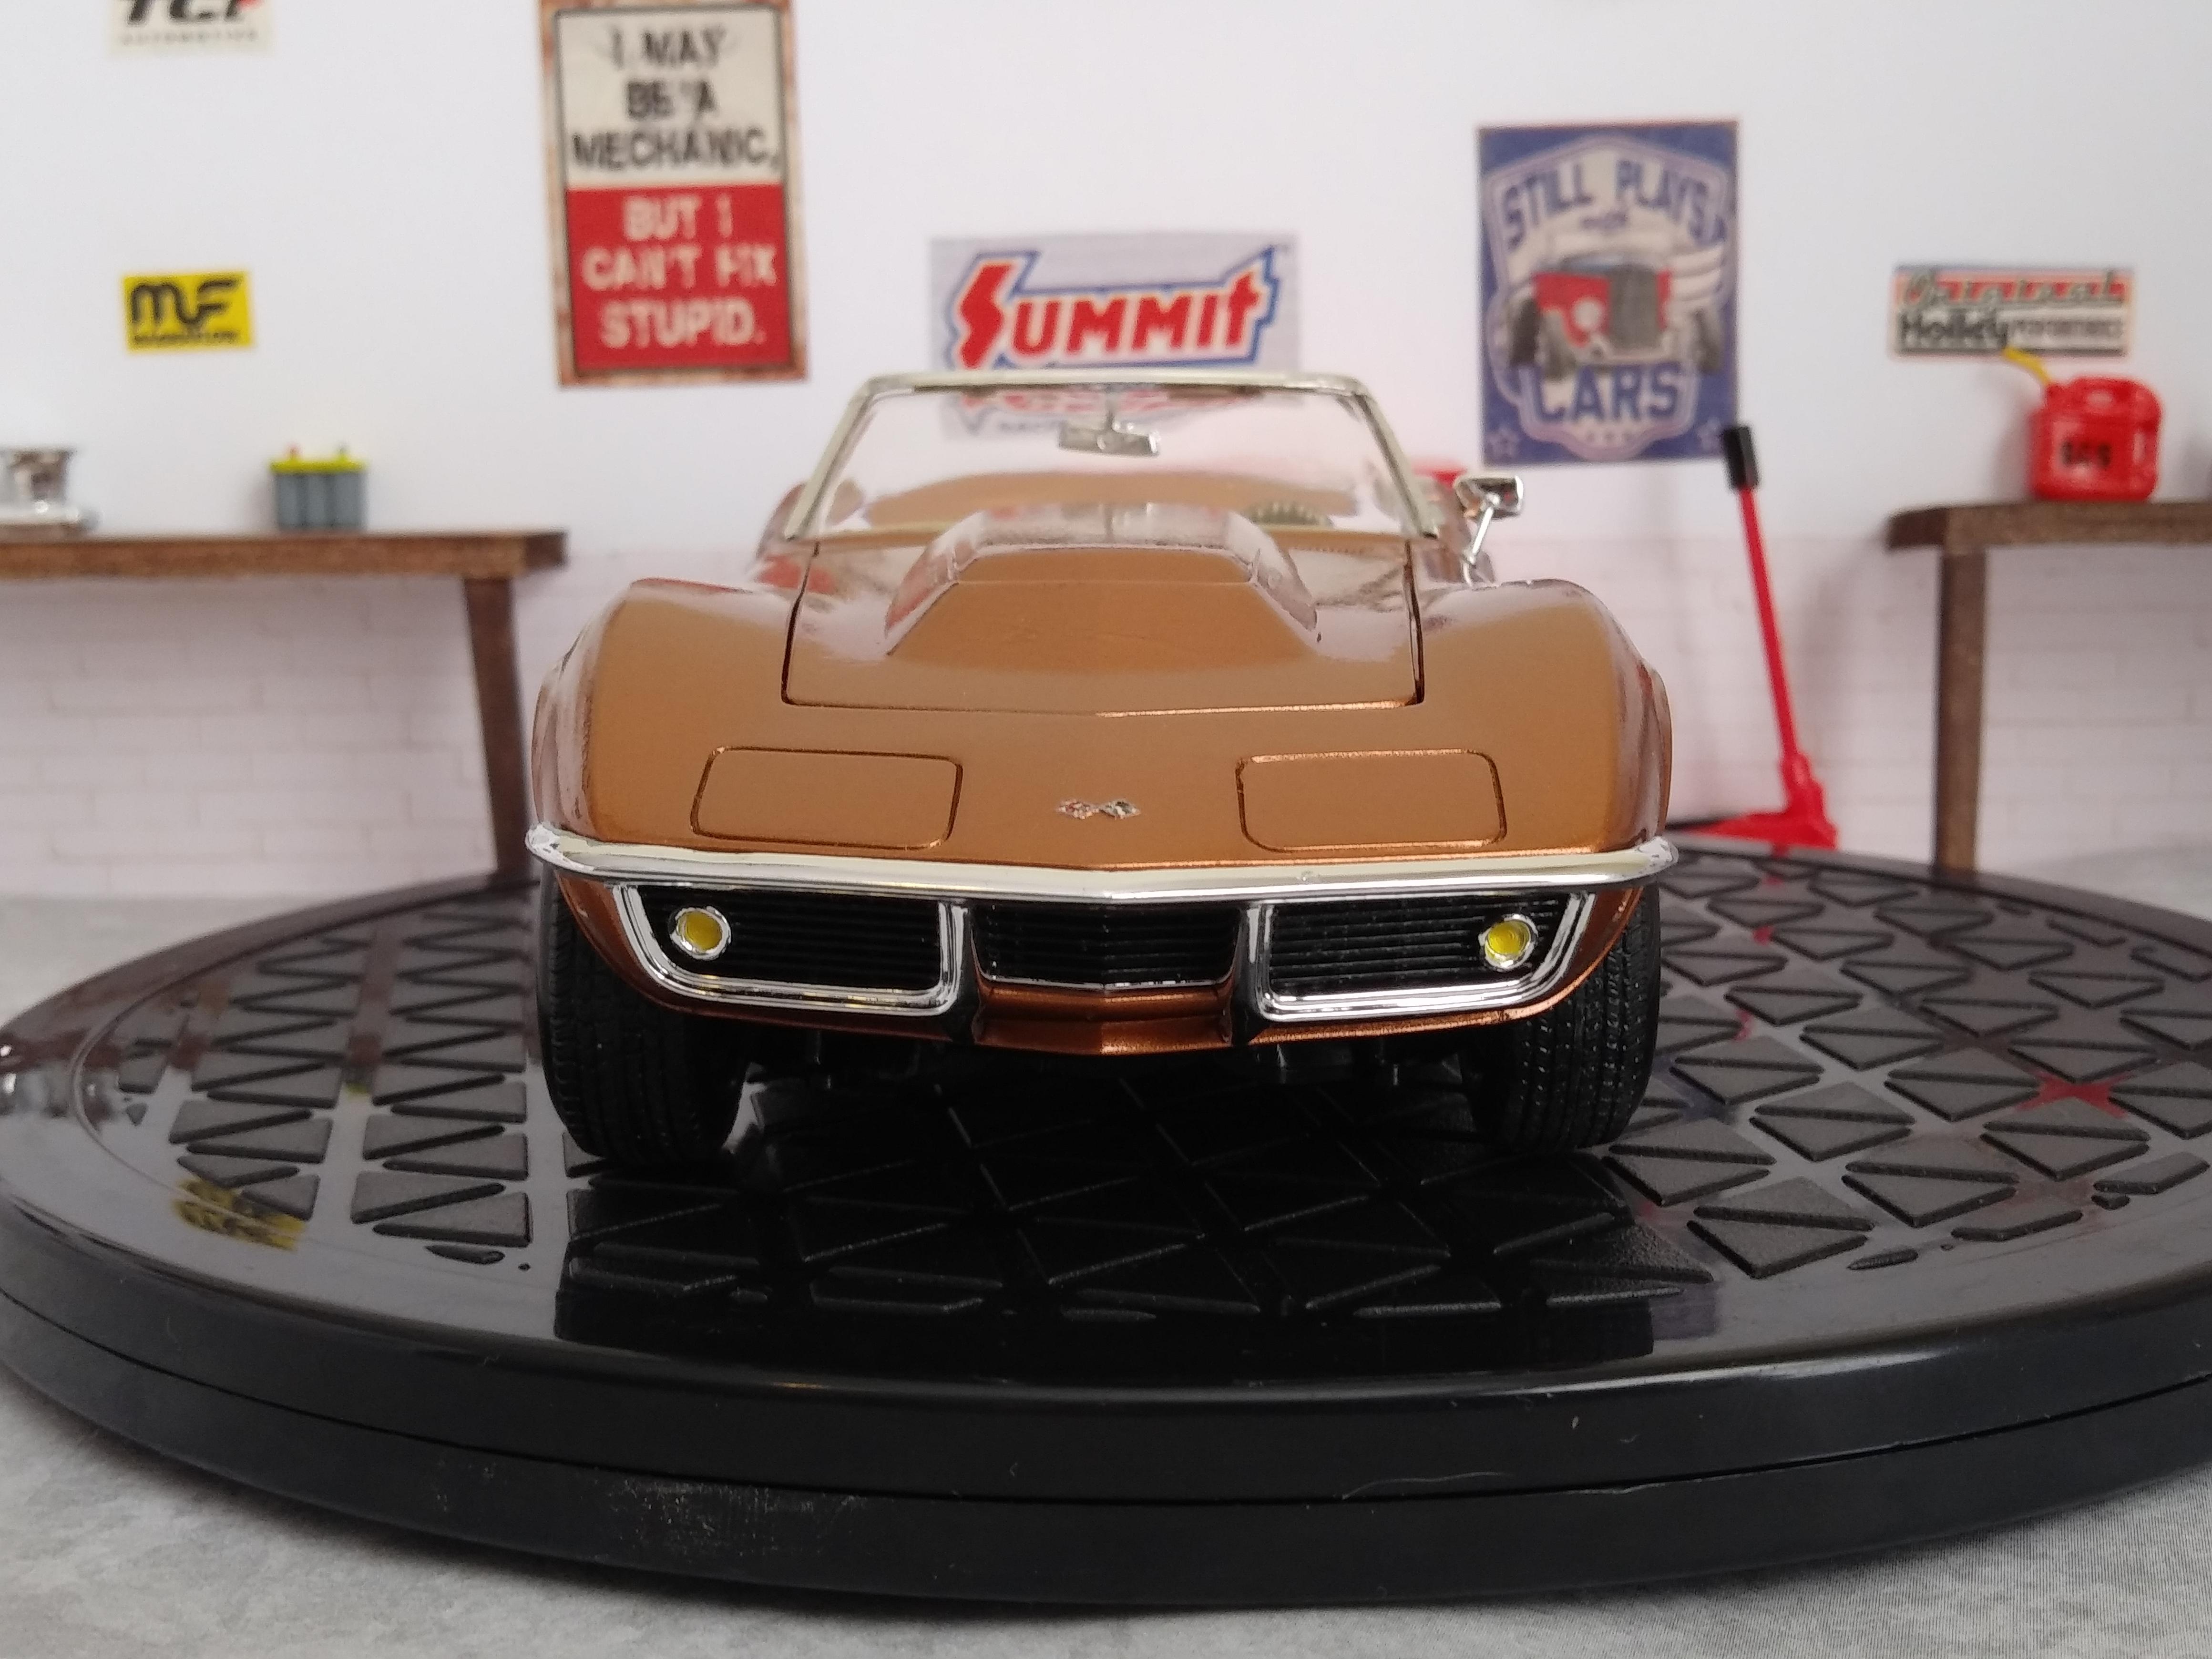
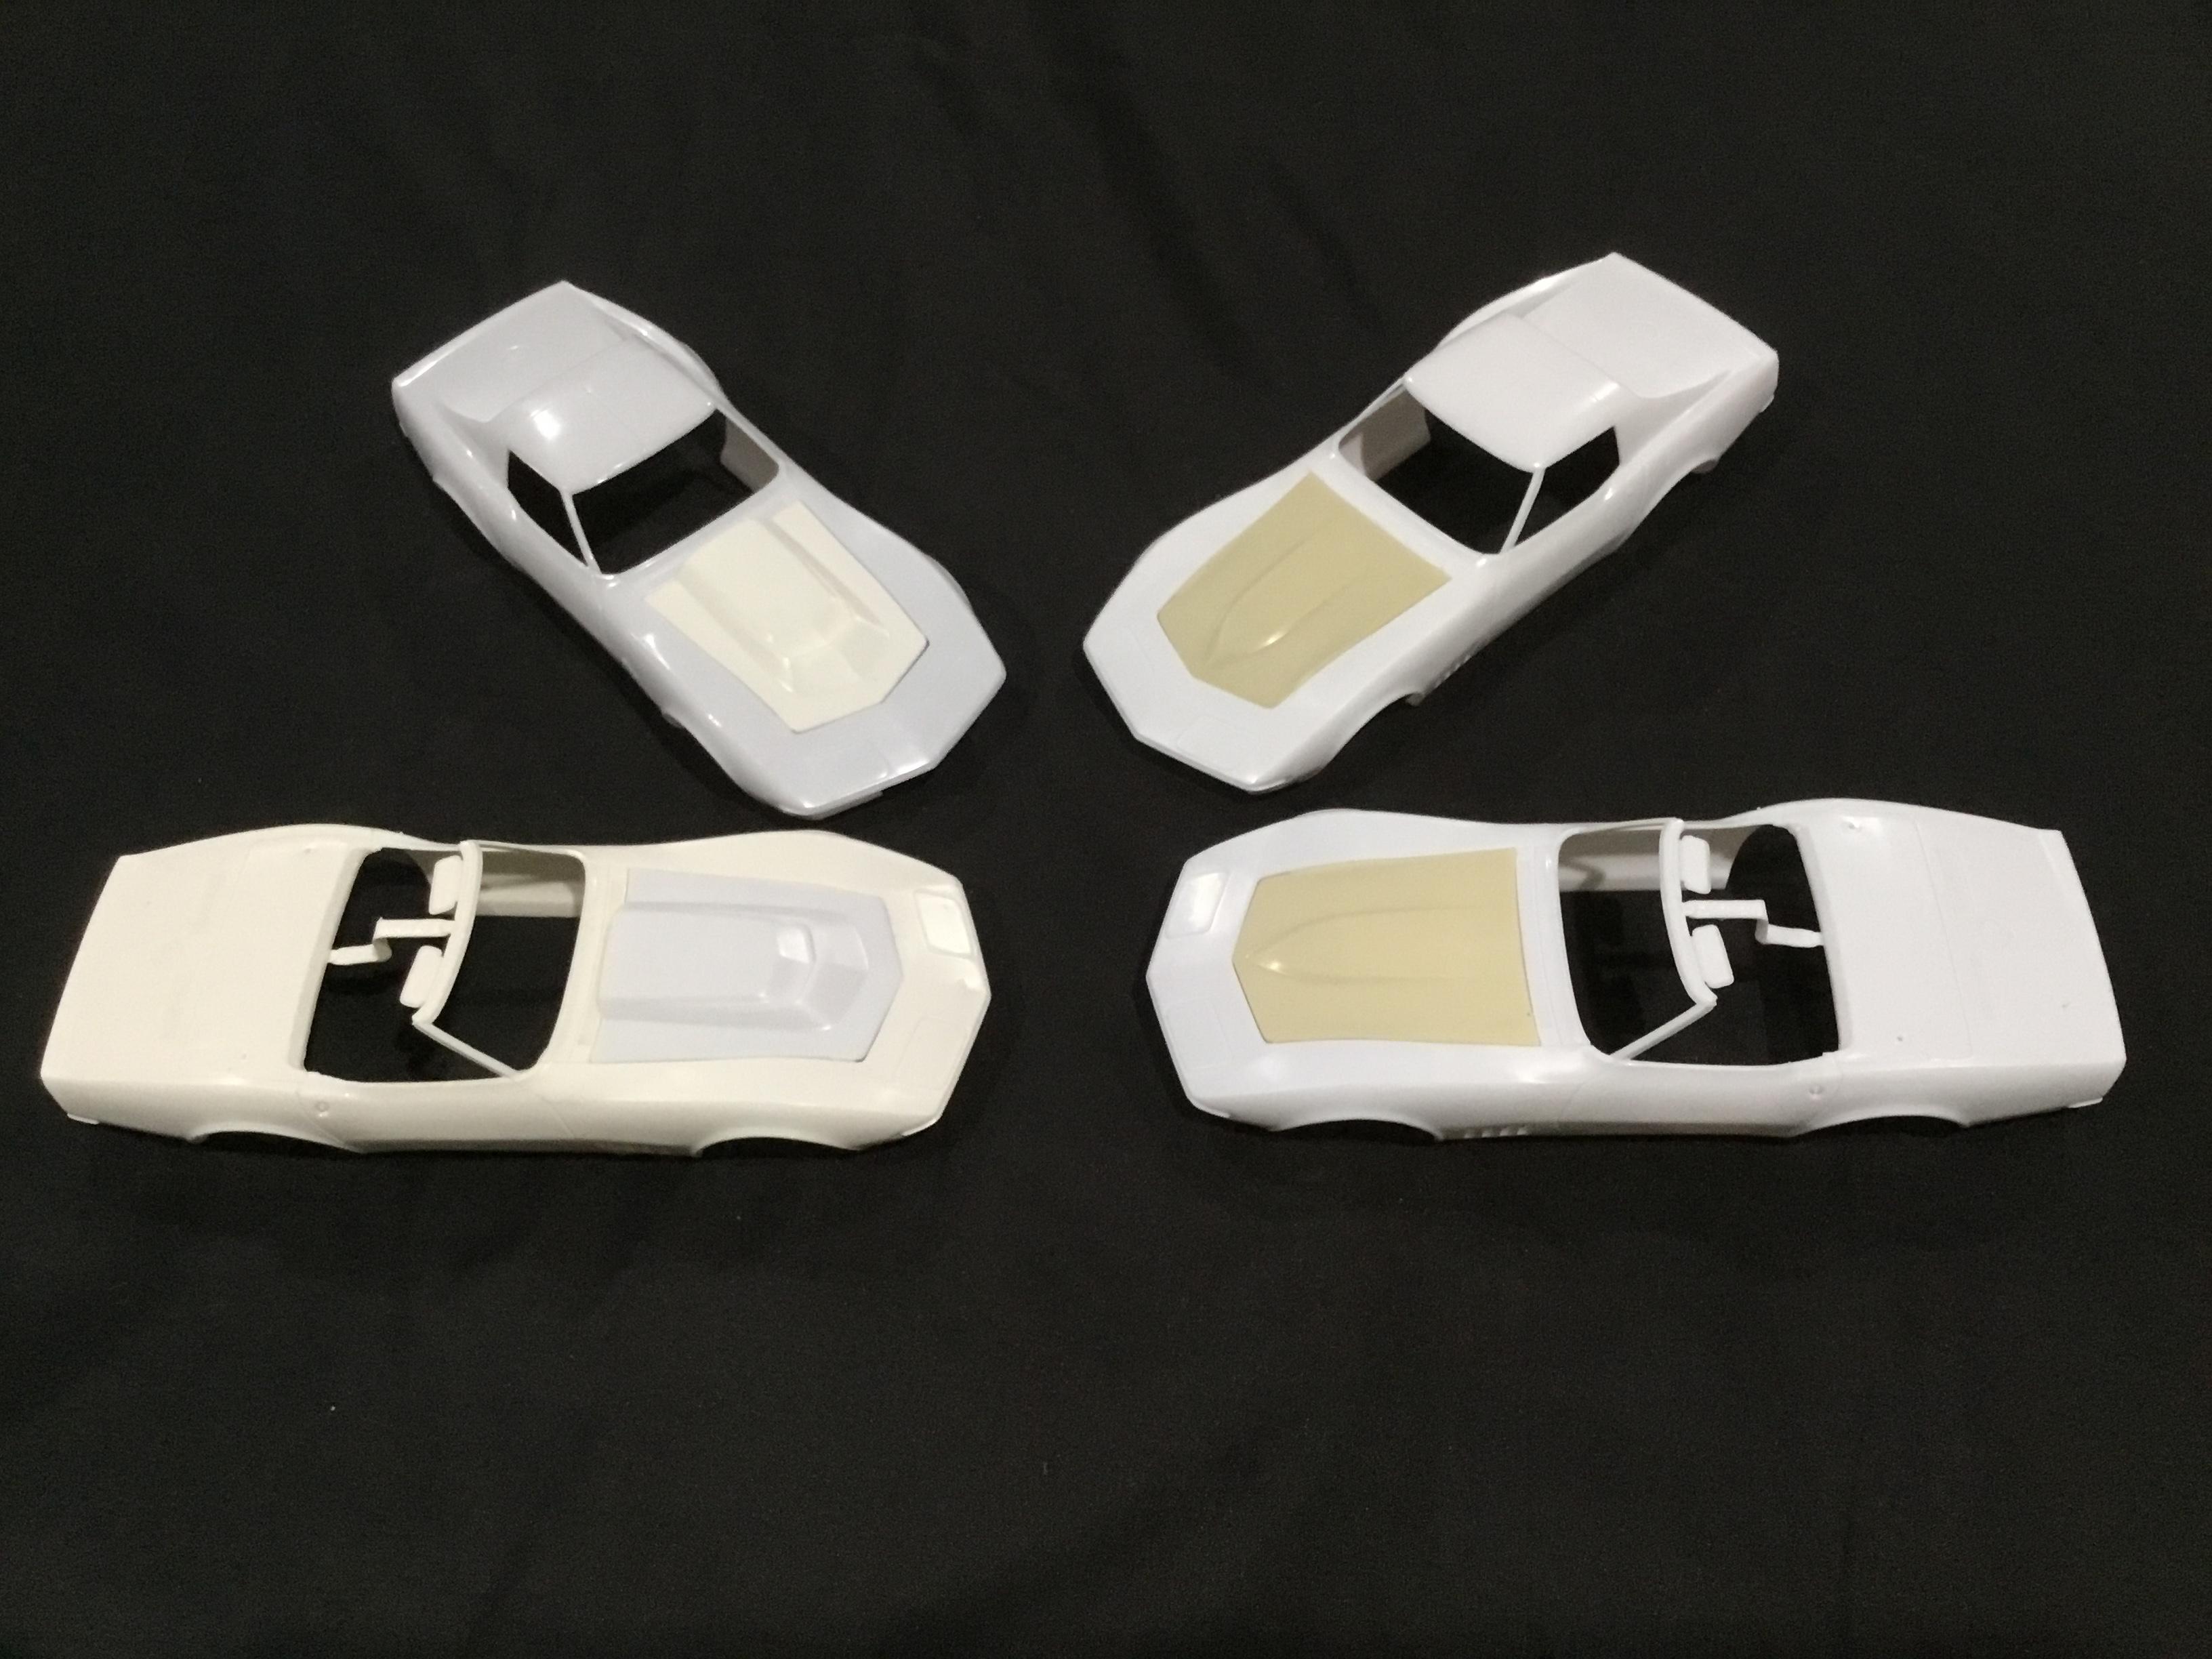
 Finished this one up a couple of weeks ago, but I didn't post any pics until now since it was for a box stock build-off for one of my facebook groups that ended on Dec. 1. It's the Revell 1968 Corvette Roadster done box stock with the only addition being approved BMF for the trim. This is a really nice kit and I had a lot of fun building it. The kit was painted with Chroma Molten Metals Acrylic craft paint custom mixed by my wife which I then sprayed through my airbrush, making it my very first airbrush paint job. The interior was also craft paint through my airbrush, as was the chassis. In fact, everything except a few small parts and certain details was done with craft paints (about 95% of the car) and mostly sprayed through the airbrush. The toughest part of the whole thing , I think, was picking out which pics to use for the contest. I like the looks of each variation-- No top, Soft top and Hard top-- so I ended up using one pic of each for the three allotted body shot angles. I am still learning new things, but the biggest thing I still need to learn is to be more patient and not to rush. Thanks for looking!
-
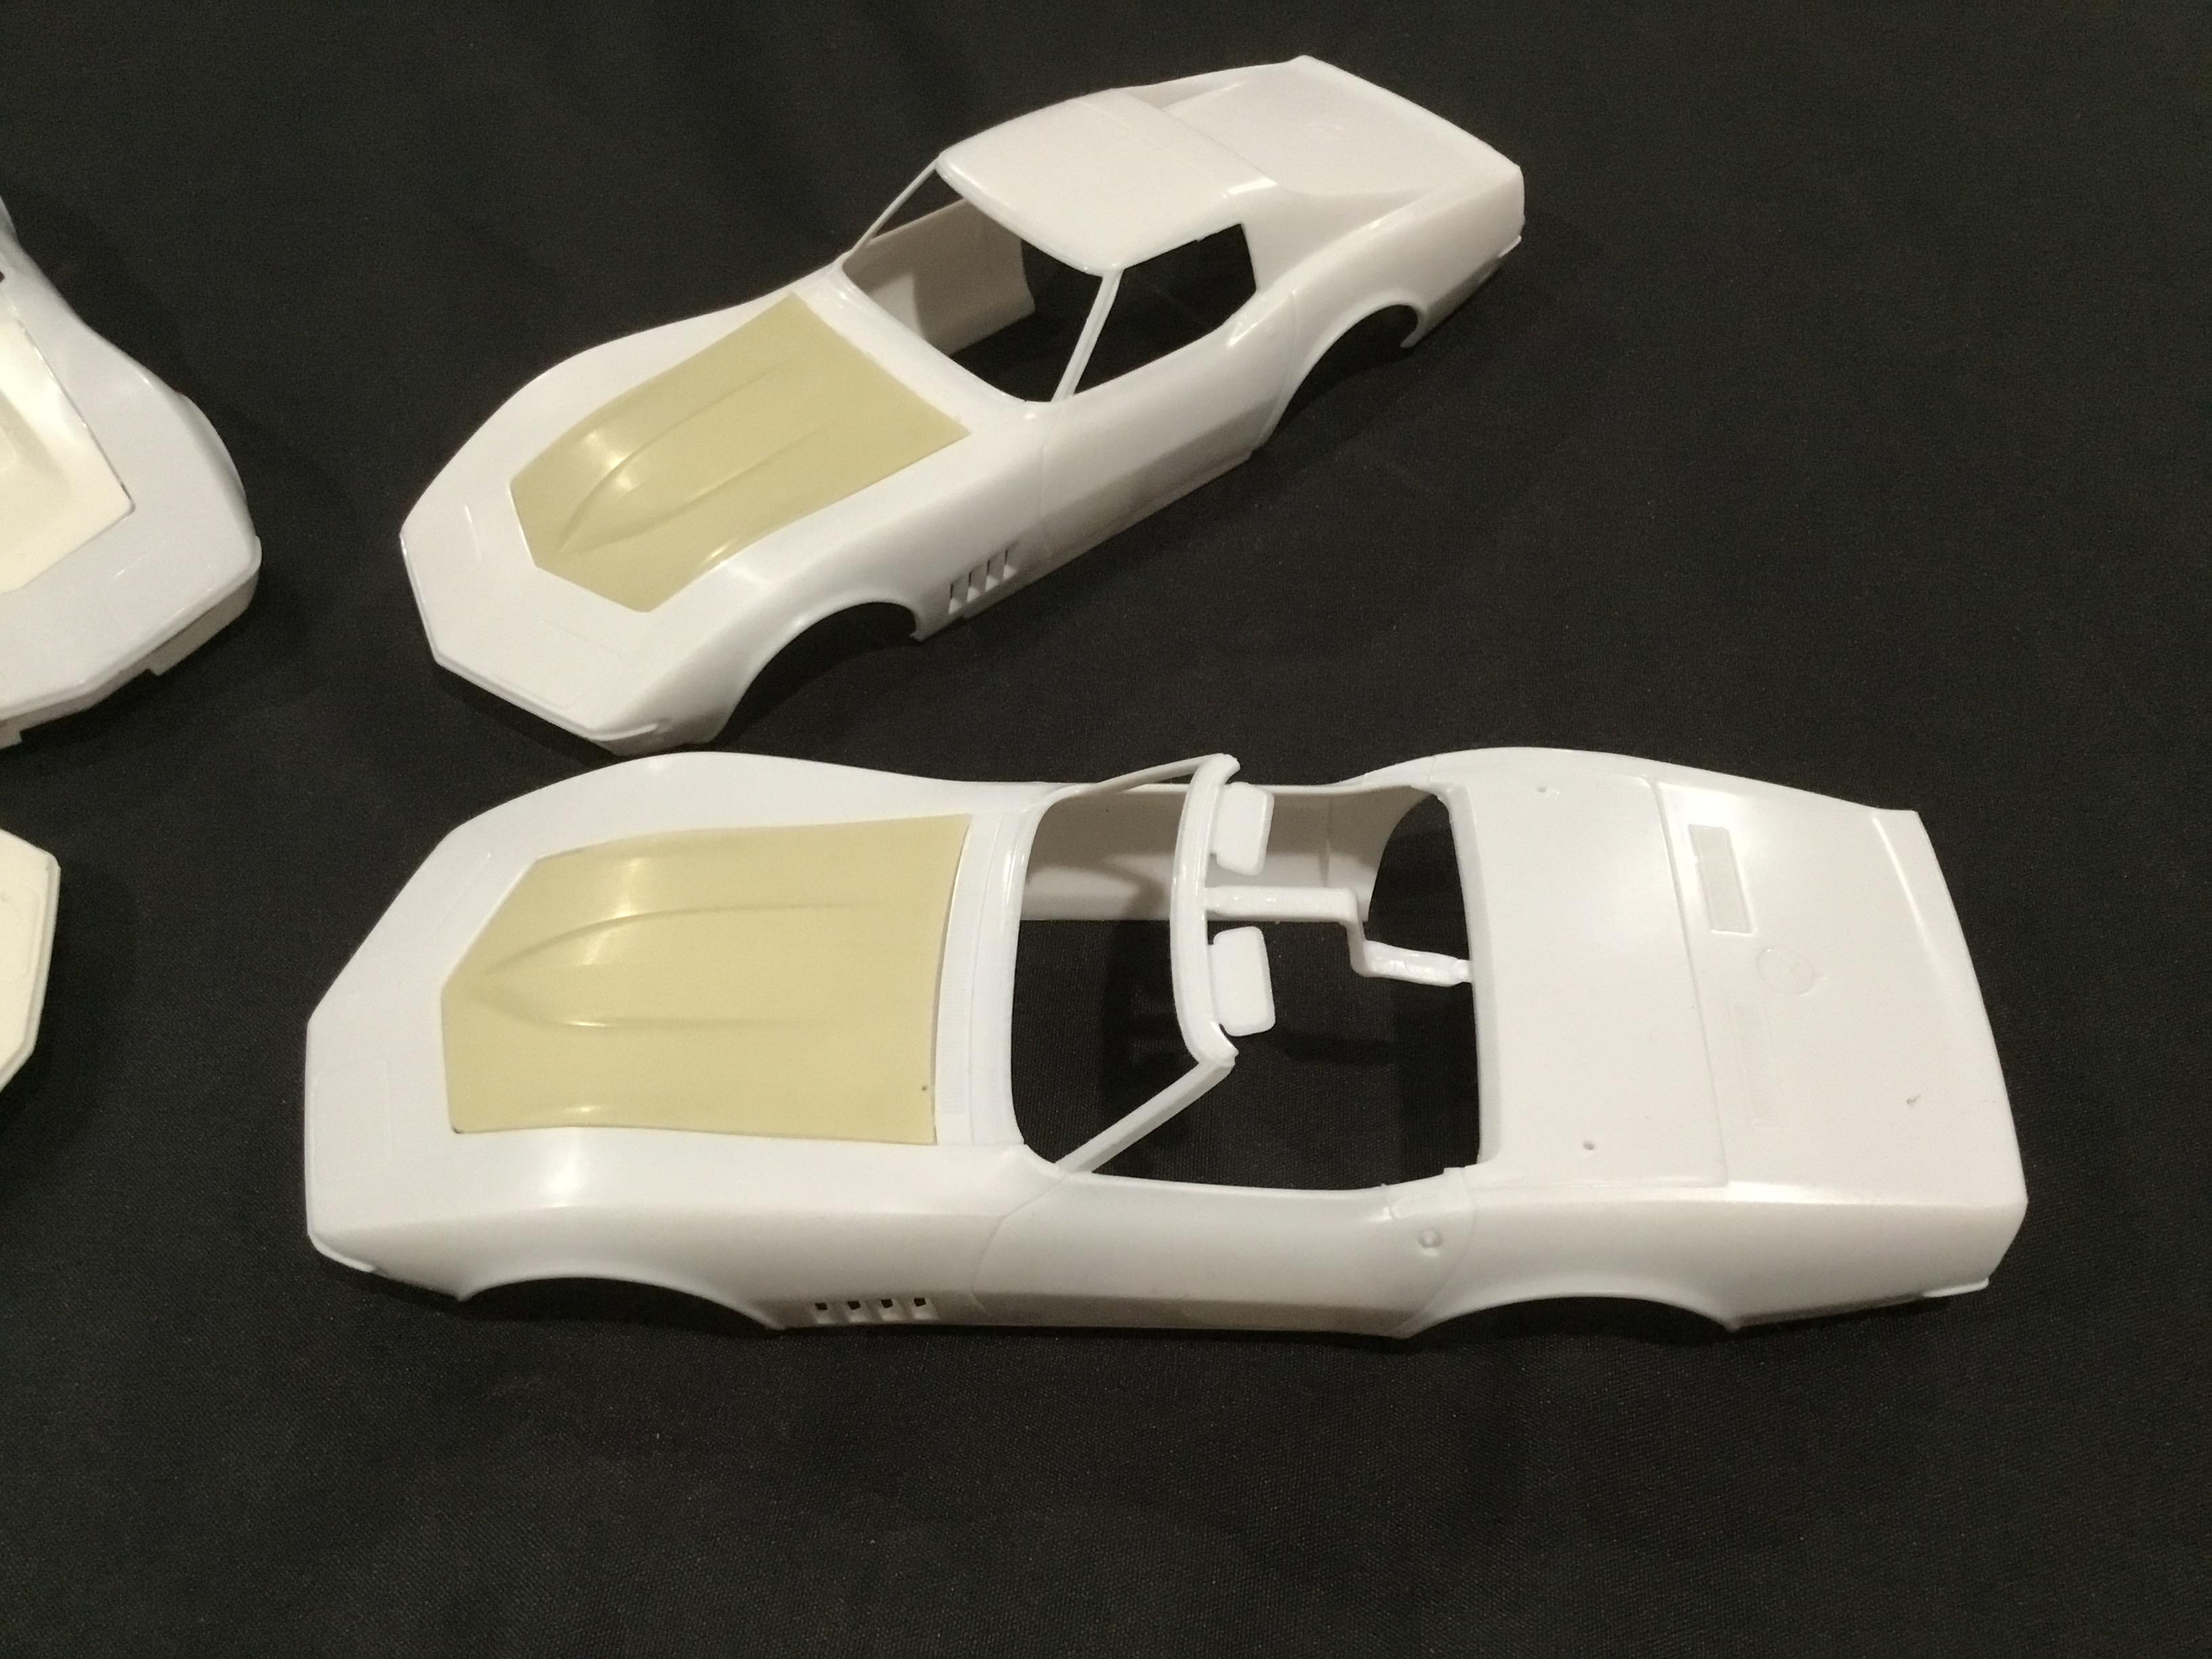
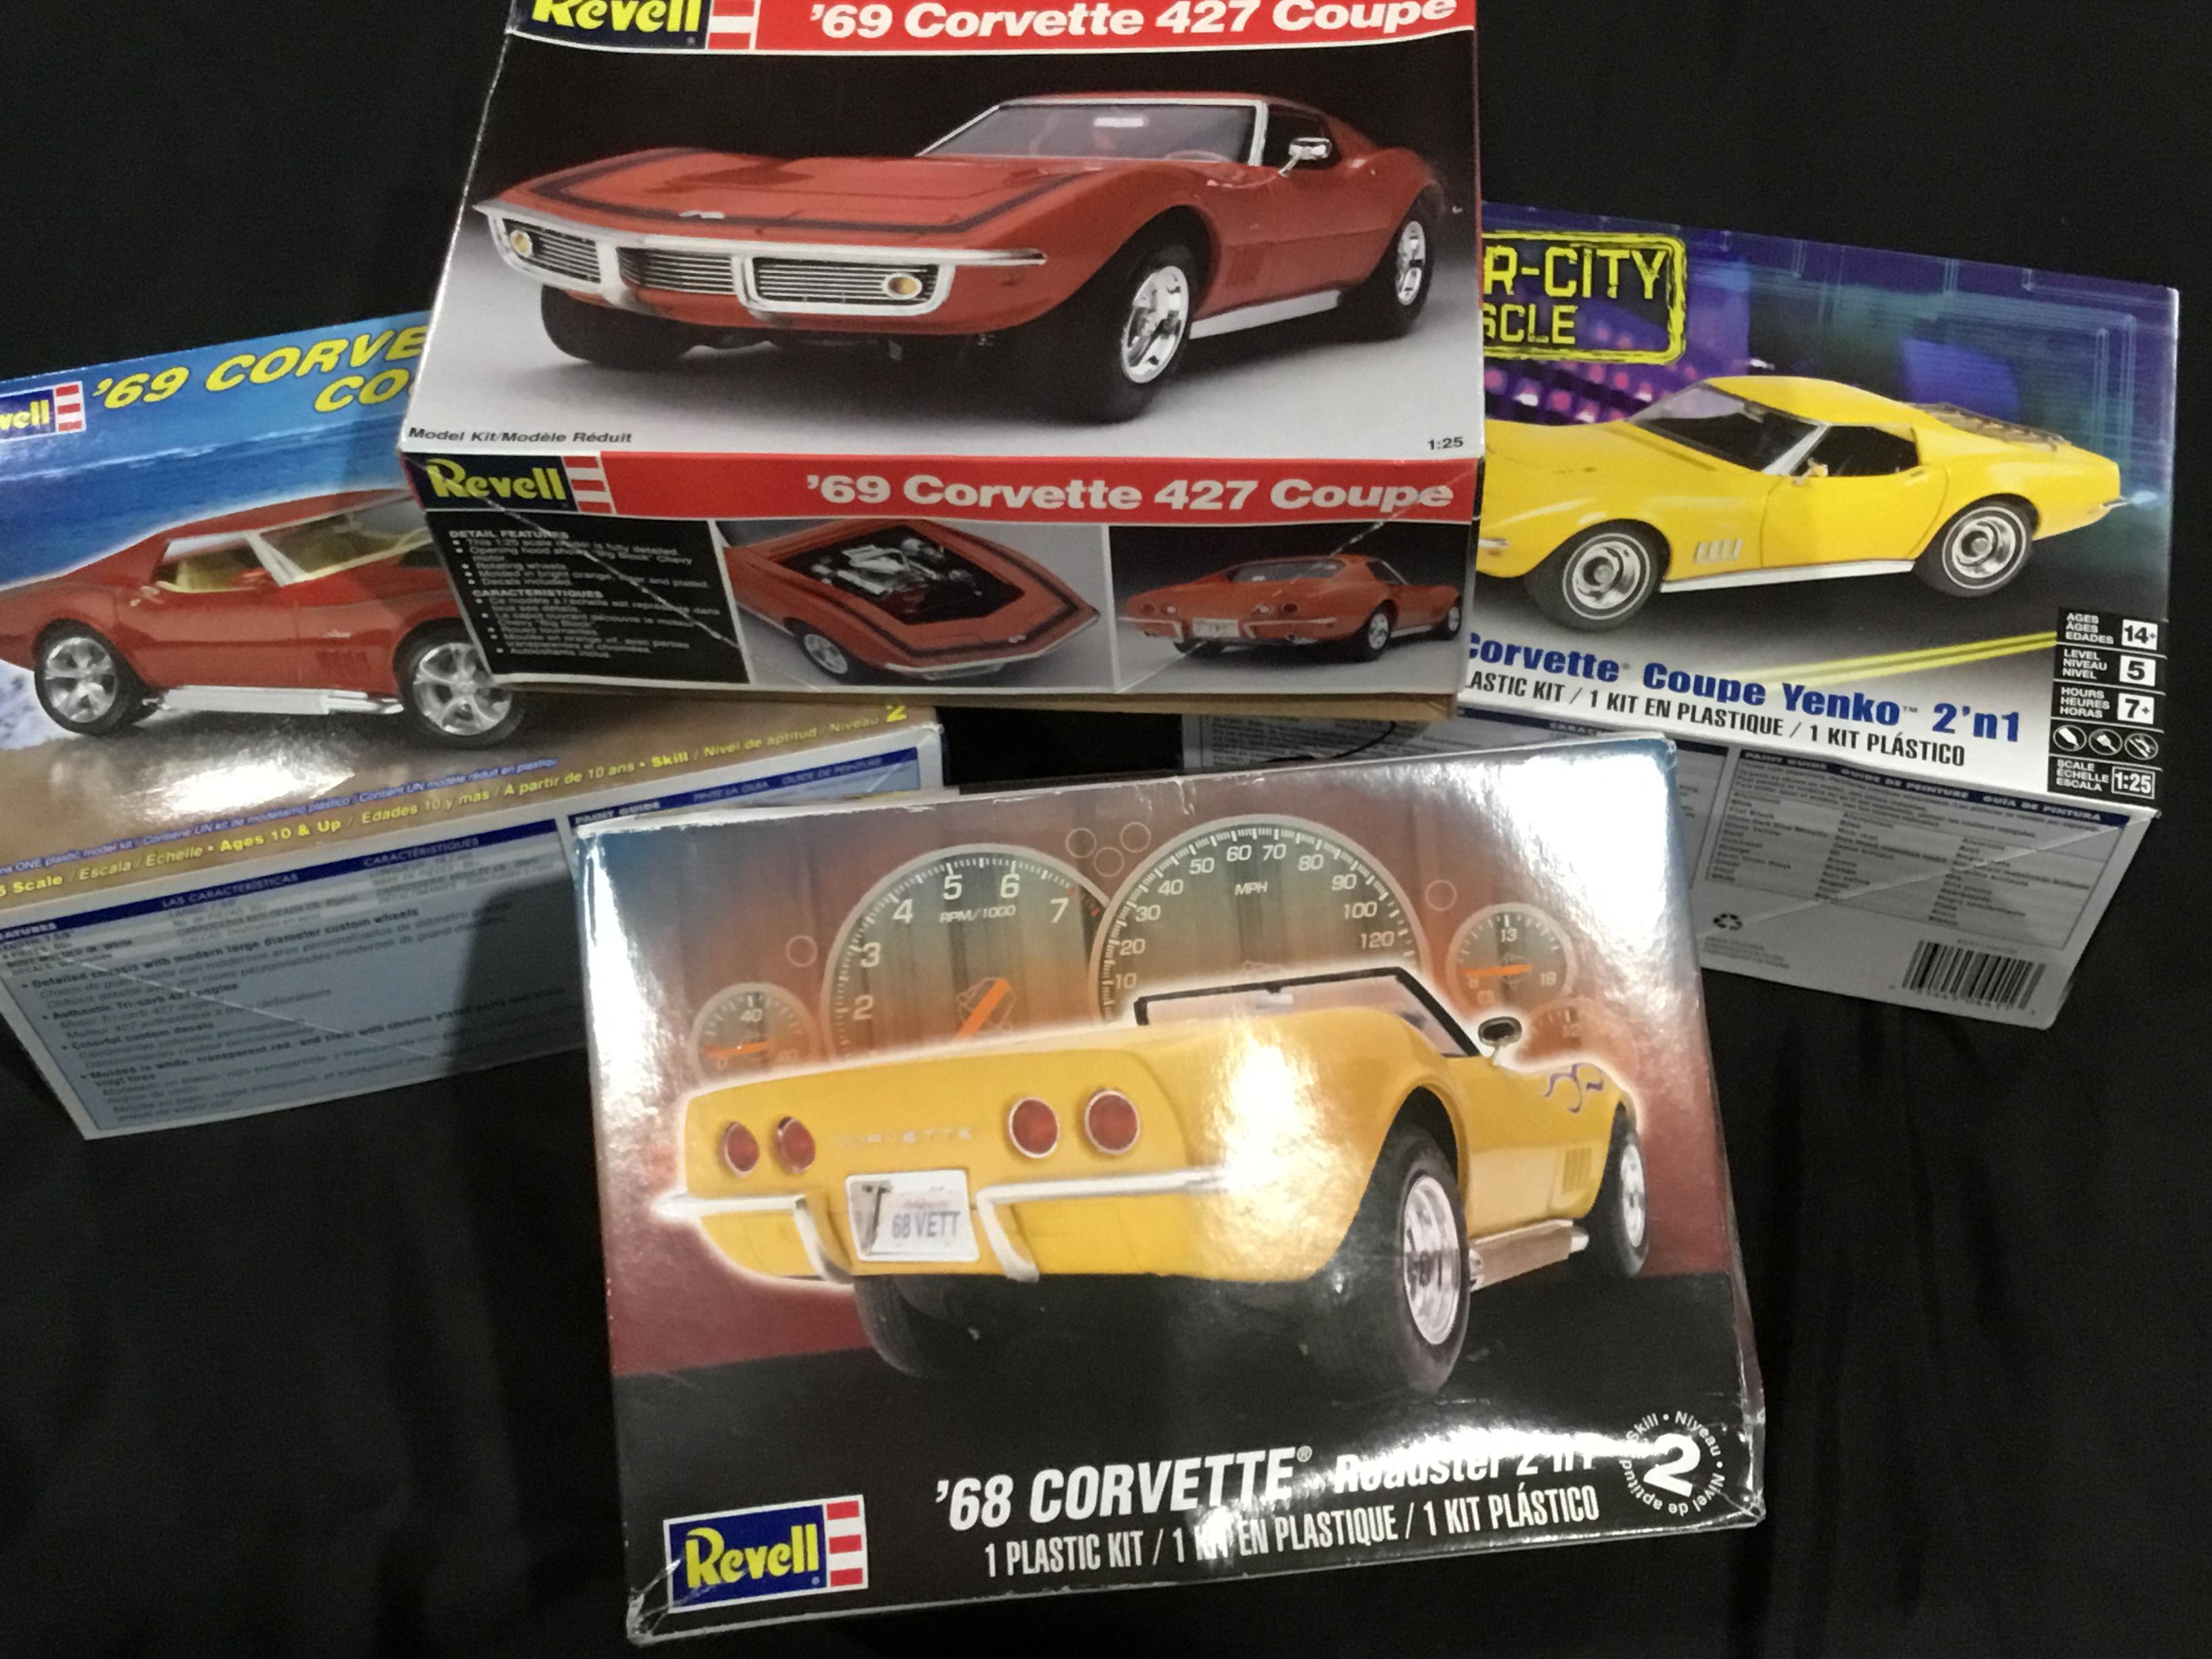
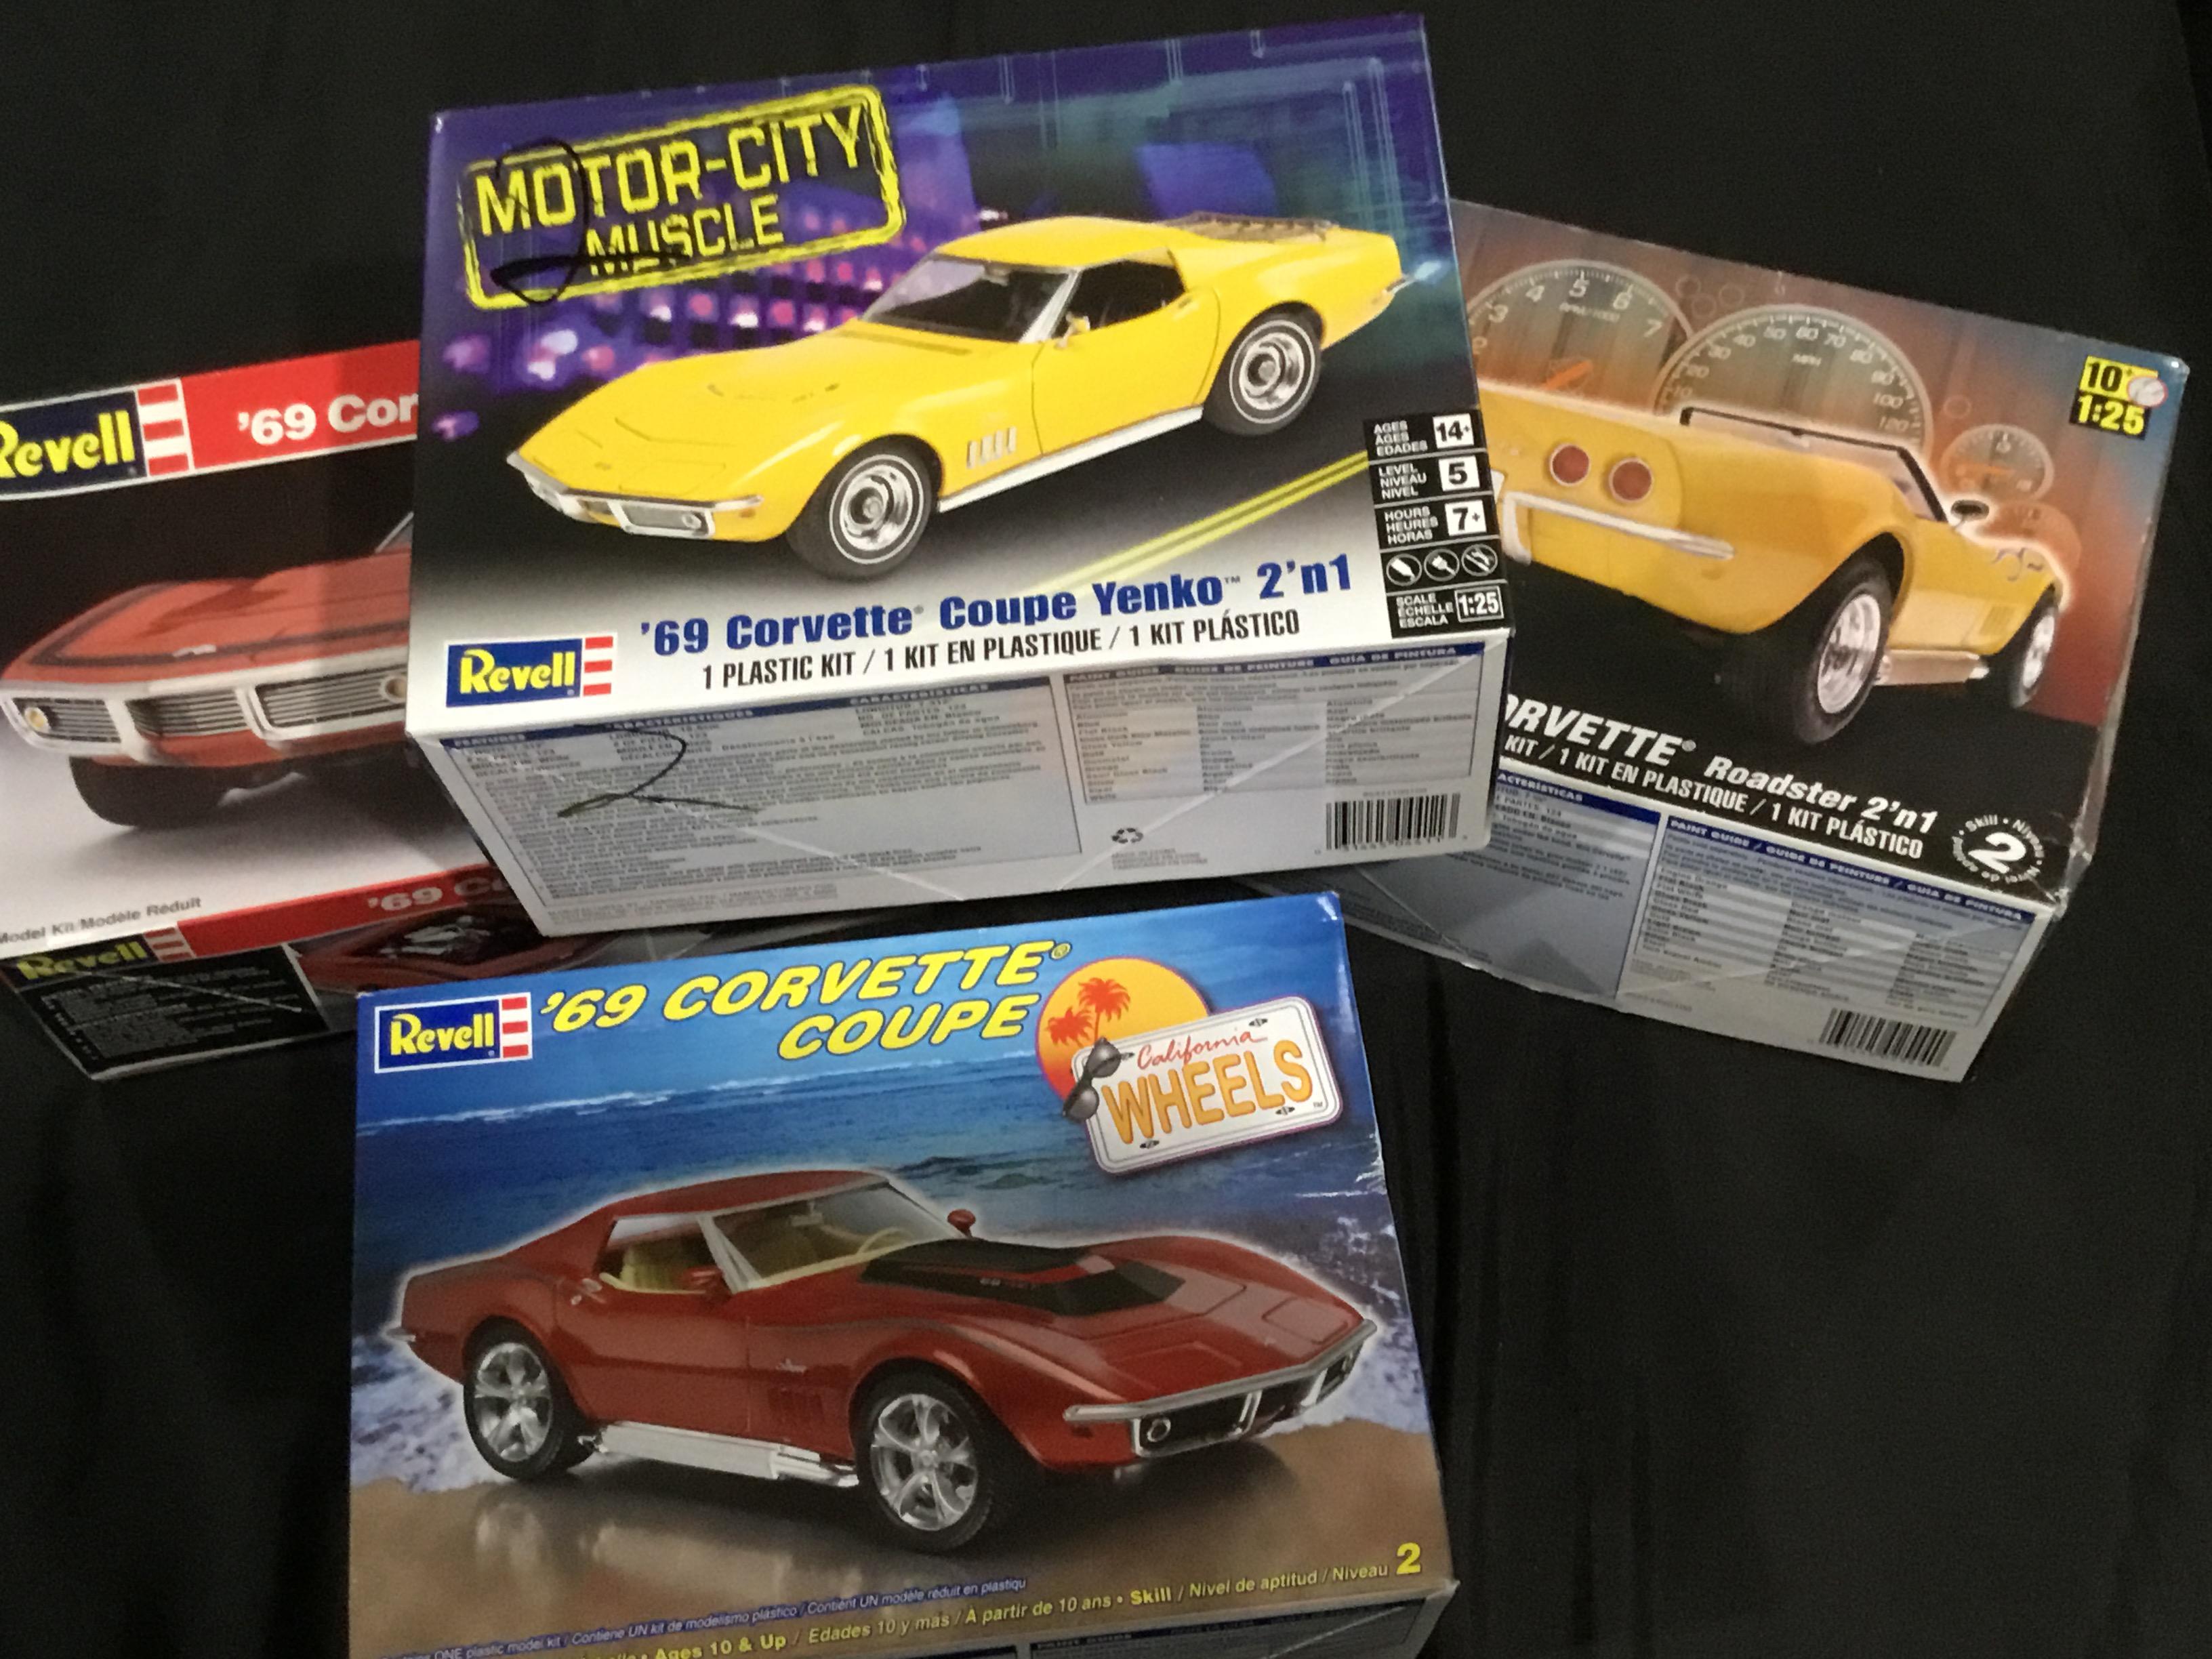
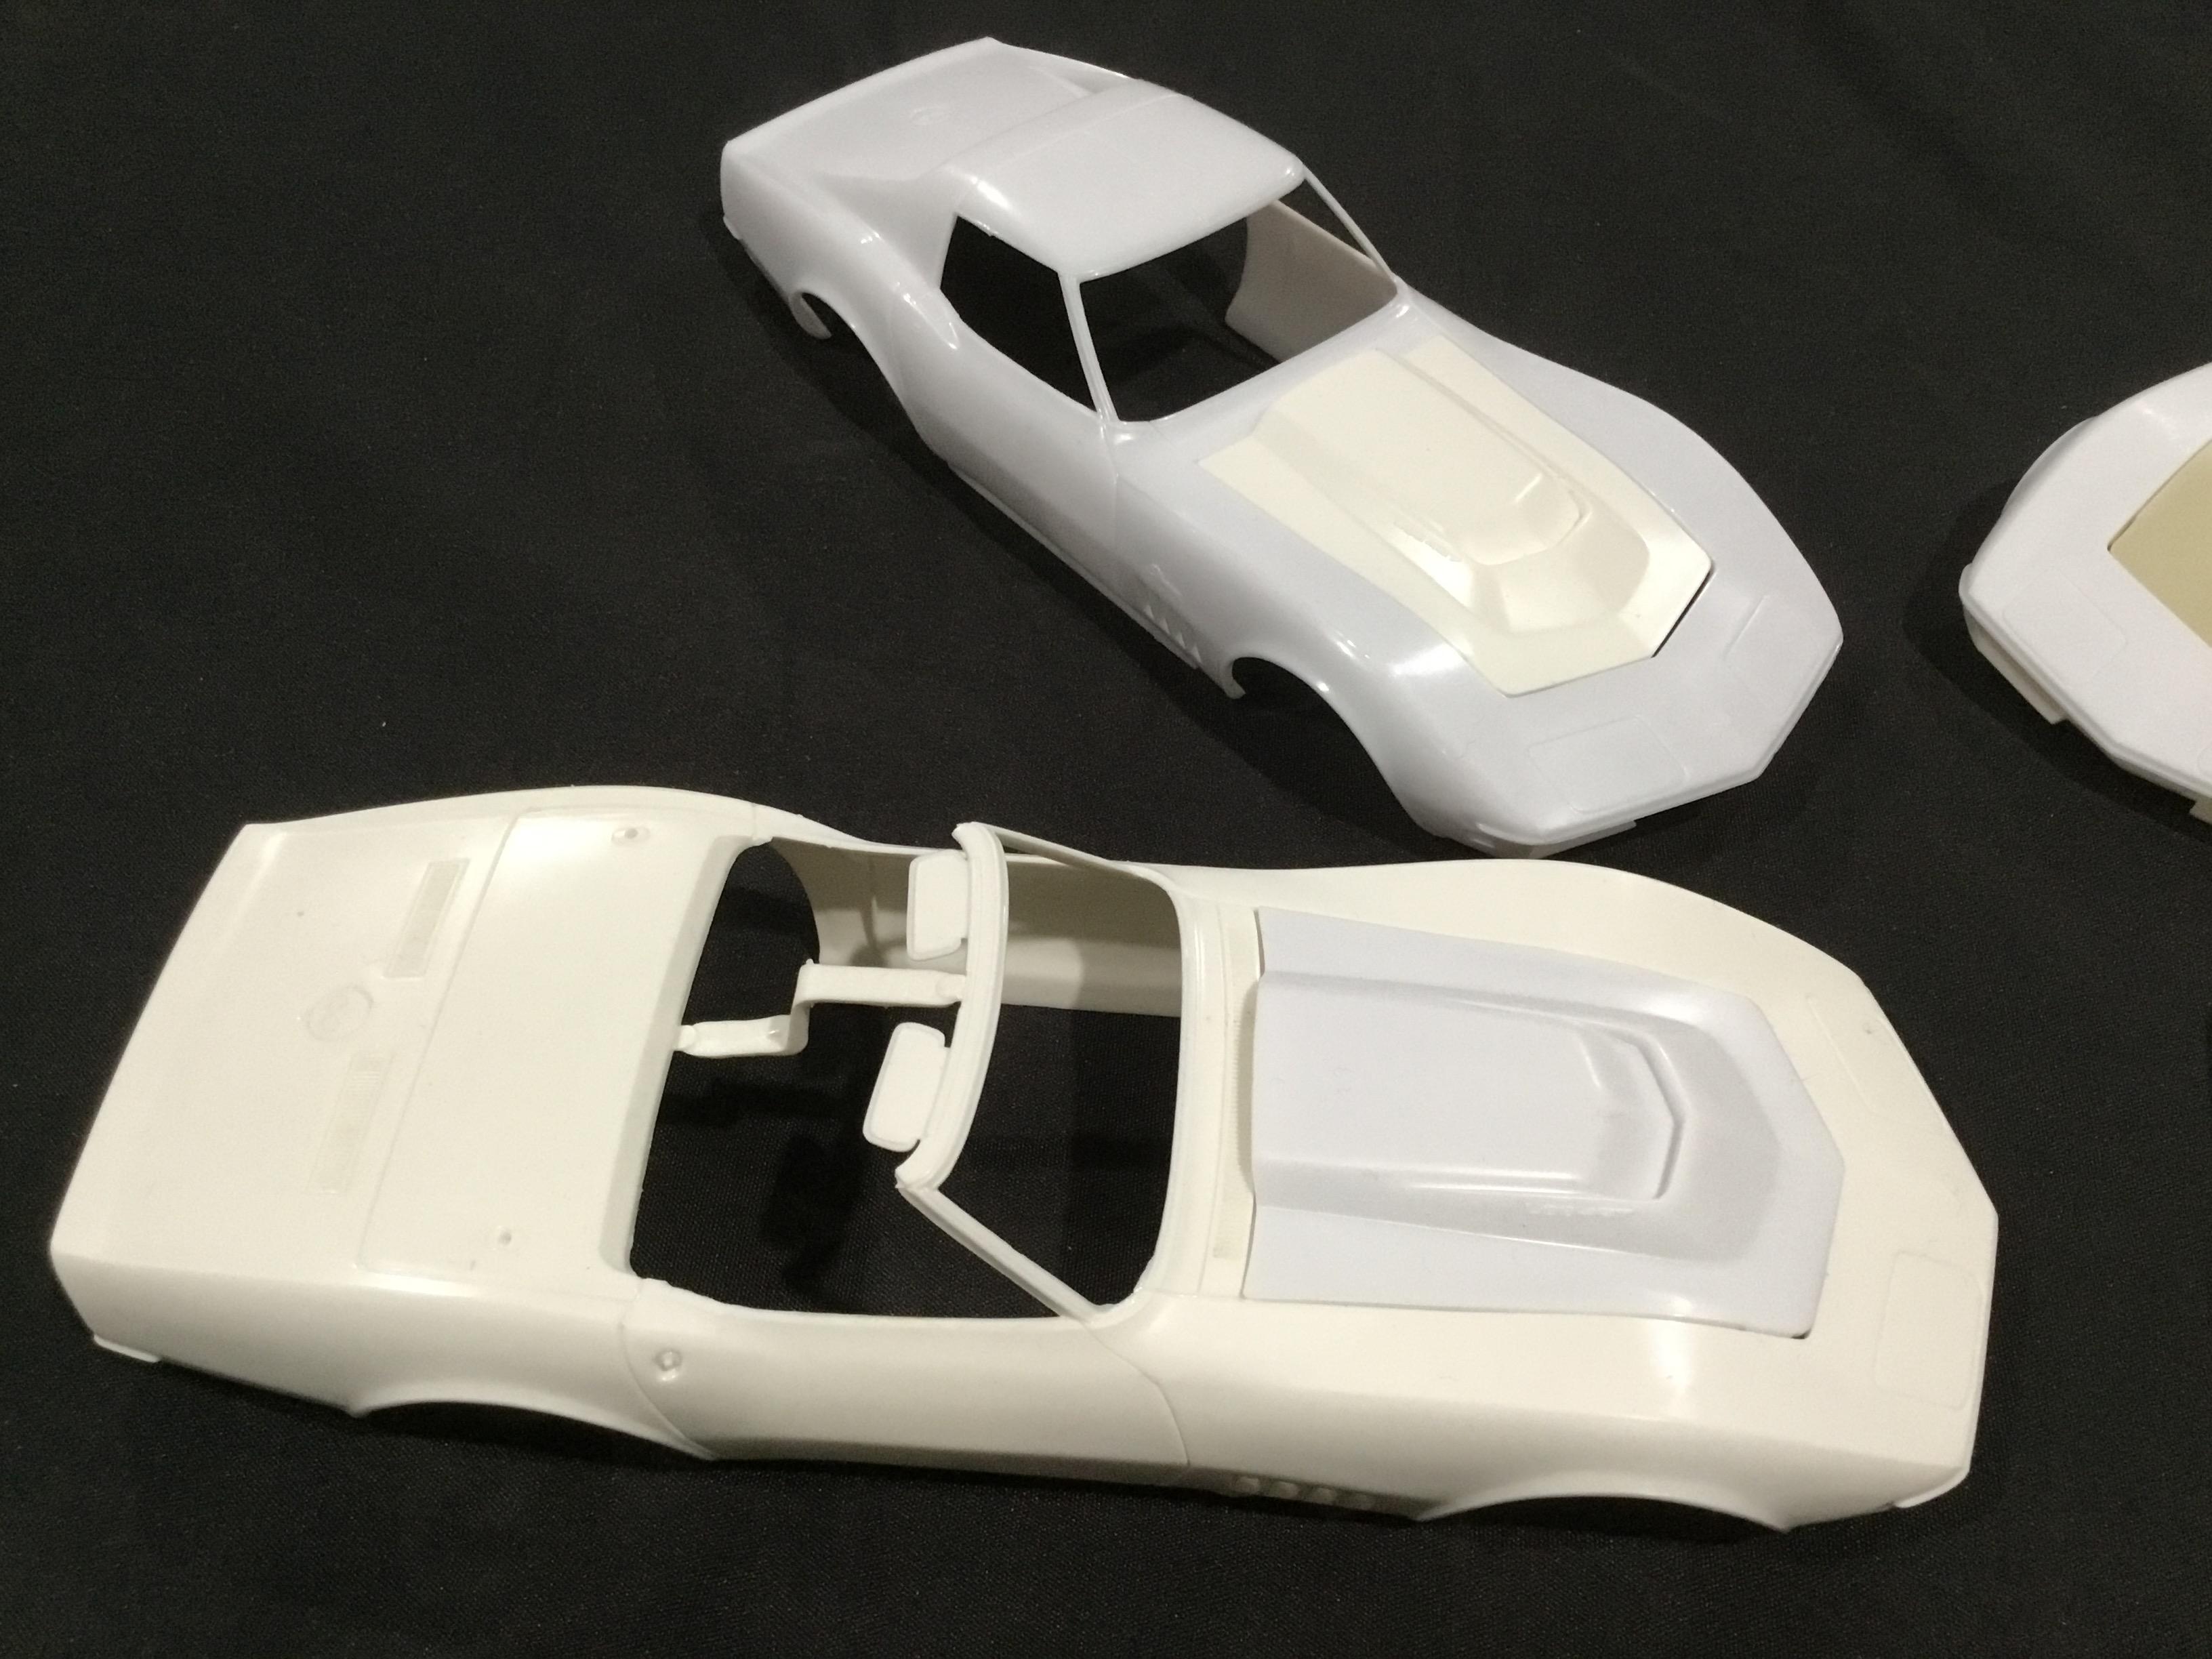
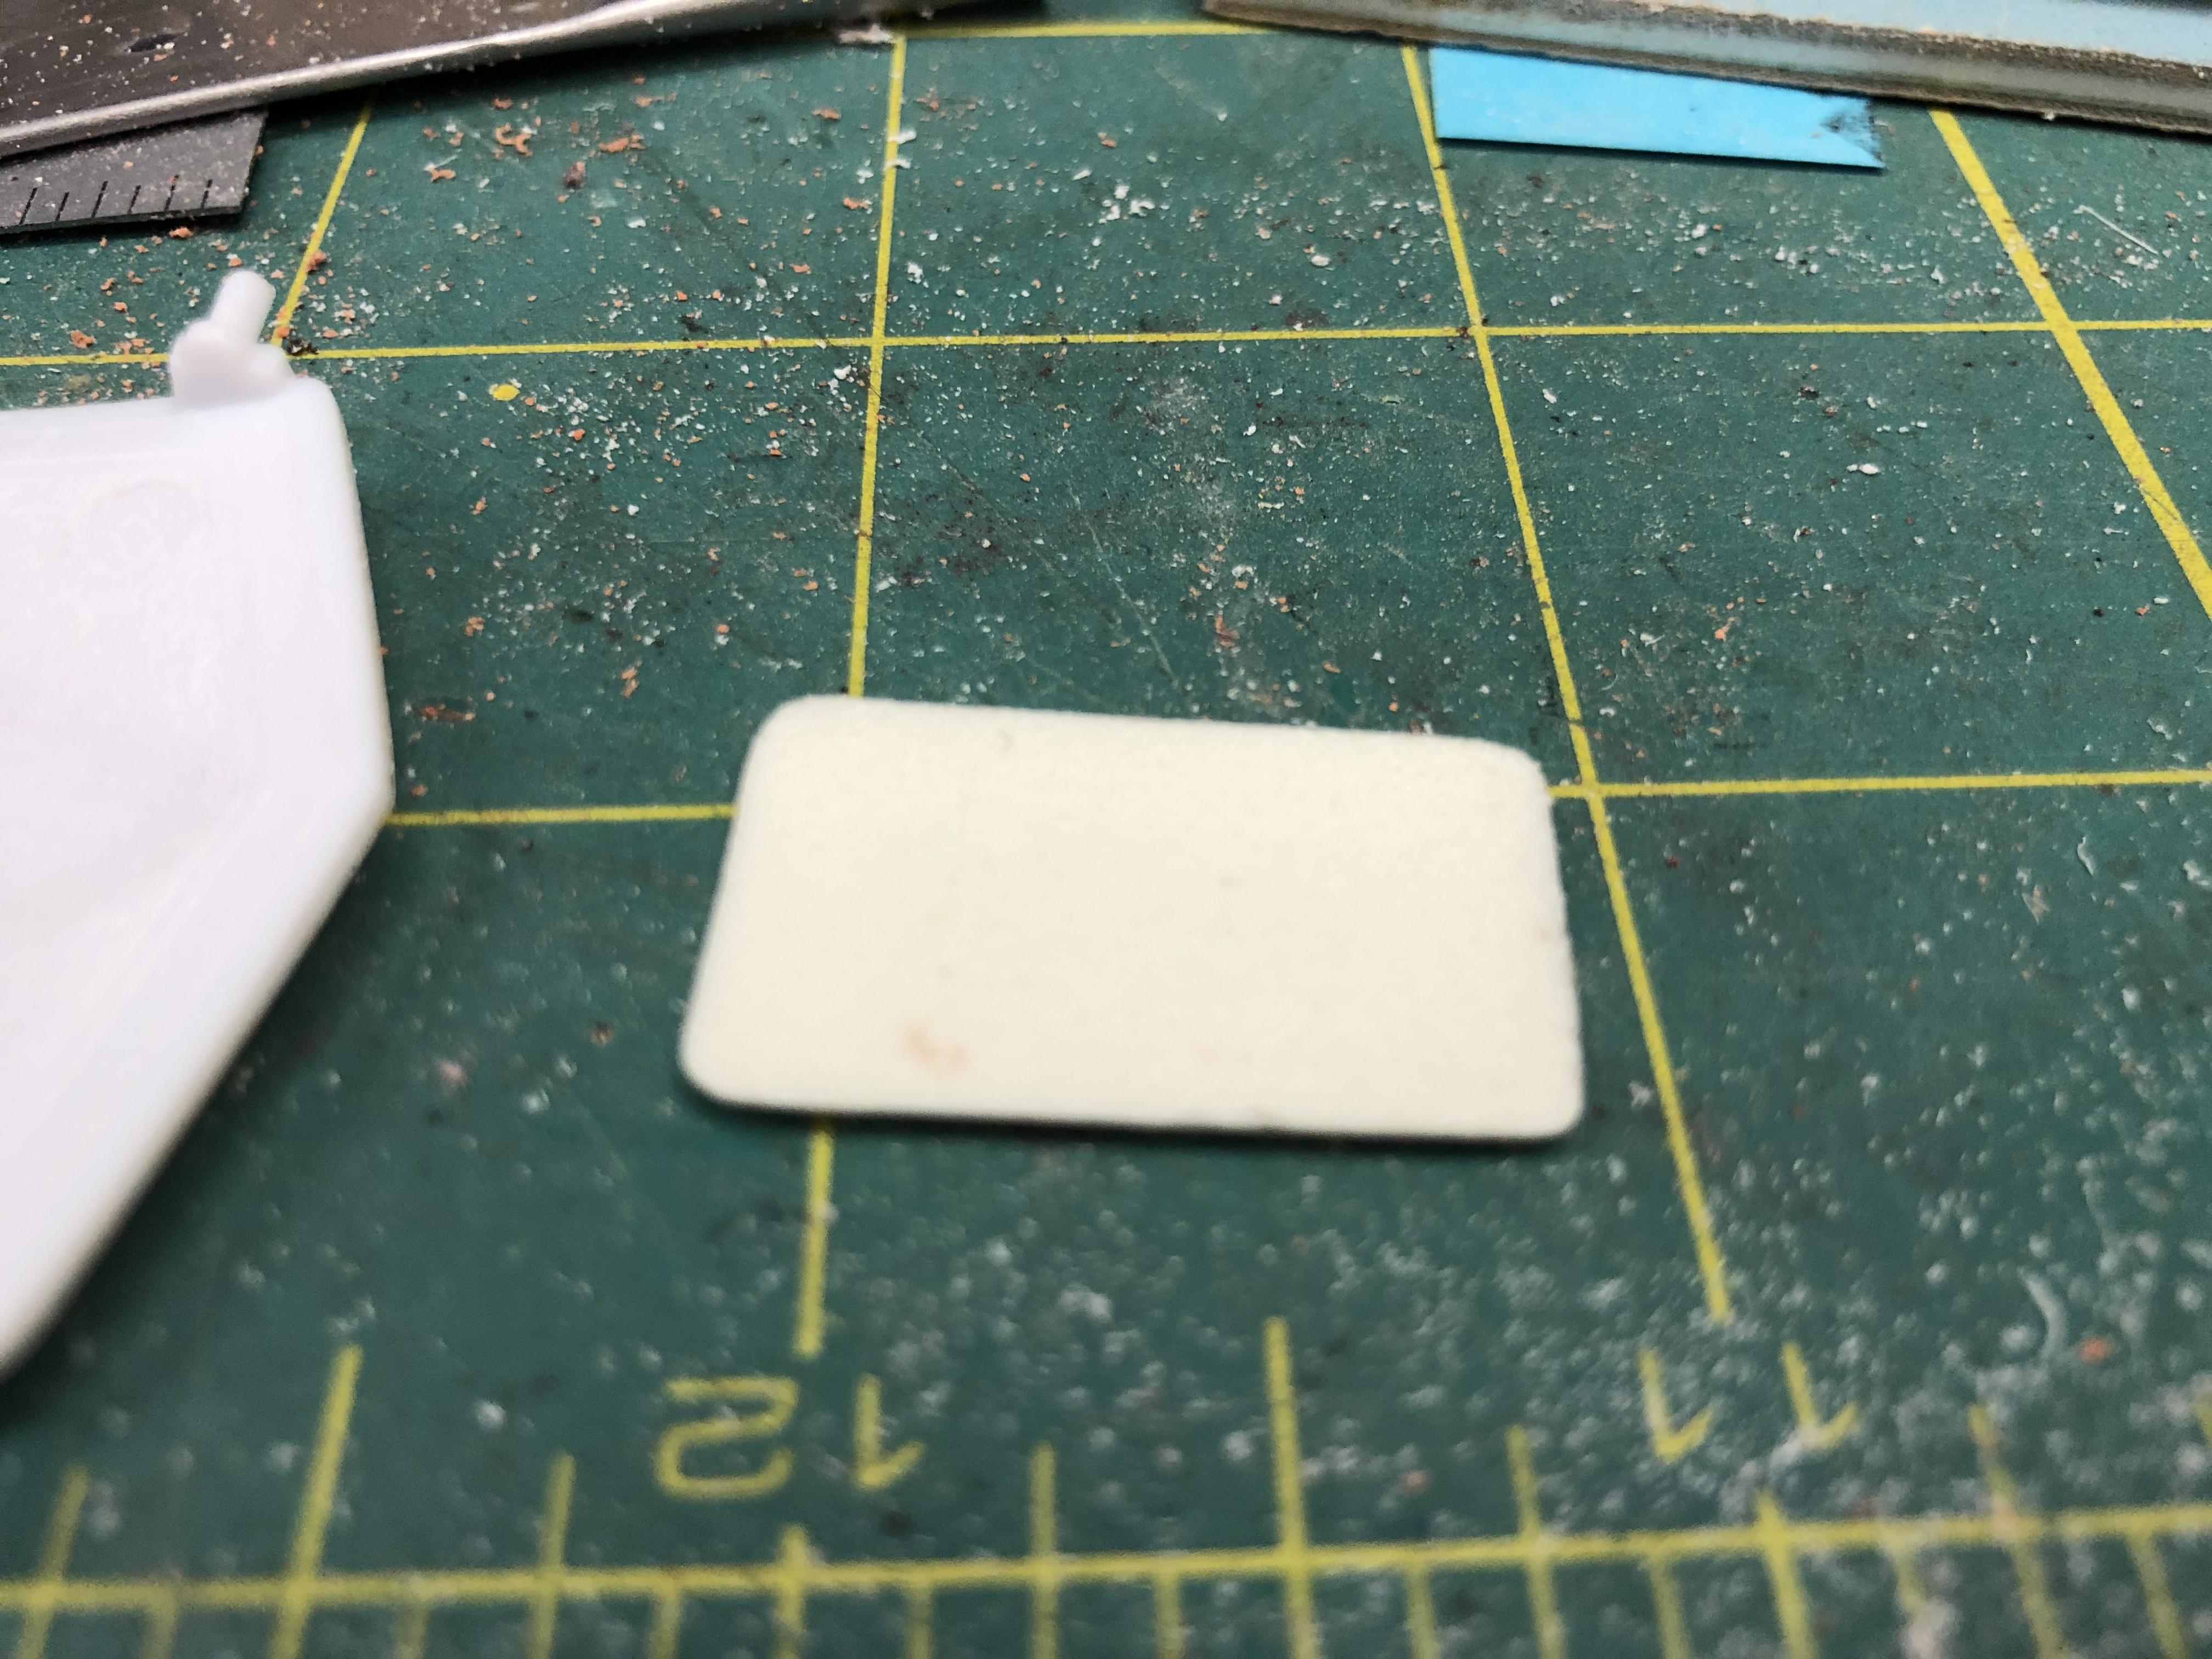
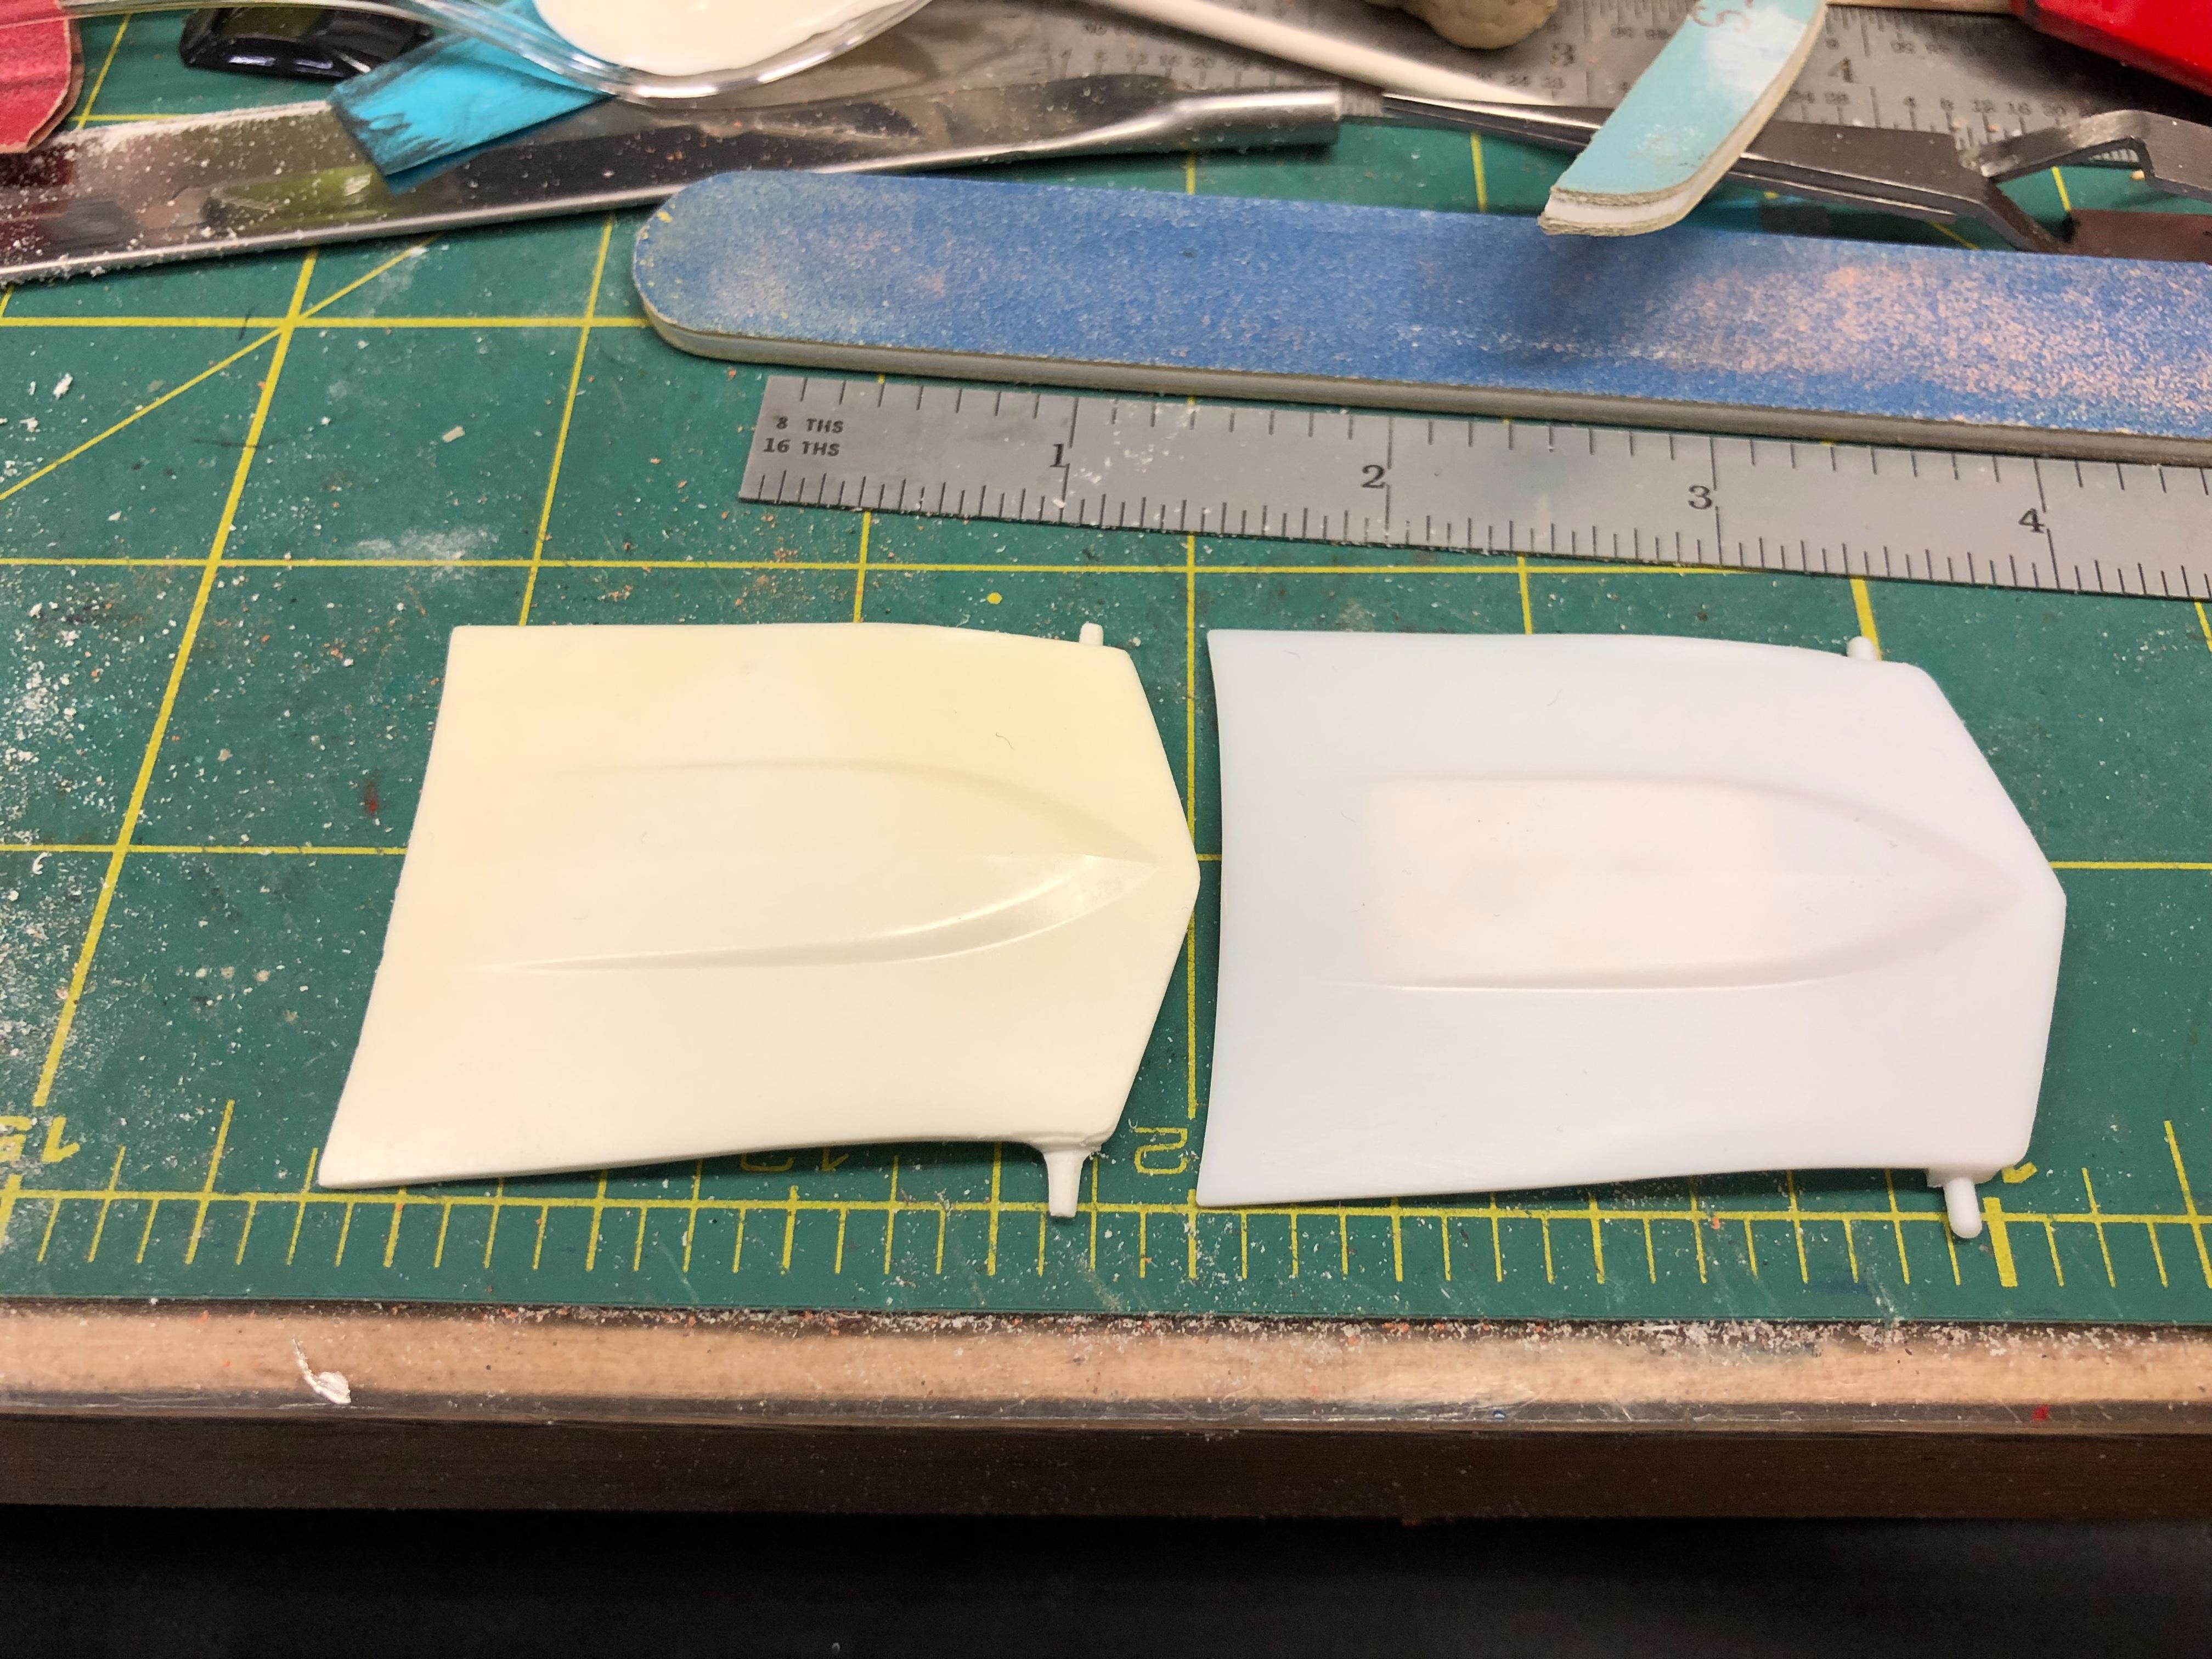
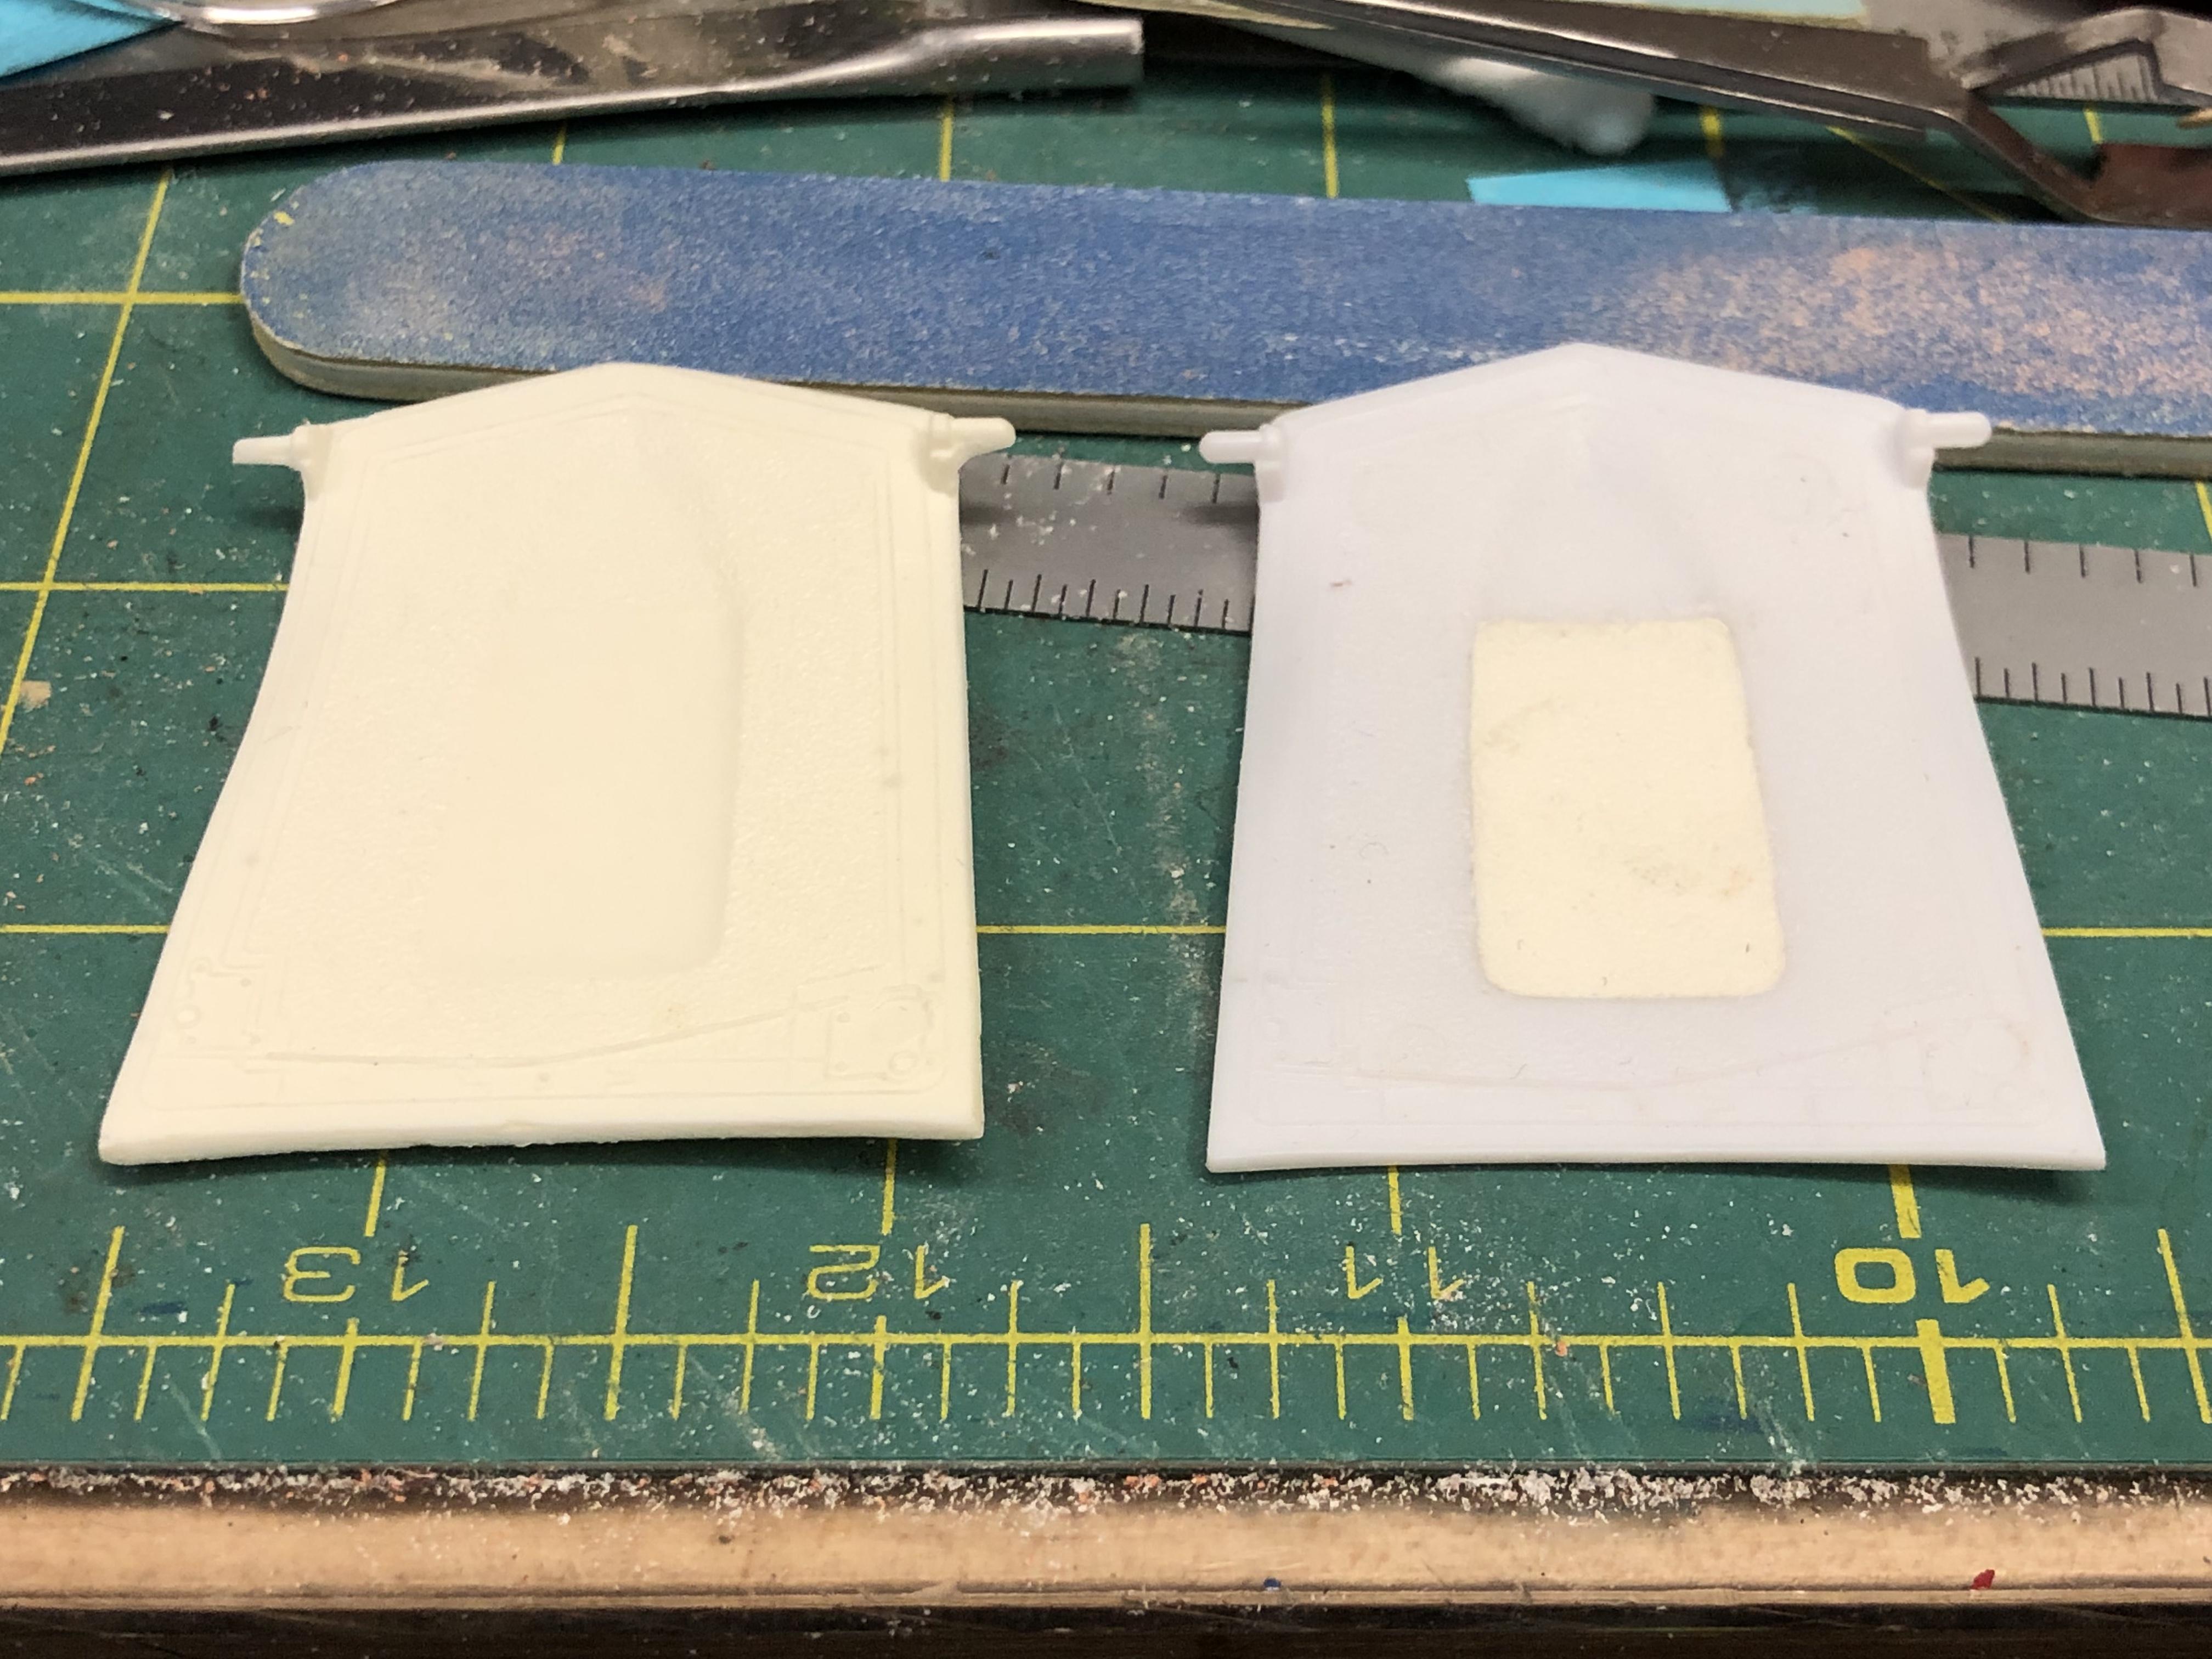
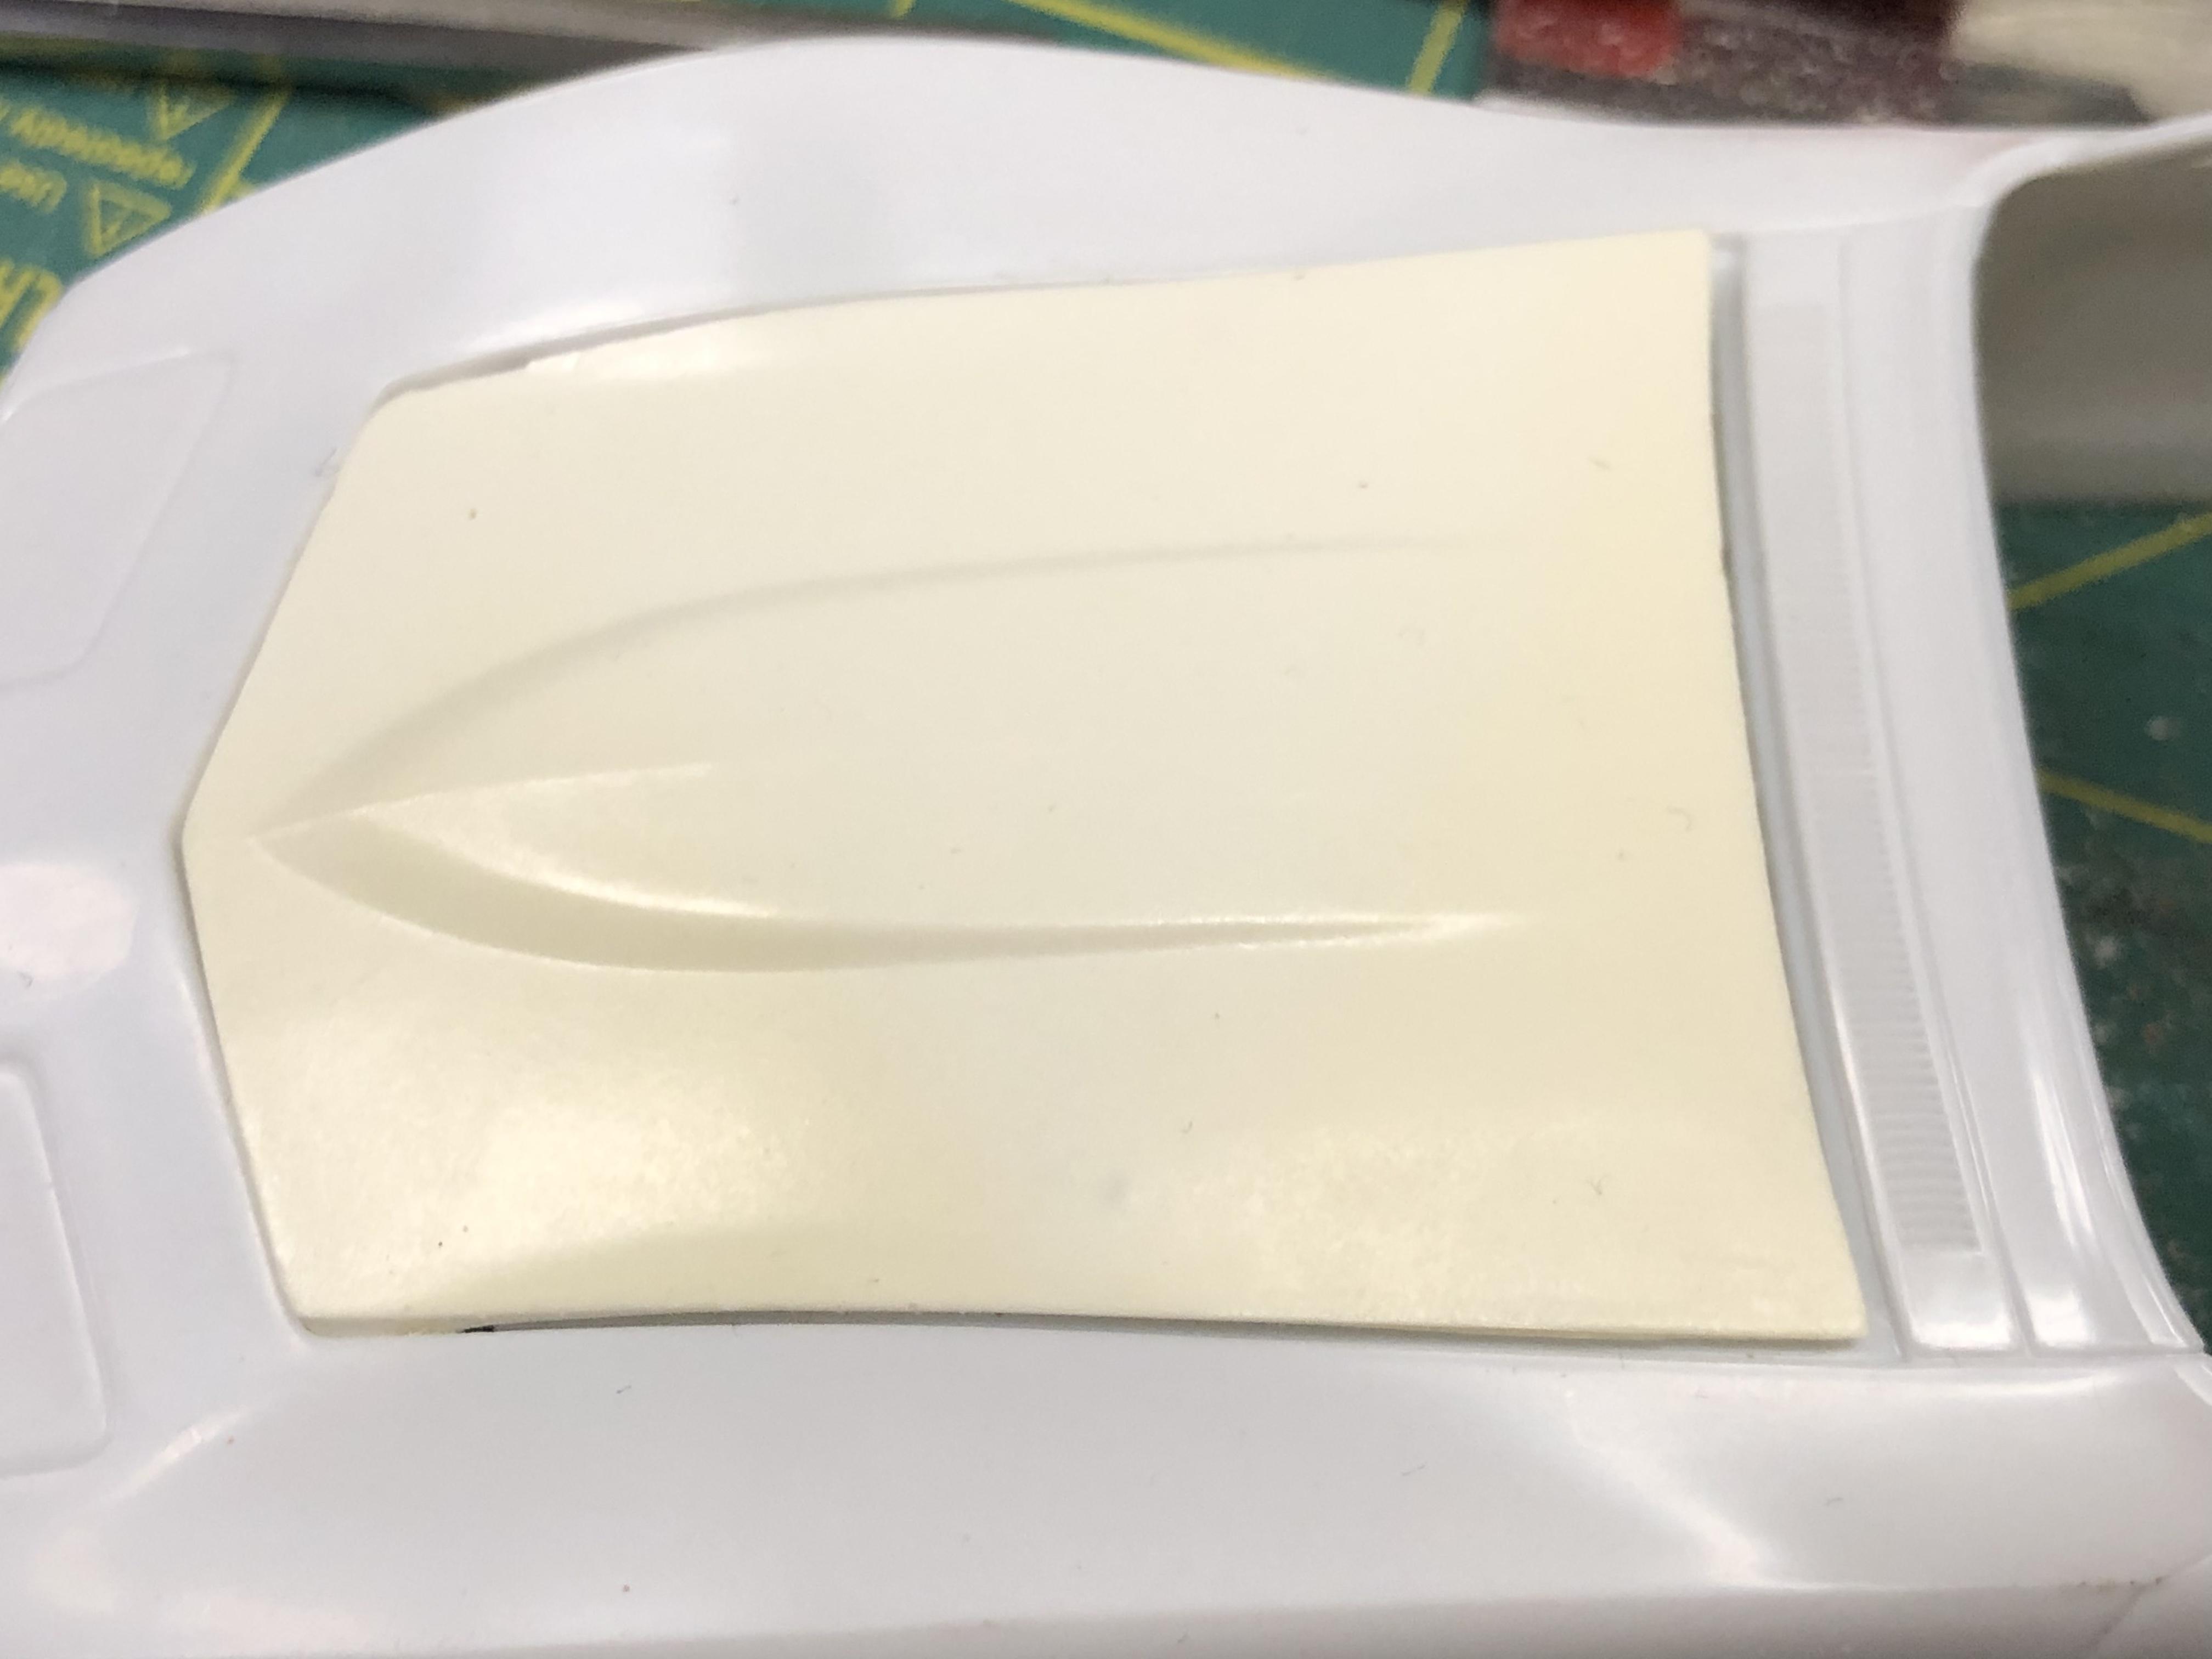
I have always felt that Revell’s 1968 and 1969 Corvette kits captured the look and feel of that C3 body style the best. My only beef with this kit is that the rear window is incorrect. But I don’t feel the need to correct all of them. Maybe just the replicas of my father’s car. Over the years, they have been offered in many different variations. The 68 has been offered as a convertible only. A couple times with the “rare” small block hood. Oddly, I never cared much for the big block 427 hood. I did like the L88 hood much better. I may be biased because my father has an aftermarket L88 hood on his 69 Corvette. Here is an assortment of just some of the issues of these cars. It is not by any means all of them. Since the 68 was only offered as a convertible on 69 only offered as a hardtop, I will be swapping parts from one to the other to make the missing links. The 68 hardtop is currently in prime at work. And may be in paint by tomorrow night. 69 convertible is also there and will probably be in prime tomorrow. Two of the cars are earmarked to replicate my father‘s car. The first one will be a medium blue metallic with a small block hood in place, and the rally wheels that came with it. The second one will have the L88 hood and American Racing Vector wheels that are currently on his car. All in all, there should be at least six builds in this thread along. Probably more! Lord knows I have enough kits. Can anybody really say that? Anyway, here is four of the first six. Correcting the small block hood was a bit of a challenge to make correct, or at least to my standards. I bought one off of eBay that somebody had resin cast a few years ago. To say the least it was horrible. For some unknown reason they sanded down the front and rear of it. It fits like garbage. And that’s being kind. The hood out of the box has a depression in the middle of the insulation on the underside. This was so you could cut out a giant rectangle for a blower to stick through the hood. On a convertible? Really? Is that a thing? I know, I’ve seen it. But it looks real dangerous! Anyway, the seller made a halfhearted attempt to fill that area but it was still smooth. So I did my best to fill that area with a section from an extra hood so that it would have the insulation texture. I don’t think it came out too bad. So I made a mold and cast more of them in resin. I resisted the urge to sand down the front and back of them like the other guy did! LOL! I think it came out pretty well! That’s it so far. I’ll take some more pictures of the other two at work tomorrow. Questions and comments always welcome good or bad!
-
Just a snap shot of the drug store/Walmart variety of 1/24th scale C6-C7 Corvettes. Left to right: Motormax C6 2005 Yat Ming C6 ZO6 2005 Welly C6 2007 BBurago C6R 2007 Braha C6R 2012 Maisto C6 2014 Welly C7 ZO6 2017 Maisto C7 ZR1 2019 Comments, questions welcome.
-
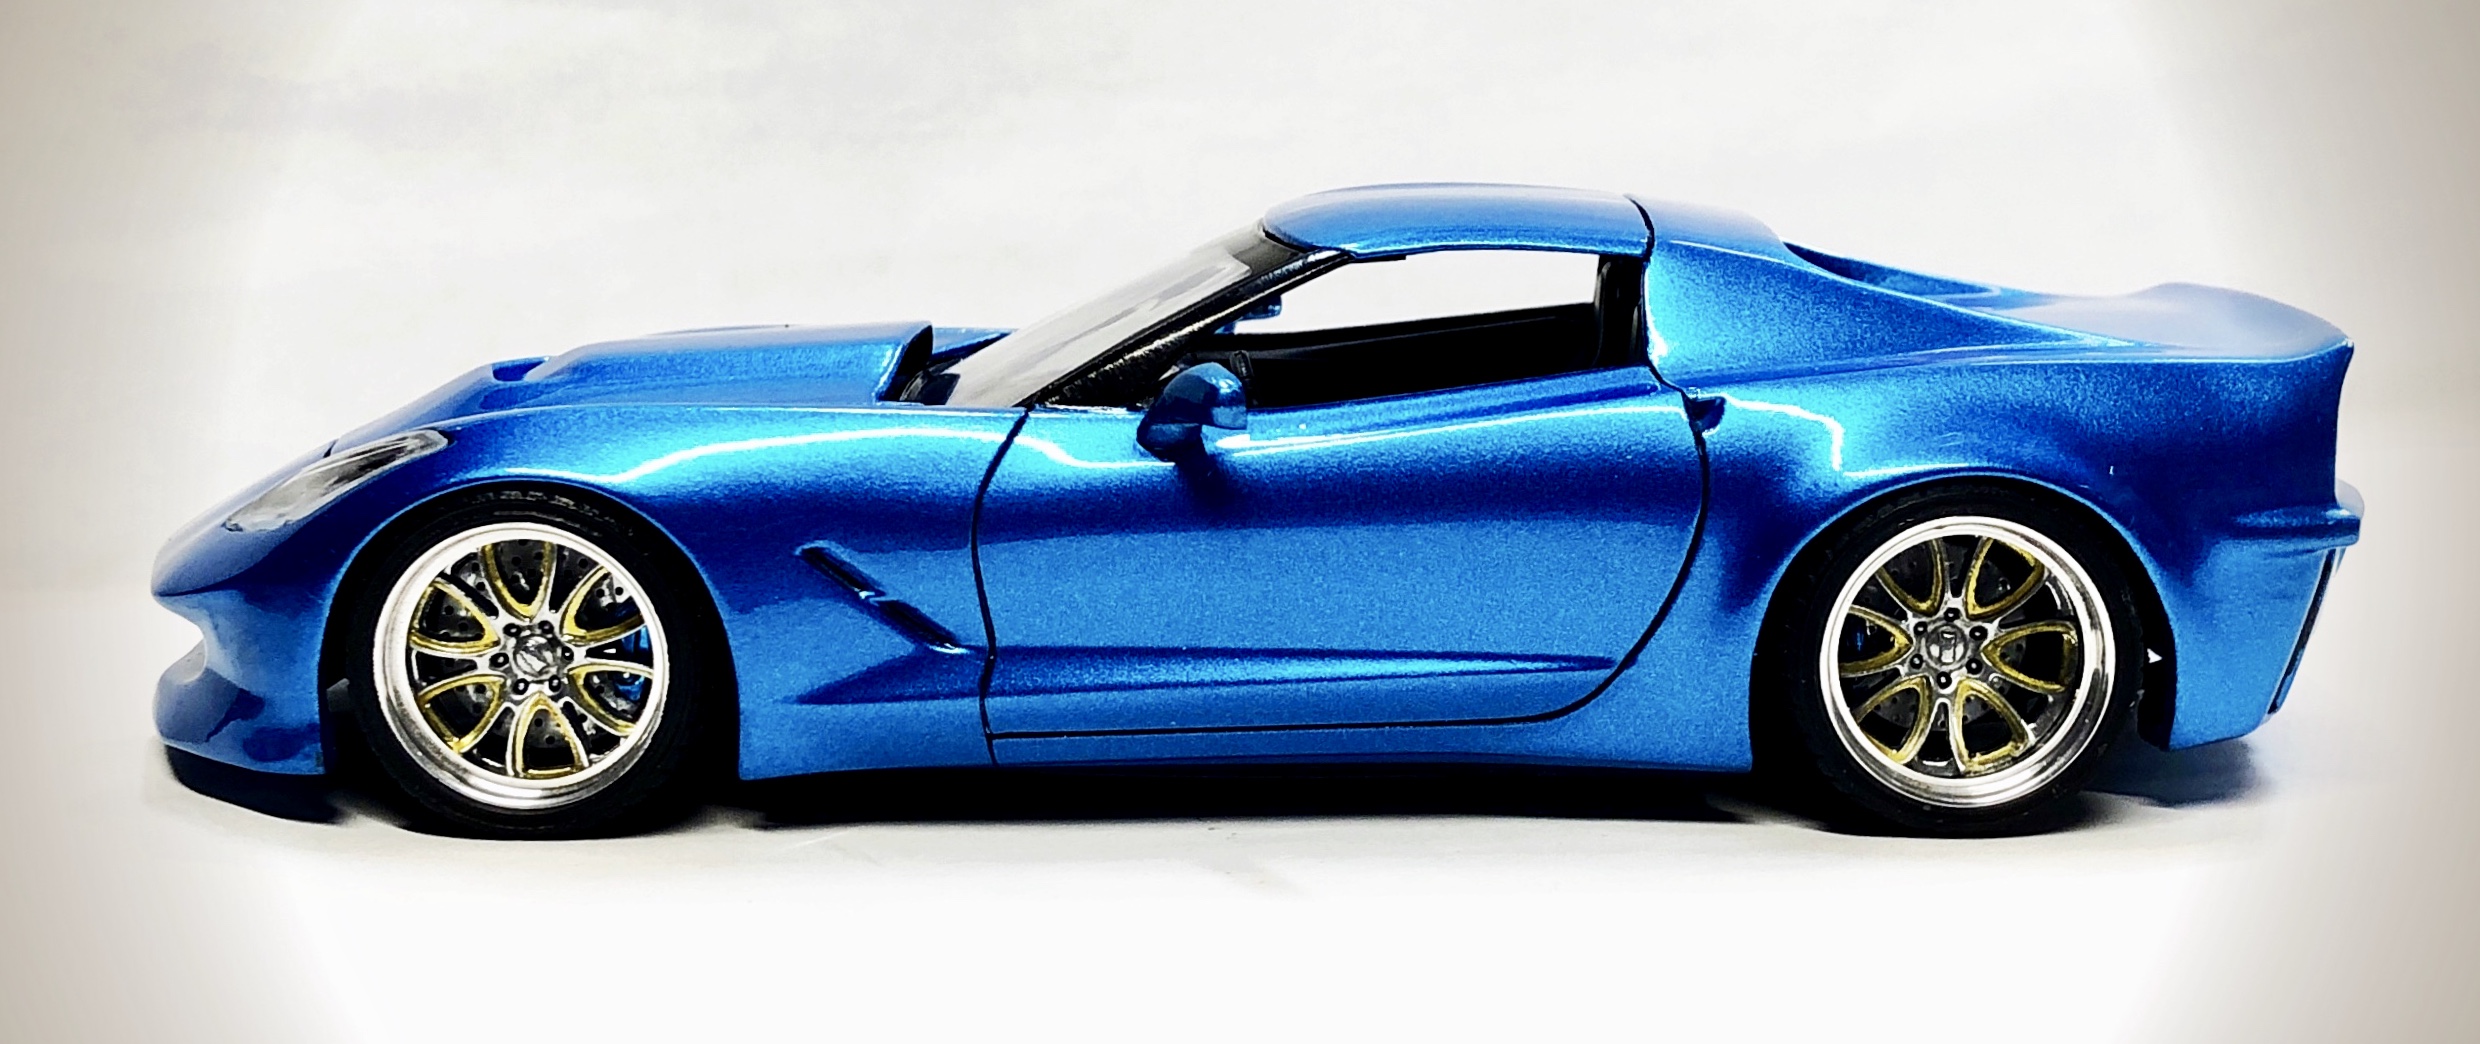
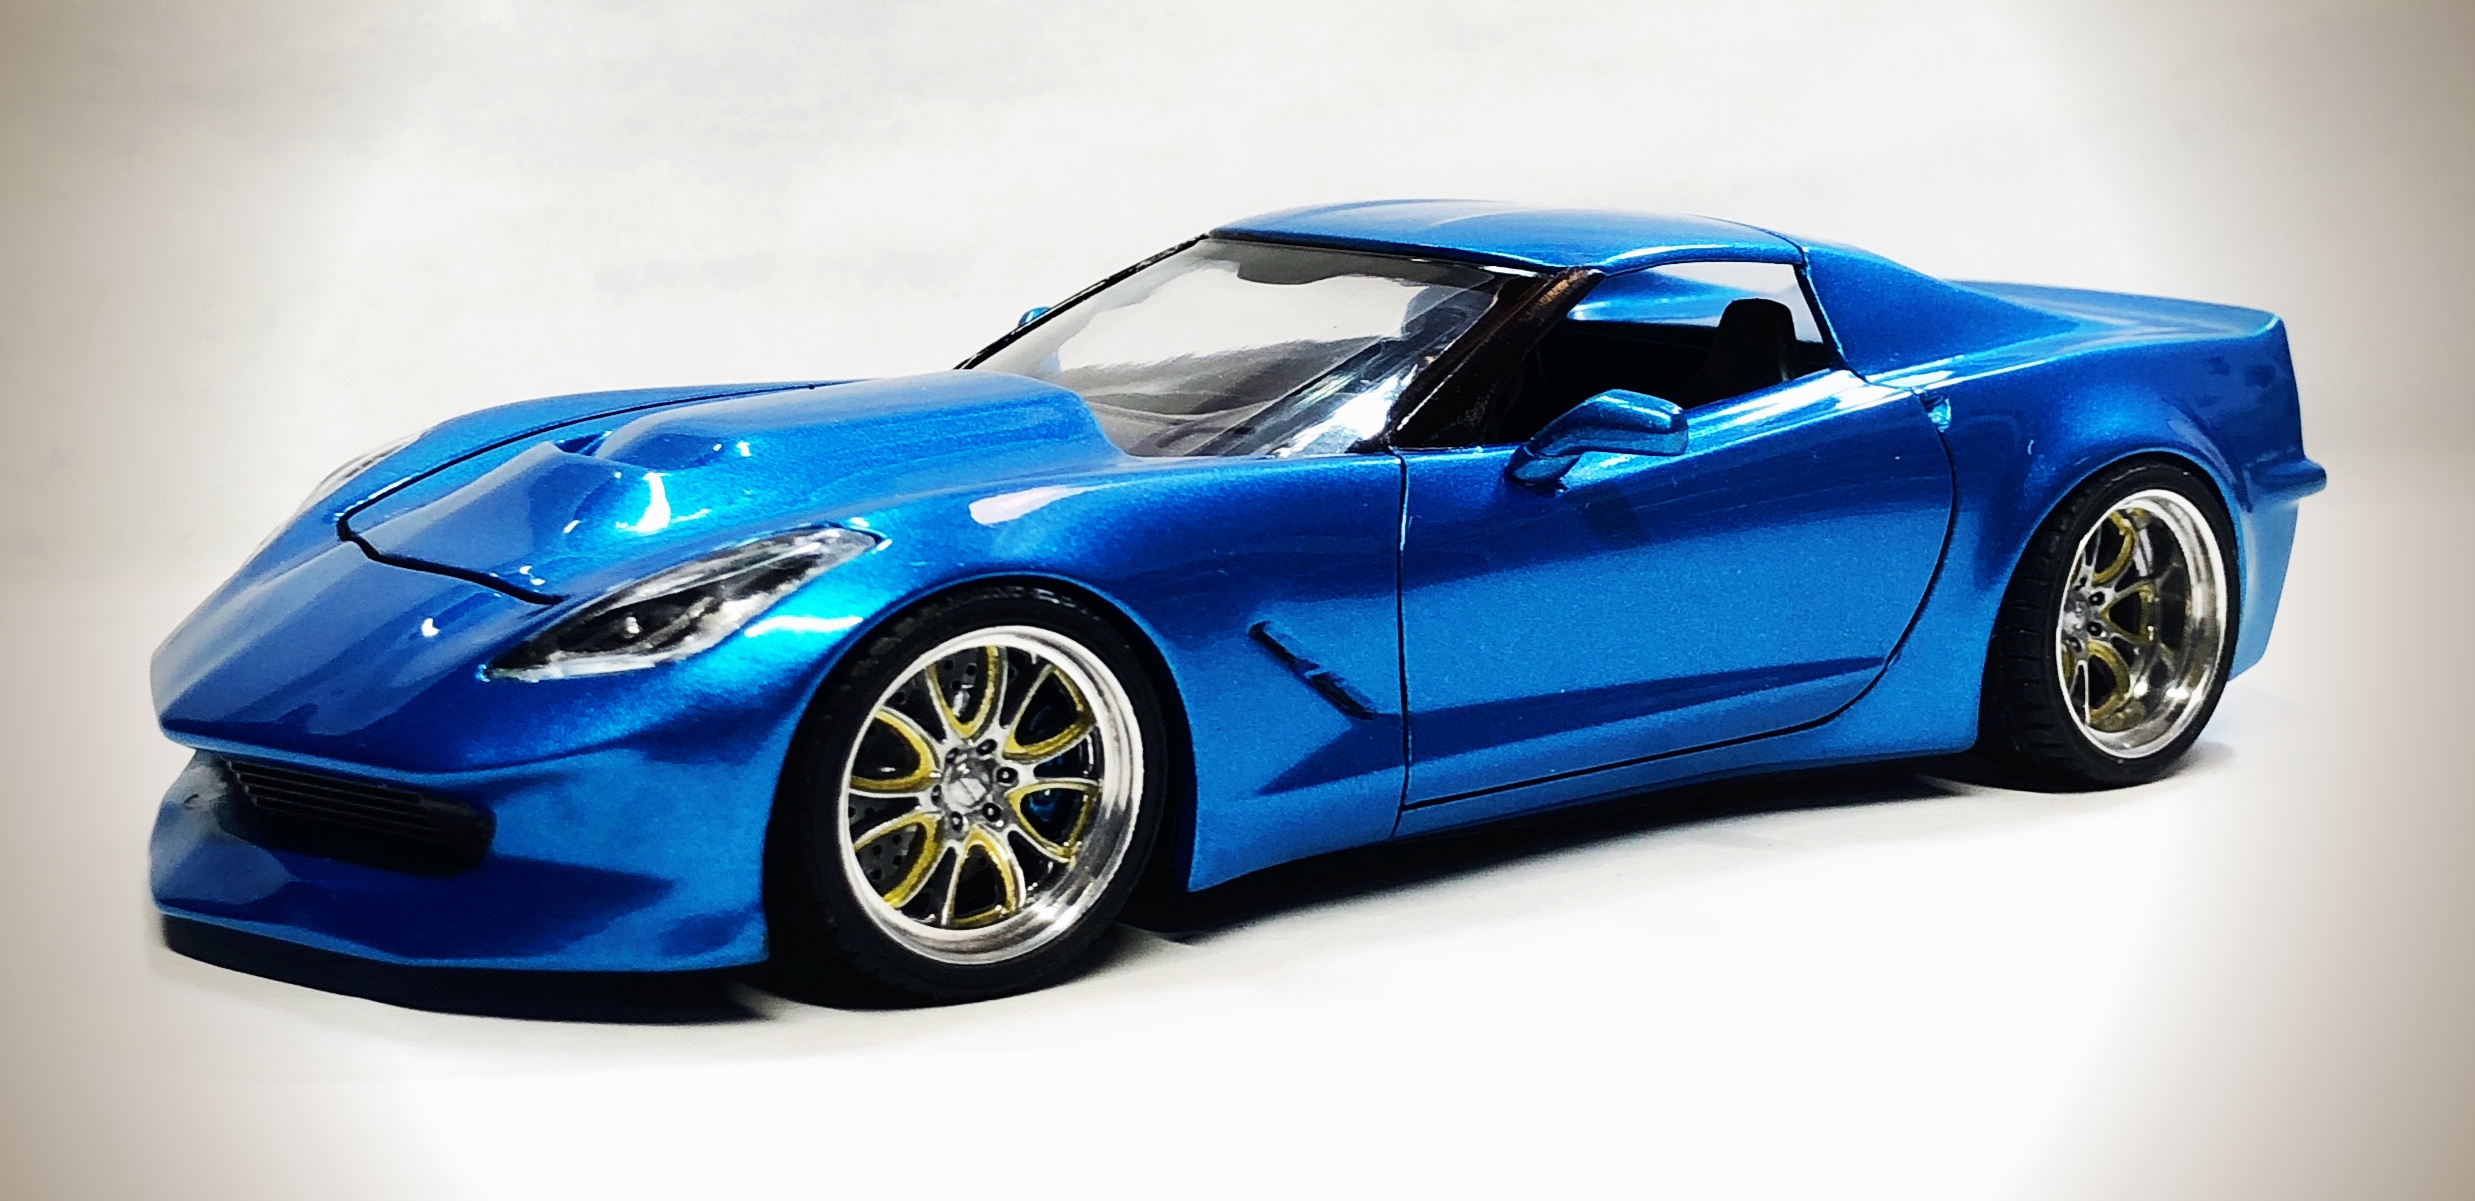
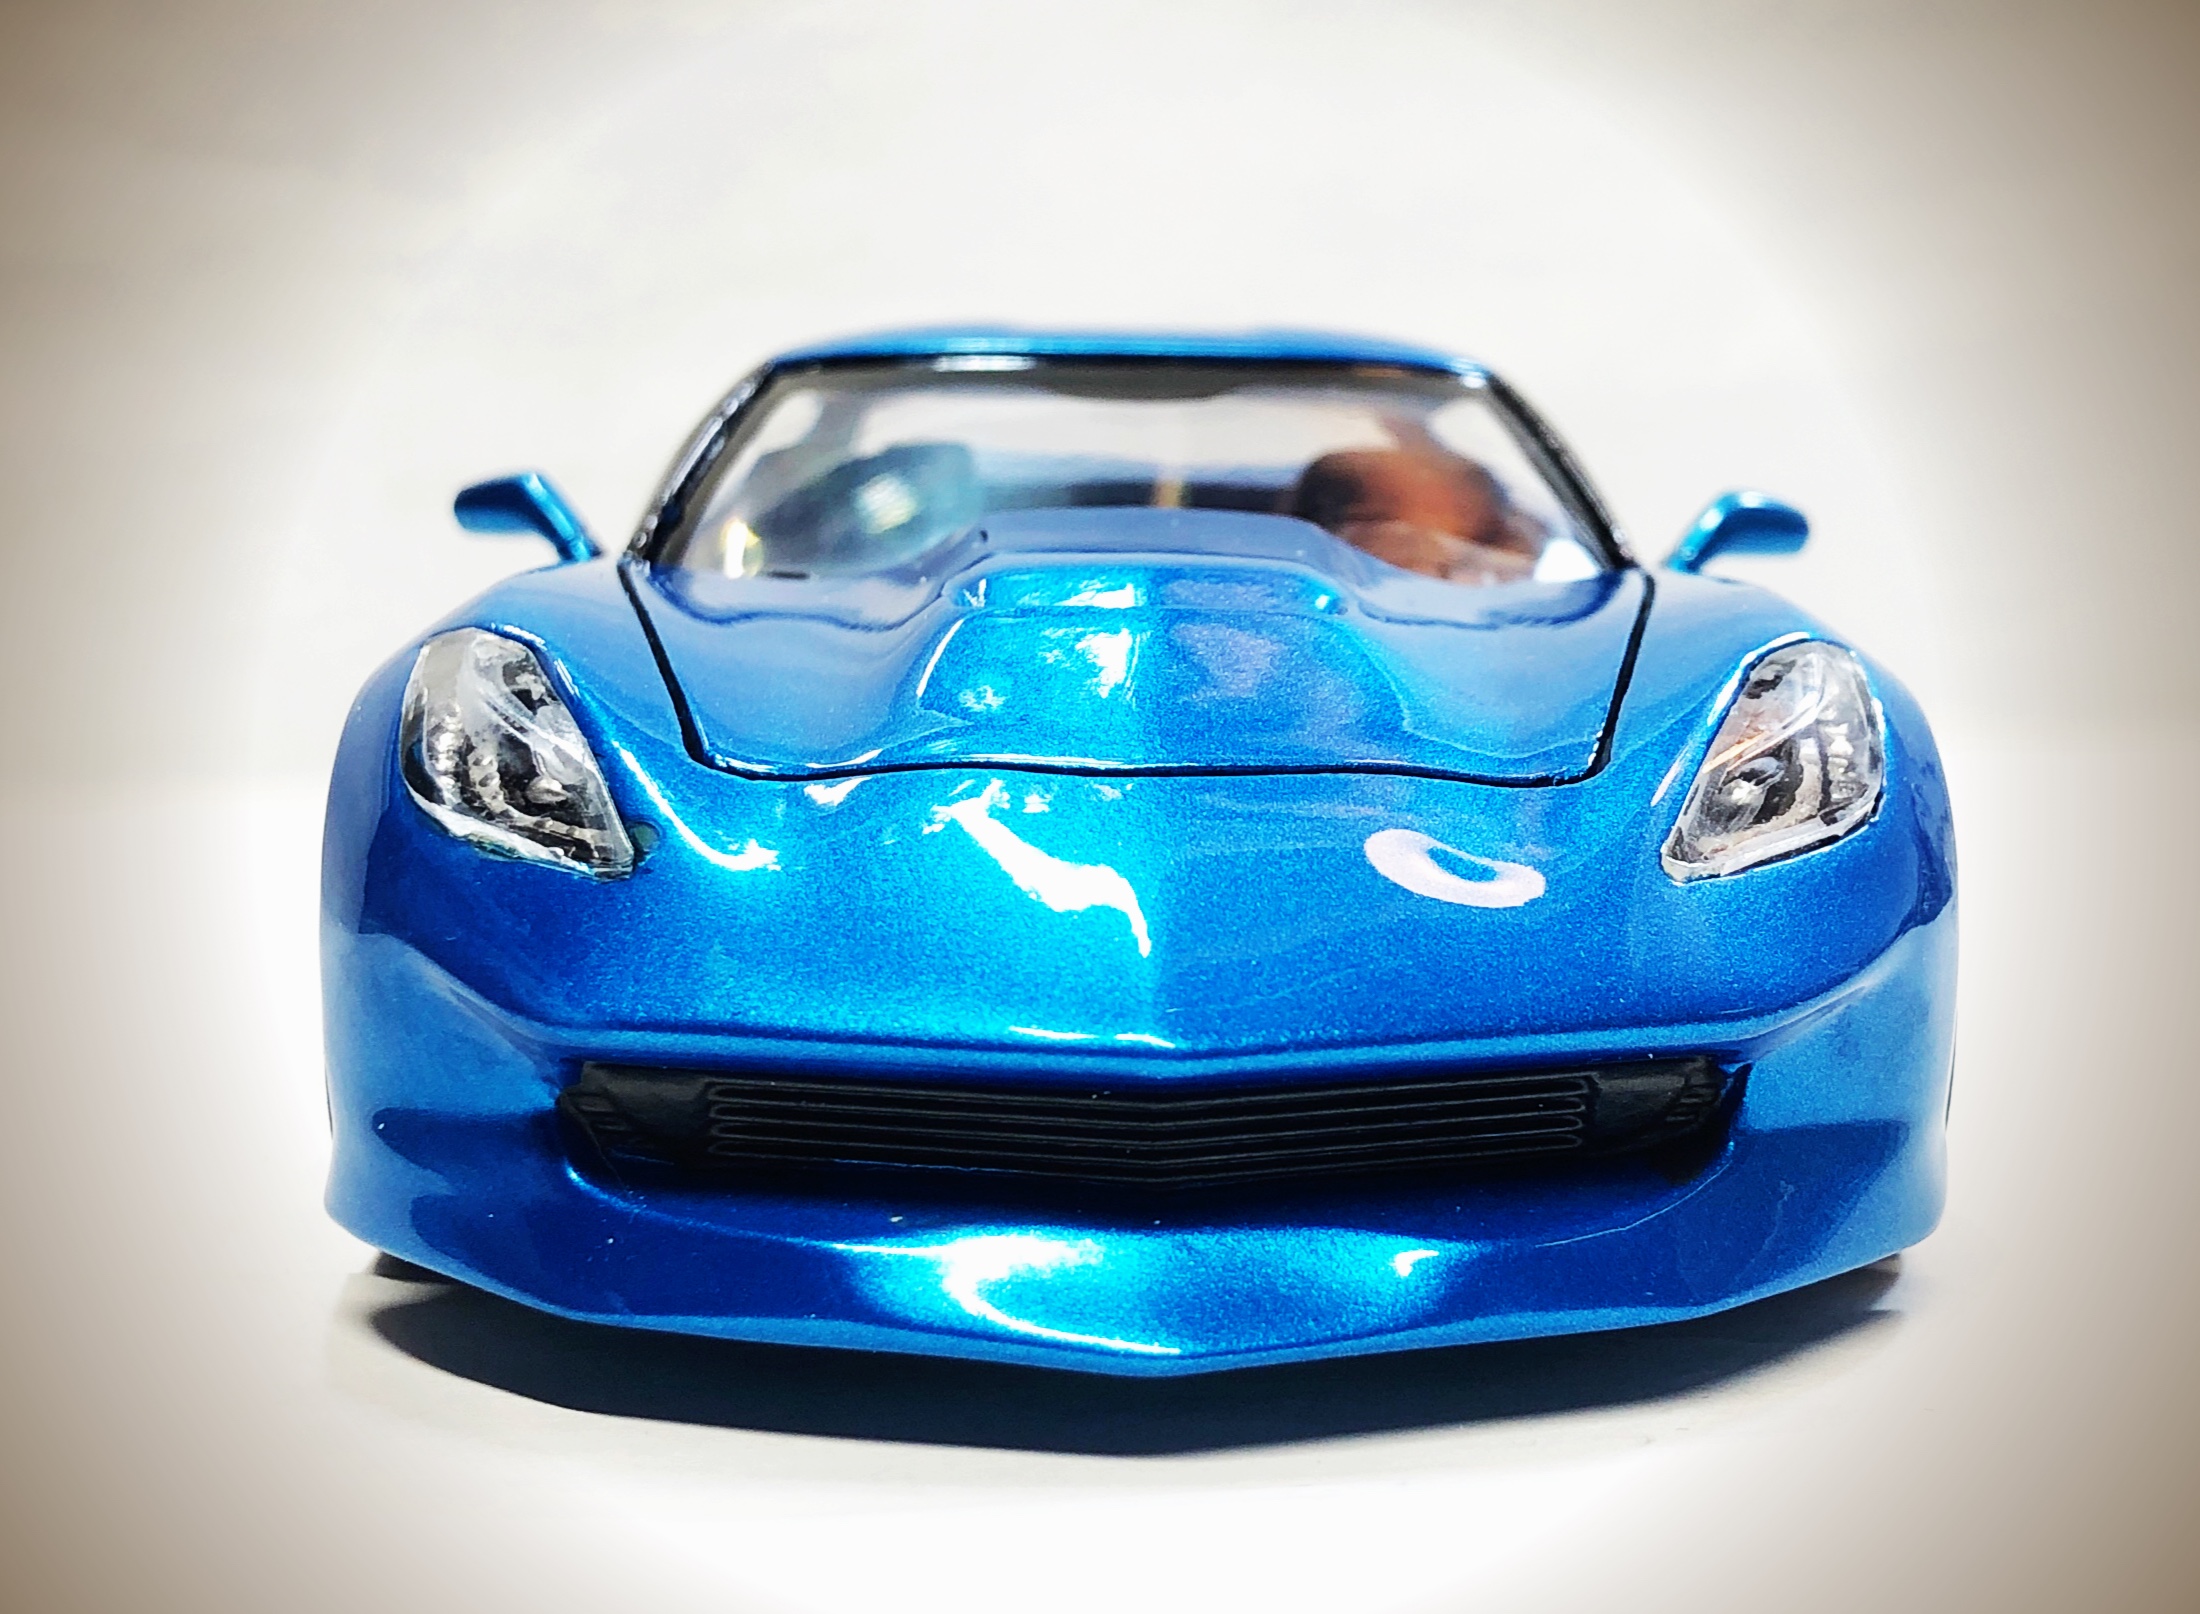
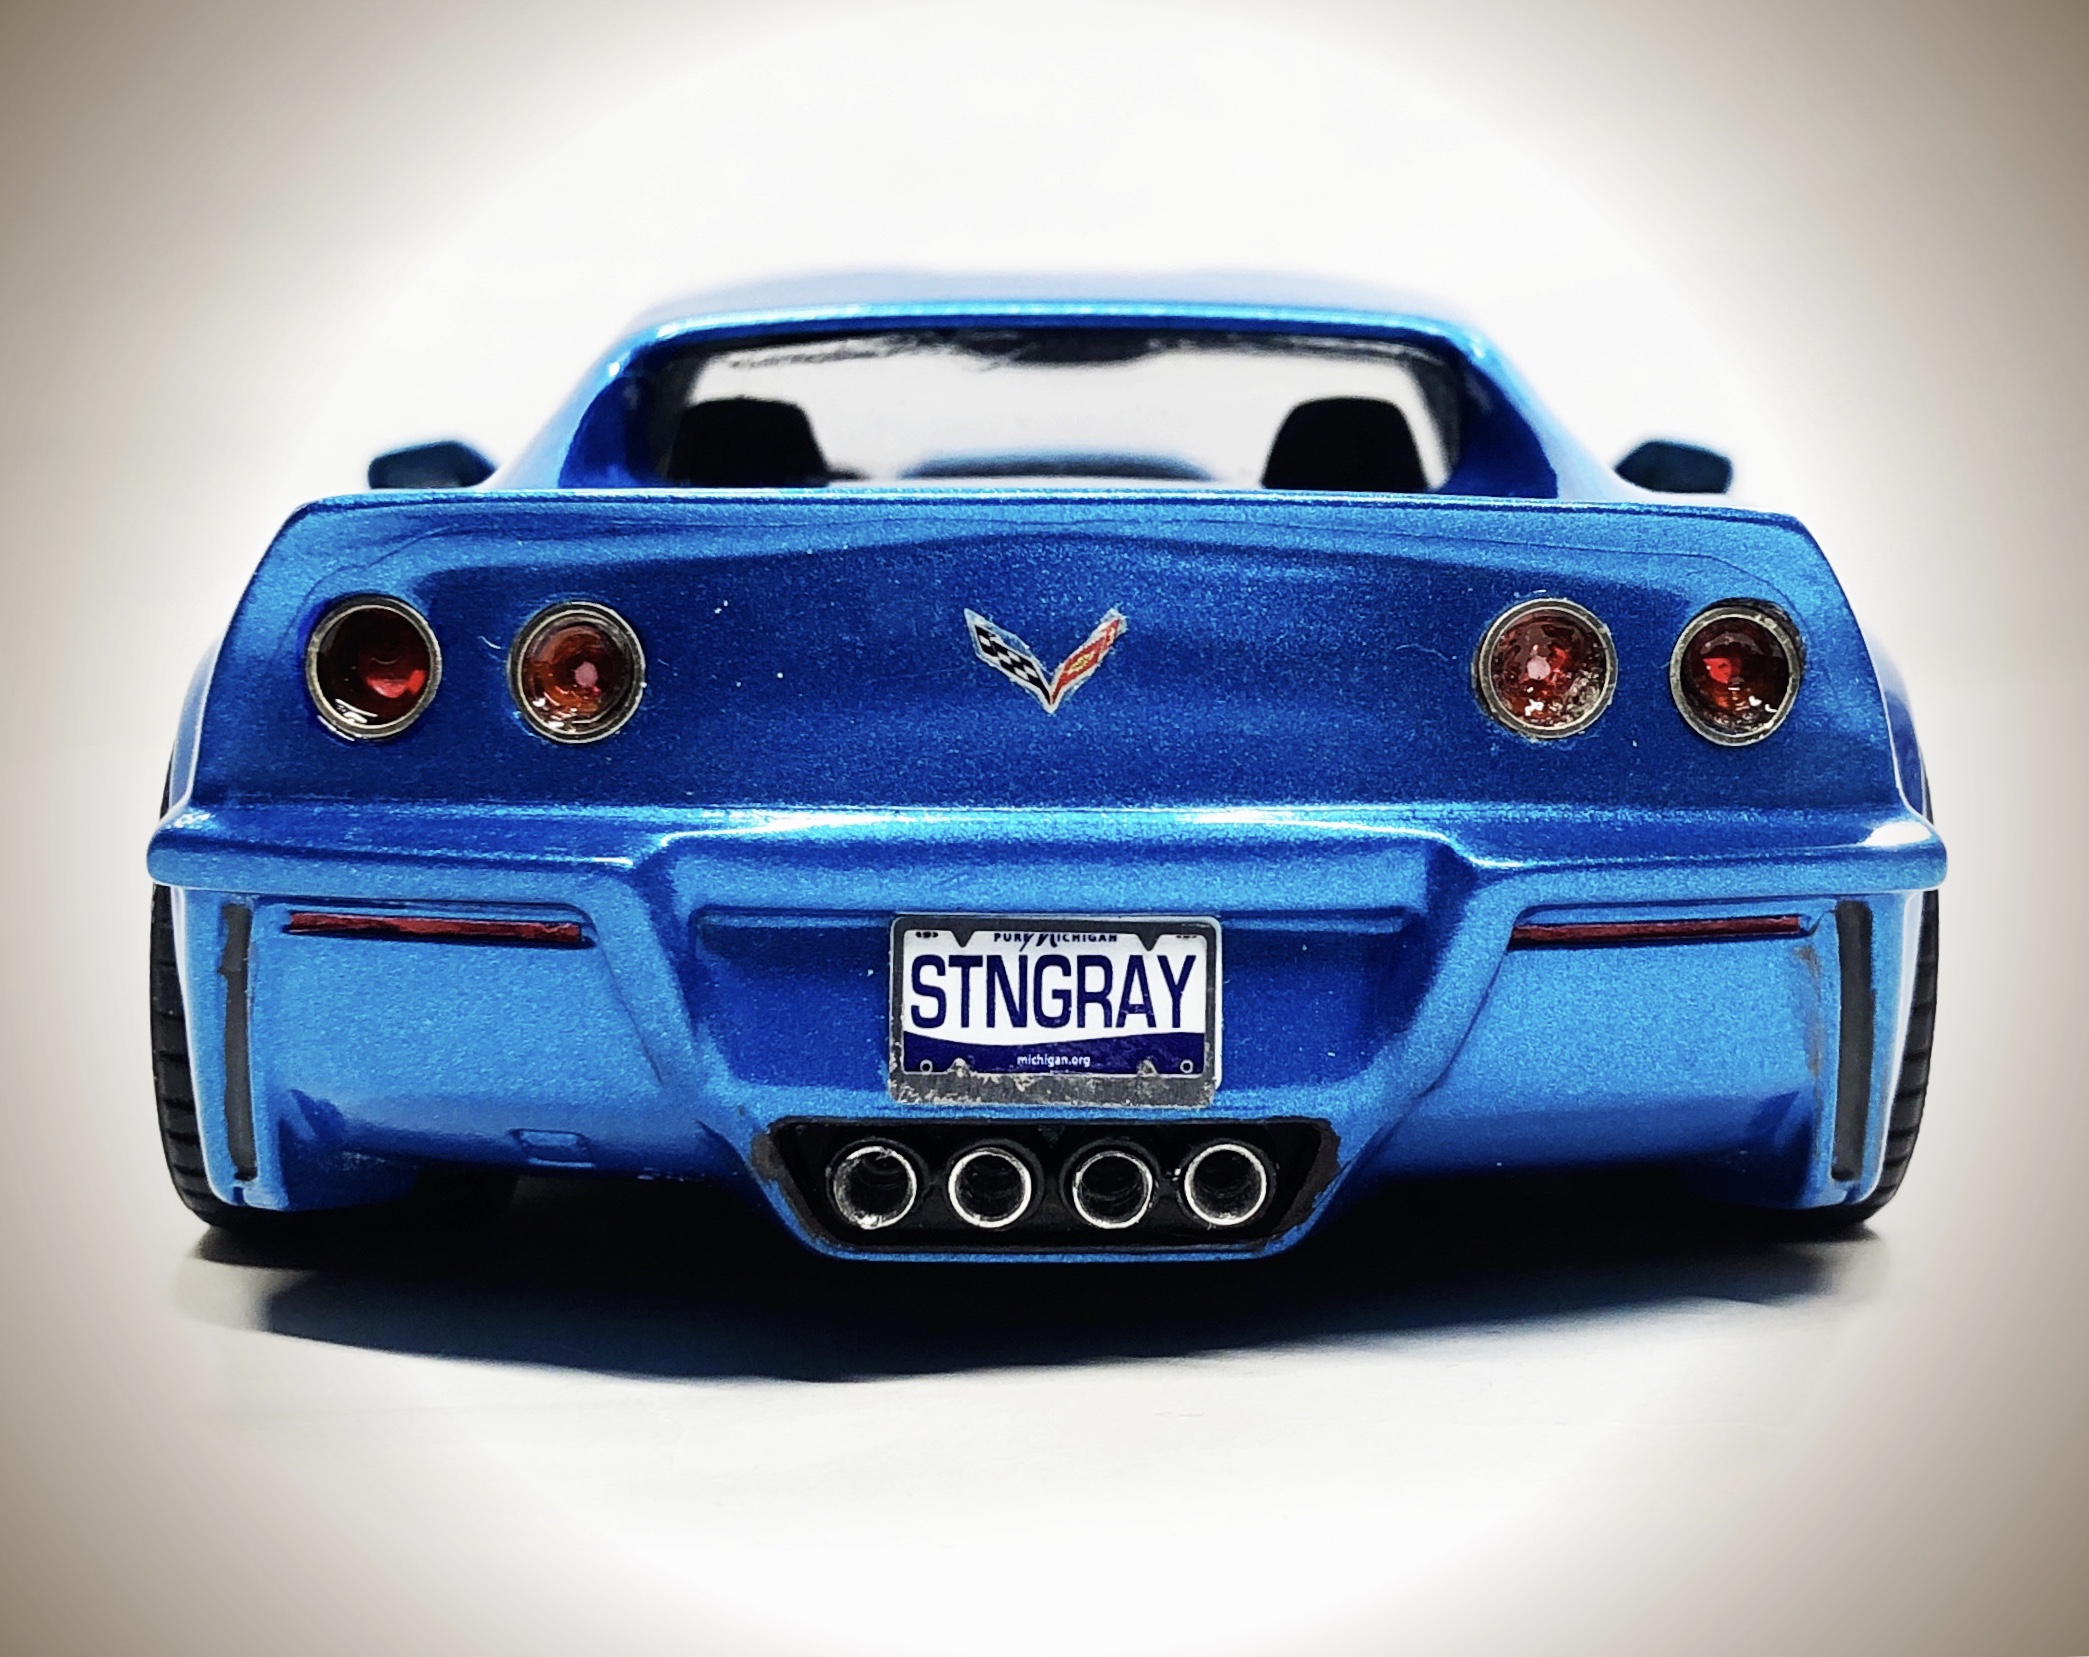
Custom C7/C3 Stingray - What the C7 should have looked like
RestoModGuy posted a topic in Model Cars
I love Corvettes and when the new generation C7 came out in 2014 I liked but not a fan of the taillights. I decided to customize one to have the classic round C3 styling and went as far to change the rear window to the original "sail-panel" rear window. Lots of modifications including a completely new nose and grafted an L88 hood. Also filled in one of the three vents in the fenders, smoothed out the hip line and added rear wheel flares and grafted rear bumperettes like the C3's have. Some build pics show some of the major bodywork I did. Paint is Duplicolor Bahama Blue Metallic. Comparison to a "stock" C7
-
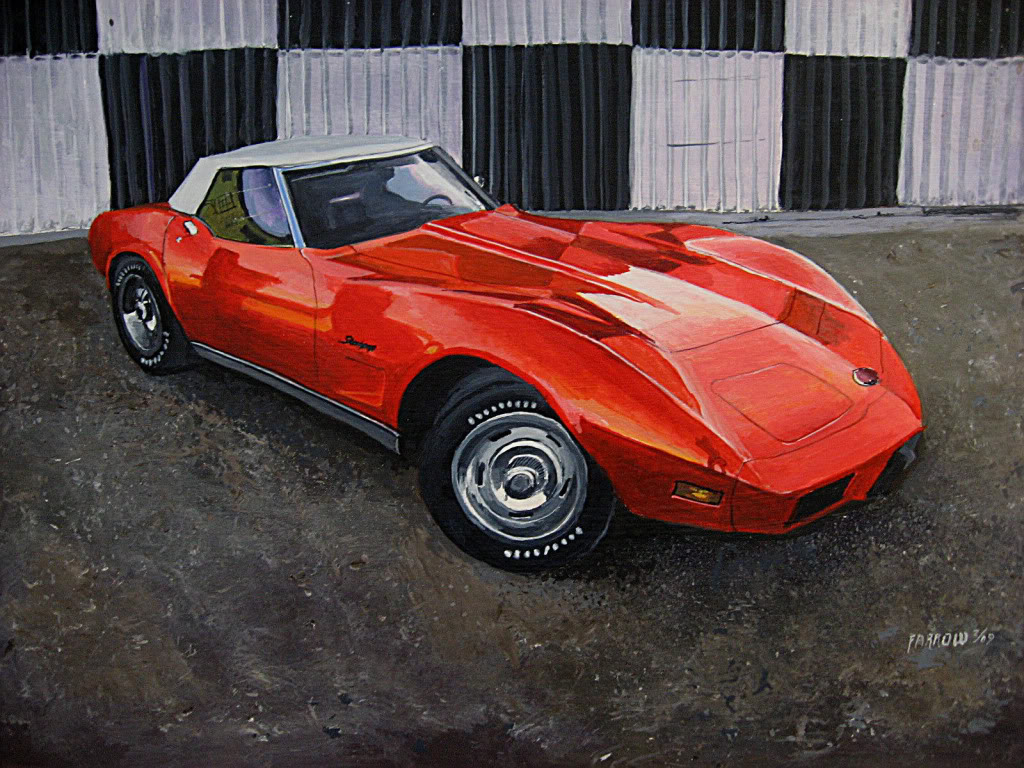
Here's another of my acrylic paintings. This was a commission,so I don't have the original. I really liked the reflections in this one.