Search the Community
Showing results for tags 'Gasser'.
-
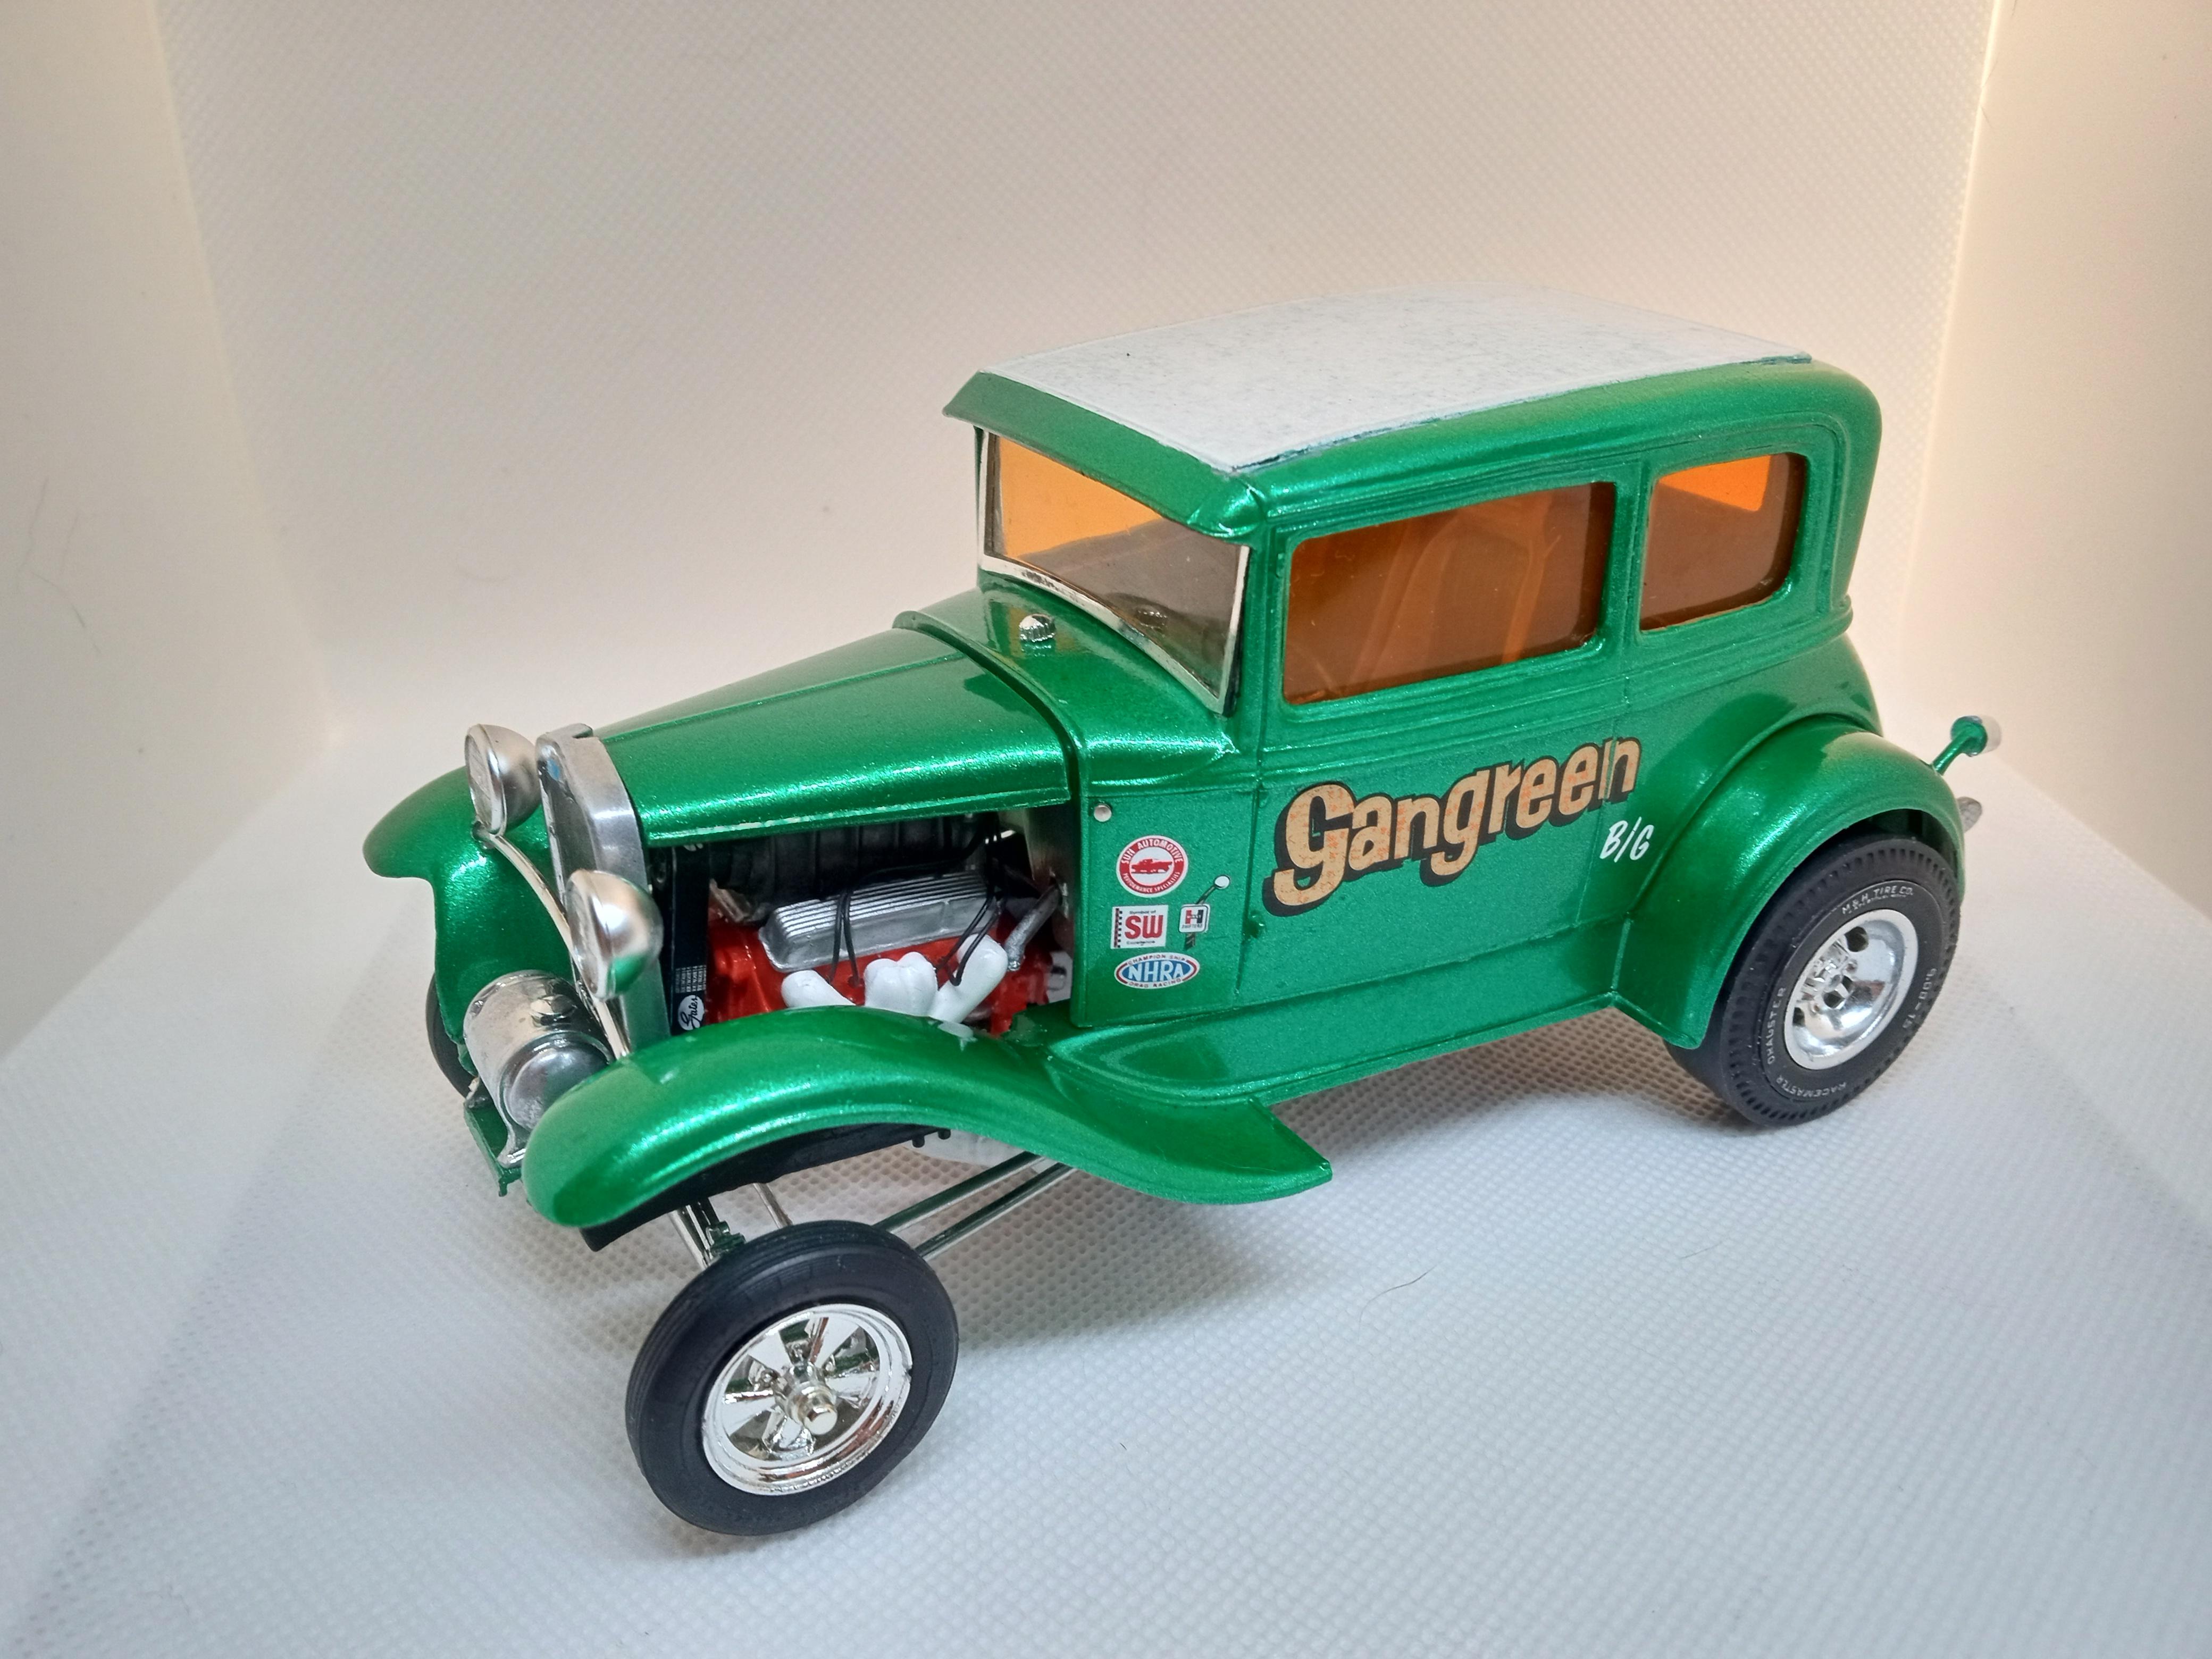
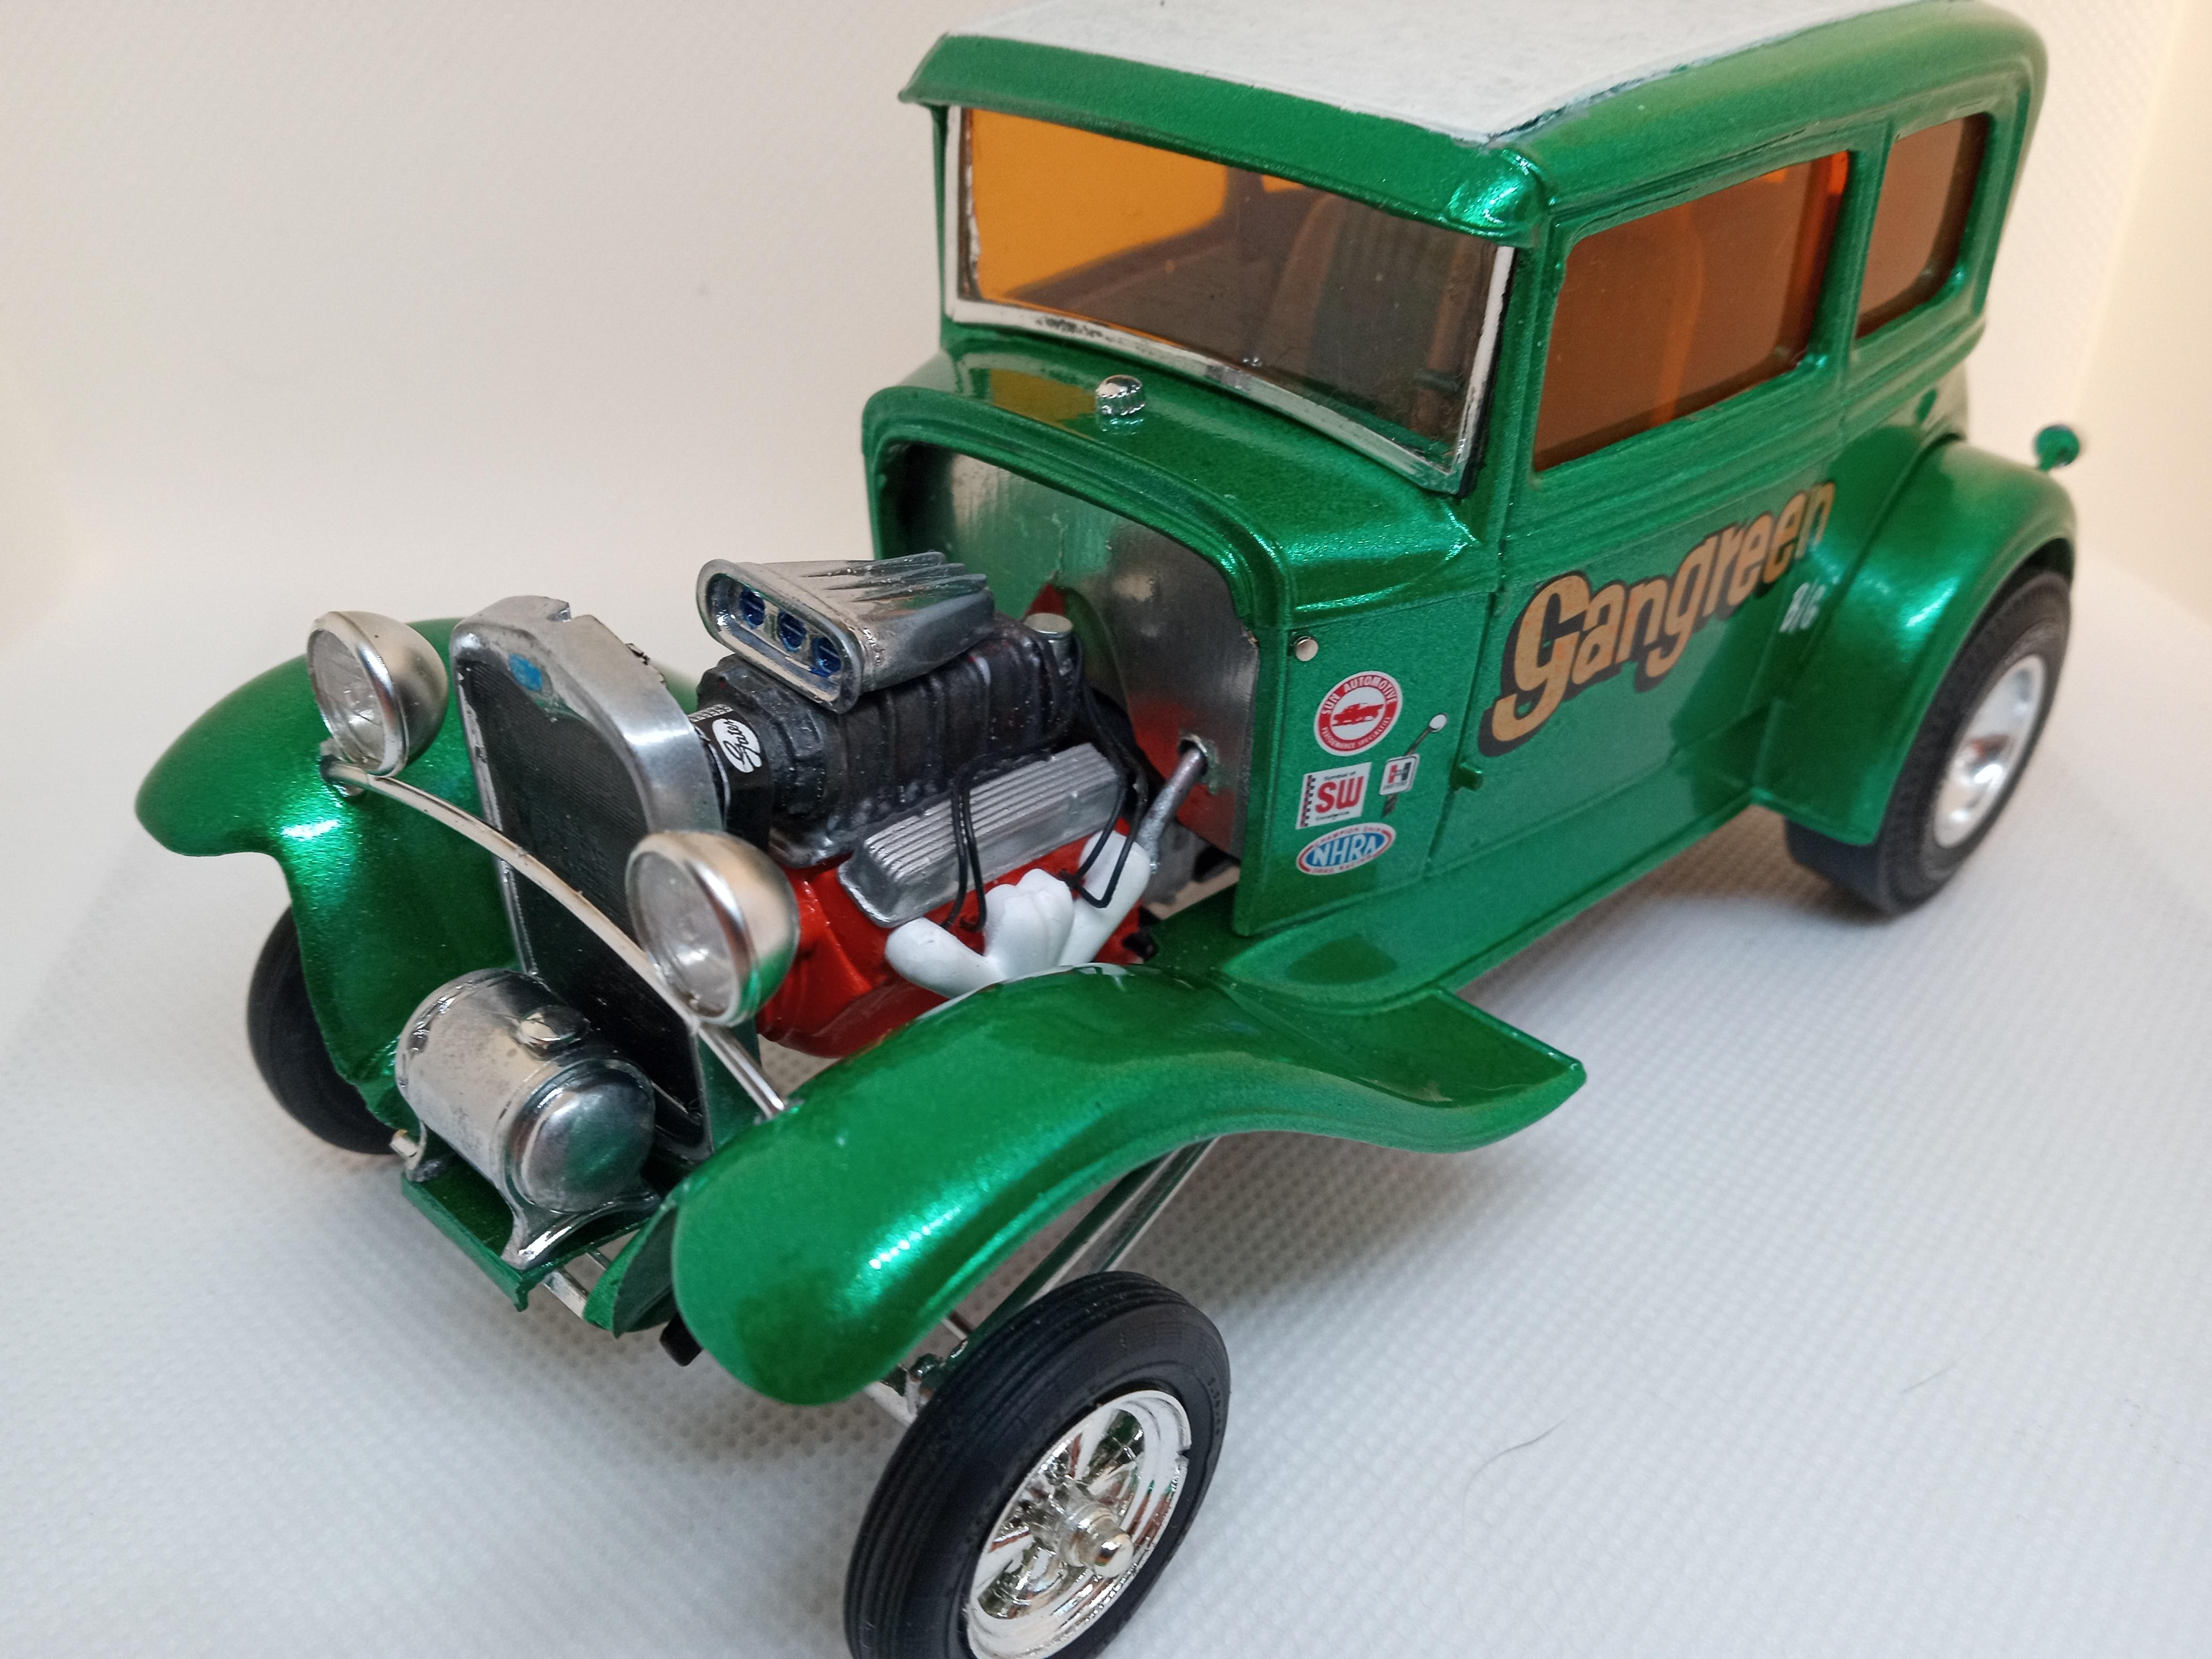
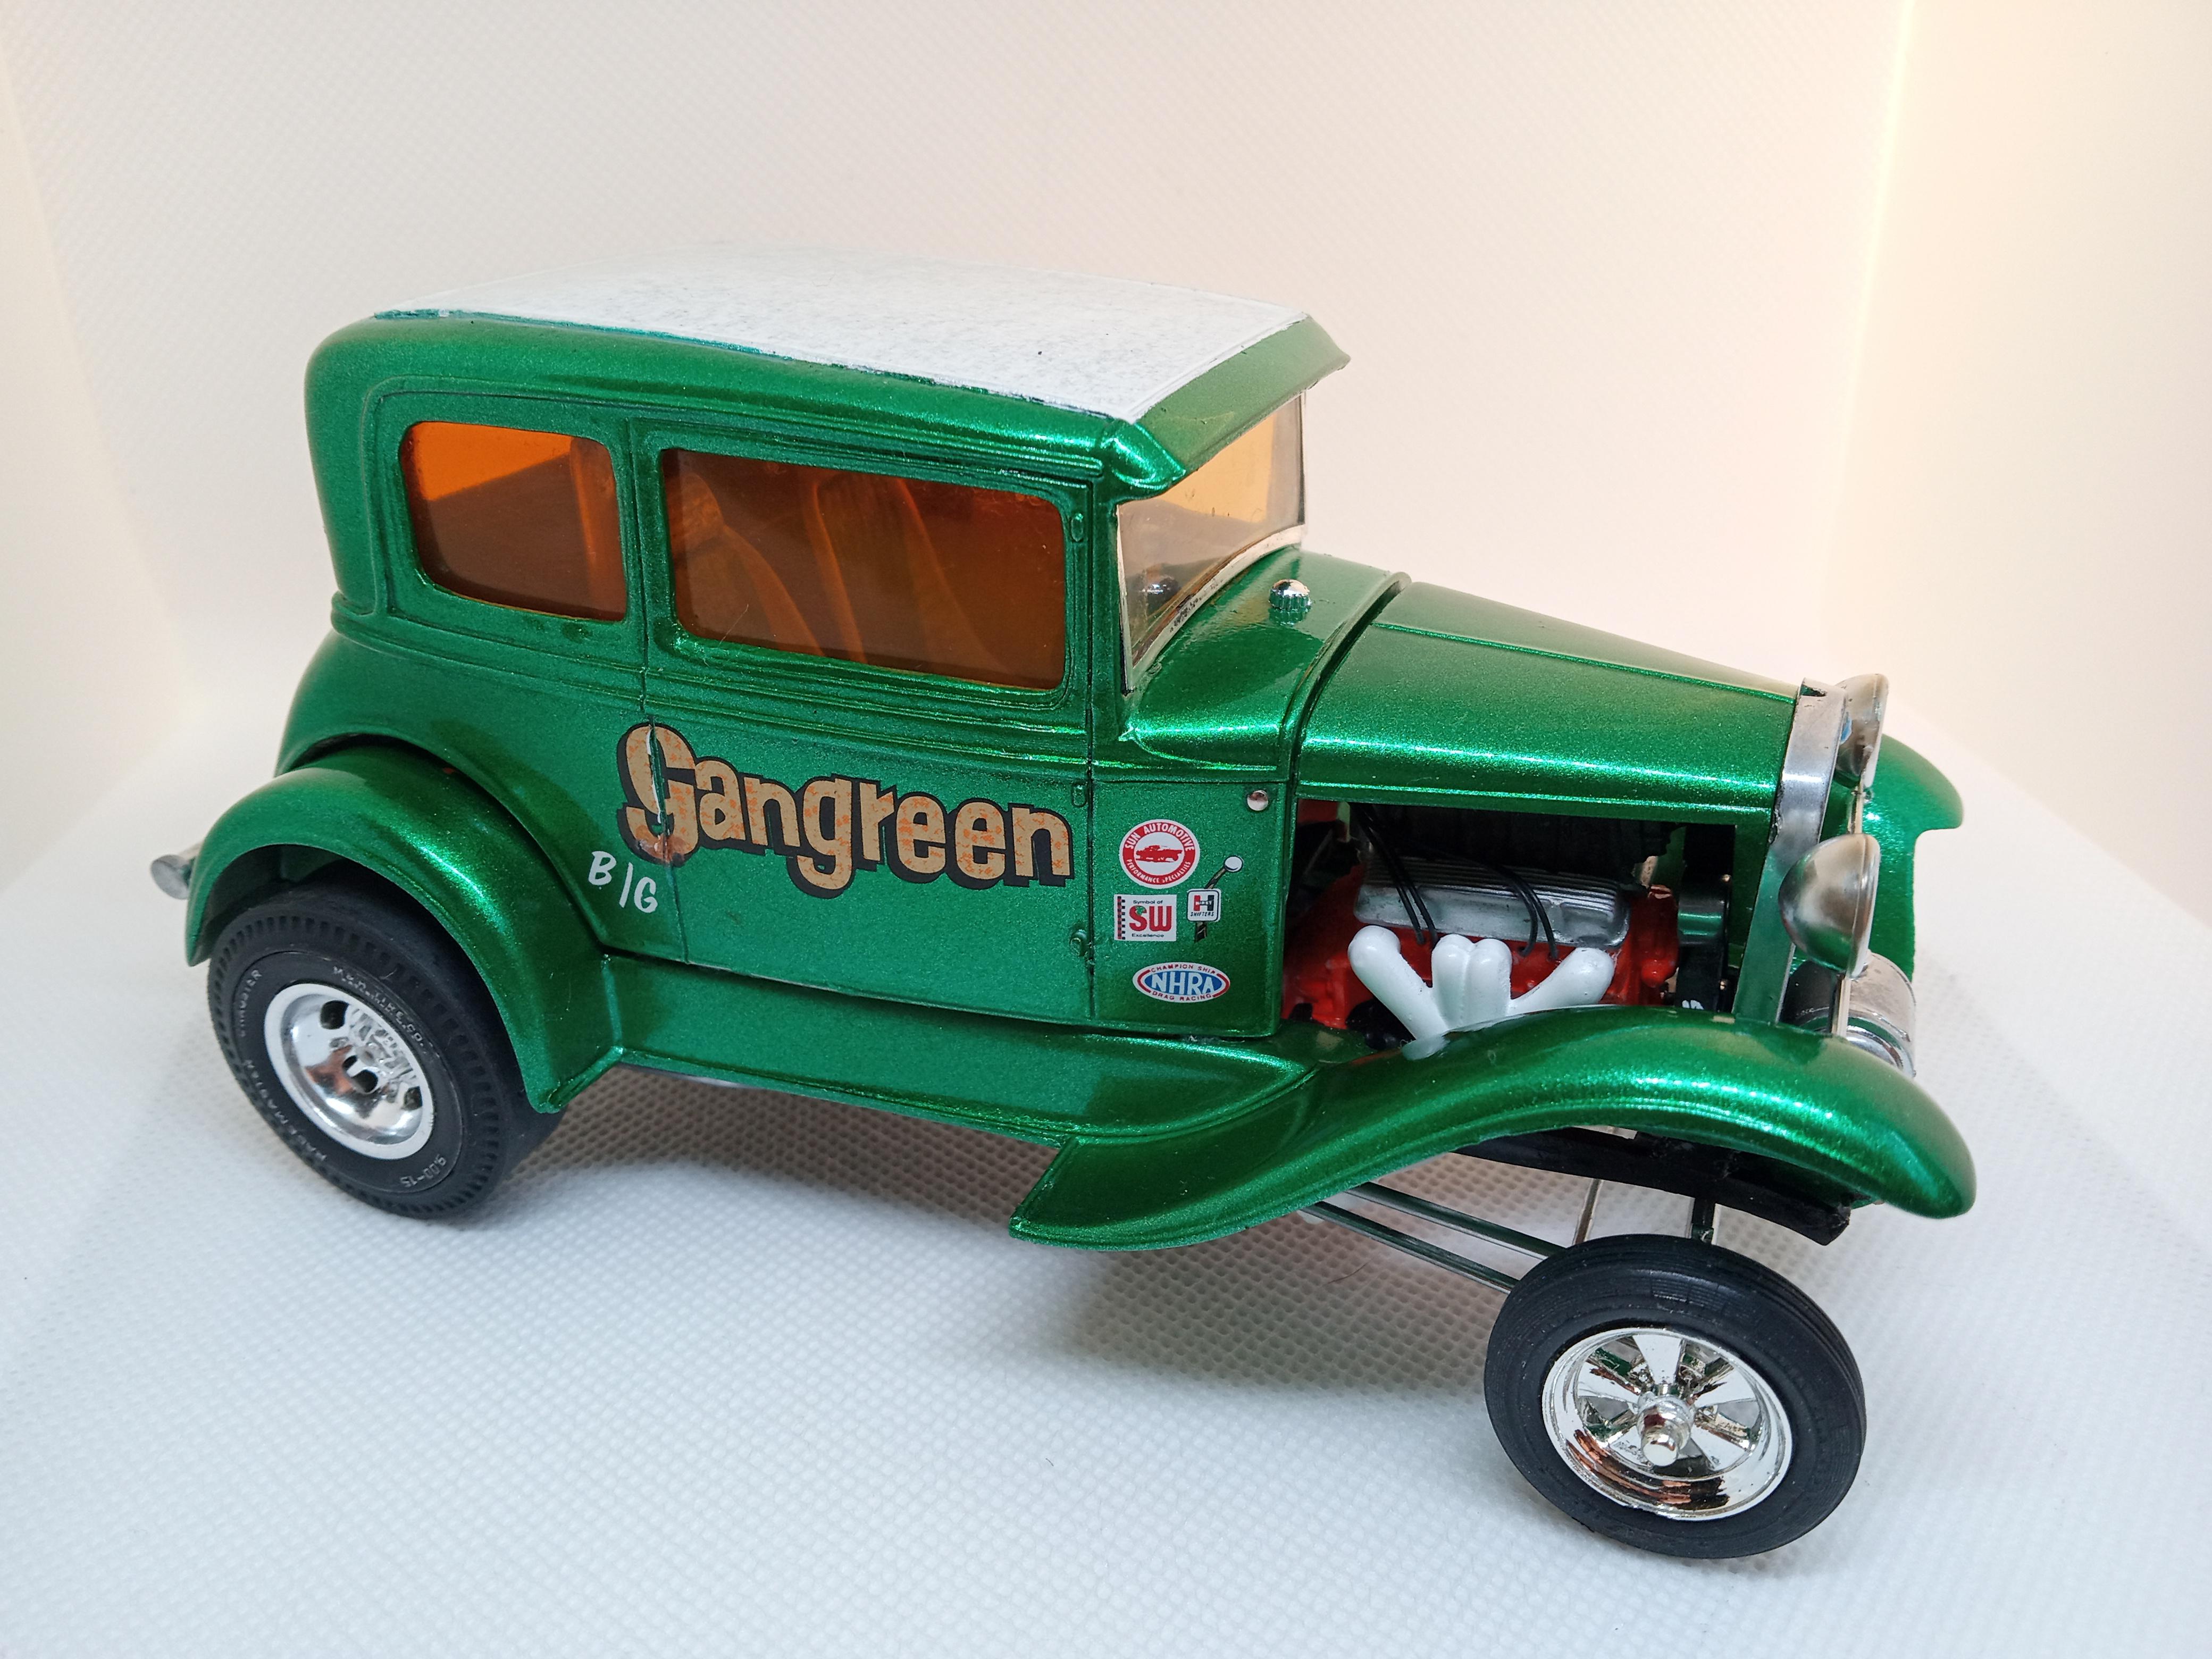
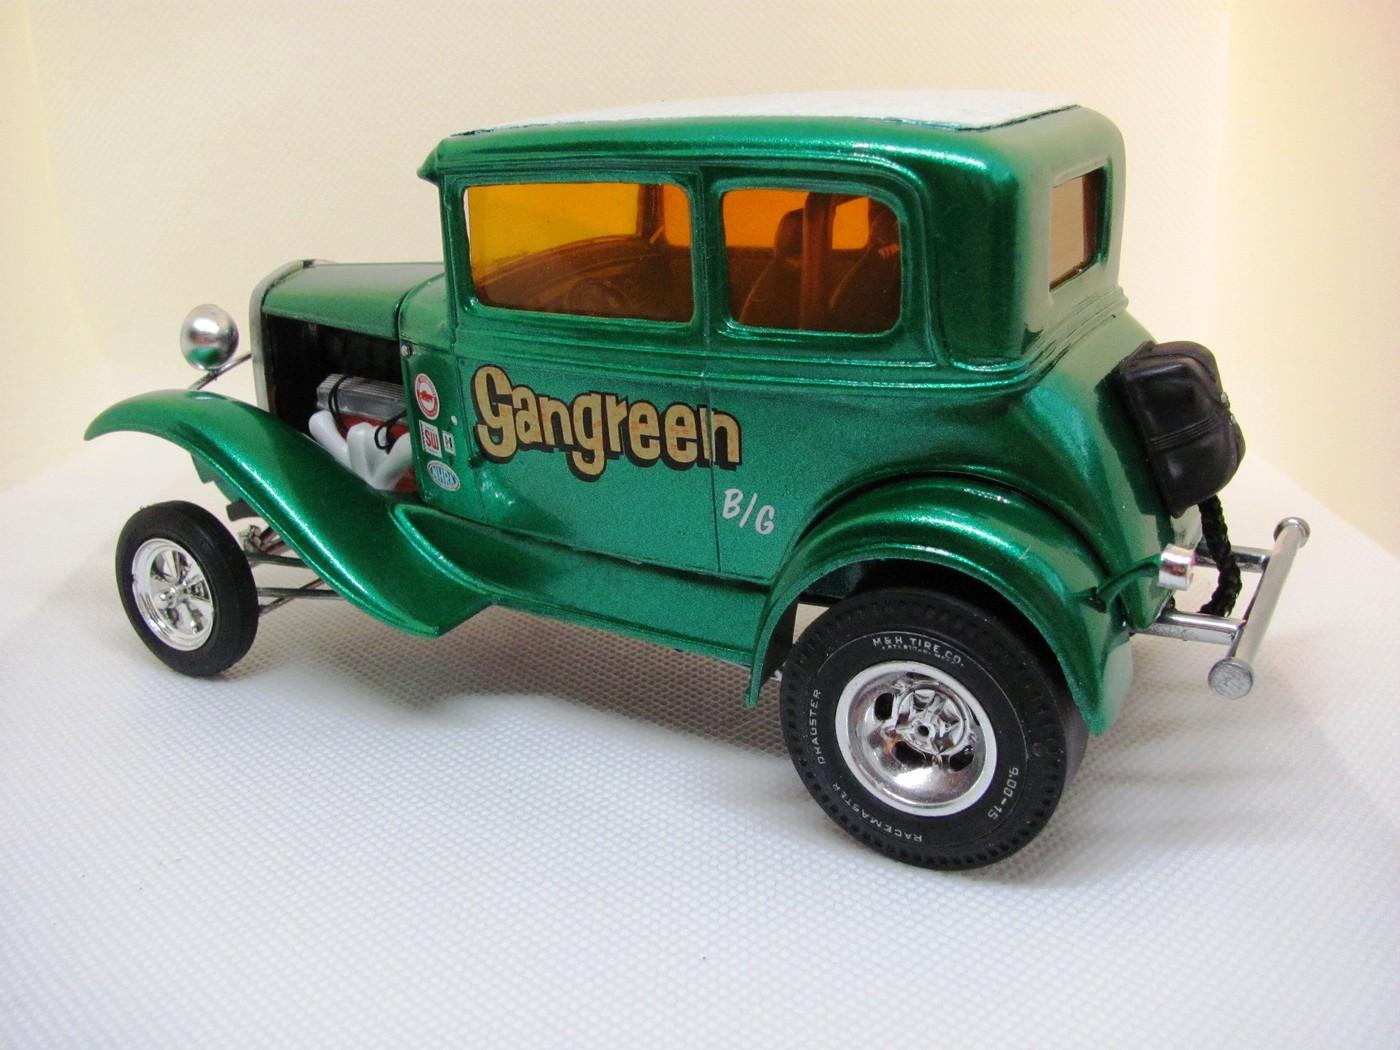
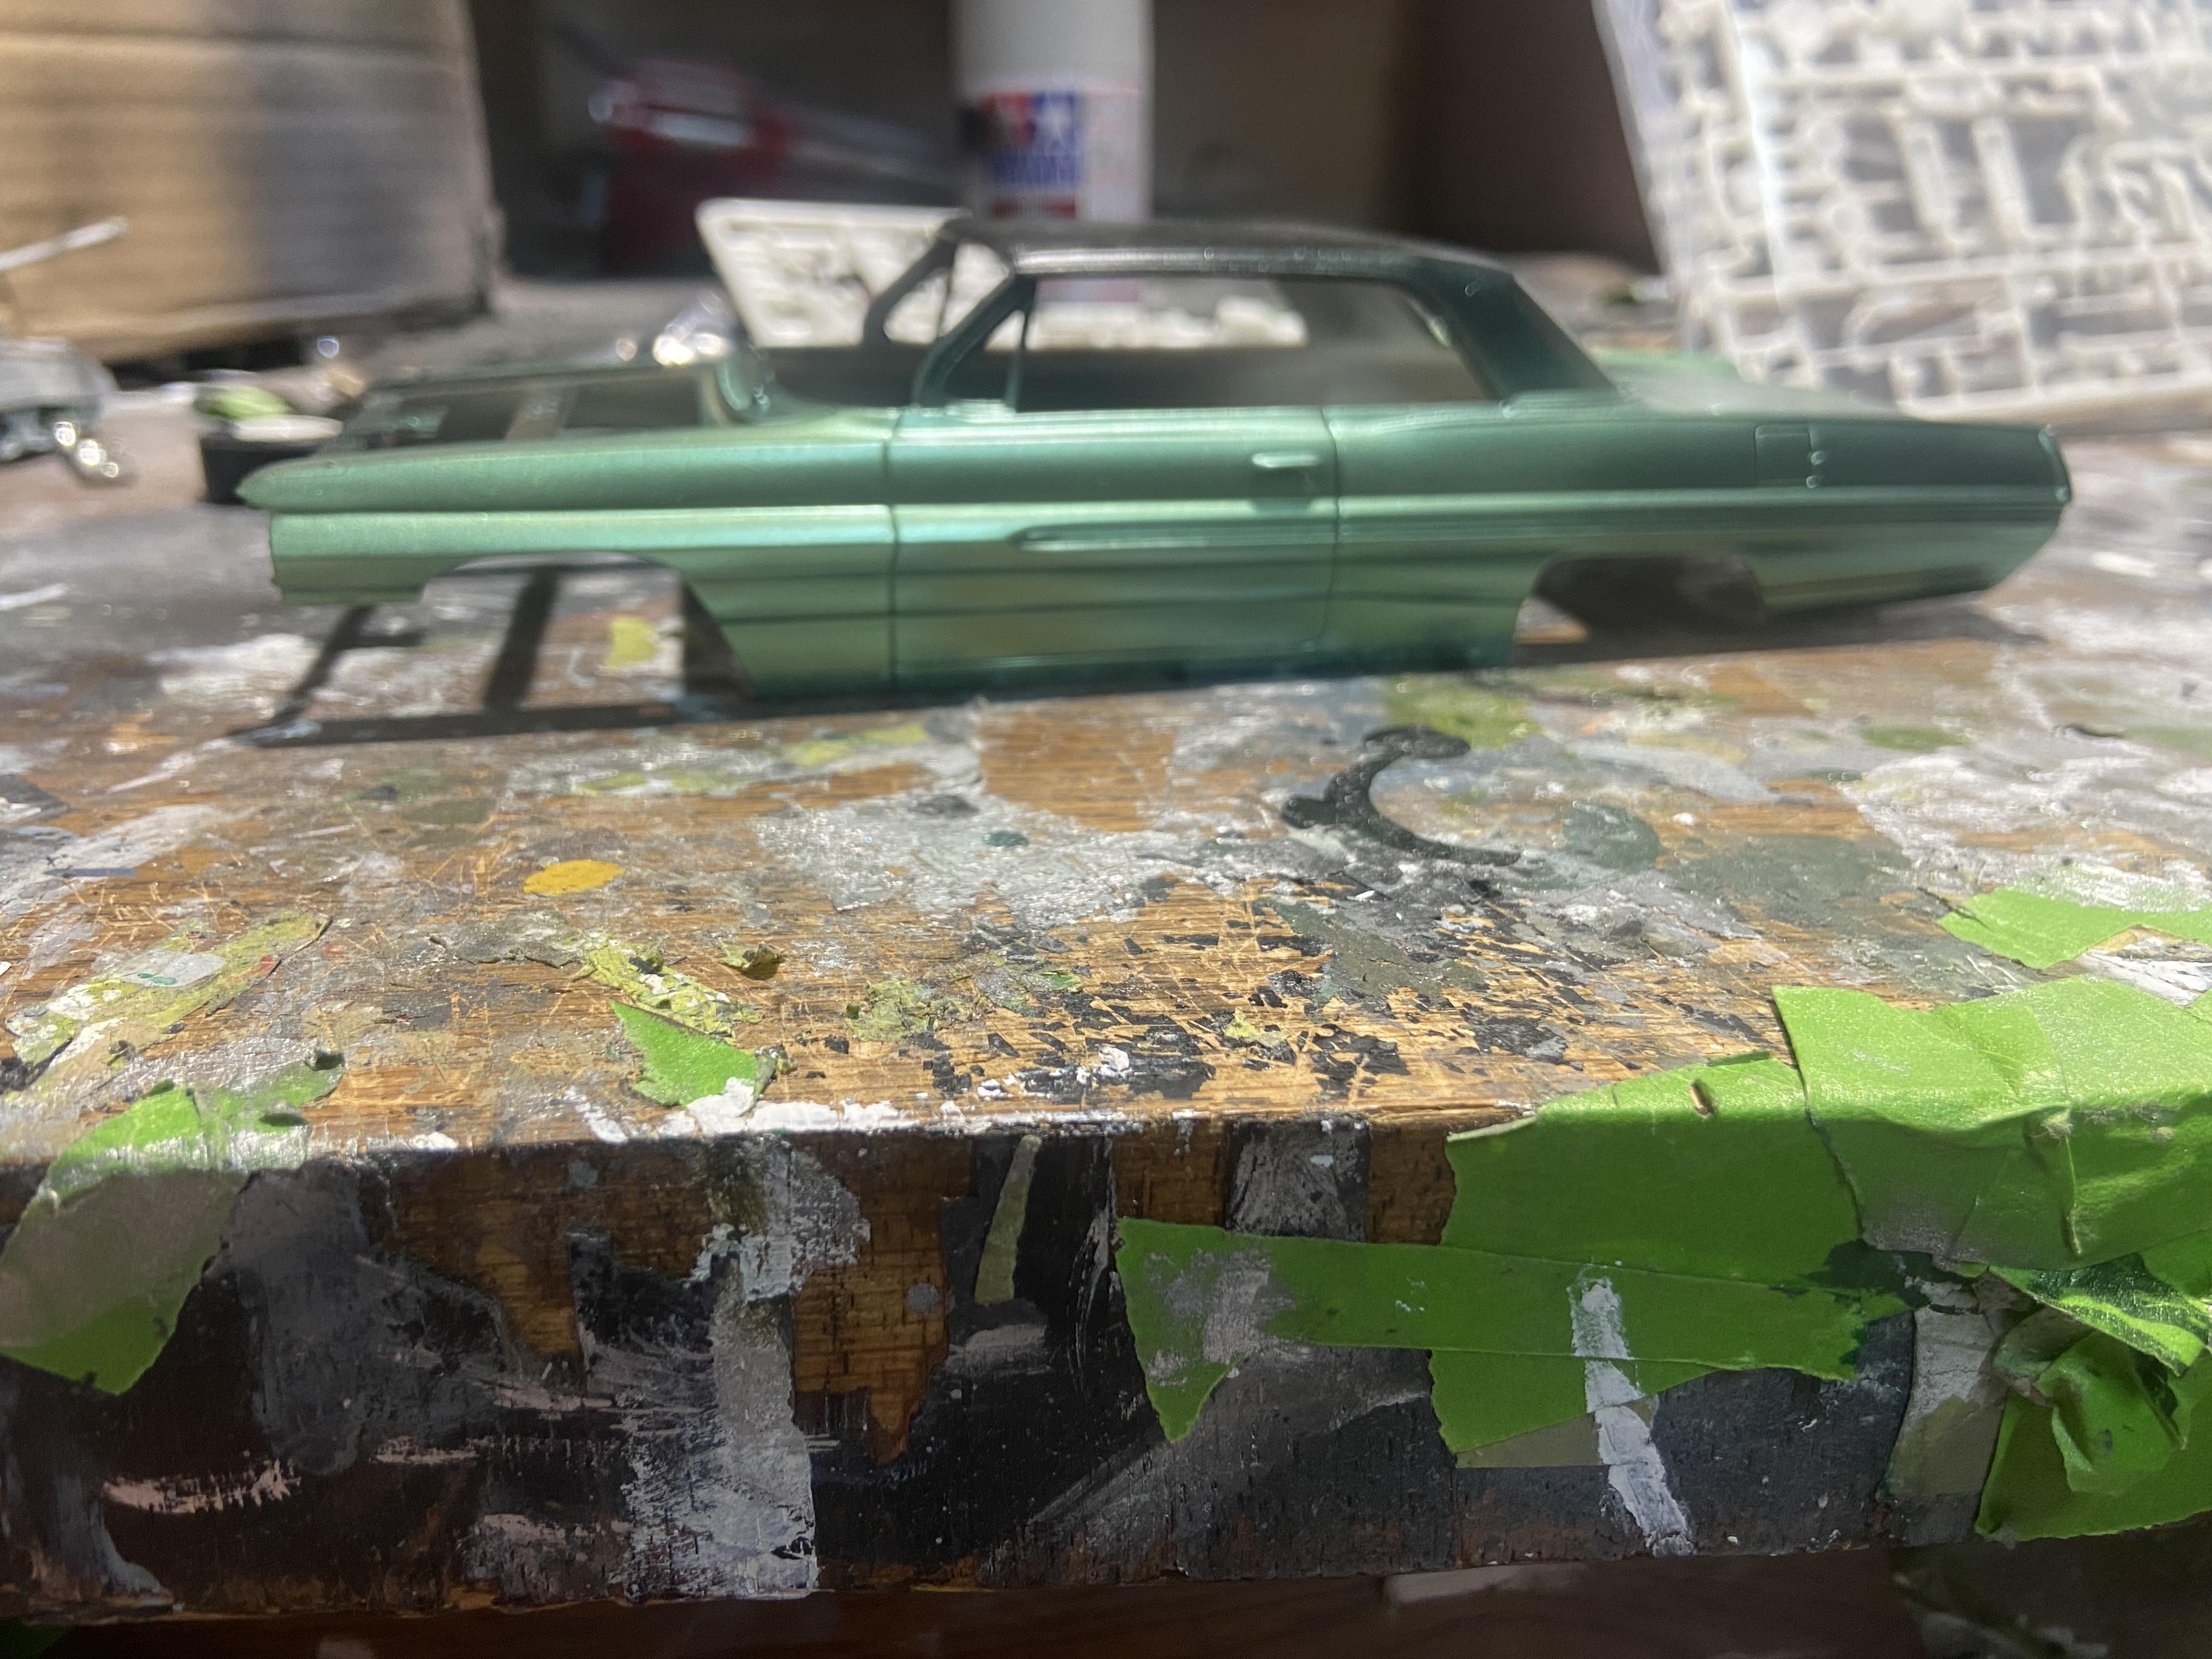
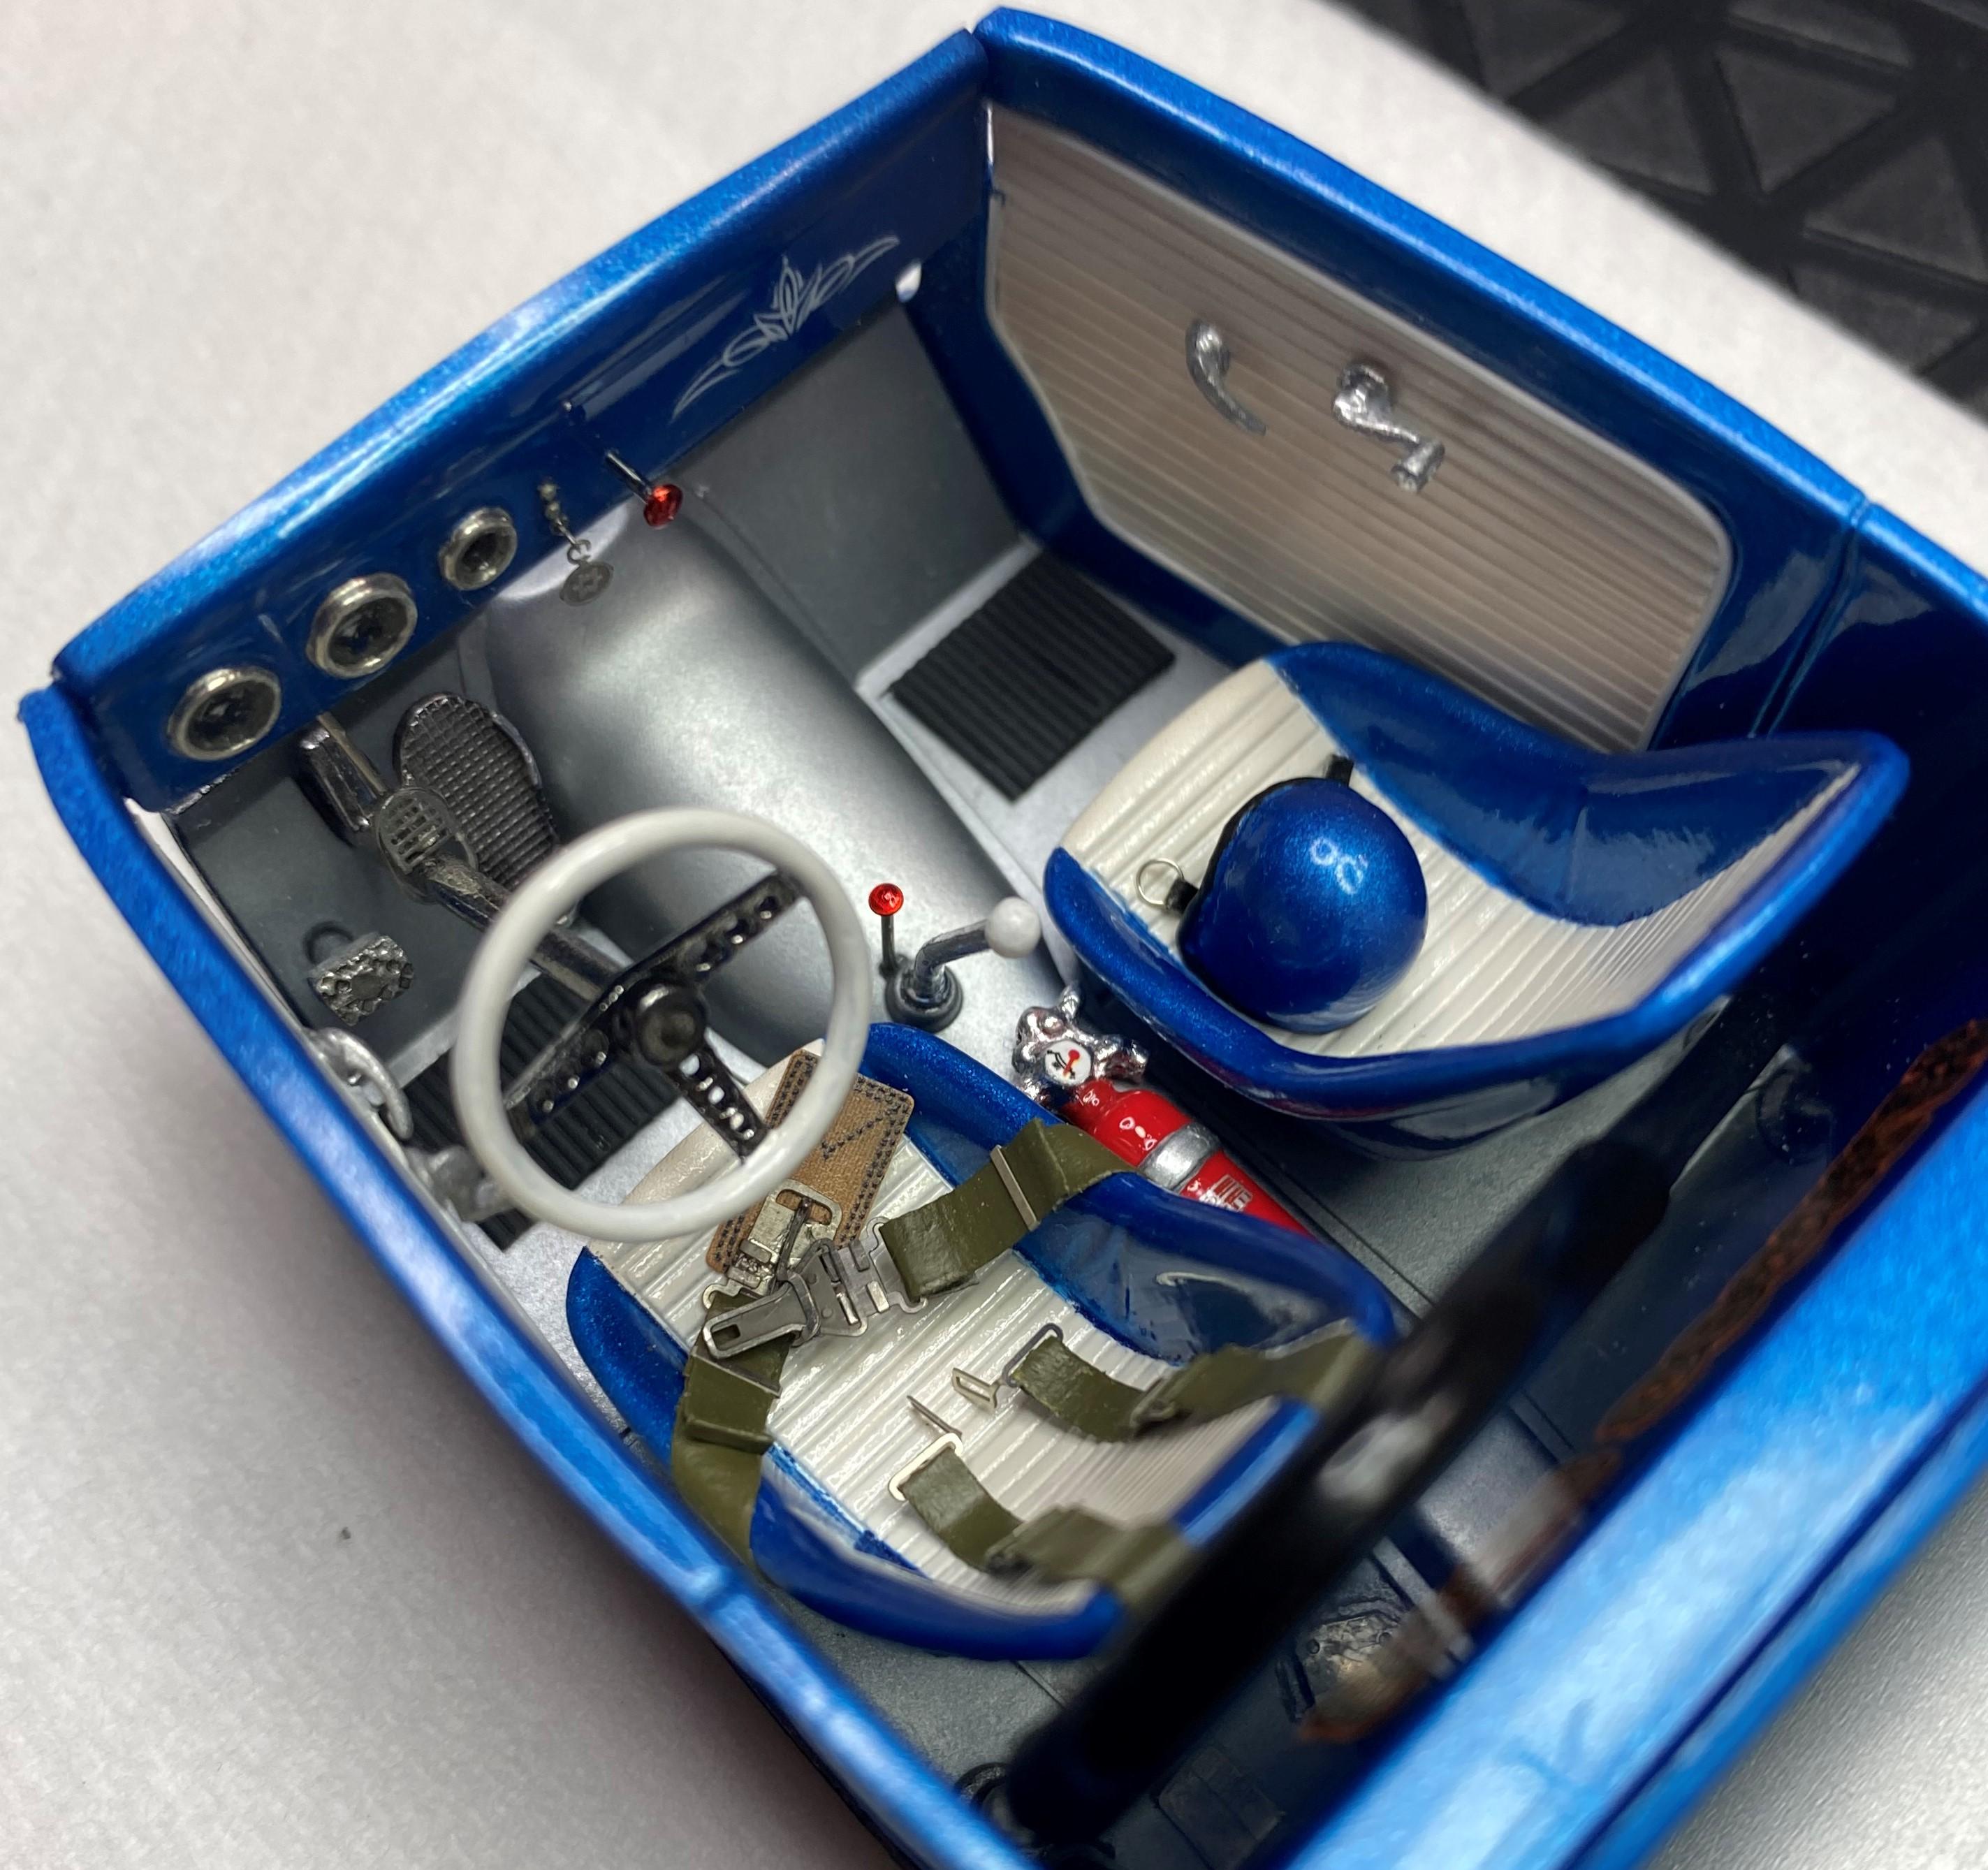
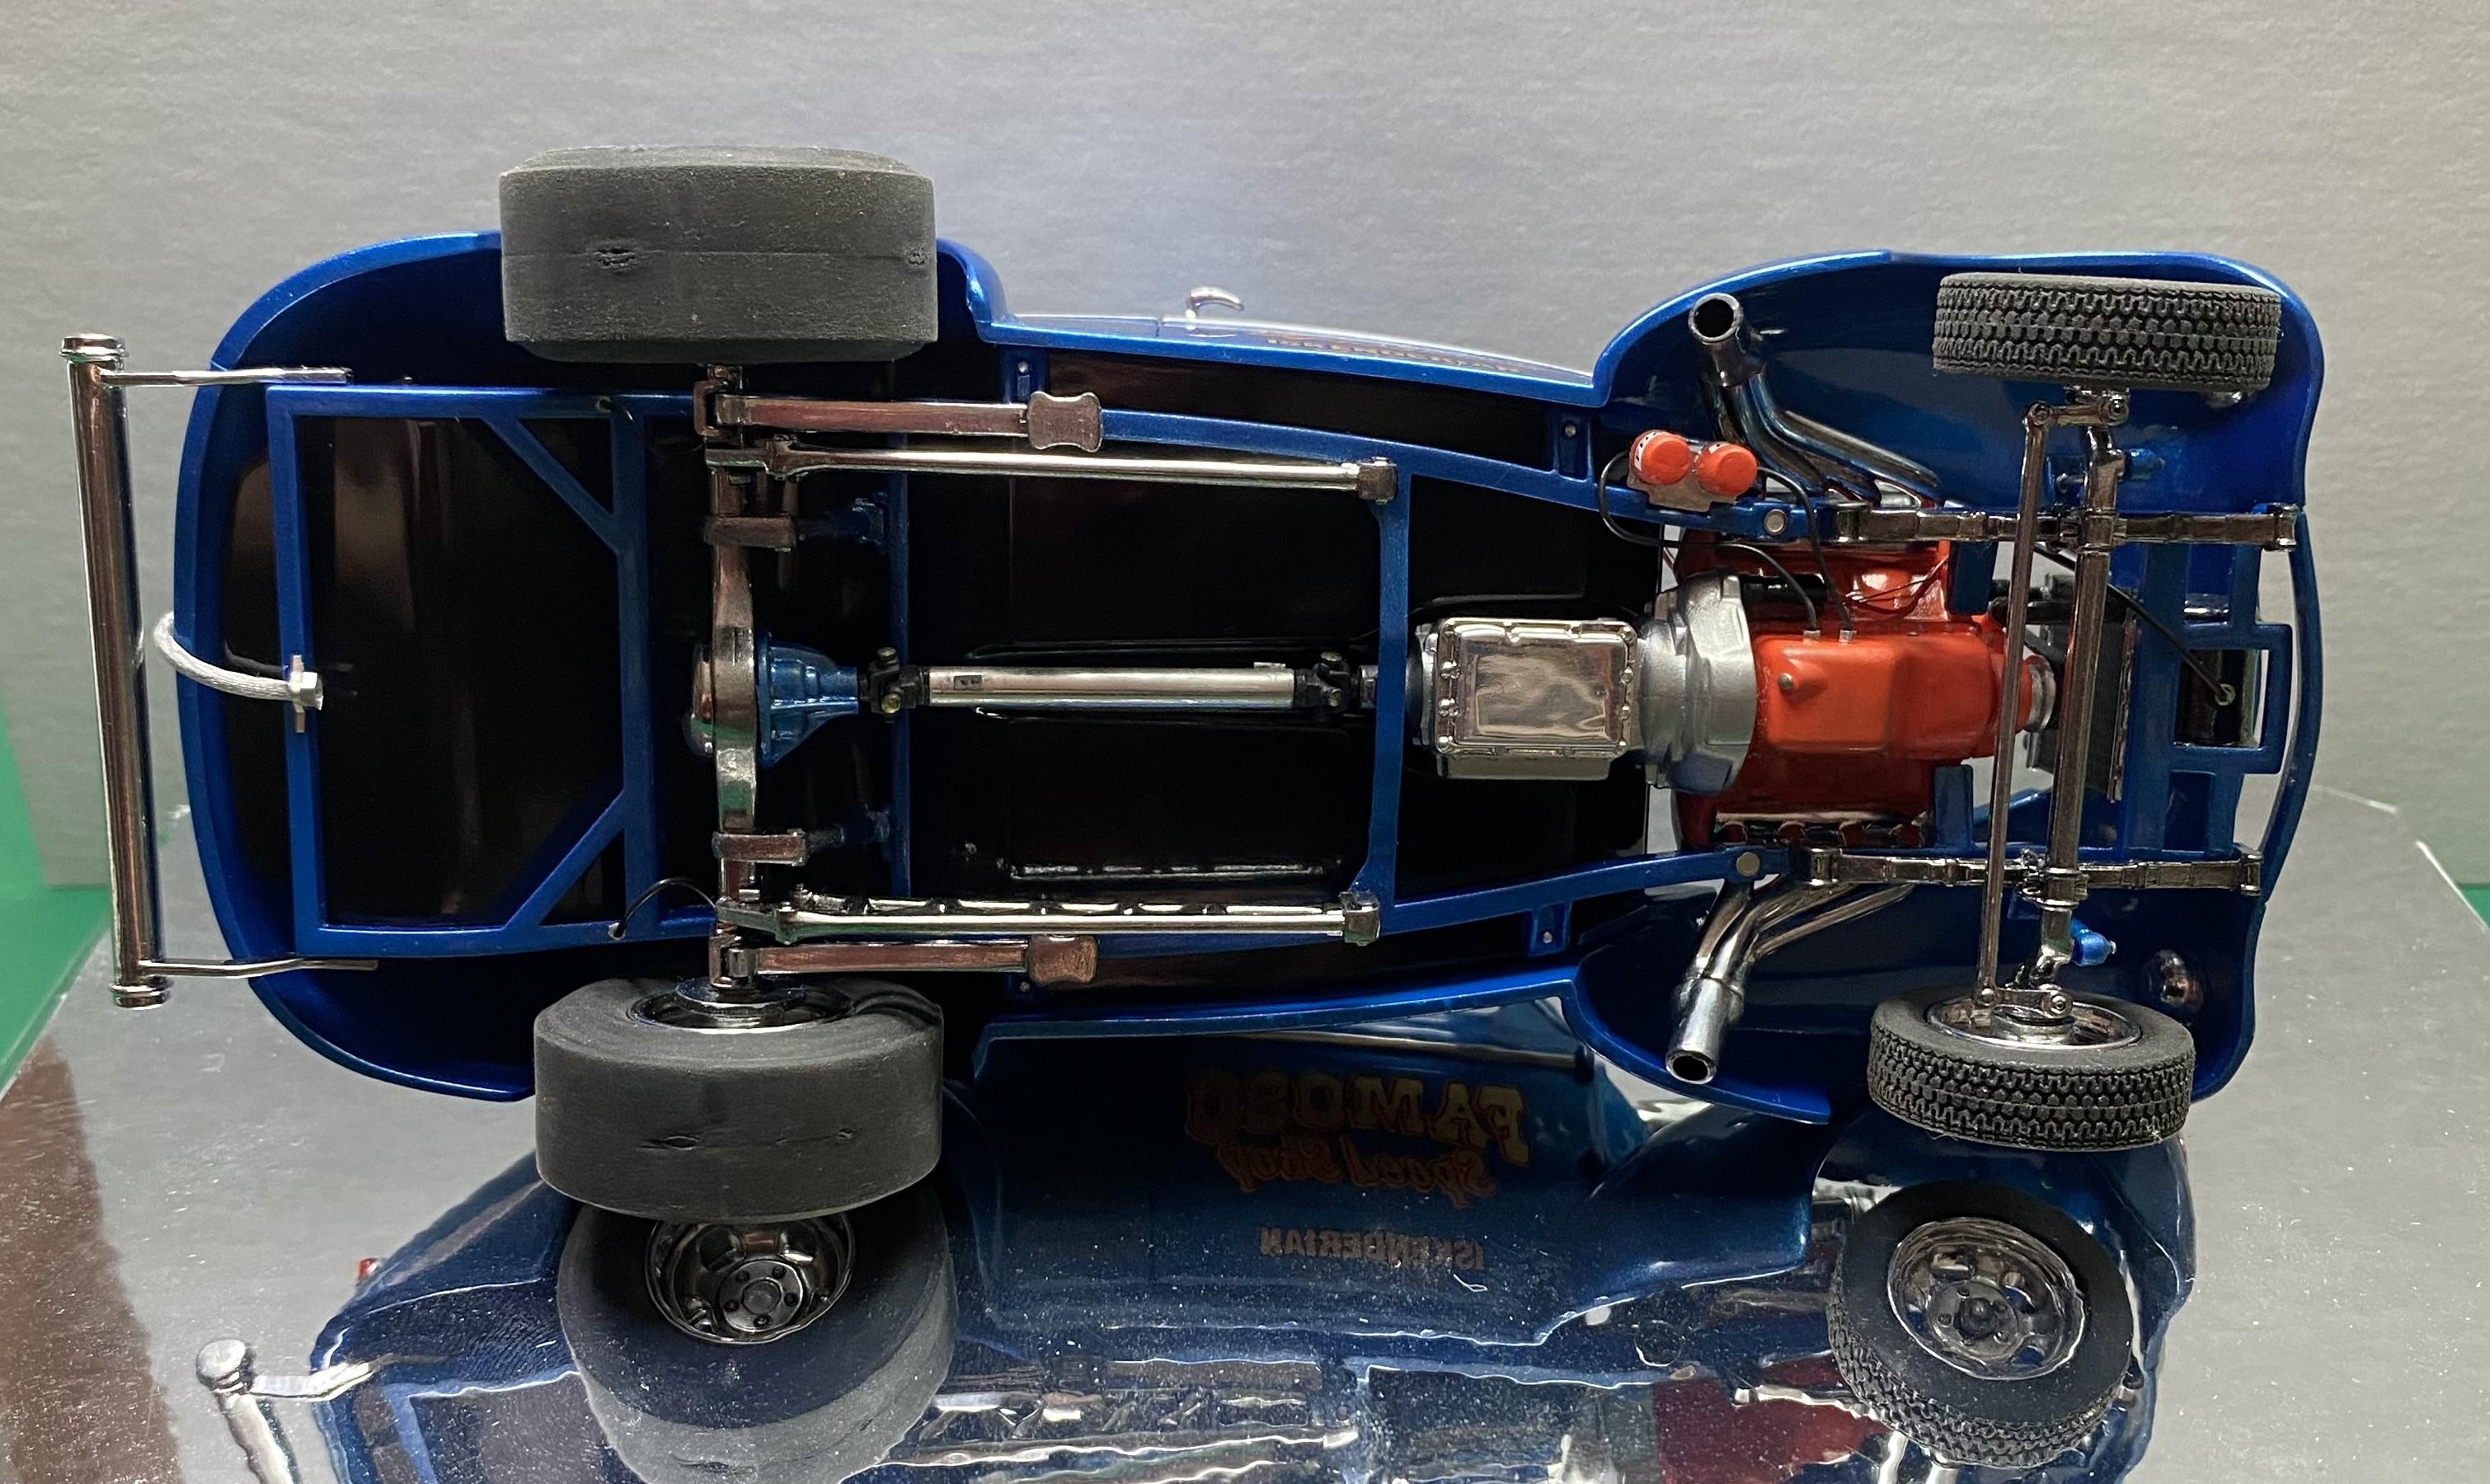
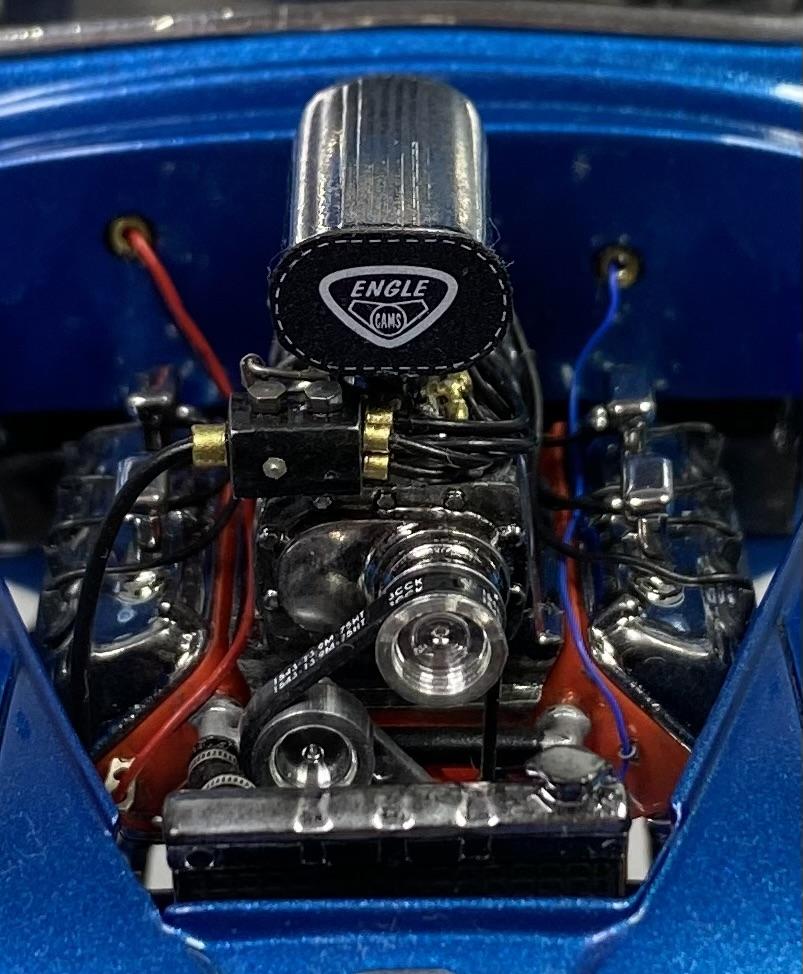
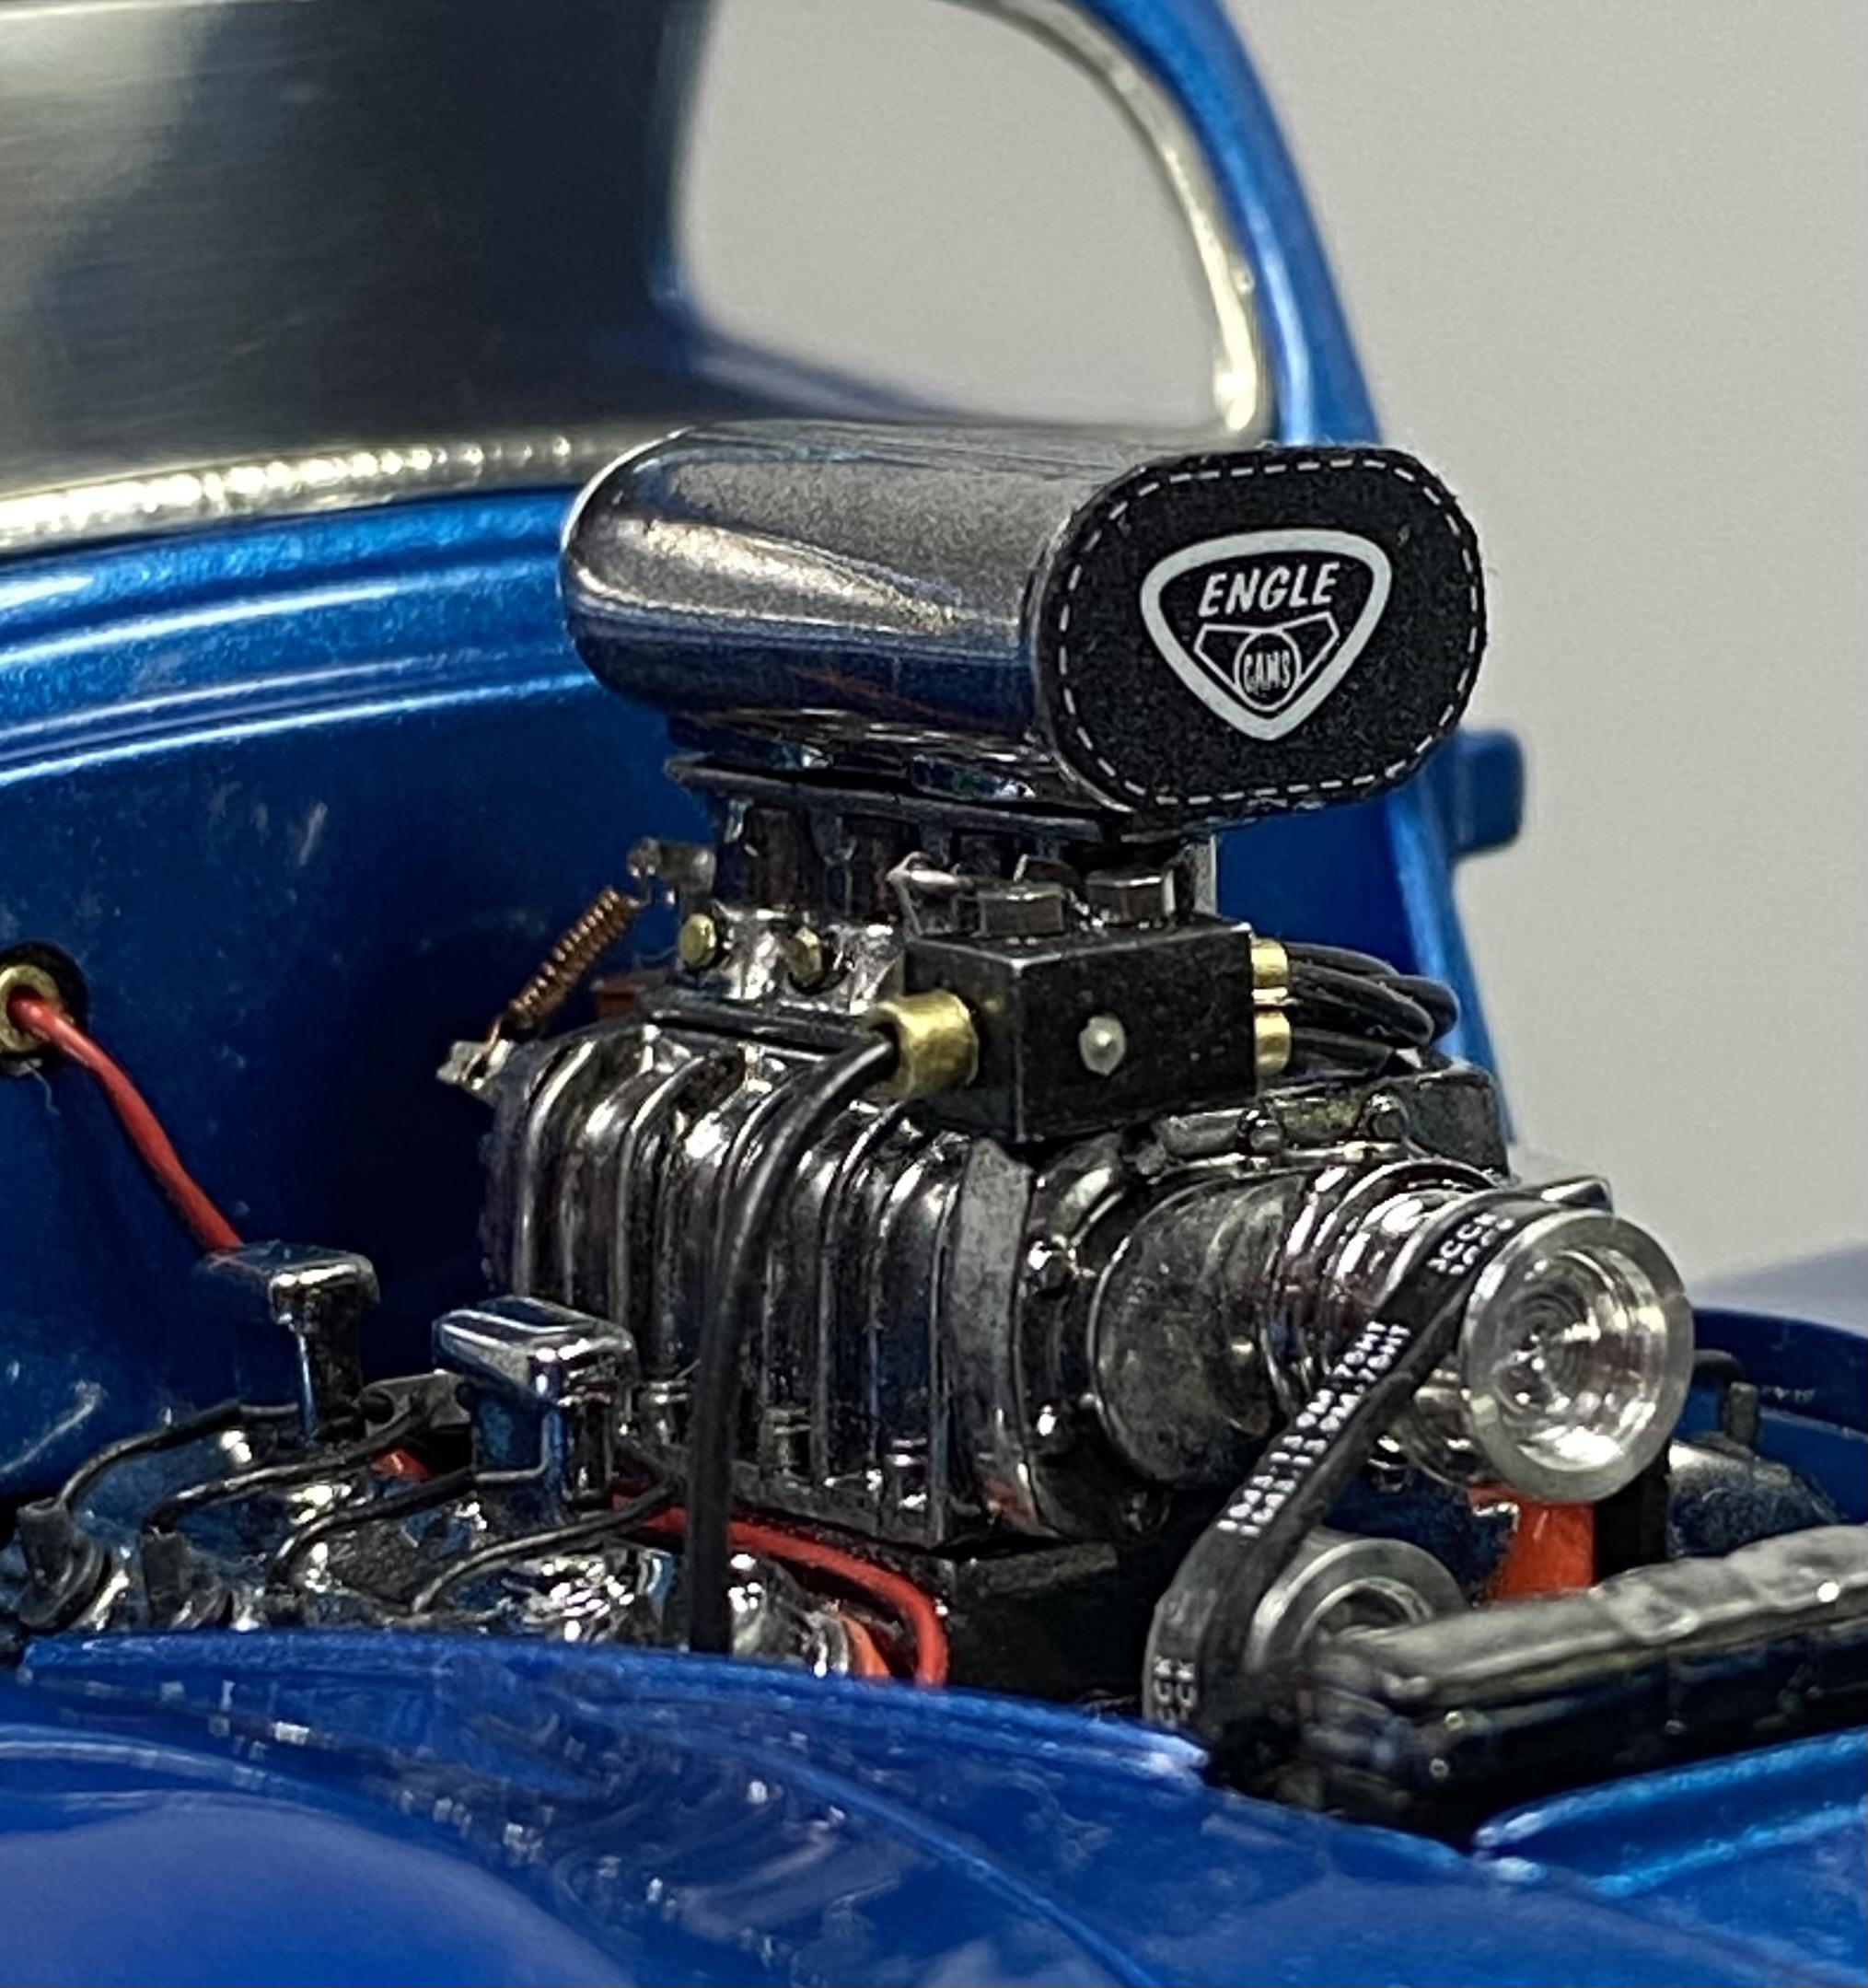
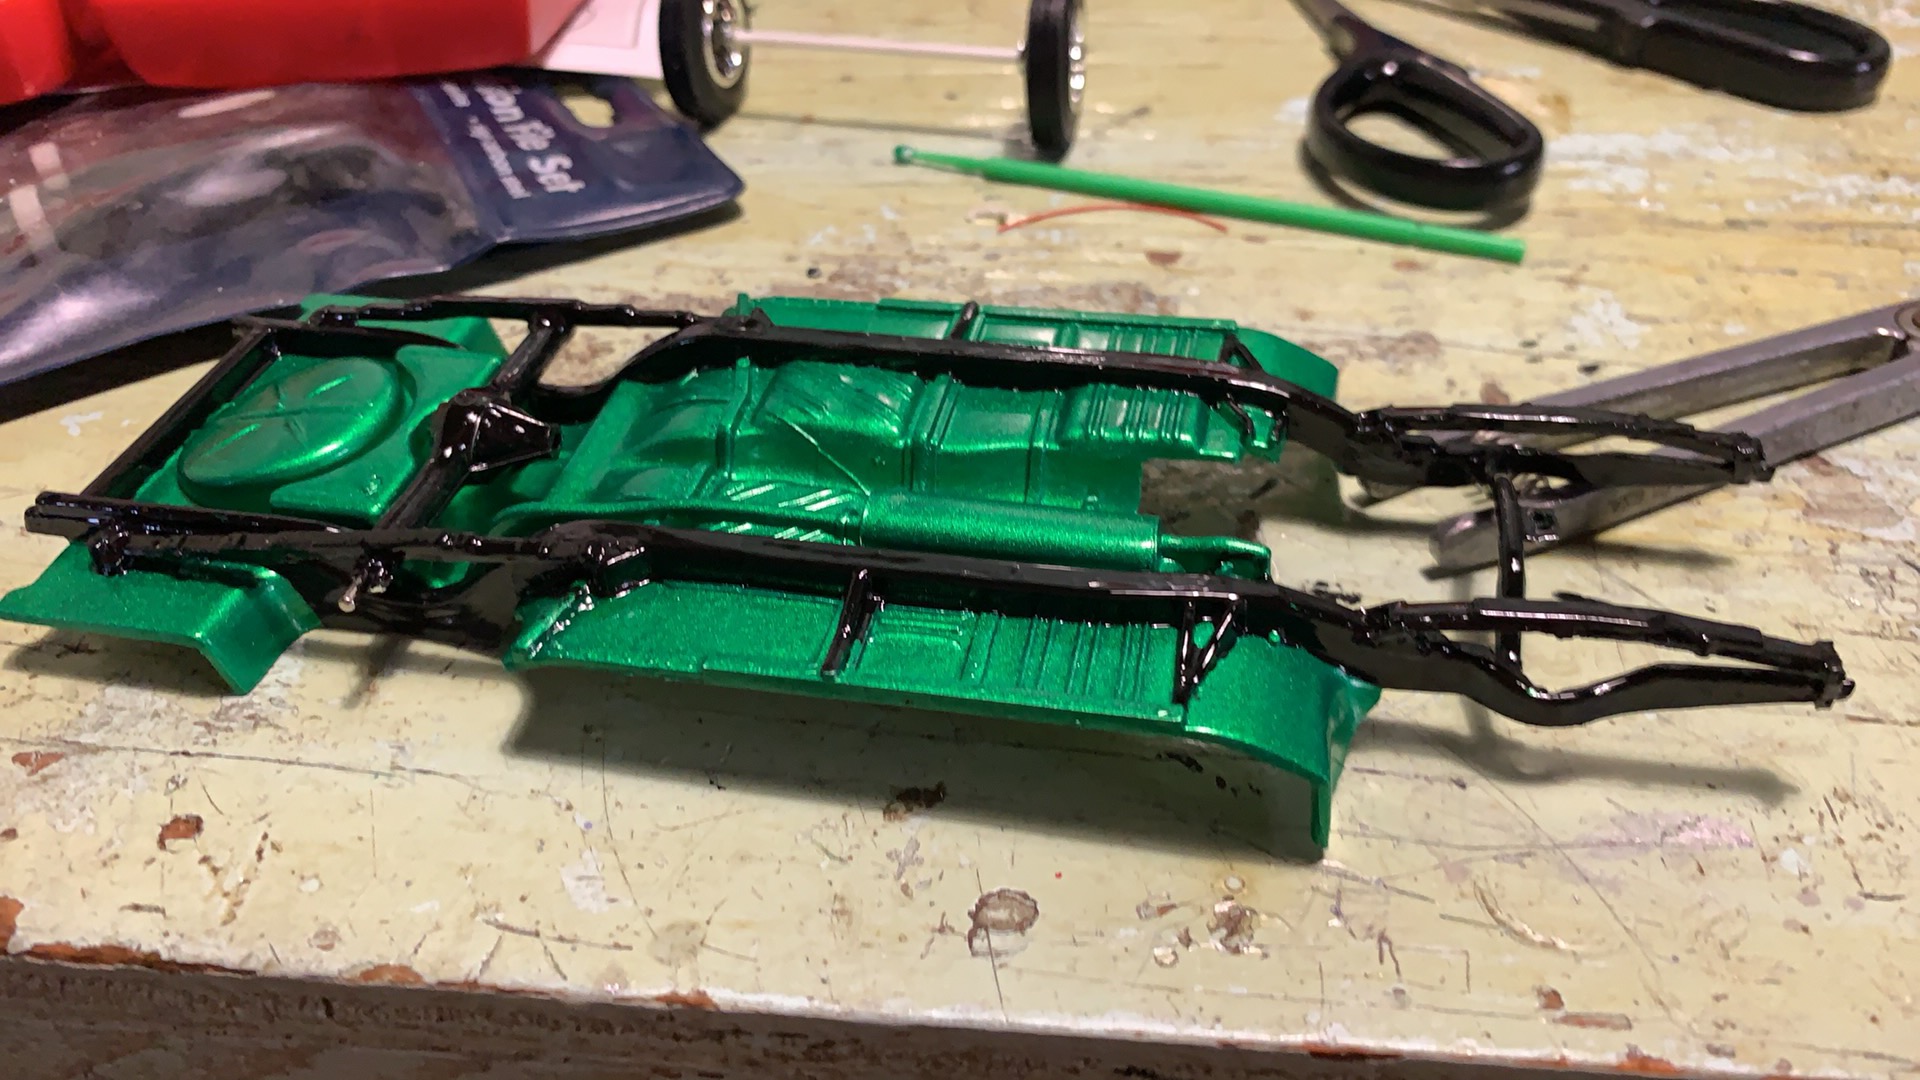
I actually started this one a few years back as a gasser coupe, based on Monogram's classic stock coupe kit.... Directions shifted a bit when I discovered one of Glen Ford's resin Vicky bodies on eBay... Even after that, it languished on the project shelf, until I saw Tim Boyd's awesome '30 coupe gasser in Model Cars Magazine #222... Then it was off to the (drag) races!!!! The Monogram kit chassis was beefed up with extra cross members, while suspension bits and rear differential were gathered from a deep dive through my parts bin... The supercharged small block Chevy power plant was sourced from Monogram's '55 Chevy Gasser kit (formerly the BadMan) Body mods included removal of the running boards and hood sides.... Firewall was tunneled for engine clearance.... I also modified the top insert on the resin body, to more closely mirror the insert on an actual '30 Vicky... Though you can't really see it, I pieced together a somewhat suitable interior from the stock Model A and various parts bin bits.... Paint is Tamiya PS-17 Metallic Green, over Tamiya white primer, and was cleared using Dupli-Color 1K.... Decals are from various Slixx sheets... For better or worse, this makes two finished this year.... Double of what I'd accomplished the previous two years combined.... And it's only mid-April!!!! 😉

-
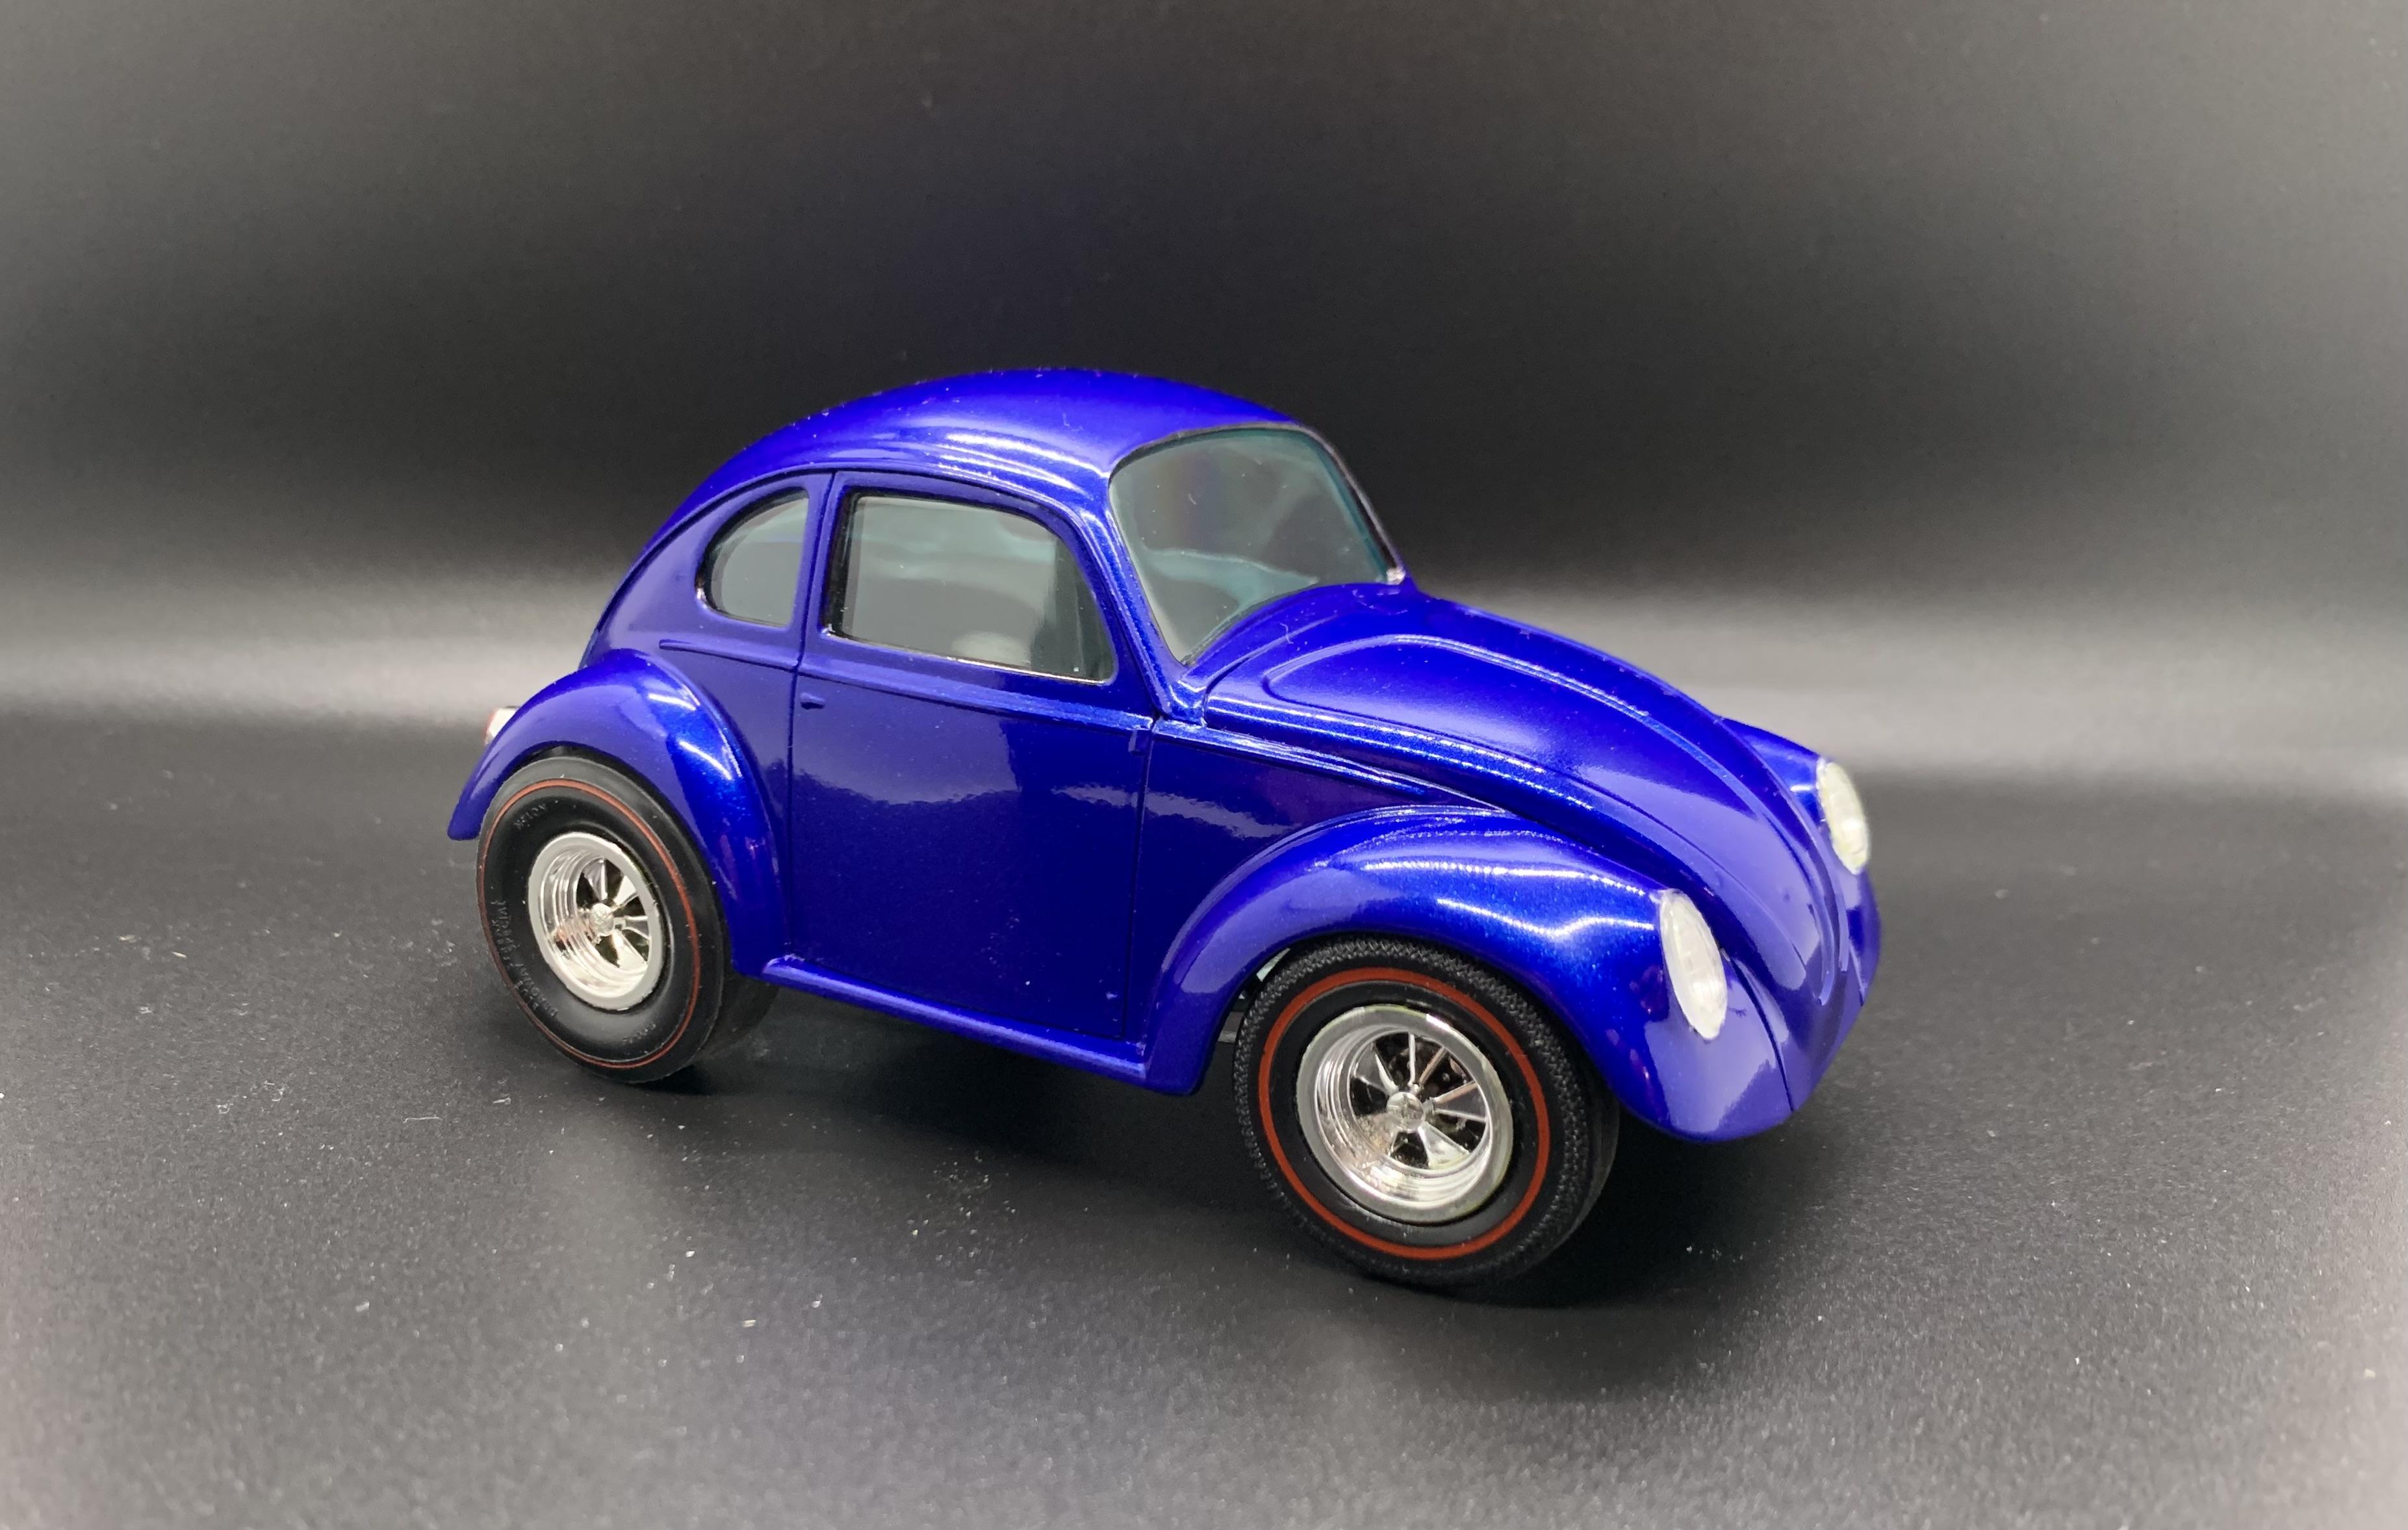
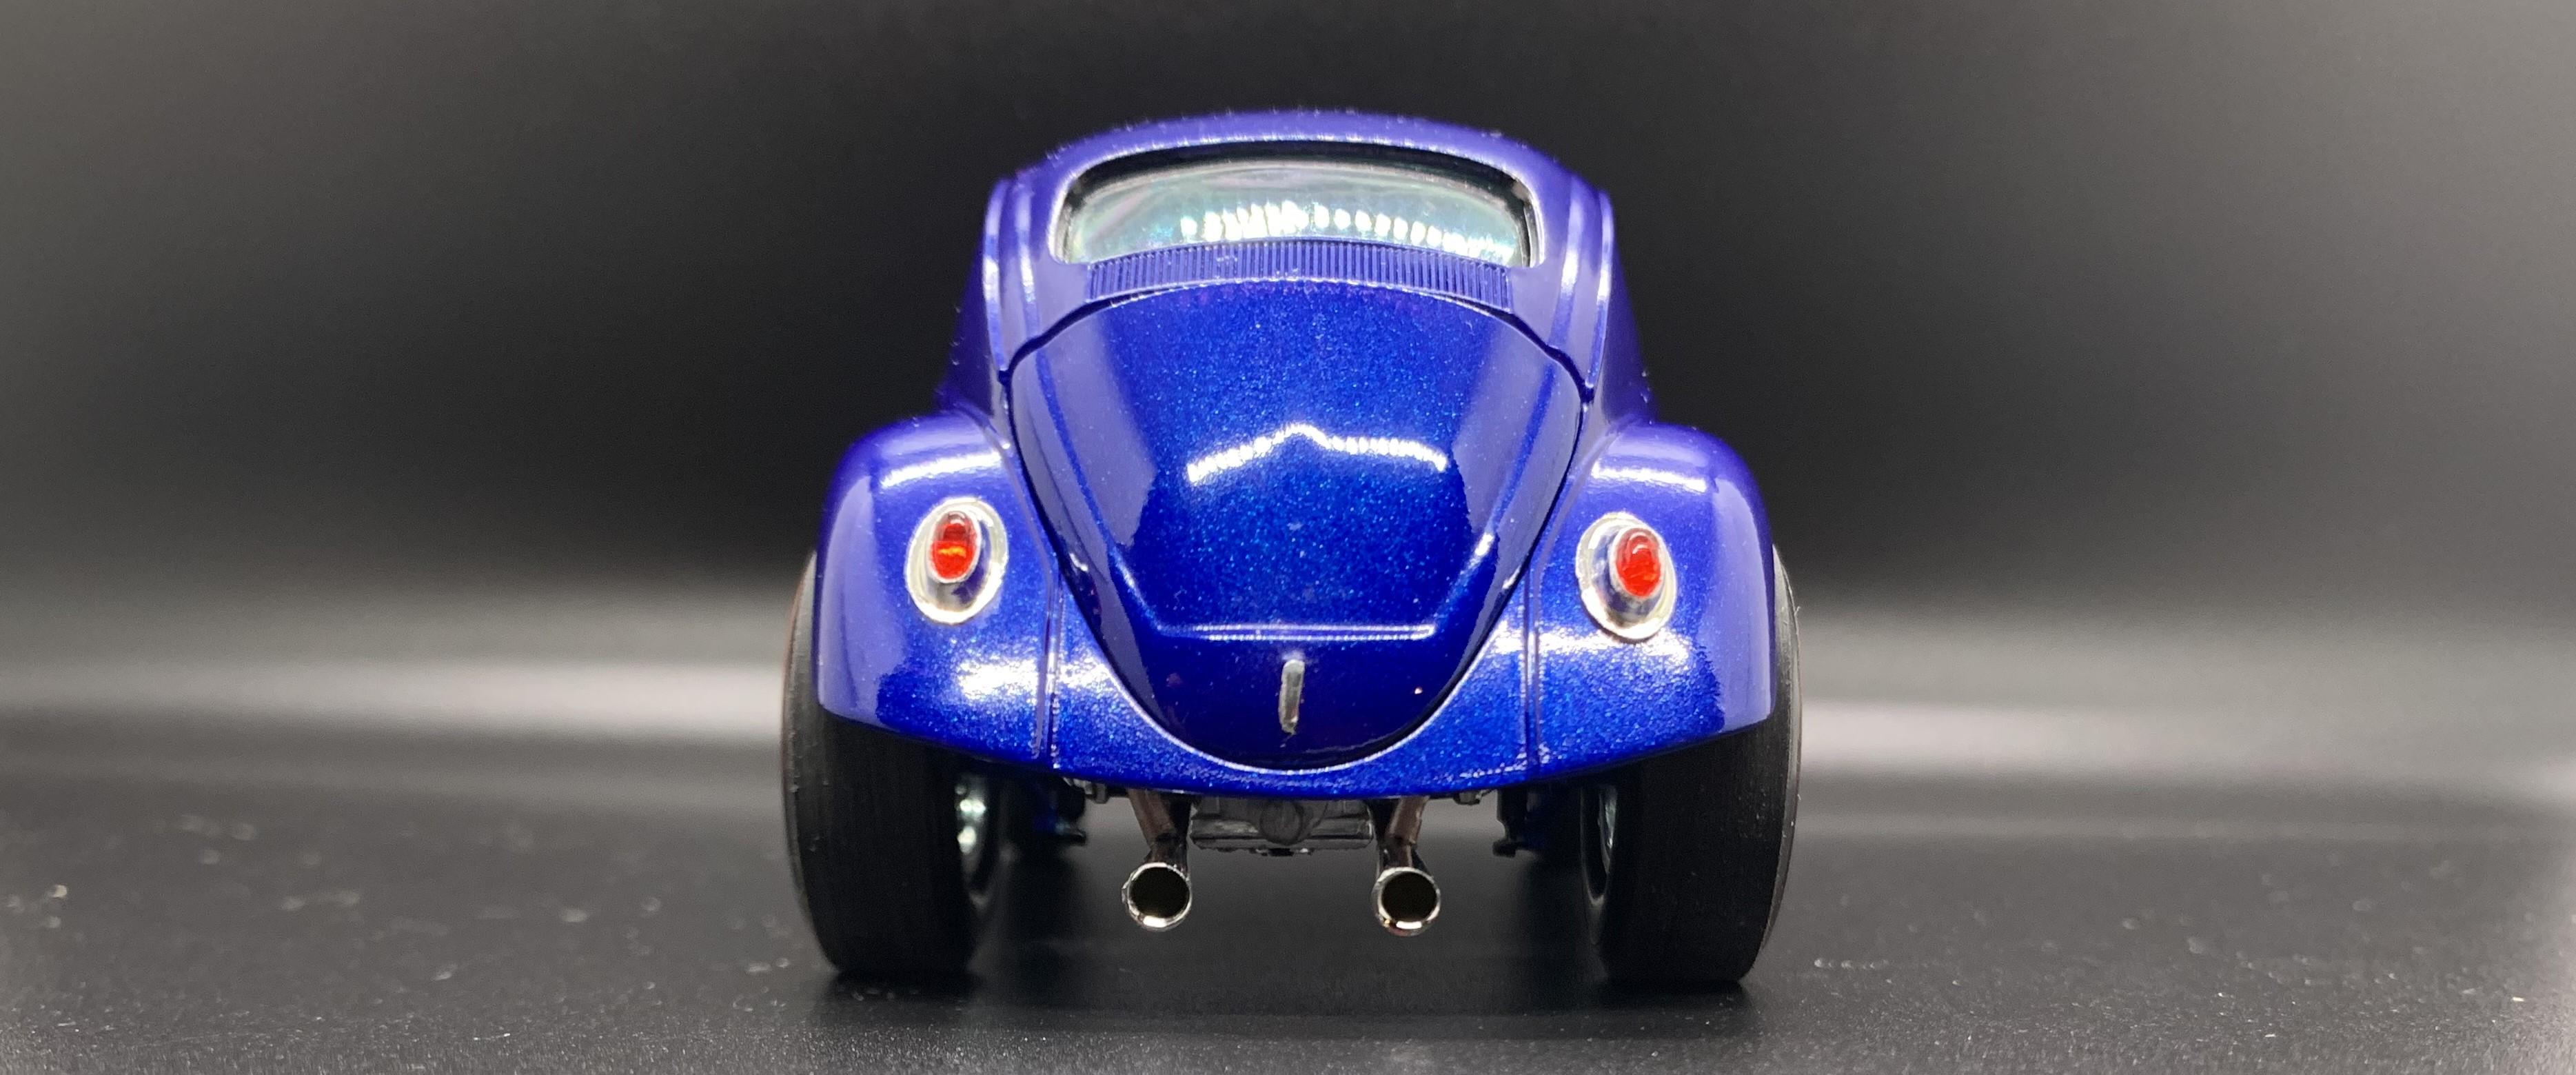
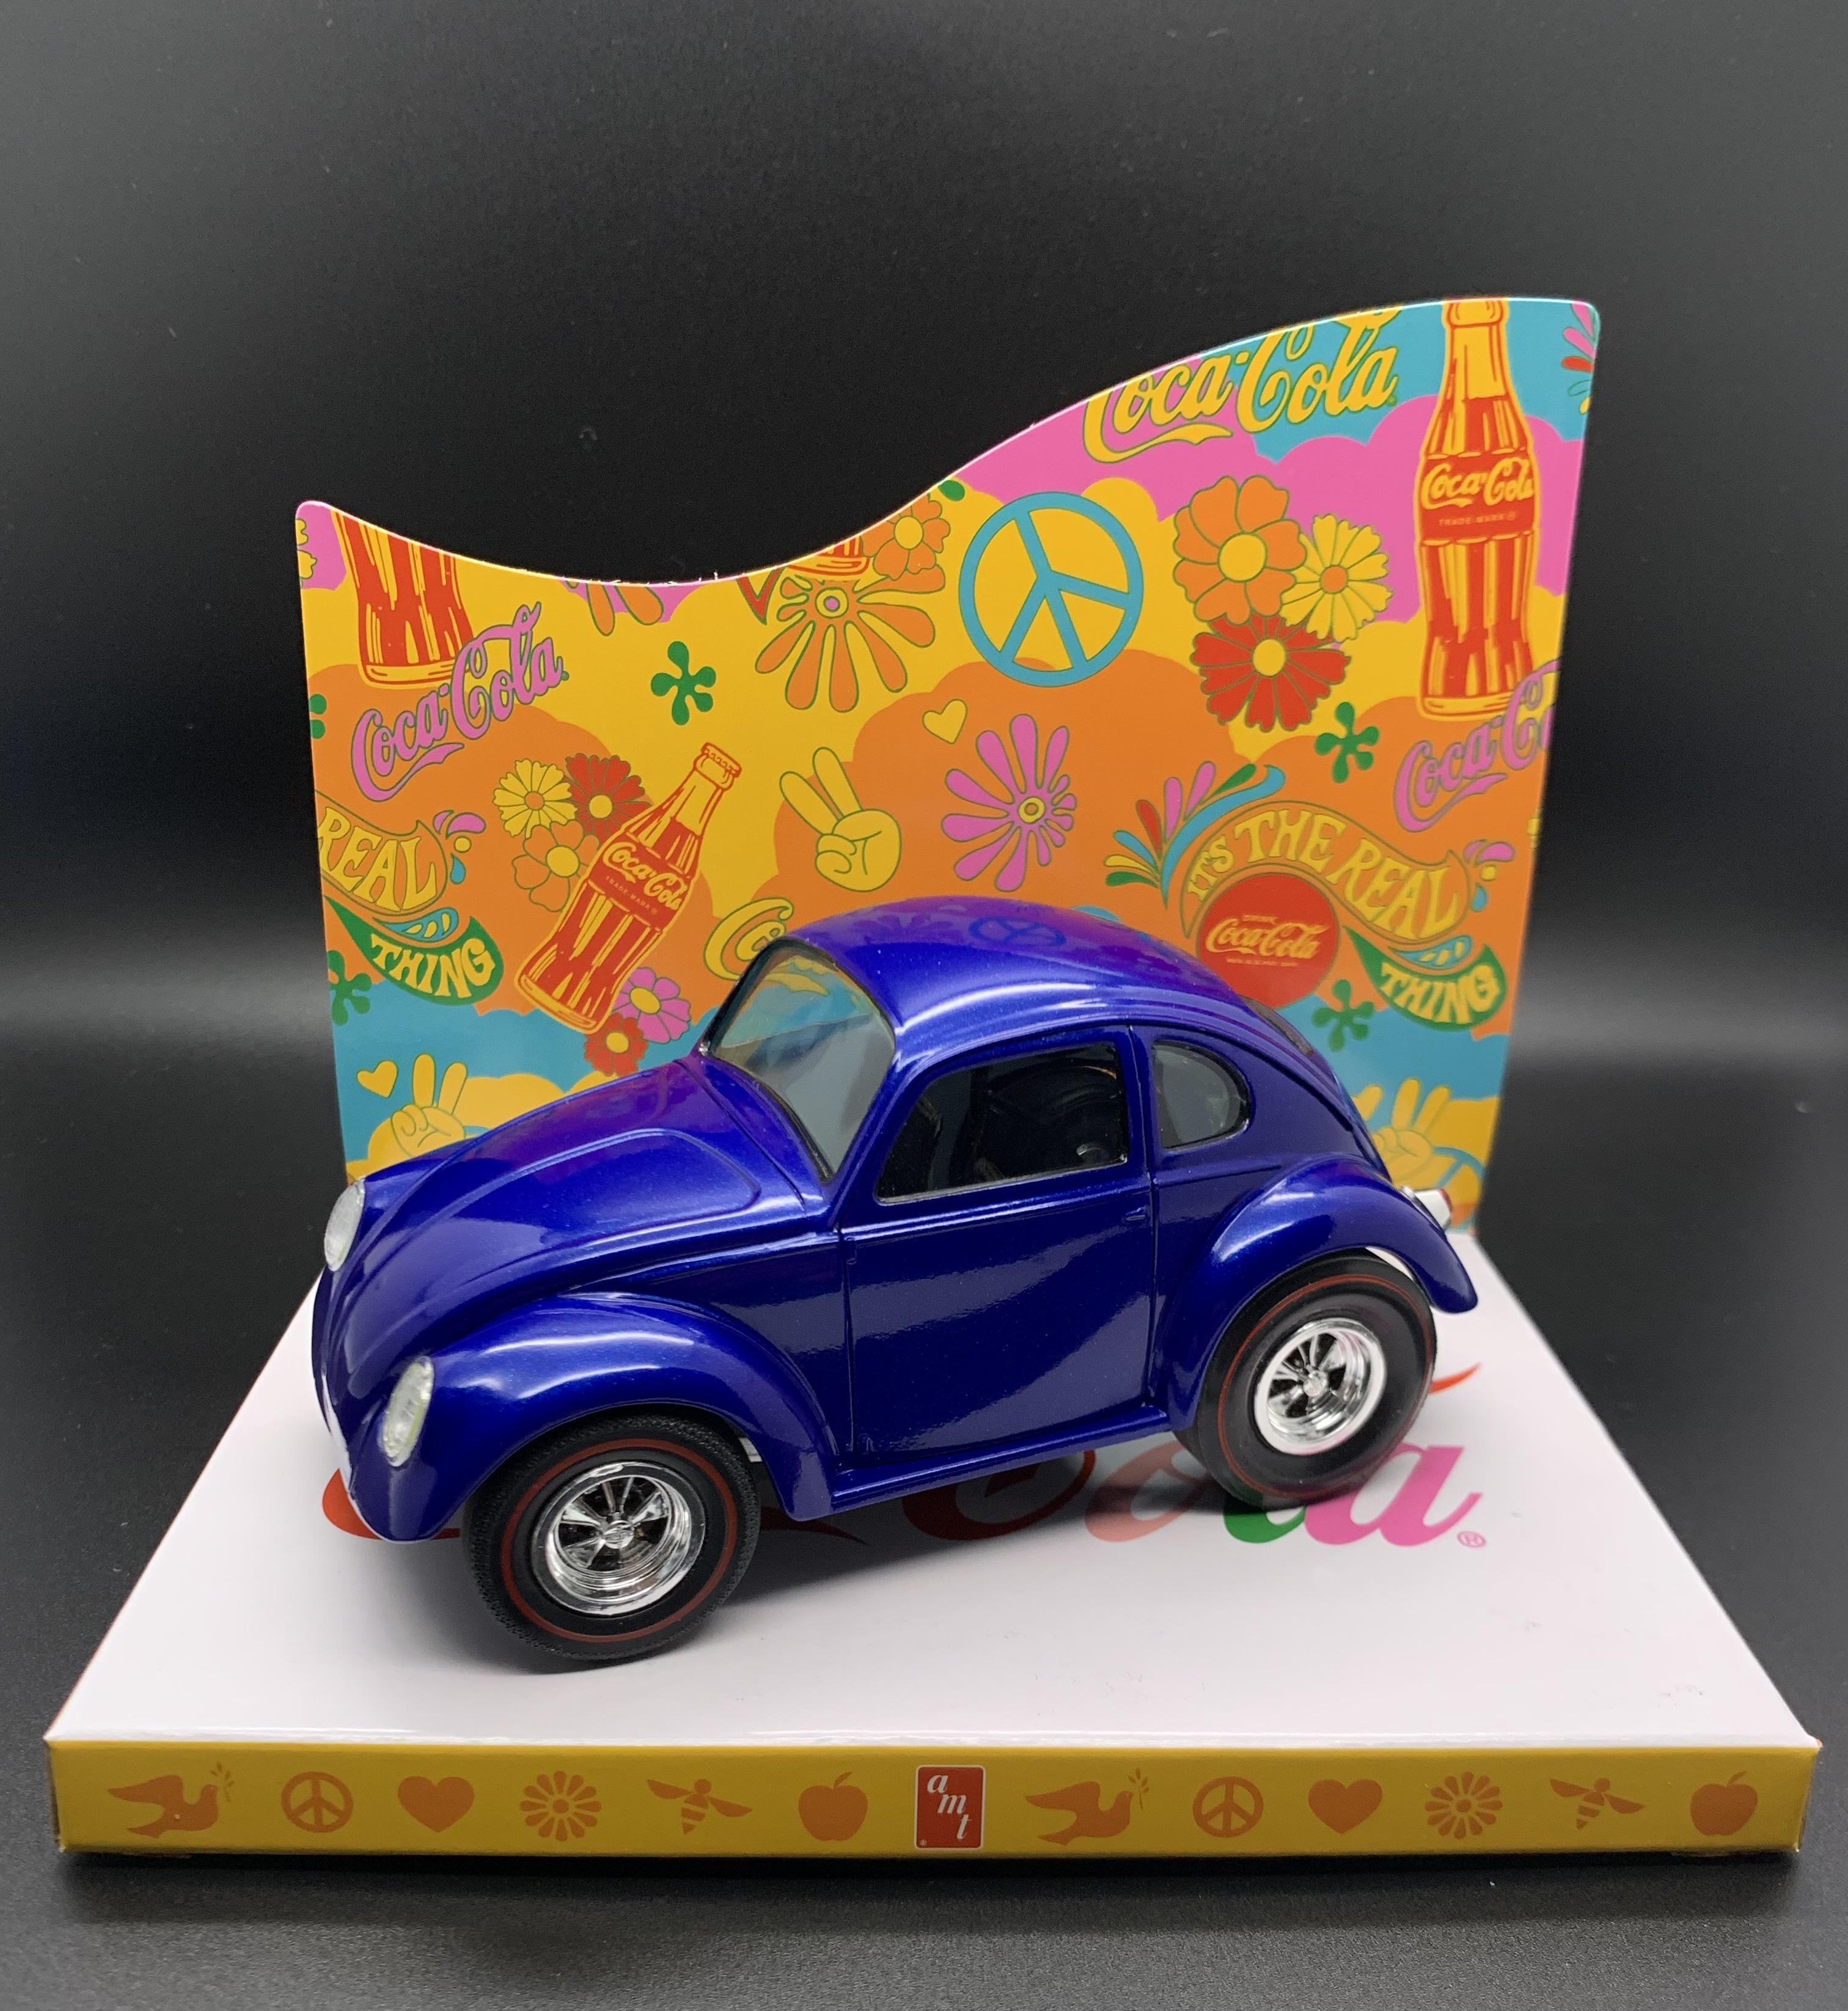
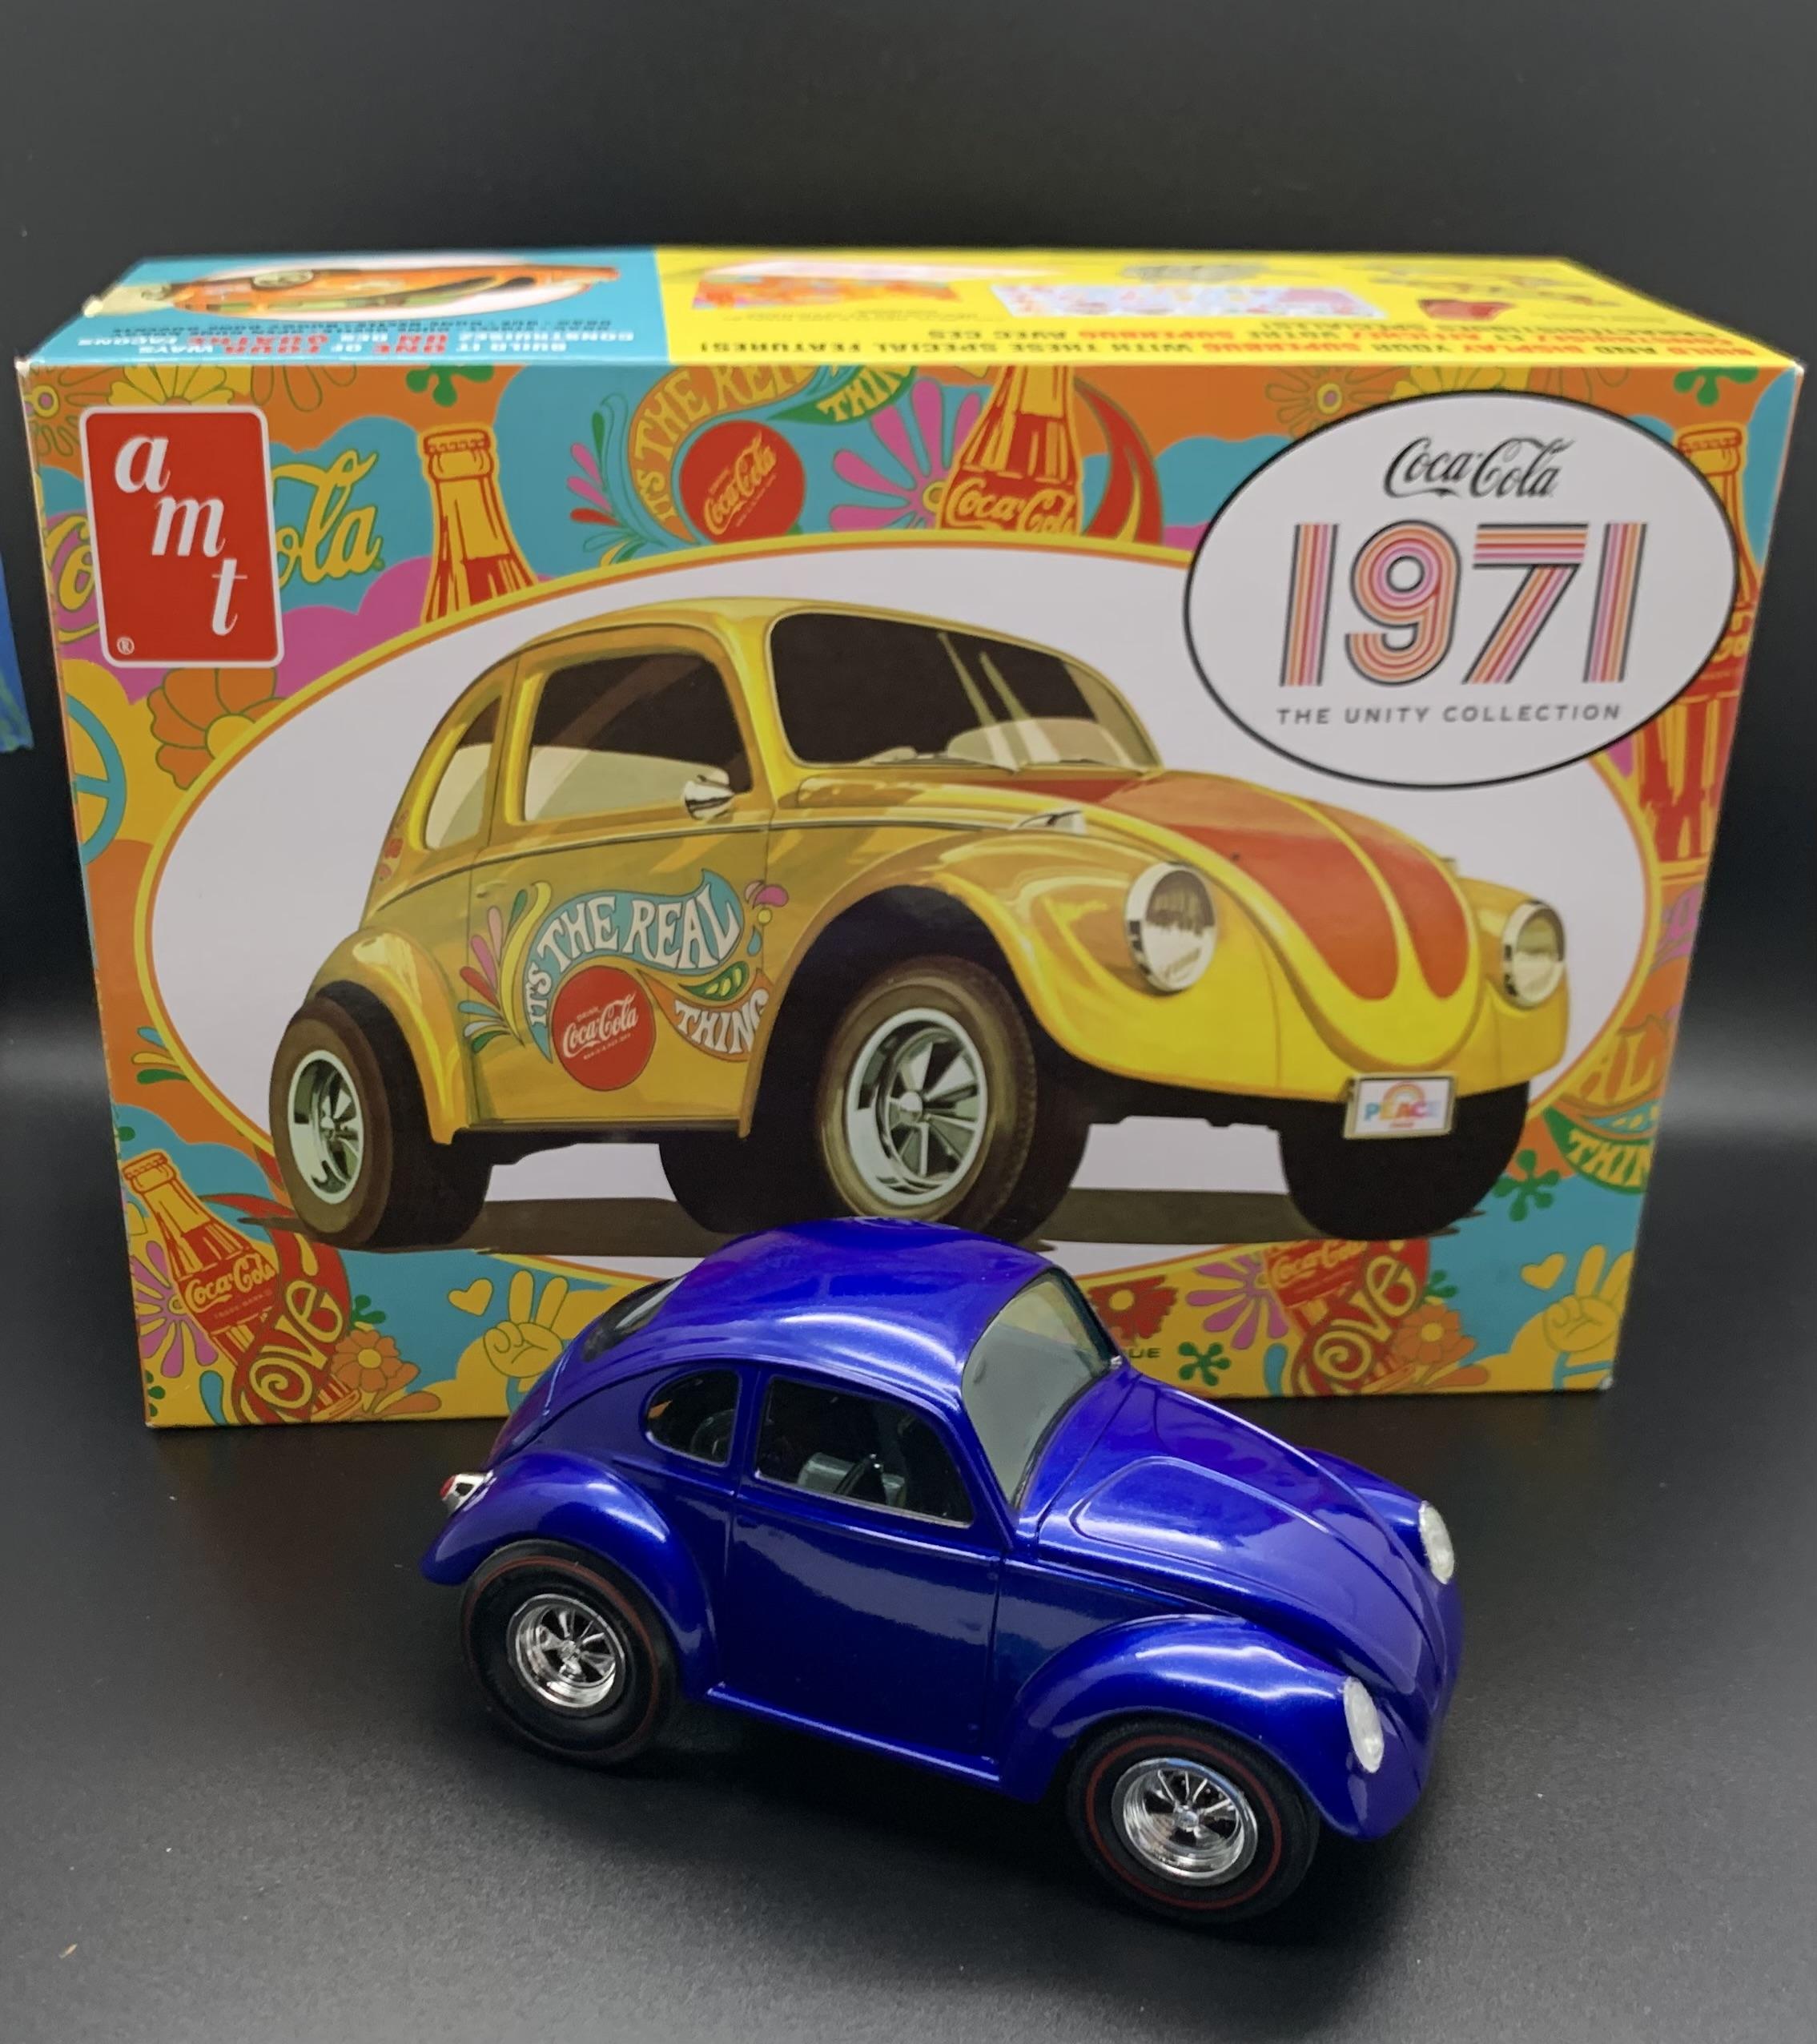
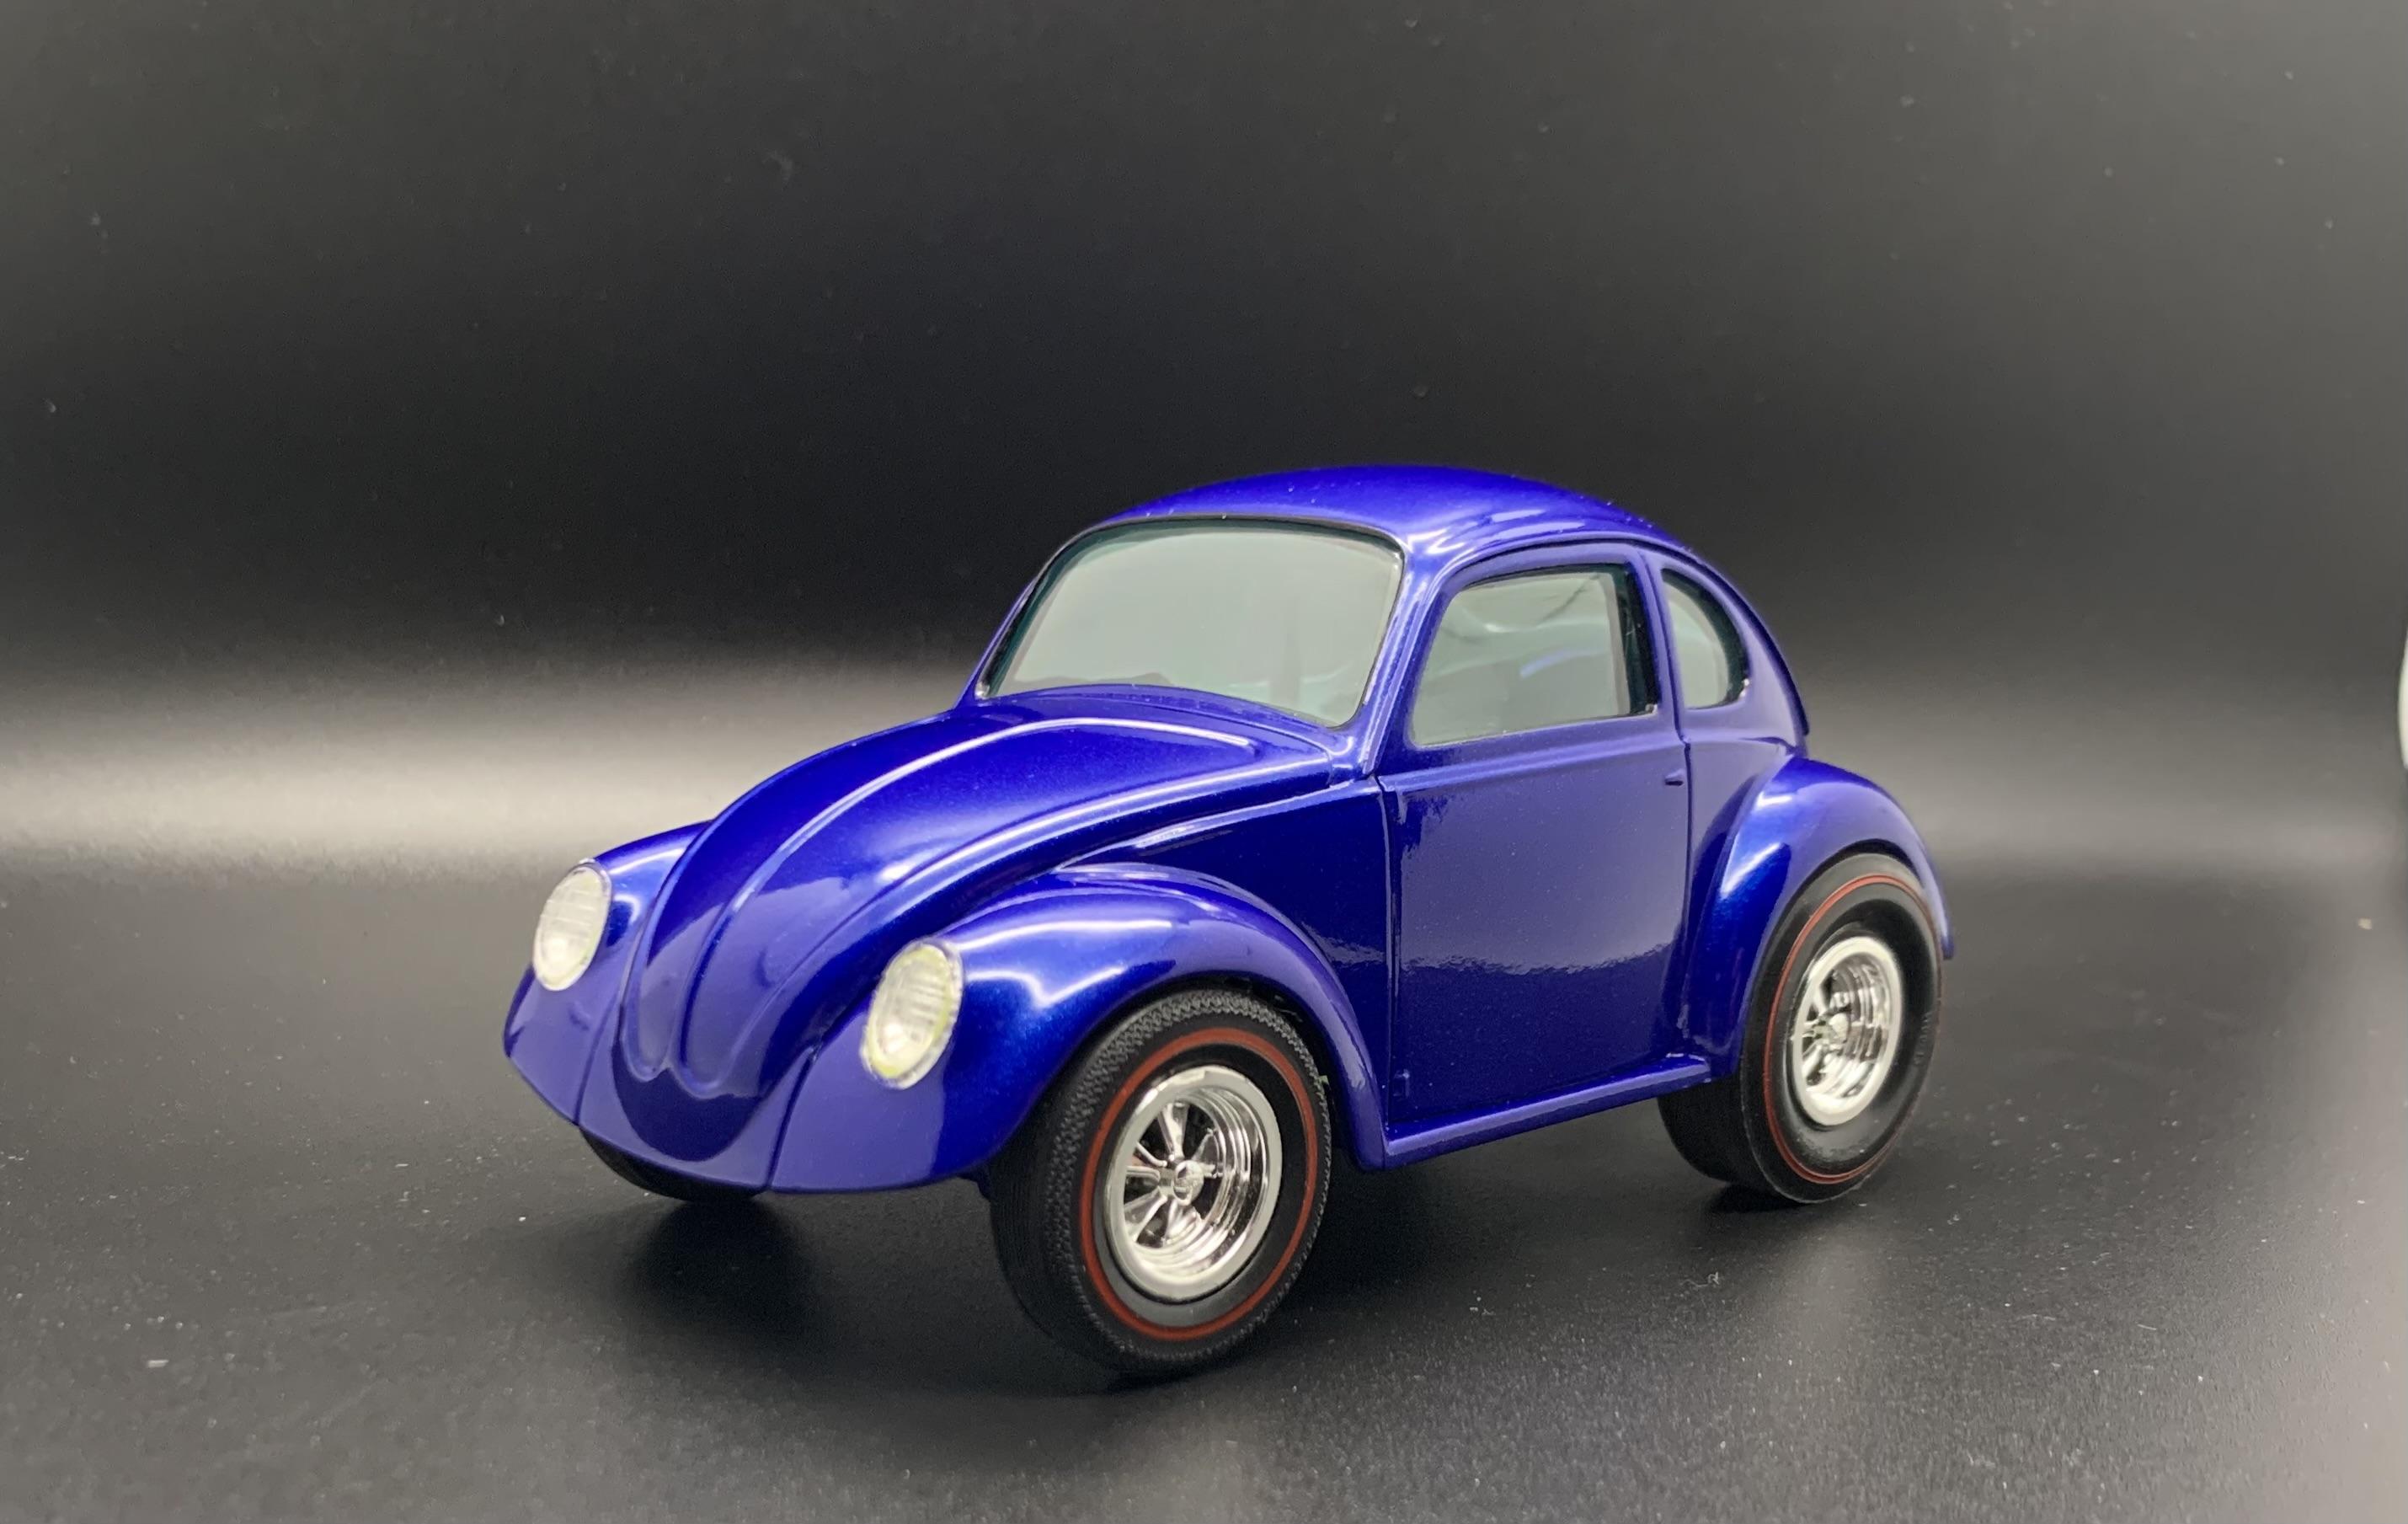
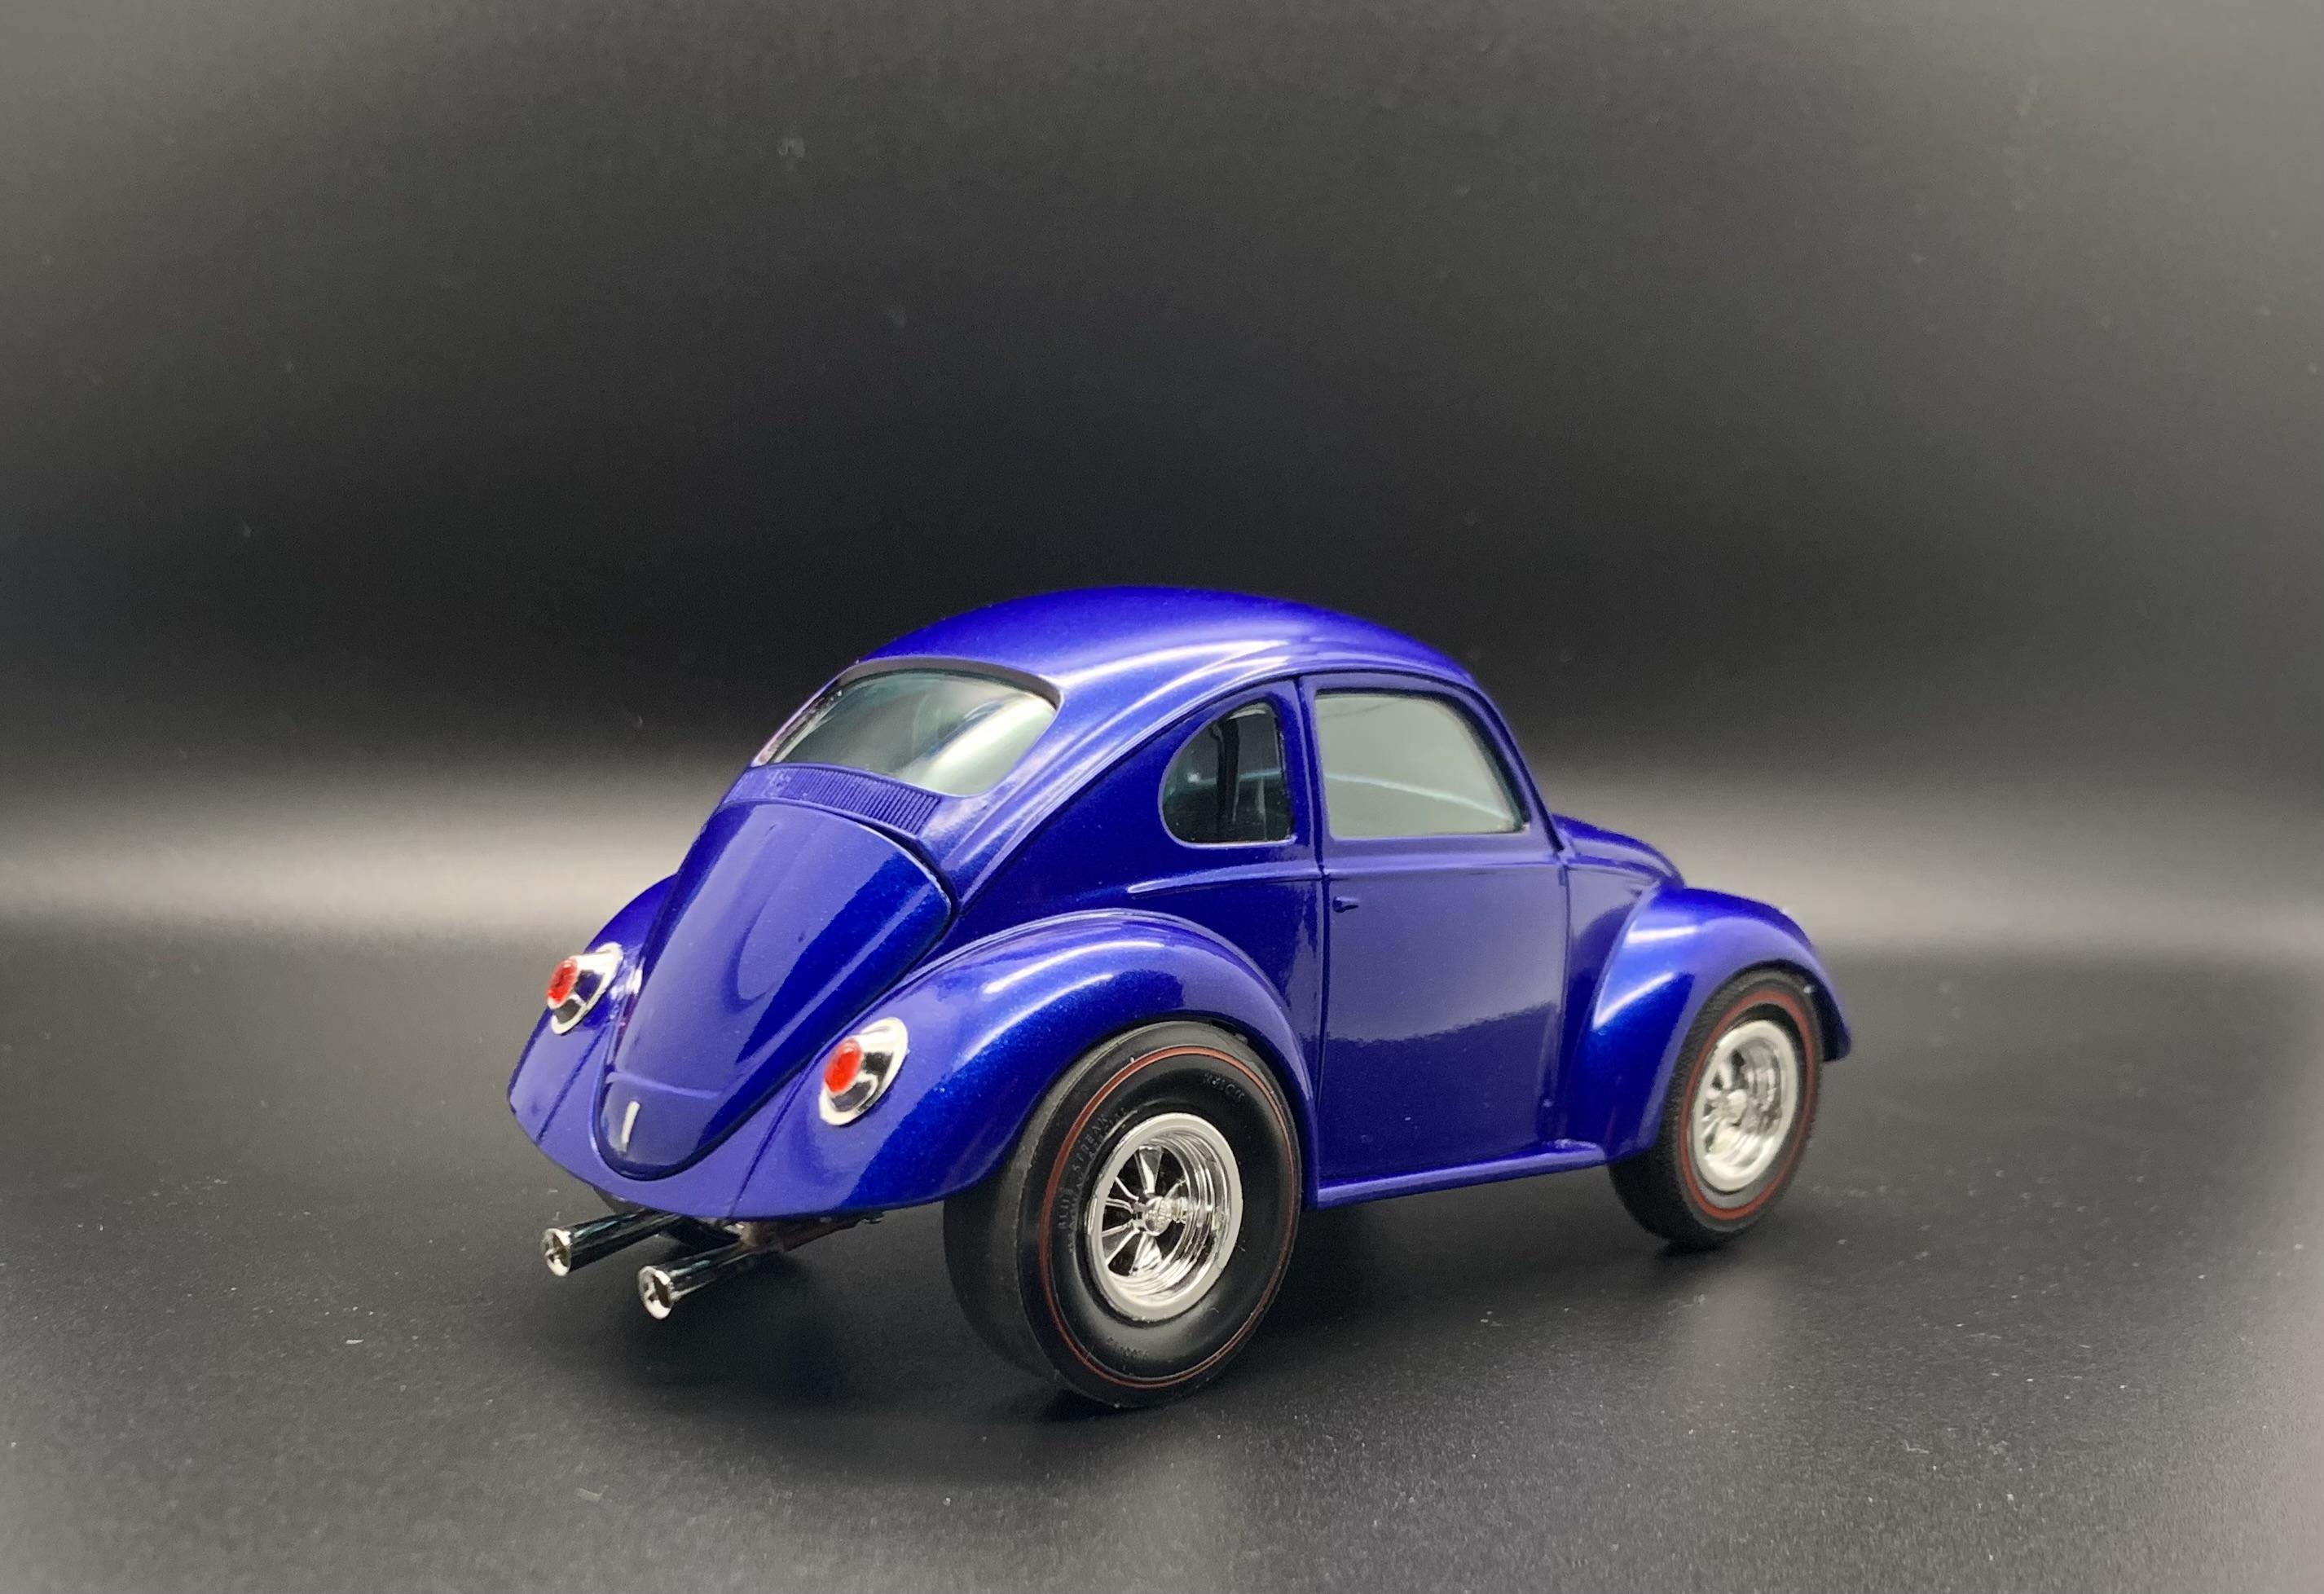
I finished this one a little over a week ago, but I was waiting for my new light box to arrive. Then I picked up a wicked head cold, so it had to wait another week to be revealed. This is the AMT 1971 Superbug Gasser, from the Coca-Cola Unity Collection. I picked this kit up for $5, thinking it would be cool to have a Beetle in the stash. I didn't realize it was the short-body version, so upon opening the box and seeing the body, my first thought was "this will never get built". But as luck would have it, last summer was spent learning to paint. For a fiver, I figured it would be a practice body, and that would be the end of it. As I was really just using it for practice, it got painted and stripped something like 3-4 times before getting it right. But the final paint job turned out to be one of my better attempts. This inspired me to continue on and finish the little bug. Speaking of paint, the color is Testors Extreme Lacquer Star Spangled Blue, straight from the can, followed up with clear lacquer (I forget the brand). The idea for the build was to create a tribute to one of my favorite old red-line Hot Wheels cars. Most of the kit was built straight from the box, but a few modifications were made for various reasons. The hydraulic steering damper was reworked, because the original part feels like it's not even from the same kit. Doesn't even come close to fitting properly. Battery cables were added just for fun and because I'd never done it before. Also, the exhaust was completely reworked. The kit supplies two exhaust options, neither one of which did much for me. Finally, if built straight out of the box, the engine cover won't close. Instructions even tell you to glue it open. I couldn't live with that, so the engine was moved inward and modified. For those that are interested in the build, the WIP can be found here: Without further ado, here's my take on the AMT '71 Superbug Gasser. As always, questions, comment, and constructive criticism are always welcome. Thanks for looking!
-
I’ve decided I will build a Monaro gasser and use the moebius 65 nova gasser as a donor kit I ordered this morning a hk Monaro Body but I already gave the colour picked out as well it’s SMS paints apple green pearl but here it is on my 62 poncho but I know what your thinking a hk Monaro gasser why? Because I can
-
Here’s my revell 150 gasser the wip on it is on britmodeller and I hope you enjoy it and here it is displayed next to my 67 vette Regards Brock
-
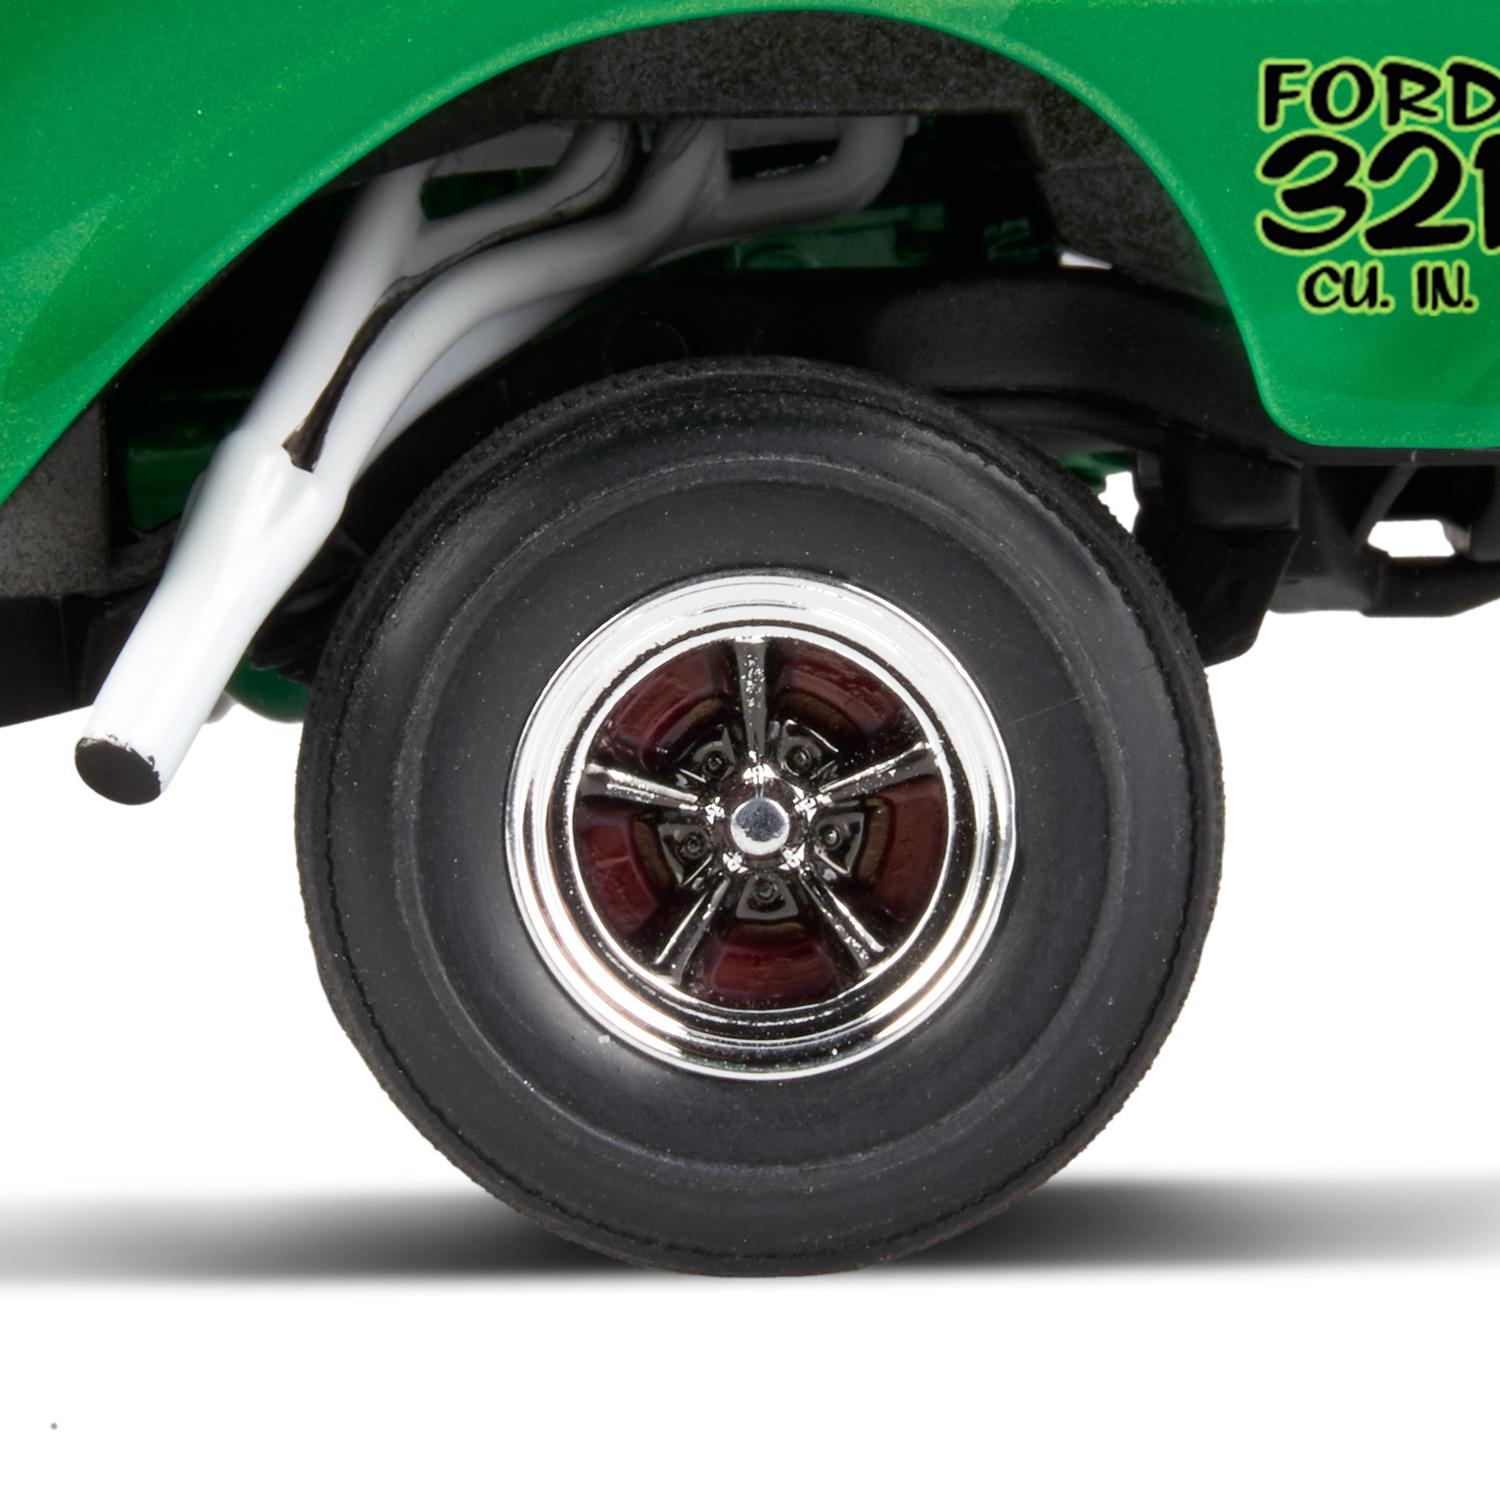
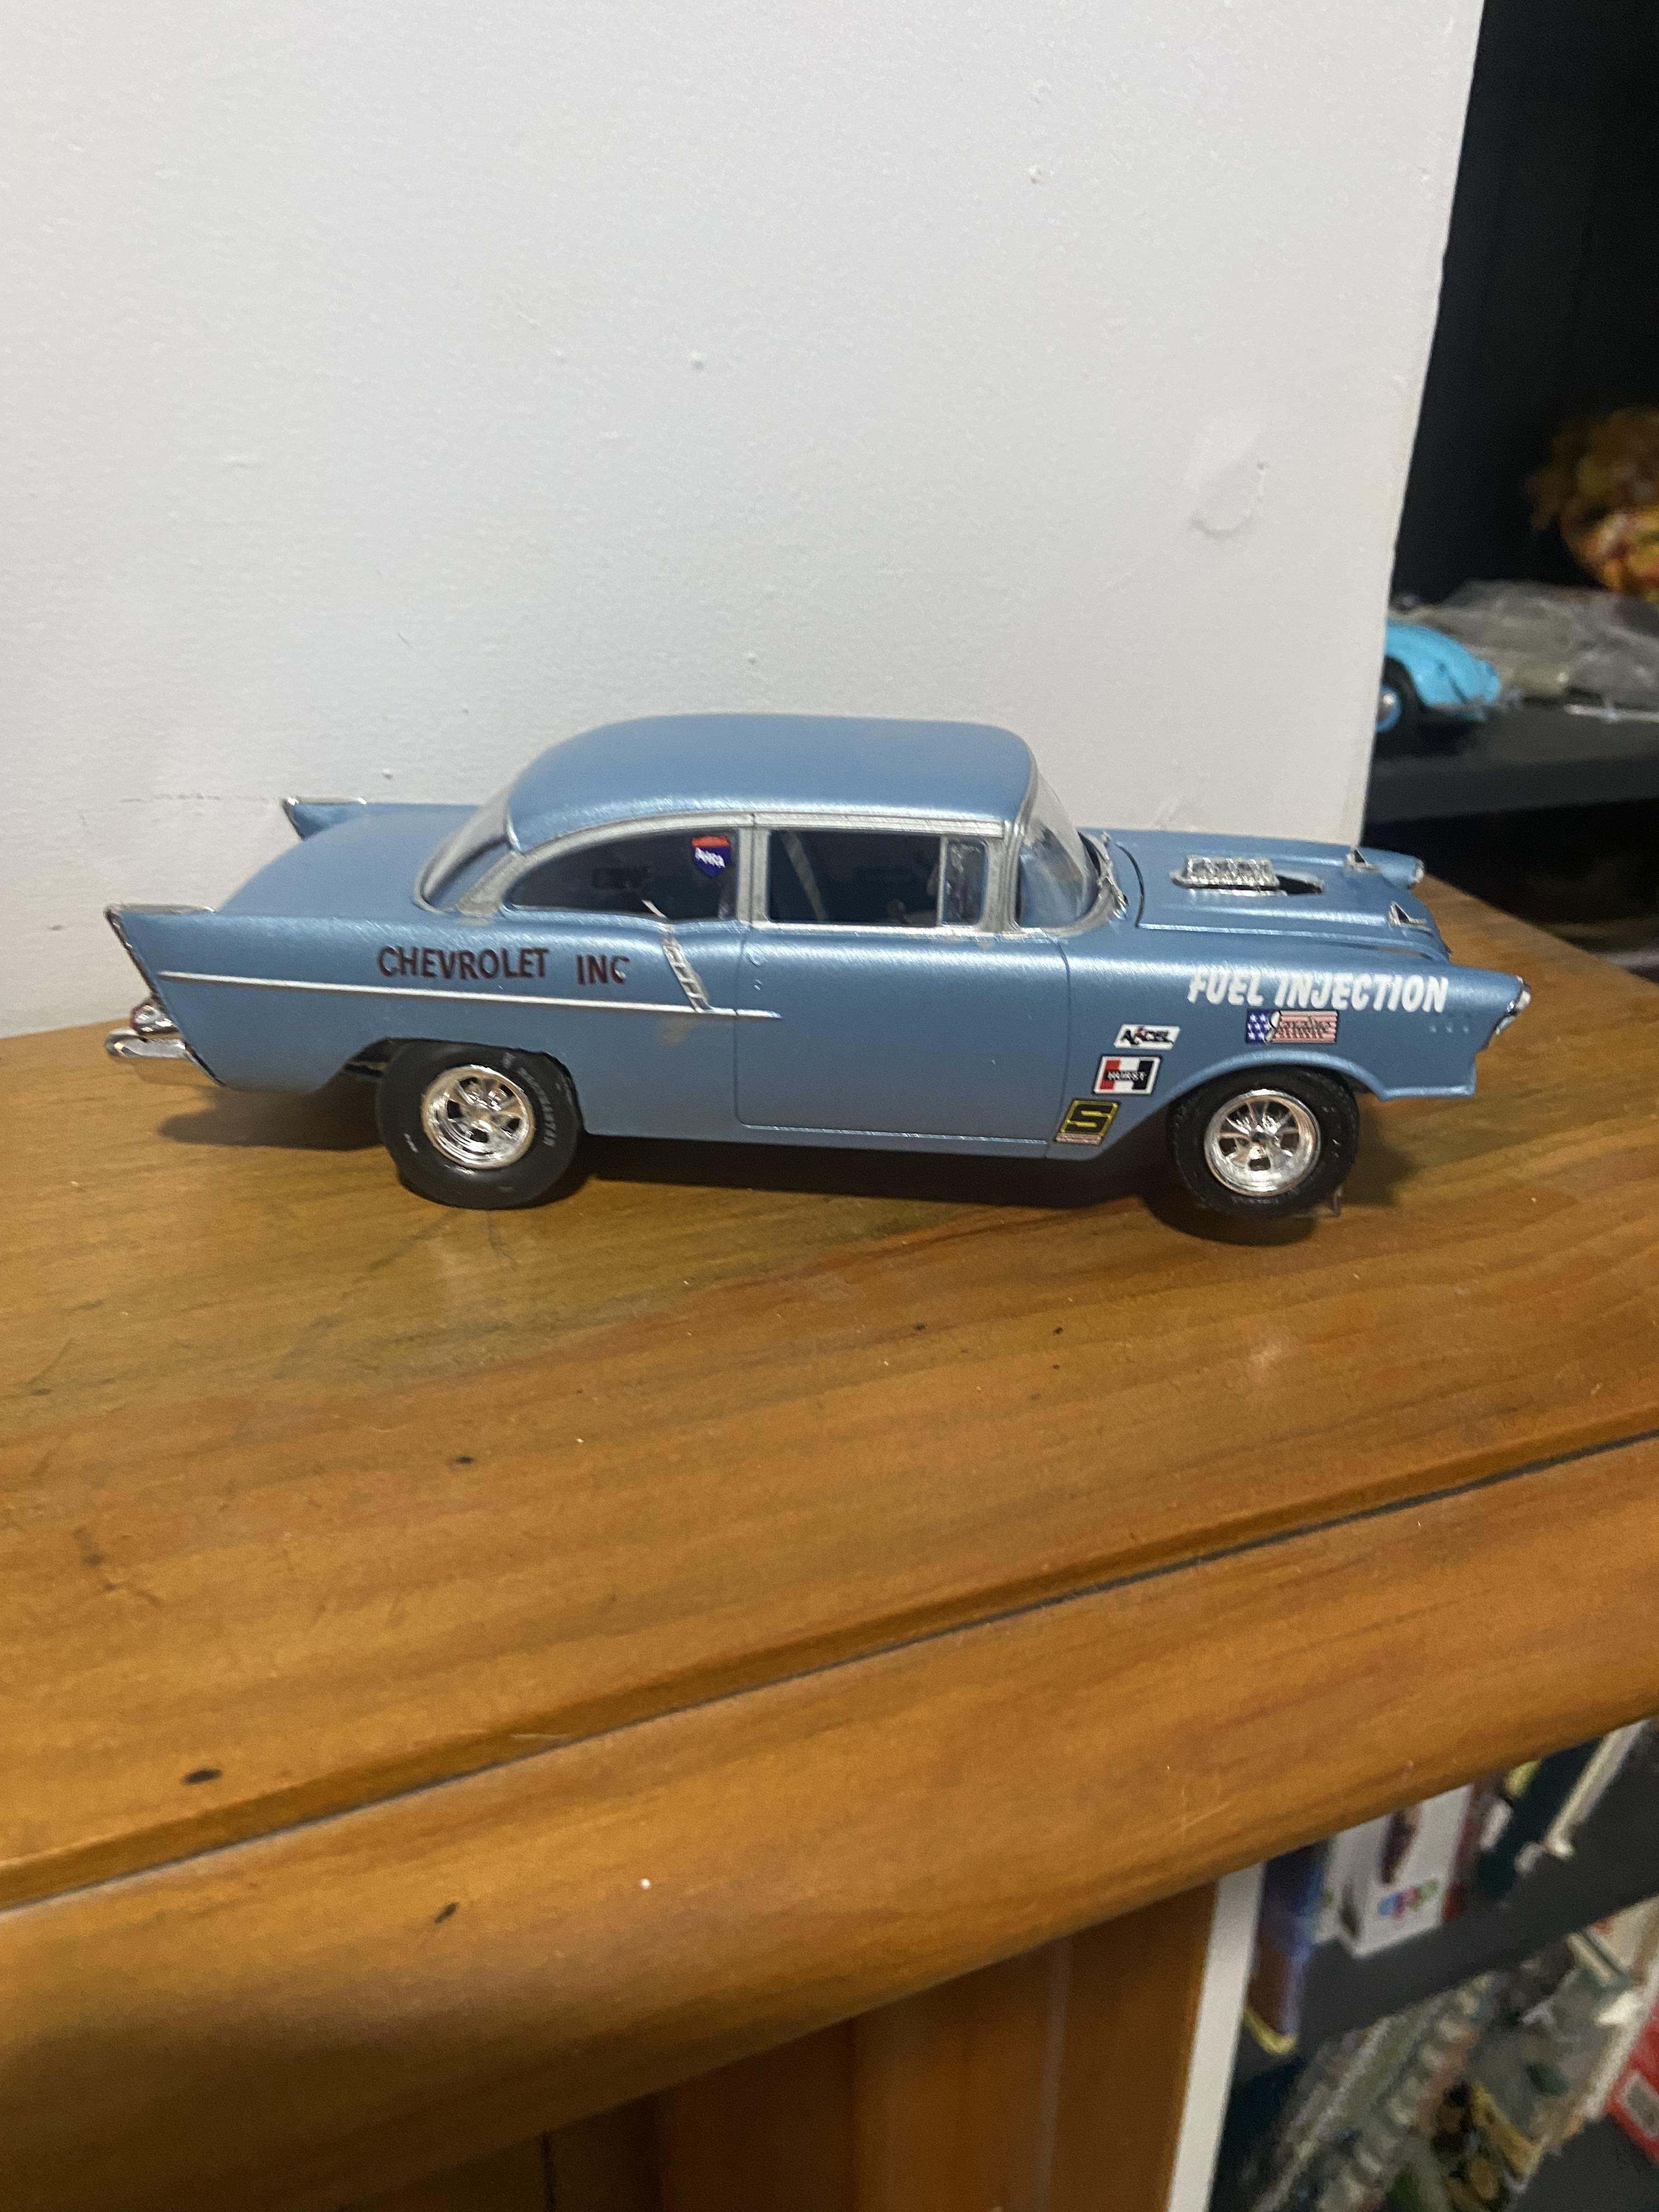
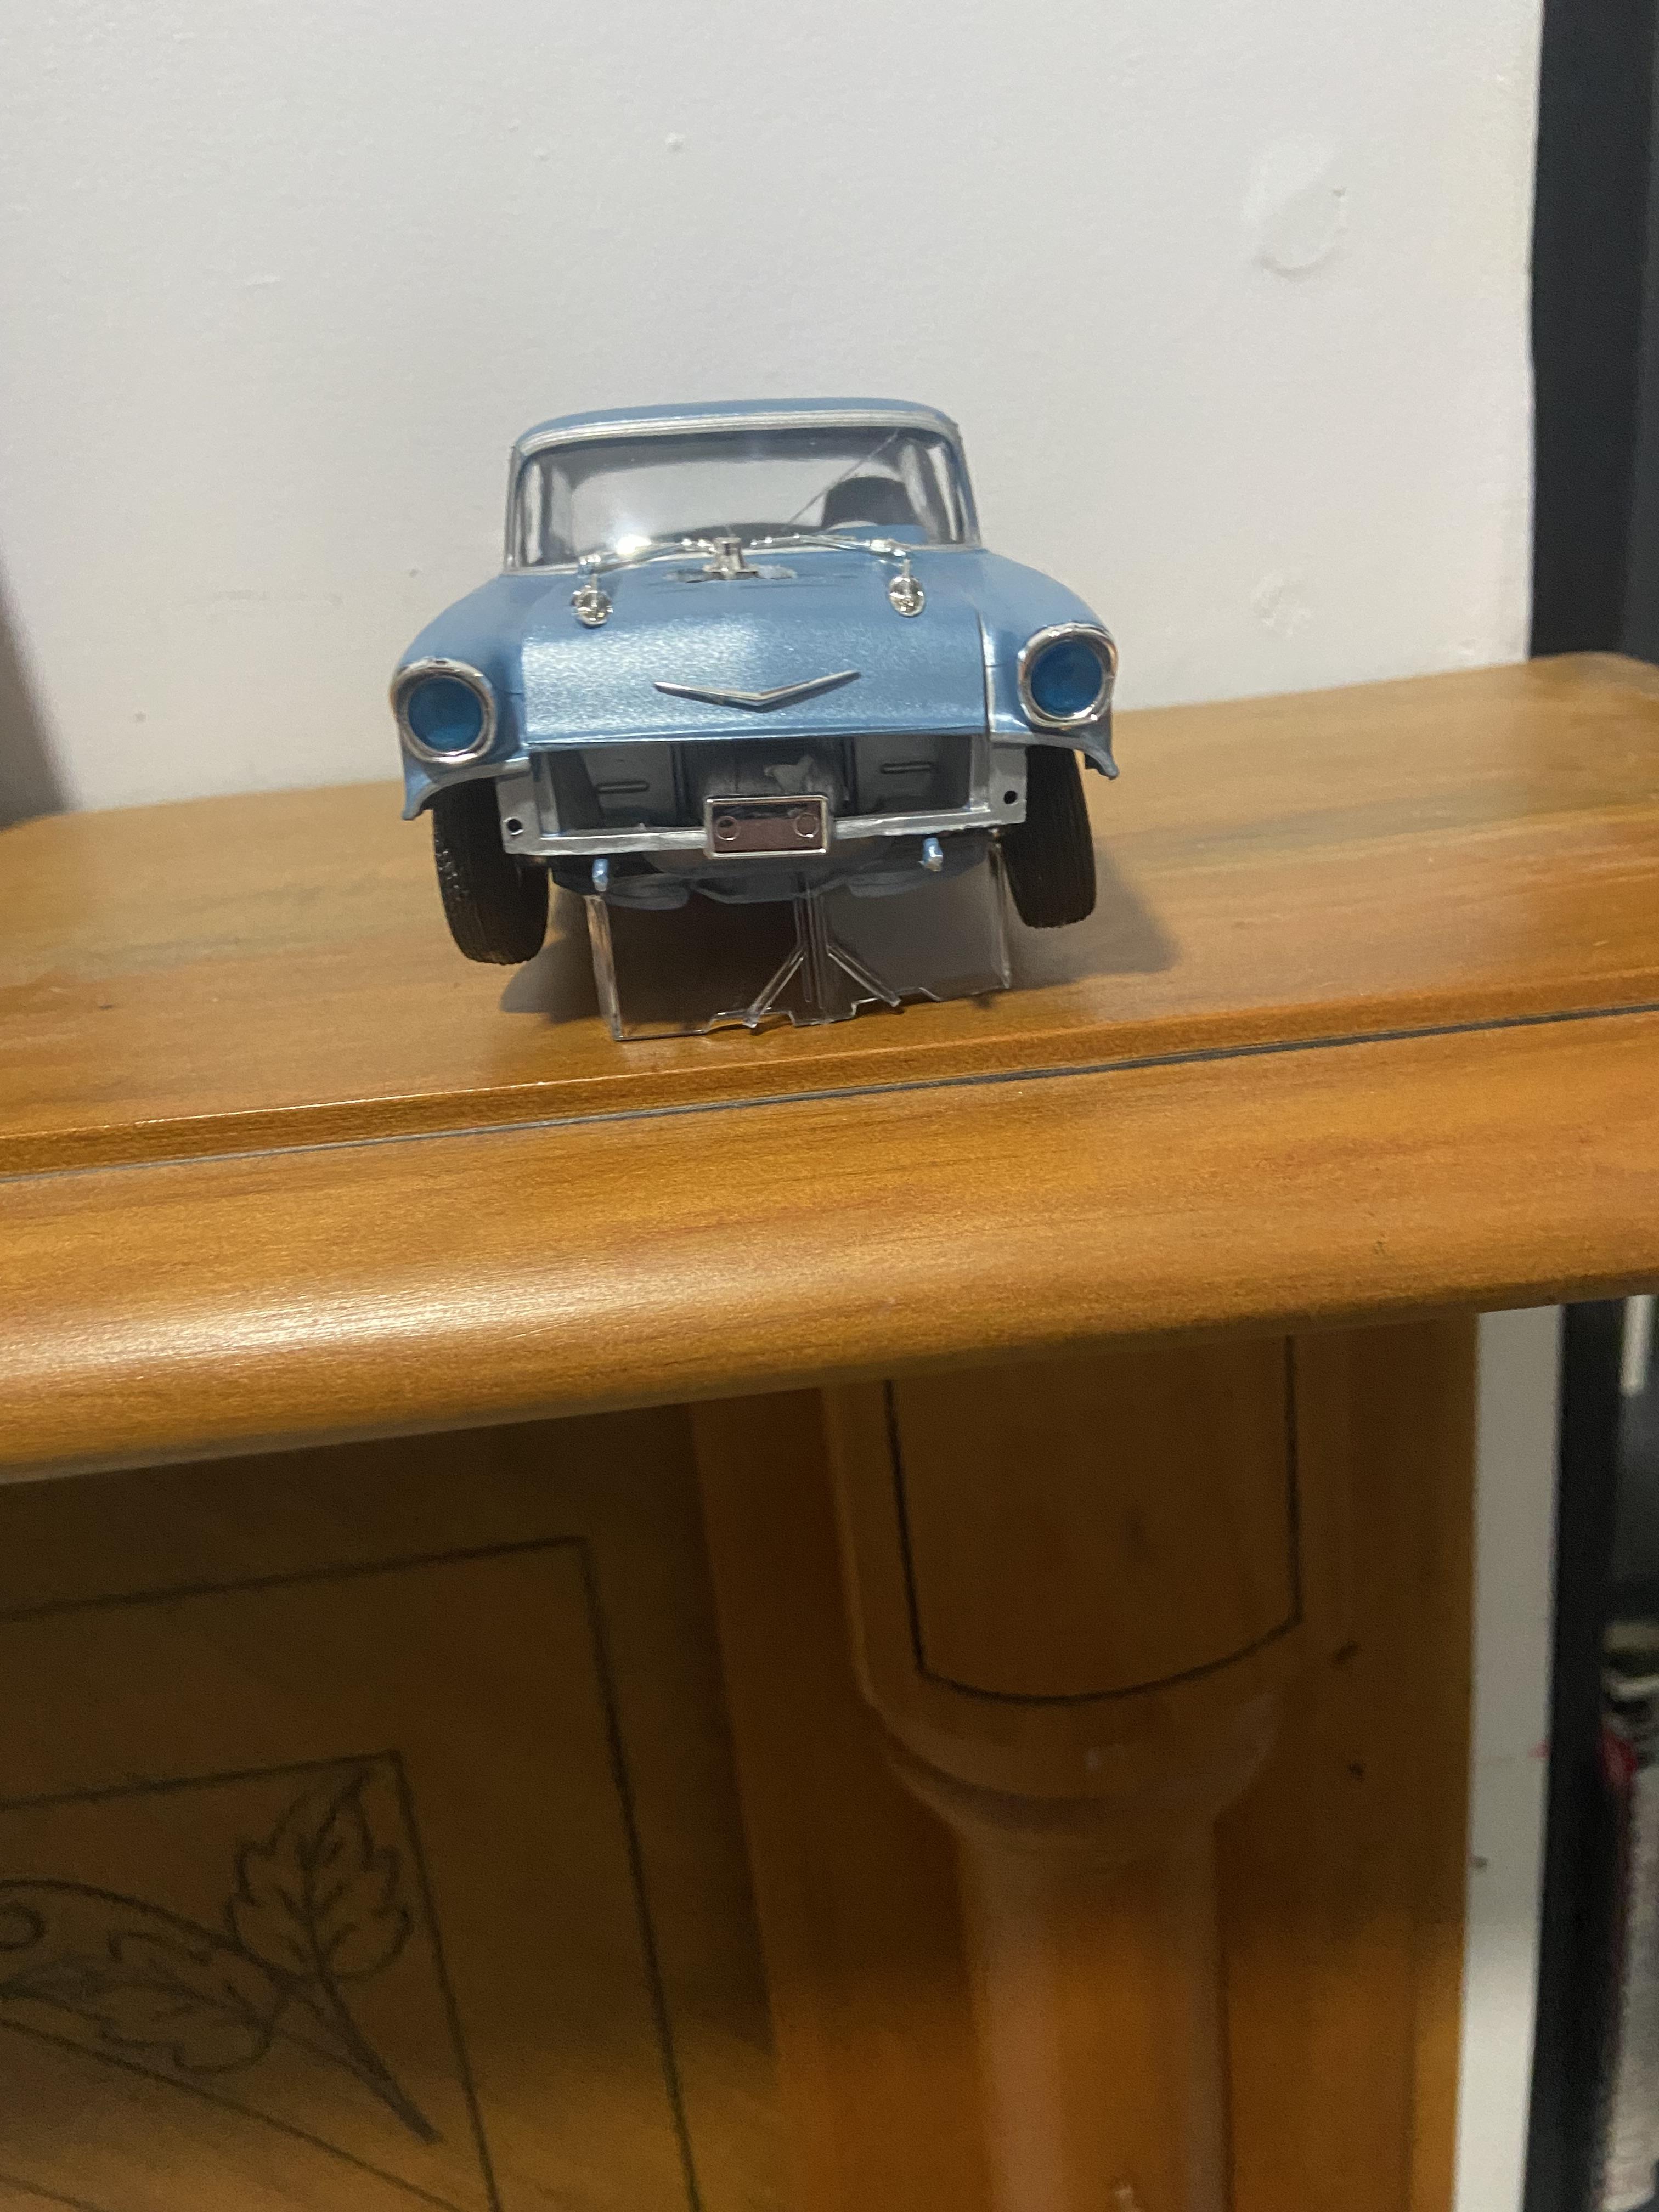
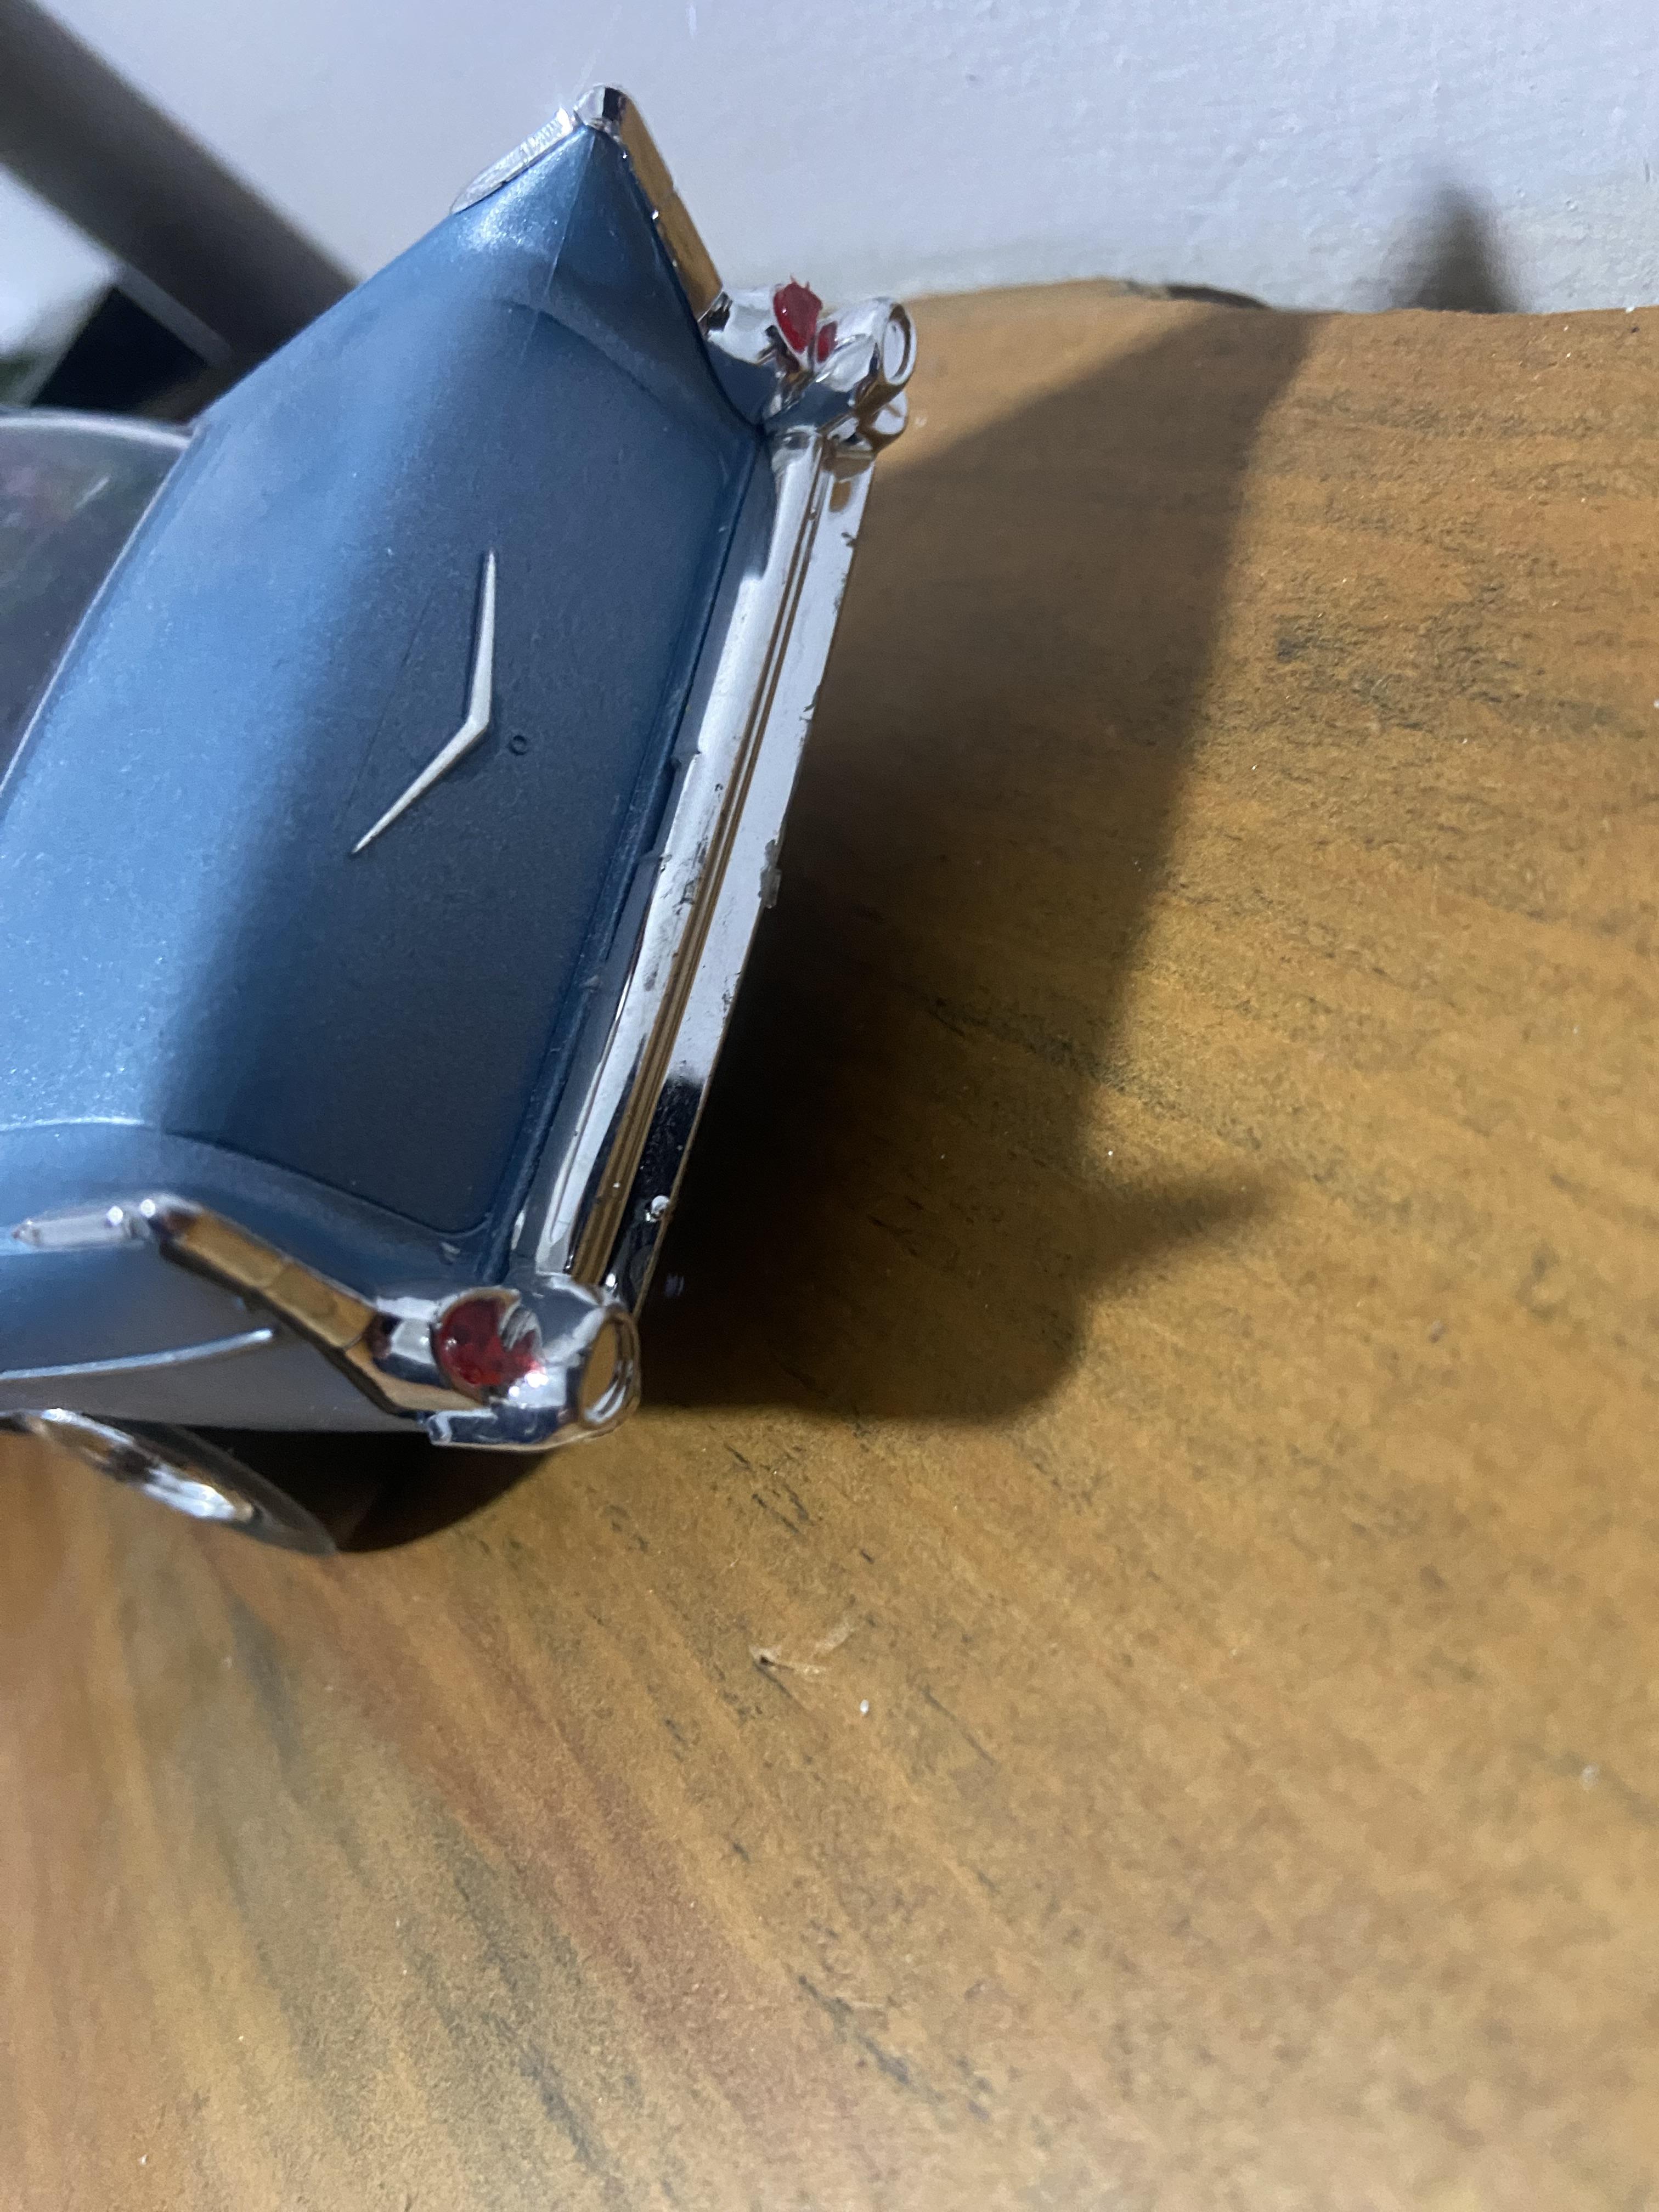
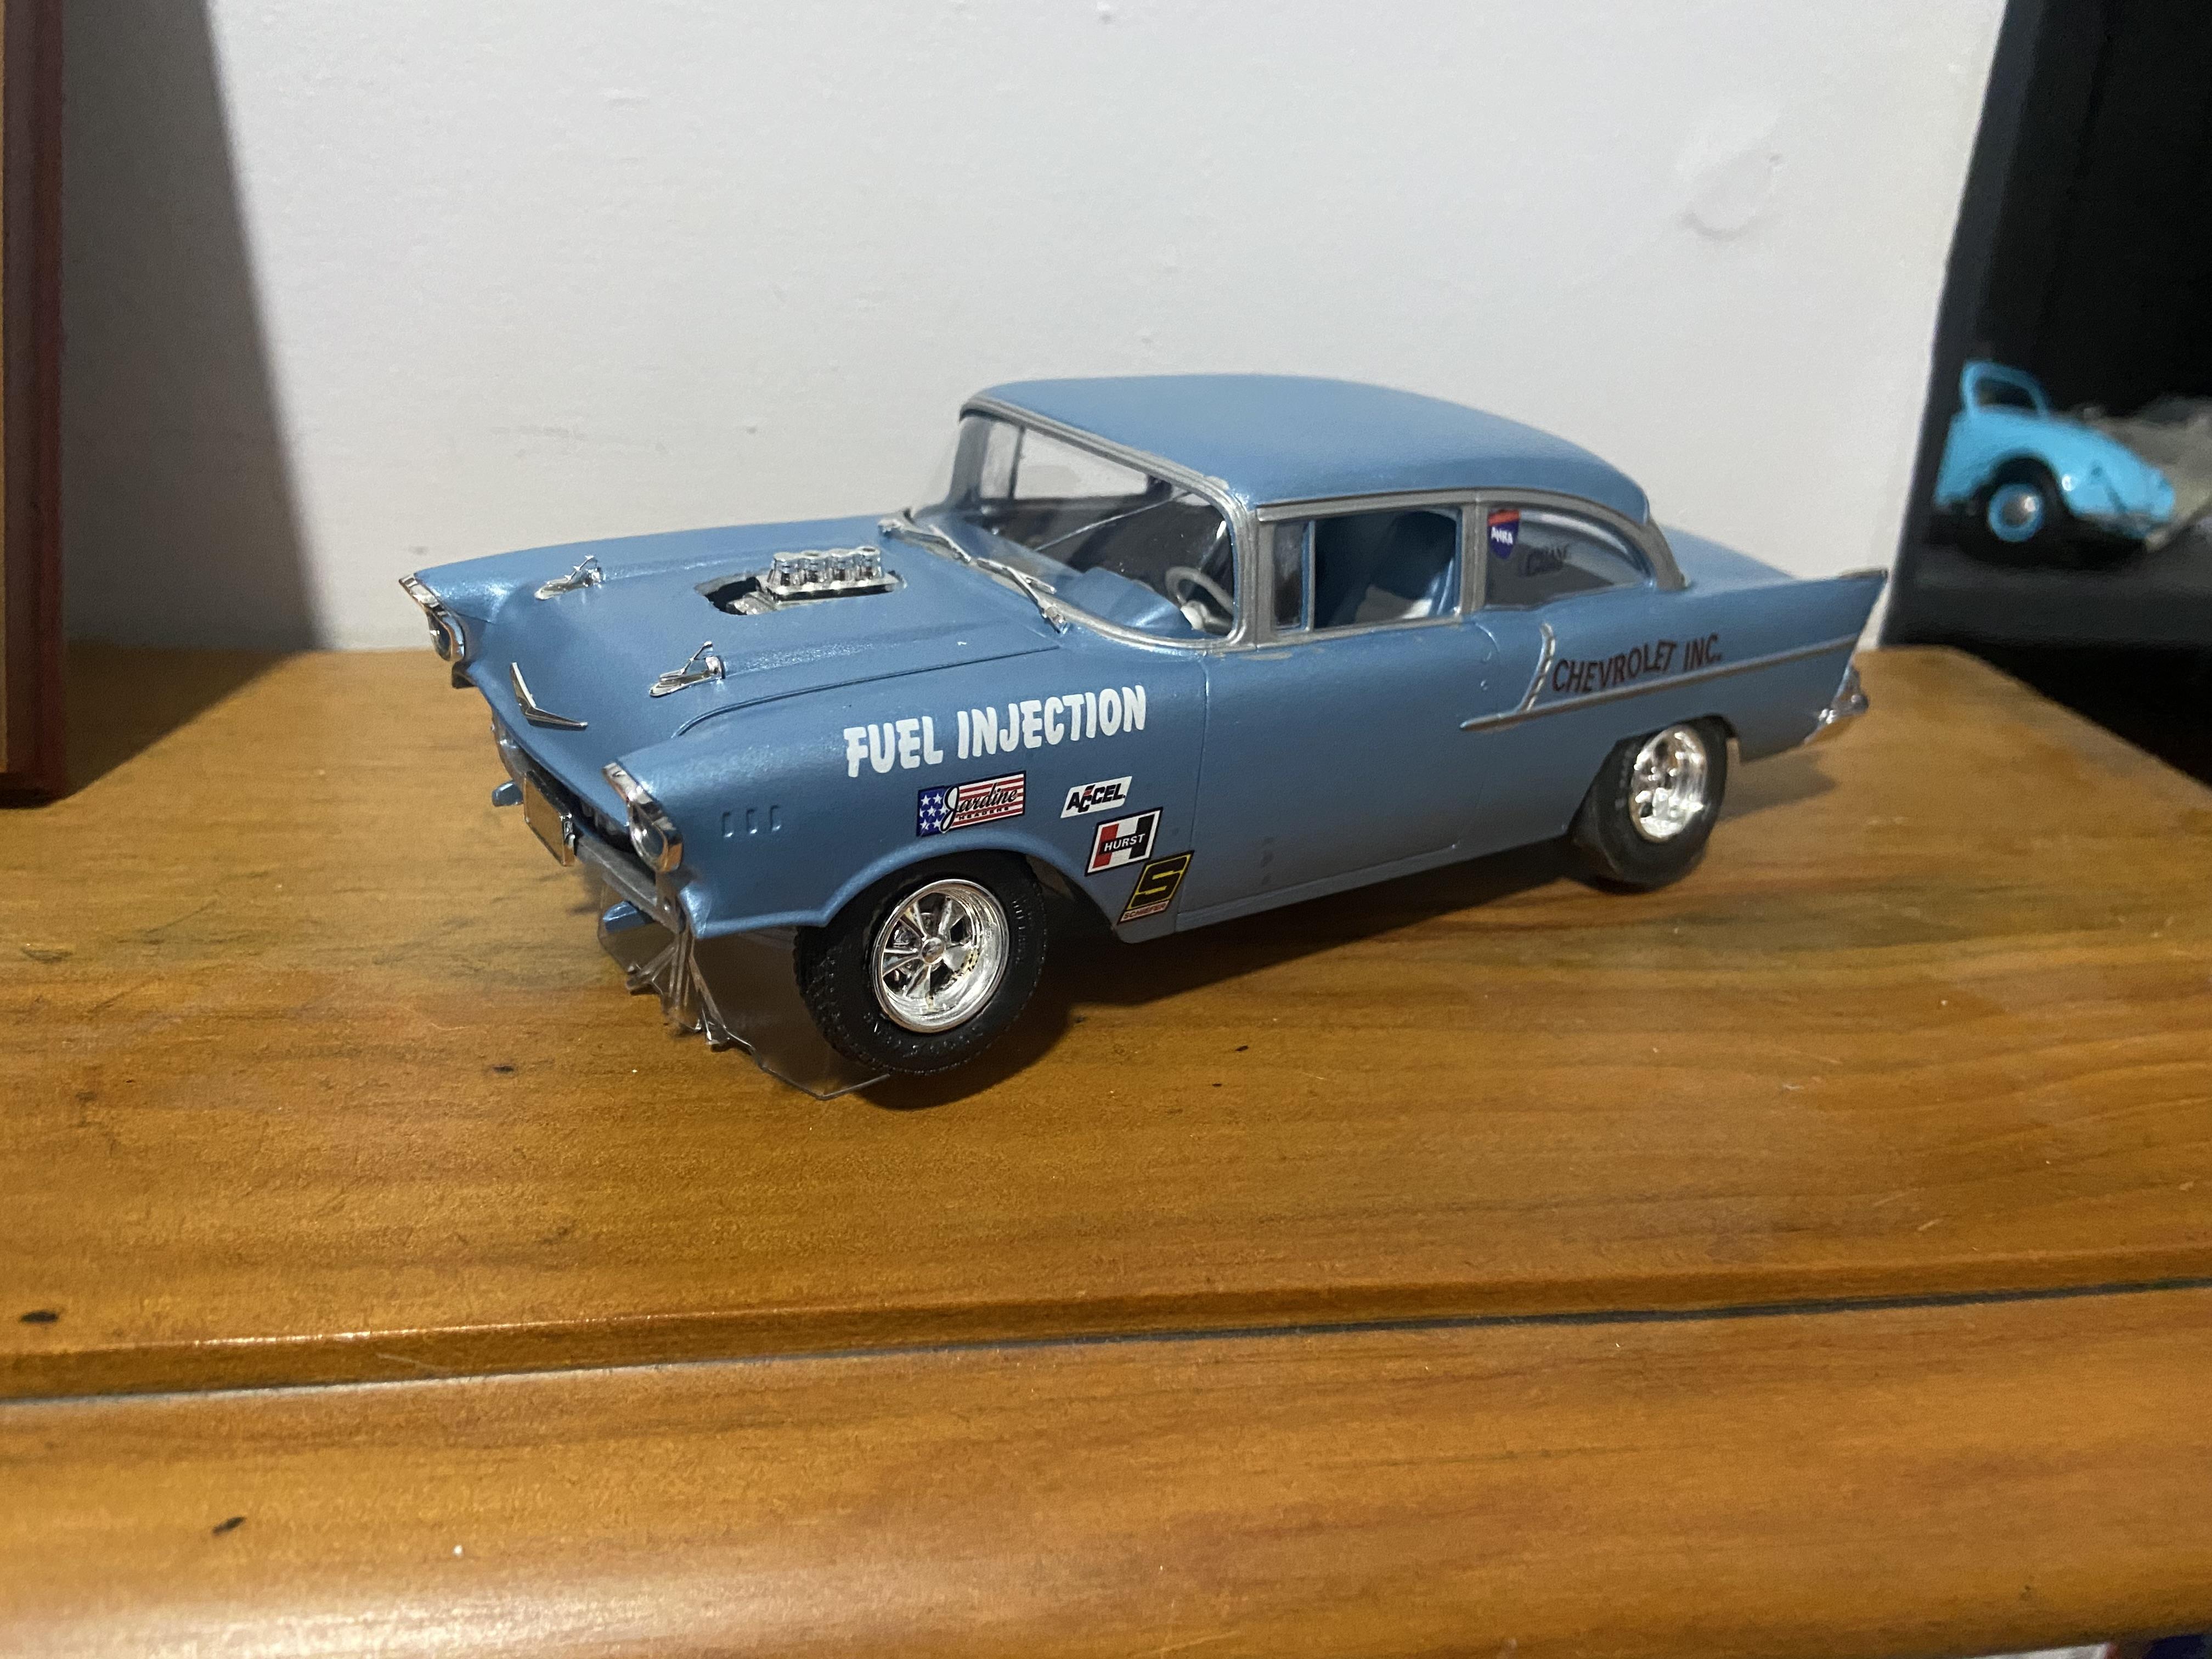
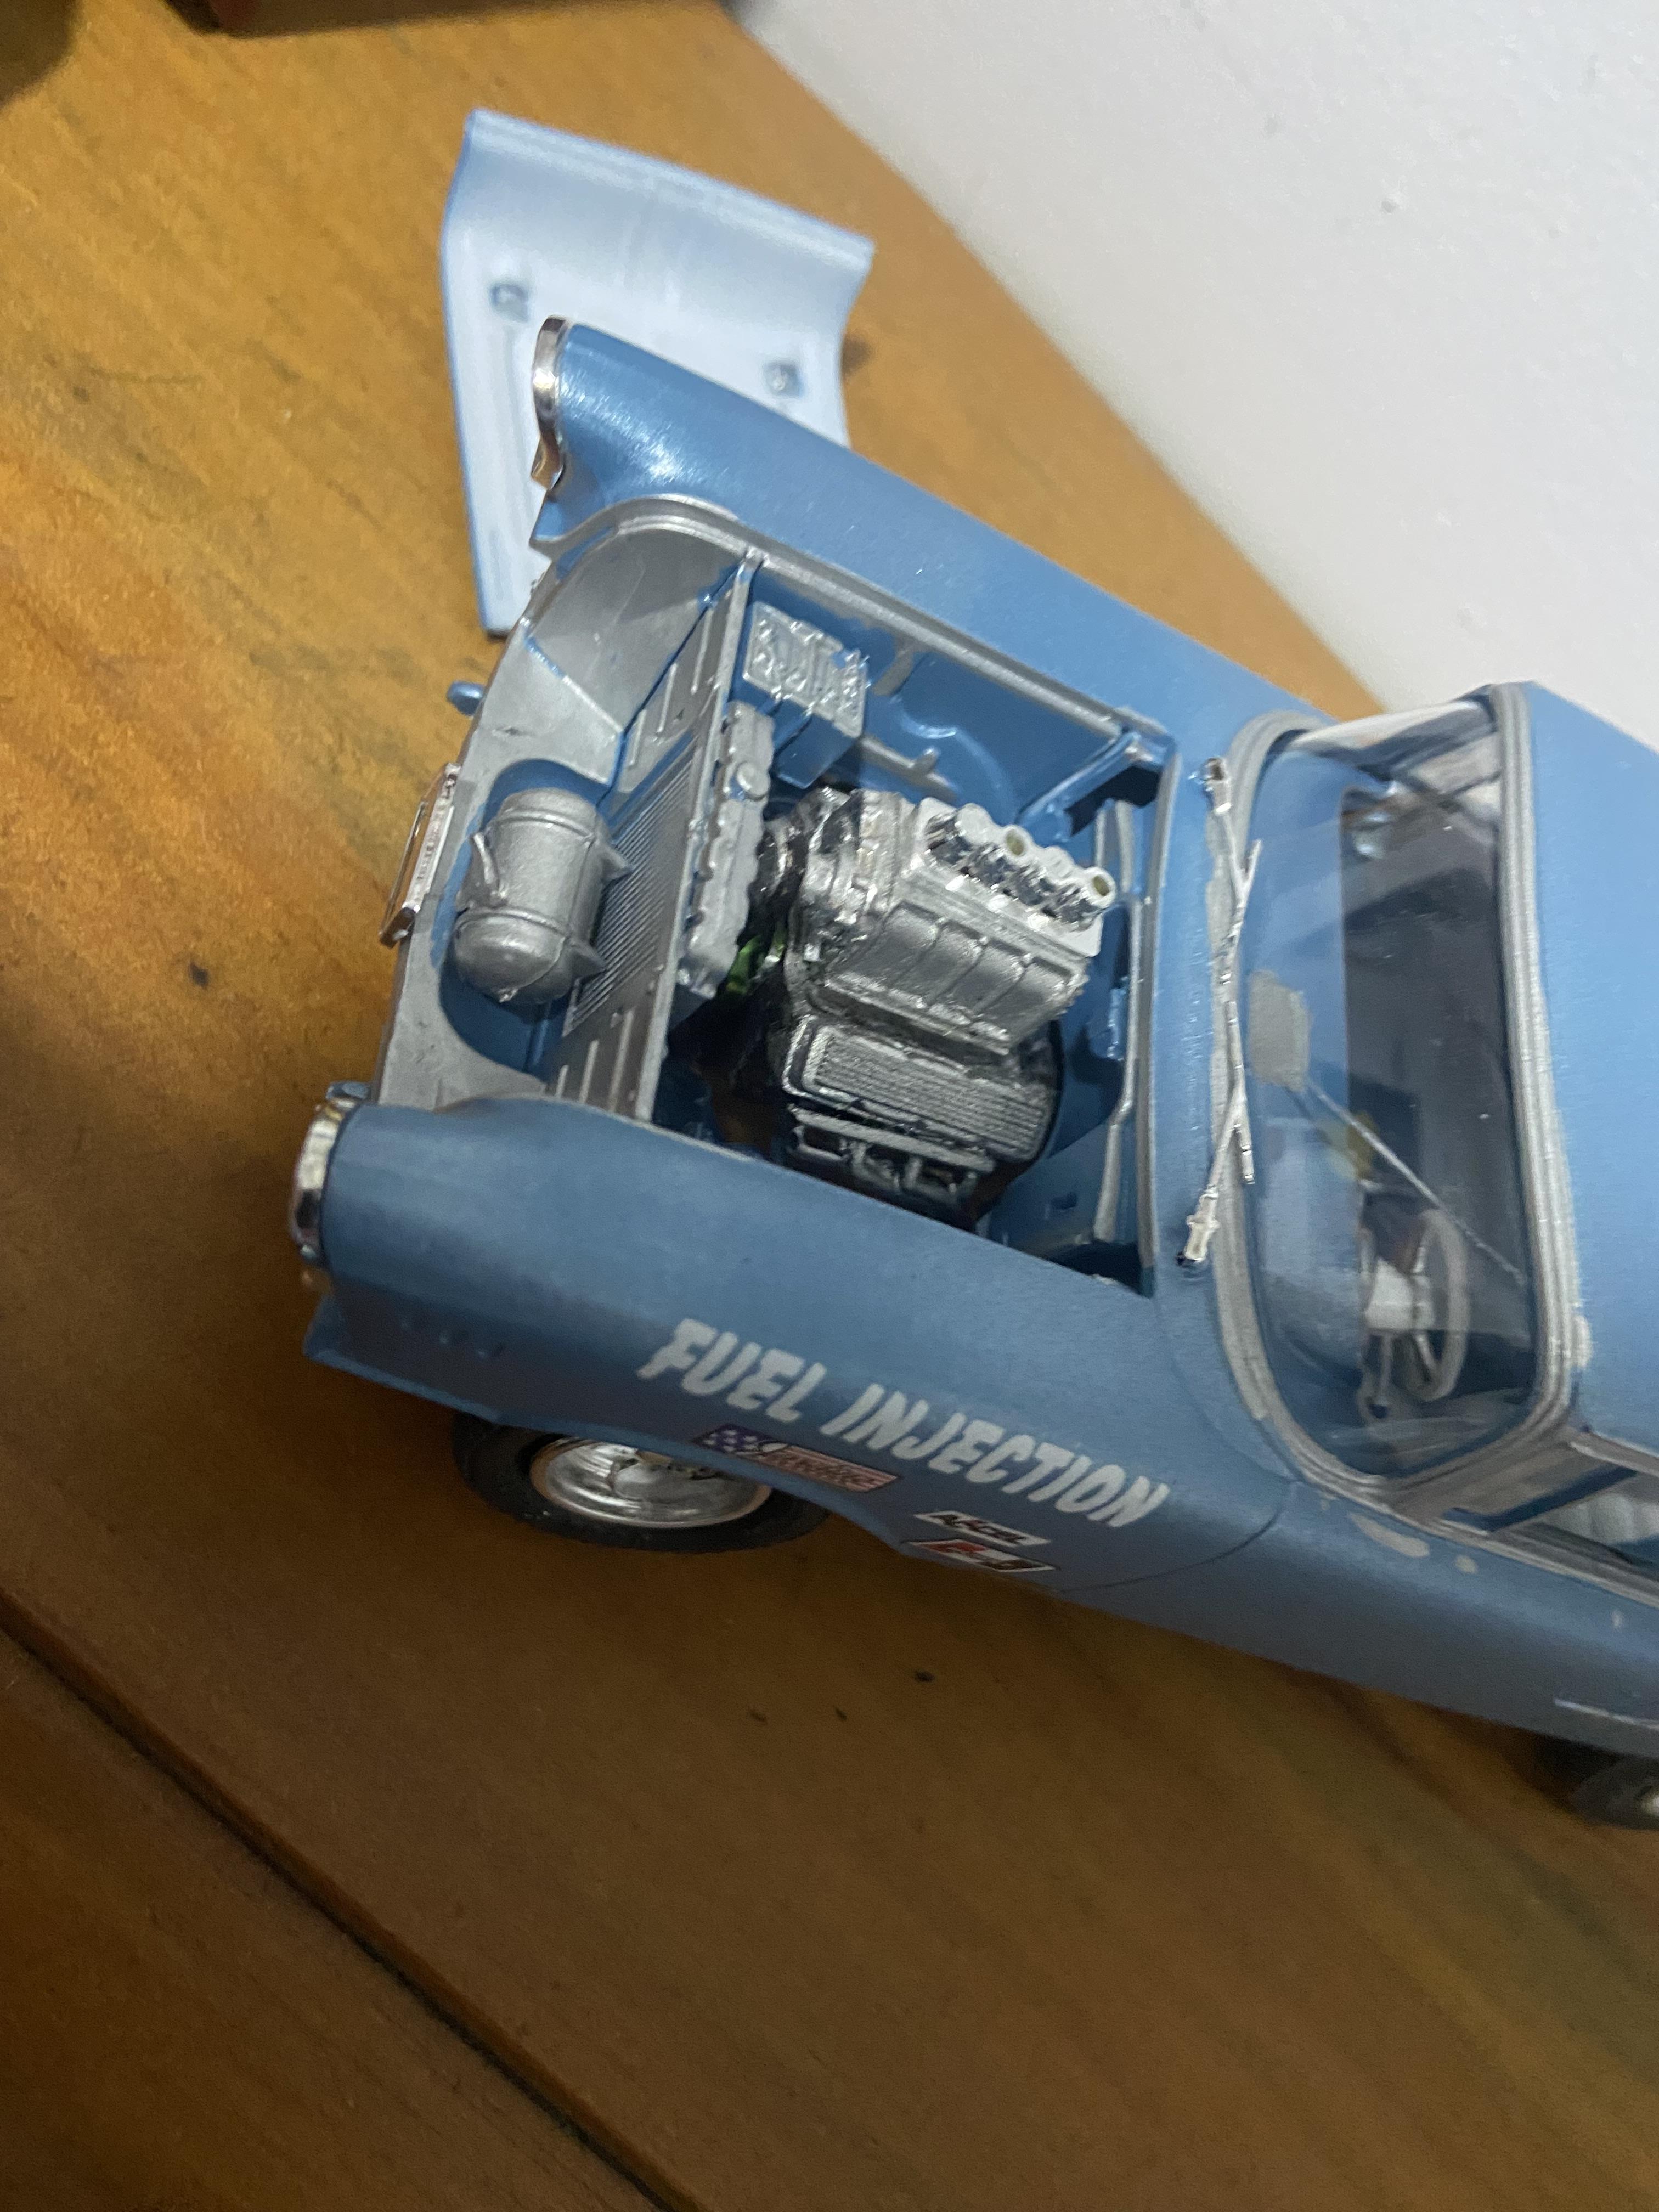
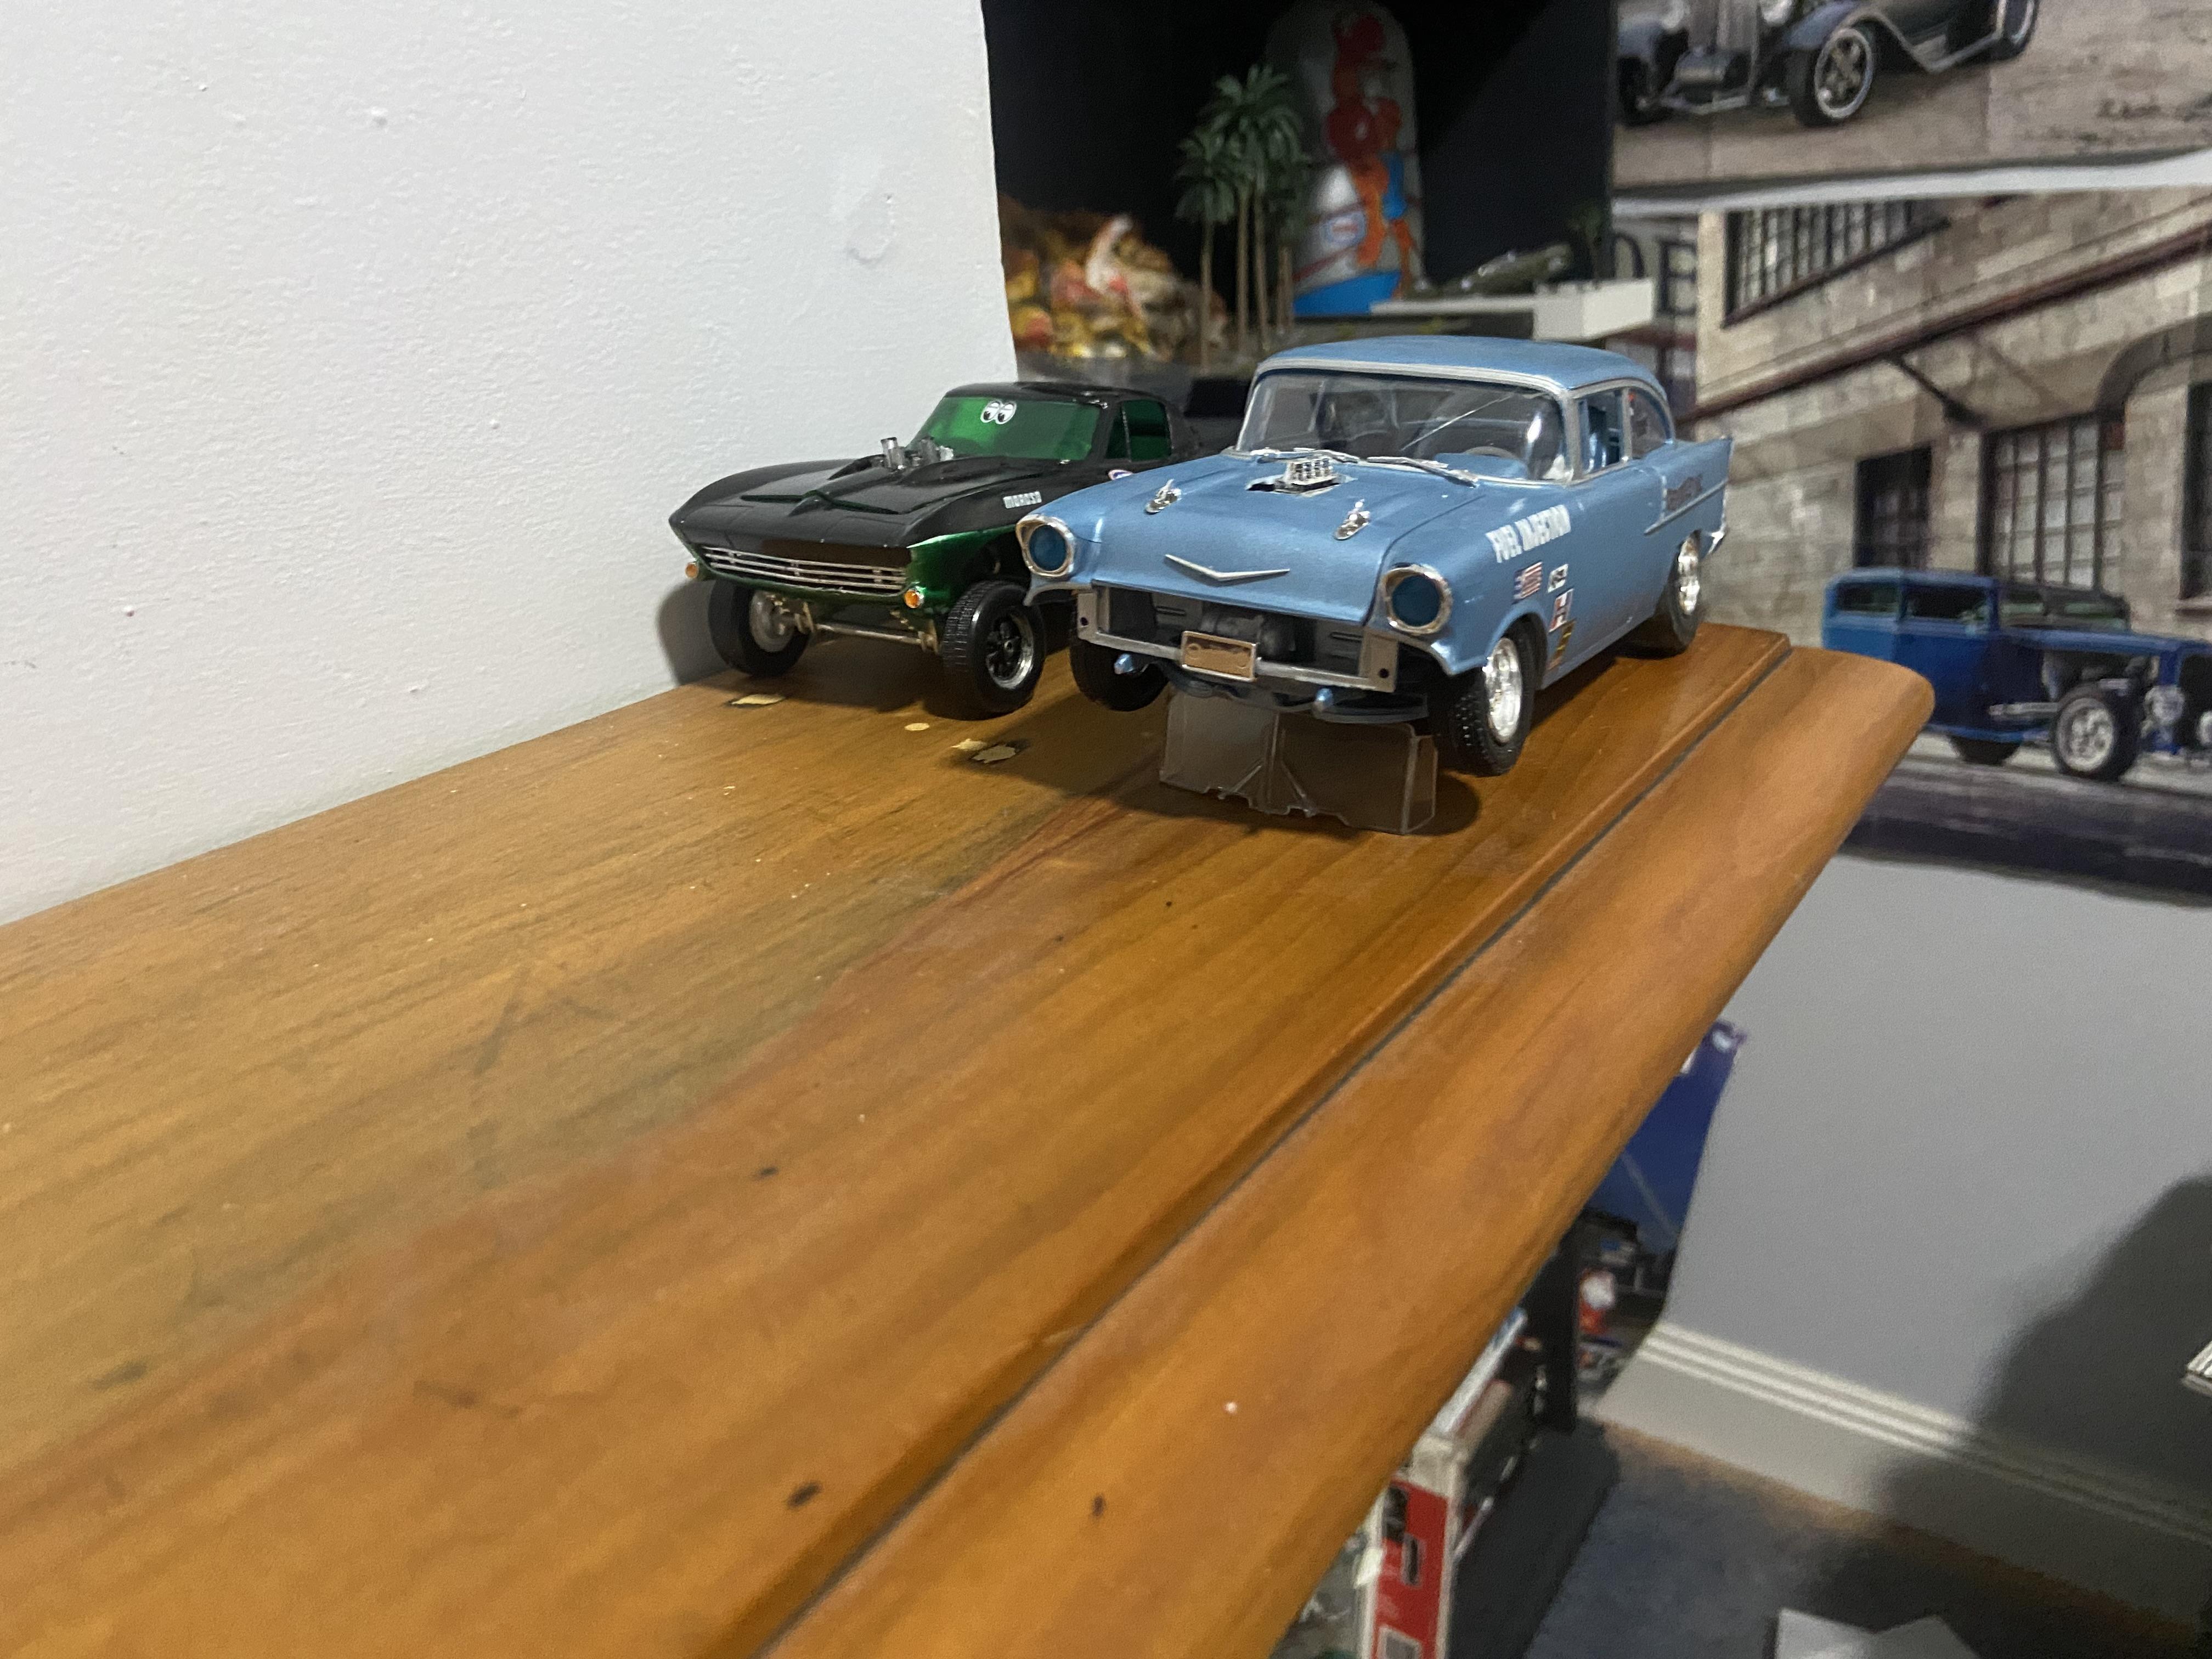
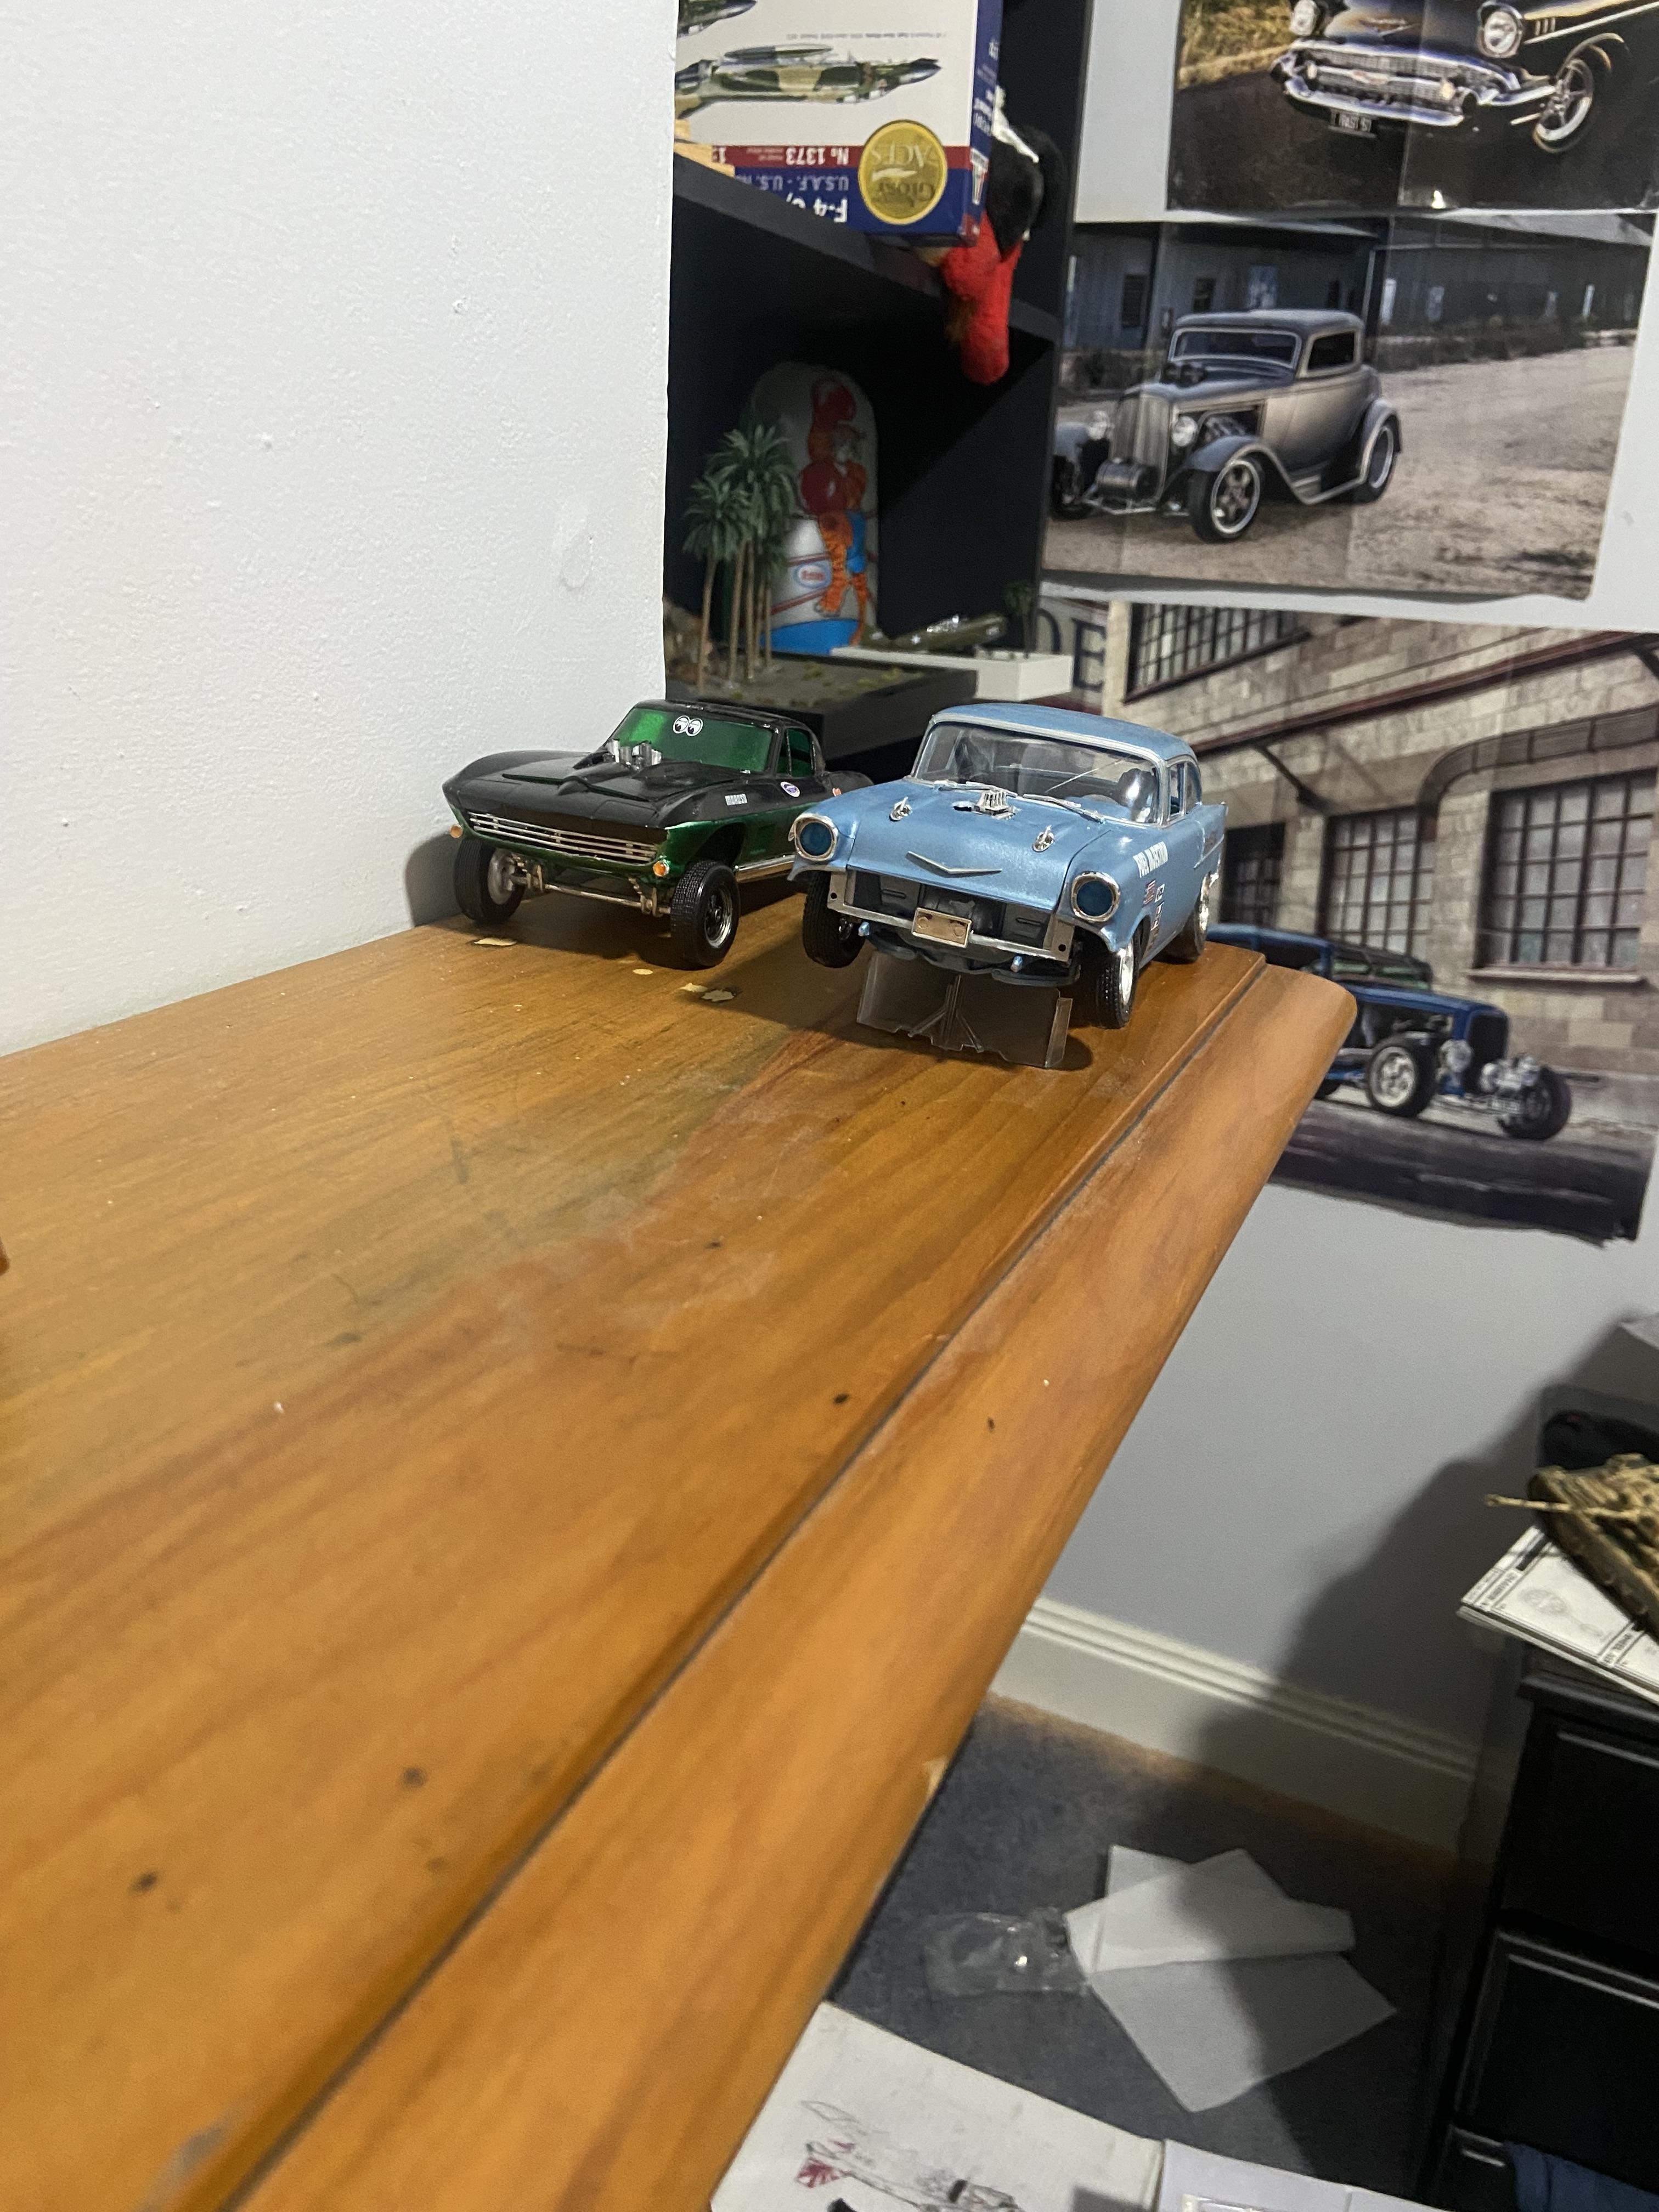
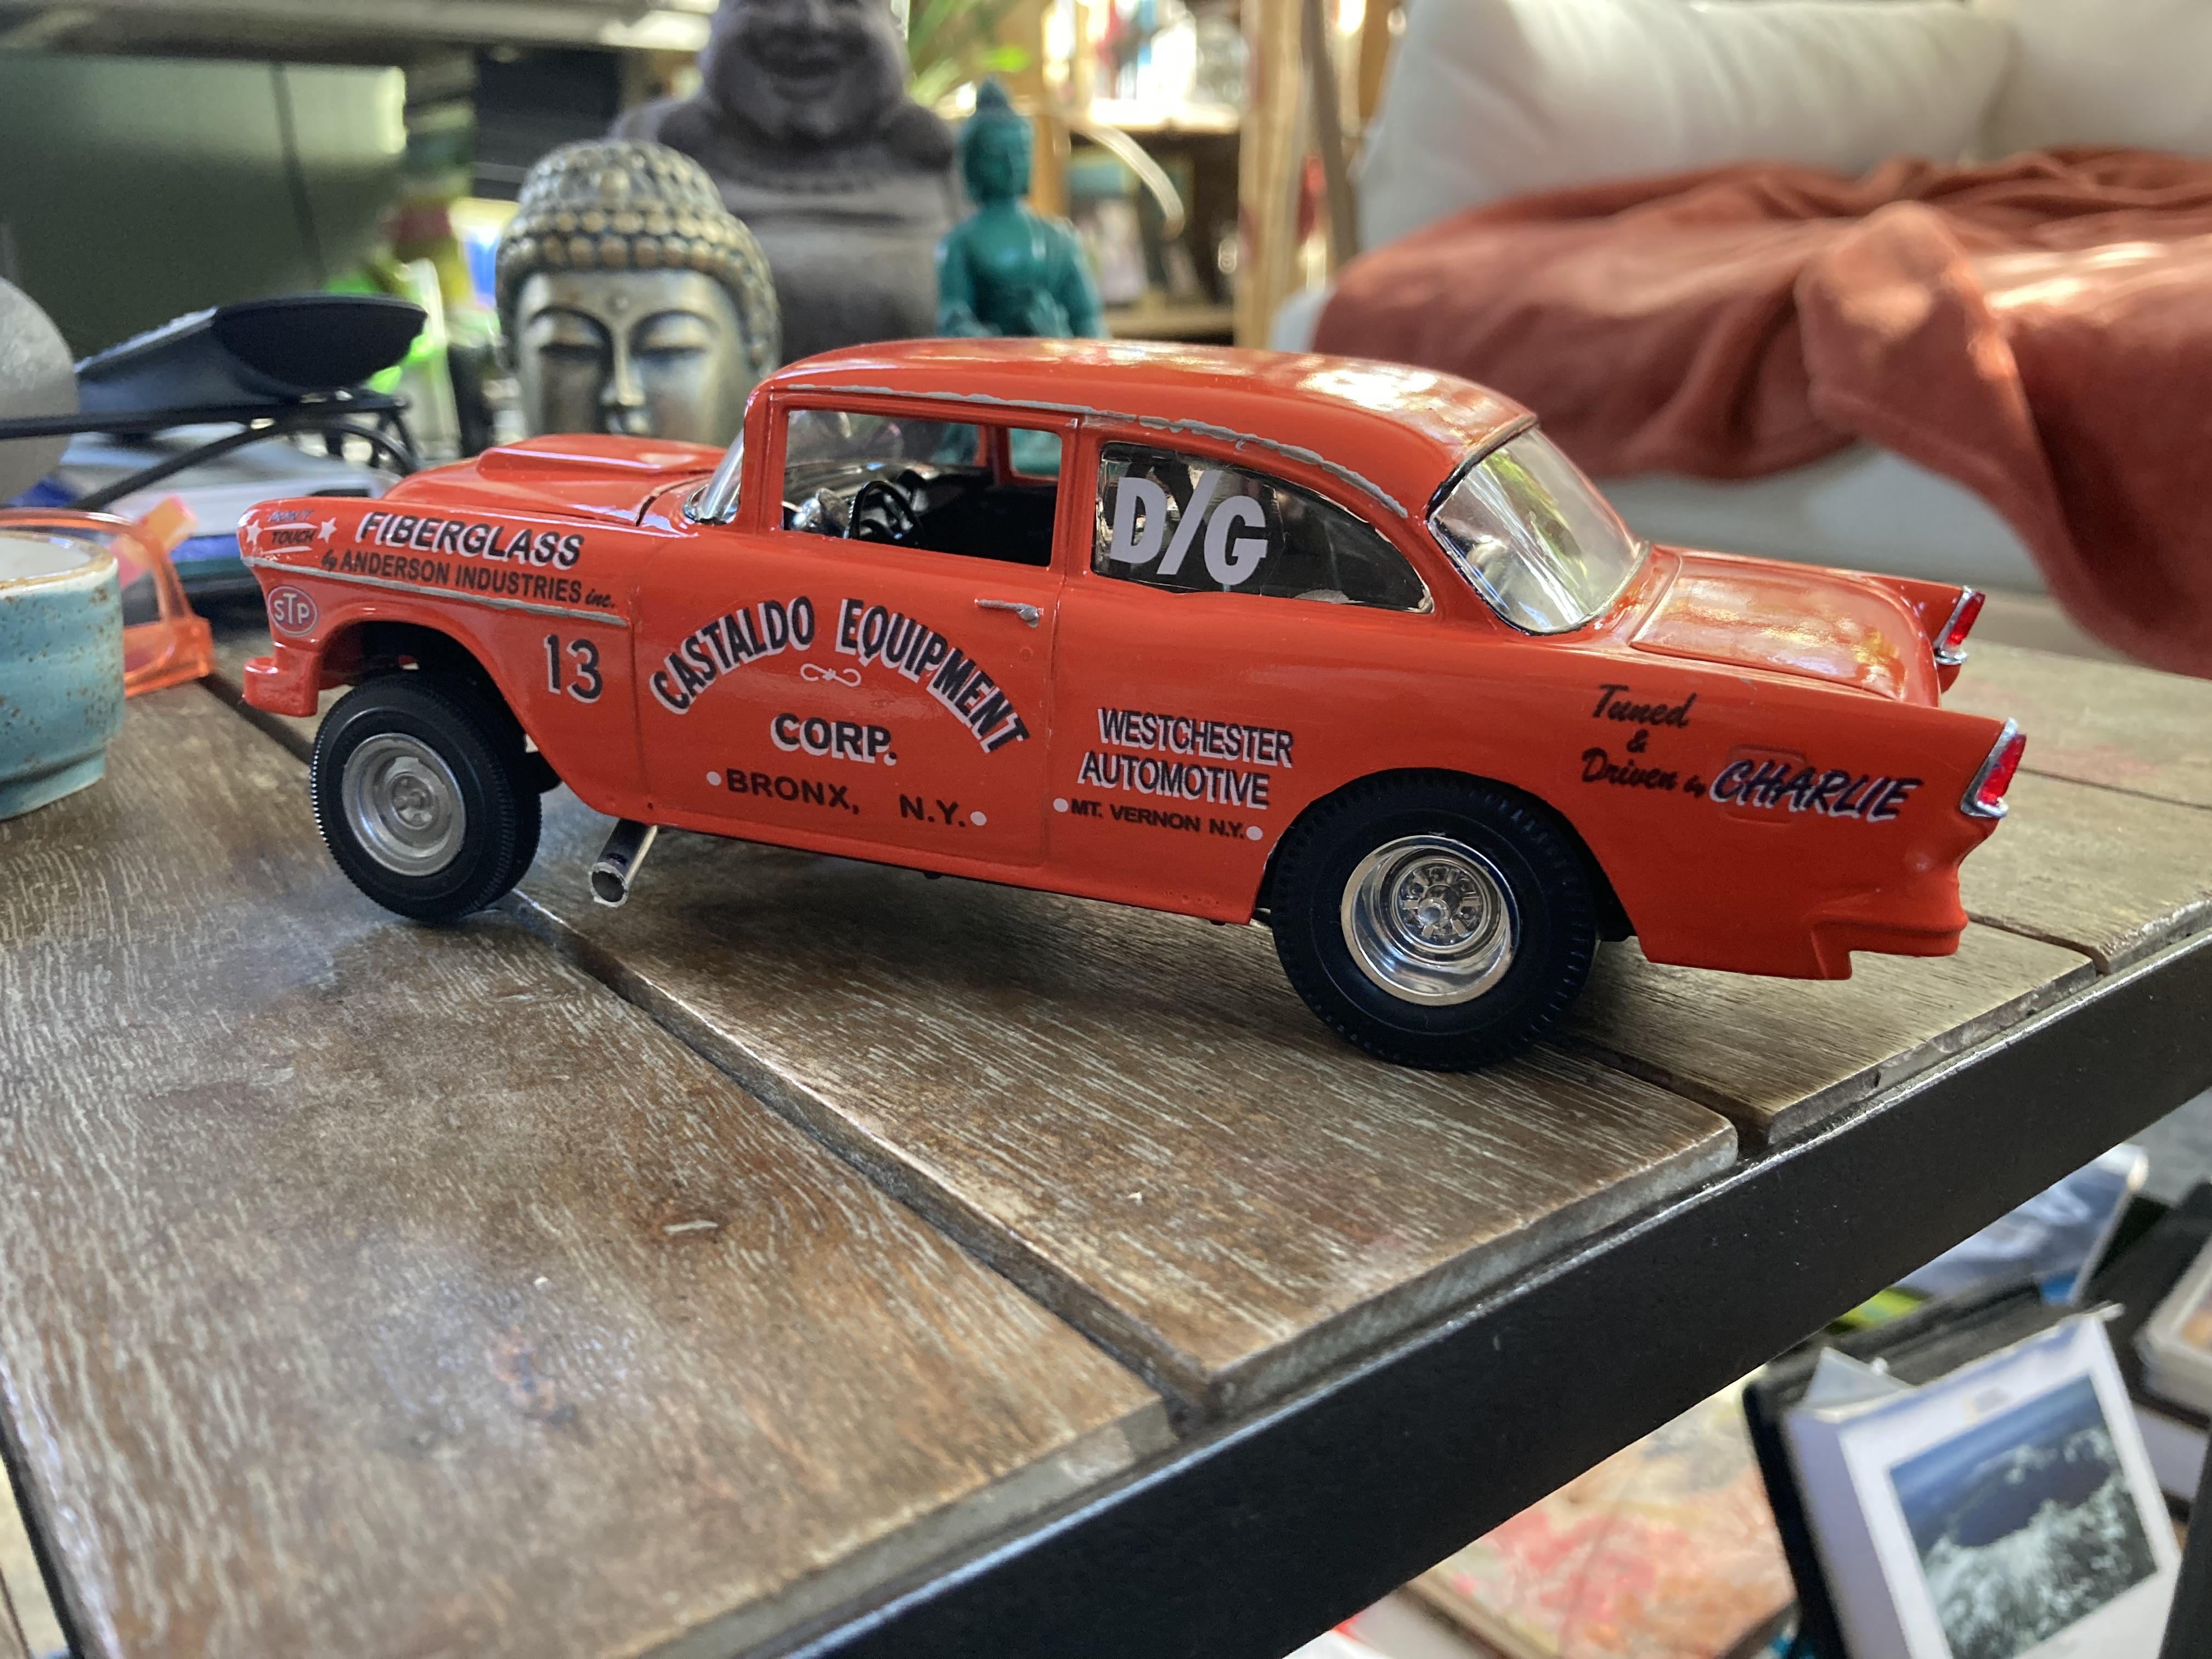
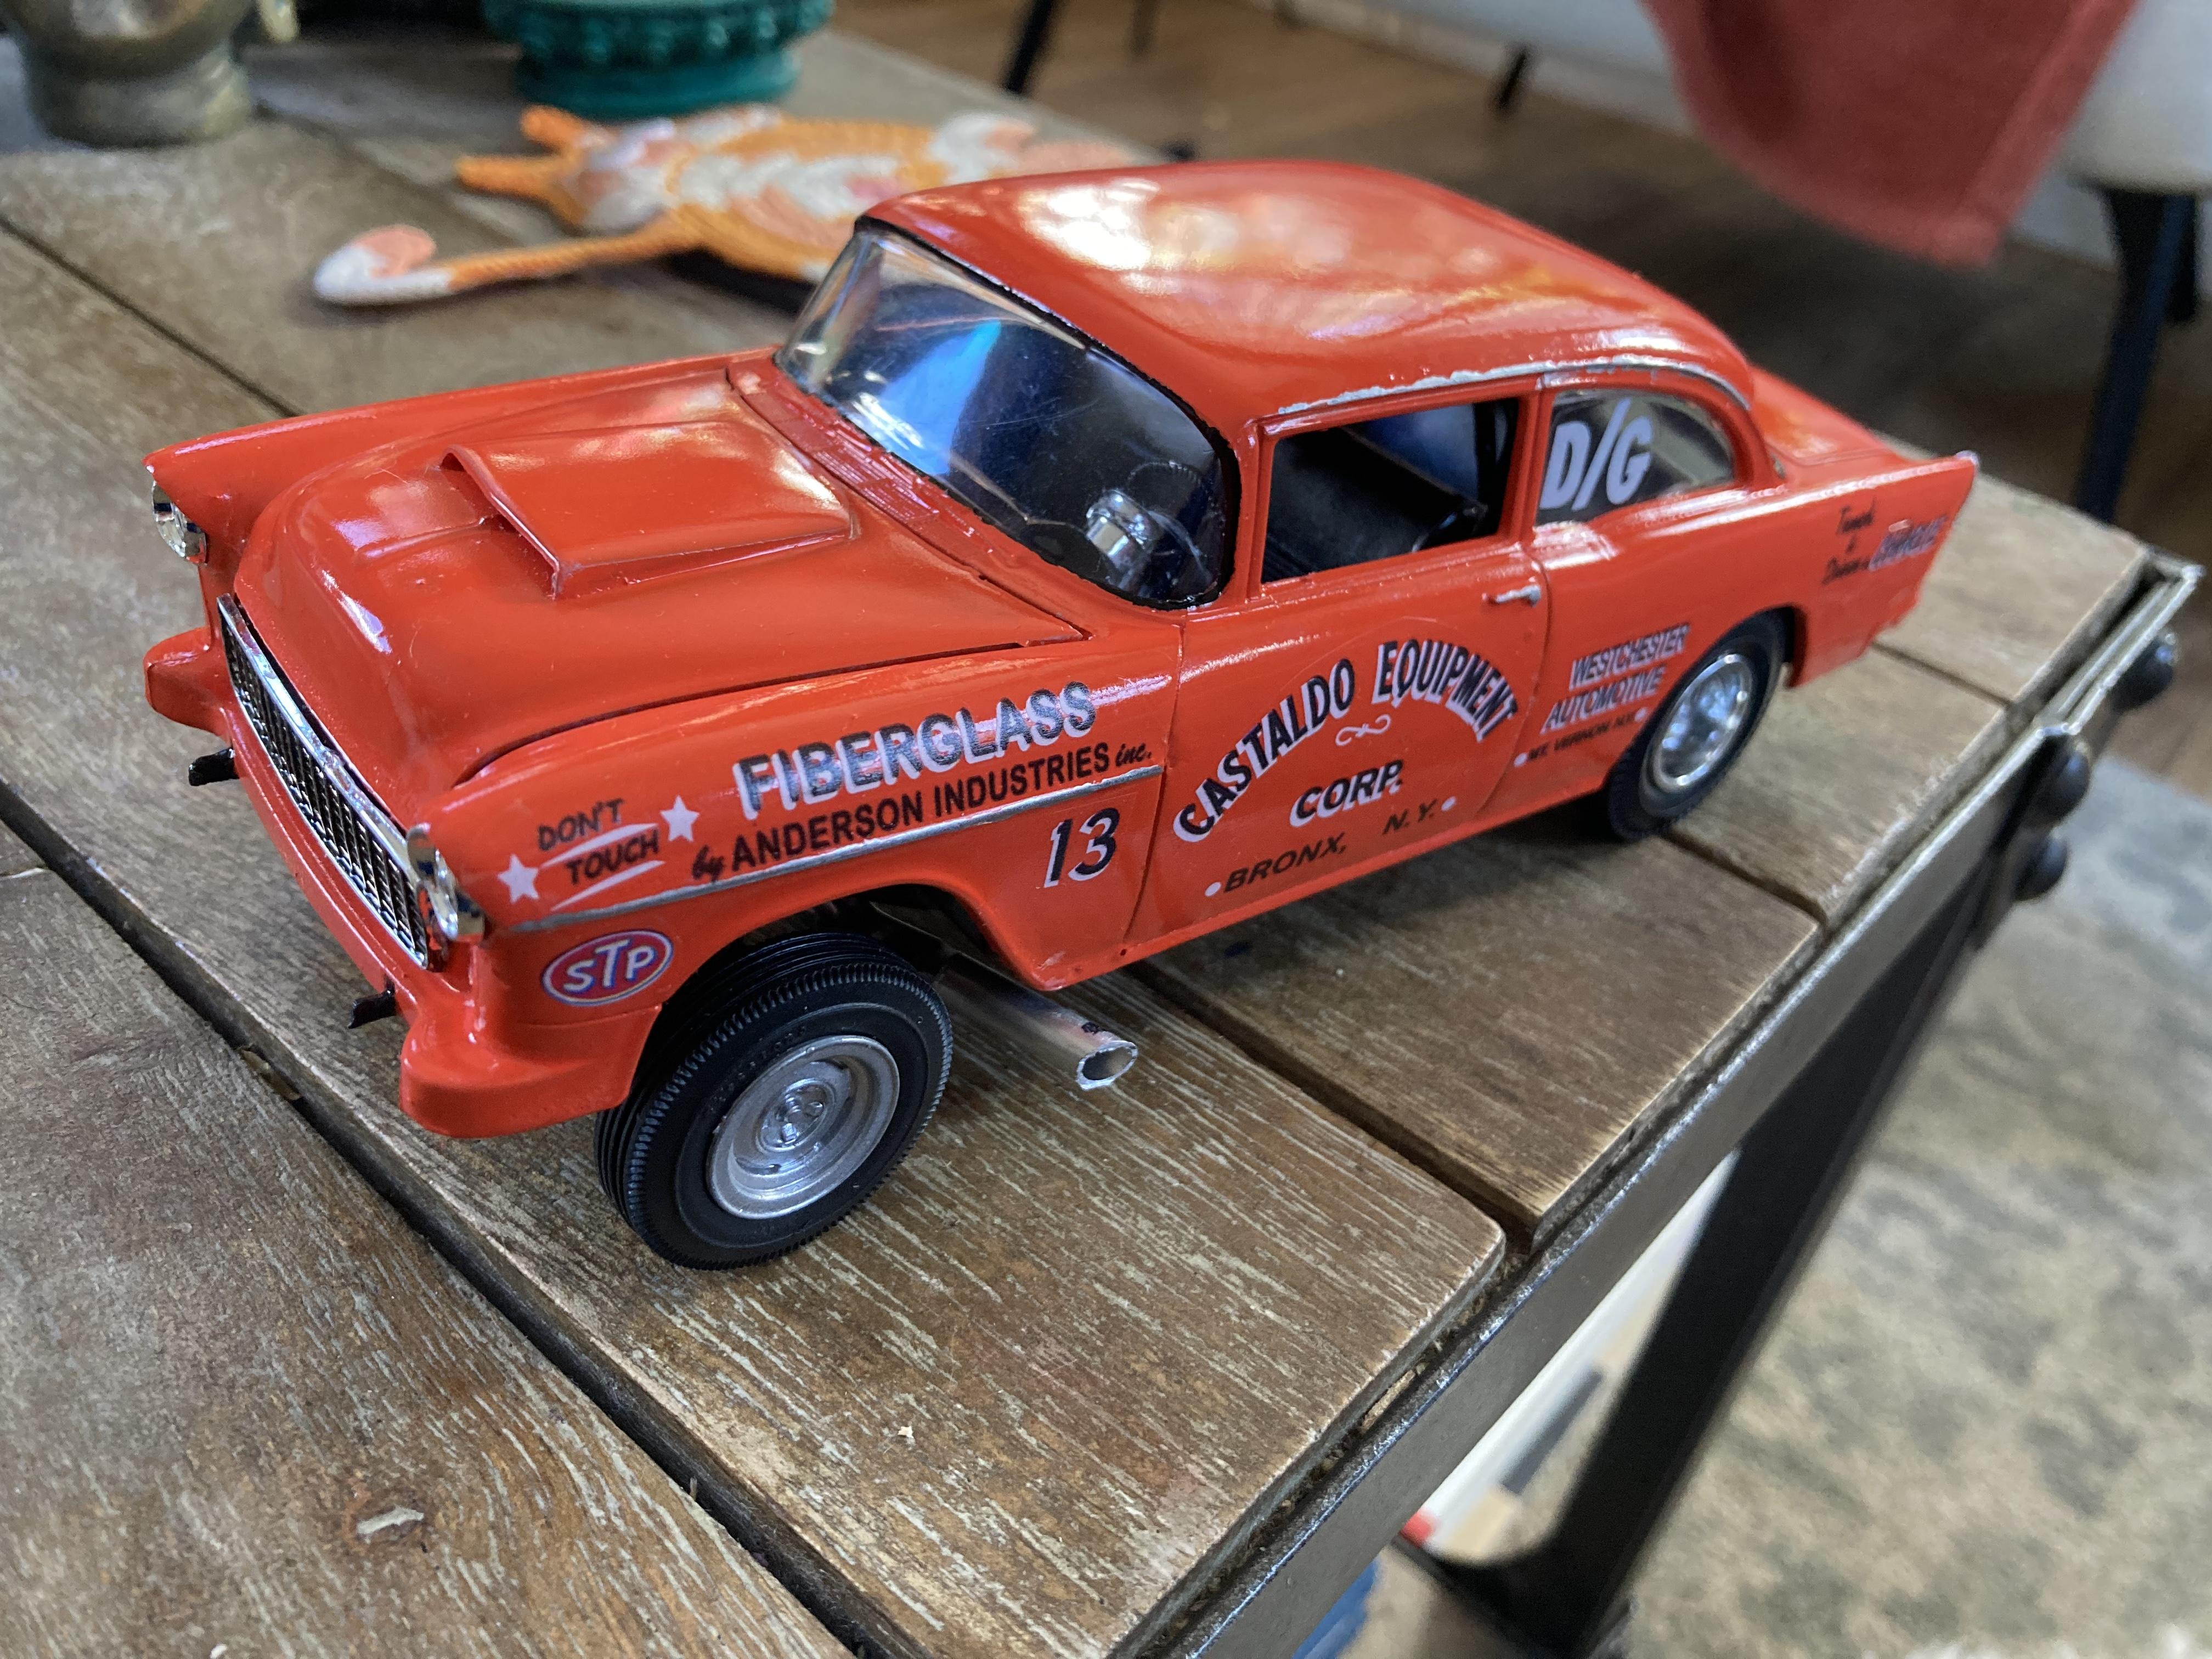
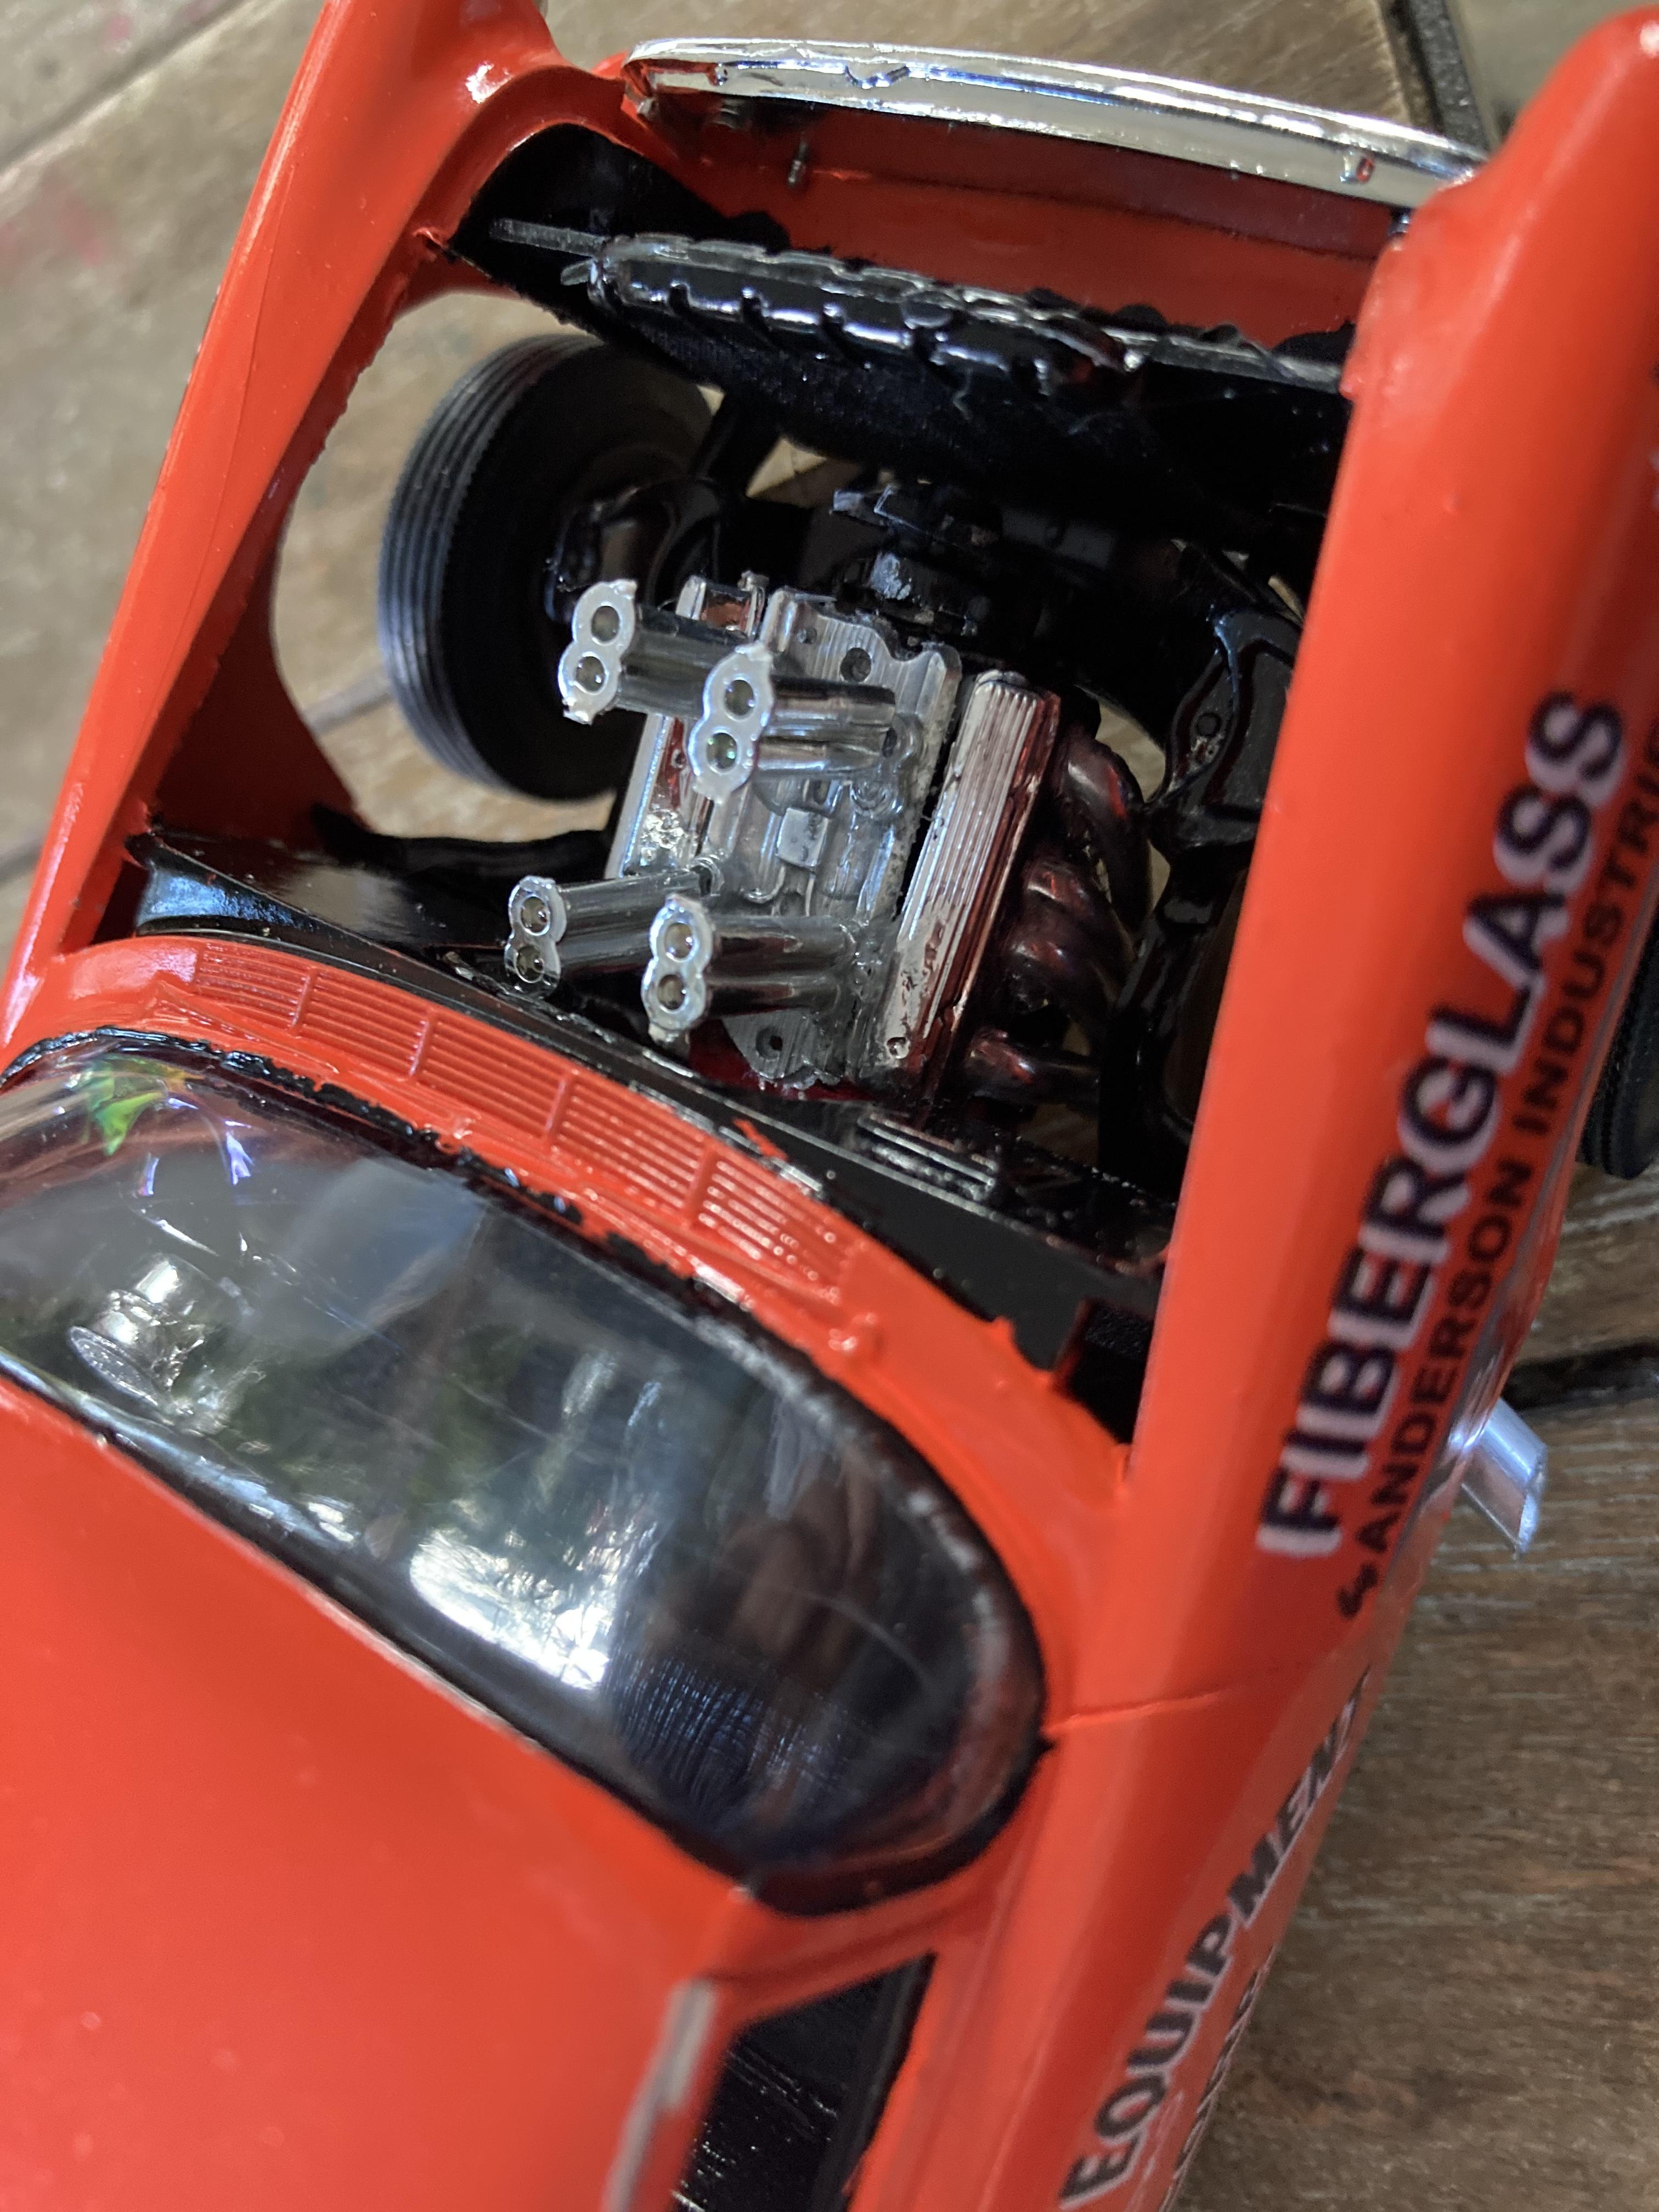
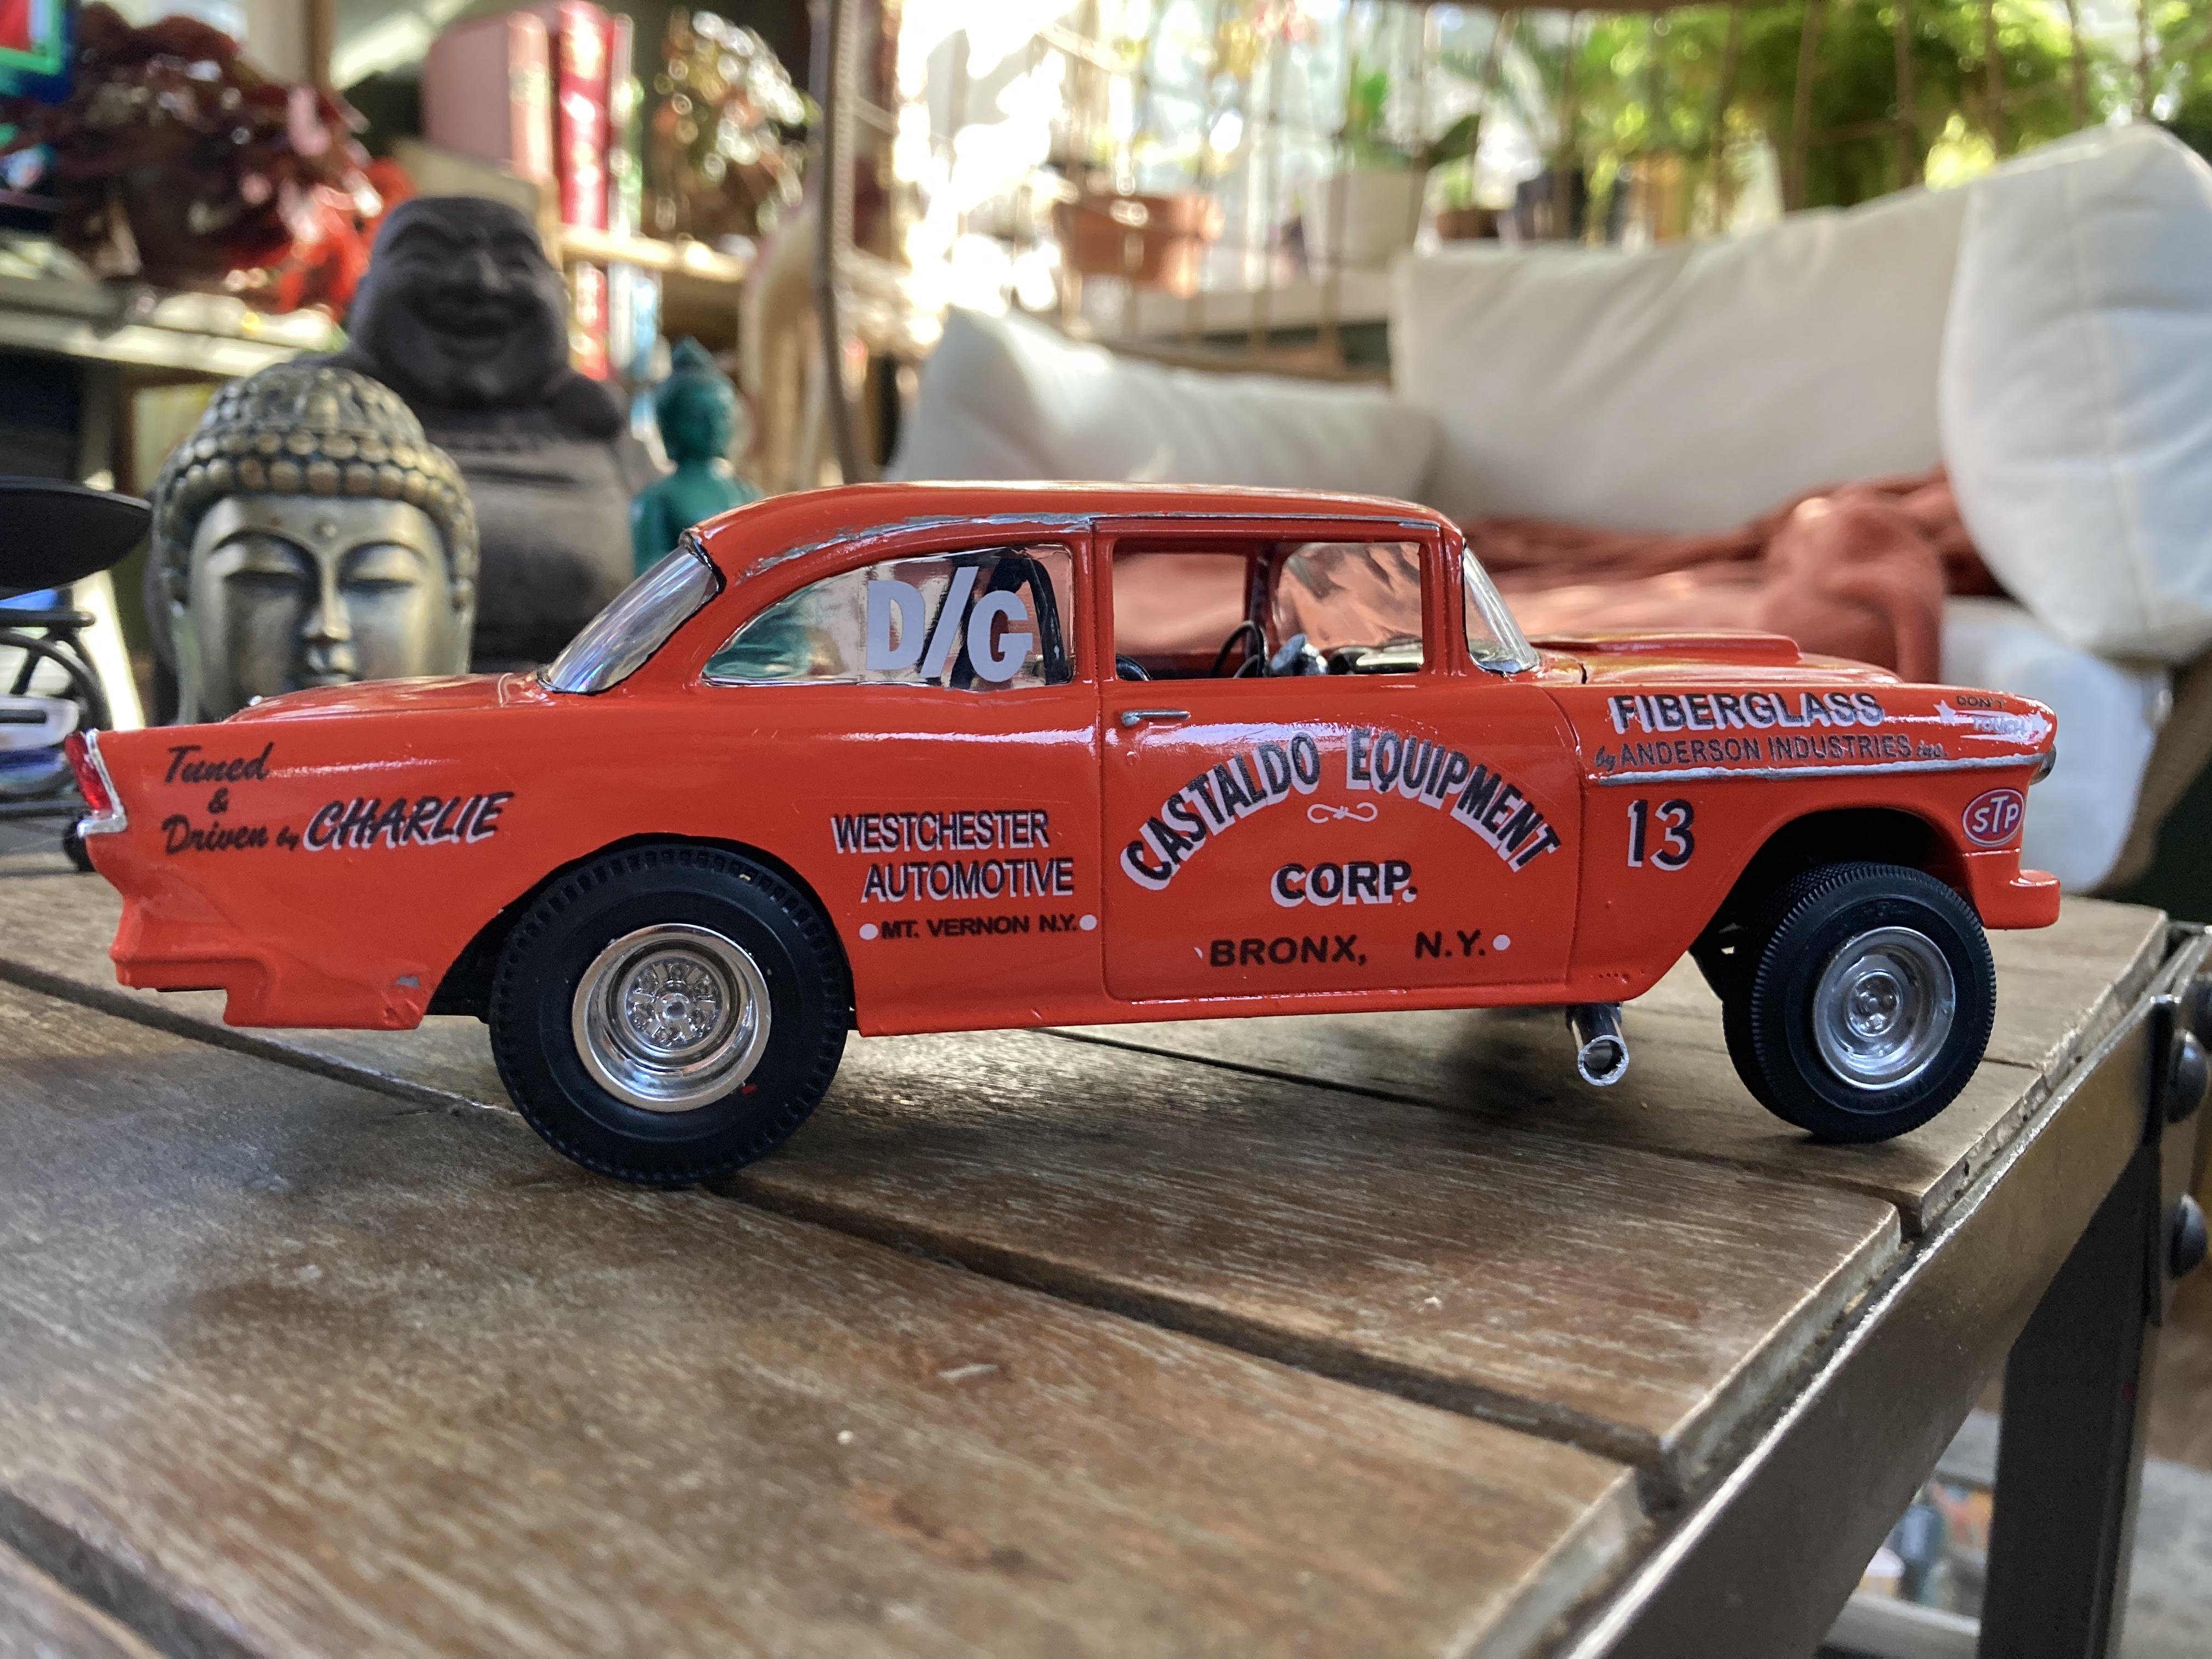
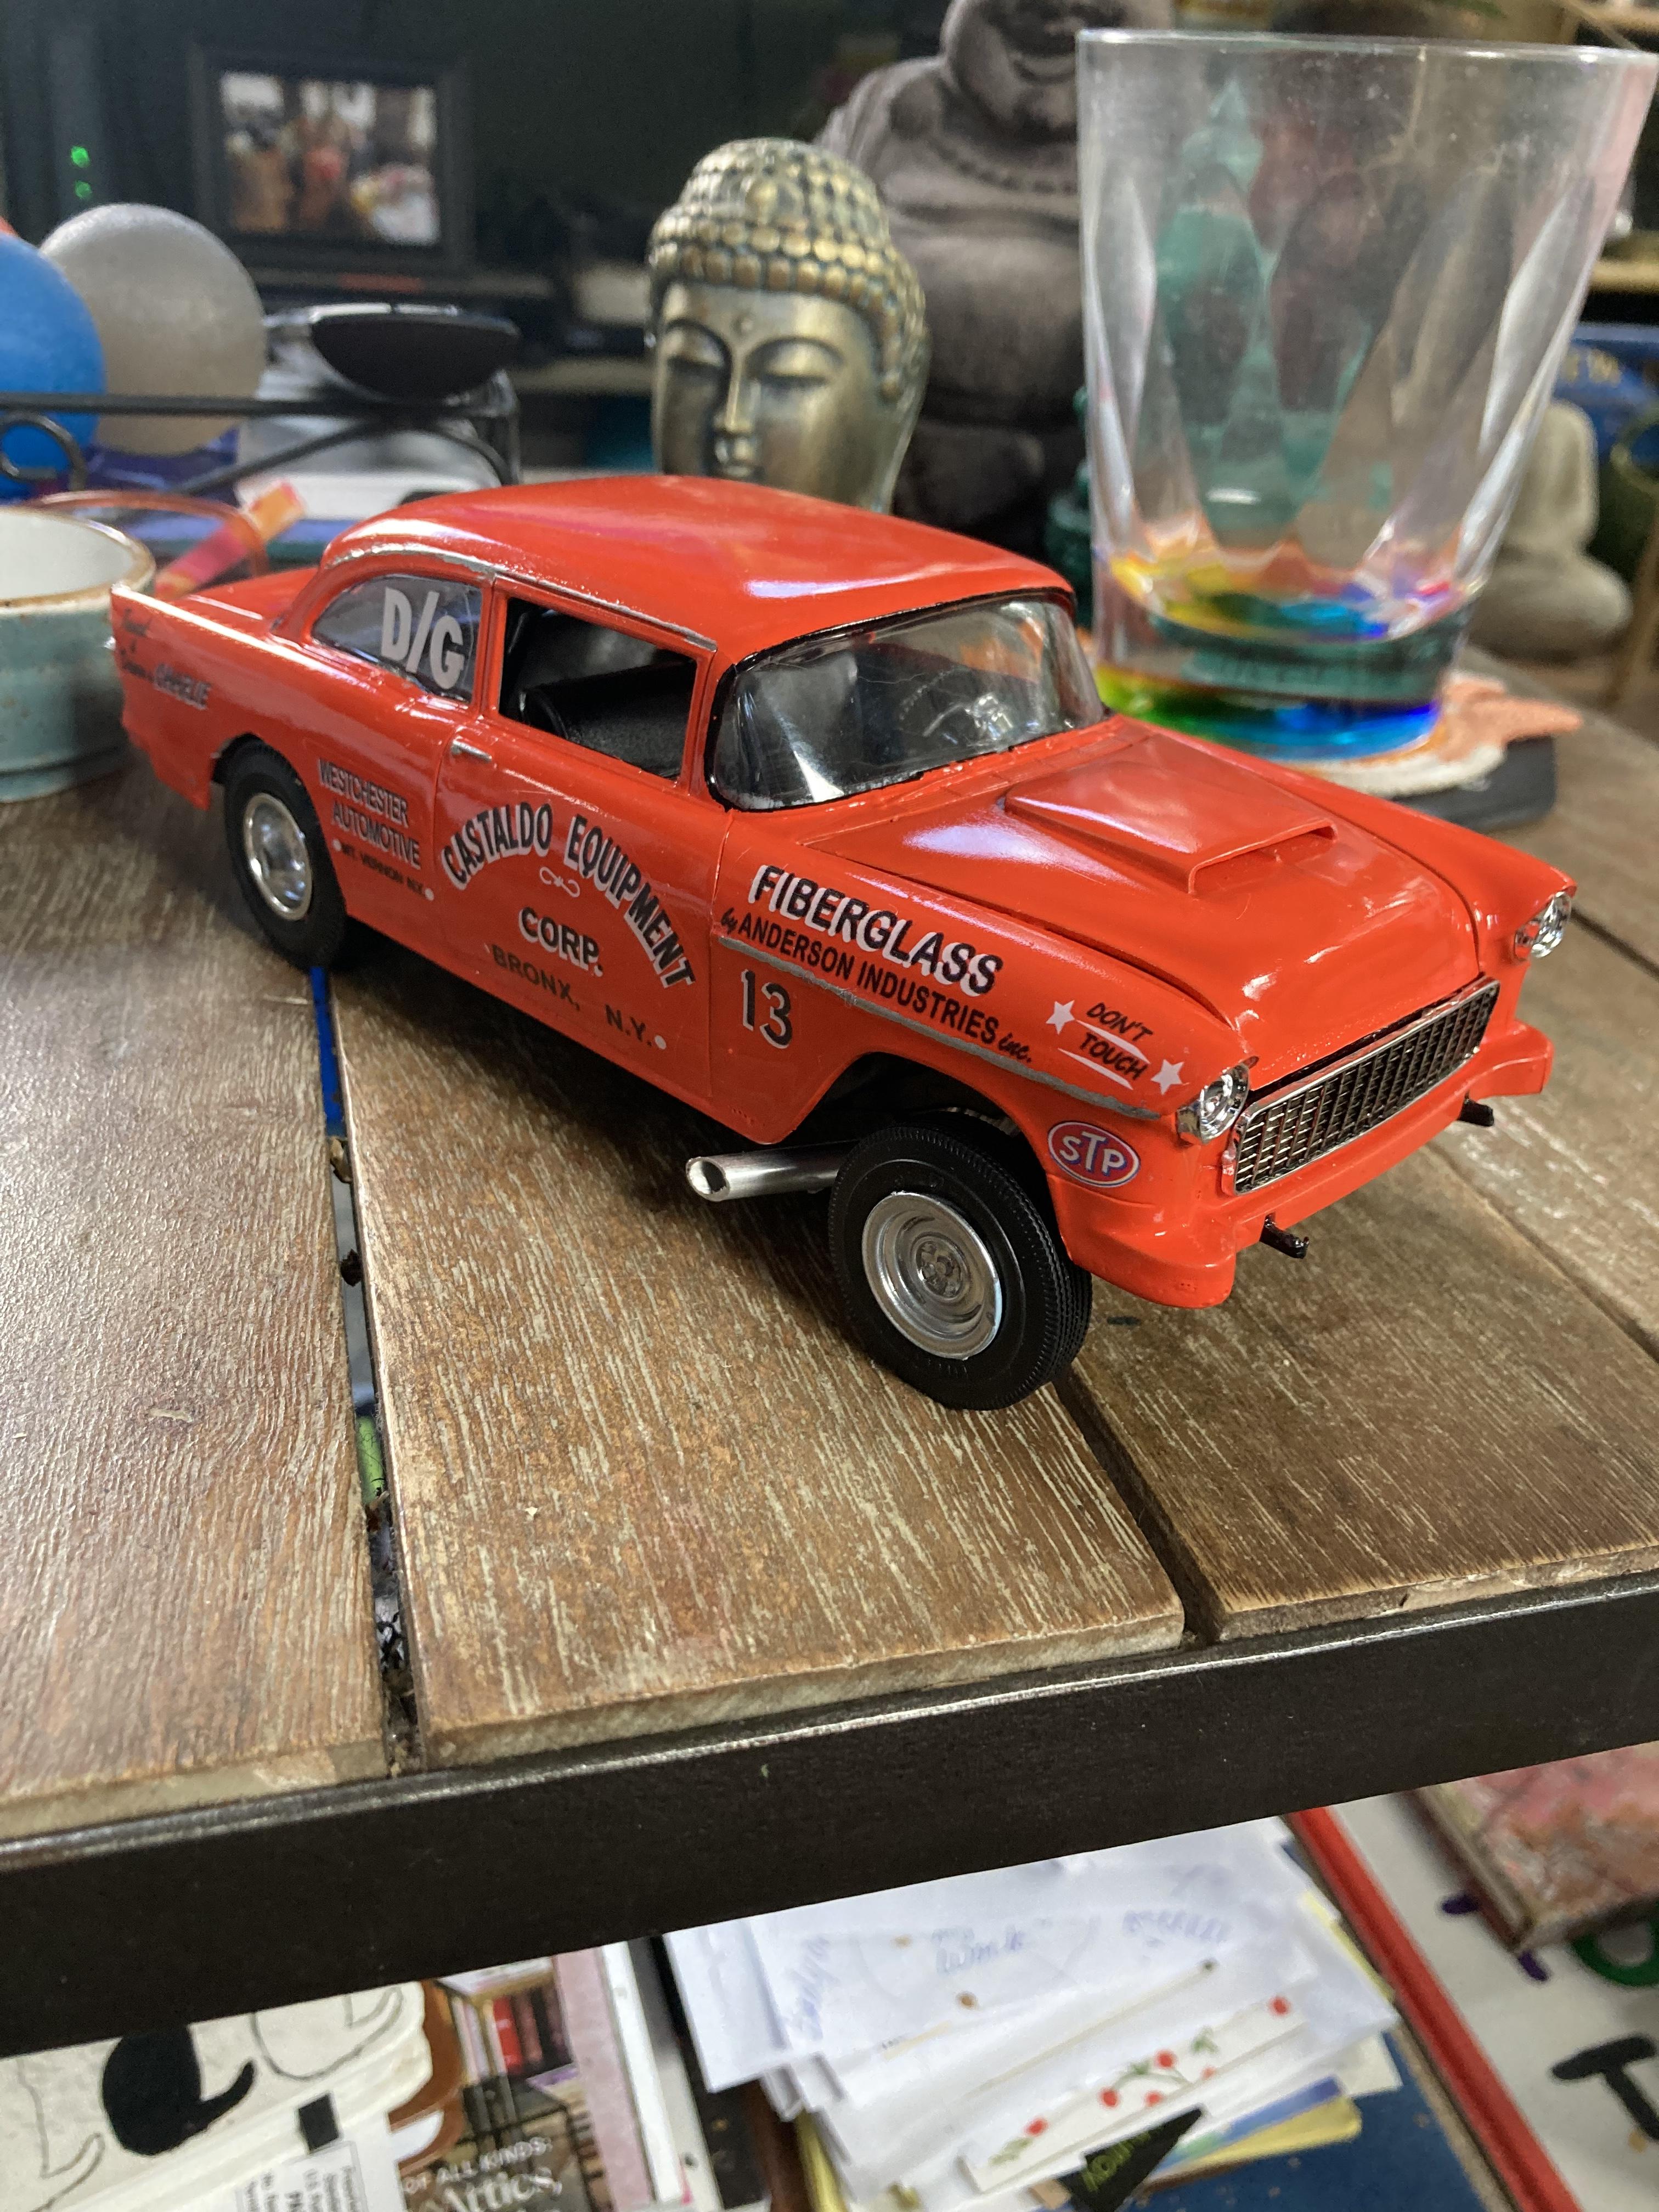
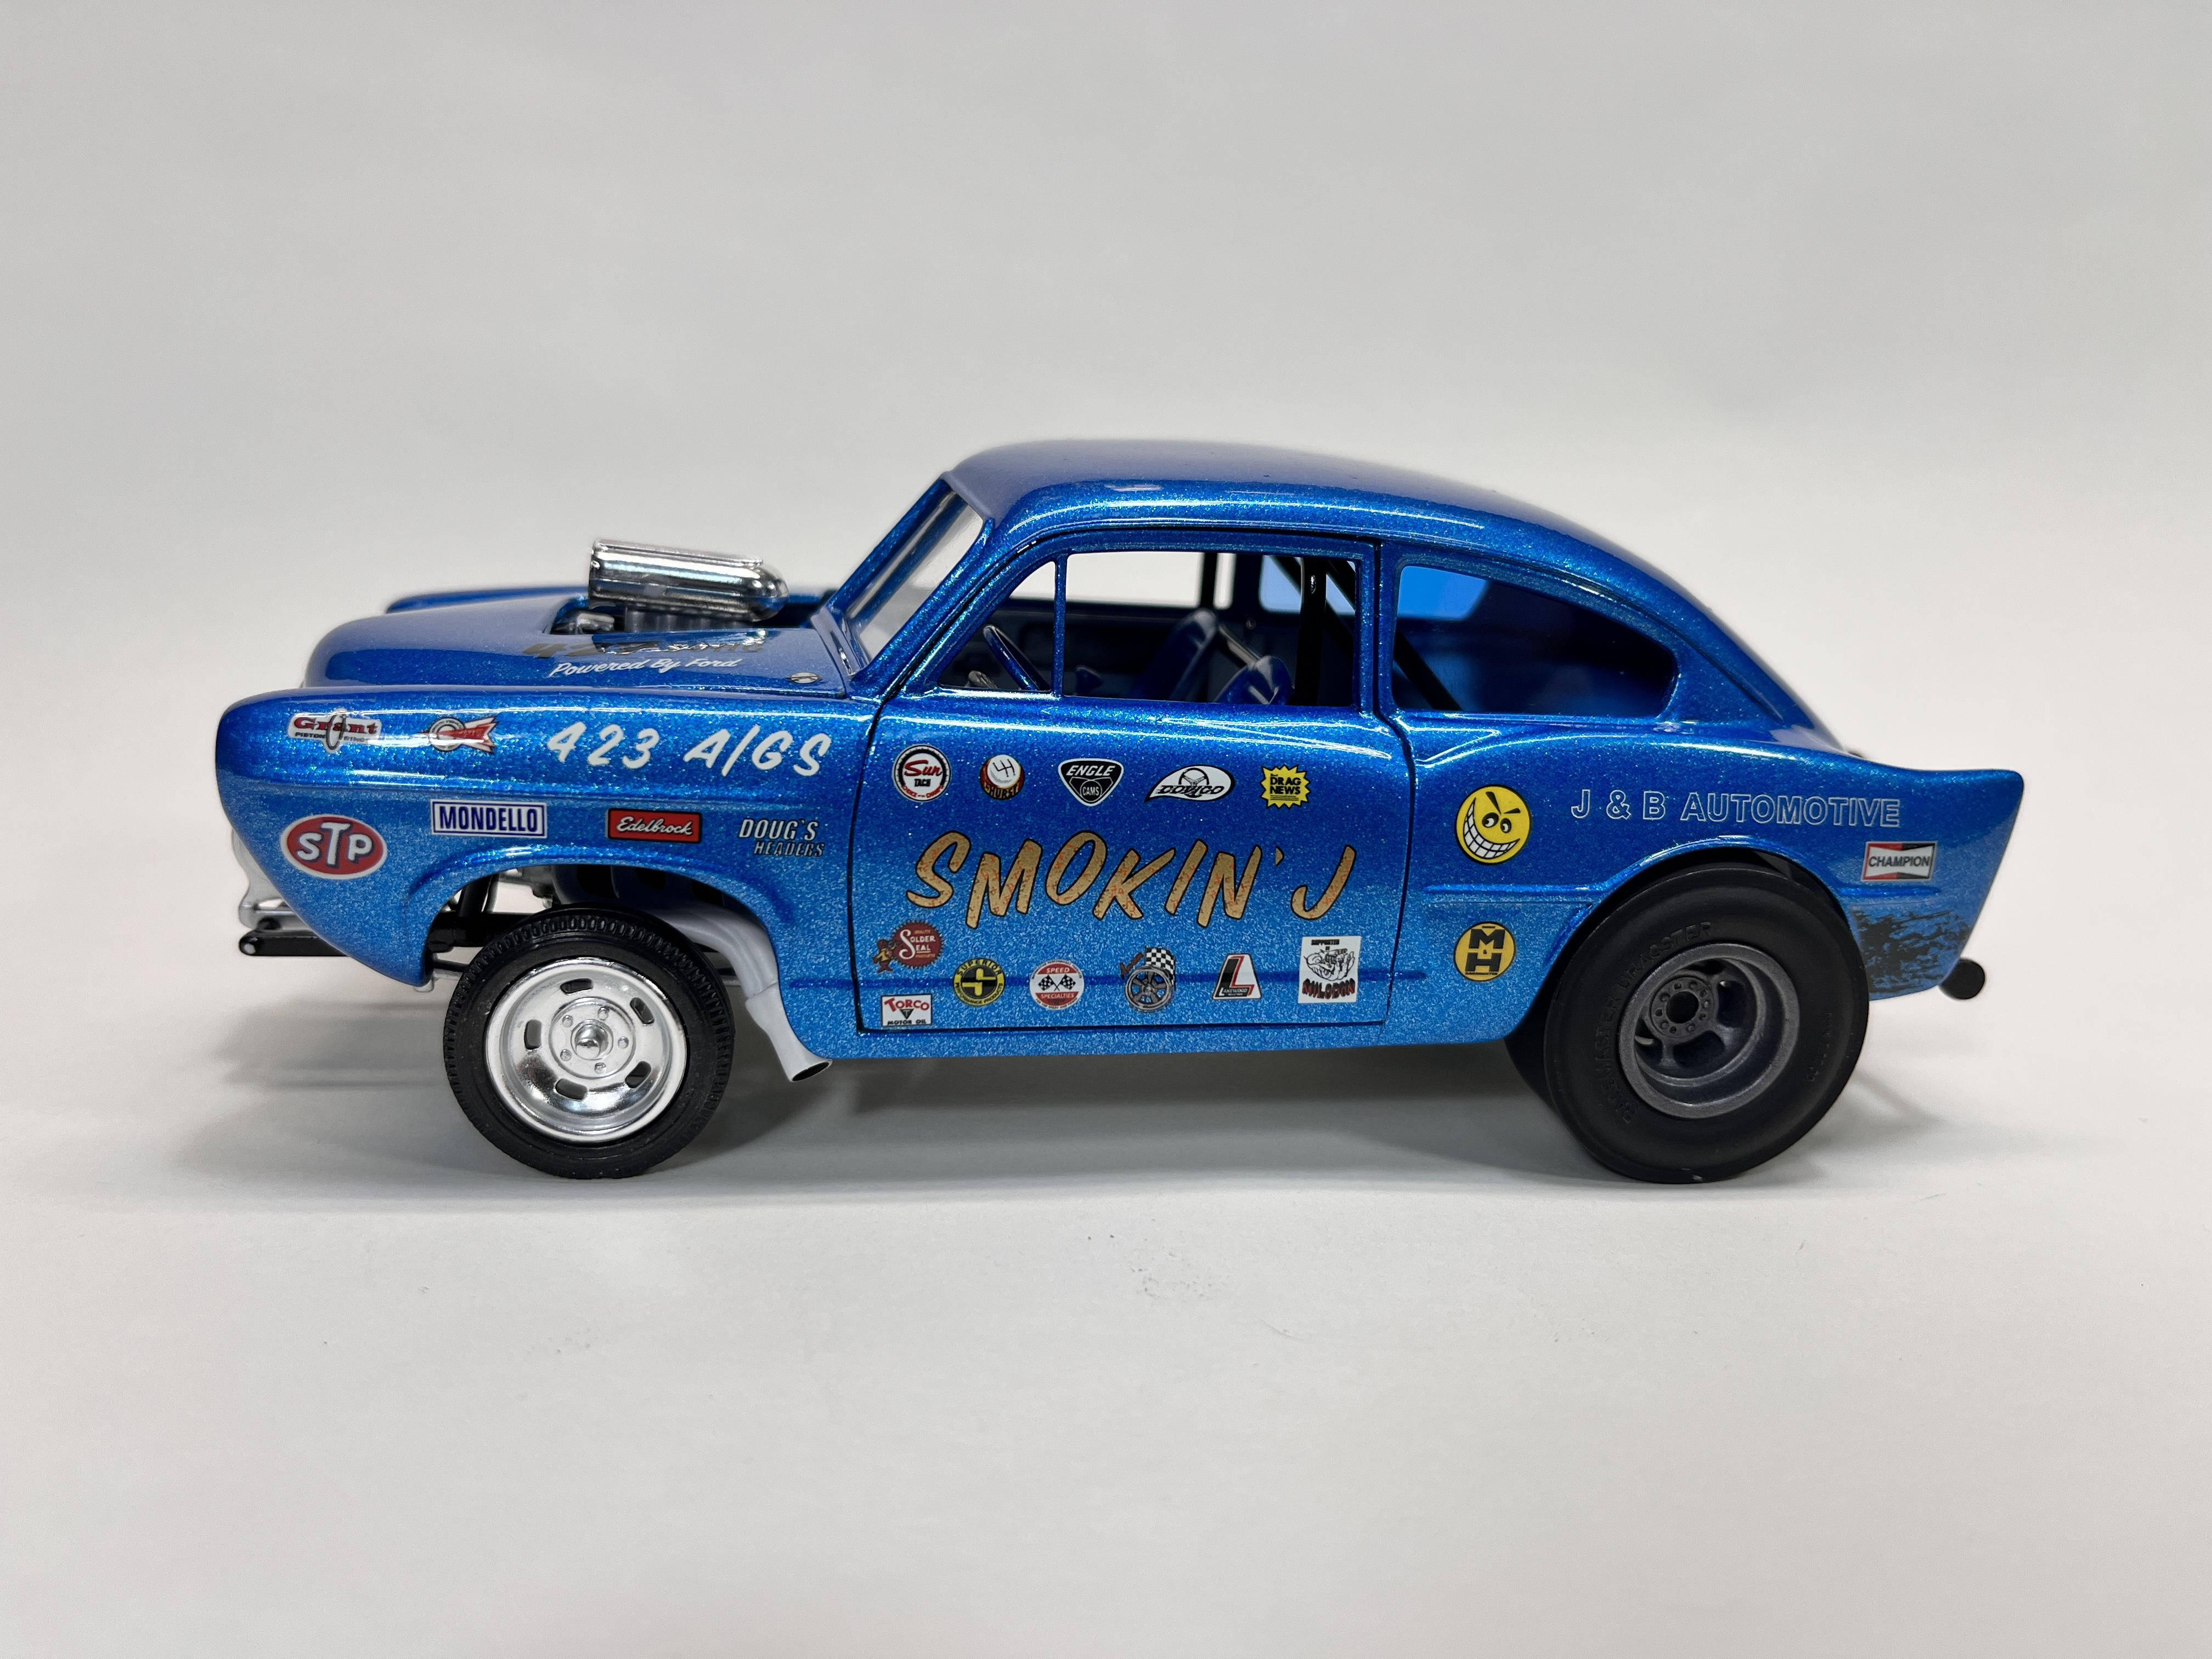
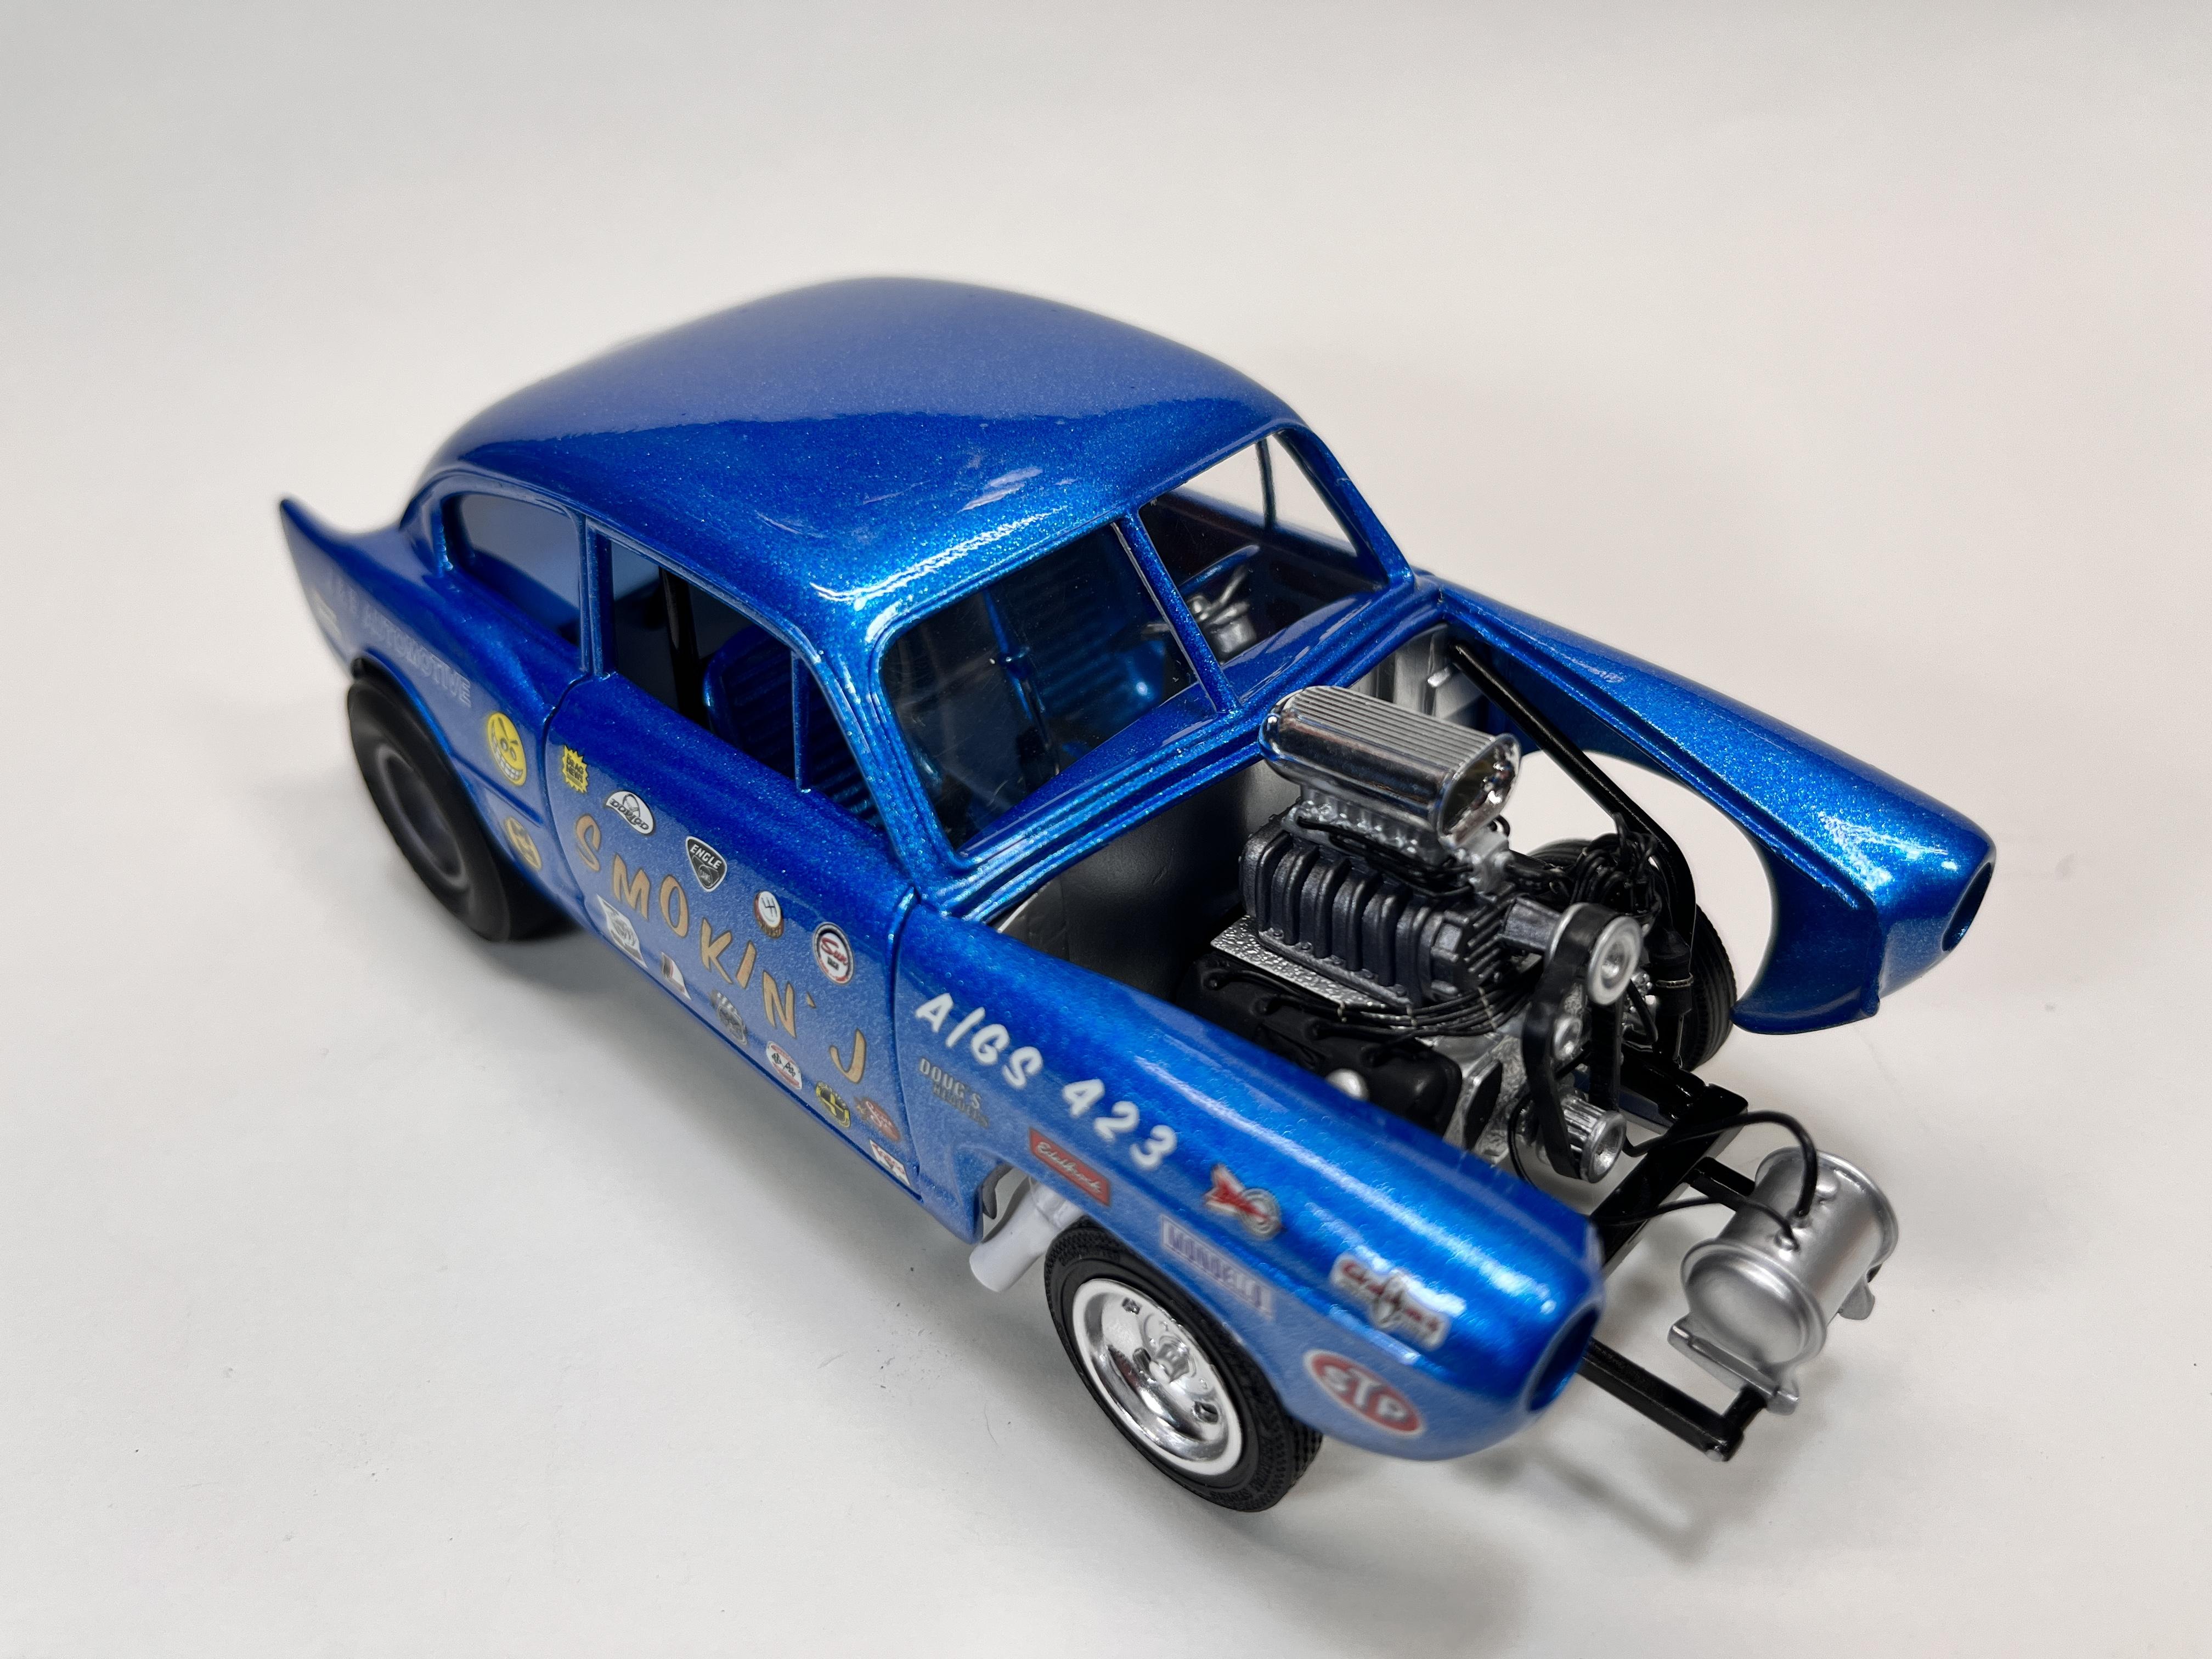
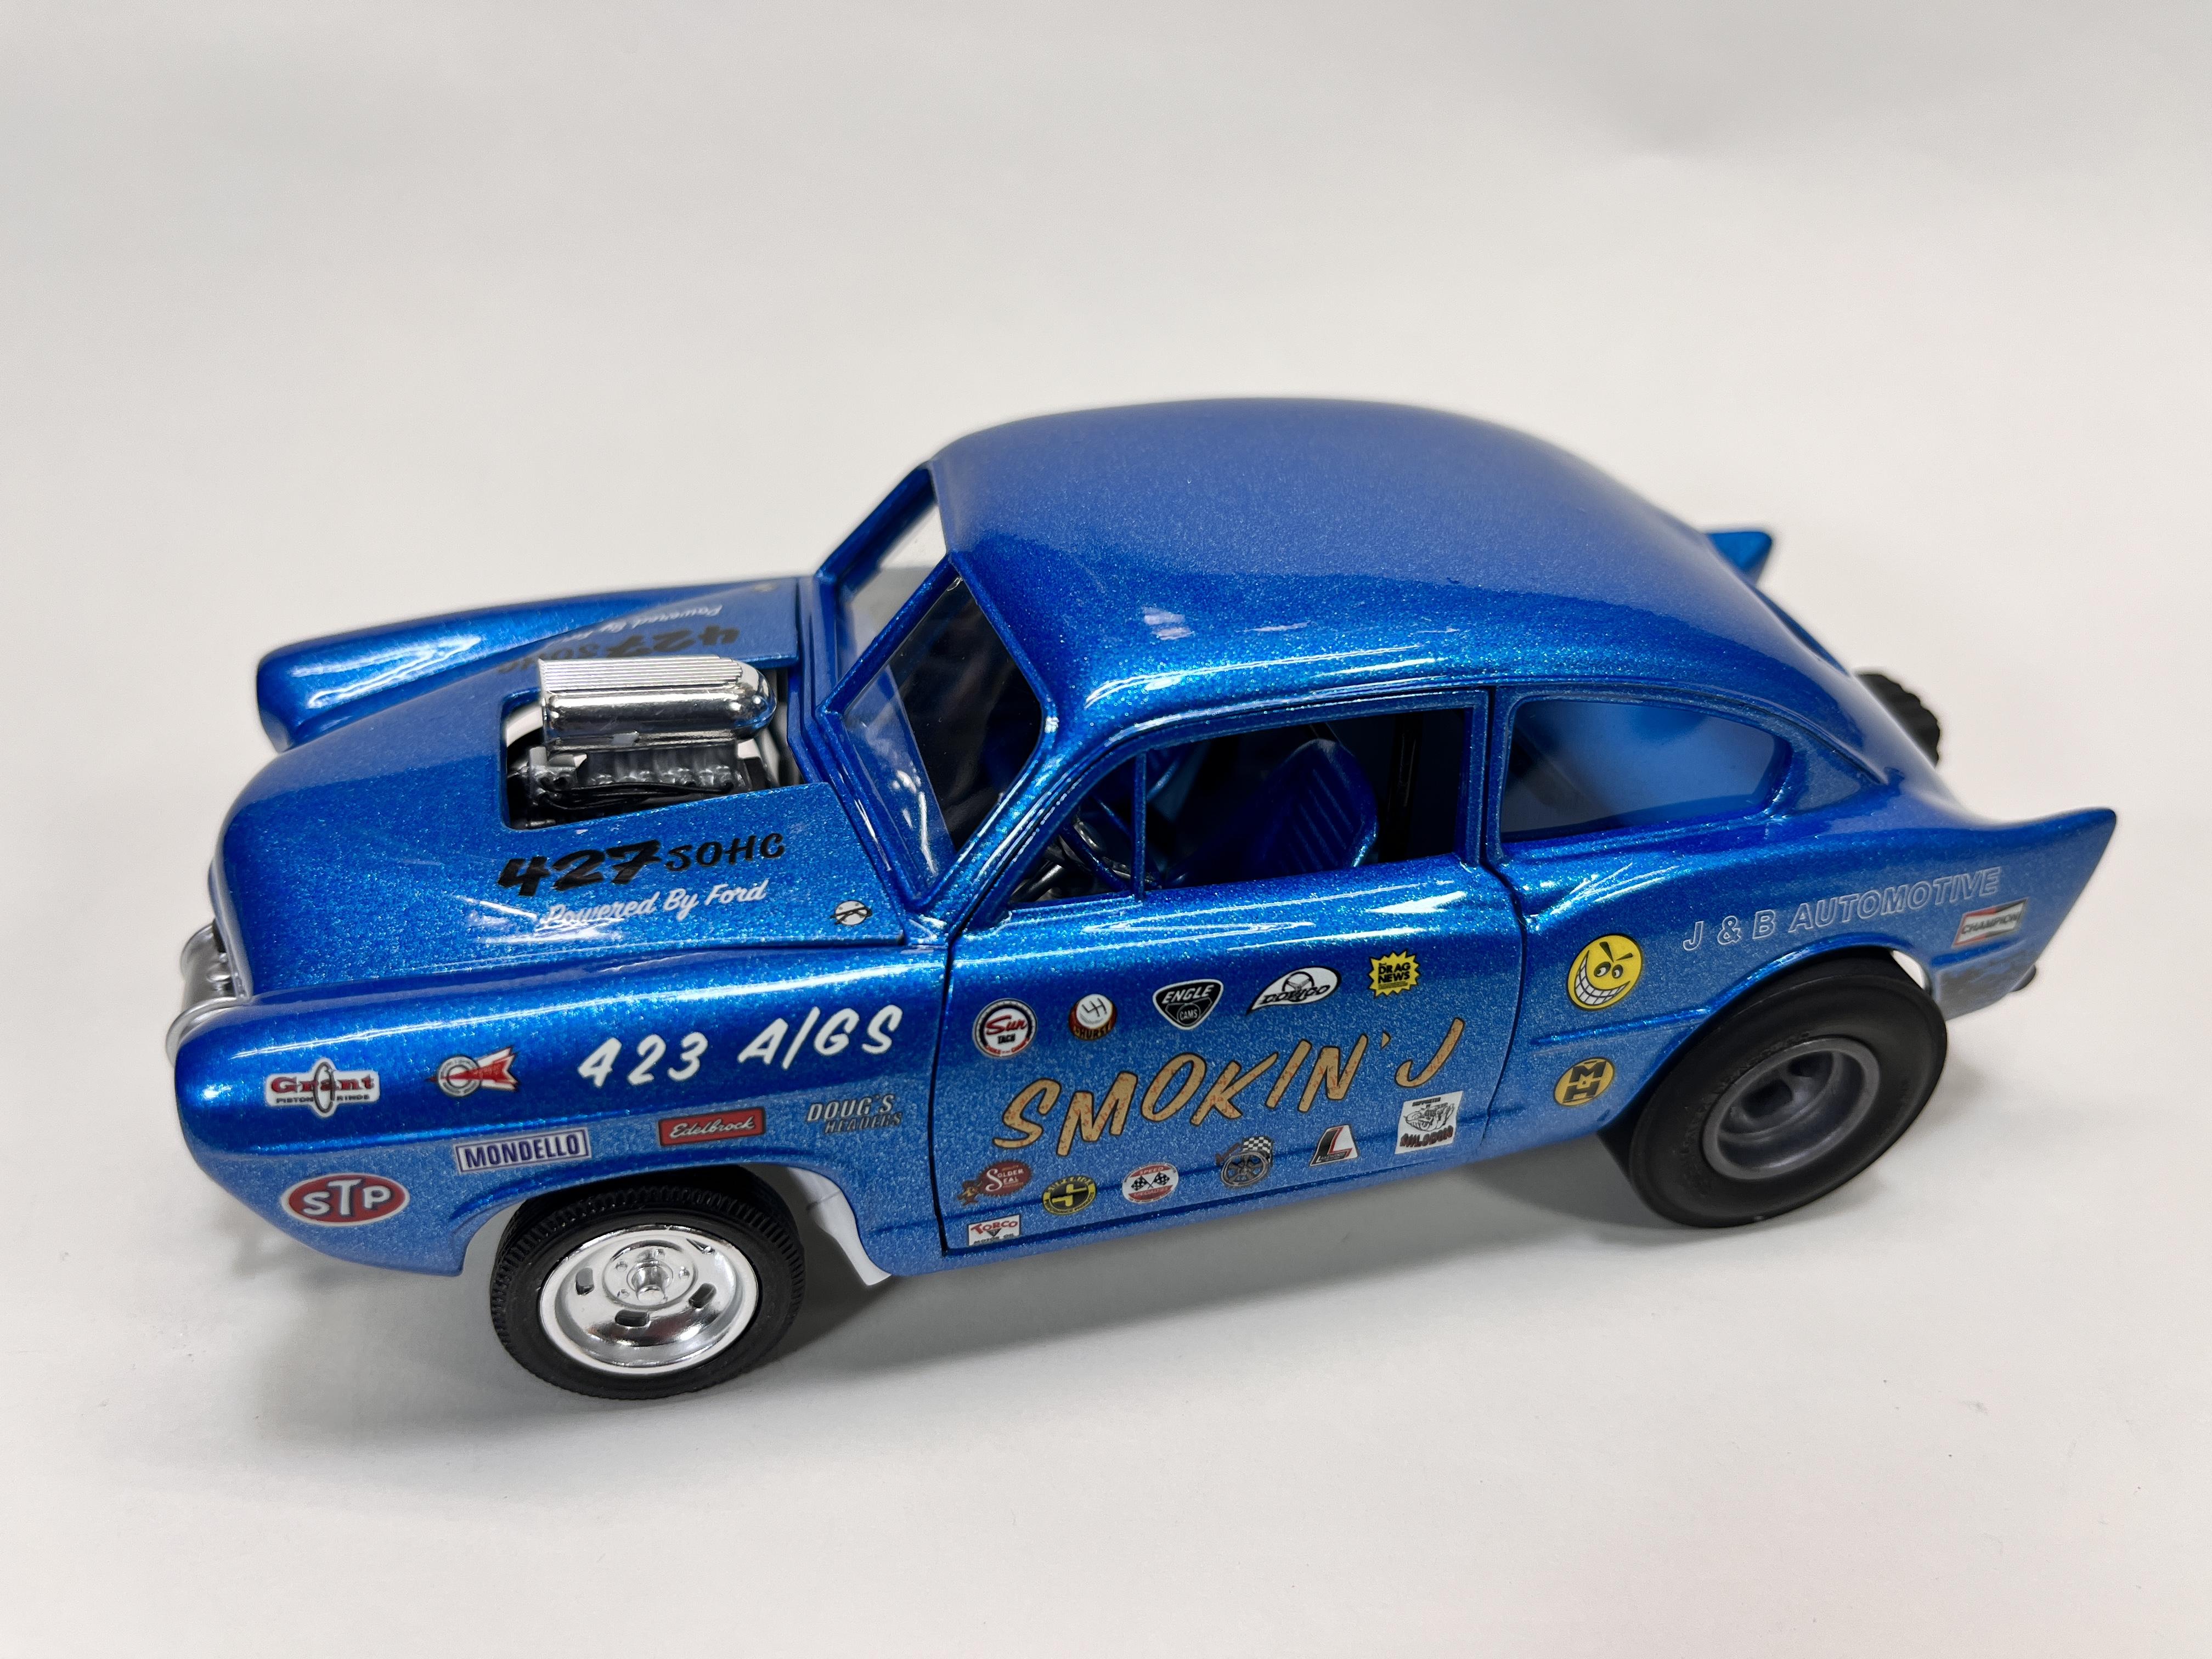
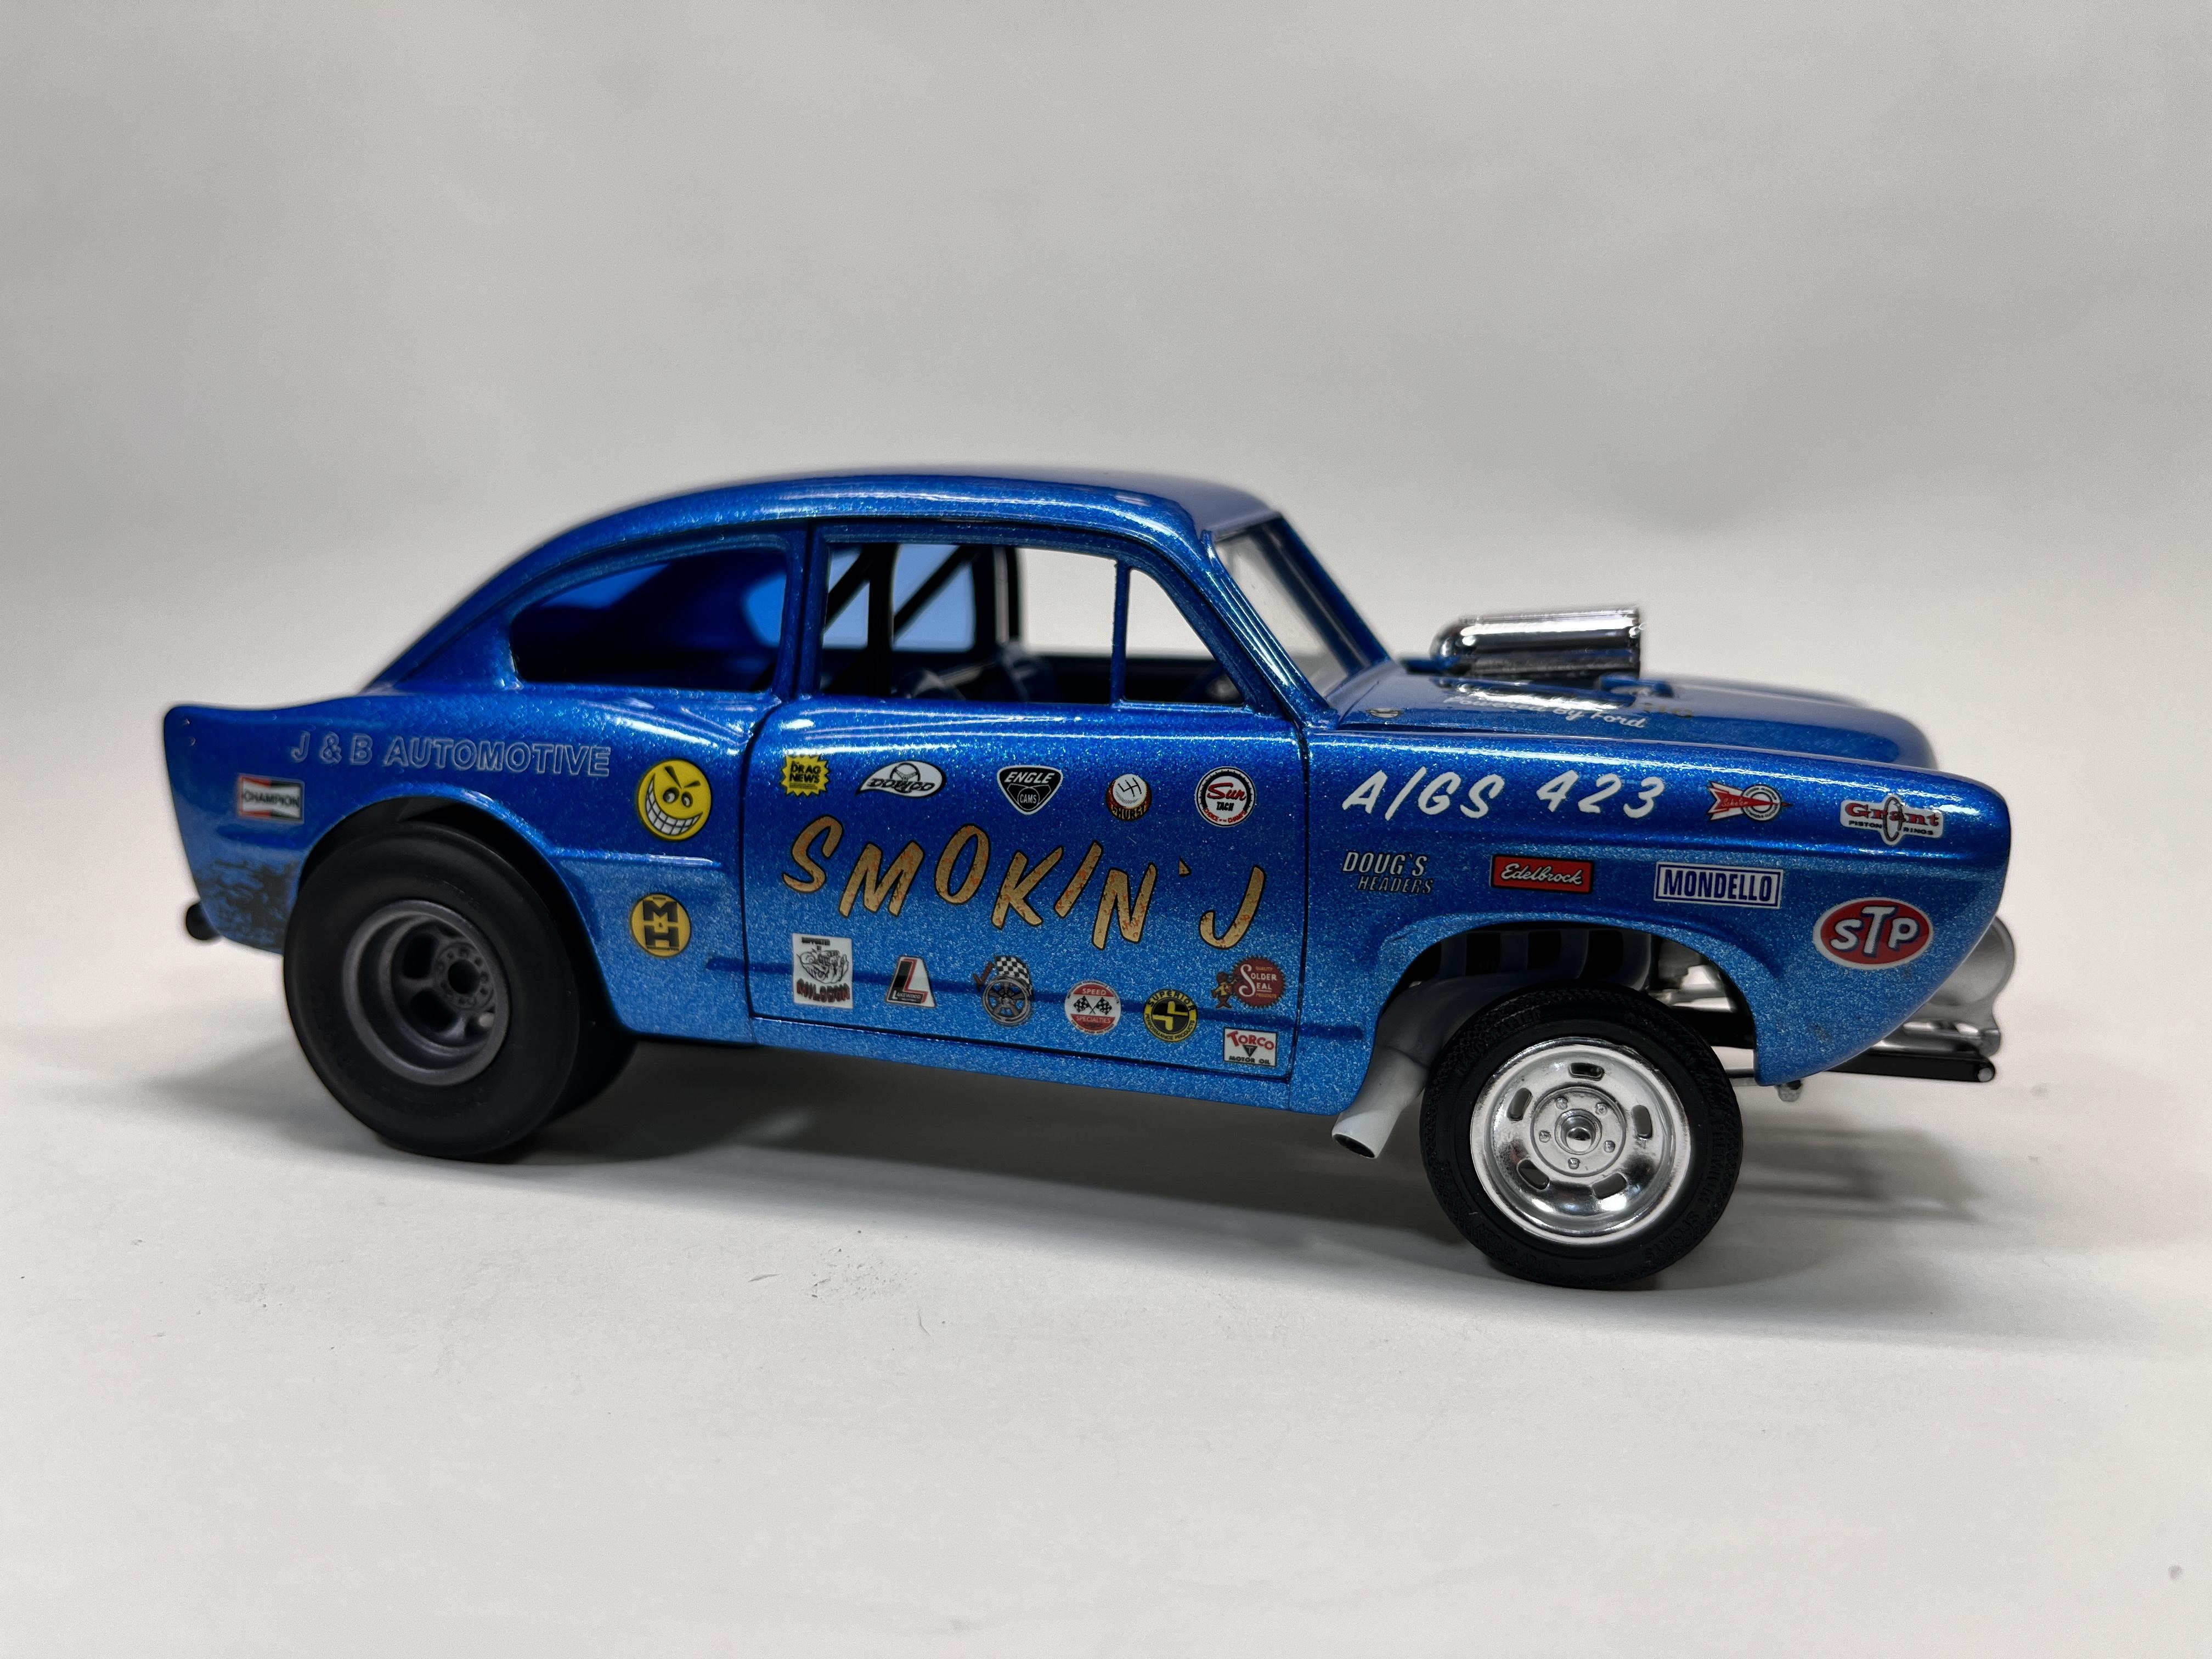
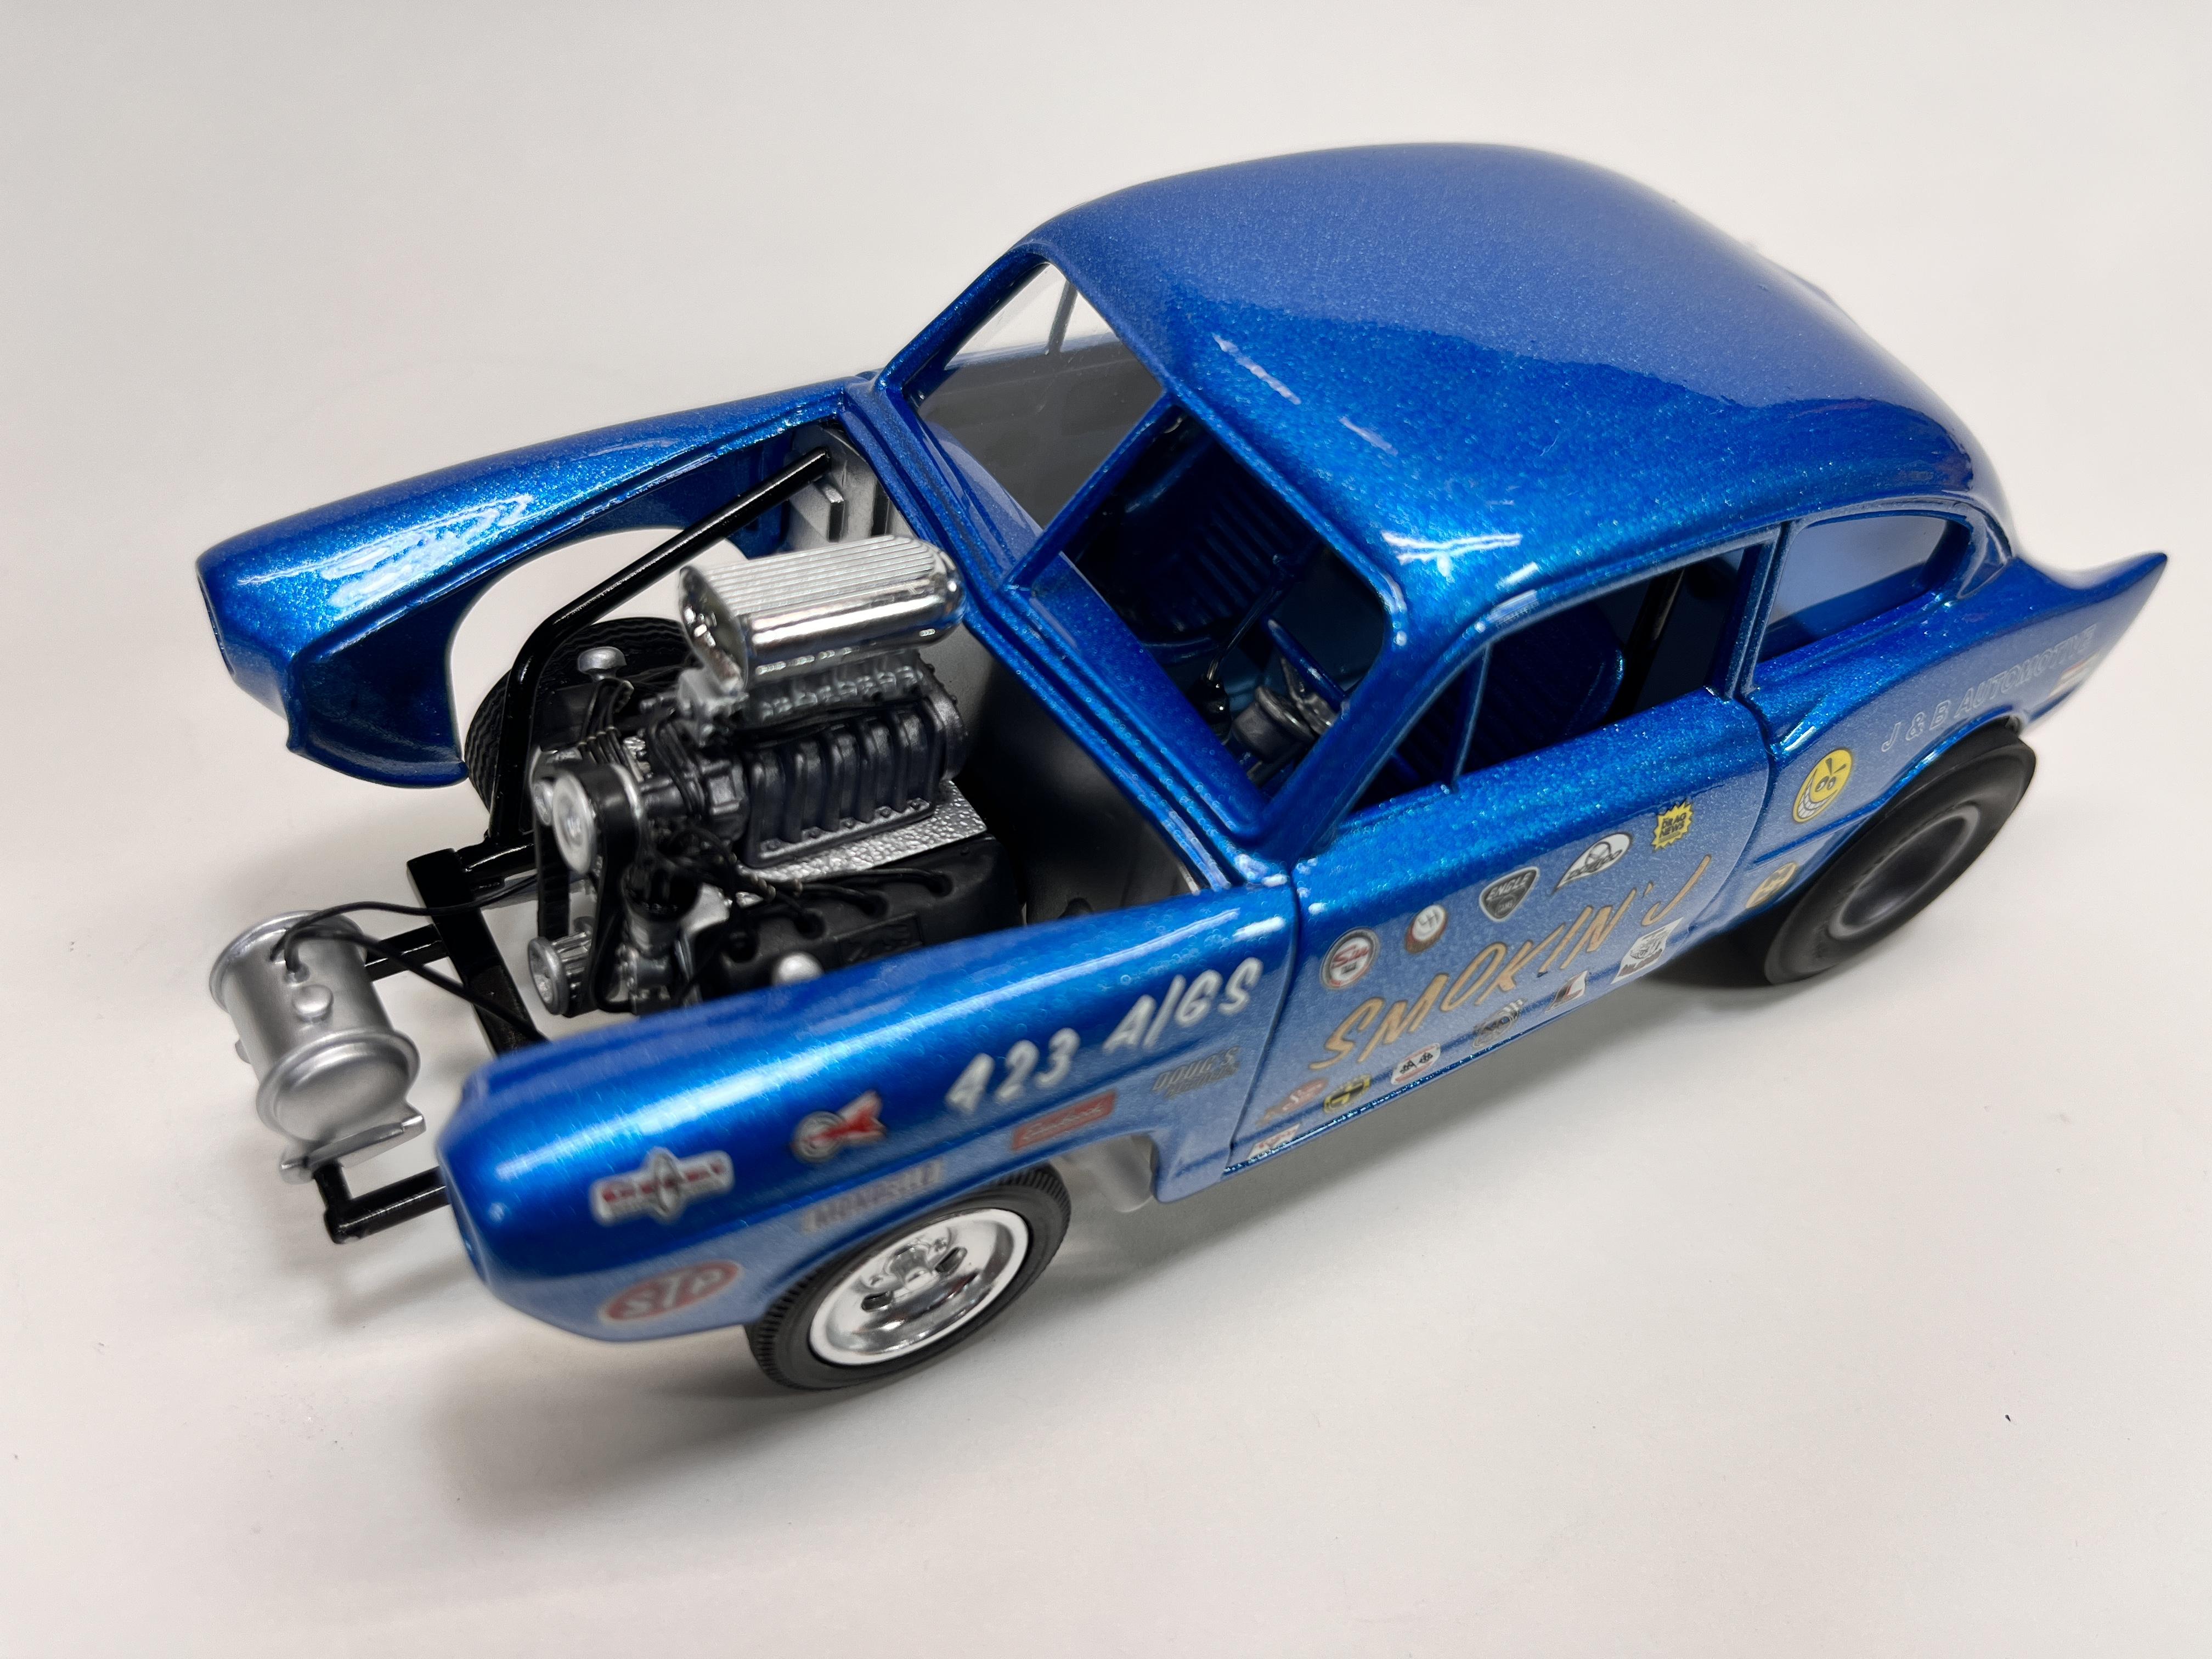
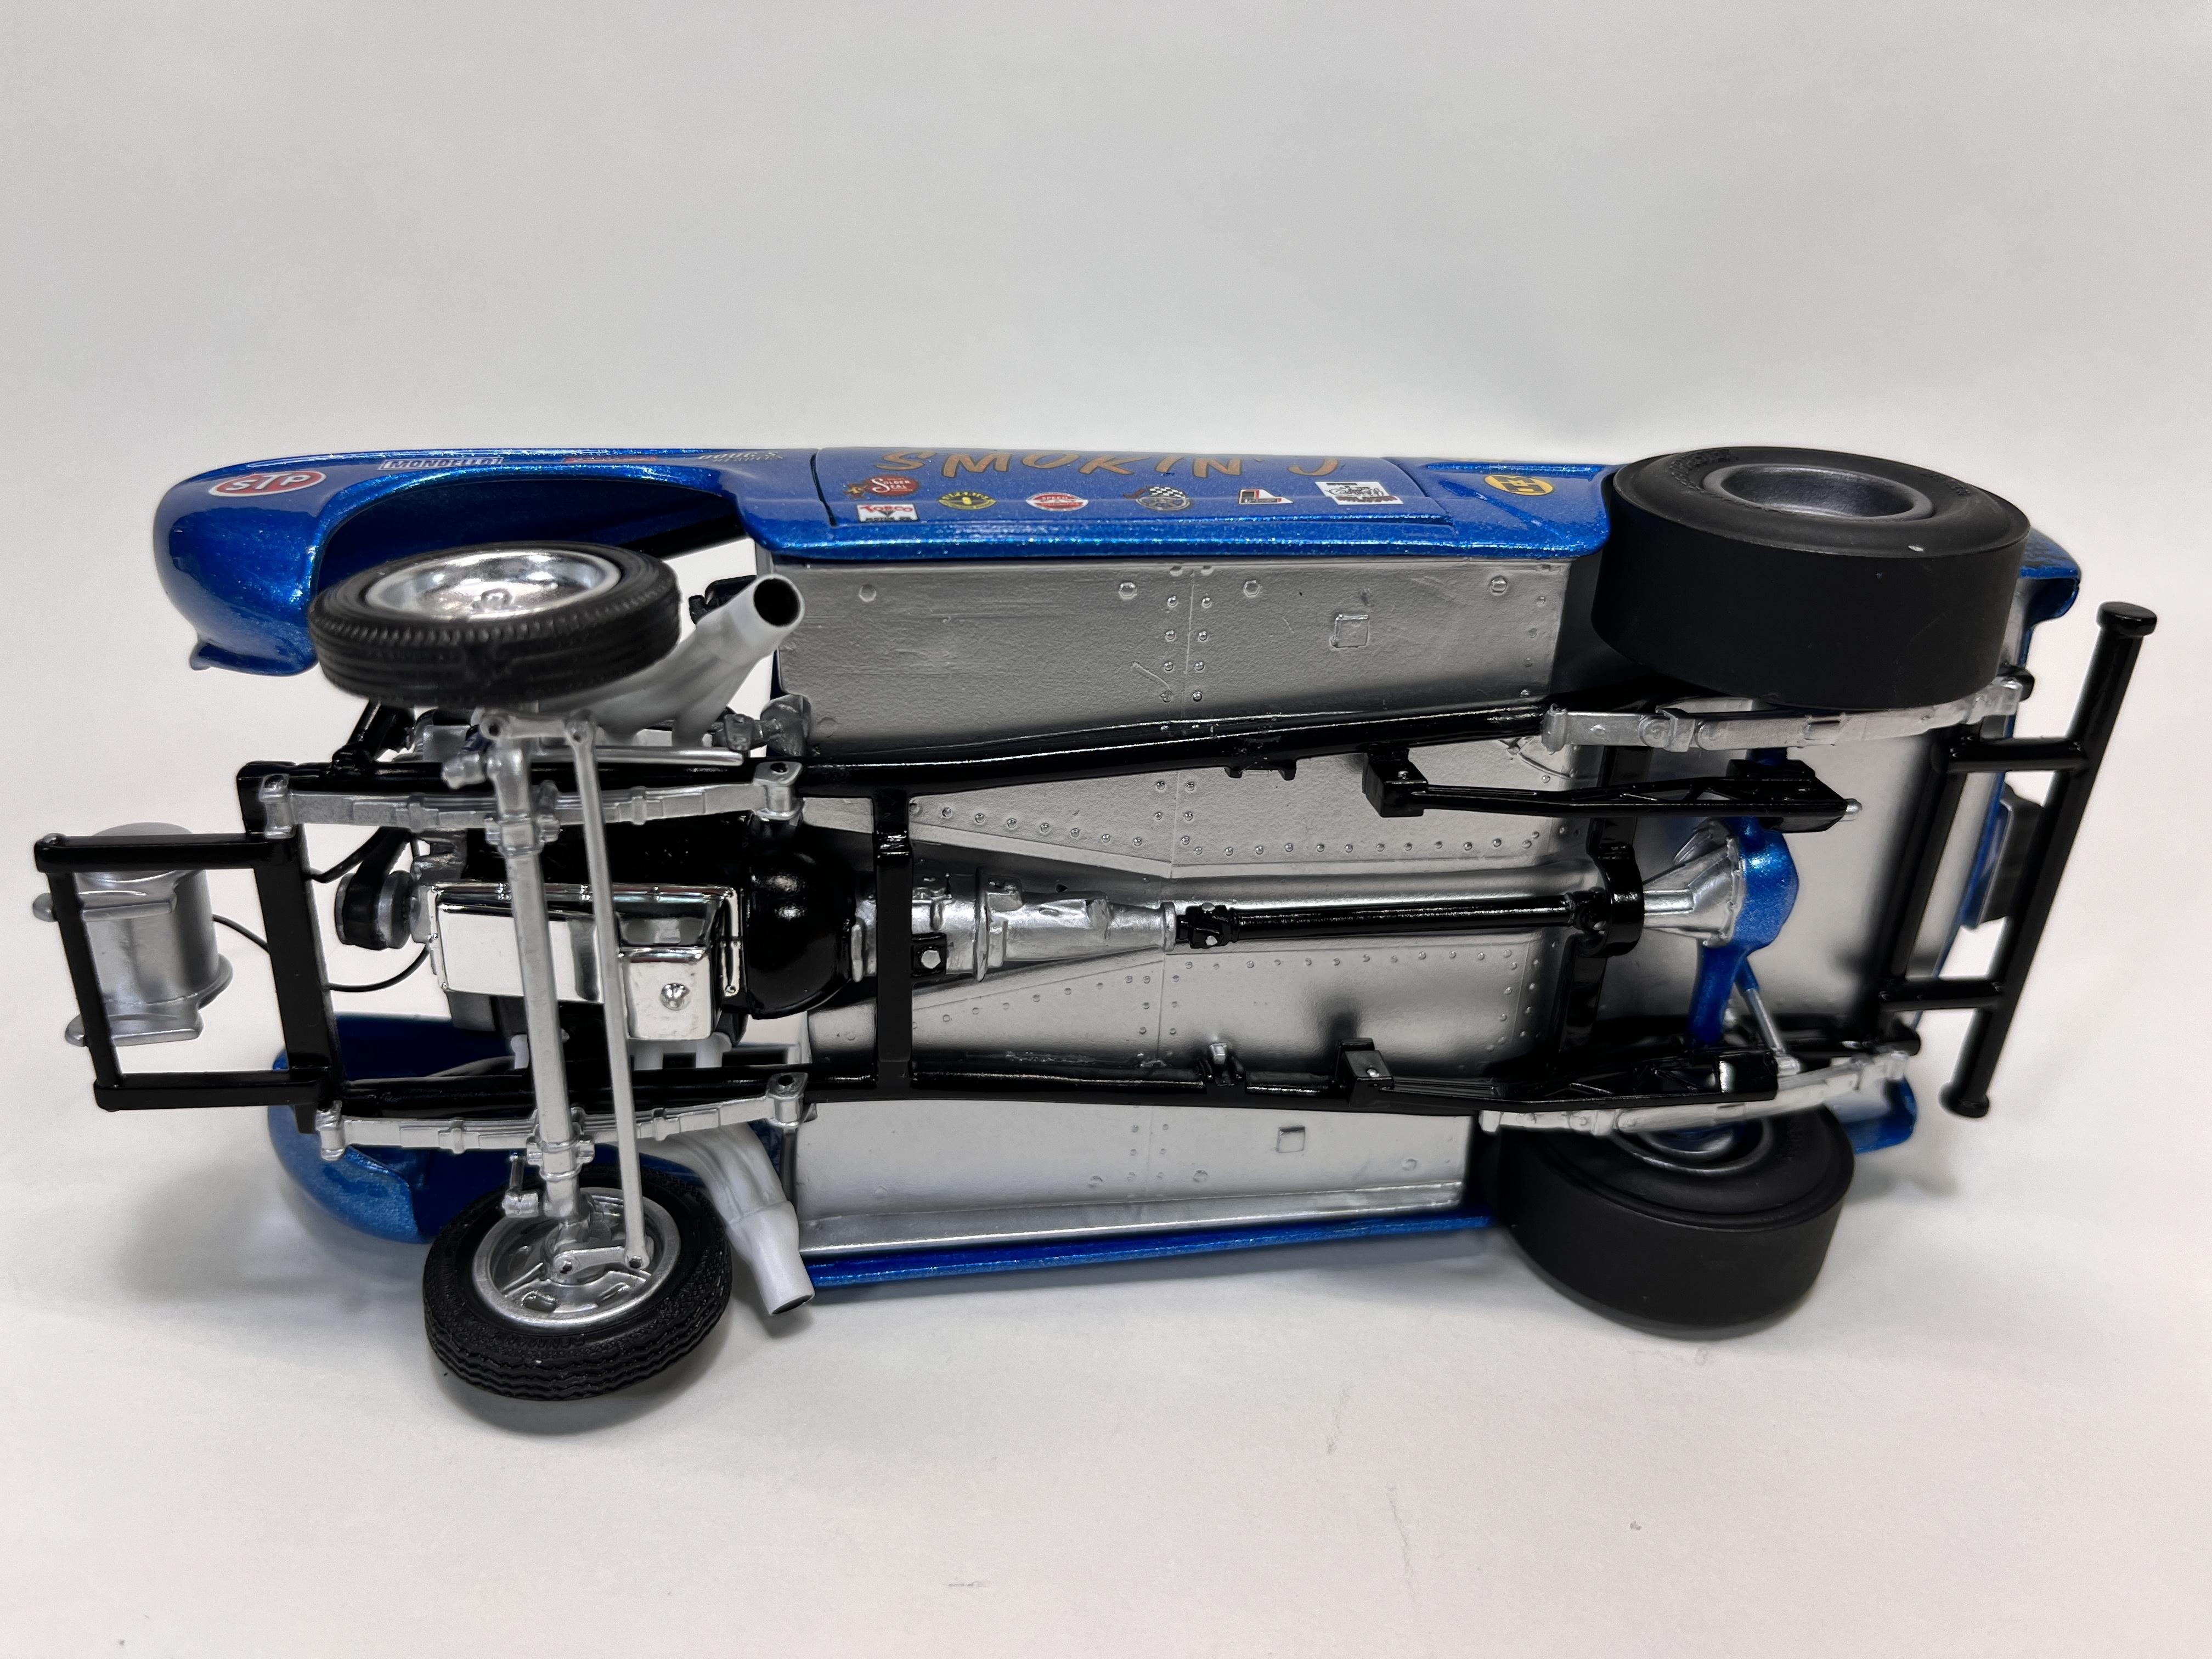
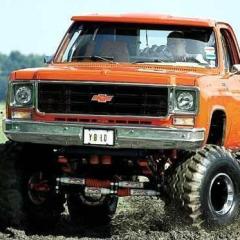
Amt’s 1955 Chevy sedan the deep chrome reverse wheels are from the amt jimmy kit. The front wheels are from my parts box . I used the kit headers but added aluminum tubing extensions . The hood scoop is a leftover part from the amt 63 impala. The paint is testors orange enamel topped with wet look clear decals are from Chris Walsh the glory years decals and graphics. If you have never used them check them out they are very high quality. Thanks for looking 👀, Mike
-
Completed this awhile ago, just never got around to posting it here. What an excellent kit, thoroughly enjoyed building it, assembly was straight forward with no issue's. Not really into Gassers. But I really like how this build turned out, especially the SMS paint. Thanks to Tim Boyd for his preview and review of this kit as thats what convinced me to invest in a couple kits. Pretty much oob, I just lowered the stance, added plug wires. Wip pics can be found here
-
Just another gasser.
-
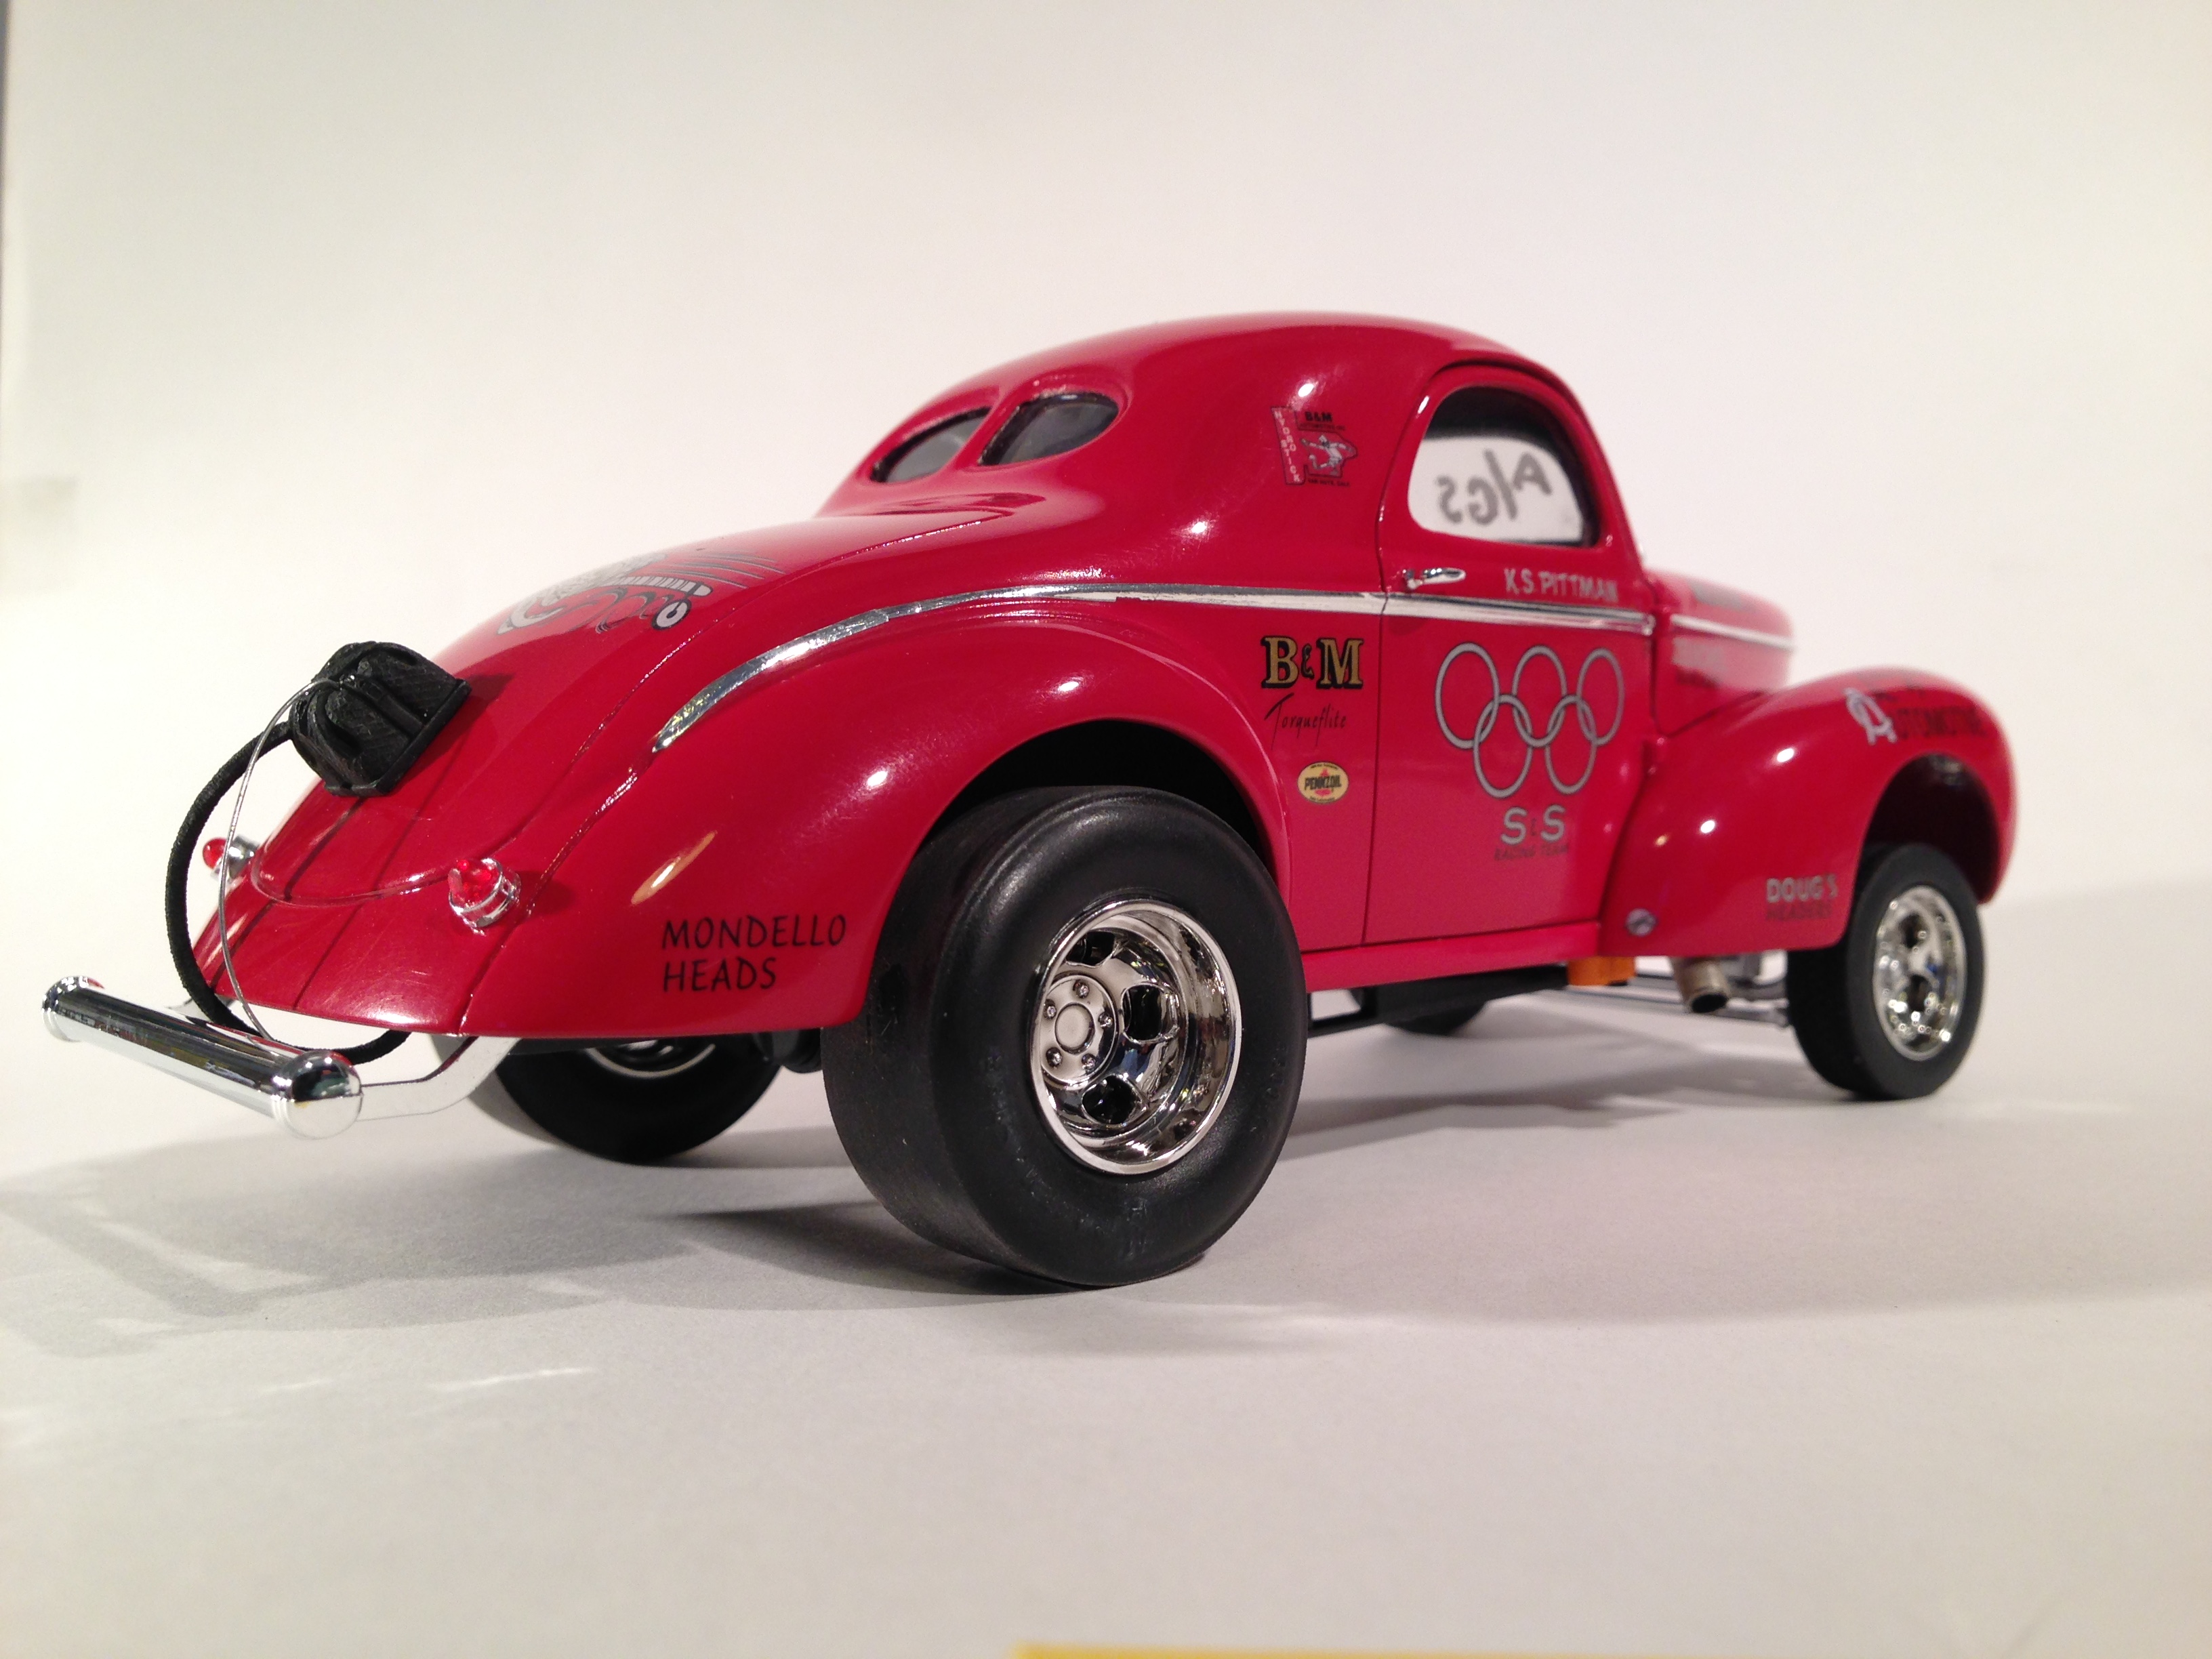
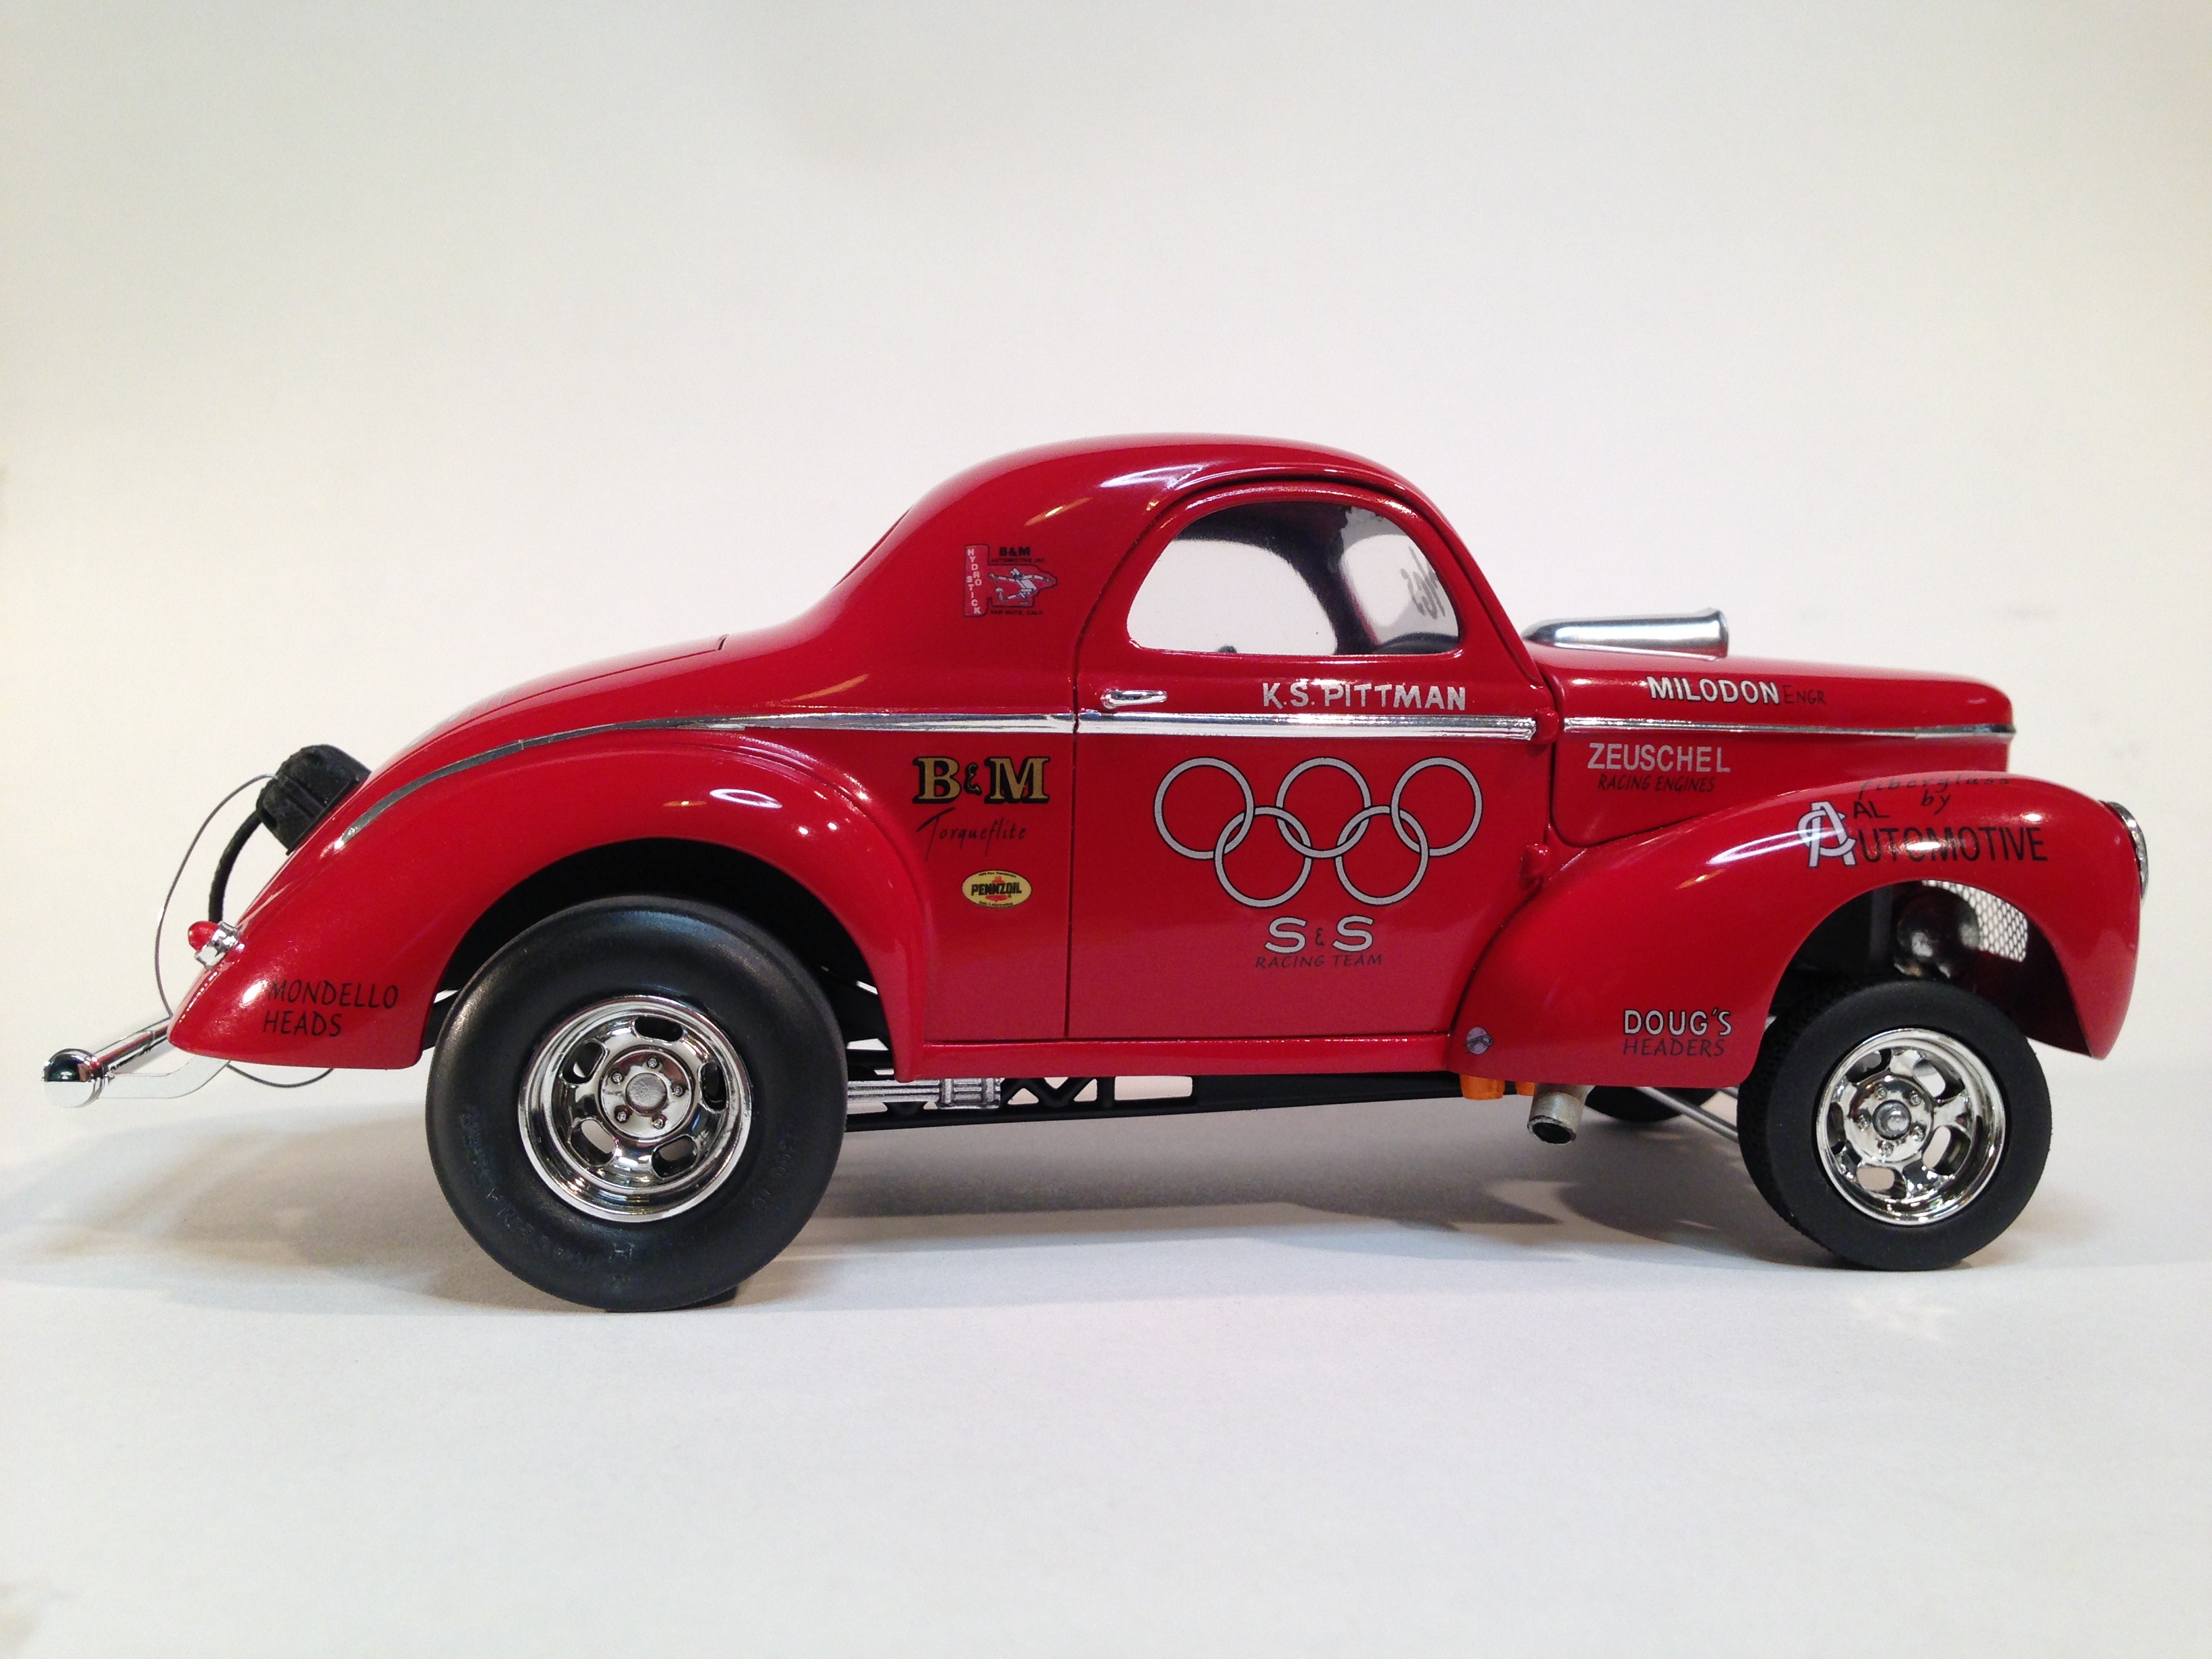
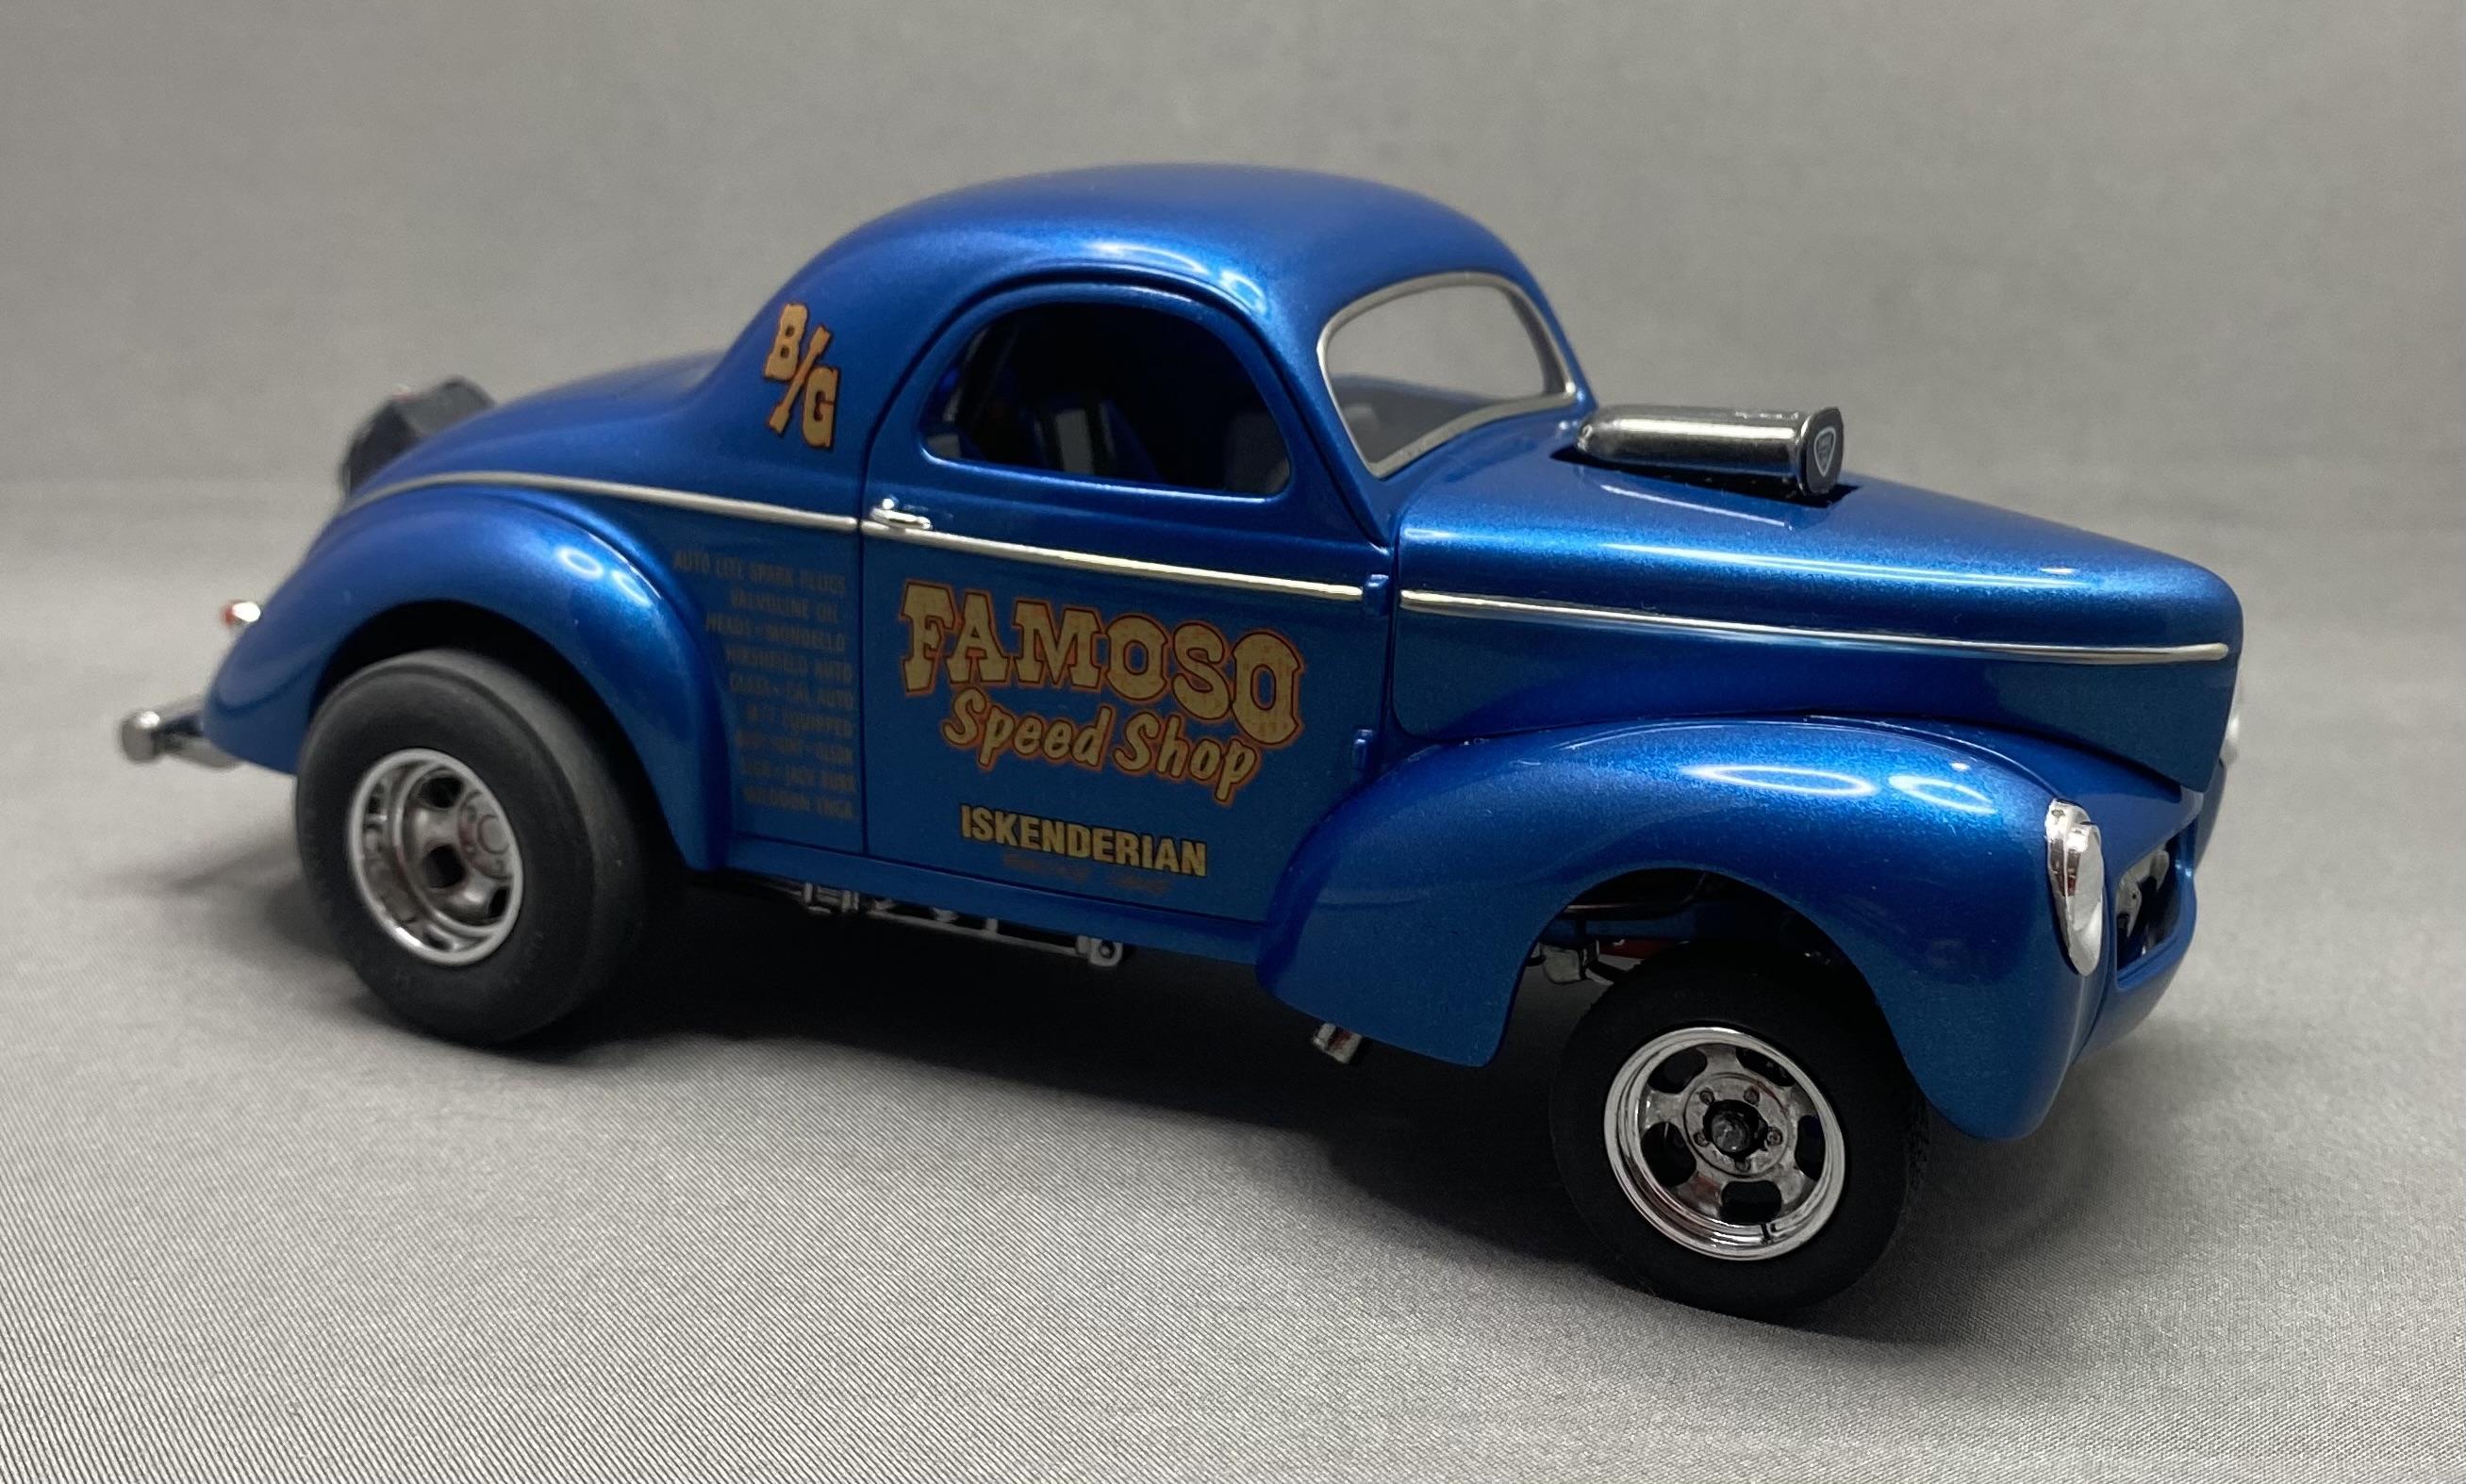
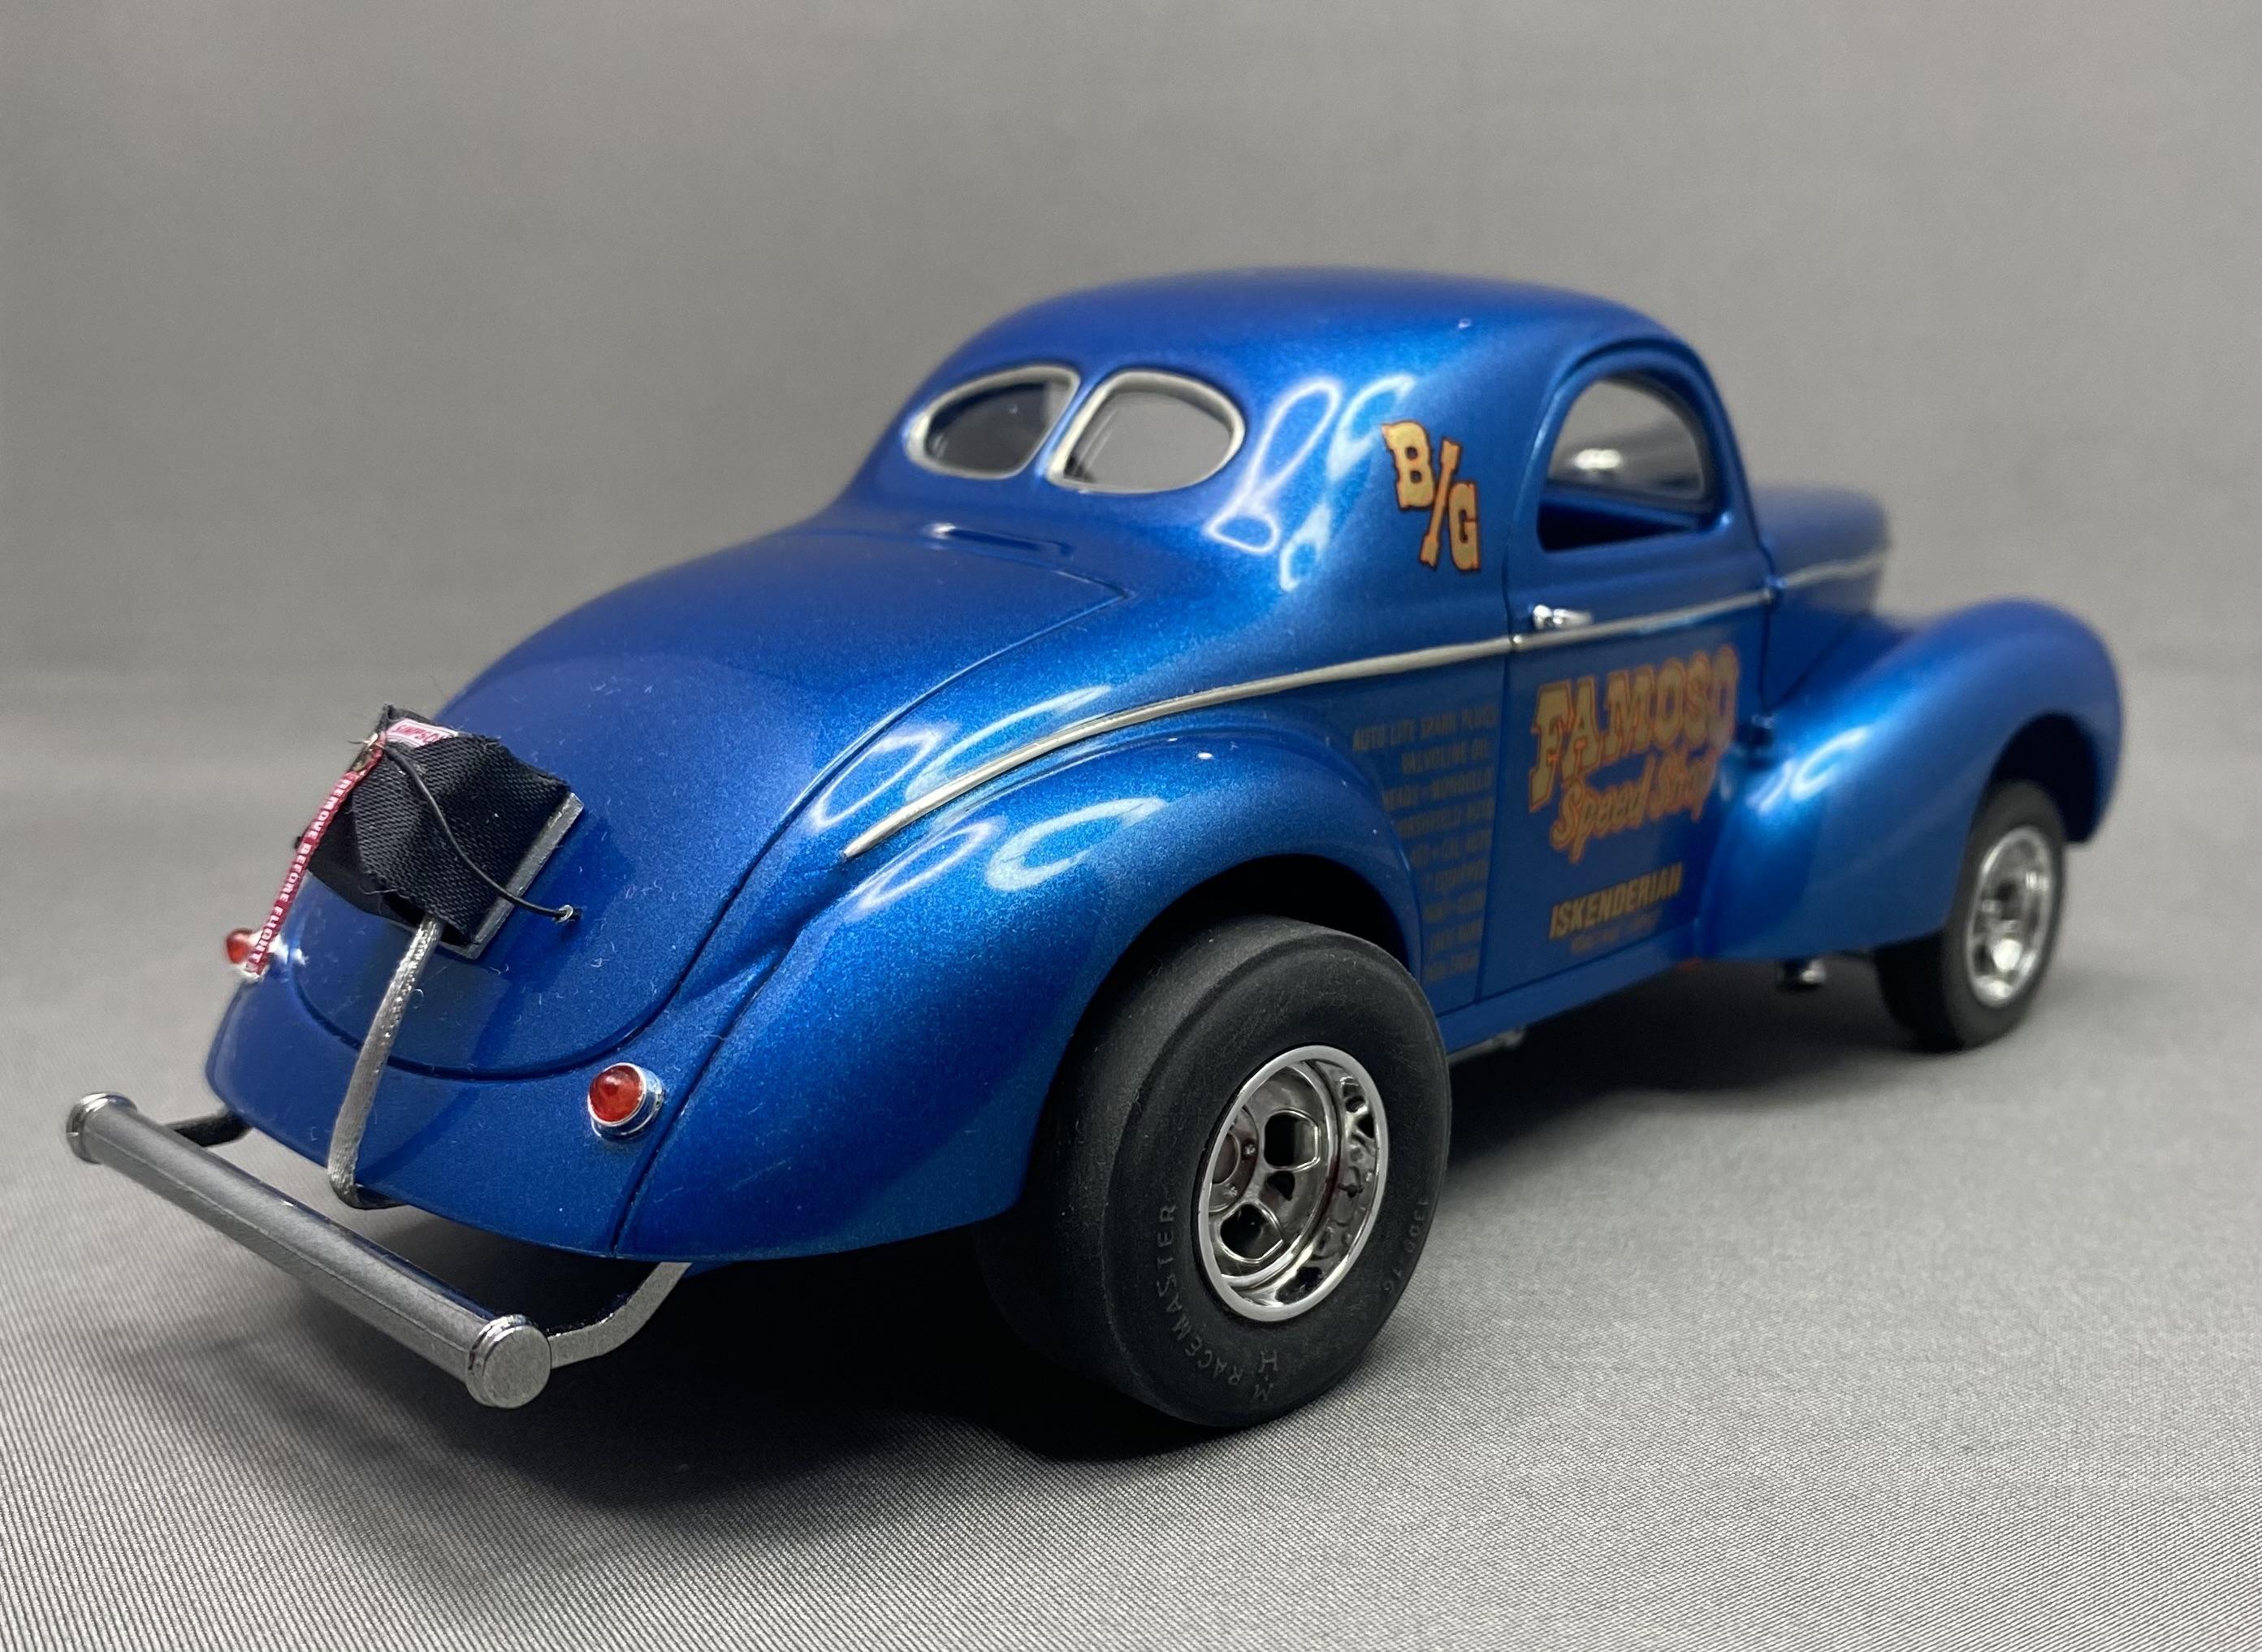
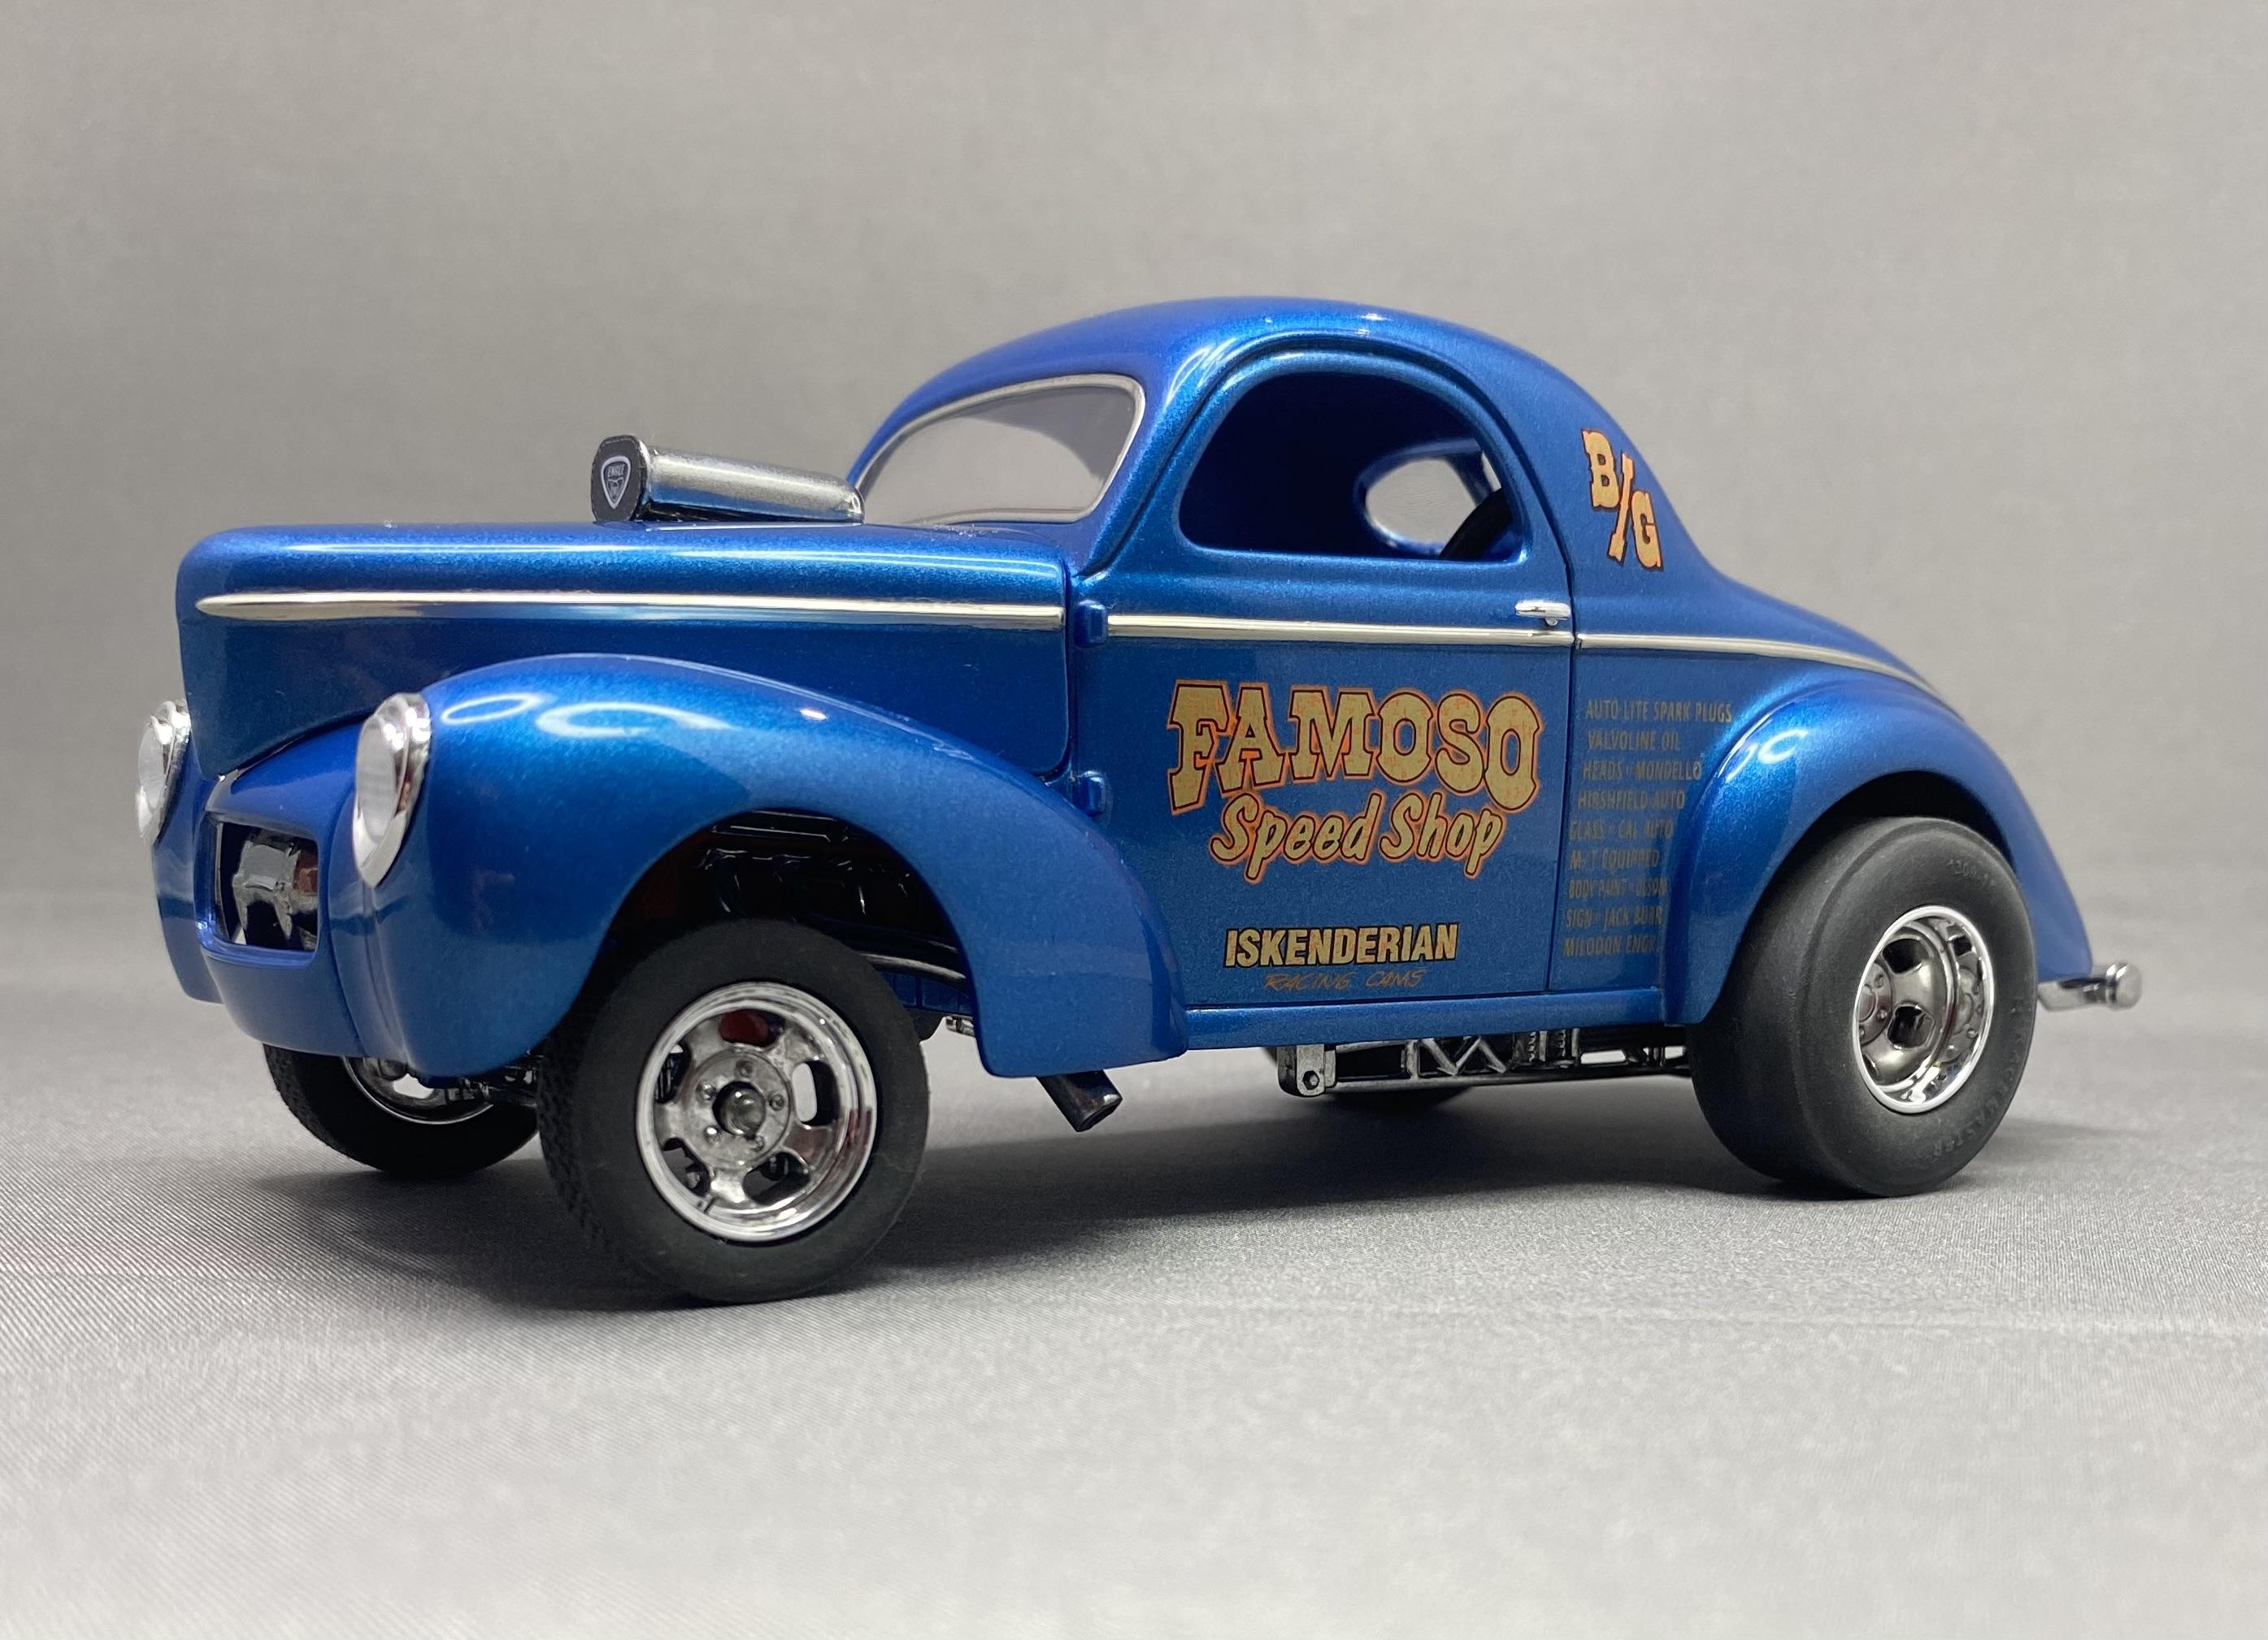
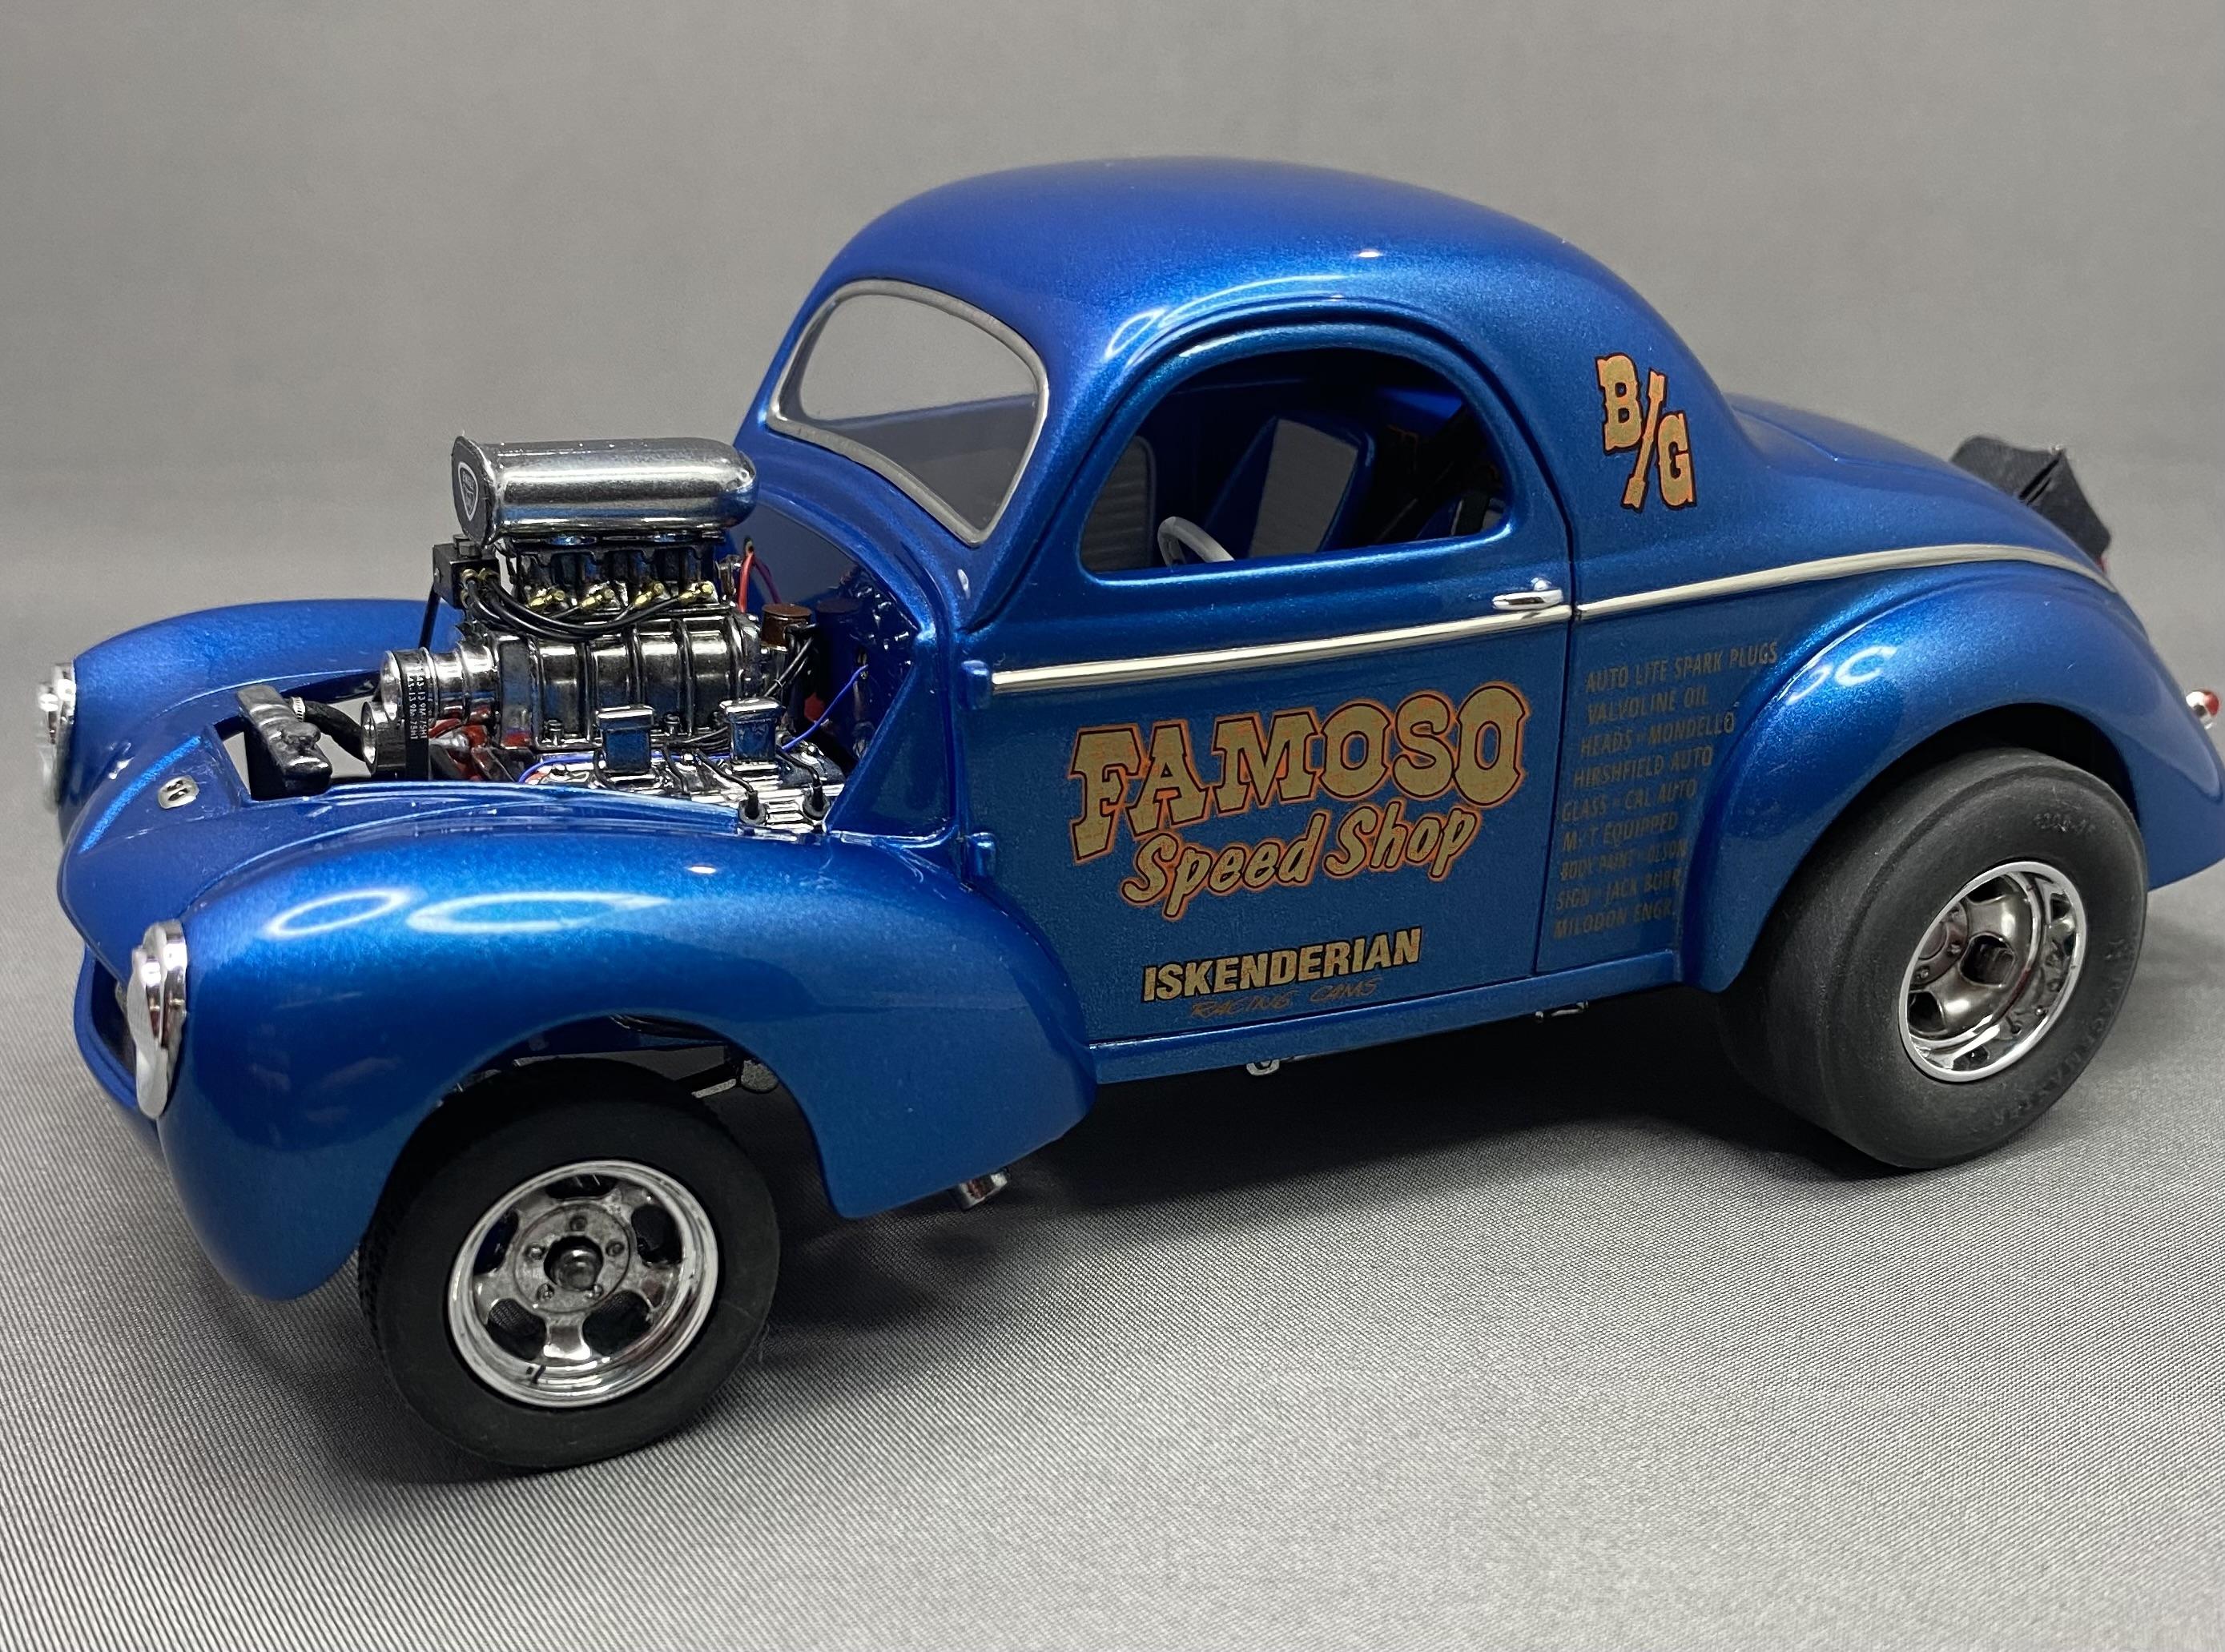
My latest completed project. 41 Willys Gasser. I started with the KS Pittman Revell kit.
- 54 replies
-
- 13
-

-
The venerable Revell Henry J kit we (some of us old timers anyway) all know and love from our childhoods. Doors welded shut and fenders attached to the body. Rear wheel wells tubbed. Cammer from the parts box. Other bits and pieces from here and there. Paint is Testors Extreme Icy Blue. -RRR
-
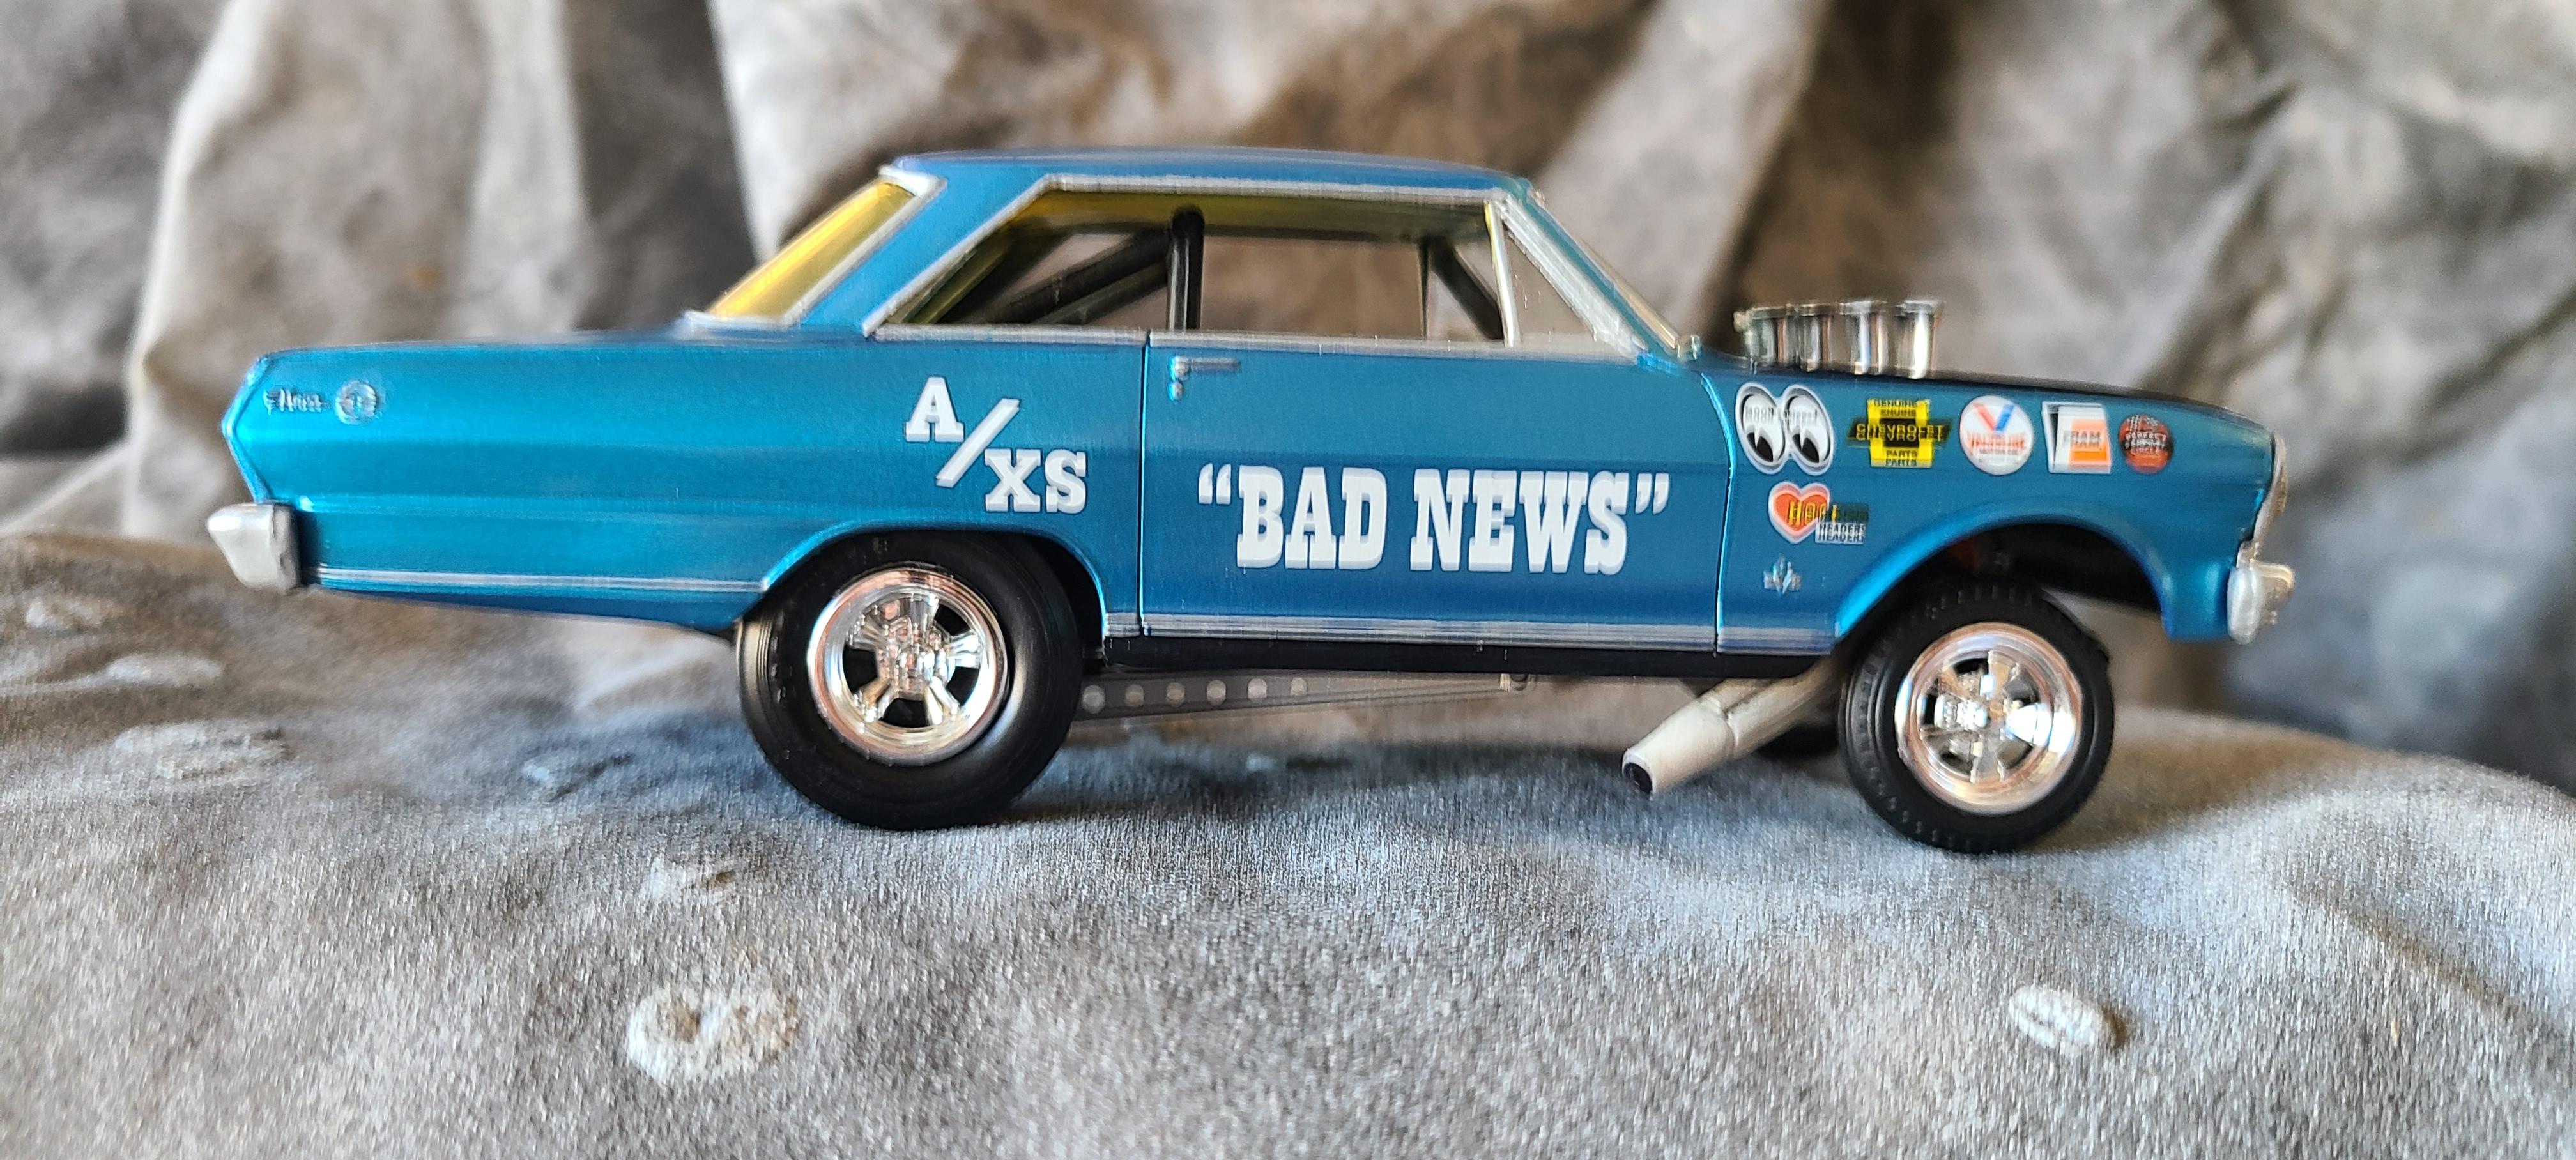
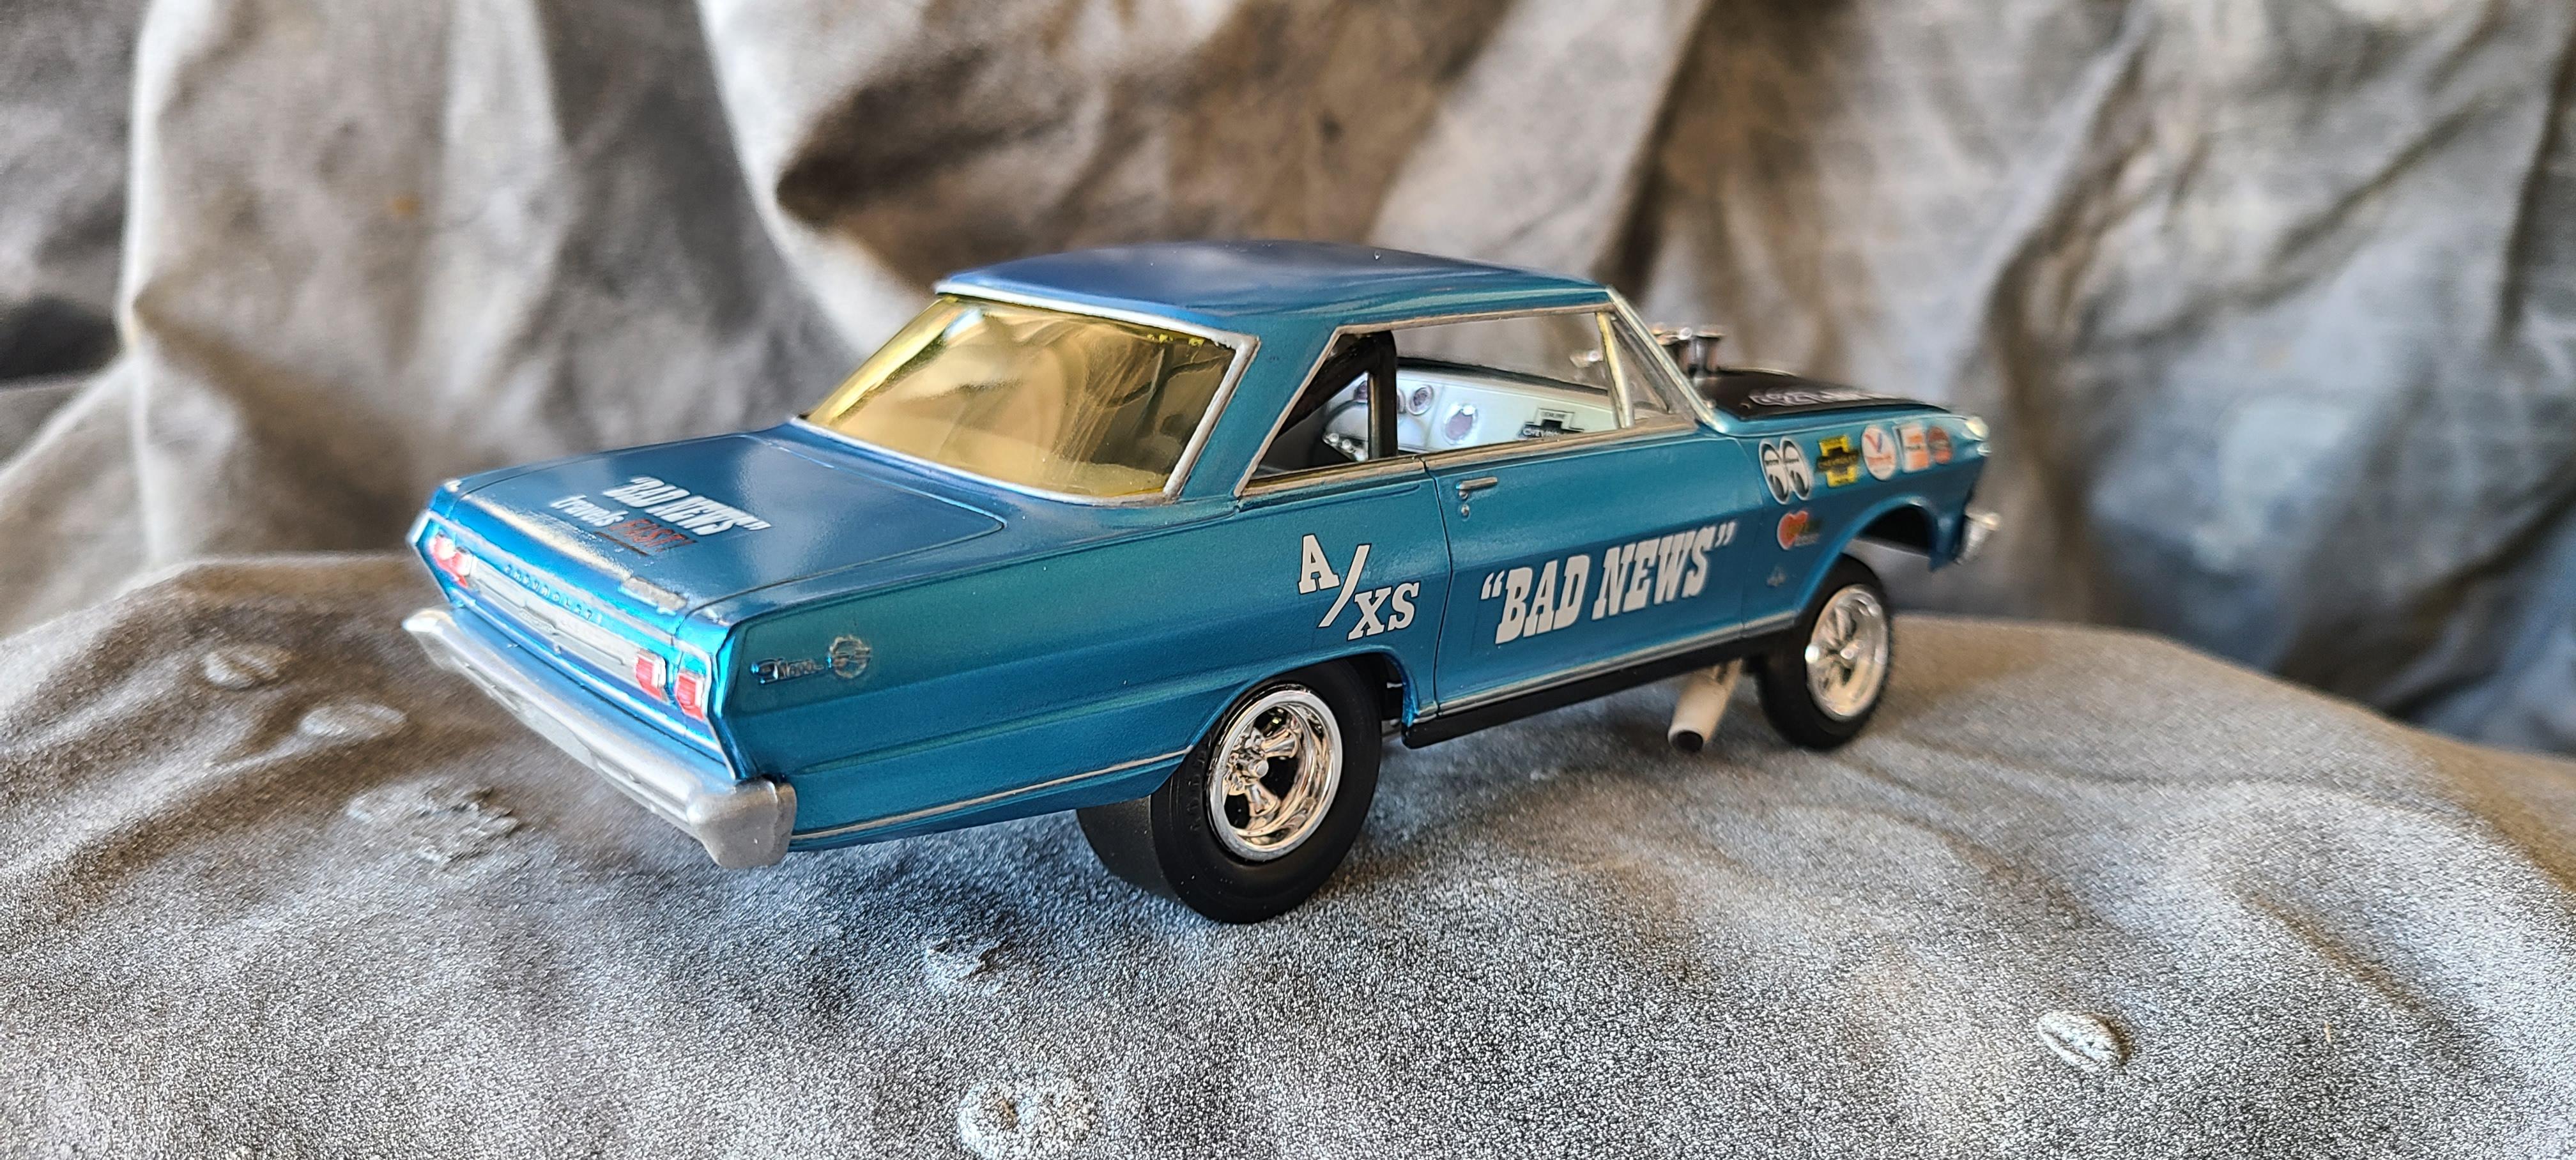
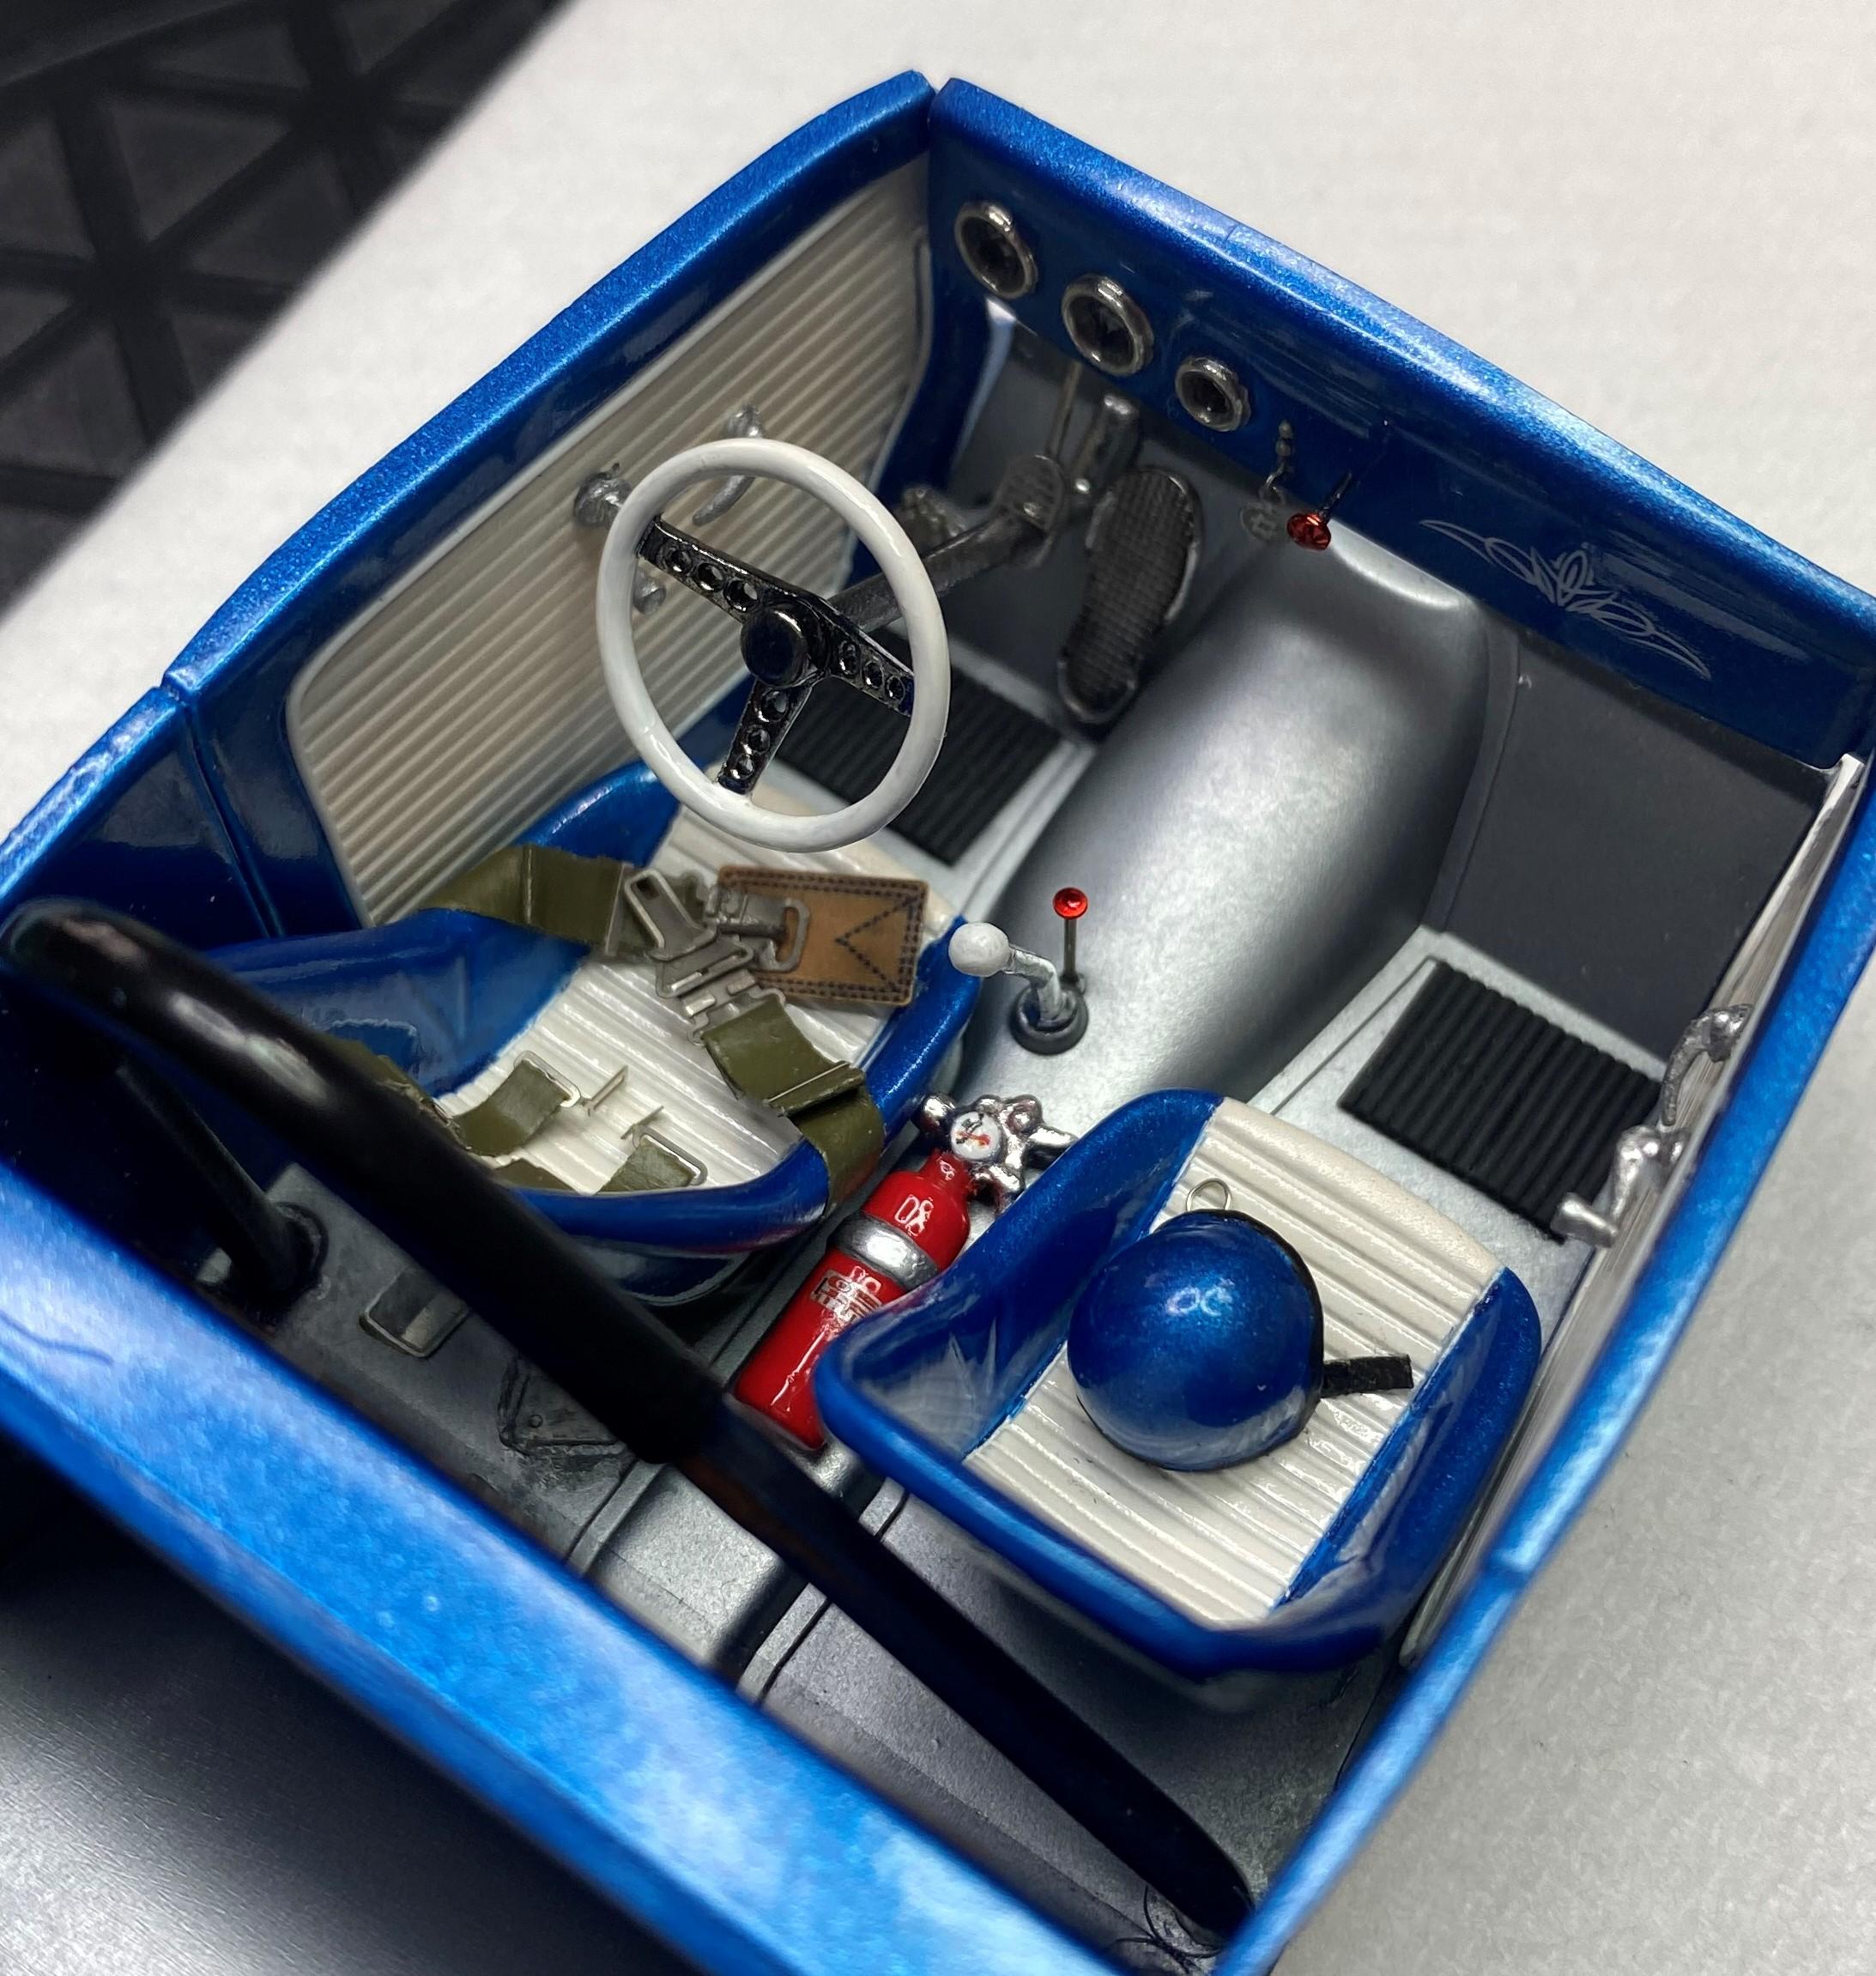
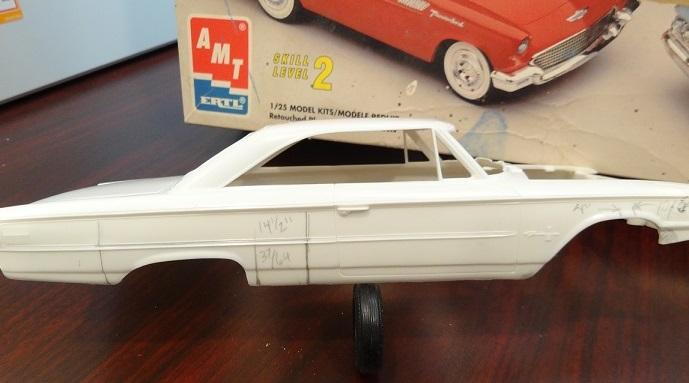
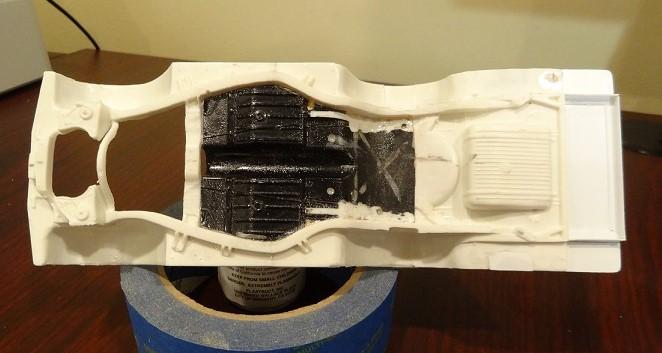
Hi All. Haven't posted a new model for a while. The various race car models posted here inspired me to finish some of my stalled projects. I built 7 models during the worst of the pandemic but I slowed down when we finally could get out. I just finished my version of a '63 altered wheelbase A/FX drag racer. I created my own decals to represent an independent SoCal racer circa '64-'65. Moved the rear wheelwells forward 14 1/2 scale inches and the front about 4 scale inches. I used spacers under the kit front suspension and created new leaf spring/extended shackle rear suspension. Had to insert a different floor pan to eliminate the molded-in exhausts and extended the frame with styrene. Have a look.
-
Here I go again starting 10 projects at once. I finally found that other header and I'm amassing parts for this project wile I'm still waiting for the kit to arrive.
-
Hey guys, it’s been along time since i just built a model, i was into it heavy when i was younger, but haven’t built anything in years so I’m jumping back in, trying to keep the build simple but I’ve changed up a few things the kit came with a straight axle setup it was a weird traverse spring setup and i wanted to run a parallel spring set up, so i made some mount/shackles/springs and a tube axle Slapped it all in the chassis and painted it i started to assemble the motor and wiring it up, only real mods i made on the motor are the headers, they are the kit headers but with the square collectors cut off and the end filed into single pipes to look like short zoom or style headers I also included a picture on how the cars gonna sit, I radiused the wheel wells, the kit had marks on the inside that they suggest to cut to, which i did but in my opinion opens the wheel well up to much , but i think it will turn out ok
-
To me the 1941 Willys is the best looking gasser. I have seen a ton of pics online and just love the way they look. I plan on getting one down the road to build and I'm looking at the Reveal Big John Mazmanian 1941 Willys. Show me what you have, what brand, and what year.
-
If I summarize briefly what has been done; The rear wheels have been completely renewed, Fujimi's stock wheels have been placed to the proper depth for this vehicle. I removed the rear wheels a little, for this I cut the case properly. A wheelie bars was made, The windows were in very bad condition, I remade the transparent plastic. Details suitable for the engine were added, Necessary additions (steering box, shock absorber ...) were made to the front suspension, I painted Vallejo orange with Tamiya varnish. 4000 sanding and polishing followed. The rims and bumpers are painted with Alclad Chrome.
-
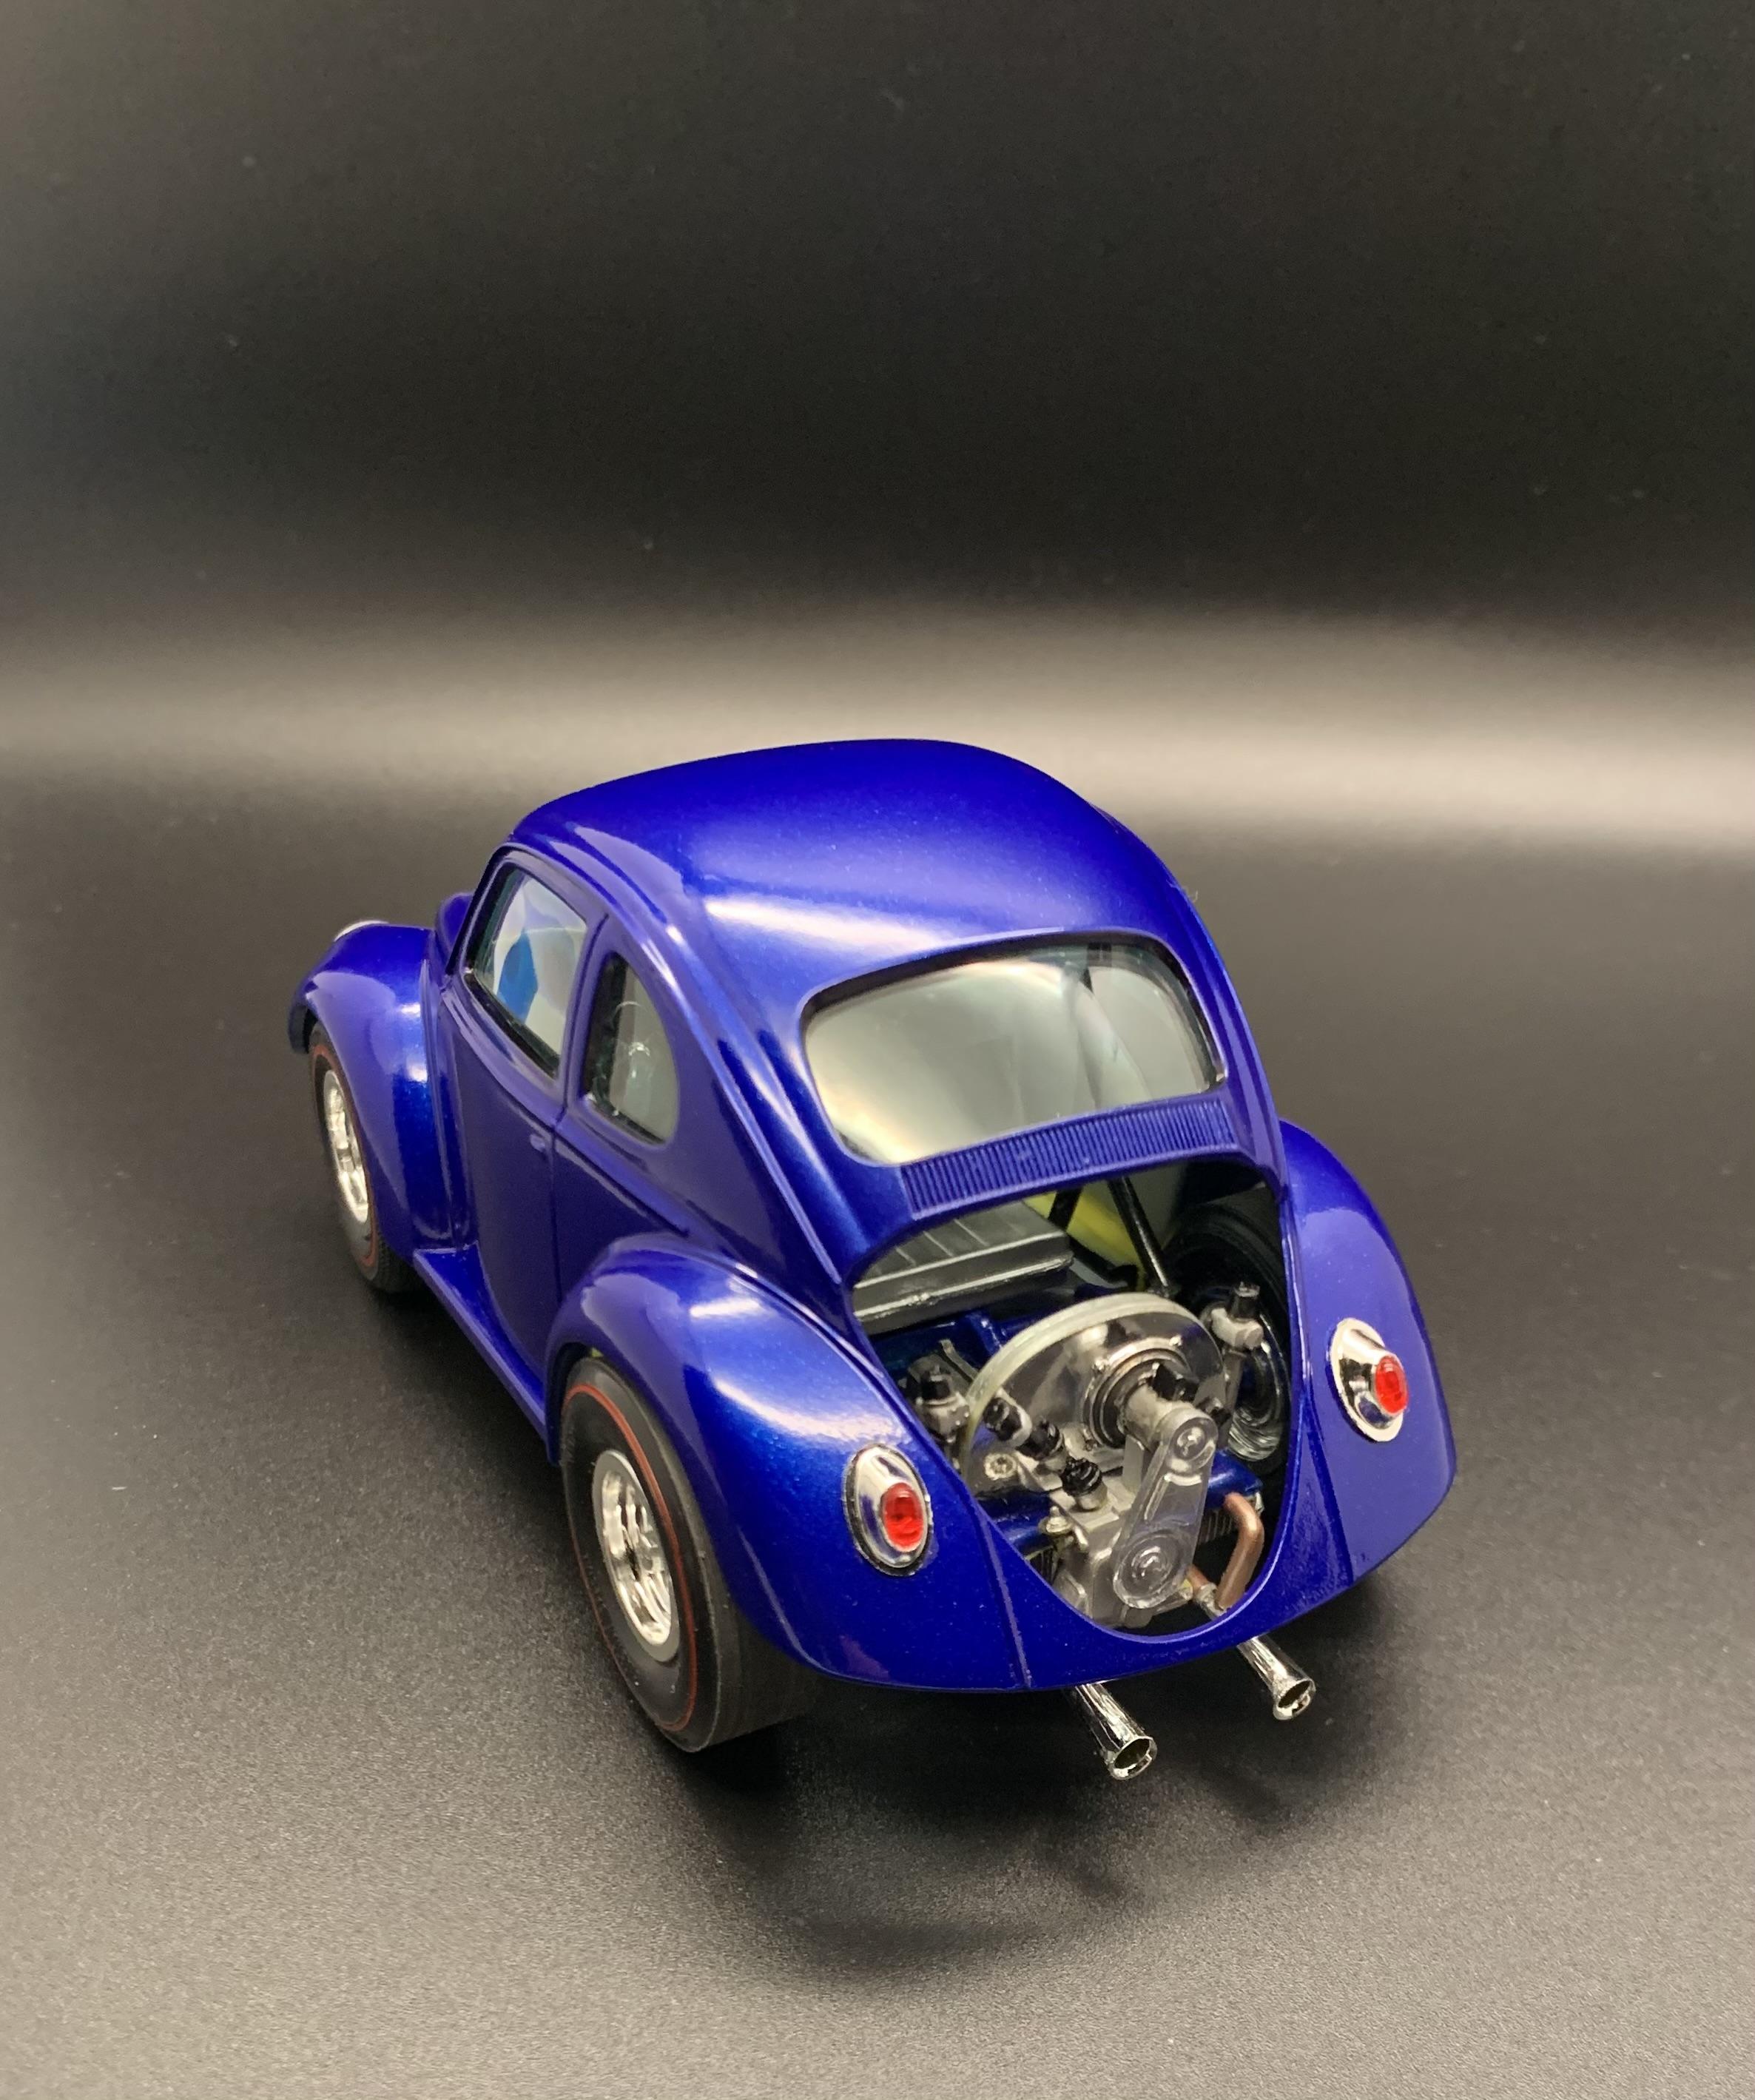
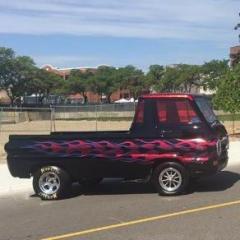
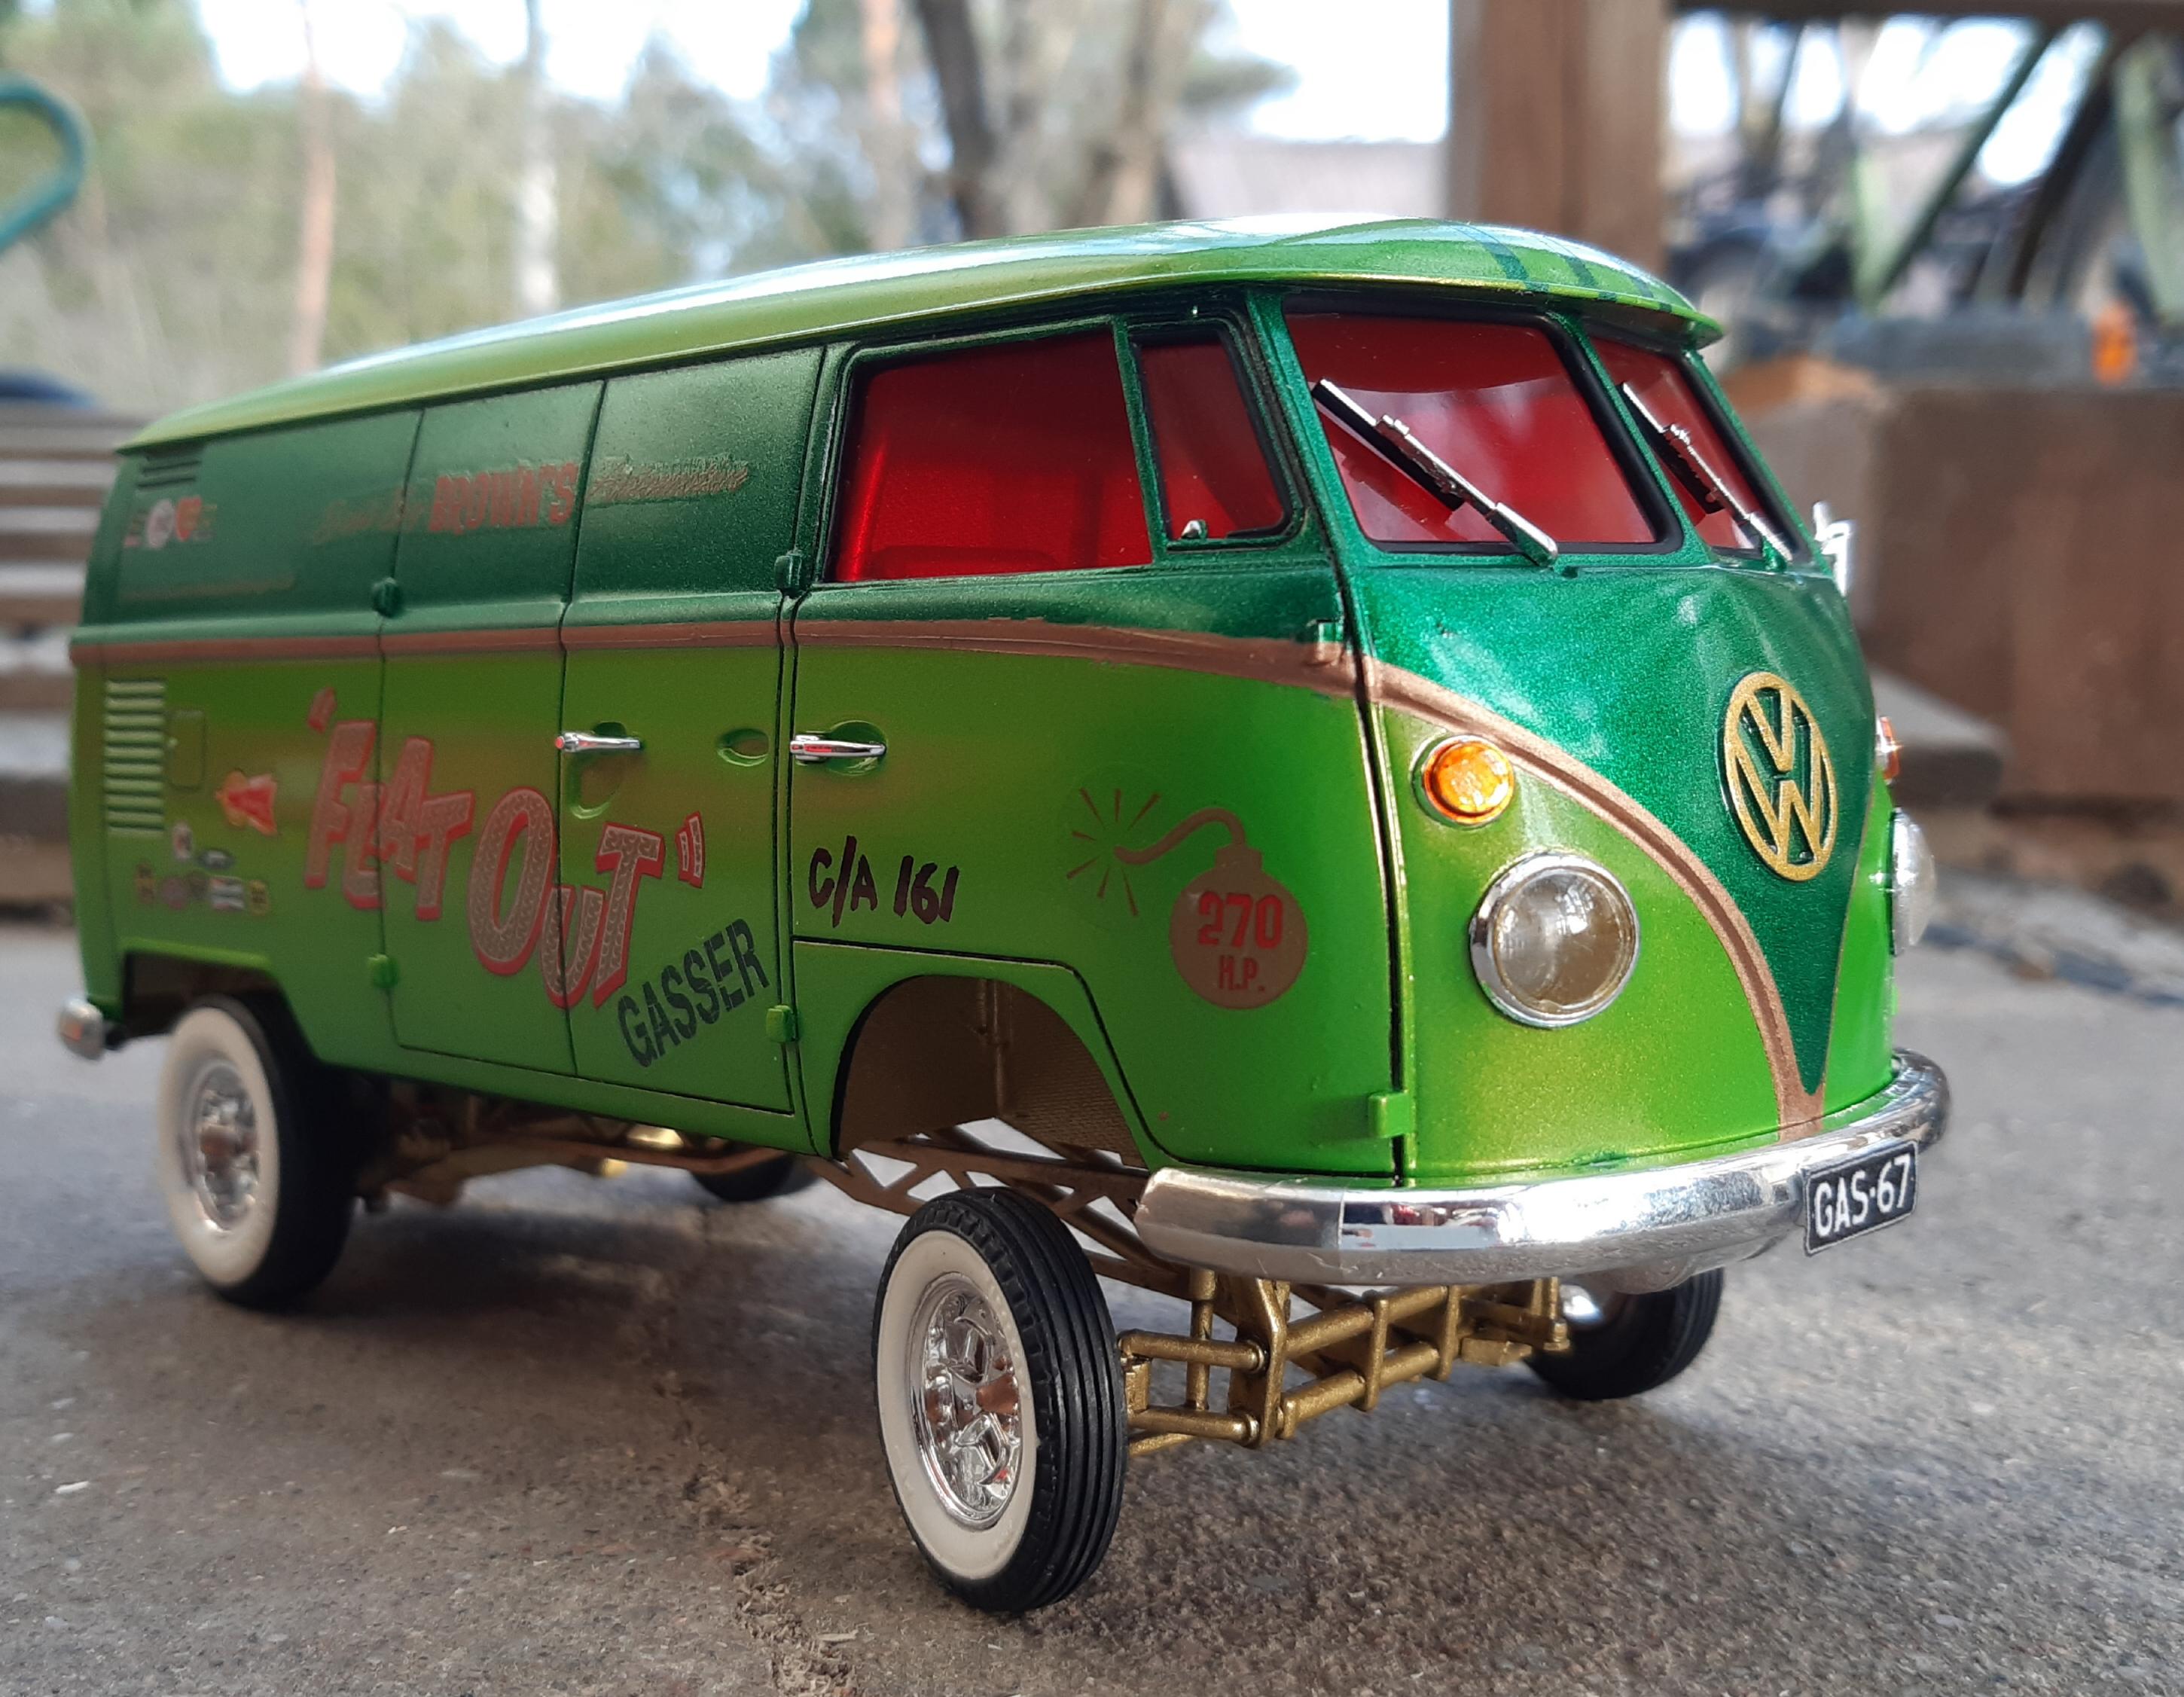
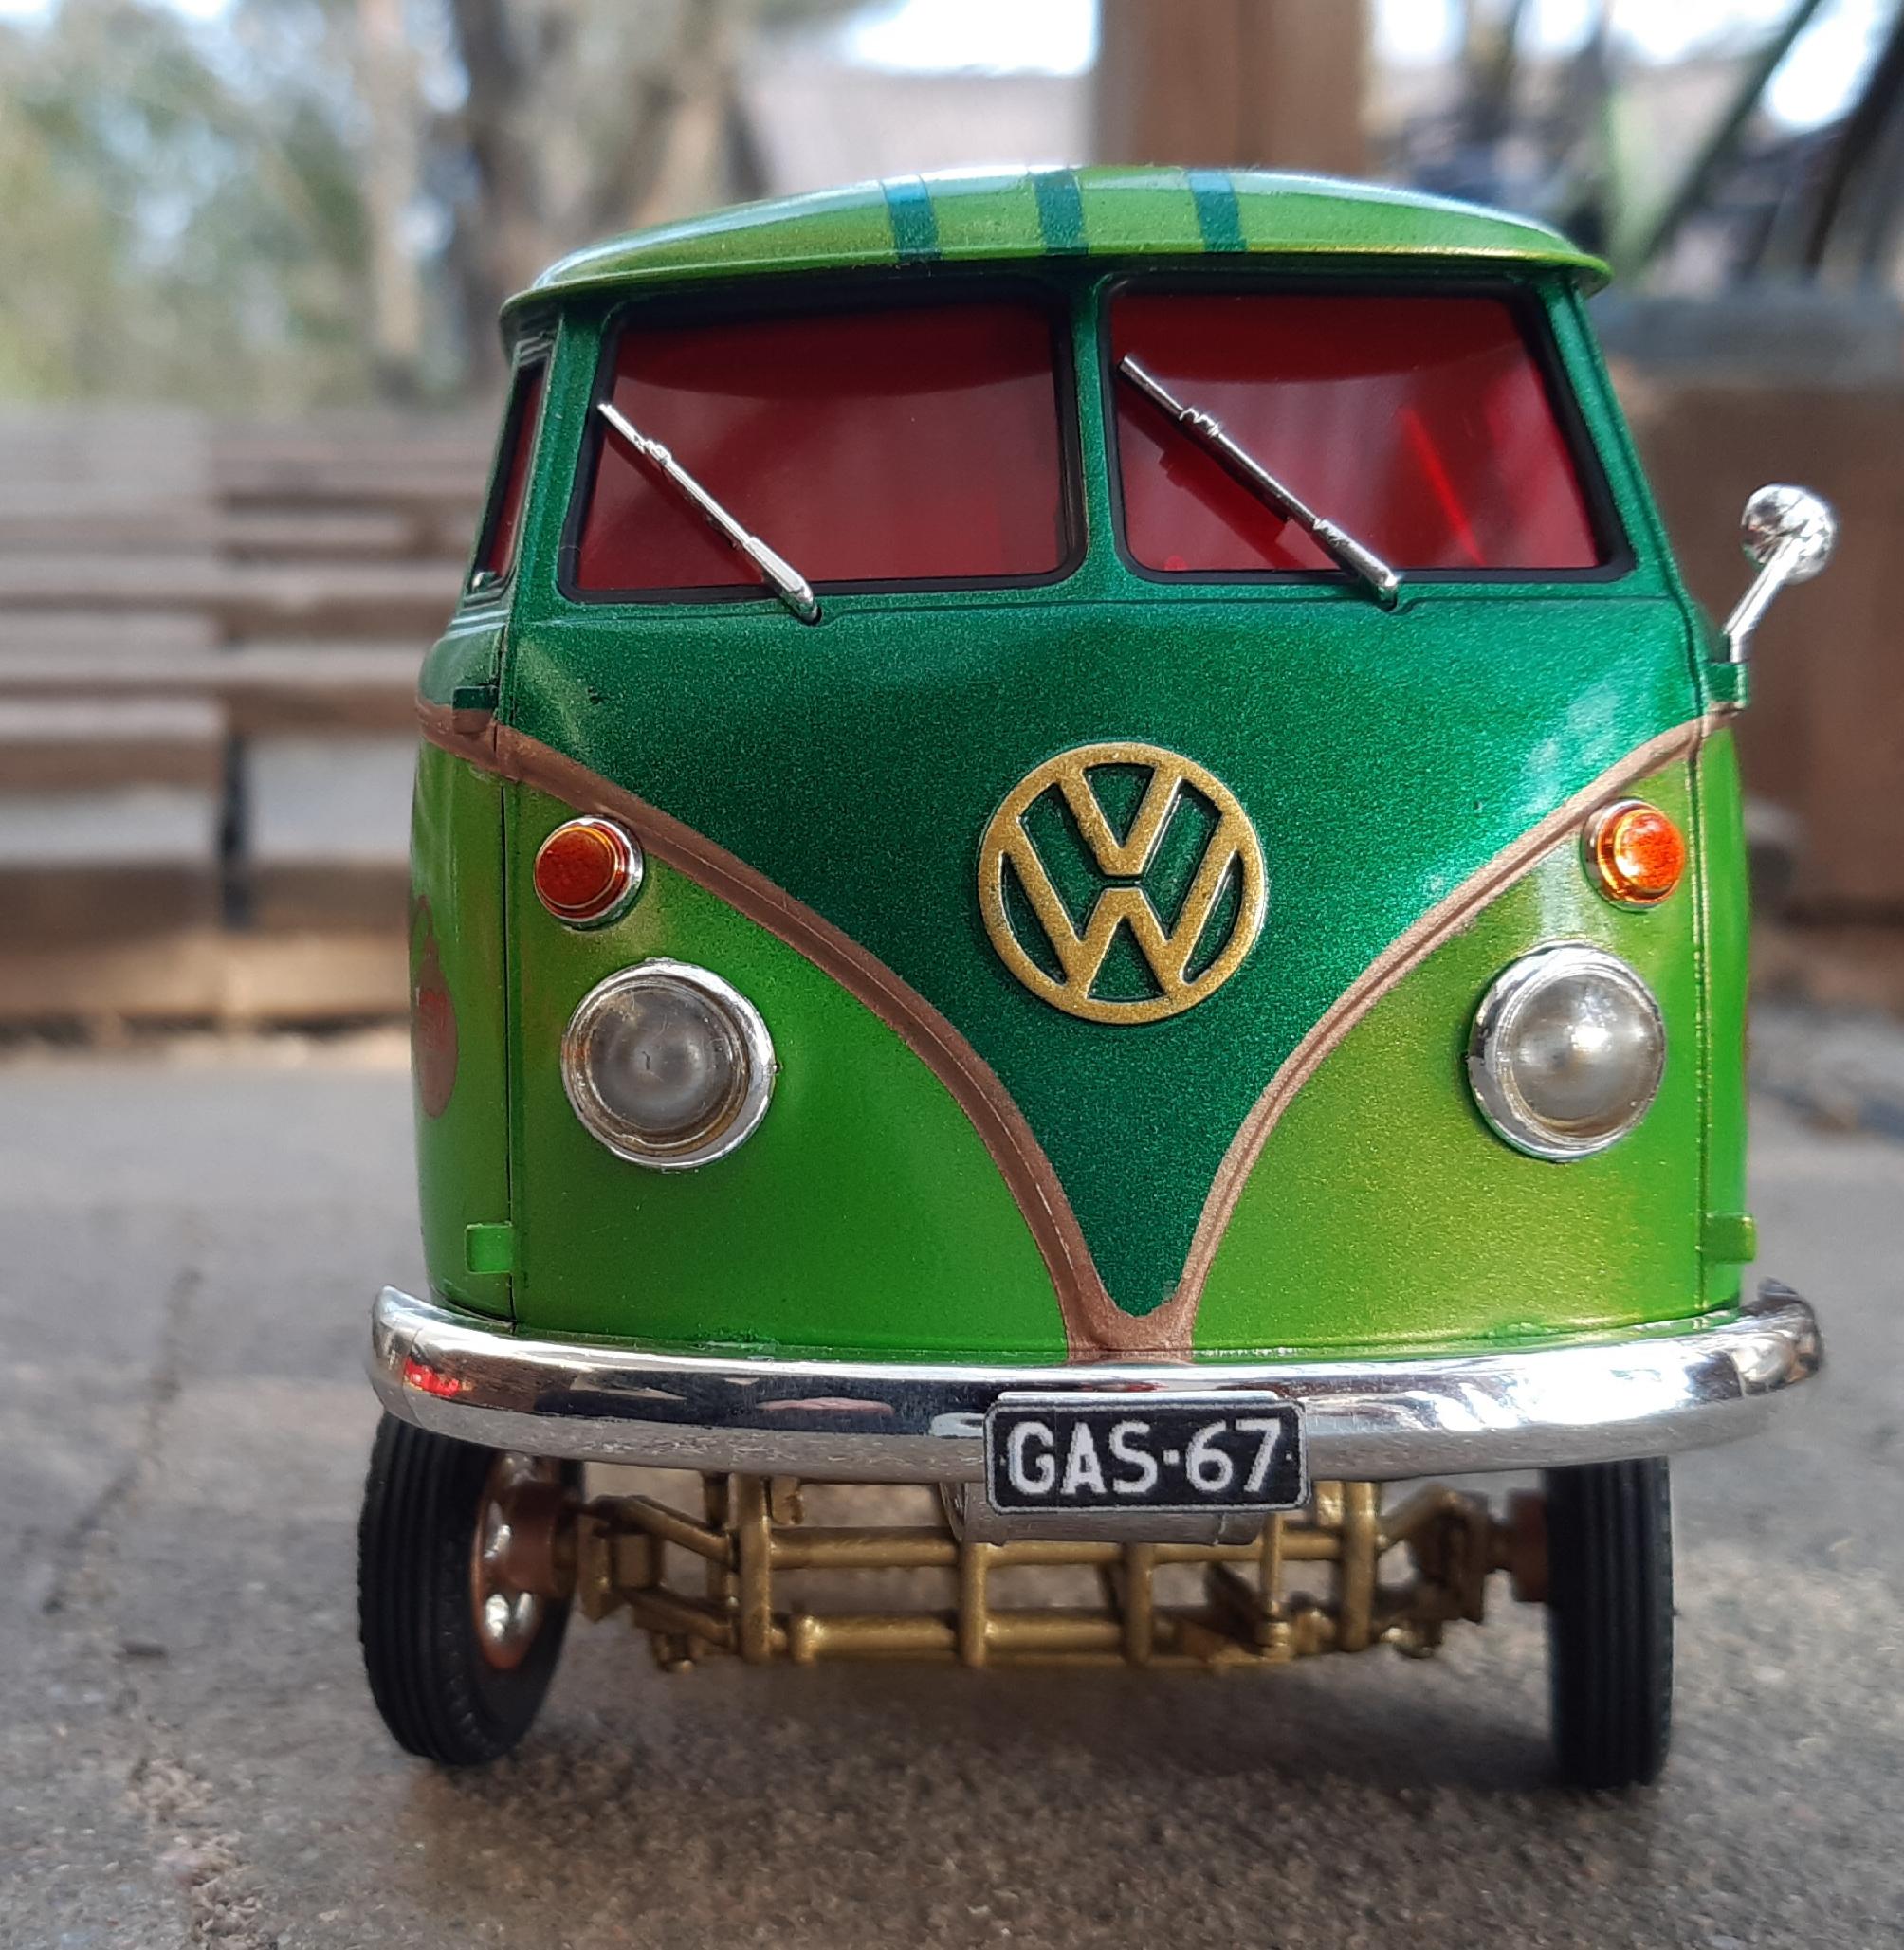
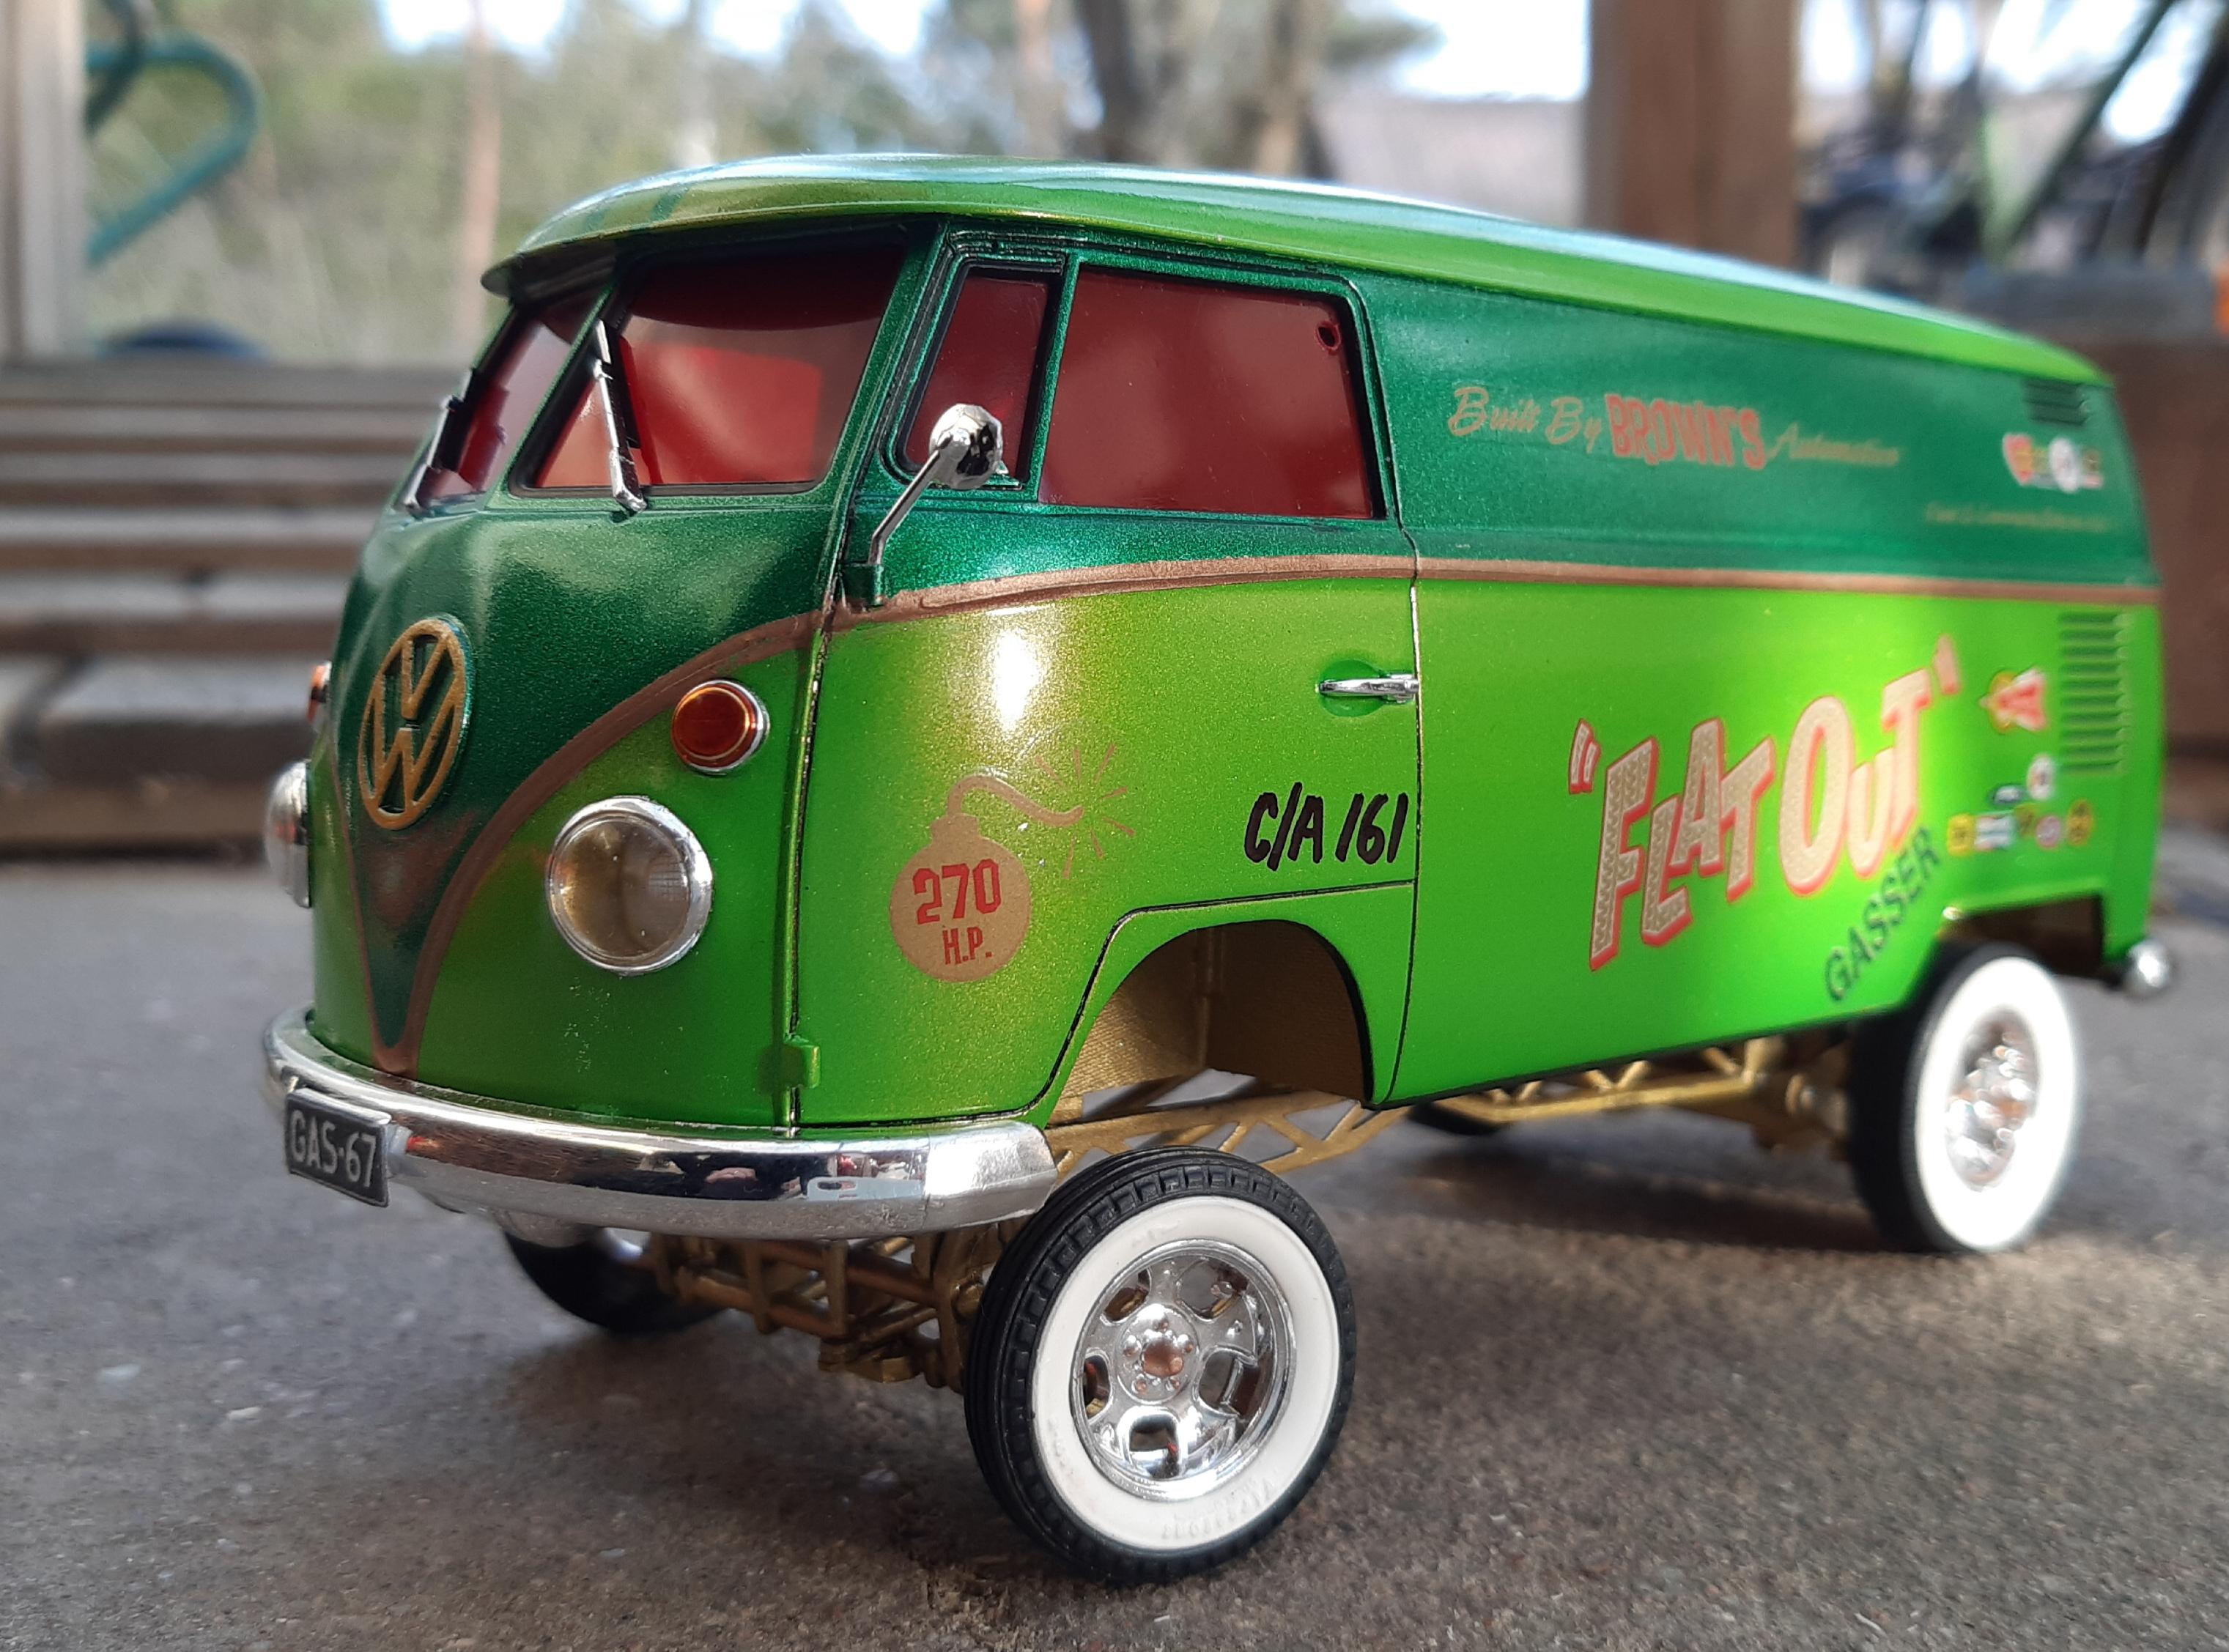
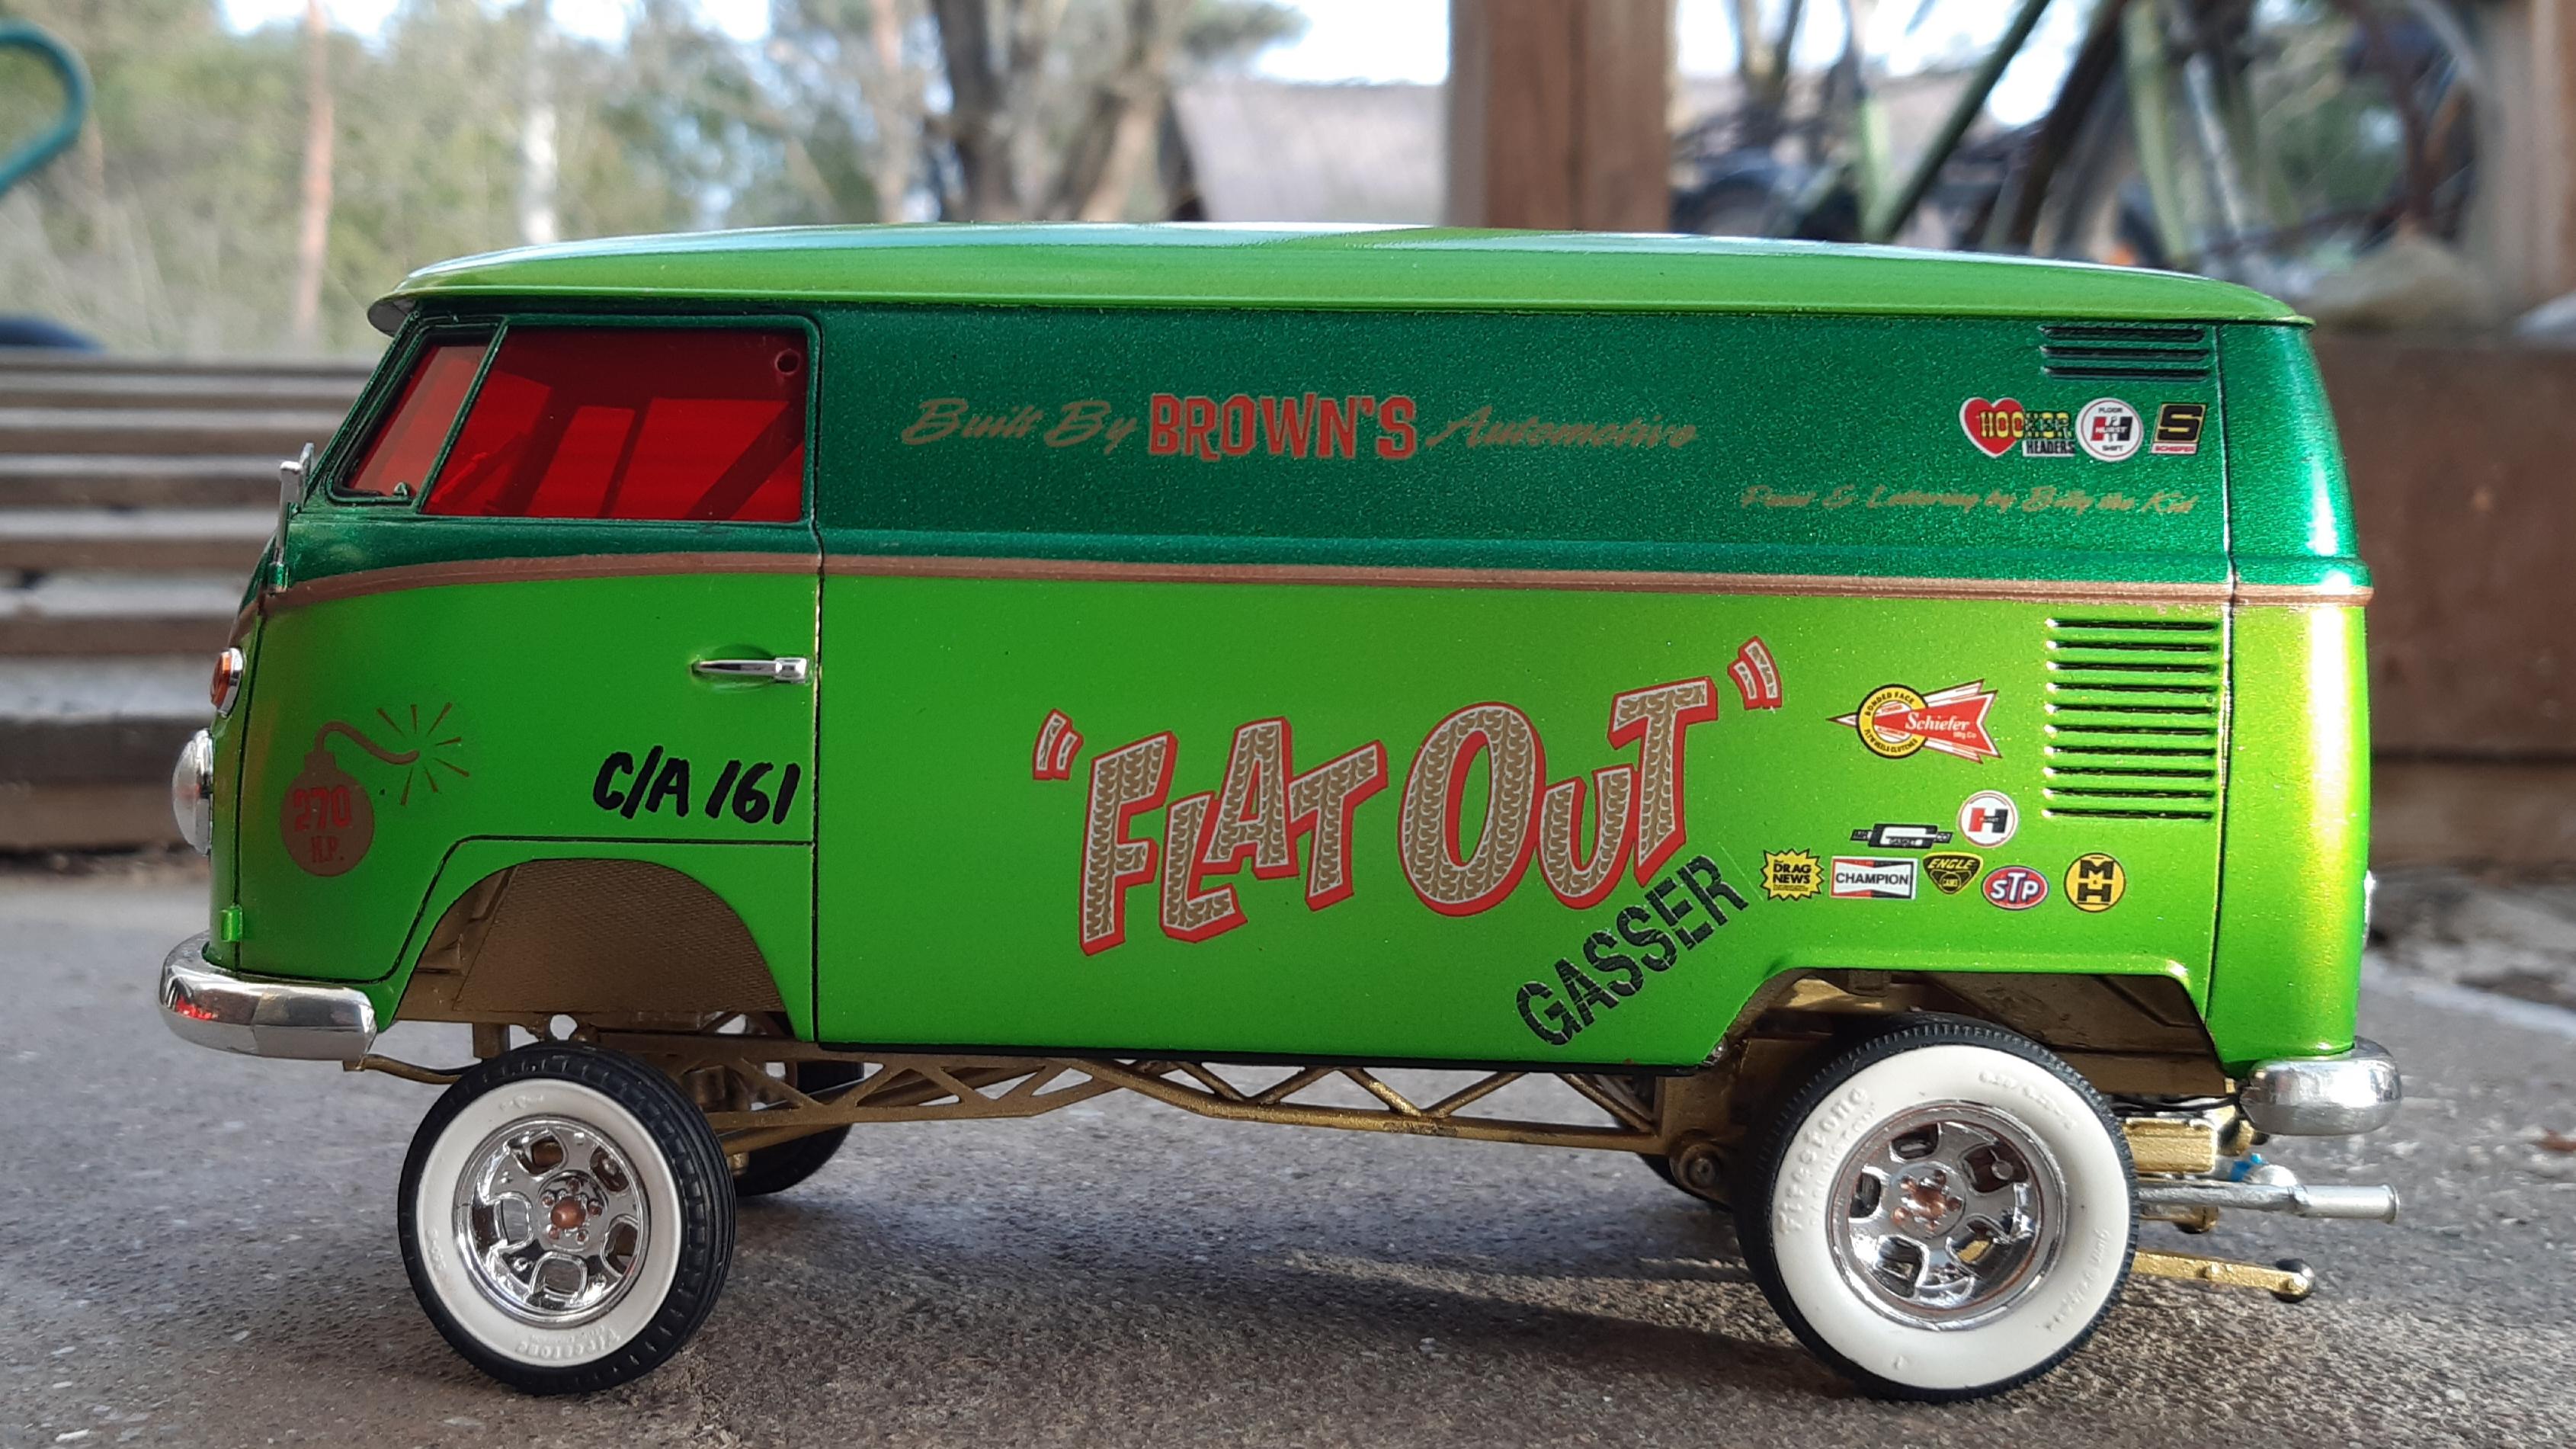
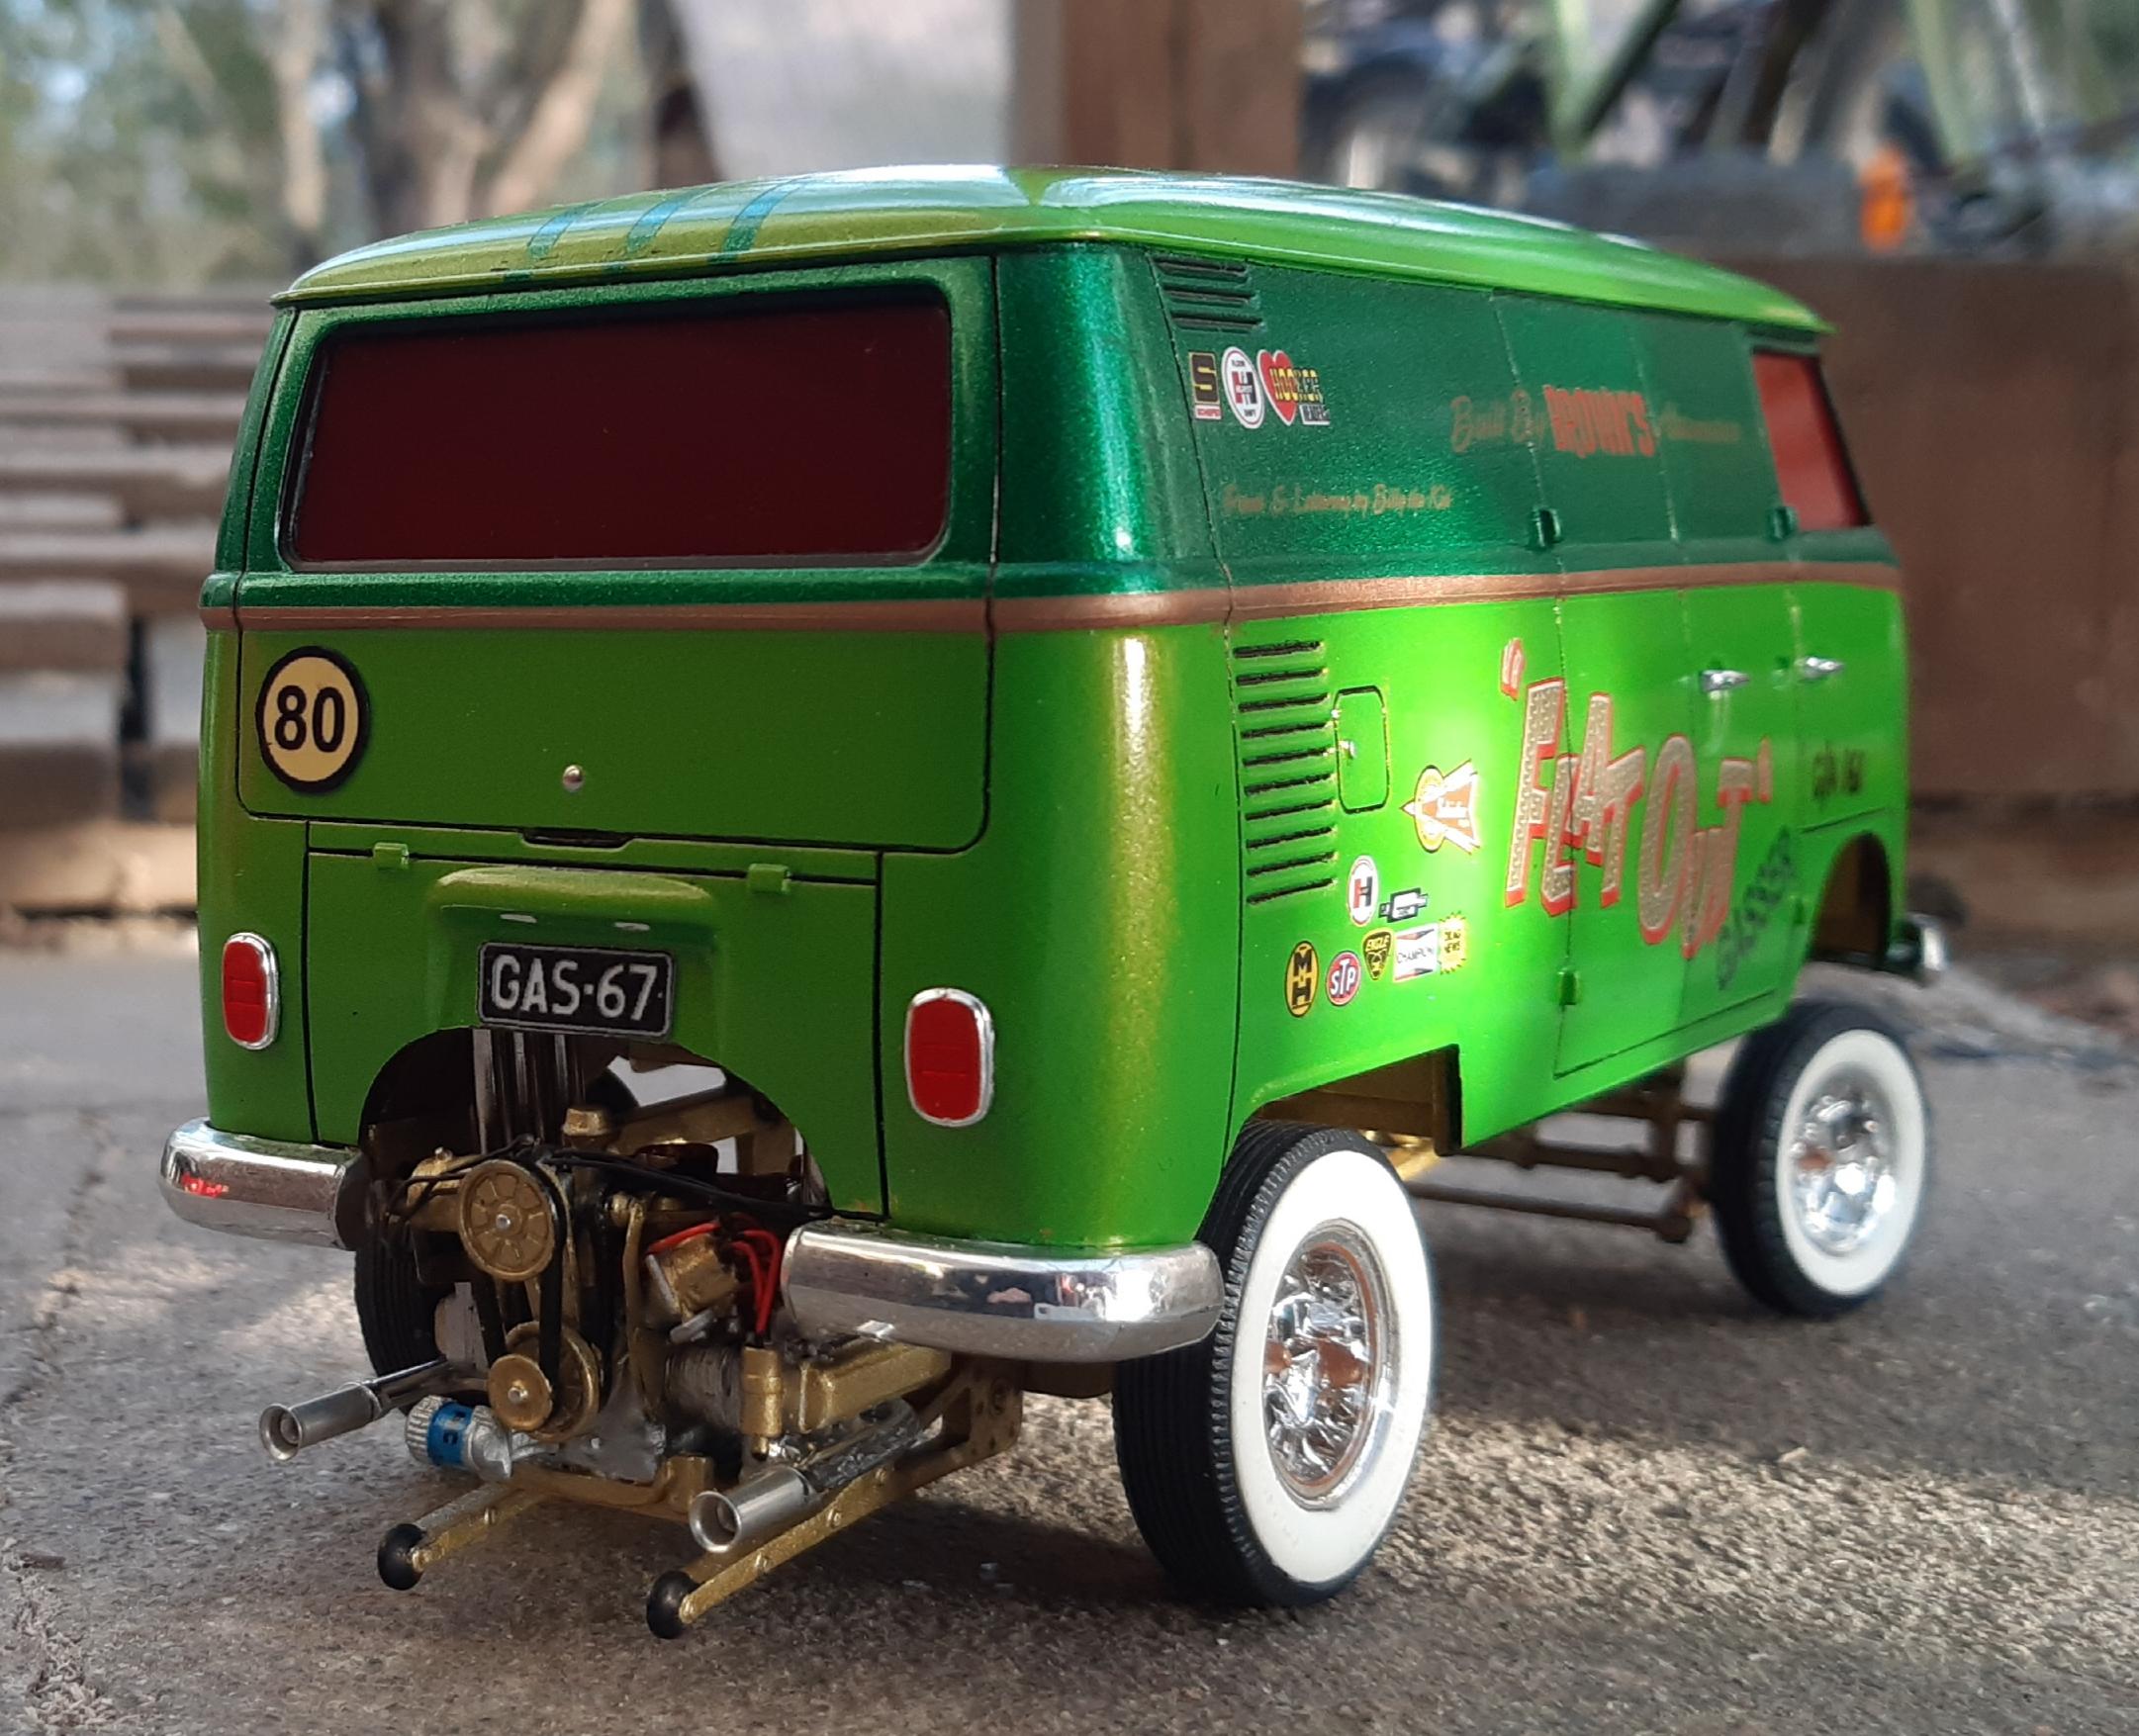
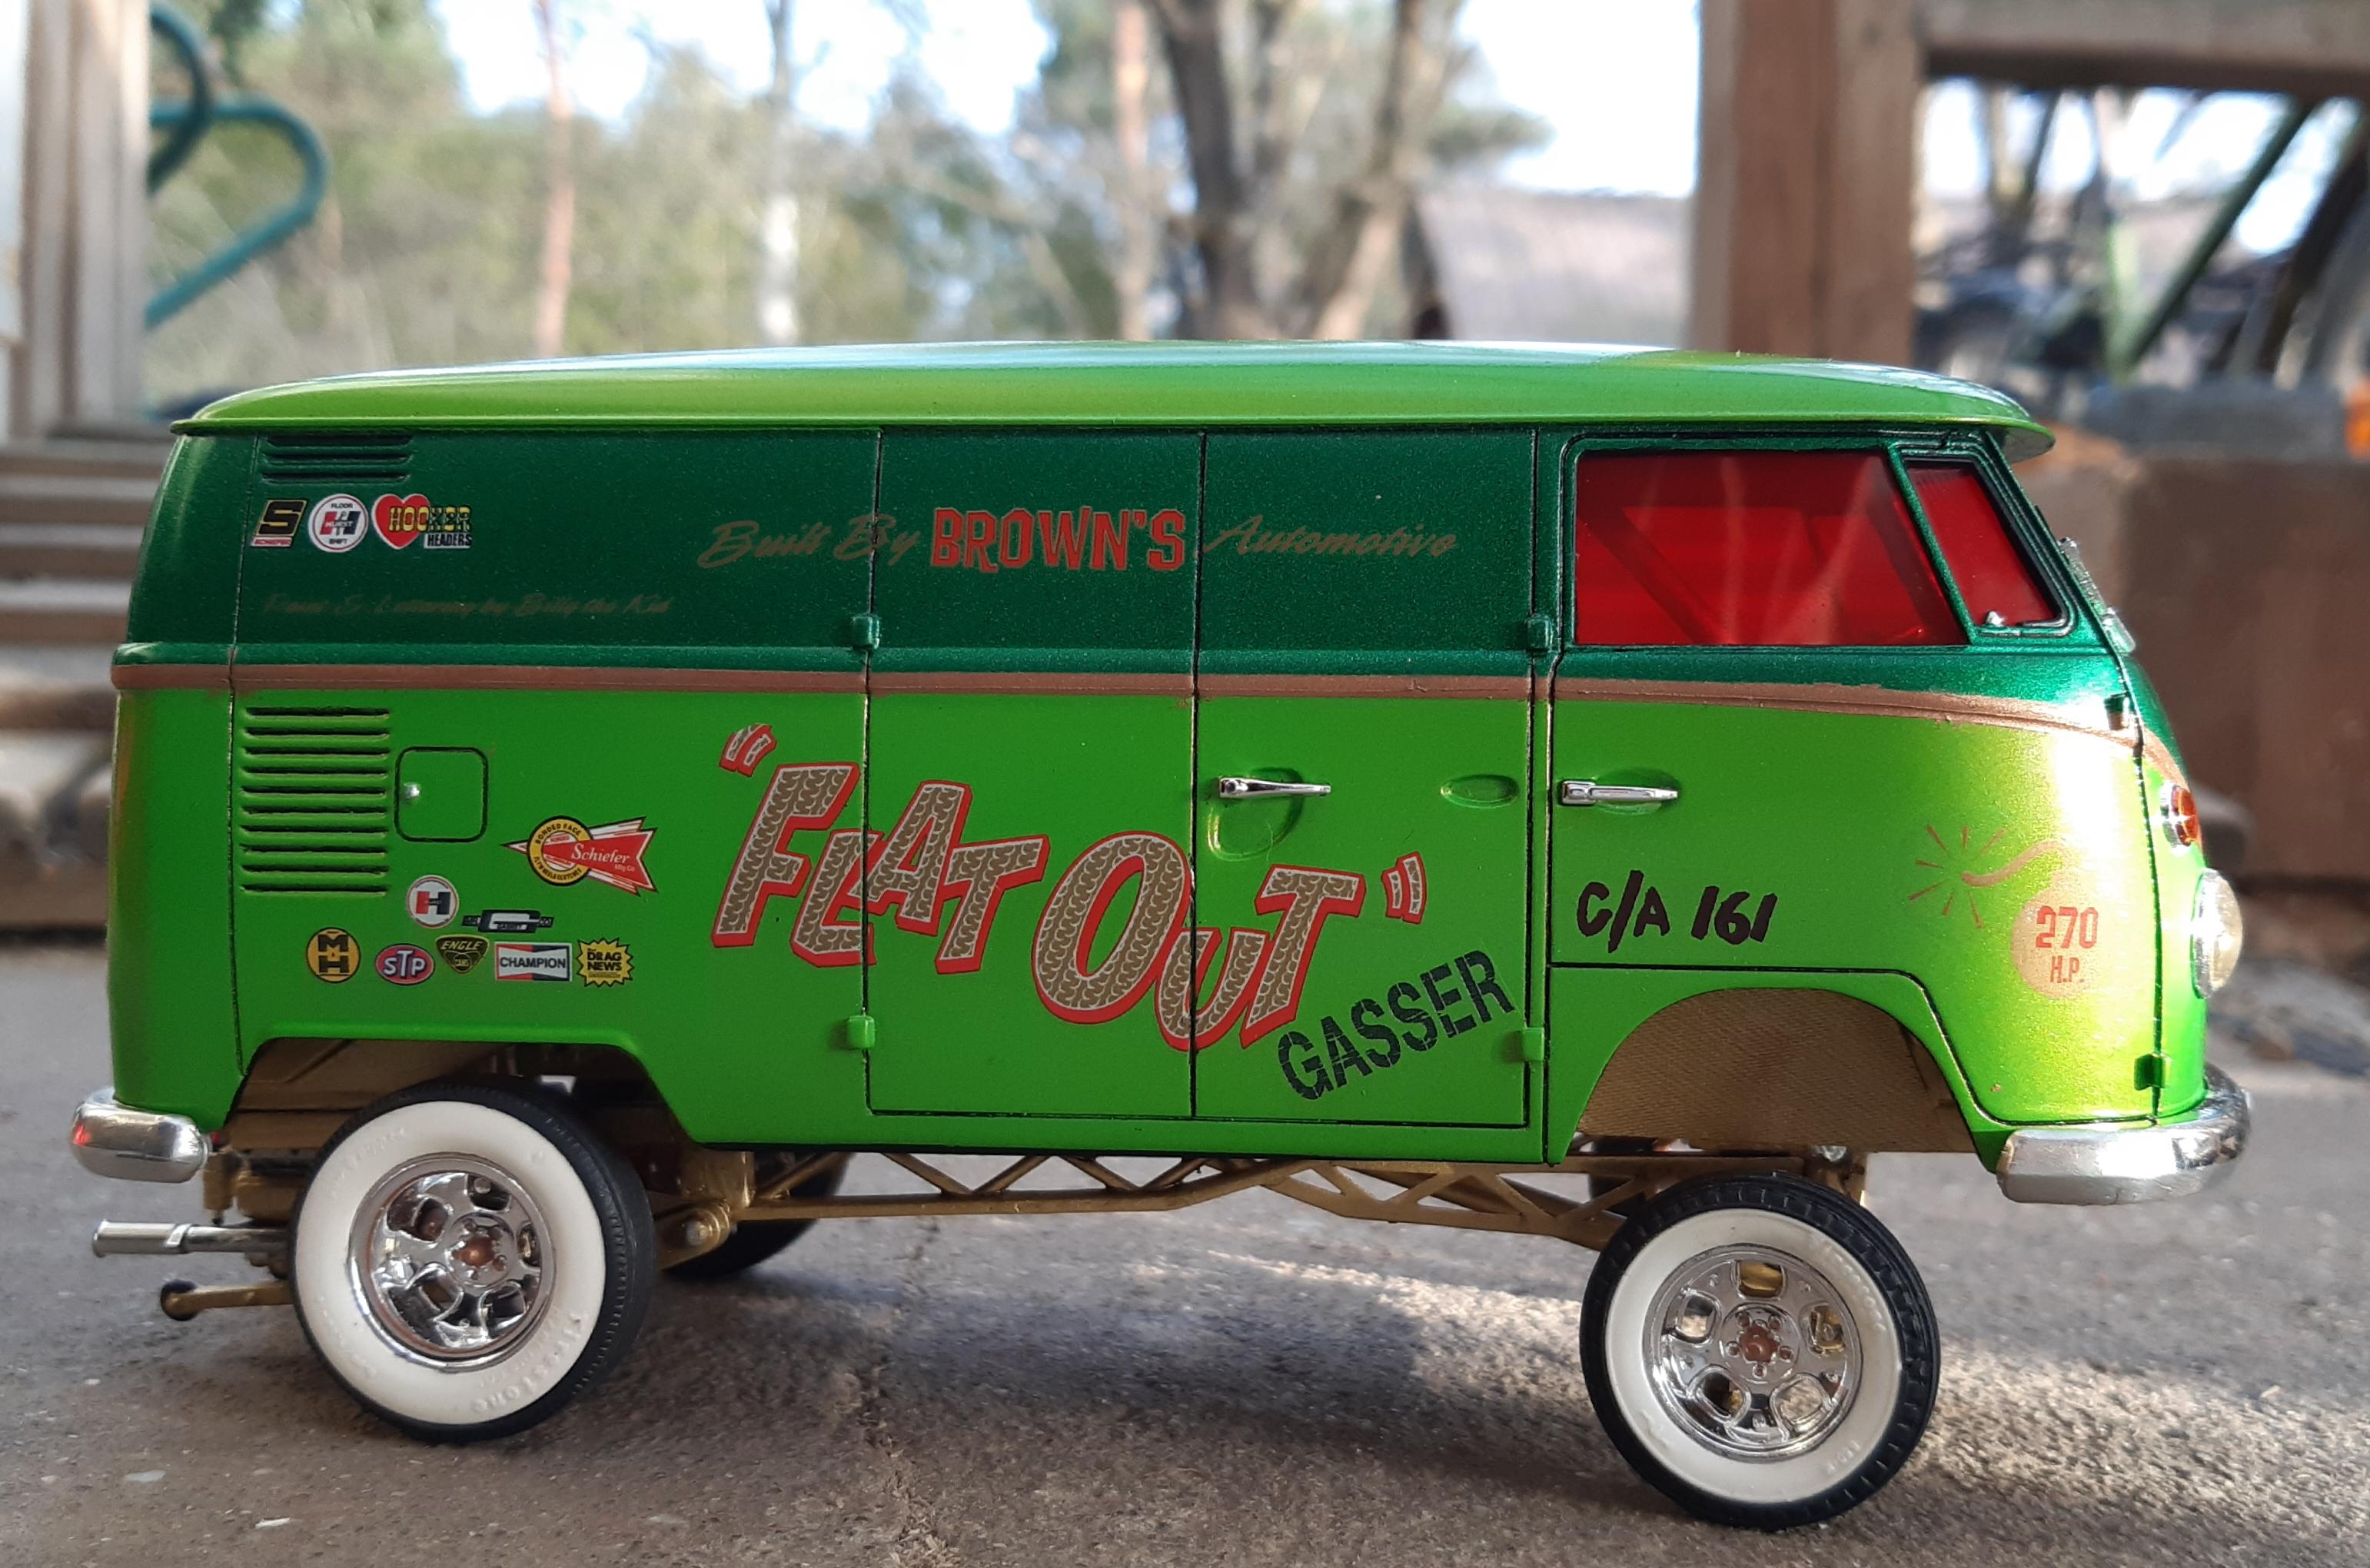
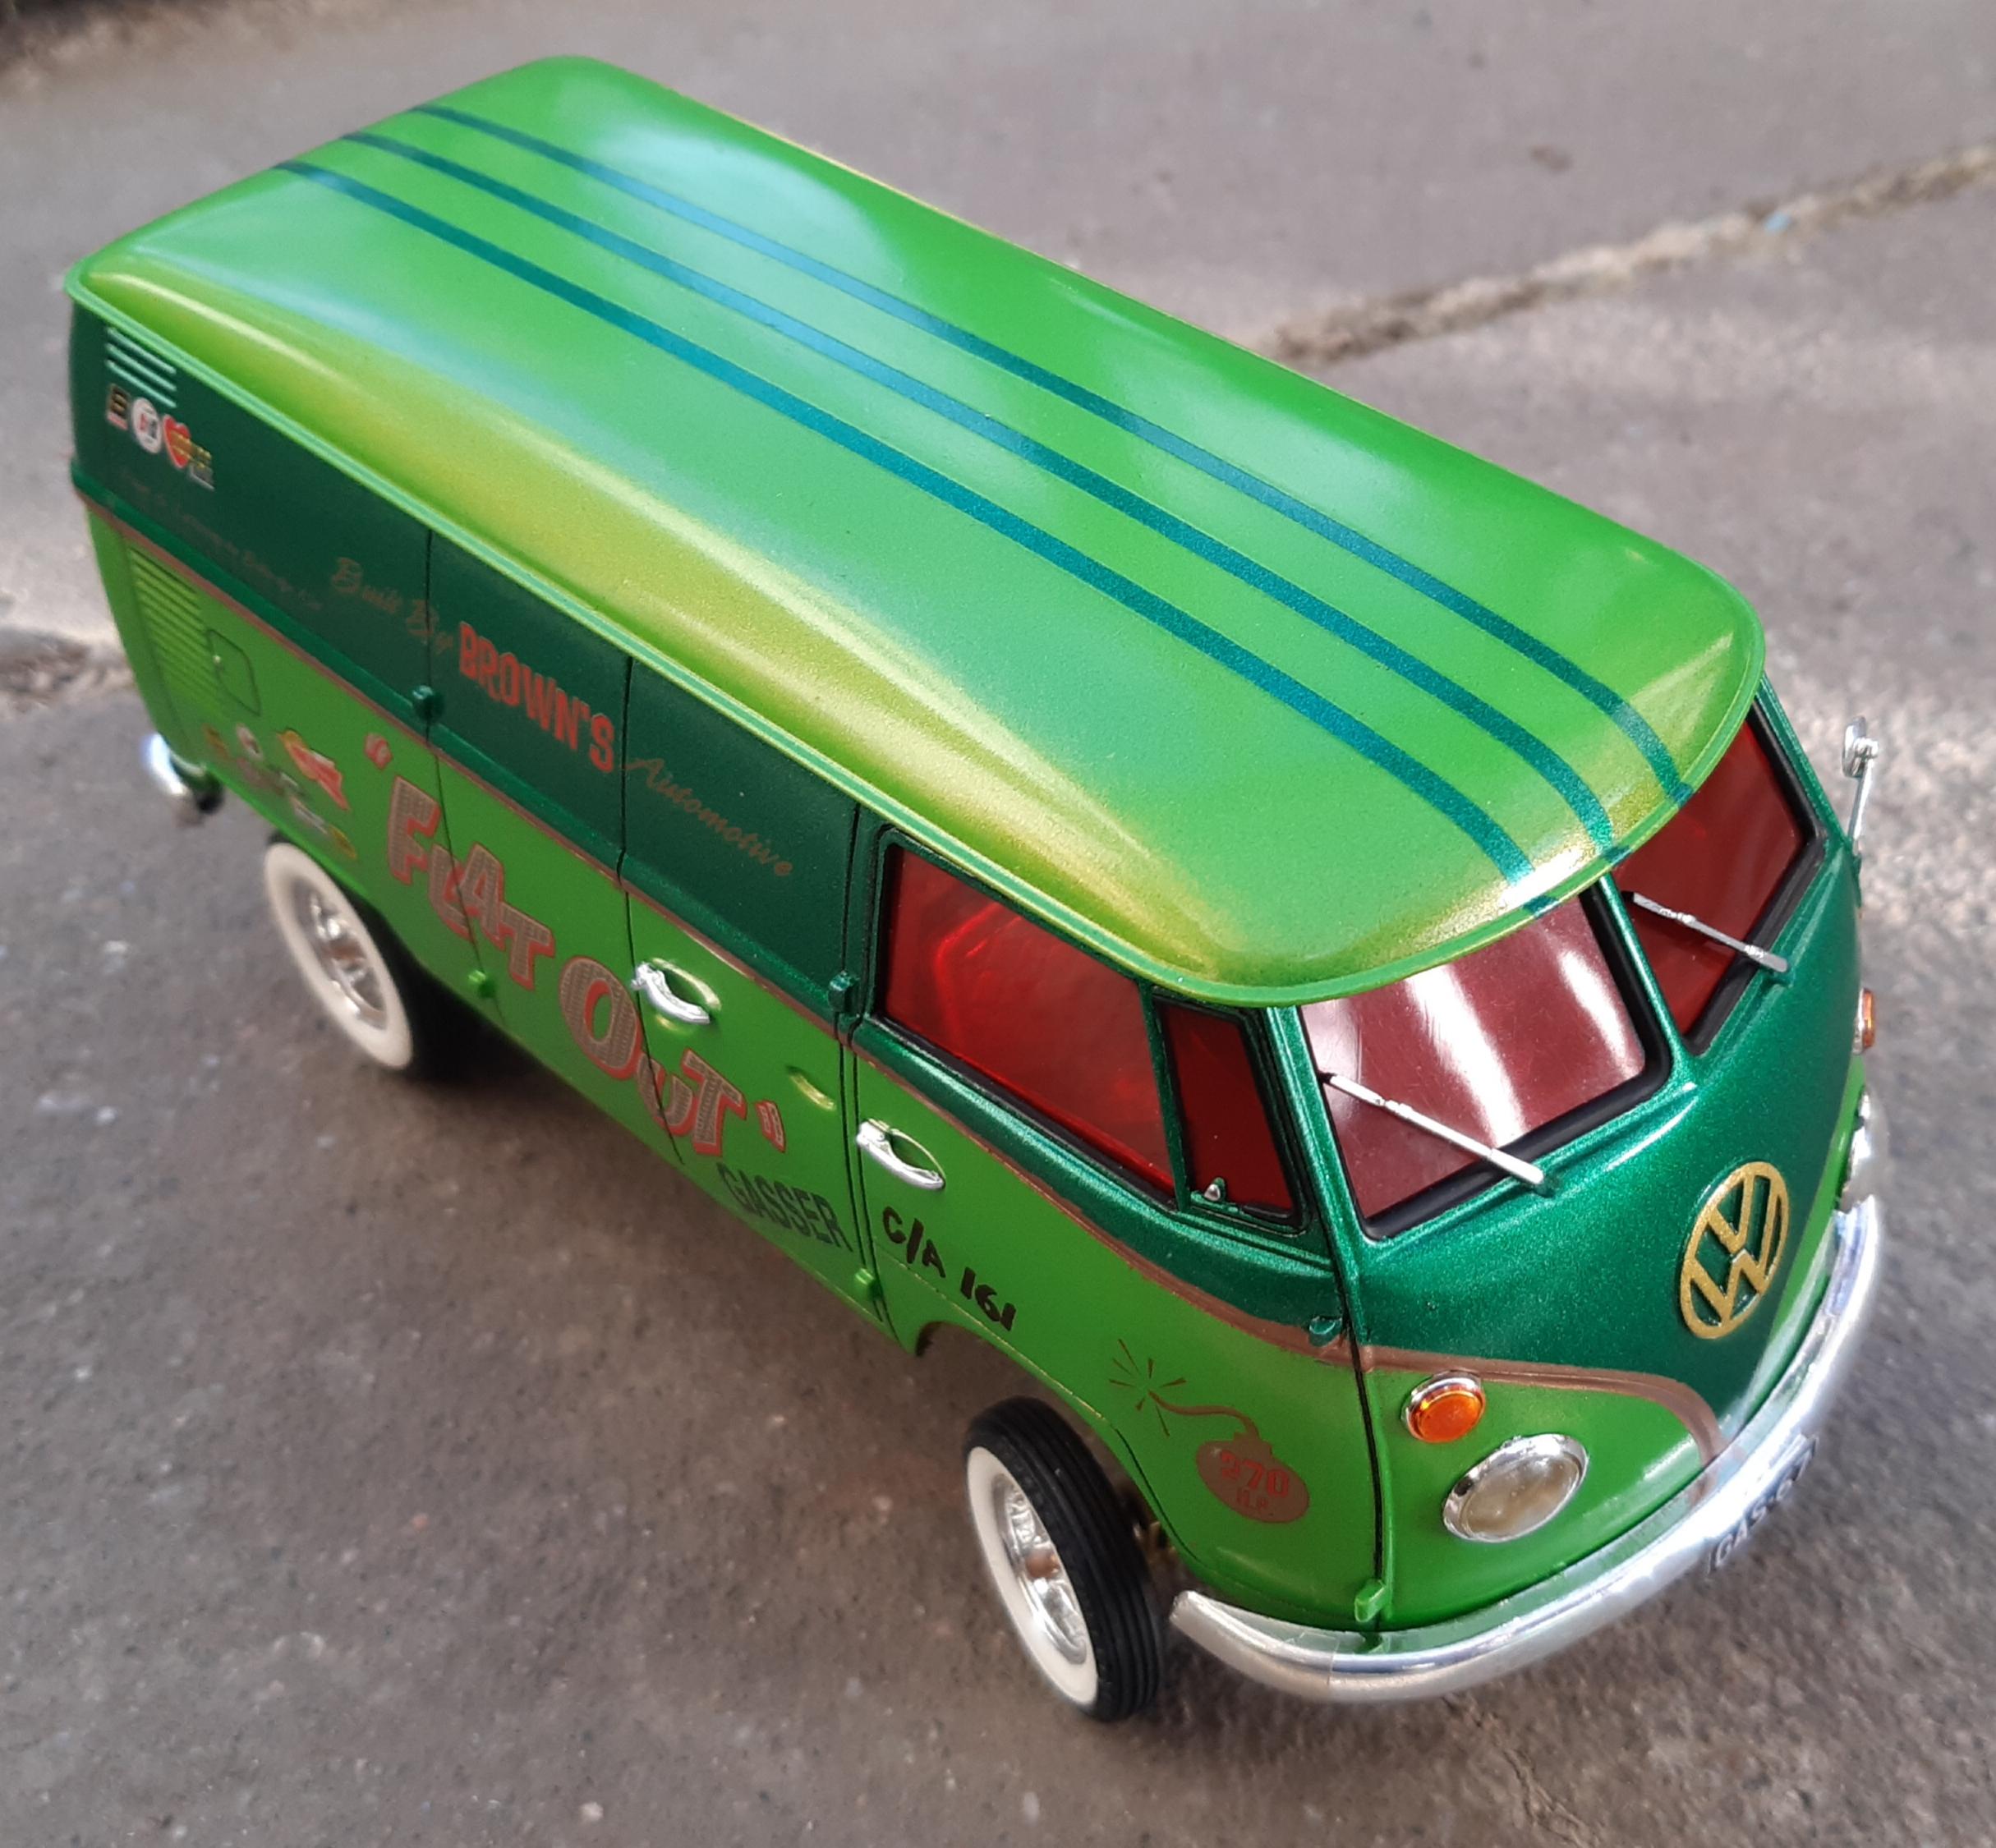
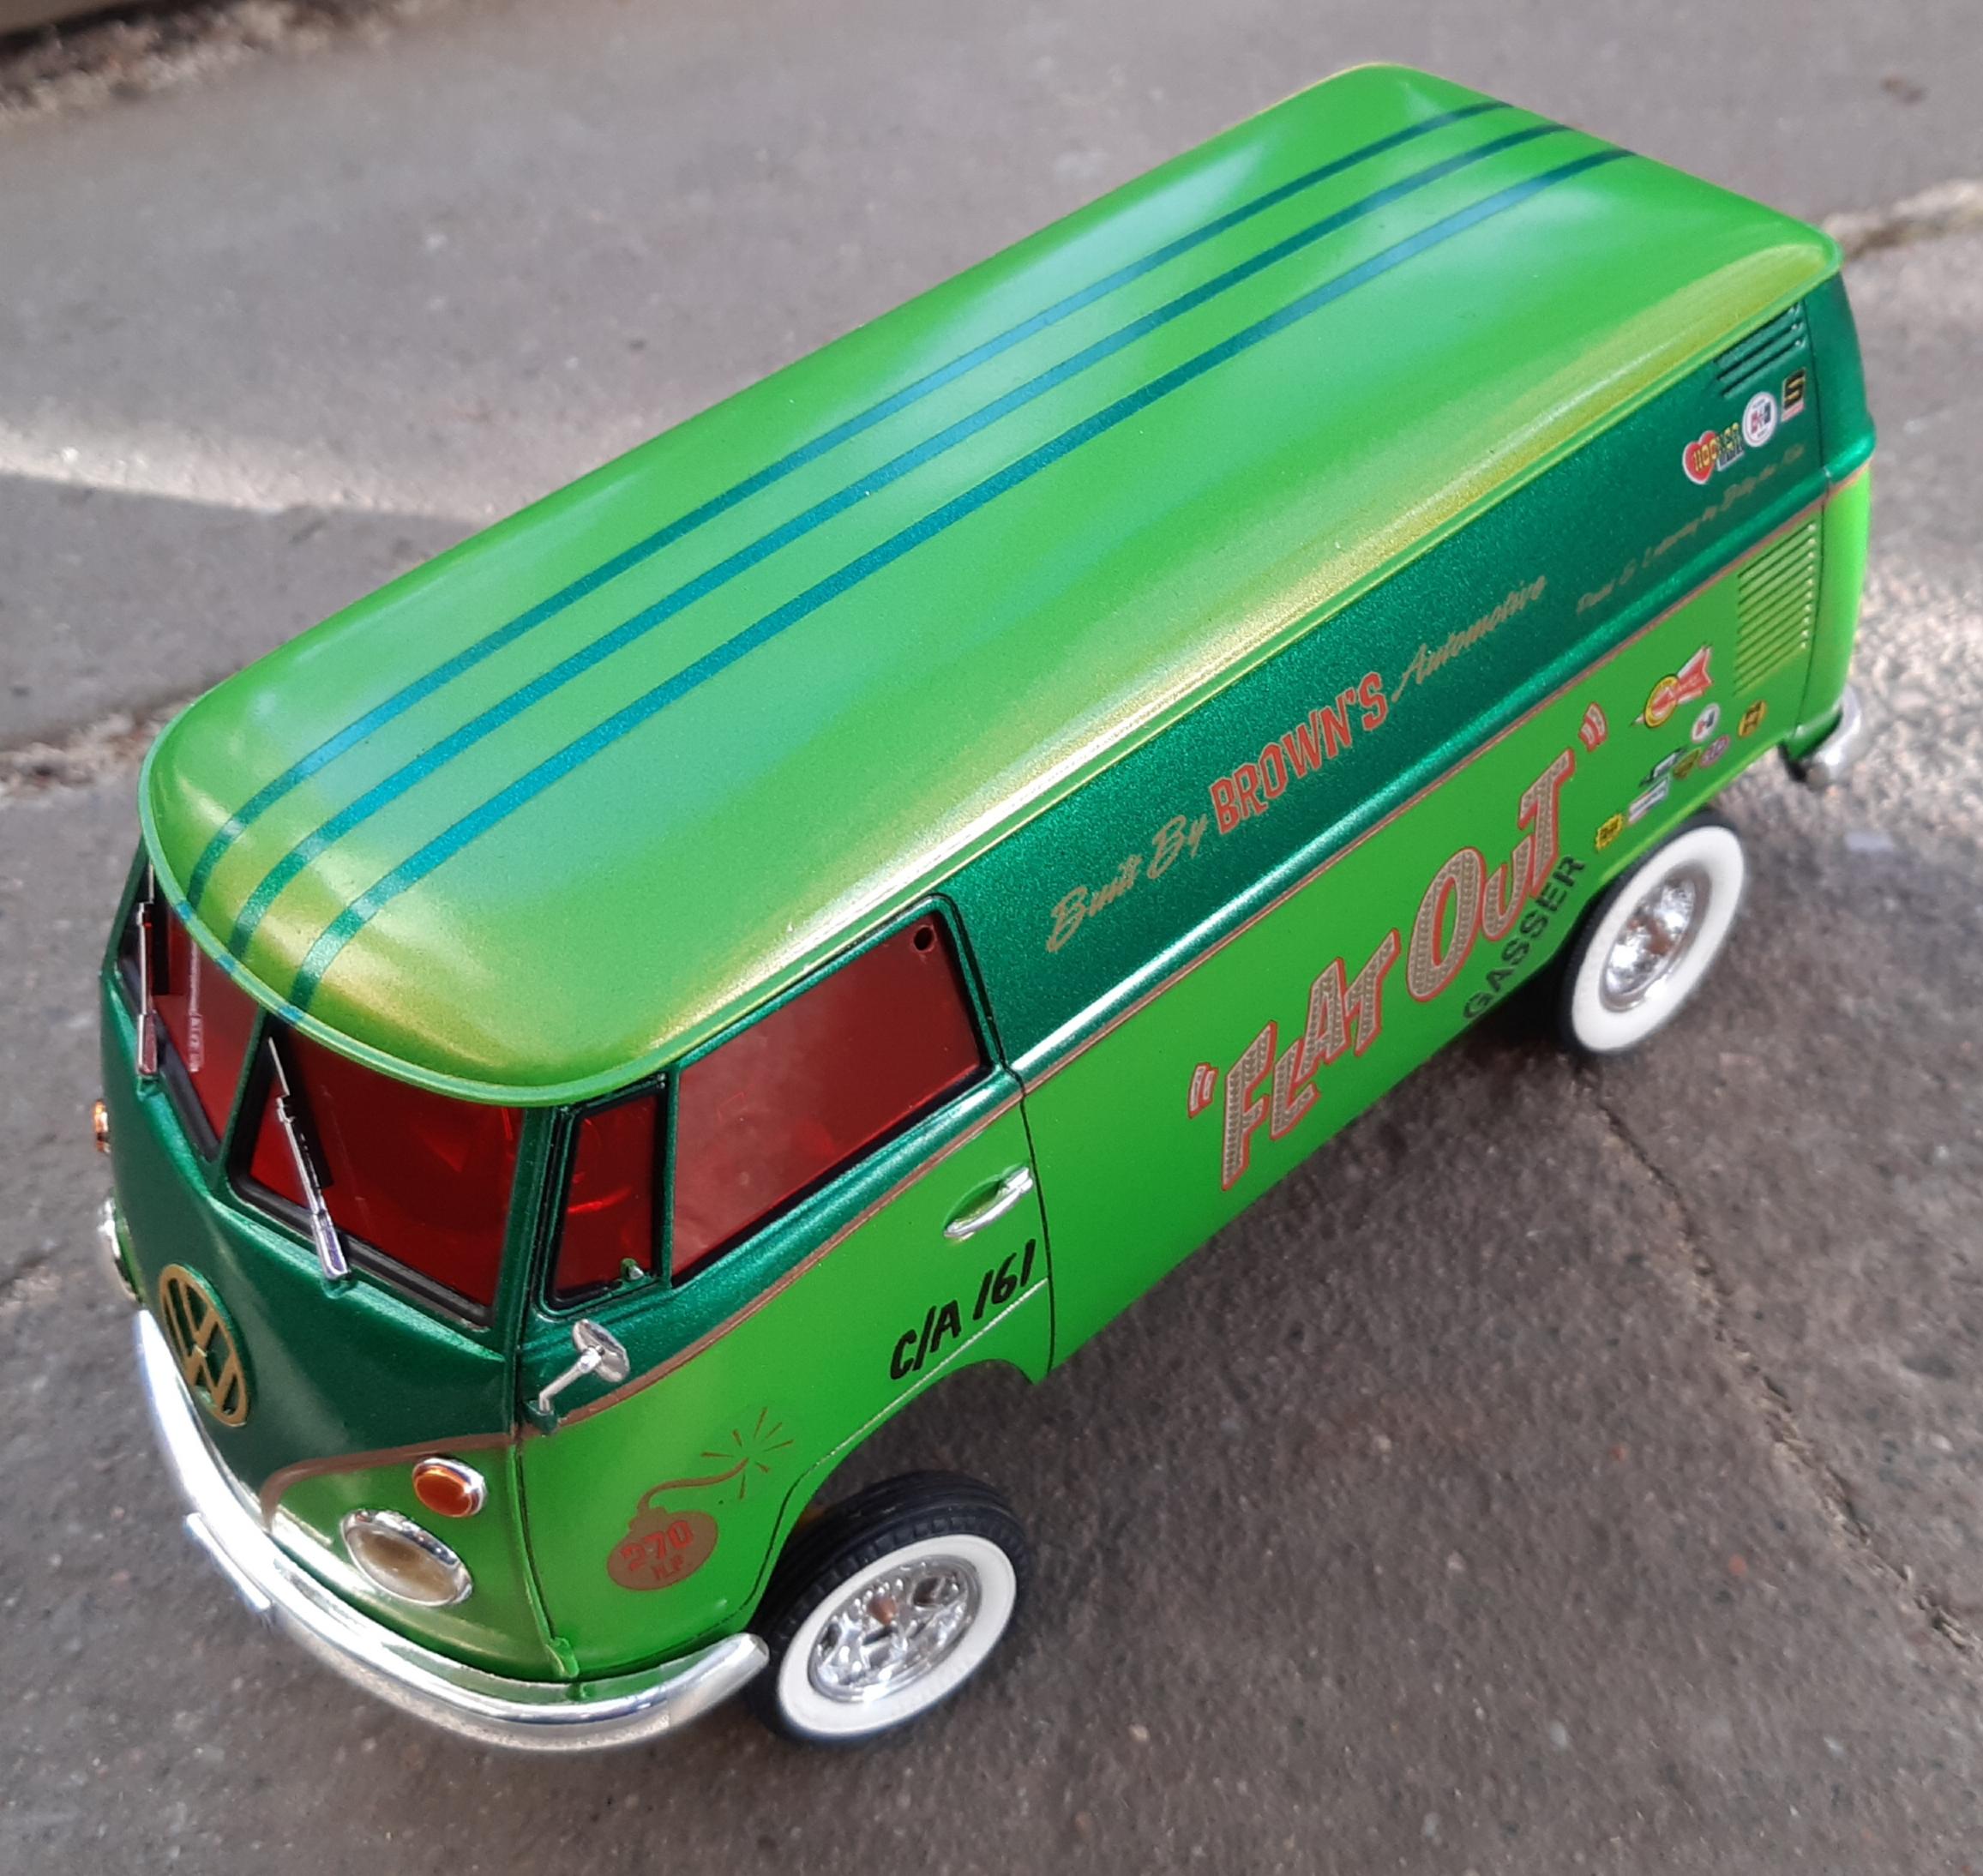
HI. This is my latest version of 1967 VW Kastenwagen ( = Van ). Built as a sixties- style gasser it has a modified Corvair engine from AMT parts pak. Paint is from Tamiya, decals are from various Revell kits. I modified interior with revell seats and console. Axles are VW original but raised with schratchbuilt and revell parts. Comments are always welcomed!
-
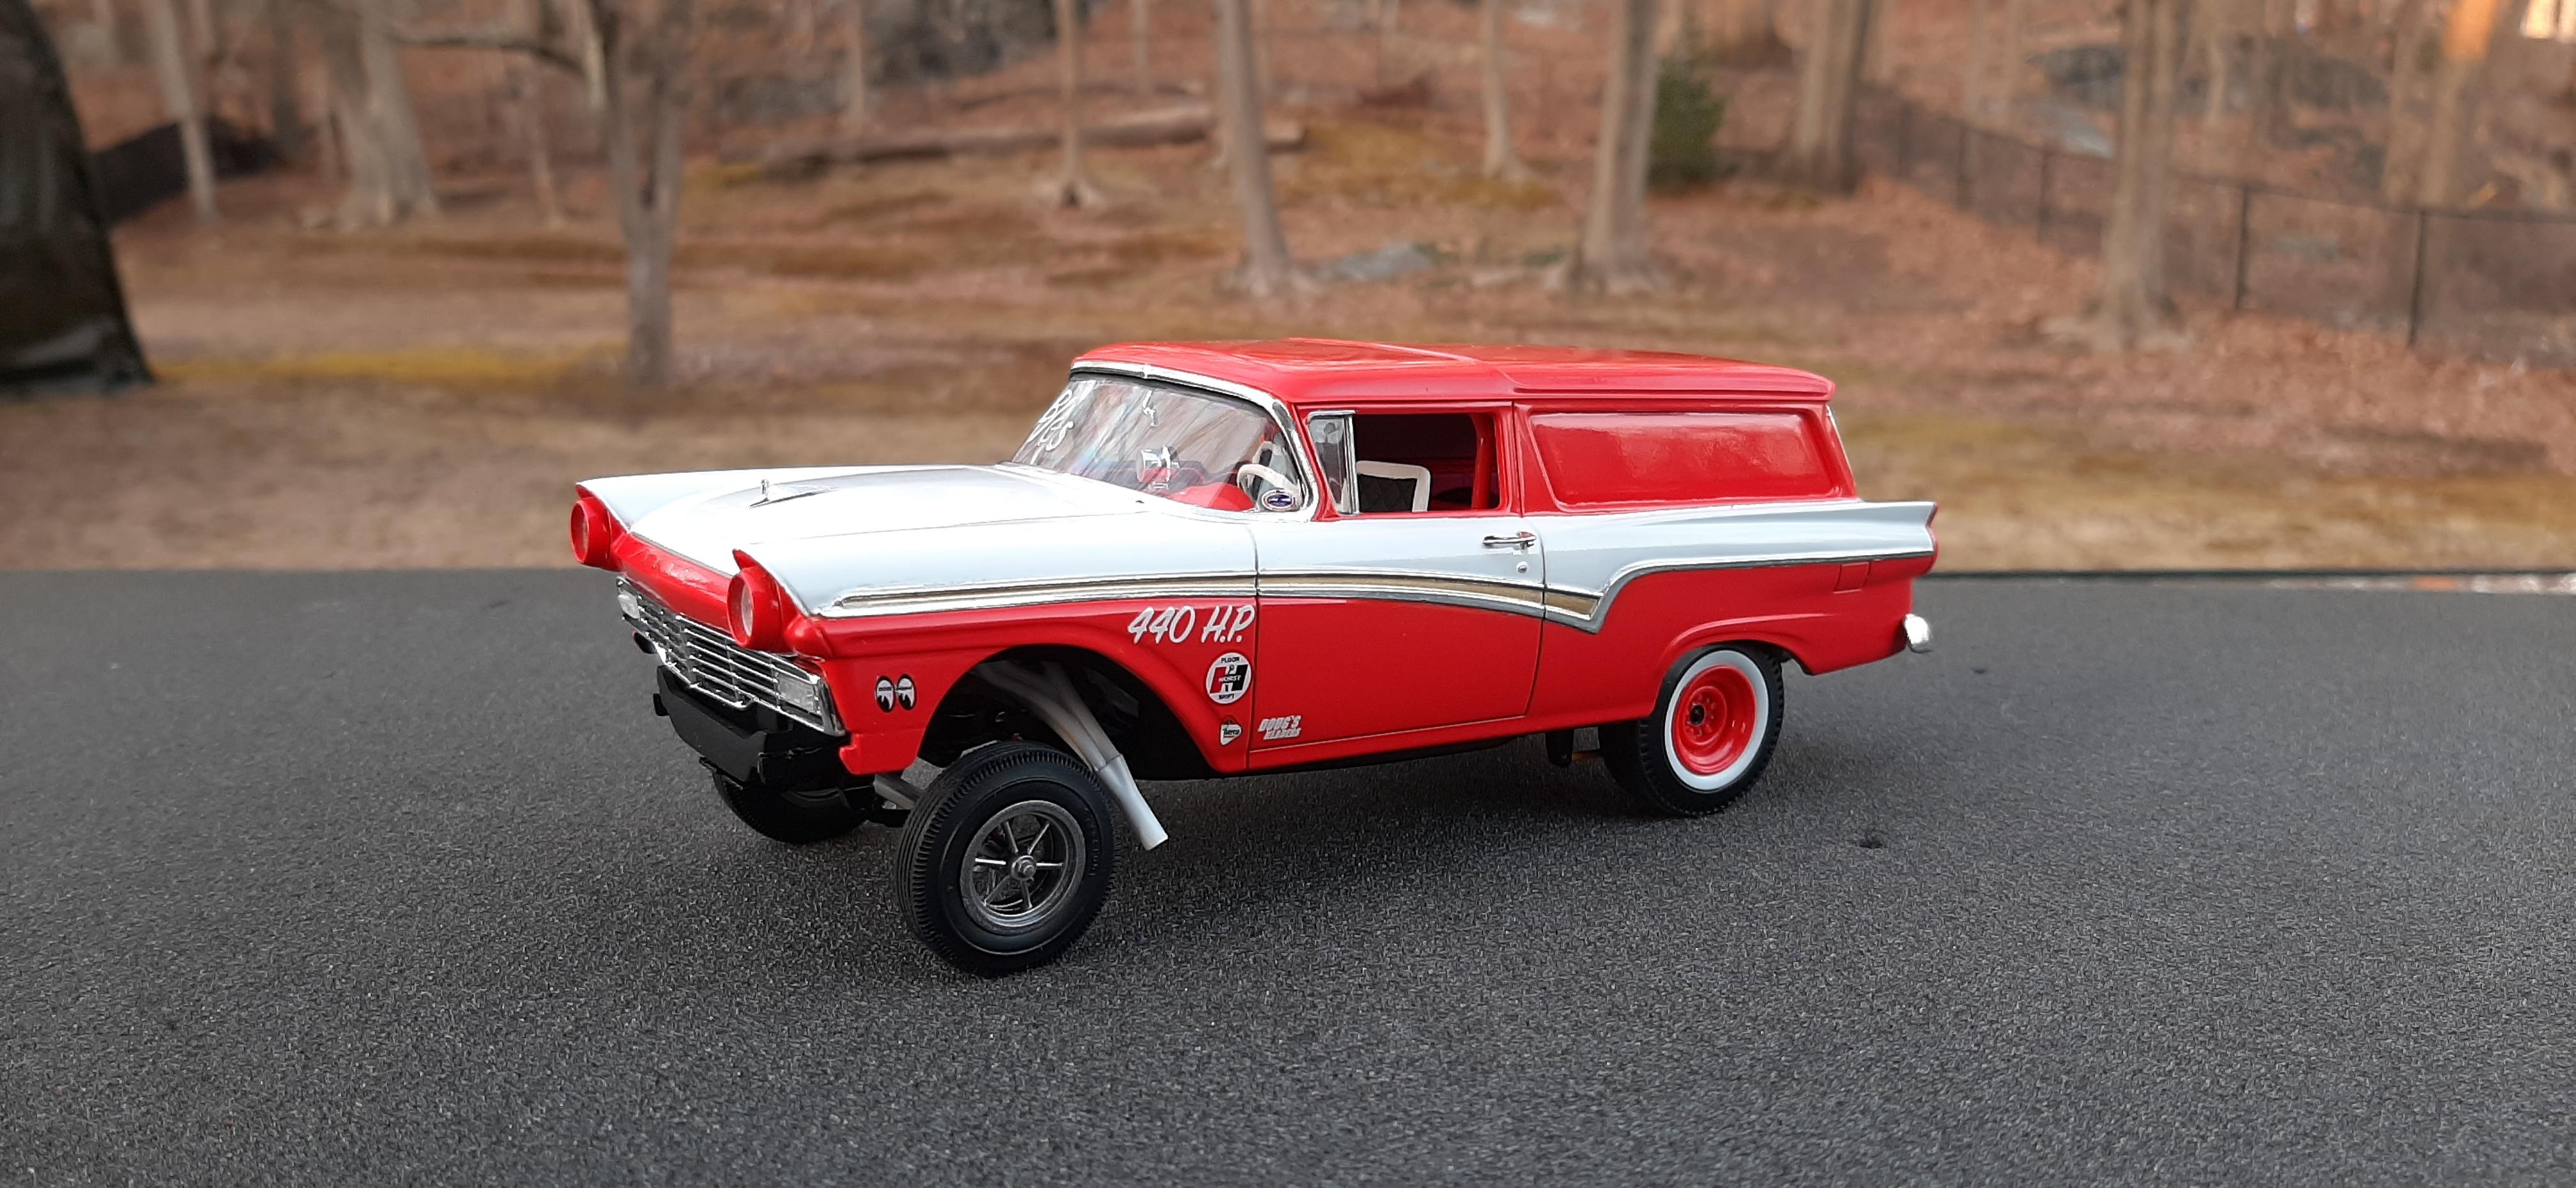
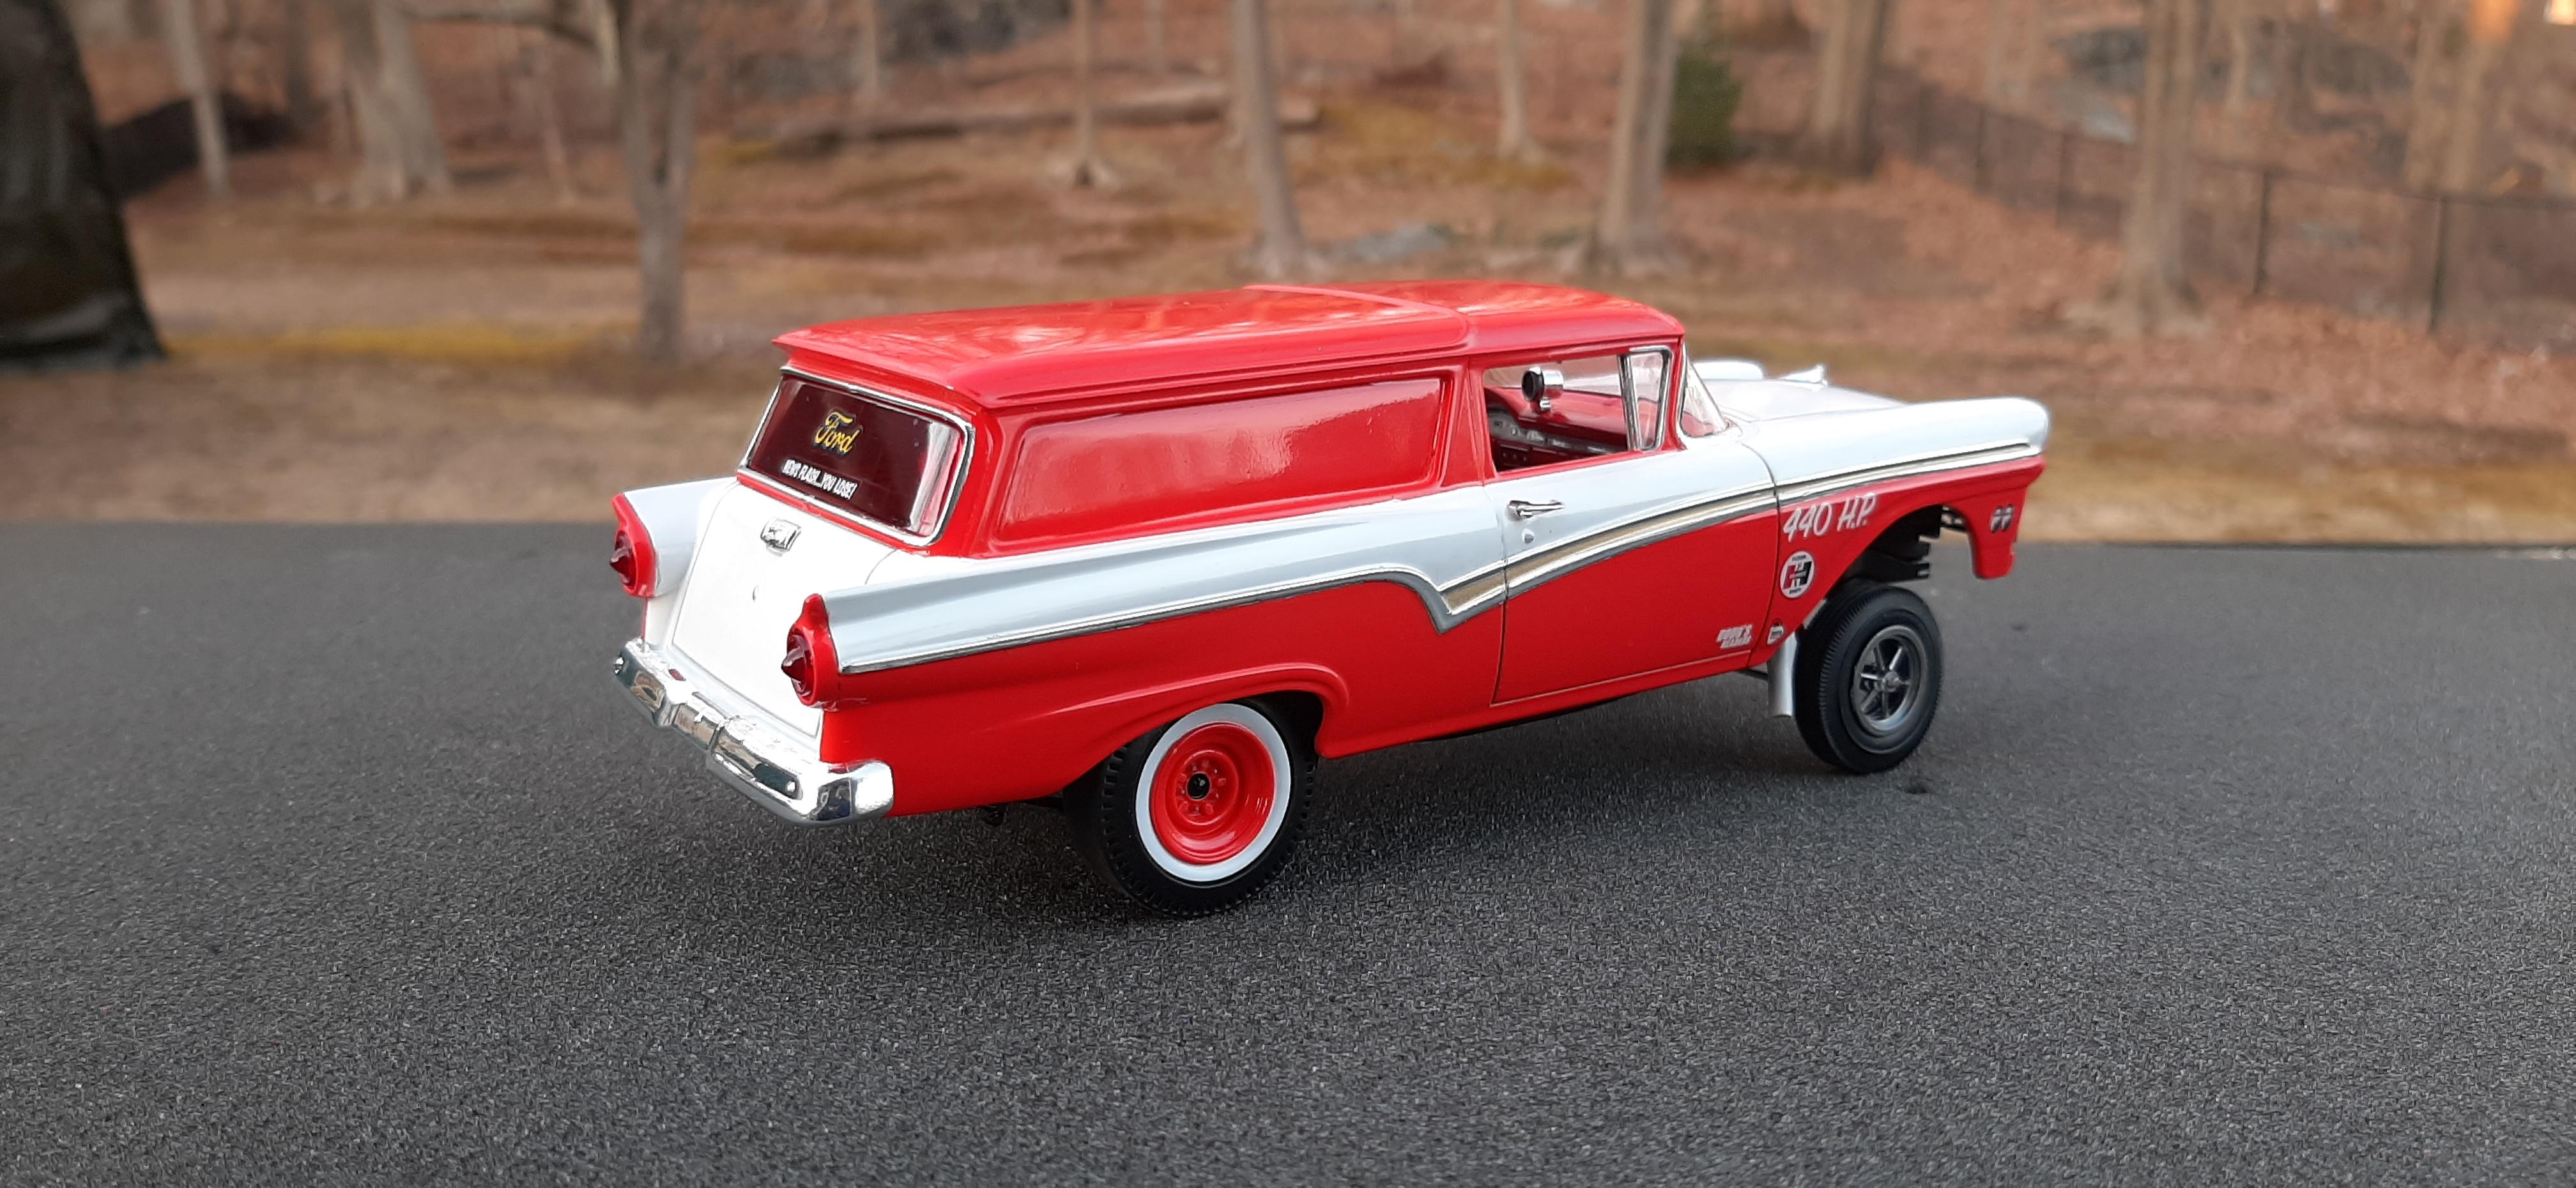
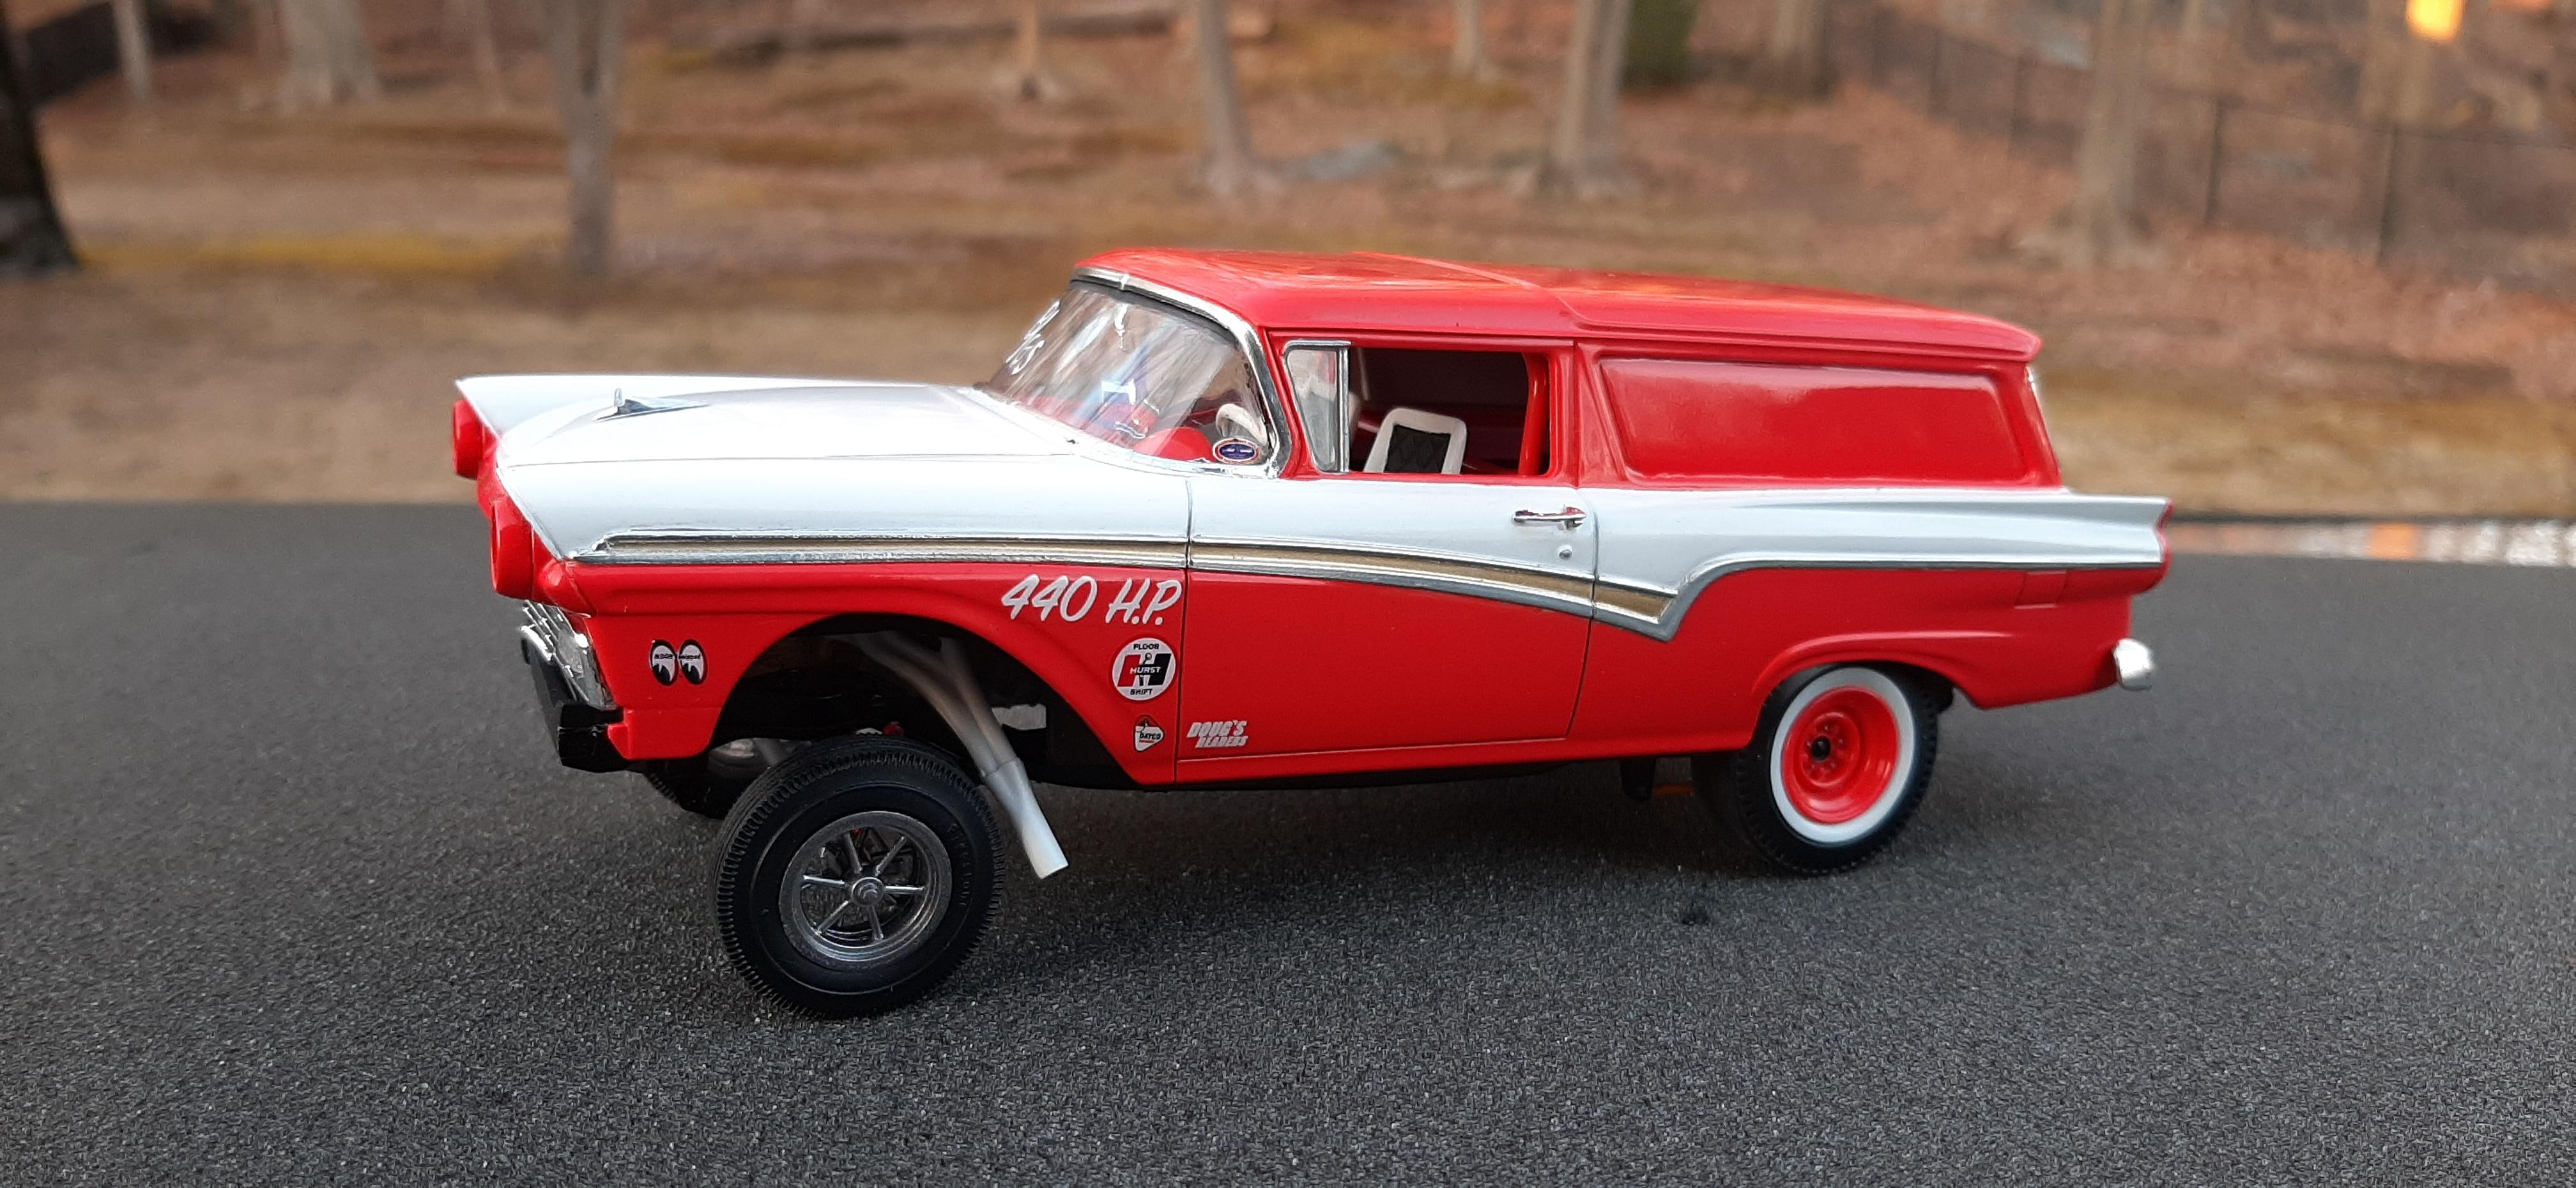
Just finished this up. While it looks red in the pics it is actually Tamiya Bright Orange and White. Seats are the buckets from the AMT '57 Ford kit. Stacks are from the Monogram 70 Mustang Boss. Decals are a mix from several kits. Wheels are from the AMT '56 Ford and tires are AMT parts pack as well as parts bin finds.
-
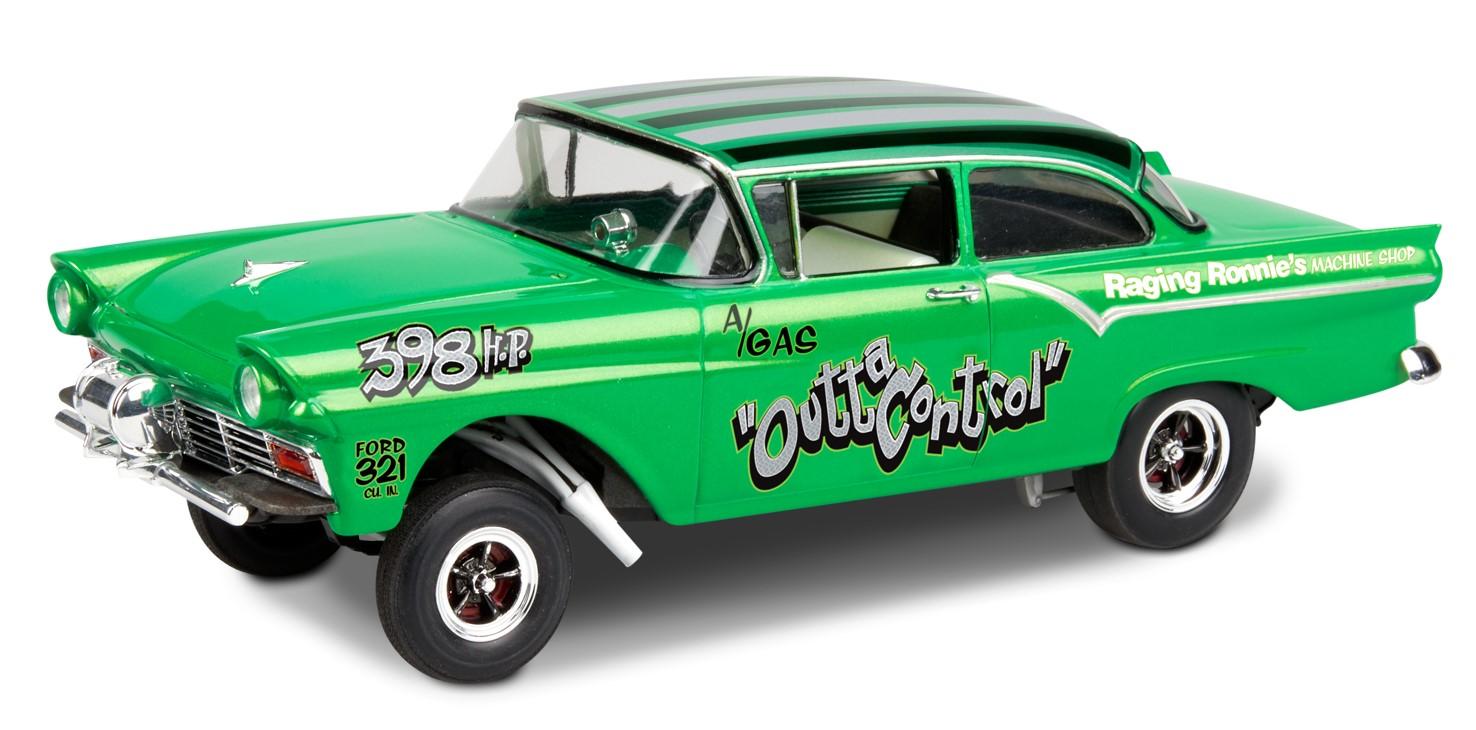
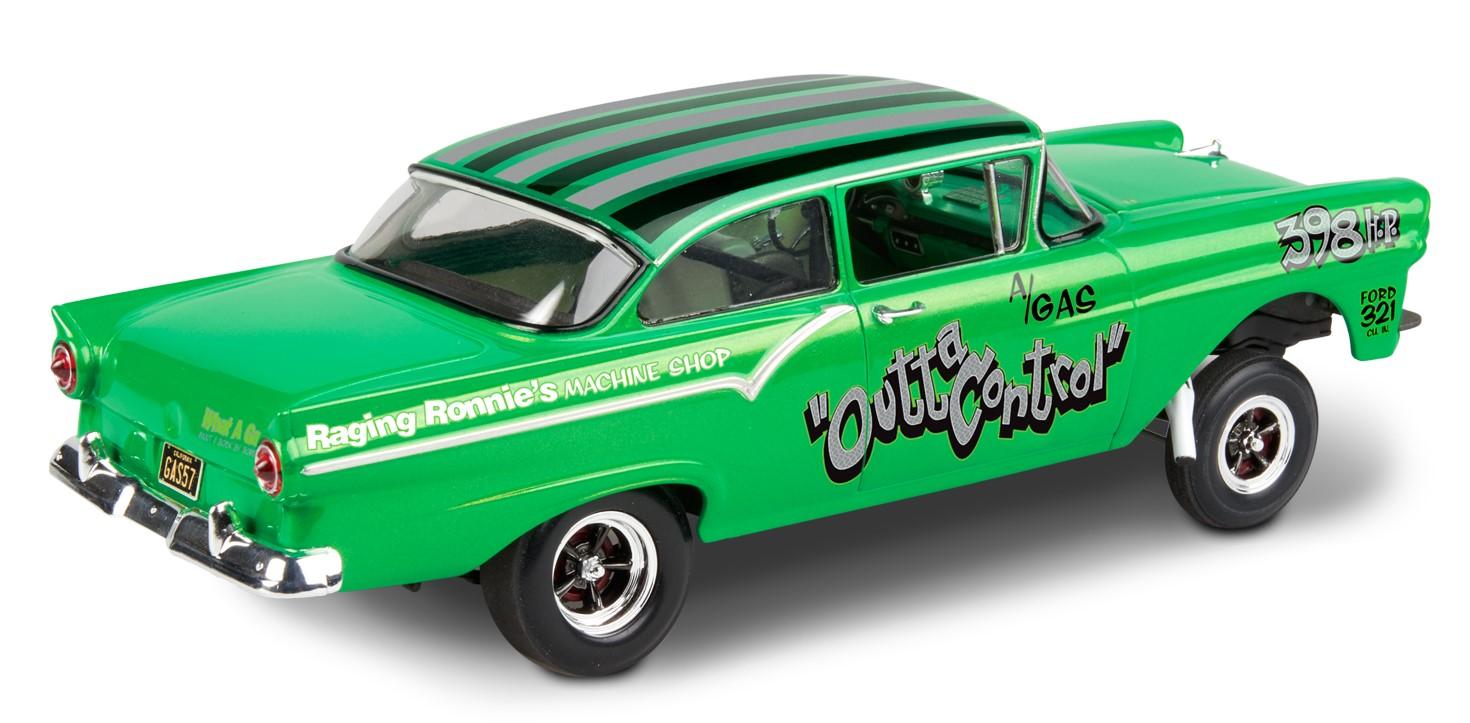
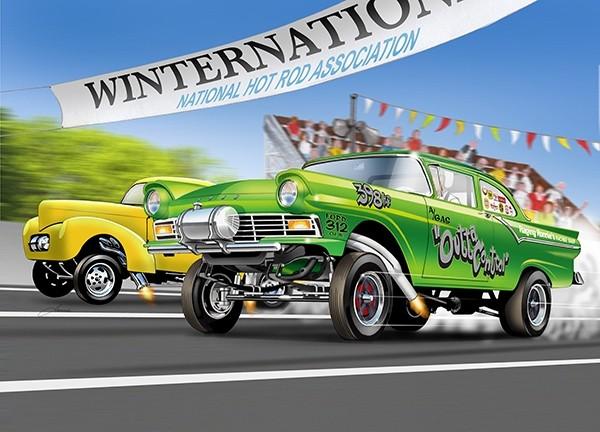
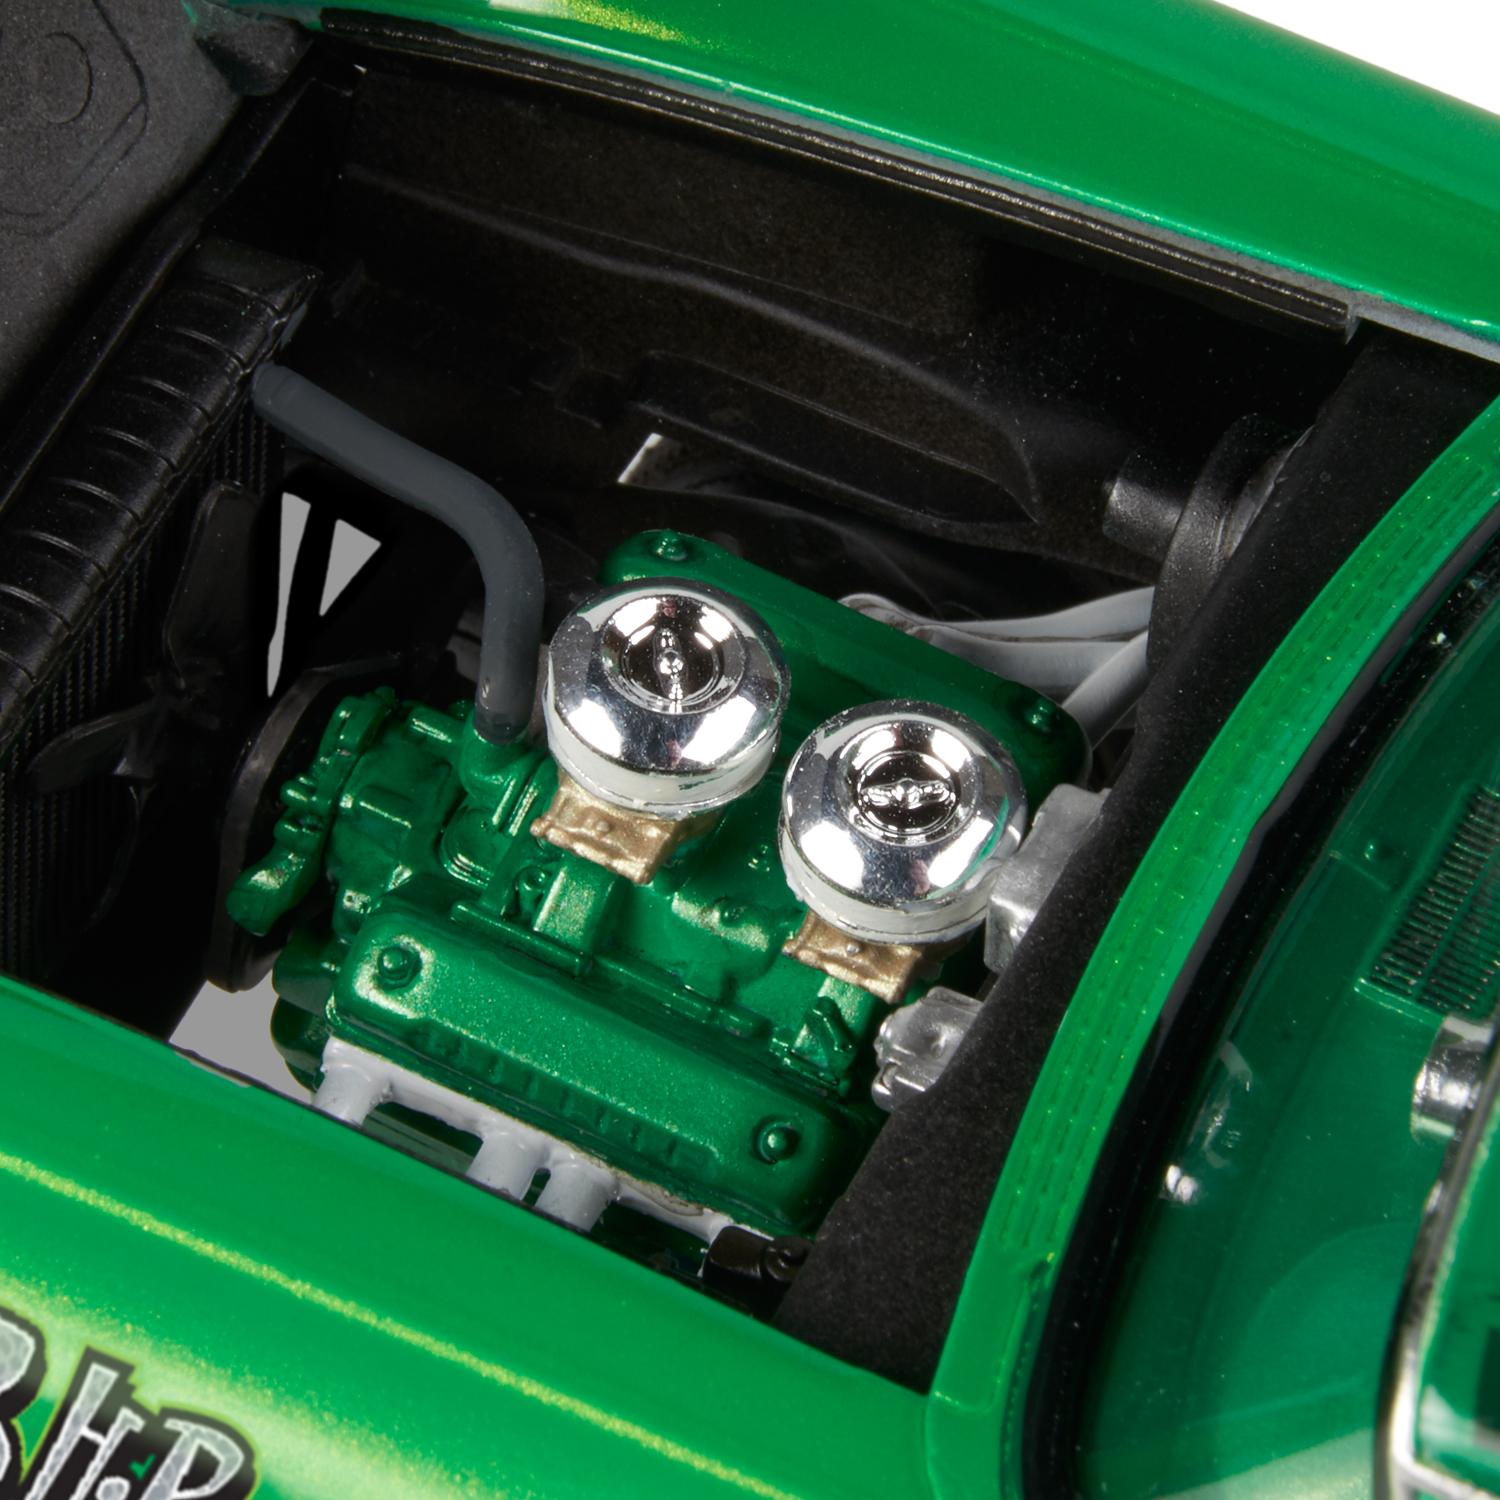
The 1/25 Revell '57 Ford Sedan Gasser kit seems to have slipped through the cracks, so now it has its own dedicated topic. It was mentioned (hunted at, more accurately) by Tim Boyd here...: ....that this (and it looks like another or a slightly different) variant had been planned, but never released, until now. Here are some images of the completed box stock model, courtesy of the Revell website: Chris/hpiguy has a video review, too:
-
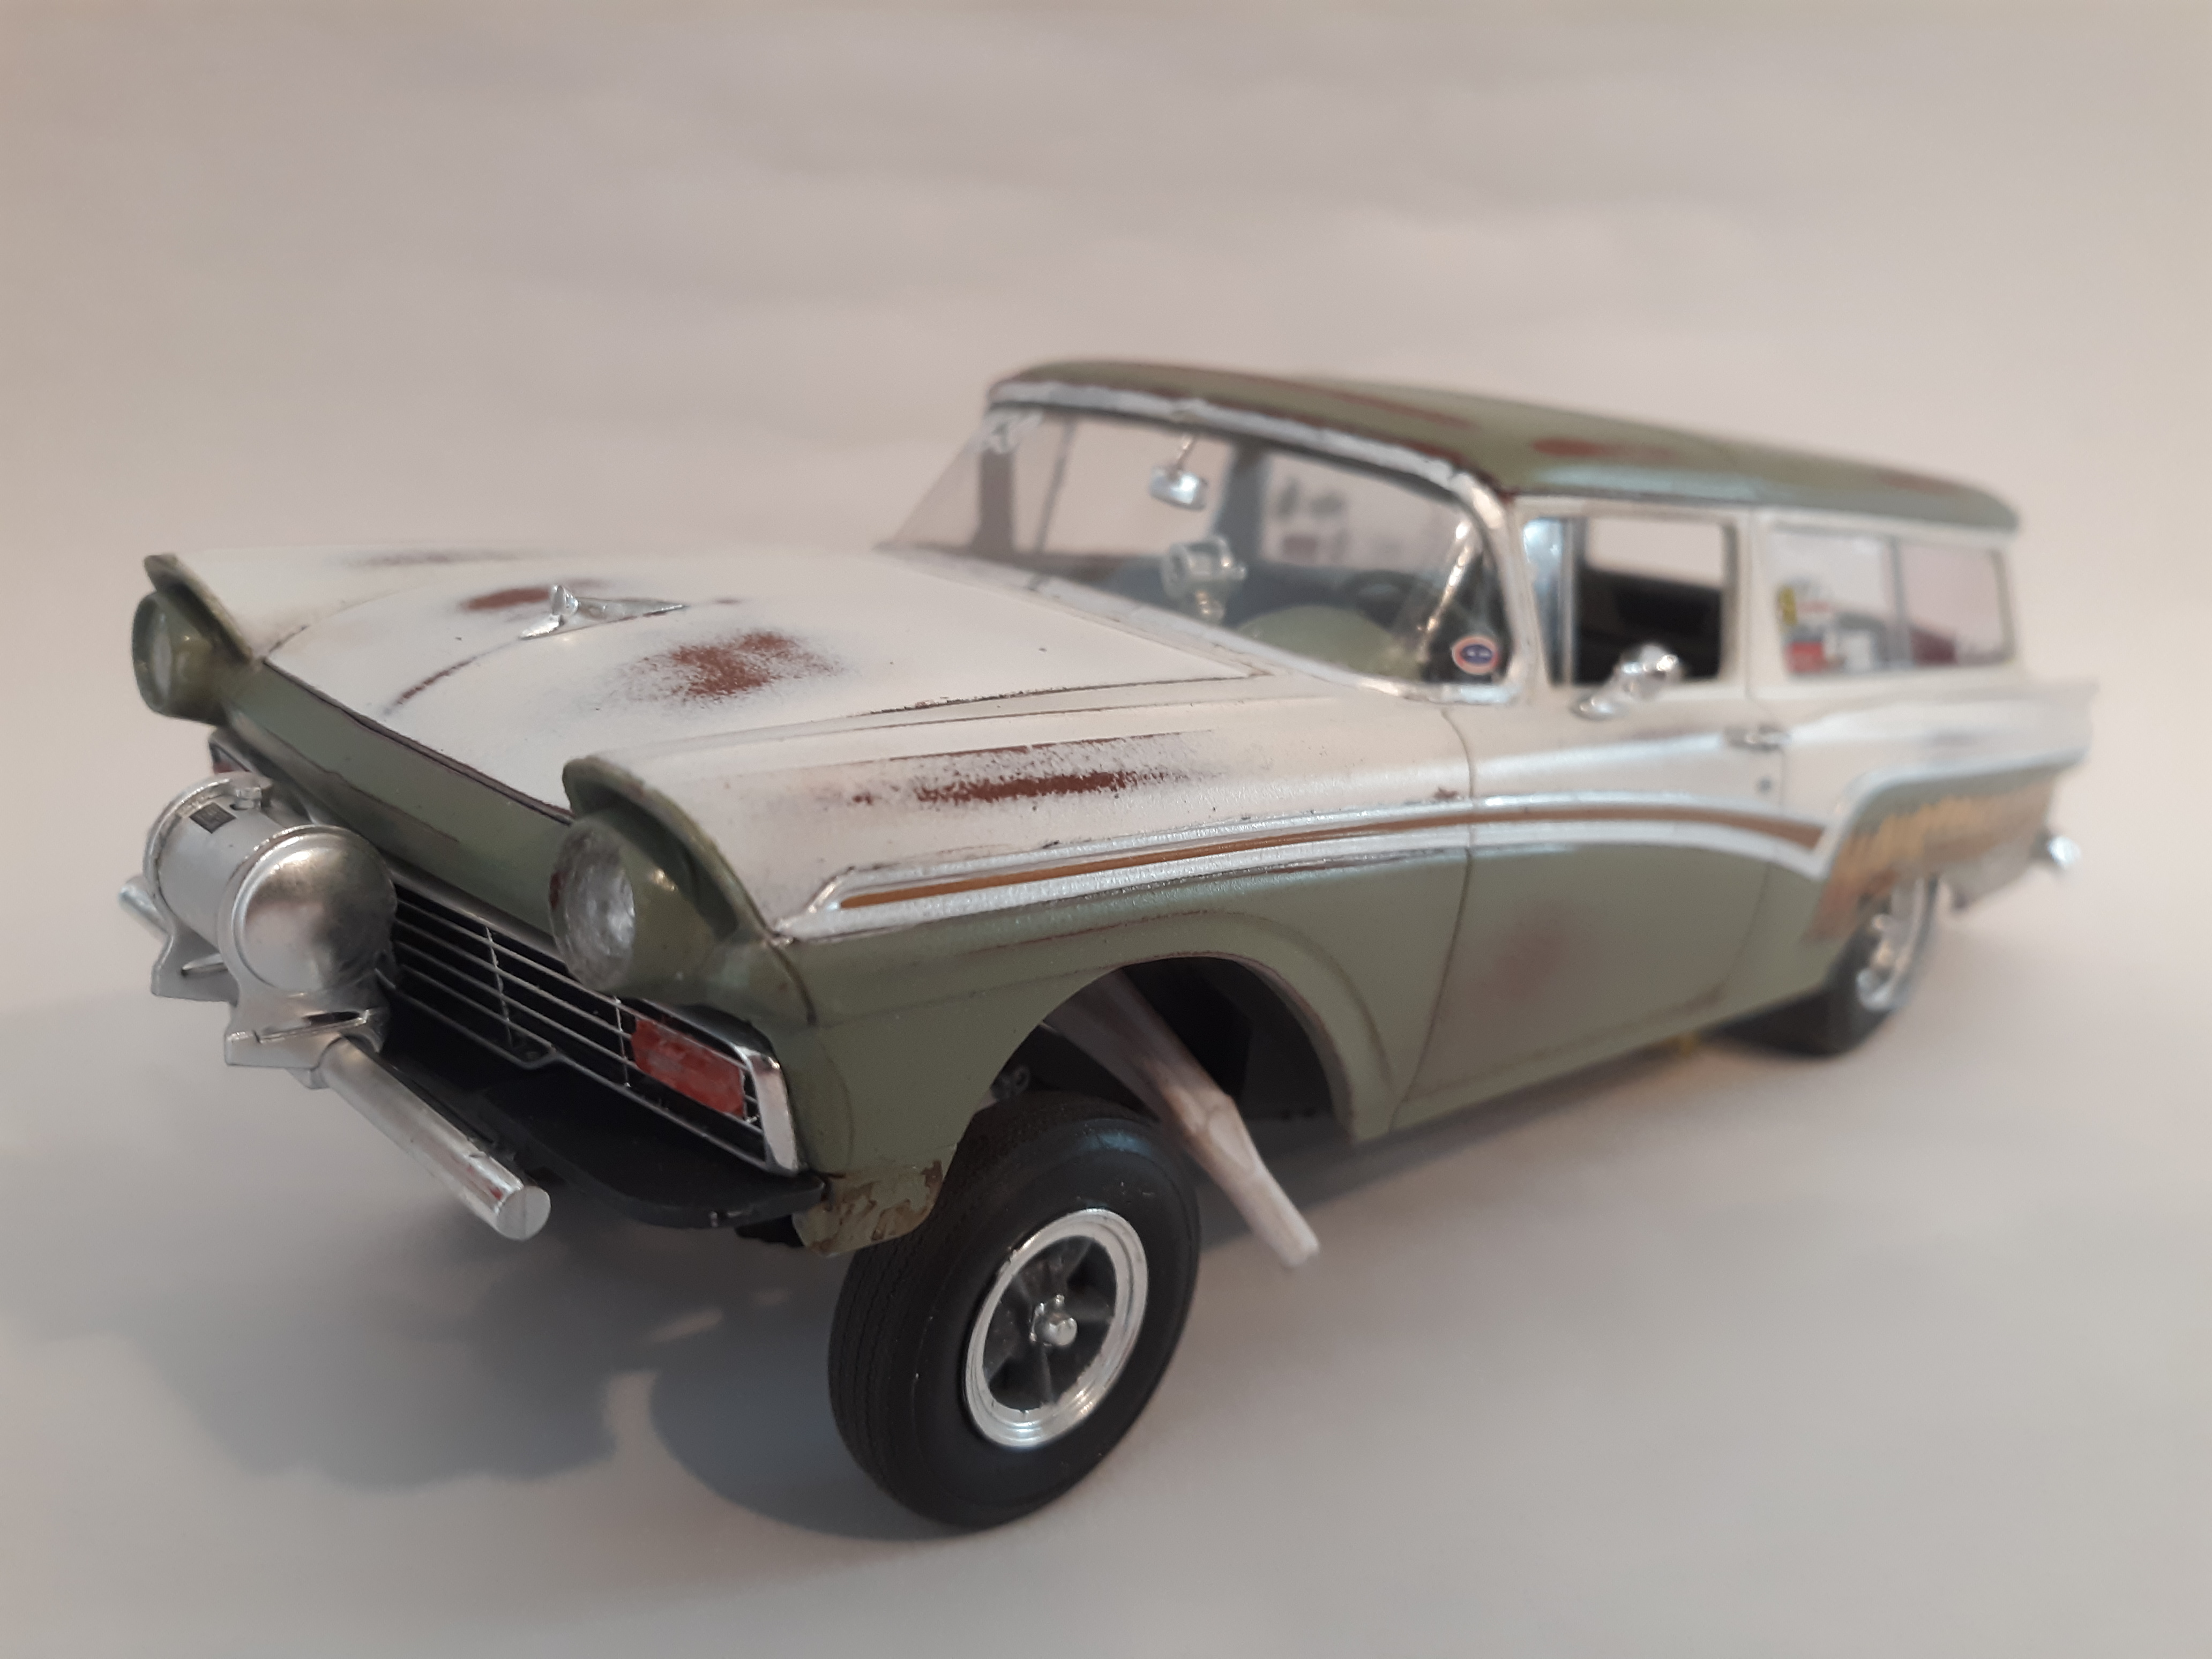
Here are some photos of not only a recent build, but the first build I have done in the last 45 years. I wanted to give the car the look of a well-used, low-budget gasser of the 60's. I intentionally made the car unrealistically low in the back end just to give it some attitude.
-
I am trying to build a 55 Chevy gasser and would like it to have a removable front clip. How could I do this? The kit is Monograms 55 Chevy Street Machine kit.
-
-
After a total cock up with the paint (I'm new to airbrushing..), which resulted in wet sanding back to primer, I figured out by how much I needed to thin decanted spray paint. I'm reasonably happy with it, except there was a warp in the chassis that only reared its ugly head during final assembly. Therefore, the bug catcher fouls the side of the hood opening. Oh well. Another lesson learned. I added a throttle arm, spring and some fuel lines, to give the engine a bit of detail. I used AK interactive true metal paint on some parts. It's very good.
-
I built this a couple of decades ago, and ran across some photos of it in the computer, so, I thought I'd share some of them. It's my take on Boyd's Aluma Coupe. Since I rarely stray far from my drag racing "roots", I incorporated elements of '50s-'60s gassers, but kept it low to the ground. It's more or less a "slammer", given the blacked-out windows. The paint scheme is loosely based on the old Santa Fe Railroad "Warbonnet" scheme (although not the colors!). I used a dropped tube front axle and added front brakes. The wheels are from a Johan funny car kit. I found some old dried out and separated duct tape, stuck to something, and cut the surface film into strips to create the tape over the headlight lenses. Those, along with the capped headers were employed to create a street/strip look. The front wheel dust caps were turned on the lathe. Shocks and radius rods are scratched from brass tubing and HO scale model railroad handrail stanchions. The paint separations are a little rough--c'est la vie...Anyway, it was a quickie build, and a lot of fun, and I like it! Comments/criticisms welcome. Thanks for having a look!
-
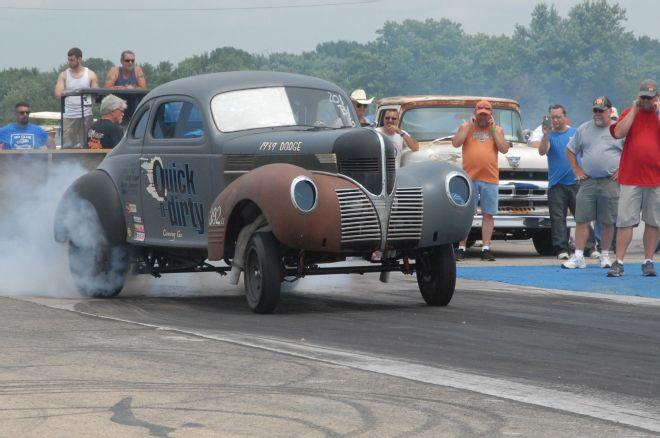
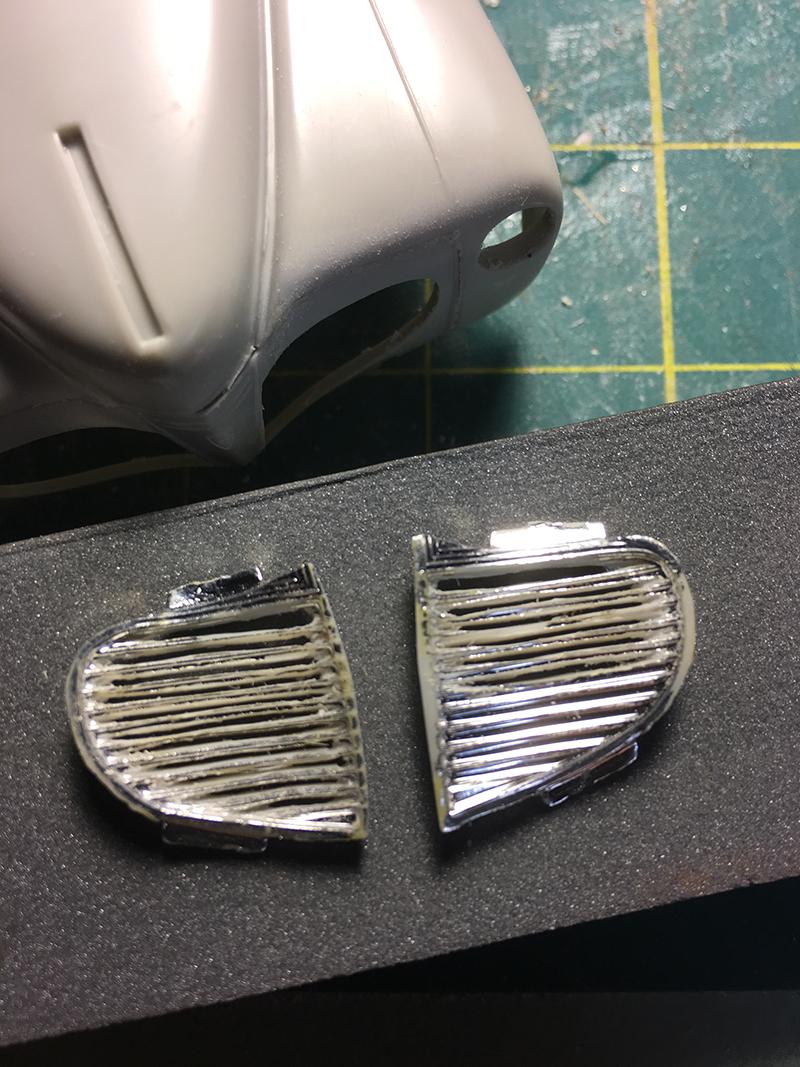
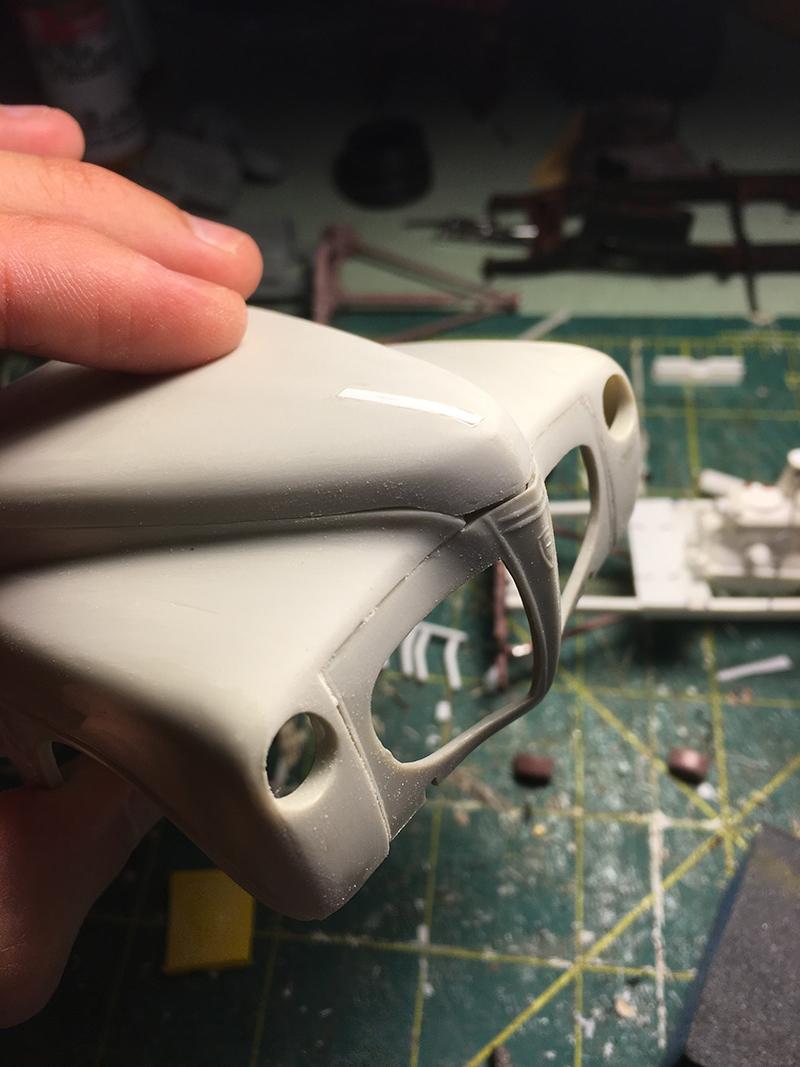
Hey guys, This is the first time I have documented a build so be patient as I work my way through this one. There will be many little steps along the way. The inspiration for this came after seeing the Southeastern Gassers Association's event at Union Dragway in Union SC. I looked over my stash and decided the 41 Plymouth would make a good gasser. The inspiration photo is a 39 Dodge with a 392 Hemi. I love the unpolished, all business approach to this thing and my build will be very similar regarding the final finish. The first order of business was to open the grill. There will be a moon tank between the grill and radiator and I wanted it to be visible through the grill. This was a tedious task that took several sessions with the xacto knife. I will keep the chrome and dull it, and weather the exposed plastic to resemble rust and dirt. Next was the grill shell. It was an ill fitting piece out of the box and required some sanding and gap filling . I may need to revisit this step after primer to make sure everything is smooth. When researching the 1:1 41 Plymouth, the vertical seams can be seen but not the seam running across the front above the grill. The hood was also sanded and filled.
-
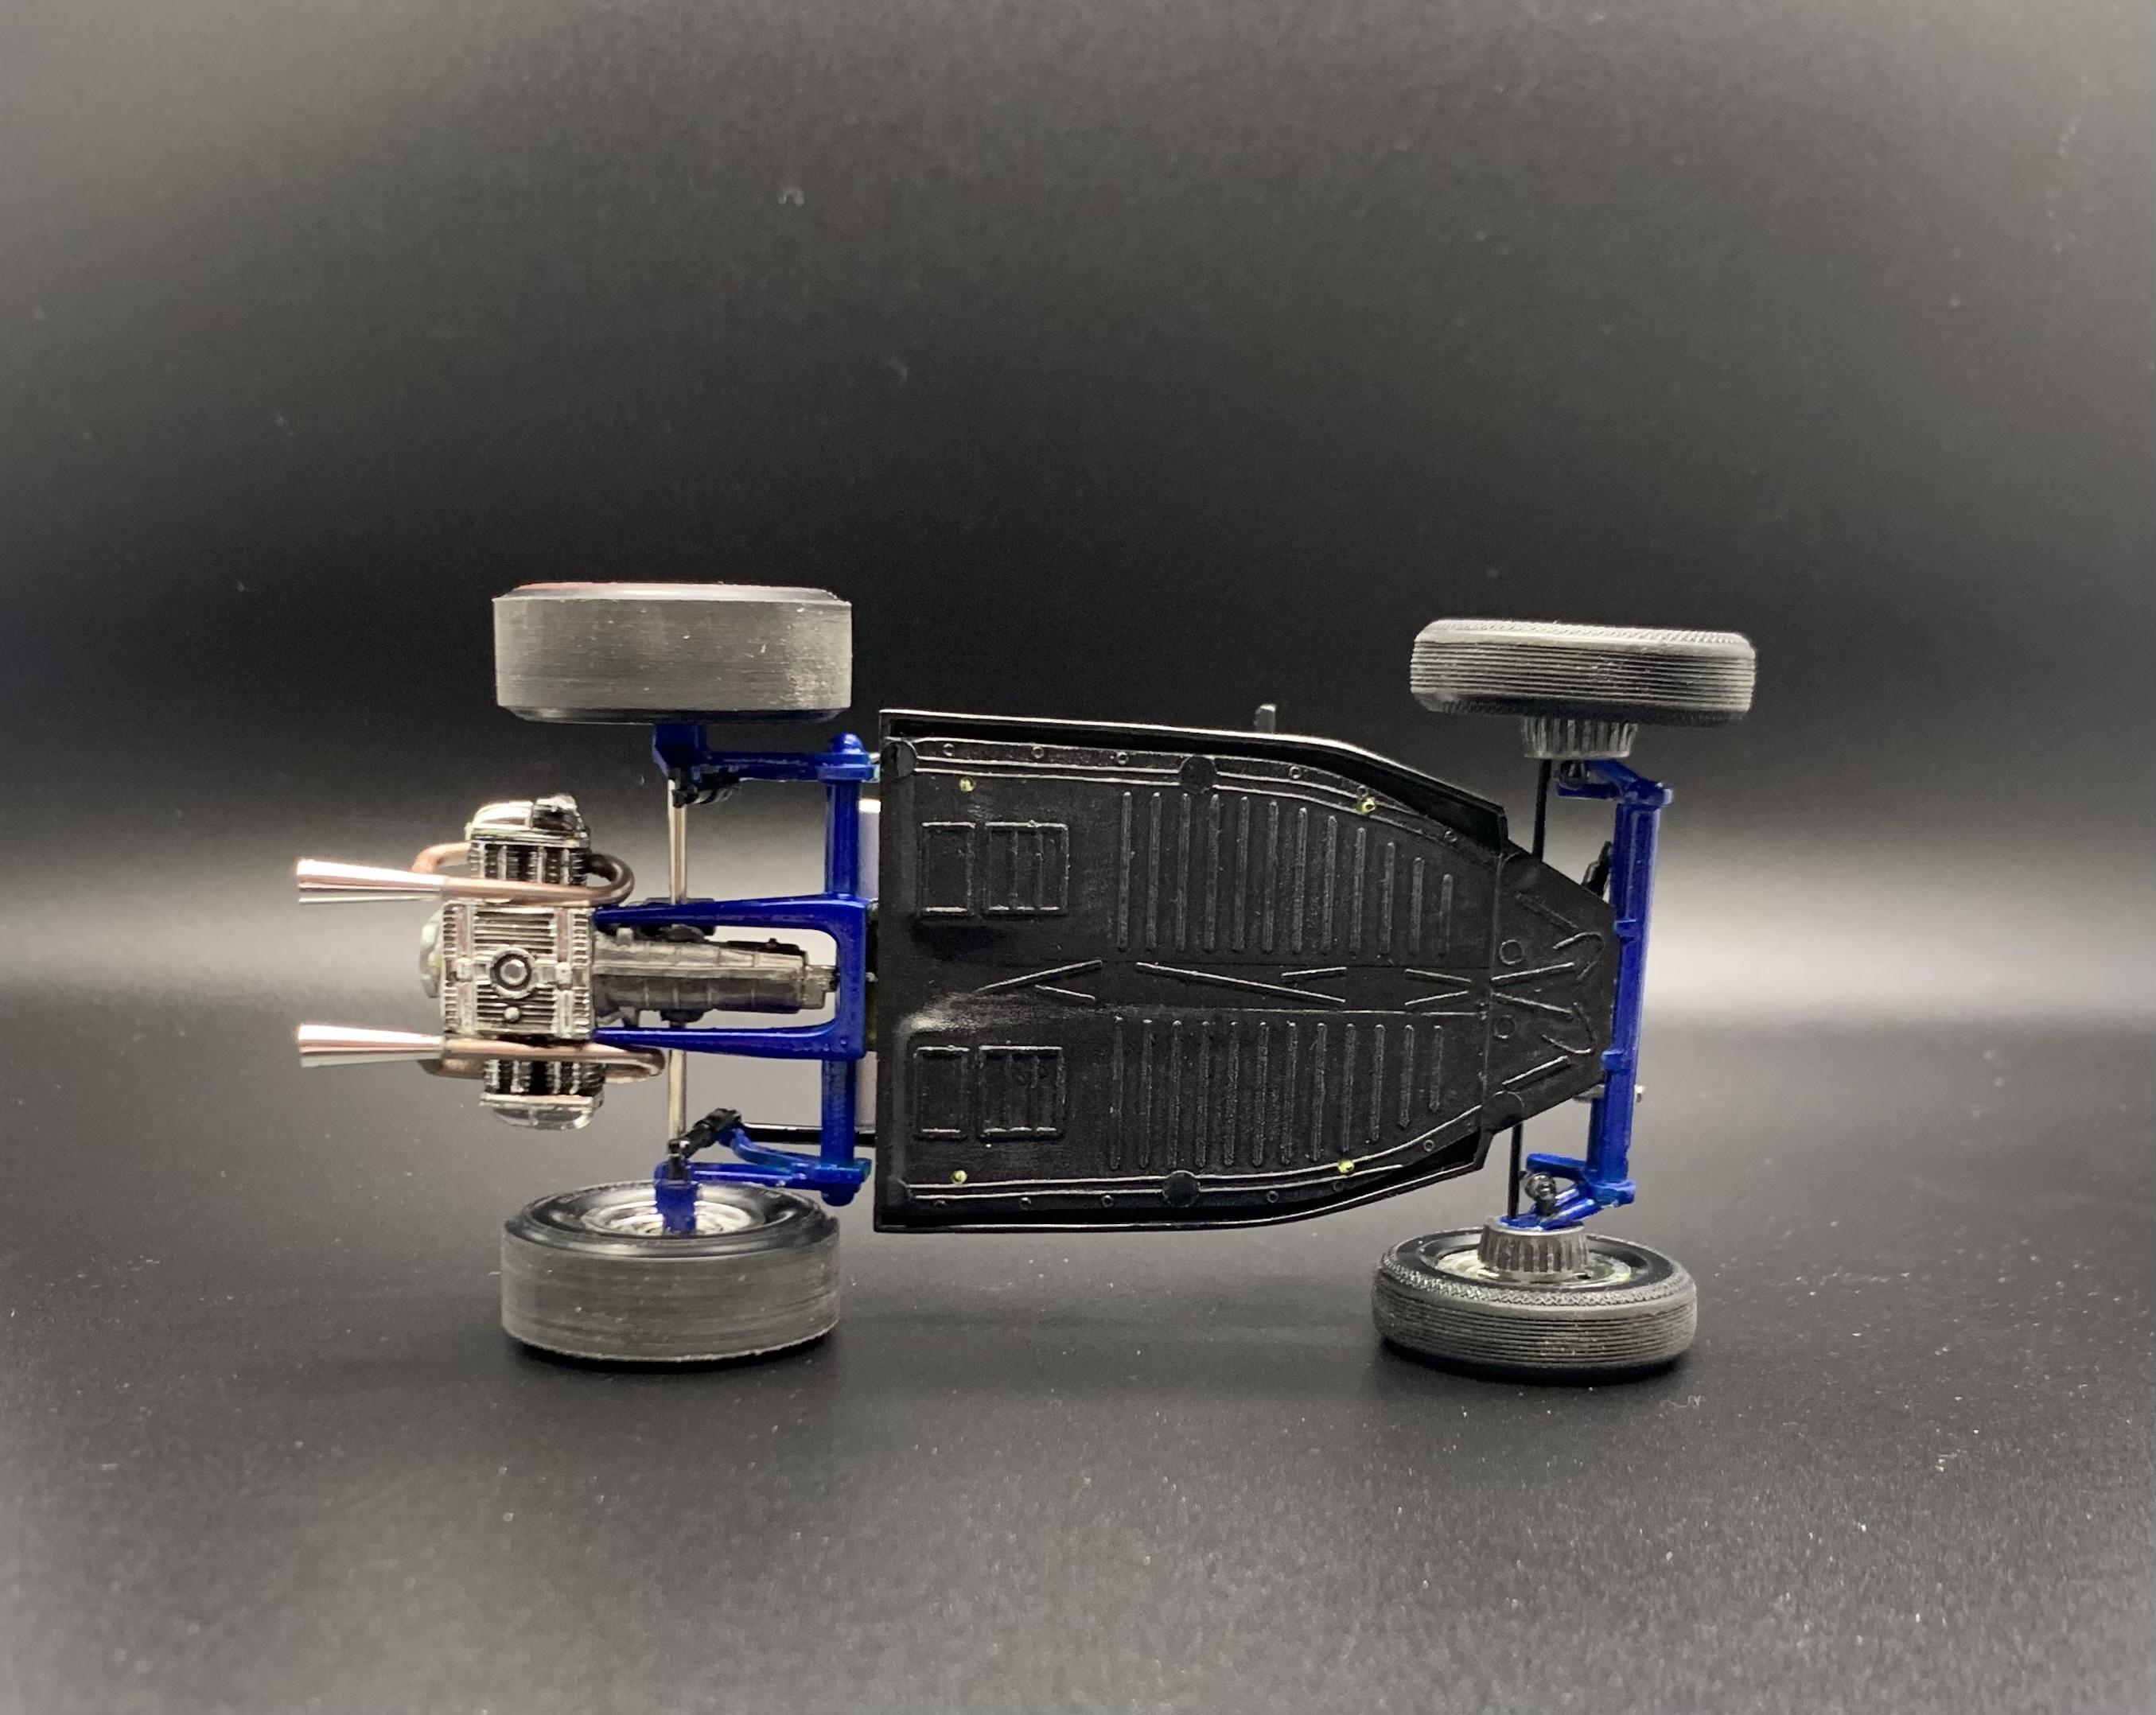
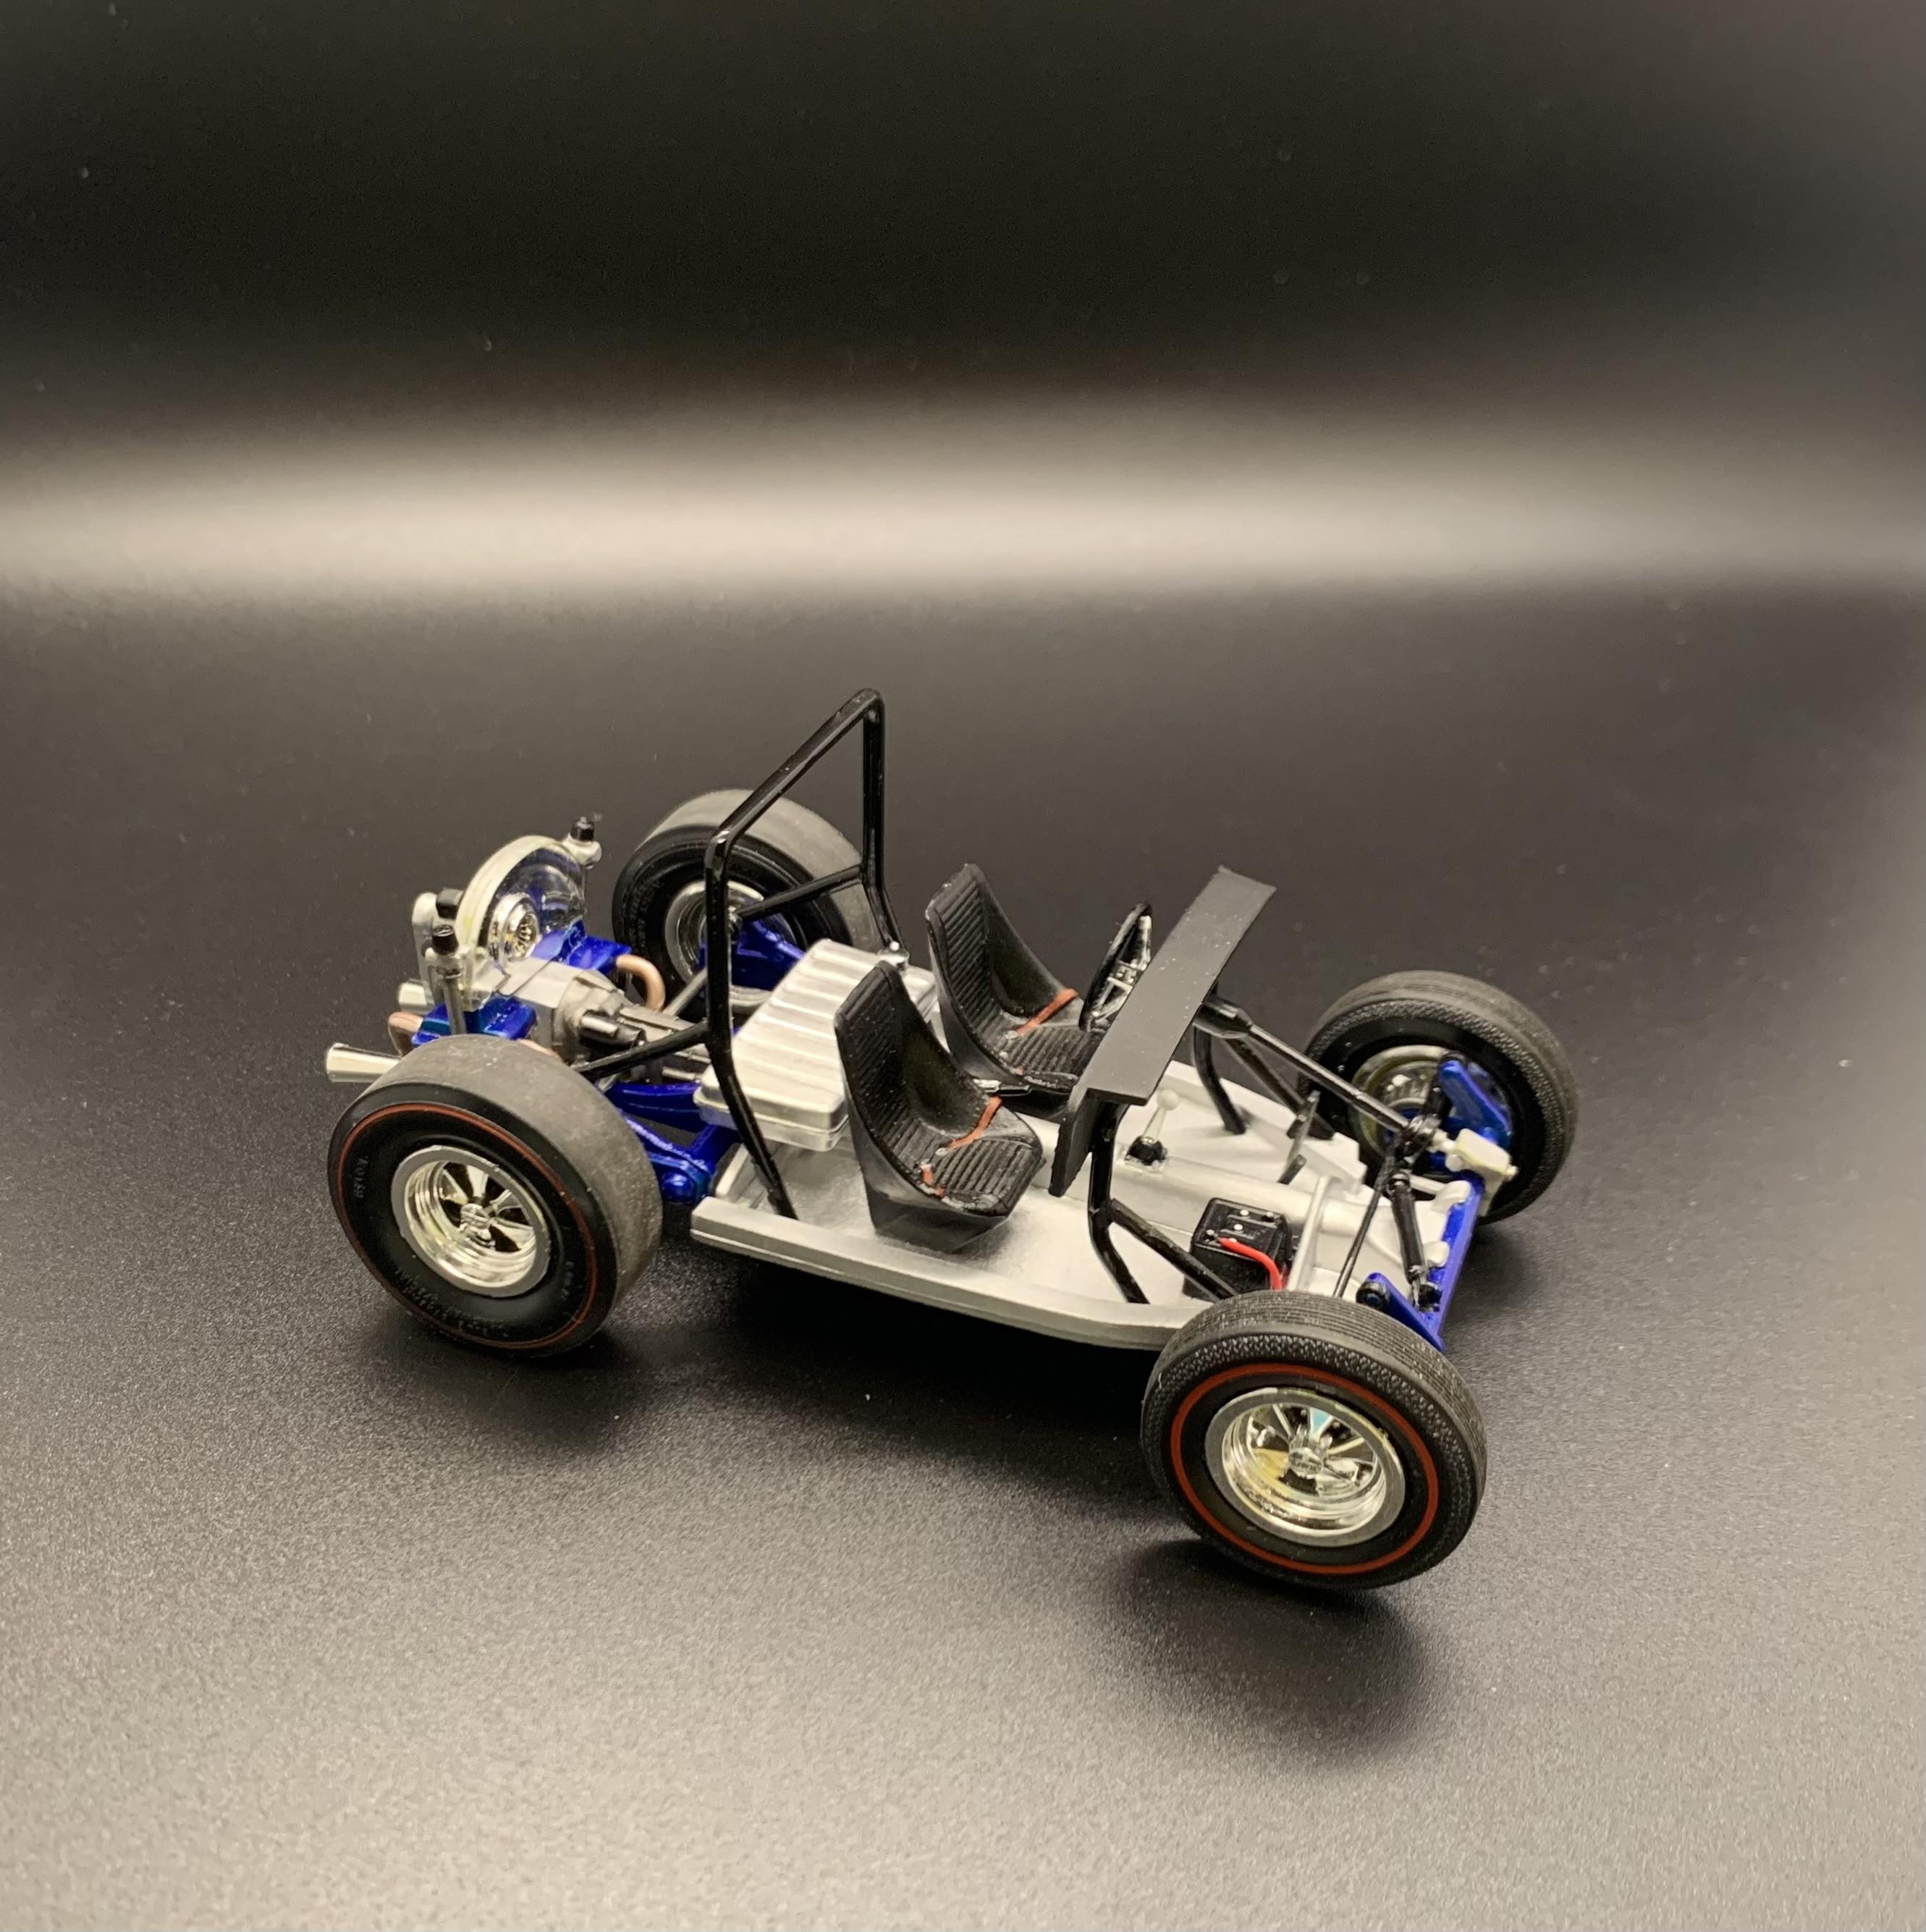
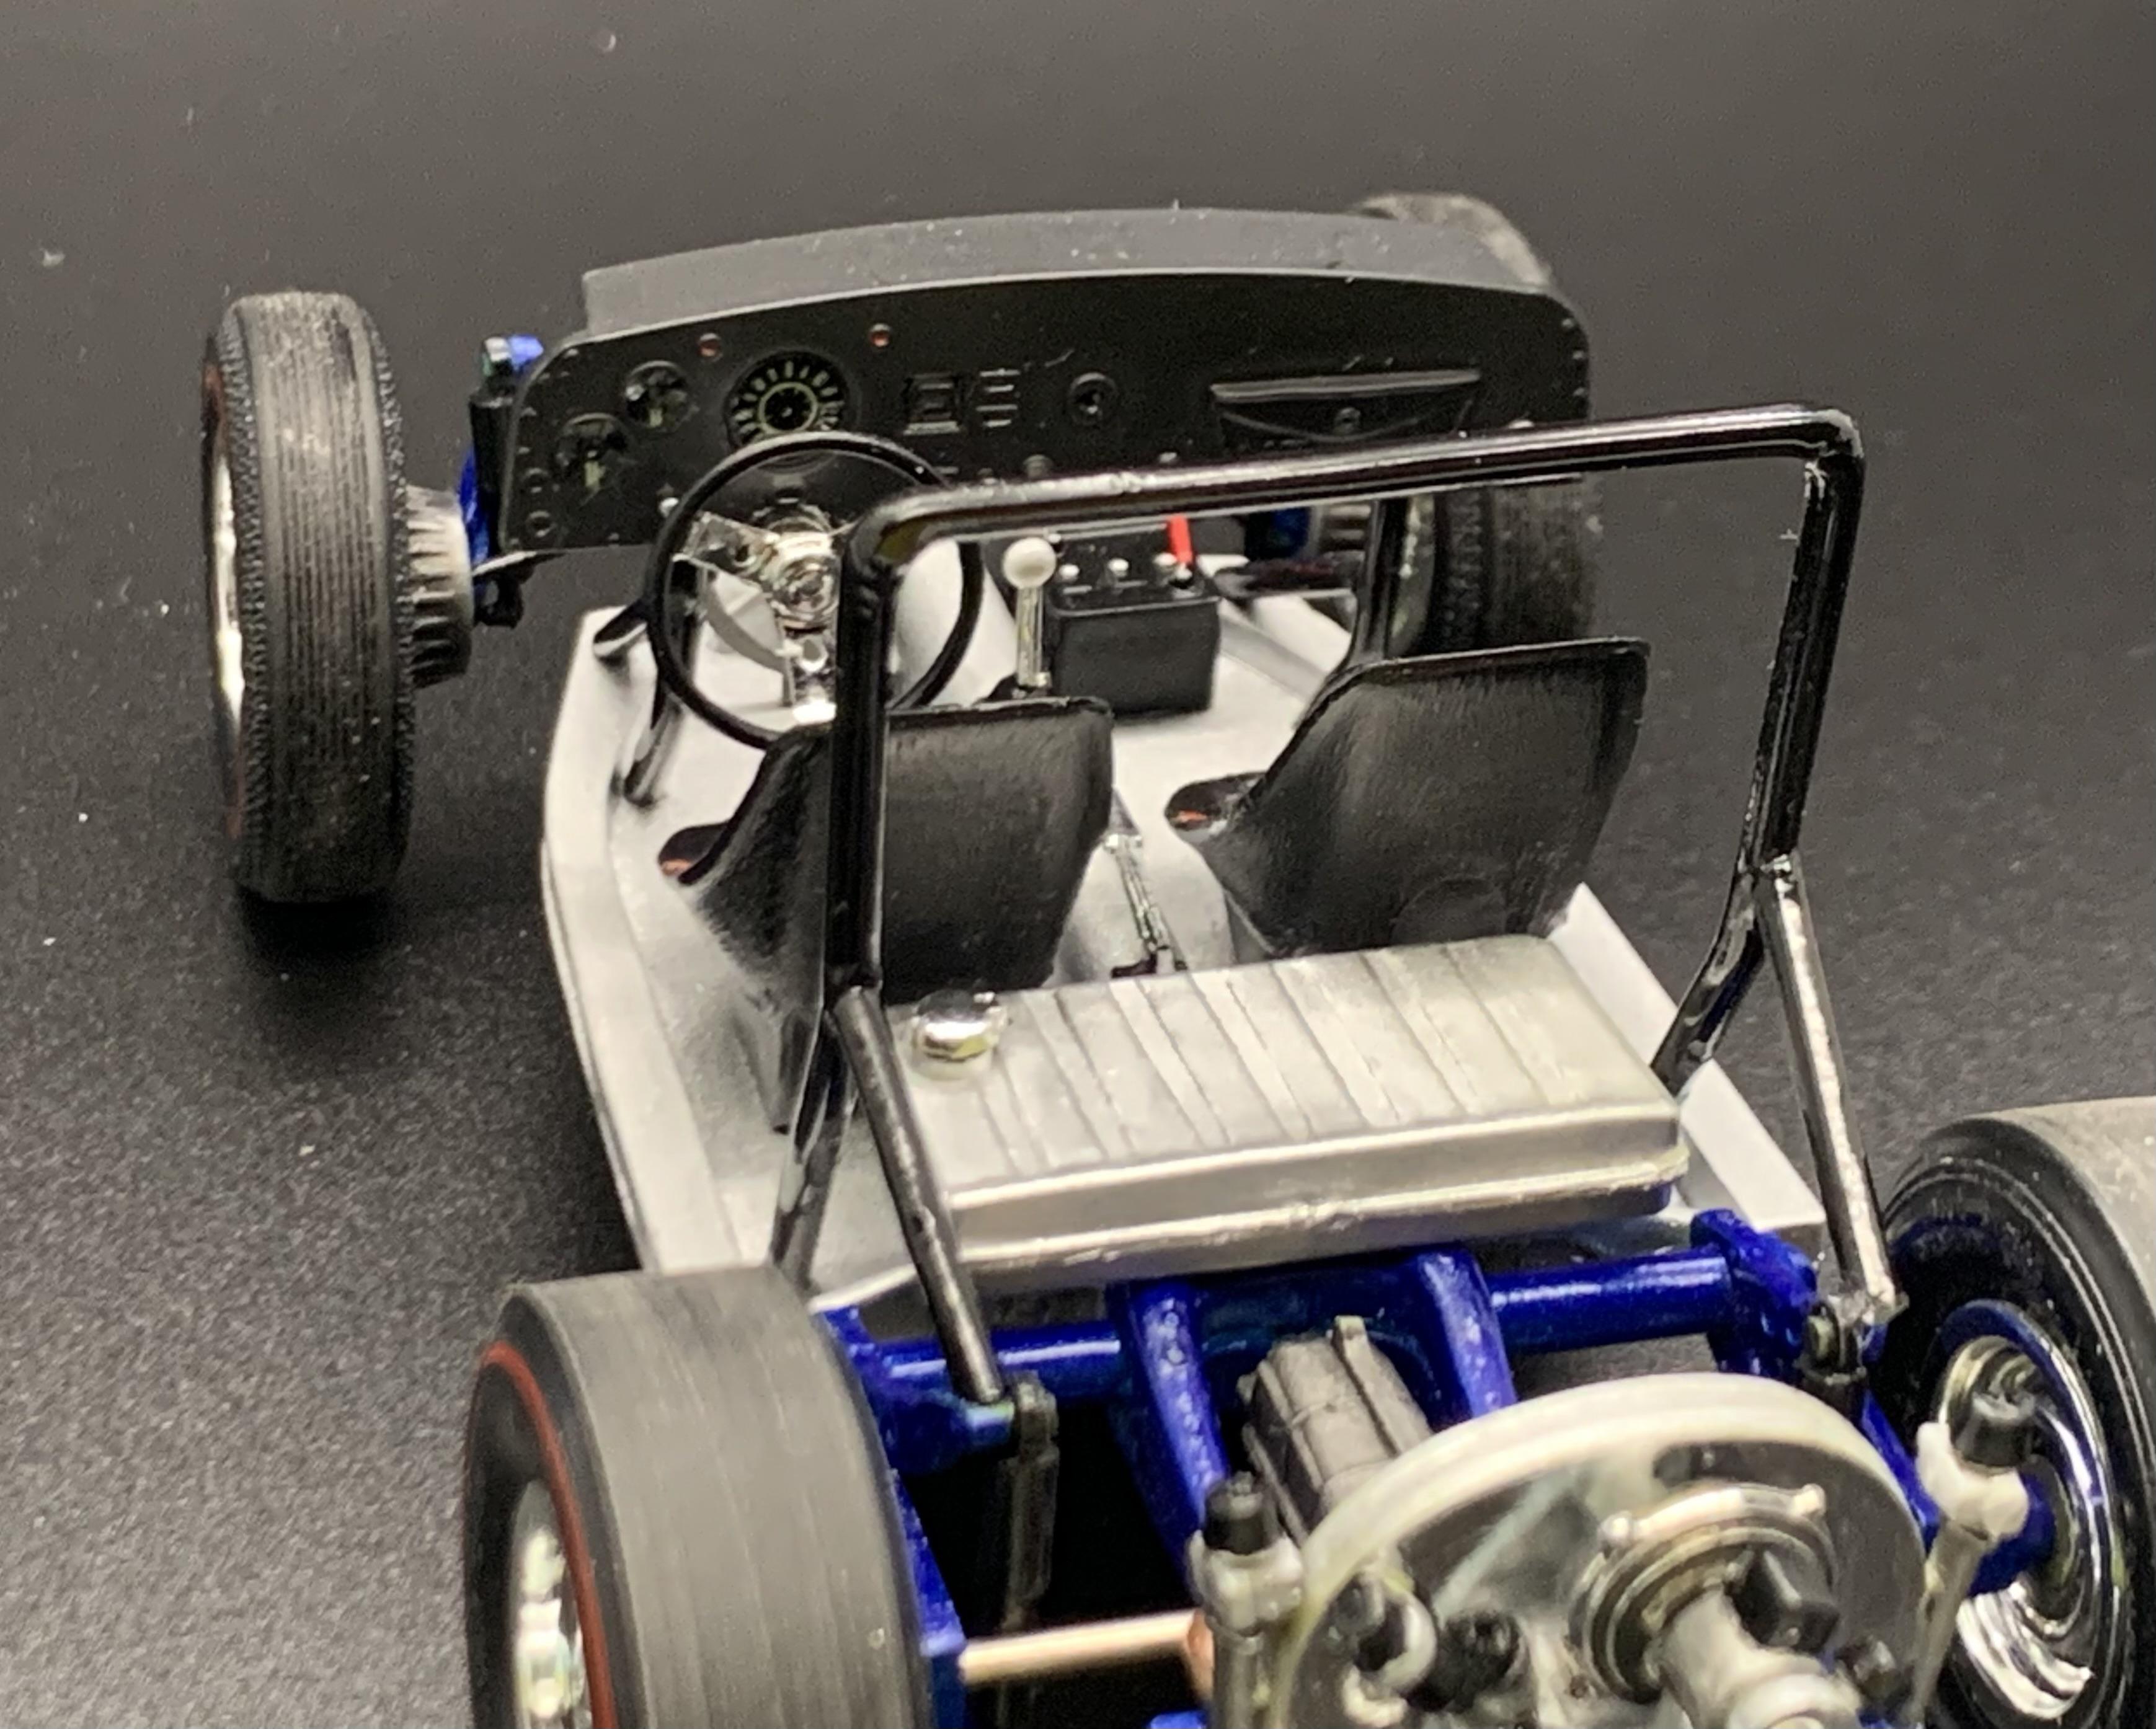
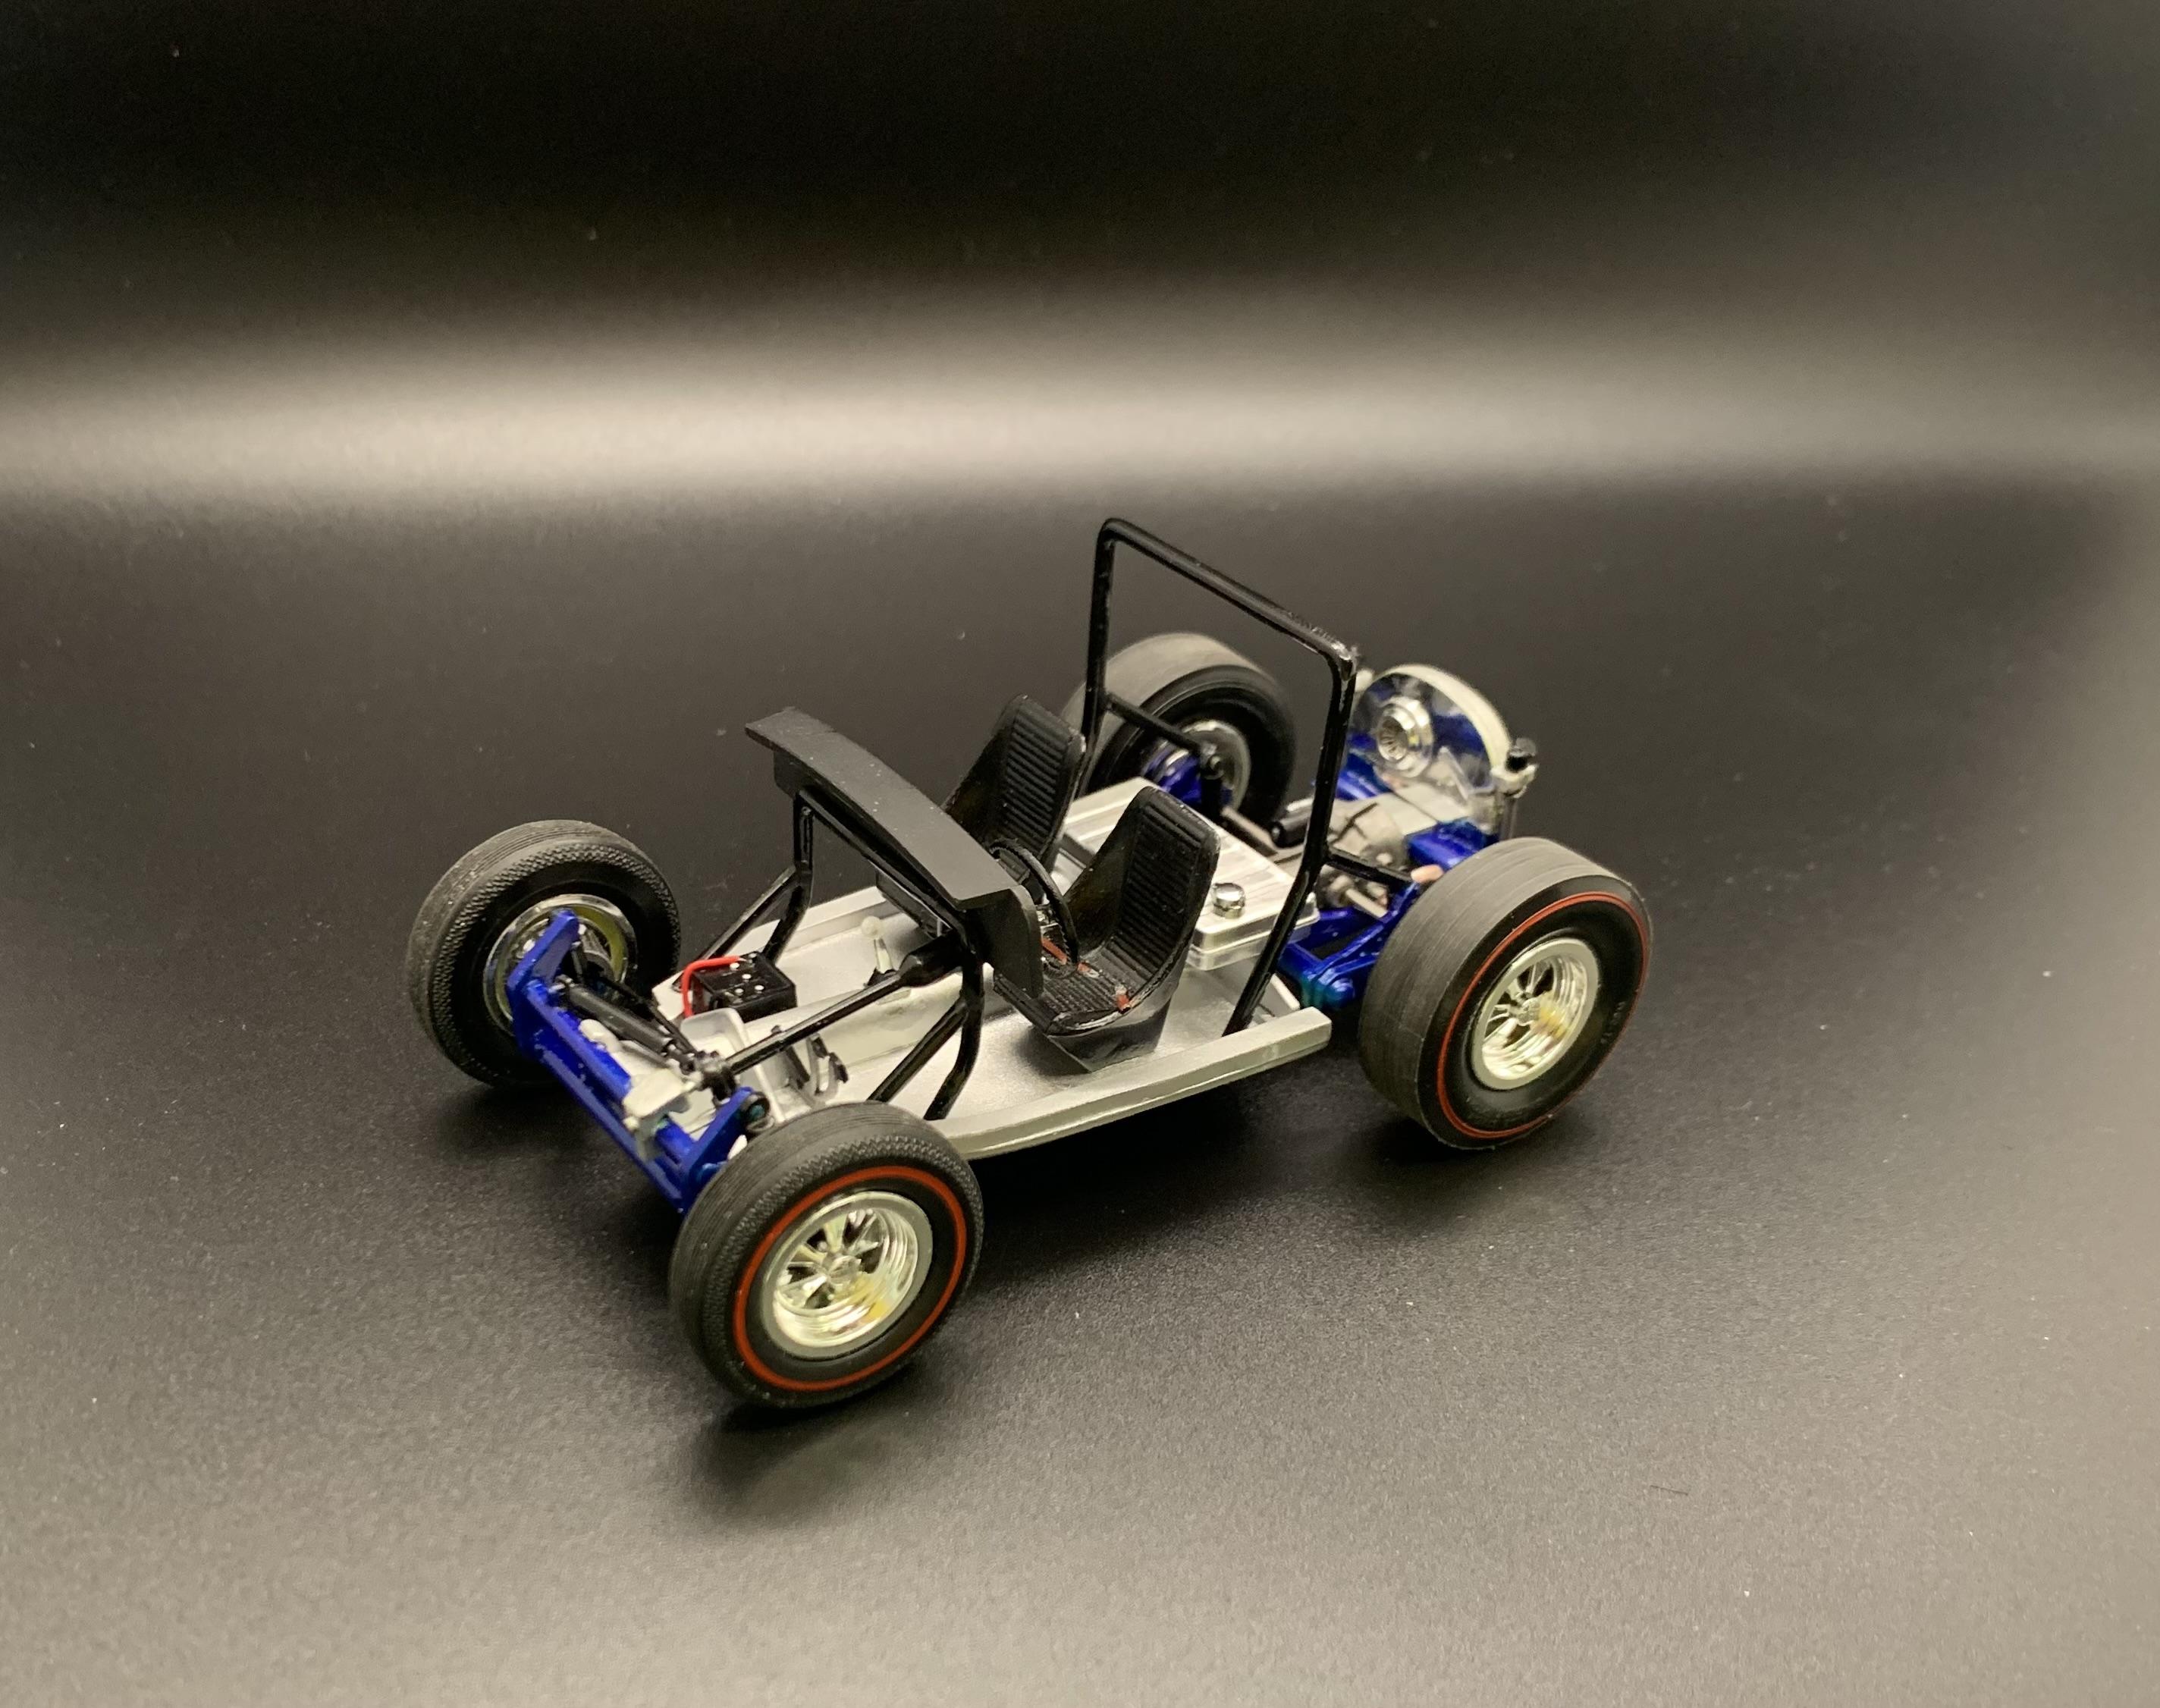
So I wasn't really going to do a build log on this, but I'm excited to share the progress. I have been kicking this idea around since I heard about the release of this kit, and when it came out it was sort of a "clear the bench" type of project. I like the simplistic nature of this kind of project in the summer, since my bench time is limited and sporadic. I'm still very excited about my Formula style model A, but when you don't get bench time for weeks on end, its hard to keep my head into something that complex. This is simple, relaxing and most of all quite fun. The basic idea was to build a pinto wagon that would have toured the indoor show circuit in the early 80's. Lots of chrome, shiny paint, and over the top everything. If you have seen my gremlin build, something like that... but a bit more complex and a bit more aggressive stance. Here are a couple inspiration images: Stance like this= Color scheme something like this= So getting started I grabbed the rear slicks from the JawBreaker Dragster, and started cutting up the rear fenders till the stance was pretty close Then I fully sanded the toy-like detail off the chassis plate... Using the Ford 9" from the new 29 roadster and some brass tubing, I realized rear-end clearance will be an issue. Some sheet styrene and wendys spoons to the rescue. Using my scrapbook cutter I drew up and cut out the springs, plates and ladderbars. Then started building the rear suspension: added some beading wire u-bolts:
-
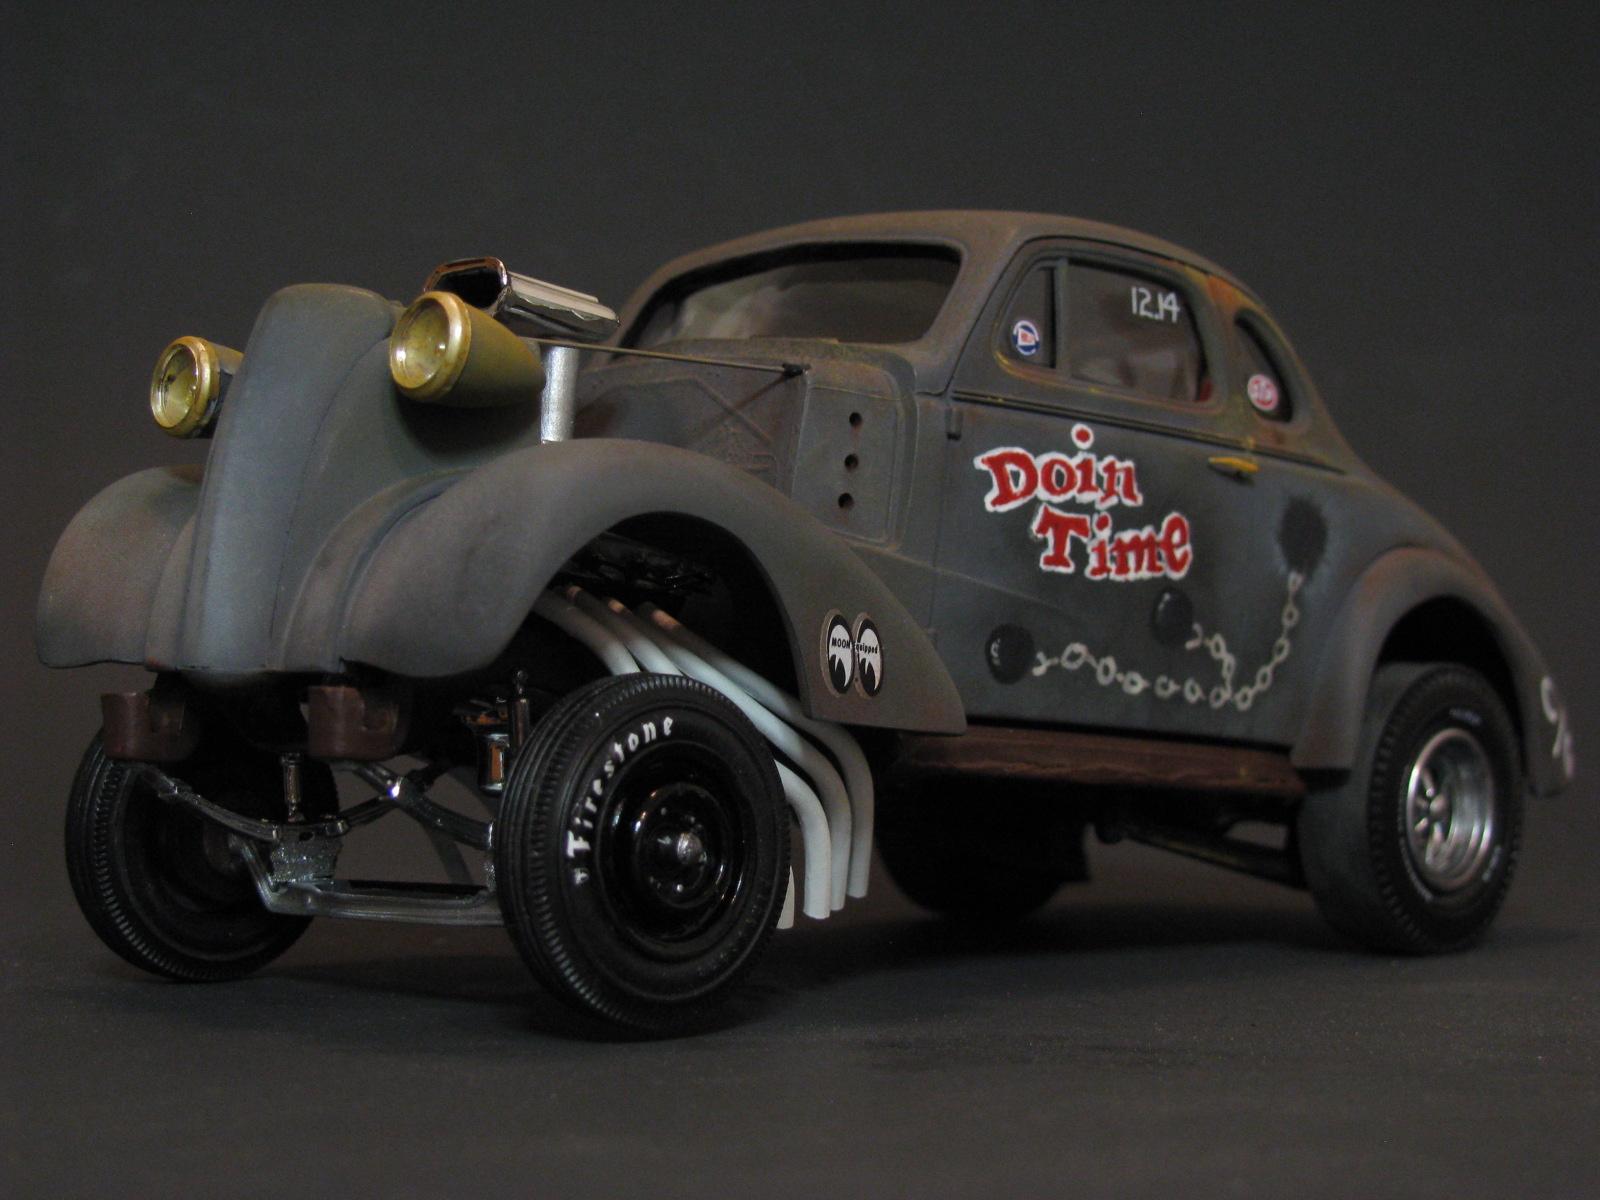
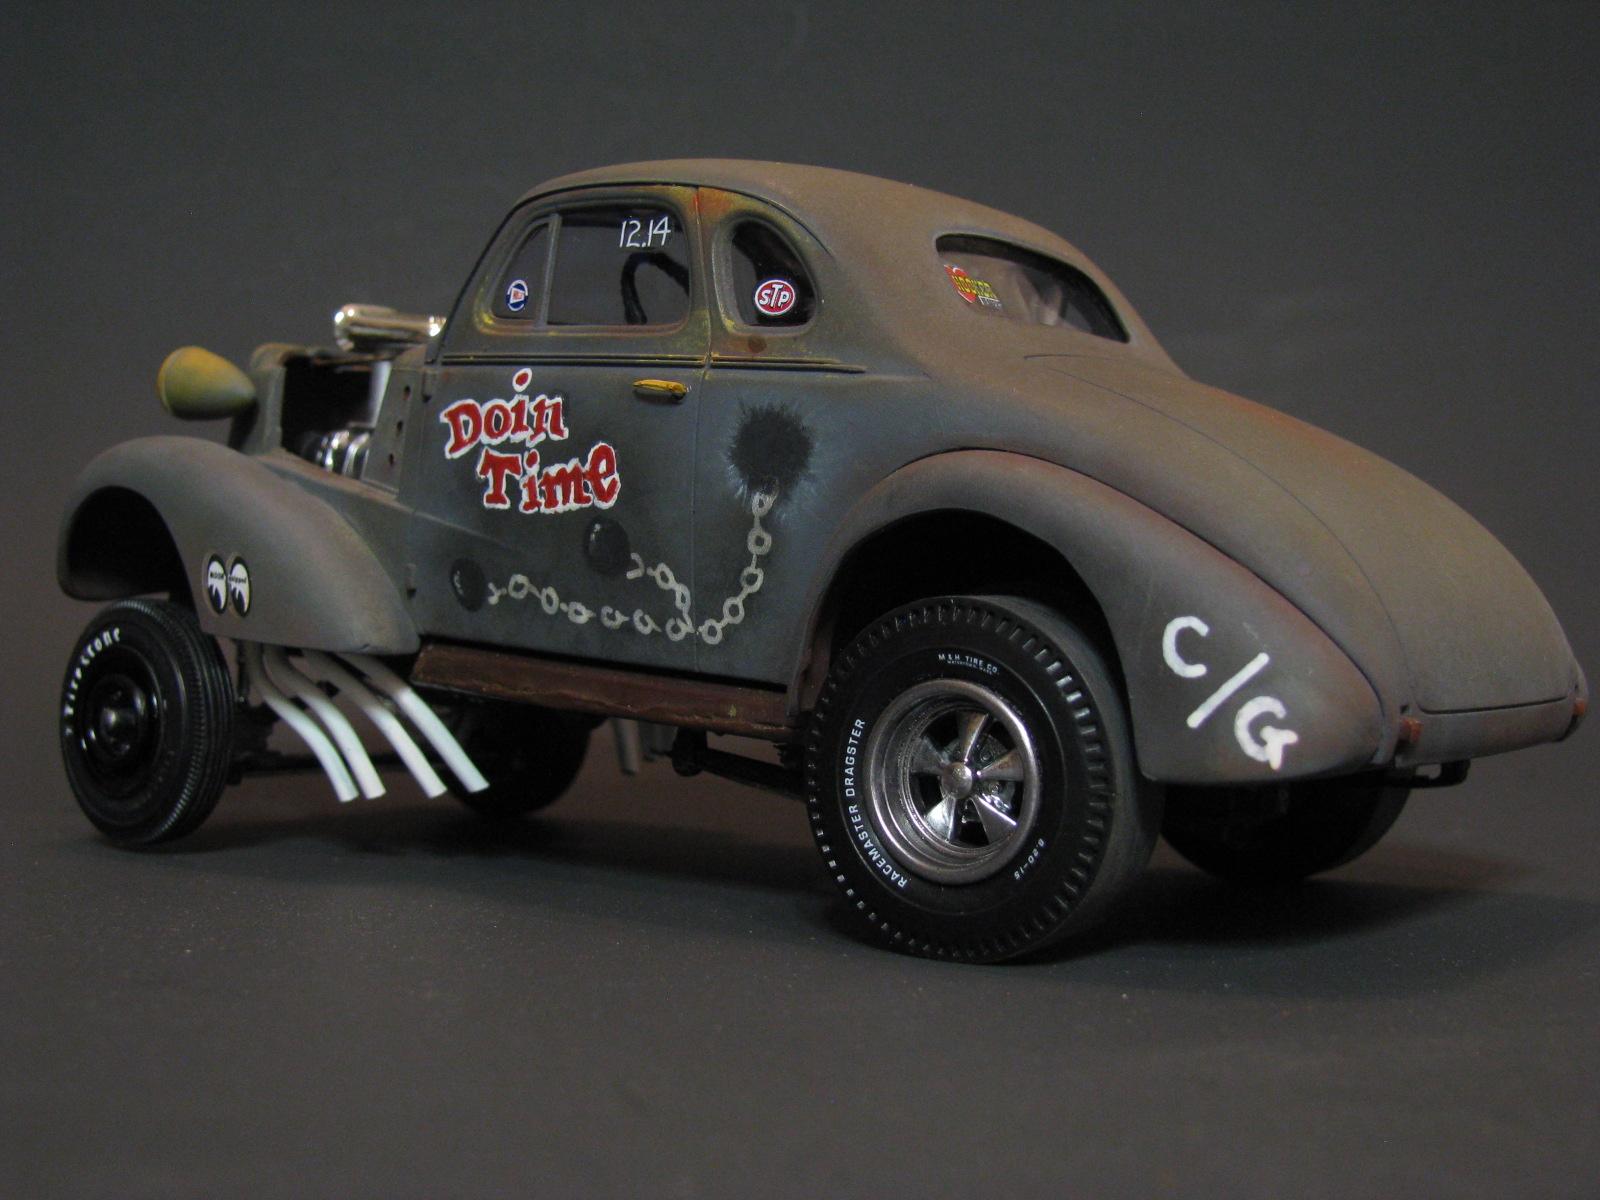
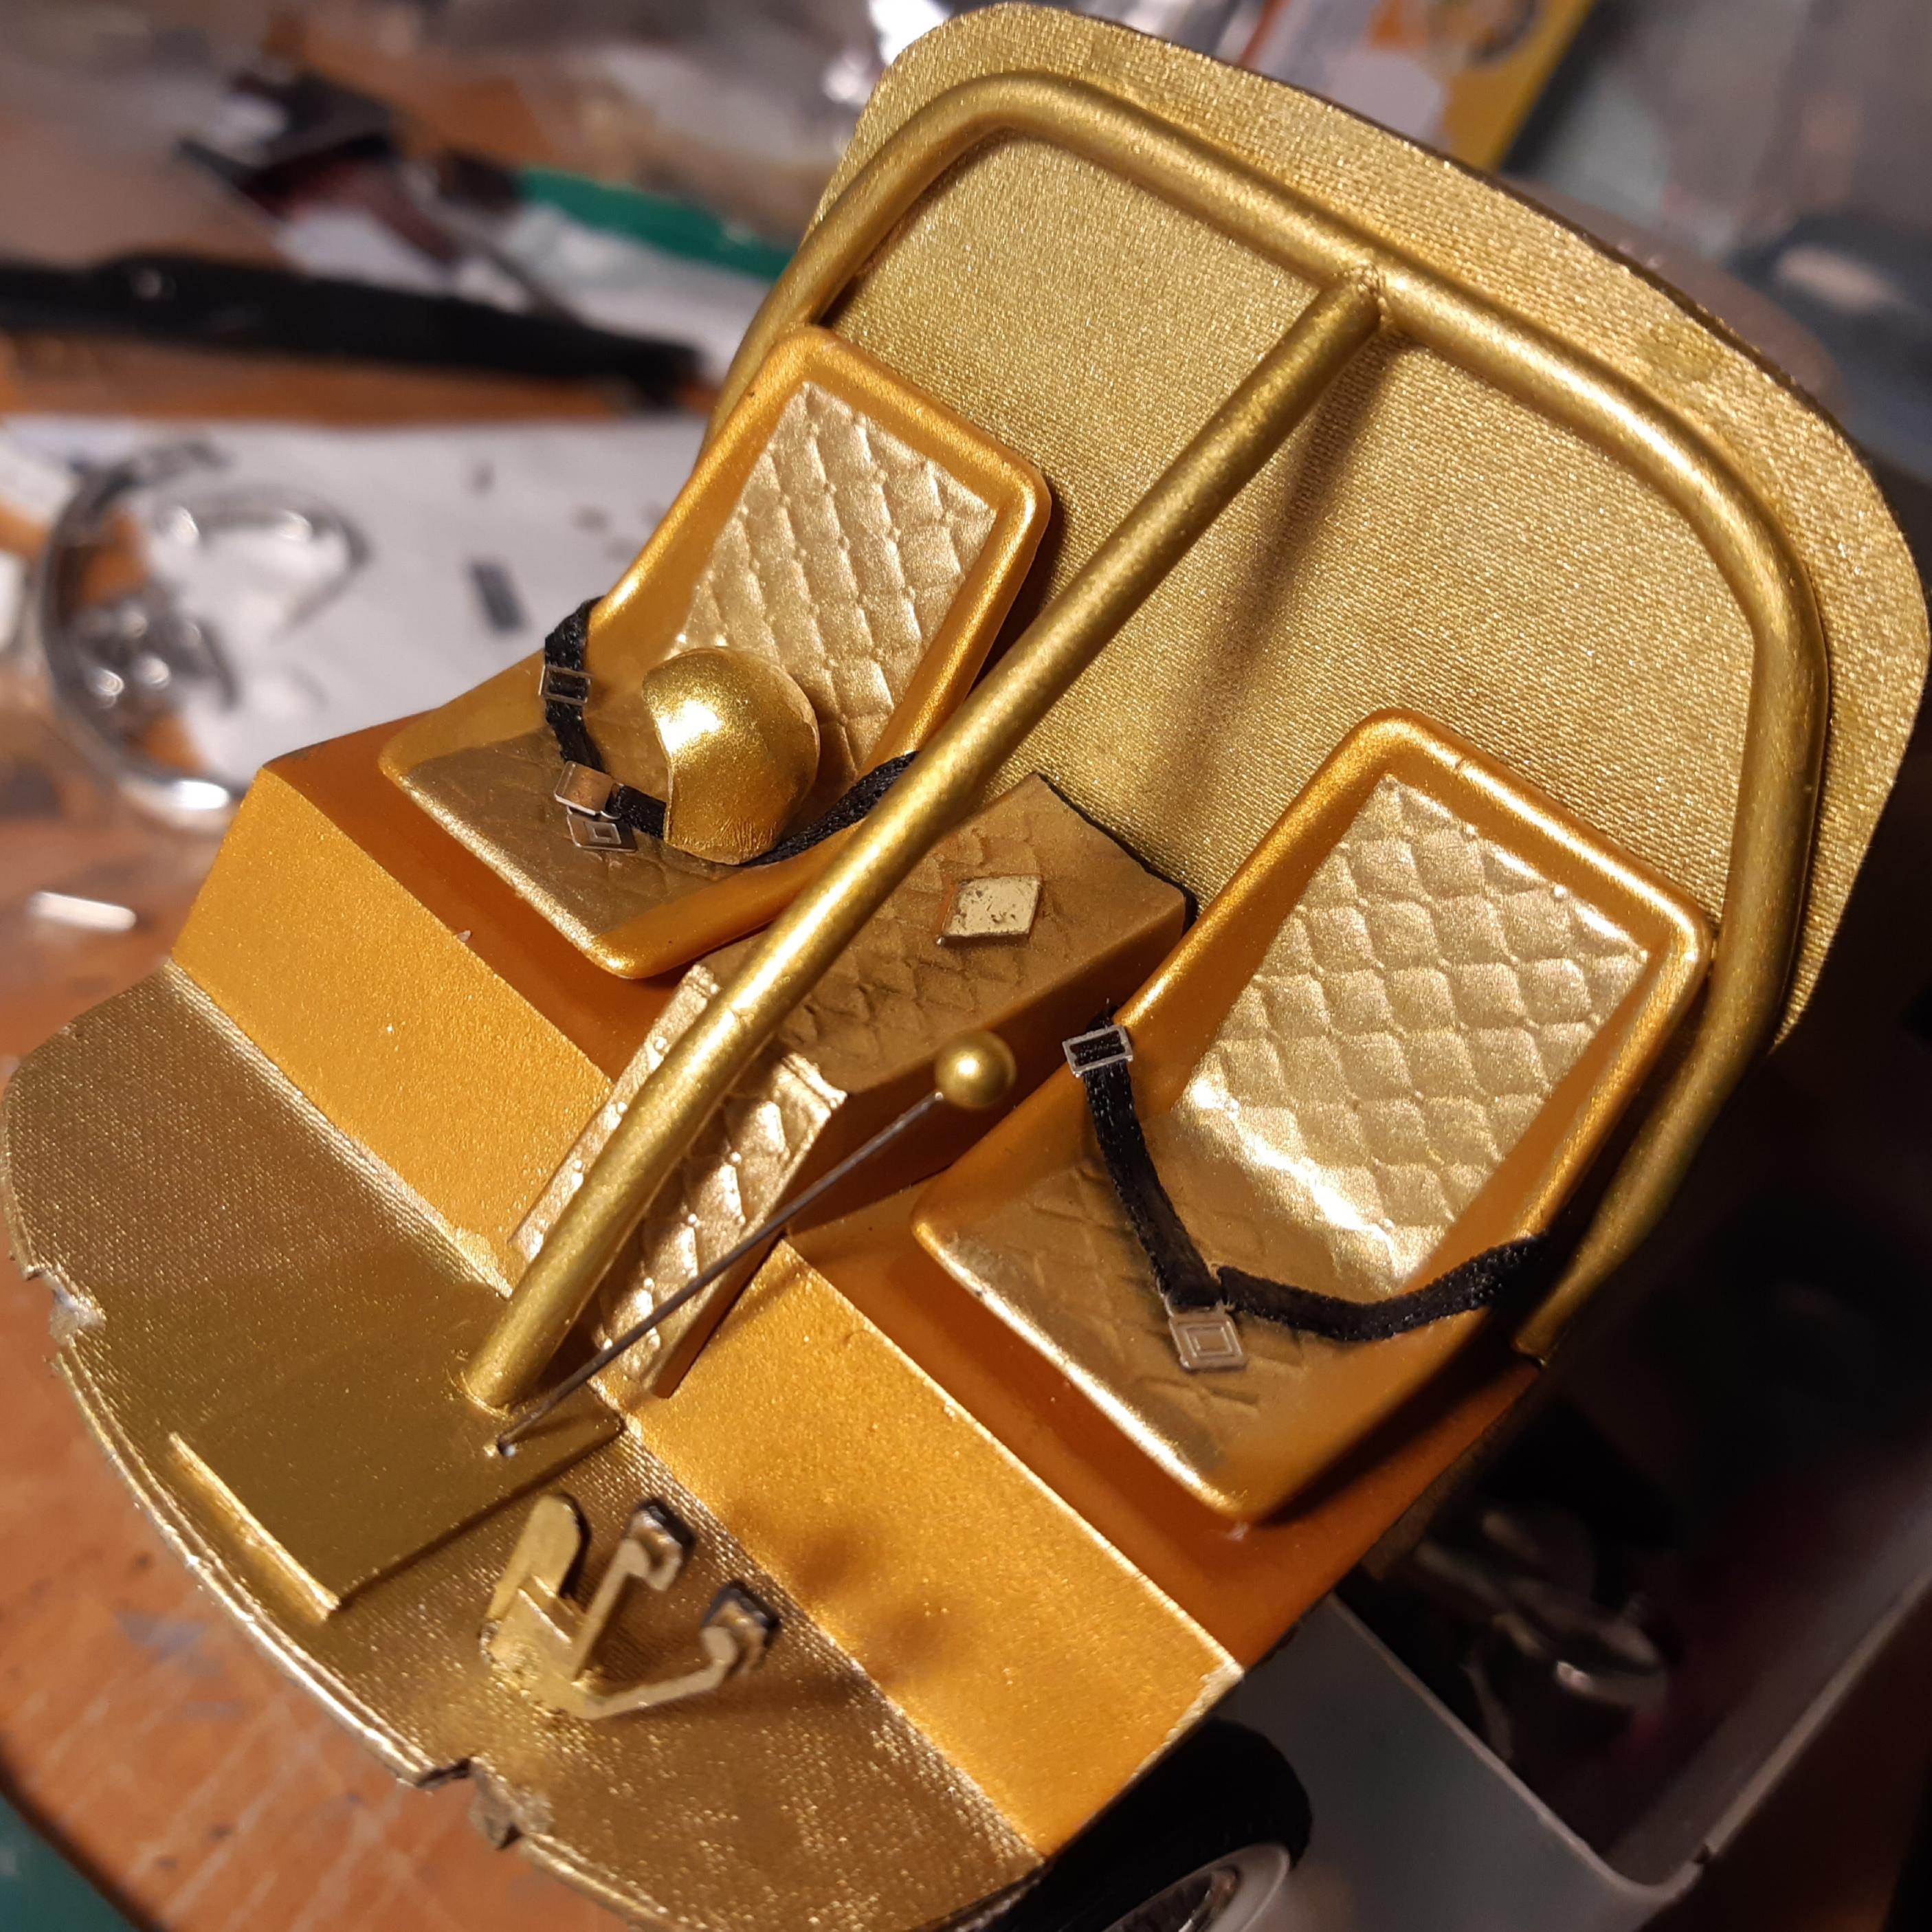
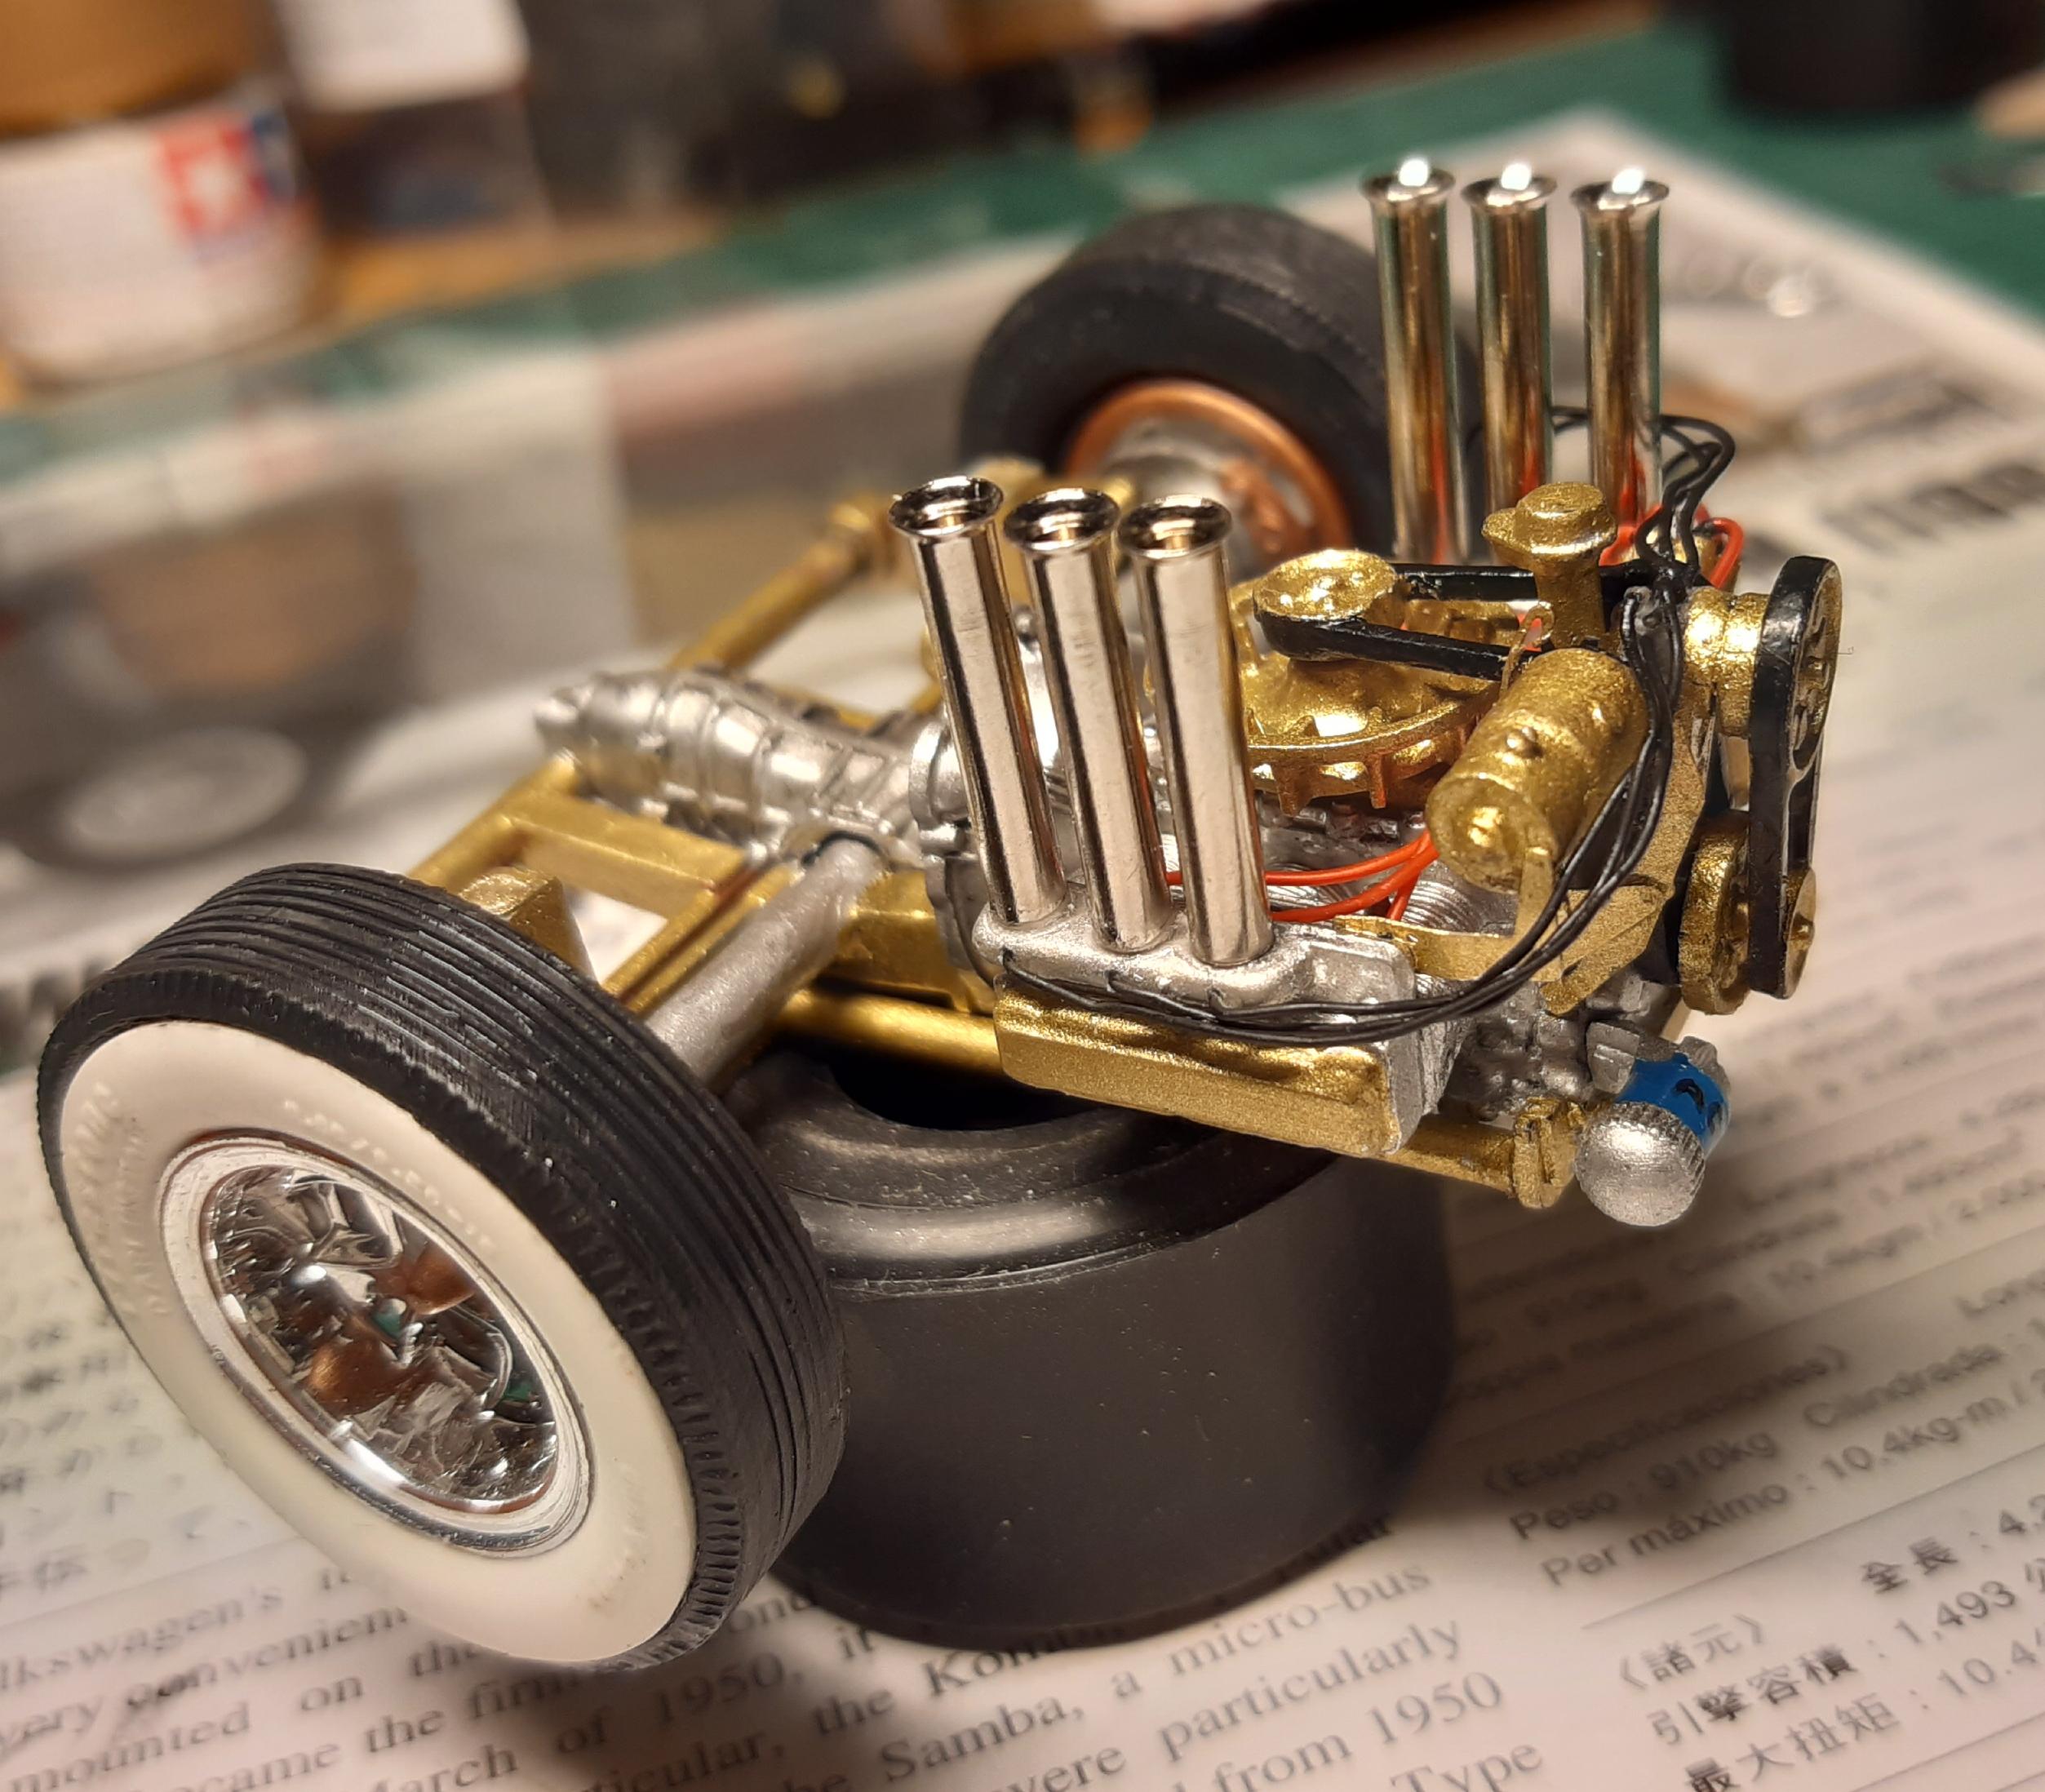
This was my first time to try hand-painting letters and artwork directly on the body of a model car, which turns out, is a whole lot harder than drawing on a piece of paper laying flat on the table, but it was a fun experiment! I’m gonna be trying more of this on more projects soon! This is my tribute to those crazy fellas from the 50’s and 60’s who lived to drag race with whatever they could get their hands on….probably built in their Dad’s garage…the big blown souped-up motor was the most important thing. Winning on Saturday night was all they could think about all week long. And maybe safety wasn’t exactly first on their mind--just winning with the craziest fastest car out there! This is the excellent 1/25 AMT ’37 Chevy kit that comes with the option to build one of three ways, and I chose to build a mad gasser in honor of those drag racing pioneers. The body was primed with Krylon Gray Ultra-Flat primer and allowed to dry outside for about an hour while I took my oil pastel sticks and scraped 5 colors into powder with an Xacto on a piece of wax paper…Orange Rust, Yellow, Light Blue and Brown. I used cotton swabs to mix those powder colors together a bit, and then rubbed the body down to appear severely weathered, like it was finally rescued from the junkyard. I sprayed Testor’s Dullcote over the body to protect all that weathering work, and to prep for the task of hand-painting the lettering and ball-and-chain artwork -- the lettering was done with acrylic paint markers, and the ball & chain was done with the edge corners of the pastel sticks that I made the powders from earlier. Then a second coat of the dulcote to protect the artwork. The chassis was painted Krylon Red Oxide and set aside. I added a few of my own touches to the beastly 427 powerplant -- like the MOROSO valve covers, some CRAZY PIPES from a Miss Deal funny car kit, velocity stacks made from Evergreen Styrene tube, a parts-box blower, and I made the fuel pump tubing from some clear plastic bead string stuff I found at Michael’s that I painted with Tamiya Clear Yellow acrylic to appear full of gasoline - then hooked up to the kit-supplied fuel pump. The rear tires are the most excellent pad-printed M&H dragmaster piecrust slicks from AMT parts pack--the Cragars are lightly coated with Tamiya Light Gunmetal to bring the kit chrome shine down a bit. Seatbelts were made from masking tape painted the same Light Gunmetal, and P/E buckle hardware was added. Finally, I used Tamiya Weathermaster Orange rust to give the door handles and headlight bezels that neglected look like it was just dug out from years in the junkyard. I also increased the ride height in front and rear from kit specs by adding cut / stacked & painted pieces of balsa wood blocks. This was a BLAST to build! Thank you AMT.


.thumb.jpg.e0420fe52e683c60d19e843462316523.jpg)