Search the Community
Showing results for tags 'Resin'.
-
Hi fellows, I just put up a shapeways shop with the stuff I designed. All are 1:25 parts, mostly wheels, wheel covers and hubcaps. I will slowly expand the line. Thanks for watching. Remove my post if not appropriate. https://www.shapeways.com/shops/basement-resin

-
 A recent aquisition and completion. Fisher Model and Pattern 1968/69 Porsche 908 longtail. Paint is Tamiya TS26 white and Testor Flourescent green for the accent. Modifications include steering wheels, seatbelts, dash switches and a few others. This particular car was driven to 1rst place at the SPA 1000 by Jo Siffert and Brian Redman. Thanks for looking and comments welcome. A fairly simple kit, as most resin are. Windscreen wipers are very delicate and took some patience. Minimal decals but all went on perfect. Those latches didn't want to come off the carrier sheet easily...also quite delicate. Window fit took some time but was worth during final assembly. All fit well. Wheels are painted Tamiya Dark Iron. Don't usually take this picture but there were some detail worth seeing.
-
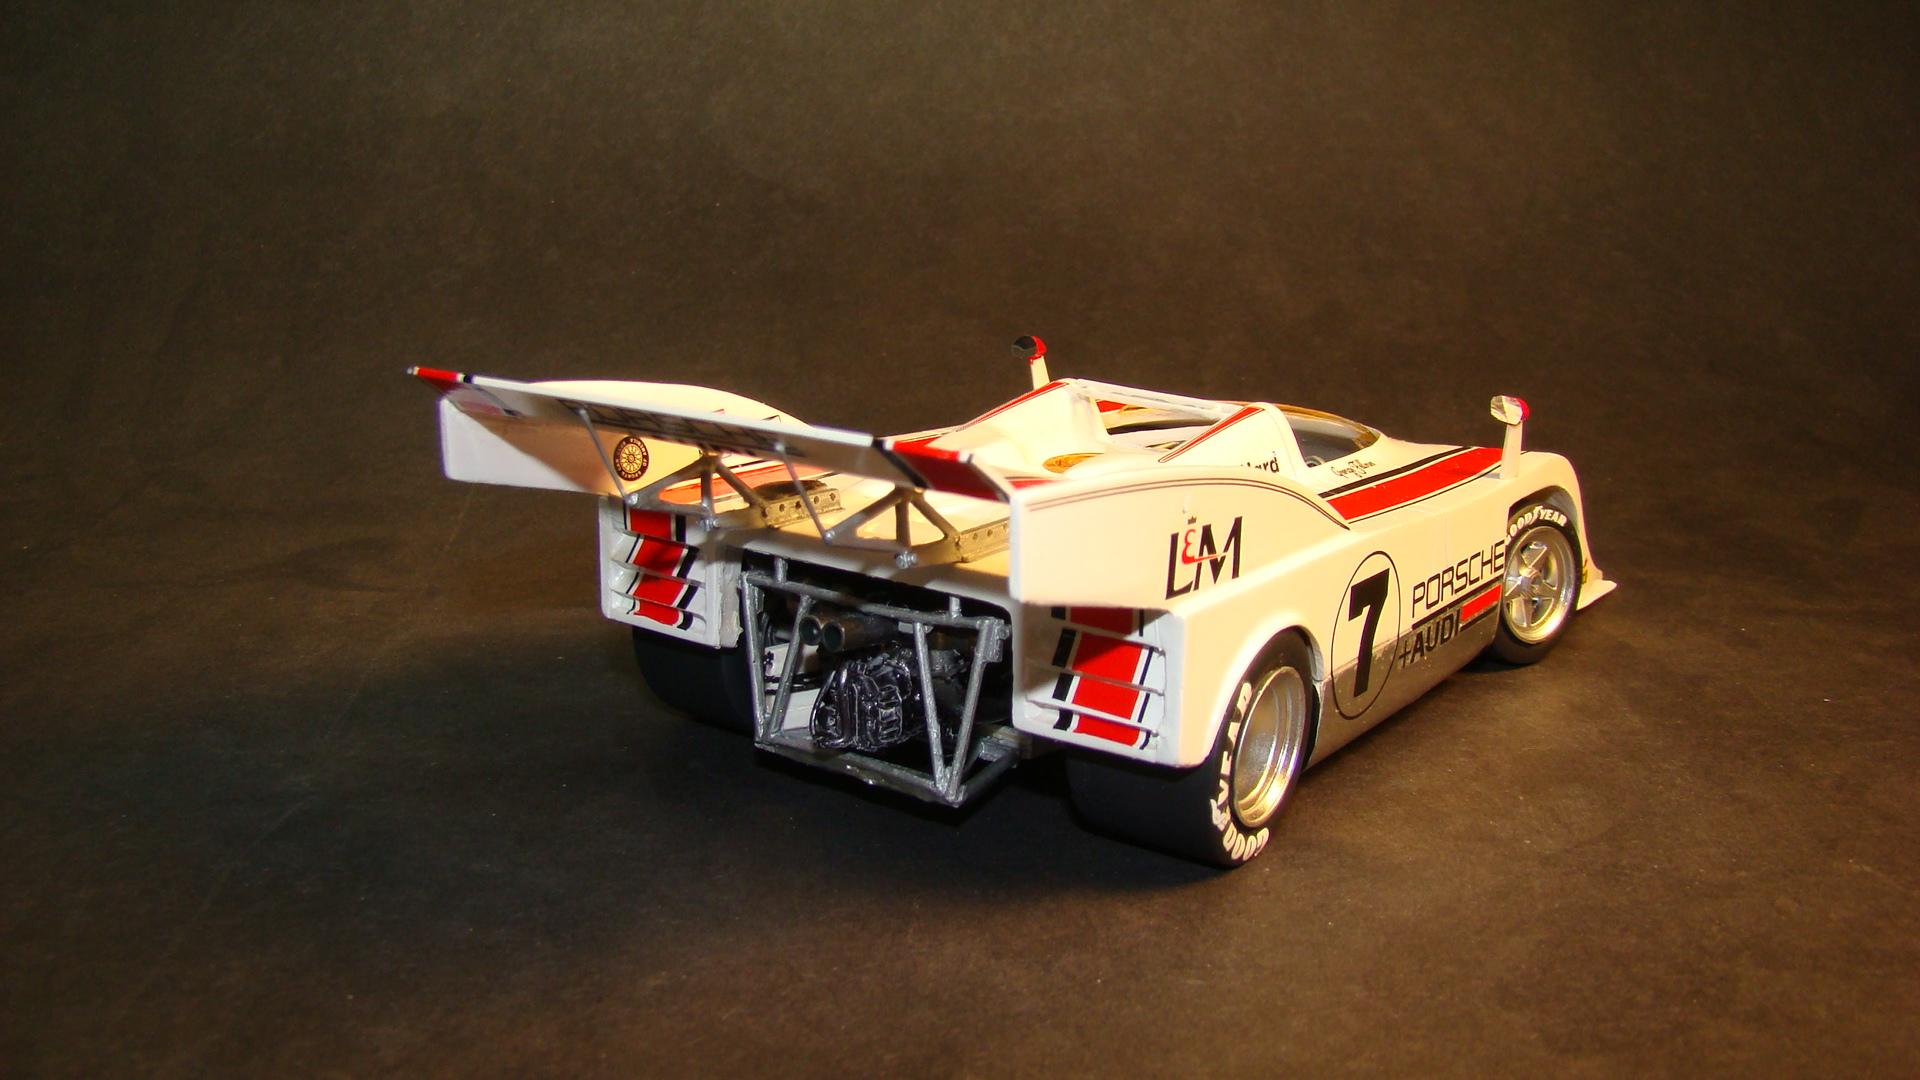
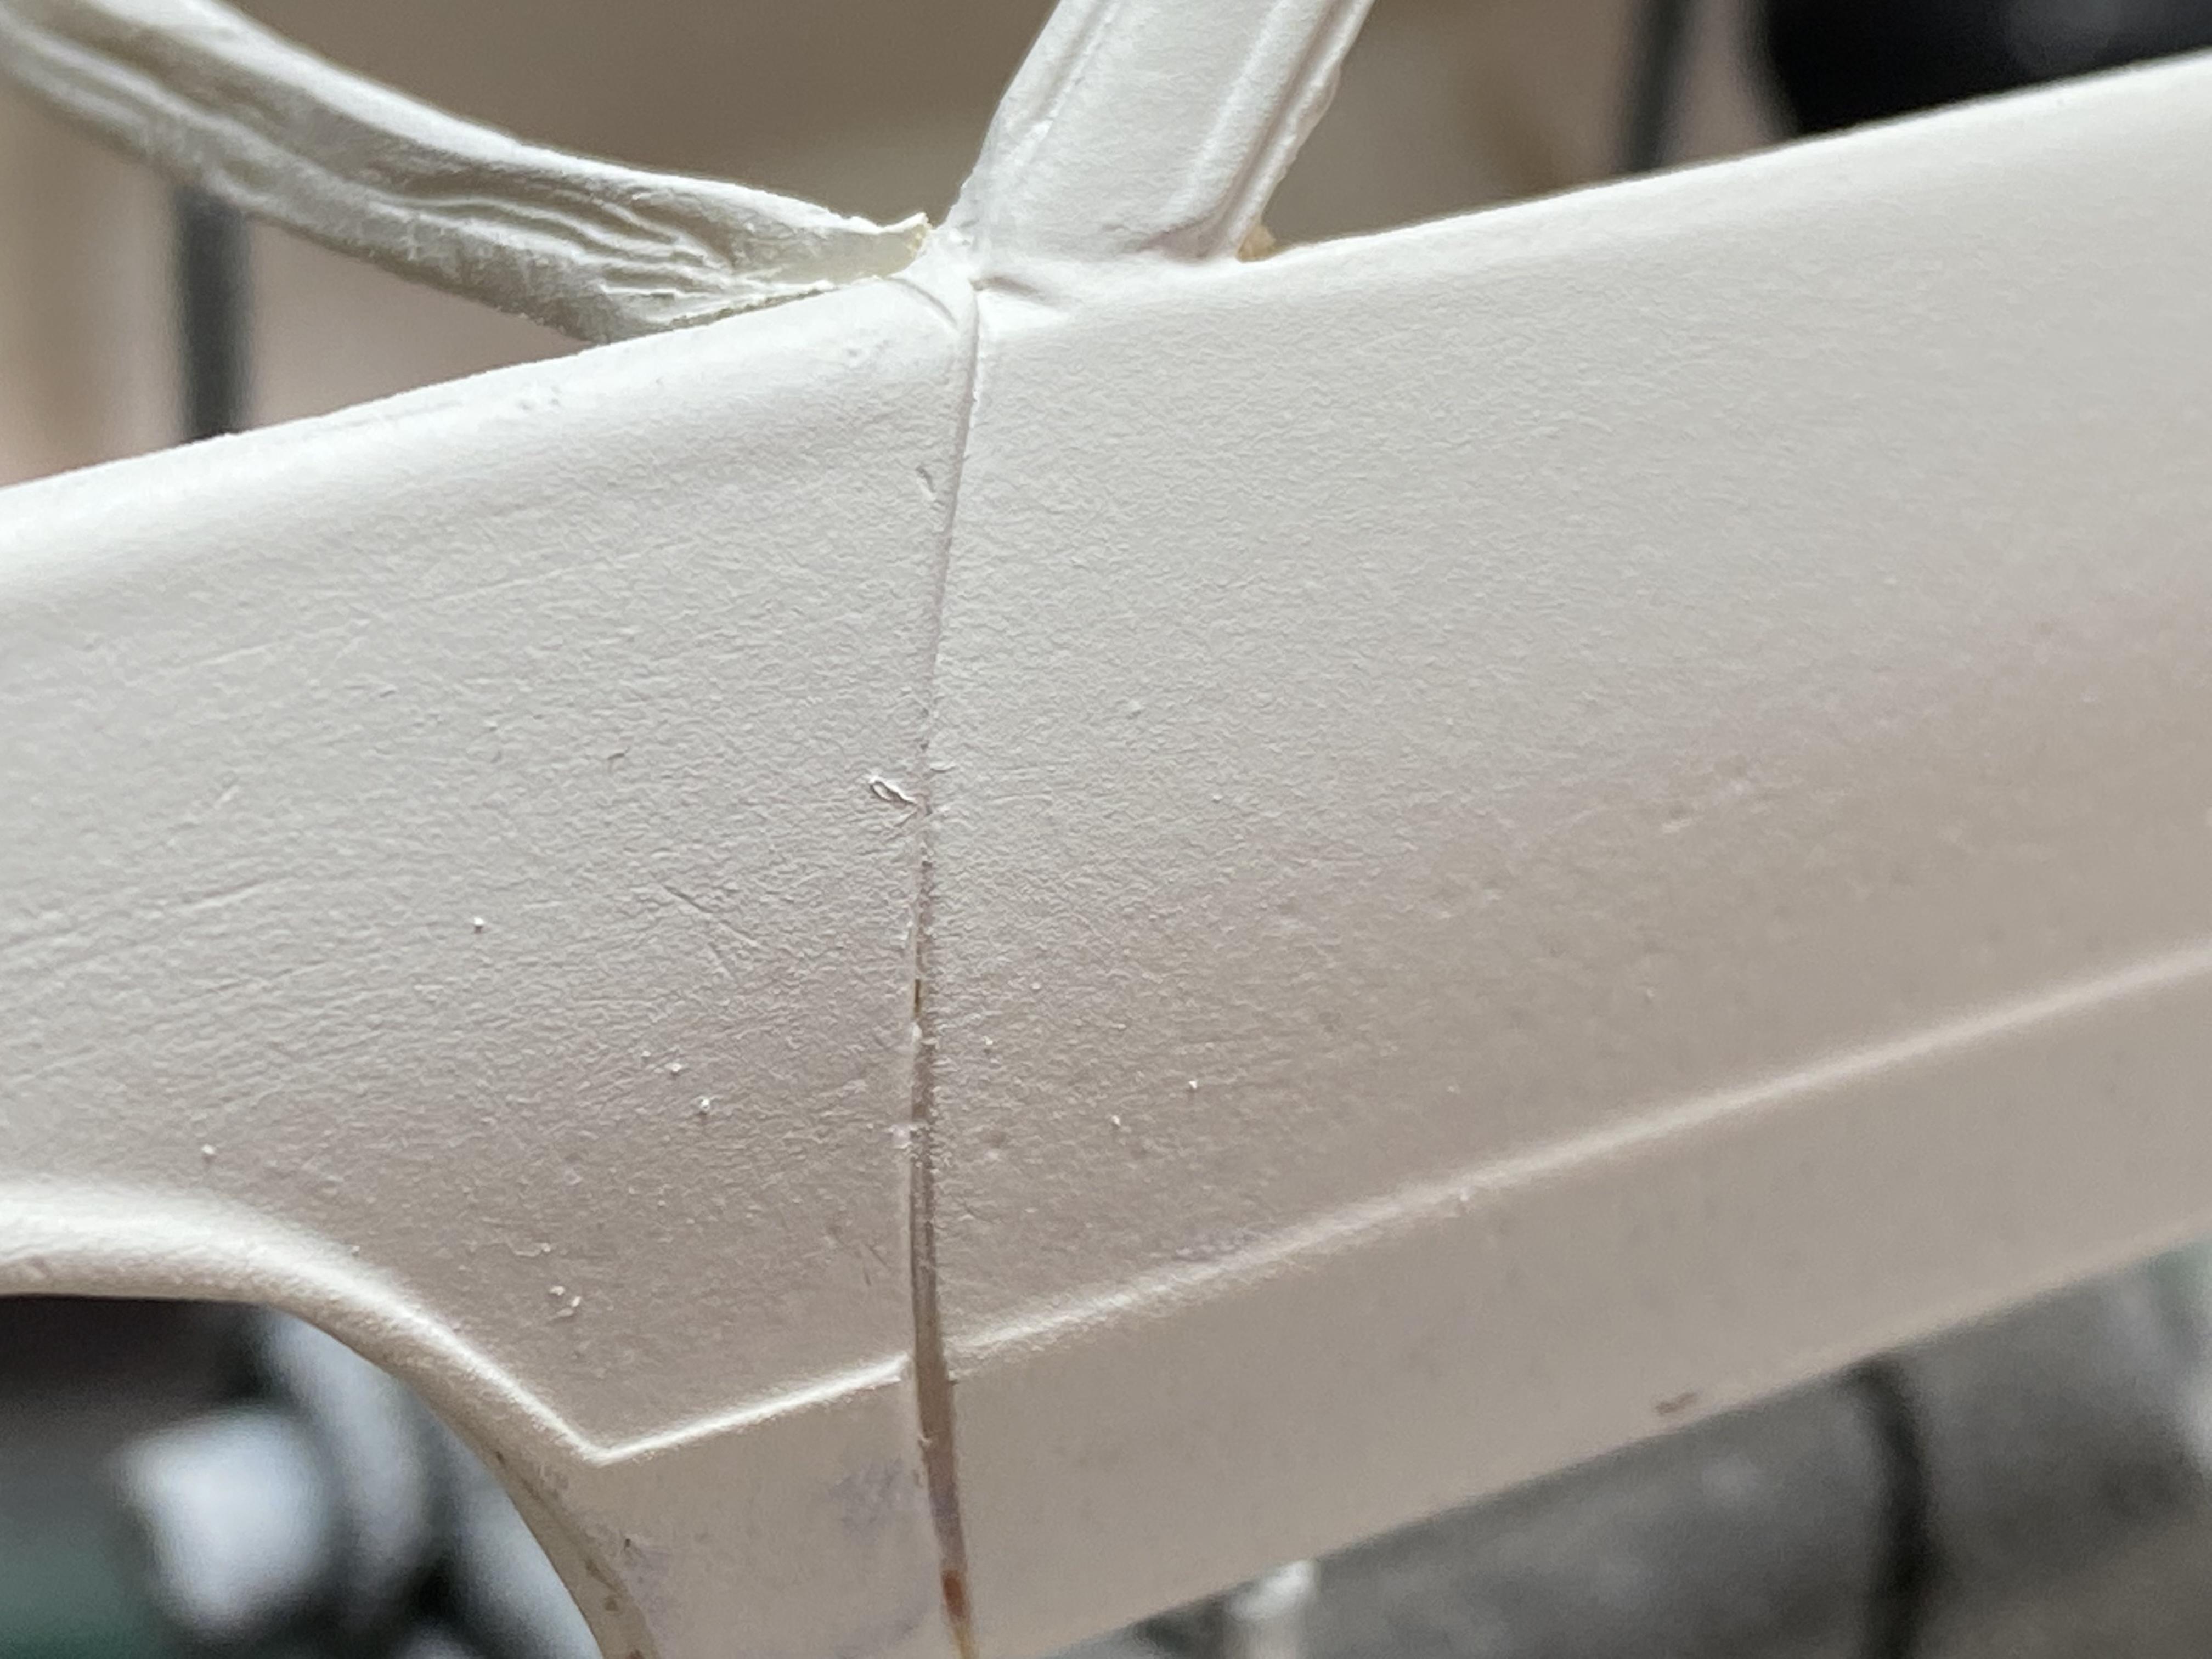
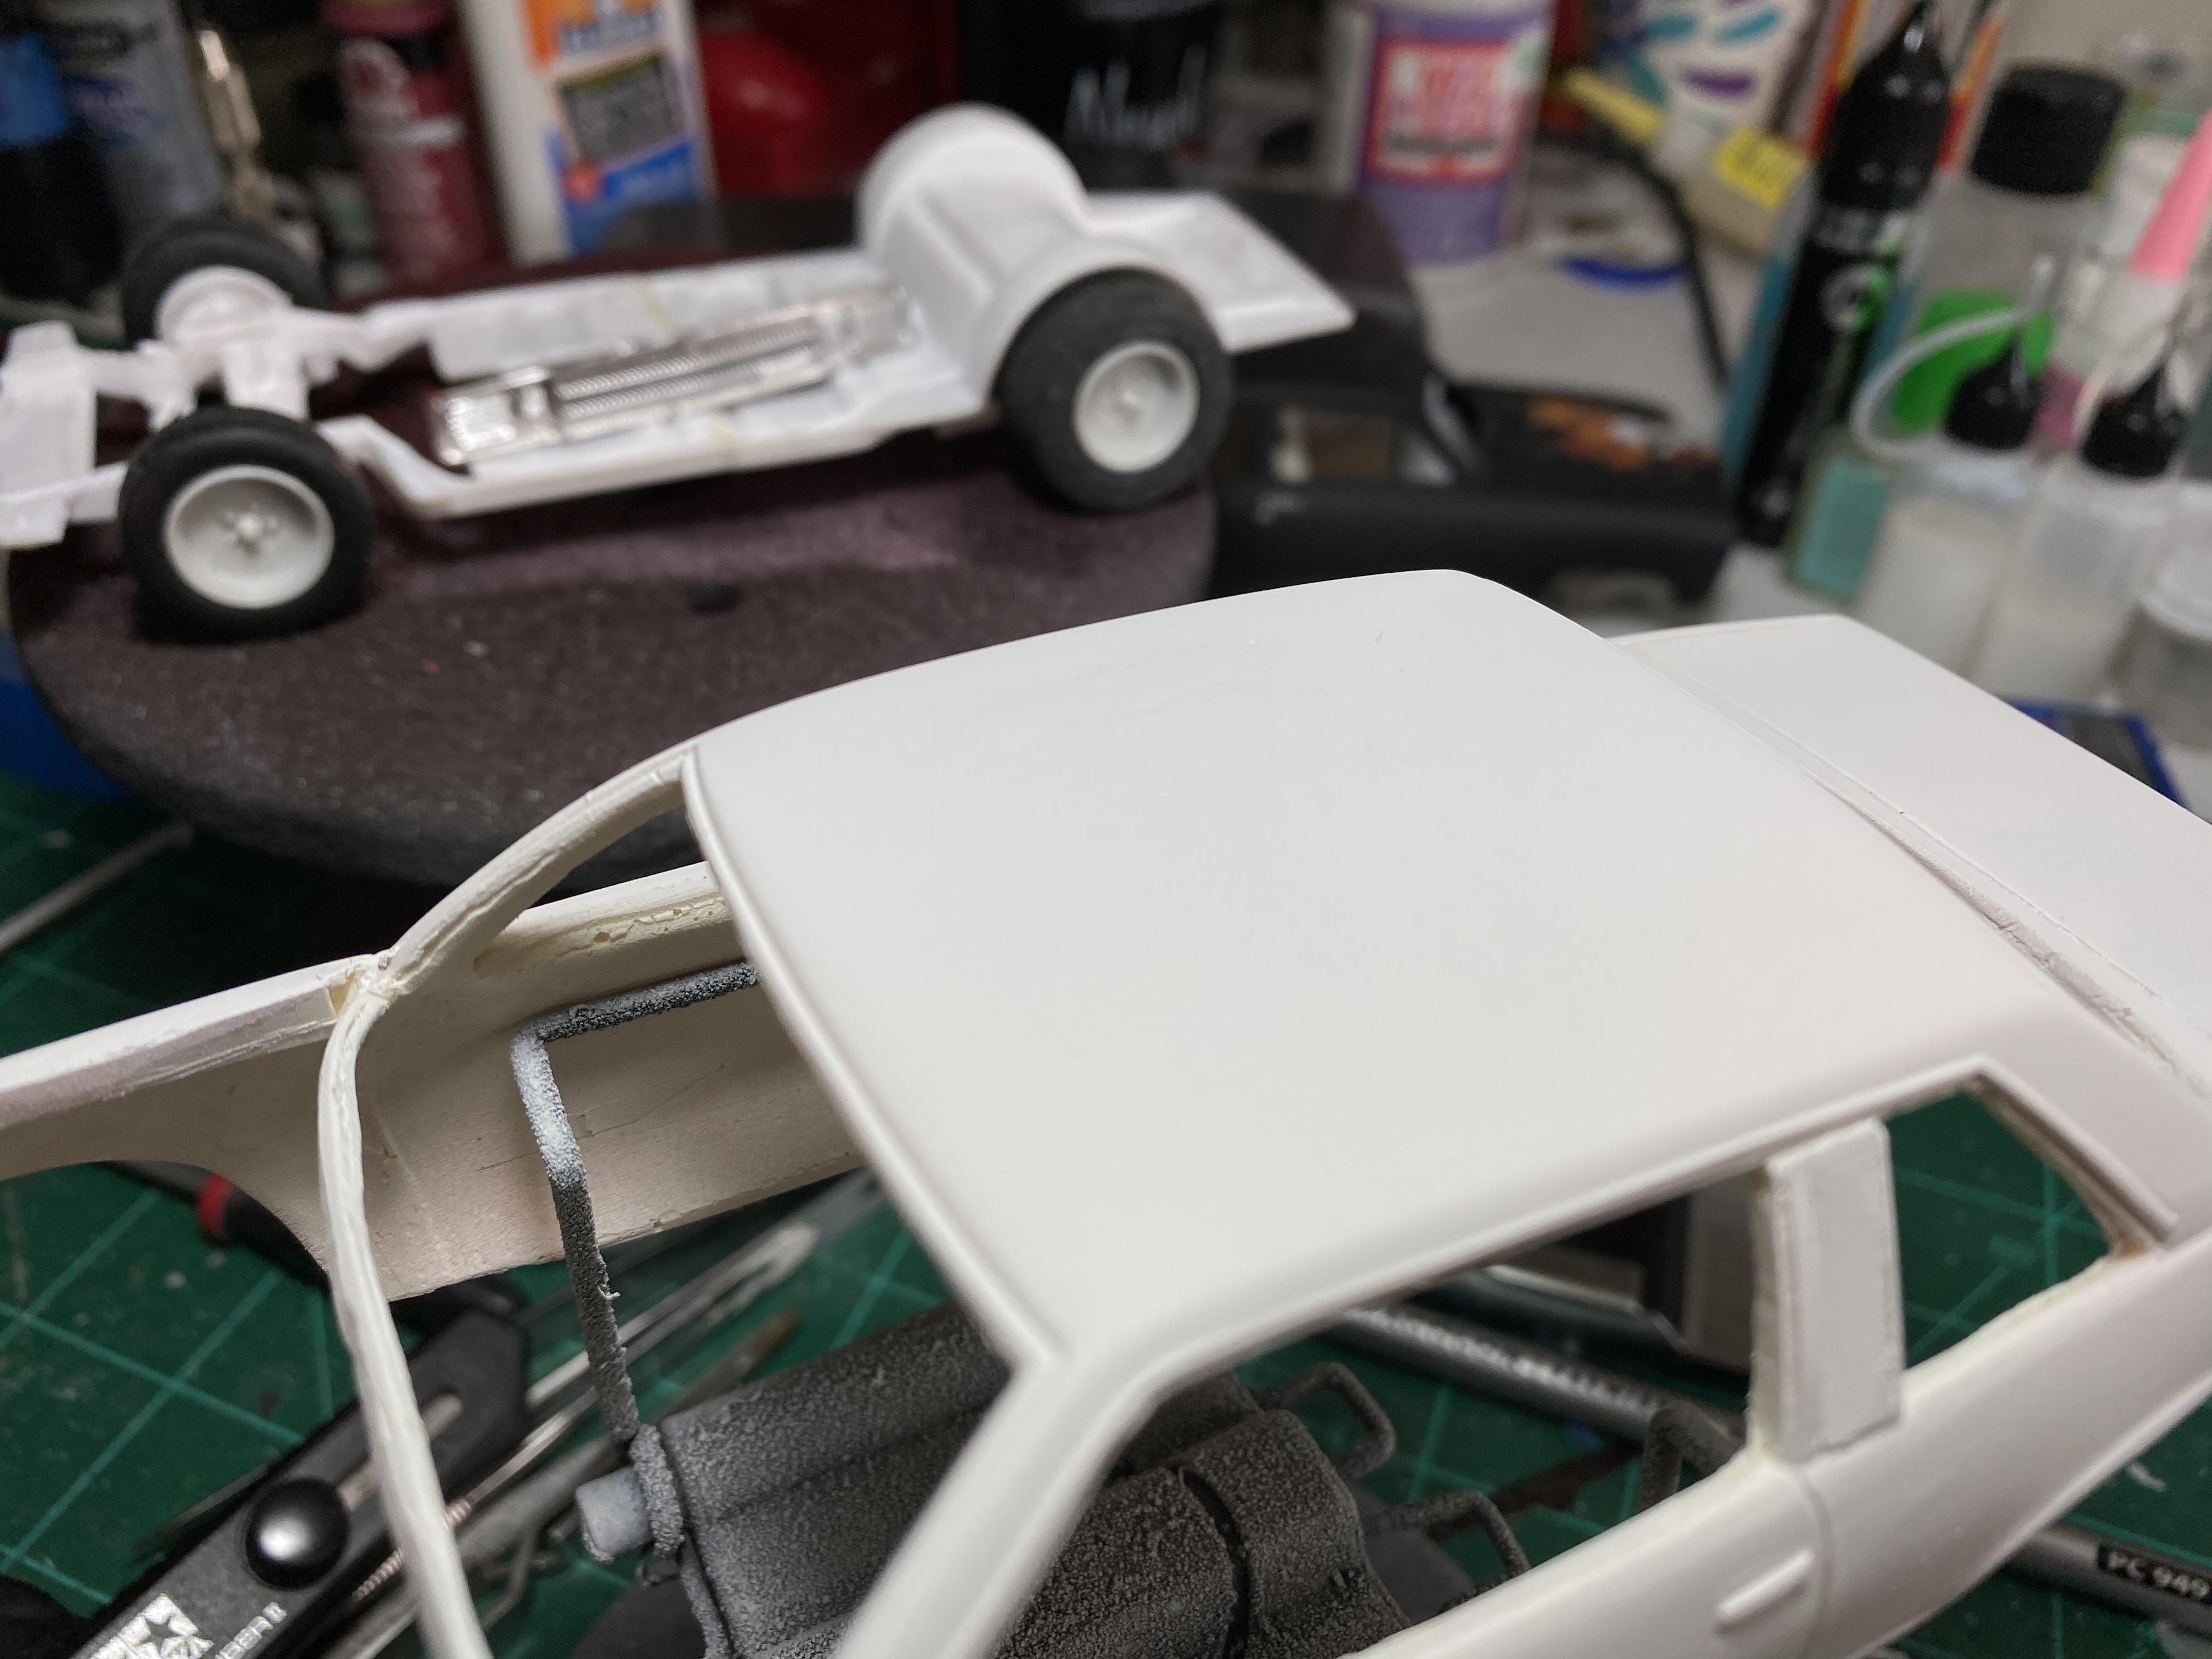
Another completion..on a roll now. Have had this kit going on 25yrs and was always afraid of ruining the beautiful decals included in this kit. But decals don't last forever and it was about time to bring this one to the bench. R esin kits are like like a block of fine marble. Its a real test of the artists skill to turn this into a masterpiece. so are easier than others, like the last one I did. I have played with this one a few times over the years. Lots of clean-up and various modifications but not as bad as I first thought. Decals turned out to be a real dream and I wondered why it took me so long. Rest of the details in the picture captions. Thanks for looking. BNon steering wheels on any model hasalways been a pet peeve of mine. Here was the solution on this one. All done and on its wheels. The decals over those front vents were a real challenge. I cut them into 42 seperate pieces and tediously applied them. Then waited for them to cure and touched them up with paint. Turned out way better than laying them on in one piece and trying to melt them in place with solvent and heat. The vents were pretty deep. Rear veiw and not as much engine detail as the last one but enough to make it interesting. The rear axle gave me fits. The lower part of the chassis is covered in Mylkar foil. The top and bottom did not line up exactly and some sheet styrene had to be added to make up the difference. Gotta touch up that number 7 Camera never lies. Interior was well detailed and probably could have used some more but my patience was wearing out. Photo etch seat bels and steering wheel center were a nice touch. There is a very obvious error here. Lets see how bad it is if any of you can spot it. Nice collection here. The 1/64 version is an A/FX slot car body I repaired and fitted with Indycals graphics. The 1/43 is a Solido diecast. The mirror is in the case somewhere.
- 22 replies
-
- 5
-

-
- 1/24 formula
- canada
- (and 1 more)
-
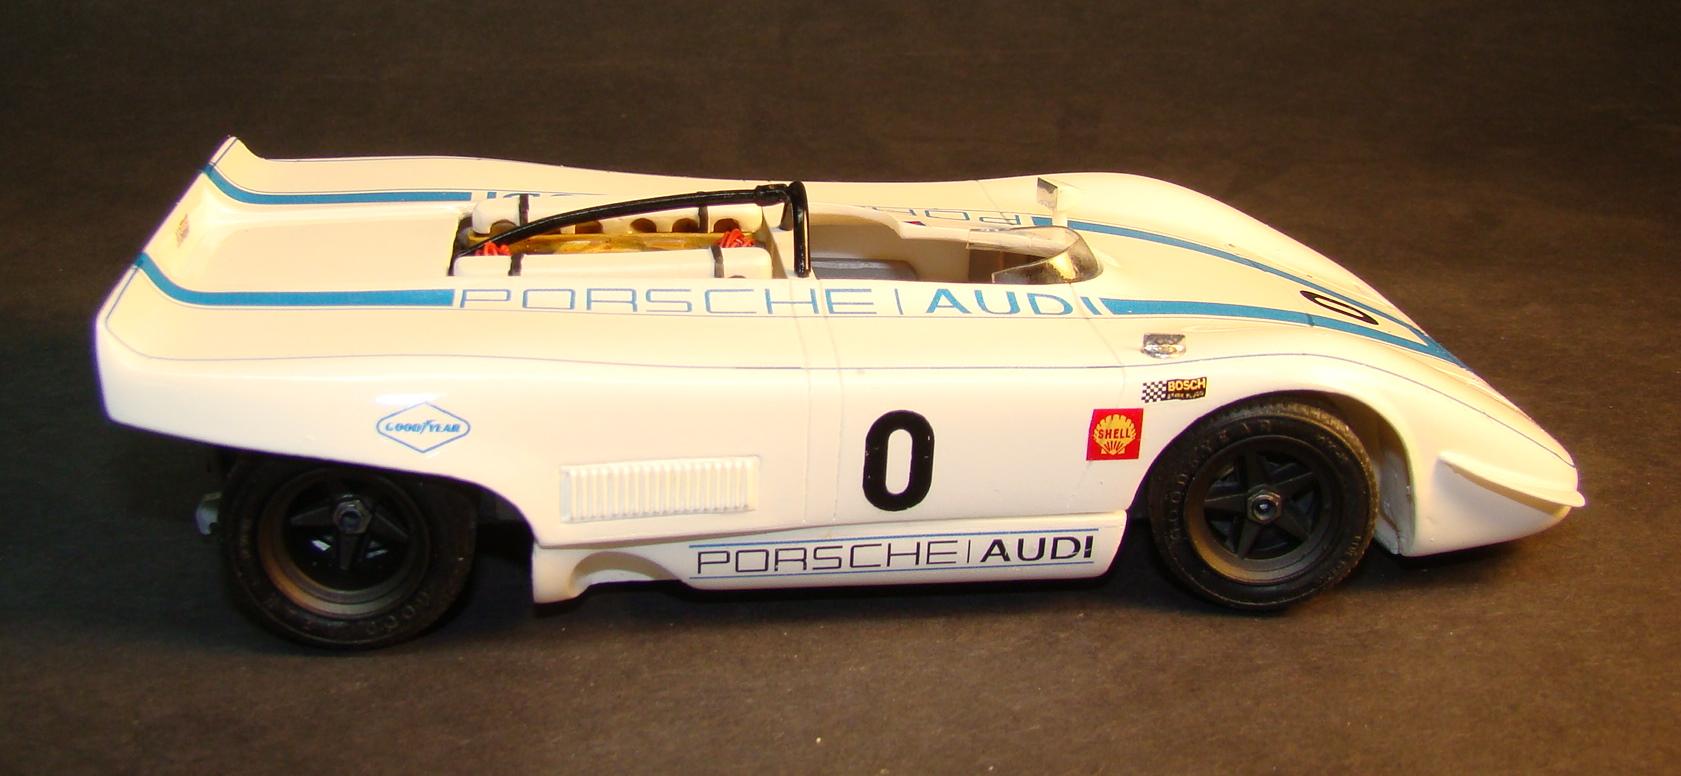
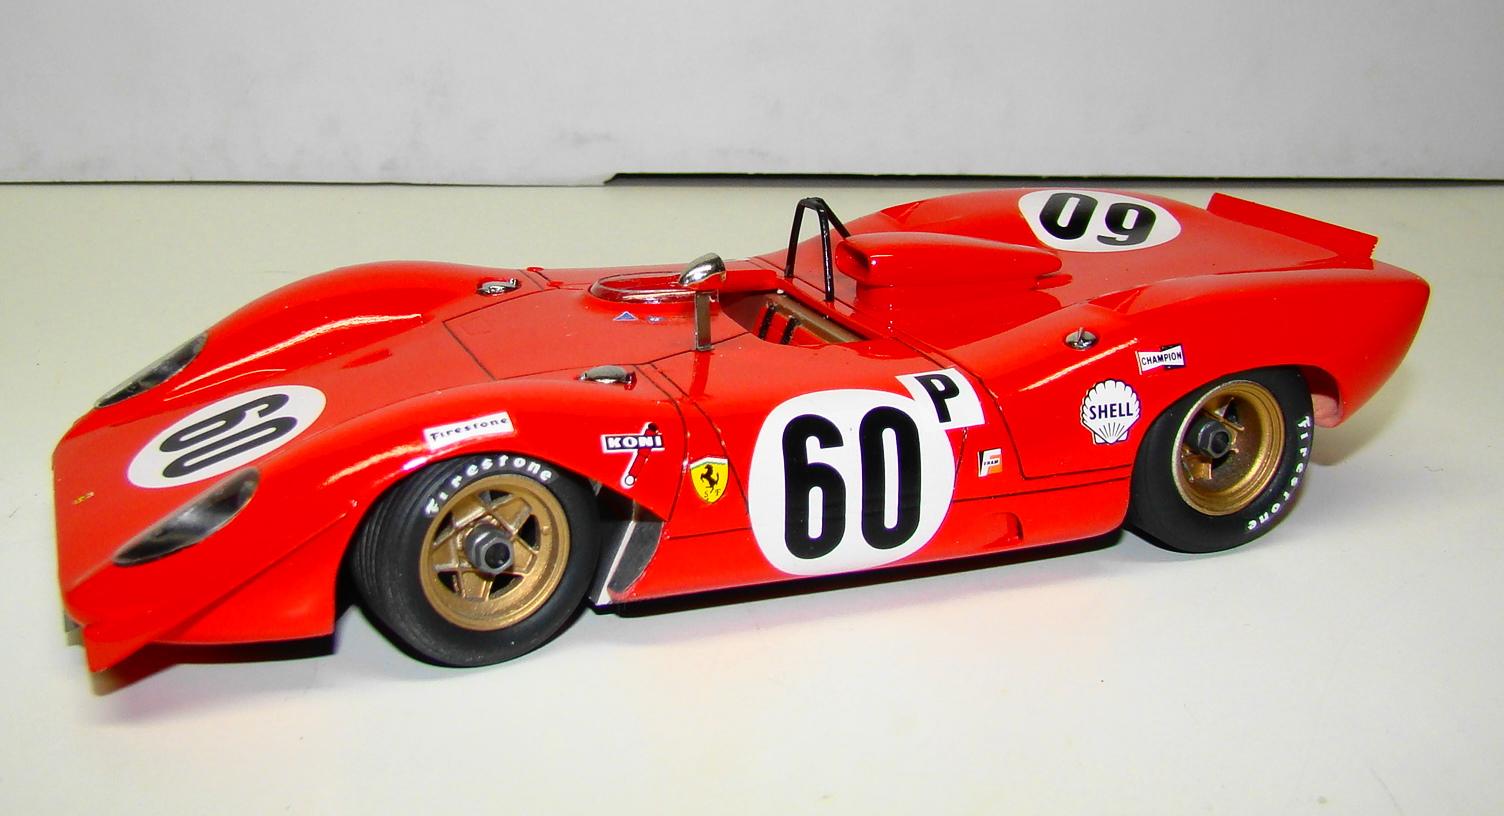
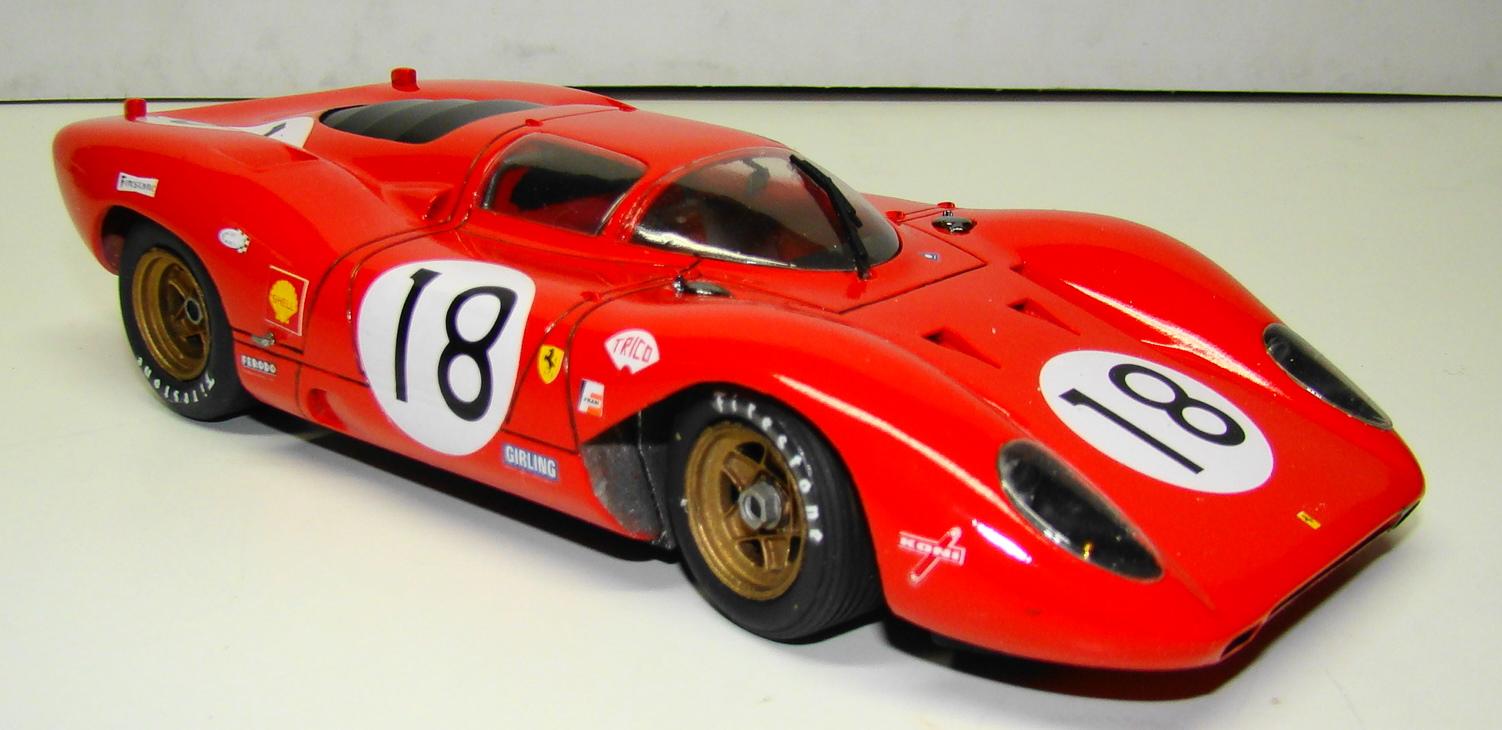
1/24 resin of the Porsche 917 PA spyder that was driven by Jo Siffert in the 1969 Can Am season. Car was light a fast and very reliable and allowed Siffert several good finishes. He finished 4th in the season. Unfortunatly , compared to the big Chevies it was underpowered. Kit was made by fellow modeler Alan Jameswho has sincew passed on. I believe this was the only kit he produced. Alan was a true craftsman and this kit was outstanding down to the last details. Color is Tamiya TS26. I did add some extra details and information on those are in the picture captions. Thanks for looking and comments welcome. The body on this kit was exceptional. Very little clean up. A coat of primer (that I shined up) and a few coats of Tamiya. The hood fasteners were some extra PE I had. Rear end and engine detail was all there. And everything fit. Body and chassis fit like a glove. I did have to thread two screws to hold them together. Decided to pin the roll bar brace in place instead of glue. That proved to be the right decision as it had to be moved around a little to get in place. Don't often do this overhead shot but there is a lot of detail to be seen. Seatbelts were PE items for a Studio 27 set made for the 917. Whose idea was it to put two plugs per cylinder on a 12 cyl engine. 24 plug wires, 48 holes and almost 3ft of wire. This shot proves it was worth it.
-
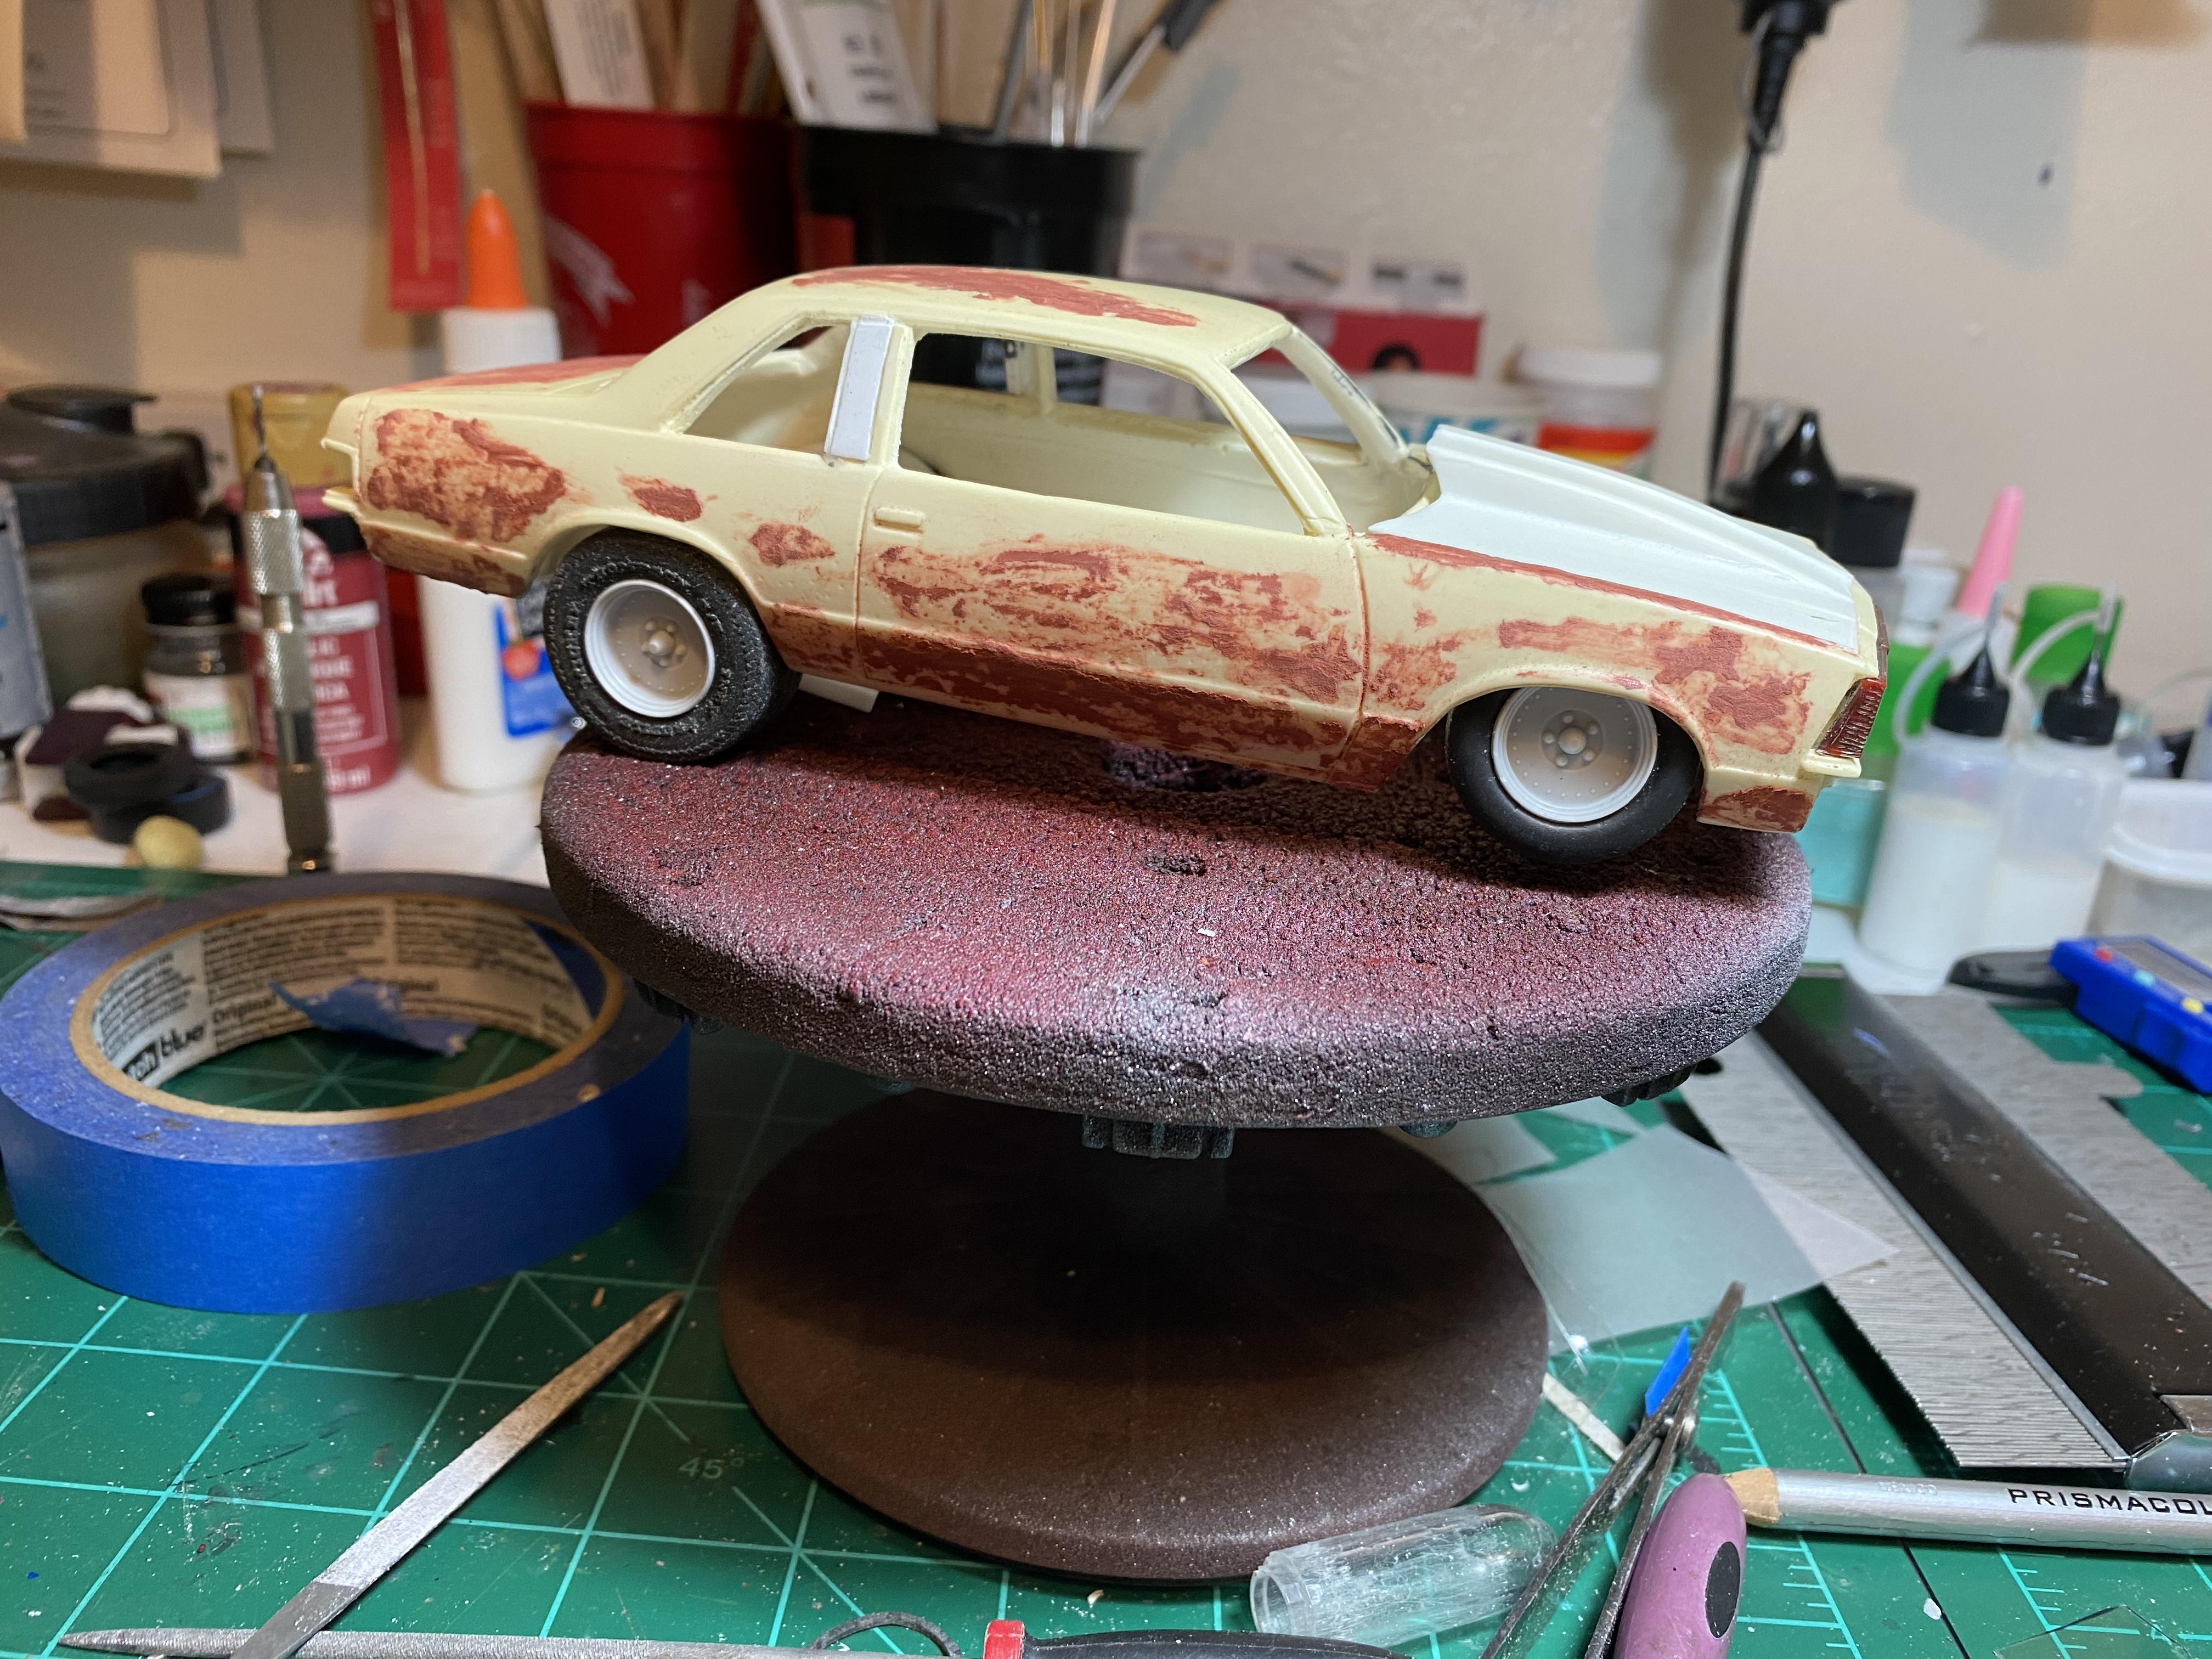
Conversion of a conversion, the Canopy Express is a rare vehicle to begin with. I started this April 1995. *Edit* I made it a 1948, simple to remove the door vent windows. For starters, anyone building the '50 Chevy pickup needs to know, the driveshaft should be assembled the other direction, the end at the differential is fixed, the instructions are incorrect. The other thing I've done so far, is correct the running boards, by shaving down the perimeter so the ribs stand proud, not recessed lines, that's a pet peeve of mine with this kit. Another pet peeve, is the firewall should be flush with the front of the cab, not recessed back, but that requires reworking the recess for the engine, so I have corrected that. Yet another pet peeve, is flat headlight reflectors, that has been corrected. Can't forget the door handles, they were shaved off, will make new ones, that will sag like the real thing. LOL The reason I put this away for so long, the interior needs a total scratch-build. The resin floor with wheel wells is completely incorrect. I am planning to not keep the wood floor boards, but make it like they put in diamond plate or a newer ribbed truck bed (will be last minute decision). I have turned the wheel well form, from Corian using the drill press. I'm now at the cardboard mockup stage, which will become part of the plastic form to vacuum-form the interior panels. I have the tailgate done, used eye glasses hinges, and interior panel is done. I'm now working on the driver seat, which I had previously cut down from the bench seat, but was incorrect. I am also making a new gas tank, based on the drawing in the repair manual that I kept from owning the real '48 5 window. Next steps are: bed sides with "rolled" edge, center taillight and also the other taillights, 4 on the floor gear shift, thinking about making a hood hinge with spring and latch, perhaps a roof rack that would be made of rebar, dings and dents with rust holes, will try some extreme weathering techniques. The final touch, what should the painting company name be (plan is to have spilled paint inside to use up paint)?
-
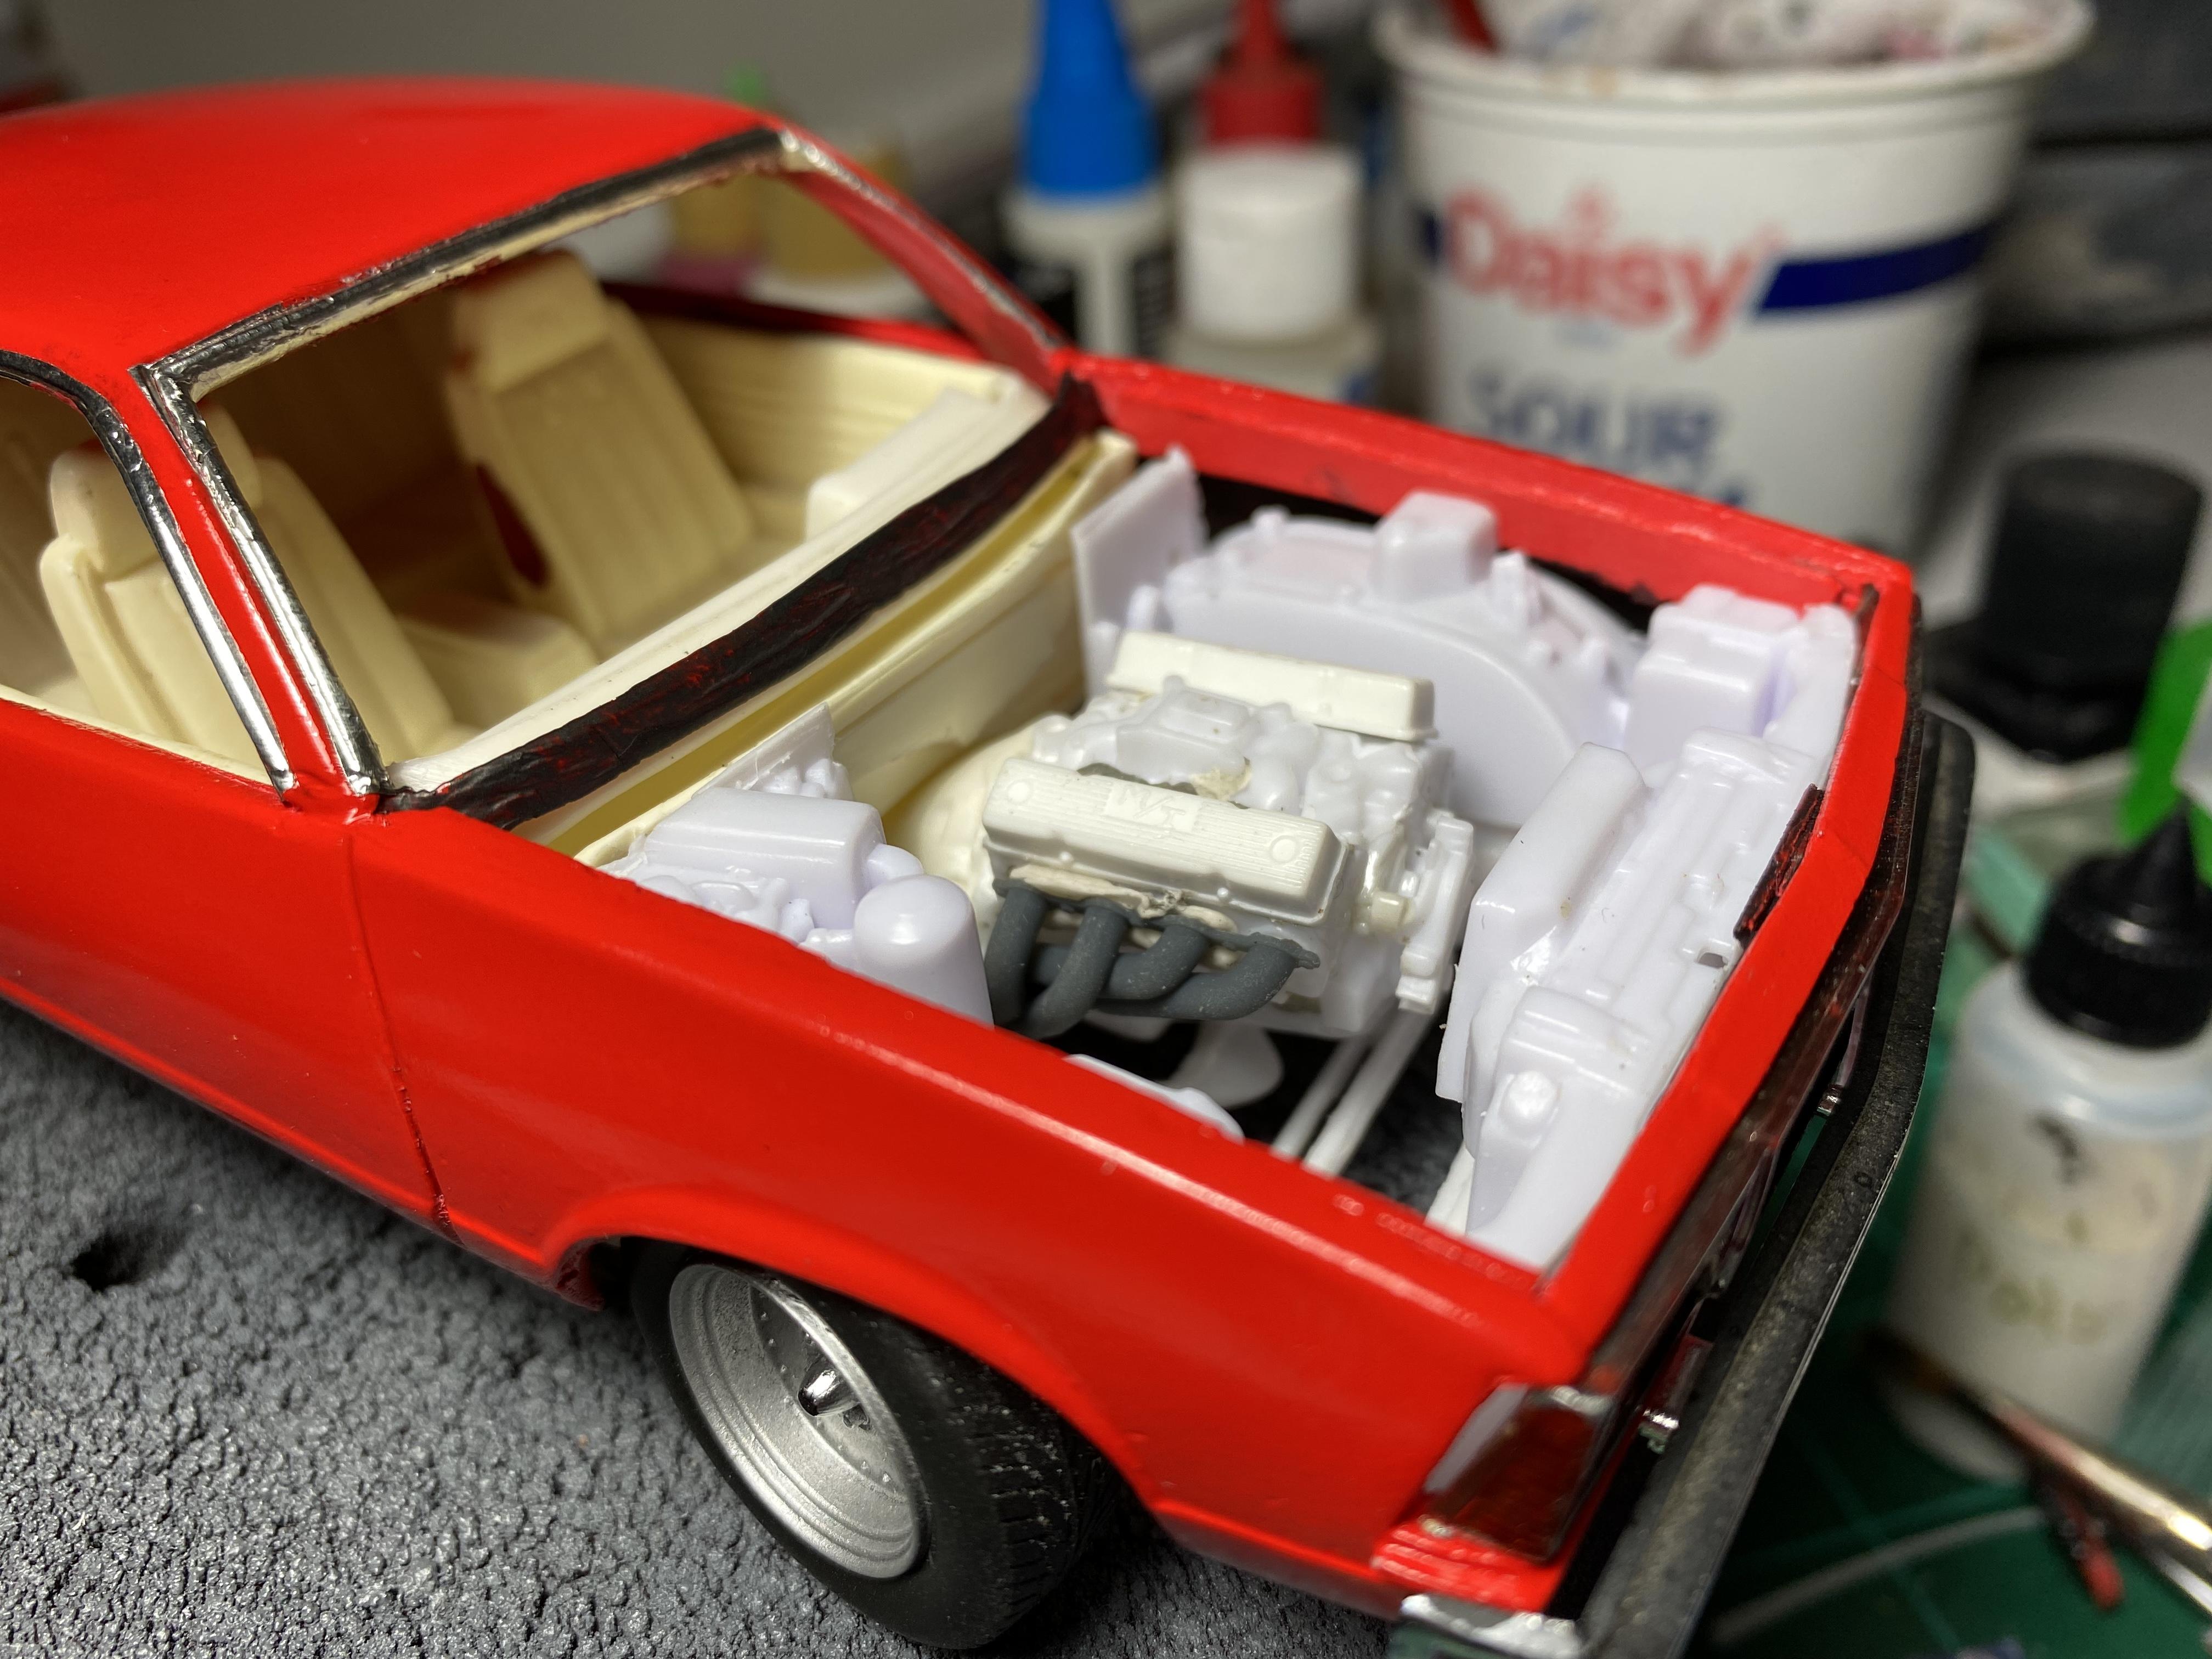
 Hi, I have several Honda Civic touring cars I would like to build and detail. They are all curbside kits though. More specifically I need the EG Civic, 5th generation, 1991-1995 version. I know of several places that sell the engines for these kits, but I can't find anyone that makes a whole engine bay kit. Do any of you know of someone that makes this?
 -
 Olson Bros website - NEW Bronco/Truck parts Guys, get them now and avoid a long wait. Plan on a few weeks delivery time anyway, possibly a little longer depending on how many orders come in. I have to hand it to 'lil bro, he really went all-out on these and here are just a few pics of what's available now. -EXPECT SHIPPING DELAYS!- Also, if you have communication issues, shoot me a note and I'll see what's up.
 -
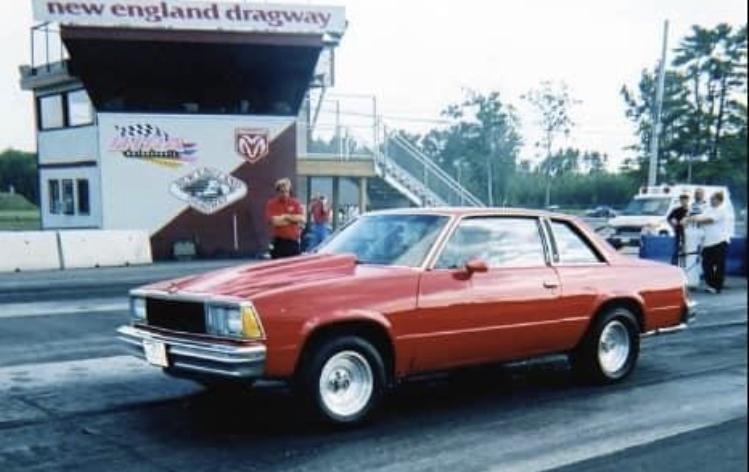
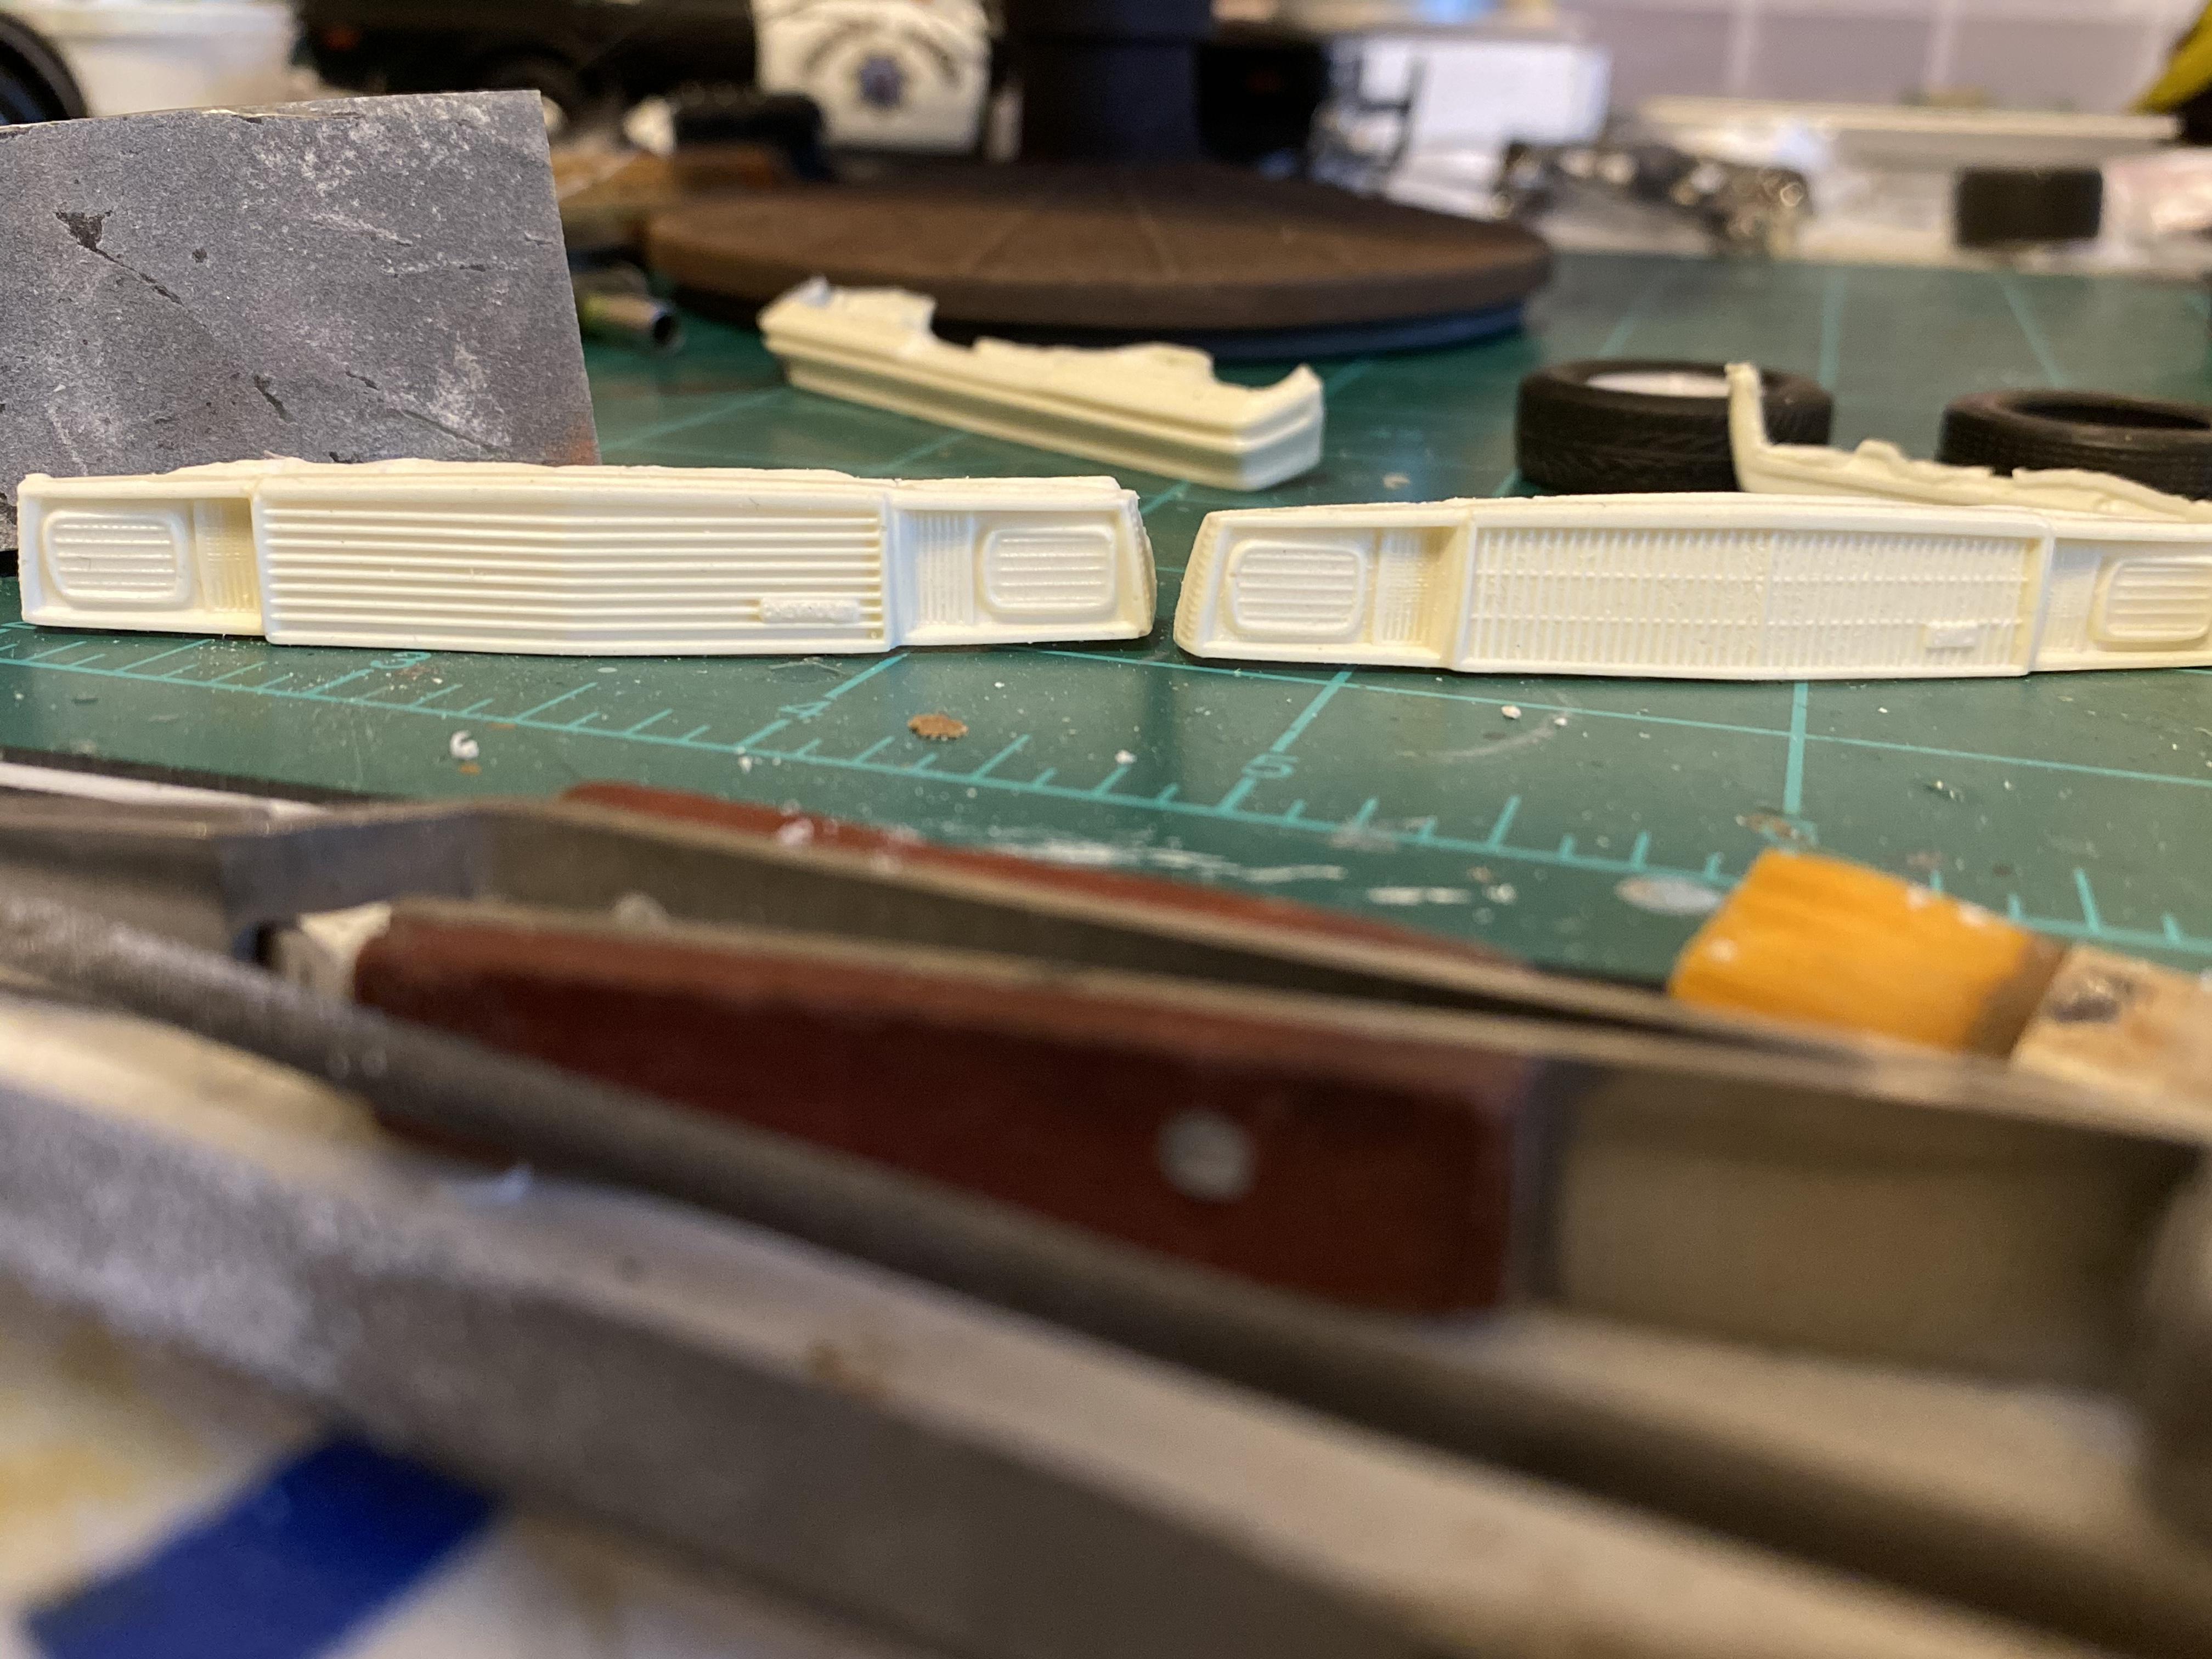
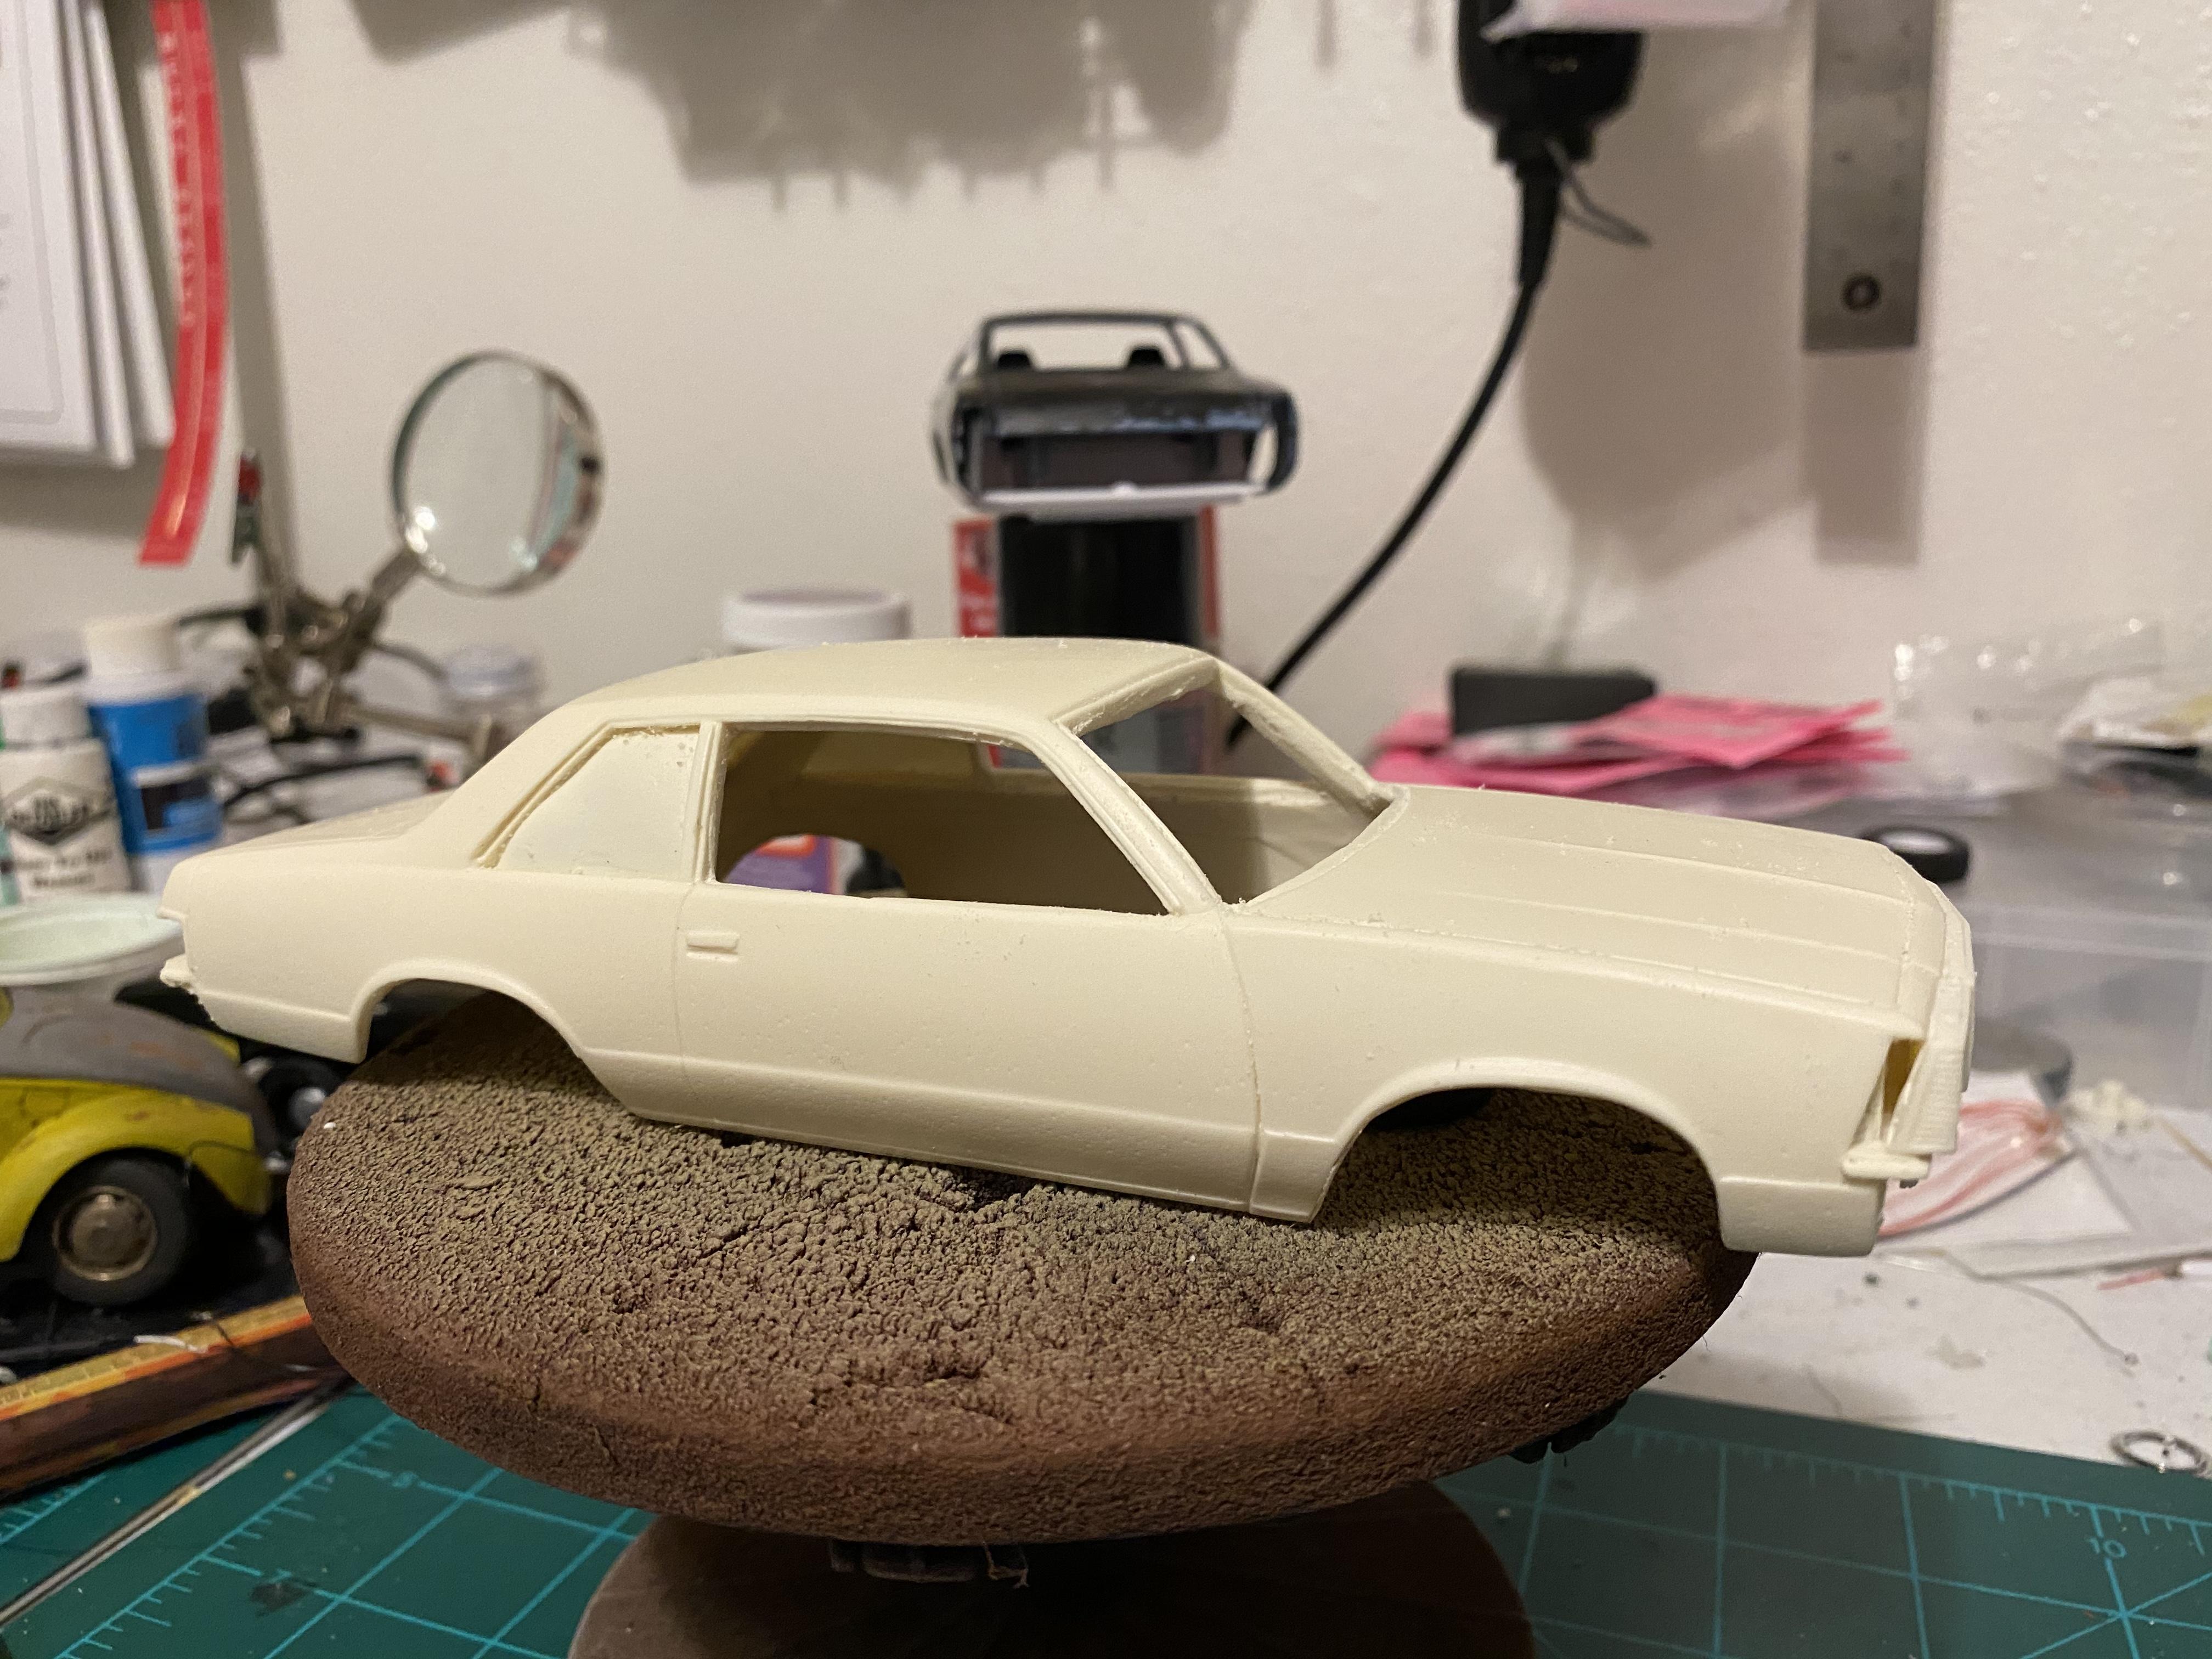
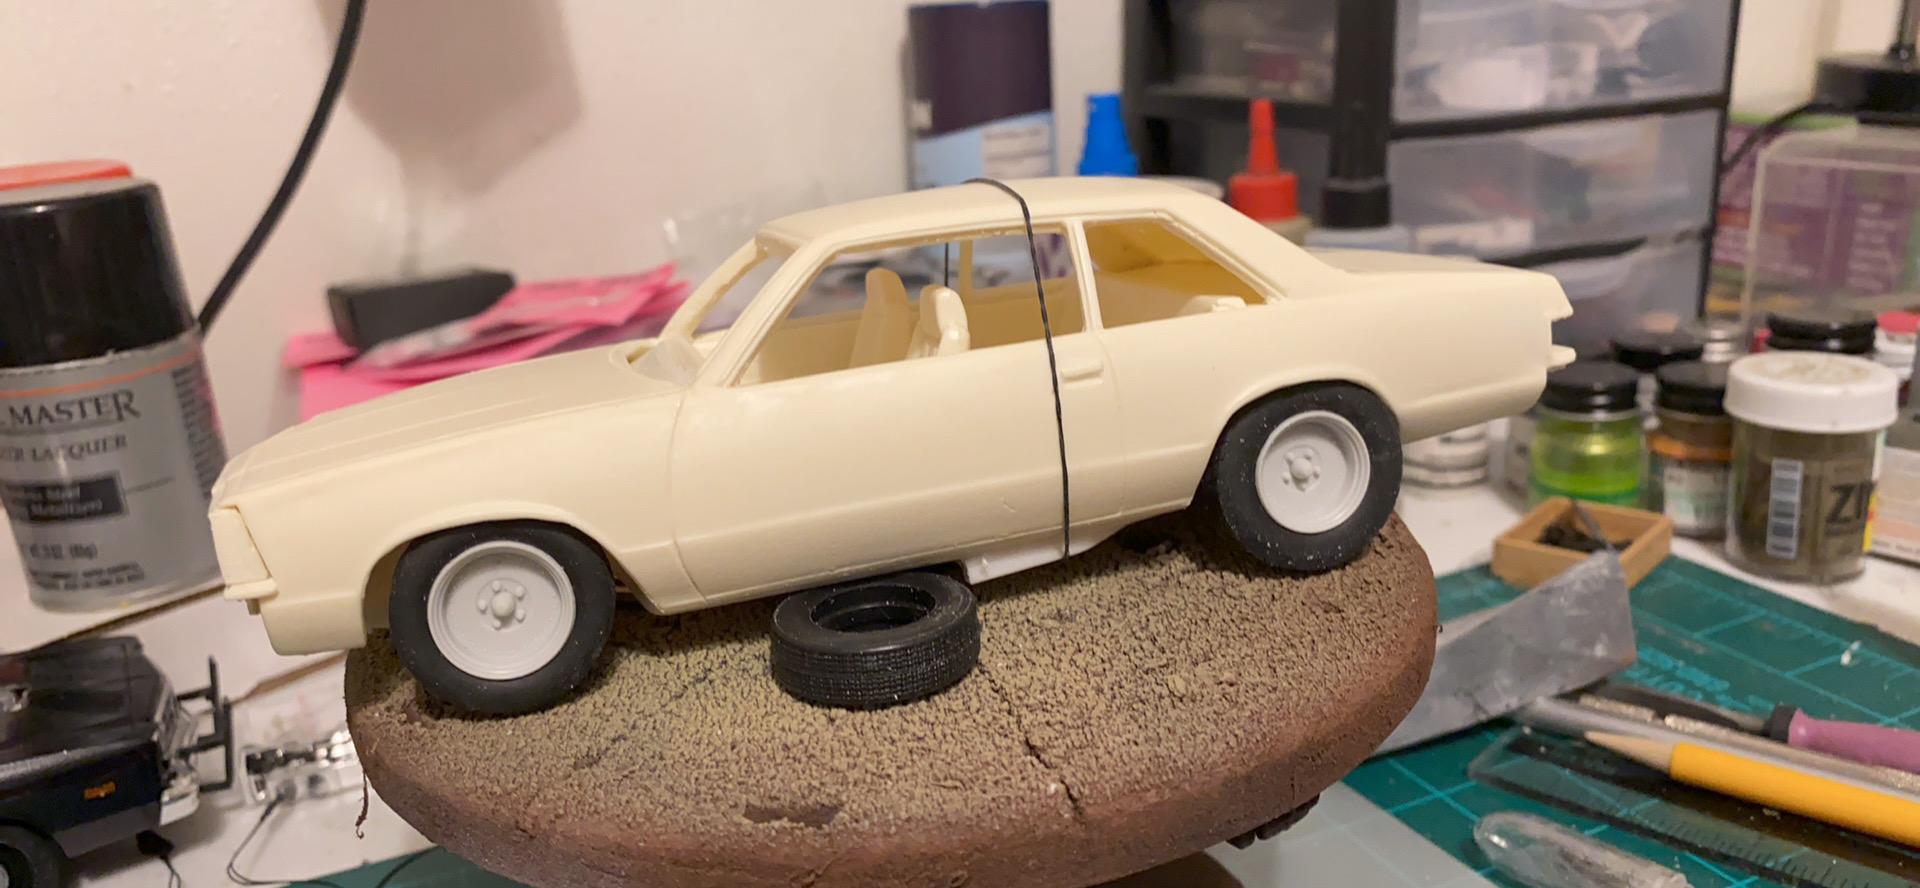
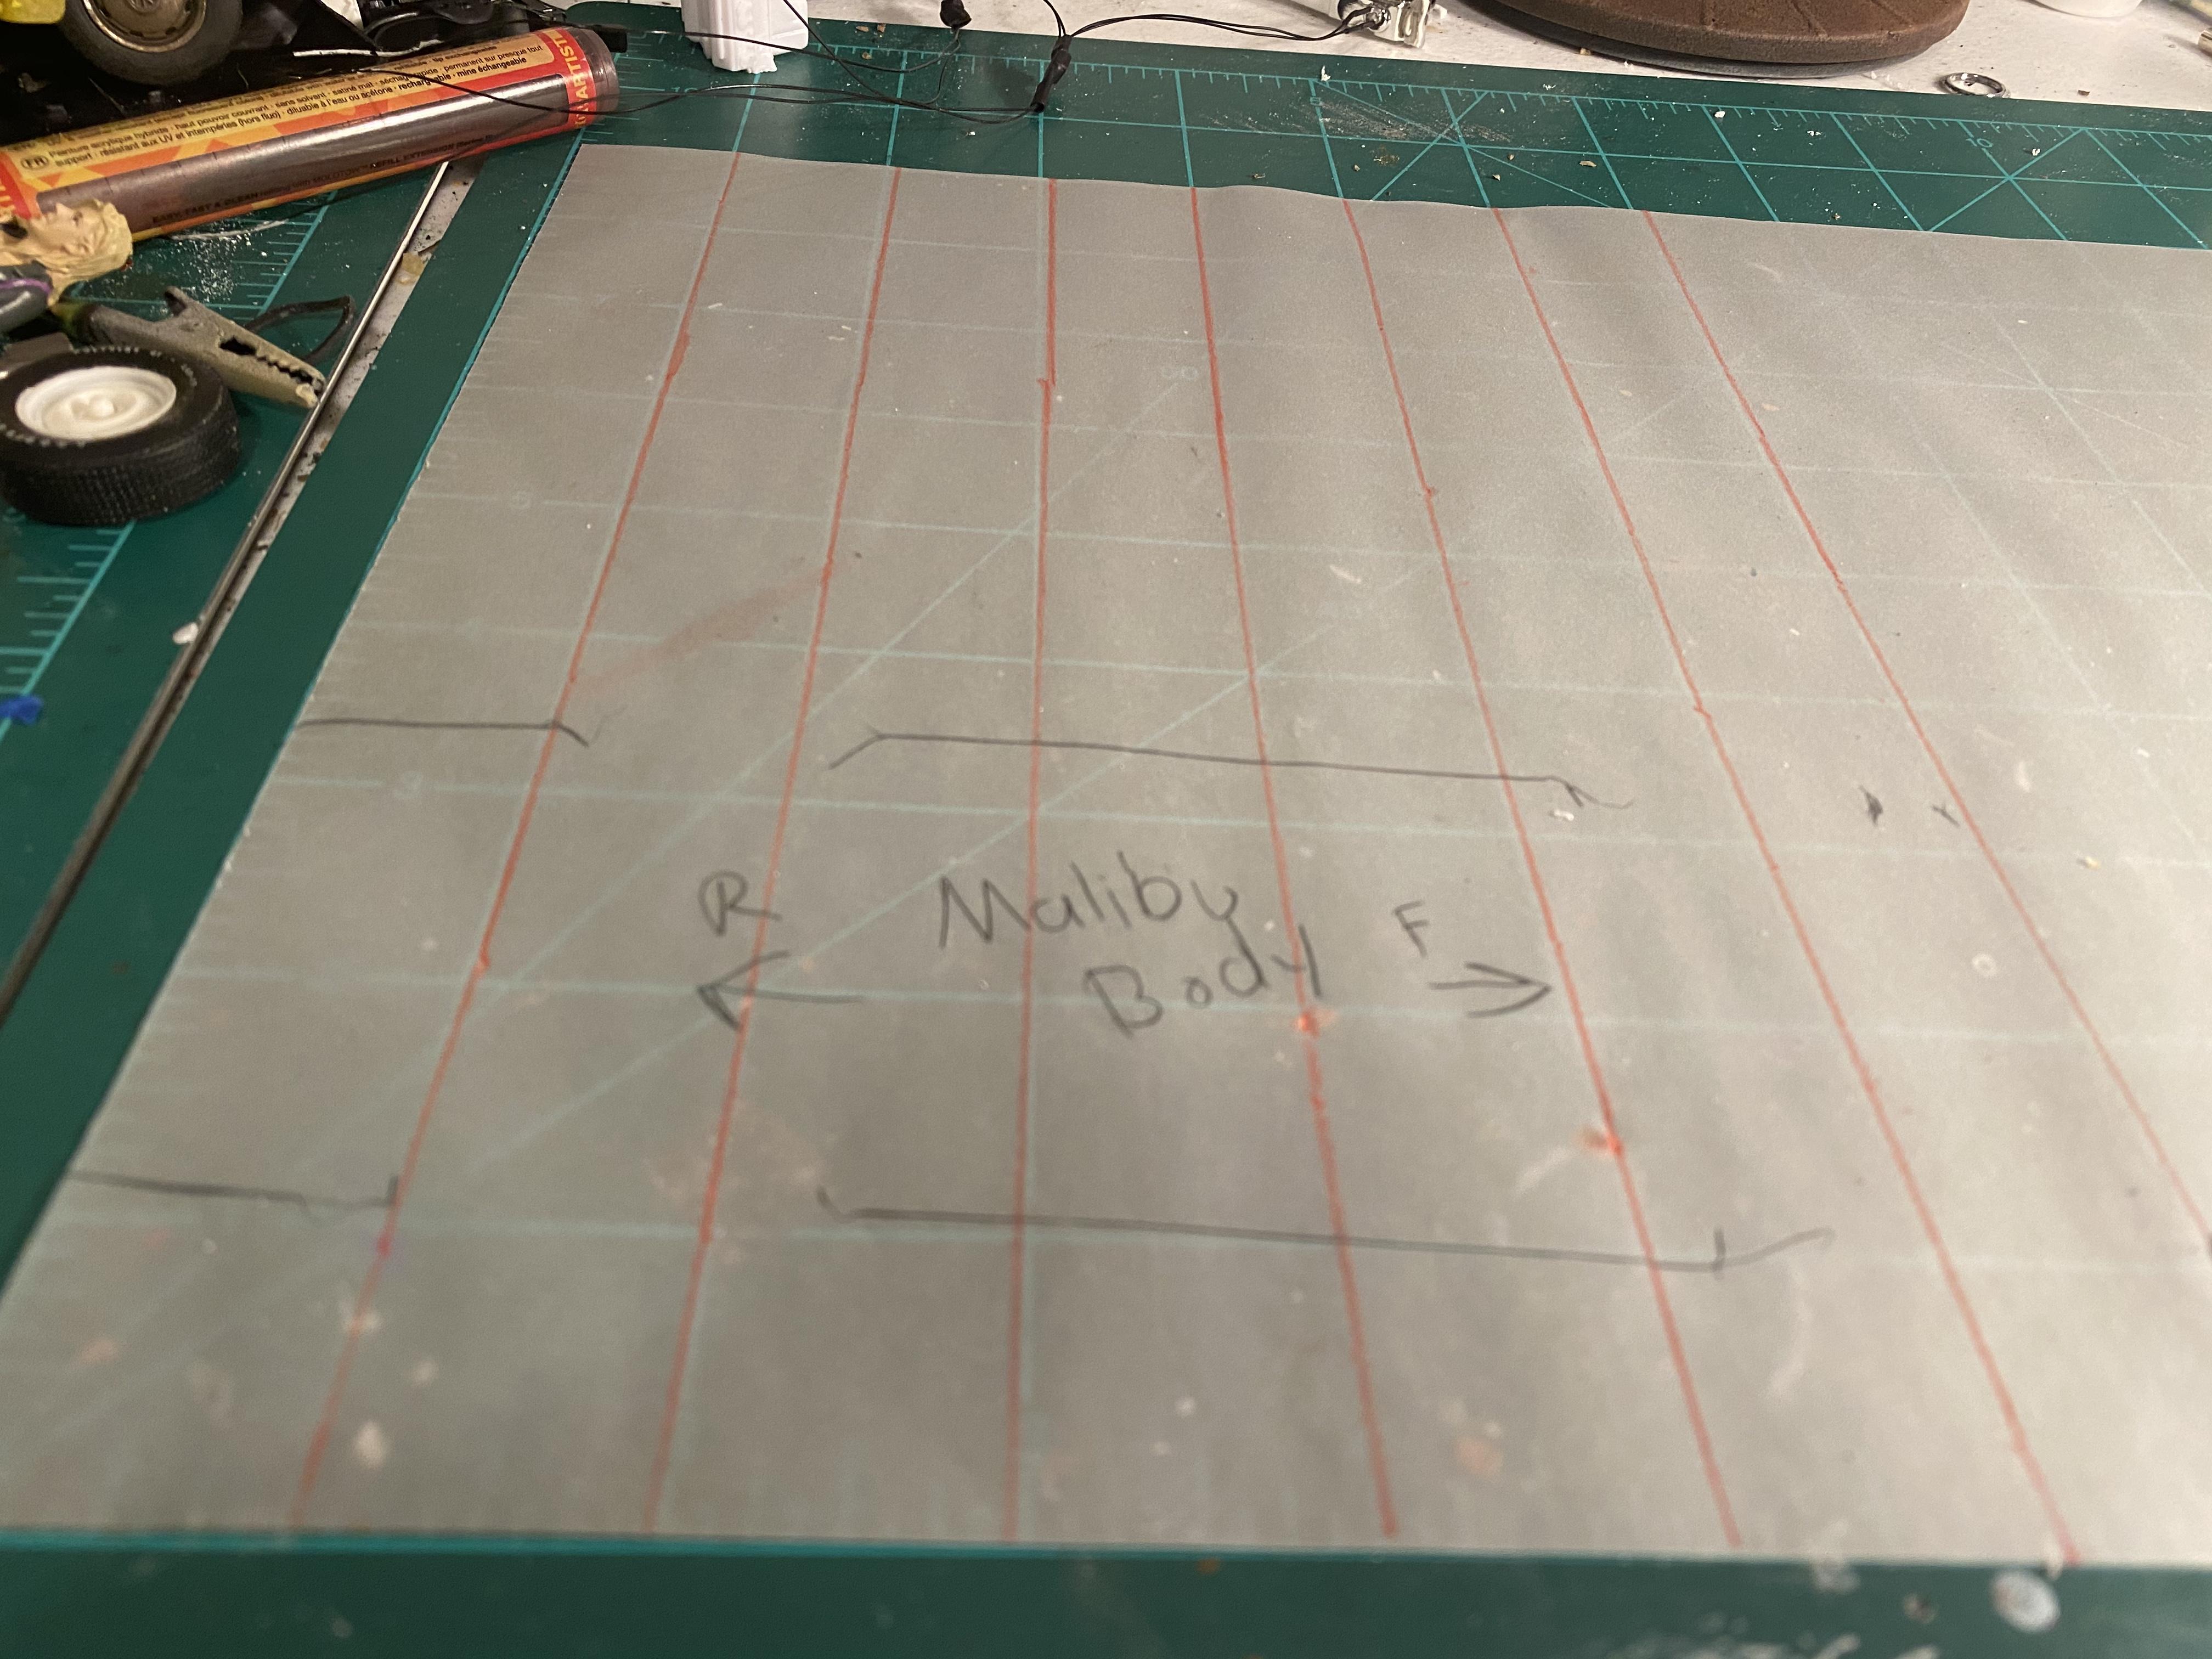
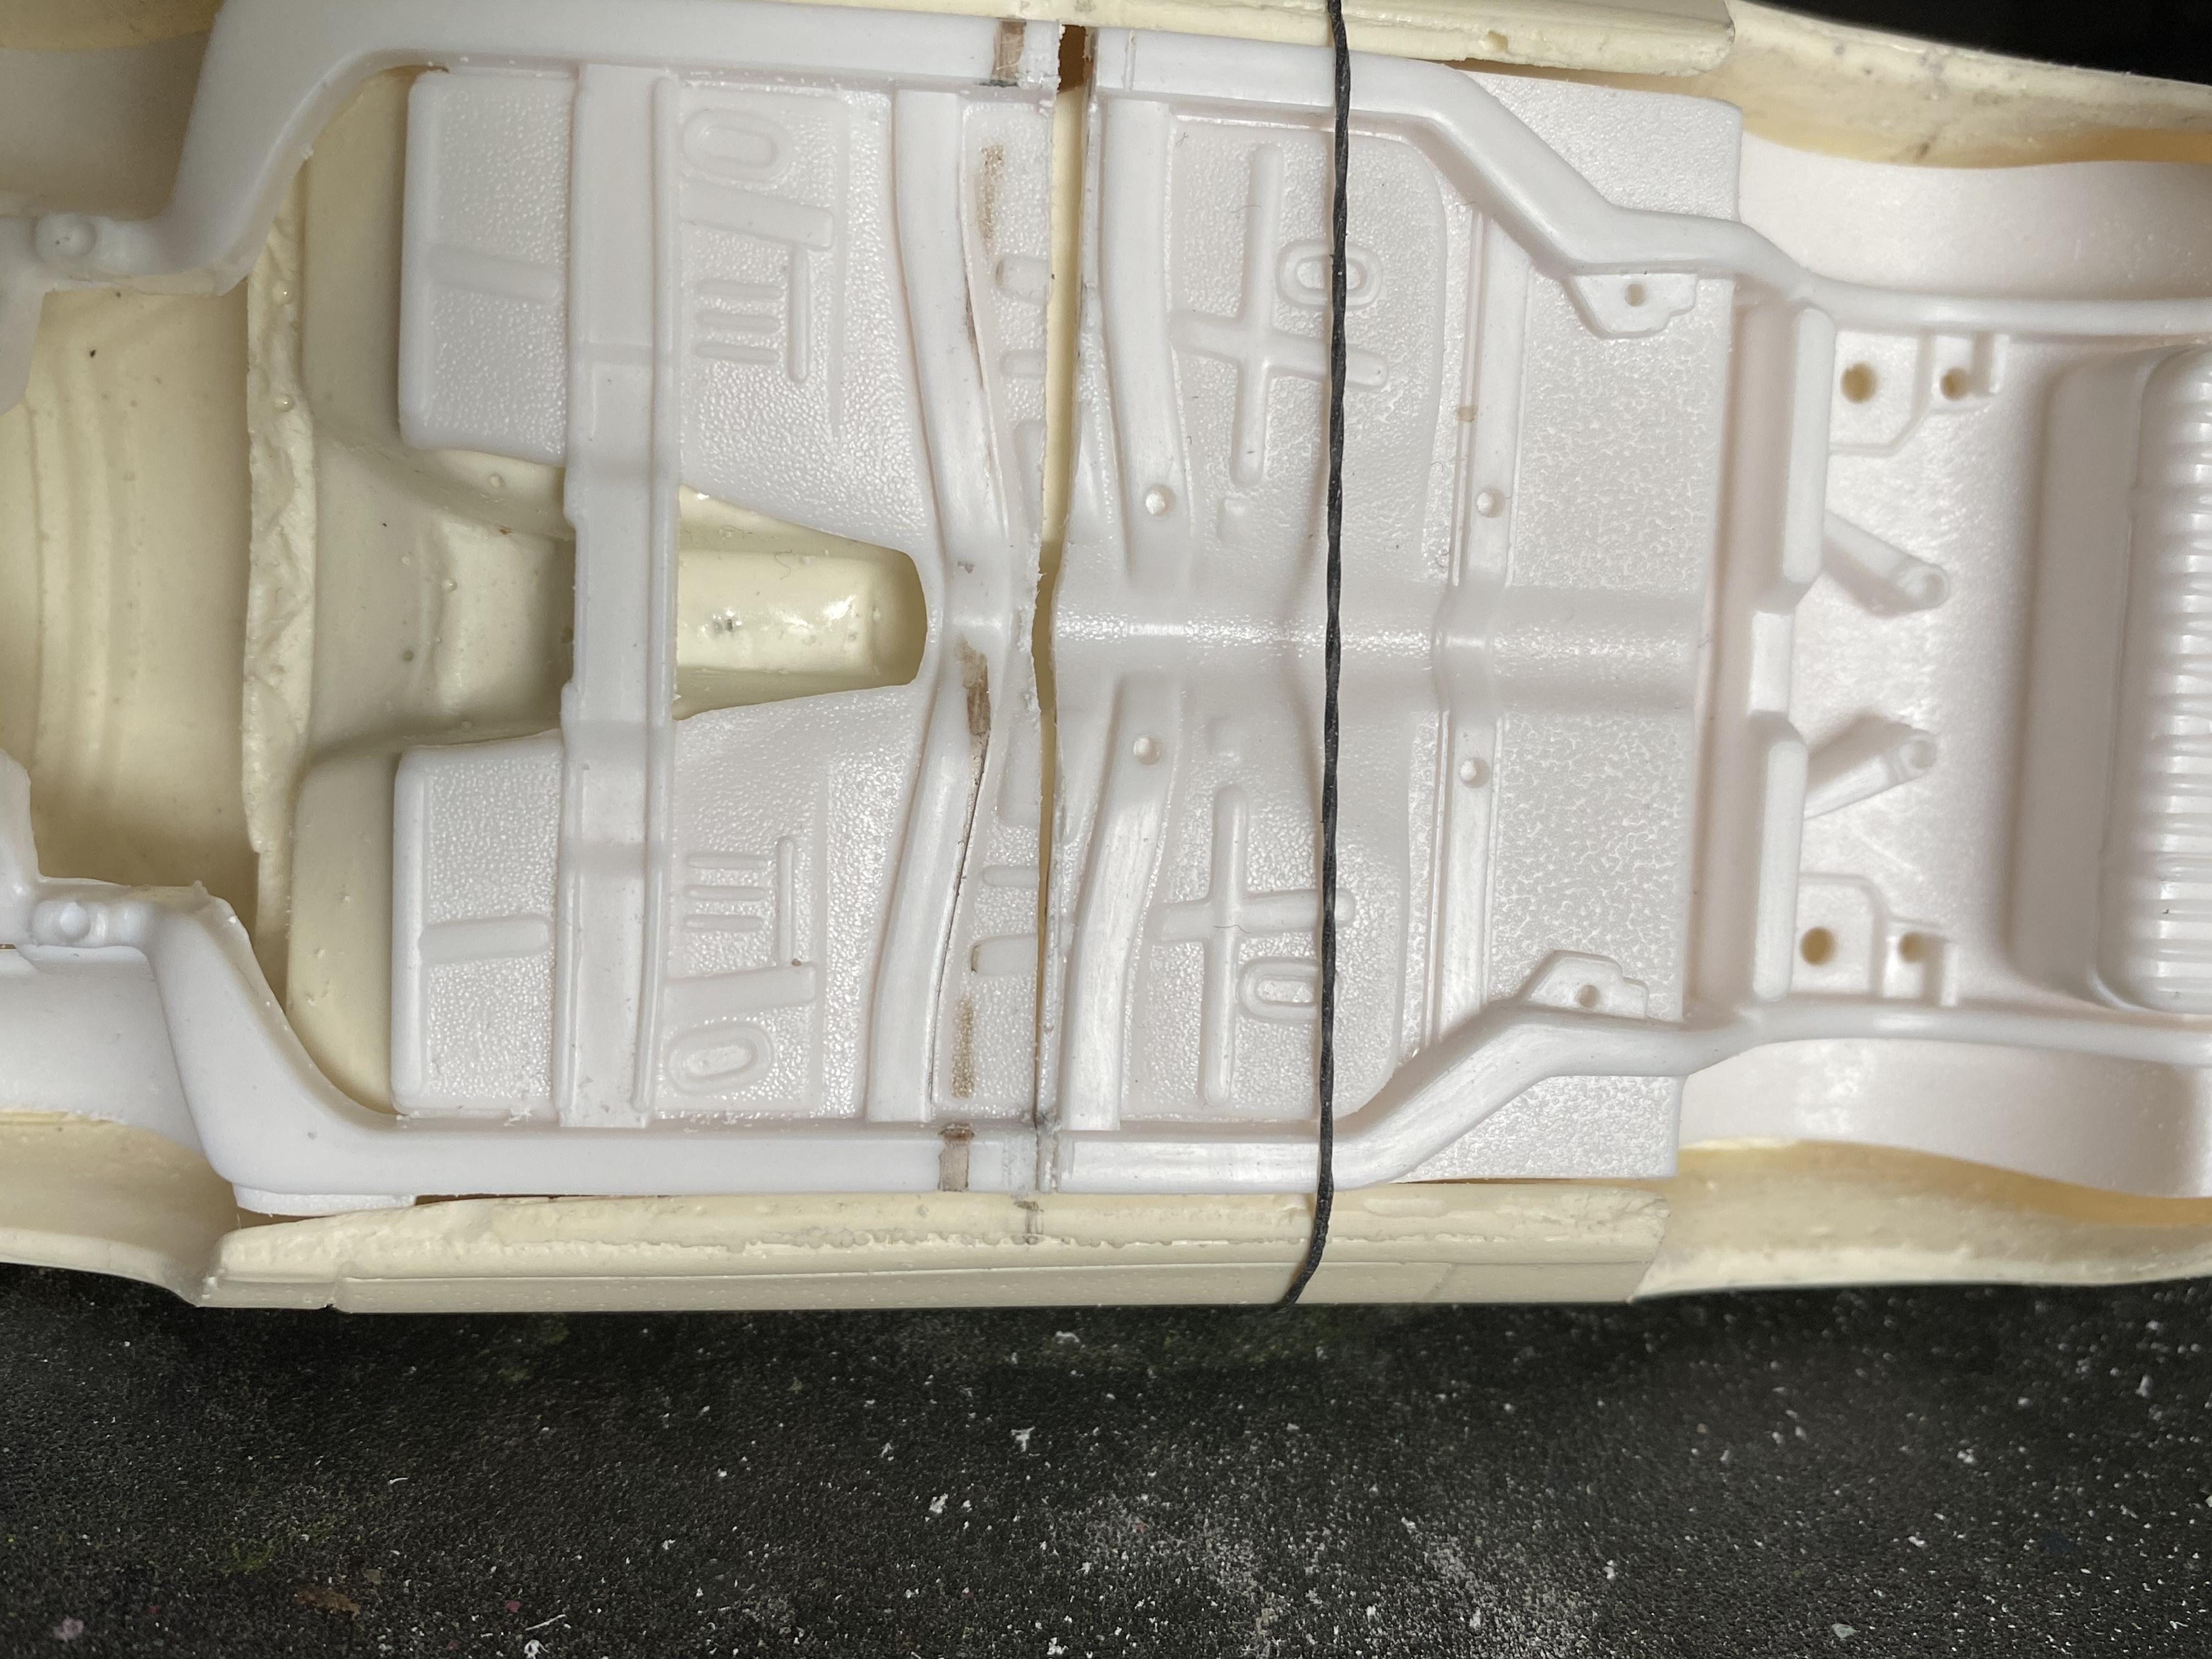
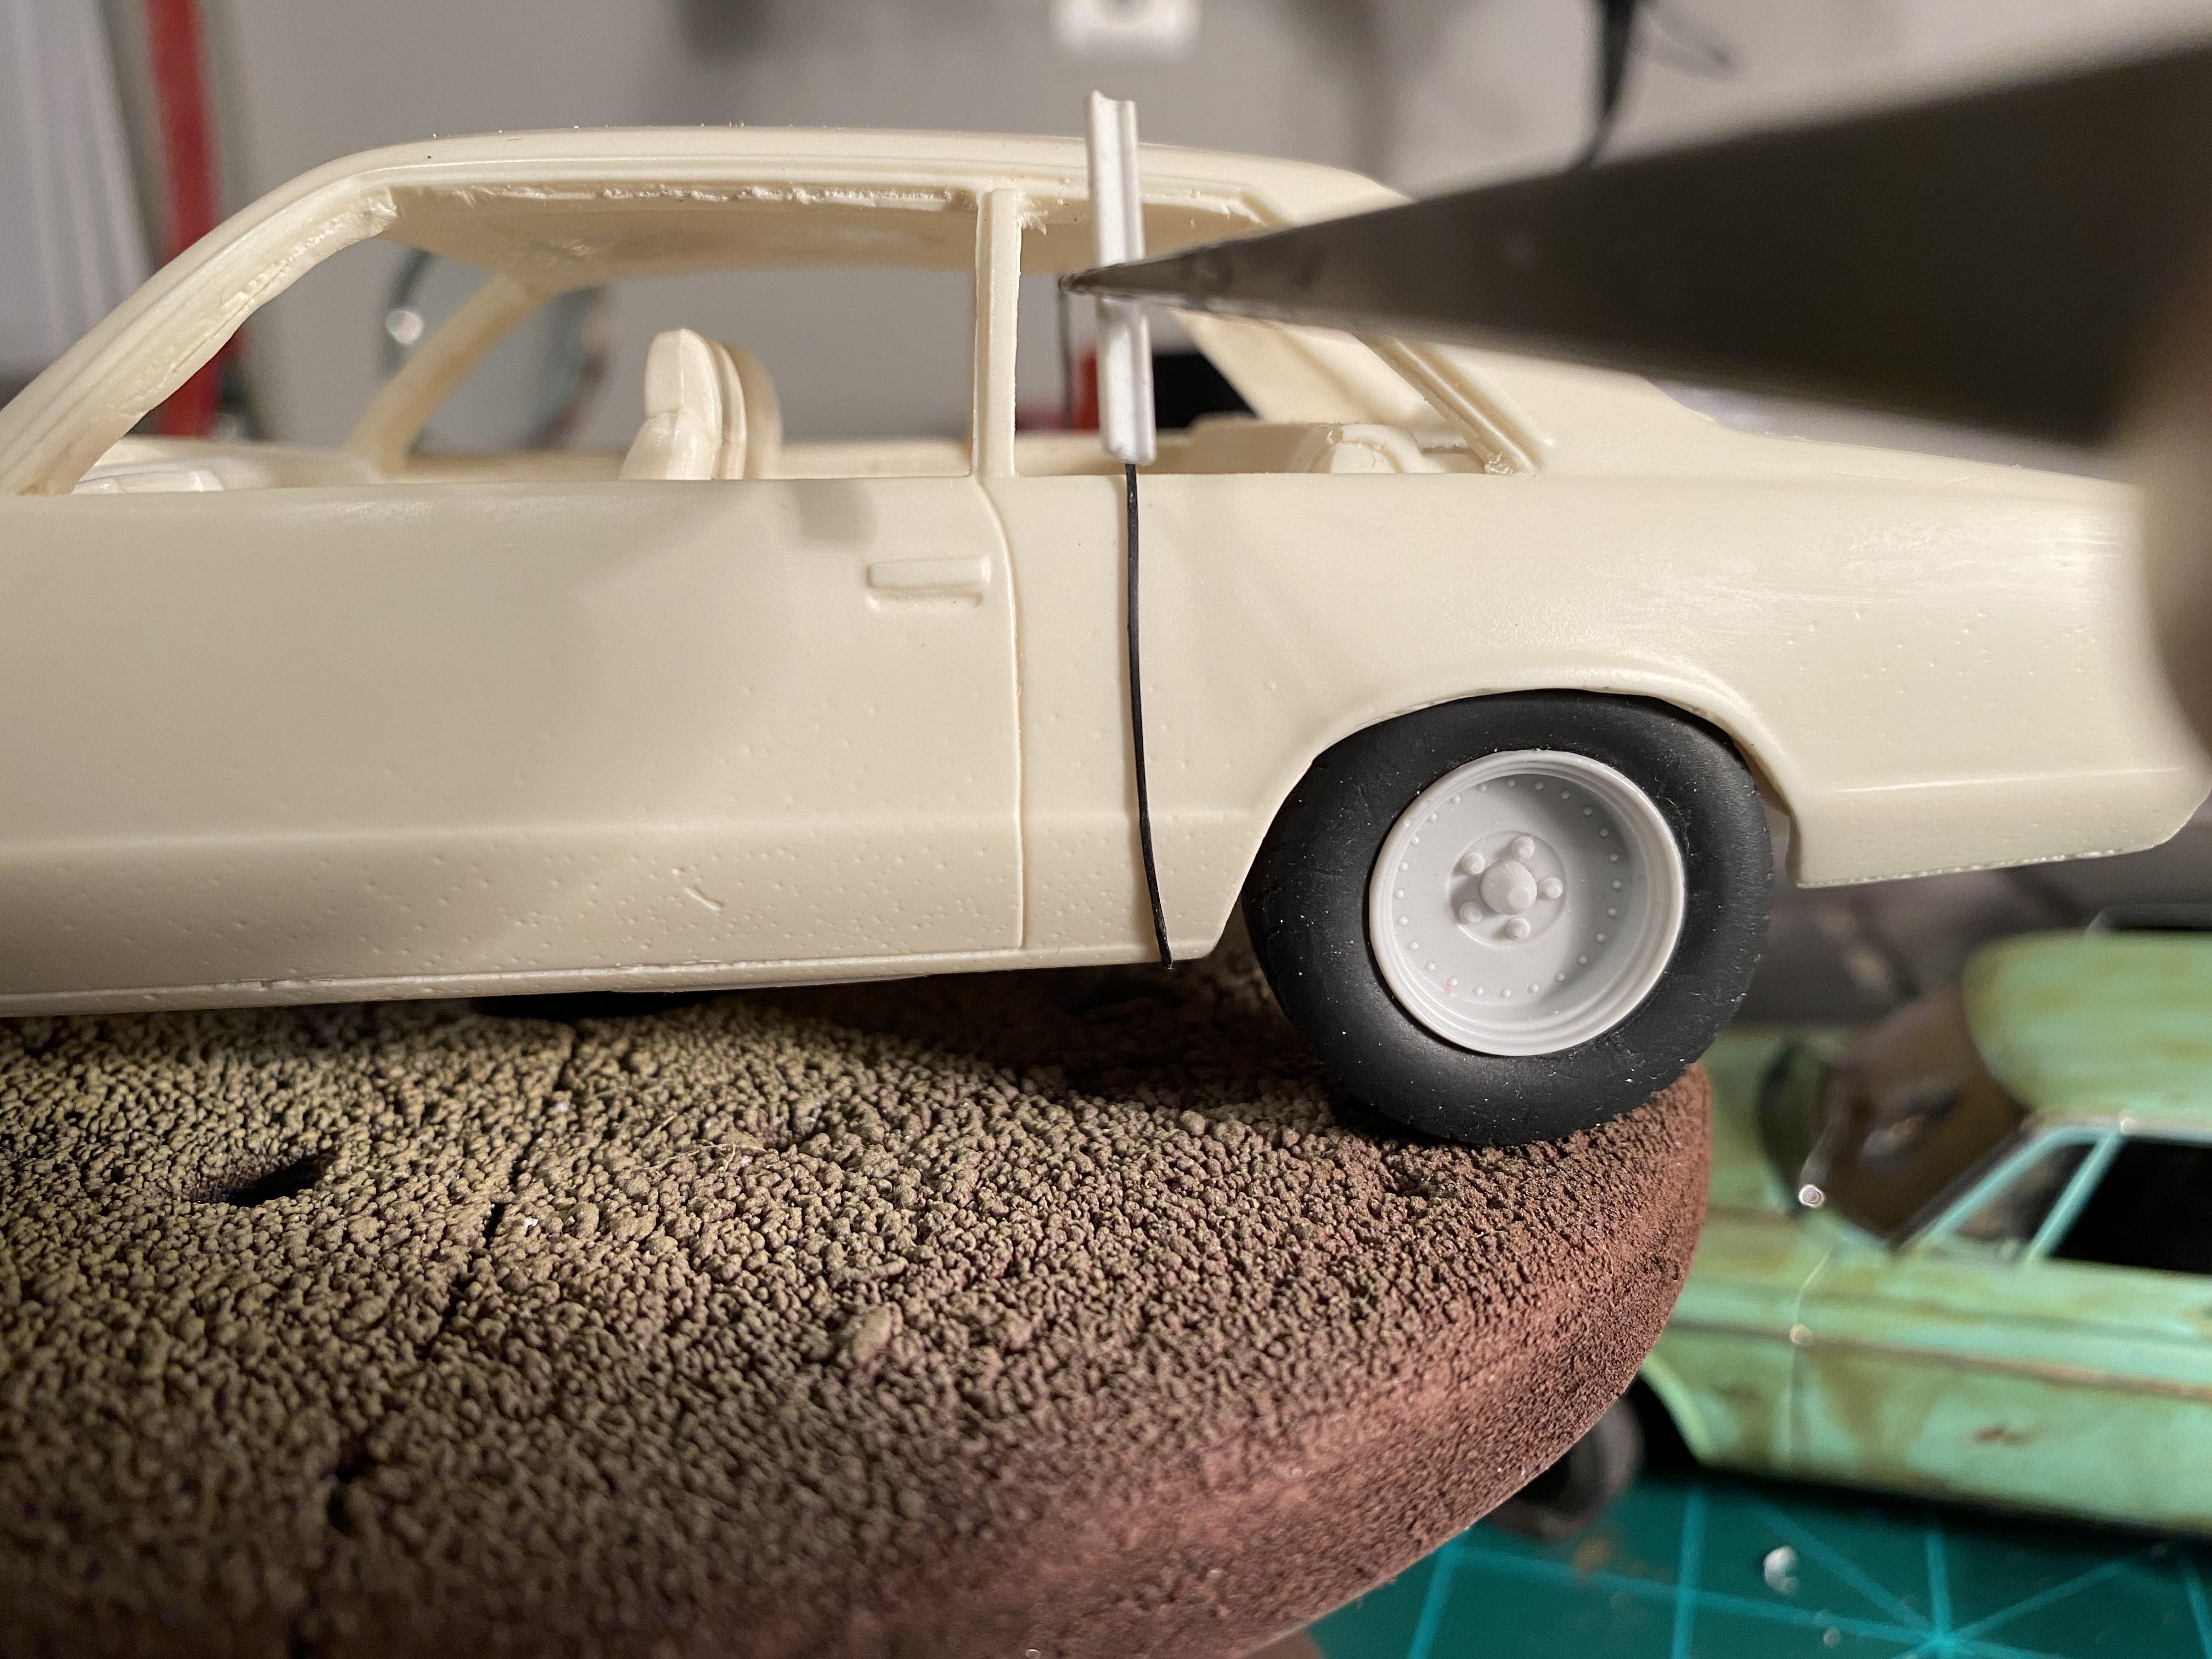
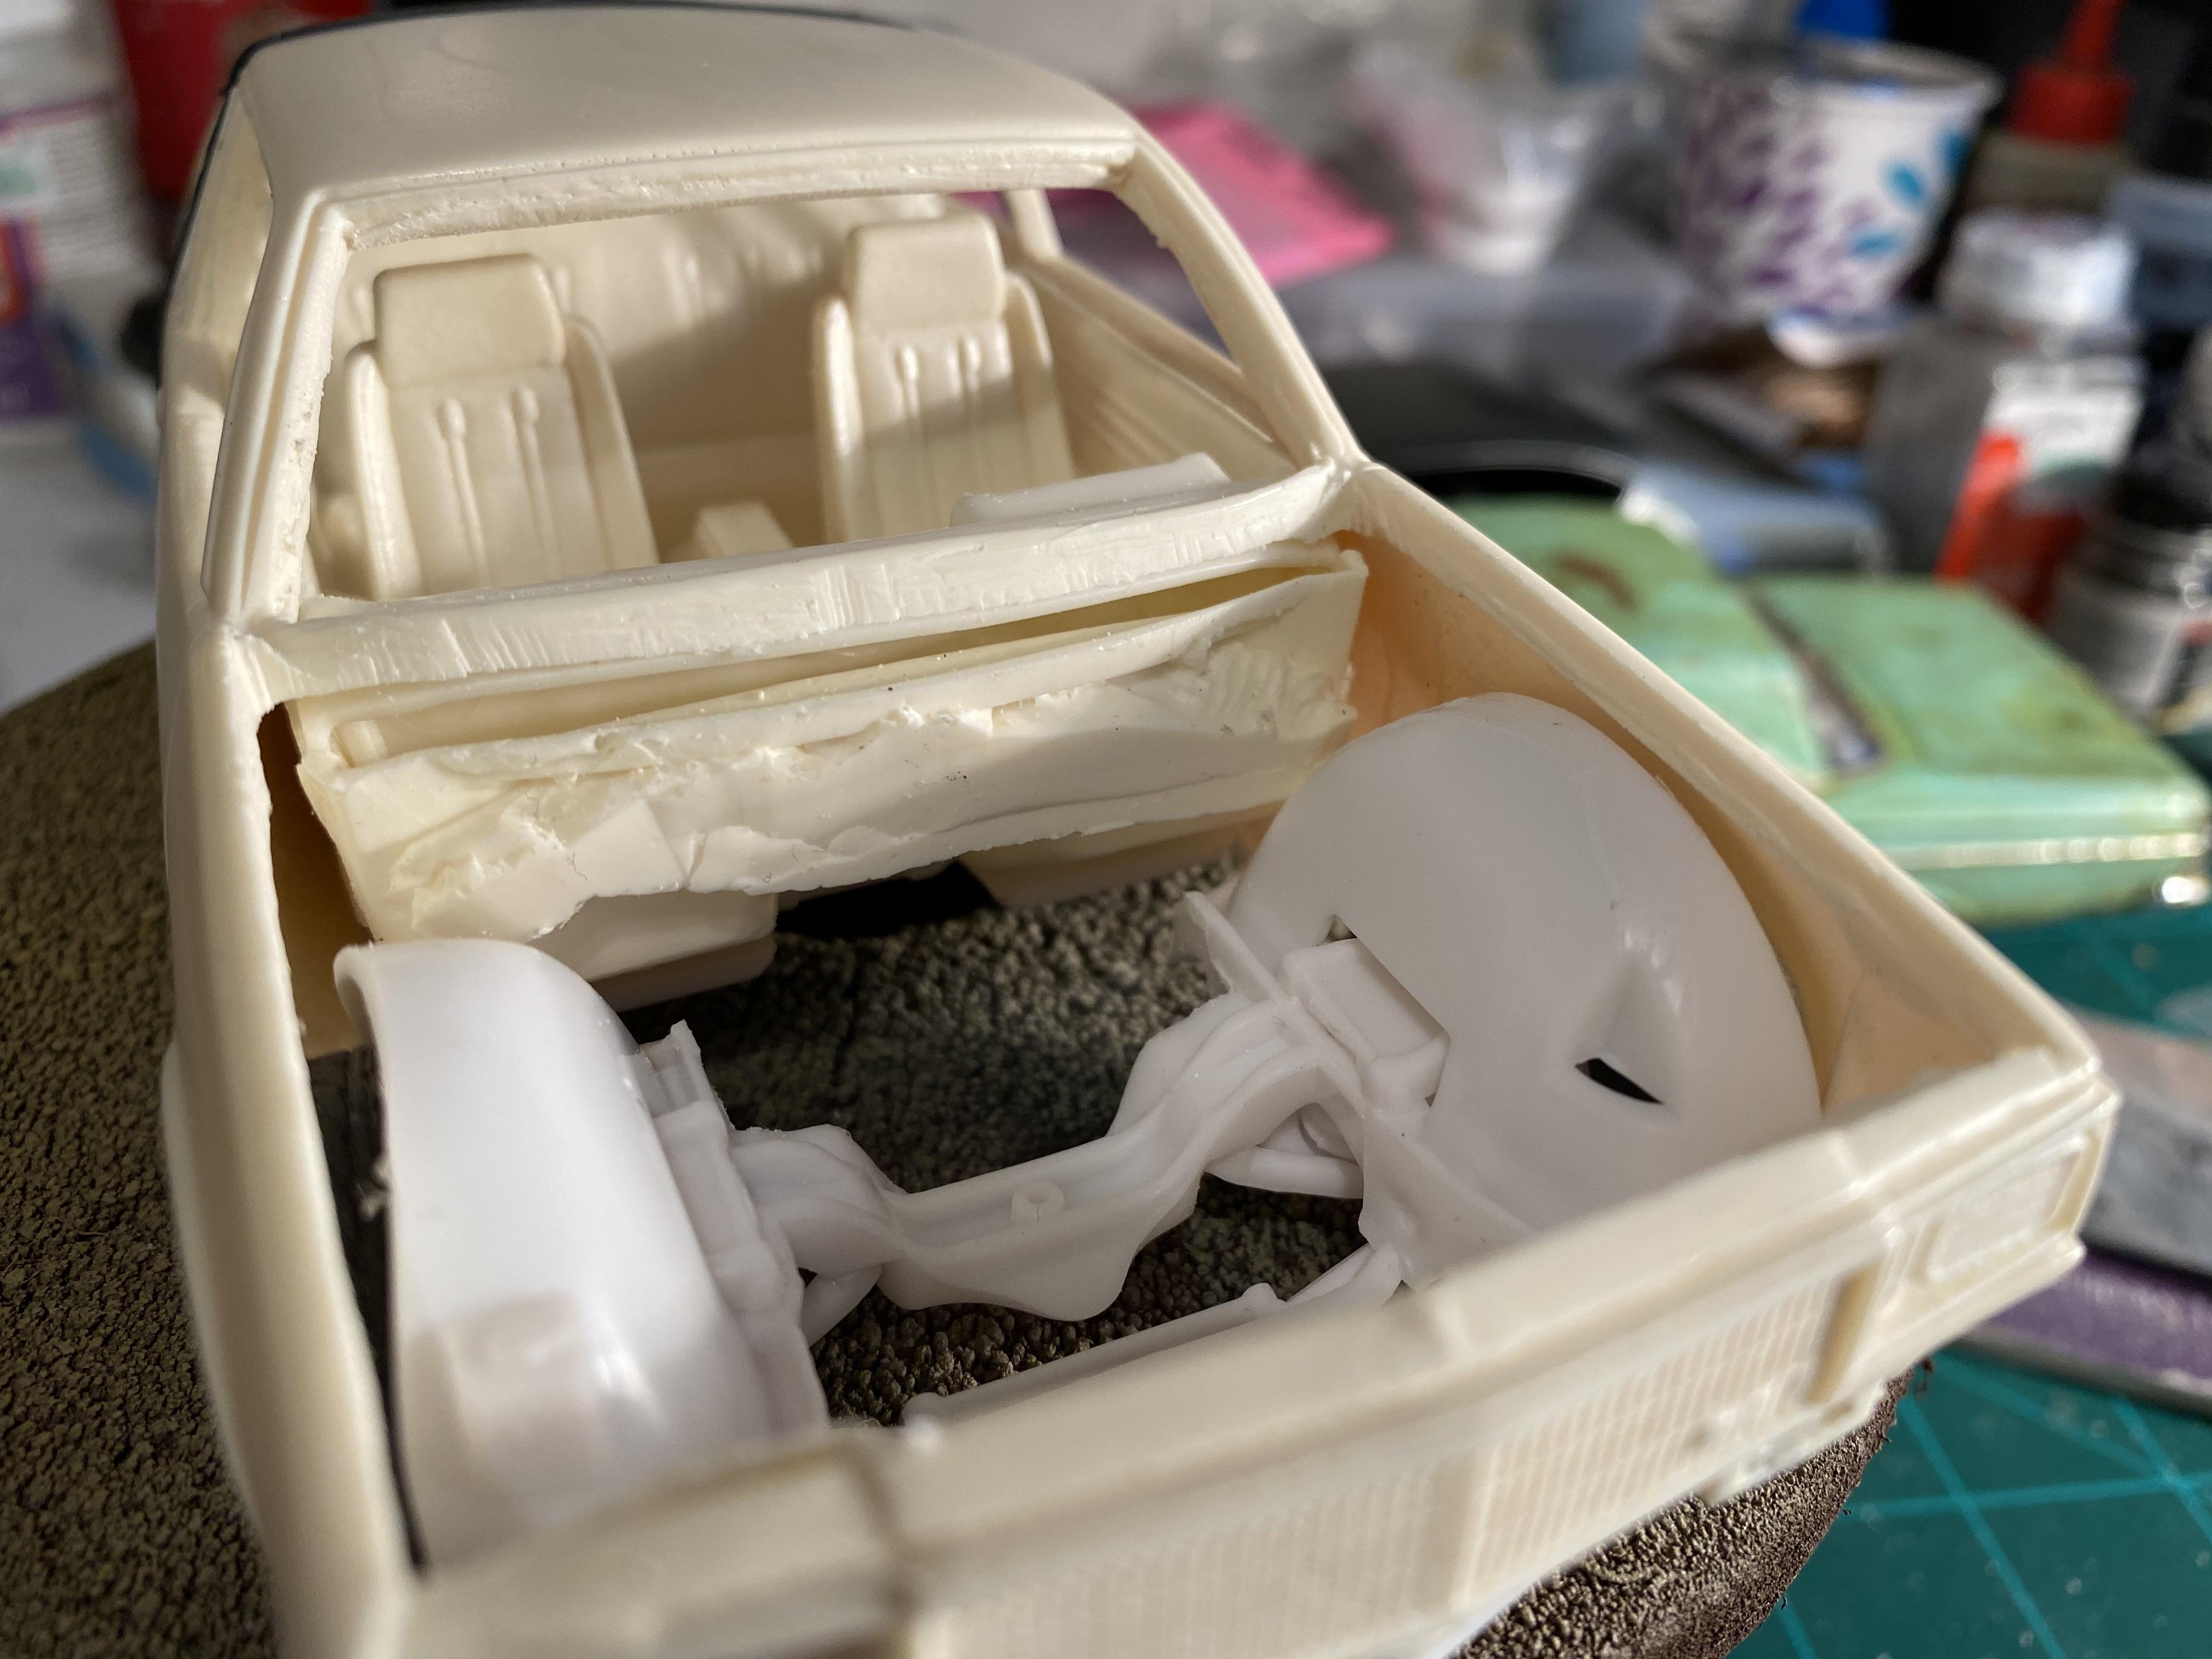
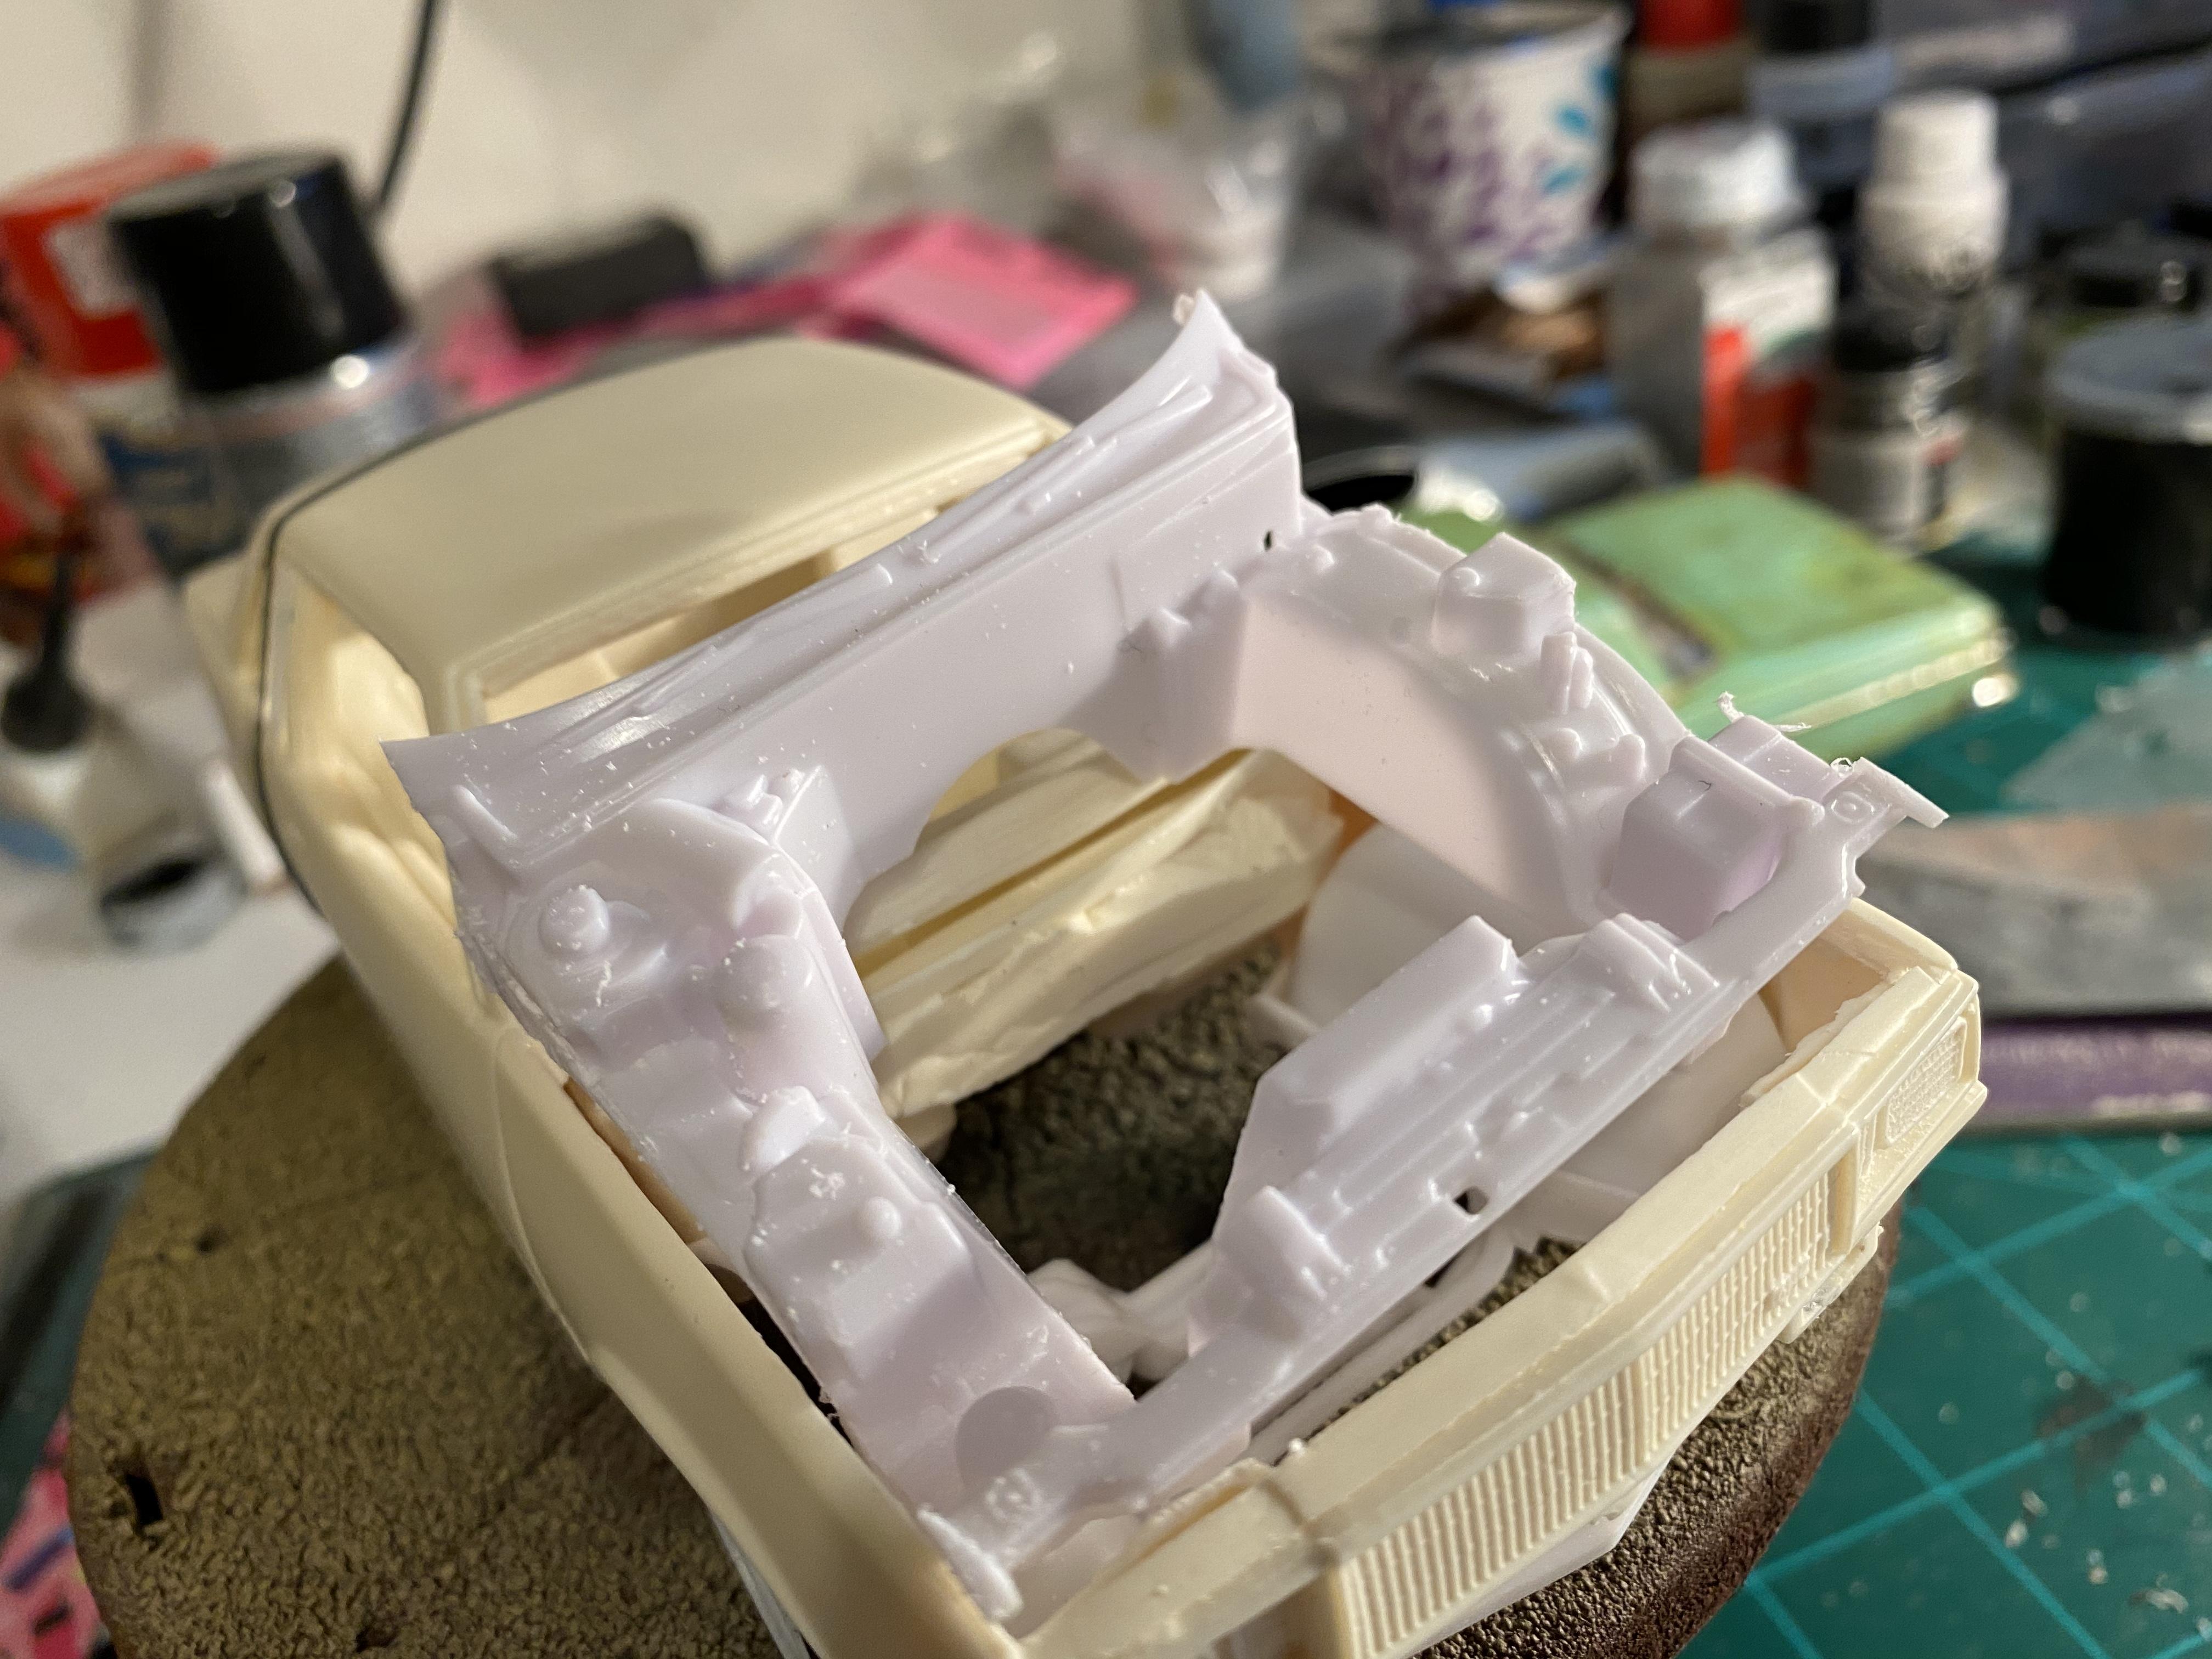
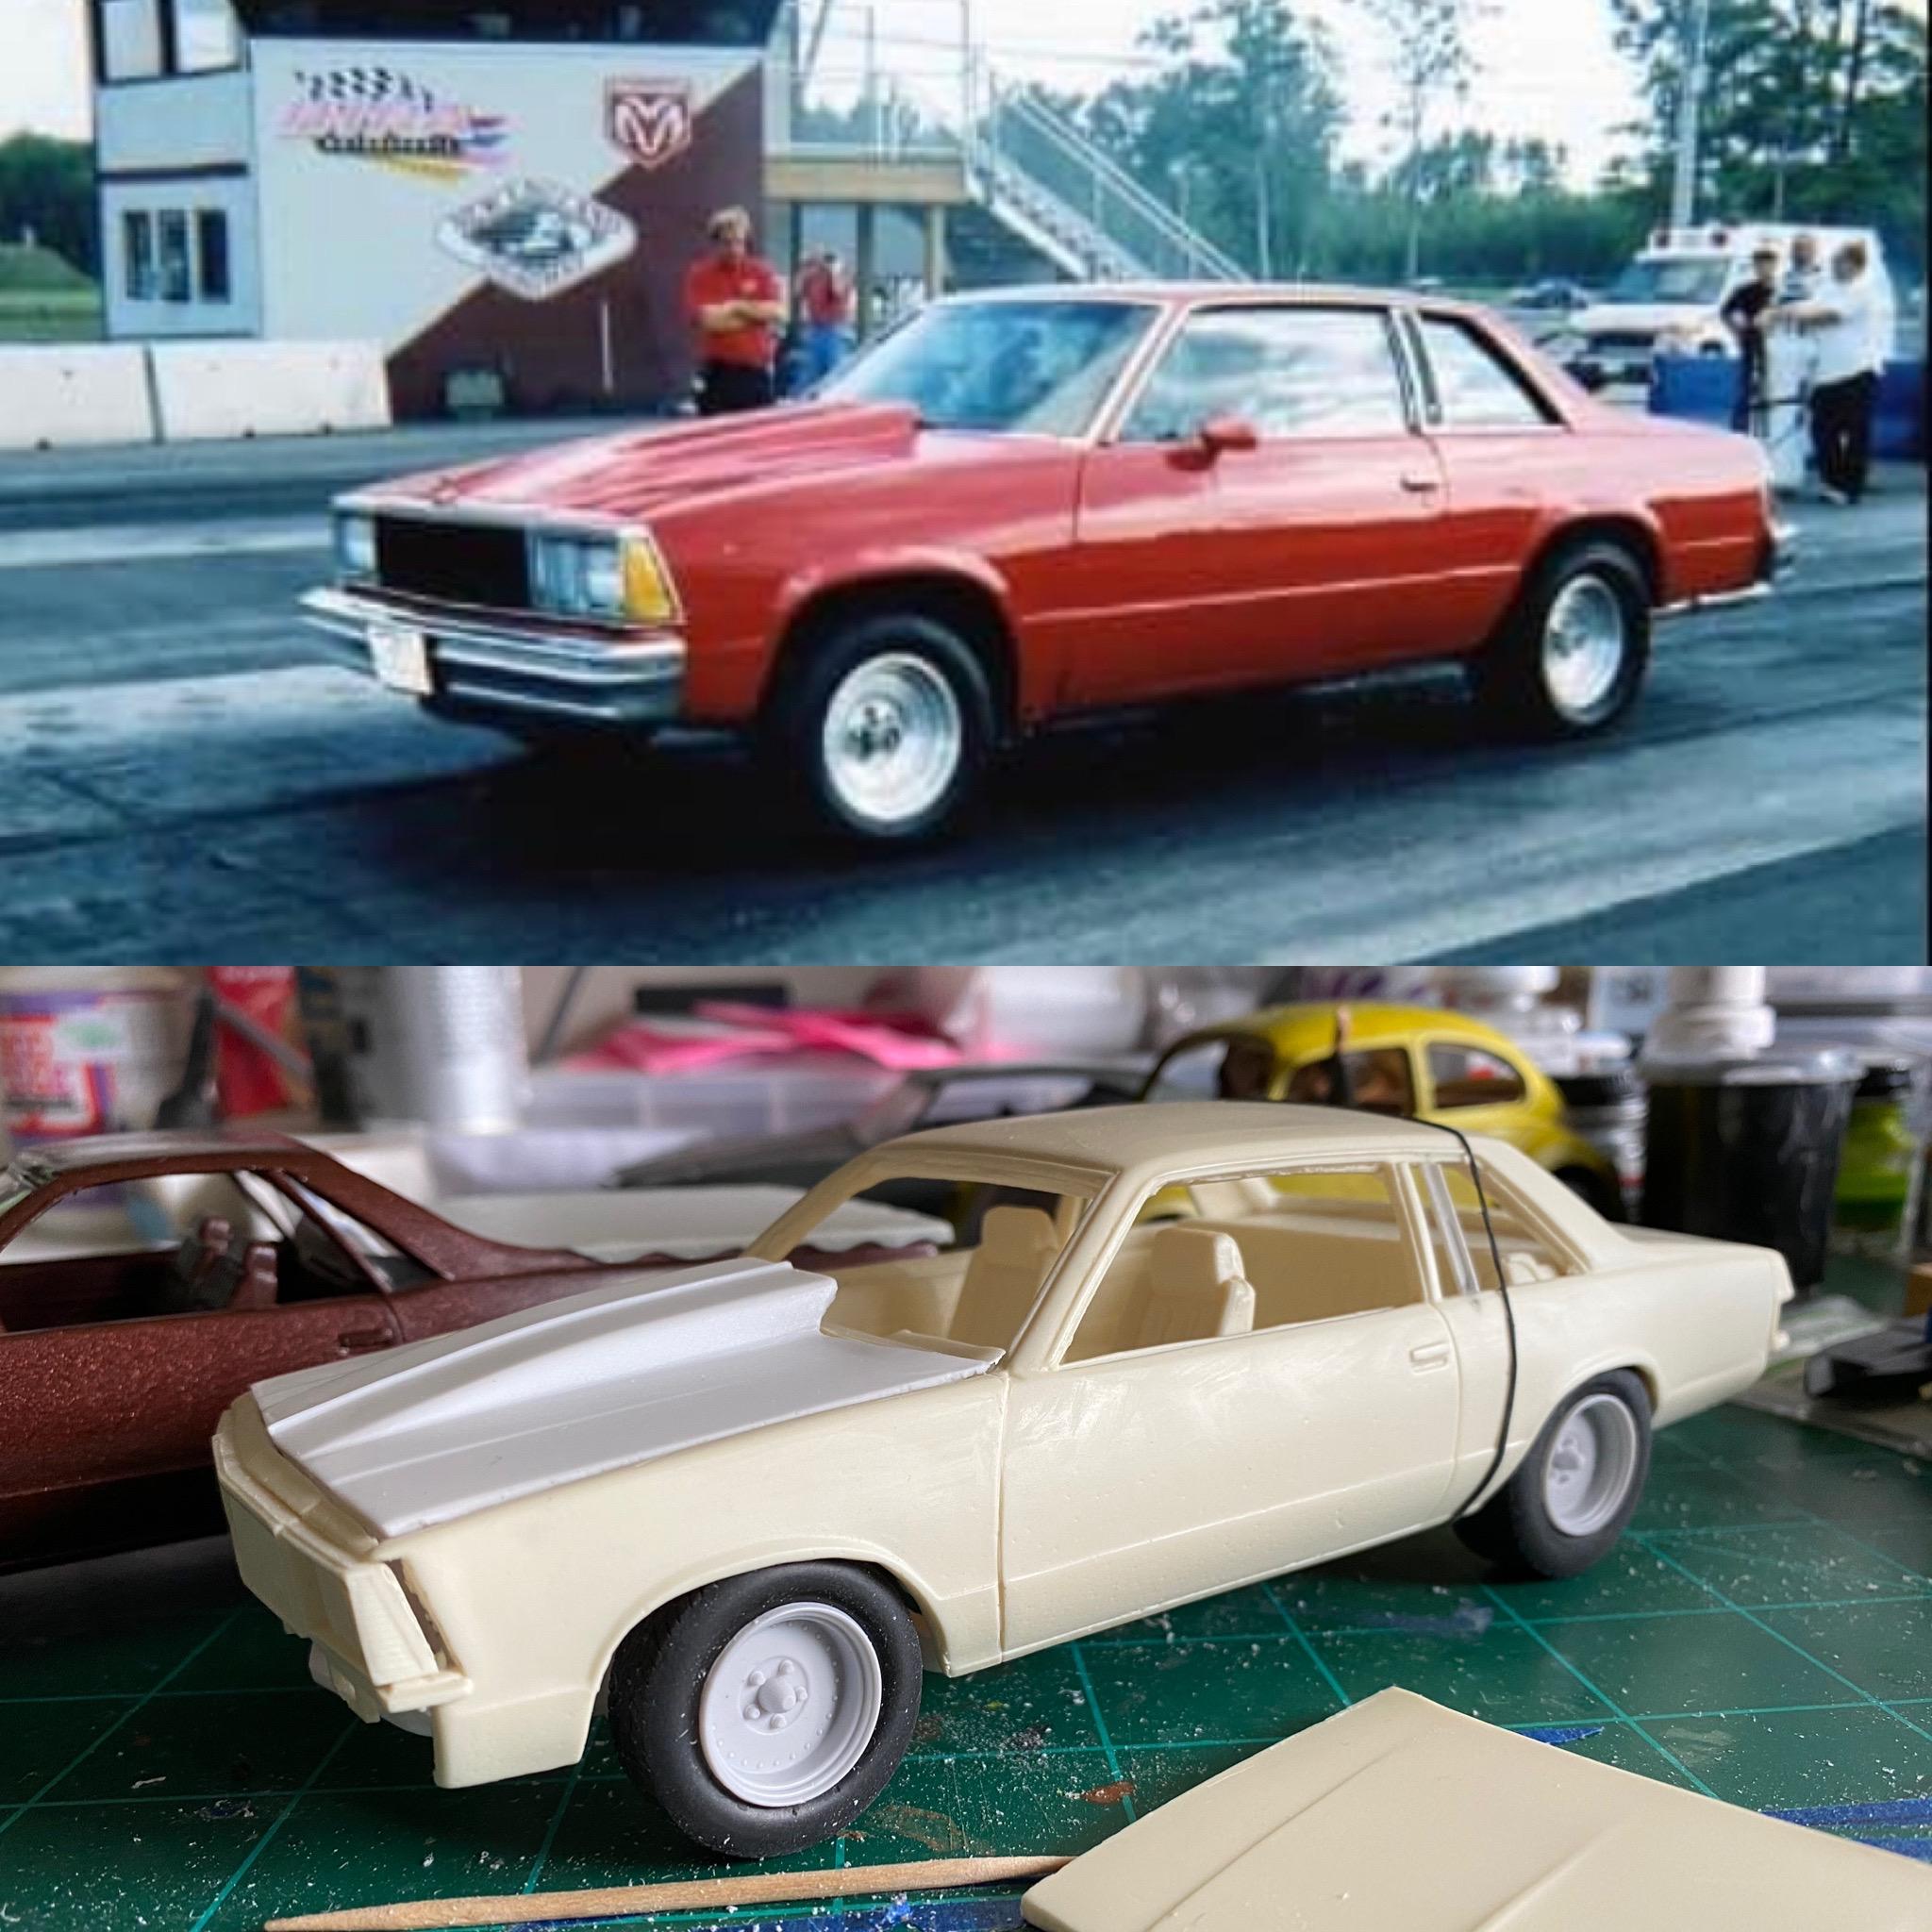
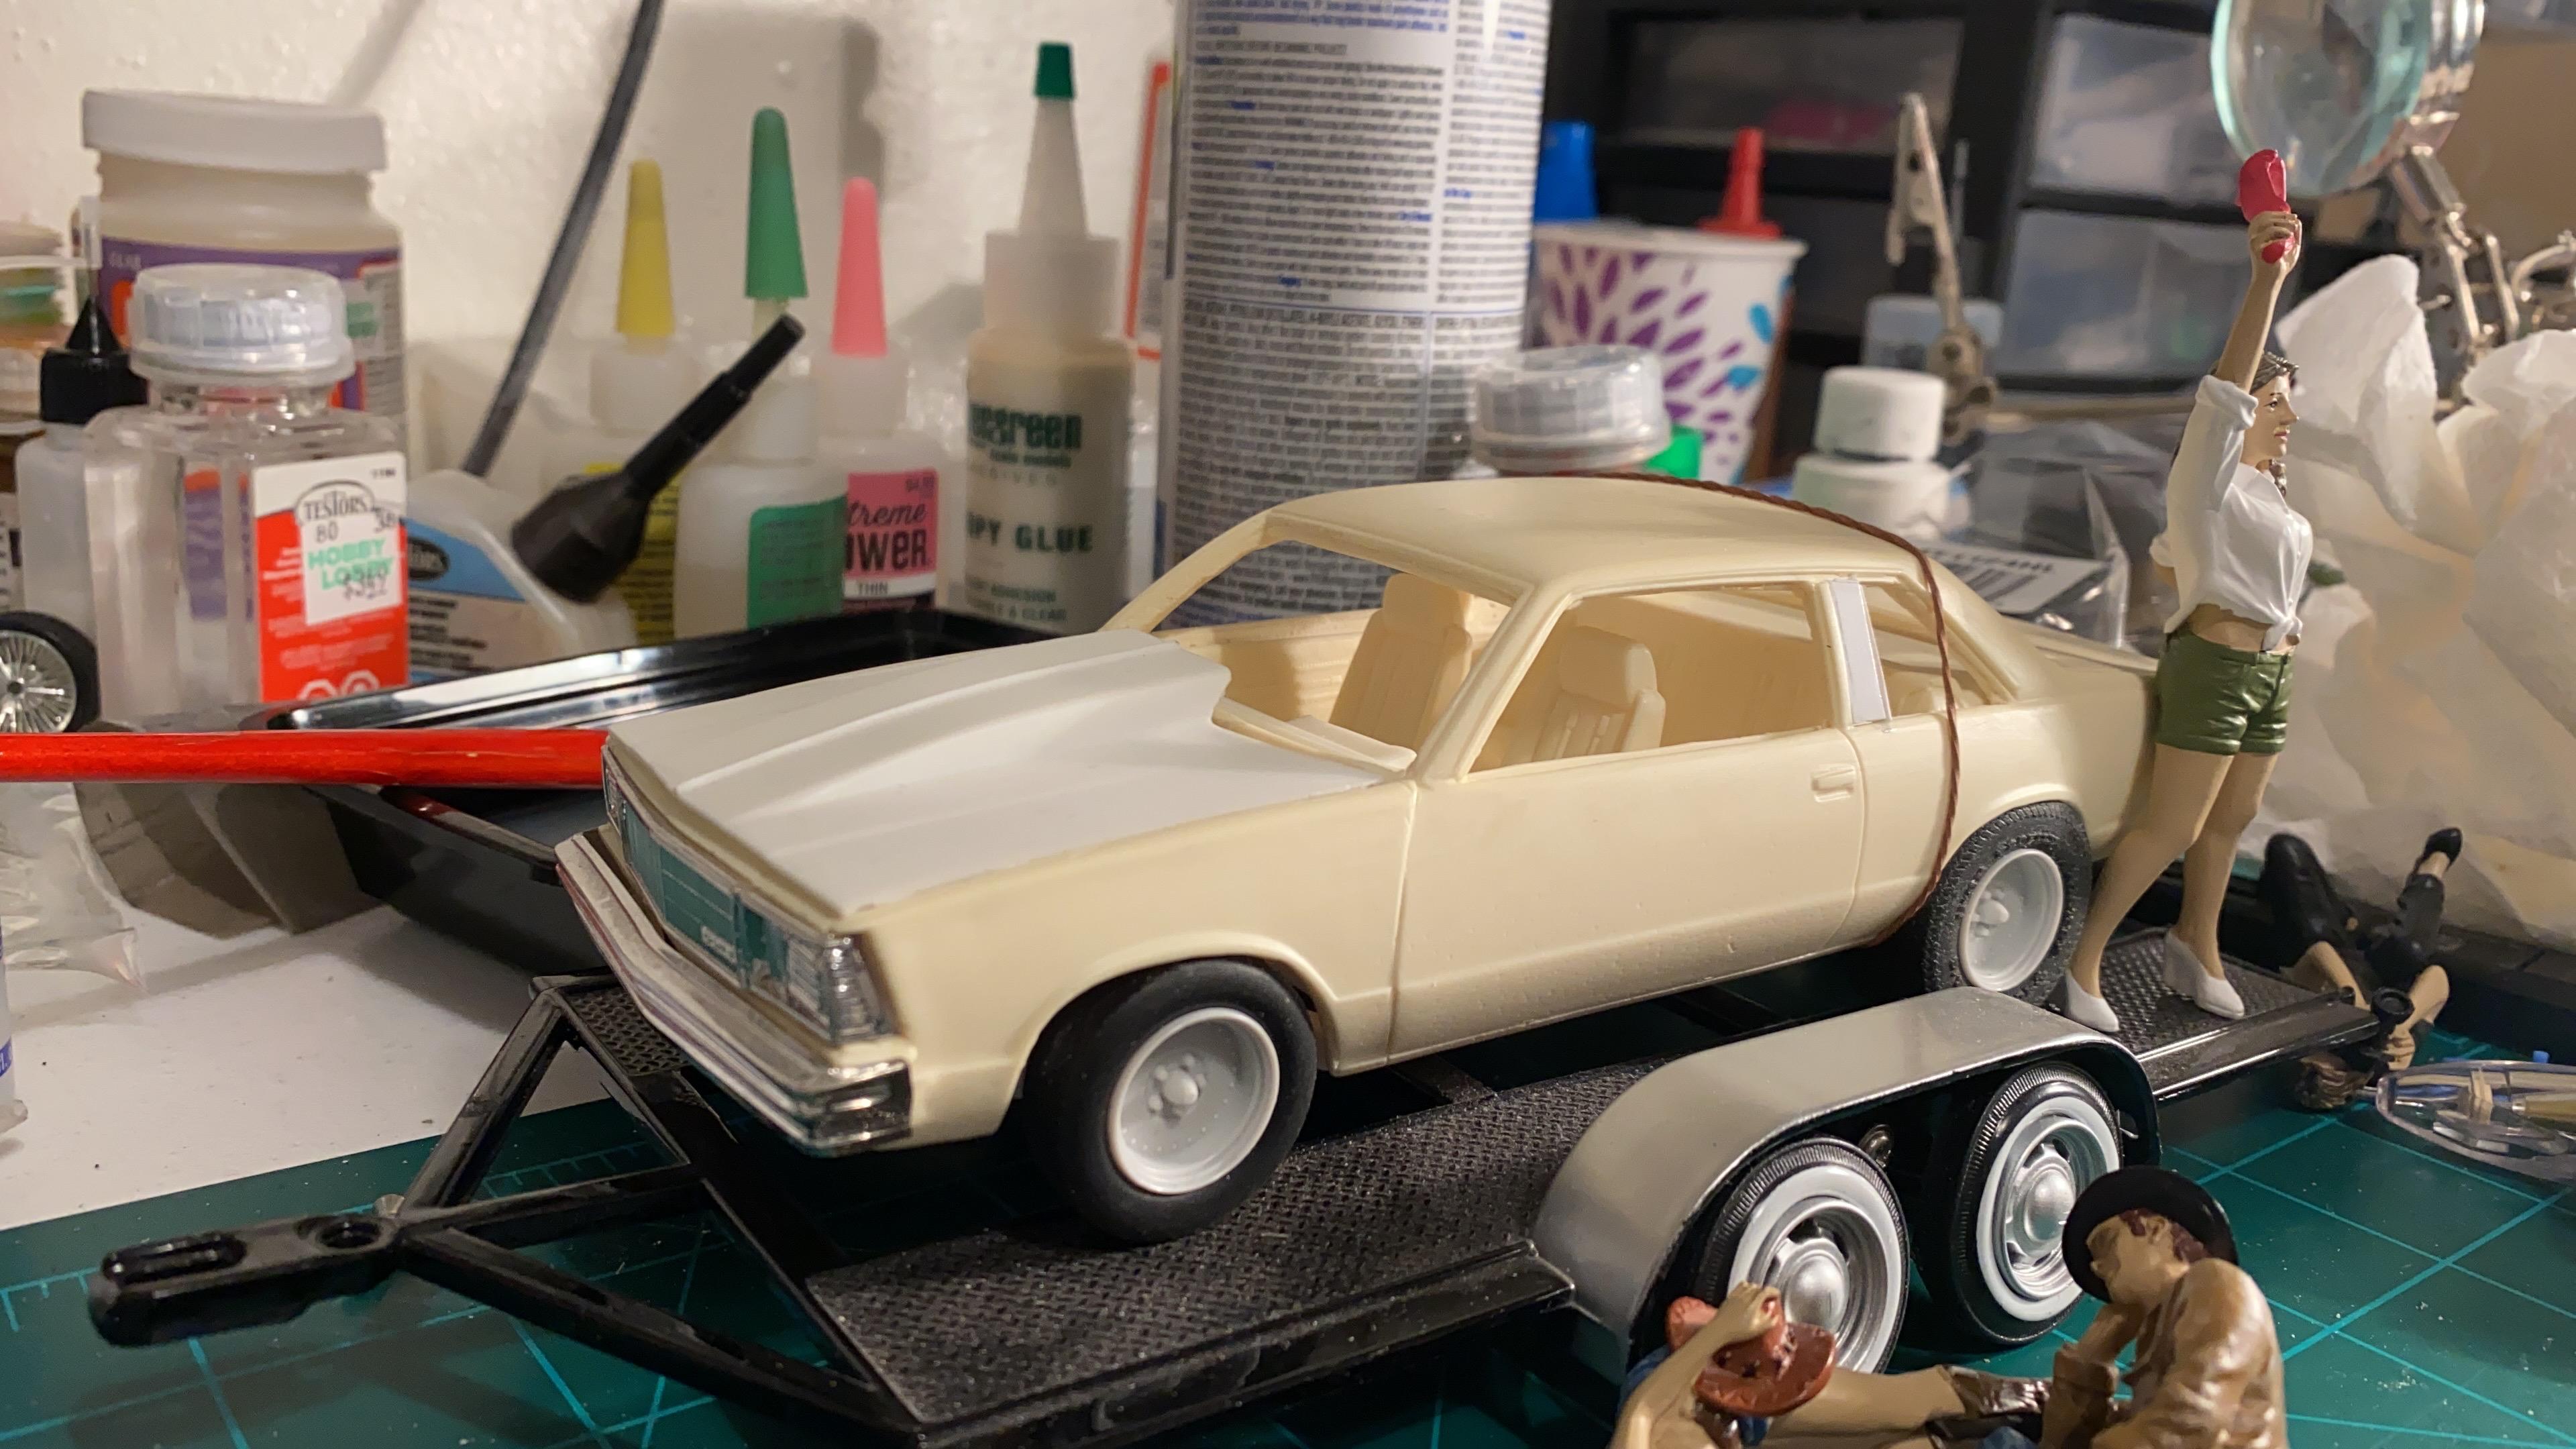
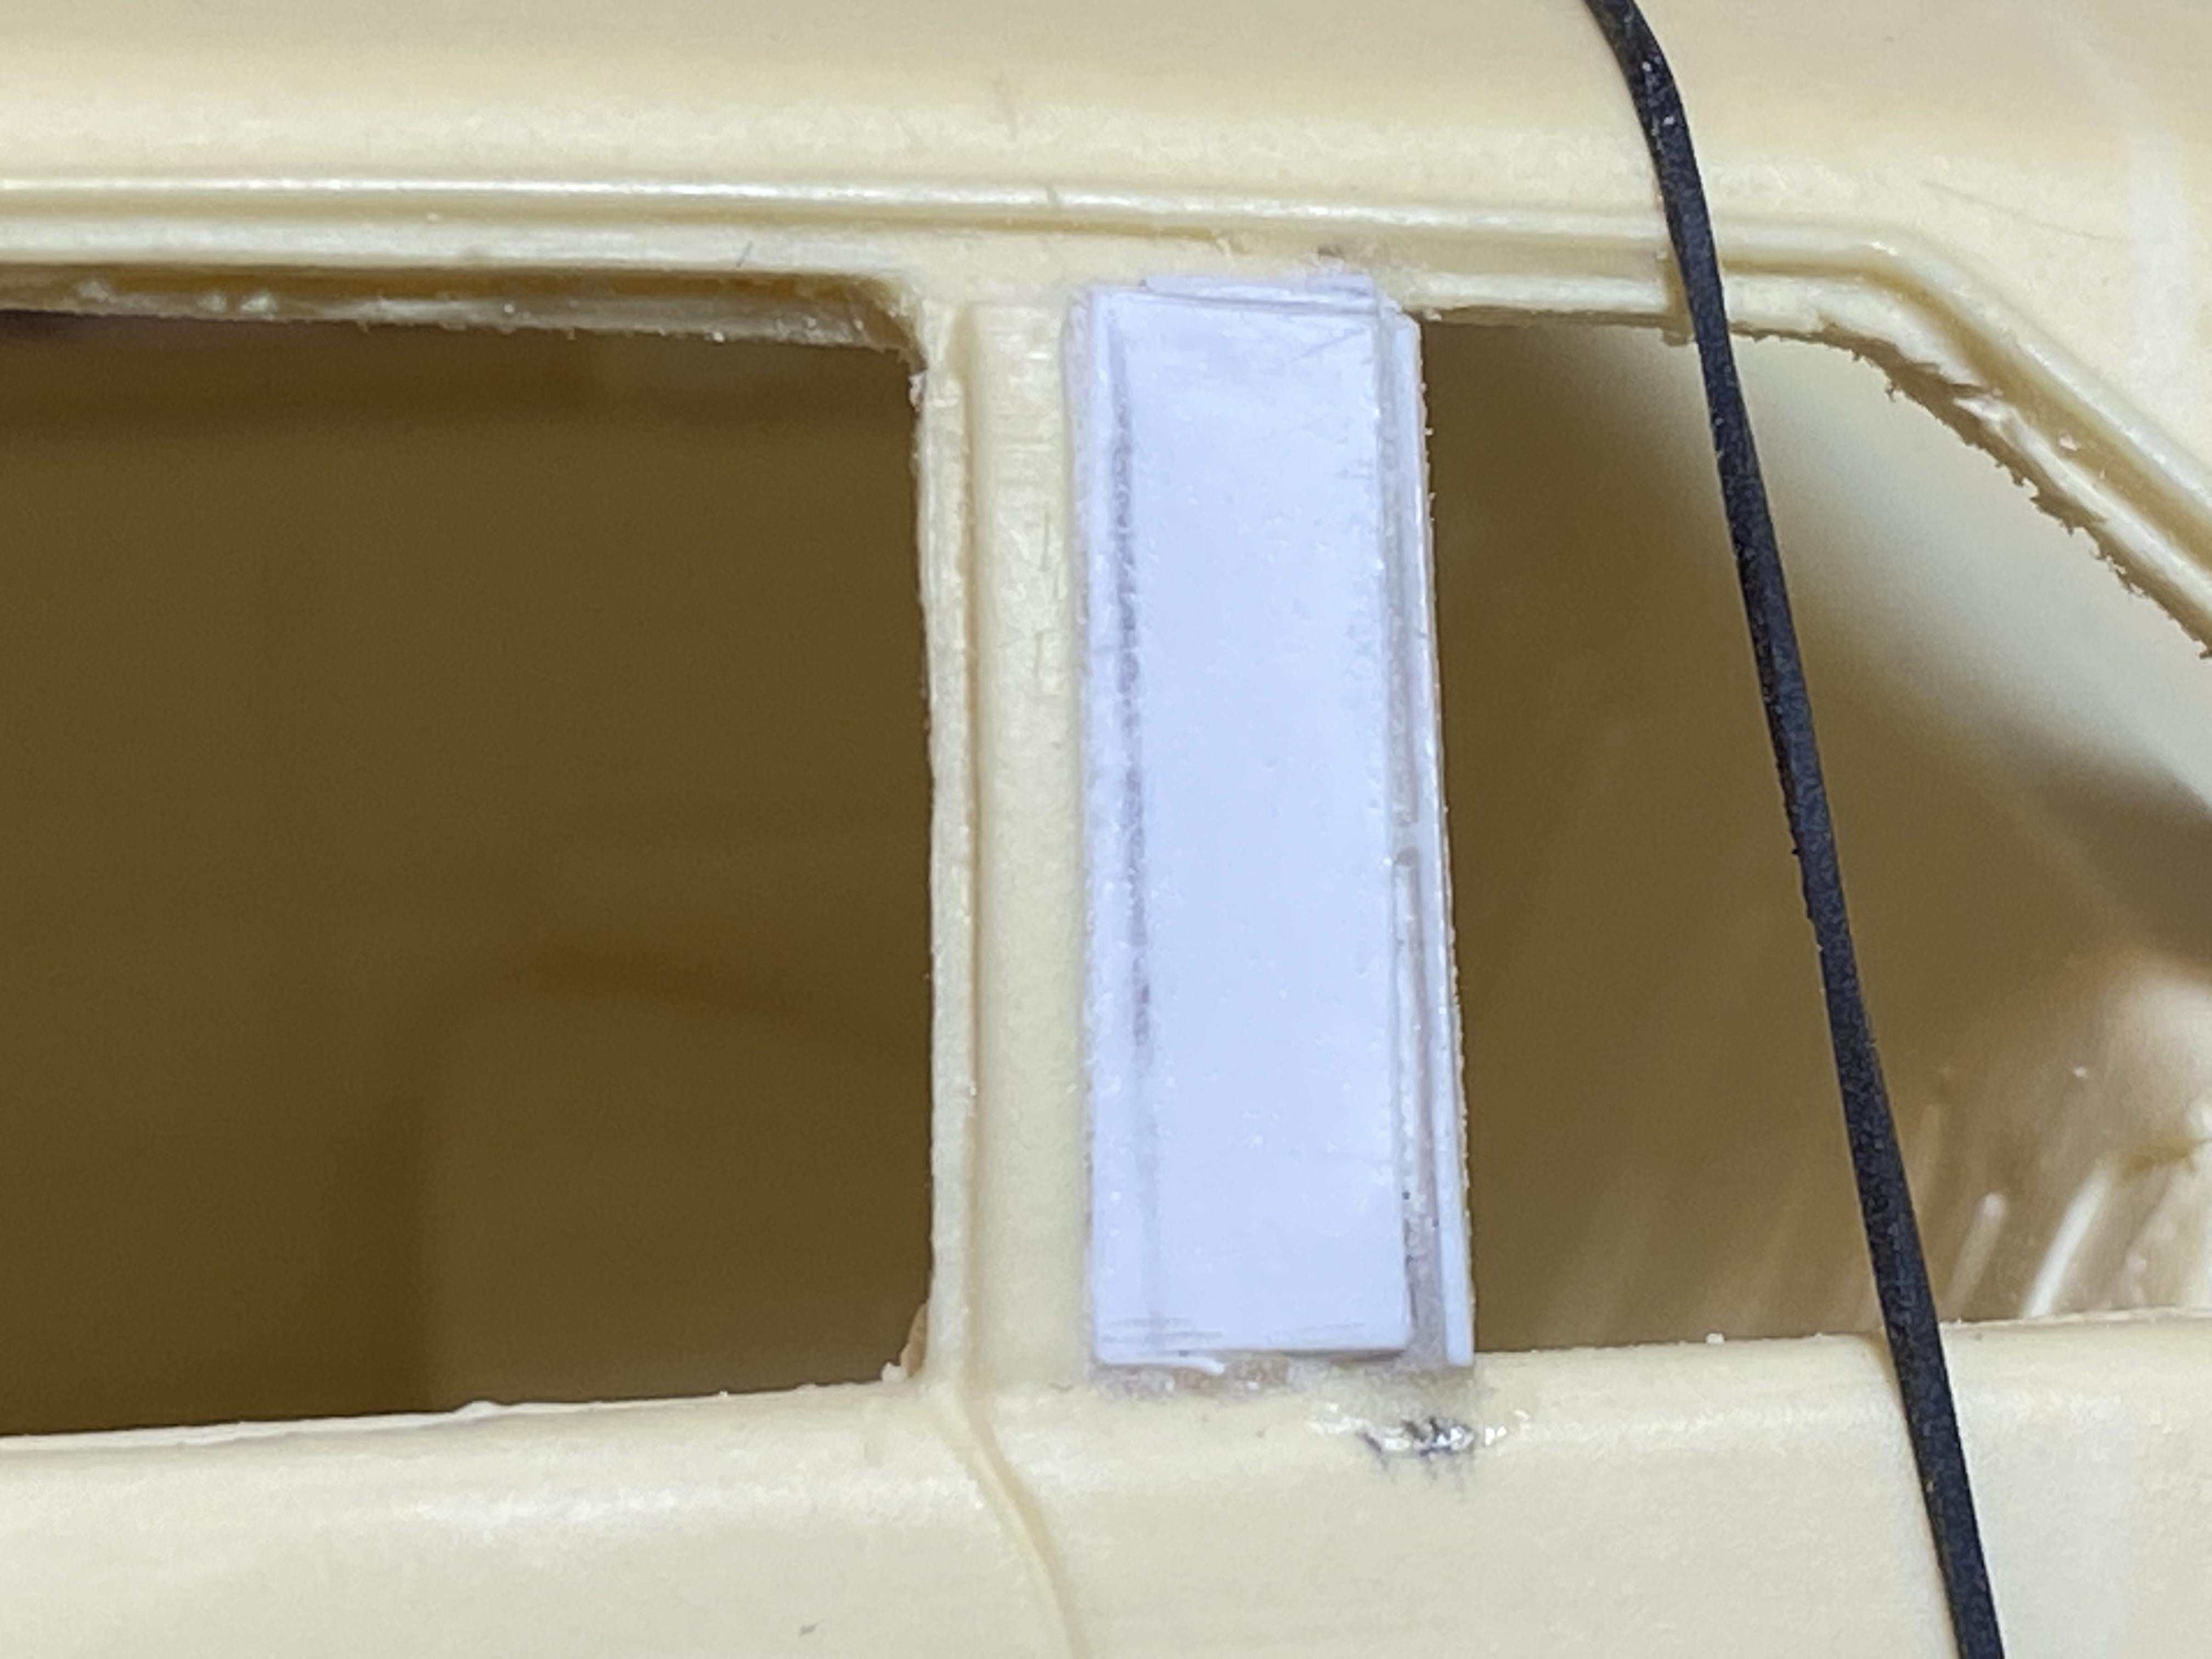
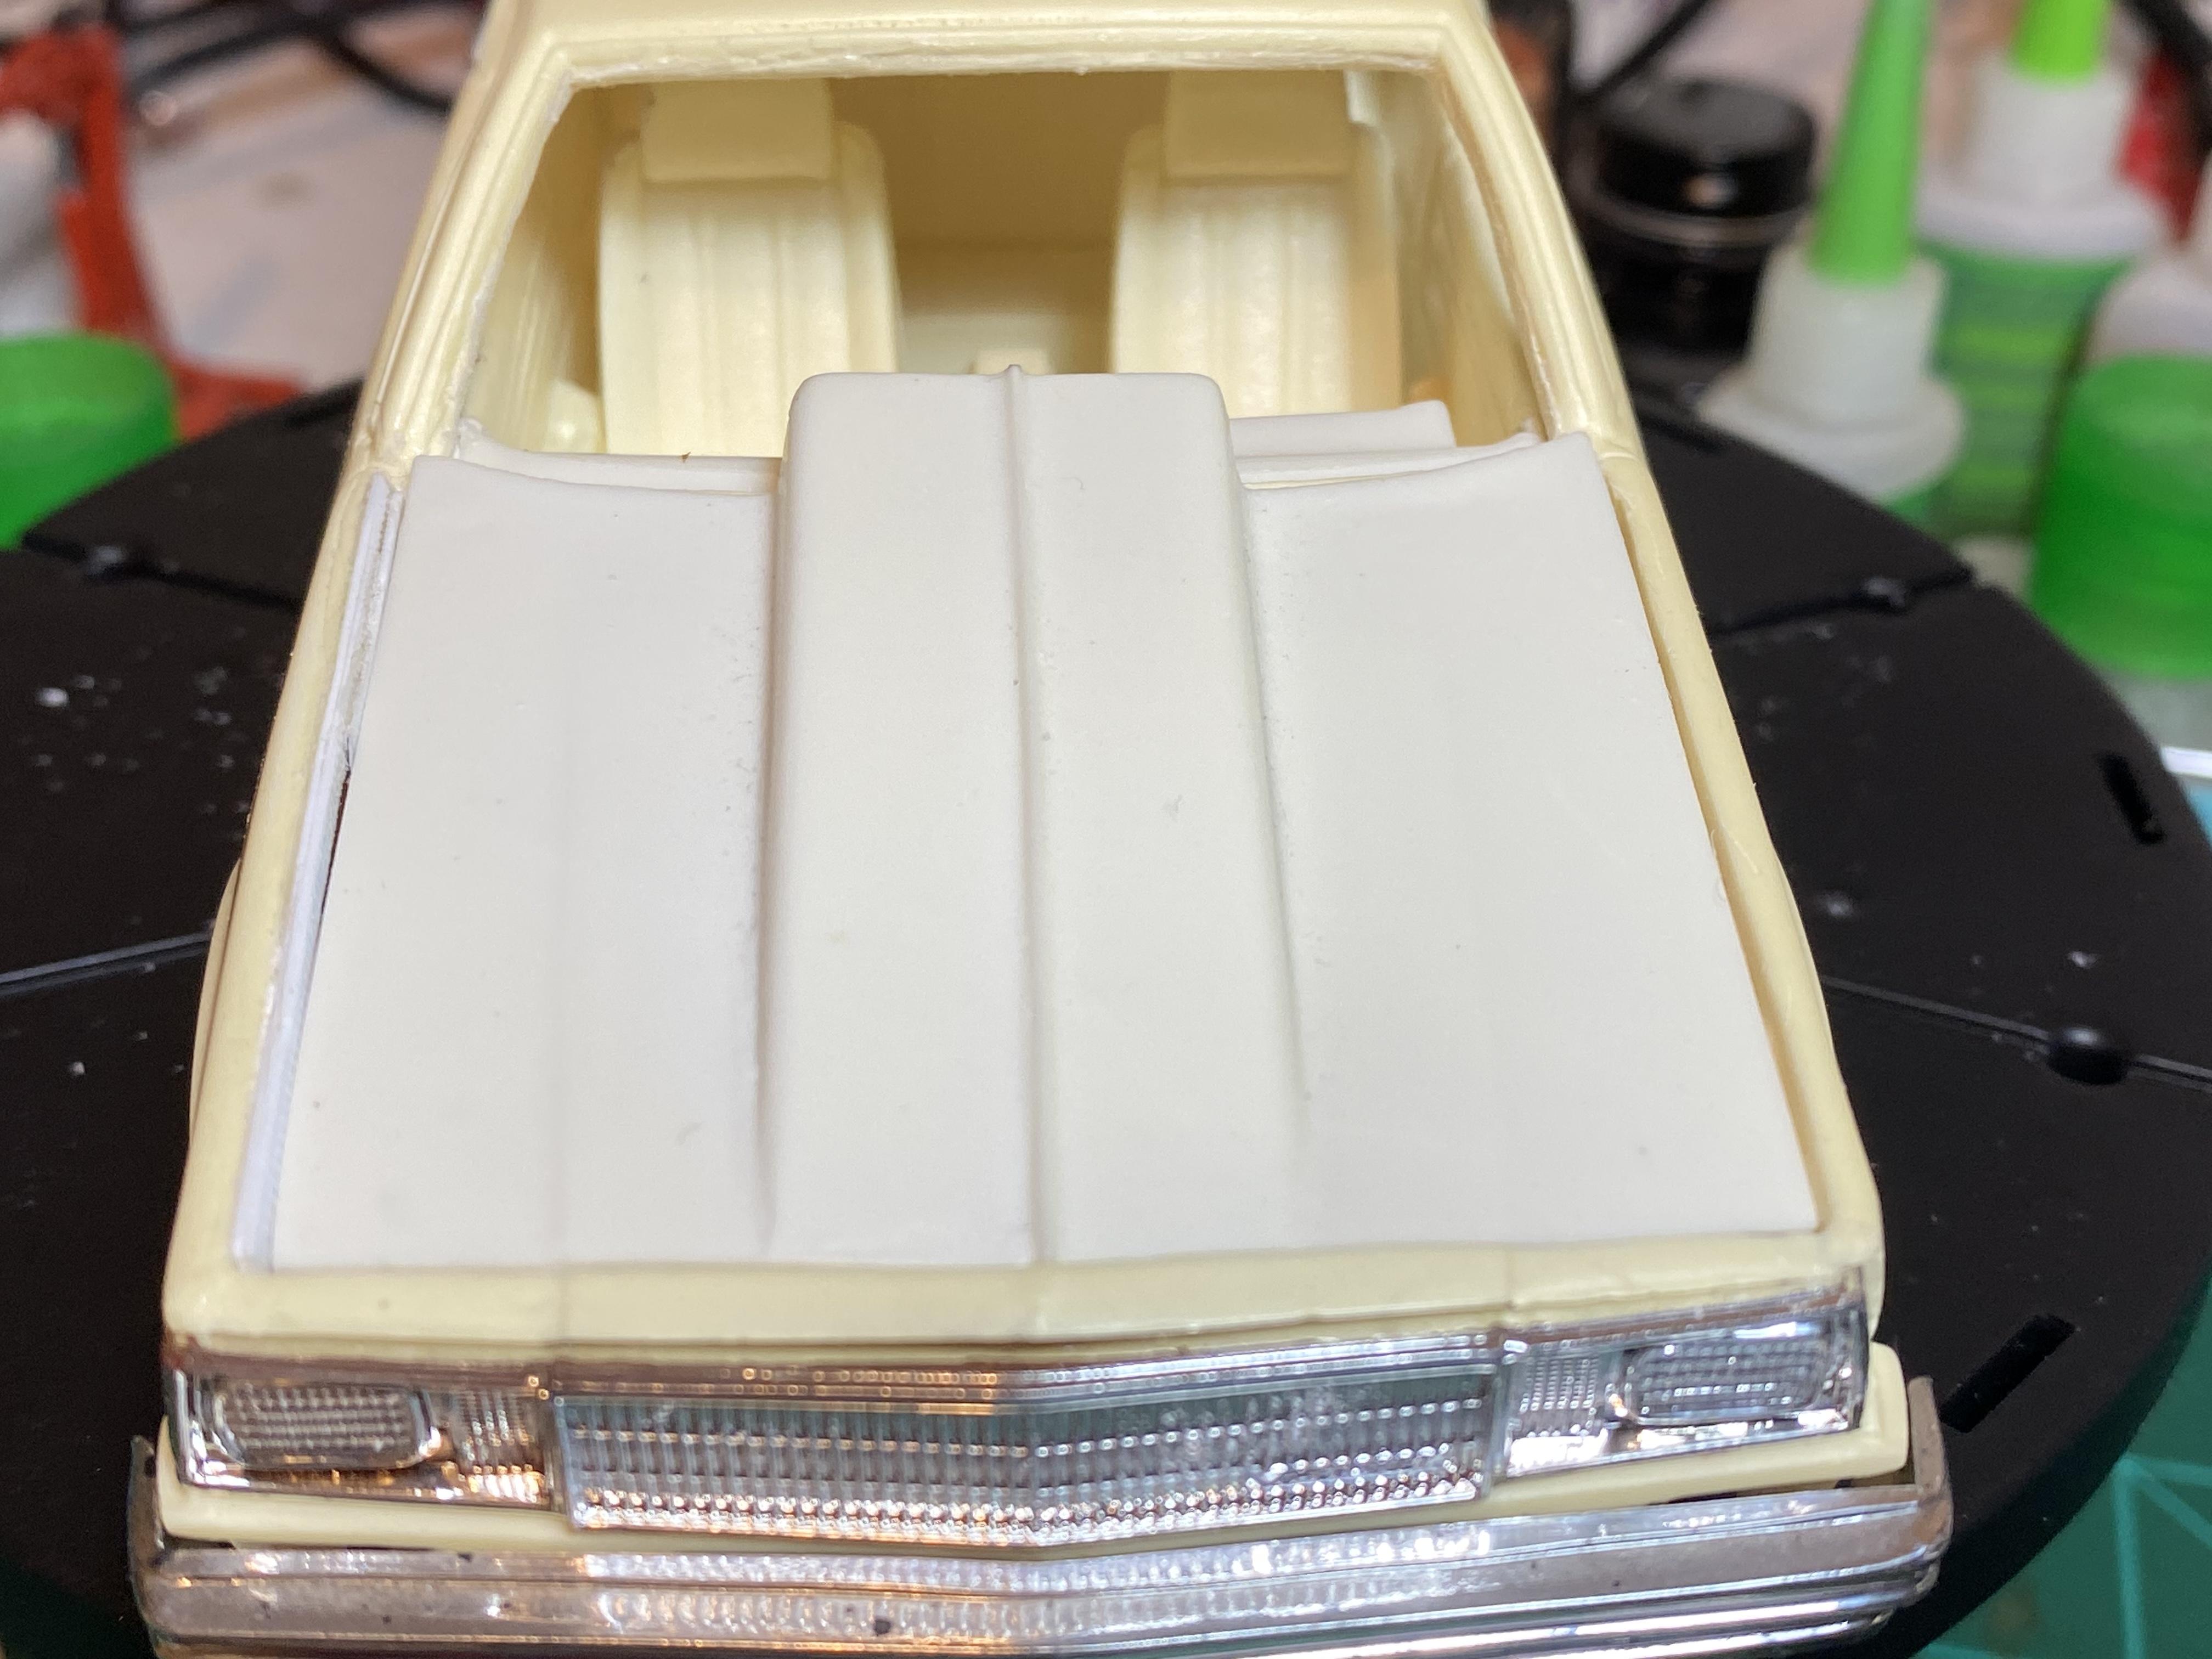
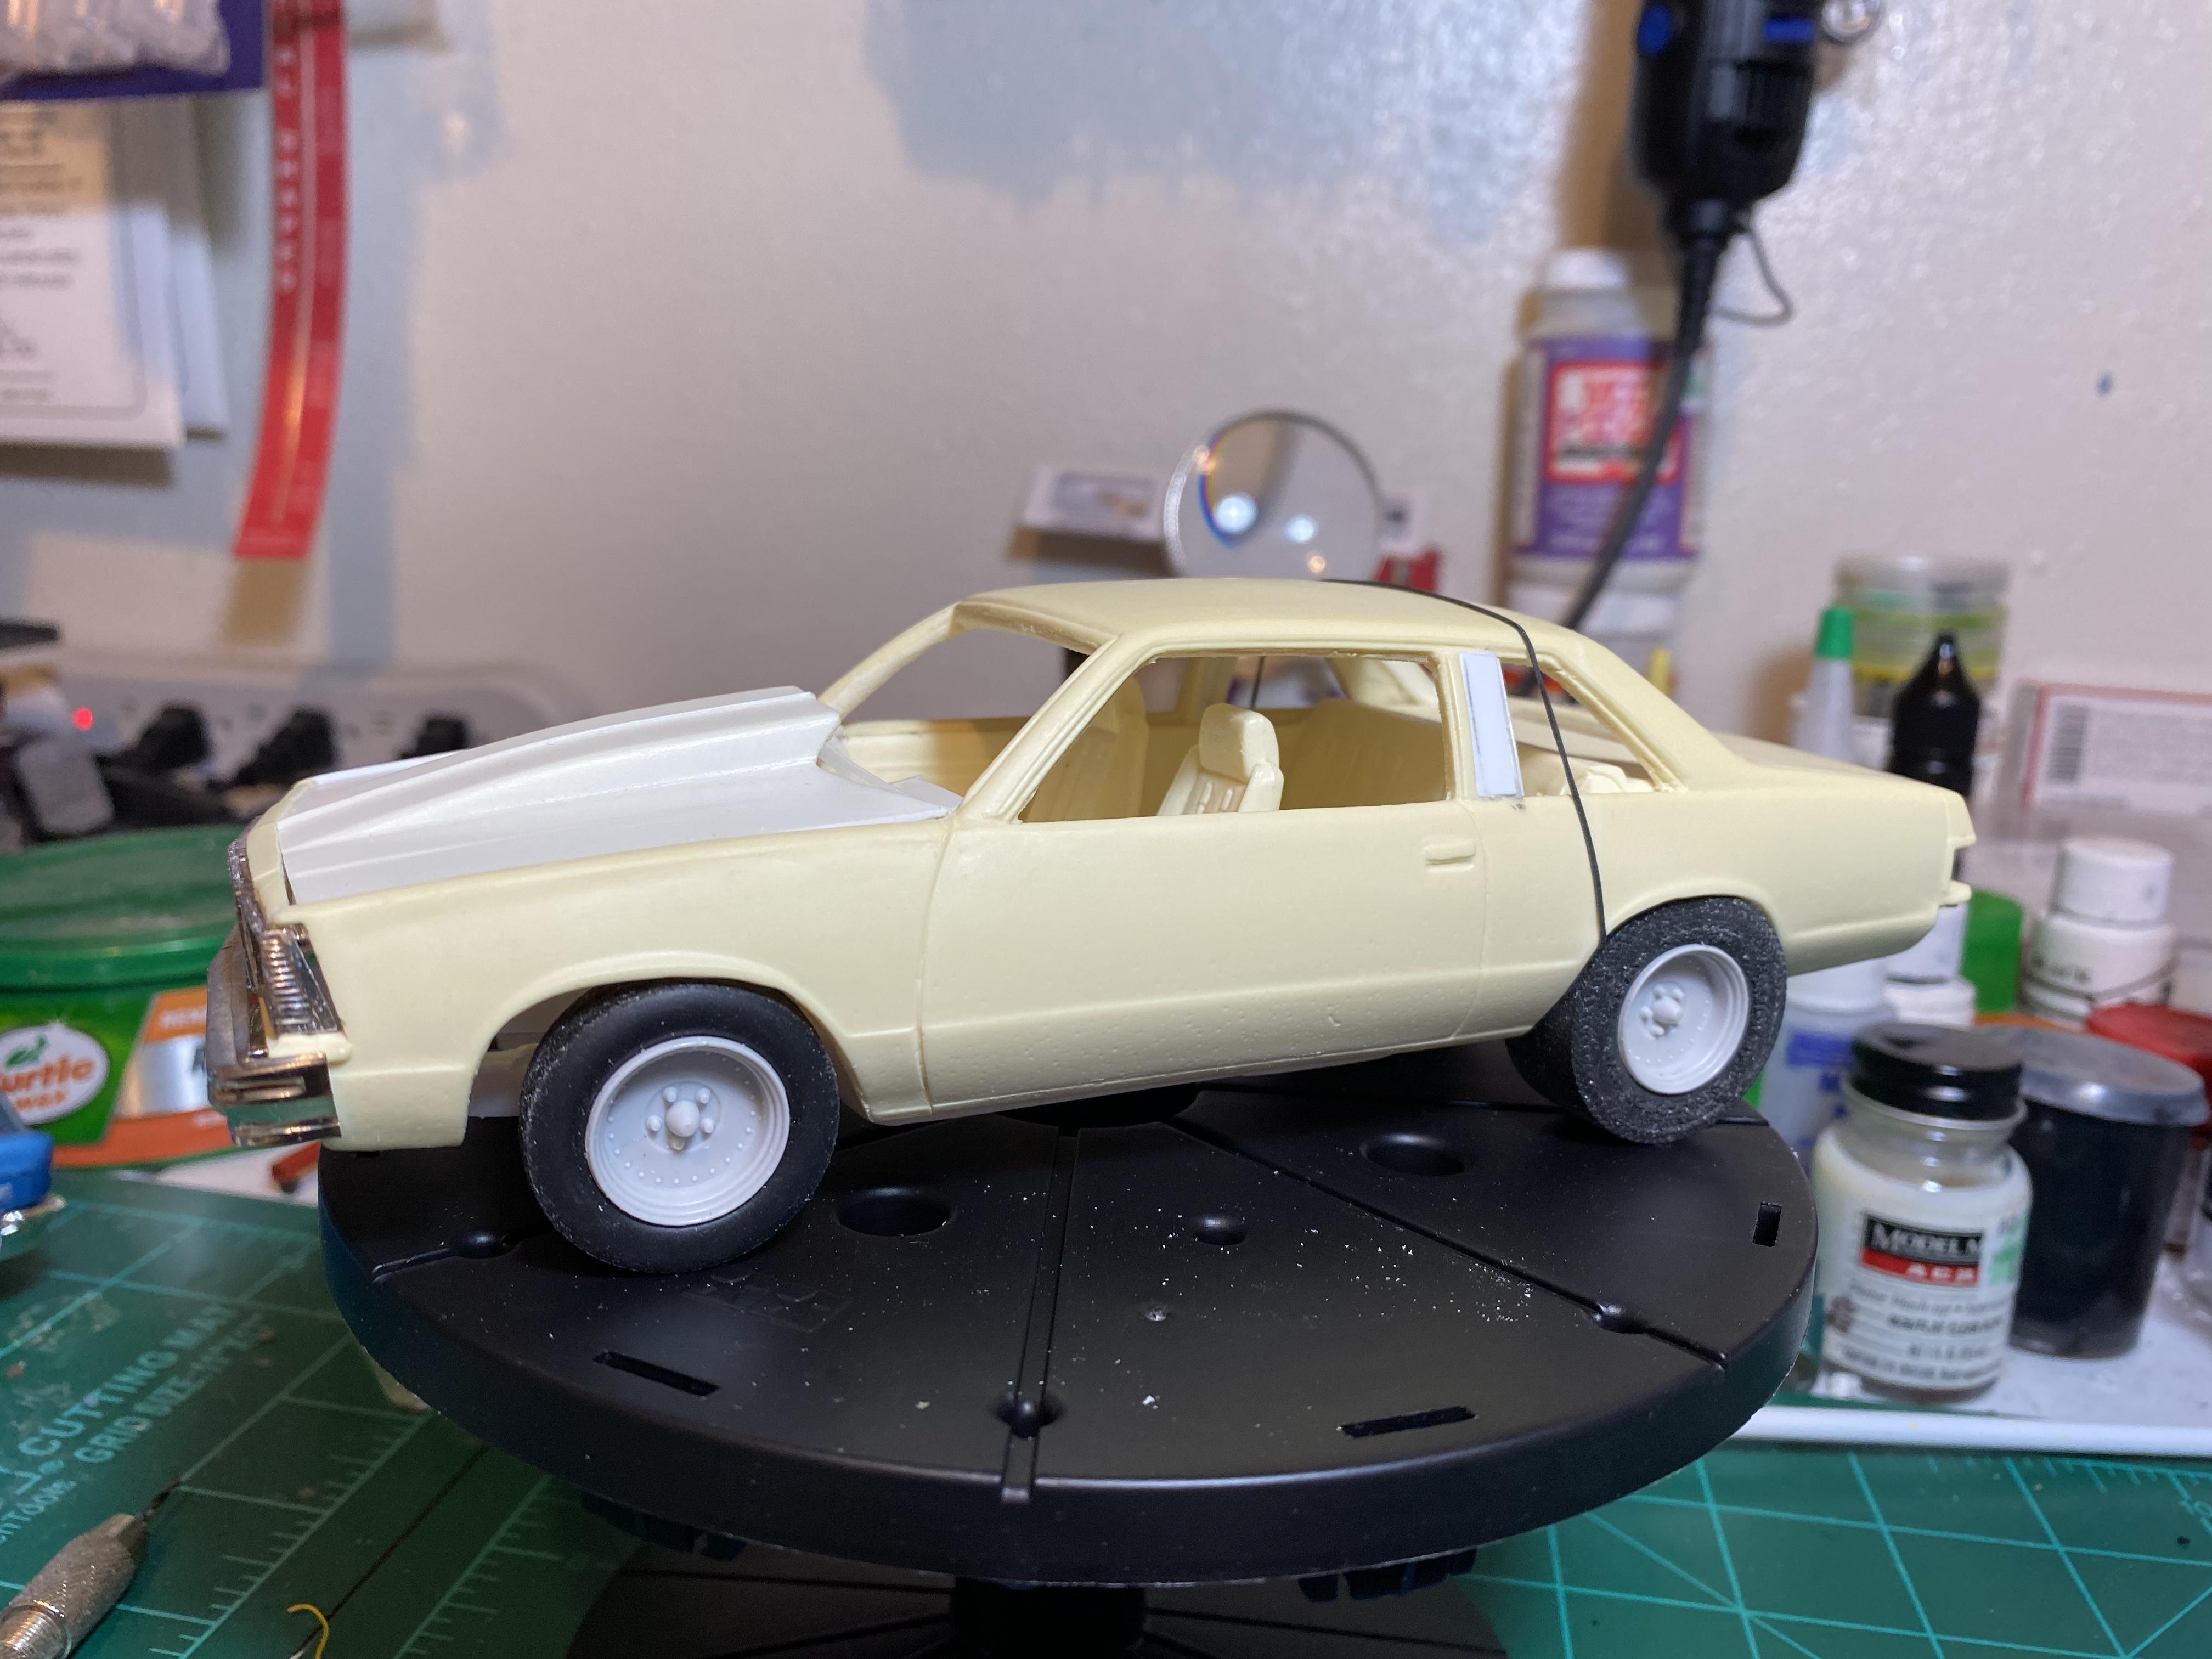
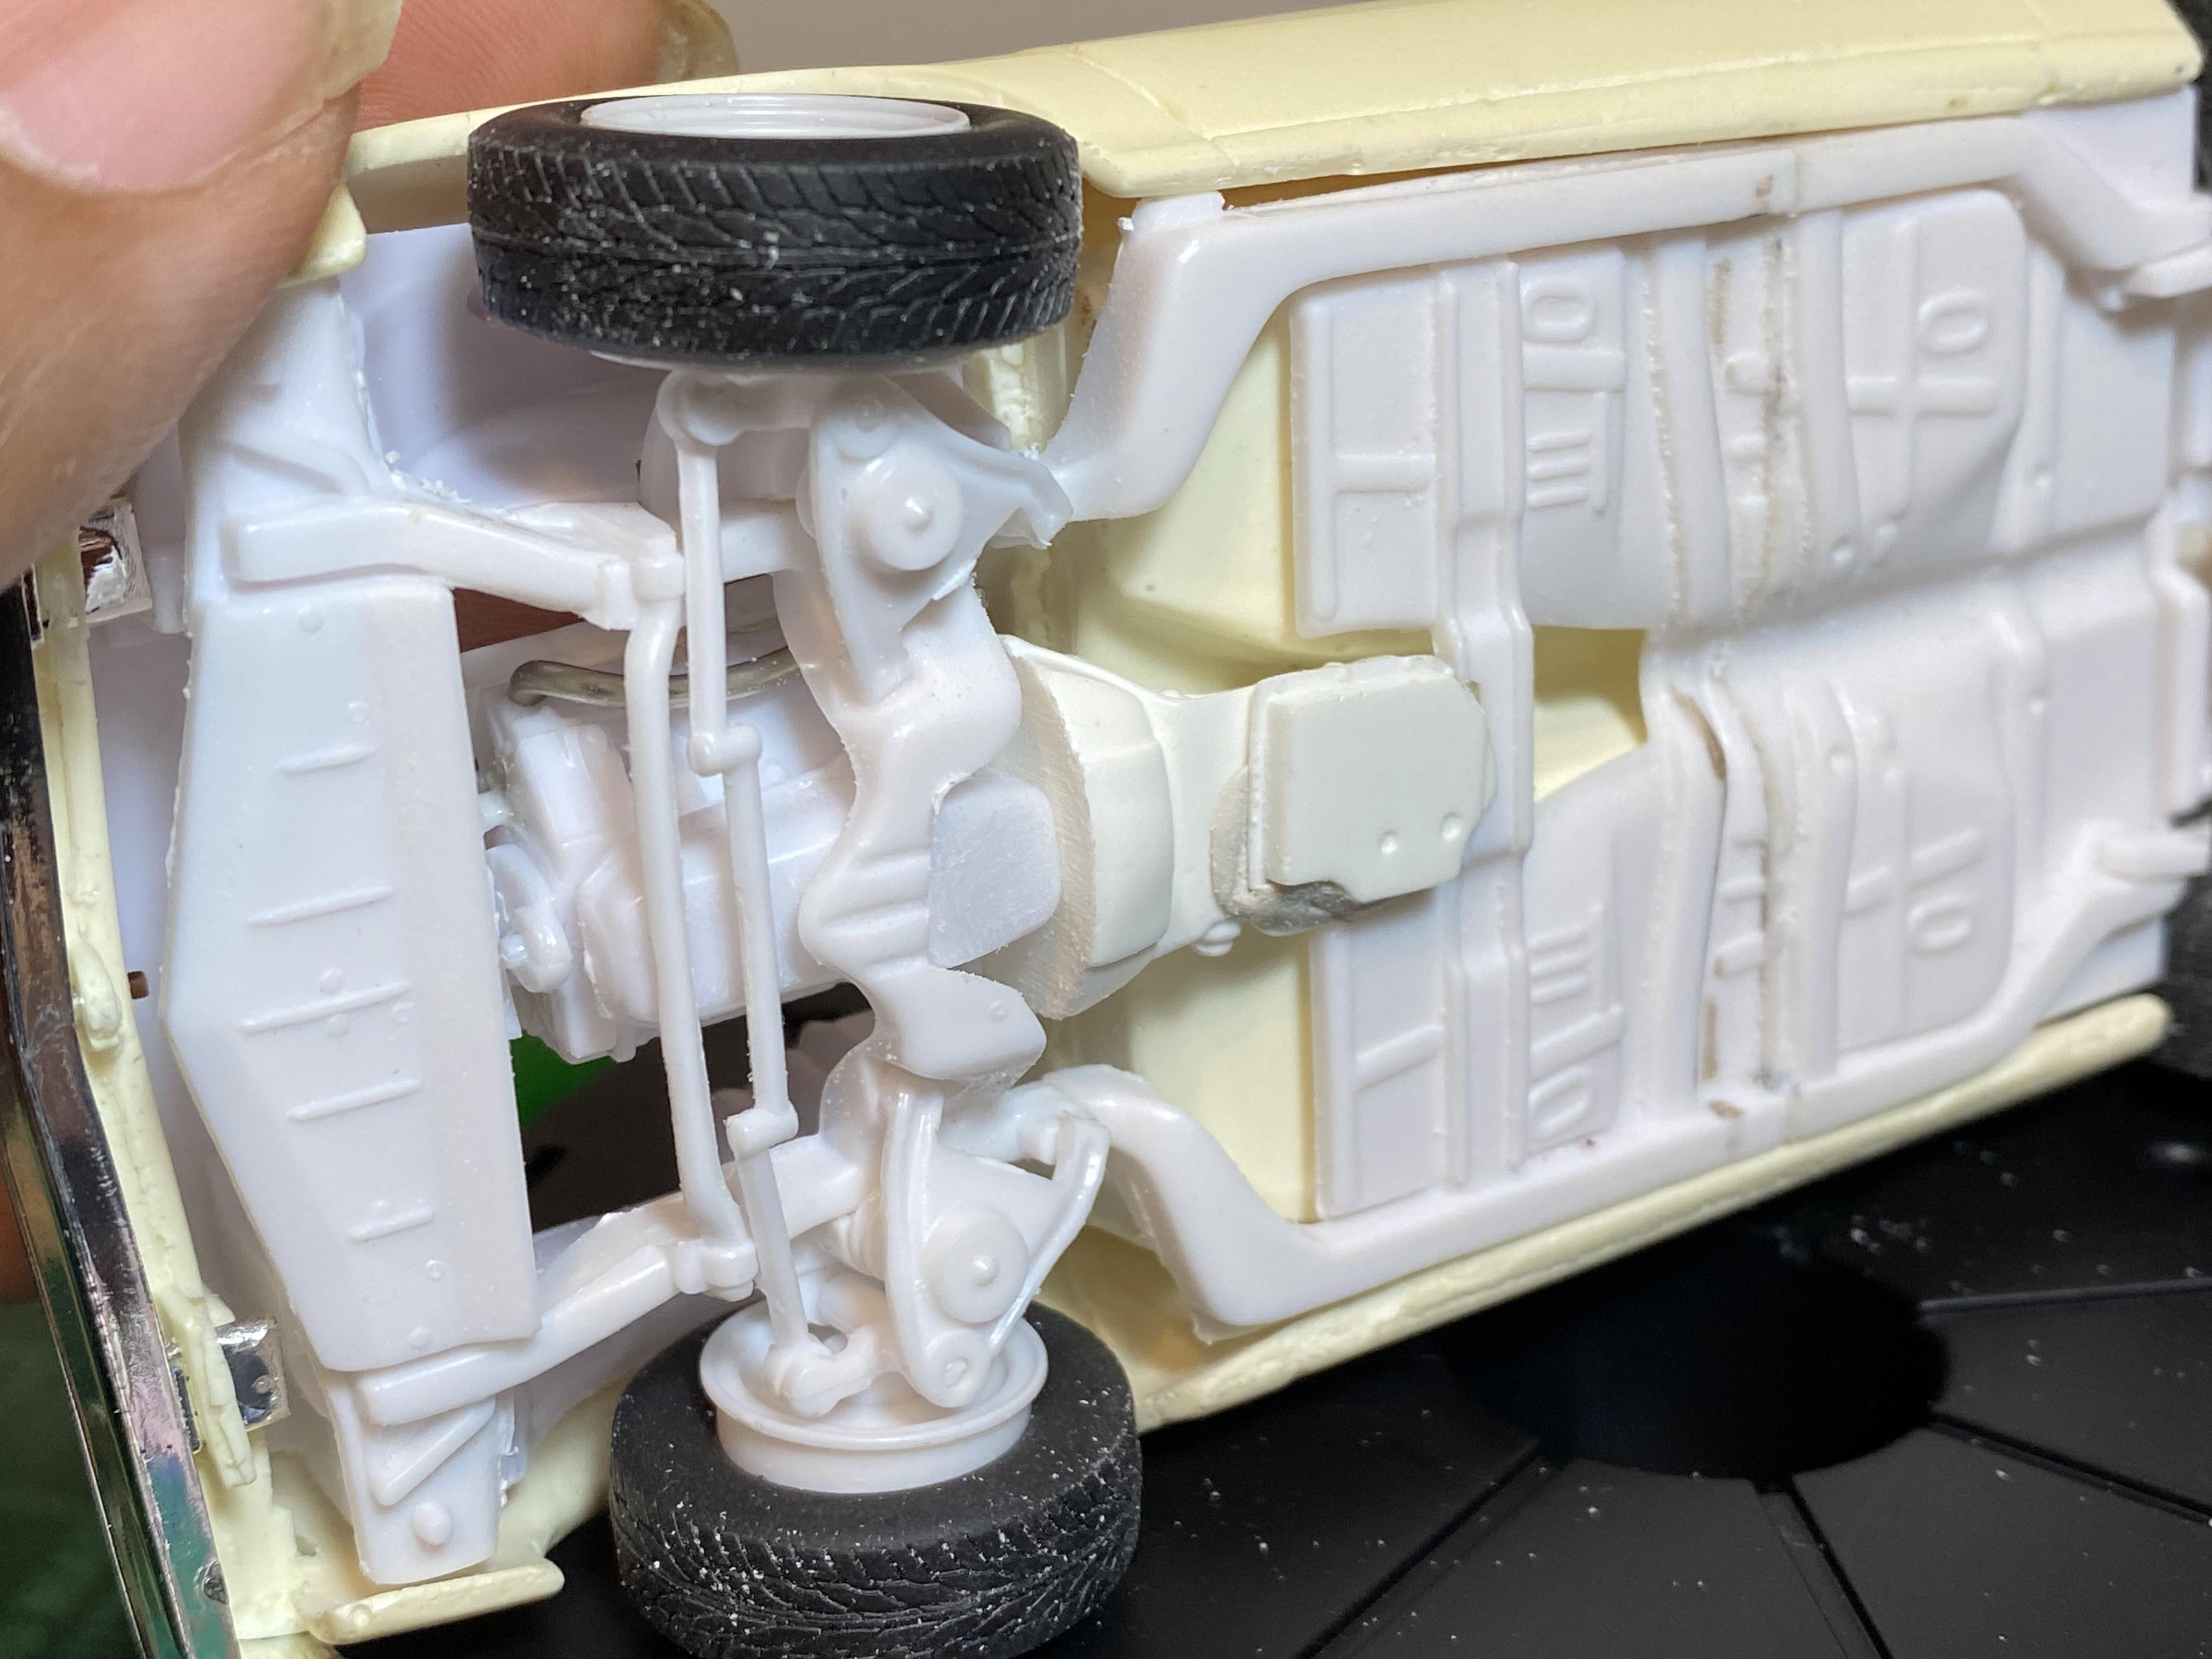
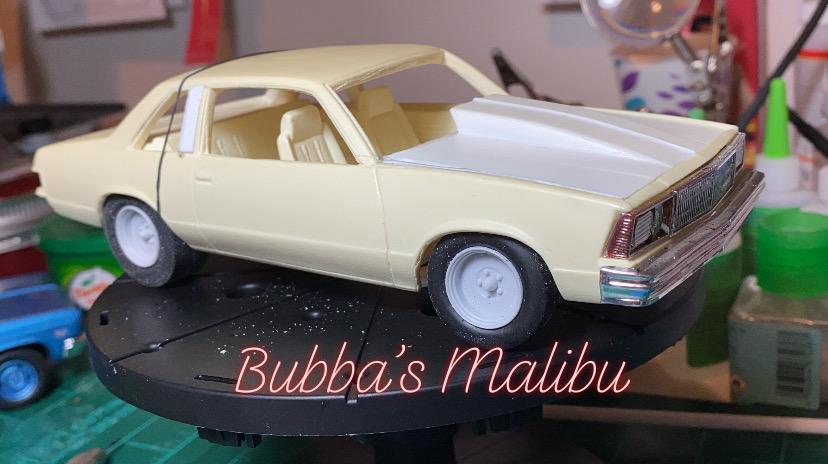
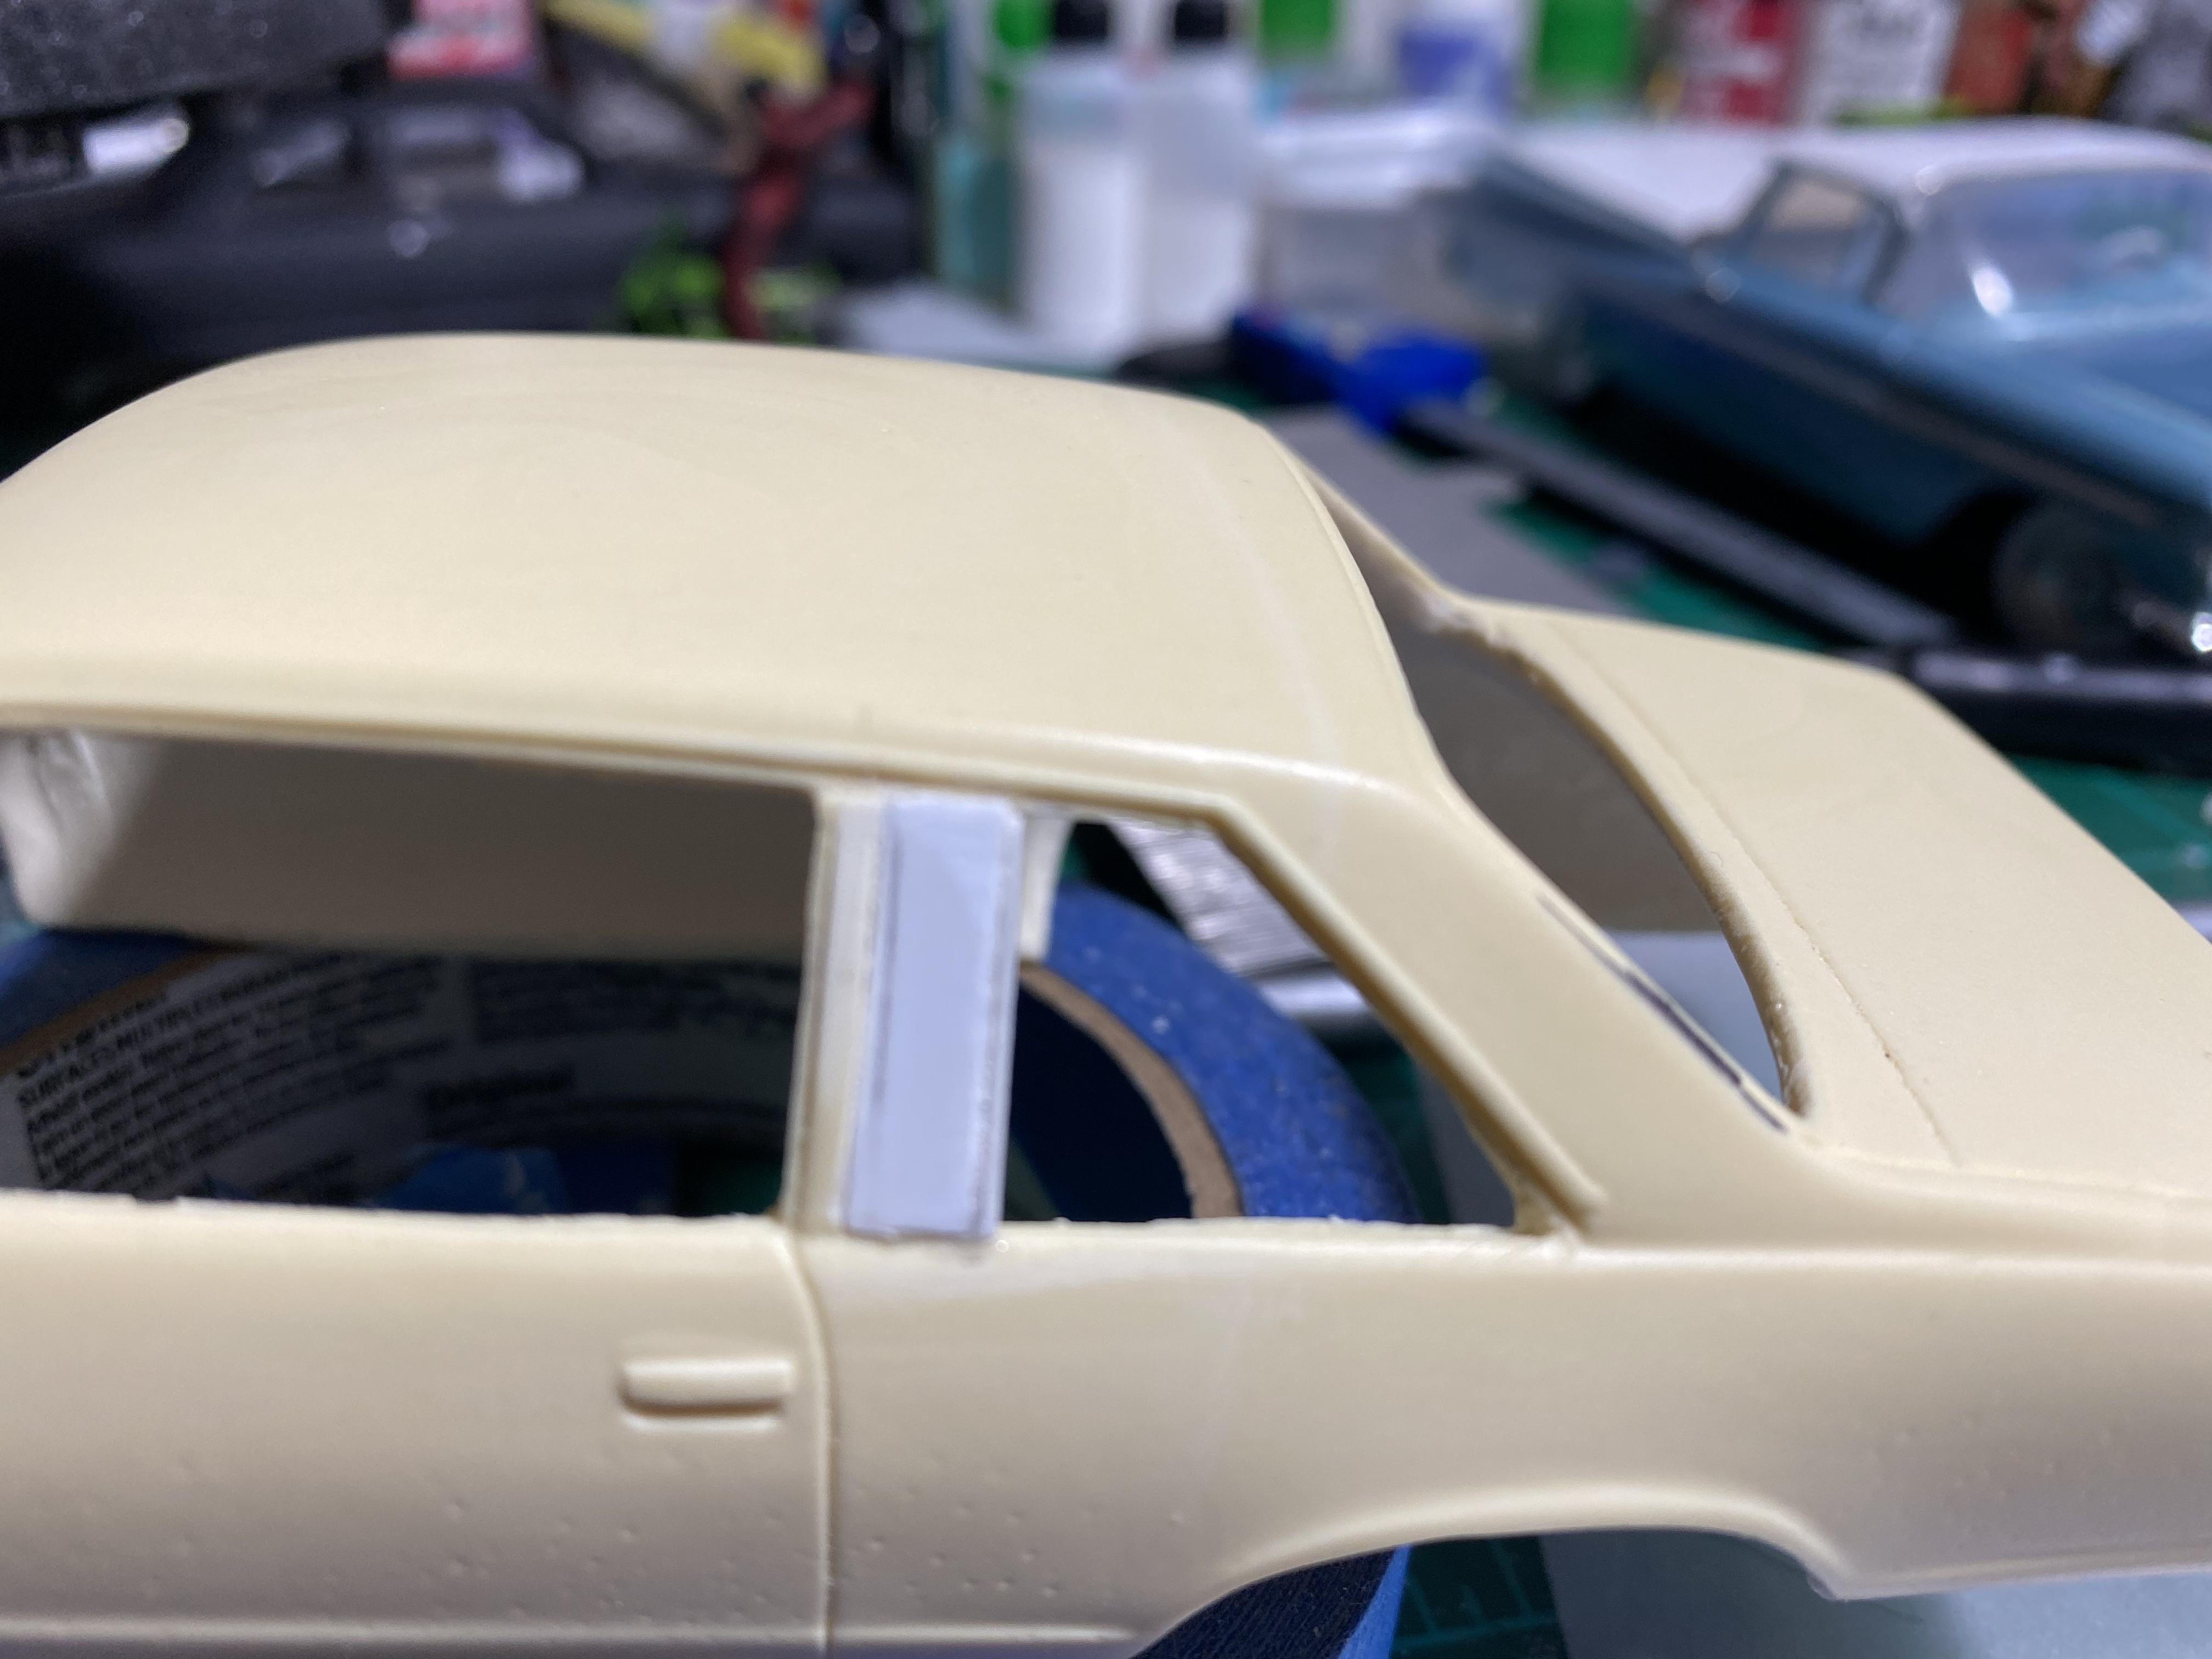
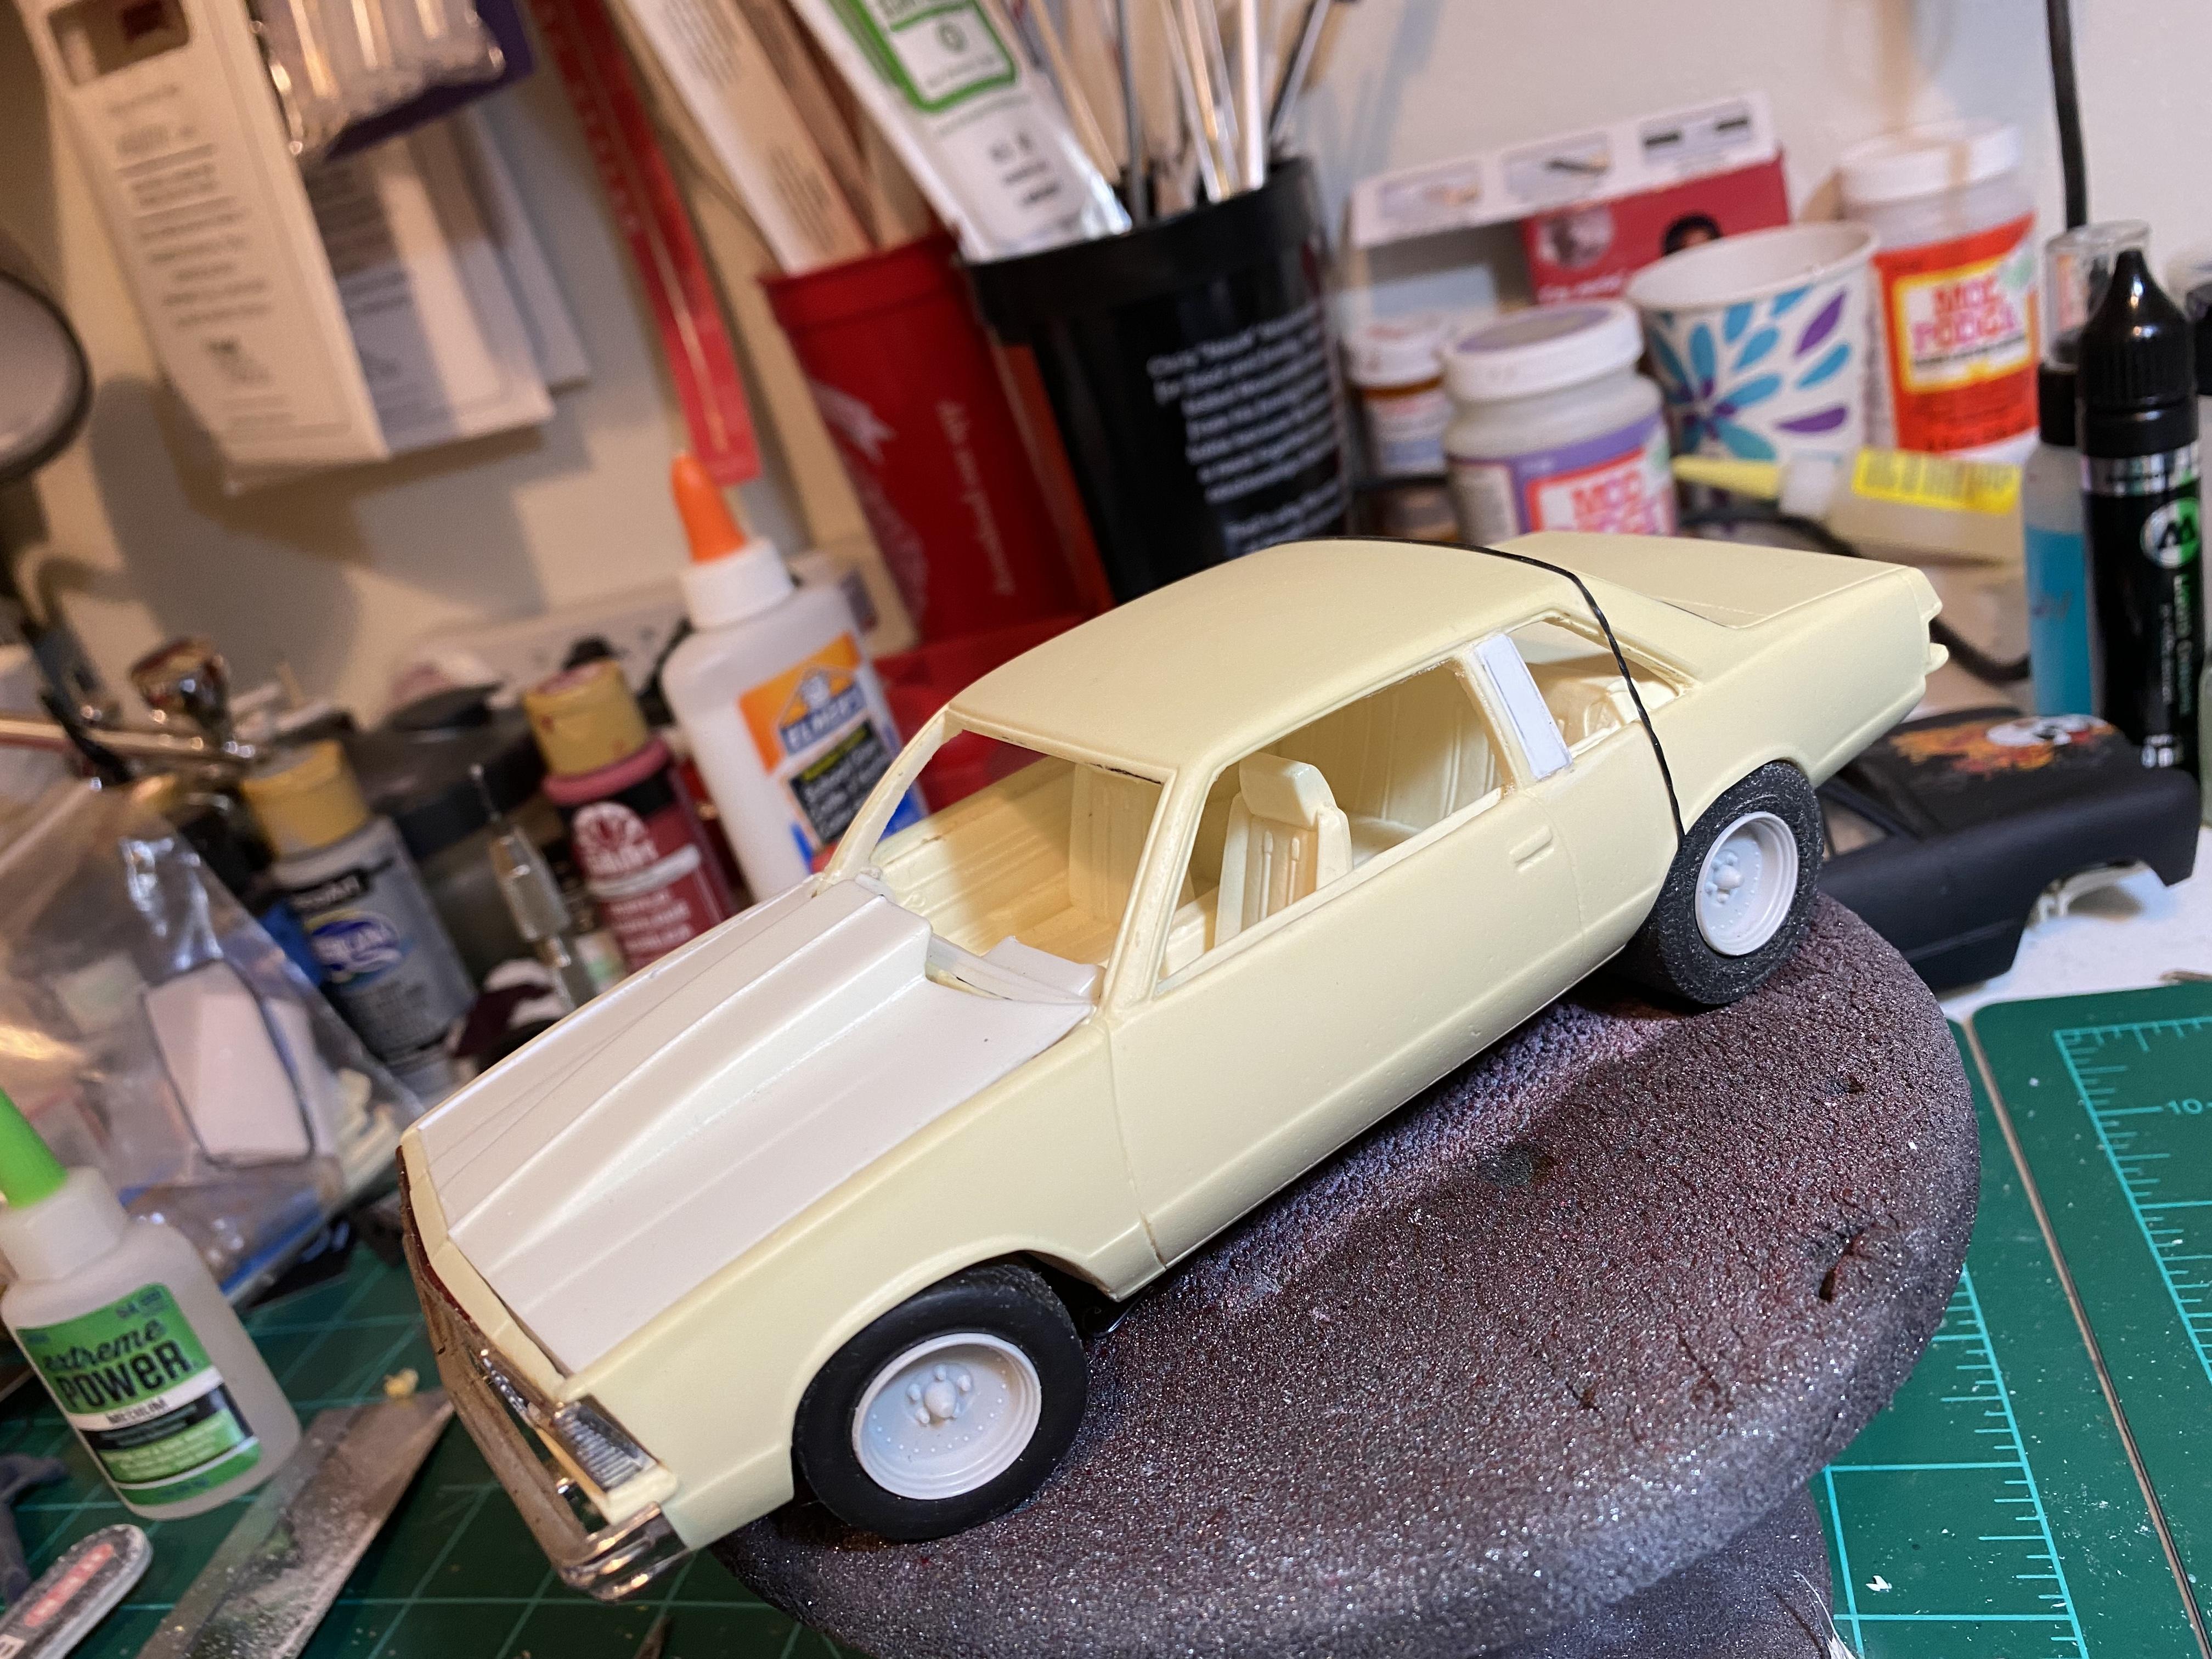
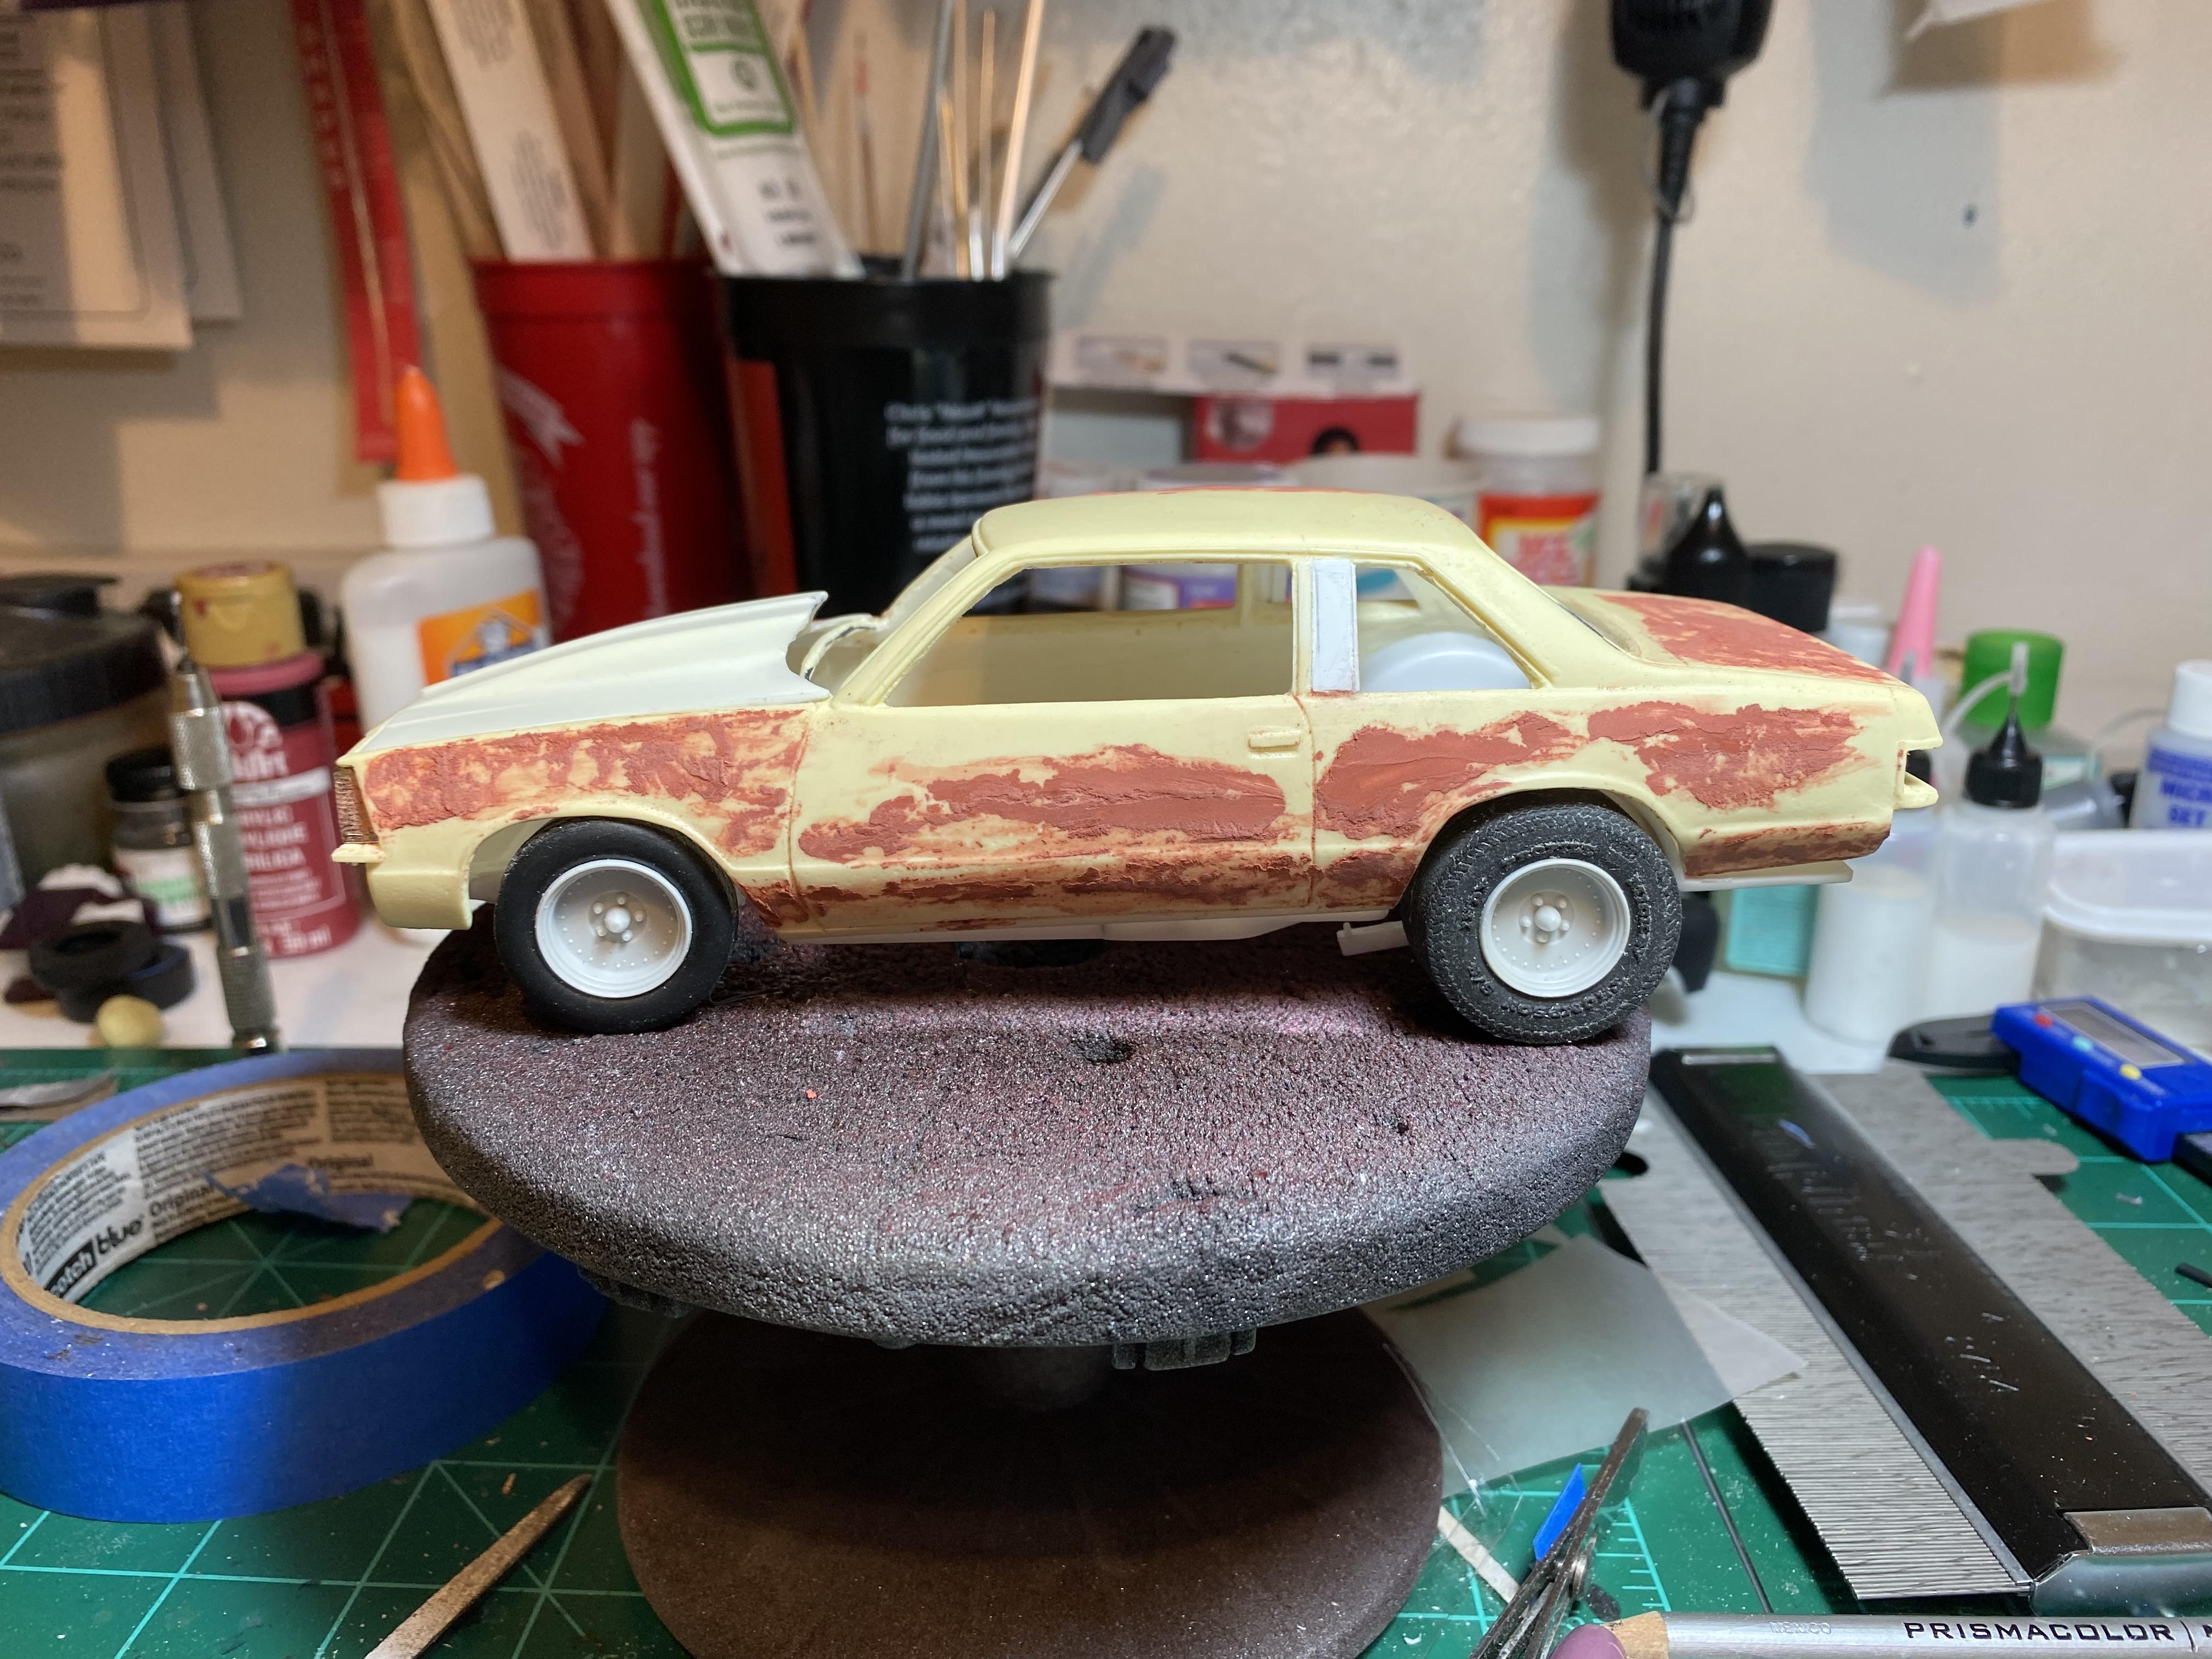
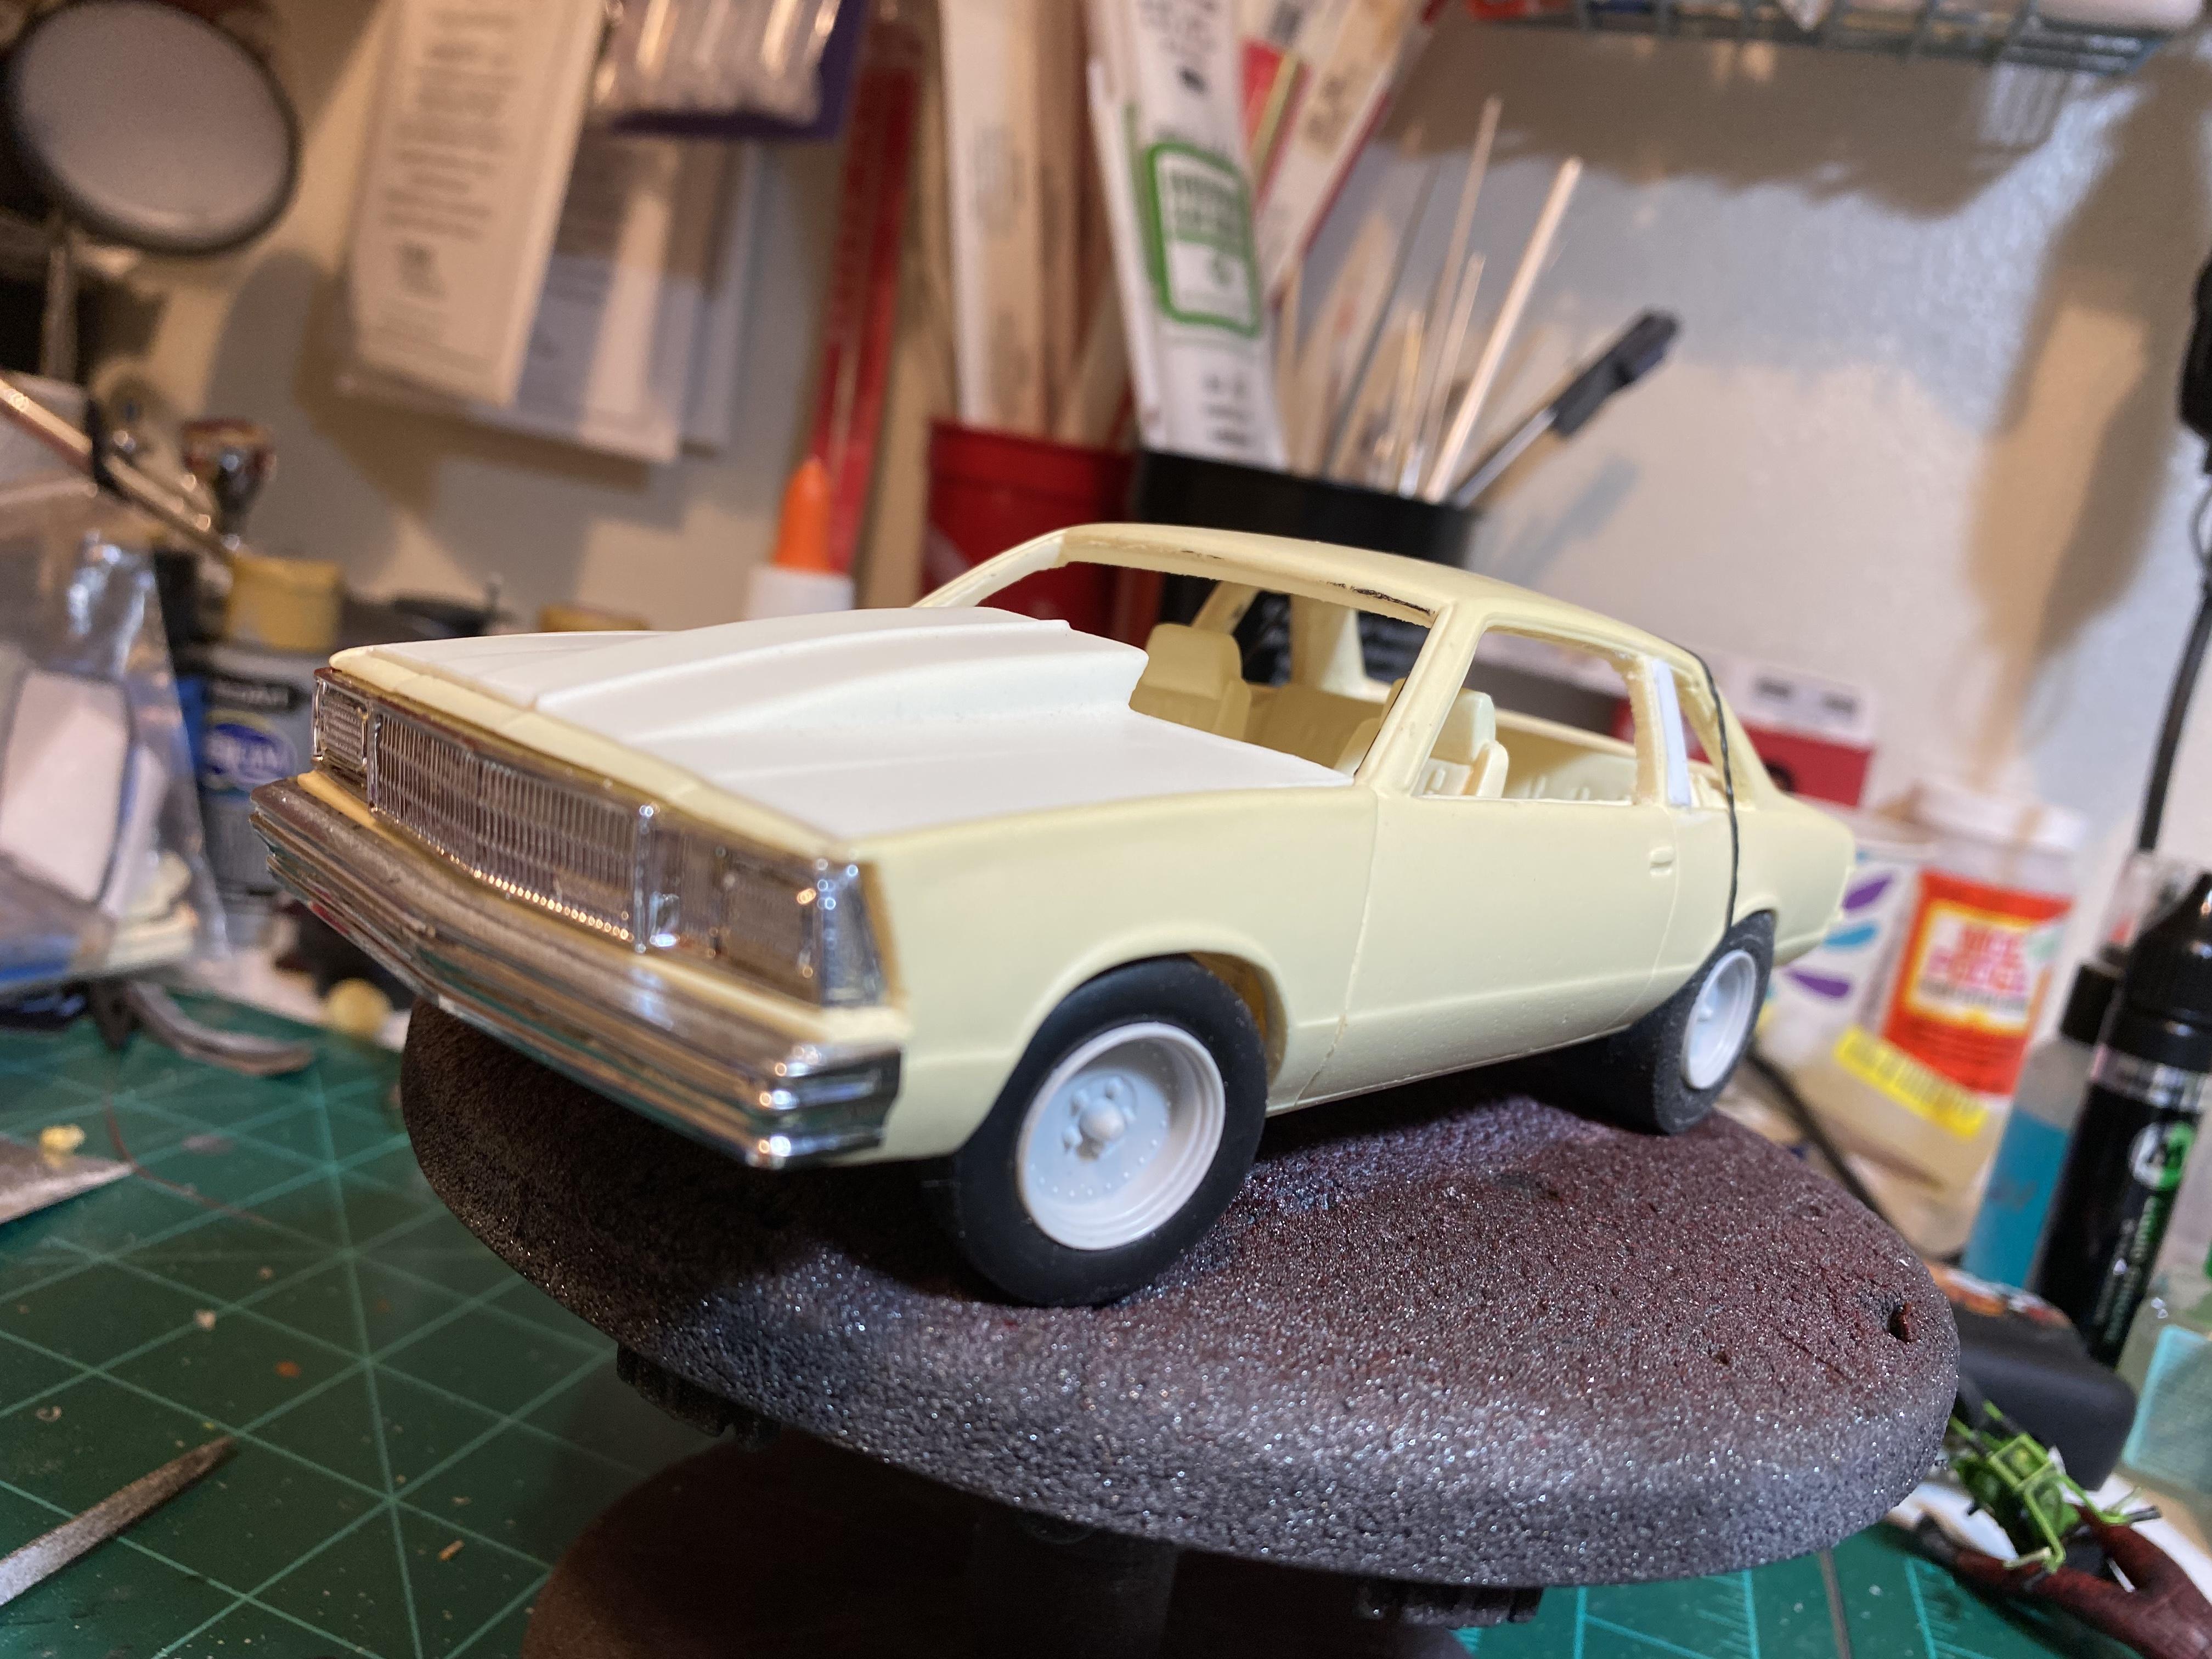
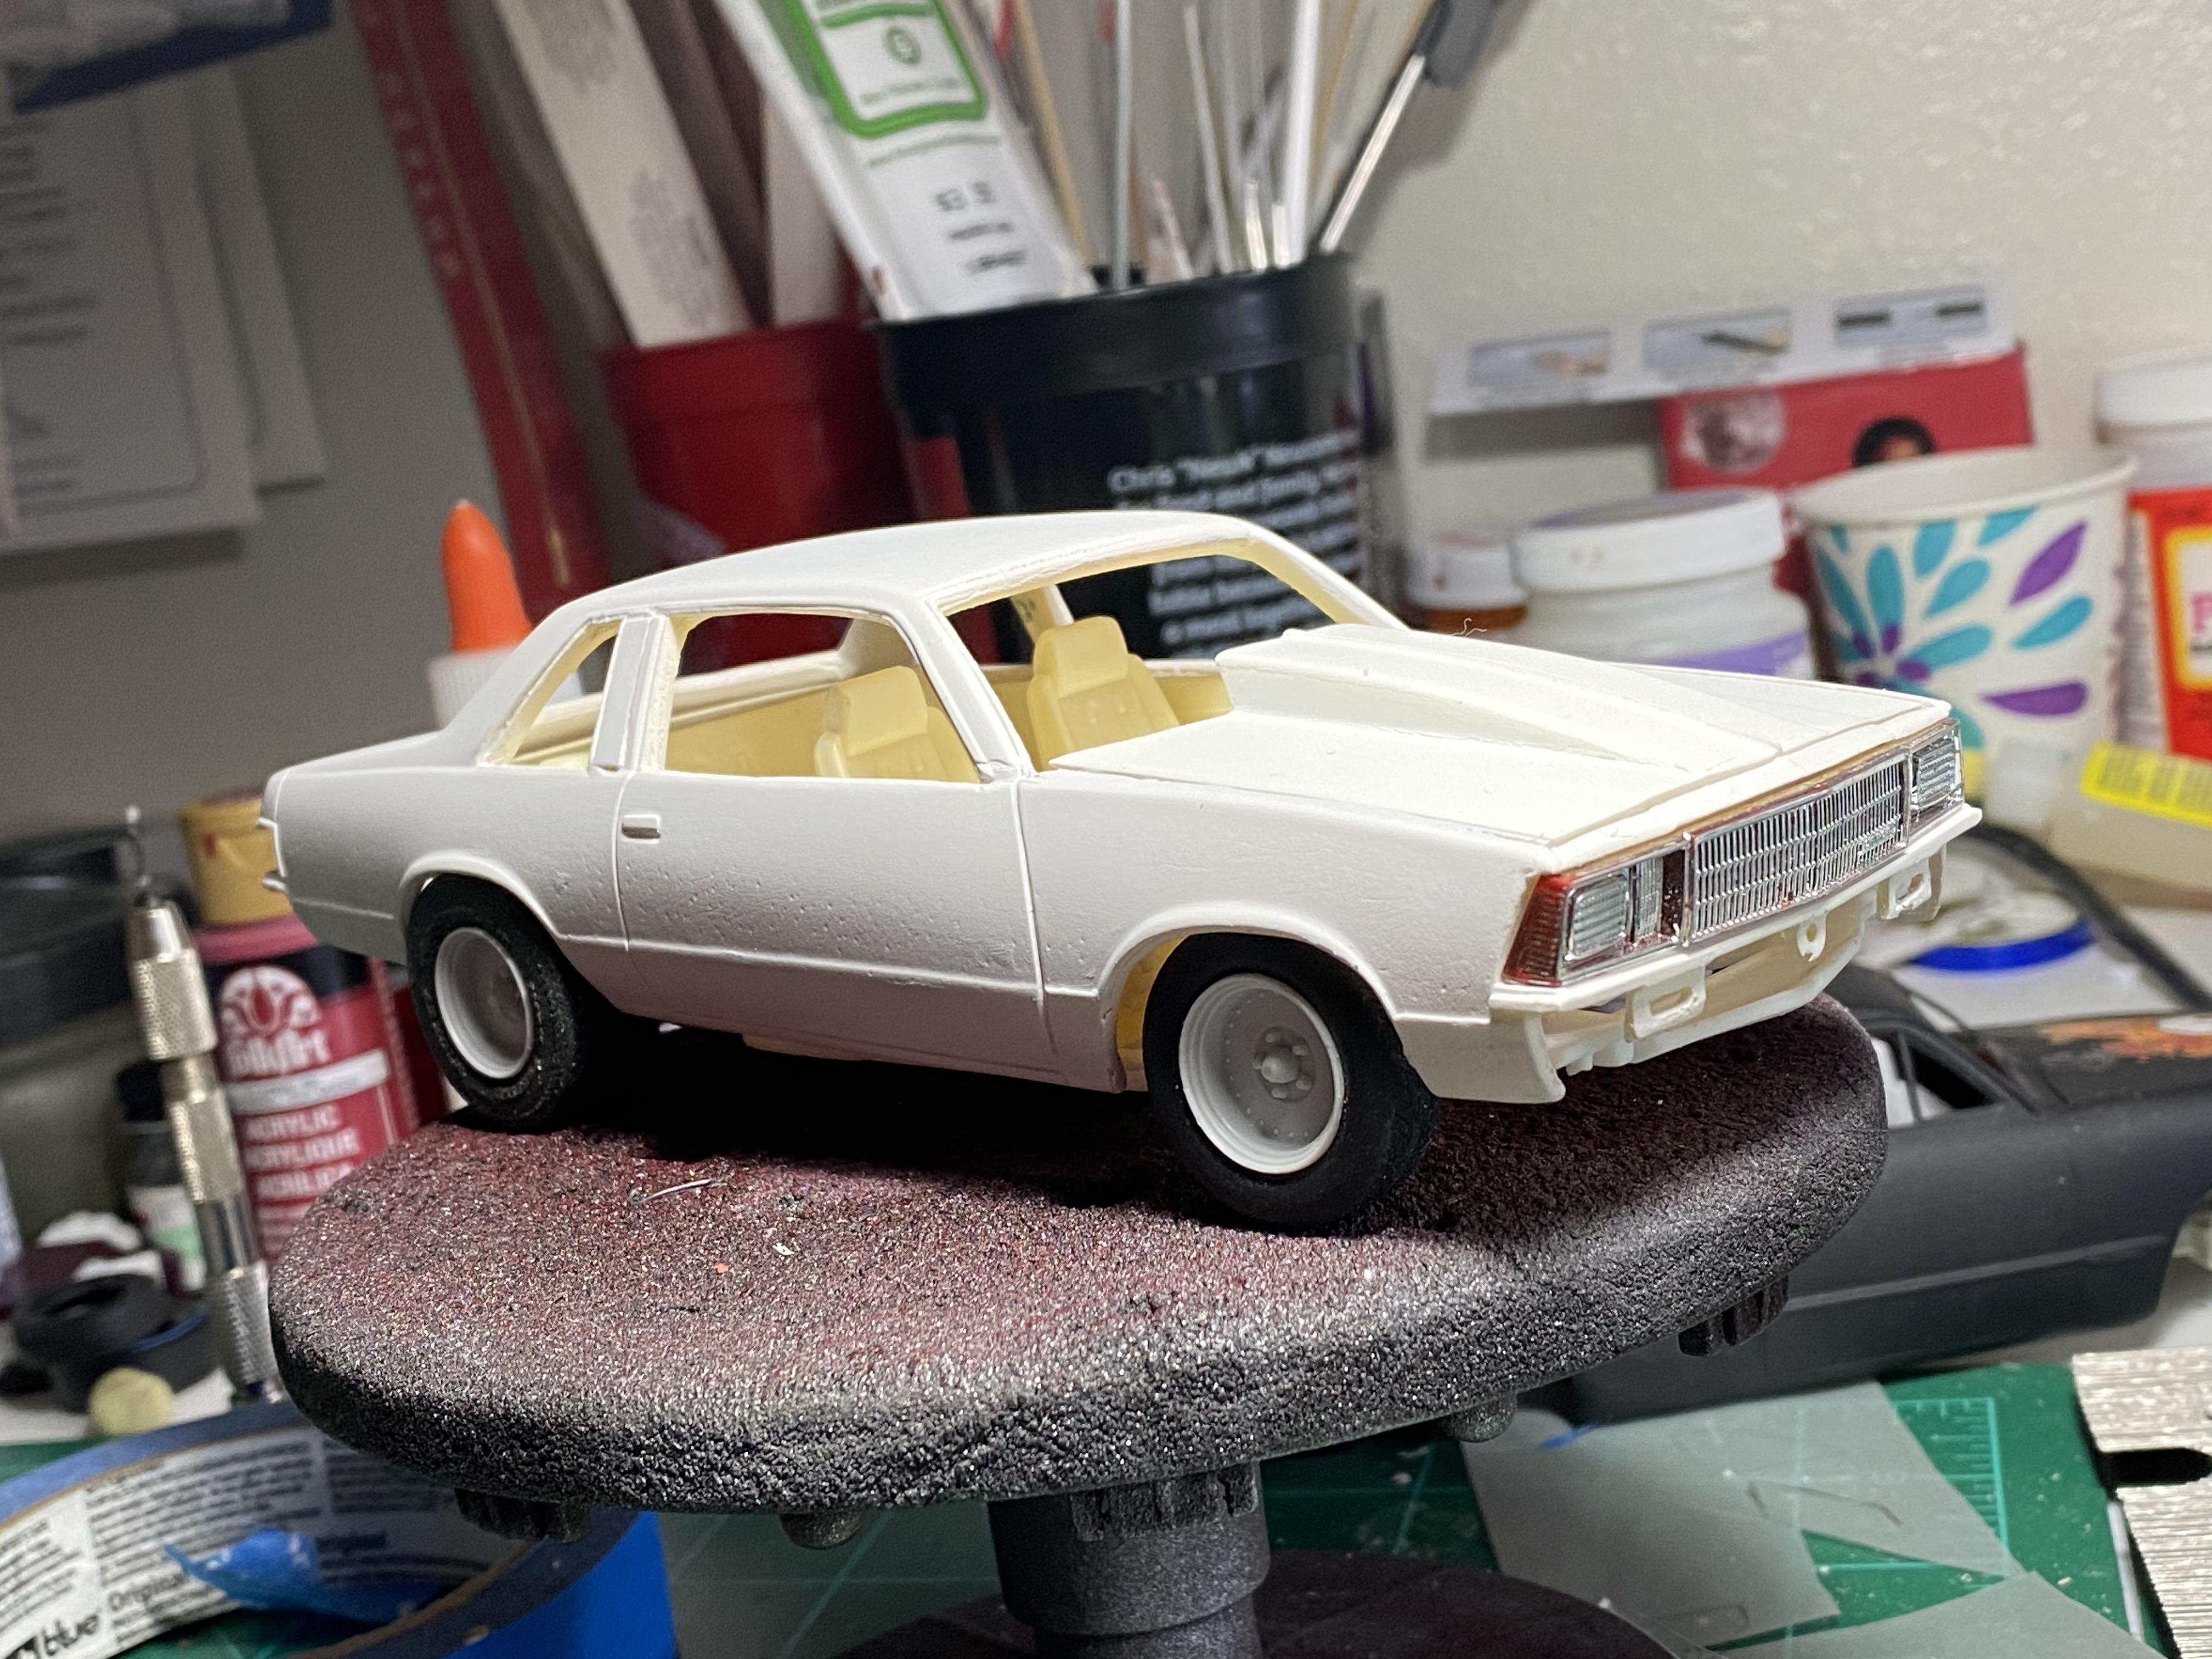
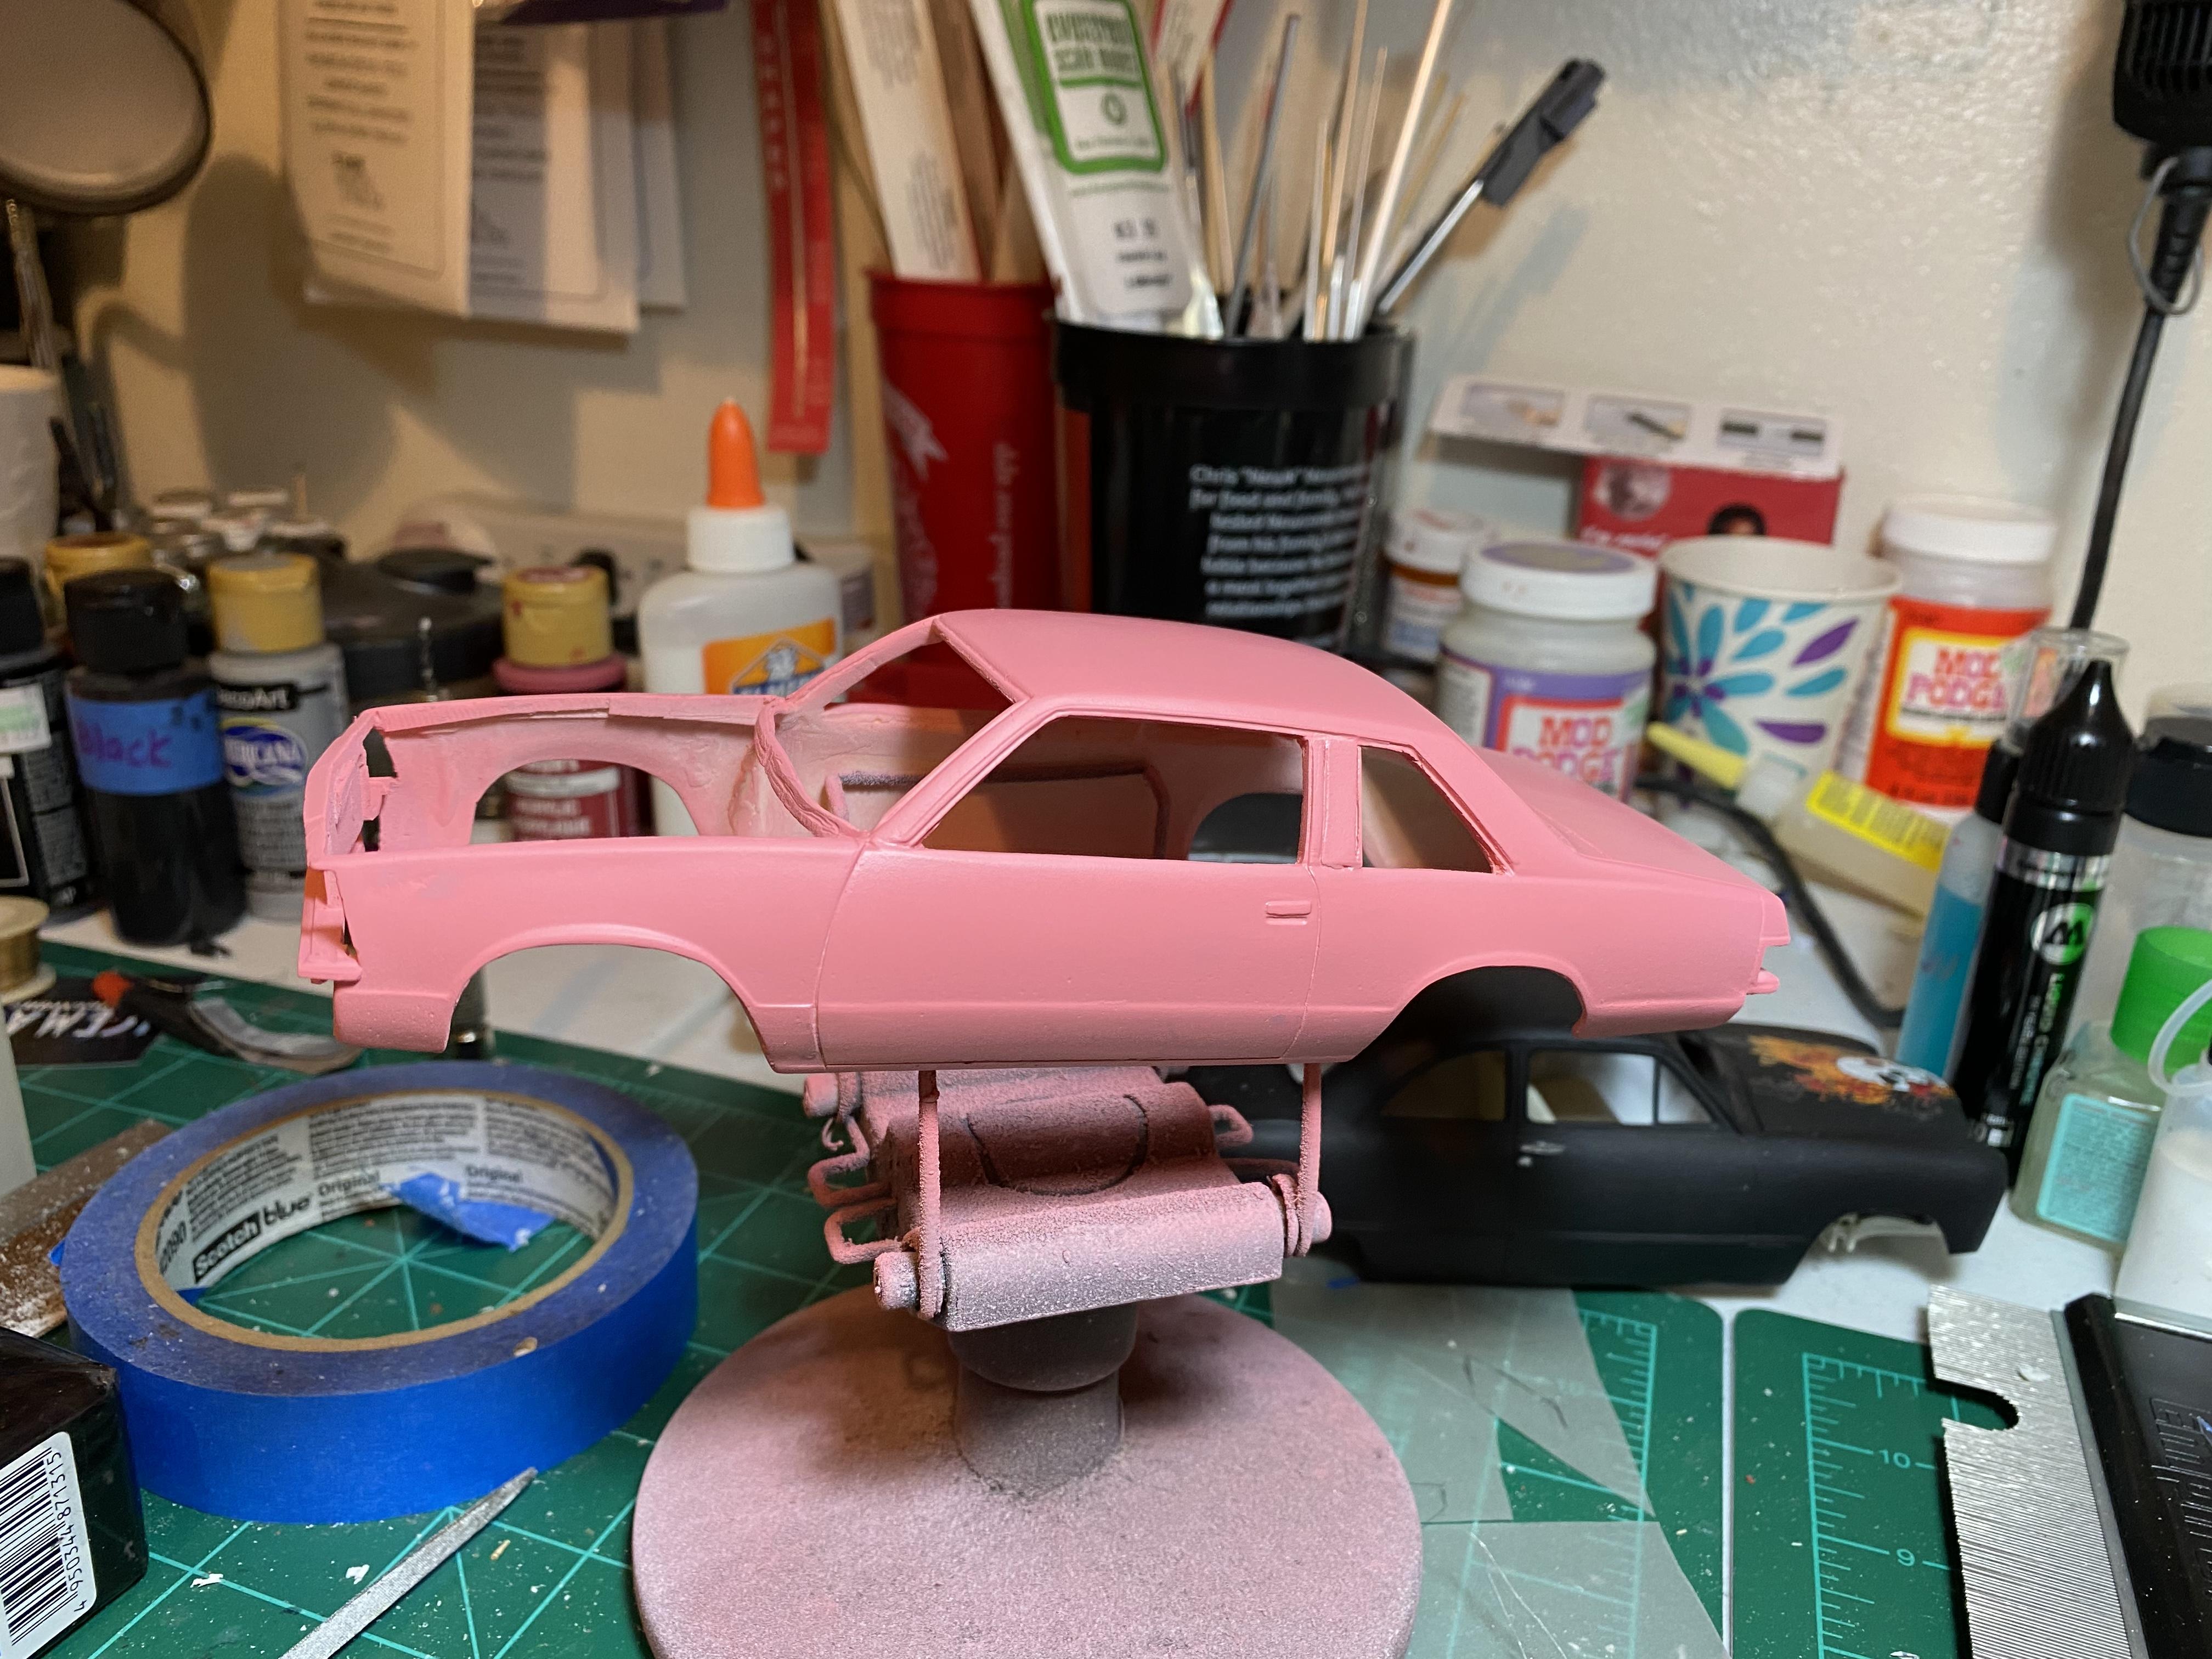
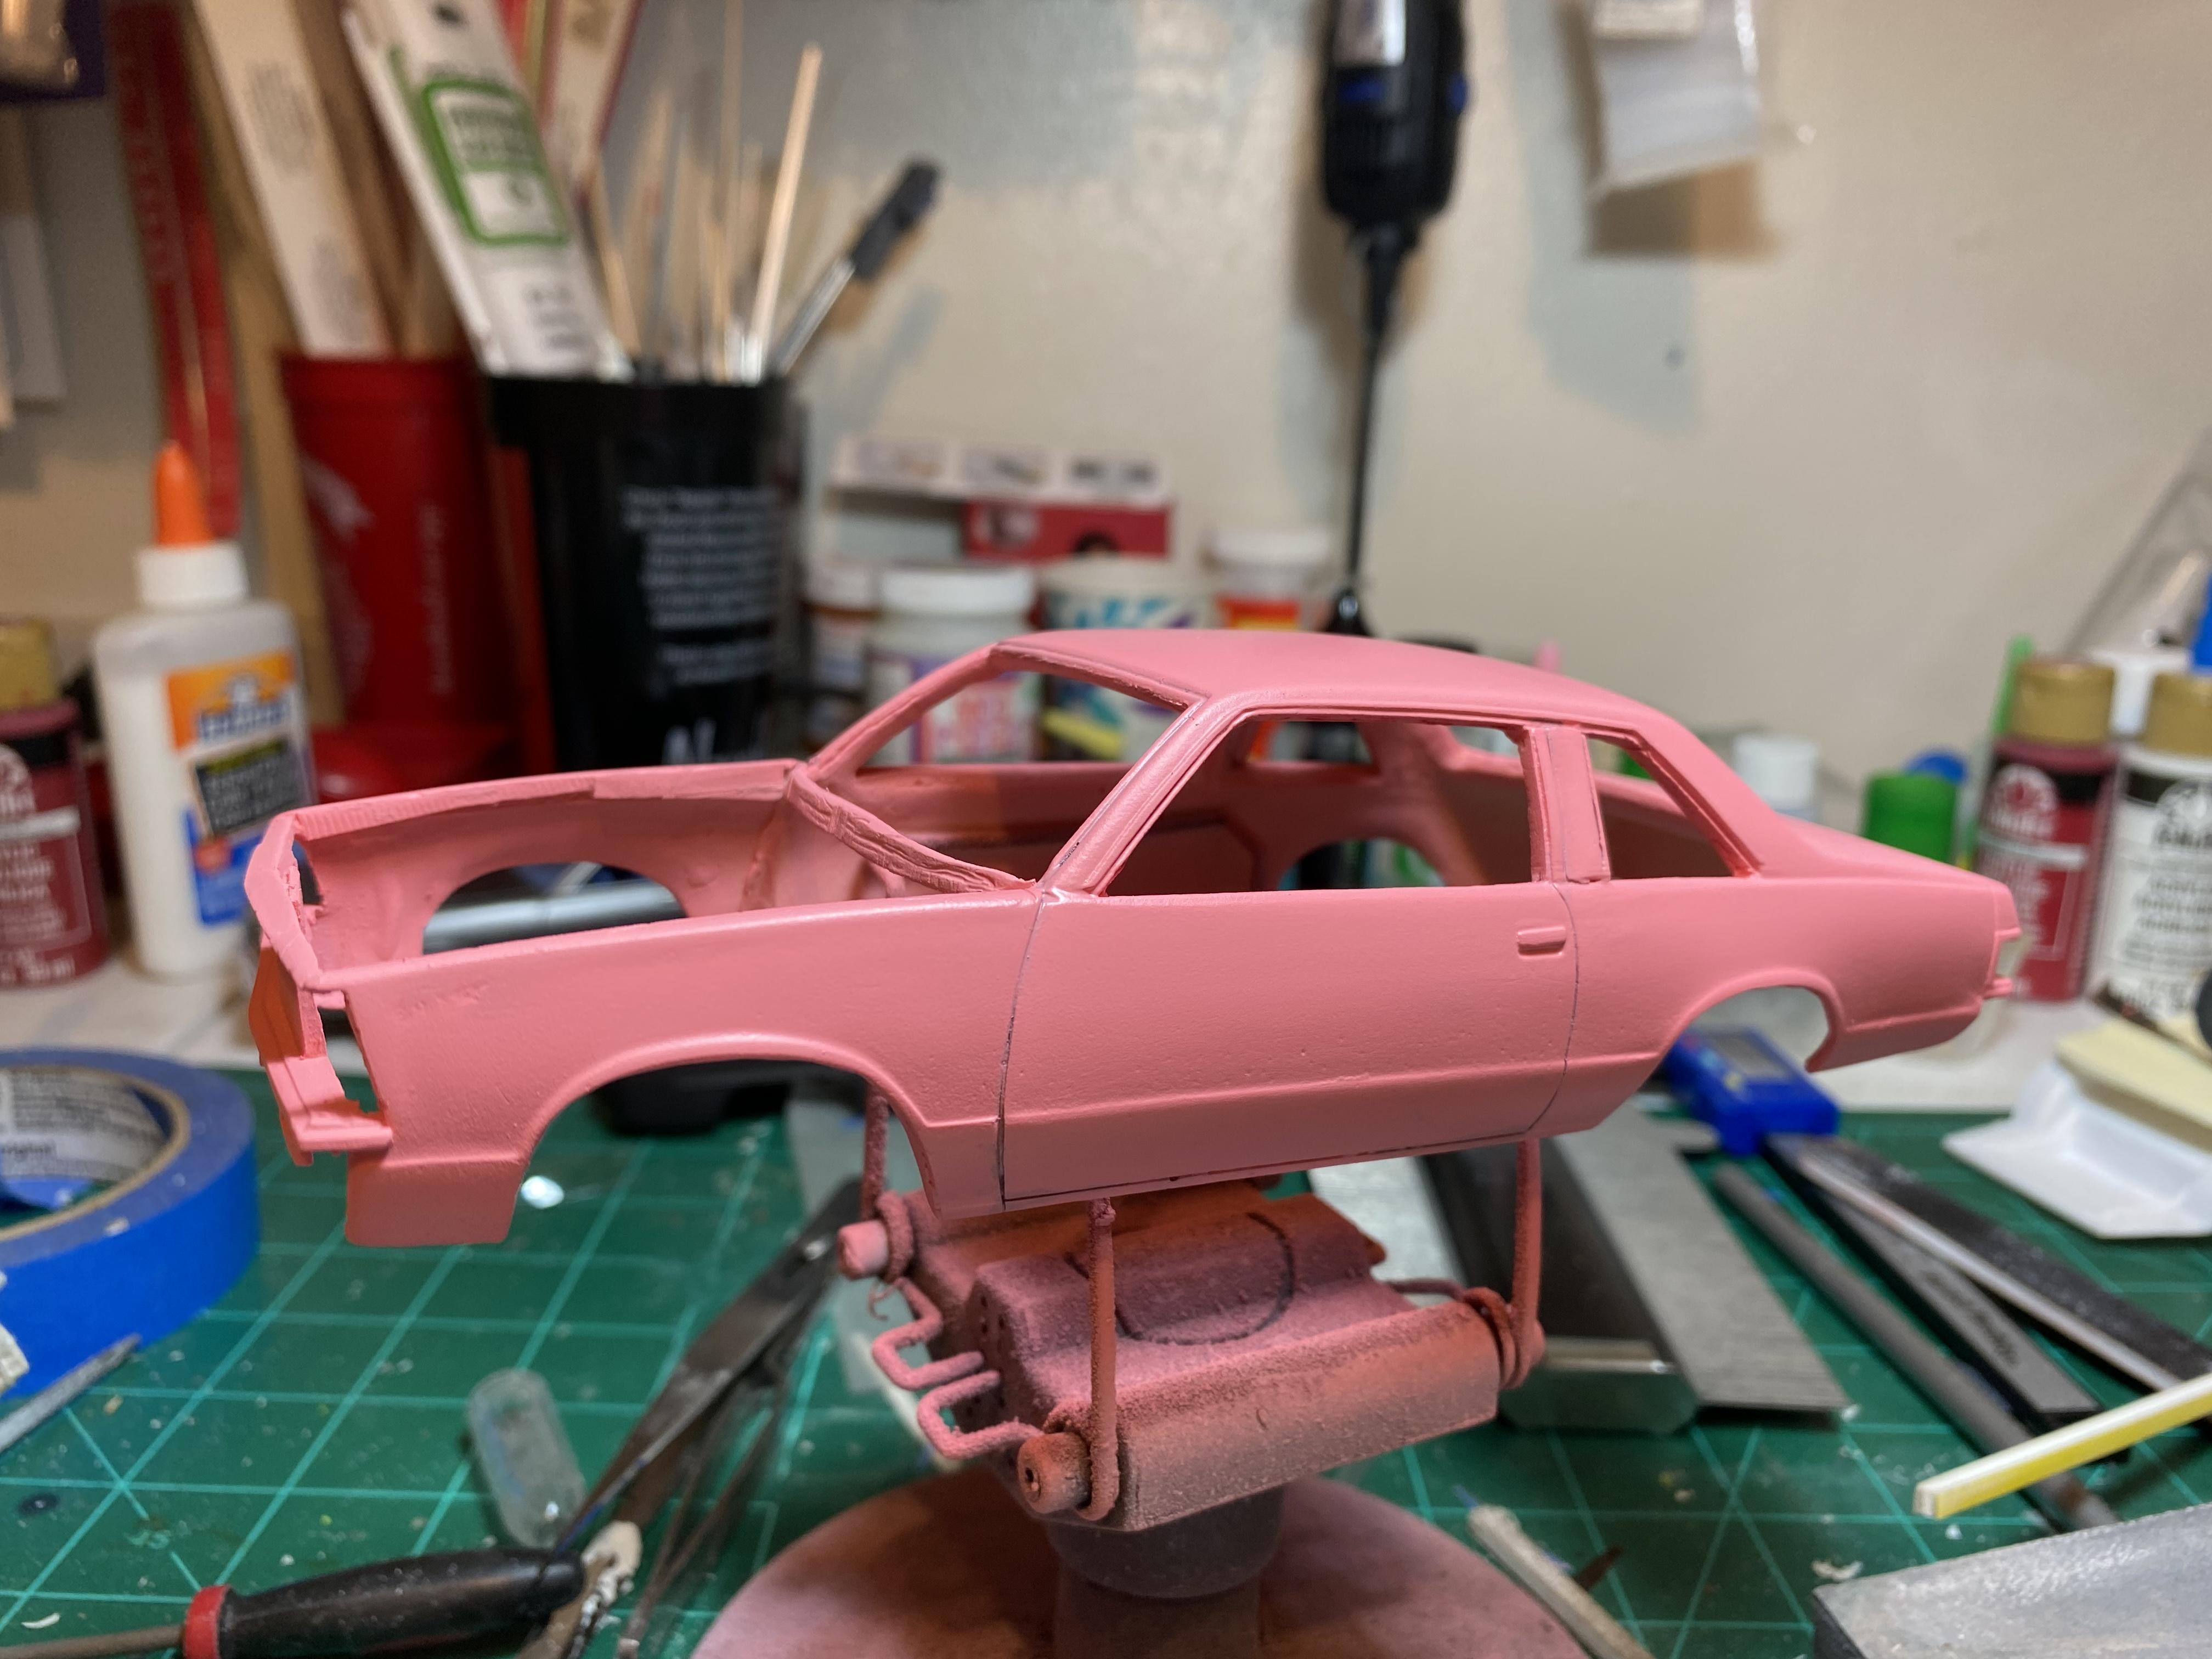
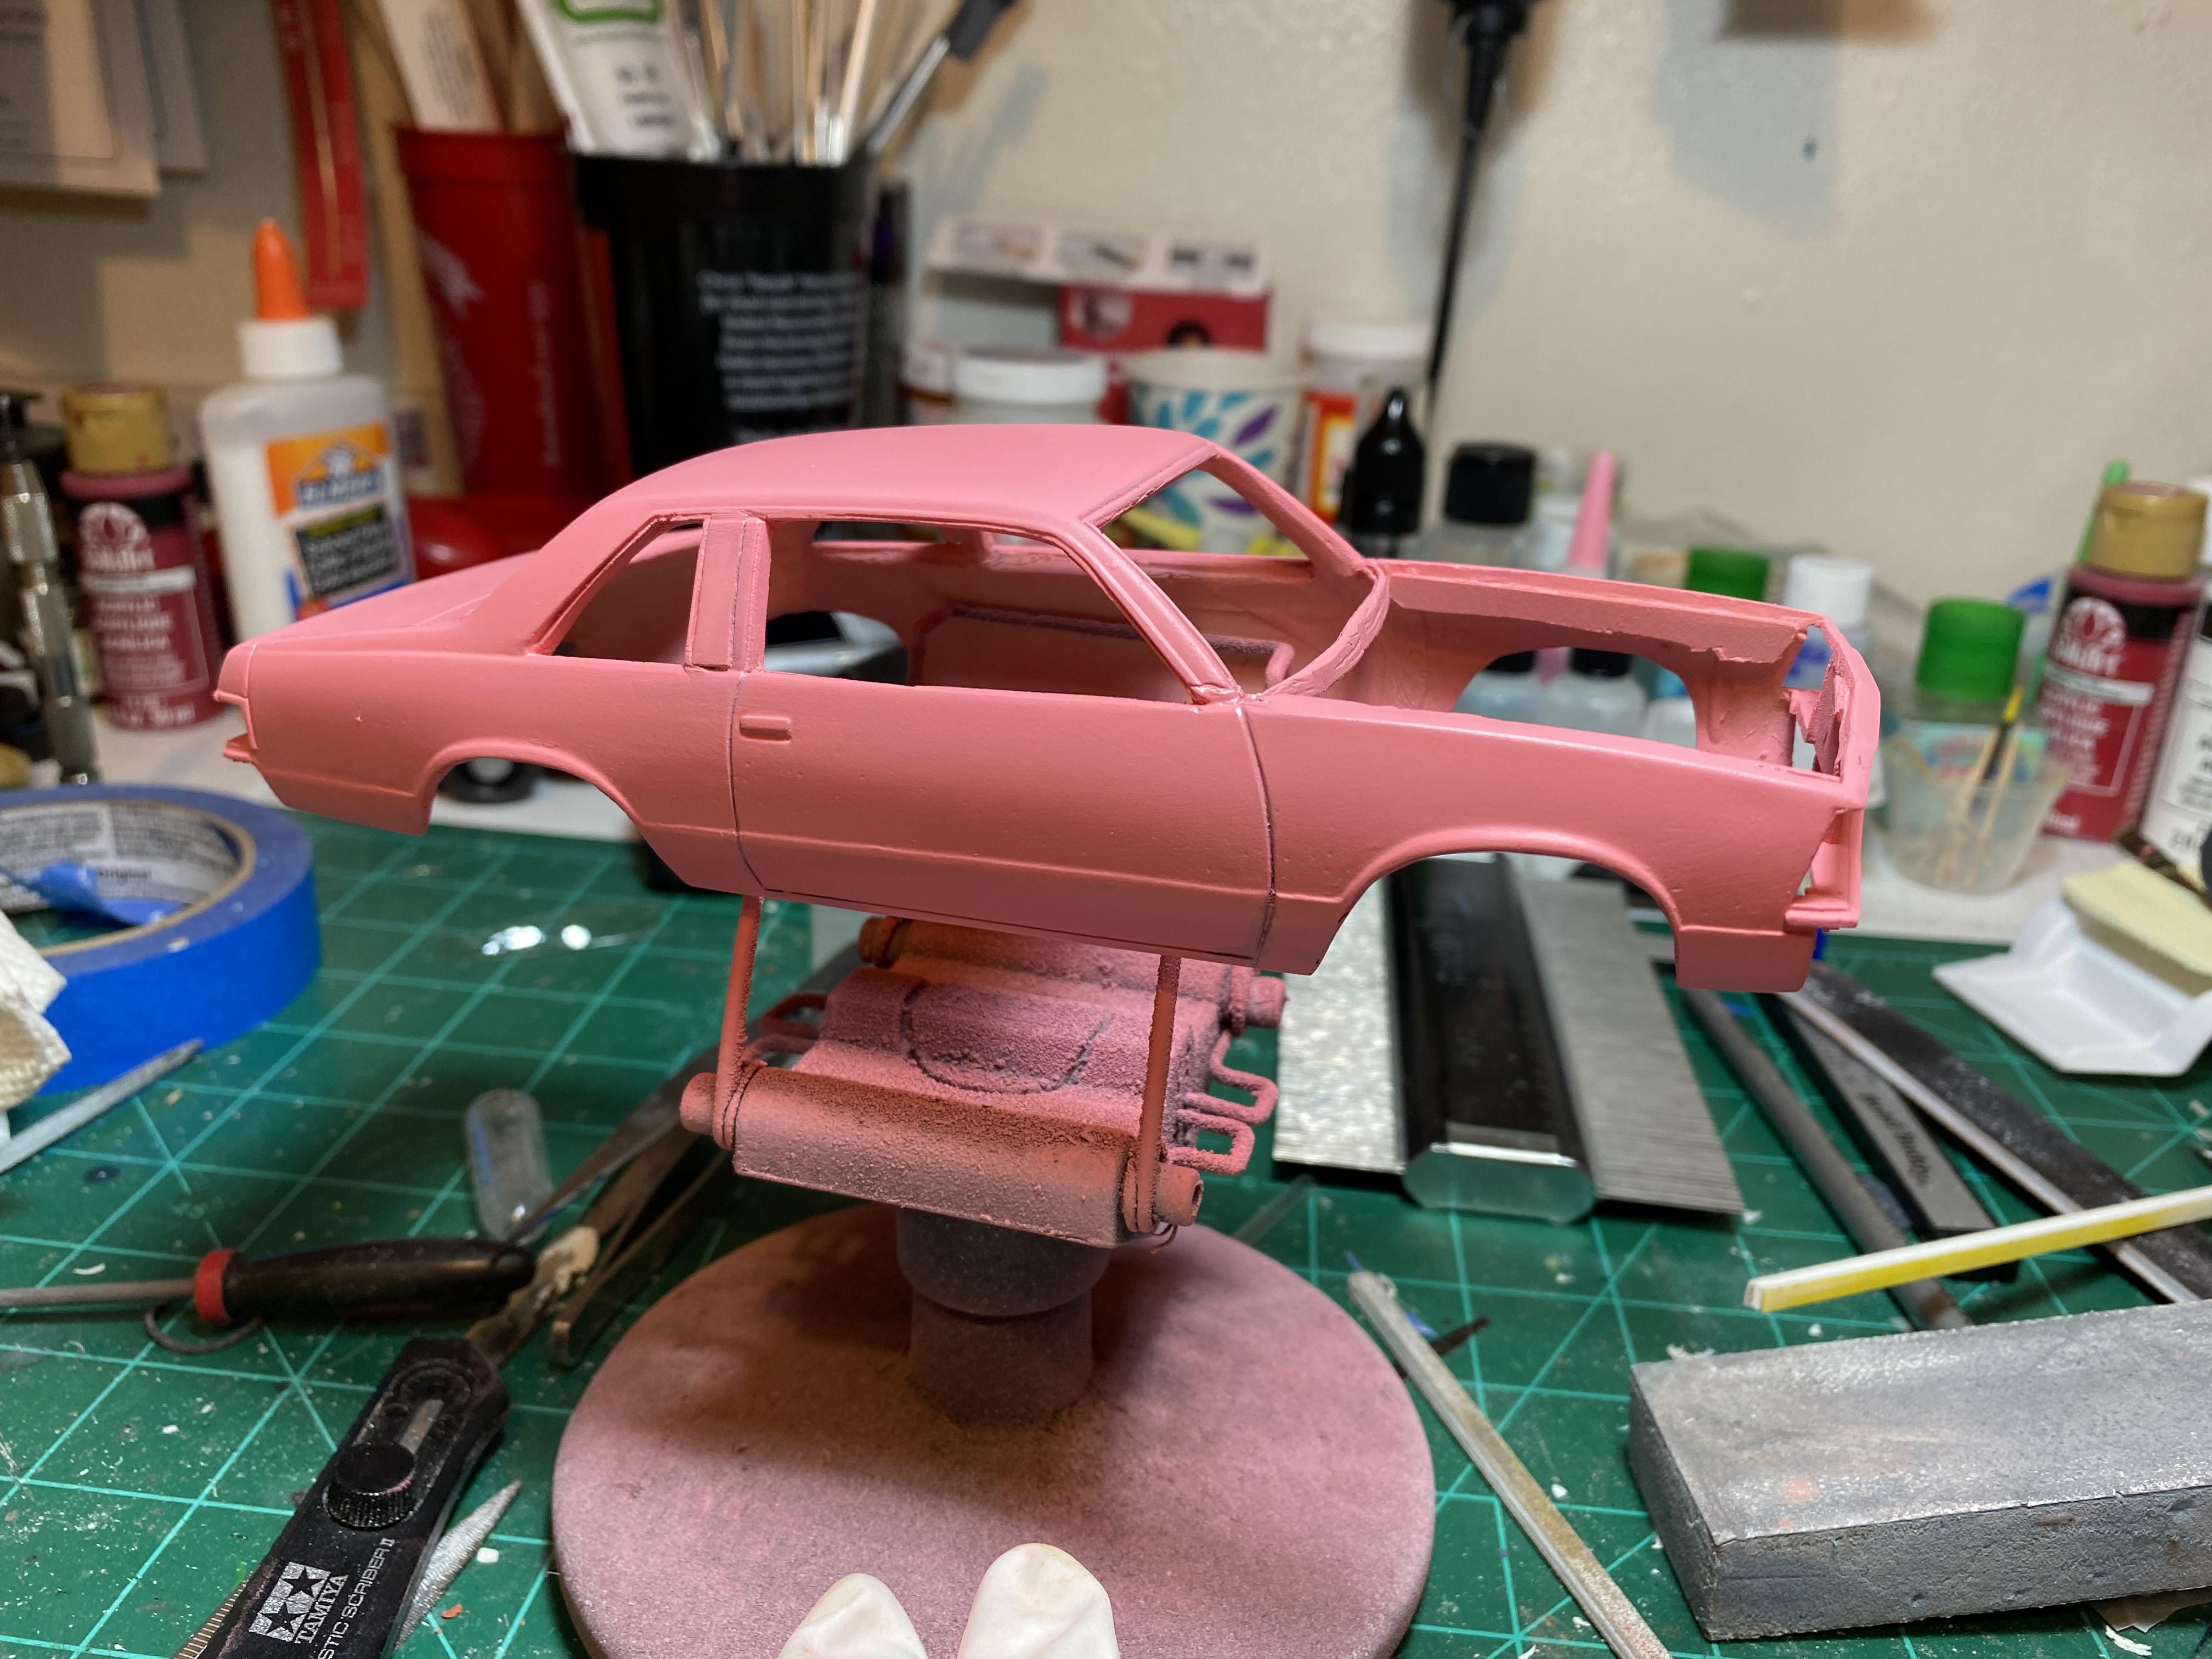
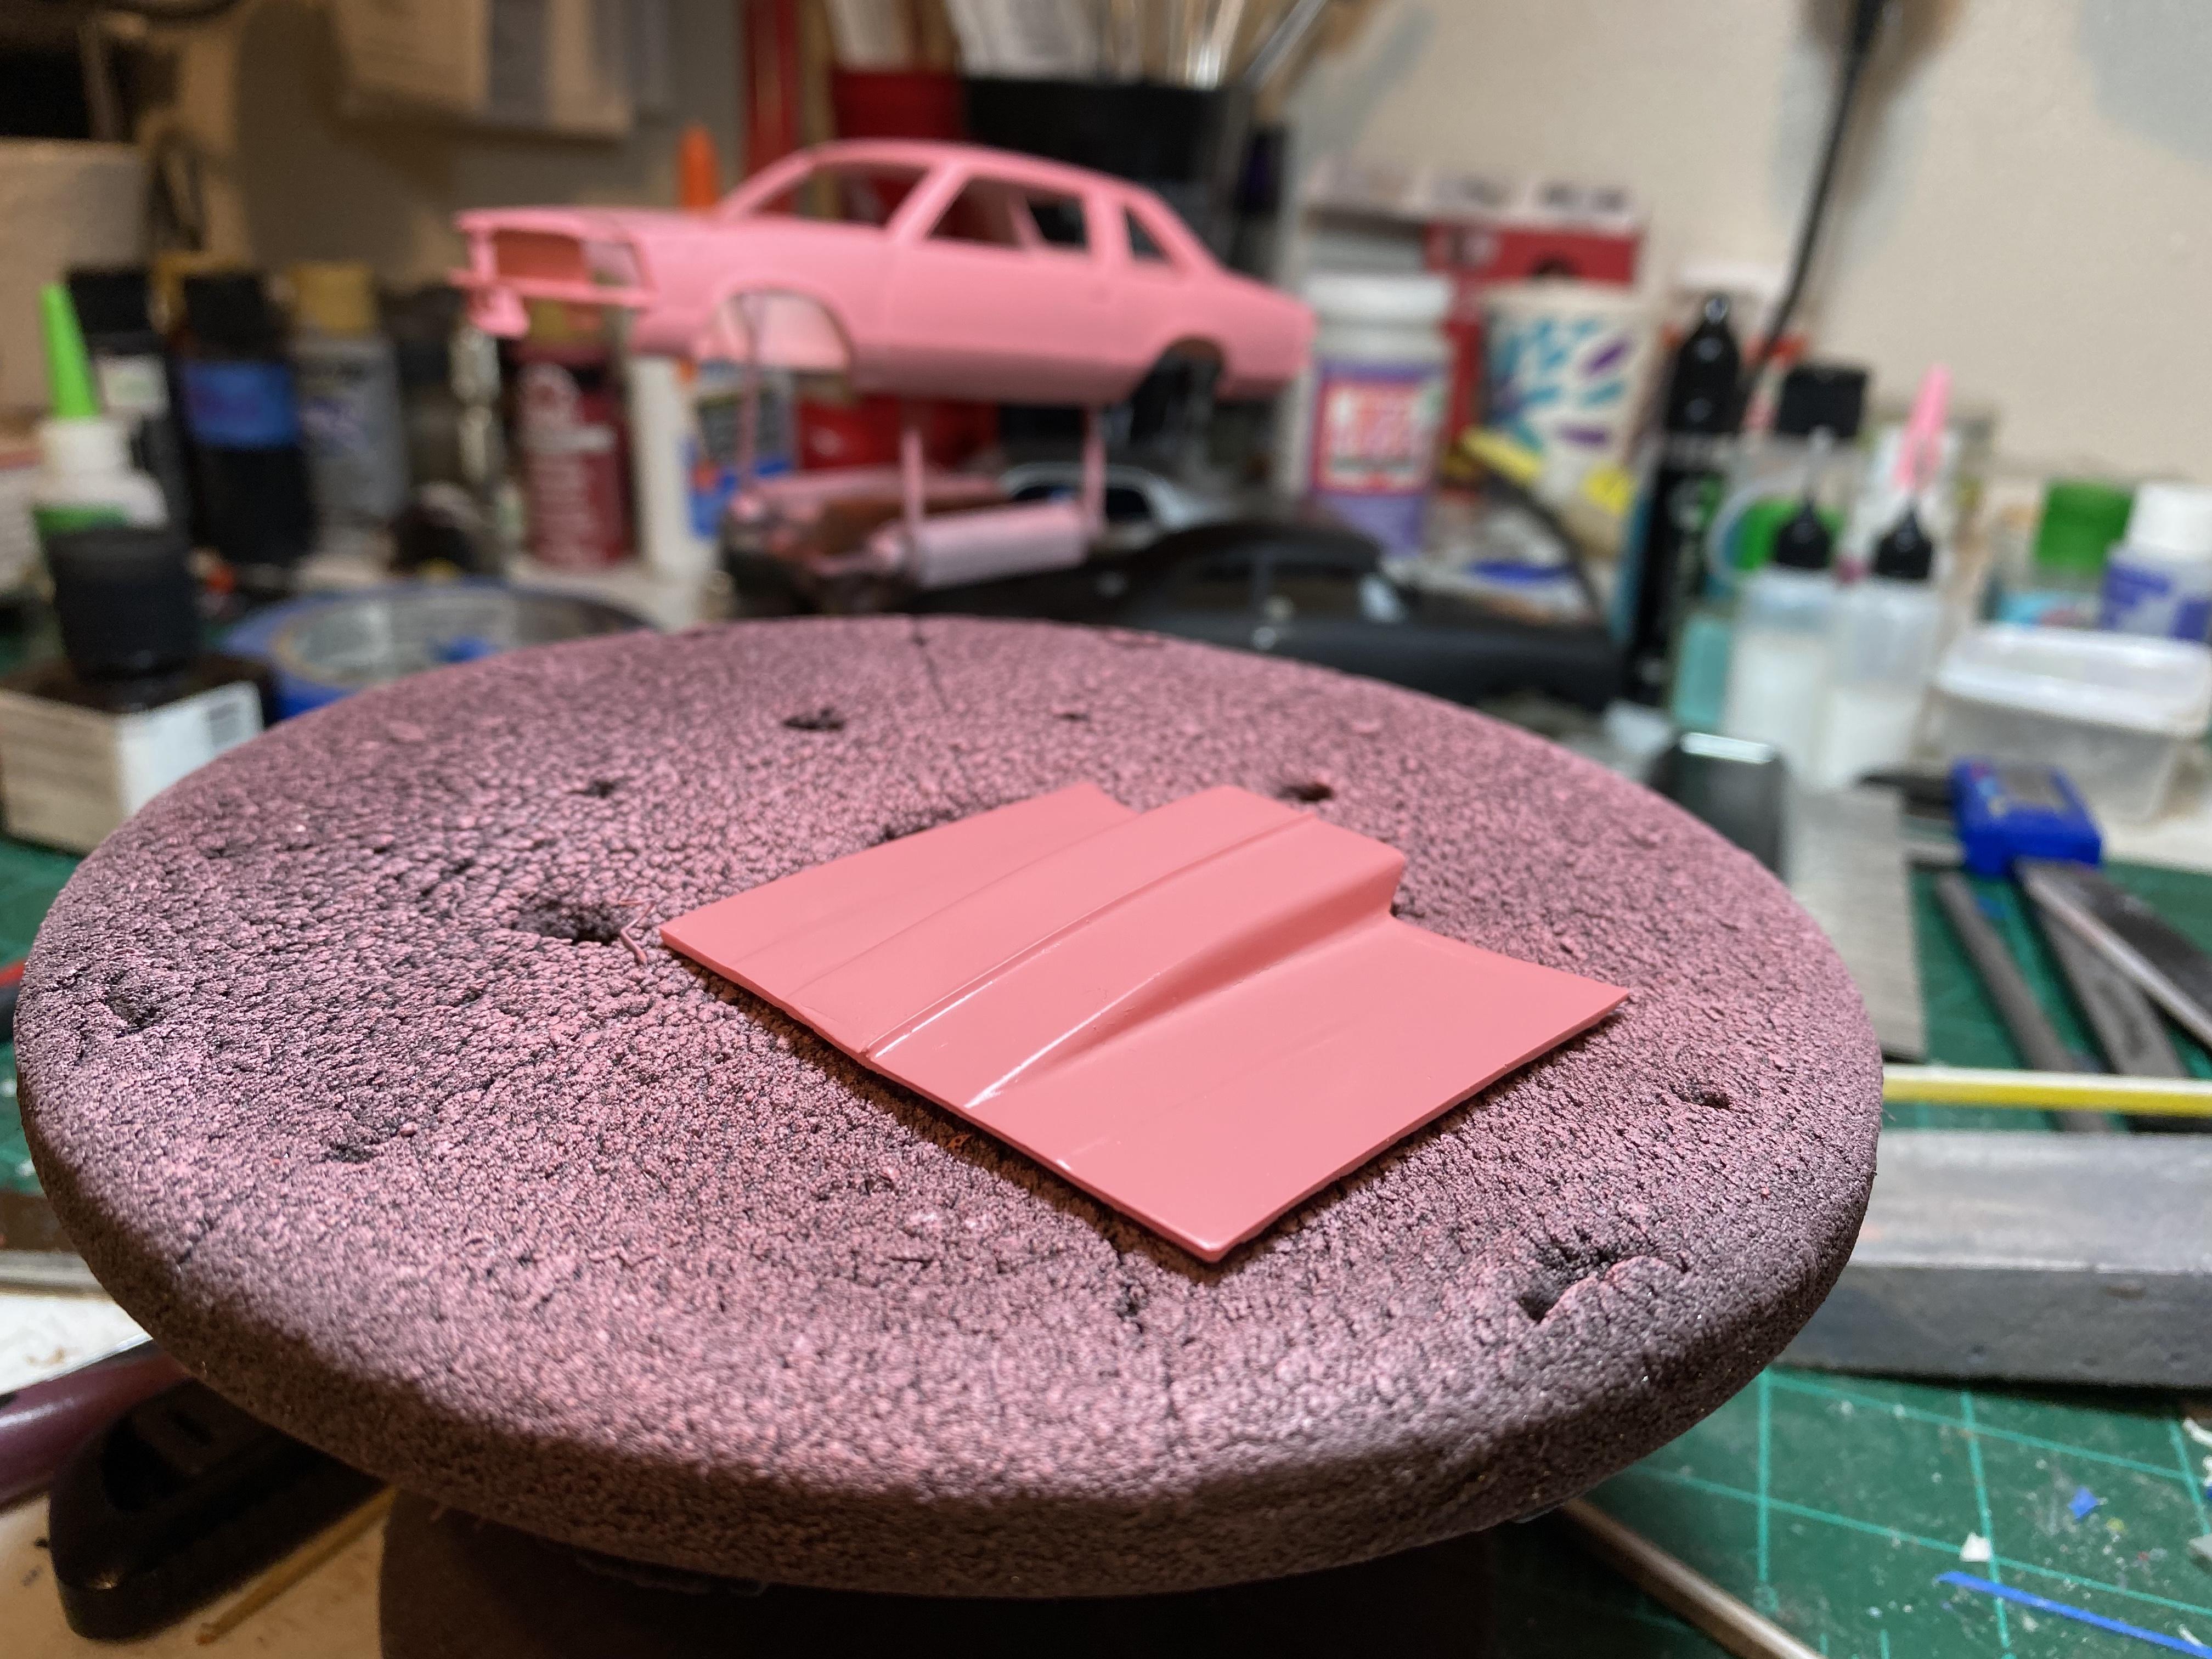
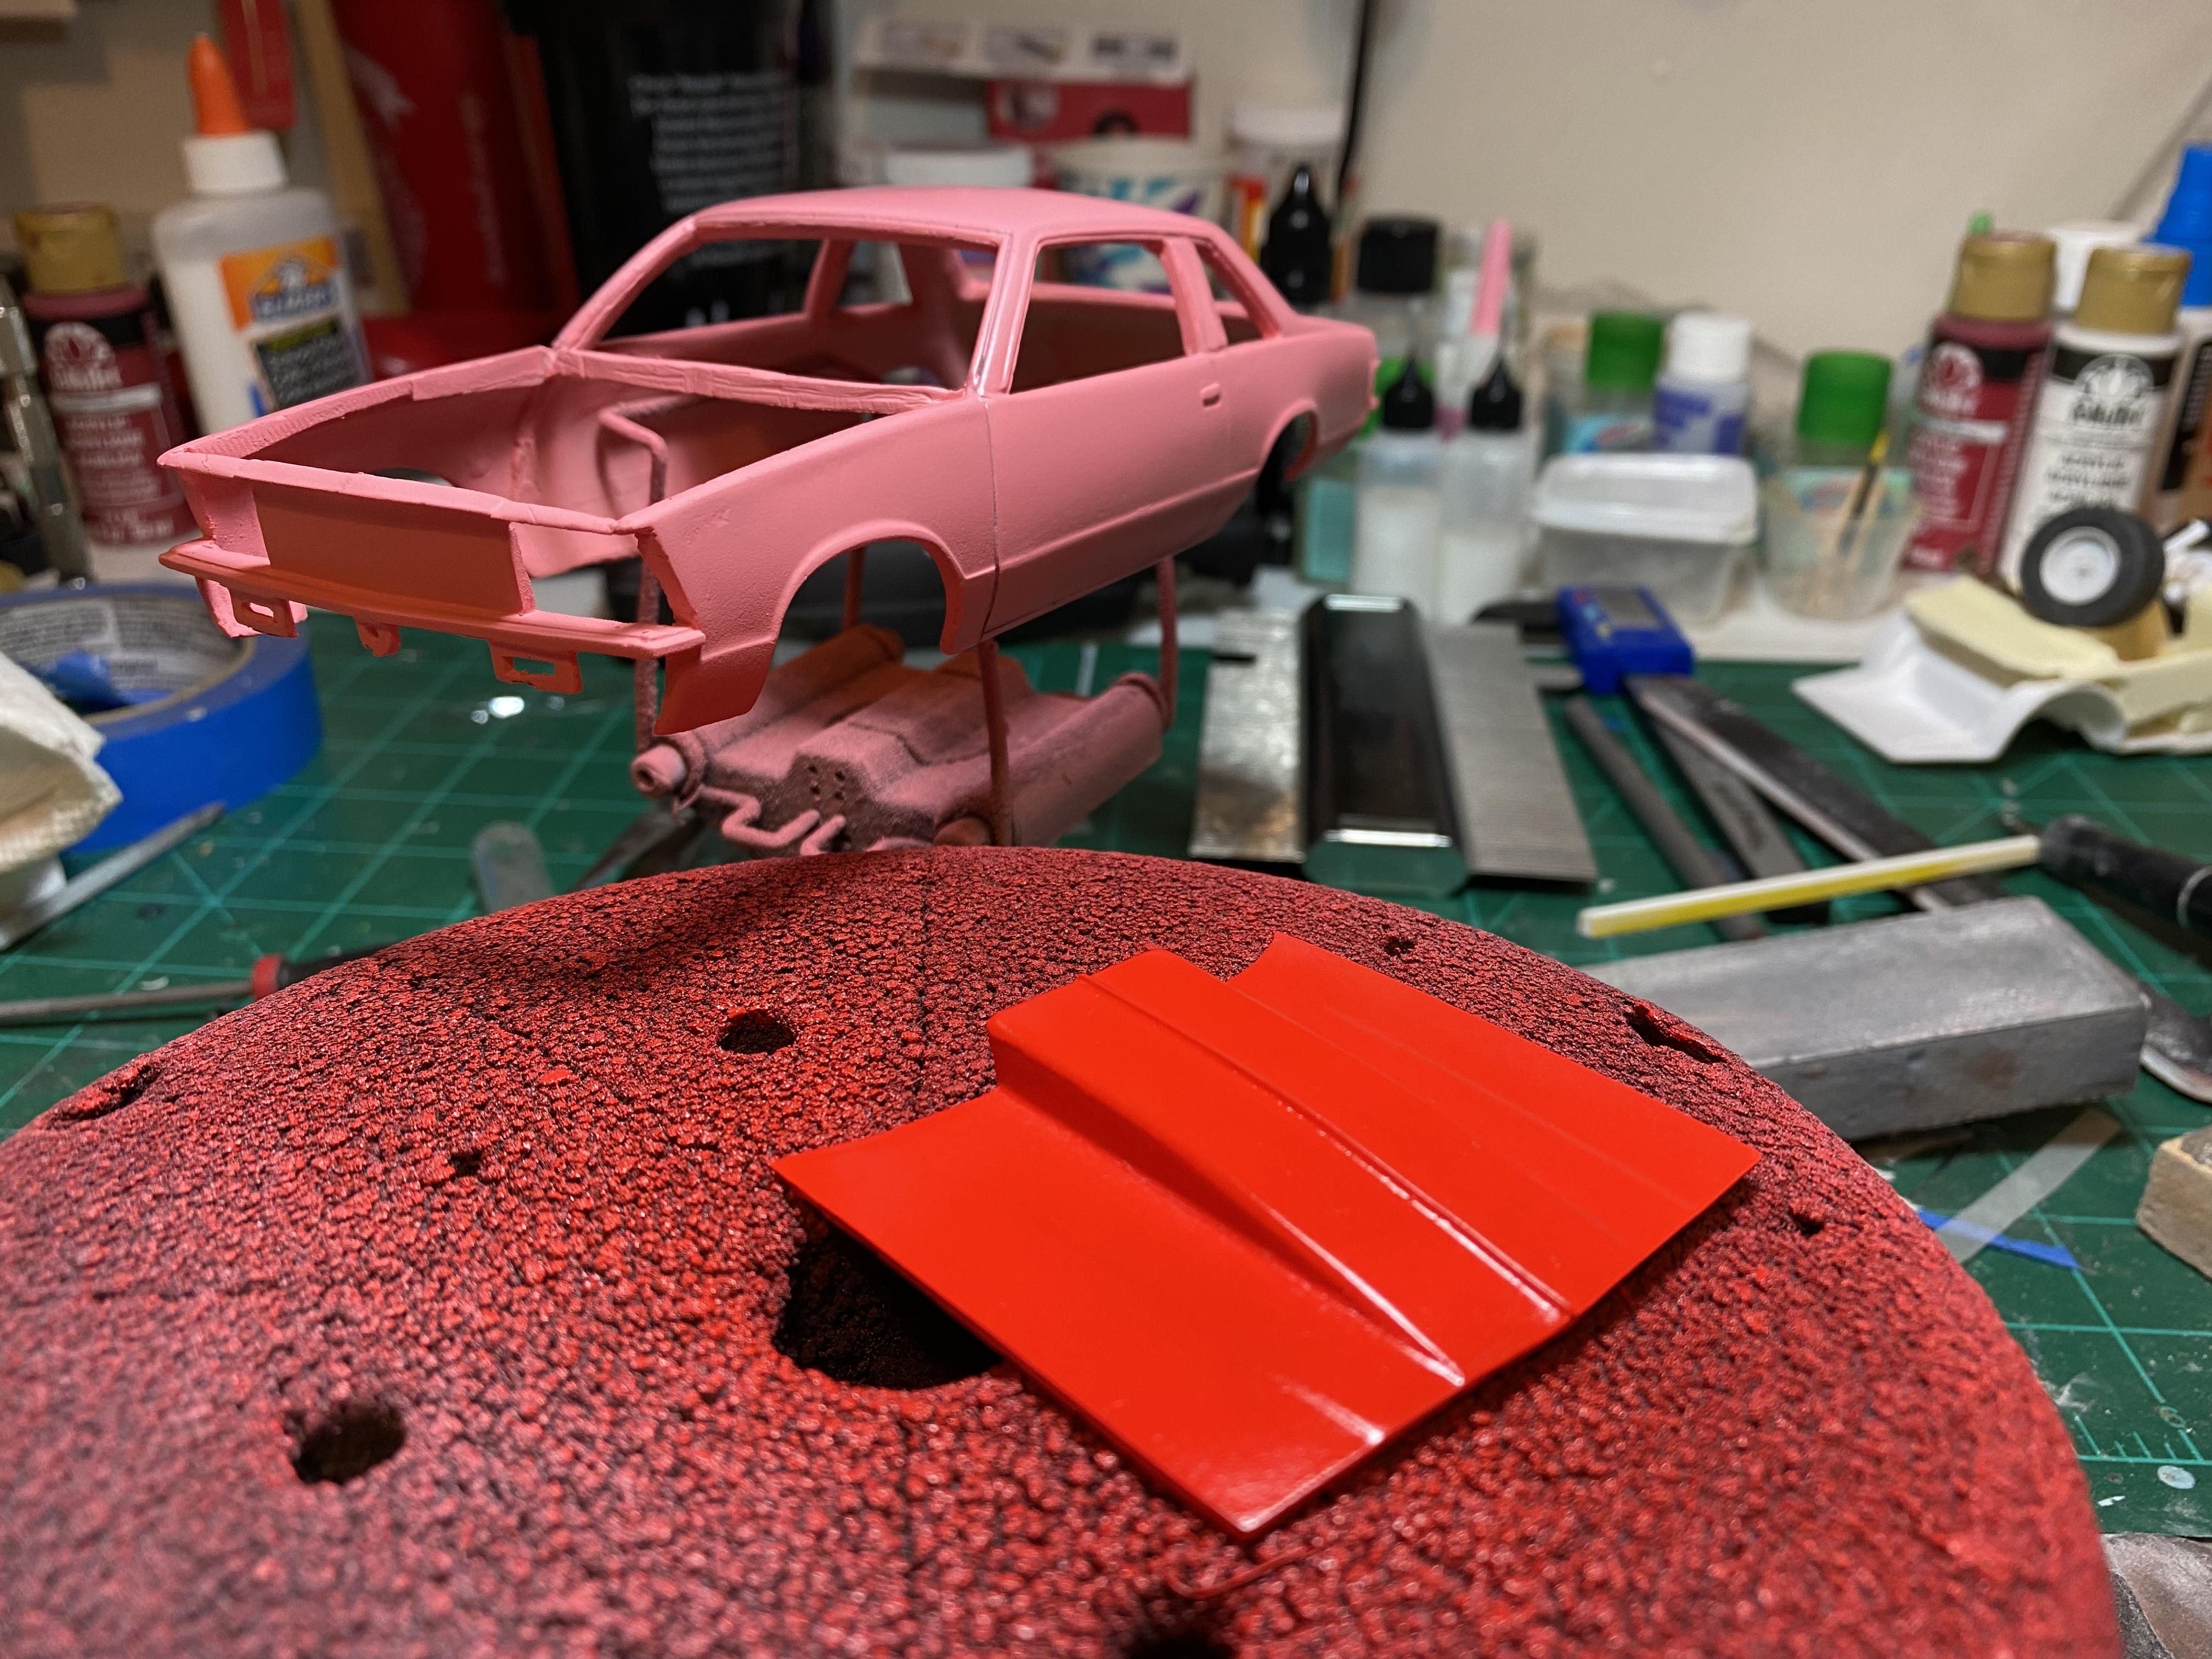
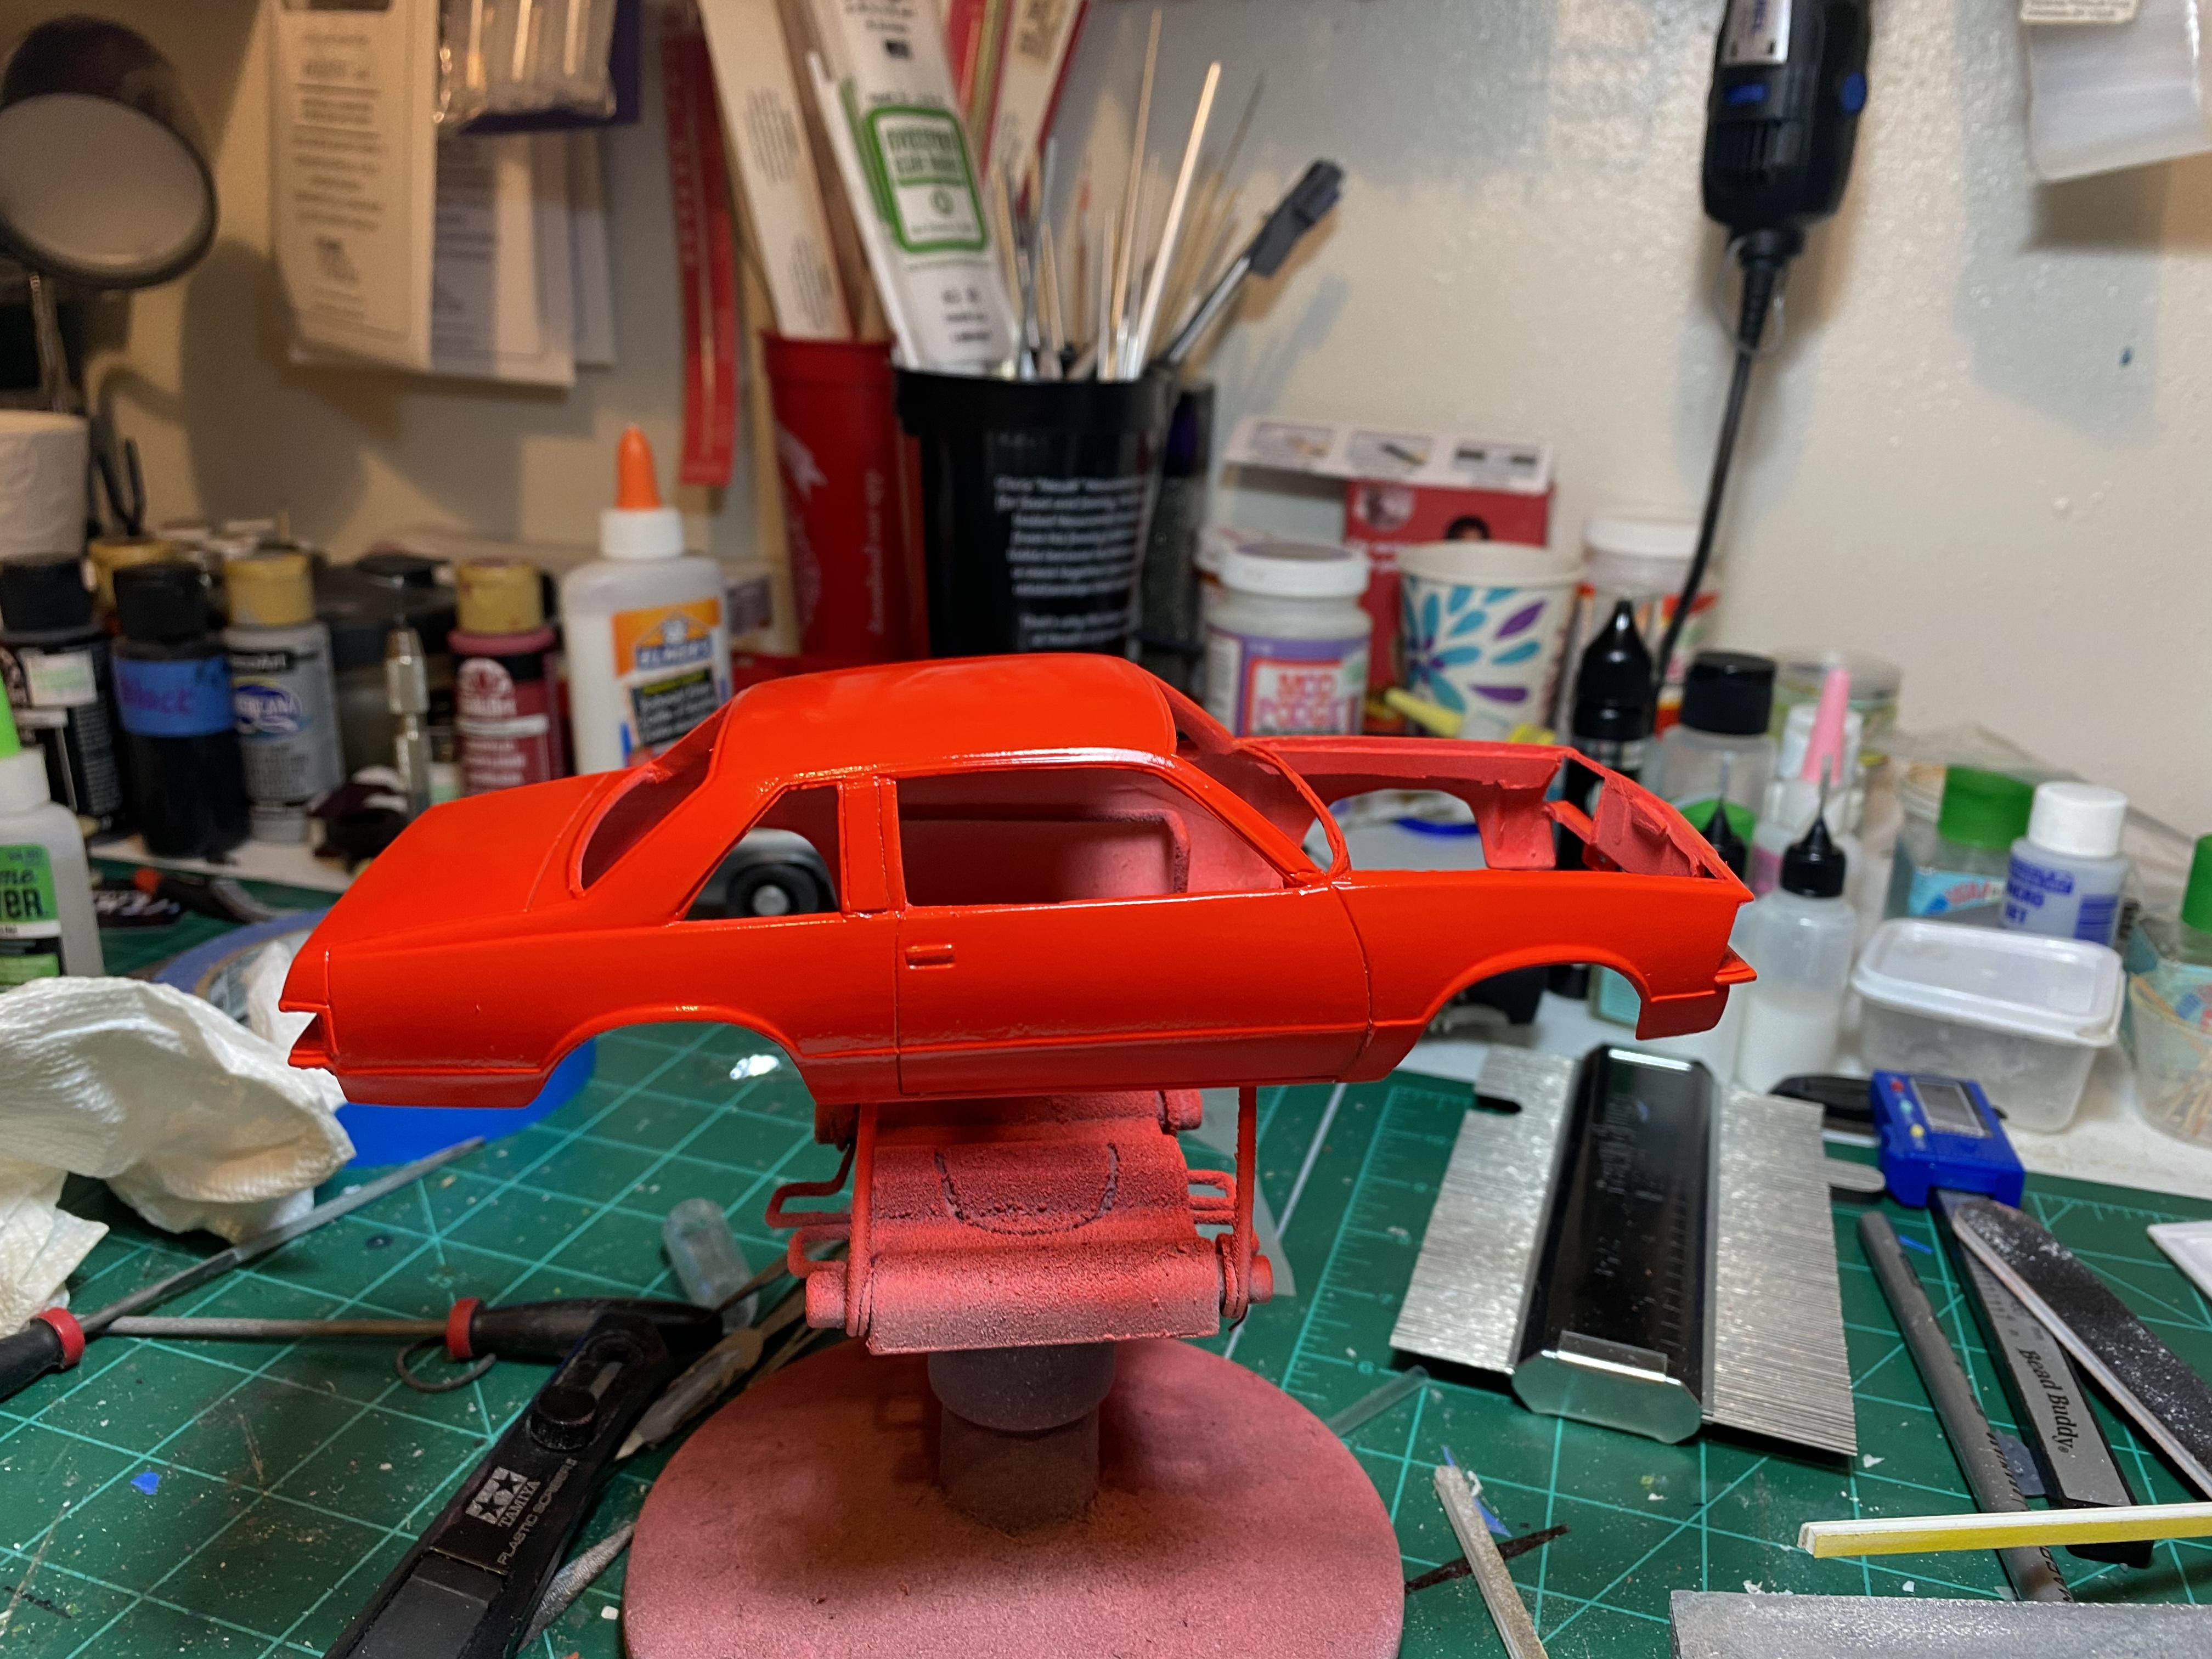
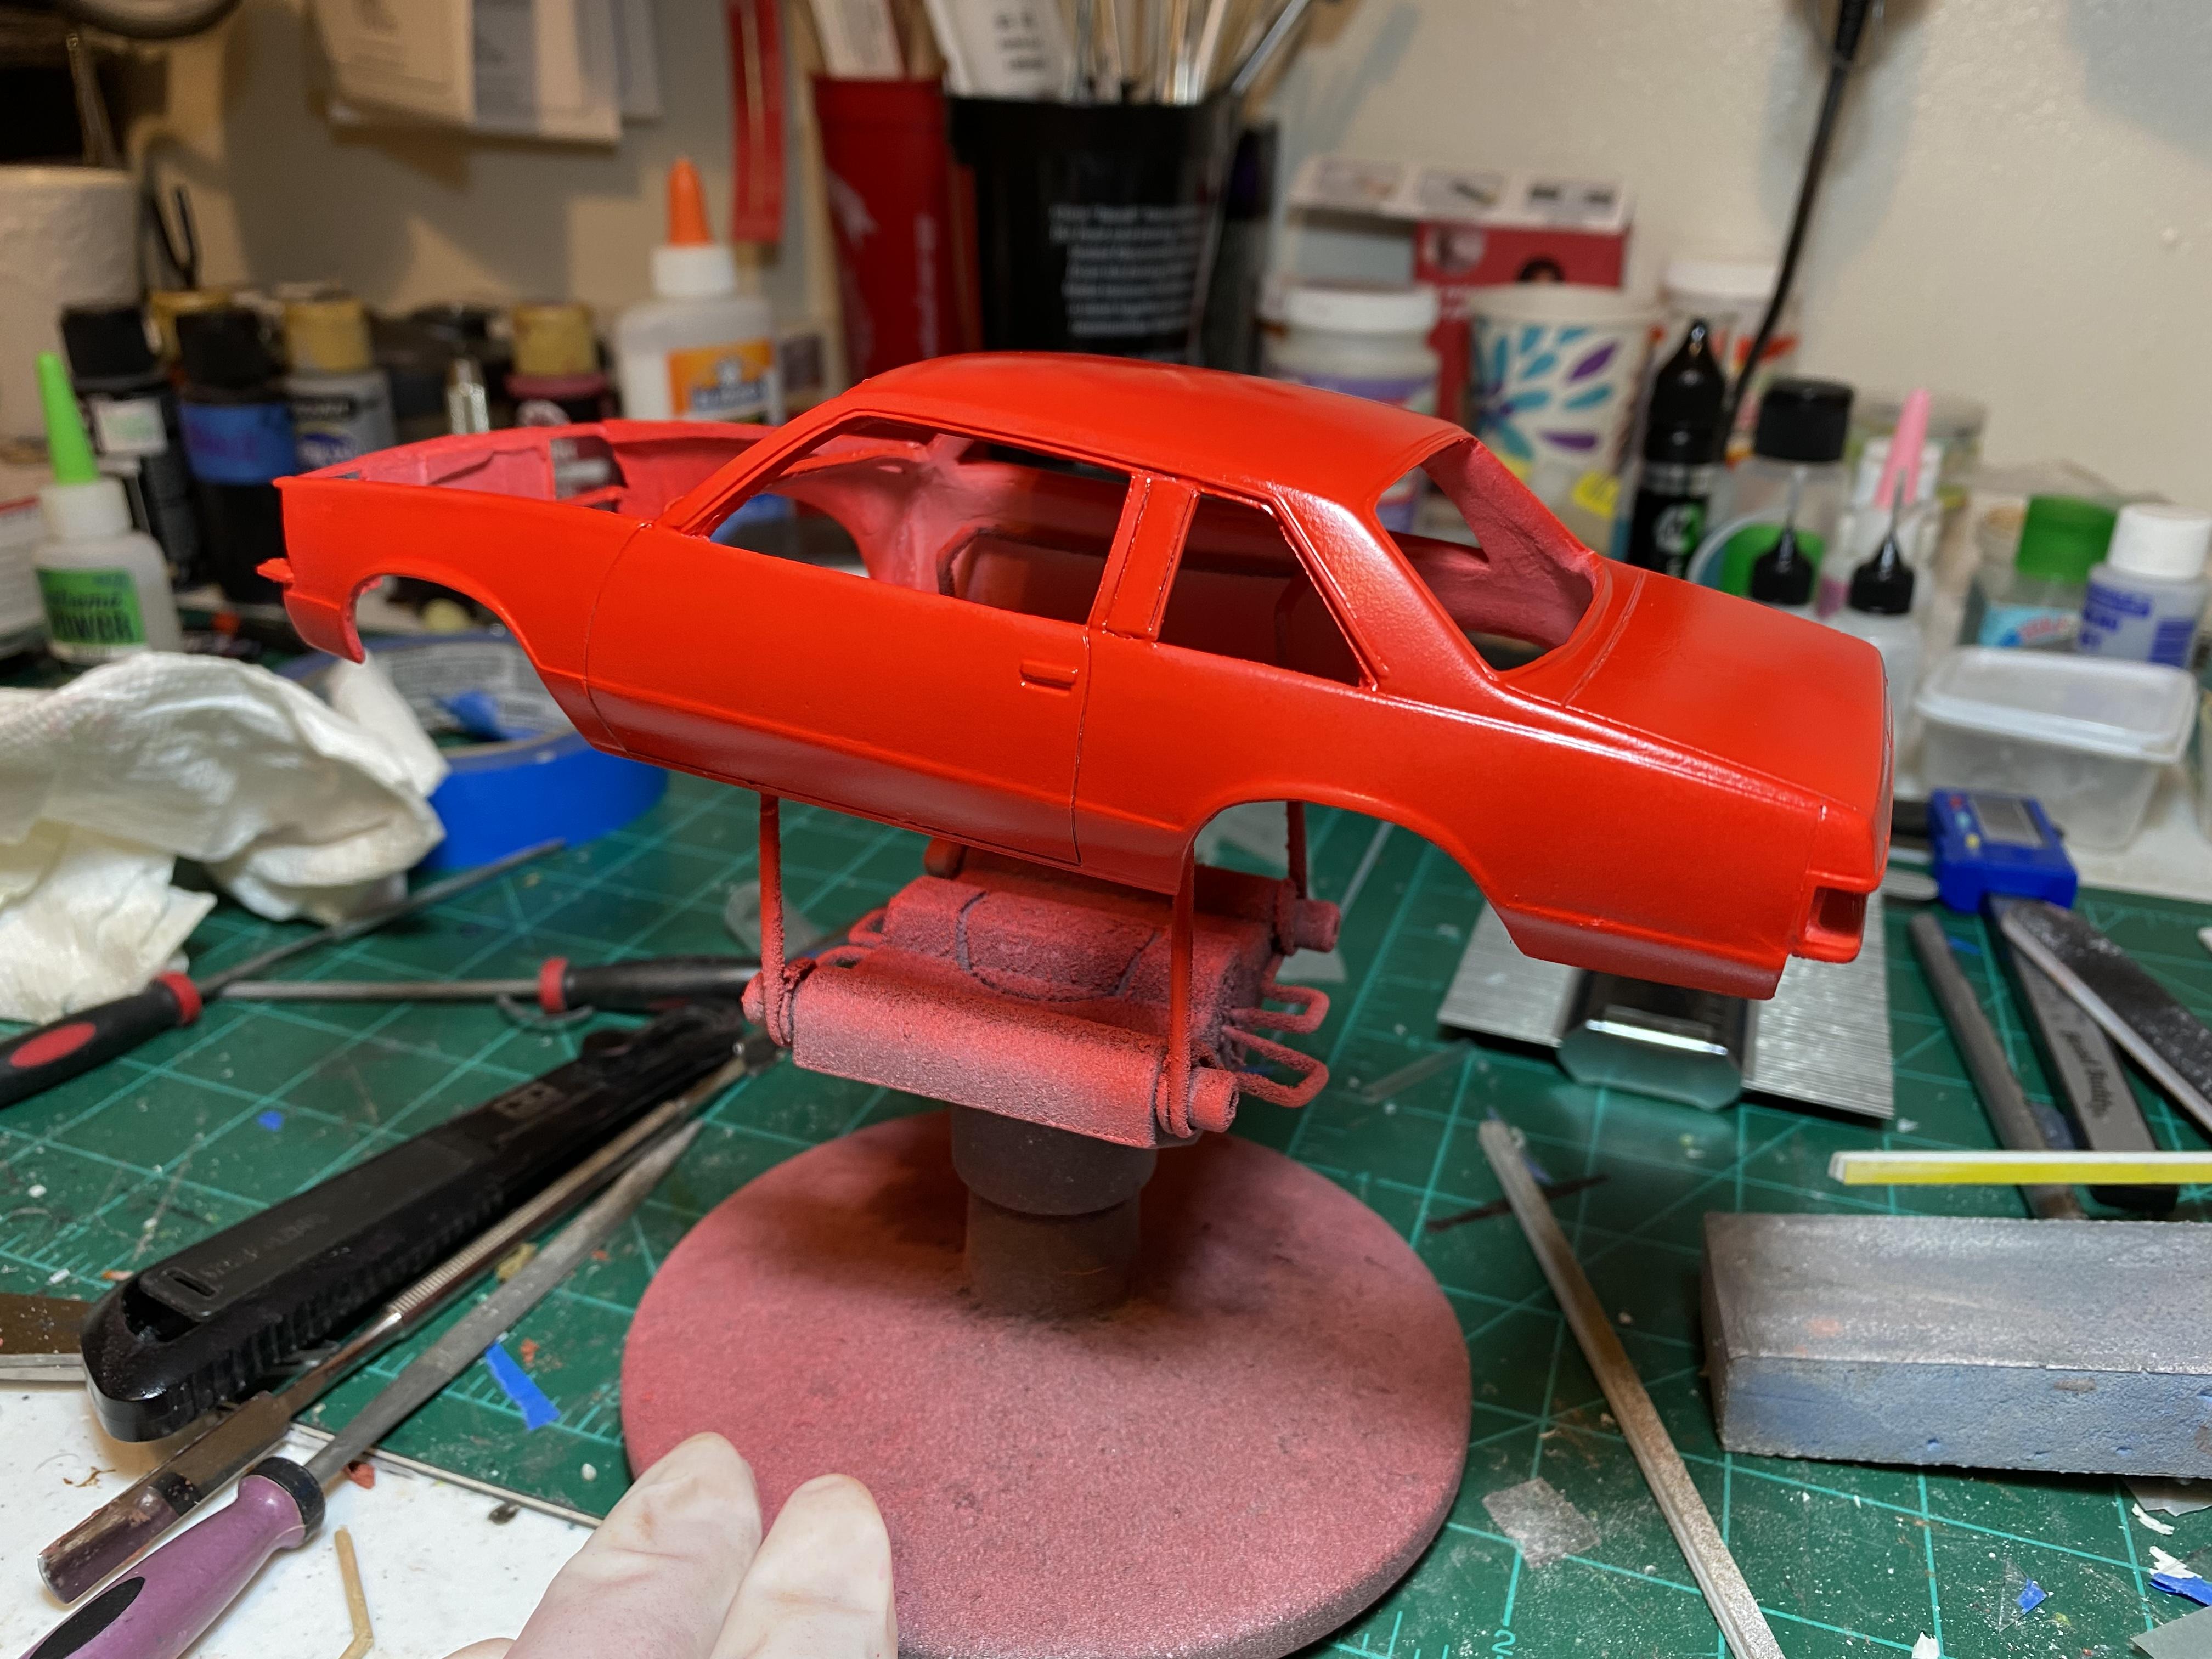
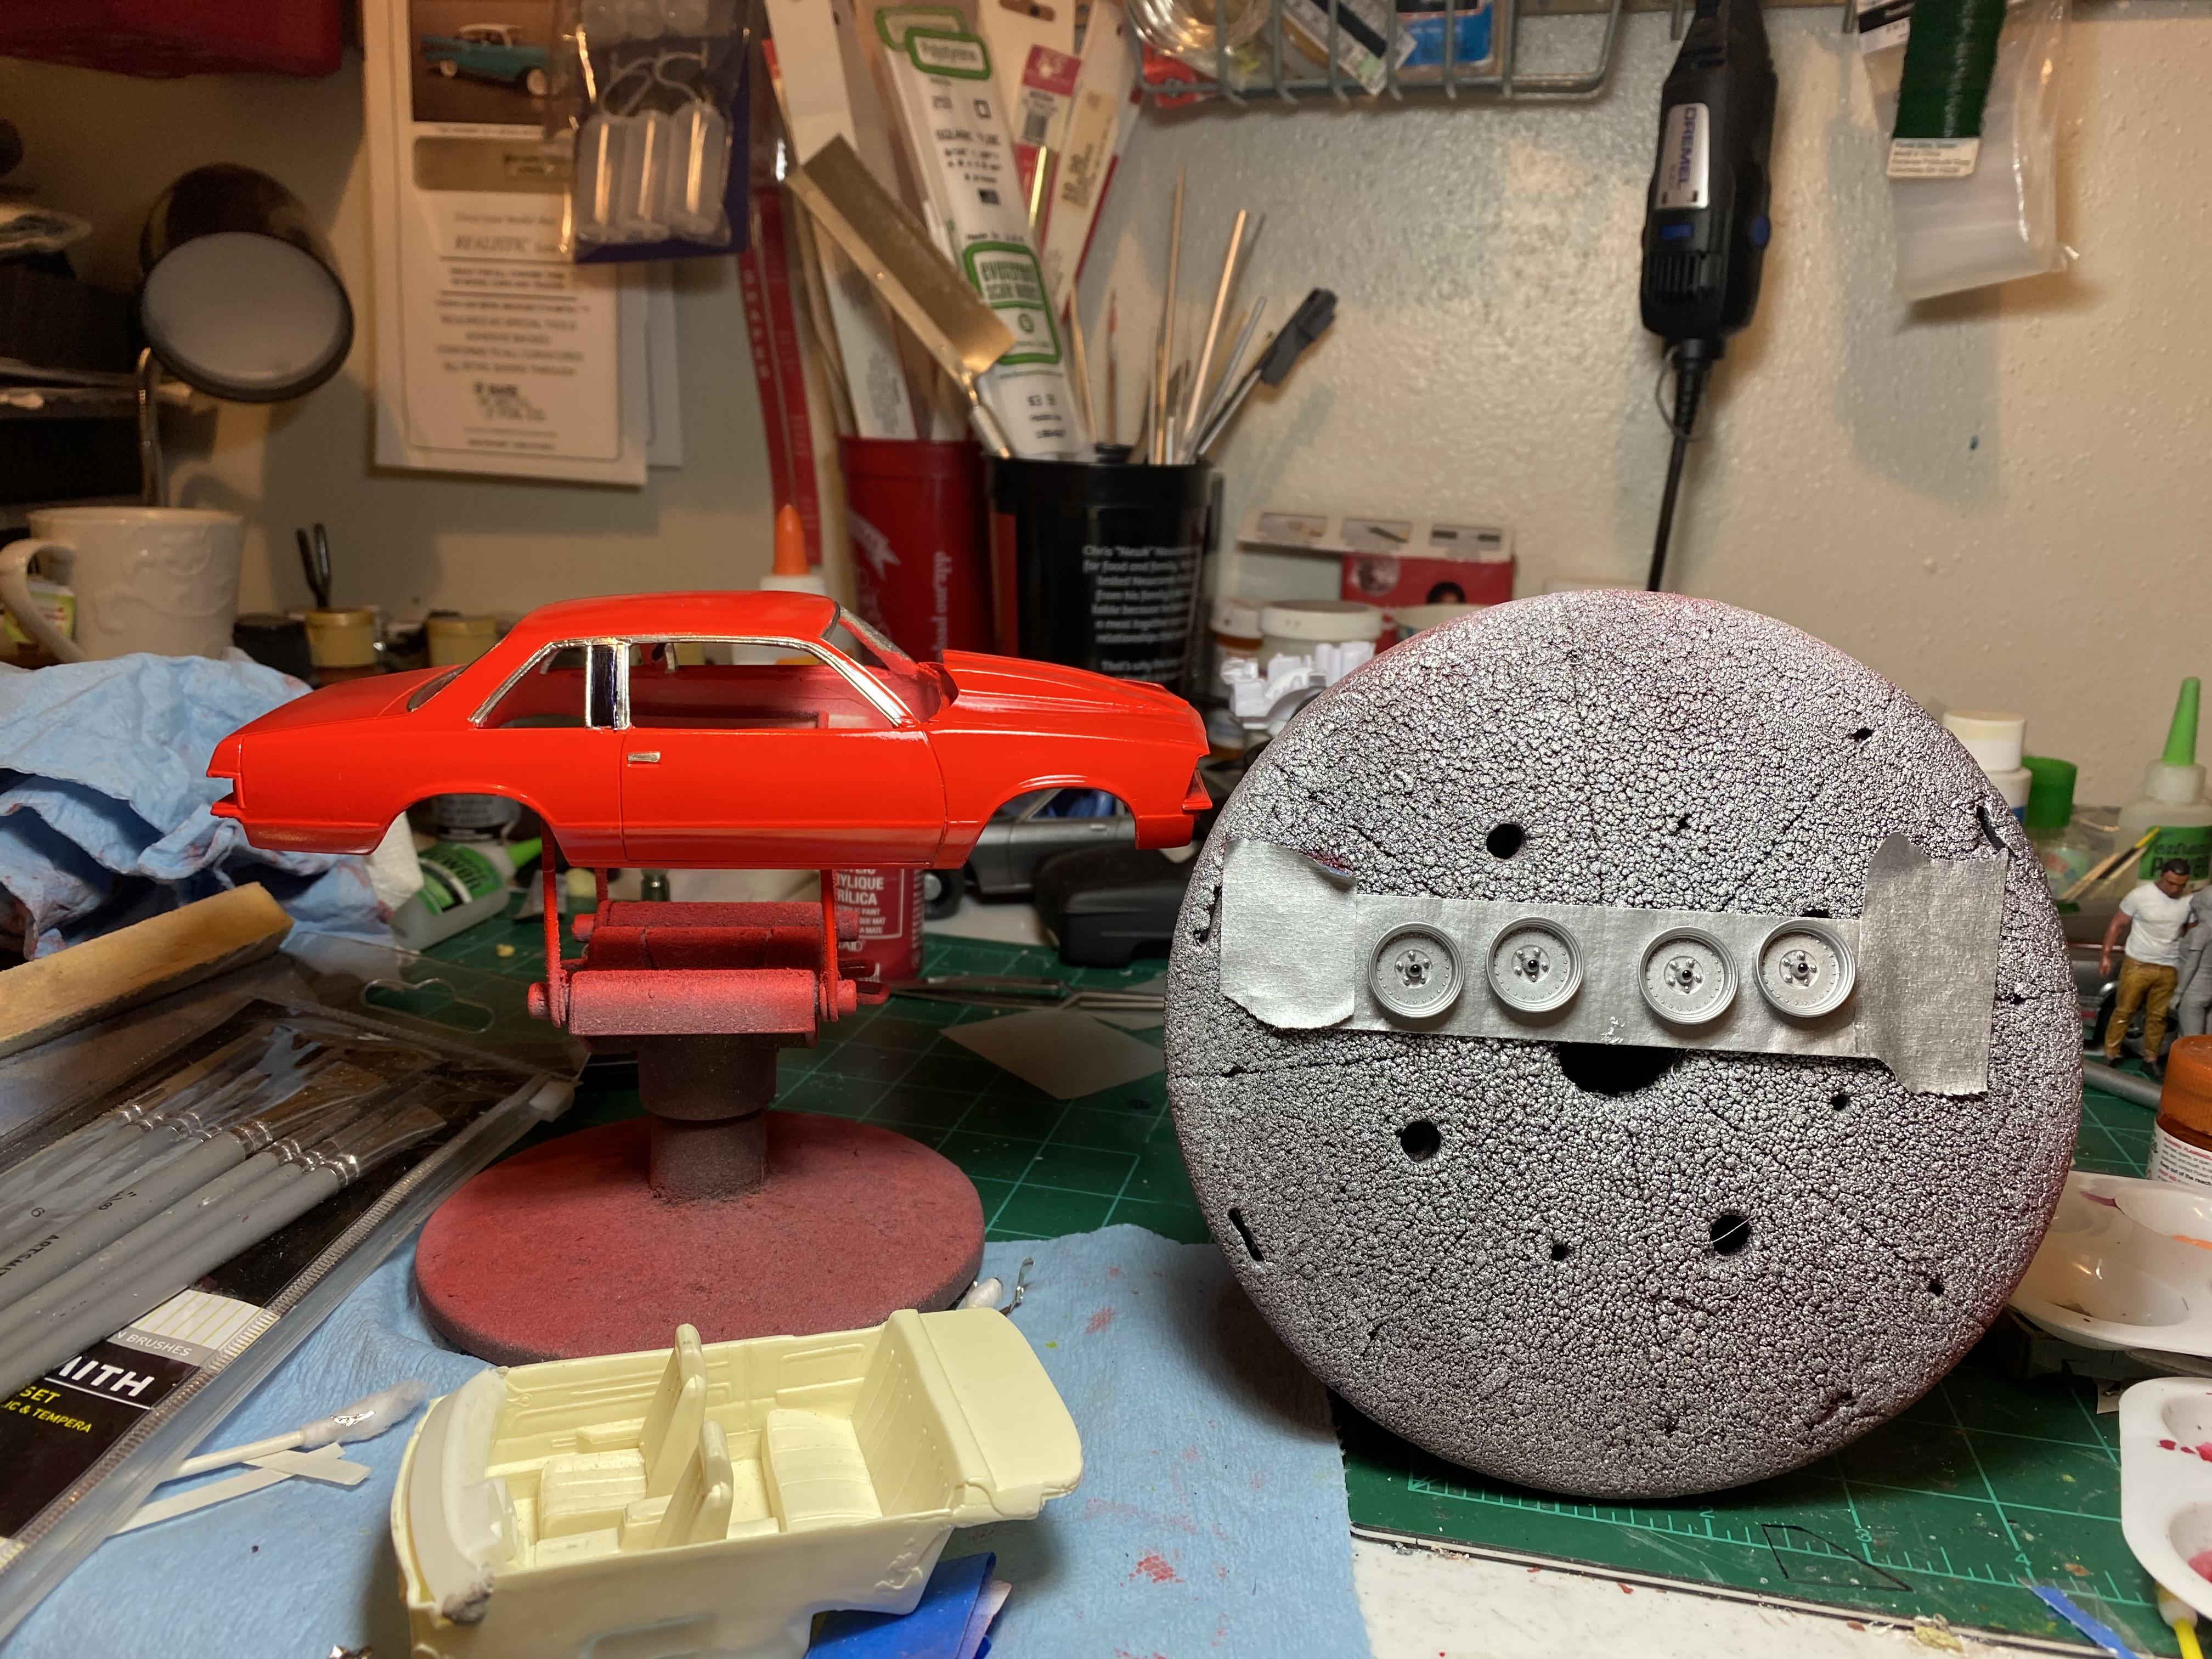
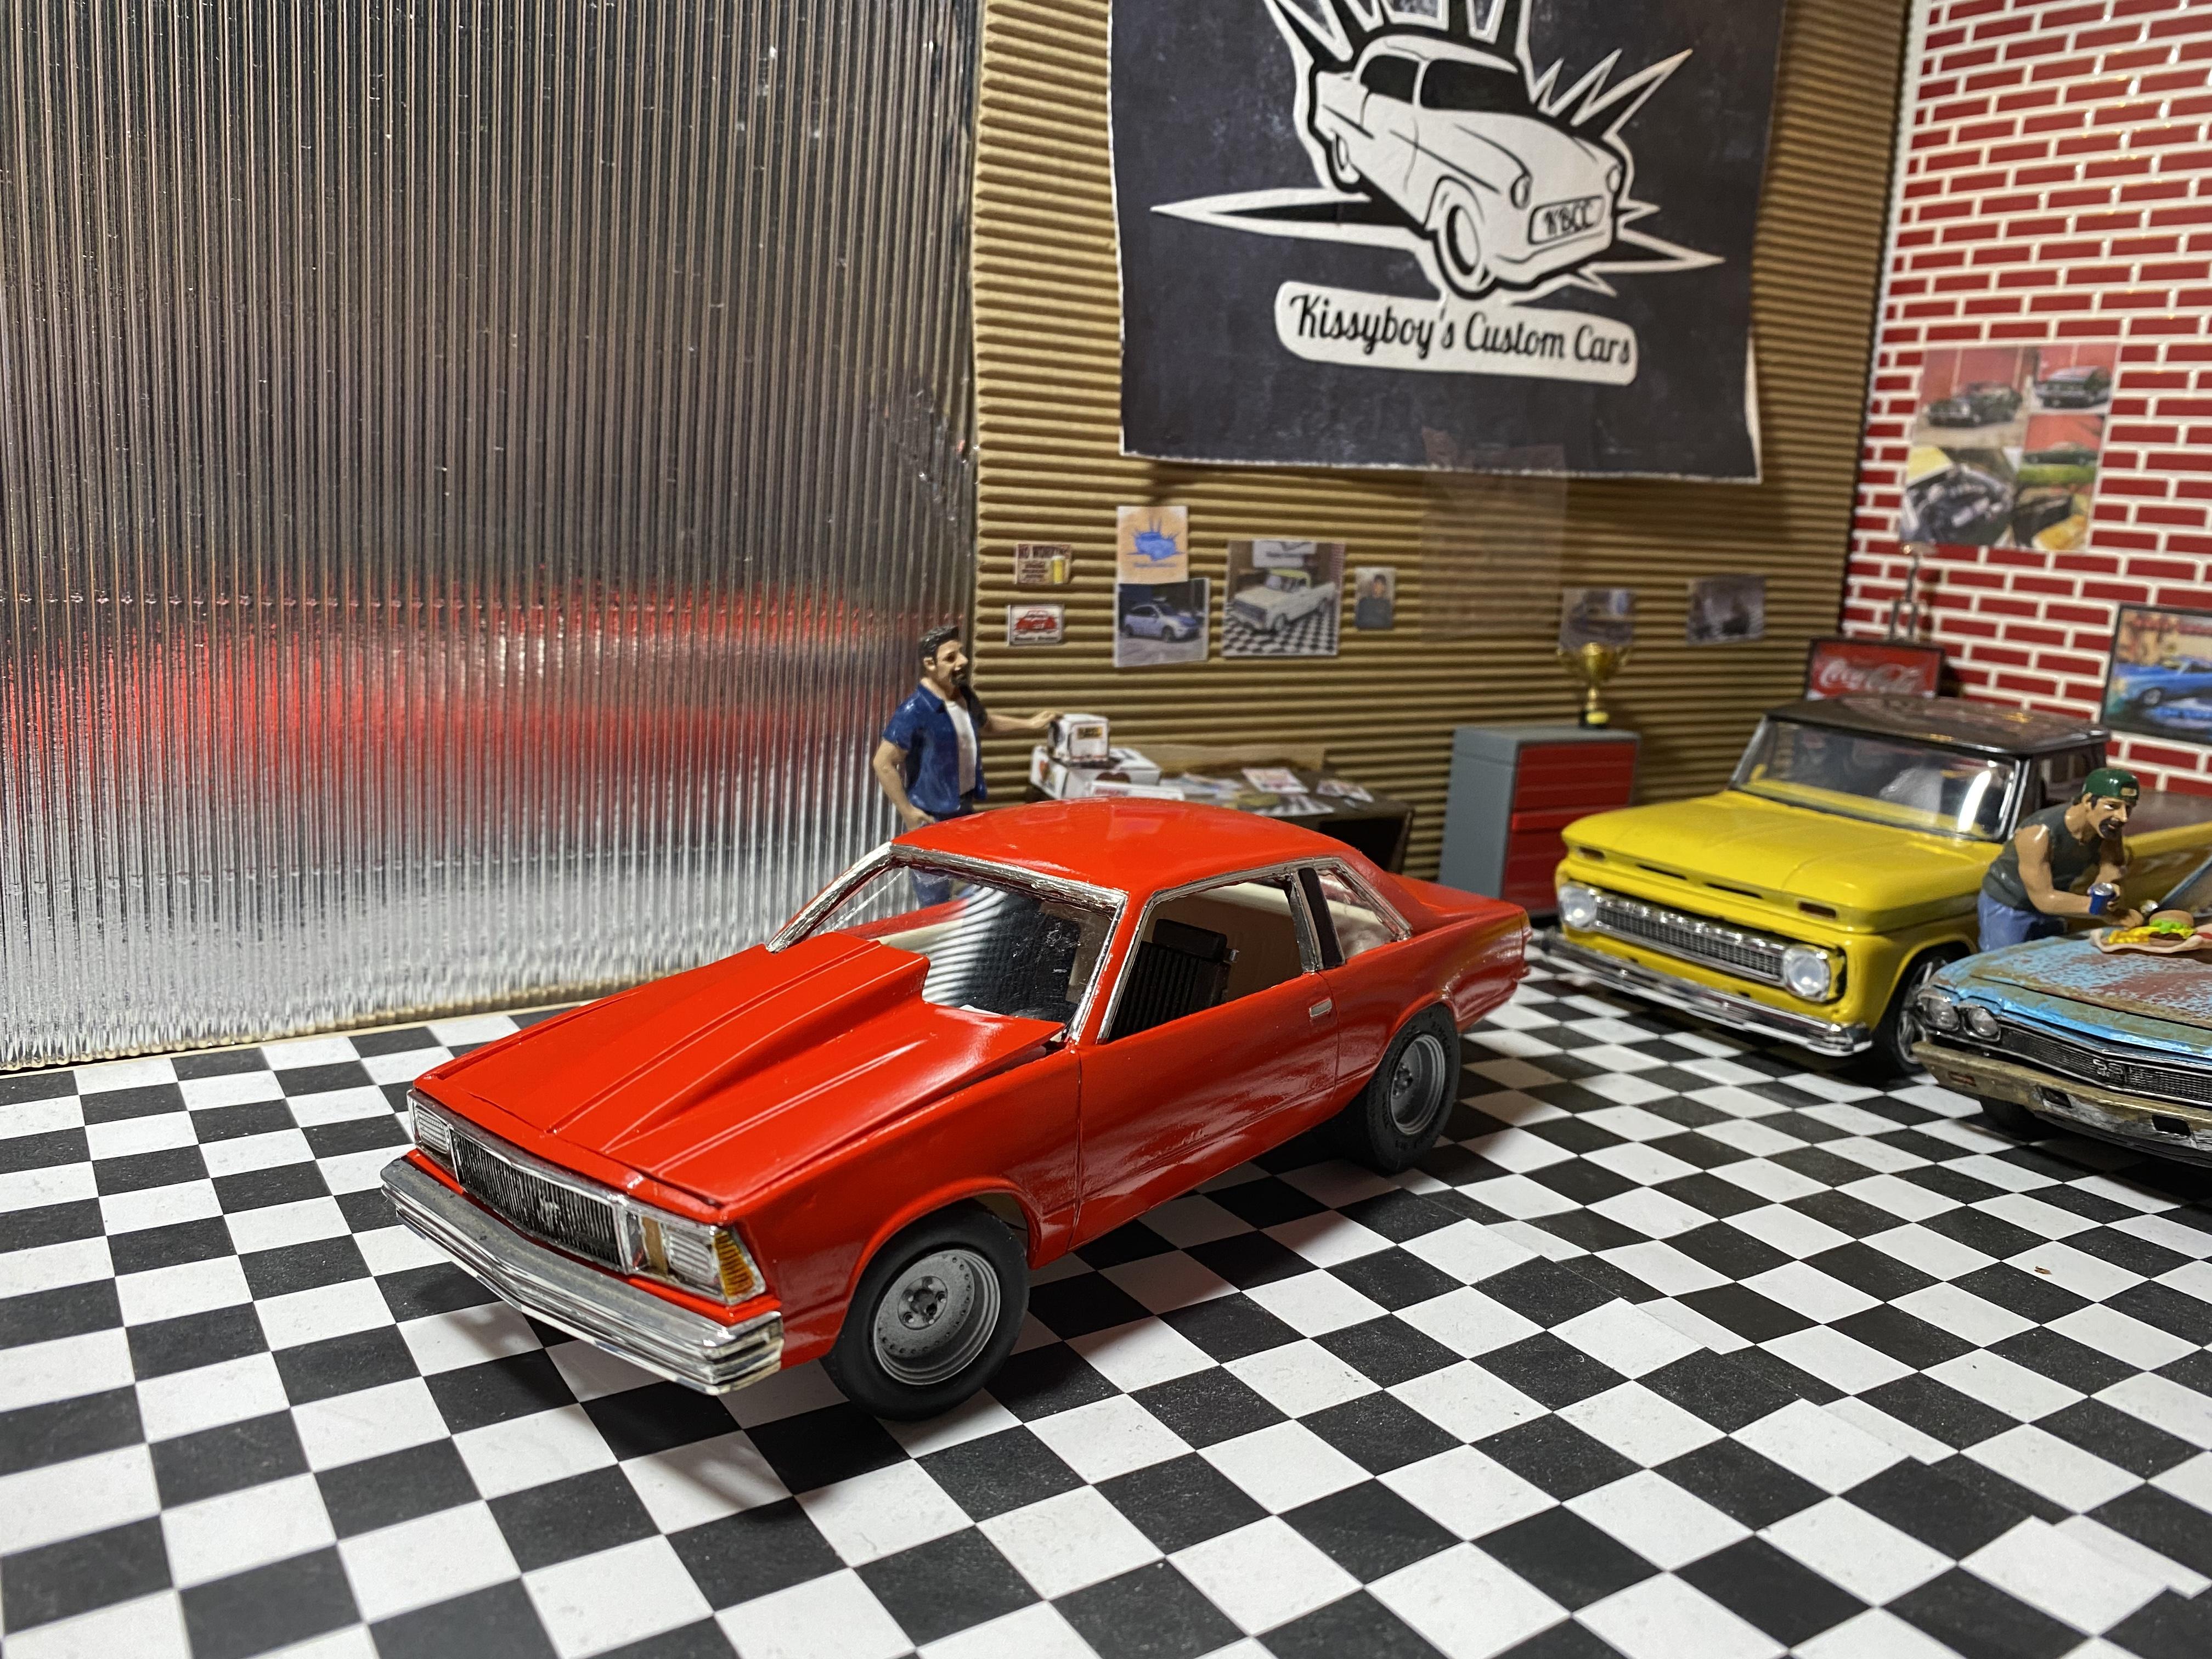
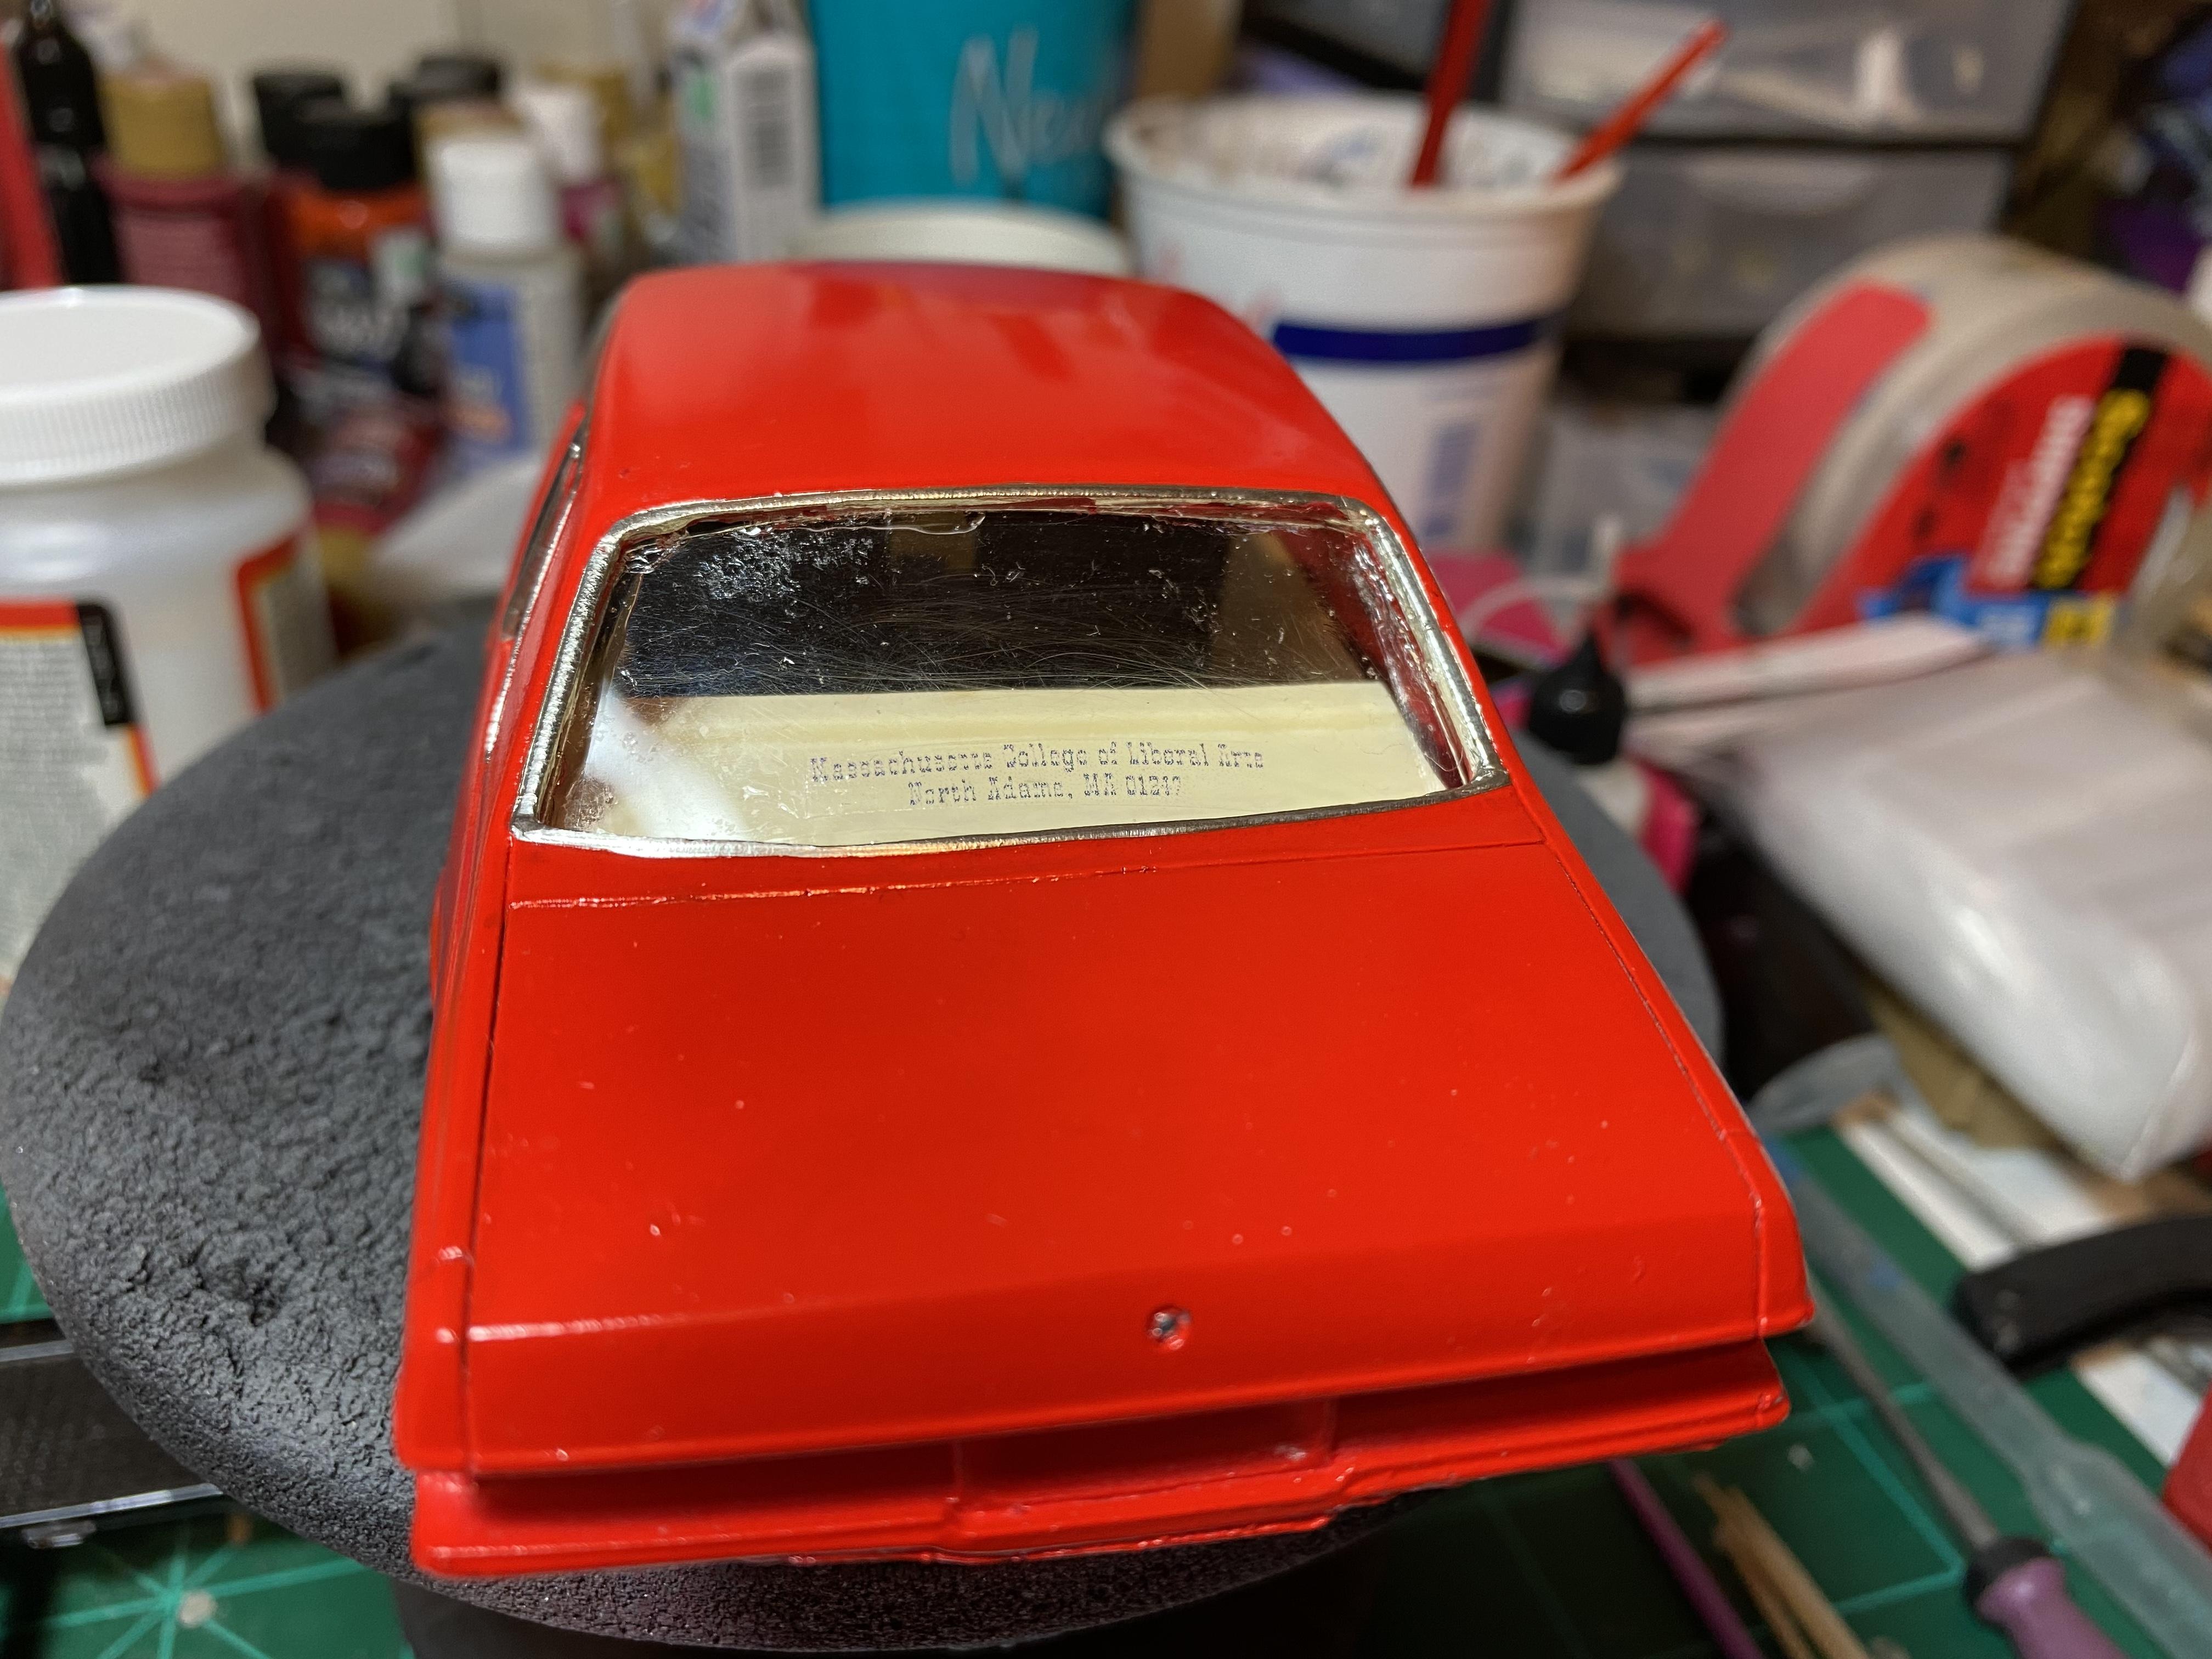
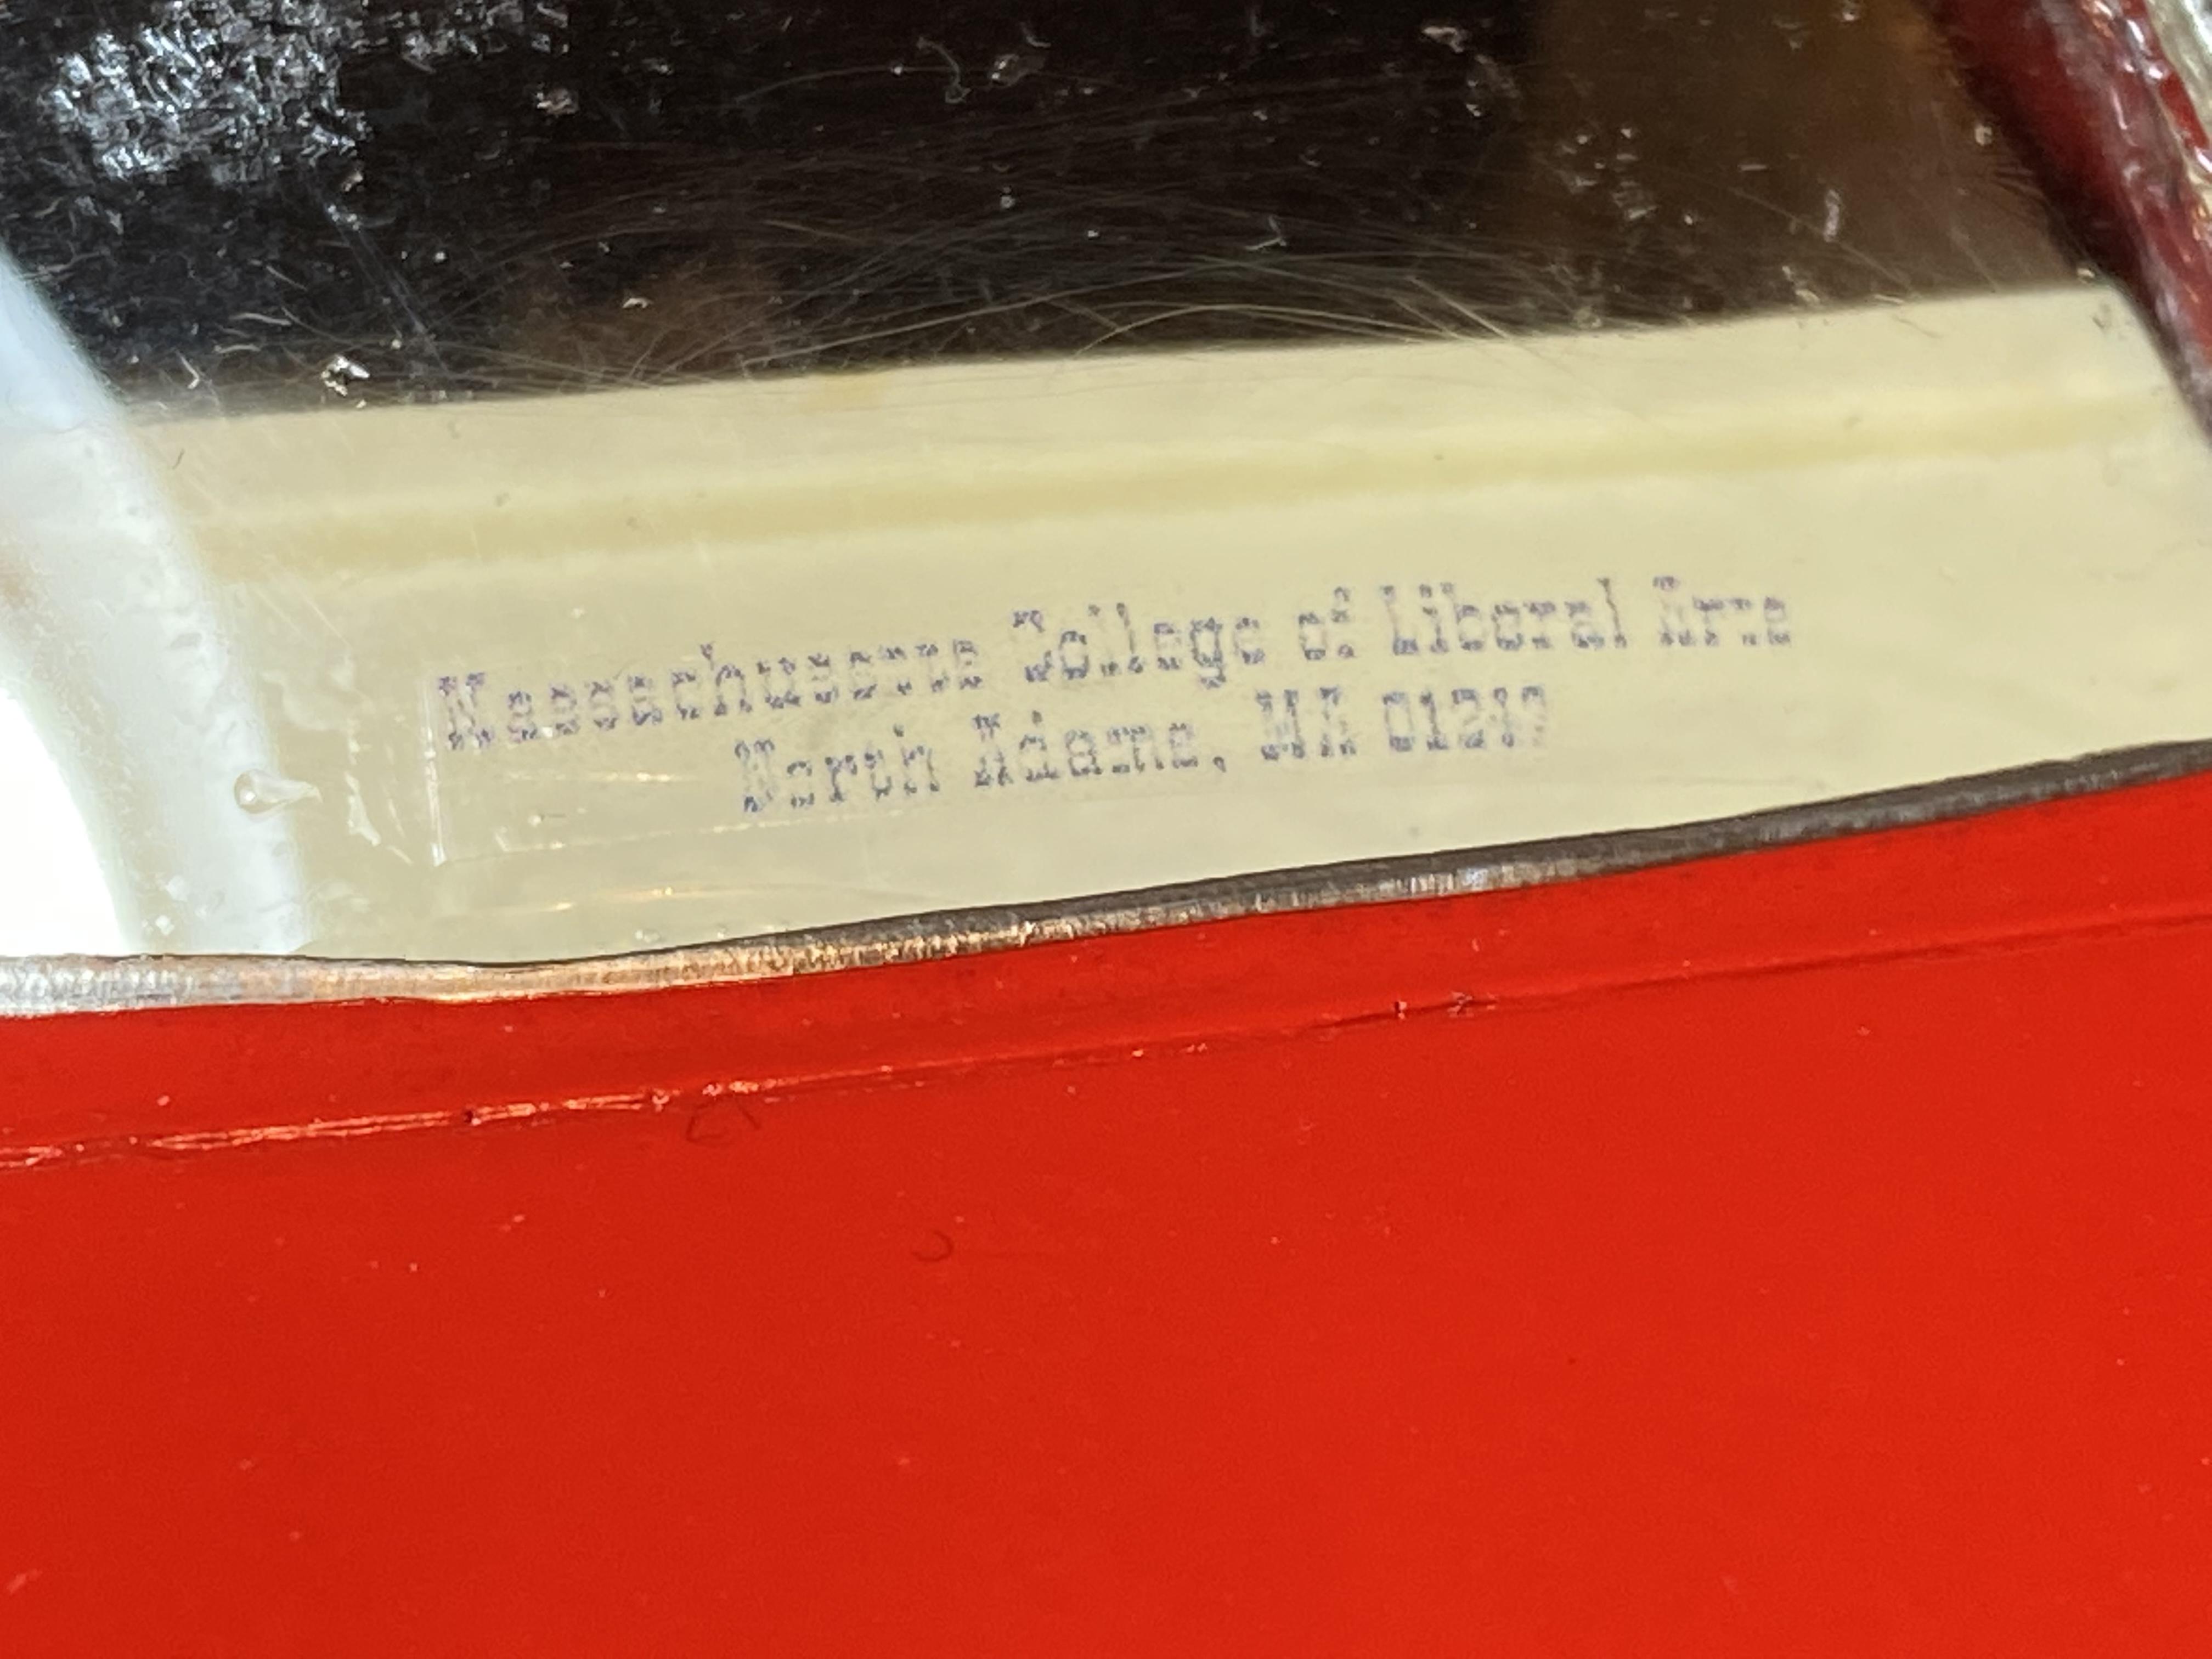
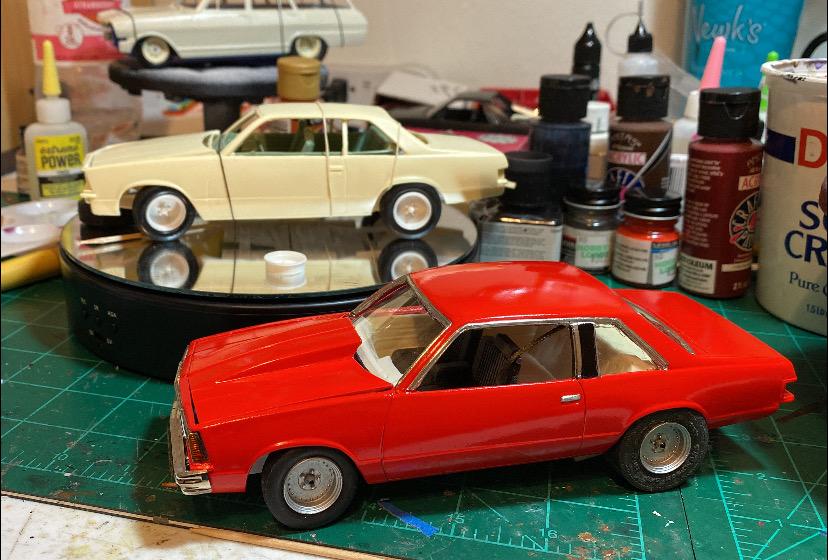
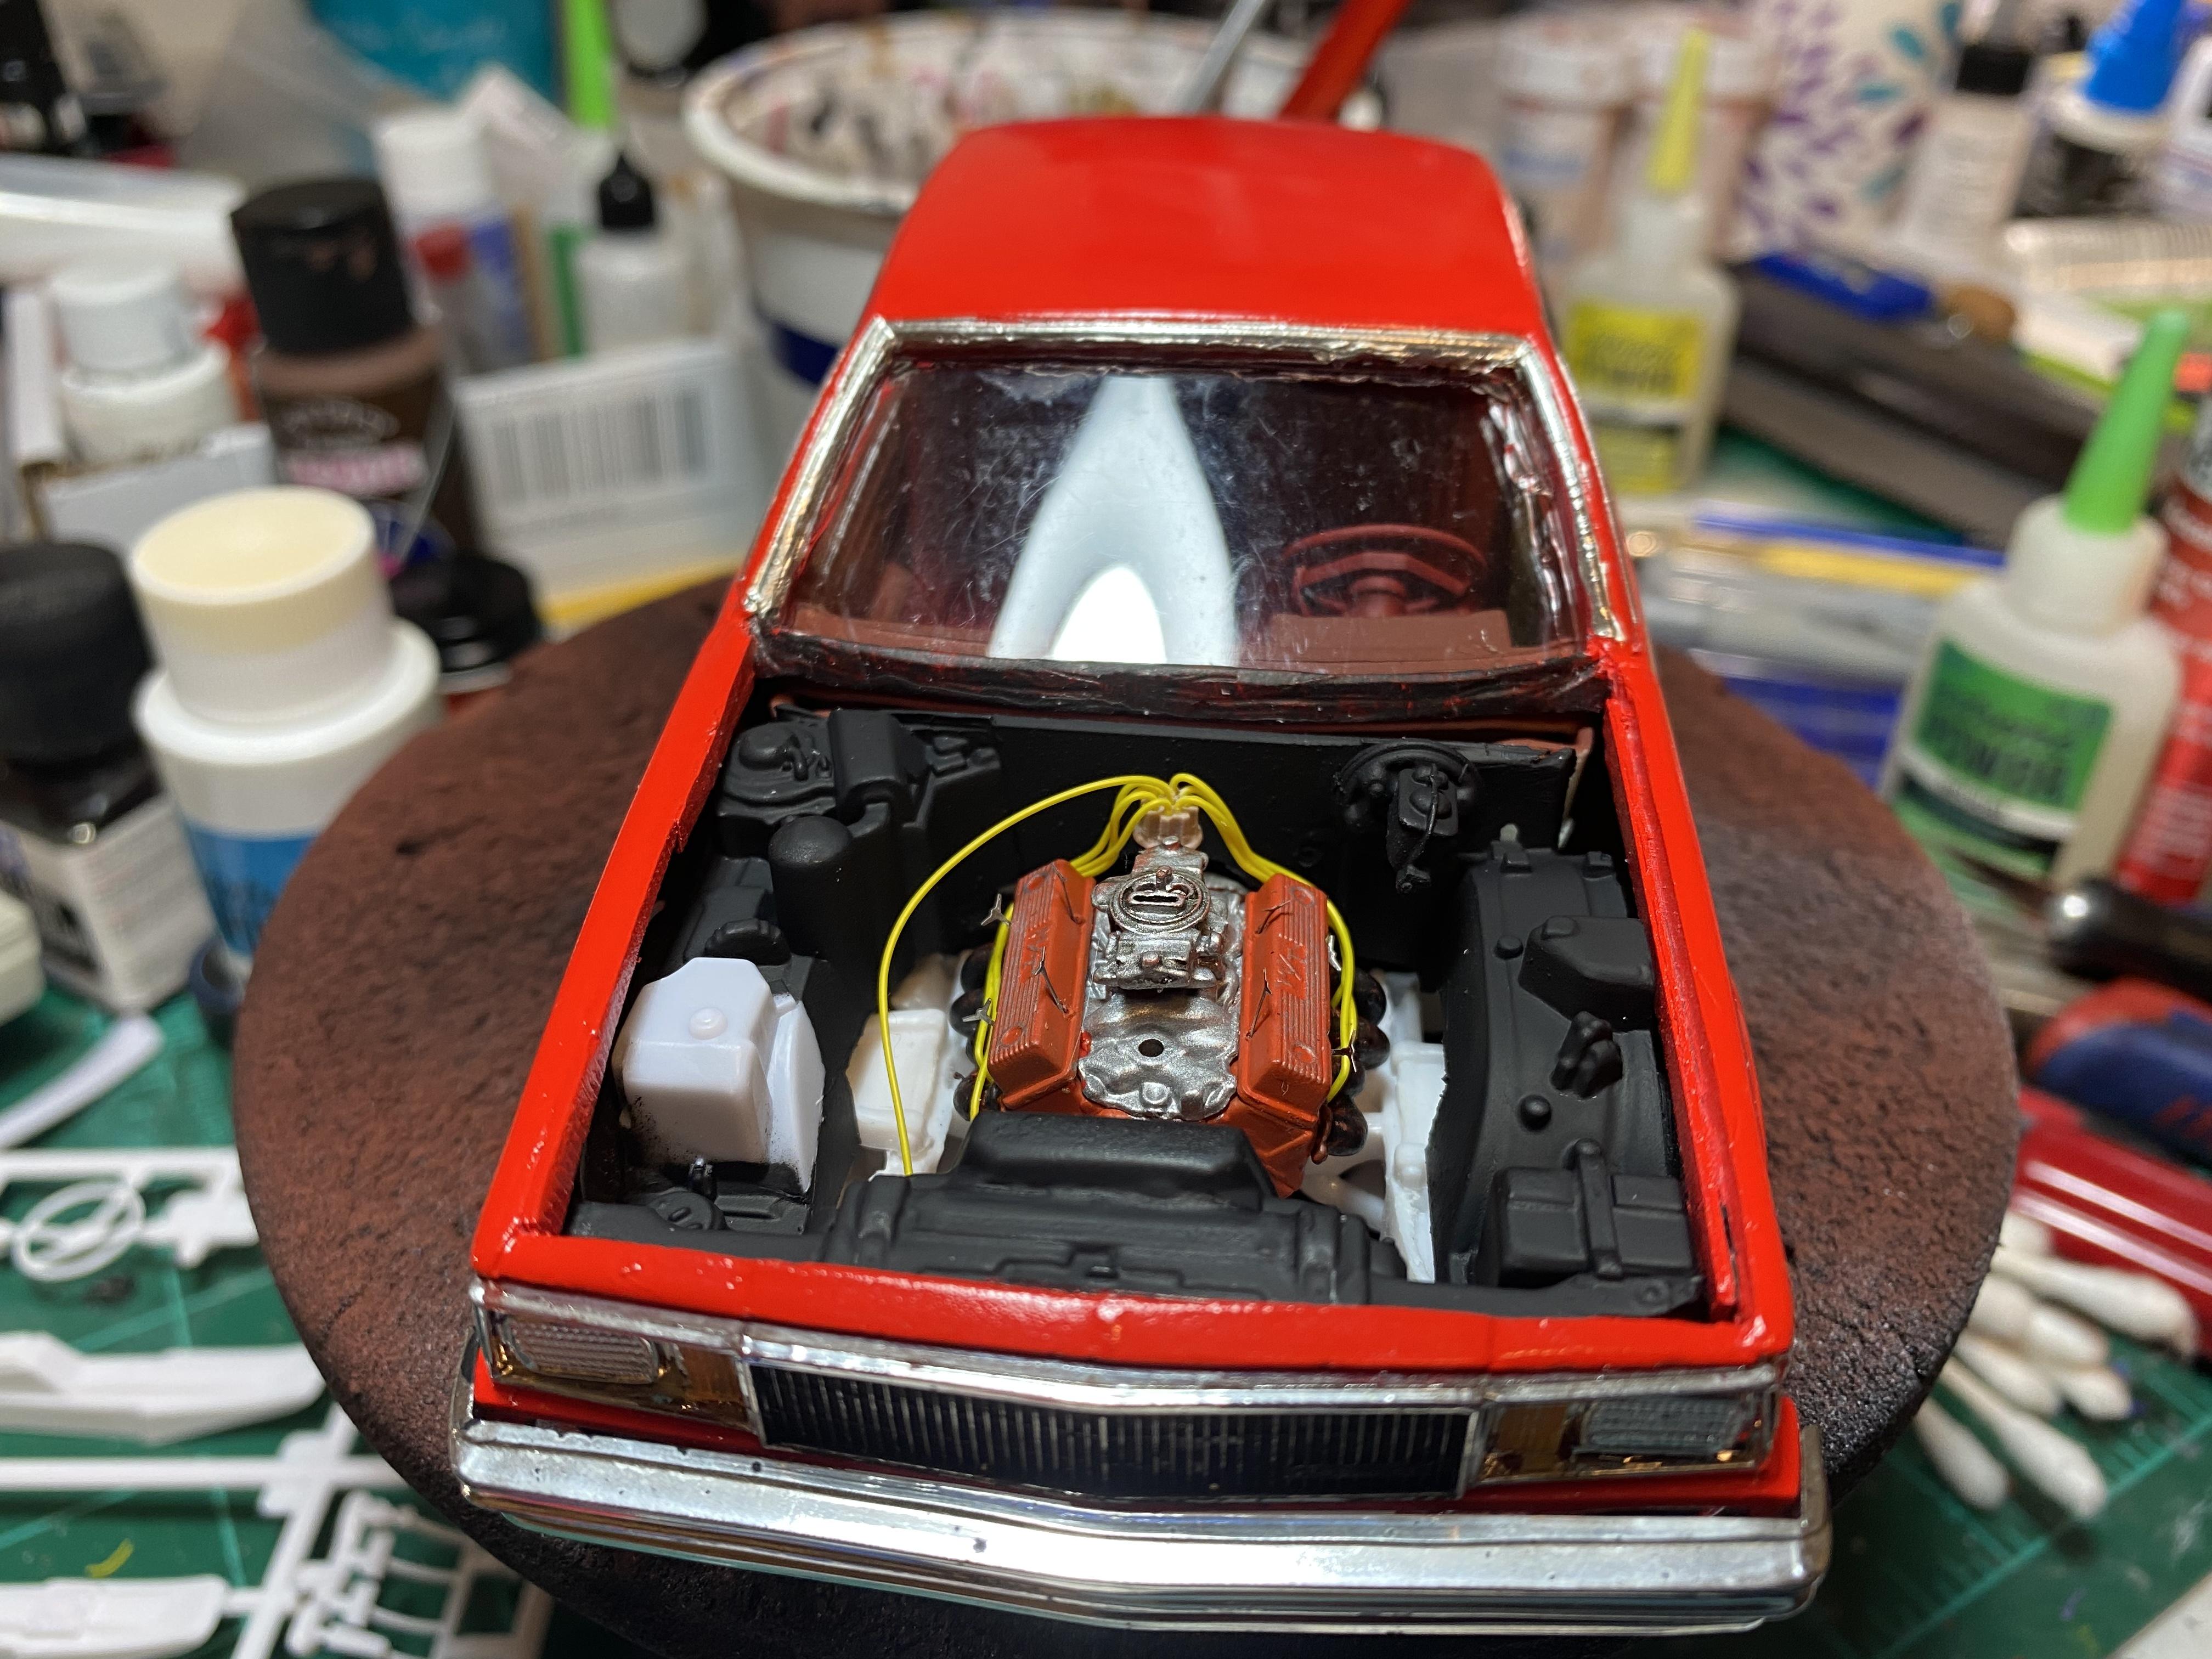
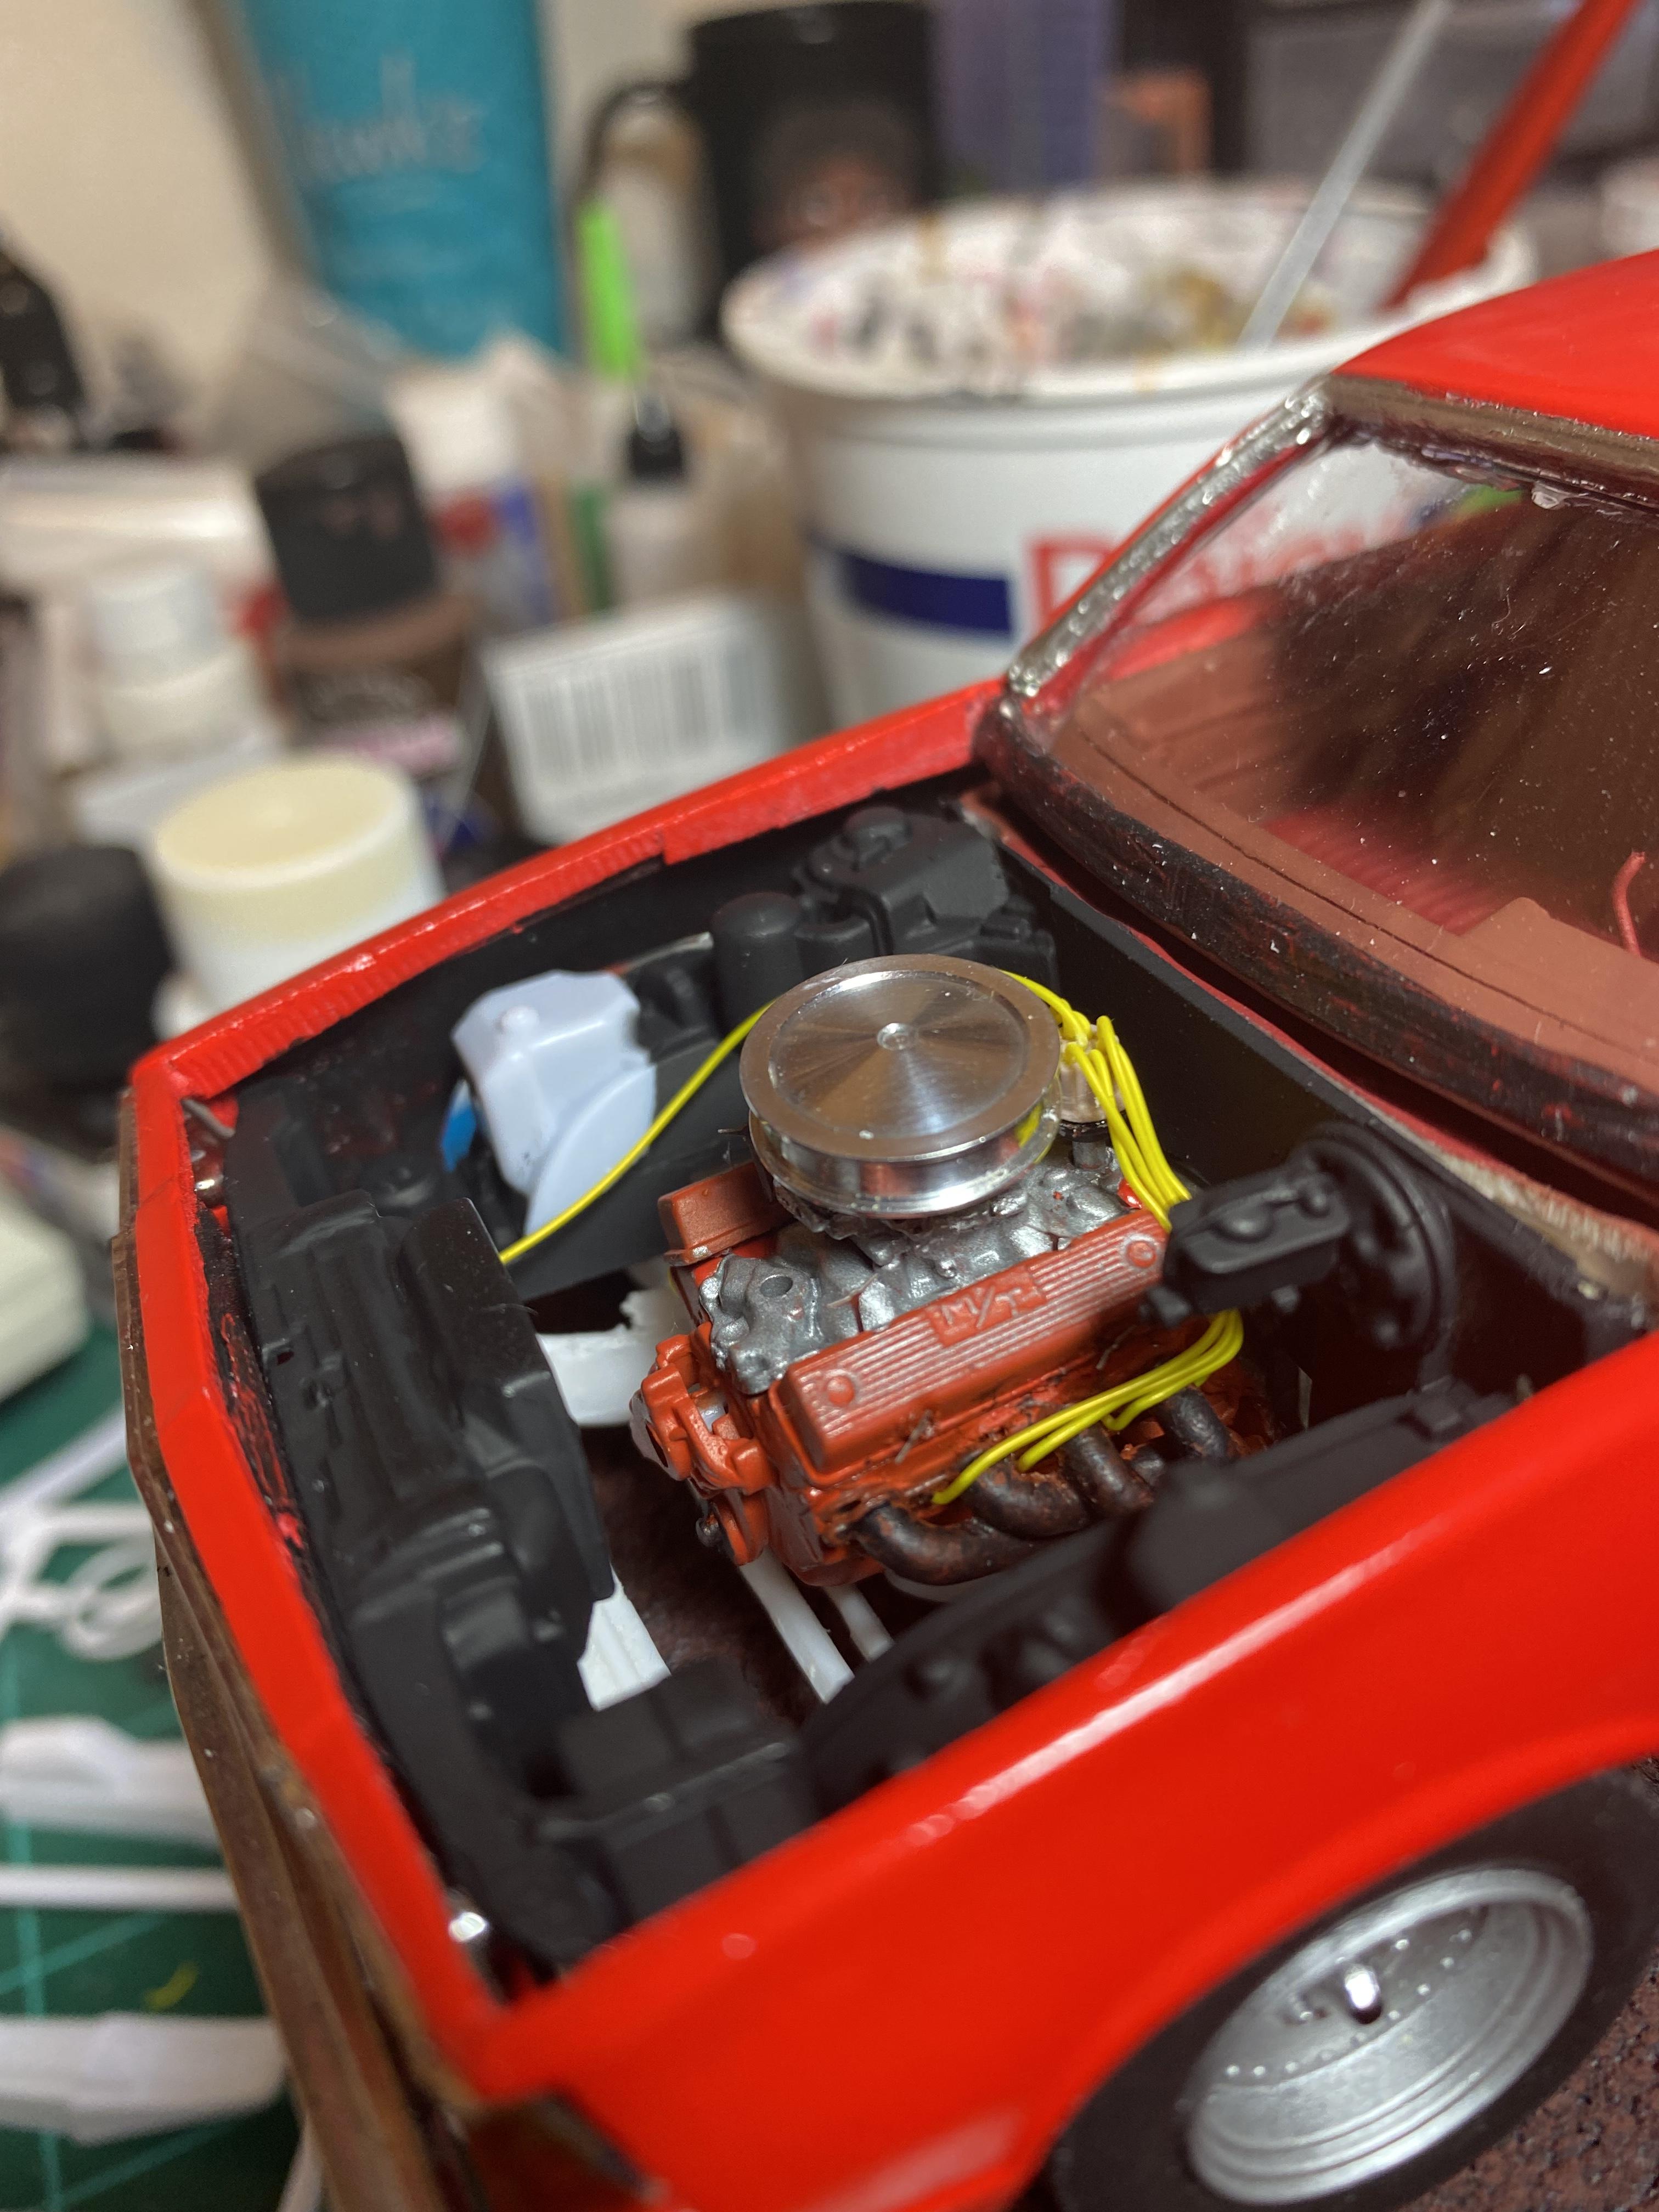
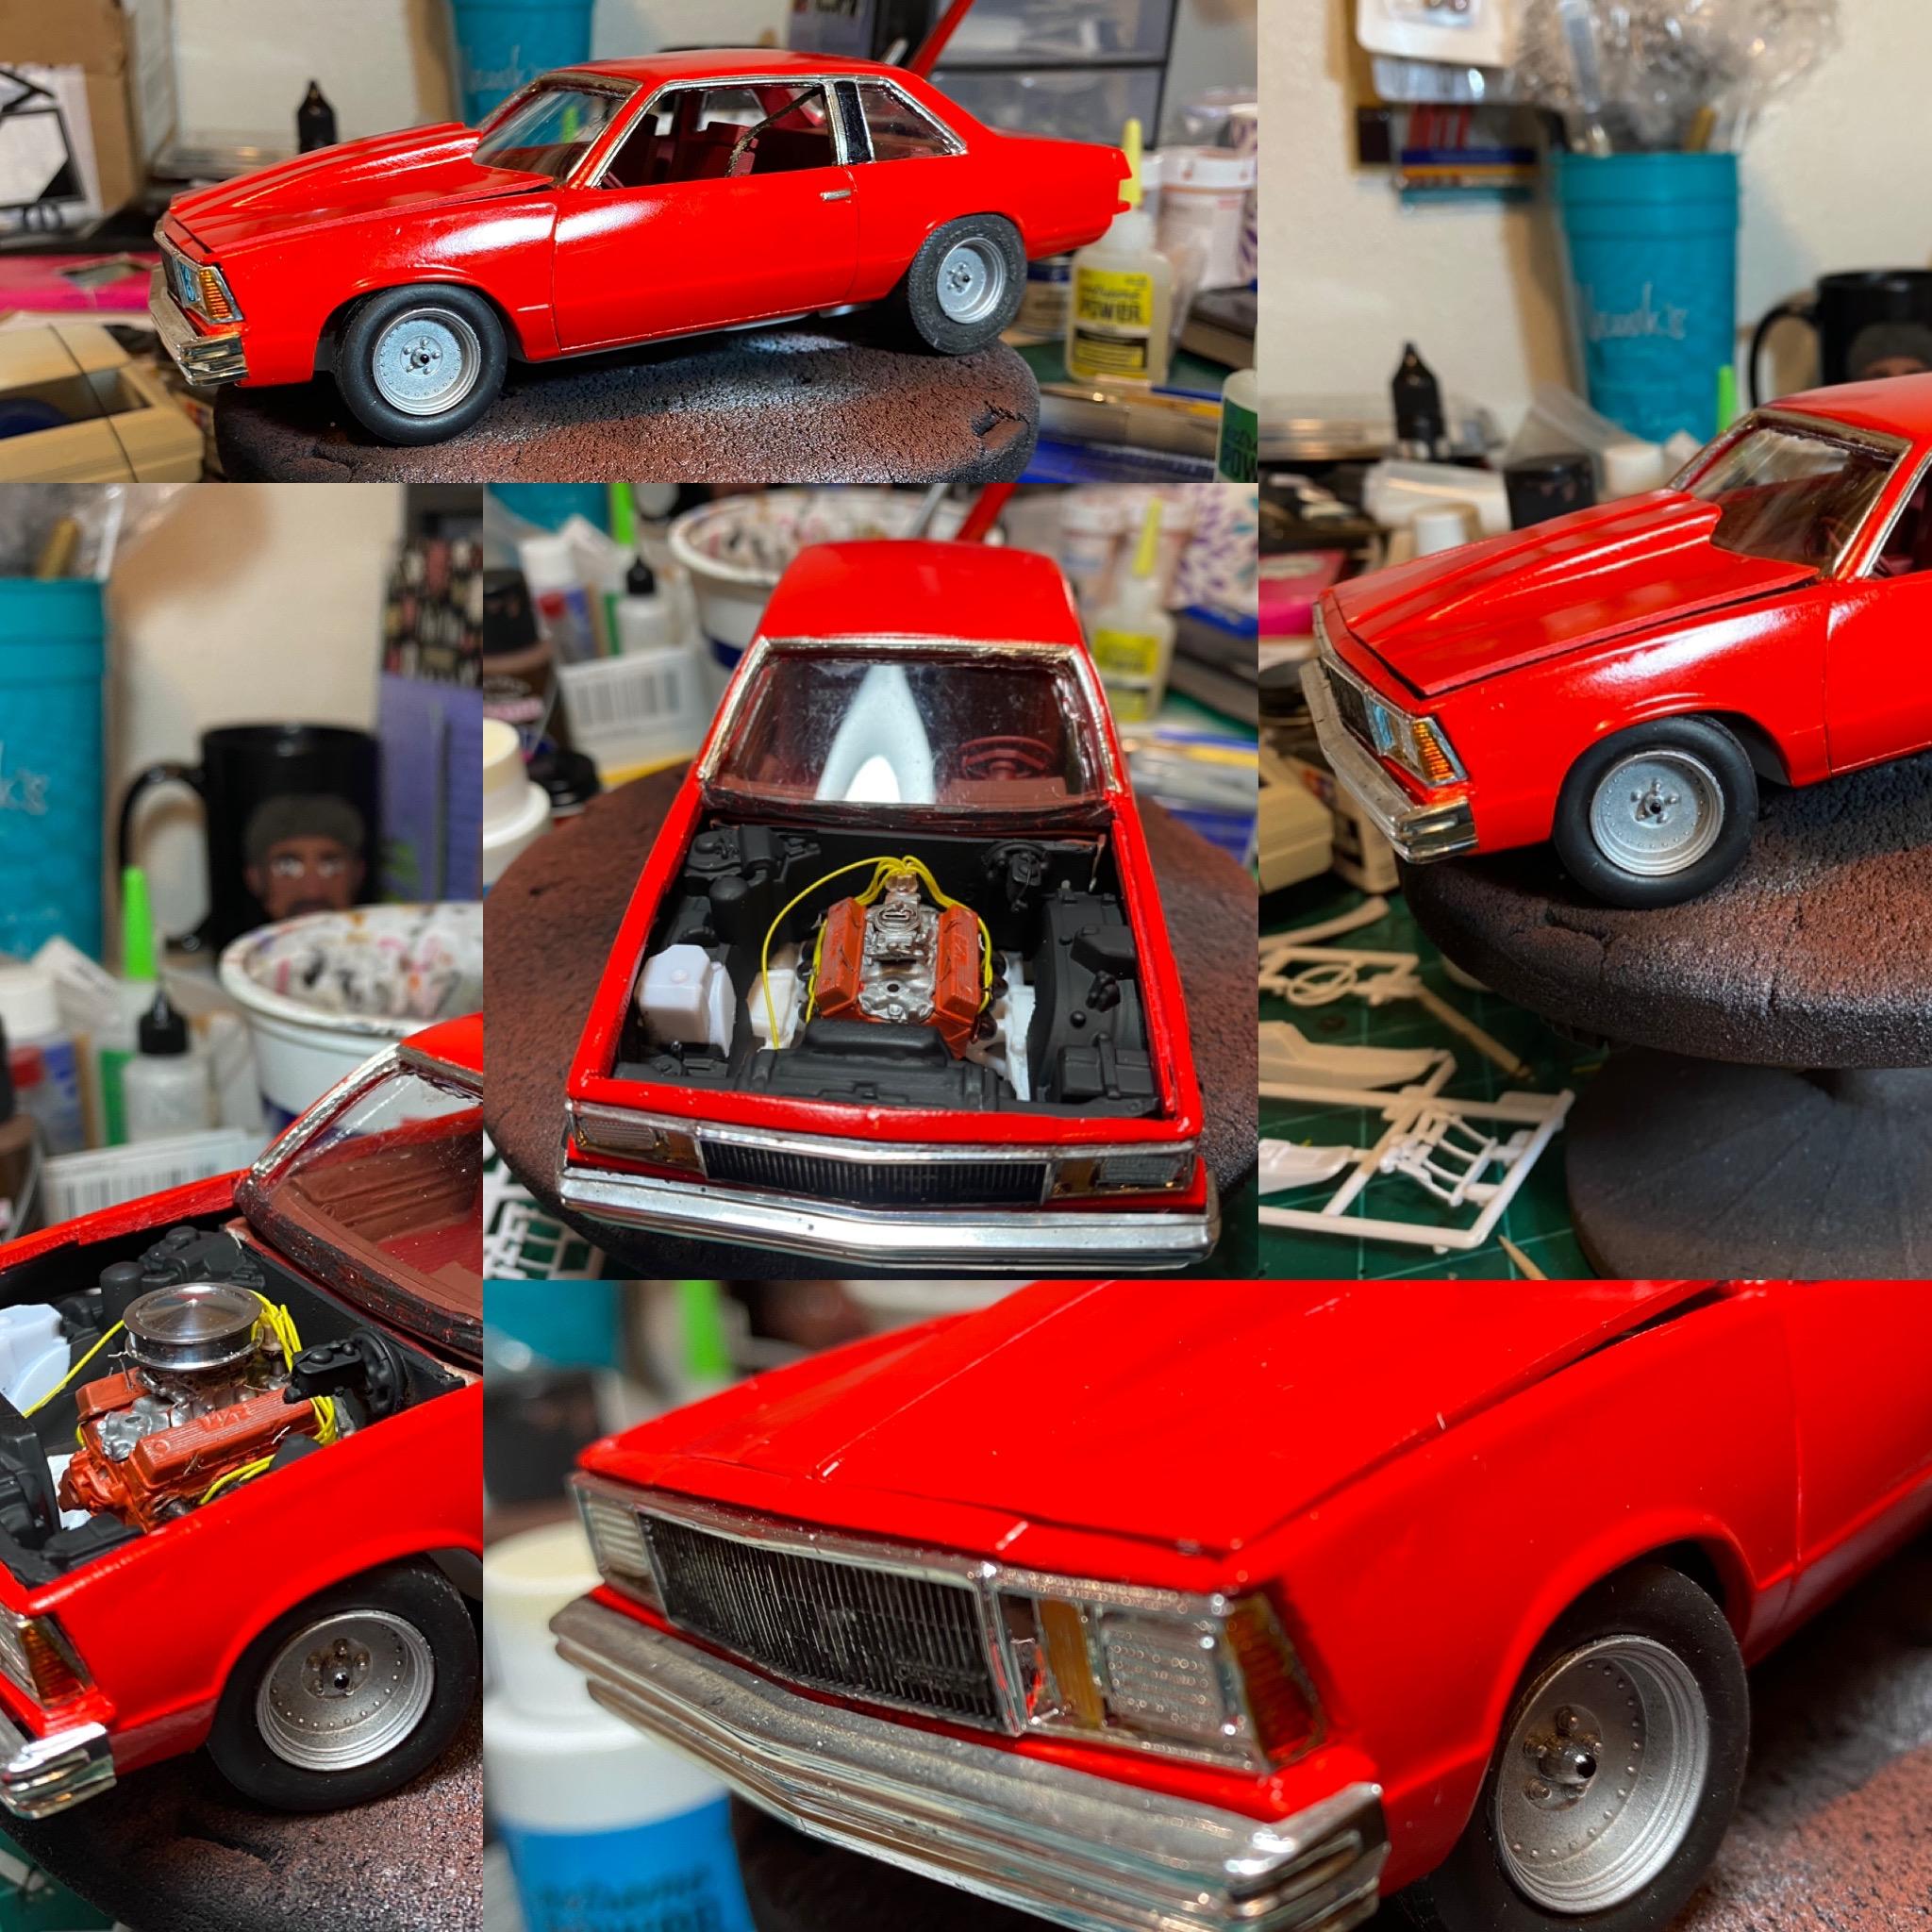
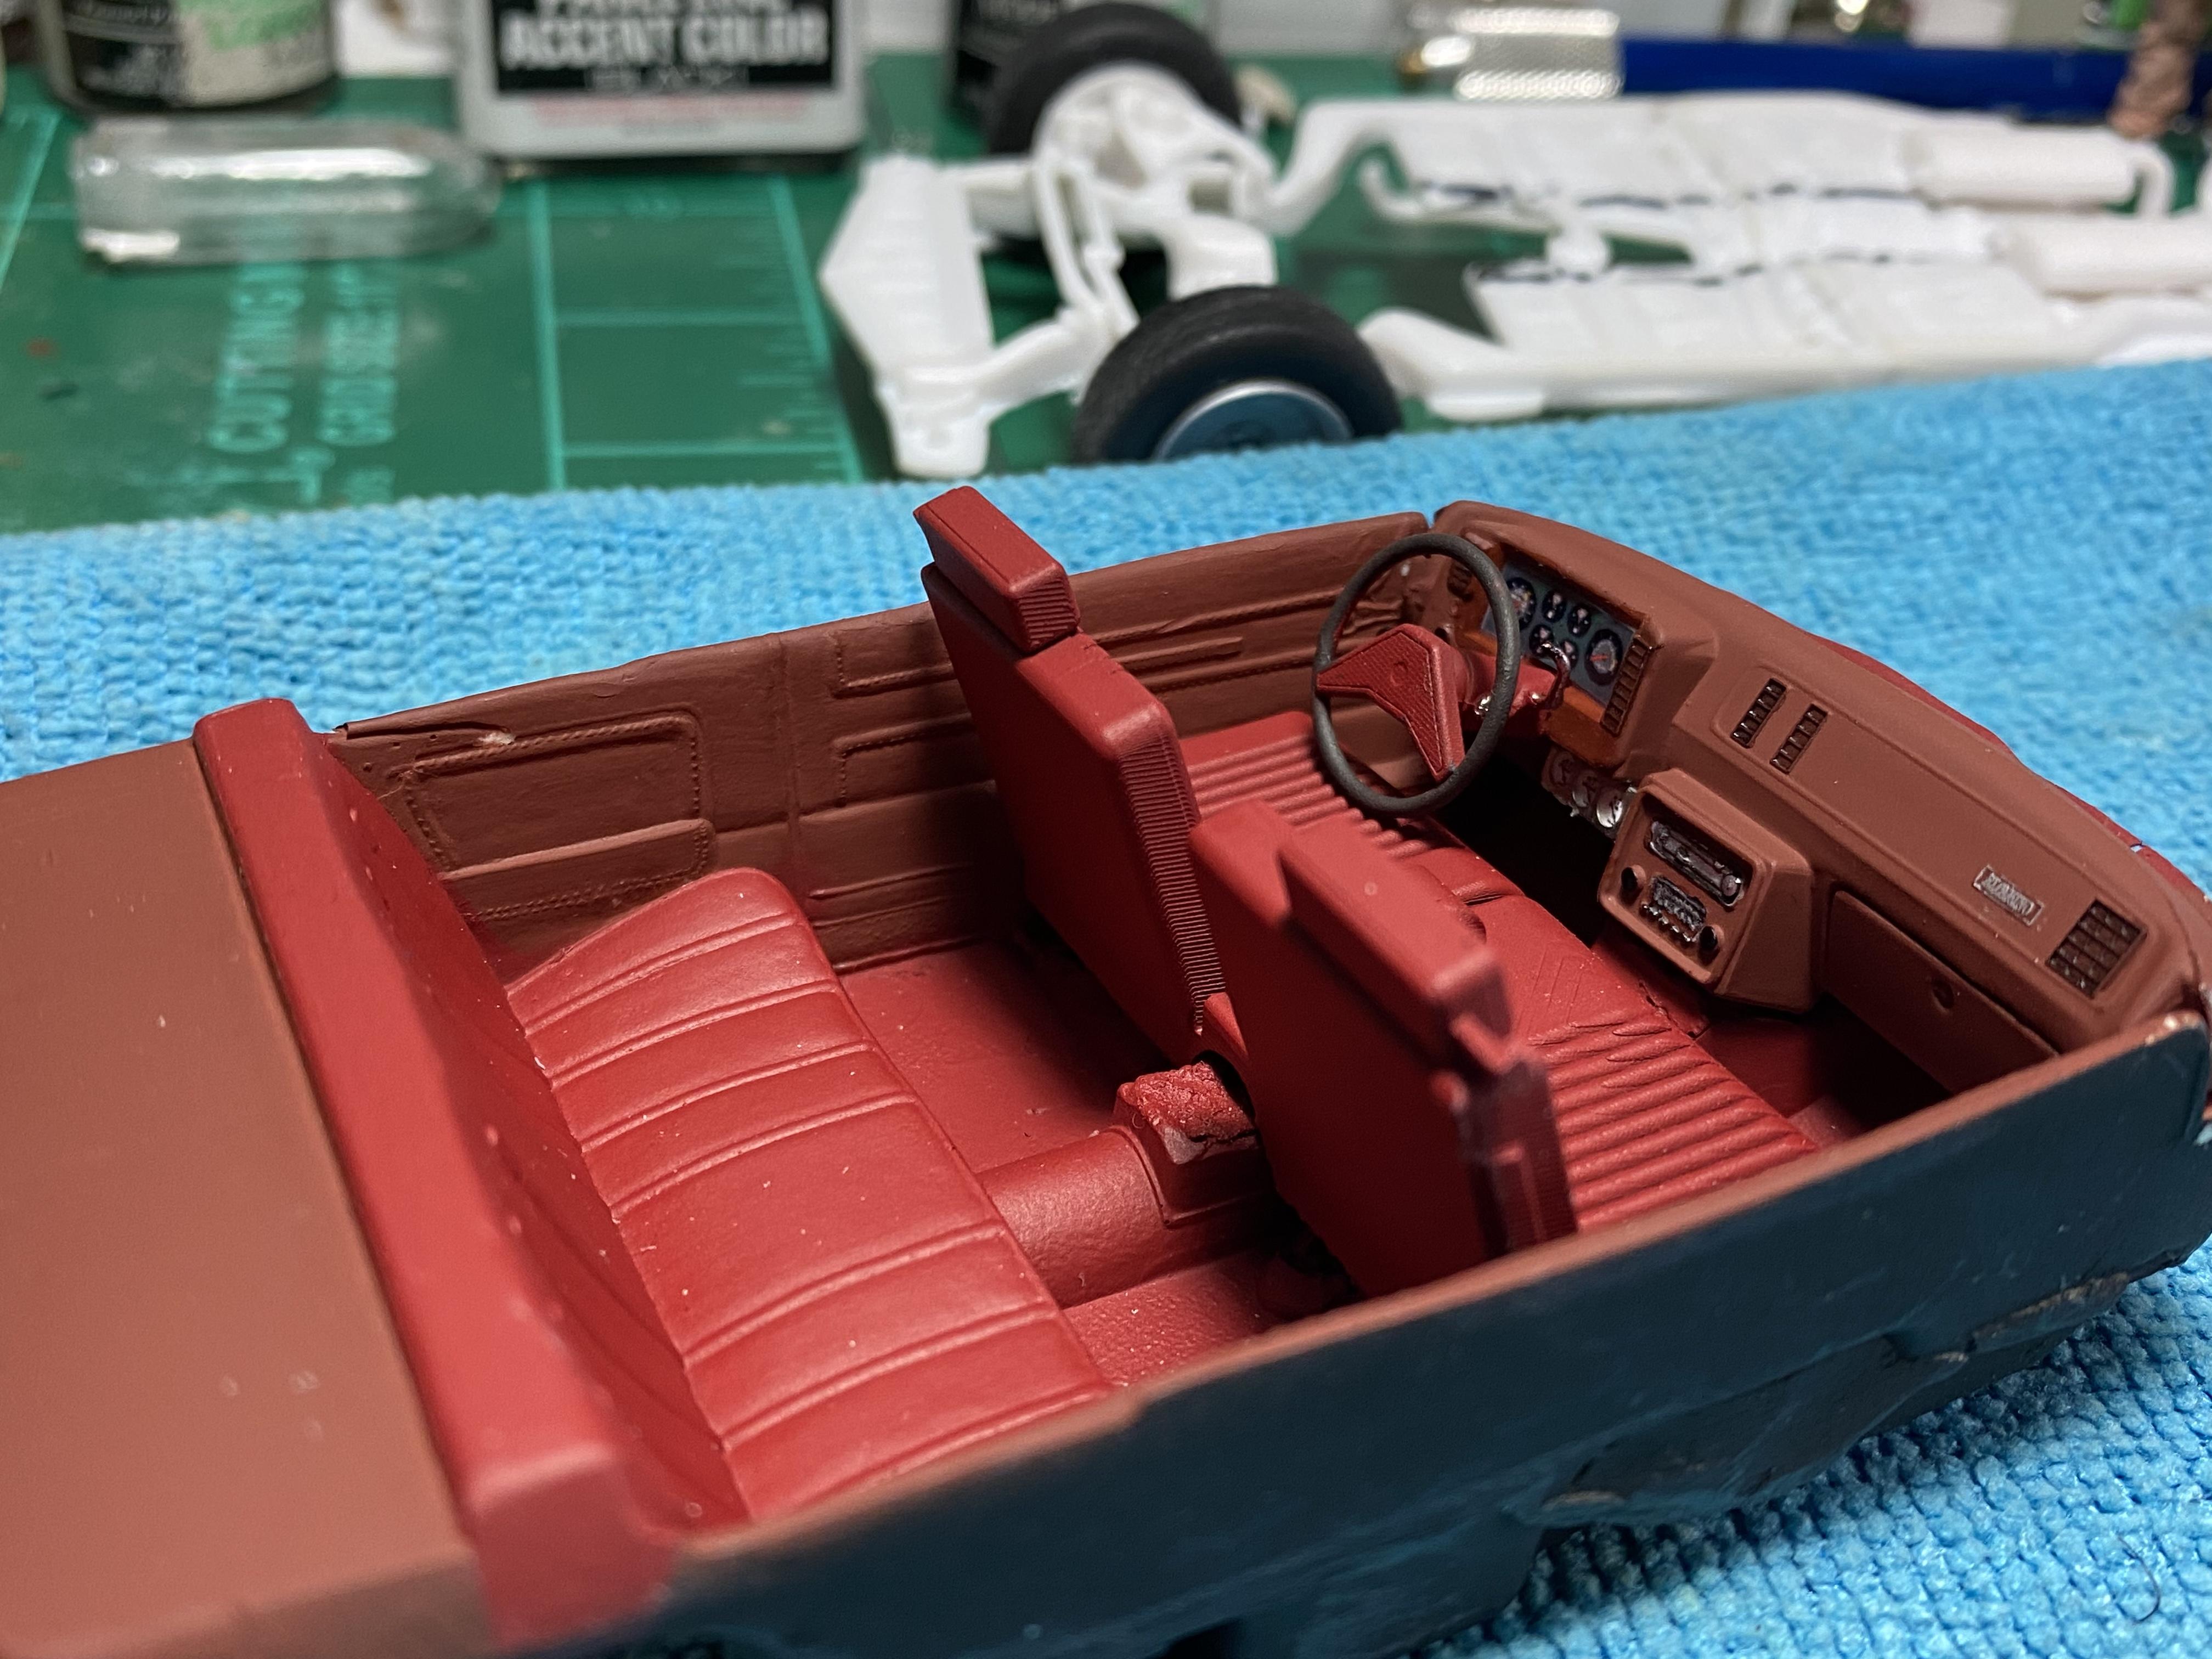
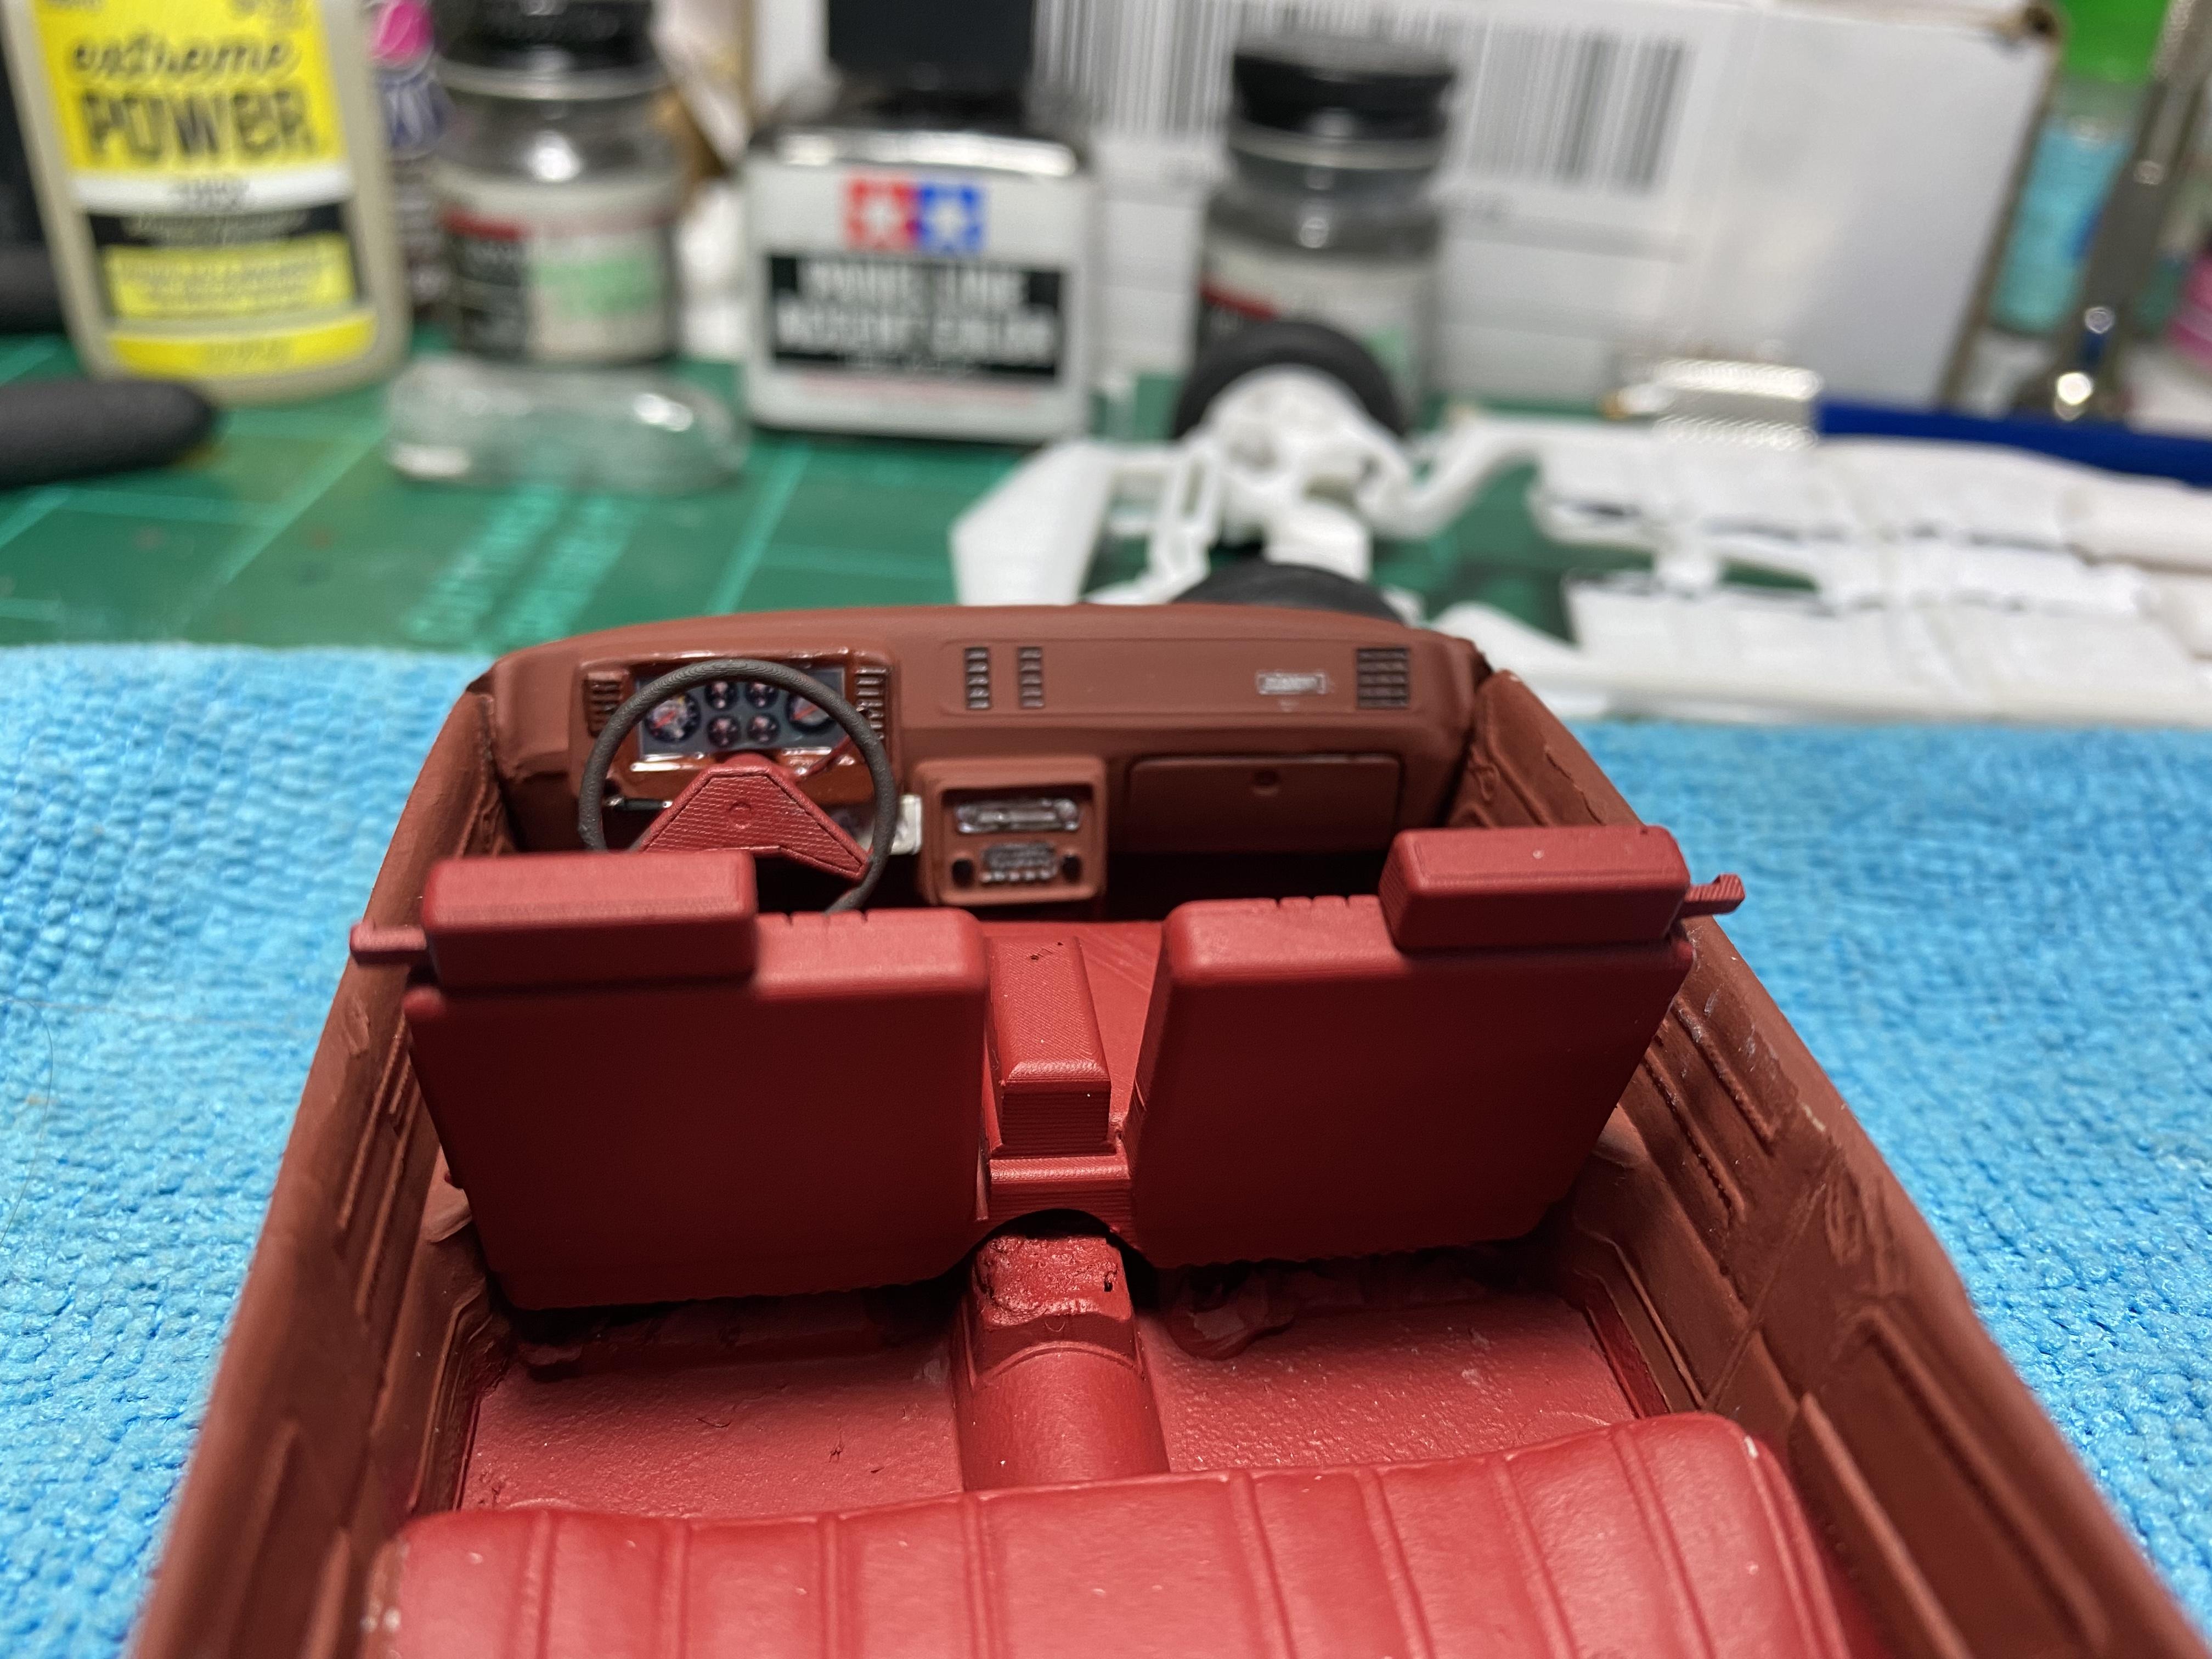
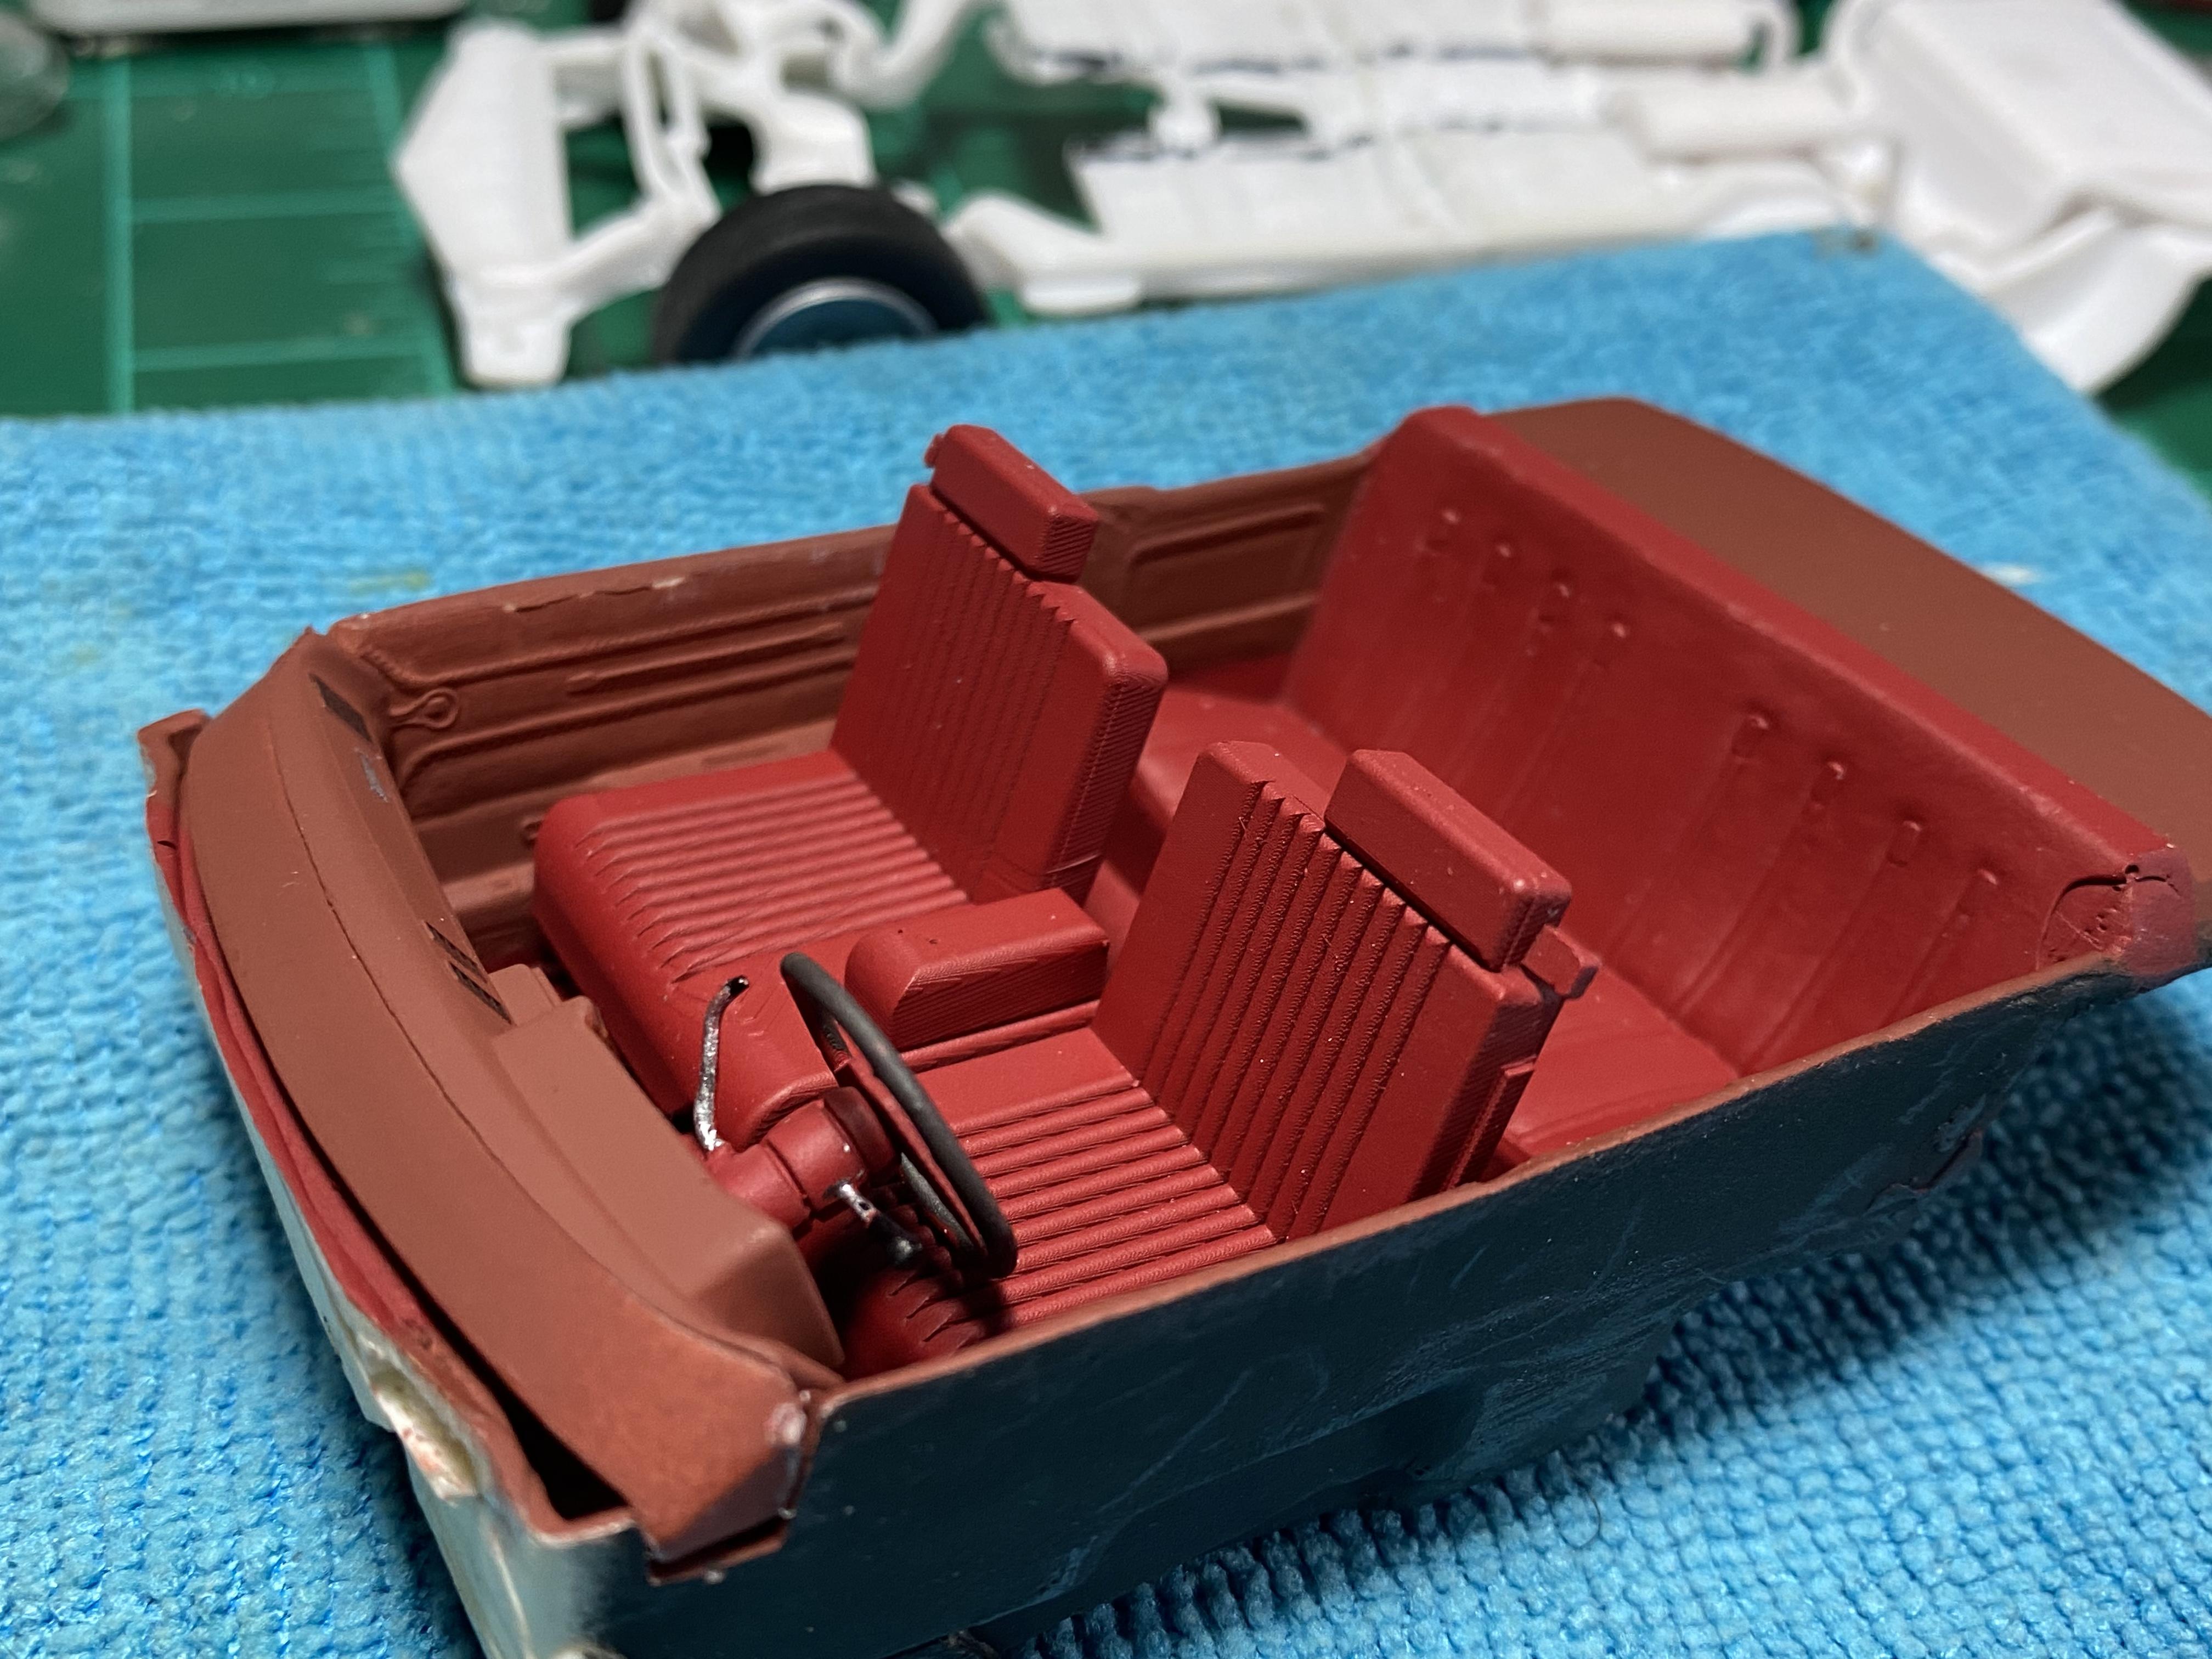
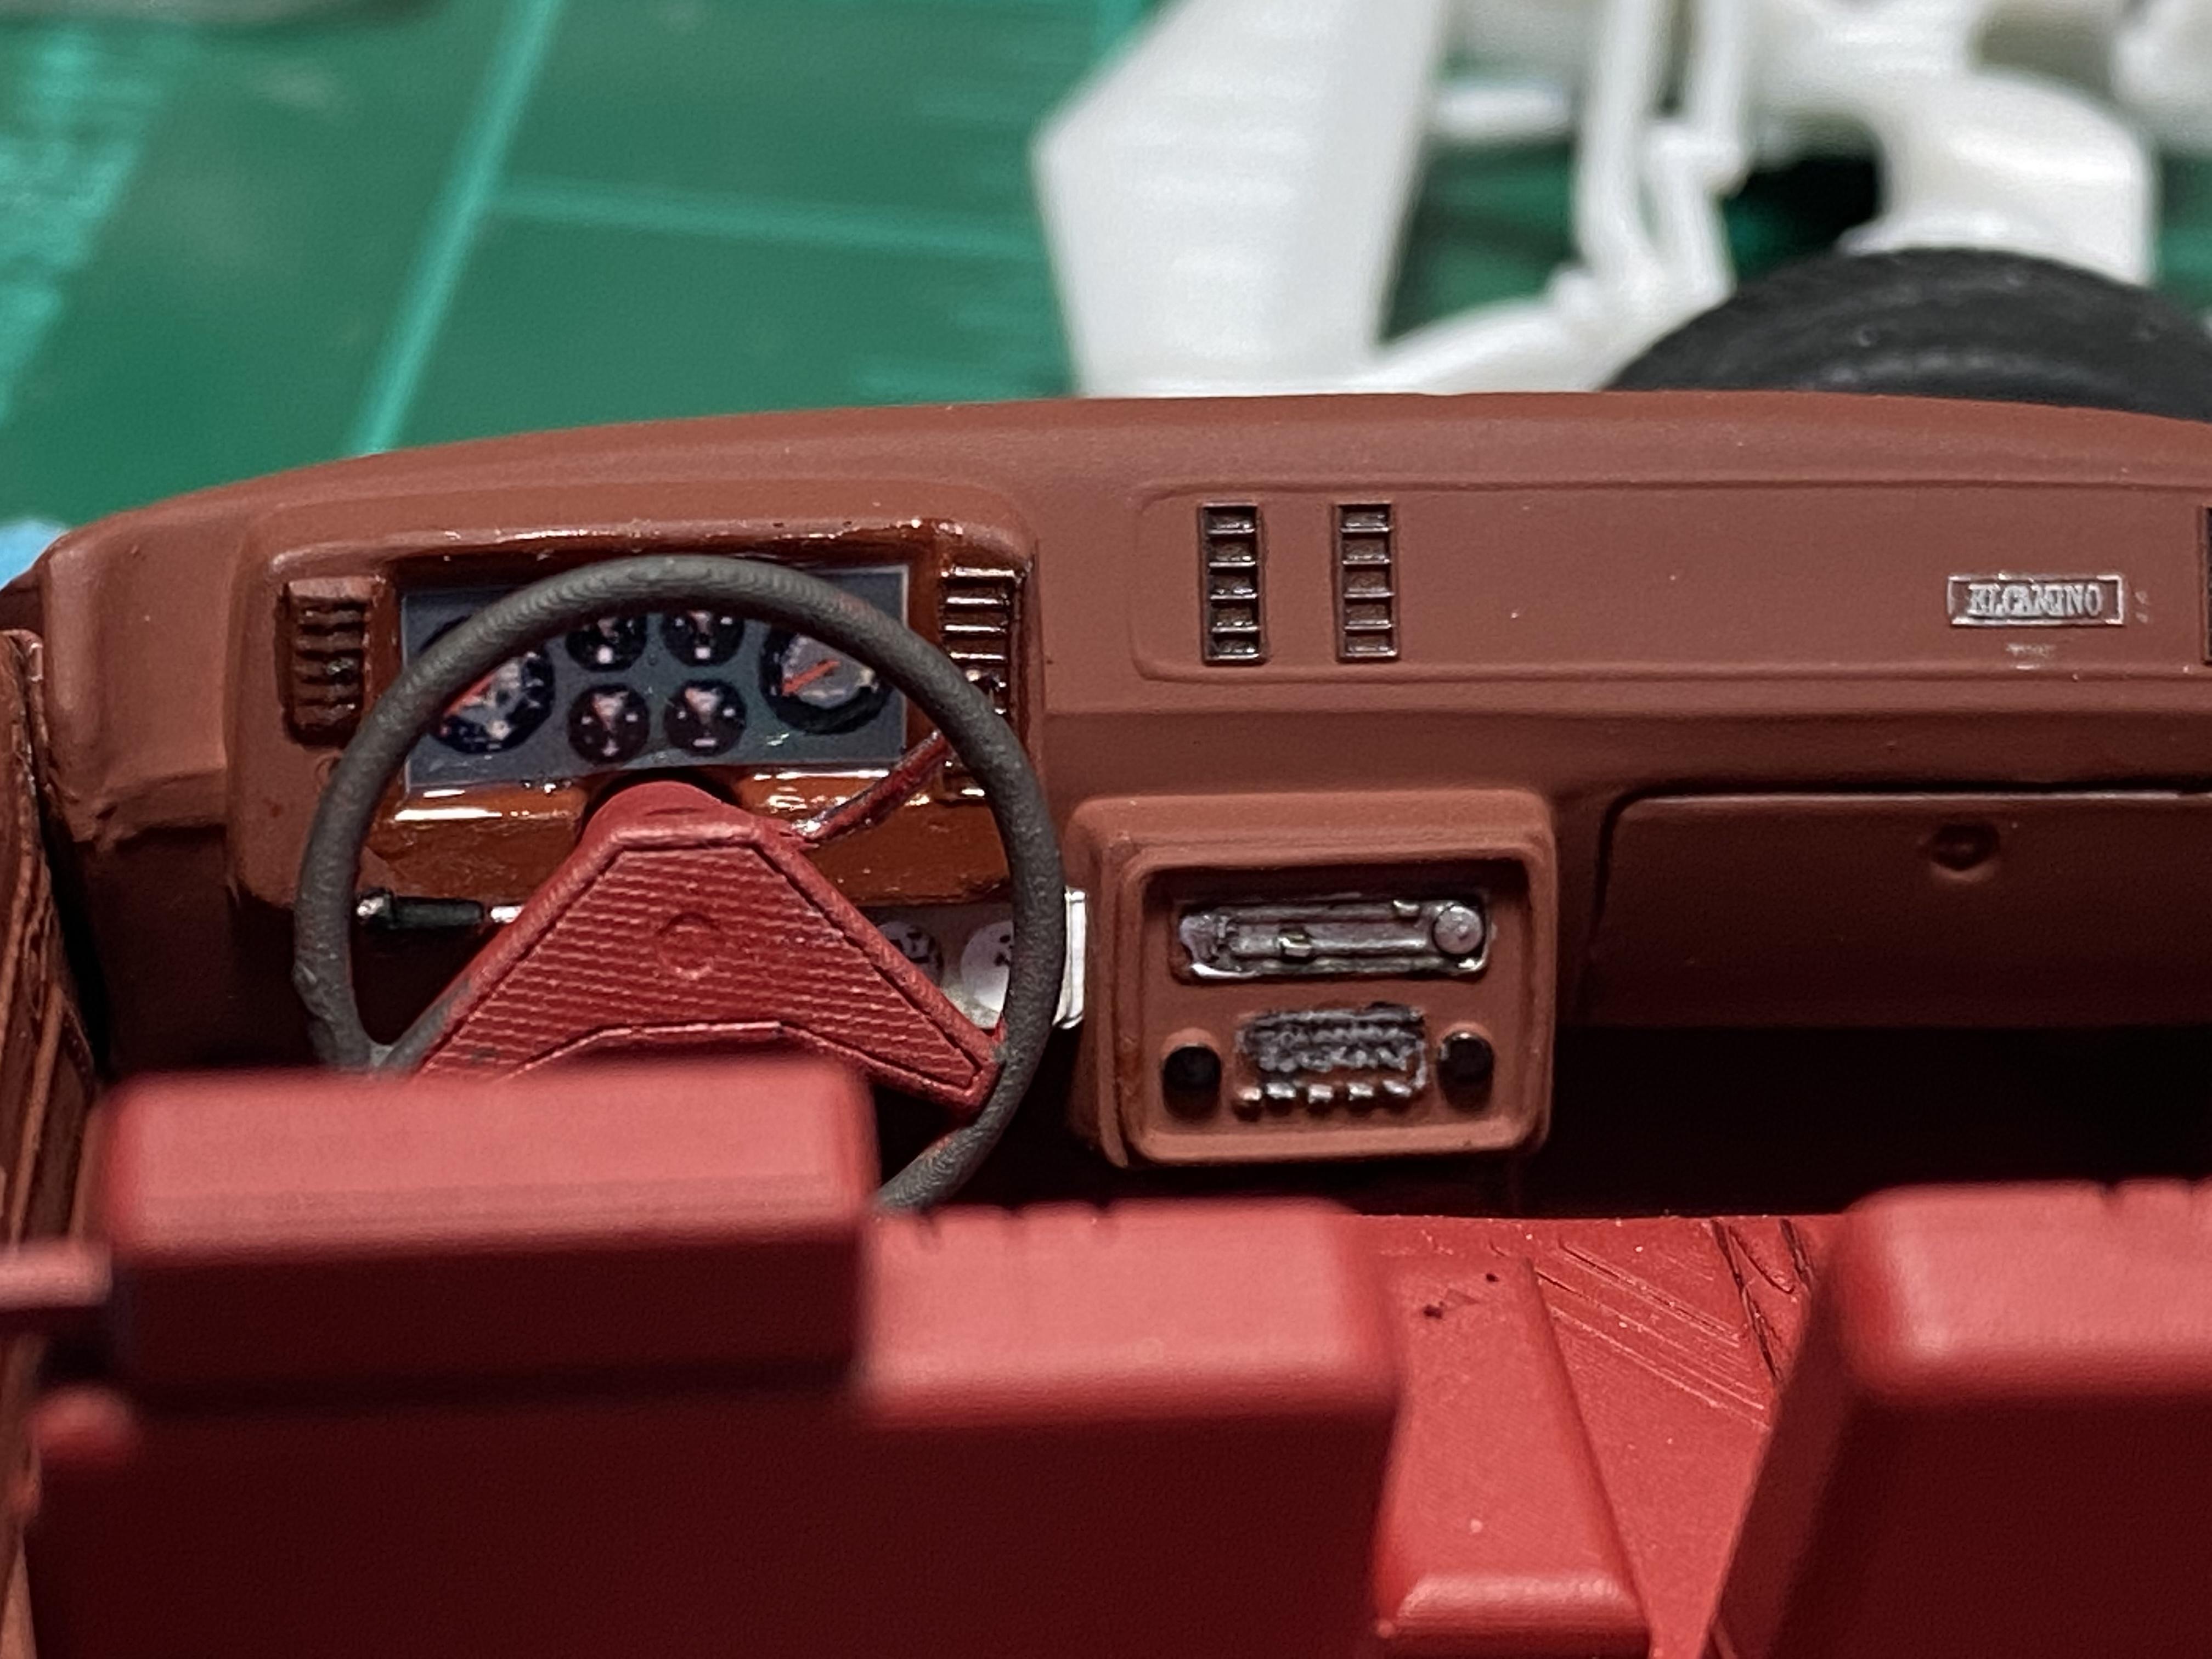
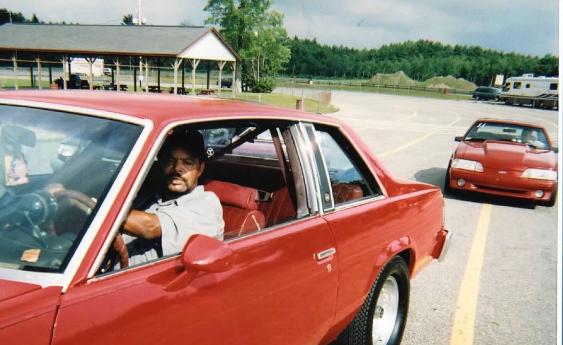
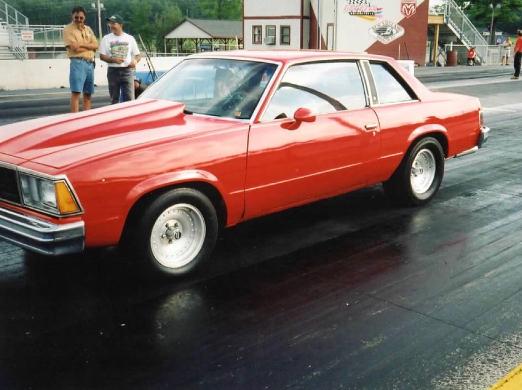
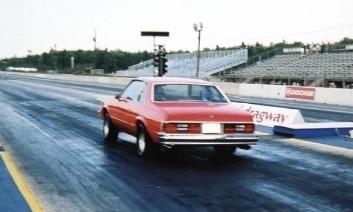
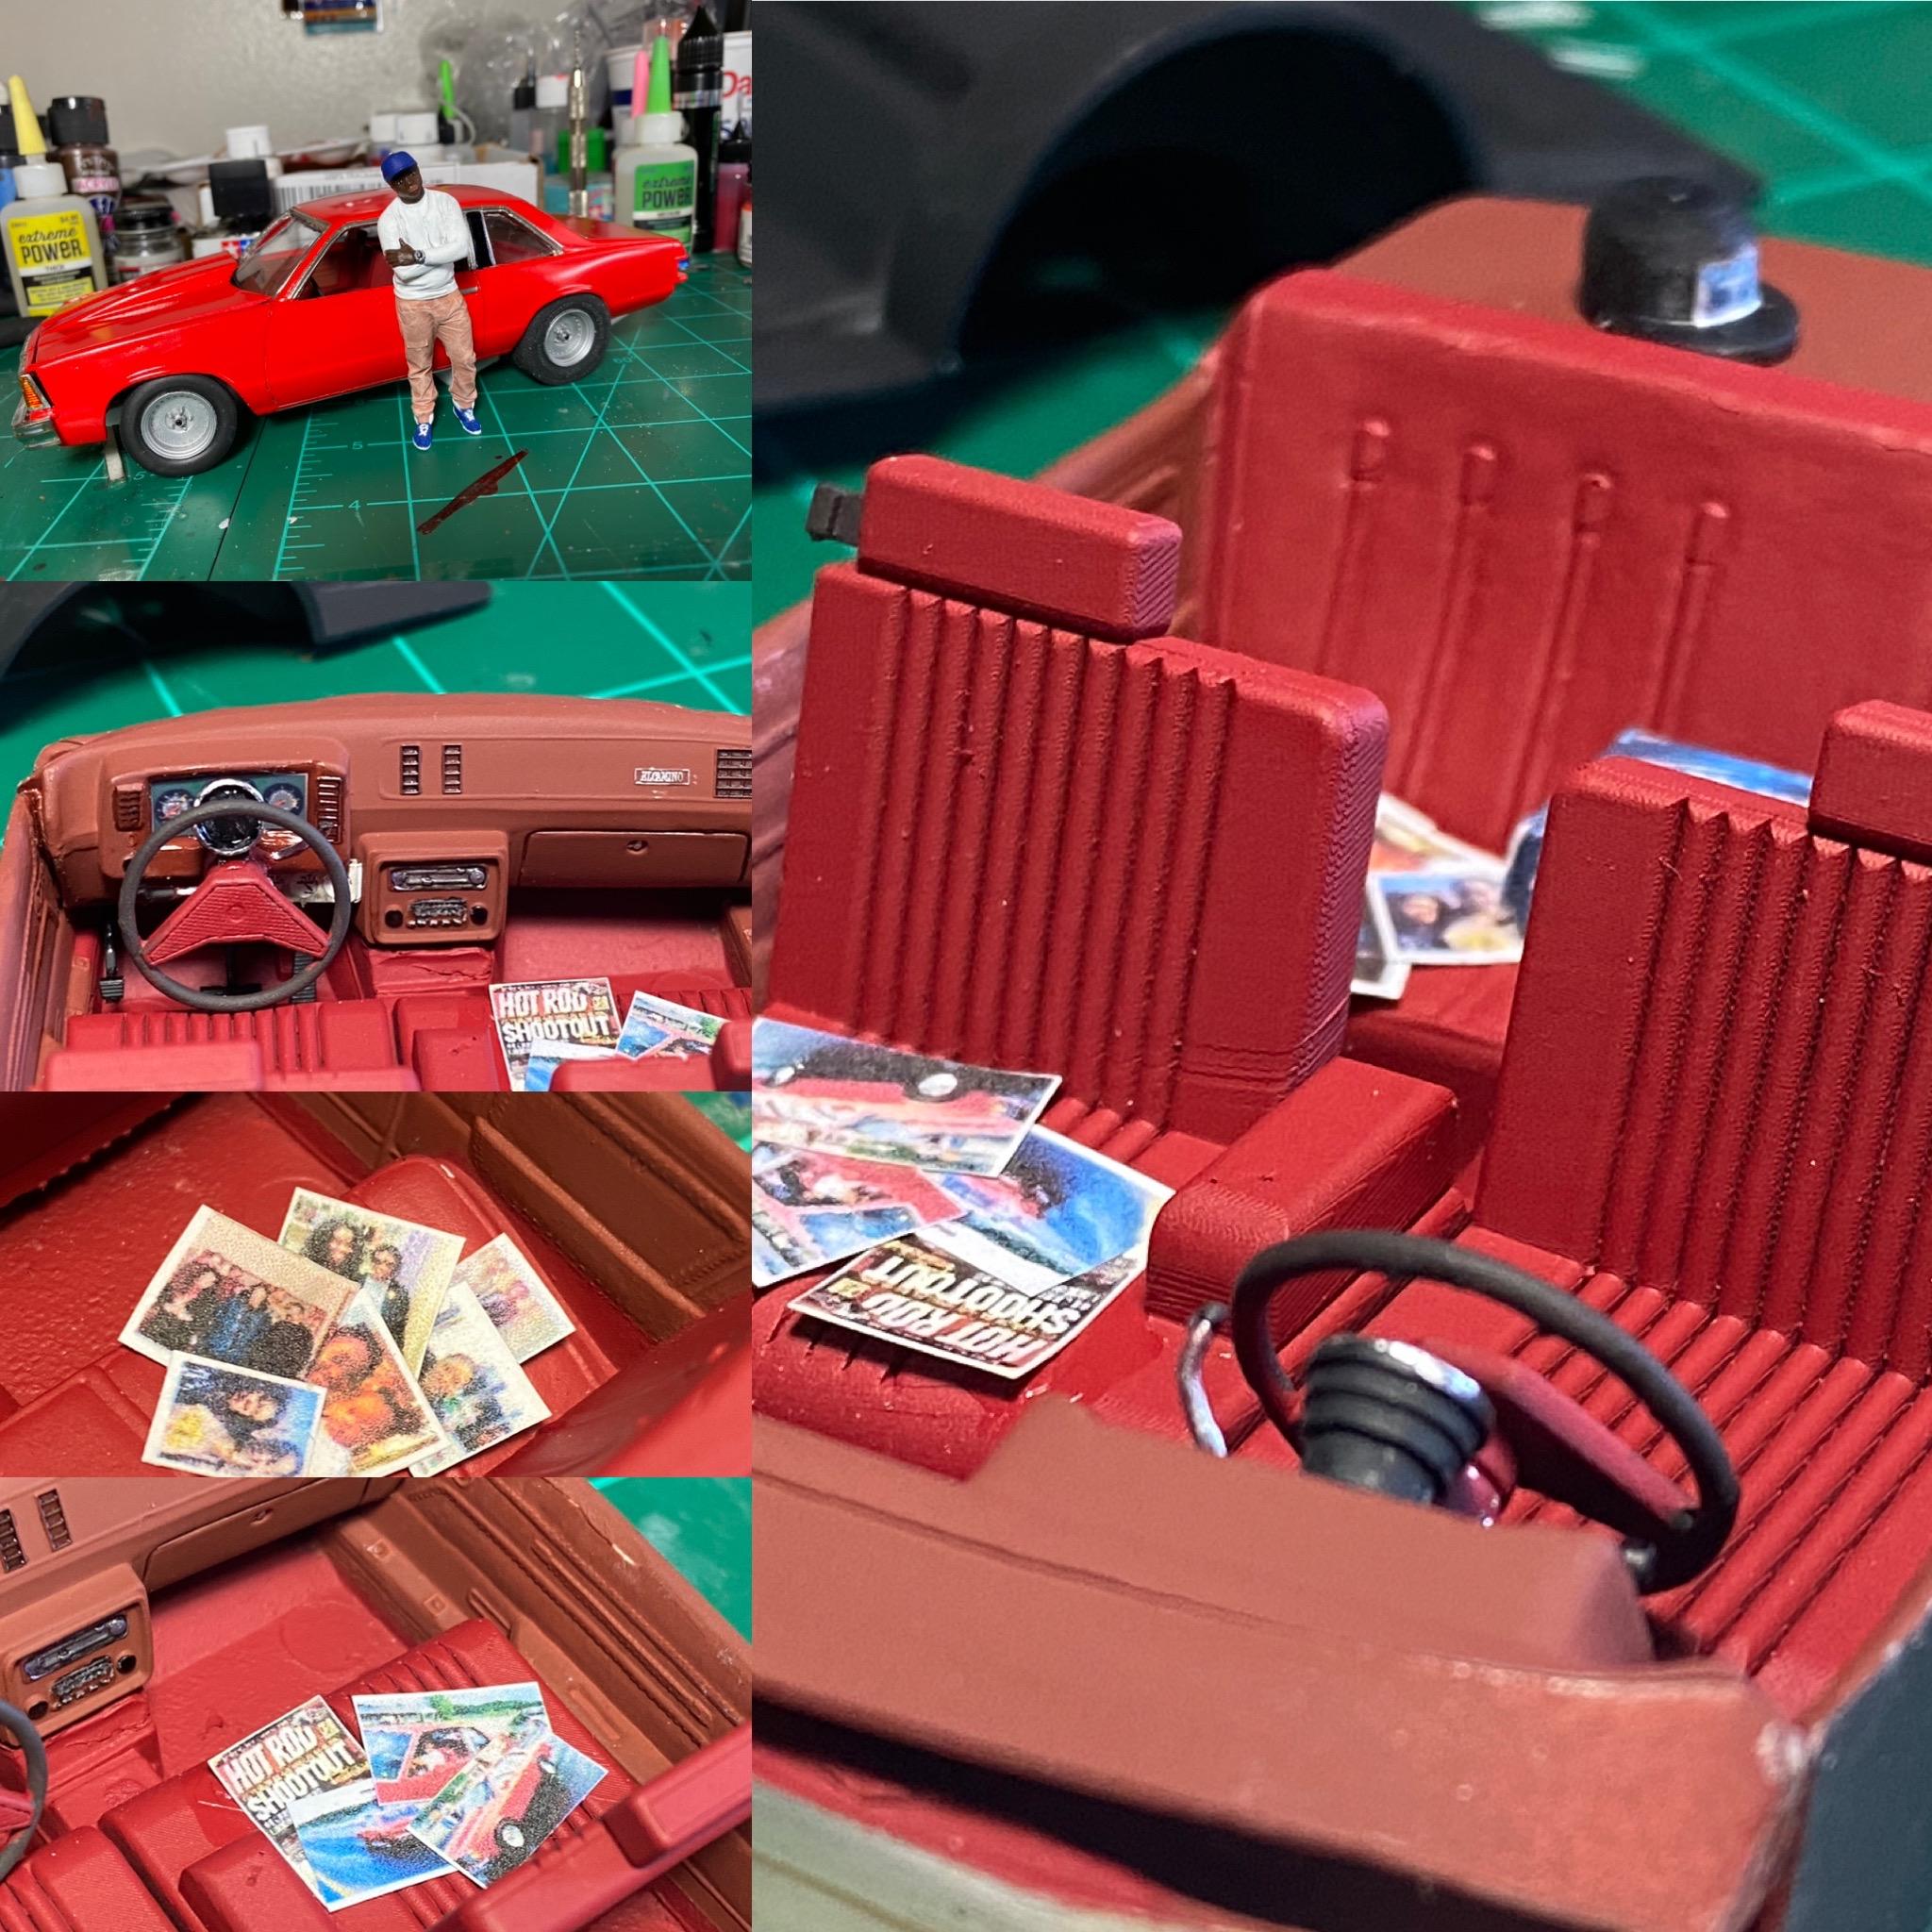
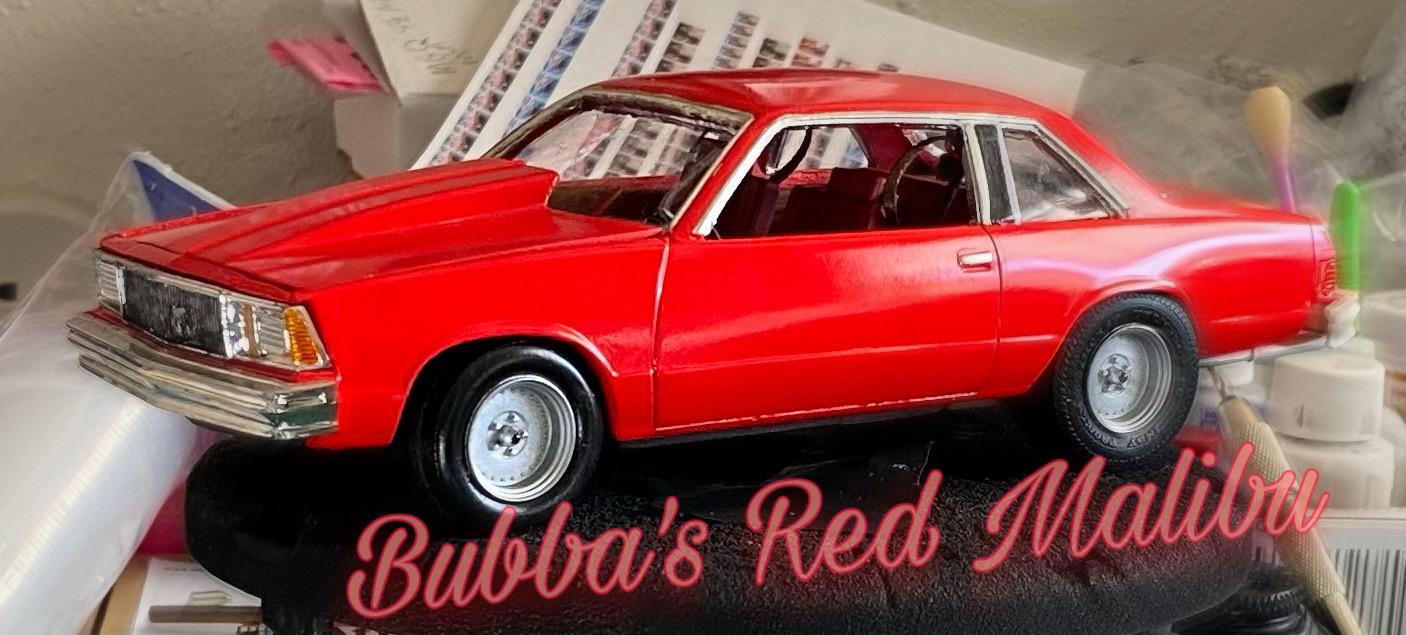
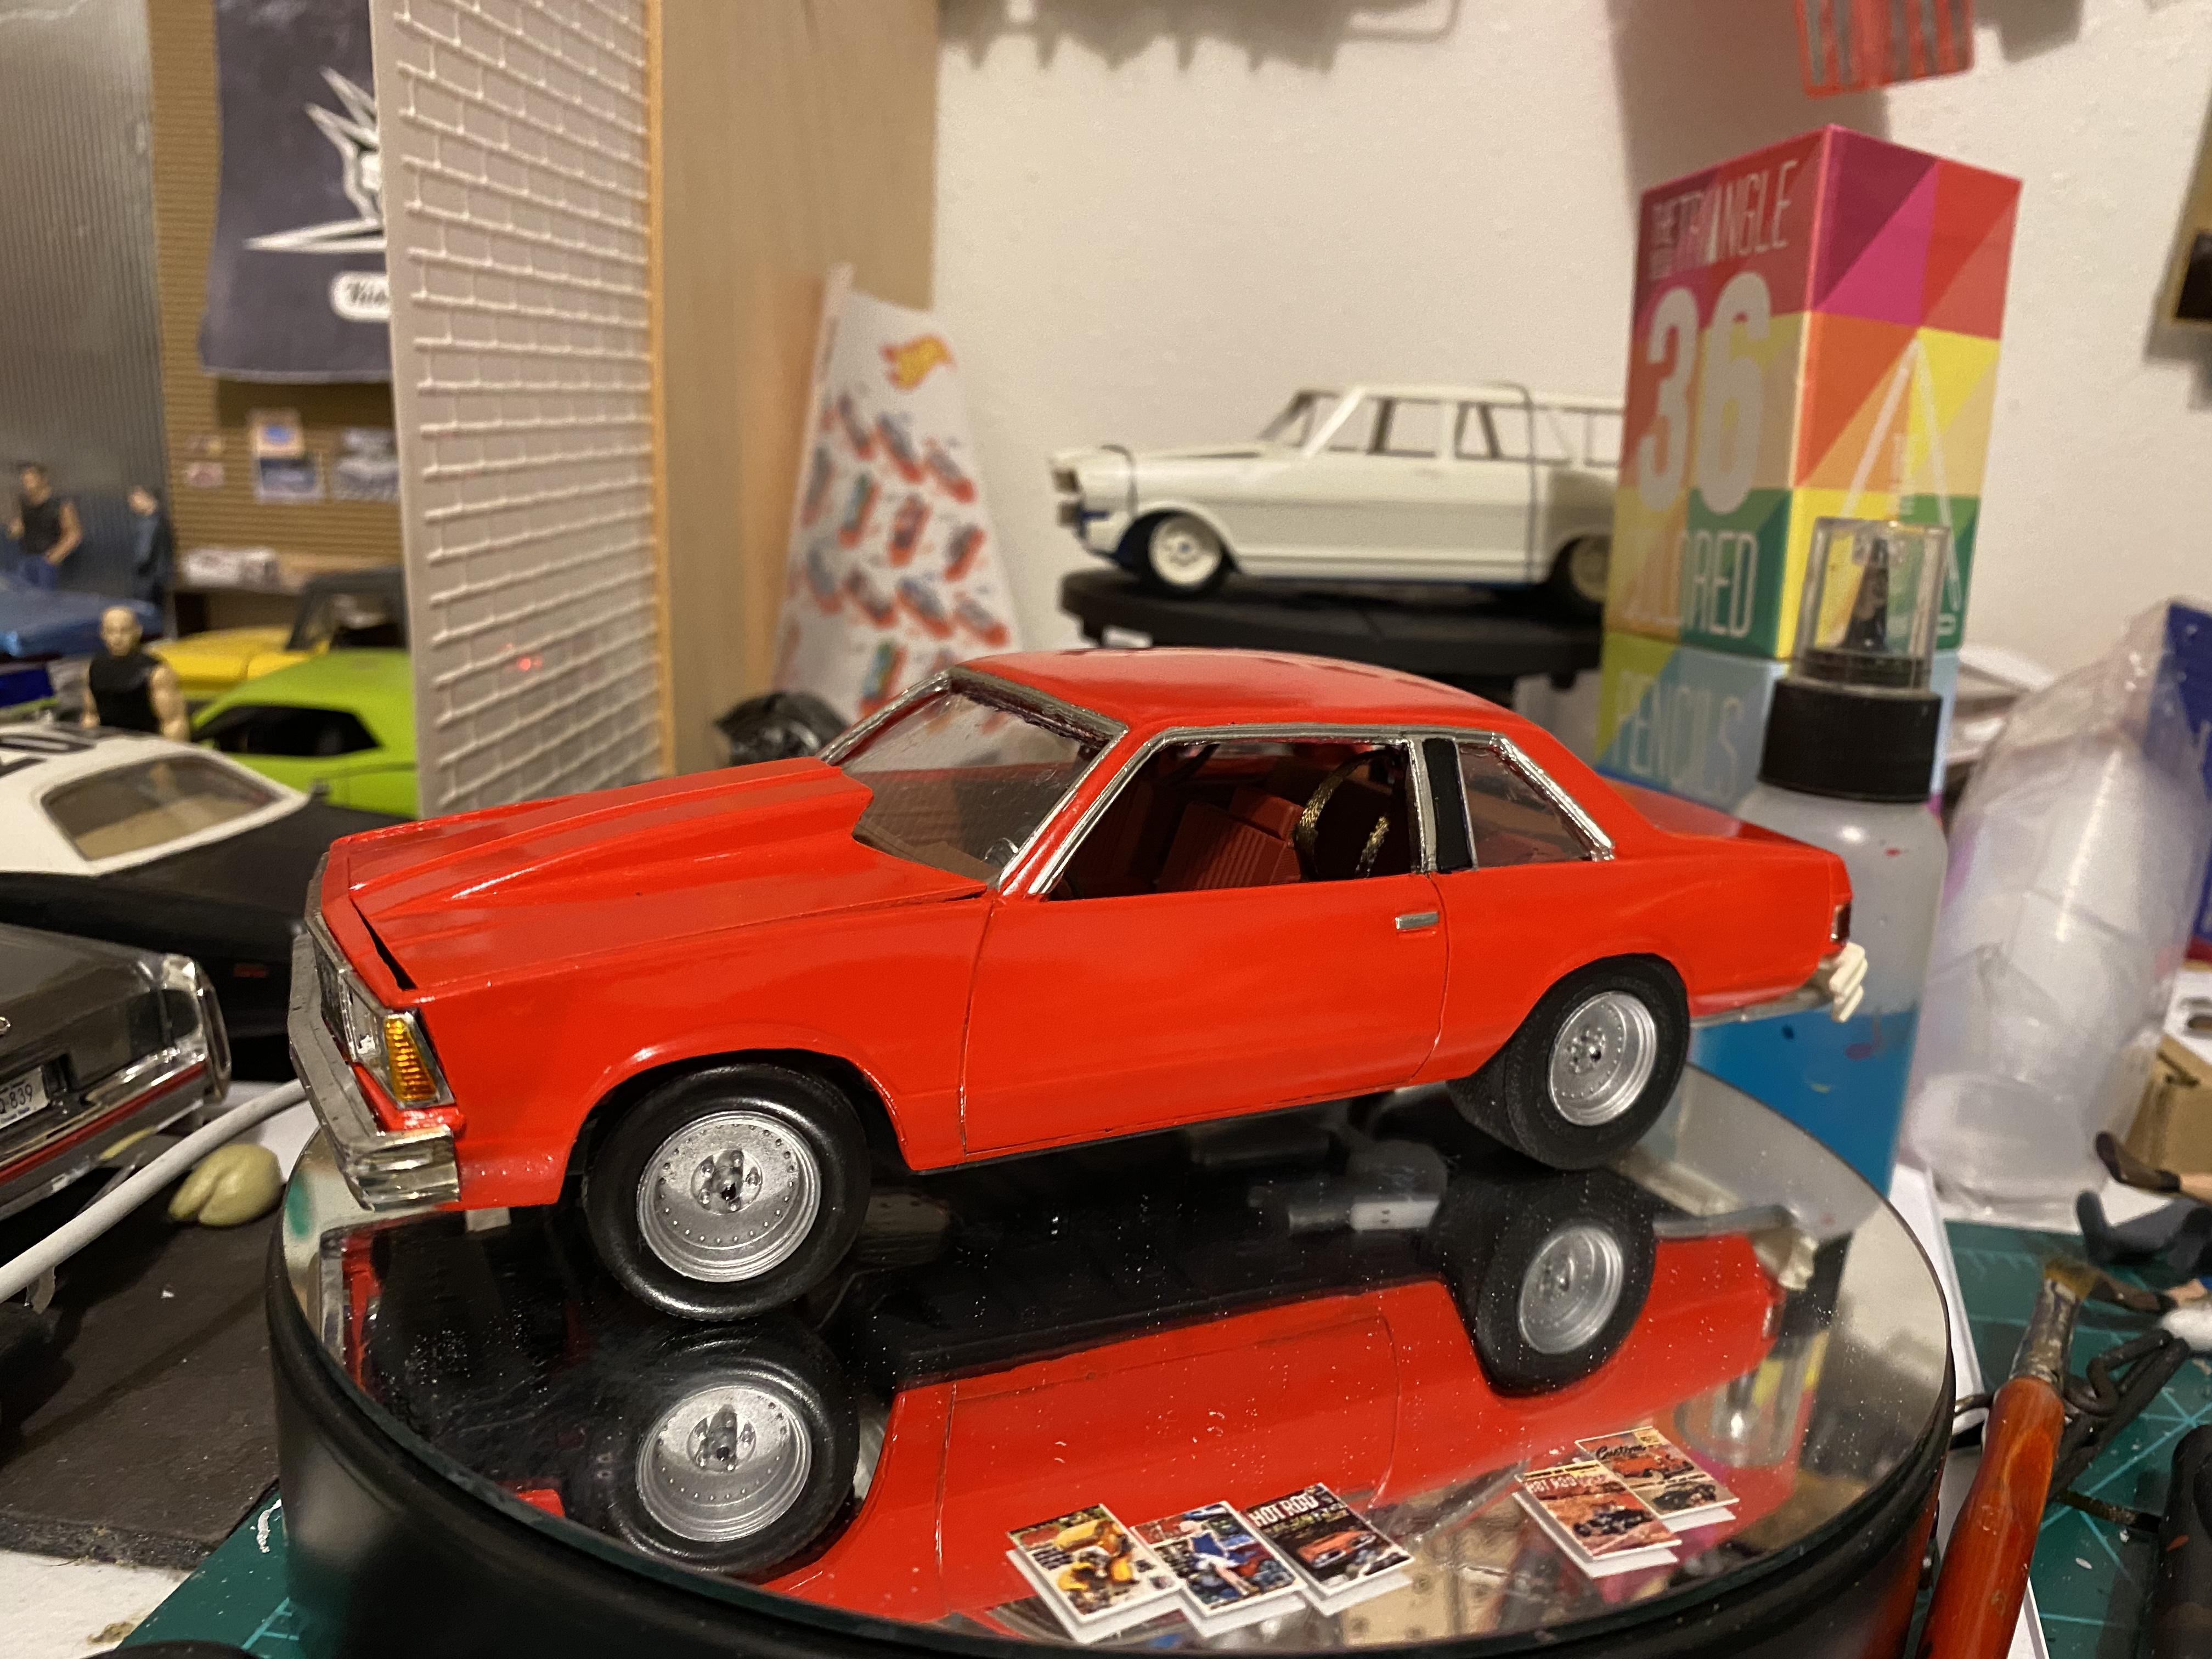
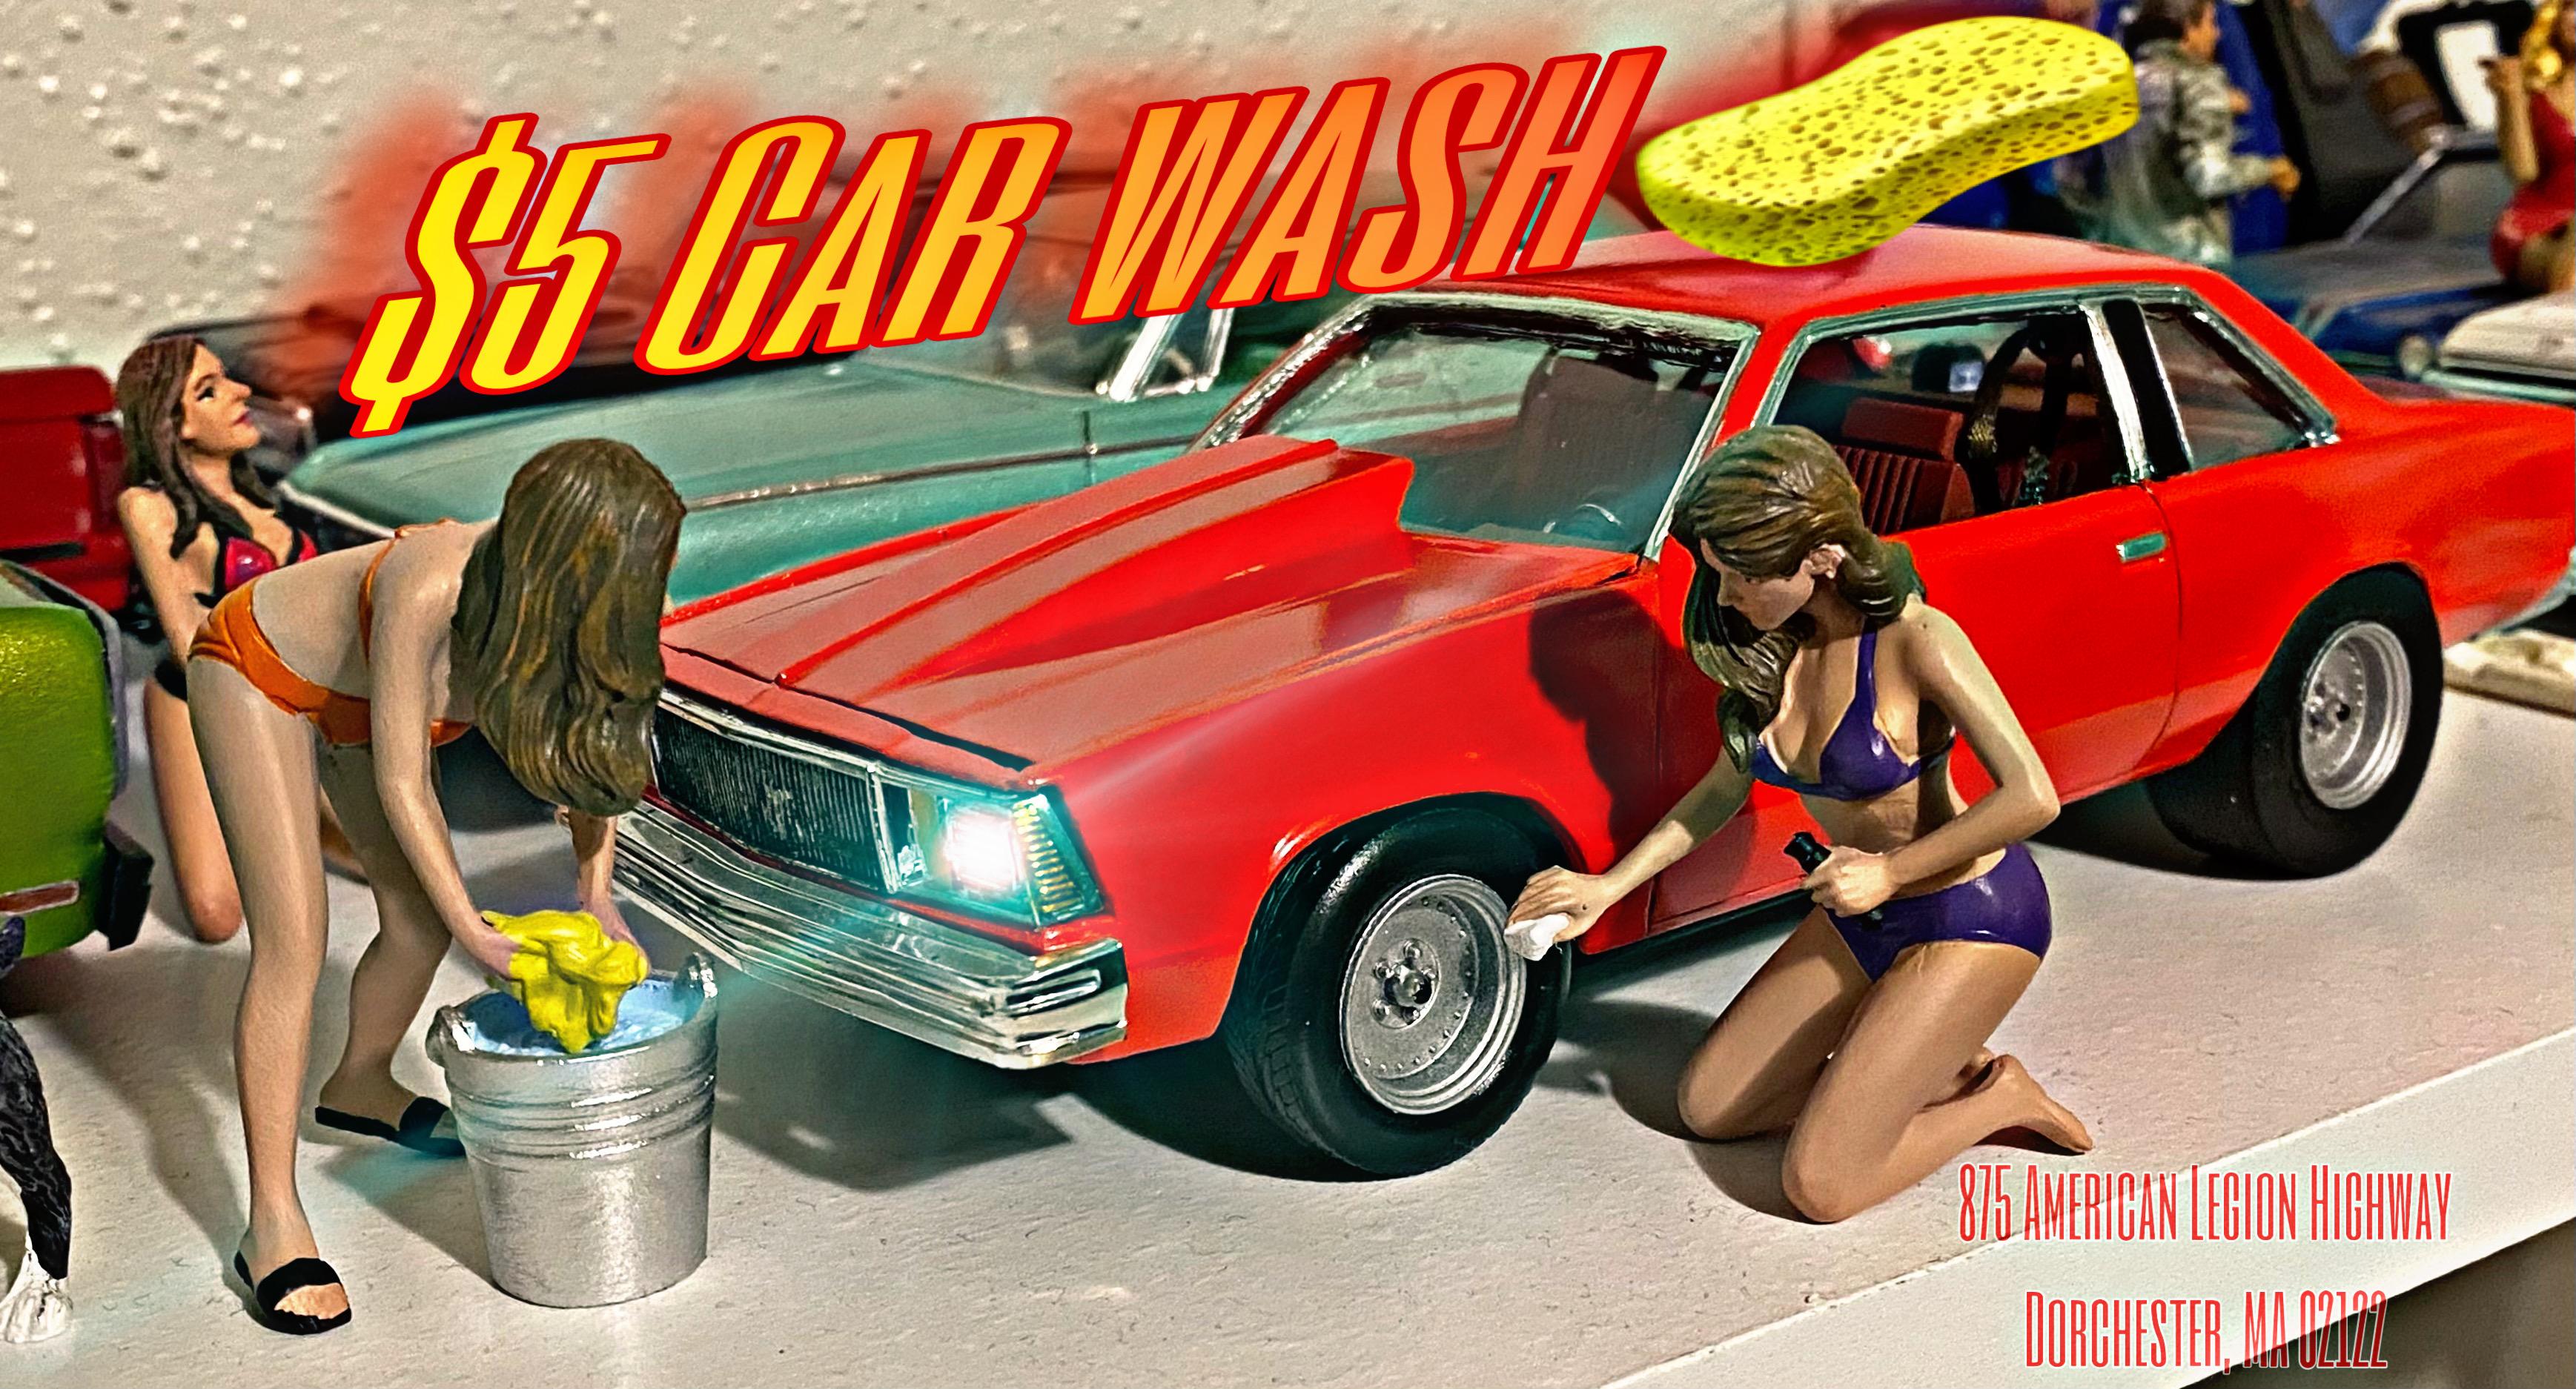
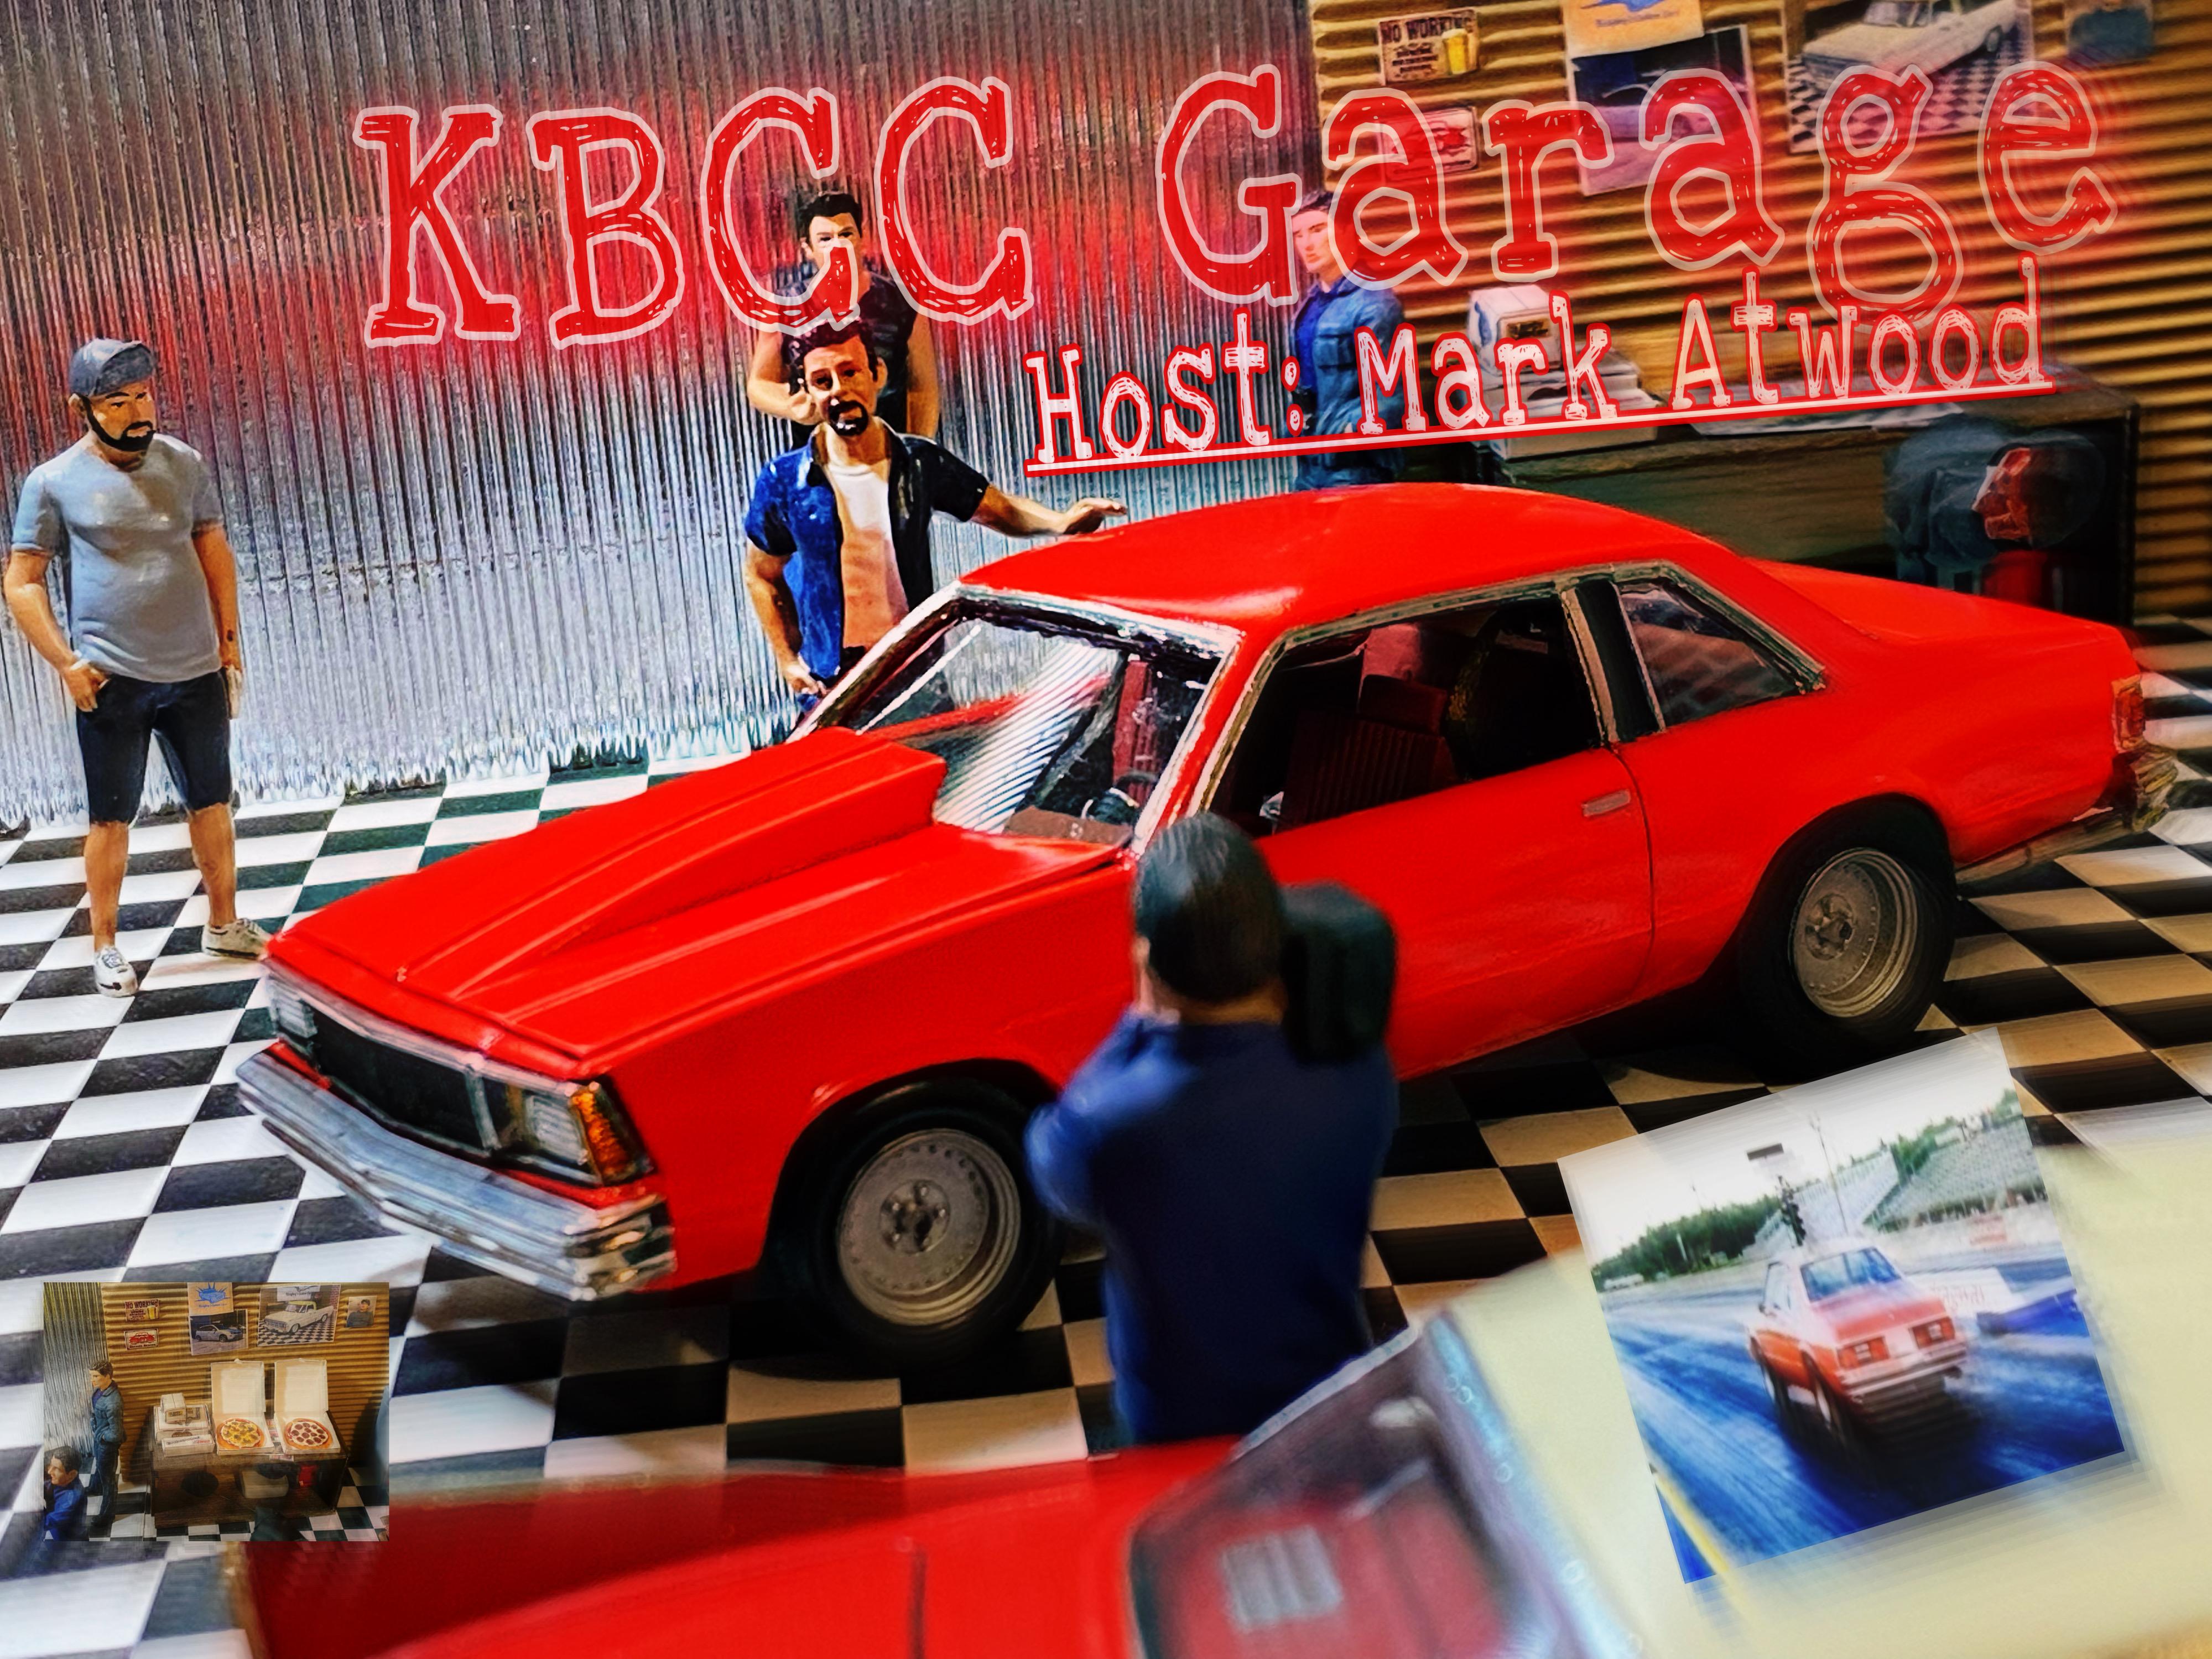
I recently completed my first all resin body project. I found the body, bumpers and grille on EBay from A&J Resin of a 1981 Chevy Malibu. This project was special because I had been wanting to recreate my uncles car in scale since the mid 1990’s. Kits used: AMT 86 El Camino AMT 69 Olds 442 Revell 83 Olds Hurst 1981 Chevy El Camino (promo) Aftermarket: Scenes Unlimited wheels Morgan Automotive Detail distributor Lex’s Resin Cowl hood Model Car Parts dash gauges Overal the project took a little over a year to complete…but doggone sure worth it. IMG_0486.MOV
- 13 replies
-
- 1
-
-
- resin
- chevy malibu
- (and 2 more)
-
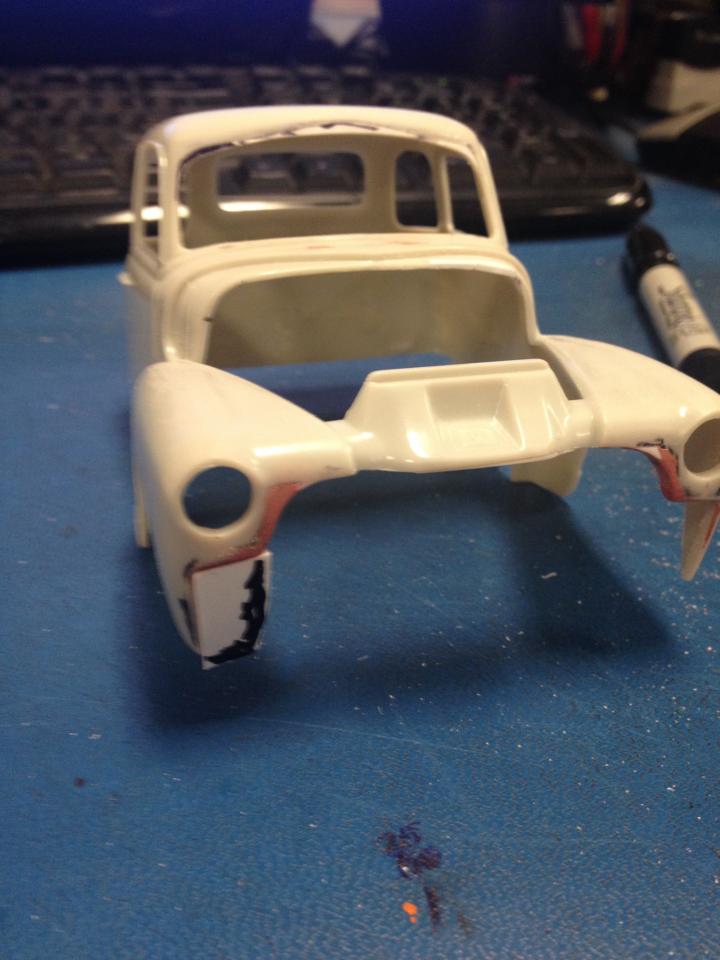
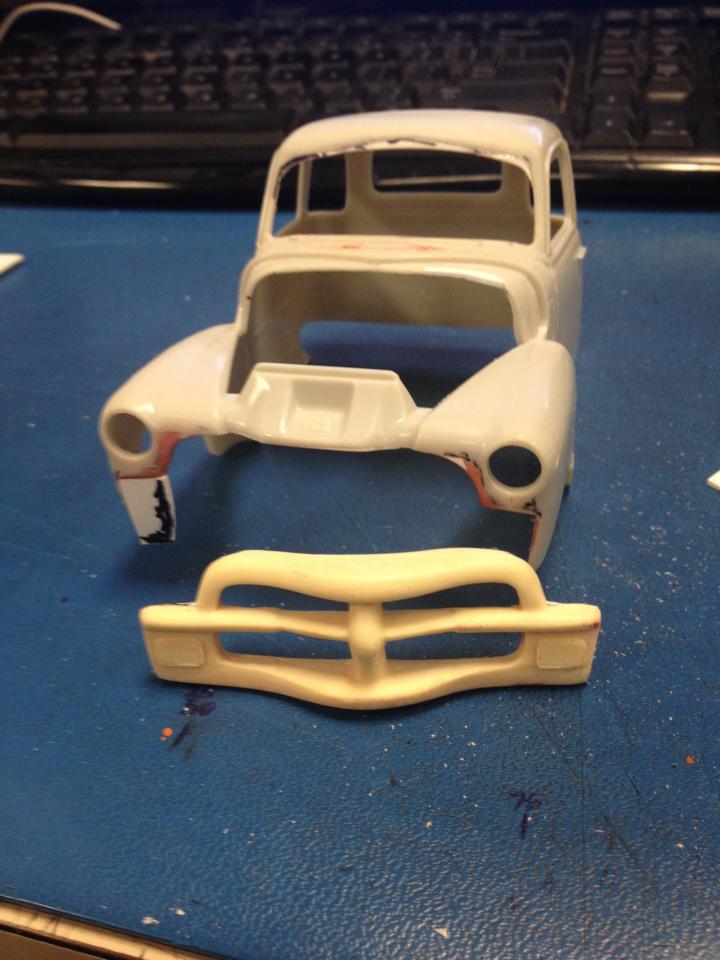
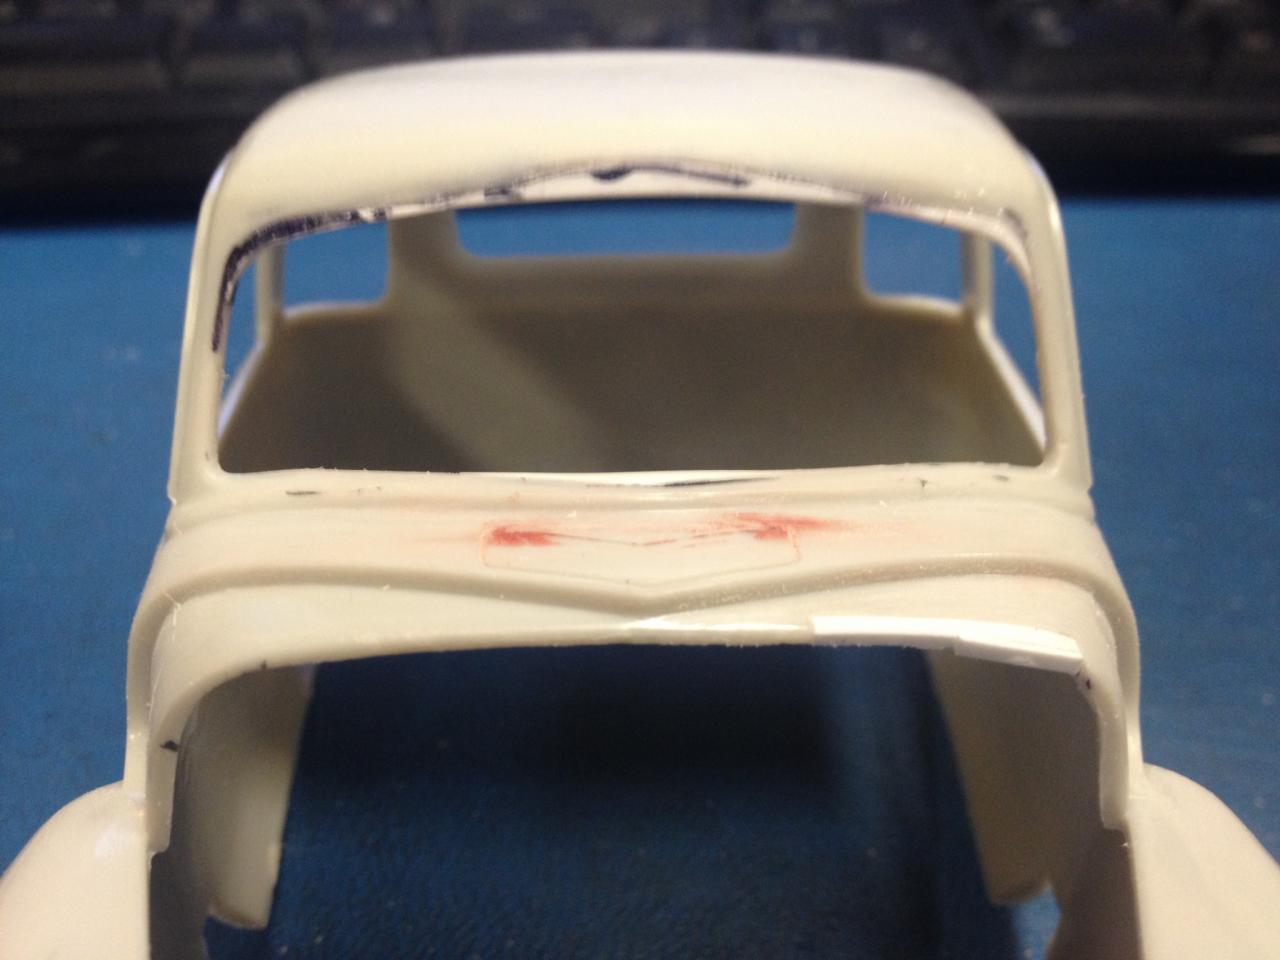
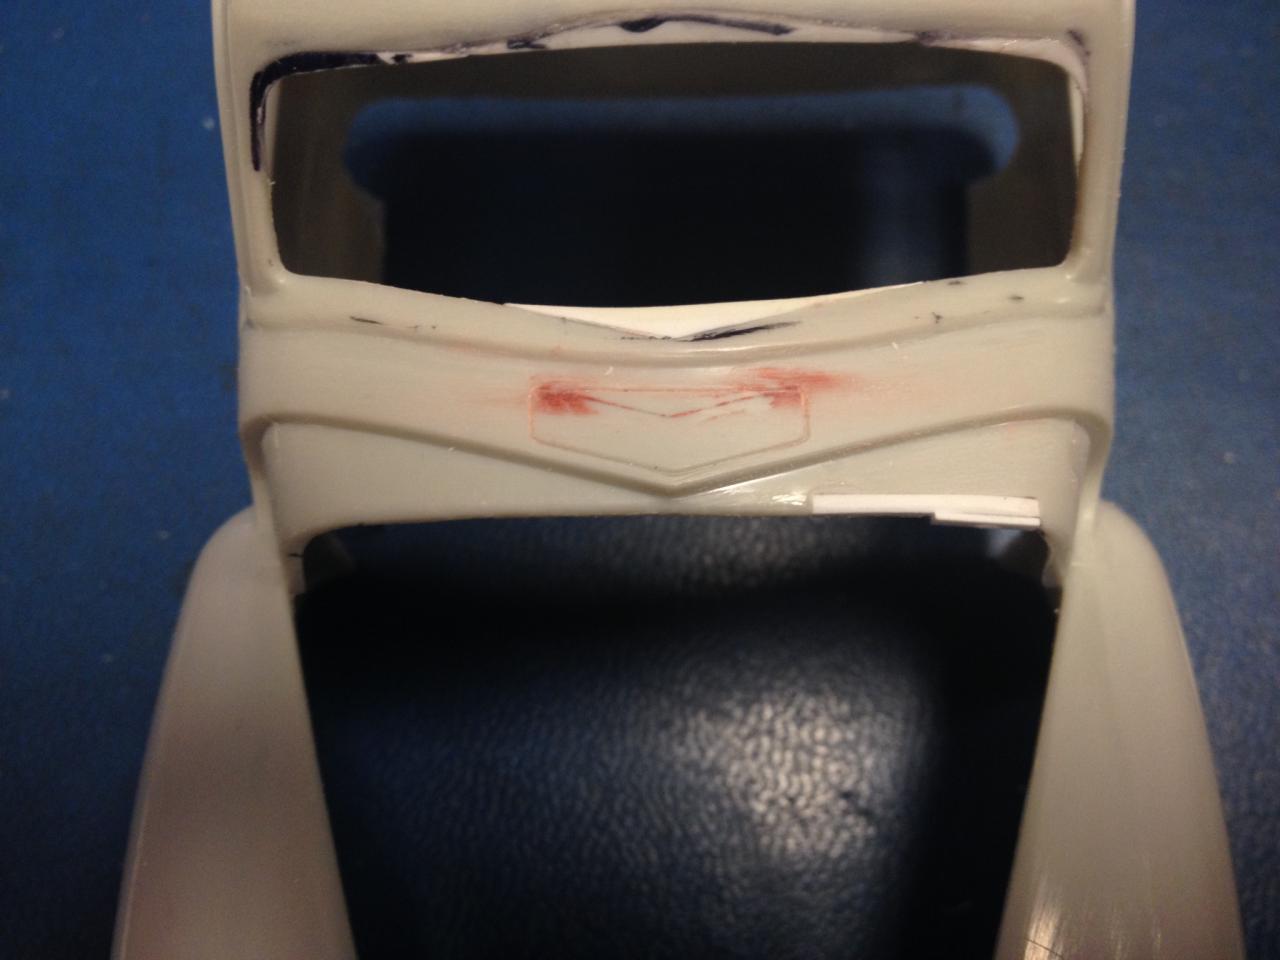
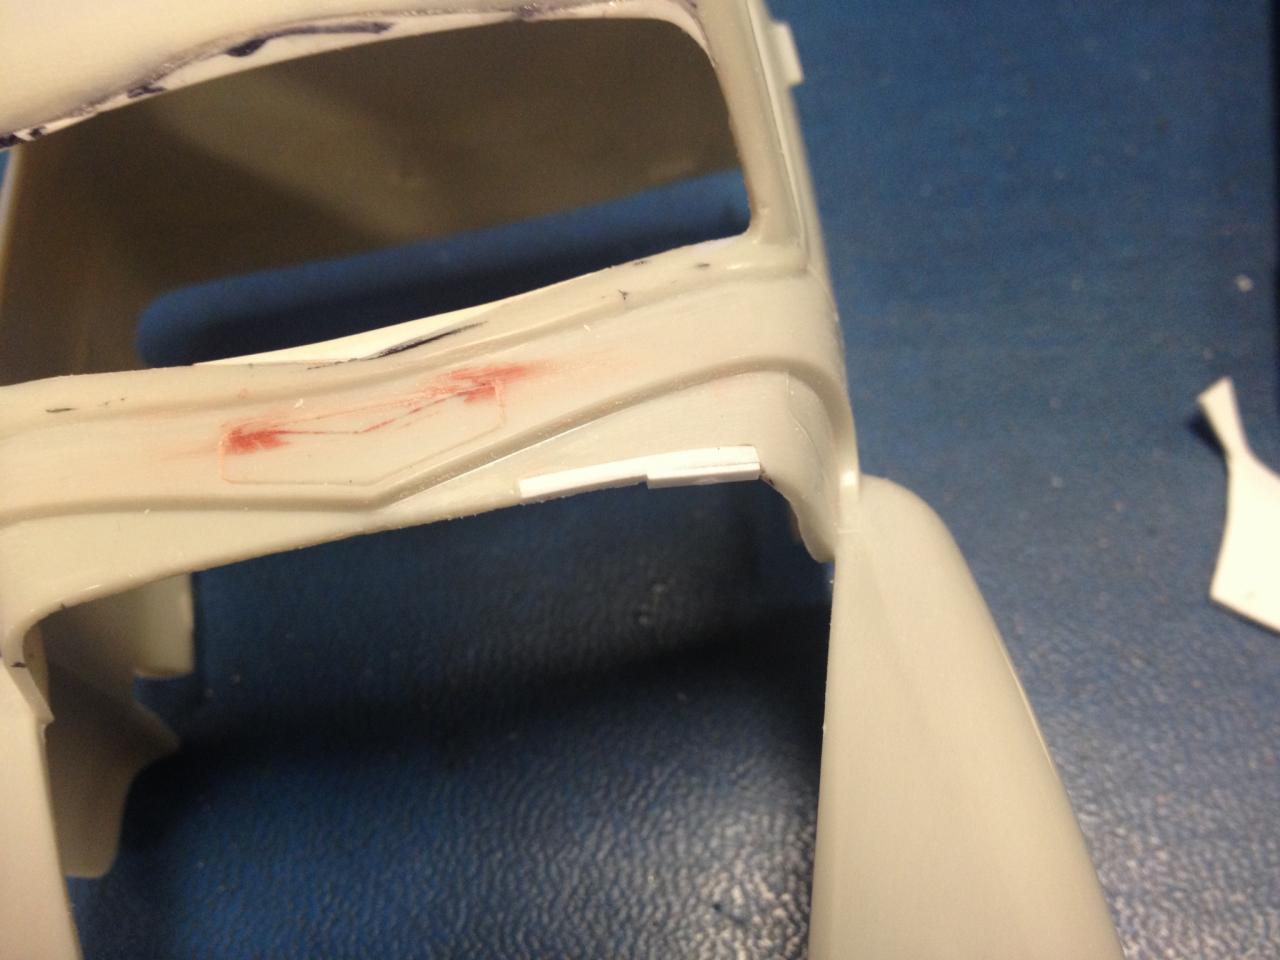
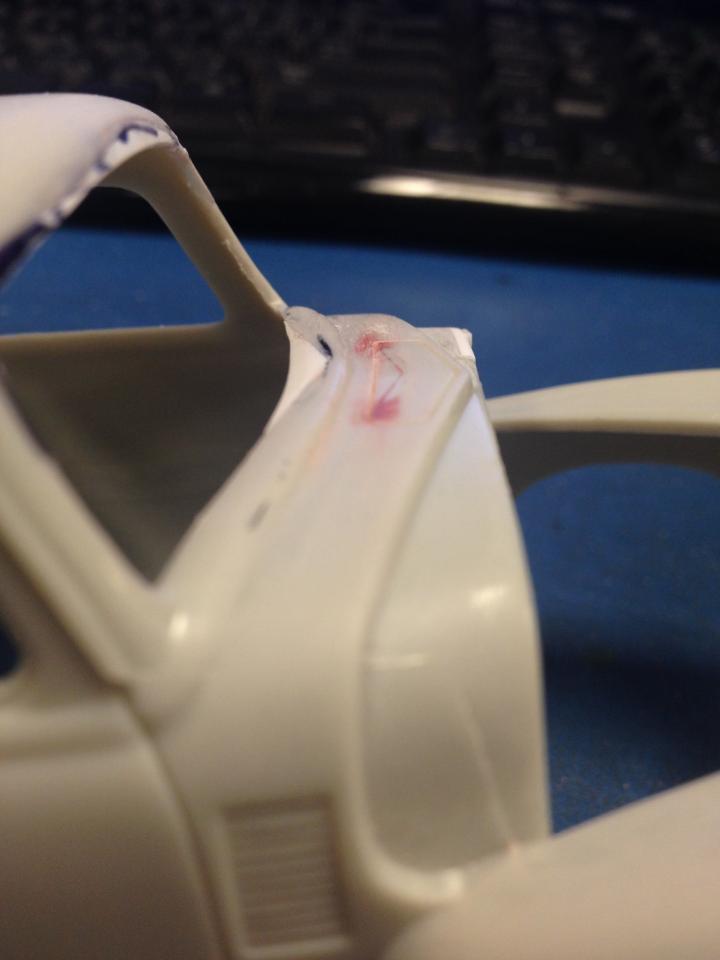
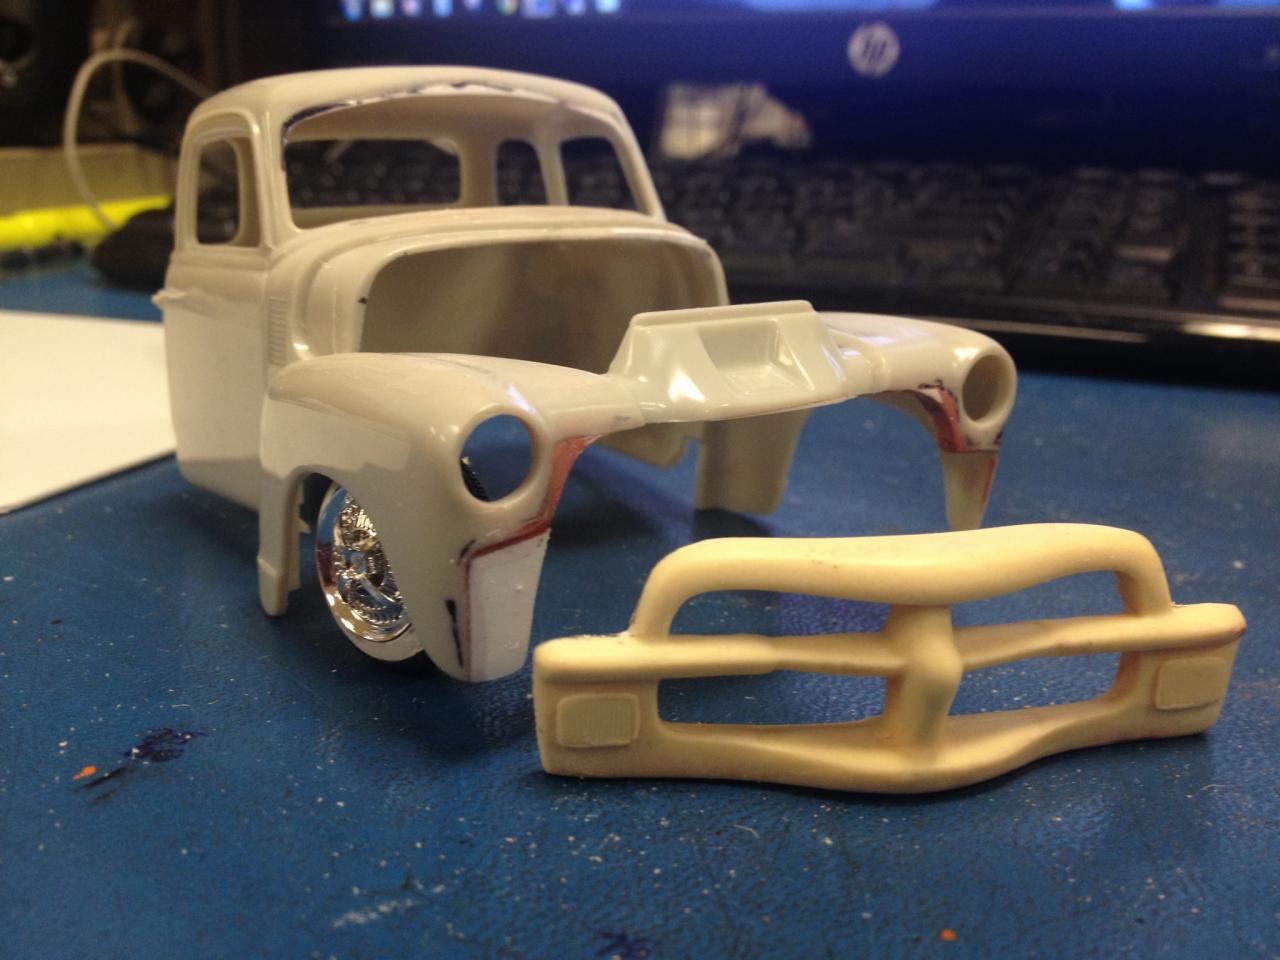
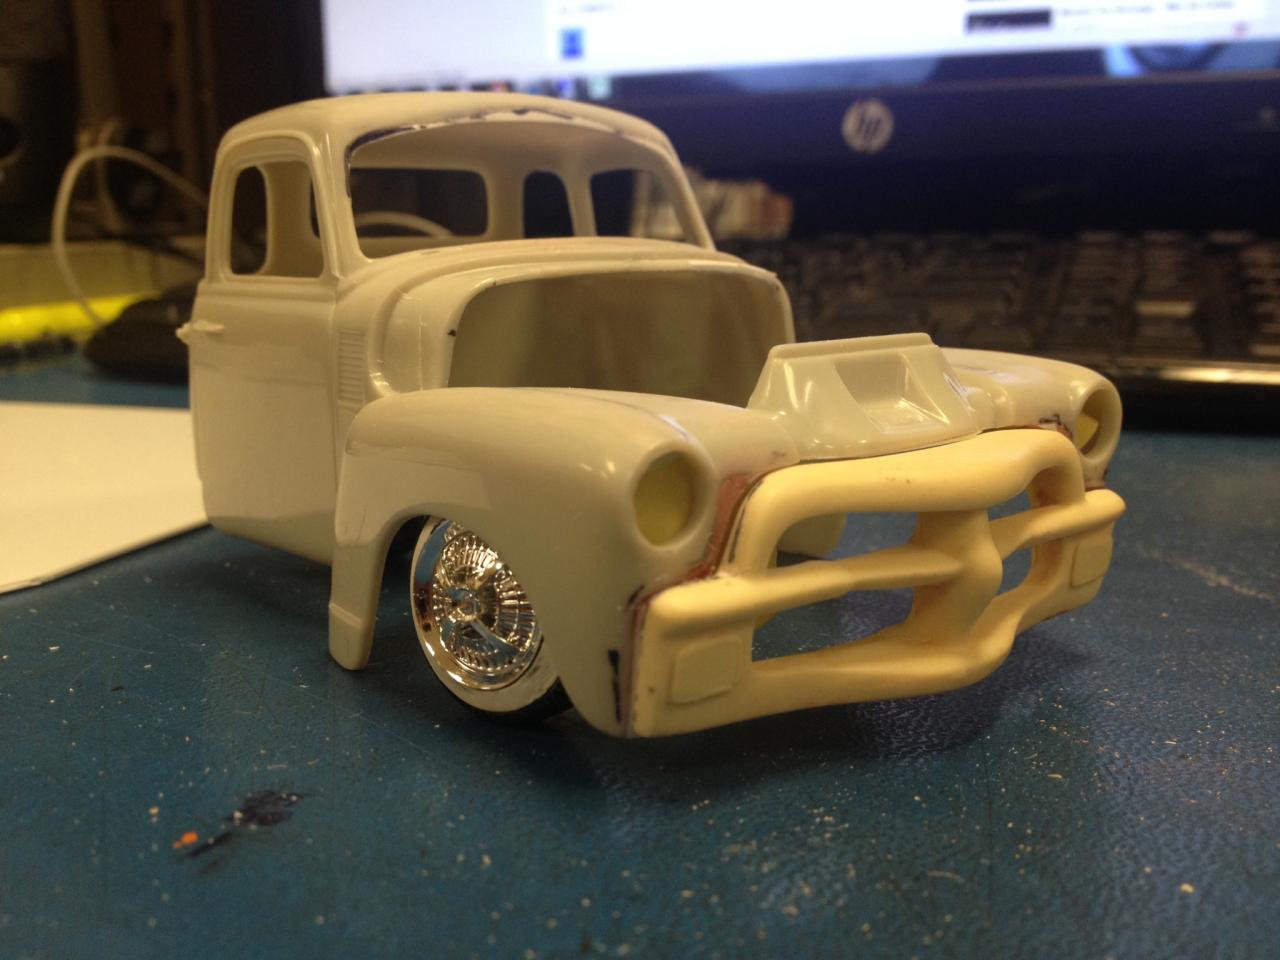
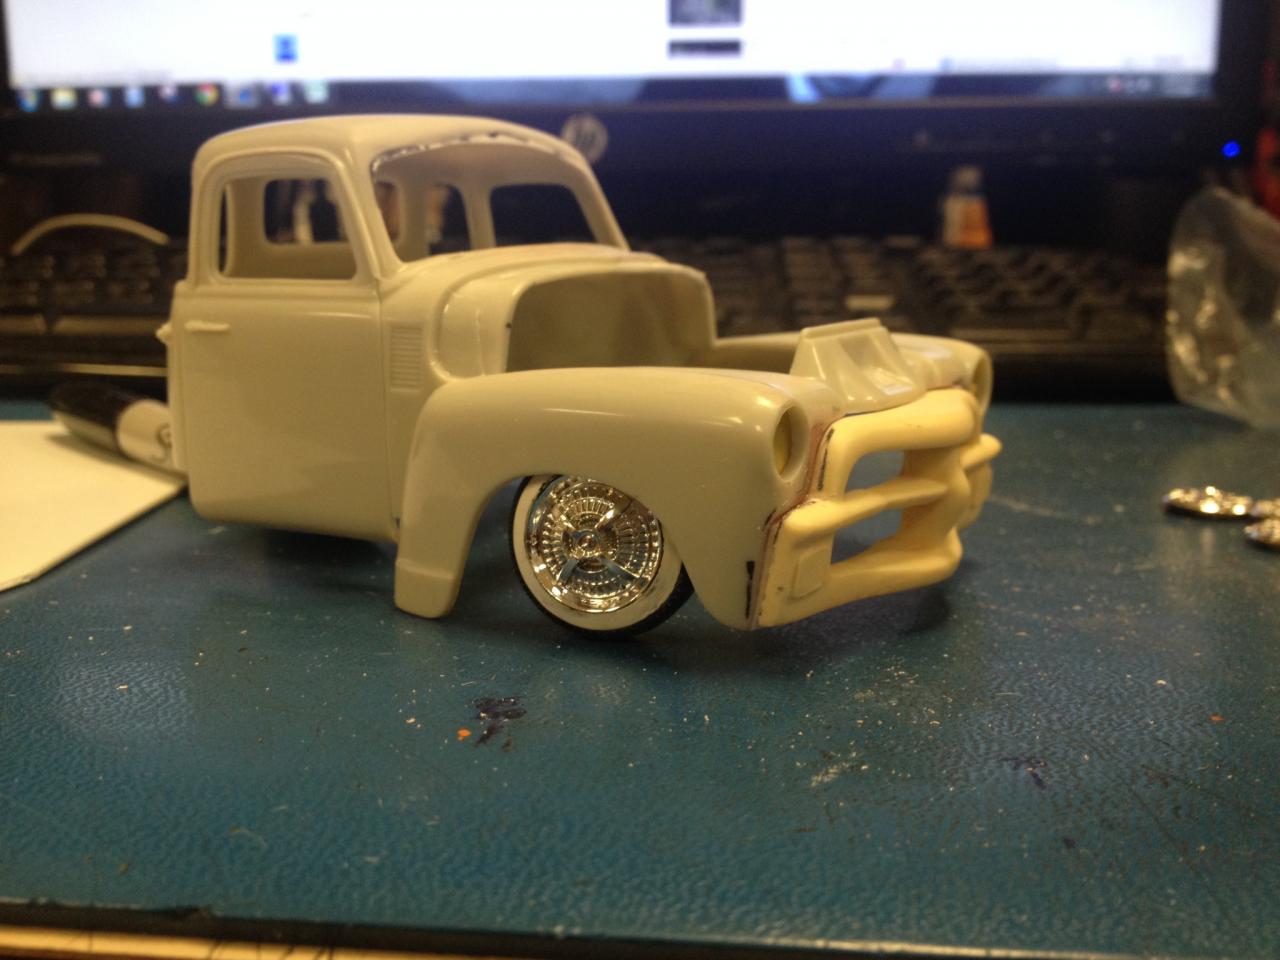
 Ok here's another project that i've had in my stash for over a year and brought it out occasianly when i got in the mood to work on it. I had bought the resin cab 54 abd removed the grille and was gonna chrome it and work on the resin cab, but after looking at it i decided why not try and use the 50 chevy cab for better plastic fitment and make my own 54. So little by little i had worked on it from an old spare 50 cab i had and started from the grille work back. So today i brought in with me to work and got back into it. Here is were i'm at on it so far. Reworking the front fenders, windshield, upper vent and fixing some cracks the cab had. I will also be making the correct rear bed sides as the 54 had them flat tops.
-
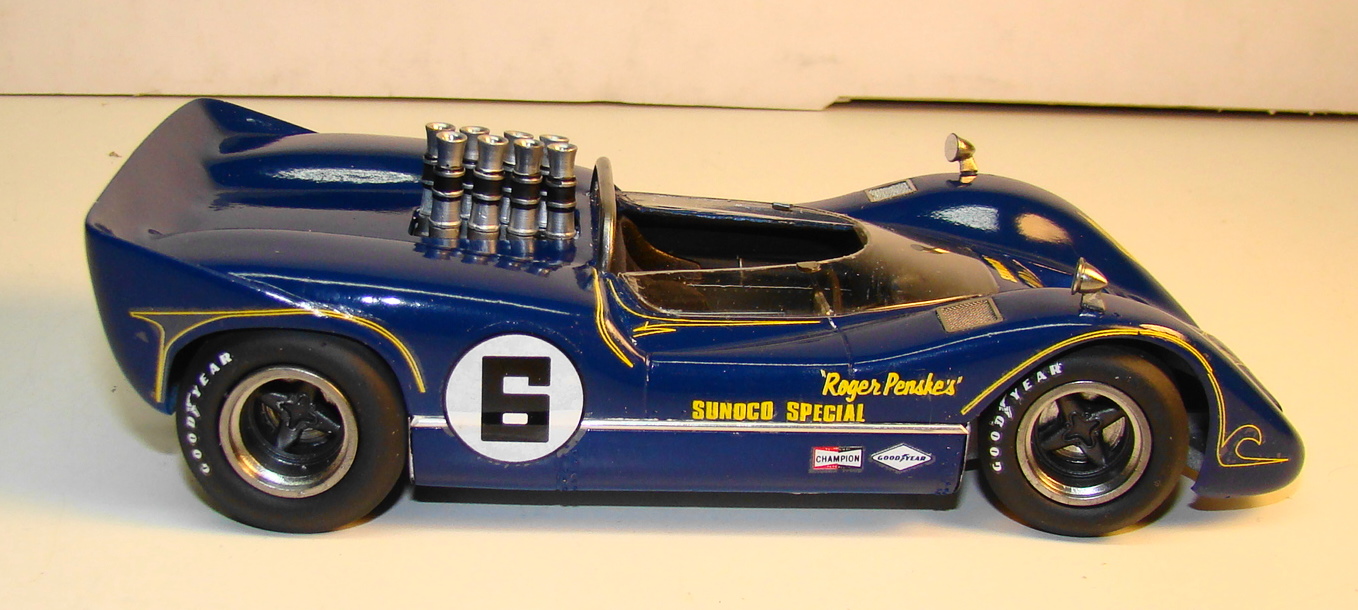
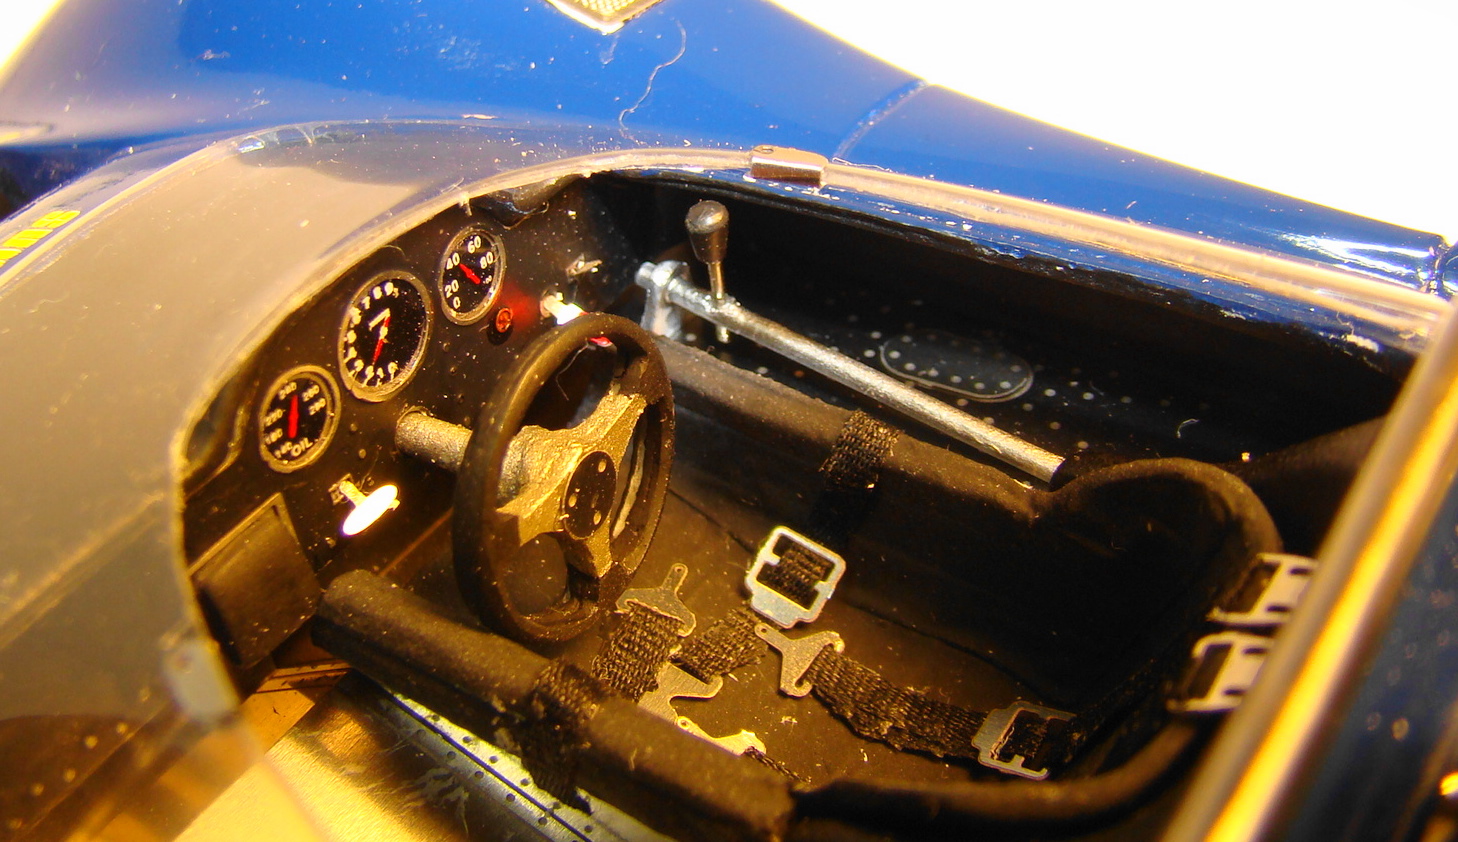
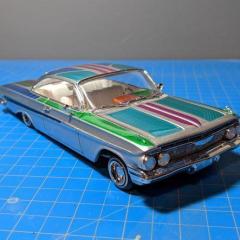
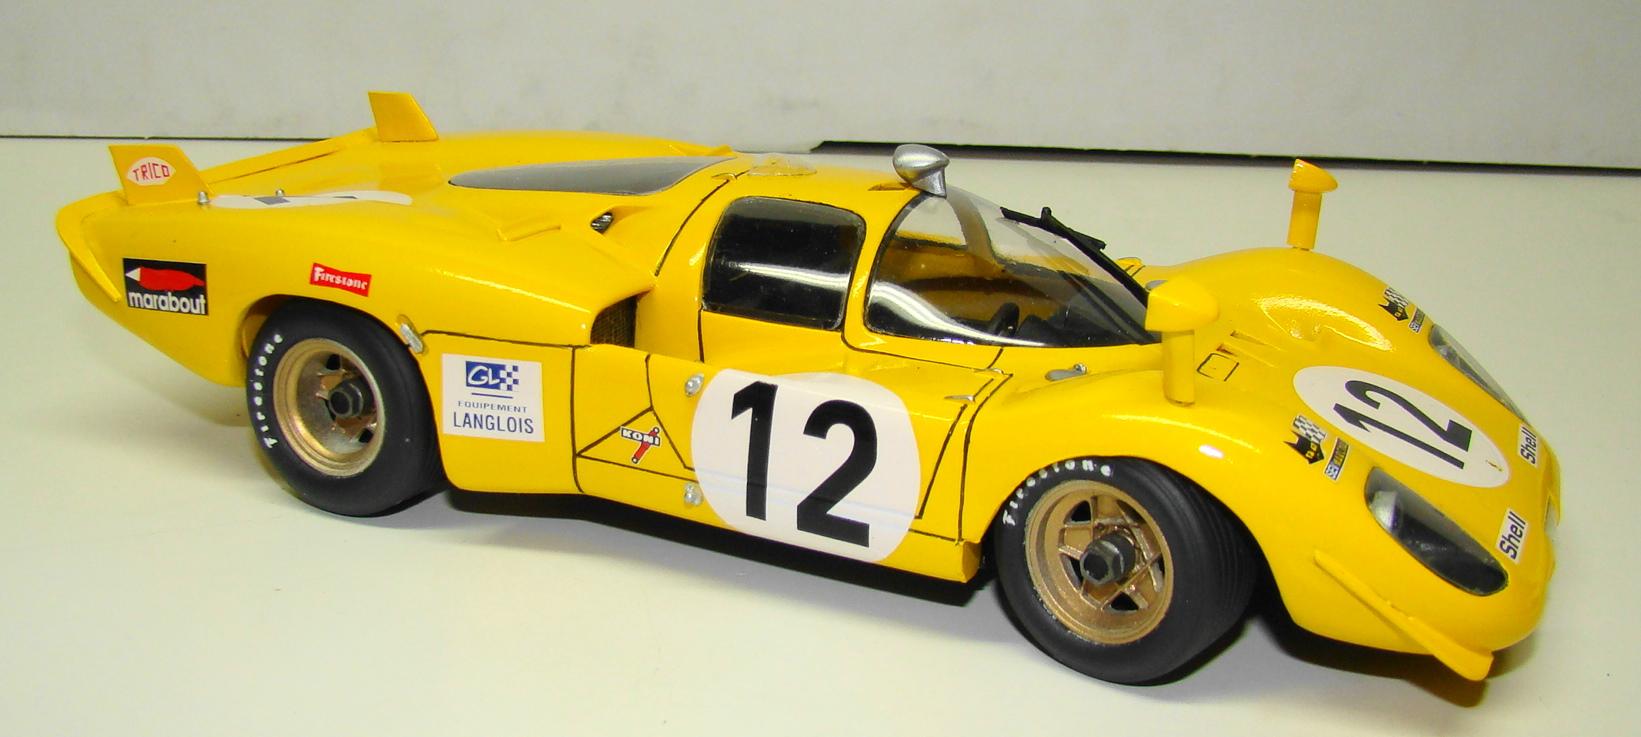
This kit went rather quicker than expected. Although I did clean up parts, make the wheels steer and prime some time ago. From paint top finish it was 3 days. An excellent kit and very well engineered. Paint is Tamiya TS-16 (80%) TS-55 (20%) for the blue. Yellow was Tamiya TS-16 (90%) TS-46 (10%) The yellow had to be mixed several times to match the decals. Only the side decals were used and the rest of the graphics decanted and airbrushed. The thin red accent line is red vinyl tape cut down thin. This proved to be a lot easier than the decals especially over the front fender vents. More comments in the picture captions. Thanks for looking. Making the wheels steer required a little body modification. Goodyear decals out of the stash. Each piece of the red tape had to be cut twice over the fender vents. I have a special tool to do this...now. I made the mistake of attaching the wing then spraying the yellow. It was a little tricky masking when it came to the blue. The thin part of the rear spoiler had to be pinned in place as no glue would hold it. Its adjustable. The bottom of the chassis is real aluminium polished to a medium shine. Its sticky back aluminium used in the label making industry. We have a plant here in town and one of my modeling friends used to work there. Here is the model with its 1/18 older brother. Diecast is by Minichamps and is quite rare now. The colors matched up pretty good considering this is the first time they are seen together. Engine detail of the Minichamps is pretty well detailed for a diecast.
-
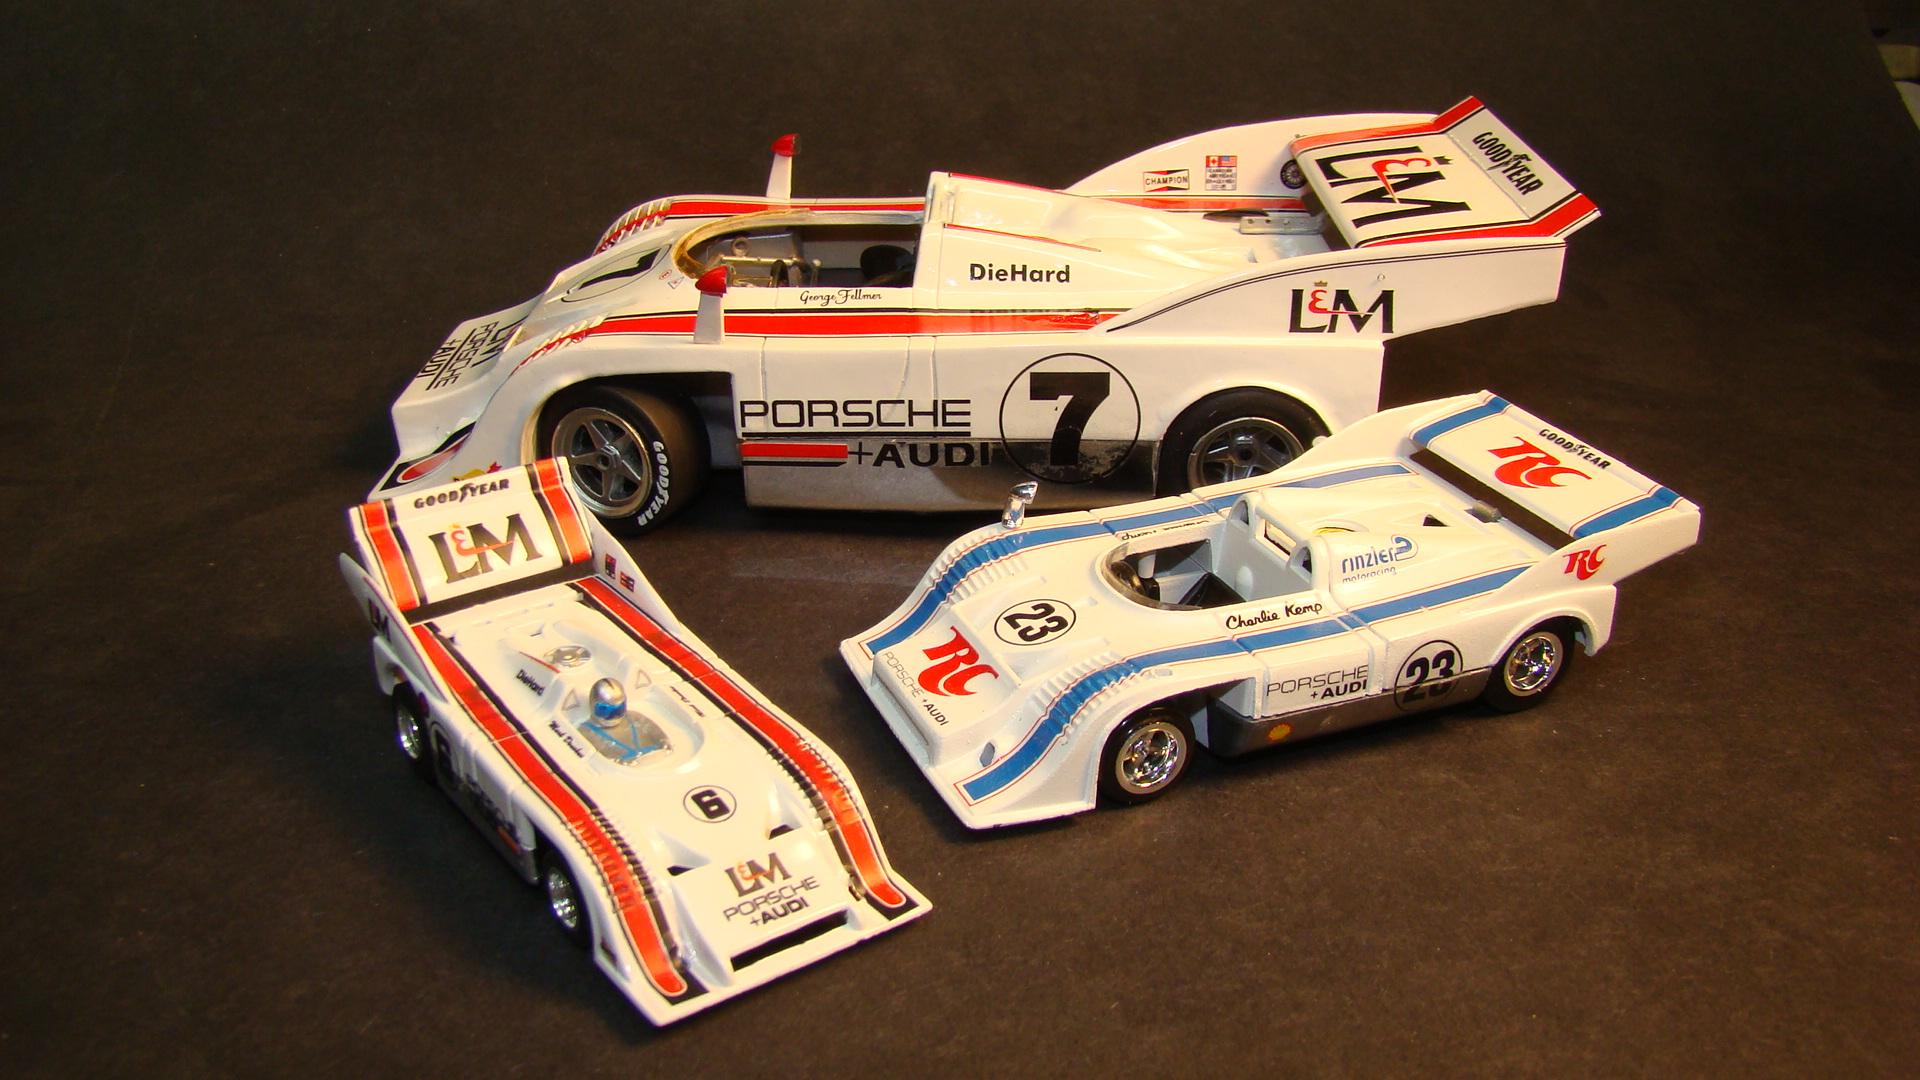
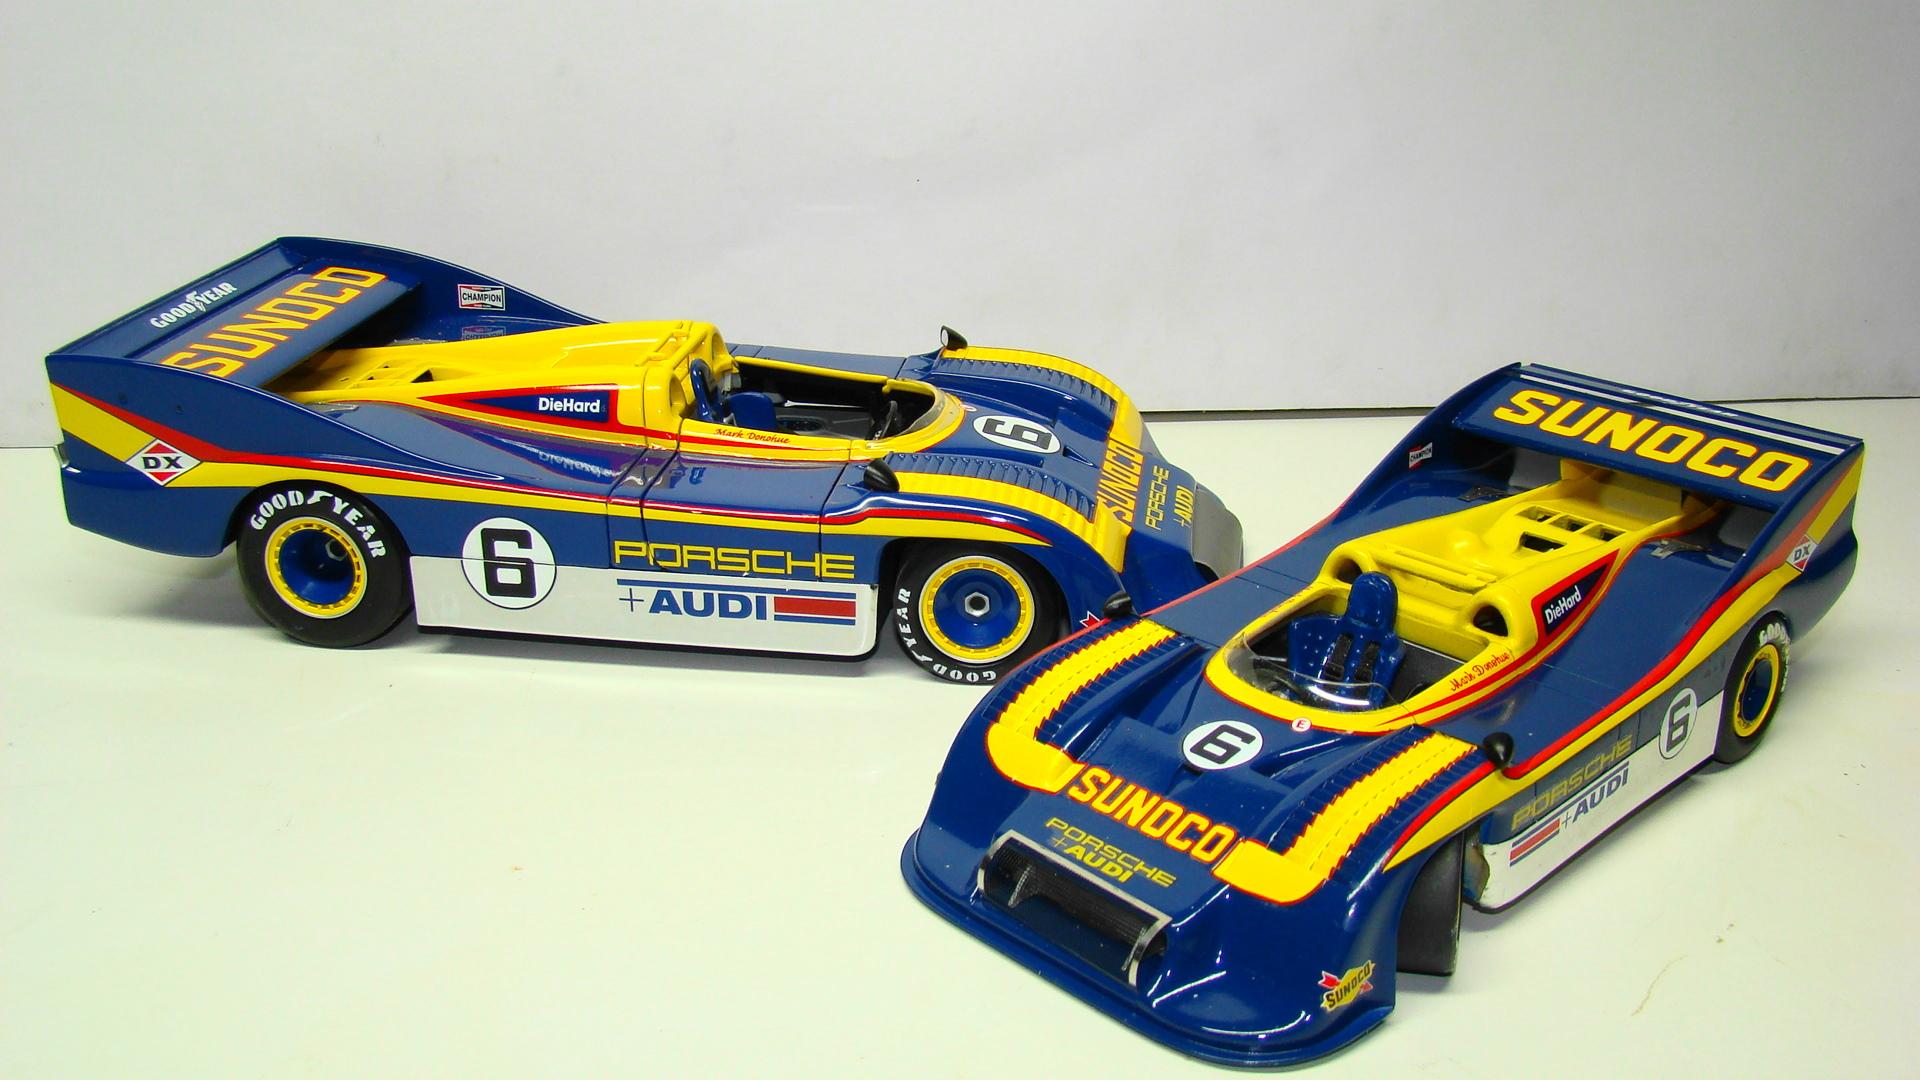
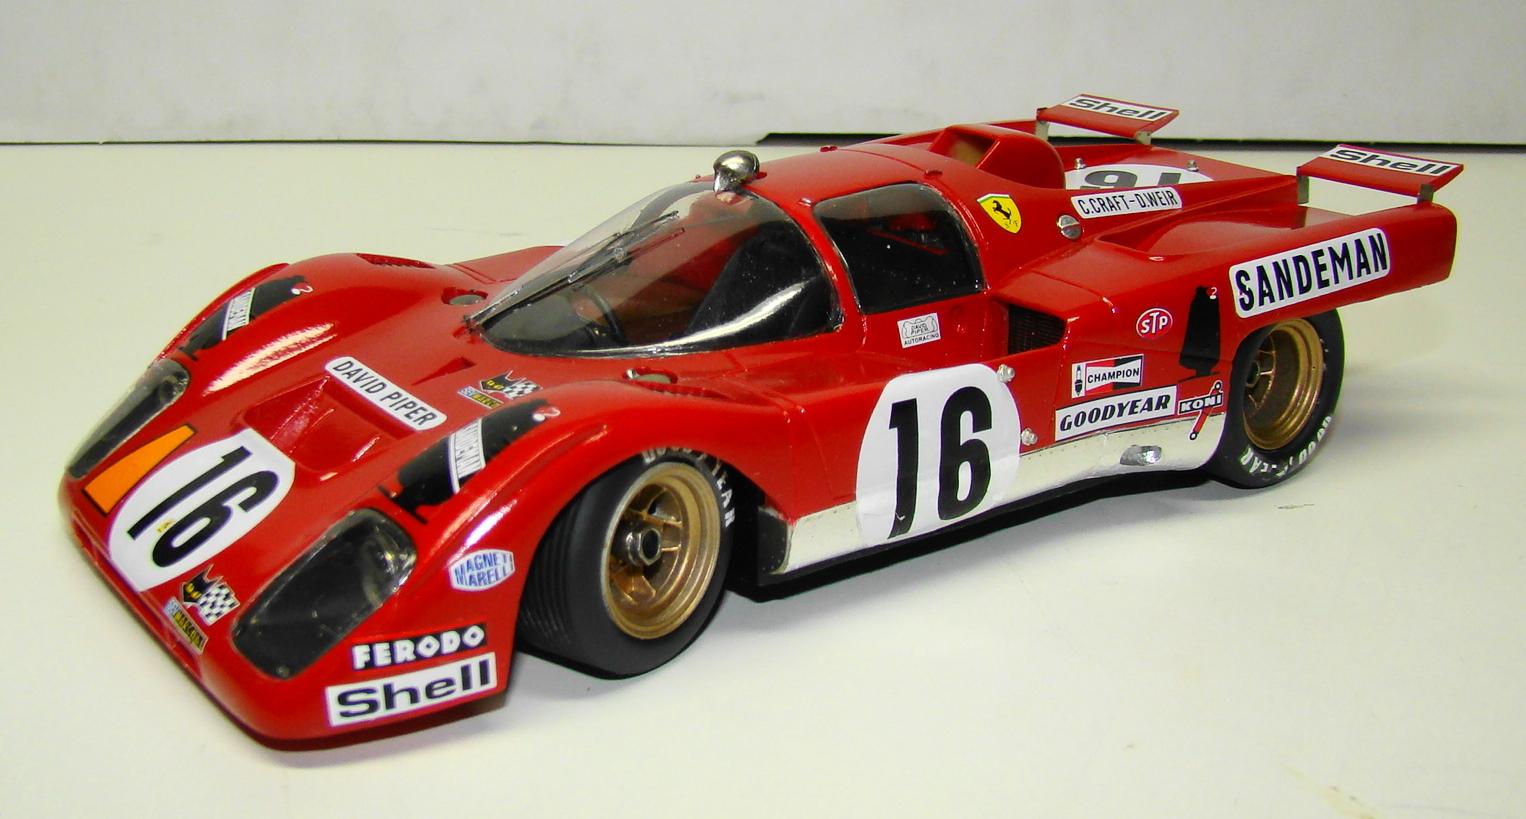
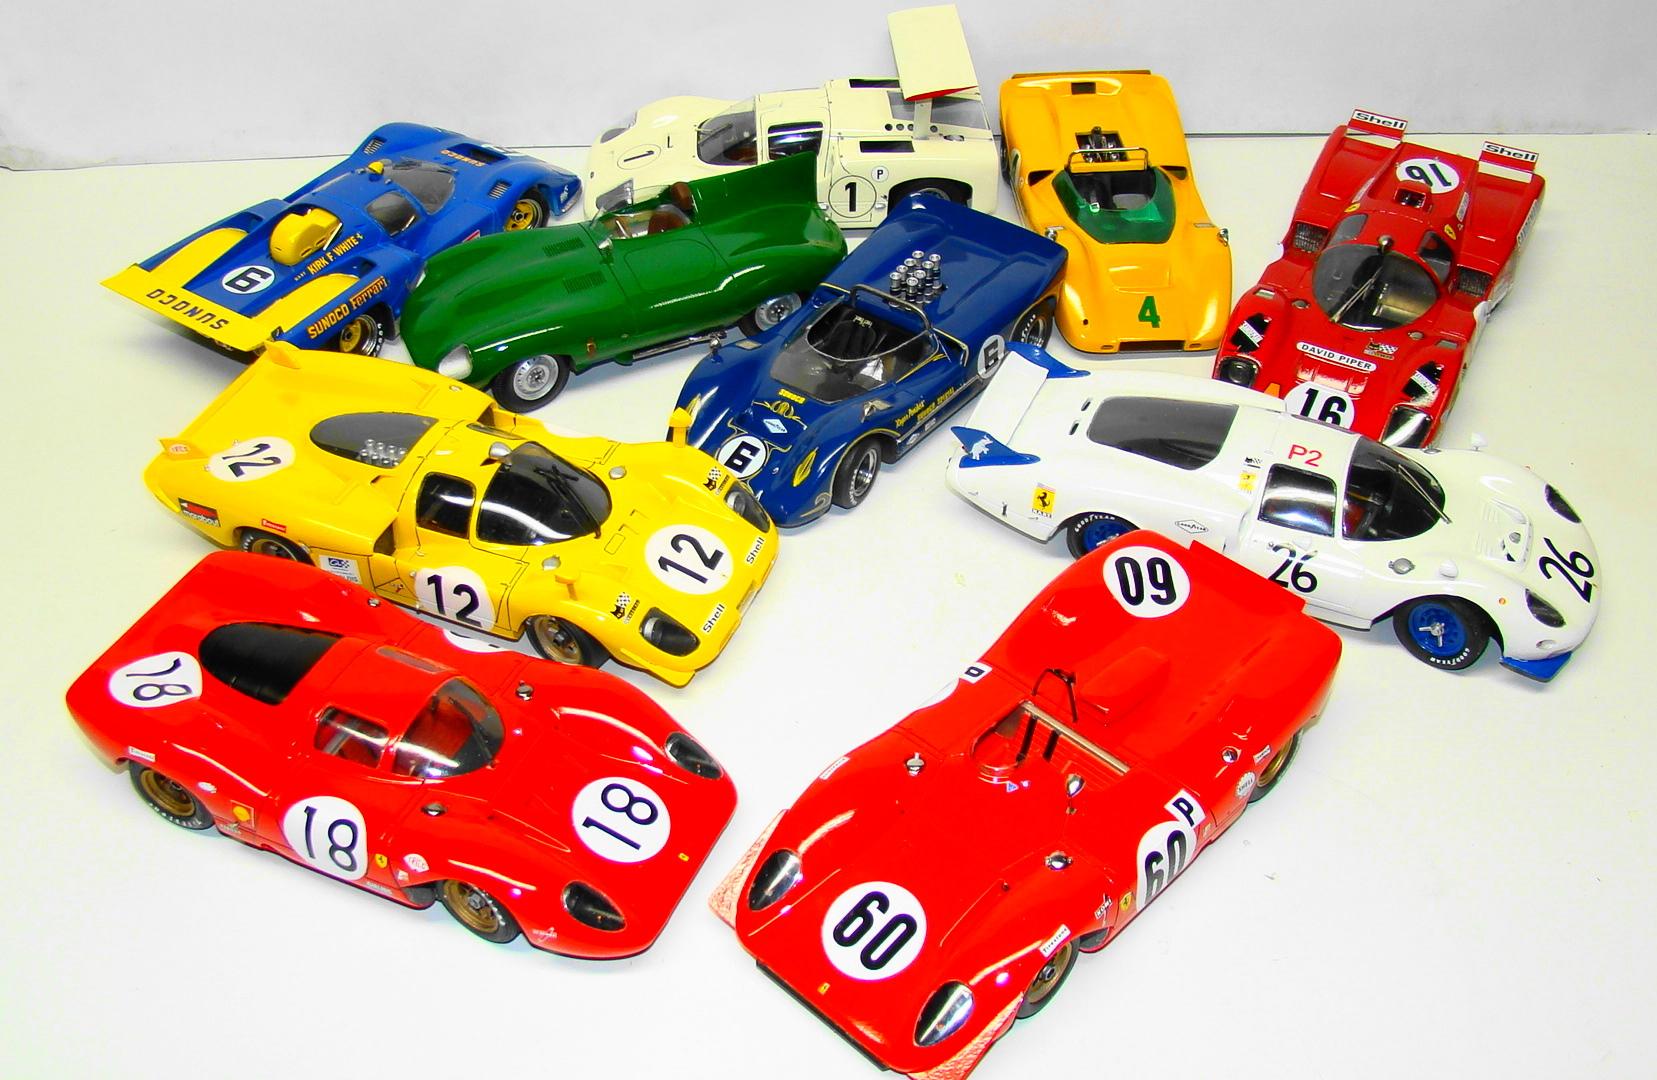
As per request by my good friend Gary (gramps46) Here are all the Fisher resin kits I have completed in the last 15 years. These kits are what got me started on resin kits. I had always been intimidated by resin. Seen plenty of them done but didn't think I had the skill myself. Once I did my first one there was no stopping me. Fisher kits appealed to me because of the subject matter and the price...at the time $85. I have since gone ouit of my way to aquire all the ones I like. Still in the works: Chaparral 2E, Matra MS670, Porshe 917-30, 1971 Gulg Porsche Langneck, 1958 Porsche RSK, Cunningham C4R. Below is my collection in chronological order. Comments welcome. My first resin kit completion. Chaparral 2F cone 4/28/07. Color Tamiya TS7 racing white. This build has won several awards, This one really appealed to me because of the shape of the car. I still consider it one of the most beautiful Can-Am cars ever. Car is a Ferrari 312P and the color is Tamiya TS49. Completed 9/3/08 I have been up close and personal with the real car so having a model of it was a necessity. The Sunoco Ferrari of Mark Donohue in 1971. Color was Testors 1111 blue. Lots of photo etch and detail. What really got me about this kit was the aluminum tub had the wrinkles molded in. Don't usually see this kind of detail in resin. Finished 4/28l10 The other half of my Ferrari 312P set. The berlinetta. Also done is Tamiya TS49. I left the nose winglets off because I though it ruined the lines of the car. Finished 6/25/19. Bougth this kit off Ebay from a German seller who was going to convert it to a slot car body but gave up. This kit went from Calif to Long Island NY to Germany and then back to Penna. It has a lot of miles on it. Color is Mr Color 109 Character yellow. This kit fairly flew together and turned well too. Completed 7/3/19 Probably the last car kit Fisher released. 1966/67 Ferrari 365 P2. This car was campained by NART and was nicknamed the white elephant. Not the prettiest Ferrari ever but still worthy of the collection. Color is Tamiya TS26 White with Testors 1111 blue accents. Lots of PE and other details added. Completed 8/7/19 Another Ferrari 512, rthis one a M. Color is Mr color #327, a slightly darker red but period correct. Lots of great detail on this one. Done 8/27/19 I was vbery excited to aquire this since I am a big Donohue fan. Came at a good price and had to build it right away, Very similar to the other Mclaren but this one didn't go as easy as that one. Decals were my biggest complaint. Color is a custom mix of Tamiya TS15 and TS55. Many extras were added. Done 6/27/21. Ooops got this one out of order. It was done 9/2/19. Another Ferrari 512 this one an S version. This car was raced by a Belgian team and hence the yellow color. Didja know that yellow is actually Ferrari's racing color. That is why the background of the logo is yellow. This color was custom mixed from several Tamiya yellows. It was my best guess. Last Fisher resin completed and this one was 8/8/21. It was featured on this forum at that time. D-Type Jaguar painted Tamiya TS43 BRG. Long as I have them all out of the case might as well take a picture of the whole tribe. You might notice on all the pictures the wheels steer on my Fisher kits. Since he uses the same basic layout for his wheels and tires it was a fairly easy conversion. And once you do one, the rest are easy. Hope you liked this tribute to Paul Fisher. These are great kits of great cars. This hobby will miss him.
-
Another MCW body I got back in December, I am combining this with the AMT 62 Bel Air frame and the six cylinder from the AMT 60 Chevy pickup.
-
I got this body from MCW resins and decided to combine it with a Revell 1966 Frame. The parts line up really well. Still working on tires/wheels.
-
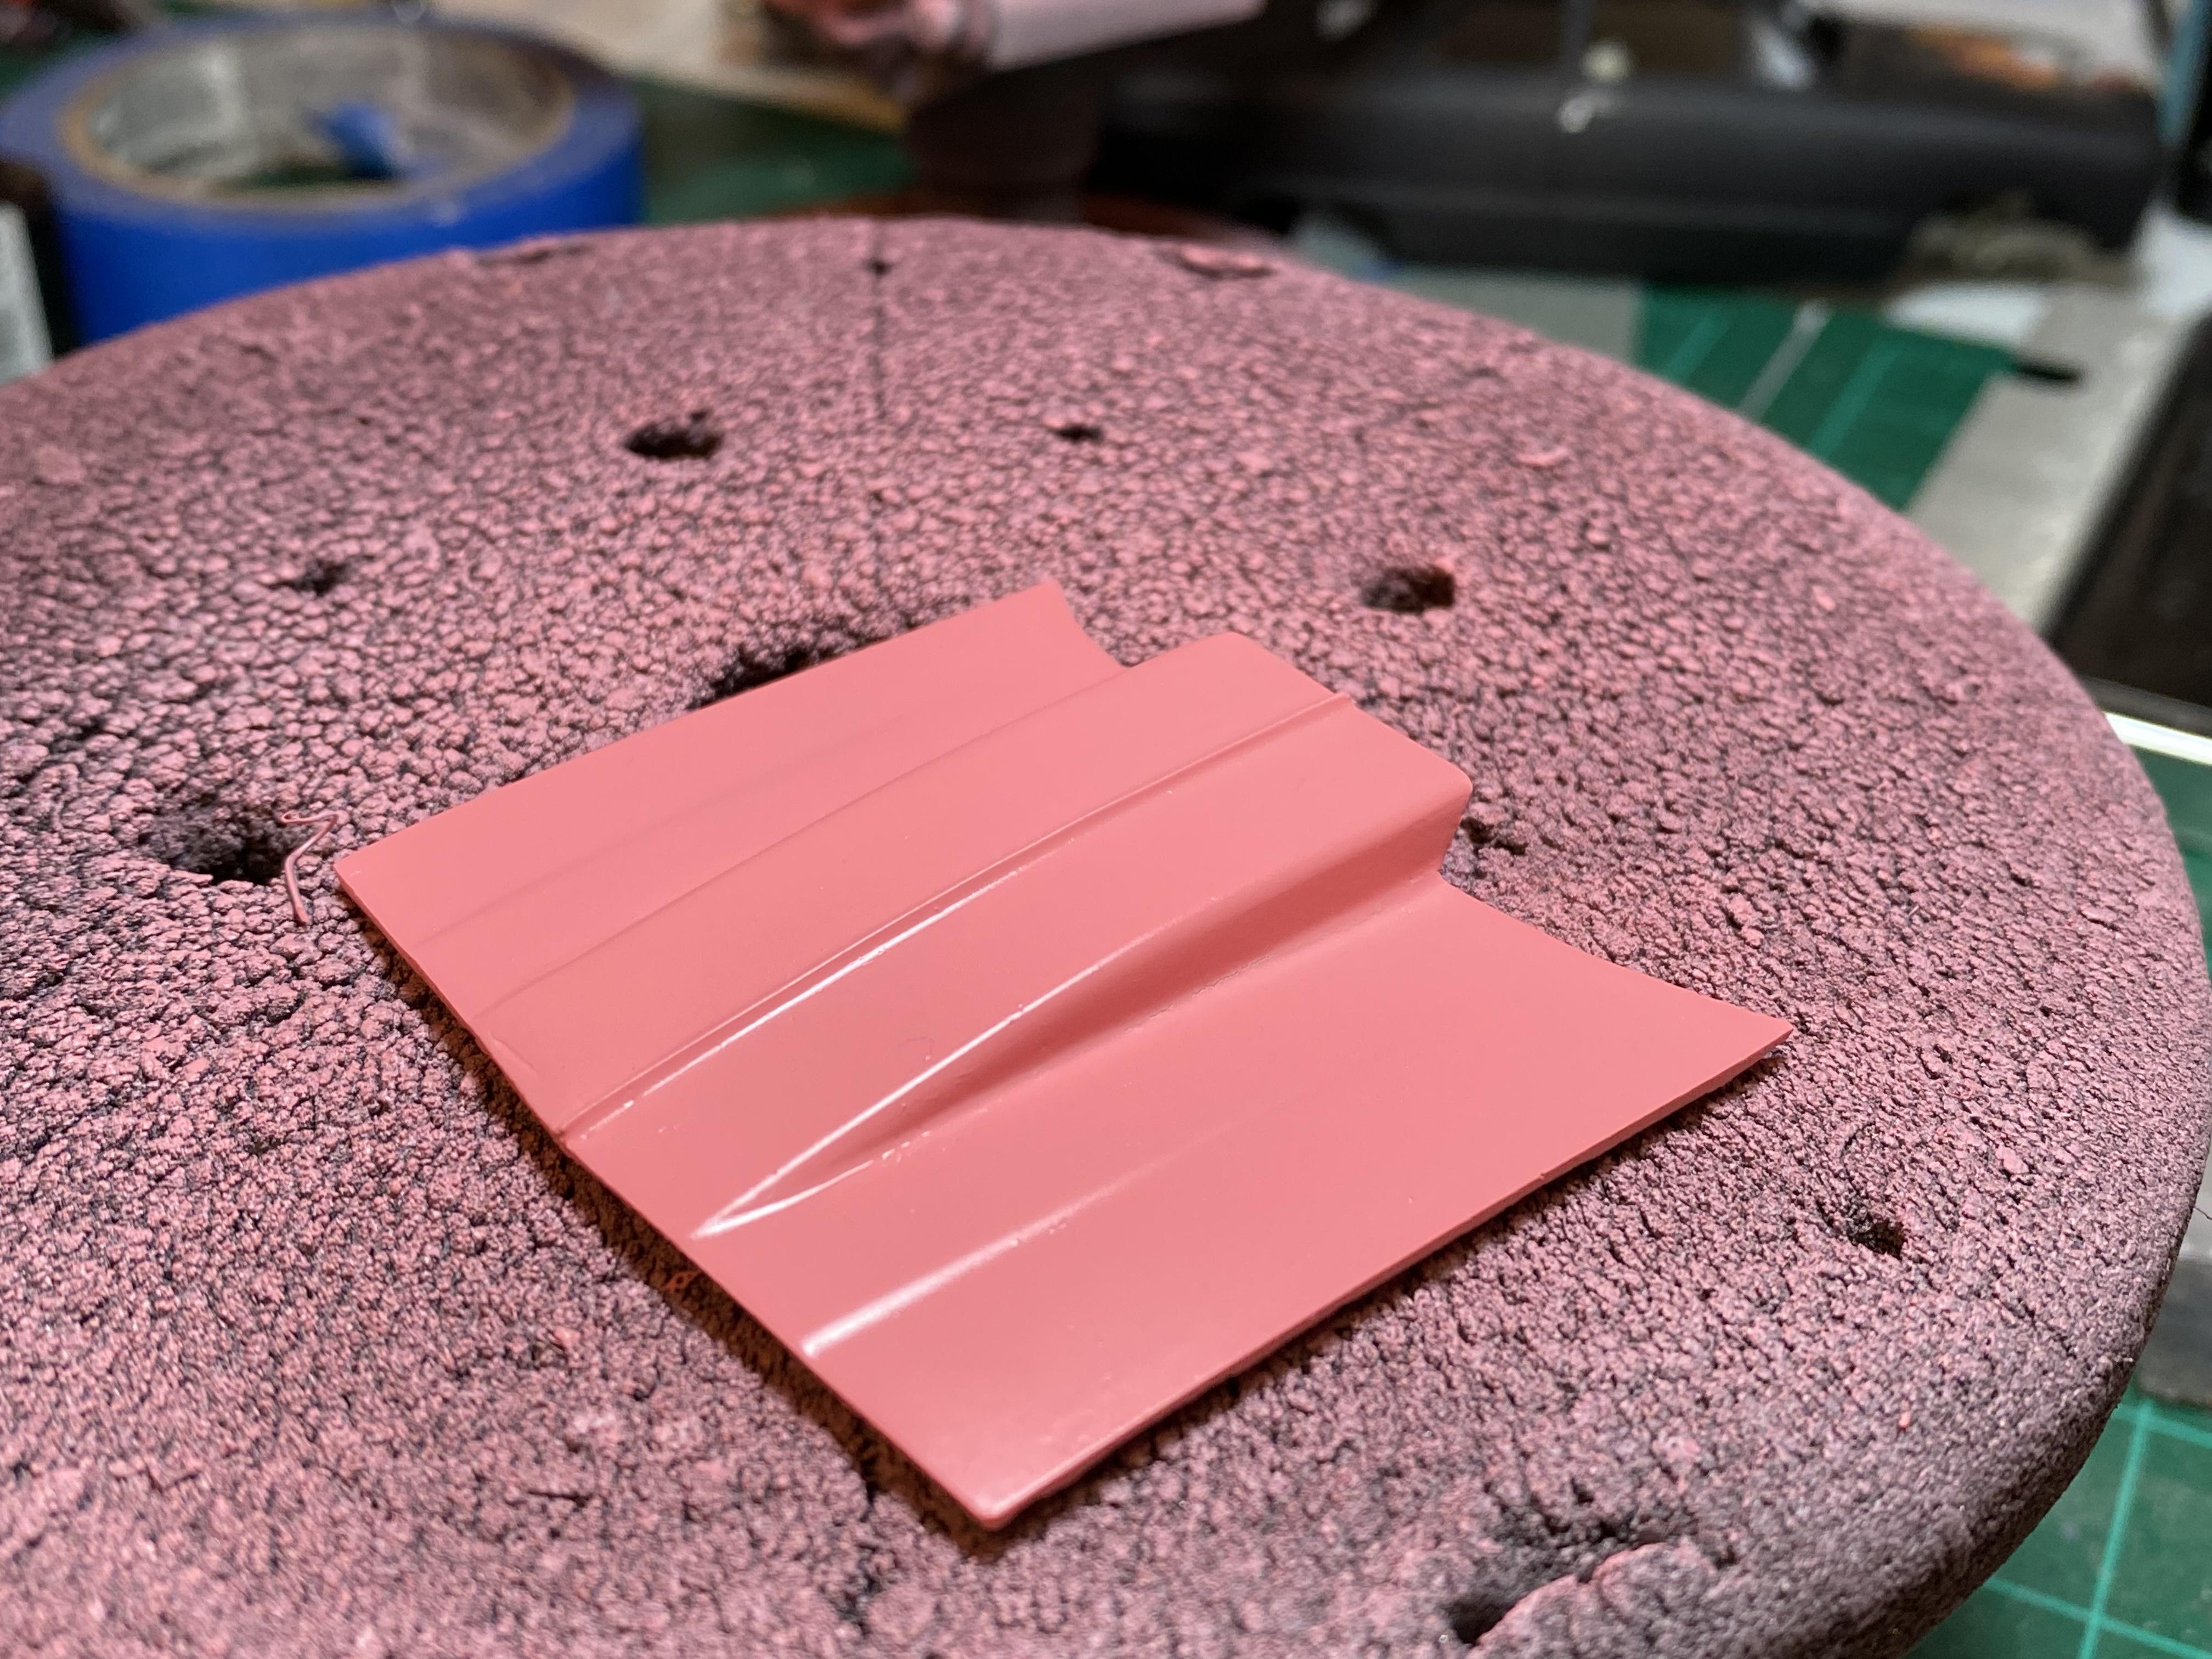
 Hello fellow automotive modelers! A few years ago I bought resin hoods from Lex and they were atrocious. However, I recently purchased another set of hoods and this video below is a review and shows how fitment it out of the box.
- 2 replies
-
- 1
-
-
- lex resin hoods
- resin hoods
- (and 1 more)
-
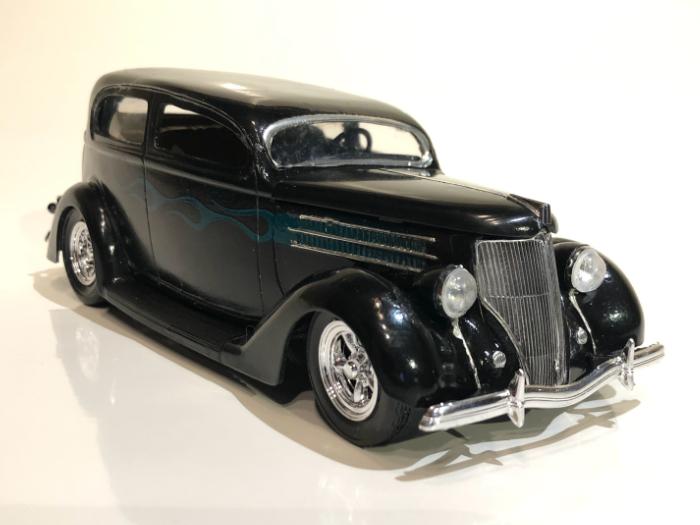
Hi guys, I just finished a new build a few days ago. It’s a ´36 Ford Humpback Sedan: Based on Amt´s Dick Tracy kit with a Mill City Replicas resin body and some parts box items I chopped the top a few scale inches, lowered the suspension and added set of Torque Thrusts from Revell´s ´32 Ford coupe Under the hood sits a SBC from Monogram´s Deuce roadster This was my third approach to amt´s ´36 Ford kits. It may not be the best kit but it’s a nice canvas for many different styles: Thanks for looking and as always: comments are welcome
-
I acquired a 68 roadrunner model and would like to know if anyone knows of a place I can buy a 68 gtx grille for my rr it is 1/25 if anyone knows anything or has some information it would be greatly appreciated
-
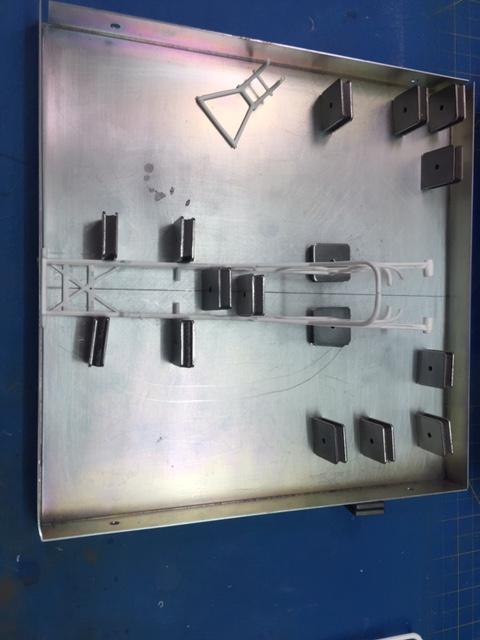
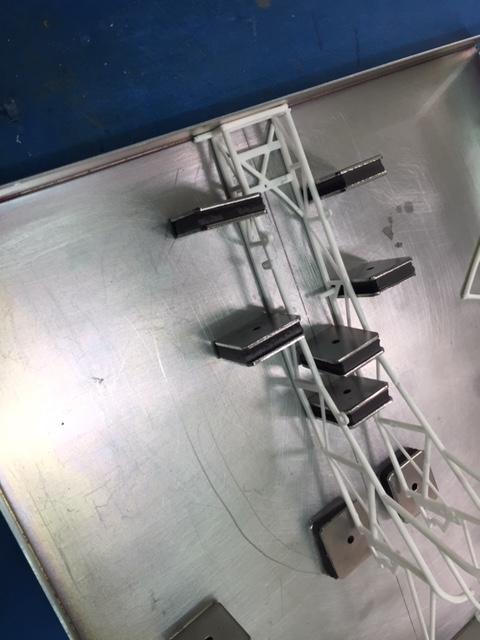
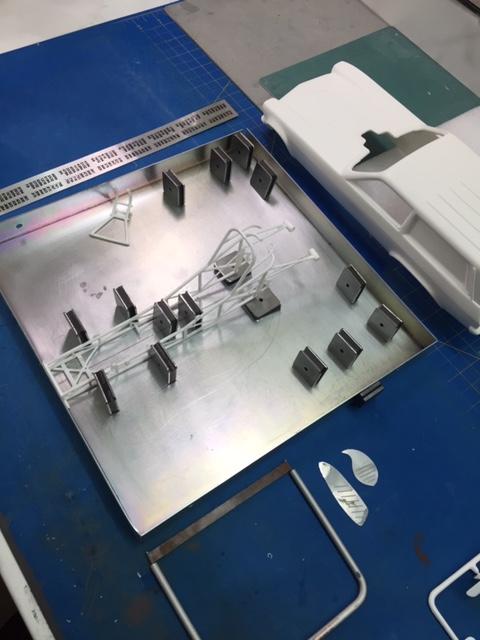
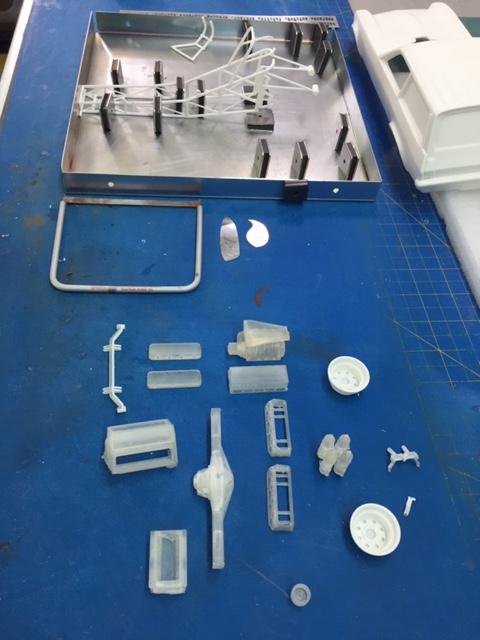
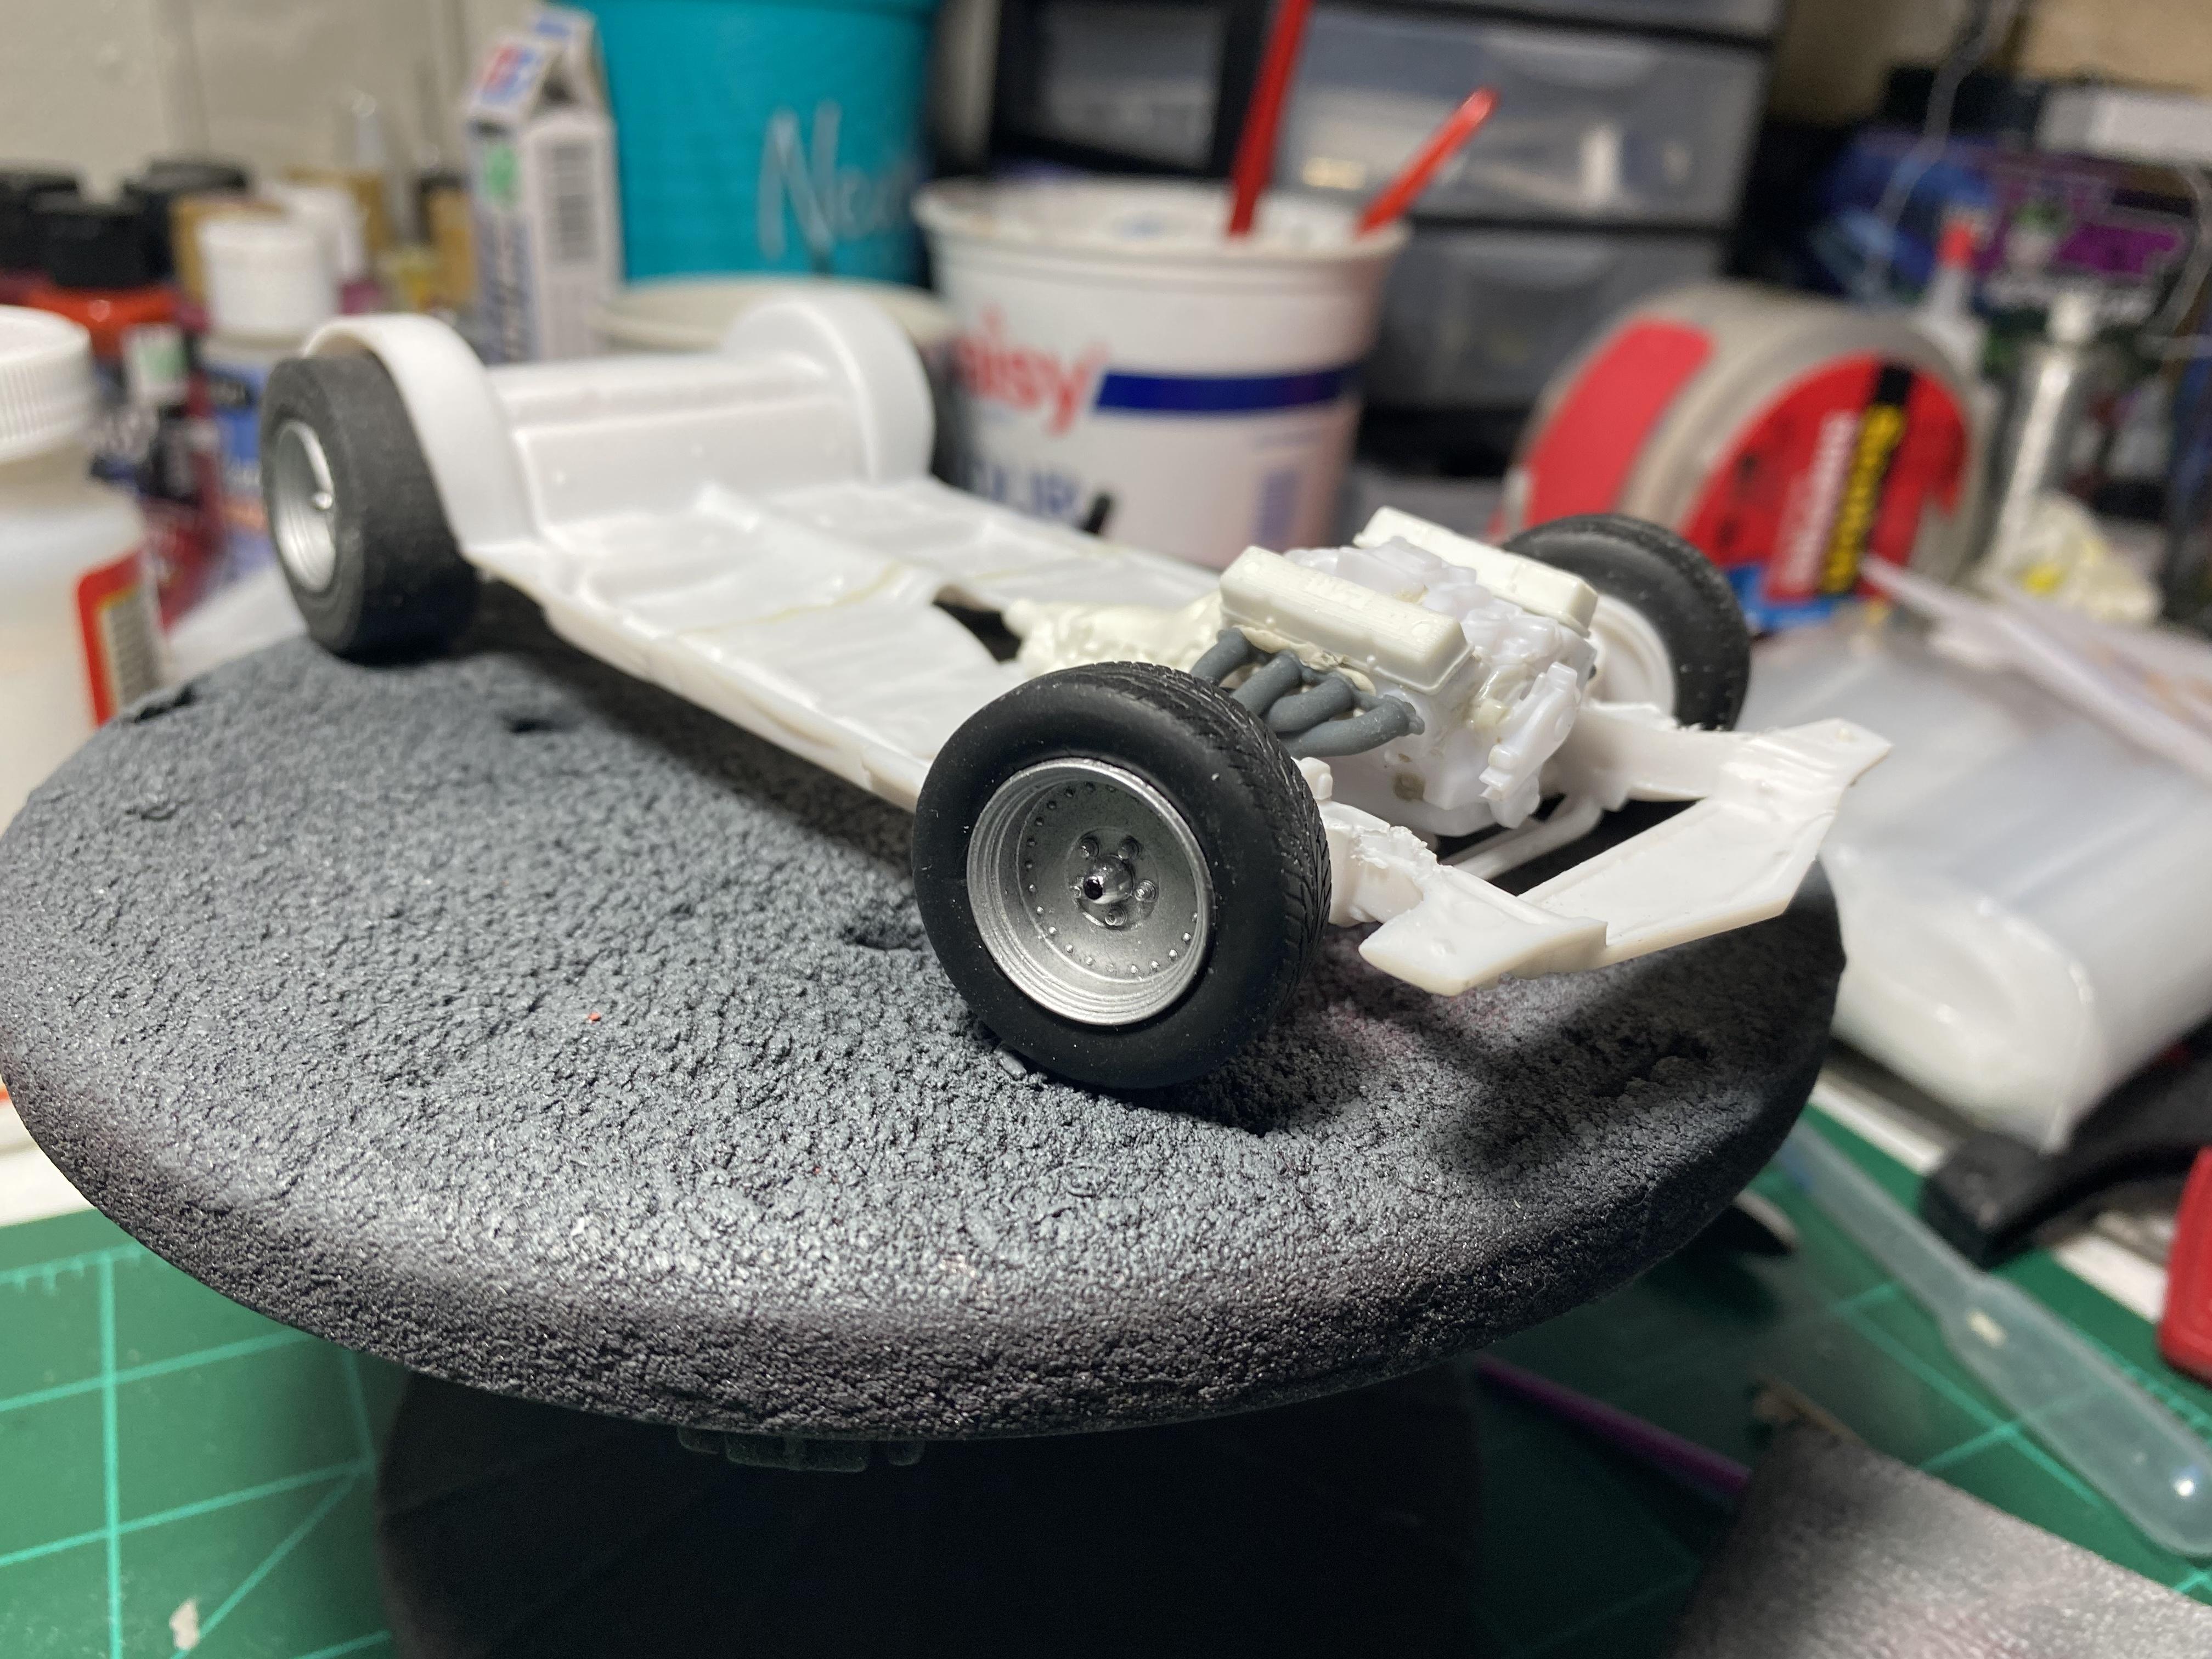
My first 1/16 scale model since I built Gene Snows Snowman for a friend when Revell first released it. This is going to be base on the recently released Hawaiian Charger Funny Car with changes to almost everything except the basic chassis. GM body, 3D printed injected BBC, 3 speed Lenco trans, 9 inch Ford rear end in place of the quick change in the kit, additional photo etch detail parts, and the inevitable scratch built bits and pieces. This is not going to be a quick build but I hope you enjoy watching the struggle. The blower in the last picture is not going to be used as this is going to be a straight up injected nitro engine. I'll try and do updates as often as I can as the various sub assemblies come together
-
drag racing Altered States Models
Mike Lowden posted a topic in Car Aftermarket / Resin / 3D Printed
Is Altered States still in business? Their website is down -
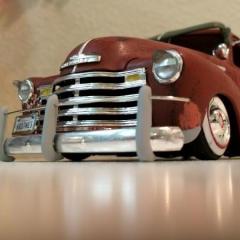
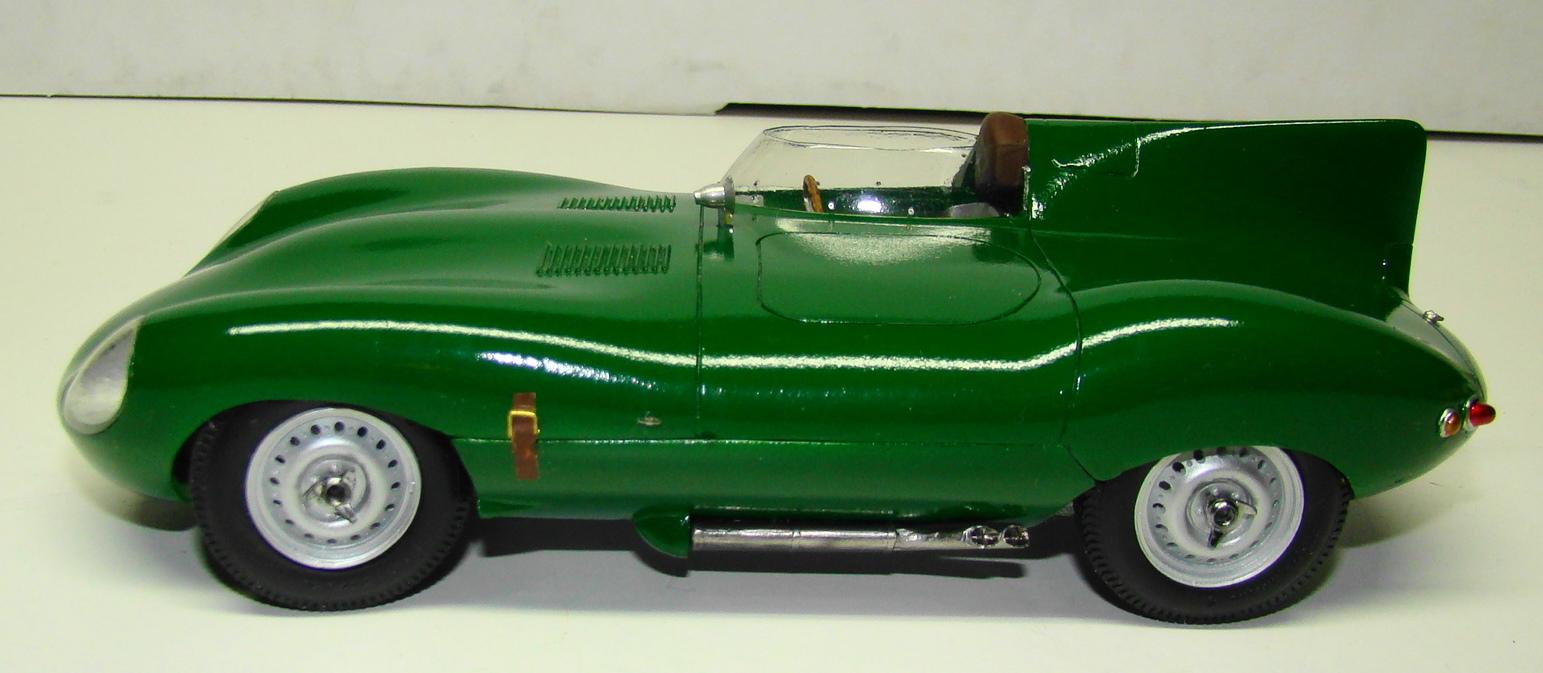
I installed two mounting posts and fitted the body to this kit sometime ago but for some unknown reason put it away. Since I am in a "finishing projects mpode" thought it was time to do it. Resin kits are often just the basics and you have to use youir imagination and research to breing them to life. This was no exception. Paint on this is Tamiya TS-34 British racing green. Car represents a fresh from the factory look. A big thank you has to go to Gary McNutt (Gramps46) who generously supplied the kit and also to Norm Veber of Replicas and Minatures of Maryland for the excellent wheels and tires. Rest of the details in captions under the pictures. Thanks for looking. Finished kit on its wheels. Went to great lenghts to get the wheels to steer. Knock offs are actually threaded on. Many oif the panel lines ahd to be deepened as the primer and paint would have covered them. Mirror is from the spares. This car had many mirror combinations. I added a few photo etch details from the spares drawer, Windscreen fit nicely but tended to spring away on the right side. There is a very tiny bent pin holding it in place at the top. Interior recieved some extra attention in the form of a new steering wheel, handmade shift knob, dash decals from spares. Note the v-e-r-y tiny PE fasteners on the outside of the screen.
-
 Hello All, Here are some renderings of the next resin kit I'm building. If I get 10 pre orders, I'll have this ready by this summer. chevy-026 by dakota_in_the_sky, on Flickr chevy-028 by dakota_in_the_sky, on Flickr chevy-029 by dakota_in_the_sky, on Flickr
 -
I have been wanting to do this kit ever since I got it. I was fortunate enough to see Mark Donohue win with this car at a USRRC race at Watkins Glen in 1967. He won pole to flag. Kit was sprayed with a mix of Tamiya TS15 and TS55. Both were decanted and airbrushed. Tamiya clear was used. There were a number of features I added and modifications made. These are explained in the captions below the pictures. Thanks for looking and comments are most welcome. Of course non steering wheels on models is a pet peeve of mine. This was a fairly easy conversion. Keeping the wheelbase and wheel height the same was a priority. Finished car. Kits instructions warned the decals were quite thin. I heeded that waring and they went on with out a hitch. Glad there was an extra set though. Rivet detail was kinda sparse so I drilled them all out and added copper wire which was then ground down with a Dremel to make new rivets. It was a lot of work but worth it in the end Business end of the car took some fiddling to get everything to fit. That is expected of a resin kit. Overall quality of the kit was very good though. I like Fisher kits. He will be missed . The stance of the car was correct right out of the box. Tire decals came out of the spares. The interior recieved most of my attention. New steering wheel, scratch built shifter and water pipes (not visible) dash decals and seatbelts from silk thread. And a few extra switches. Kit suppllied phot etch interior was a nice plus to this kit.
-
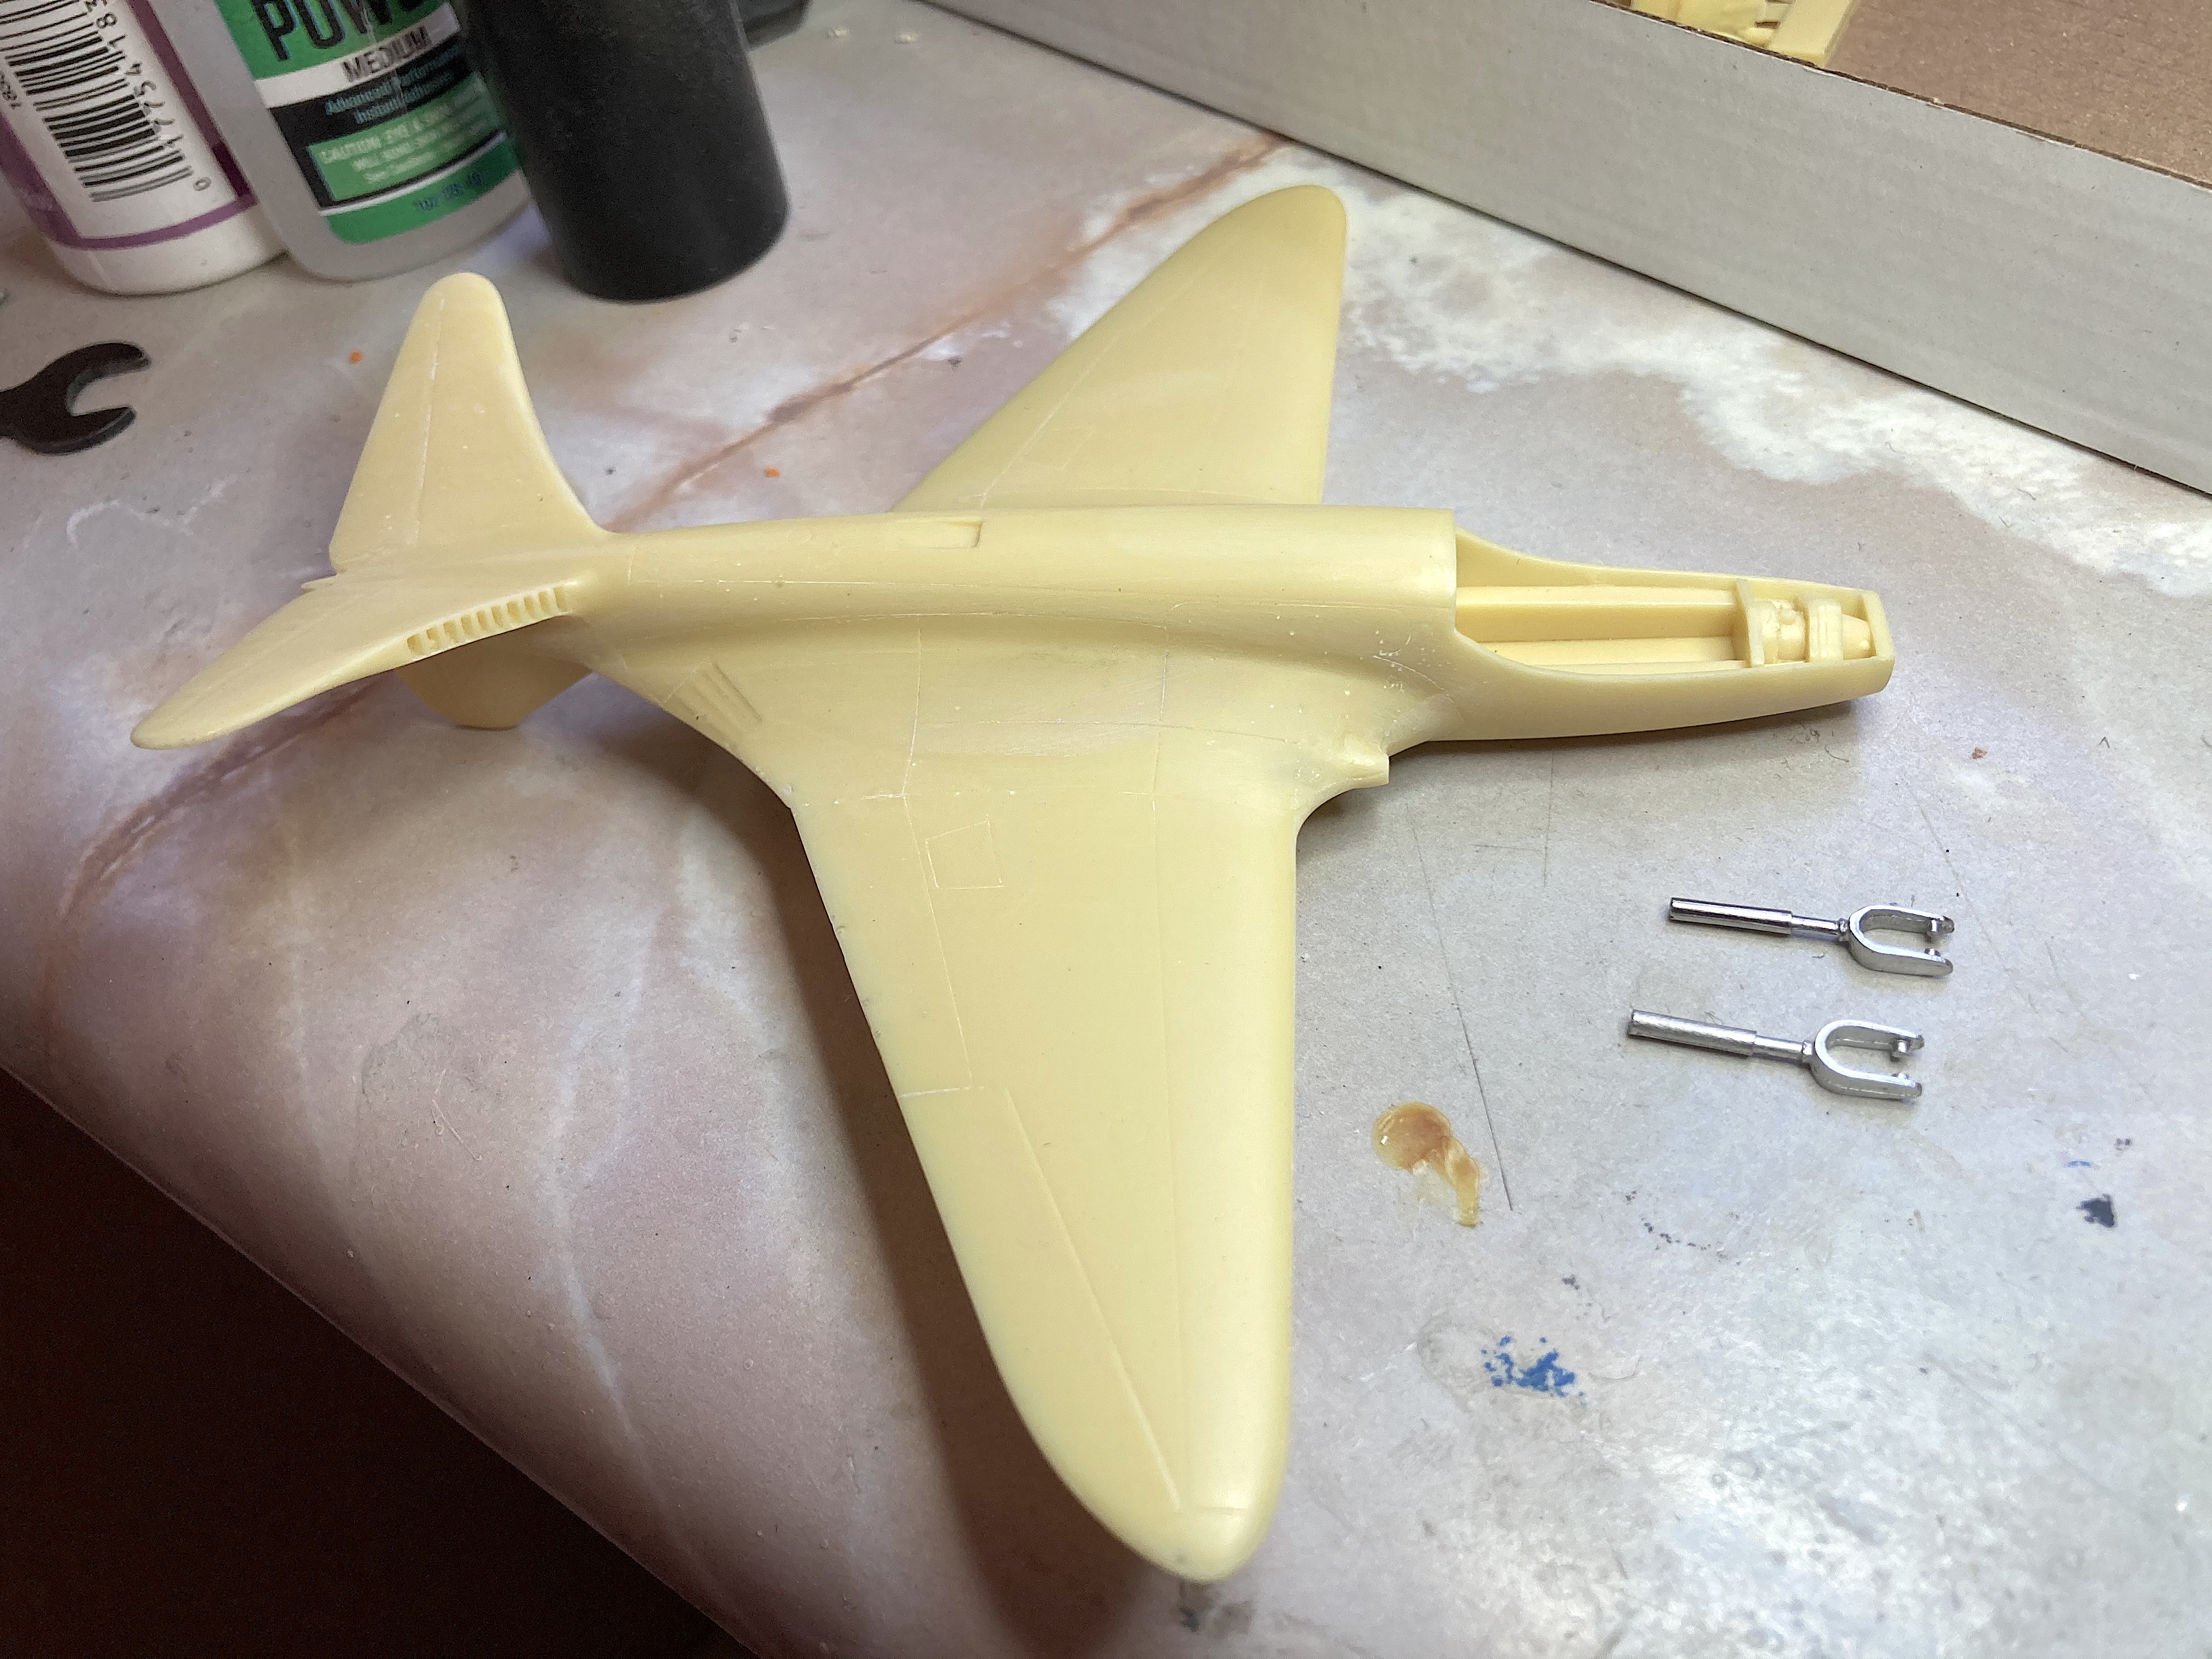
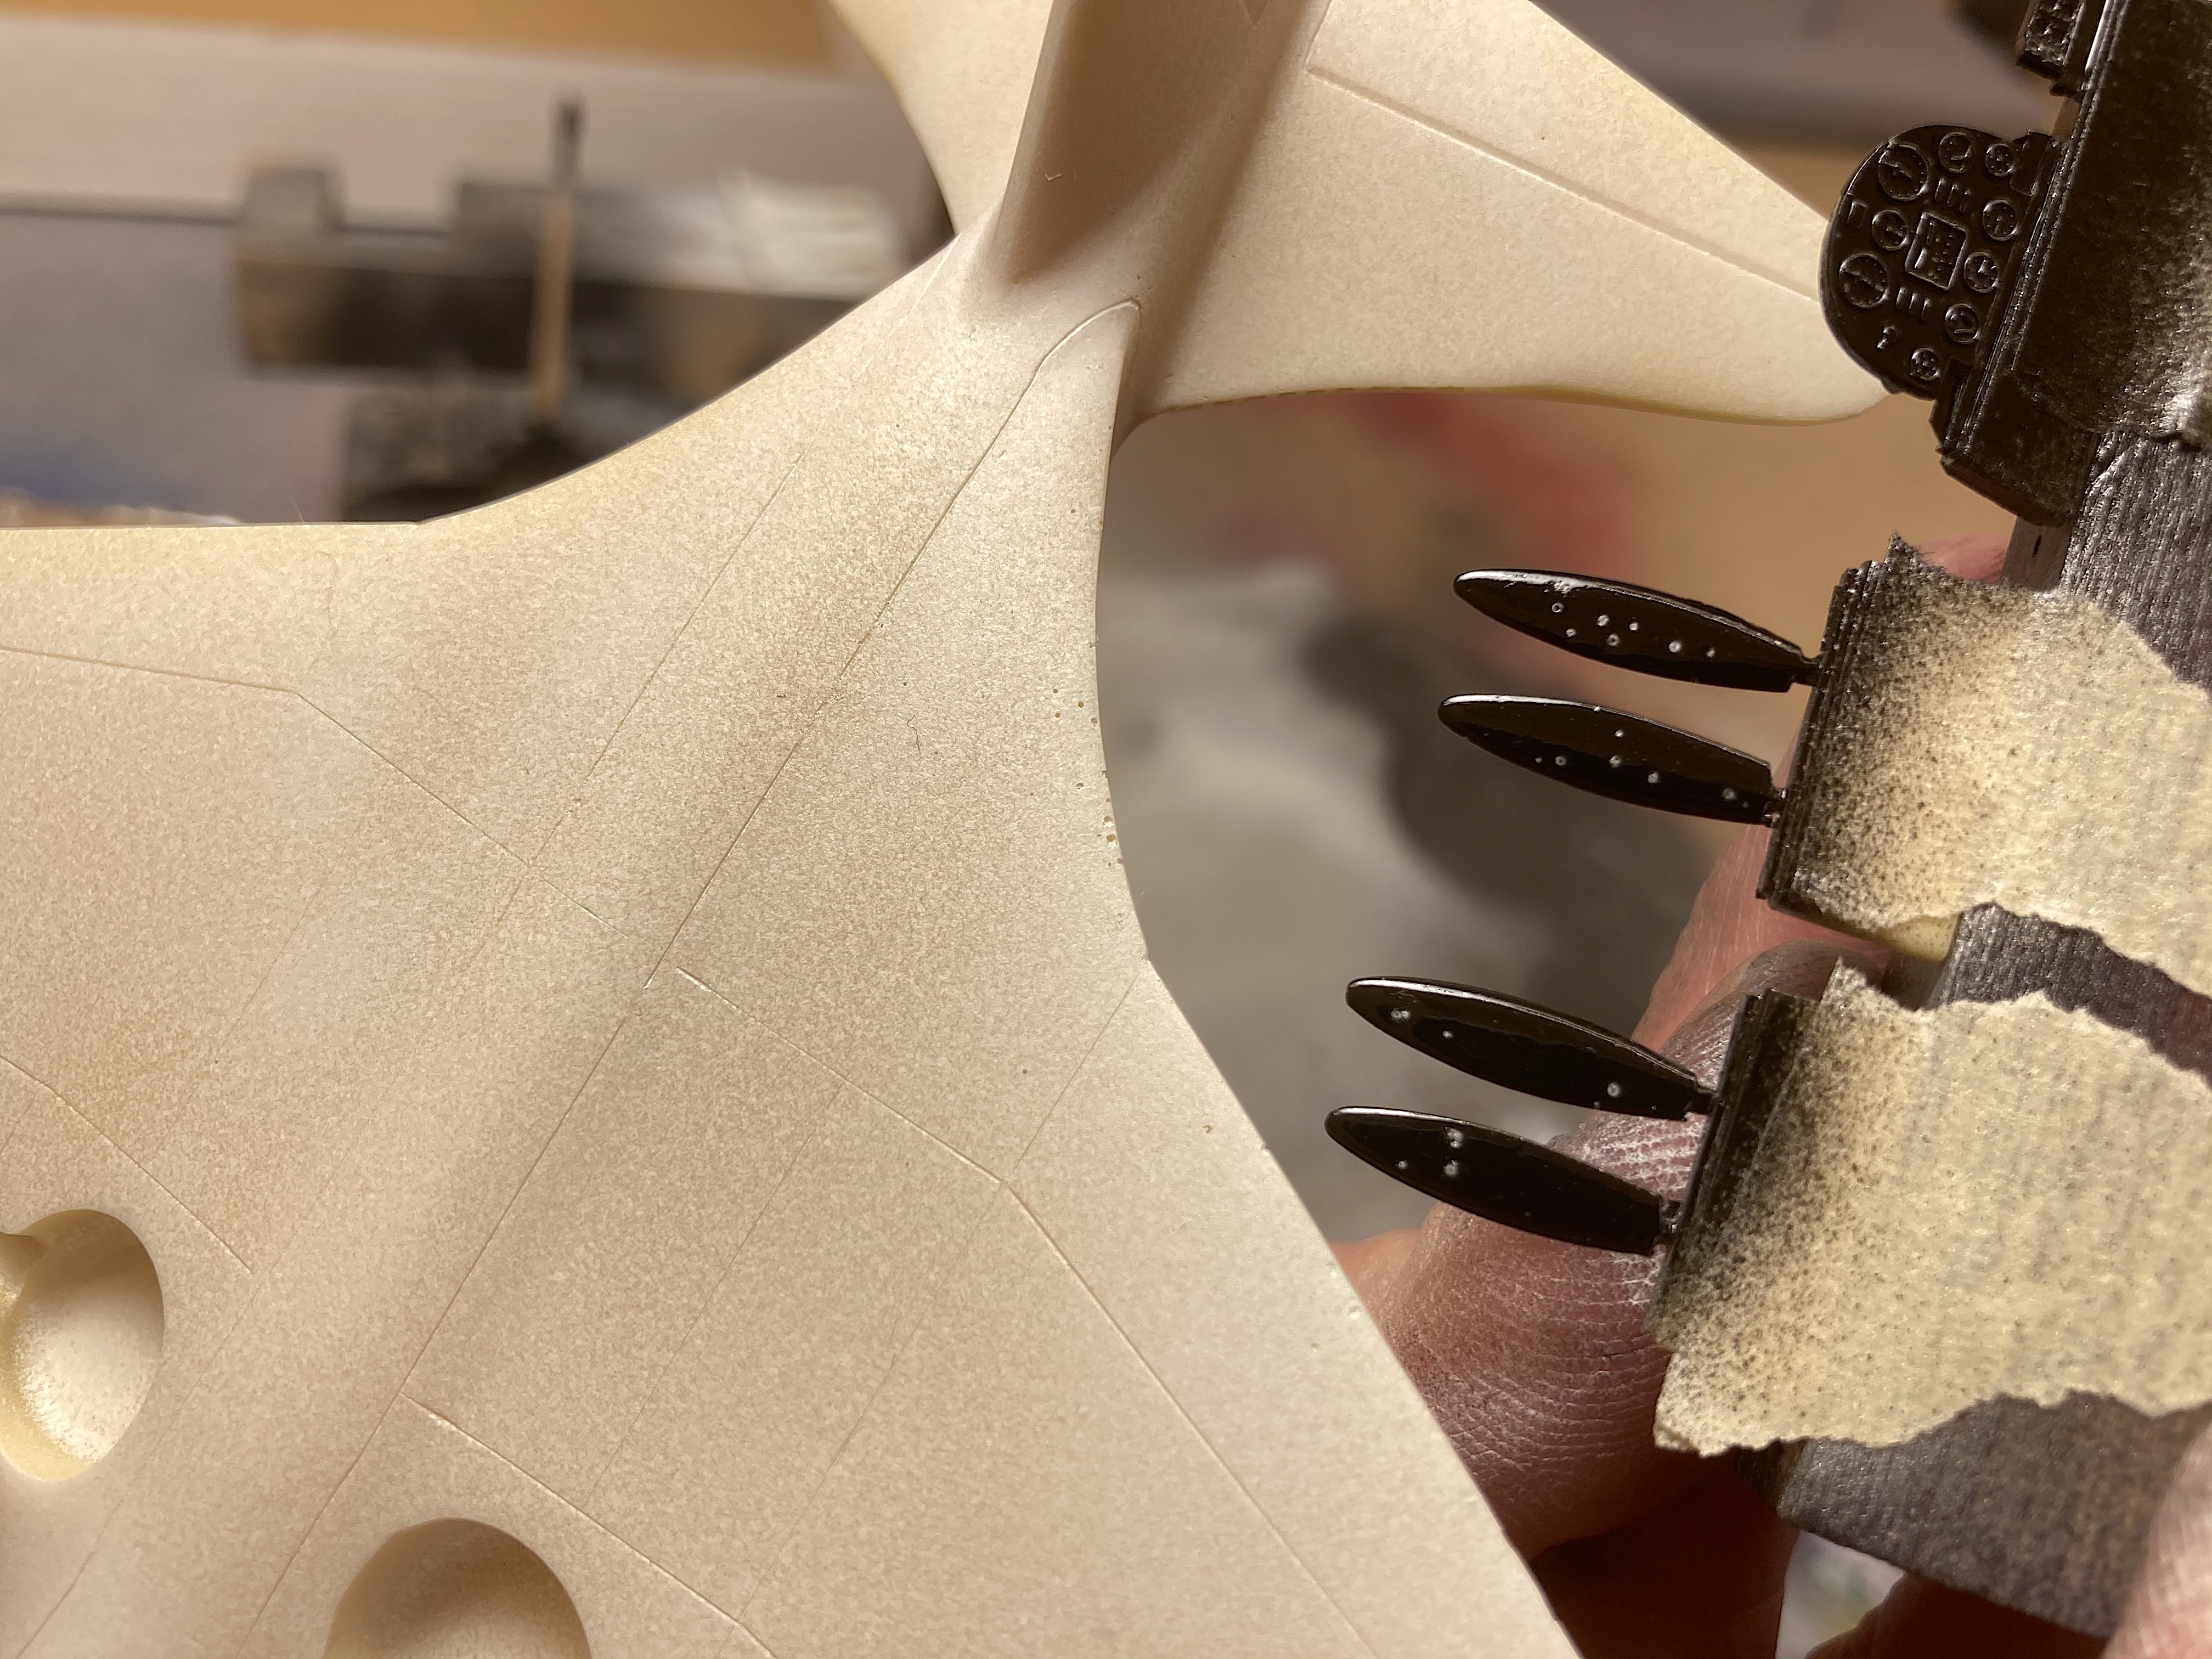
 Y'all thought I posted in the wrong section? 😆 Planet Models 1:48 of the one-off racer airplane Bugatti 100P, I found at the IPMS Nationals in CO. I haven't done a thing for a couple months, wanted to call today a vacation, and build something quick. It's a brick, the two engines would have been fun. No seams or gaps like the typical airplane model. No decals, so I might finish it. But then again, I just can't build box stock anymore. Flickr: Stu Carr Not many parts. The vacuum-formed canopy is duplicated, so that was nice of them. The instructions have only blue and black for color references, but the box art is color, so I needed to figure out the interior which appears red, wheel wells must be light blue. Spent some time looking for bubble holes, there are many. The landing gear is white metal; I have filed, sanded, steel wool and Dremel wire brushed one here. The exhausts needed to be fixed, going to use steel tubing. Spotted a detail that was overlooked. How anyone can miss this, is beyond me. The box art has it, pictures I found of the plane at the Oshkosh museum shows it. Made from aluminum newspaper printing plate. Also added the tailwheel. Fun to do a model that can be painted the same day. Tamiya primer to start. Gloss black, then Alclad polished aluminum. Now I'm irked. I used a magnifying glass to look over the body, still missed an area. Then the propellers shouted about bubbles, on both sides. 🤬 Enough whining, it's typical of resin.
- 24 replies
-
- 1
-
-
- bugatti 100p
- airplane
- (and 2 more)
-
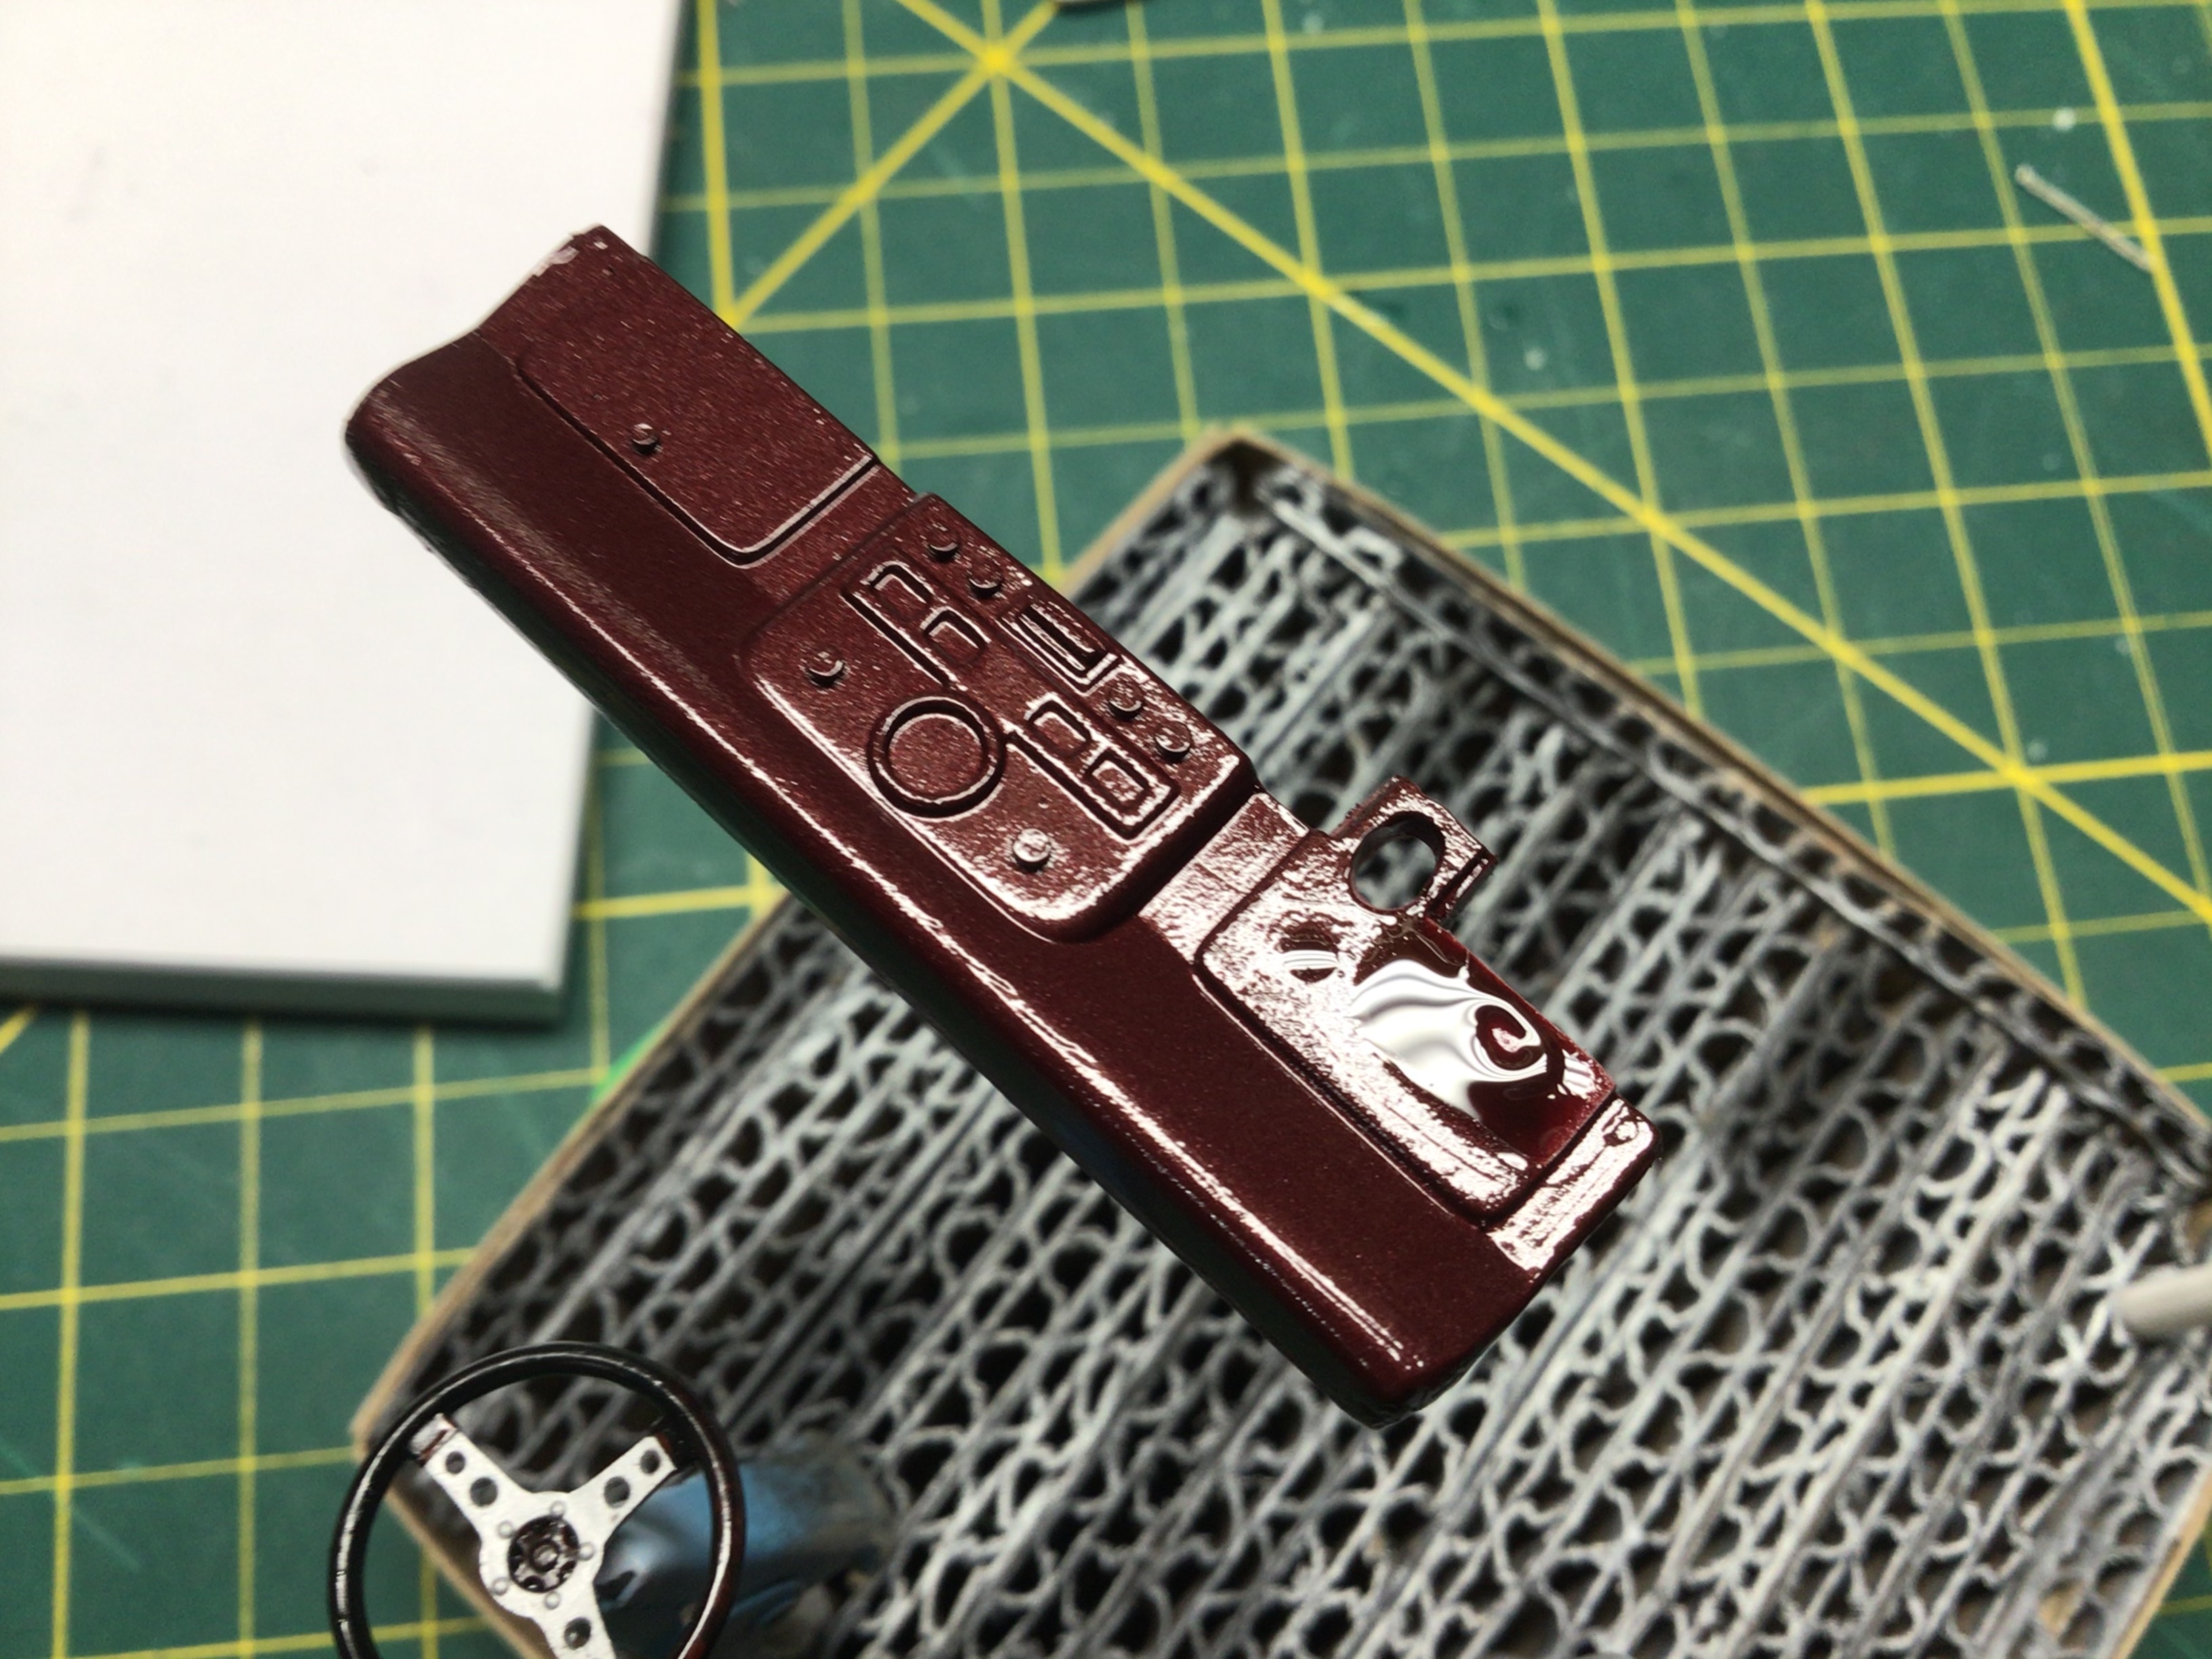
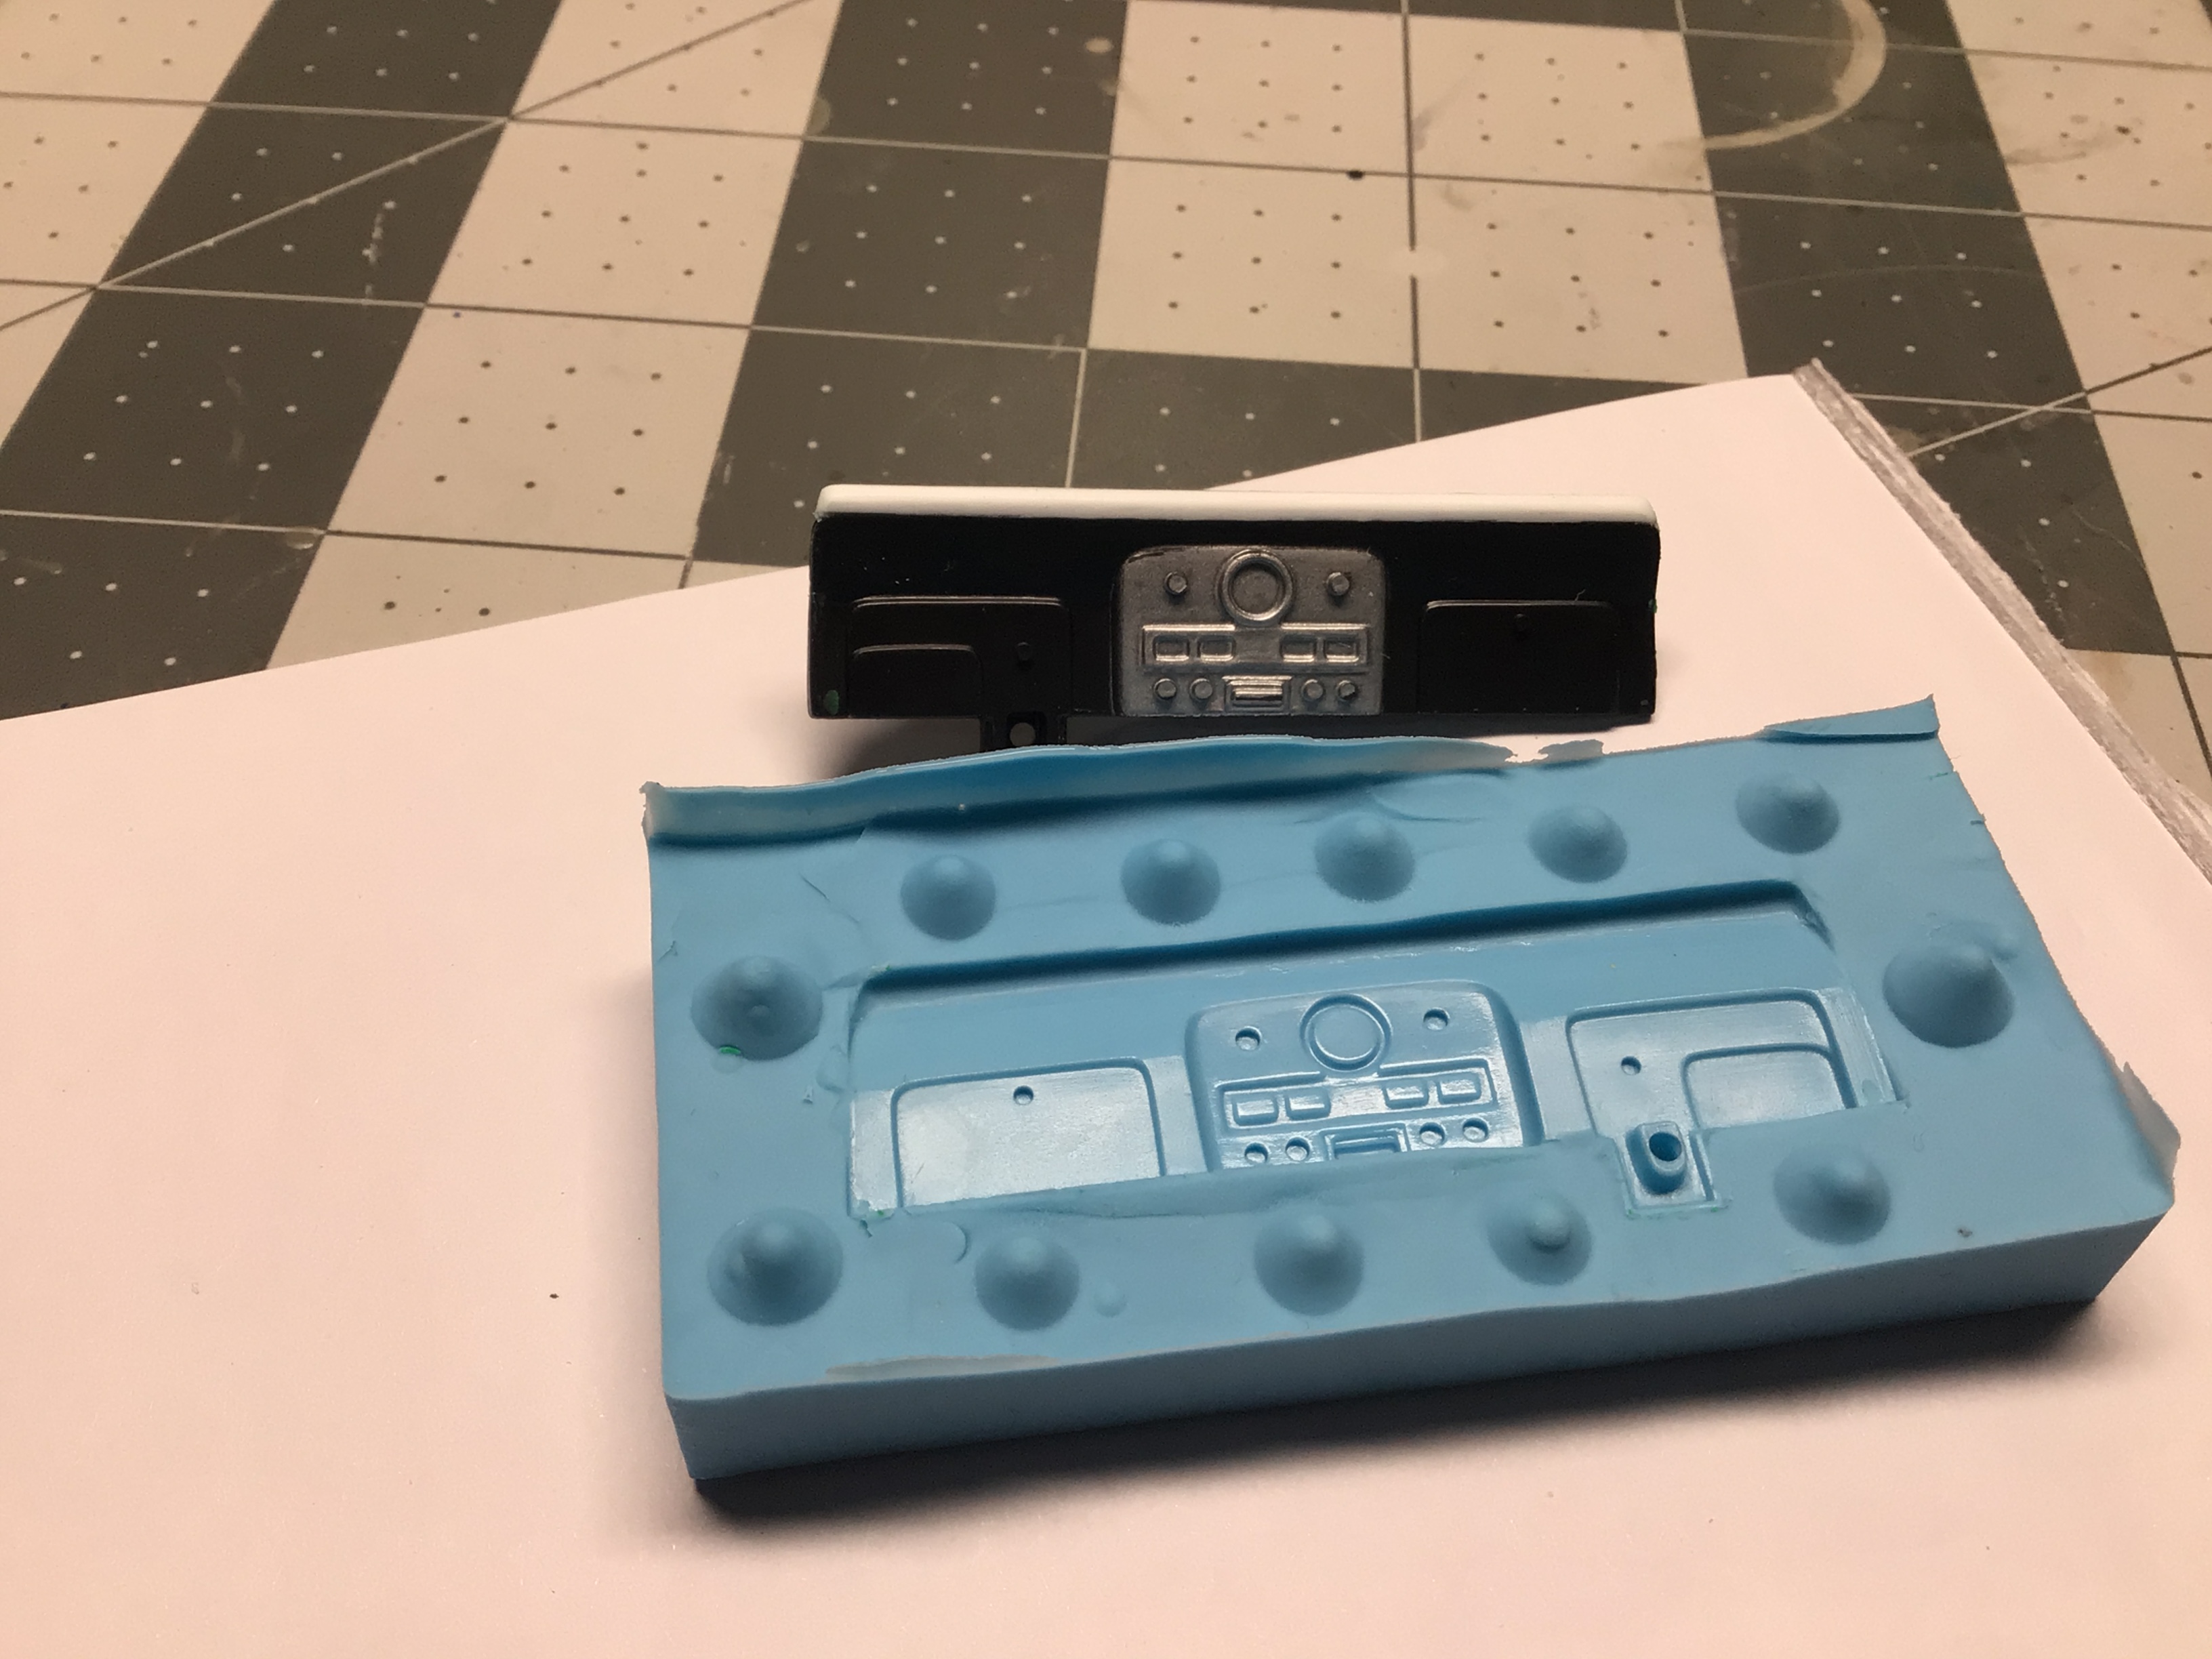
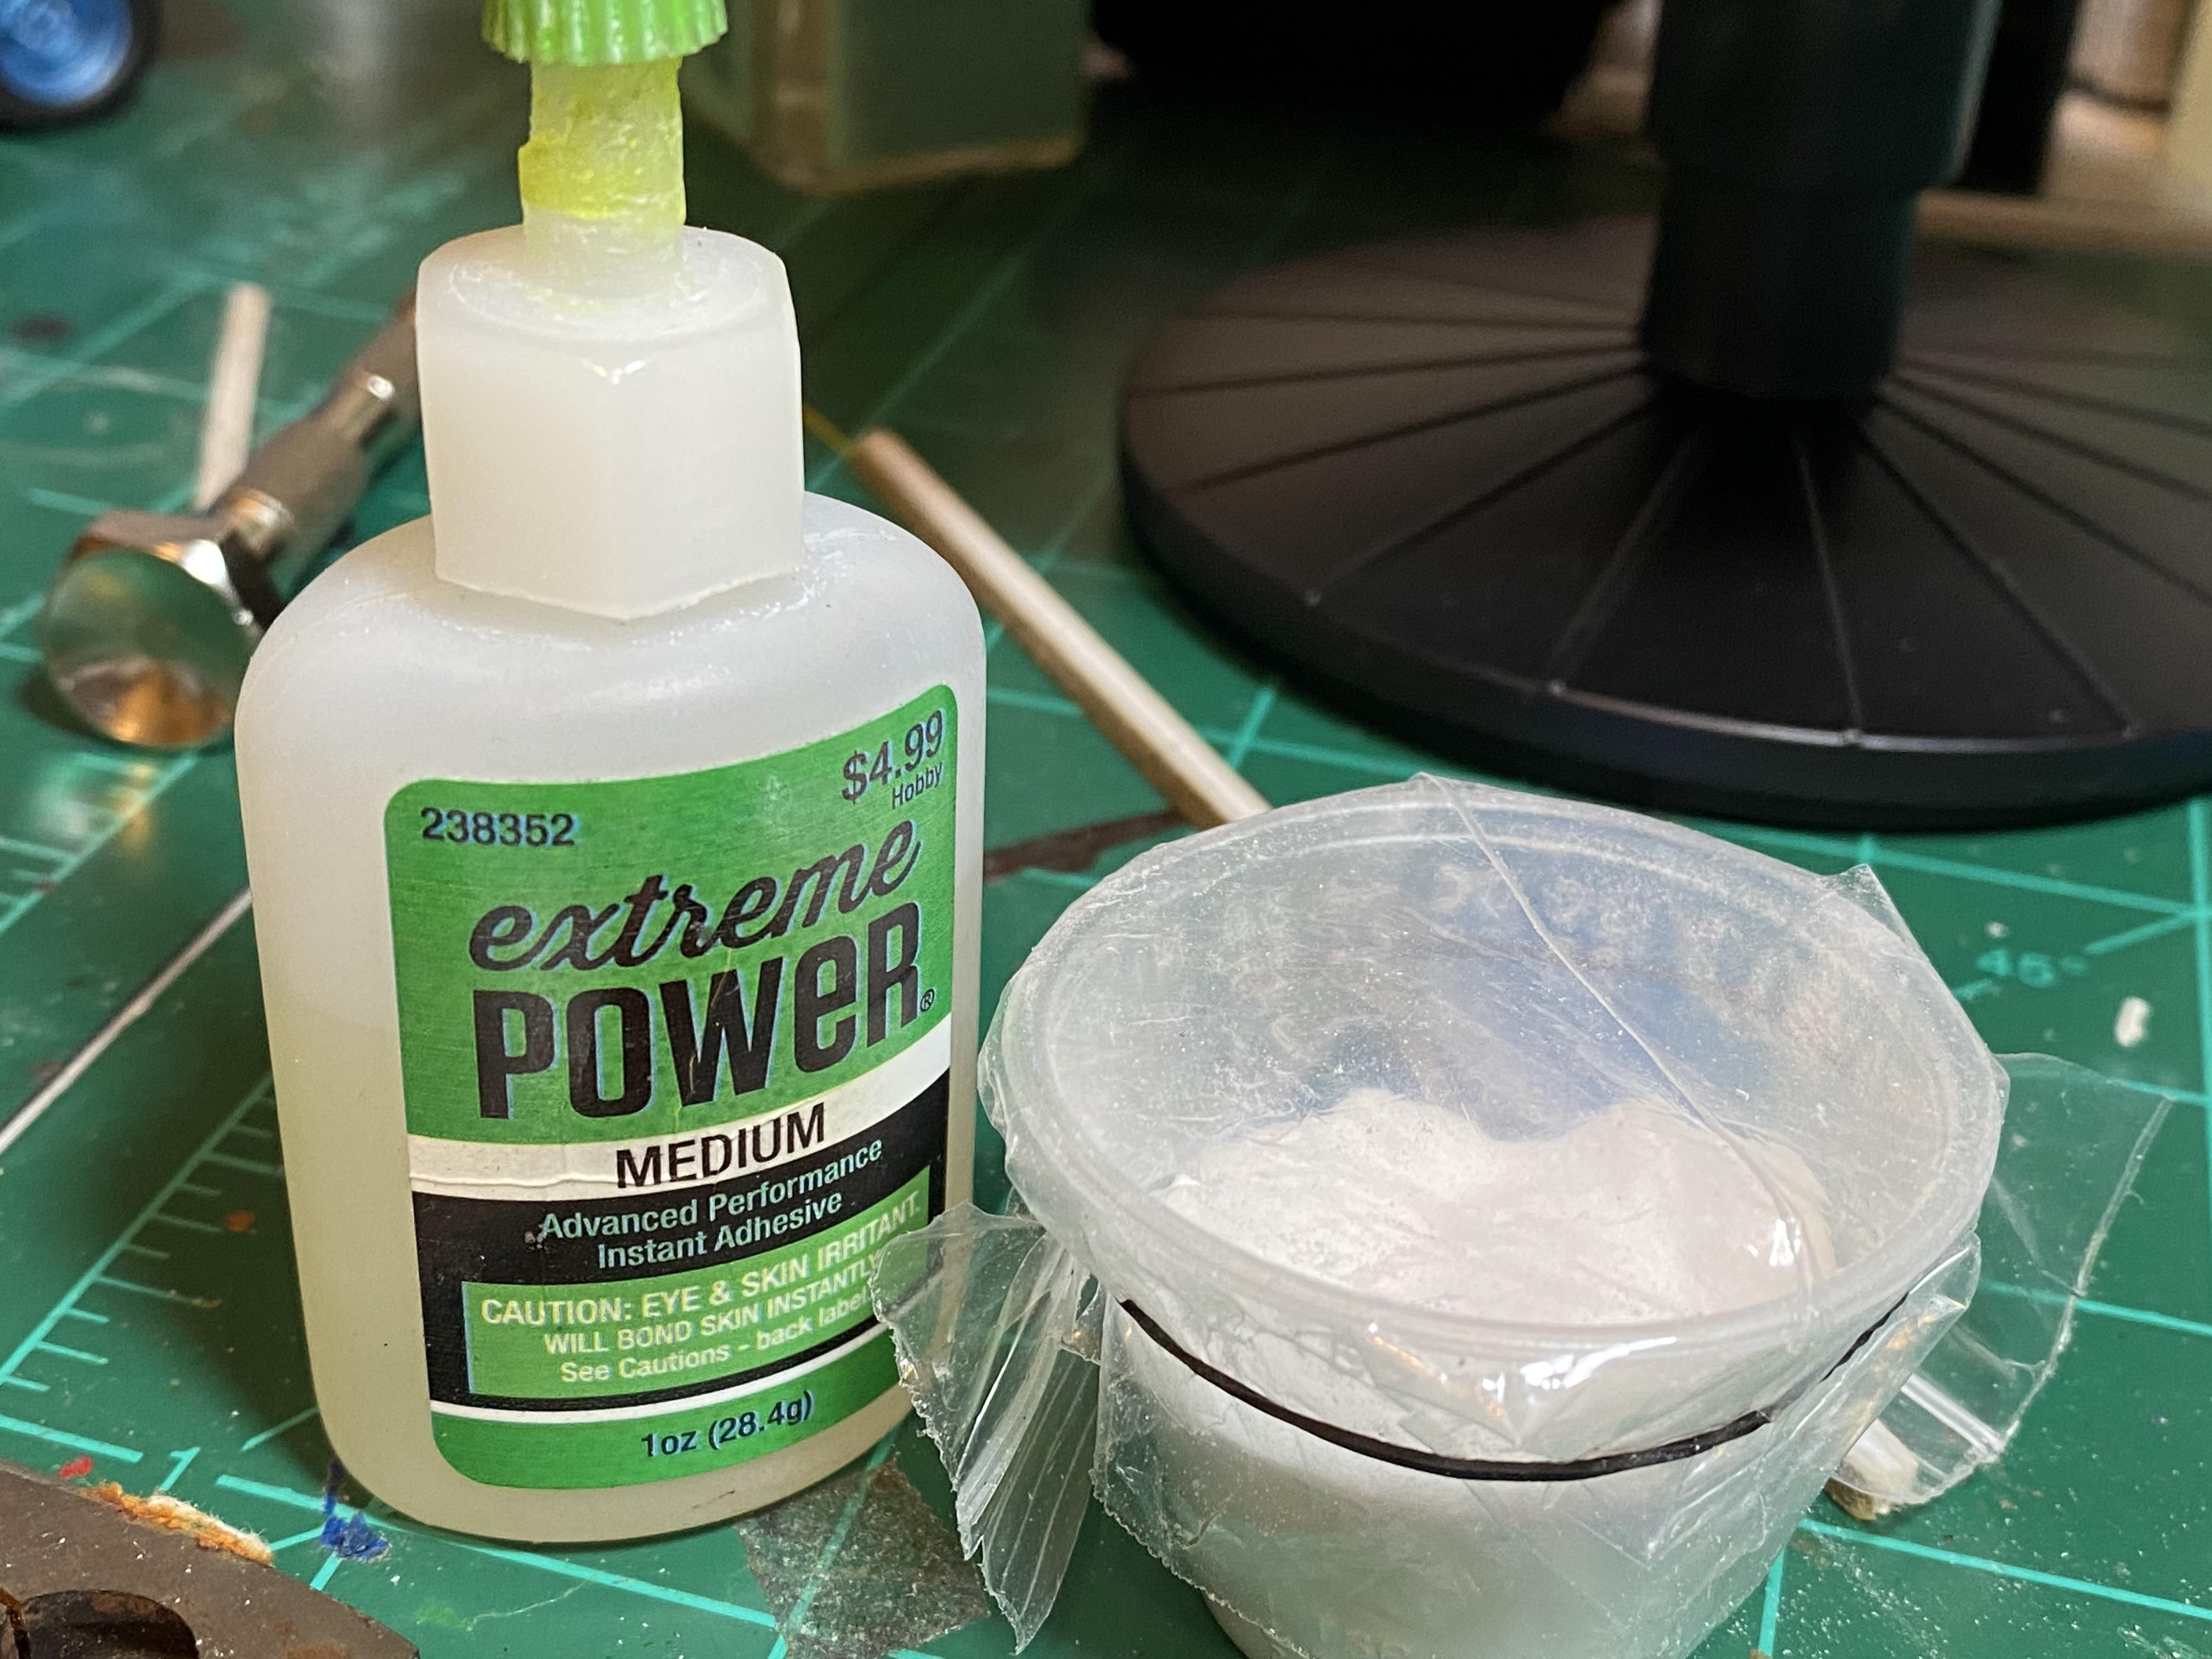
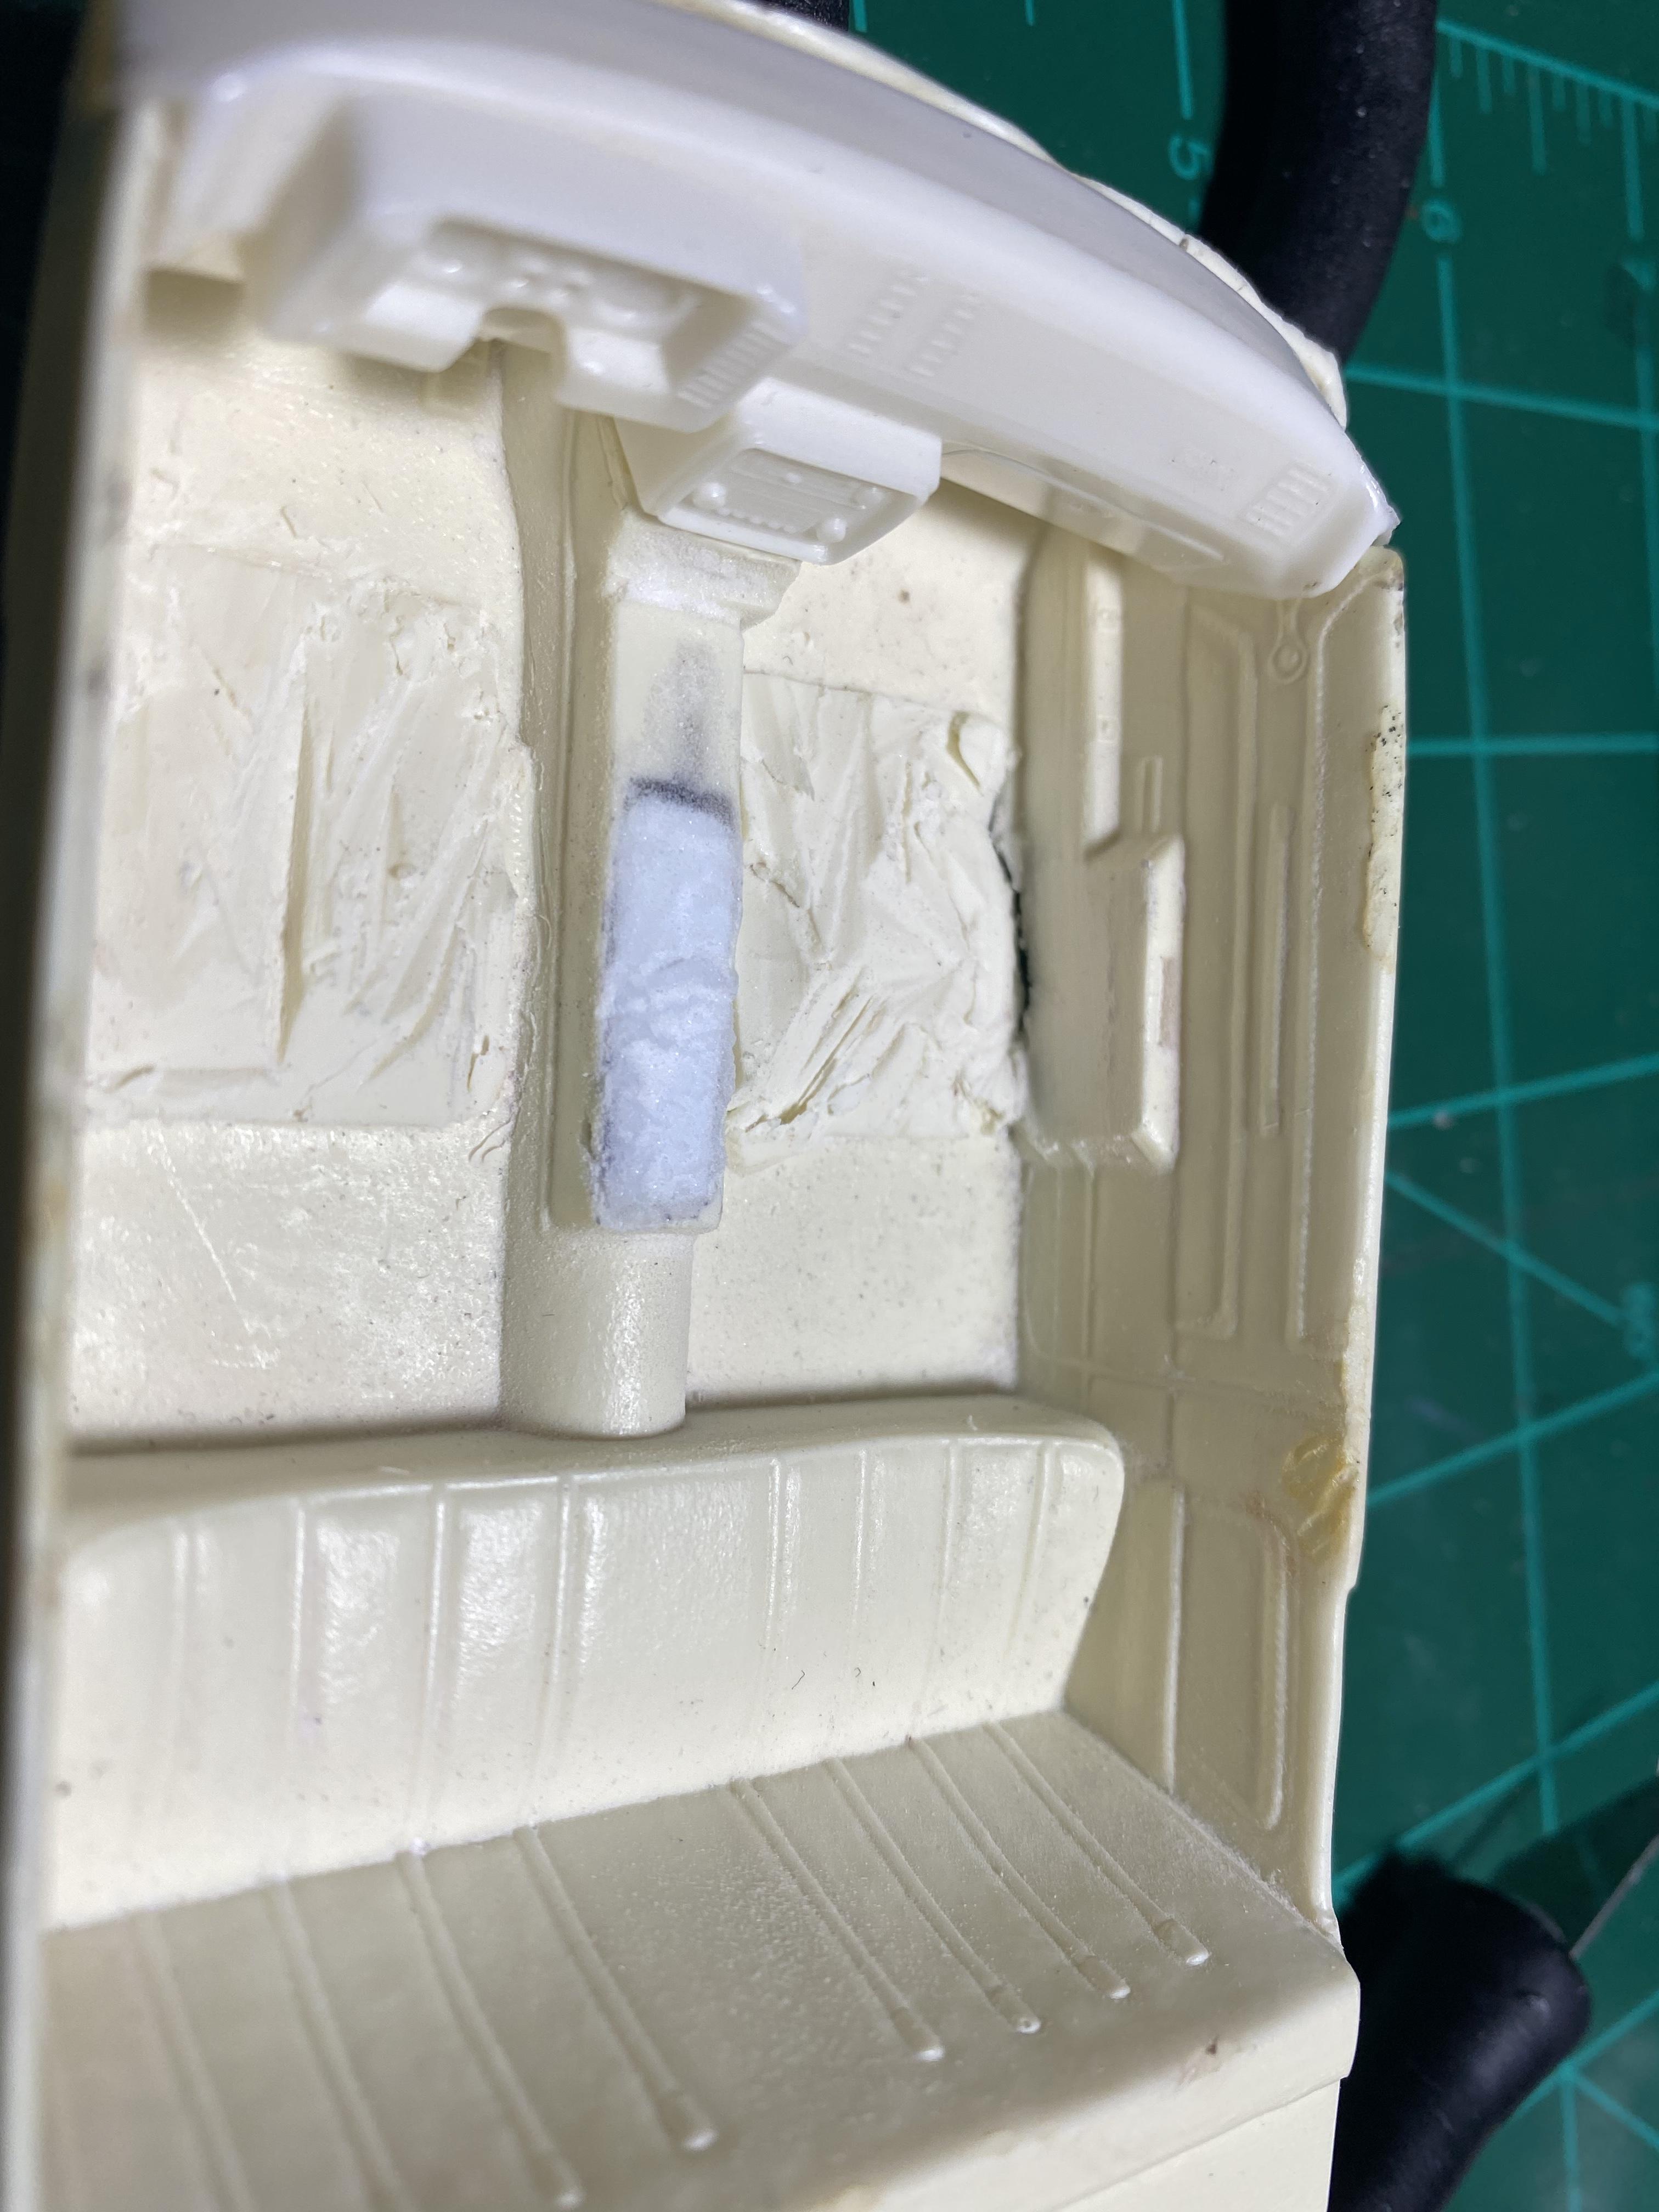
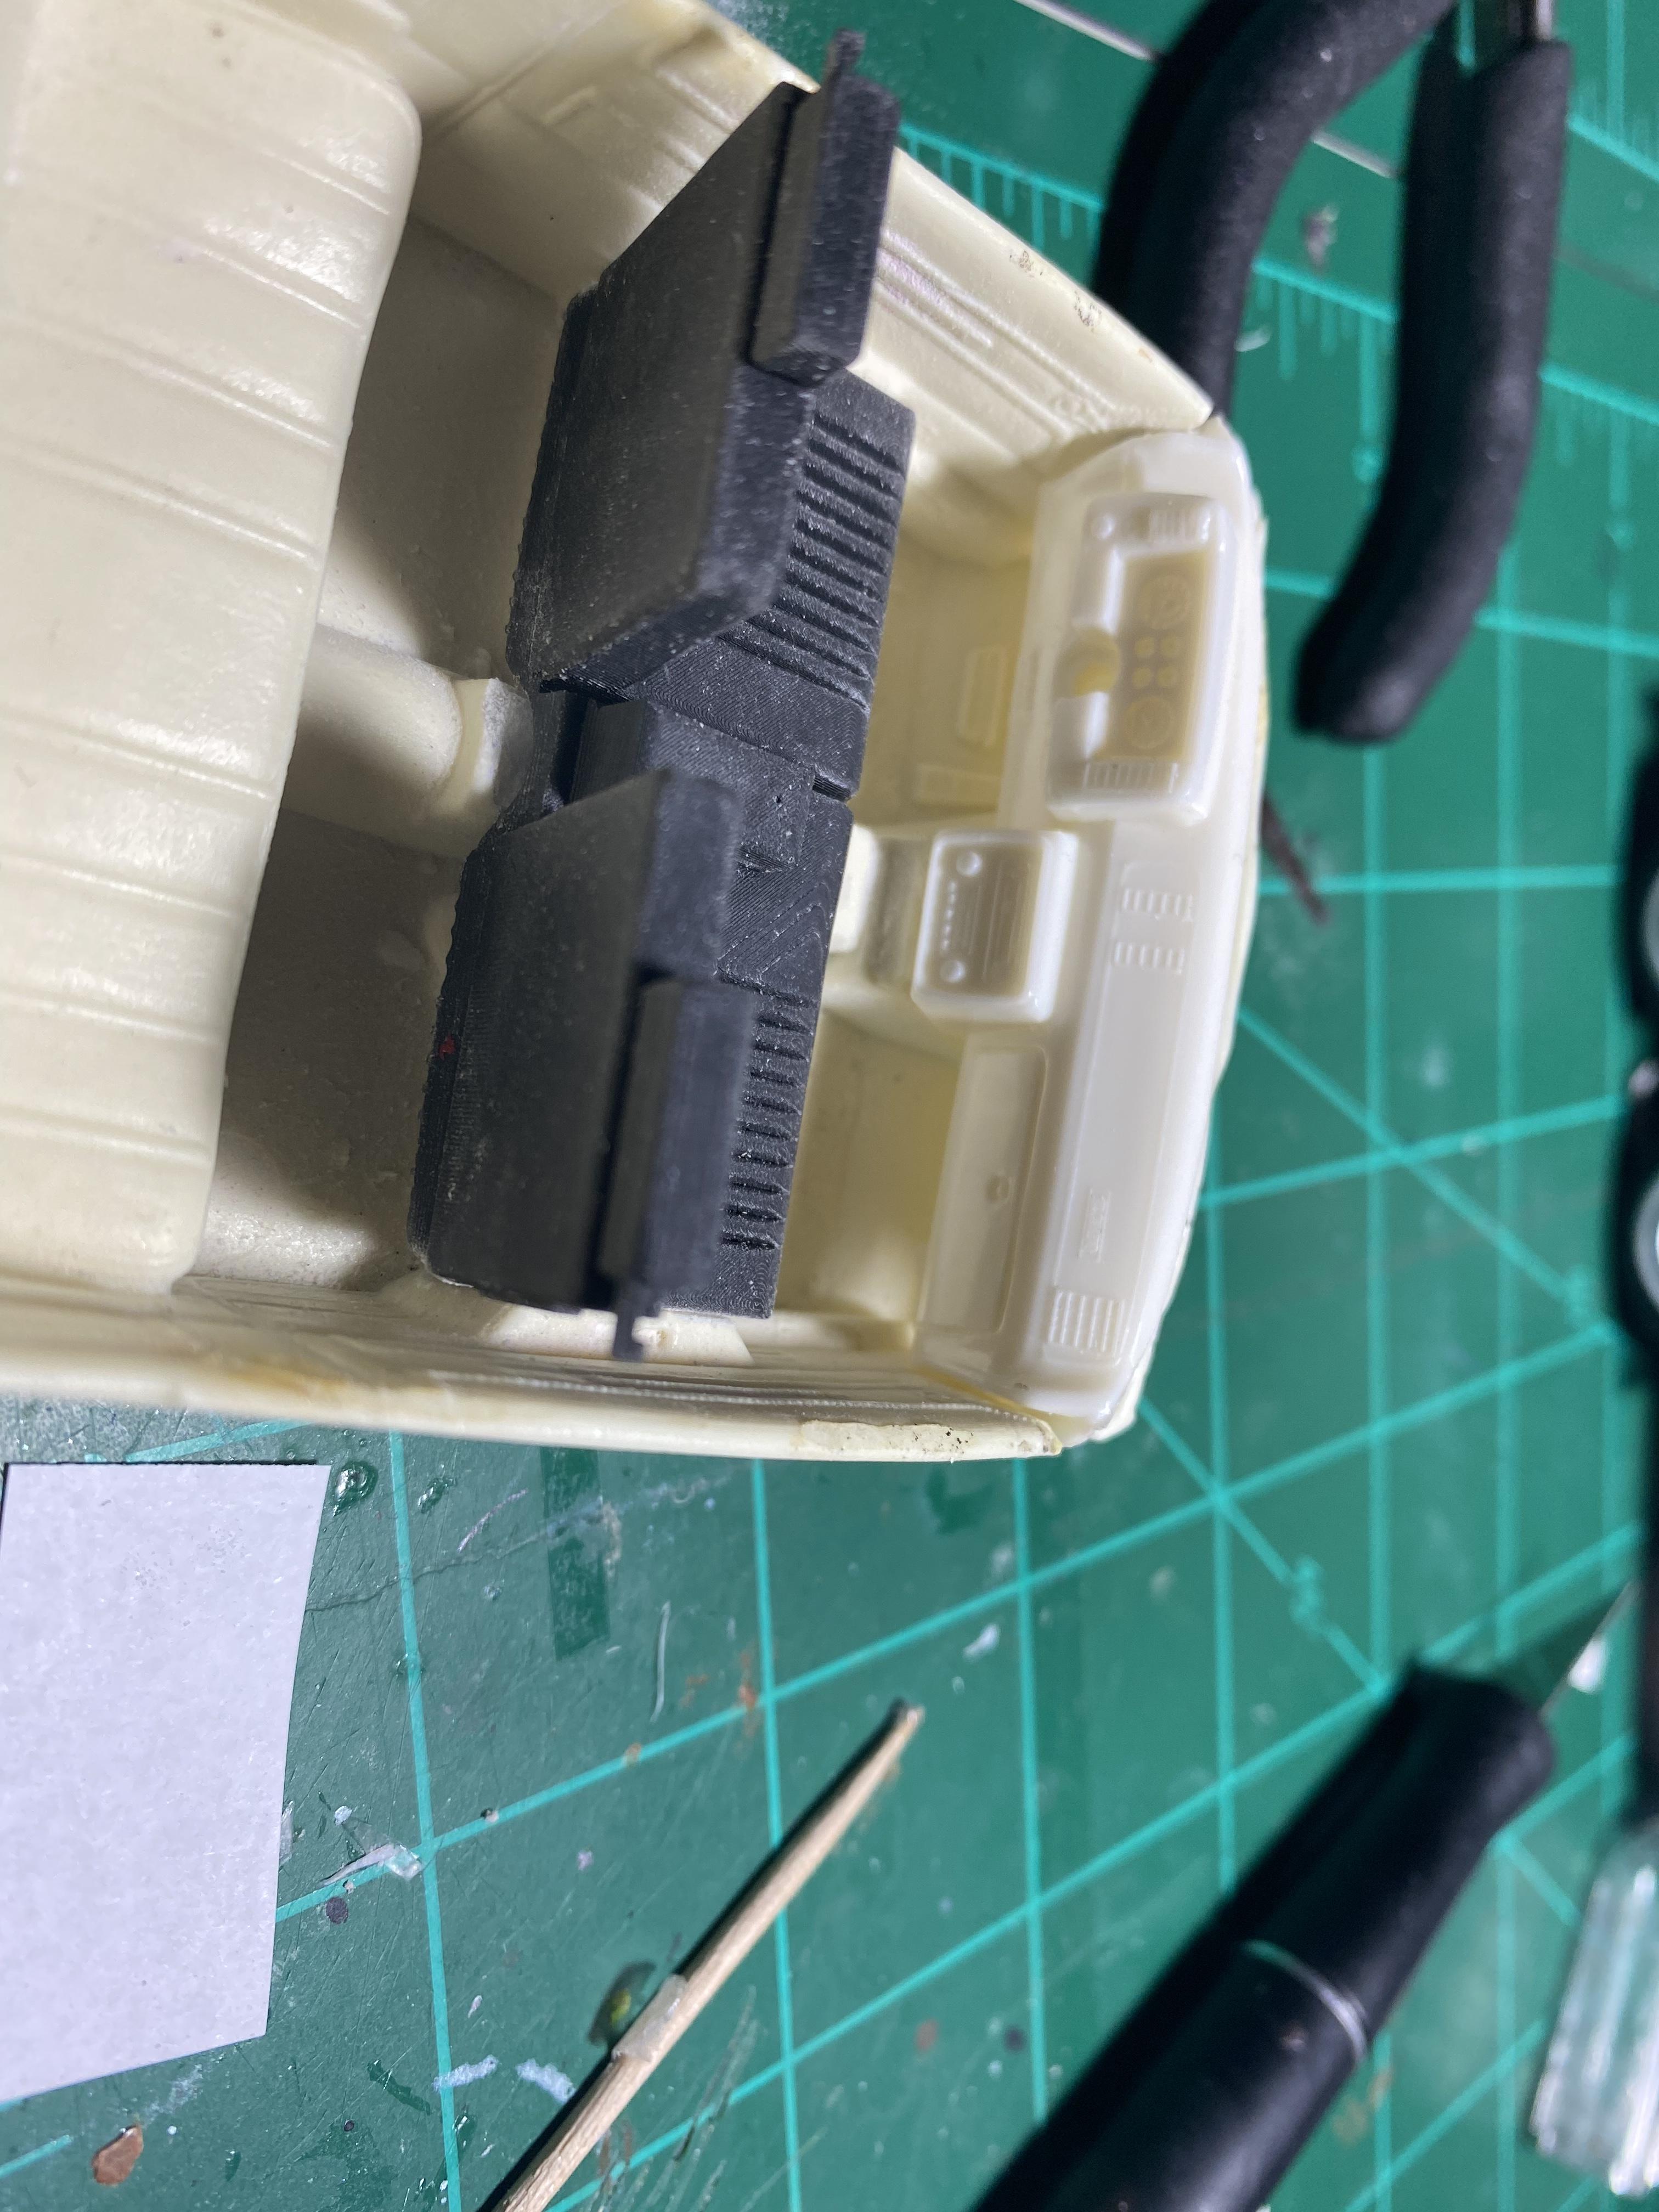
This paint was put into an aerosol can many years ago for me by an auto paint supplier. I sprayed this dash weeks ago, and it has been sitting in the dehydrator since. There is a raised portion of the dash that I filed down...and on that spot, the paint is still liquid. How long after casting does resin need to cure before painting? I must have painted this just after the filing that exposed fresher resin?
-
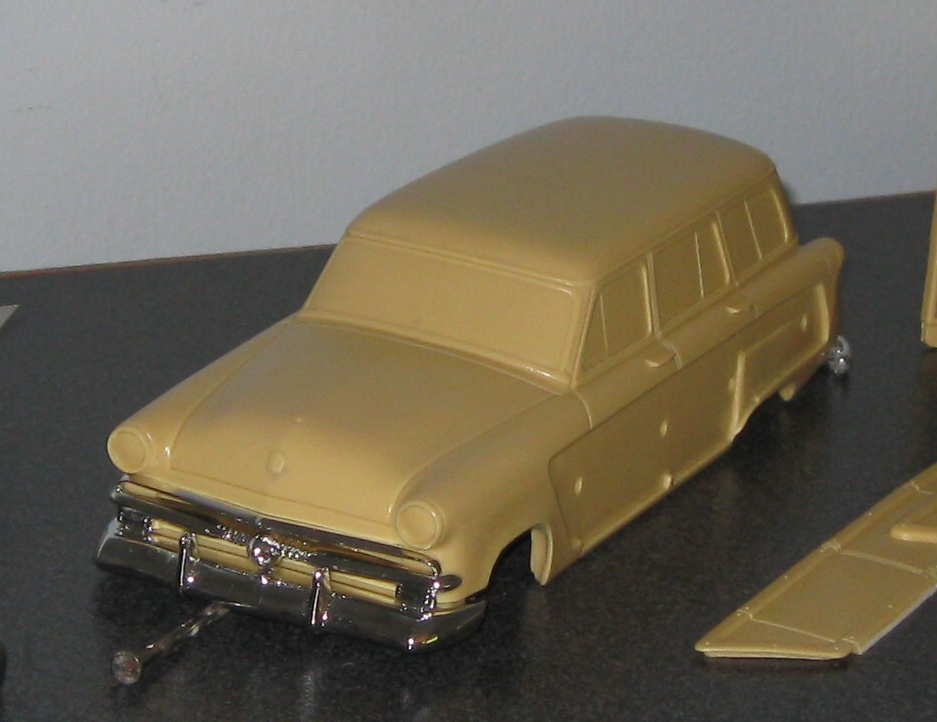
 I sold off some more of Tom Piagari's unfinished projects last weekend at the LMMCC meeting for his widow (thanks to all those who bought them! ). One that hasn't sold yet was this resin '53 Ford wagon: Under the hood are the words "Copyright Property of TJH Model". Does anyone have some history on this kit, like when it was made, who mastered it, etc.? It's a solid kit (no windows or interior; plate chassis) but the quality is really really nice; almost as if Modelhaus made a Banthrico! It doesn't look like the Lindberg '53 Ford kit was used for the master (the grille is different). Other chrome is in the packet - dog dish hubcaps, taillights and hood ornament. The wheels seem to be injection molded (one is missing - the kit's only flaw) and I think the tires could be kit-sourced (Goodyear Super Cushions with sprayed-on whitewalls)? Note the wood areas are separate parts and there are neatly printed peel and stick appliques for the dark panels. So if anyone can fill me in on more history (did Clarence/TJH make any other kits?) and especially if one of you could turn up another wheel, I'd greatly appreciate it. I was asking $70 obo for it at the meet; does that sound like a fair price?
-
Did not see that anyone has shown this particular Audi Quattro kit, which is a low volume resin kit made in France. It represents the pinnacle of the Group B rally cars, infamously called Killer B due to extreme performance mixed with stupid spectators standing on the edge of the roads. I'm planning to build Walter Roehrl's car, with appropriate "weathering". This model has the engine, some other kits do not. I am going to use the Facebook embed method, since I've noticed old posts using photo hosting sites are now useless, and I don't want to use up my allotted space on this forum. I have basic descriptions on each of my photos. (if this does not work, please let me know)


RCprofile.thumb.JPG.1691ea753d0f0897fdc1b2510cf06775.JPG)