Search the Community
Showing results for tags 'Toterhome'.
Found 3 results
-
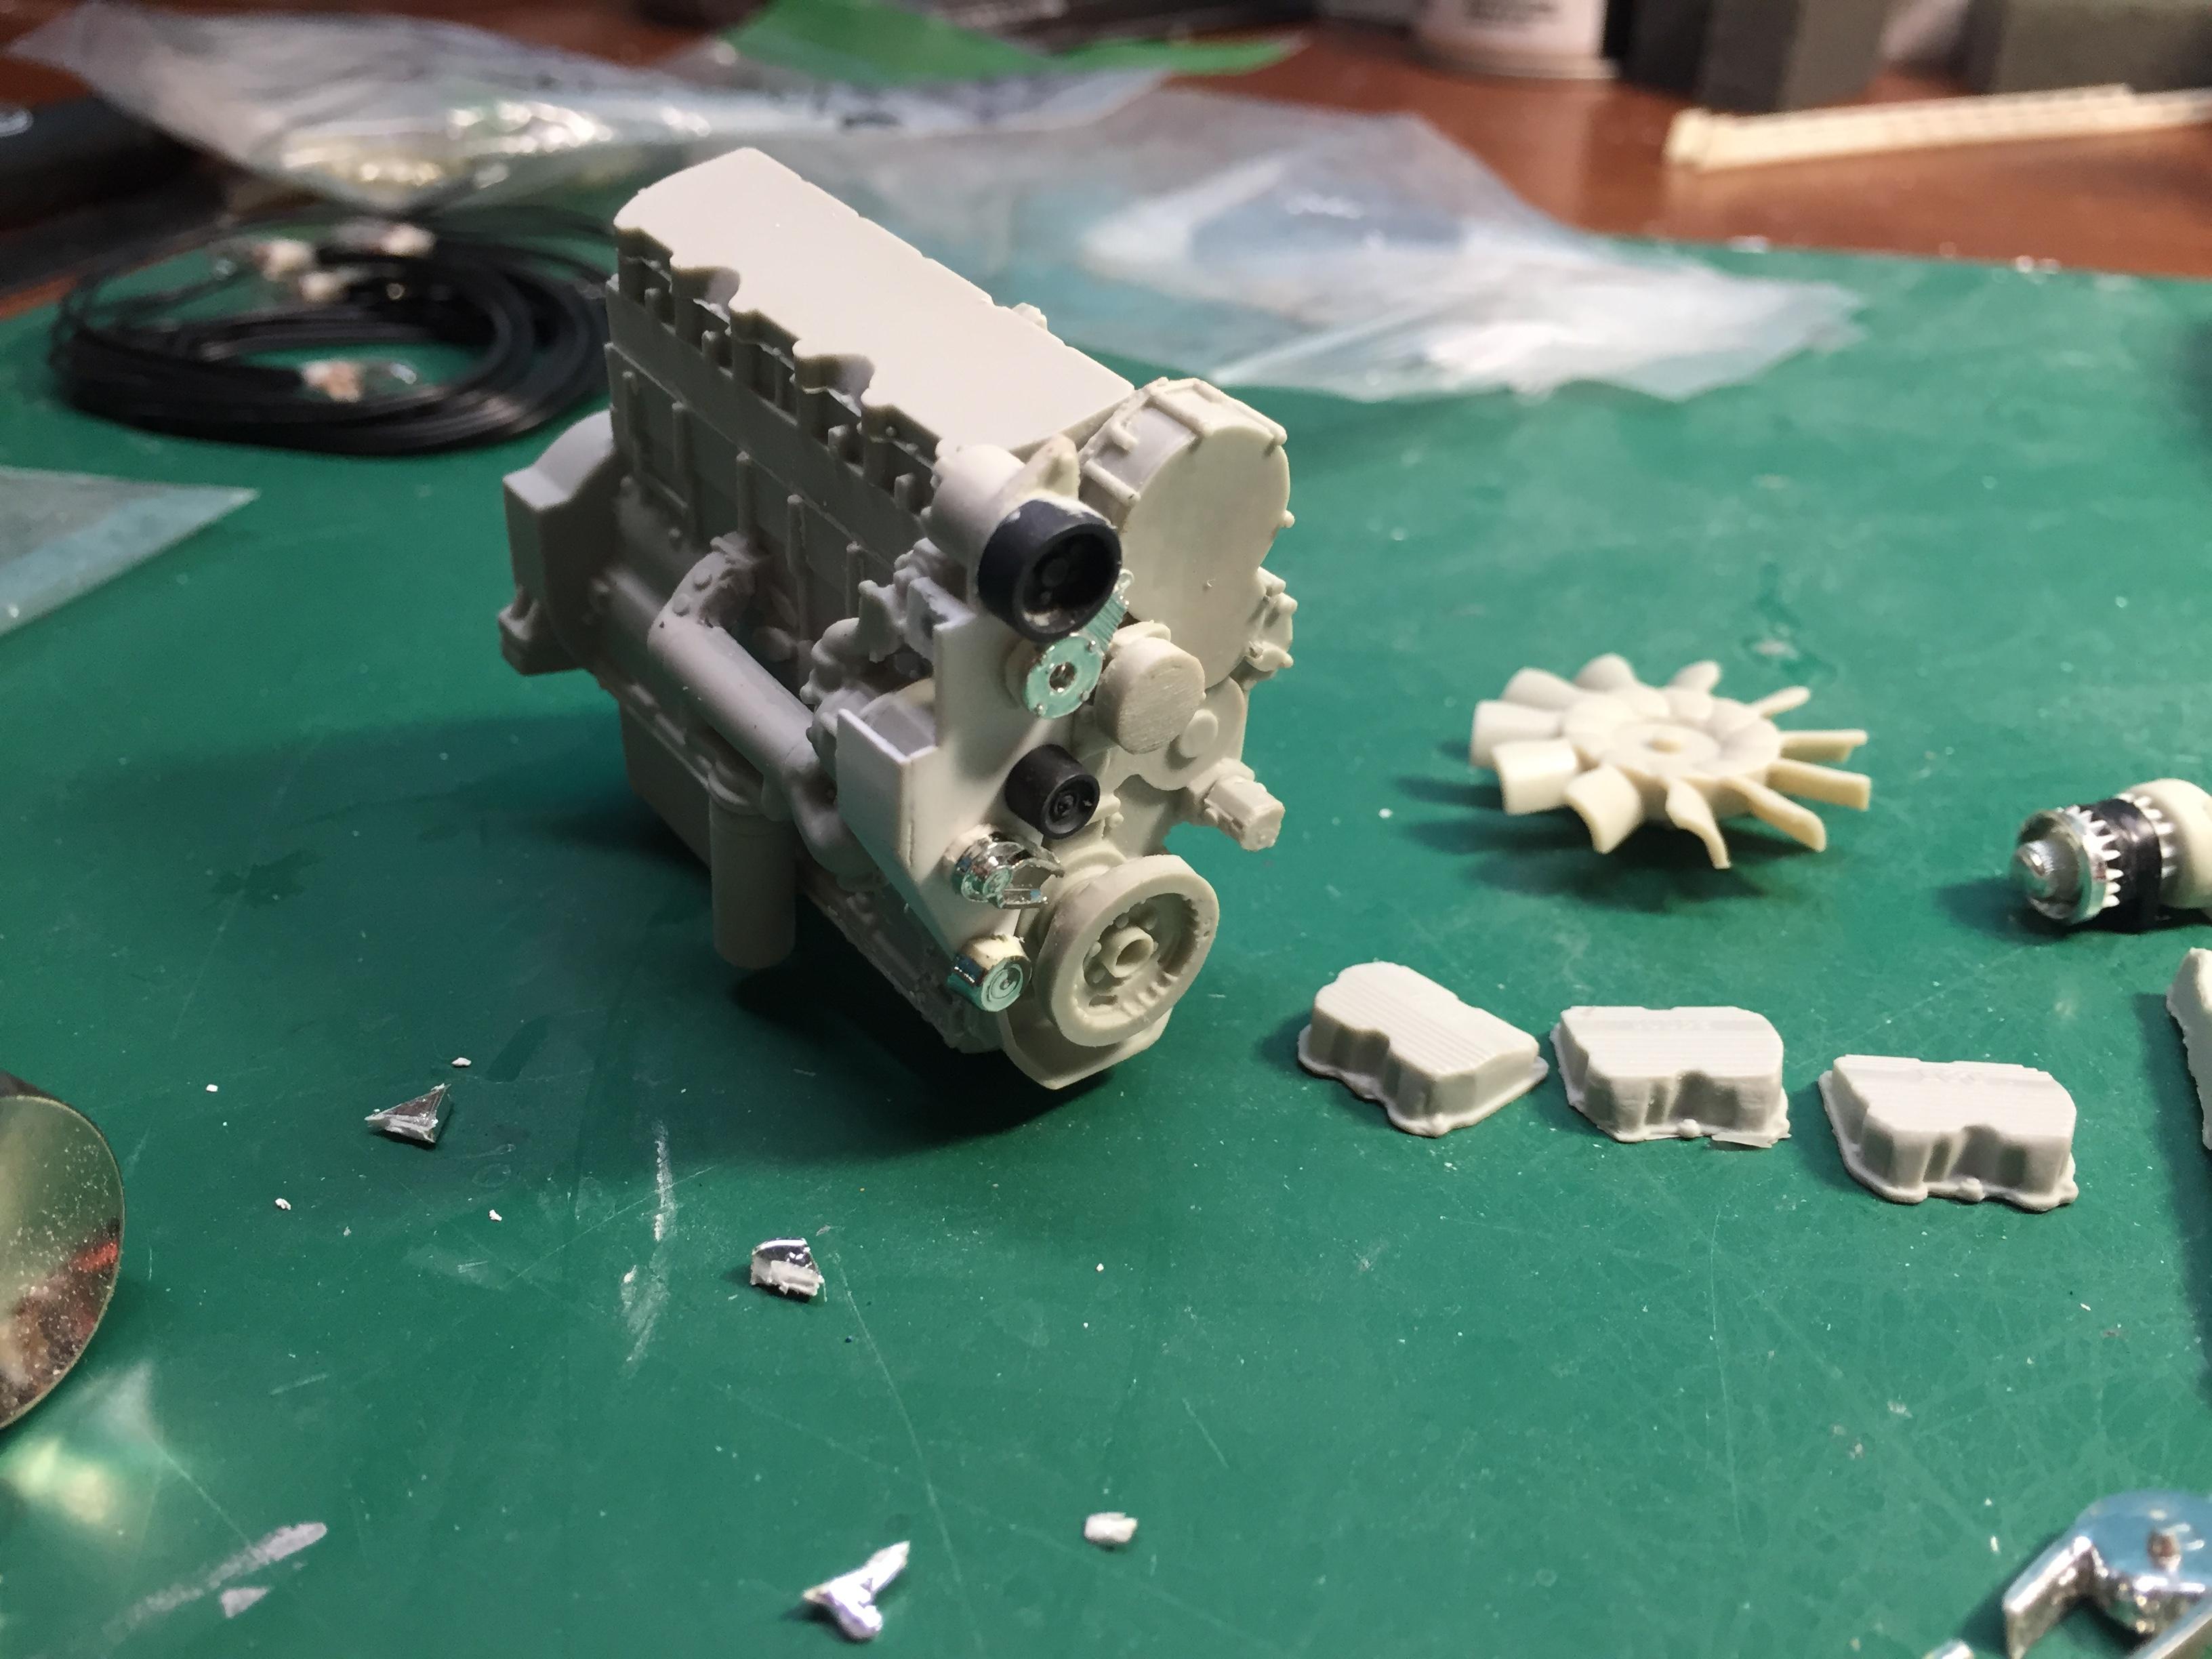
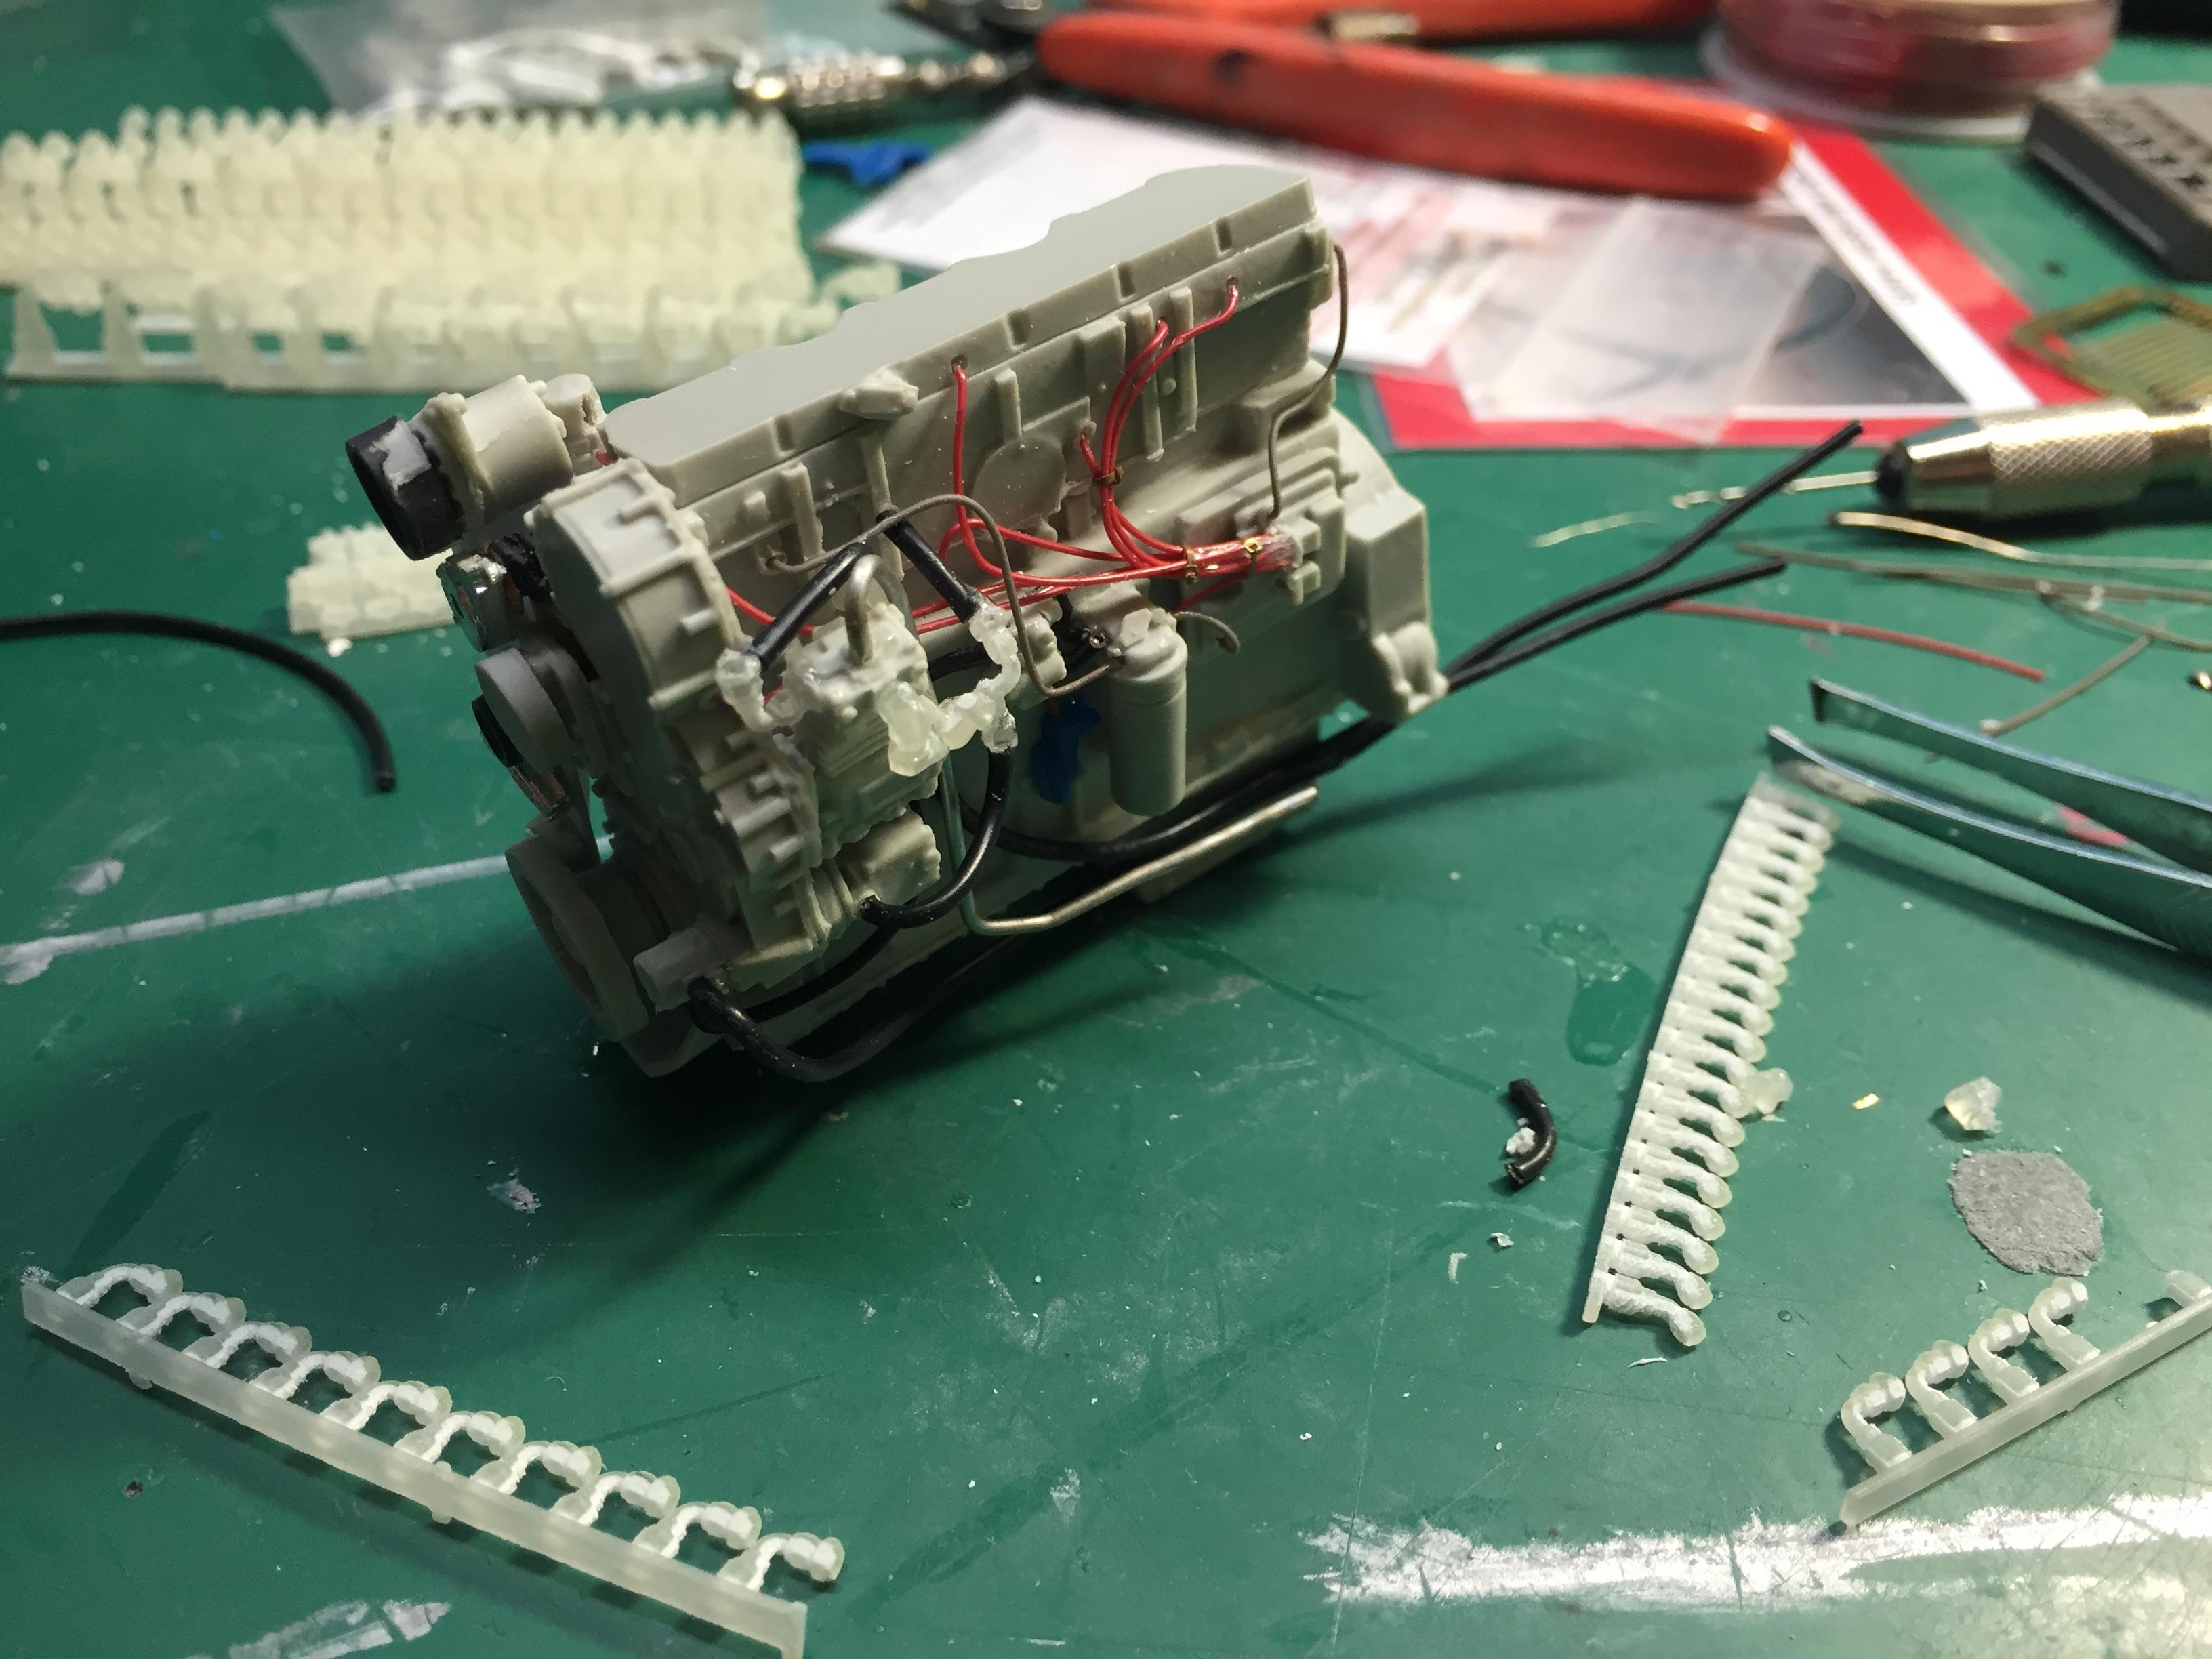
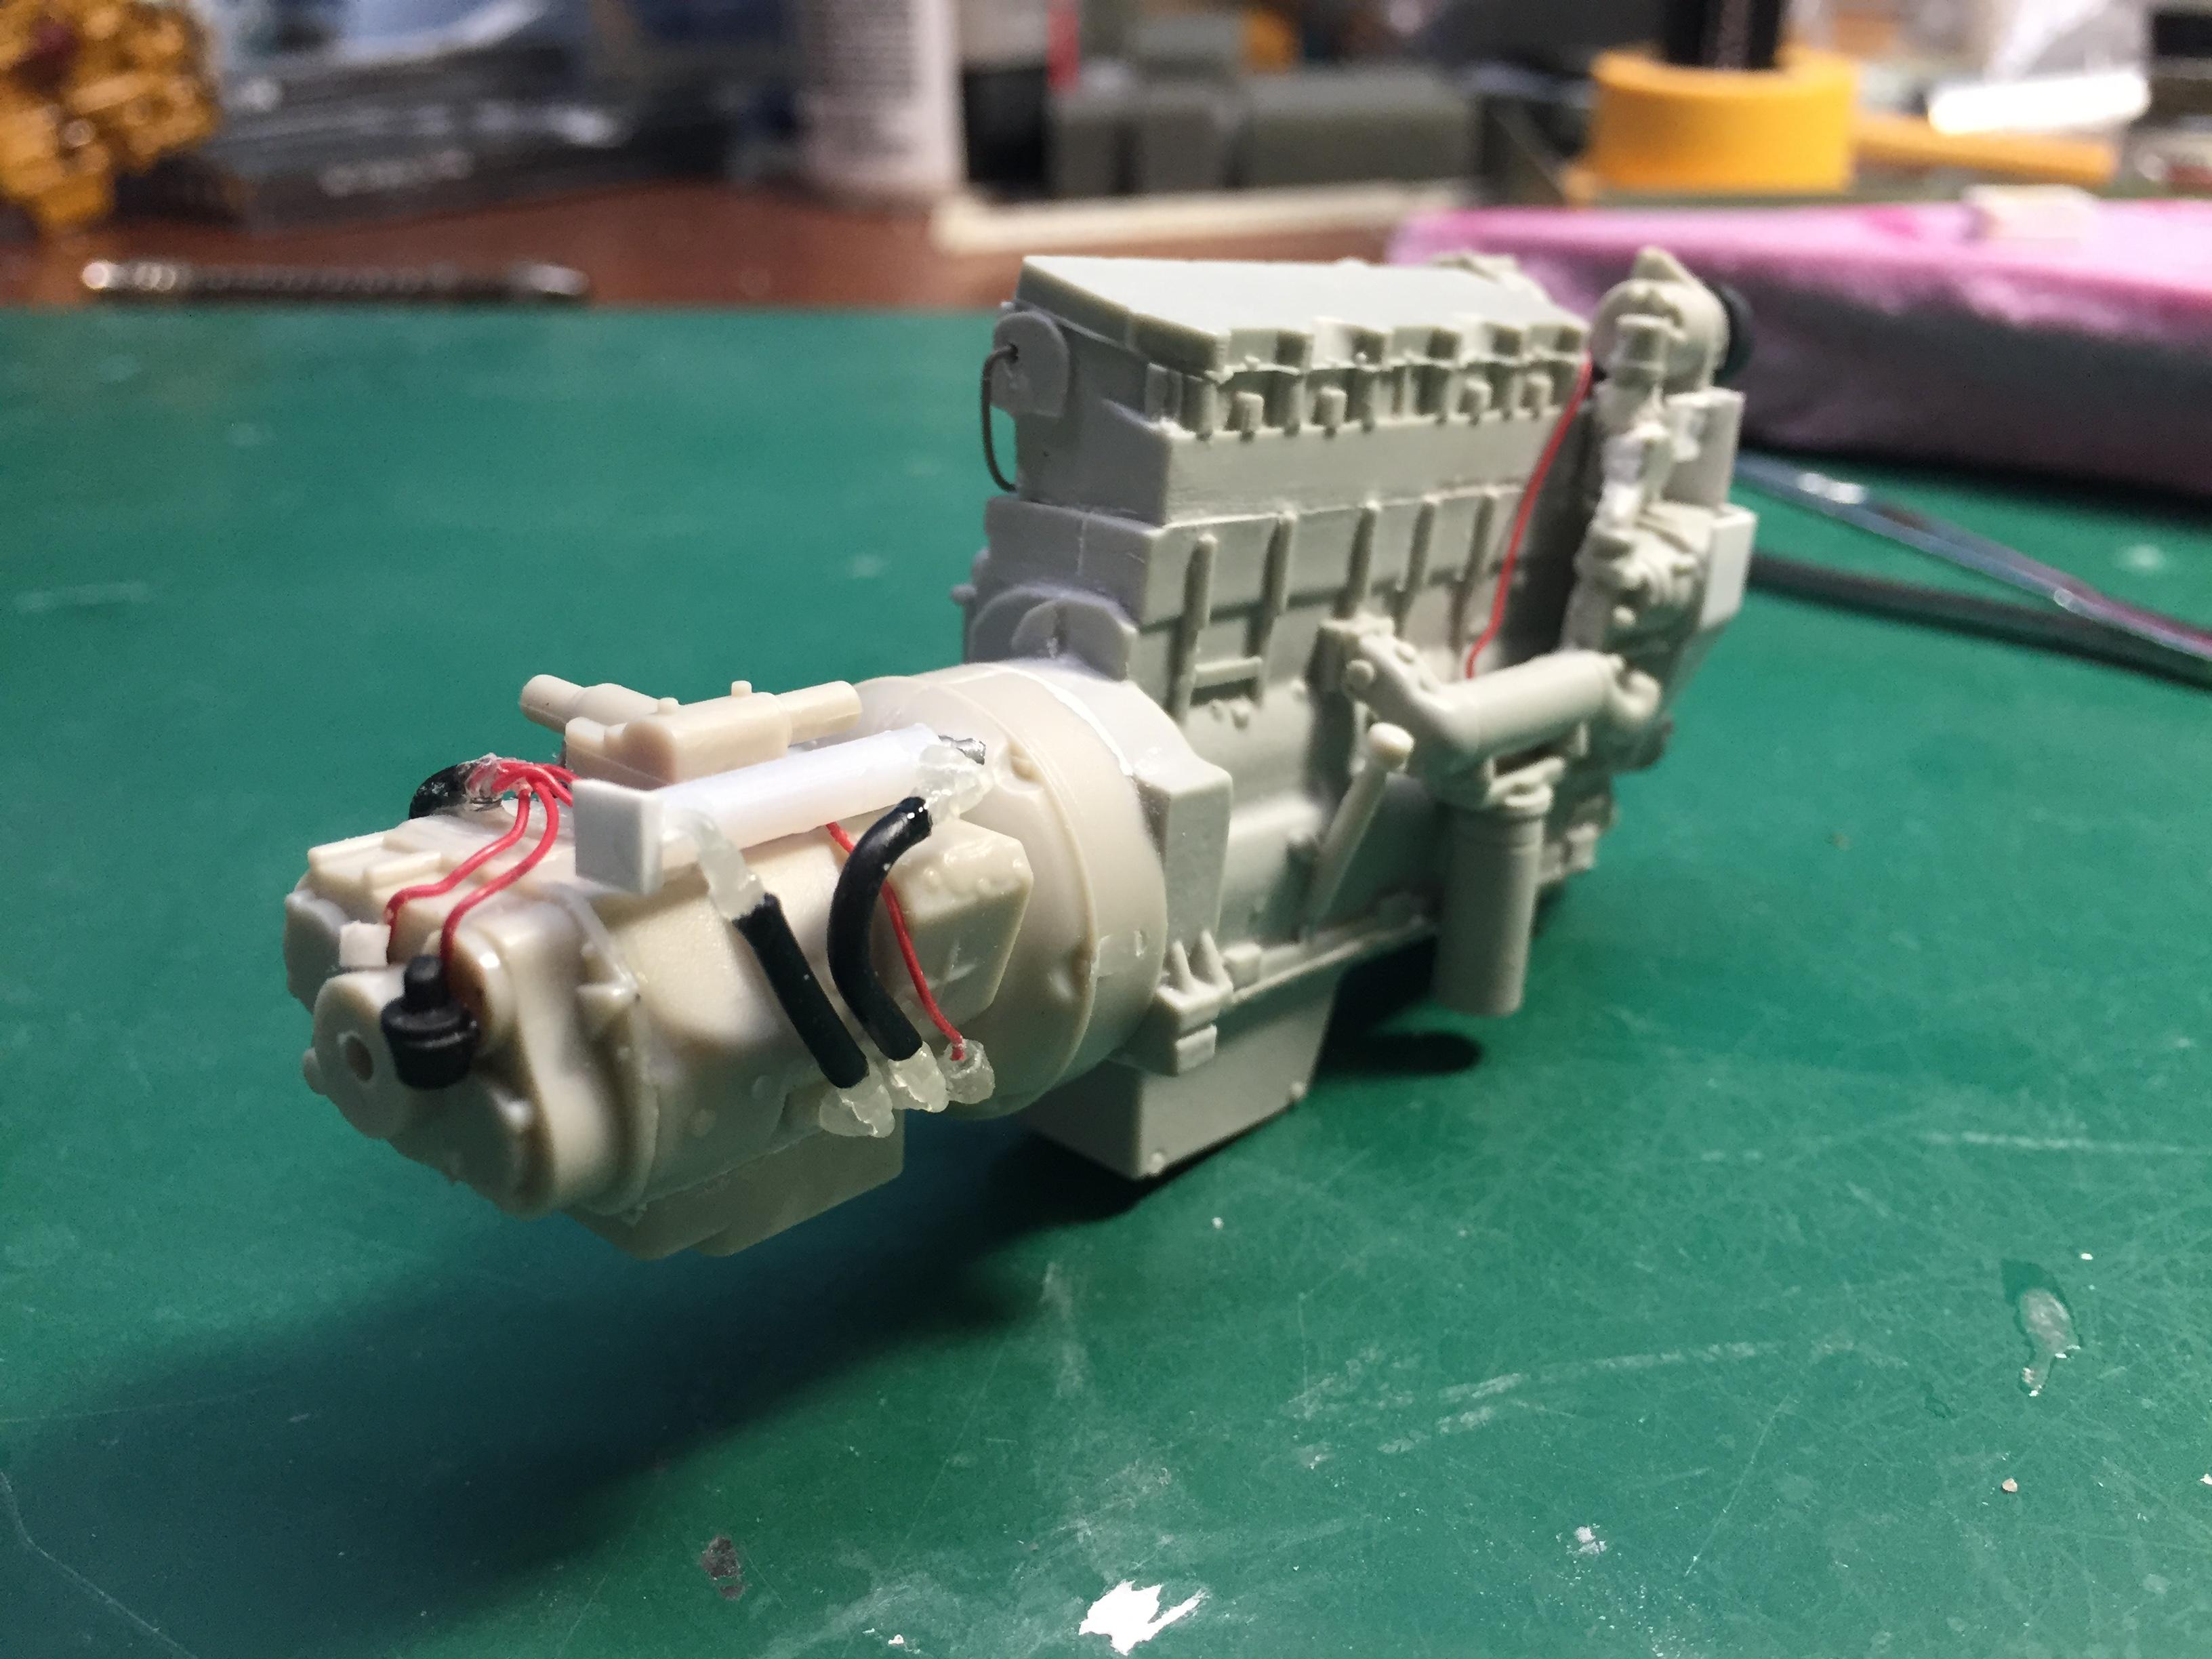
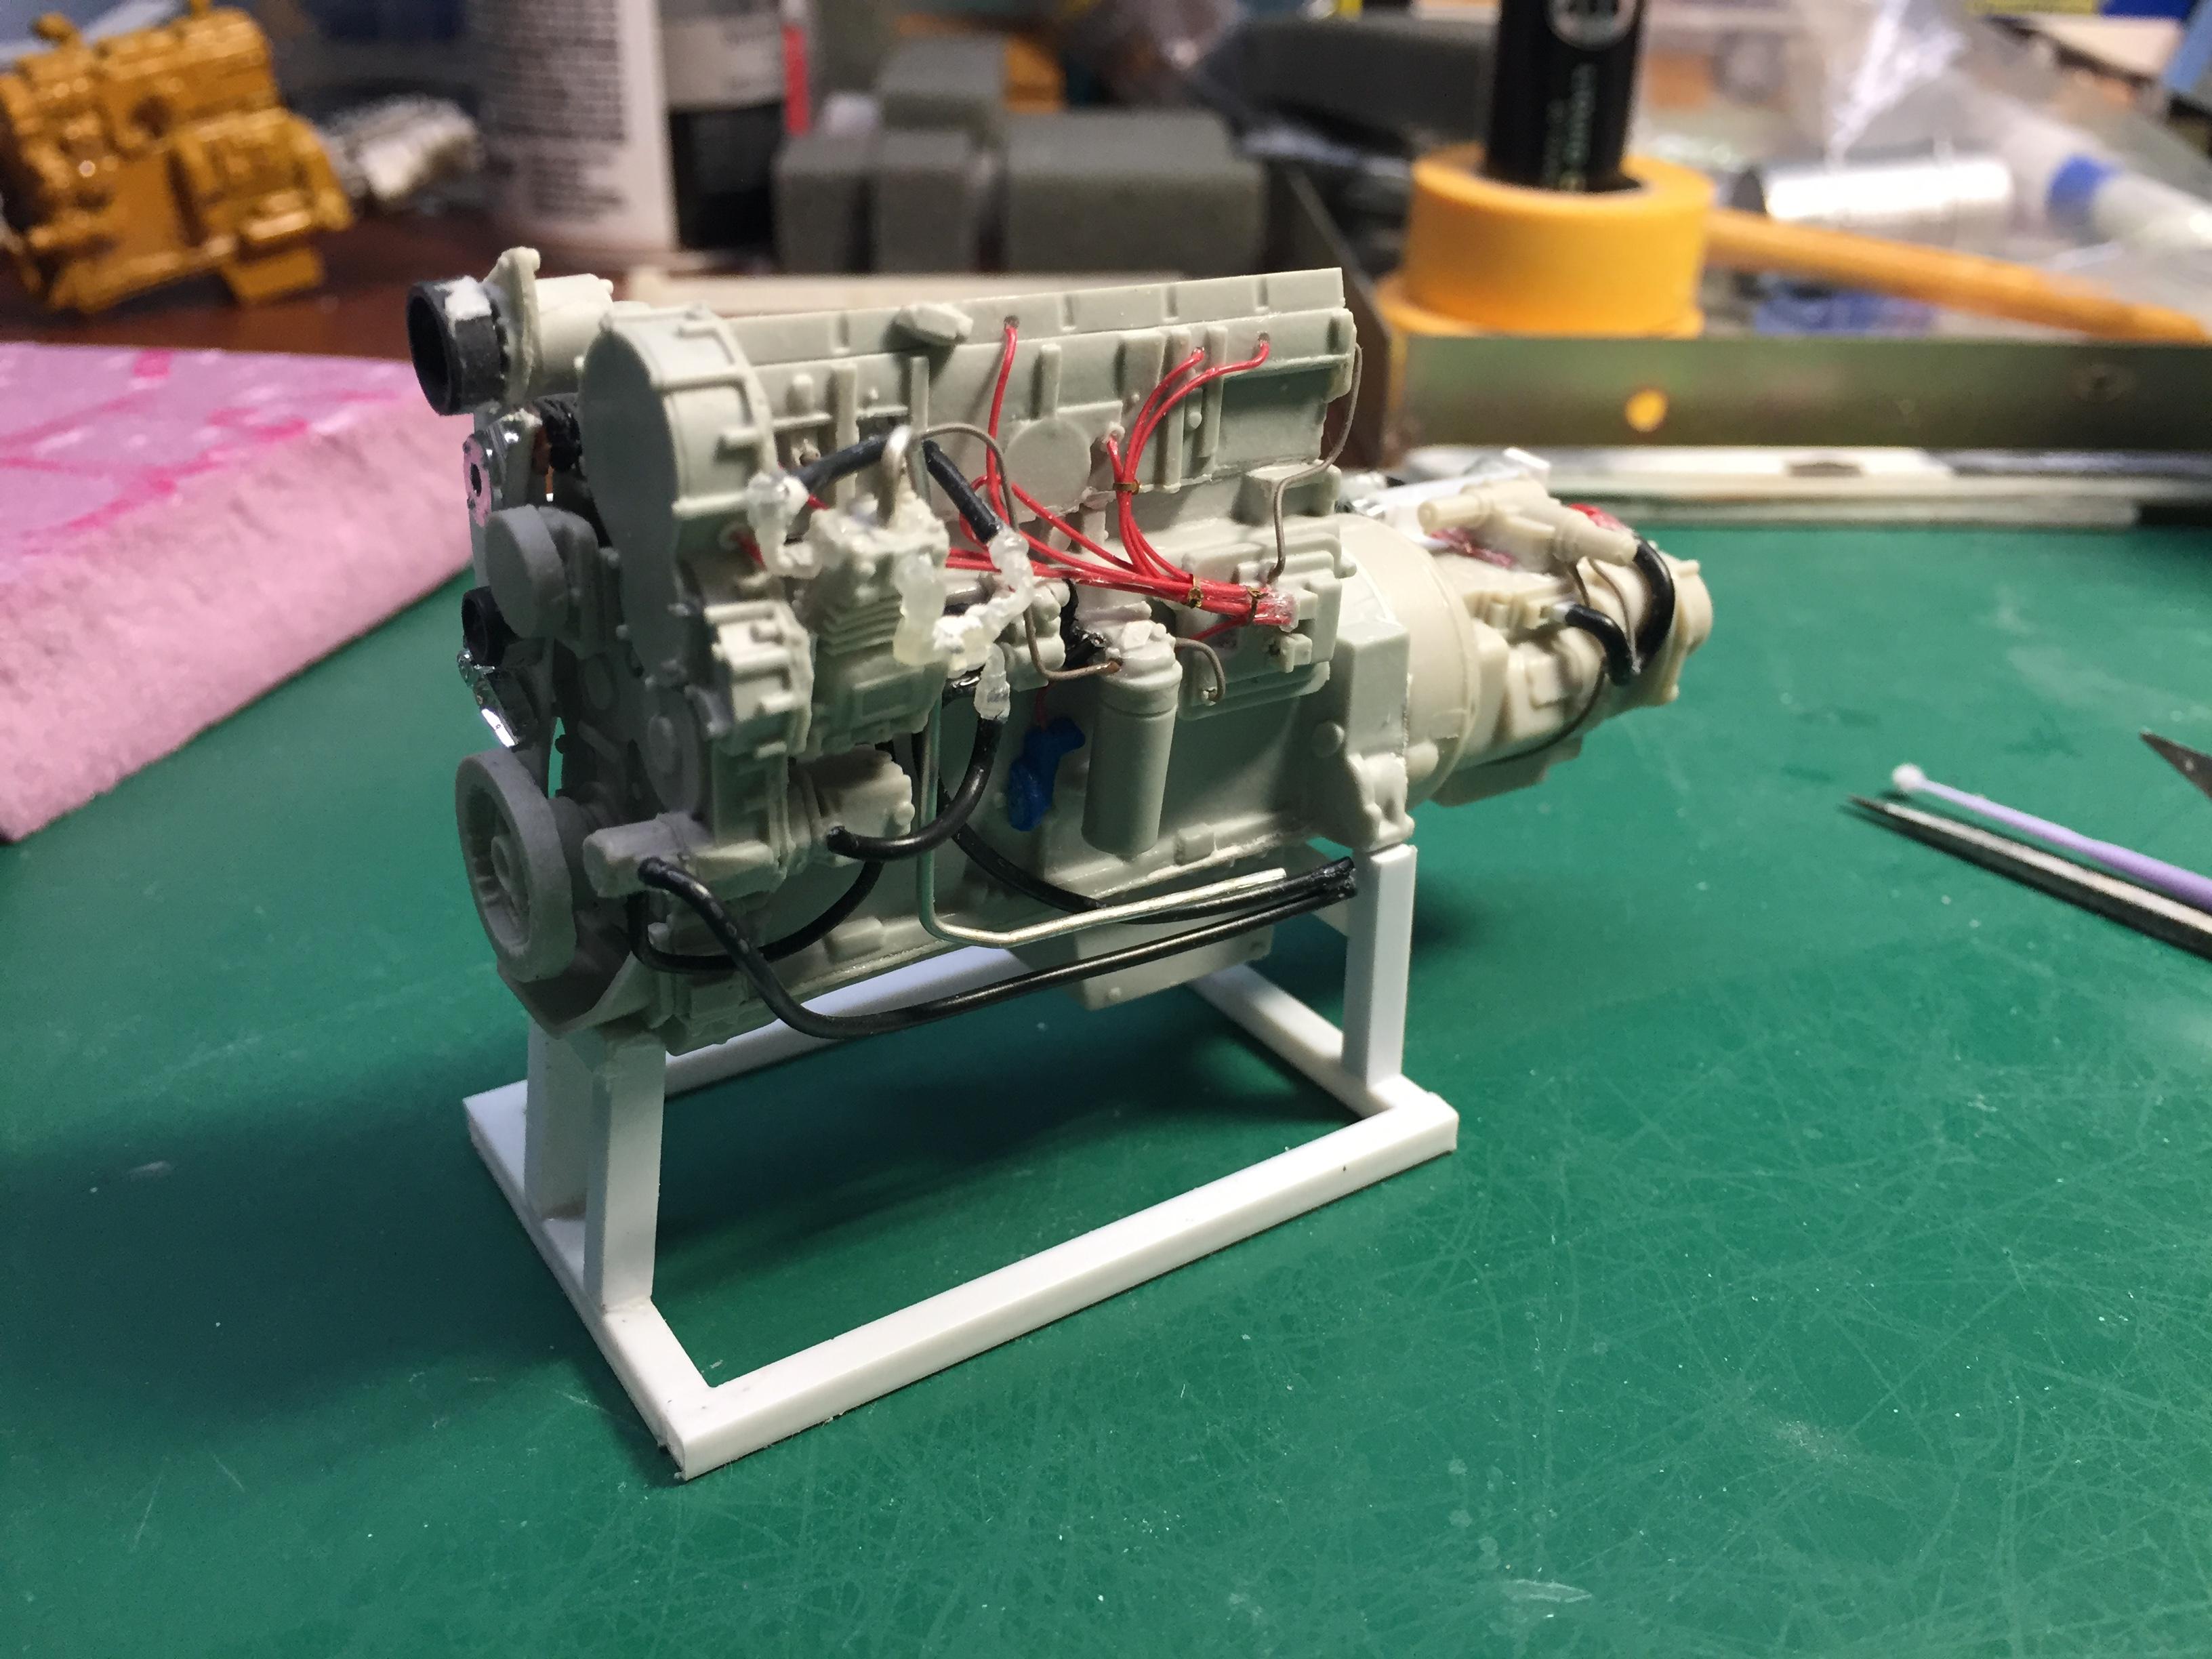
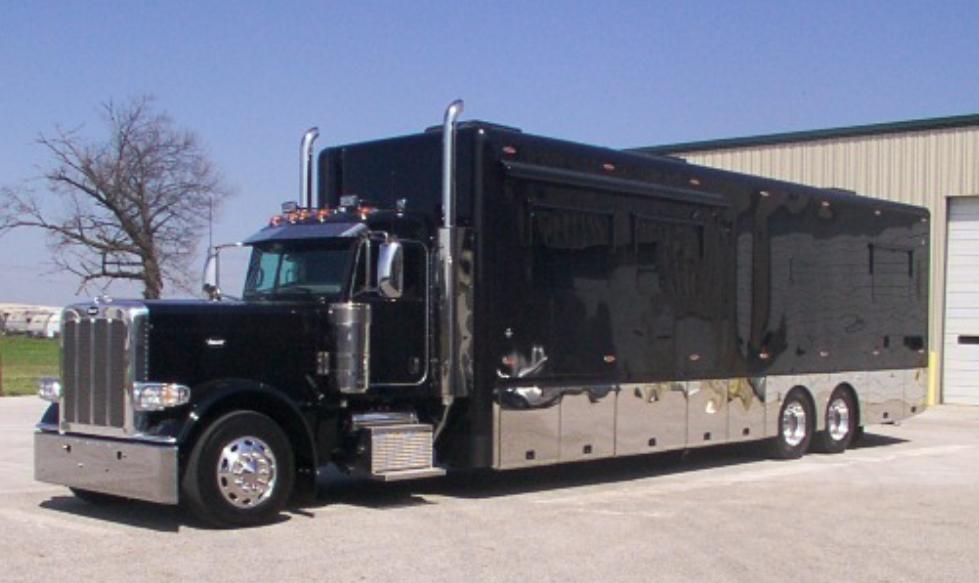
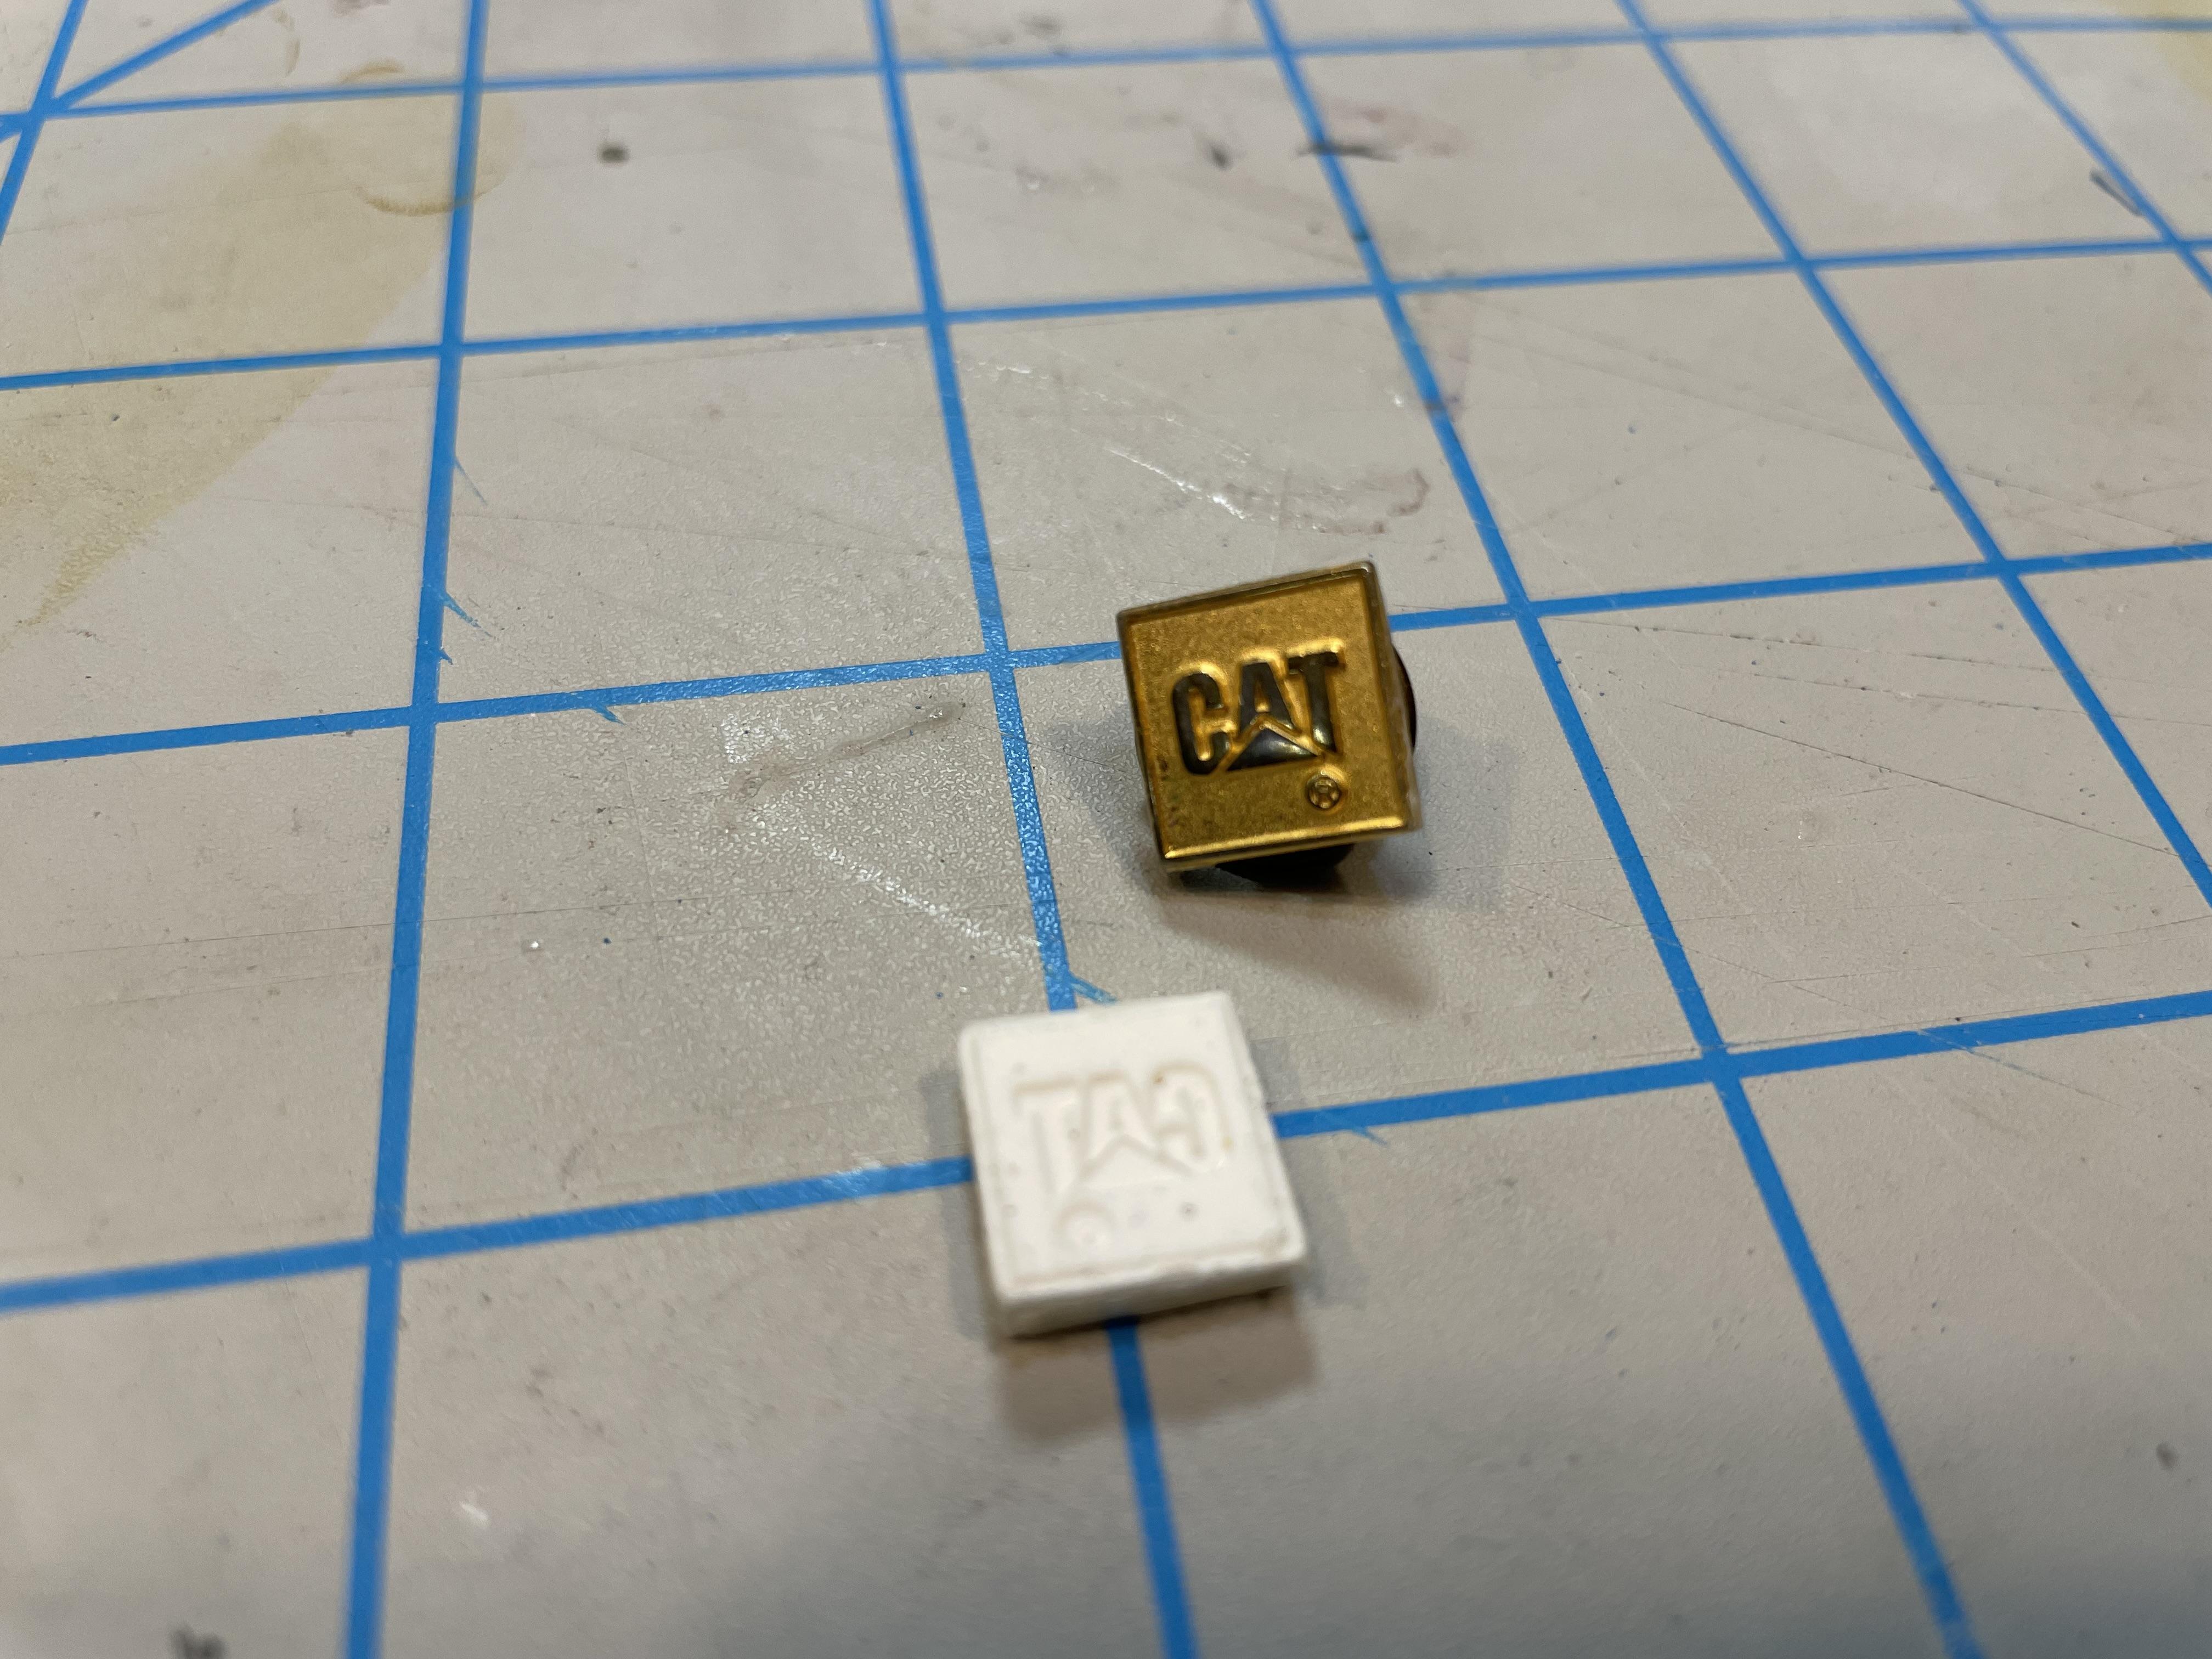
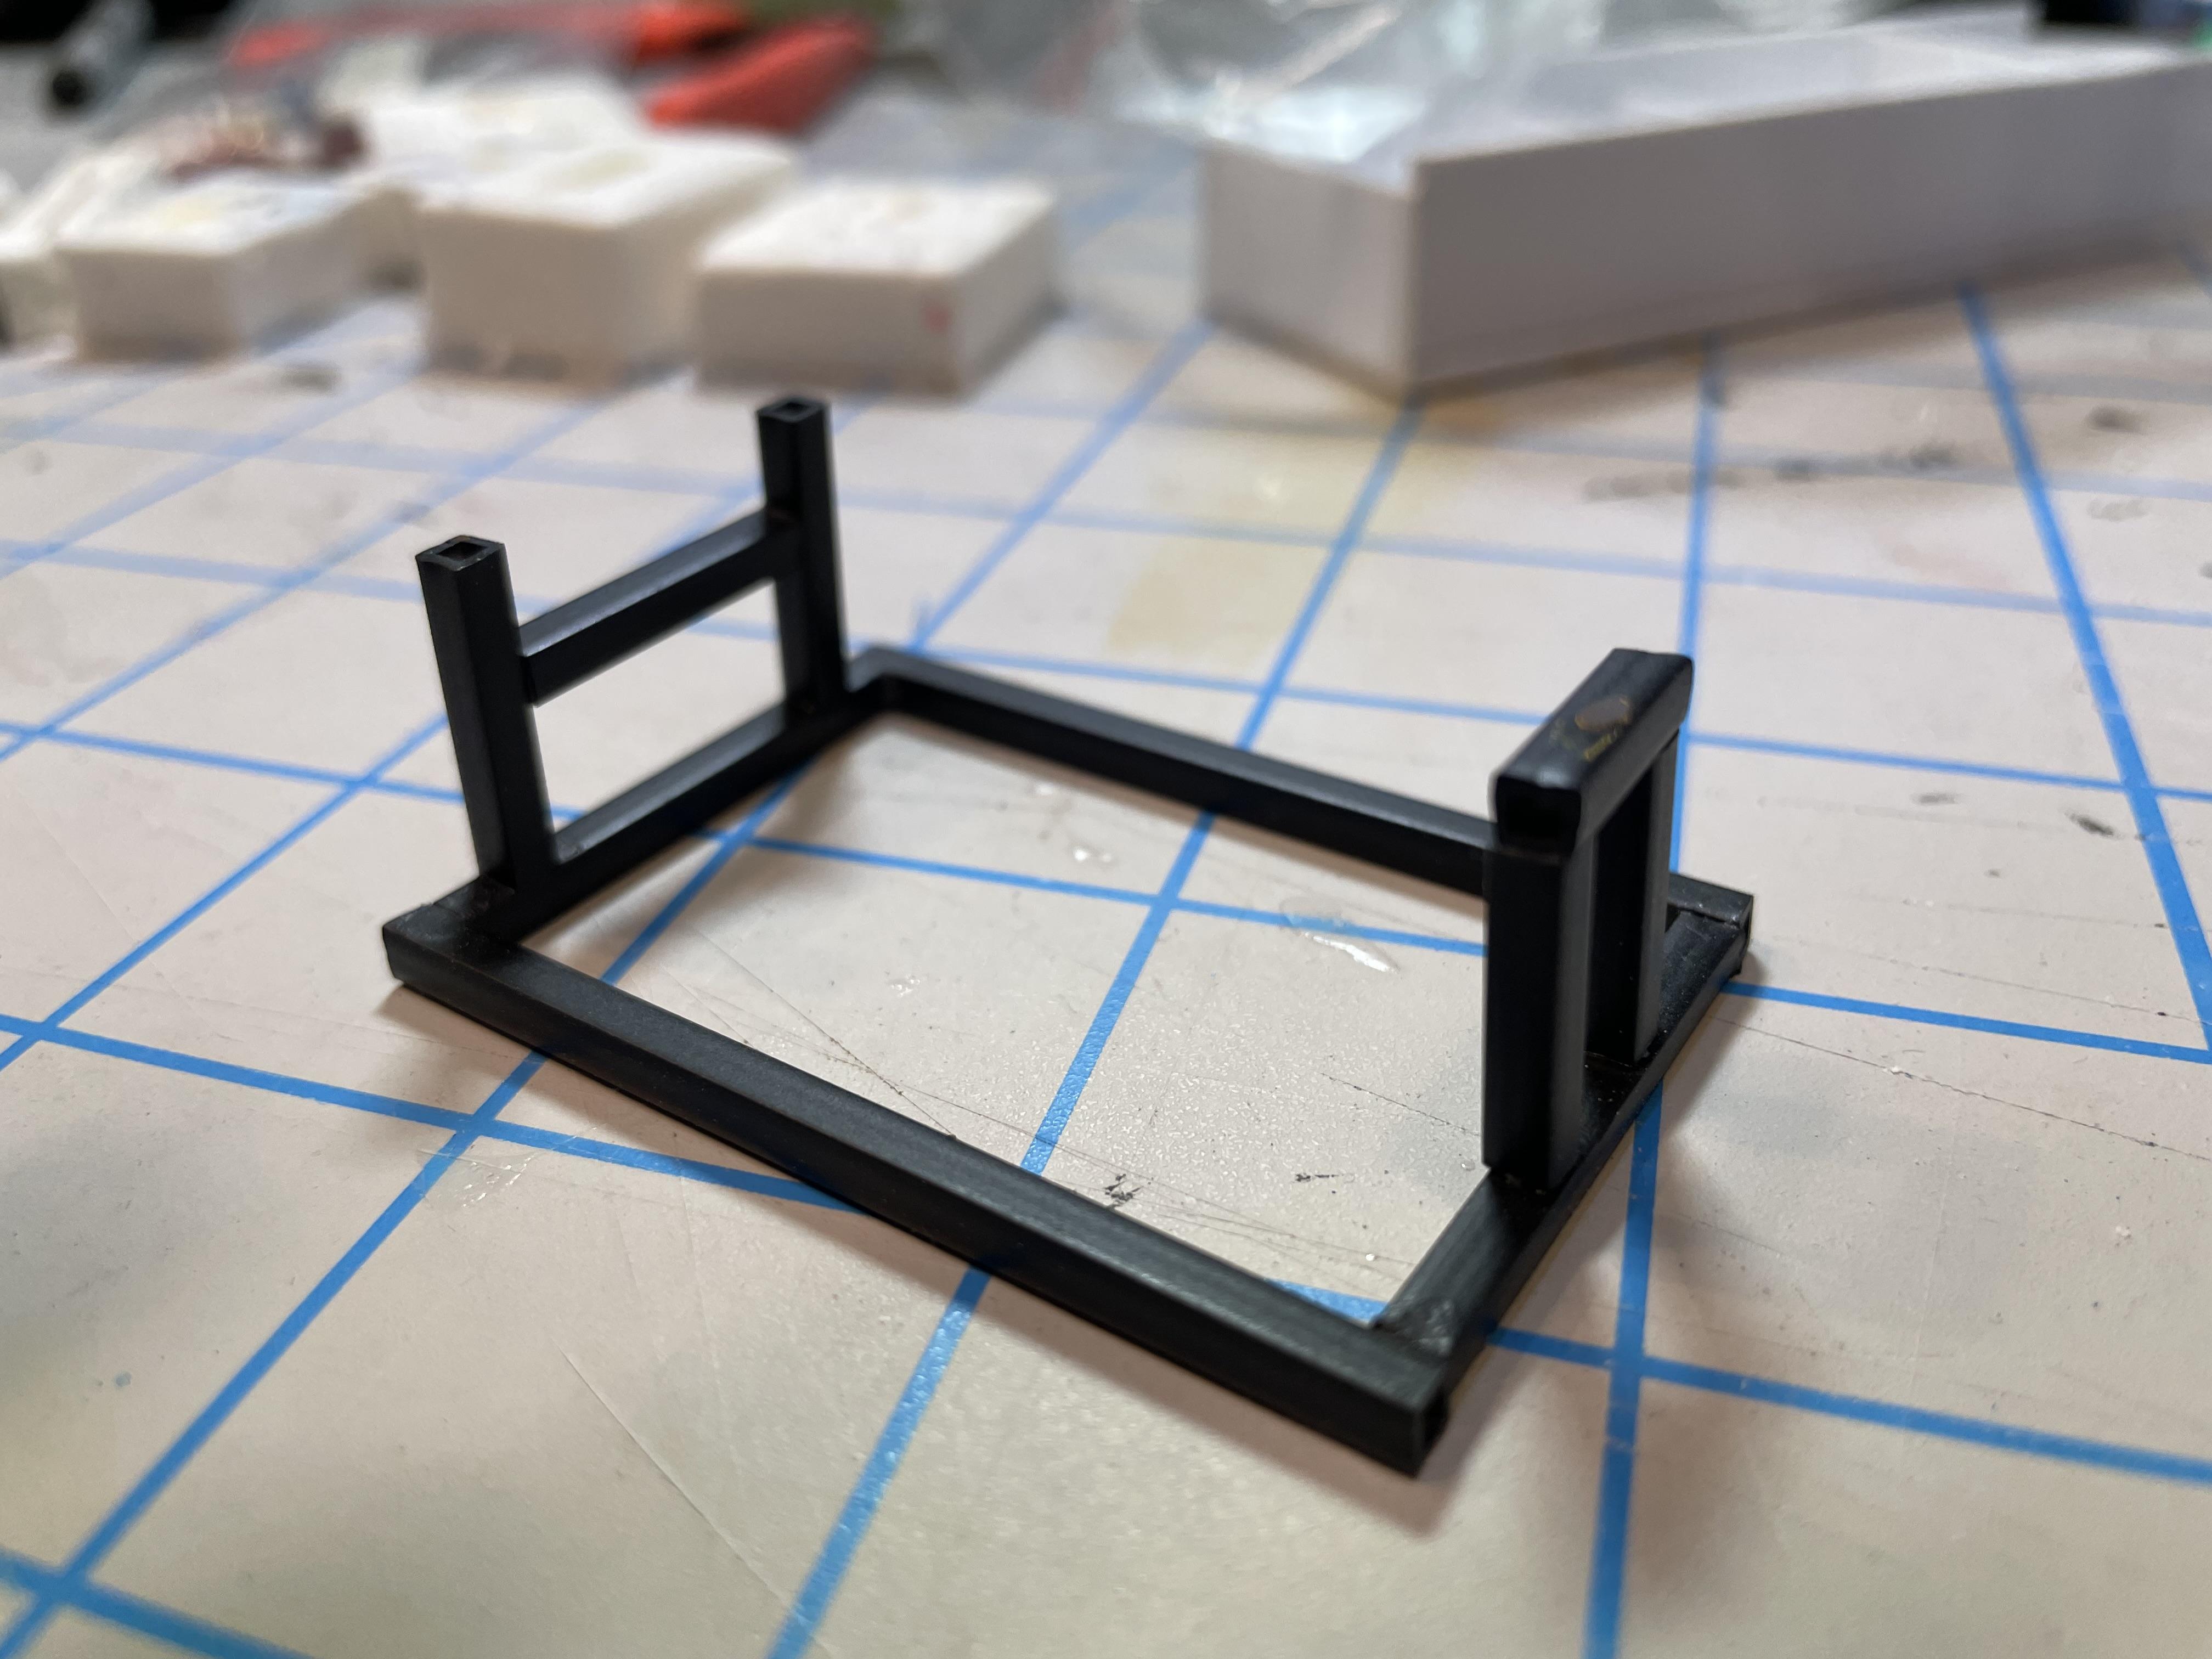
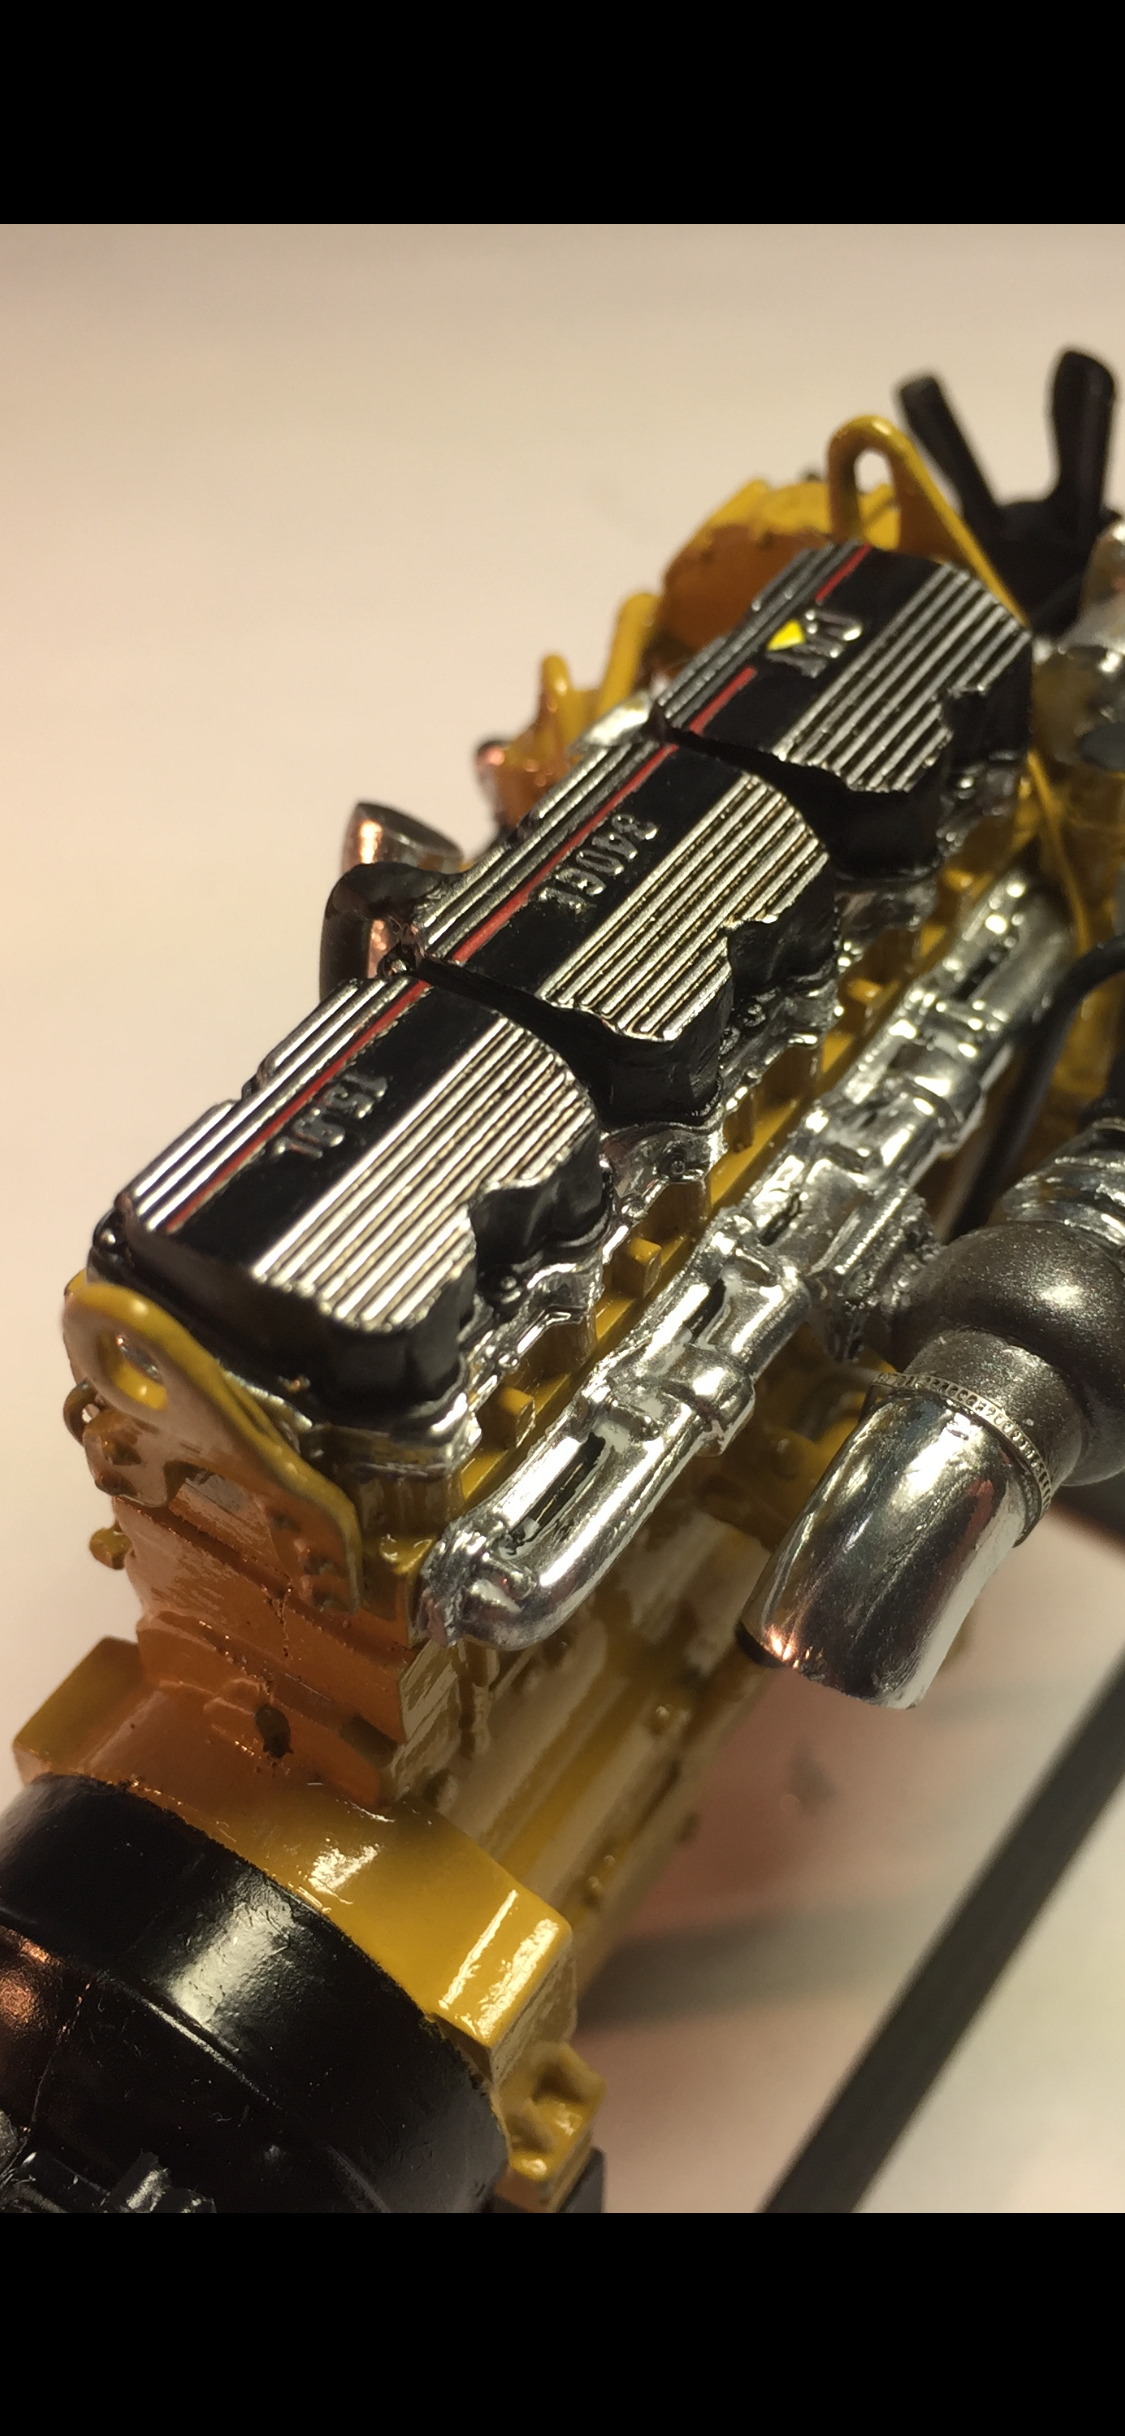
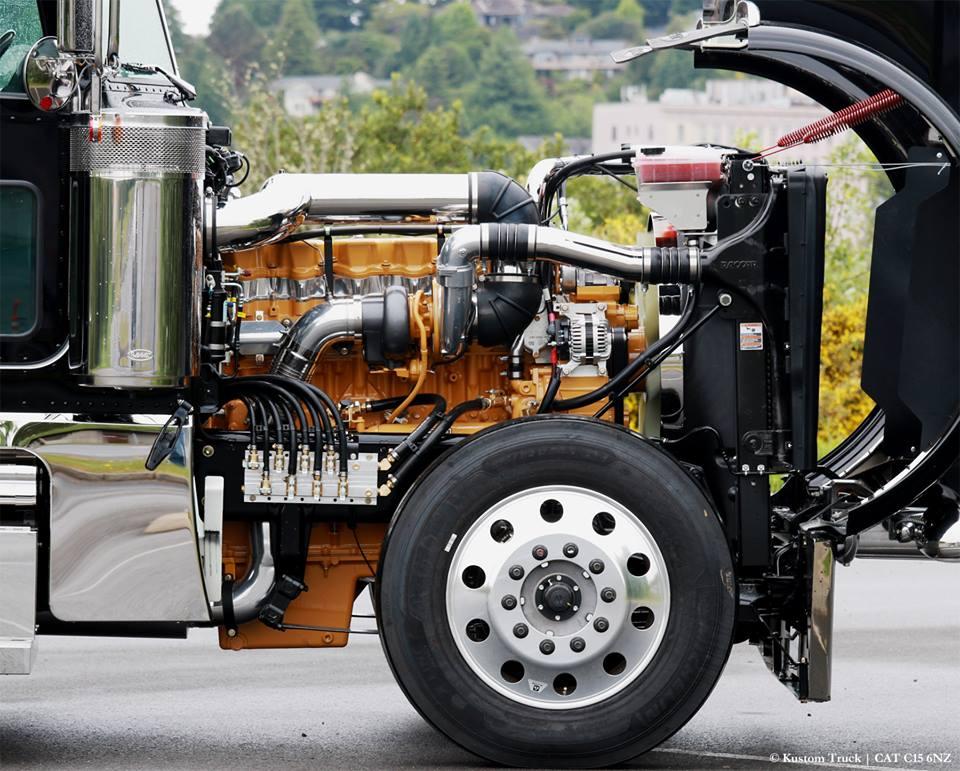
Here’s the build thread for one of my current projects, a 1/24 scale RV Conversion based on a Peterbilt 379. Imagine taking a retired truck and building your dream RV from it? This build will be mostly custom work, just like the real thing. These rigs don’t roll out of the ‘ol Winnebago factory…and you find models like this in a kit, either. Inspiration for this project came from rigs like this, (though the one above is a 389) where a used or factory-fresh commercial class 8 chassis is stretched and a coach body is added, creating the ultimate RV. The ultimate RV starts with the ultimate engine. Some may argue differently, but I think Cat’s 3406e from the late 1990’s is the finest example of diesel power, especially when it’s been decked out in aftermarket chrome and ceramic performance parts. I started with a resin Cat 3406E from Jamie at Moluminum. I detailed it using Ken Smith’s Car Modeller article on Fotki. I used 3d printed elbows from modelbuildermatt on Shapeways and metal fittings from Detail Master. Several engine components were scratch-built. The 18 speed Eaton Auto-shift transmission came from Moebius, with a lot of detail parts added using reference photos. Jamie’s casting didn’t include the 3 dimensional “CAT” logo on the chrome timing cover, but I added one using a casting of a Cat lapel pin I found on EBay that was the perfect size. I’m not a pro resin caster by any means, but I’ve found casting small, very simple parts, to be useful in this project. It took me several attempts to get the valve covers looking good. I finally found putting Molotow down first, then adding the black in the recessed areas via a Molotow black pen was best. Careful painting of the red stripe and a triangle-cut of a yellow decal finished the iconic look of the Caterpillar 3406e’s valve covers. I also put together a simple engine stand using square styrene tube. I still use it for other engines that are waiting to be installed in the next chassis. That’s the basic engine so far, more about the other engine components when we get to the chassis installation. Ask questions, I’m sure there’s explanations I missed. Next, let’s get the frame rails laid down…

-
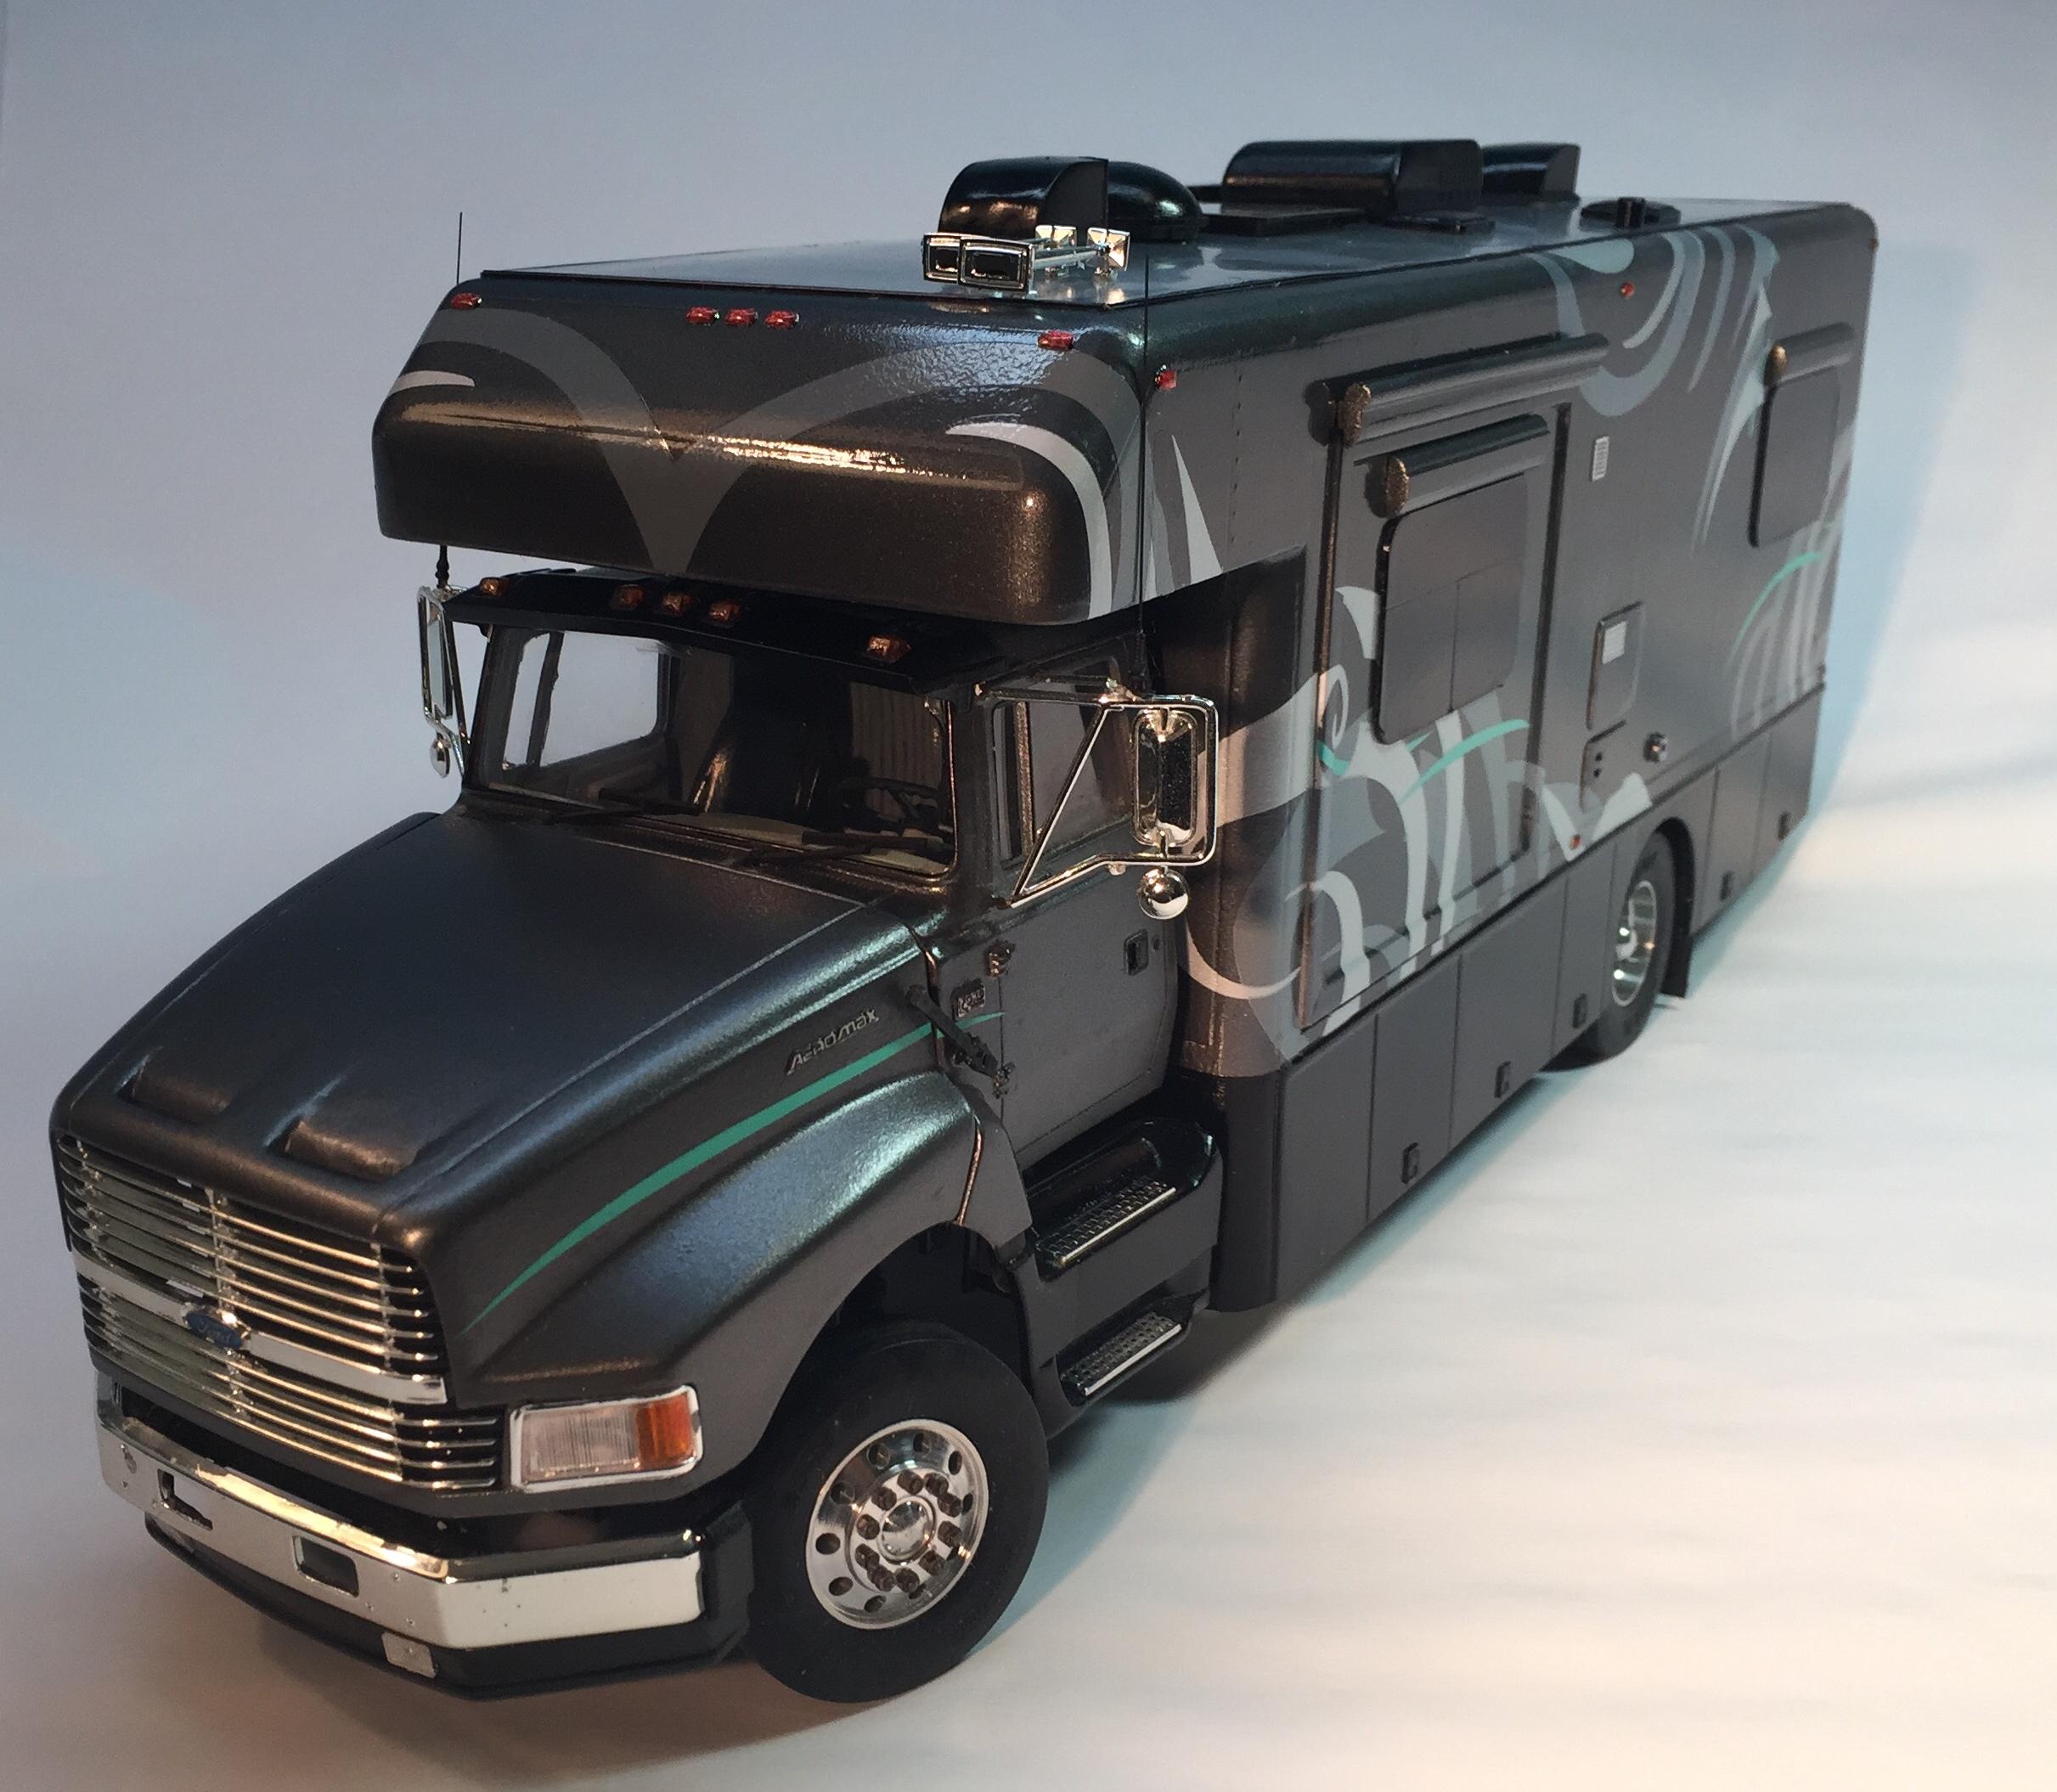
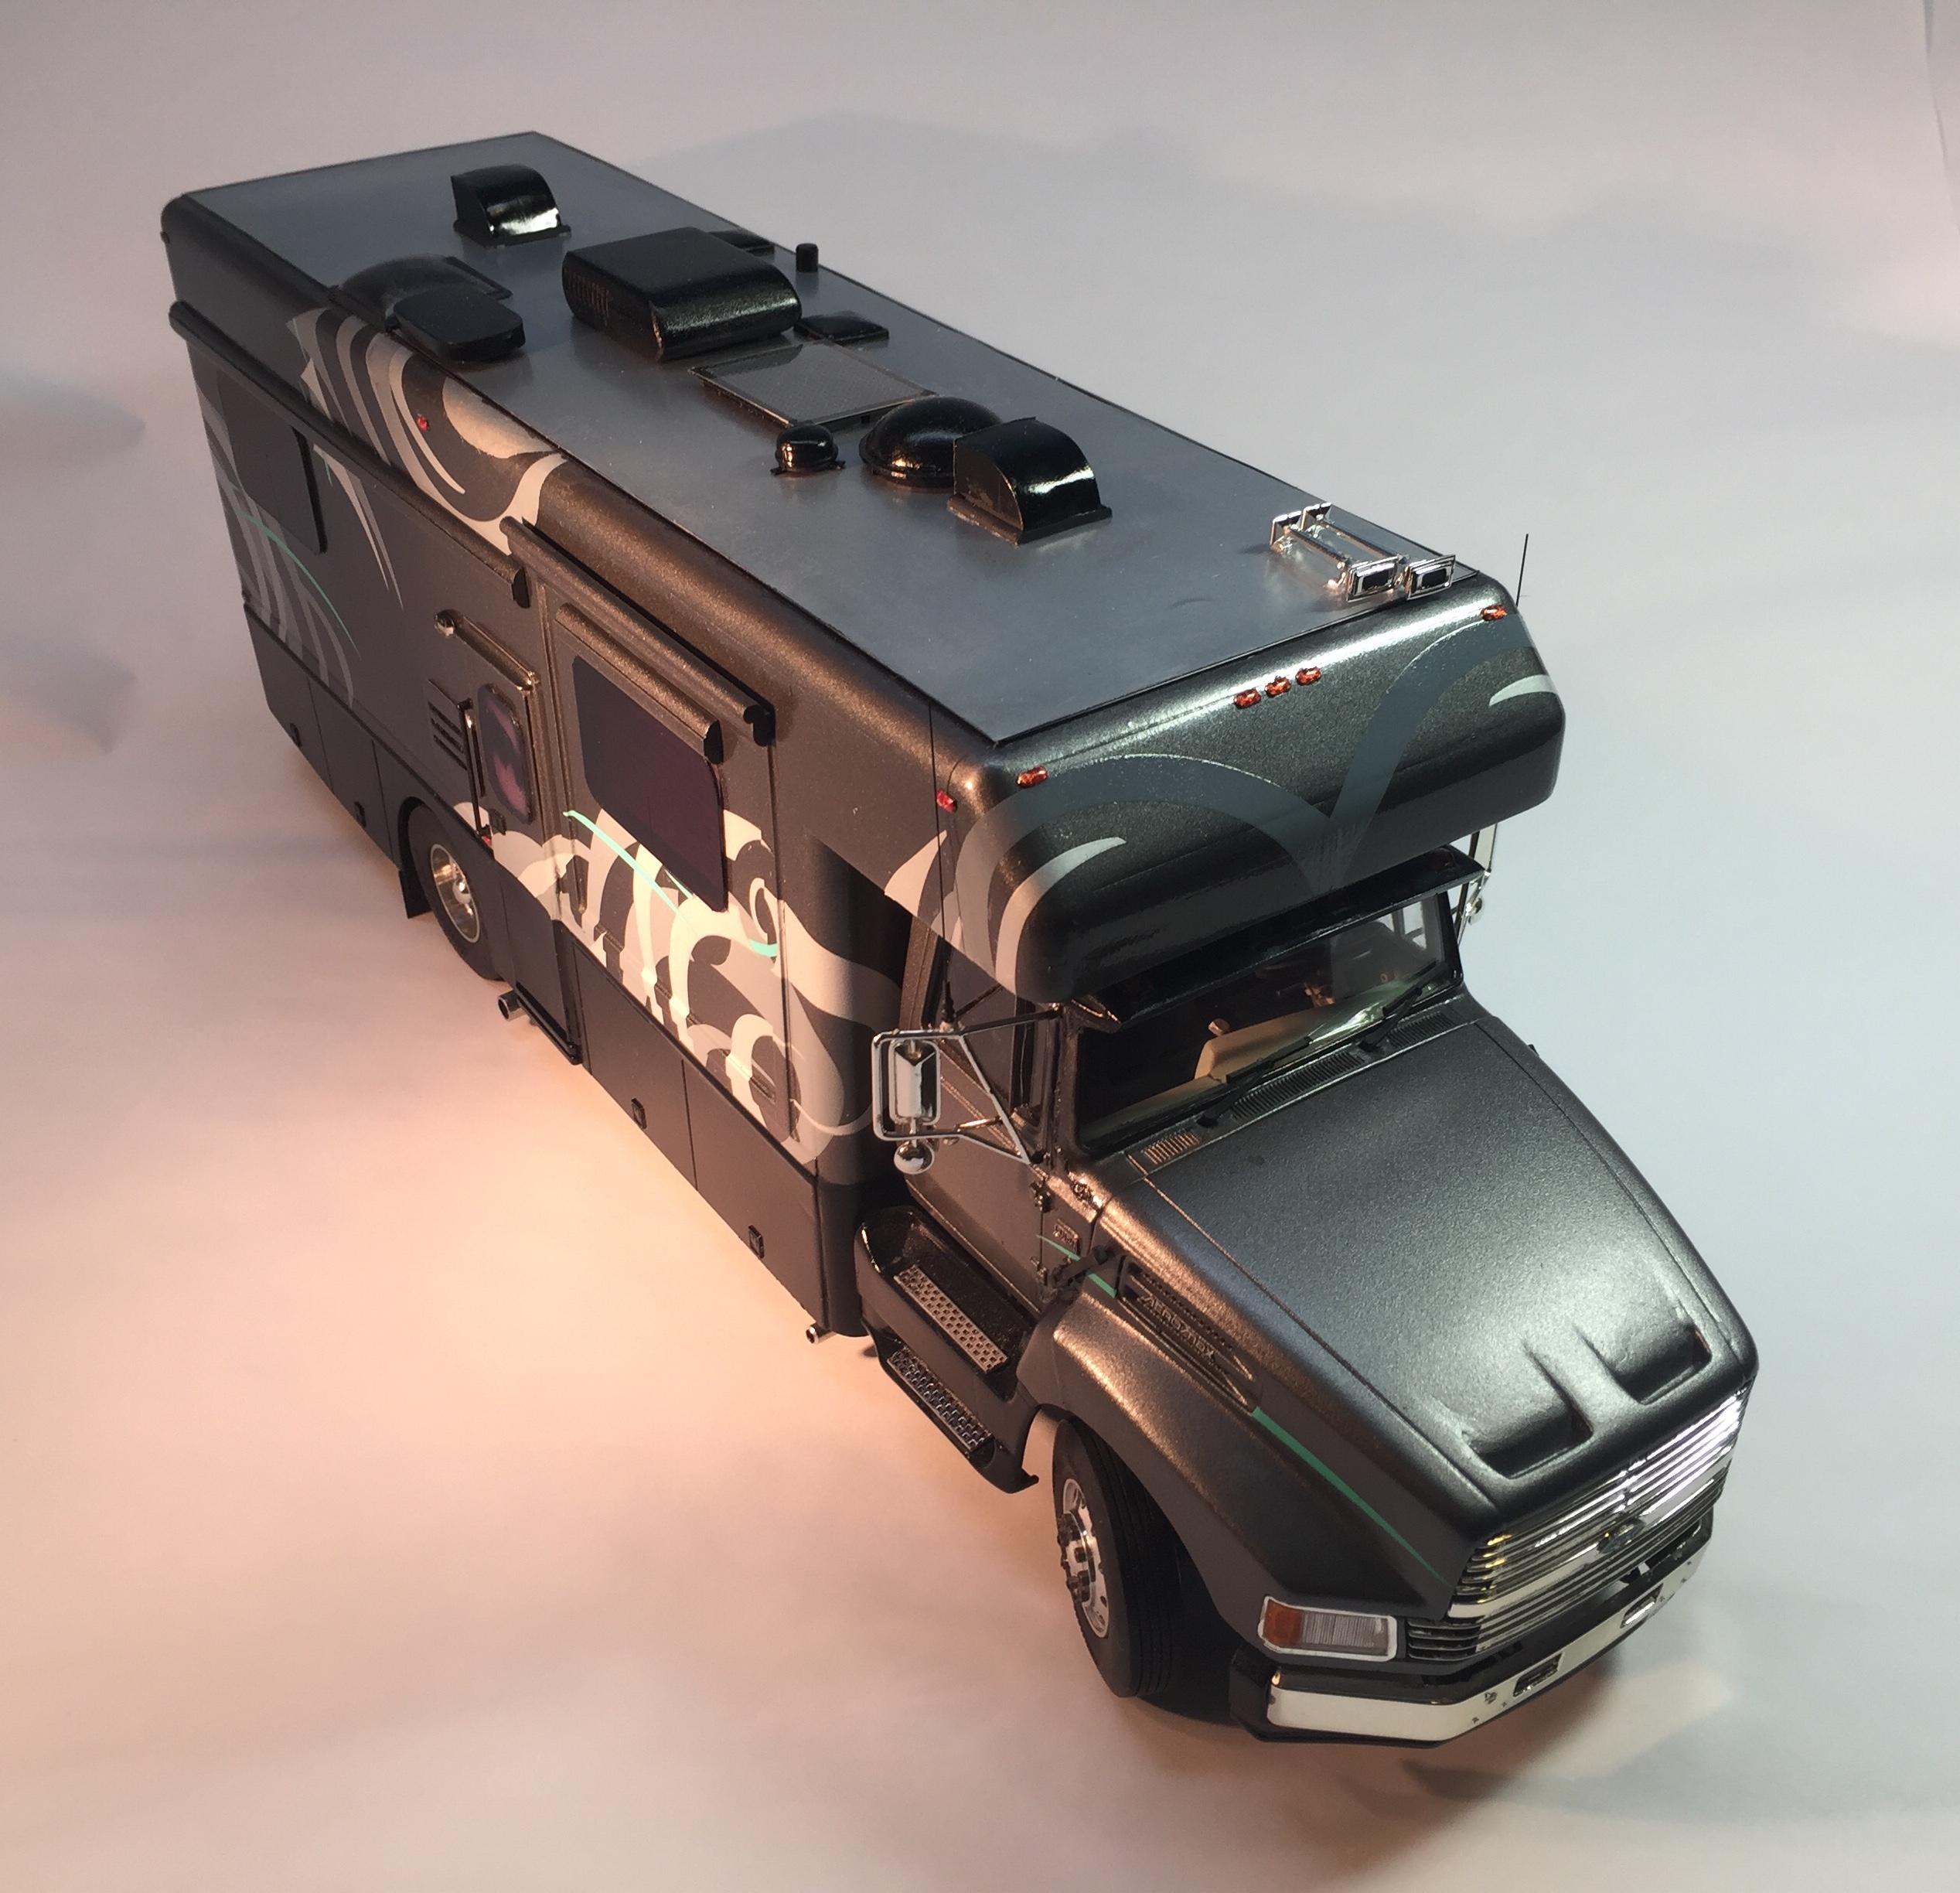
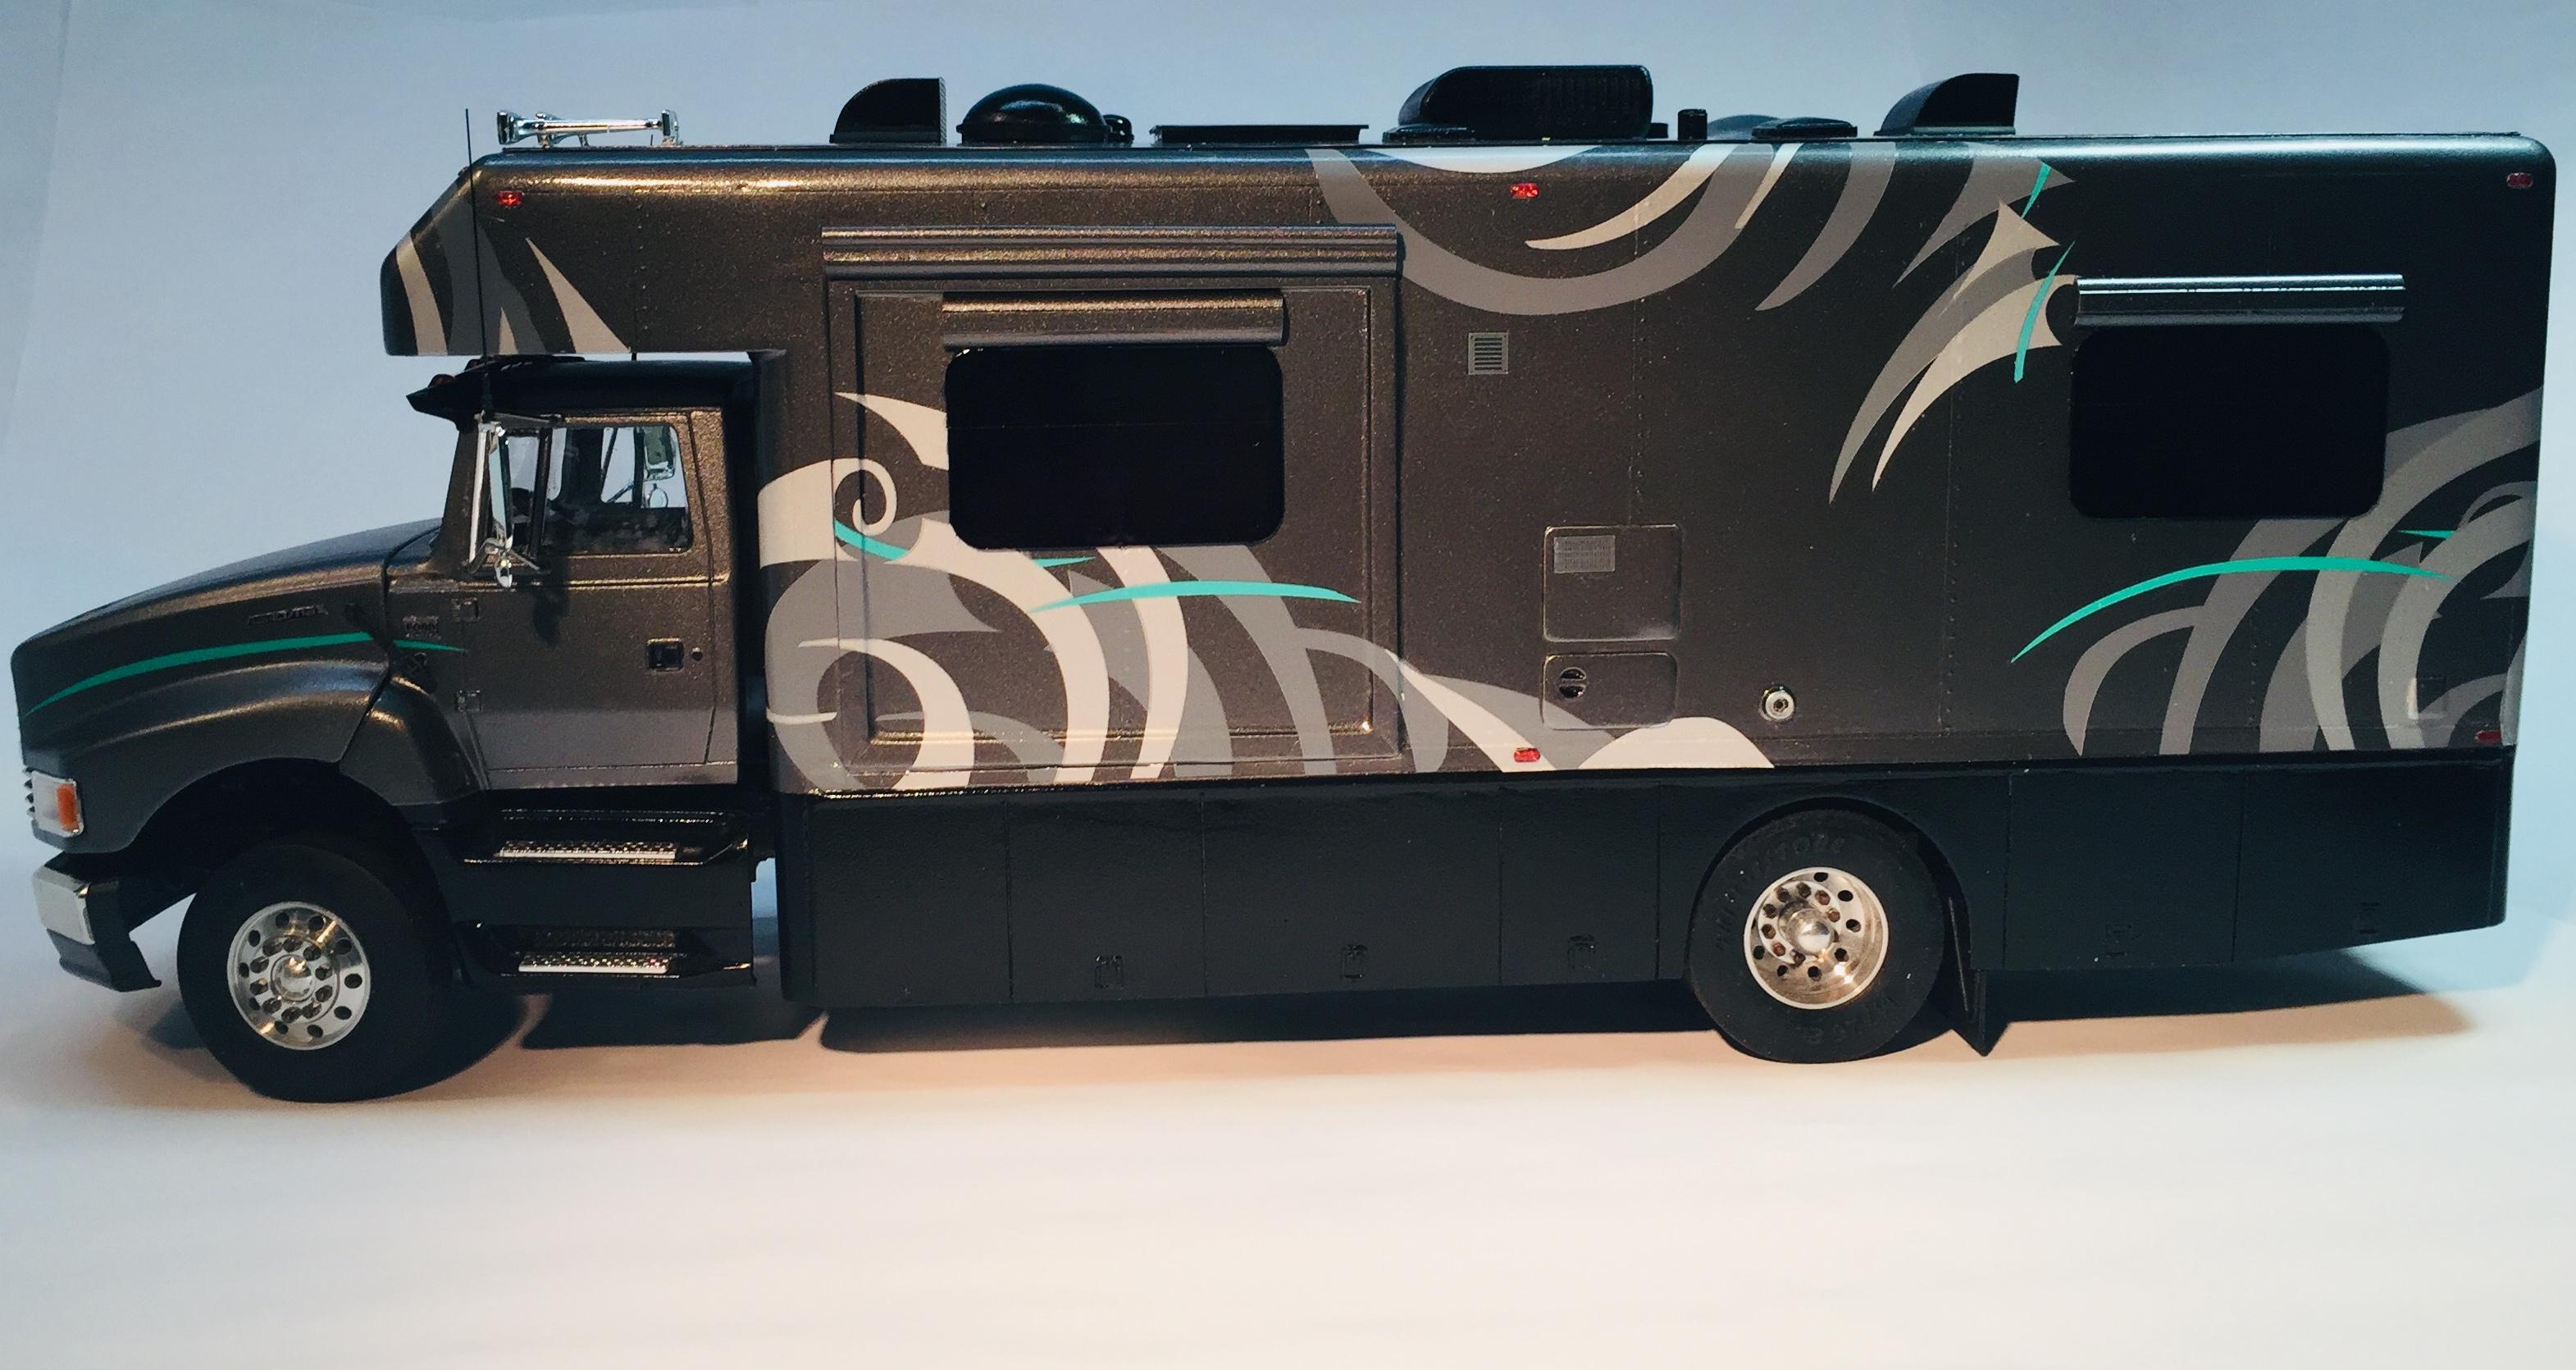
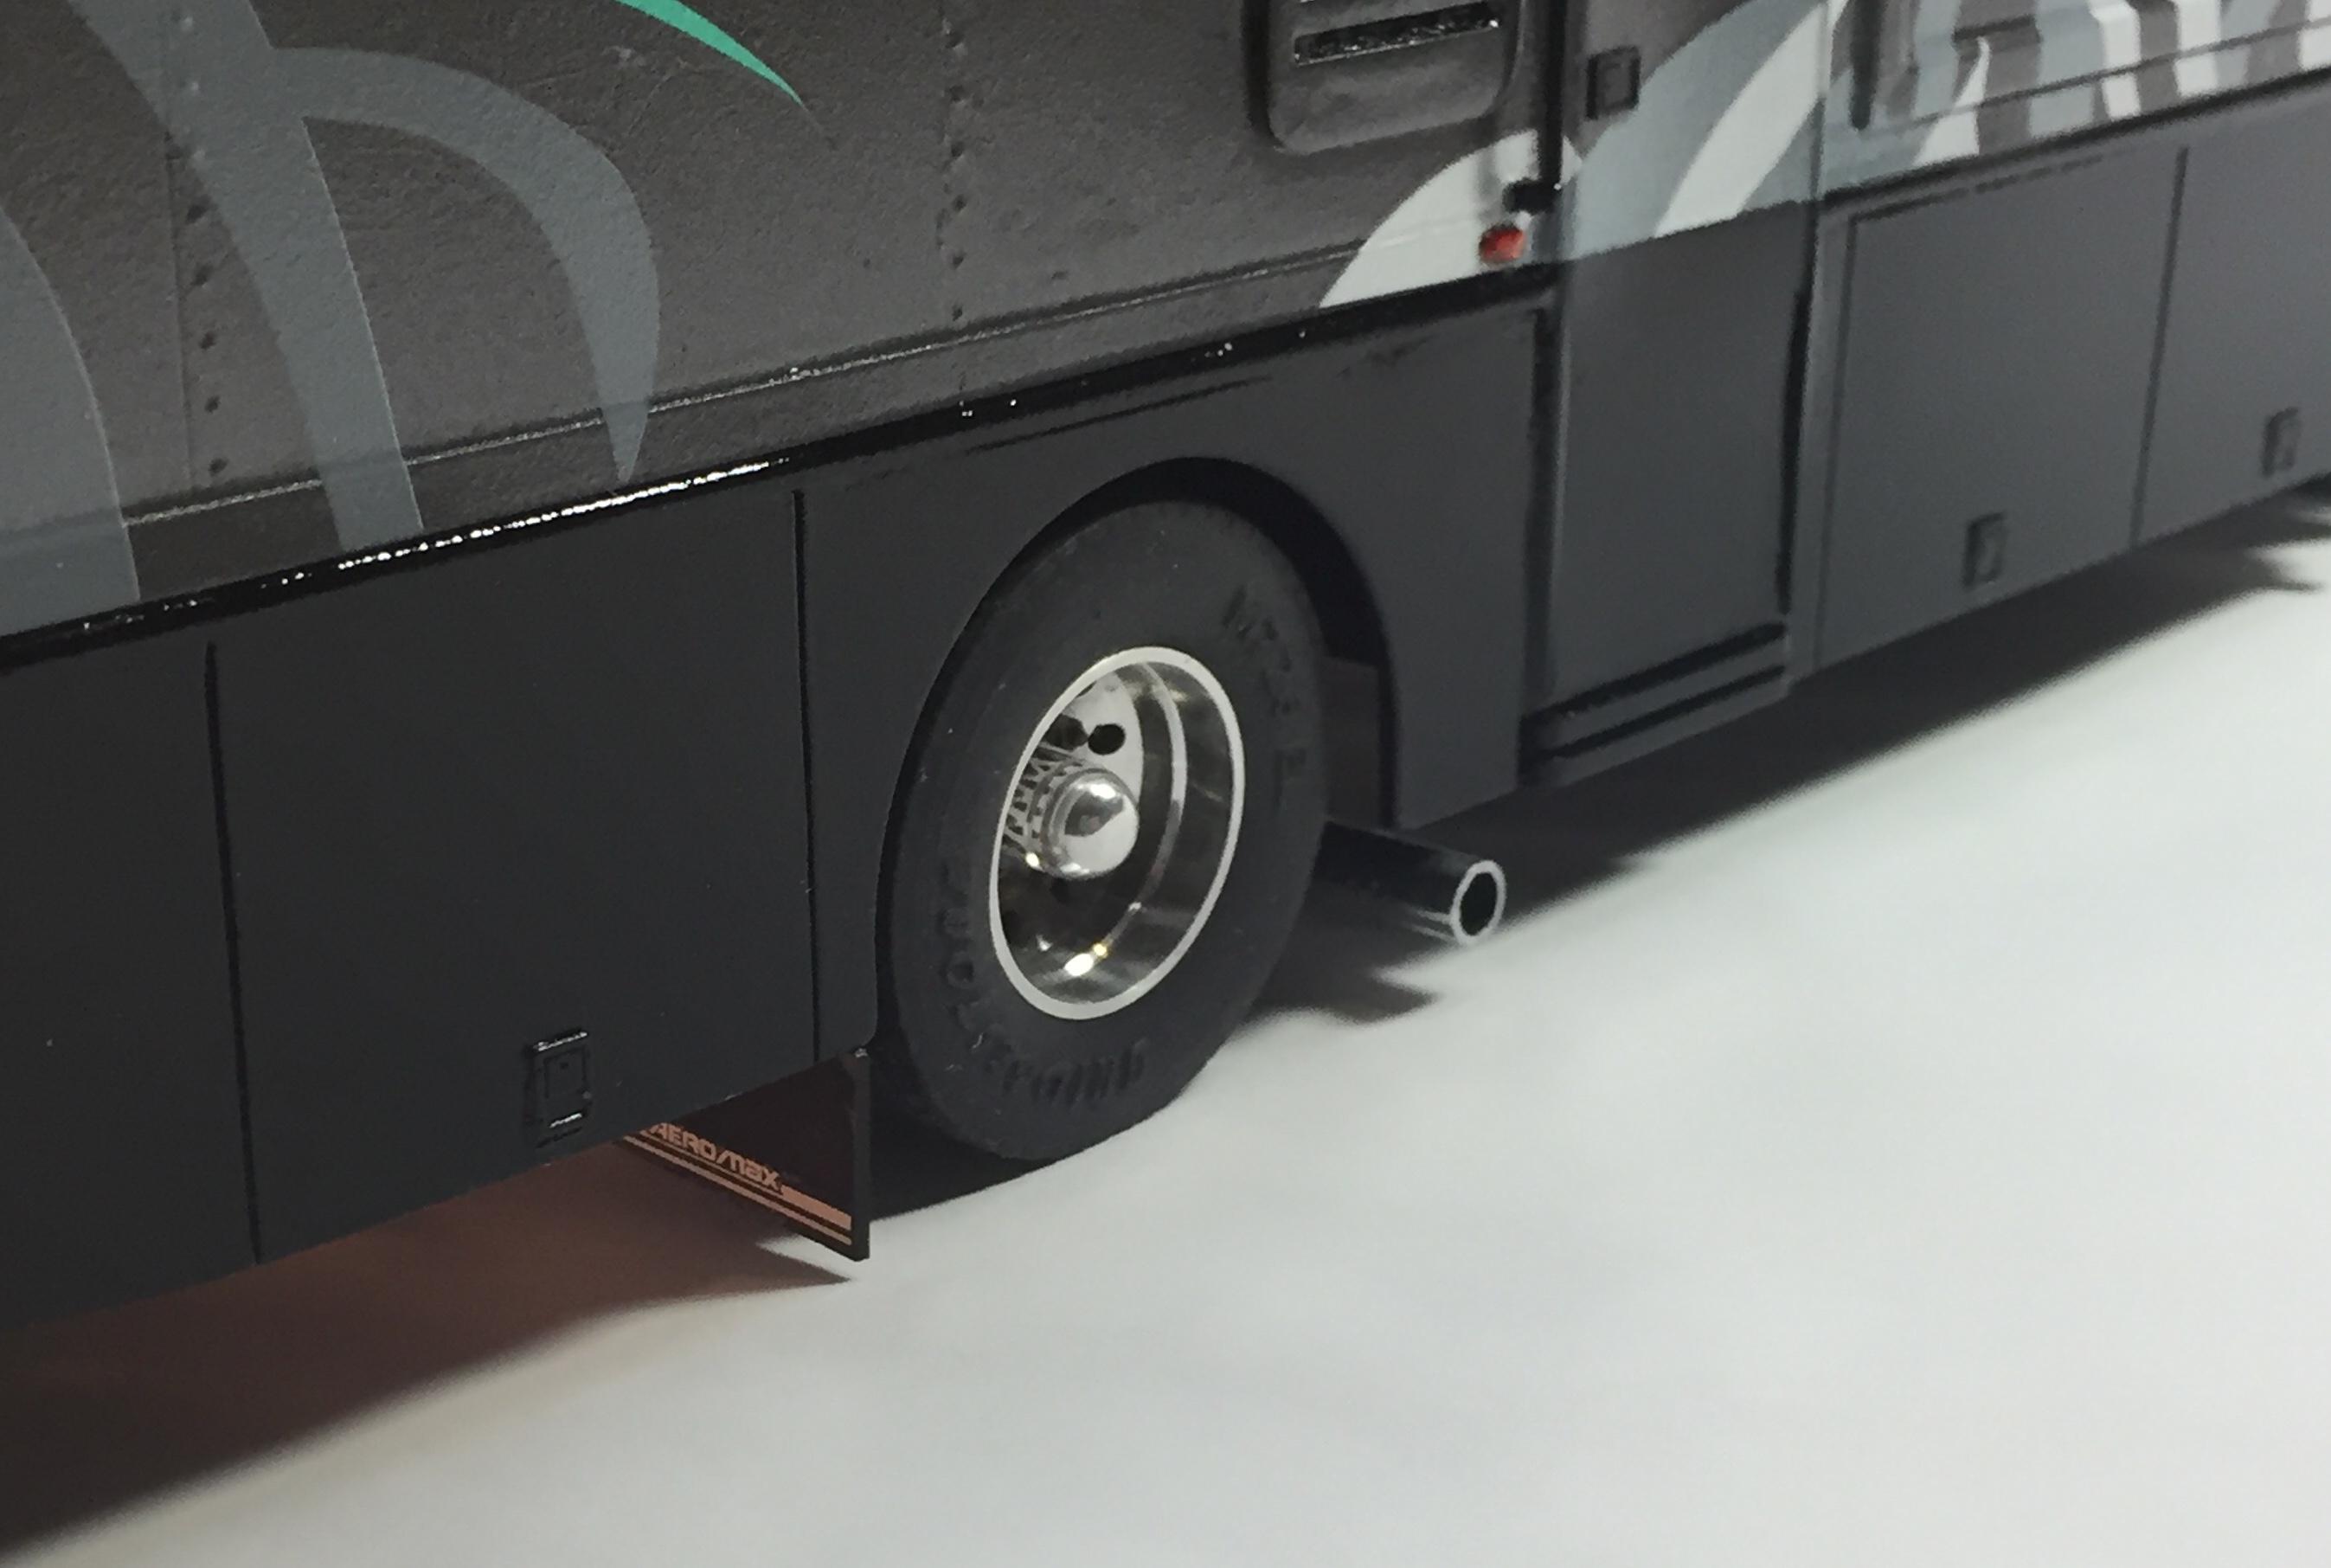
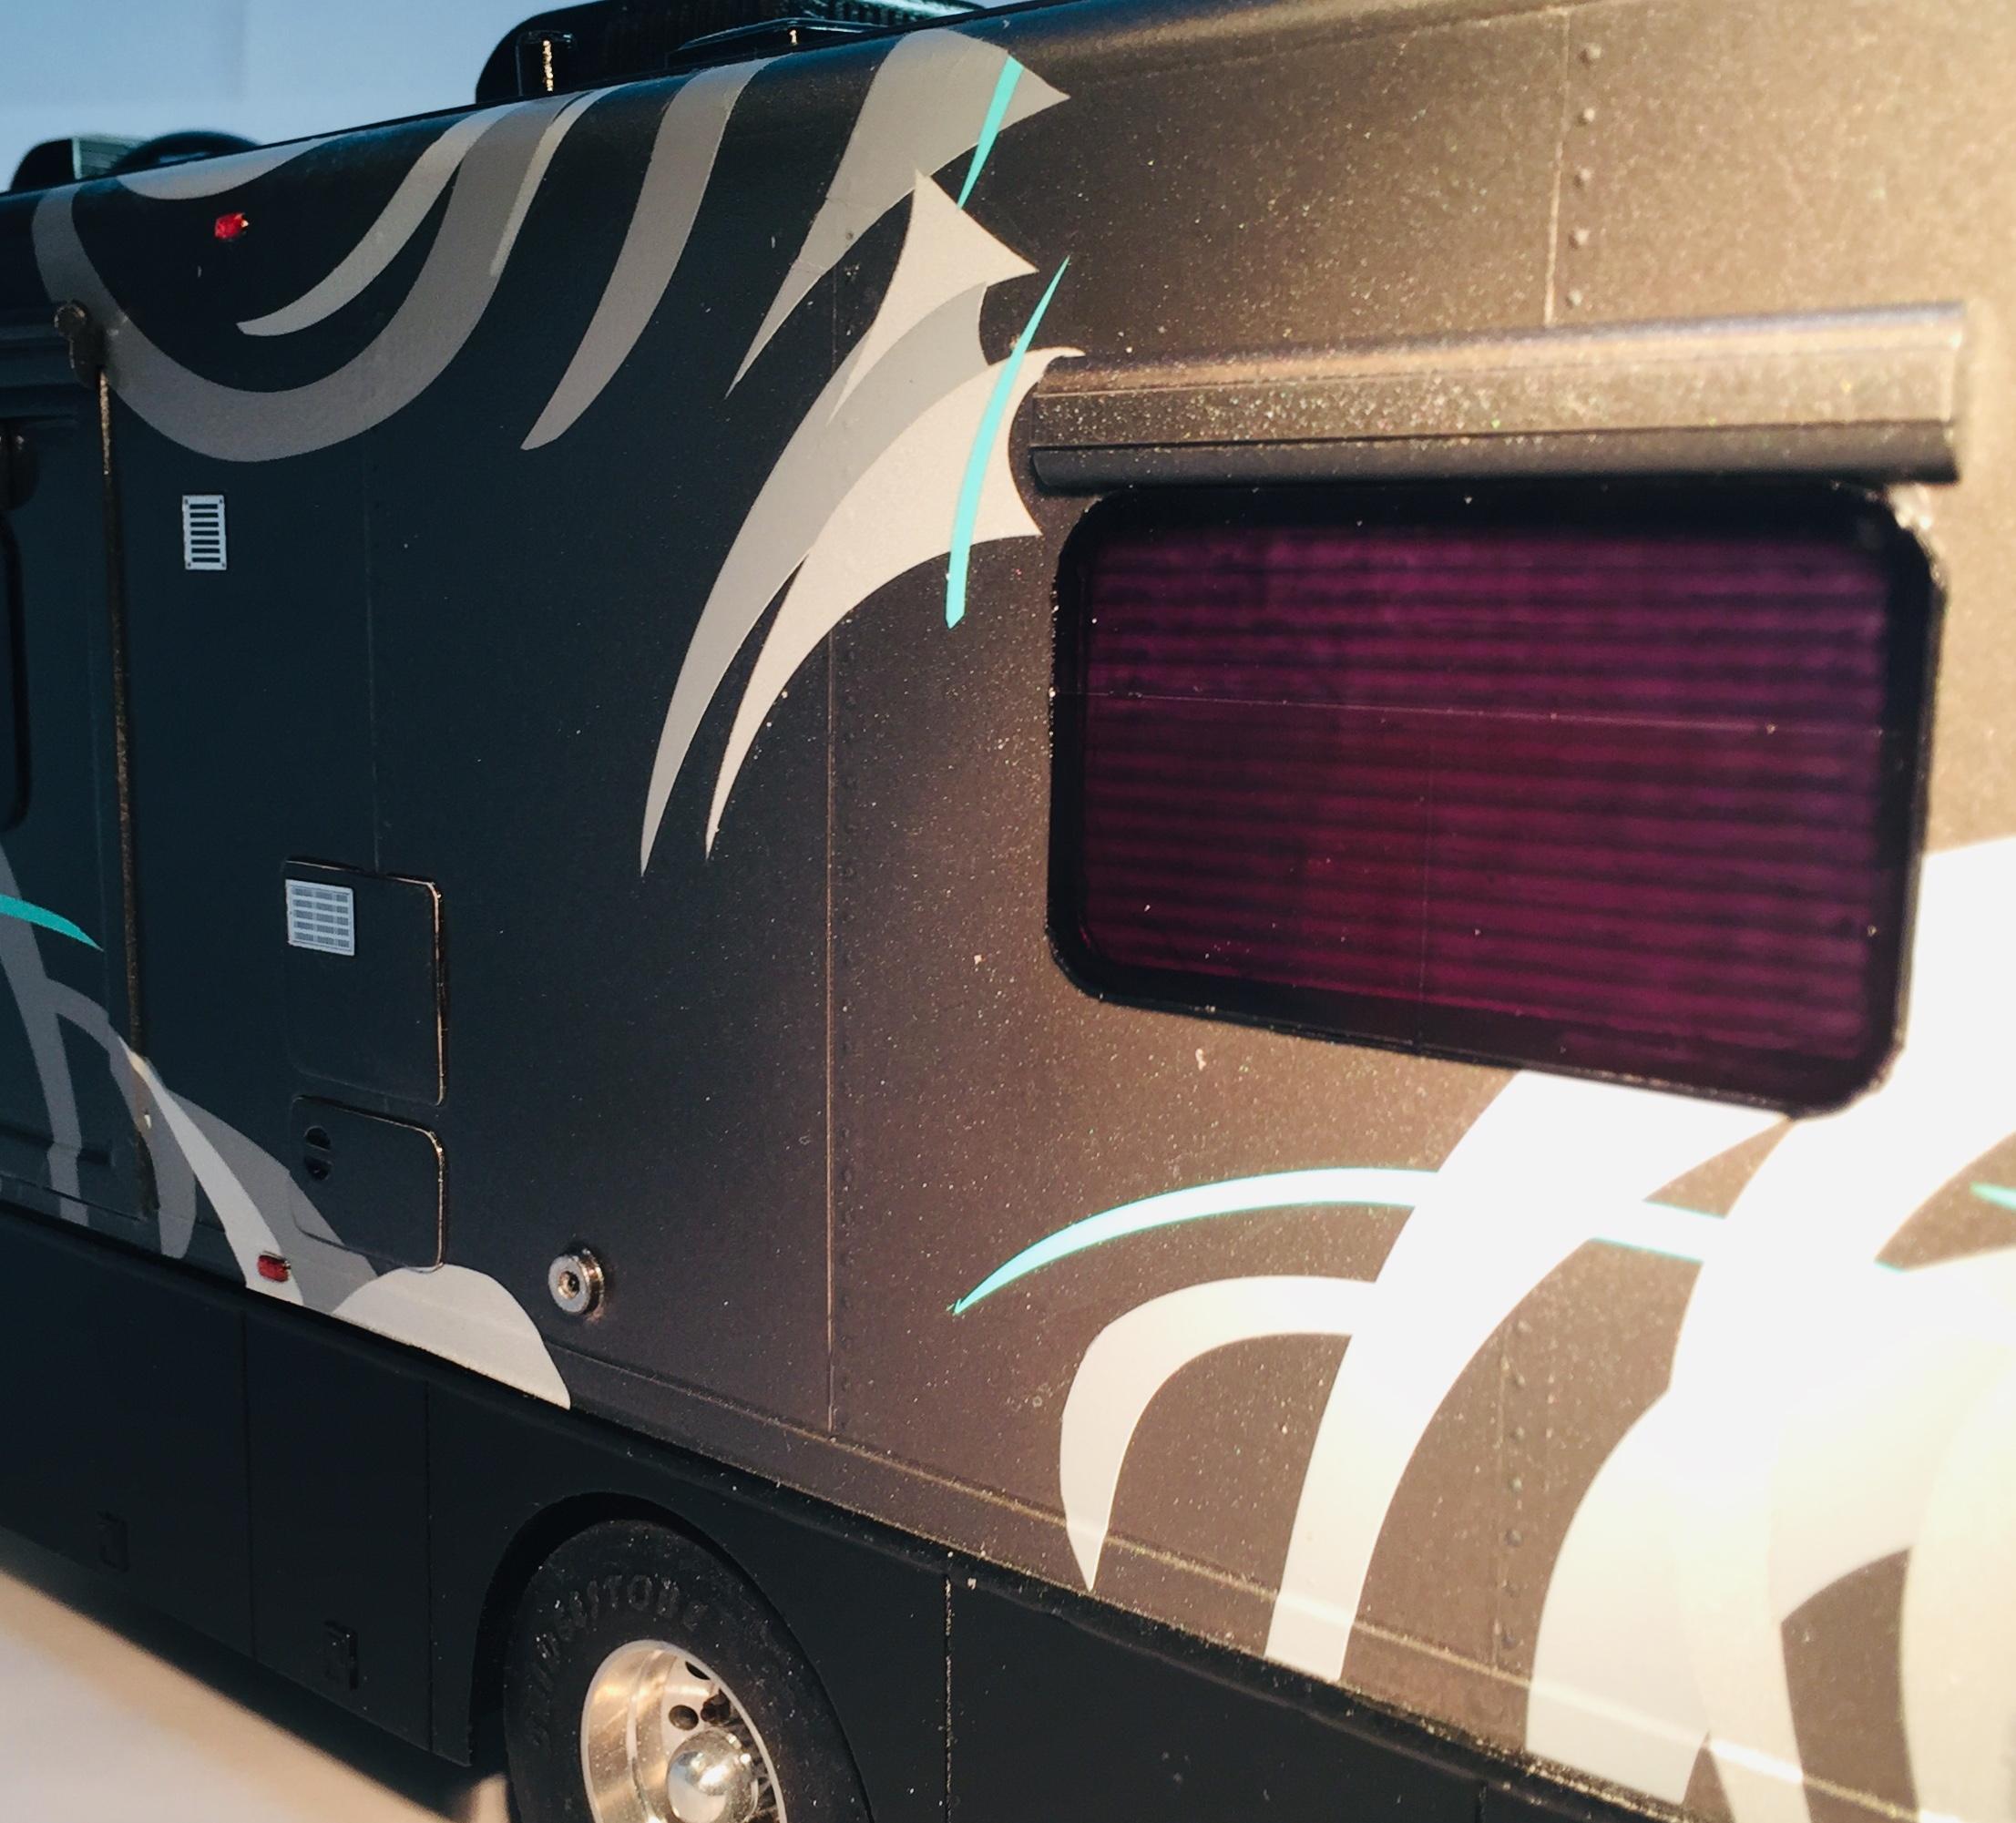
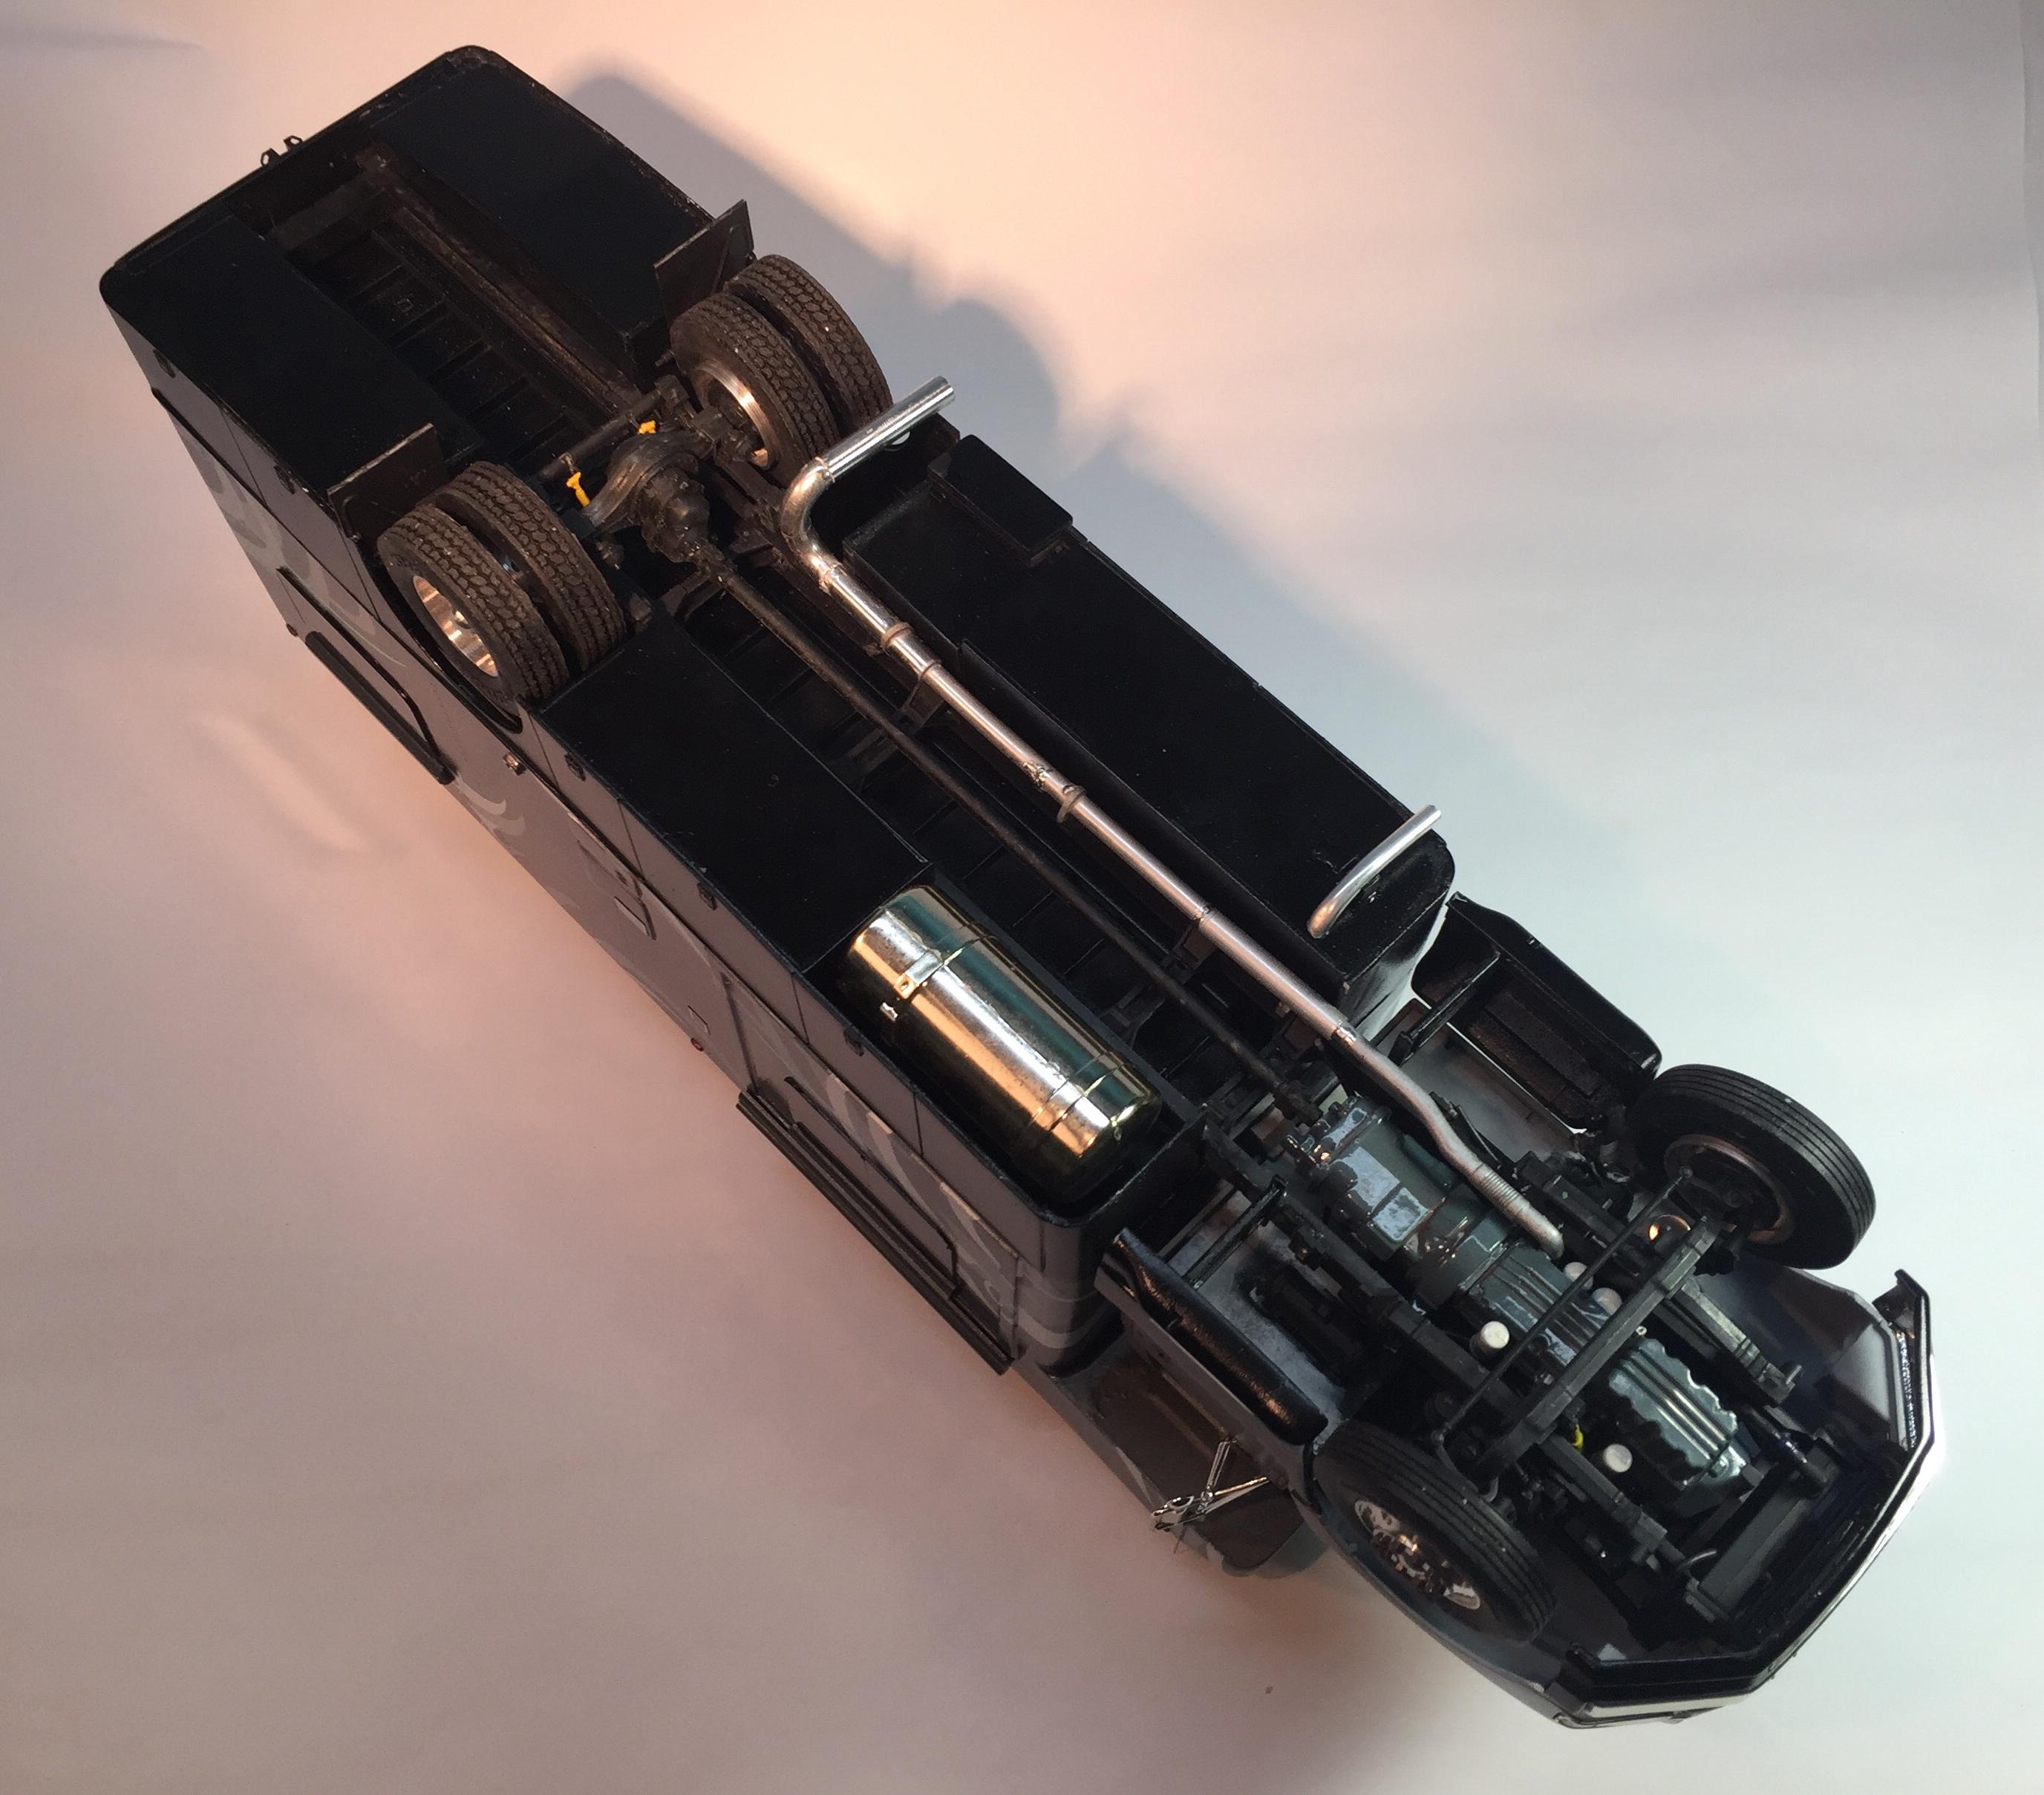
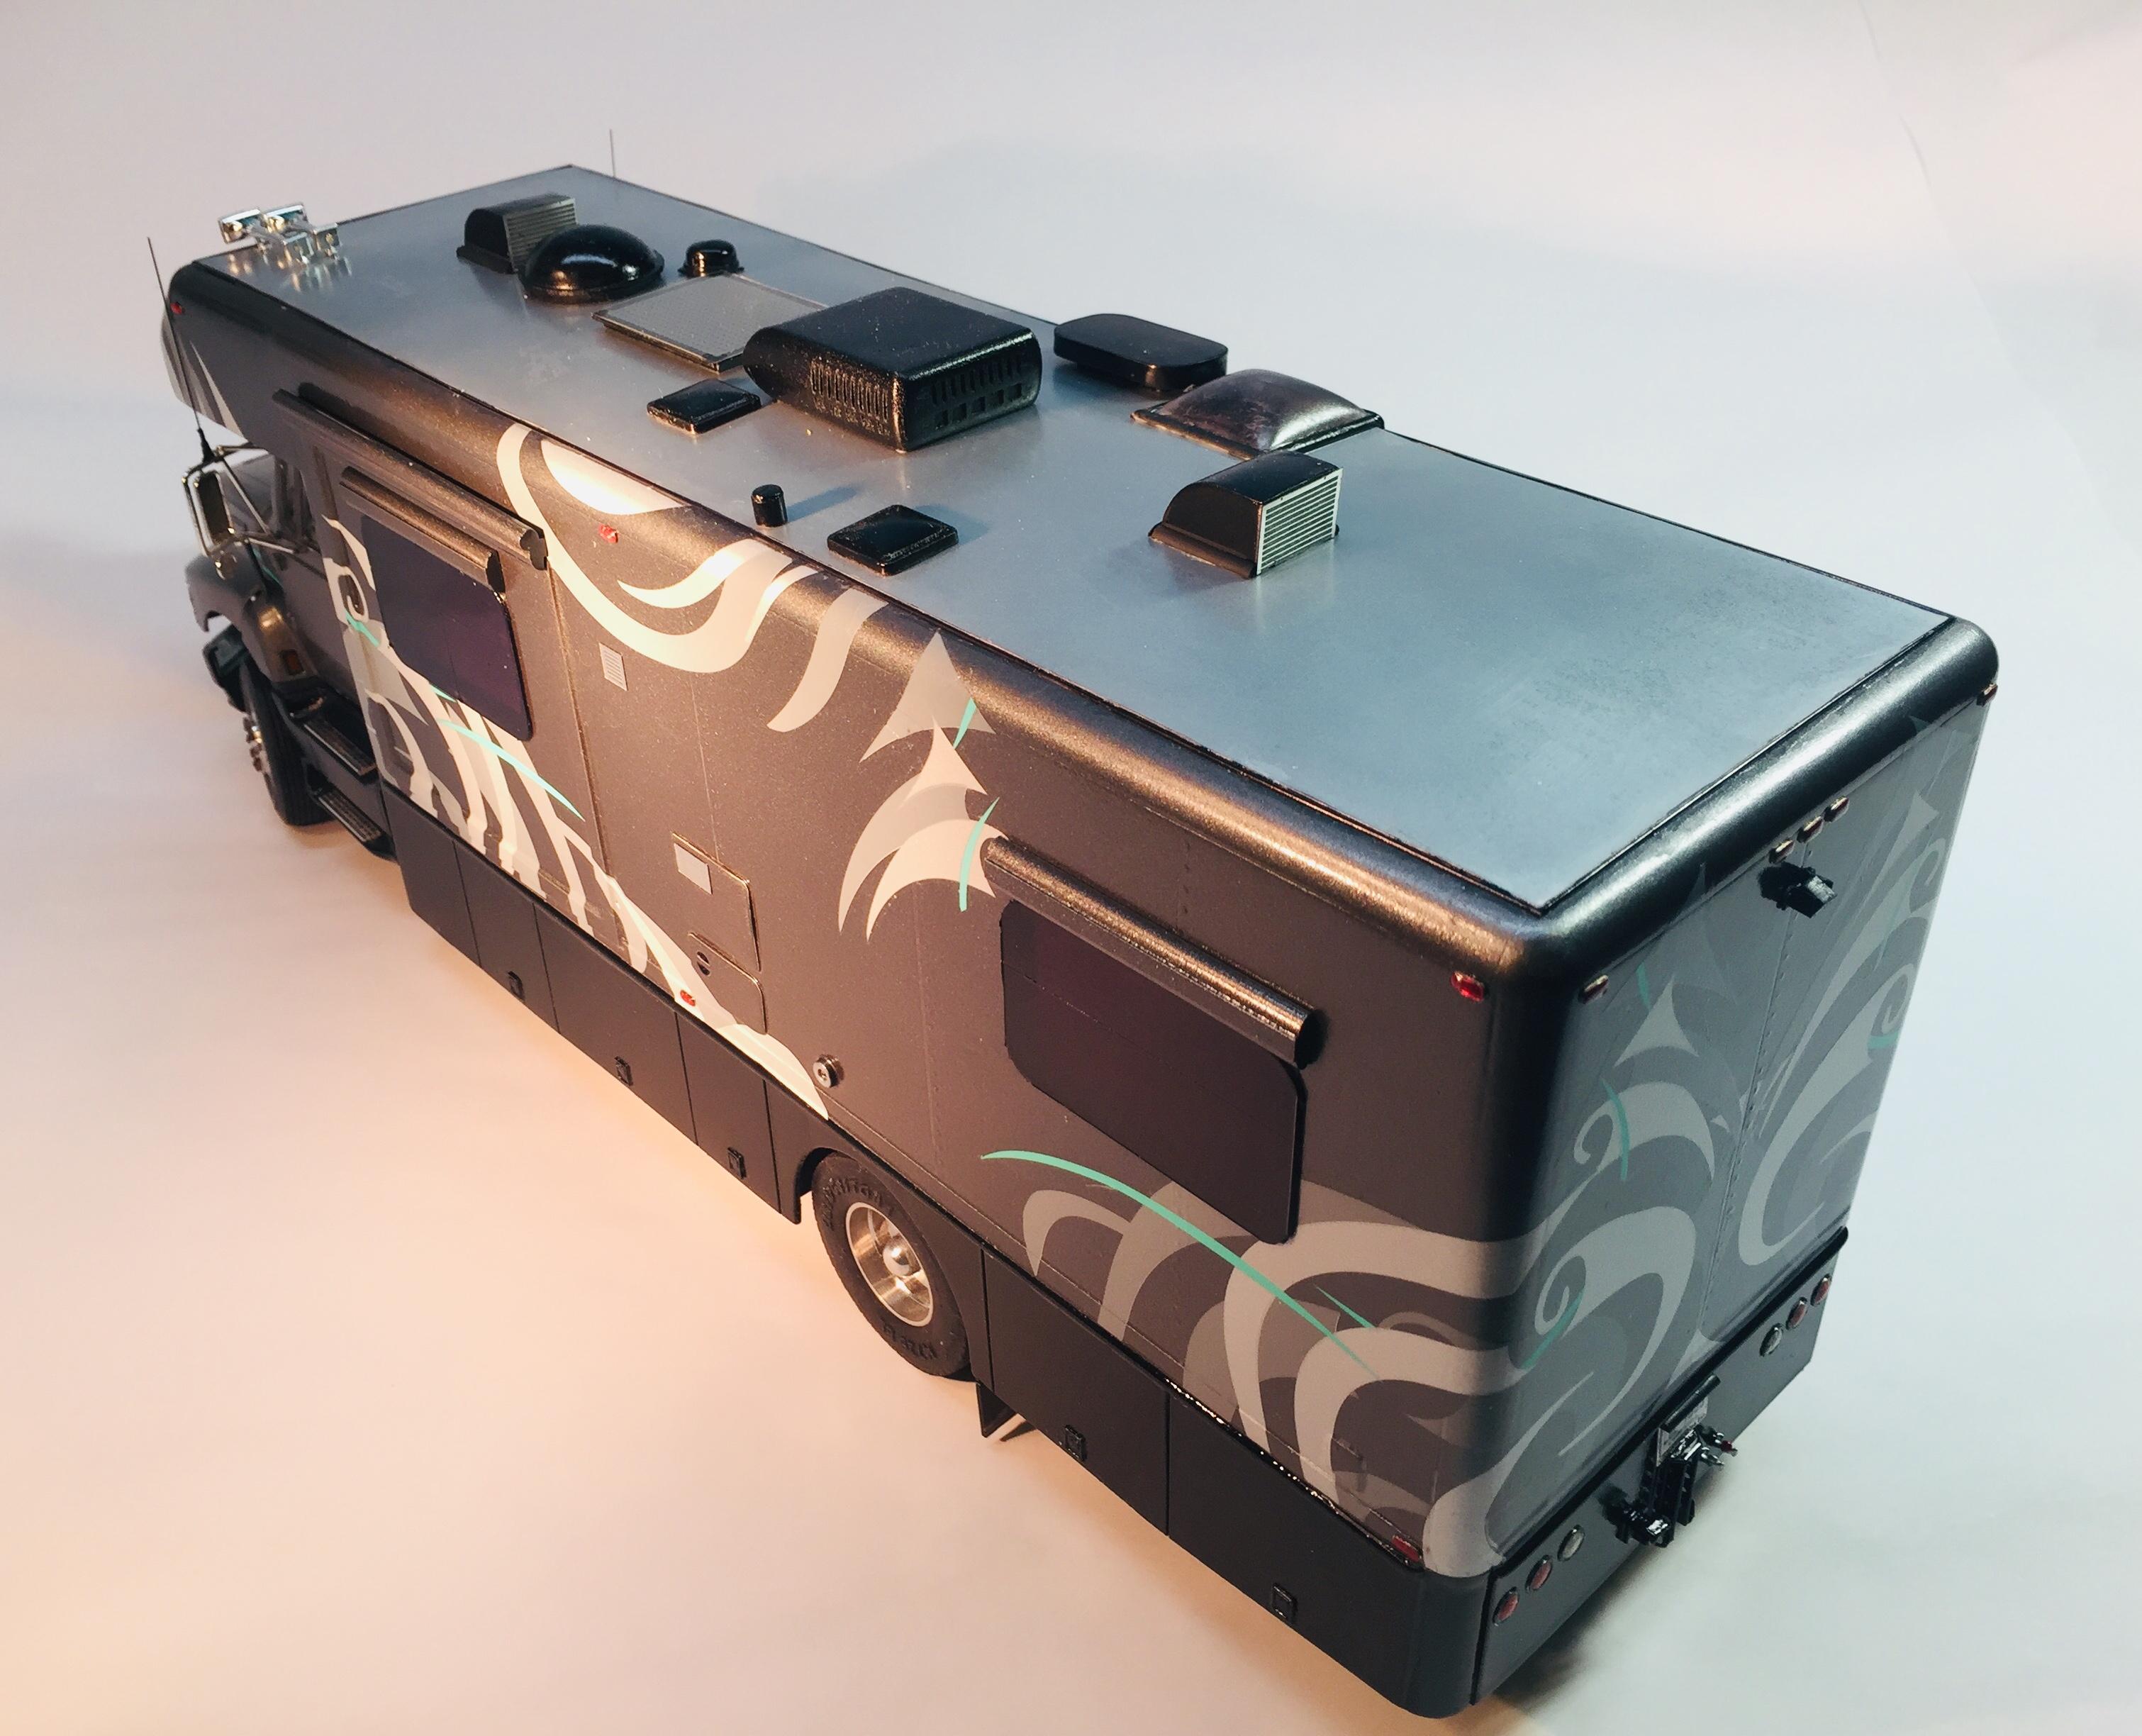
 My first major scratch building endeavor, a 1/24 scale 34’ RV conversion on a Revell Ford Aeromax 120 cab and chassis. The project began over 5 years ago, but the majority of it was built in the past two months. A huge thanks to everyone on the forum that encouraged the build along the way. The RV body is a scale 24’ long with a 42” bunk, typical of the single rear axle units. These class 8 truck conversions, ever increasing in popularity, are a favorite amongst weekend race teams. I based this one off of 1:1 toterhomes built by NRC Modifications. Other popular custom builders include Showhauler and Renegade. Power is supplied by a Italeri 12.7l Detroit Diesel Series 60. It rides on real aluminum wheels from MCA, and Bridgestone tires from Moluminum and Double Take Replicas. Next on the workbench is the trailer, so there will be more to come. Thanks for checking it out!
-
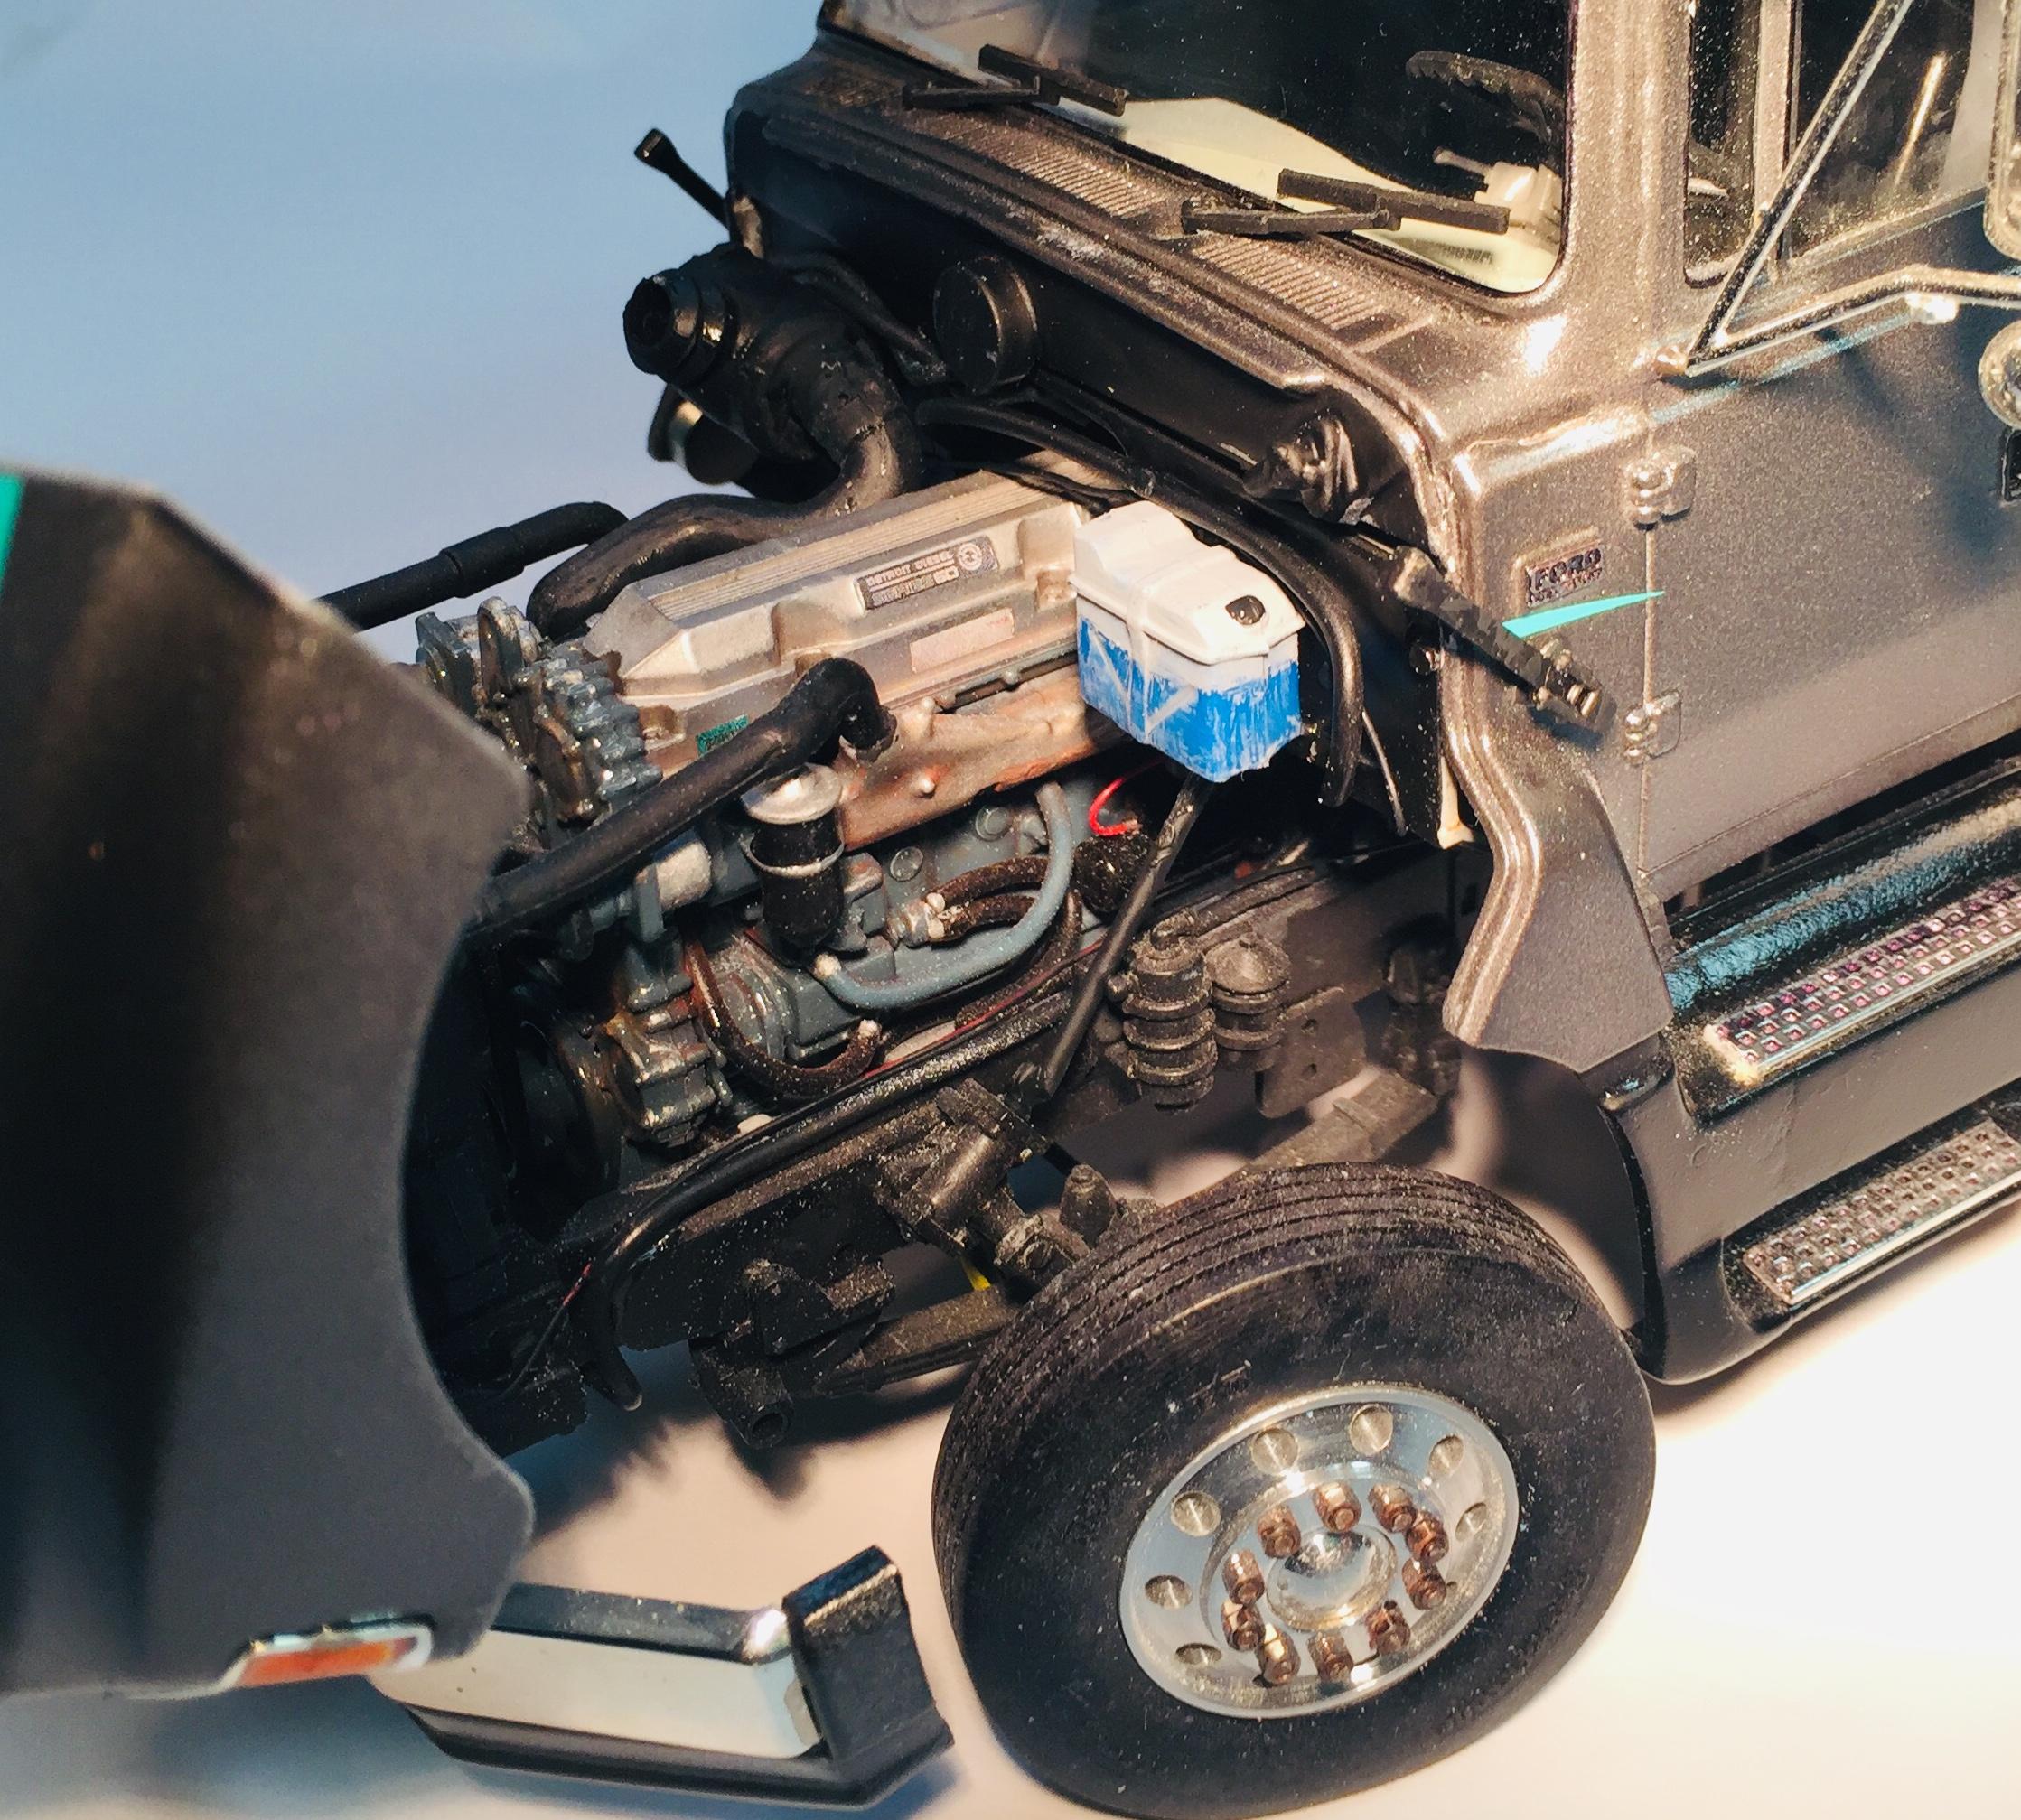
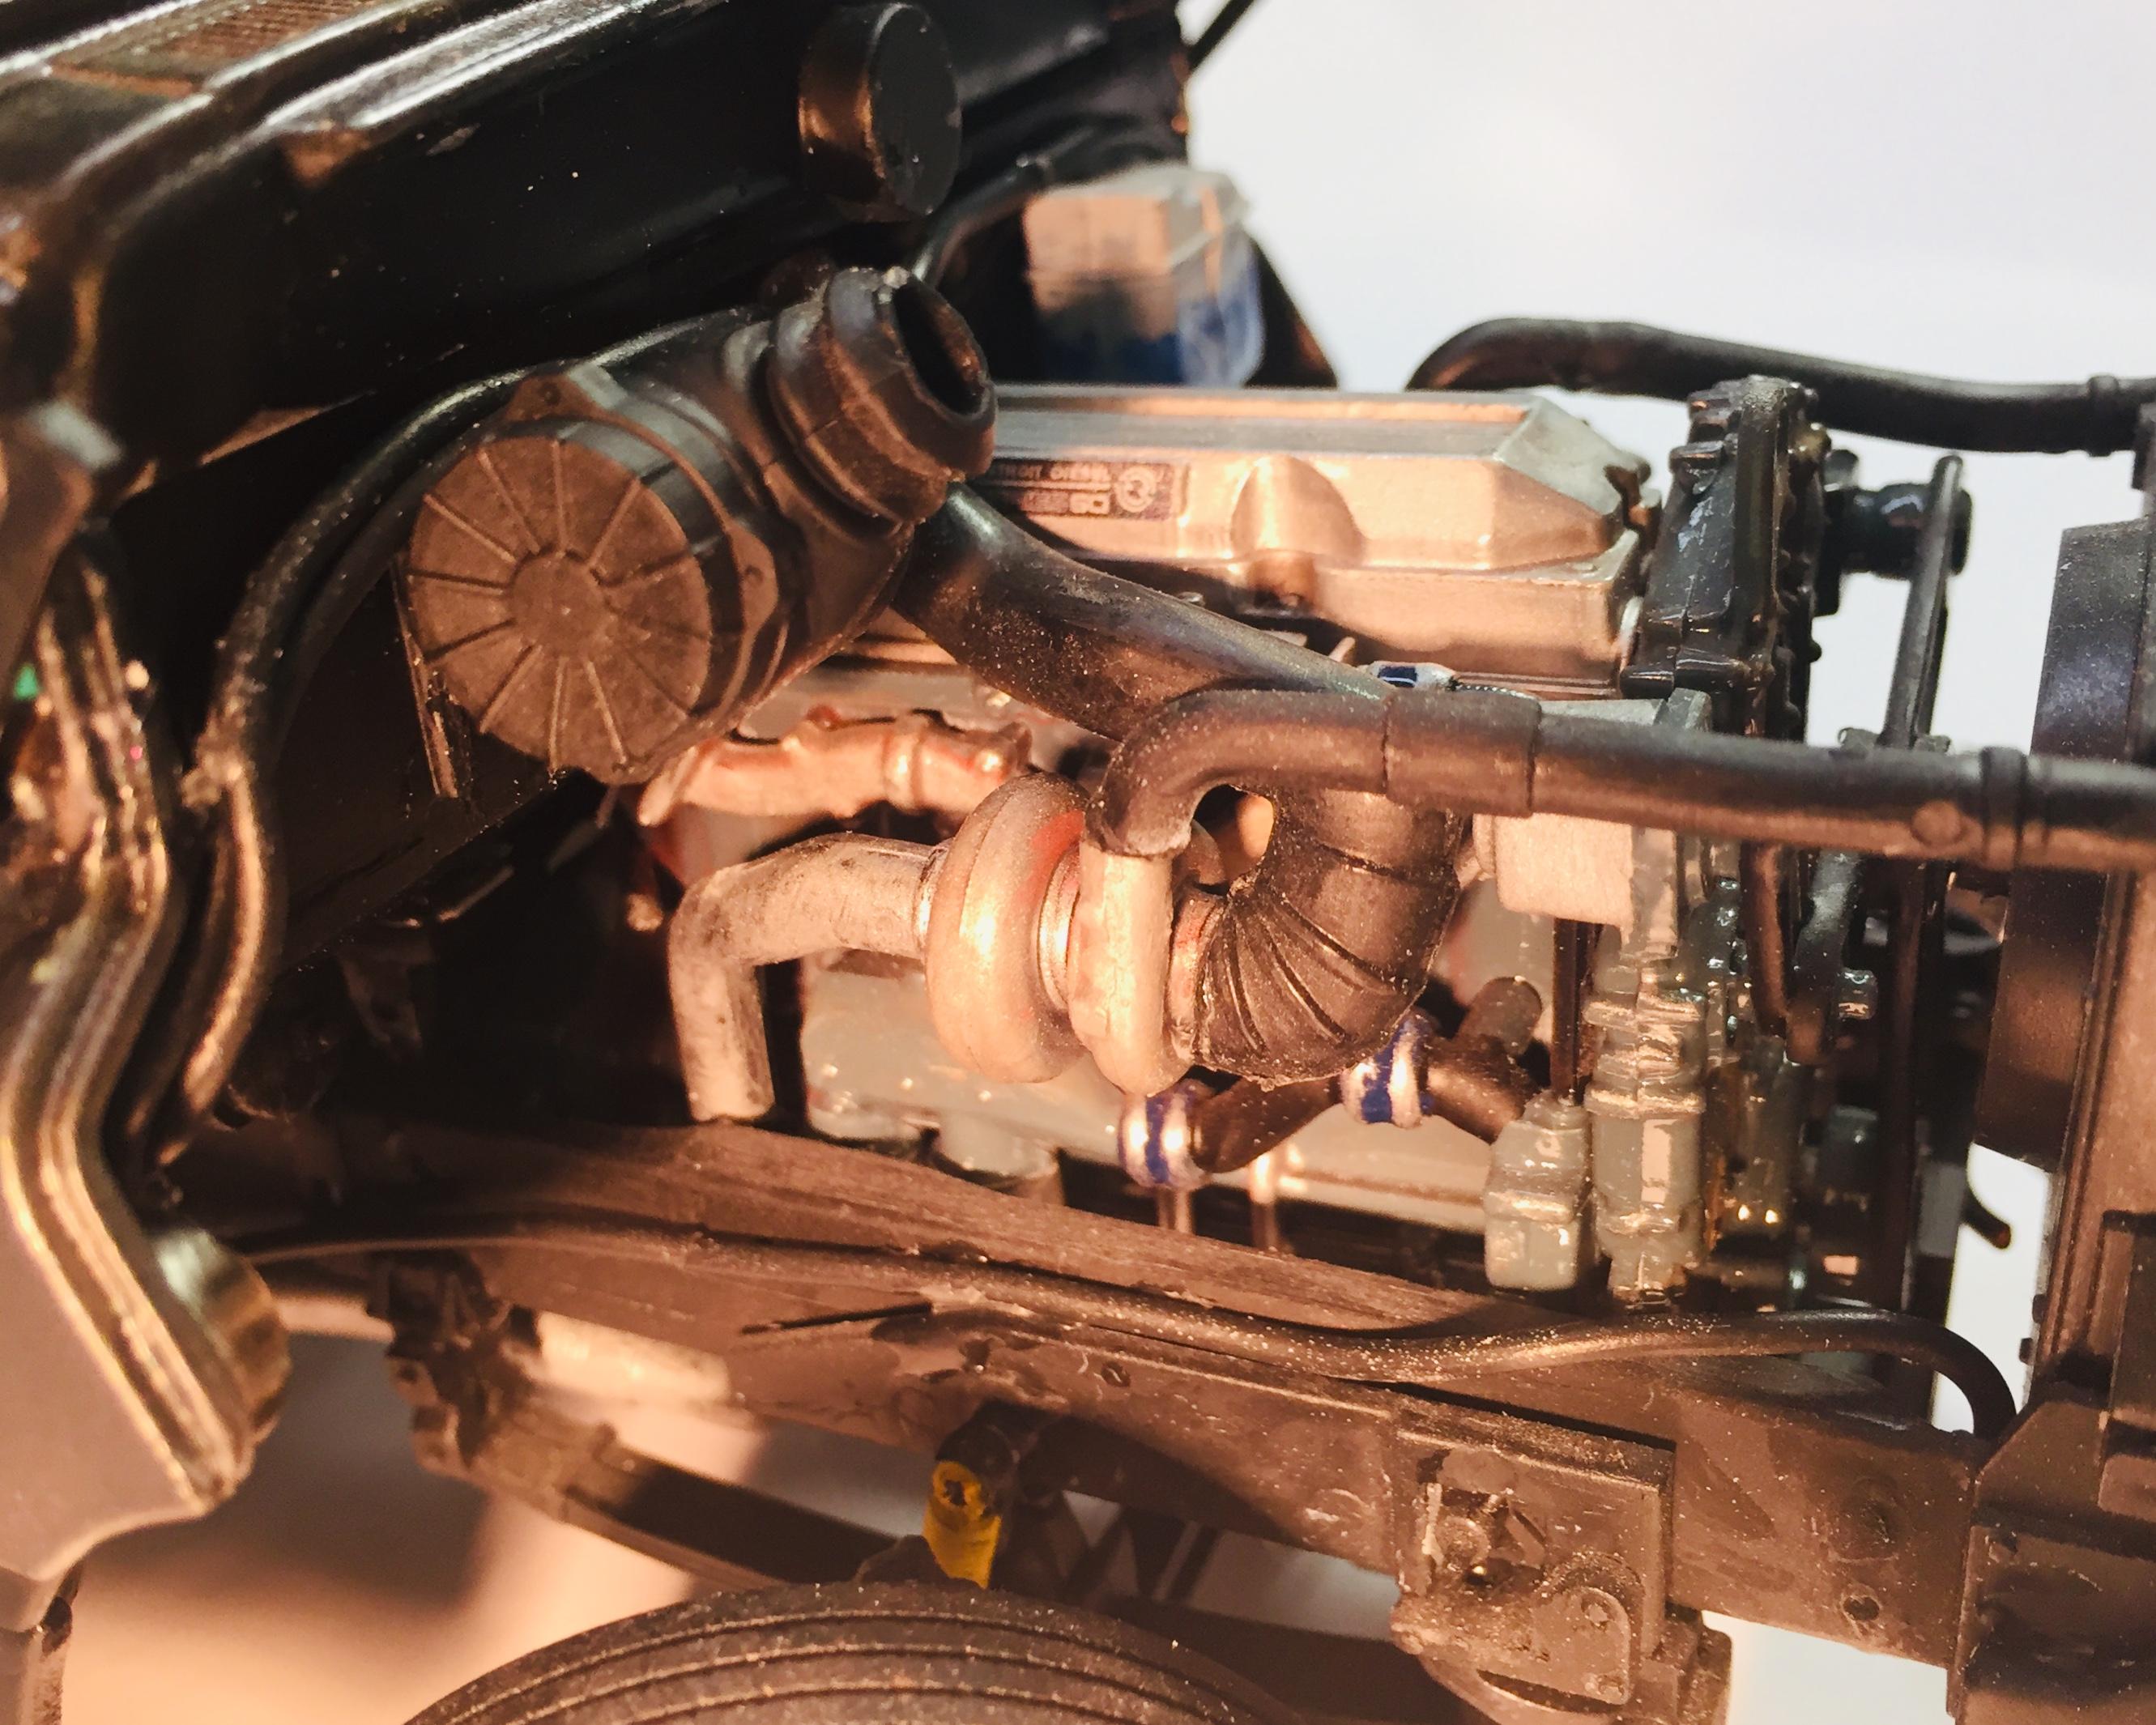
I have begun my first Class 8 truck conversion, this project has been in the planning stages for a while. My first one will be built on a Revell Ford Aeromax 120, a kit I partially built back in high school. The kit had been in storage, along with others for quite a while. I had been a die hard model railroader, but now I have "diversified" and I am back into model kits too. Anyway, I'm looking to scratchbuild the 25' coach body on a single axle, much like this rig. I think I'll go with the "standard white" paint too: So far, I have finished the engine and I've started on the cab and chassis. Power will come from a Detroit Diesel Series 60 from an Italeri 378 kit. I have painted it with real Series 60 Blue, a rattle can I picked up at a Freightliner truck repair shop. Plumbing and wiring is wire from Radio Shack. Decals are from Scale Truck Detail Studios by Kurt McLucas (You can get them from Ben @ Class A Resin). A big thanks to Kurt for his decals and reference pics from his awesome models. The cab parts, like many others, were warped and required putty fill and a bunch of work to get it together. Filled all of the roof holes, as with the bunk over the cab, I won't be mounting anything there. It has been sanded and is ready for primer: The workbench has the spread of parts, frame has been stripped and an axle removed. Thanks for looking, I'll update when I have the chassis complete.