Search the Community
Showing results for tags 'charger'.
-
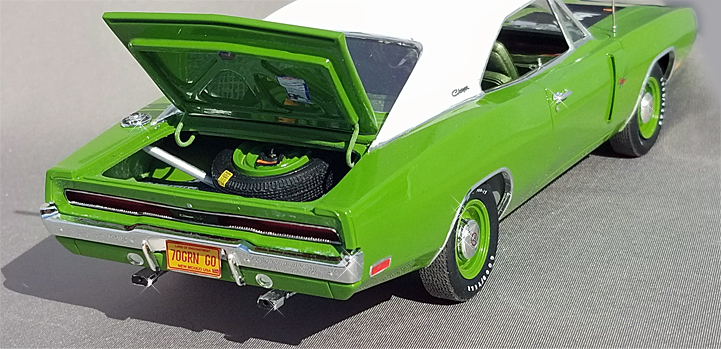
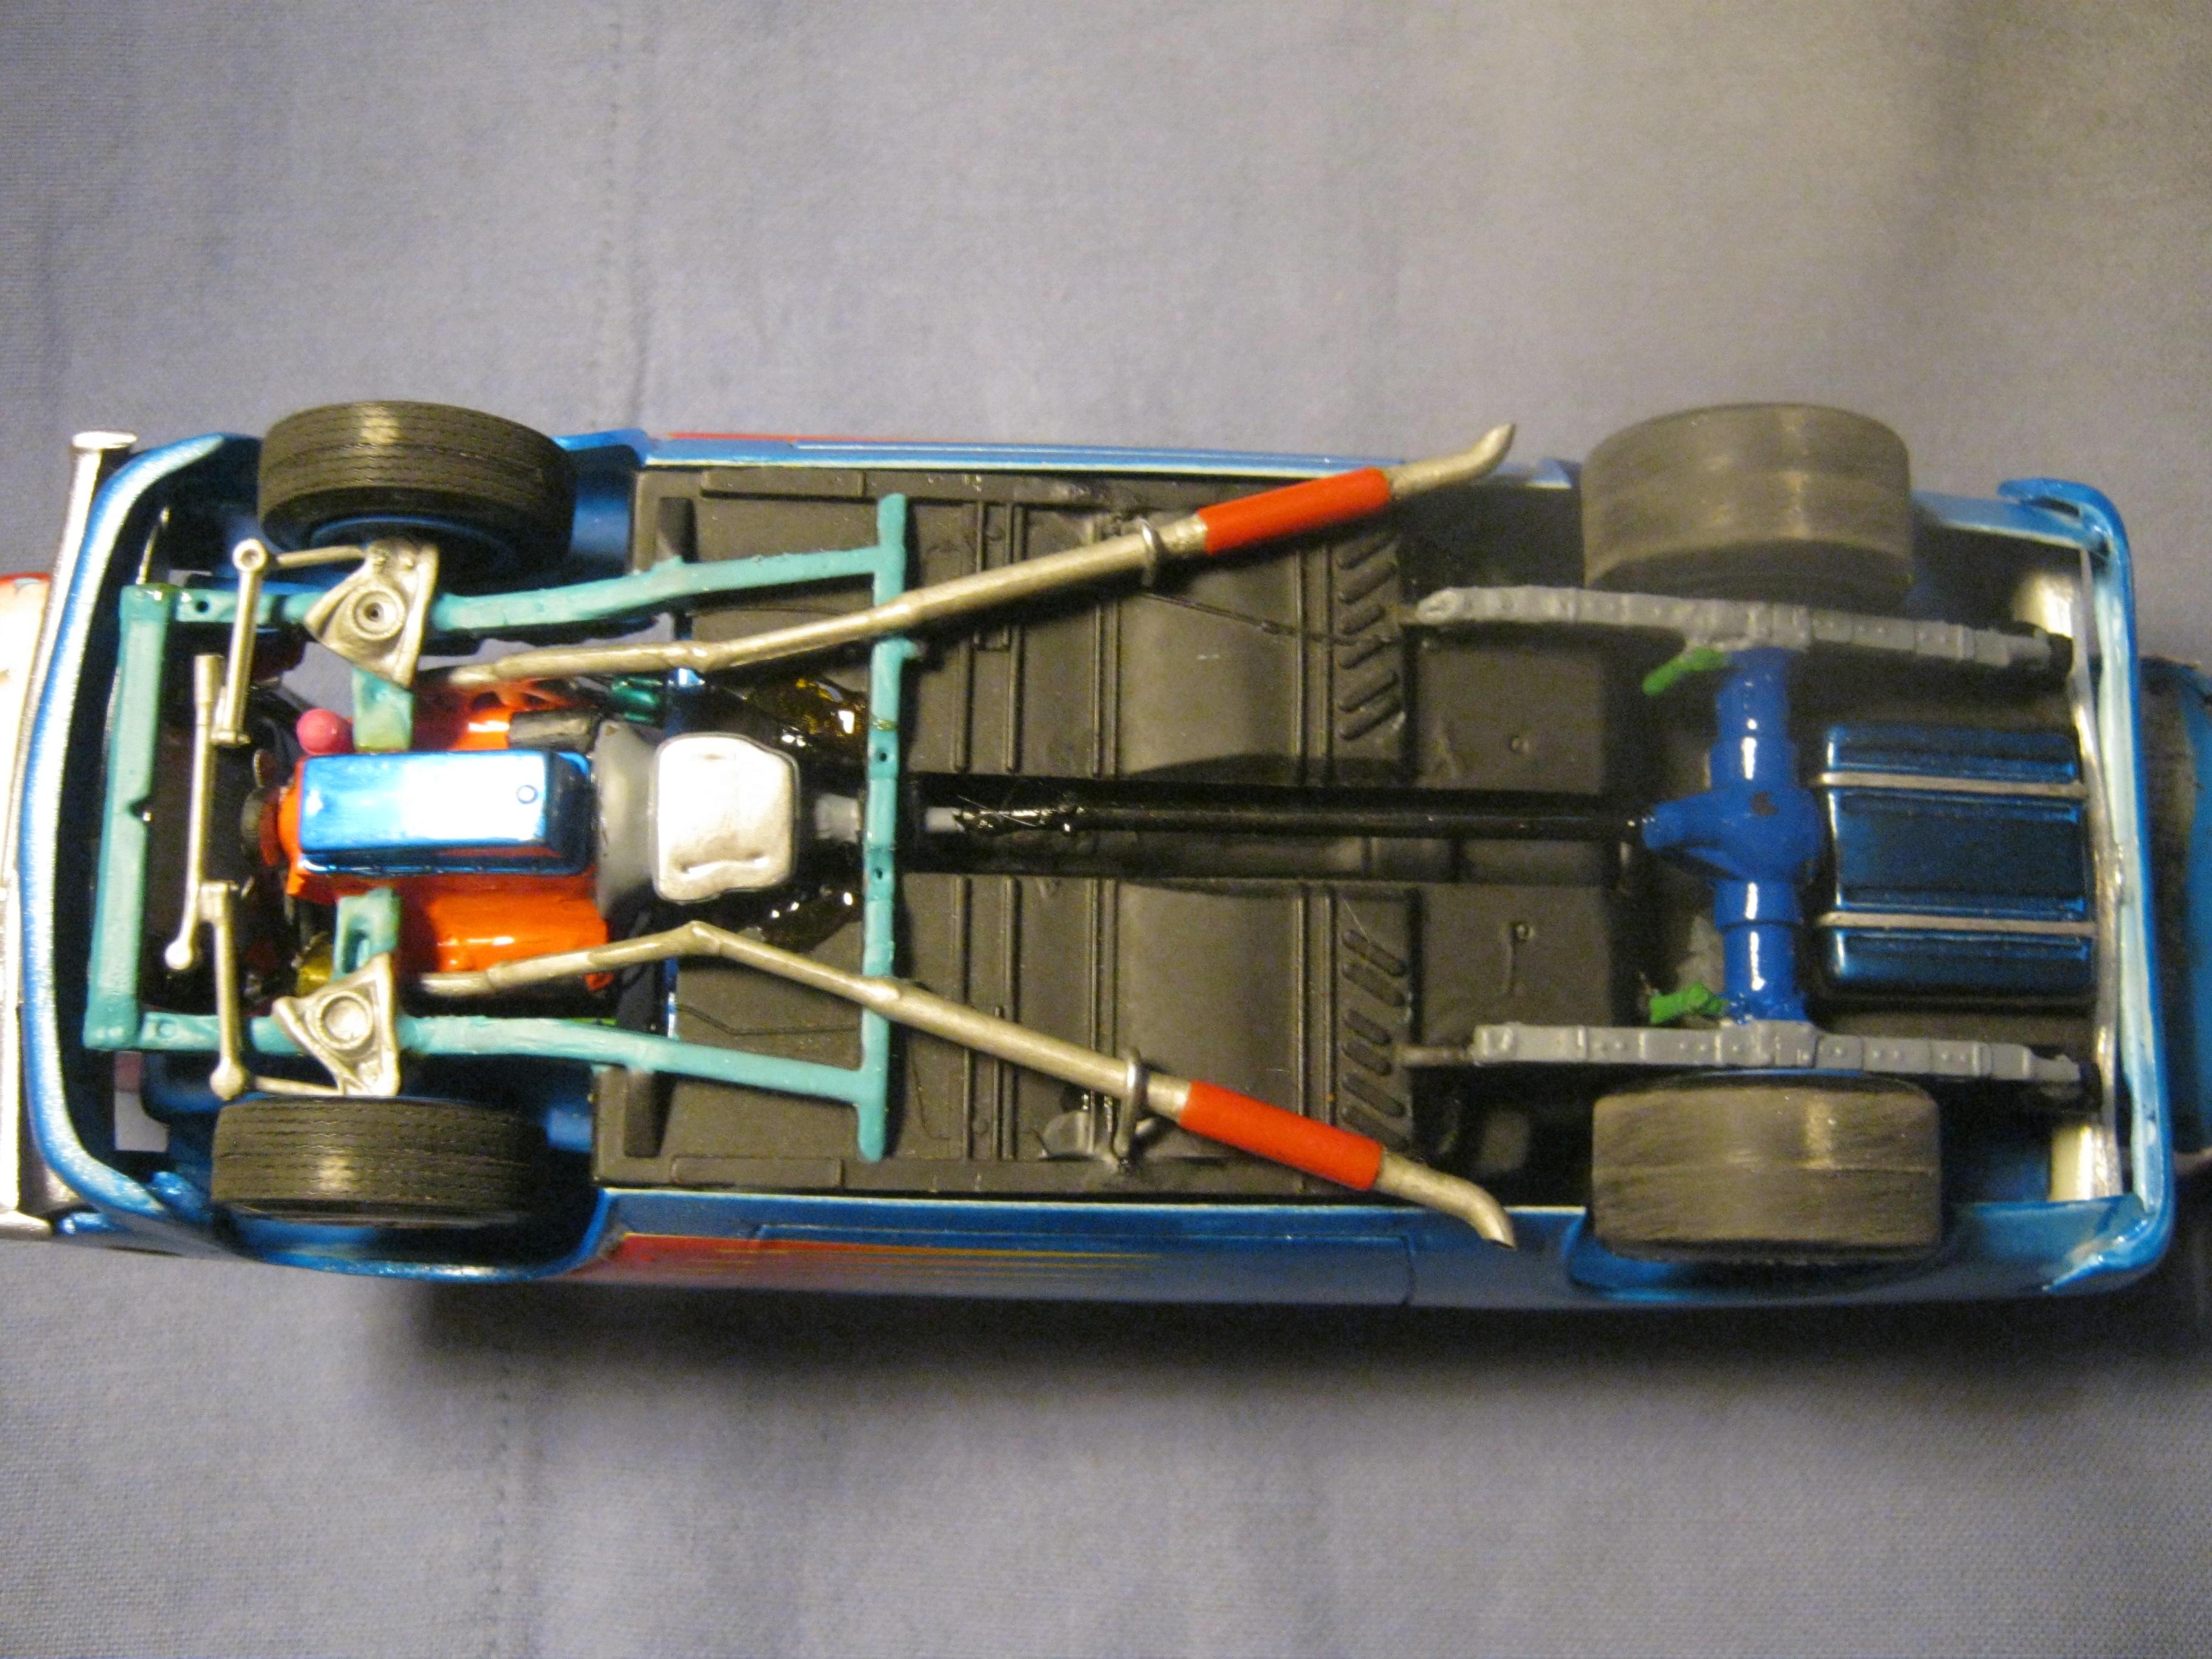
The newer Revell version. Been wanting another 68 for awhile. The kit is pretty nice and I love how it had the dog dish rims in the kit. I believe I saw someone on here the other day that did one and had a problem with the front end. I did as well. The A-frame for the front wheels doesn't line up right. It pushes the piece for the turn lights up; which in turn messes the grill up. I eventually had to super glue it down. Didn't realize my grill wasn't quite in place at the time. Still it came out looking alright despite the set backs. SAM_1362 by Eric Lucas, on Flickr SAM_1363 by Eric Lucas, on Flickr SAM_1364 by Eric Lucas, on Flickr SAM_1365 by Eric Lucas, on Flickr
-
Greetings all,,enjoy the works on here. This is a "what if" car,, entire build using leftovers from all my spare parts bxs,,so I have no idea what brand kit it is,,got it at a swap meet 1/2 built blob+ parts in a ziplock bag for 5$. I didnt have a correct front grill set,,so I put a charger front grill on,,looks ok. And the back tail lens area is a front grill from some custom kit of something. So its a kit bash for sure,,but it has its own look,,and thats all it needs. Build on!

- 9 replies
-
- 4
-

-
- 426hemi
- challengerx
- (and 2 more)
-
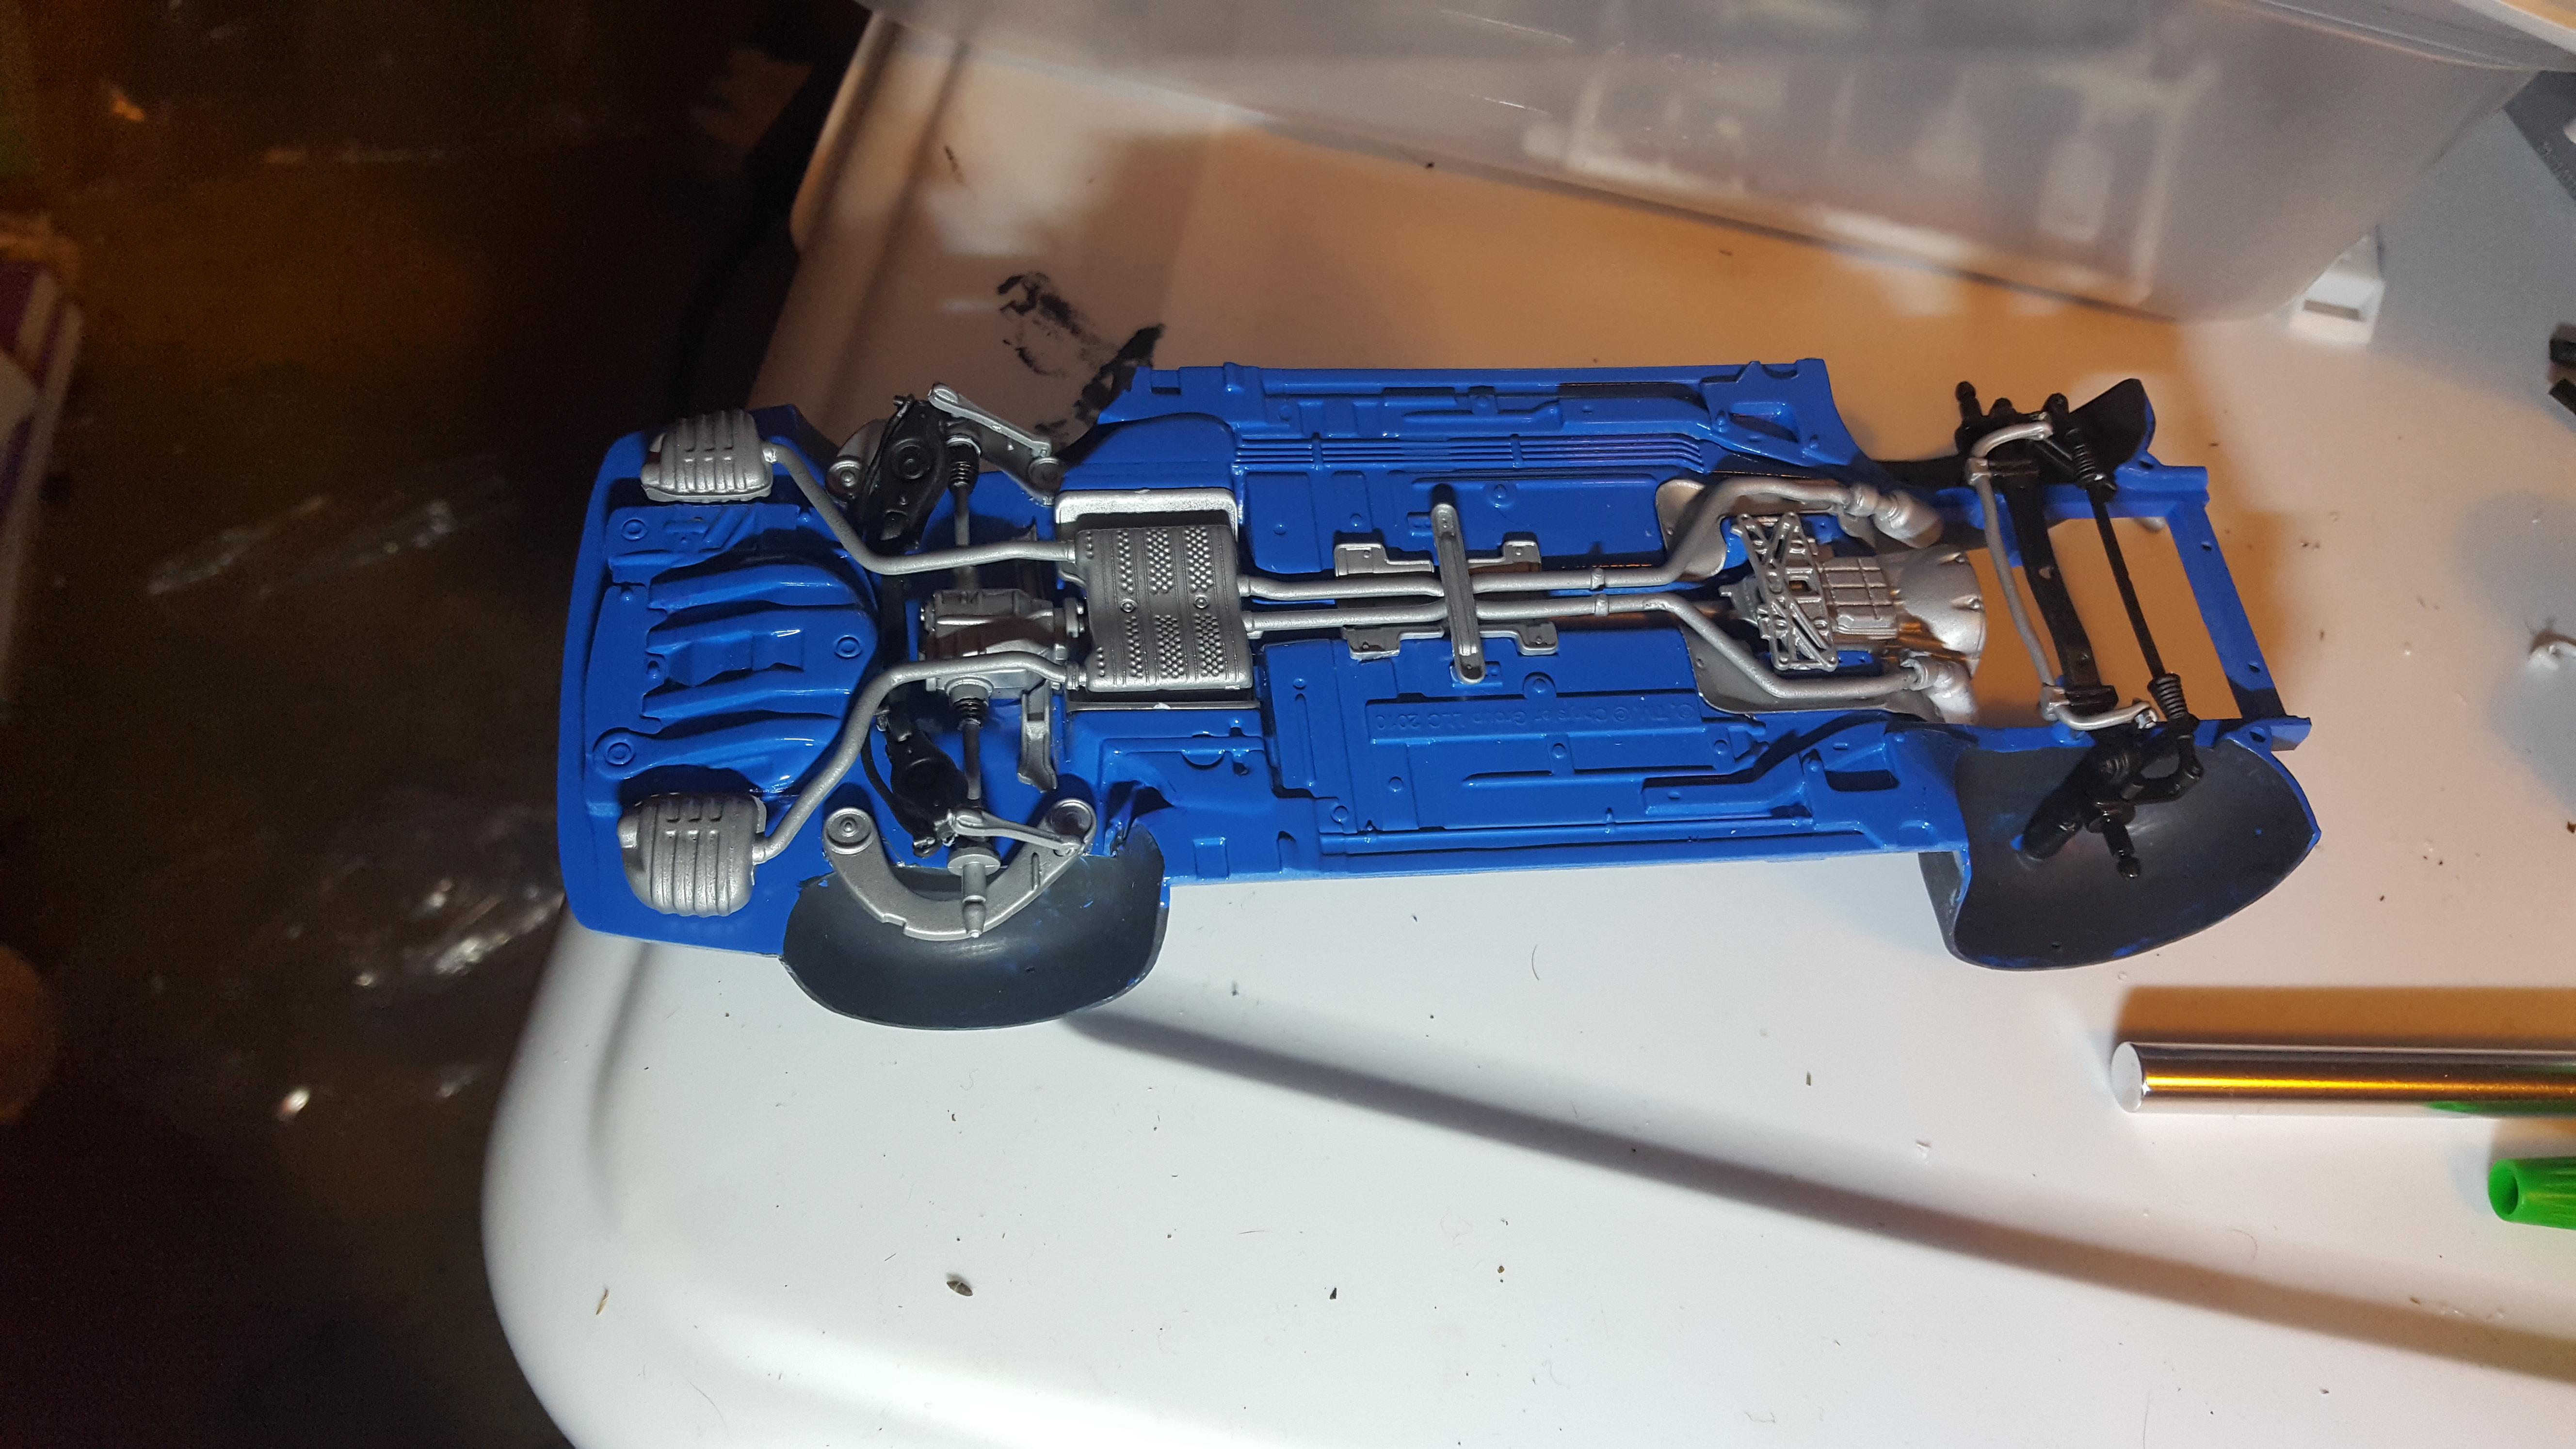
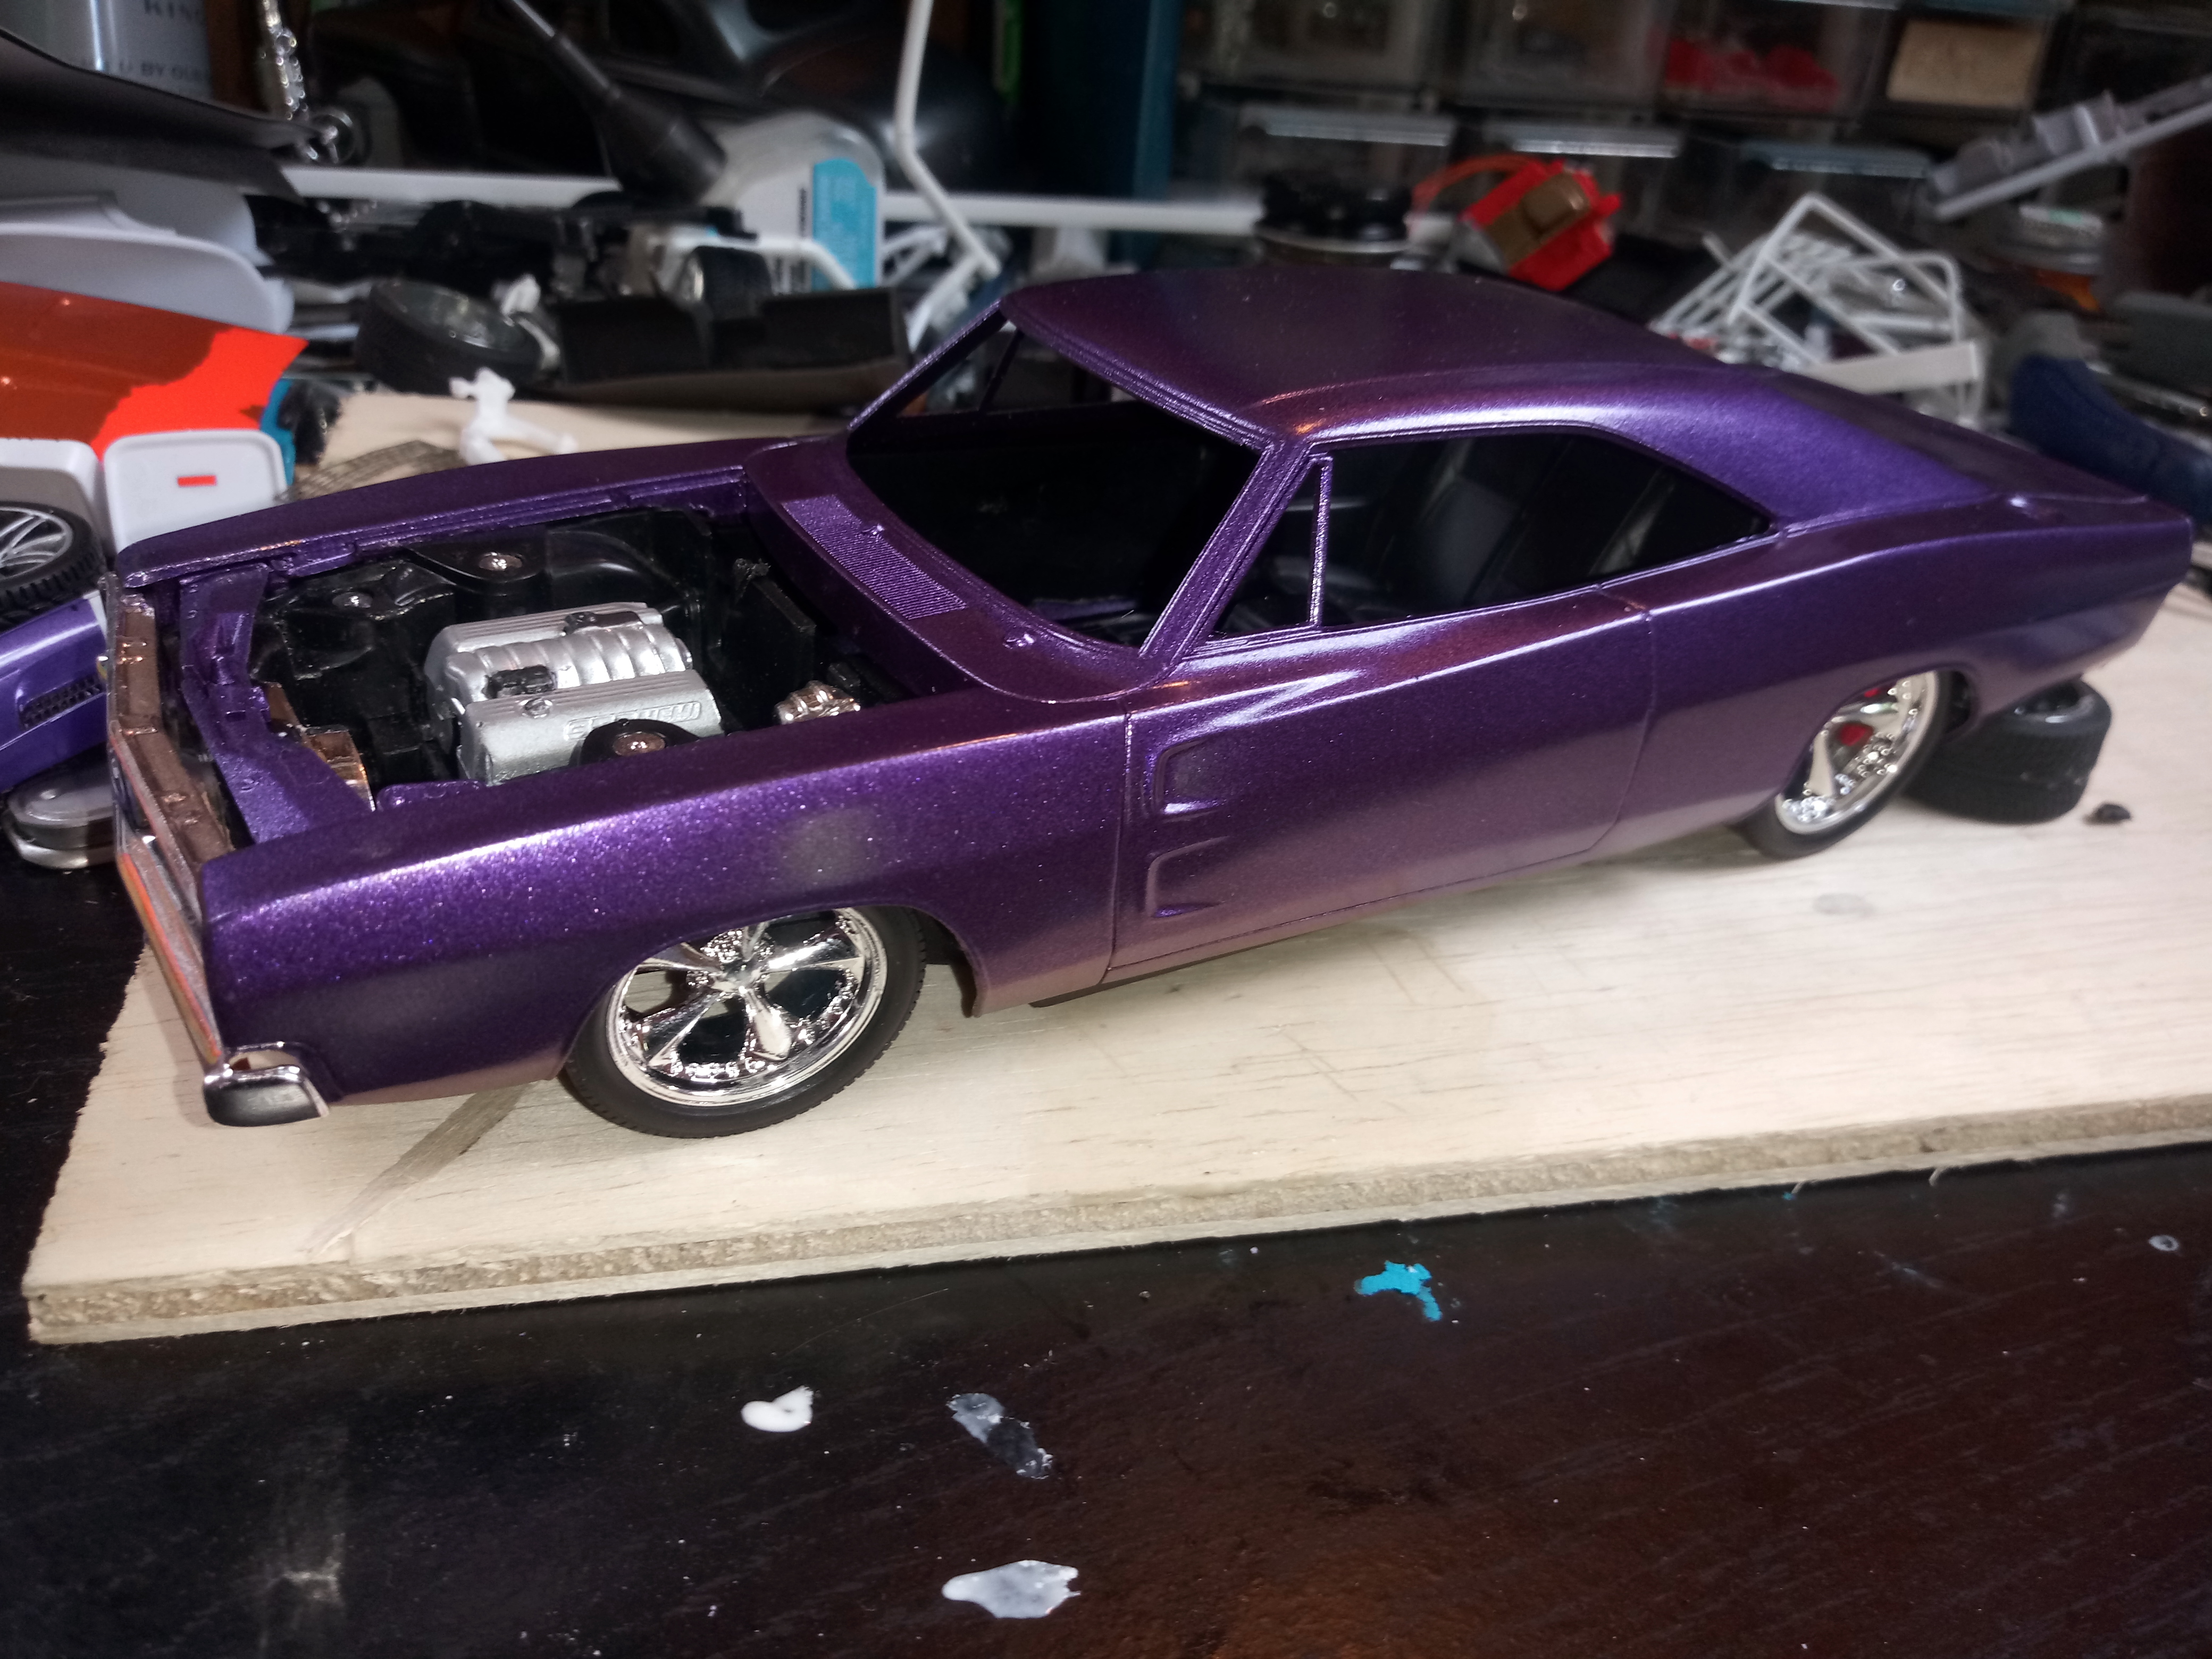
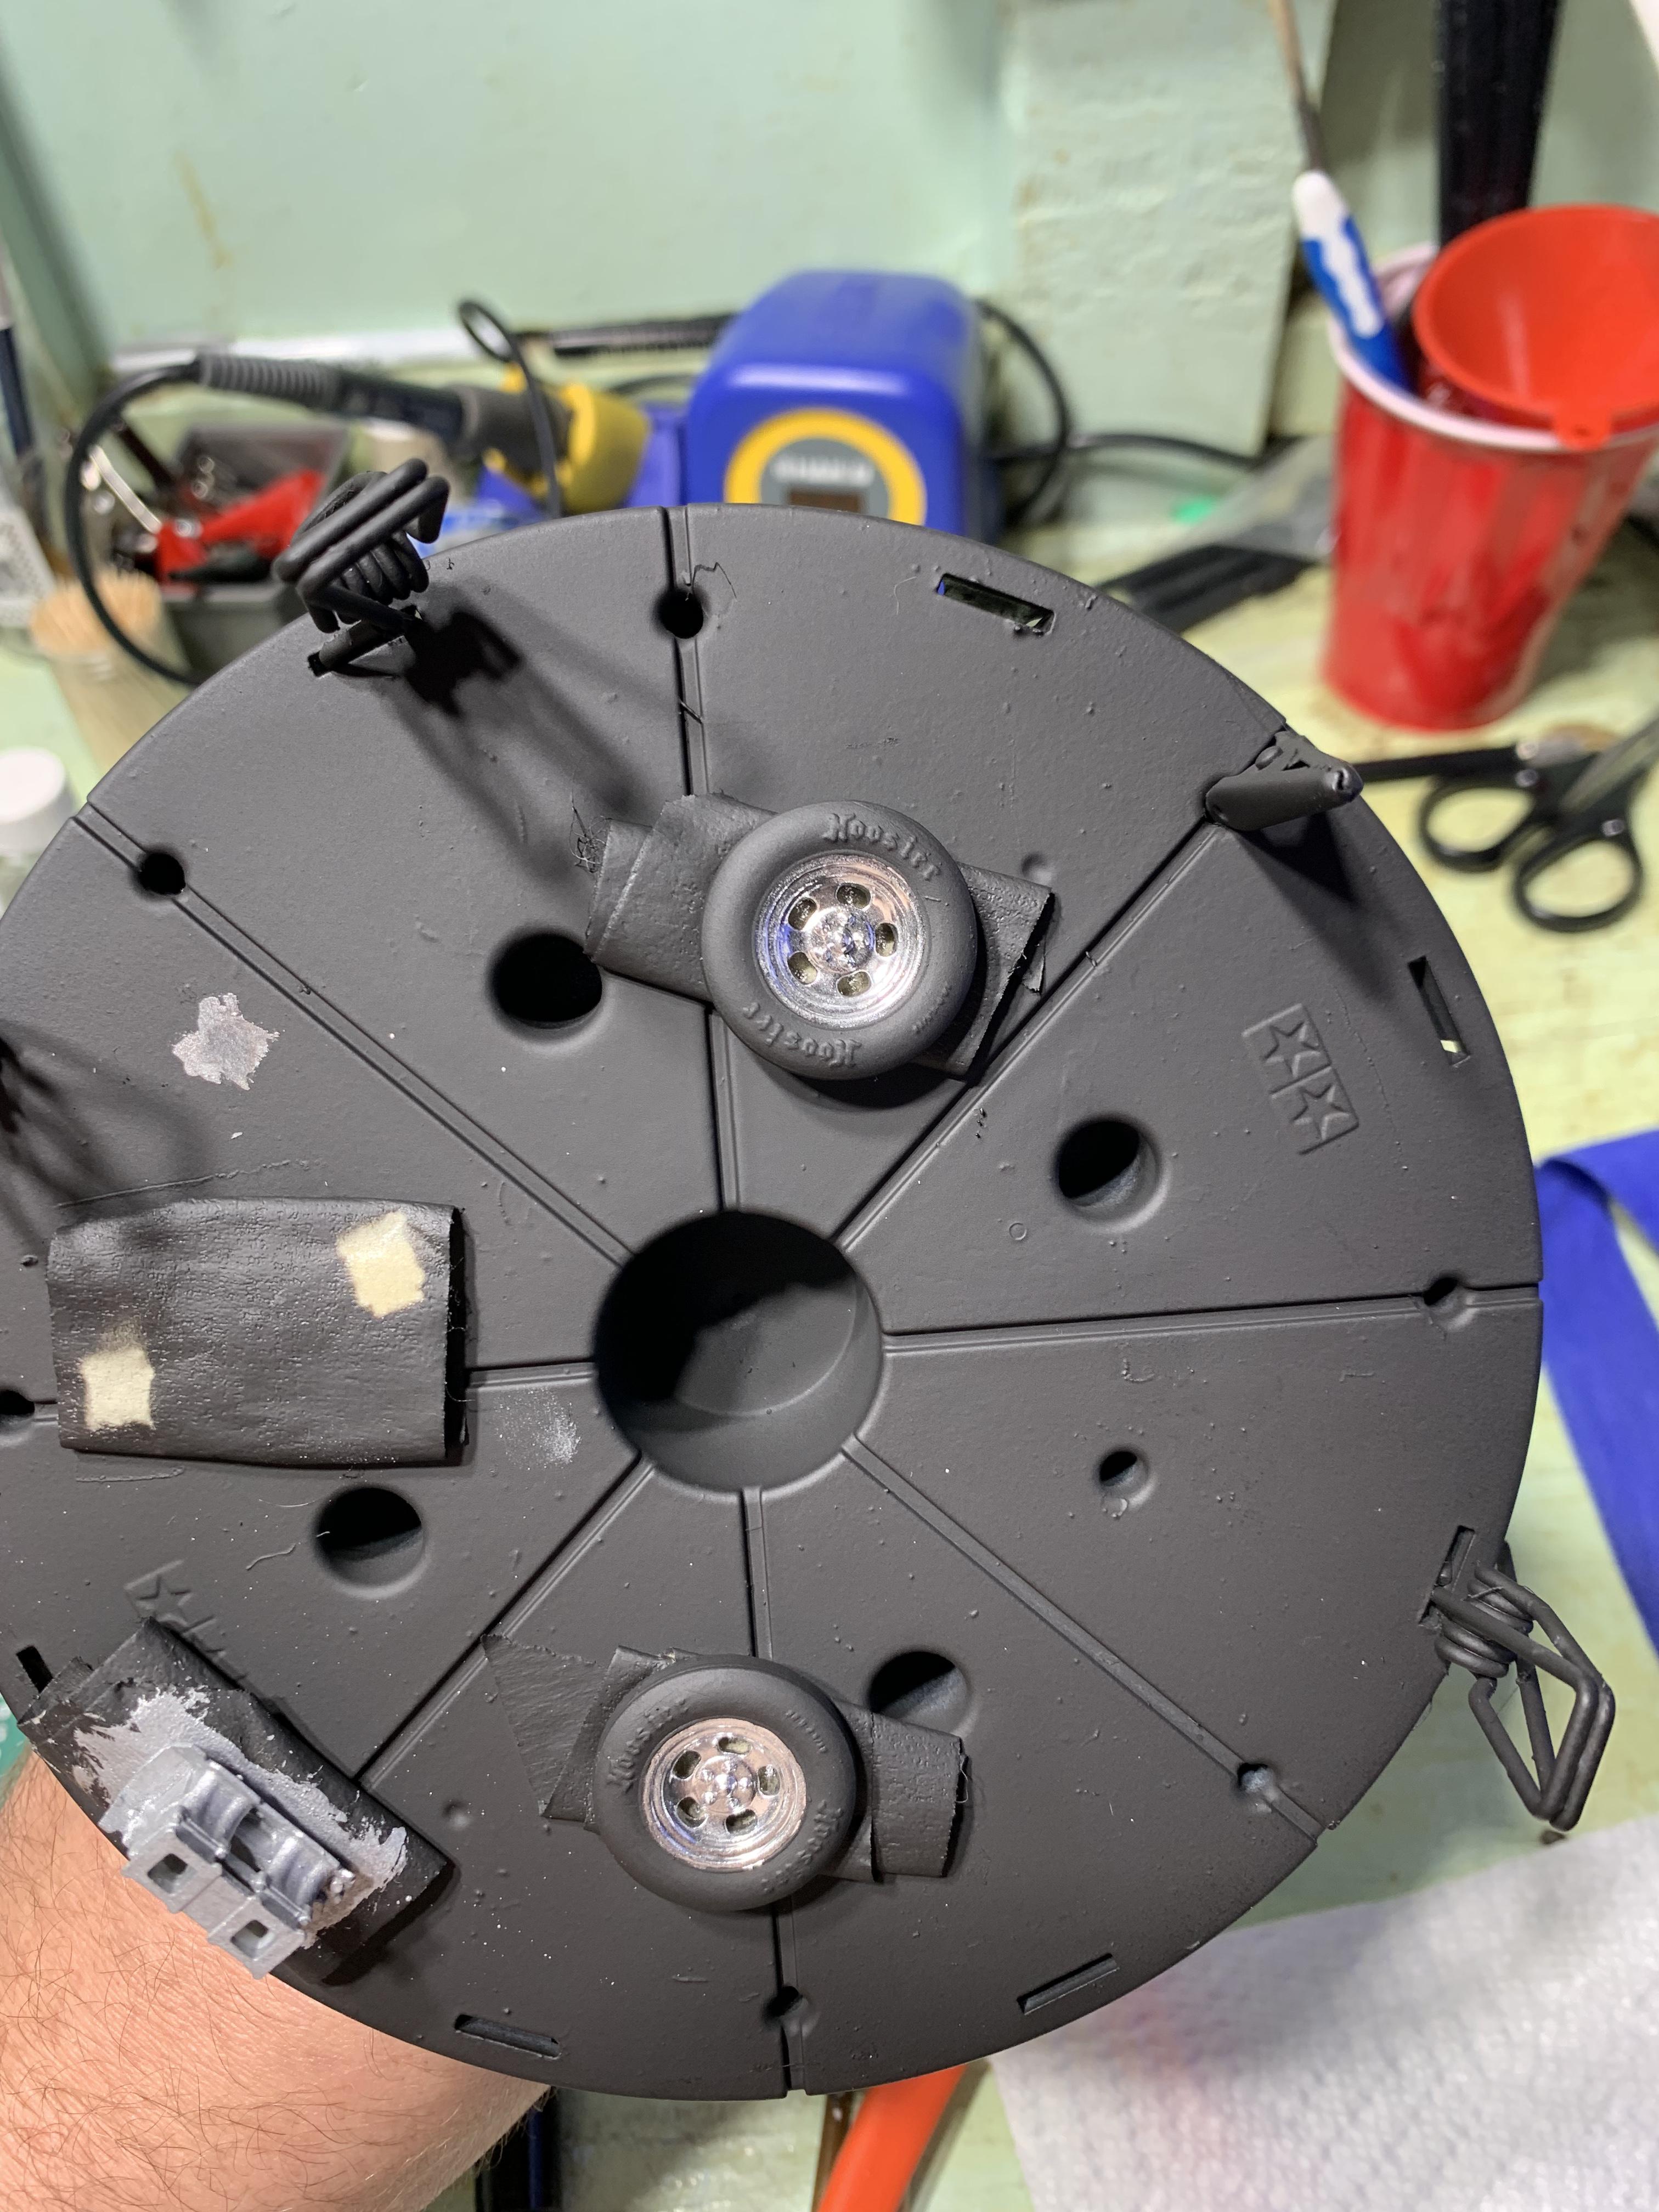
So recently i just jumped back into modeling, i was on reddit reading and what not trying to get idea on what to start working in, and came across a post from a guy wanting to downsize his collection, and wanting to help people get into the hobby, after talking with him he sent me this charger kit for free *awesome dude and much appreciated* so when i was building in the past i always built my cars the same way, perfect paint jobs and fancy builds. Which is why i think i got burnt out, i was putting to much into trying to make it perfect and just wasn’t having fun anymore so with this car i wanted to try some different things that i have never tried before, i wanted to build it as a nice car maybe some guy in the mid/late 70’s got just out of high school and dumped his money into, nice but driven look, so i wanted to do some lite weathering i also have been messing with 3D printing and just picked up a resin printer so i wanted to try to print some things up for. A lot of talking i know, but I’m getting to the pictures and building i promise lol so like i said i wanted a 70’s style street machine. the stink bug, shackled up stance, tunnel ram sticking through the hood, etc.. so i went to Ron olsens website for some stl files and pick up a tunnel ram, some Hoosier front runners, ansen wheels and then saw the predator carb files he had and said “oh yea this car needs those” So i printed those out and they came out pretty good still learning the printing process Paint turned out ok on the parts, not perfect but it will work, i have painted the filter elements since i took these pictures, Molotov chrome on the wheels and carb body Aluminum on the air cleaners and just primer for the front runner tires
-
The other day I was going through my "built before becoming a teenager" stash and ran across a Richard Petty Charger, molded in Petty blue and black. It looks like I didn't bother to paint it, just slapped it together and put the decals on. I thought it was a Johan, but now I'm thinking MPC. Anyone have a recollection of this kit? And who made it? Thanks John
-
 Is there really no kit of the Dodge Challenger or Charger SRT Hellcat? I see there are die-cast models. Reason I asked, getting a Lamborghini Chetah kit, which is motorized, thought keeping with the Chrysler V8 theme would be cool.
 -
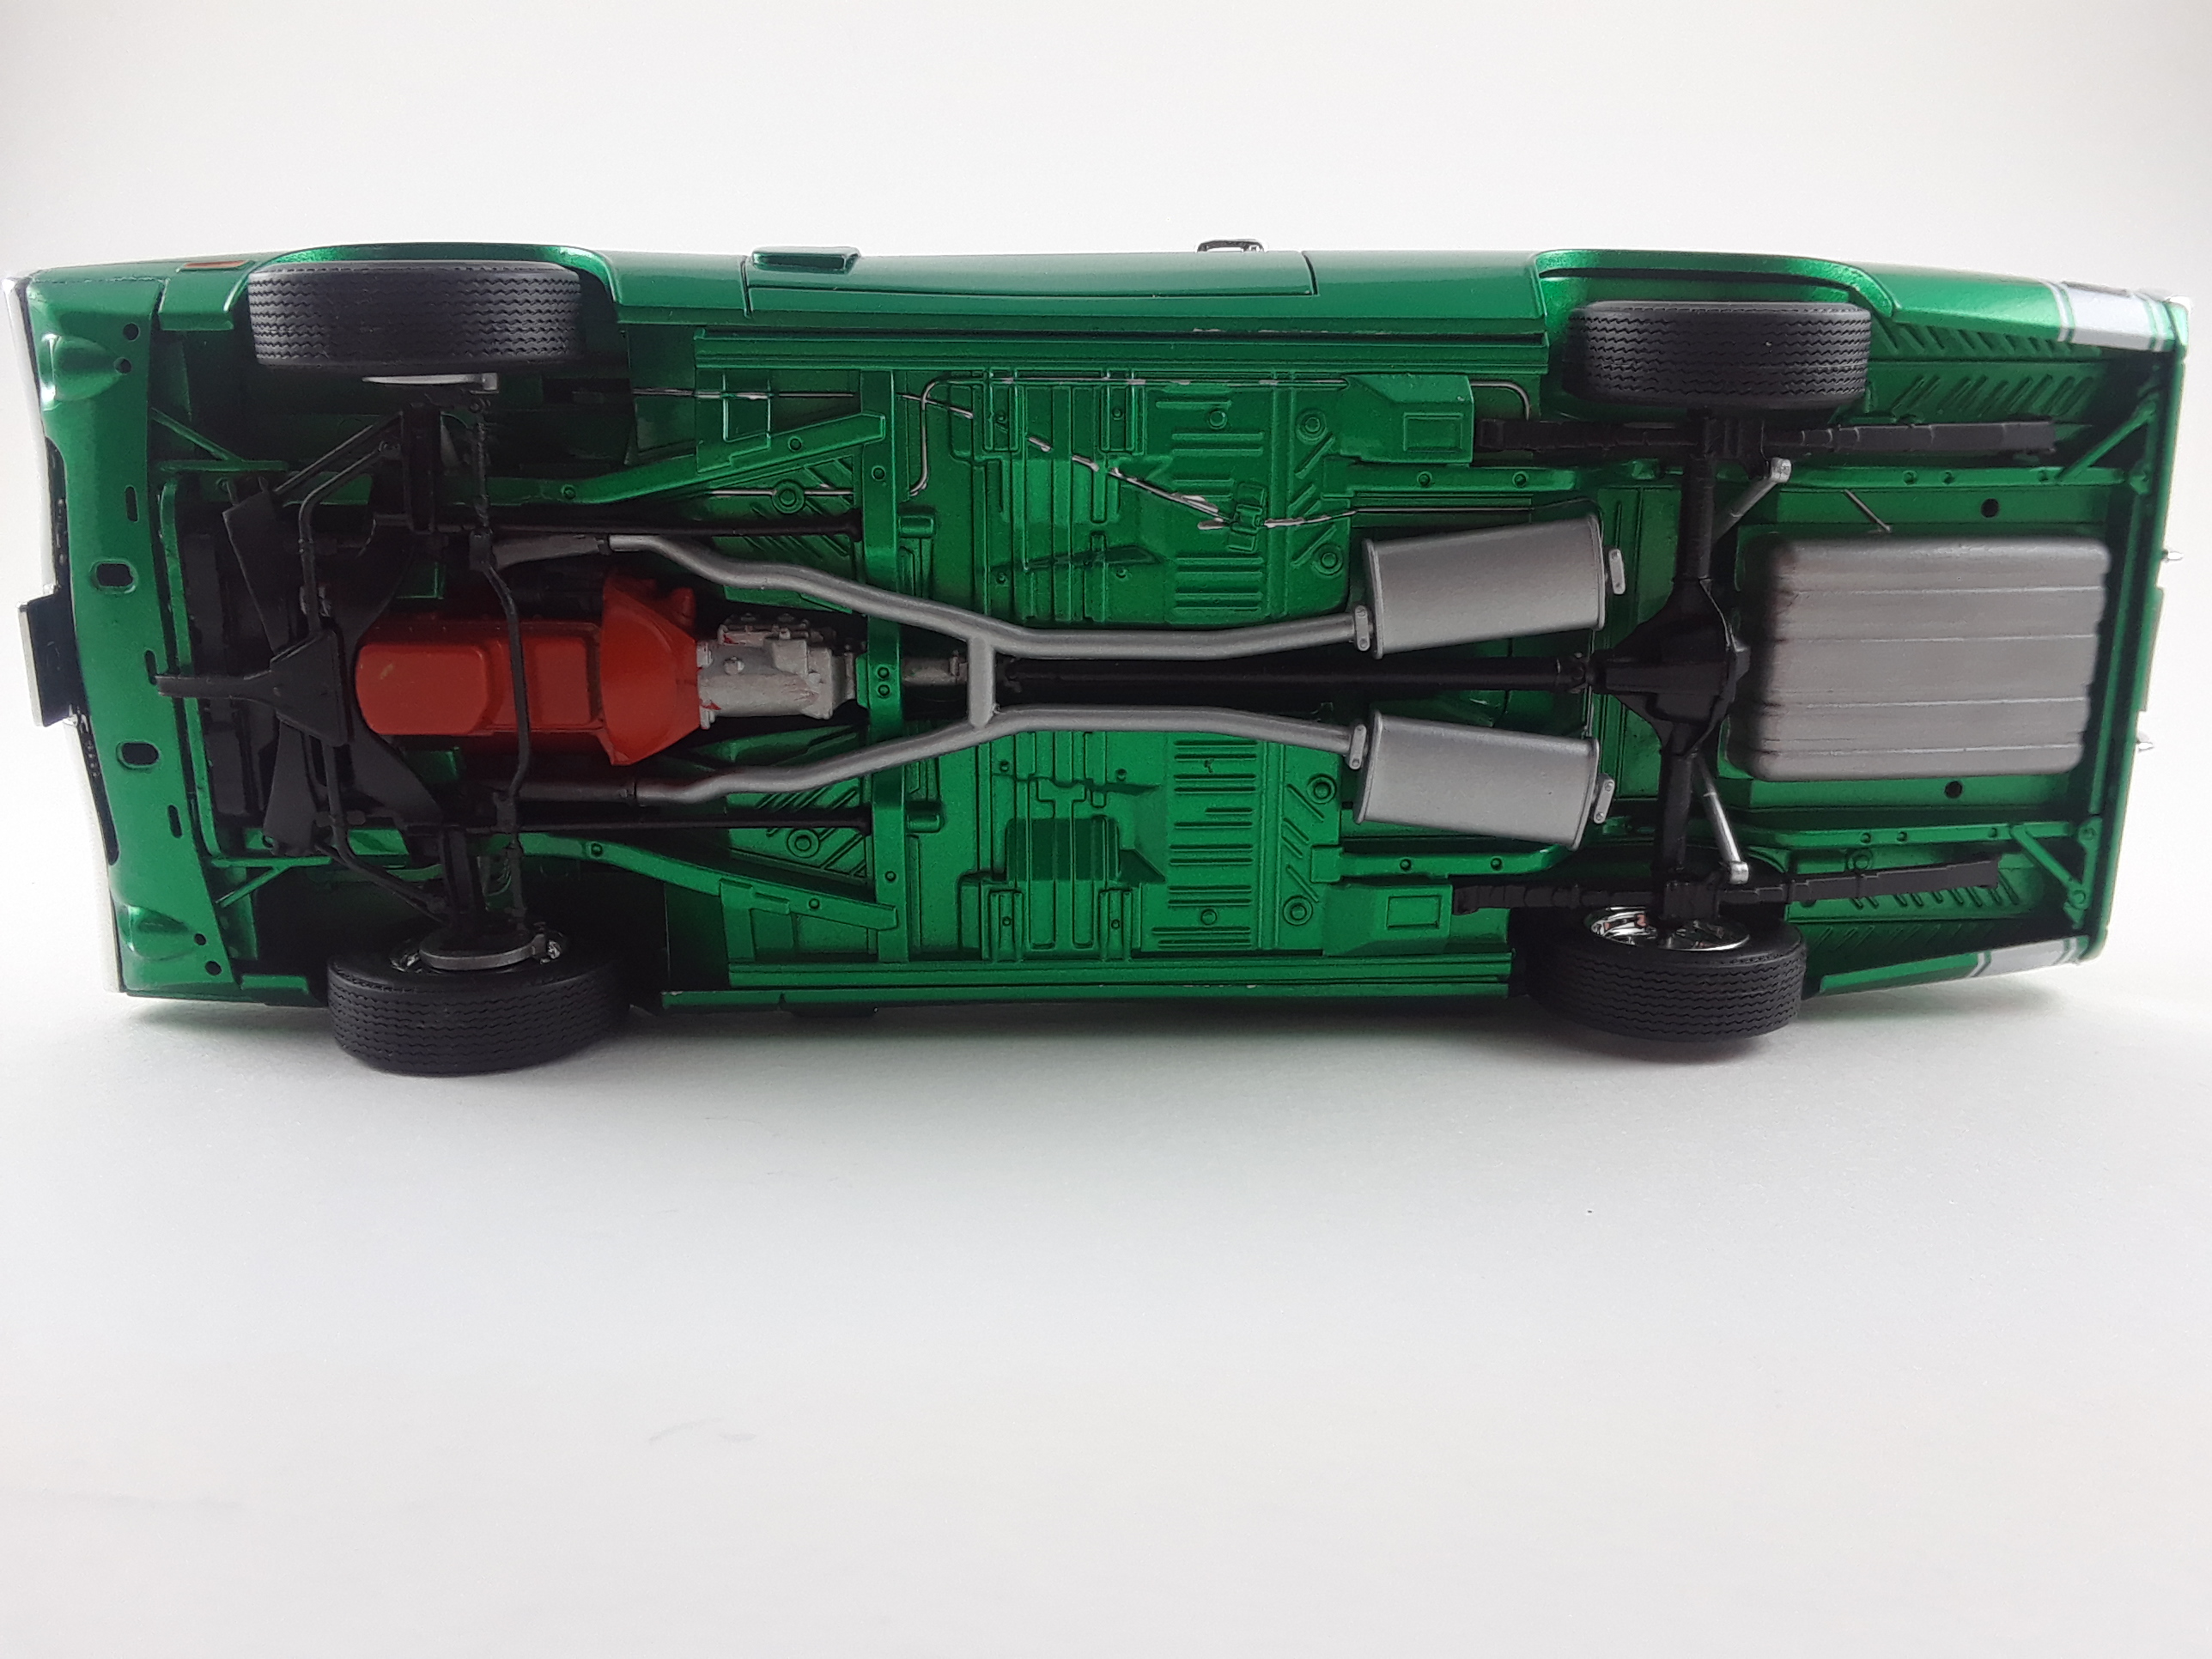
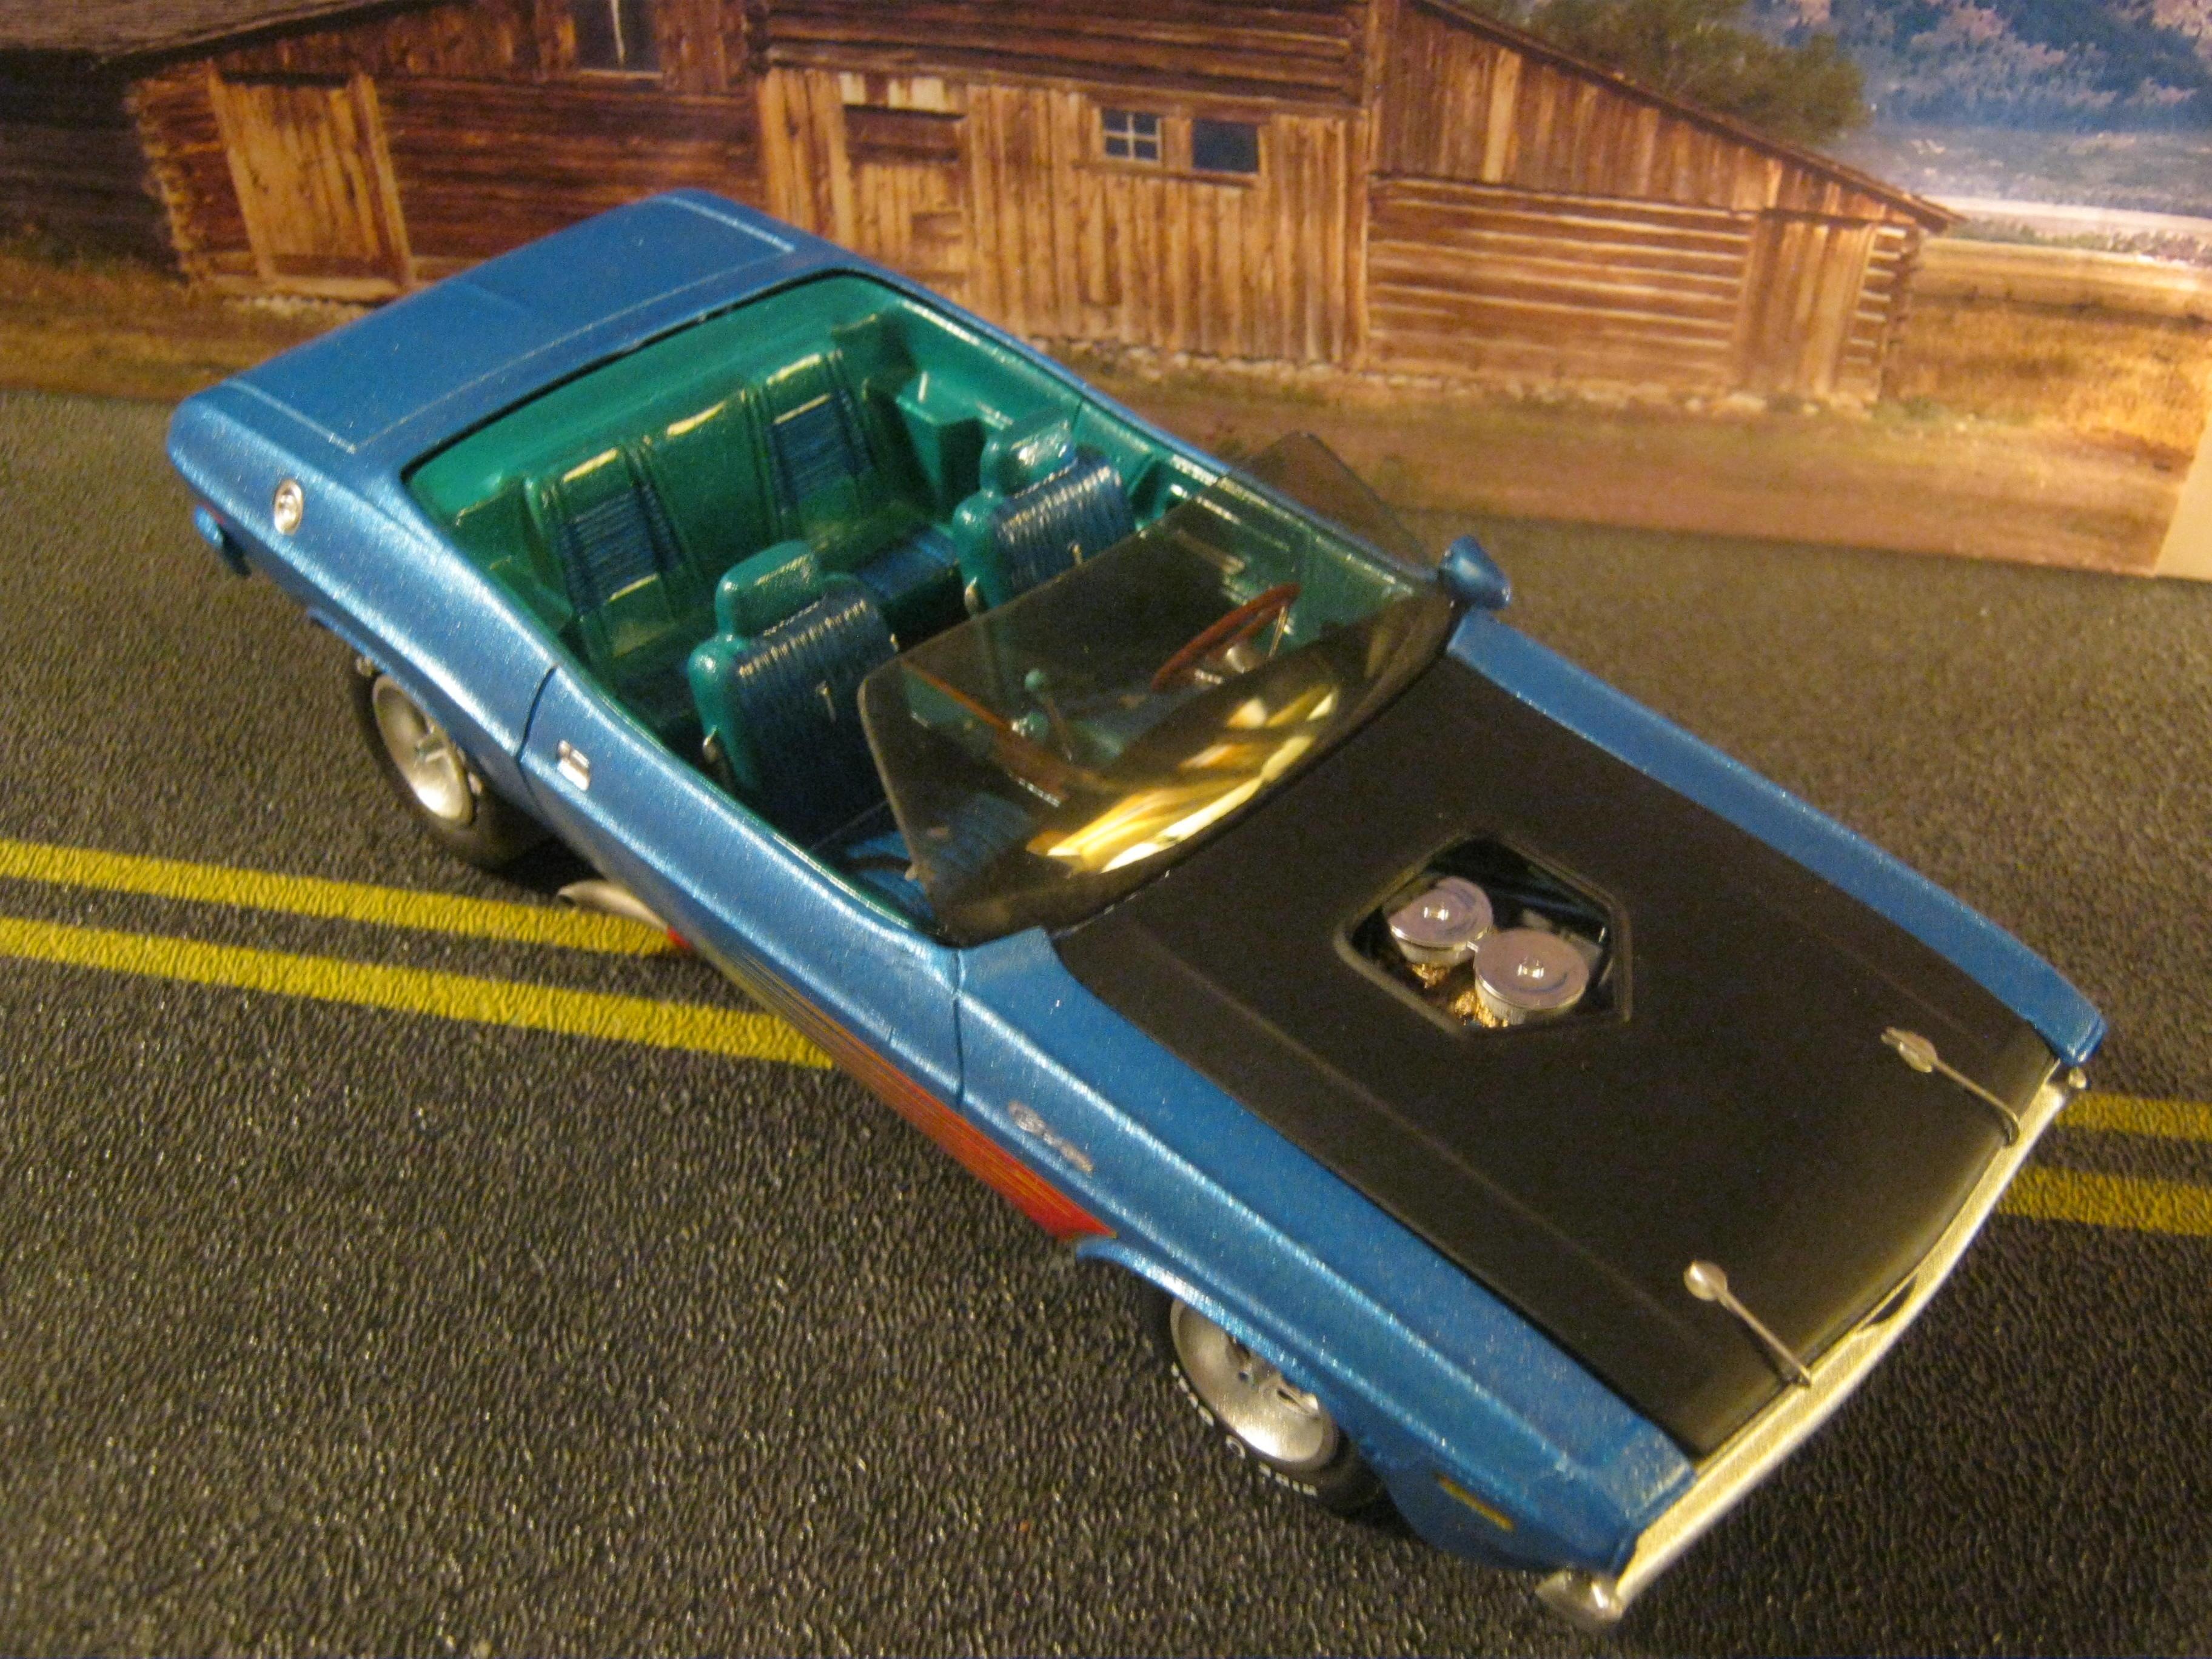
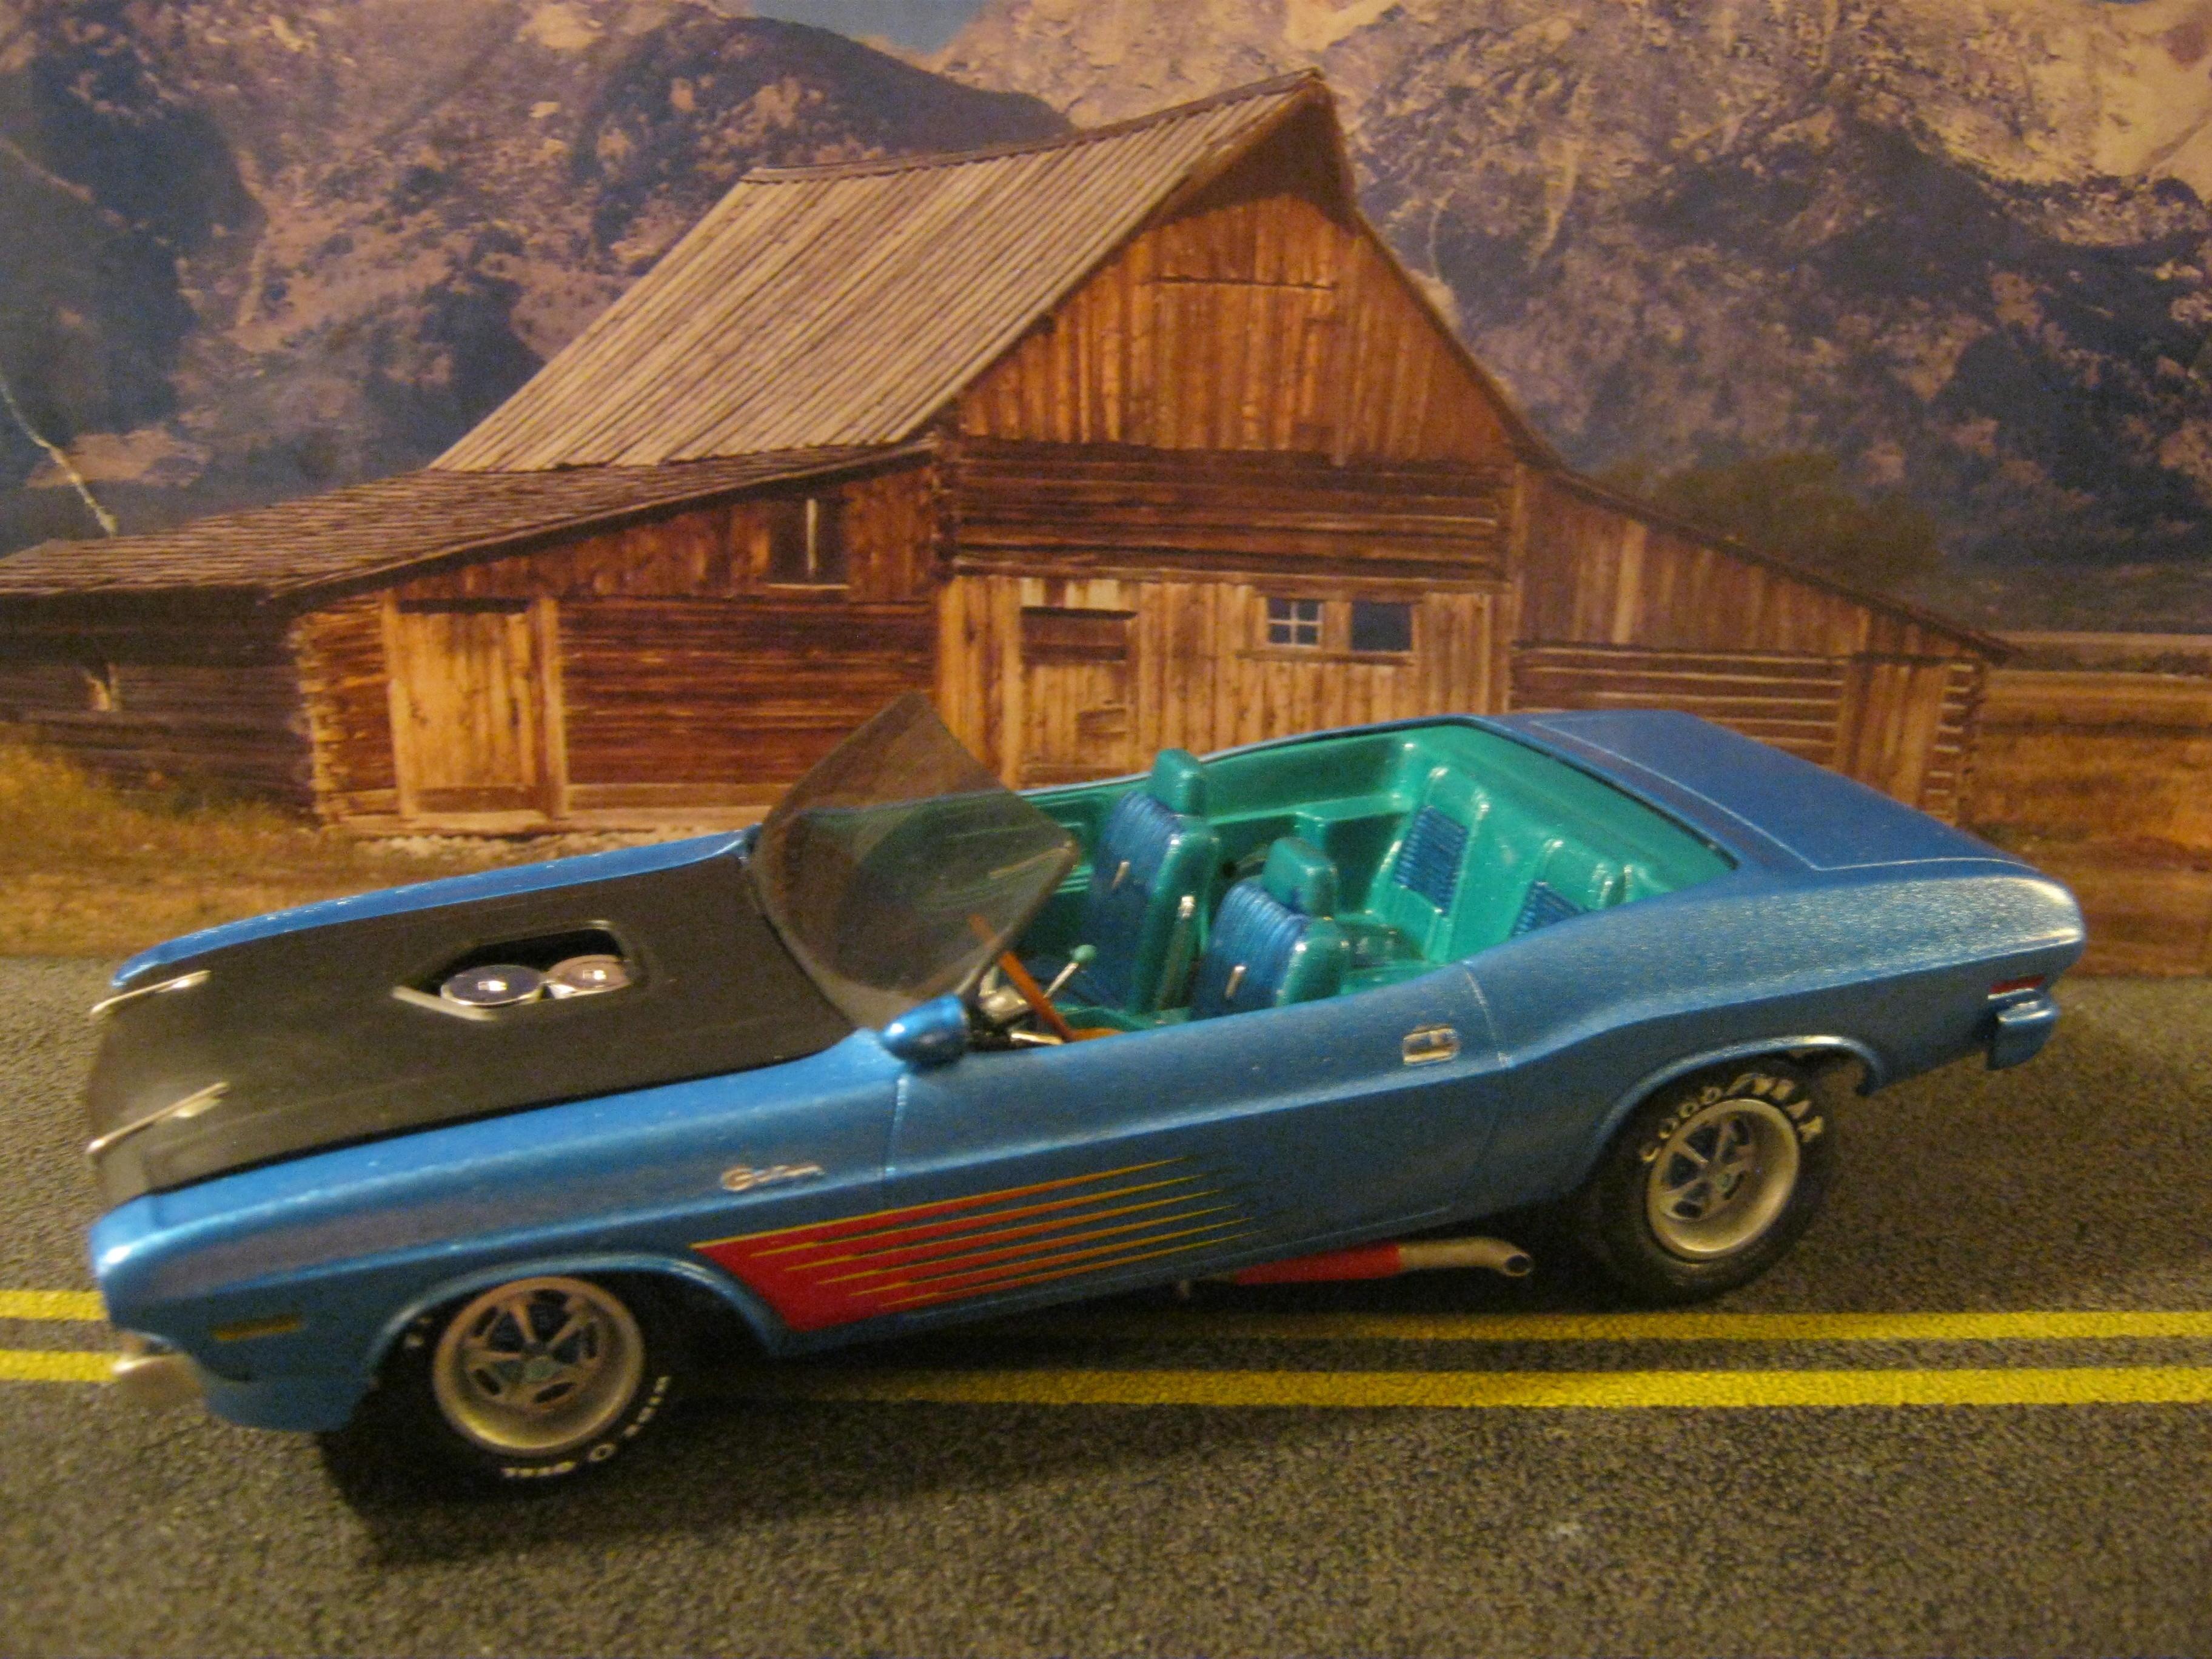
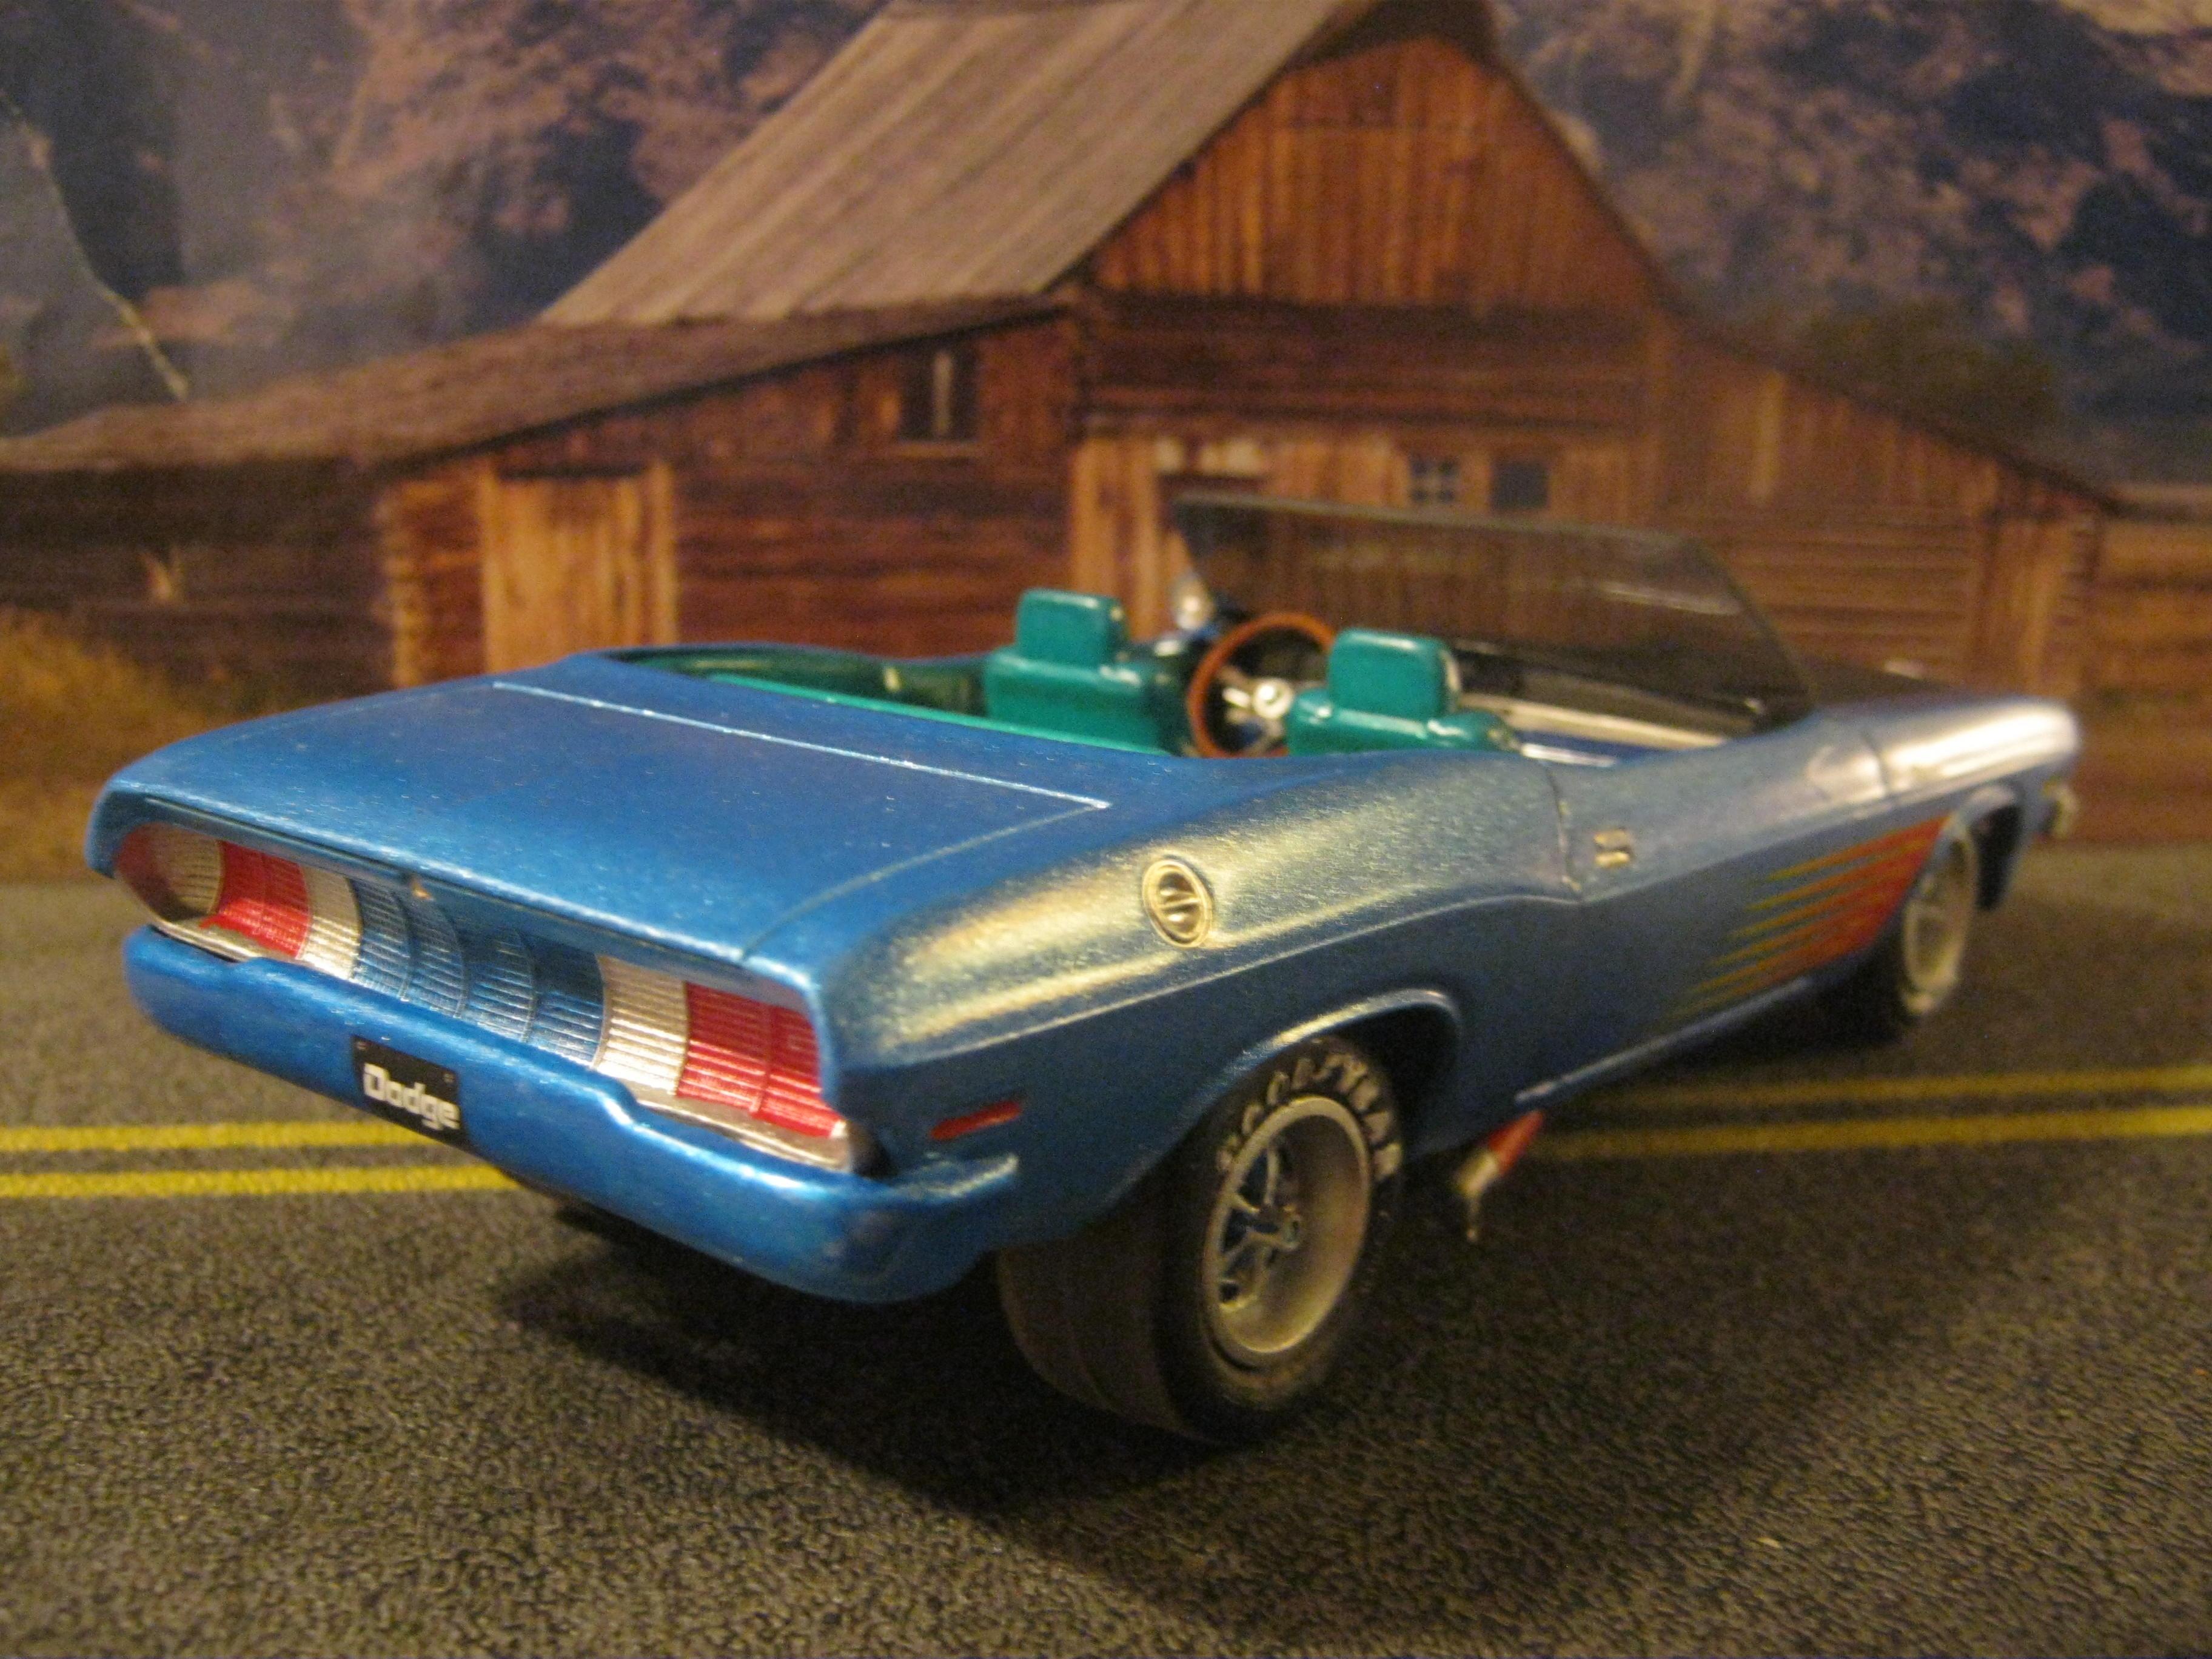
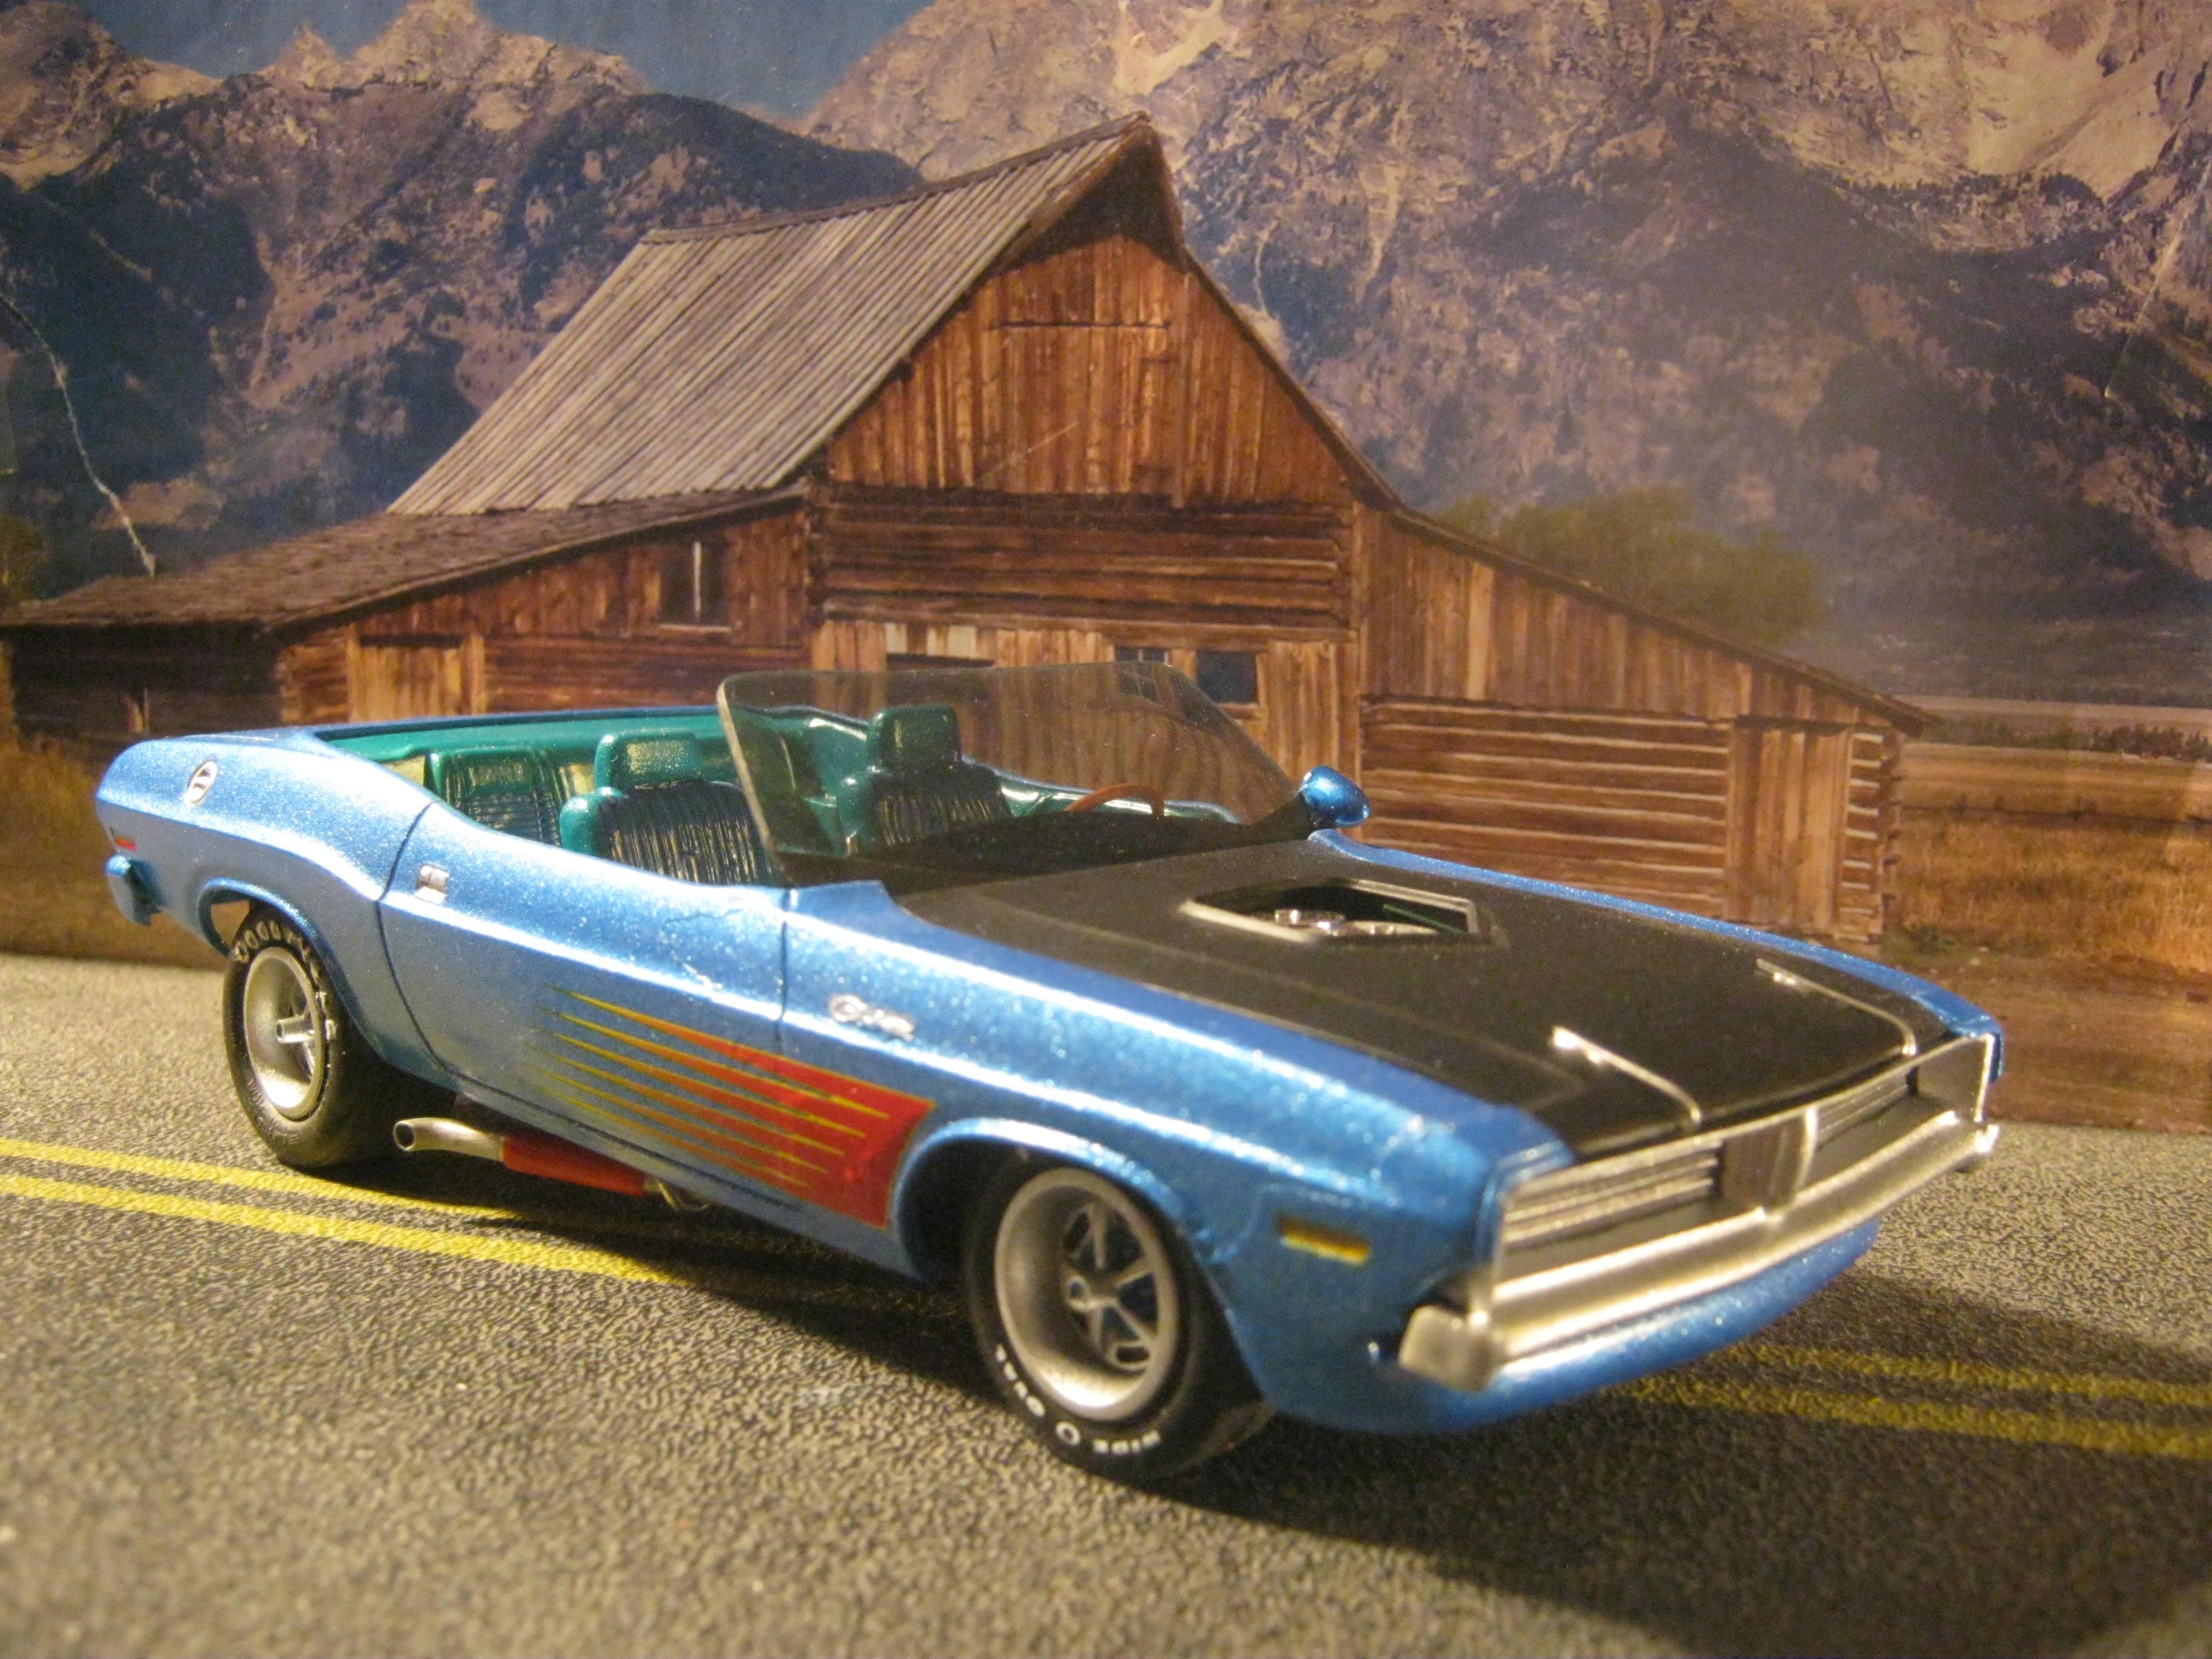
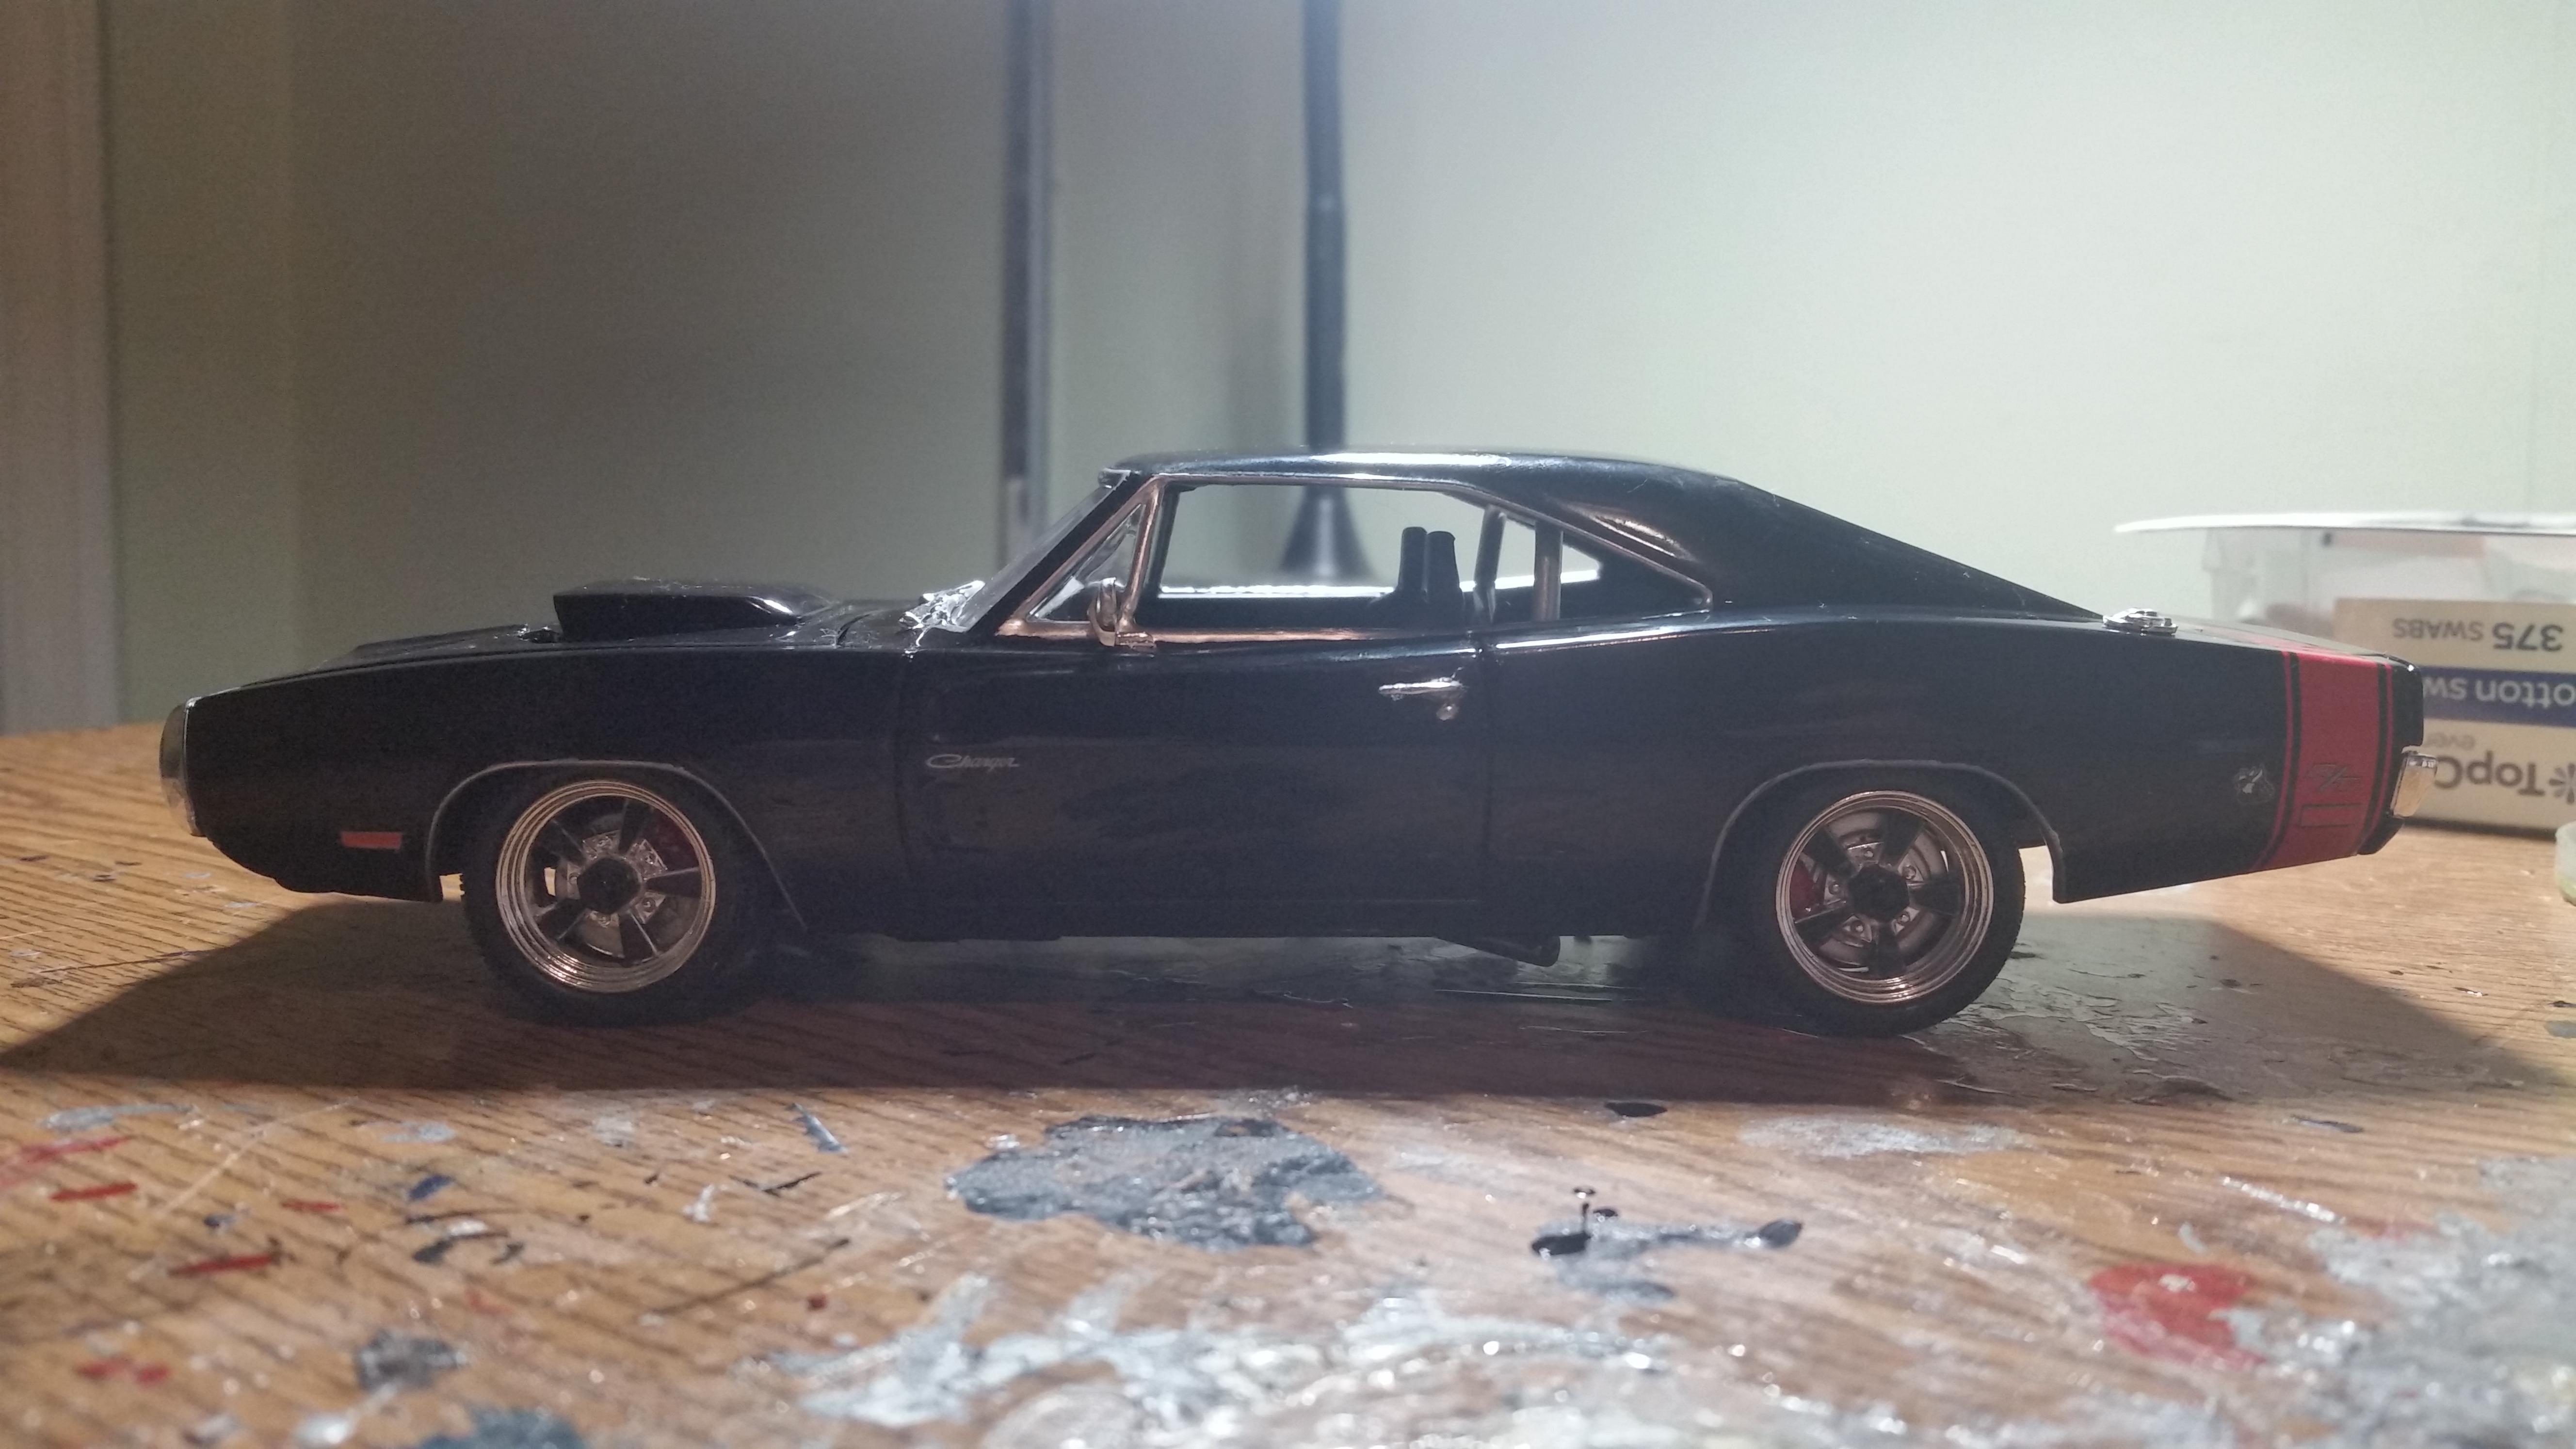
Built from Fast and Furious Dom's Charger kit. Kit's parts like the motor+ blower and wheels/tires were raided for other projects, but as I had most of the essential parts present I was customizing anyway. Mods as followed: Hood scoop from Revell '68 Charger drag option placed on '70 hood. 7.0 litre Dodge Viper motor from scrap Revell Viper ACR build, with a custom made vortech style super charger setup using a resin turbo, exhaust and sprue pieces. Styrene scrap trees bent as intake tubes and oil filters turned into air filters as the original pieces were missing. Electronic fan/radiator comes from an unknown source. Custom built side exhaust. Seats from Dodge Viper ACR. Wheels are Radio Shack X-mods, with front tires sourced from an AMT Fast and Furious Supra and rear tires from Revell C5 Corvette. Disc brakes were also sourced from the Viper ACR. Various decals were used from the 68 charger, and the red tail stripe is from the stock '70 Charger. Exterior is Walmart Color Place Gloss Black, cleared with Pledge.
-
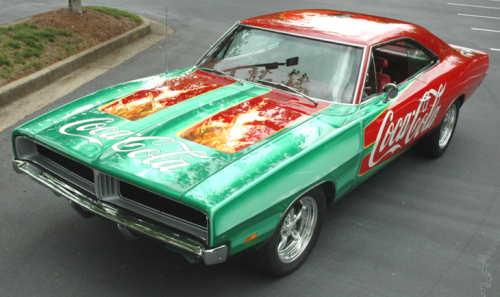
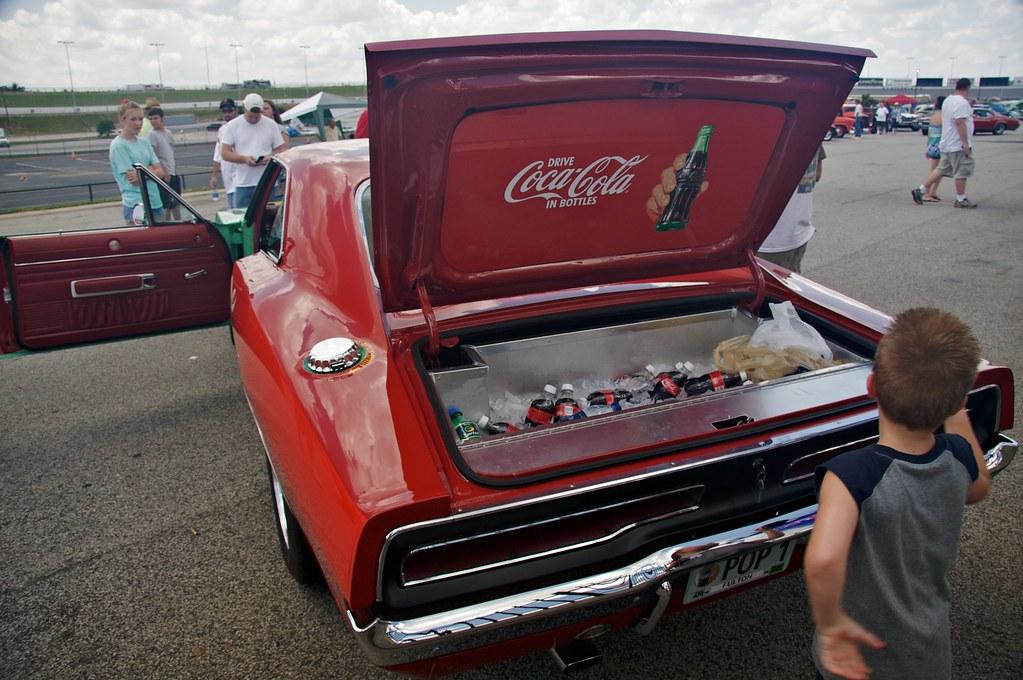
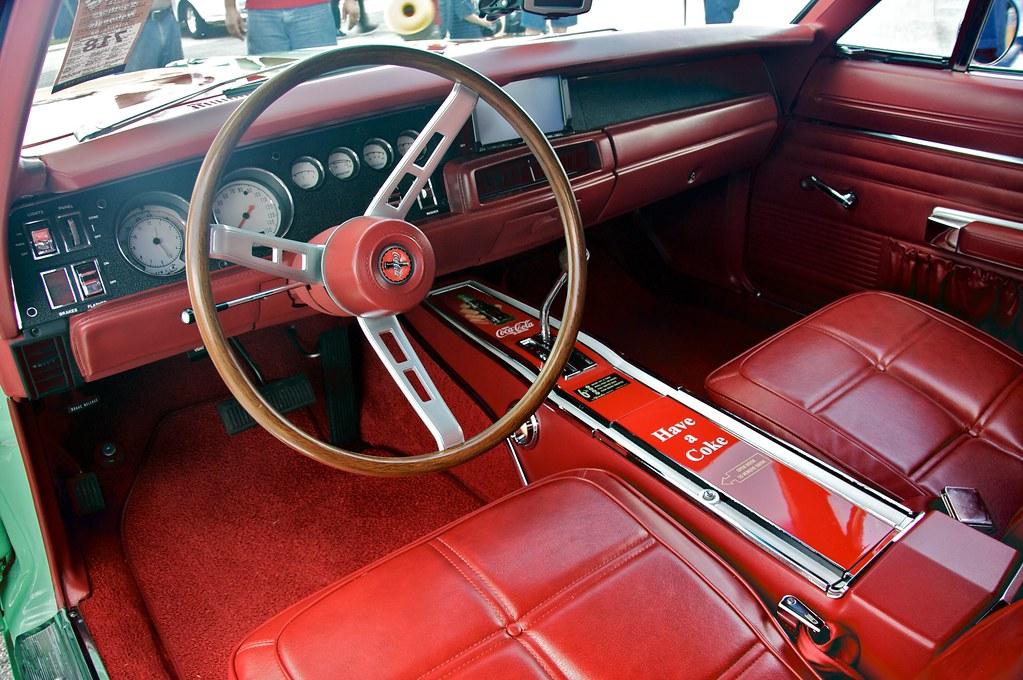
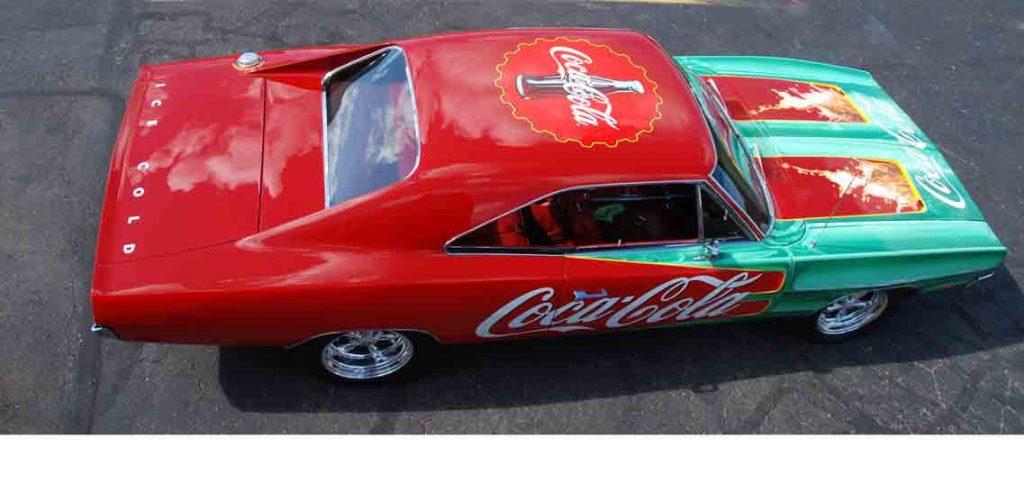
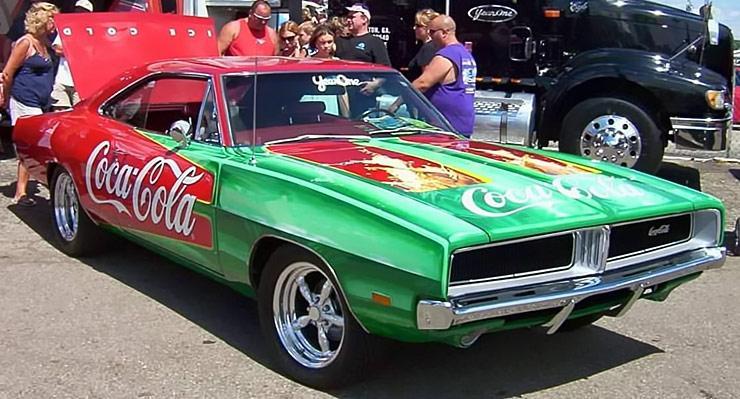
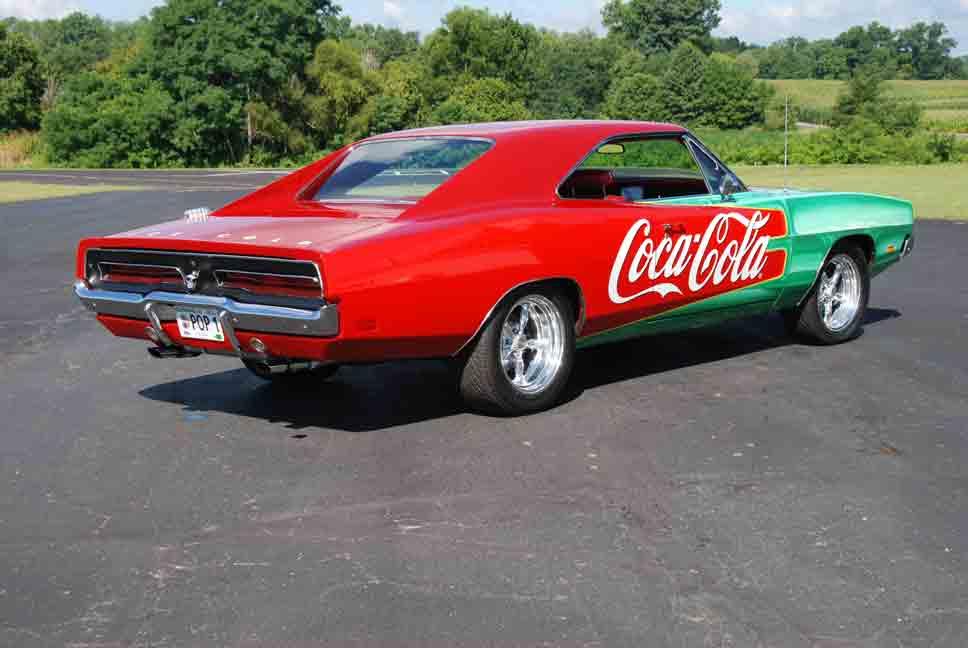
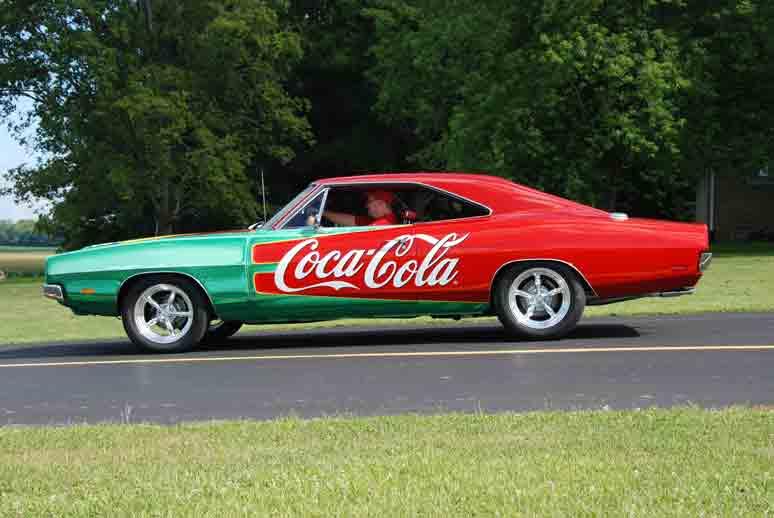
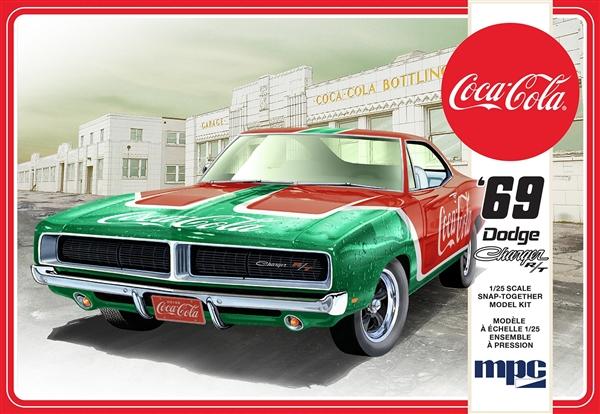
So you know how many of us (myself included) kind of mock Round2 a little for all of the Coke kits they come up with? Yeah, yeah, I know, I know...interesting subject matter, and we don't have to use the decals. Yes, that's why I have several Coke kits. Anyway, so they did the Coke Charger. Now which came first...the kit or the real thing? This surprised me. It's umm...interesting...
-
This one's number 3. Backstory is a poor amateur radio operator needed a used car with a strong electrical system. This one looked like a good deal as an ex-Michigan State cruiser, maybe used by a ranking trooper as it had some nicer features. Colors are are by guess, I couldn't find 2 pictures that agreed.
-
-
Just completed this FJ6 Charger a few weeks ago. I've been waiting on the white side stripes for a month to no avail ... So I decided to post it anyway ... I added a 440 instead of the kits Hemi engine and the rare M51 power sunroof.(Only a 112 were built with this option.) Door locks, radio antenna, and a window sticker were a few items that I added as well. I also added a close but not perfect M91 Luggage rack...another not to often seen option. It sports a V1W white vinyl roof which was supposed to bring out the side stripes ... :-) The deck lid was cut out and a few minor details were added... The front grill has the black surround added as well, by making a template then cutting it out of black electrical tape.
-
The Charger Squad. The Hemi Orange 69 I built a few years ago, it fell off the shelf and still needs some parts put back on.
-
Gonna start posting some of my pics that got lost. Here is a 1969 Charger that I did a few years ago. Guards Red and Black 1 (7) by Eric Lucas, on Flickr 1 (8) by Eric Lucas, on Flickr 1 (9) by Eric Lucas, on Flickr 1 (10) by Eric Lucas, on Flickr 1 (12) by Eric Lucas, on Flickr
-
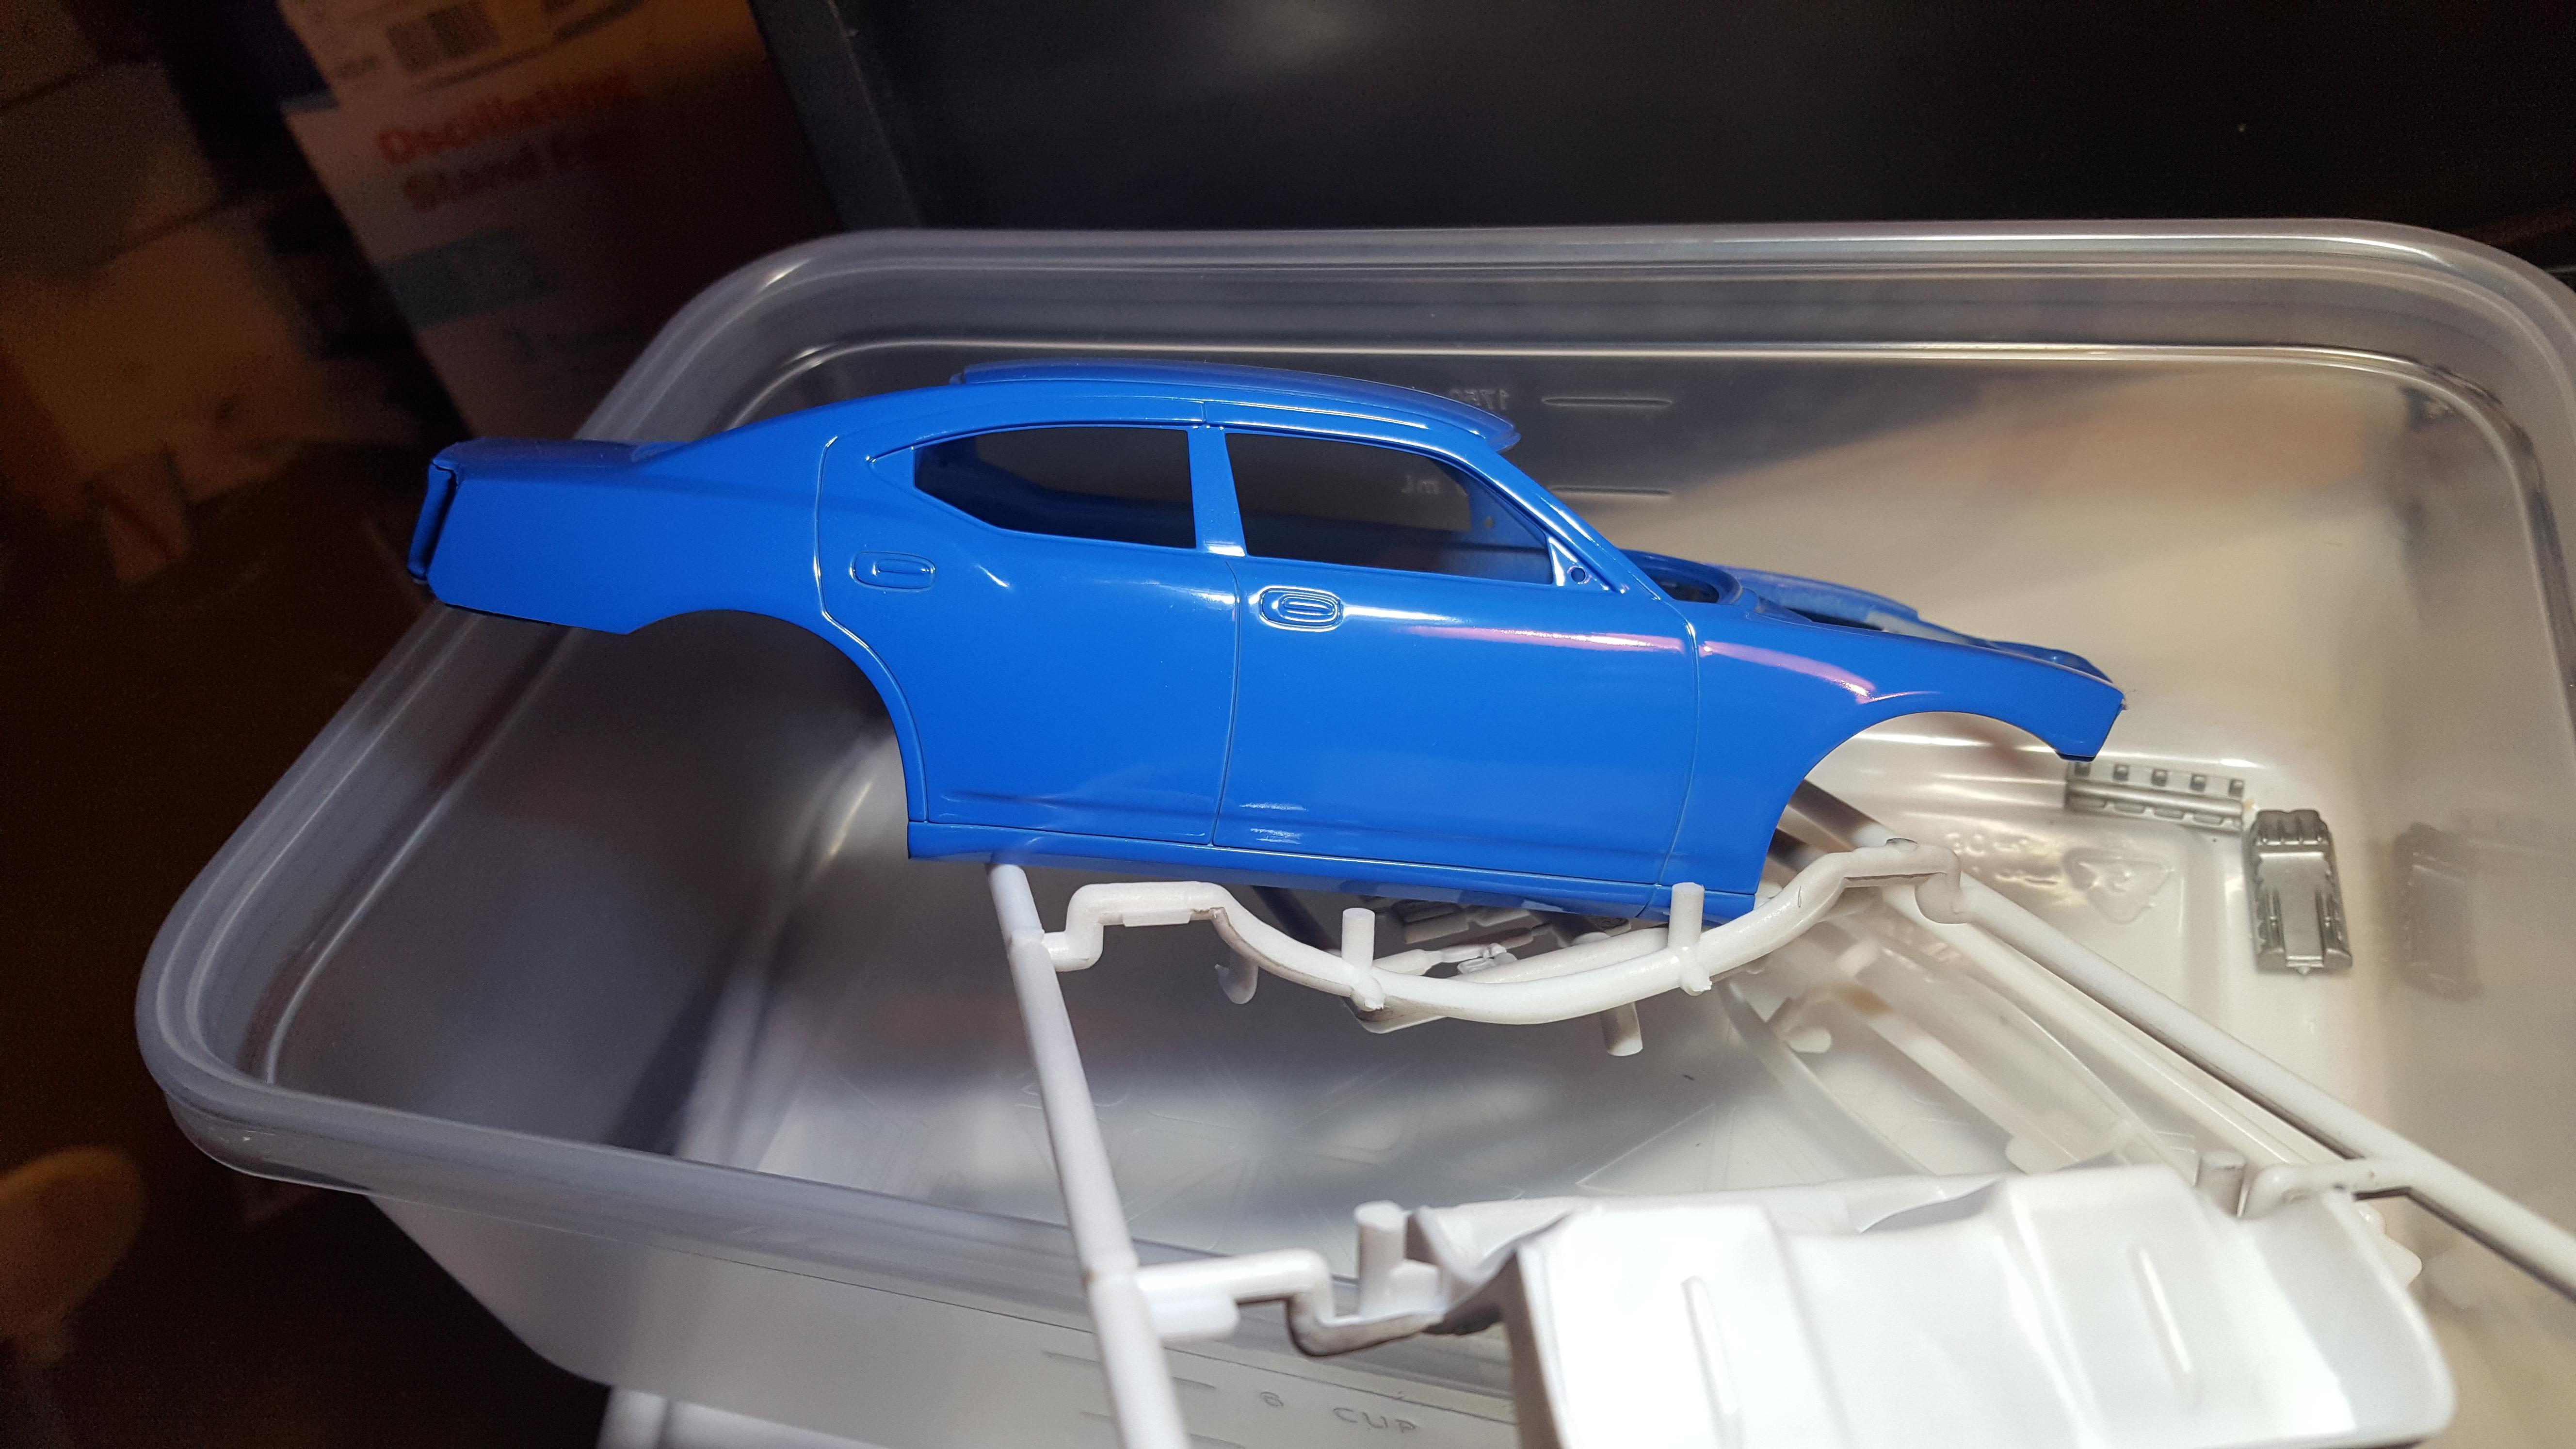
Finished this one up yesterday! Not a bad kit at all and easy to convert to a street machine. Painted Testors' Go Mango with Tamiya TS-65 Pearl clear. Interior seats were taken from a Revell 68 Charger along with the exhaust pipes which were cut down to fit onto the kit supplied headers. I had an extra 68 so I used the tail light panel from it to make a hybrid 68/70 Charger. Thanks for looking and all comments welcomed.
-
I got all the rear stripes put on the Chargers now. Check them out. 68 Flame Red 69 Sublime green 70 F&F Go Mango 70 Sun Yellow 70 Panther Pink Thanks for looking, comments welcomed.
-
I got my Fireball Model works six pack intakes in the other day. Unfortunately they are just a little big to fit on the AMT & Revell 1/25 440 engines. That's okay though because I have a couple of Monogram 1/24 scale MOPARS that those intakes will fit. I went through some boxes and found some six pack intakes that would fit the engines though, so all is still good. Here is the one for the AMT 71 Charger, I forget where I got this intake from, but it is molded in yellow. The tires/wheels for this build I also picked up another 71 Charger, this one is the street machine version with the Hemi. Here is the set of tires/wheels I finally decided for this one. The wheels are some MPC units from something while the tires are those Goodyear Raised White Letter 15s.
-
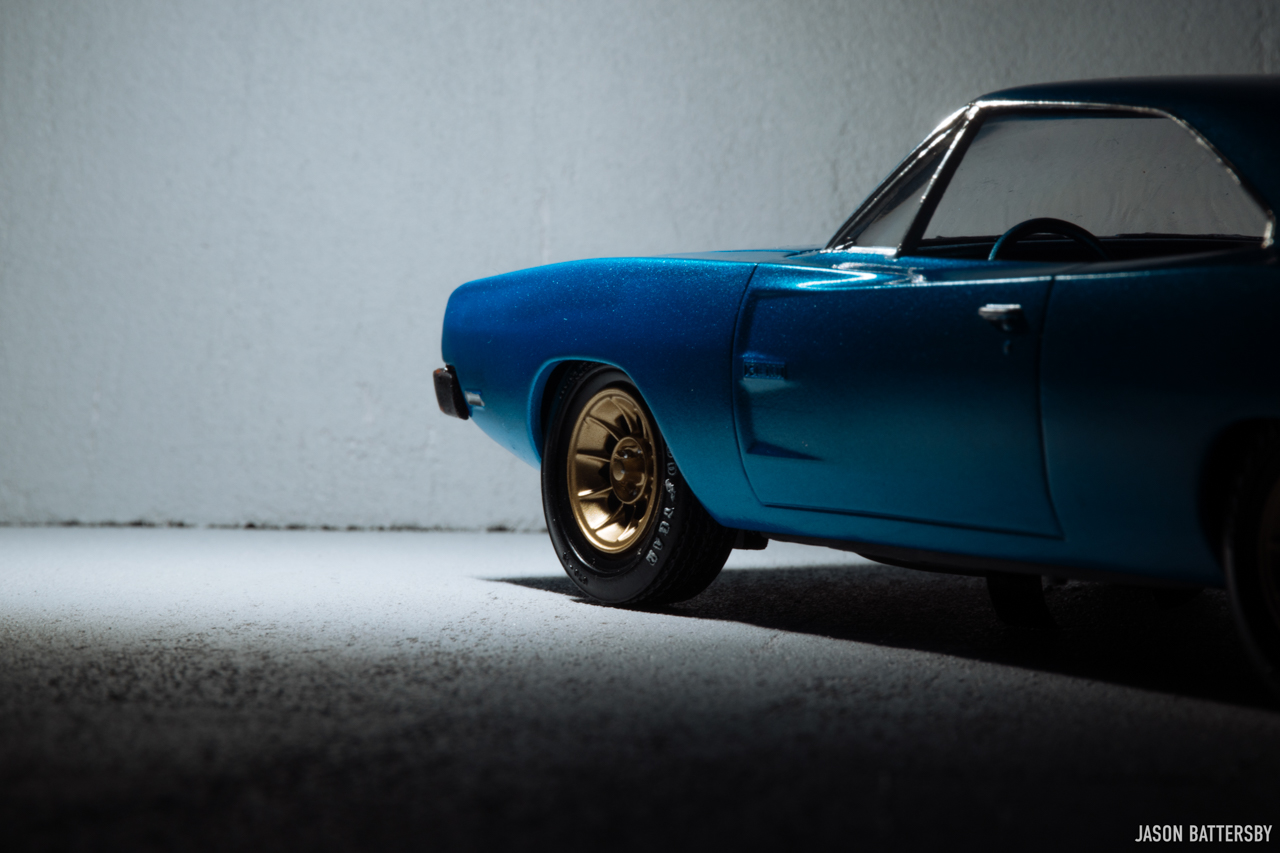
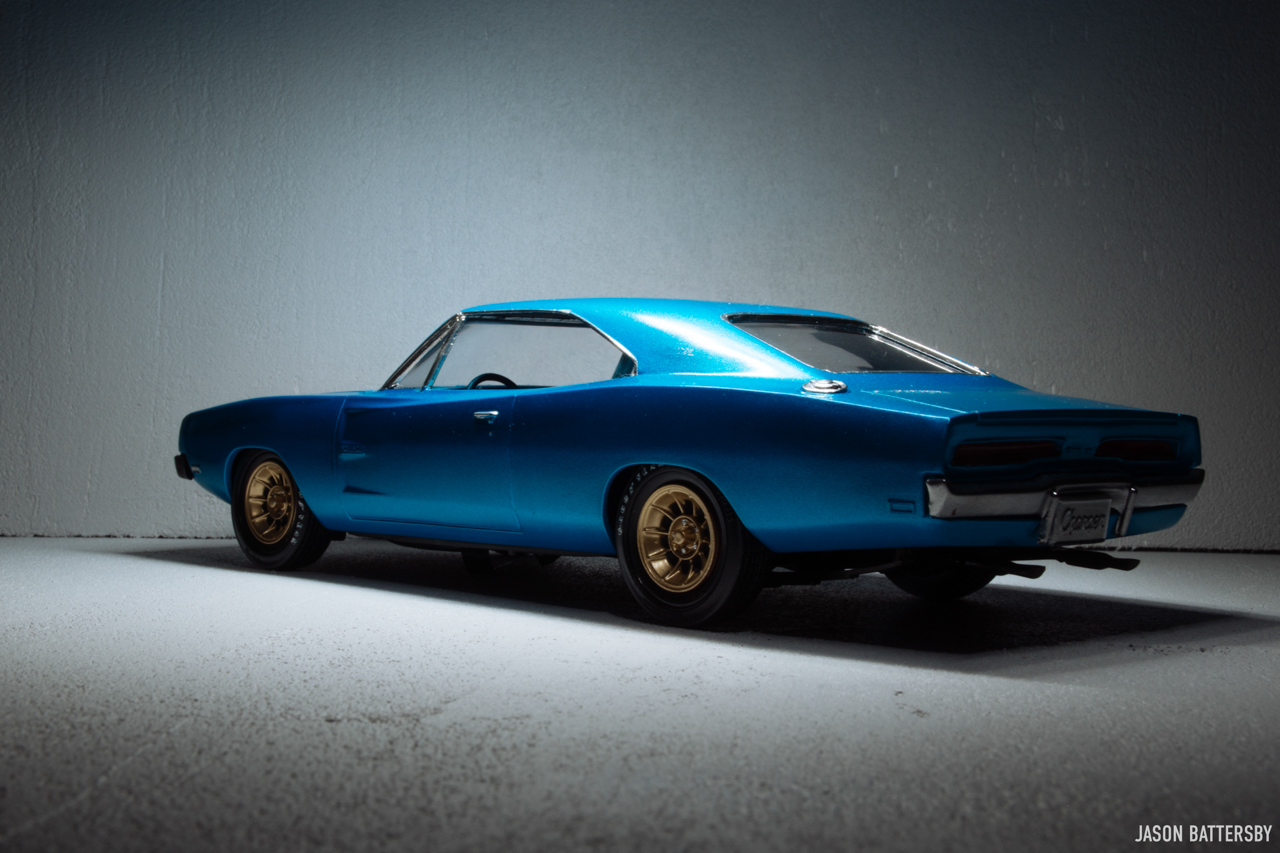
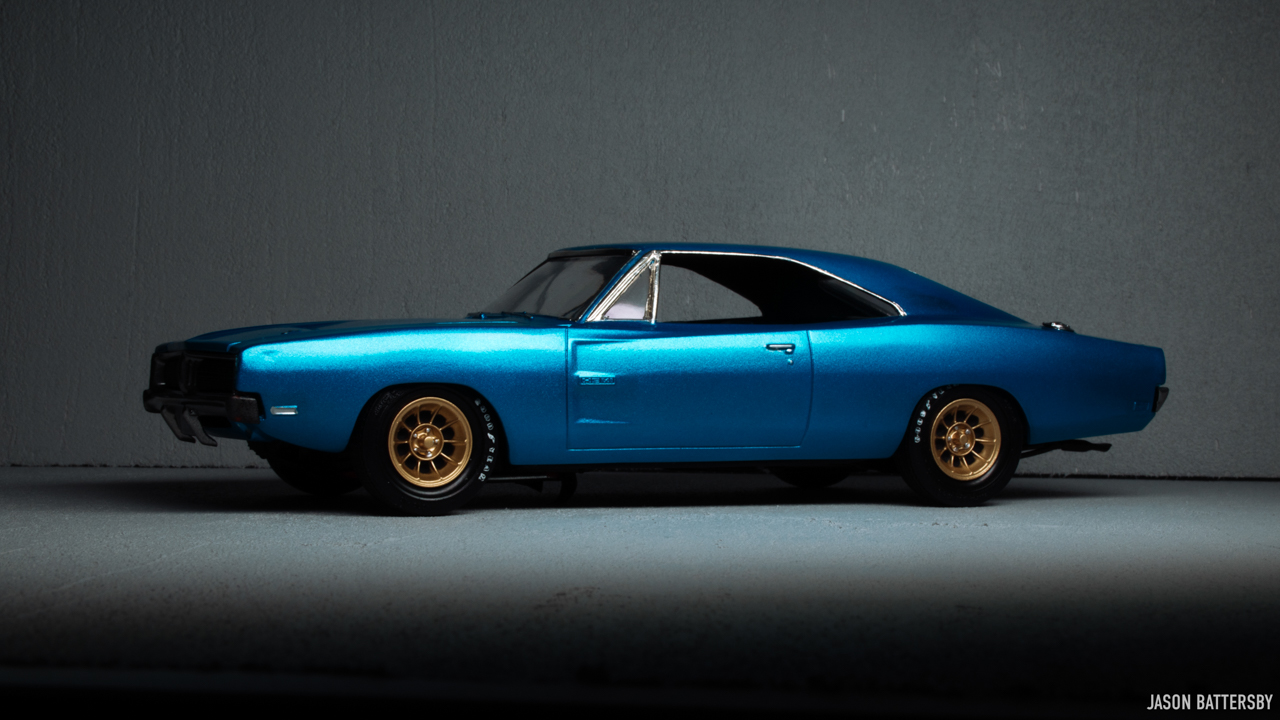
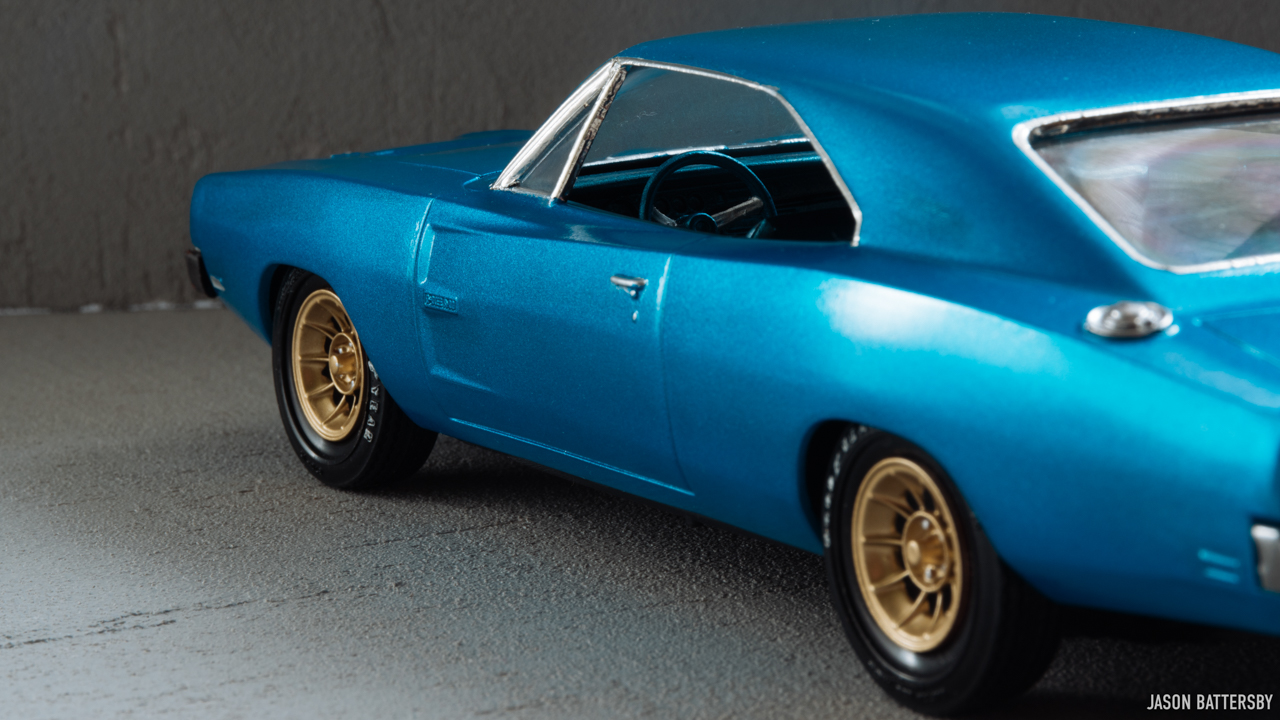
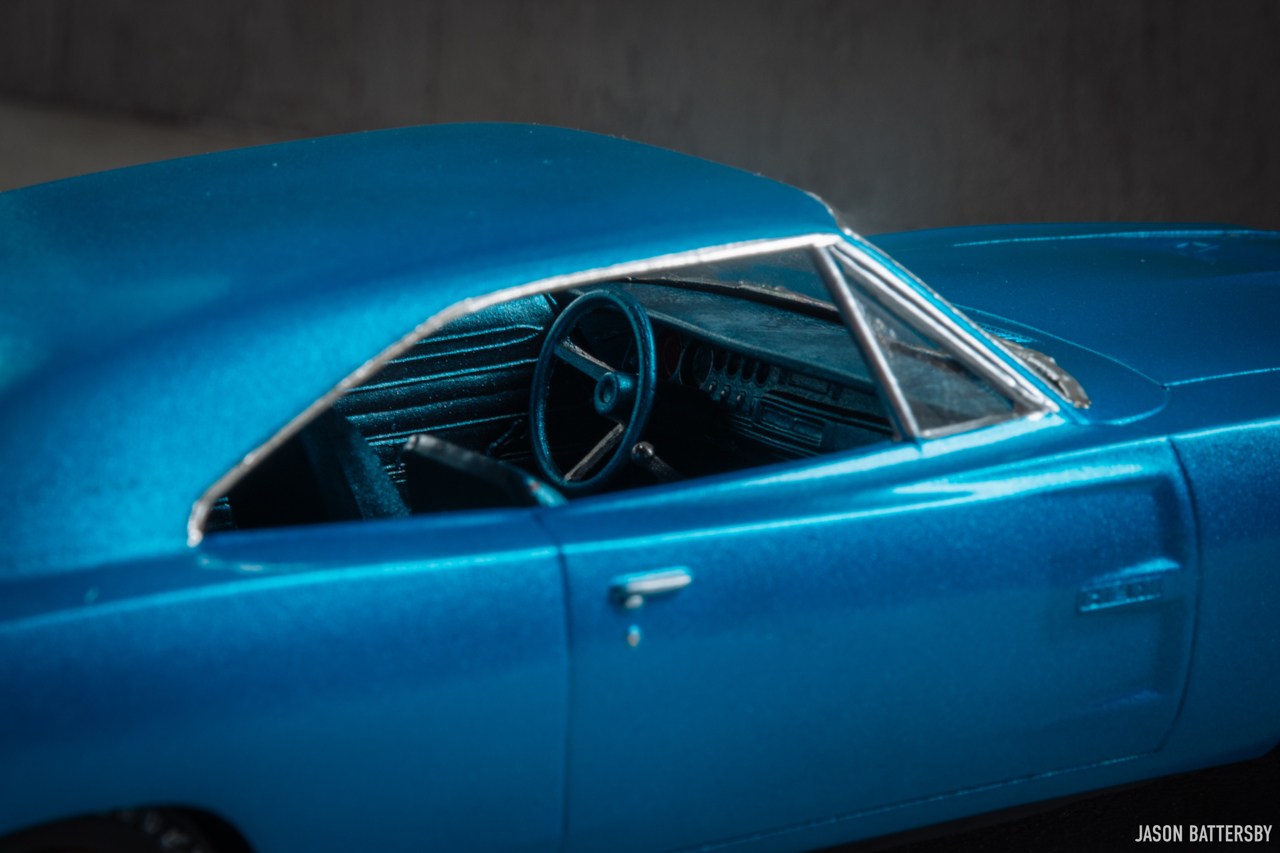
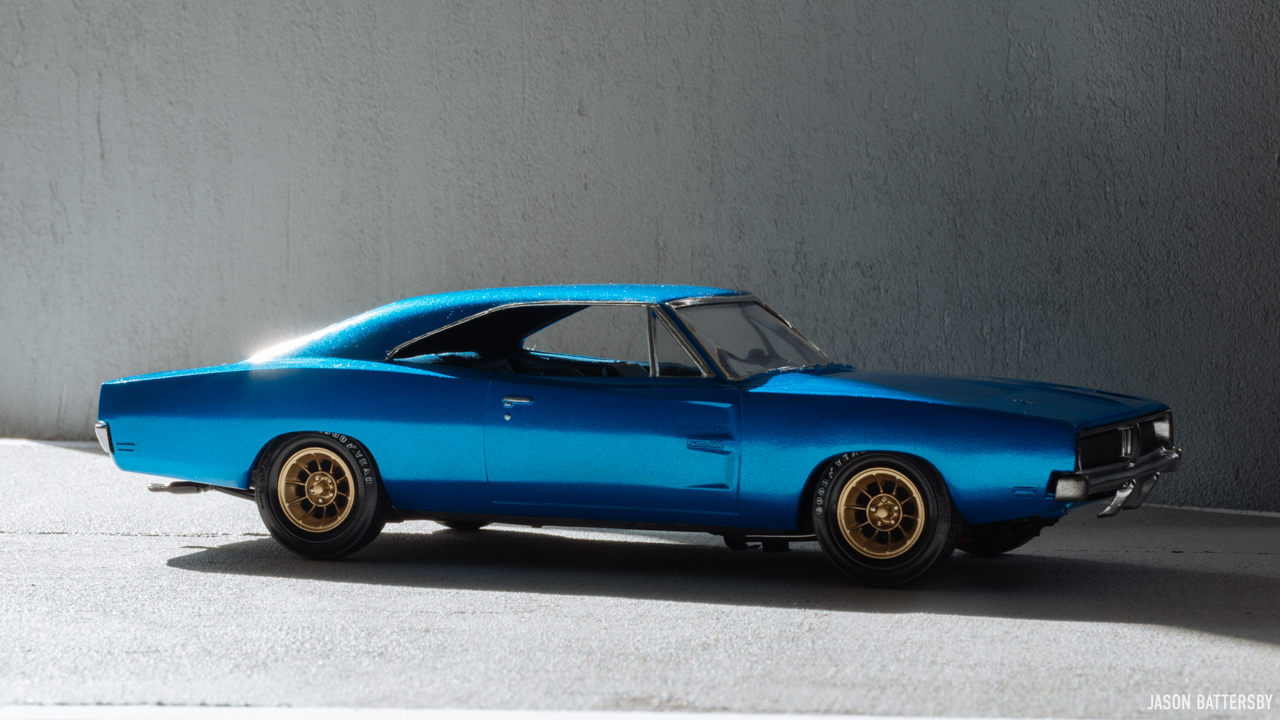
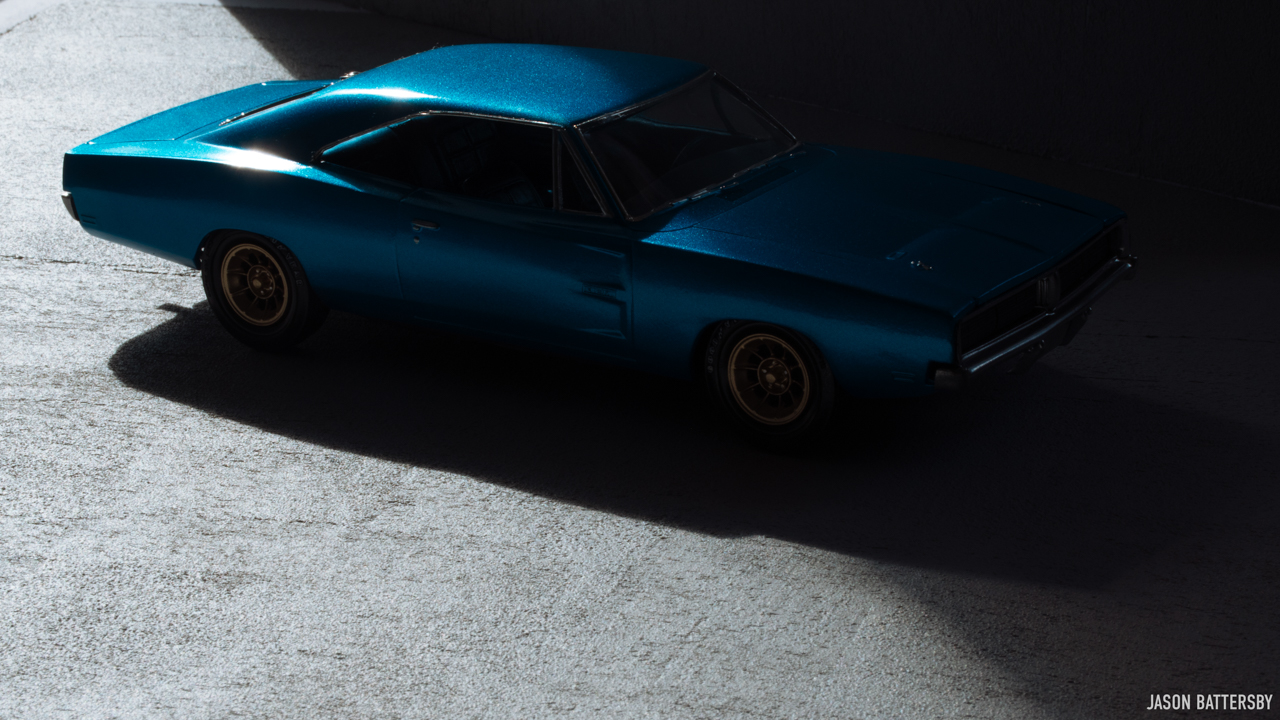
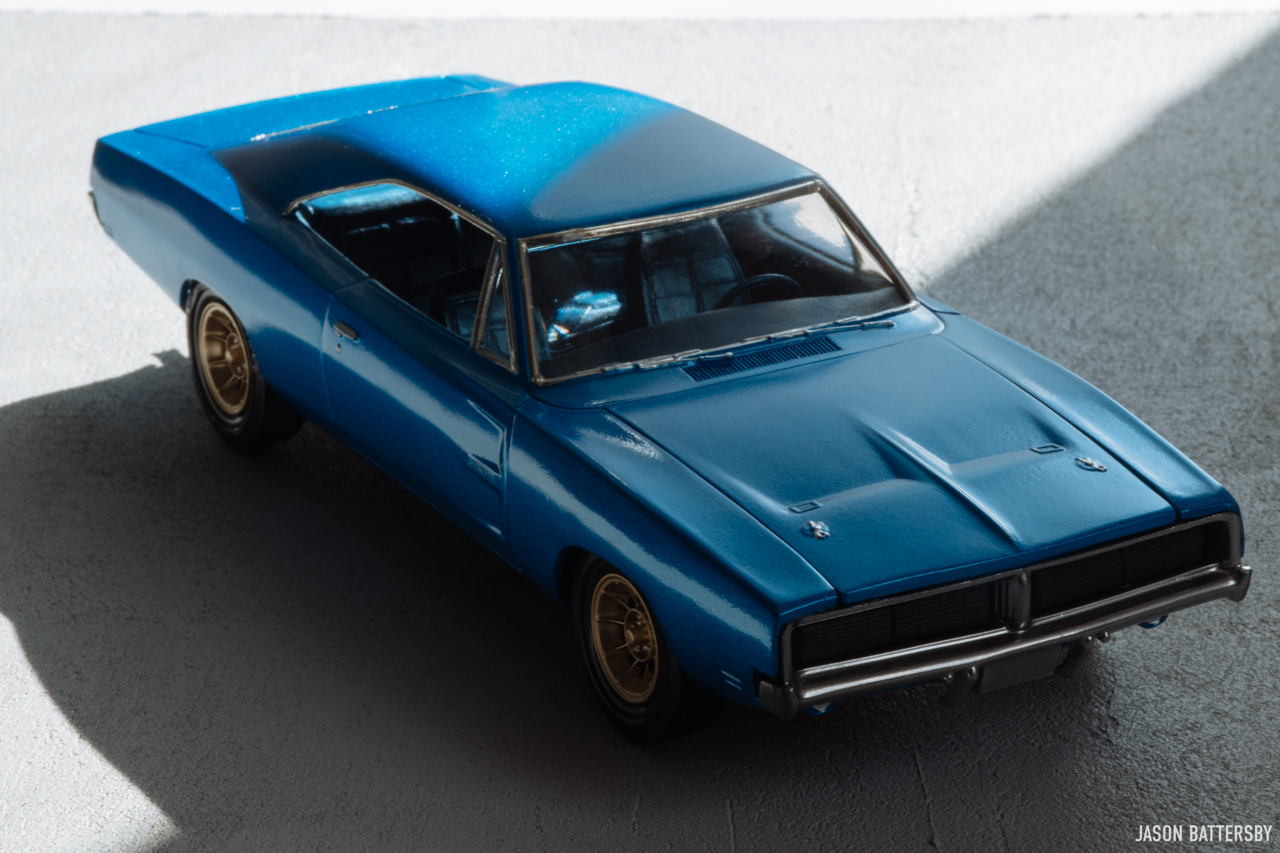
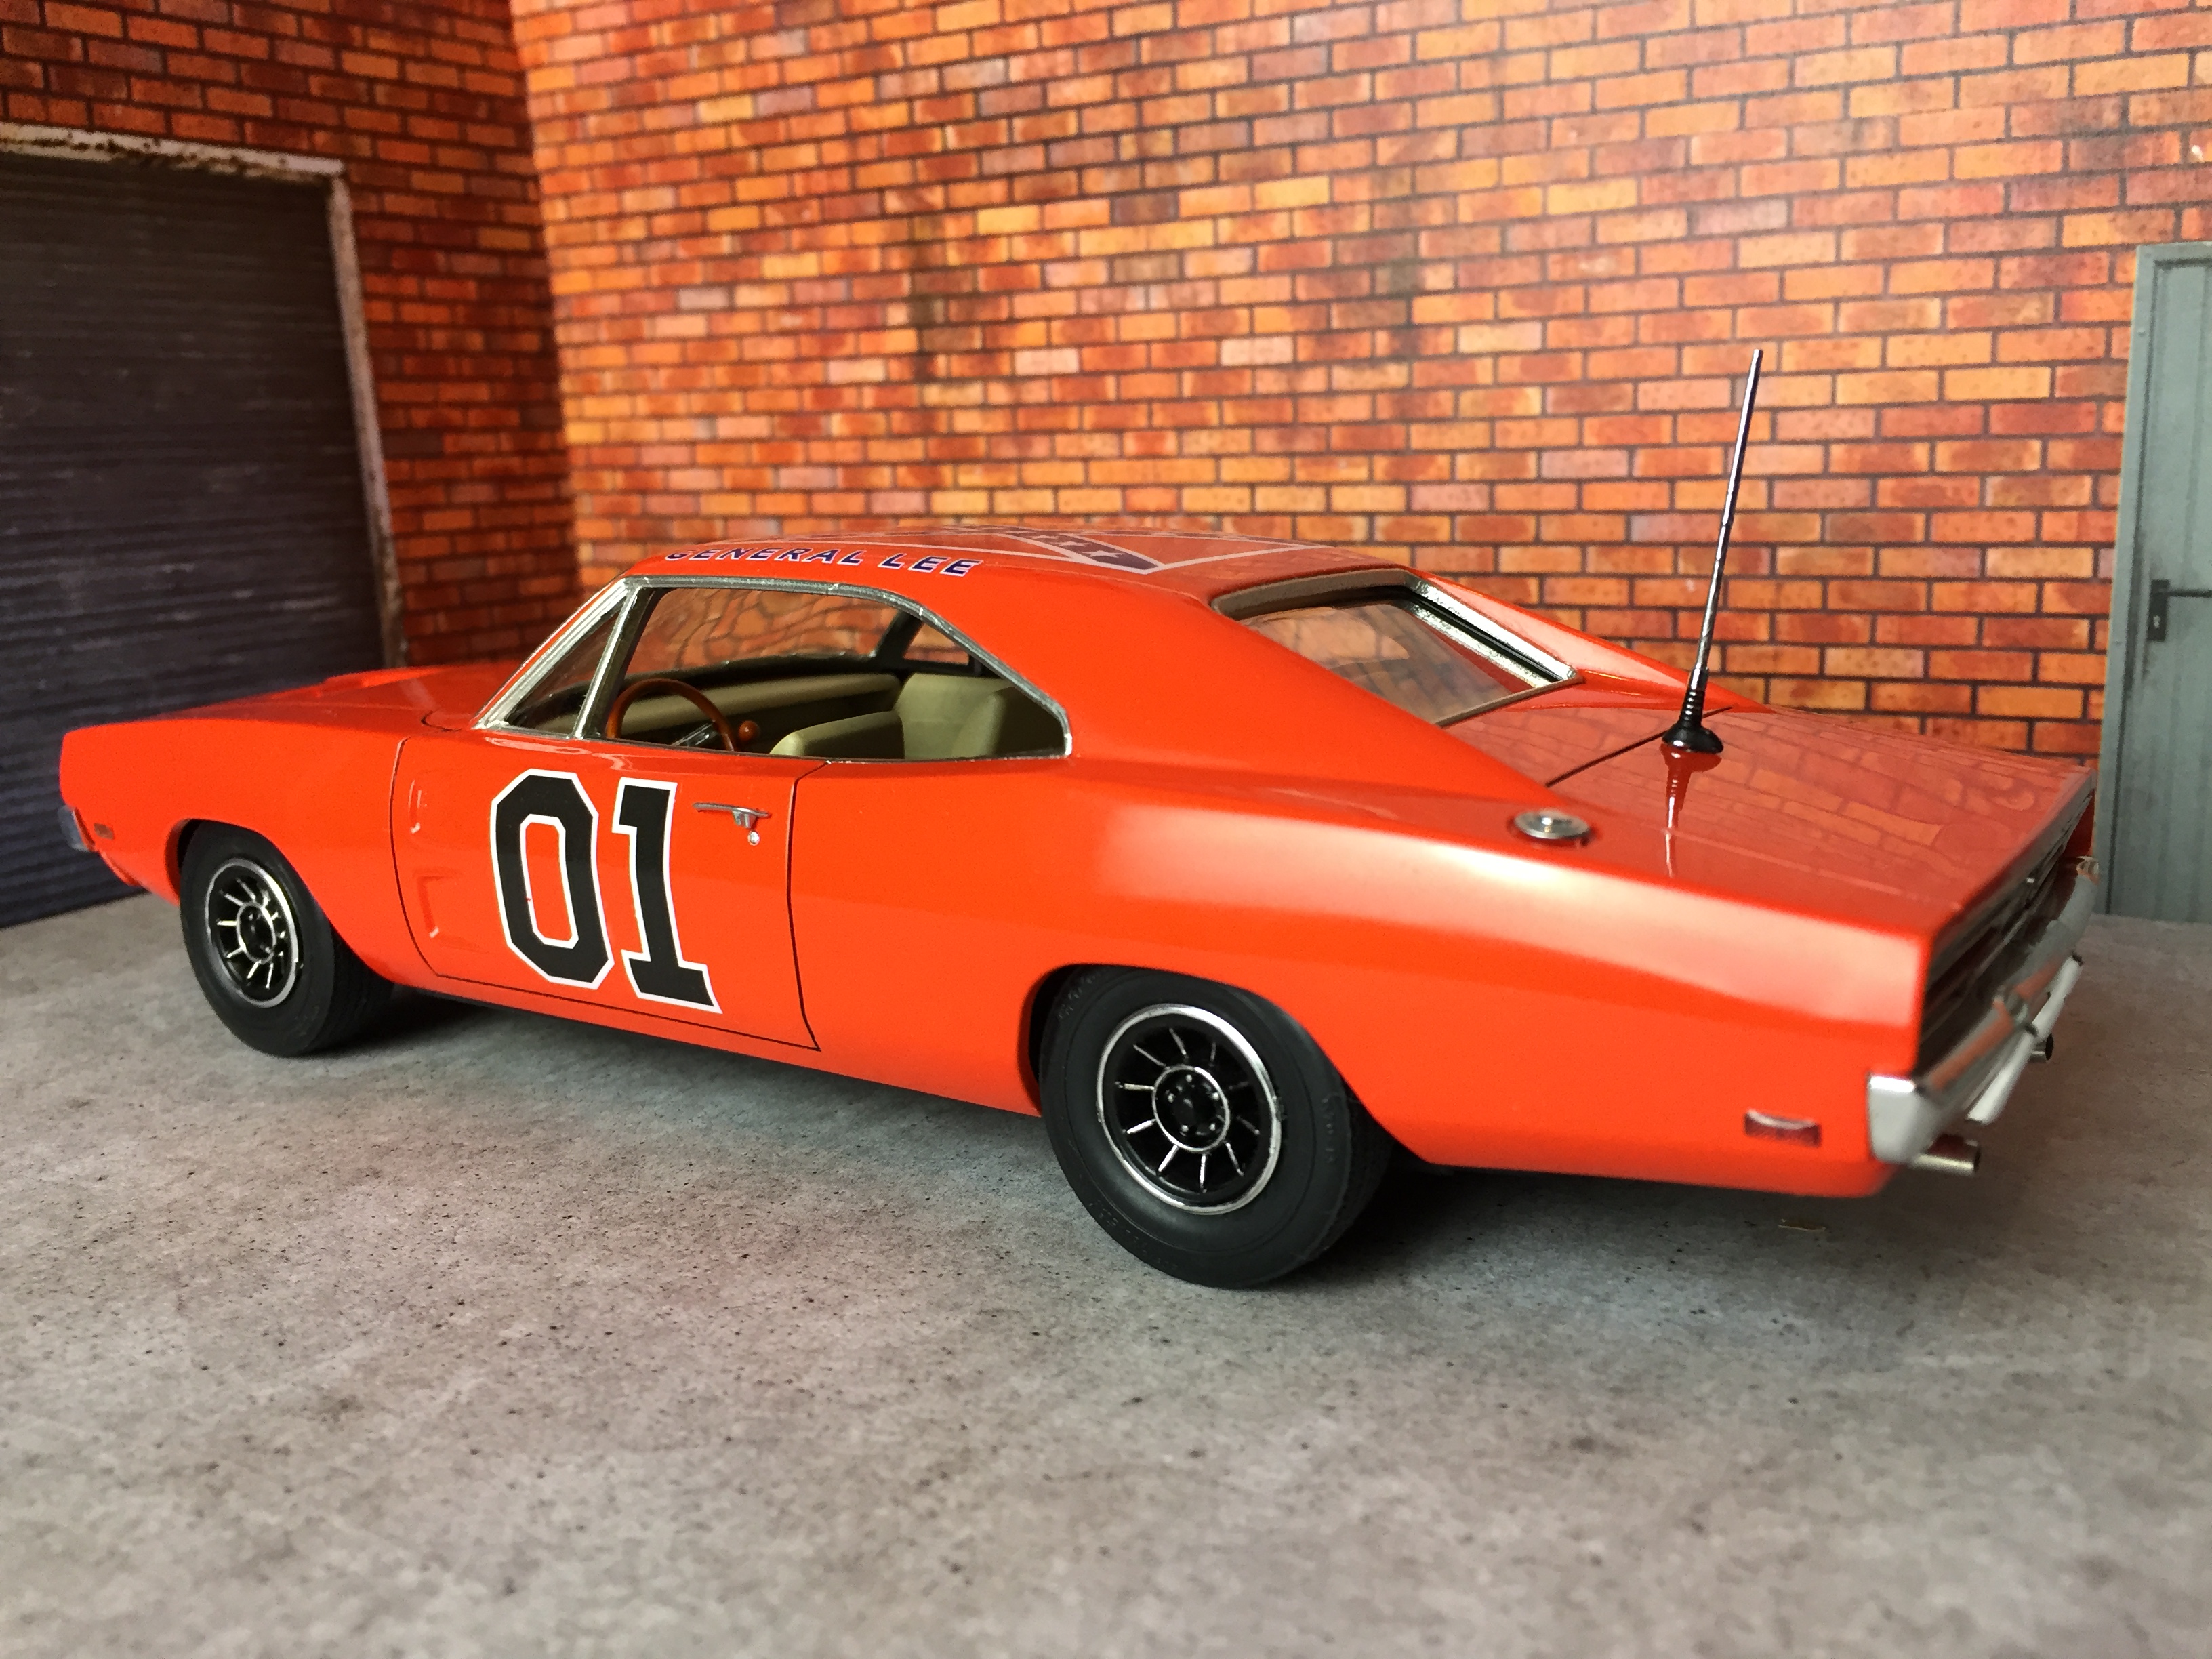
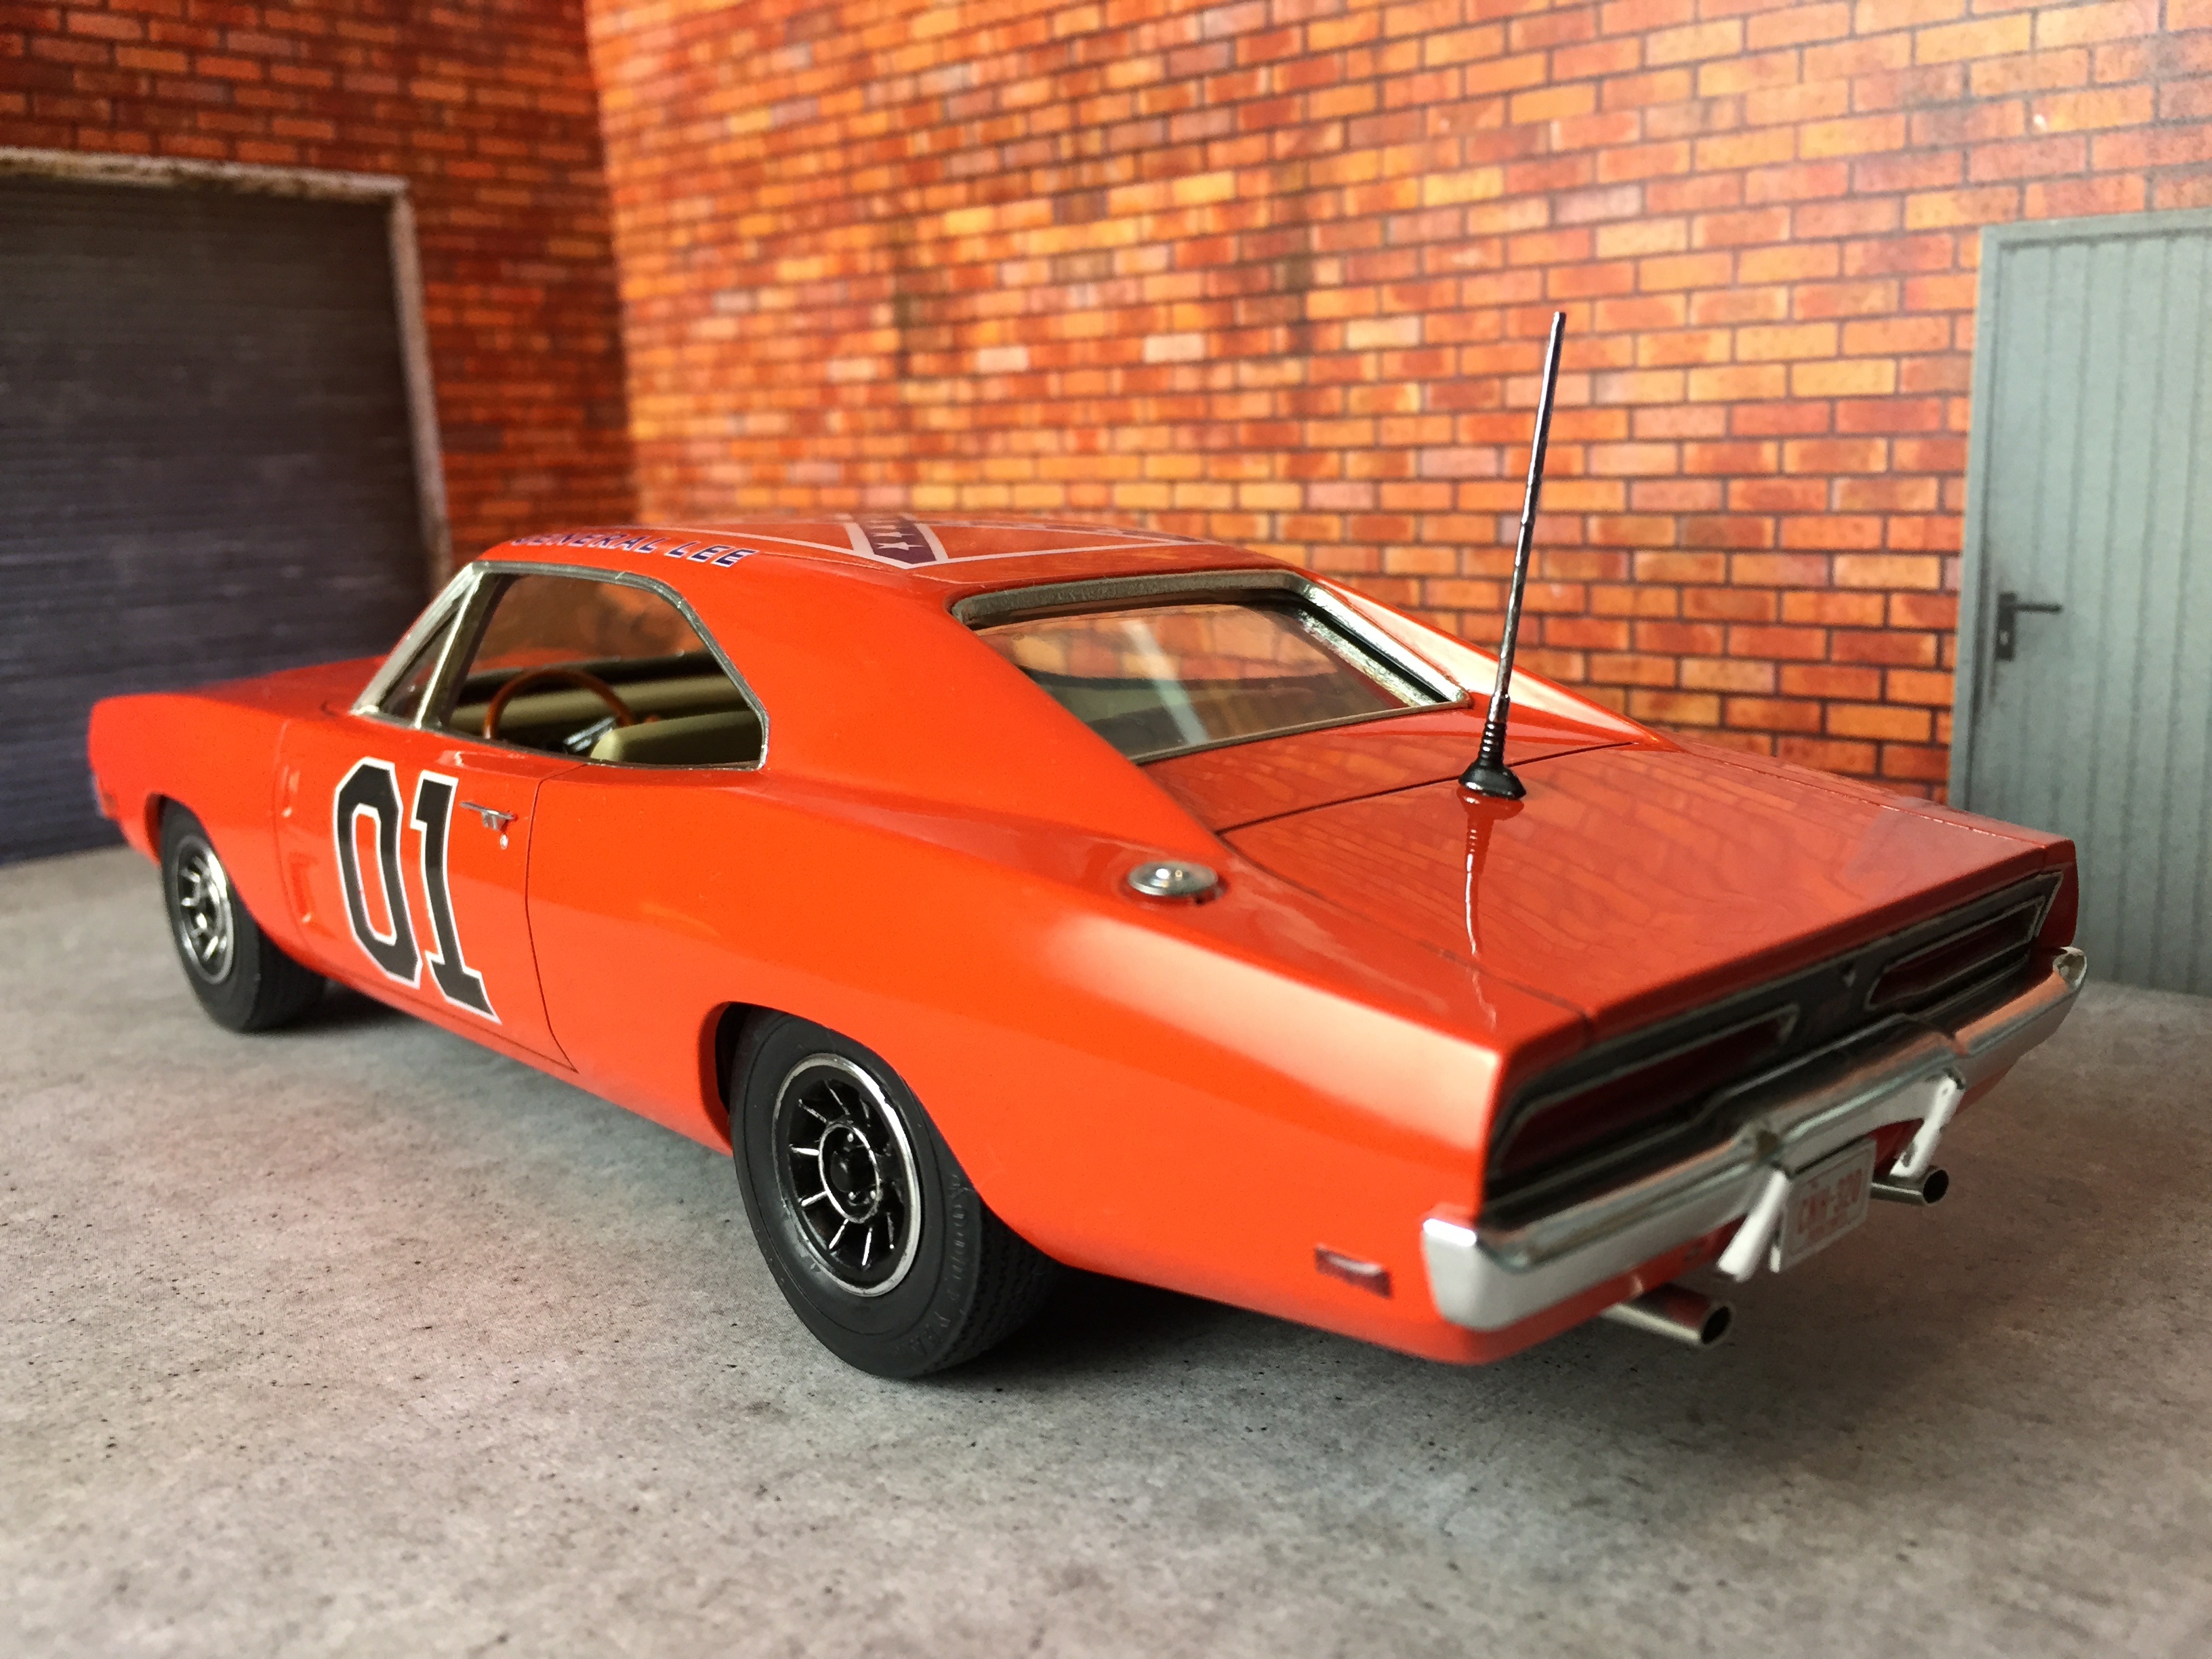
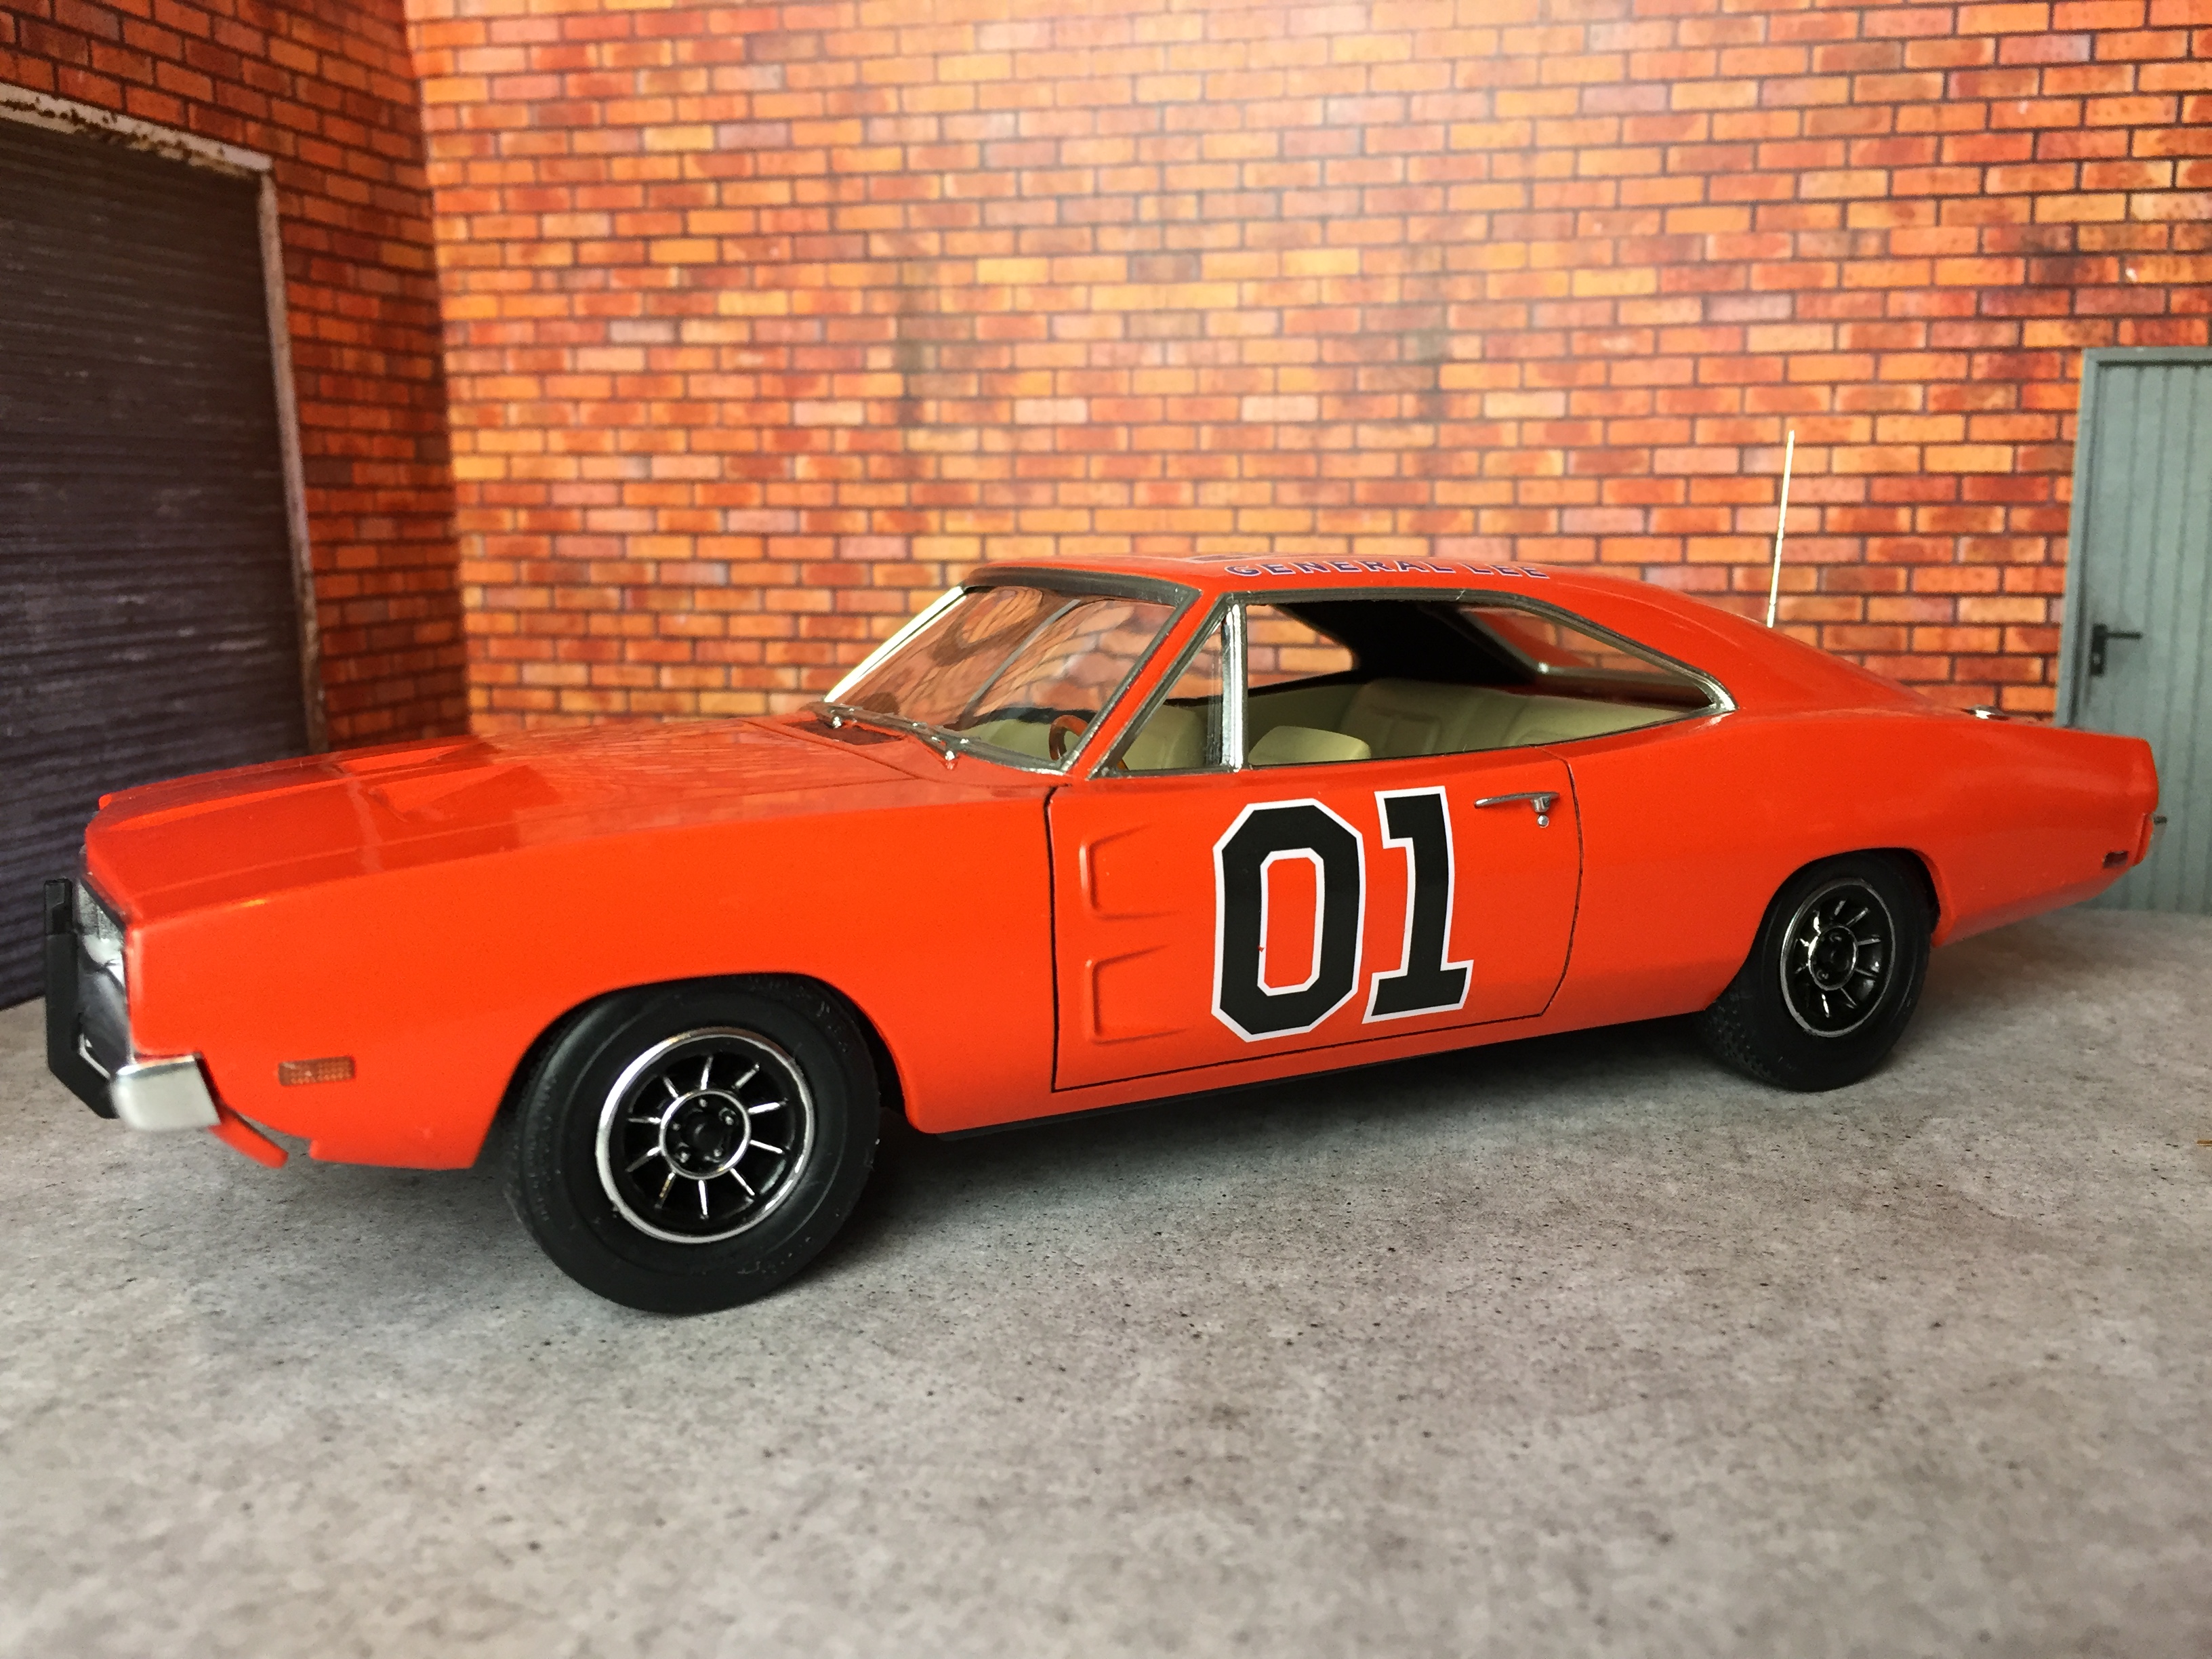
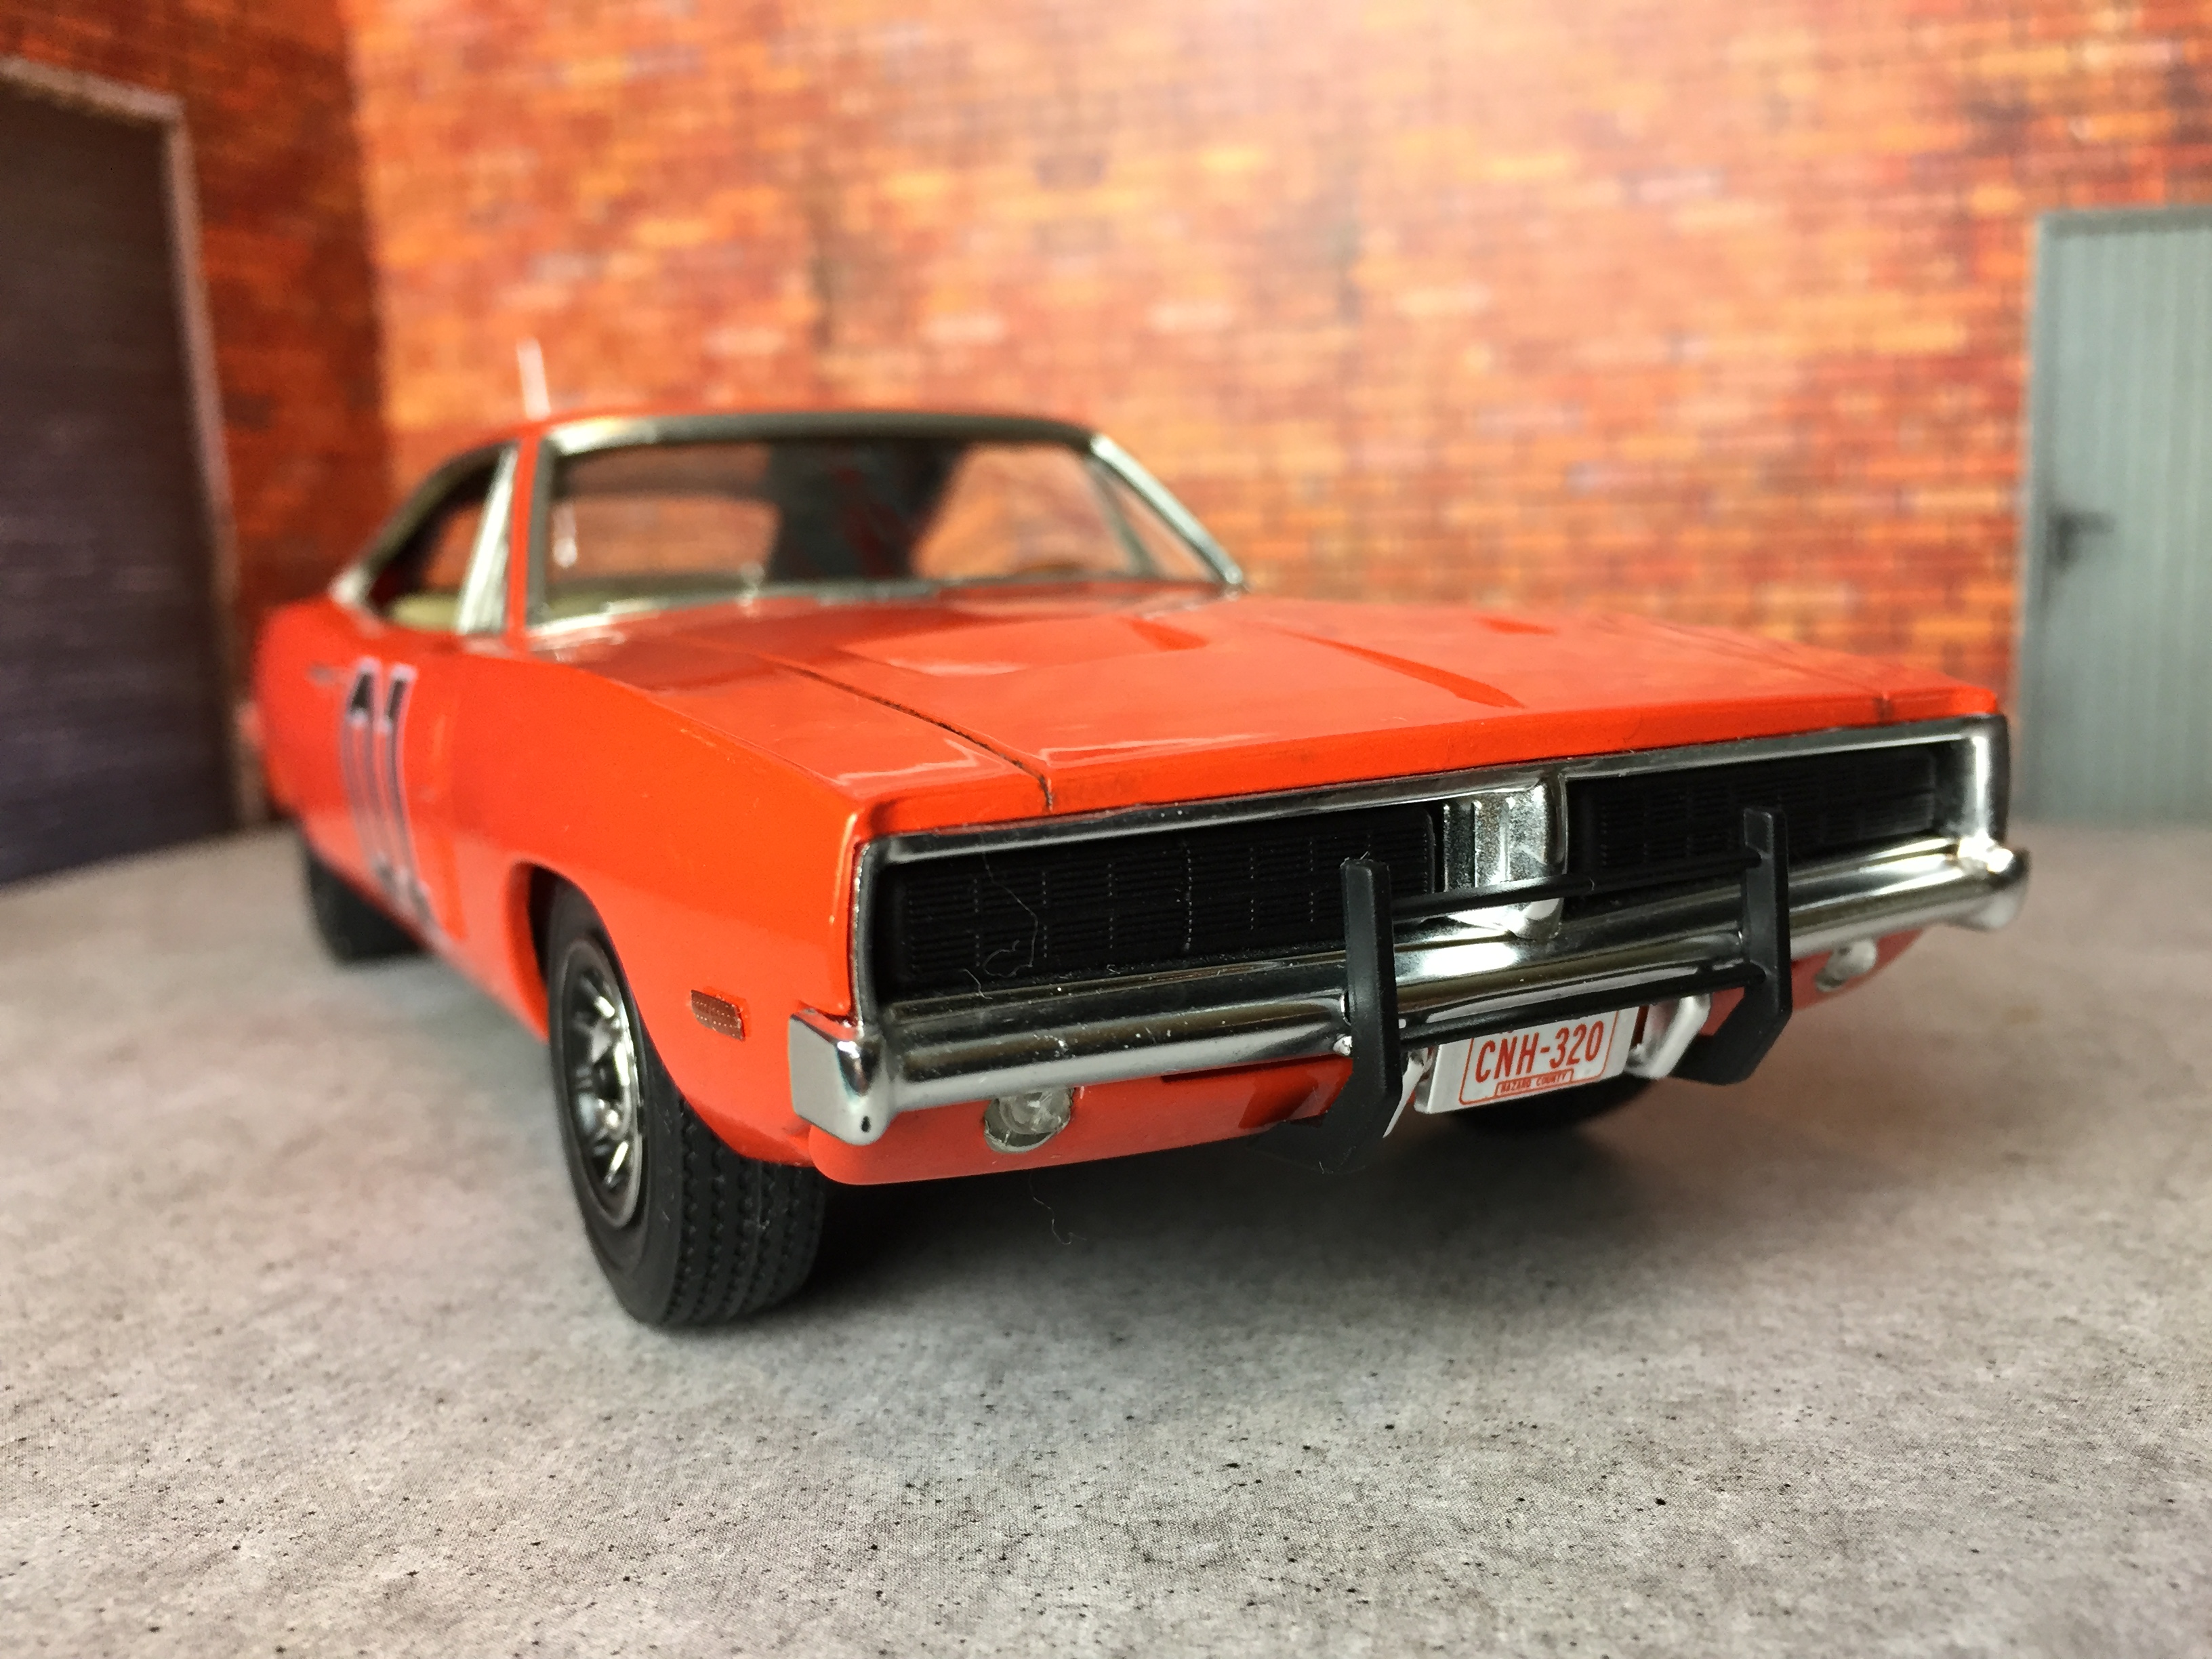
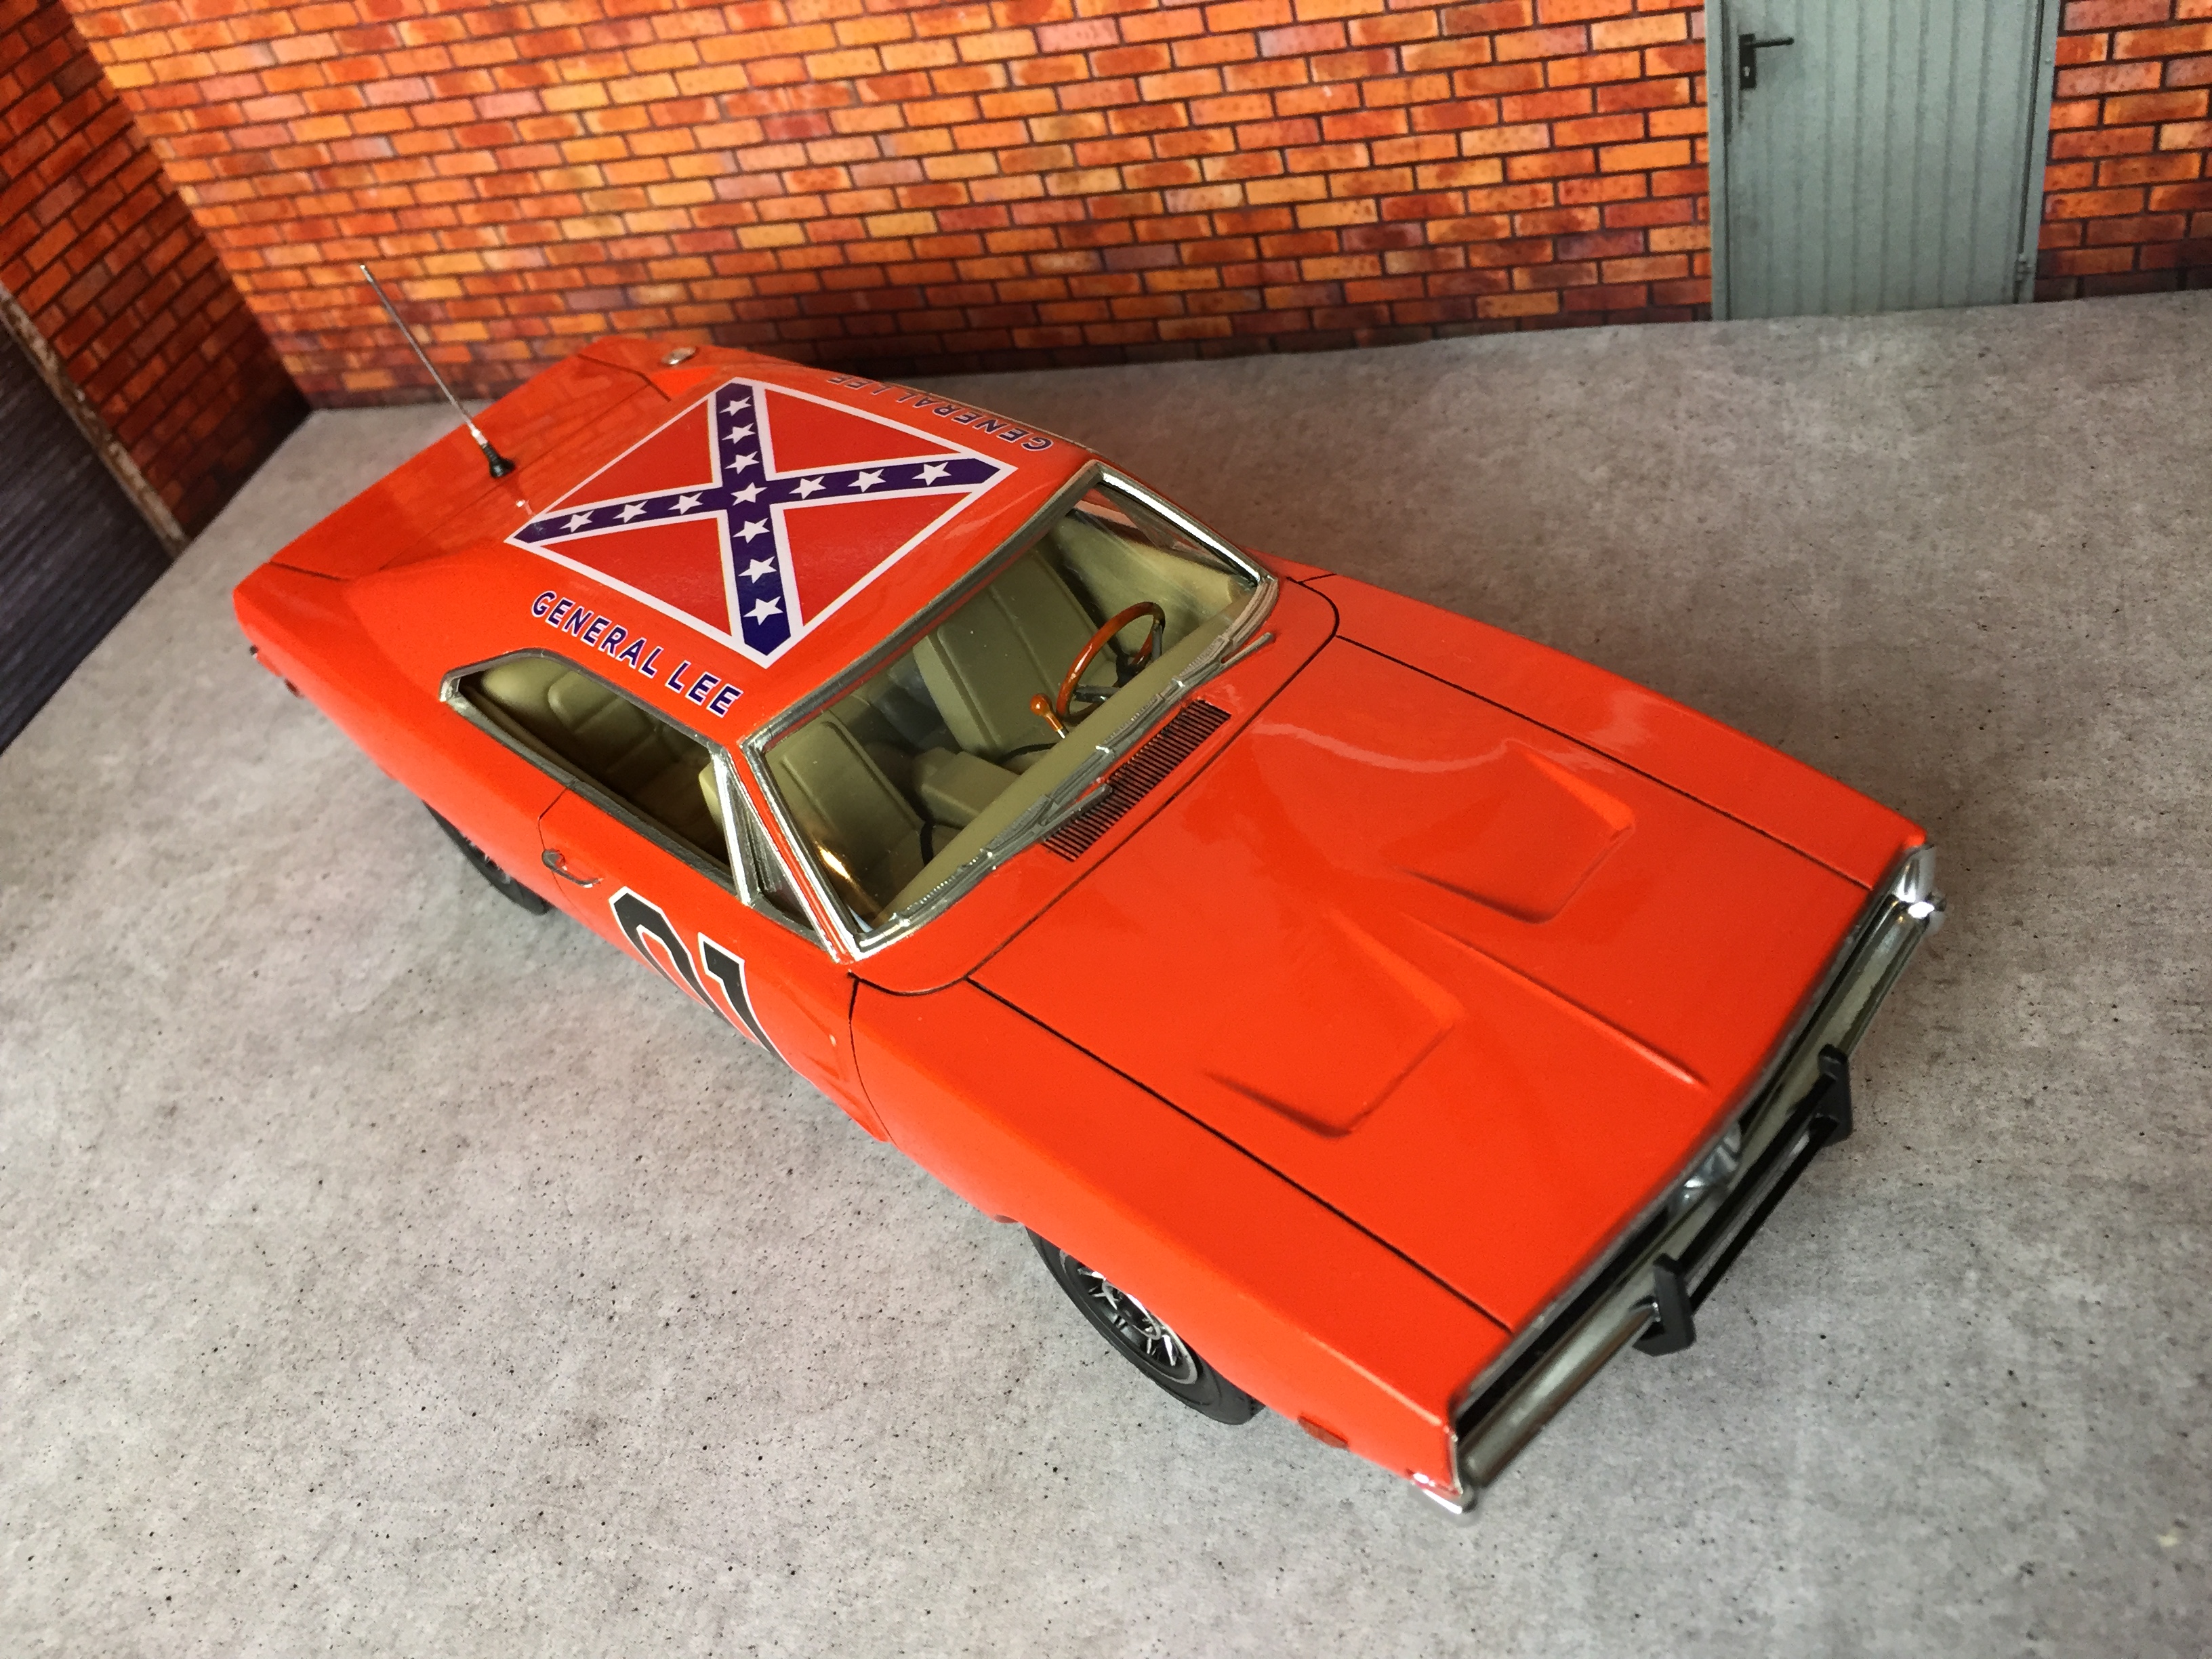
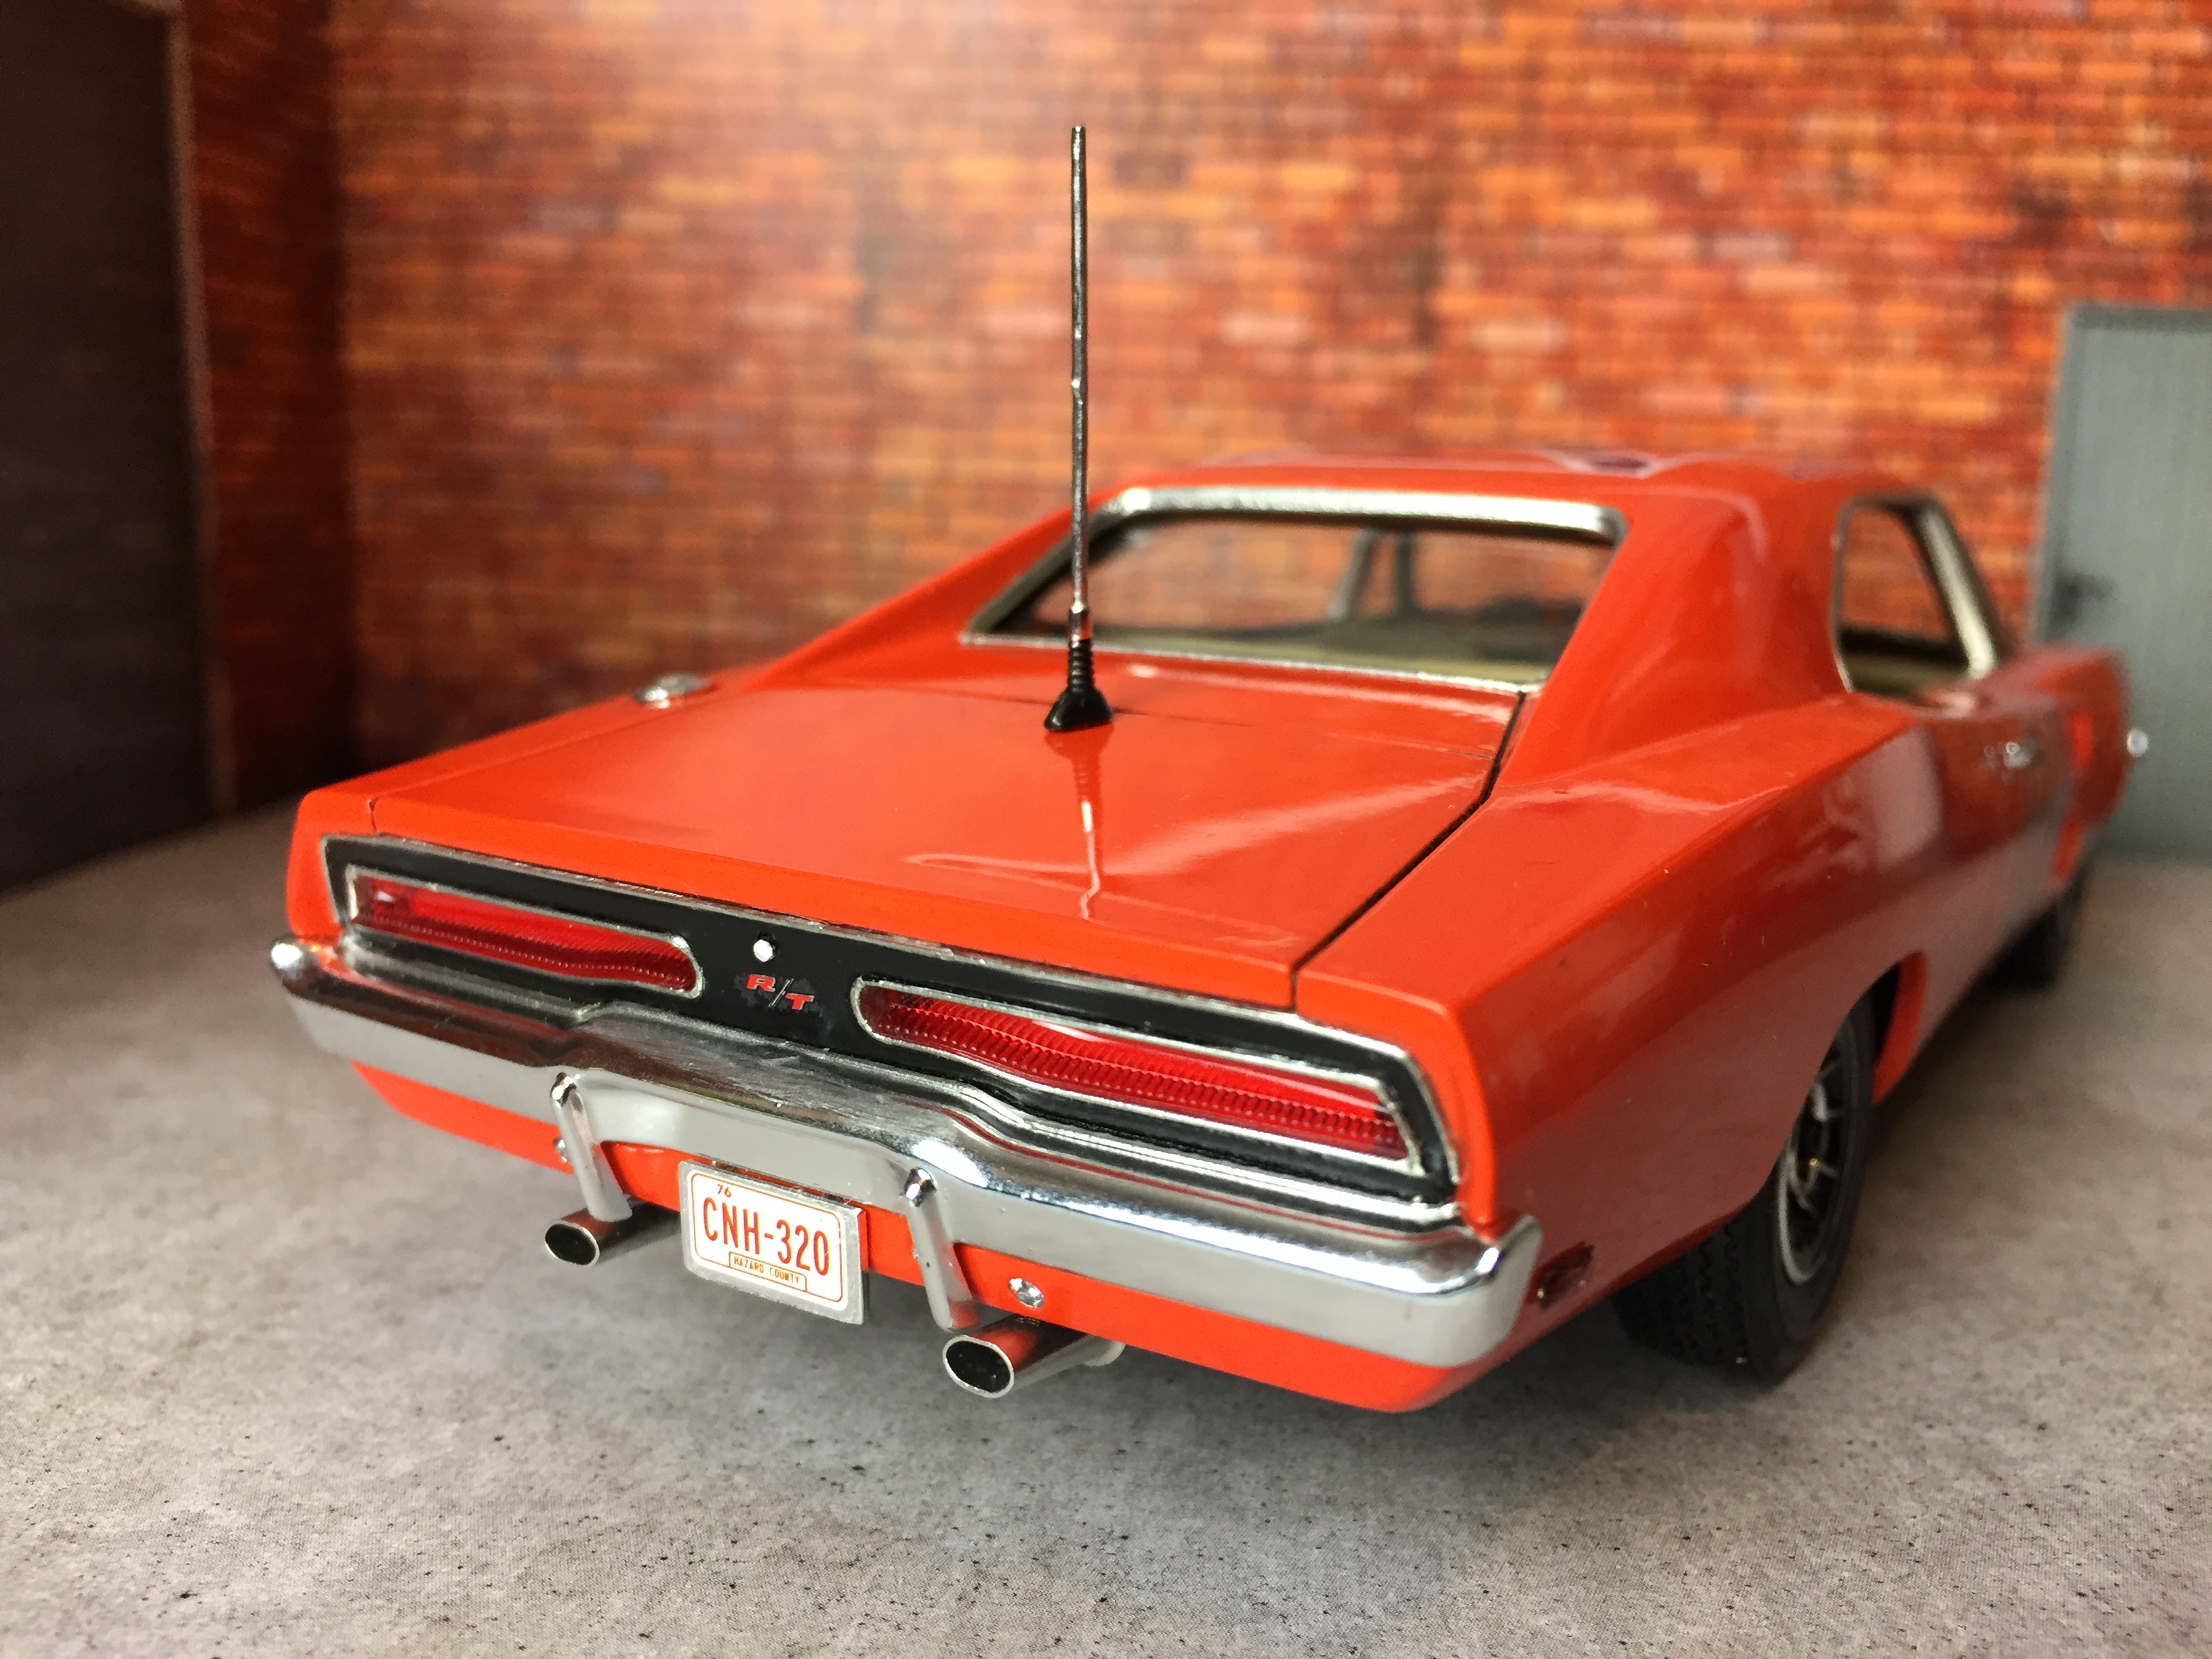
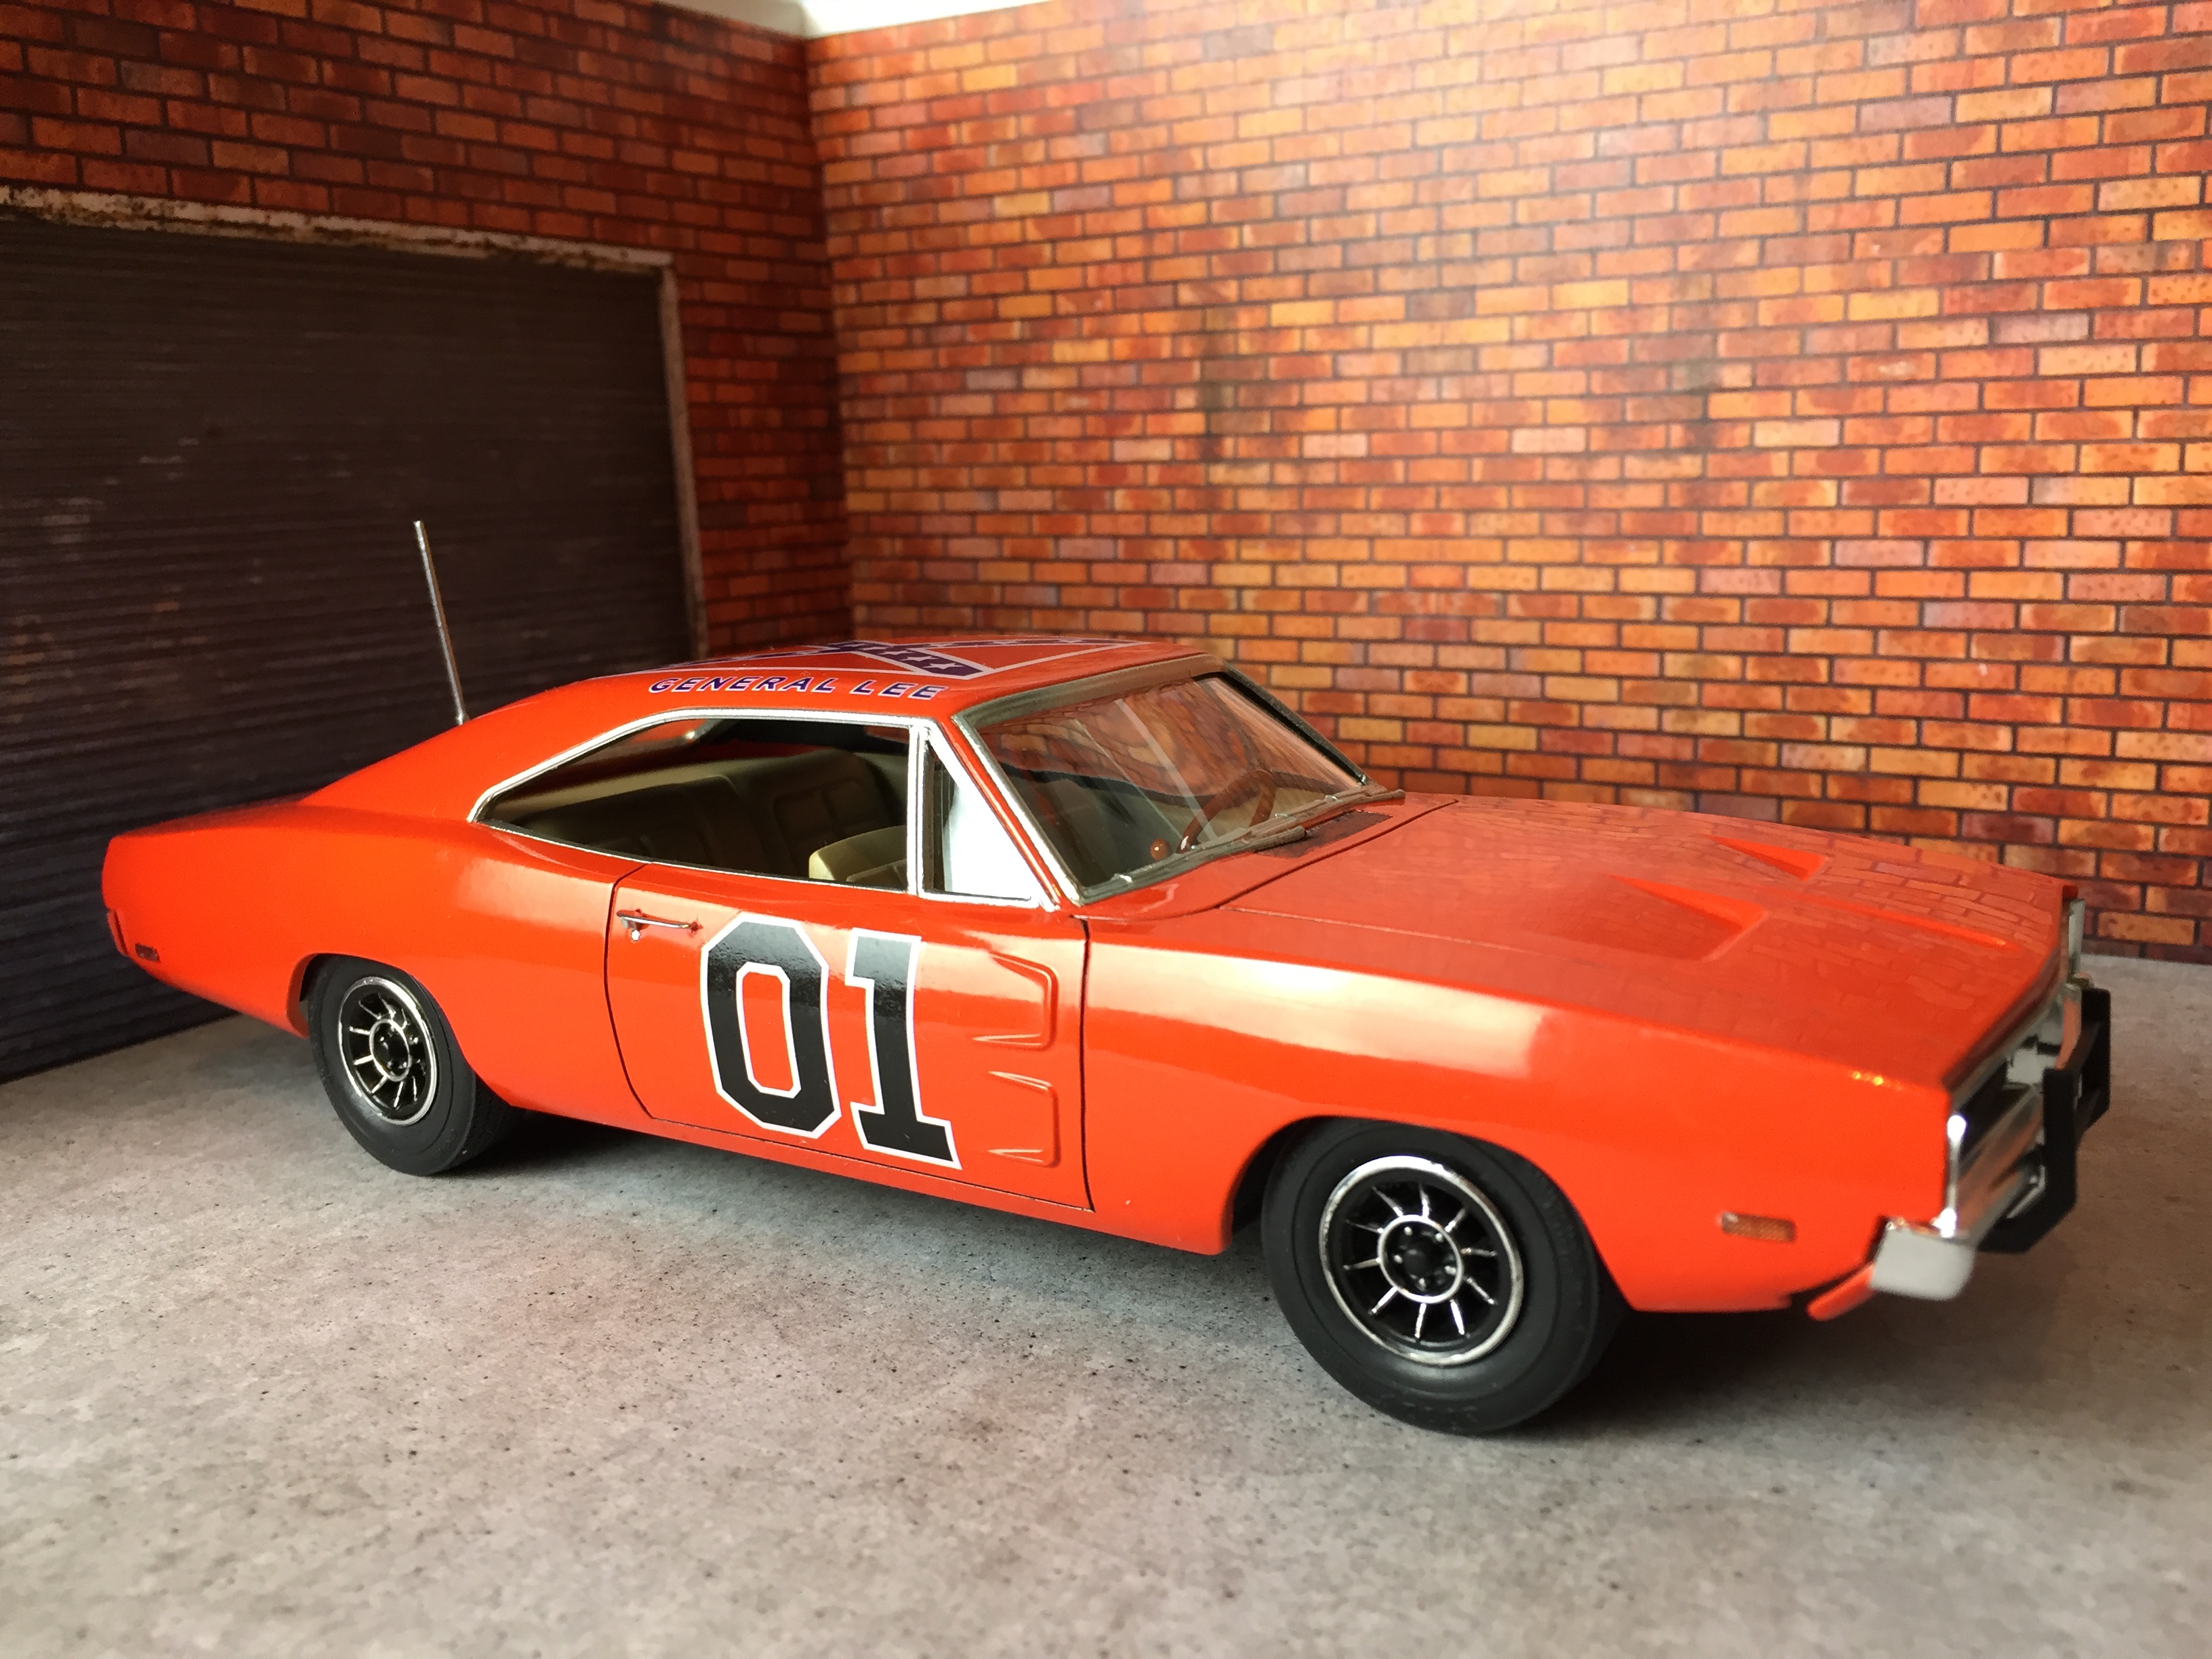
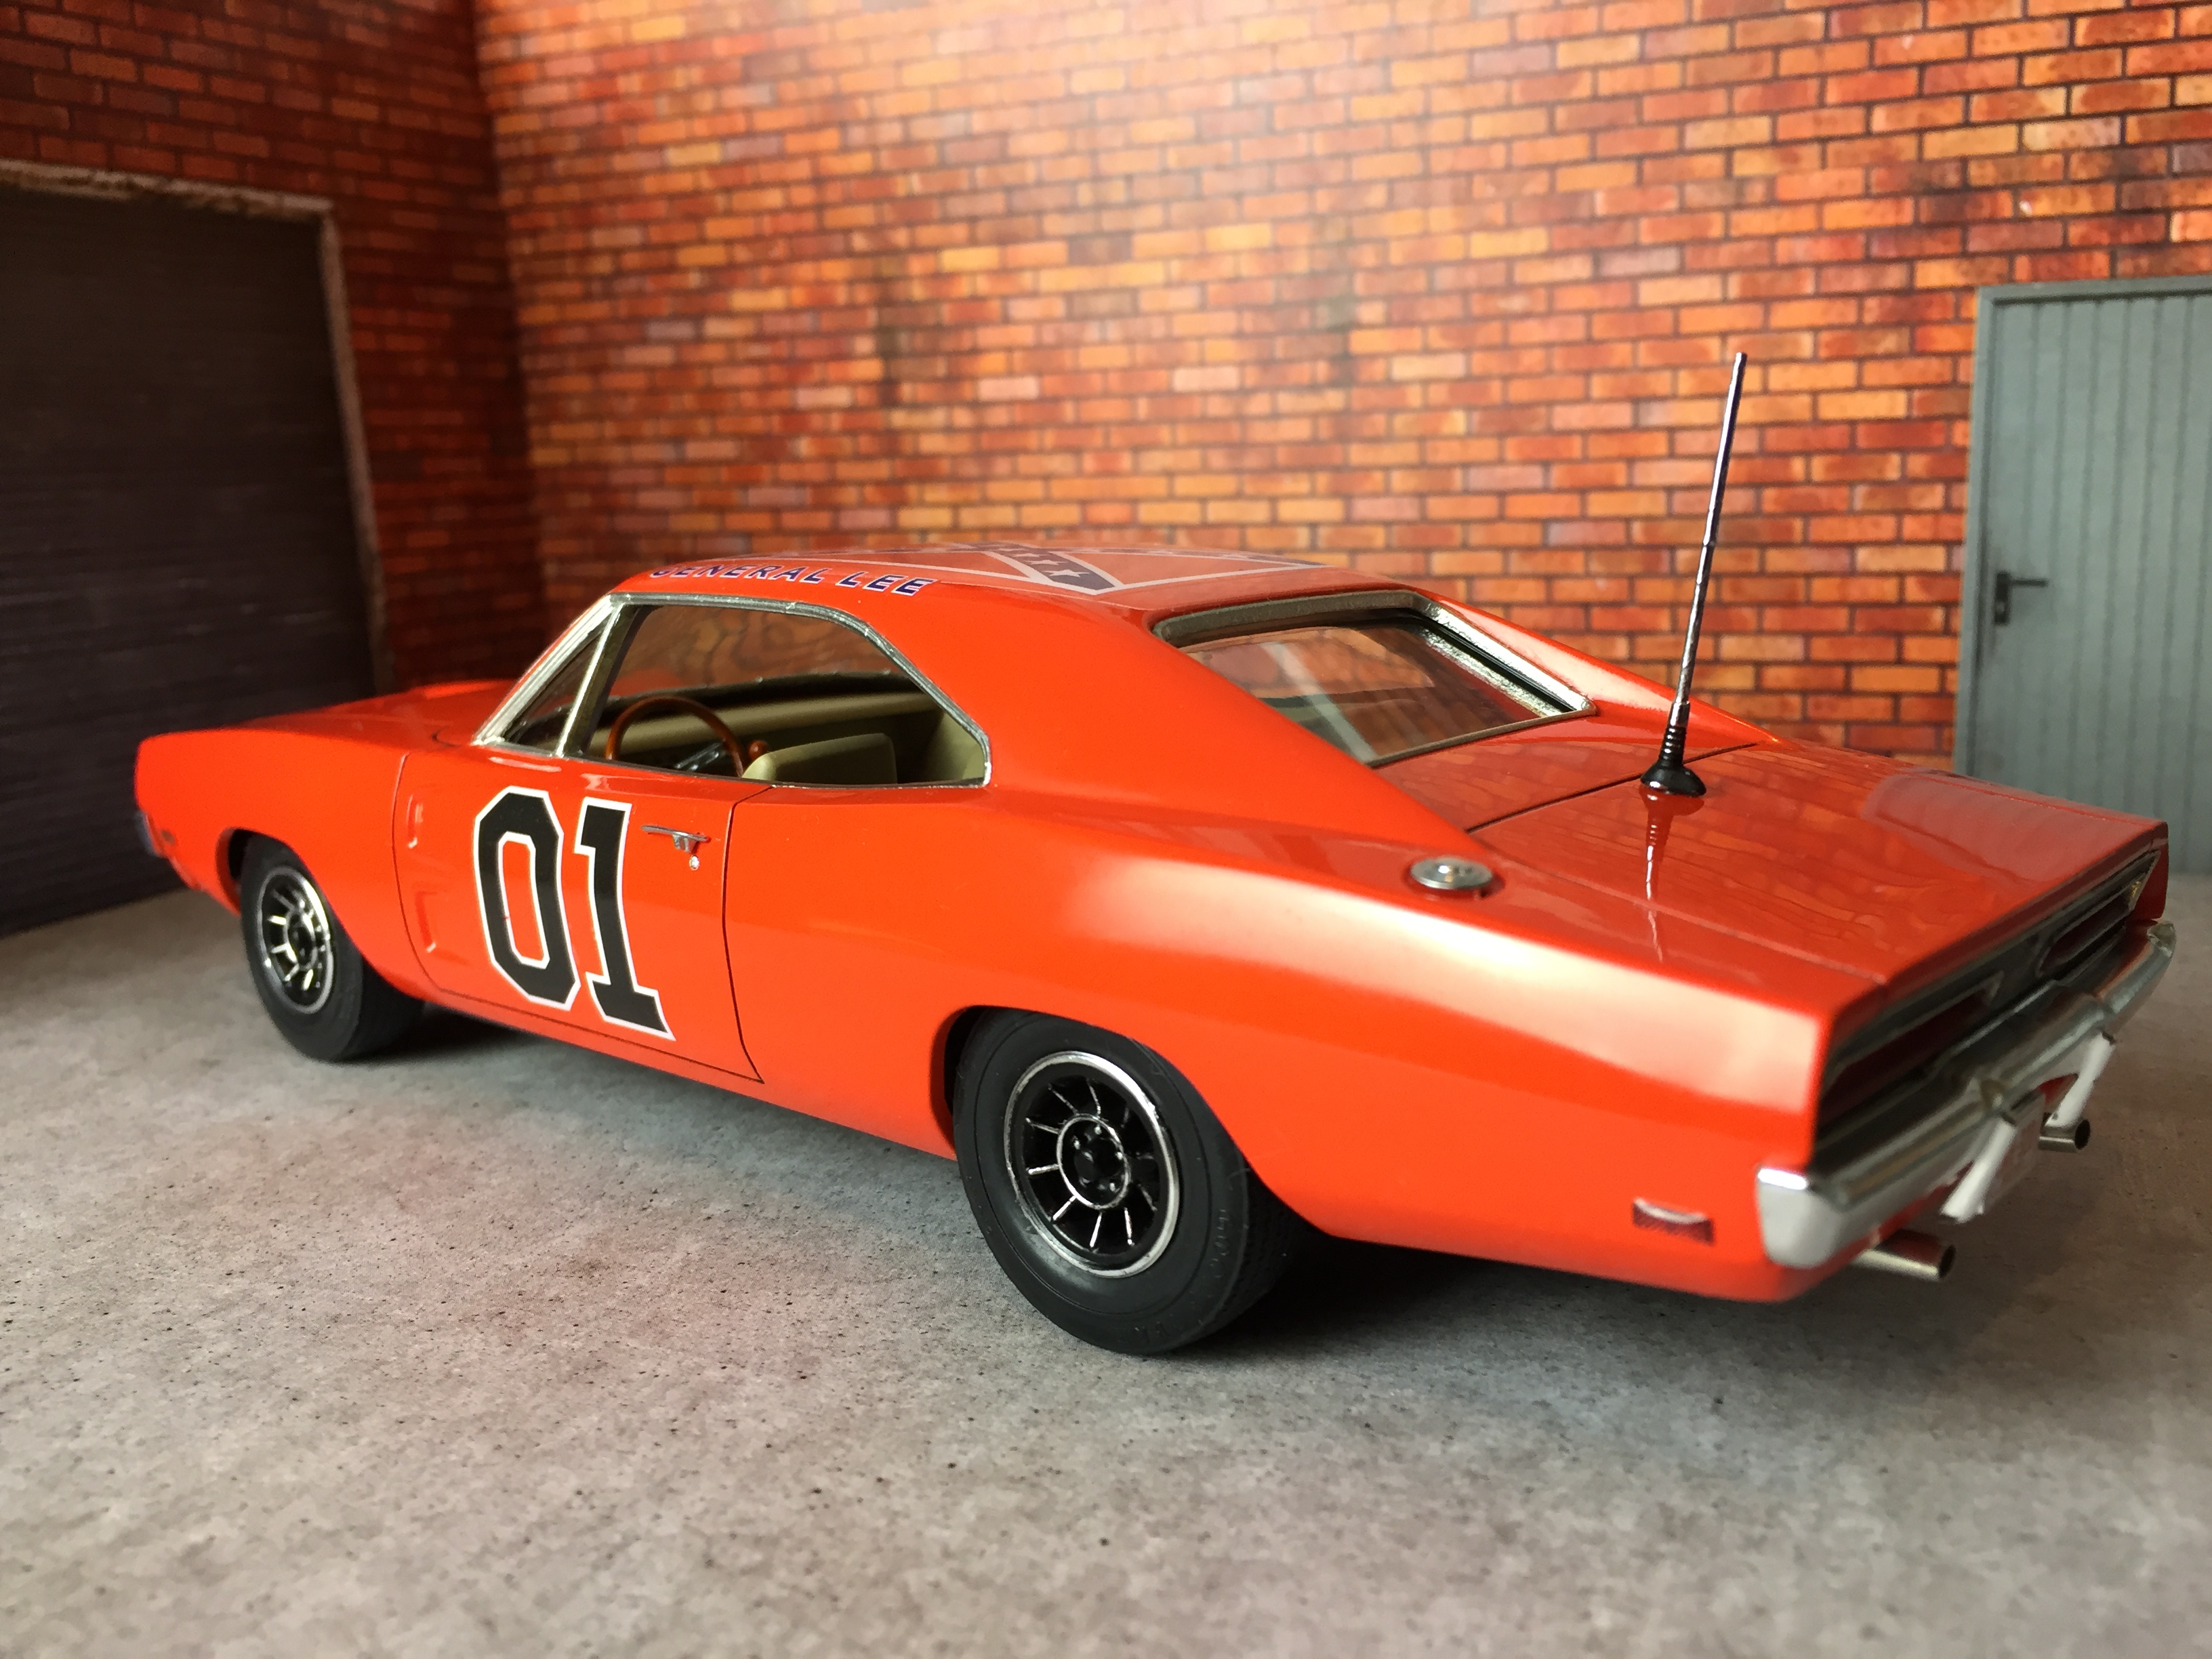
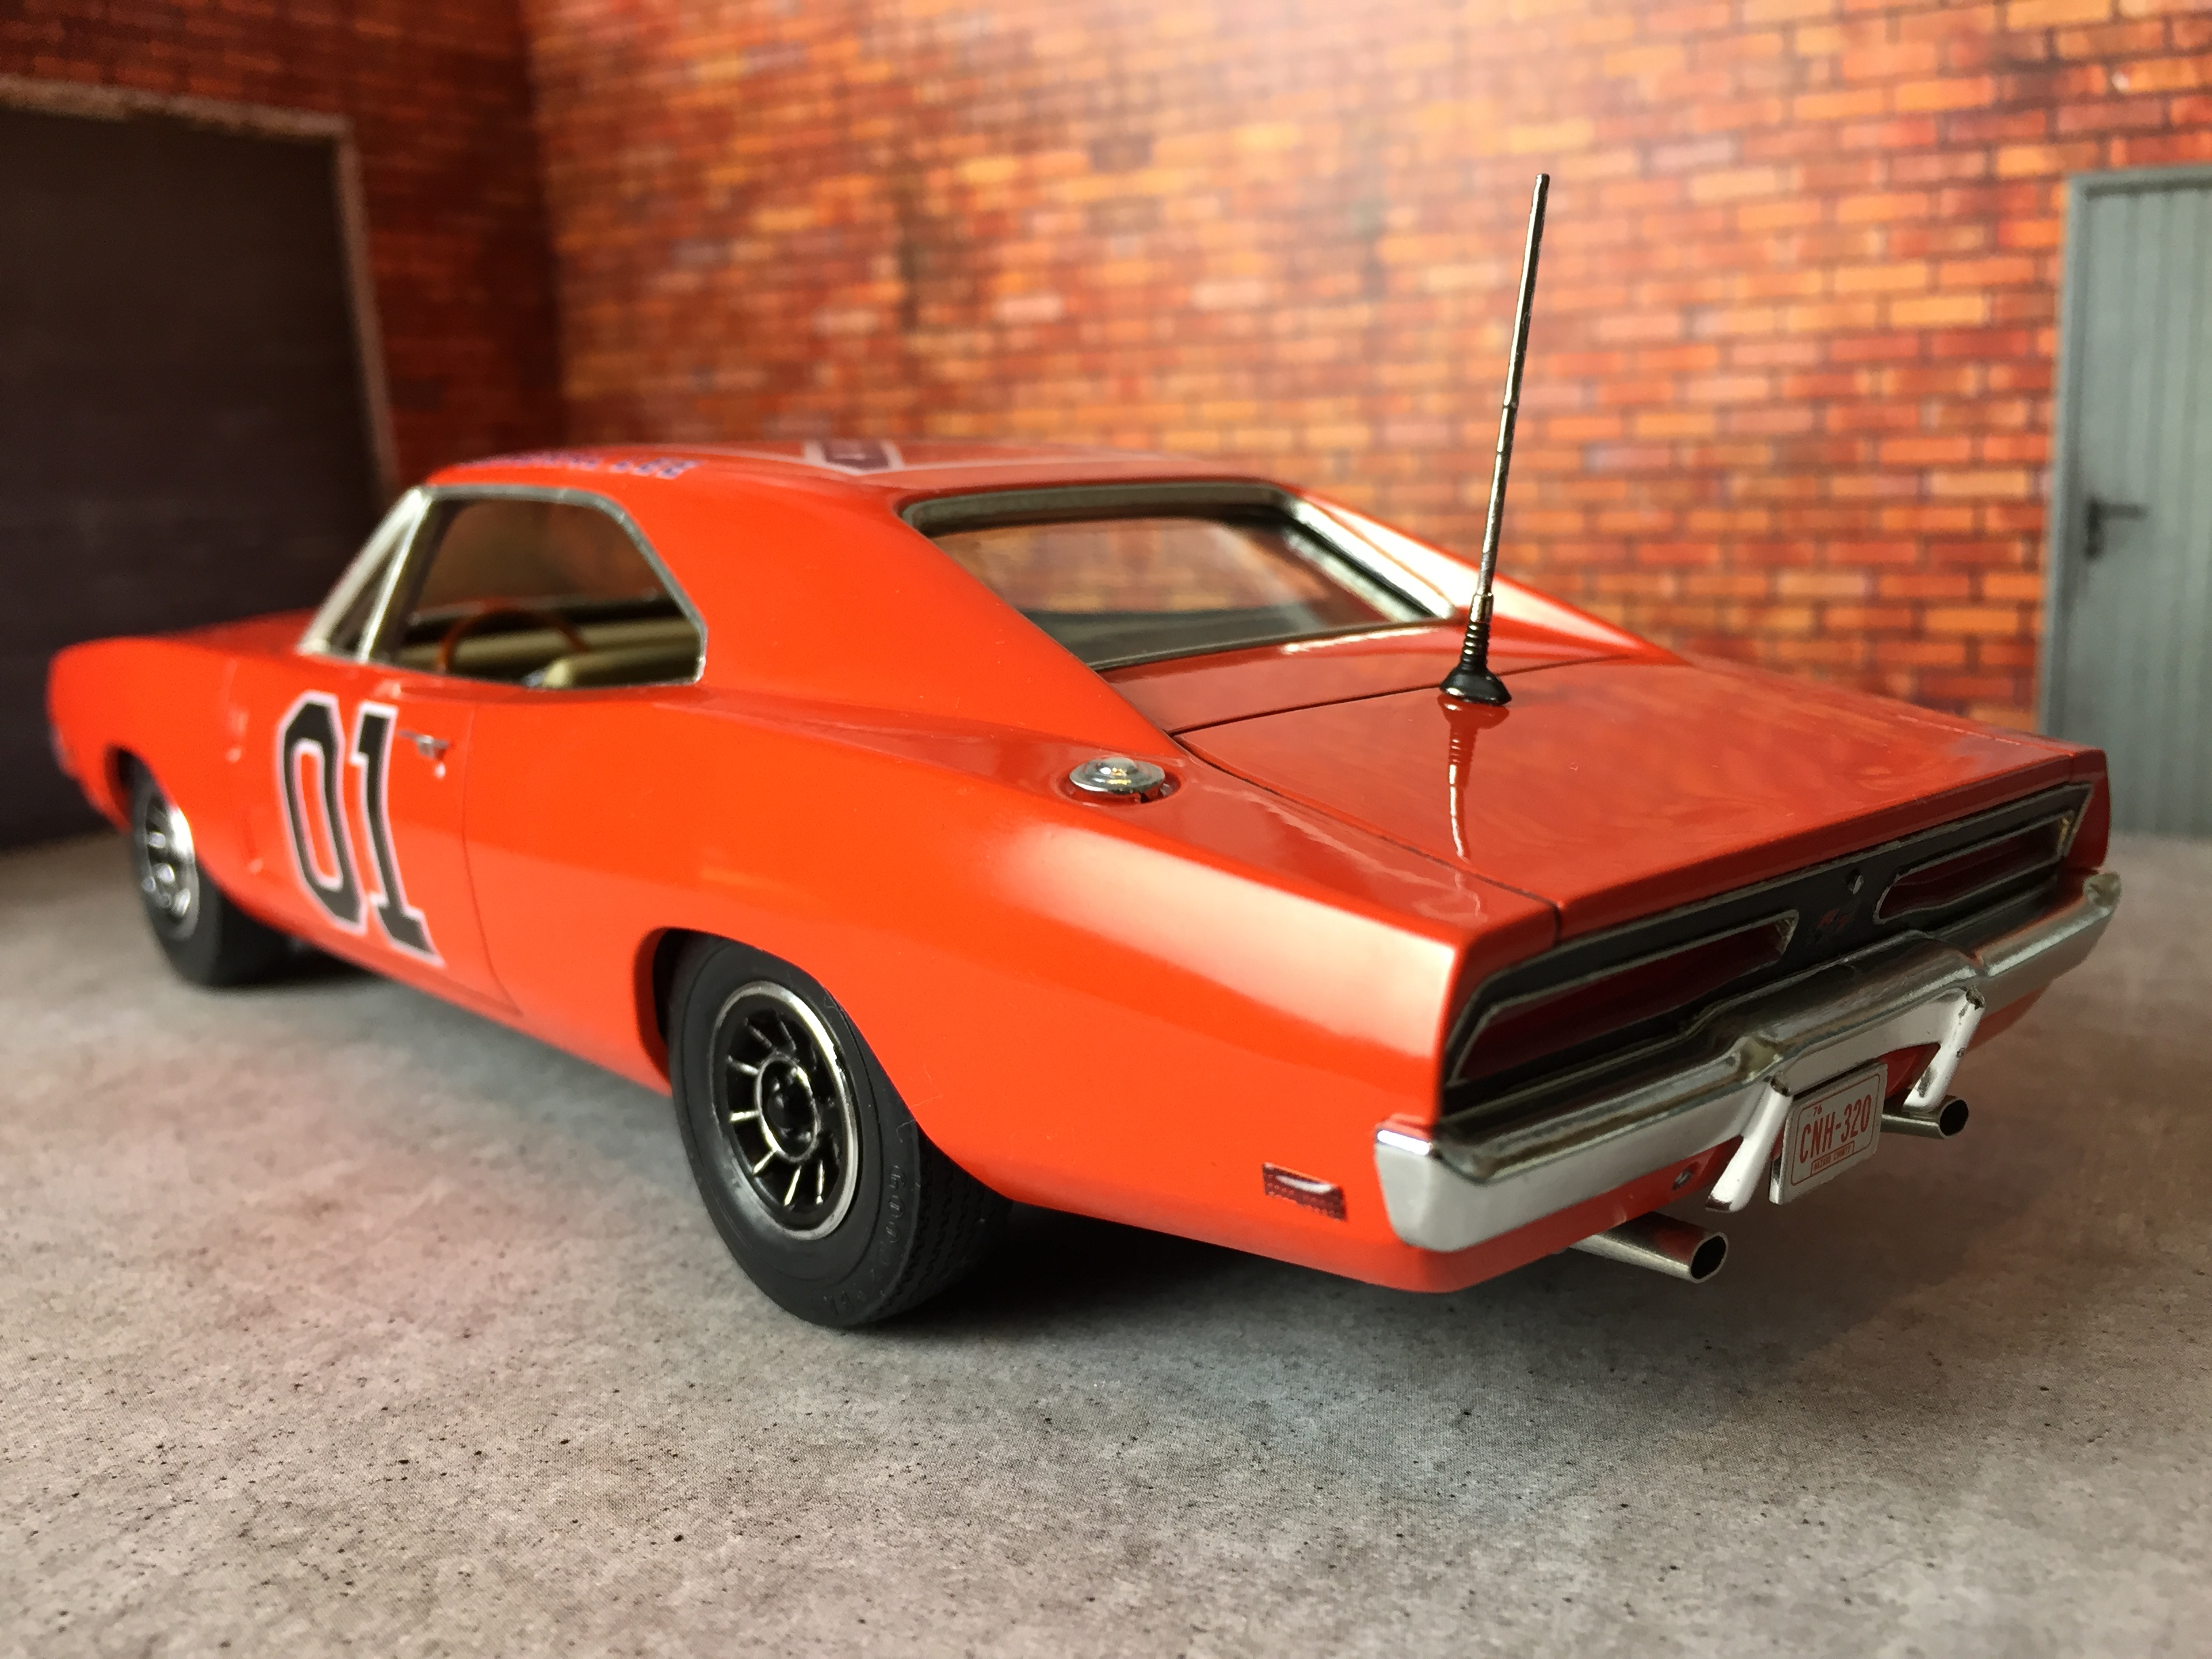
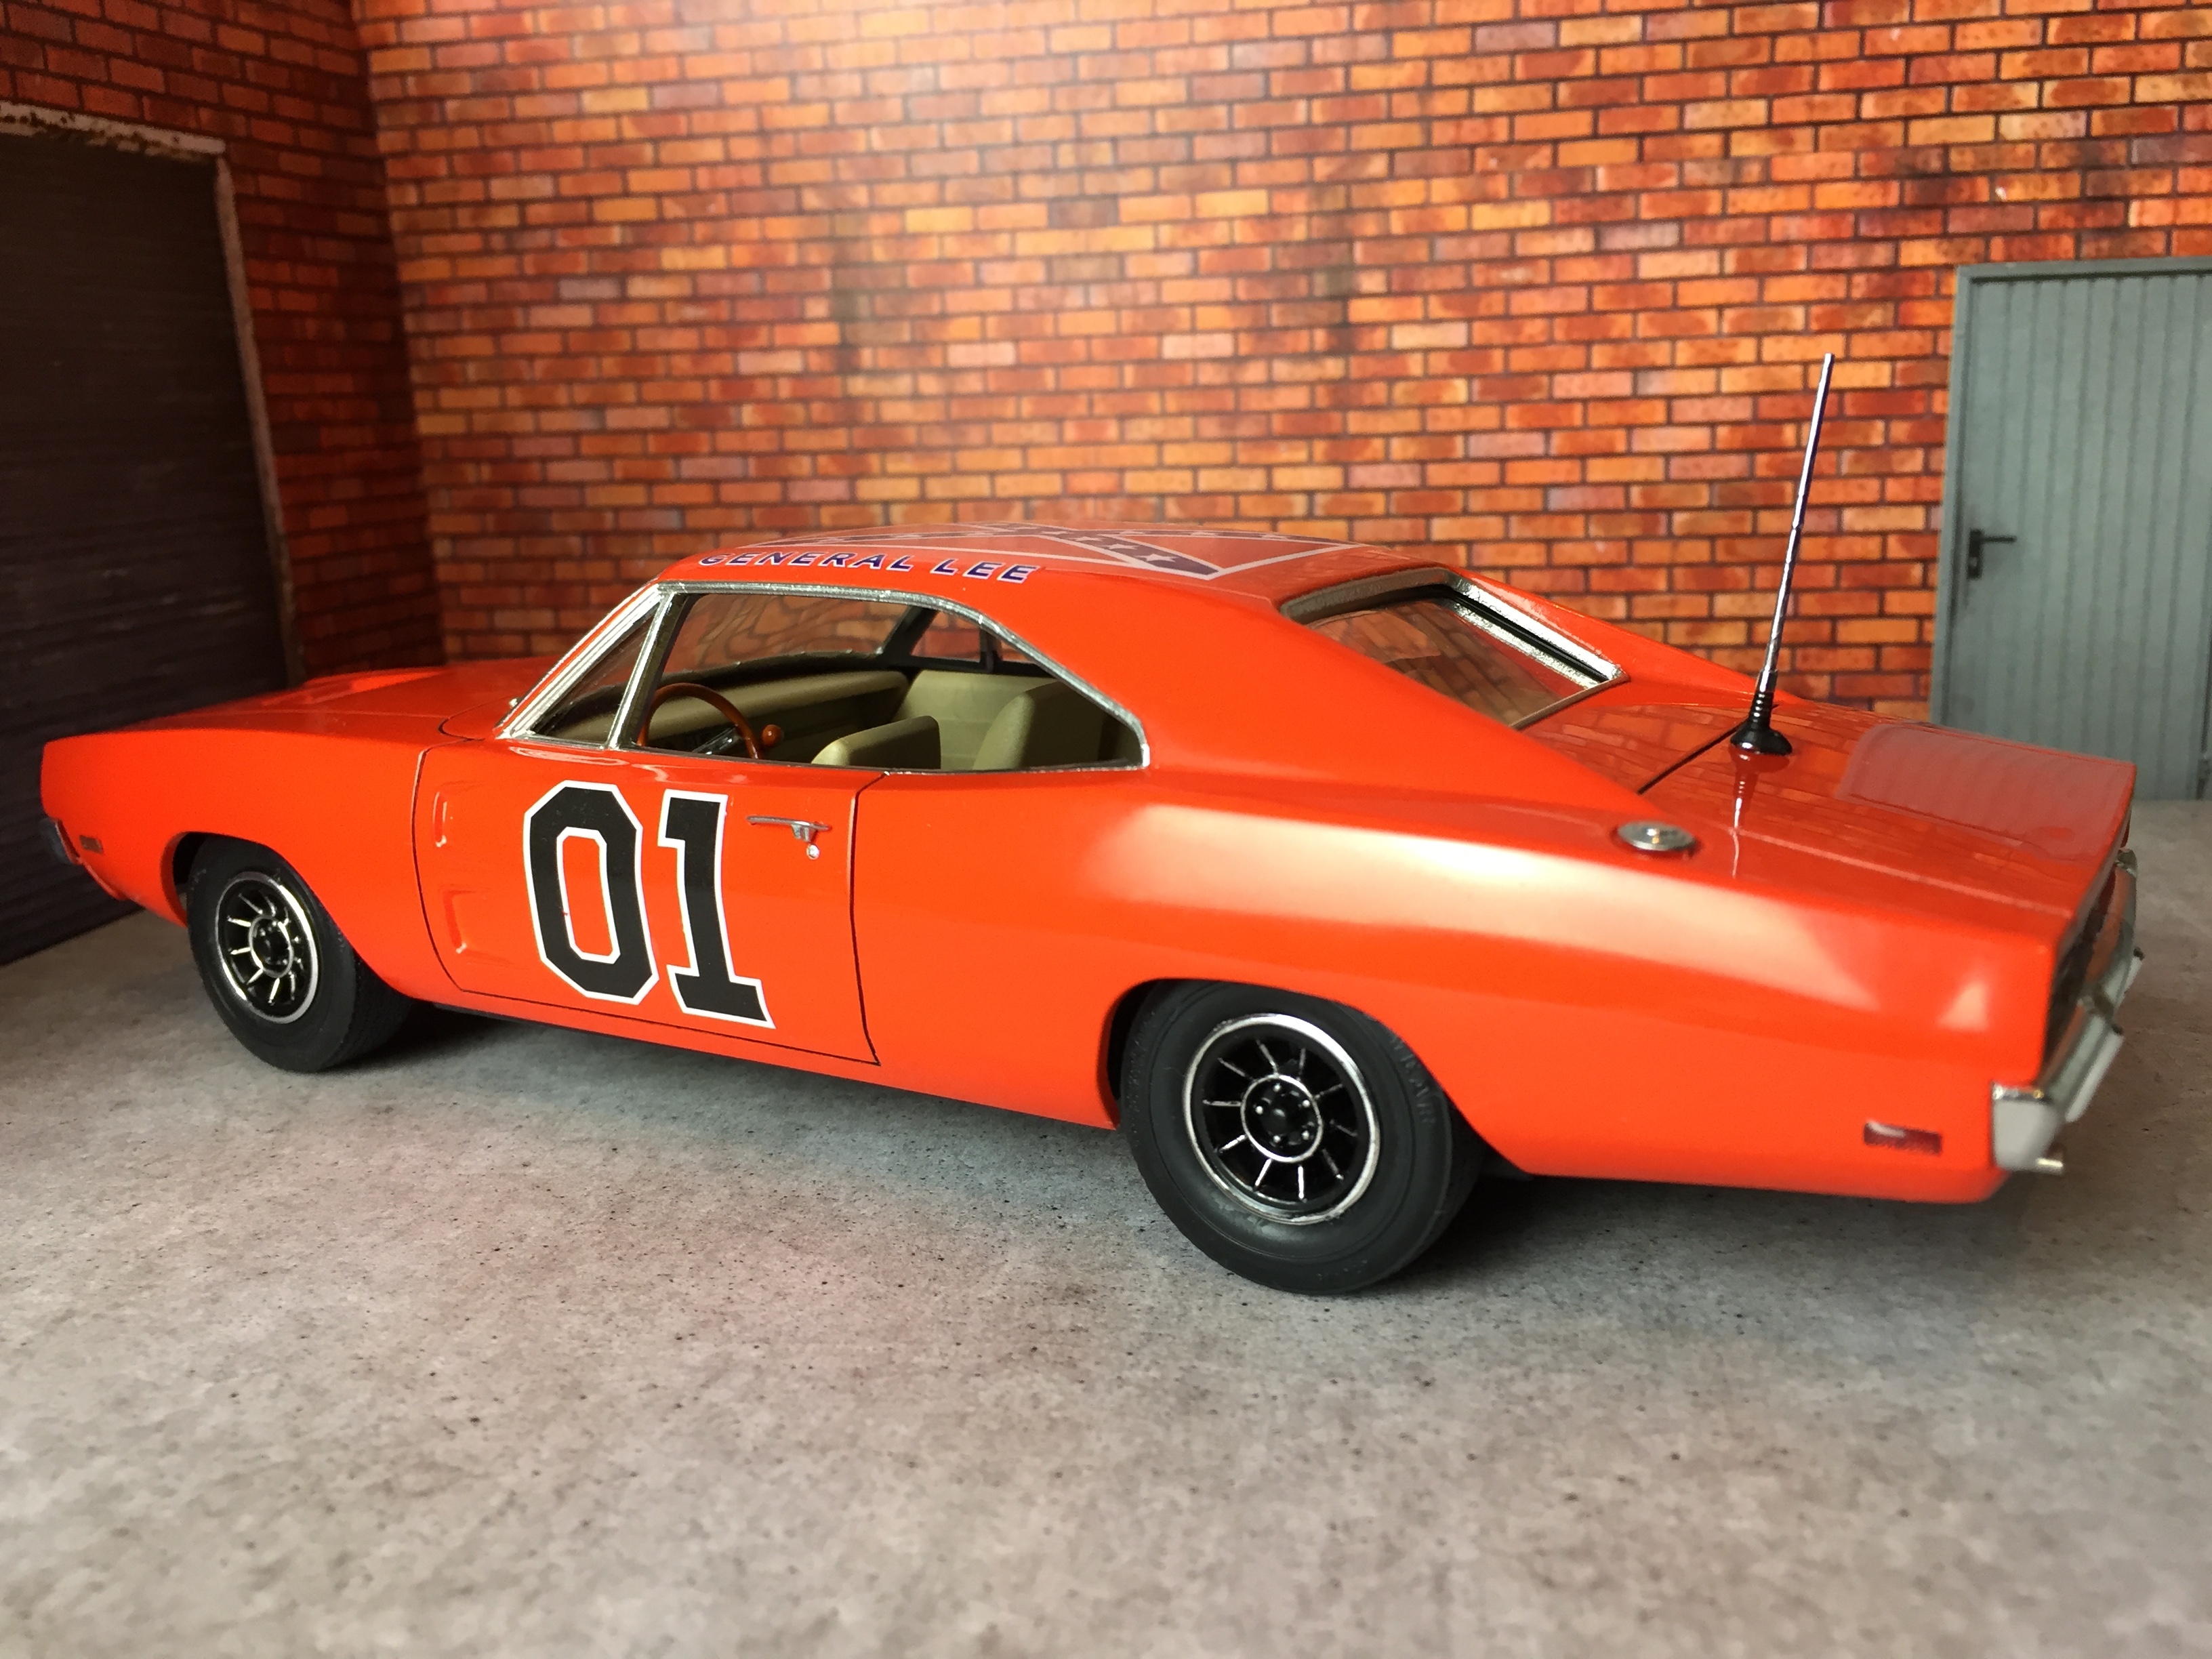
Hi all, here's another model I recently completed. Started in 2014, I lost motivation due to the quality of the plastic. This General Lee MPC kit was really poorly molded, even with quite a bit of bodywork there's still alot of defects that show through. I eventually decided to just paint it as is and at least get it off of the desk, which is why some areas are not perfect. I de-chromed everything on the chrome tree, and redid those parts with Alclad. The wheels I sprayed a Zero Paints gold and left them in a matte finish. The body is painted Zero Paints Light Blue Metallic with Tamiya Clear, and the interior the same Zero Paints Light Blue Metallic over black, matte finish. I chose not to do the rear panel black for something different, the rest is all stock. The most fun for me was the photoshoot and trying out new lighting techniques, it's there where the car really shines. Cheers!
-
Front and rear bumpers and bucket seat/console set from Harts resin, a set of AMT redline tires, and some rims from an AMT 69 GTX/Road Runner kit. Color will be Testors' Plum Crazy with a white interior. This one is also going to have a 440 six pack in it. Just how I would have loved to have bought one in 71 if I could have! I'm waiting on more plum crazy to shoot the body. Thanks for looking, comments welcomed.
-
My latest addition to my Charger stable is this Fast & Furious version. I found a set of really wide treaded tires that would fit the kit wheels. I only had to use some #14 spacers from an MRC tire pack between the rear axle and brake plates to get them to fit without rubbing the springs. I'm actually going to have some fun with this one, as I have a 68 tail light panel and interior to put in it. So it will be a 68 Charger with a 70 nose. I will paint this one Go Mango with a black interior, like the 74 Road Runner I just rebuilt. It will have full exhaust so it will be a street car instead of a drag car. Below is just a mock up of how it's going to sit.
-
I finally got a finish on this body that I can live with! Interior is almost done as well. This will have a 440 six pack with the carb setup from Fireball Model works. Thanks for looking! Comments welcomed.
-
The maroon 68 has morphed into a flame red one! I had so much problems with the maroon that I chucked it into the pond and bought another kit. This is the paint job after a dip in the pond as well. The 68 turned out to be a problem child. I have some hood clearance problems with the air cleaner that I will fix. Thanks for looking, all comments welcomed!
-
While looking for inspiration on the internet, I spied this 69 Hemi powered sublime green charger with rally wheels. So I just had to build it! I have some wide BF Goodrich Radial T/As and rally wheels coming from fireball model works for this. I just started on this one so no frame or running gear done yet. Thanks for looking, all comments welcomed!
-
 Hi folks, after completing the '69 Camaro I felt like doing something that should be quick, easy and fun. So I chose this snapkit and indeed it was the right choice. Despite the small number of parts, it builds up pretty nicely IMHO. I did only a few modifications such as: trimming the floor panel/ chassis massively (it's way too big to fit into the body, don't know why they did it like this), replacing the molded-on door handles with separate metal parts, making new exhausts from aluminum tube (bent to the right shape), adding fog light lenses from the parts box and adding PE side markers from CTM on the front and rear end. Painting has been done with ZP Hemi Orange Basecoat and ZP 2k clear. Here it comes, hope you like it:
-
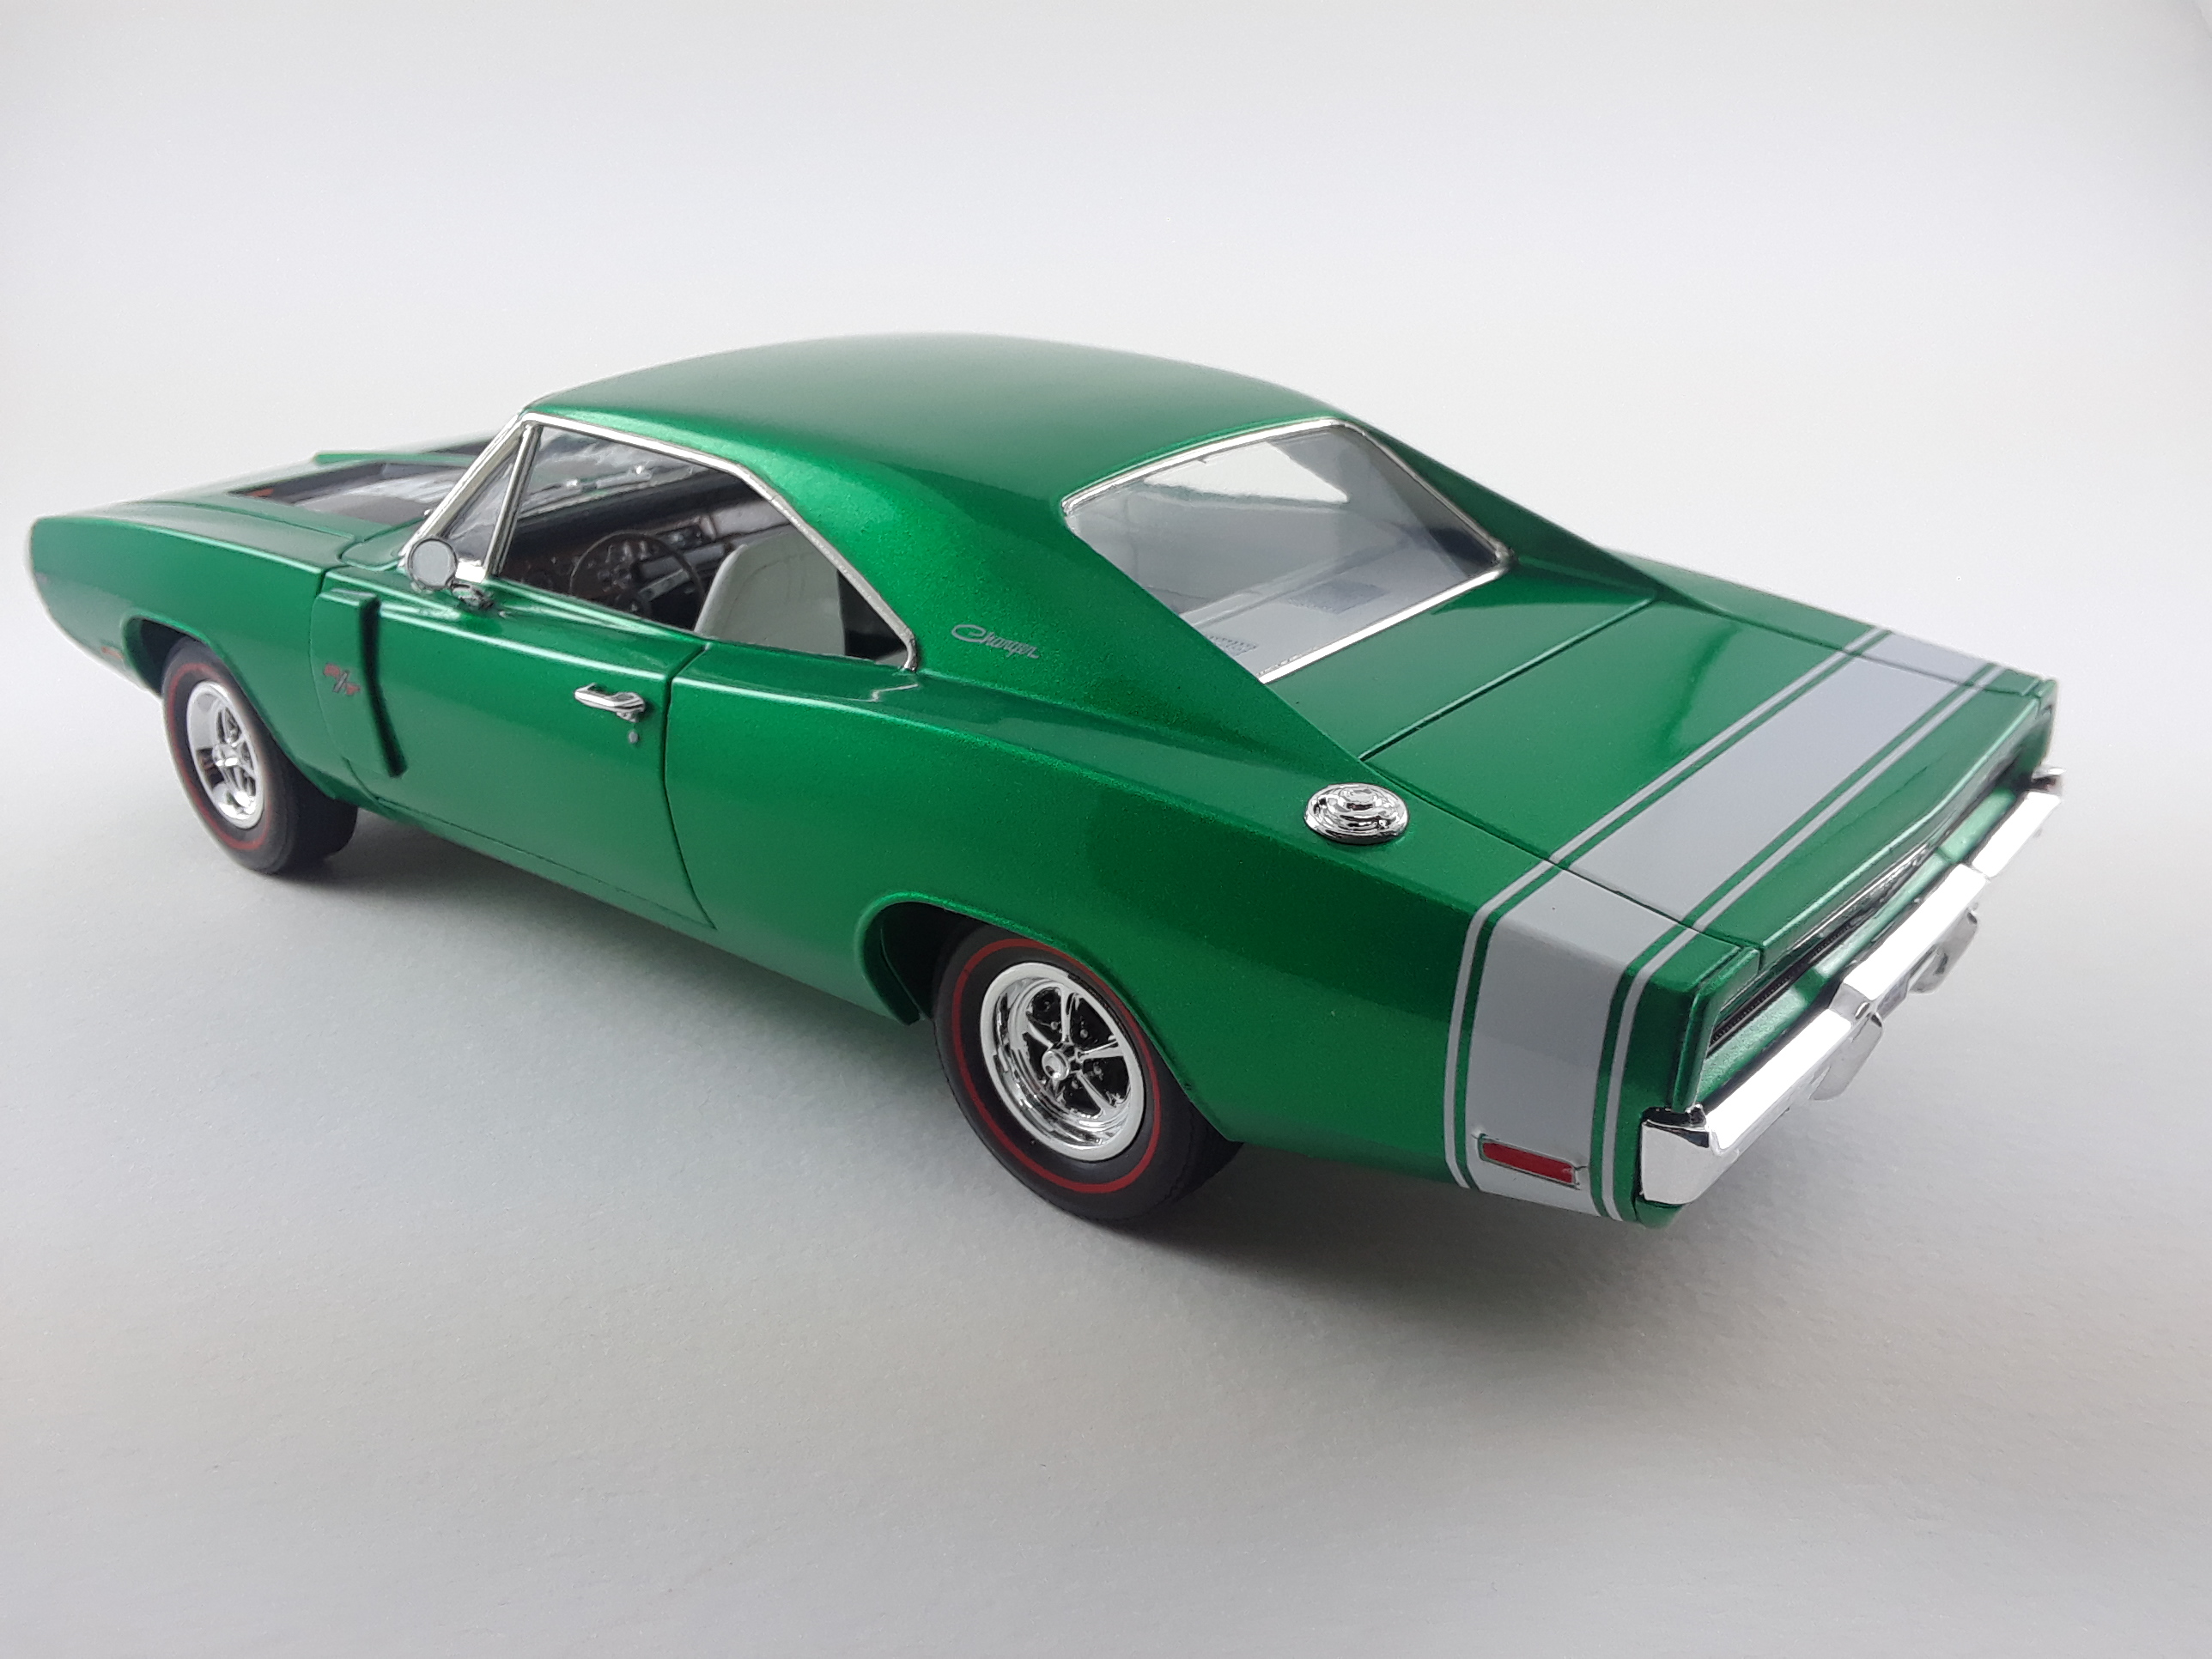
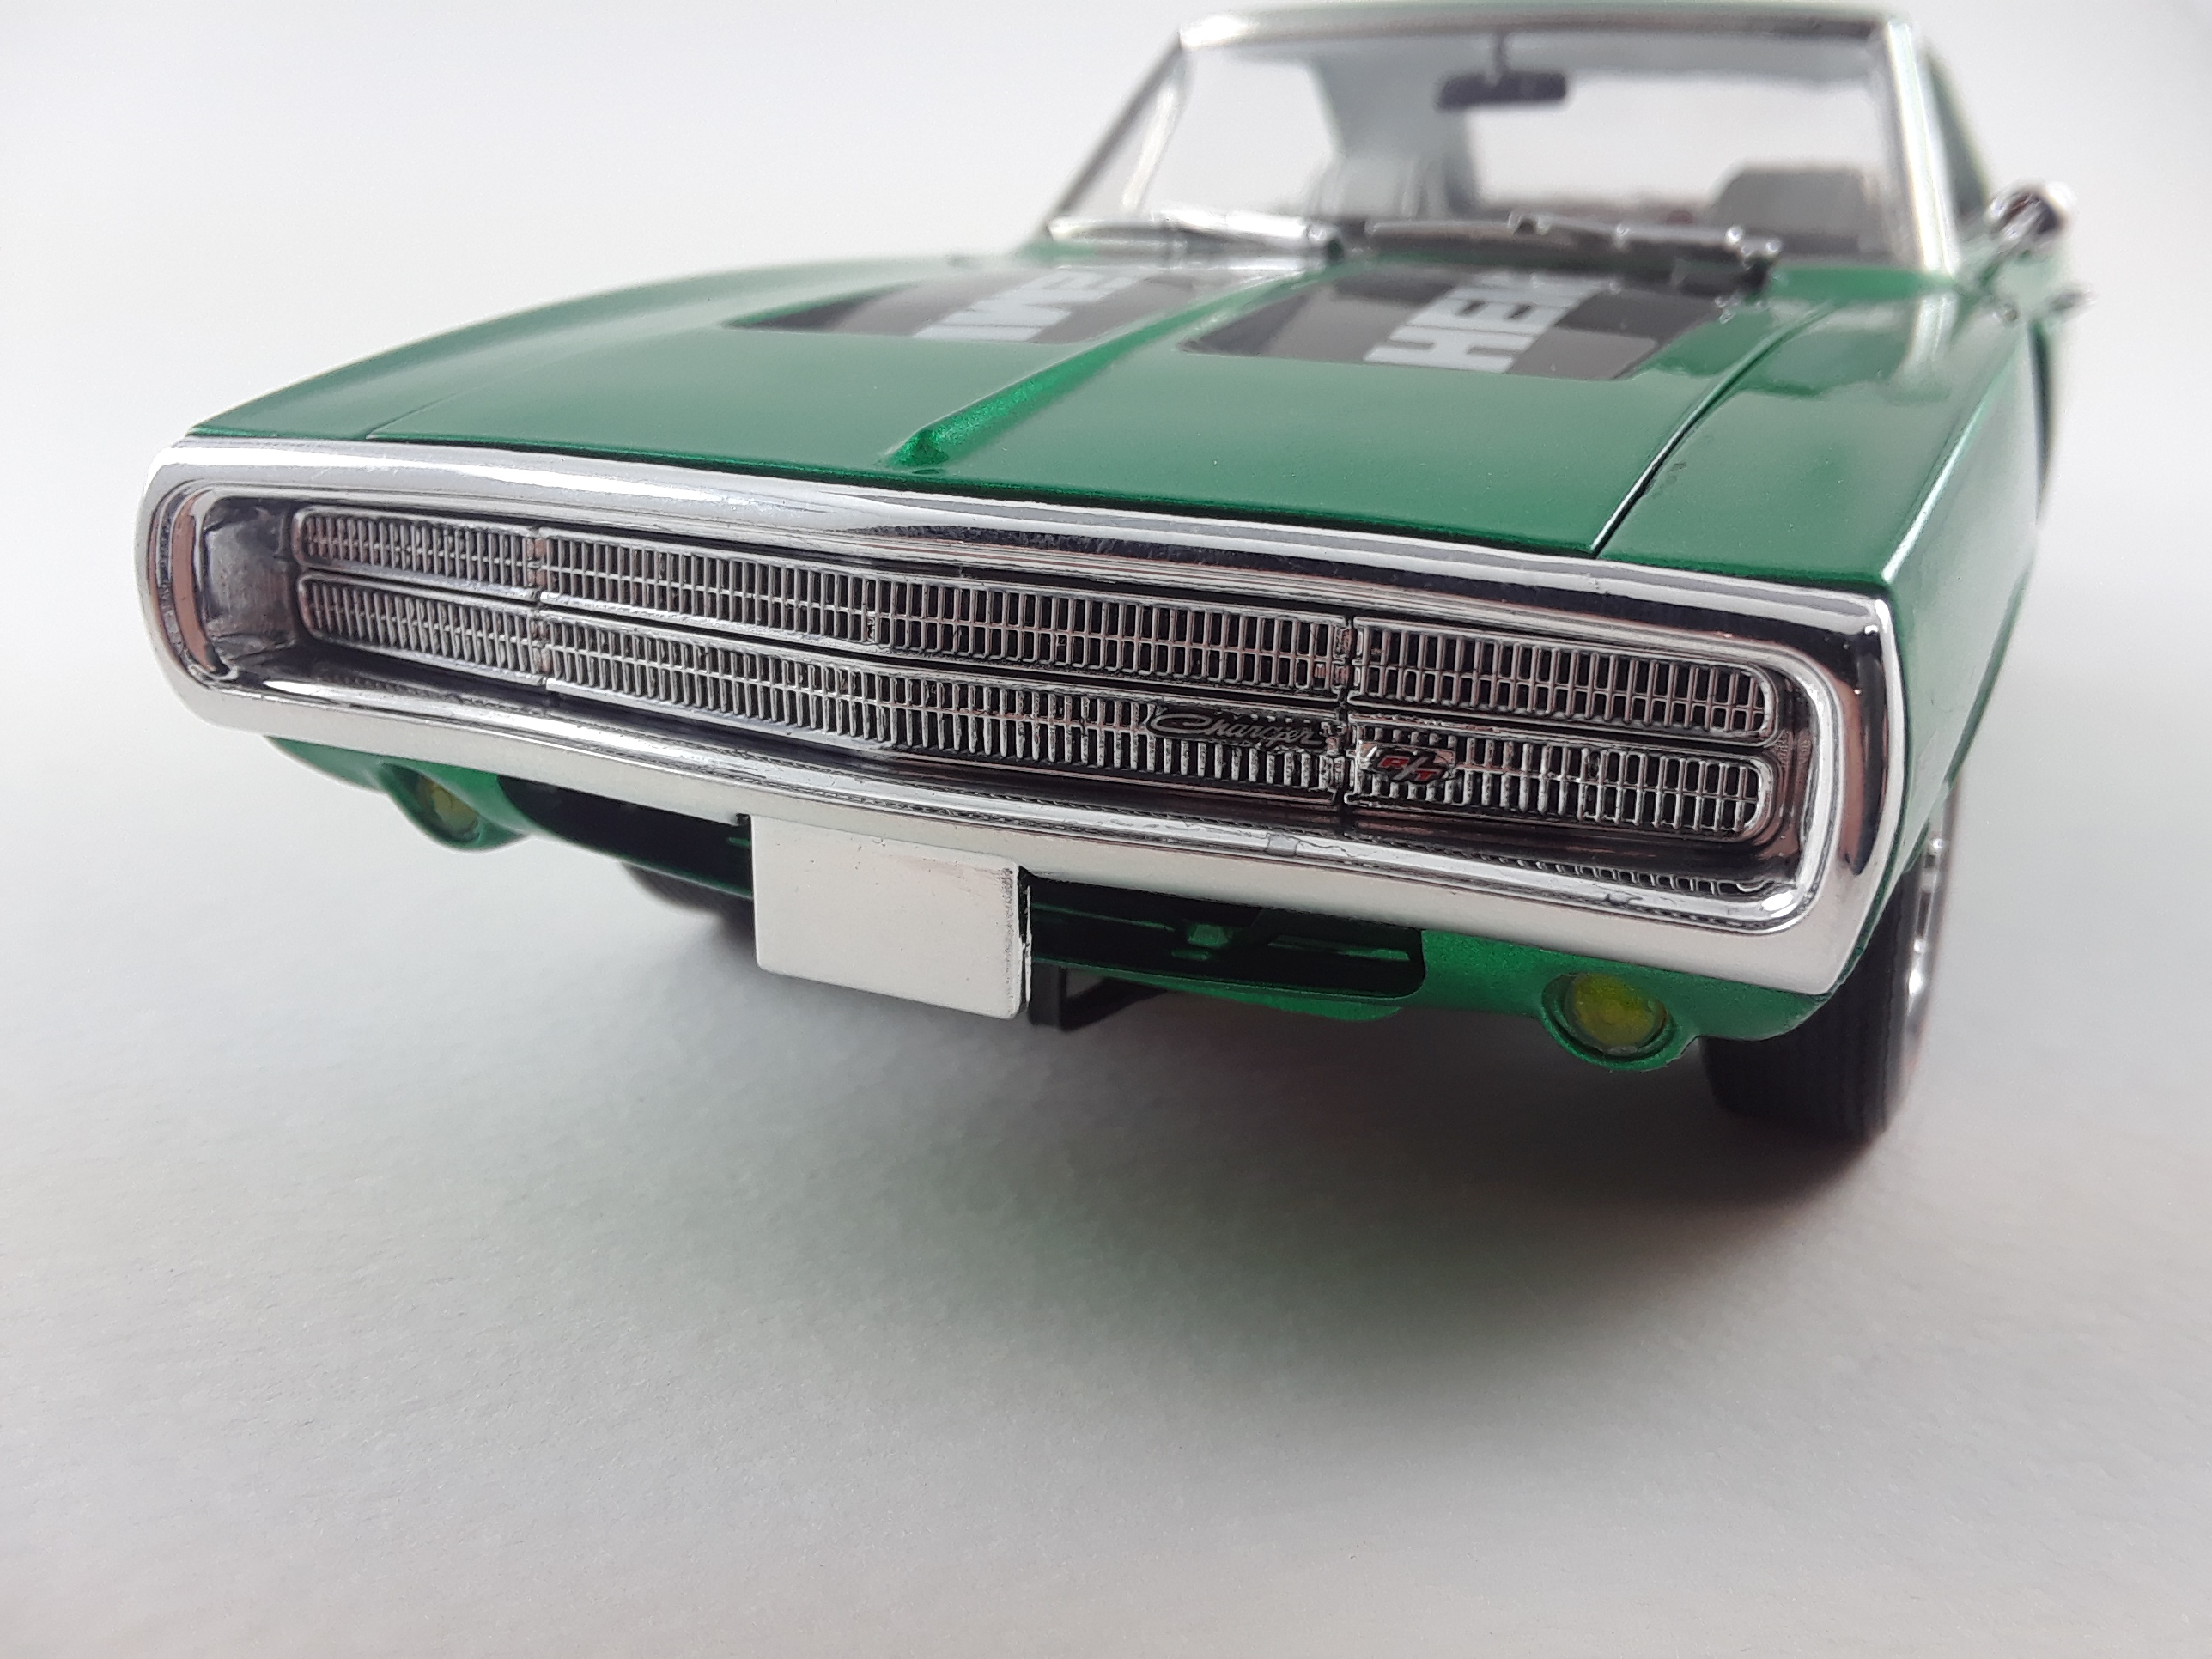
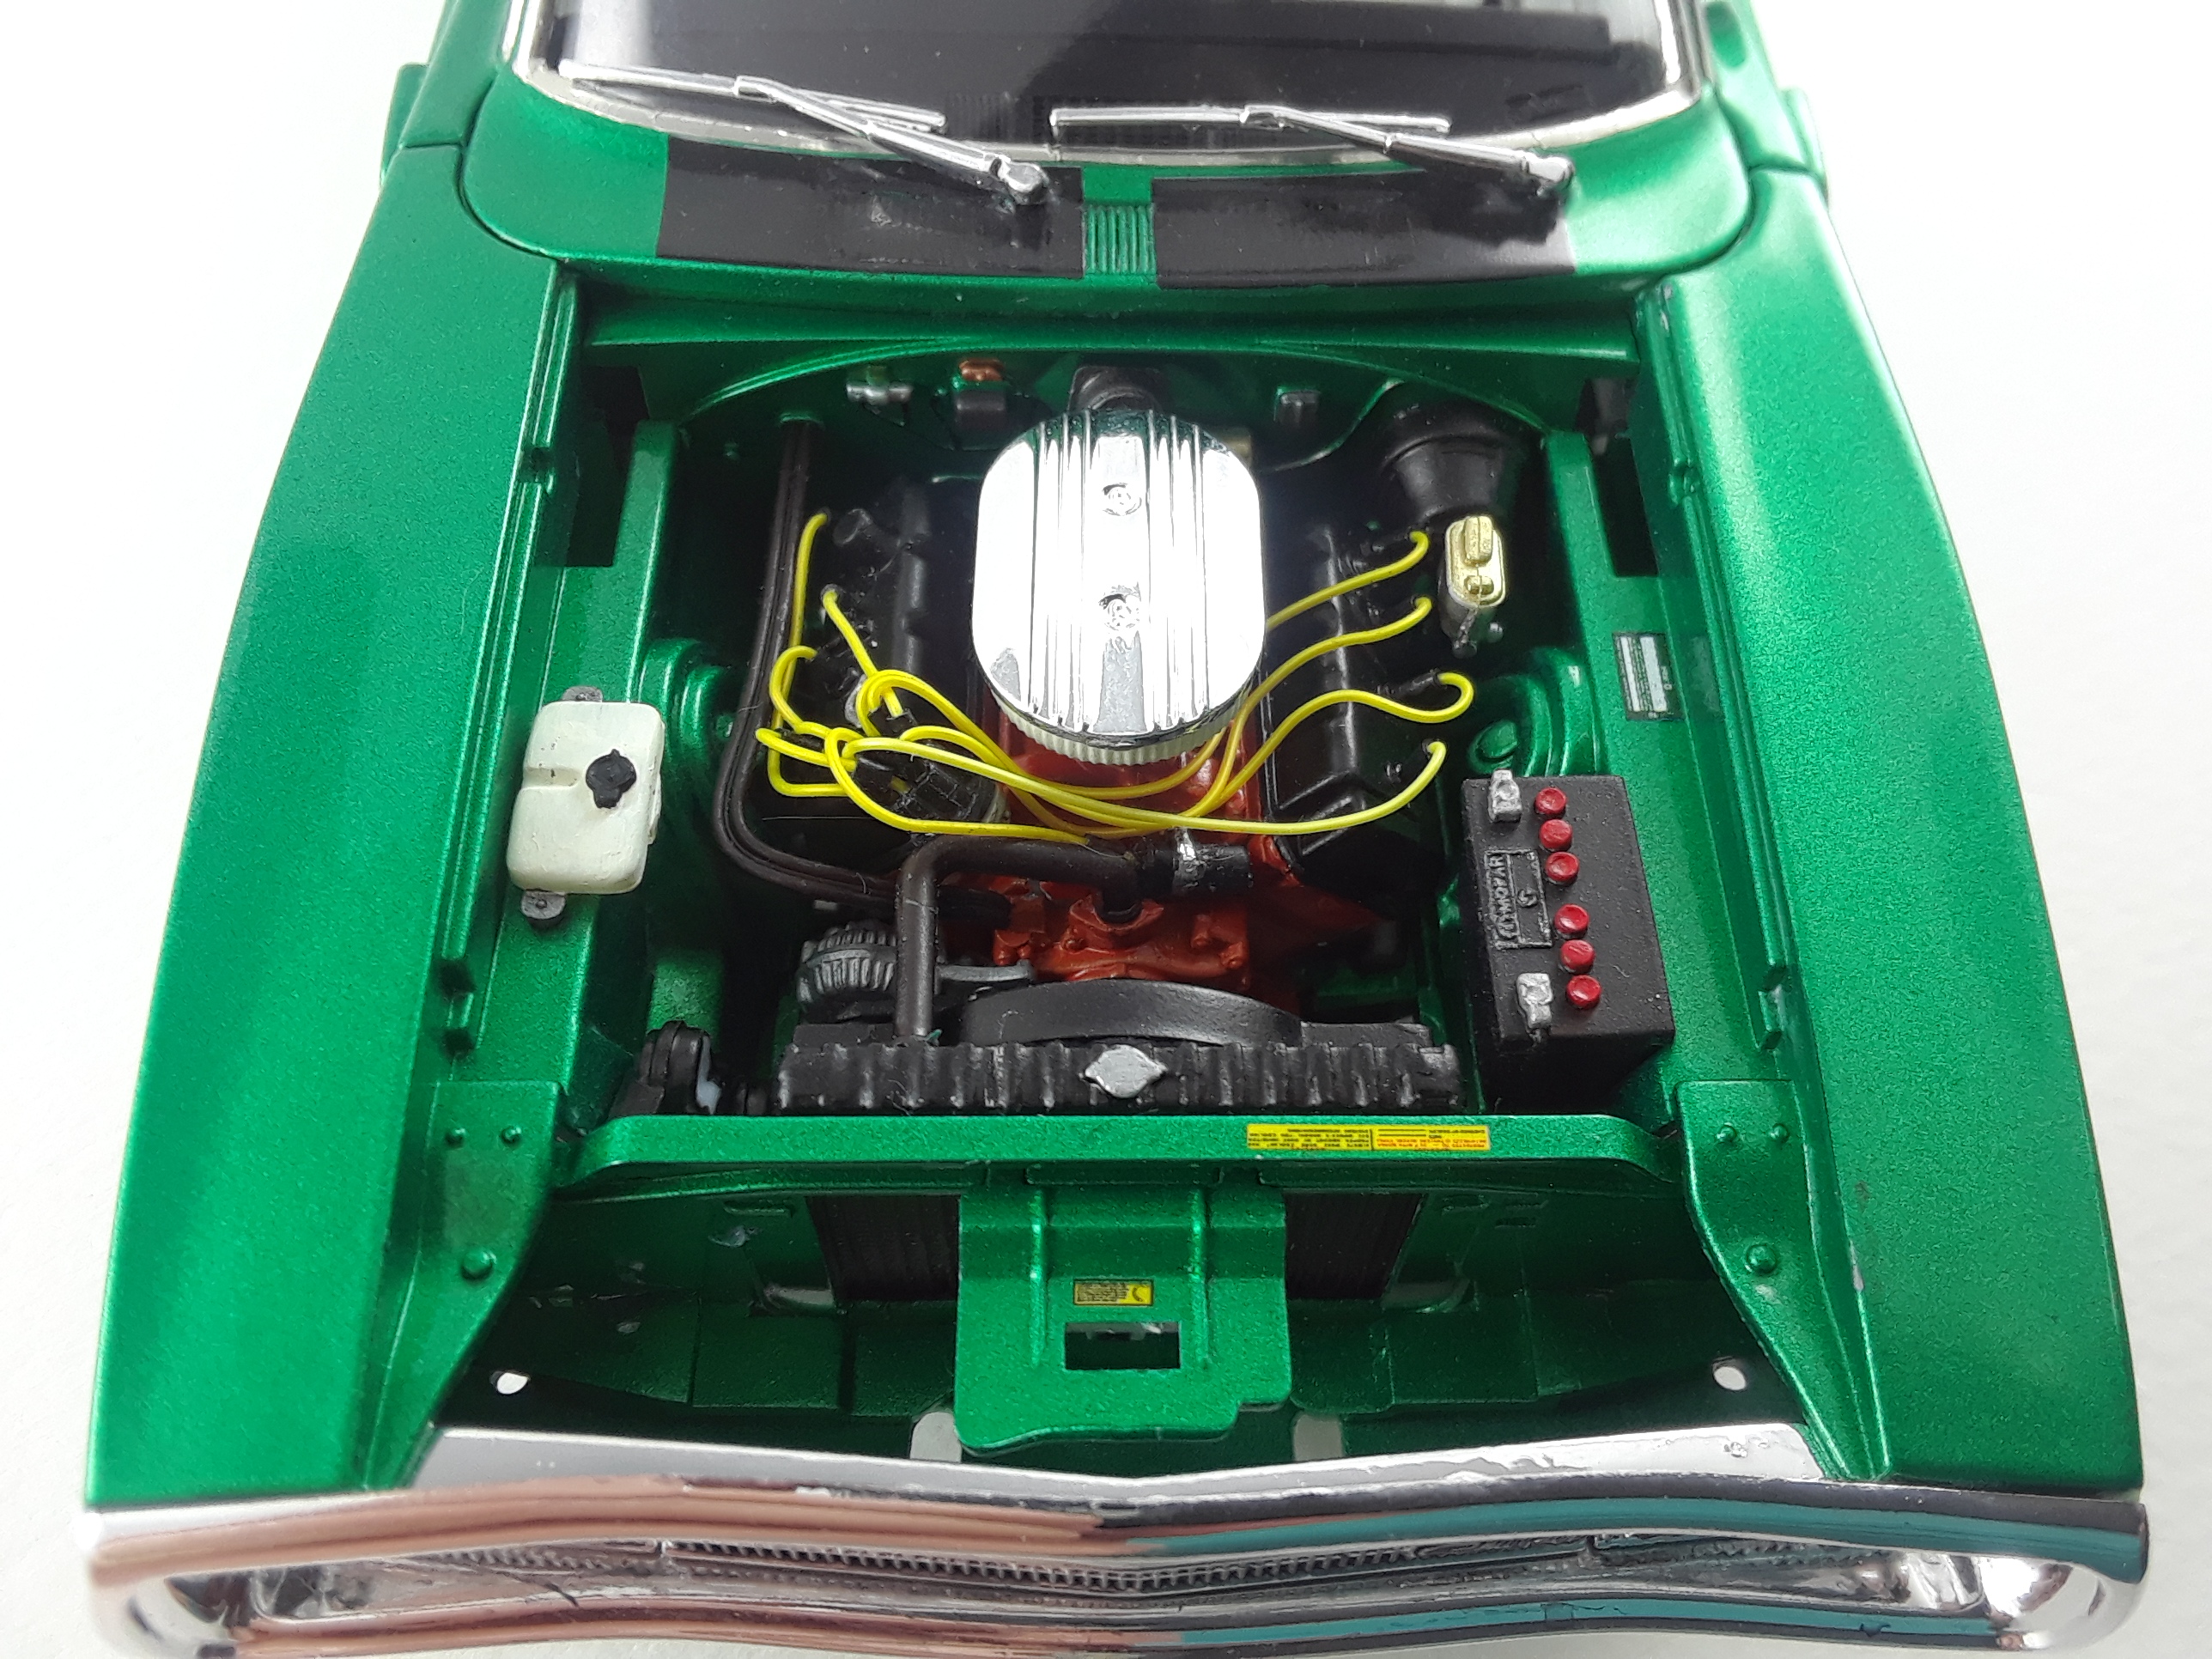
Revell 1970 Dodge Charger R/T, painted with Testors mystic green one coat lacquer and Testors wet look clear. White interior, basically box stock except for plug wires. Thanks for looking
-
I wanted to work on something bright, so I got out this 70 Charger for a quick build (I hope). Painted Odds & Ends sun yellow with wet look clear coat. Thanks for looking, all comments welcomed.
-
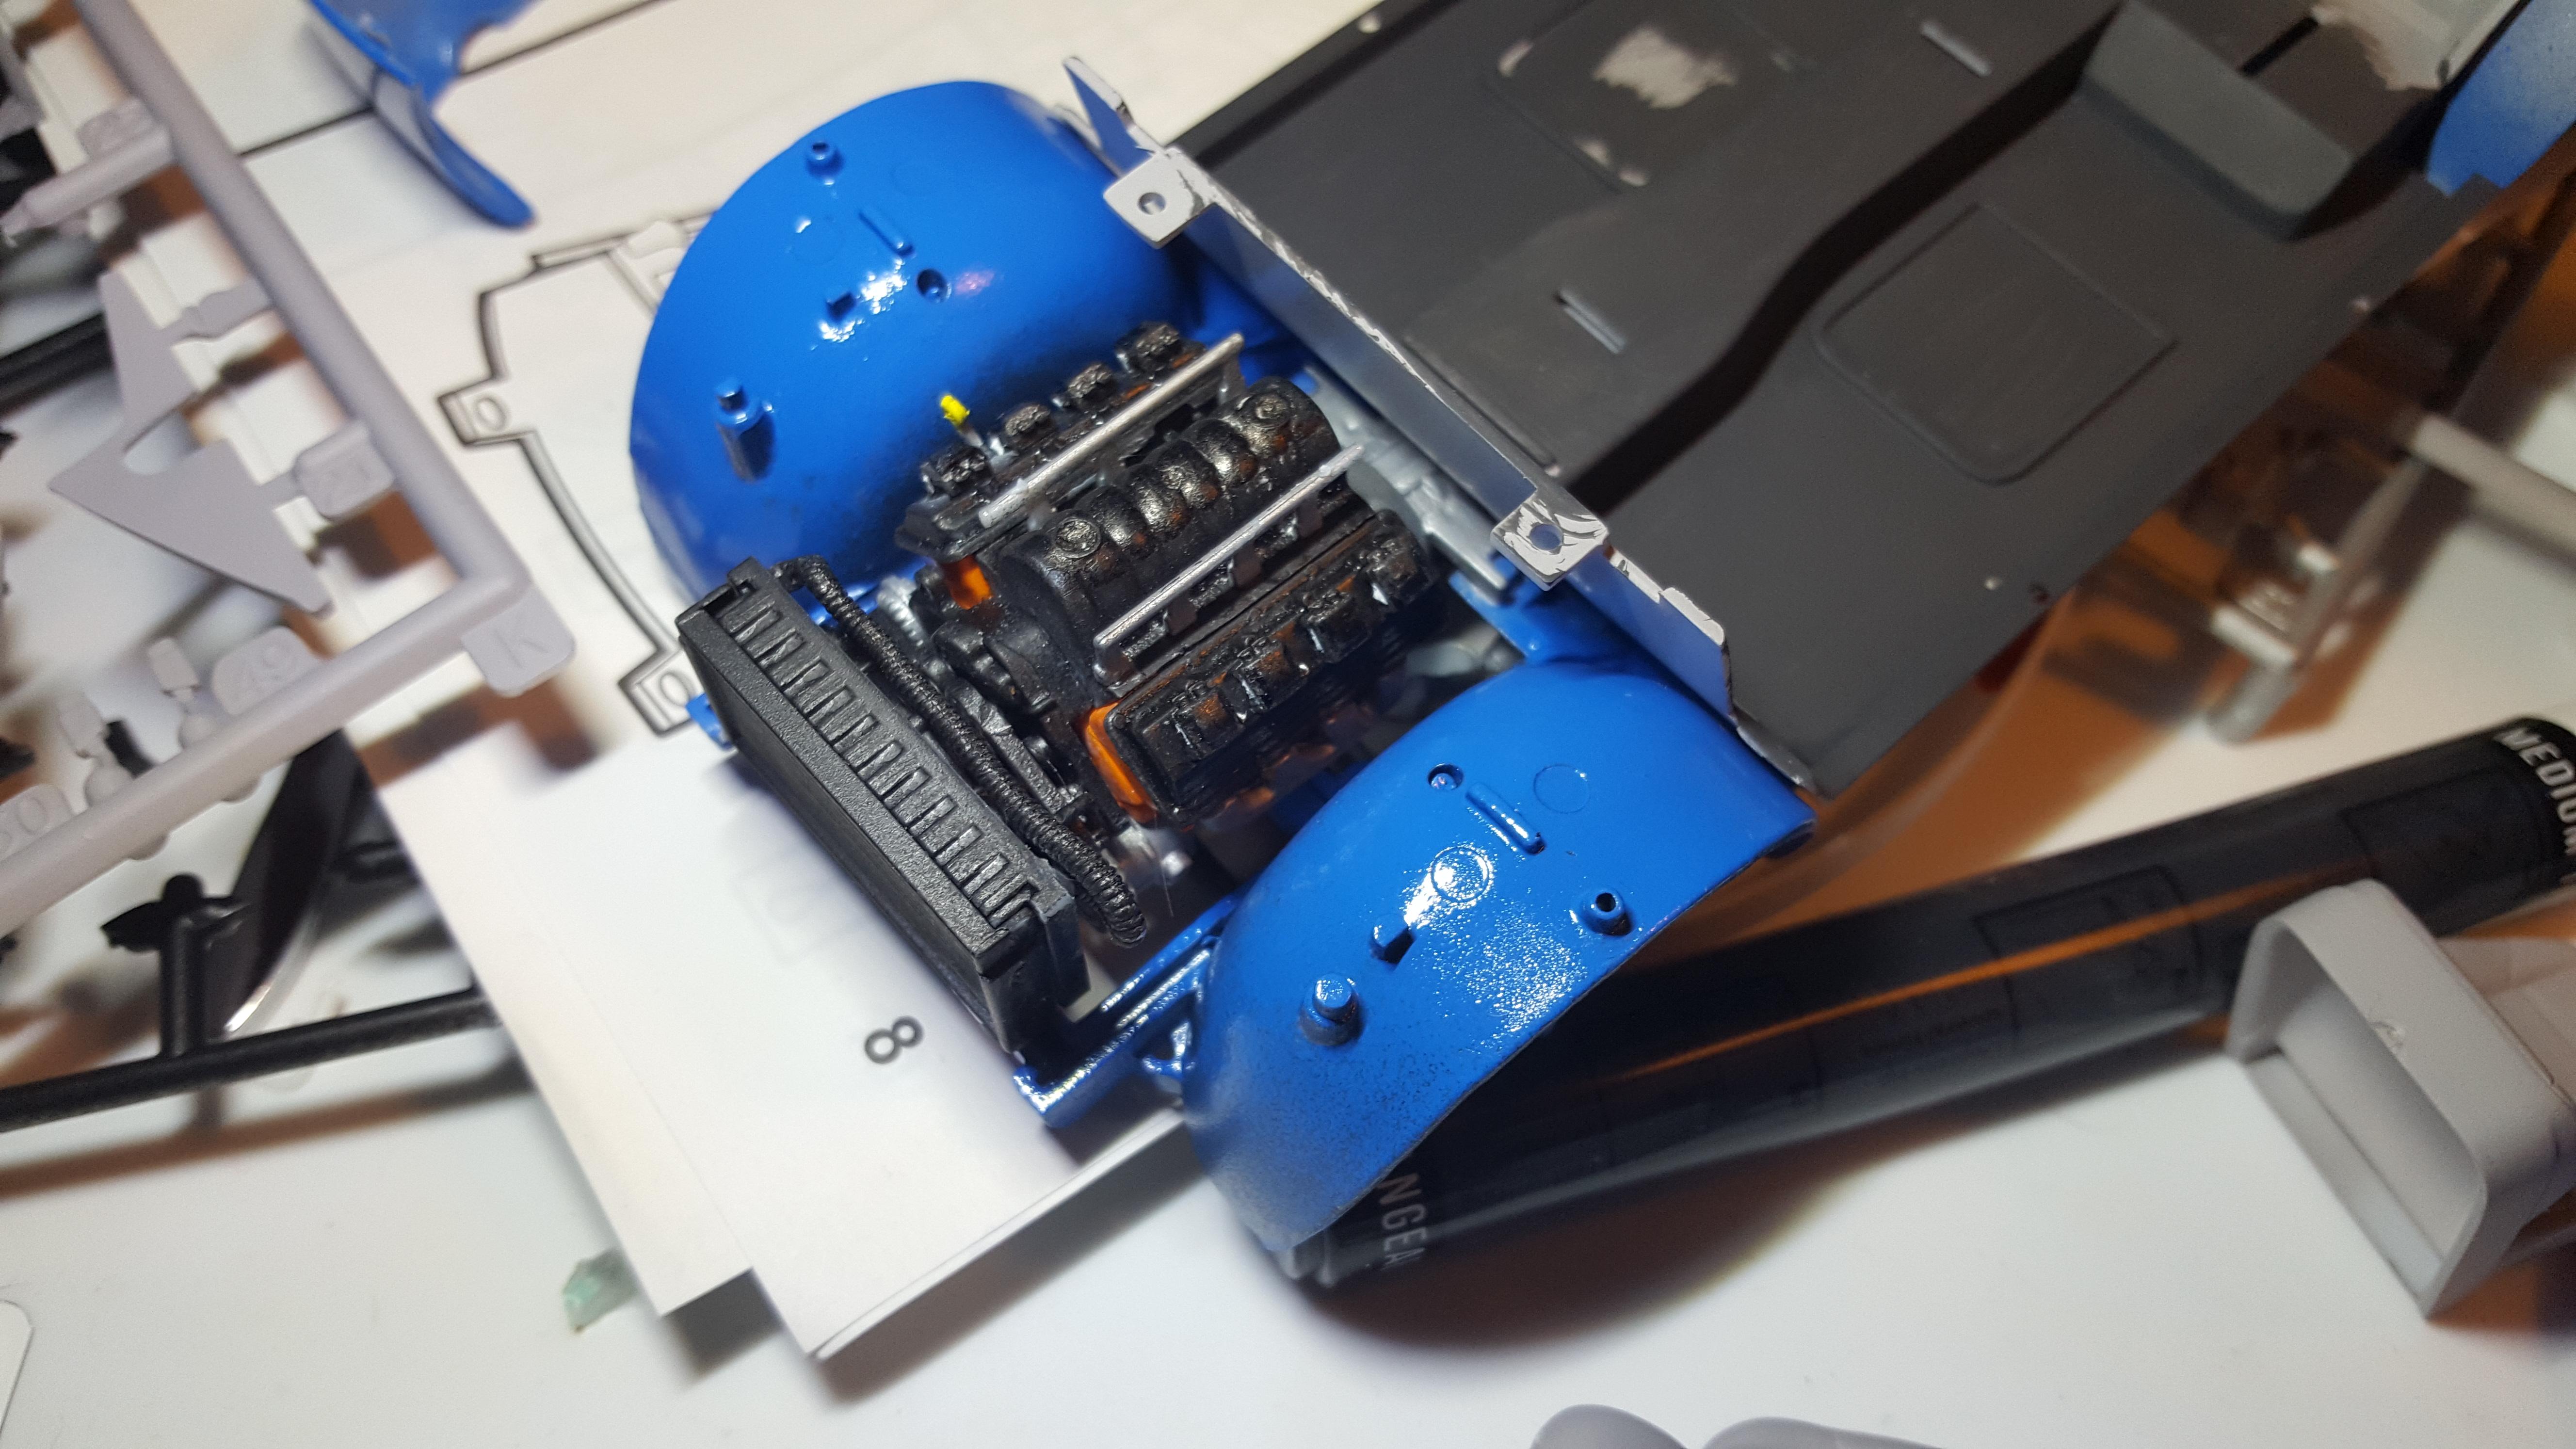
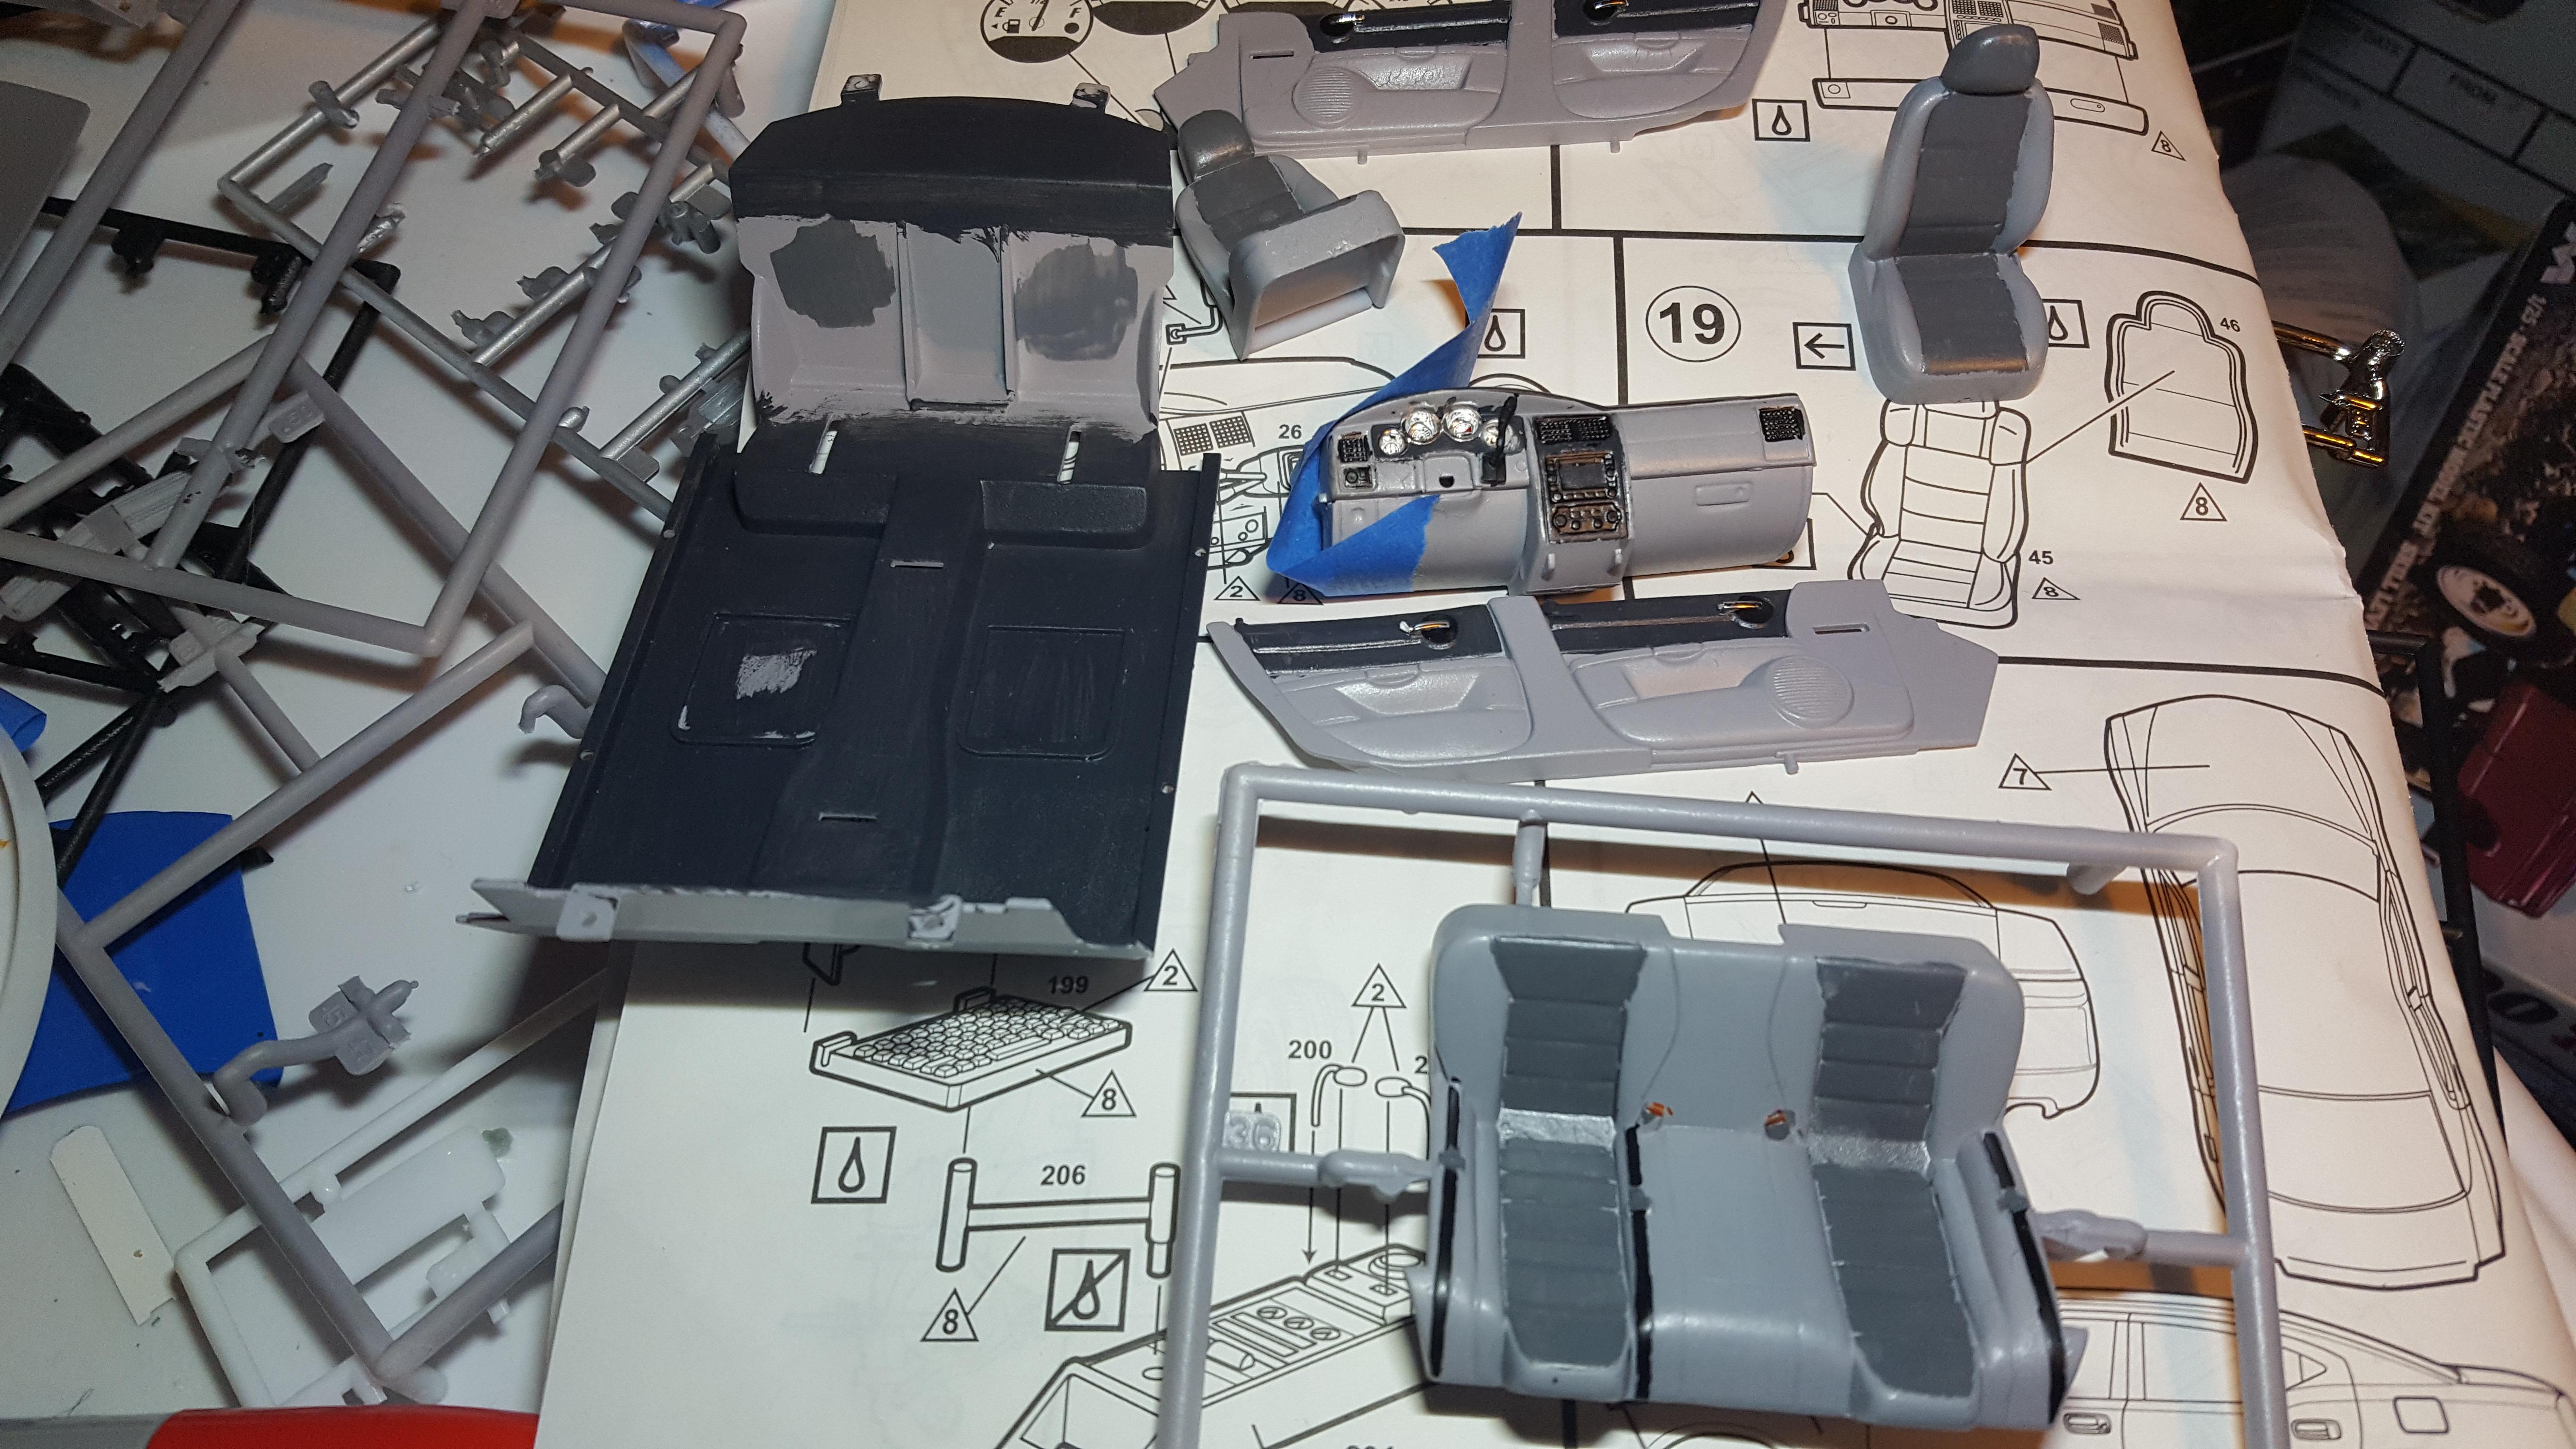
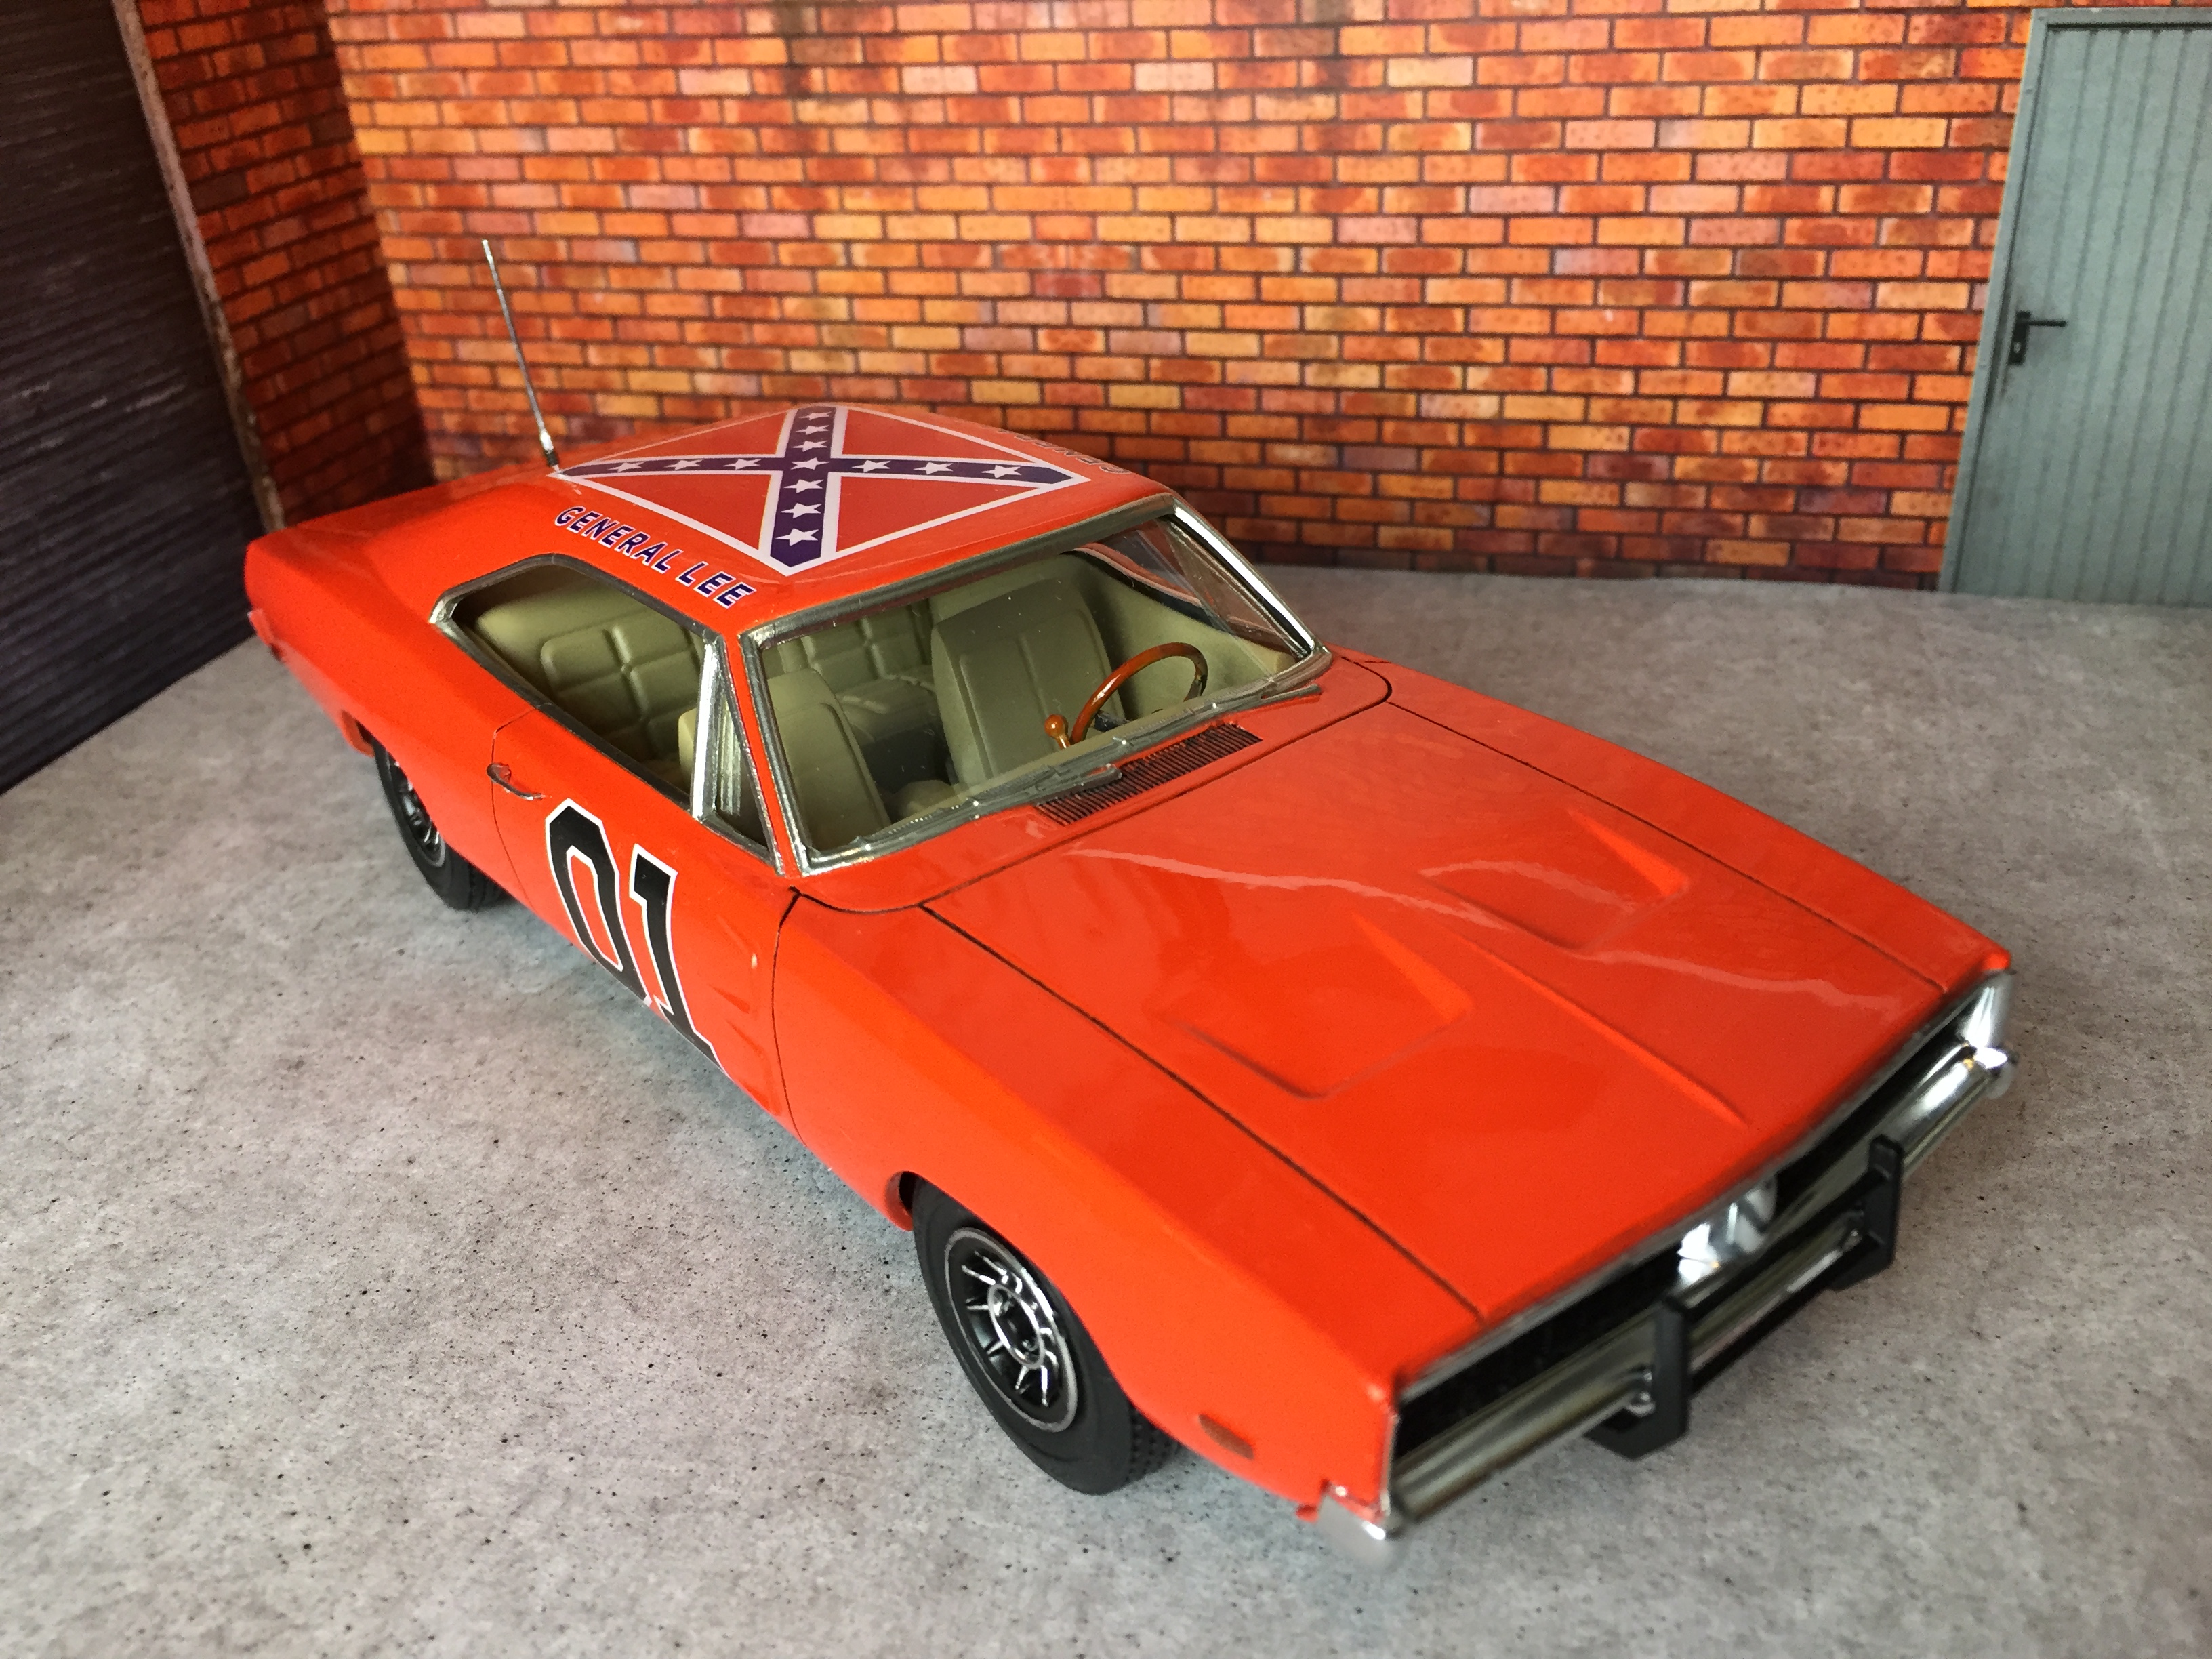
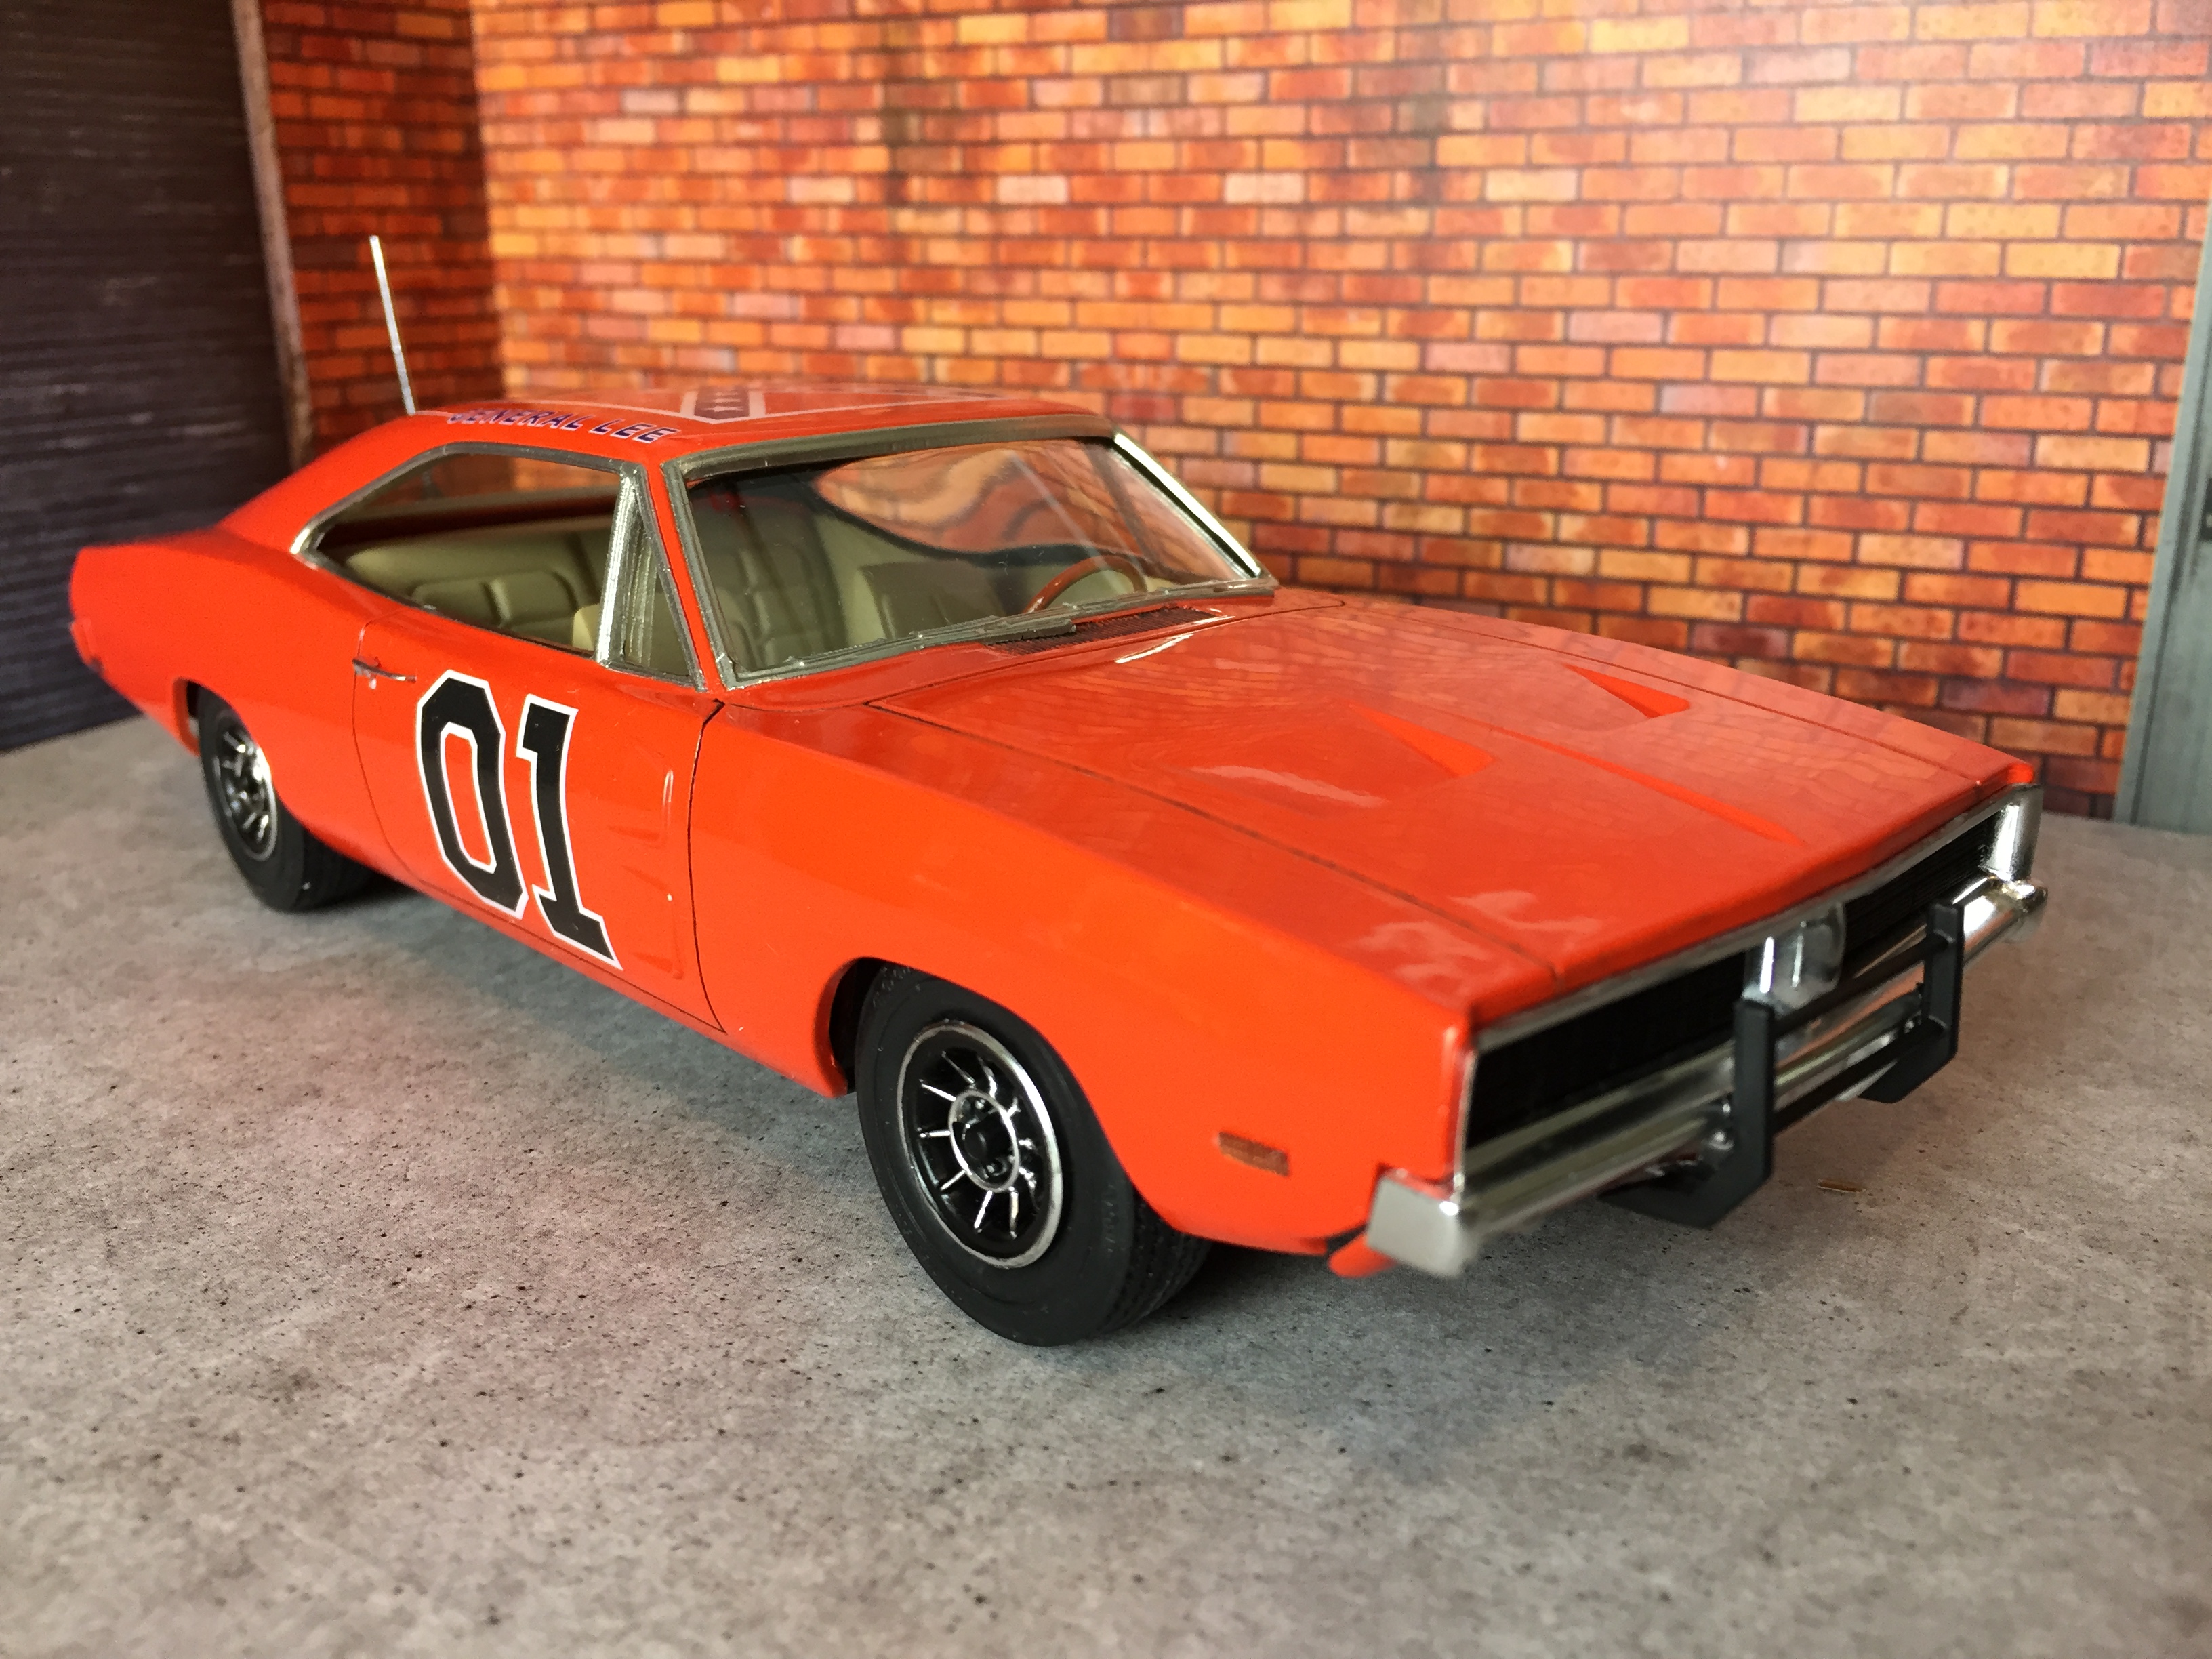
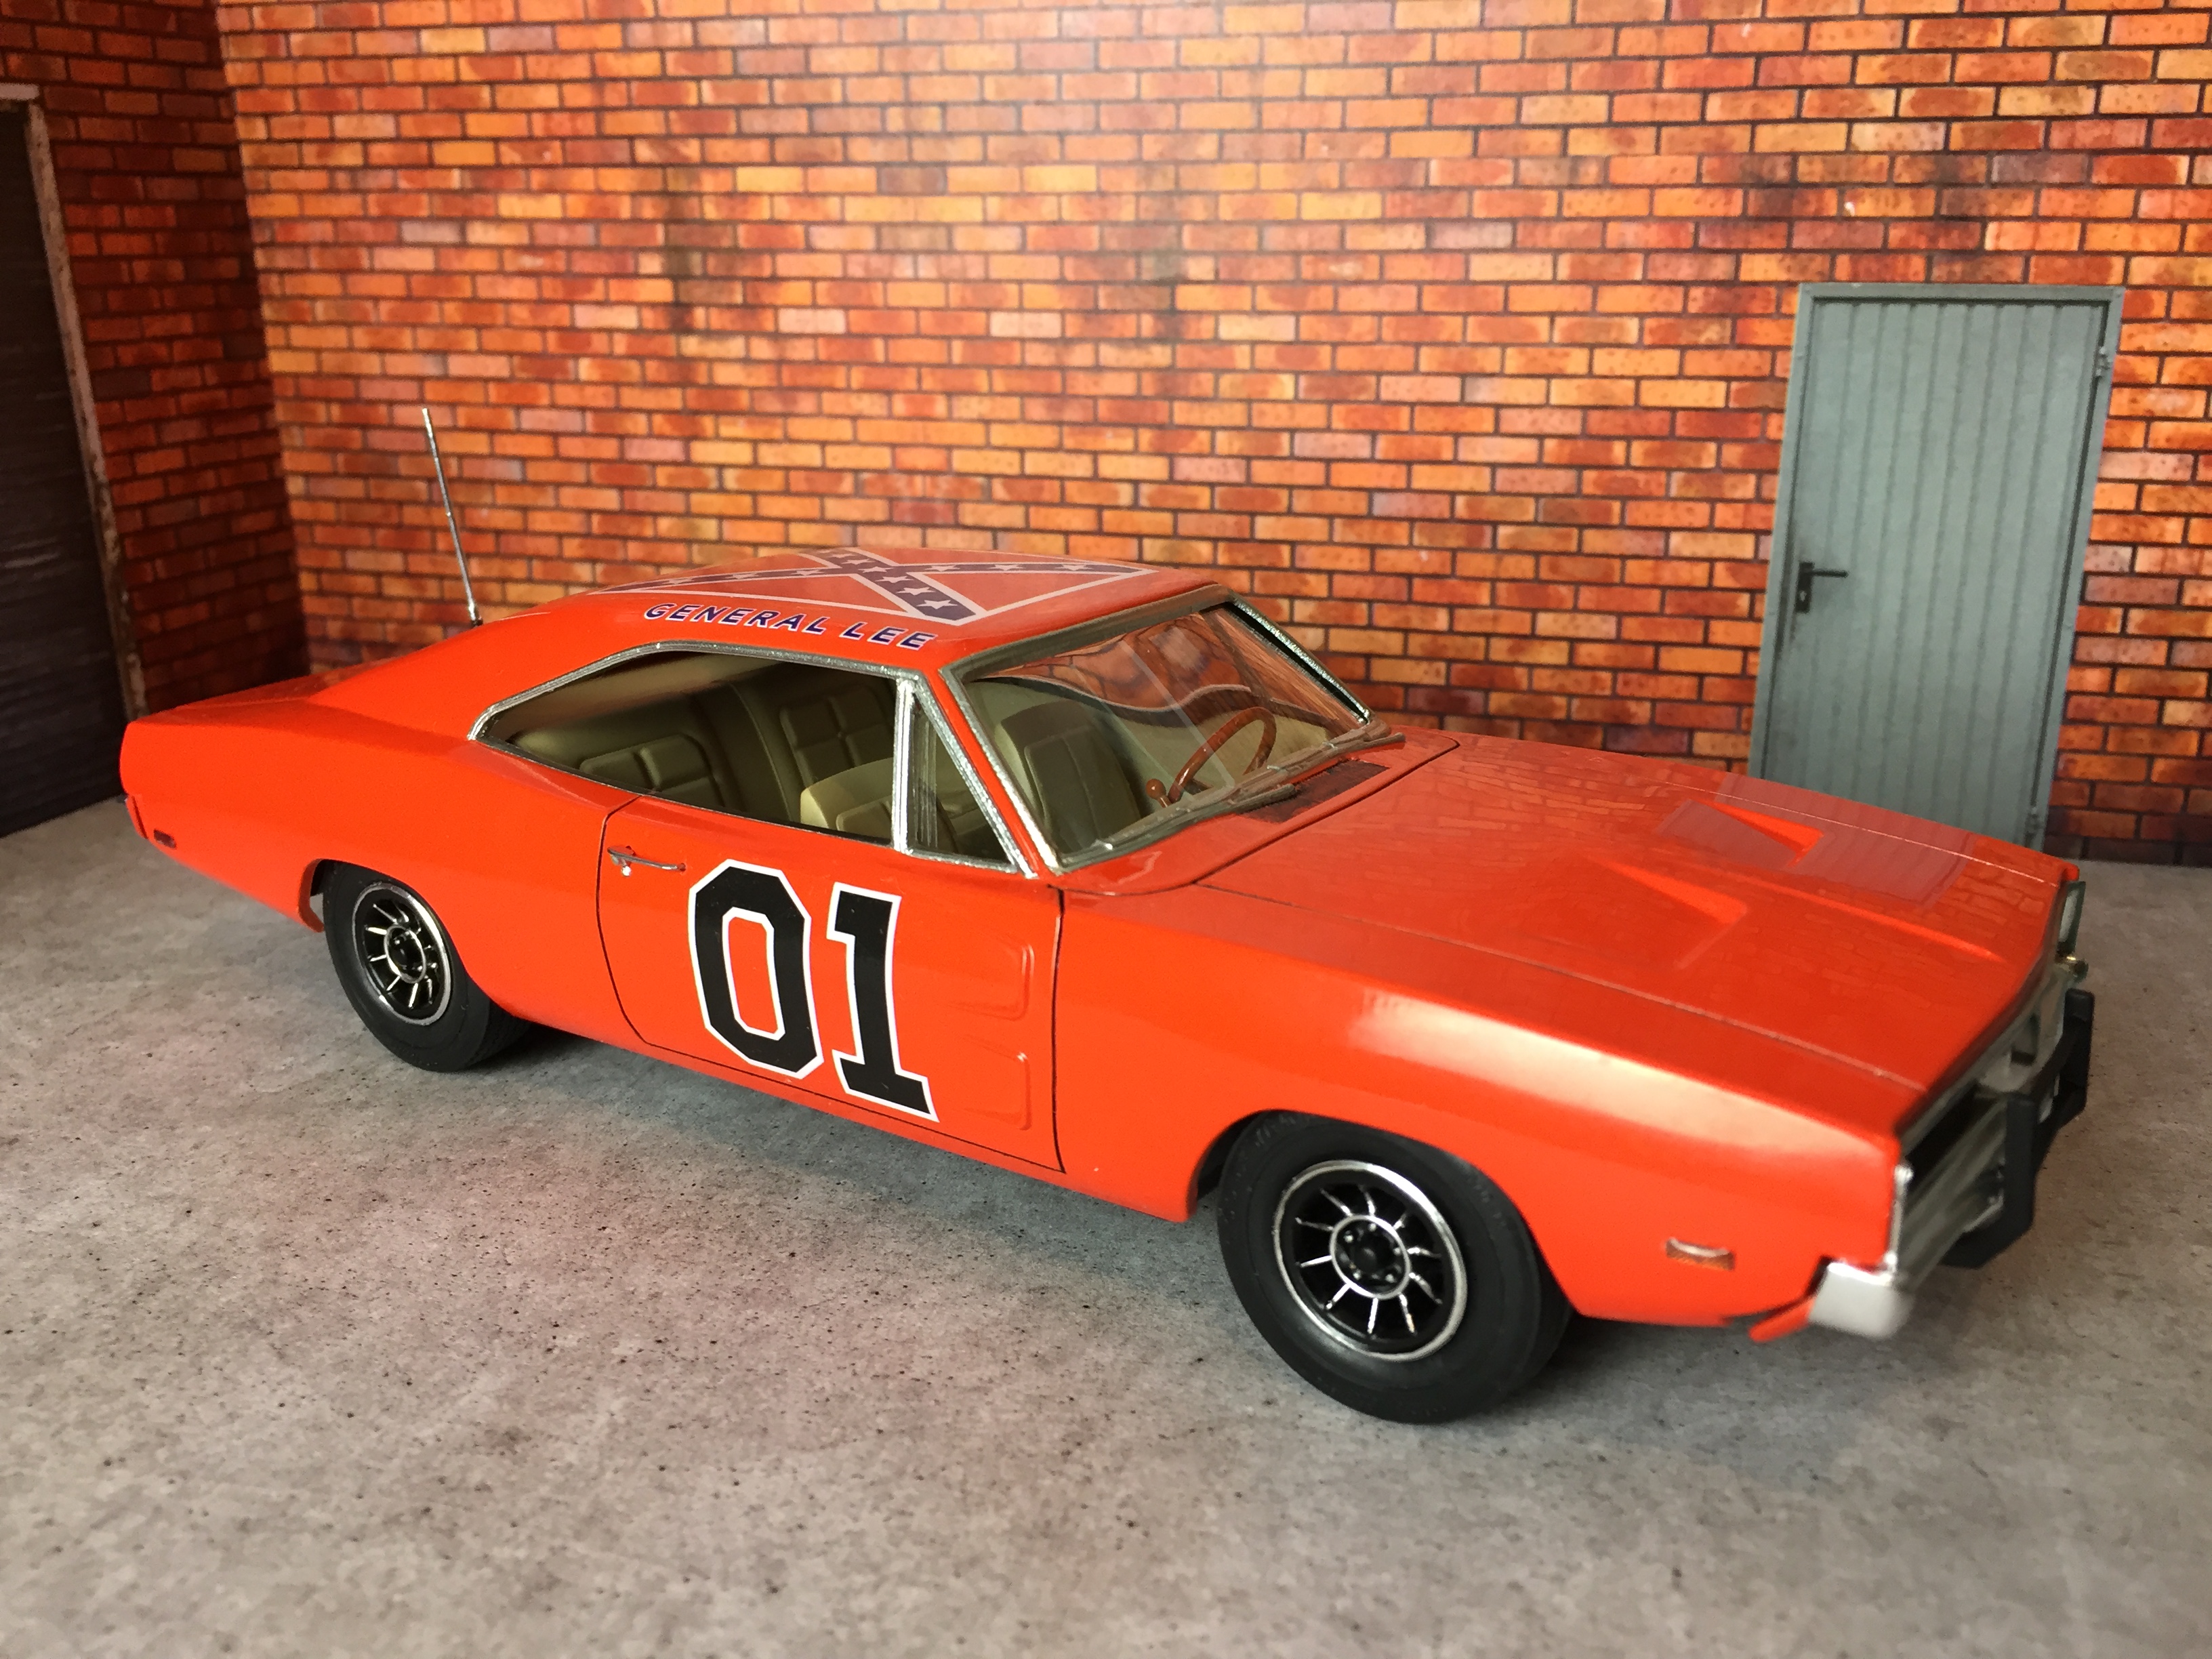
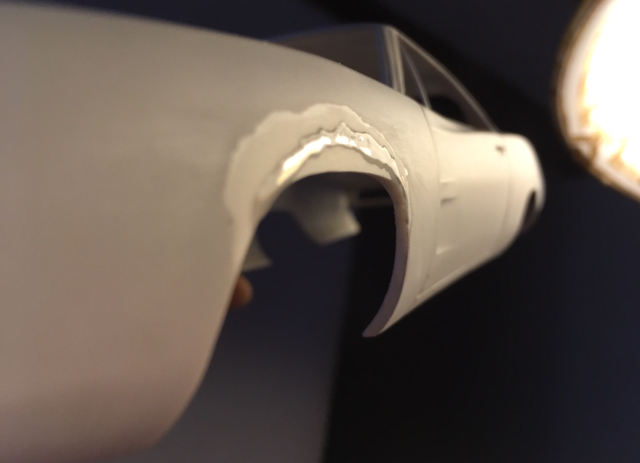
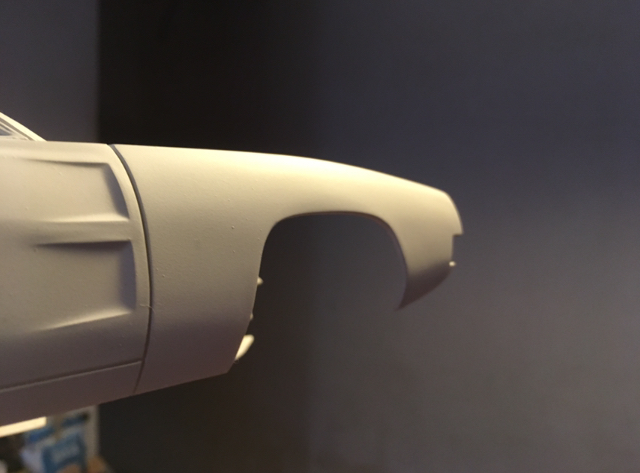
I have not done much over the xmas period, but I did start to fiddle with the MPC Dukes of Hazzard Charger.... I do not plan to build it in Dukes trim, it is a hash up of a few different models; Petty’s ‘73 Nascar charger, amongst others. There is no rear seat, no inner front wings (fenders) apparently the engine is not correct, tires way too fat etc etc so I ‘m going to build my own dream race-prepped street charger mash up. so far I have the 426 cu in hemi painted and built, and I am working on the body at the moment, adding front wheel arch tops as the kit comes with nascar style round-topped arches- I have replaced tbe missing plastic with the bonnet (hood) gap sprue so as to have exactly the same plastic as the front fenders for material integrity. Stock round-topped arch closest to camera, the repaired flat-top at rear: That piece of flat sprue was shaped and welded in place. It even has the correct curvature, so hopefully no stress or strain to crack in the future: Arch is shaped in situ, small gaps are filled with tamiya styrene cement: Righthand arch shaped and primed, lots of wet sanding to do still before the paint goes on, but a seamless repair: Nicely detailed hemi v8, but the manifold headers come with no exhaust pipes to empty into... go figure. I’ll have to make my own from scratch. Other little niggles appear whilst test fitting; such as the roll cage which is designed for the 73 Charger just does not work in this earlier 69 body- more chopping and bending to be done then... All in all not a bad model, but to build it box-stock would be somewhat disappointing for me. There is also a cubic tonne of flash on many parts, everything needs a good clean up, though the detail is more than acceptable. Even the engine block has molded in cylinders and pistons, the heads have the combustion chambers and valves, and even the camshaft and rocker assemblies are supplied. There is a clutch, also never to be seen once assembled.... Obviously some thought was put in to the simple enjoyment of the build, rather than the show of the final result!


.thumb.jpg.d0926de2d8346363976c7c0a63bd15d7.jpg)