Search the Community
Showing results for tags 'moebius'.
-
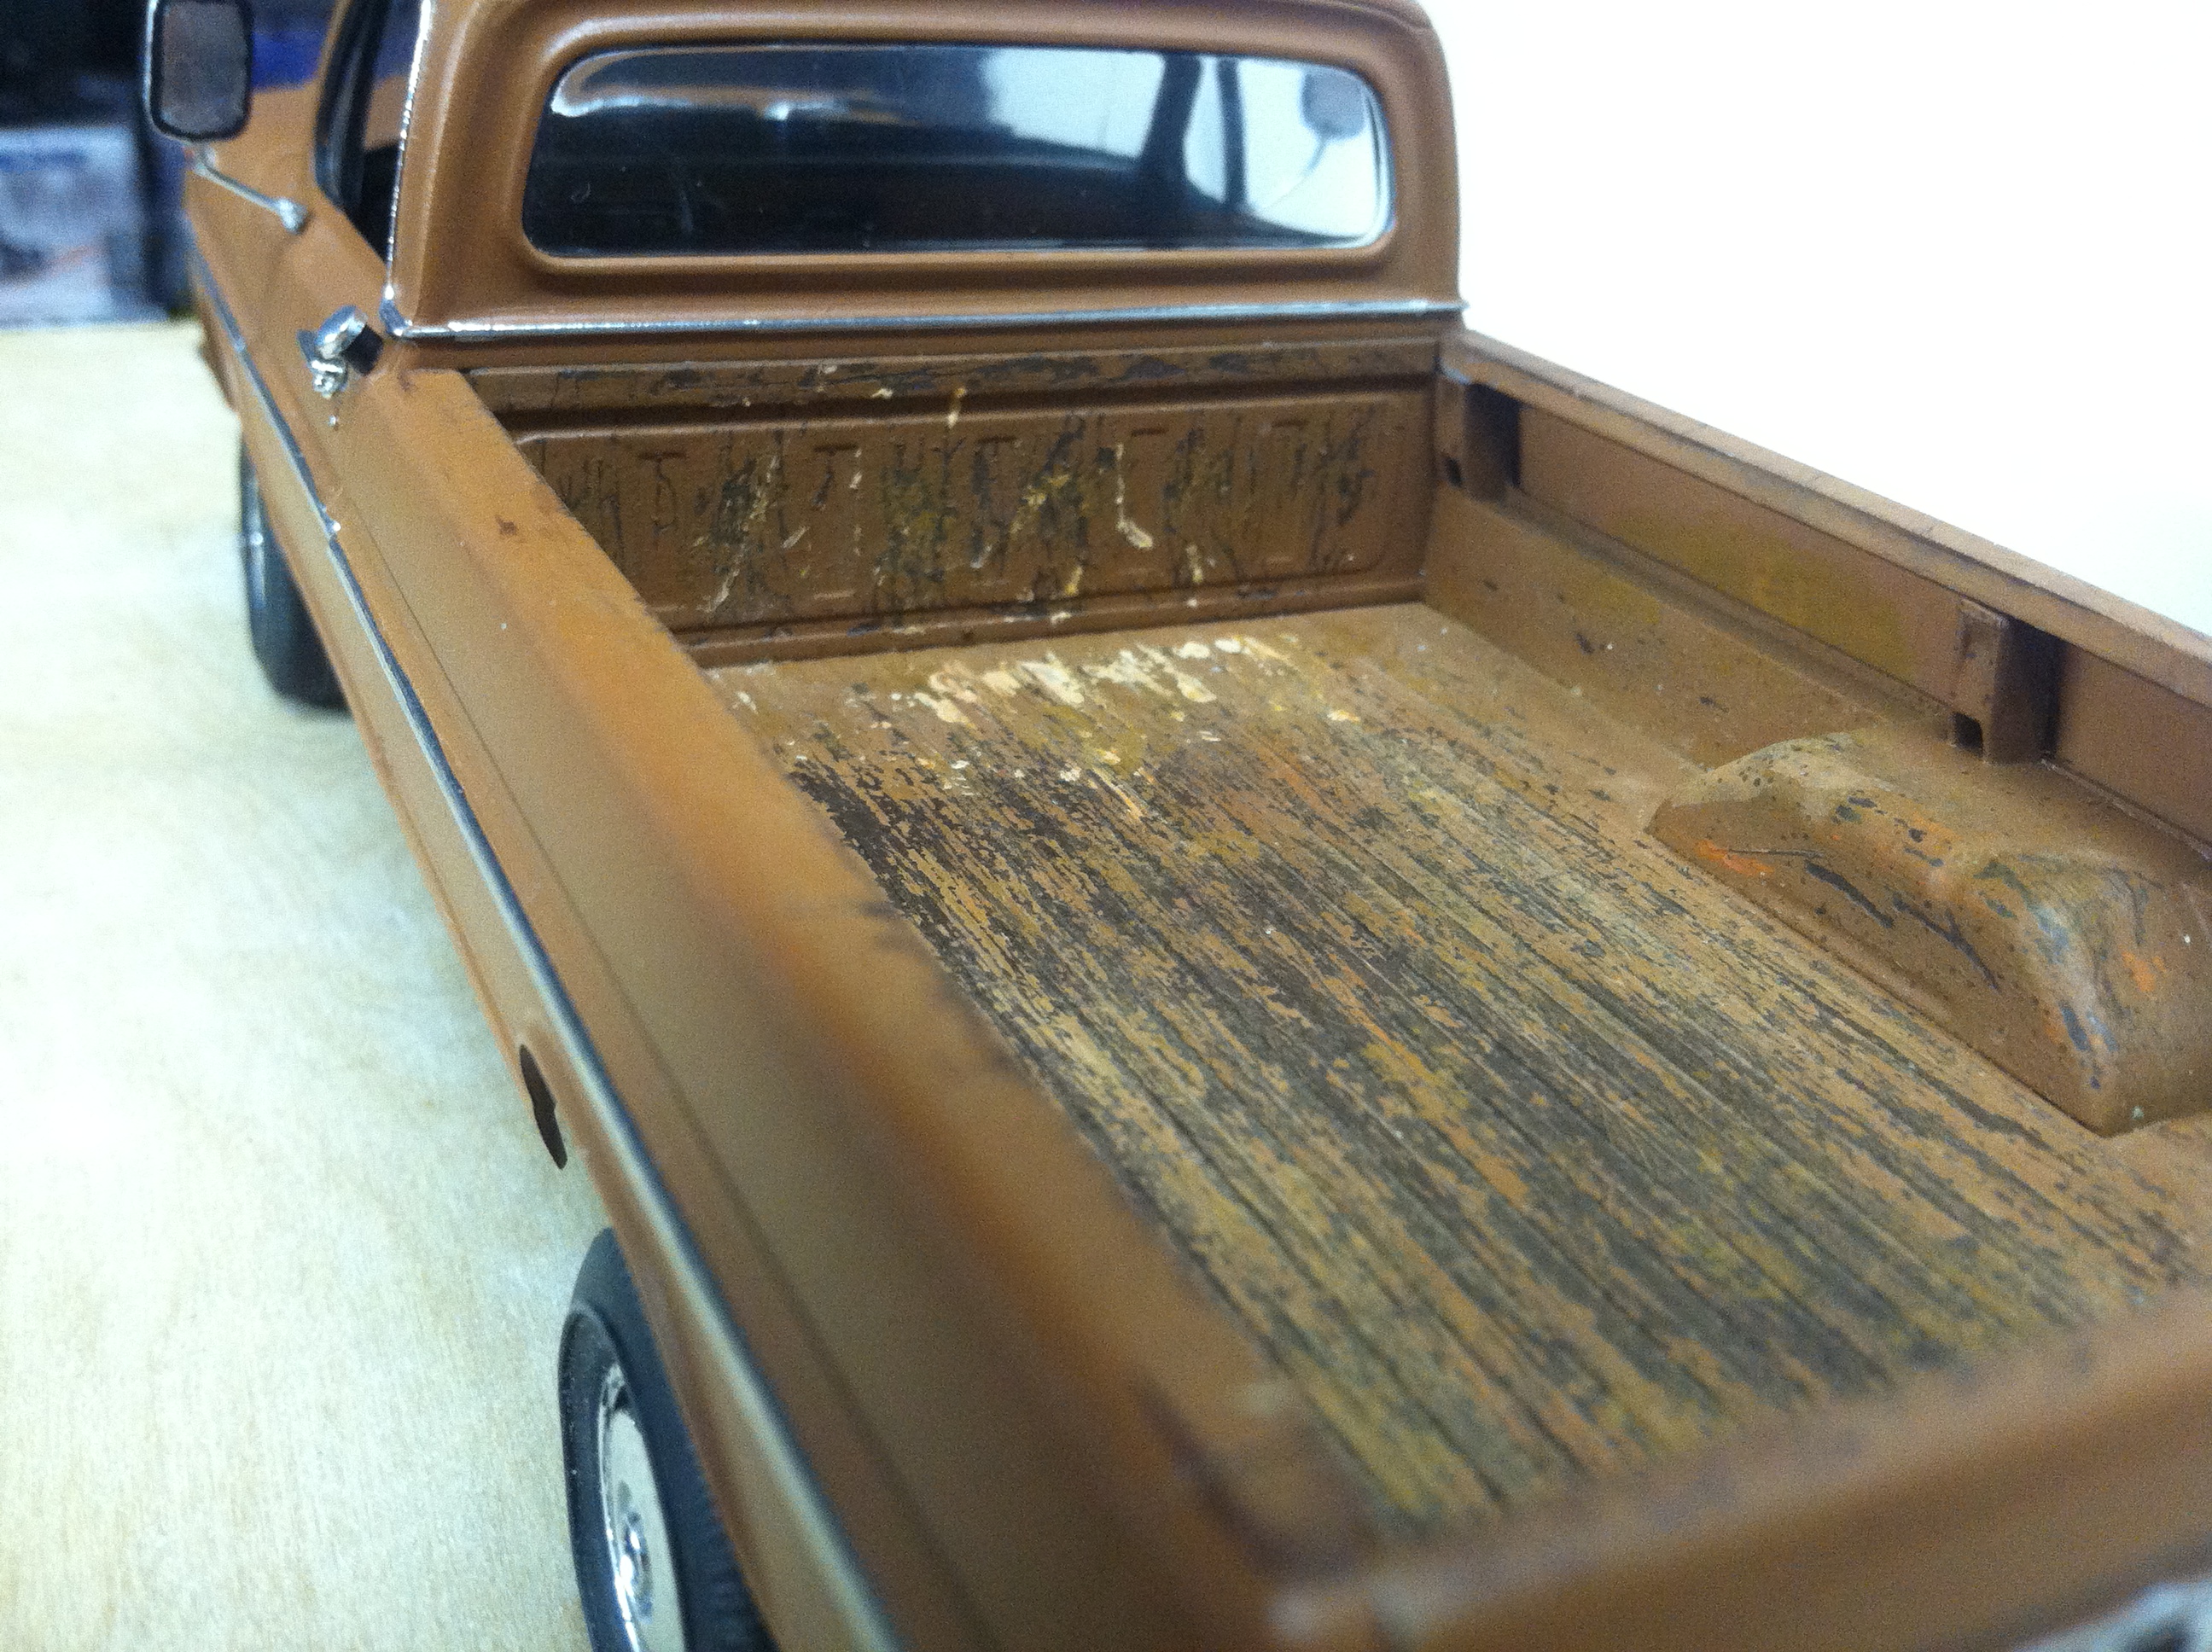
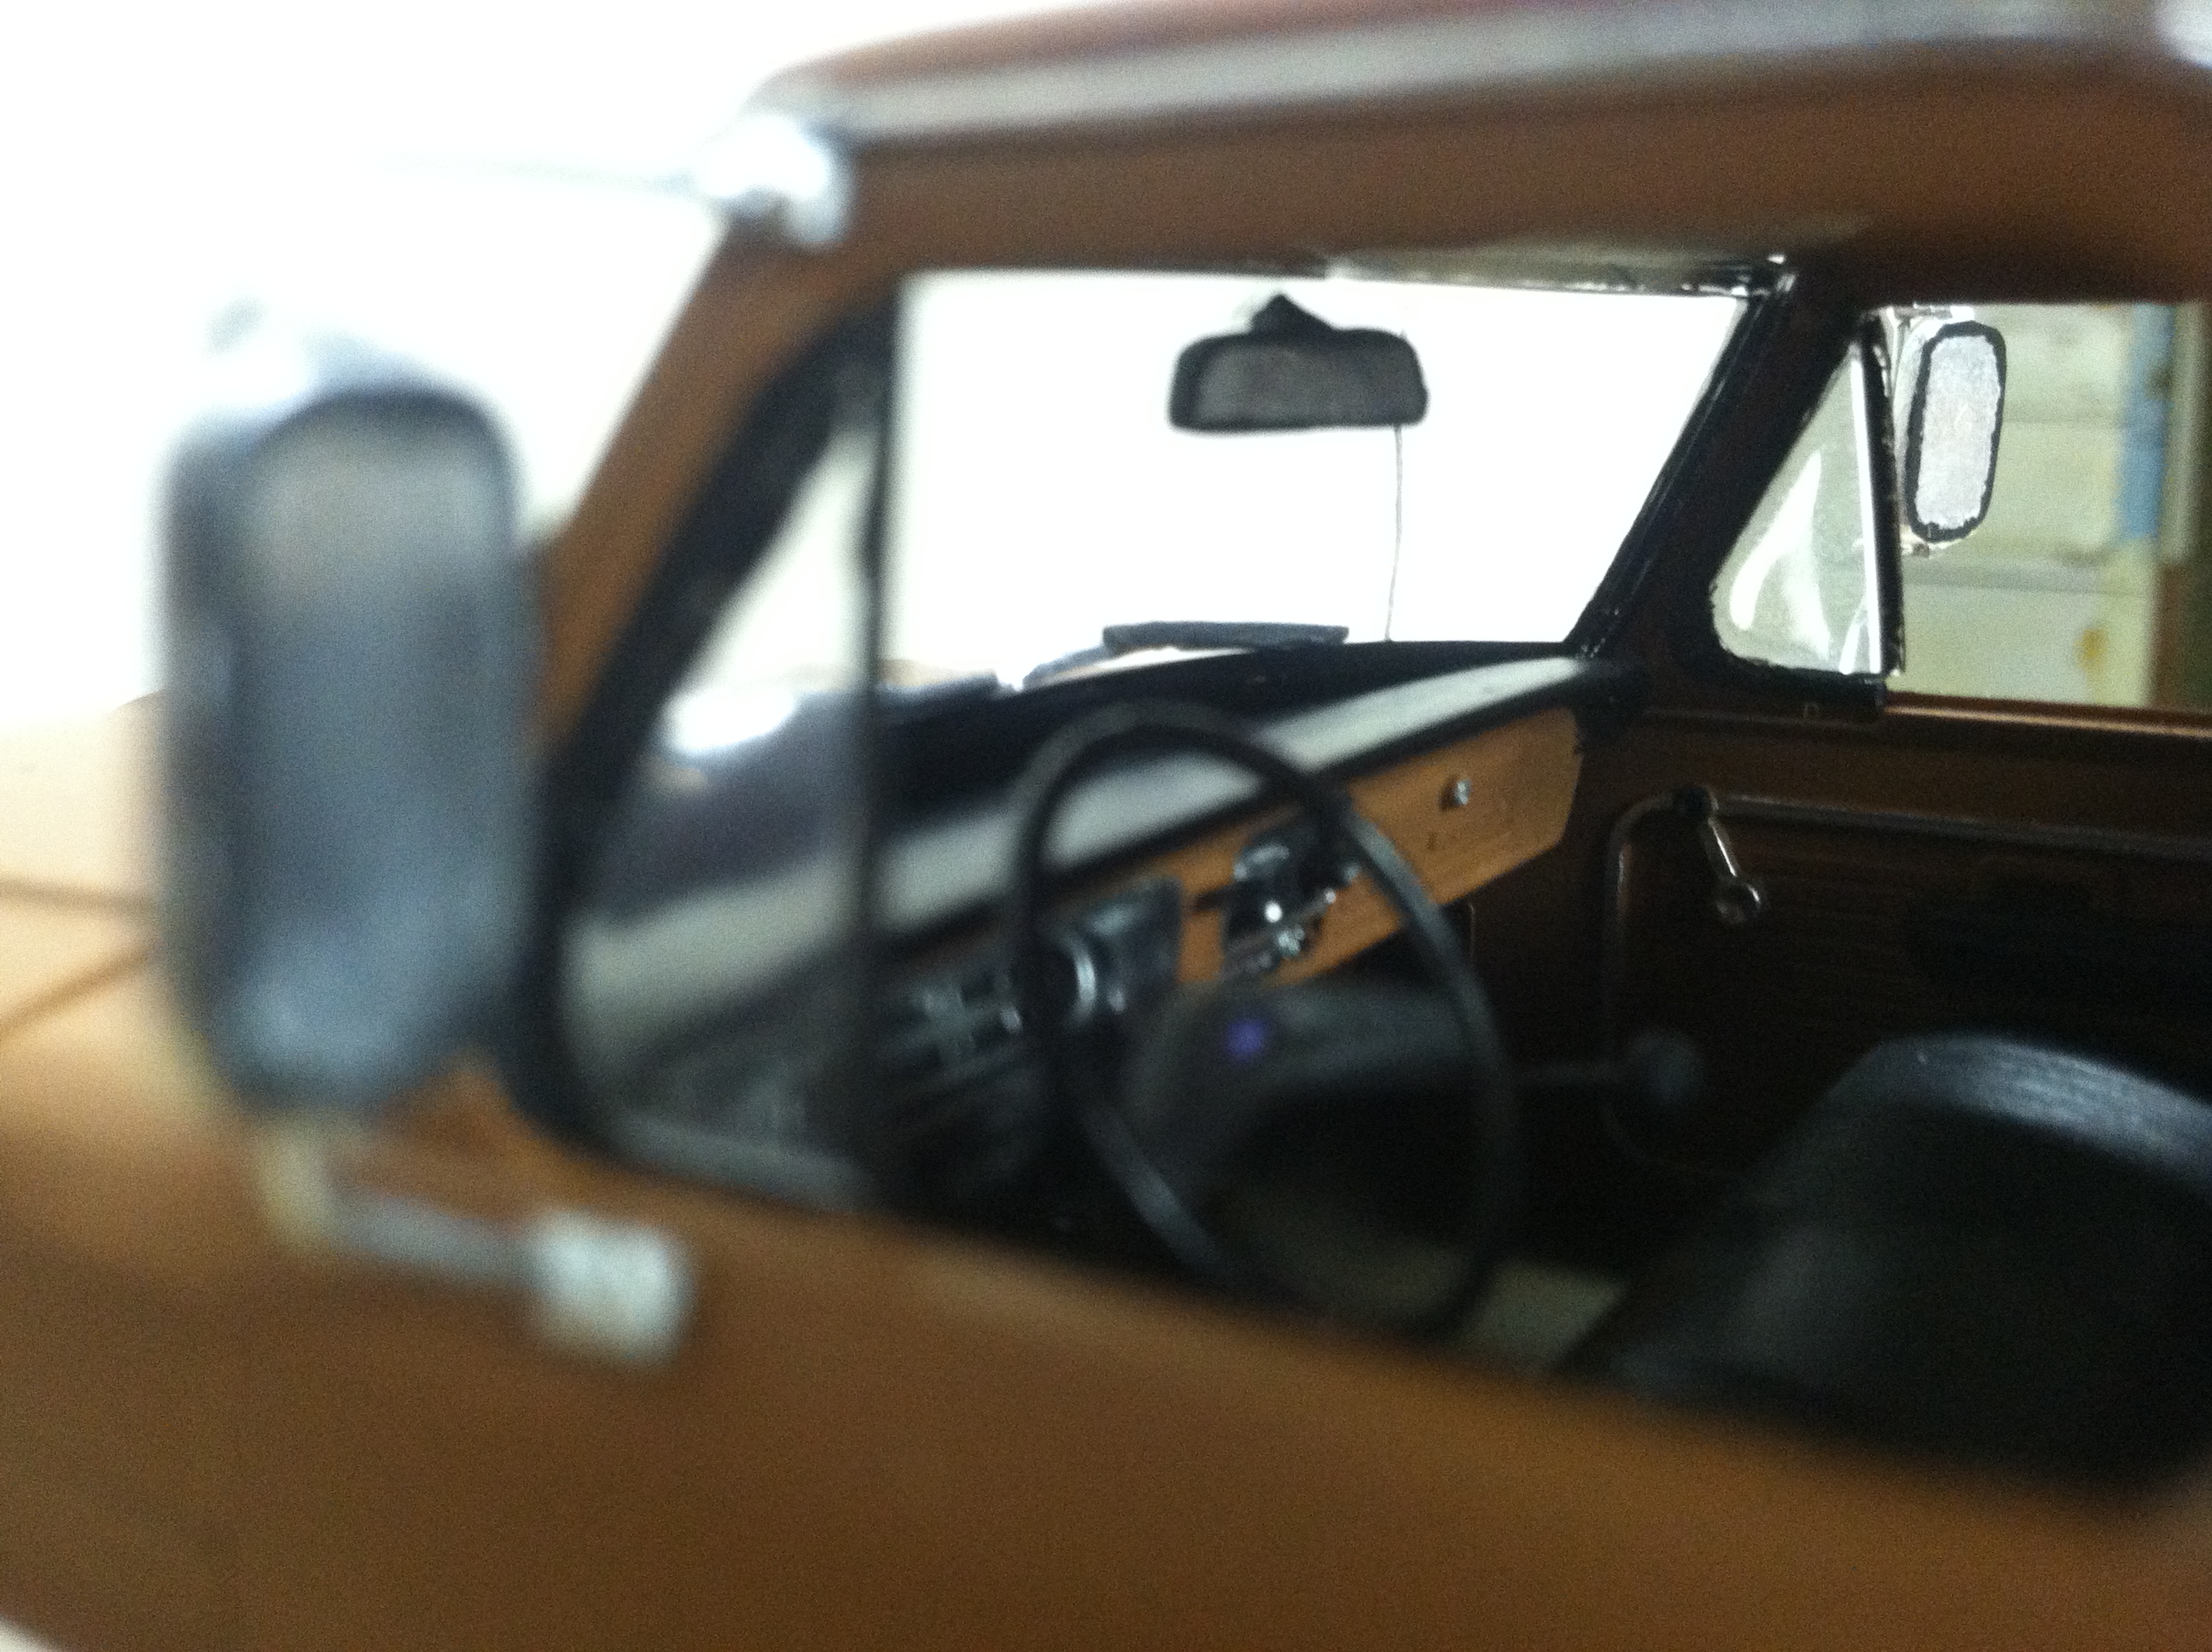
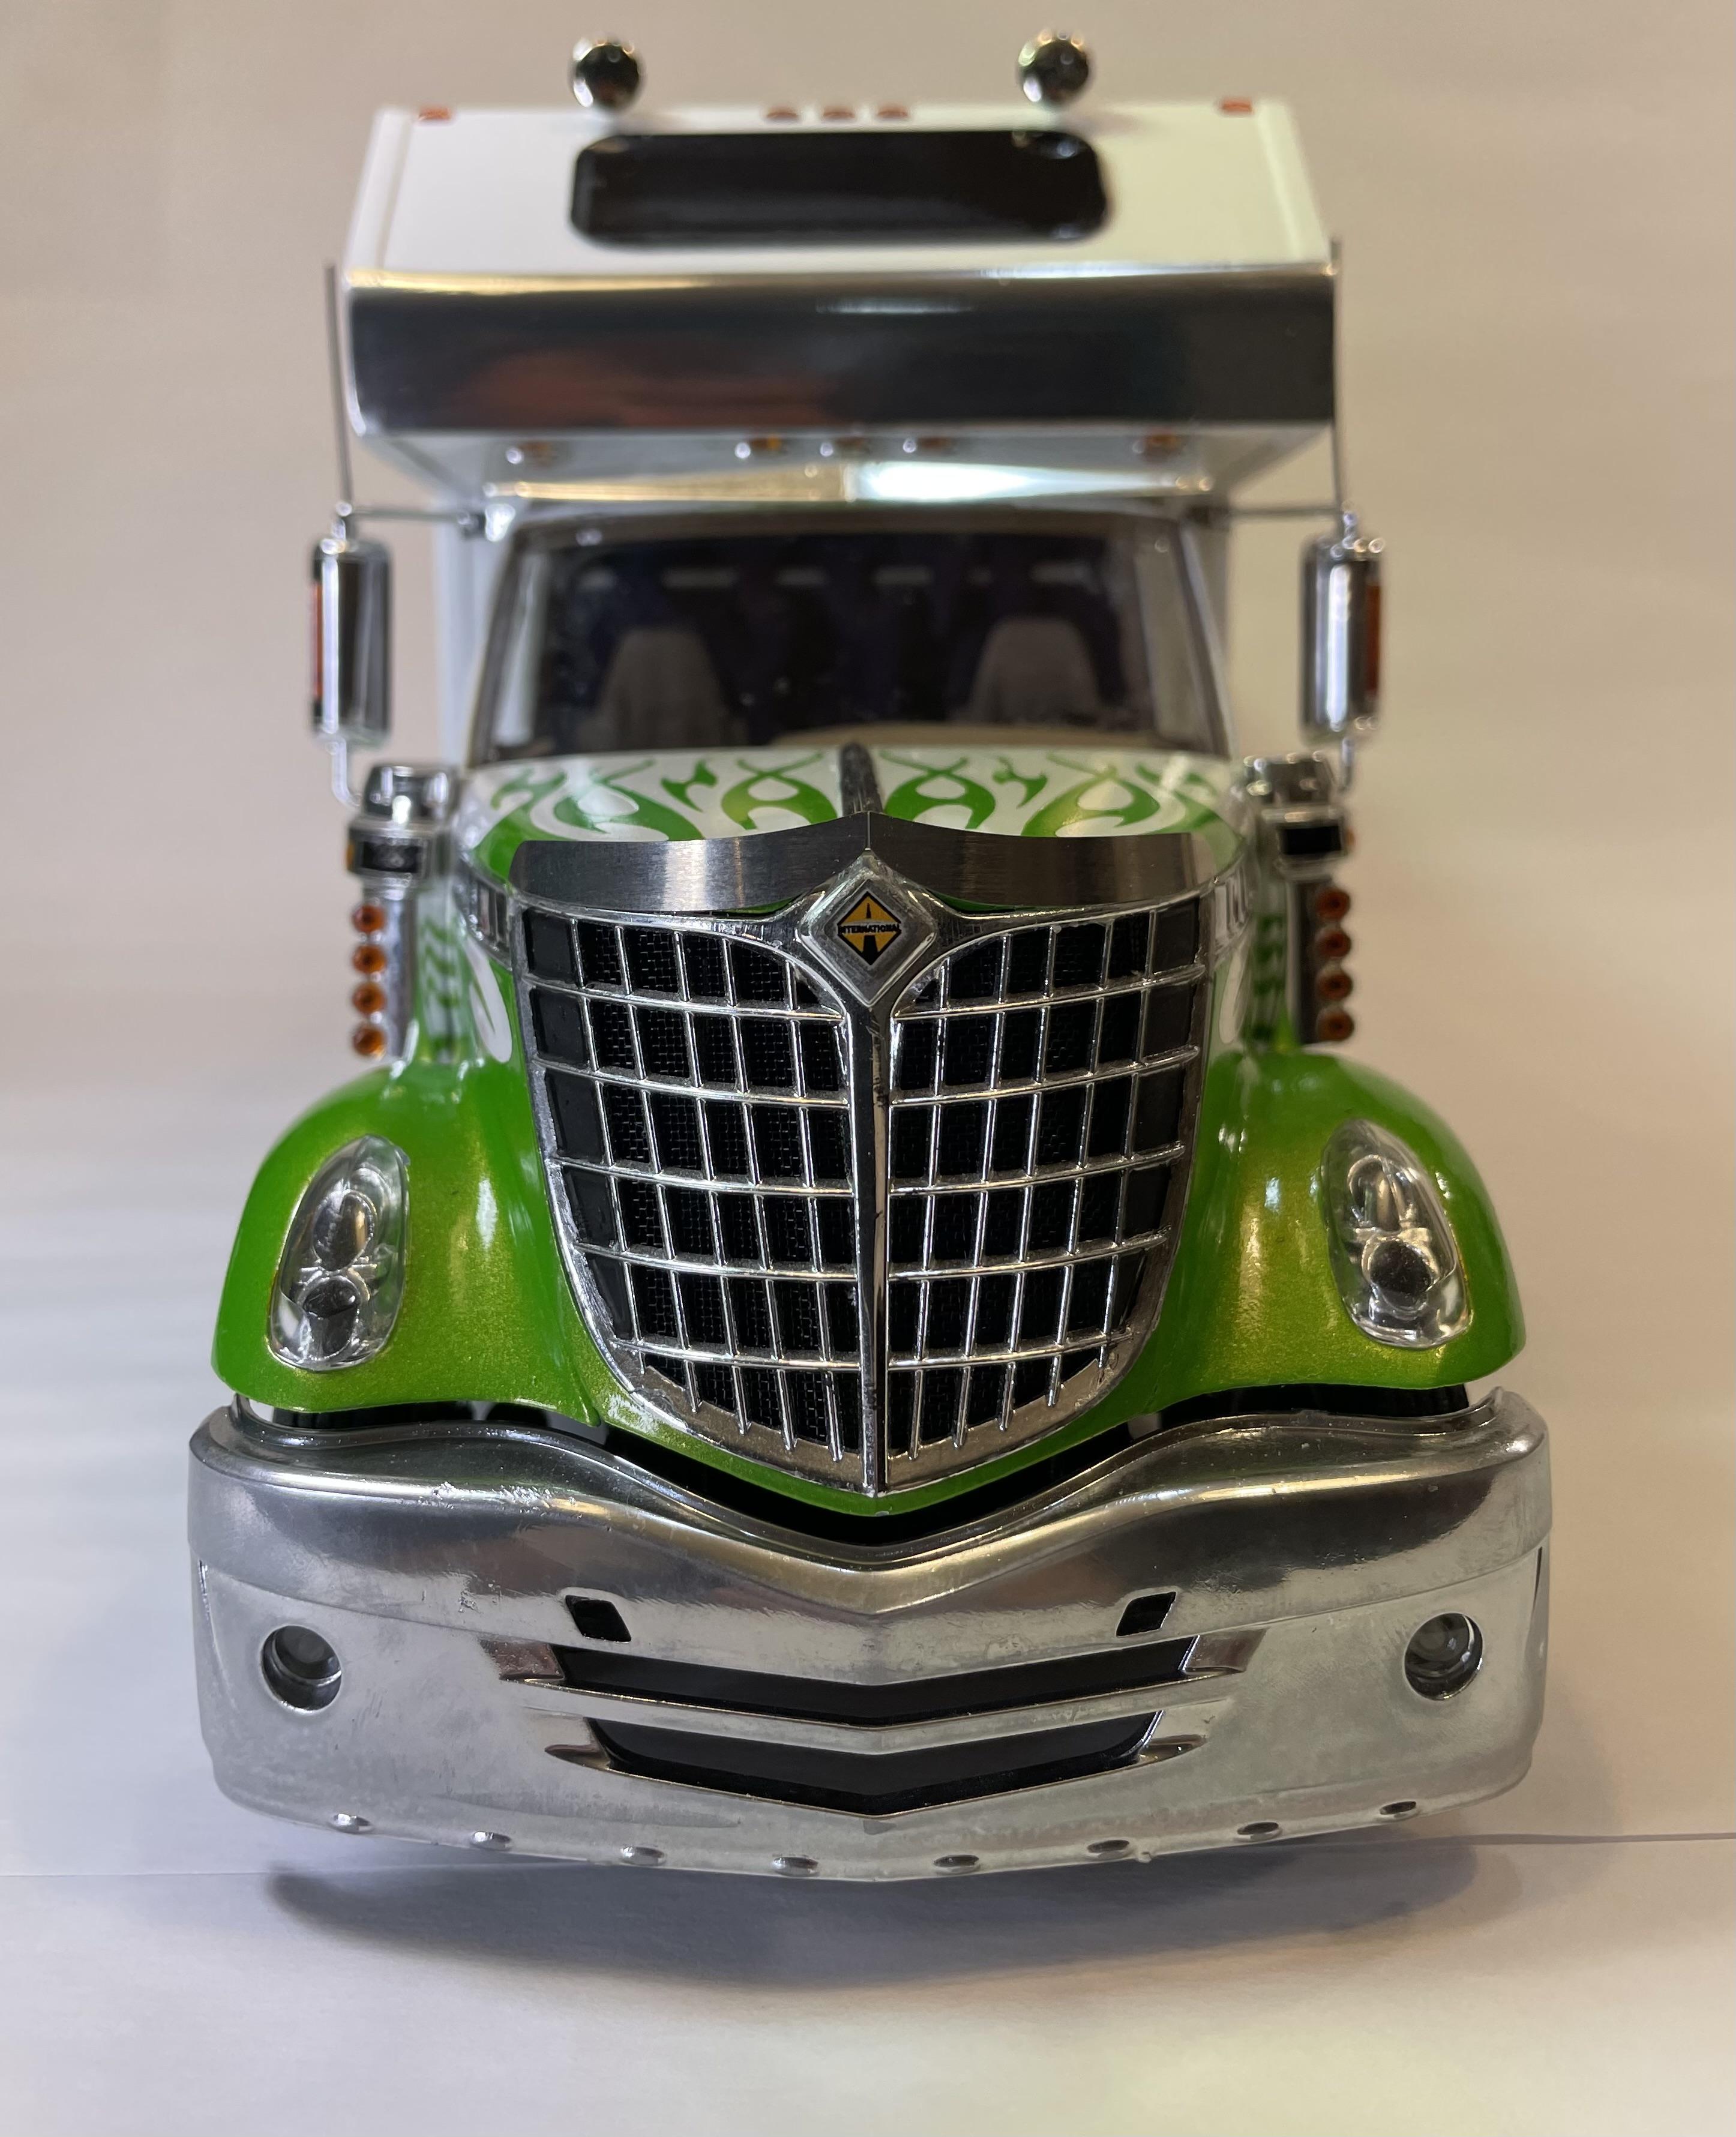
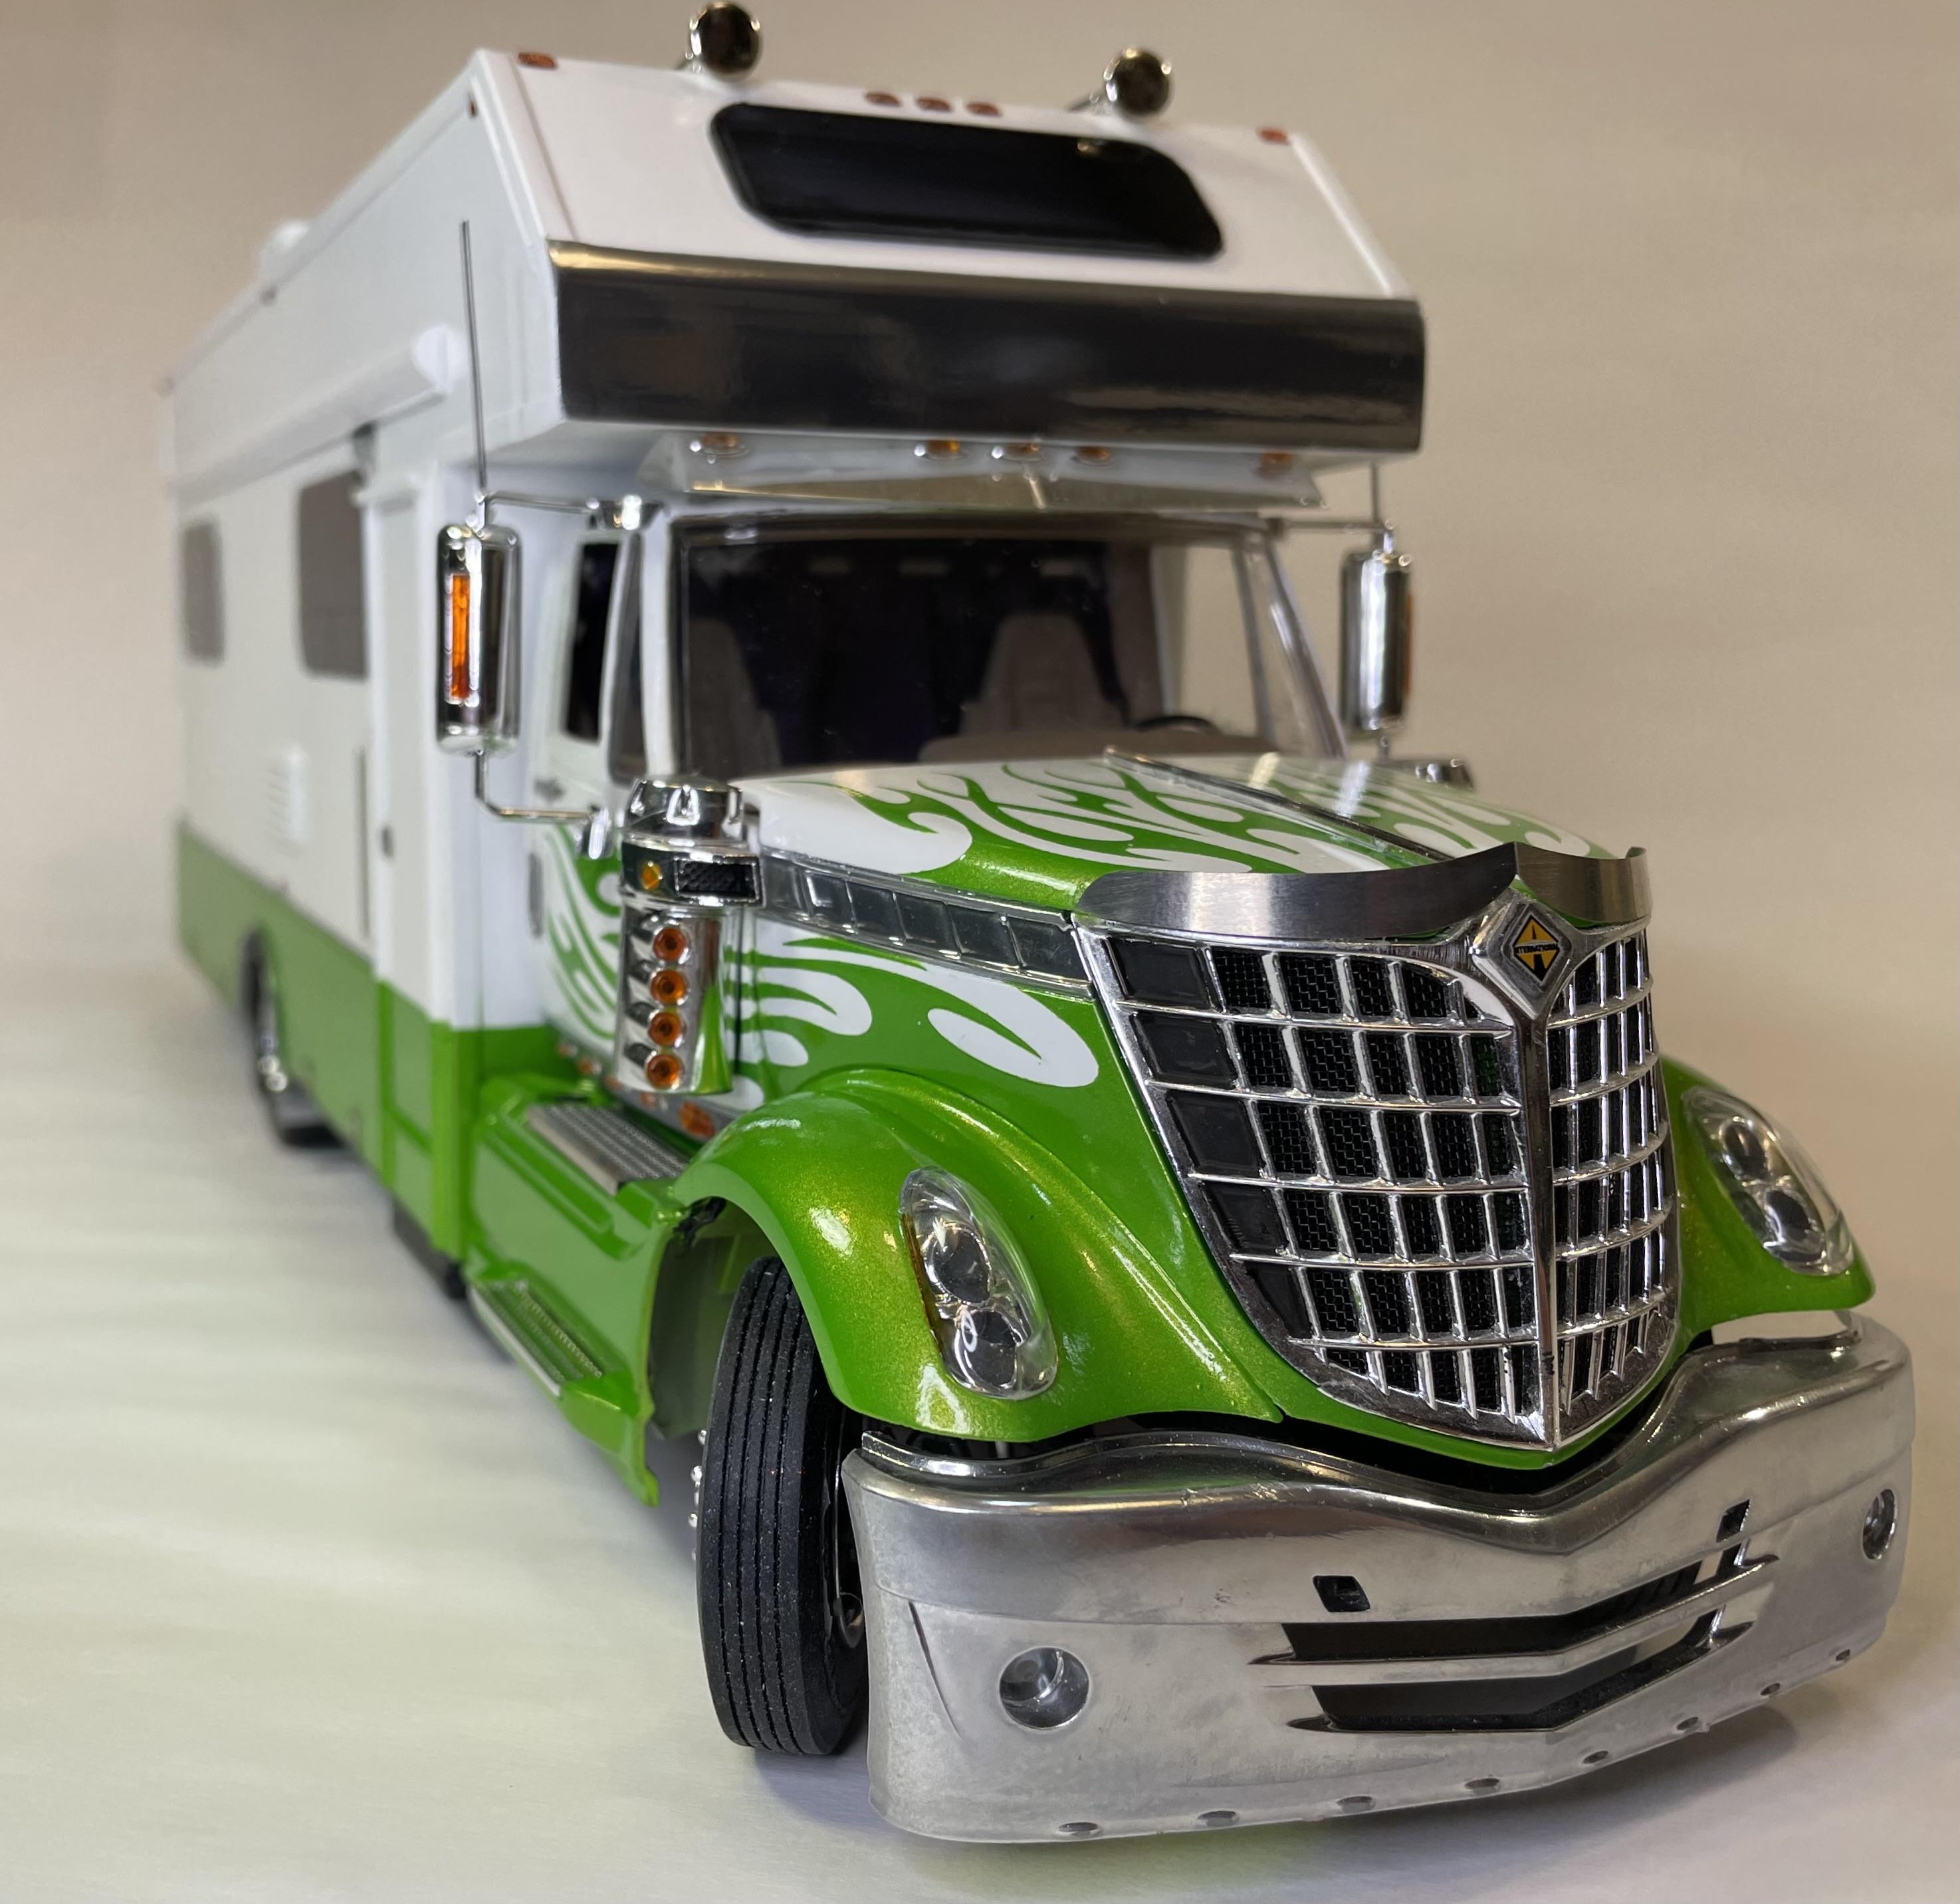
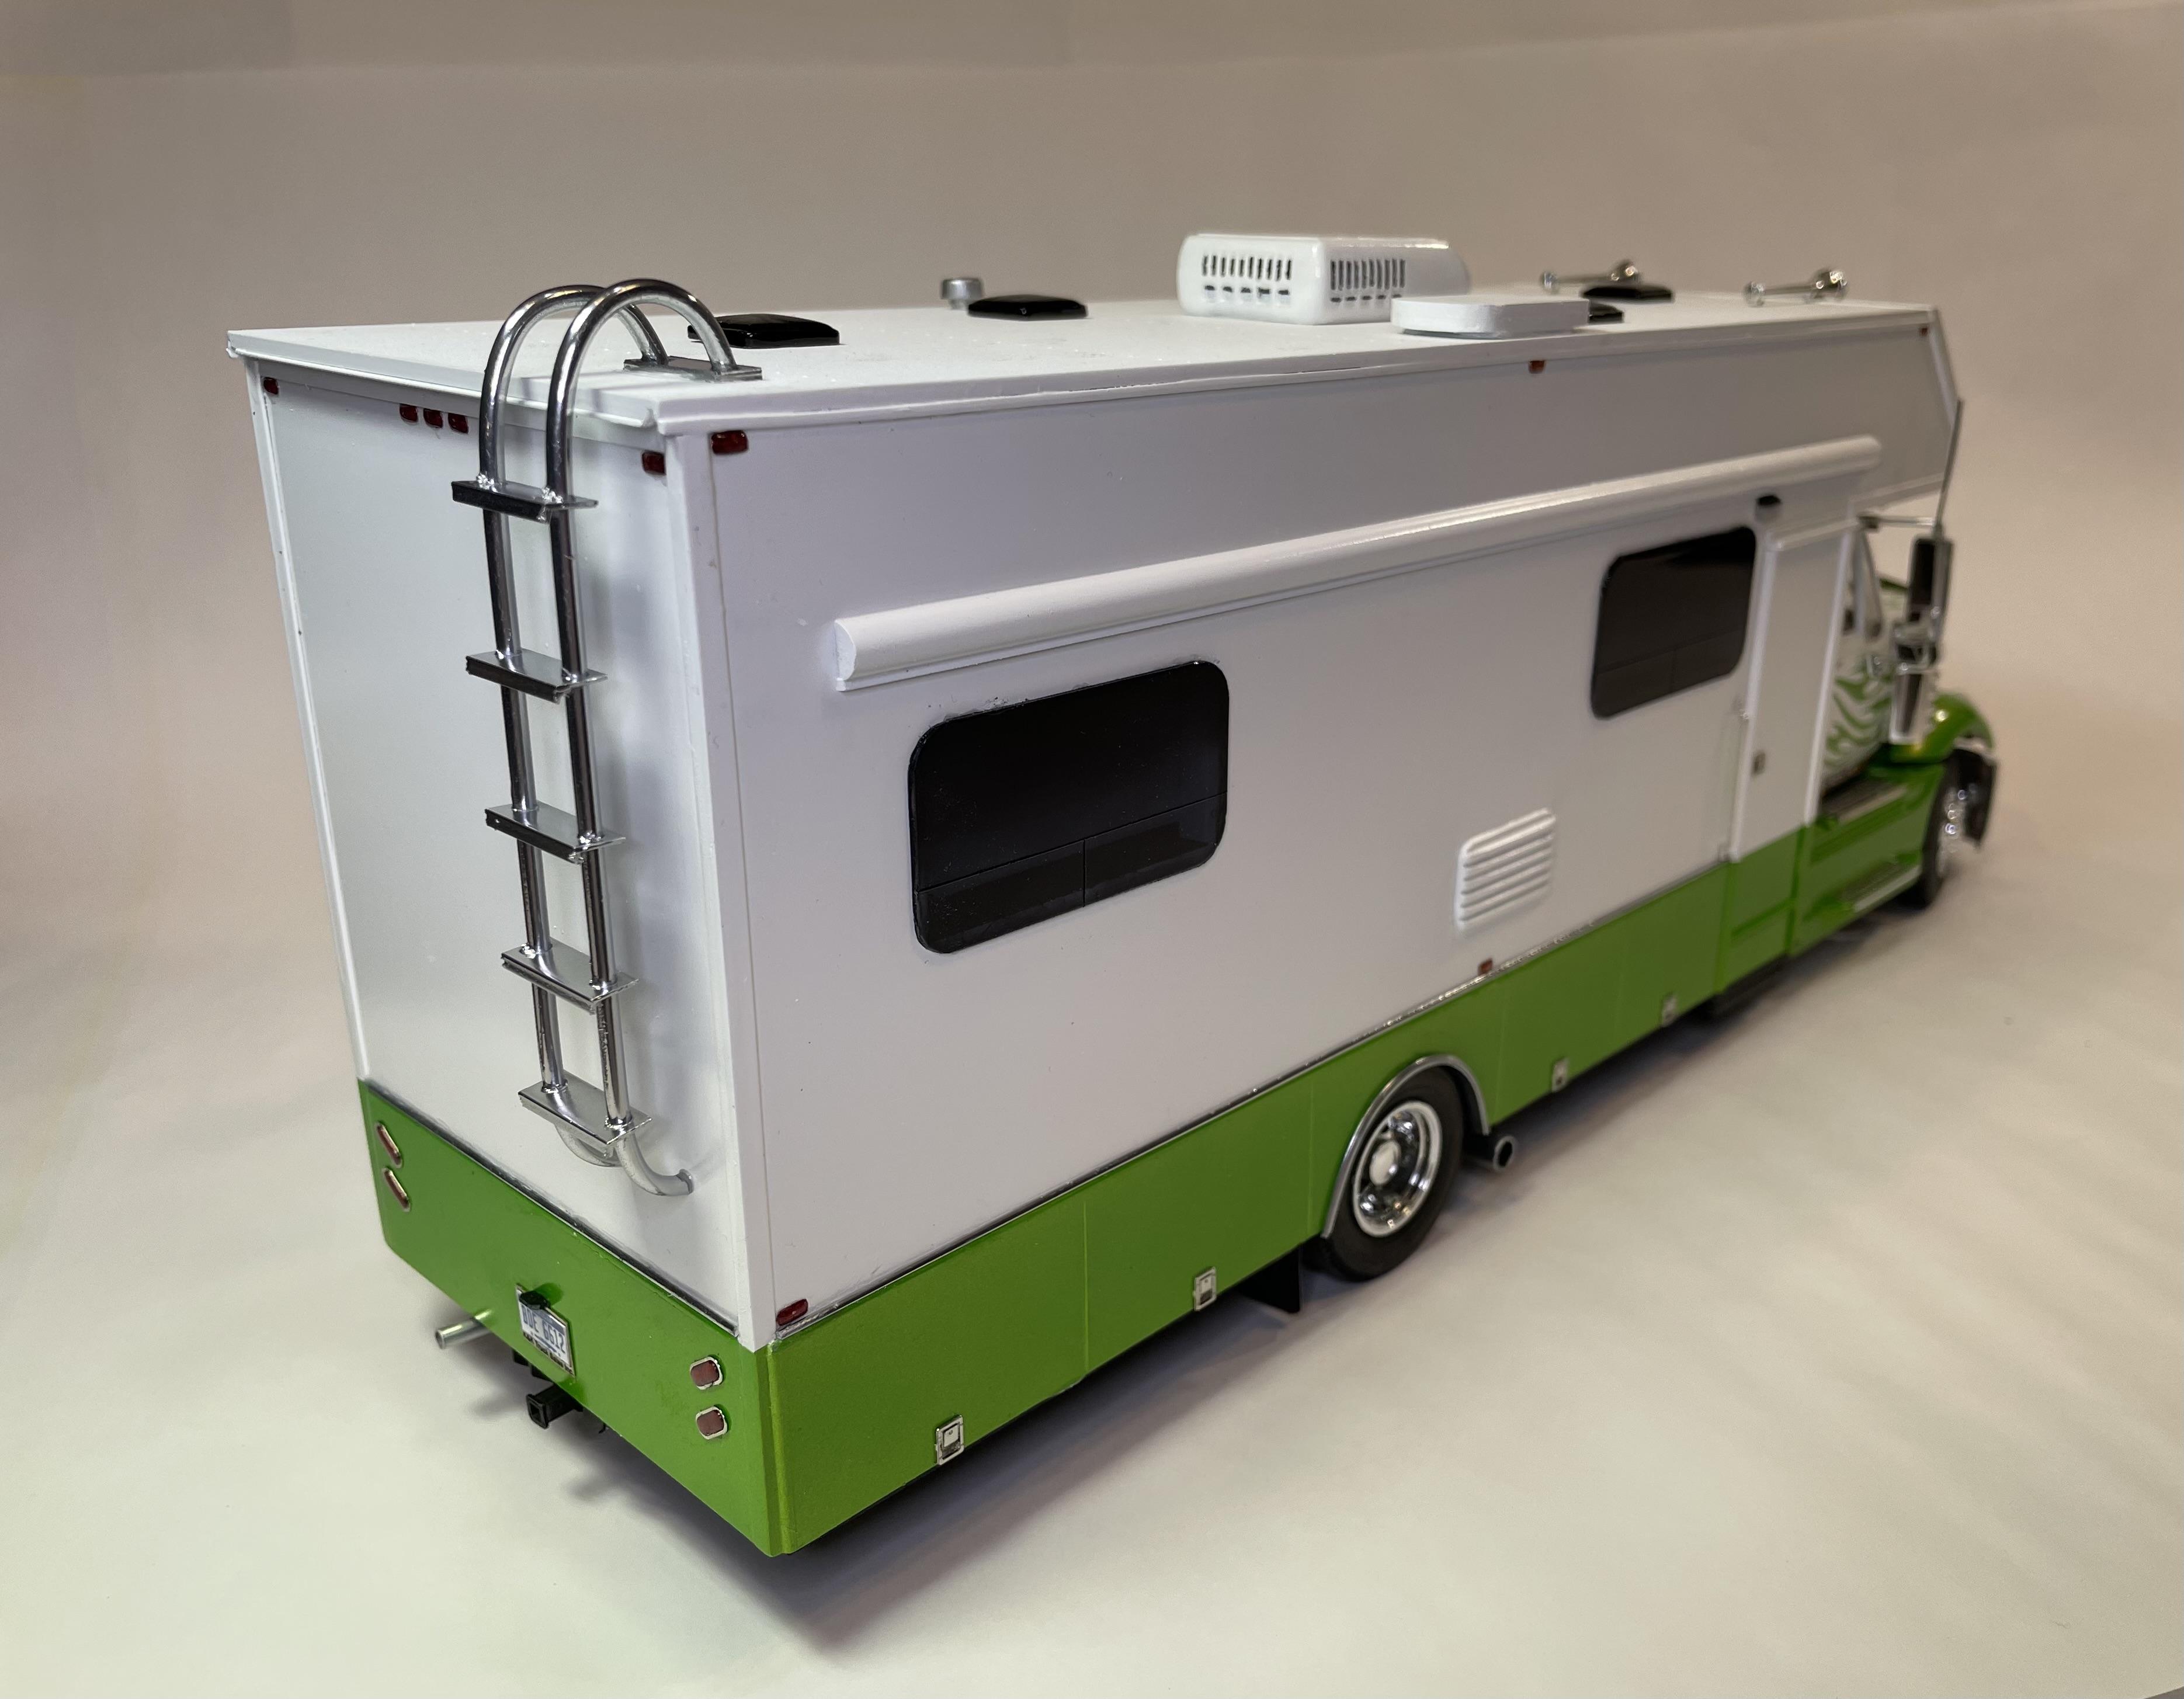
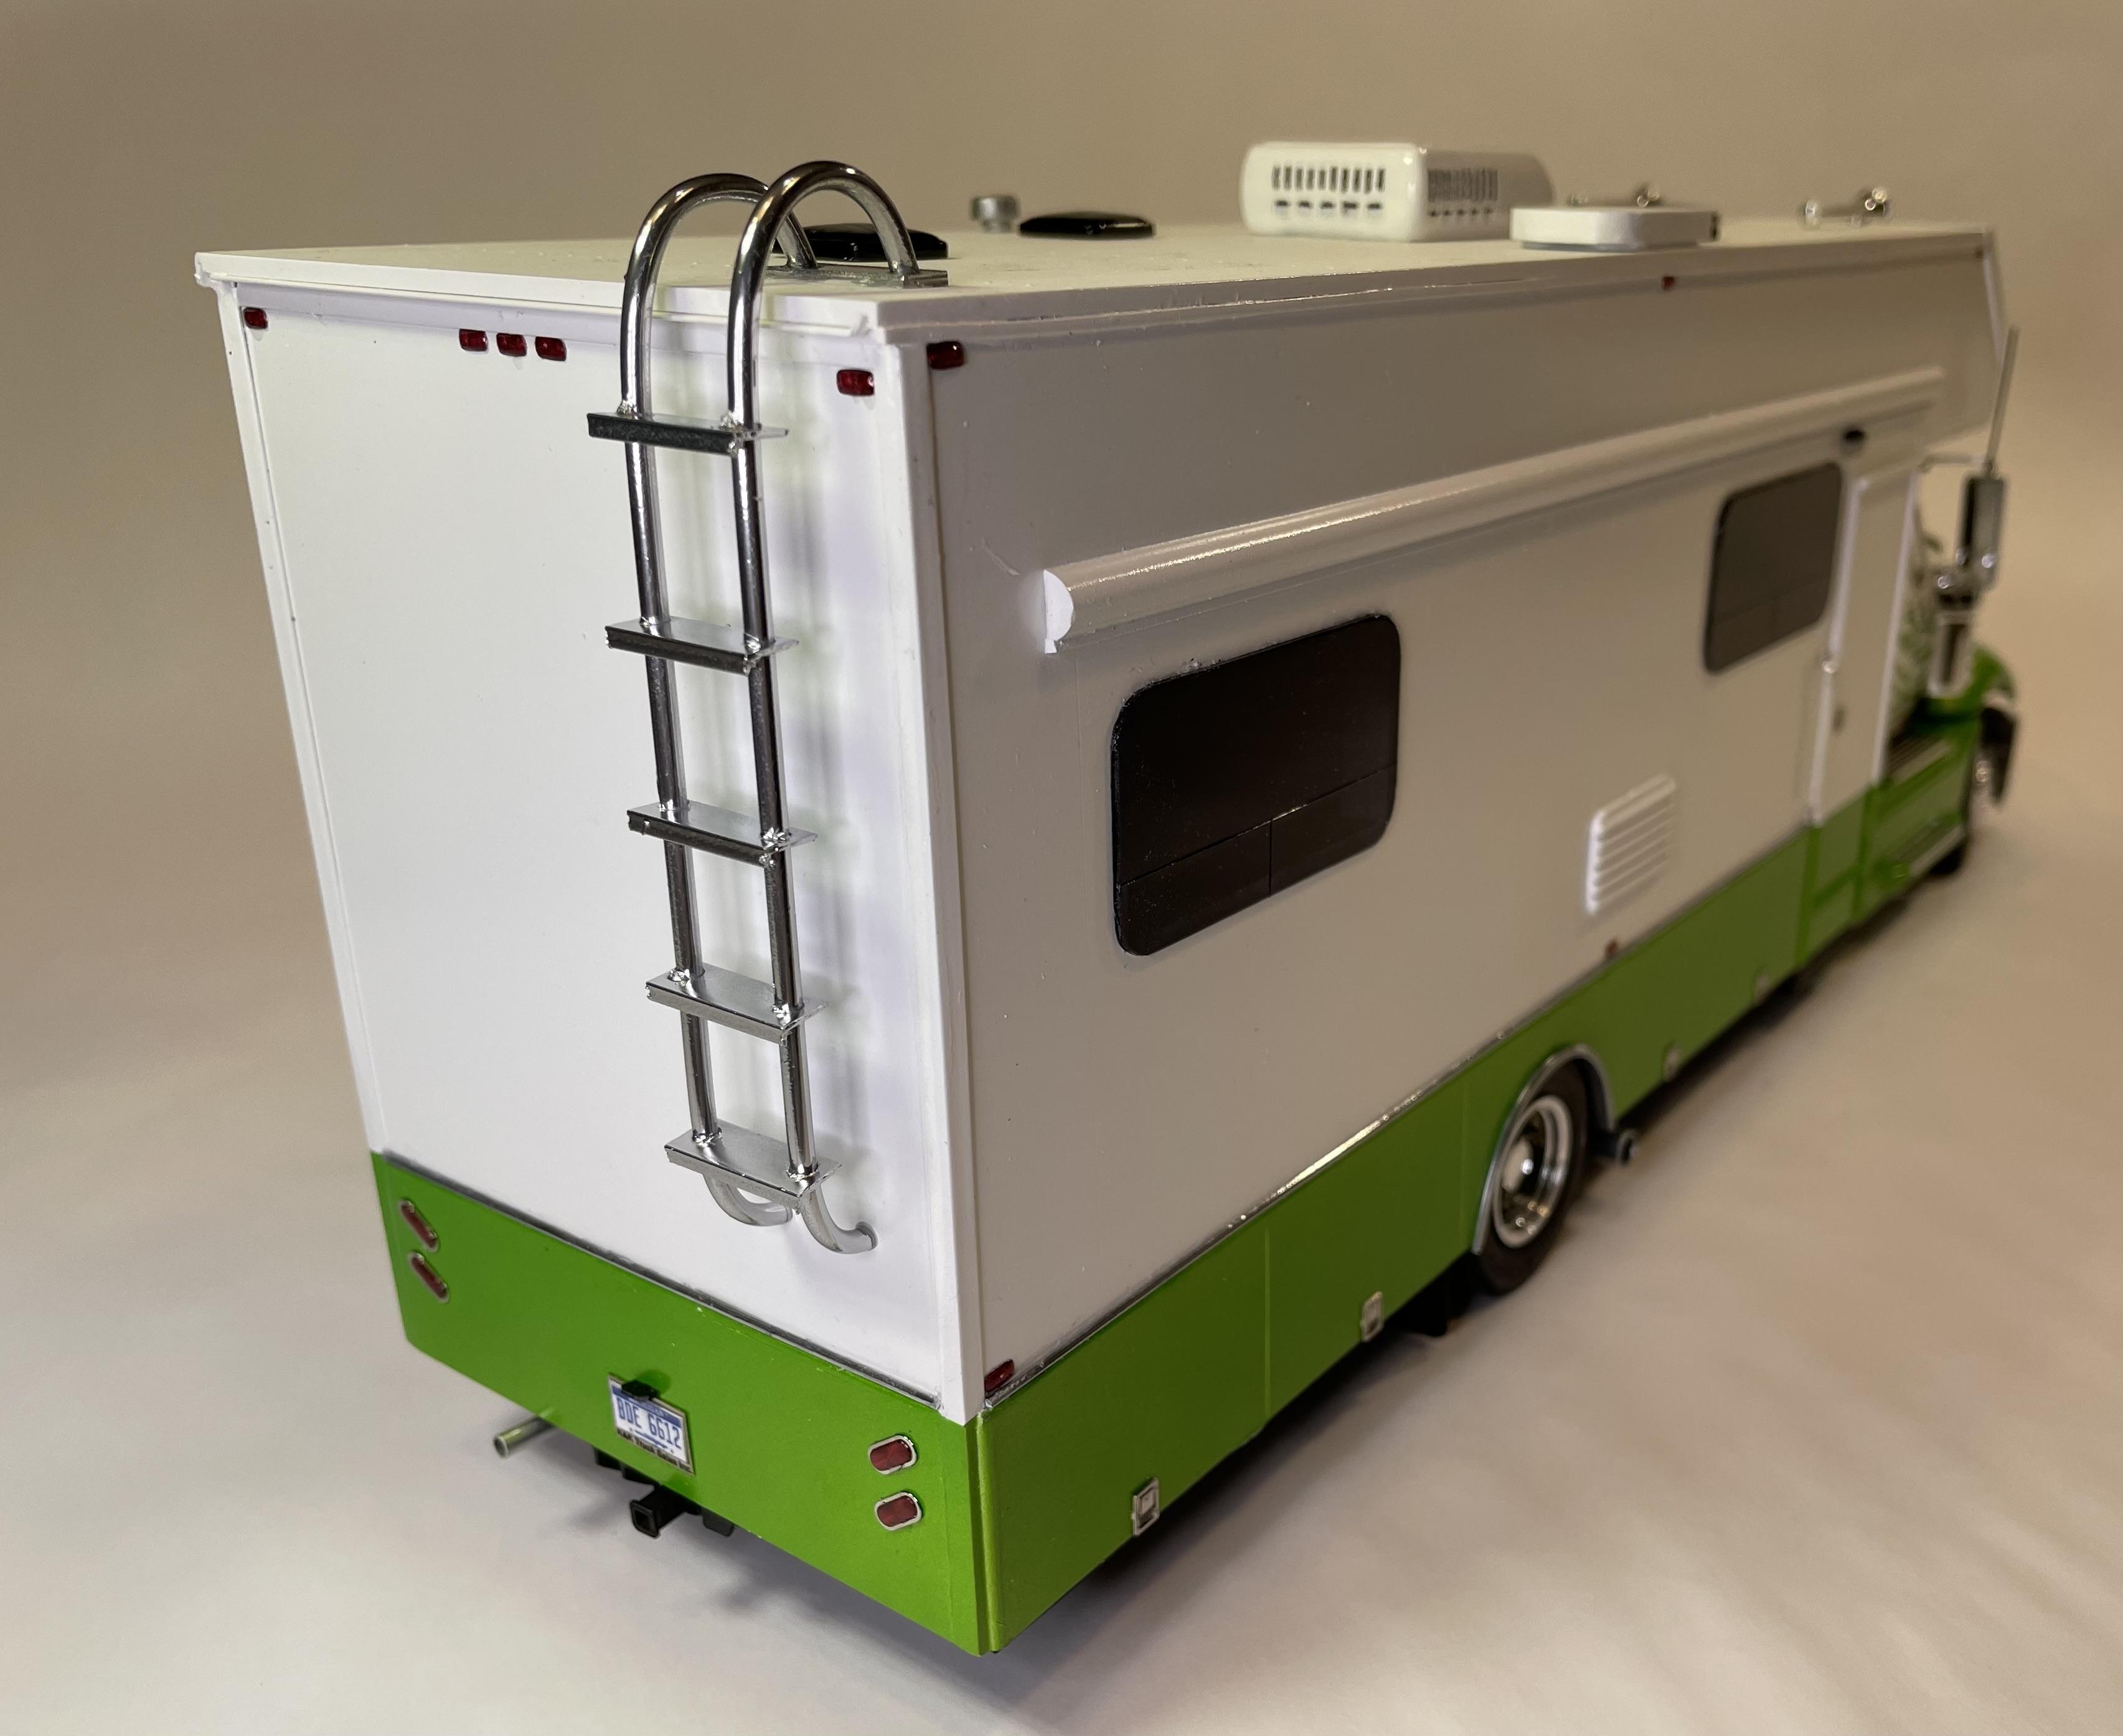
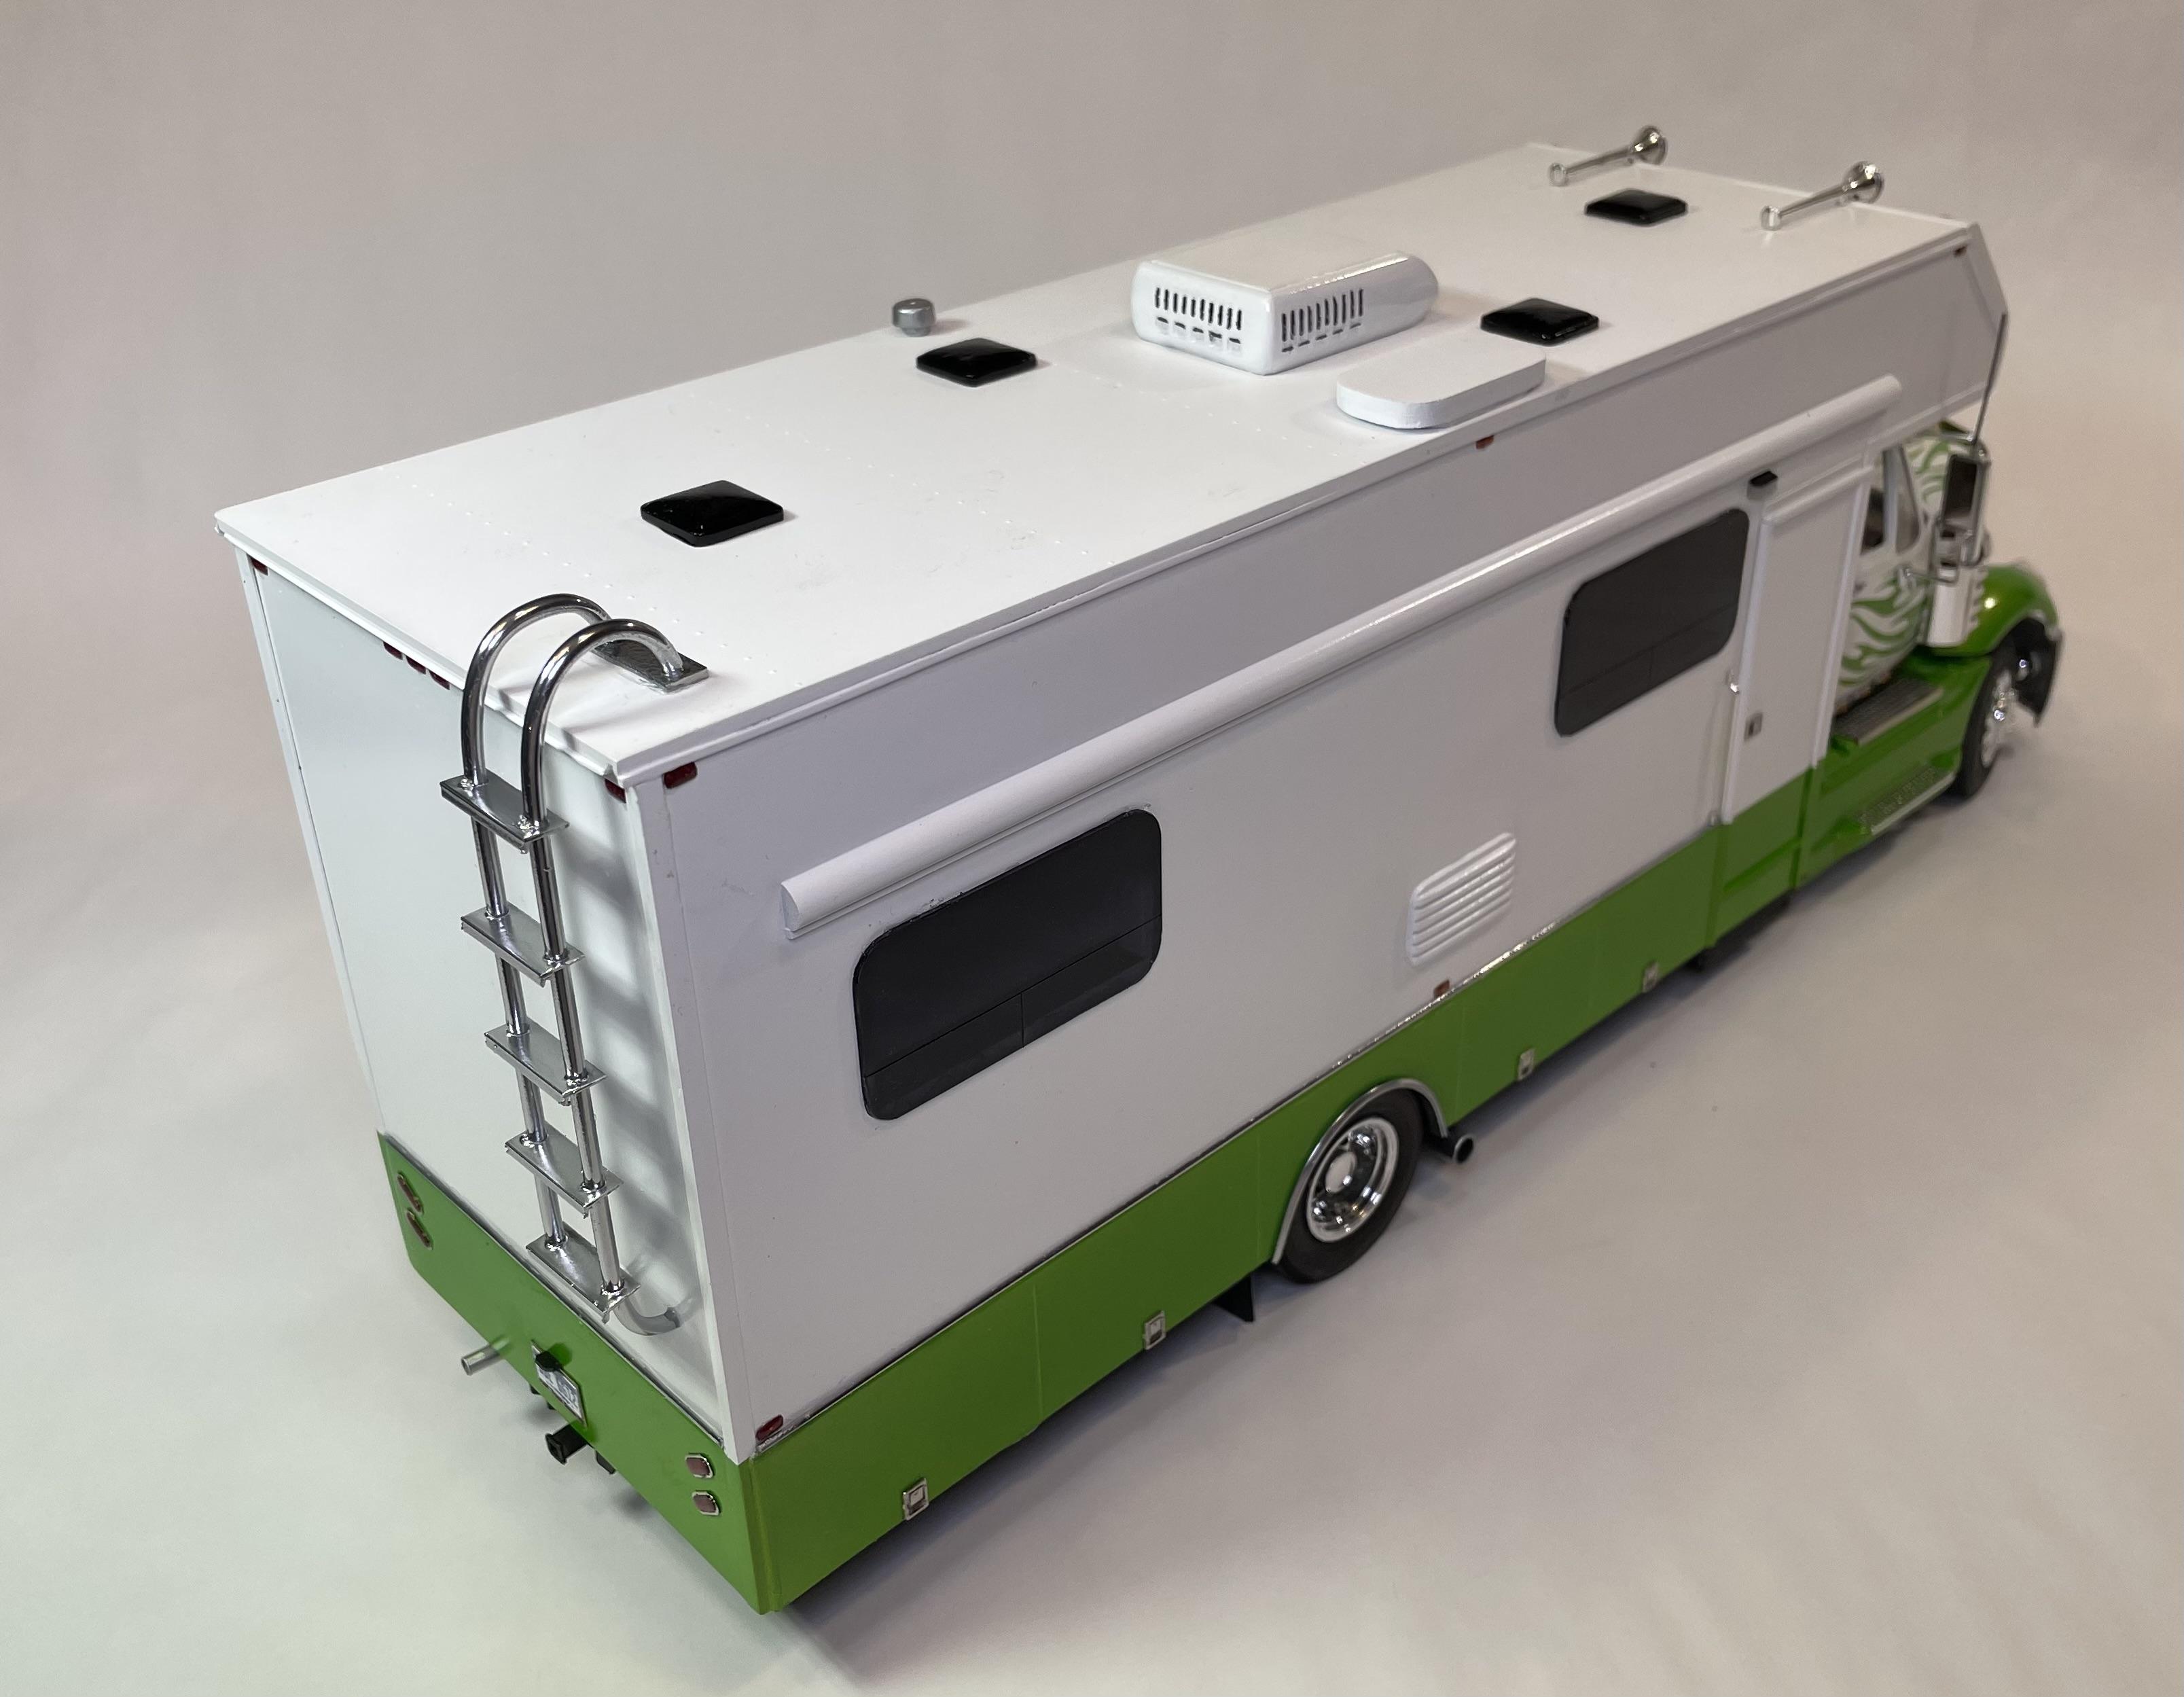
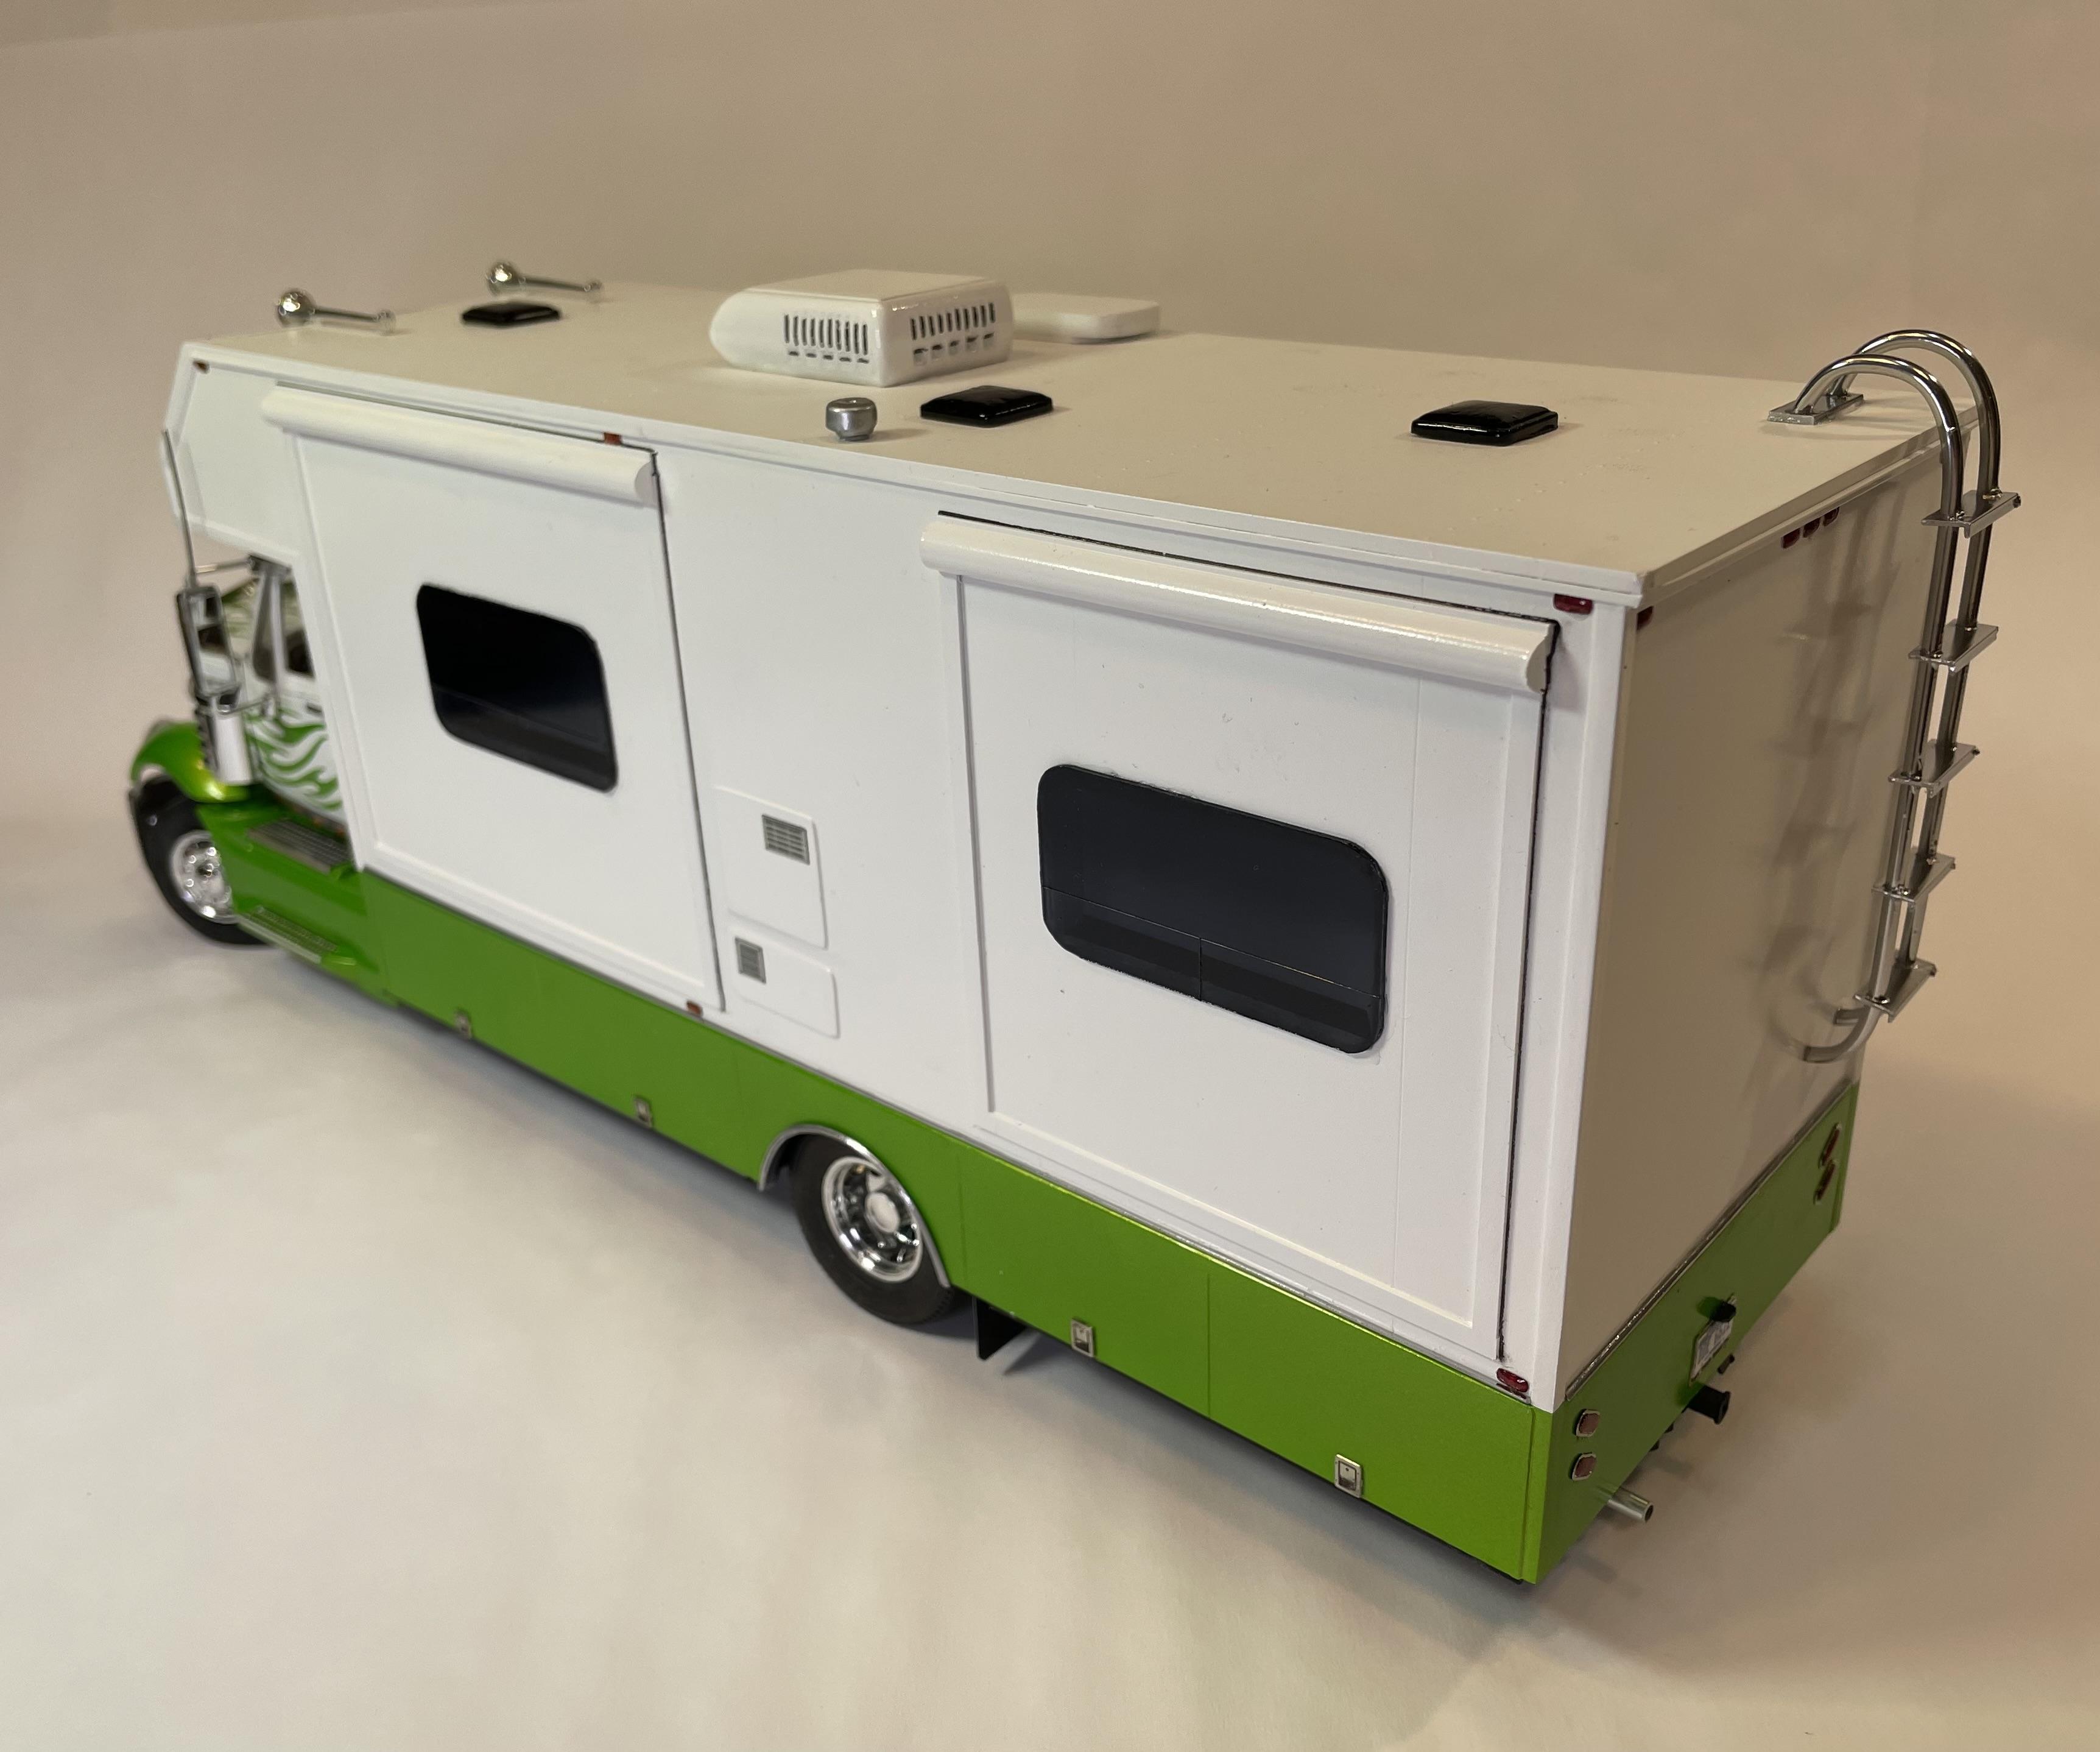
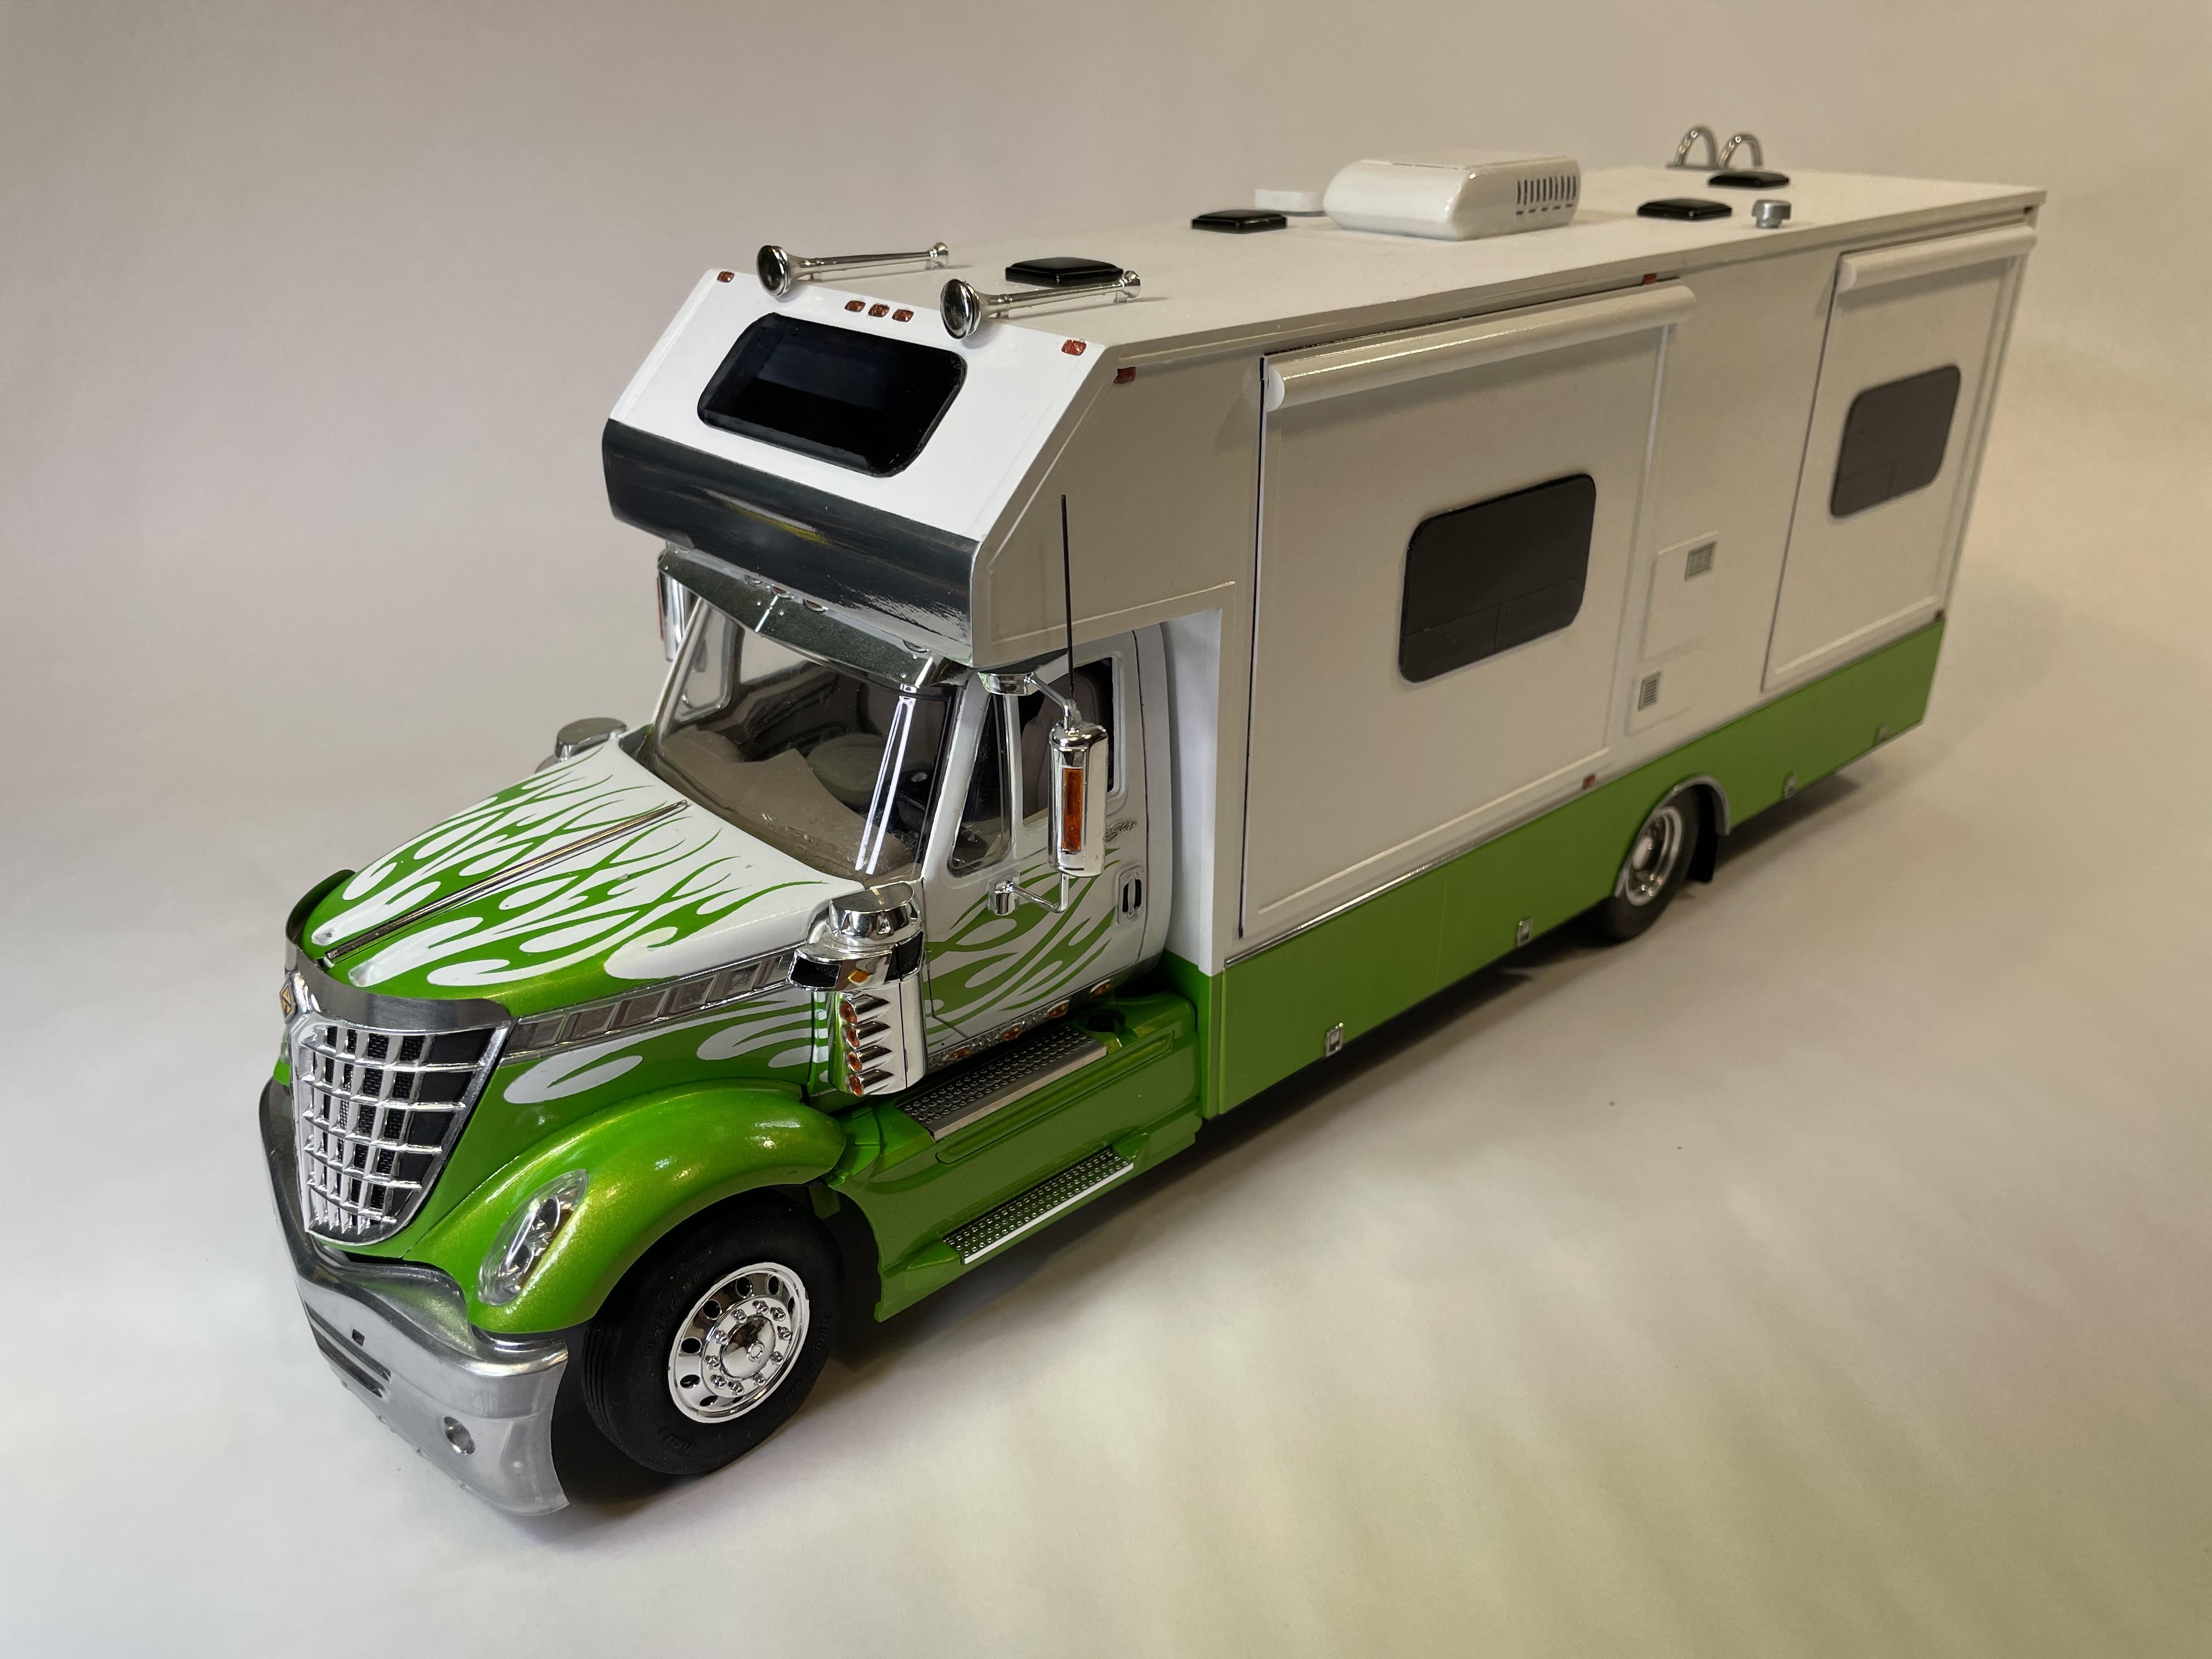
Here is a relatively quick scratch-building and glue bomb save project I started about six weeks ago. I typically don’t build this quickly. Tamiya pure white and candy lime green. It’s curbside - both the RV body and under the non-opening hood (just a simple engine block painted Cummins red). The real production Lonestar trucks did not come with the Maxxforce 15 that’s in the kit. Since I’m a stickler for engines, I wasn’t going to detail it out if it wasn’t in the real truck. I wanted to build more of a “home-built” toter, nice, but not a more fancy production-style coach like my Aeromax RV or my current 379 RV project with radius corners. Though, it has the fancier frameless windows you see on new RVs these days, mainly because, well, they are much easier to make. Years ago, Oldr-n-drt was kind enough to send me the cut styrene sides to a toterhome body, which I put to good use on this project. It’s been a long time, but thanks again! For the cab and chassis I used a badly warped daycab glue bomb I got off of eBay that had been sitting around waiting for inspiration to put it to use. I stripped, filled, sanded, and did my best to straighten it. Gluing the hood shut helped a lot. First time doing a flame paint job. I used masks from Lazy Modeller. A little tricky, requiring a bit of touch-up, but not too bad. I used a portion of the aero skirts from a Prostar, modified to fit. Most of the kit chrome was in bad shape and had to be refinished with Revel spray chrome. The front tires are Bridgestone steers from Moluminum. Photo etch from Czech Truck Model. Be sure to ask if there is something I didn’t cover. Hope you enjoyed it.

-
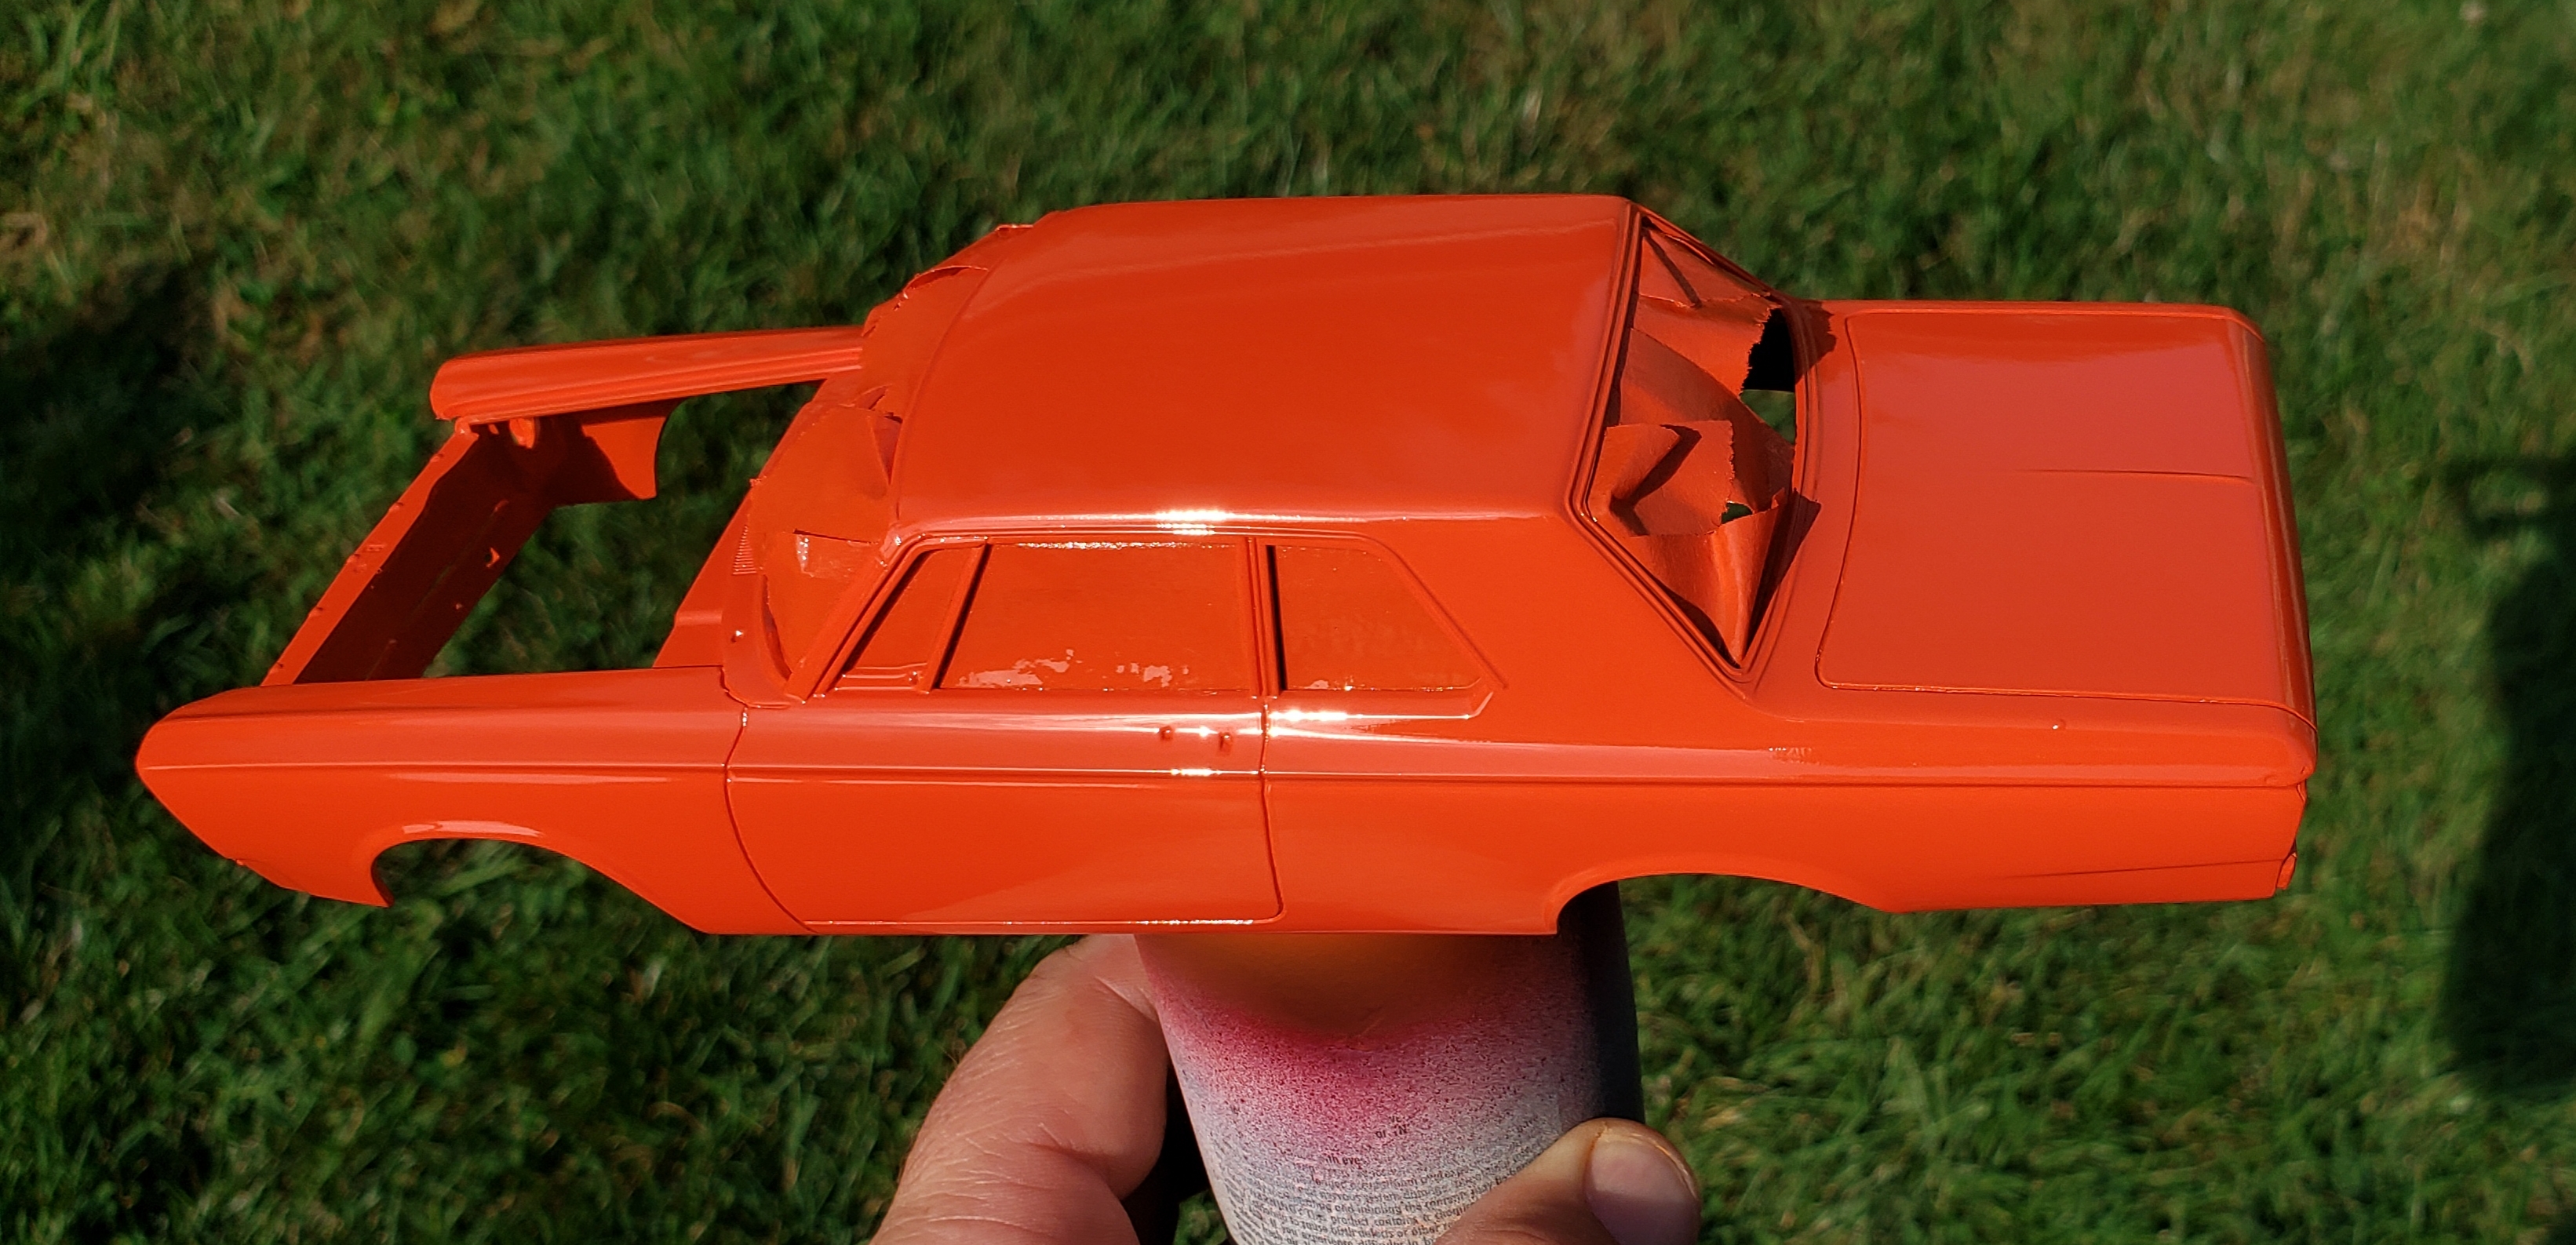
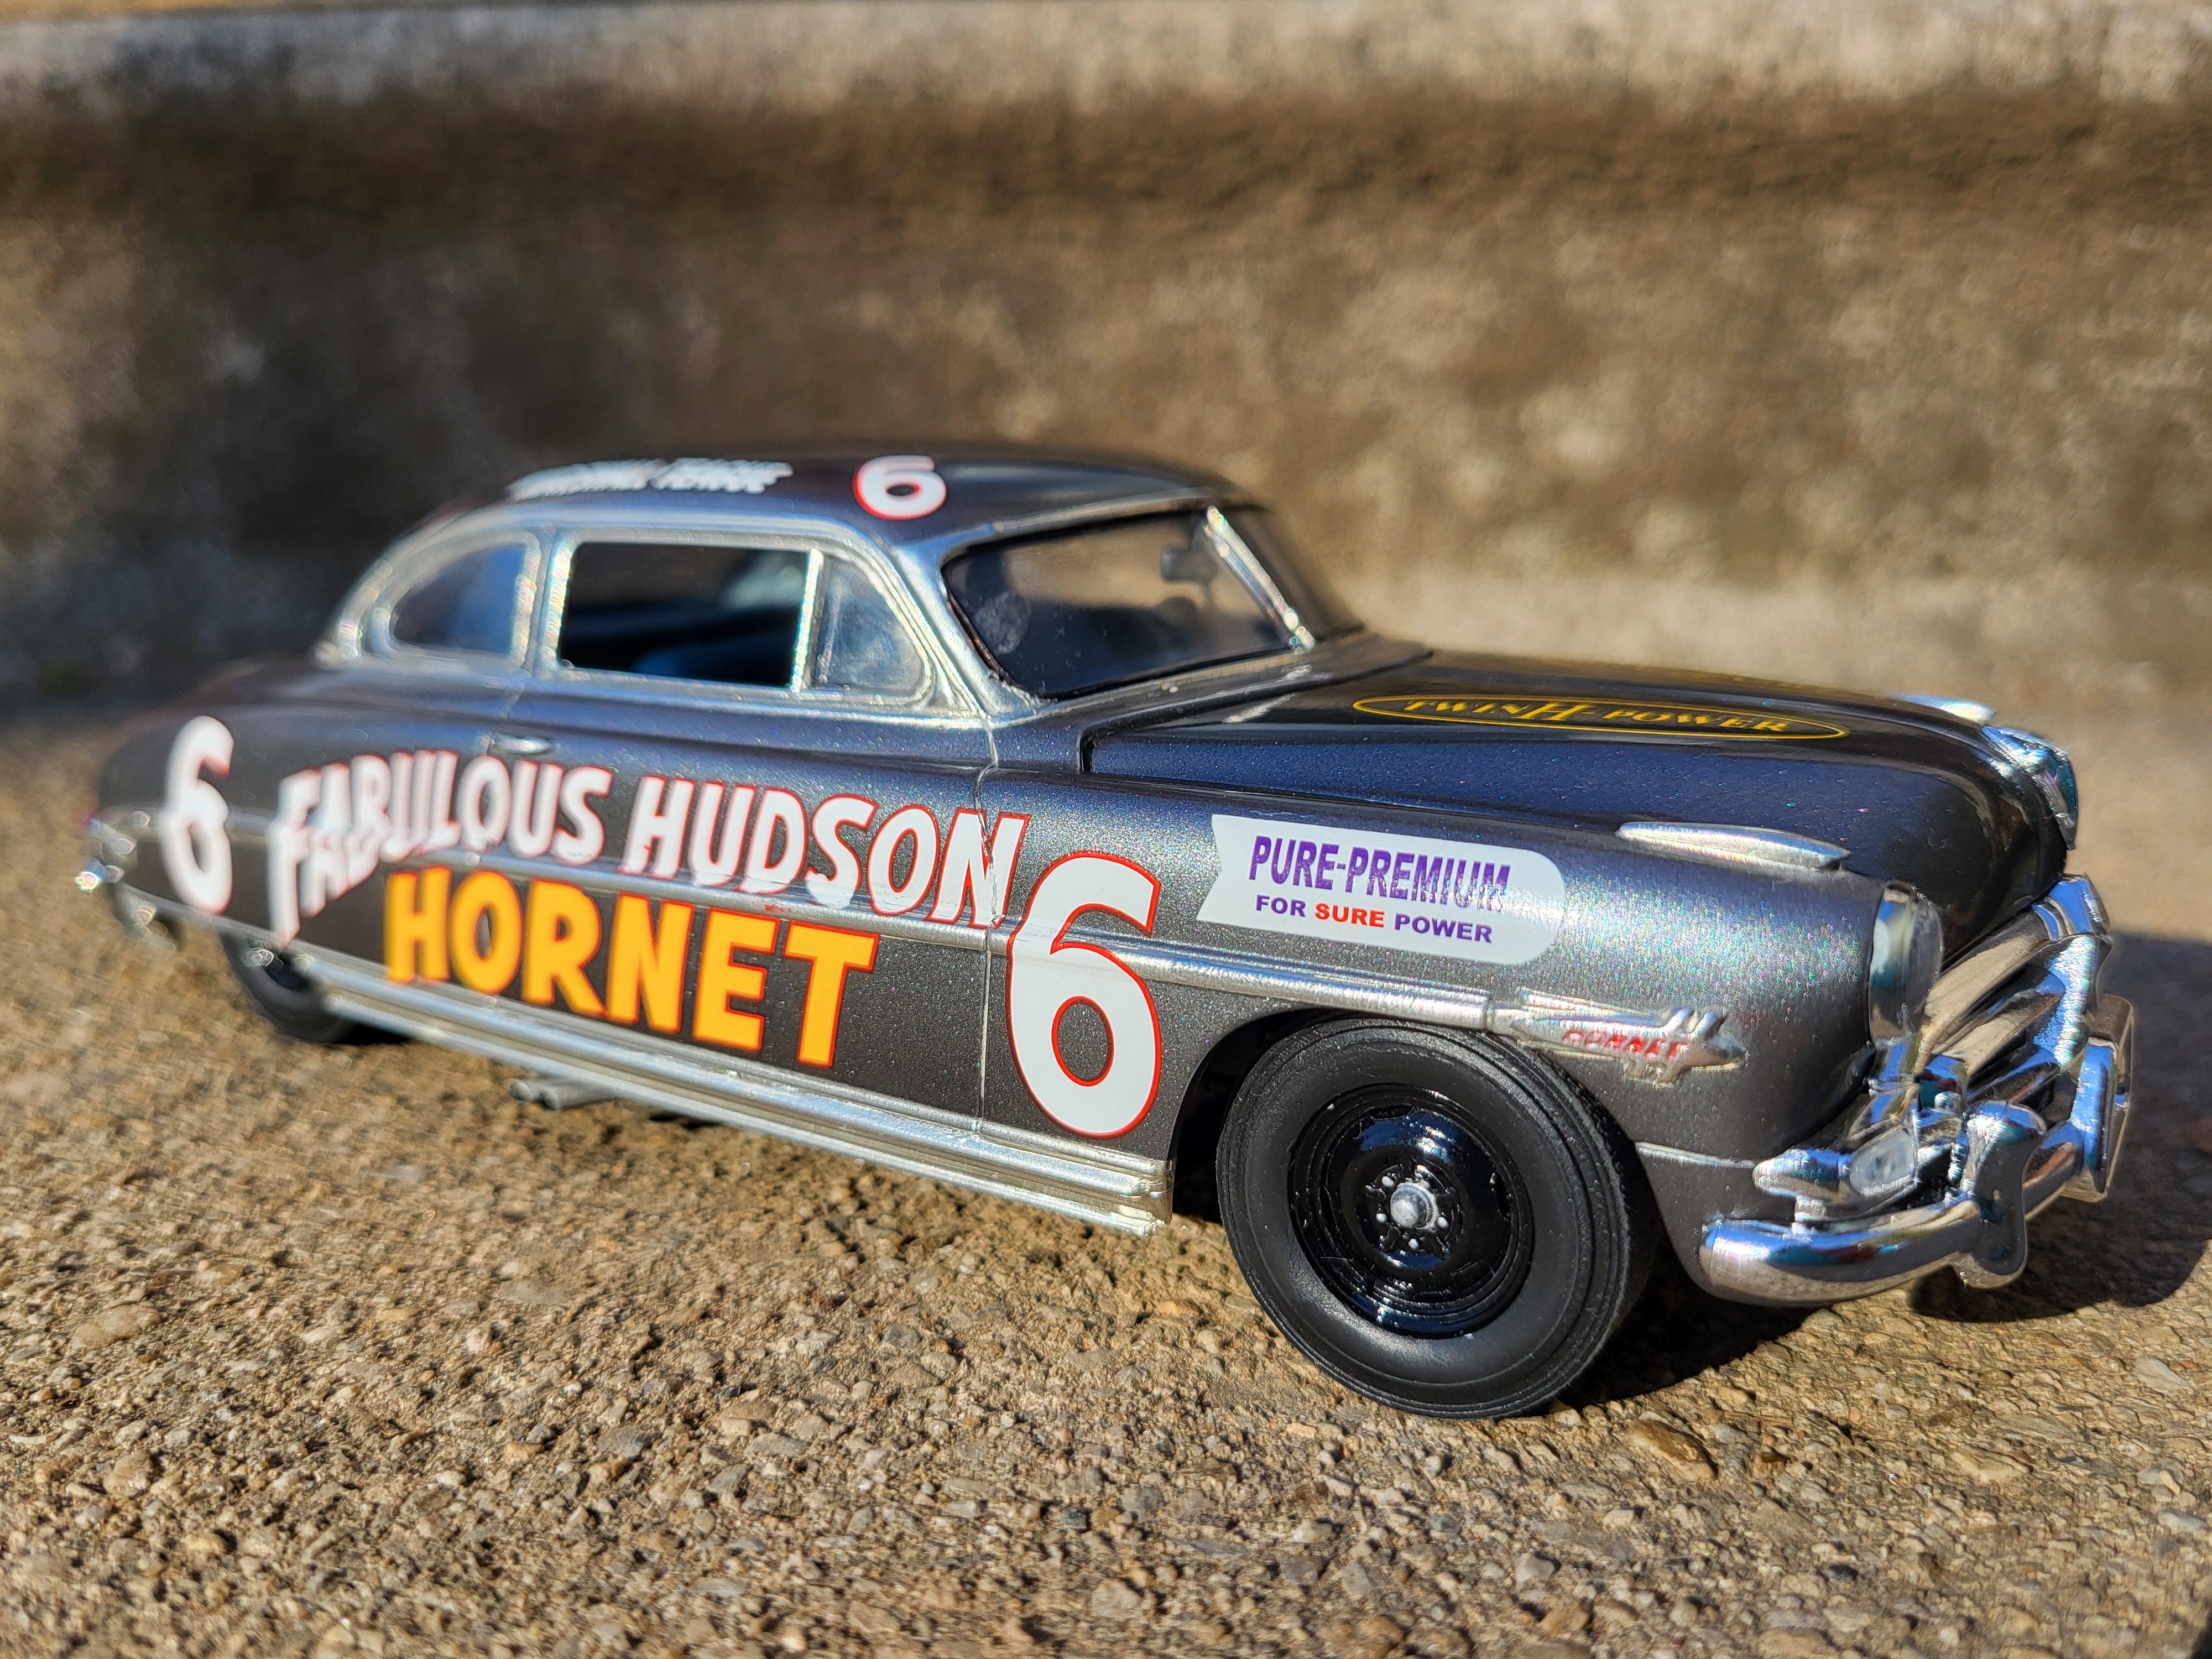
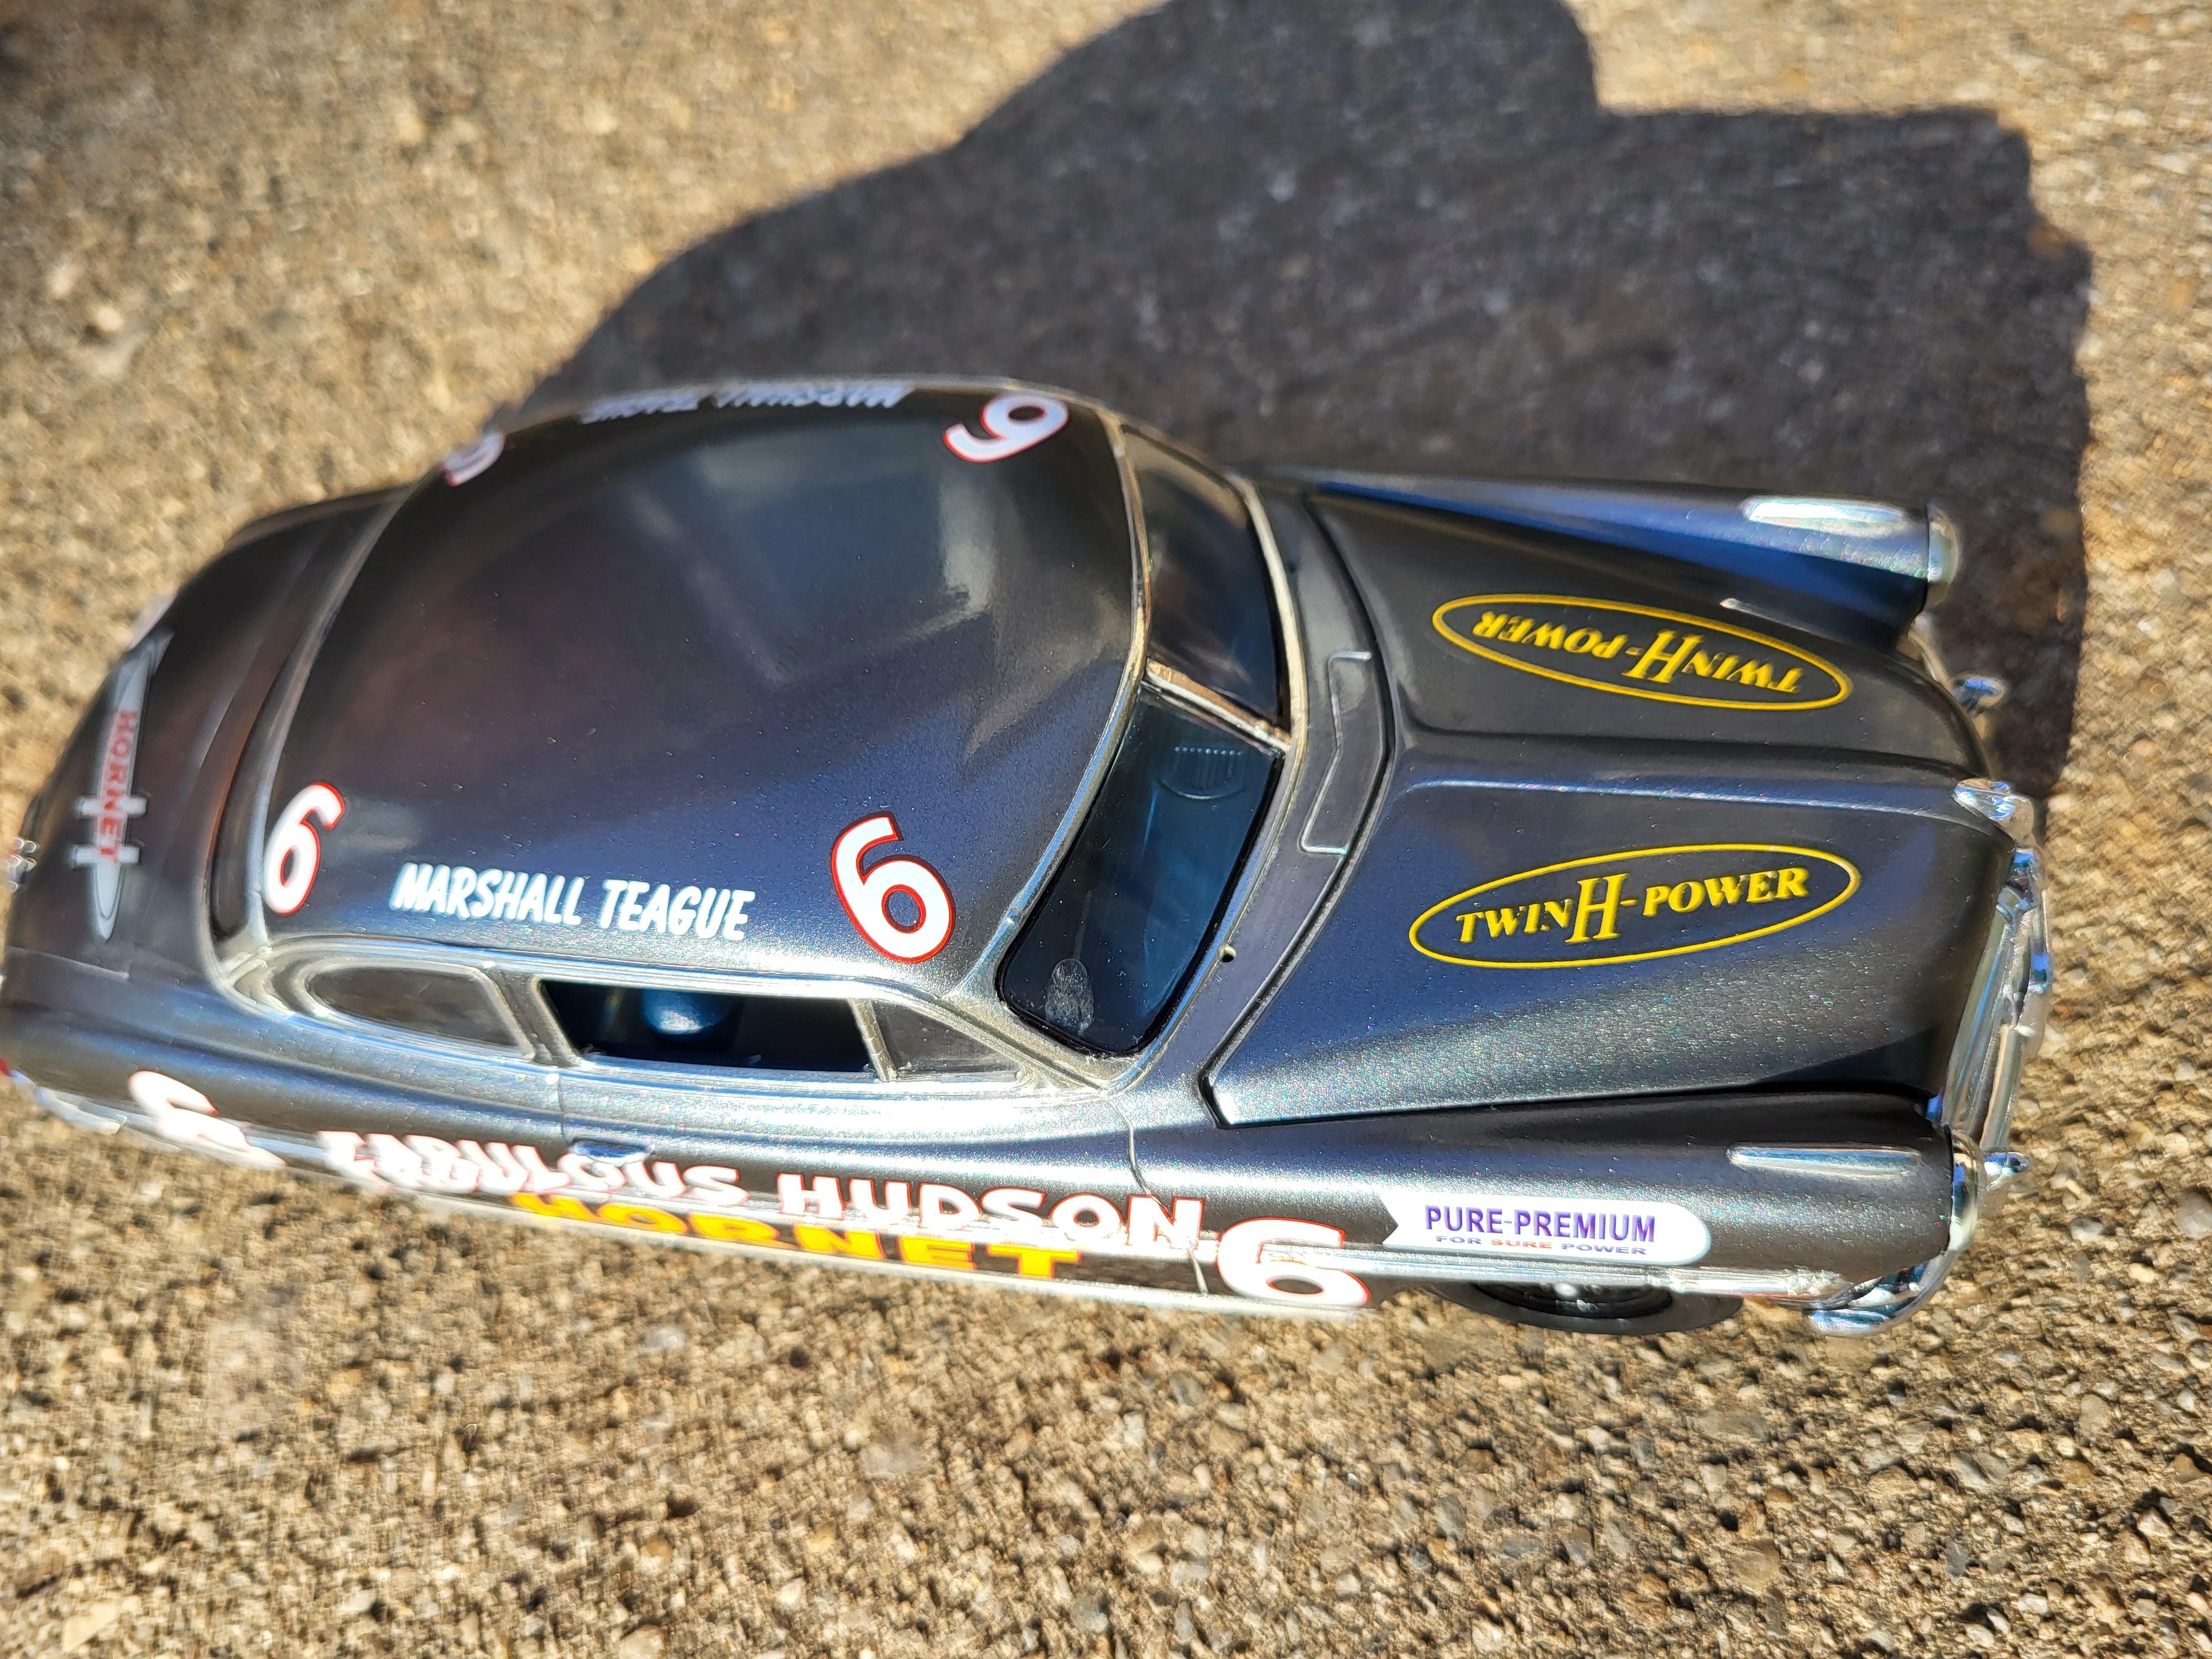
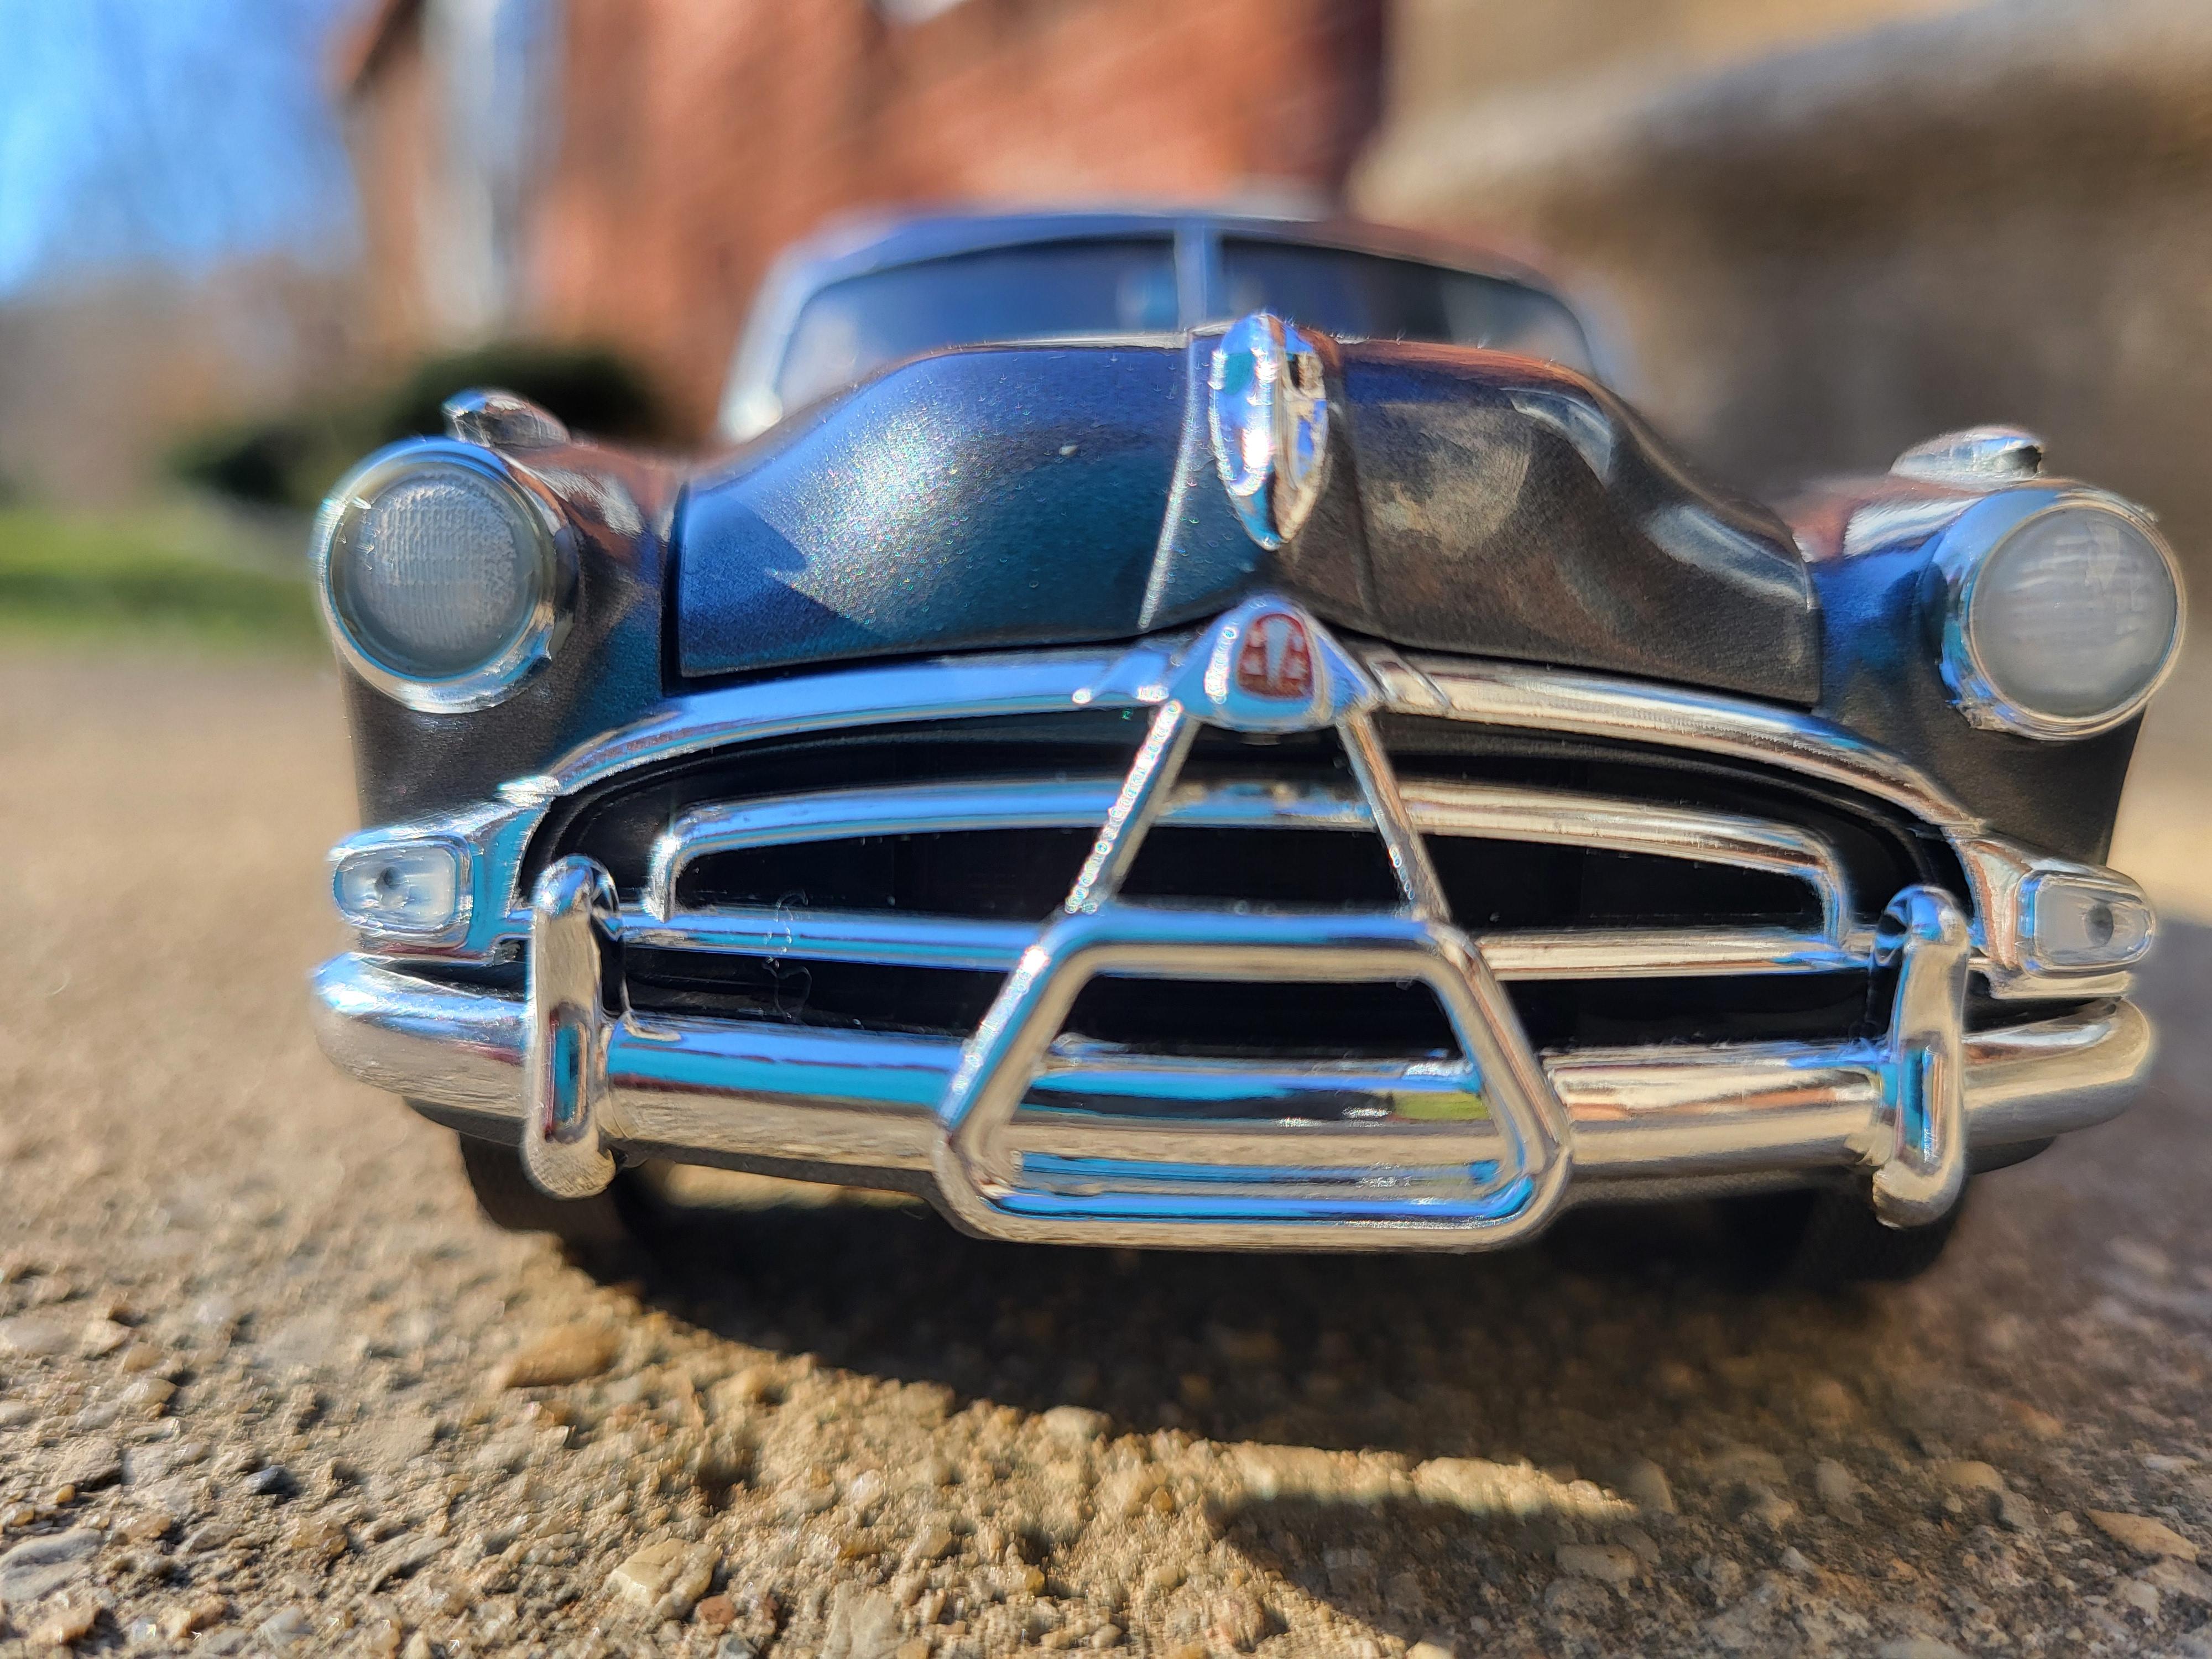
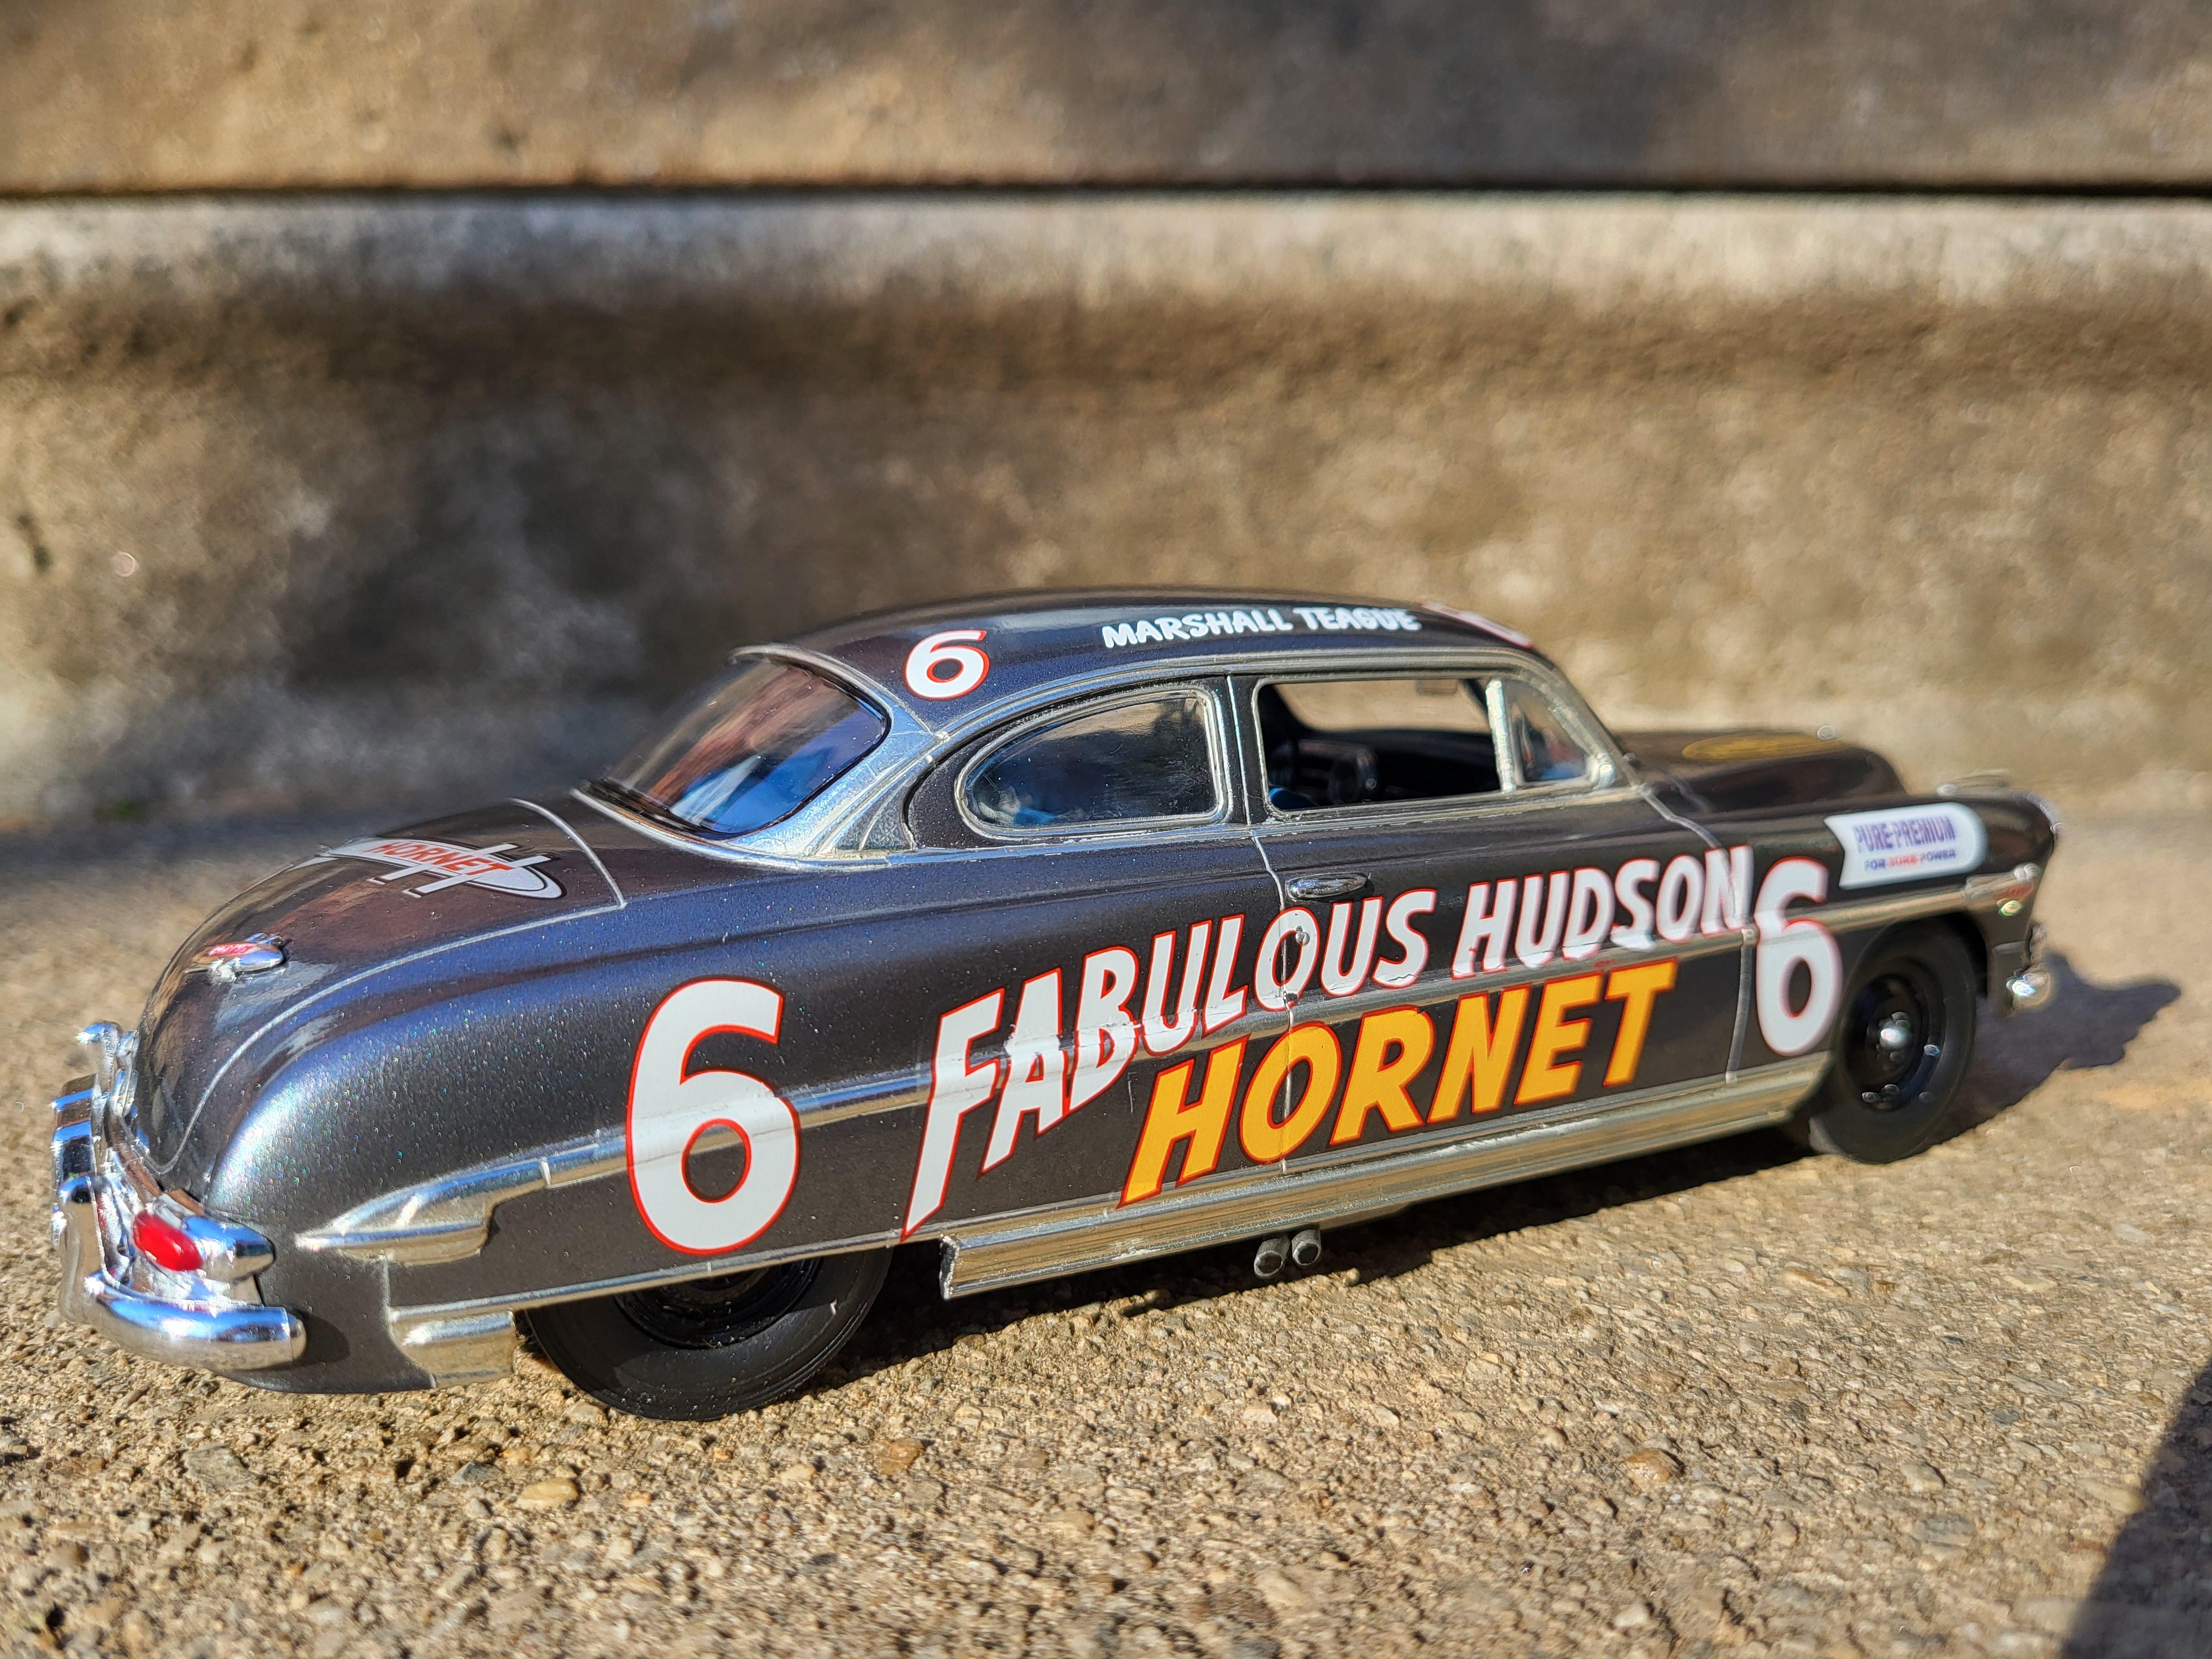
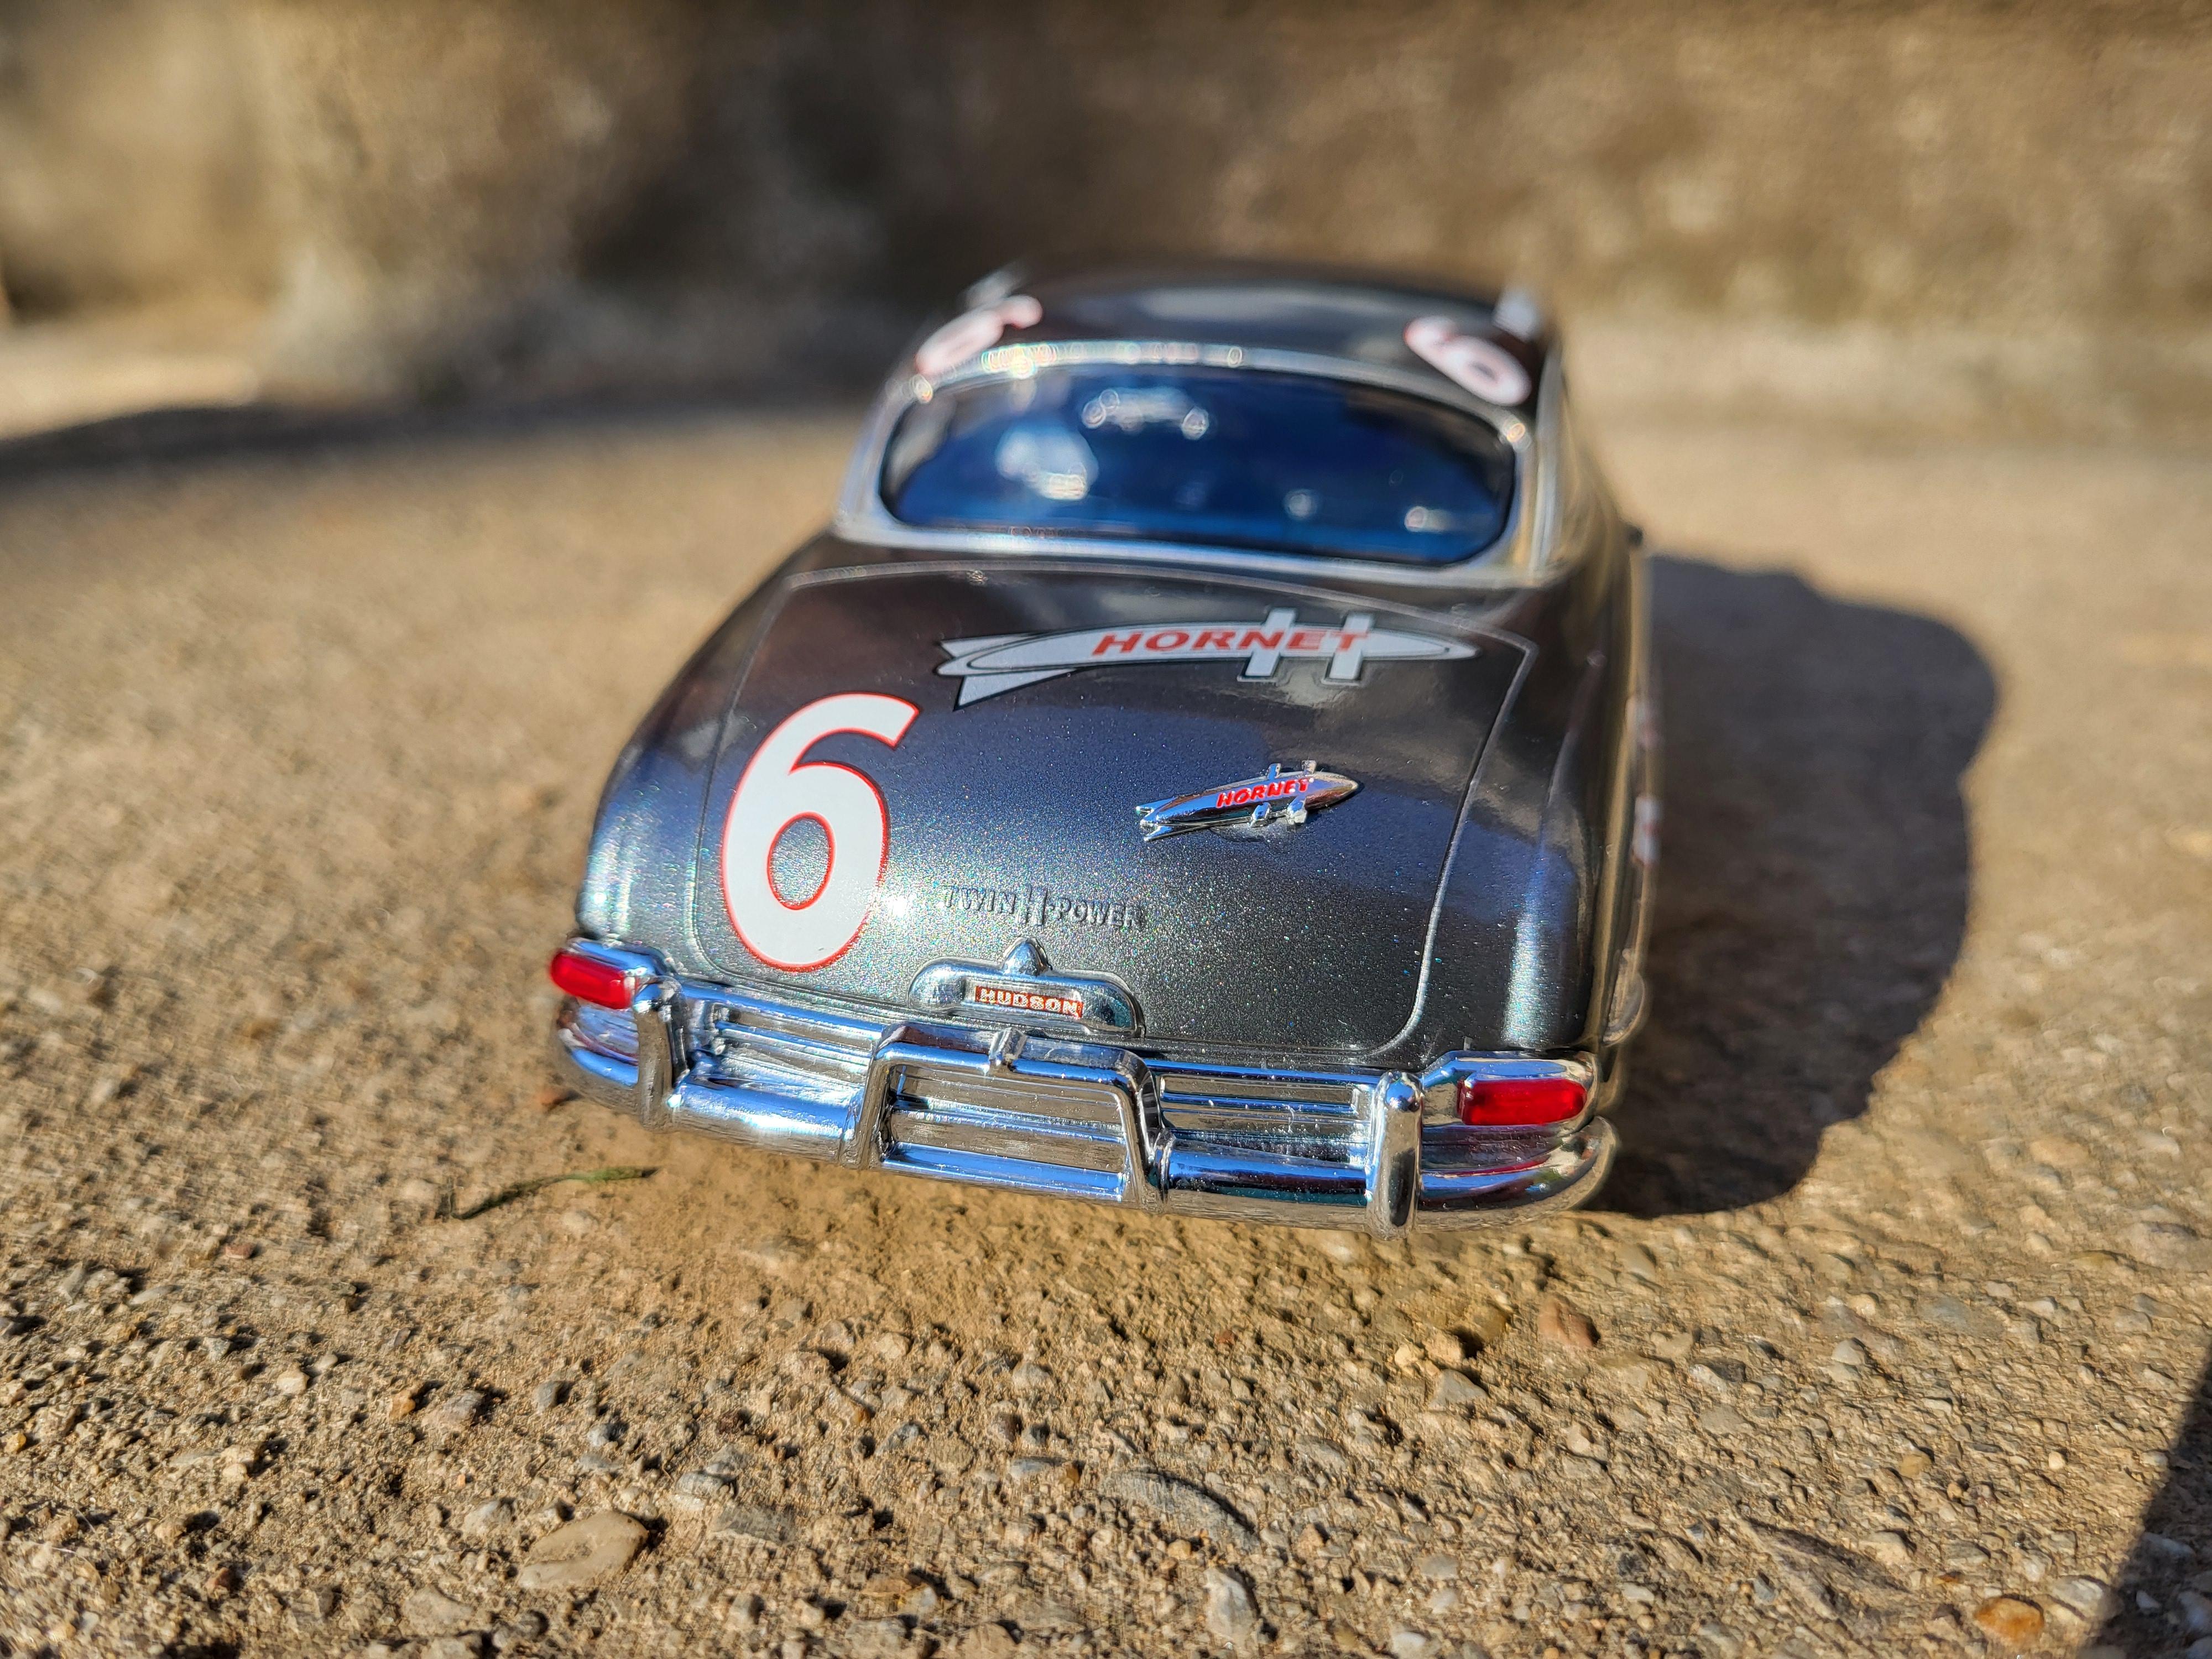
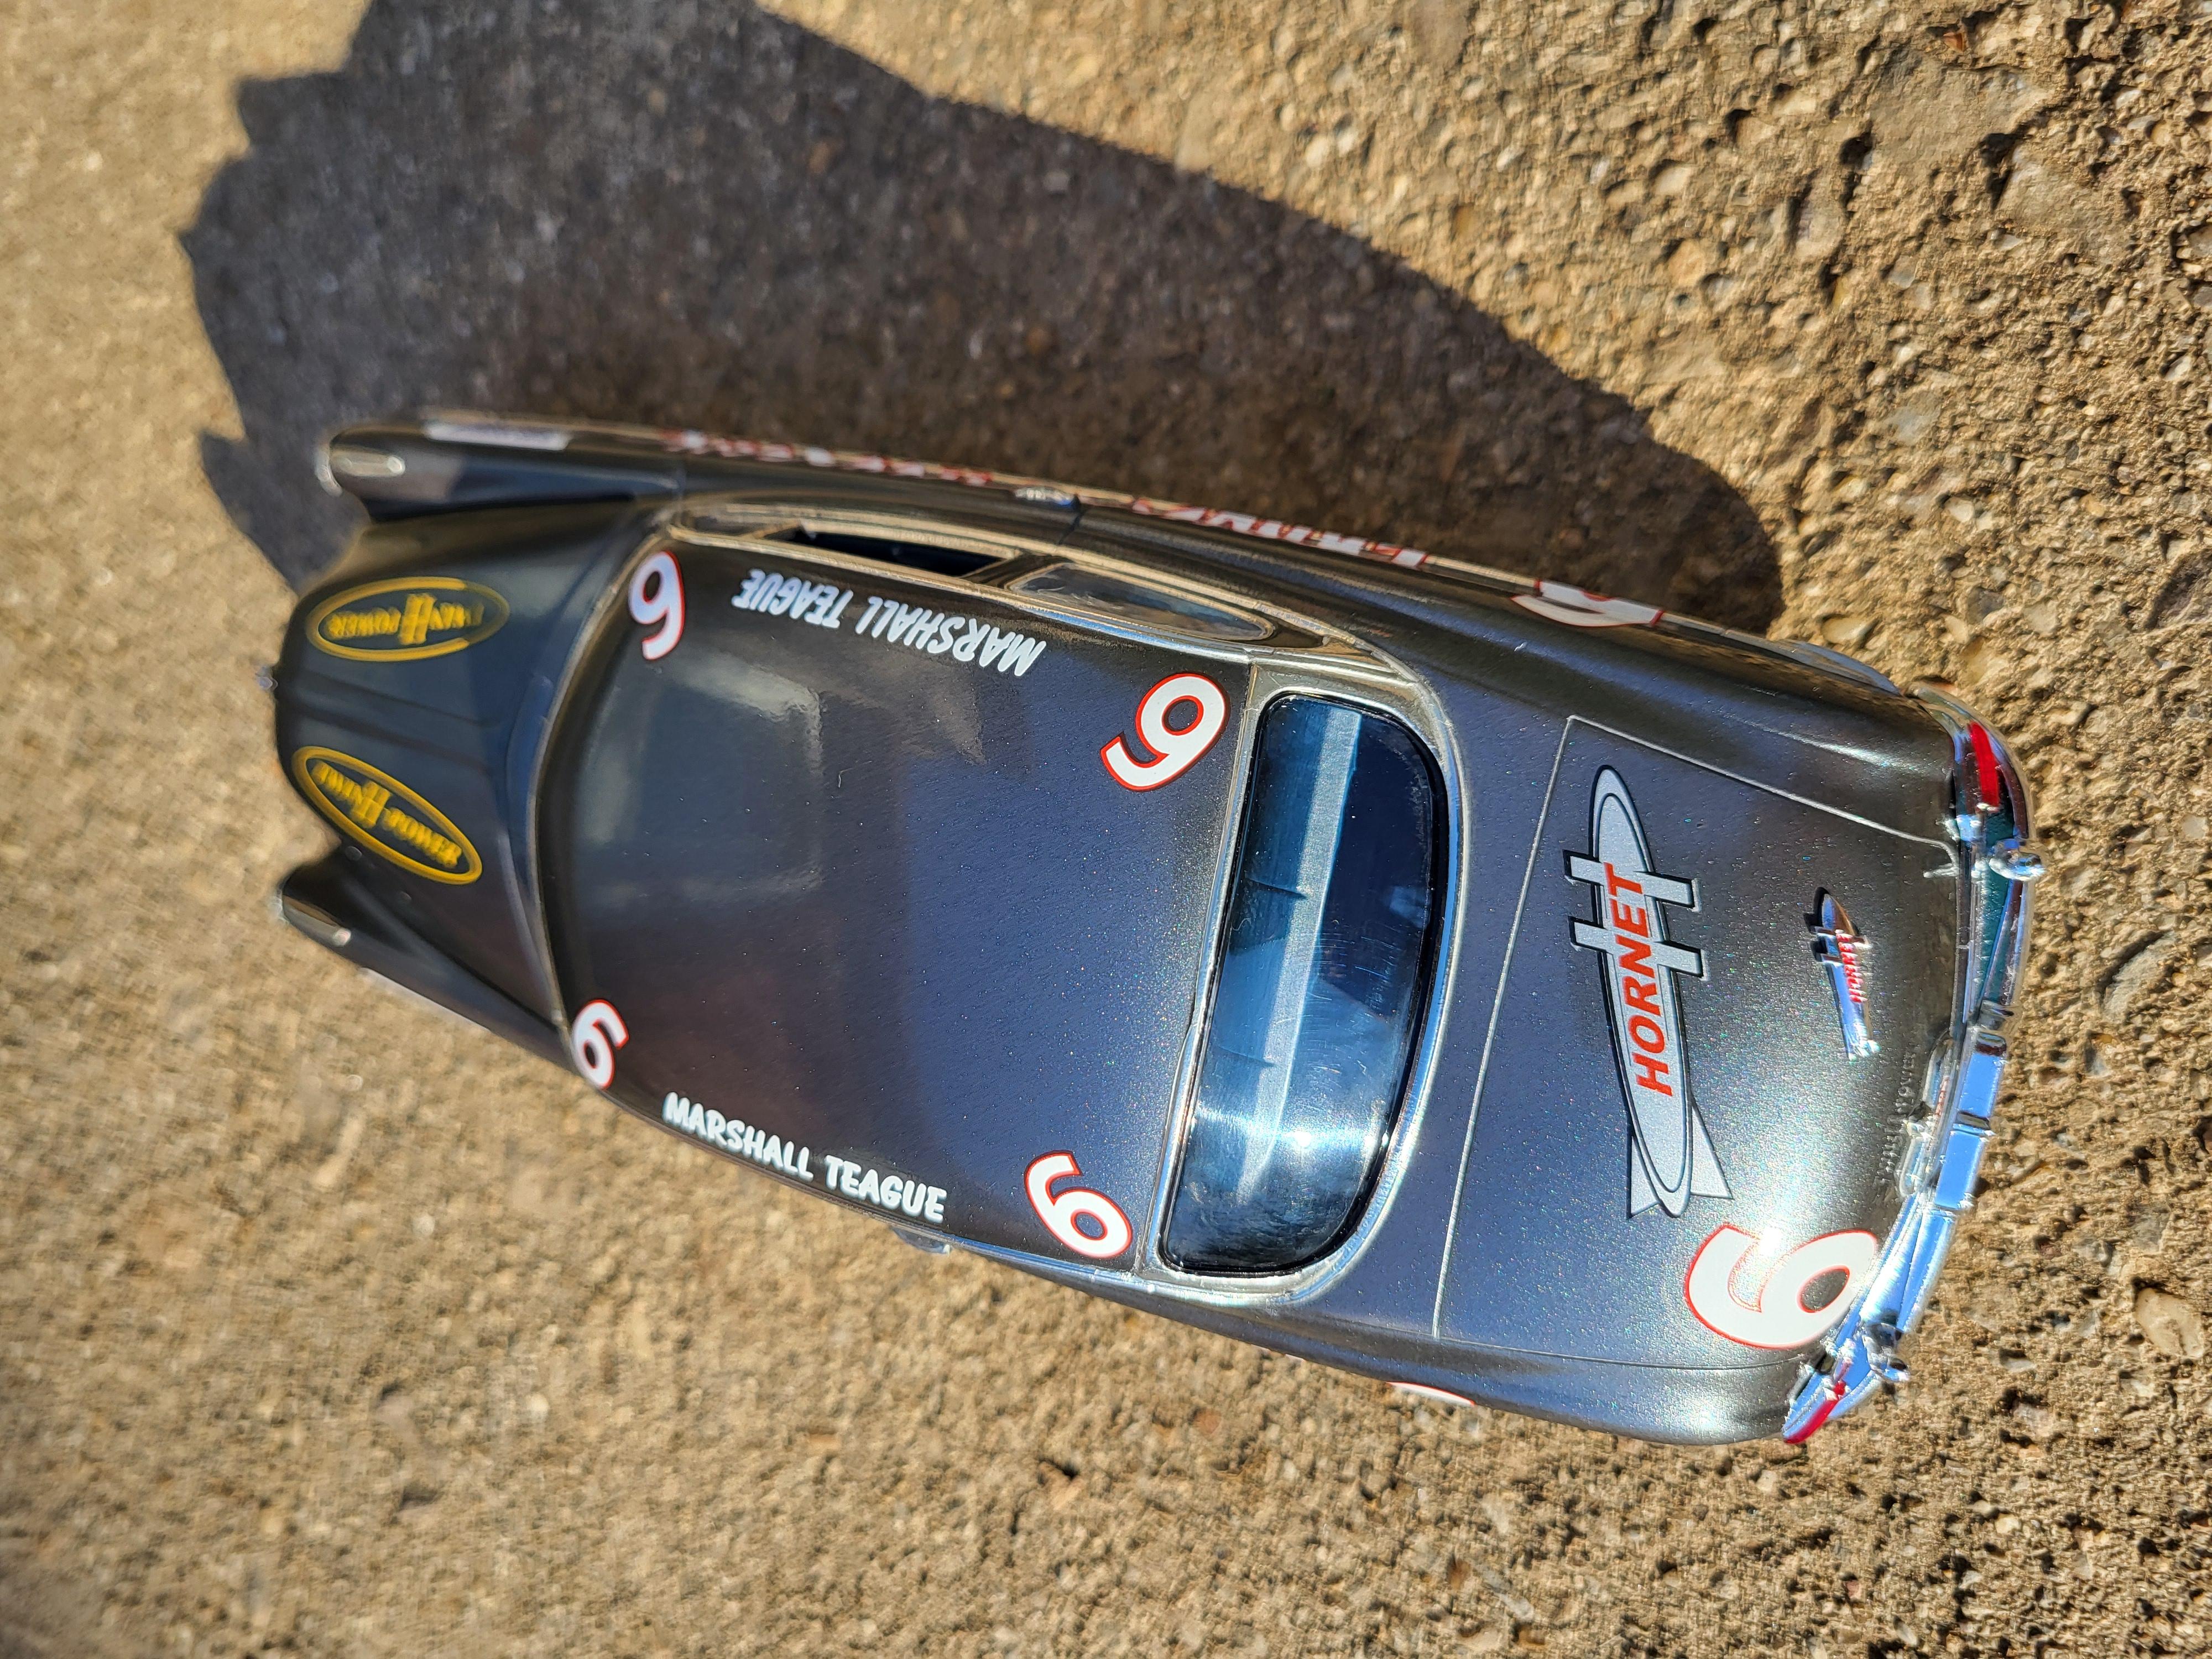
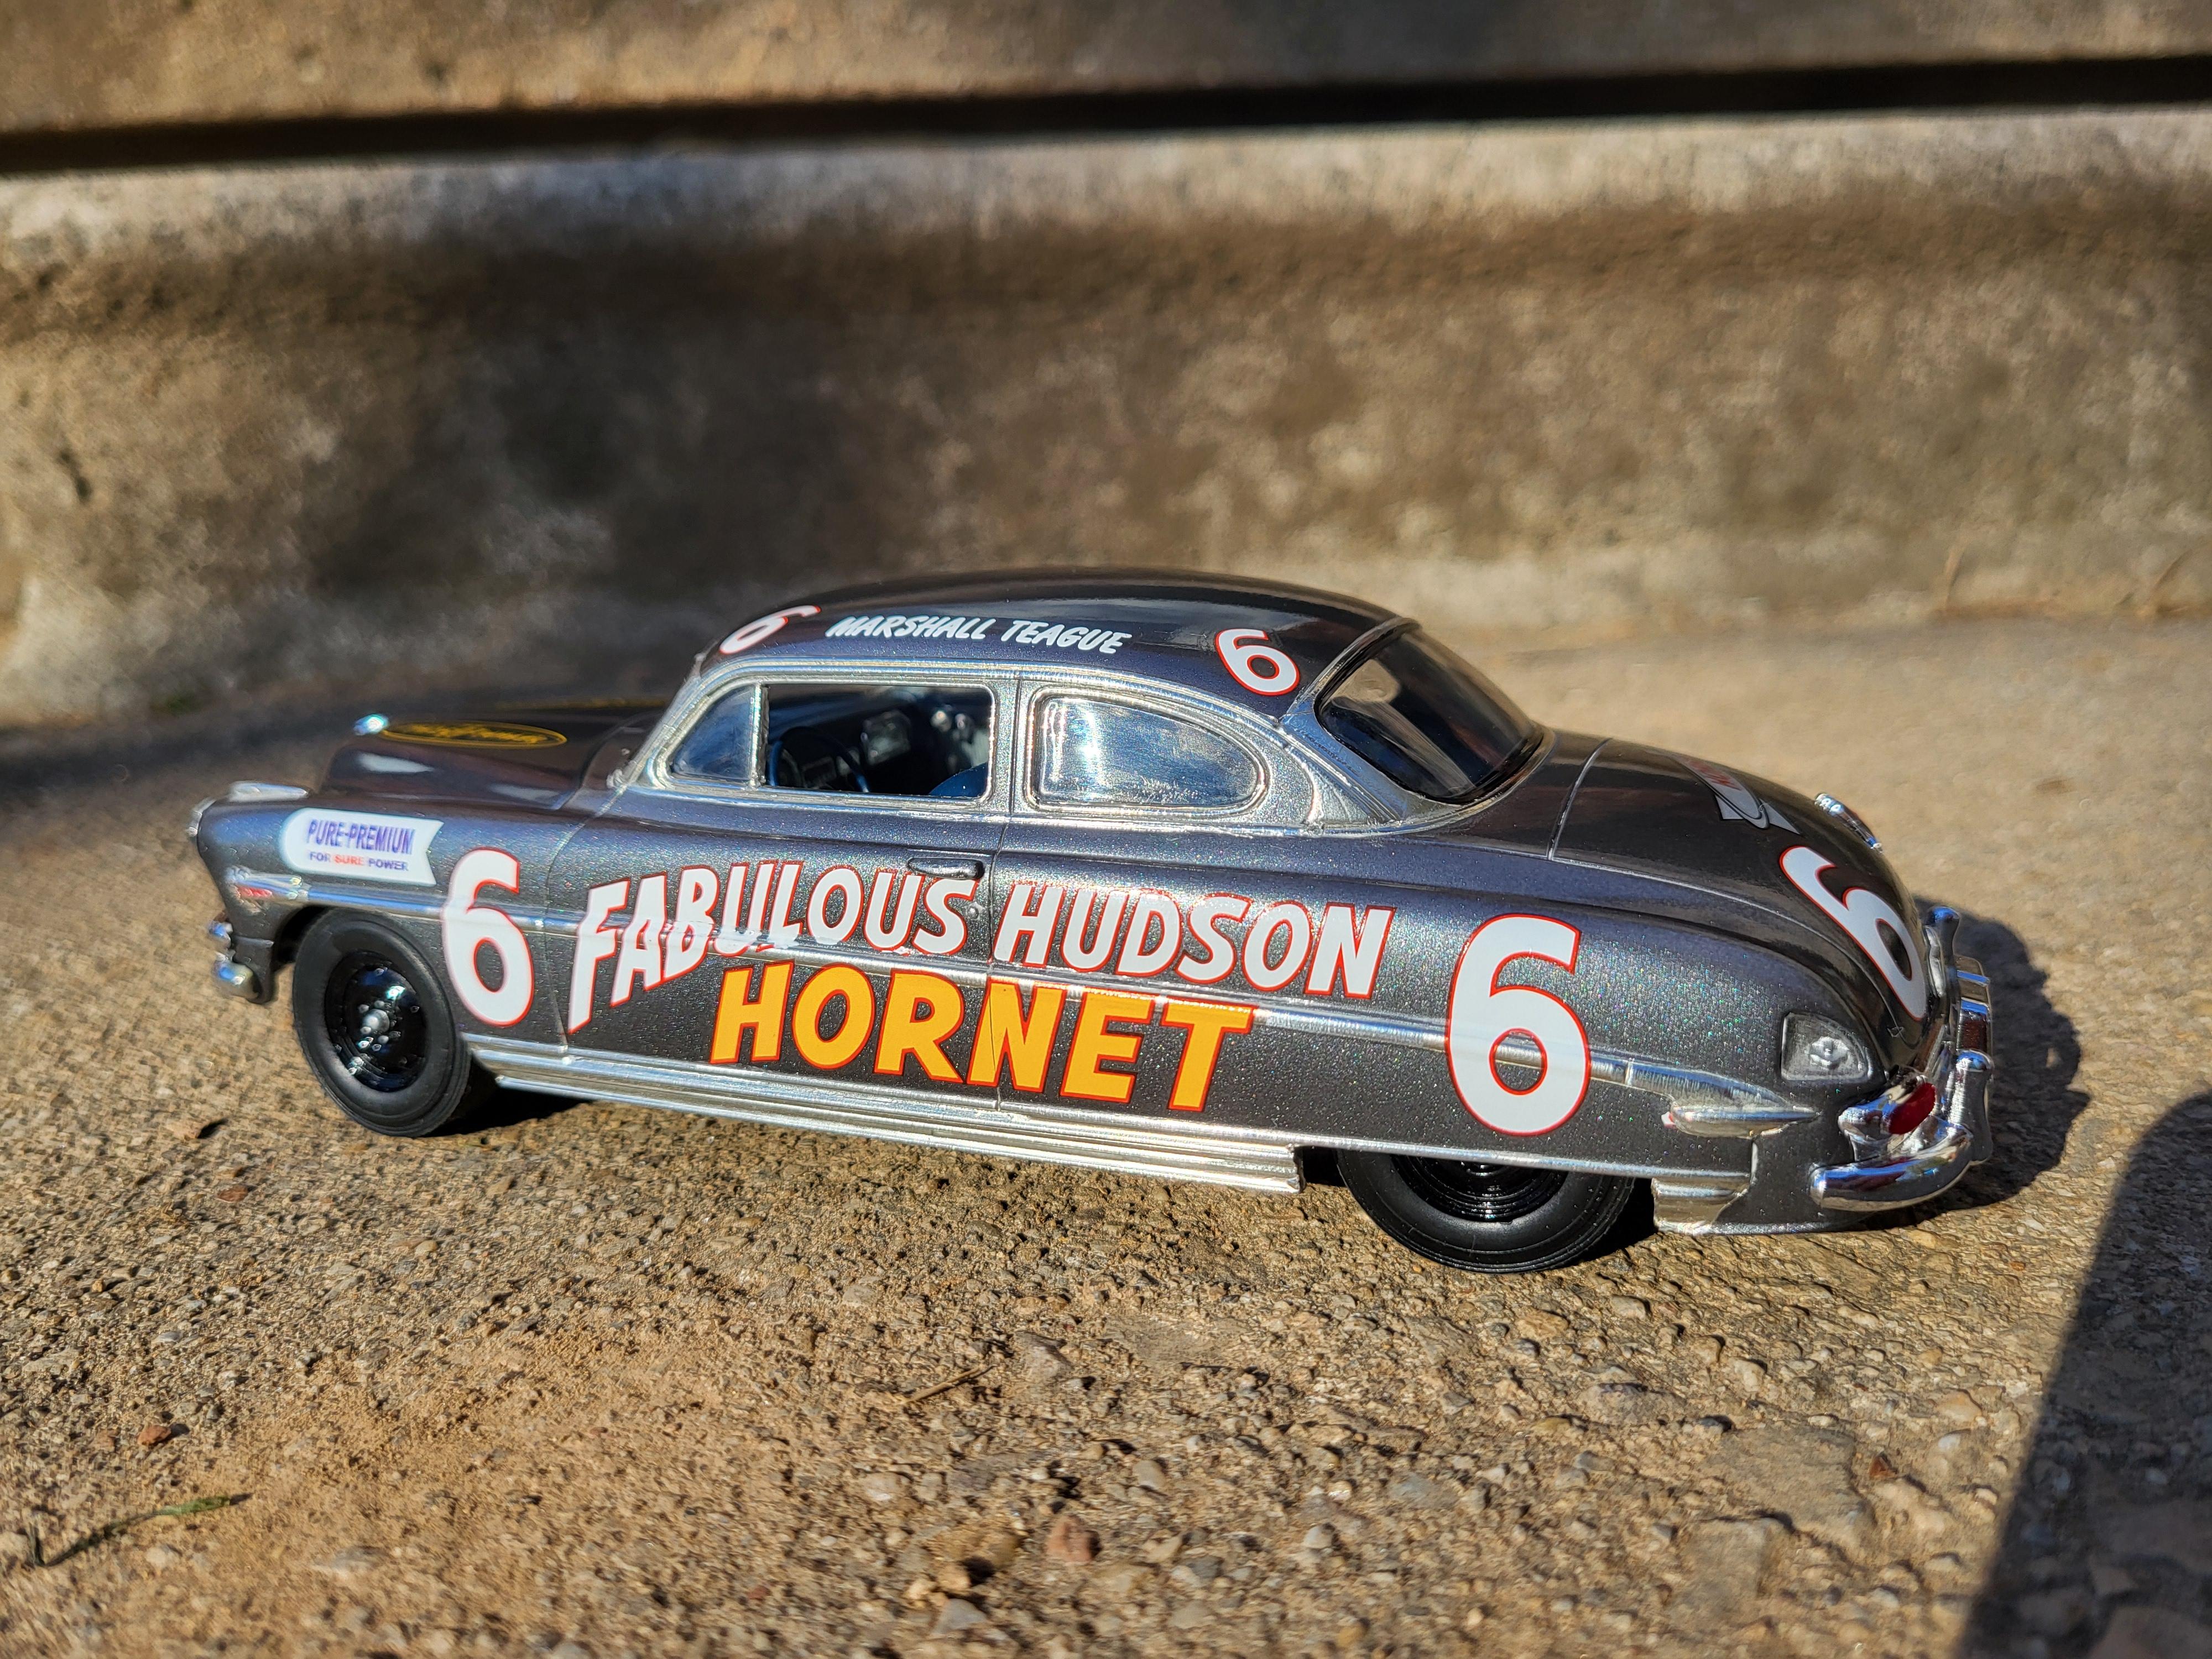
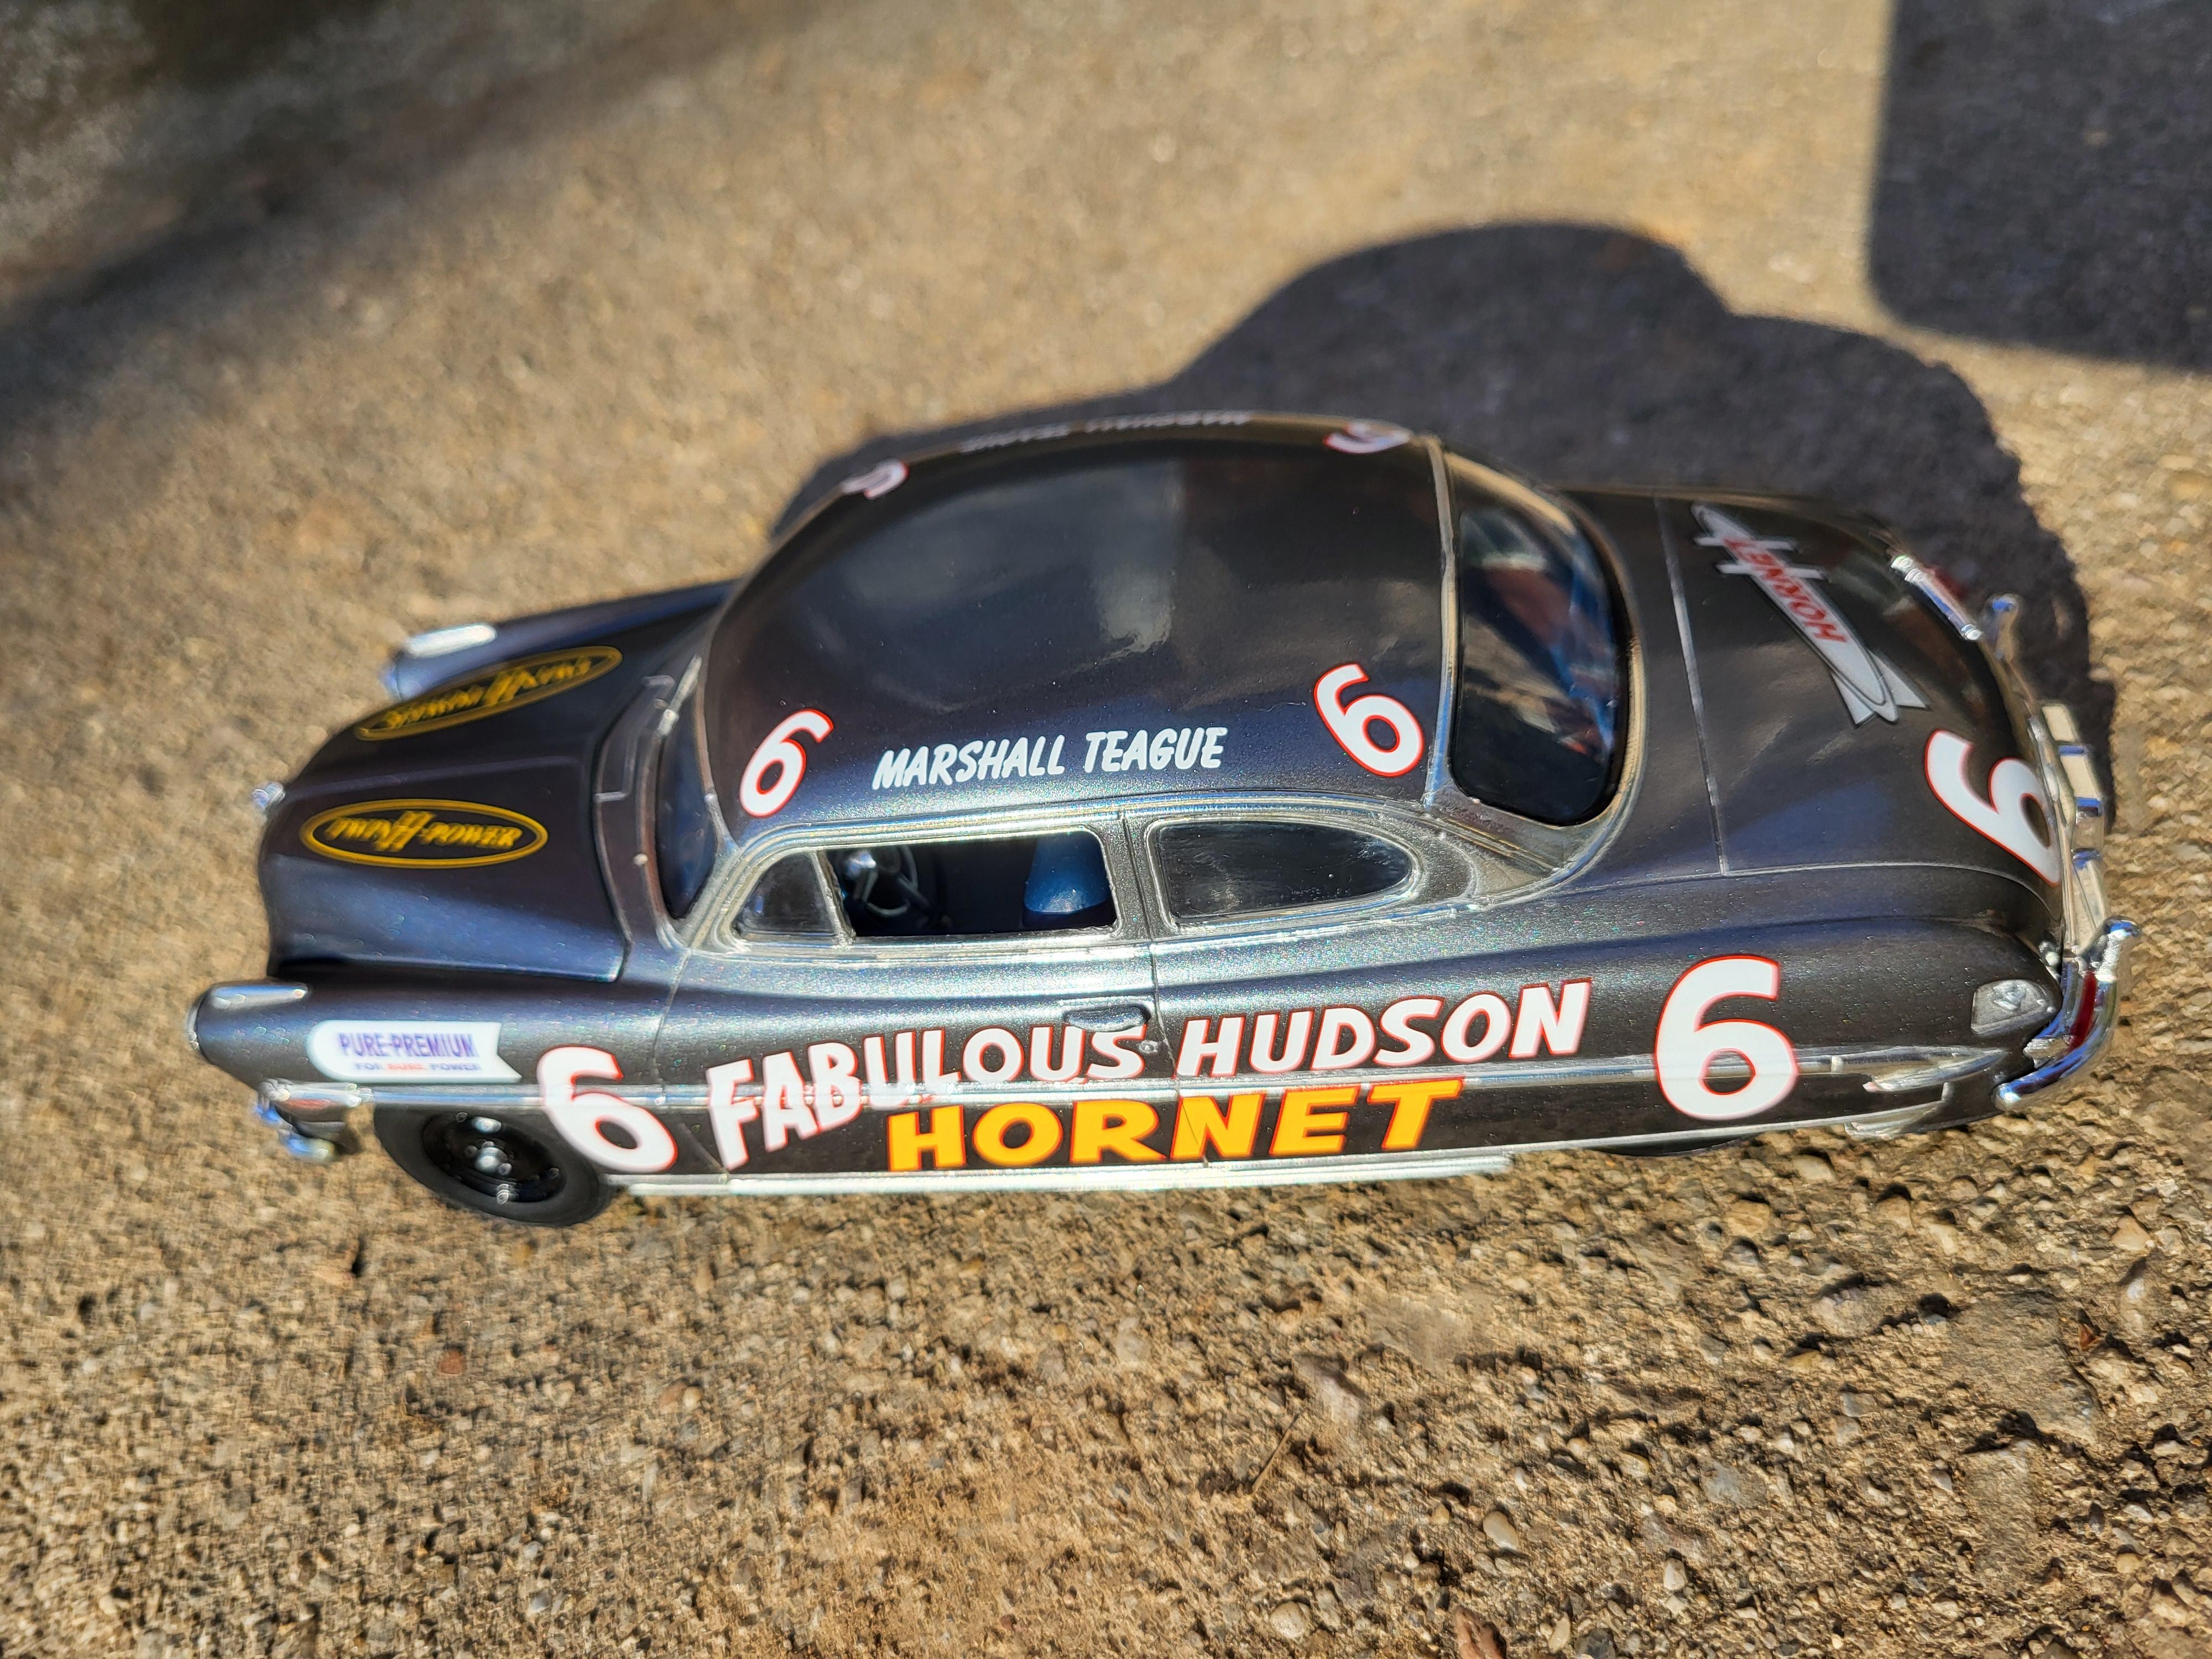
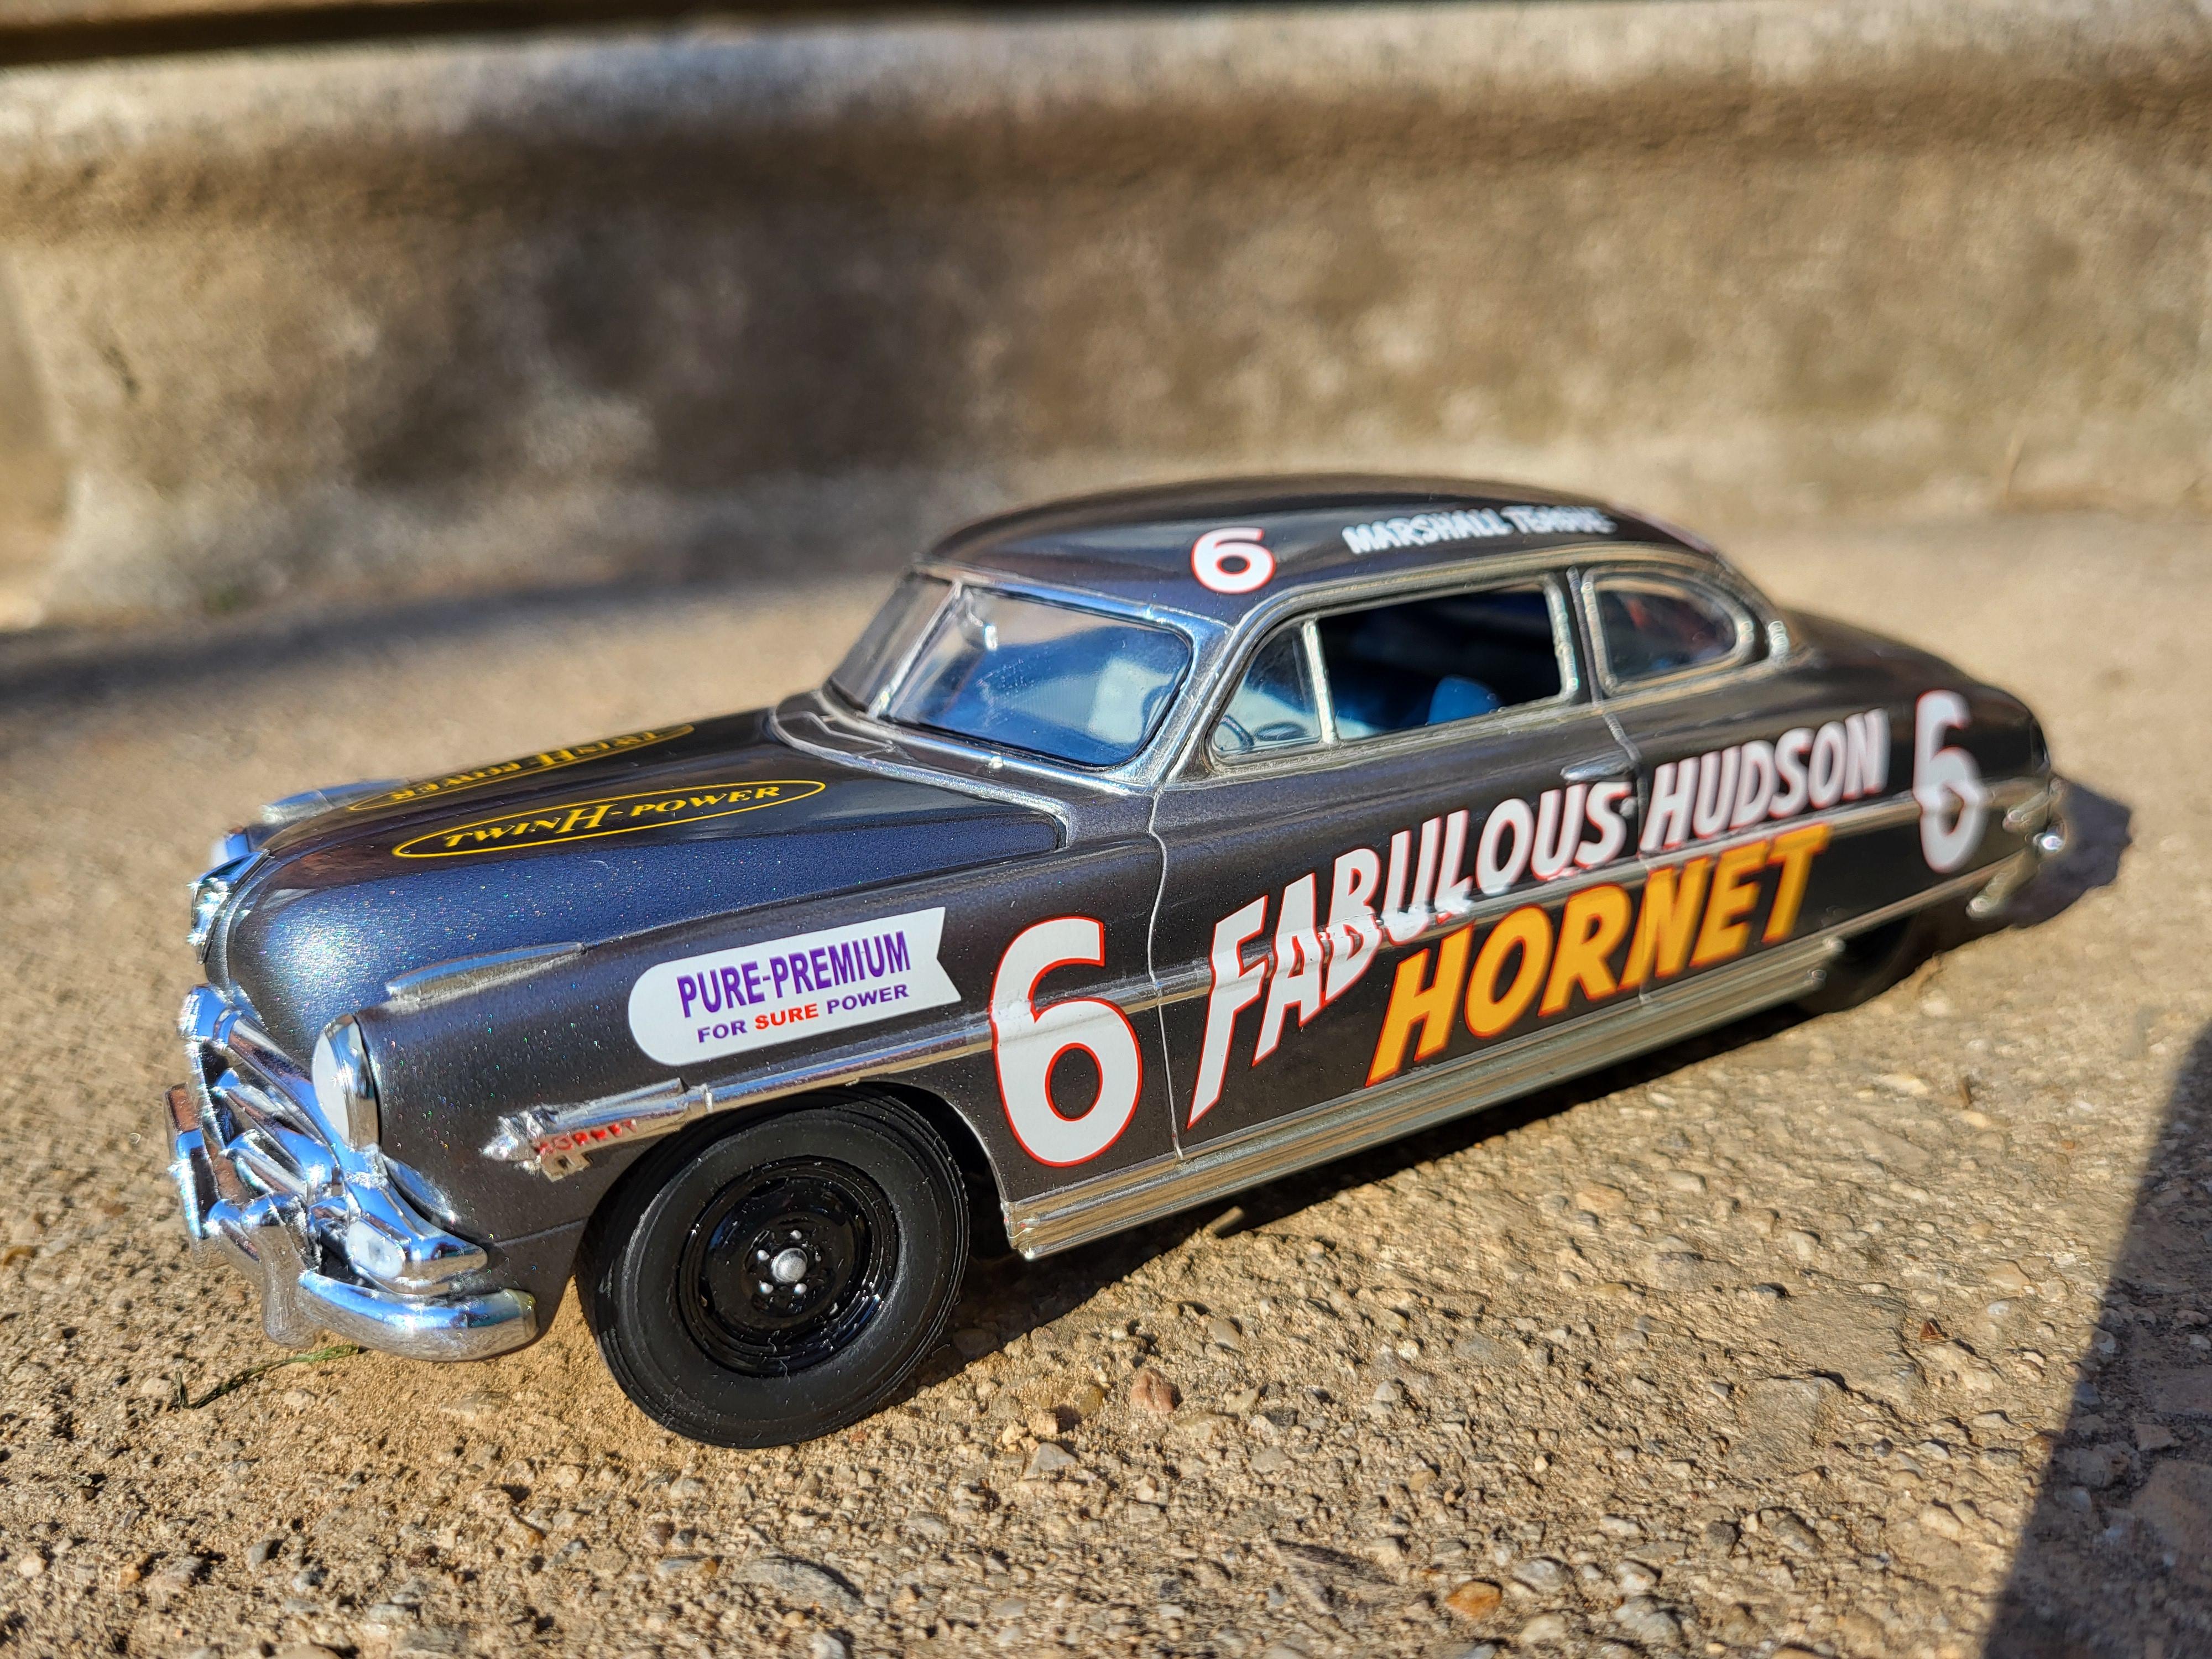
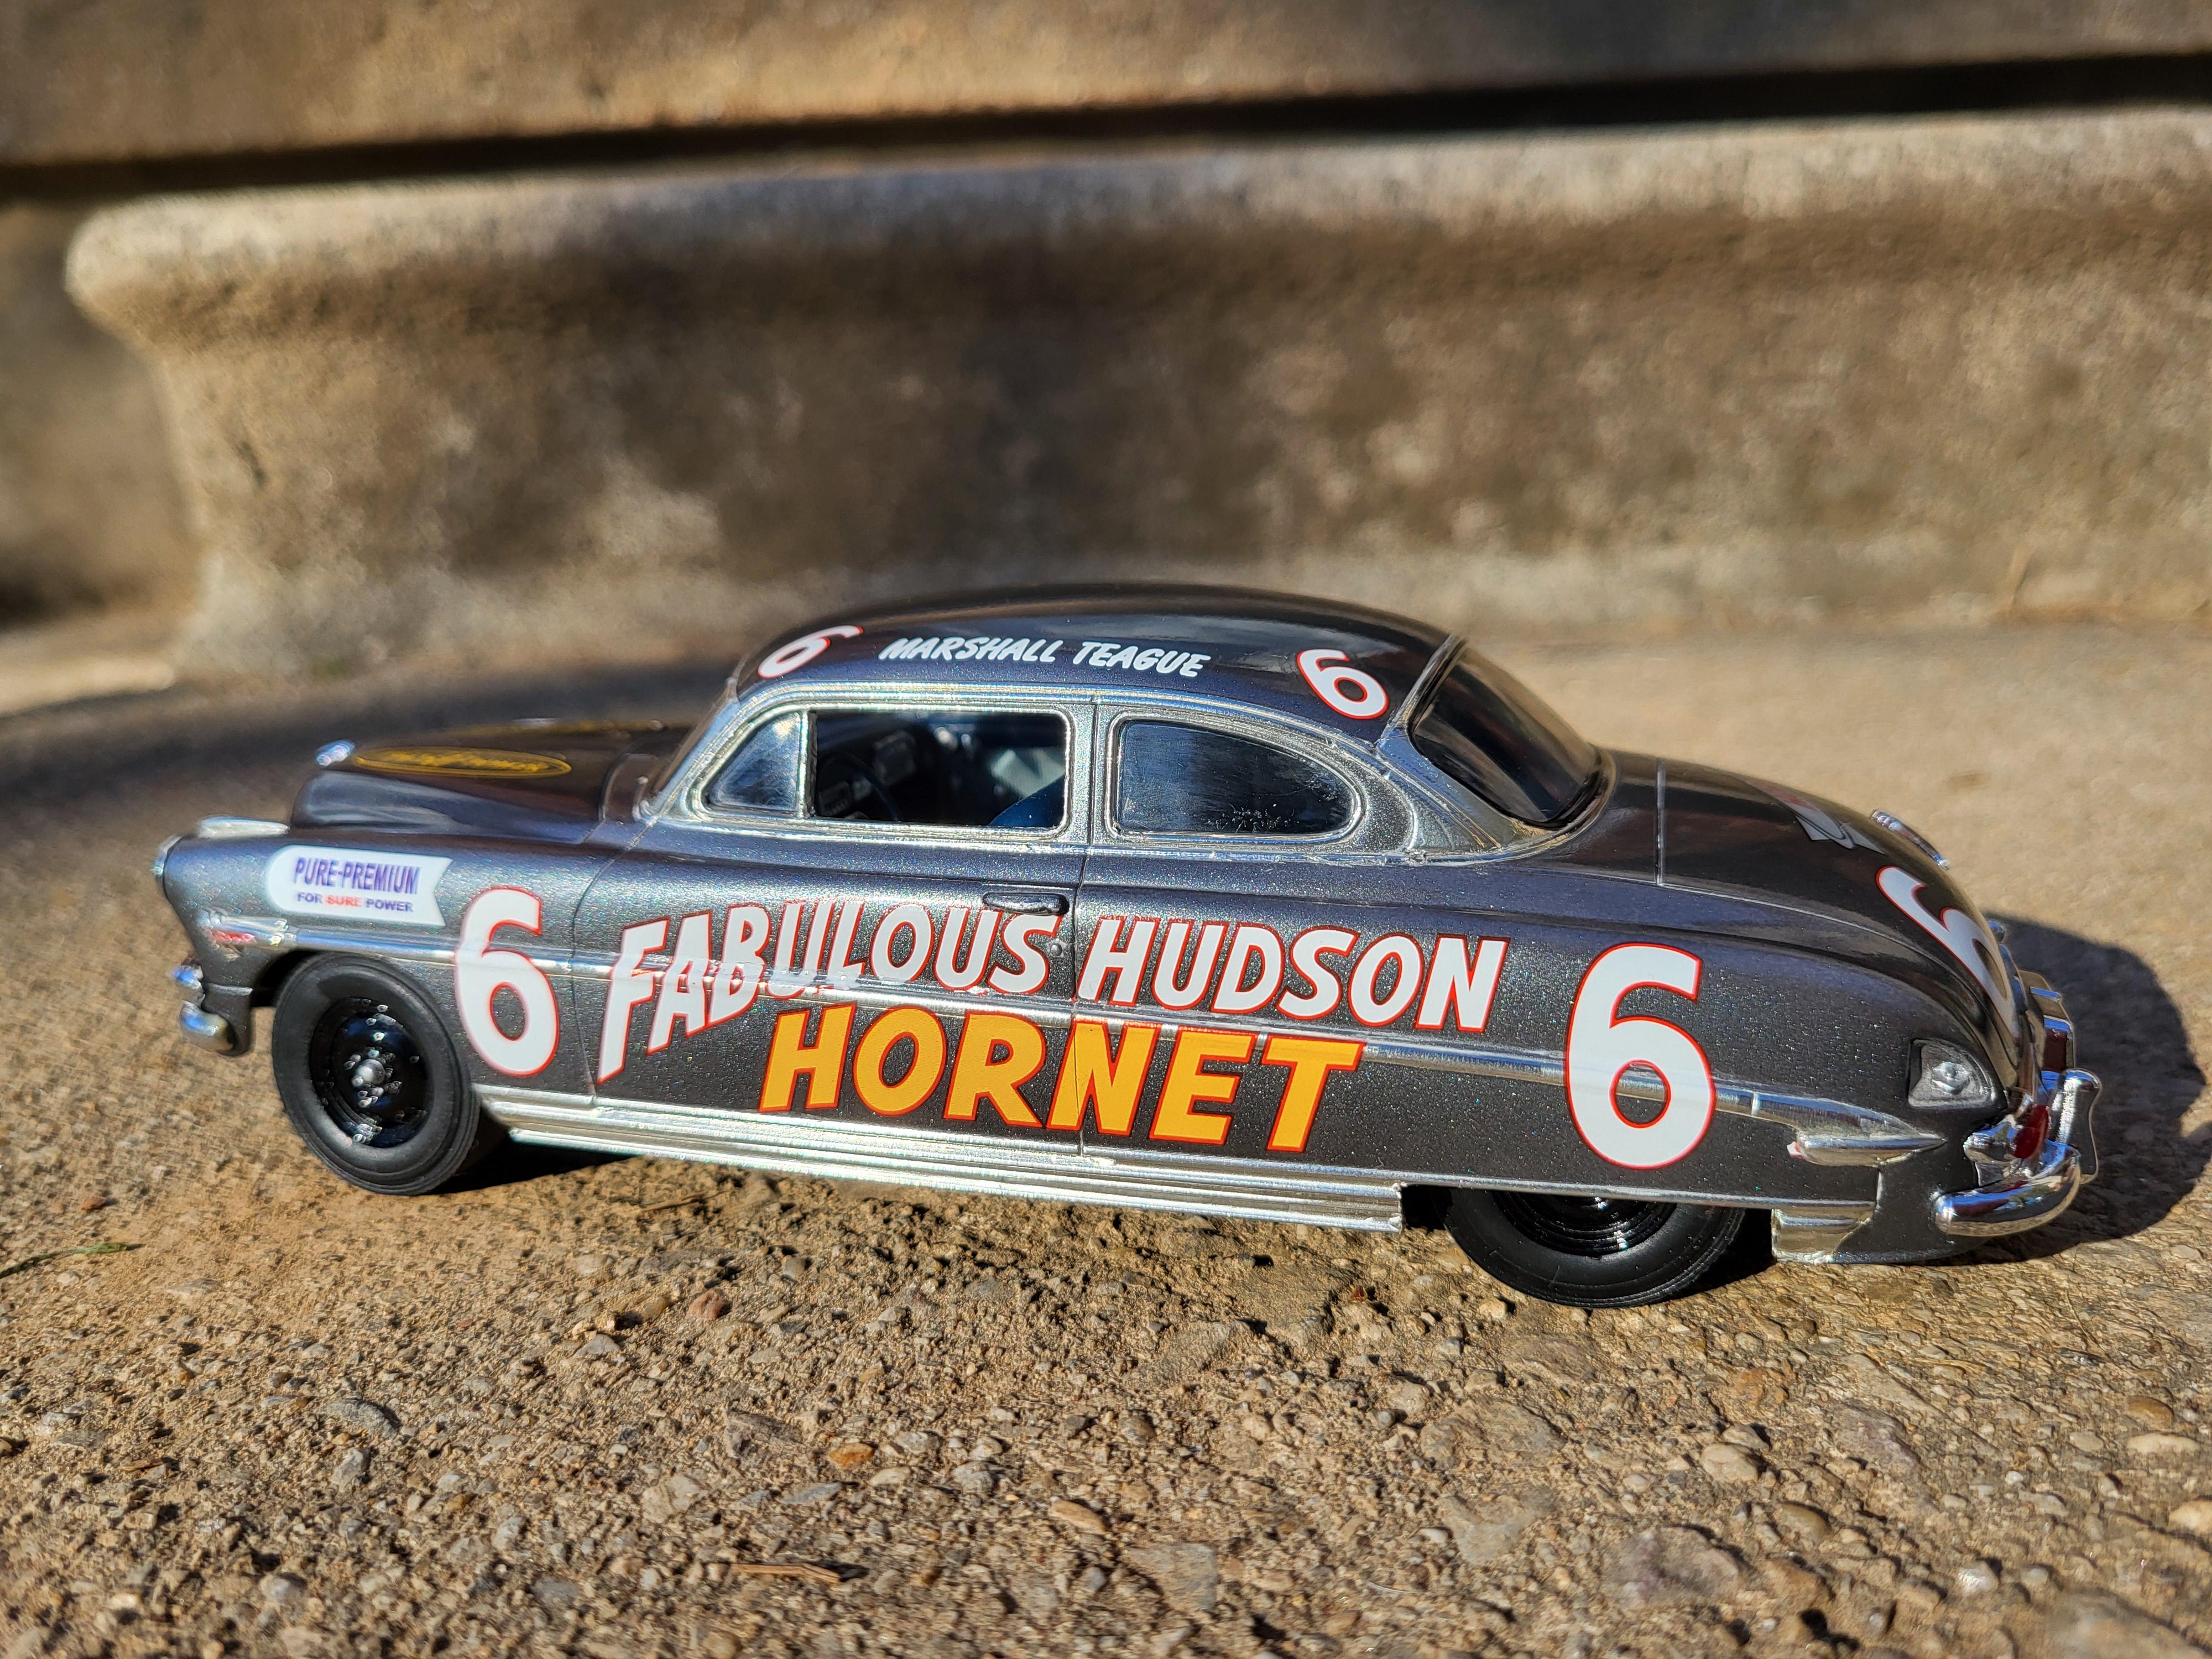
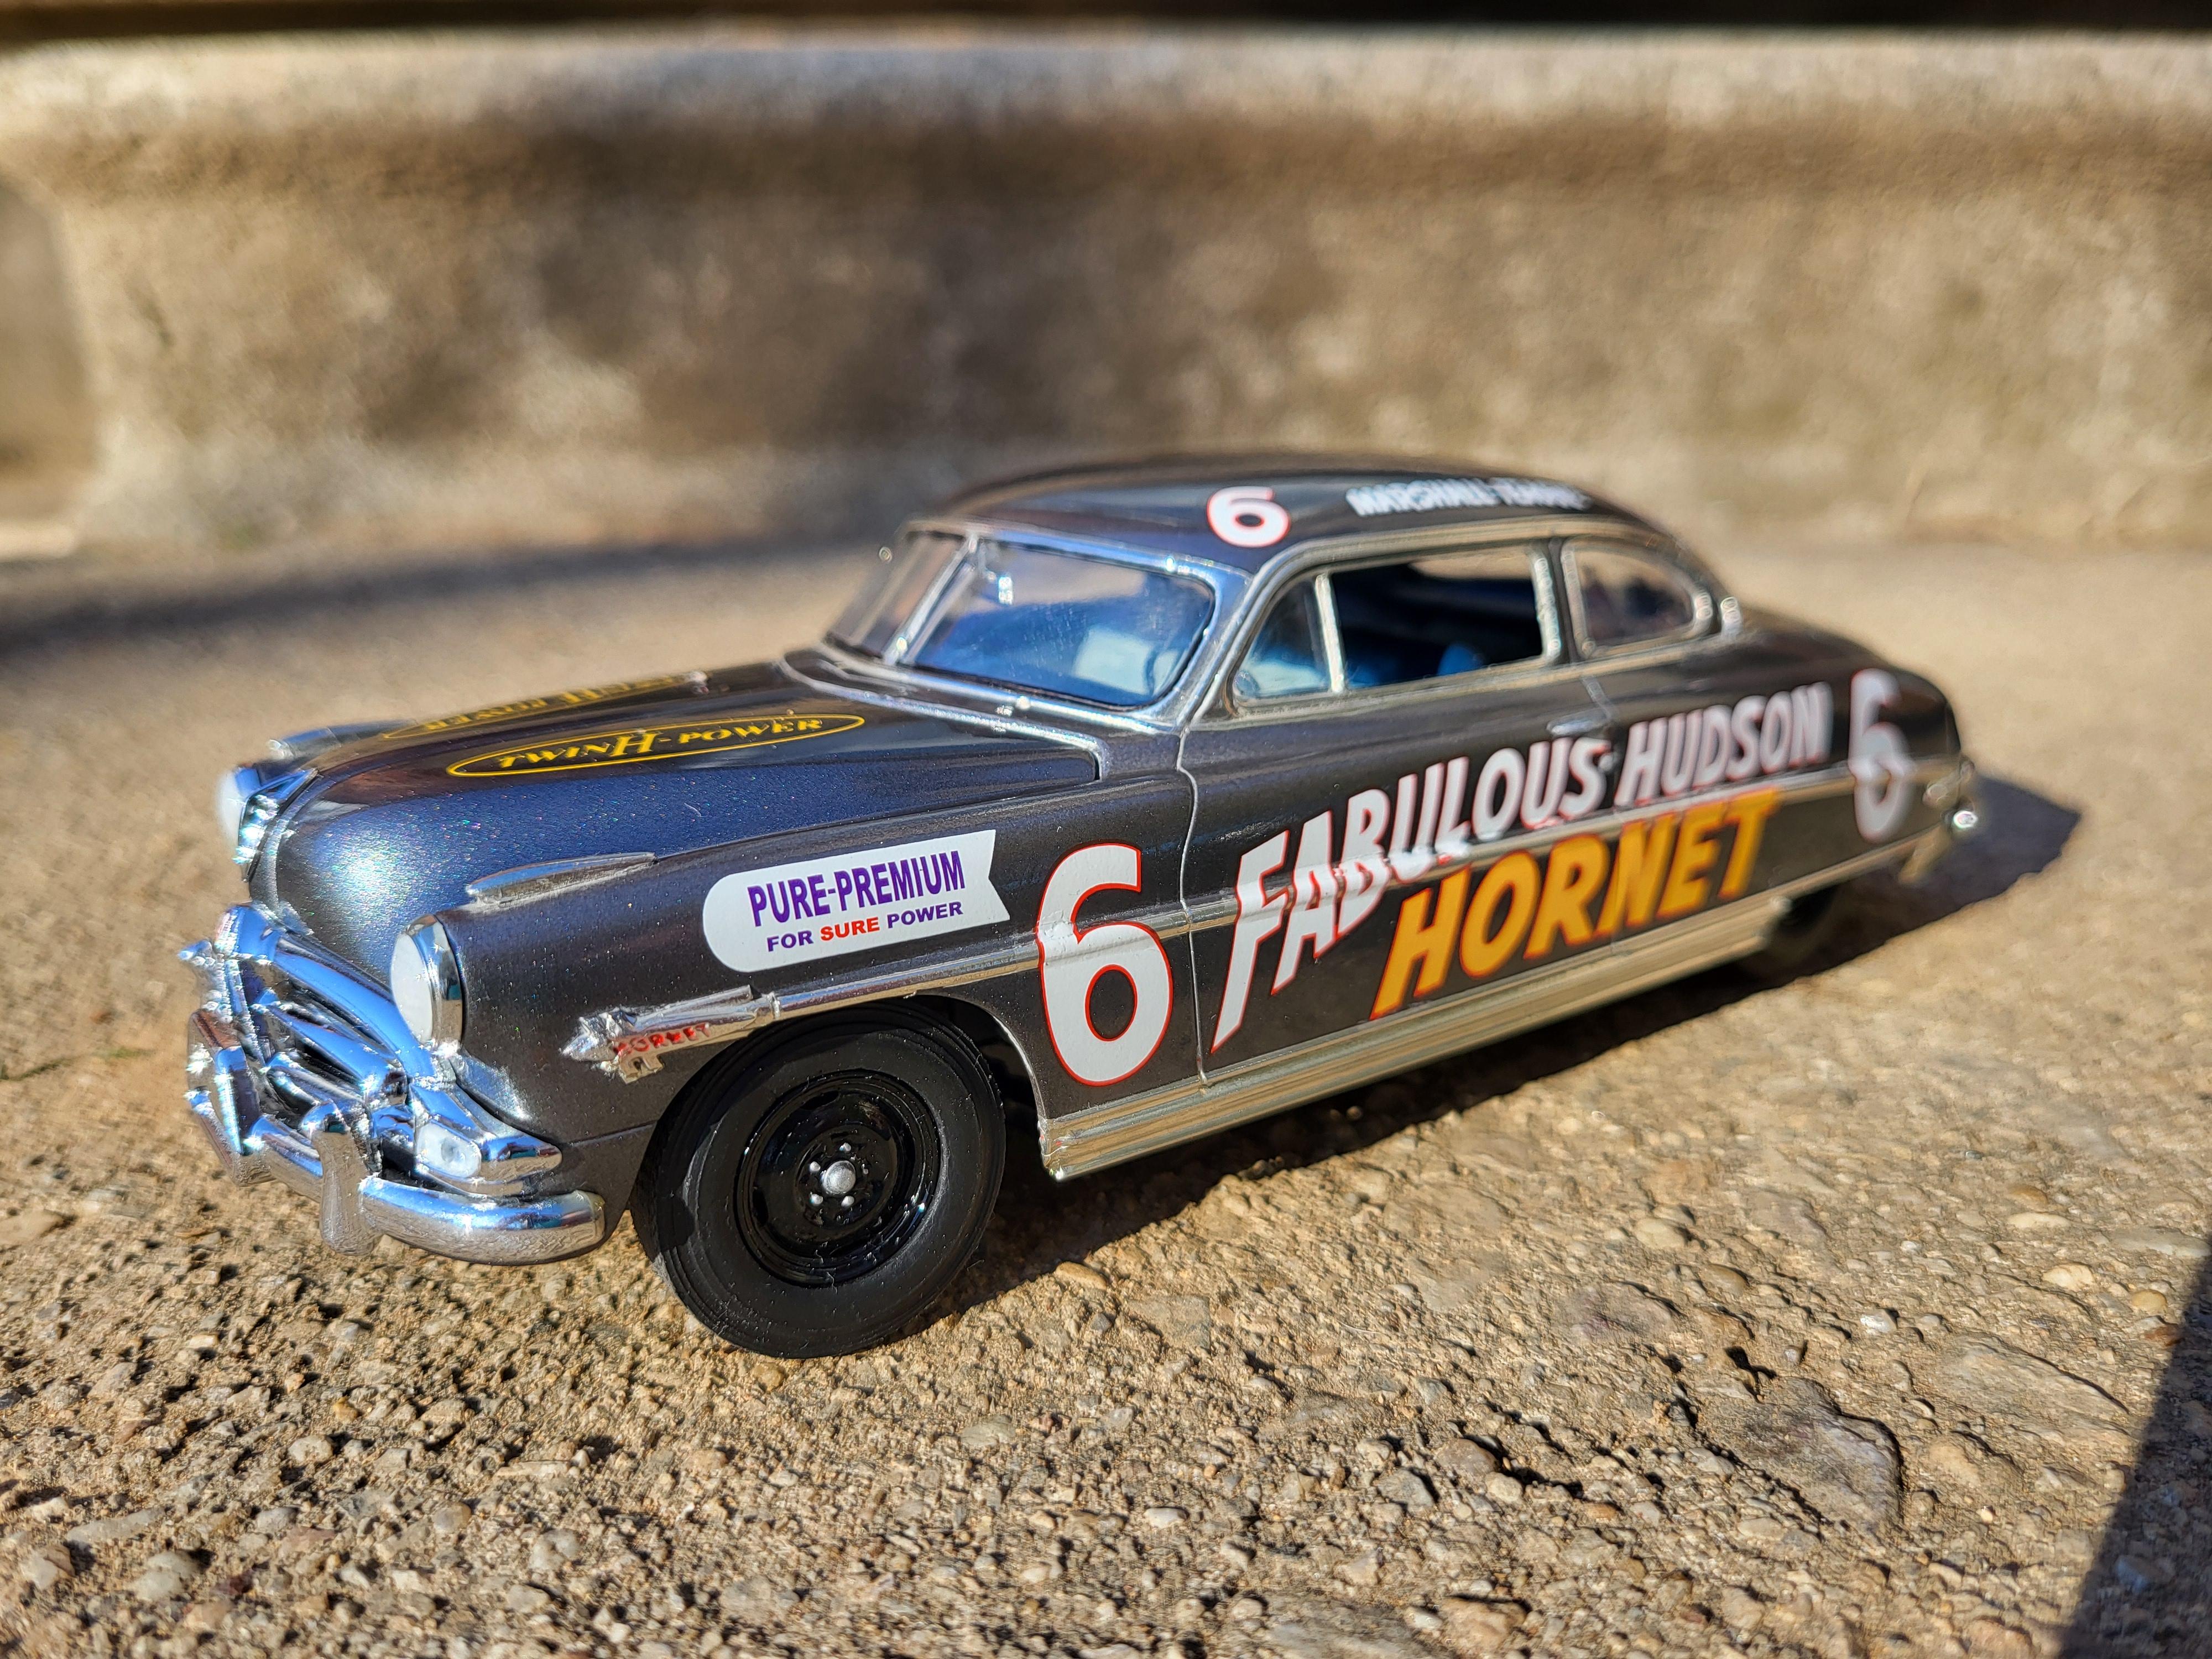
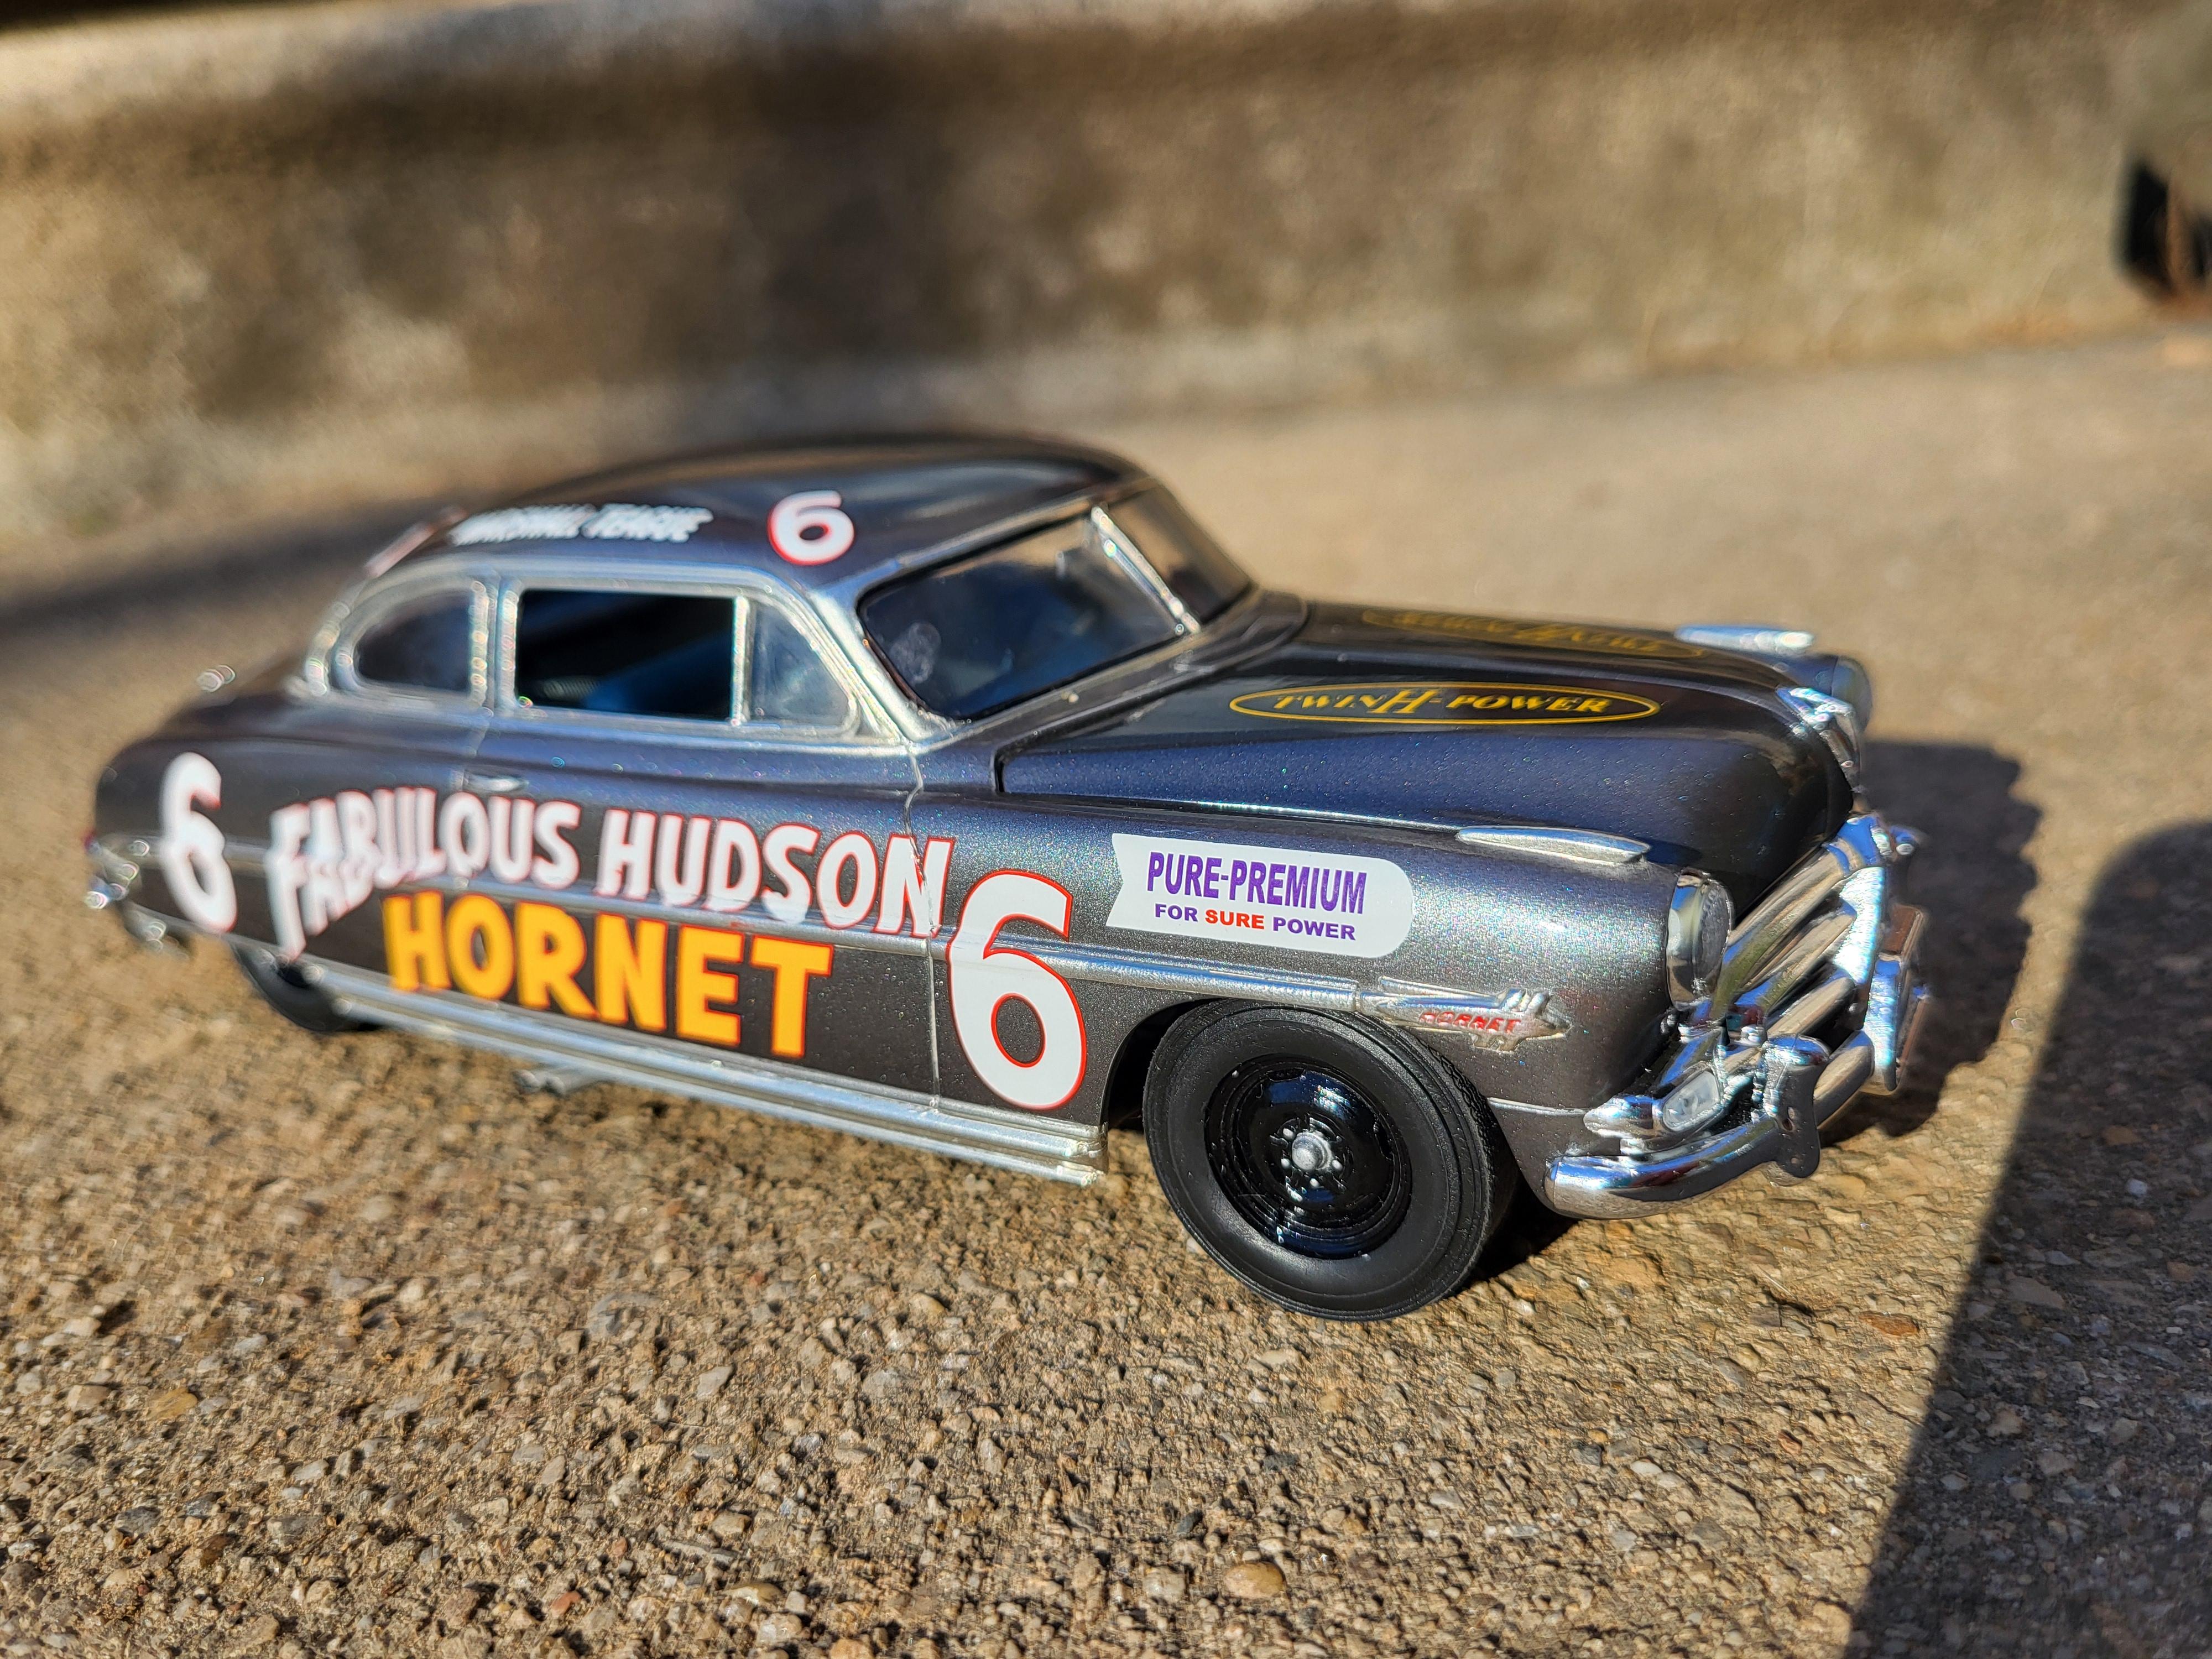
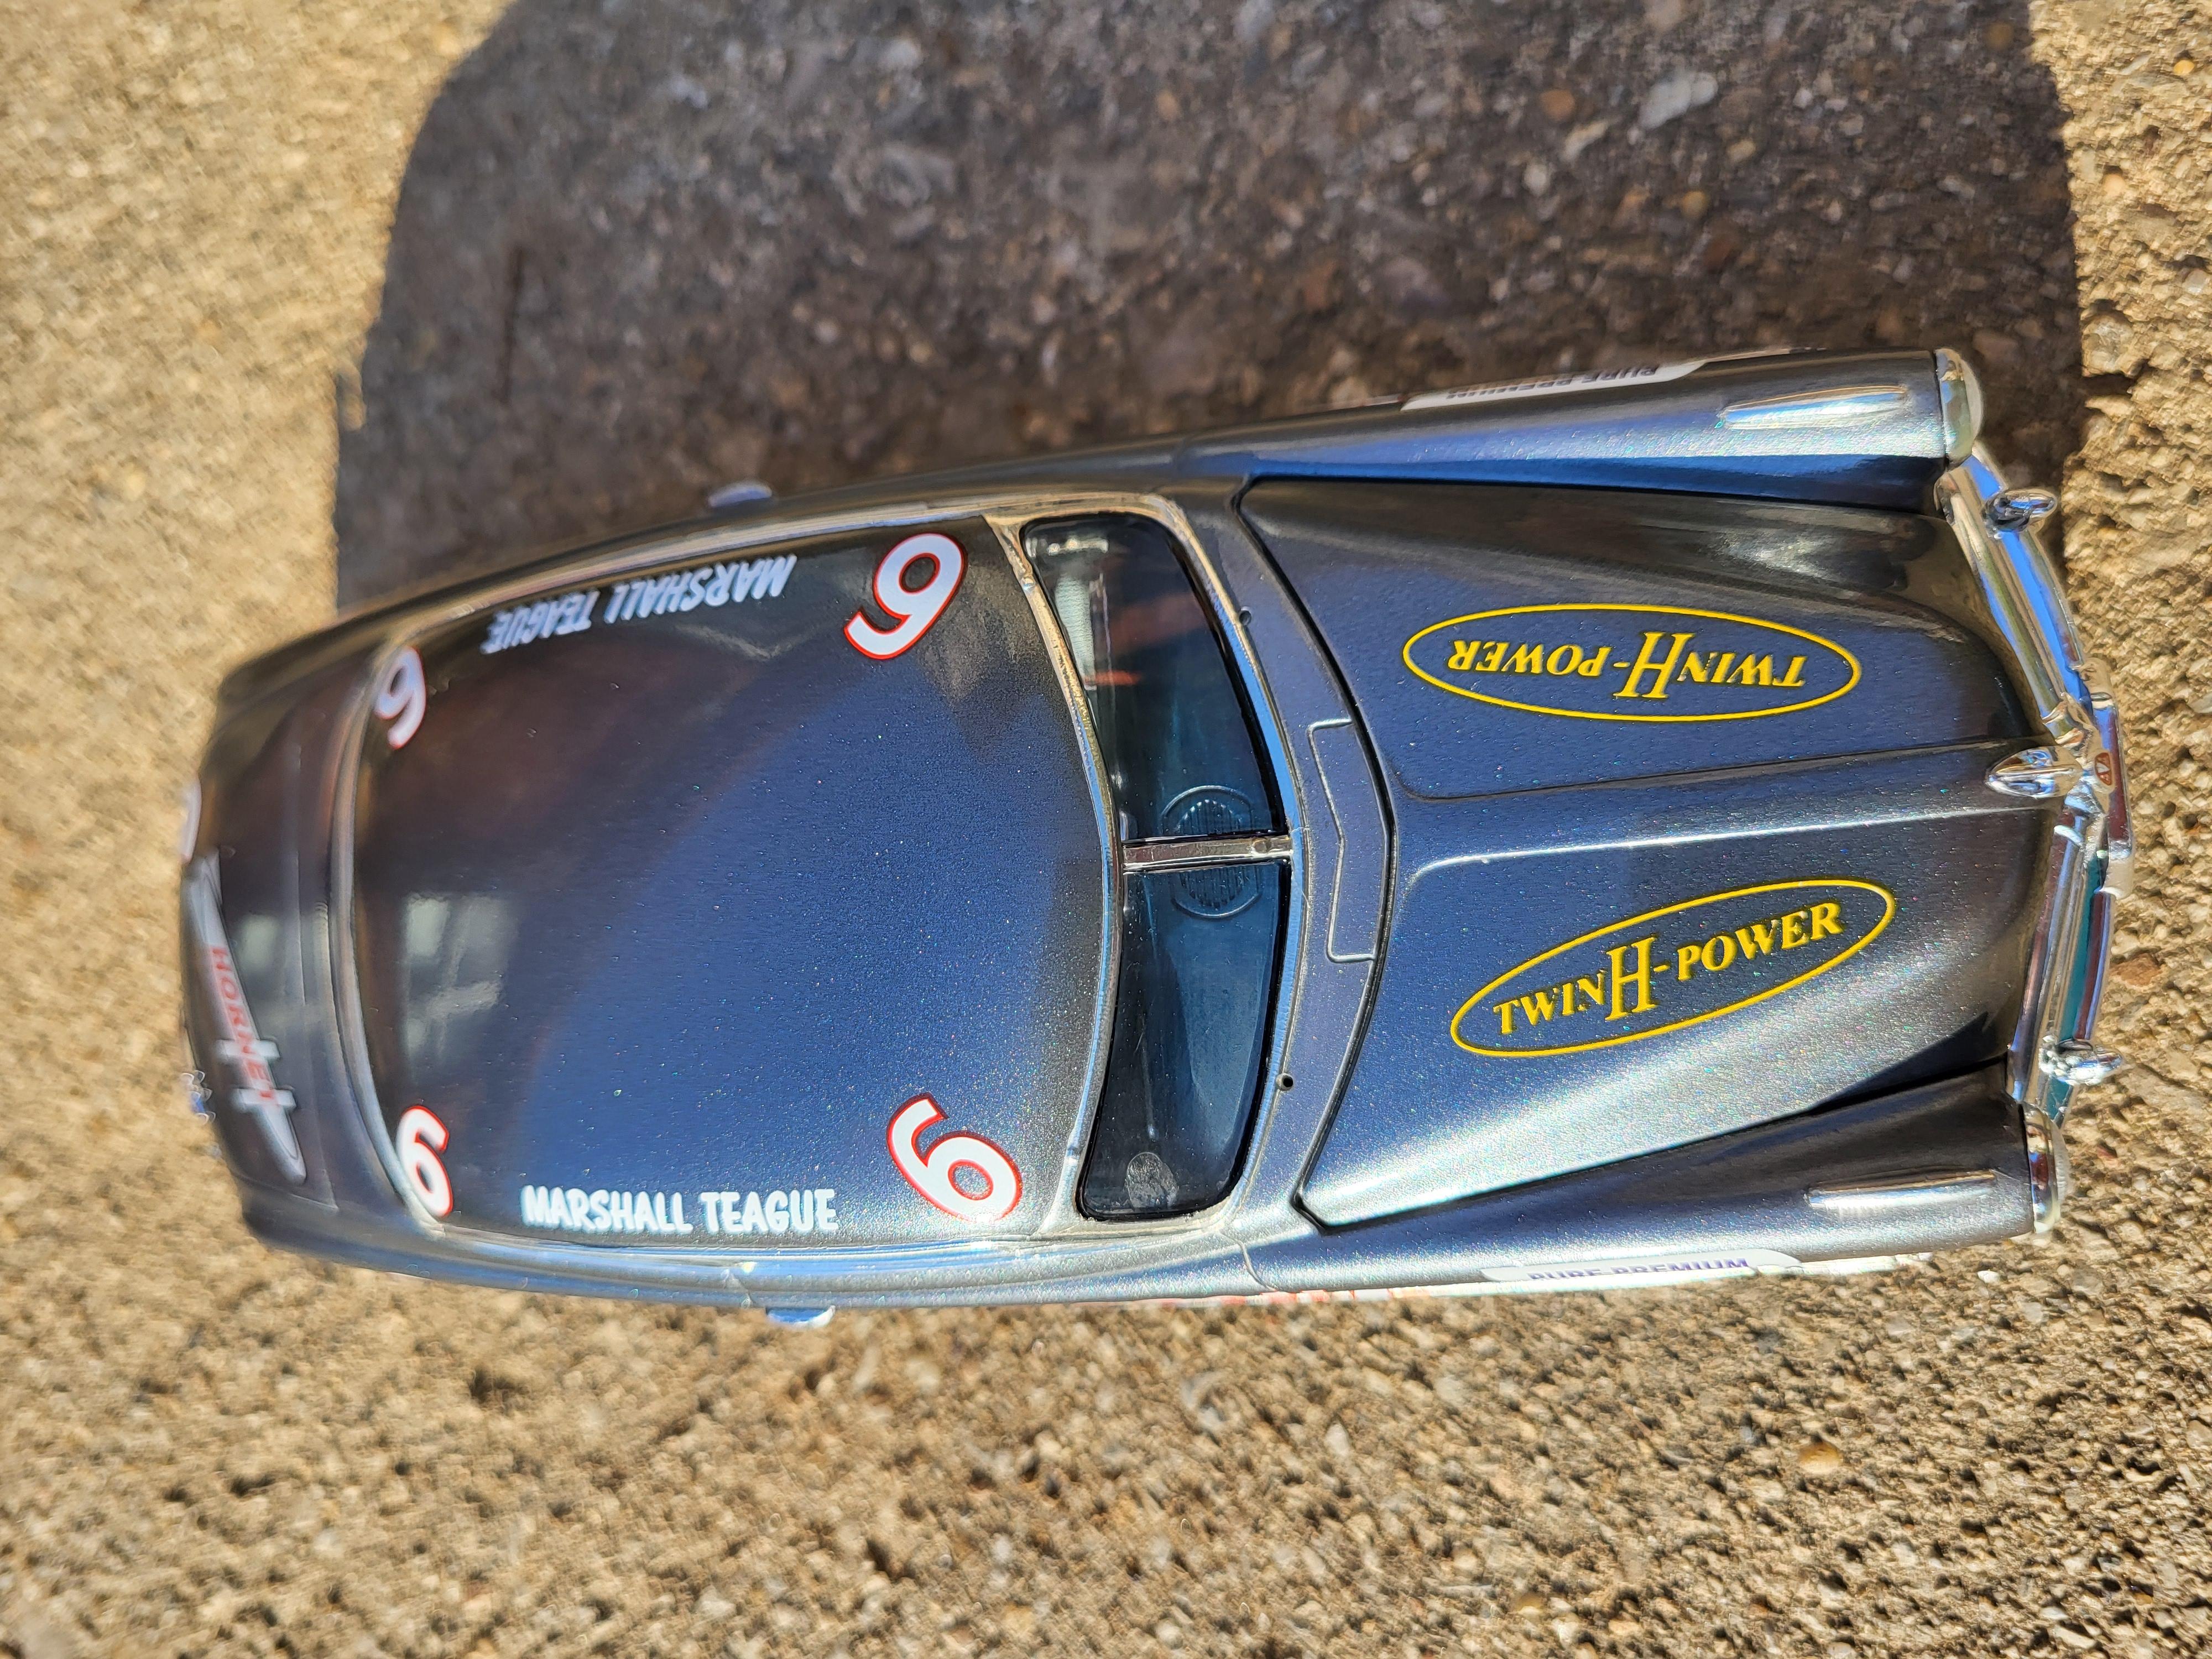
While digging through my stash, I found this one that was painted, bare-metaled and decaled 11 years ago and never got around to finishing. Moebius 1952 Marshall Teague Hudson Stock Car kit. Box stock. Painted with Testors Bright Platinum Metallic spray can and cleared. Had to redo some of the Bare-metal trim after storage. Had to touch uo some of the decals that didn't quite lay down on the body side trim and it flaked off. Cut the rear wheel skirts out. Another one that's not perfect but glad to have another completed.
-
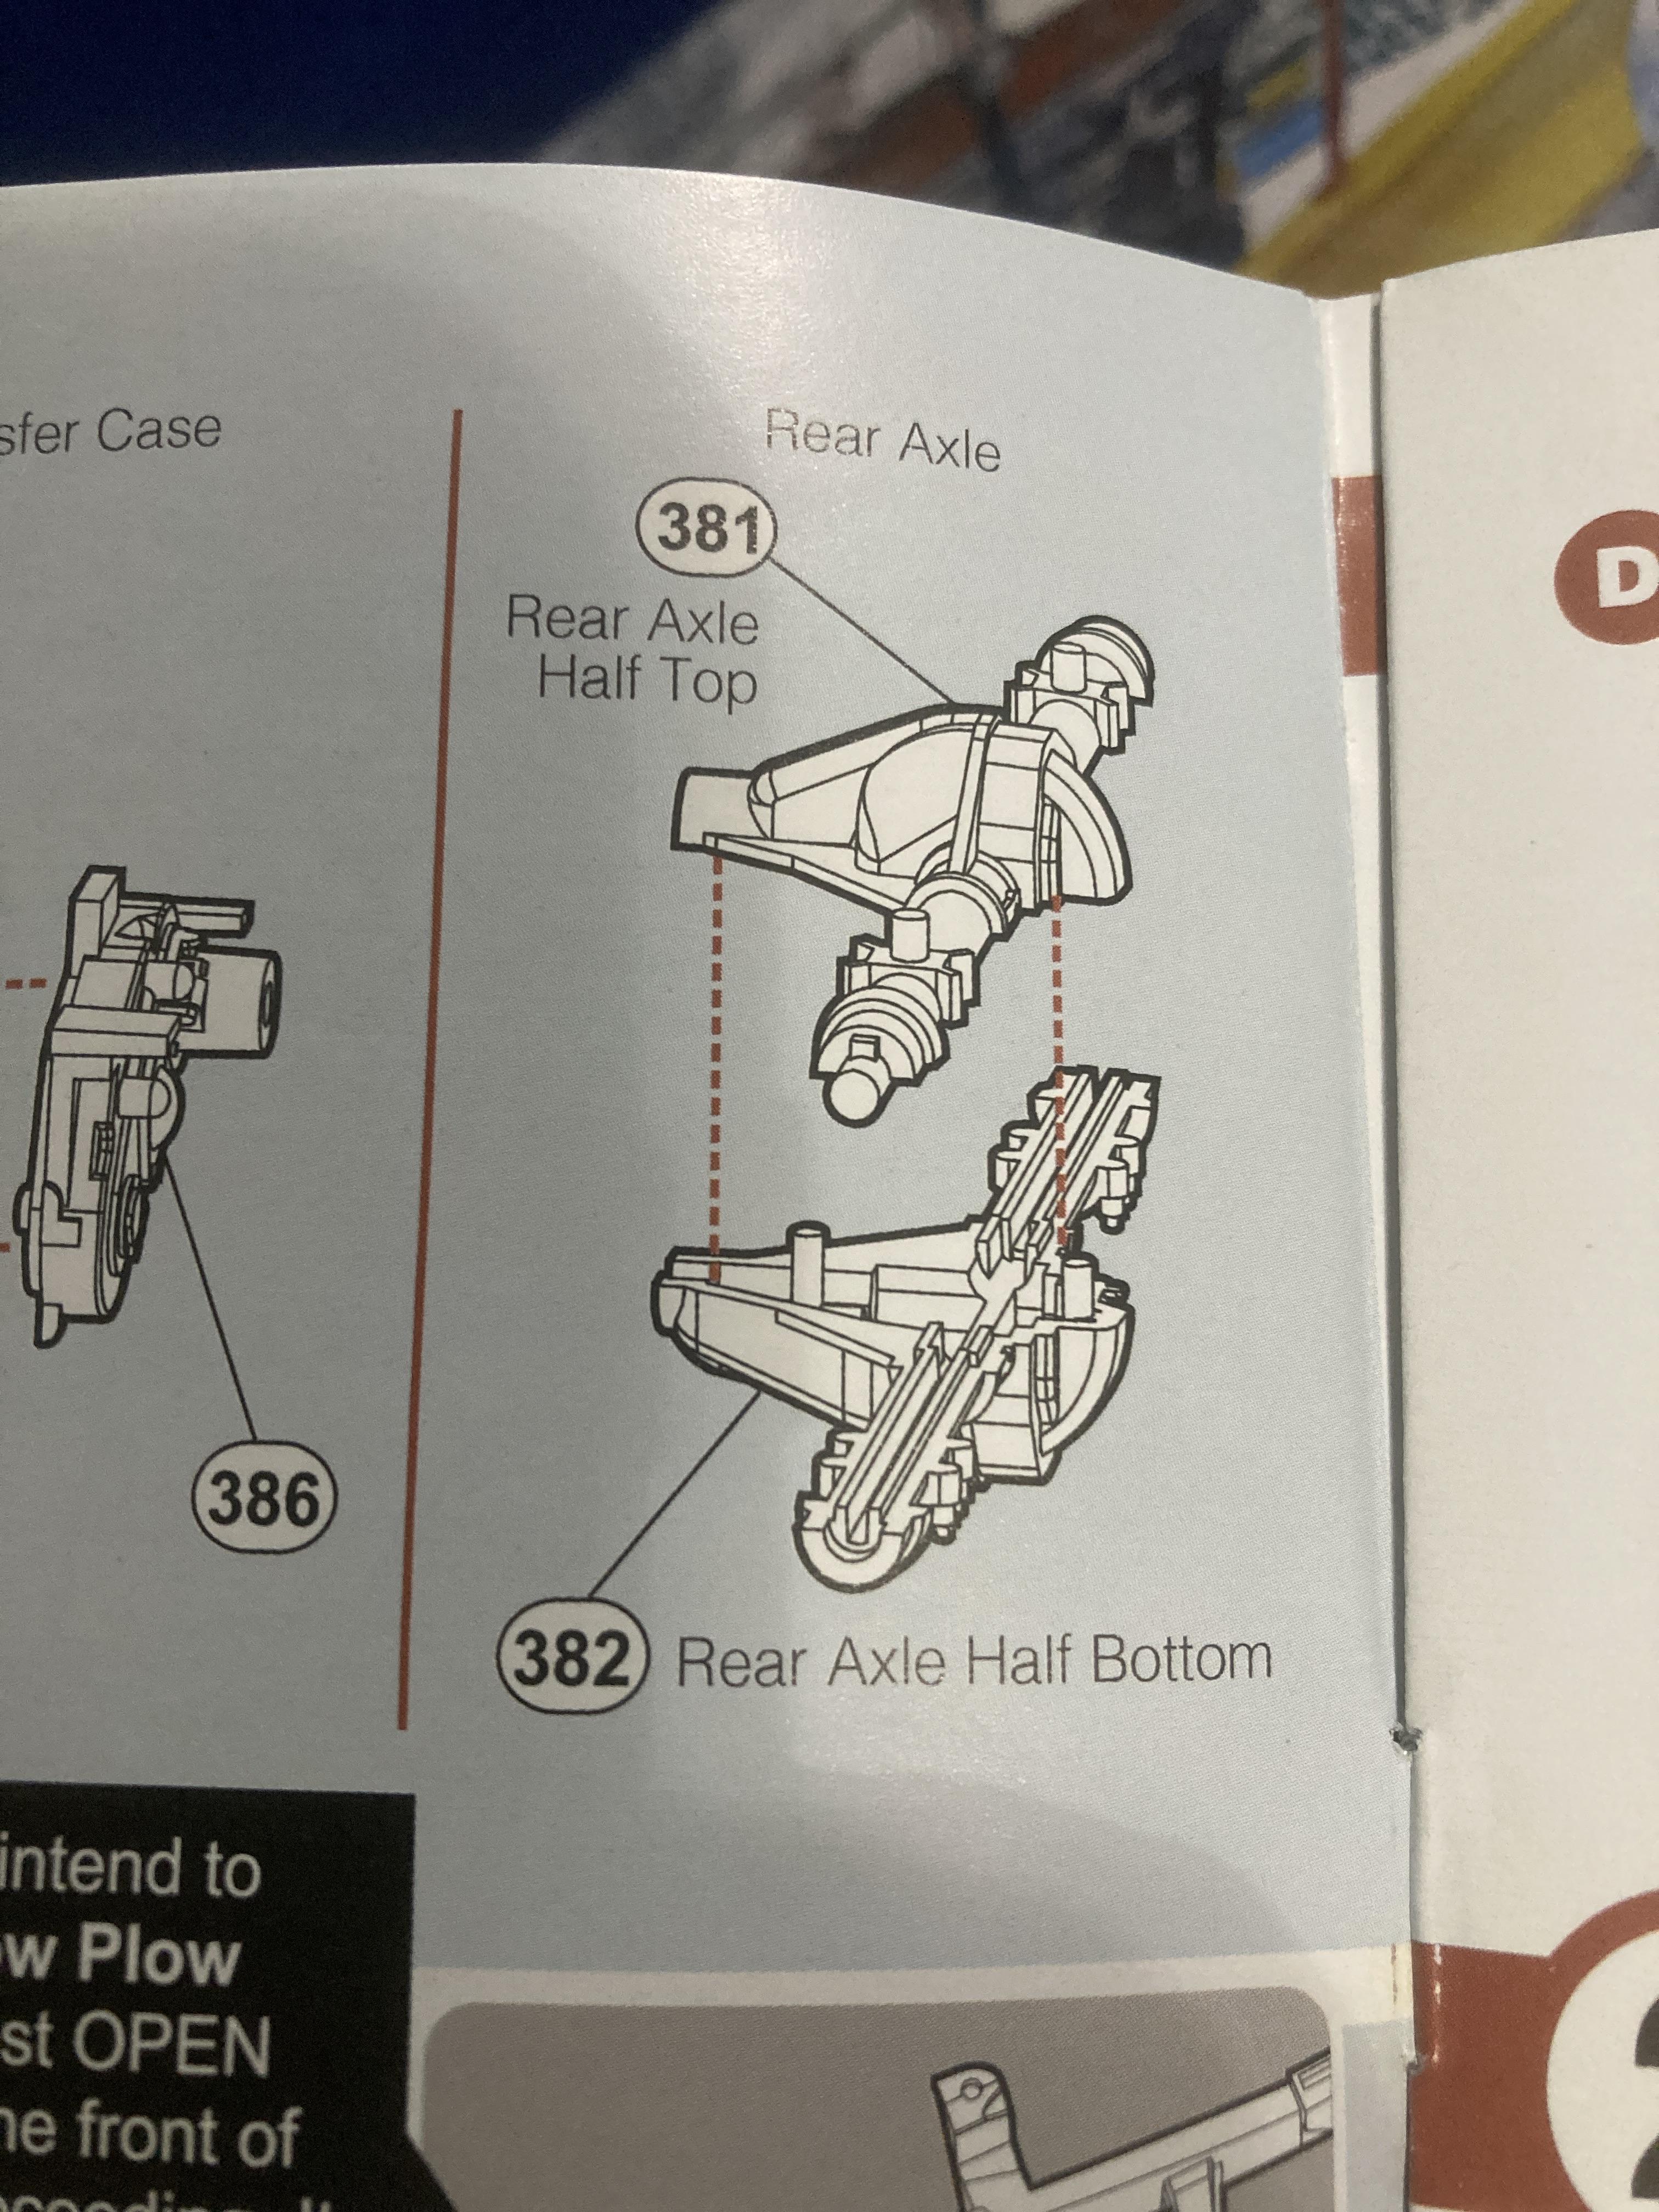
Hey All, I’m in need of the rear axle from the Moebius F-250 kits. In those kits it’s listed as part numbers 381 and 382. PM me and maybe we can work out a trade. Thanks
-
Purchased this kit with the intention for it to be built in my favorite style I have done on many builds. Over the years many people have questioned how I achieve my black paint jobs, so in this thread I will do my best to explain the process I use. This is the paint that is always used. But first things first with this type of build, the wheels. After that its usually get the body out of the box and mock up trying to figure out where I want the ride height. Might not be practical or even possible in the real world but Im okay with that, as I like my builds low as possible and hope it wont involve too much work achieving a super low stance. Now on to the start of preparing the body. Wash the body. I place about 1/2 a teaspoon of dishwashing liquid into my ultra sonic cleaner and put the body in for a 5 minute cycle. Could soak and wash in a container or sink with a toothbrush or small scrubbing brush. Either way give it a good clean and rinse with water after. I use a chamois cloth to wipe away excess water and airbrush to blow dry the body. Then set it aside while preparing the surfacer. Check coat using Surfacer. Instead of using spray can primer, I prefer to use this. And here is a quick video I found to show the ratio and technique for pre thinning. Using an Iwata HP-TH .5, with the trigger set at 2 turns and the psi @18-20, I apply 1 wet but light coat. Preferably a .3 to .5 needle size is best for applying primers and surfacers. This is what I call the check coat, I find using black helps to see all the mould lines and others areas and spots that usually need to be sorted and fixed. And once you start sanding and scribing you can see what areas you have worked on. I learnt this technique from Japanese and Korean model car and Gundam builders. Another purpose for airbrushing a check coat of the 1500 surfacer is so it can be easily removed with the MLT which will be shown further along in the prep process. Set aside overnight to dry. How can I not resist another wheel mock. Back to tomorrow with the next part of the prep work.
-
Completed this awhile ago, just never got around to posting it here. What an excellent kit, thoroughly enjoyed building it, assembly was straight forward with no issue's. Not really into Gassers. But I really like how this build turned out, especially the SMS paint. Thanks to Tim Boyd for his preview and review of this kit as thats what convinced me to invest in a couple kits. Pretty much oob, I just lowered the stance, added plug wires. Wip pics can be found here
-
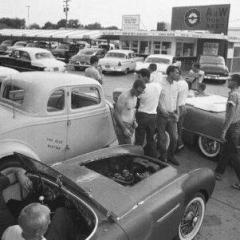
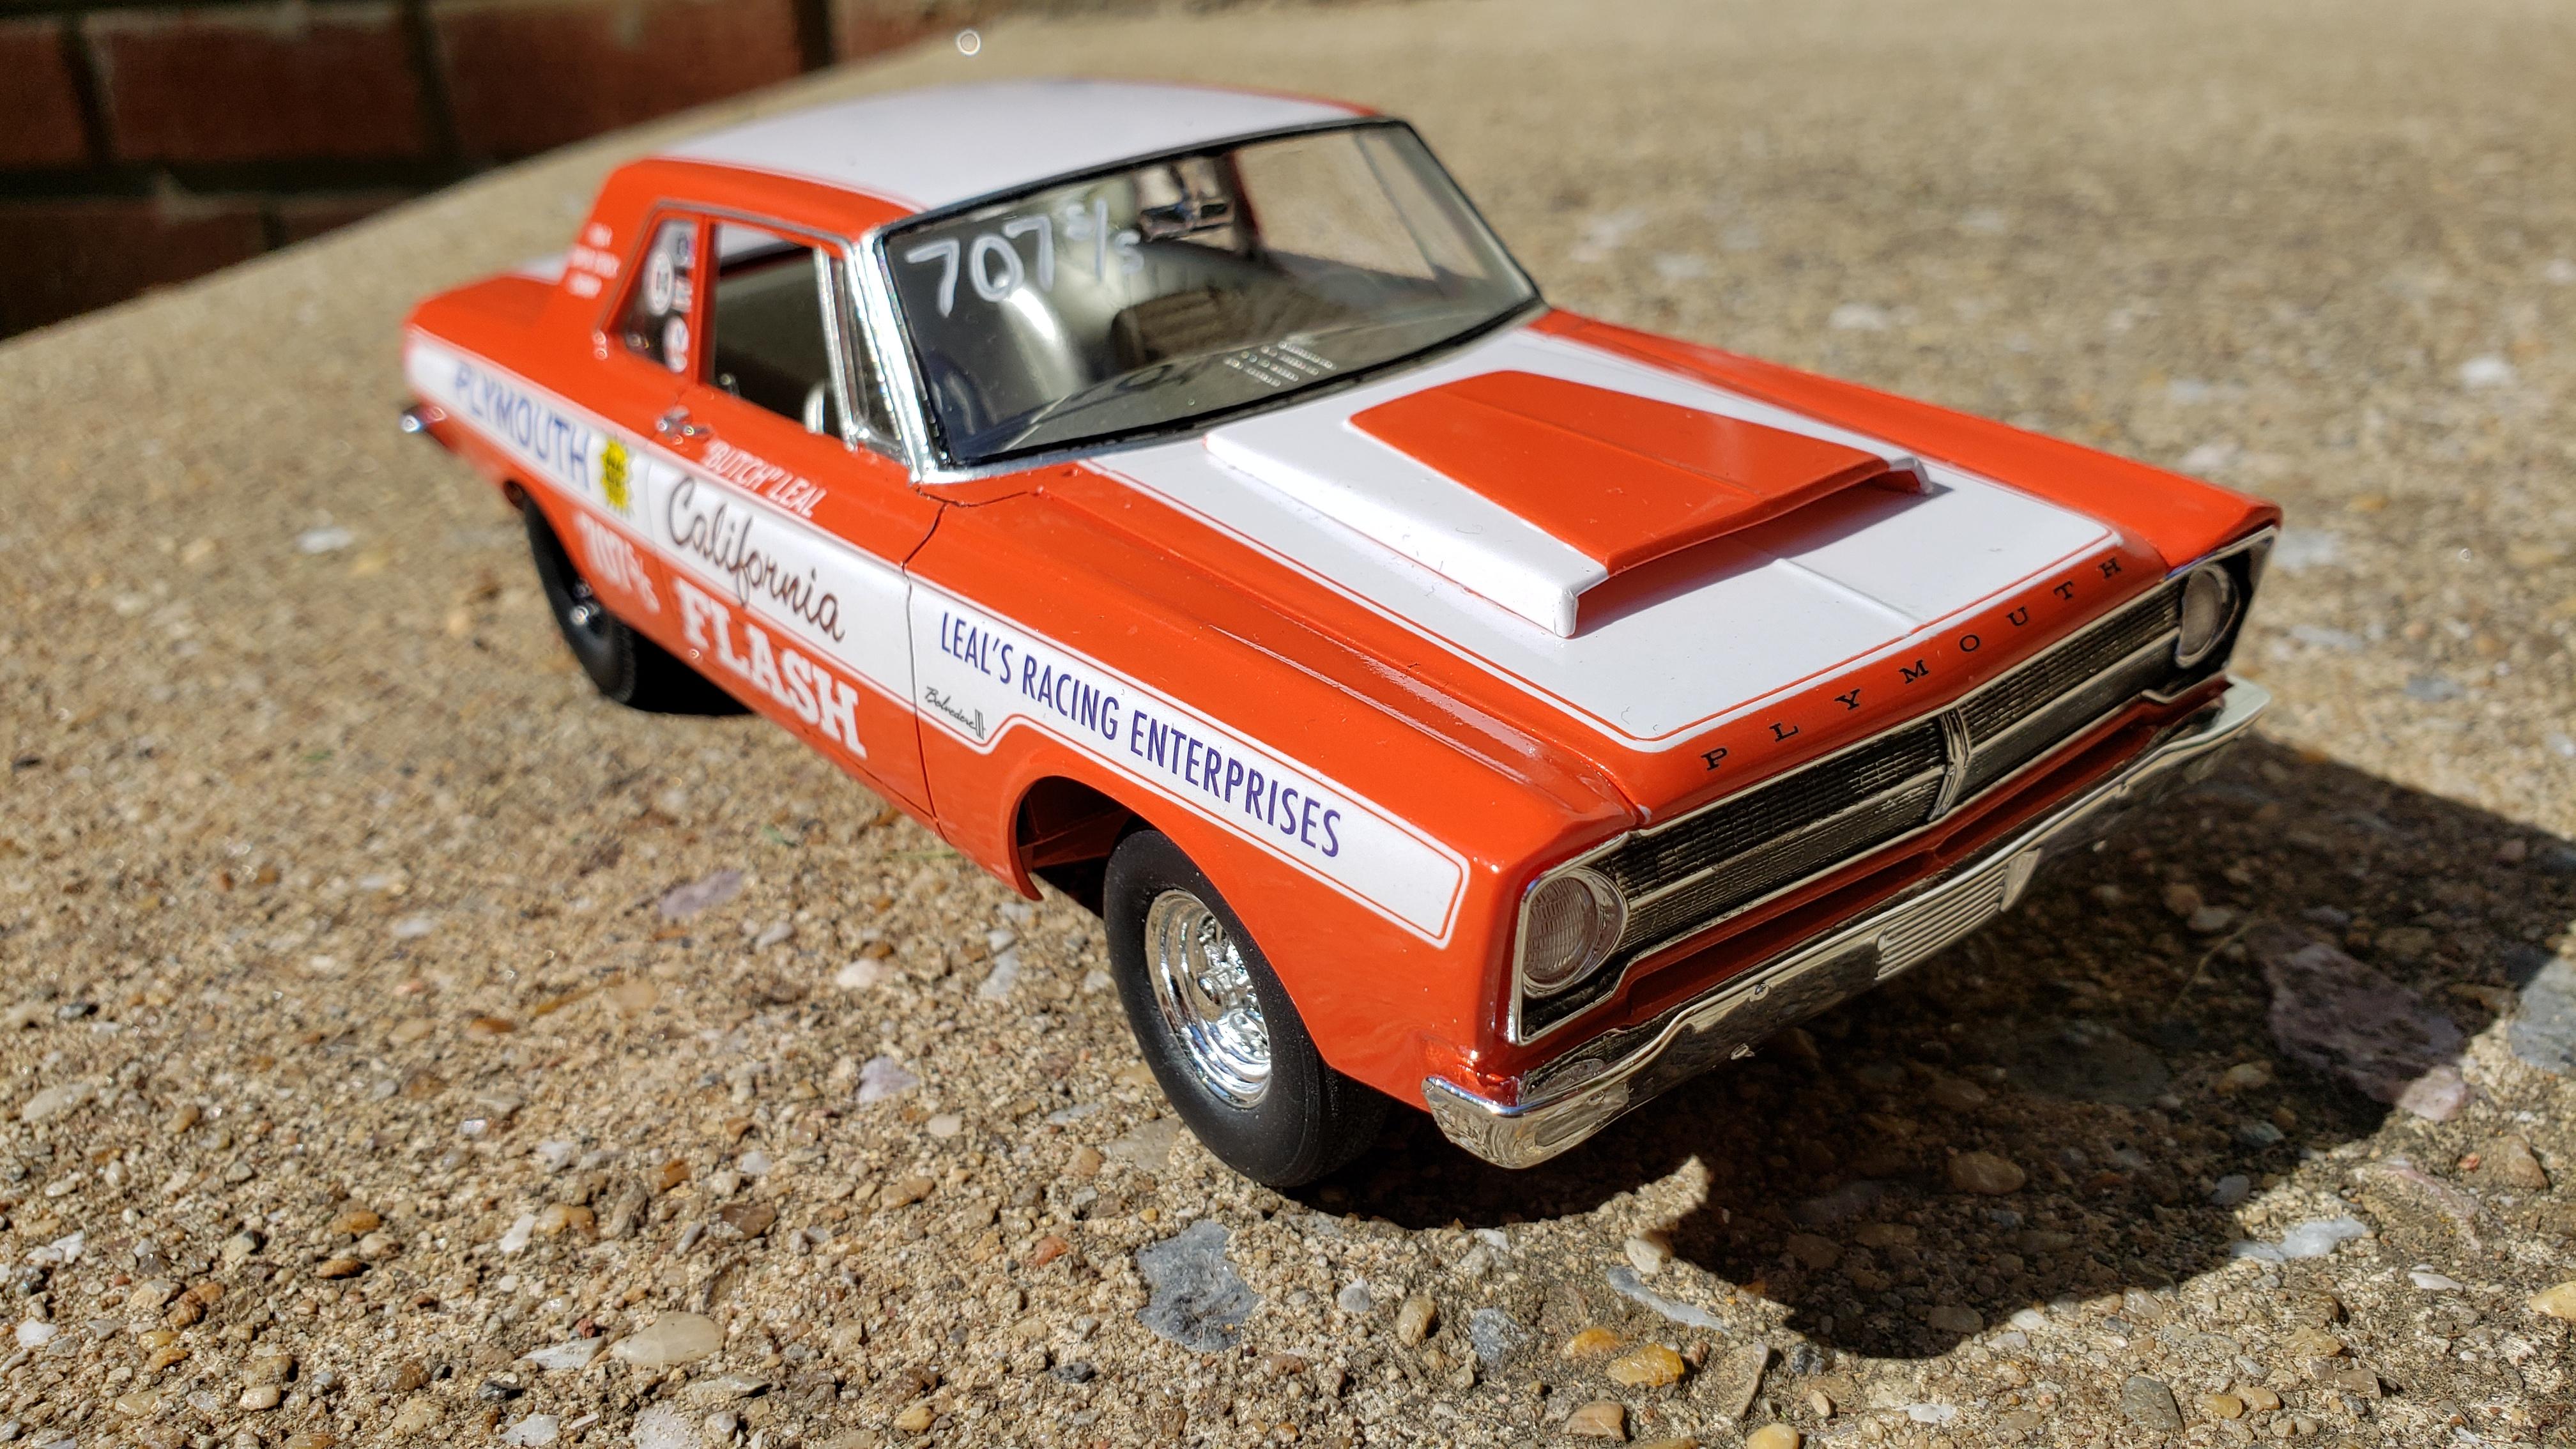
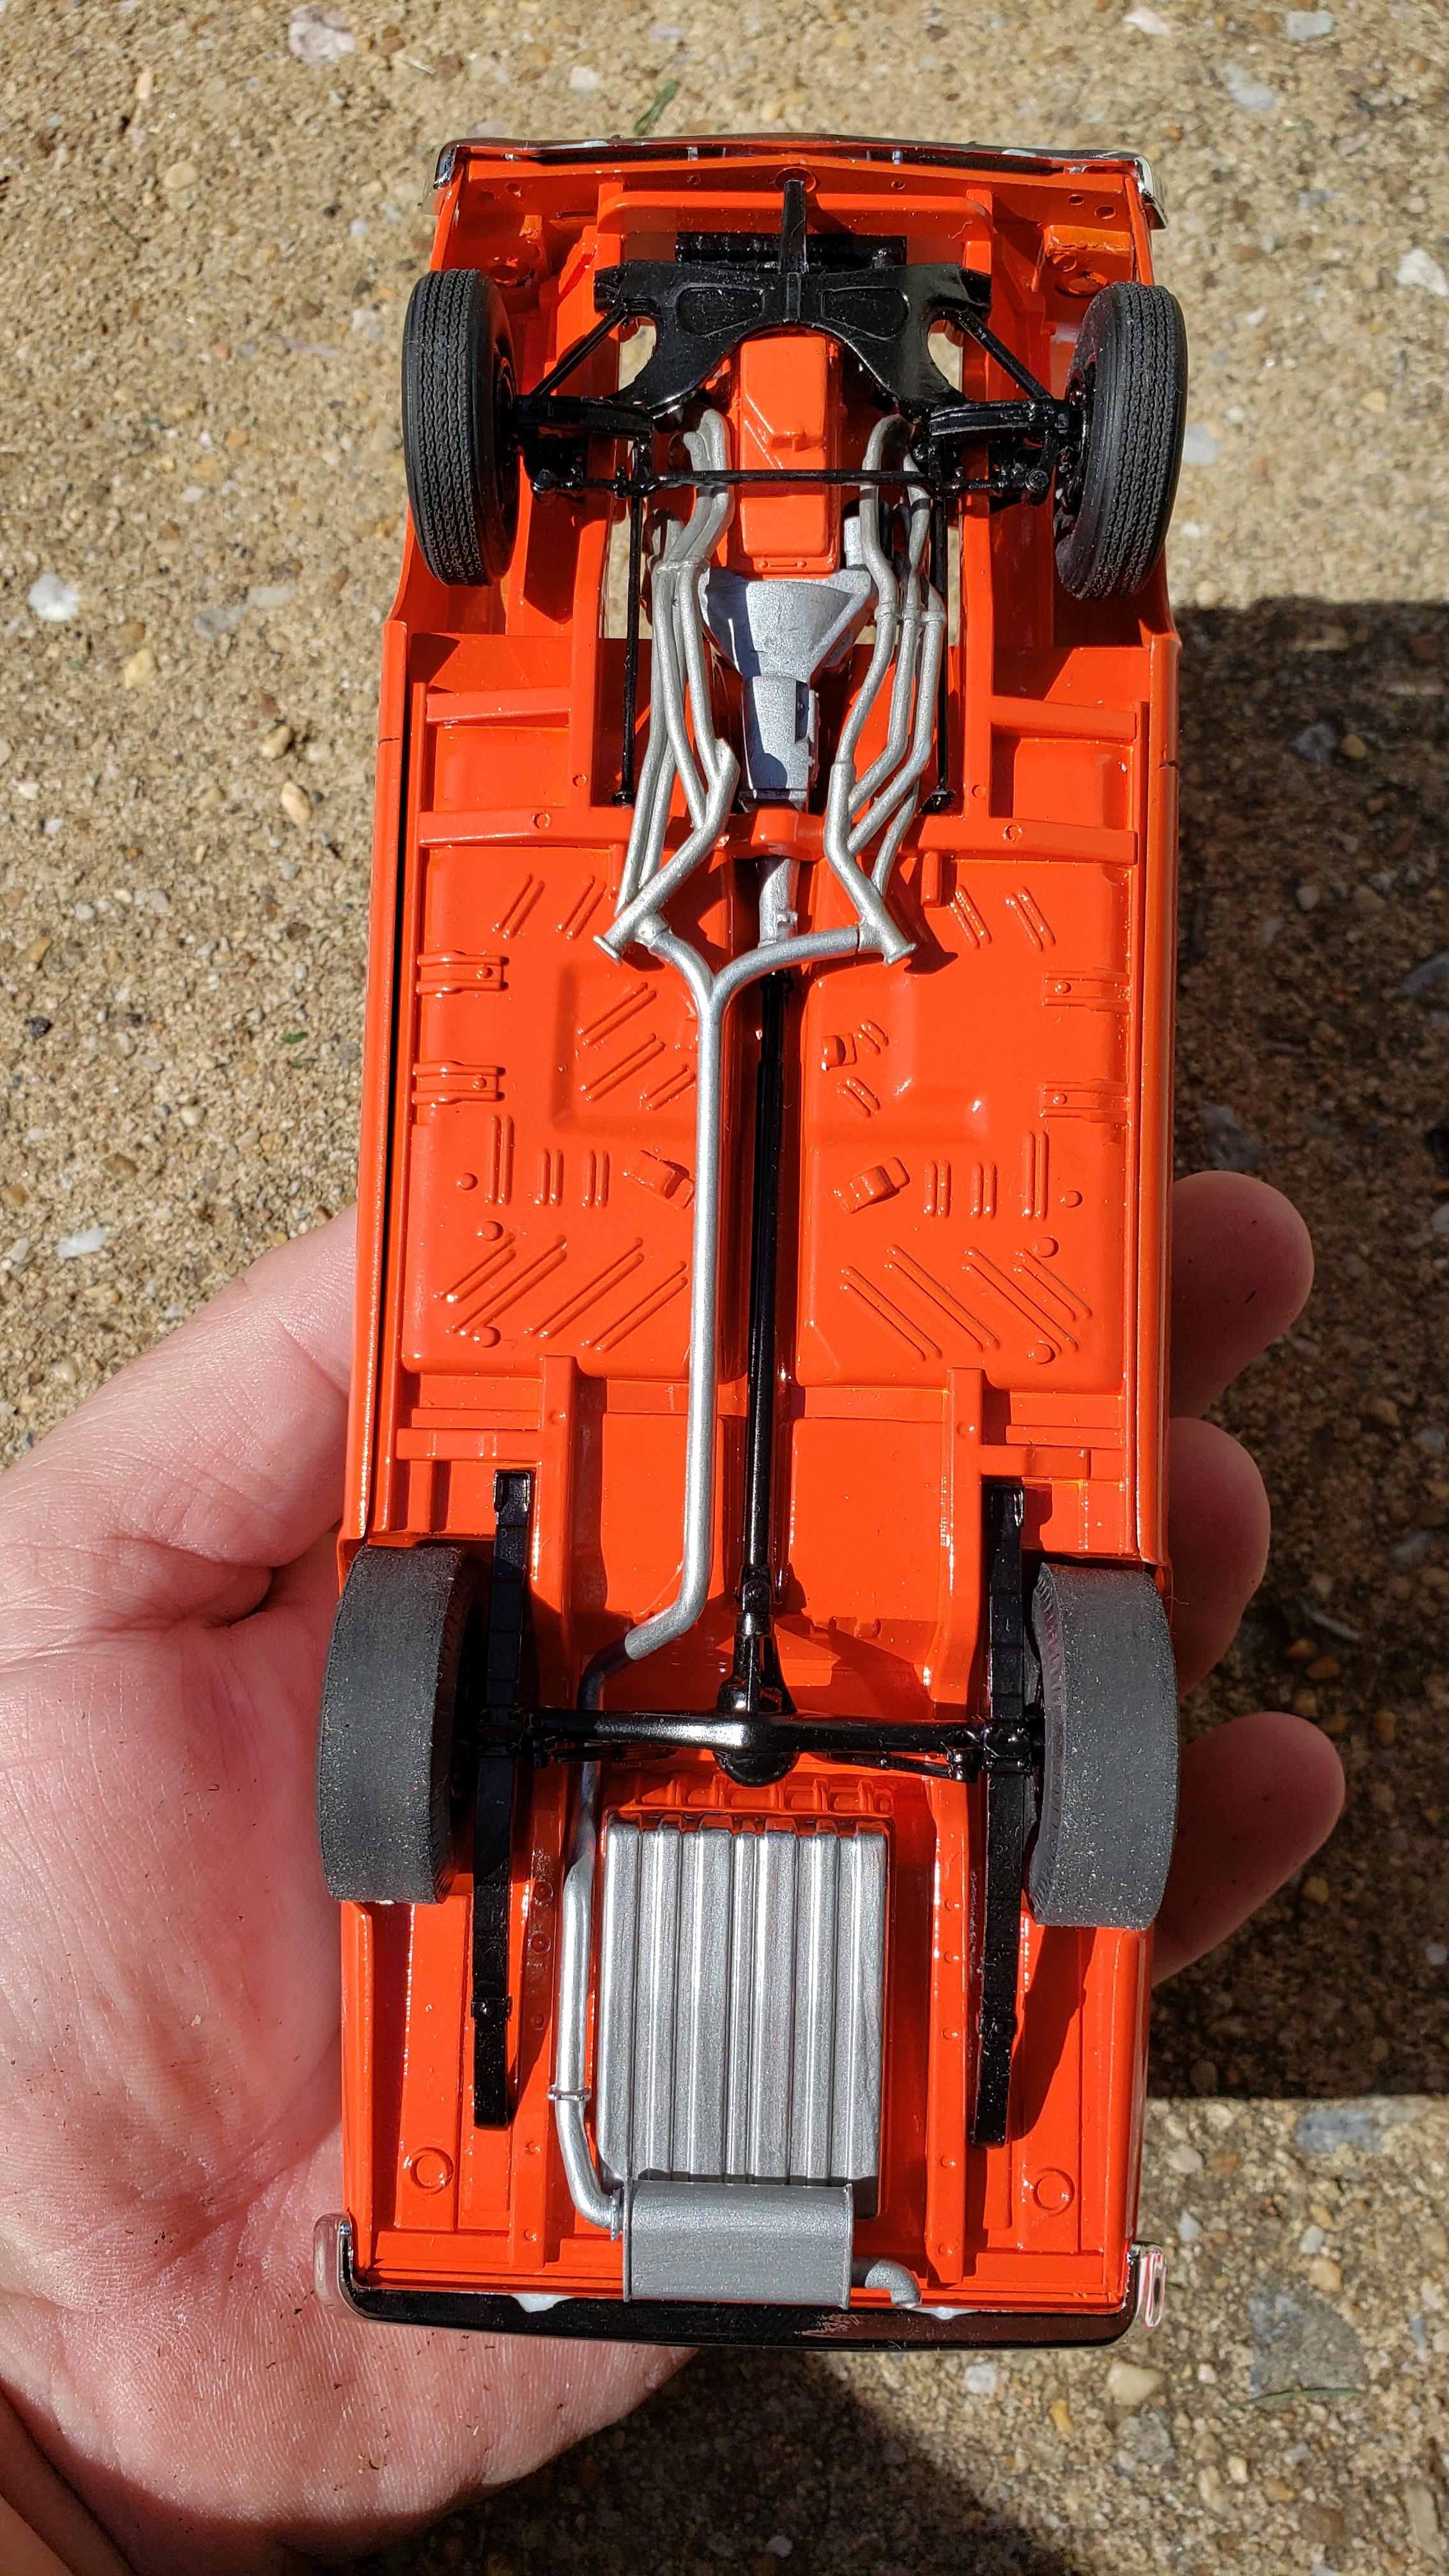
From Wikipedia: Weatherly began racing cars in 1950. "Little Joe" won the first modified event that he entered. He won 49 of the 83 car races that he entered that season. In 1952 he won the NASCAR Modified National crown, and he again won 49 of 83 car races that he entered. Weatherly won 52 more races in 1953, and won the Modified National crown again. Weatherly had partial interest in what would later be called Richmond International Raceway from 1955 to 1956. In 1956 he moved into the NASCAR Grand National series (now Monster Energy Cup.) He drove a factory-sponsored Ford car[2] for Pete DePaolo Engineering. For the next two seasons, Weatherly drove for Holman Moody.[2] In 1959, Weatherly recorded six top-five finishes and ten top-tens. He would narrowly lose the 1959 Hickory 250 to Junior Johnson; being outlapped twice before the race was concluded. Weatherly won NASCAR's Most Popular Driver Award in 1961. He won two consecutive championships in 1962 and 1963 for Bud Moore Engineering. Moore did not have enough resources to run the full season, so Weatherly frequently "bummed a ride". Thanks to tips culled from here, I fitted the glass ahead of time. I should have spent more time on the hood and grill however. I'm pretty pleased with how it came out, Moebius kits are really fun and well detailed. Comments welcome, thanks for looking!
-
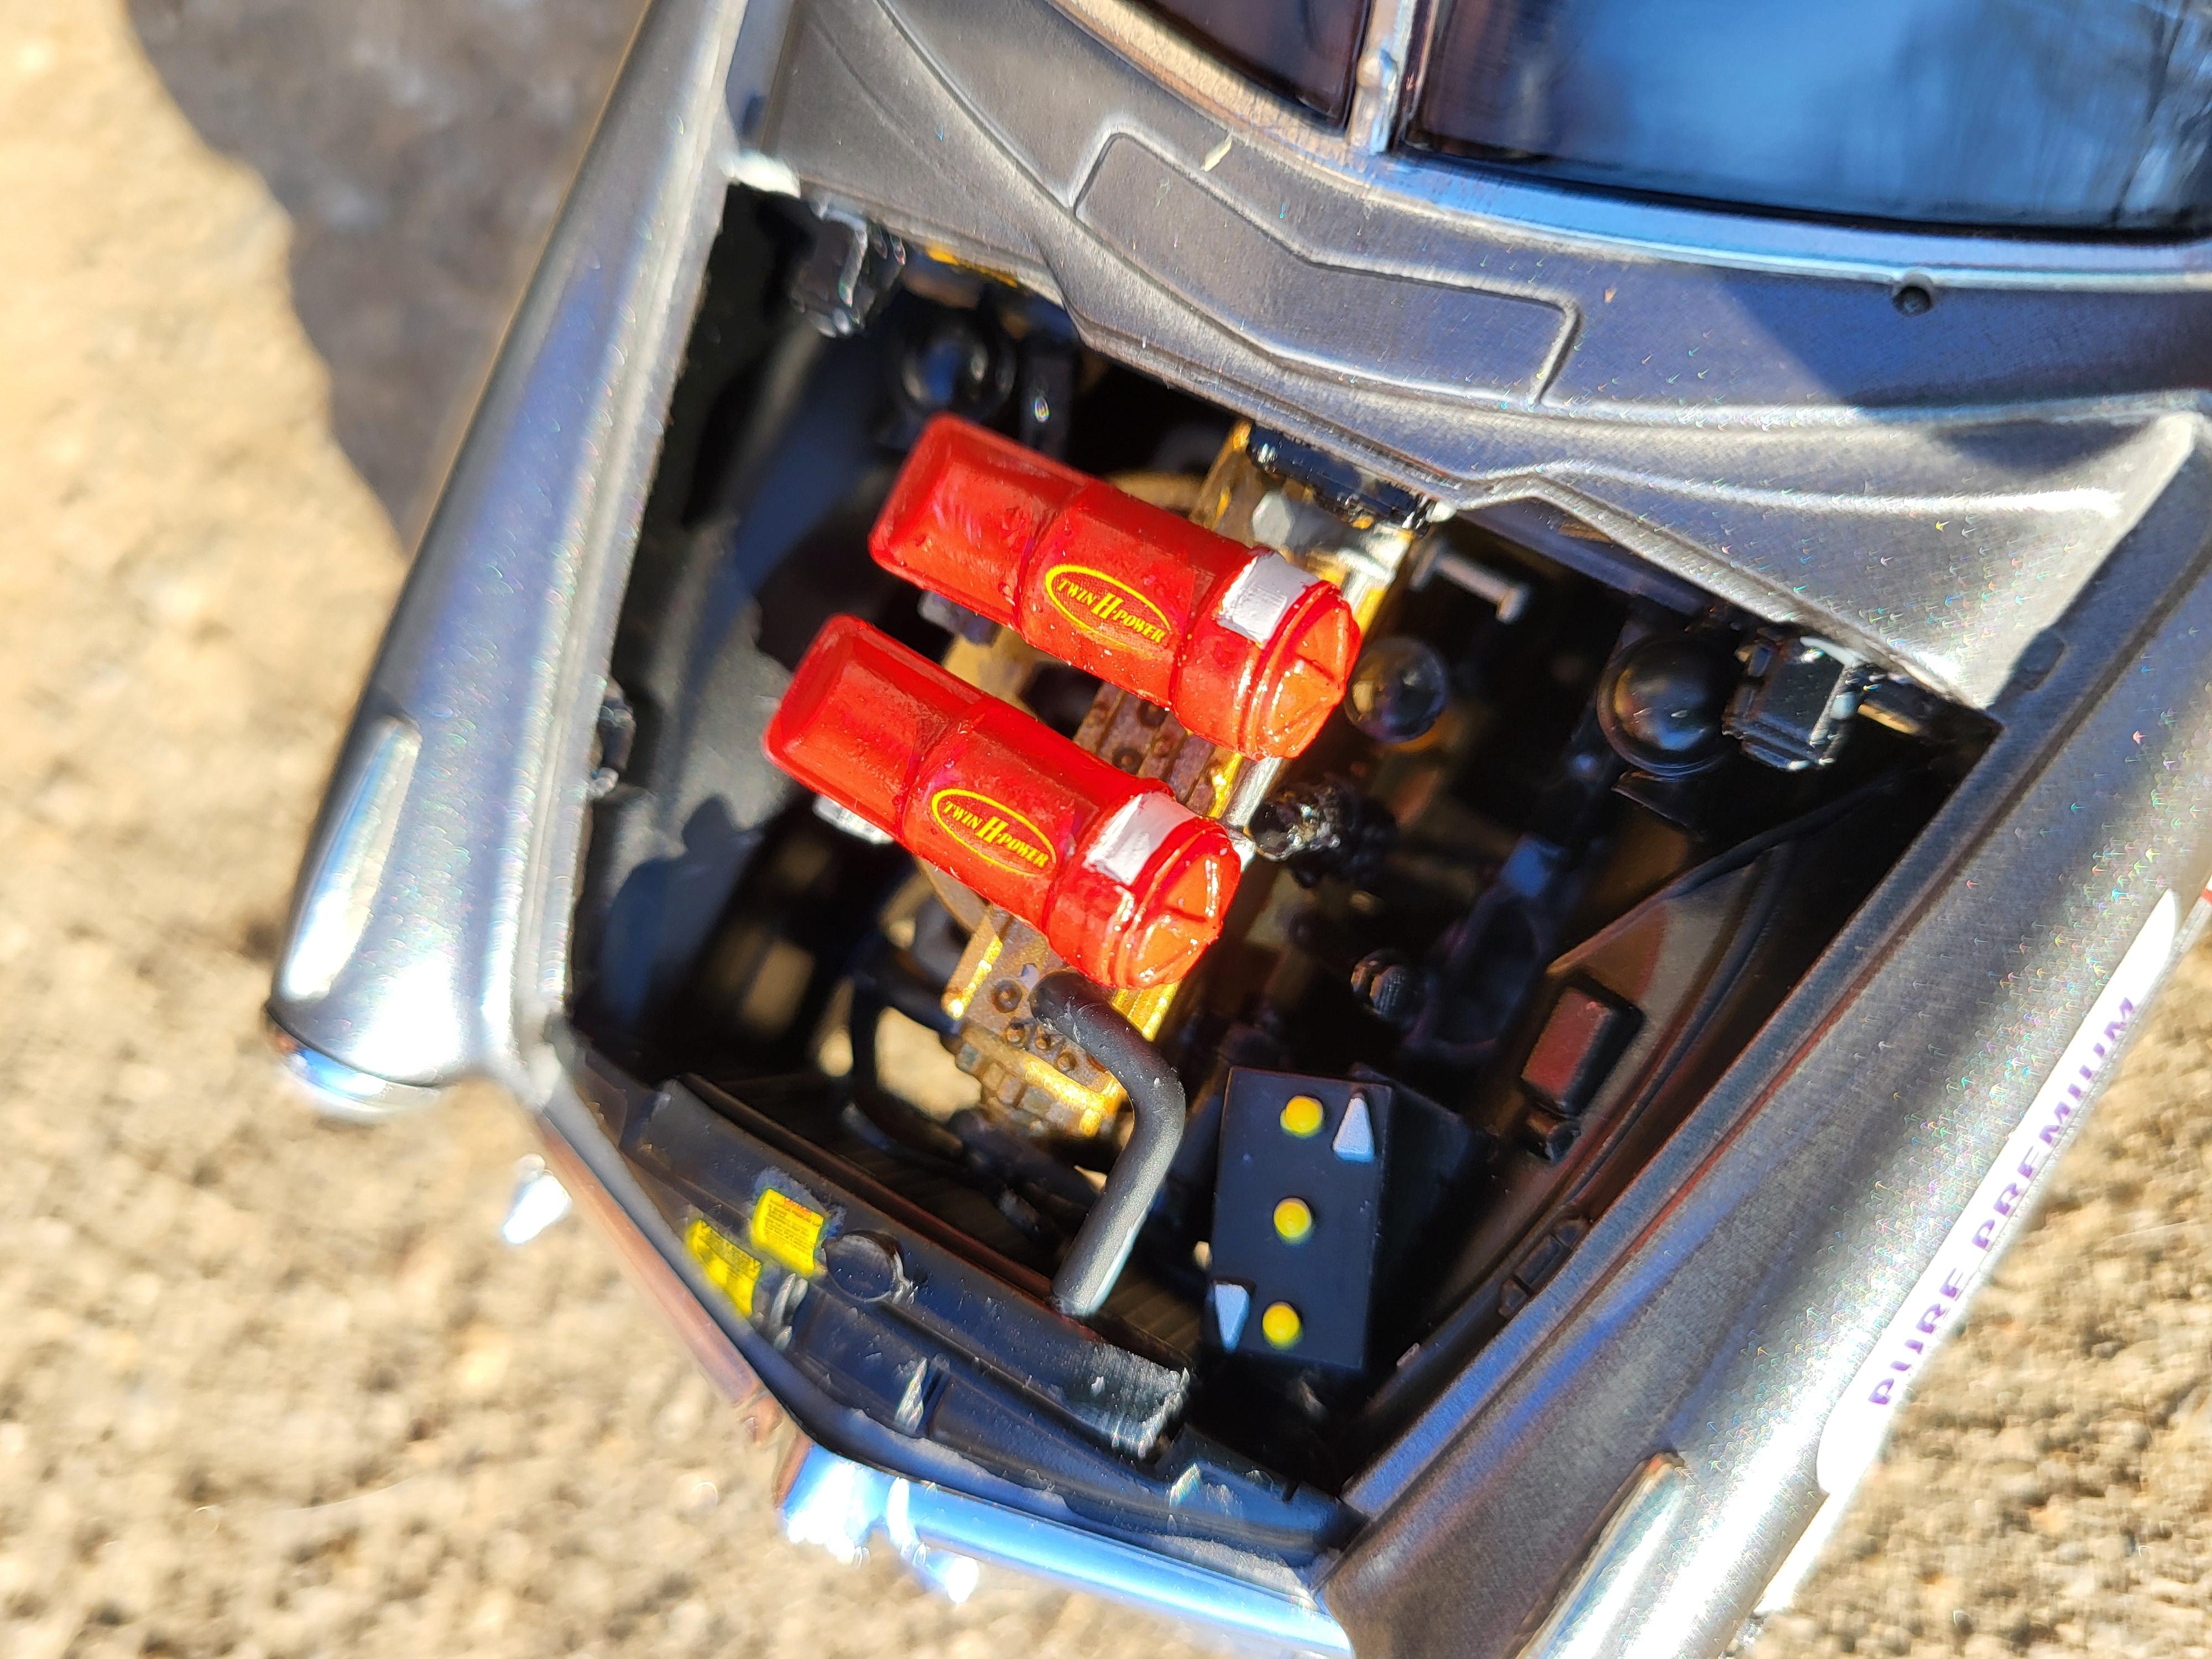
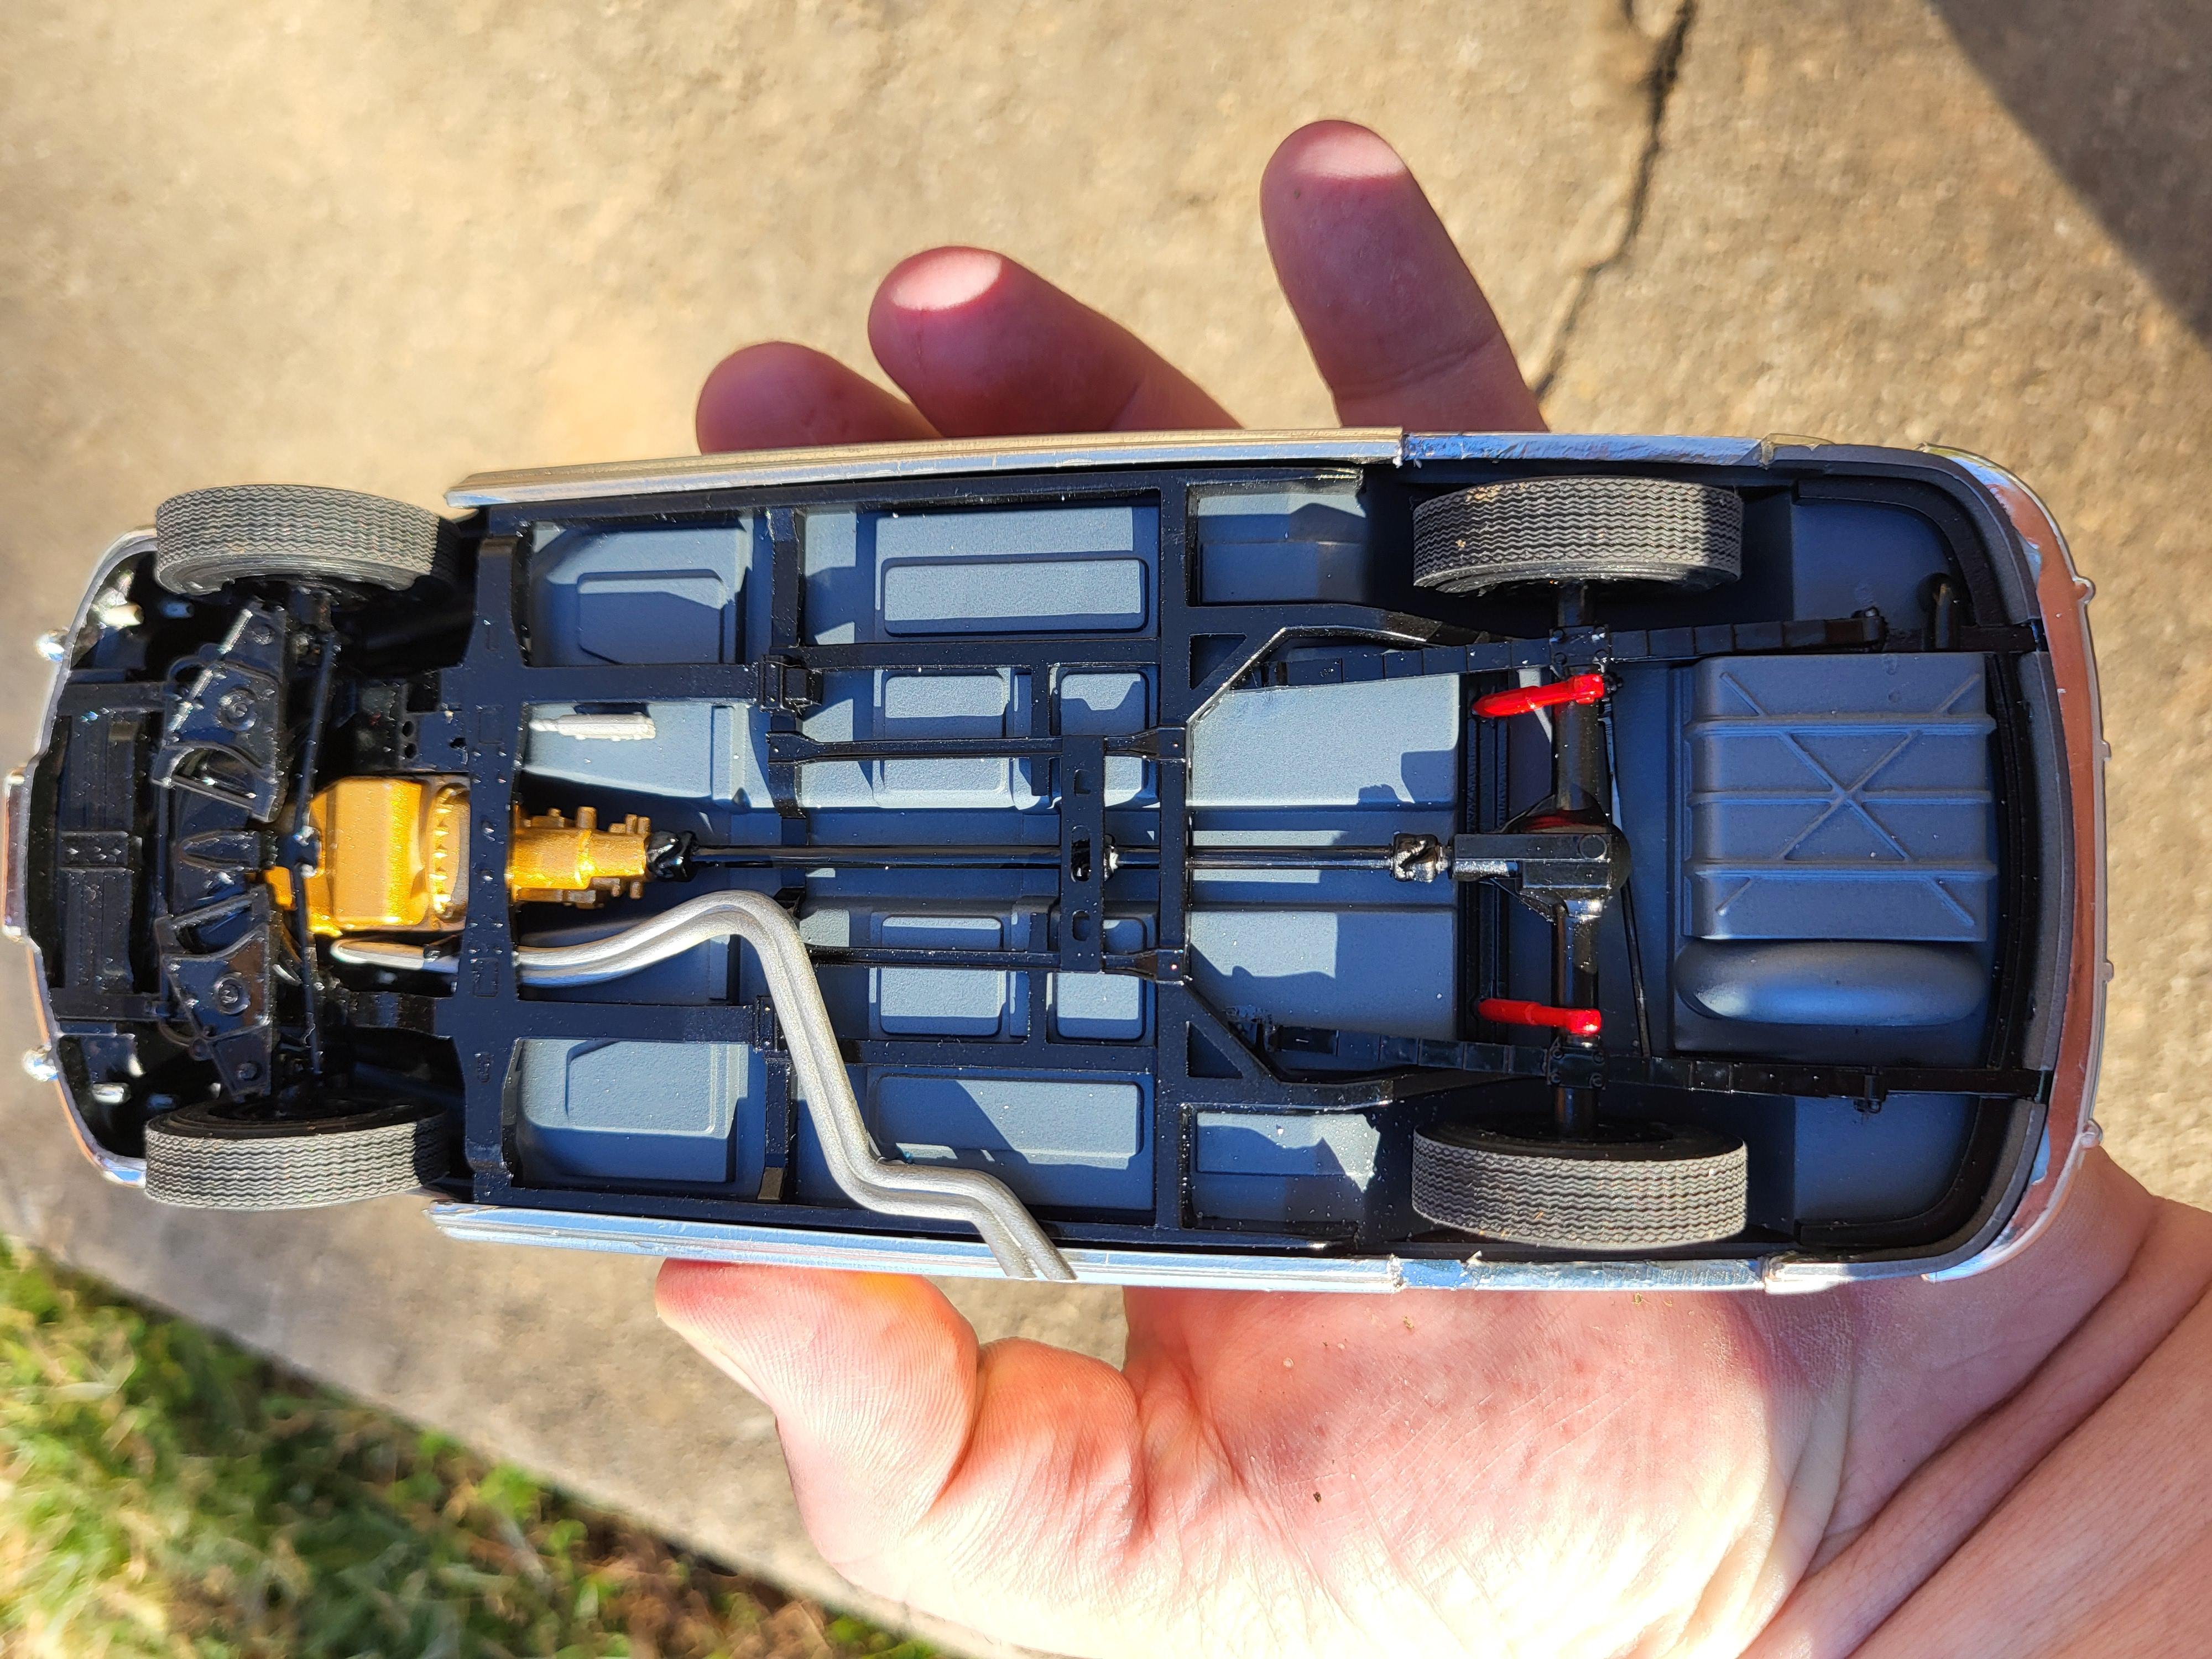
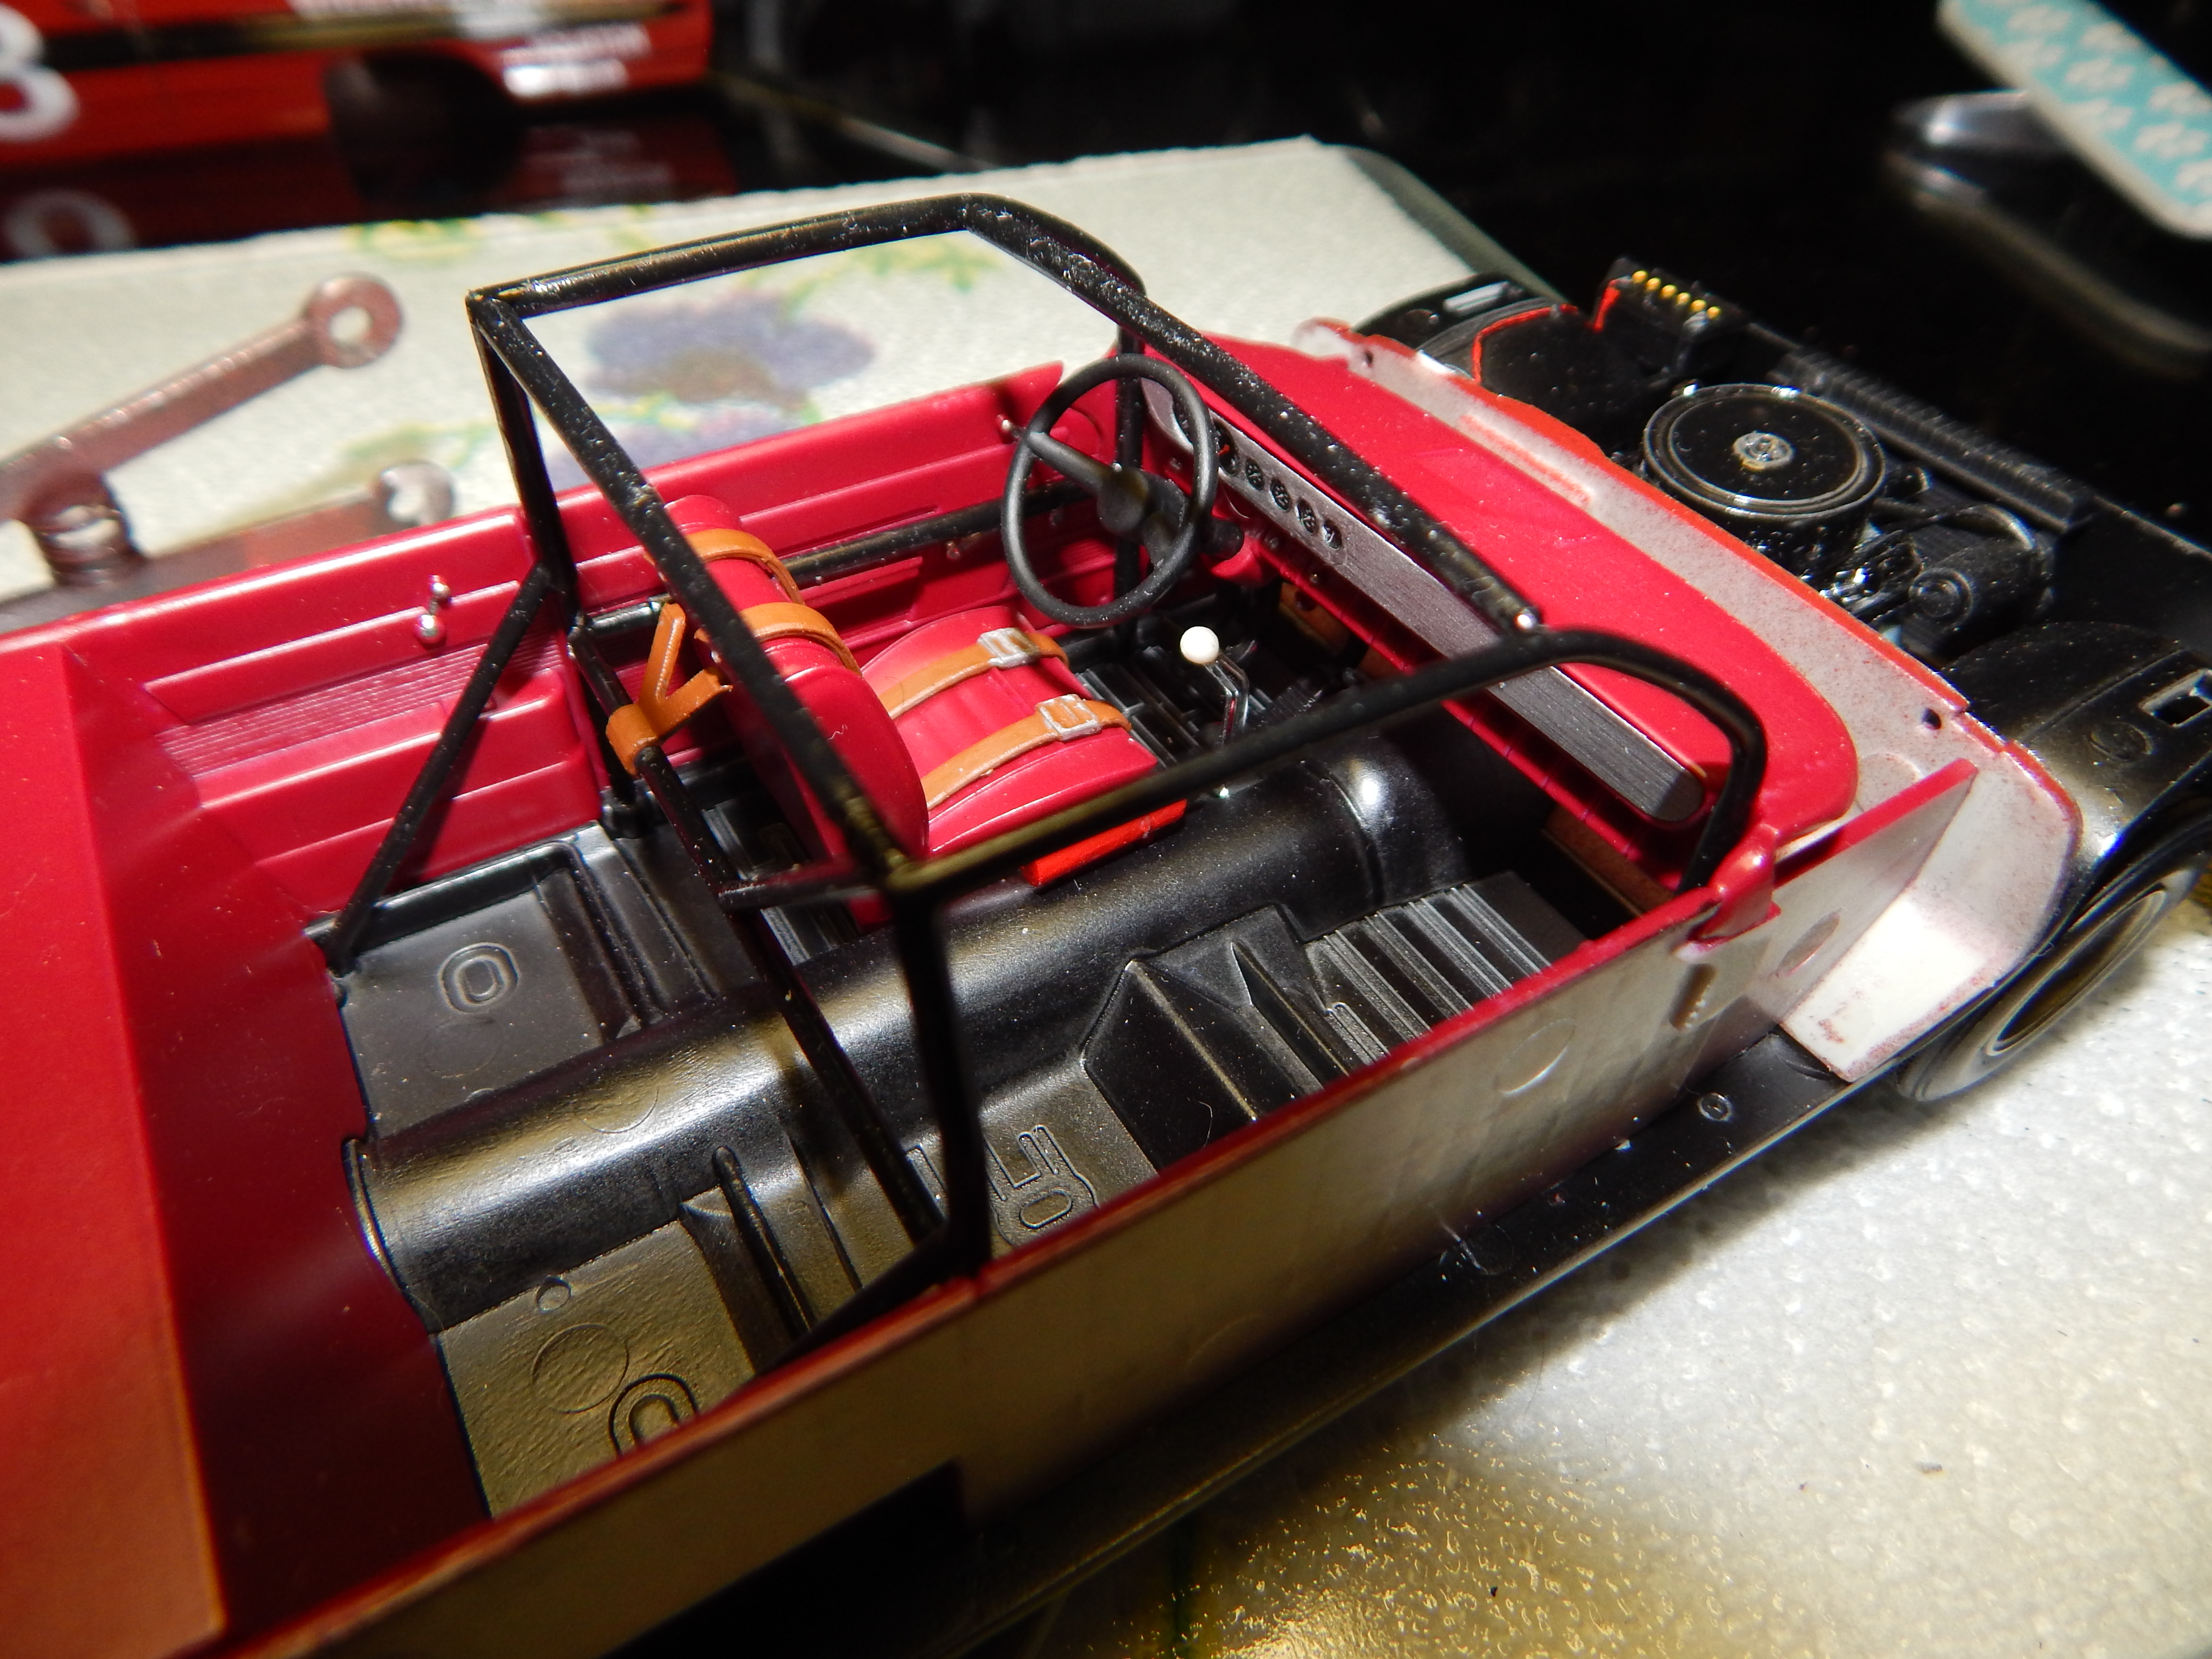
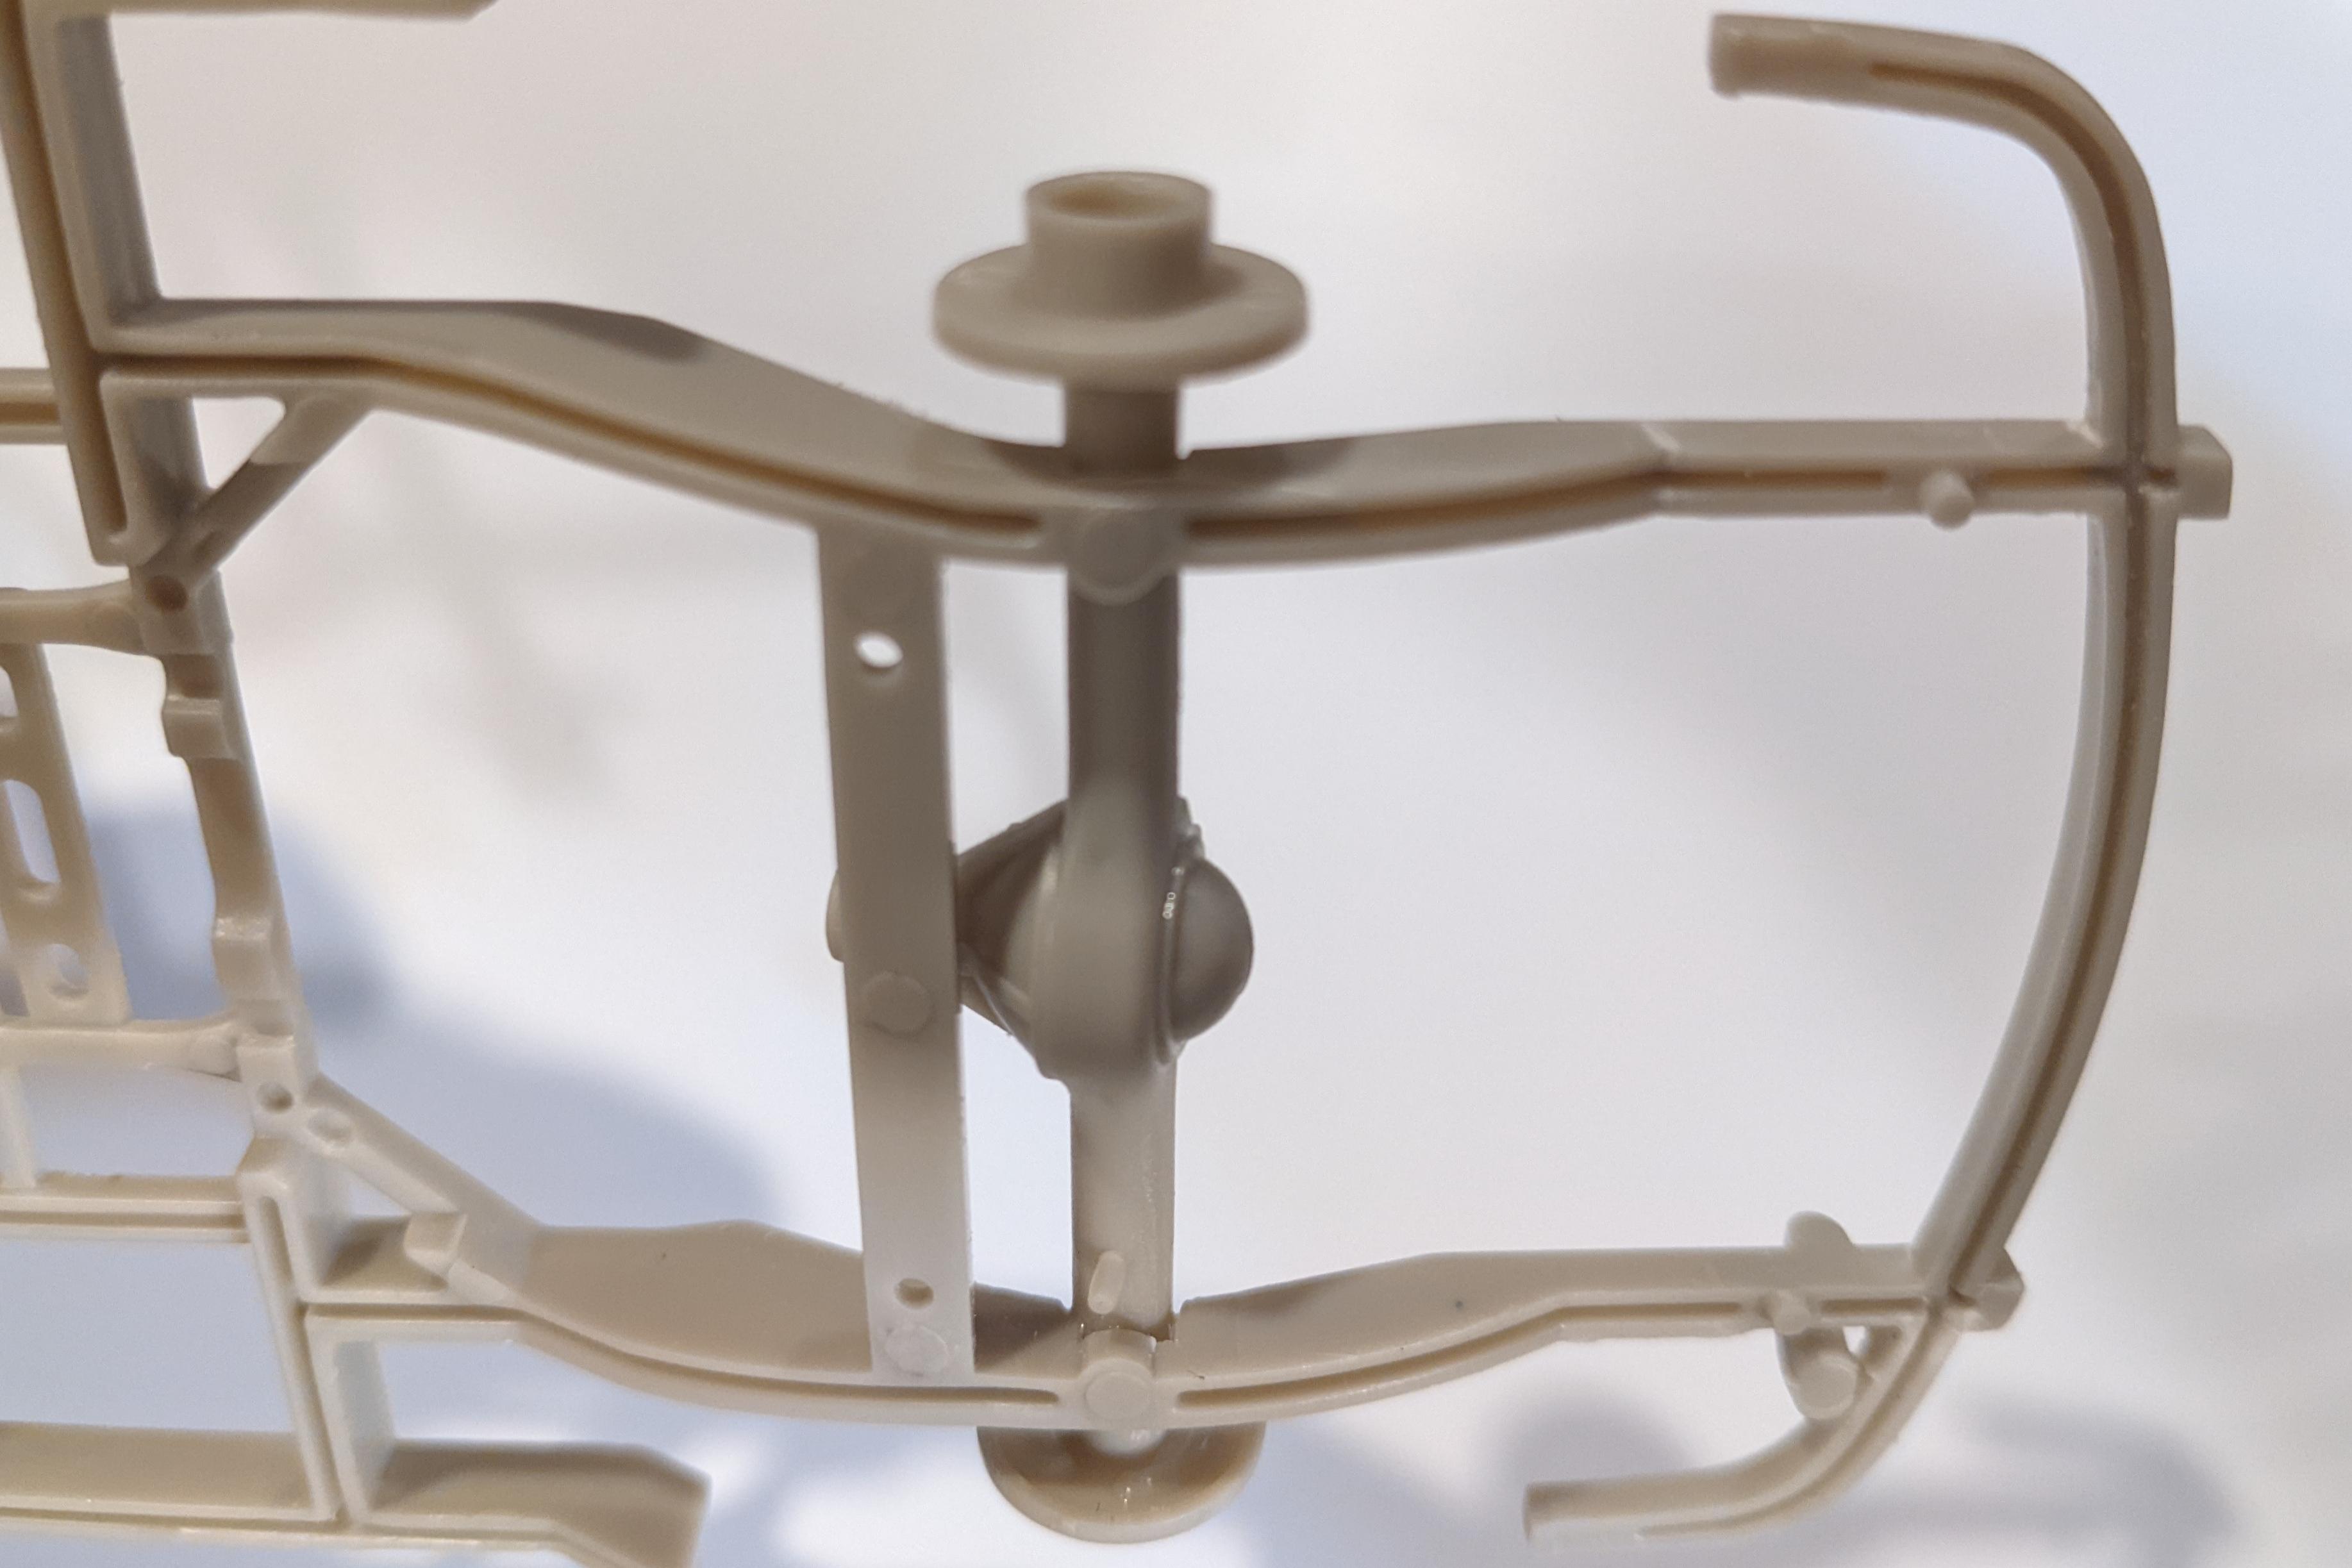
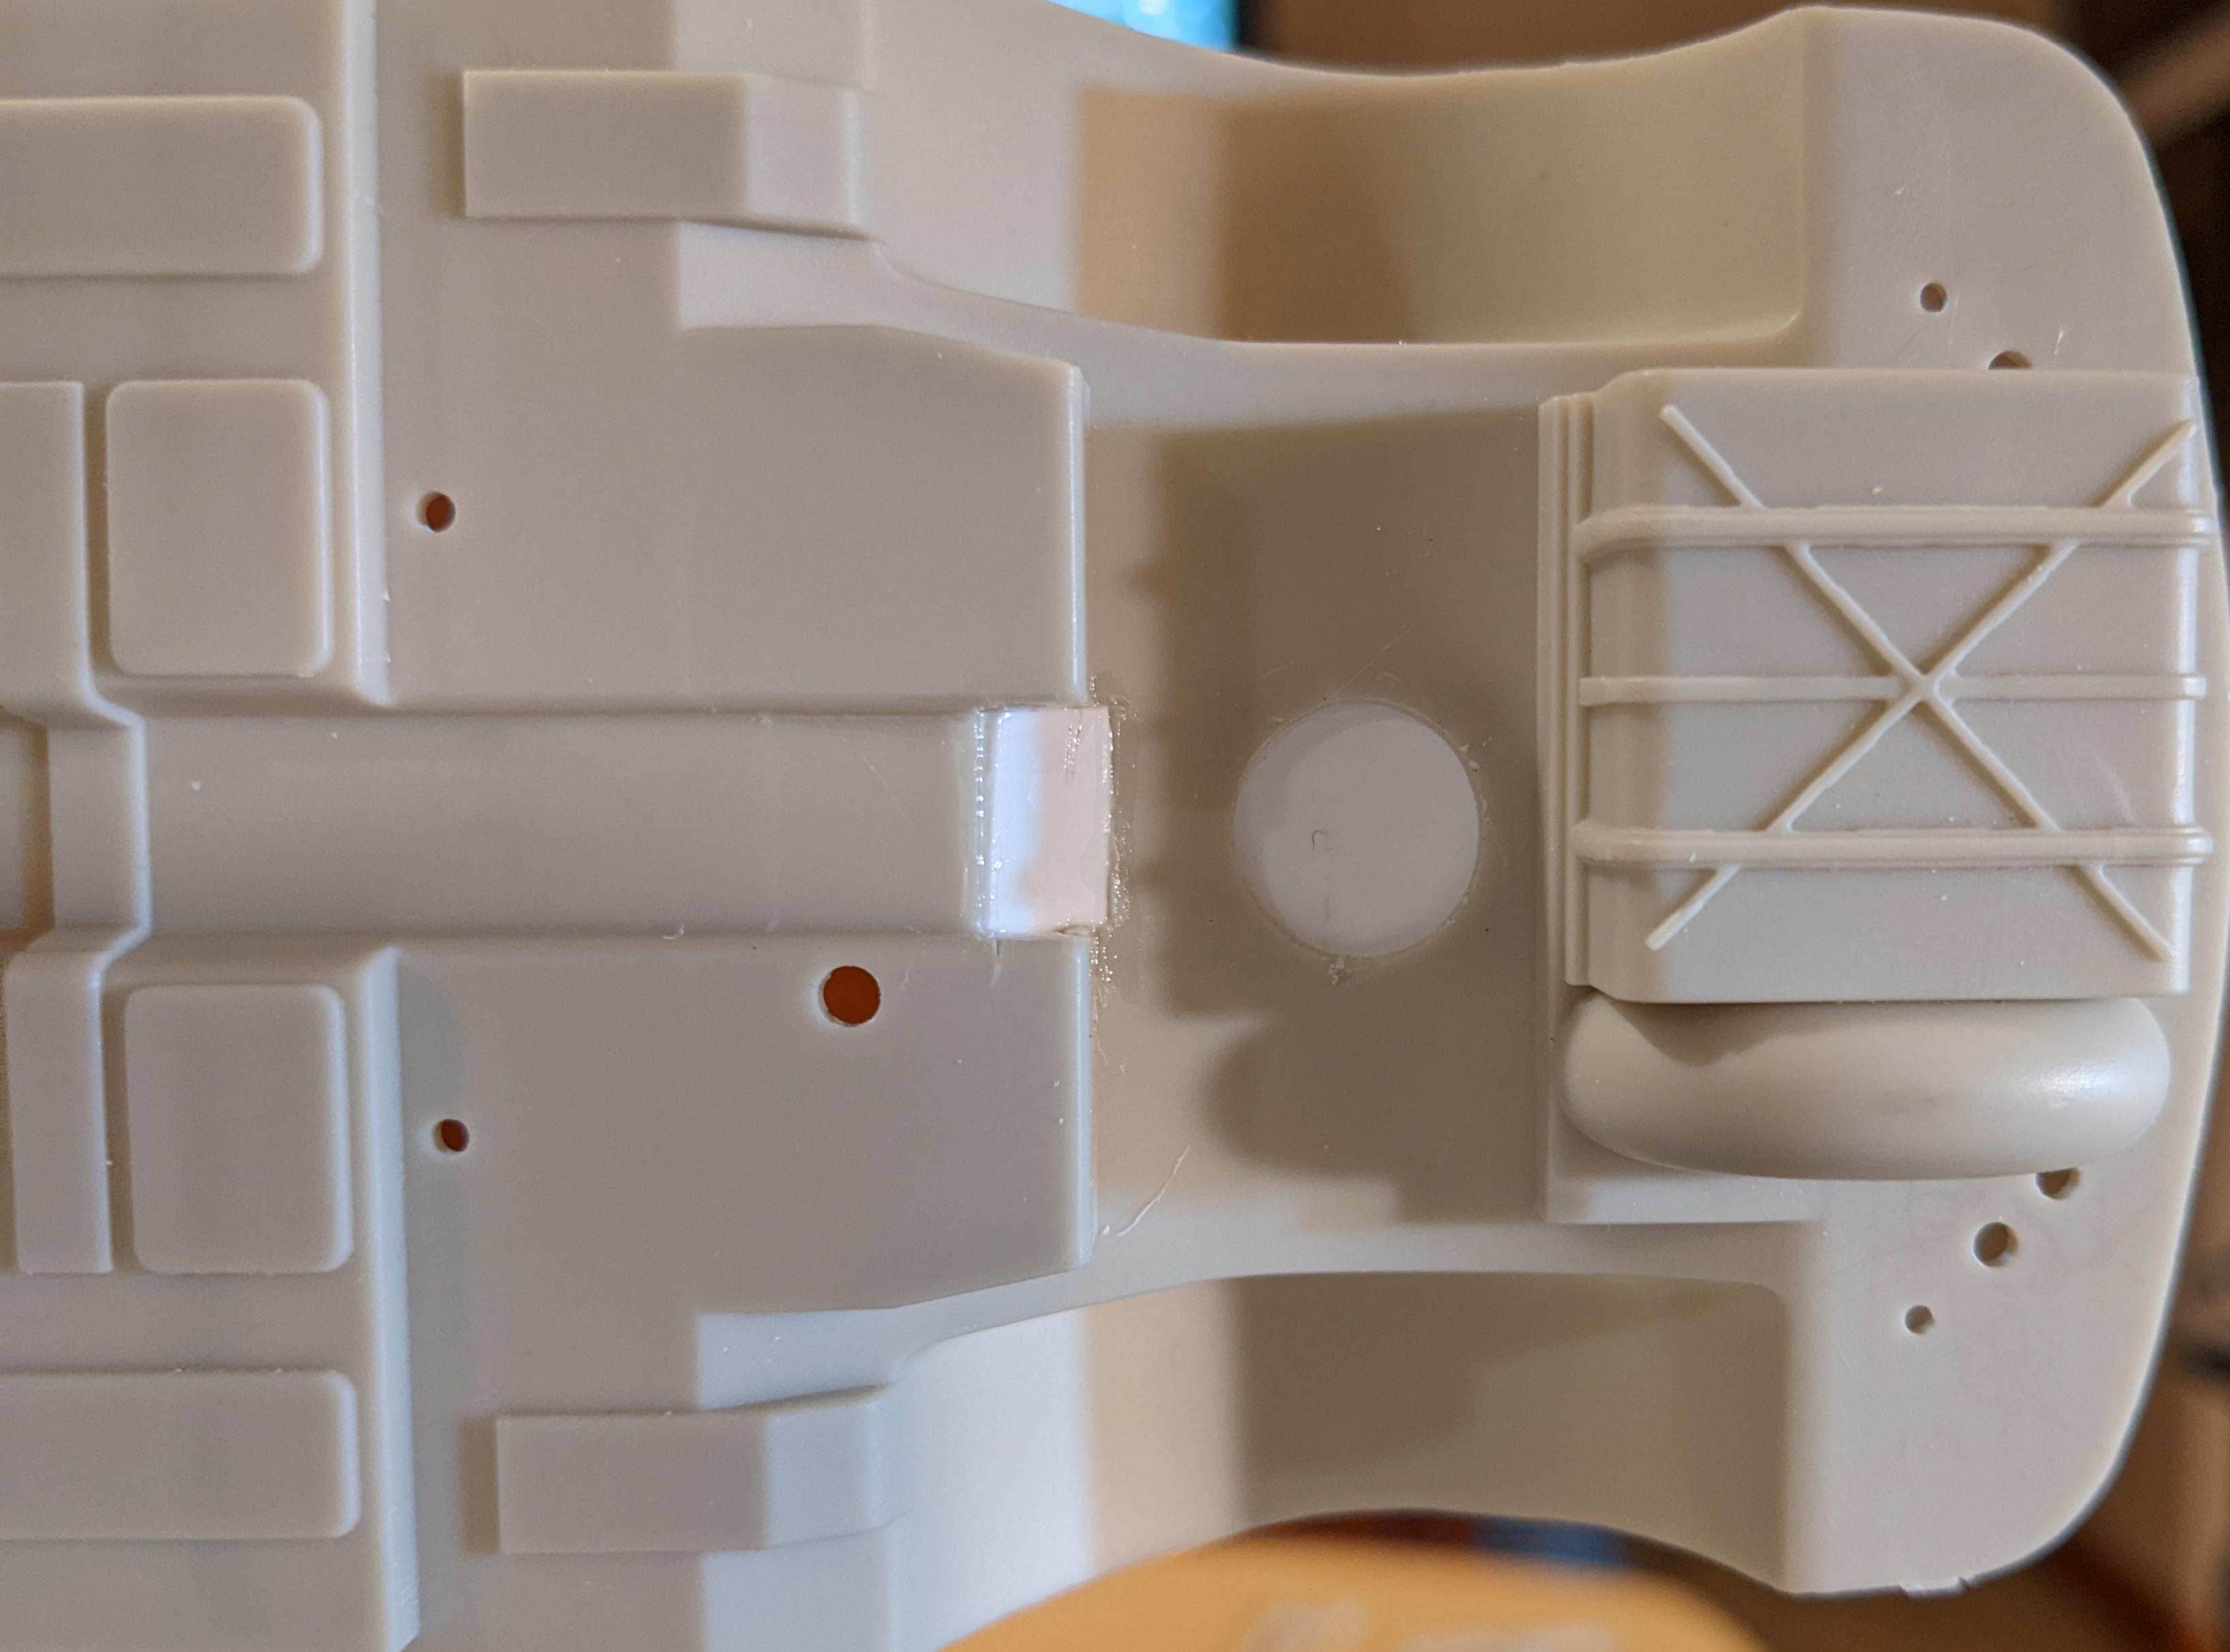
I've built models off & on since I was a kid, but now I'm retired, I can put effort into modifying them. Here is how I'm lowering a Moebius 1952 Hudson Hornet coupe. The technique should work on any of their kits that share this chassis. I'm lowering the rear 3mm & the front 5mm, to also achieve some rake. I plan to use the chrome steelies from the convertible kit, which I also have. I'll show the rear, which is as far as I've gotten, then add the front later. Hope this post is useful to folks & comments are welcome. First, I notched 3mm from the frame rails to raise the rear axle relative to the body. Then, I cut out a portion of the floor to clear the driveshaft, and another to provide clearance for the differential. I added styrene sheet to fill in the holes. Finally, I added 3mm tall blocks to the leaf springs, made from square styrene tube. This mod provides an eventual connection to the axle, & allows the shocks ti remain unmodified. More to follow...
-
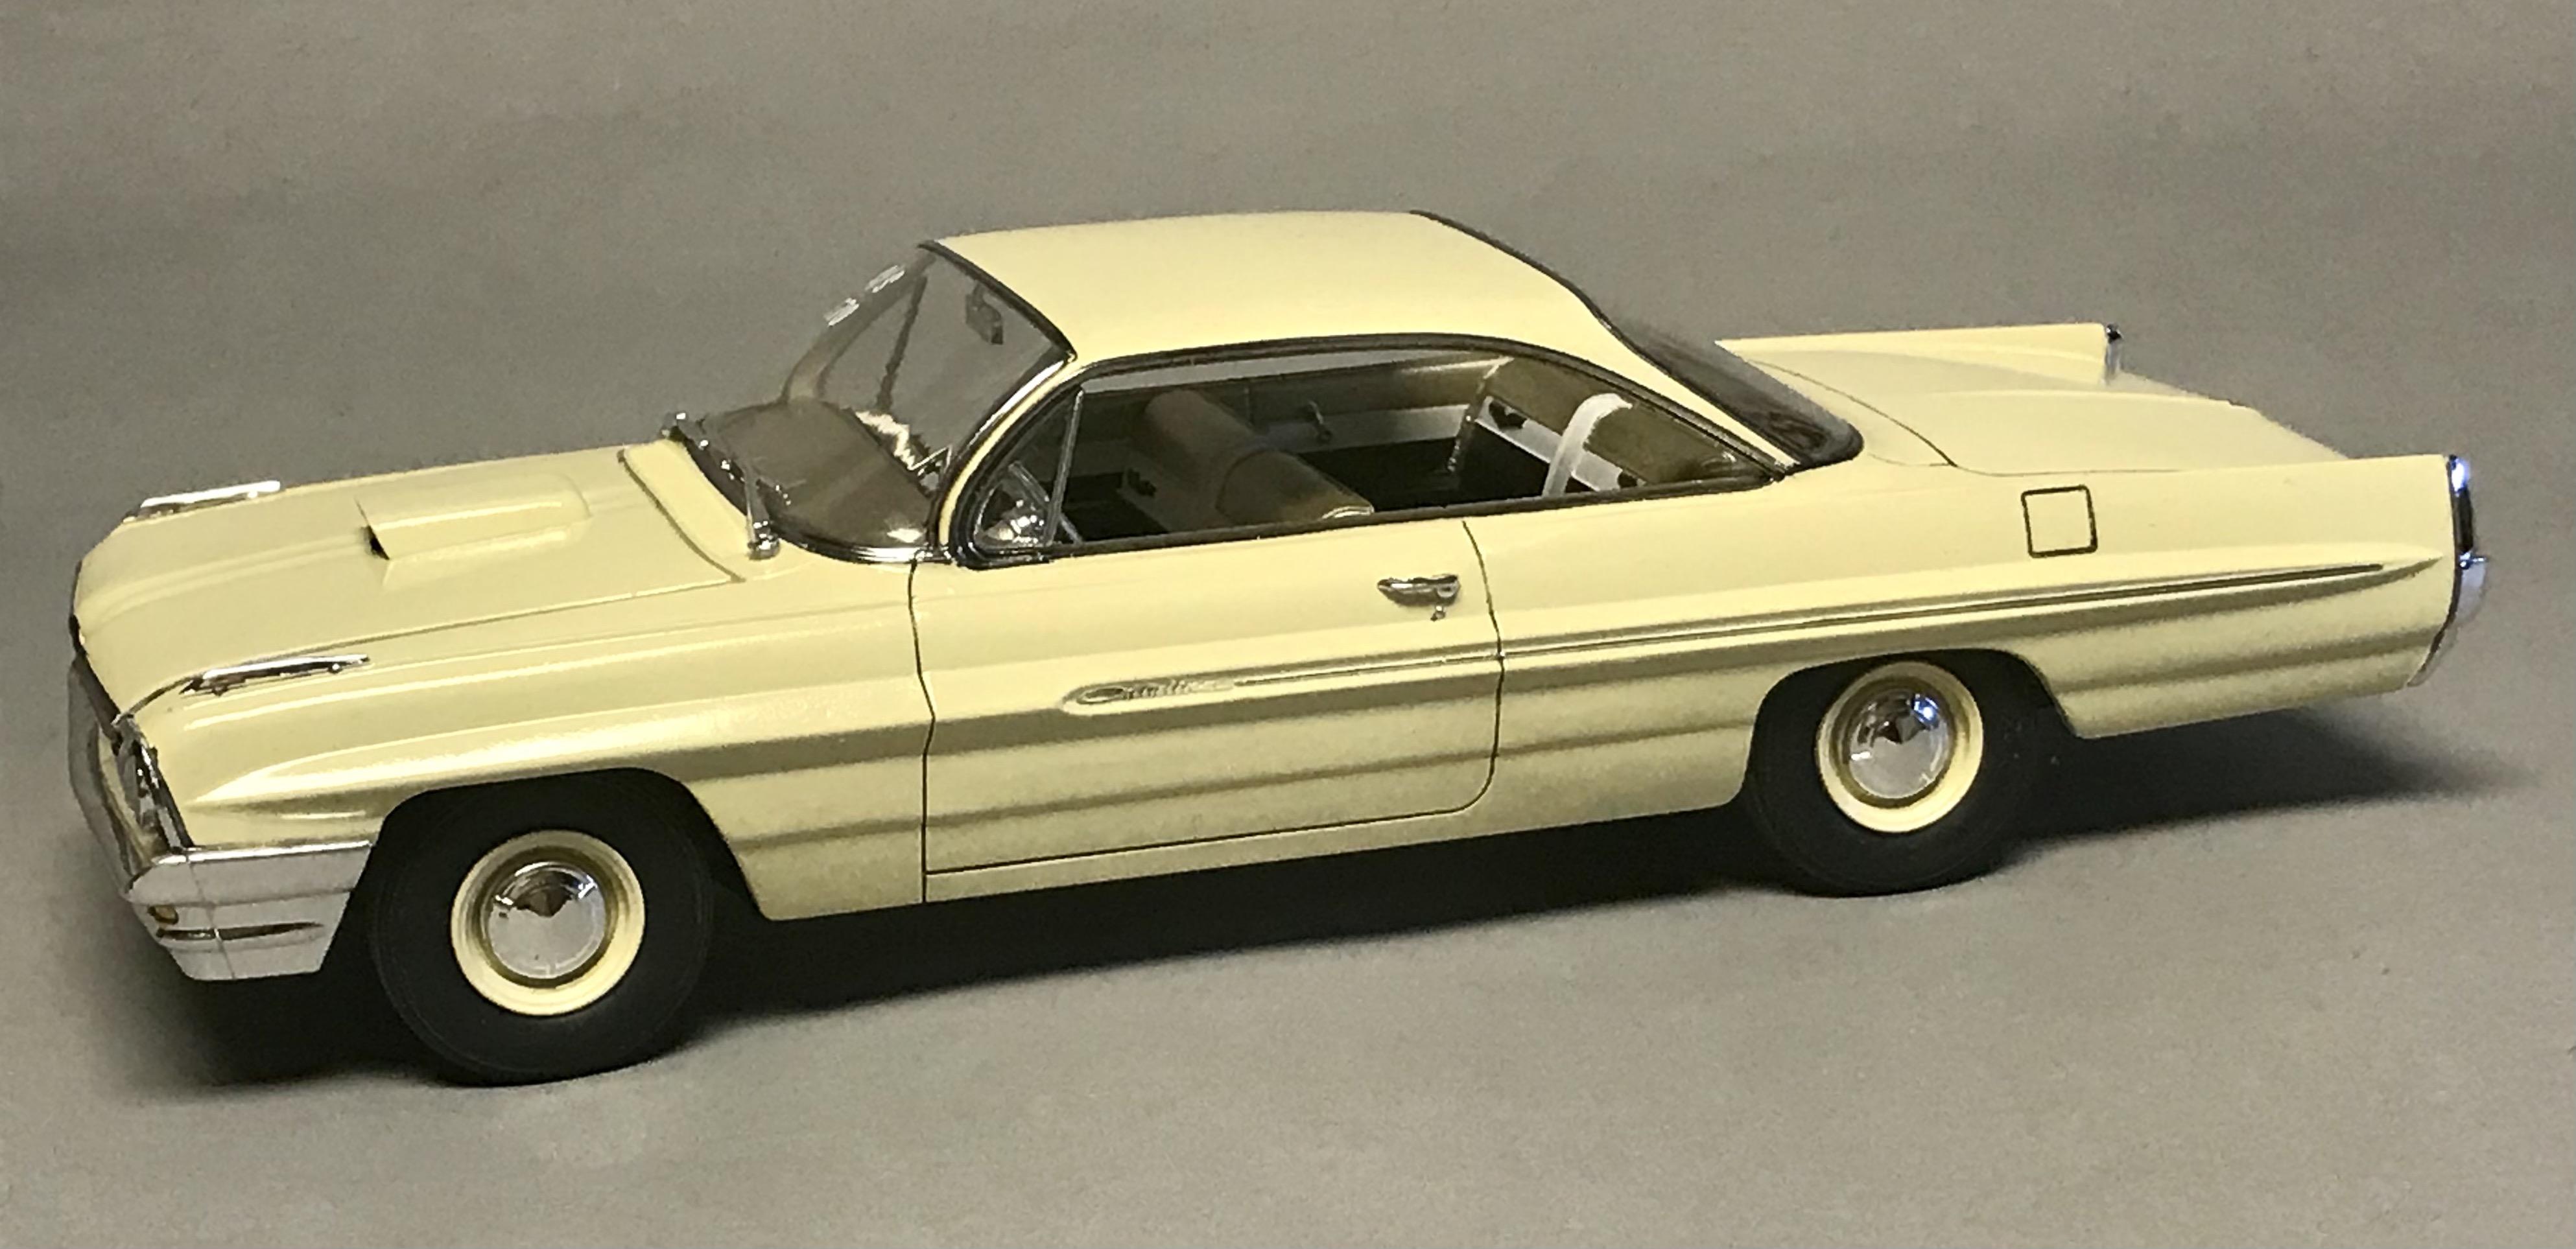
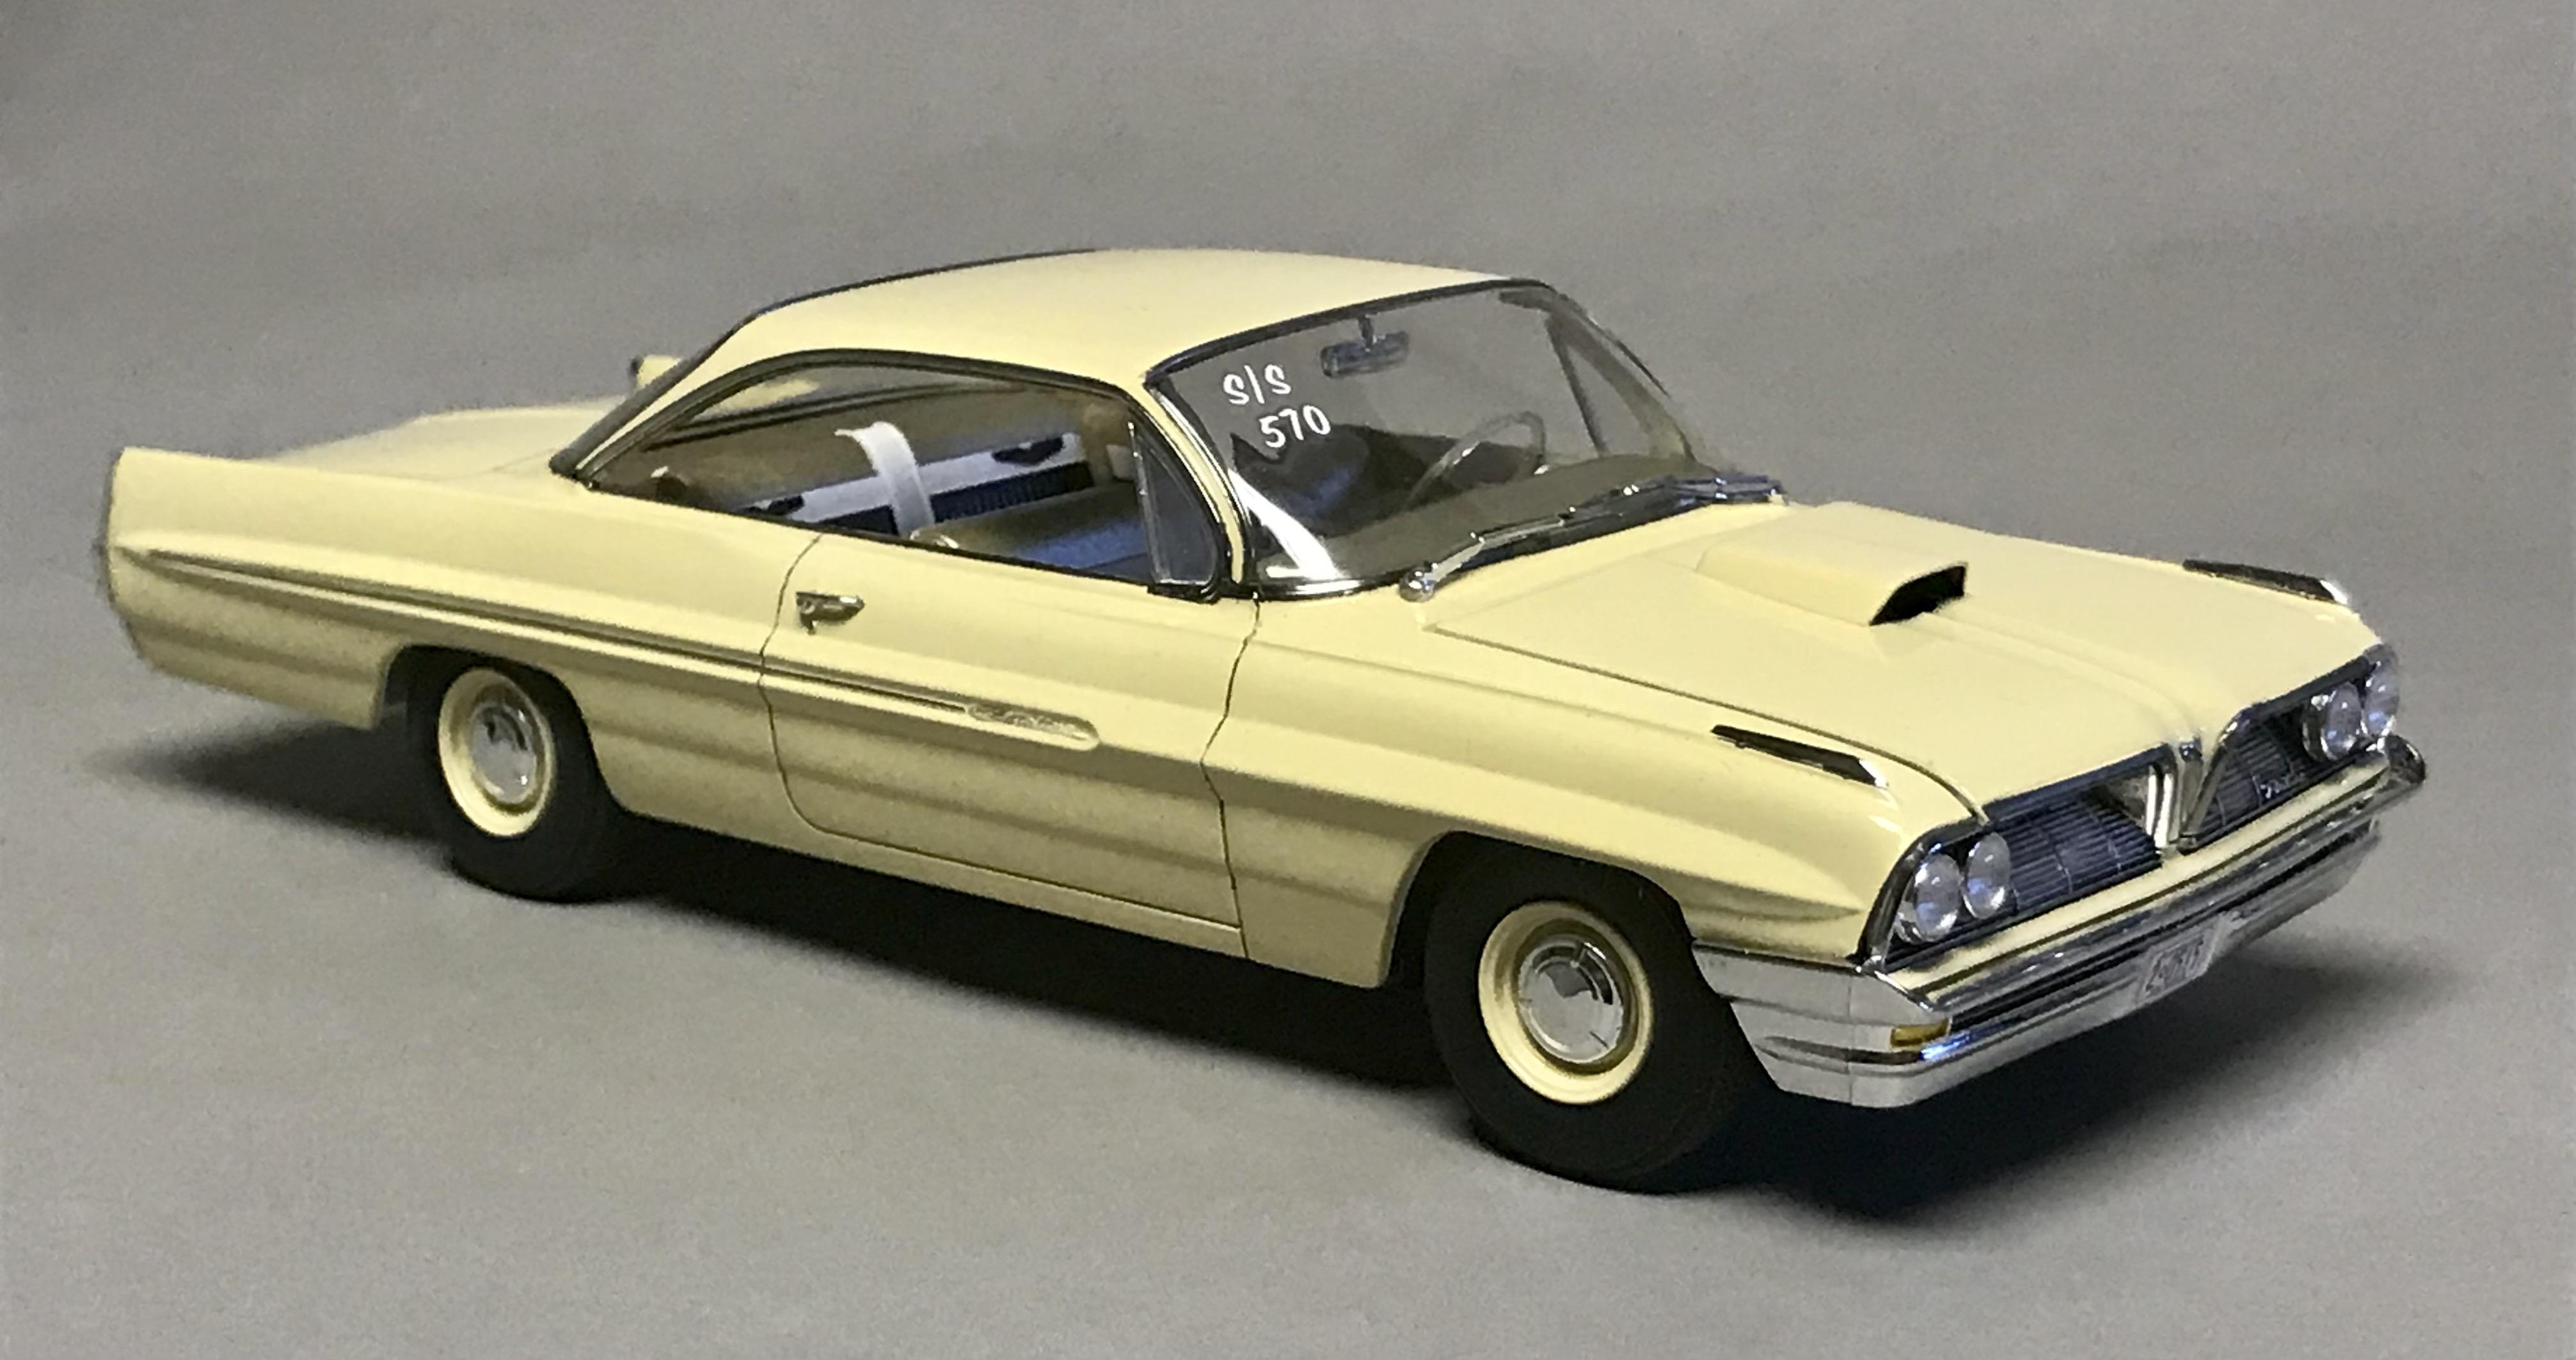
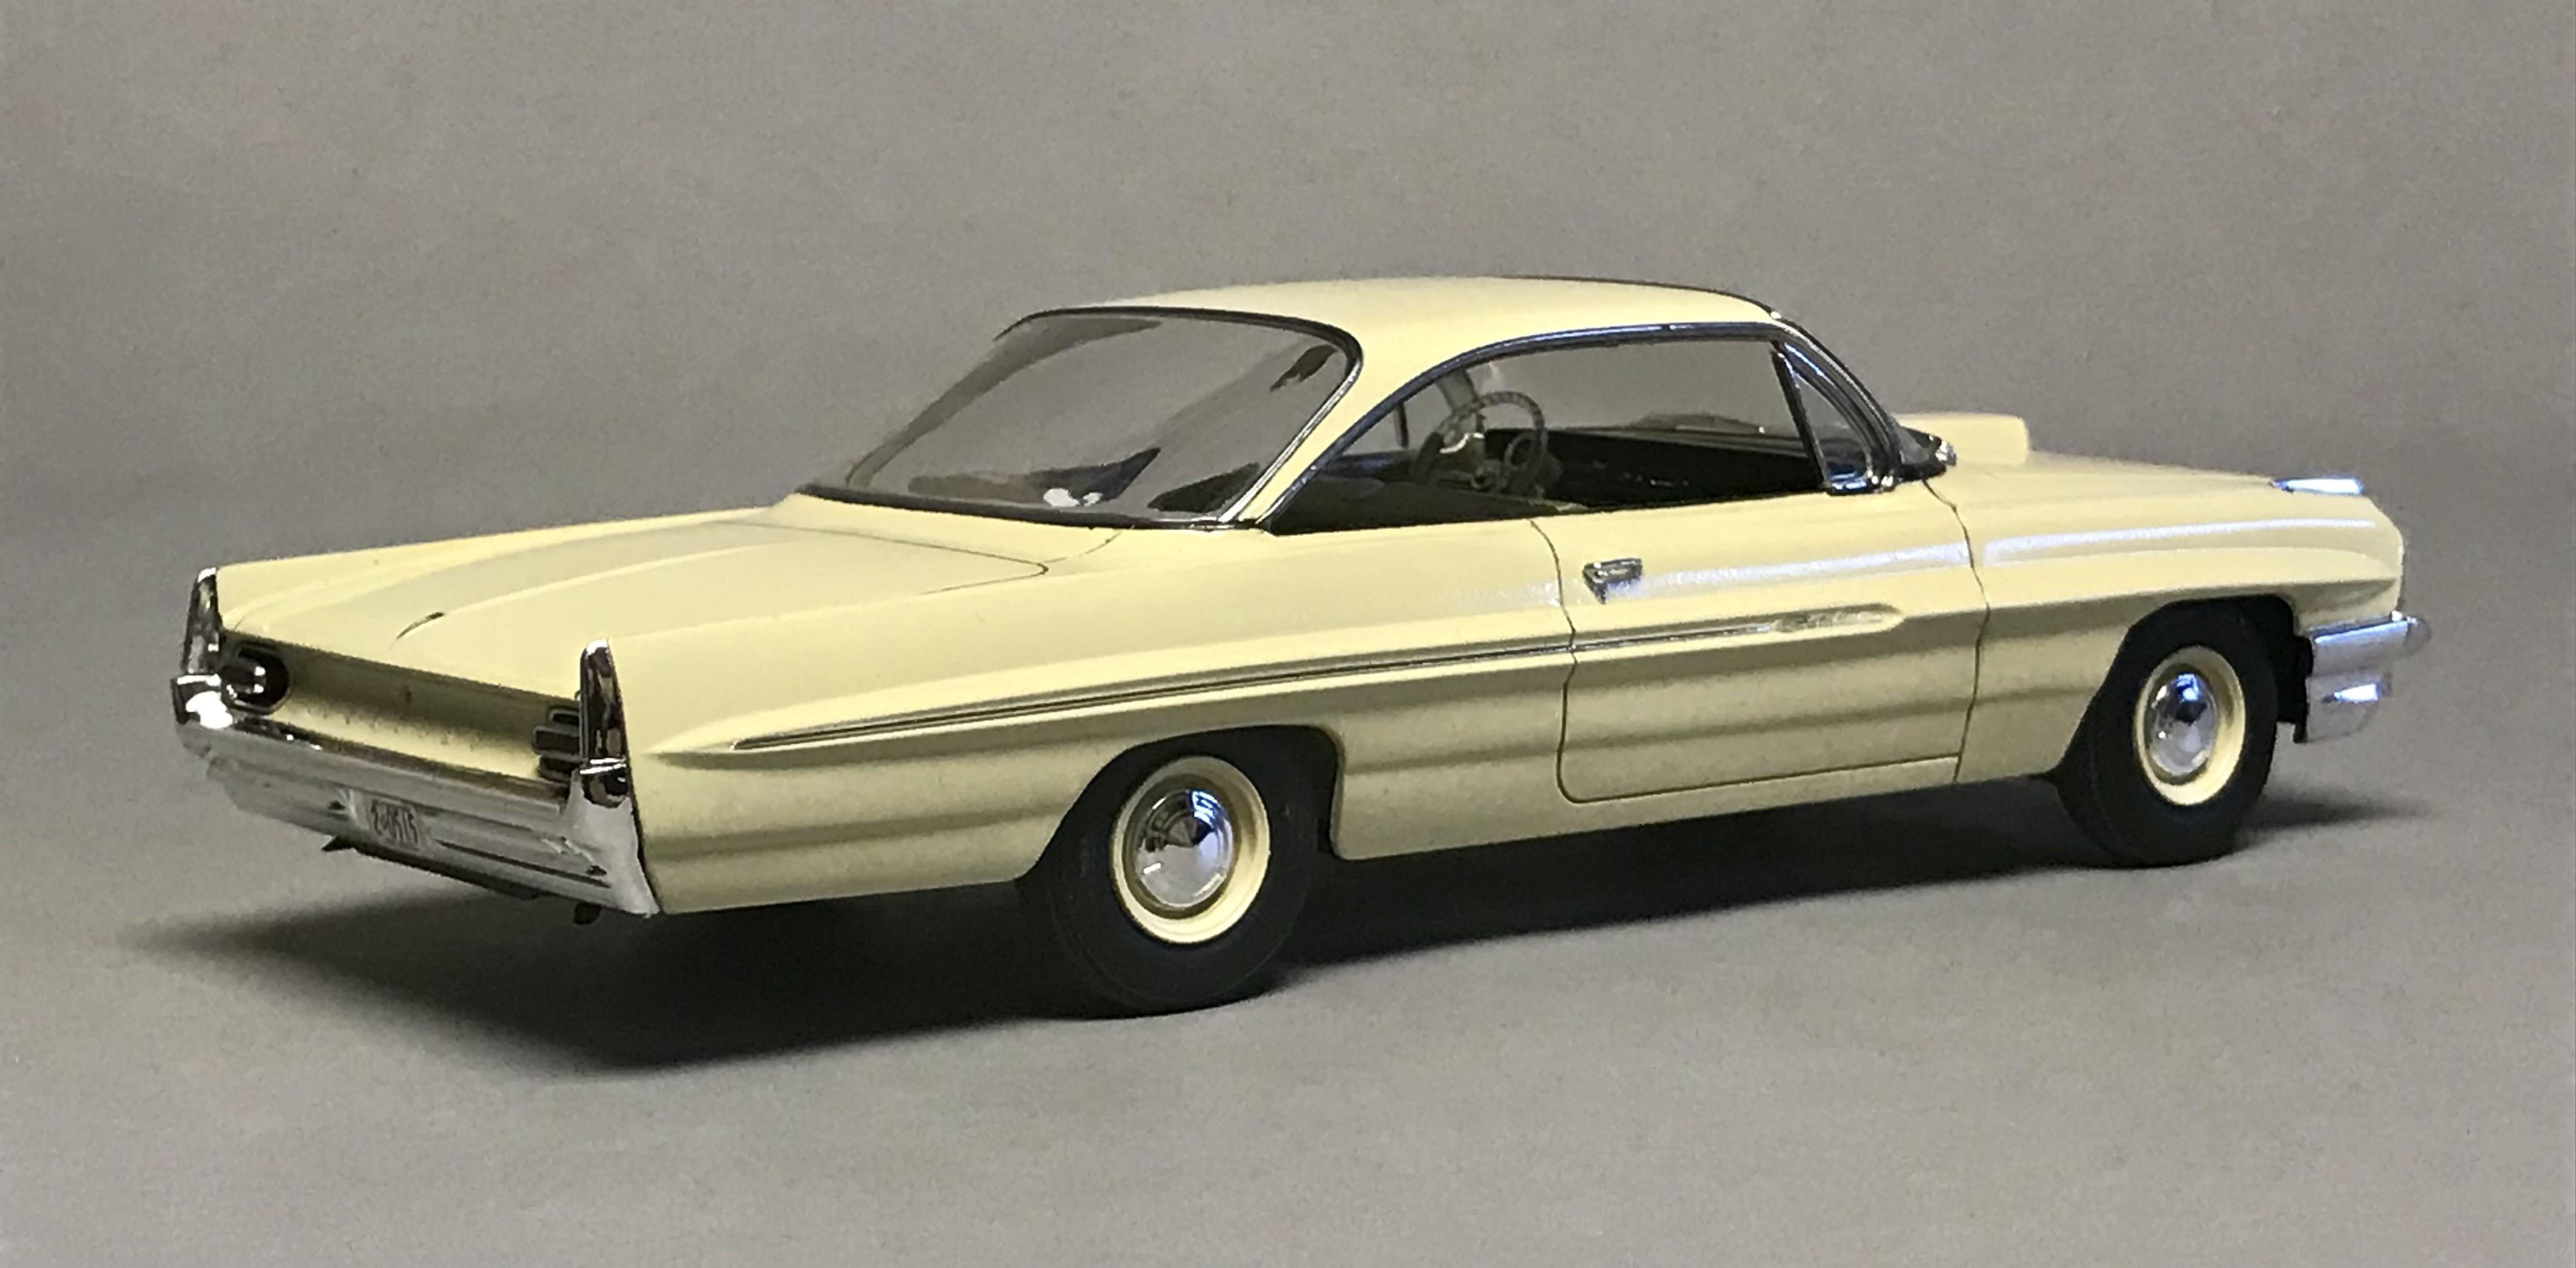
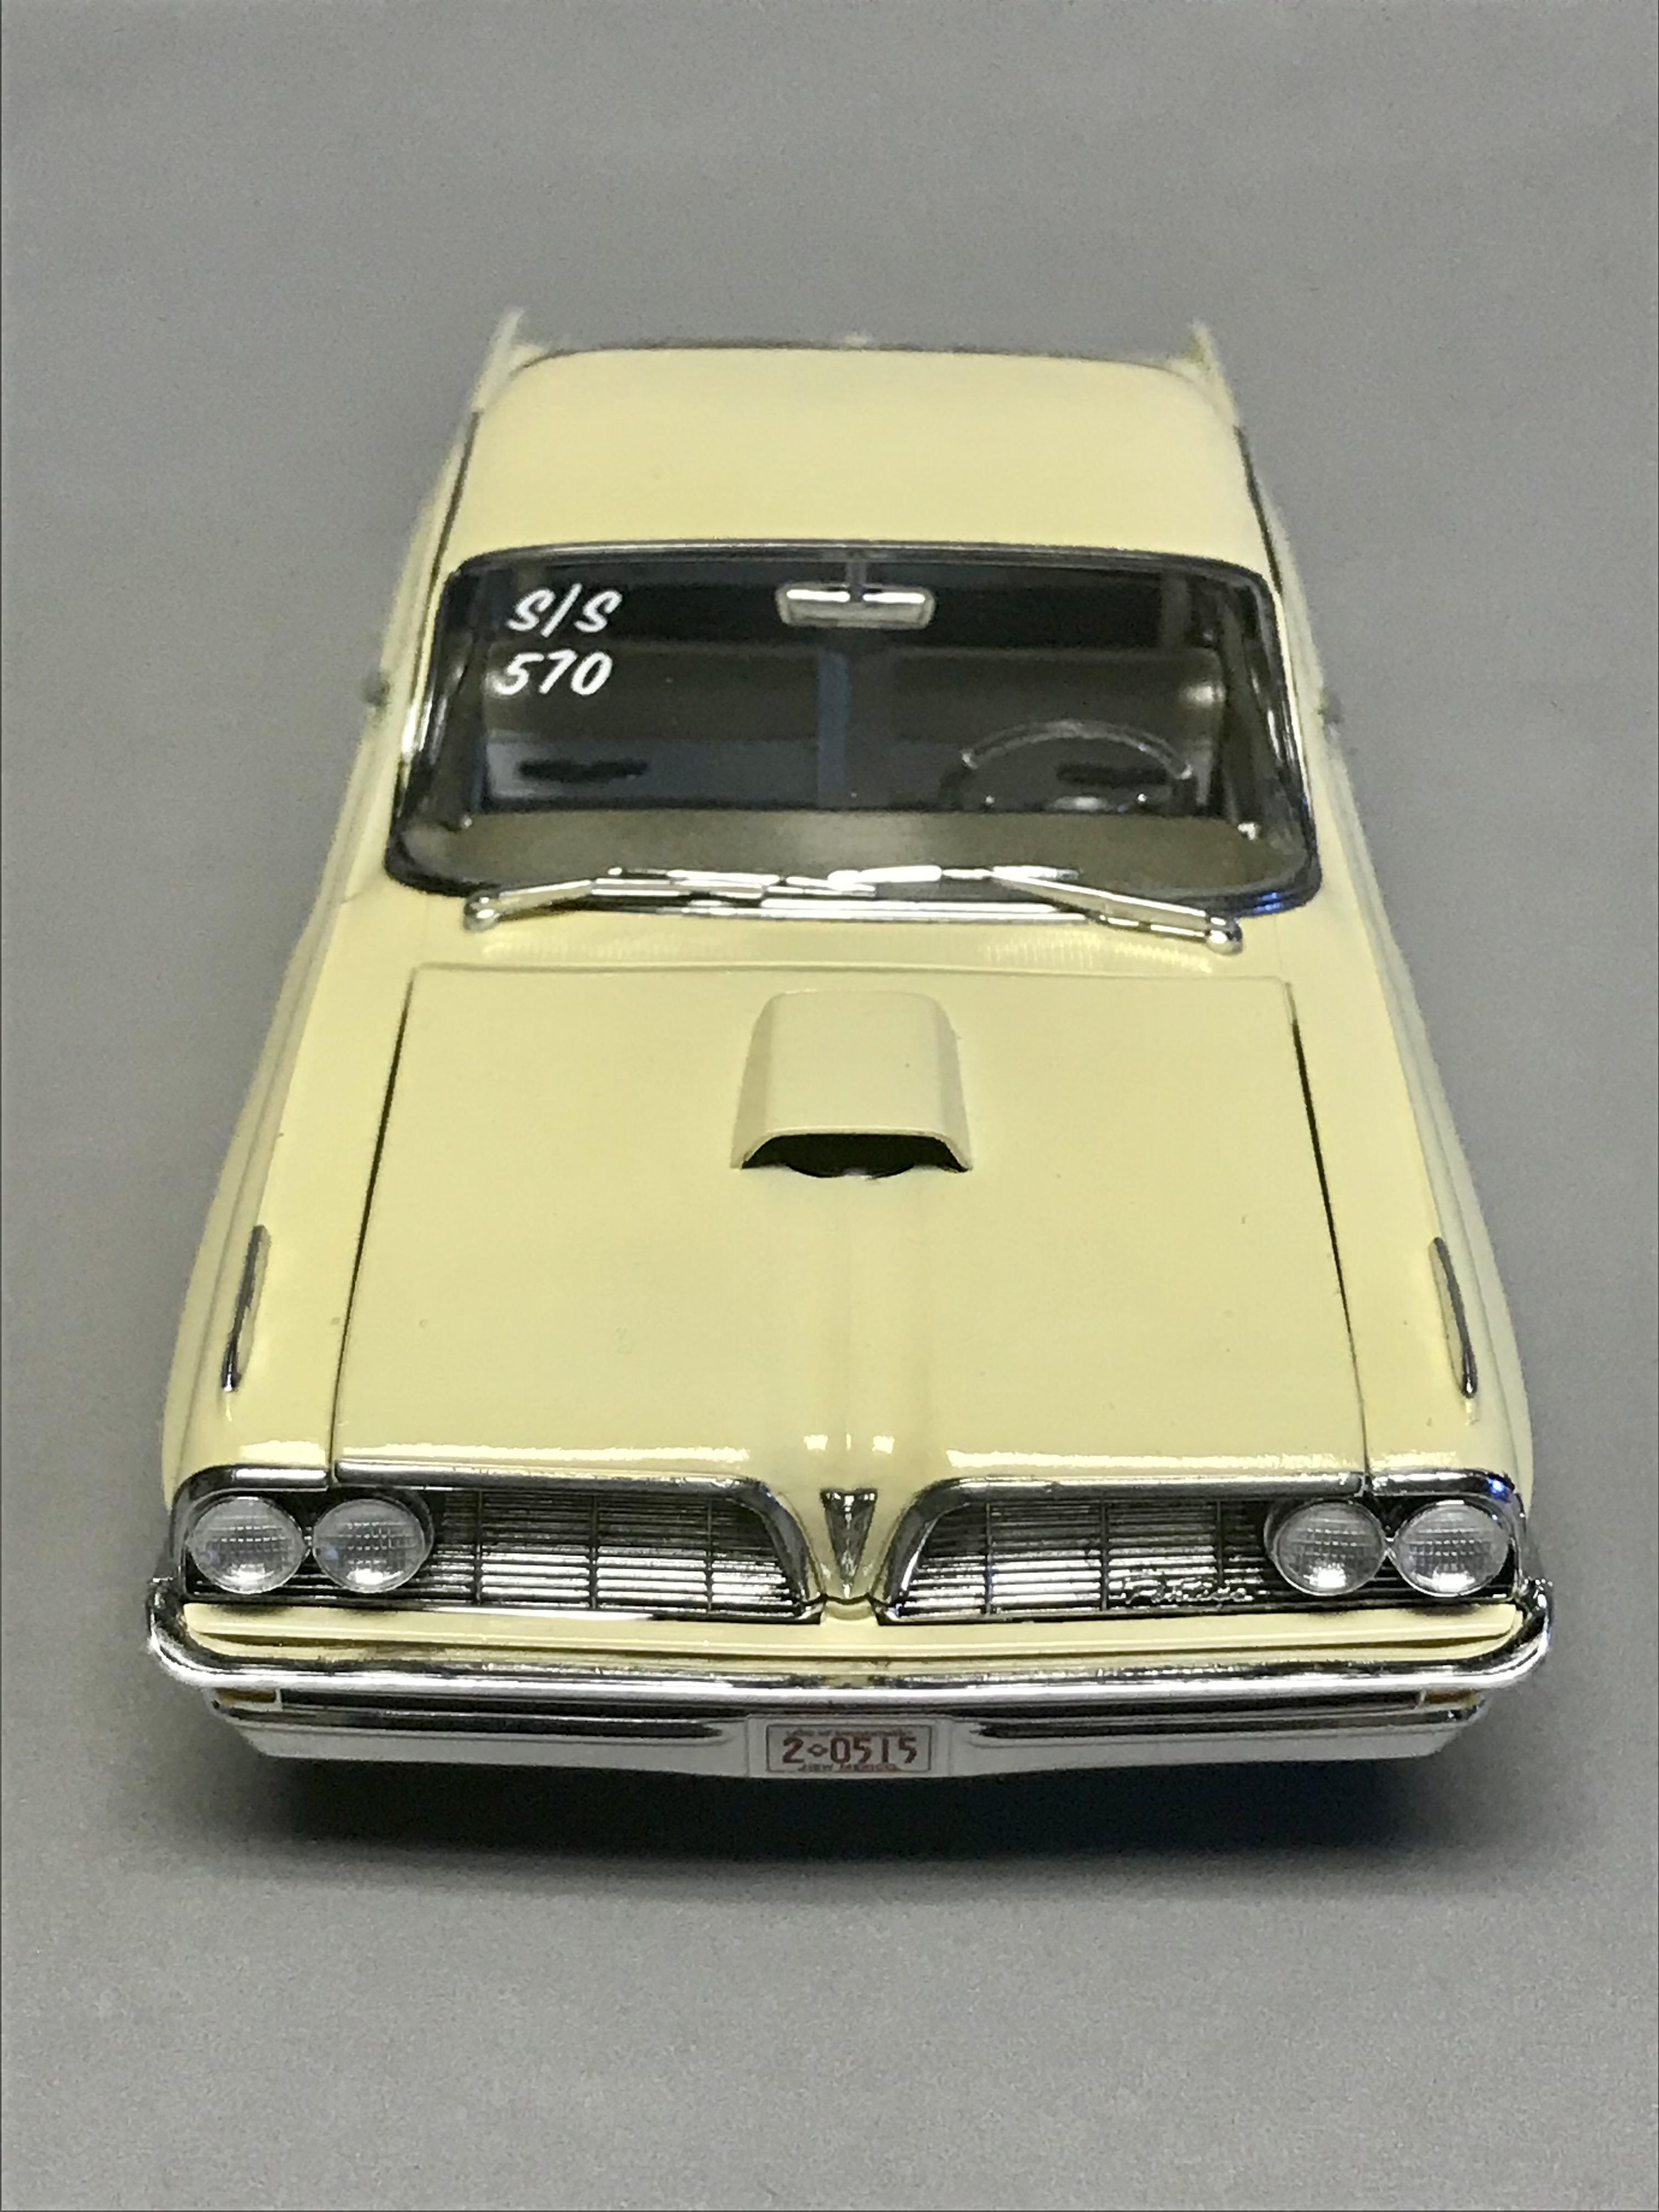
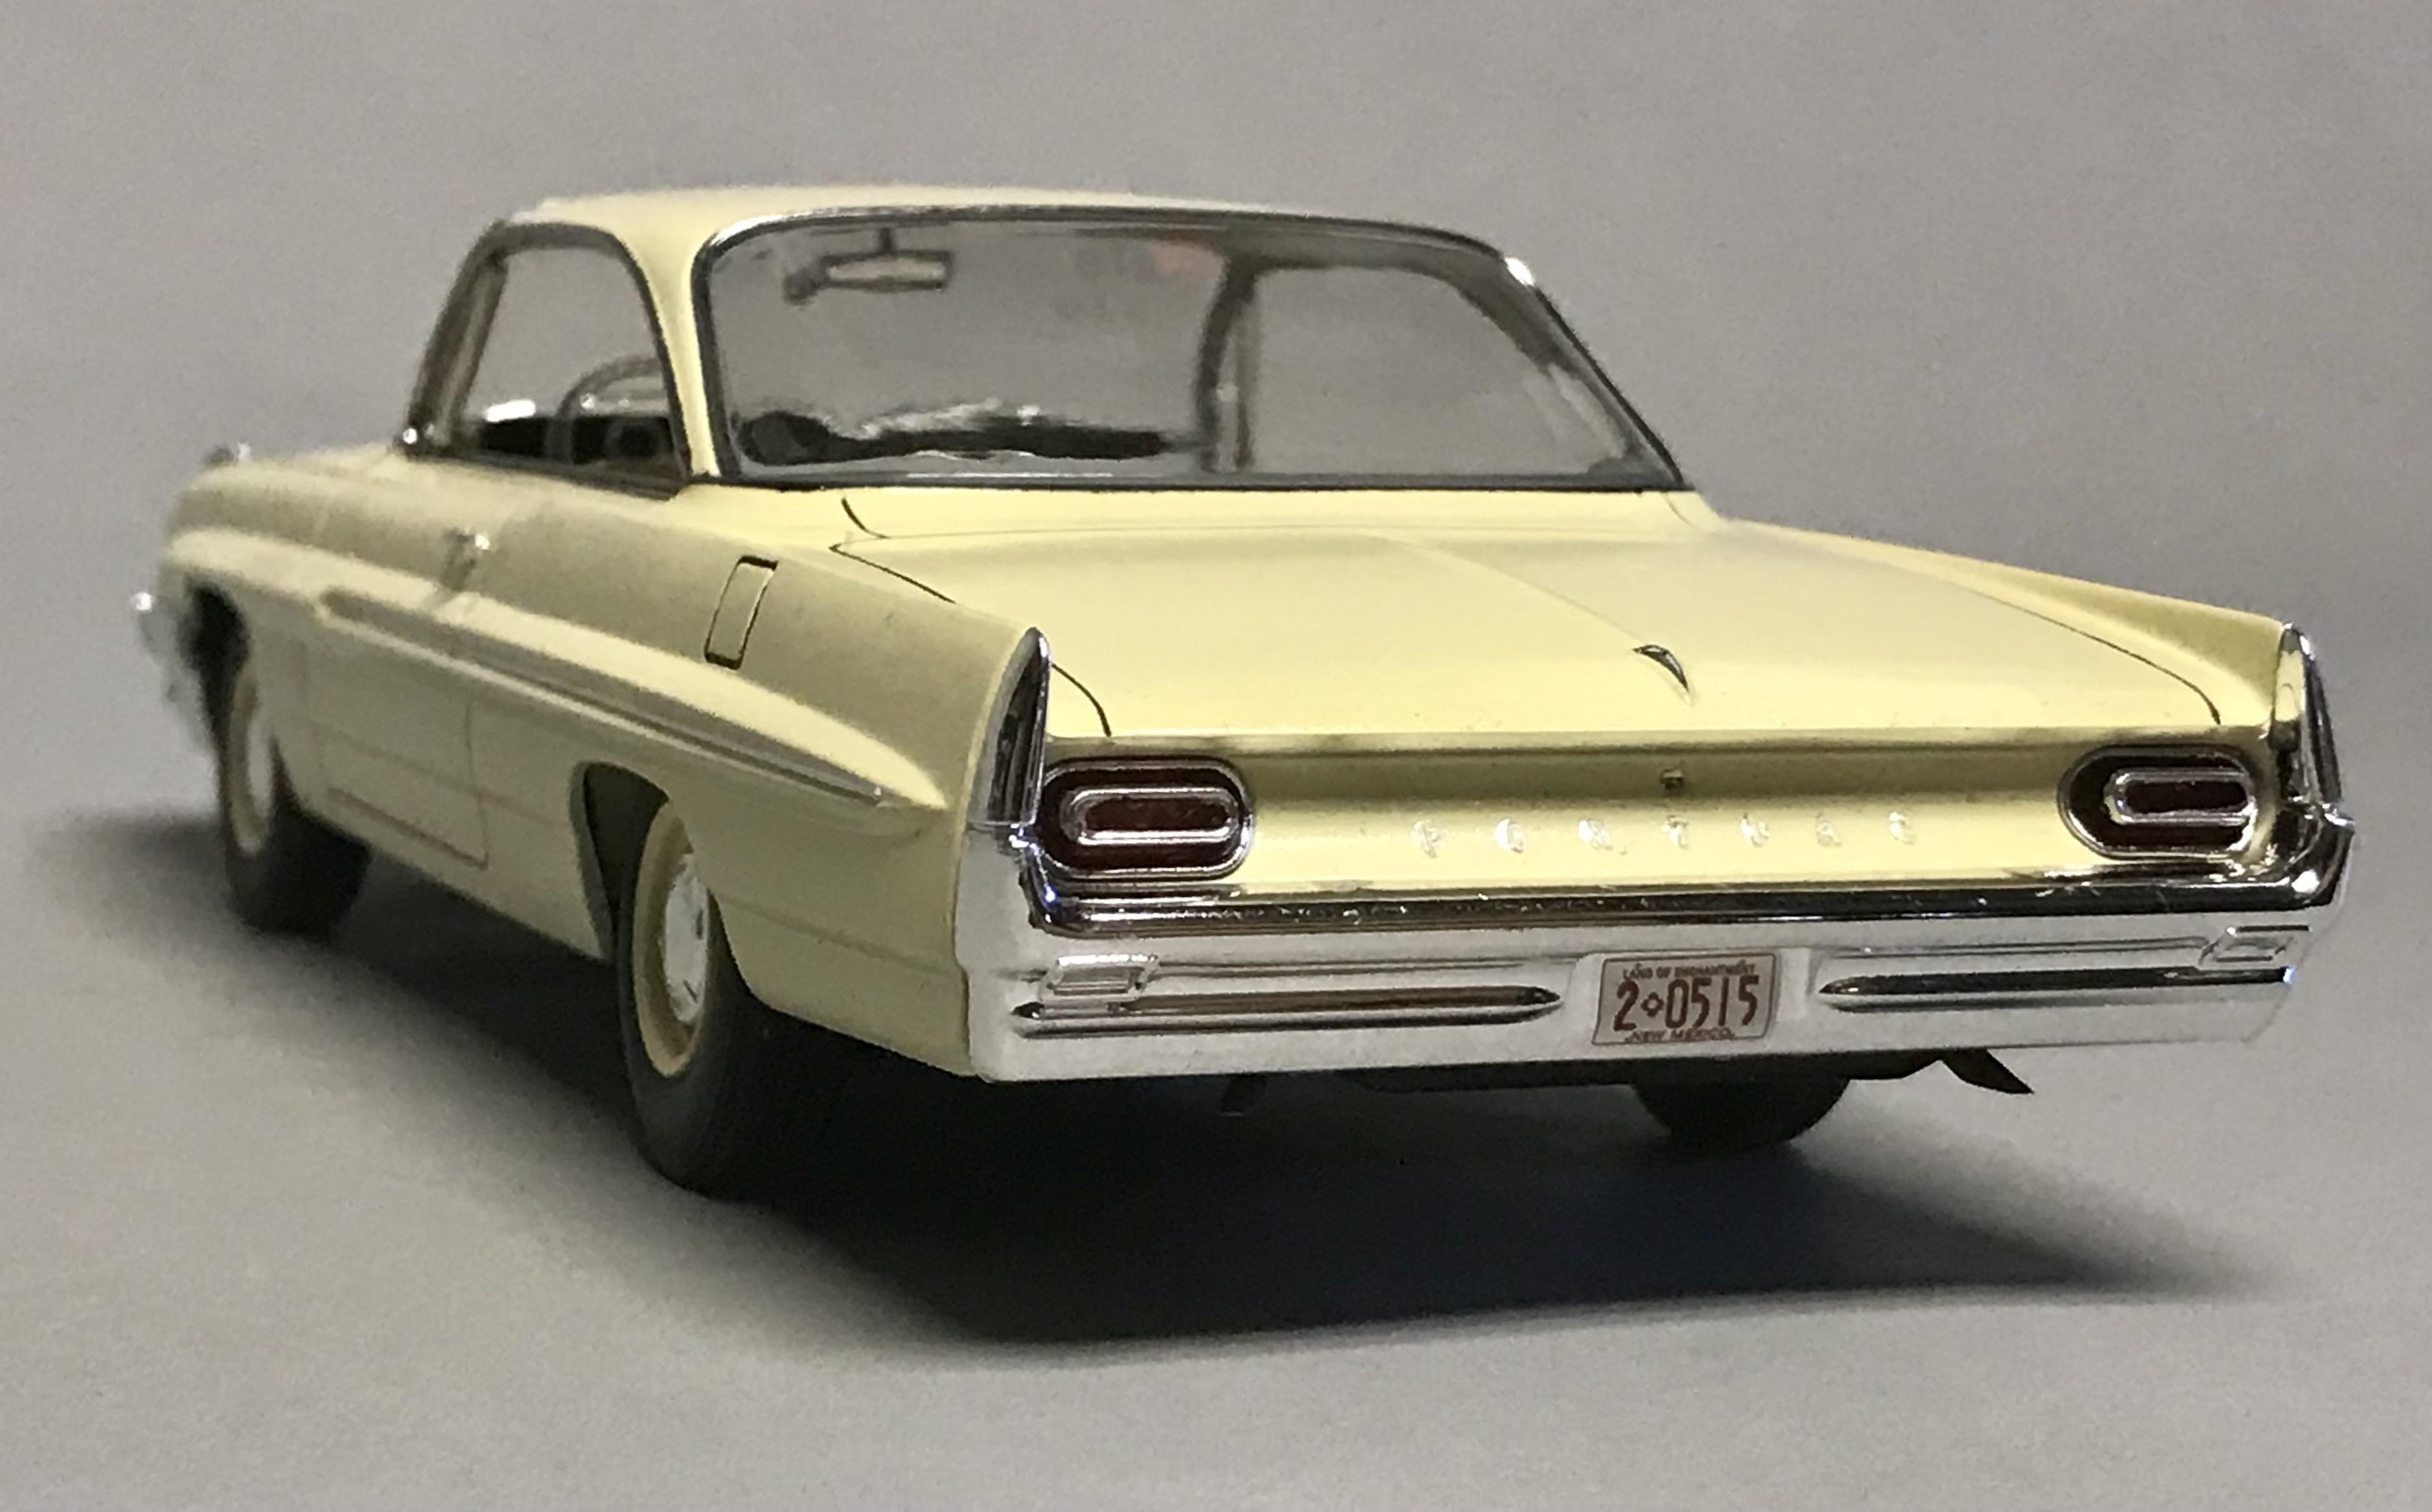
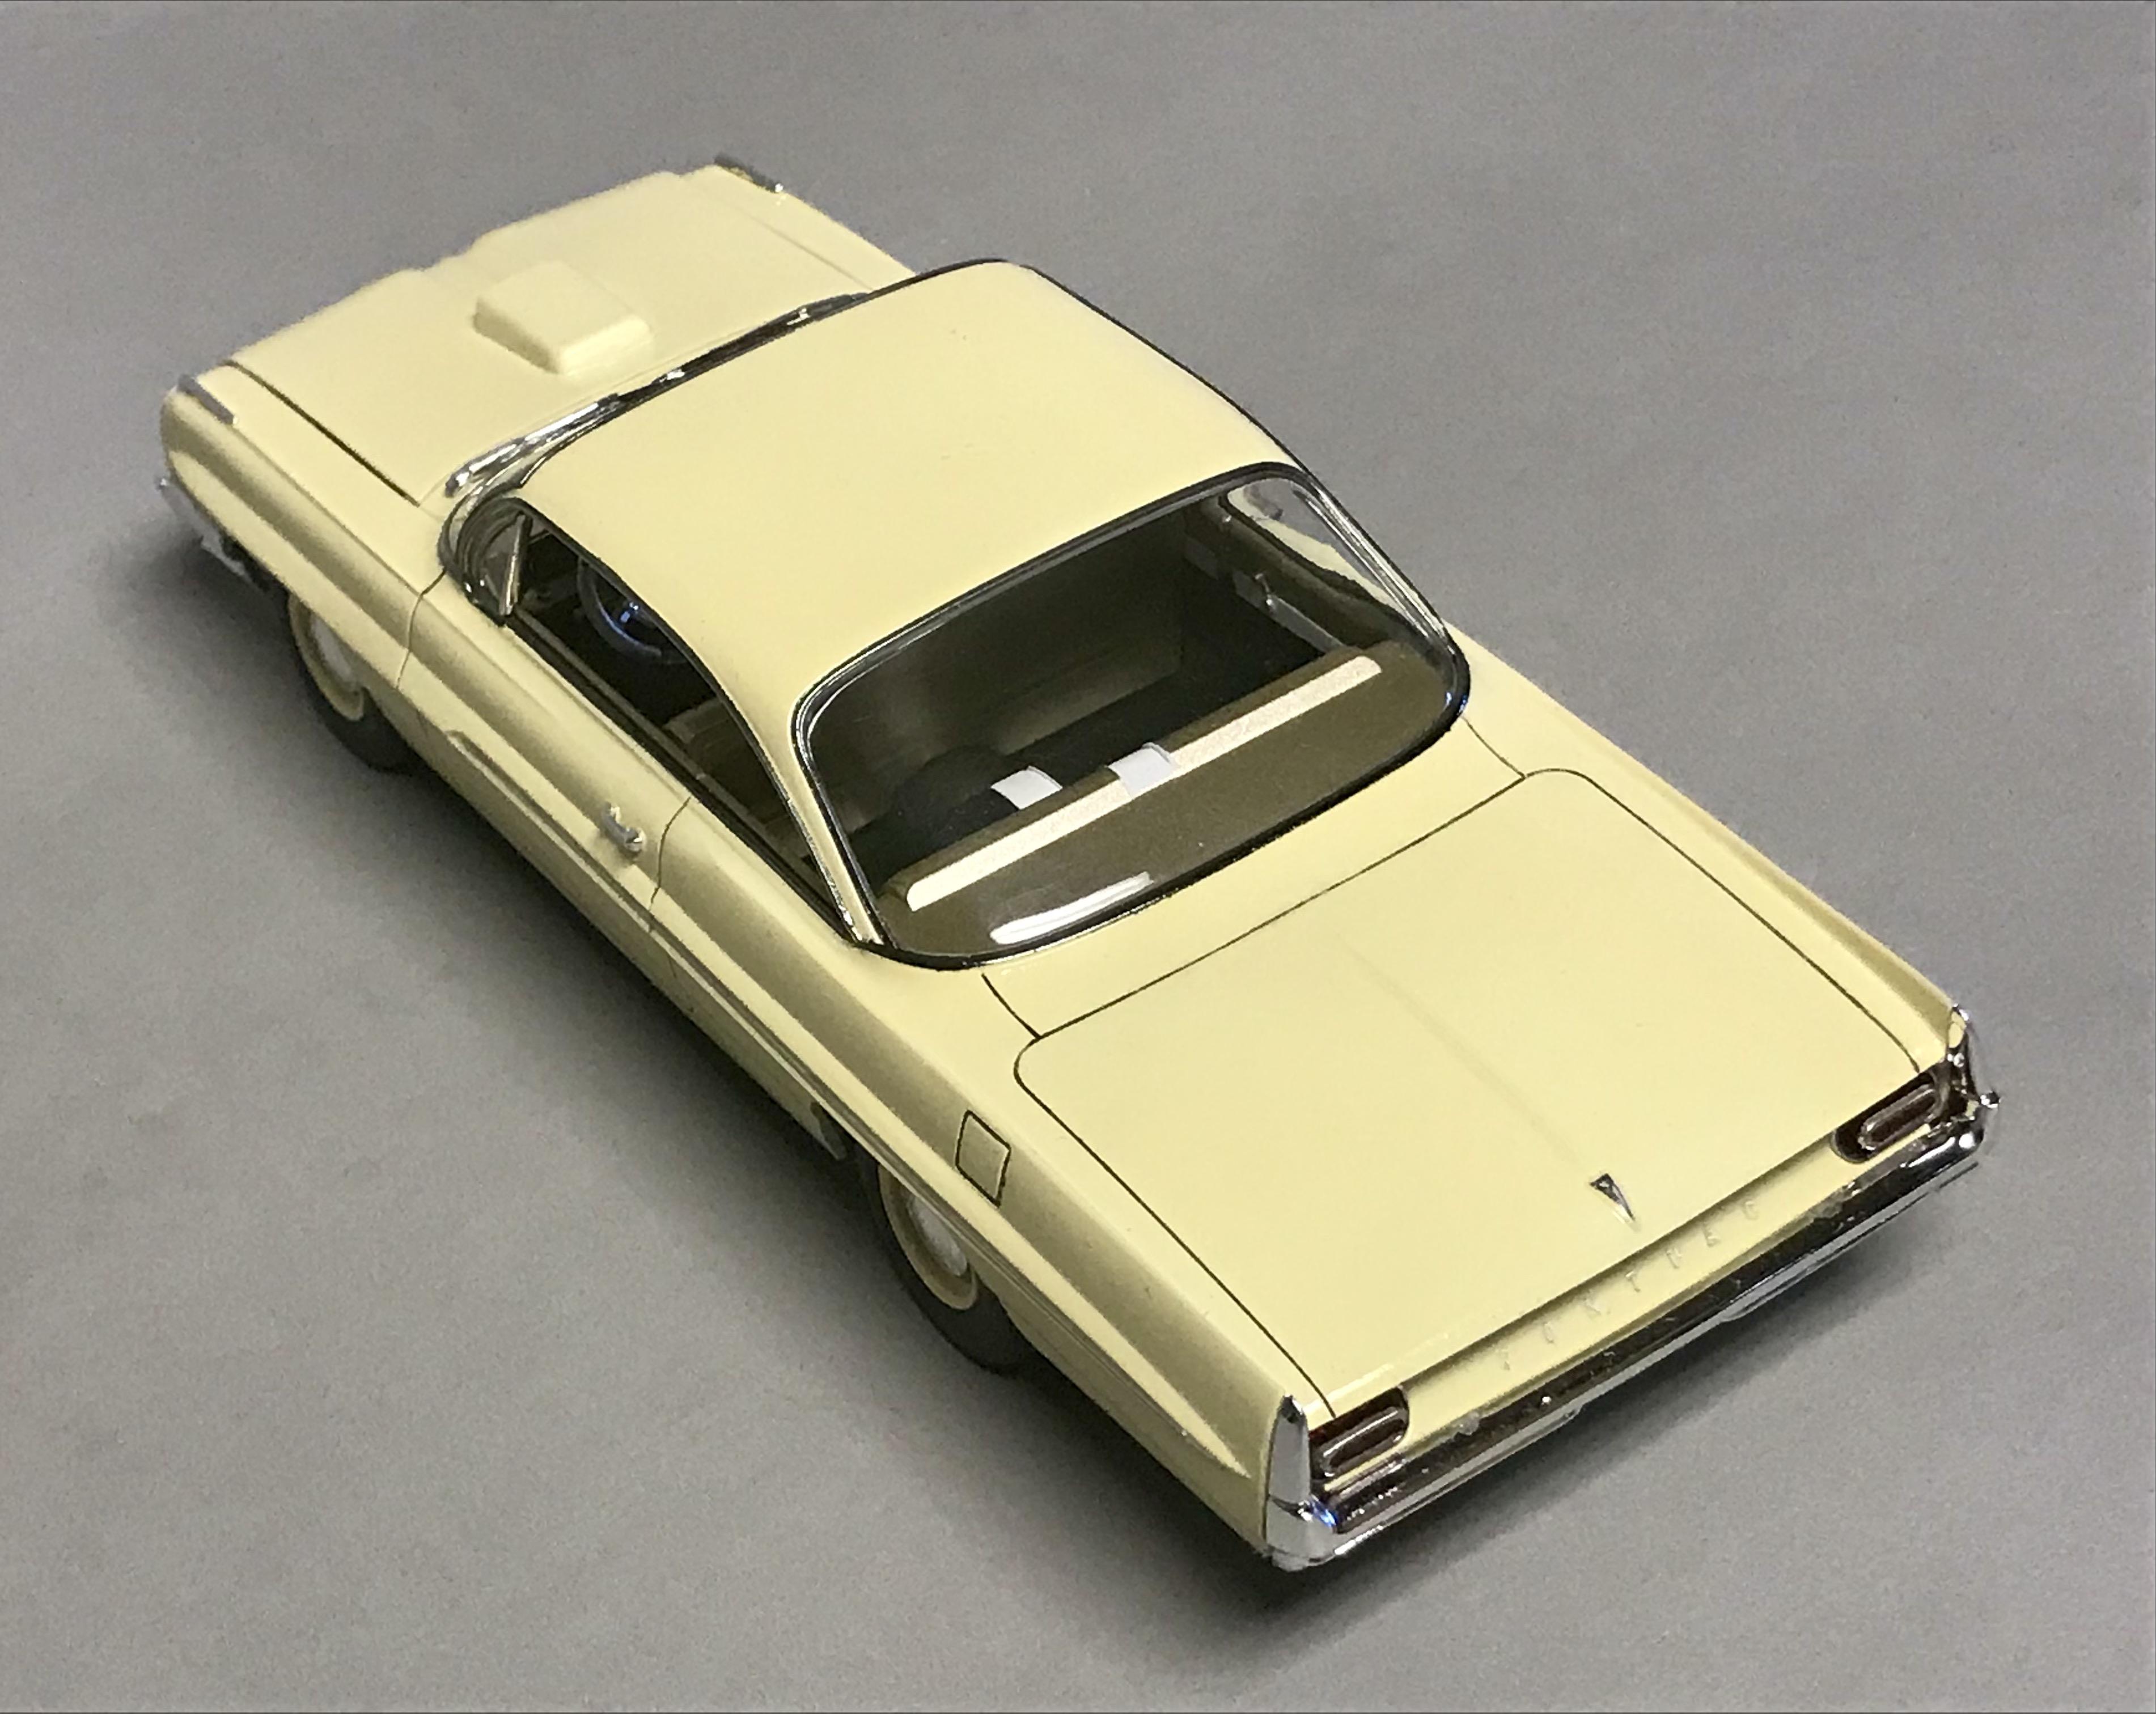
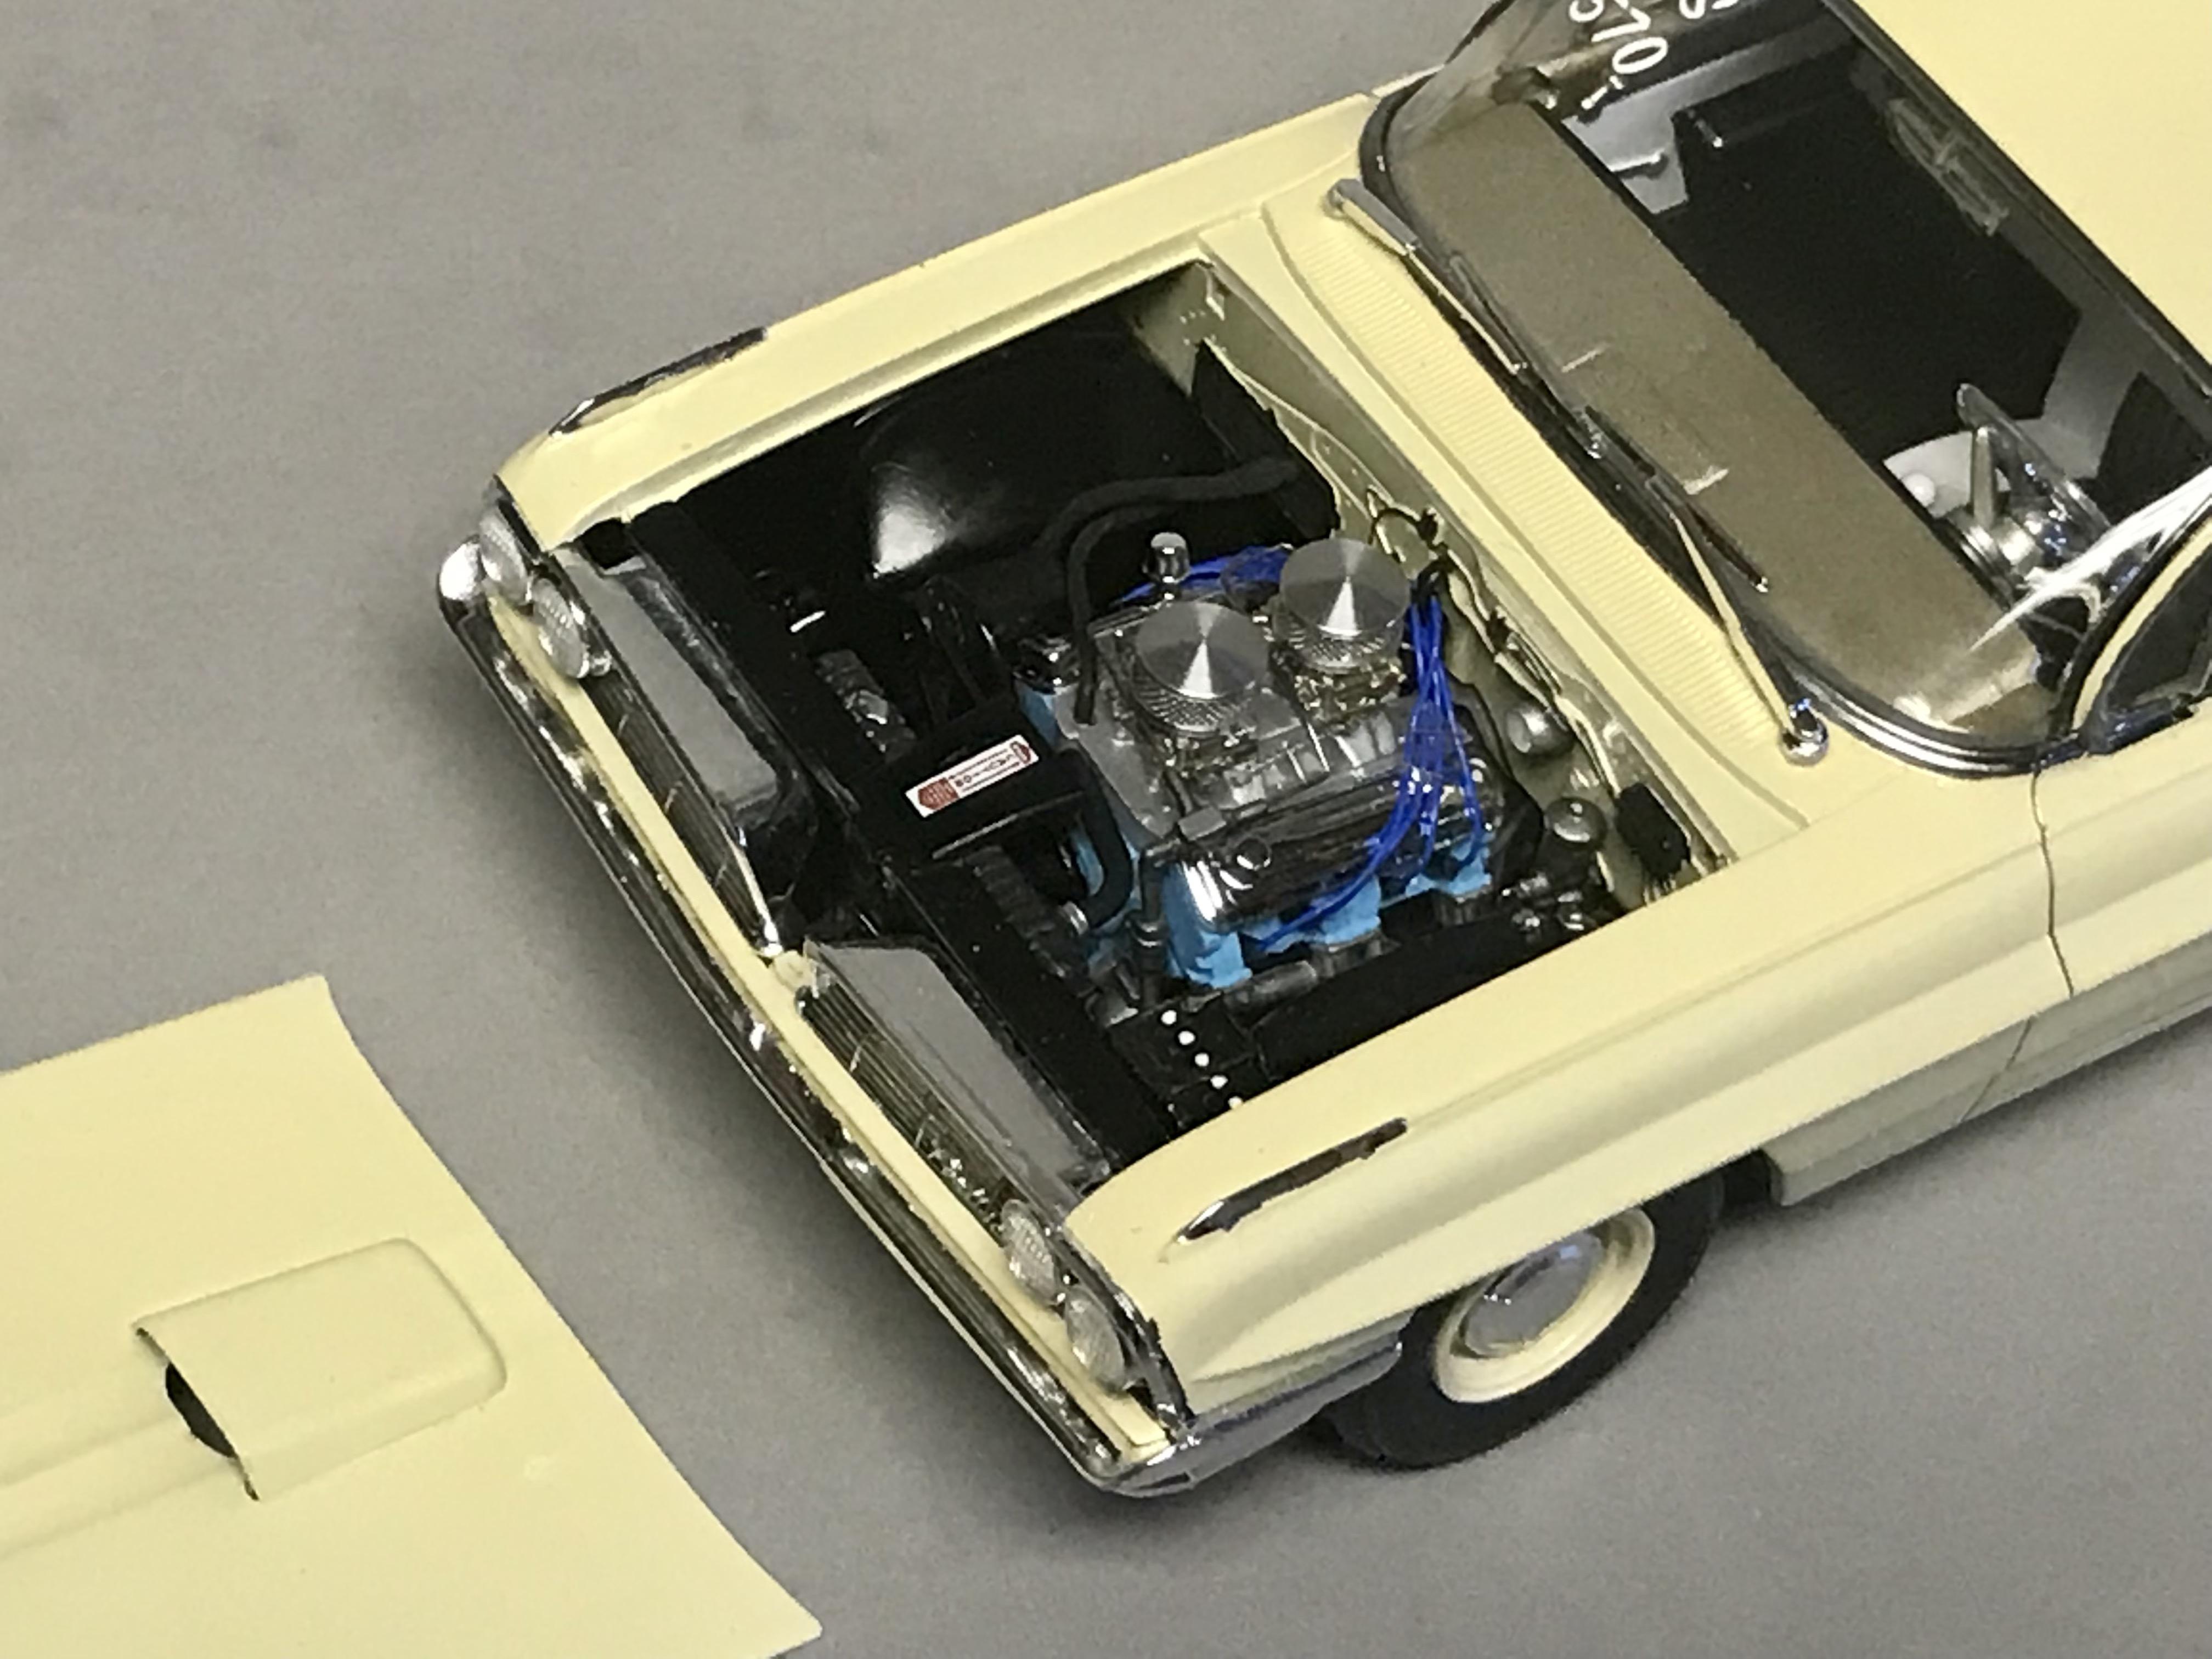
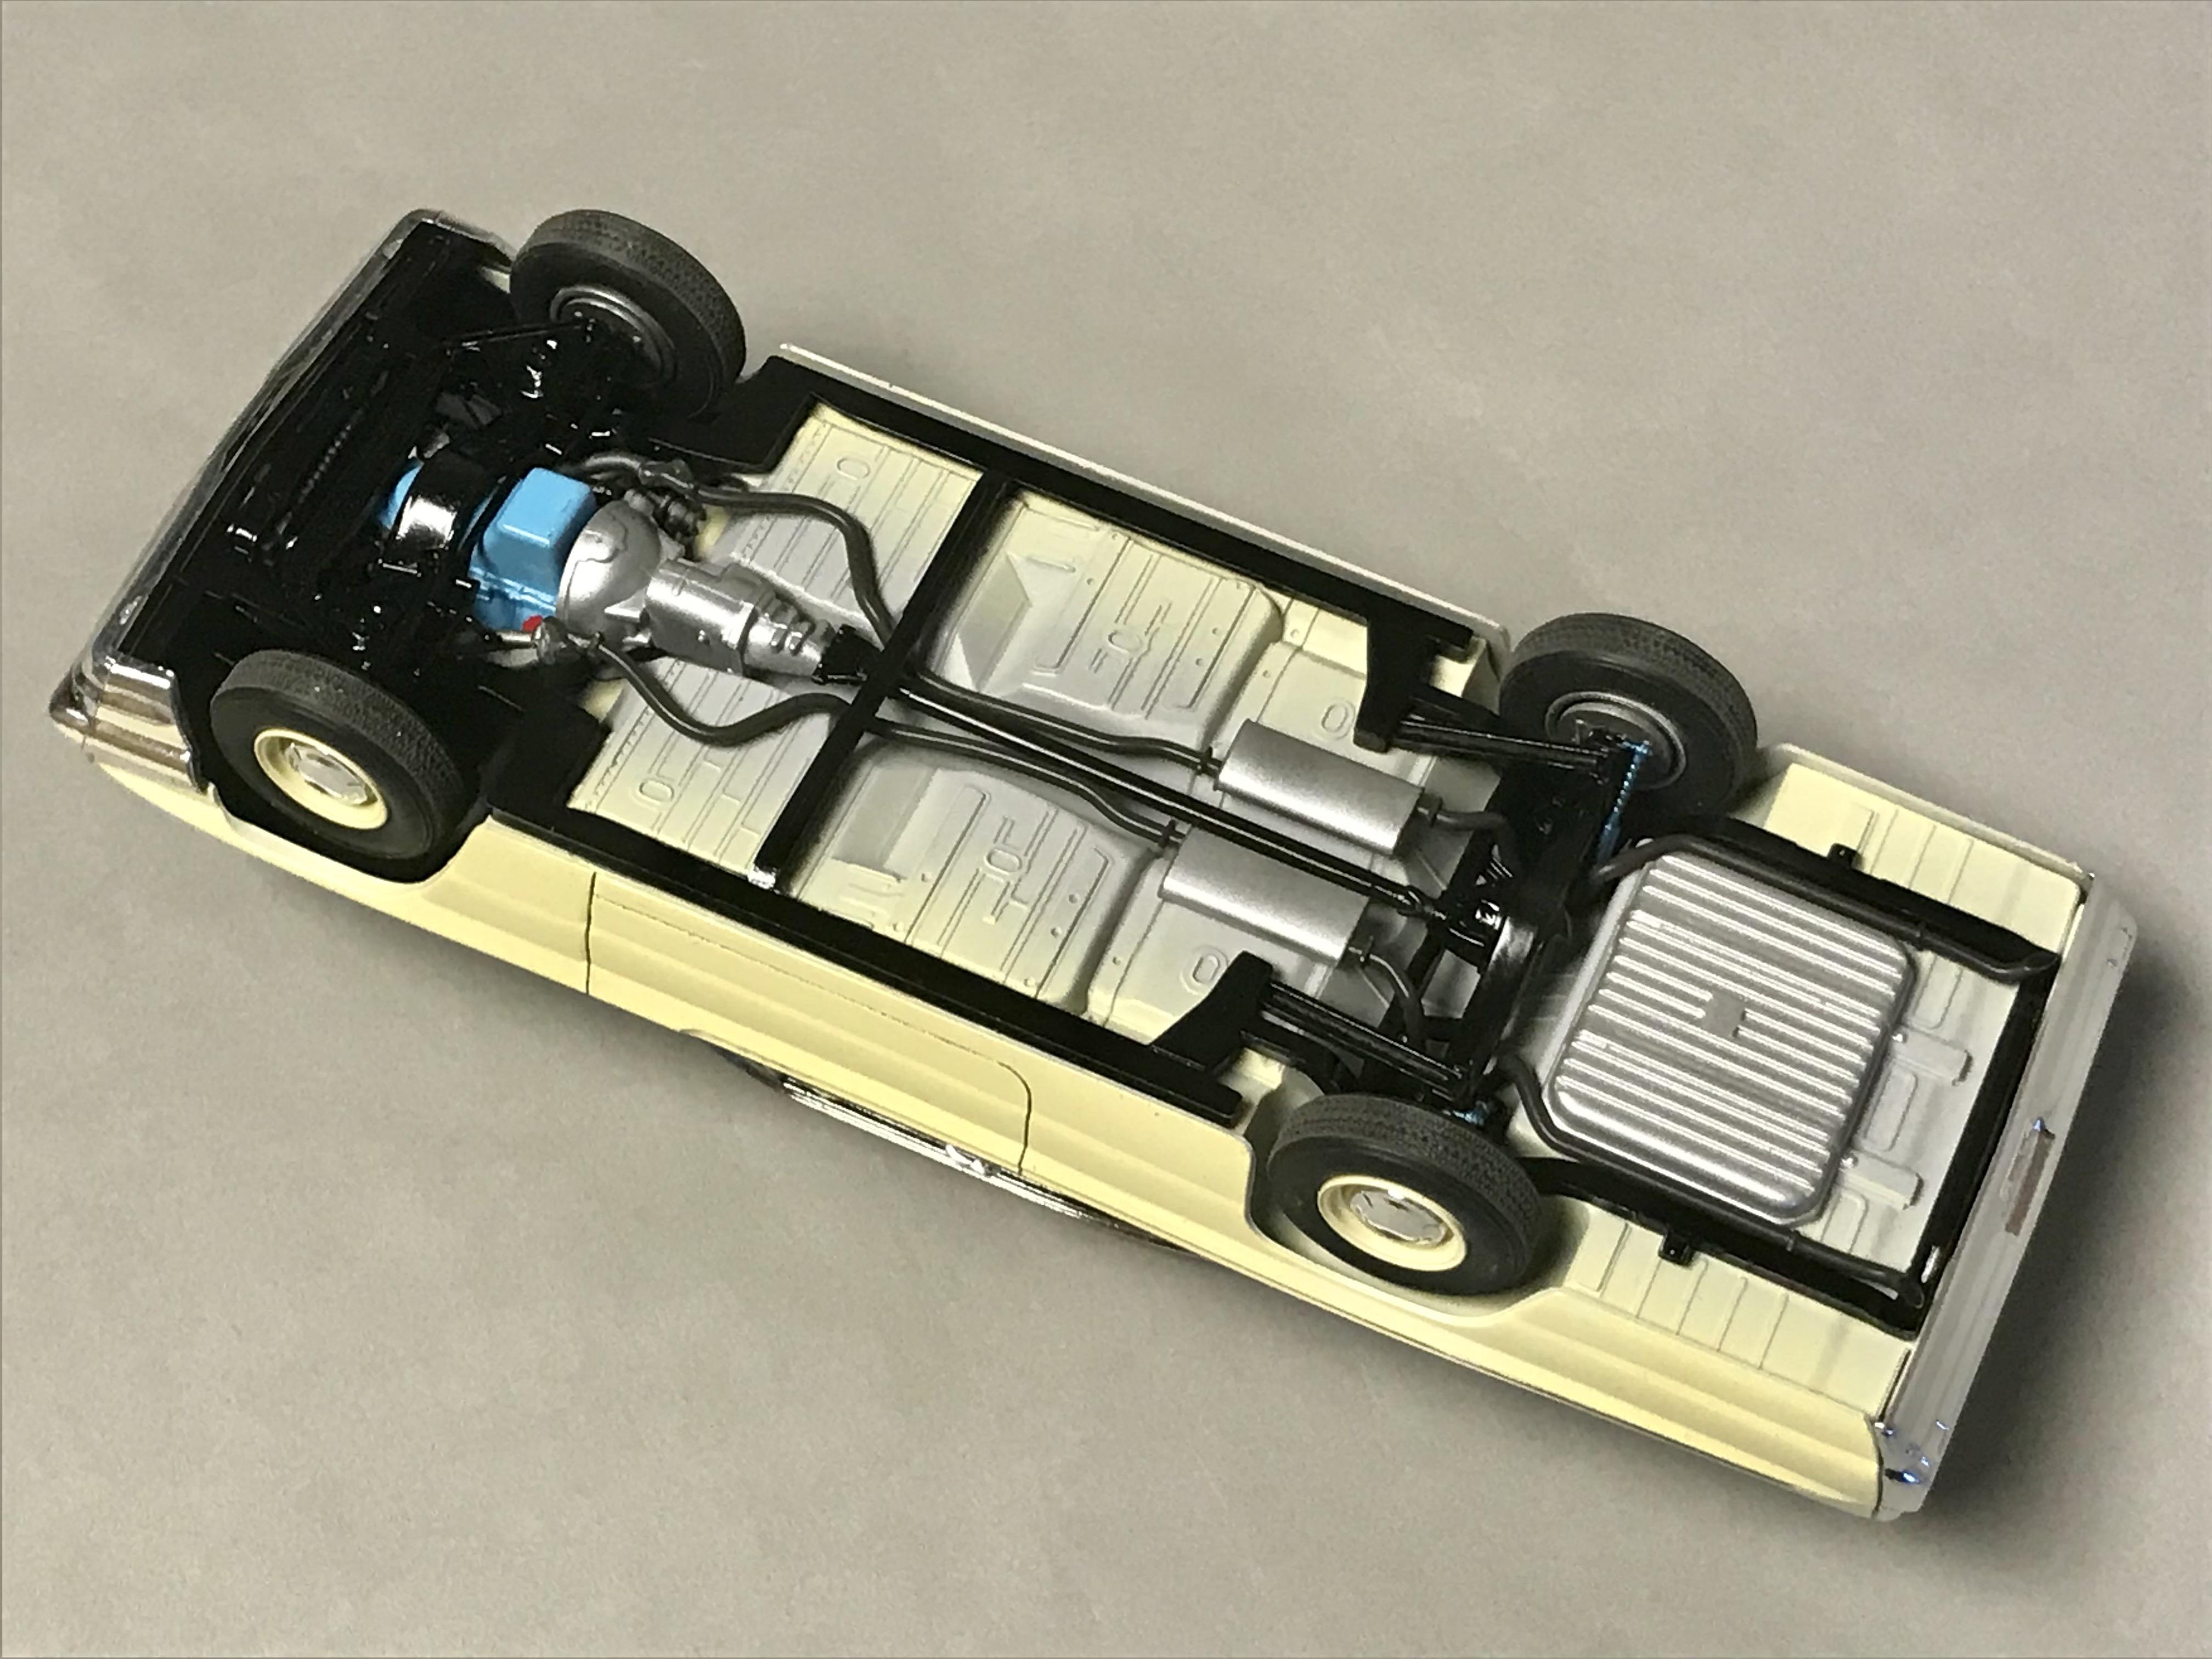
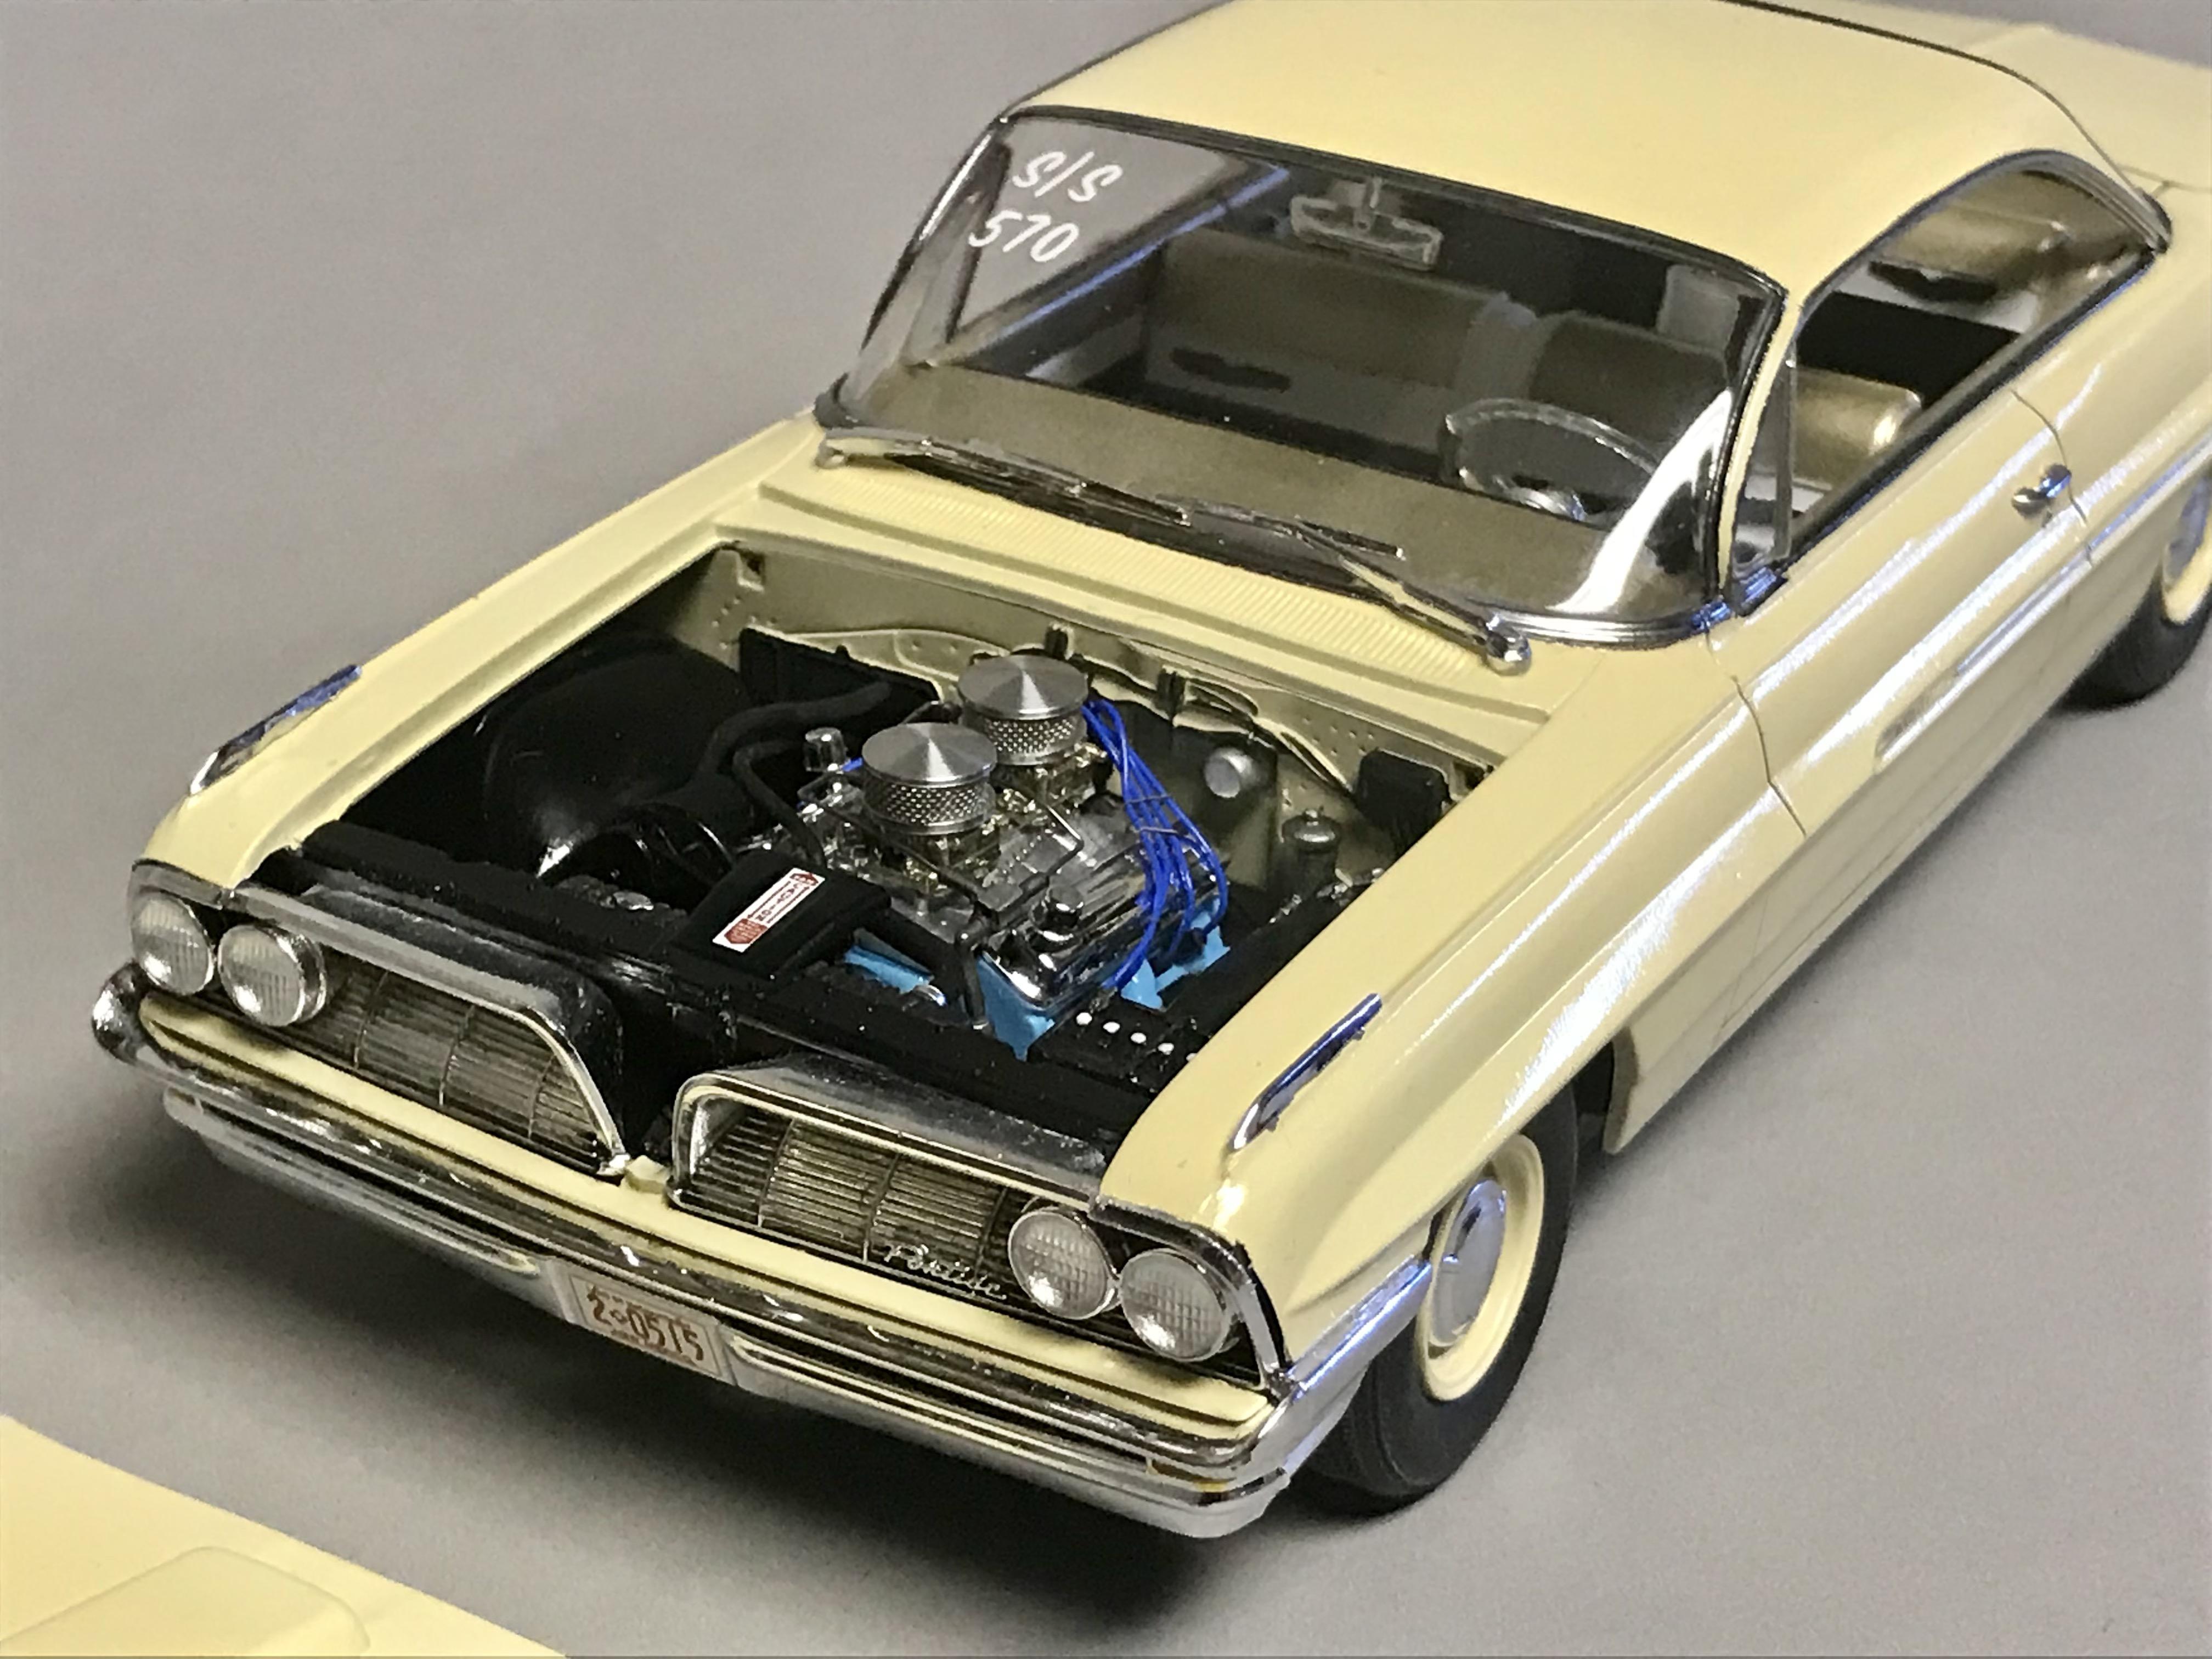
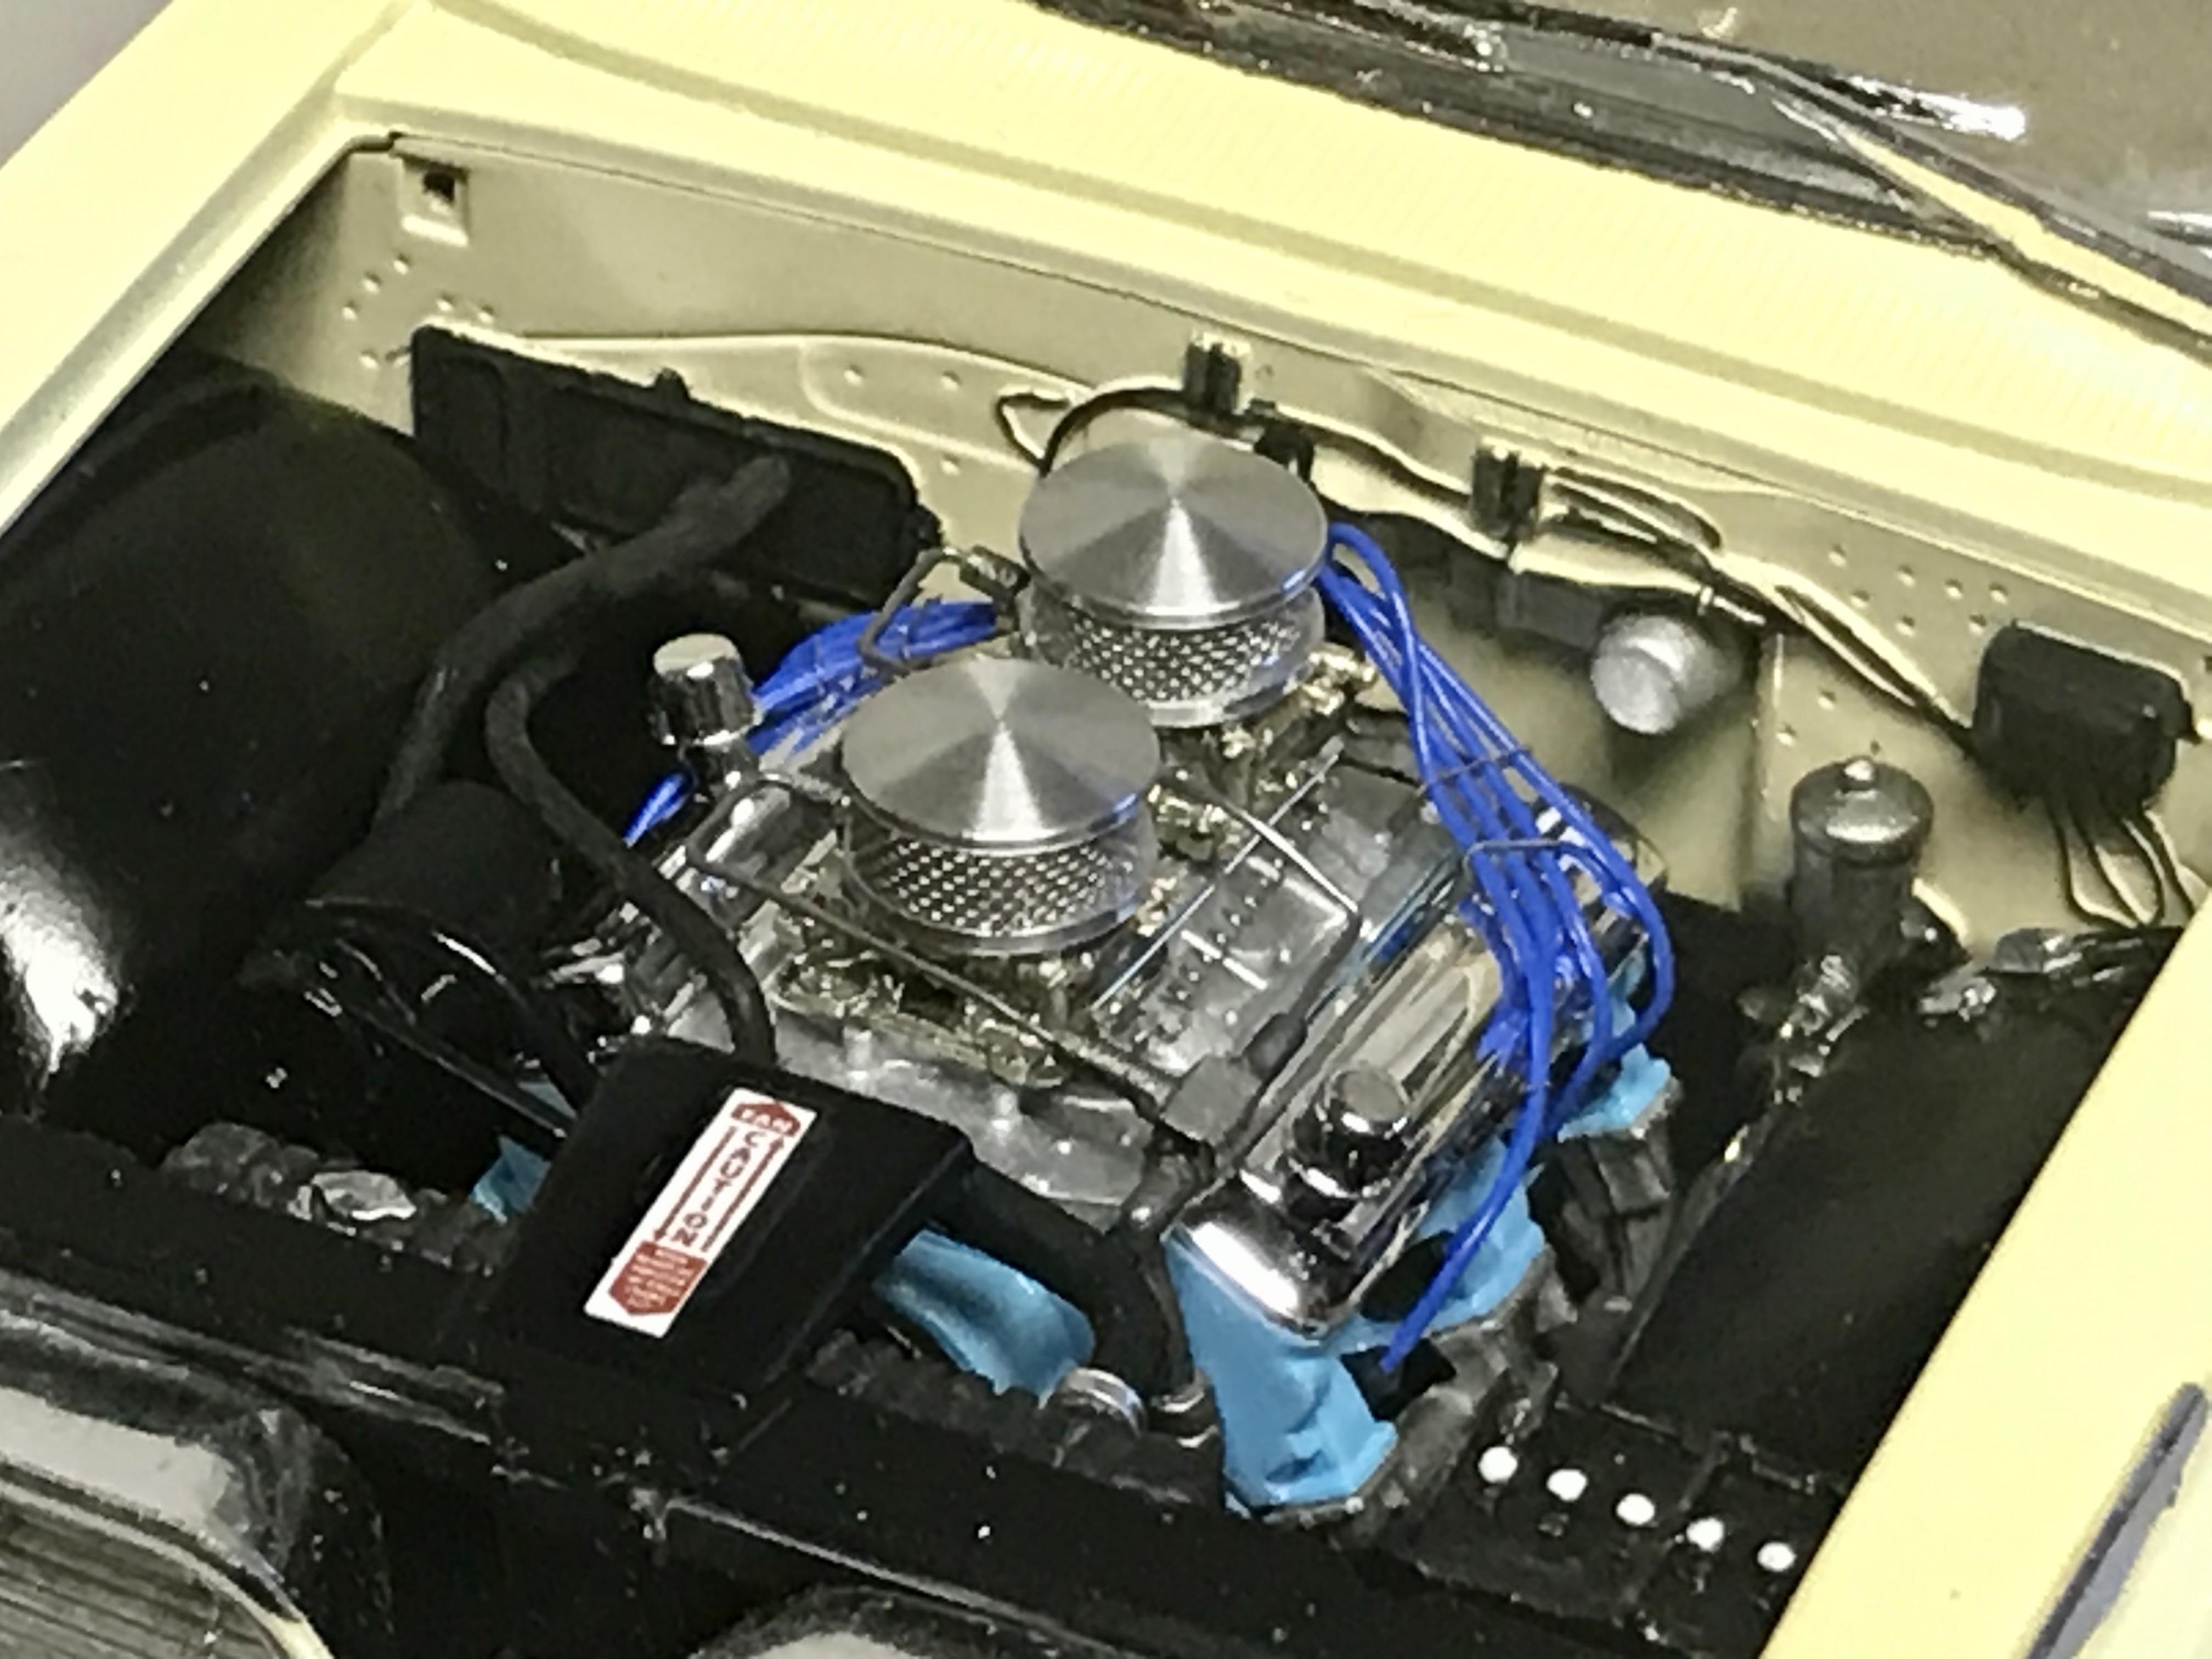
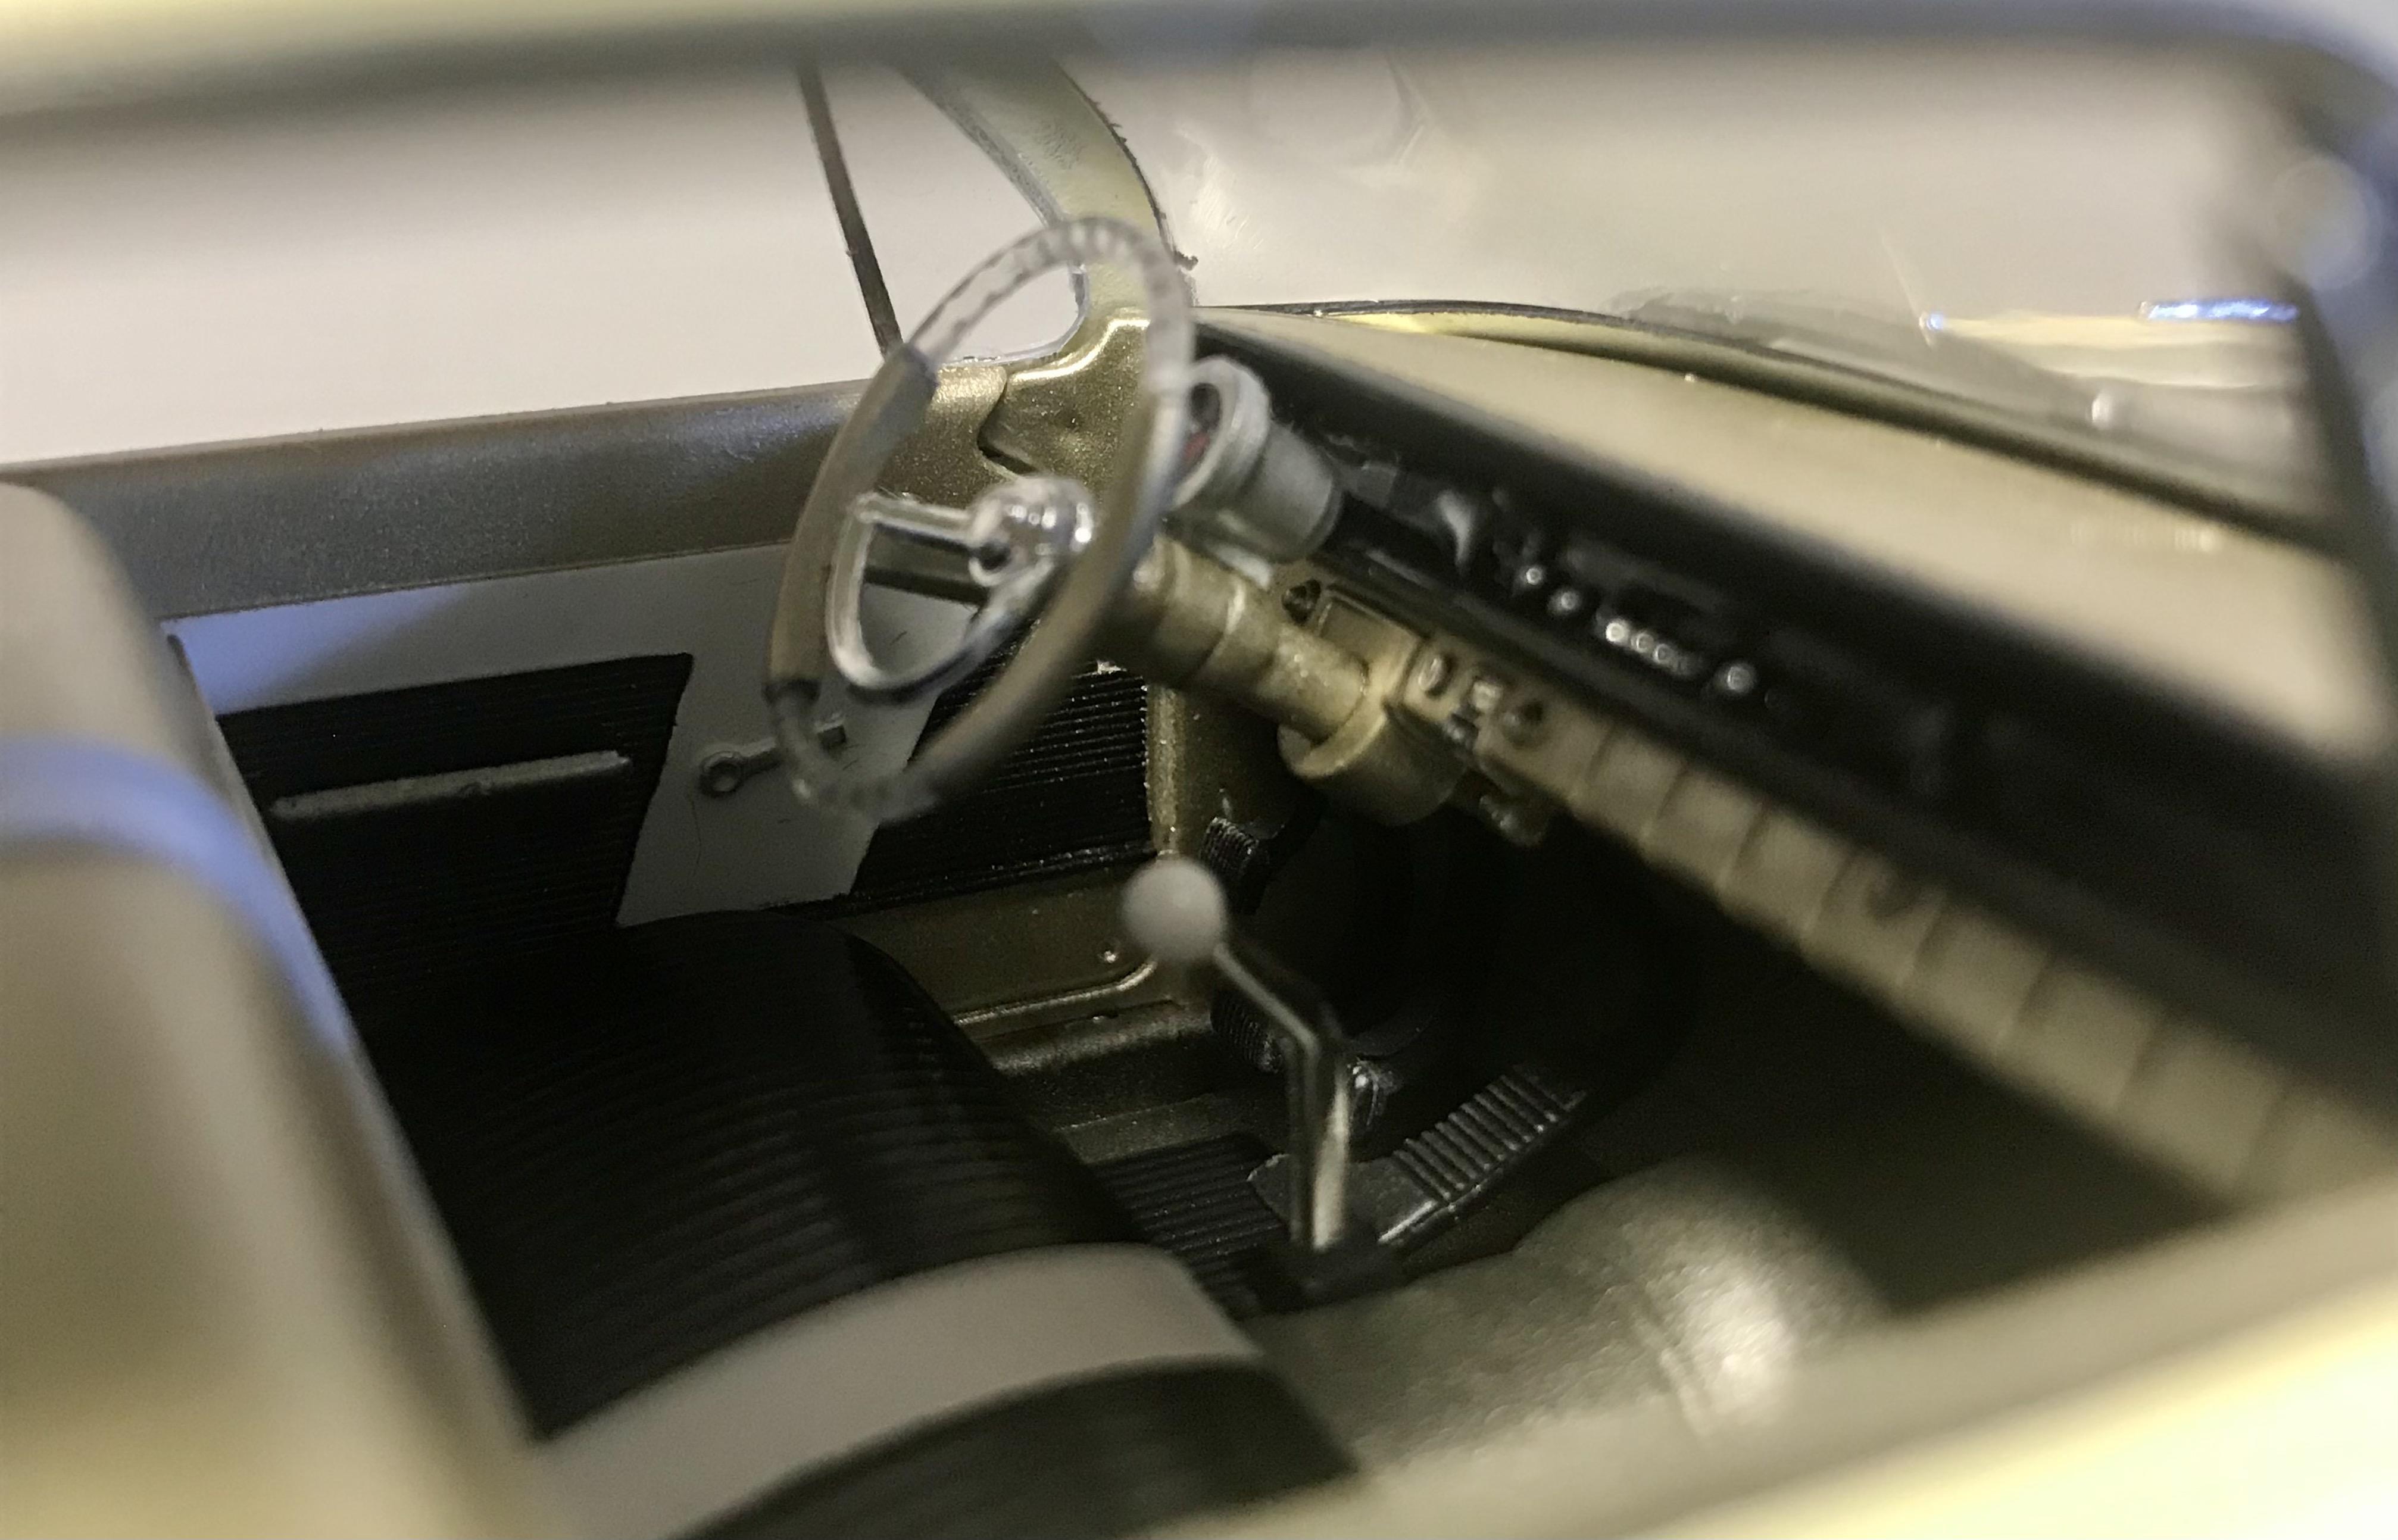
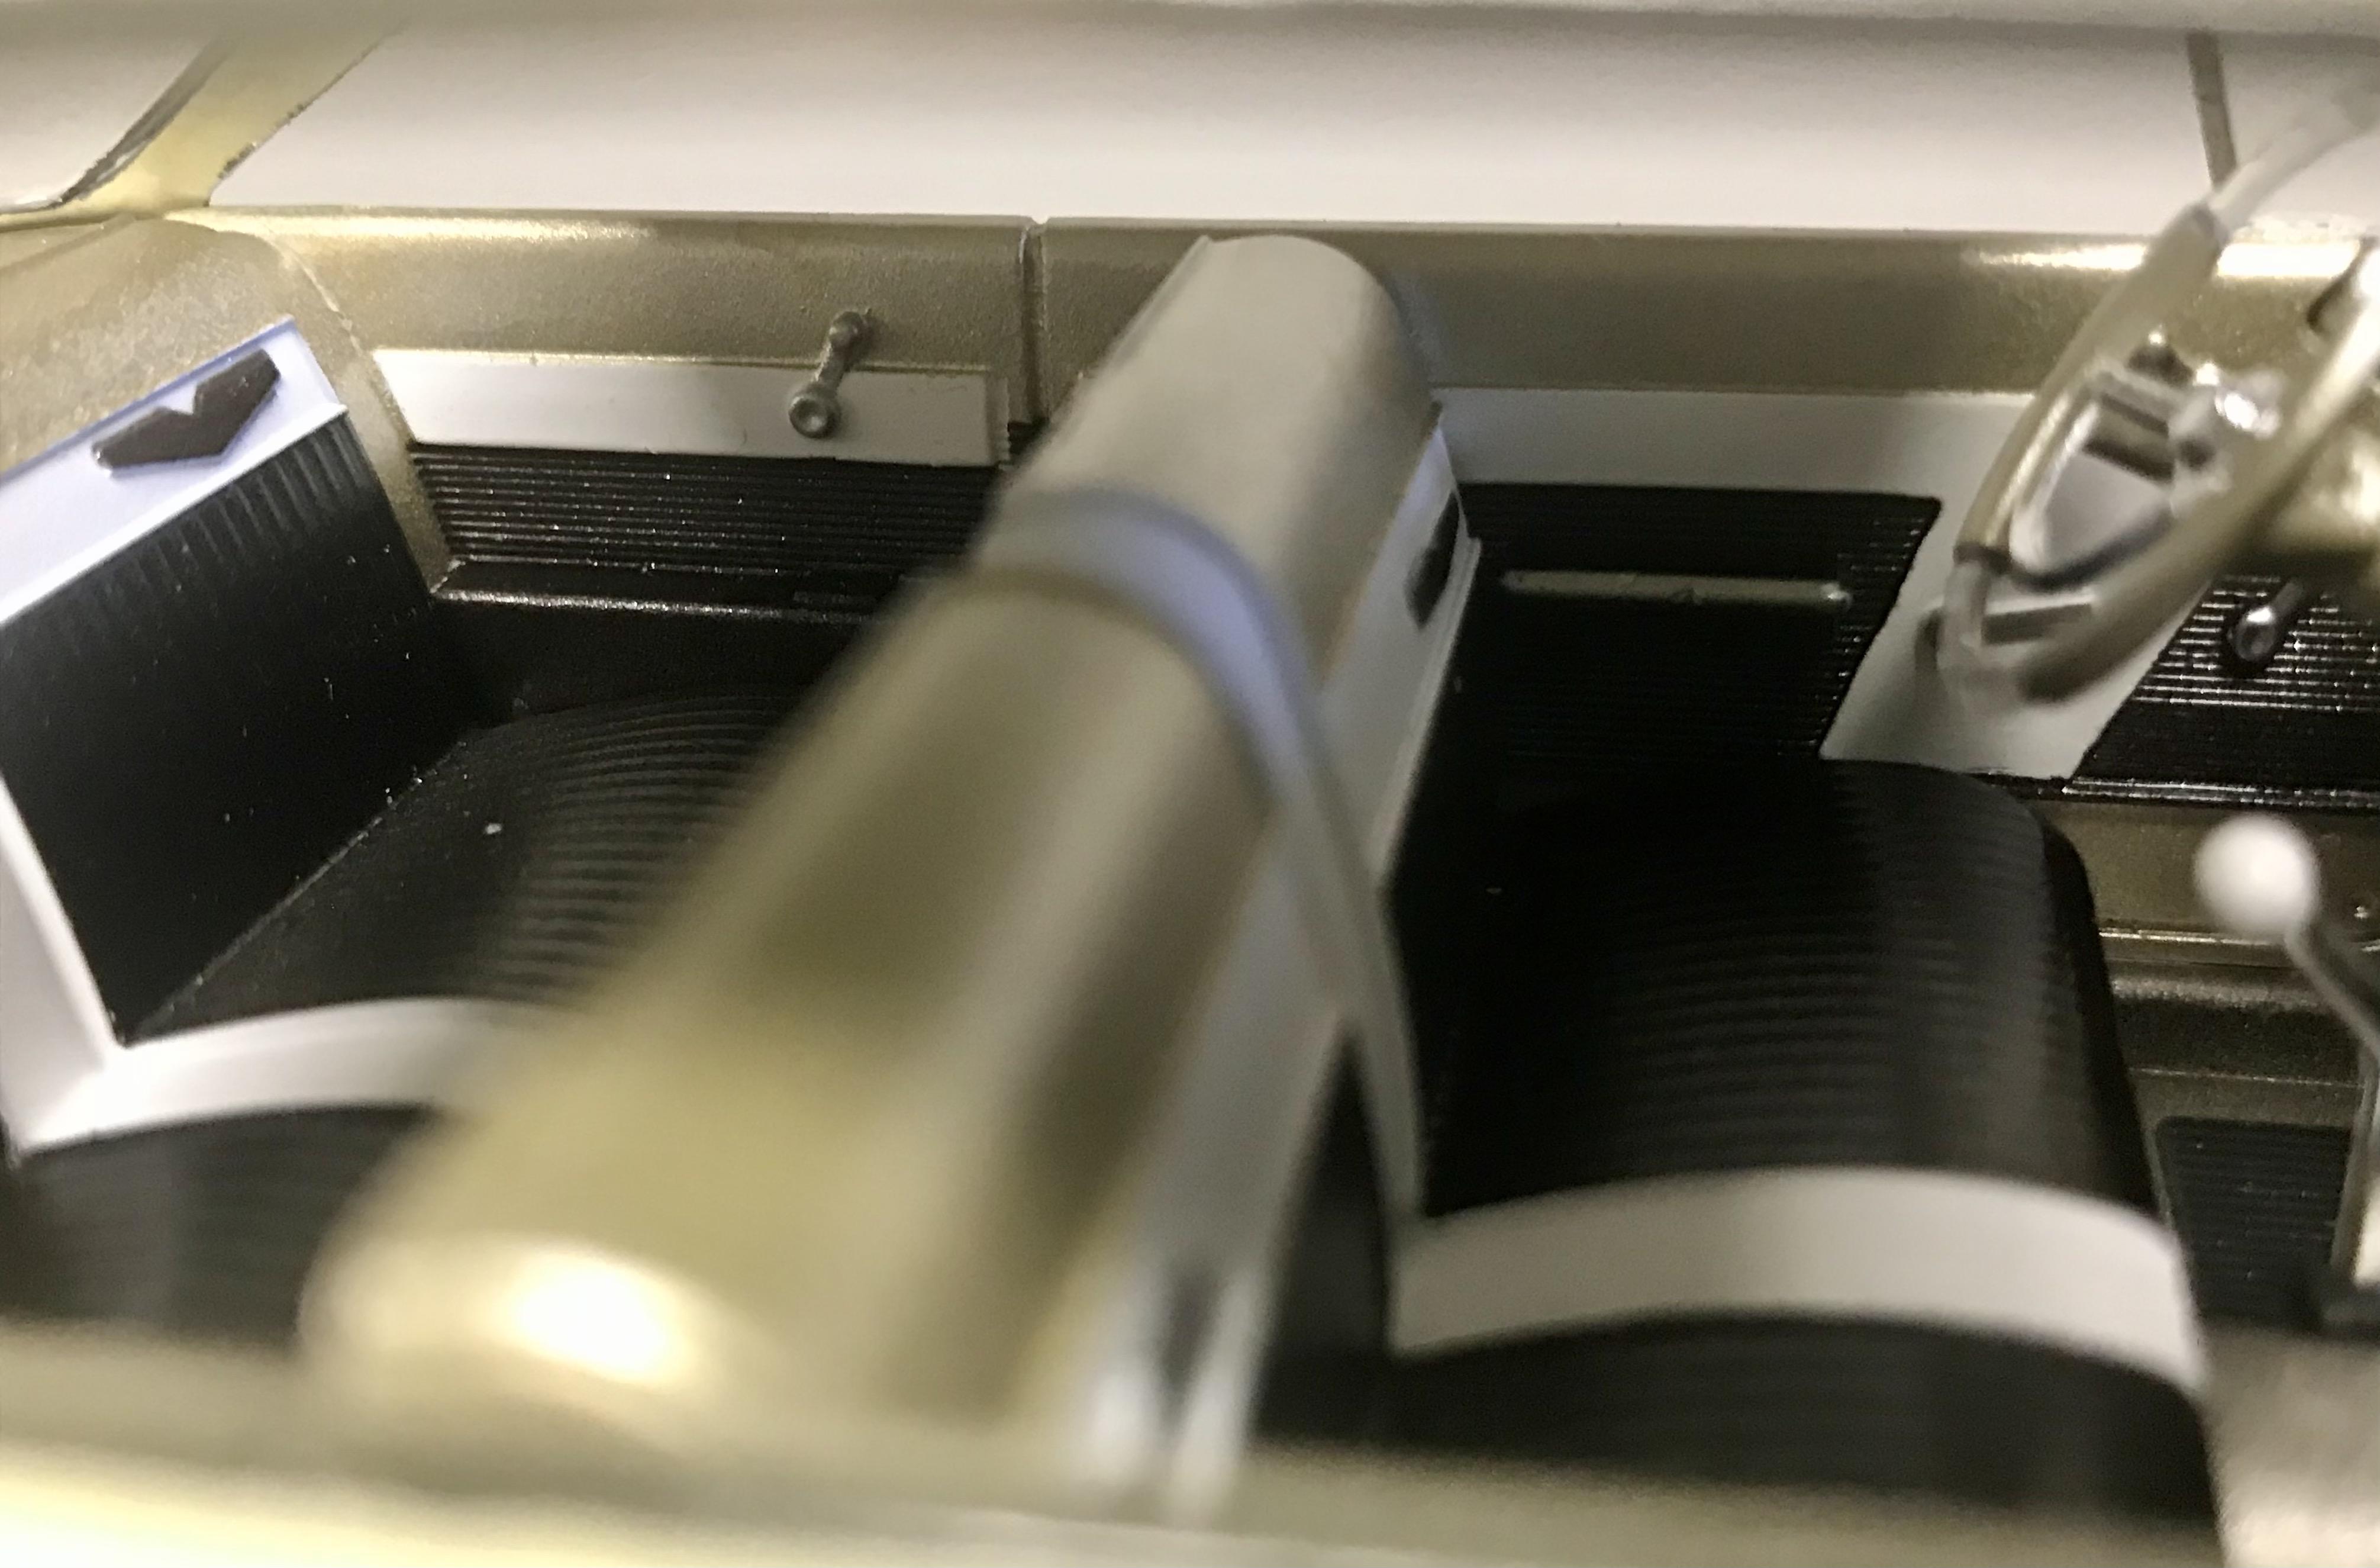
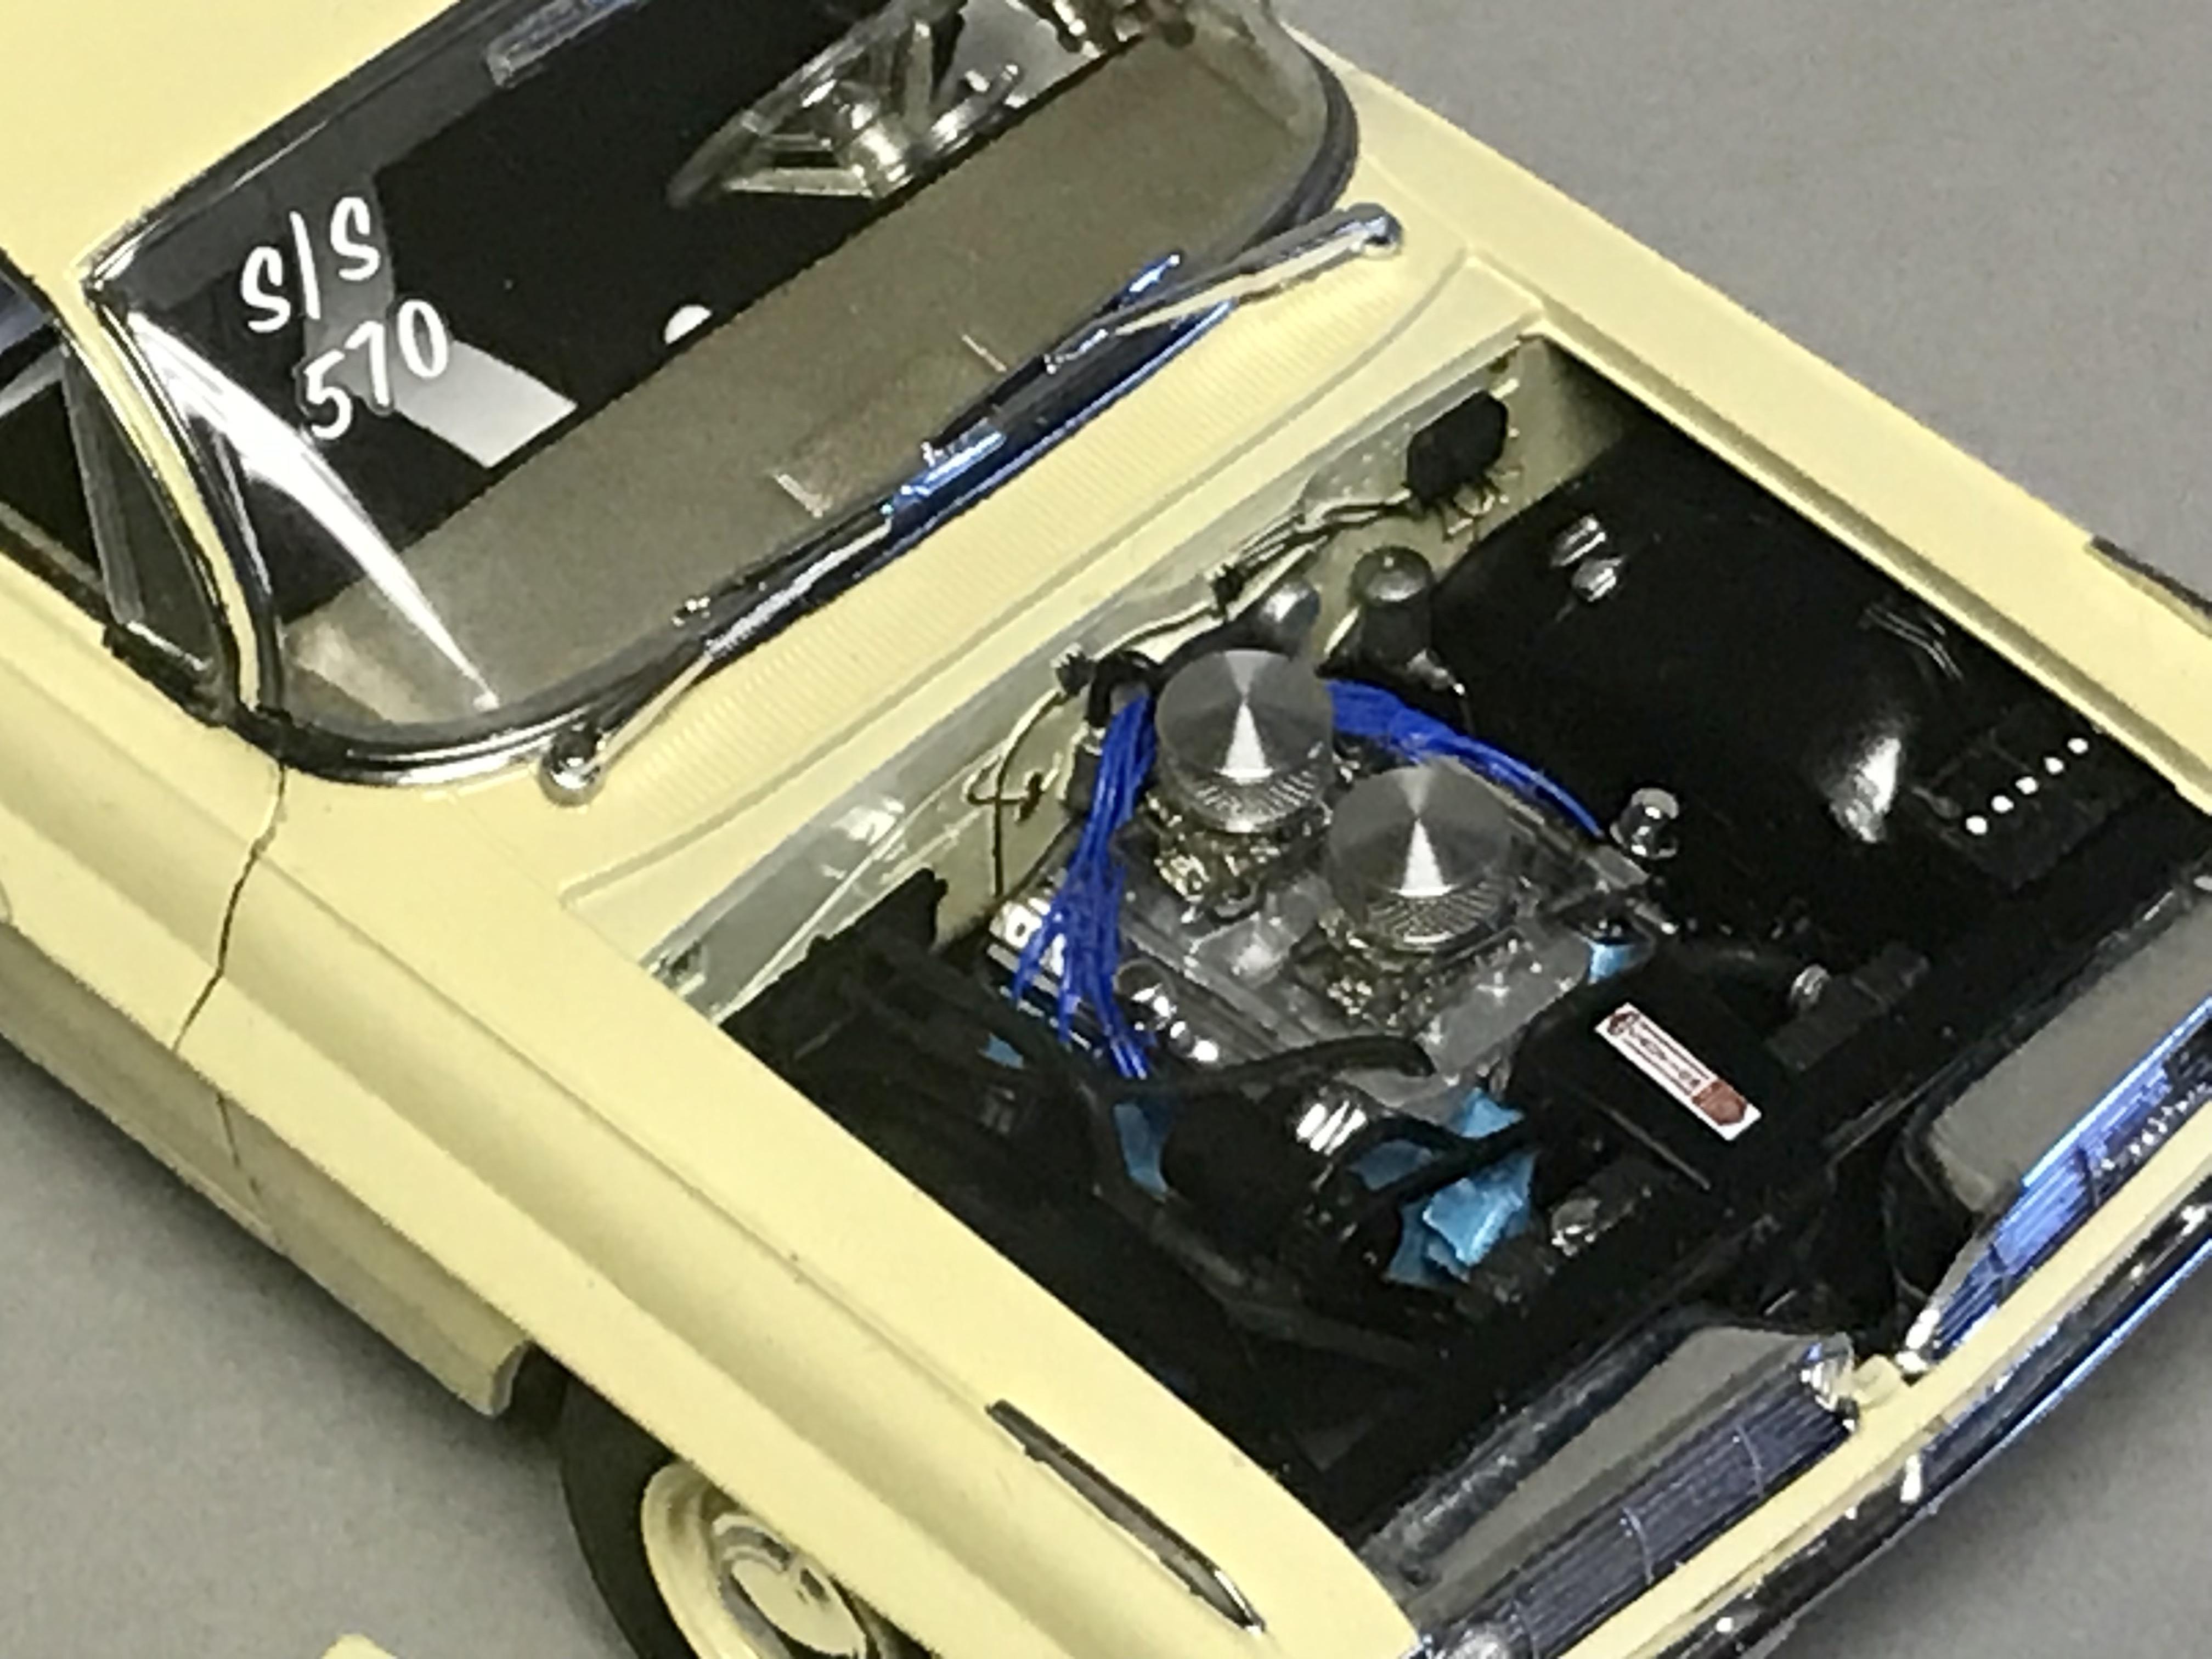
I wasn't sure whether to post this one in "model cars underclass" (stock) or here. This is my interpretation of a mostly showroom stock 61 Pontiac Catalina with some mild mods that I believe would fit within the NHRA rulebook for "stock" class (class S/S for 0 - 10.59 lbs./ hp, I figured 368 hp (dual carb 389?) for a 3750 lb. car and came out with 10.19). Dual carbs (Holleys) and the hood scoop (actually a Ford truck part that Pontiac had to assign a stockroom number for) were around then but not on the standard order form as I understand it. I used an actual restored car posted on the web, a beautiful Bamboo Cream colored Super Duty 421, for the "appearance" prototype for this model (here) but wanted this model to be closer to a car driven off a car lot and taken directly to the drags (think Carol Cox's NHRA winning '61 Ventura (first woman to win an NHRA class!)). I'm sure someone might find some errors in my interpretation and the execution of this build but it's just a model car for goodness sake and I had a lot of fun building this one. This is the excellent Moebius kit mostly OOB but I added the resin carbs (Fireball), aluminum distributor and air cleaners (Detail Master) and misc. solder fuel lines and wire linkage and brake line. The carbs and air cleaners are likely over-scaled but I'm happy with the over-all look of the engine. I scratch-built the hood scoop using Evergreen styrene sheet and the tach using Evergreen rod and tubing. I airbrushed Scale Finishes base paint for the Bamboo Cream with a Tamiya TS-13 clear coat and masked and airbrushed the tri-color interior using Tamiya acrylics. Remaining areas were painted using Tamiya acrylics and Alclad Chrome over black enamel for the window frames. I used BMF to do the two super thin trim spears on each side as these were too thin to try to mask and paint with Alclad/ enamel. I'm down to a 1/2 sheet of my "good" older BMF and not sure what I'm going to do when this is gone, the new stuff is terrible. I've been building mostly sixties SS'ers since 2019 and wanted to do an early car that reflected the years when they were driven off of the lot and directly to the strip without a lot of mods, true super "stock" drag racing. I'm happy with this one, hope you like it too! Cheers, John
- 23 replies
-
- 3
-

-
- catalina
- super stock
- (and 1 more)
-
Here's my finished version of the Moebius 66 Ford F-100 short bed pickup which is based on the second round test shot. The tooling is about 95% ready to go at this point and final test shots should be available shortly. Colors I used are Rangoon Red over Wimbledon White. Still waiting on the decals which will include some scripts which are missing from my build up. Moebius is shooting for the first release to be before the end of the year, most likely it will be the 66 Flareside version. Look for a display of these kits at the Detroit Show coming up next month. -Steve
-
 Loved this kit. Been waiting since the 90's for someone to make it. Reminds me of my trucking days
-
This one was a longtime work in progress, and it feels food to say that I am pretty impressed with the way it turned out. I am 26, and I started modeling in late 2017. I think this build was a milestone for me in terms of patience and how it impacts the final product. I love this hobby. I rent an apartment in the Boston area, and I commandeered a space in the shared basement to put a 6 ft. table, along with a few shelves, and build my plastic. I haven't been building much lately since it is summer time, so finally finishing this feels especially nice. I ordered the Fireball F250 upgrade kit and I was not disappointed. Chassis assembly was a breeze and the detail on the parts is pretty astonishing. Moebius created a great kit, and Joseph allowed us to build the truck on the box. I wish I took more shots during assembly, but it tried to get a shot of the accurate tranny on the finished truck.
-
 This kit is Moebius' interpretation of the old old Strombcker Convair Manned Nuclear Interplanetary Vehicle kit. In this case, Moebius refers to it as the Convair NEV (Nuclear Exploratory Vehicle). Based on designs by Krafft Ehricke in the late 1950's. It's similar in size to original Strombecker kit put out in 1959. Despite being basically the same size, Strombecker claimed a scale of 1:91 scale, where Moebius claims 1:144. Which seems more reasonable to me. The other main difference between the two kits is the length of the necks between the engine/fuel tanks and the crew compartment. The Moebius kit being a little shorter. That and the decals. I was delighted that Moebius decided to put out this kit a few years back. I love these speculative designs of possible spacecraft from the 1950's and early '60s. And since the Strombecker version came out in only once in 1959, when I was only one year old, I never got a chance to get my hands on an original. Being that the kit is put out by Moebius, everything fixes prefect and went together well. The one problem the old Strombecker kits seem to have, is the neck starts to bend with weight of the crew compartment on the end. From what I'm seeing so far, it looks like the Moebius kit should not have same problem By the way, it should be noted that Krafft Ehricke design for this vehicle was one major influences on the design of 2001: A Space Odyssey's Discovery spacecraft. I recently added the book 2001: The Science (Volume 2), the Scientists, Influences & Designs from the Frederick I. Ordway III Estate, by Adam K. Johnson. It not only confirms this information. But, it's my understanding that the author, Mr. Johnson has soon influence on Moebius issuing this kit.
-
 Yes, the wait for the 4x4 version is almost over. I have a '70 long bed on the workbench as a I write this. Photos of the 4x4 parts will be forthcoming, I'm waiting for Fotki to get back on line. Box art is already in the works. Also we're also getting a 65-66 F-100 based on the on the current kit. Dave got the go ahead just last weekend and I saw the 3D artwork at the NNL East. Test shots of the 65-66 kit may be ready by late this summer. Along with the short and long bed stylesides, we'll be getting a stepside for first time. -Steve
 -
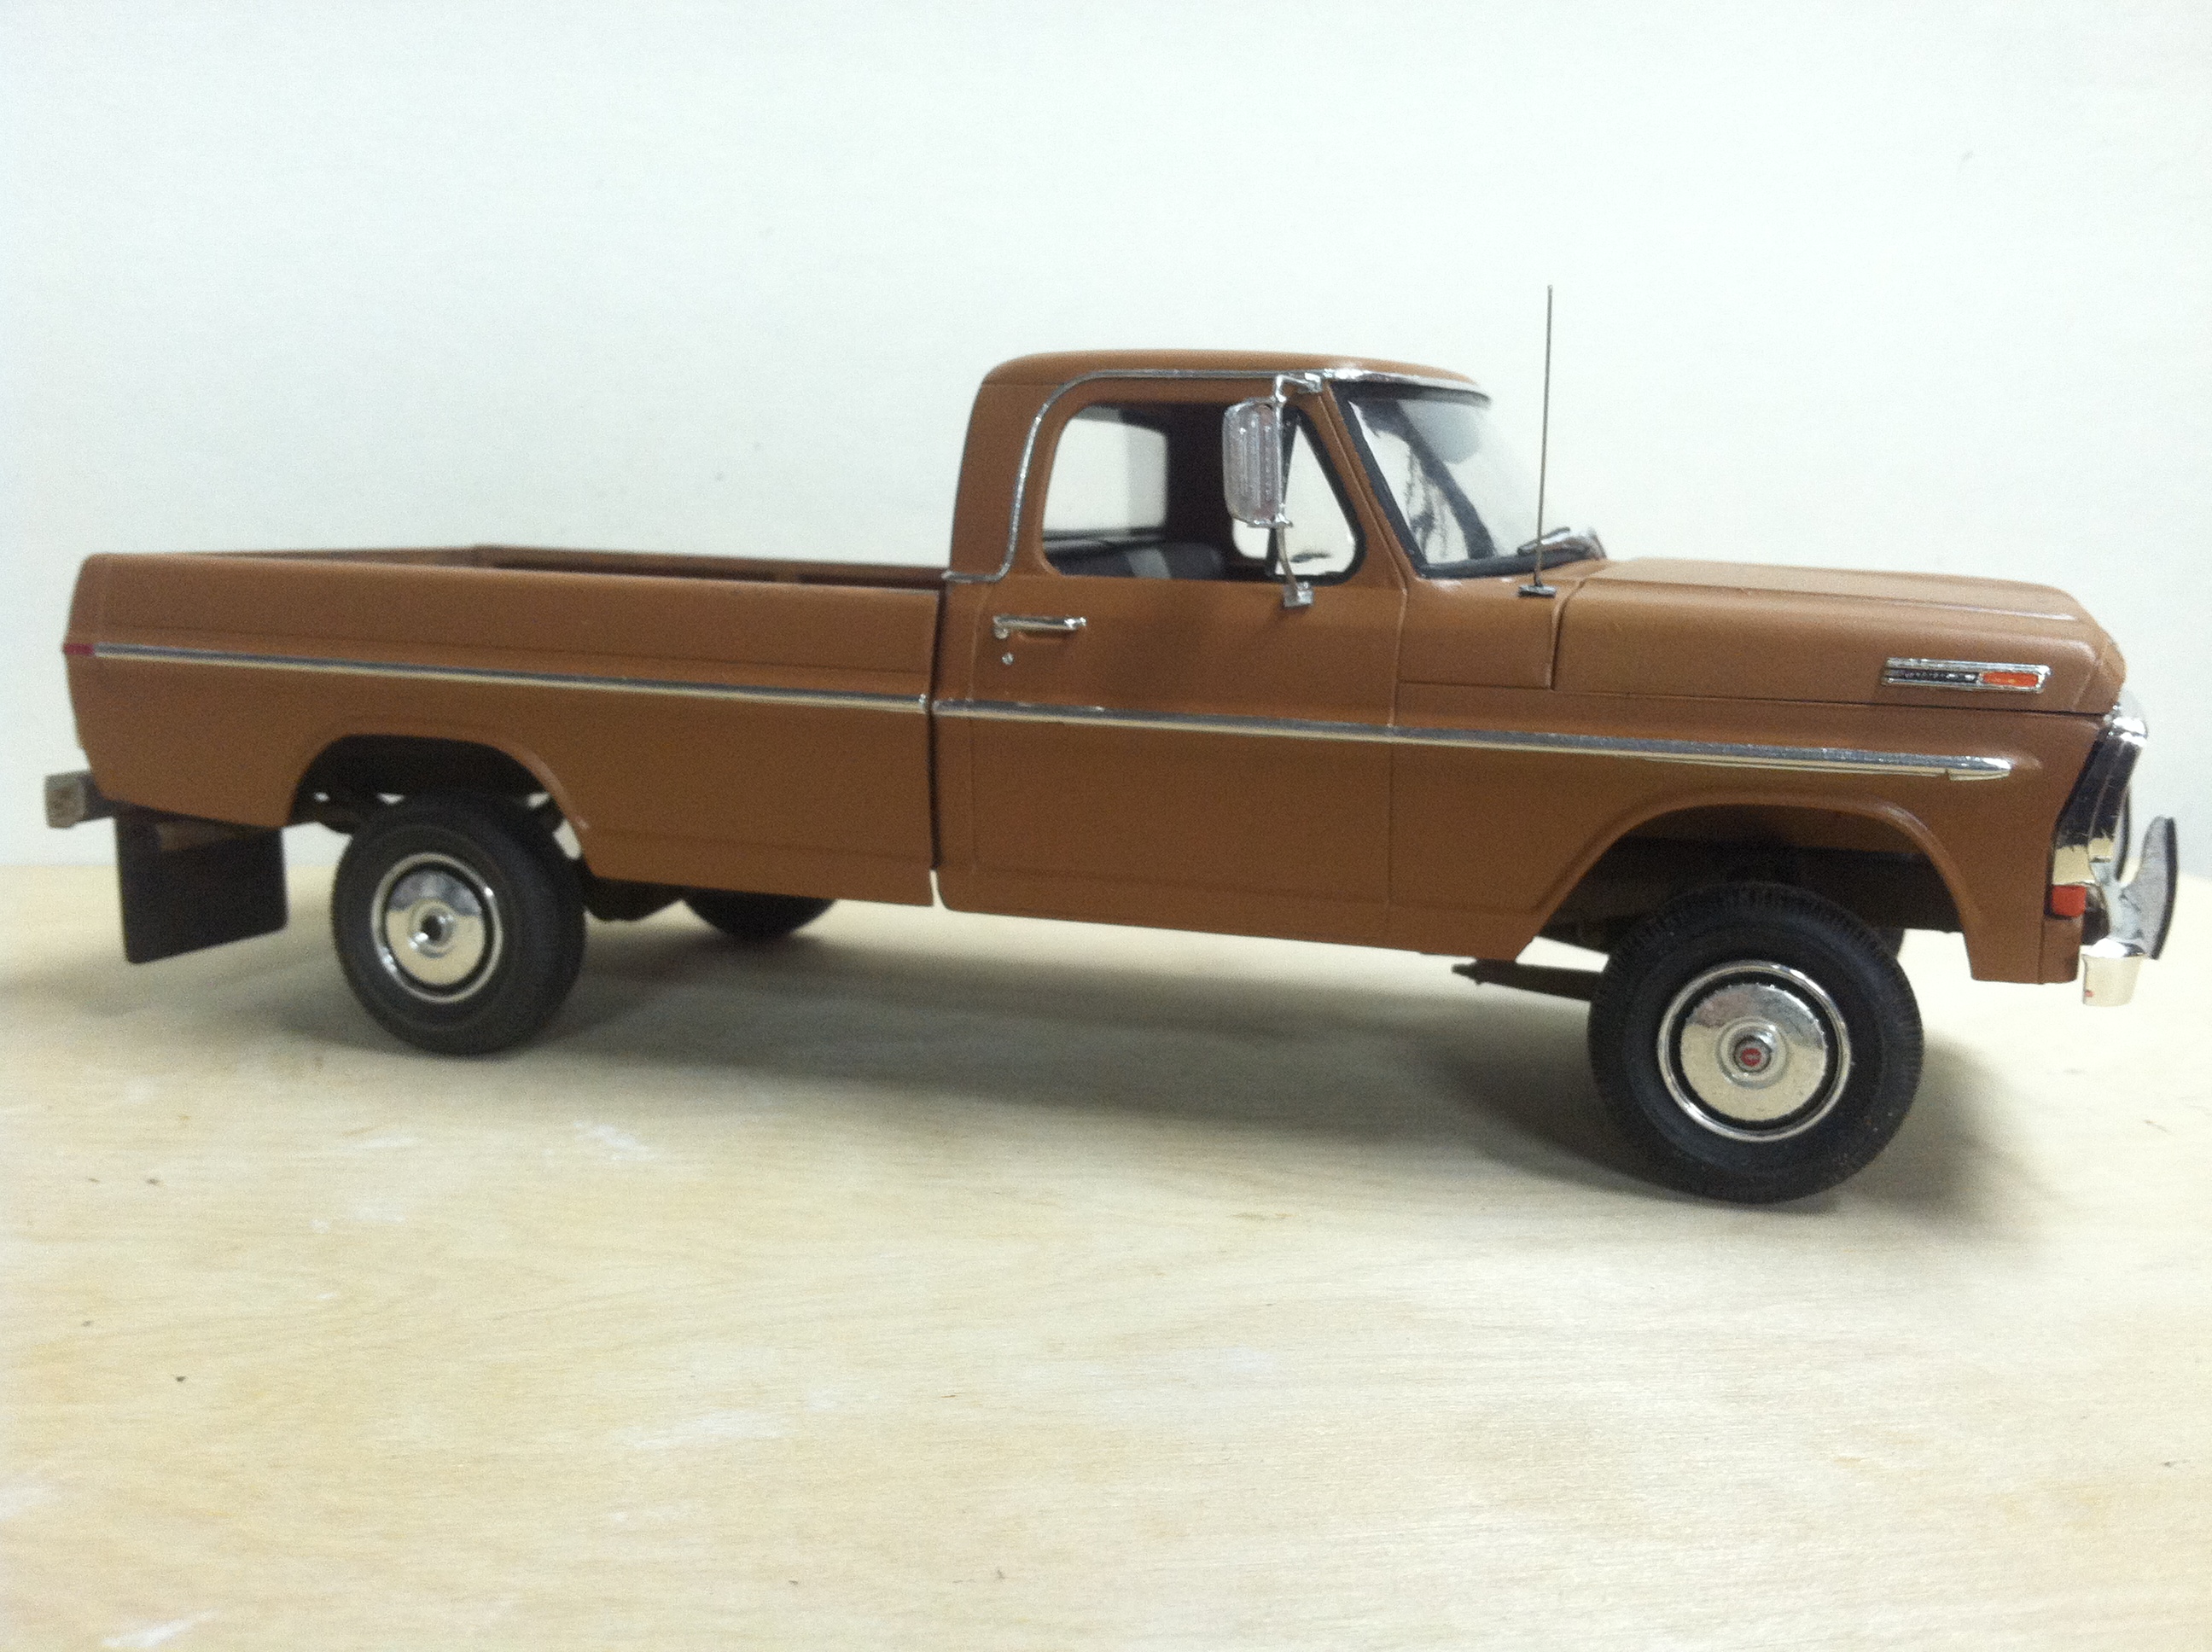
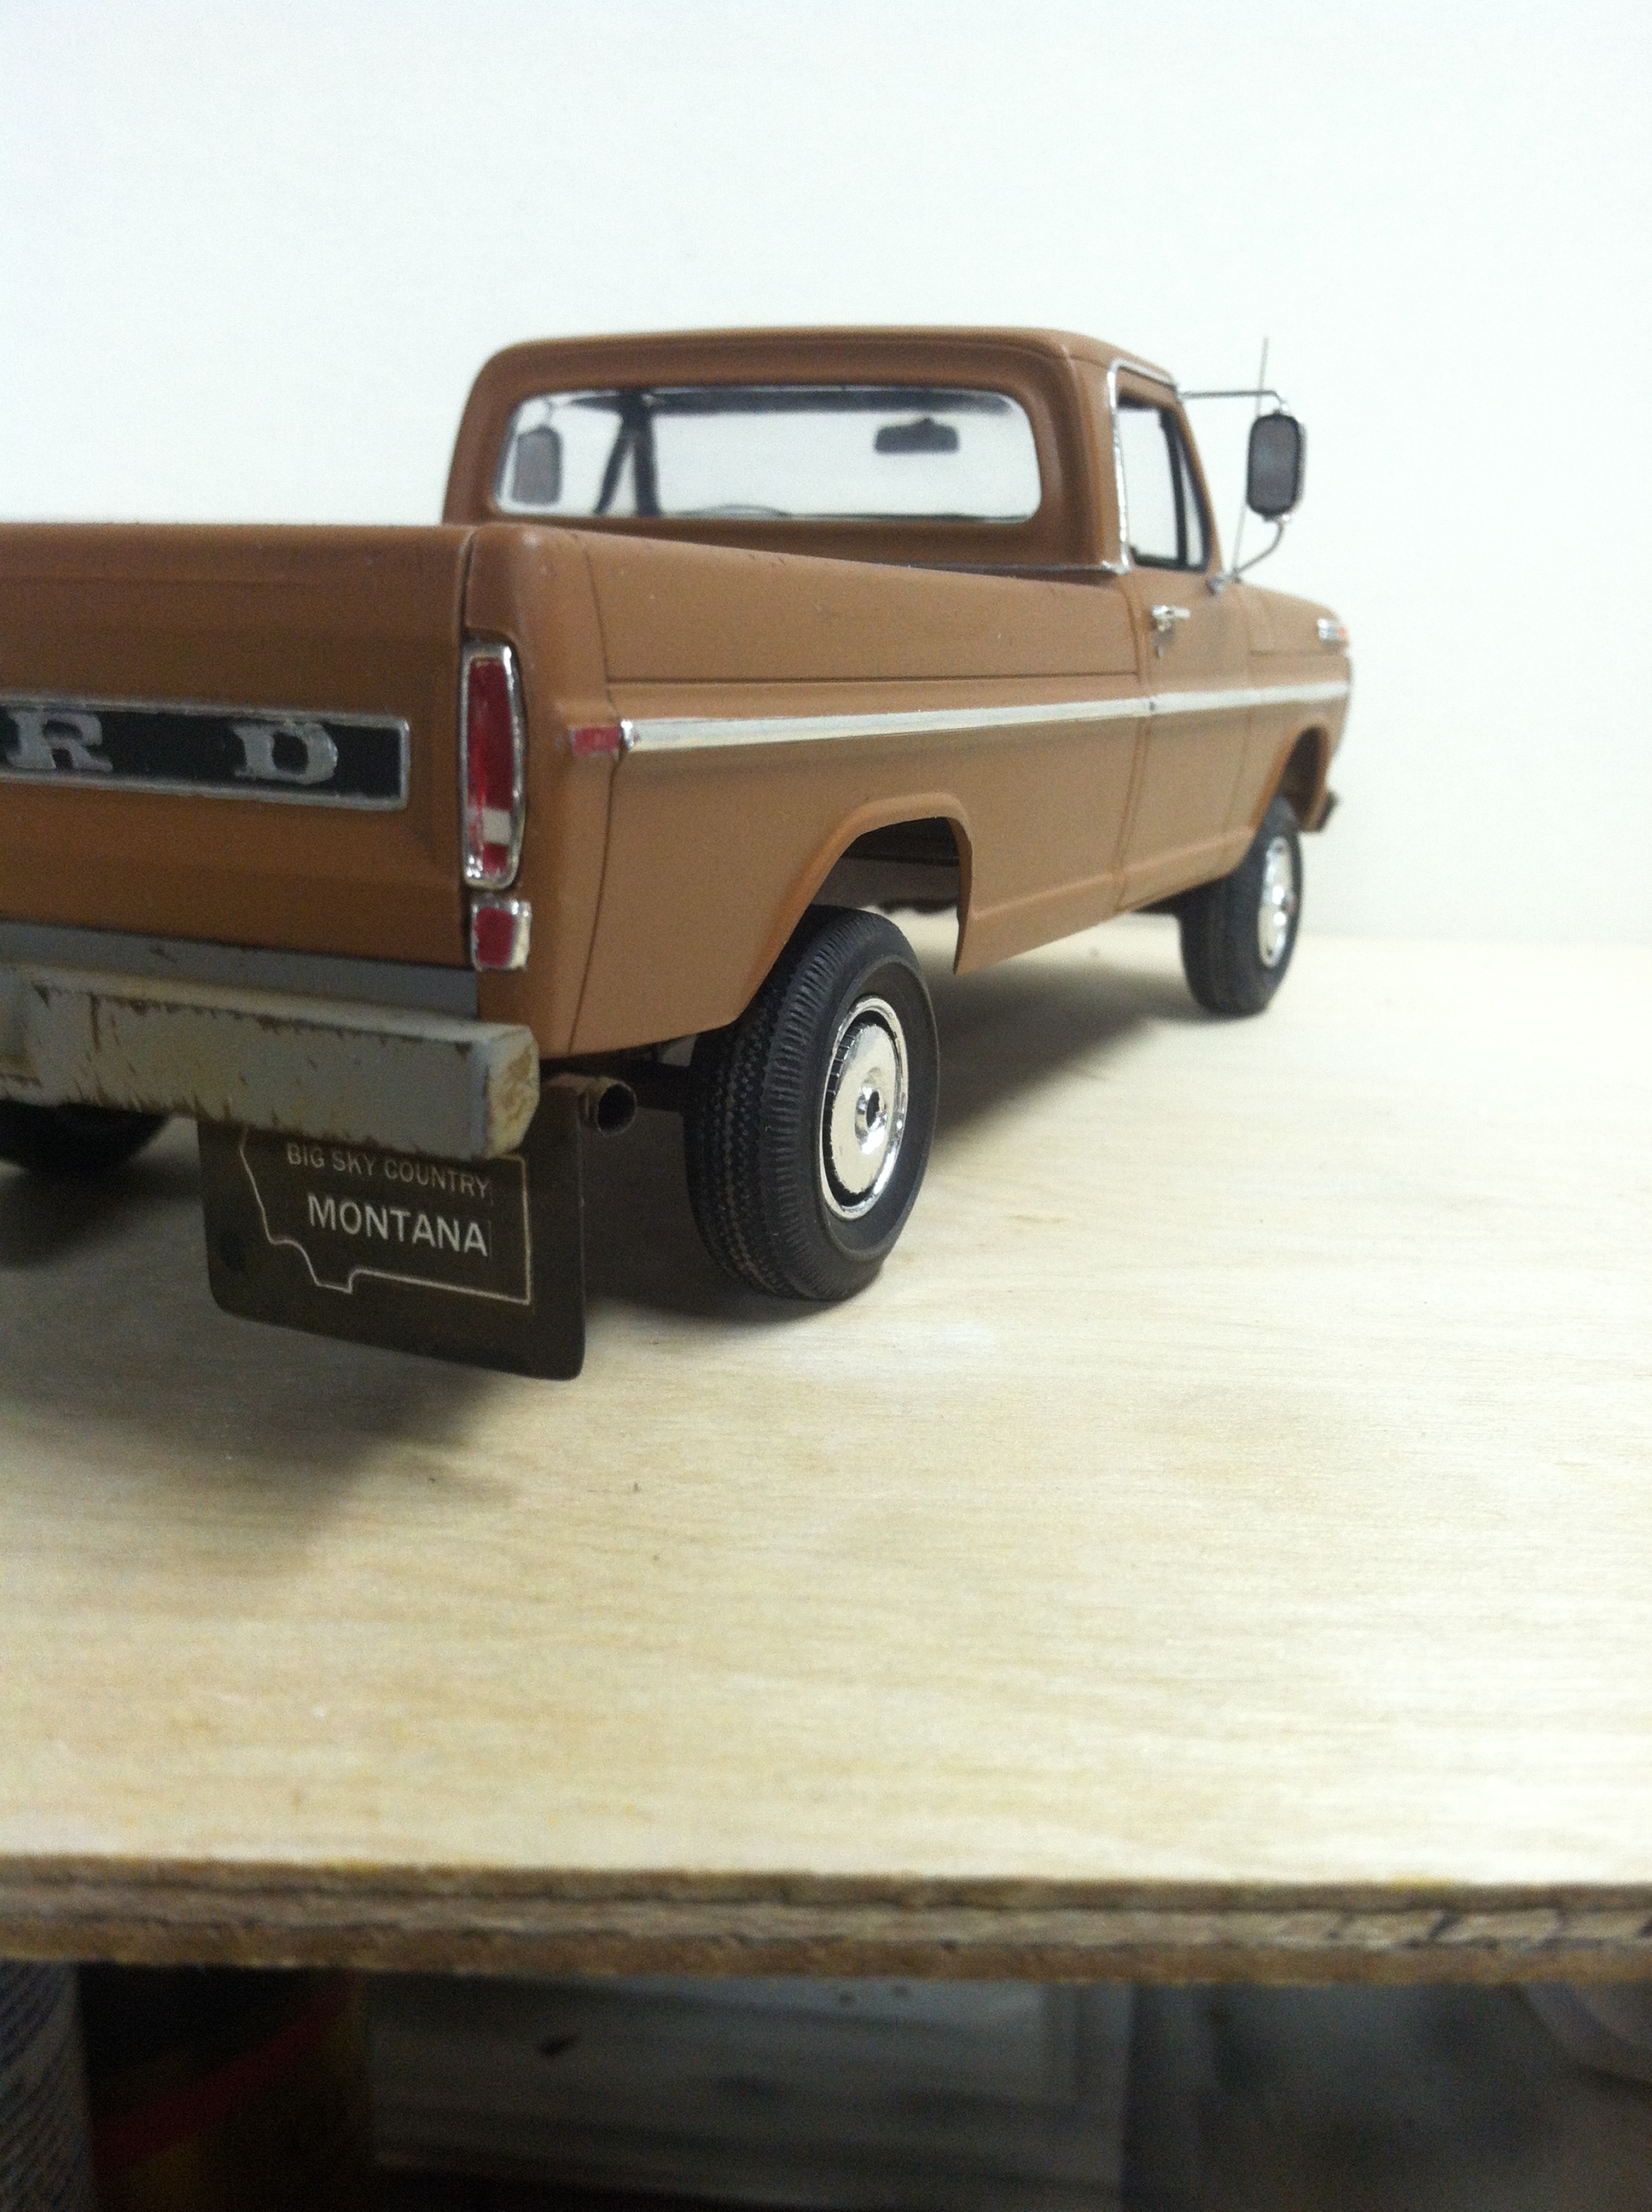
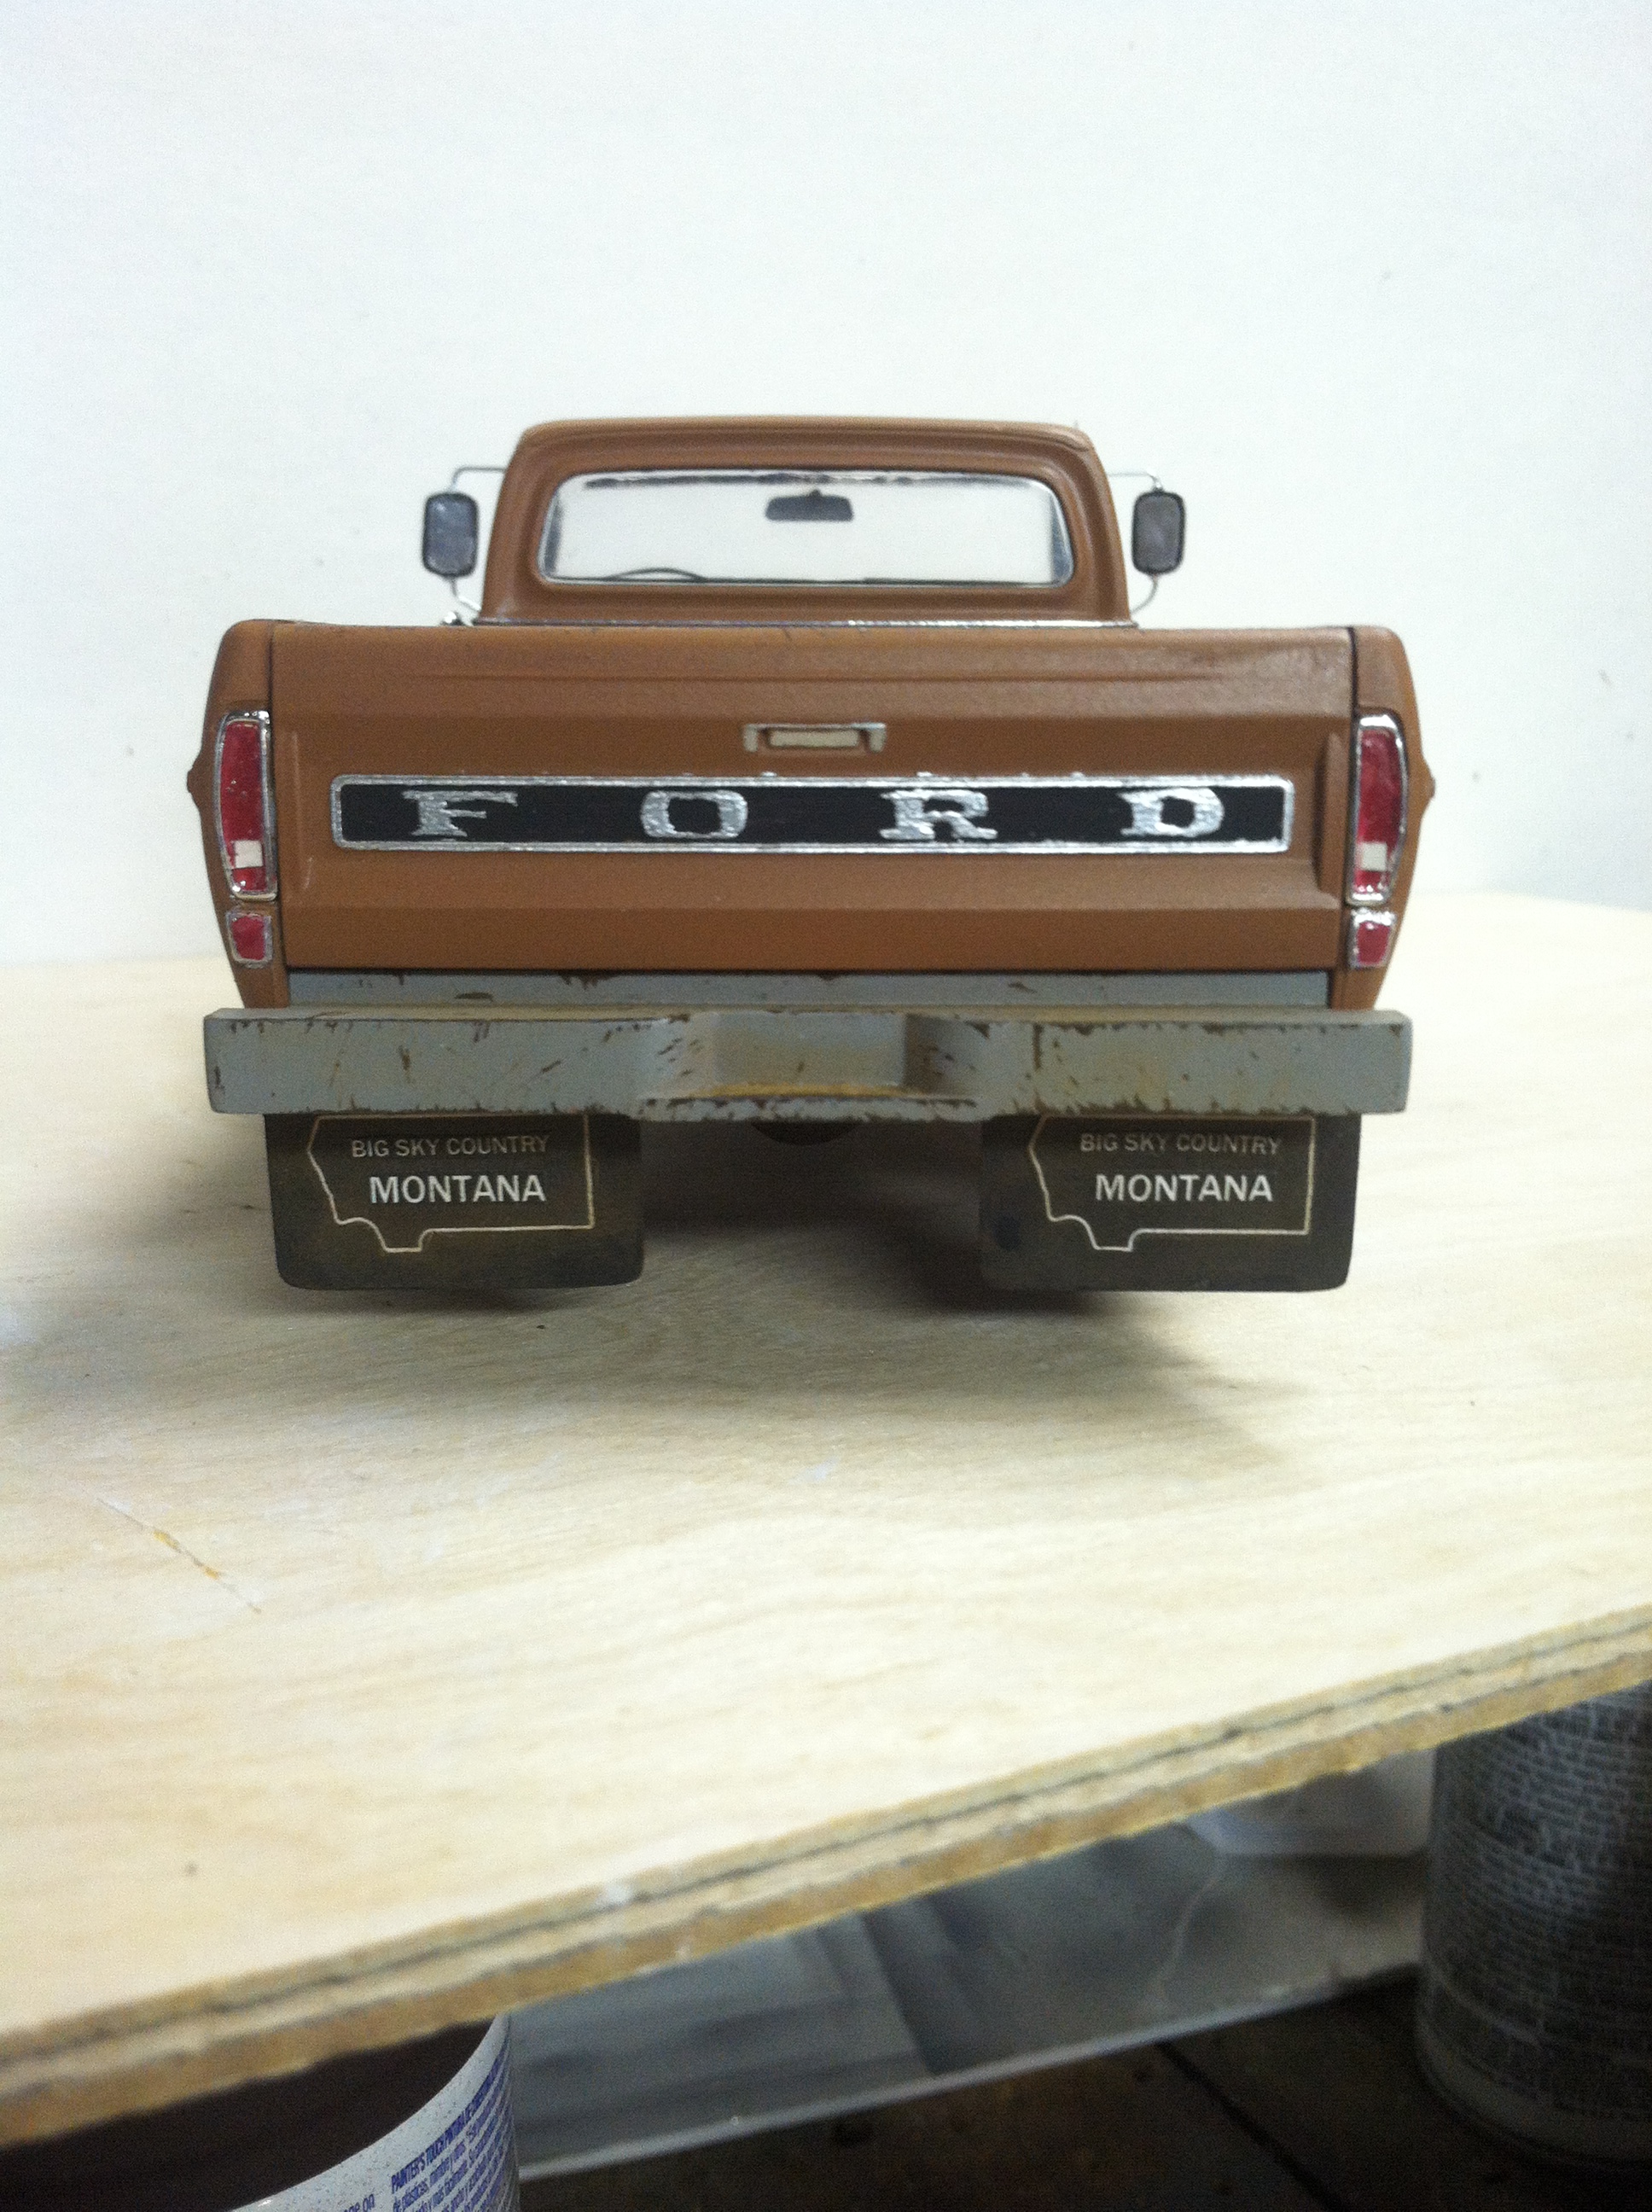
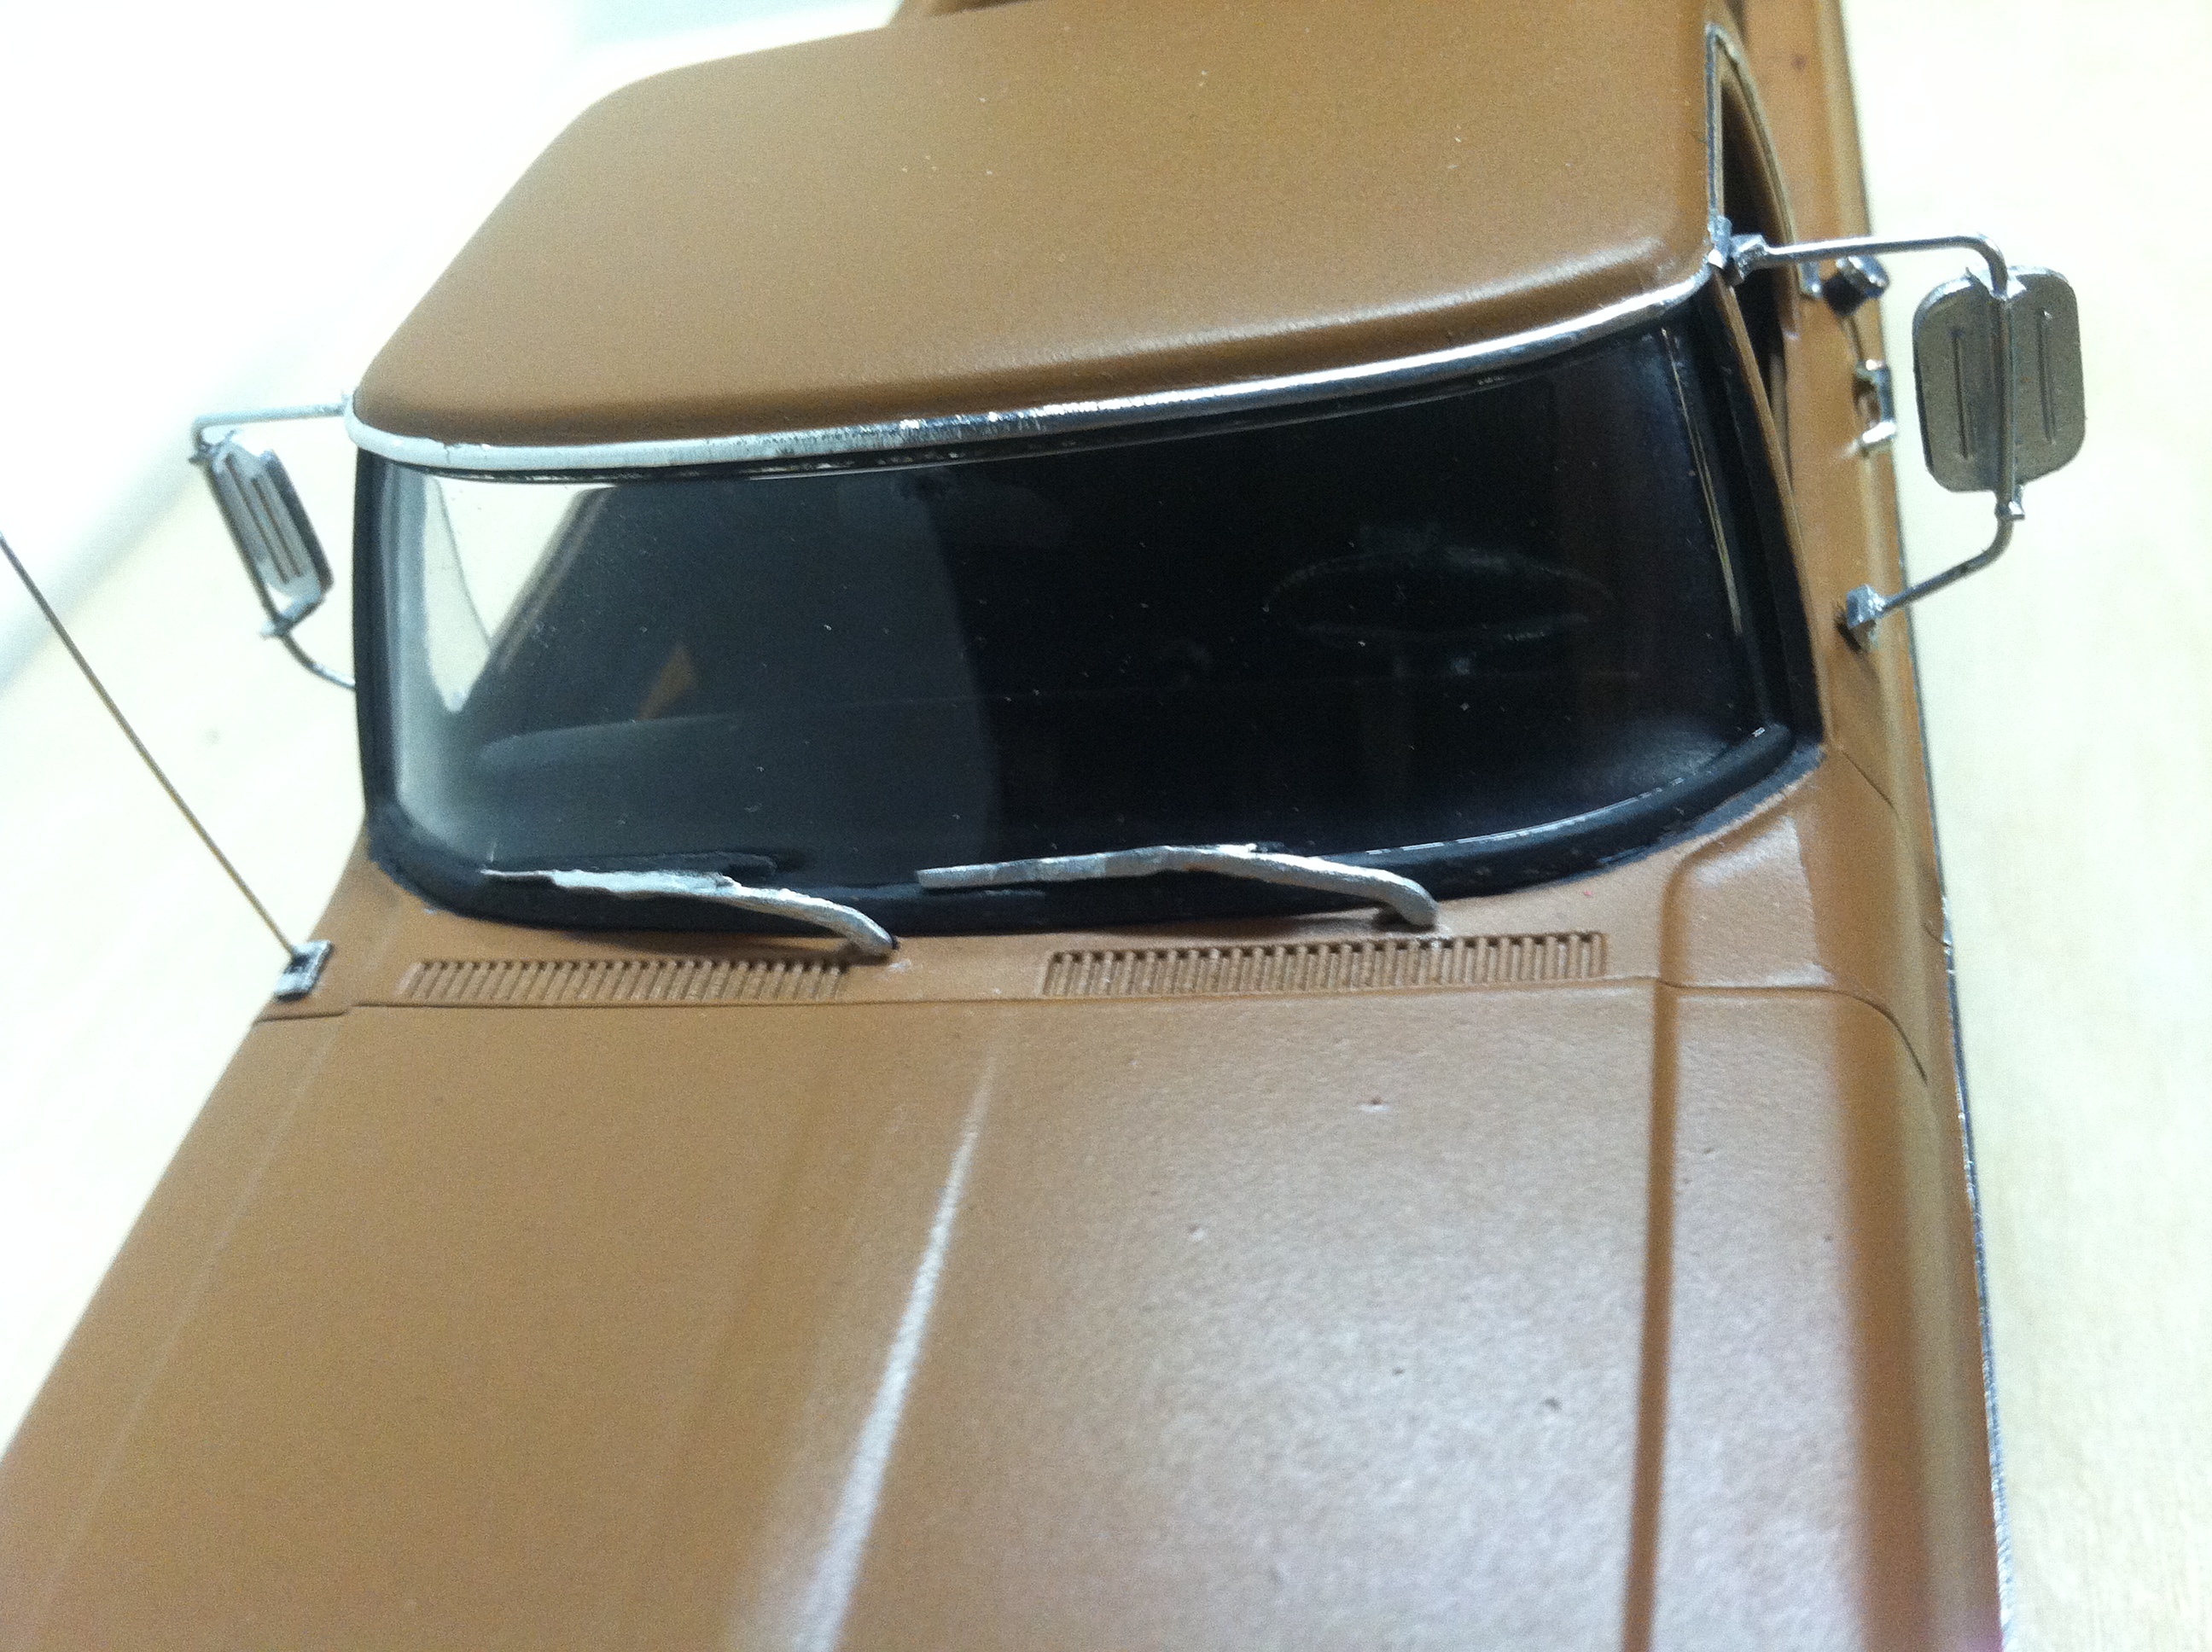
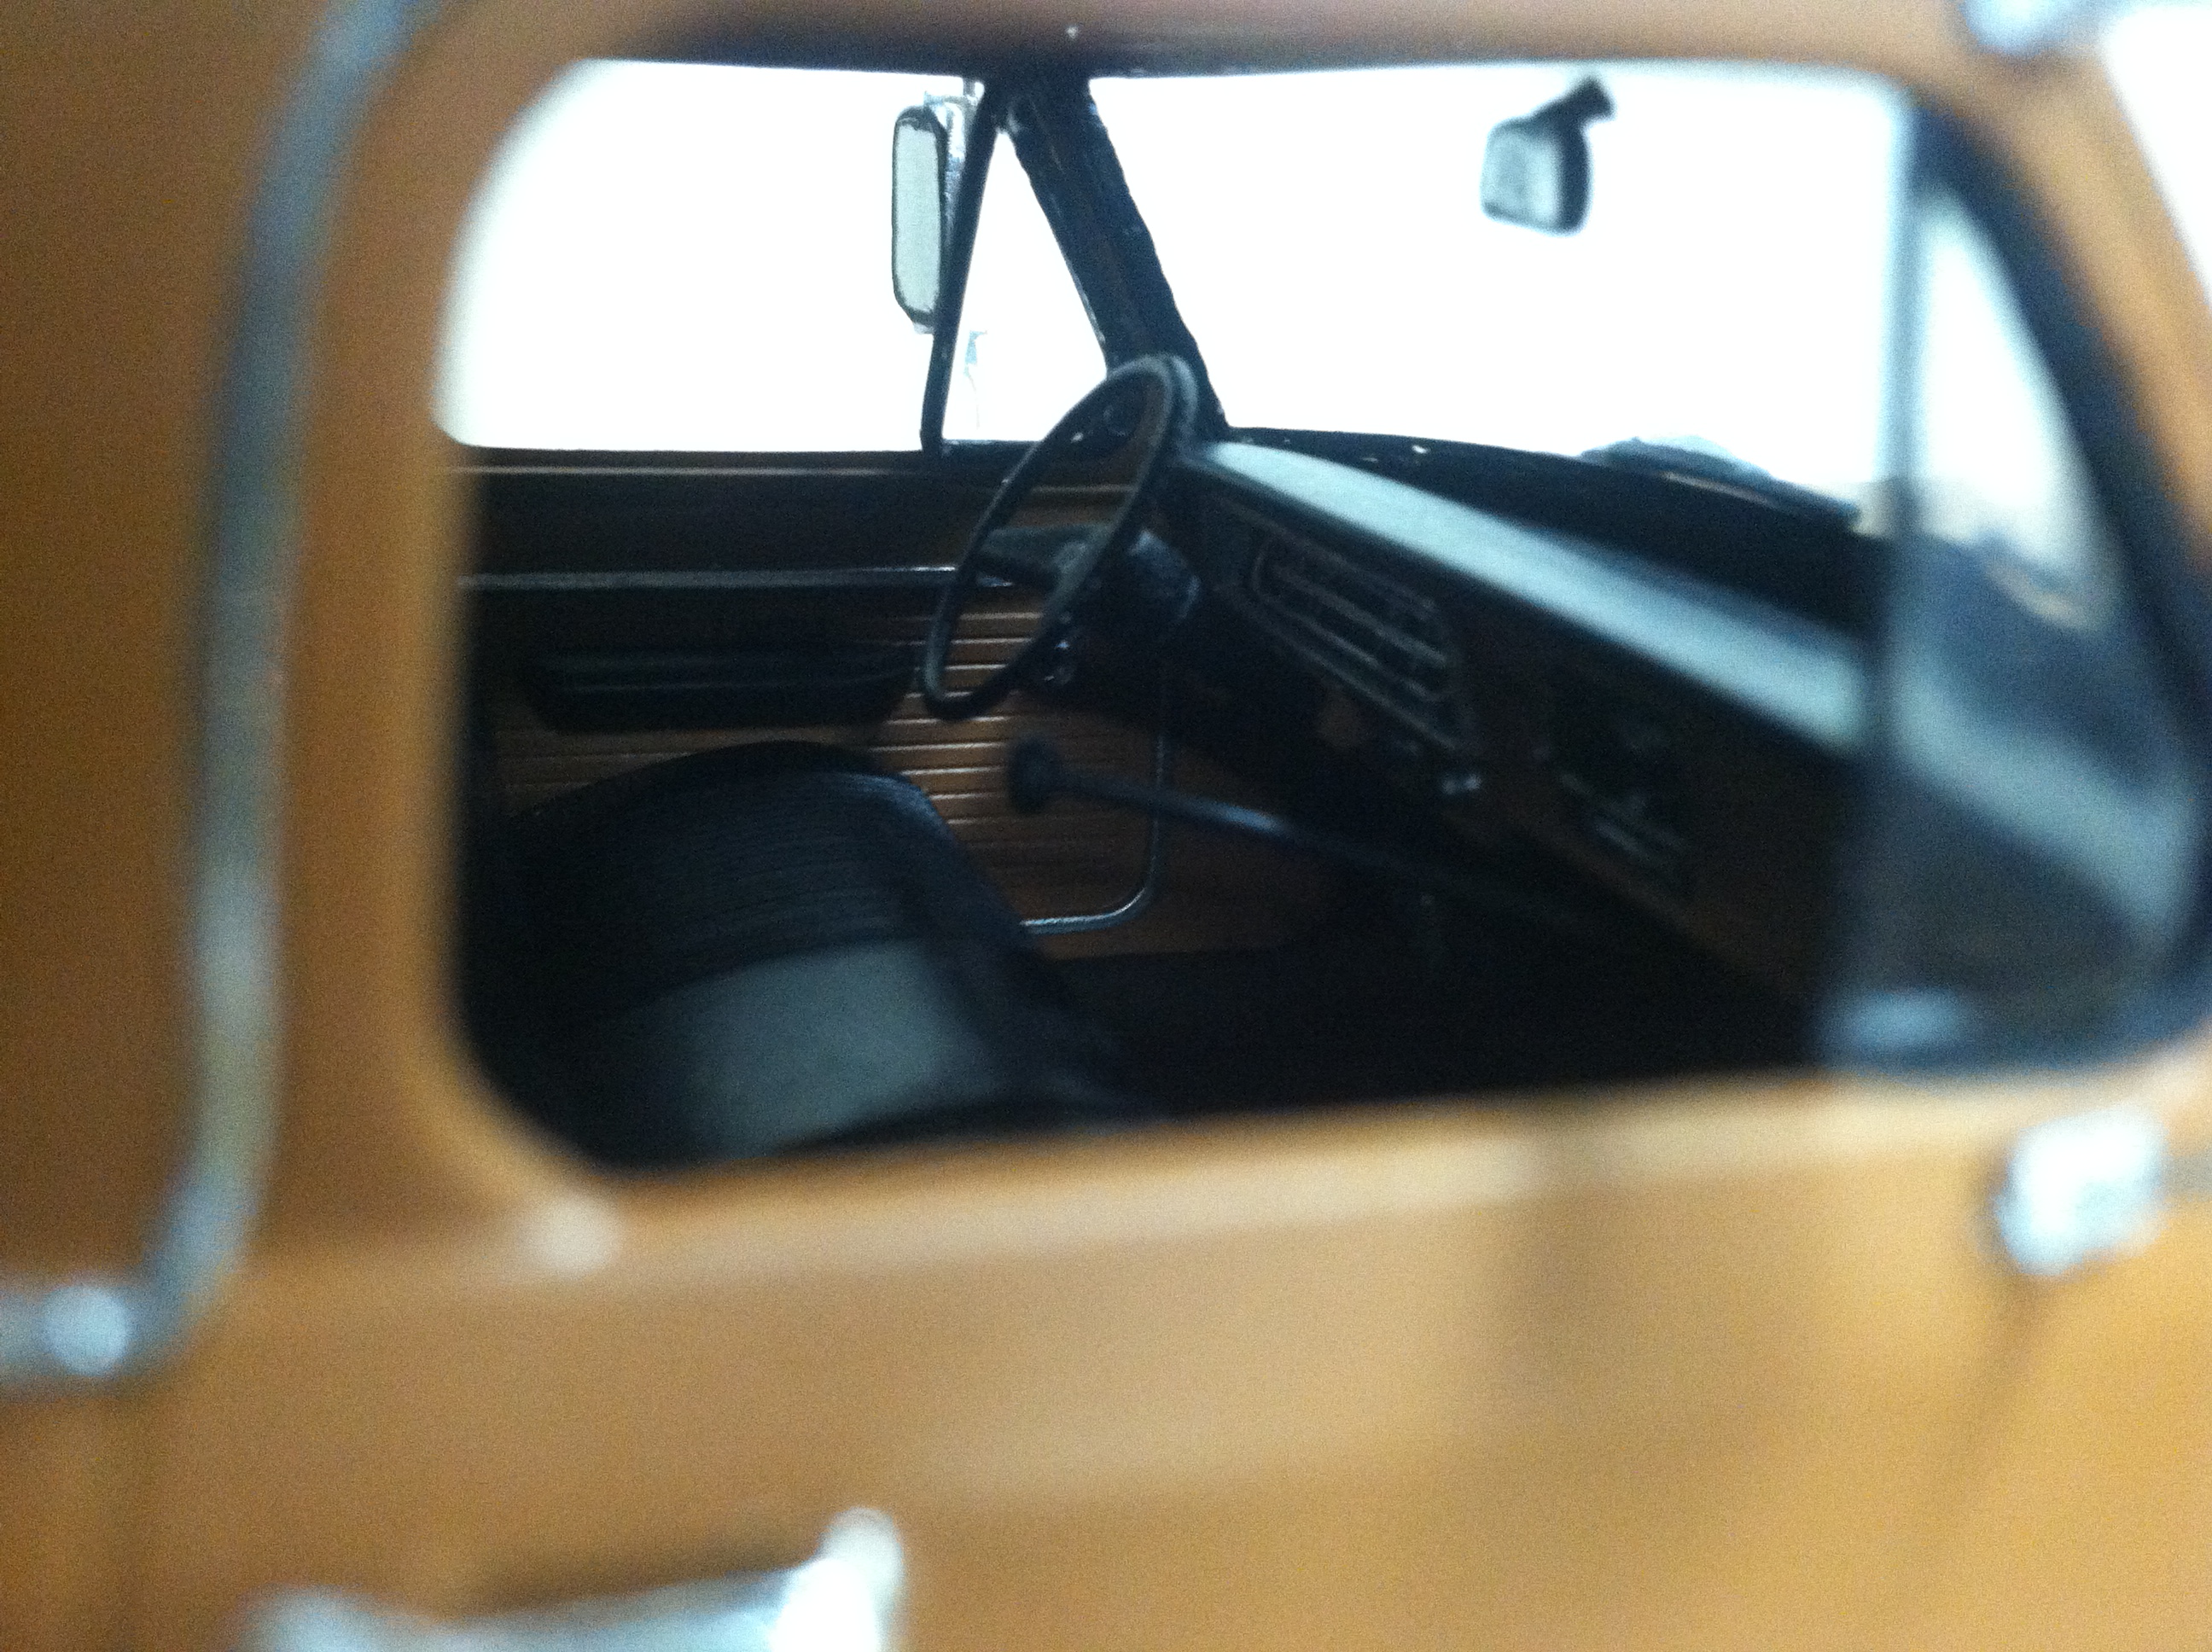
Just finished my 4th build in my "A day in 1979" series for my future diorama. It began as the Moebius 71 Ranger xlt. I combined AMT's 78 Ford Firestone kit for the 4x4 components. I wanted a bare bones Ford Custom cab with a lower trim level than the XLT. I picked up a Moebius 70 Ford for the use of the door panels, seat, and tailgate. Modifications are minimal as the kit is pretty good as is. I had to fix the steering column to get the steering wheel straight, grind a little off the area where the firewall and interior tub meet in order to get the bed to line up with the cab properly, shave down the windshield wipers and pedals, and bend the exhaust to fit with the new suspension. Scratch built items are: mirrors, antenna, bumper guards, mud flaps with angle iron, gas filler neck and cap, shifters, dash pad, drive lines, exhaust extension, lock out hubs, starter solenoid, thermostat housing, heat riser, dip stick, all vacuum lines and hoses, throttle linkage and spring, battery cables, wiring harness, alternator bracket, brake lines at master cylinder, and the washer hoses to cowl. I used scale model spark plug wires from an aftermarket company (cant remember the name). Parts box items not including the 4x4 parts are: fan belt assembly, rear view mirror (inside), hub caps, valve covers, 4 speed transmission, and bell housing. I have a pretty thorough explanation of the build under the workbench section if interested. Thank you for looking and comments are welcome! I would be happy to answer any questions if you have them. Enjoy!
-
What would be a good way to convert this kit to 4wd? Saw another thread discussing it and it sounds like the 70 F100 would be a good start, but the wheels would be incorrect and there are no aftermarket options. Is there something that I could piece together from various kits? Thanks!!
-
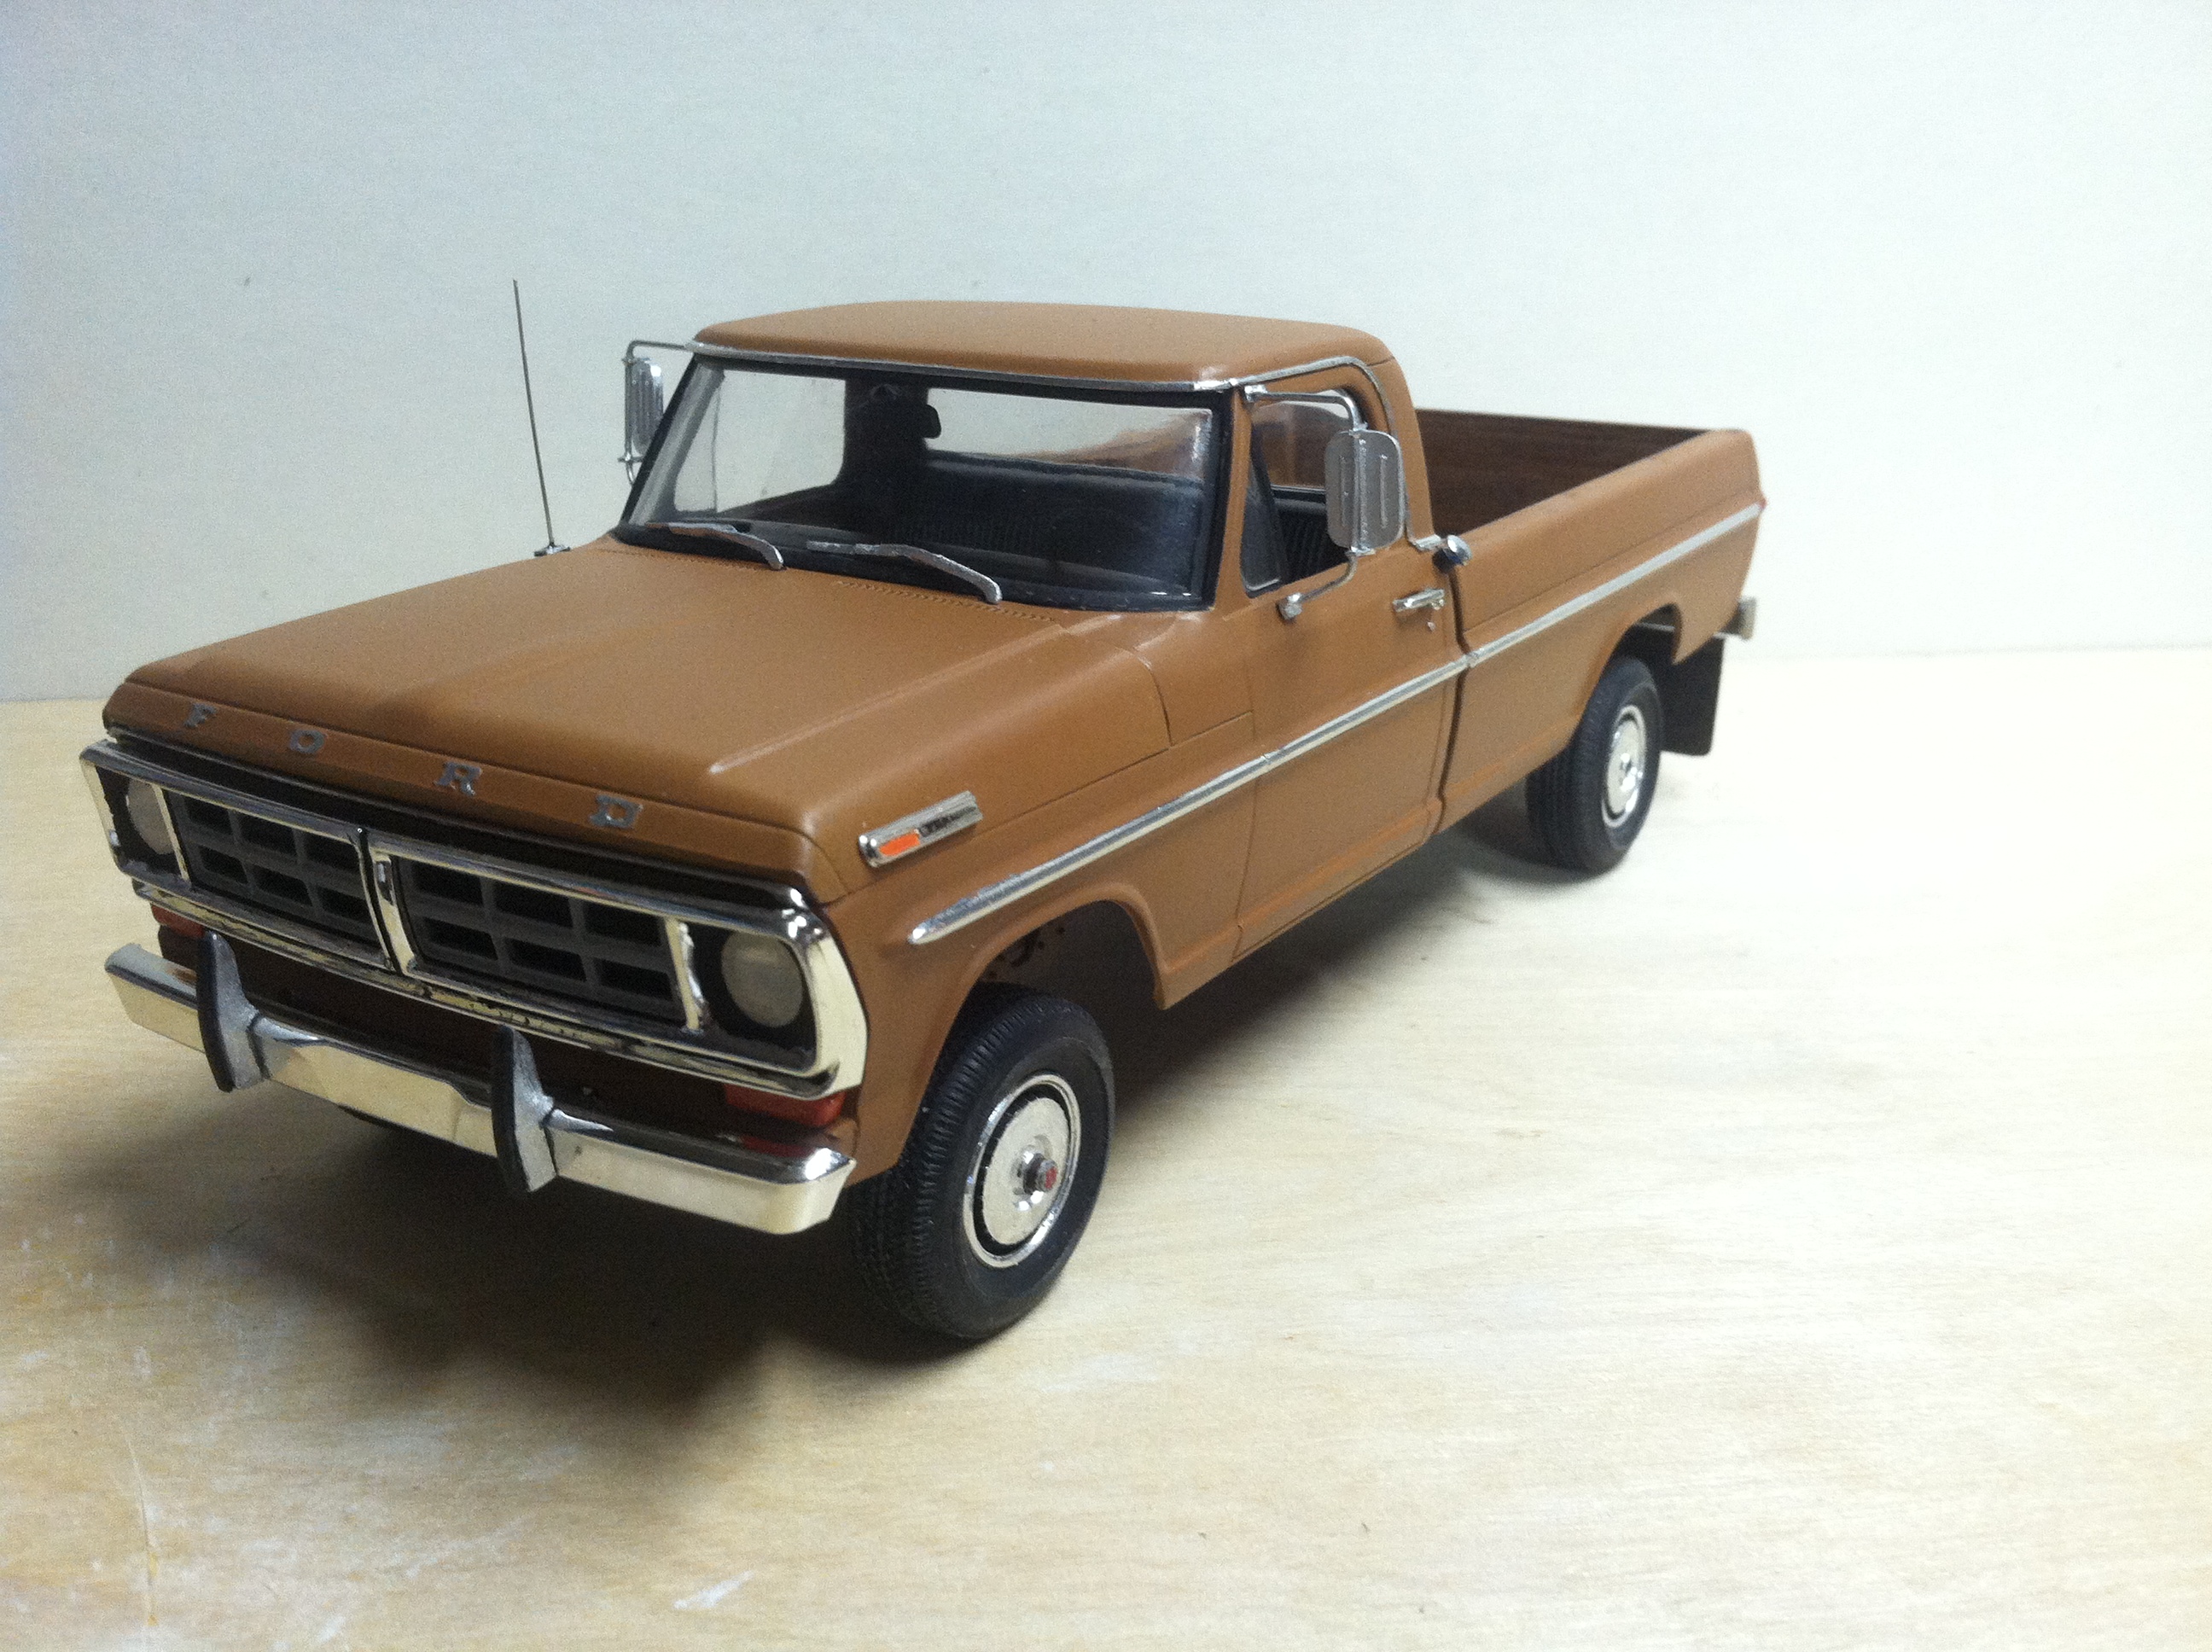
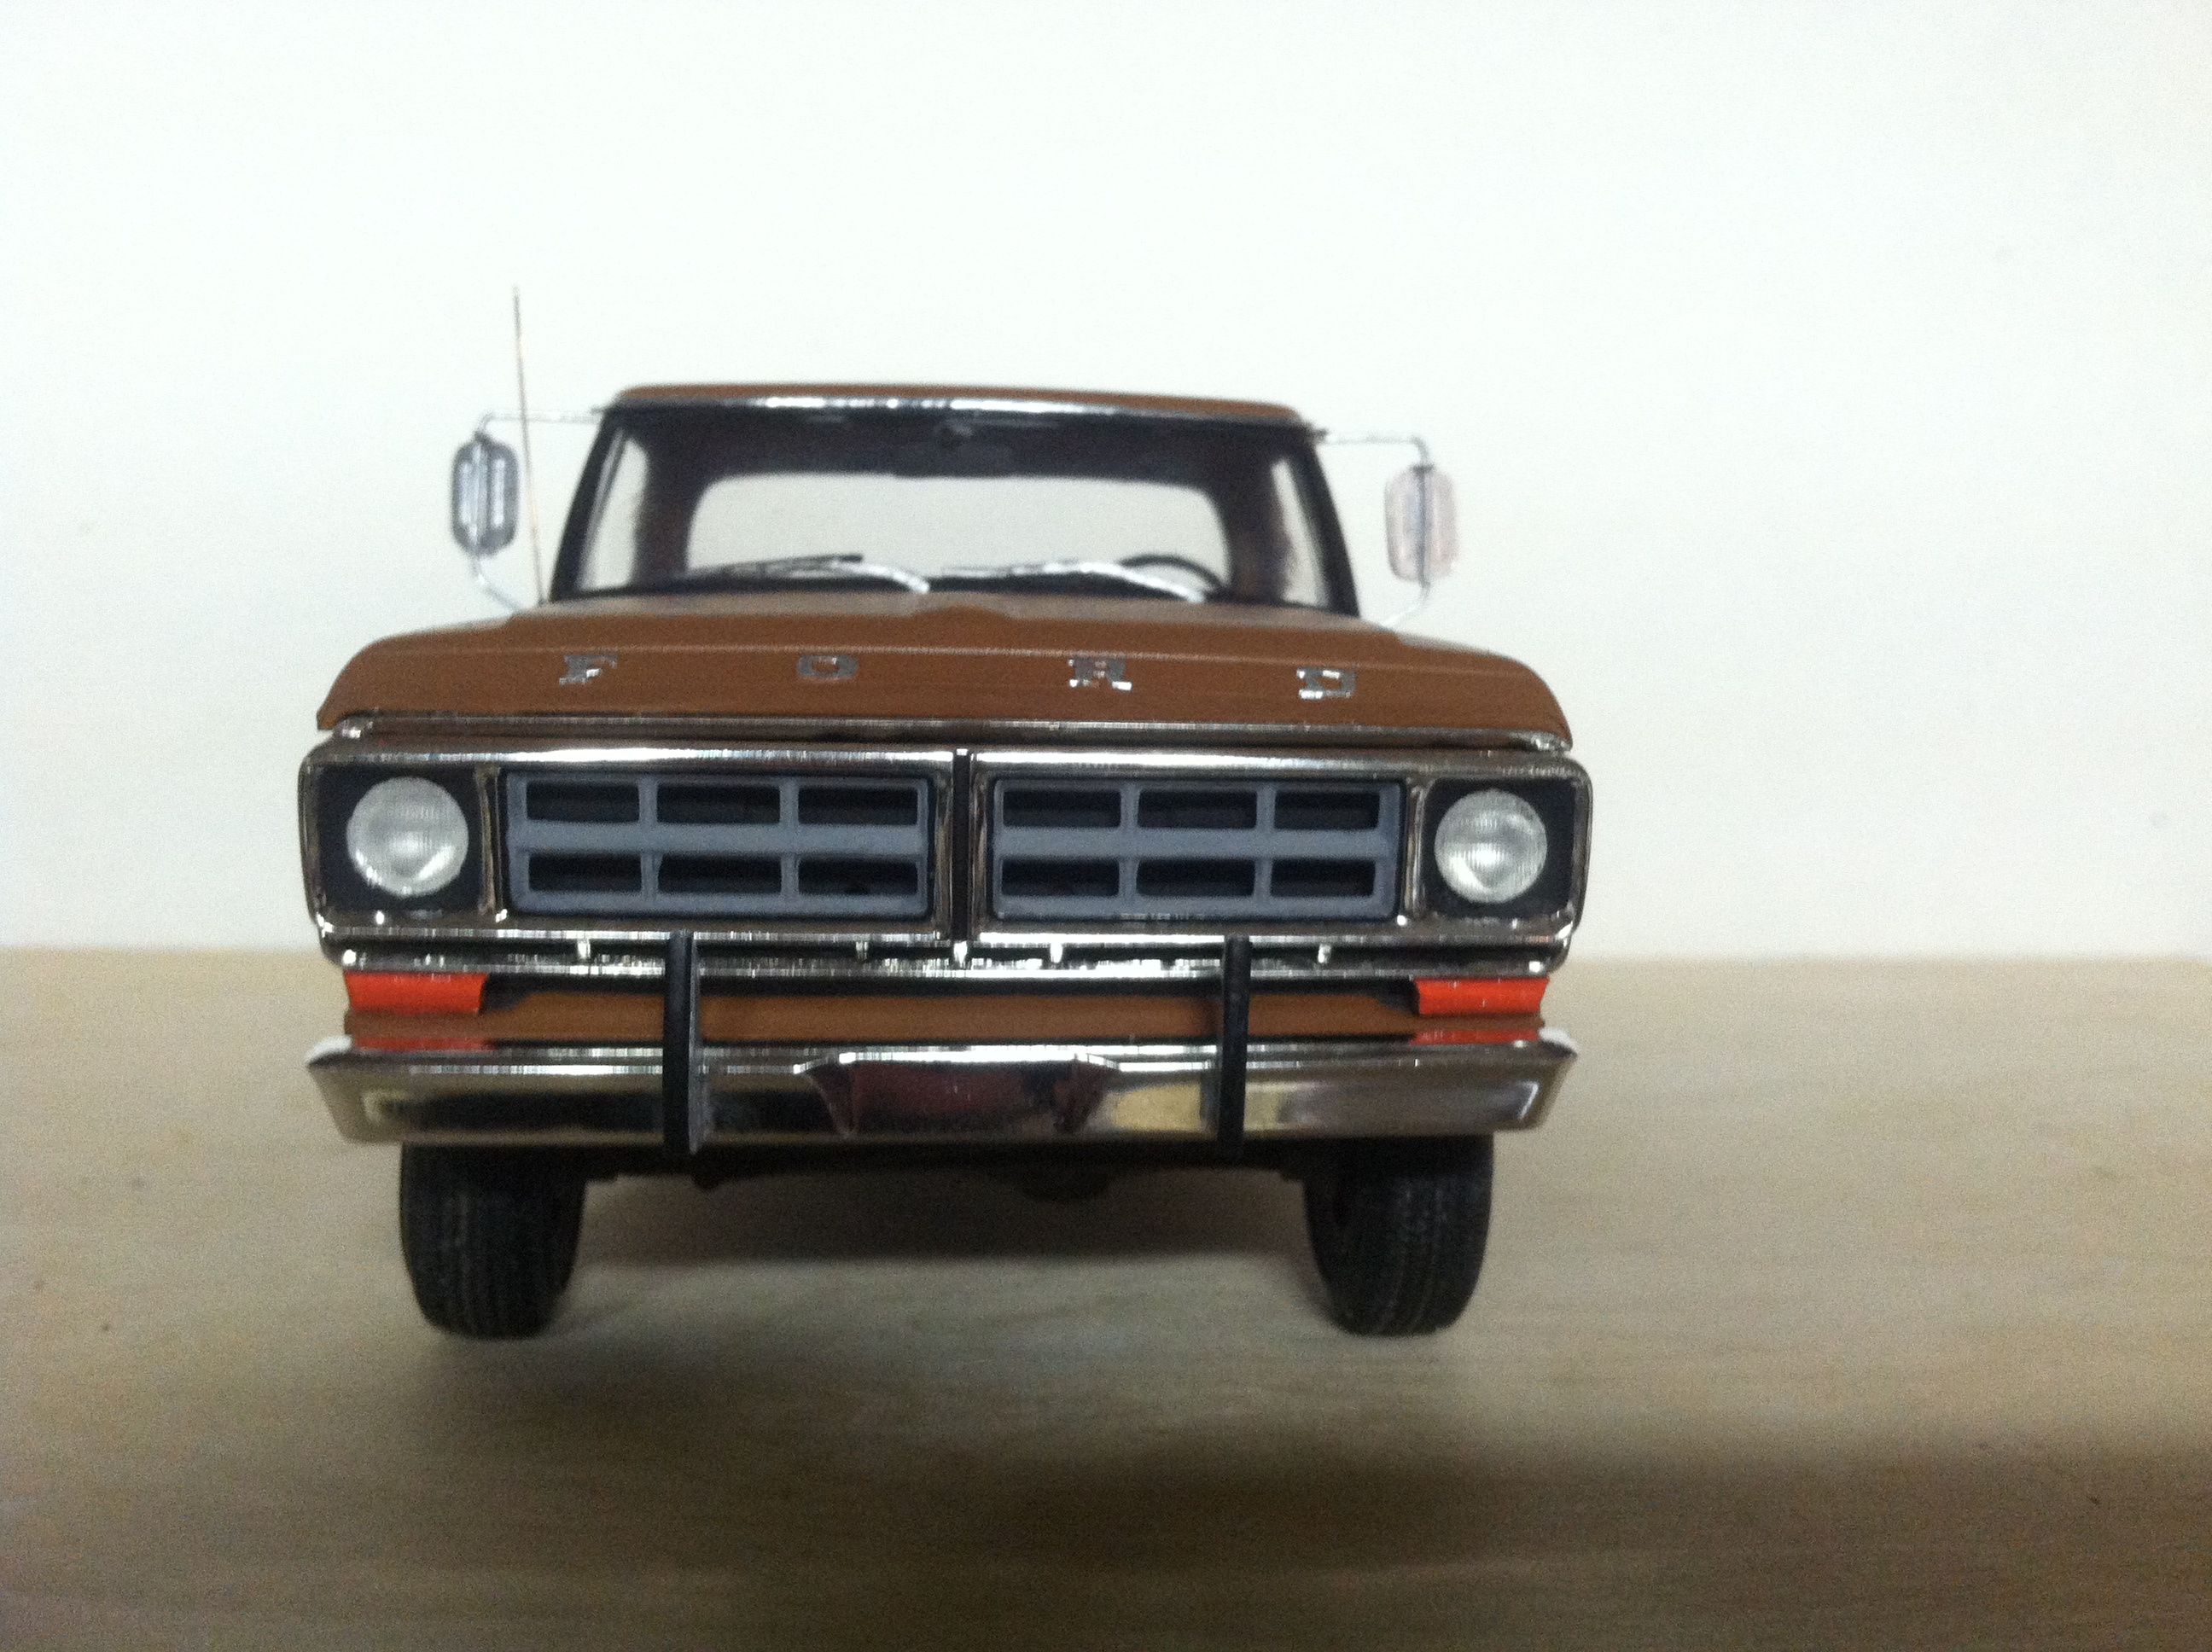
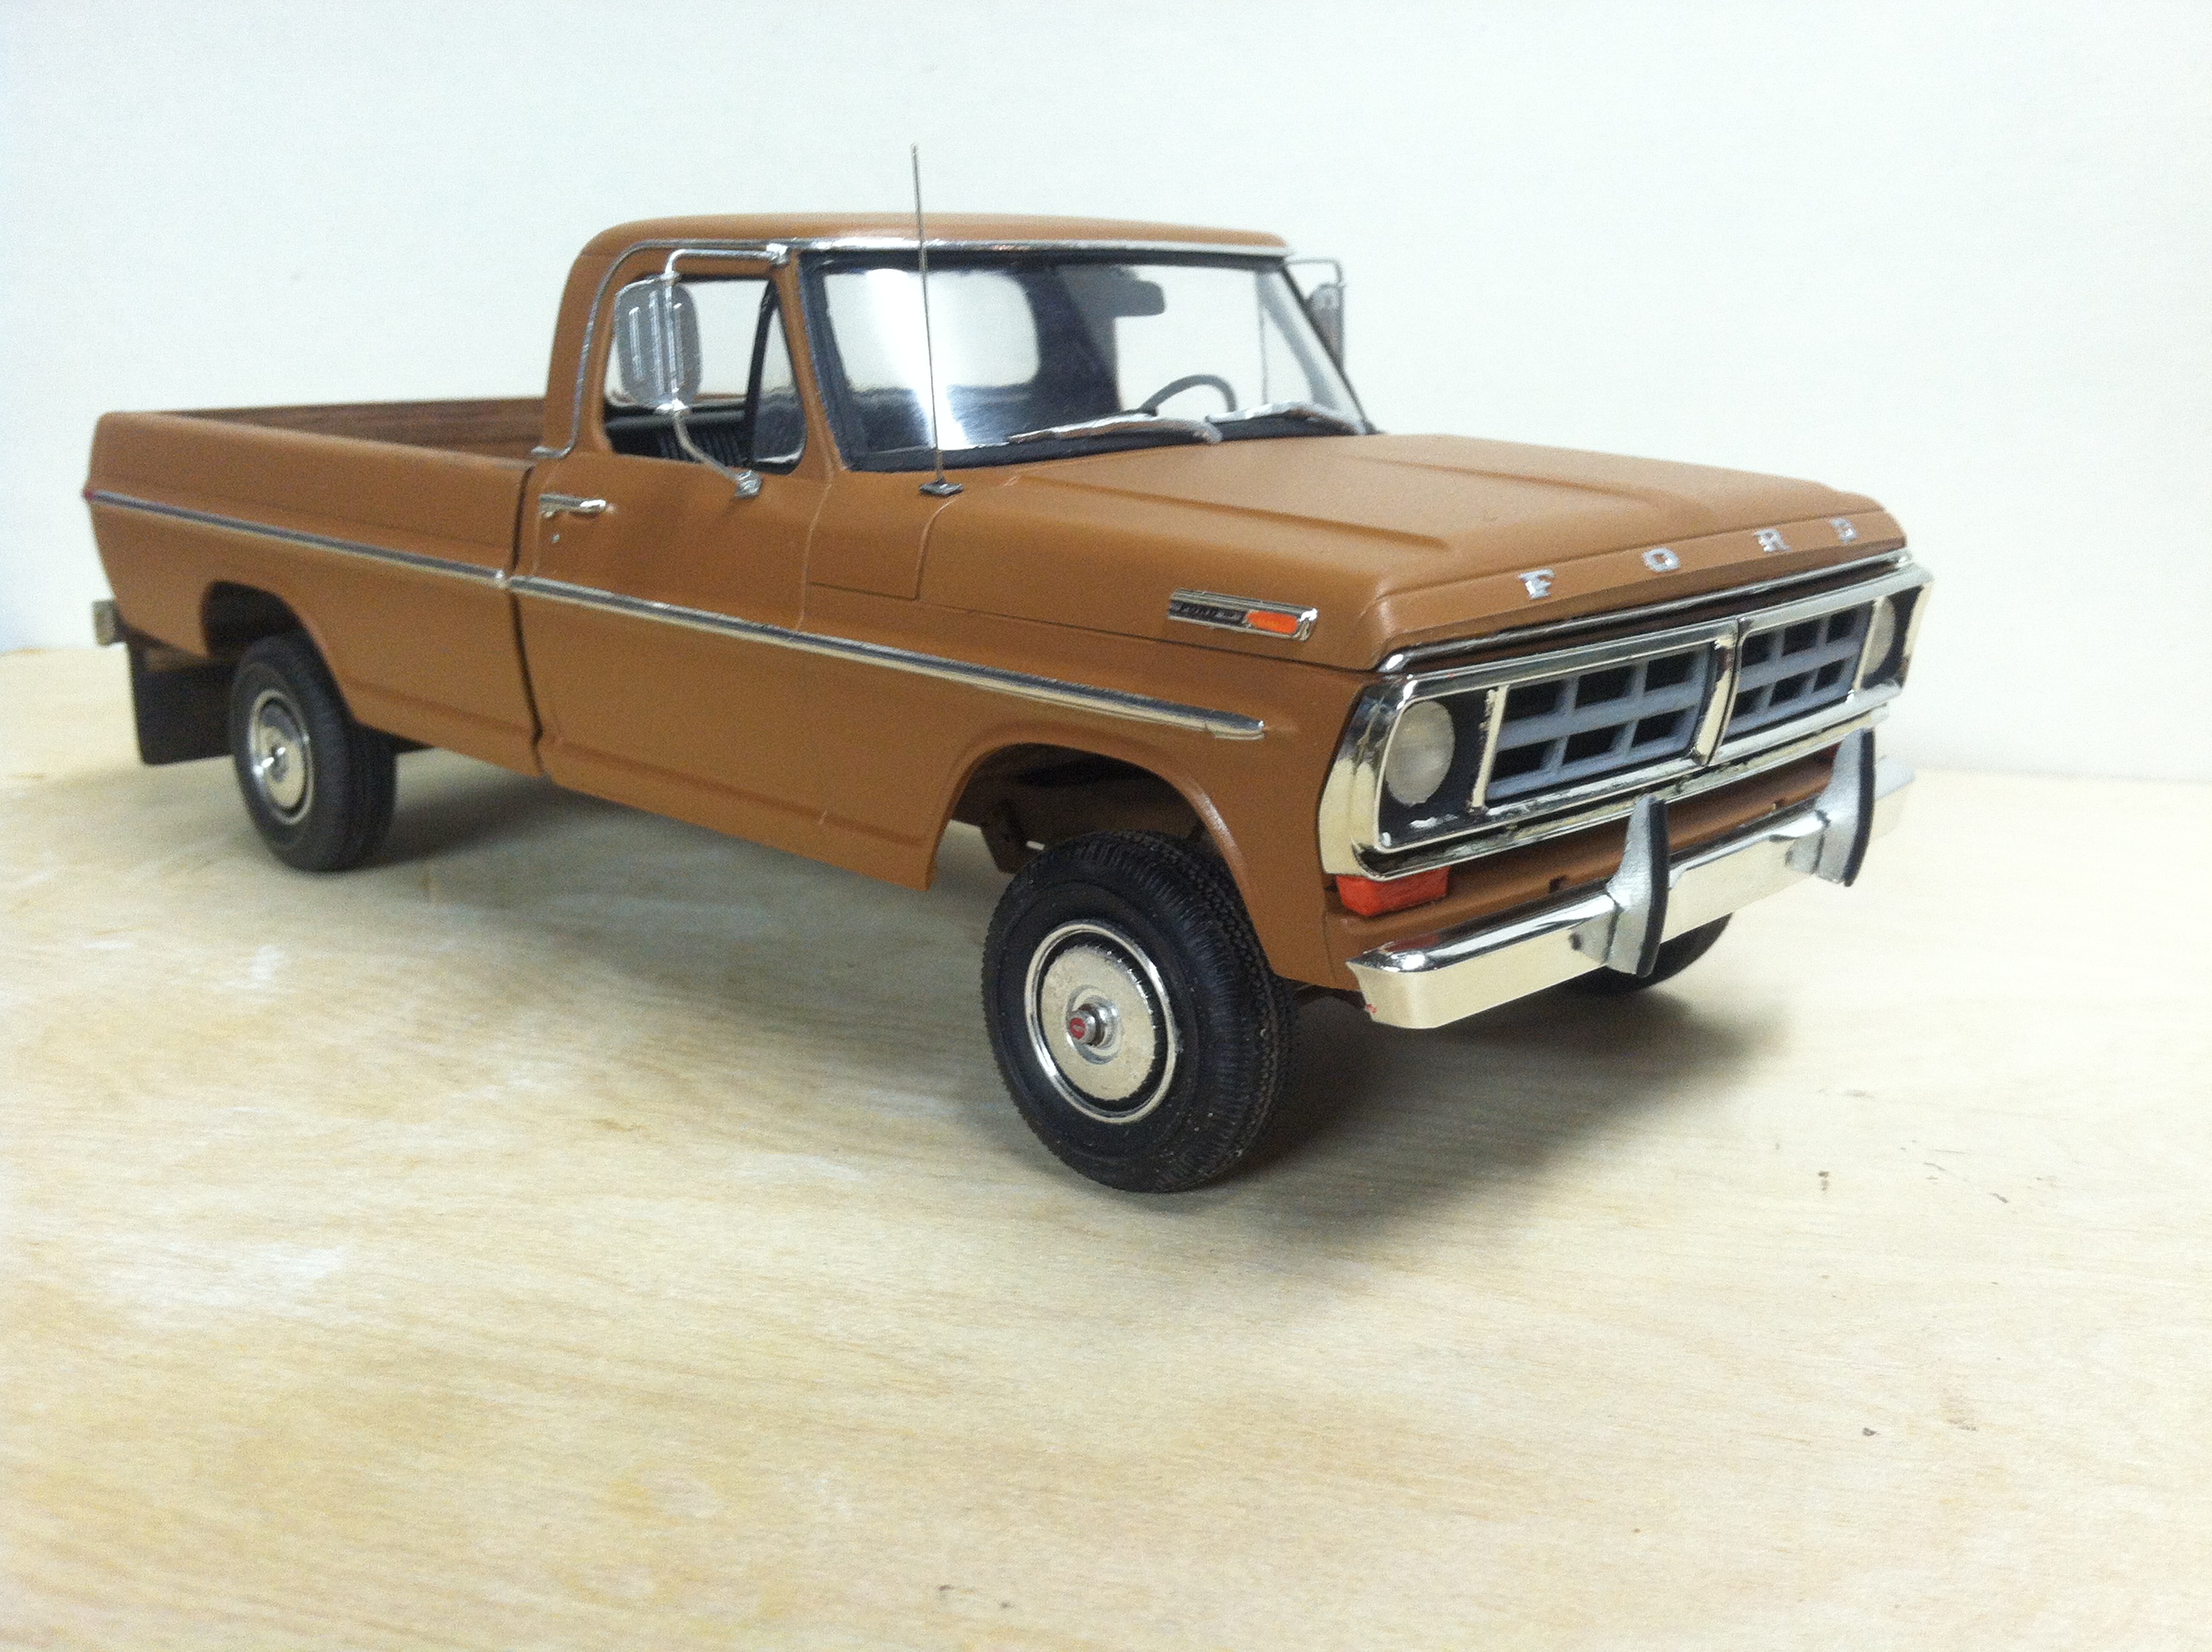
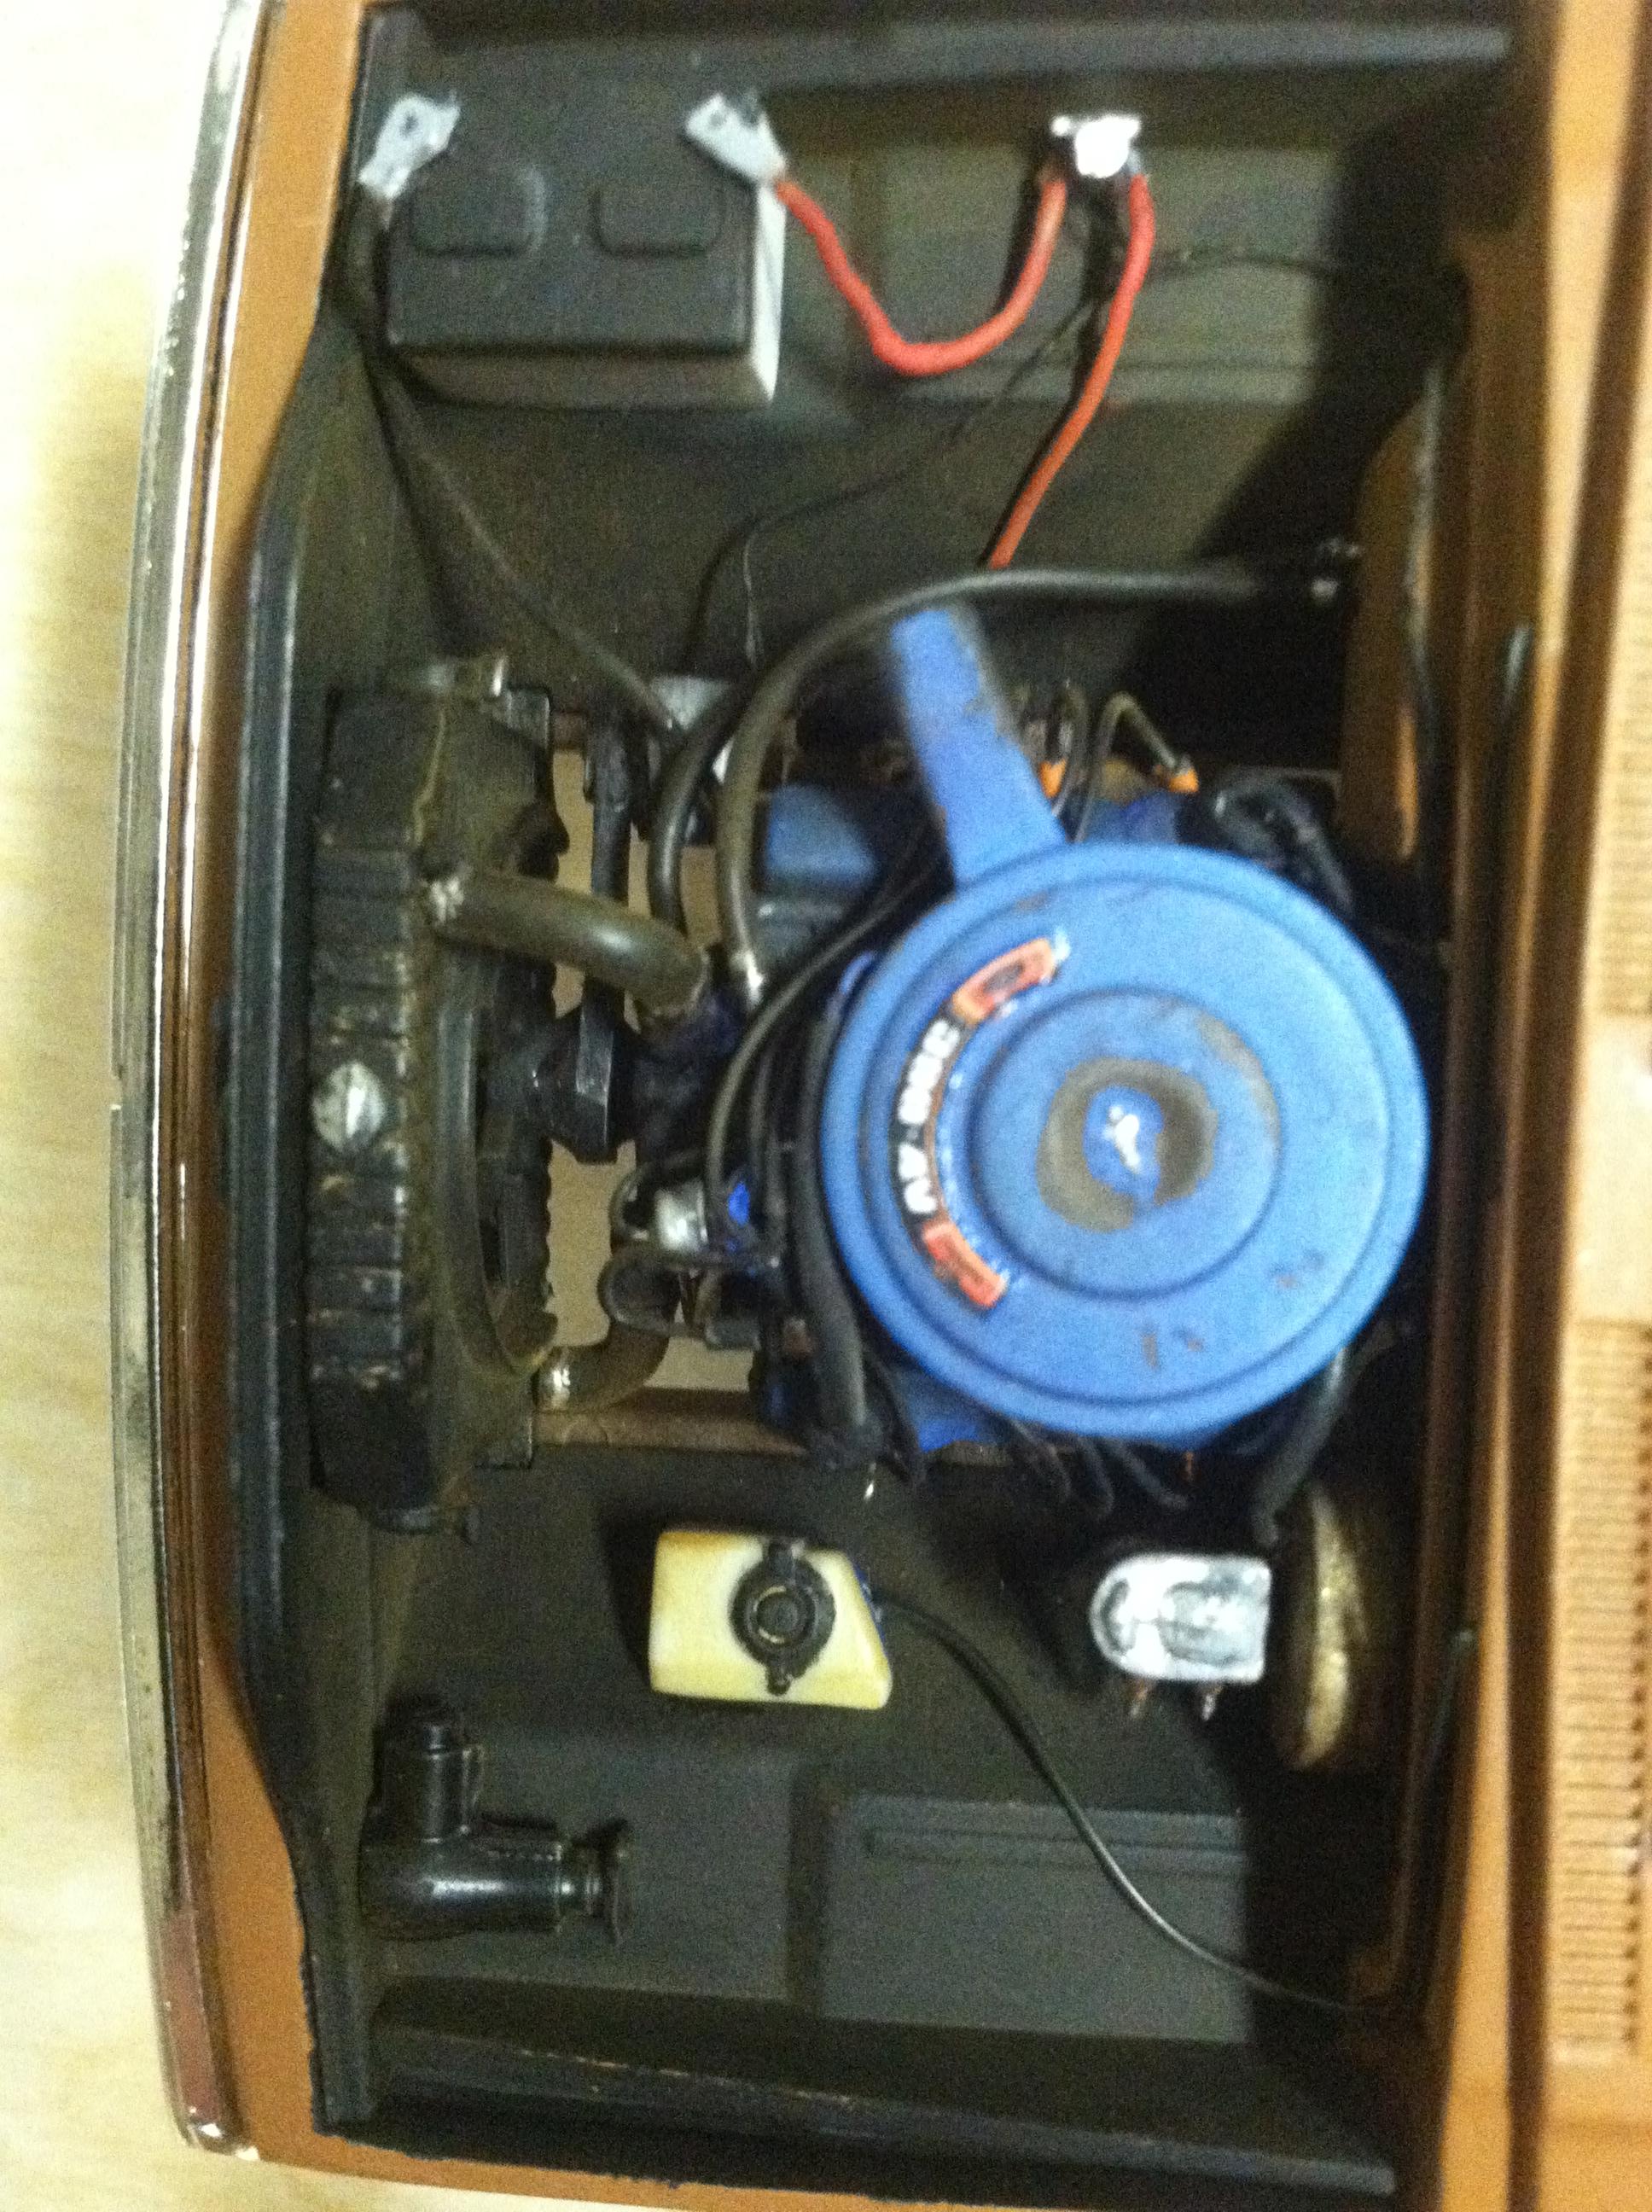
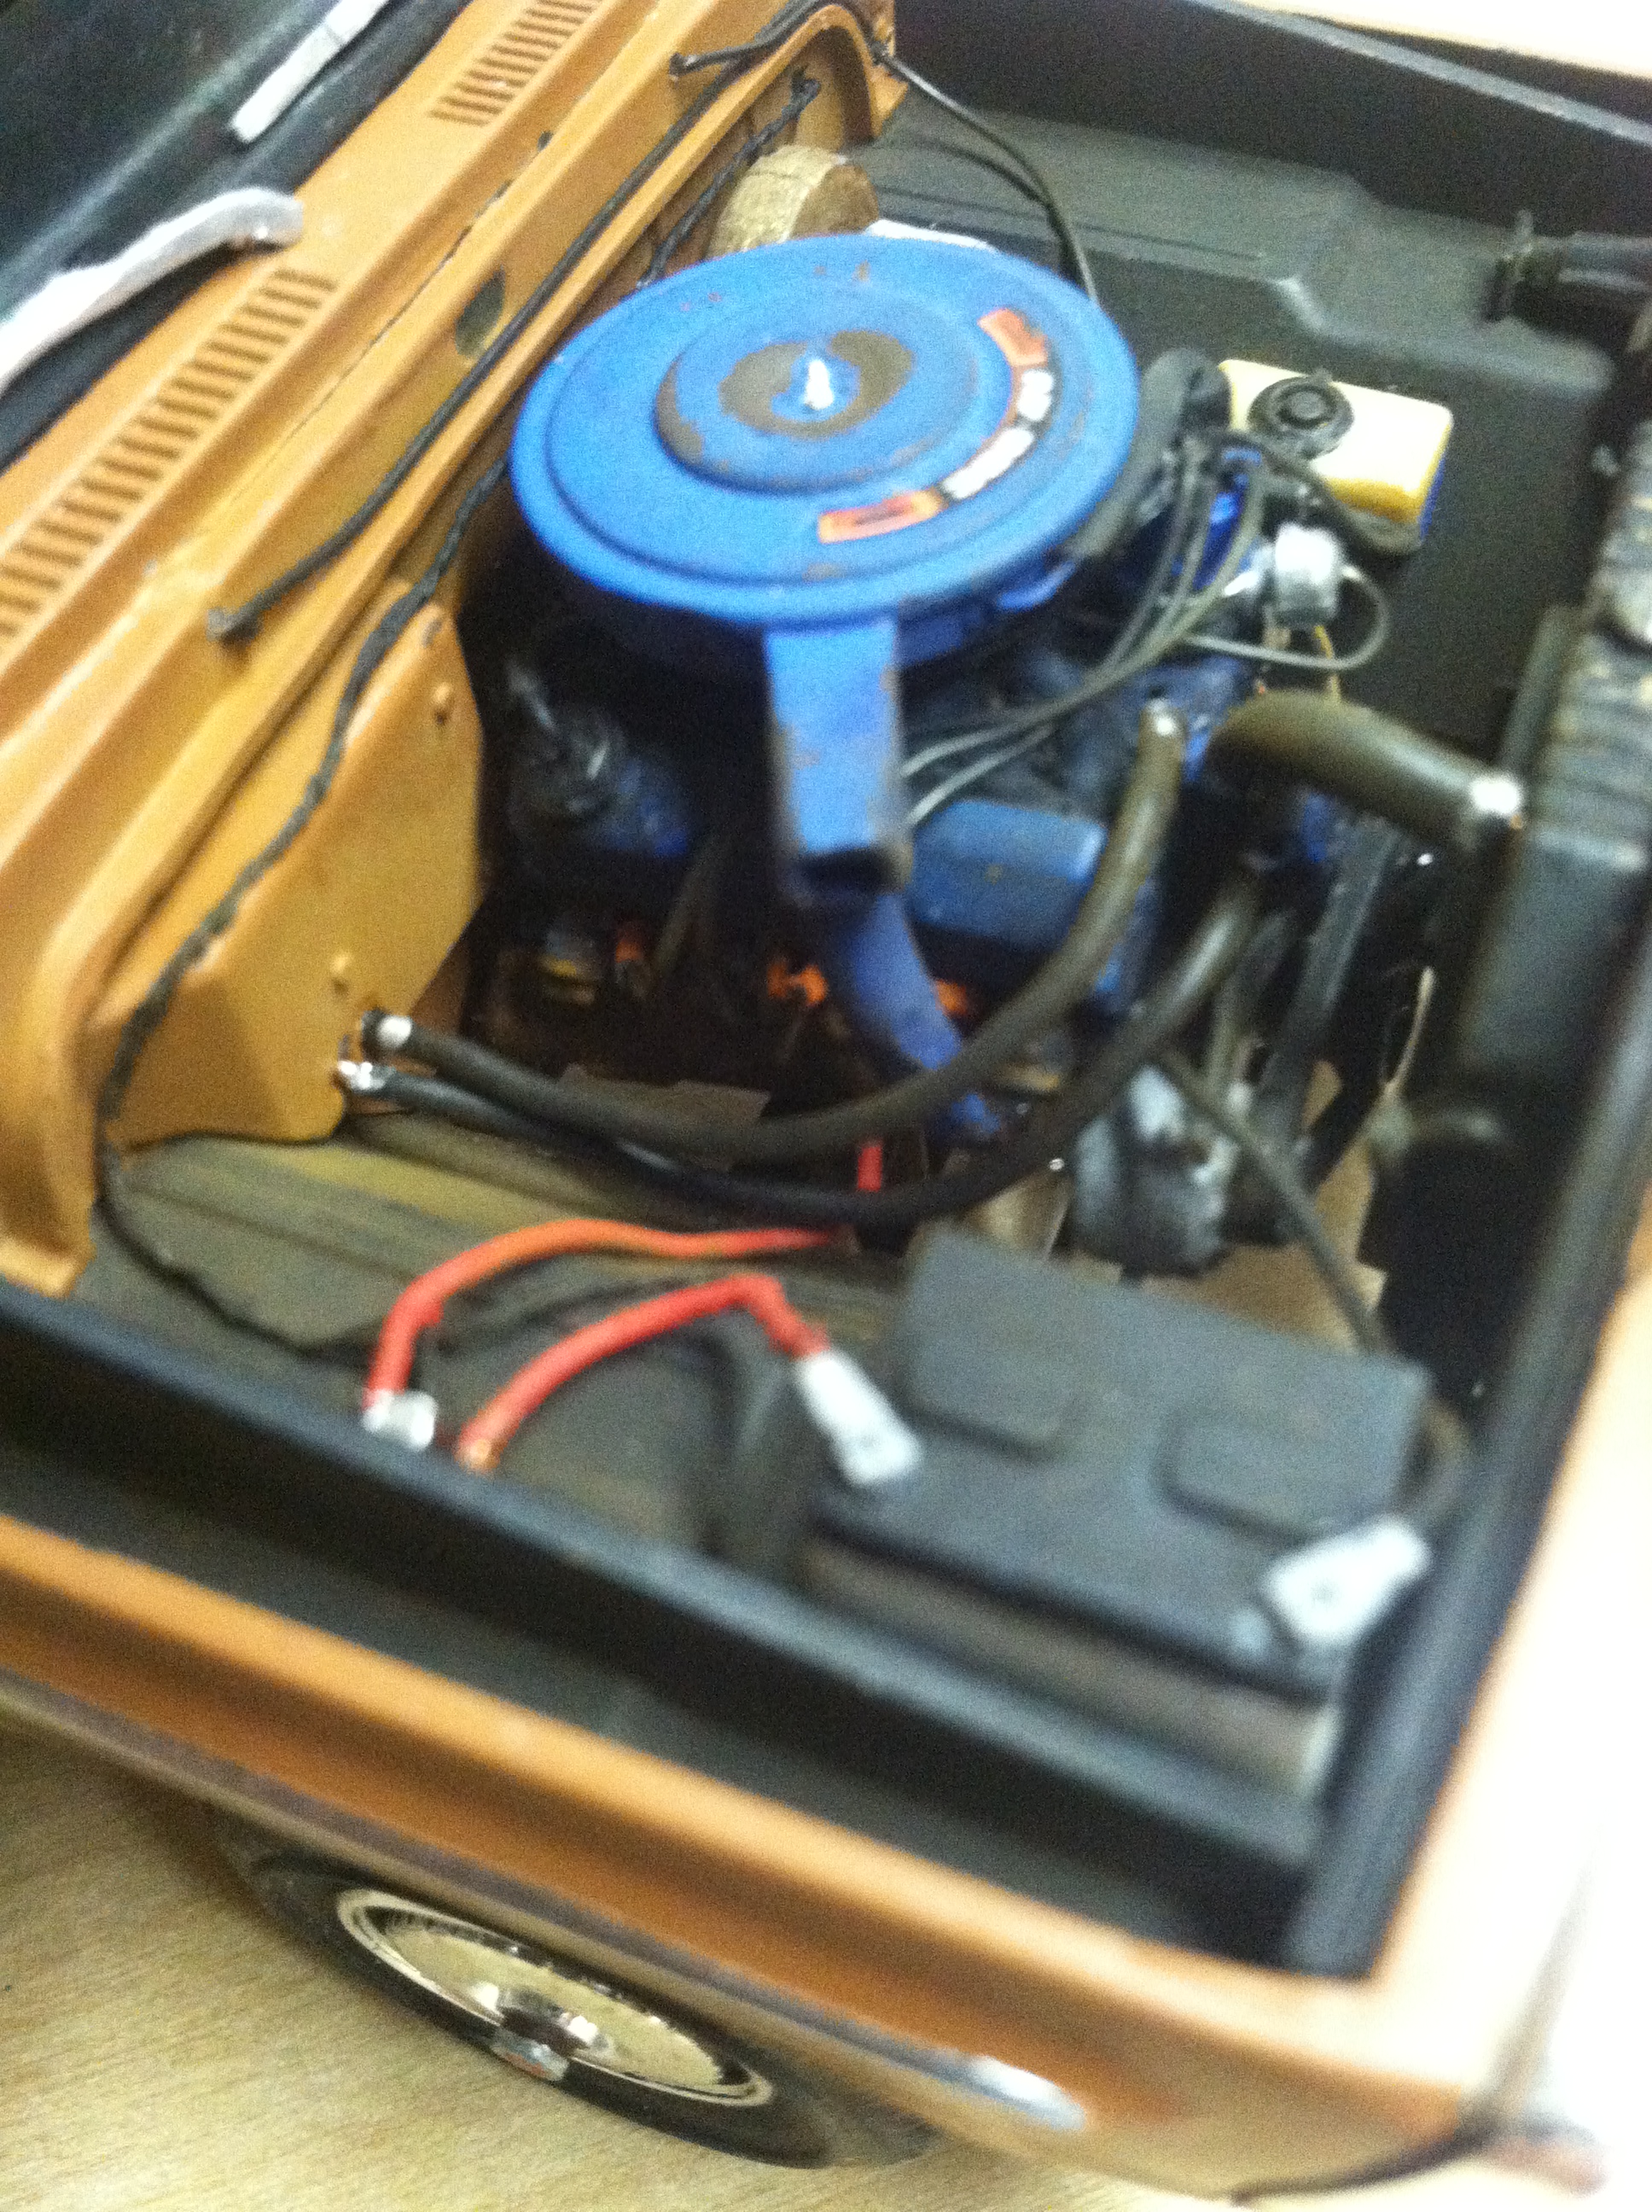
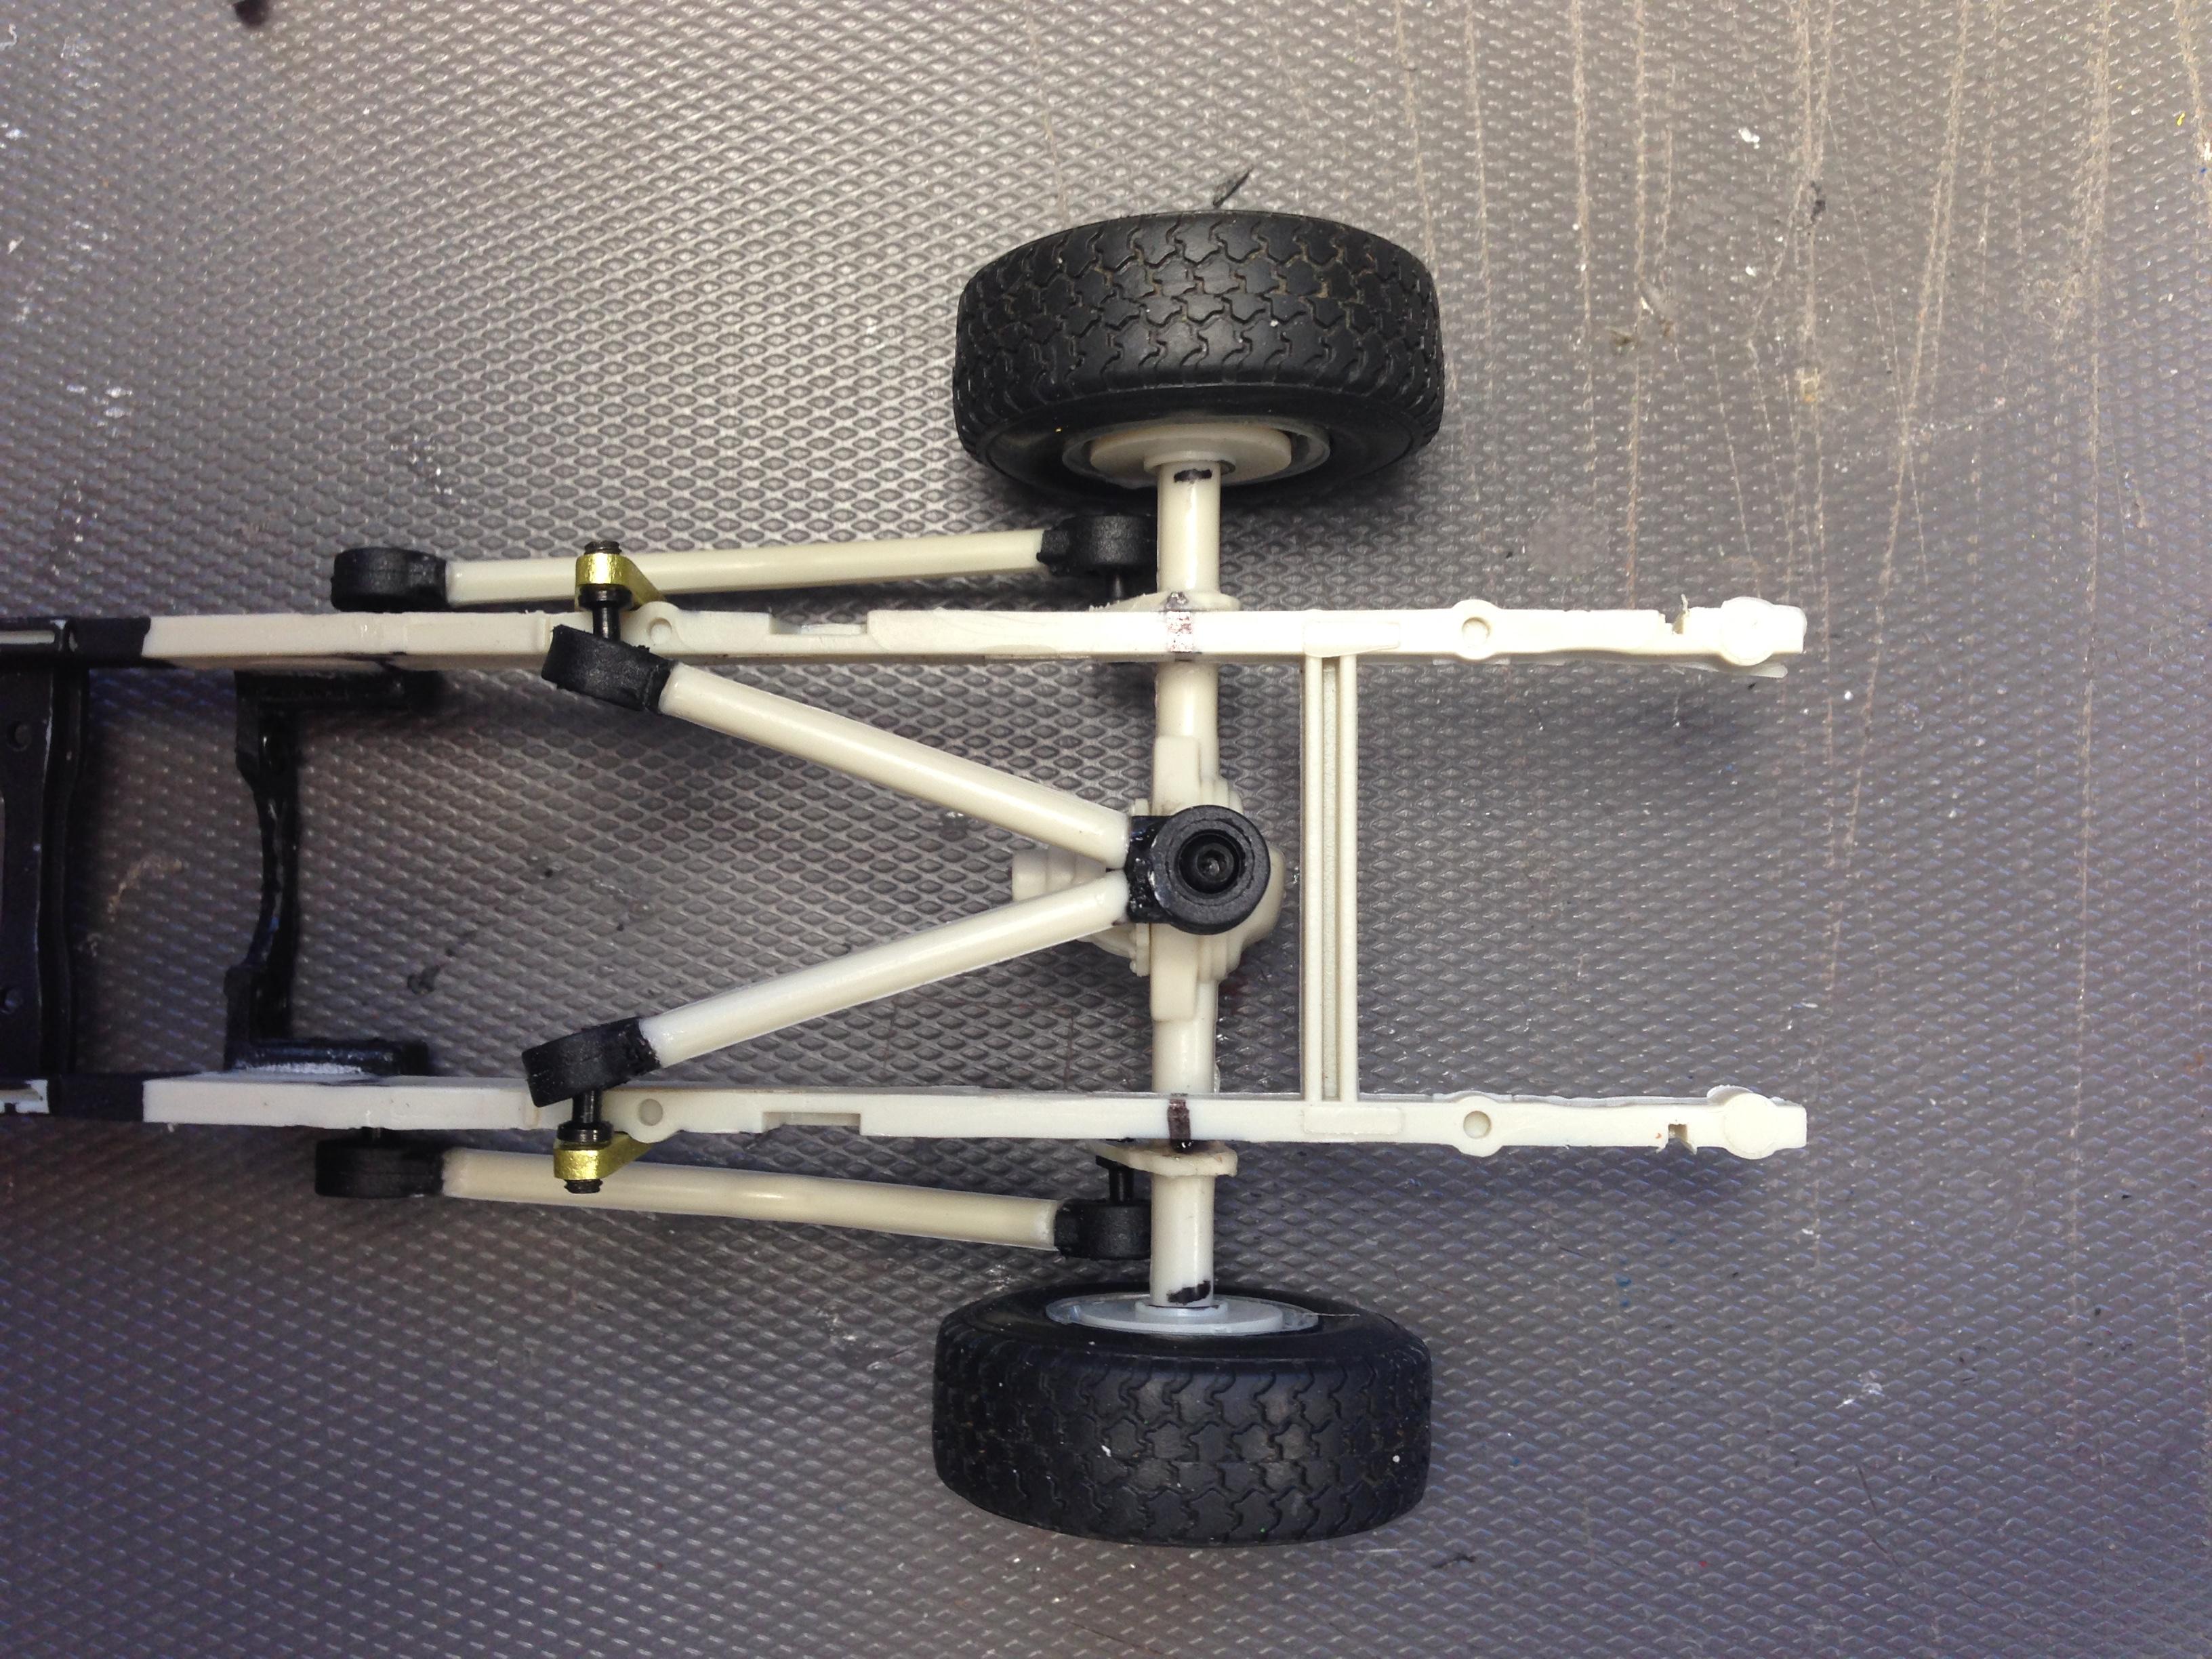
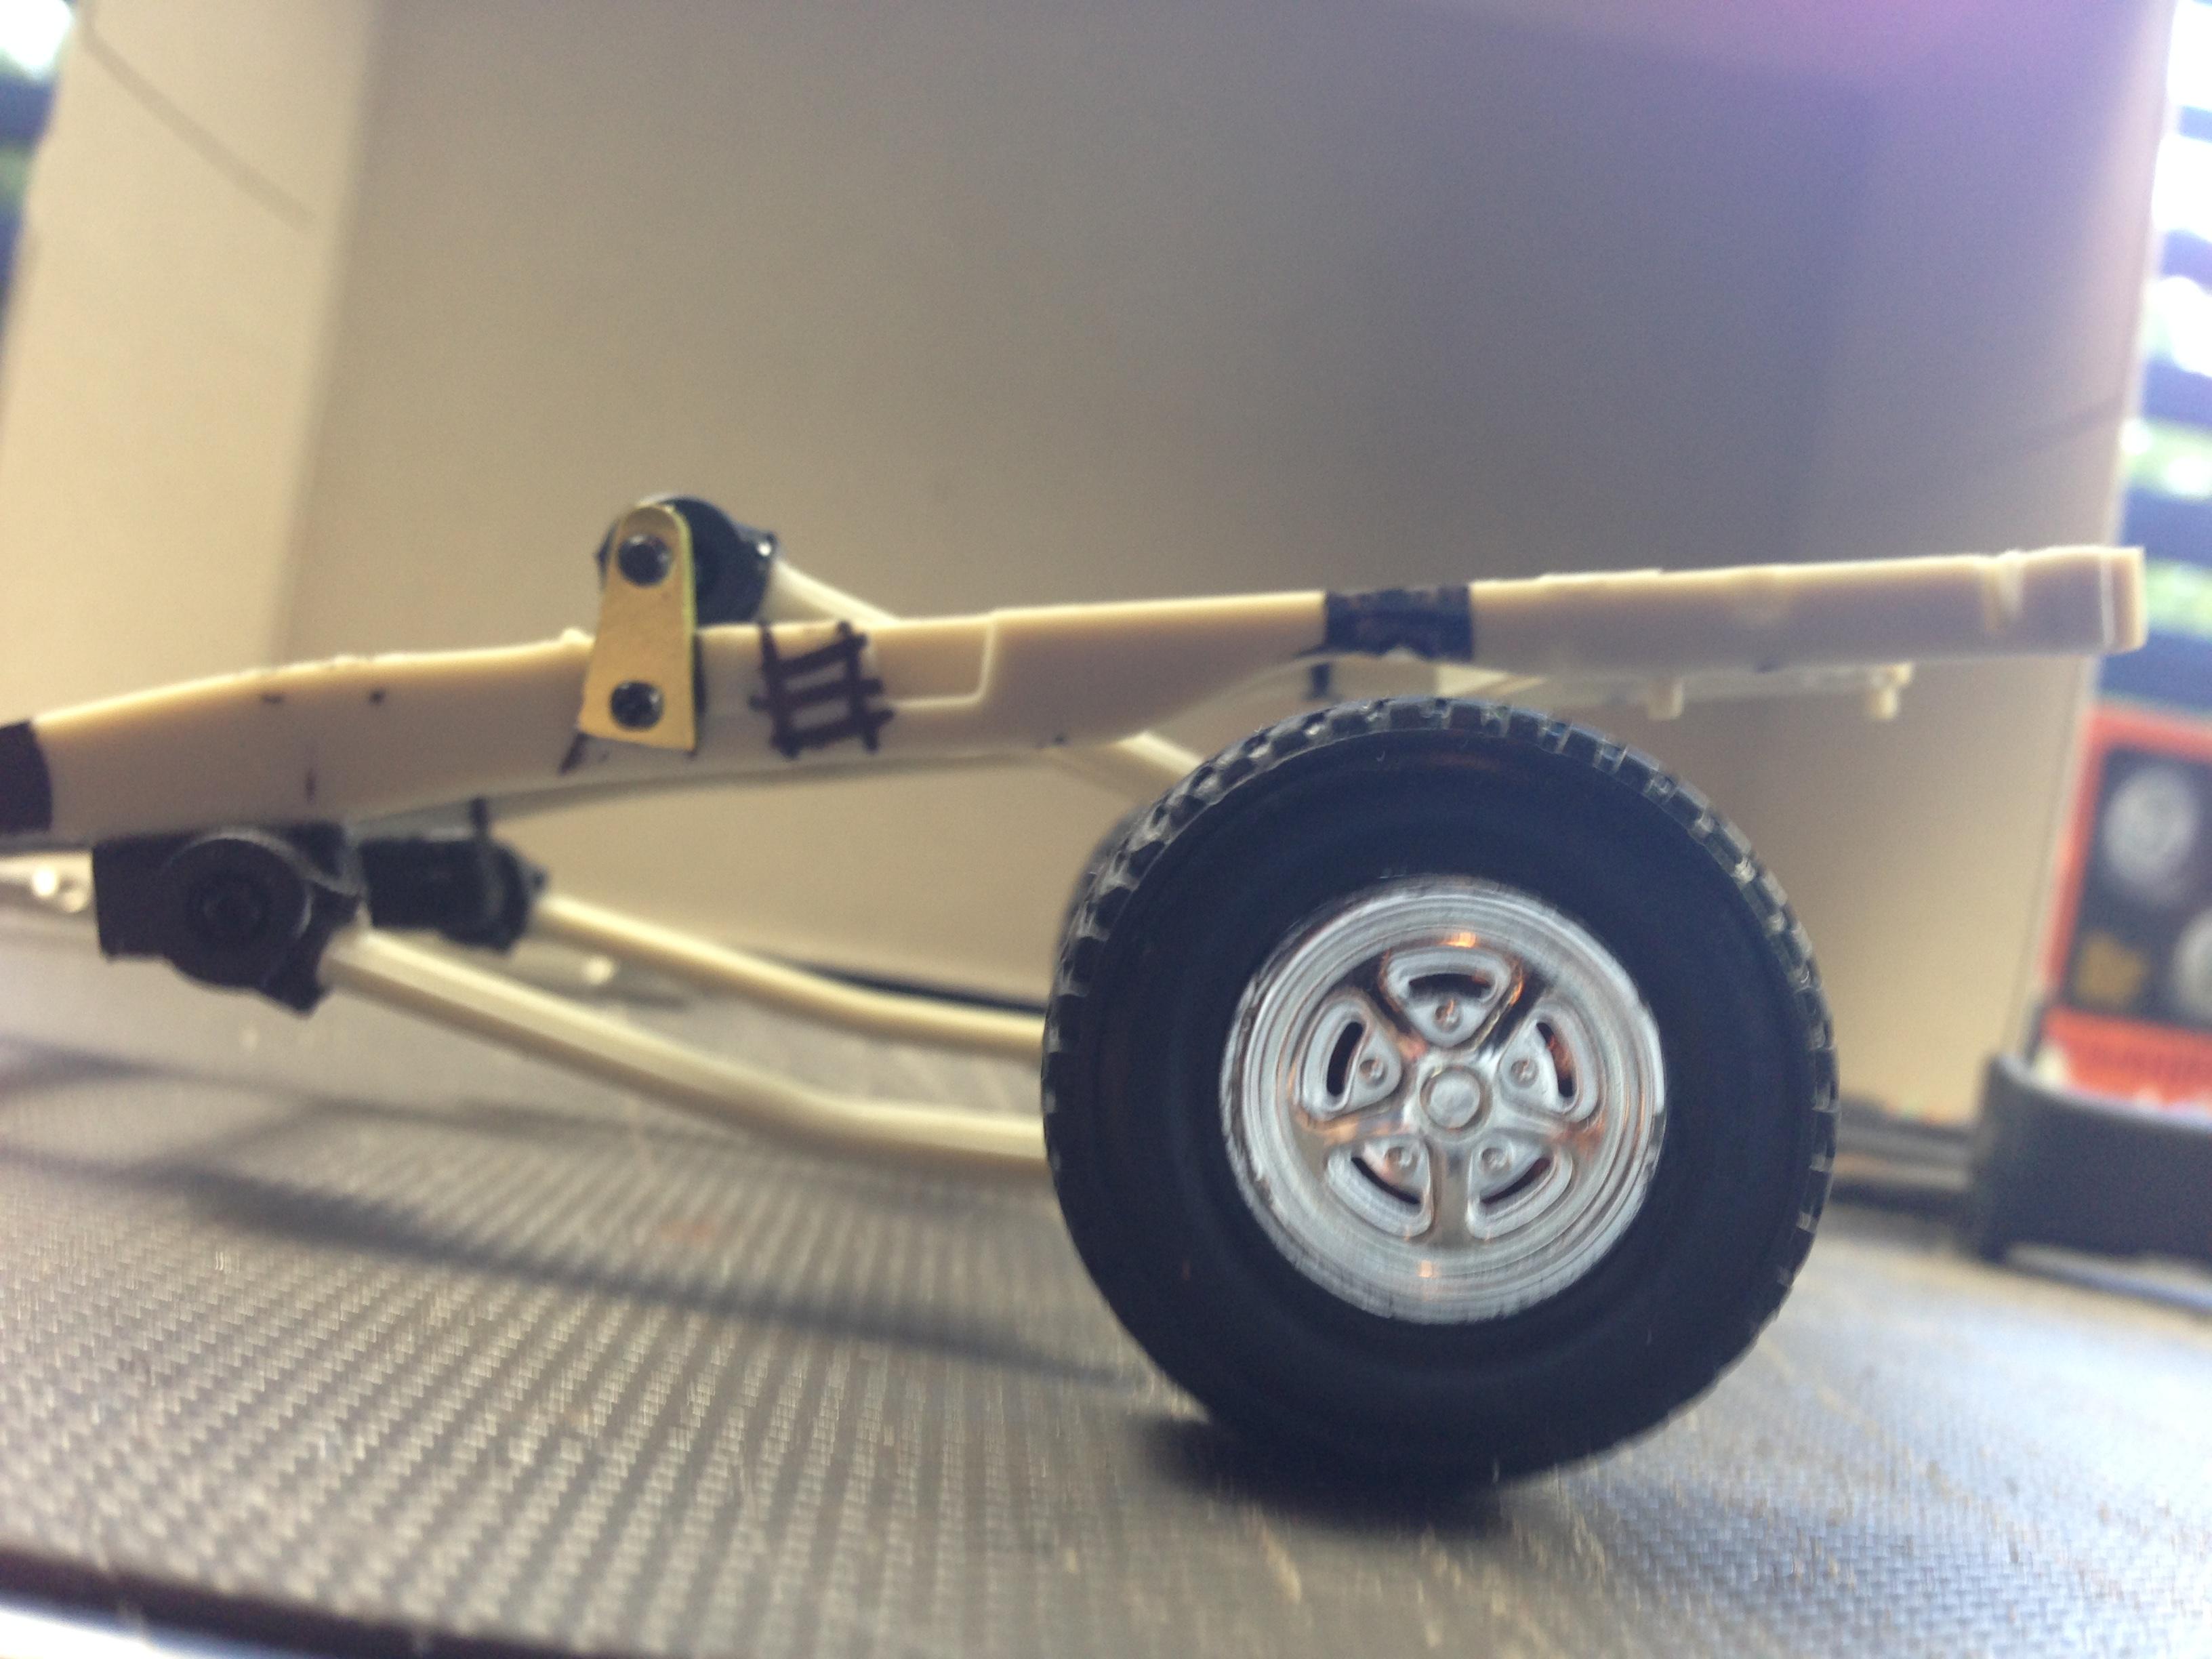
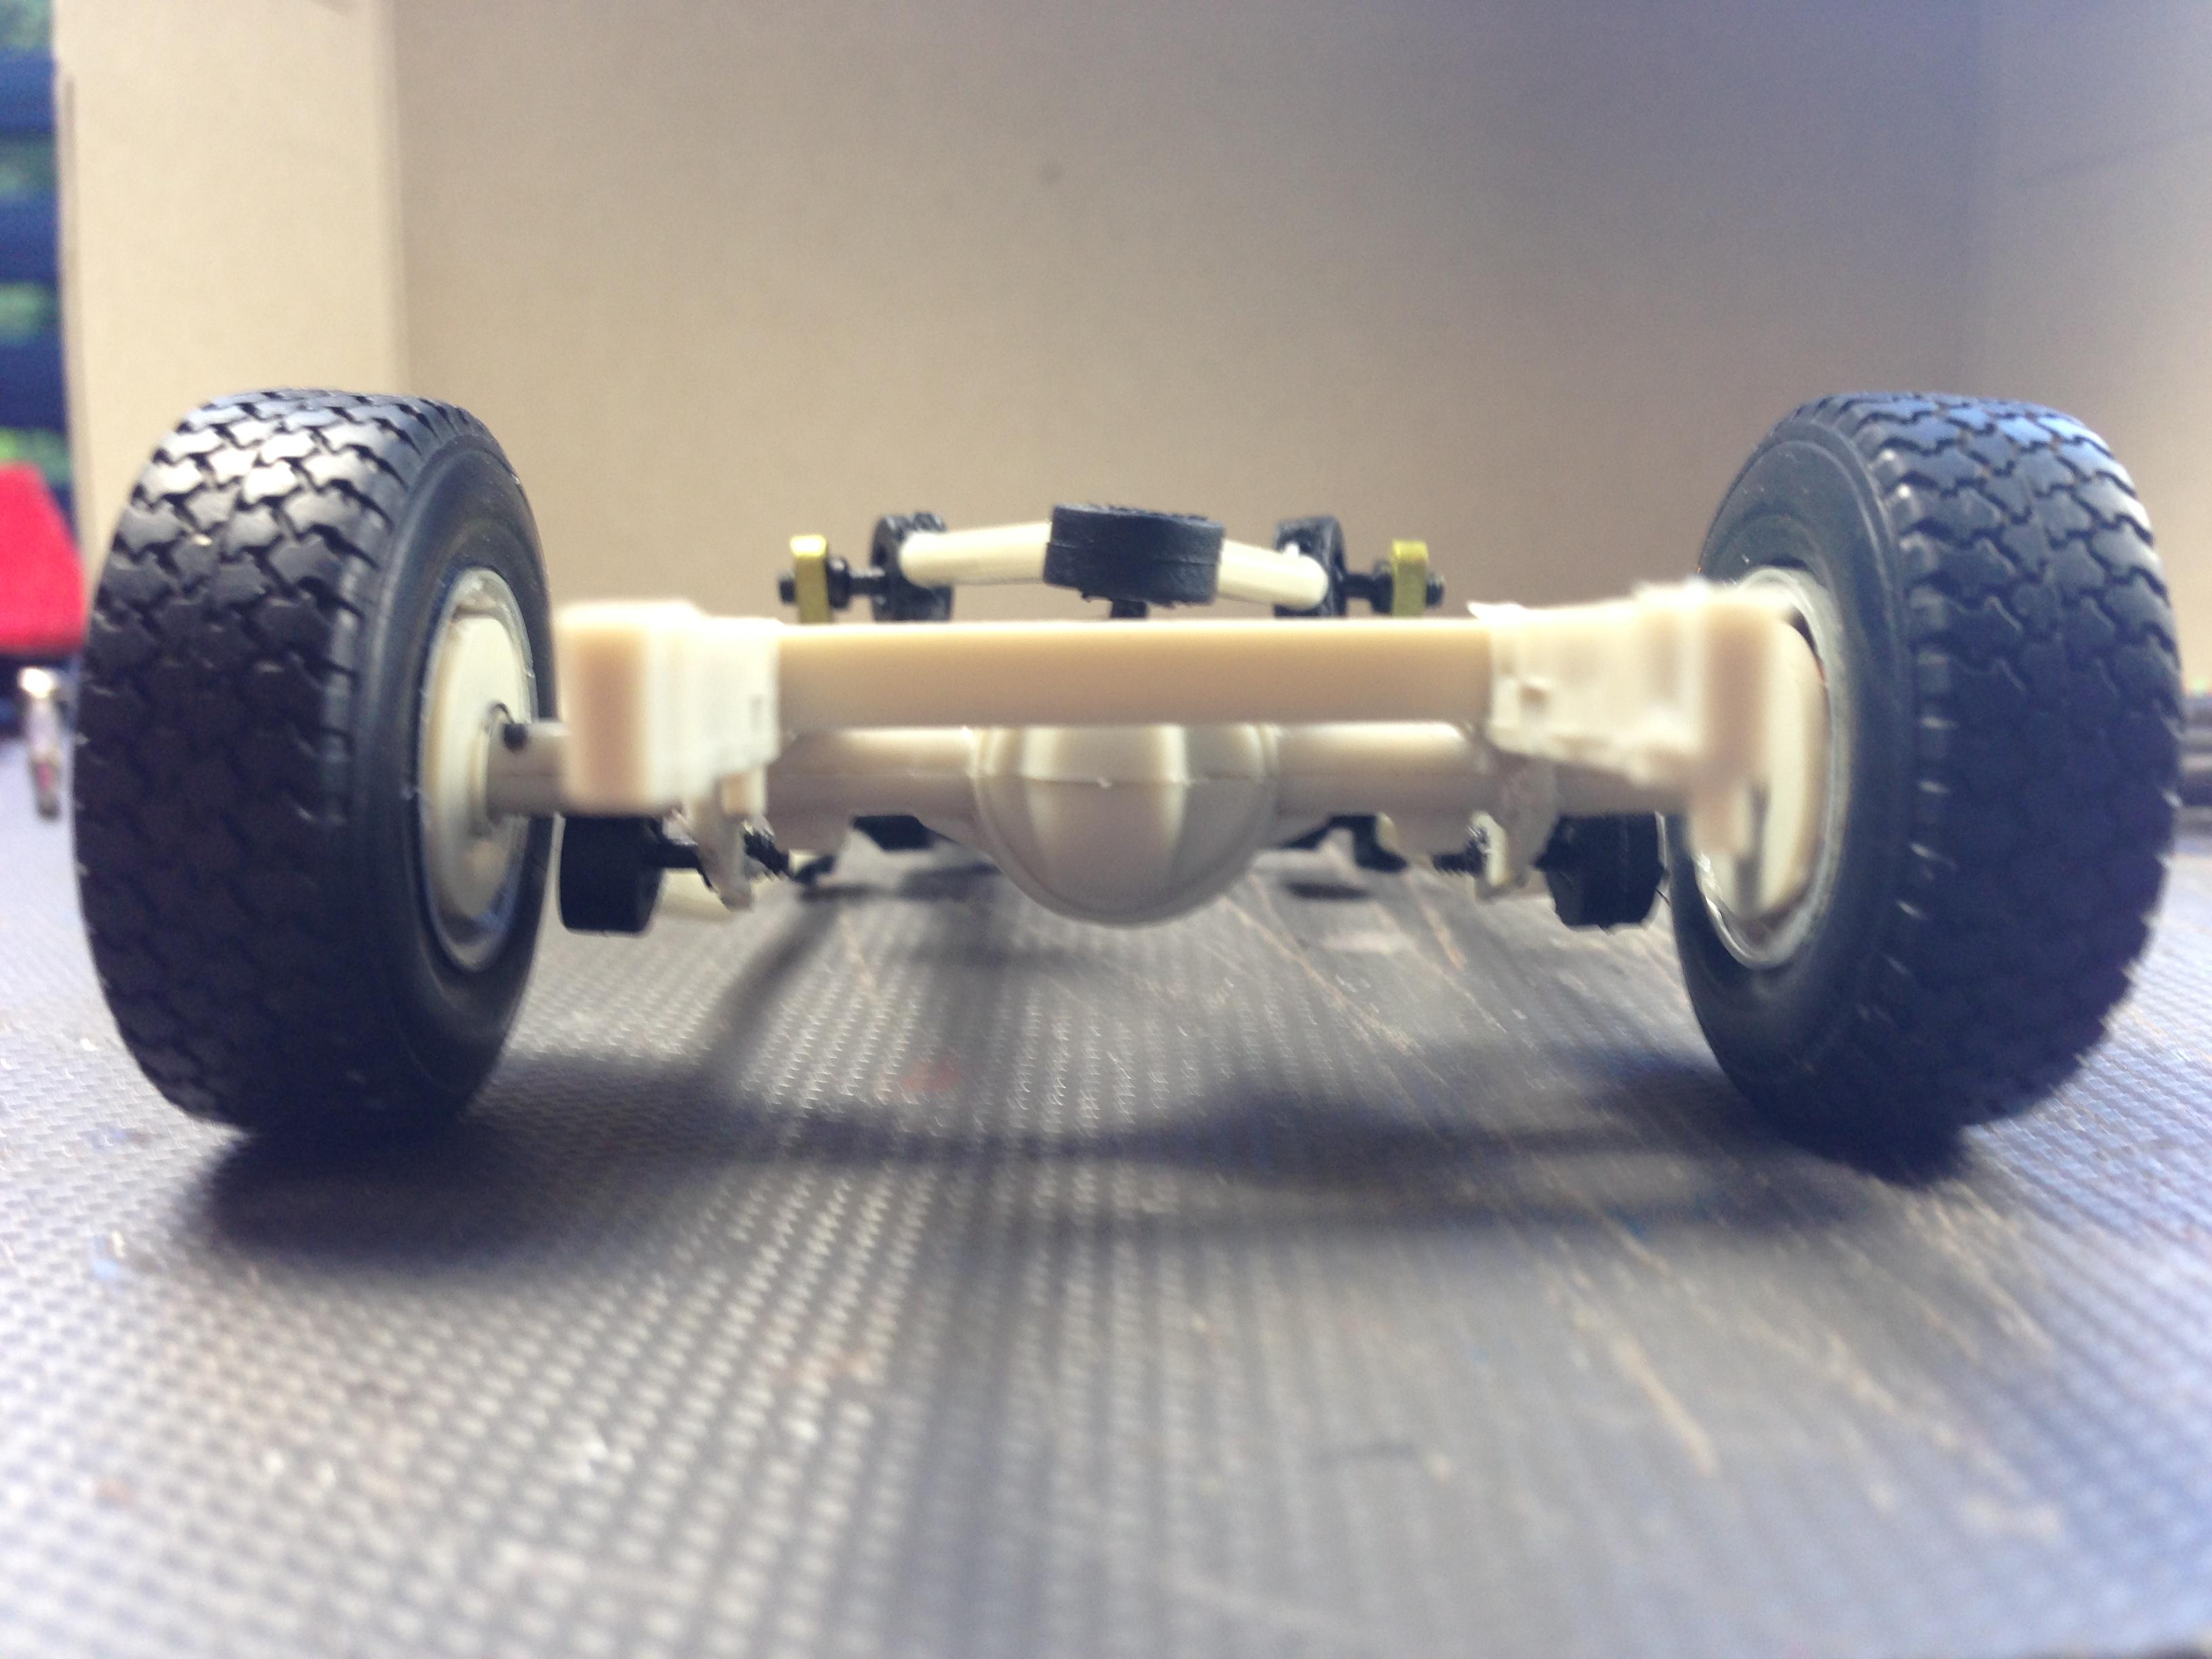
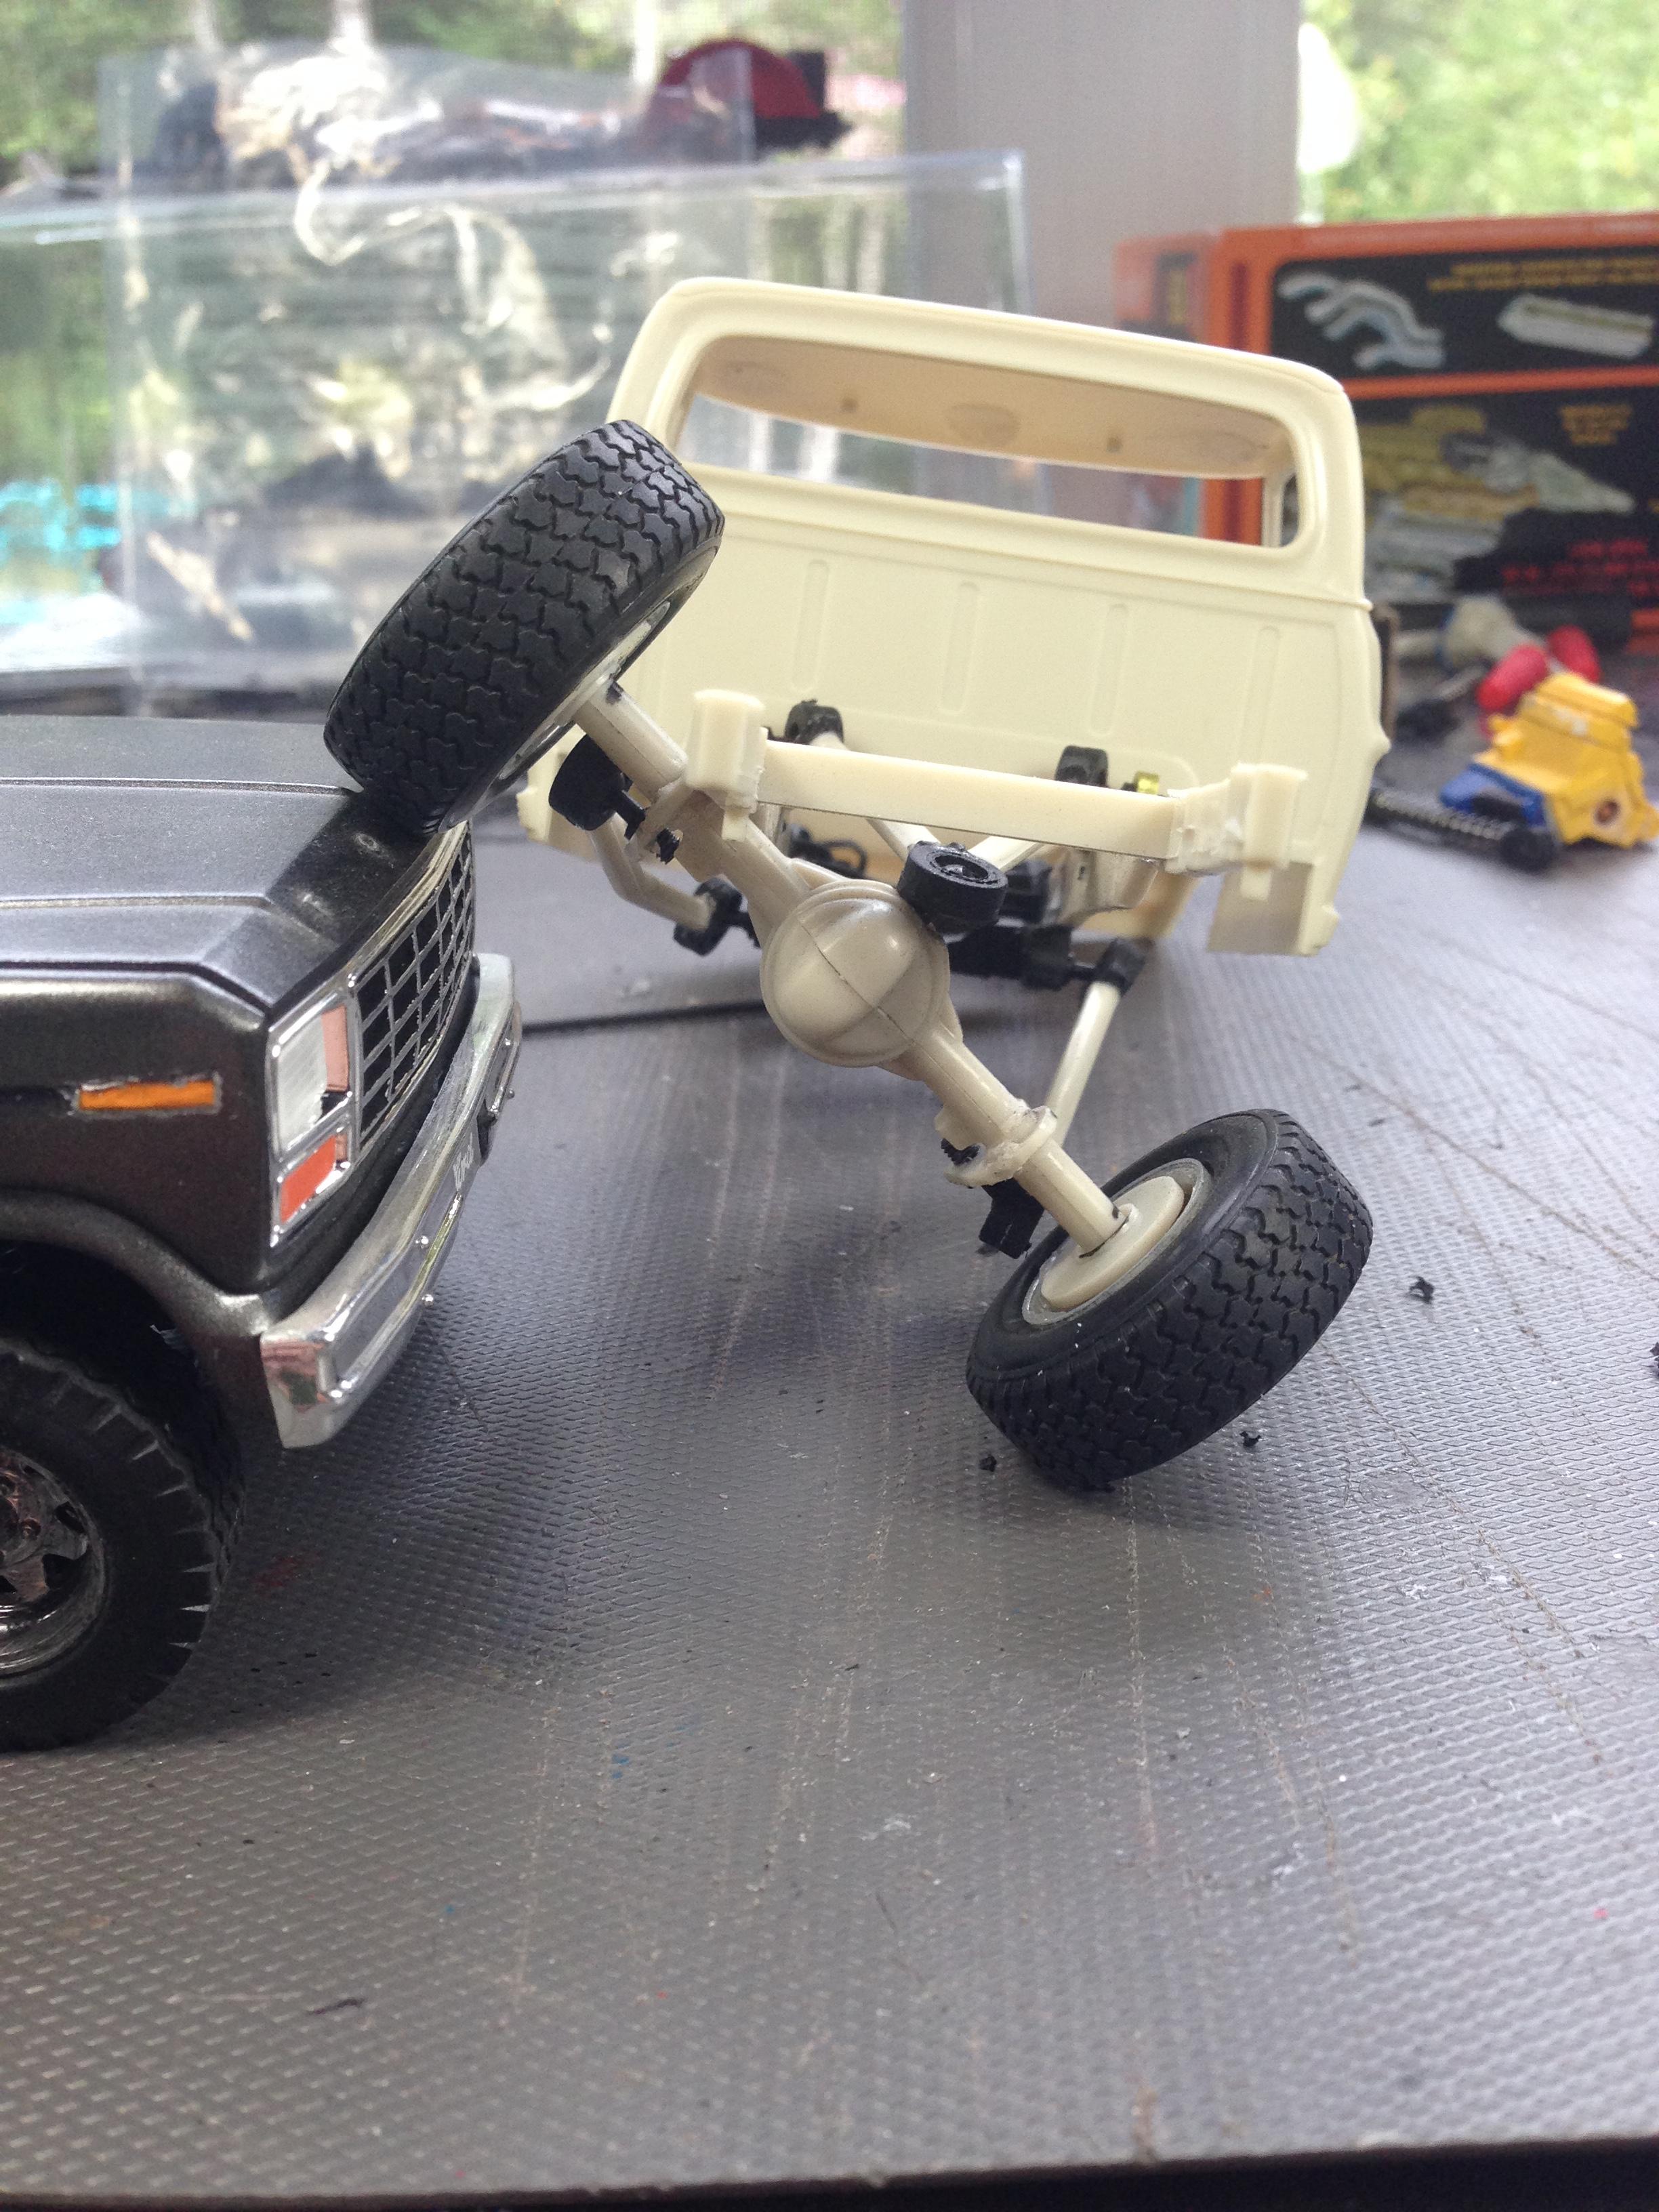
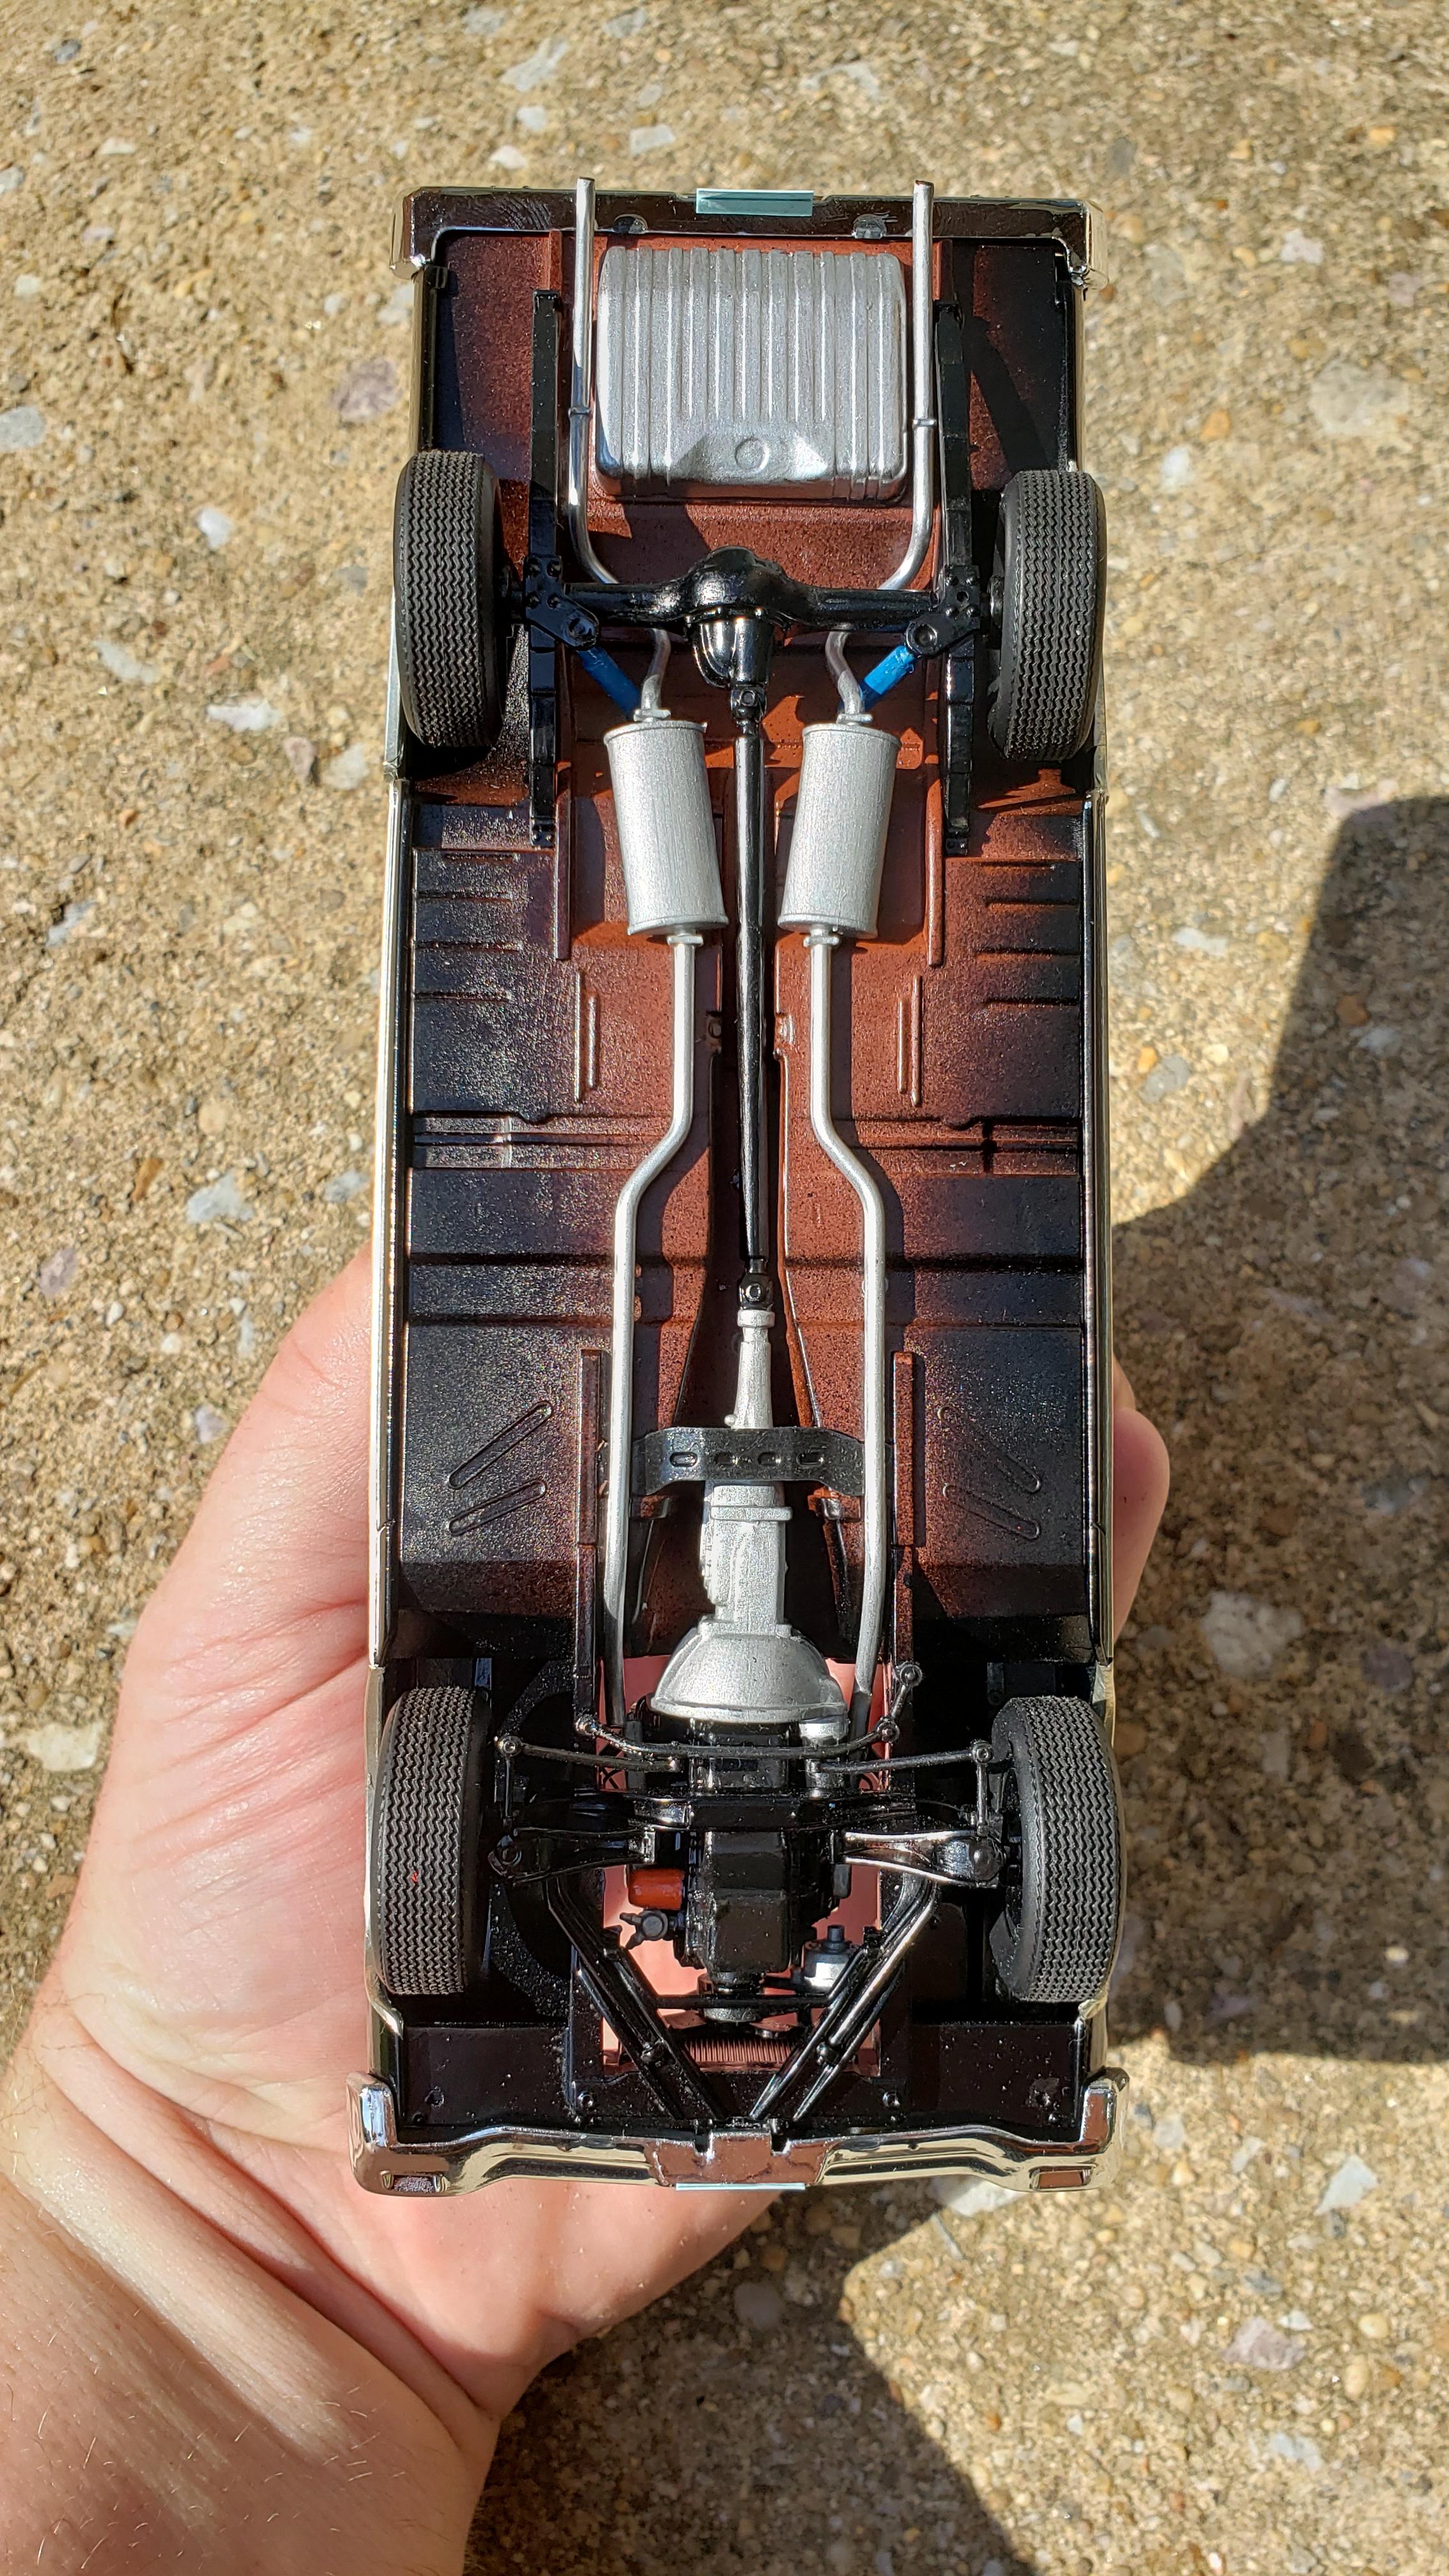
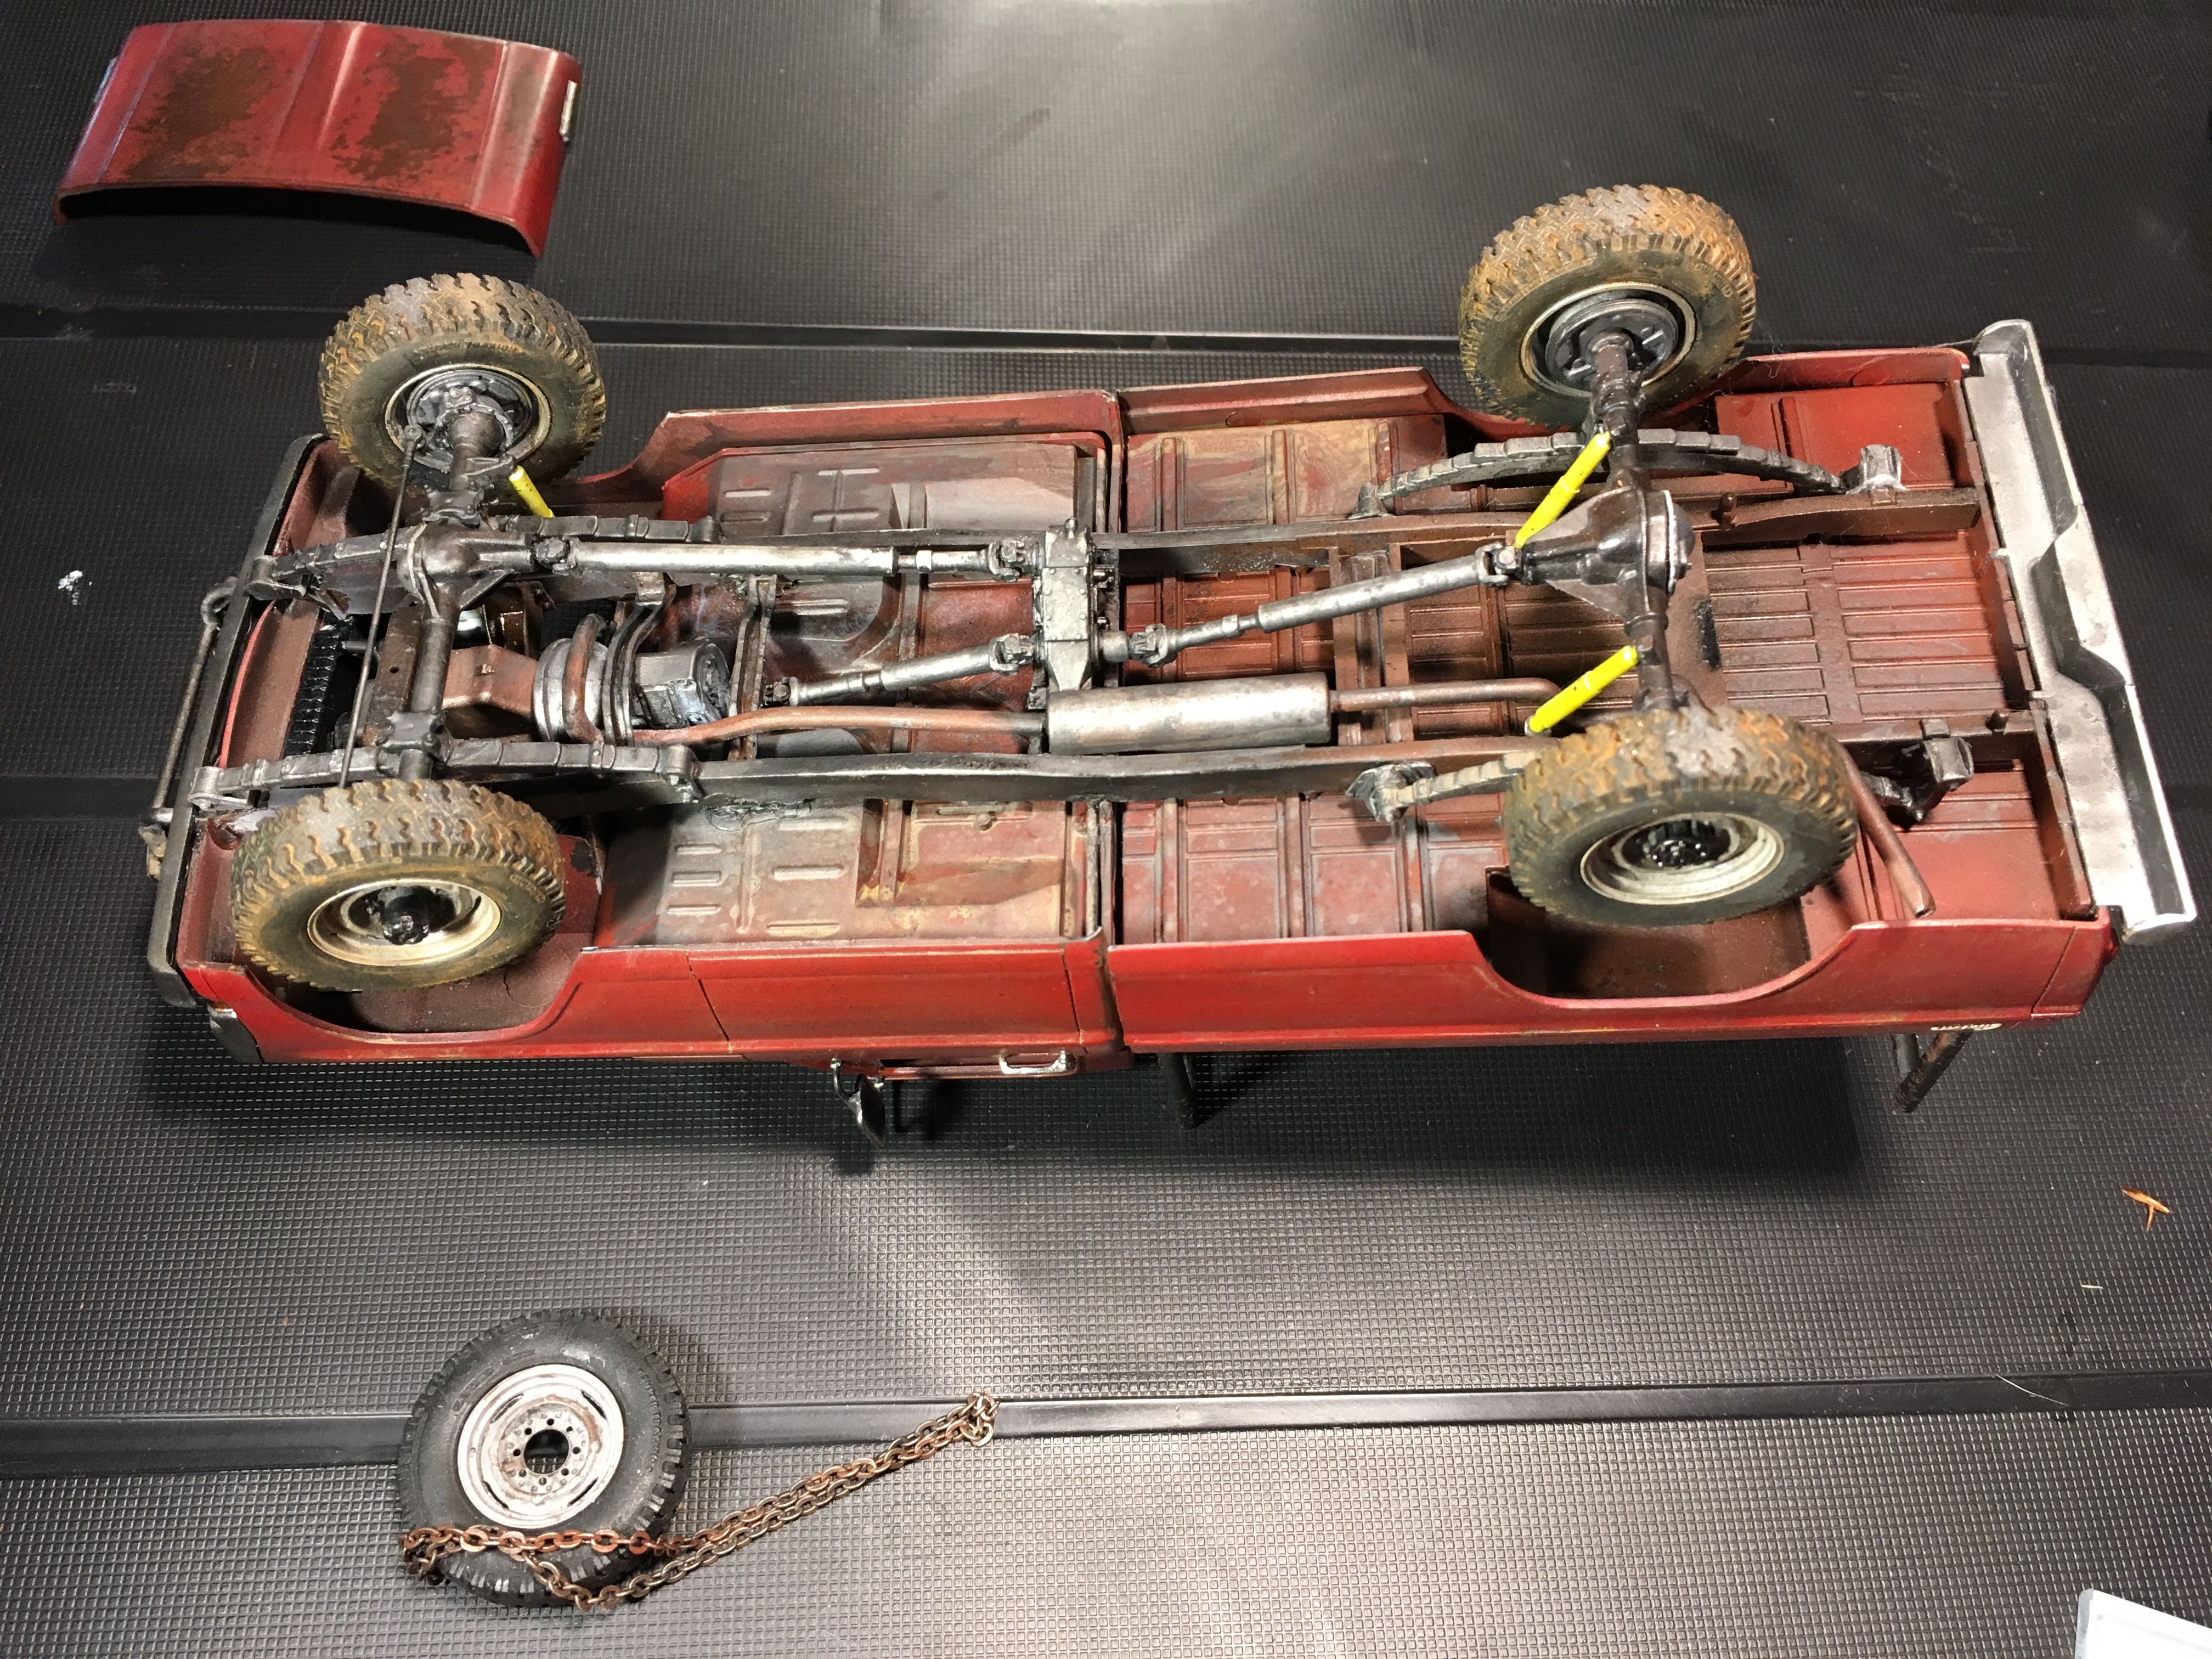
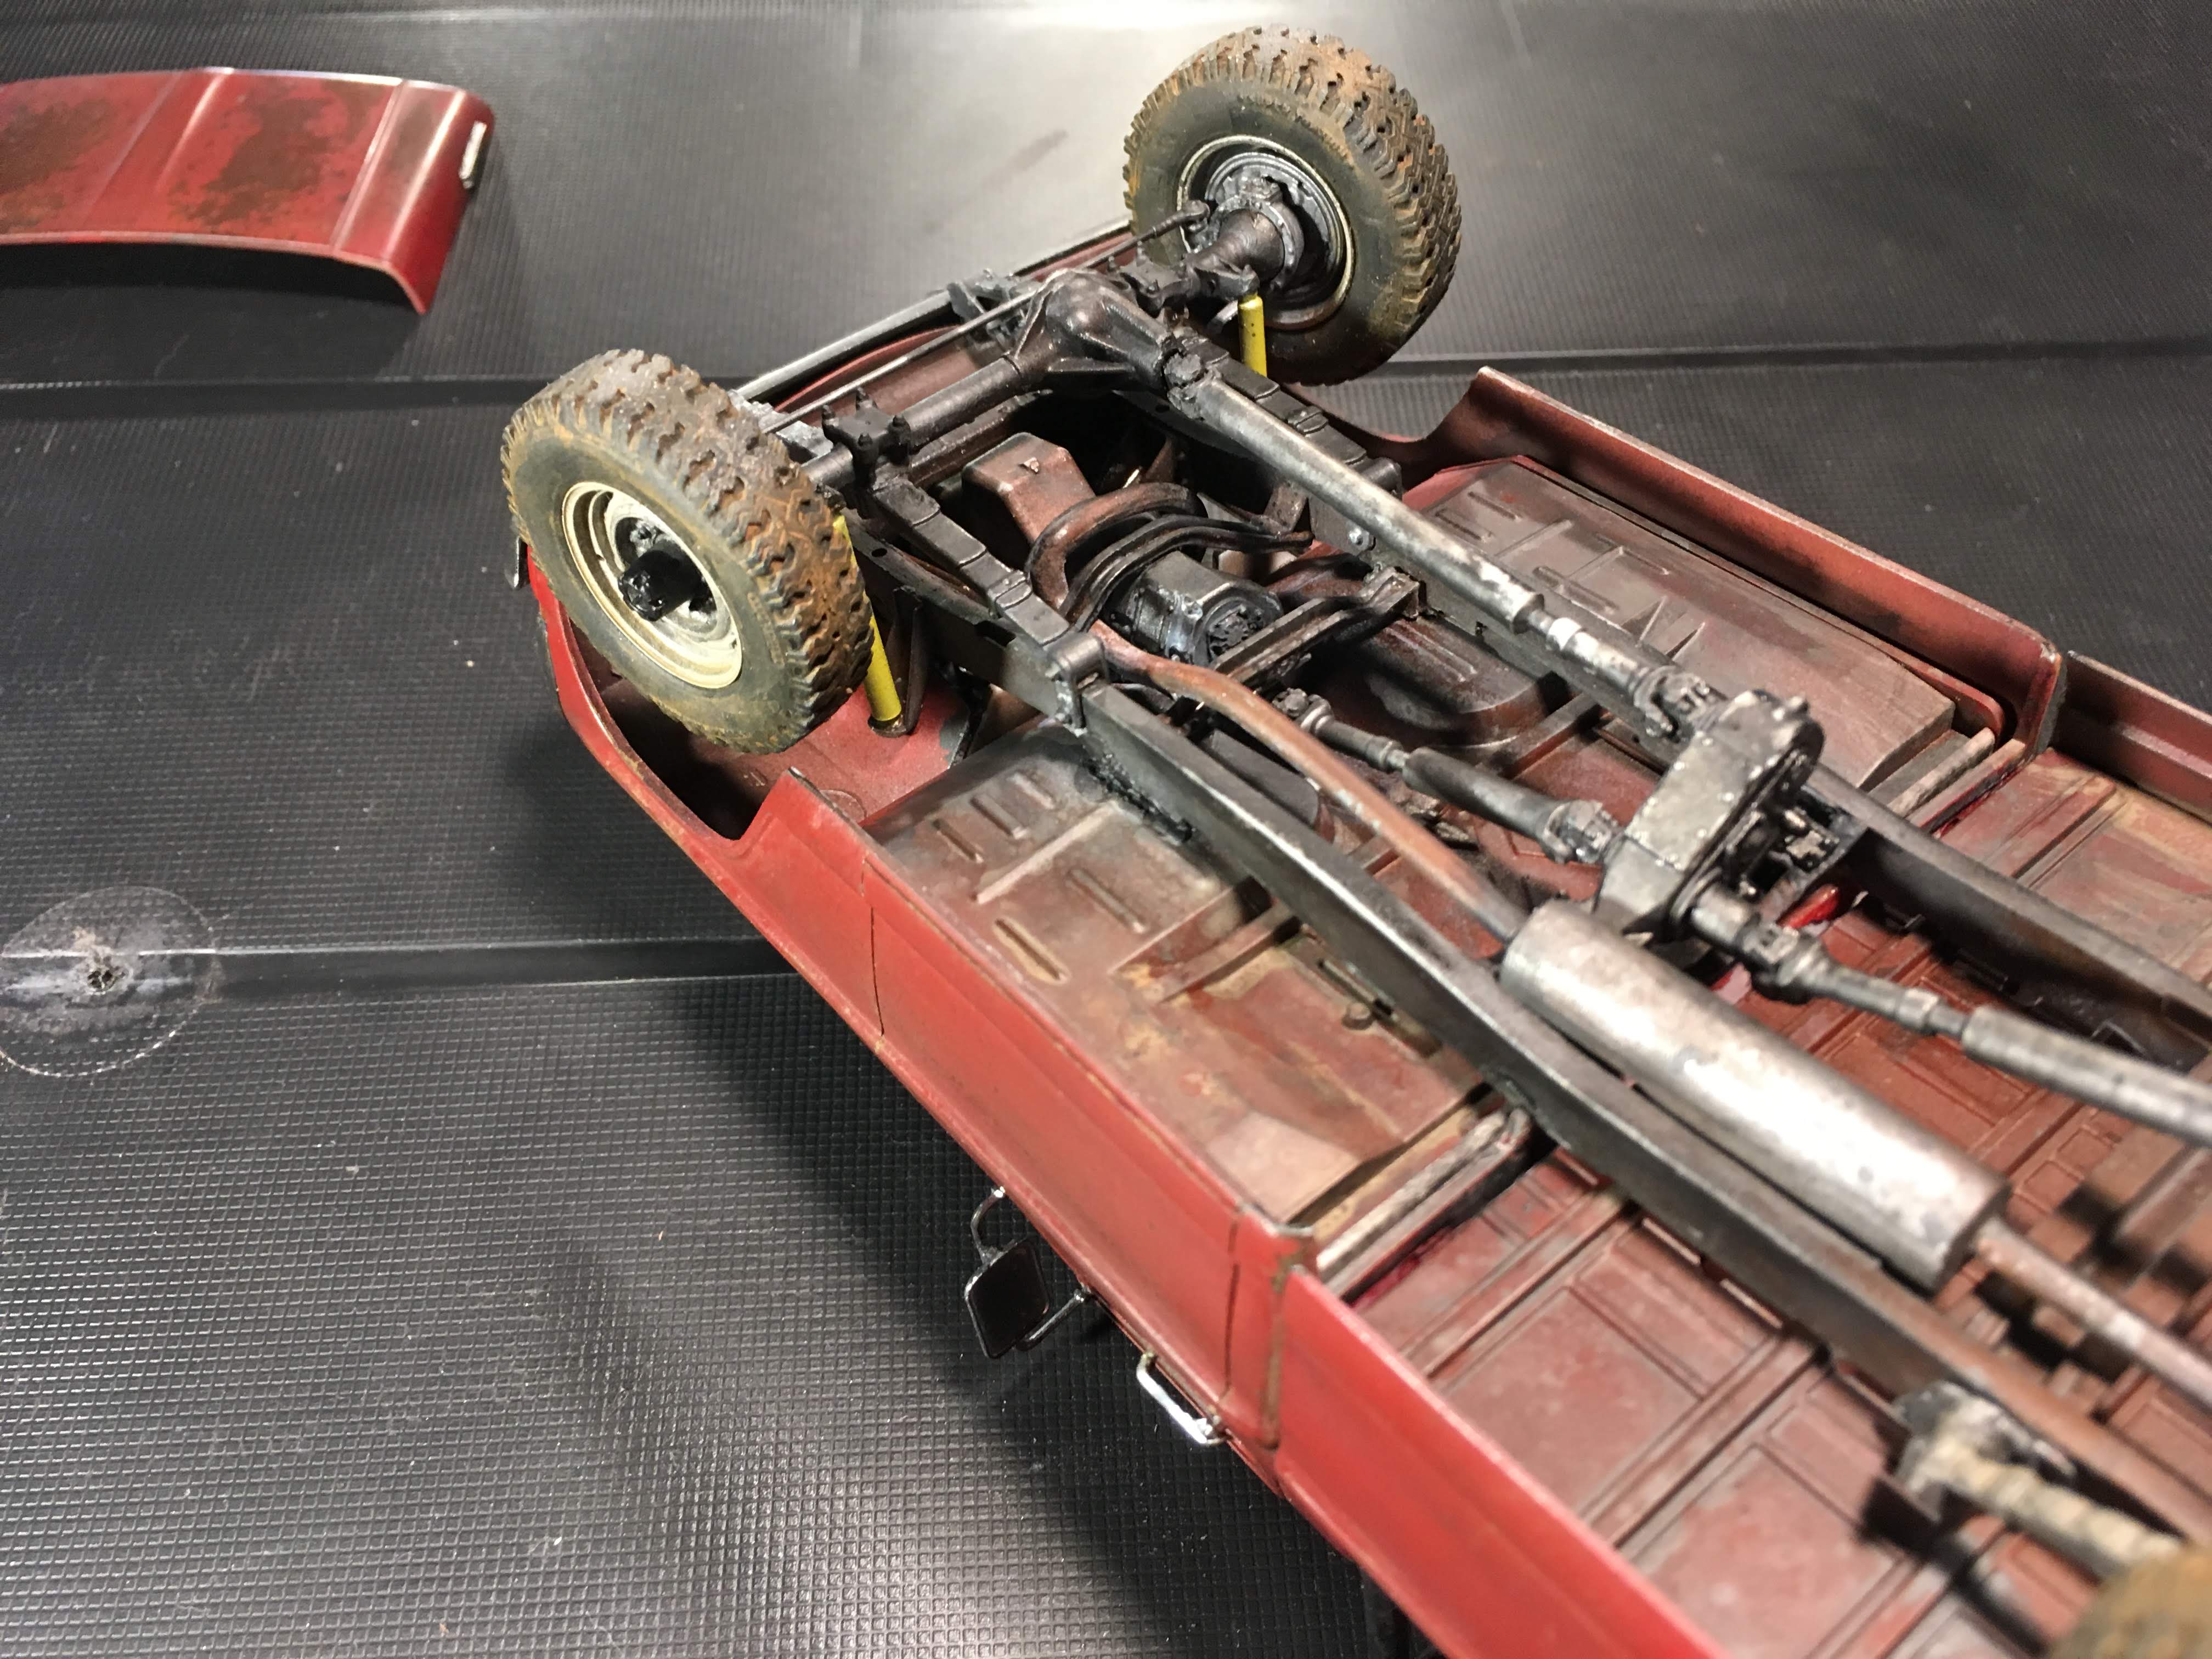
 Recently started work on this one; the 1972 Ford F100 Sport Custom by Moebius Models. Due to my fascination for the extremely simple Twin I-Beam front suspension on these trucks, I can't help but make it funtional. It won't be my first time building a working suspension like this, the first time being on the 1980 Ford F150 by Revell (posted on this site years ago) where I made a fully working Twin Traction Beam suspension up front. However, it was built as a stock truck, so the rear flex only came from the box stock leaf springs. This one will be MUCH different as it will be a long travel prerunner suspension. All I've done so far is the links to the rear suspension because the front is proving to be a little more difficult; The ball joints are from a small scale rc crawler and the springs will be from the same. As seen in the eighth picture, this setup can achieve extreme flex and travel. Also in that pic is the '80 F150 mentioned above. This last pic is what it should look like when the suspension is fully compressed and with some extra weight all around I hope to get it to flex on dioramas without being pushed down or held. The hood scoop is made to look like those found on some HD dump trucks of the same body style. I have many things planned for this build so stay tuned. Comments welcome! -Jay
-
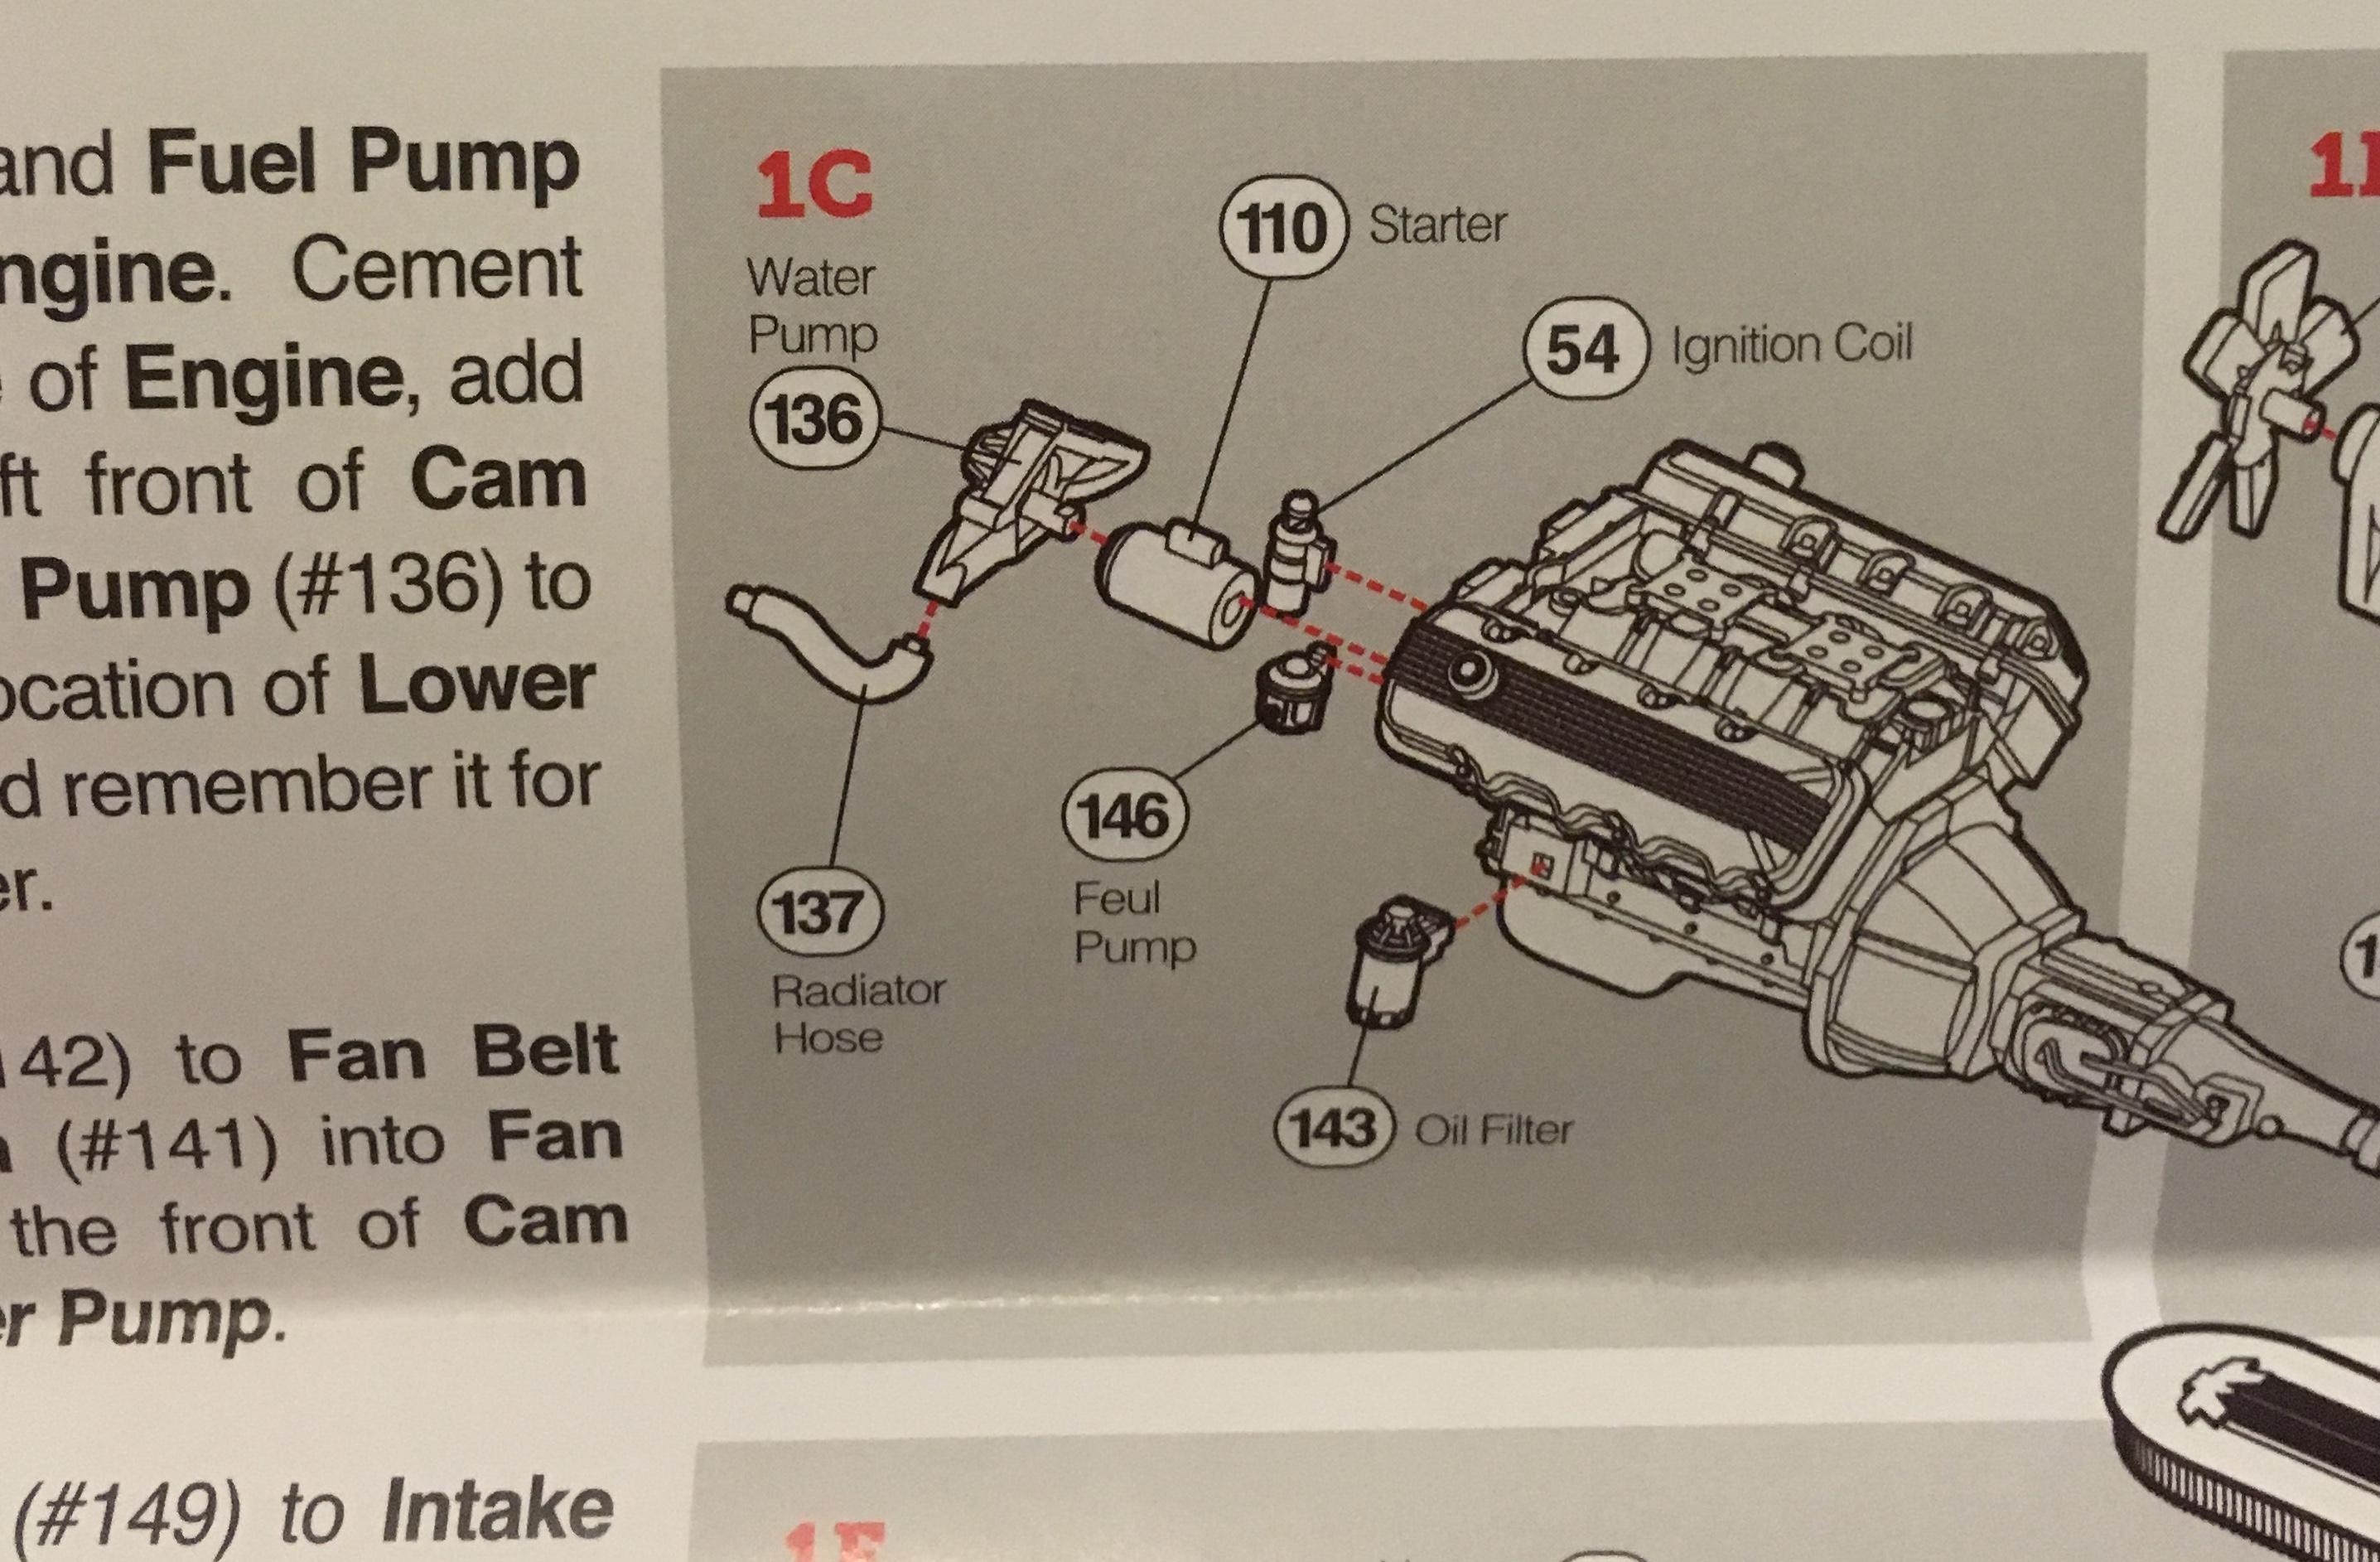
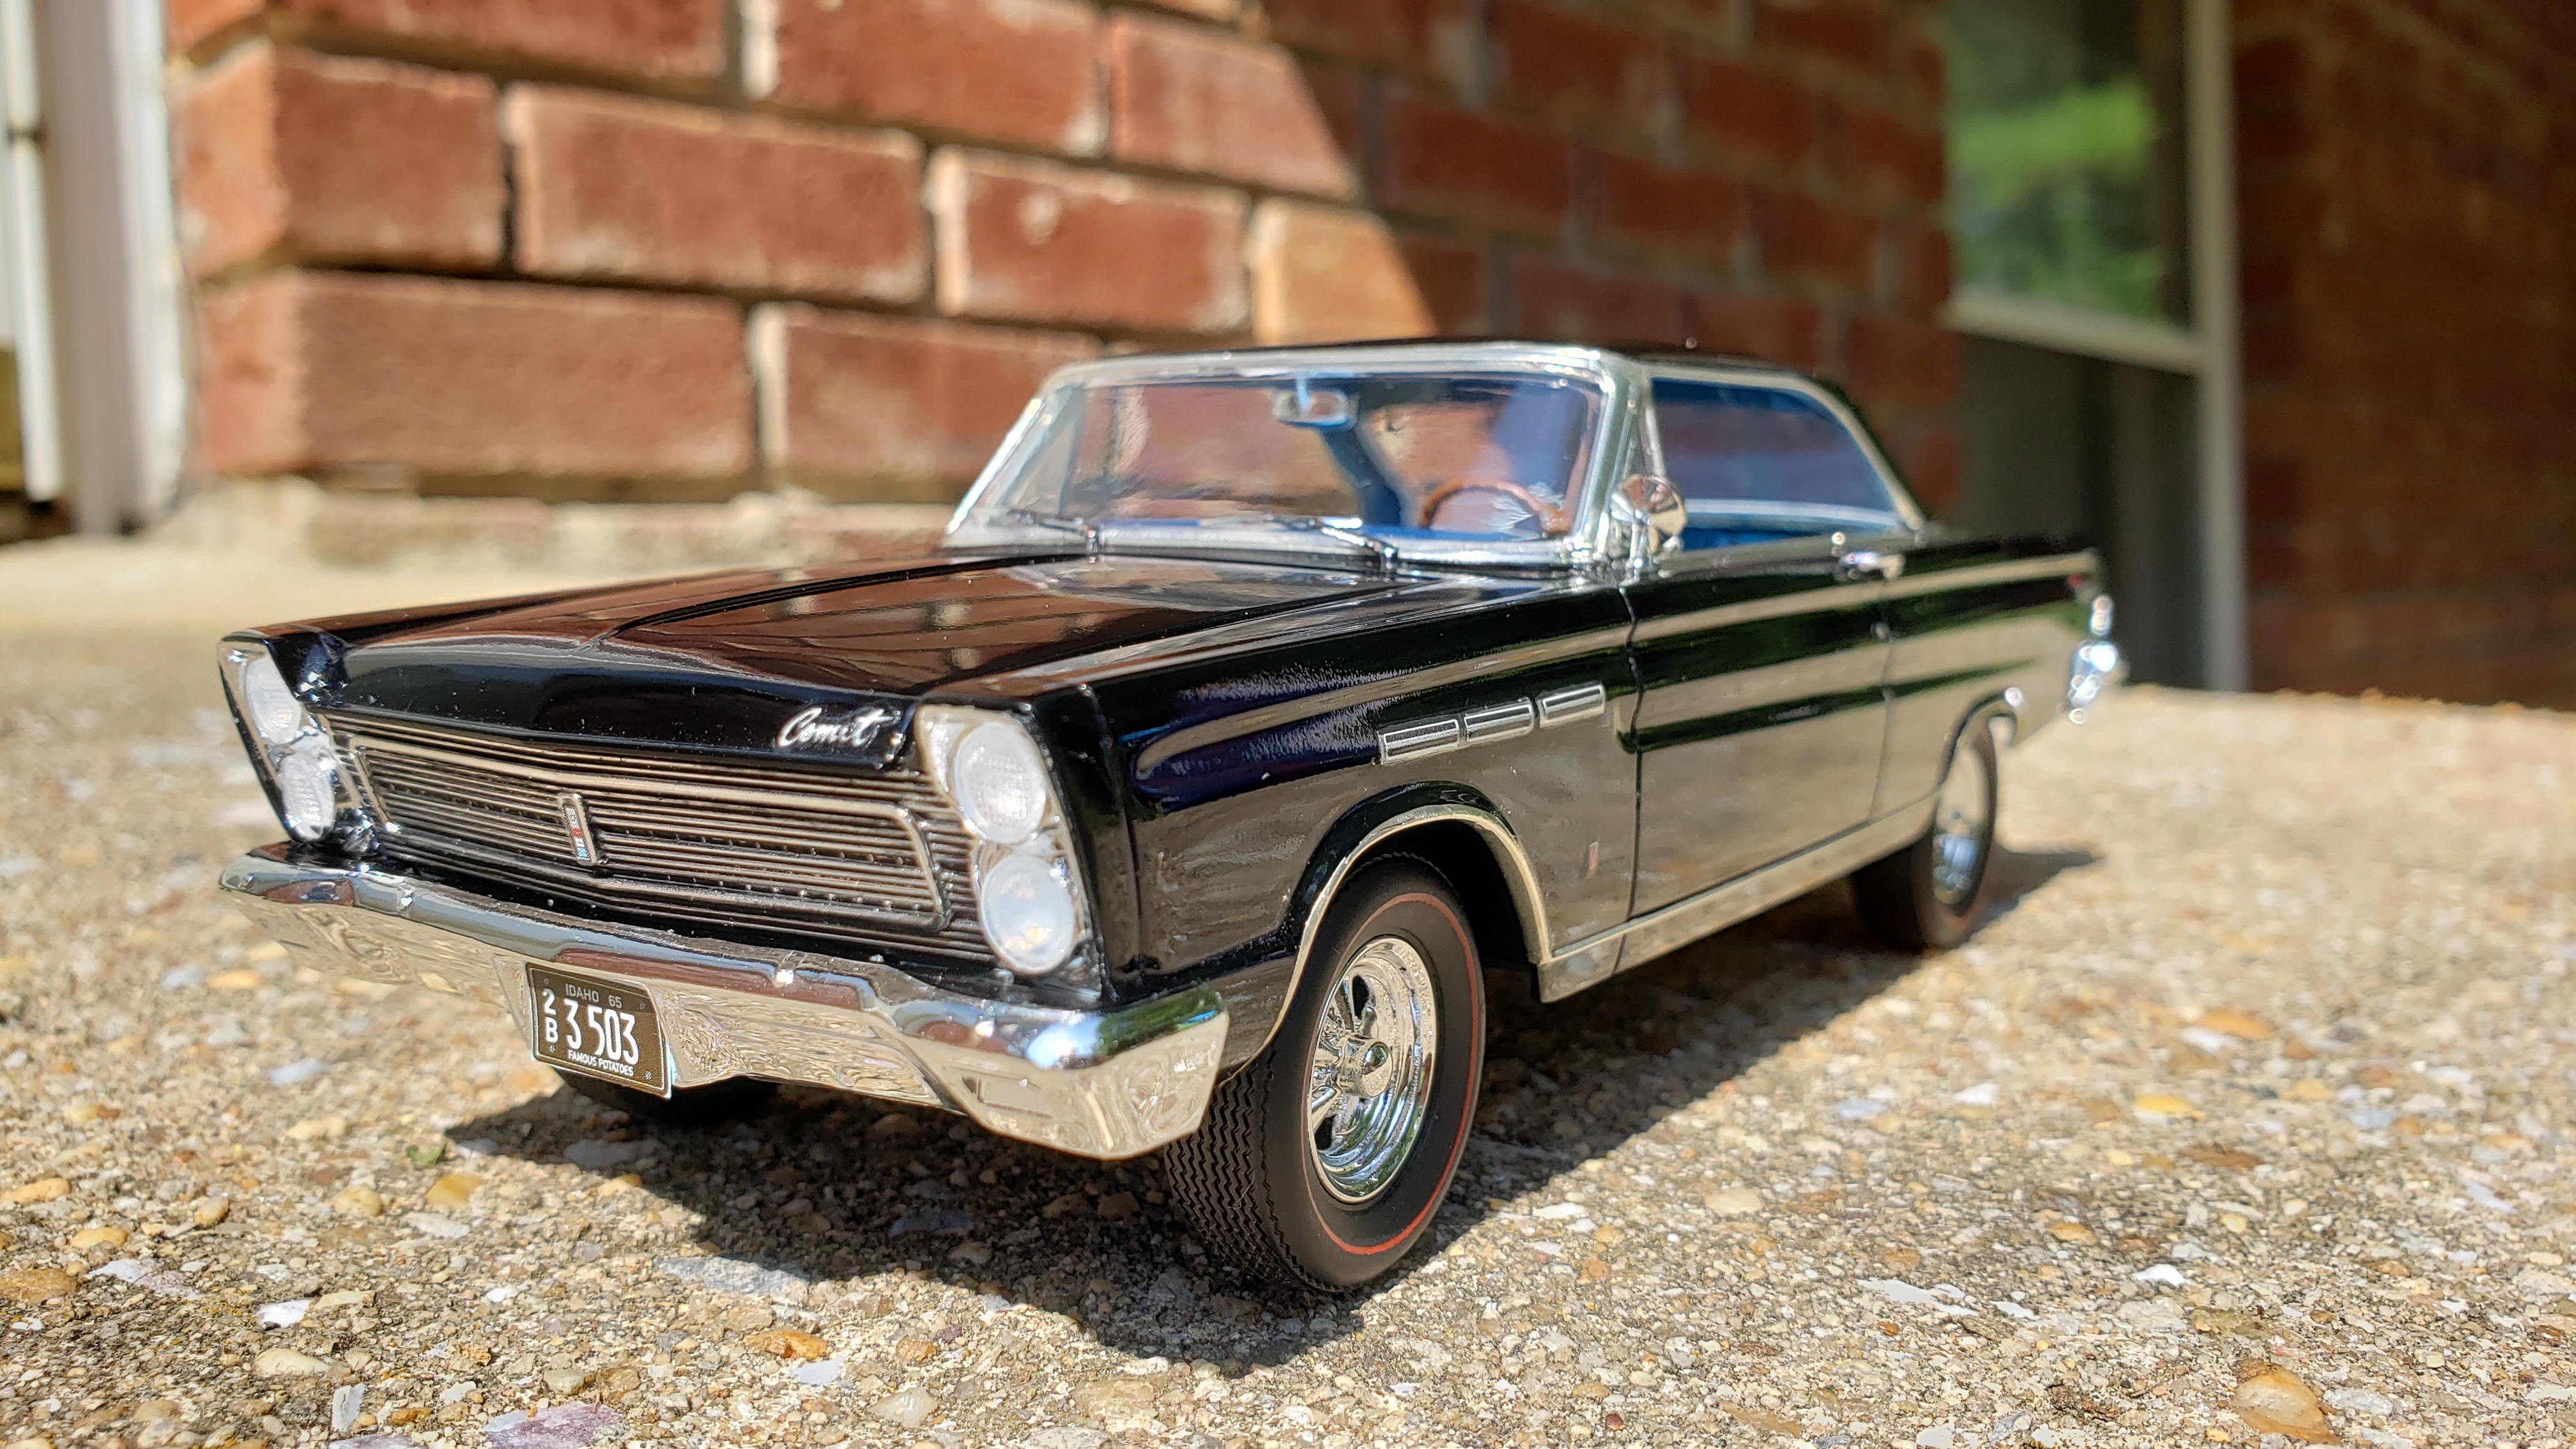
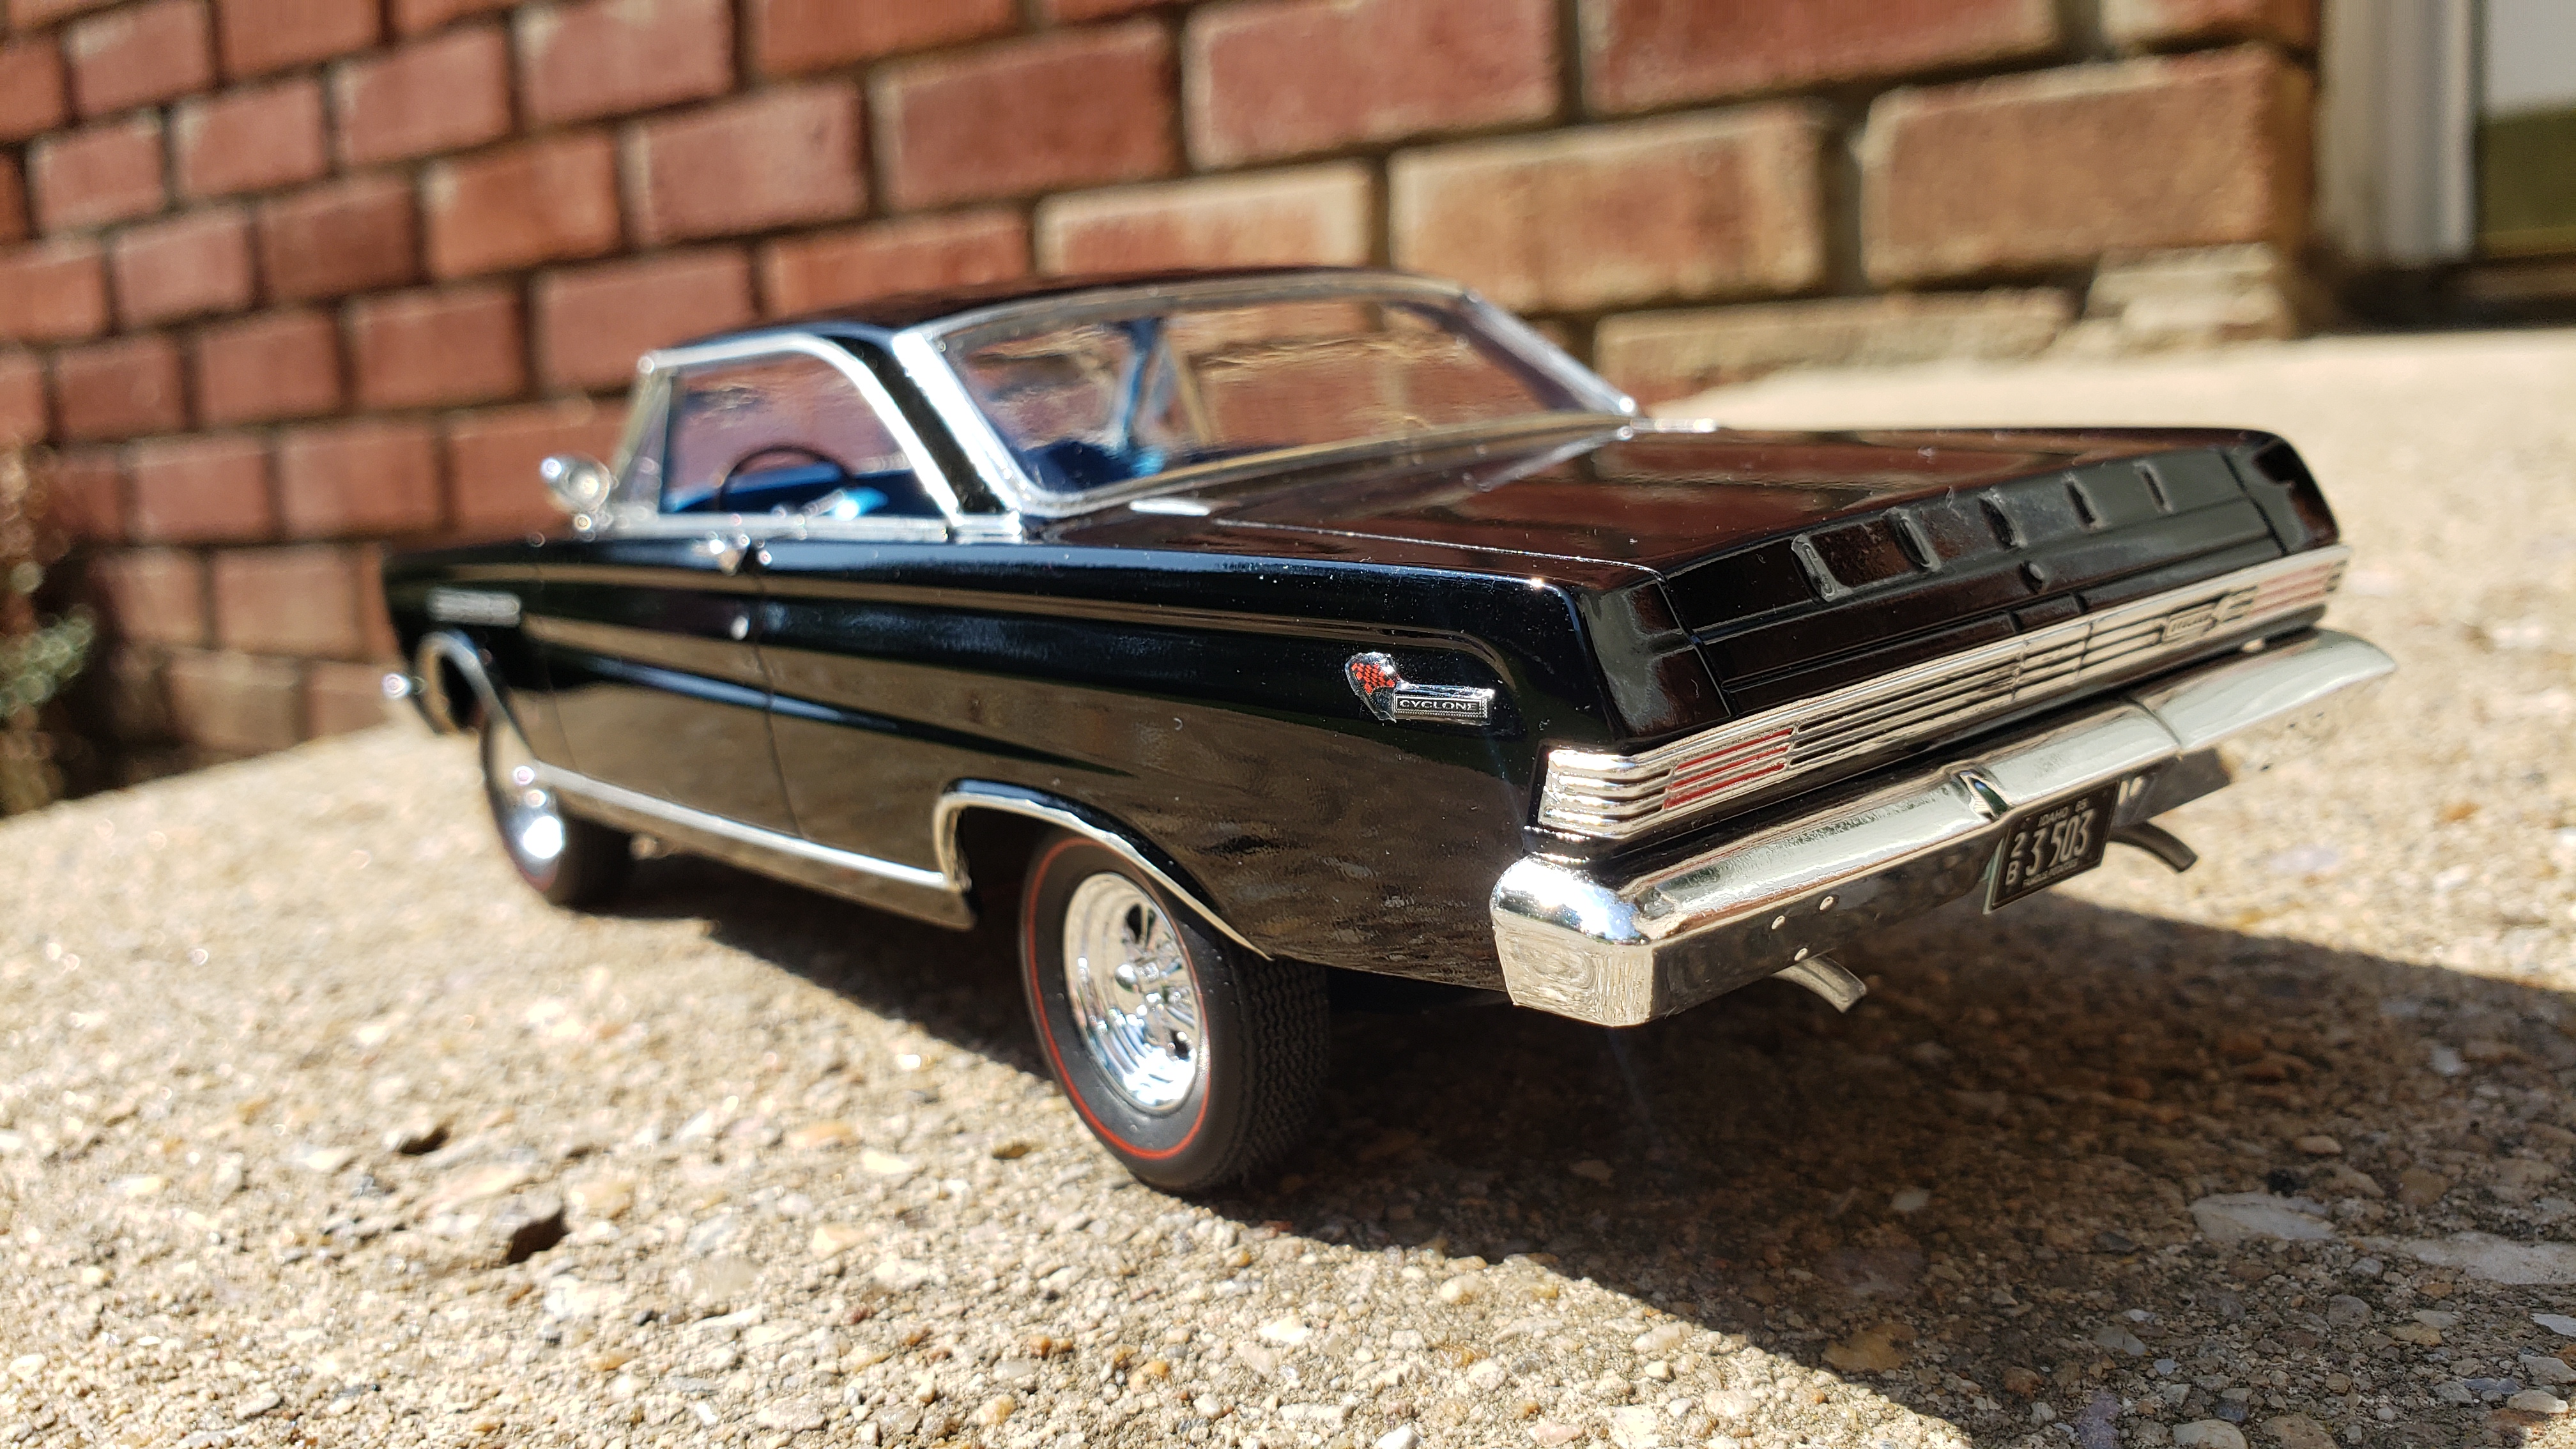
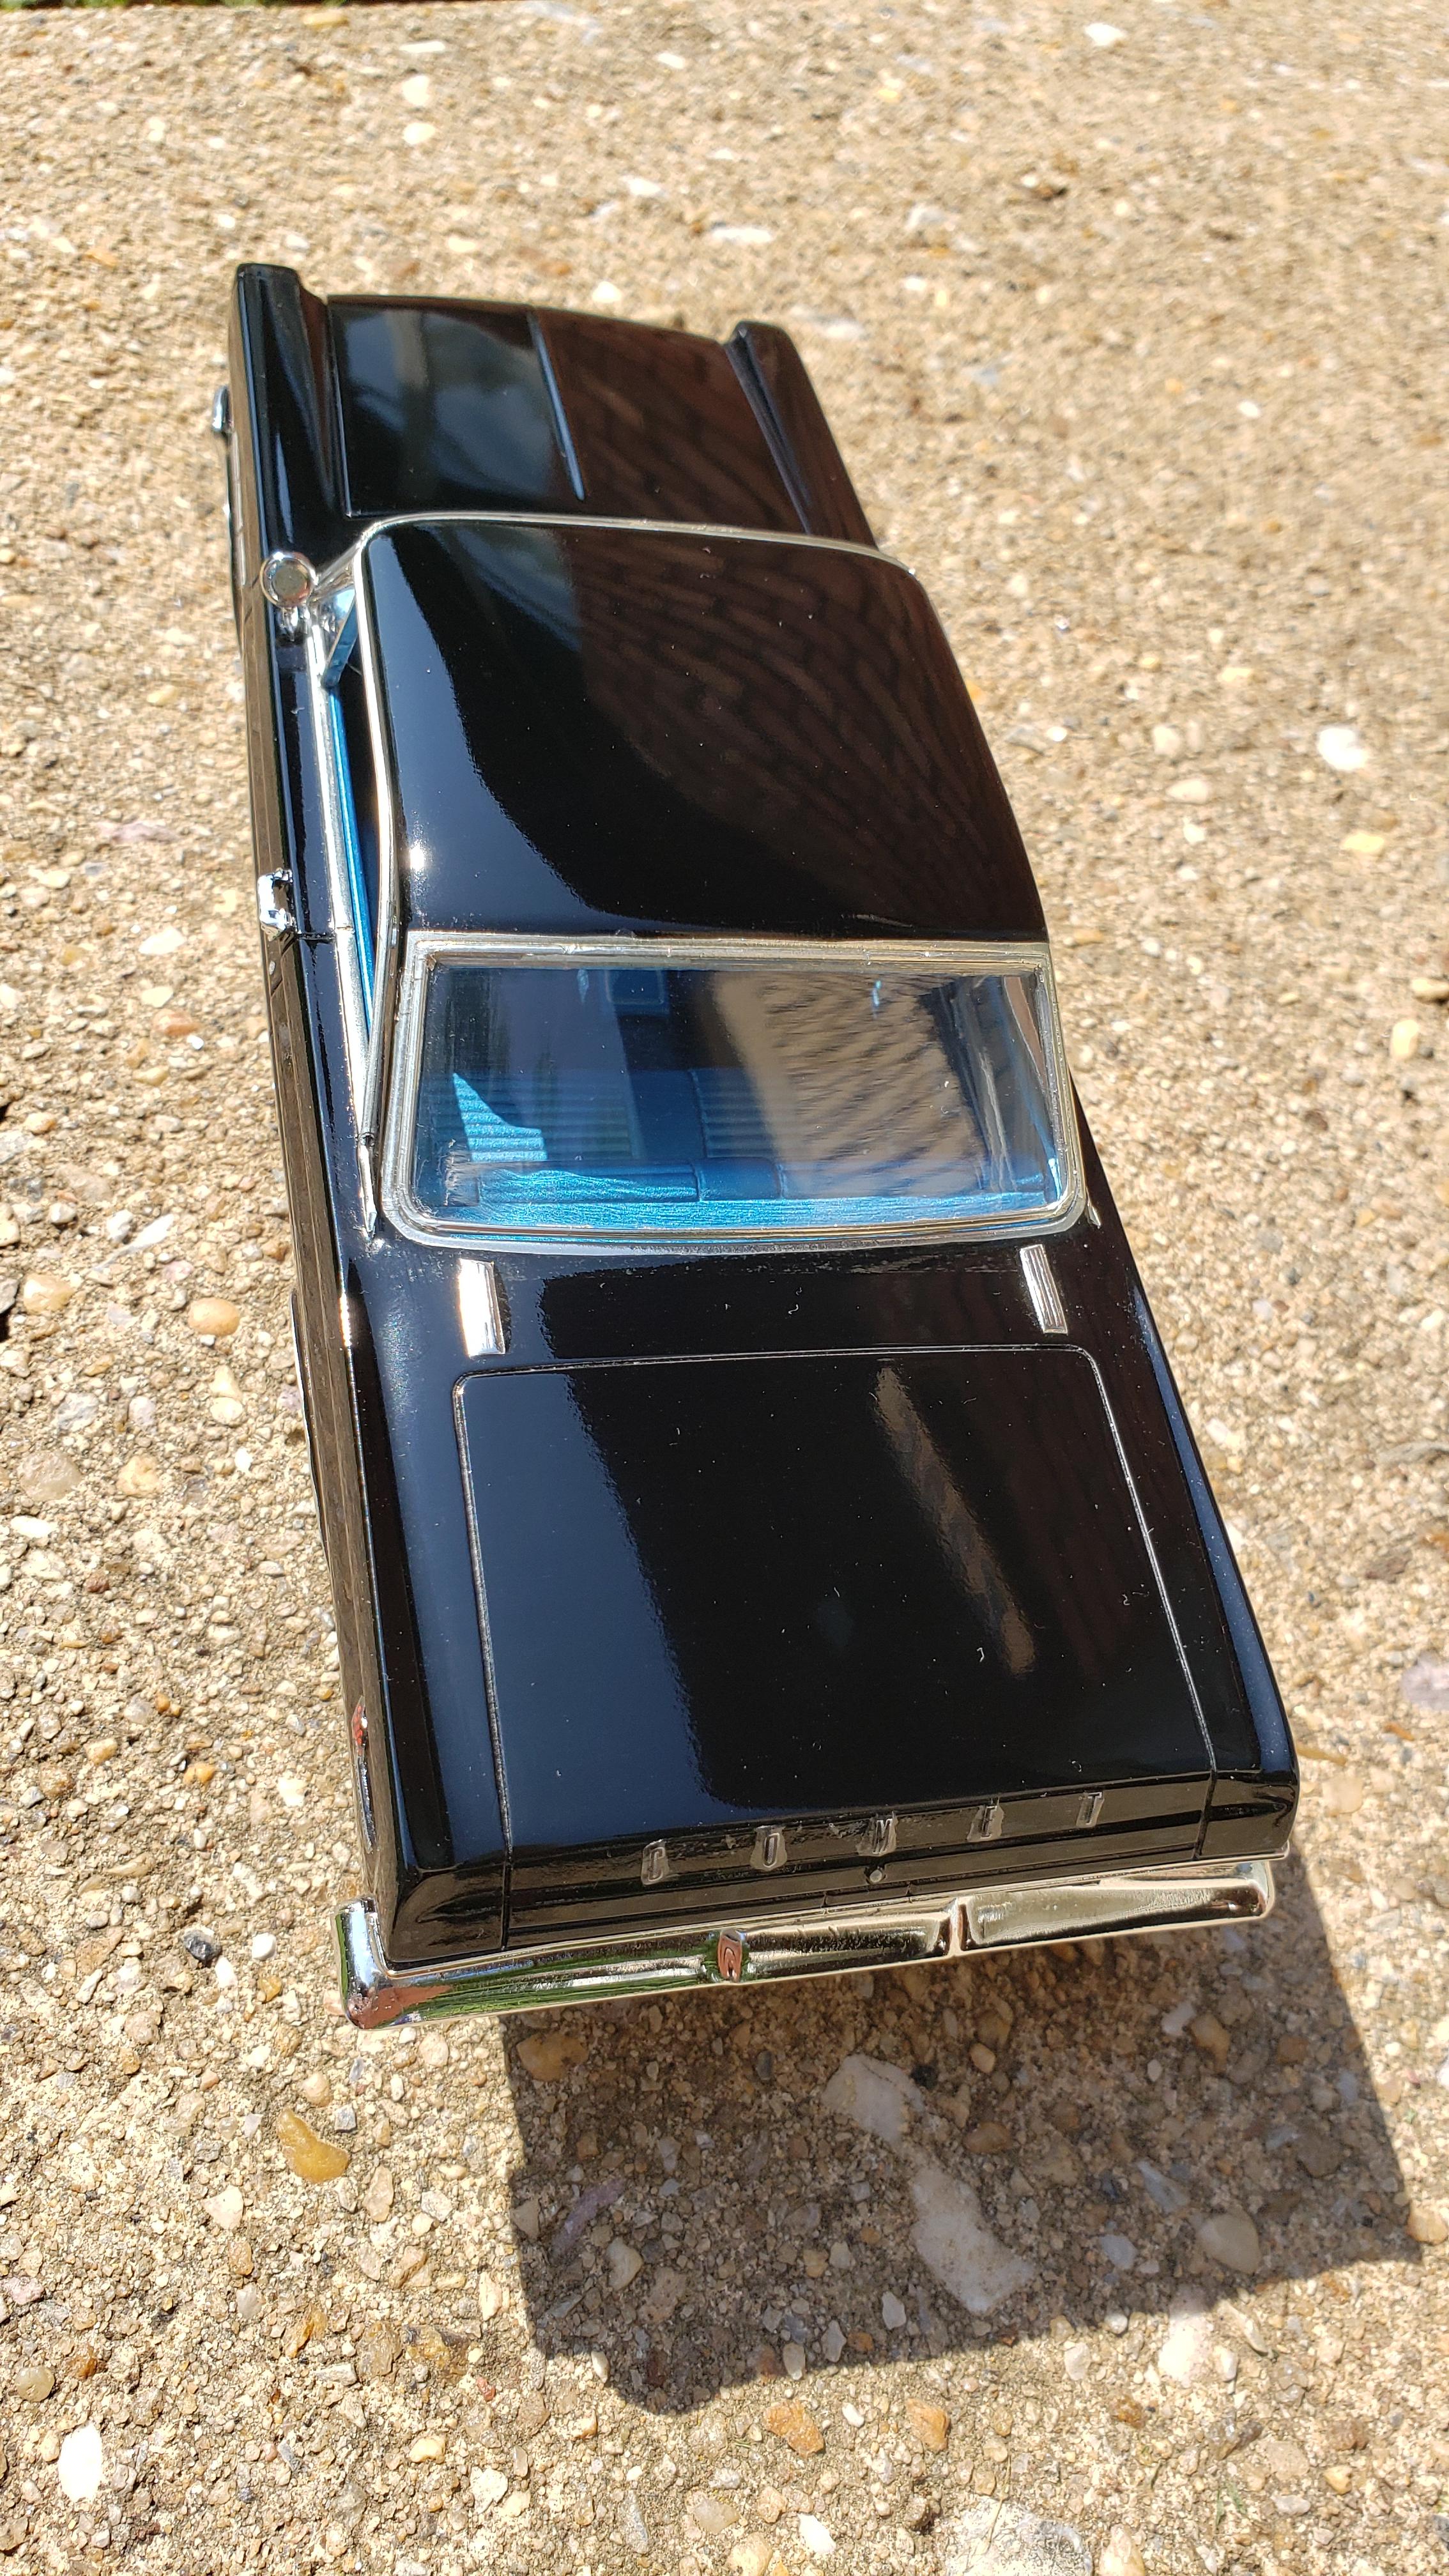
Today I bought a moebius Dyno Don Comet and as I was looking through the instructions I noticed a couple of typos 1.The fuel pump is labeled feul pump 2. In the final assembly stage it says Arnie Beswick 1965 A/FX comet has anyone else noticed this?
-
Completed another one. Haven't seen too many of these built yet. Have a few more kits to as other super stockers. Paint was Scale Finishes Calypso Coral. White is all decals from kit. Front Cragars are from Beswick Comet Moebius kit.
-
I'm at it again. Had some left over Scale Finishes Calypso Coral paint from my 1970 Boss 302 and thought I'd get this ready for paint. Using Tamiya Champagne Gold for the interior. I'm going to try and use the White decals to see how they work. I haven't really seen anybody build this kit yet to see if they have any bleed thru of color. I really should finish up some more models before starting more but, oh well.
-
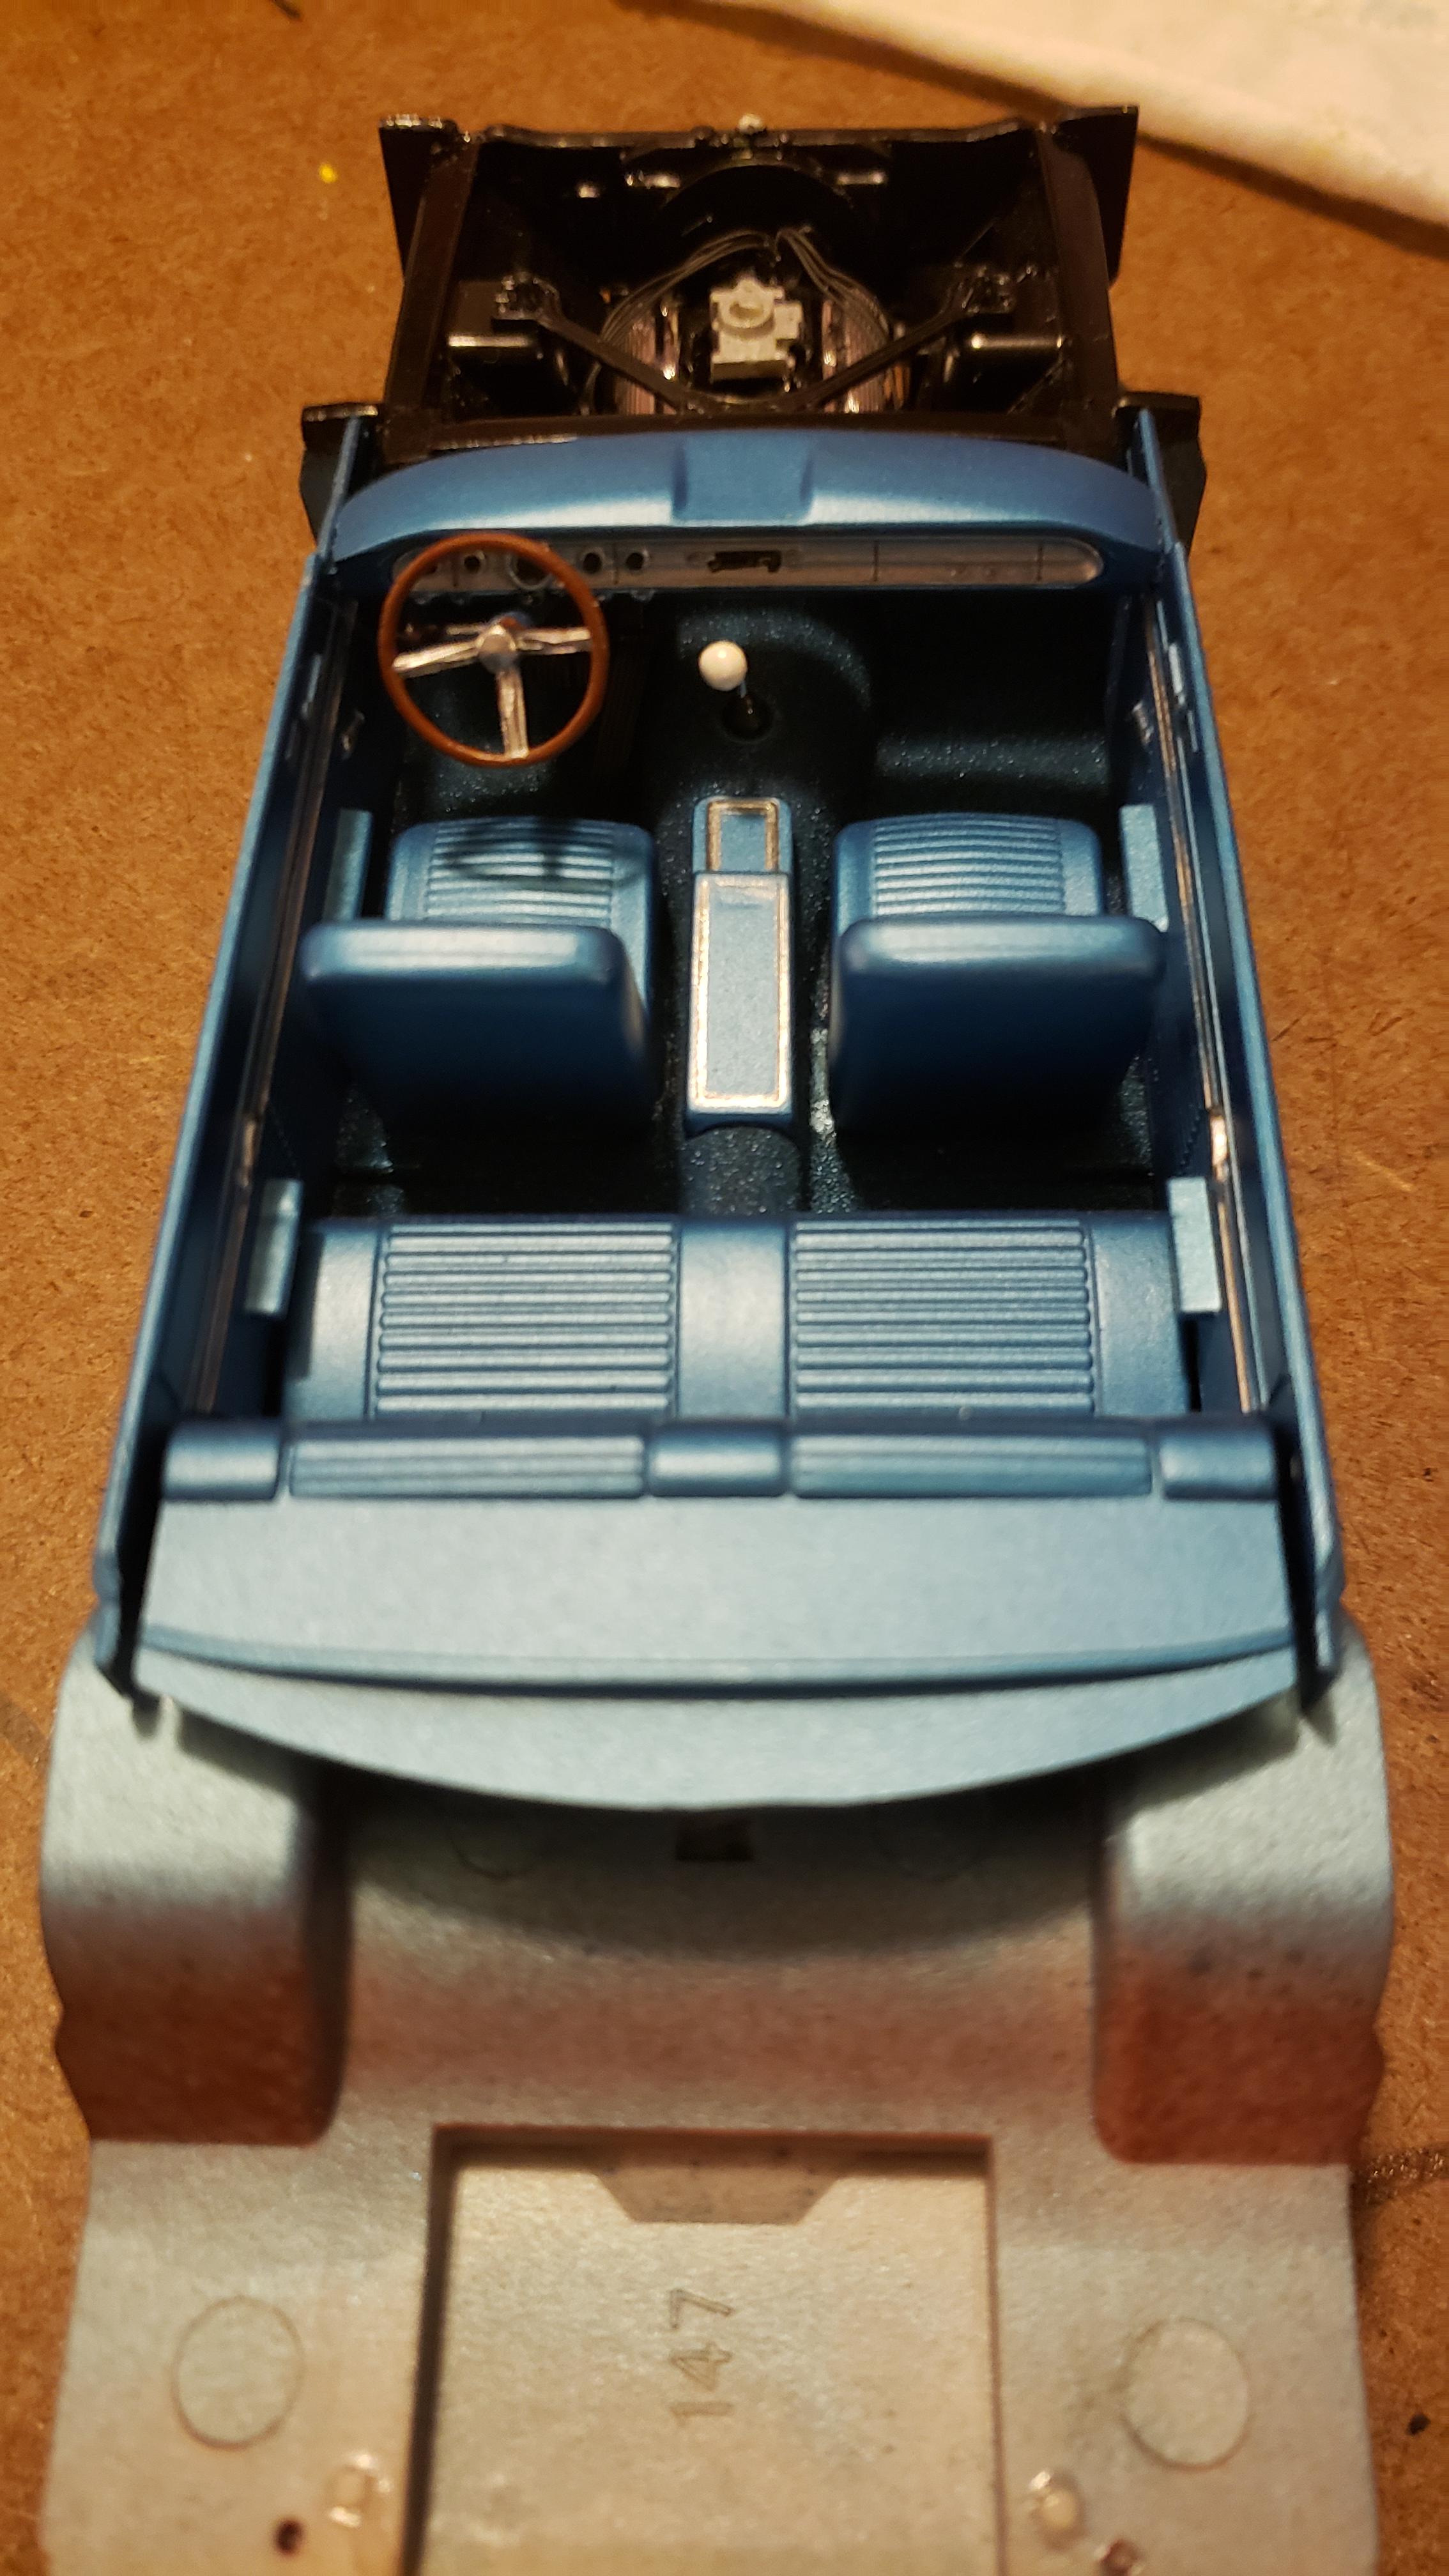
Not sure if I had started a WIP thread on this one or not but, completed today. Tamiya Black and Clear with Testors Nassau Blue interior. Redline tires from AMT parts pack. Kit wheels. Wanted something different than Red or Black interior. Thought I'd try Blue. I really like the look.
-
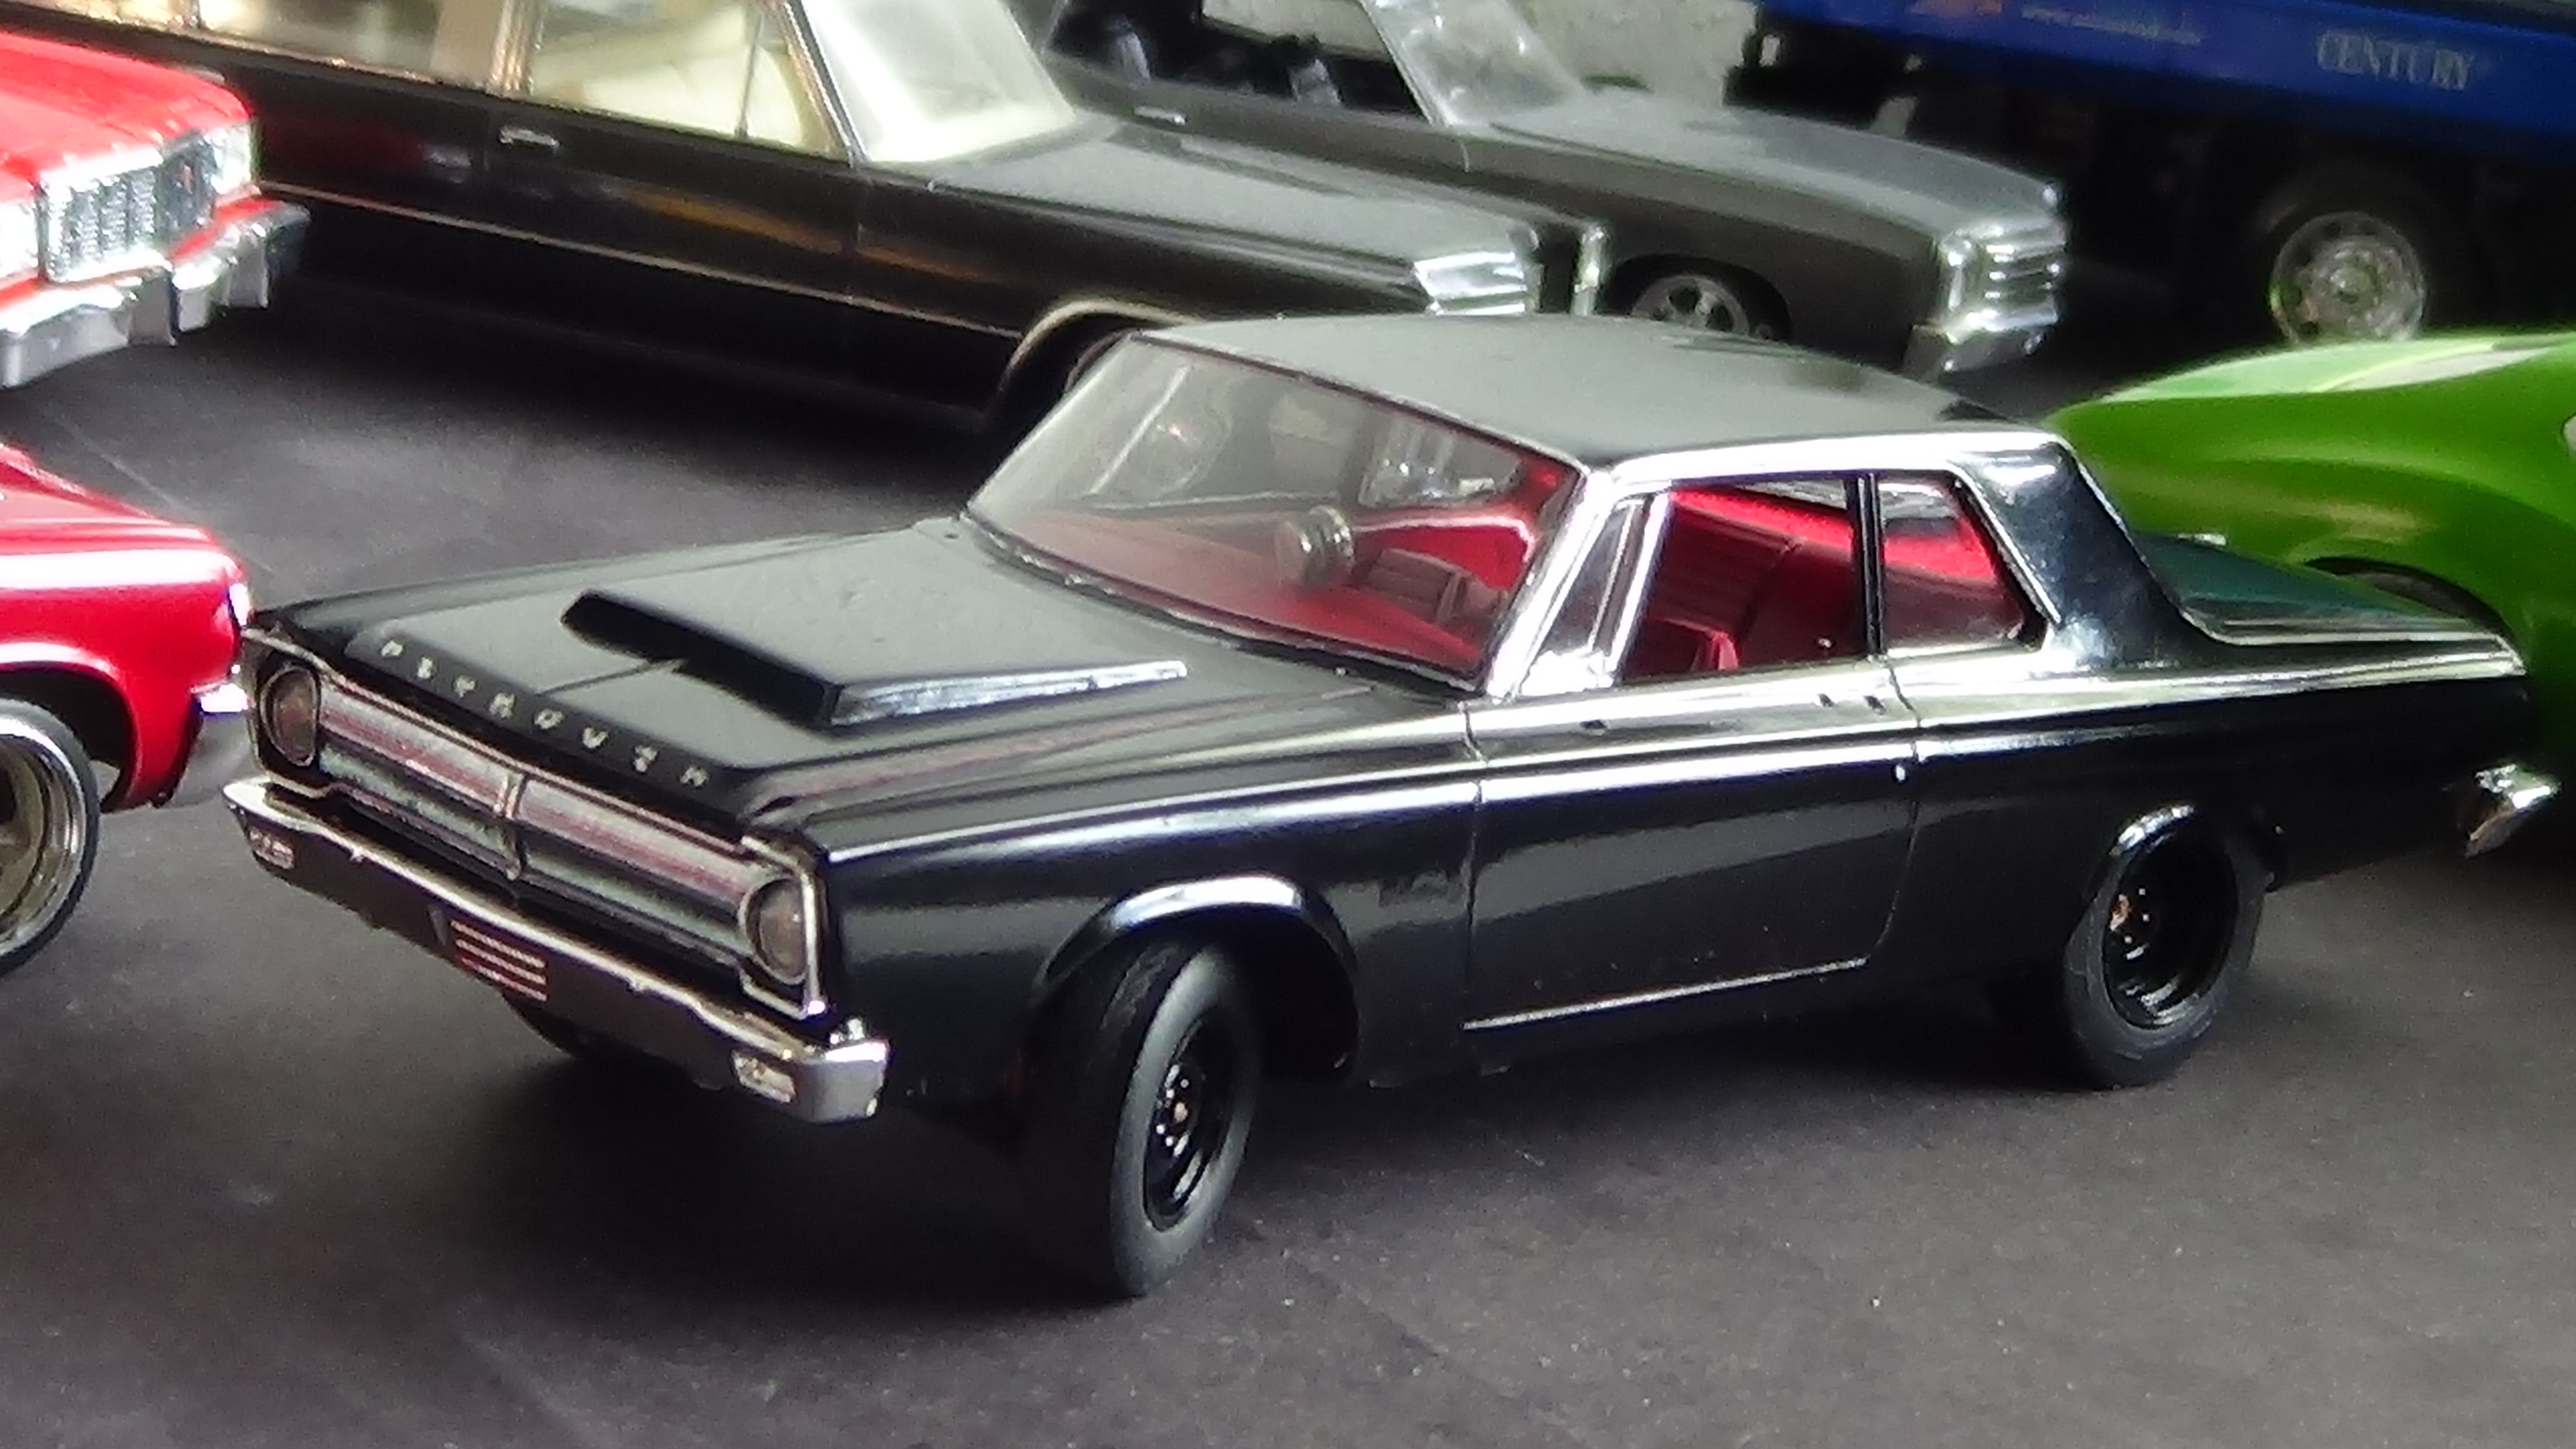
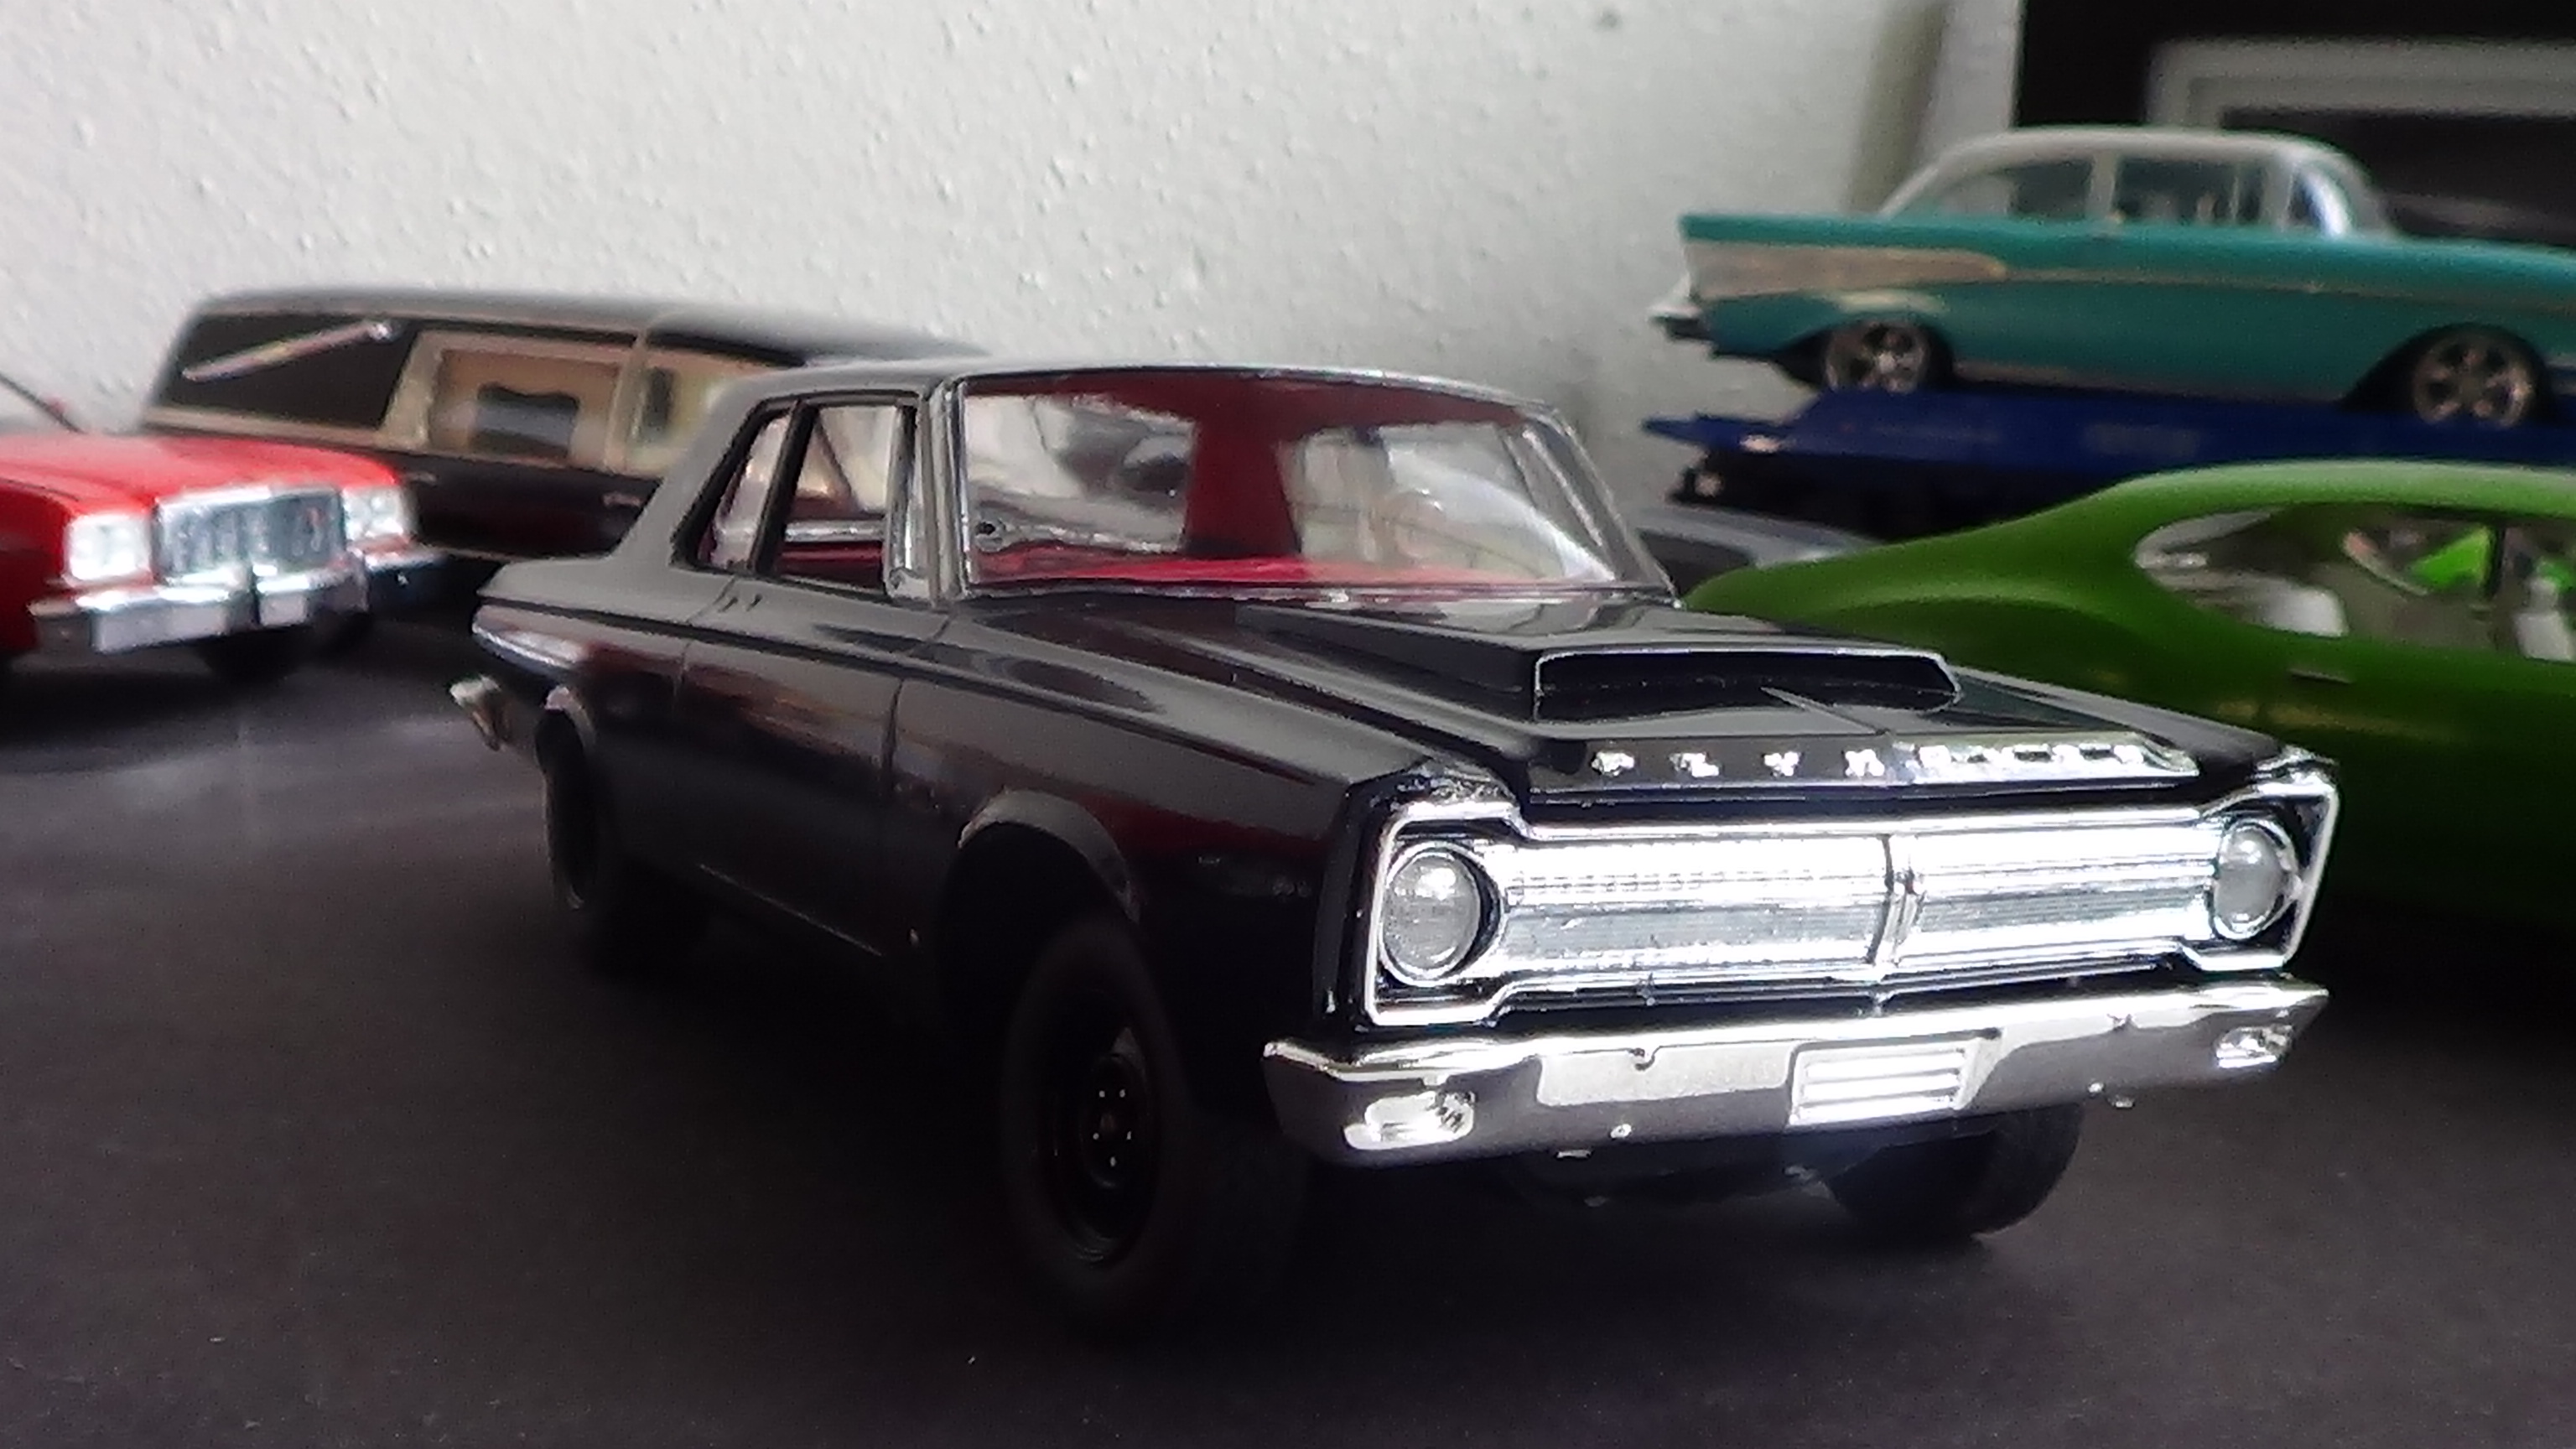
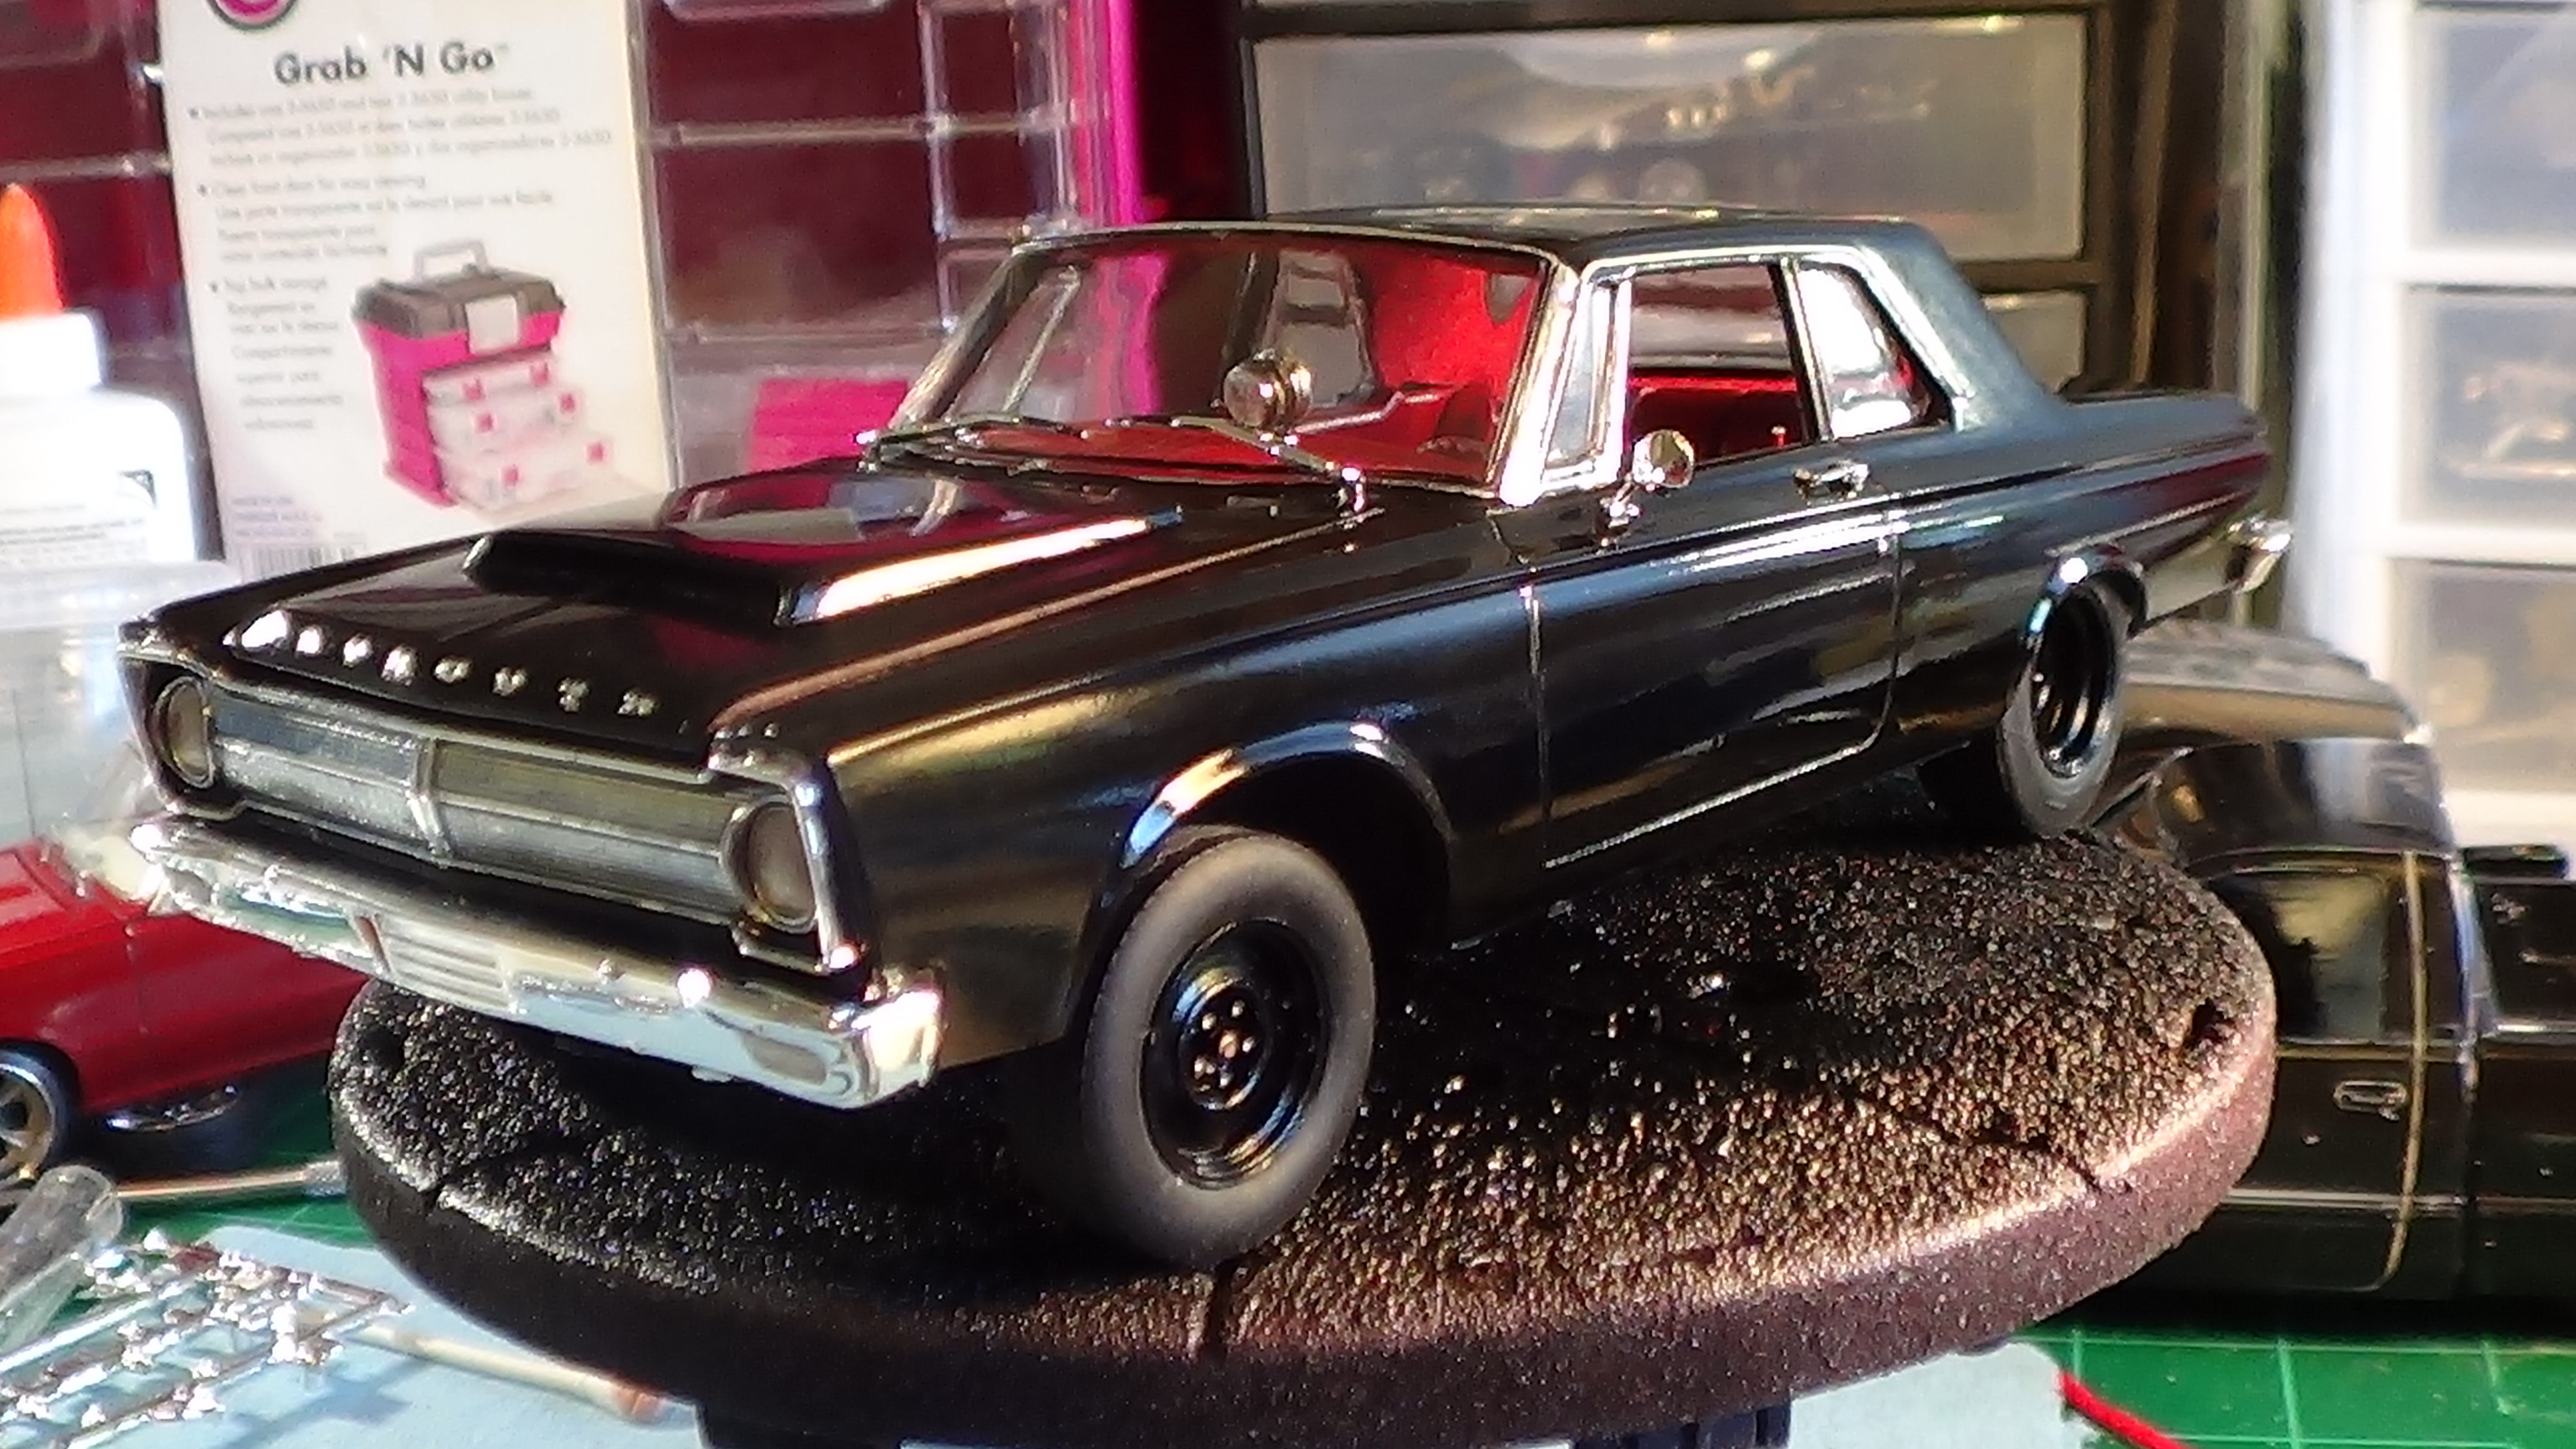
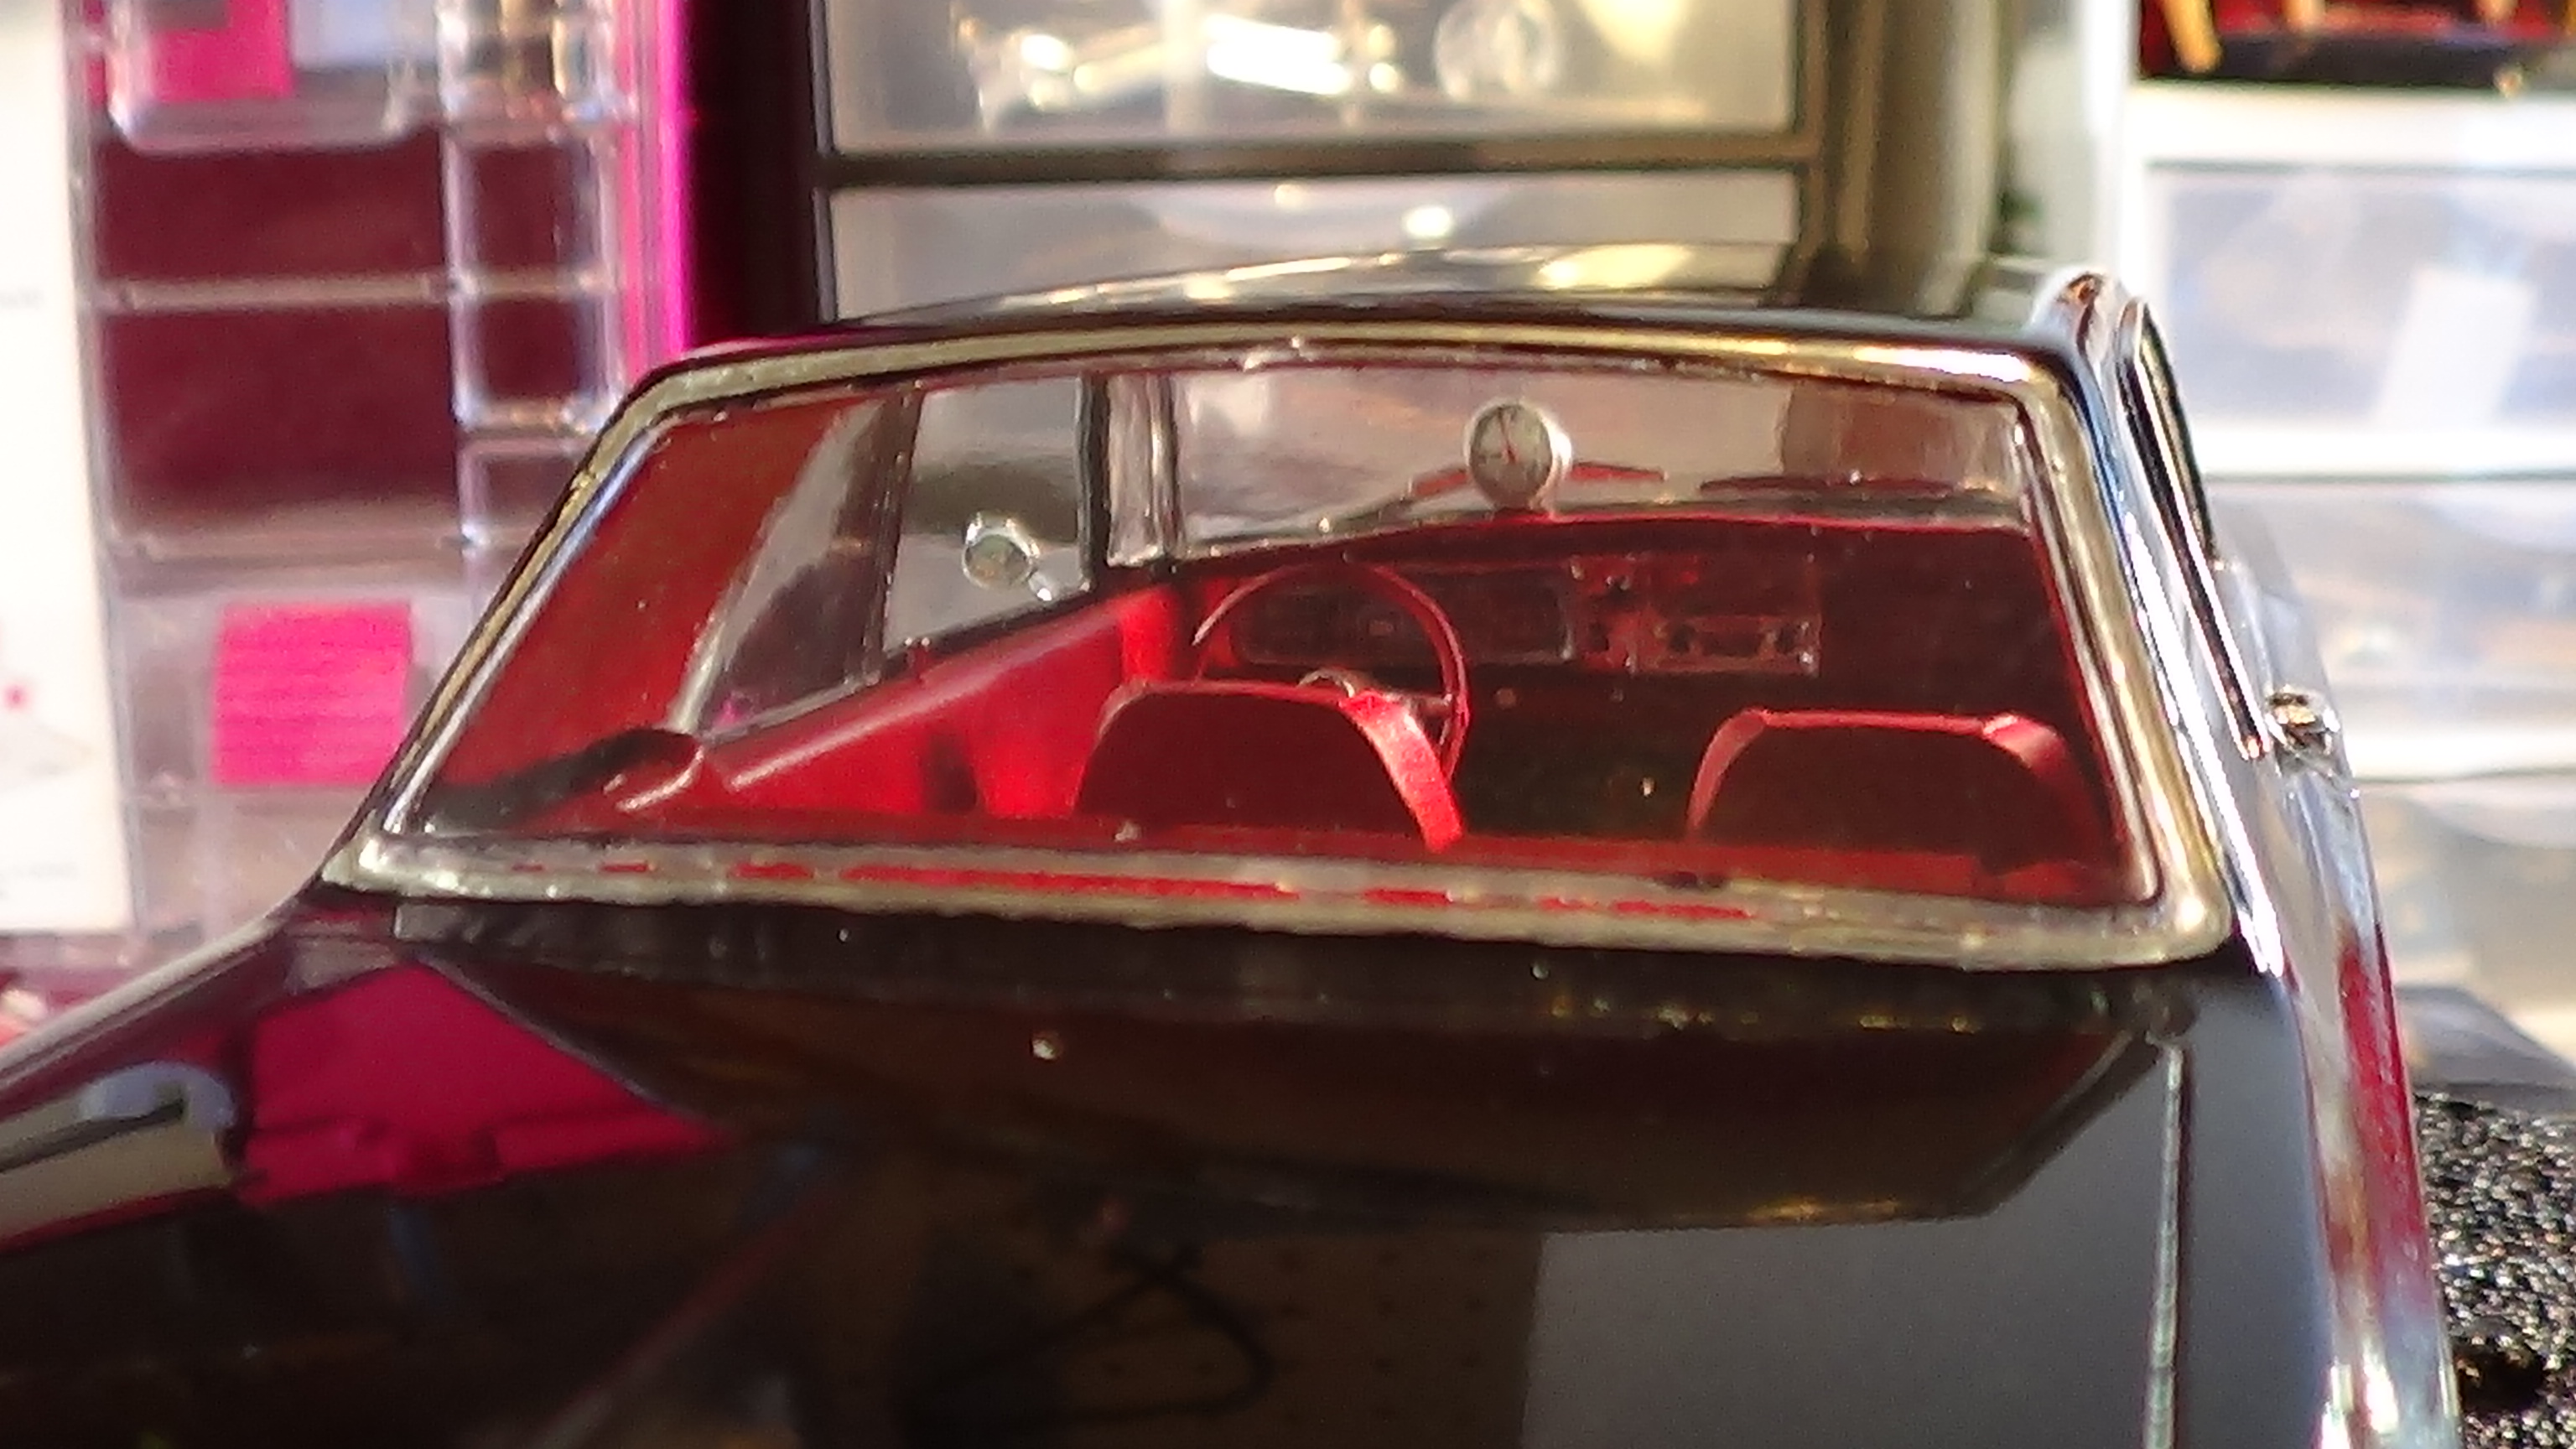
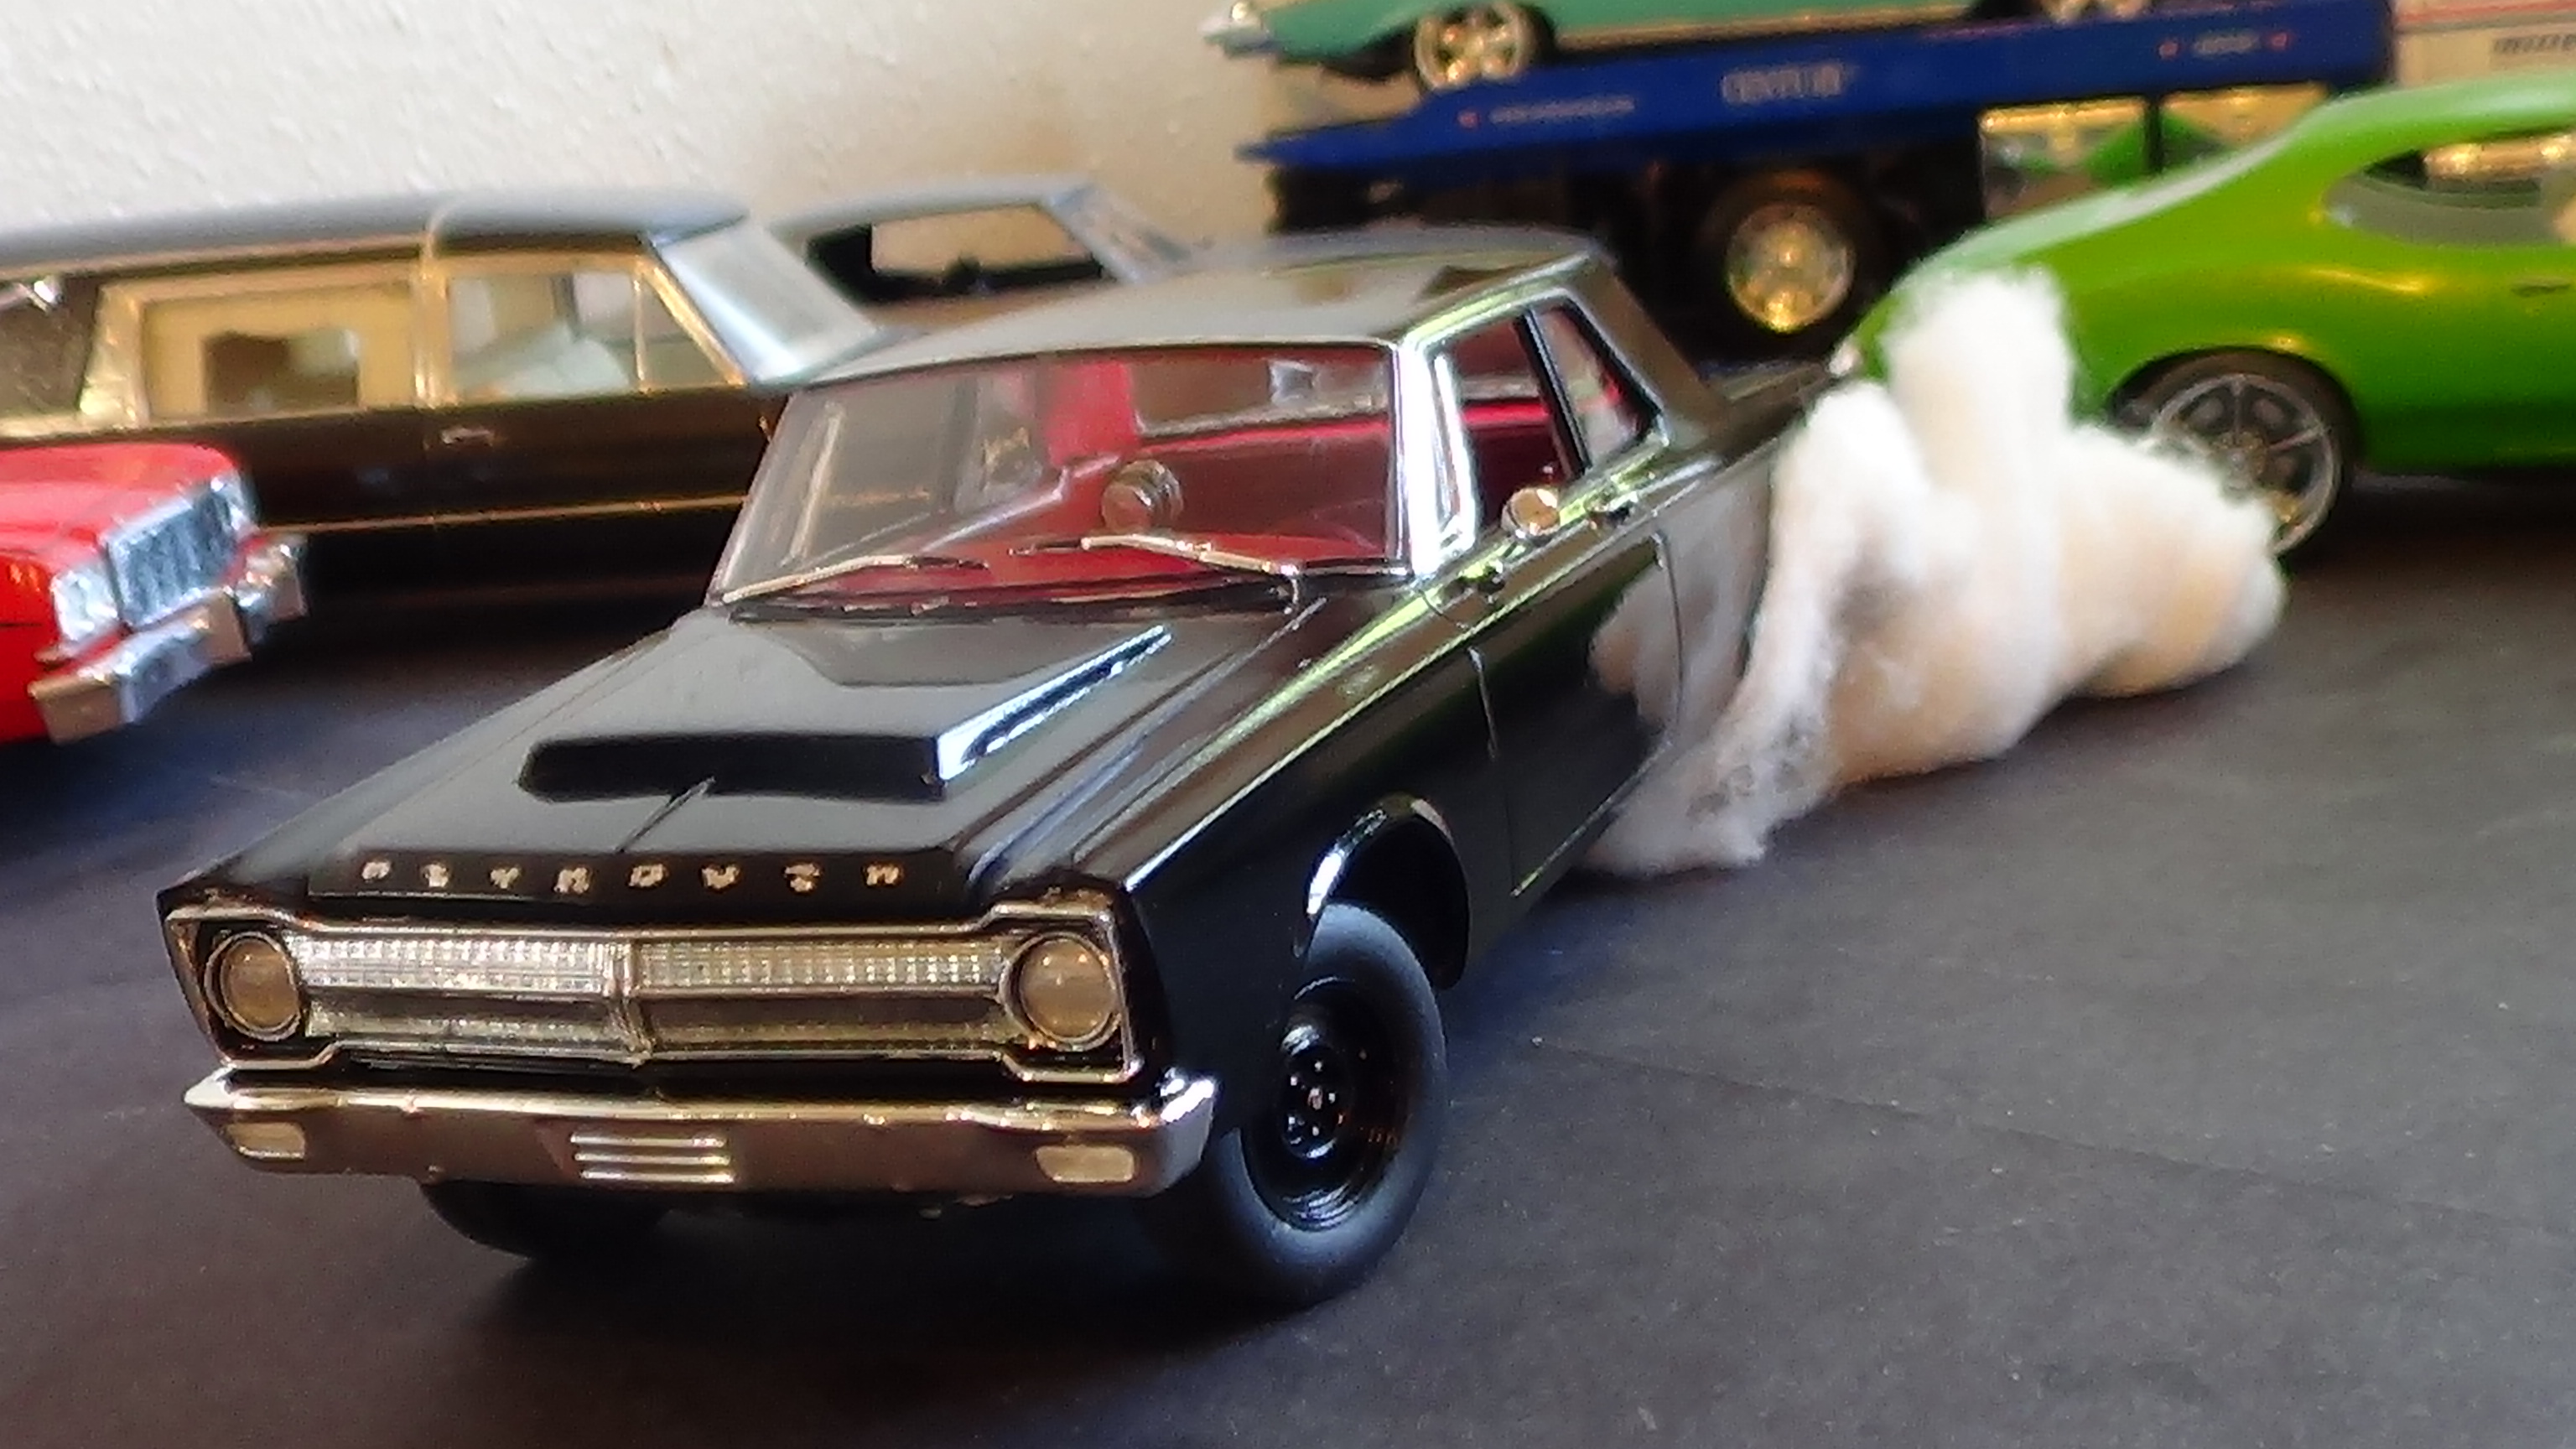
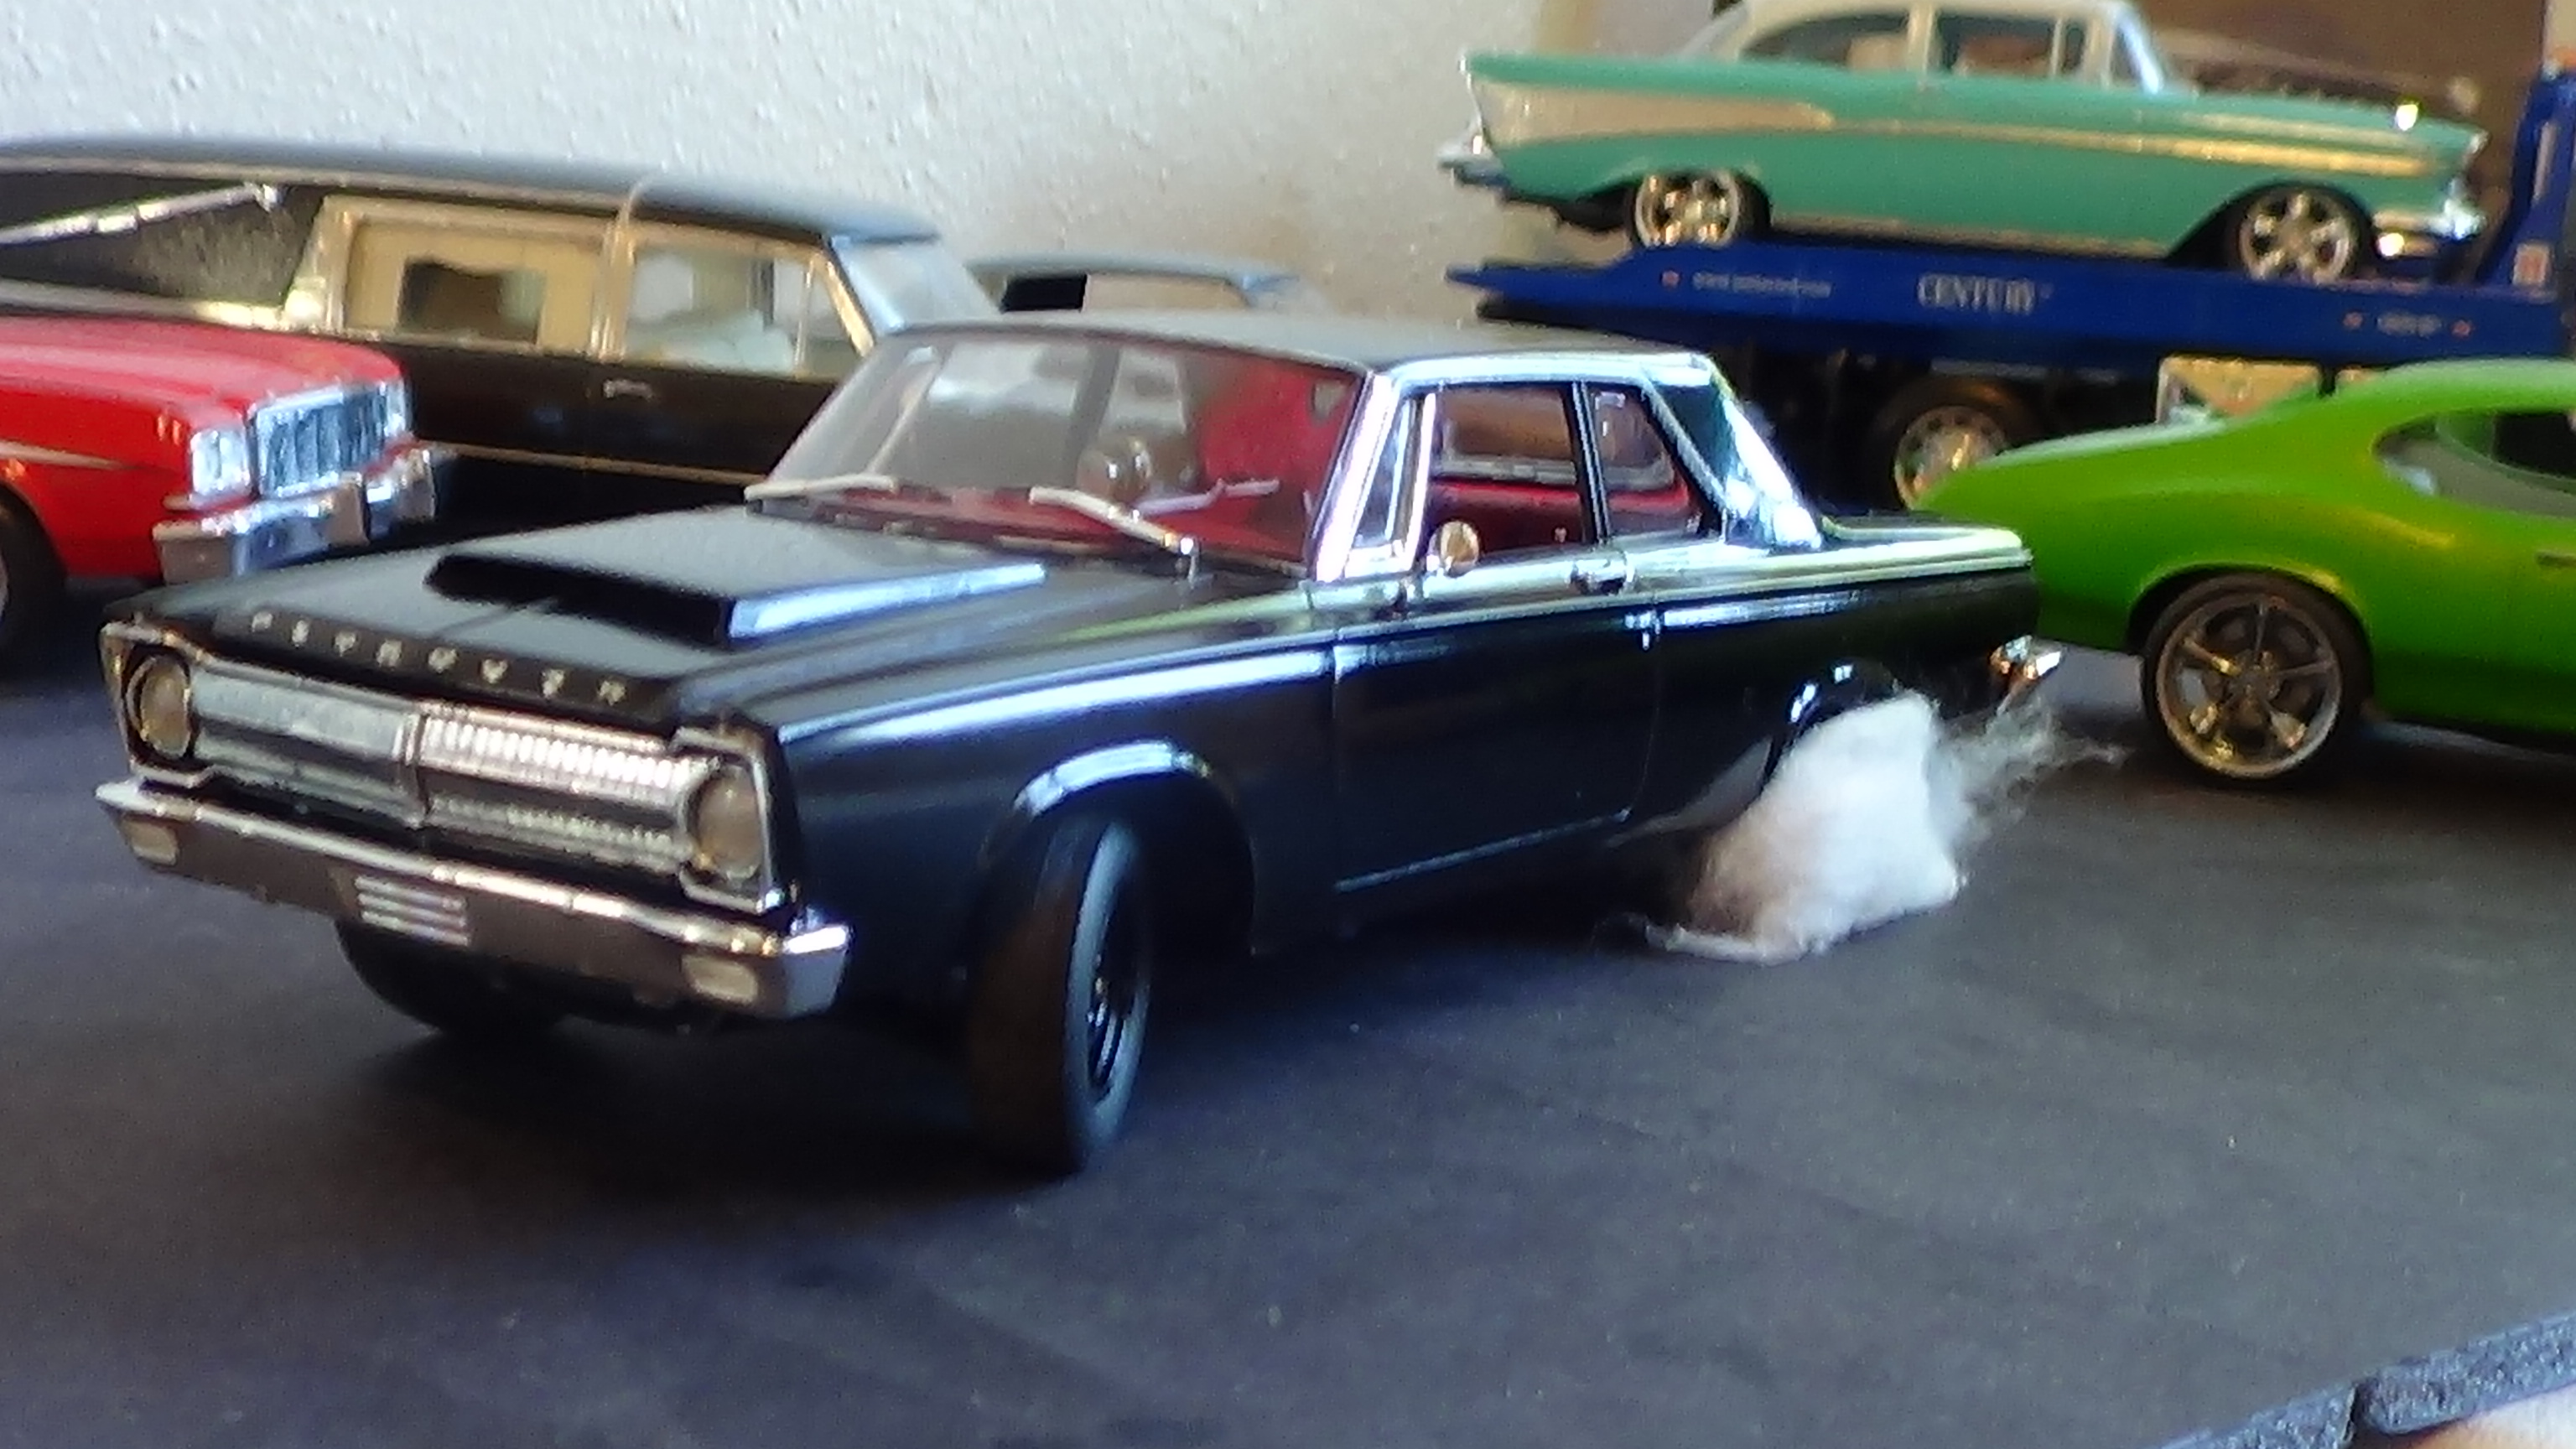
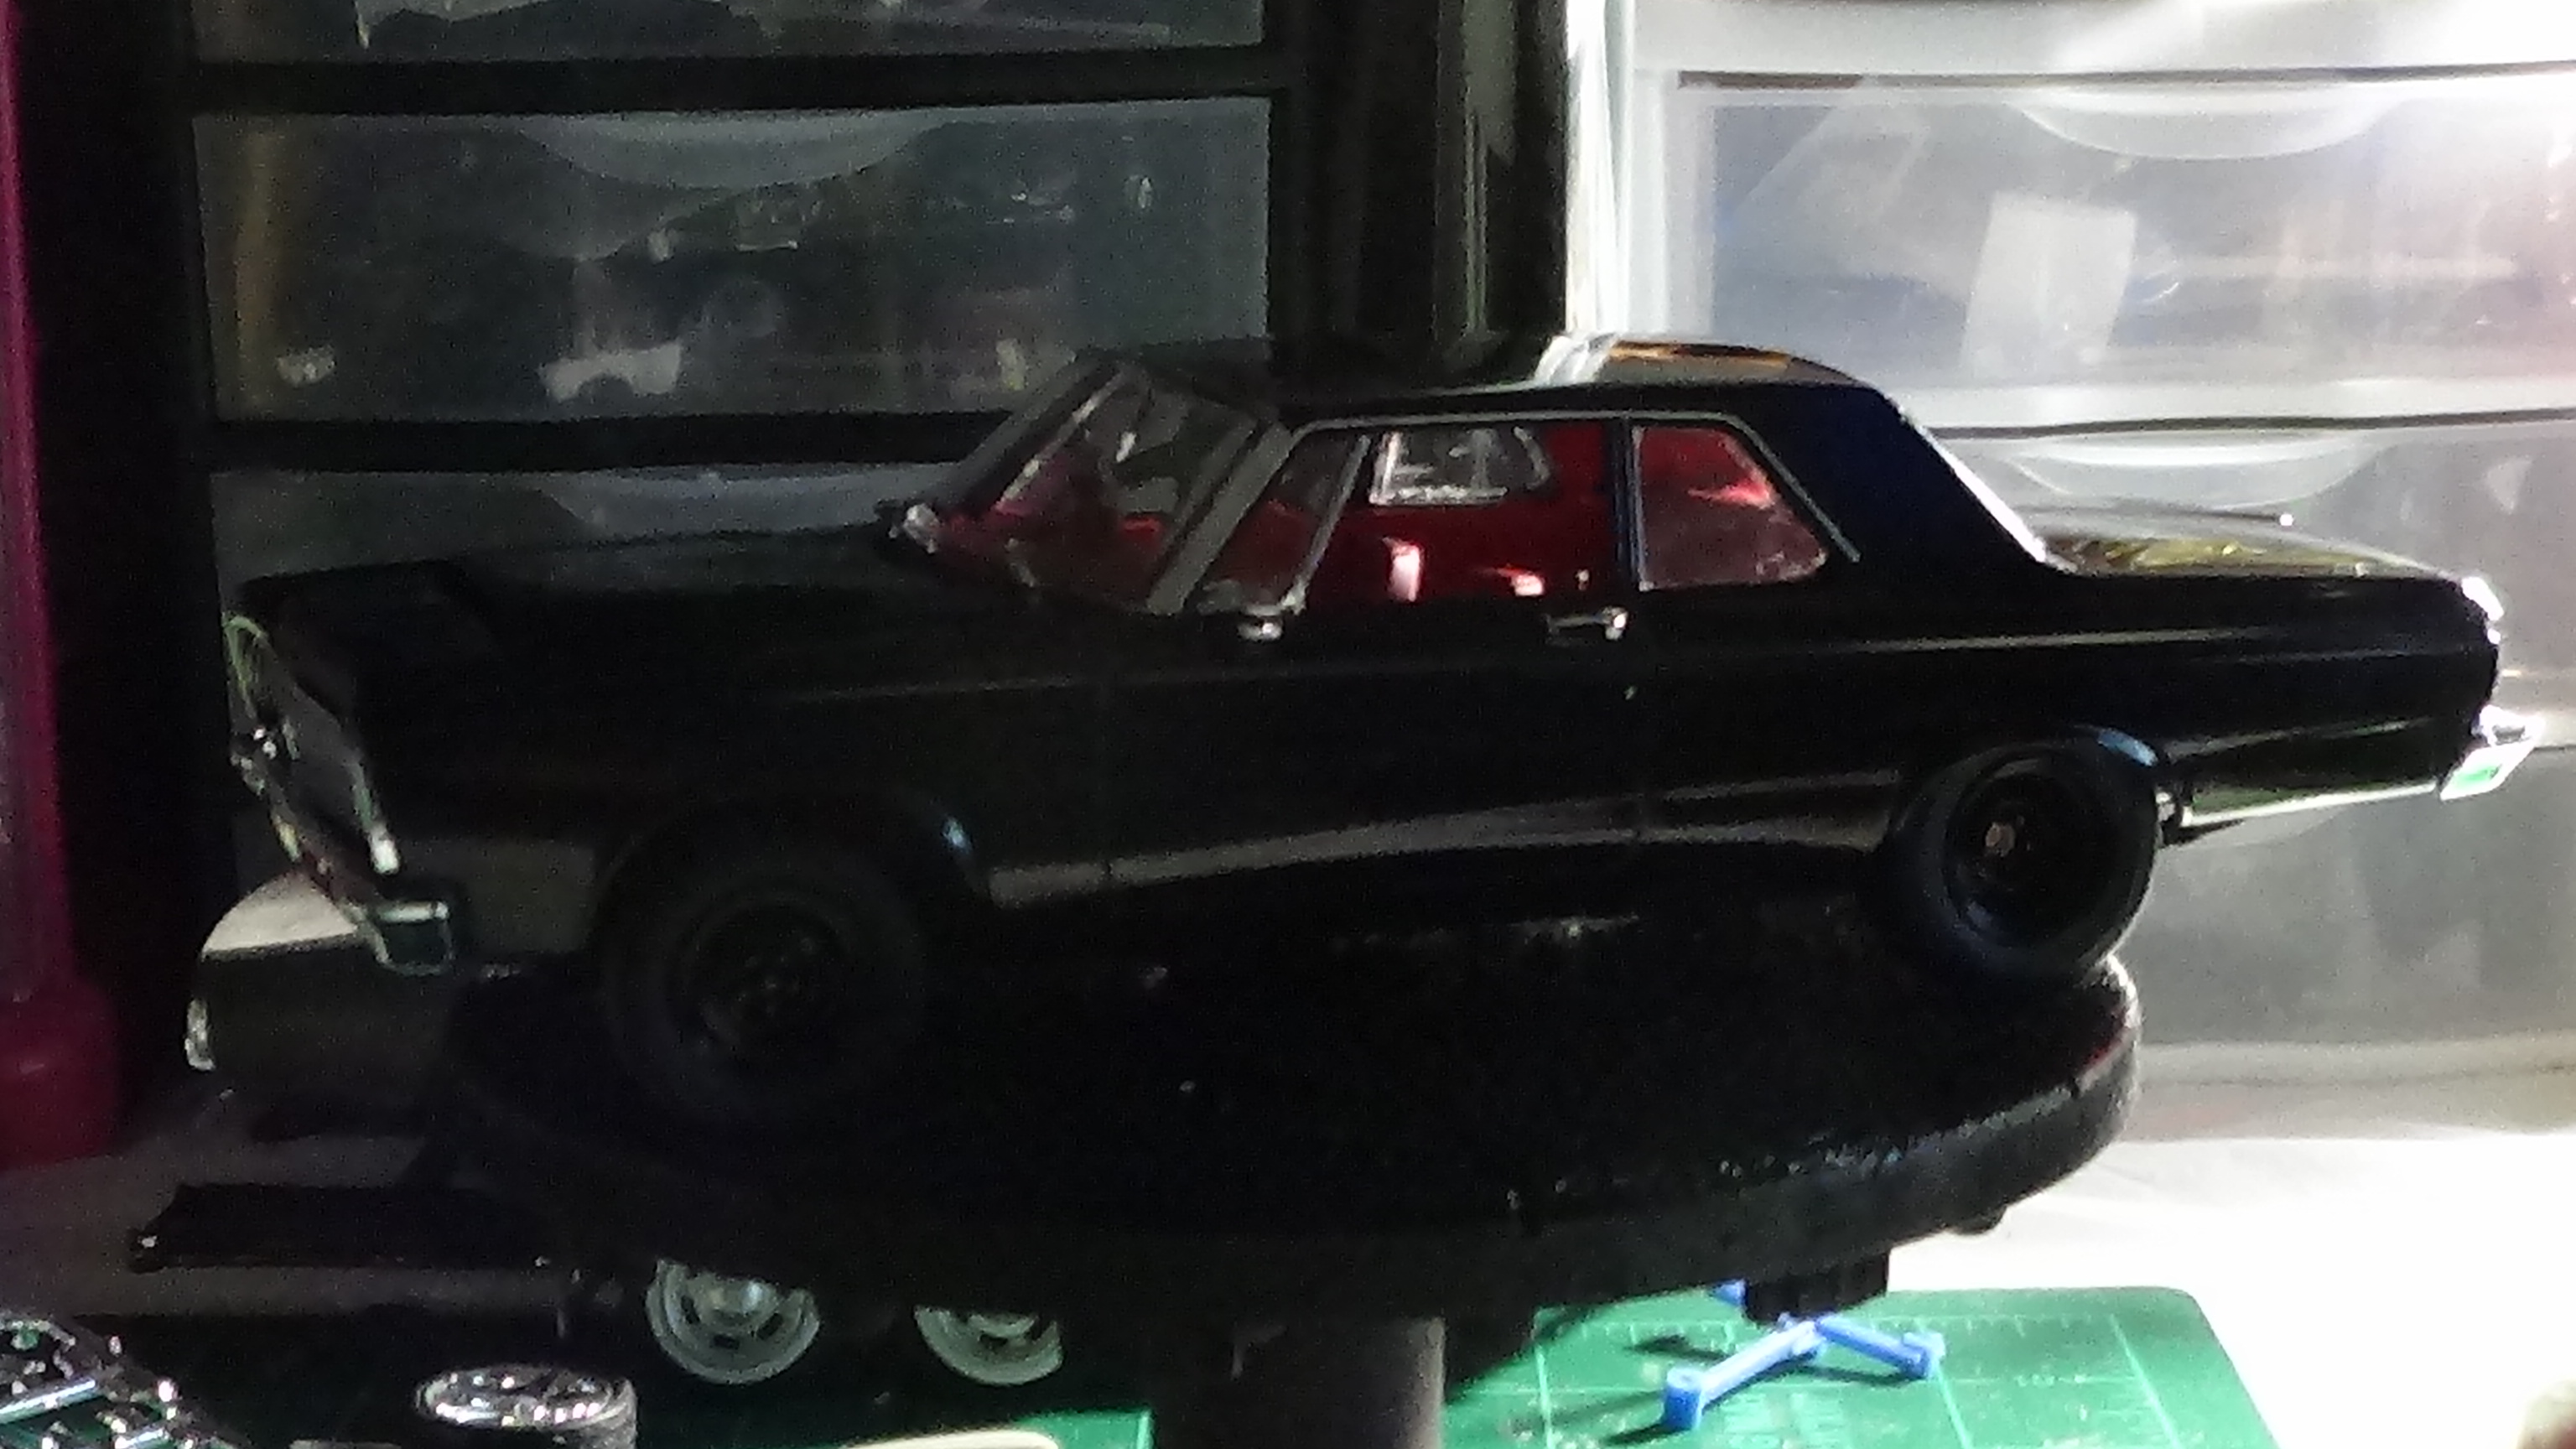
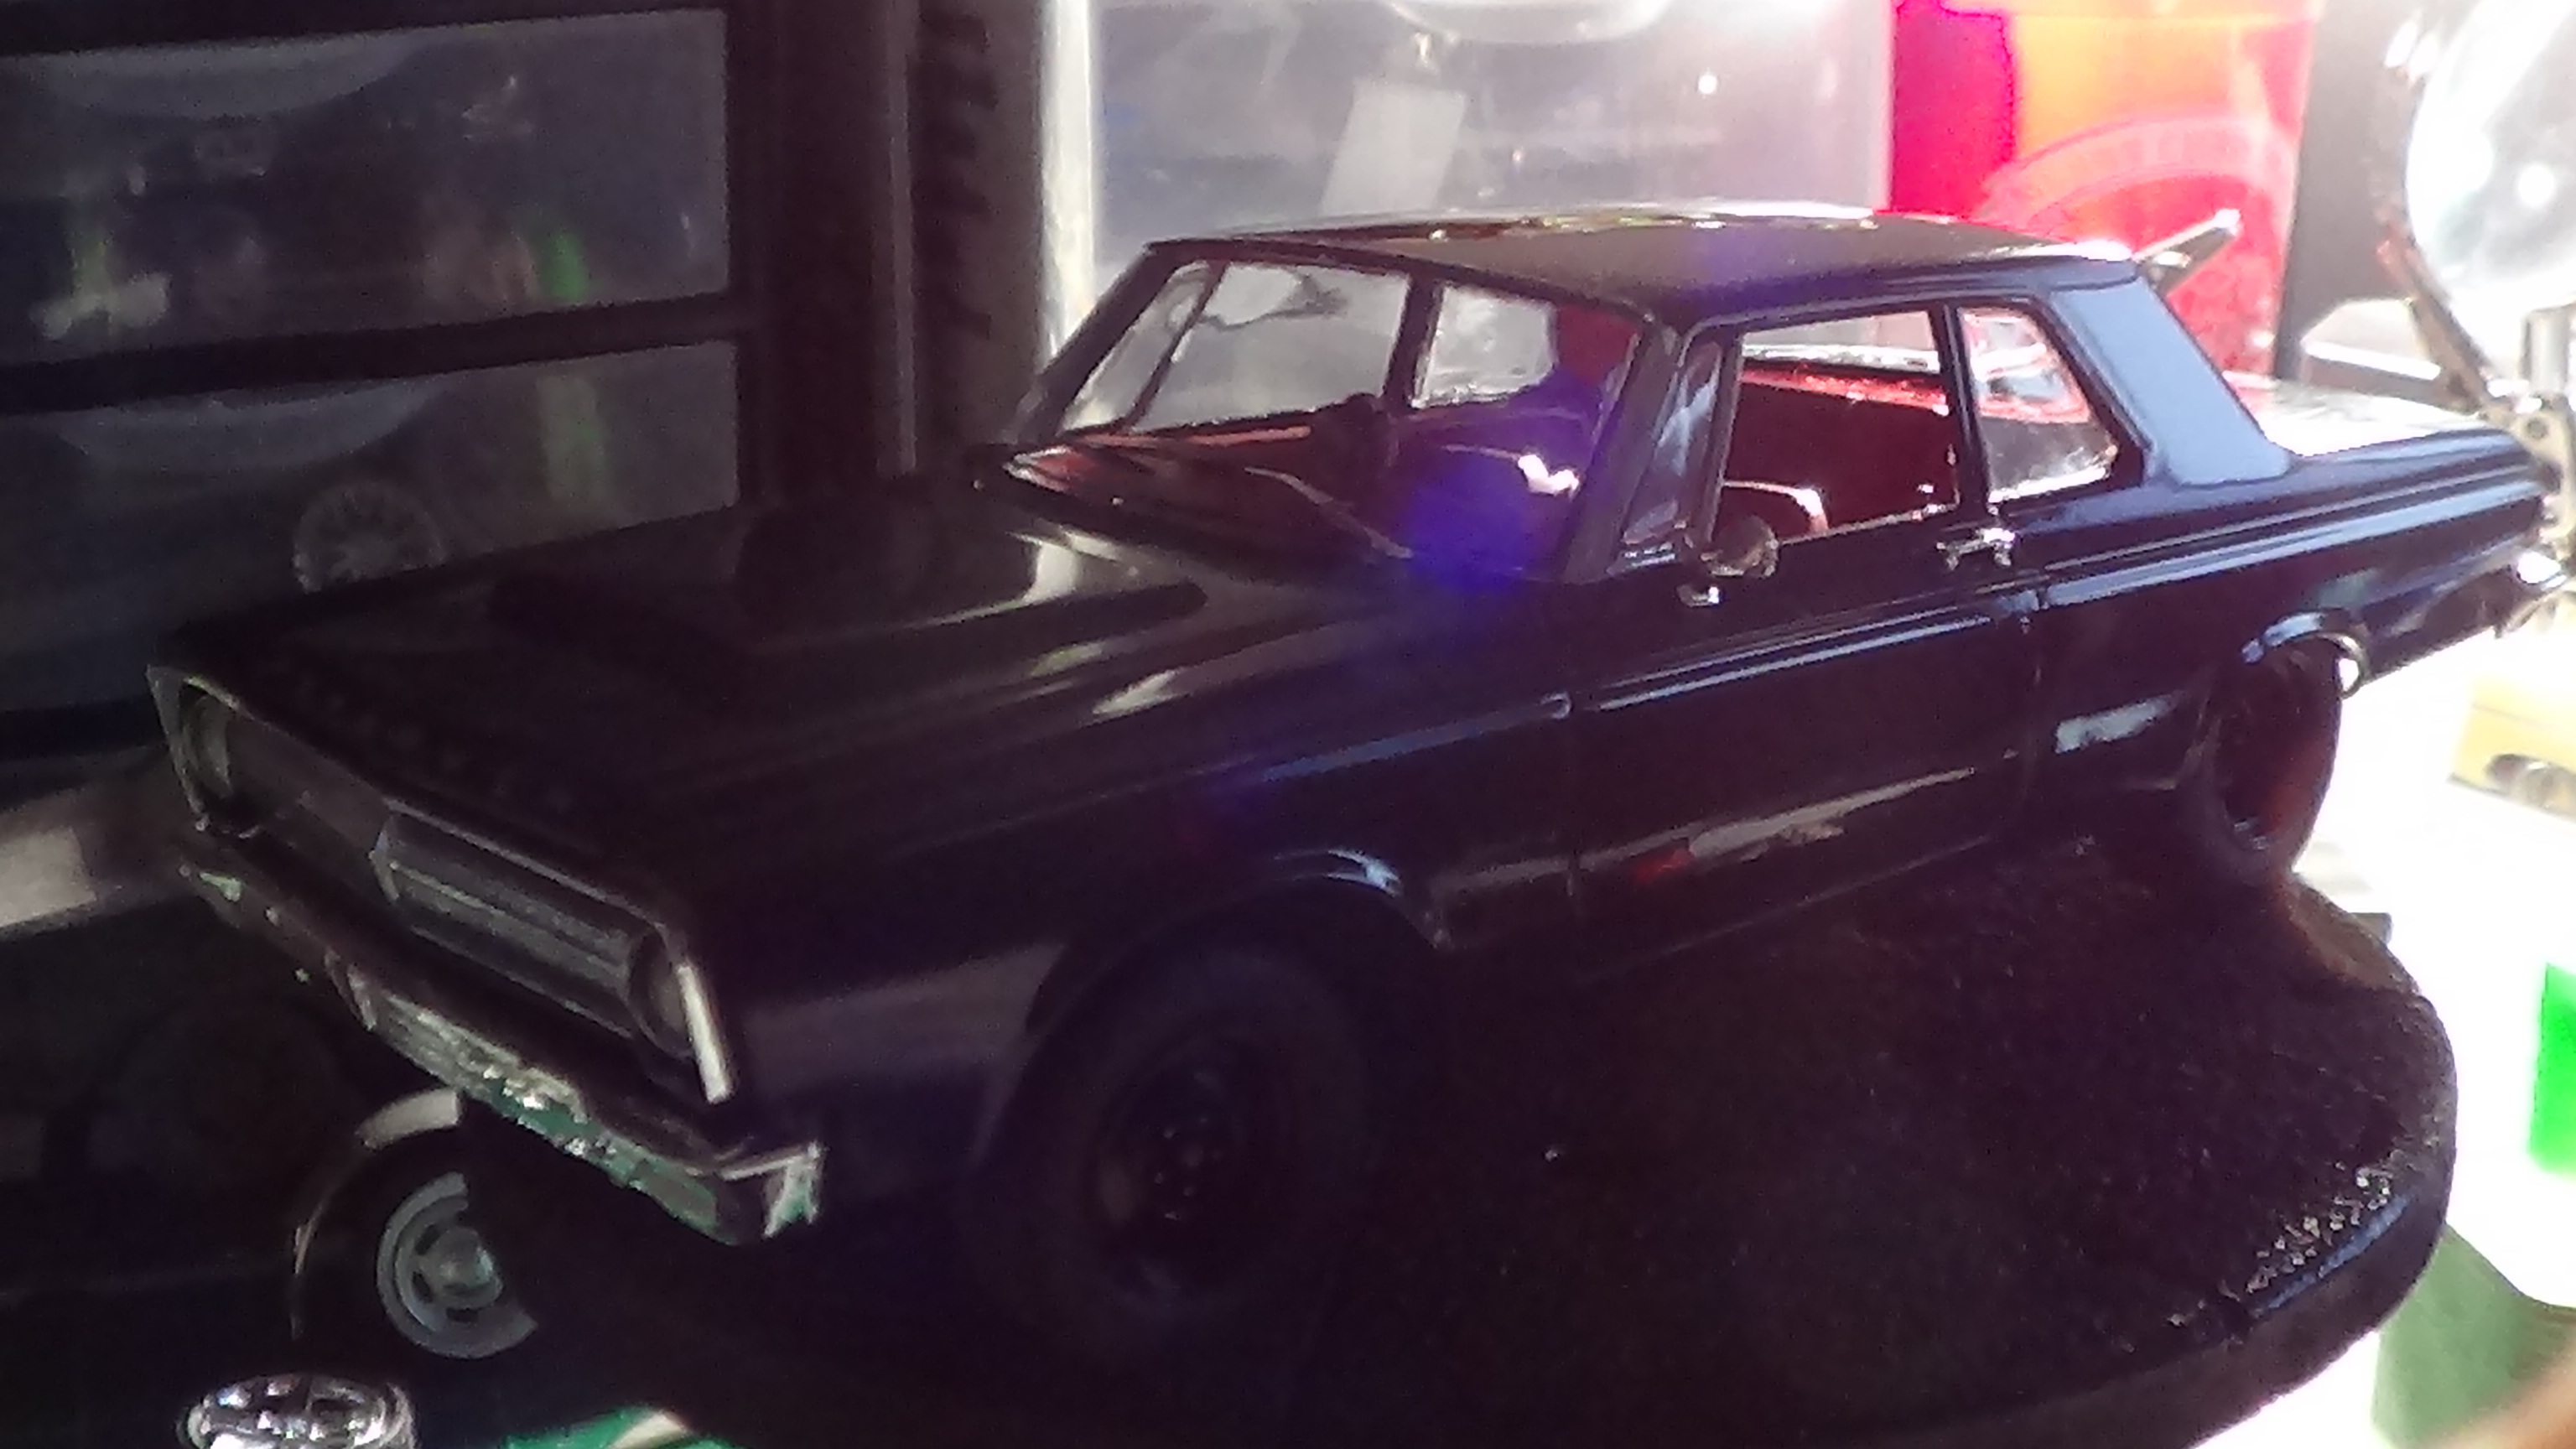
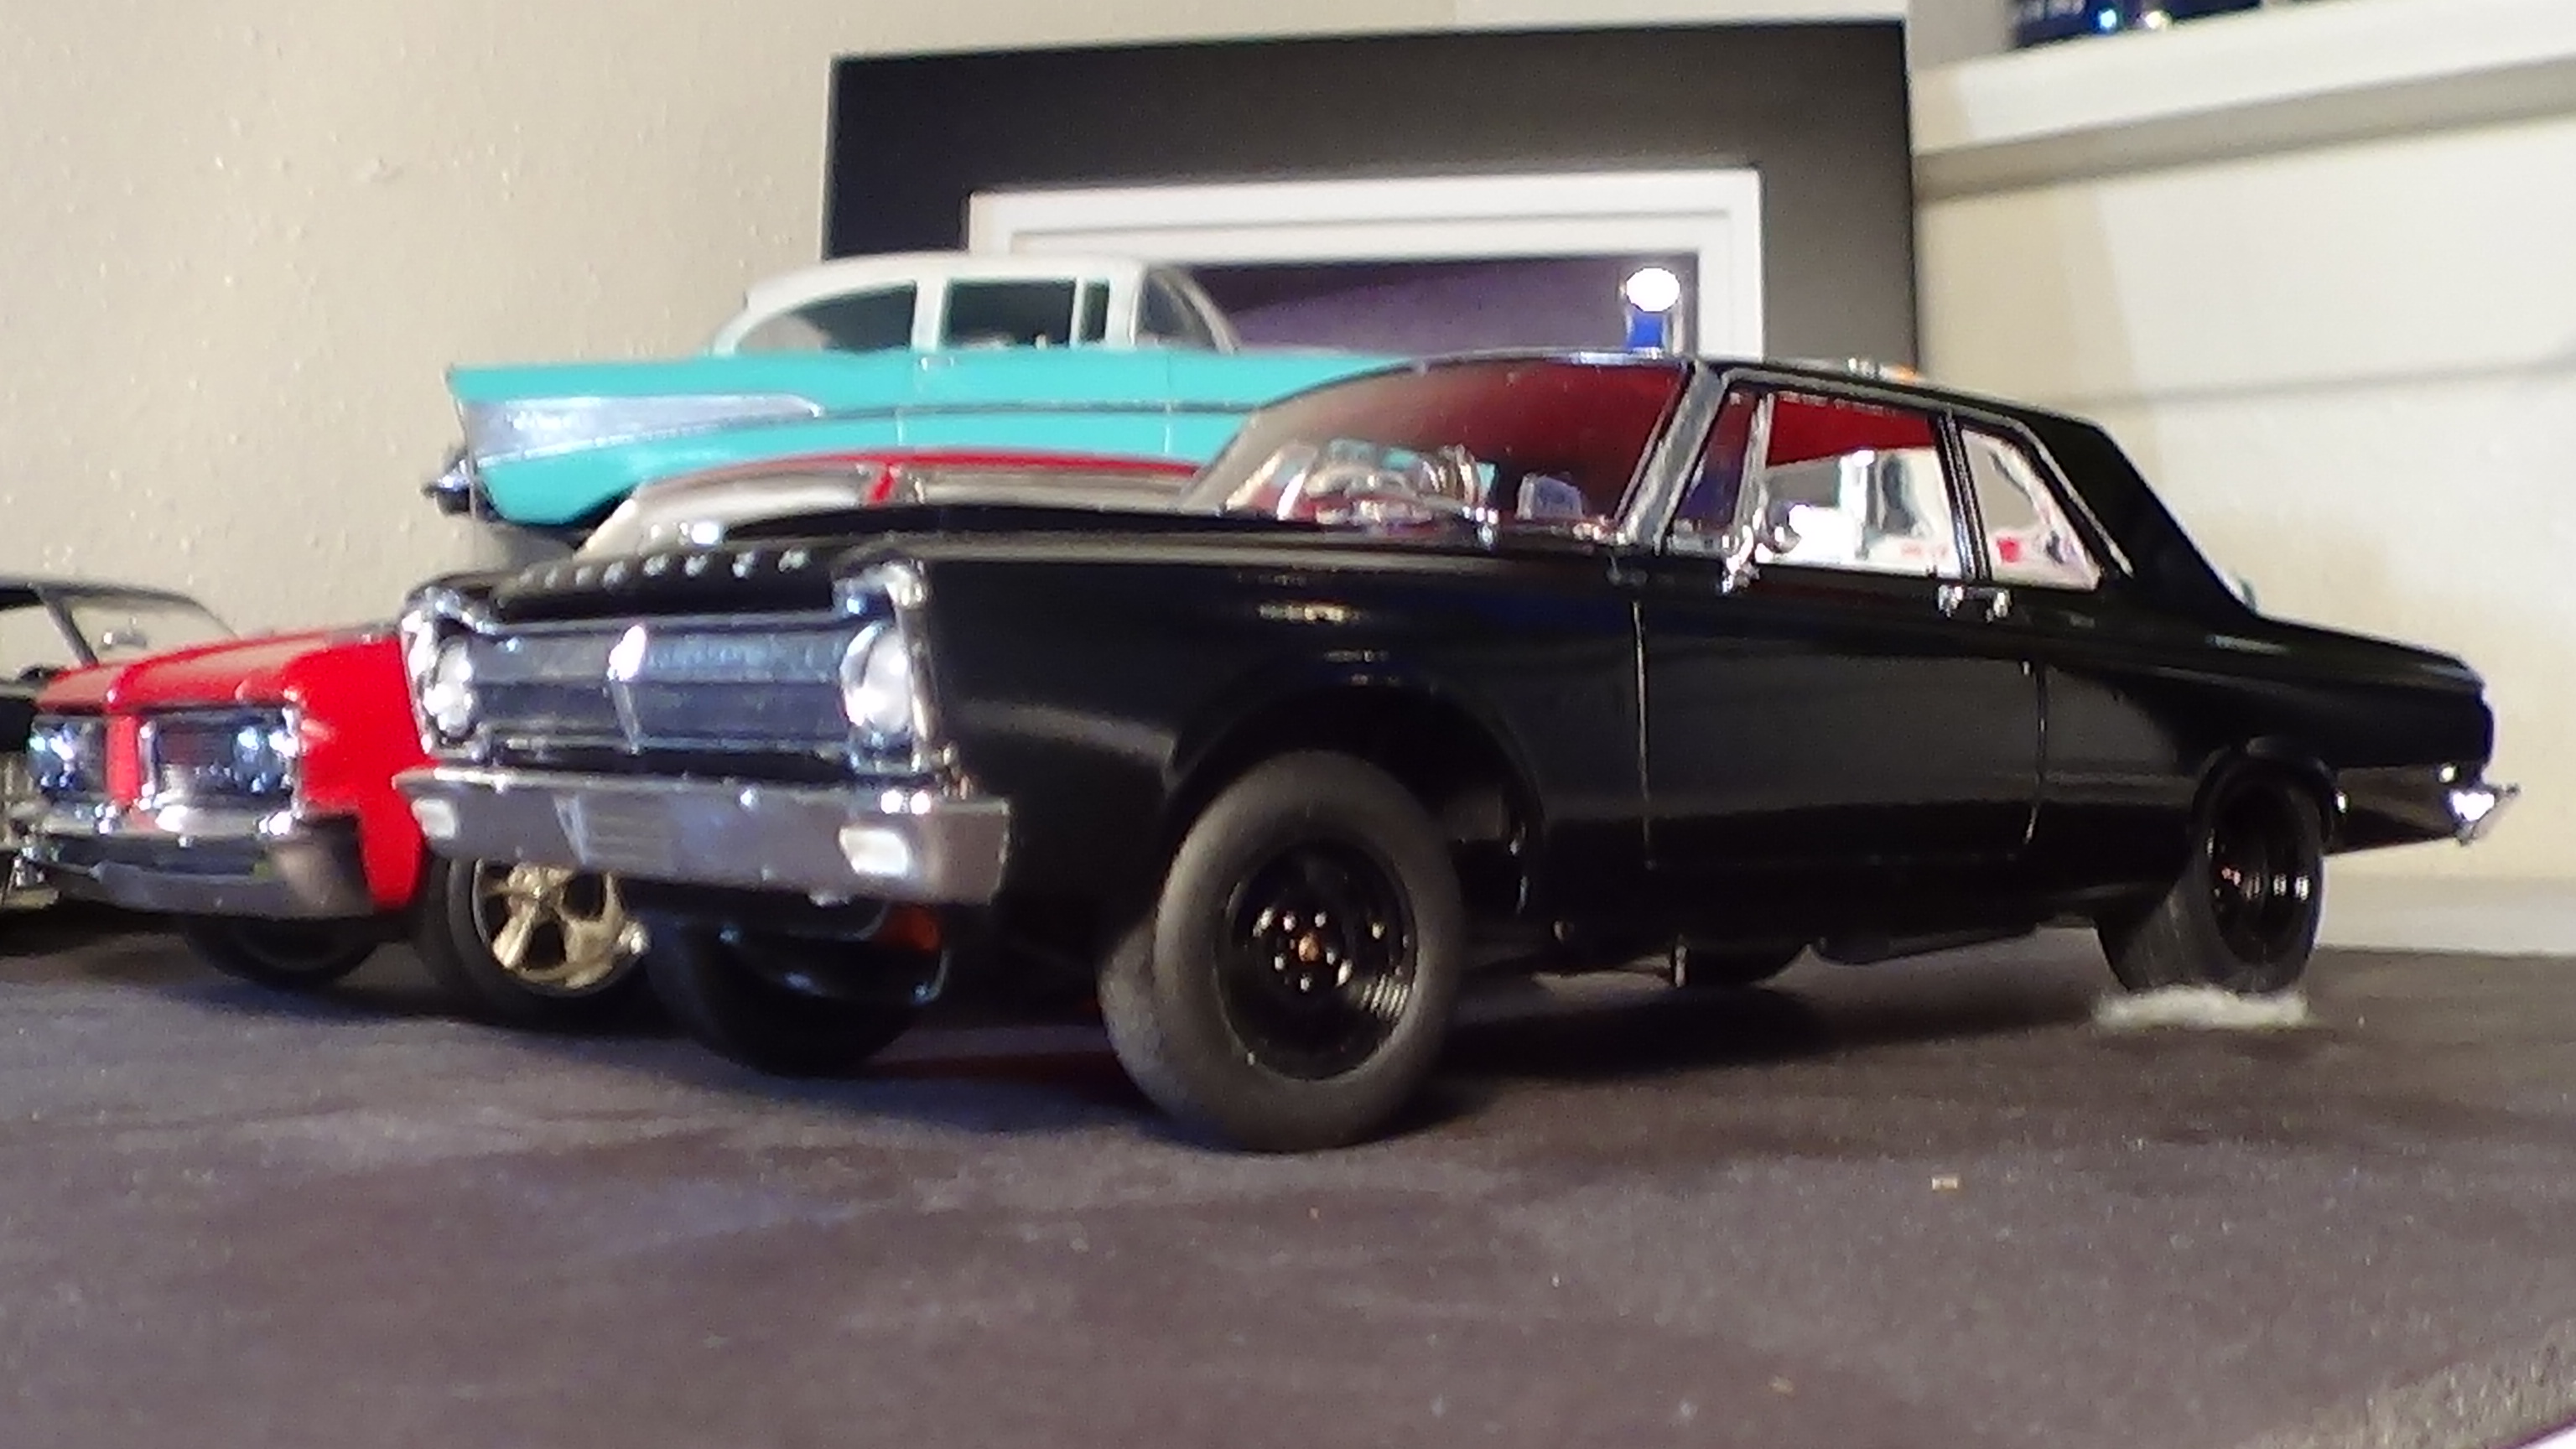
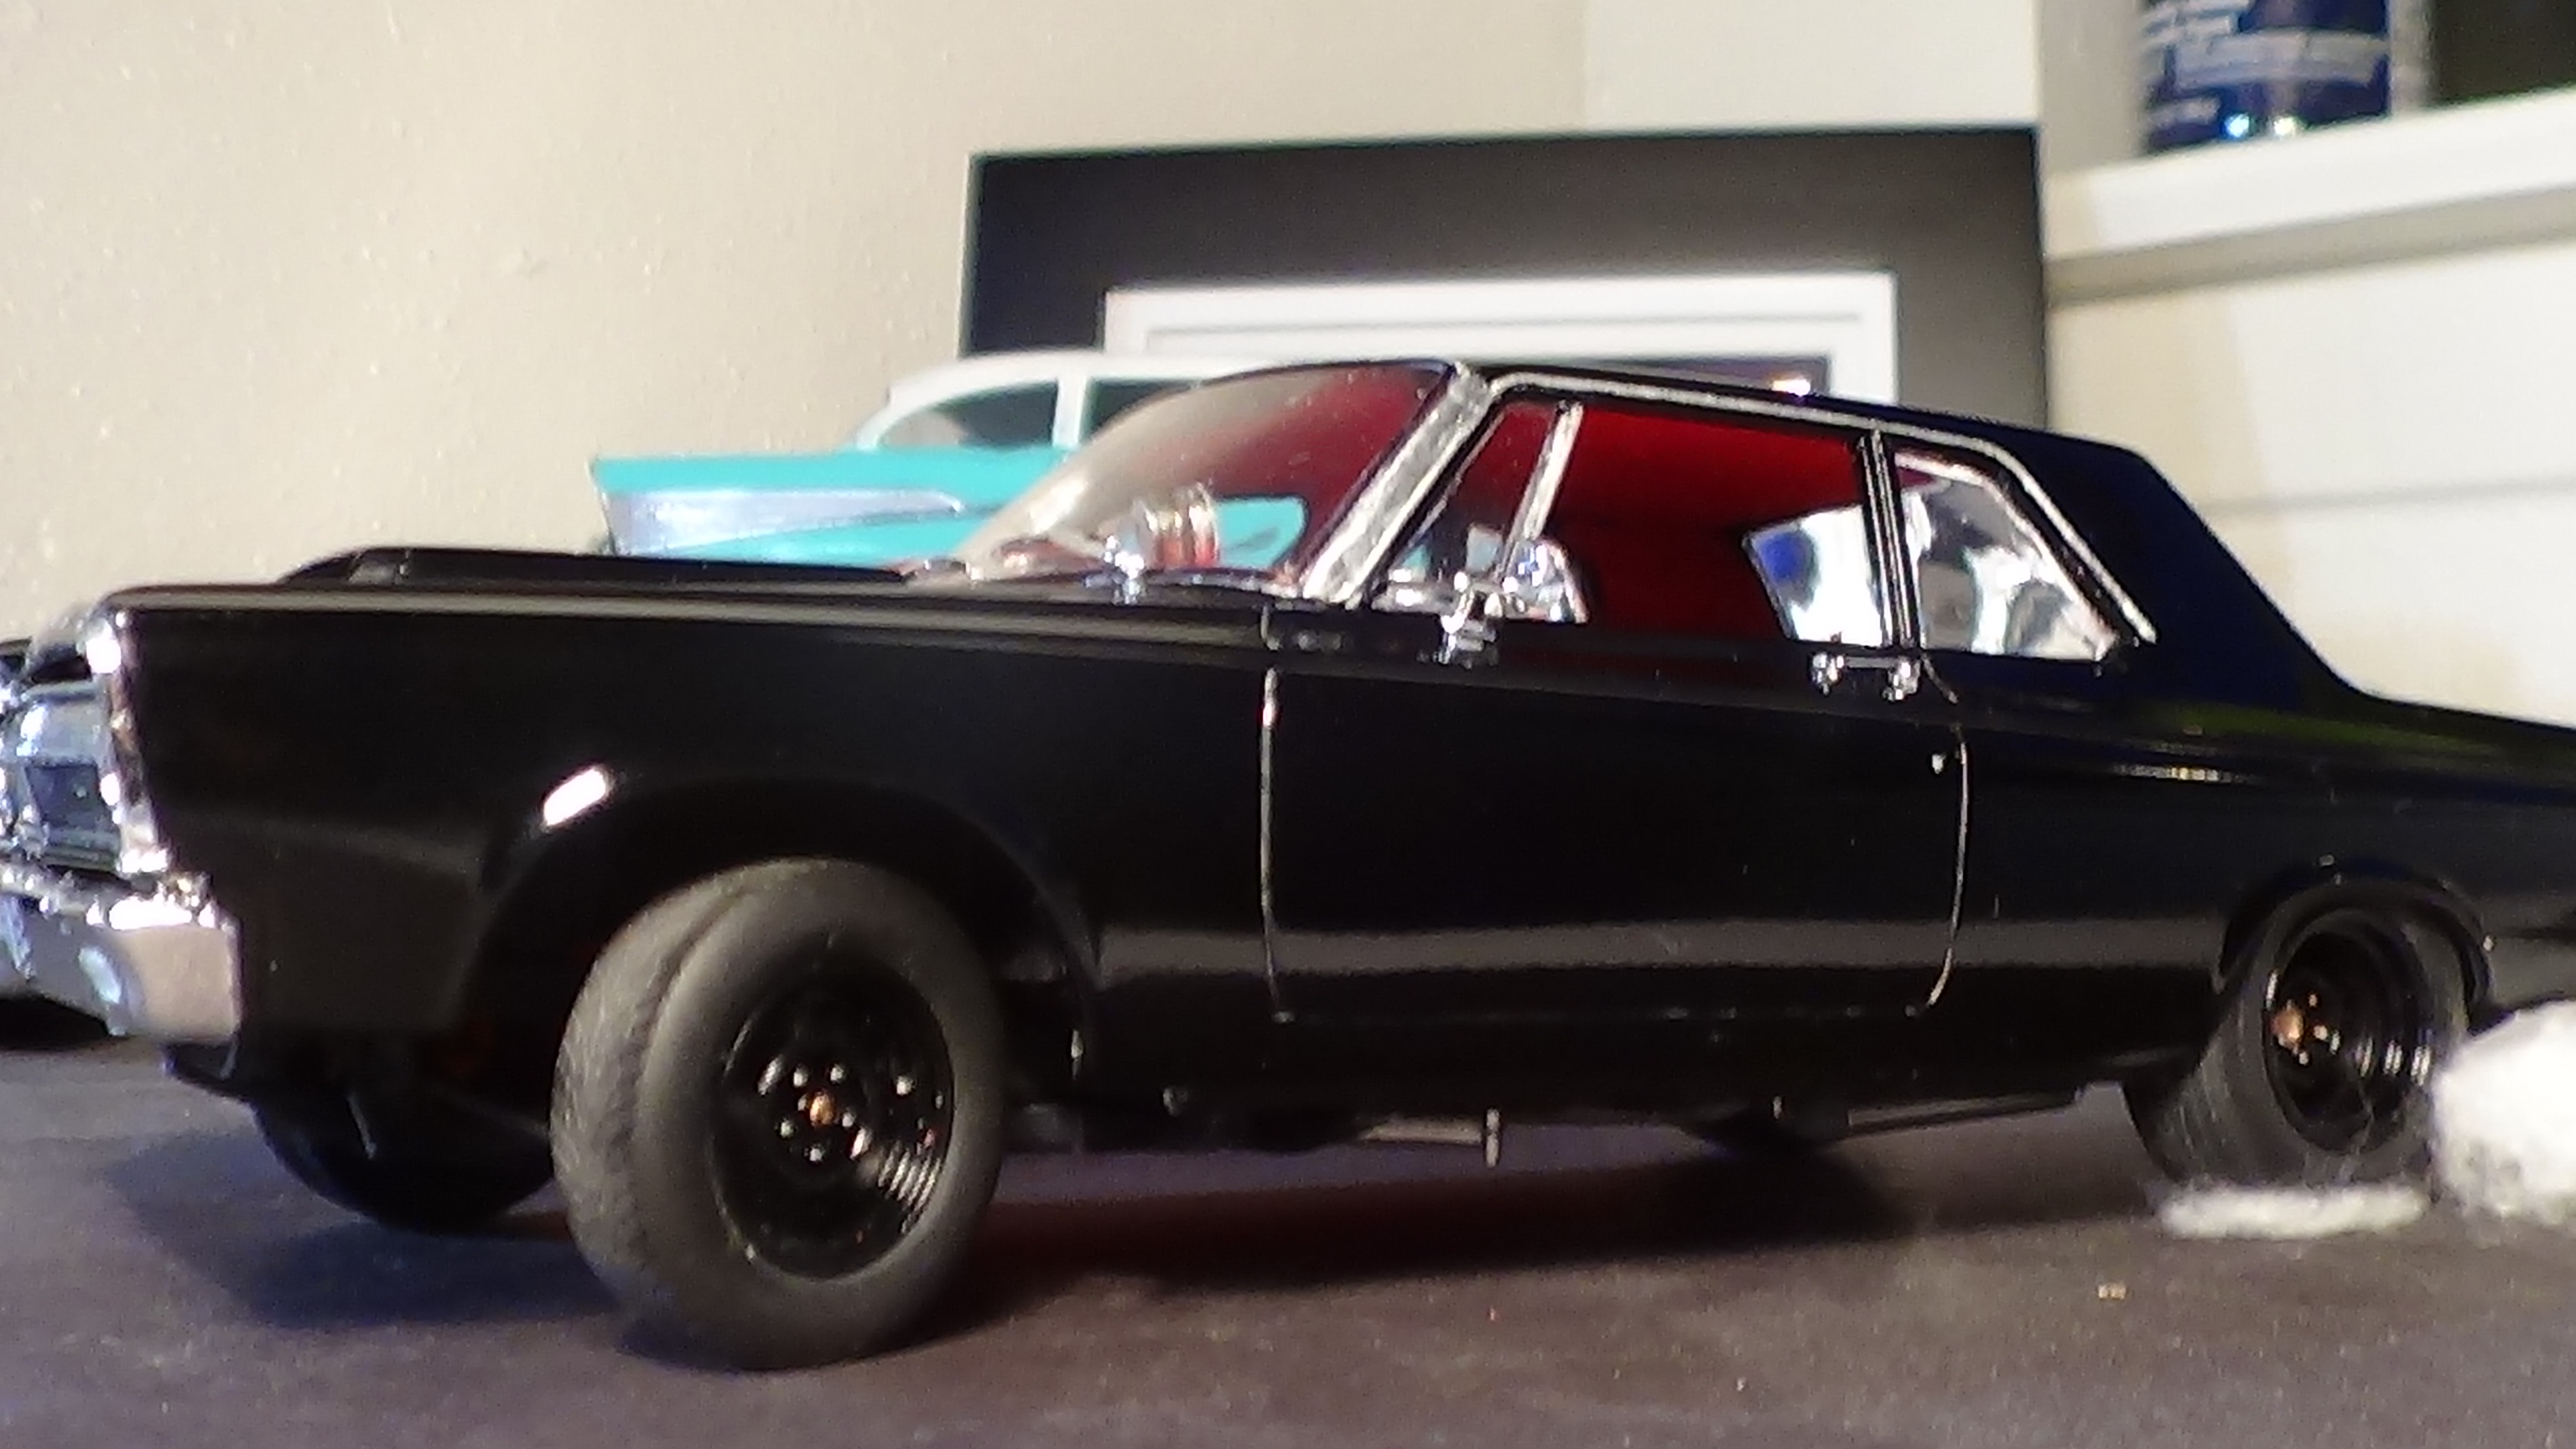
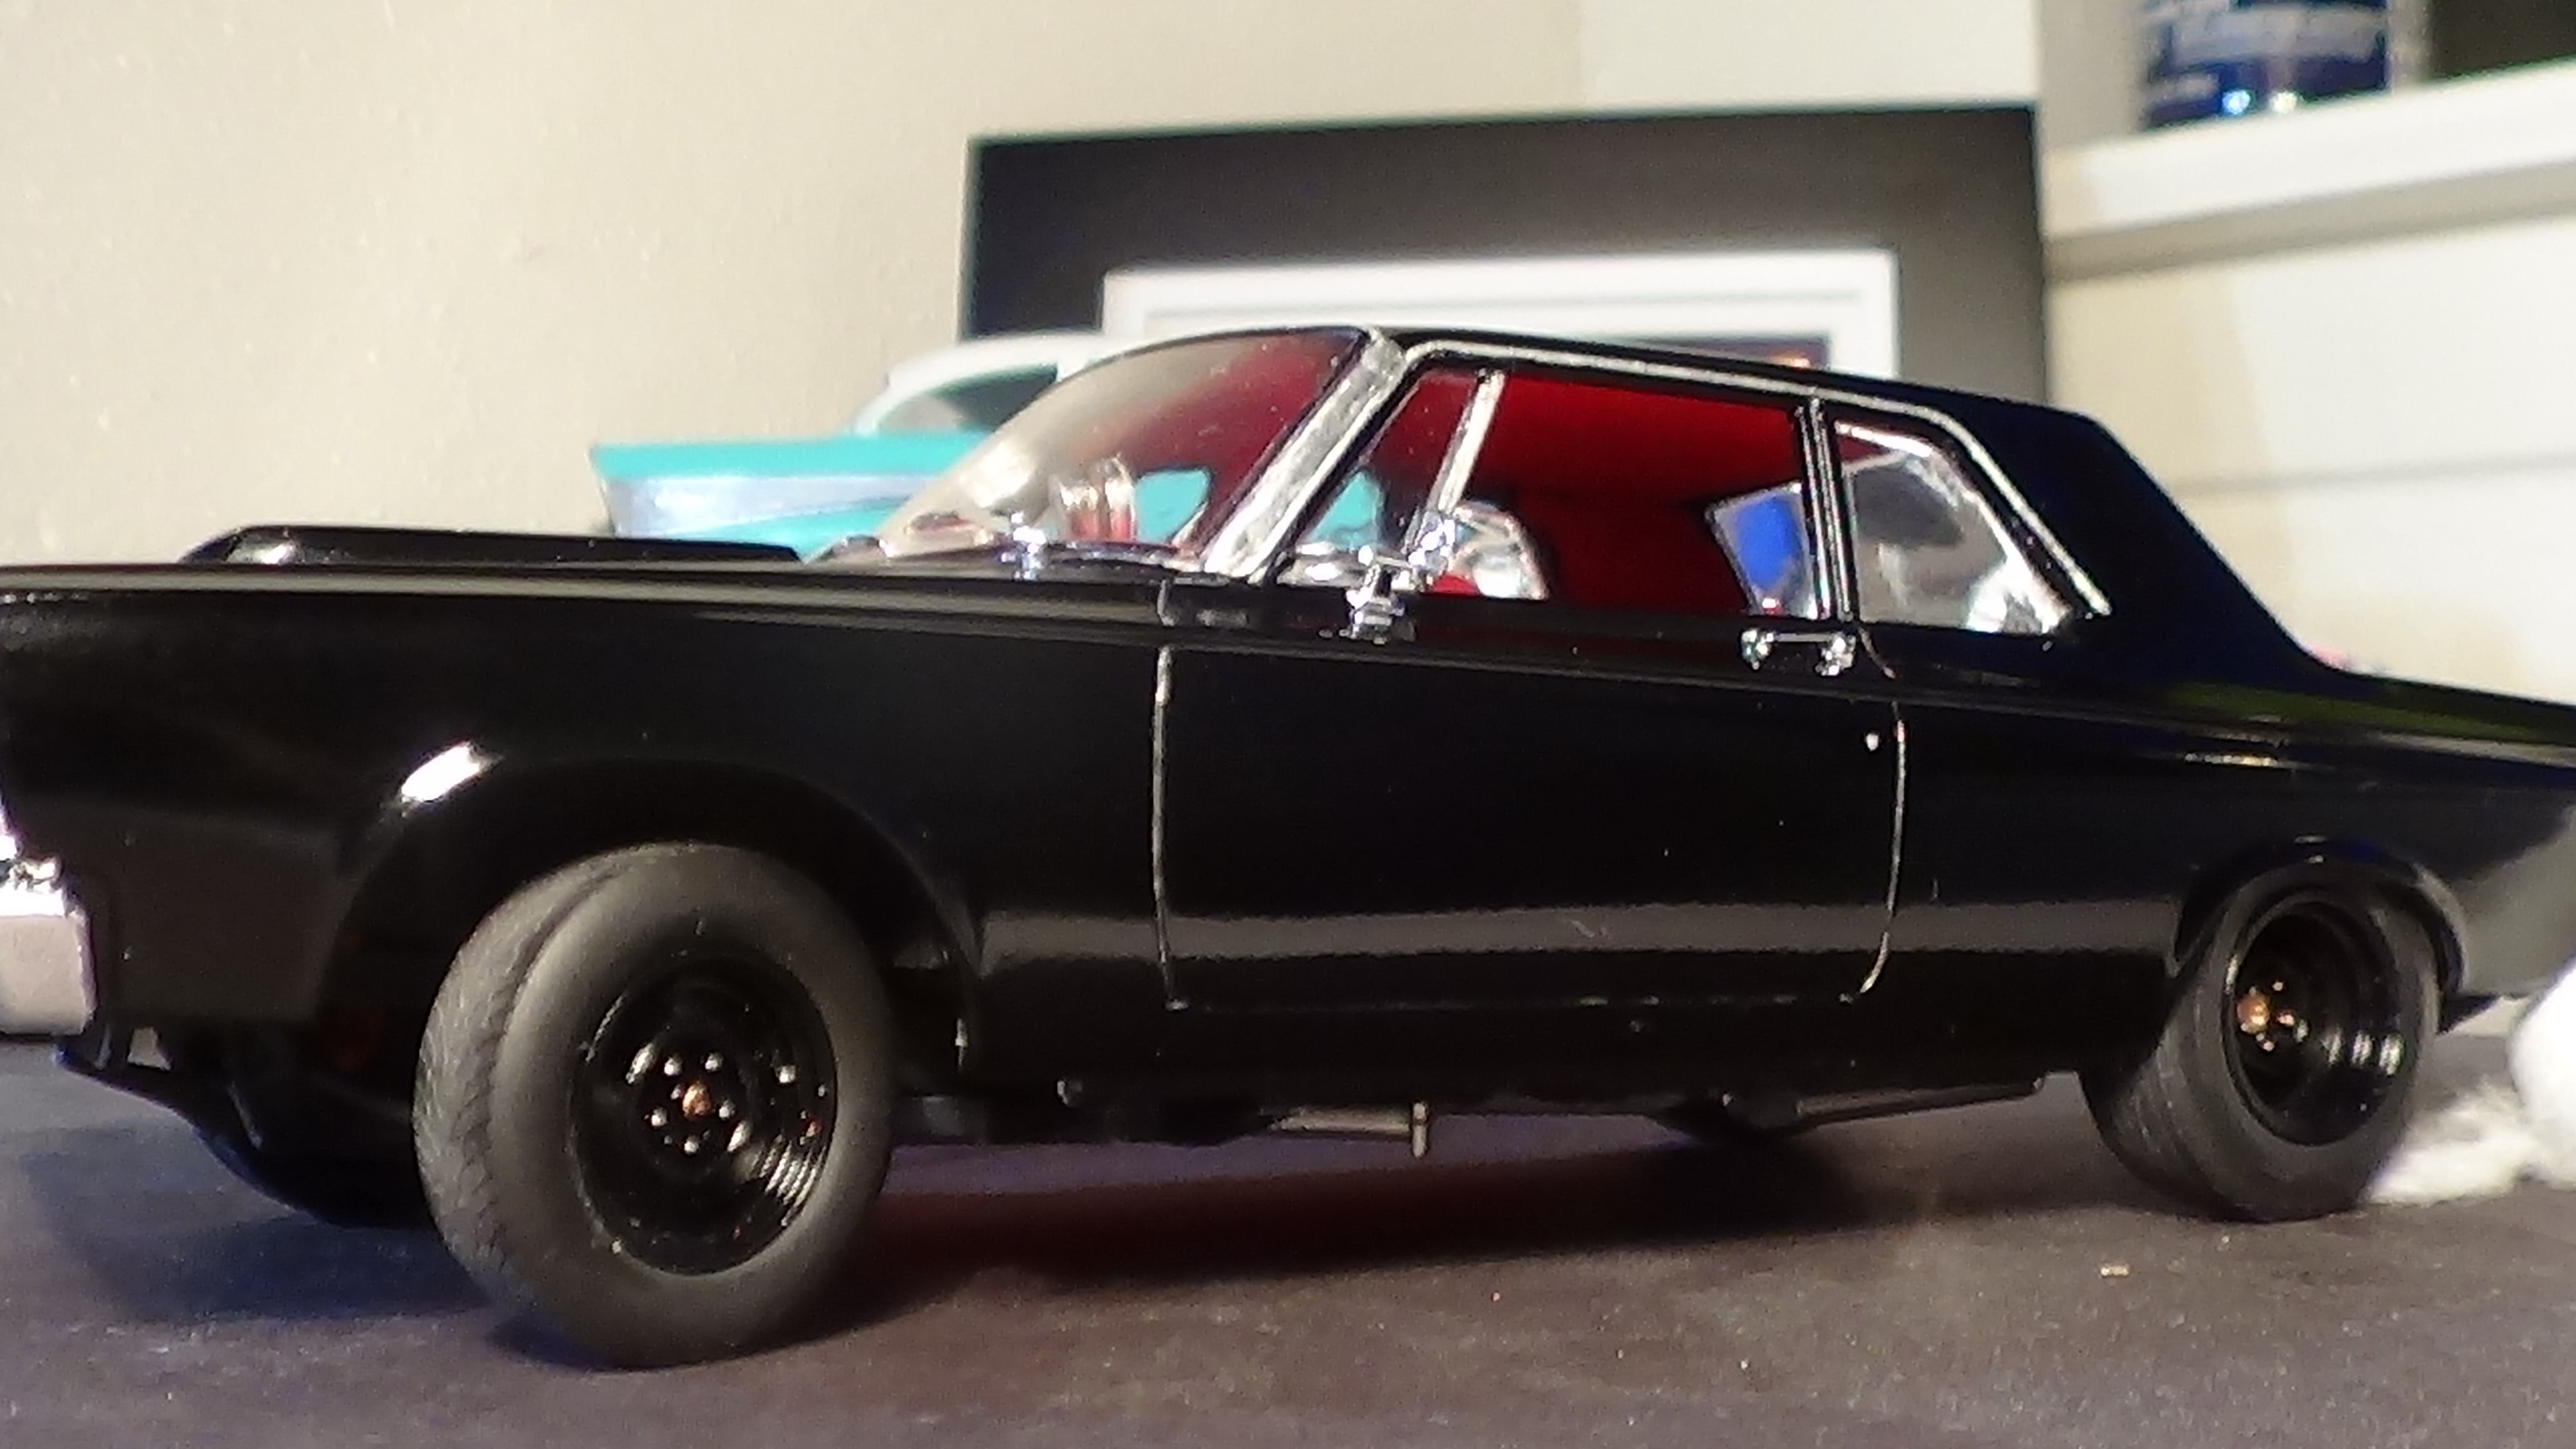
Finally finished the 1965 Plymouth Belvedere I by Moebius Models...known as the Villain. For pics of this build check out the On the bench section here. Here are pics from the final resulting build. Also, you can see more on this build on youtube at https://youtu.be/_oswBSc9HEA
-
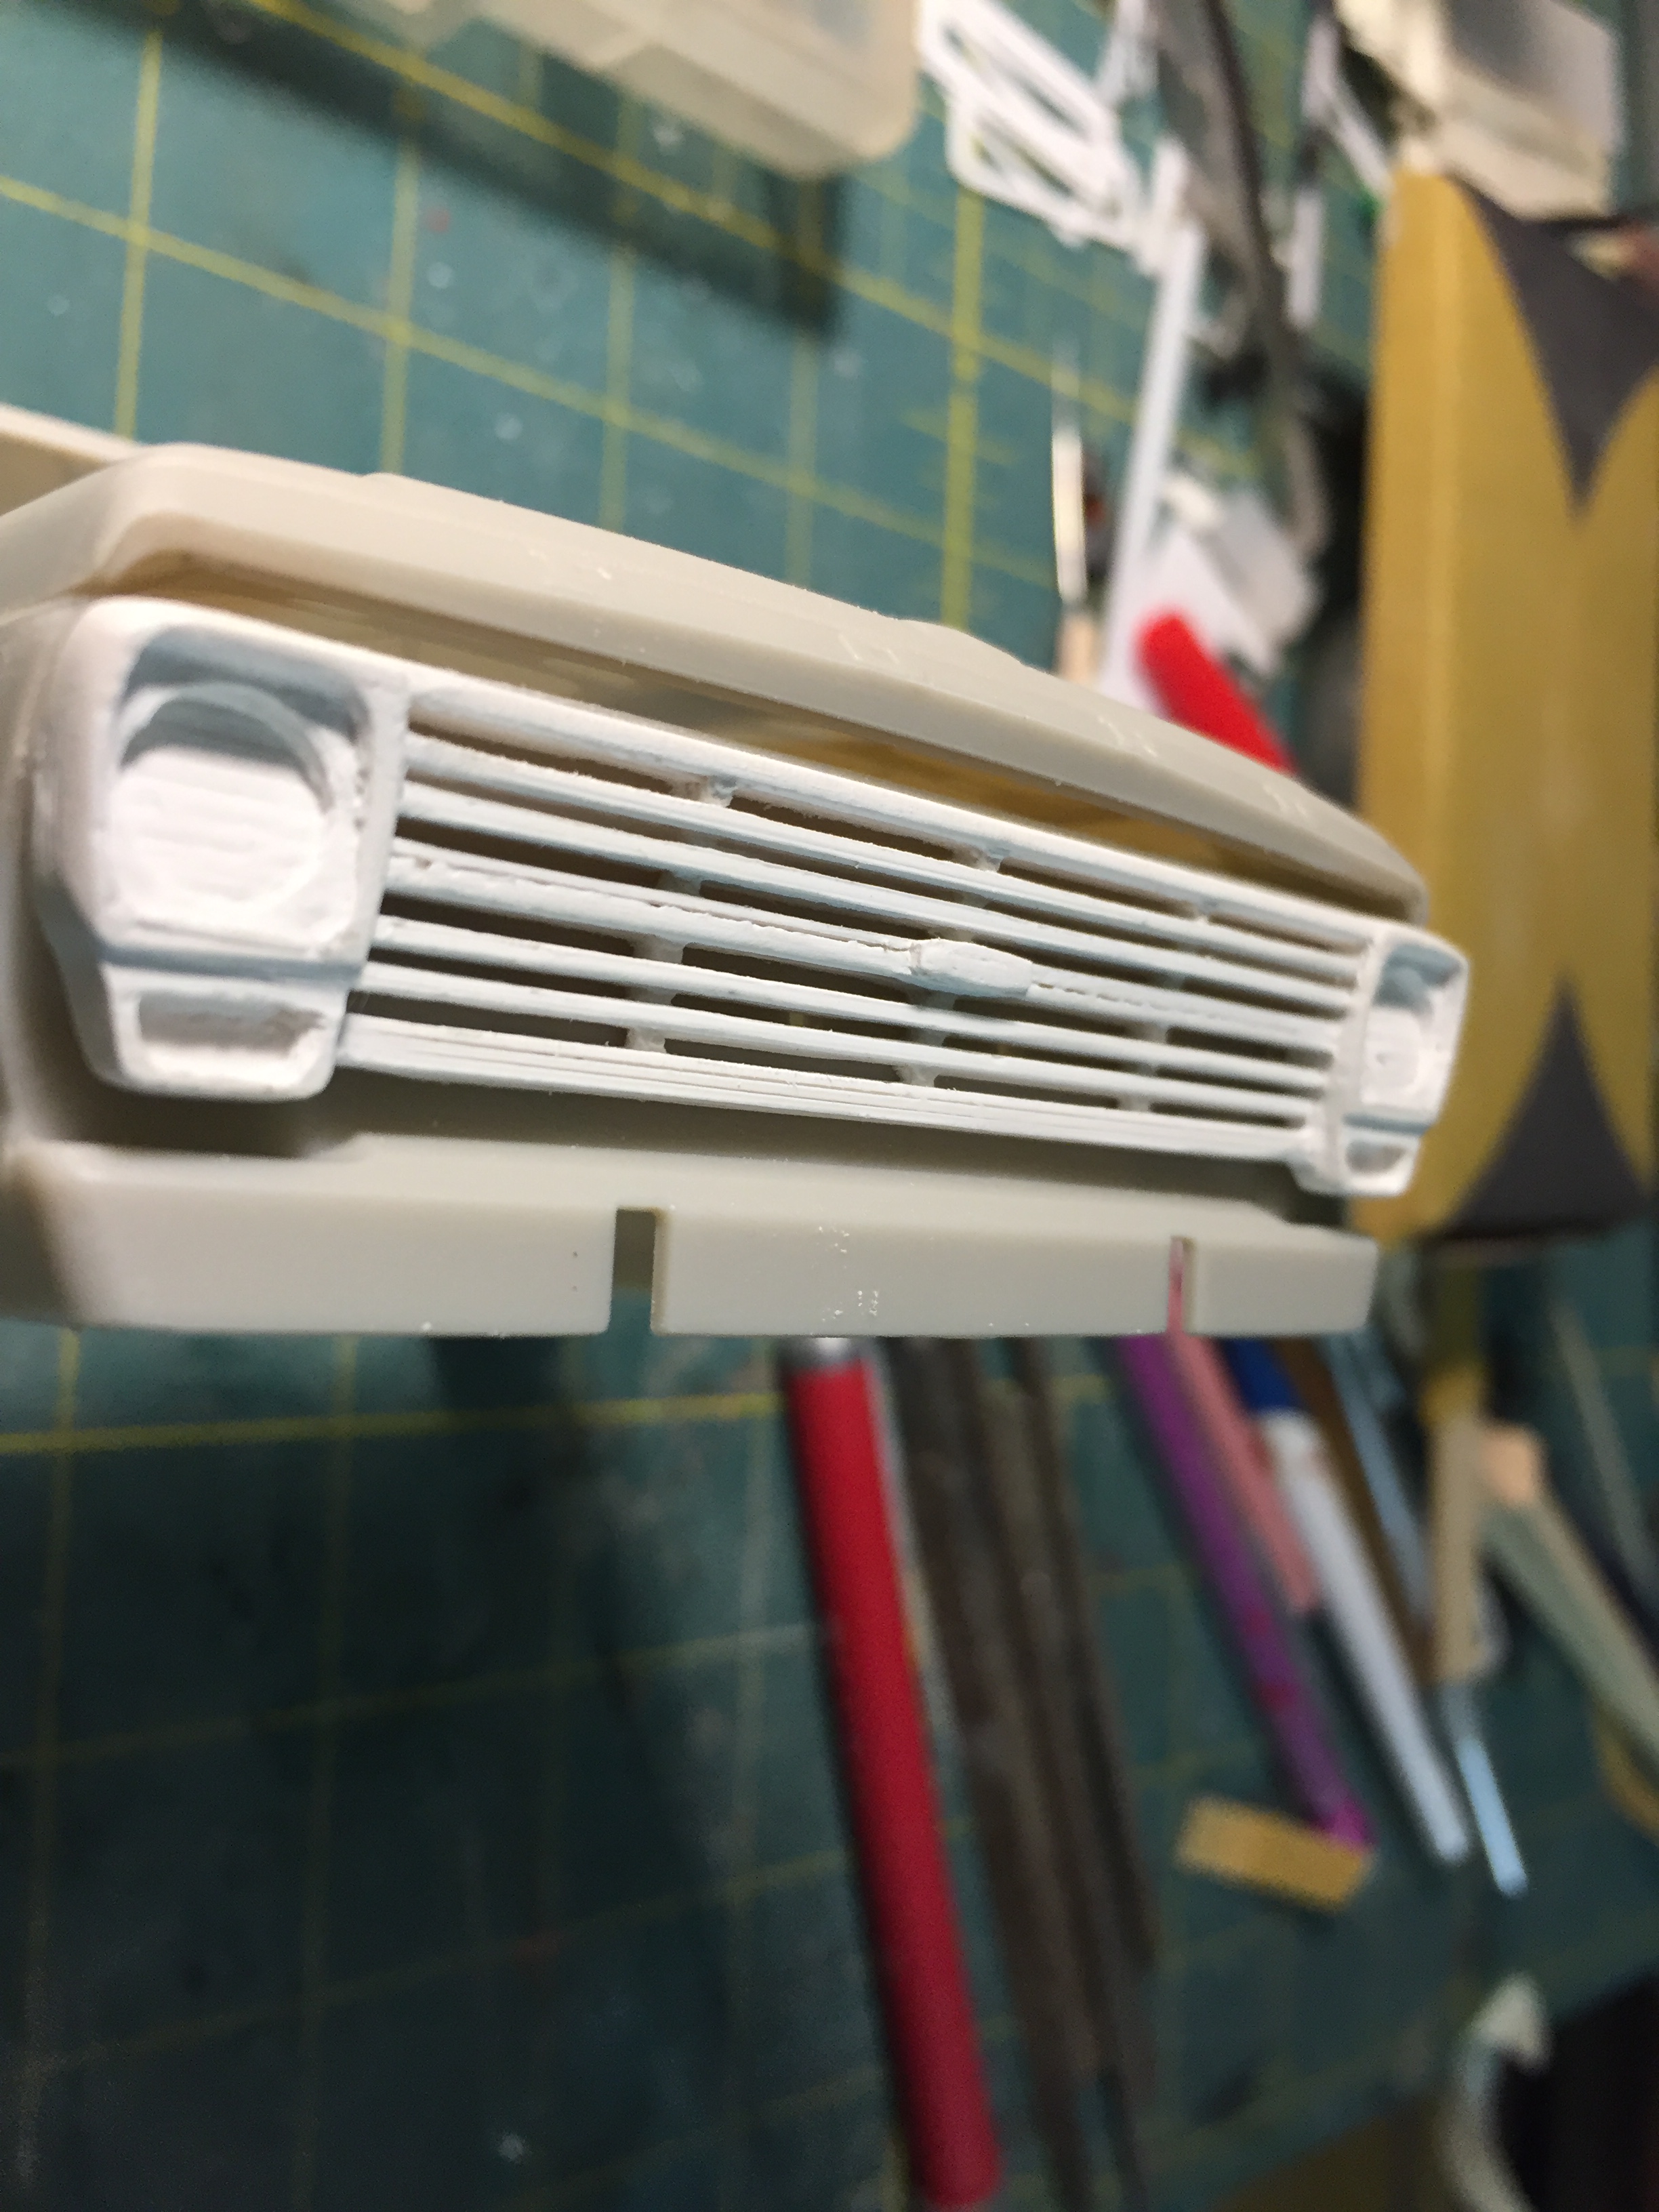
Over Thanksgiving I was visiting my daughter and grand kids in another state. When I had a minute, I started working on my computer to design a new grill for the 69 Moebius pickup. I have always hated the grill that the kit came with and I couldn't take it any longer. My son-in-law had a 3d printer so I had him print some preliminary designs. When I got back home I couldn't stop thinking about fixing this problem so I got back into it and redesigned, tweaked, and adjusted my design until I came up with this. I decided to go with a "Ranger" grill with the emblem in the center and unfortunately had to "beef" up the smaller bars in order to have a strong enough piece to cast from. It still needs some bondo here and there and some sanding and fine tuning but it is pretty close to being a usable piece. The headlight lenses from the kit fit into the cutouts nicely. I would like to here some feed back on this piece before I cast it. I am already working on a 67 and 68 grill to cast as well. Thank you for looking and any help would be appreciated!
-
This one is the Ventura, started these this week, I do like how the finned brake drums turned out. Closeup of Pontiac Wheels. Centers were painted Tamiya aluminum while outside was painted Testors' silver. Can't leave the Catalina out of this, can I? Wheels are kit supplied while I sourced the parts box for the BF Goodrich Radial T/As And since I'm building Catalinas, here is the AMT version. Wheels are from AMT 65 Pontiacs while tires are parts box items. Thanks for looking, all comments welcomed.
-
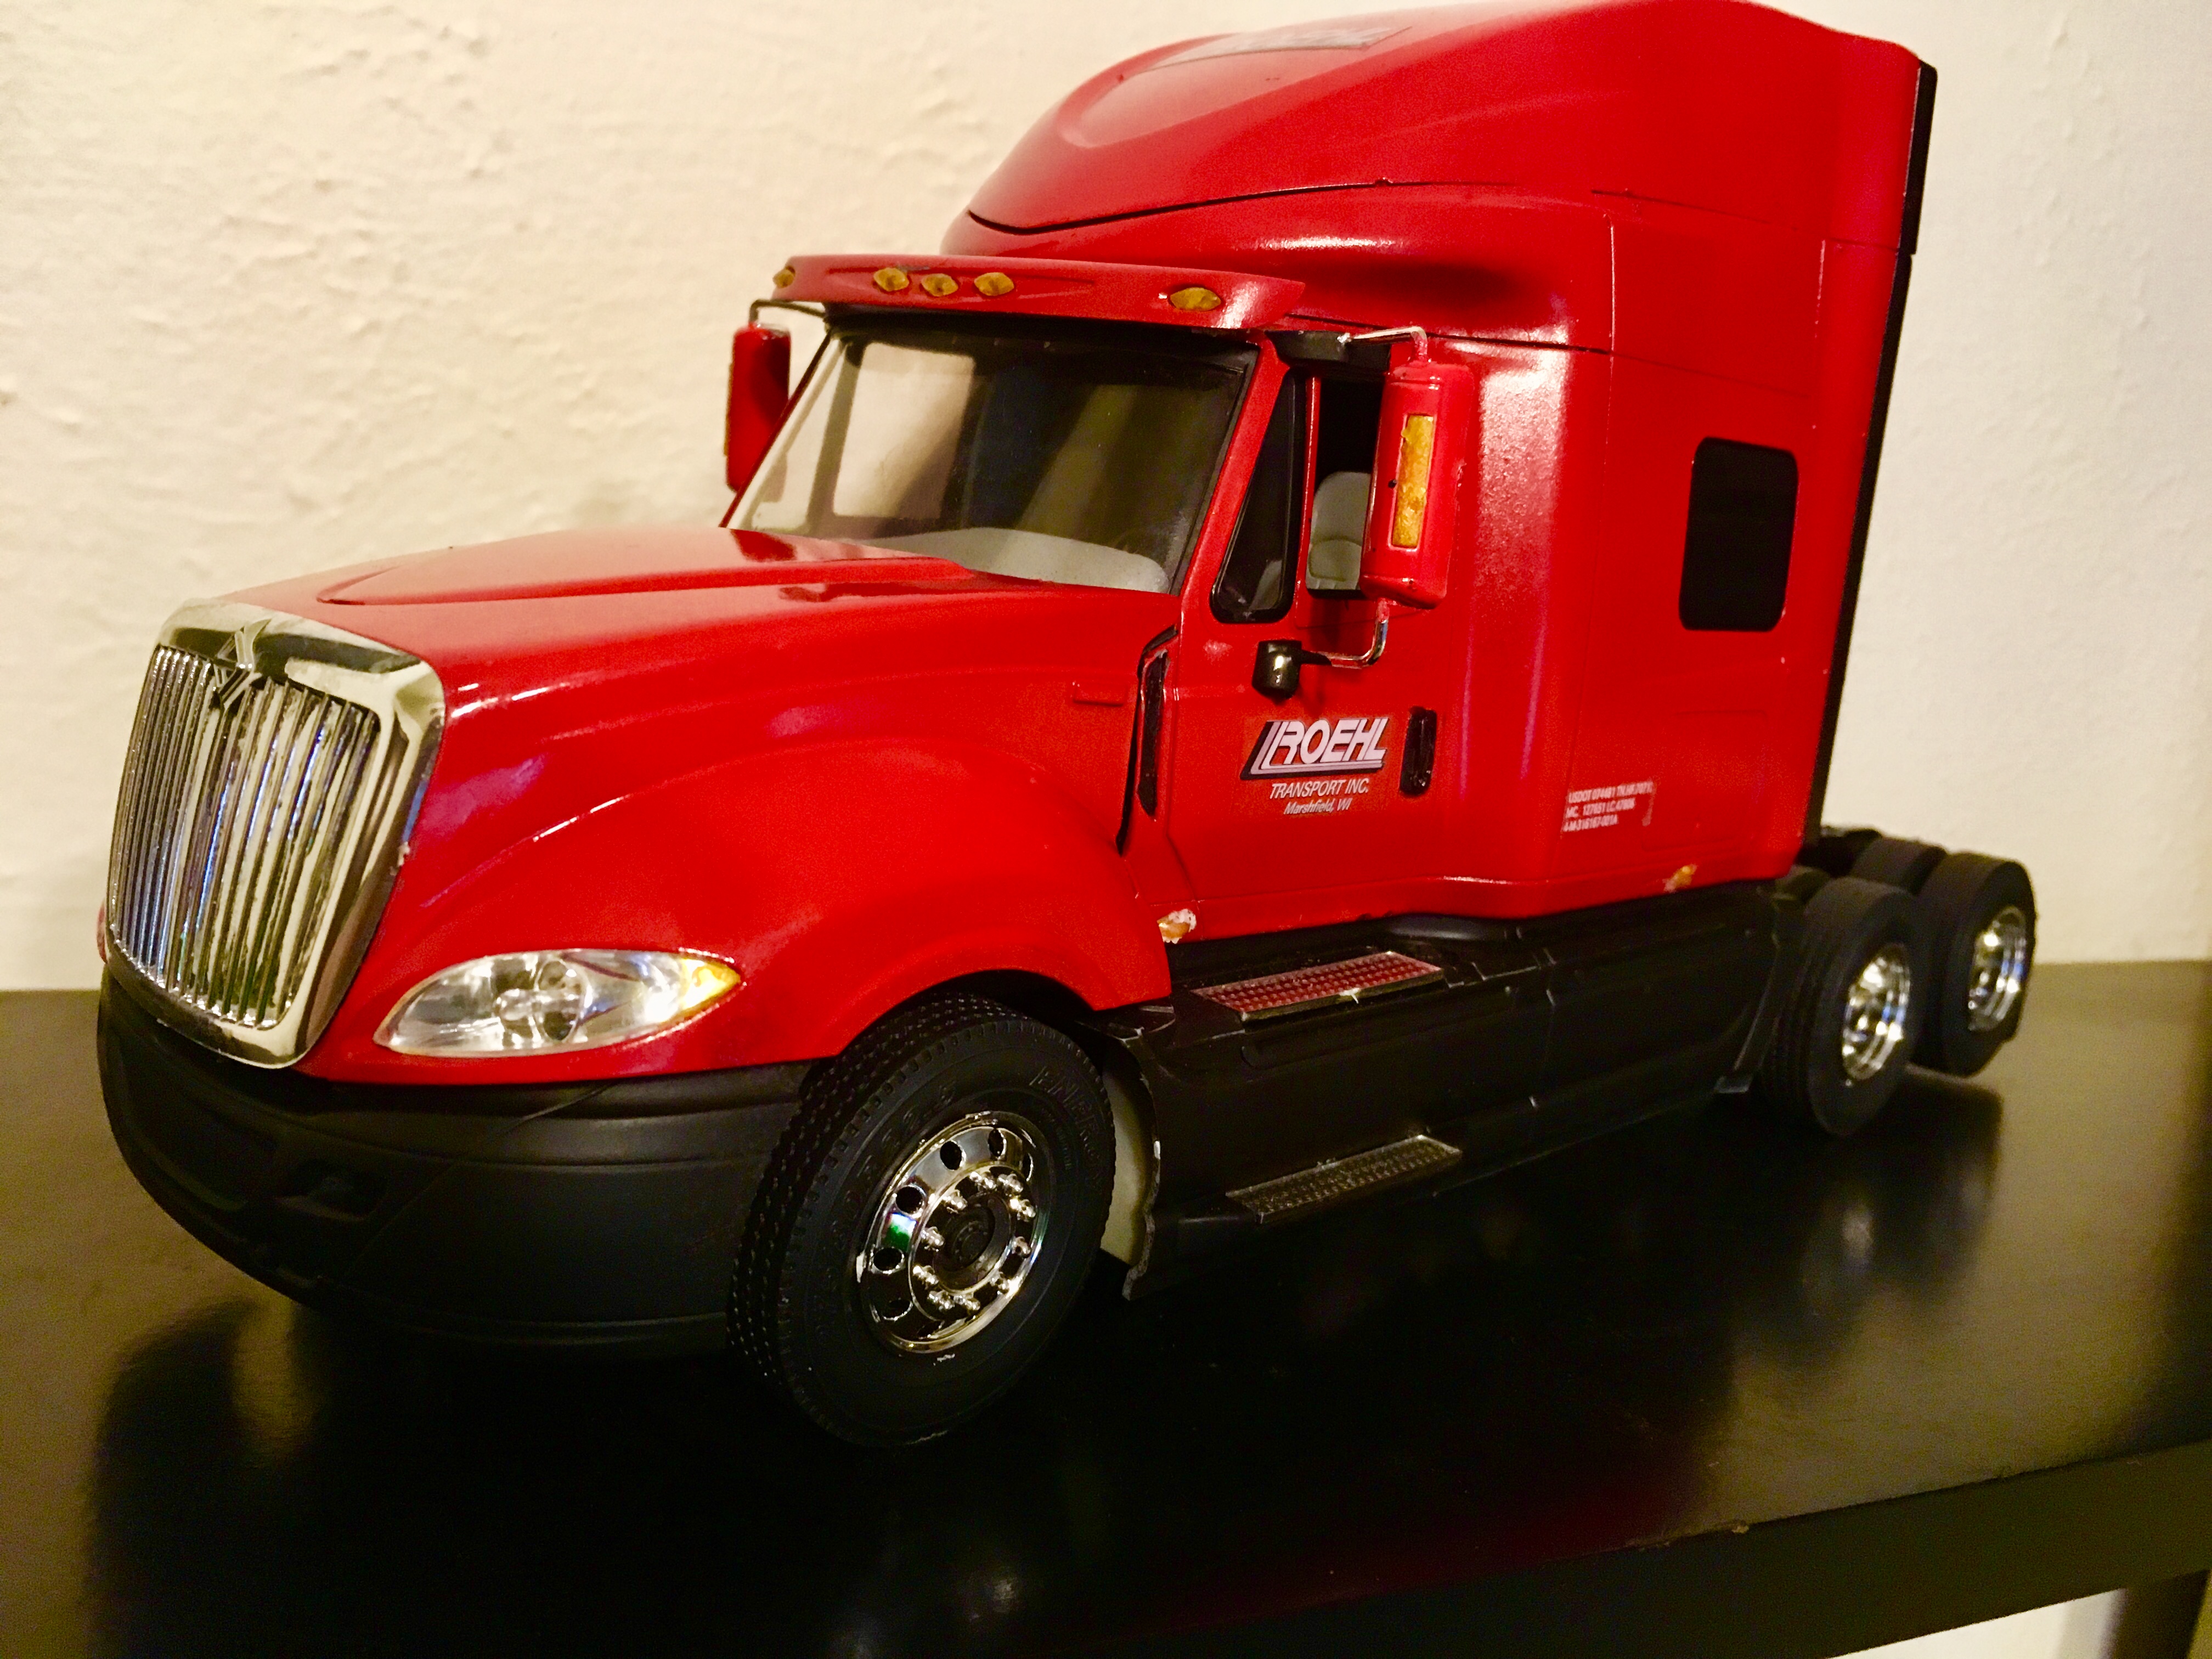
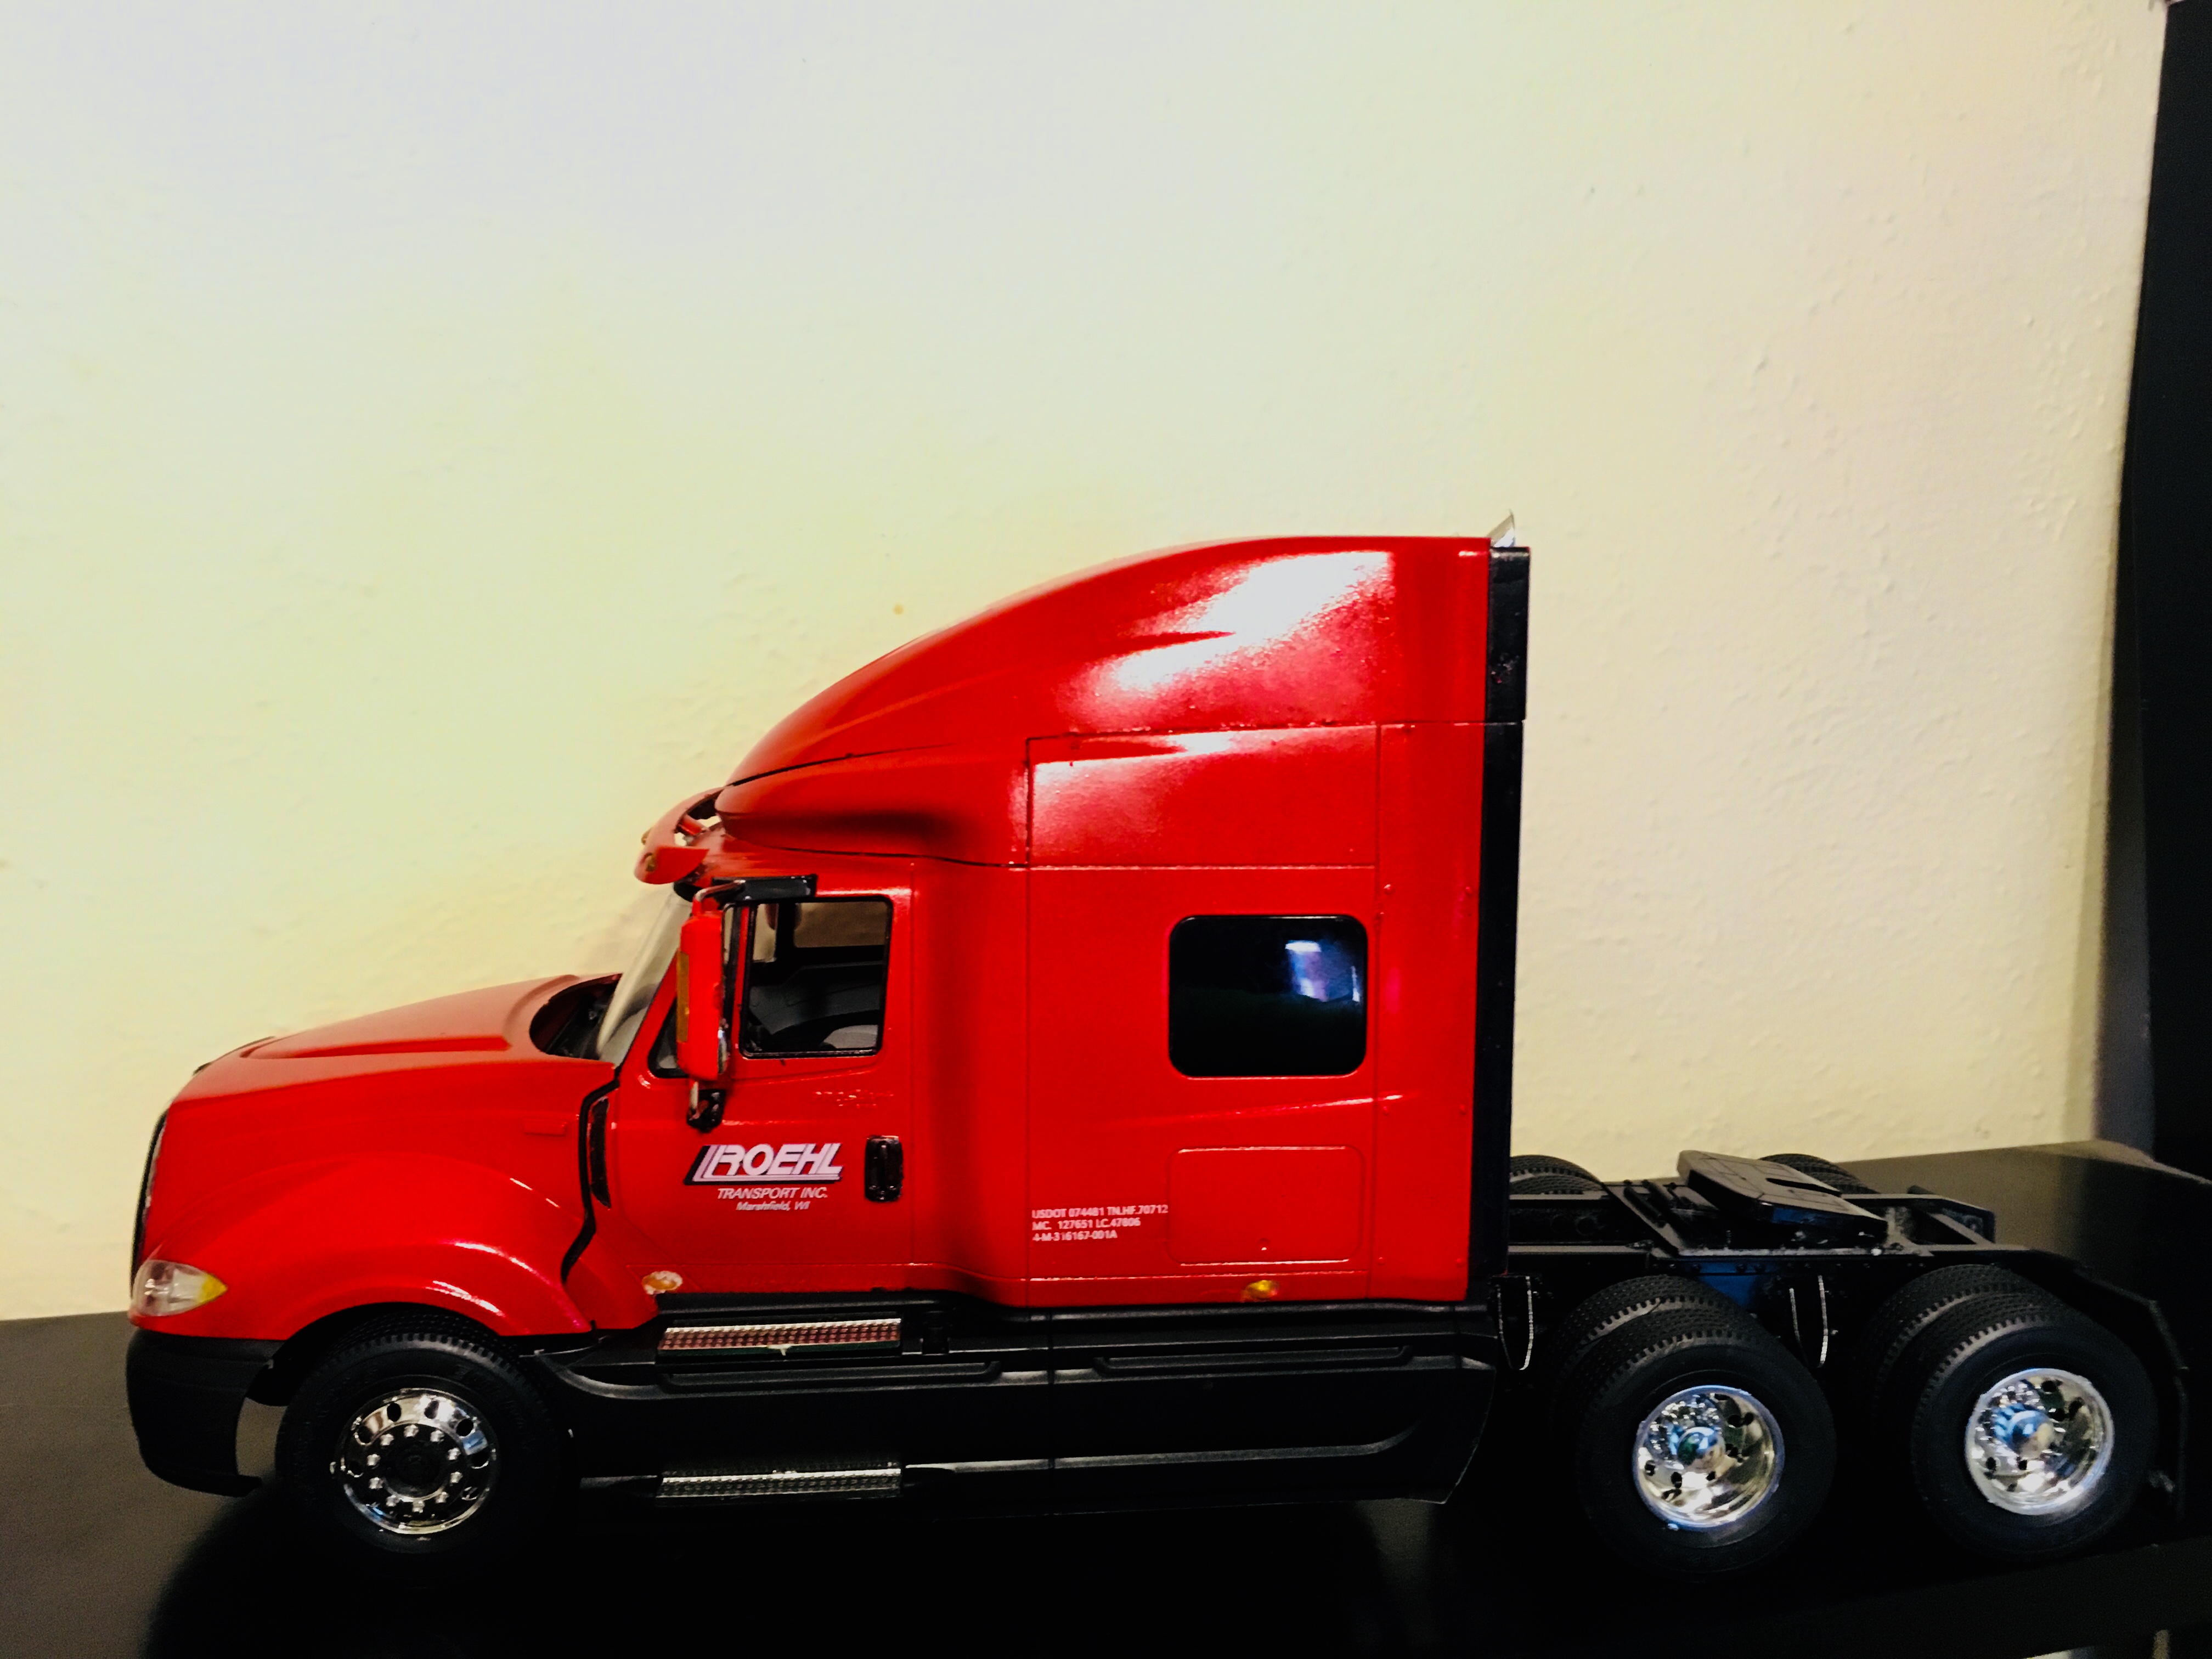
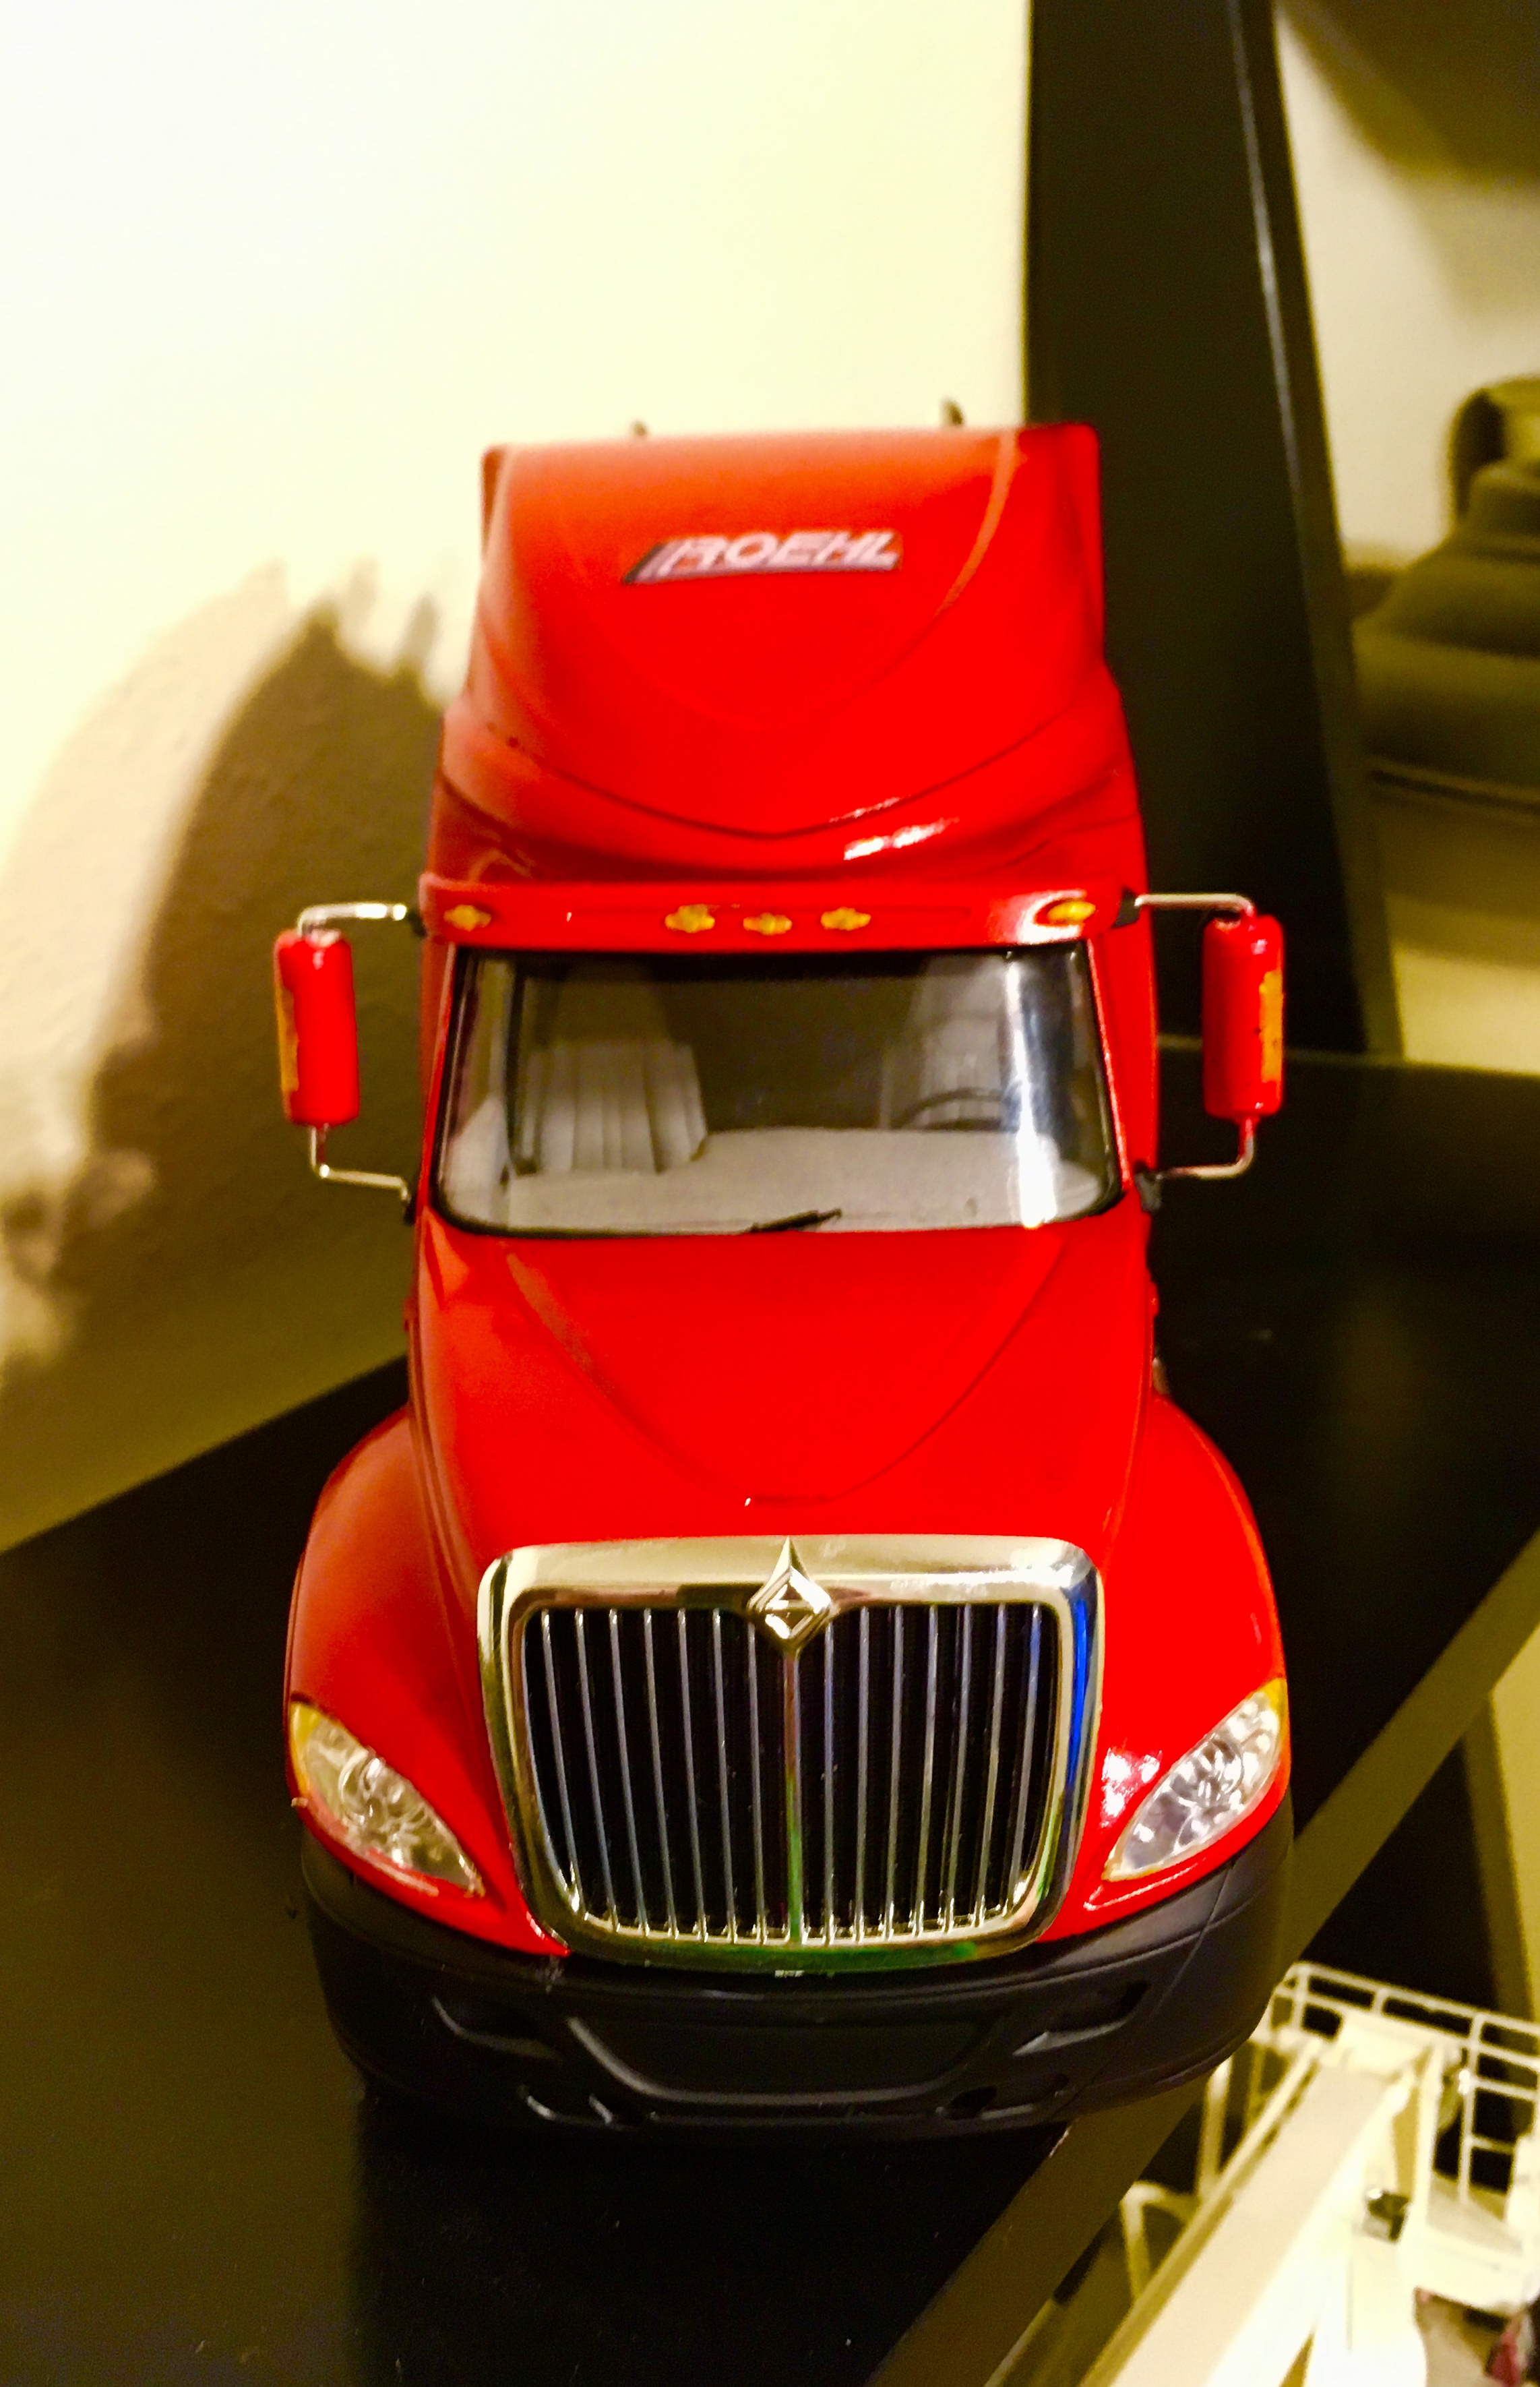
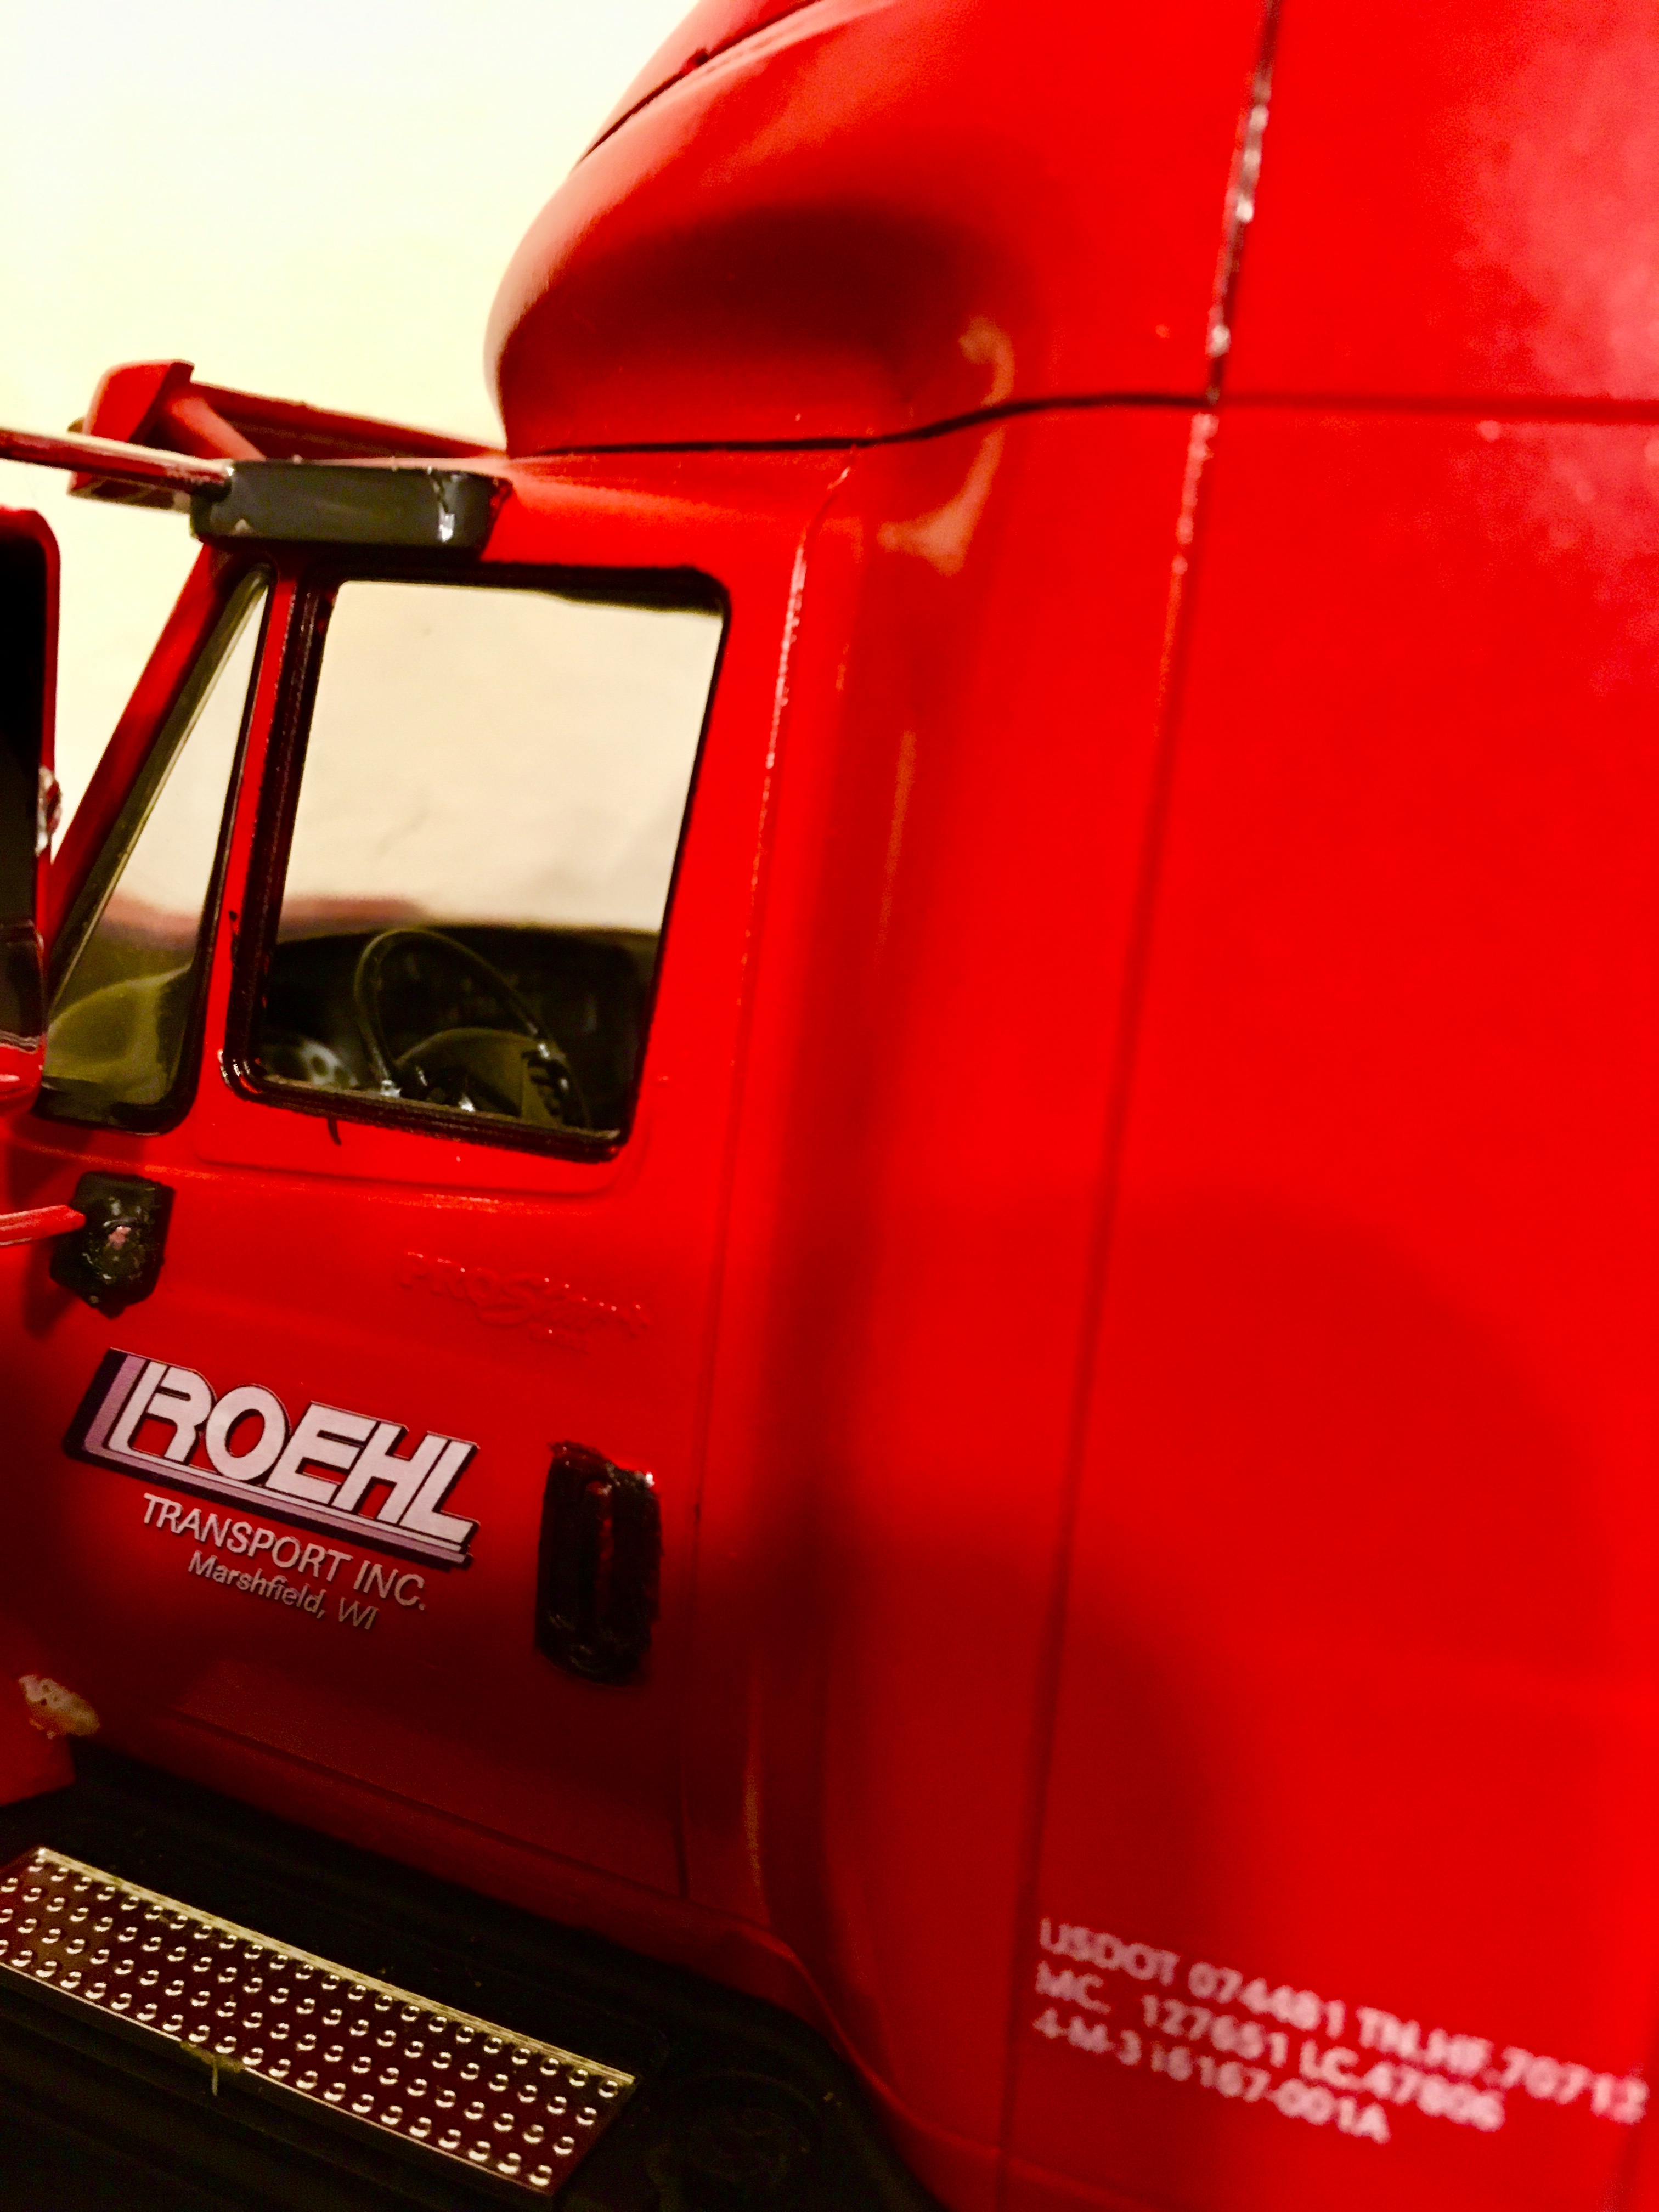
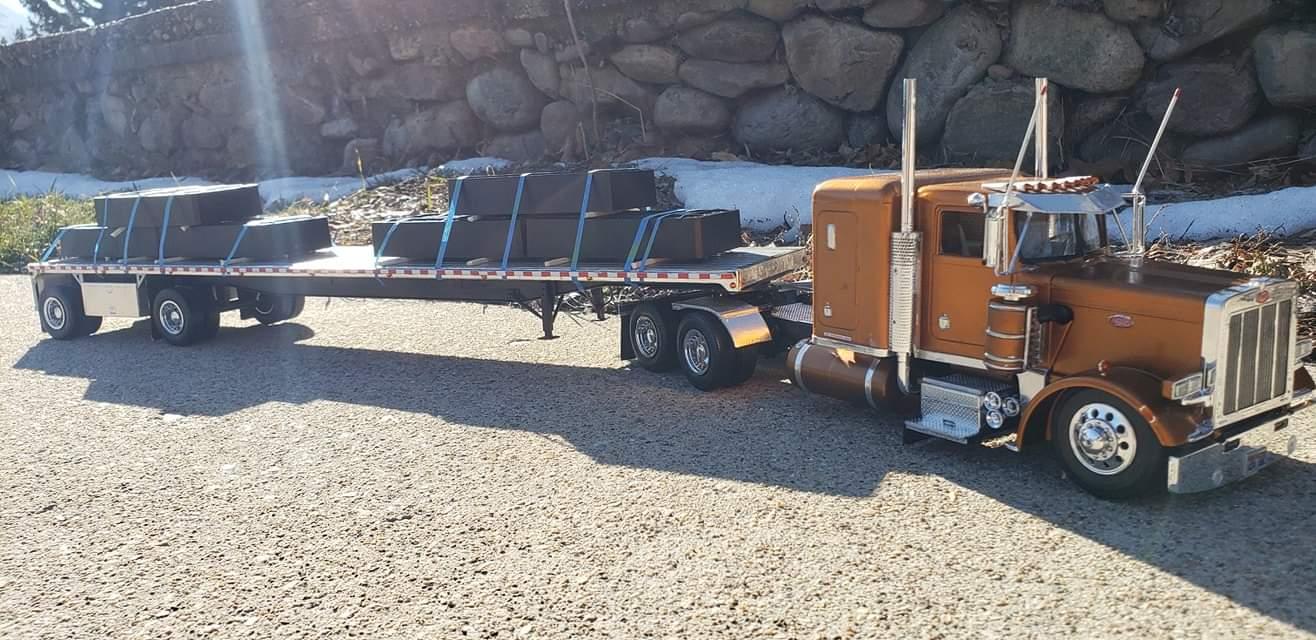
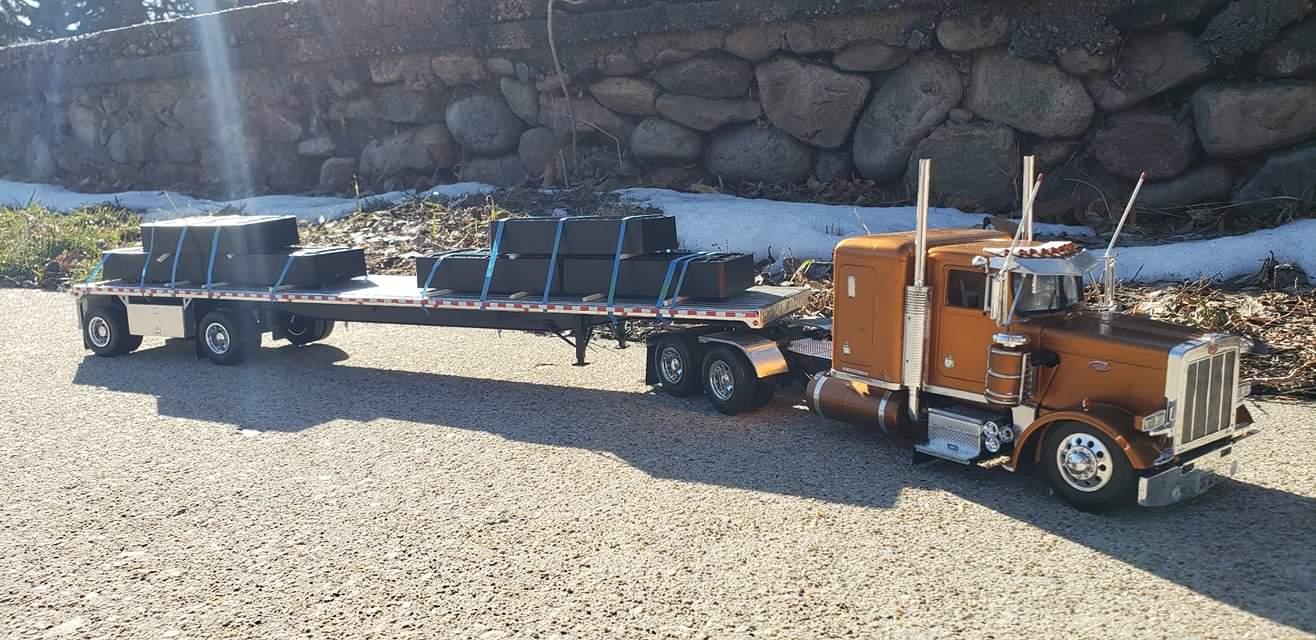
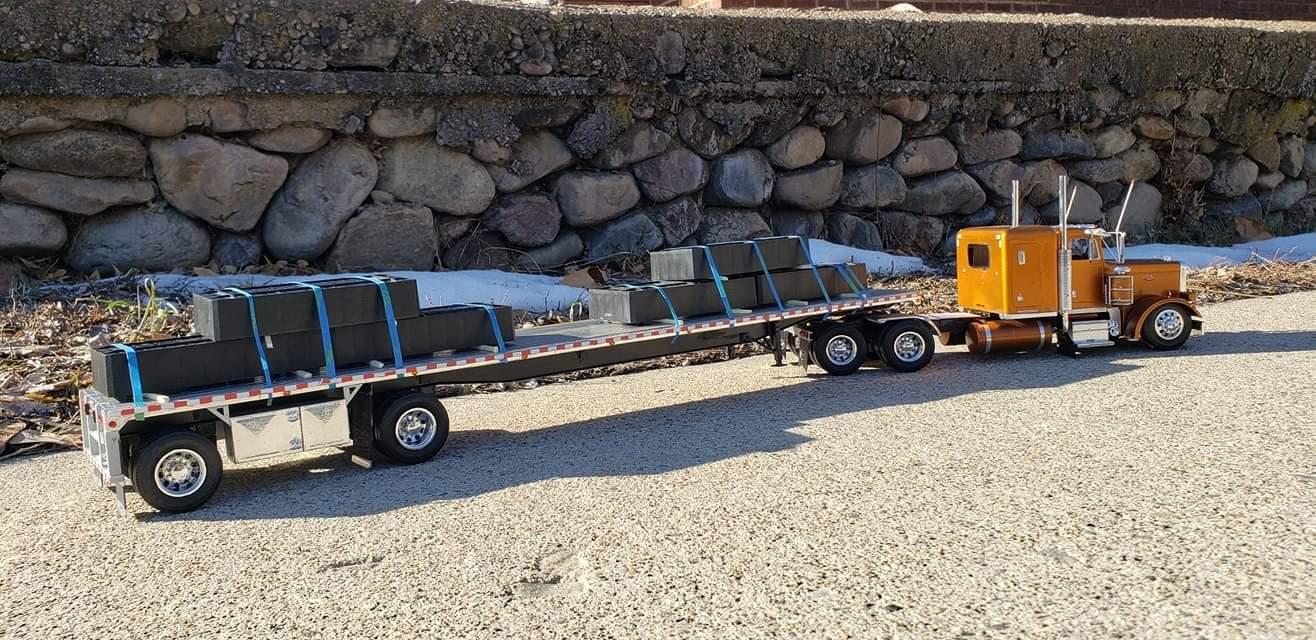
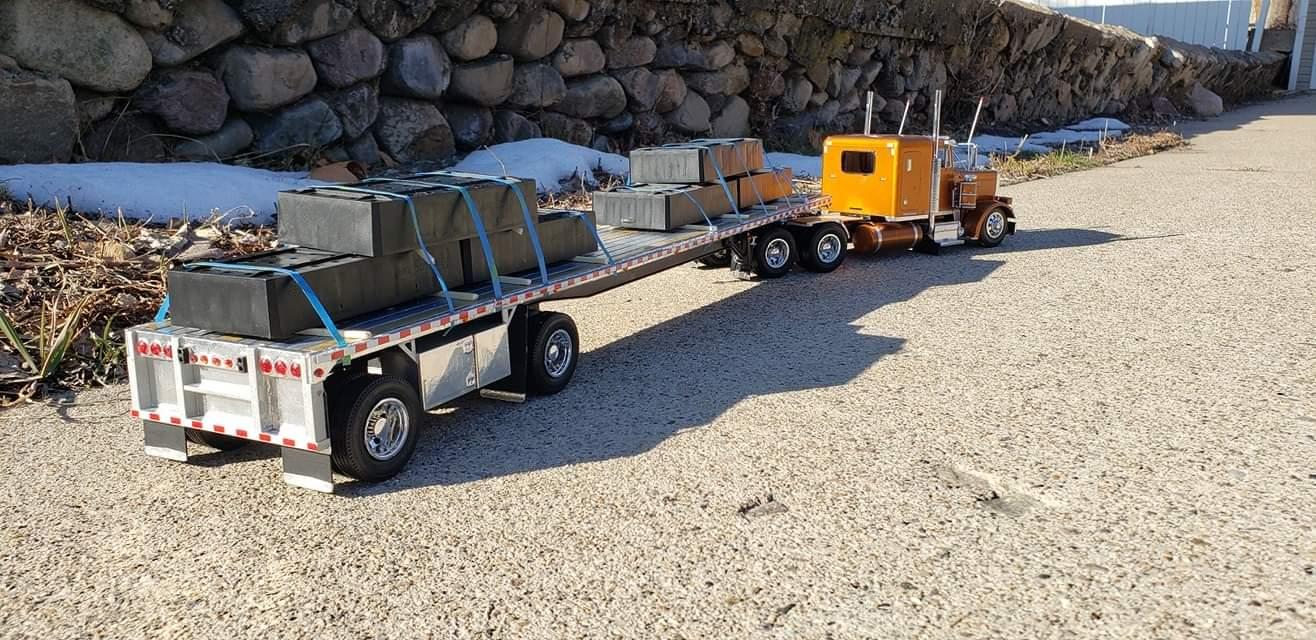
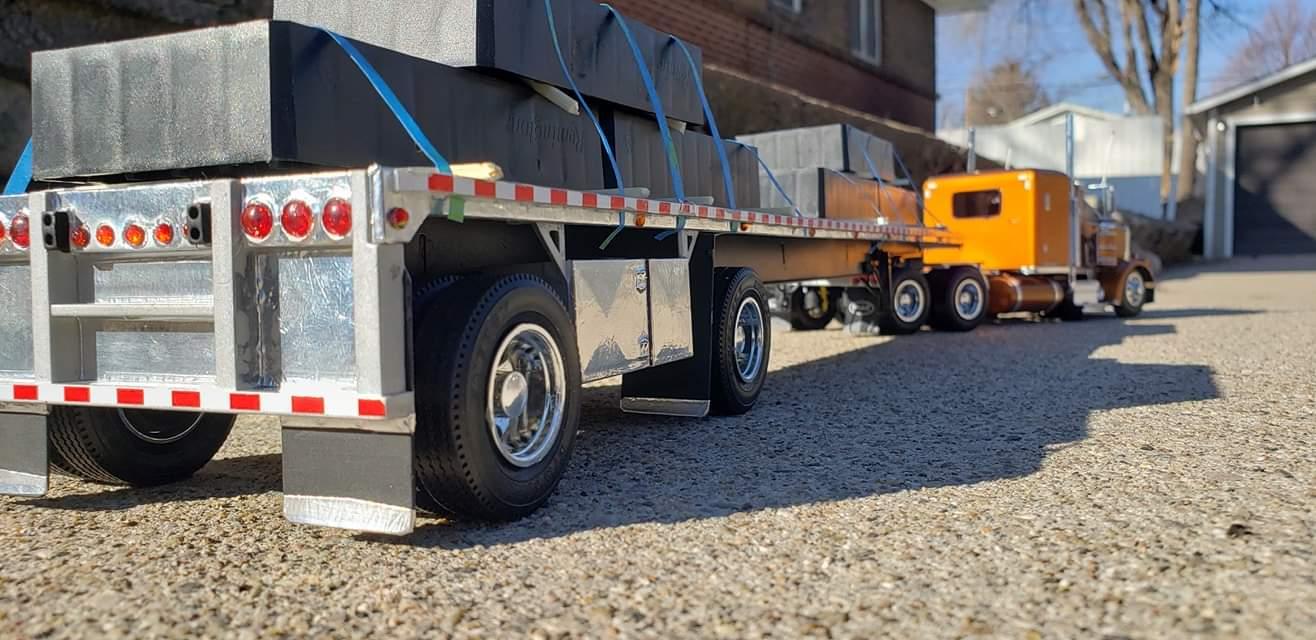
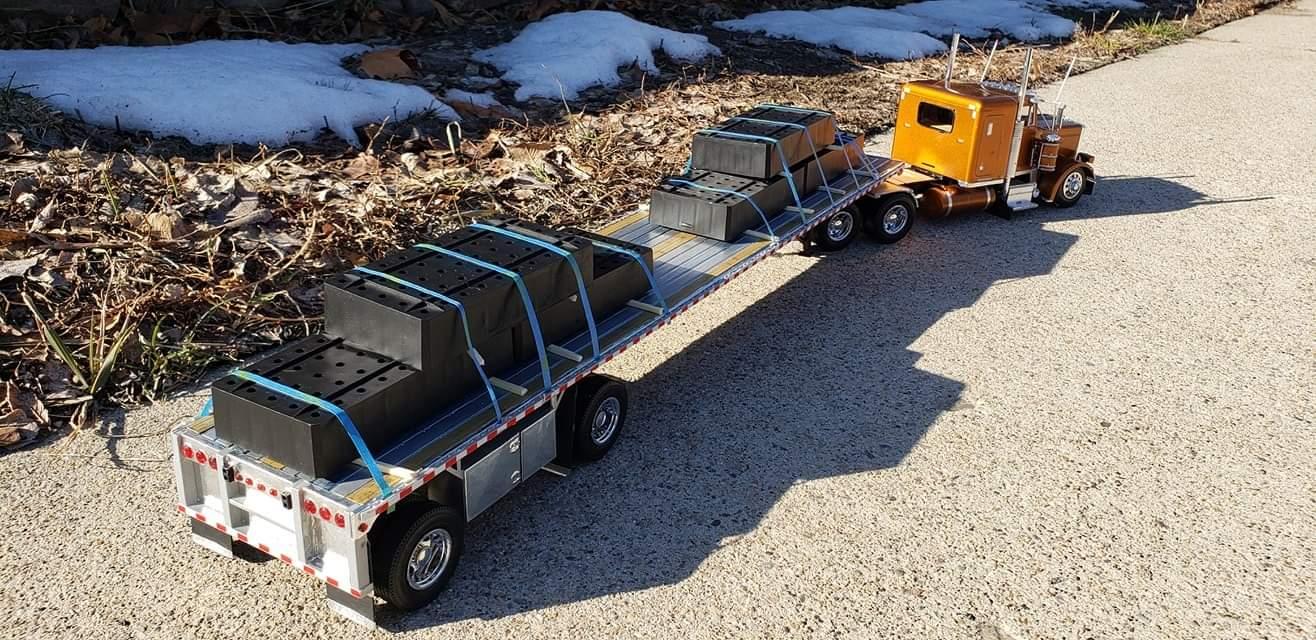
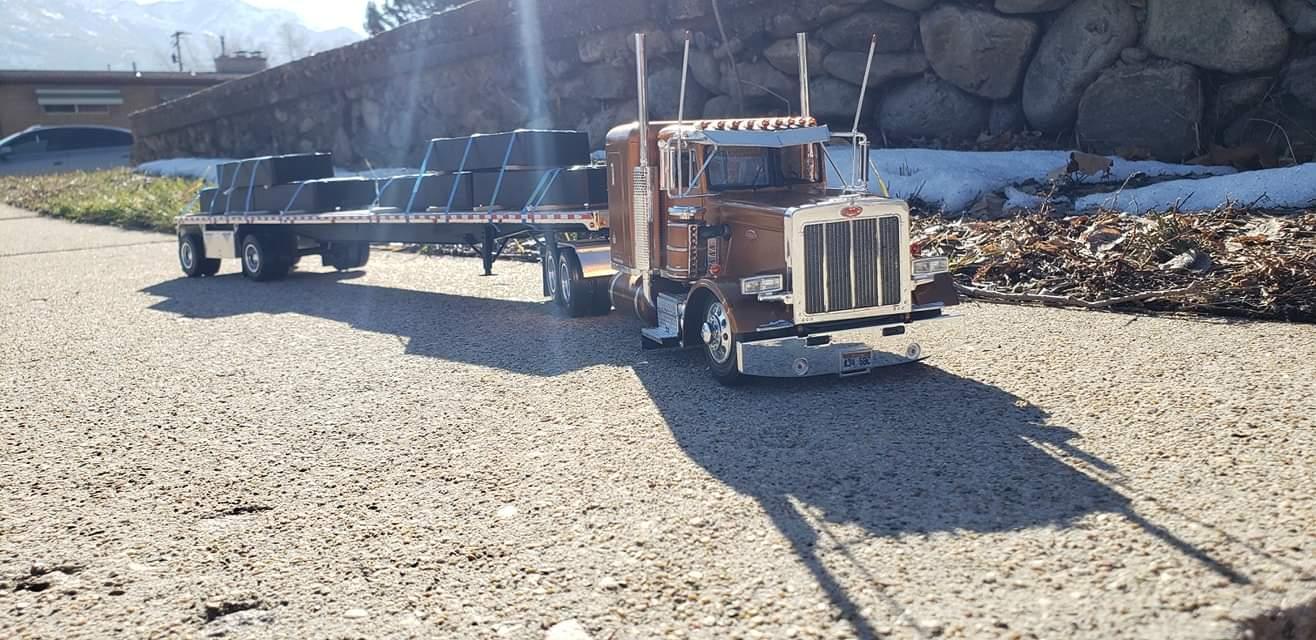
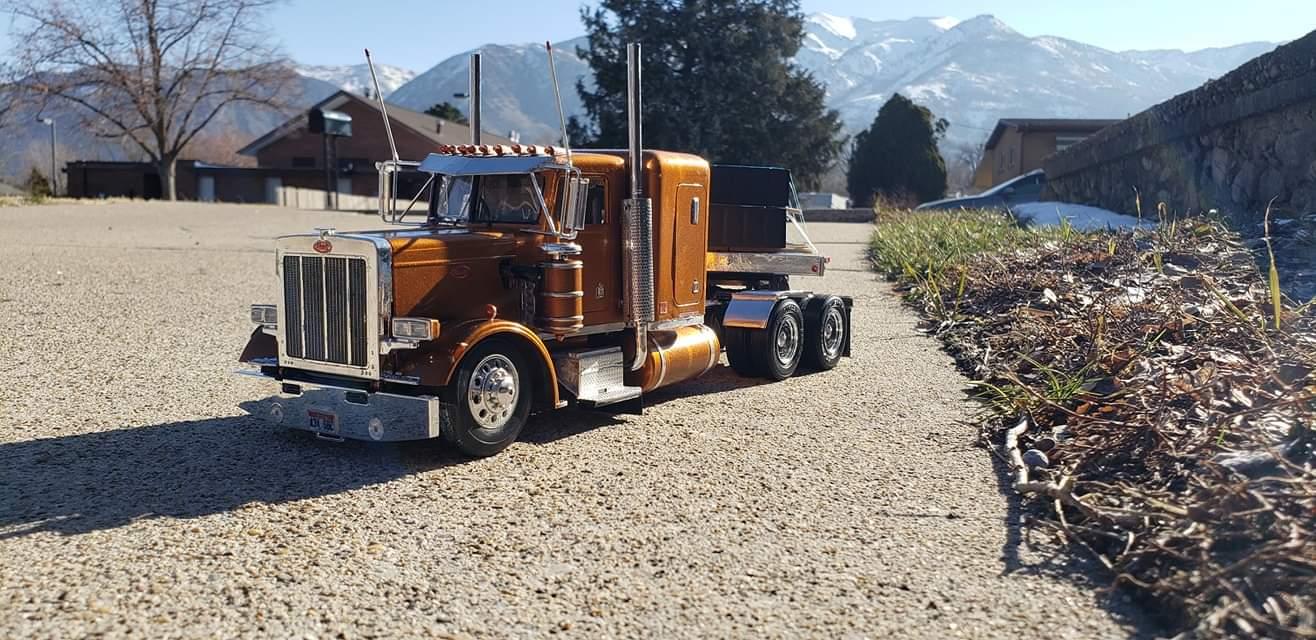
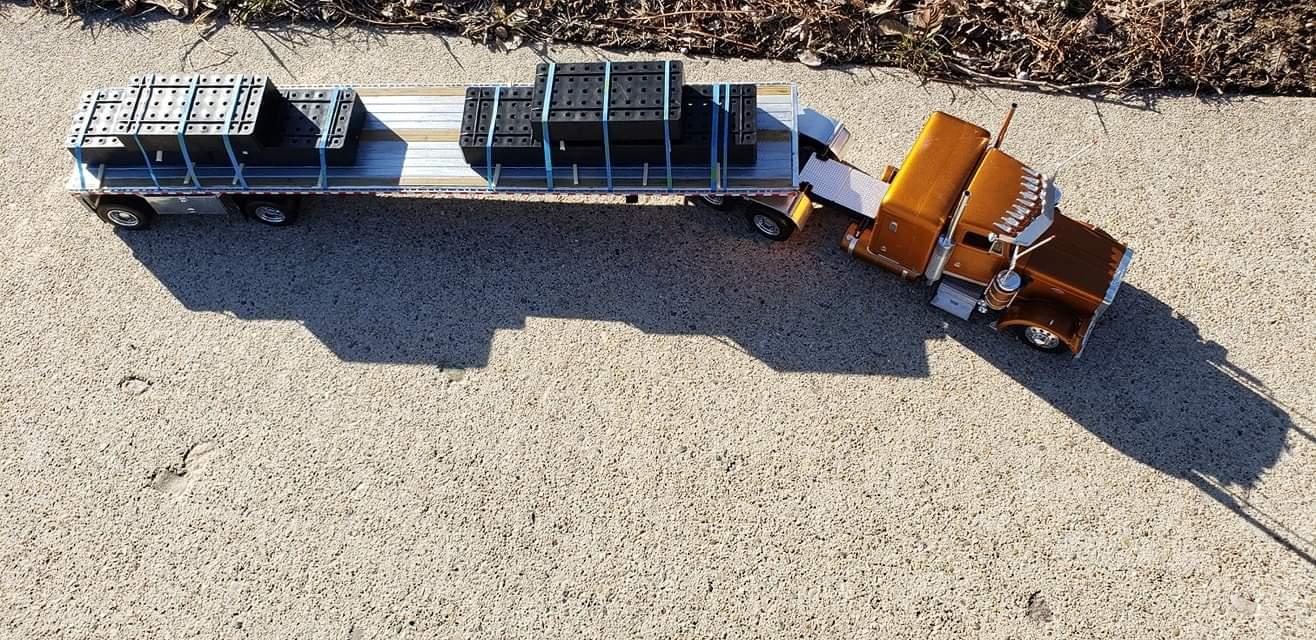
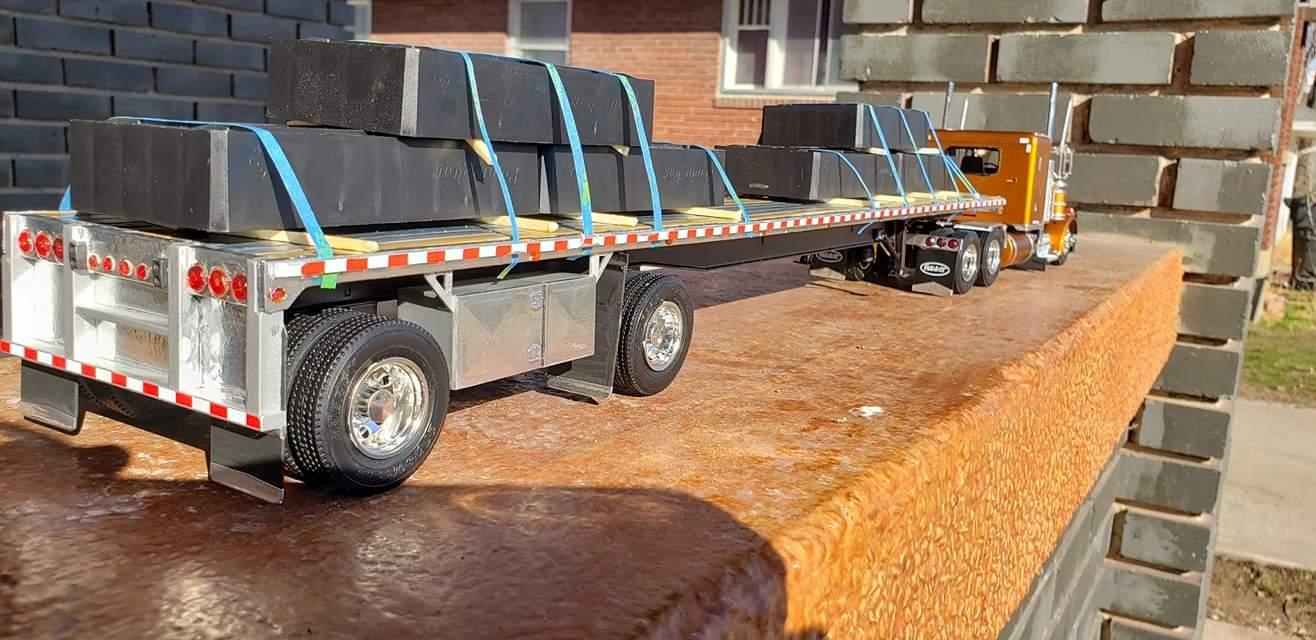
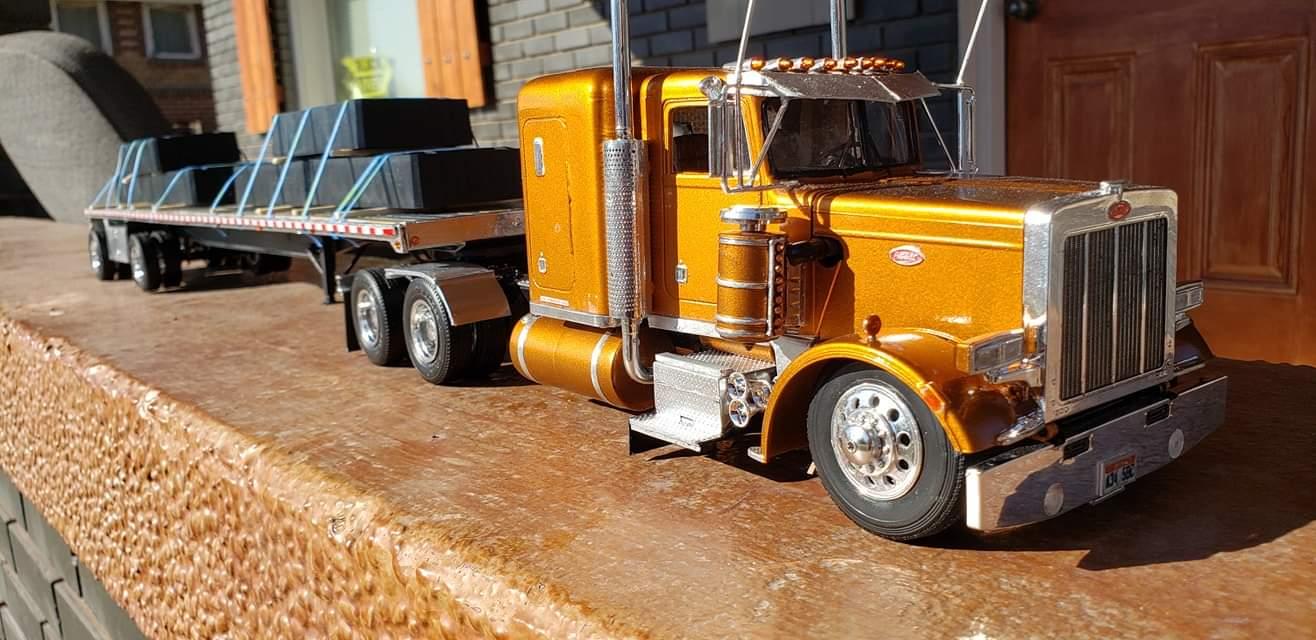
Hey guys! New to the site. I’ve been modeling on and off for a few years in what little free time I have. I just wanted to show off my latest build. It’s the Moebius International ProStar. Just a fleet truck from my home state of Wisconsin.
-
Model King / Moebius Joe Weatherly '61 Catalina
S. Svendsen posted a topic in Car Kit News & Reviews
Here are some sneak peaks at the box art and model I created for the upcoming Model King / Moebius Joe Weatherly '61 Pontiac Catalina kit. The kit will probably be out around summerish.


.JPG.133bffff038504c57f1233ed965dc6eb.JPG)

.JPG.93898bc38033e5756f16c1f56d916fa2.JPG)

.JPG.282d3e5f518e051b41bcc7d31579cc8a.JPG)