Search the Community
Showing results for tags 'monogram'.
-
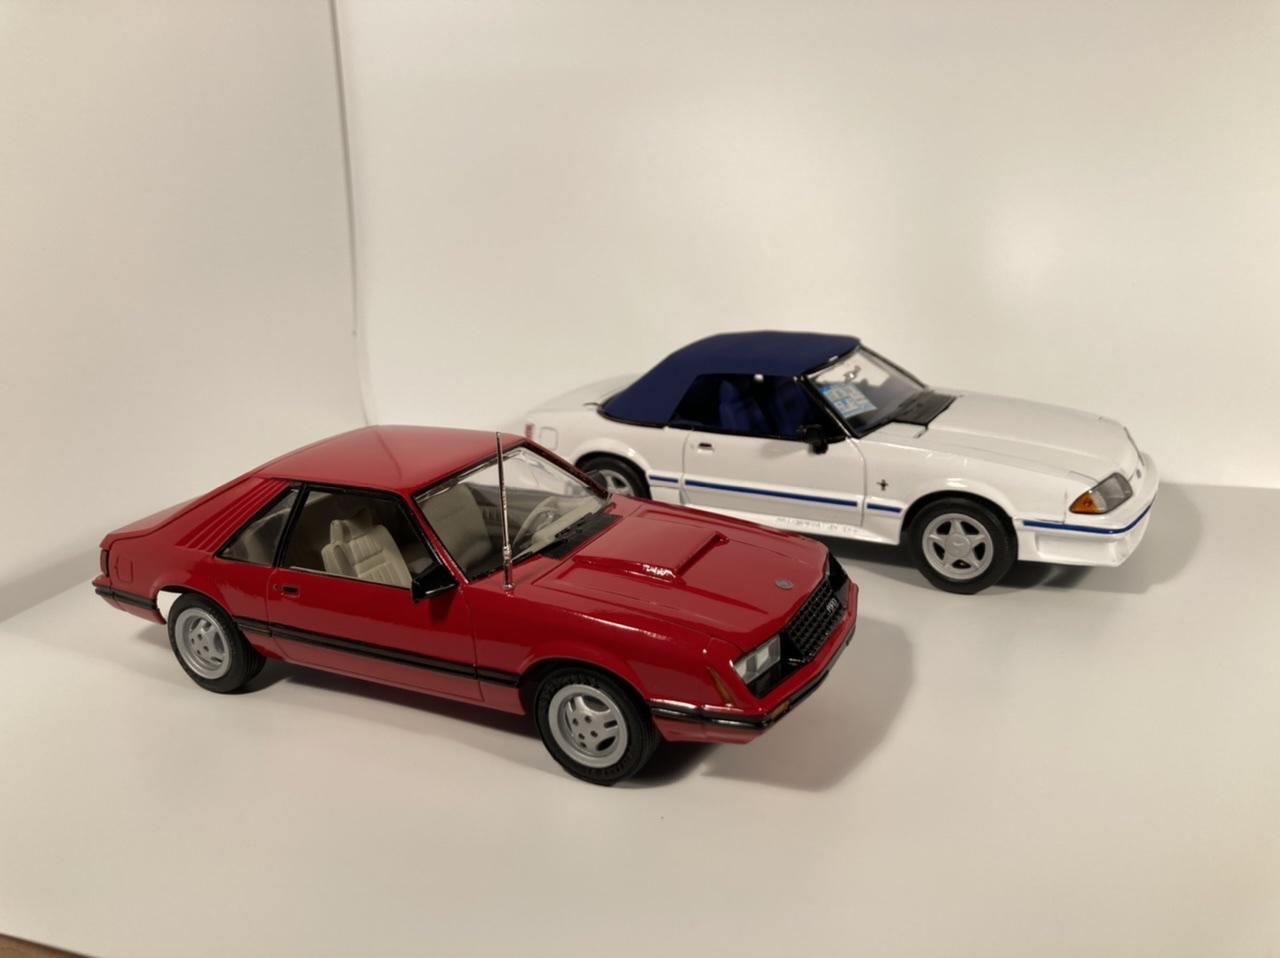
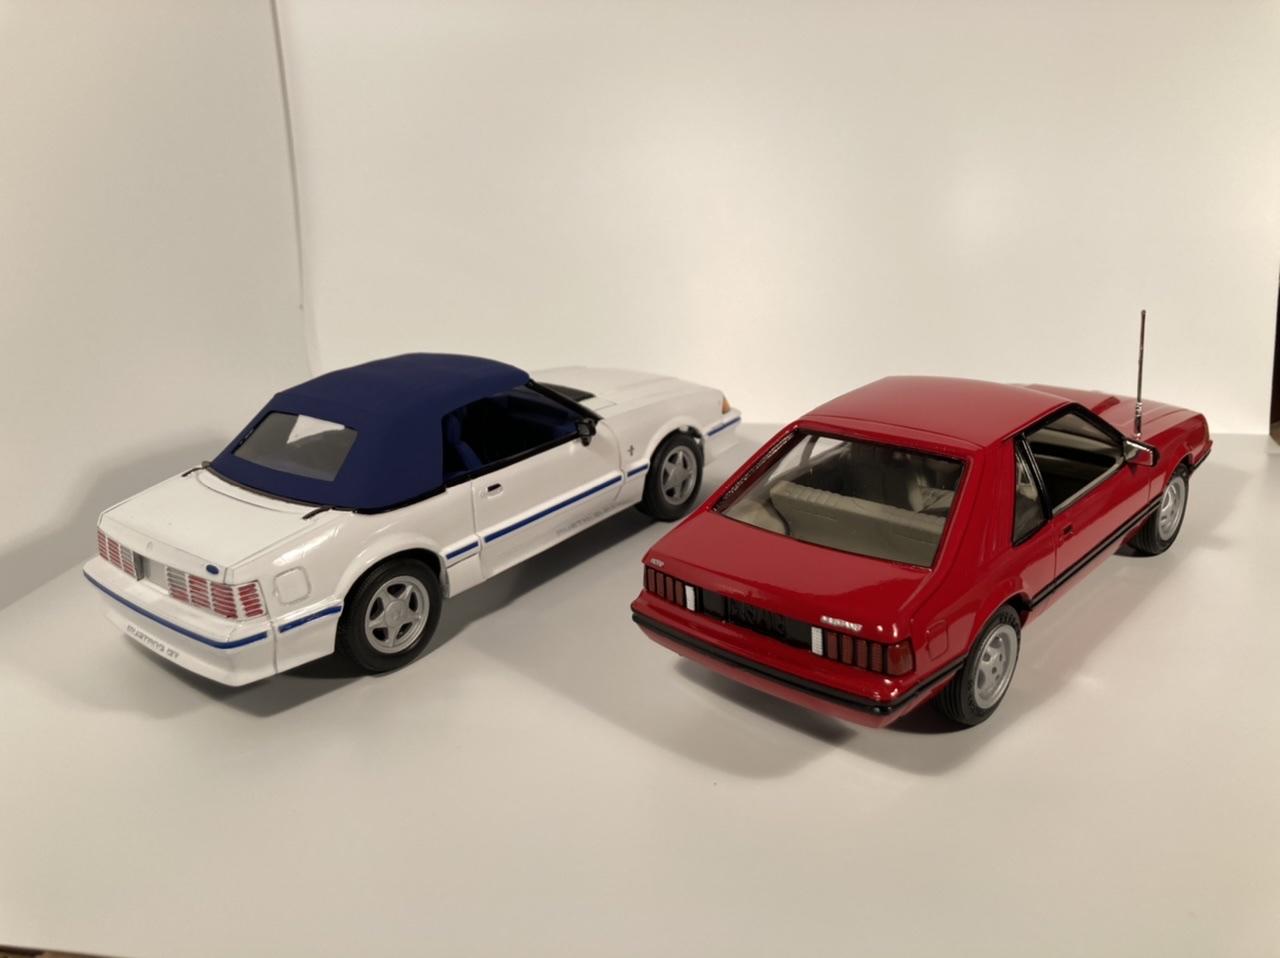
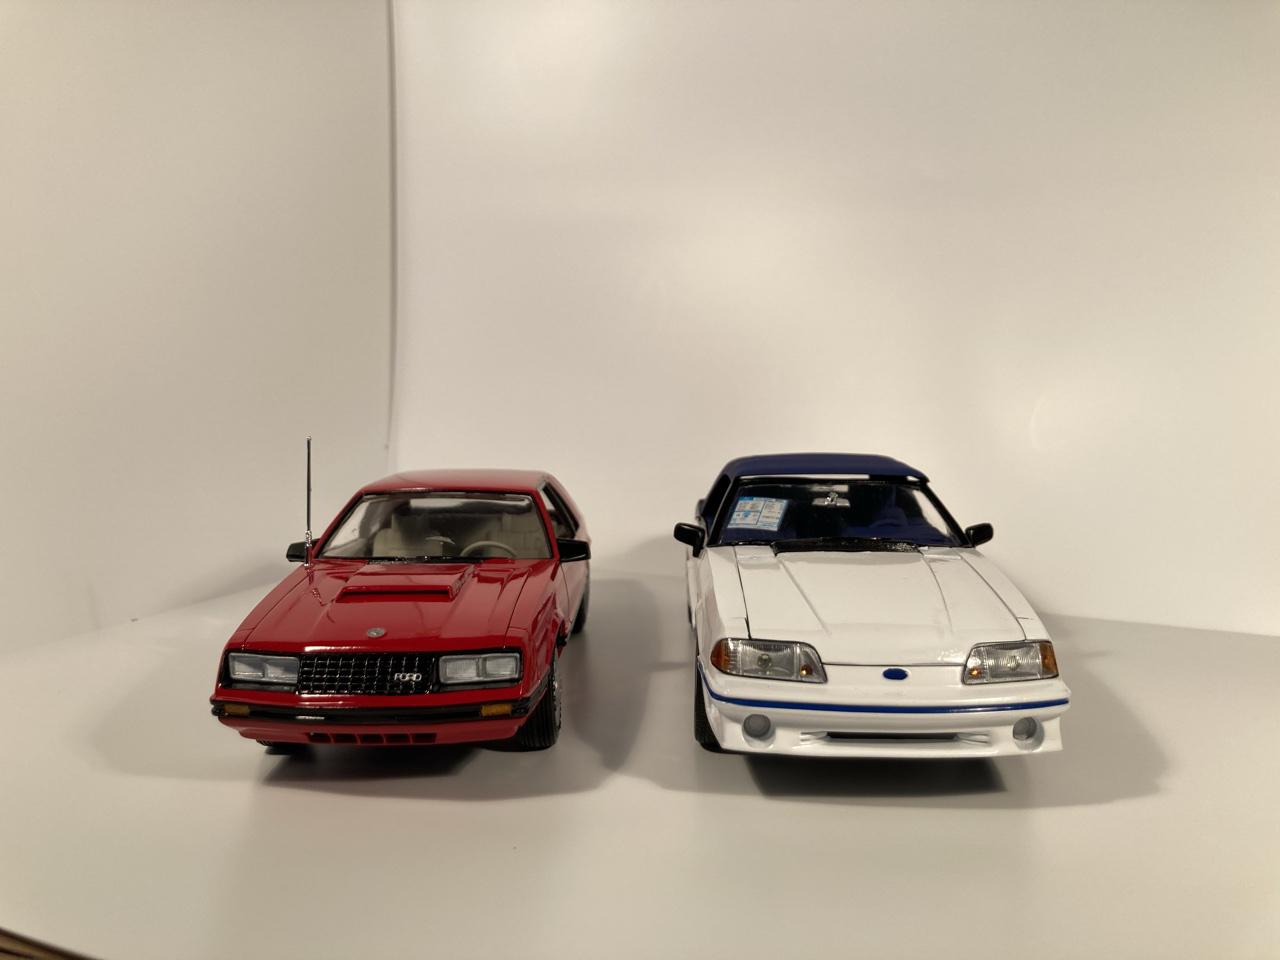
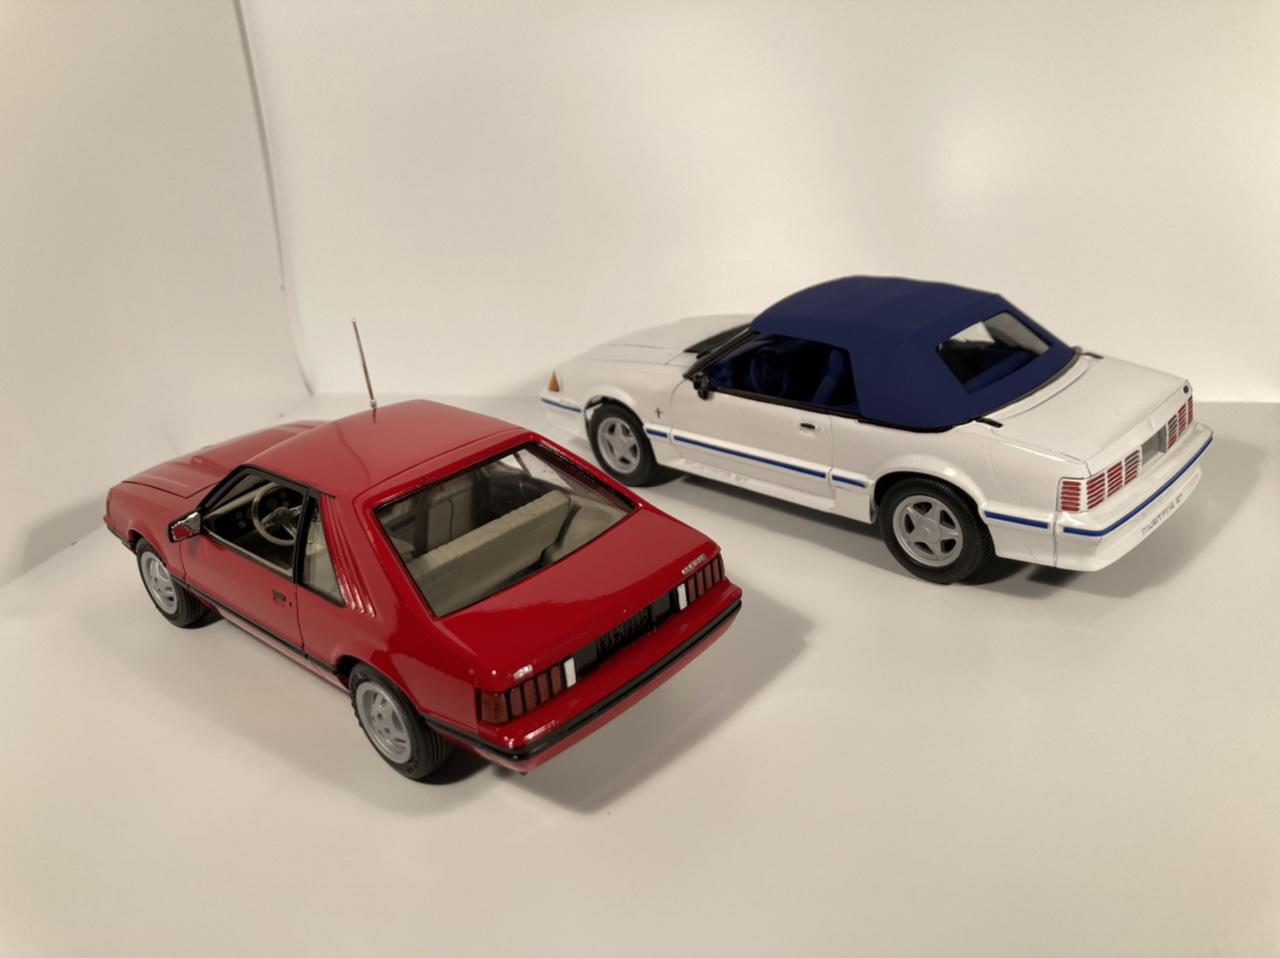
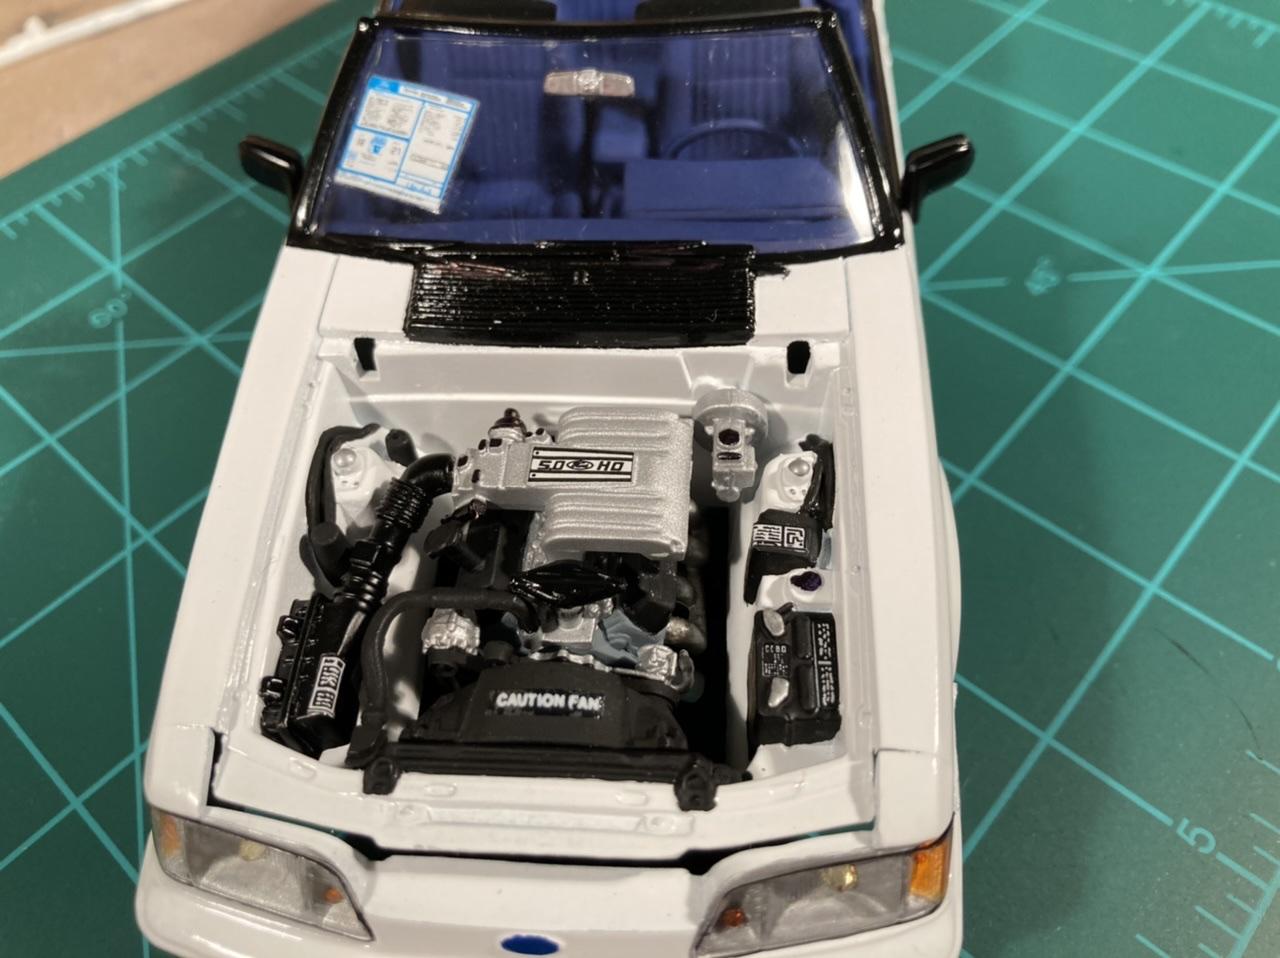
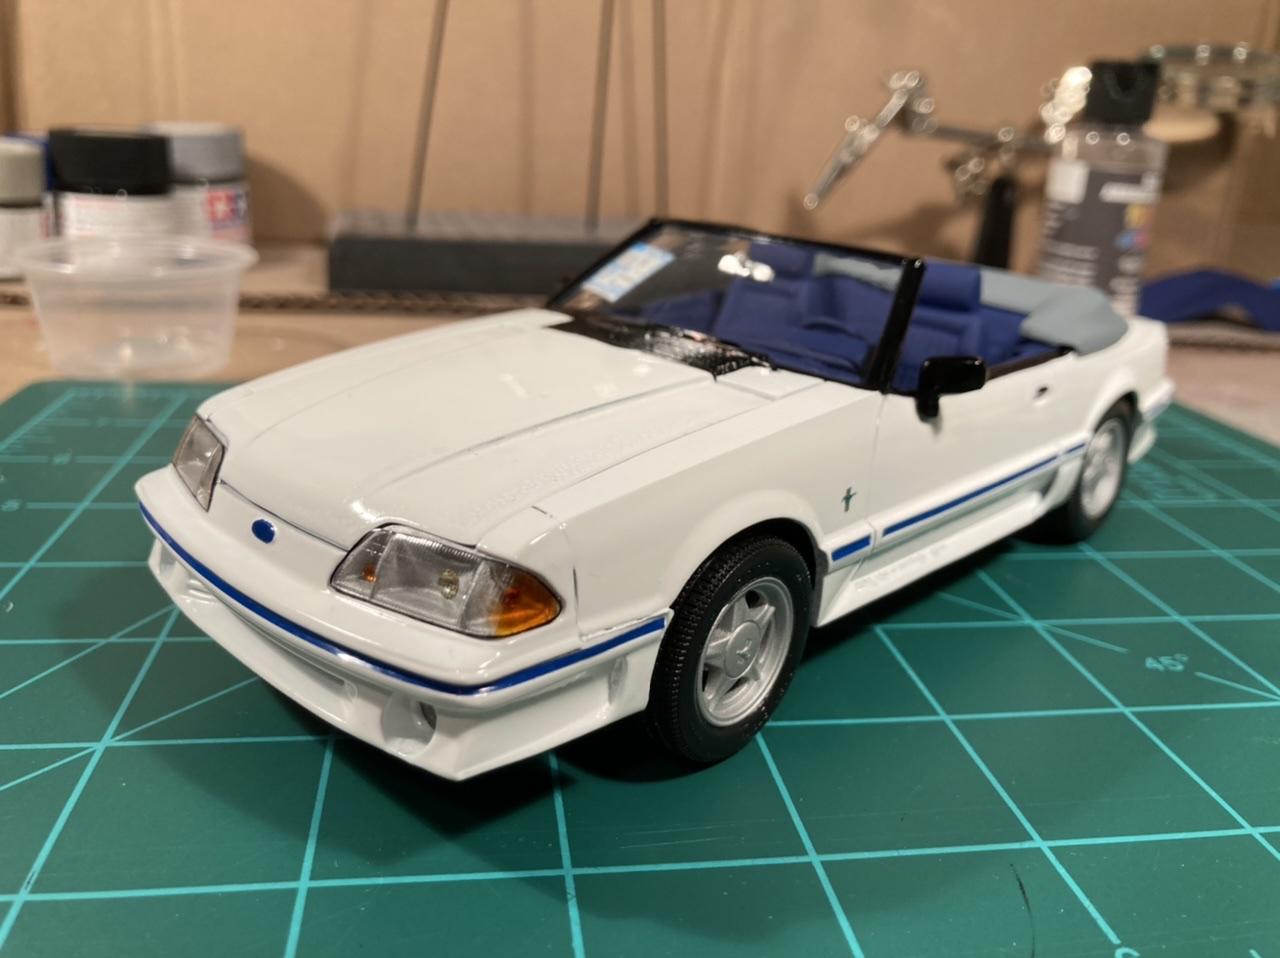
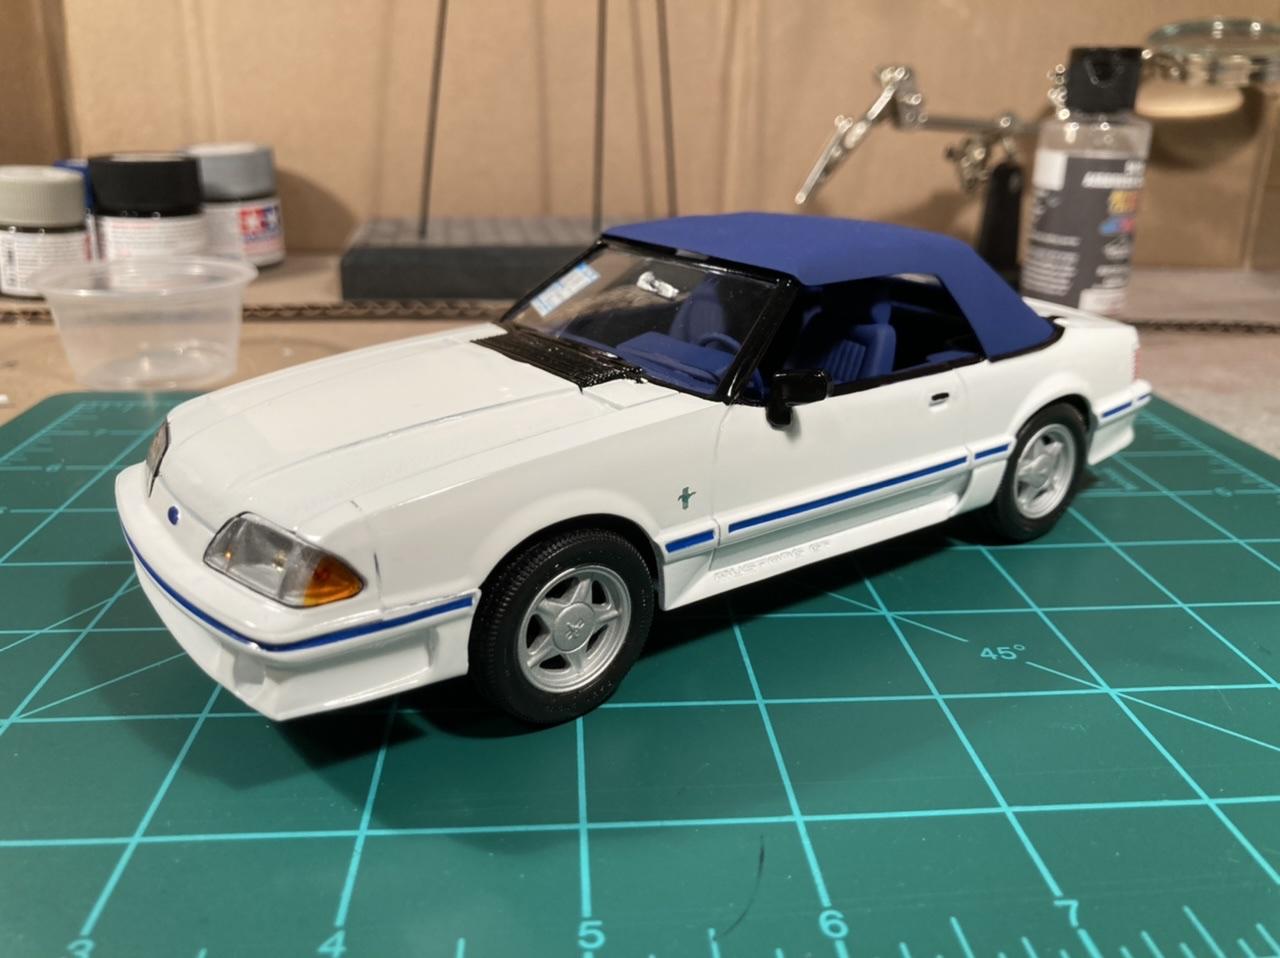
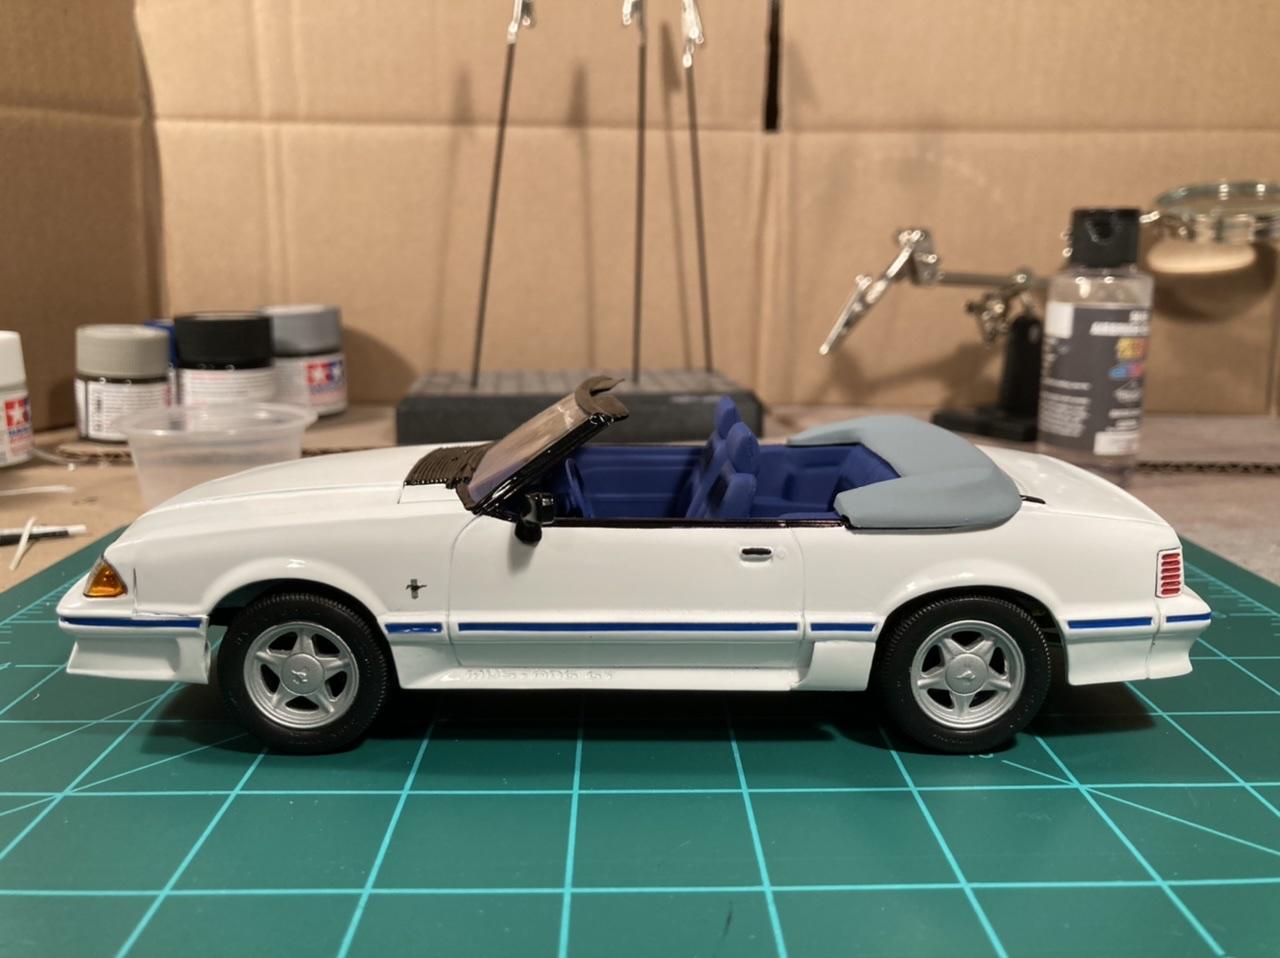
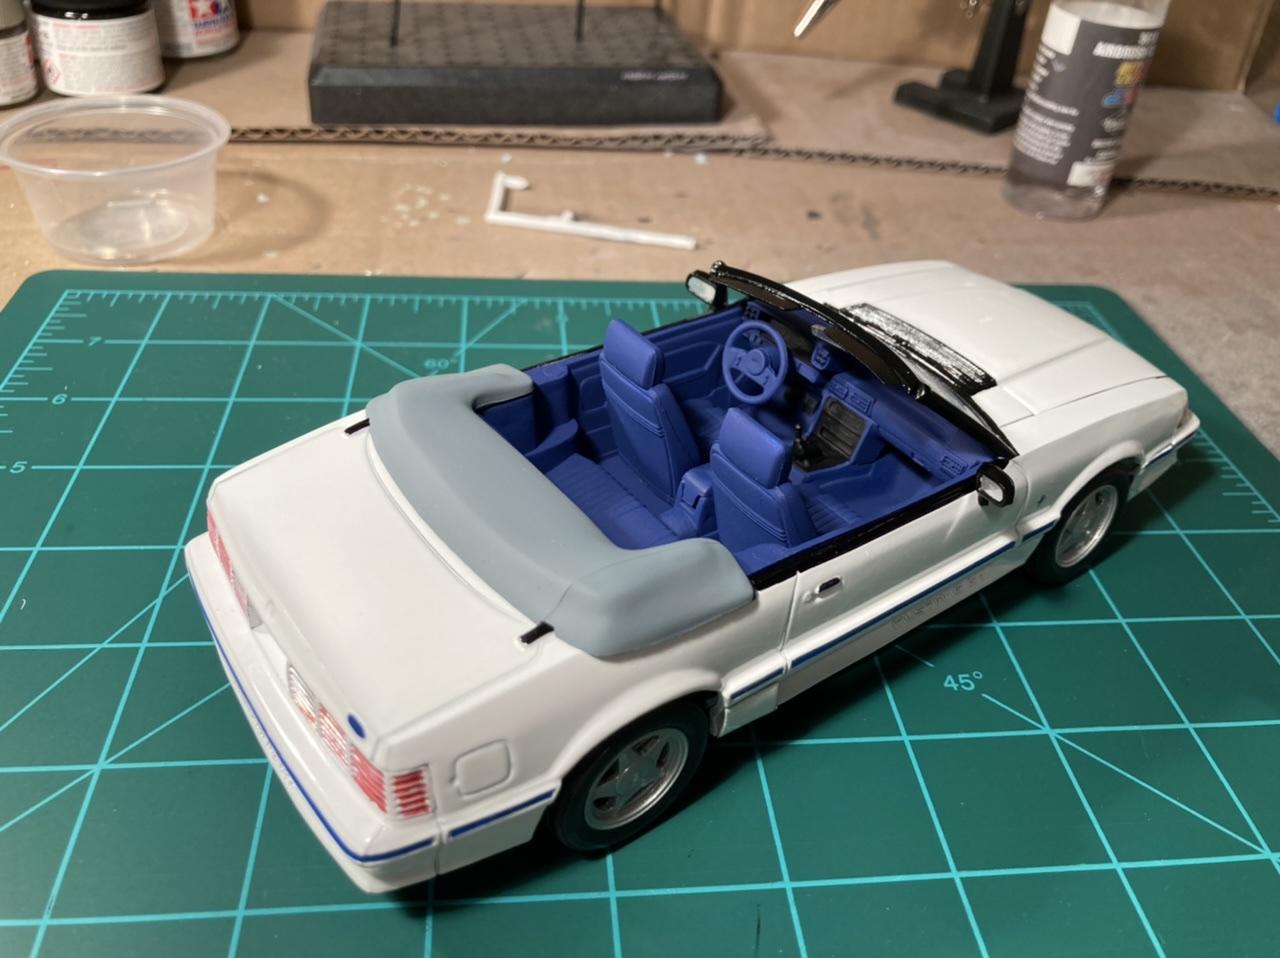
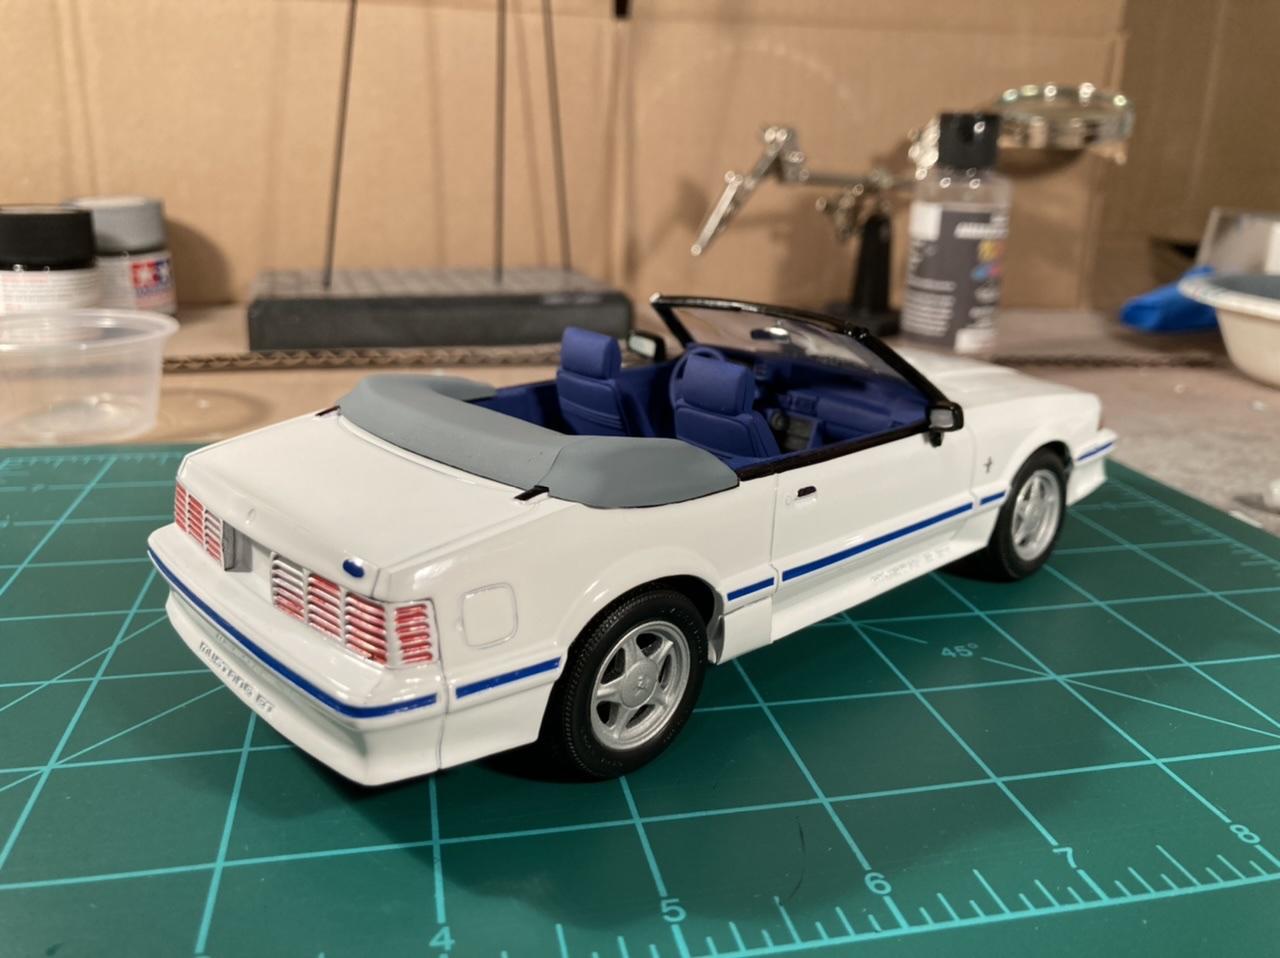
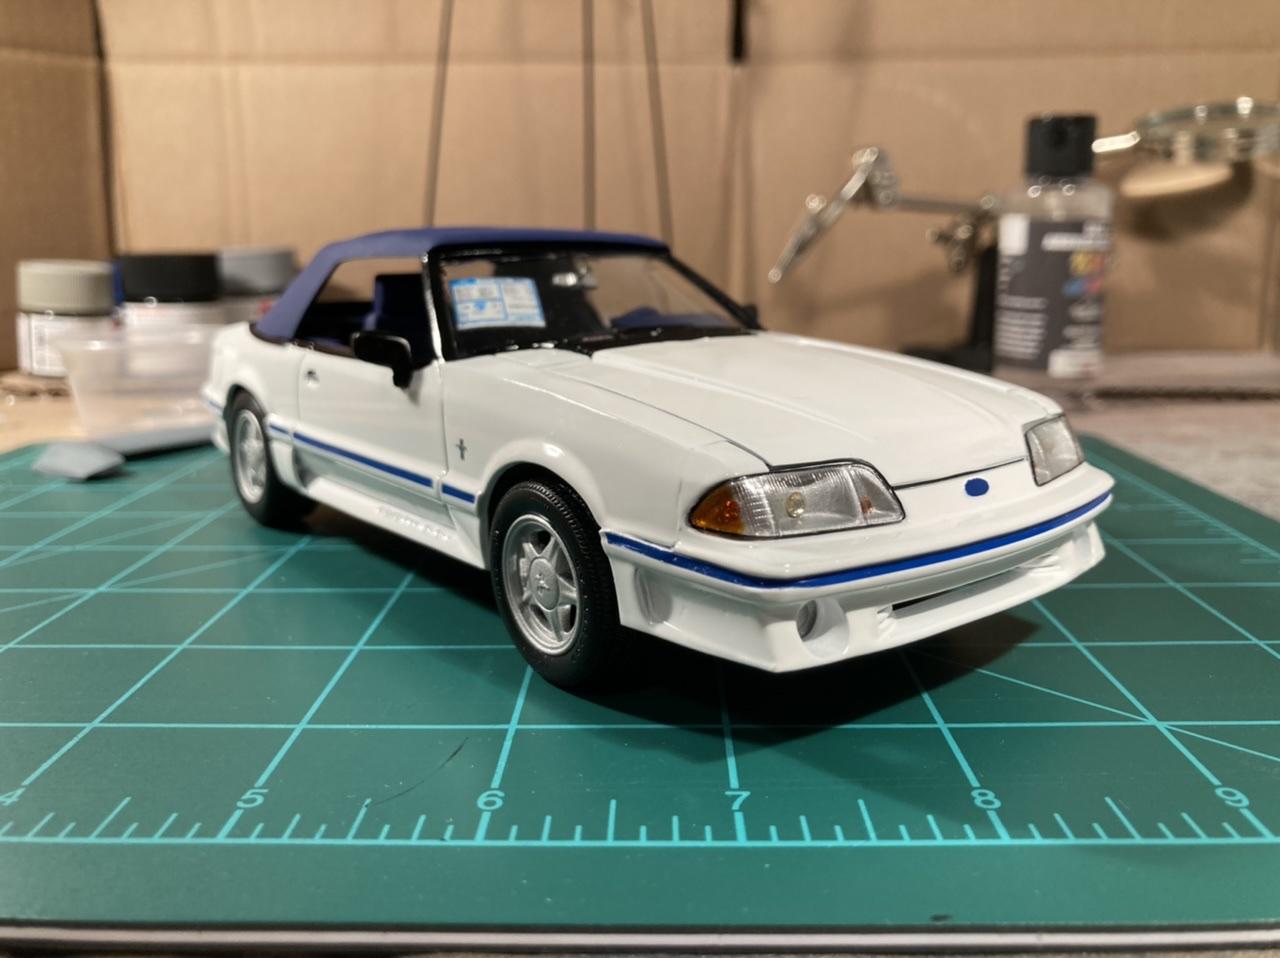
Here are my two builds from the beginning and end of the long running third generation Mustang Fox Body. MPC’s 1979 Mustang Turbo Hatchback and Monogram’s 1992 Mustang GT Convertible. Enjoy!

-
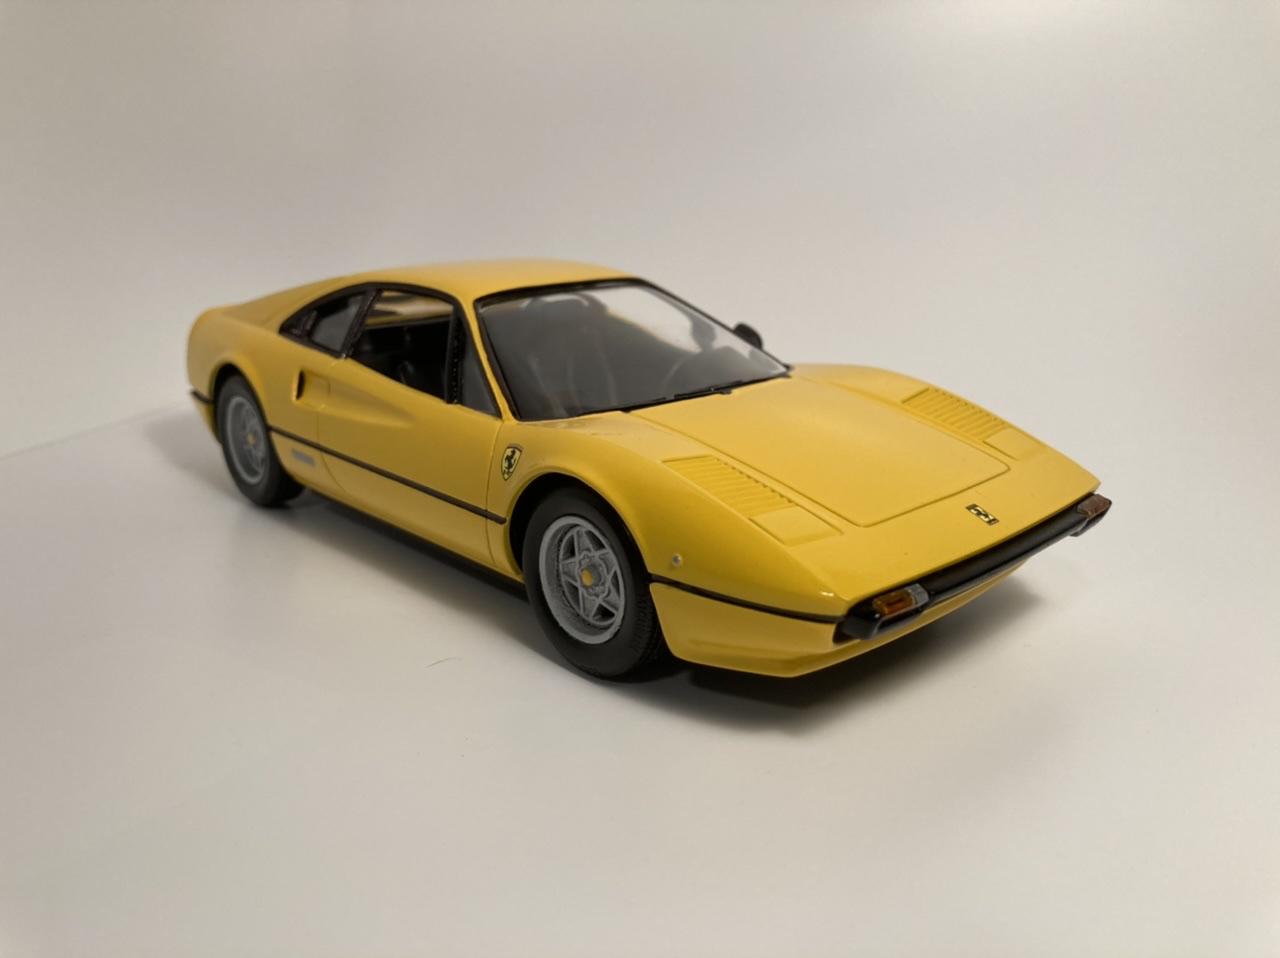
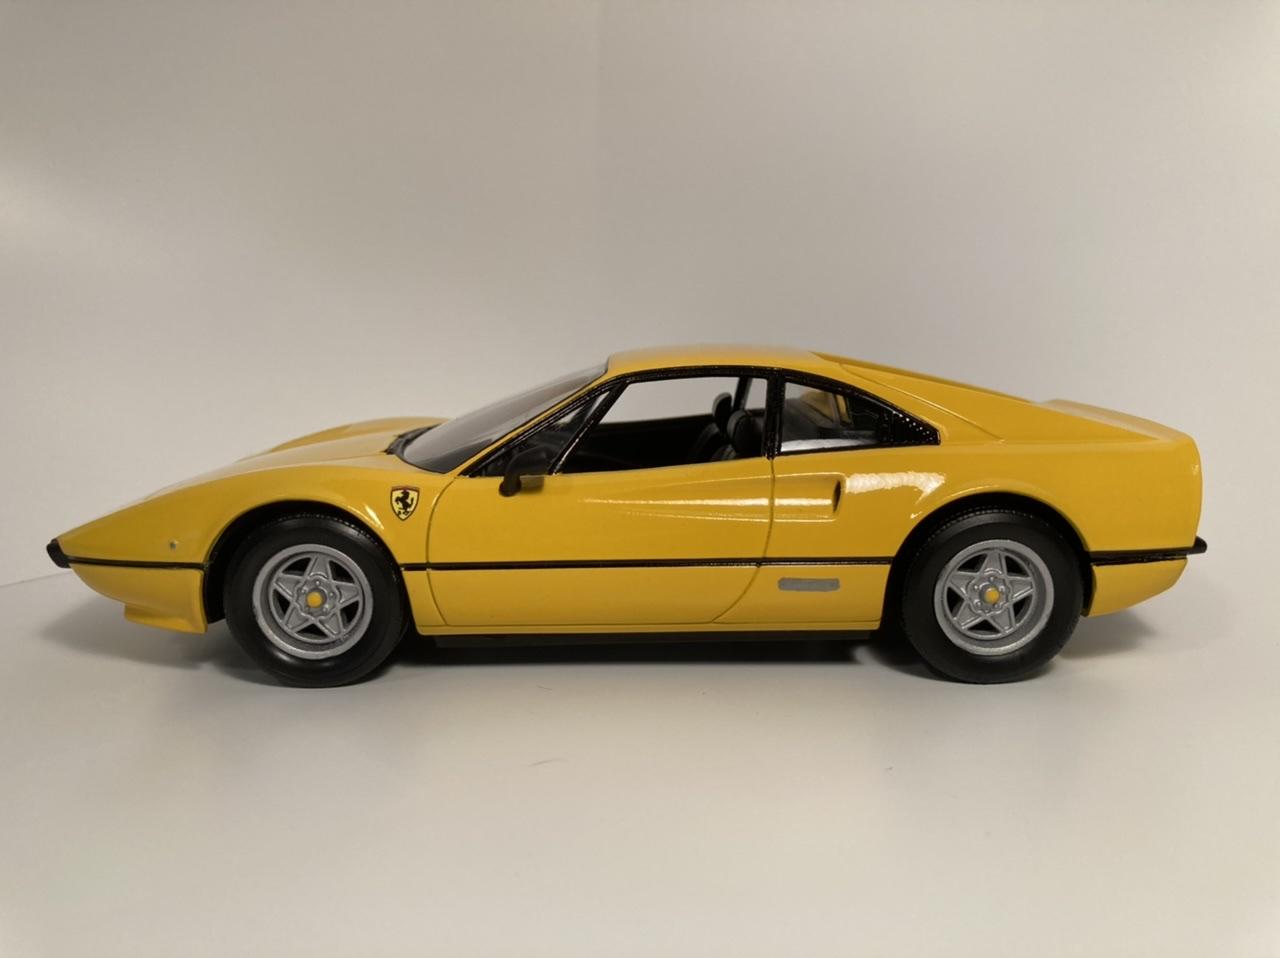
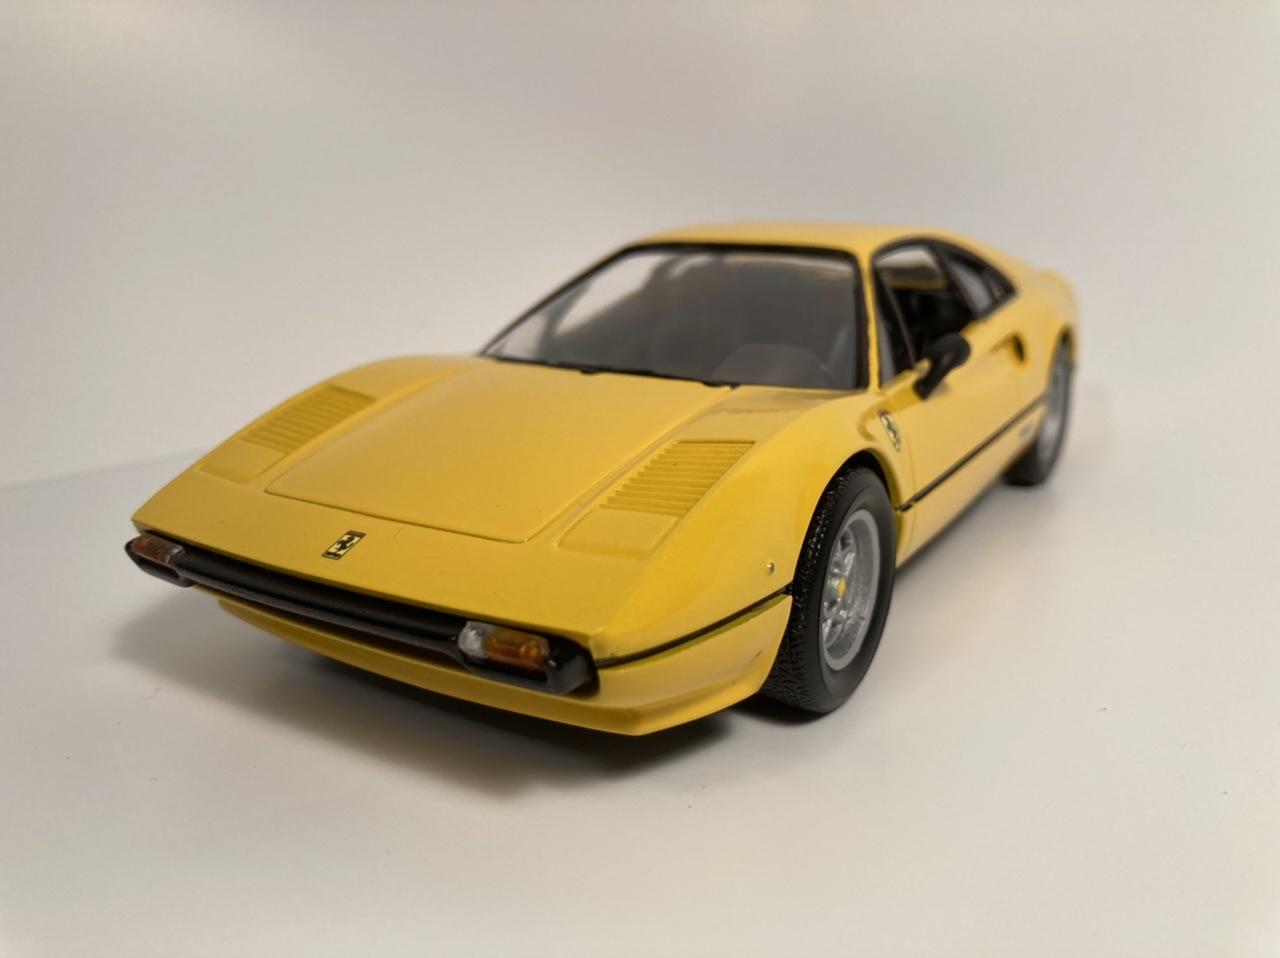
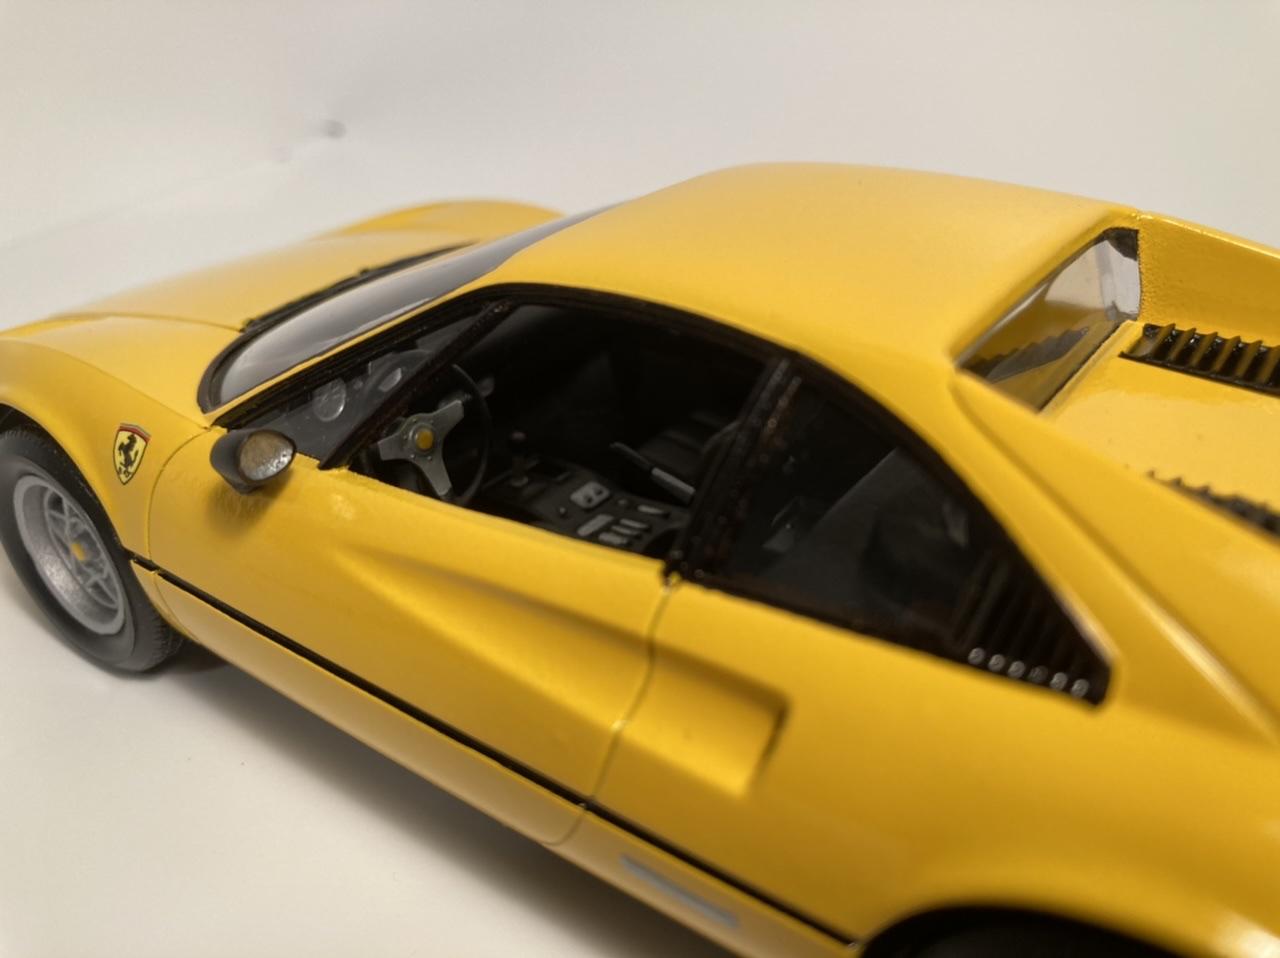
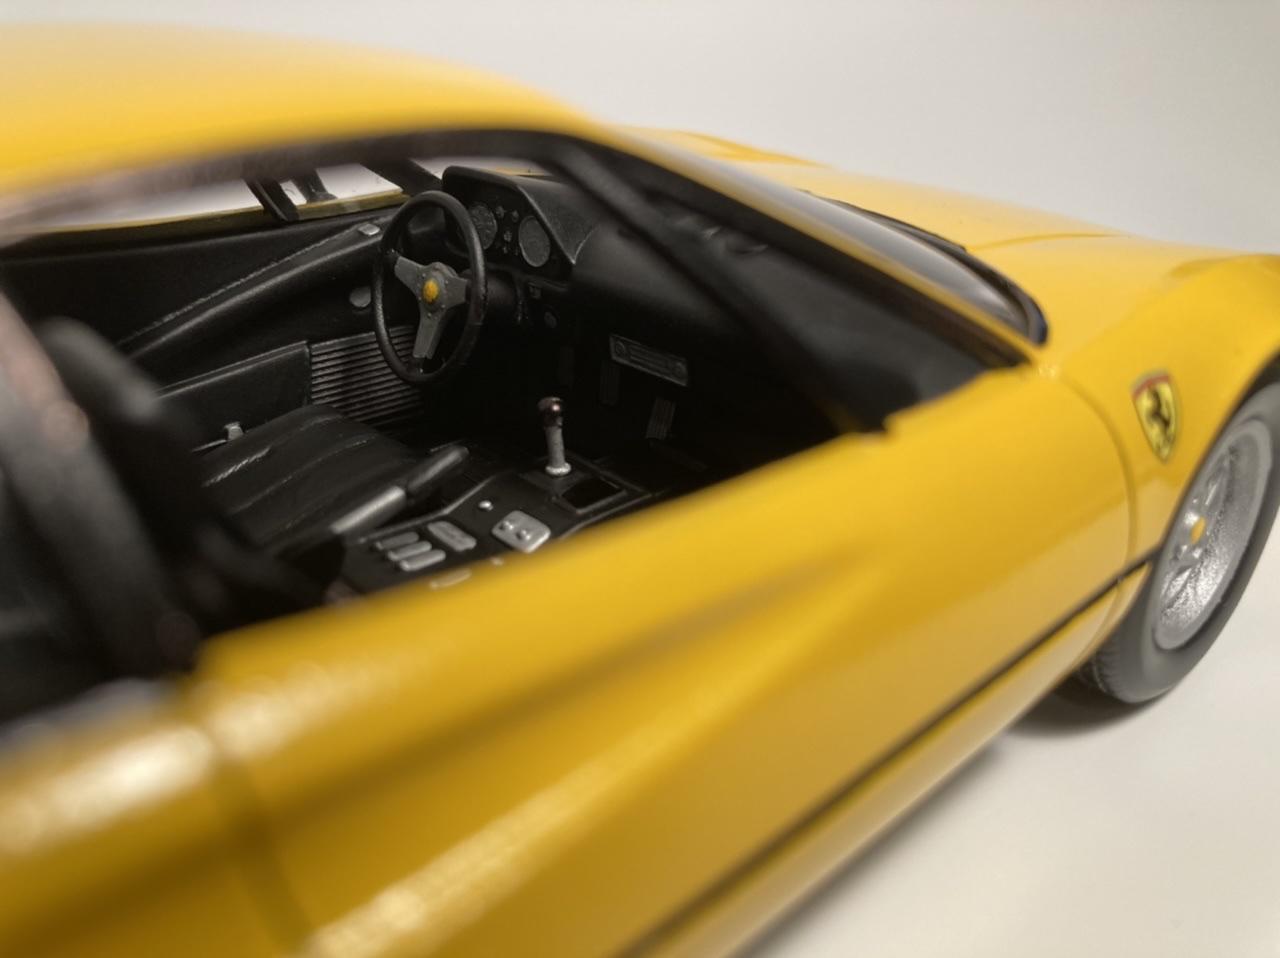
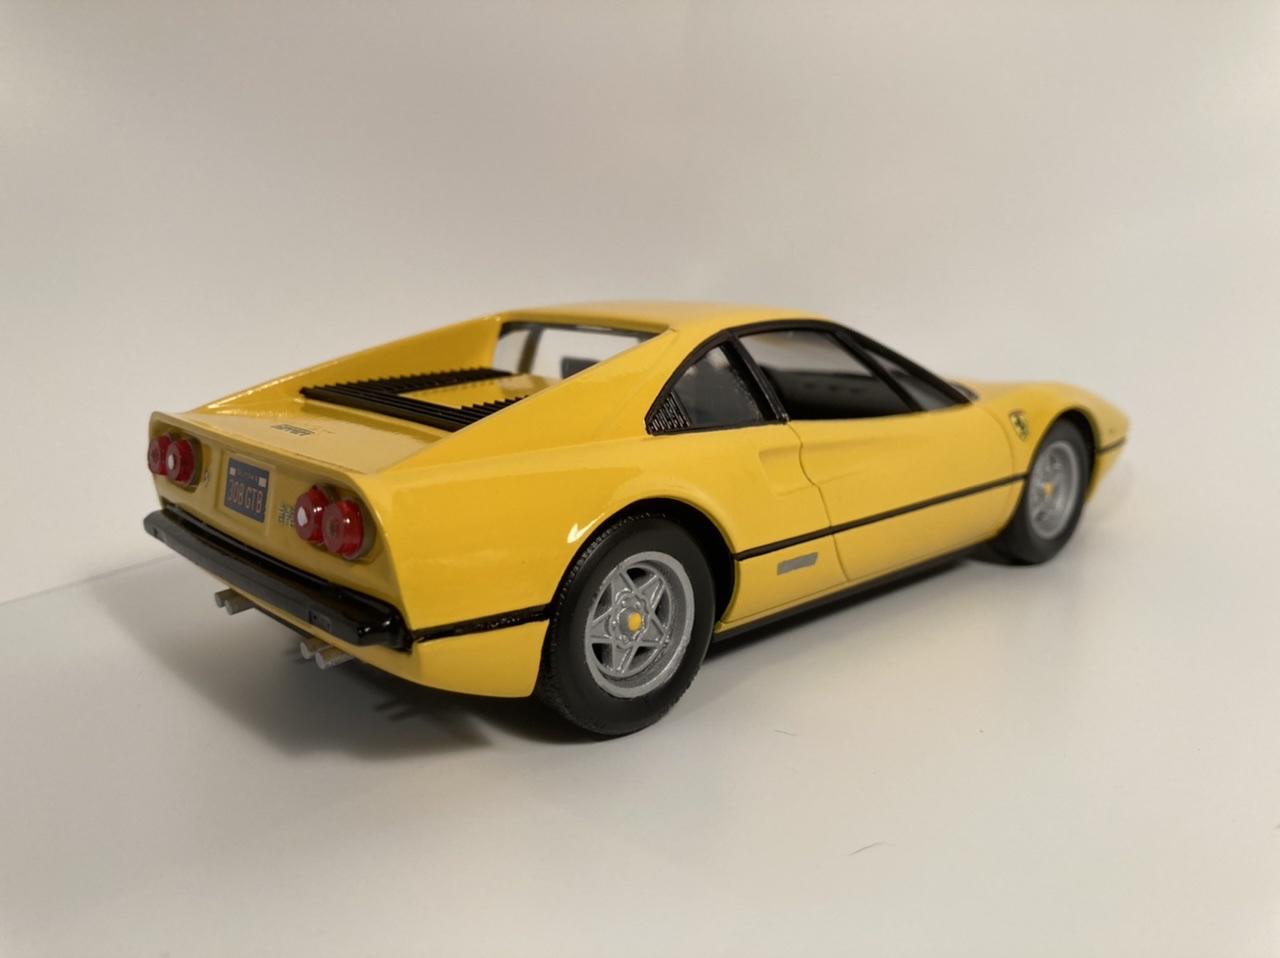
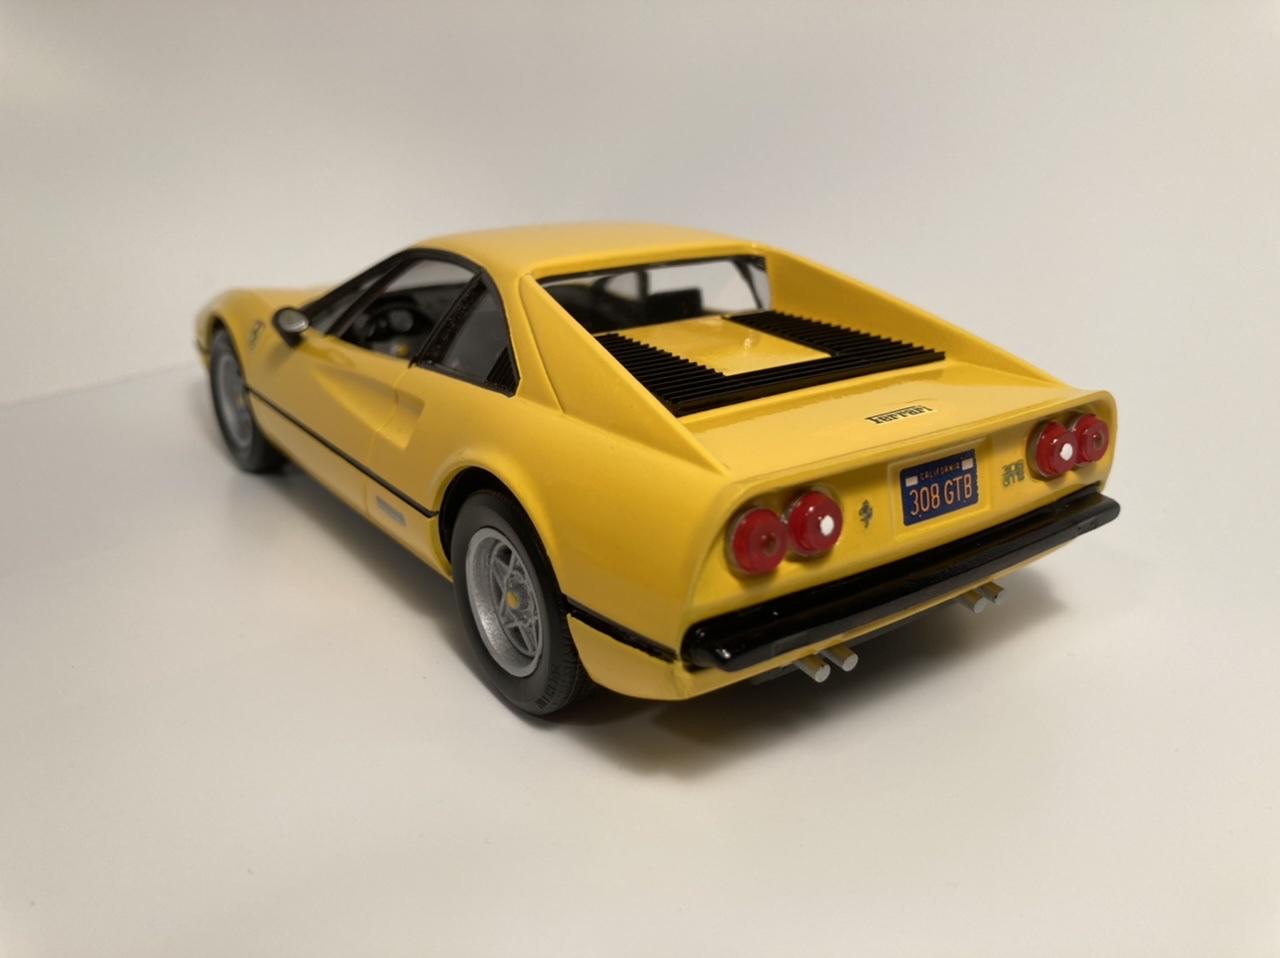
Here’s my Monogram Ferrari 308! It was an early release, sealed, bagged no-box kit from eBay, molded in red. It’s a curbside kit but it goes together great and has some decent detail. This was my first attempt at the Bare-Metal-Foil-before-you-paint-it technique for the emblems, and it didn’t come out great for the deck lid Ferrari script or the side Pininfarina badges. I think I’m still laying my paint on way too thick, so there wasn’t much of a raised script left to strip the paint back off. Anyways, I think it turned out well enough for my shelf, and lessons learned for the next one!
-
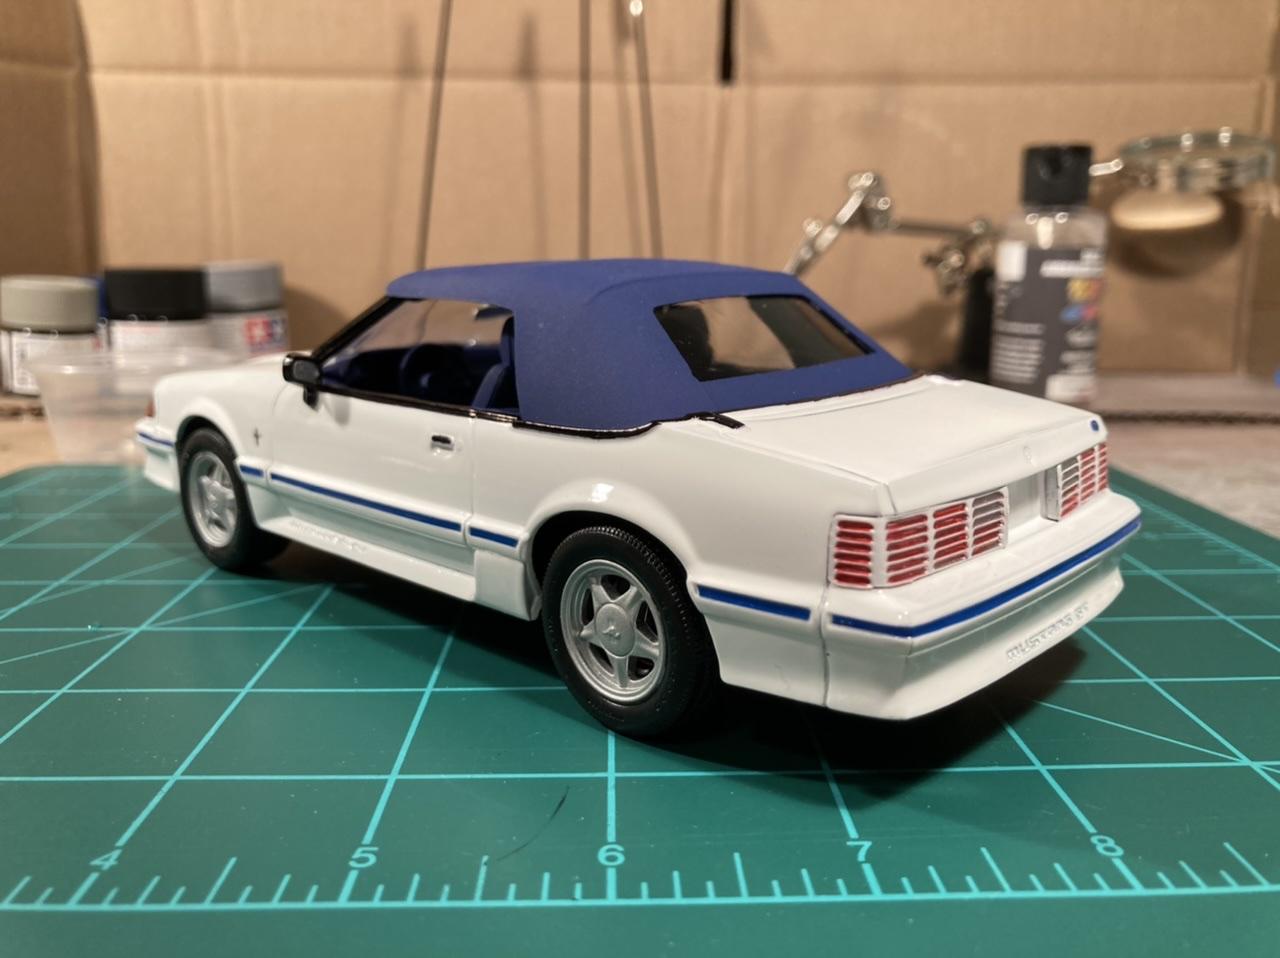
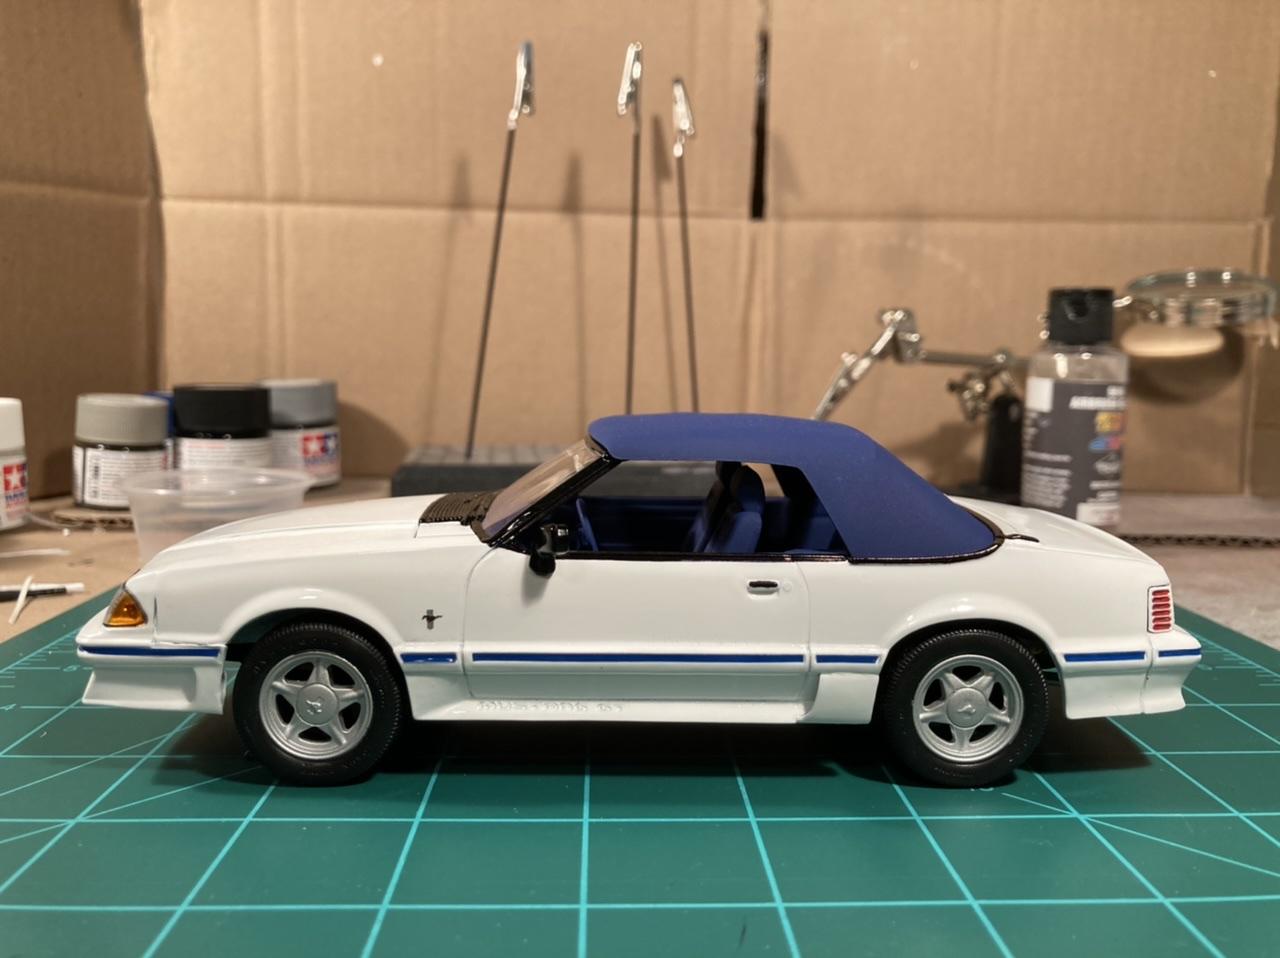
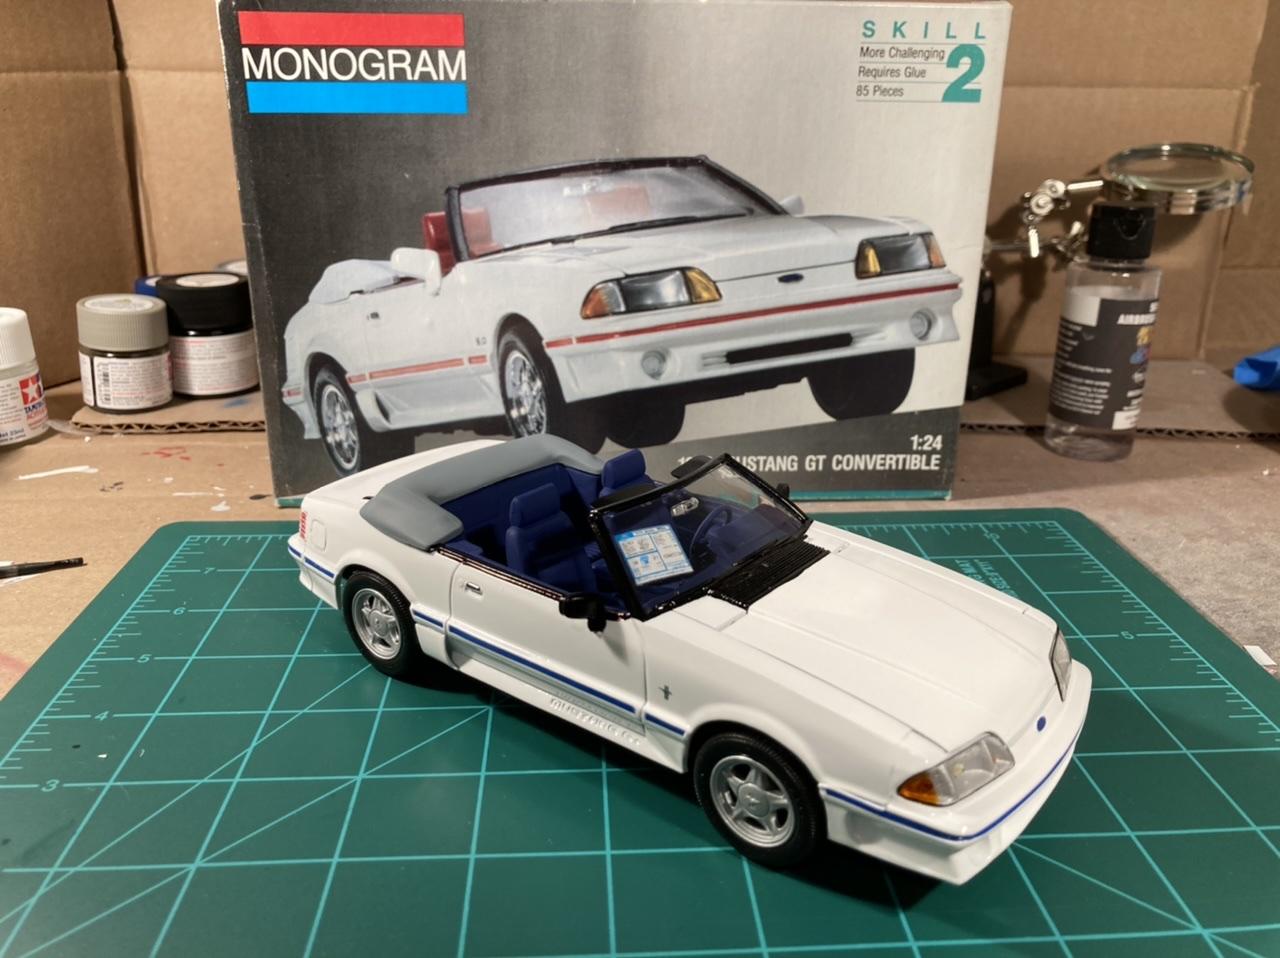
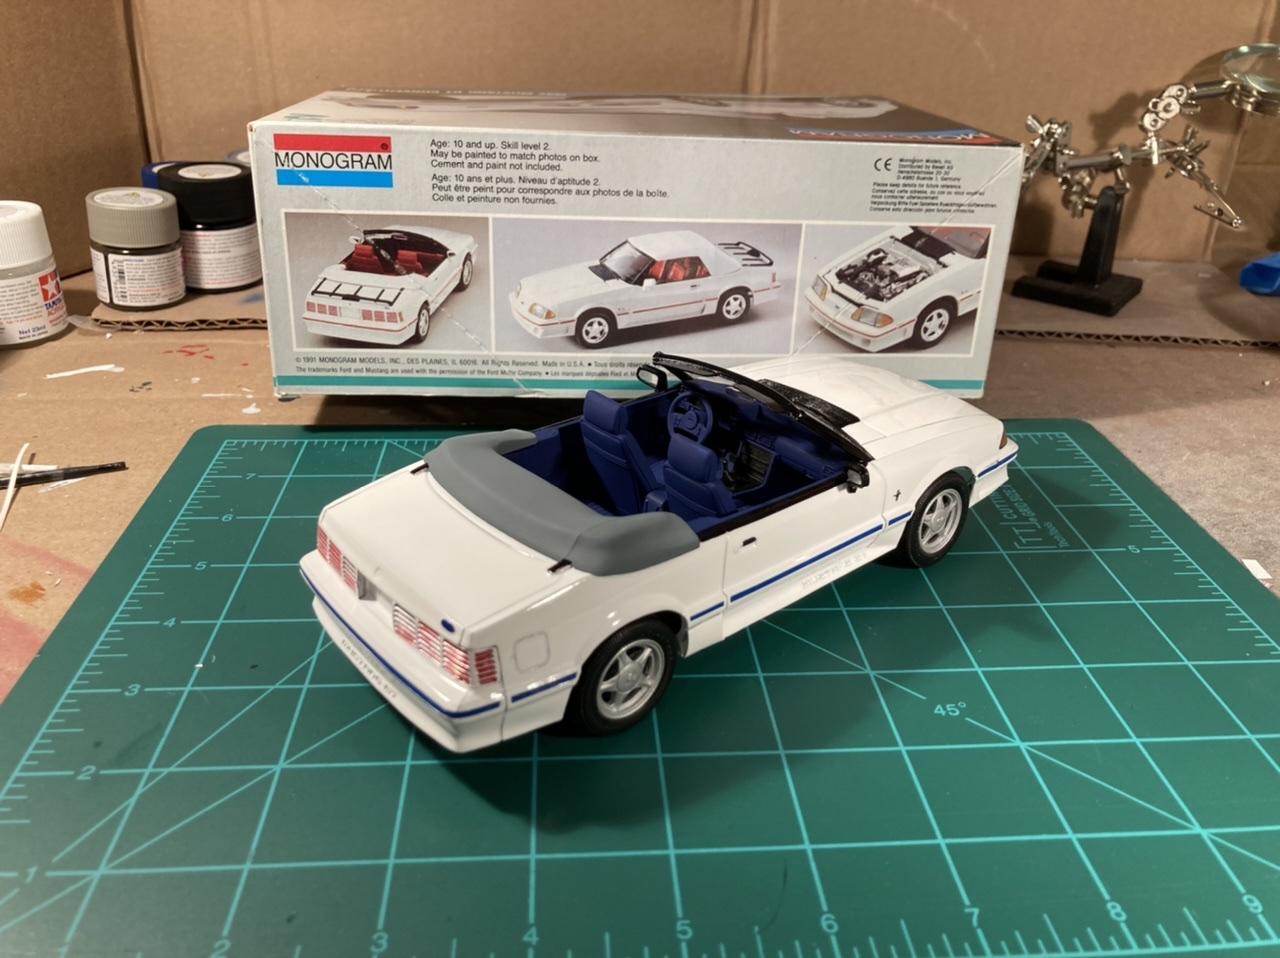
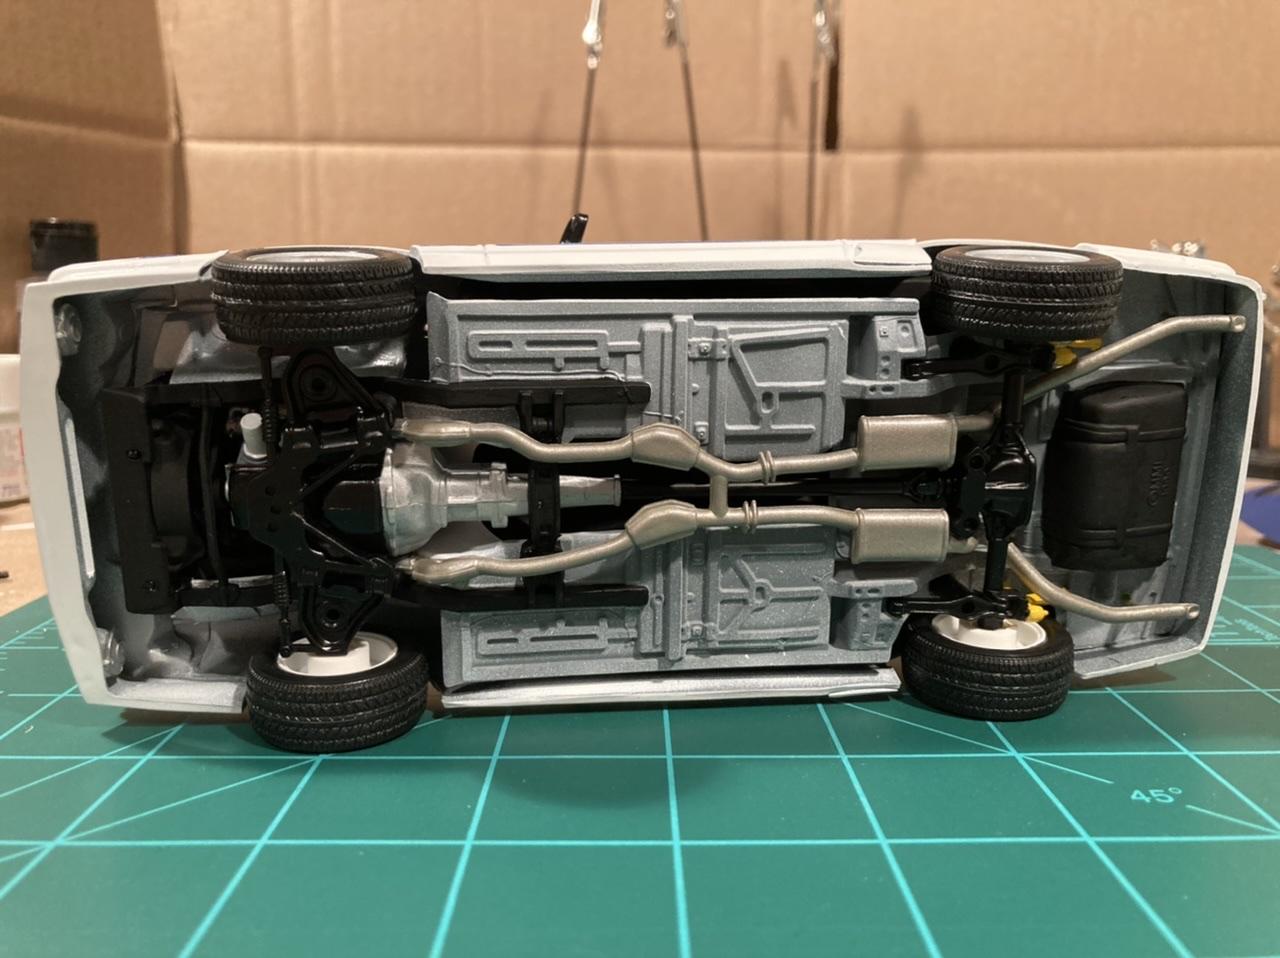
Here is my Monogram “1992” Mustang GT Convertible. I built this kit as a color scheme tribute to my 1:1 Mustang, a 1993 2.3 LX. My original idea was to kit bash this GT with an SVO or ‘83 GLX to create an LX ‘vert but all three of these kits are expensive on eBay today and I just don’t have the skills or stomach yet to cut up two $40-$60+ kits ?. So I settled for my car, but as a GT! I used Swarovski Crystals (meant for ladies’ custom nails) from Hobby Lobby to simulate the headlight and turn signal bulbs. And I used the actual belt line stripe tape left over from my 1:1, cut down for the 1:24 belt line stripe. To do those blasted cheese grater taillights, I painted them all white first, then used silver and red gel pens to color the lens sections. It’s a little sloppy but looks good enough. I messed up the clear coat on the hood too so I’ll have to repaint it at some point but it’s not that noticeable in these iPhone pictures ?. You’ll notice that the parade boot is grey when it probably should be white or blue. But my 1:1 came with a grey boot so I painted this to match! The previous owner also shaved the trunk luggage rack so I did the same here. I’m very pleased with this one and can’t wait for a nice day to photograph both cars together!
-
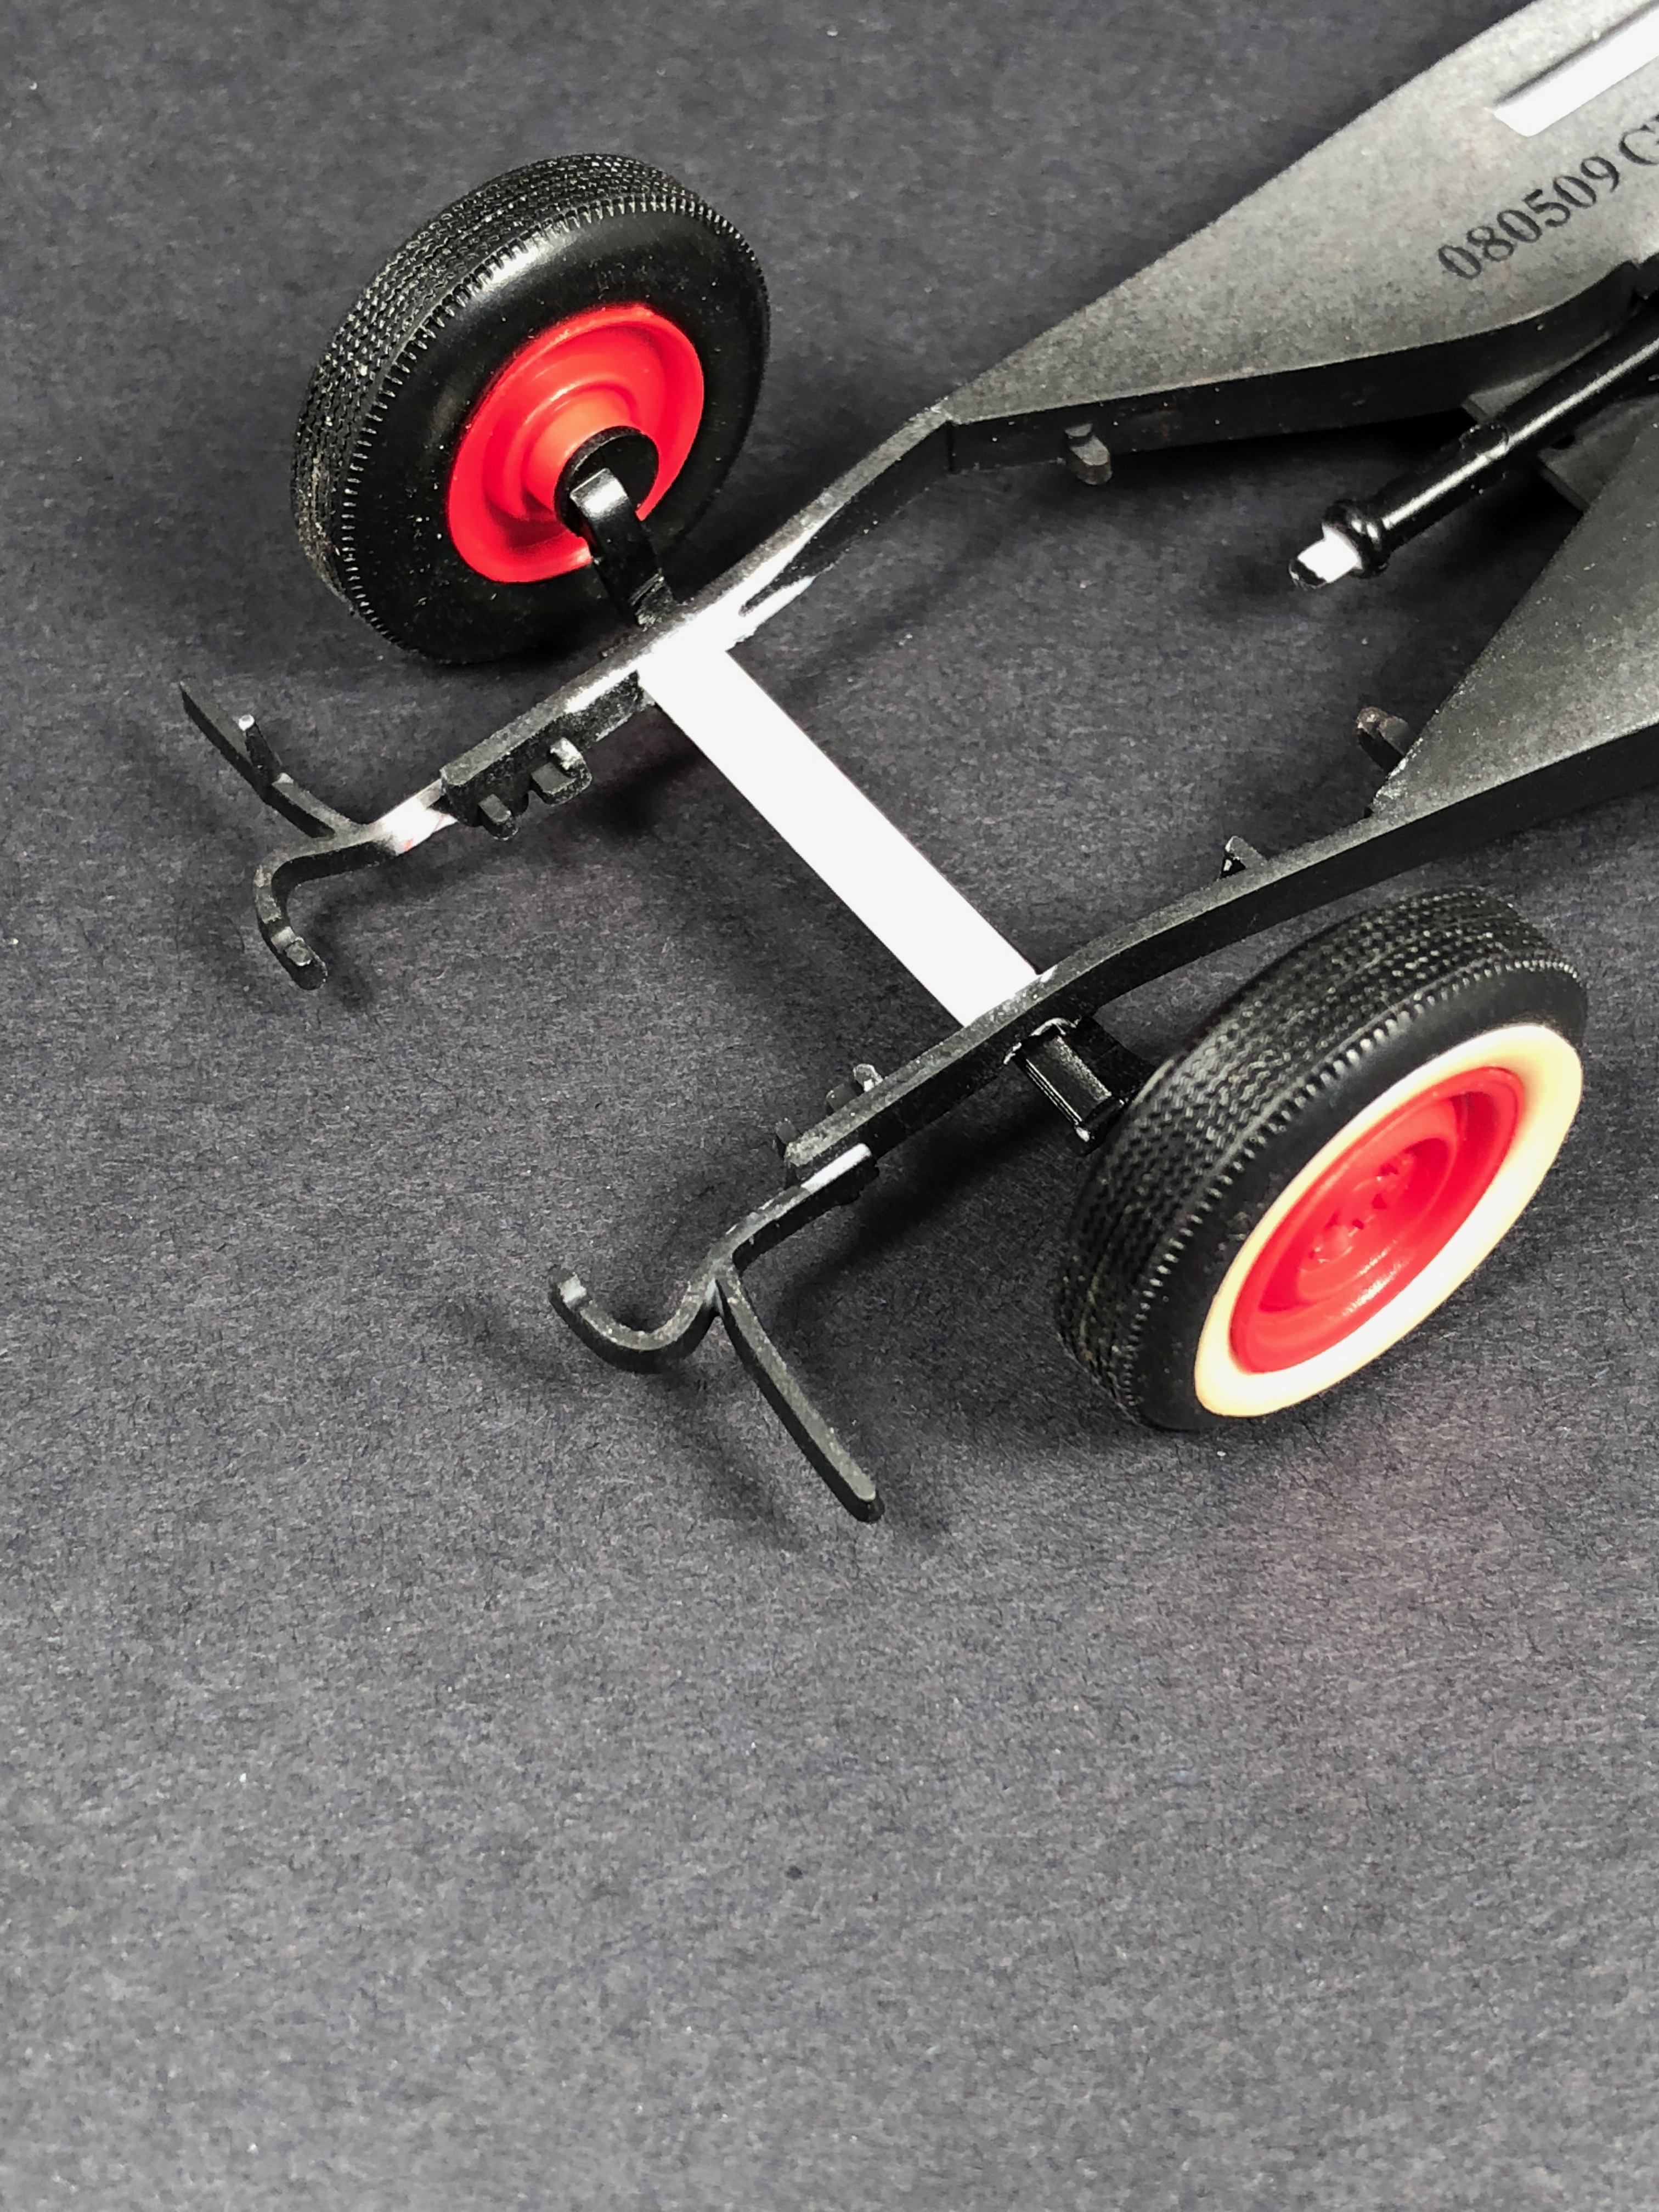
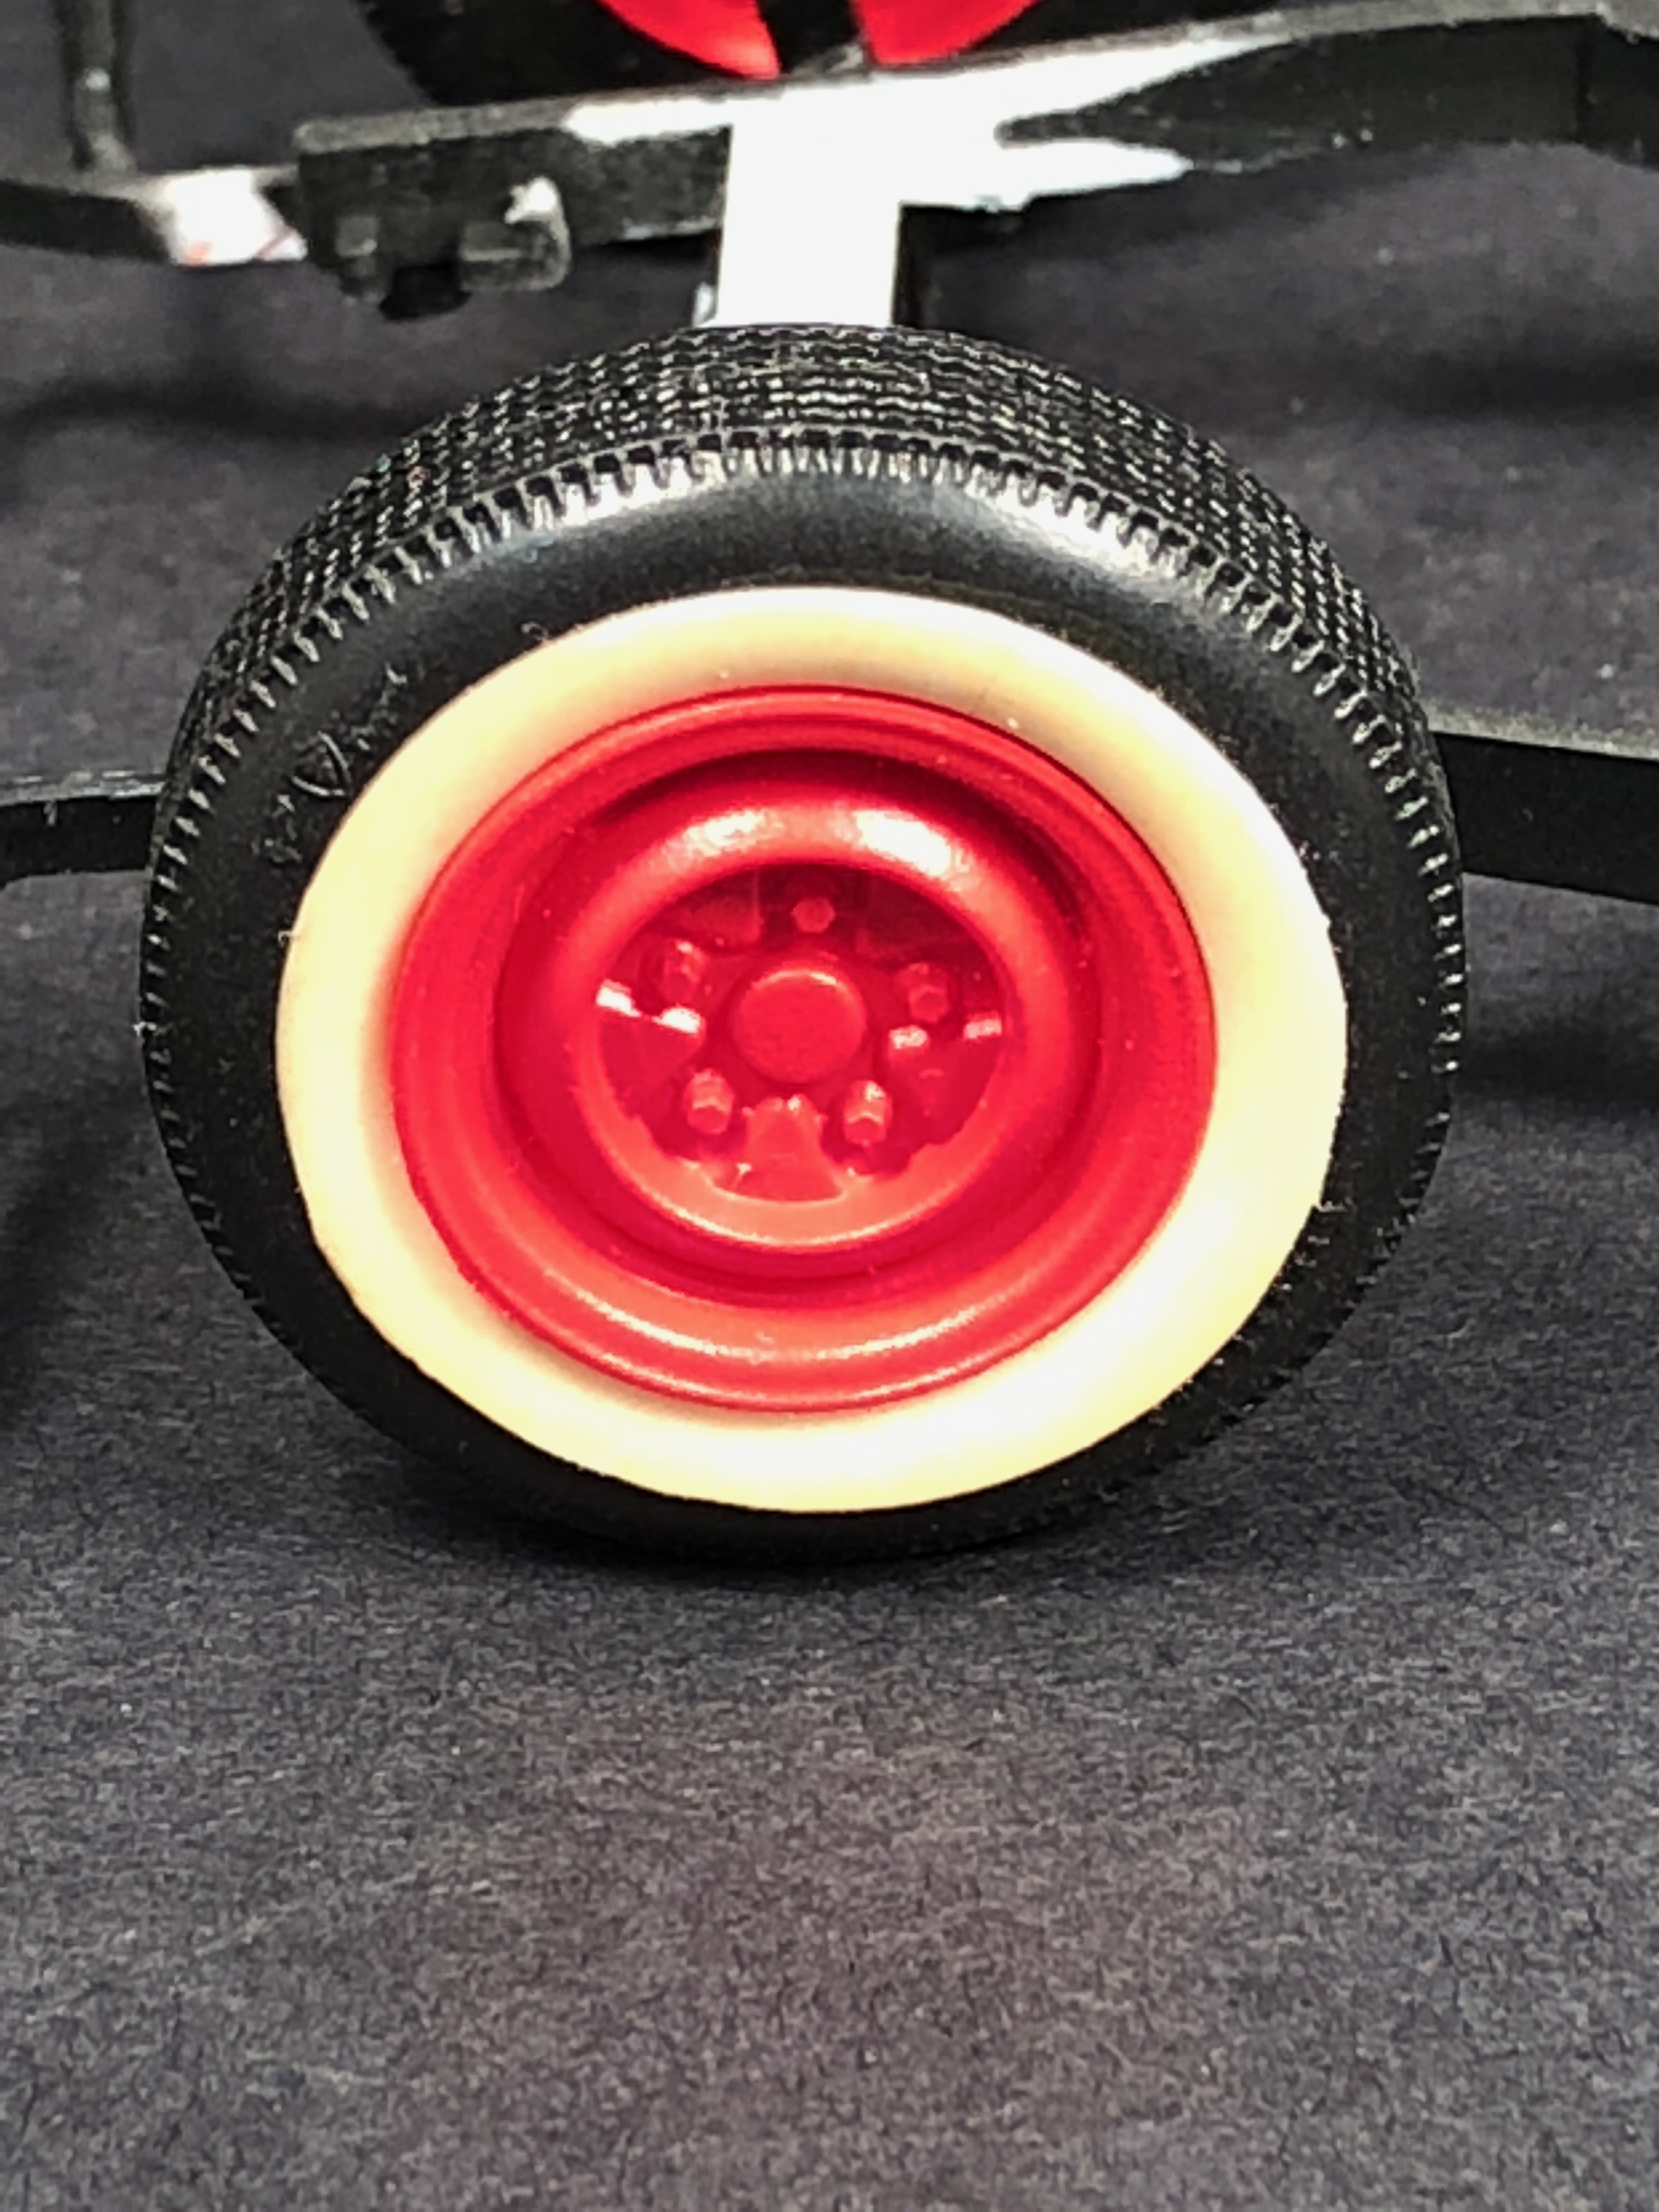
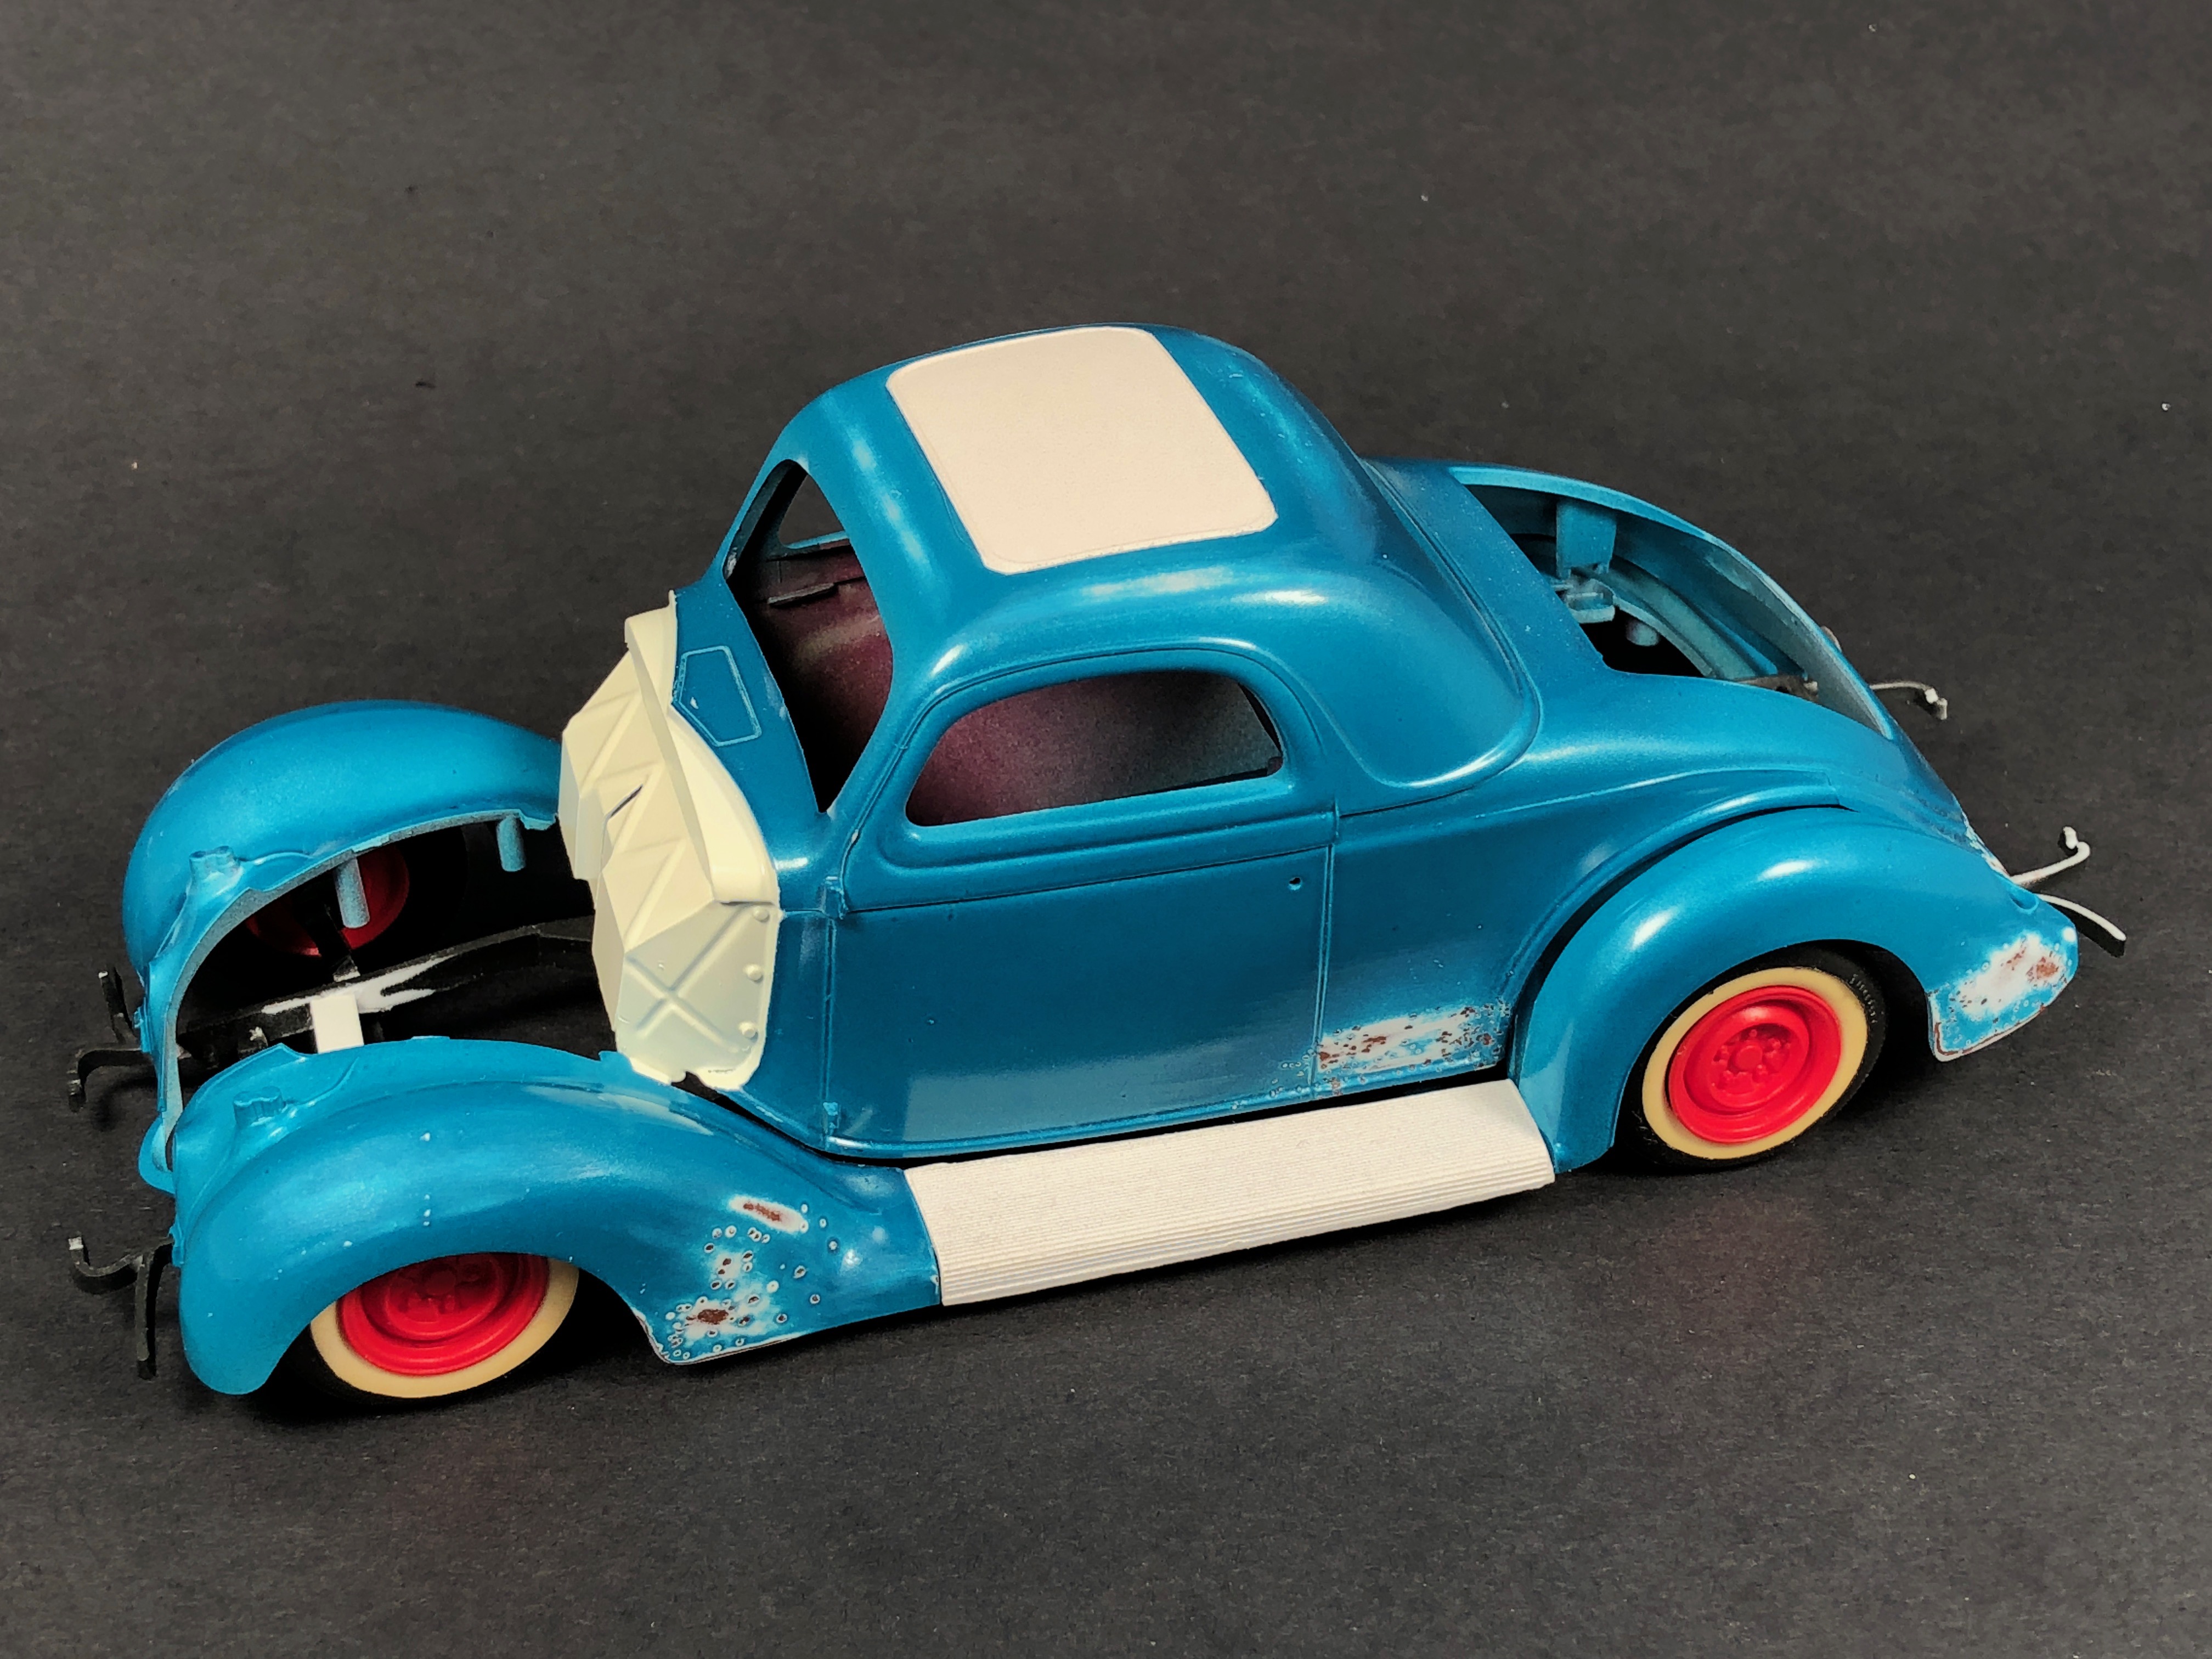
I got started building weathered street rods years ago after reading an article titled "Beaters" by Pryor Passorino in Plastic Fanatic. Since then I've been learning techniques from the military guys and applying them to my hot rod efforts. My latest will be based on the venerable Monogram '36 tool that has been around since I was a kid. I'll be using the Revell 2 in 1 "Car Show " version. Getting the proper stance is no more difficult than substituting a length of evergreen channel for the stock front crossmember. The rear is already perfect. Floquil rust applied to the whitewalls provides a more realistic yellowed appearance. I used the salt and hairspray technique to accomplish the rust spots. I used Testors enamels and Pantene hairspray. The body is first airbrushed with Testors rust, followed by and application of hairspray and a dusting of salt in the desired areas. There are a million Youtubes demonstrating this technique. Next comes a layer of flat white followed by the color which is a 50:50 mix of green and blue metal flake. Finally the salted areas are sanded with 400 grit. I will follow all of this with a layer of Testers Dullcoat. I've decided to go hoodless and will install a blown flathead. More to follow.
-
This is the Hasegawa boxing of Monogram/s 1/24 kit, with additional white metal parts by Fine Molds. First up, the body in Zero Paints Guardsman Blue, with Zero 2K clear coat. This is as she came out of the paint shop. There are a couple of minor blemishes to polish out, but other than that I don't plan on doing any more "added shininess" Here's a few of the engine in progress, to compare and contrast the original and Fine Molds parts: And this young lady will be popping in from time to time in this thread. She's a Master Box figure, from their new "Pin-Up" series: Loads more work to do on her as well, but she's very nicely sculpted... ;-P bestest, M.
-
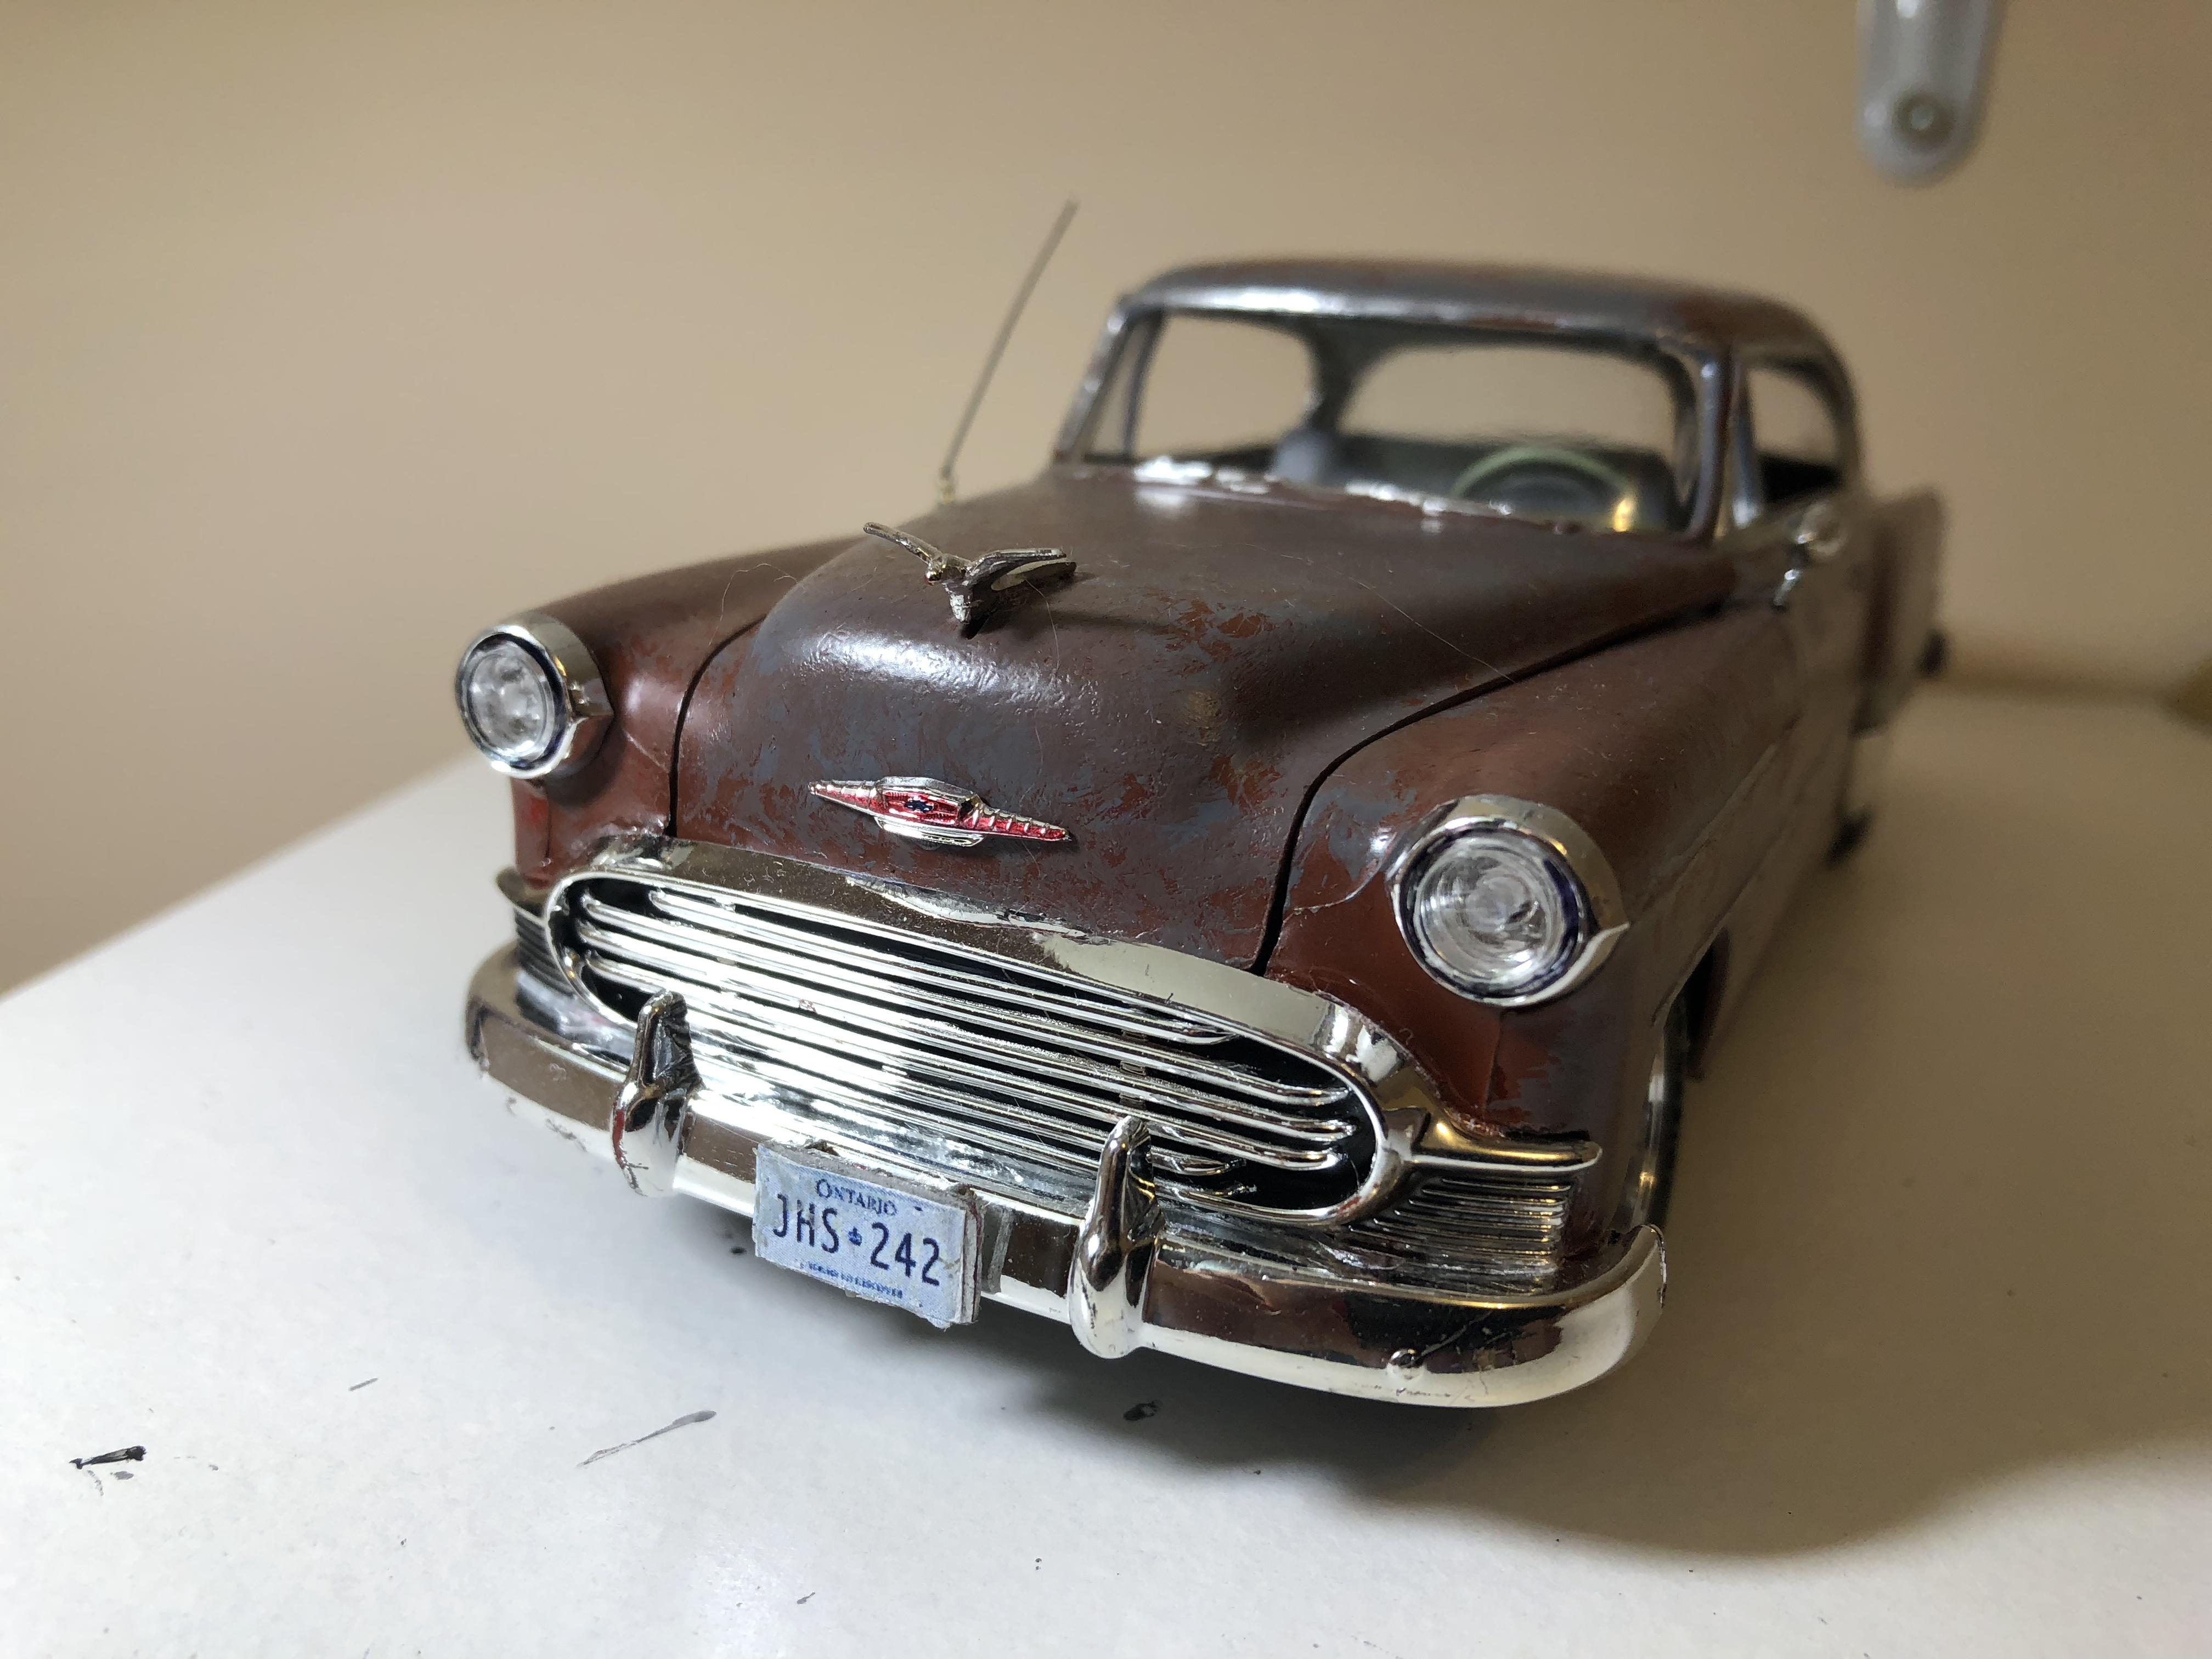
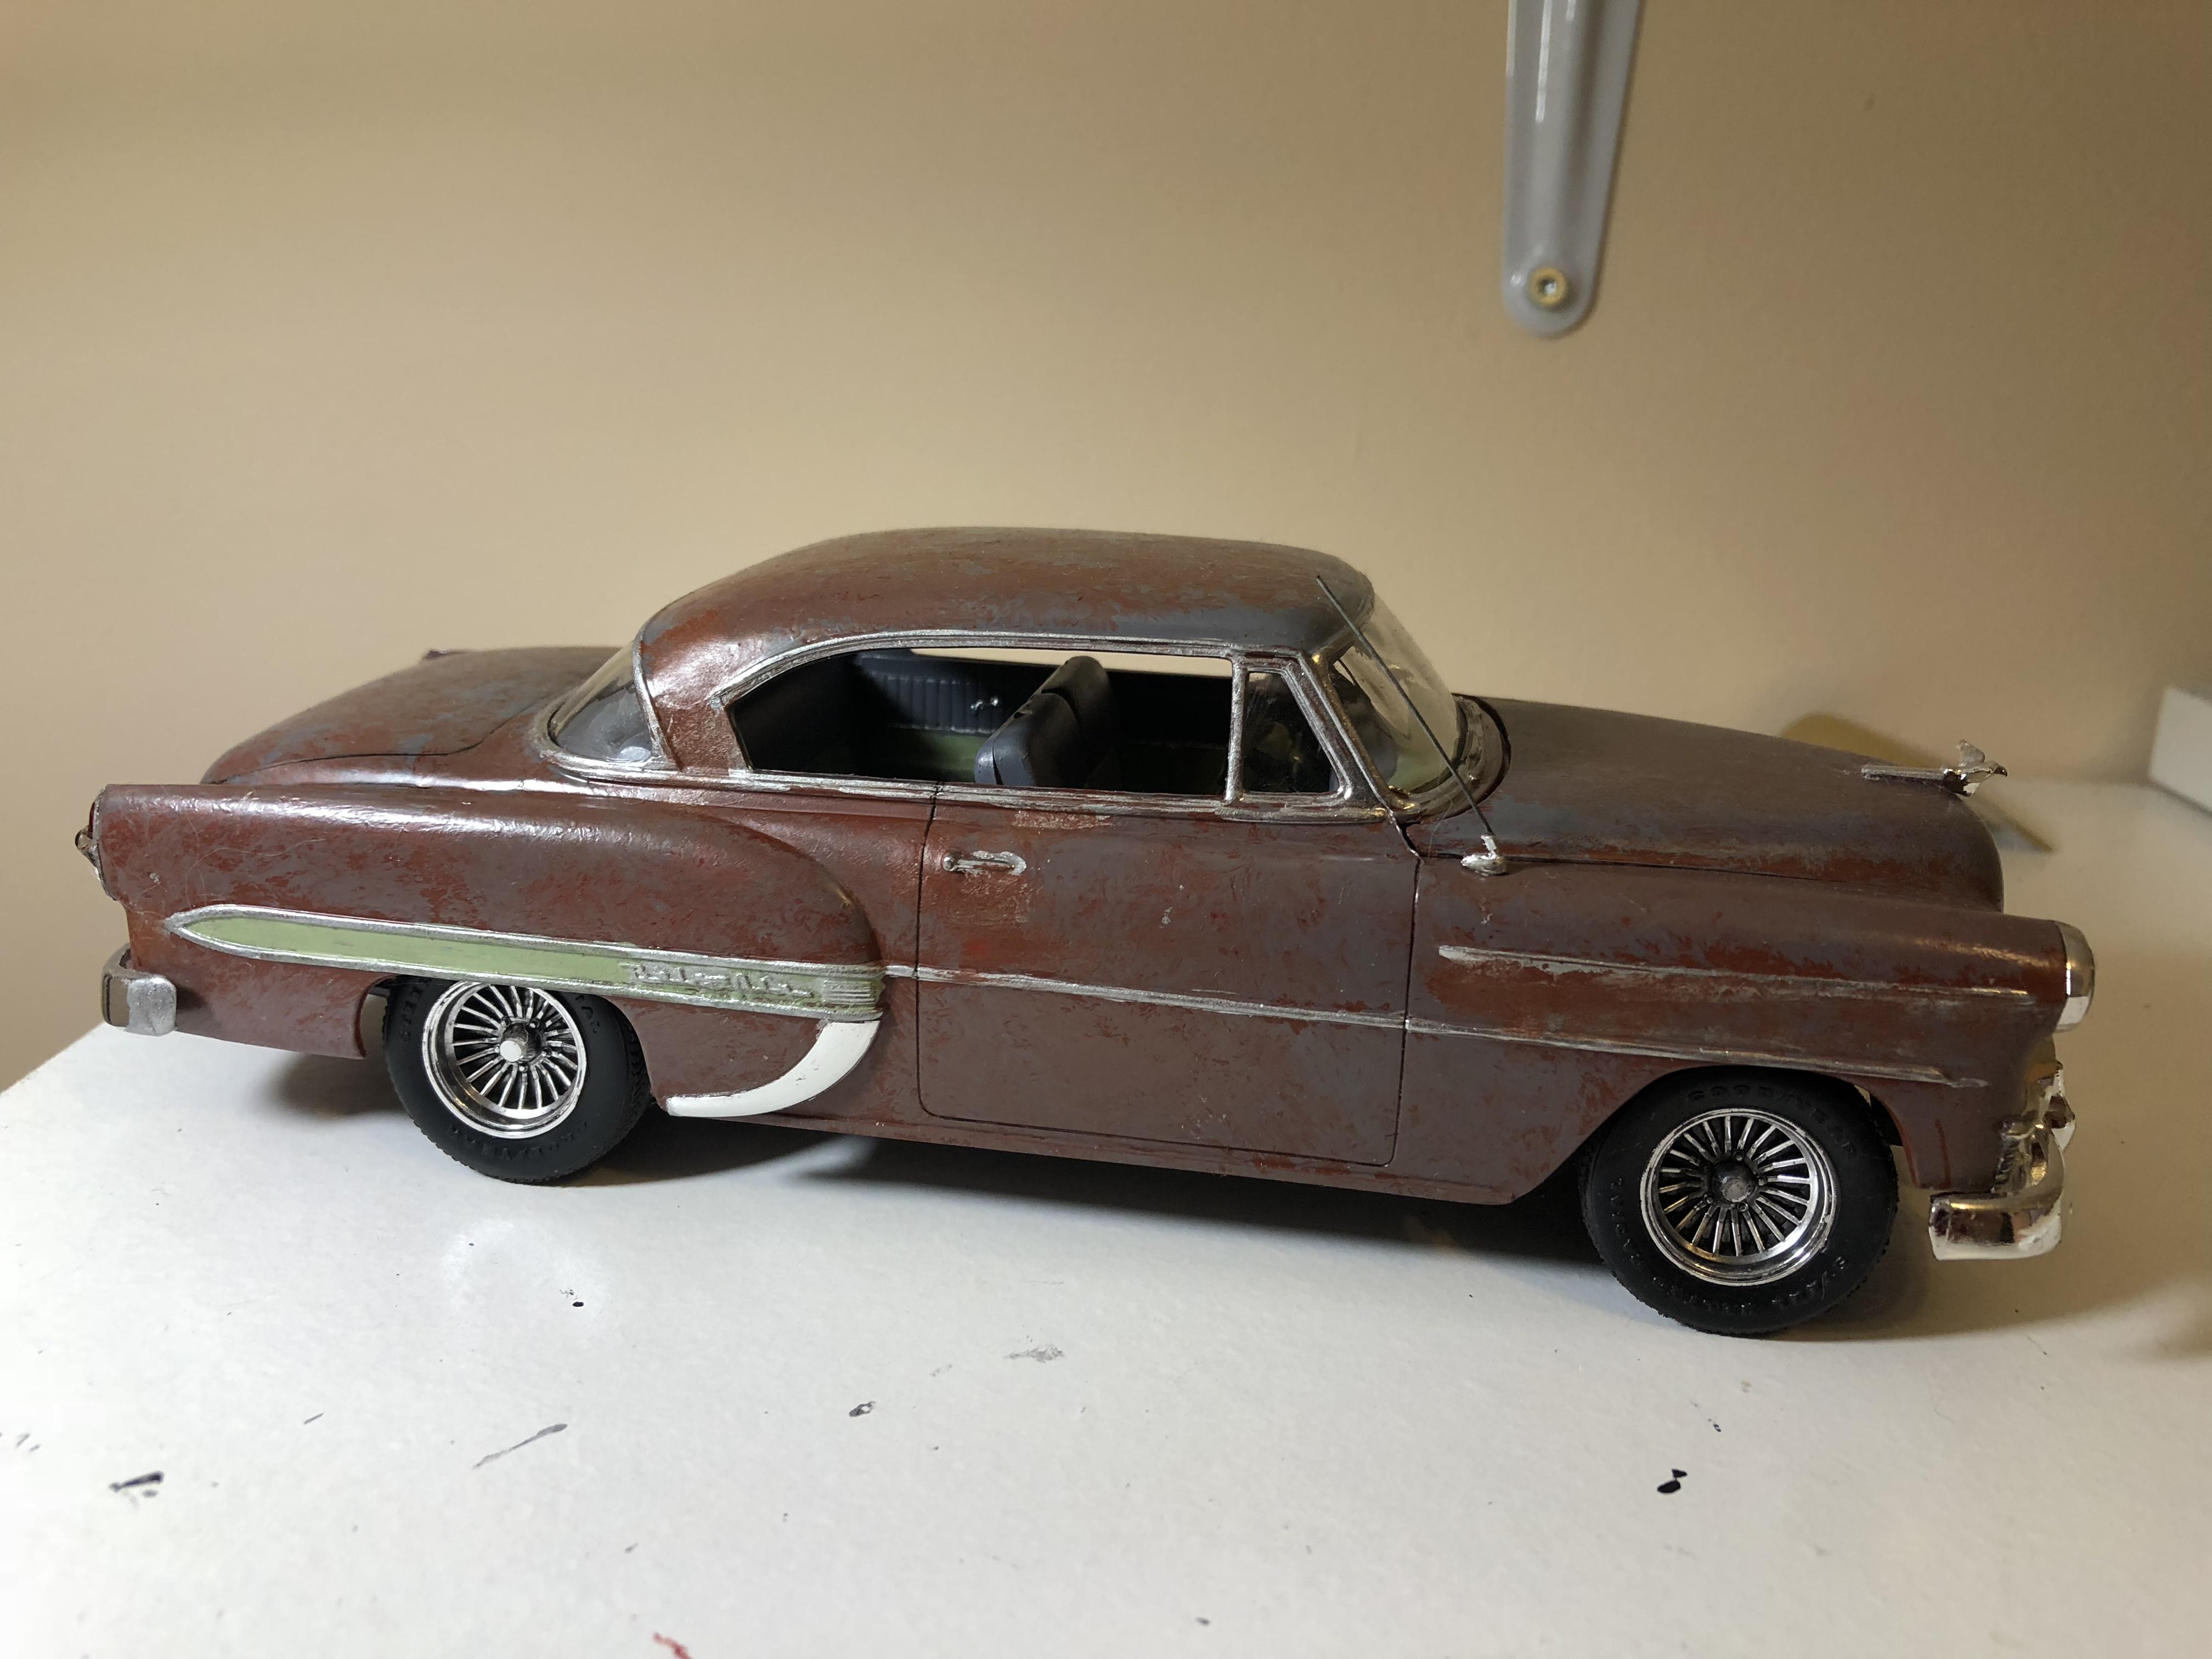
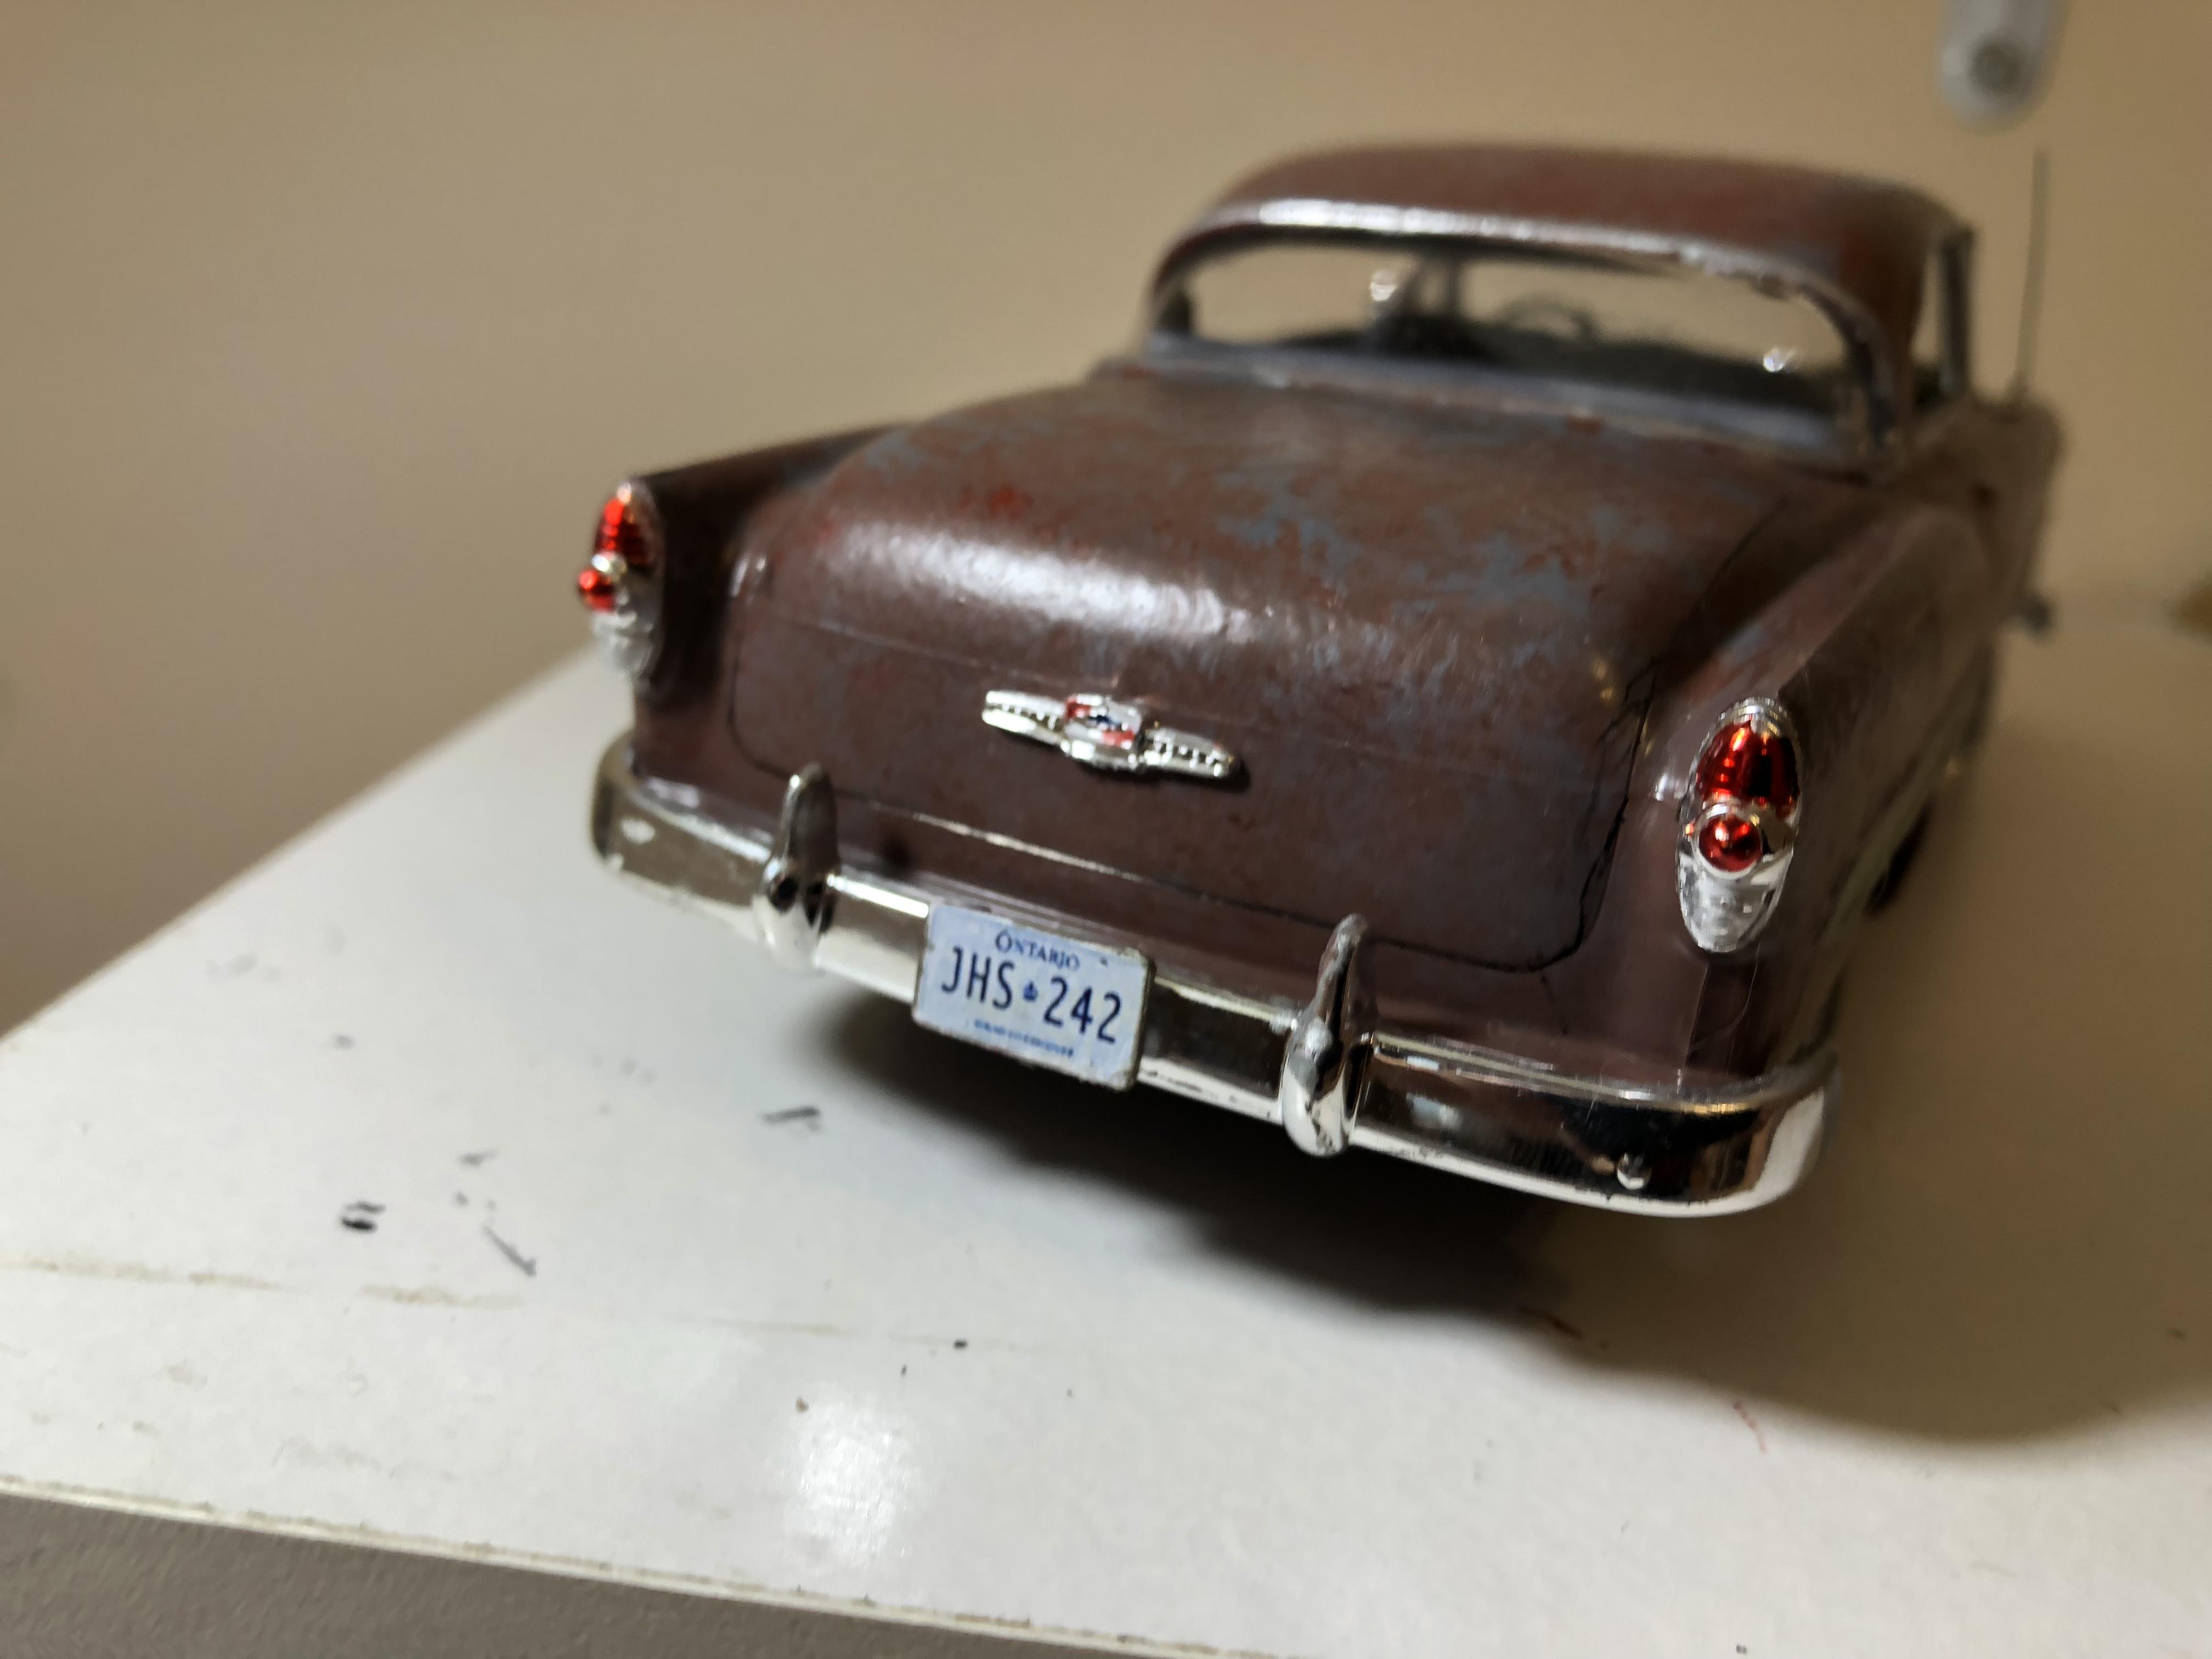
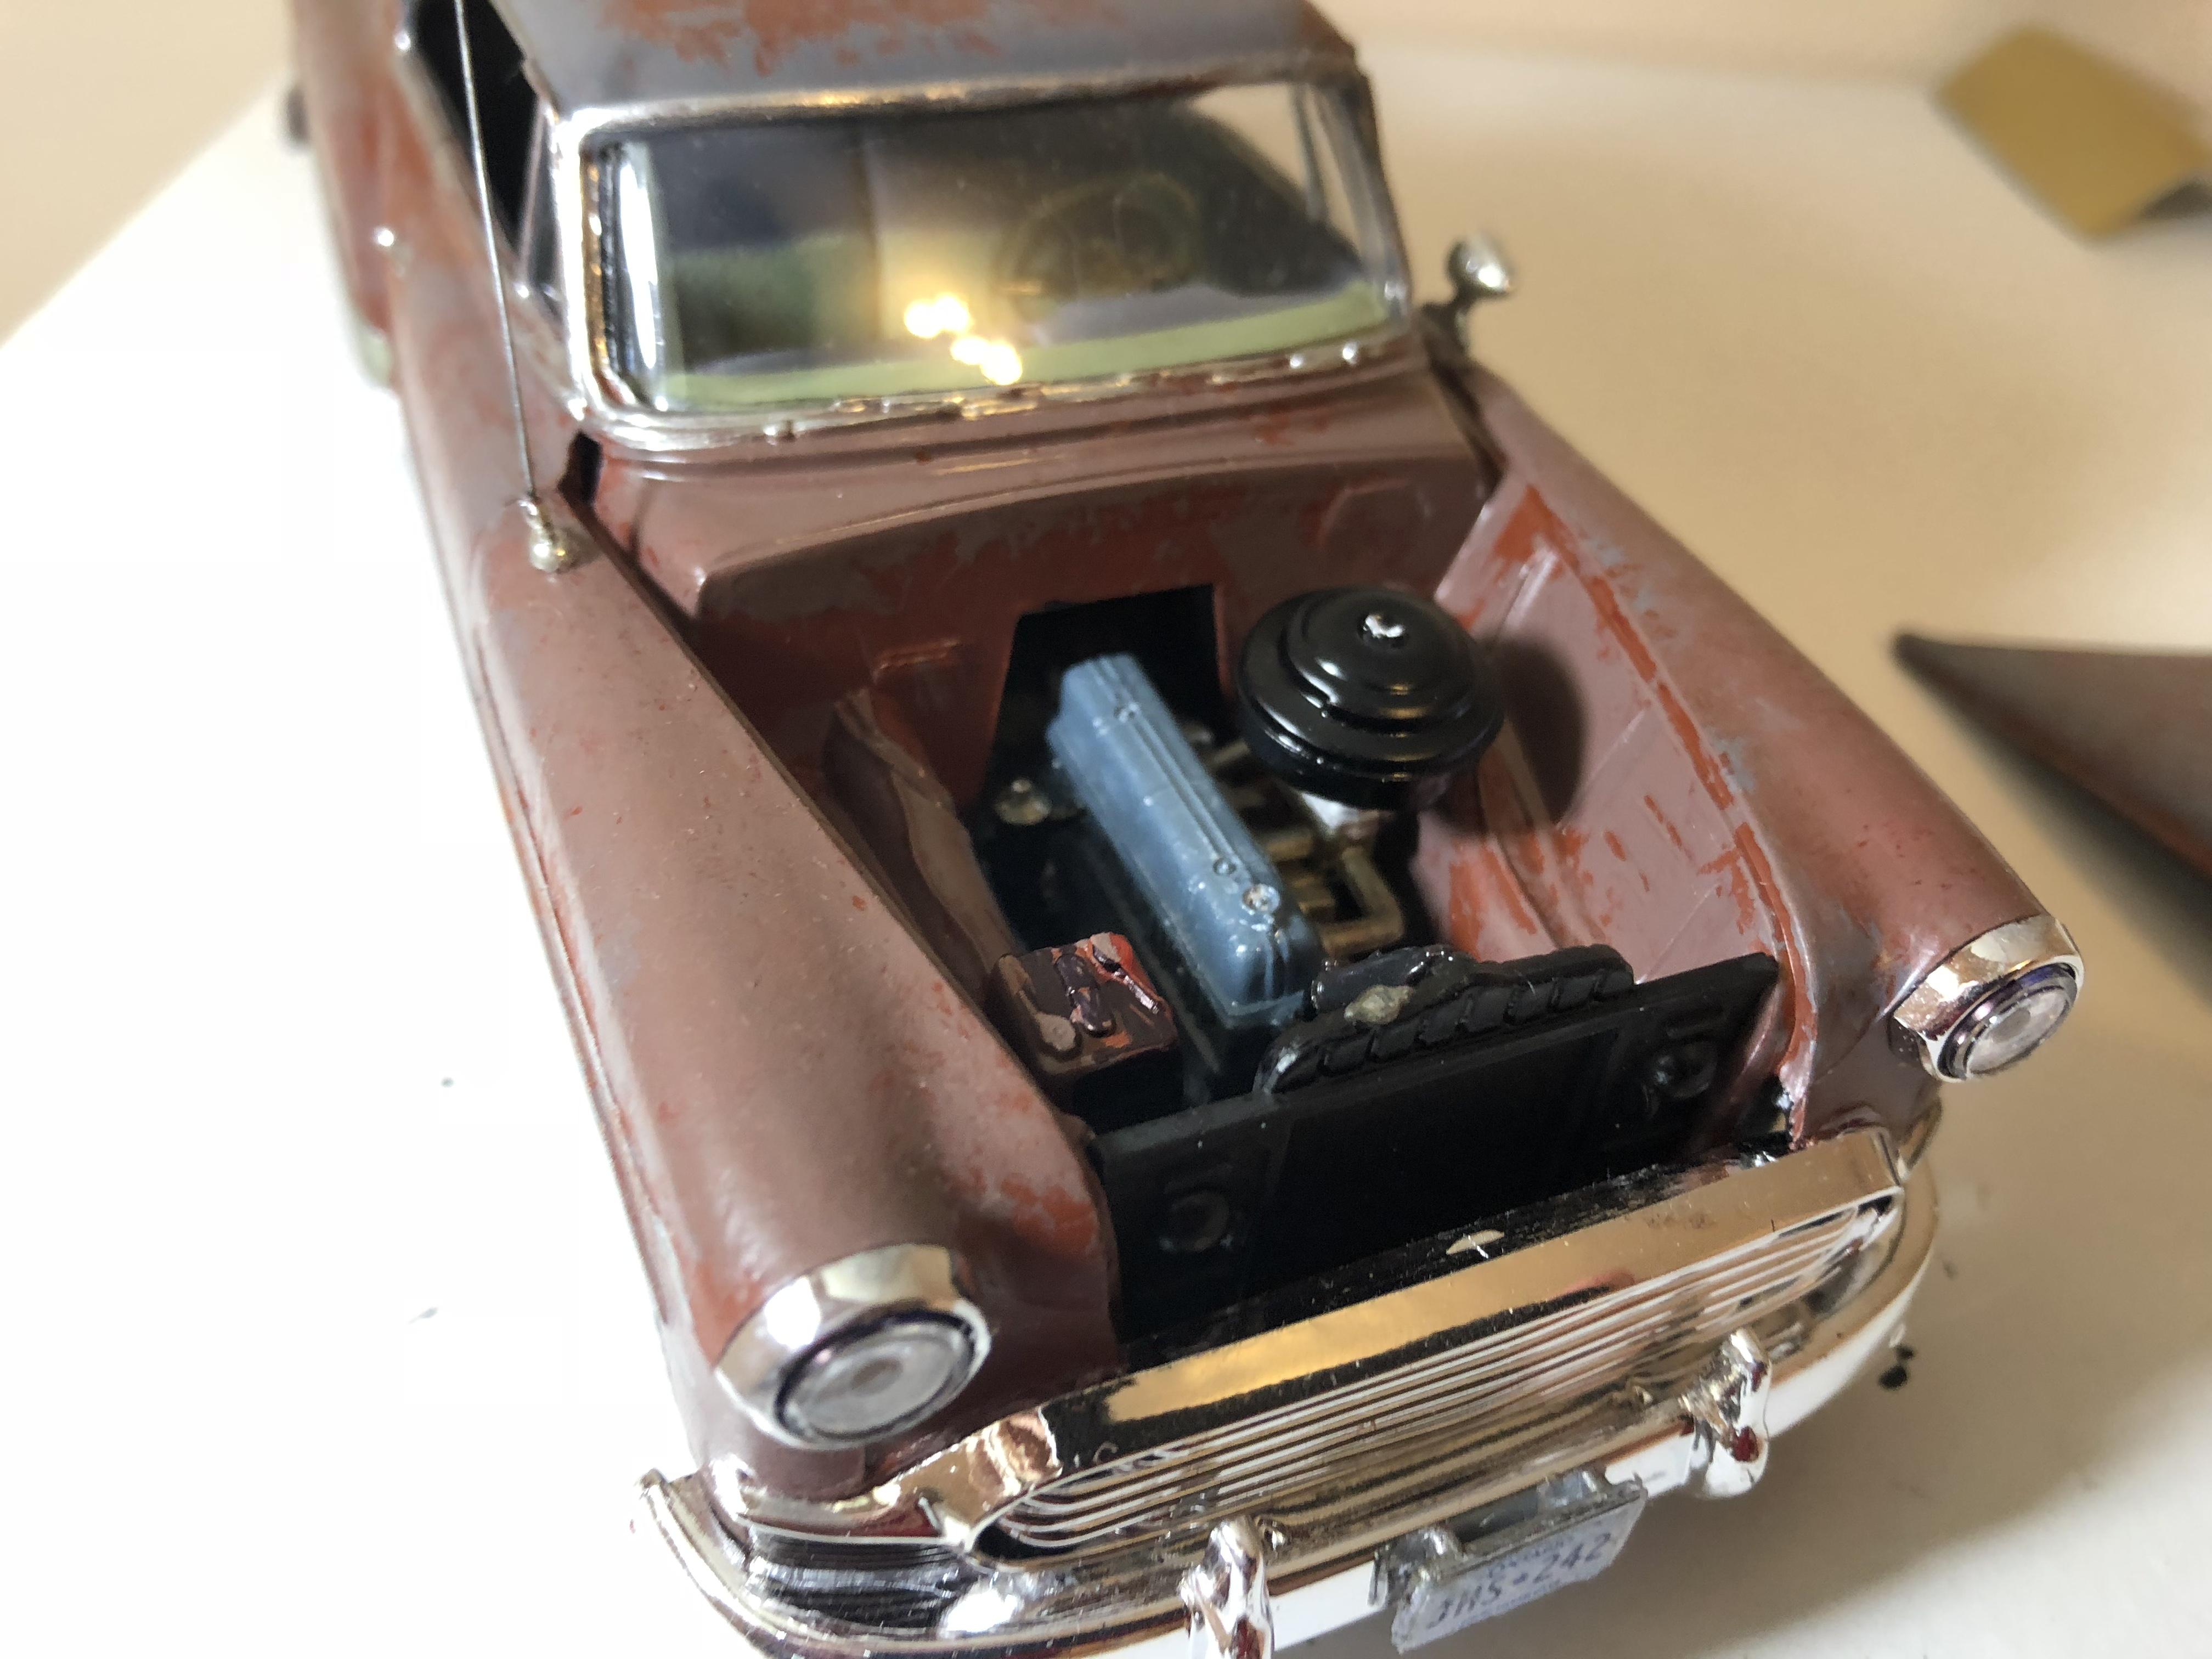
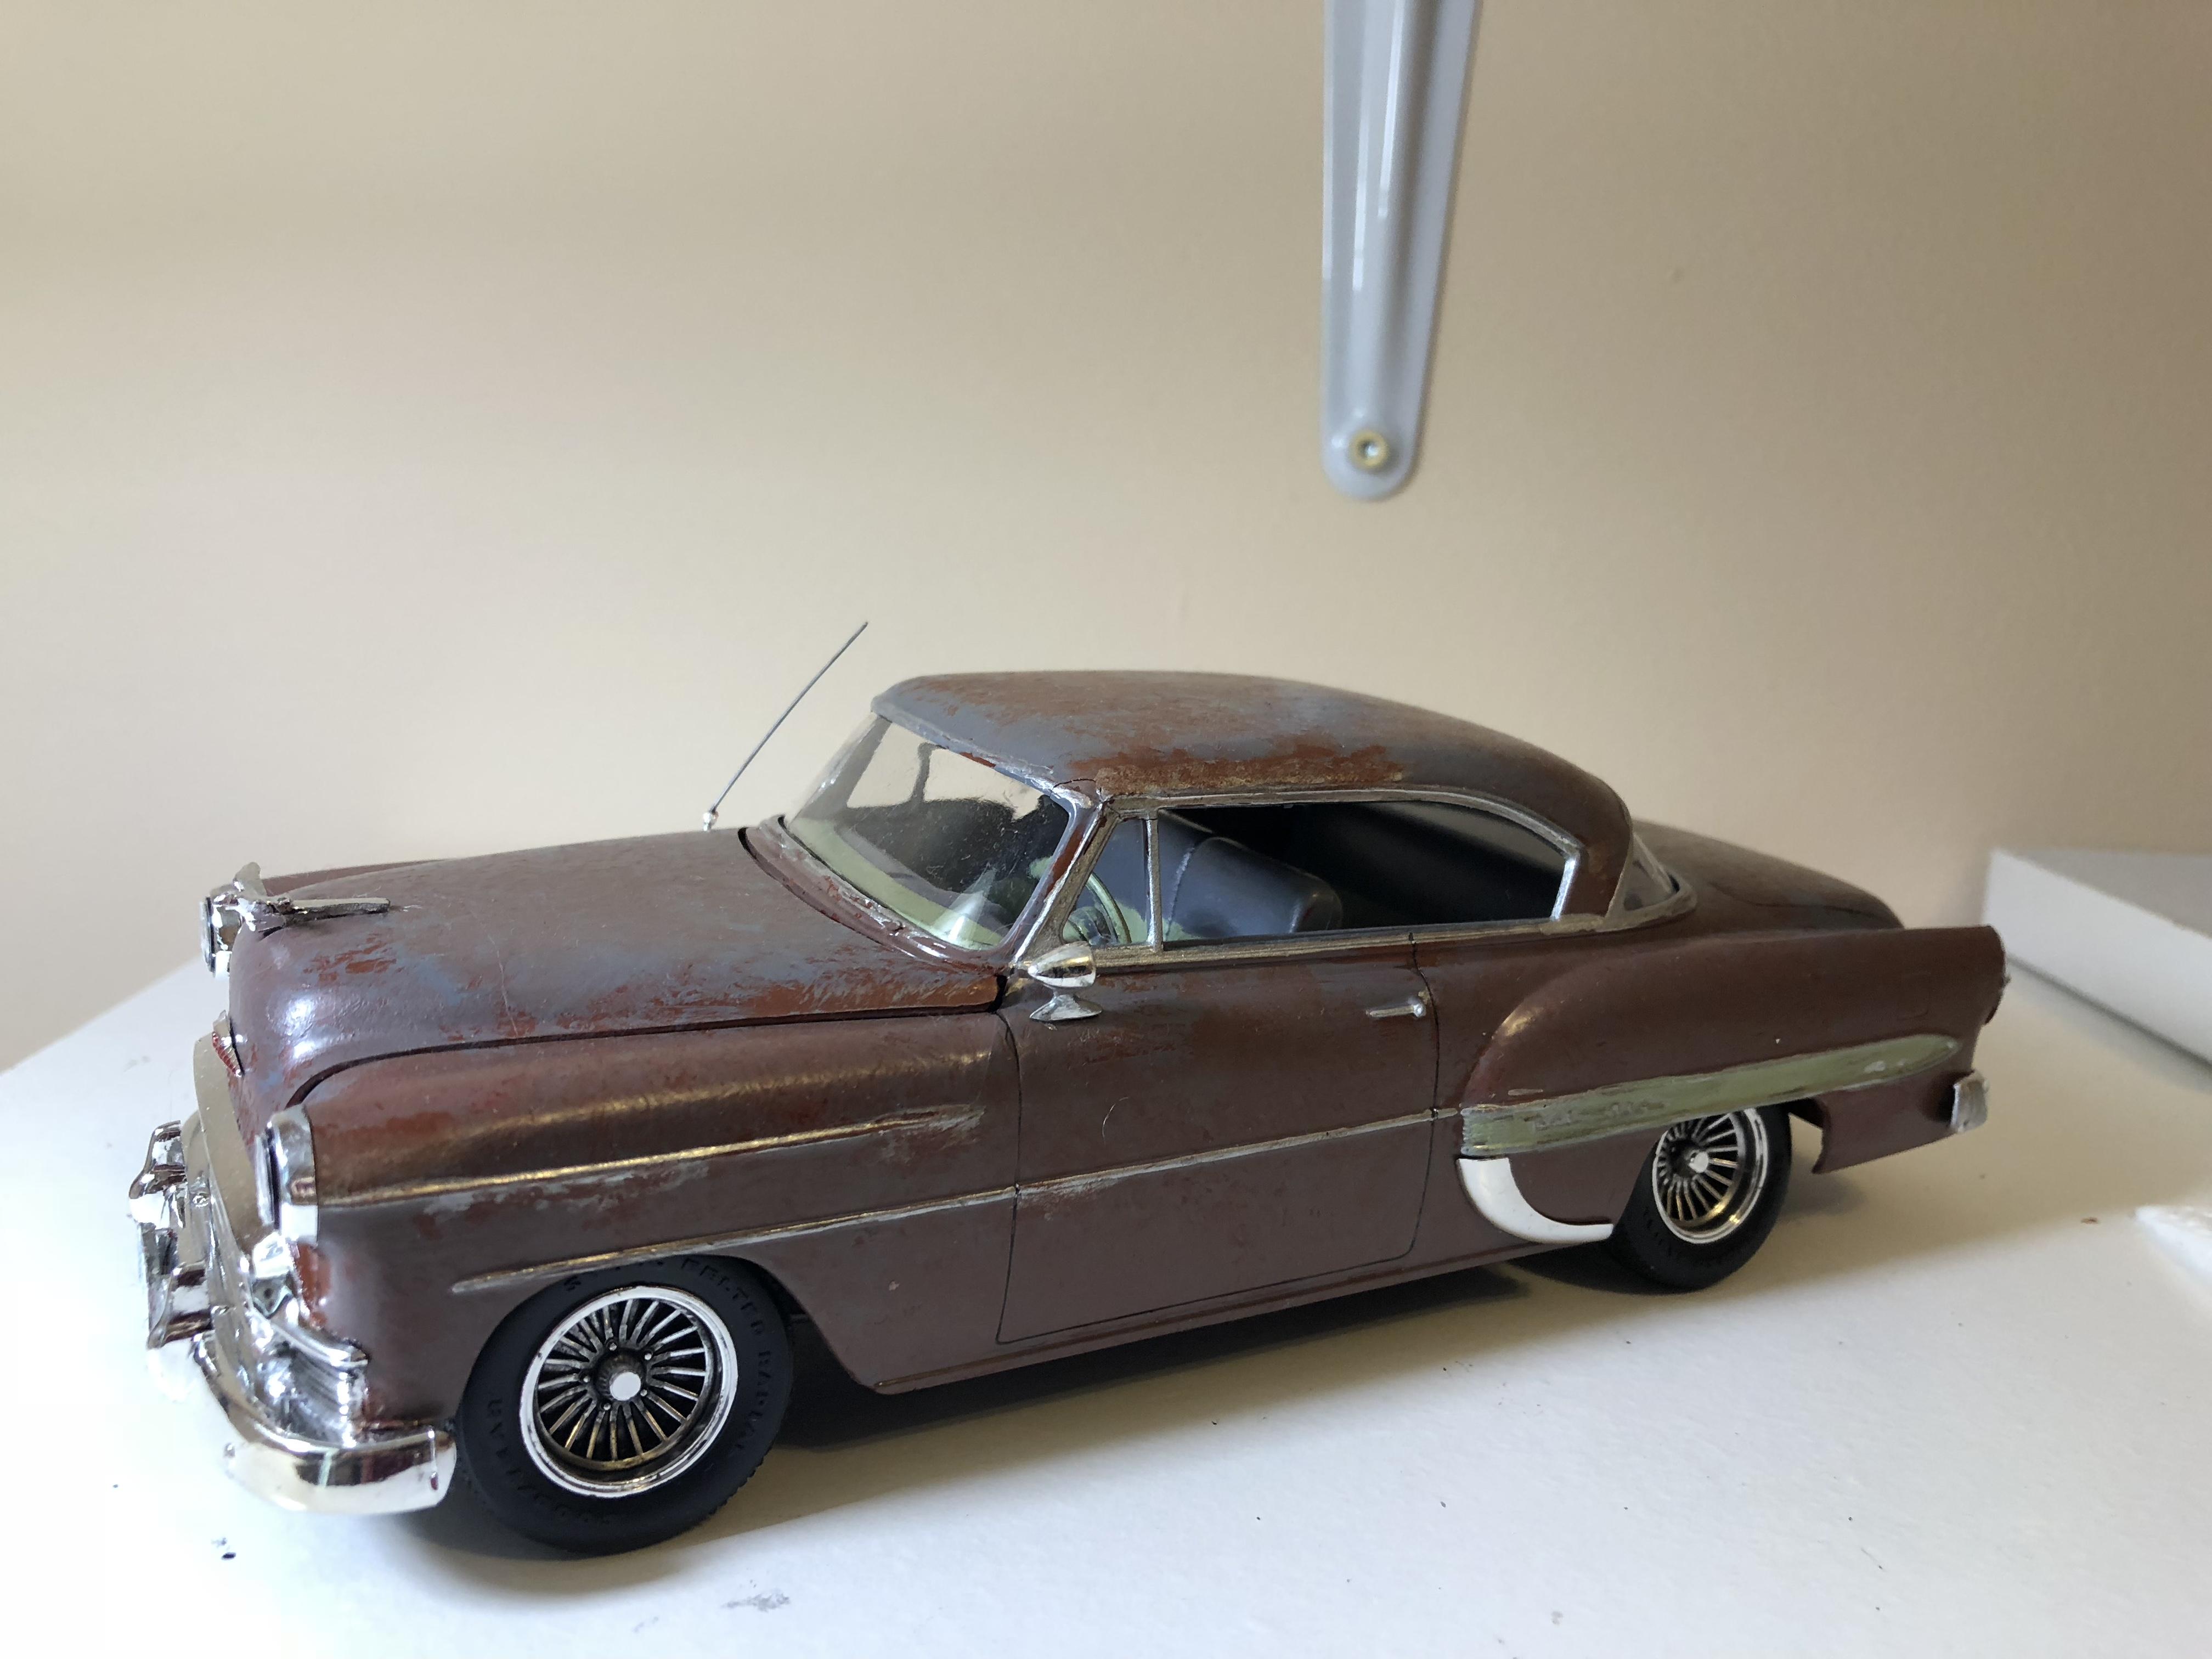
Model started off as something to do while on vacation in Montreal a few years ago completed it a few weeks ago supposed to look old and that but this is how it ended up turning out thanks for looking
-
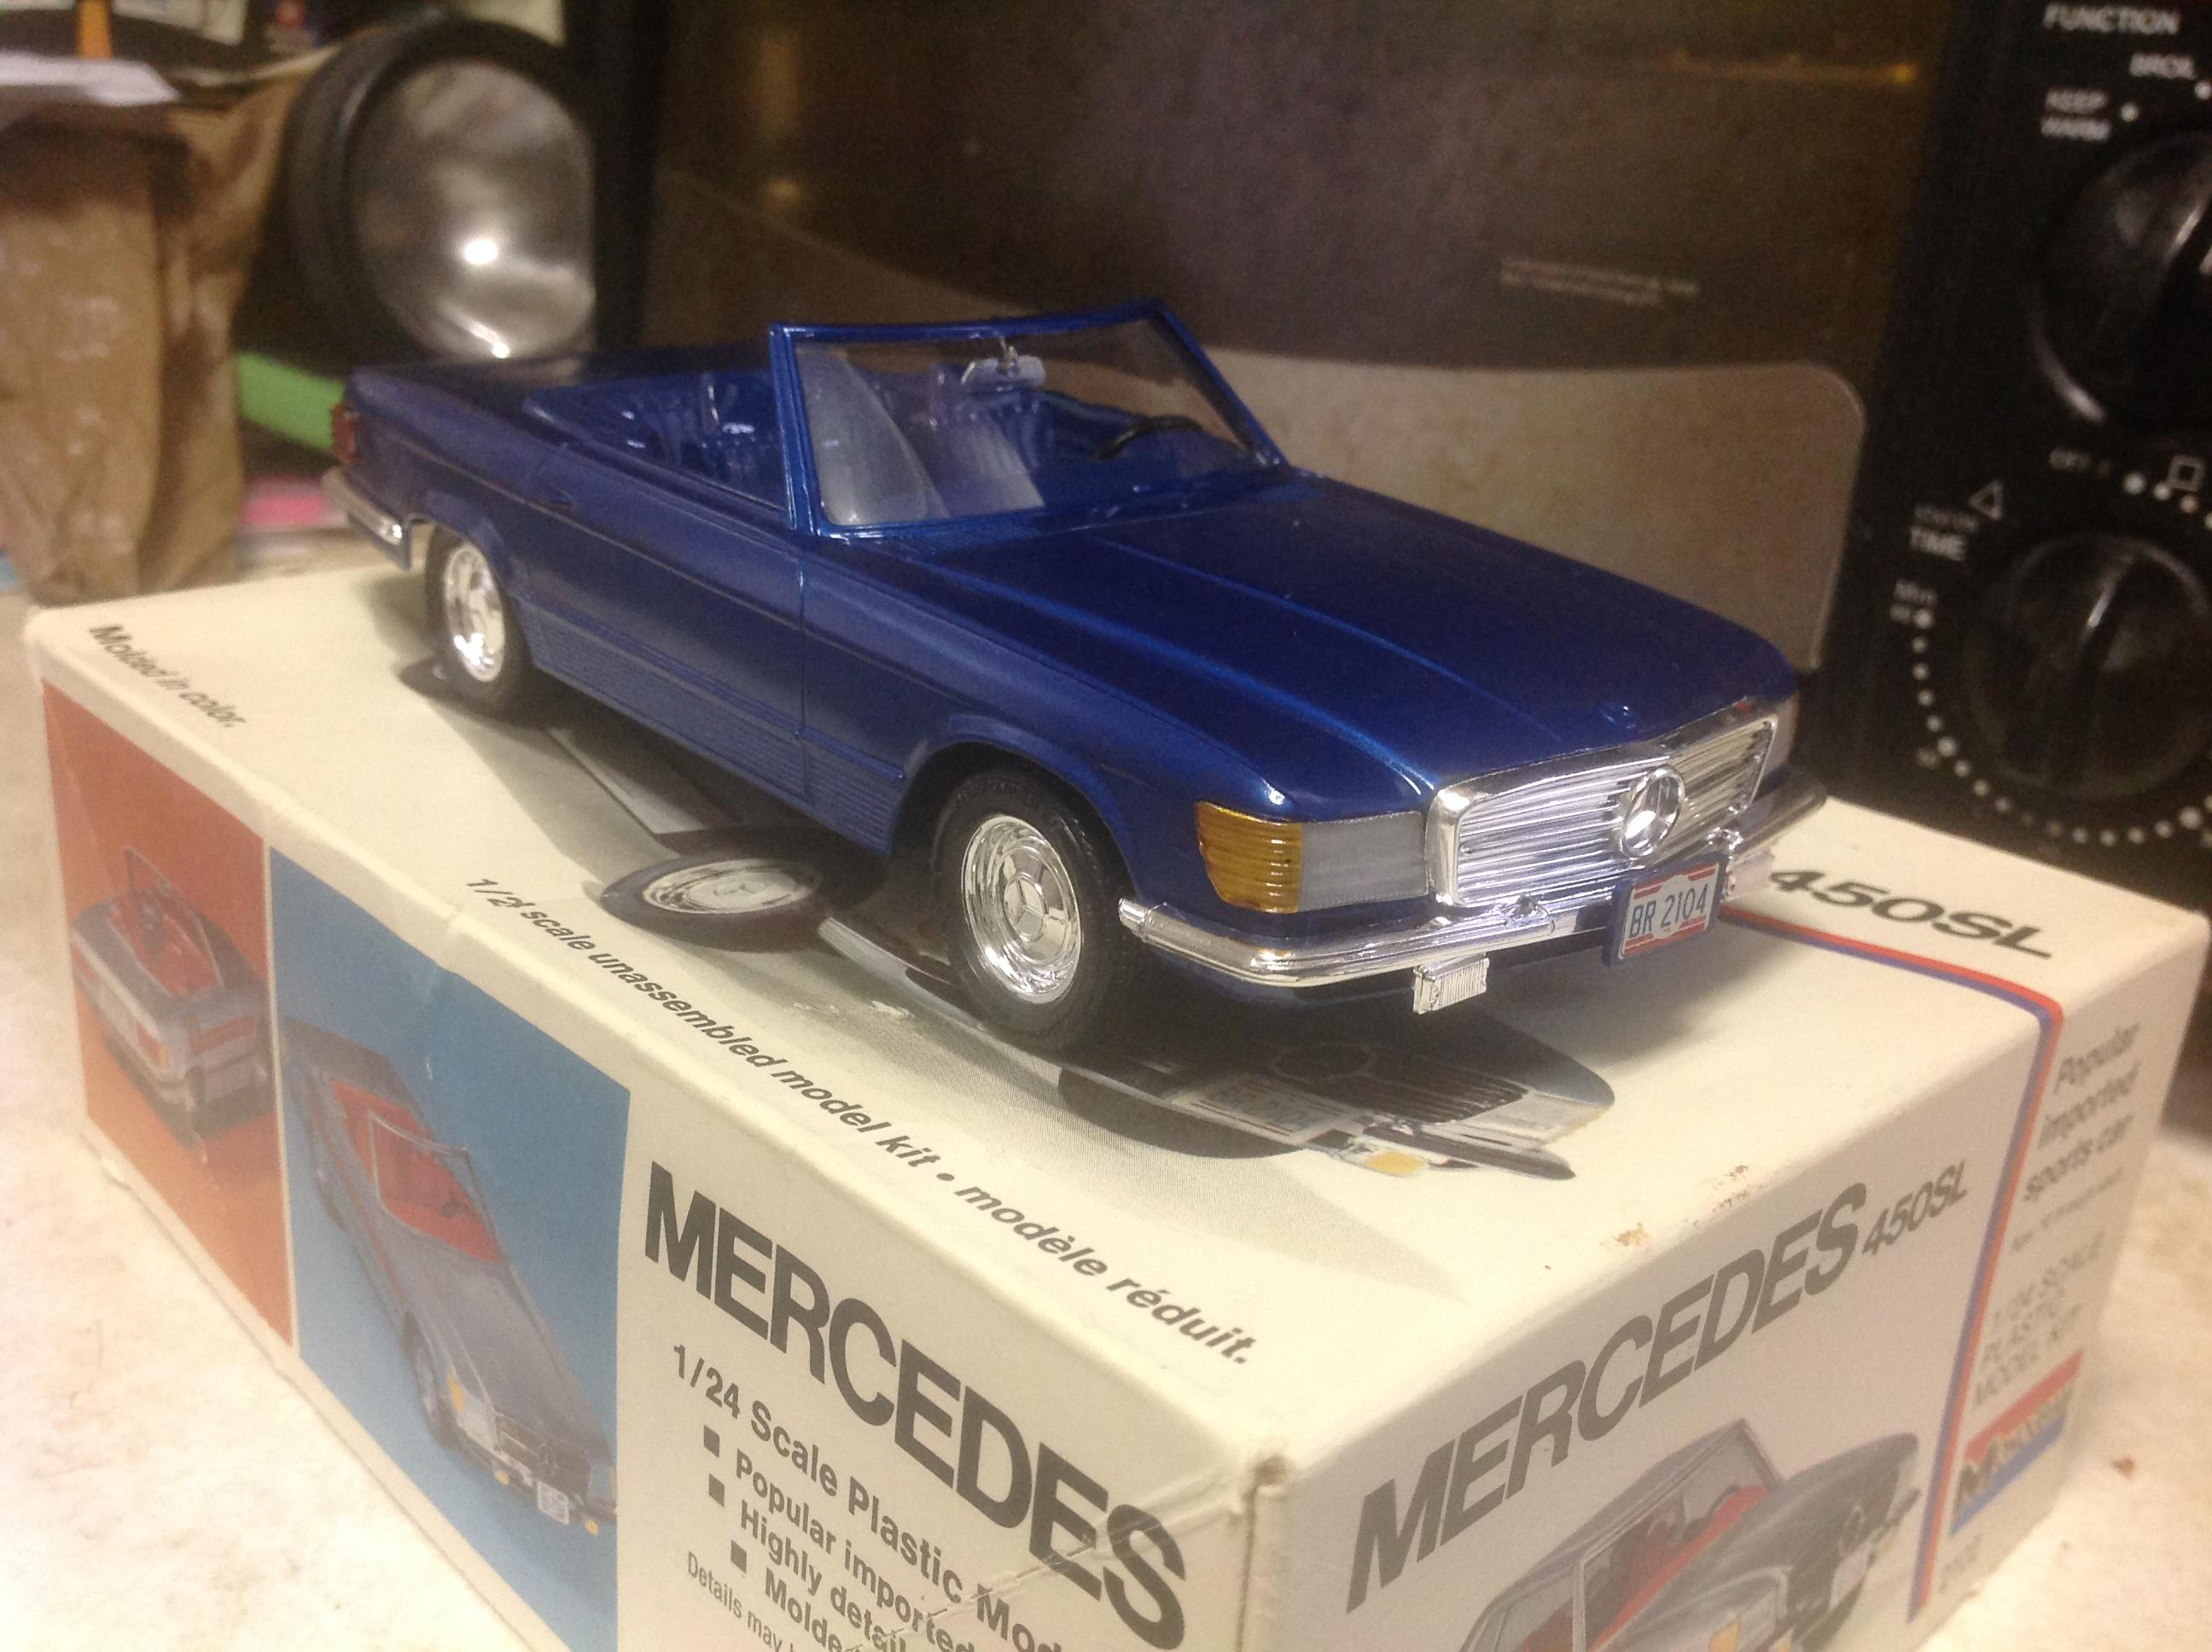
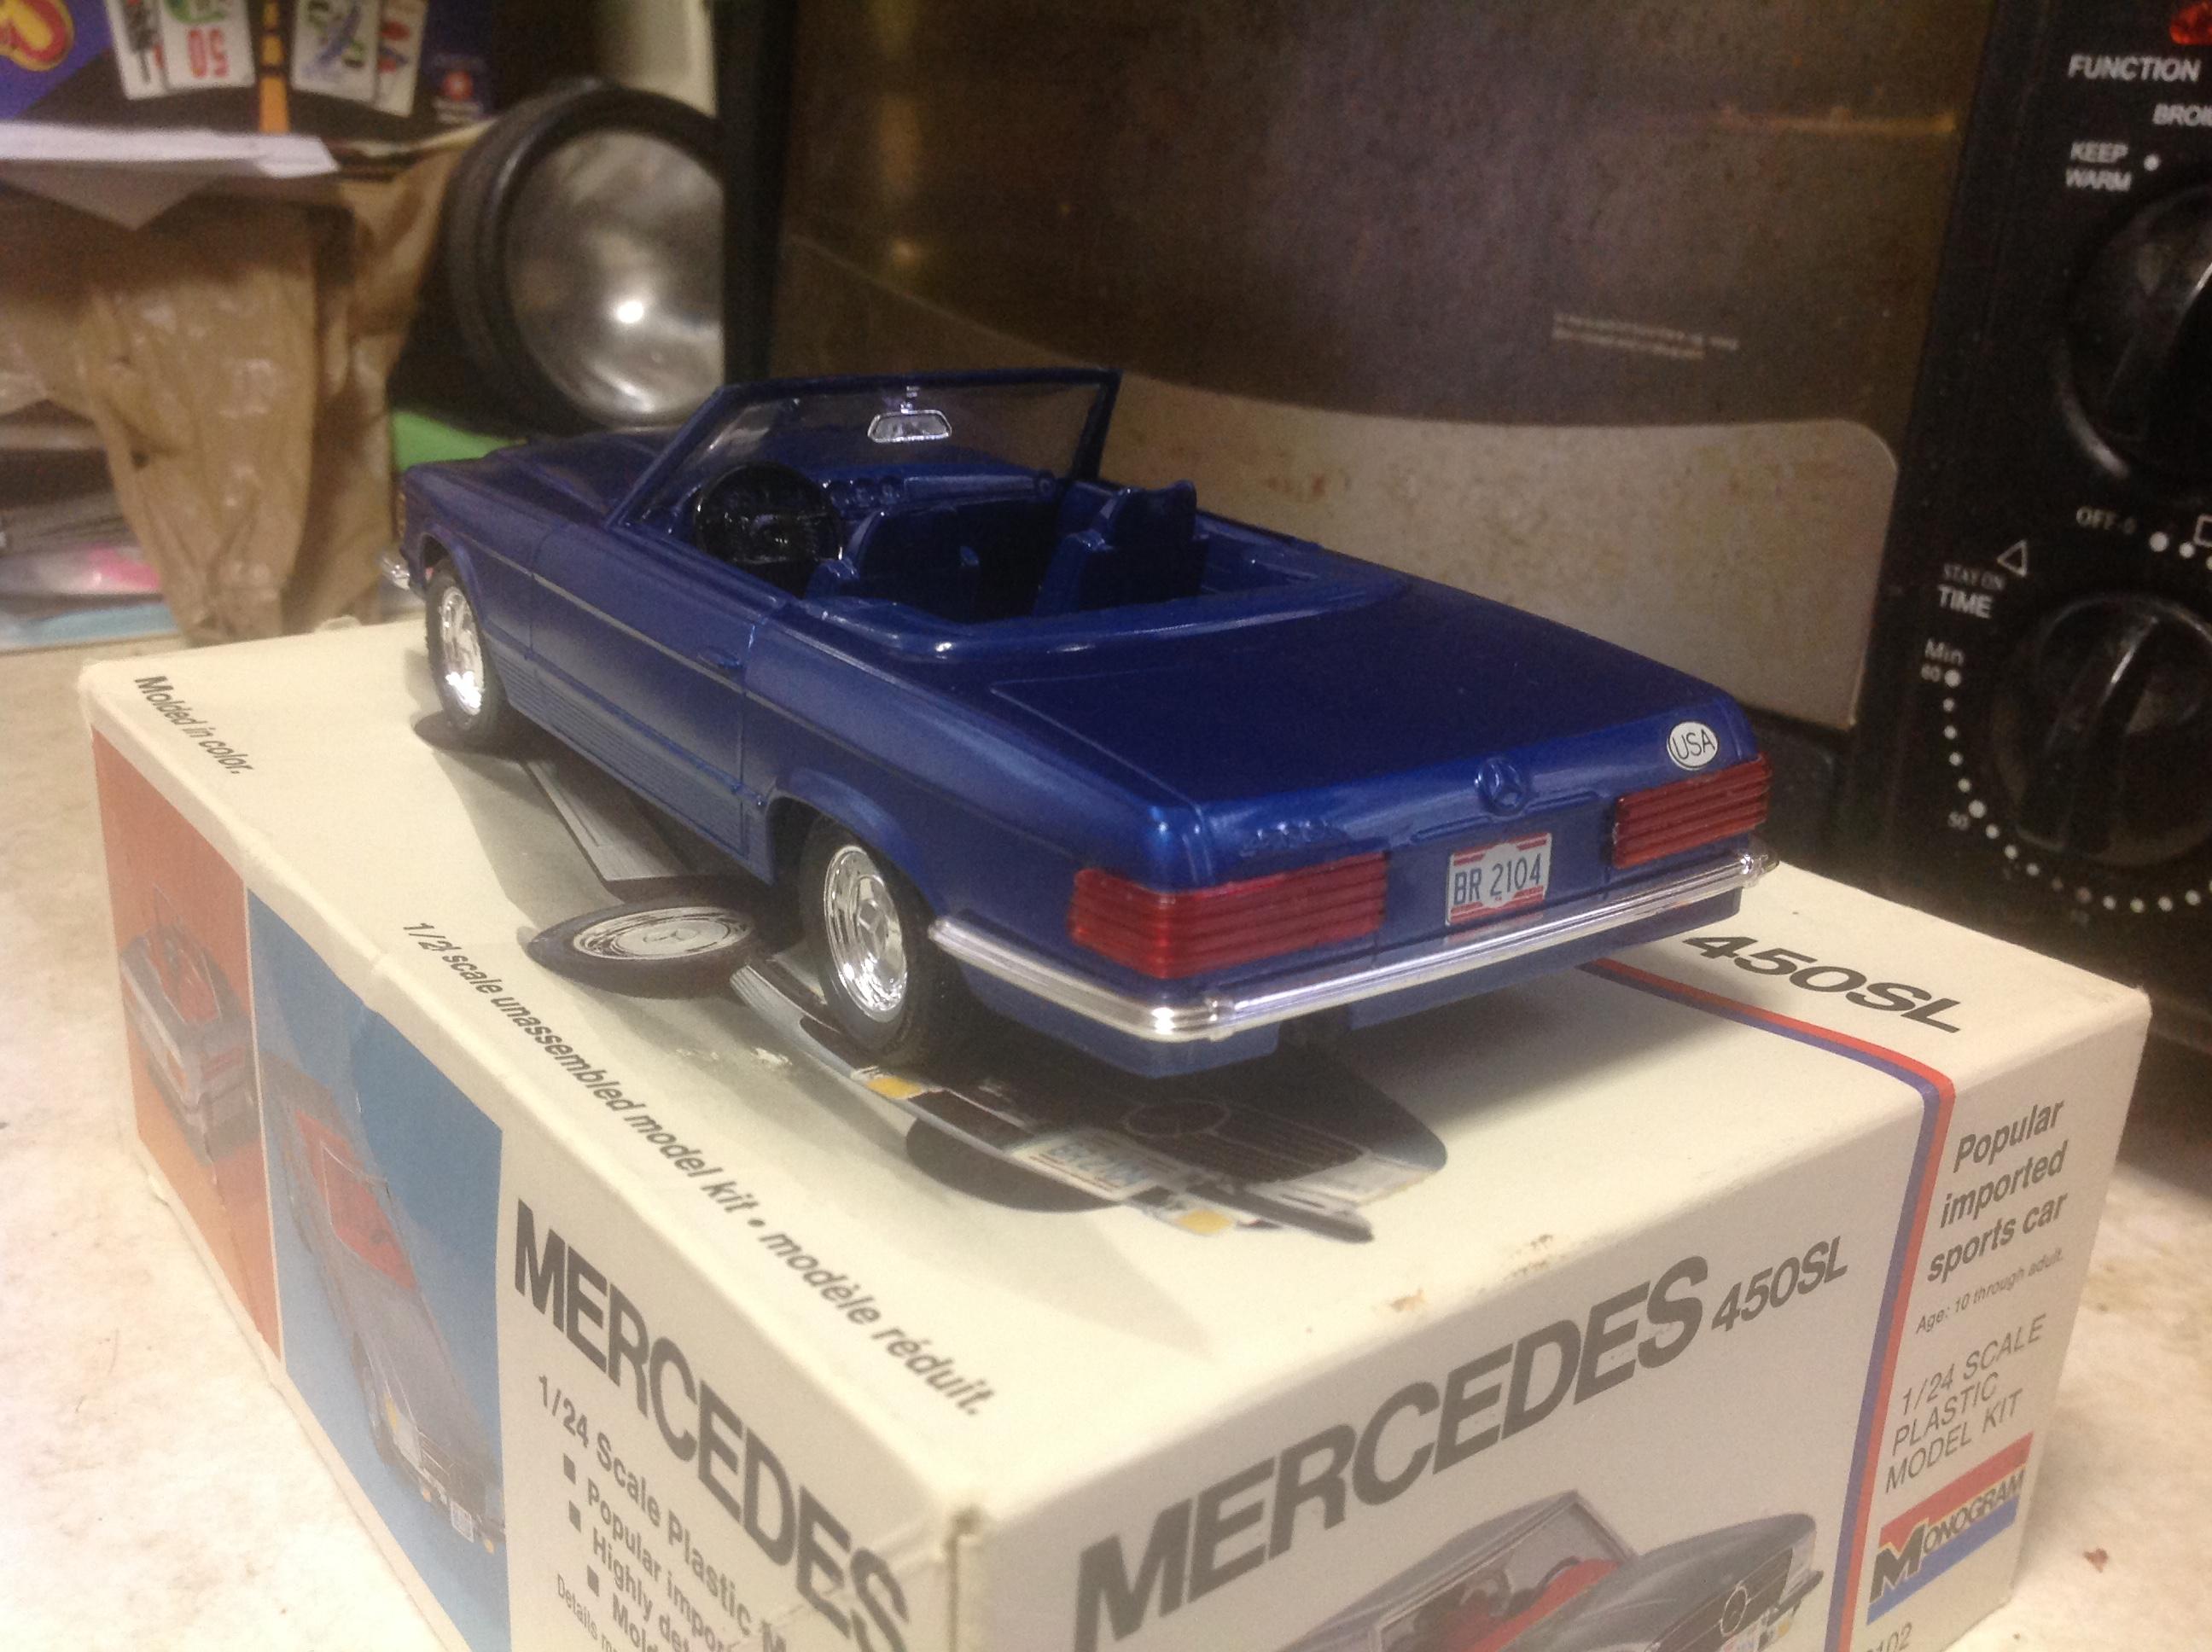
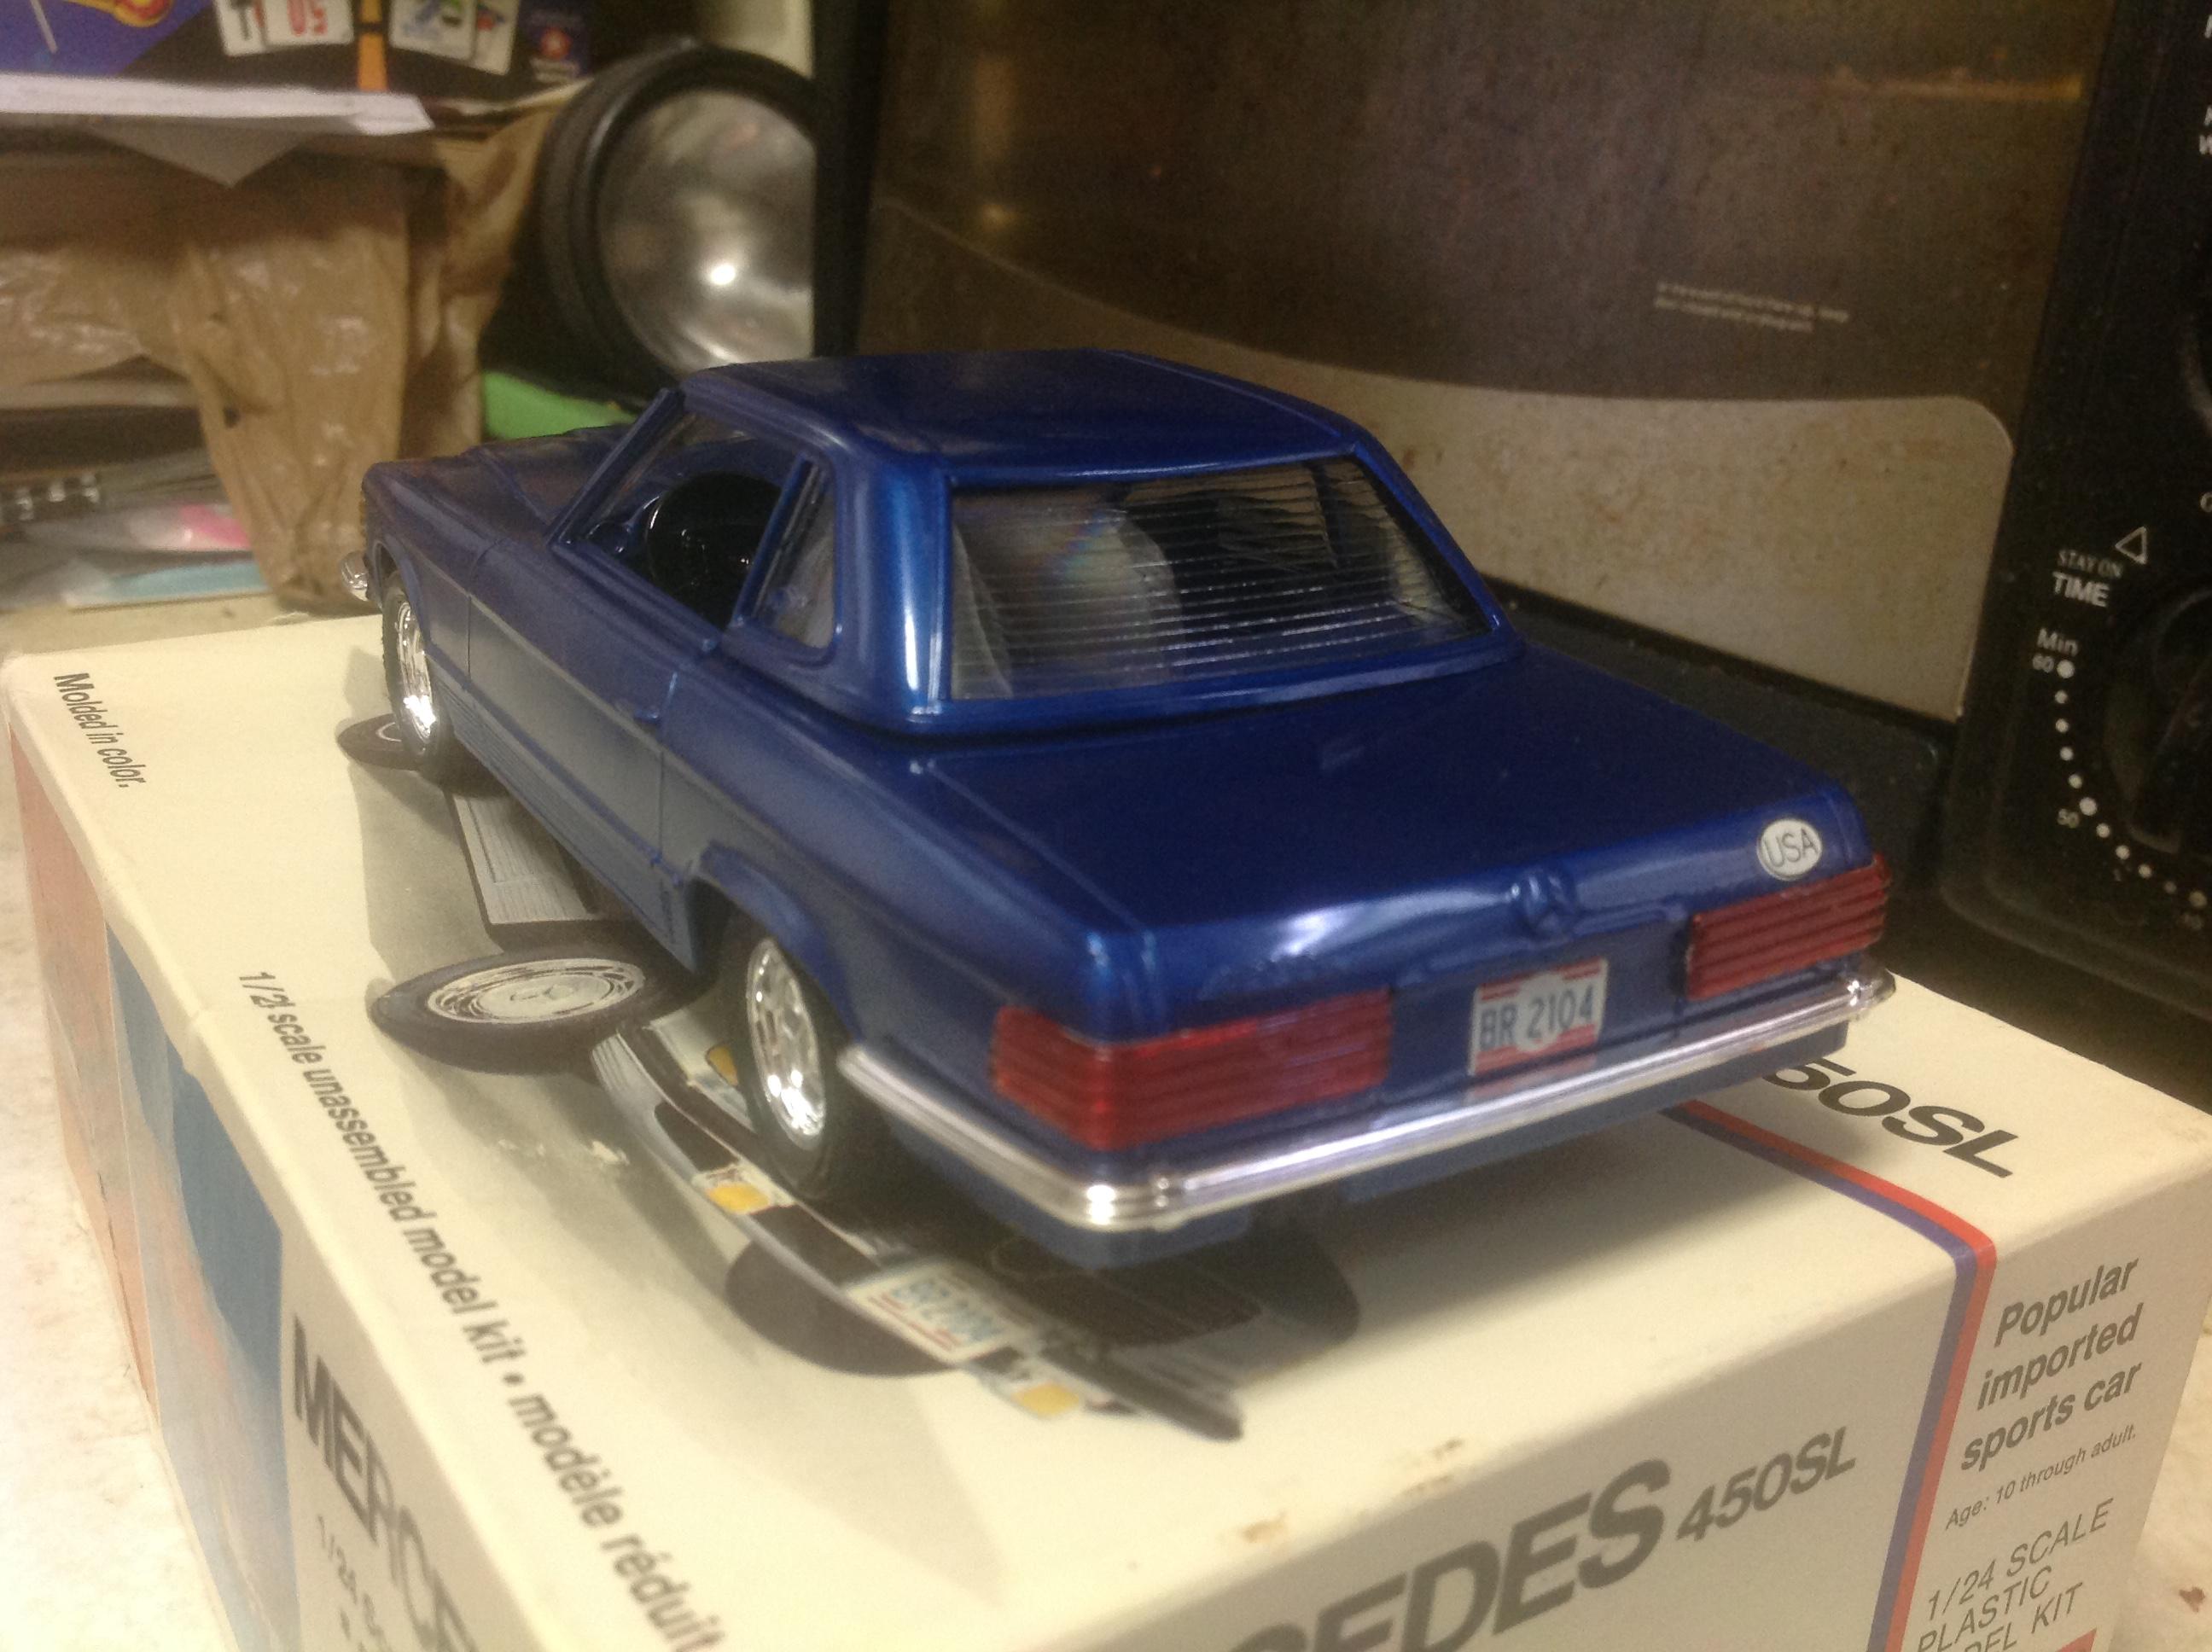
Finished this one last night. Monogram's 1/24 Mercedes-Benz 450SL, from 1976. A very nice simple curbside kit. I hope you like it.
-
 Kenworth Tanker / Monogram / AMT Hello friends ! Today I'd like to introduce you to my recently completed Kenworth tanker truck. The tractor is the Kenworth Aerodyne Snap Kit in 1:25. Matching the AMT tank semi-trailer to the same scale. In the Kenworth I have also made a sun visor, and an insect deflector on the hood. Mudflaps from an old bicycle tube were cut from the front and attached to the fenders. On the trailer there is a lot more modifications done. The tank was covered with chrome adhesive foil from the sauna area. There were still long front fenders mounted, as it is regulation in the US. I have seen these additional fenders on every tanker during my travels to the USA. They are designed to protect against whirling stones from the tractor. A second ladder has been added to the front right side. There are then the red-white reflector strips have been attached. The filling fittings at the pump were provided with a protective box and a tool box to be opened. The tanker has gotten the logo of Union 76 on the ladder at the back. In addition, I have some homemade decals attached. The semi-trailer I built more than 3 years ago, had not yet the right tractor. Have fun watching . Greetings from Jan
 -
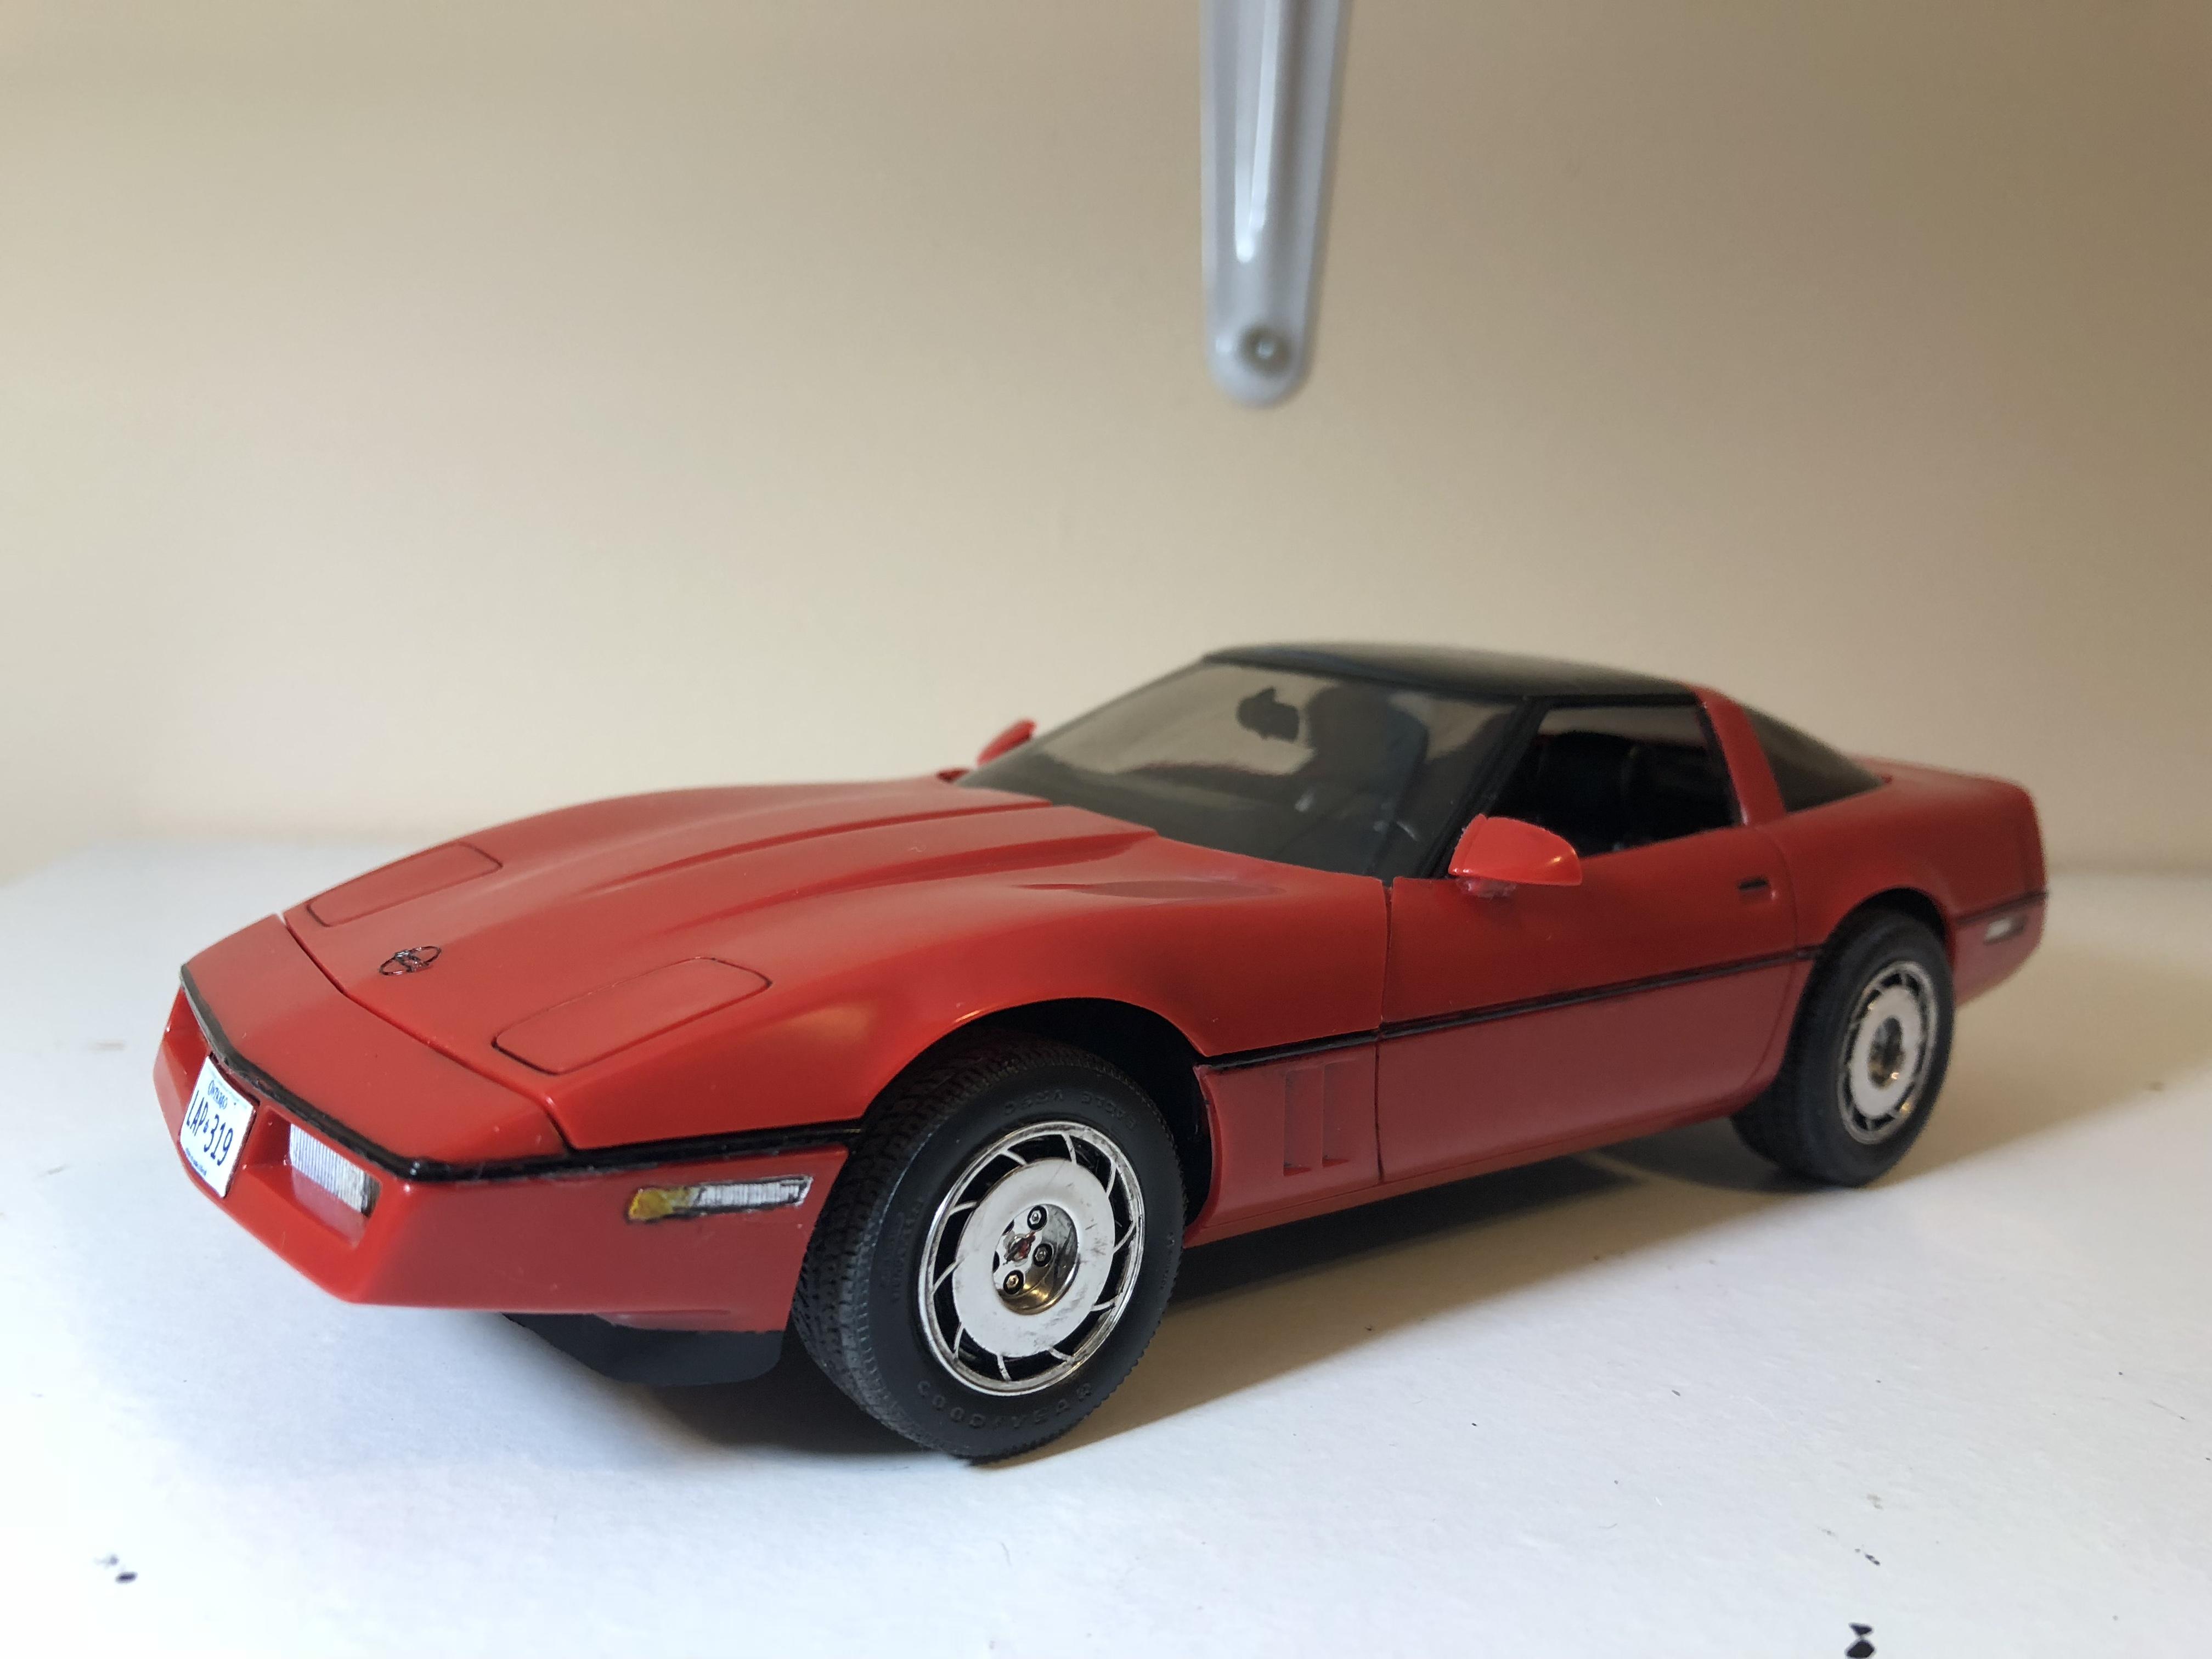
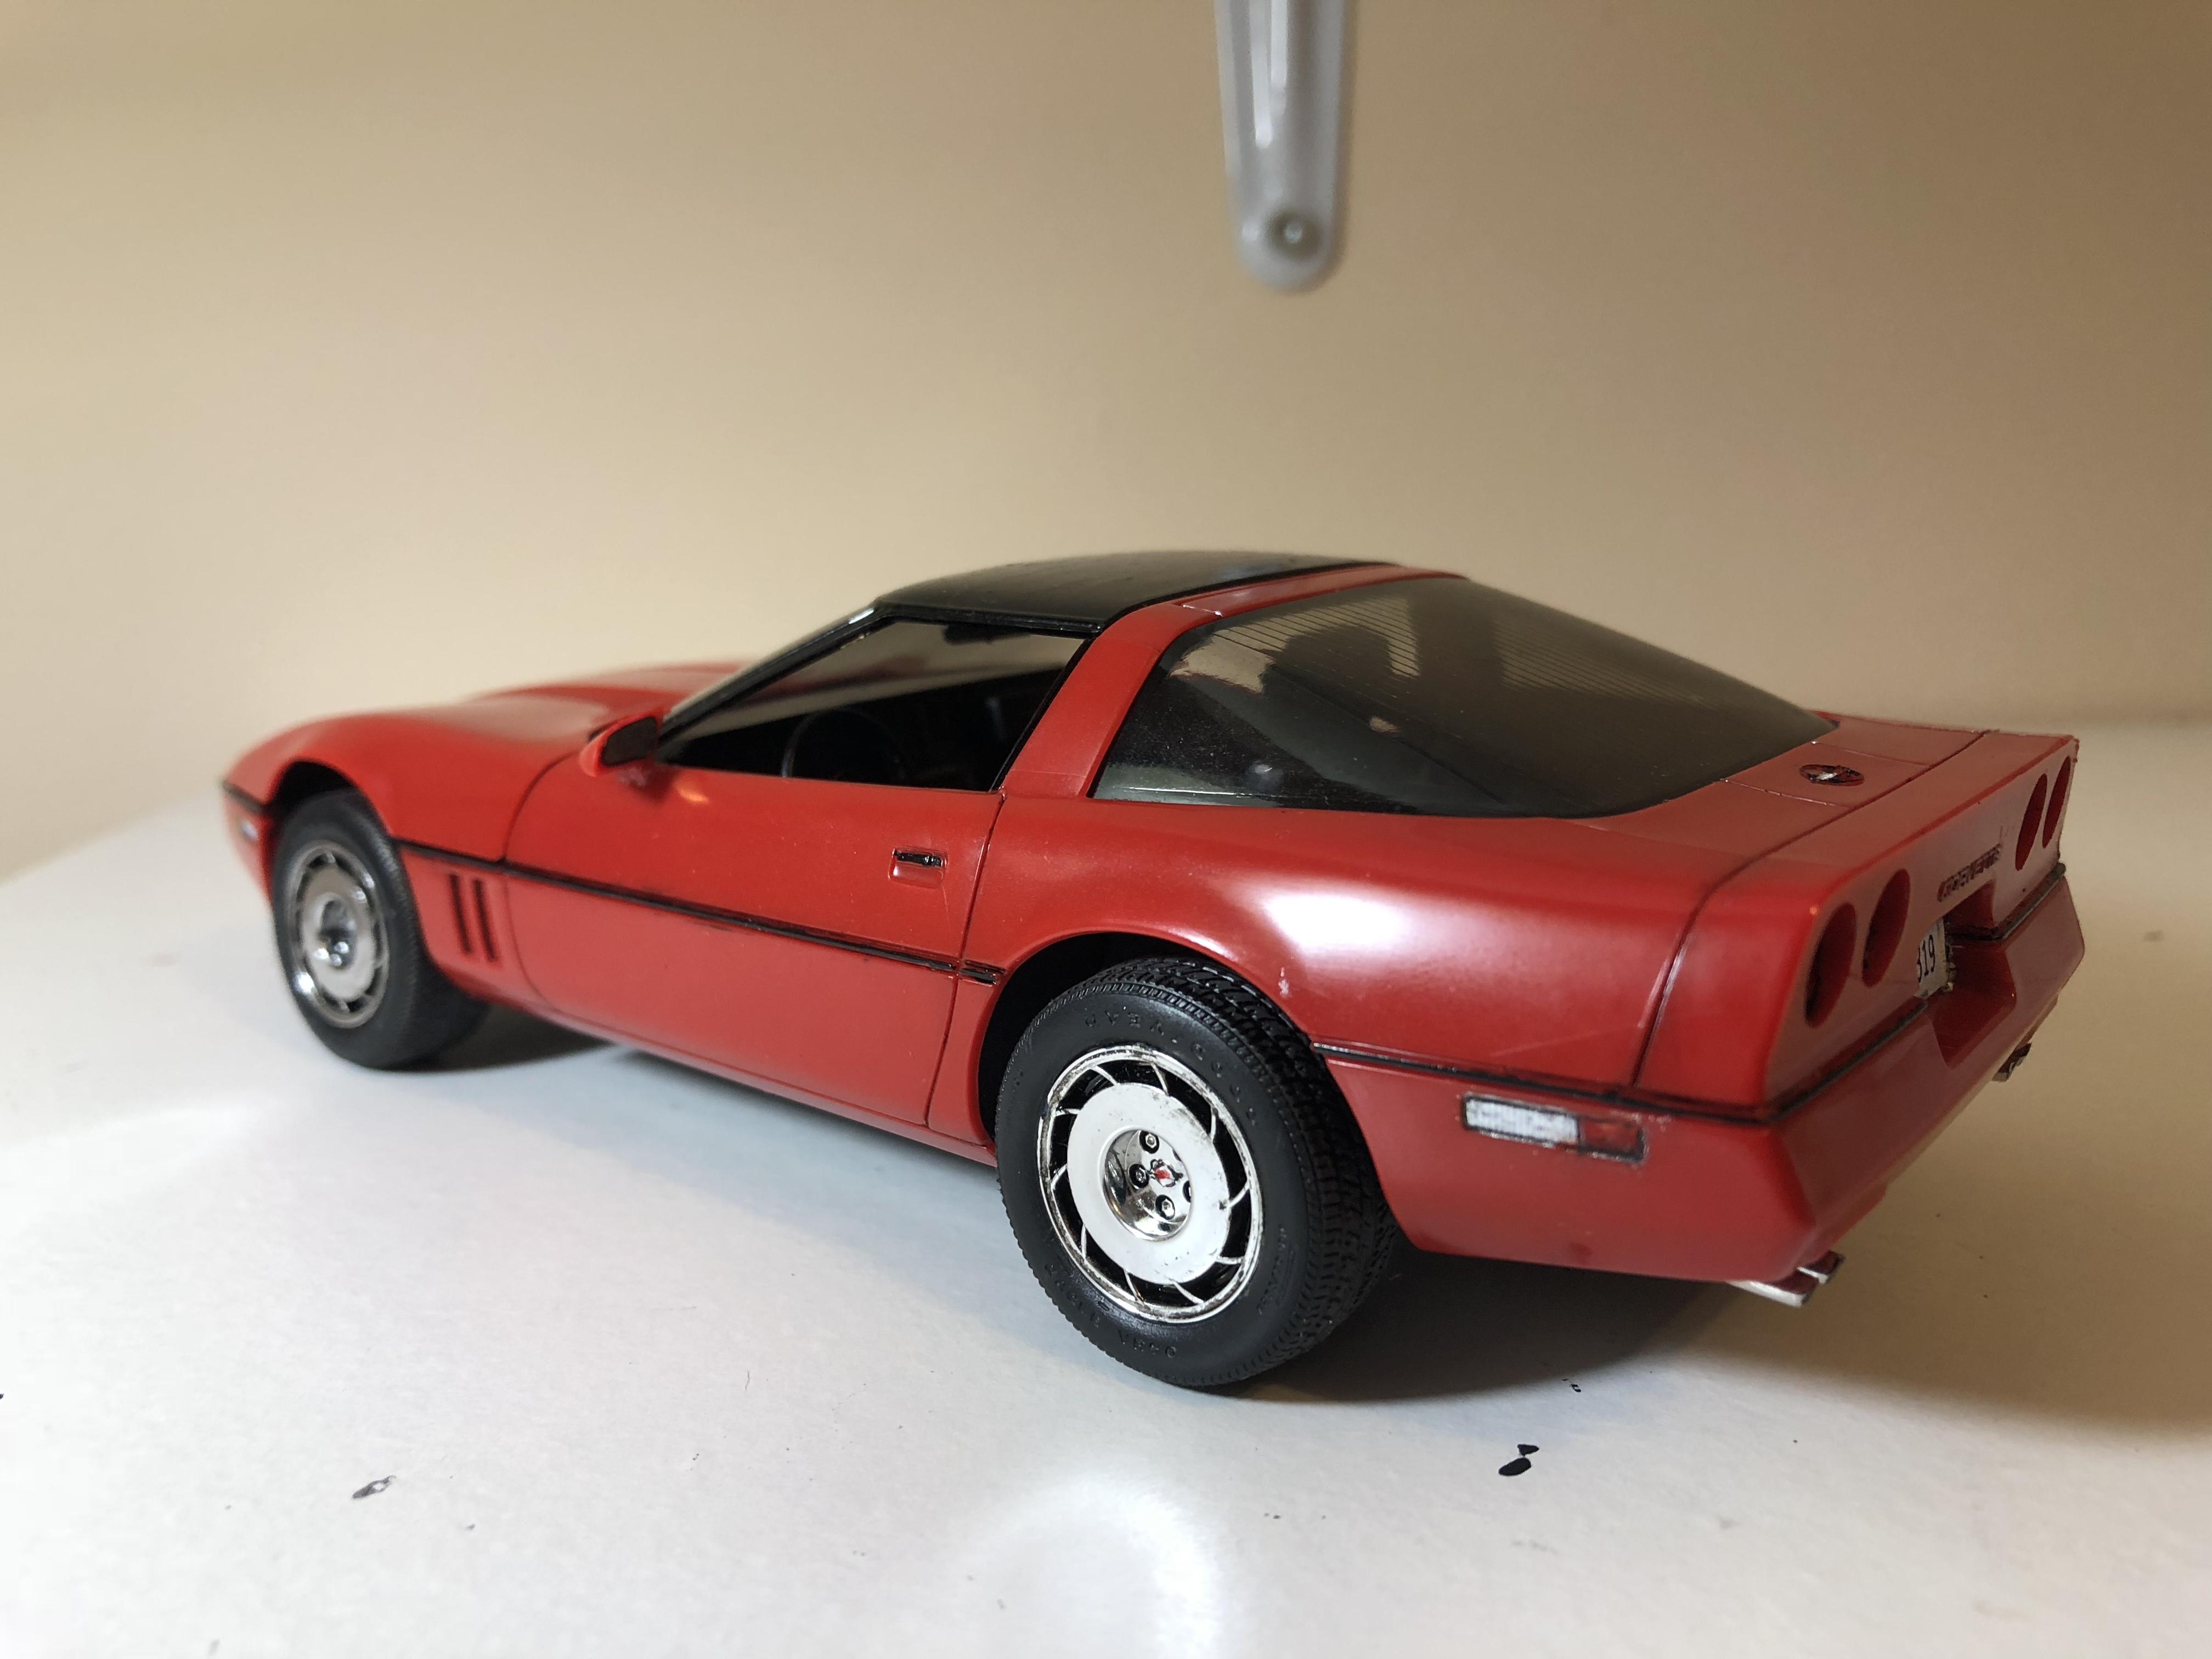
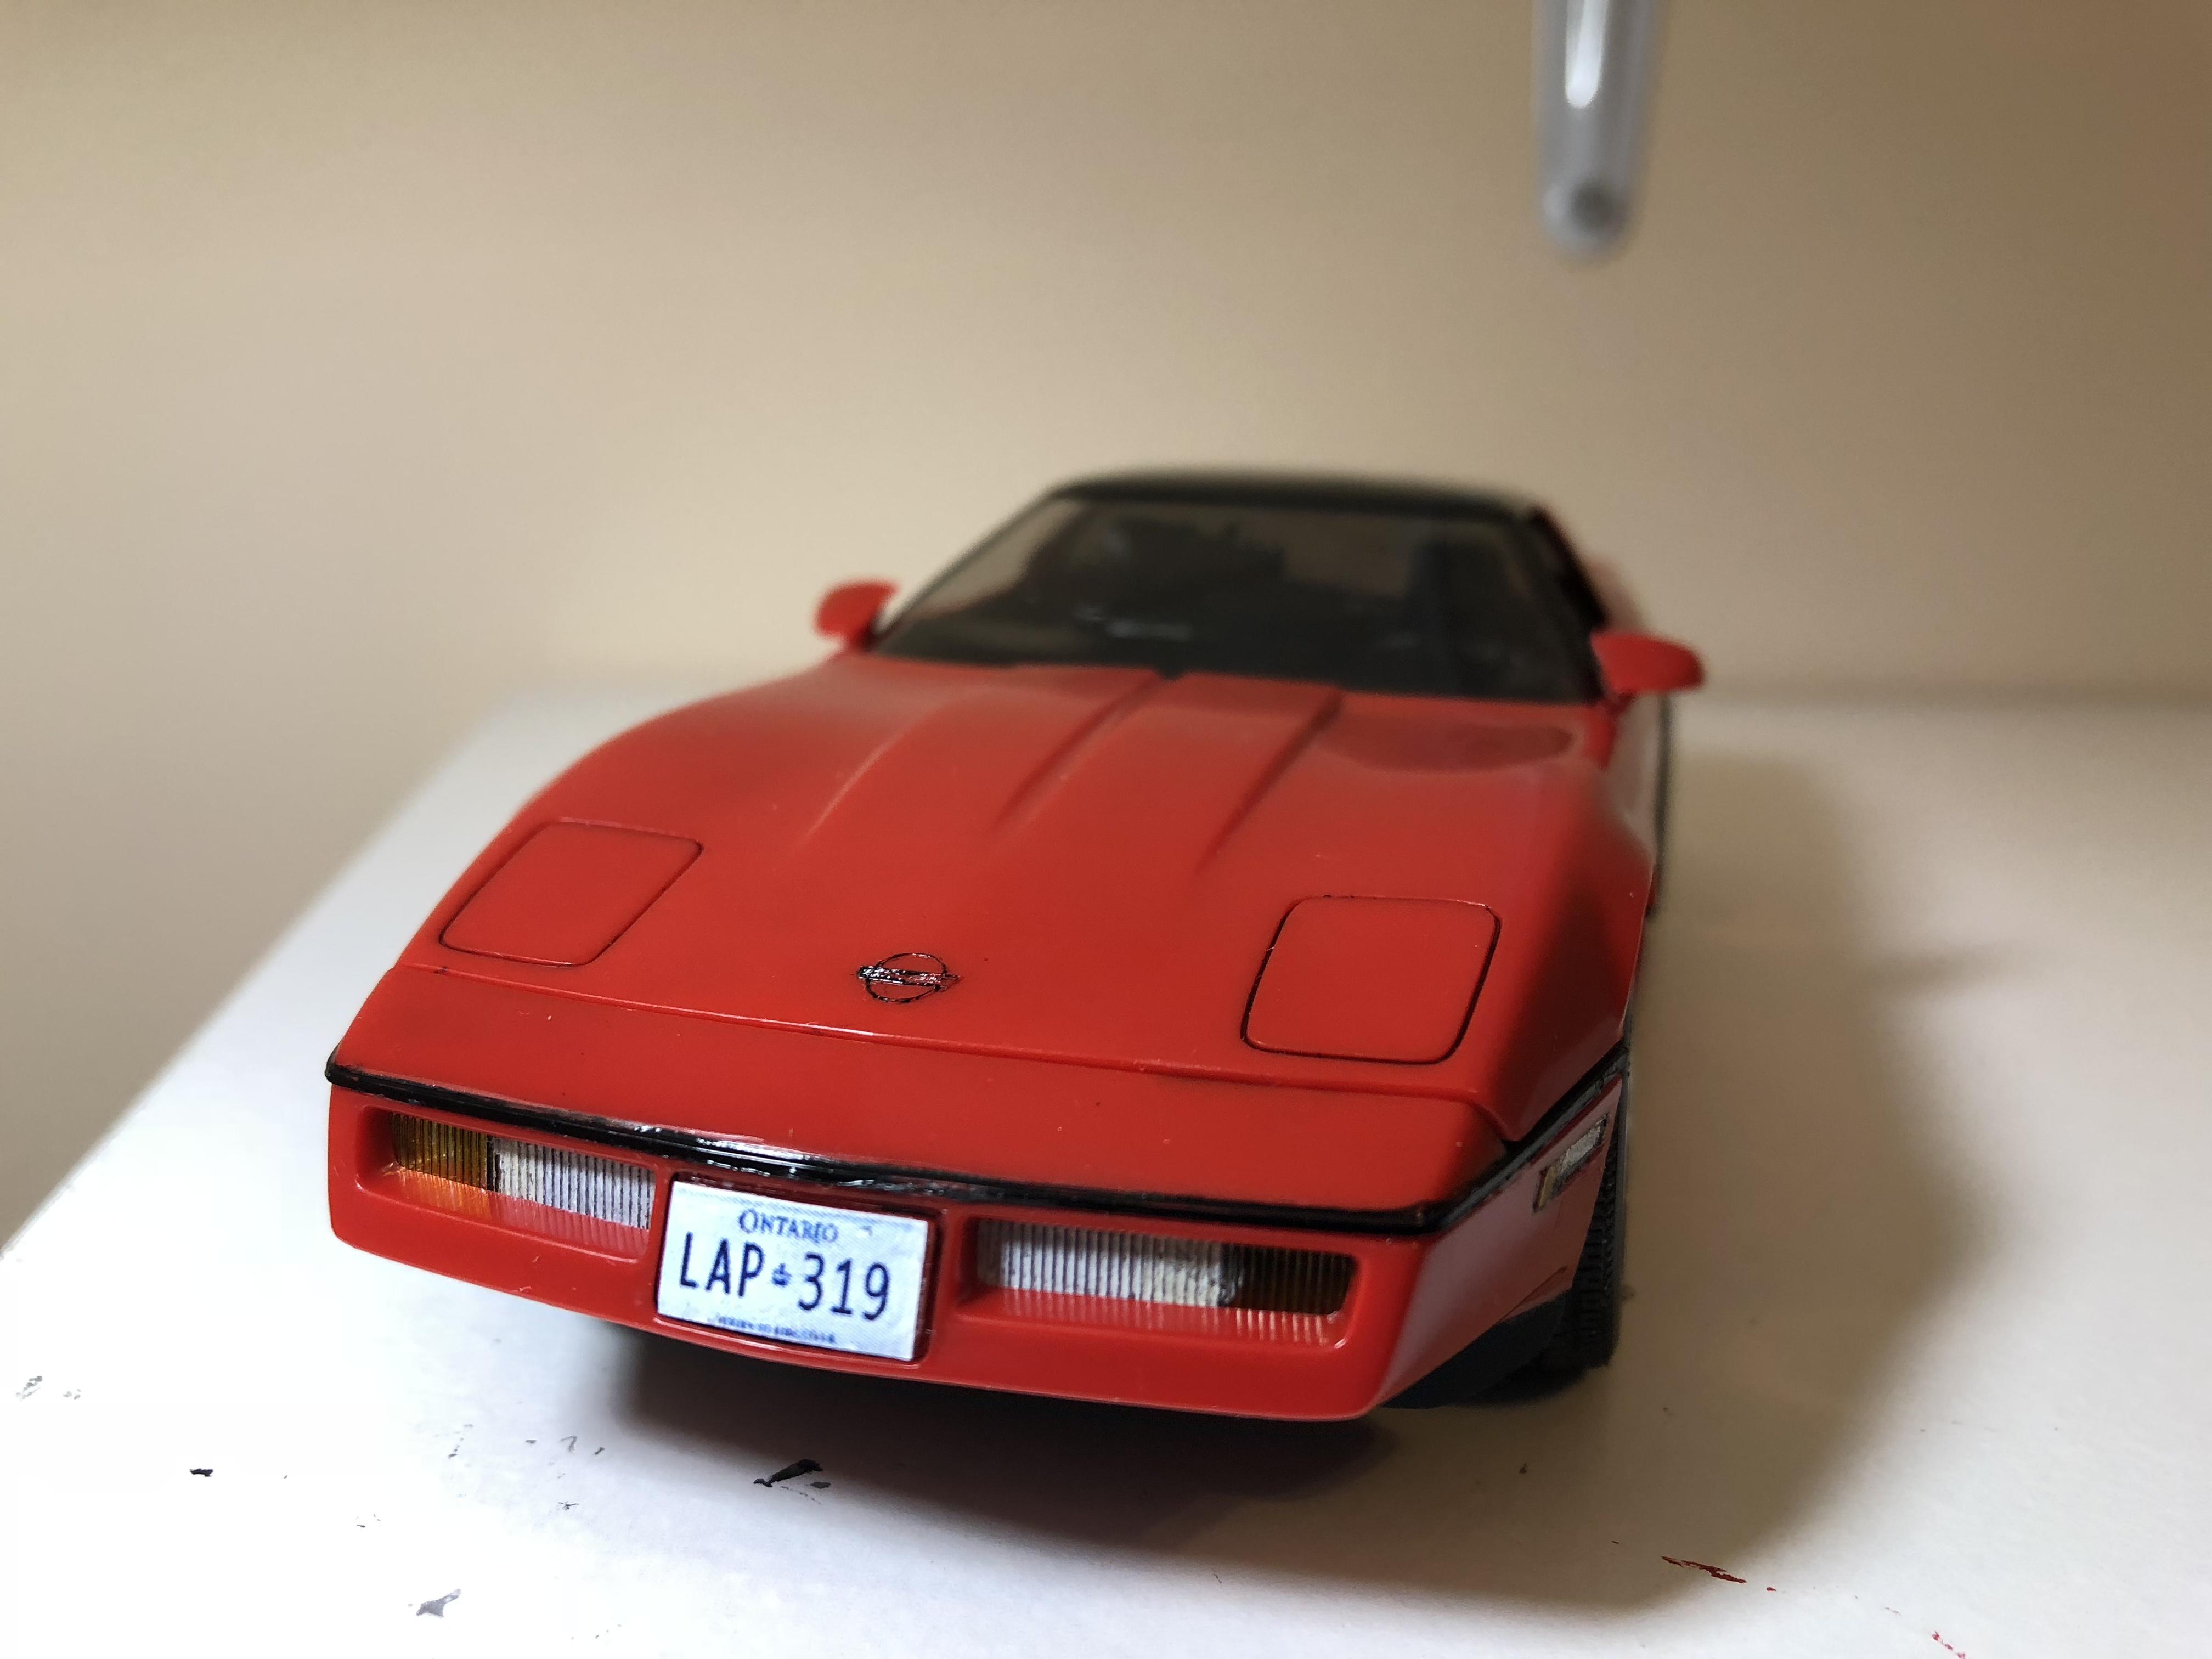
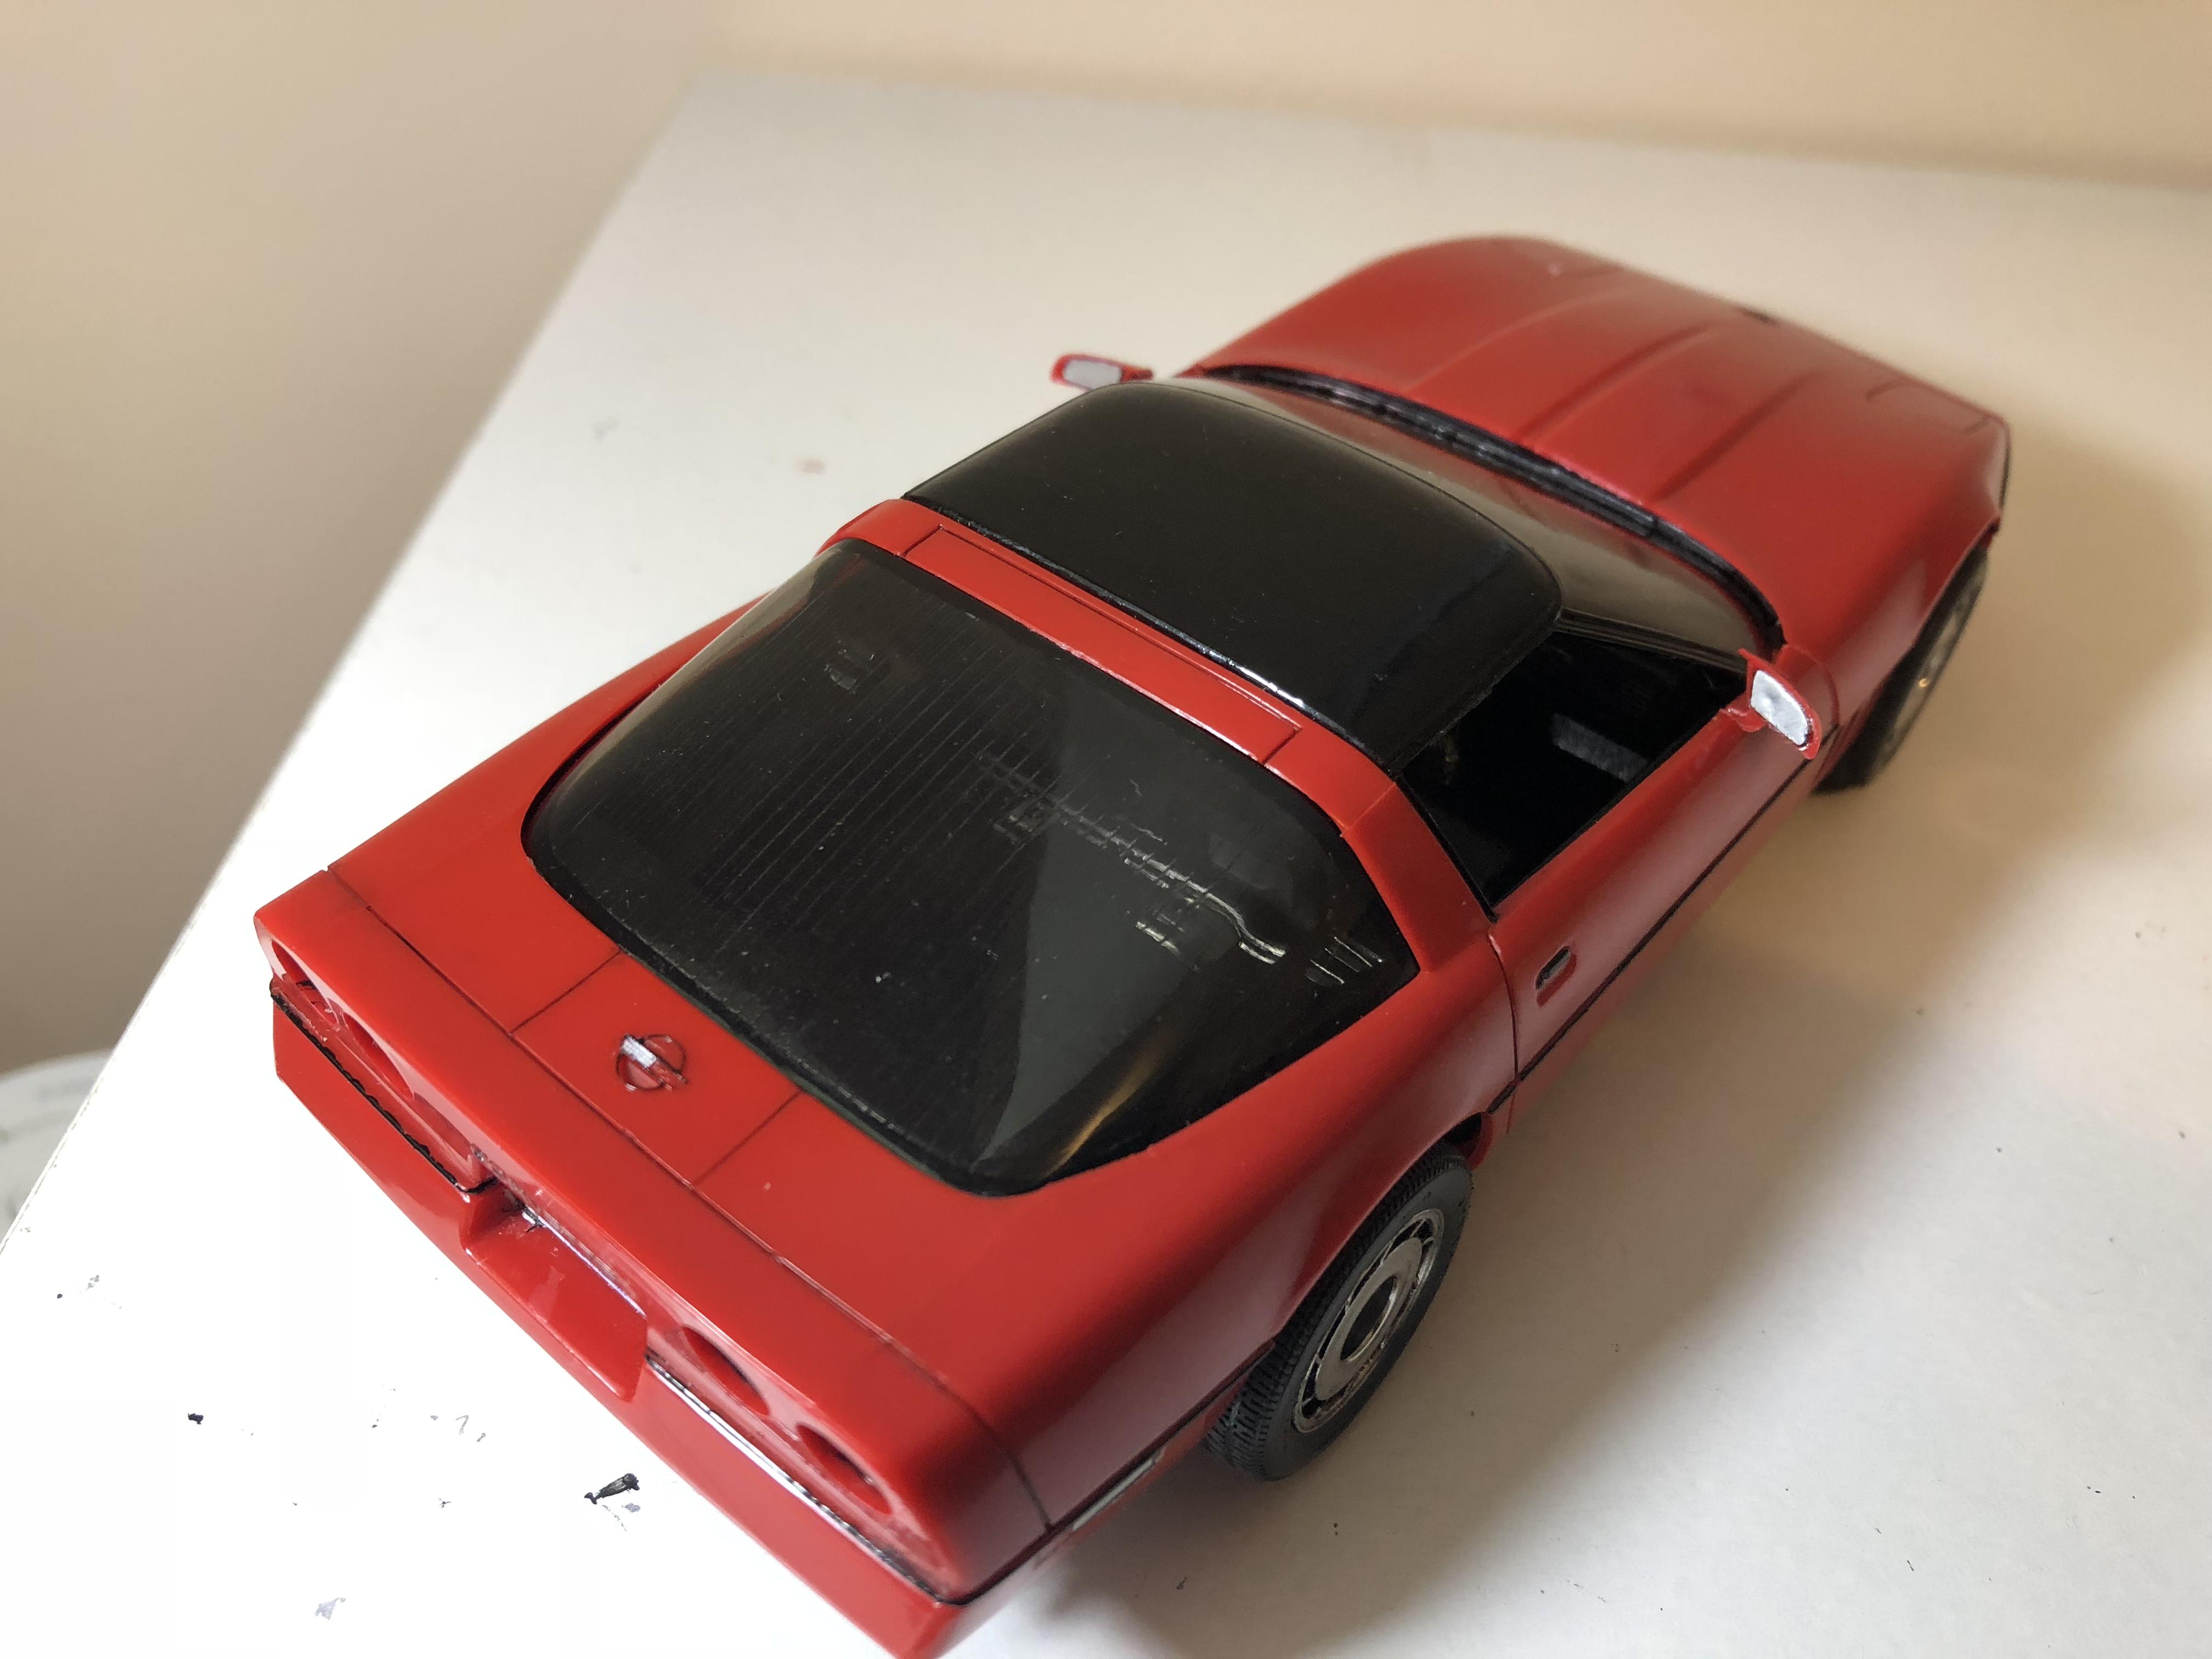
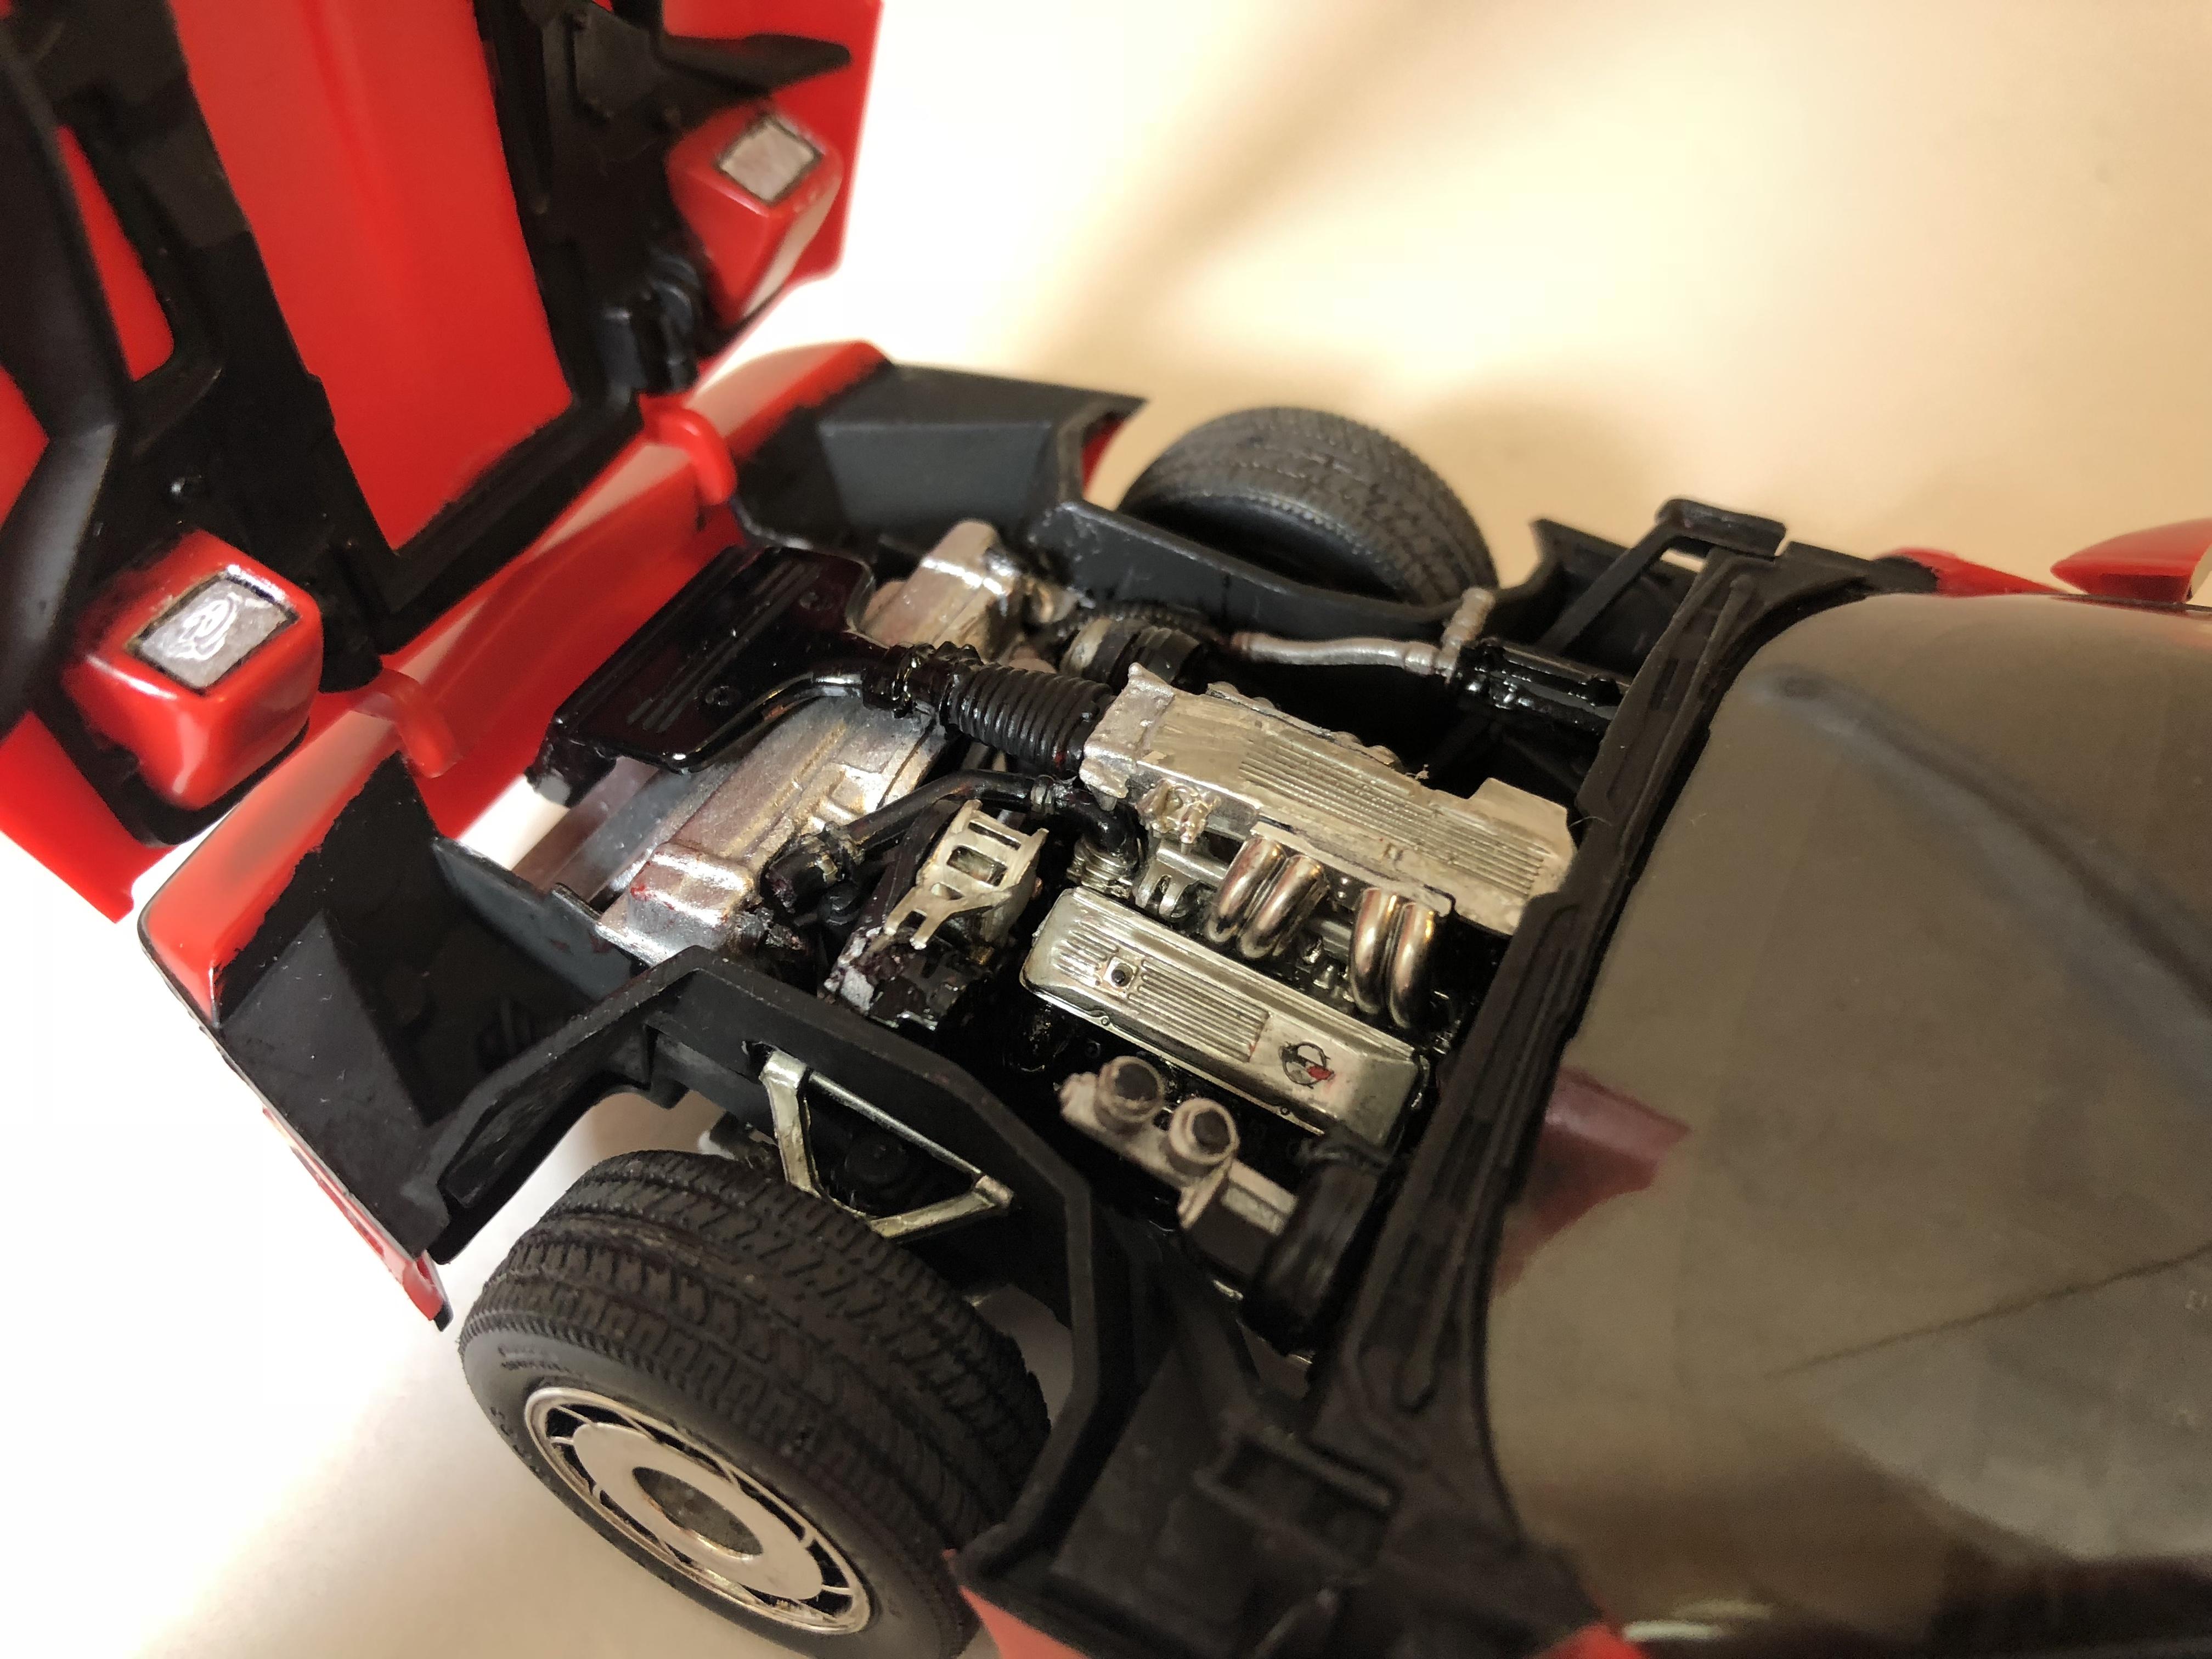
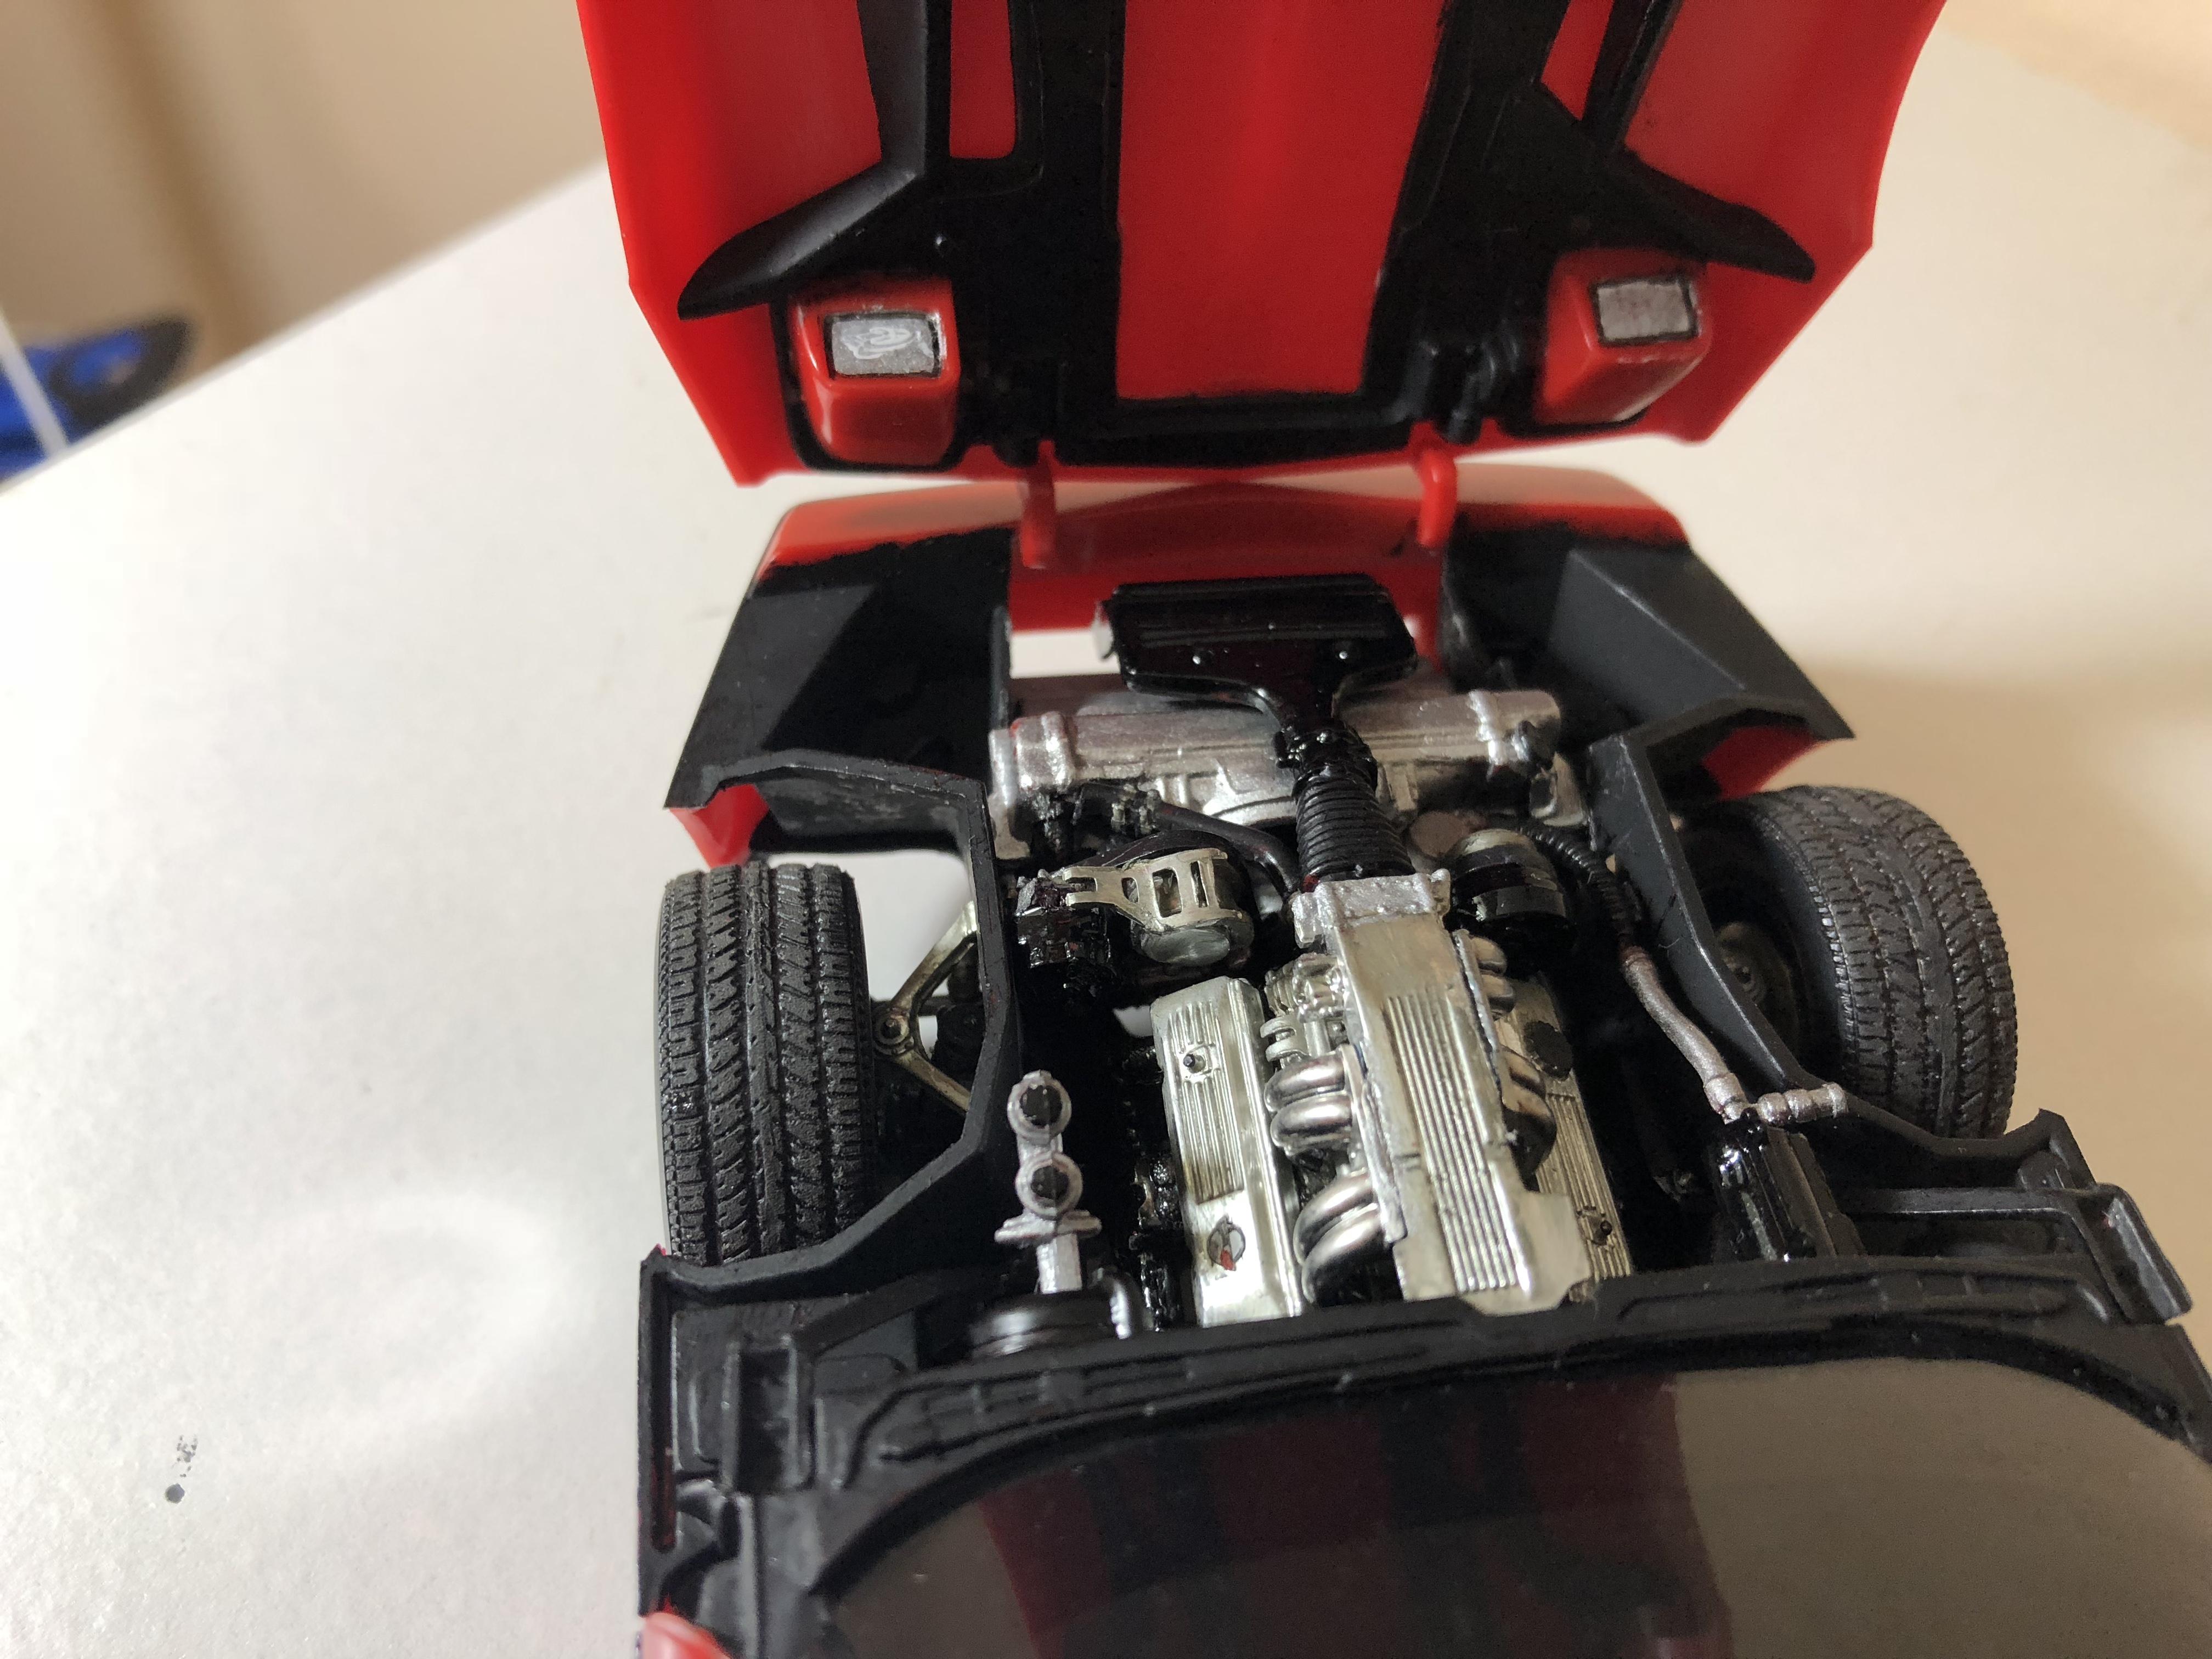
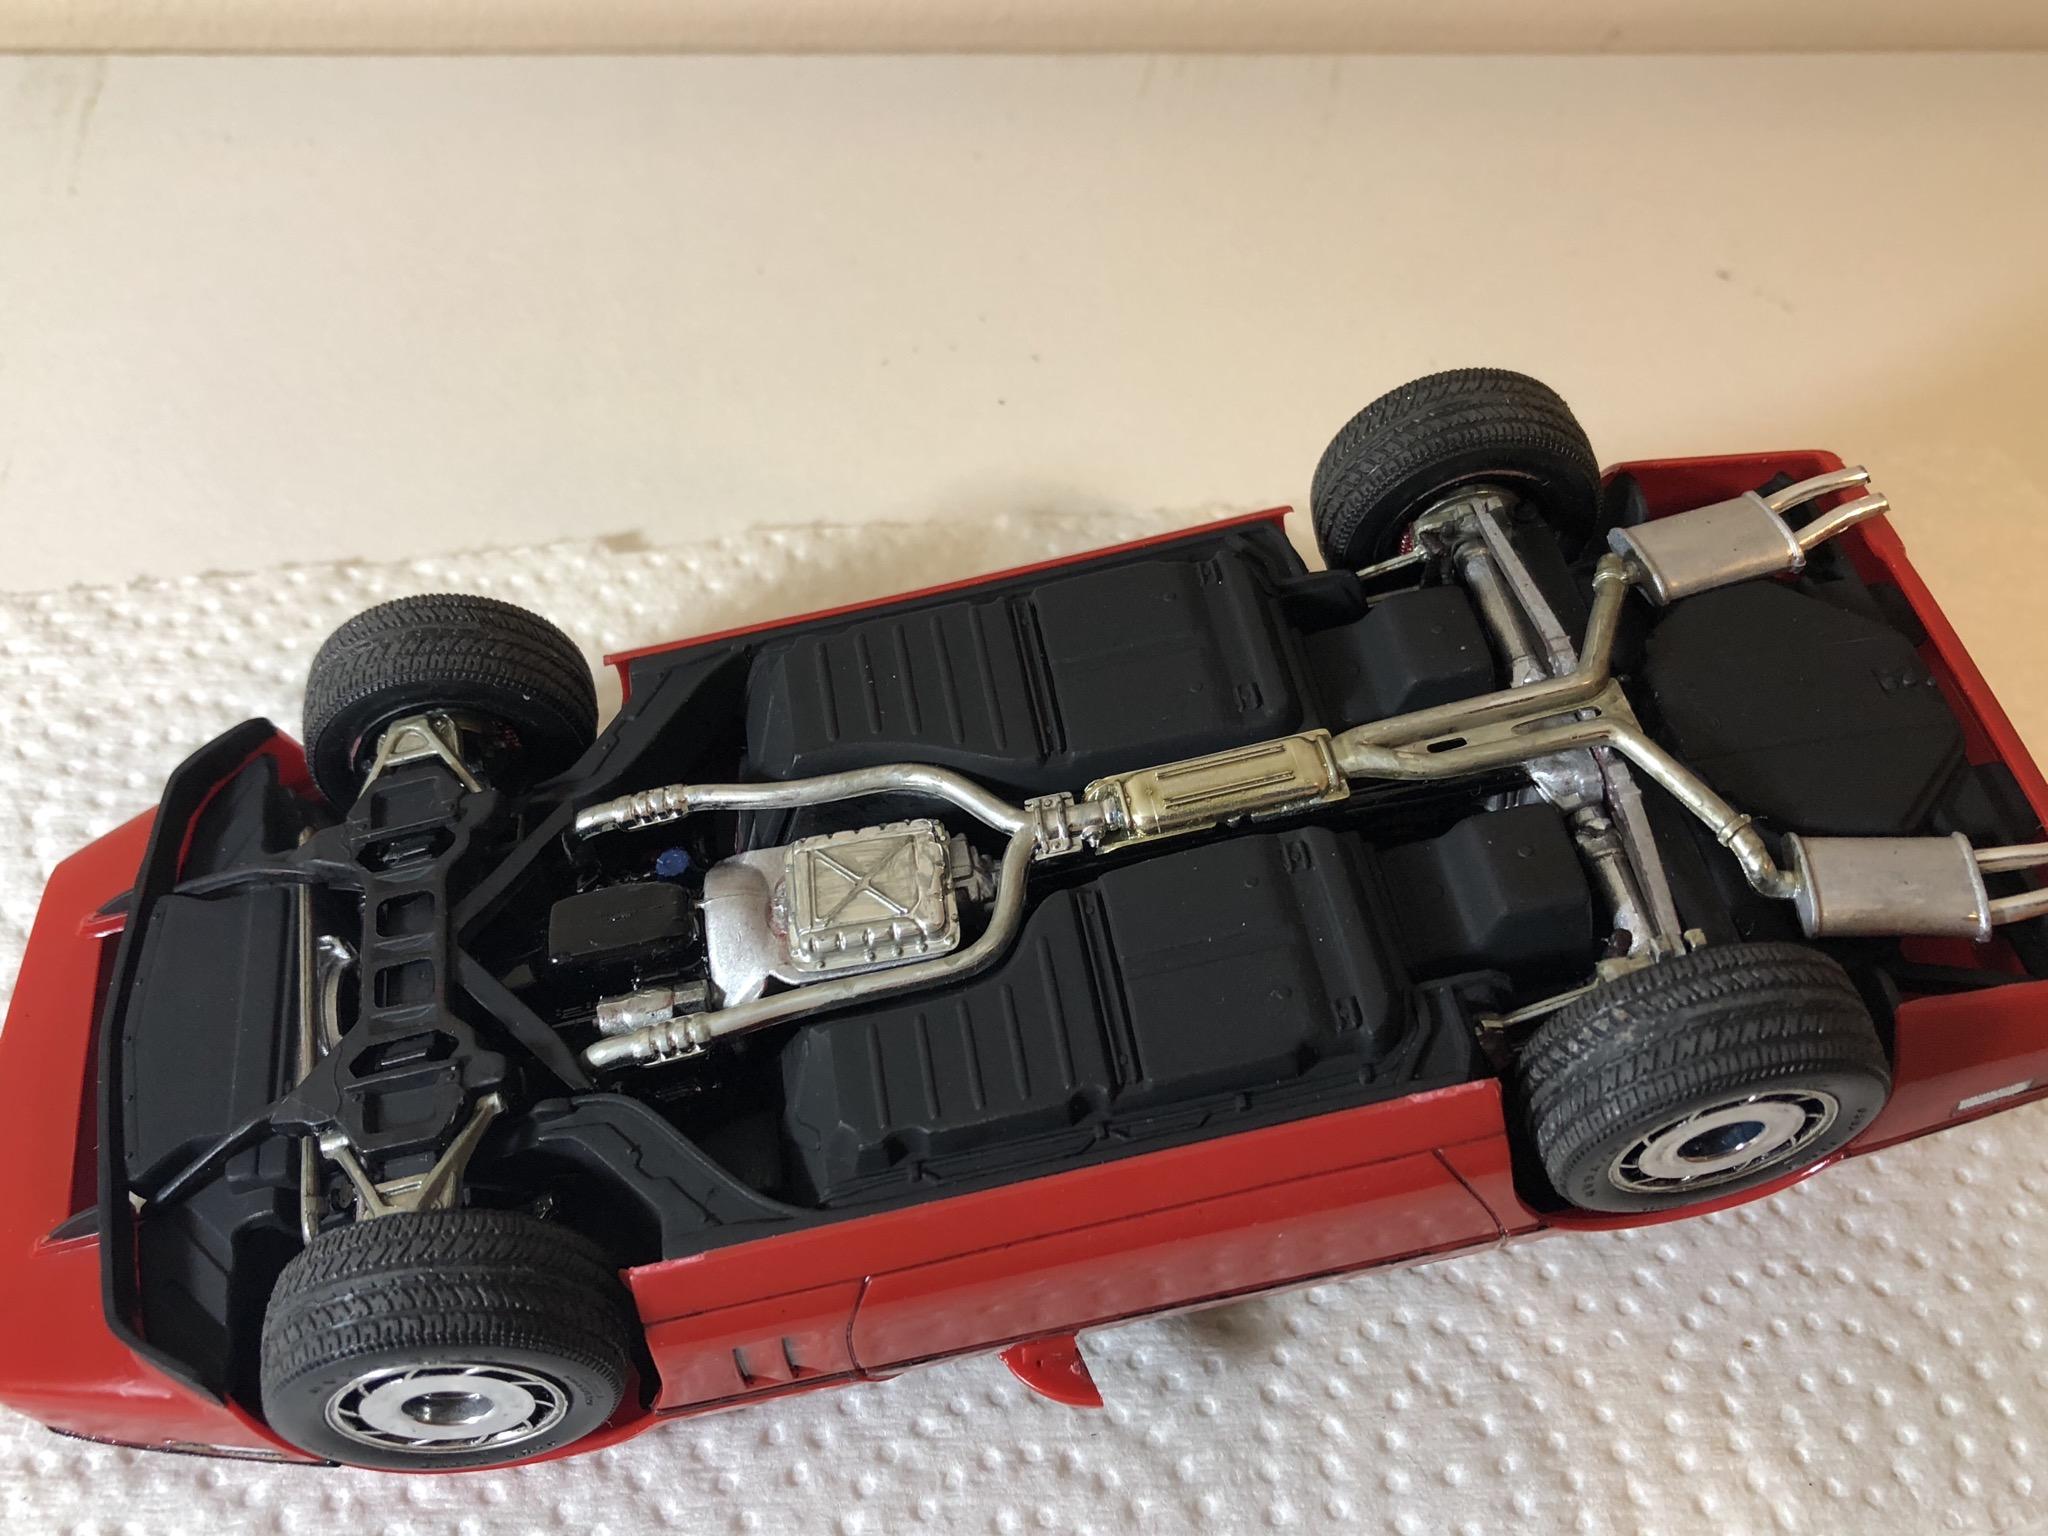
Hello. Completed my 1985 corvette by monogram. Box stock build. Left the classic monogram read bare plastic. Painted all the trim free hand. Think it turned out ok. Has some tricky suspension bits. But looks good. Great detail for a old kit. only issue I had with the kit was the taillights molded on the body. I tried my best to make them look good. But I think I overkilled it. Thanks for looking all comments welcomed
-
Another start. Monogram classic ‘85 vette molded in red. Working on the body first. Started painting the black trim. Going to leave this one Bare plastic. Has my supplies are dwindling. Thabks for looking. All comments welcomed.
-
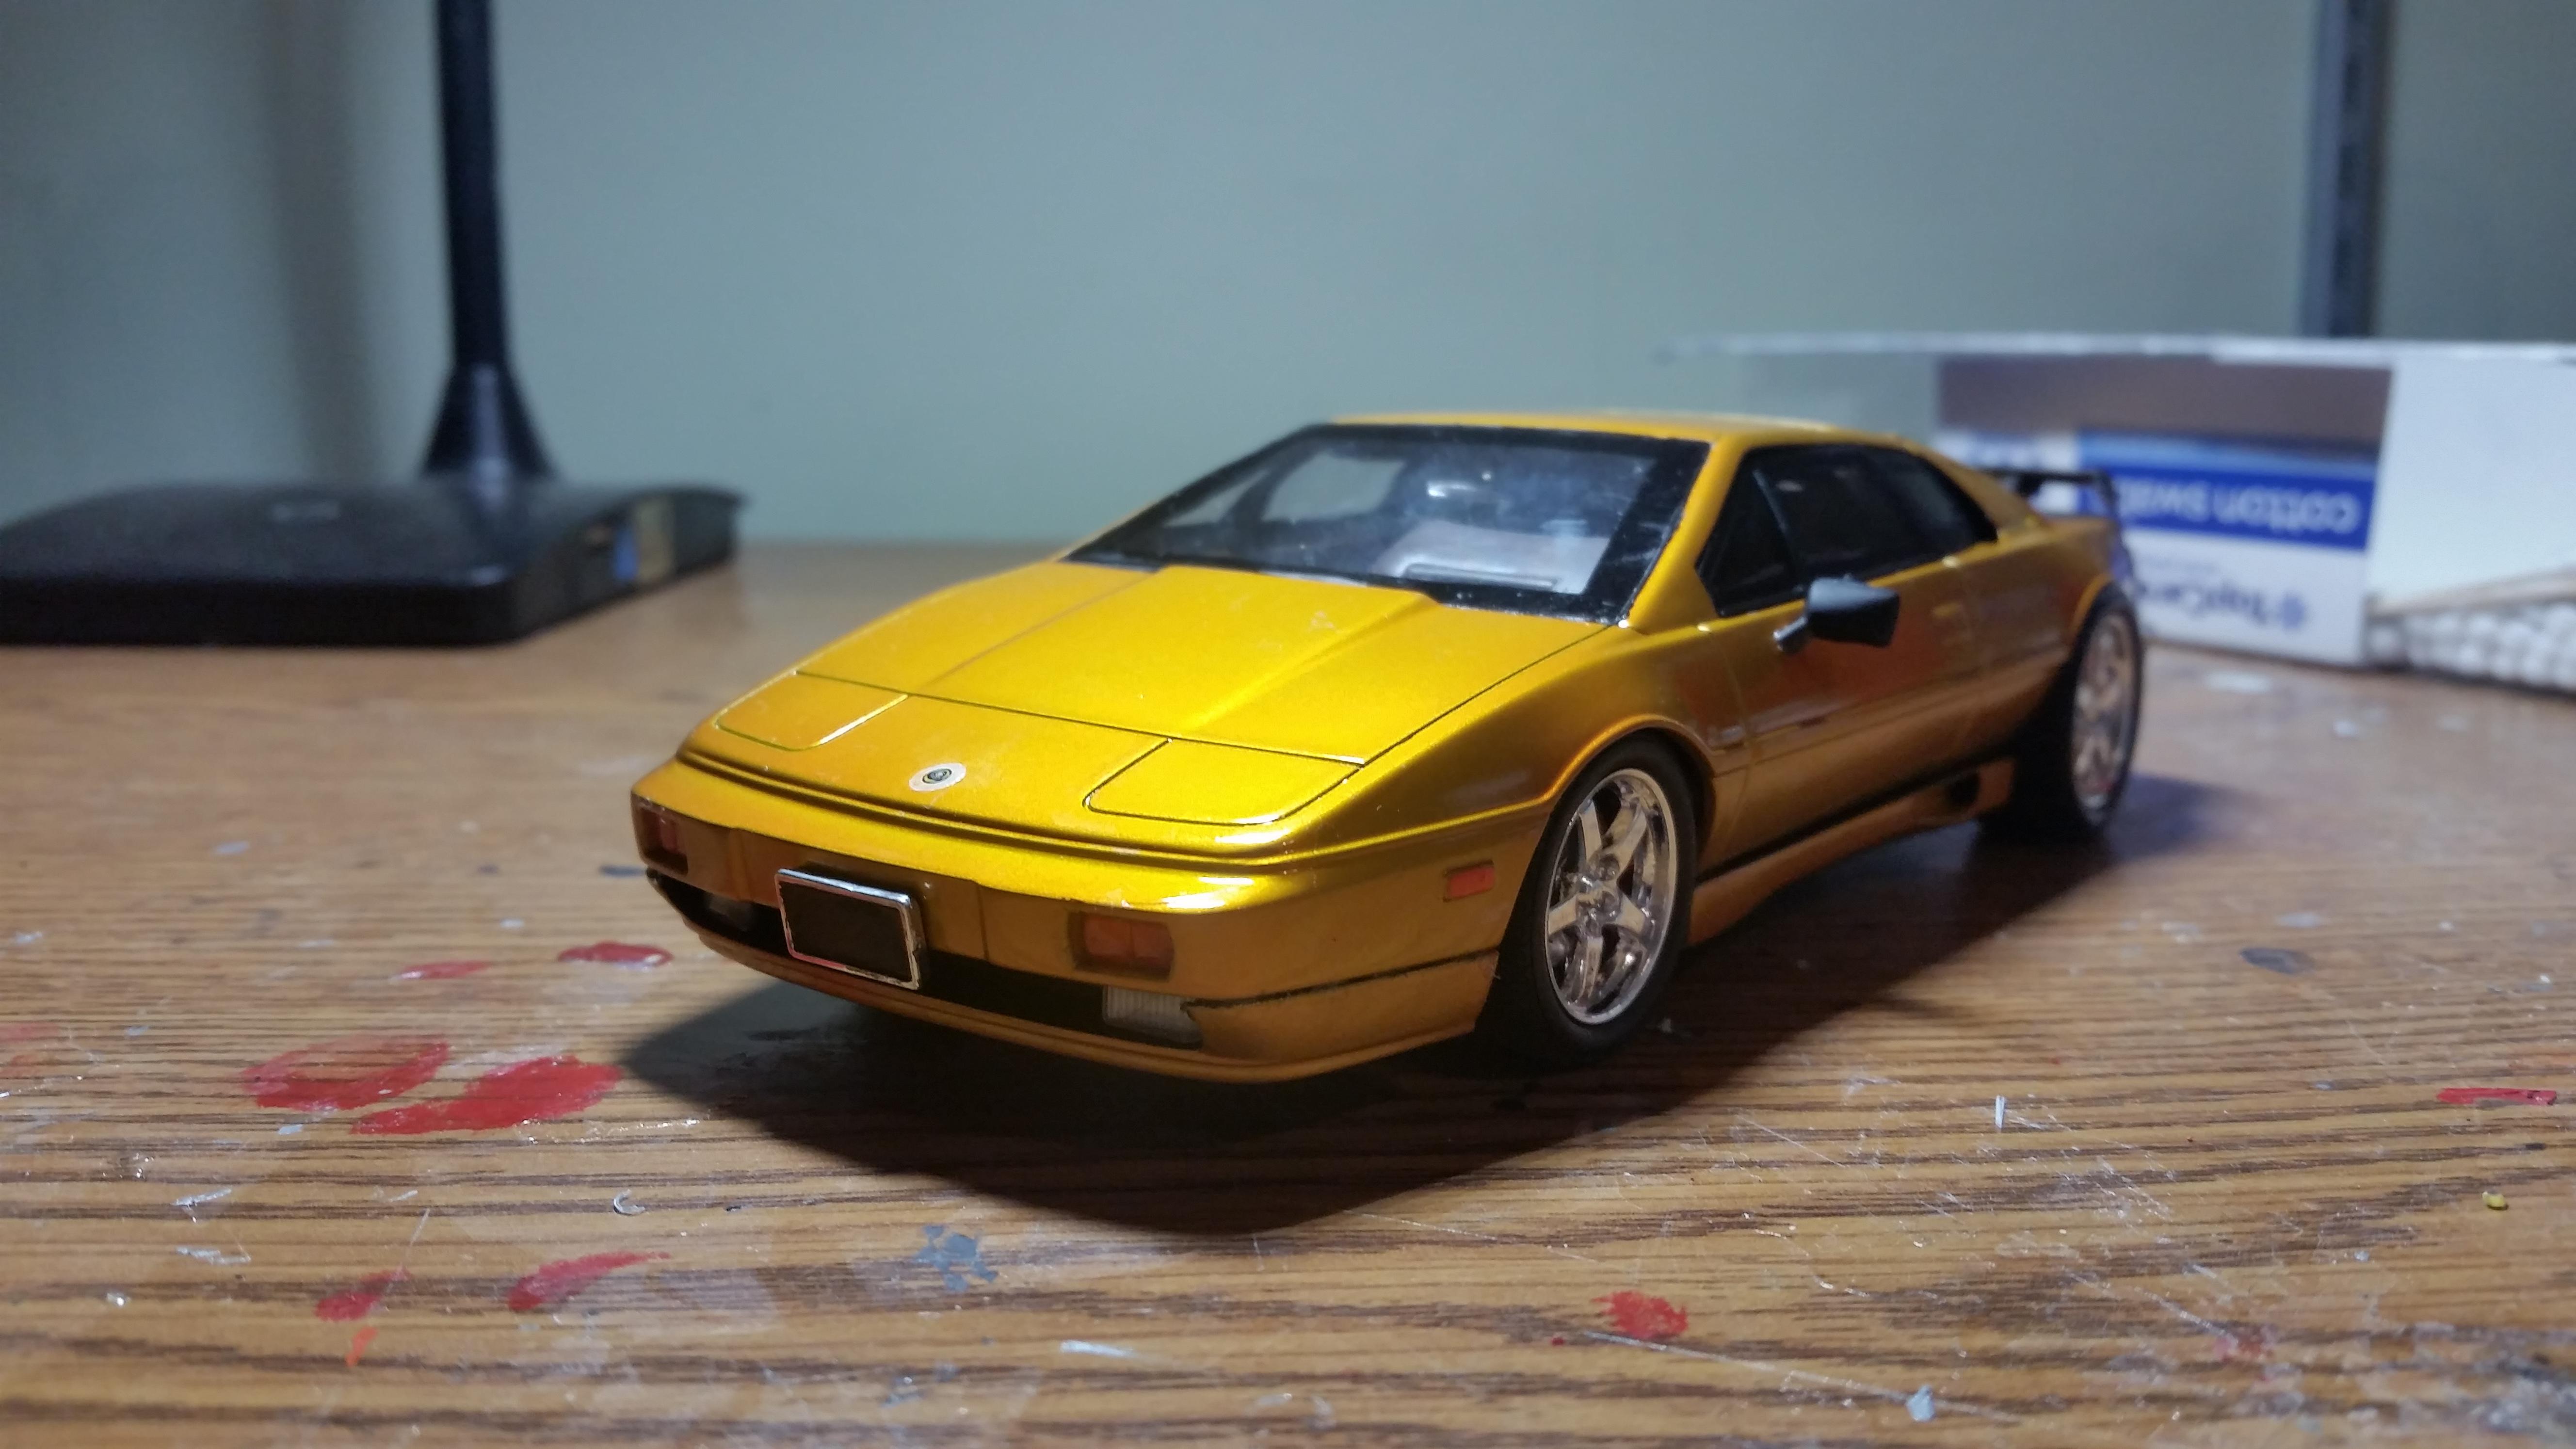
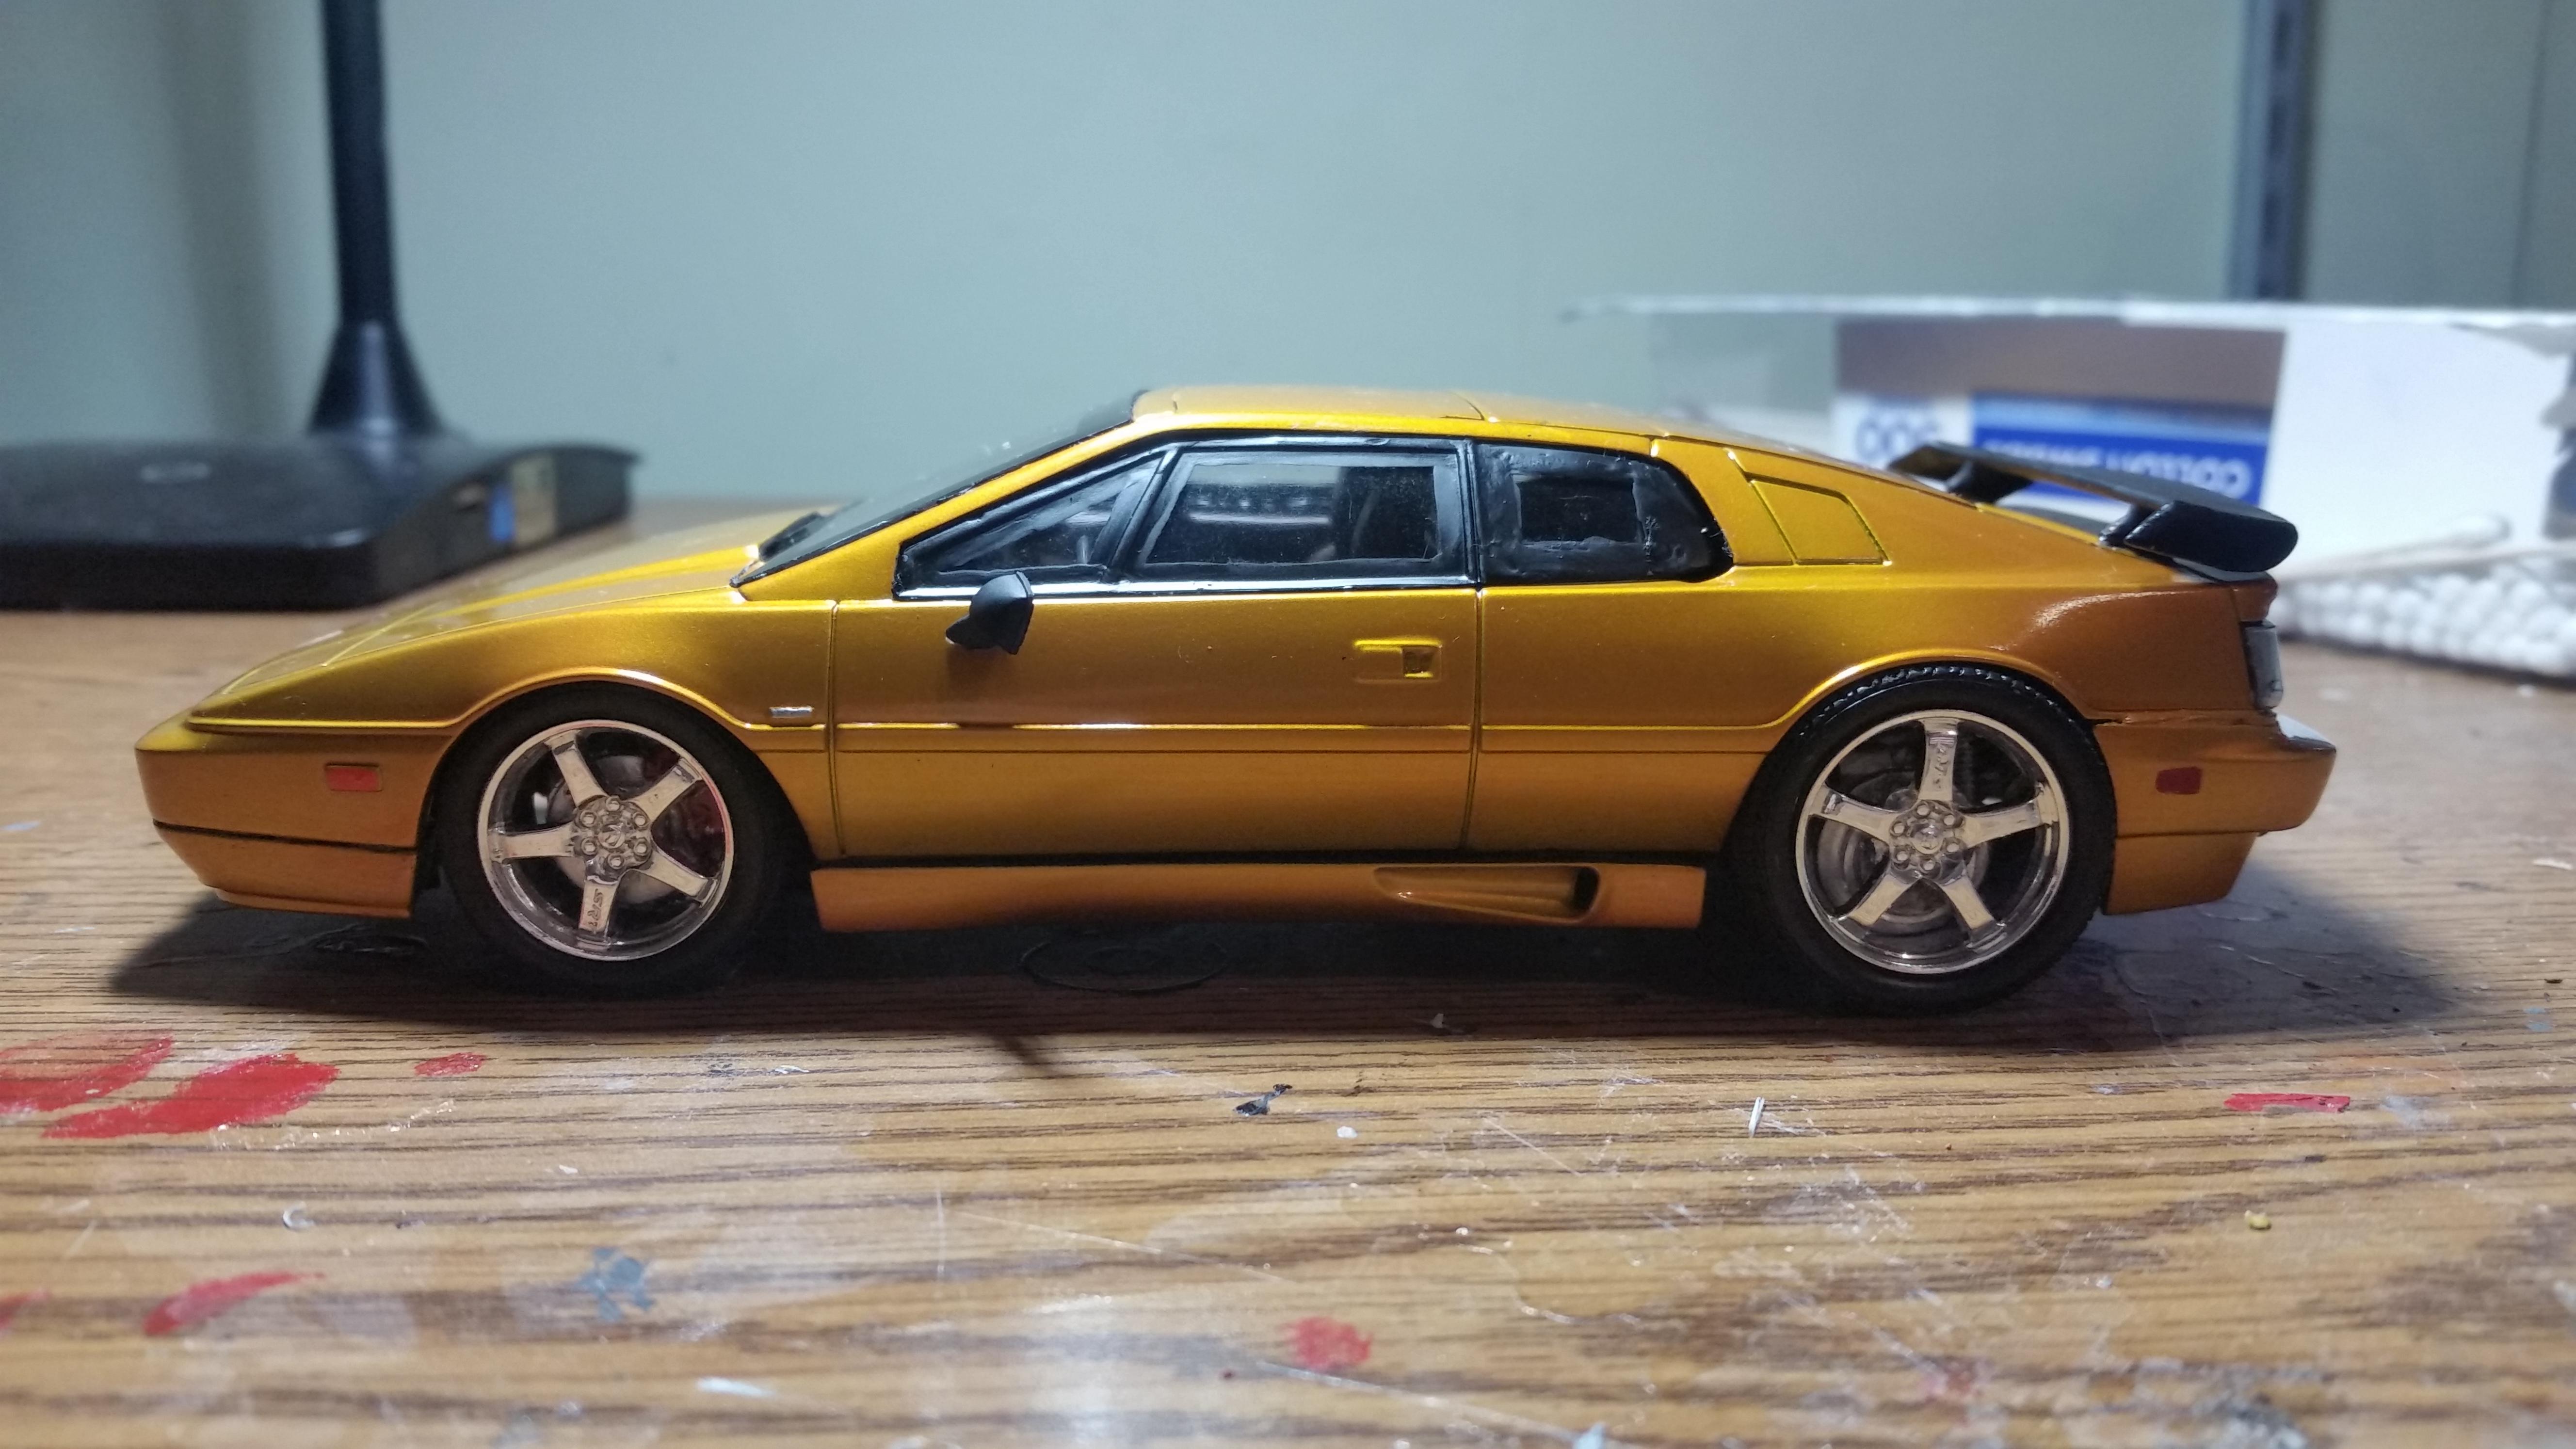
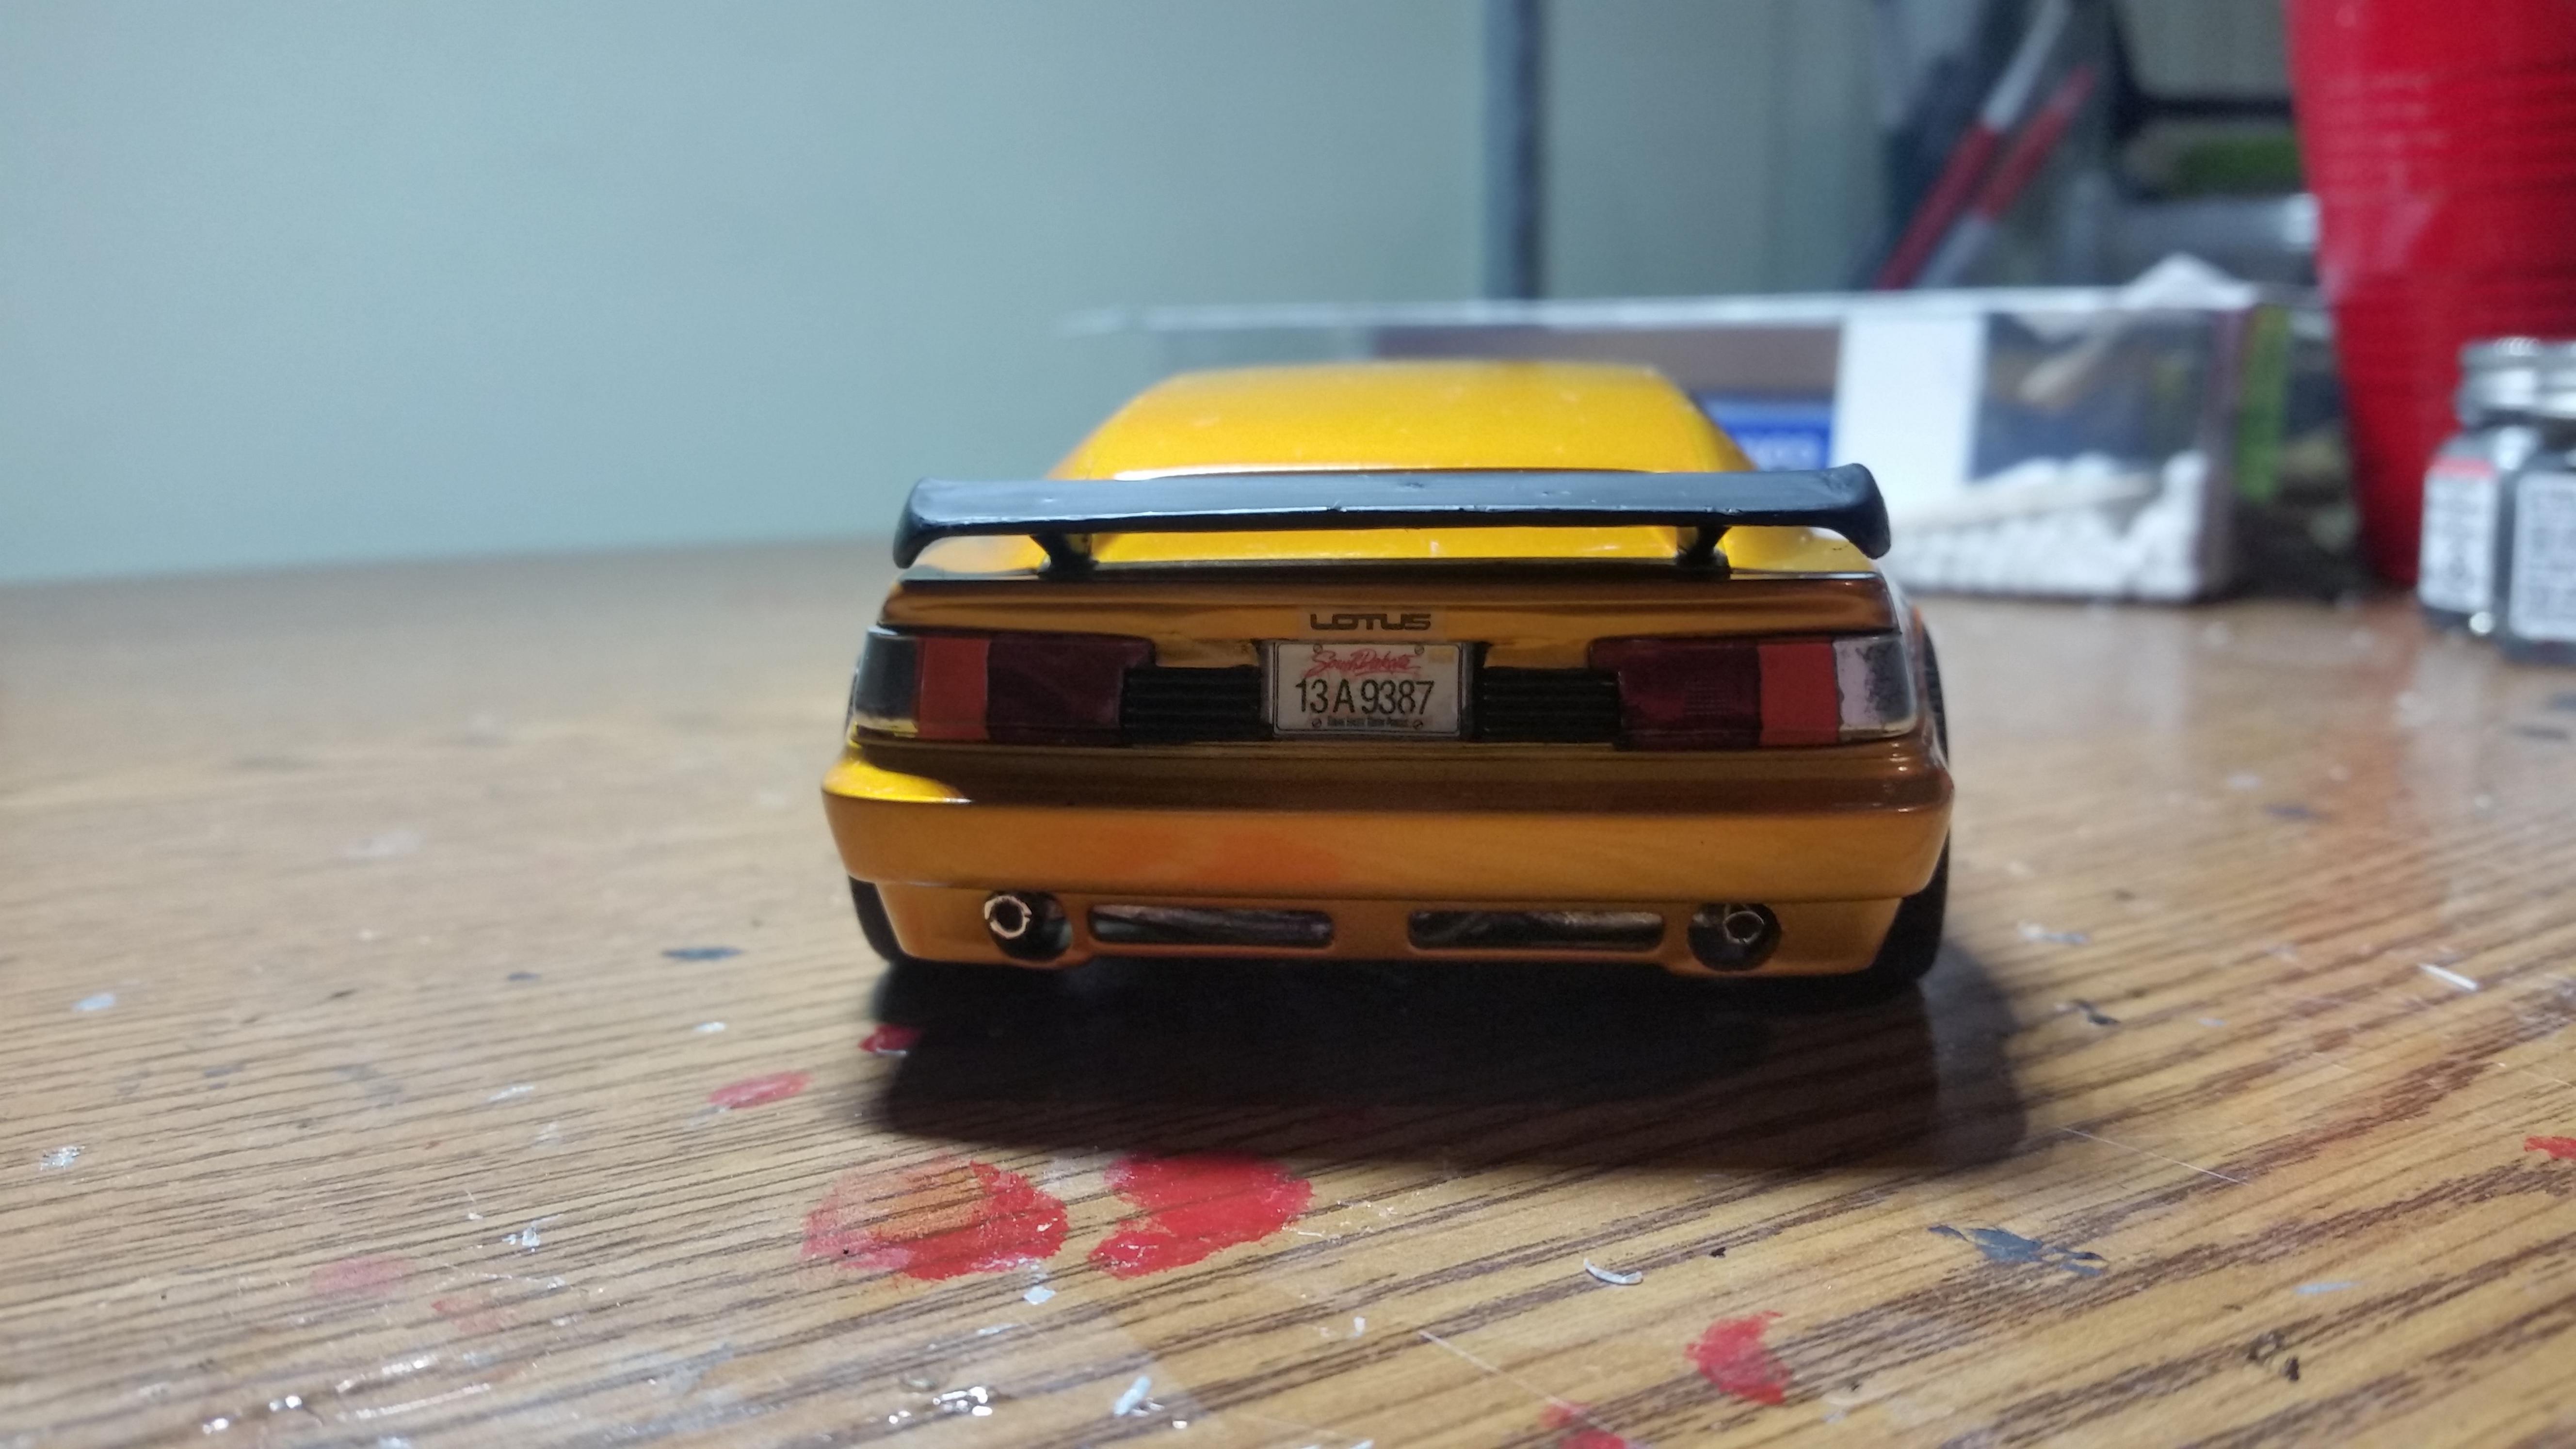
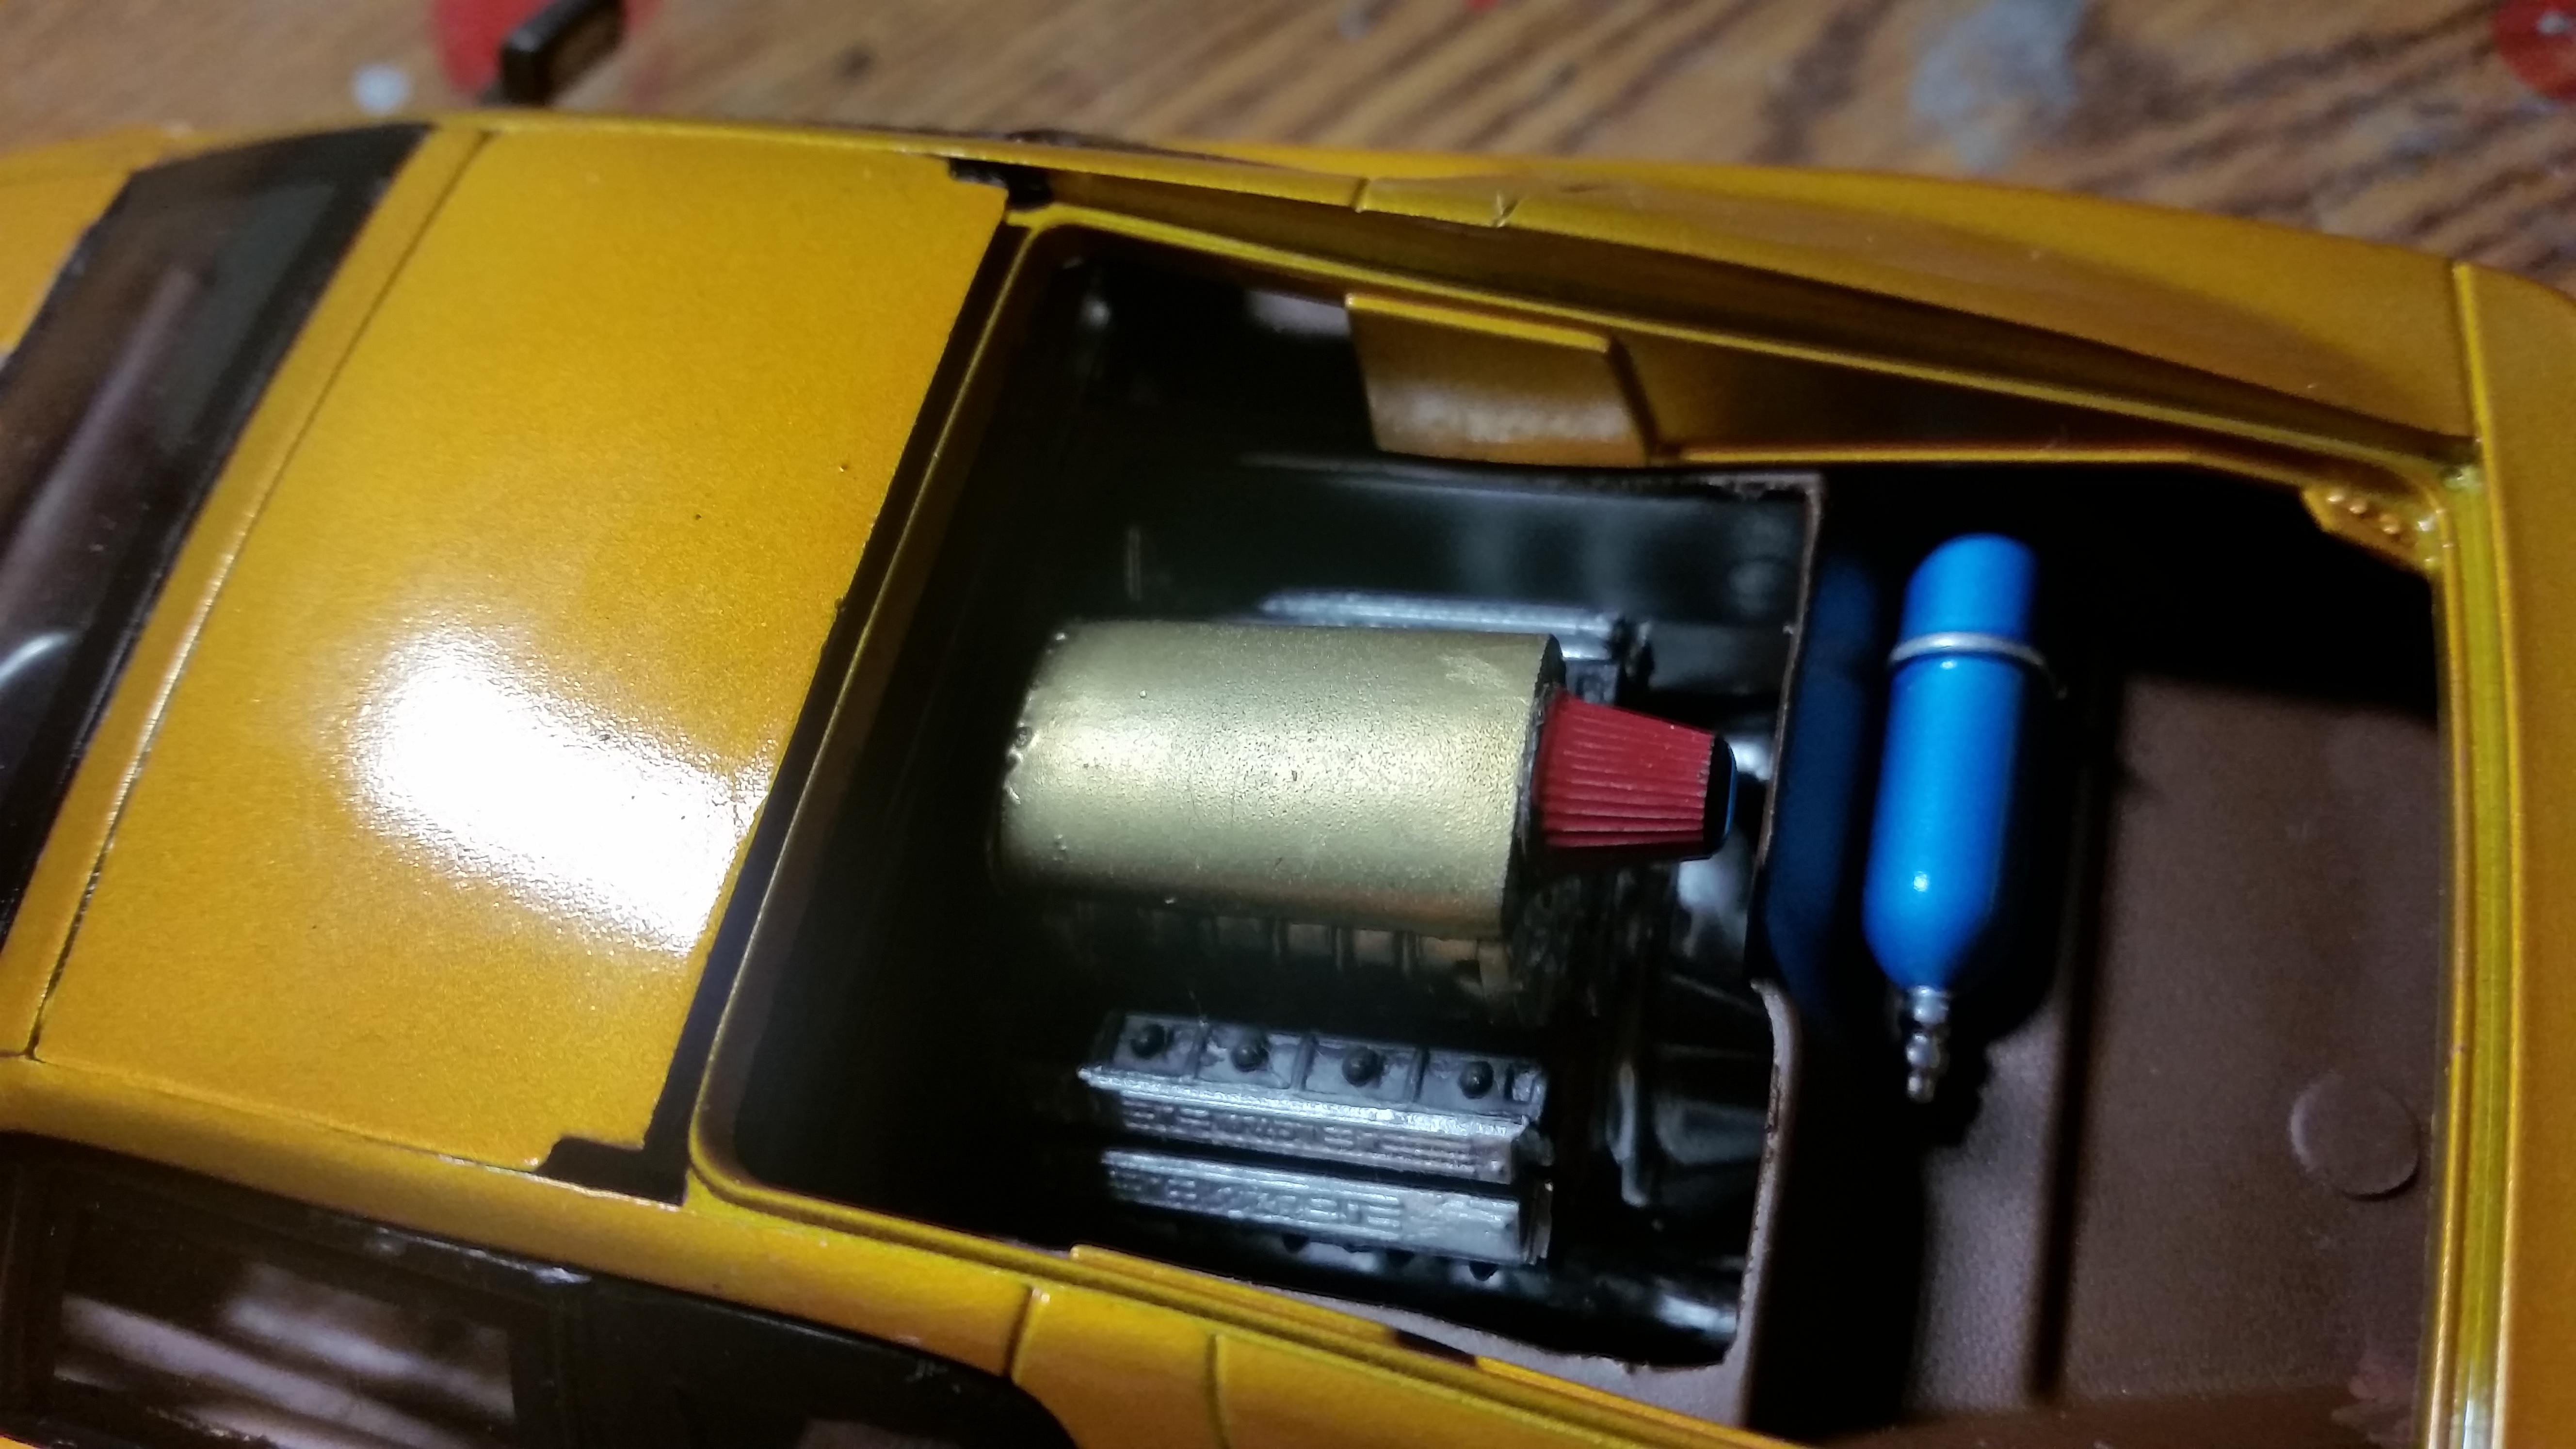
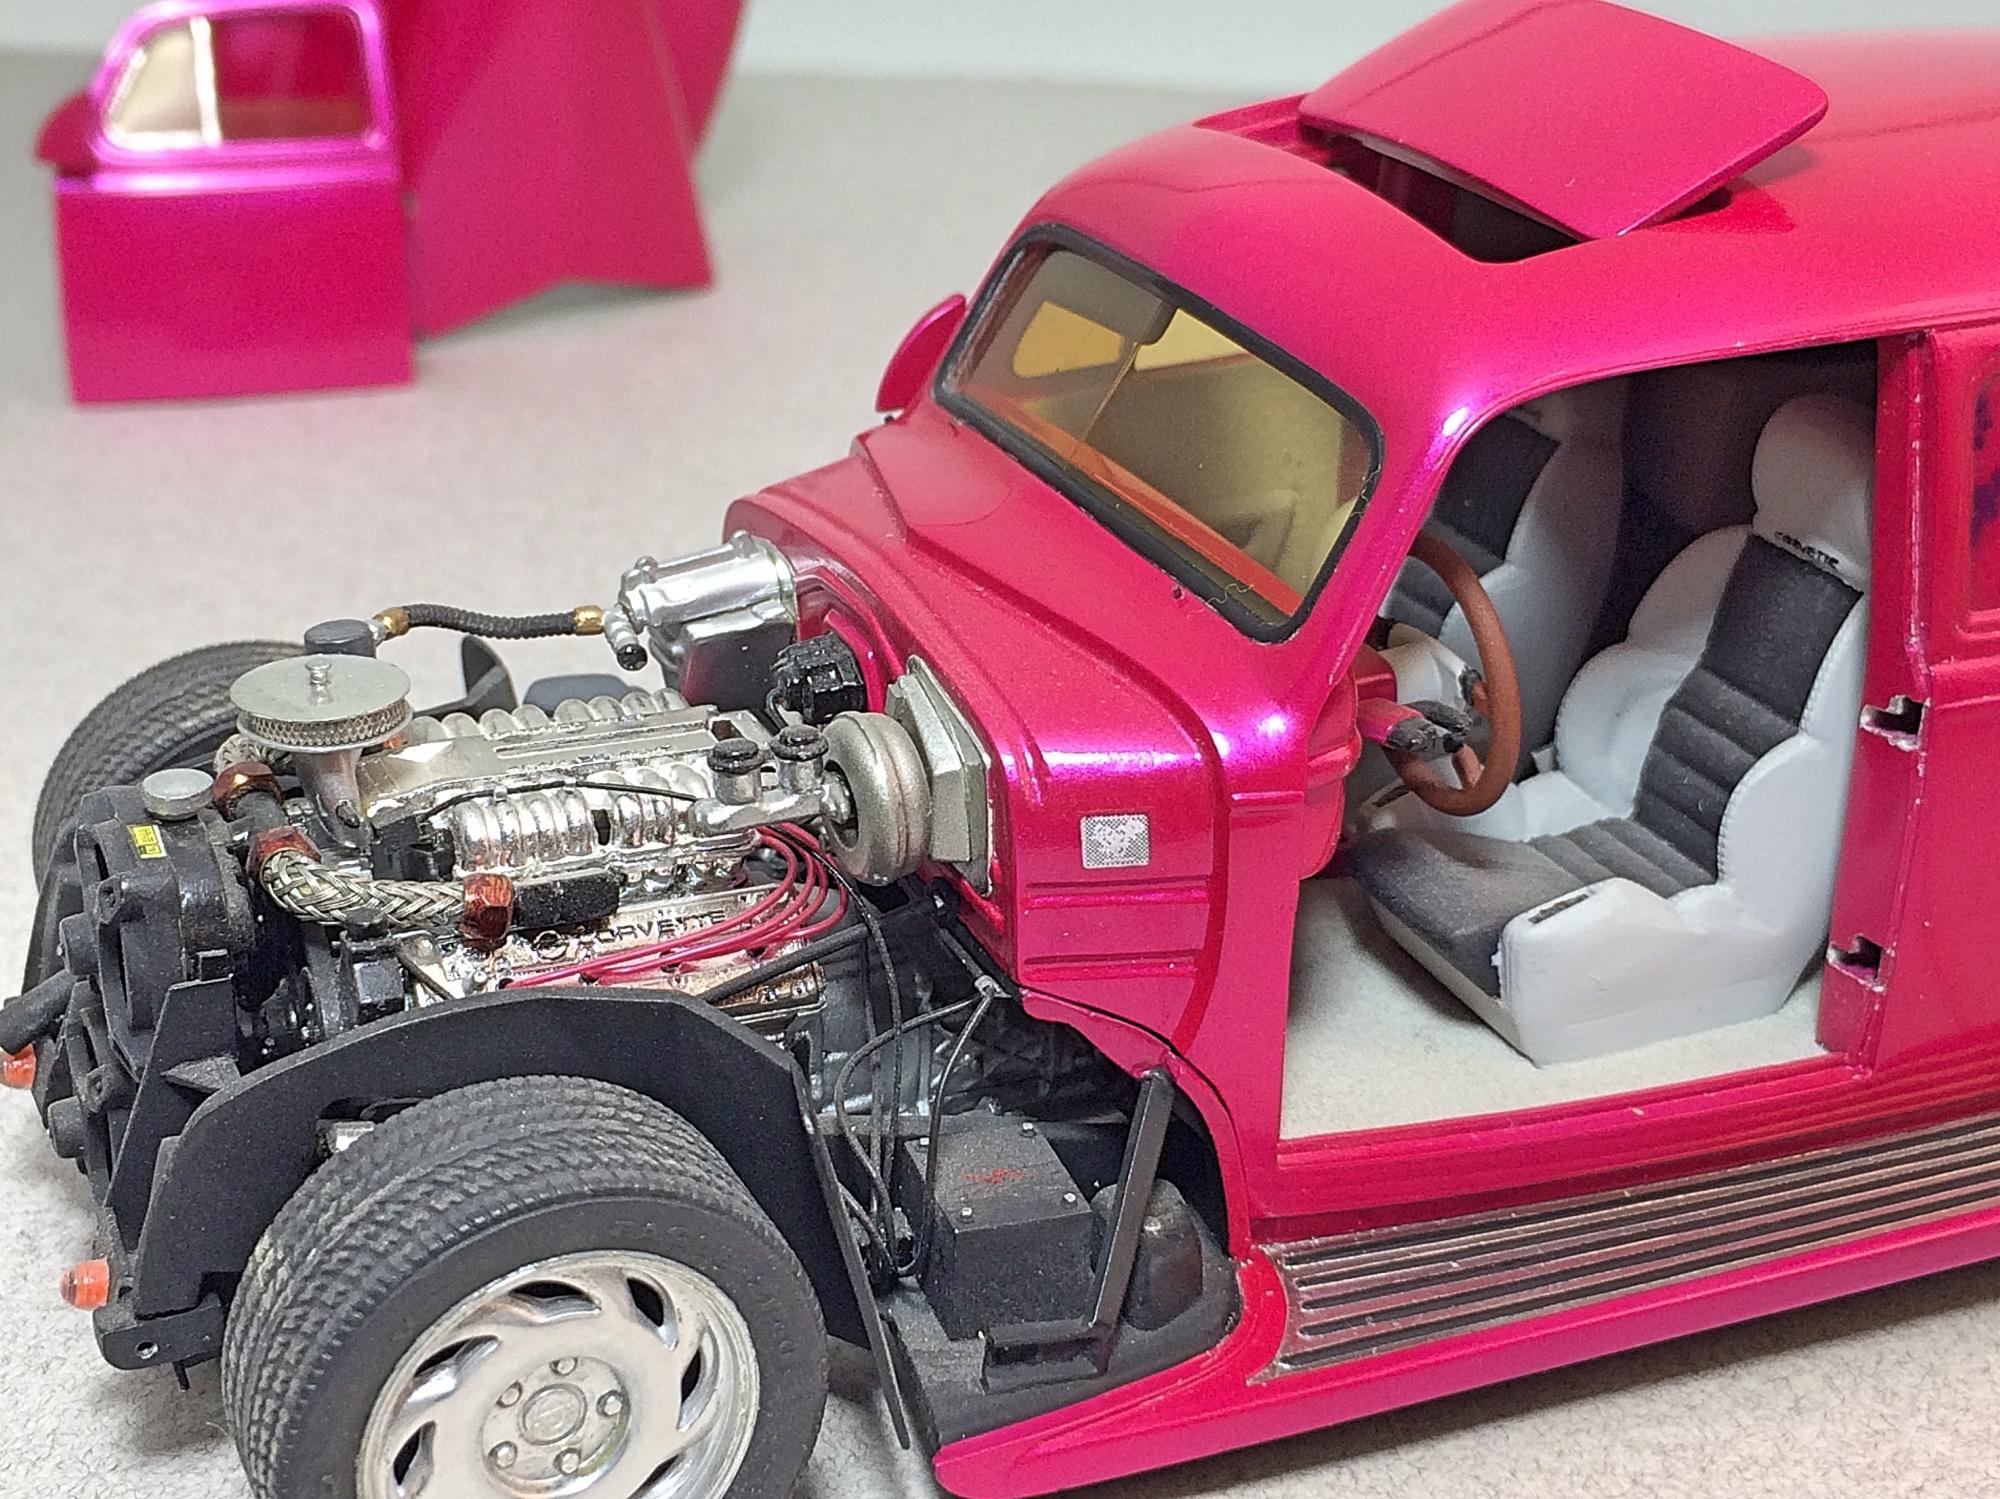
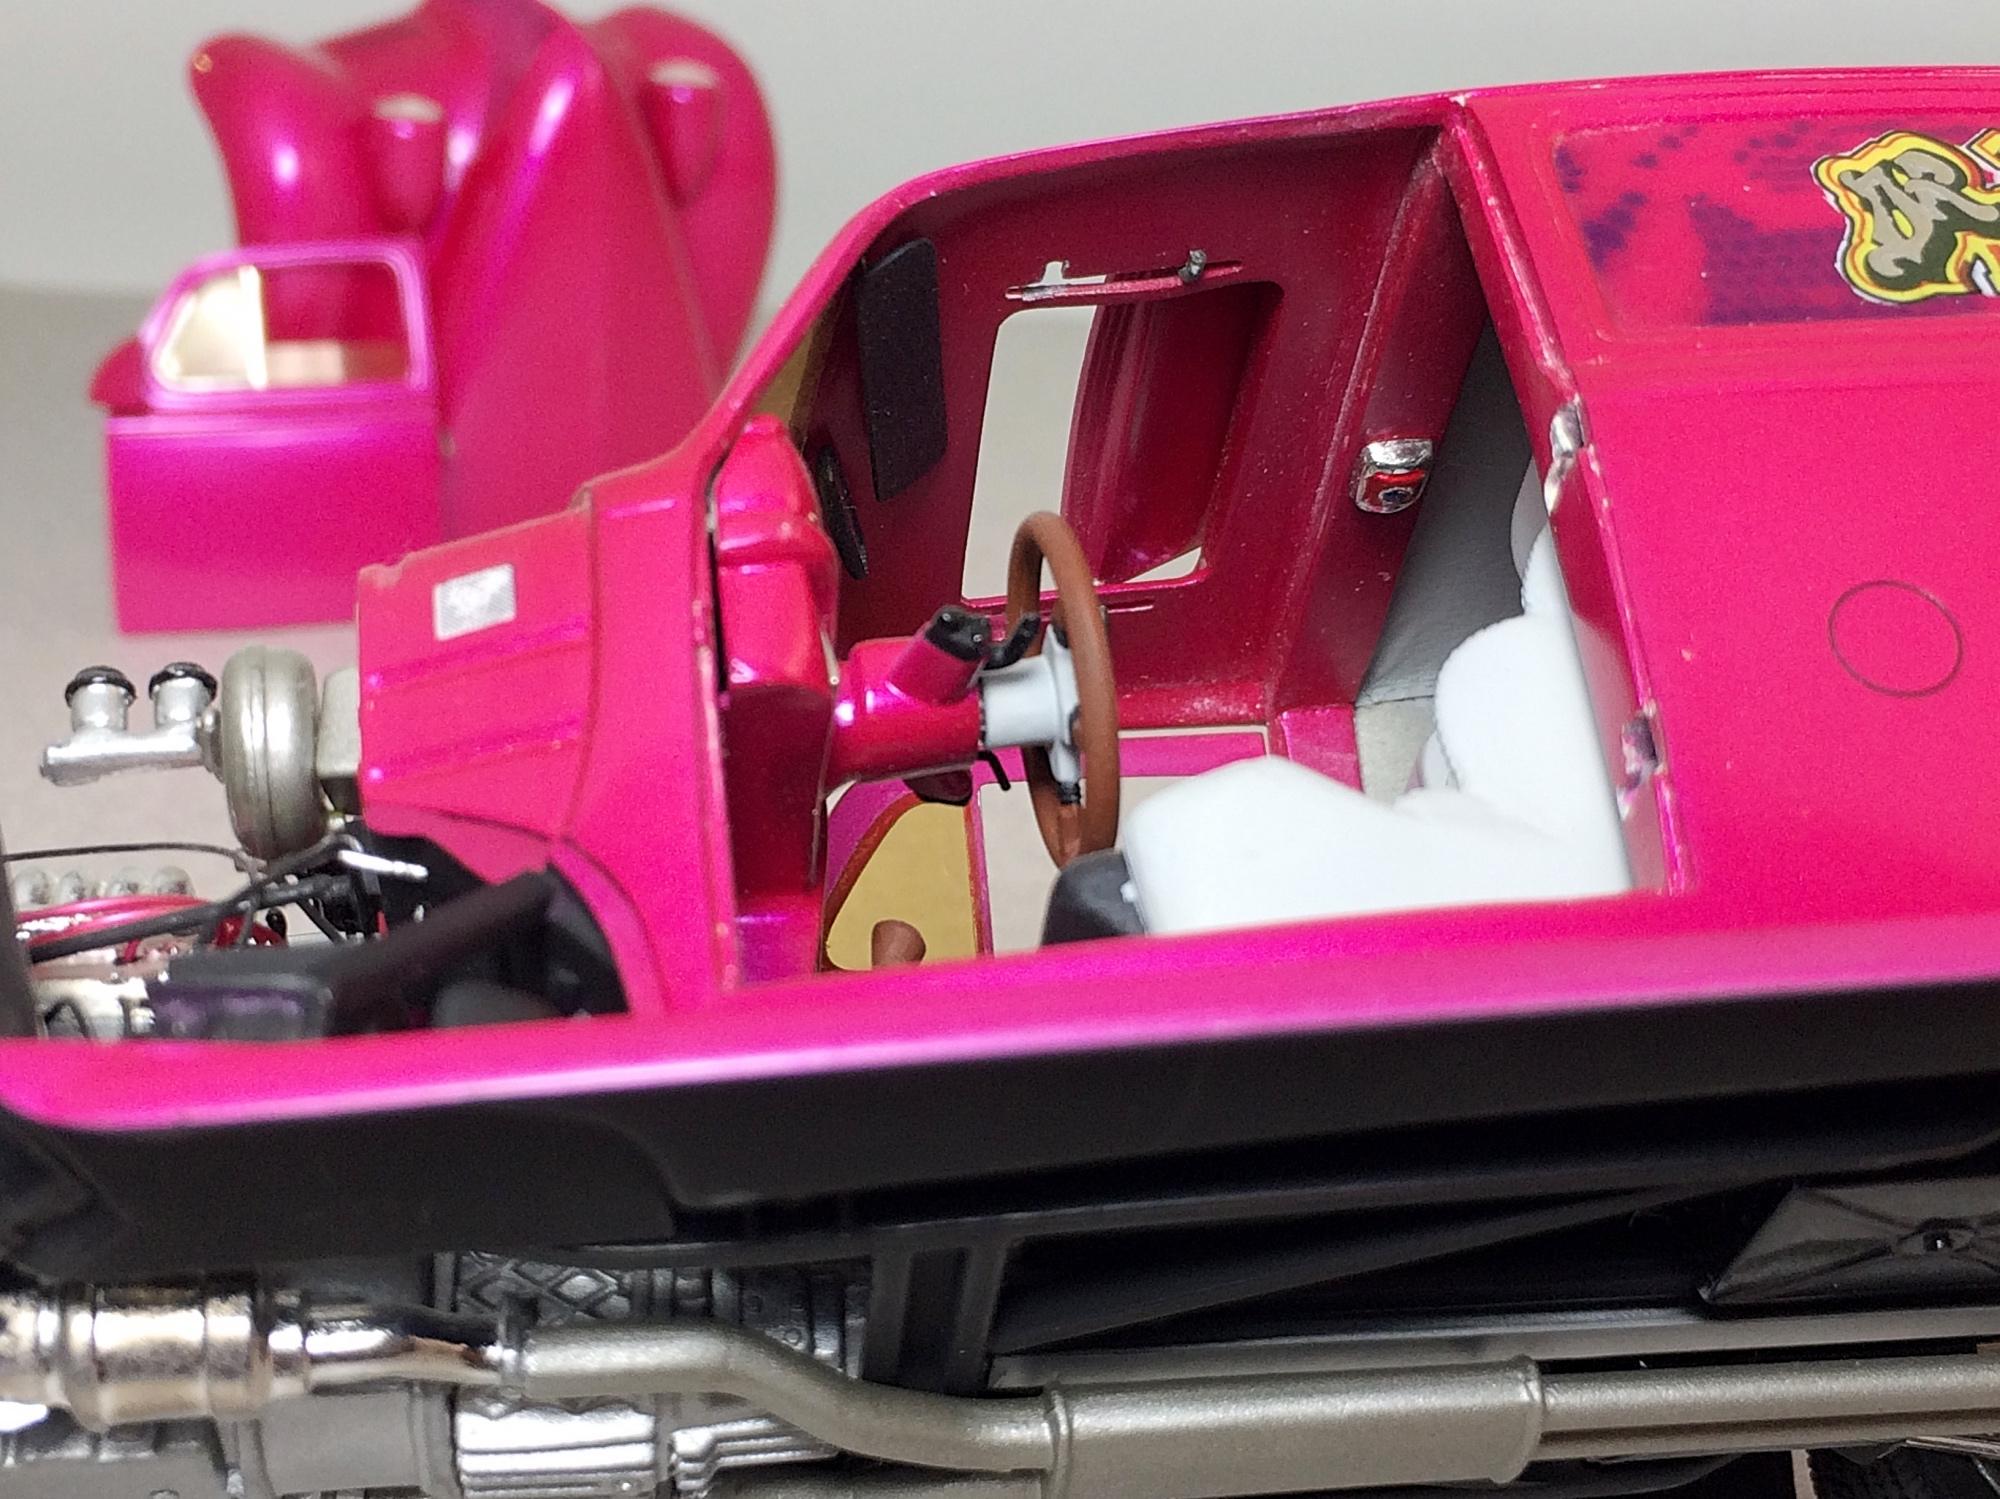
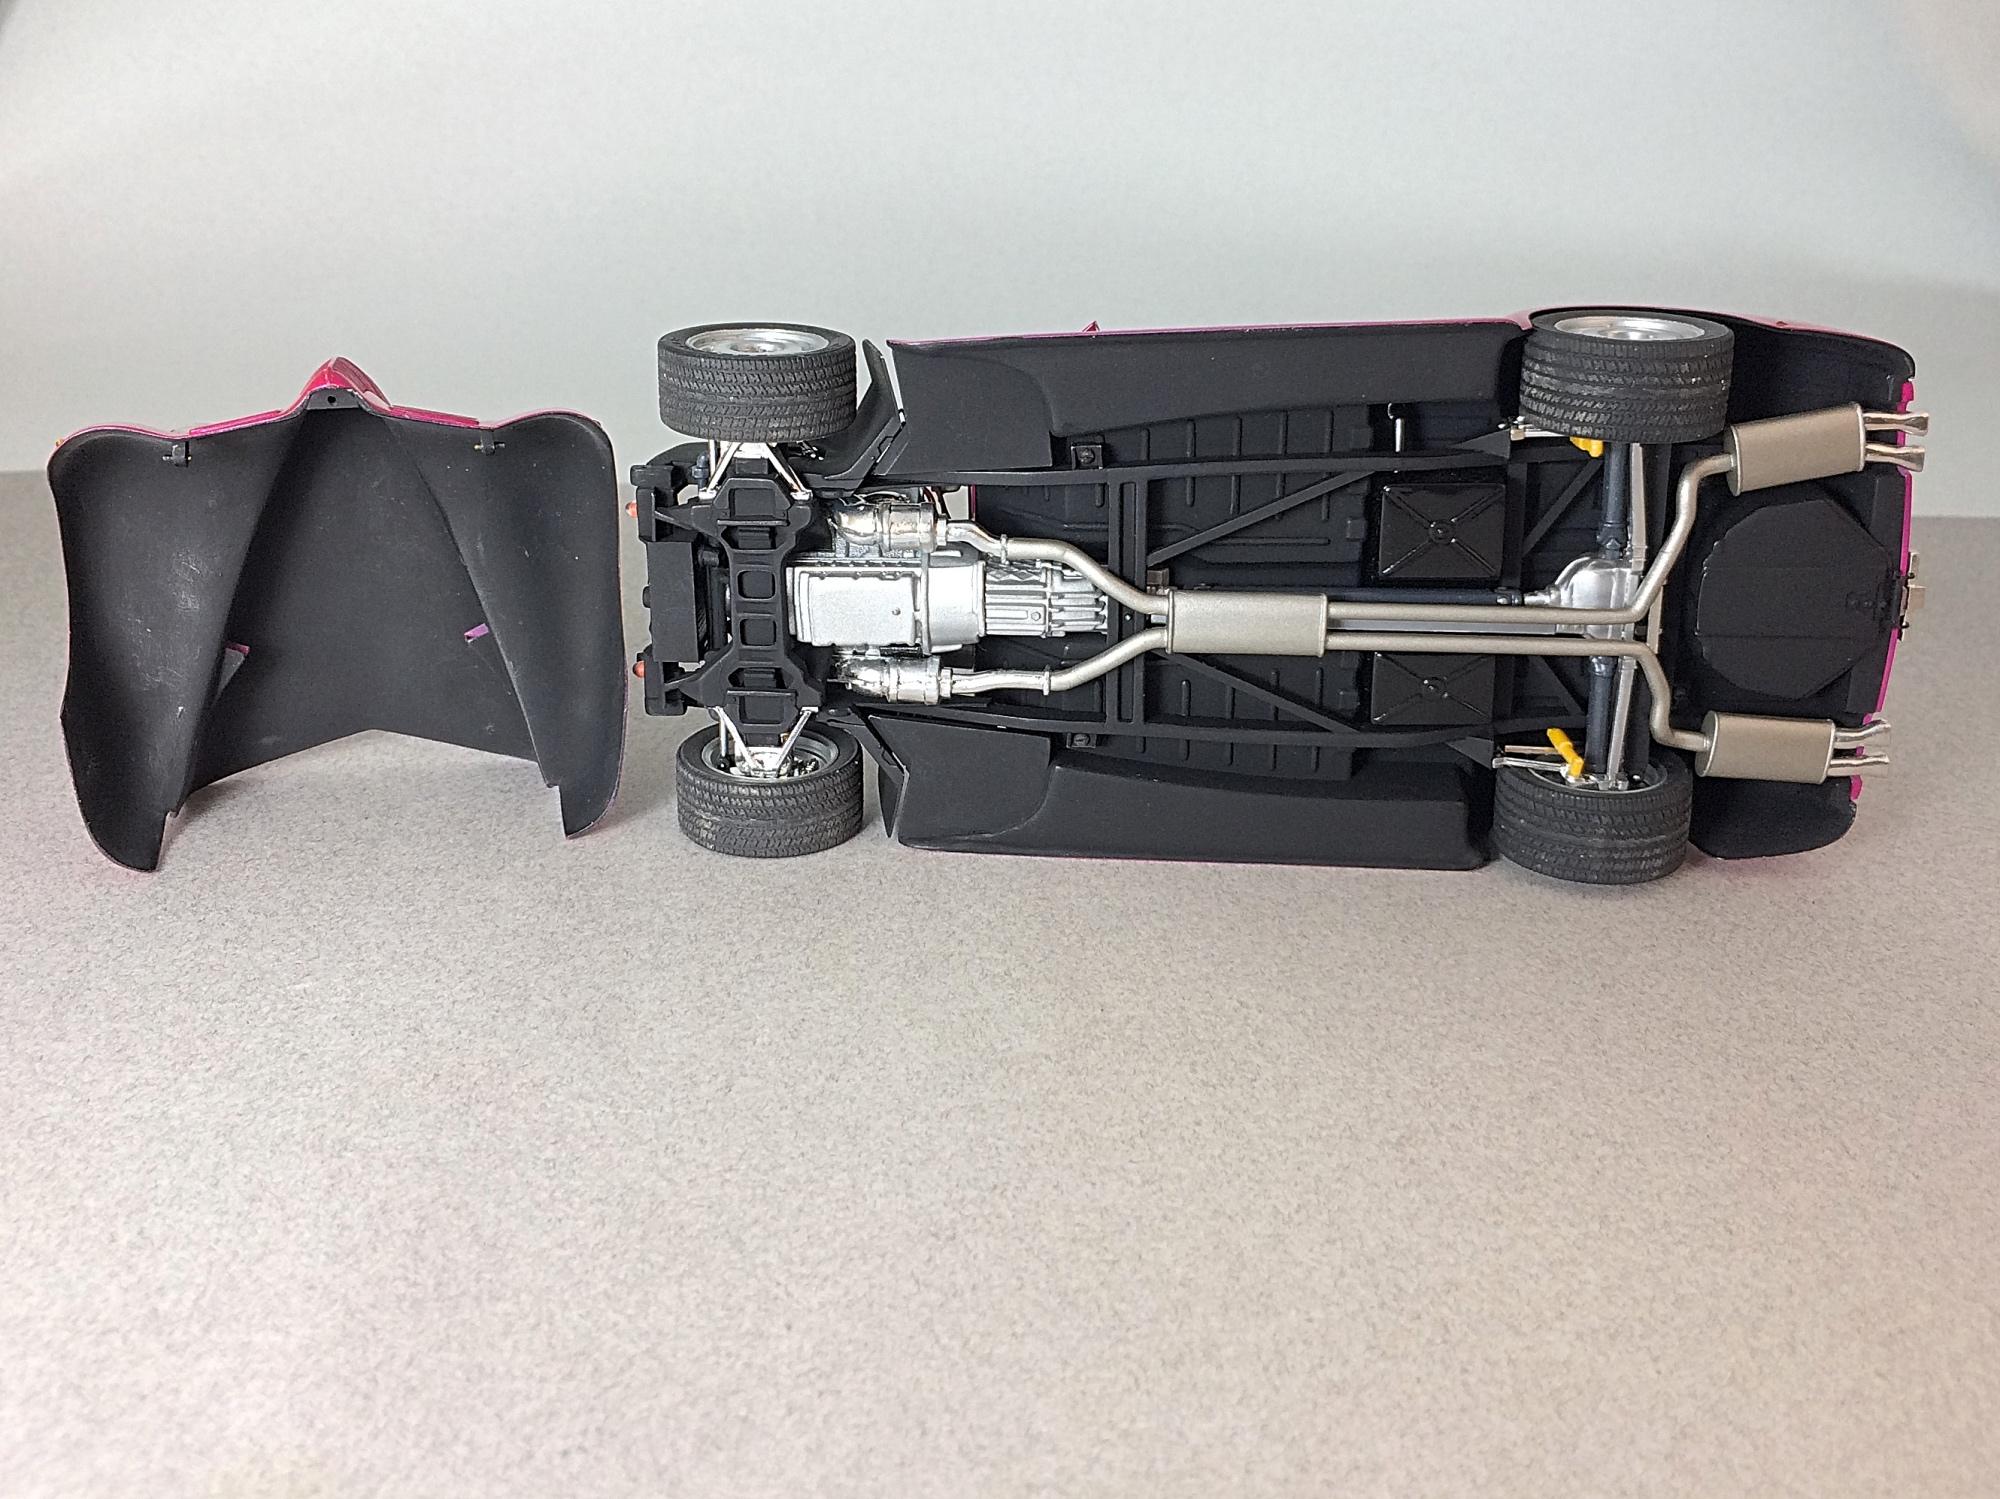
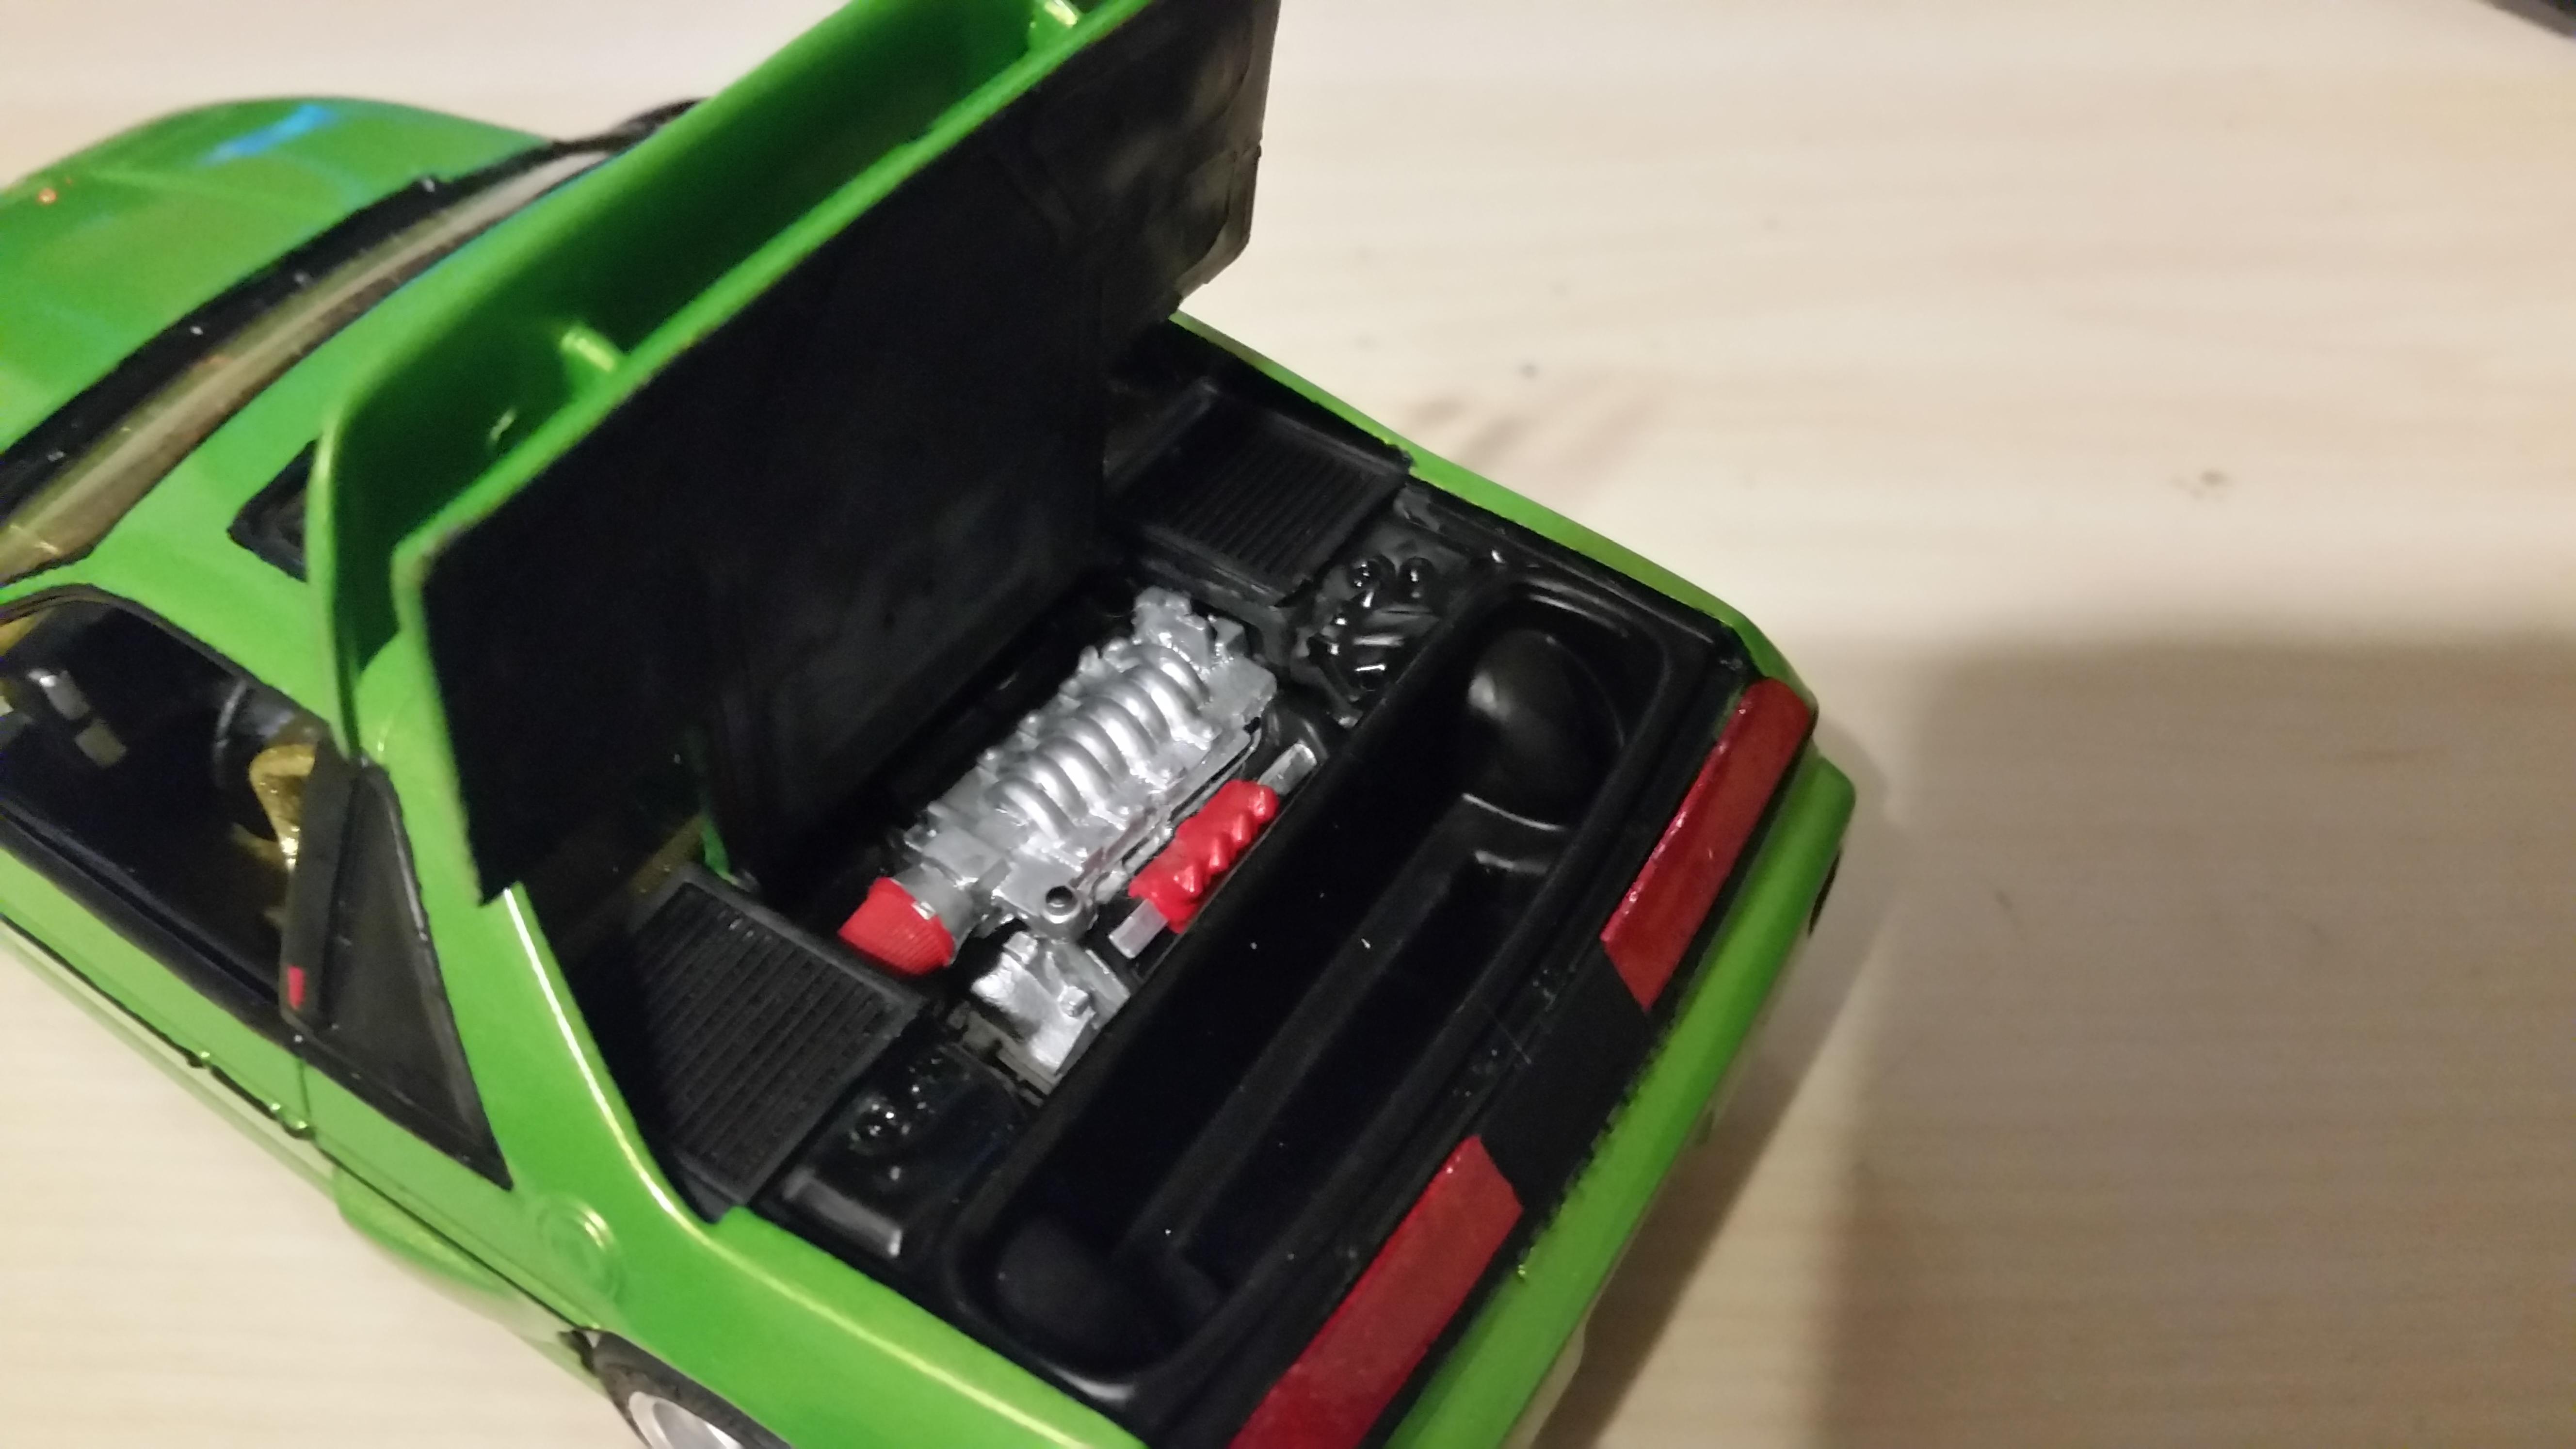
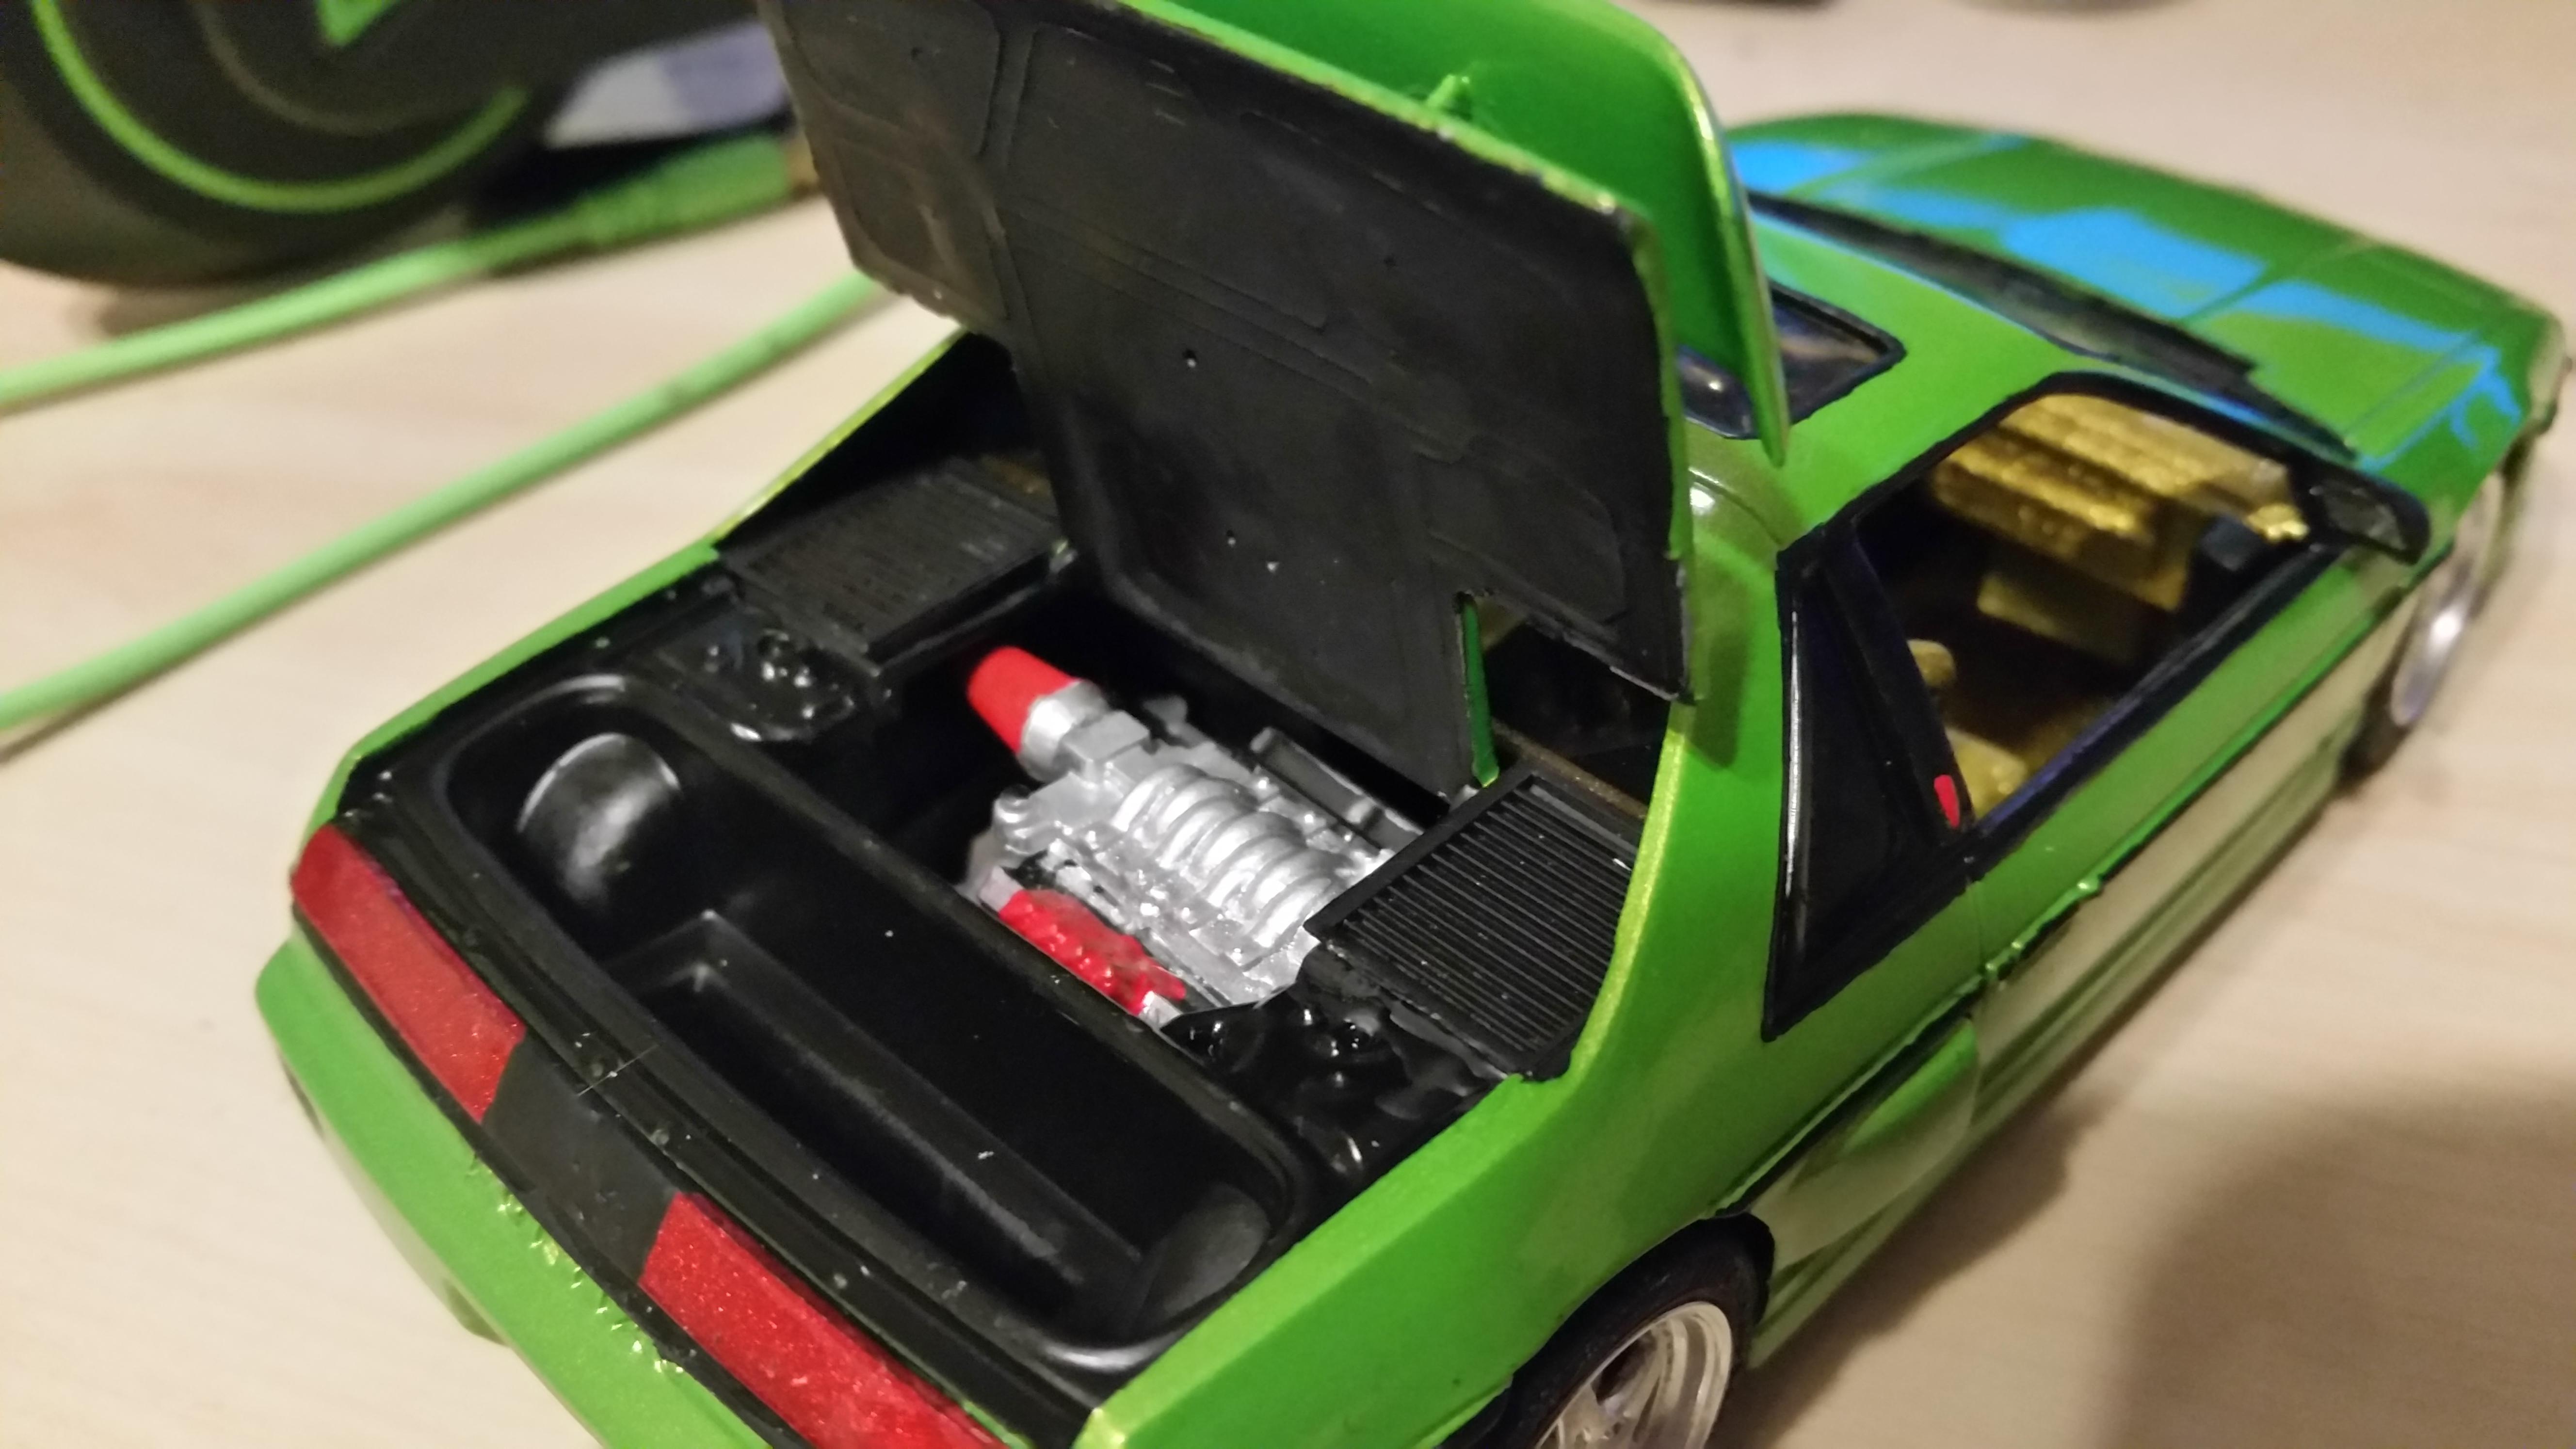
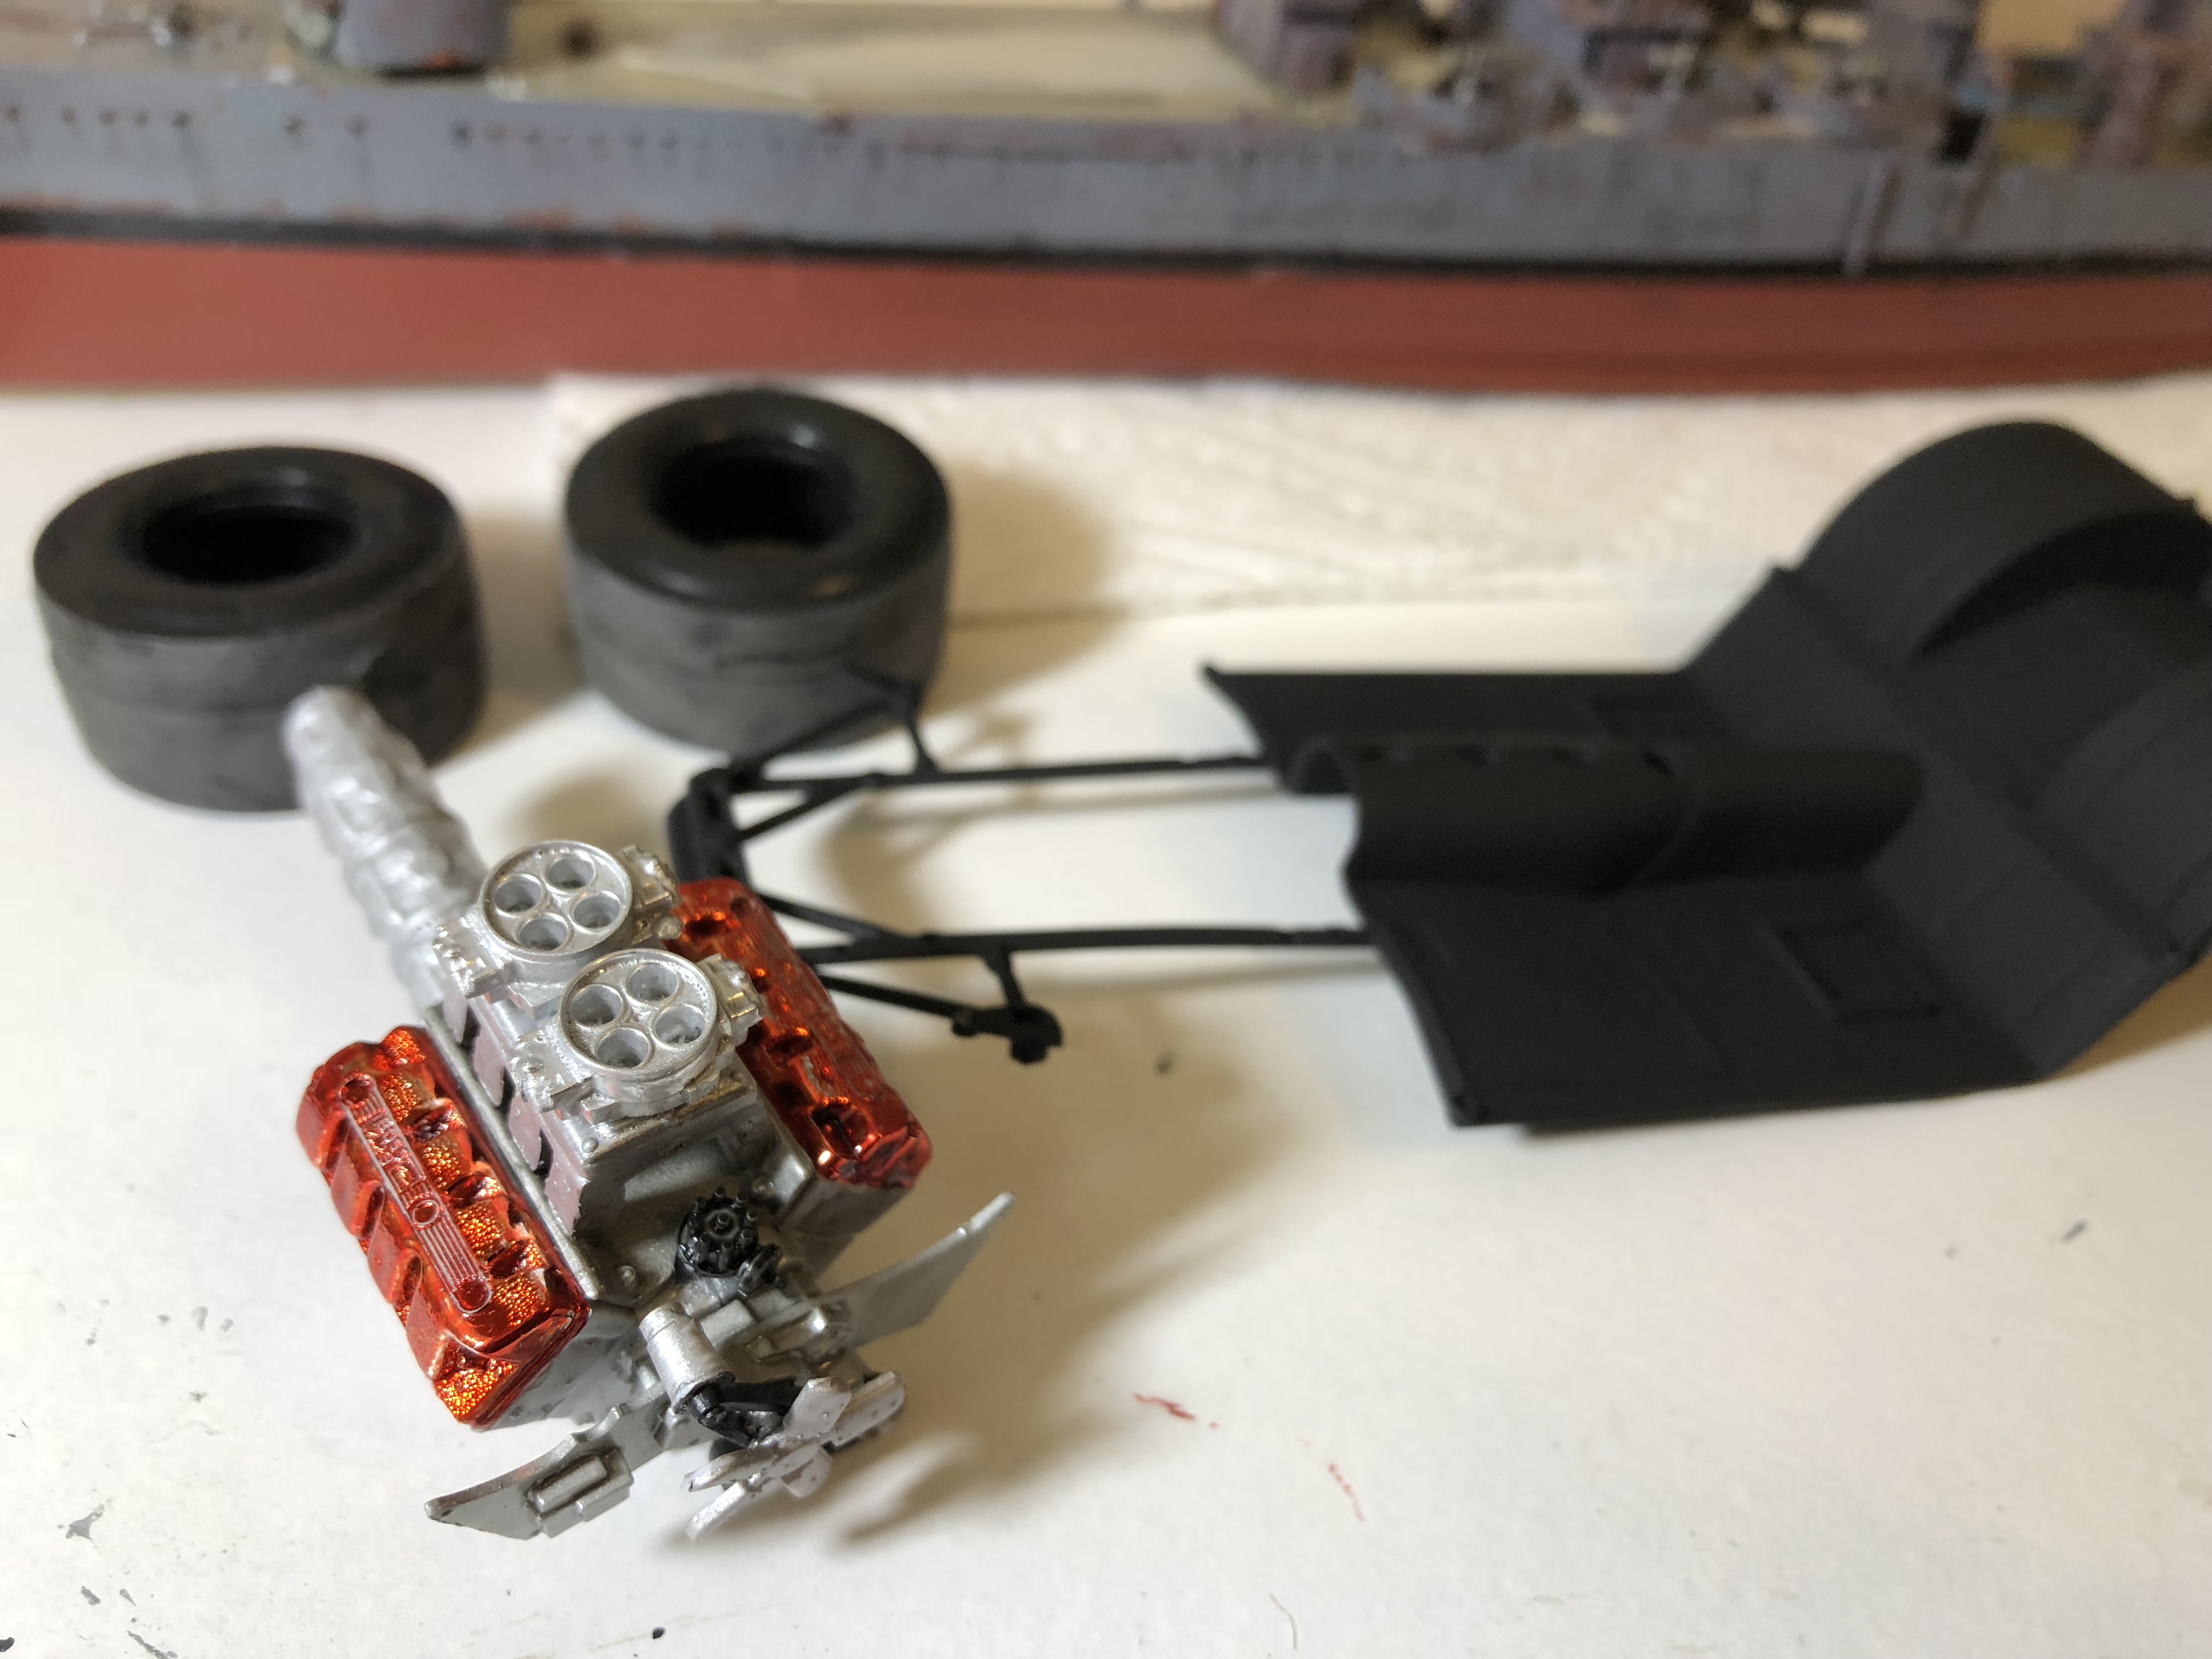
Monogram Exotics Series 1/24th scale kit. I had originally built one of these, in a failed attempt with a baldy warped frame/interior shell and horrible glass, back in 2008. I had acquired a parts kit cheap at an auction back in 2016 that was missing the body shell and it's pieces along with some other small parts, which inspired me to find the pieces of the original one I had built back in '08. Since then, I had located the body w/ rear bumper glued on, the rear deck with it's spoiler, and whatever remained of the DOHC 4 cyl it had. I always customize my BLAH_BLAH_BLAH_BLAH and wasn't going with a 4 banger set-up for the new build. I found a chrome molded Chevy 350 block (which could be from a AMT ZR1 since they had chrome engines and had provisions for a separate transmission) and used the DOHC heads and valve covers from the mint Lotus motor and the built one to make a wild DOHC V8 combination that would look dayumm in the Lotus! I located a front cam/fan belt assembly piece from a Ferrari V8 that fit on the 350 block and mated up nicely with the Lotus heads. I also went with a roots supercharger setup with a custom intake to drive the wild factor to 11. I also added a NOS bottle and headers from some unknown source that fit on the Lotus heads, and made a custom exhaust system using parts from a Revelle Corvett Sting Ray III. From the box I saw issues with the front ride height sitting too high making it ride like a 4x4, so I lowered the front spindles and made adjustments to the rear to fix the truck like stance it had. I also went with wheels and tires from a Revell ACR Viper since the kit's pieces were just tripe. I had to trim around the rear hatch to fit the tip of the motor and intake for the Supercharger, and decided to use the hatch's glass as a molded body piece that also acts as a hood scoop for the motor. Spoiler fit is a bit weird, don't know if it's lazy engineering by Monogram Interior or what, but I think it needed something ether way. Interior is Rustoluem Advanced Formula Flat Brown, and exterior is Tamiya TS-73 Clear Orange cleared with Pledge.
-
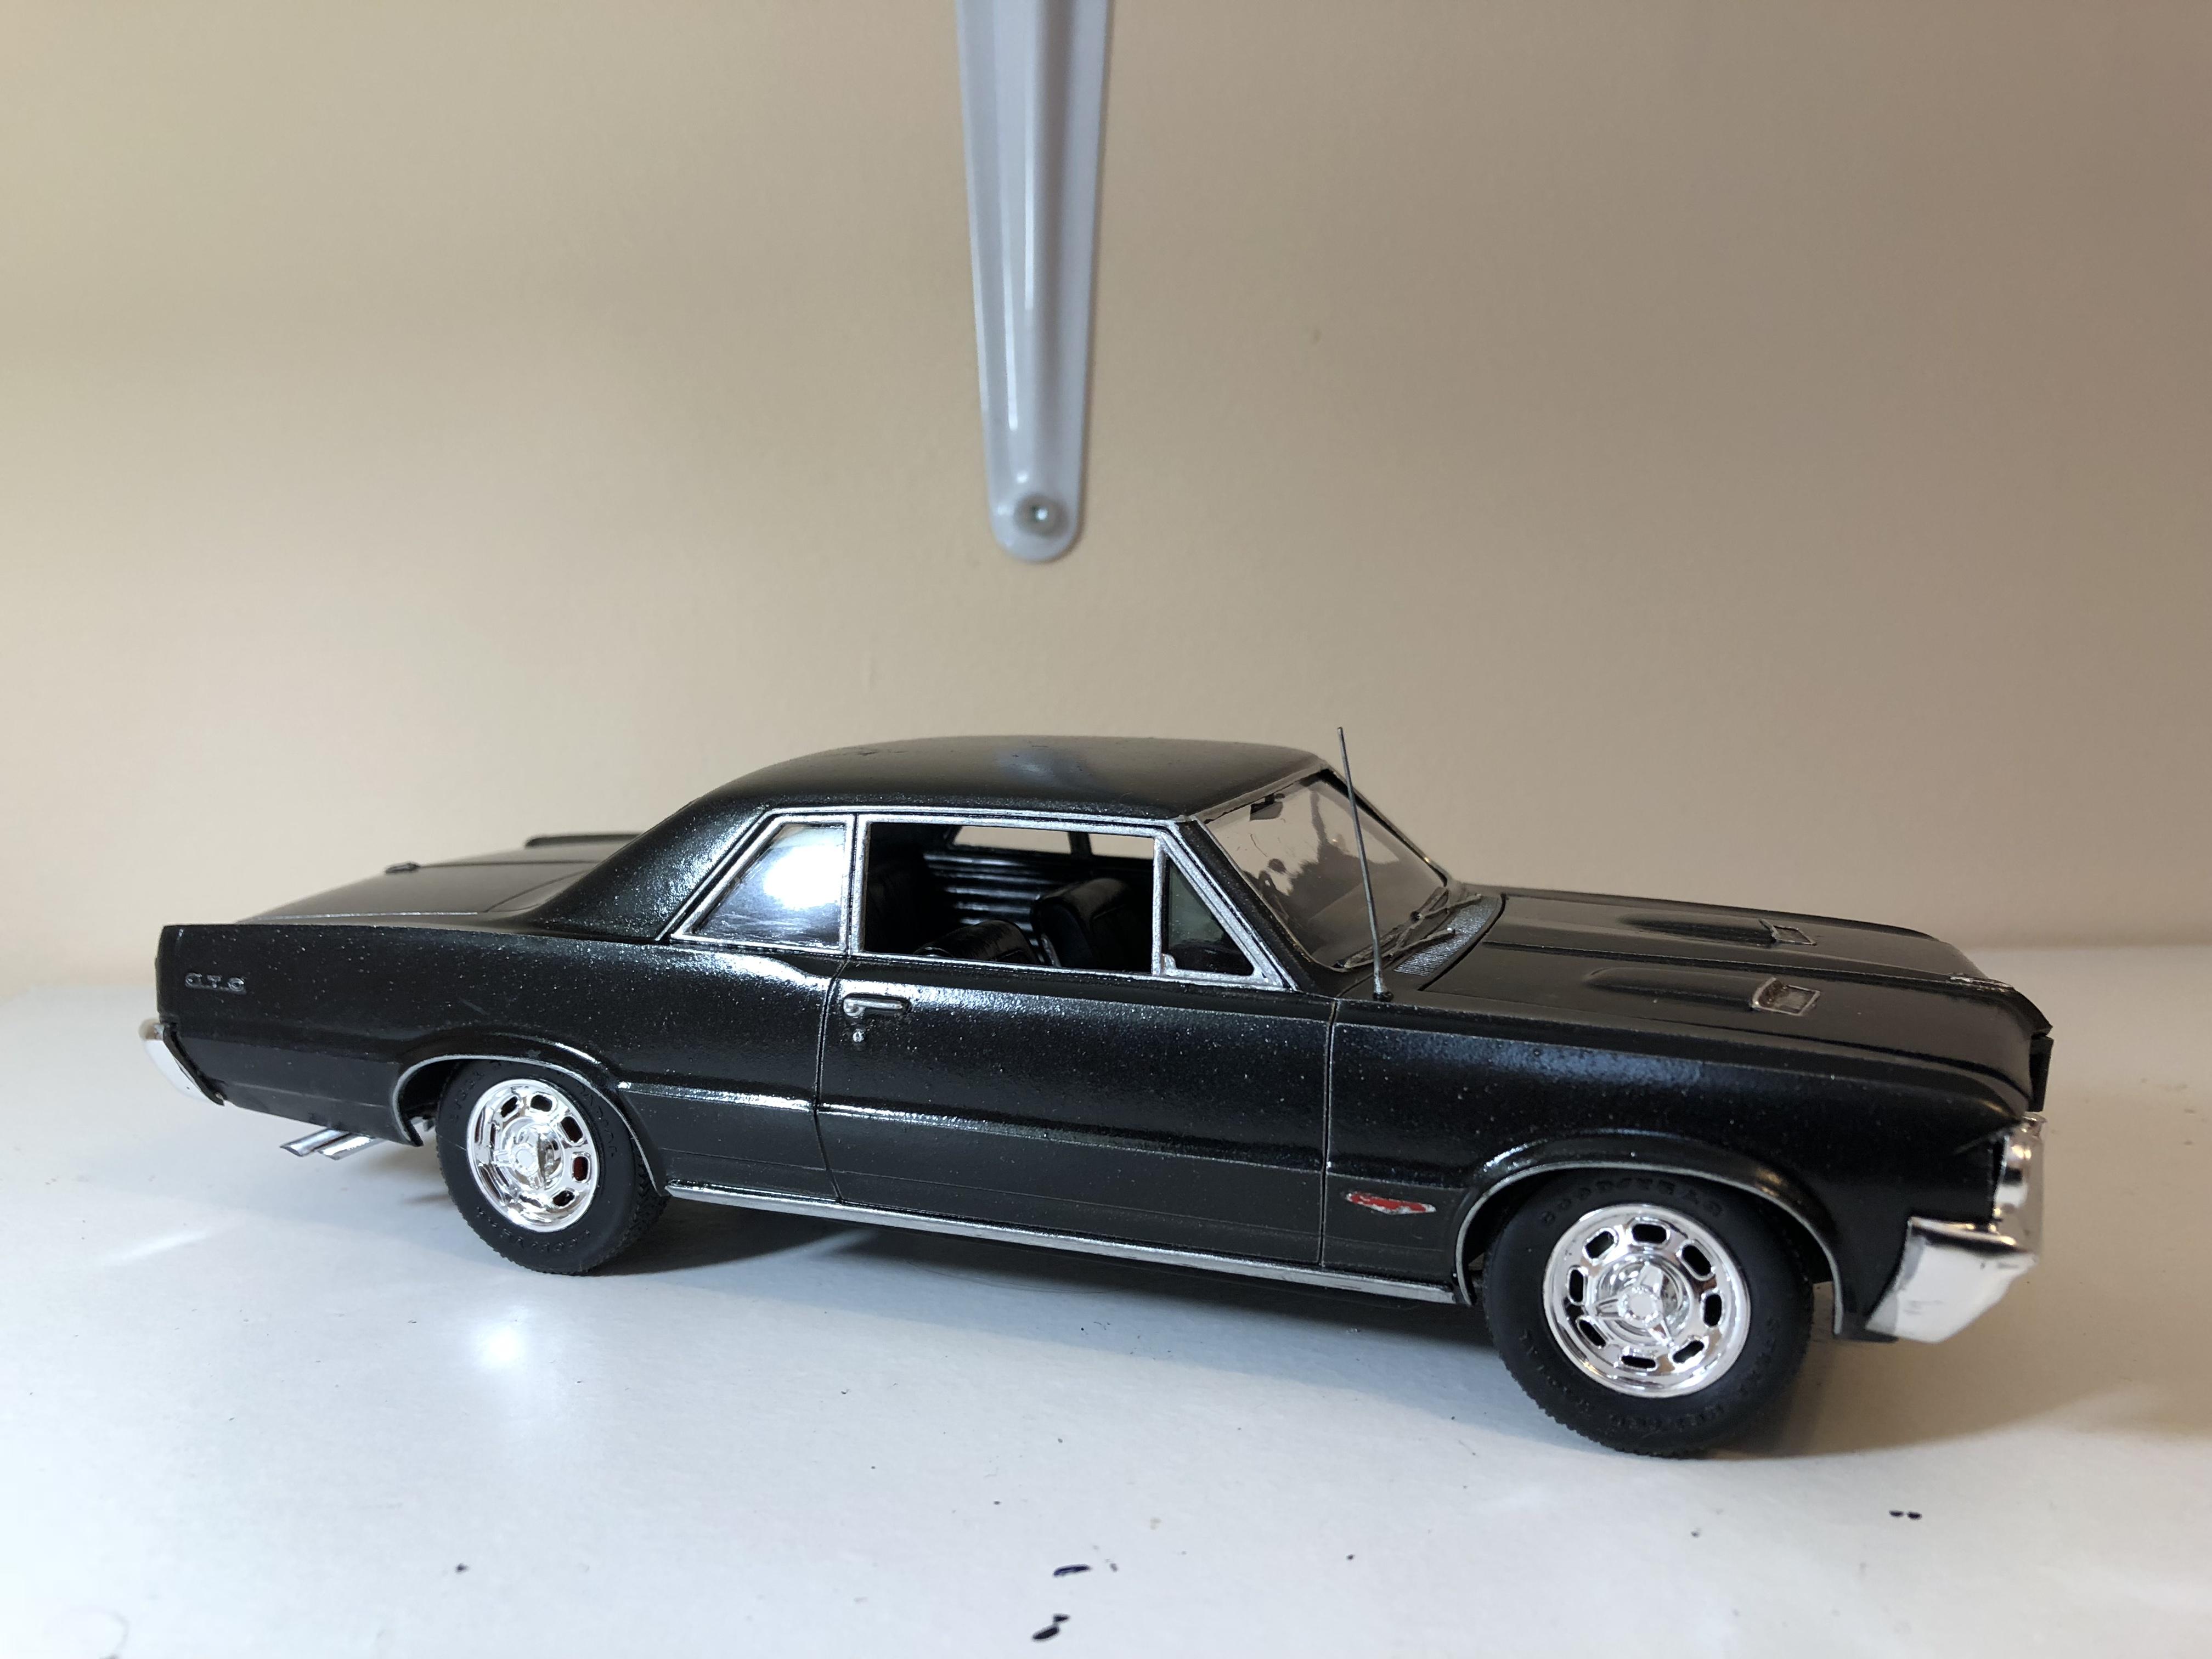
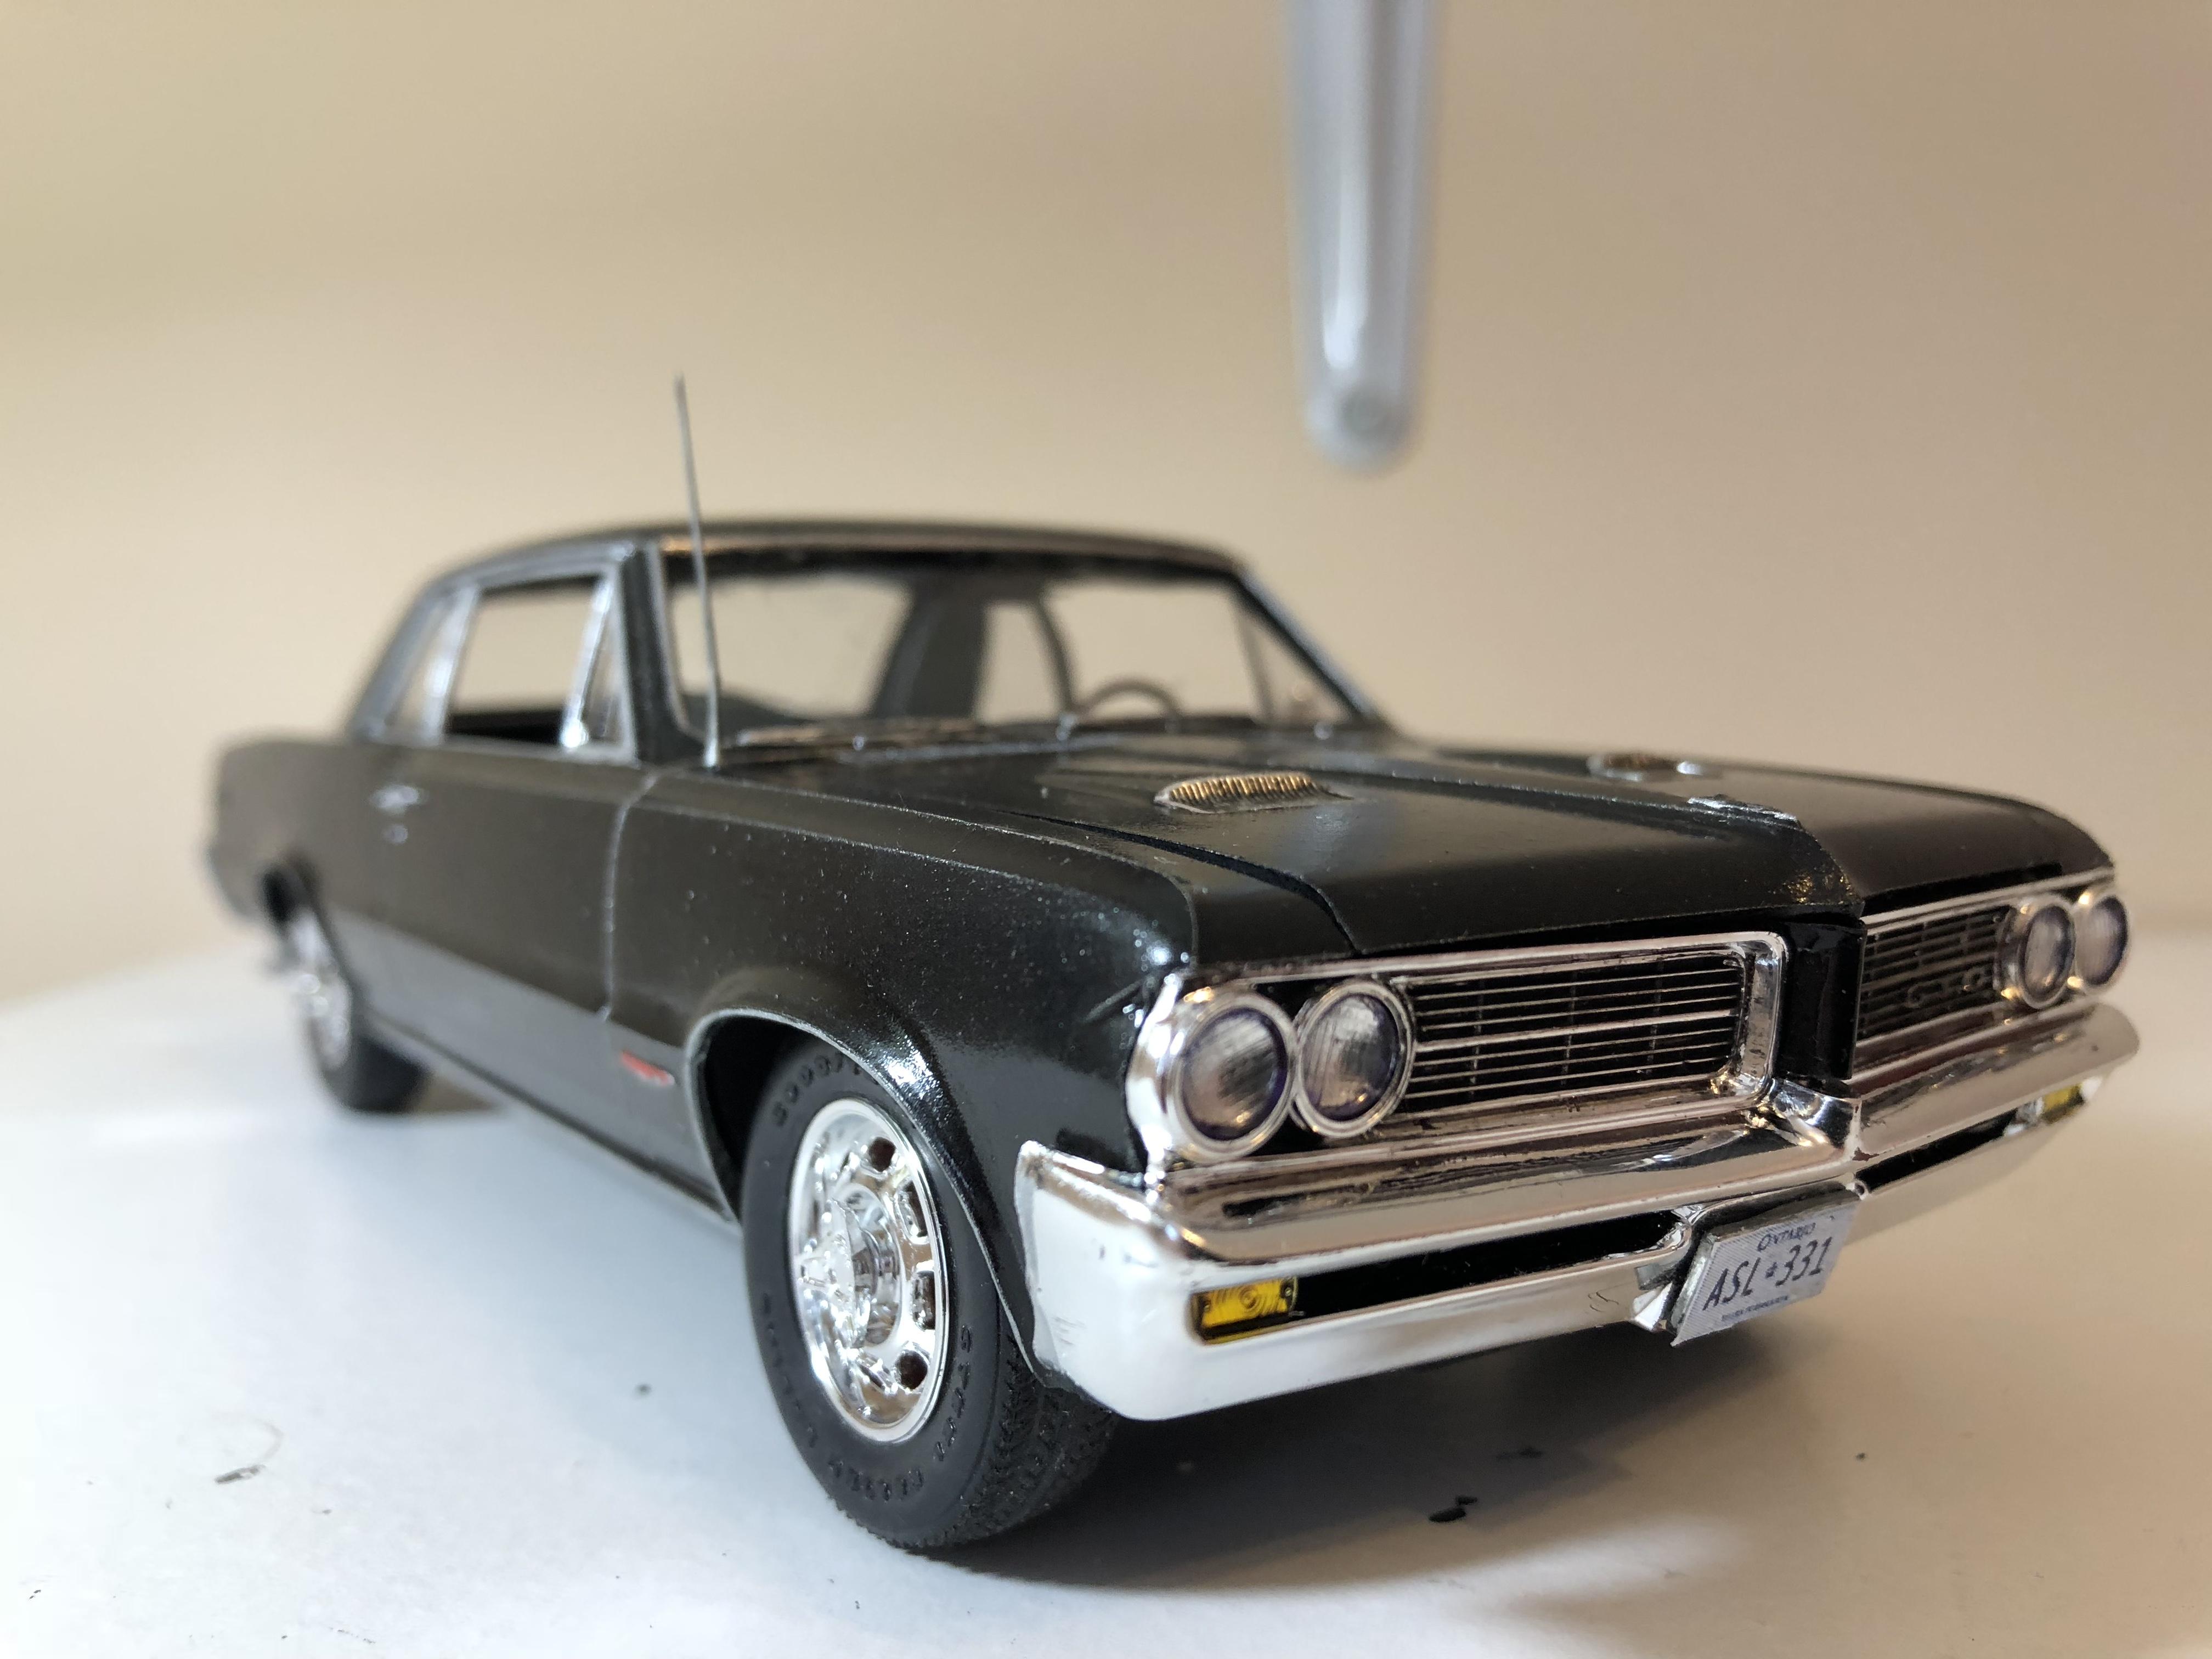
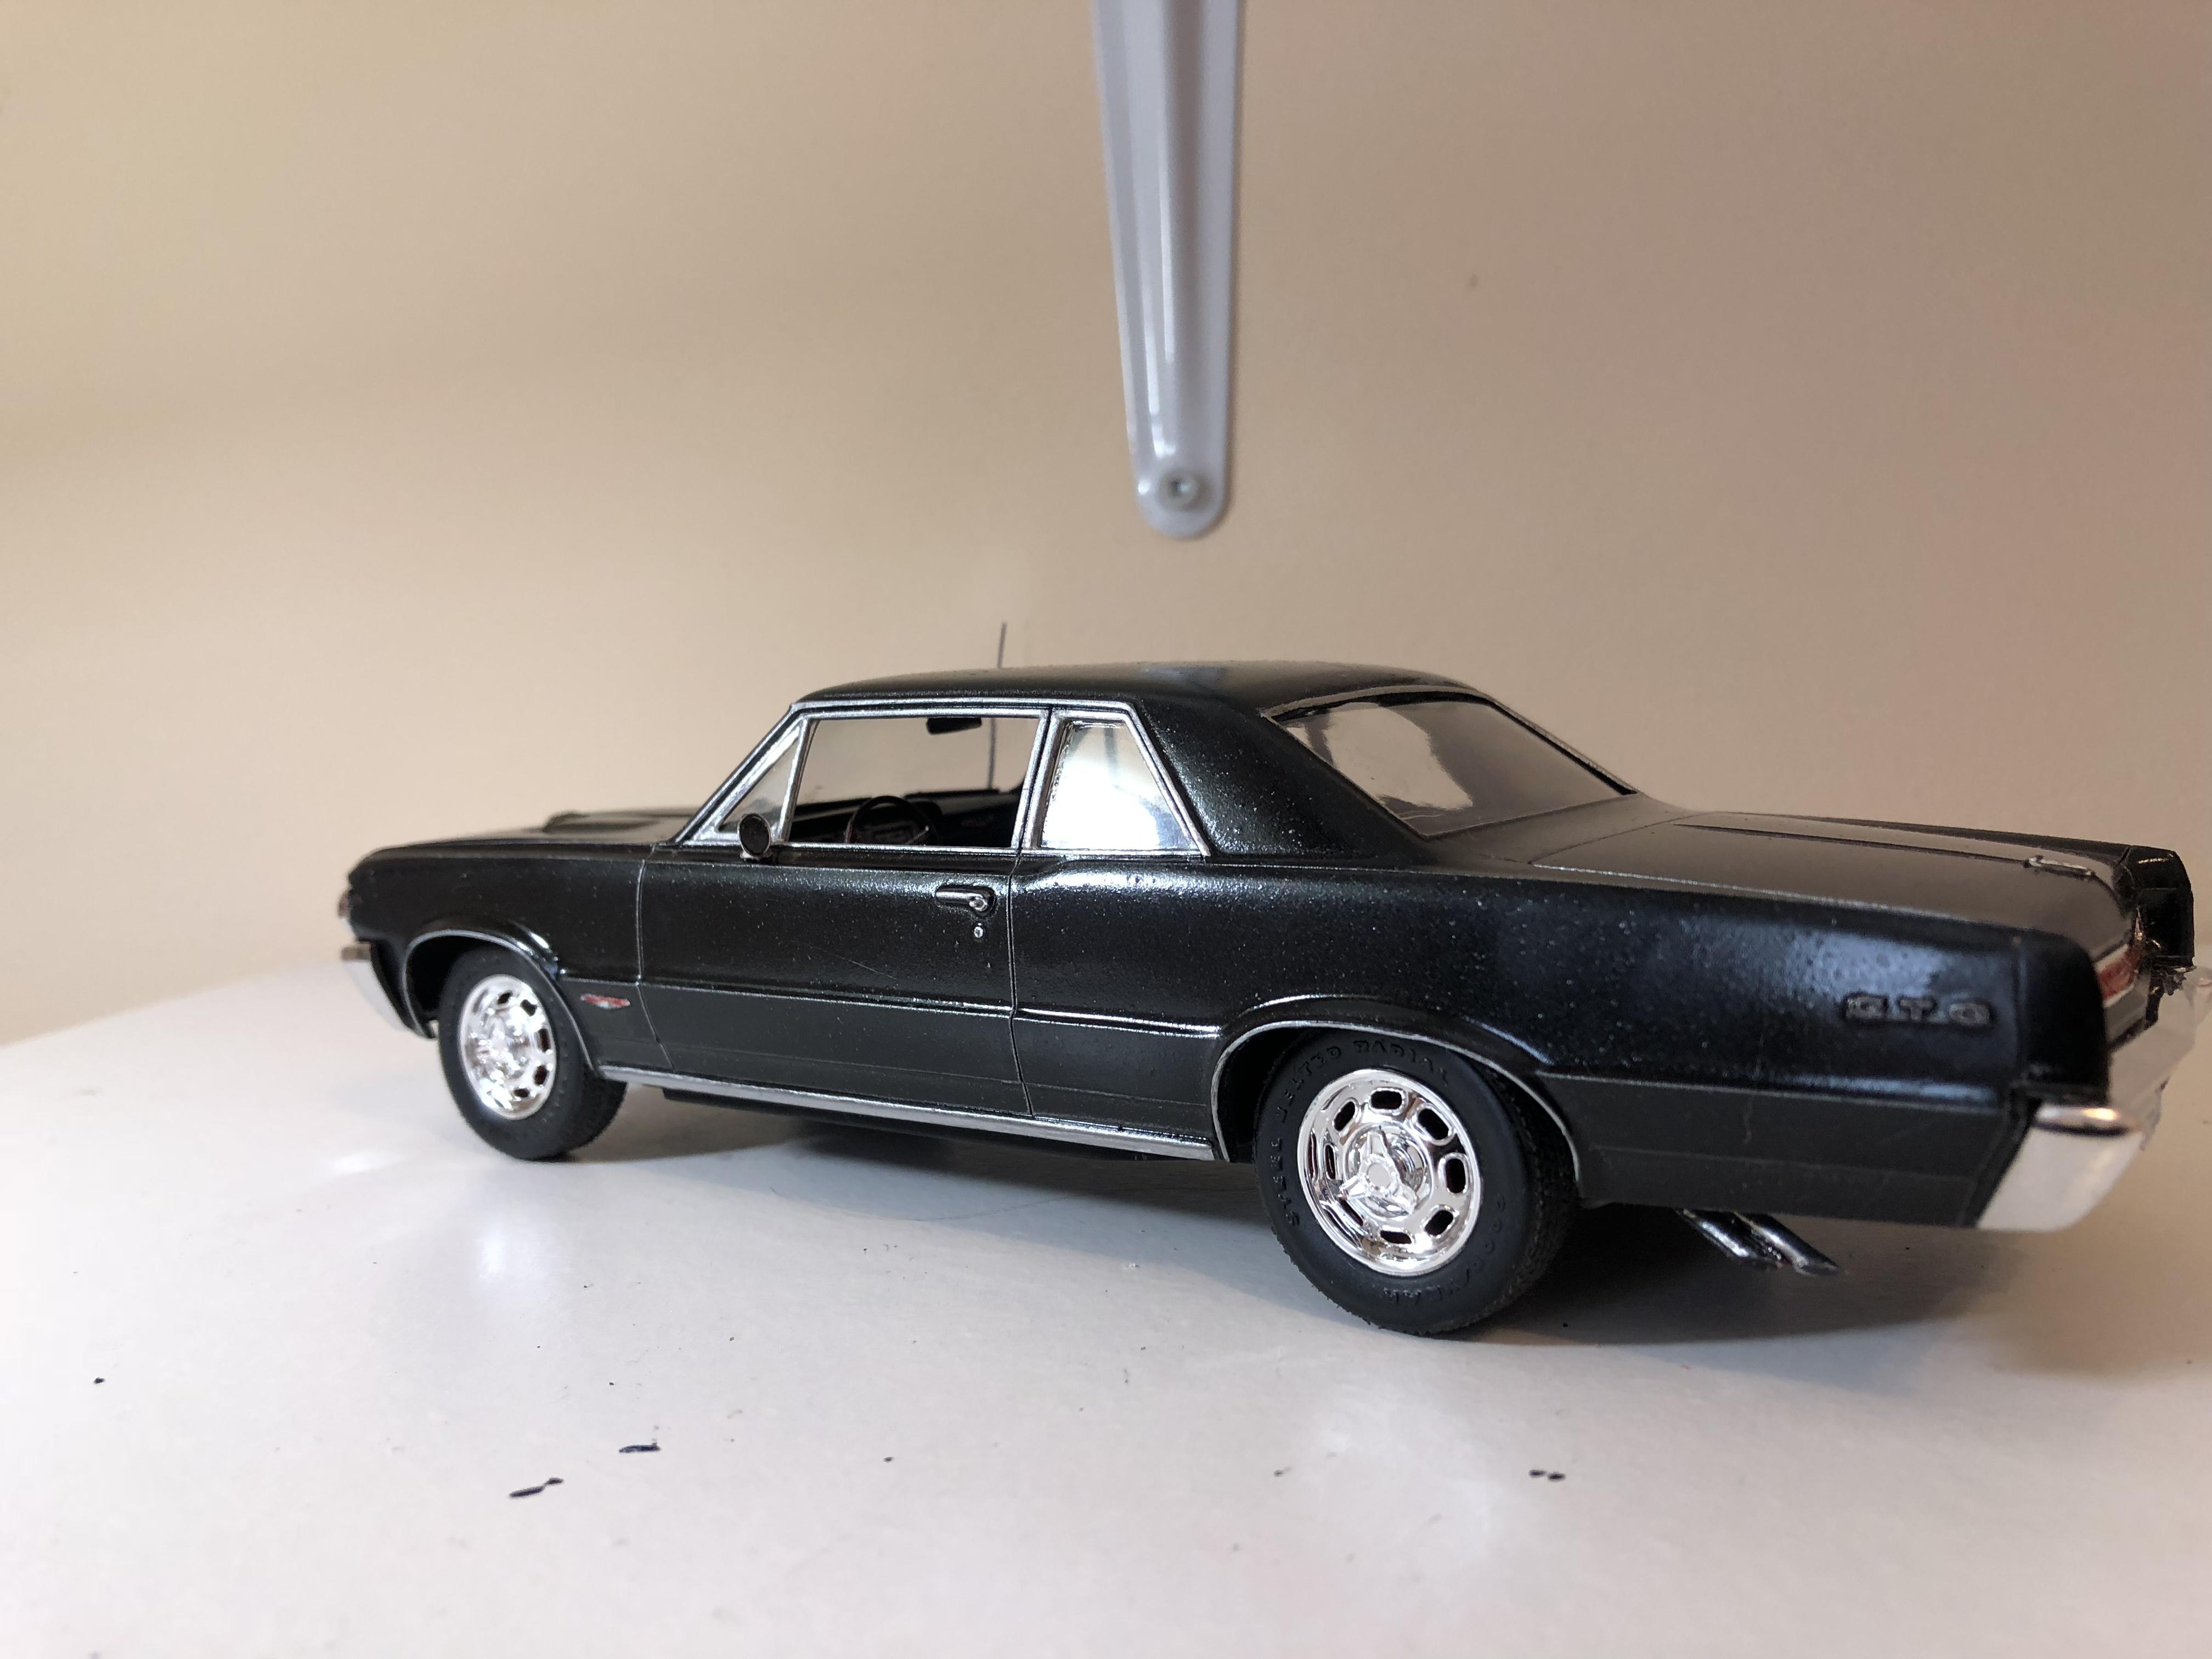
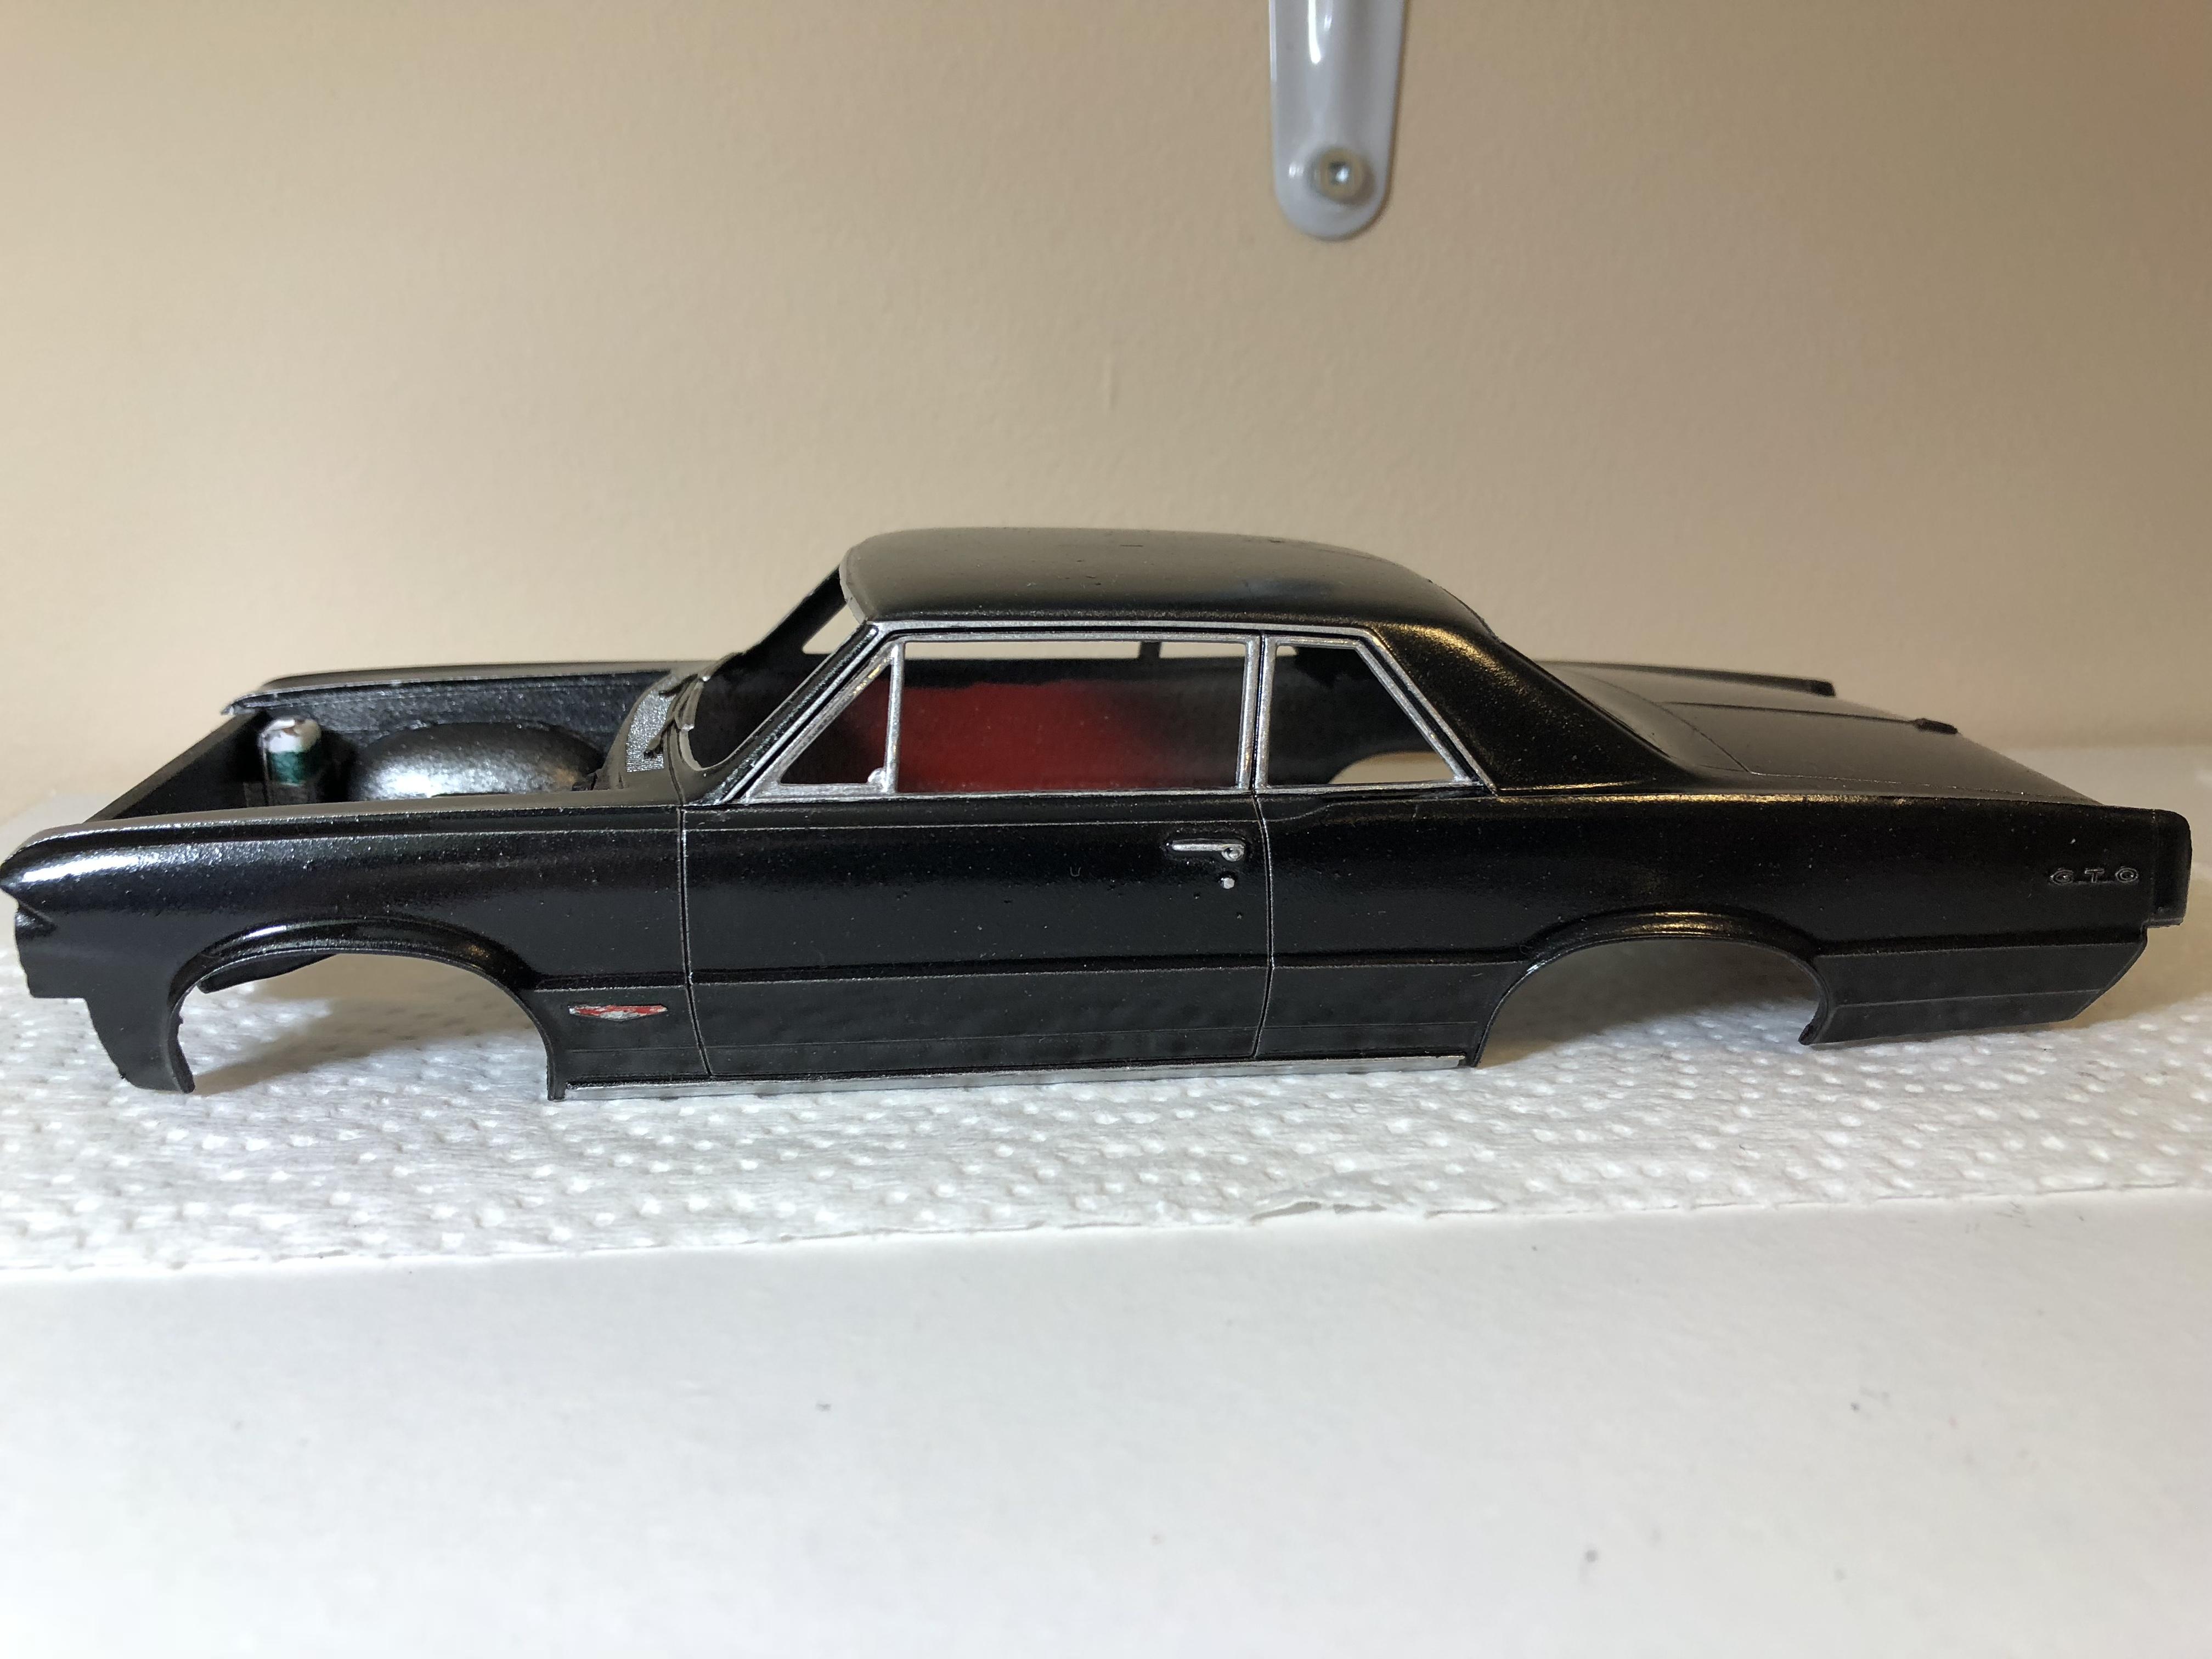
My GTO is completed. This was a fun build. Had one when I was a kid but. Emcee completed. I am very happy to have this kit again did not come out perfect but I’ll play with it car was originally red then sold. Painted some over. Then sold lastly painted black. Car was far from stock. New owner brought her as close as he could. That’s the story box stock build except for the antenna made with stretch sprue. My build. All comment welcomed
-
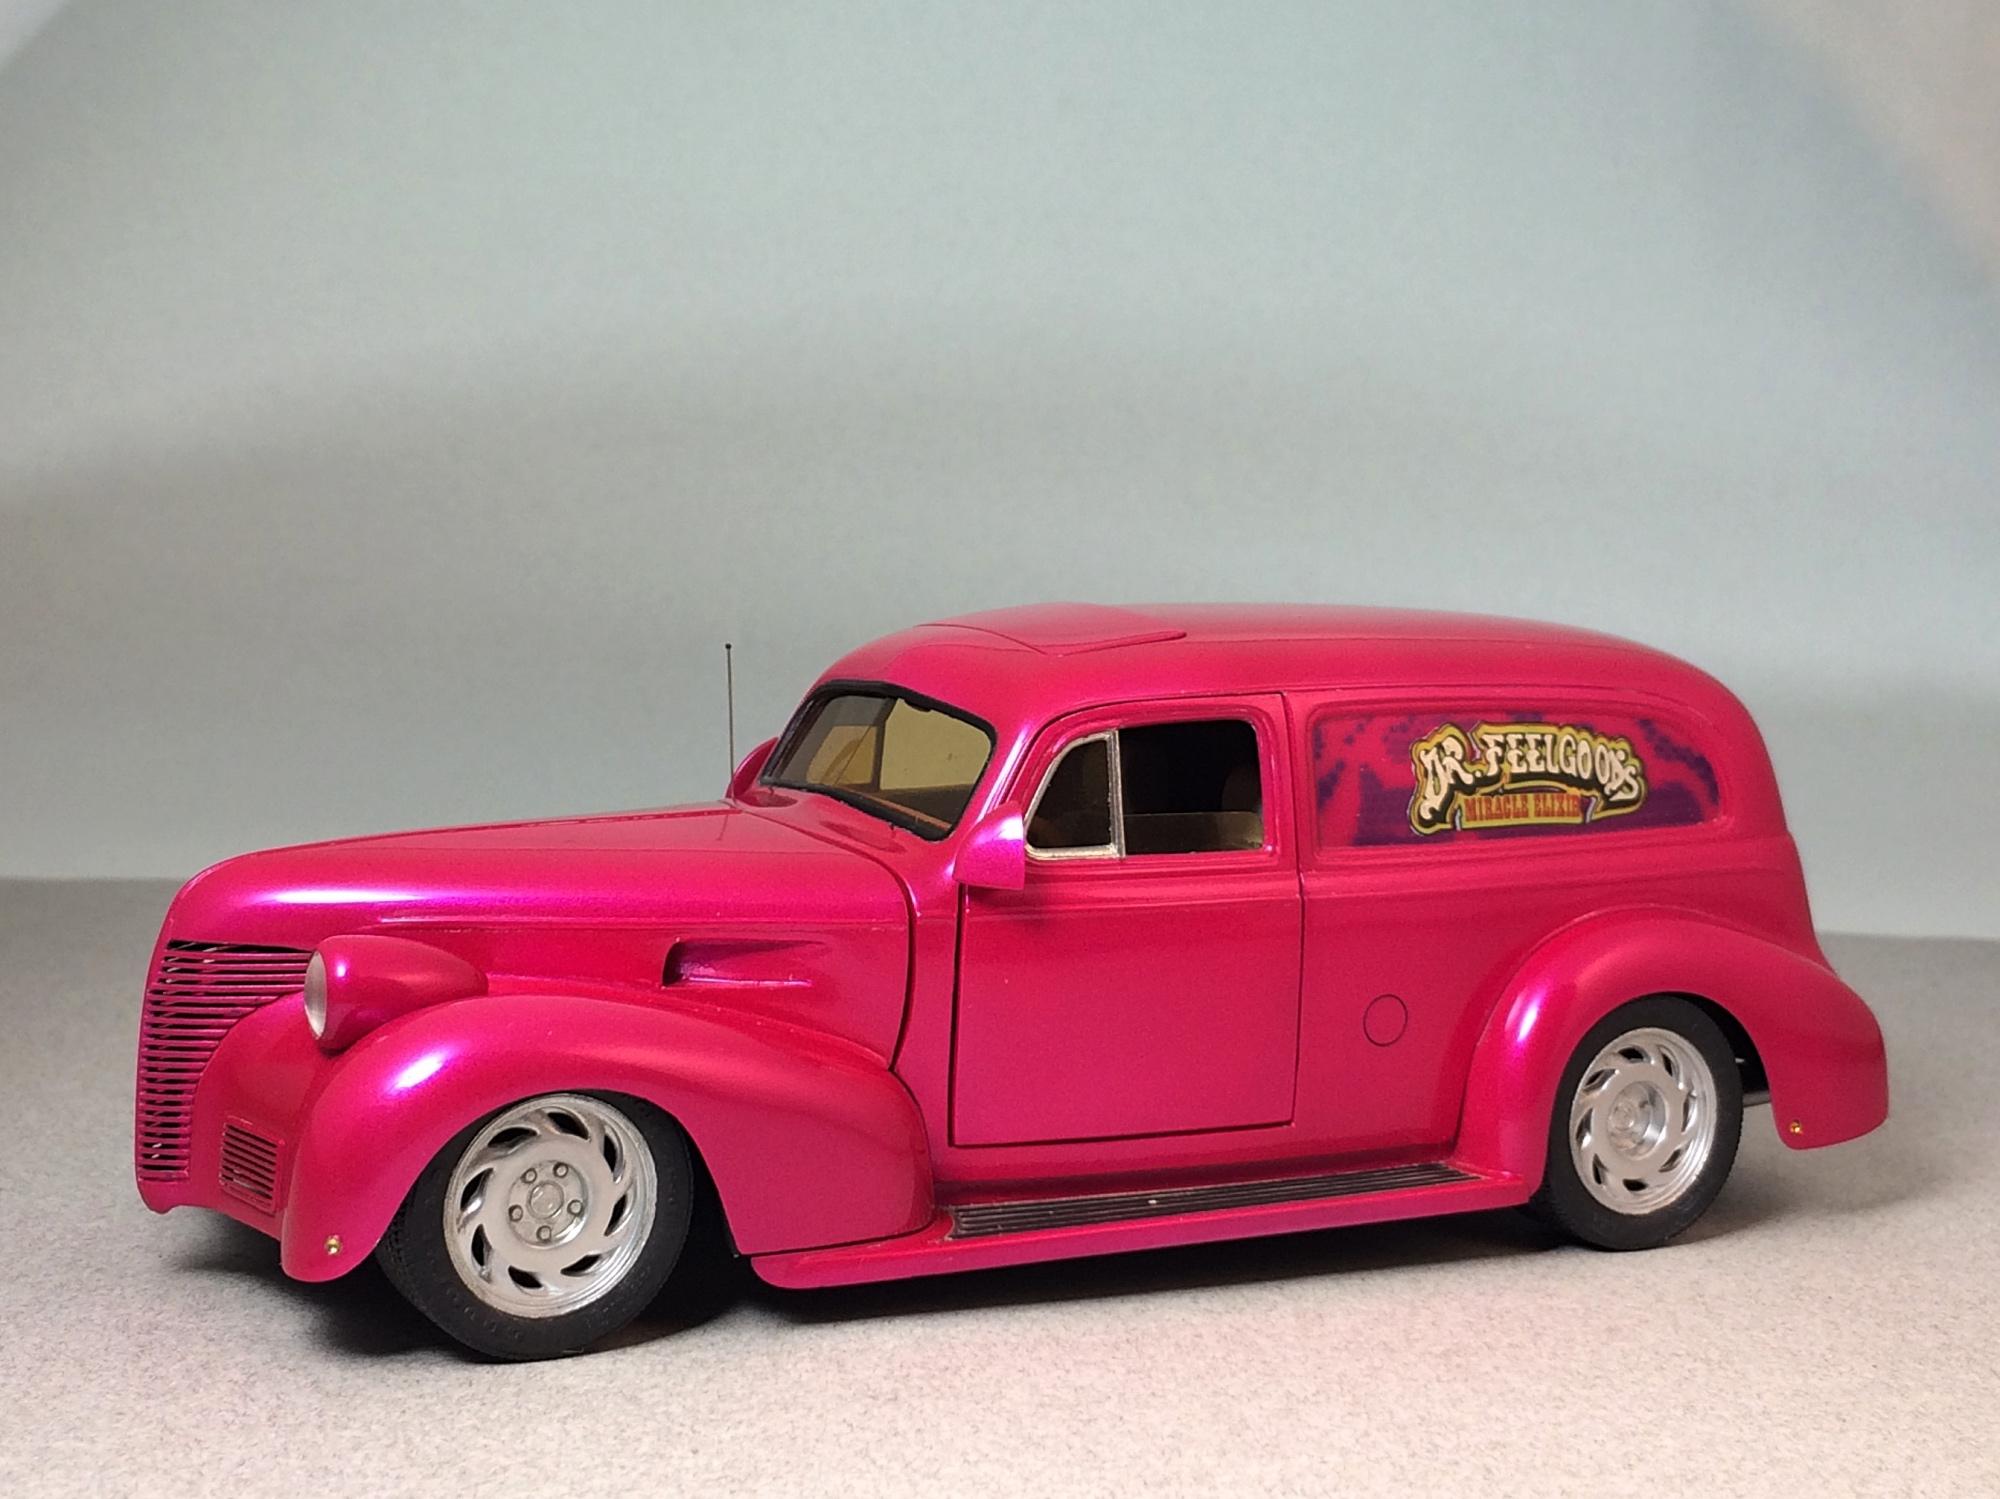
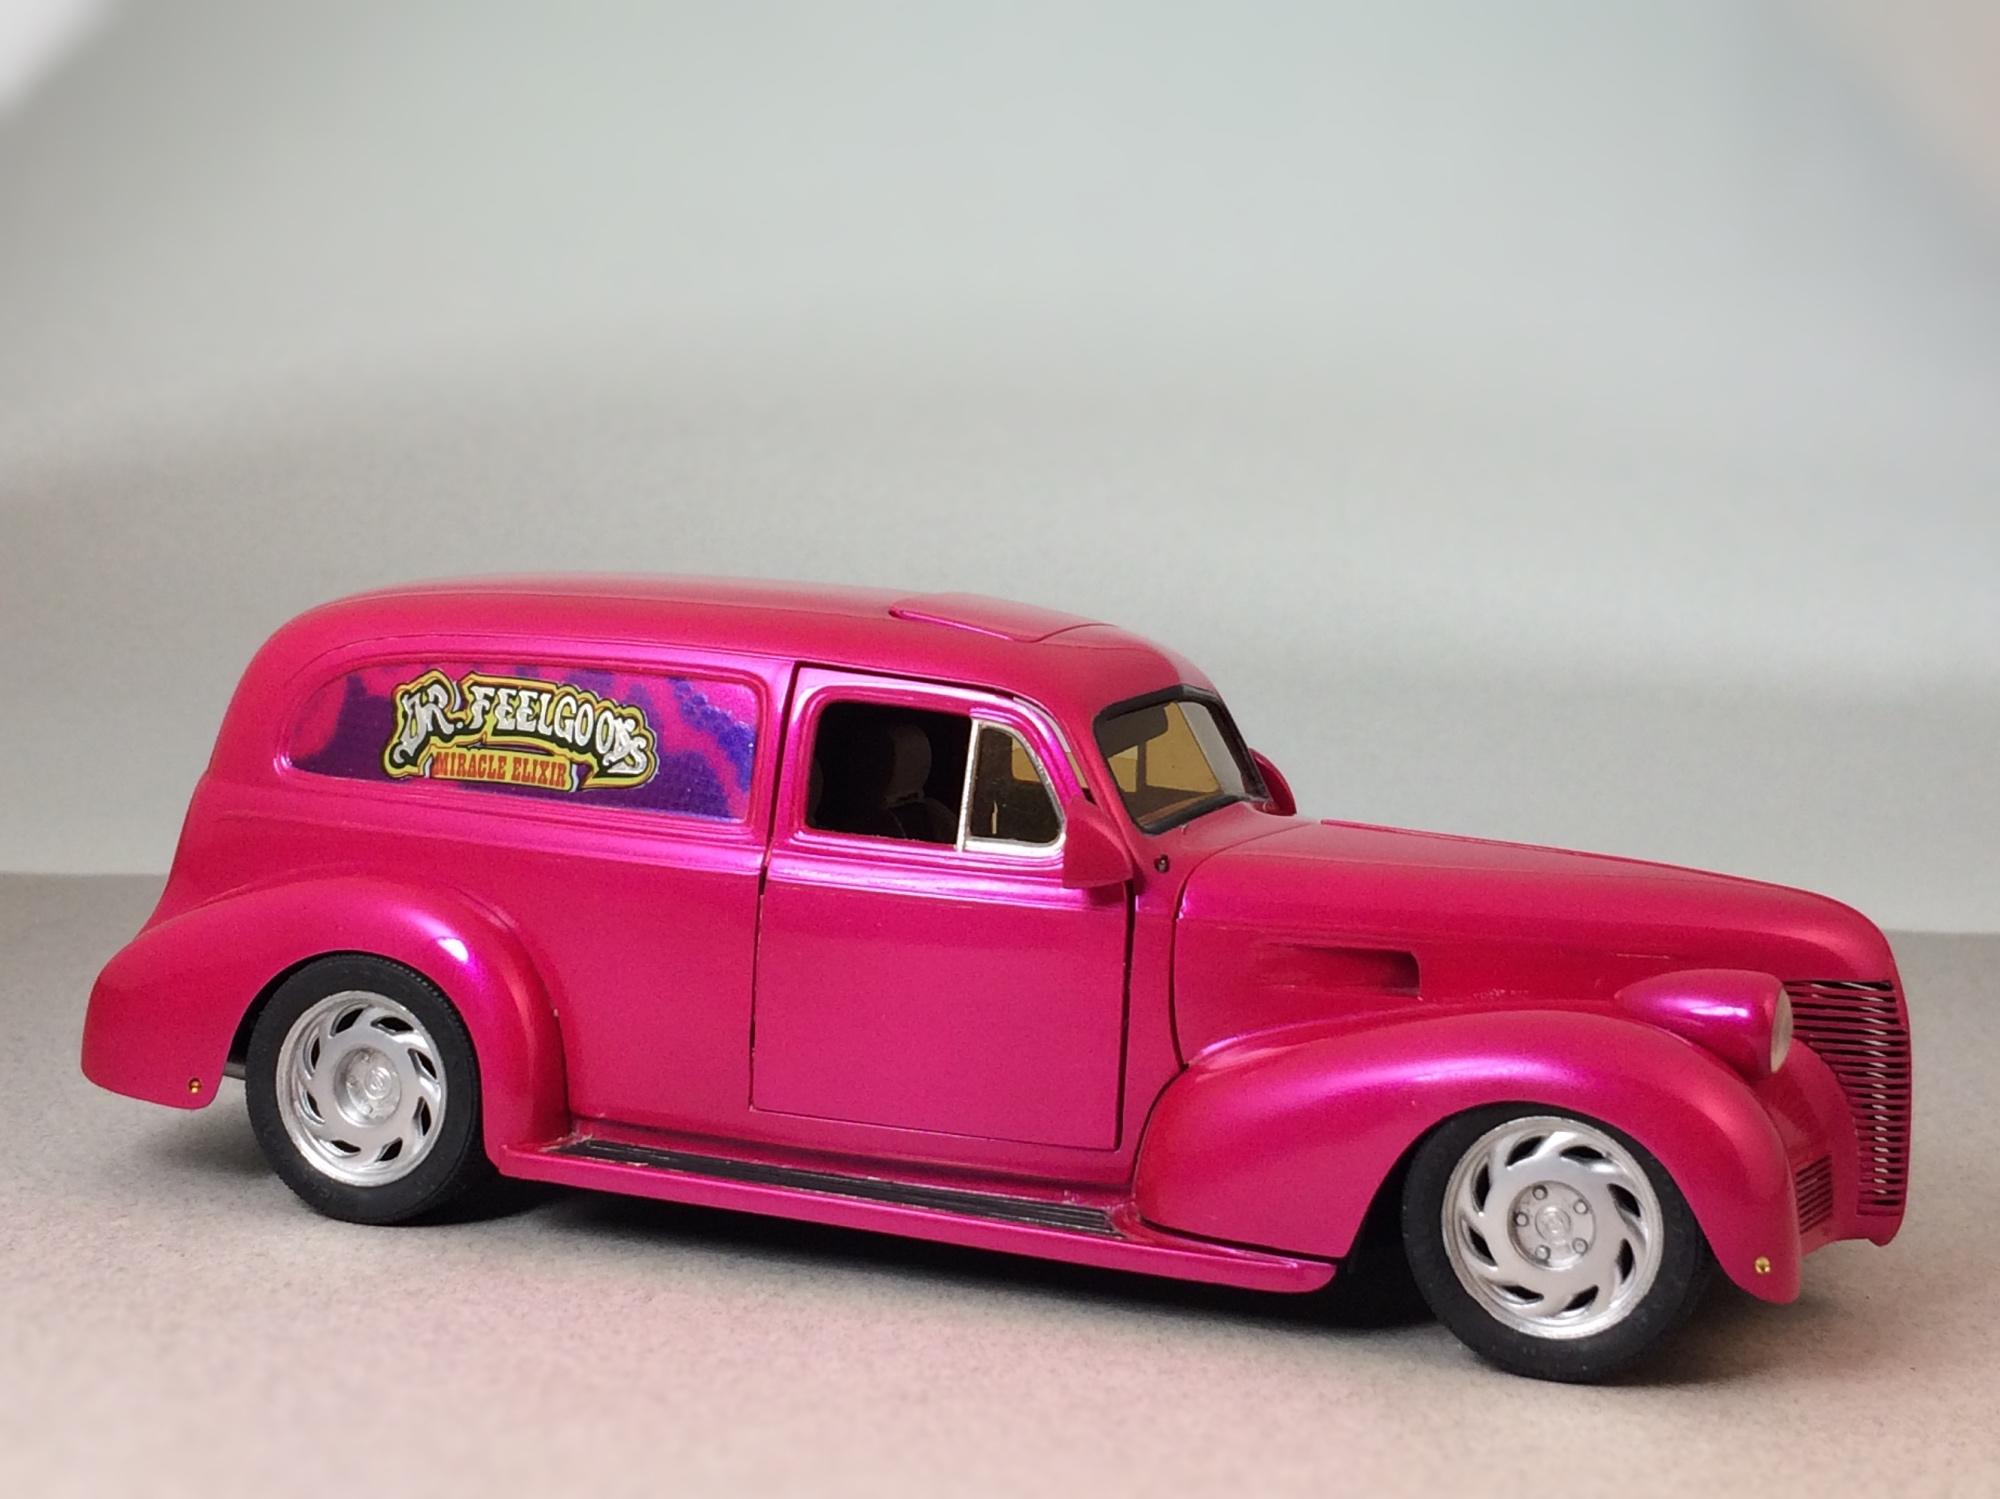
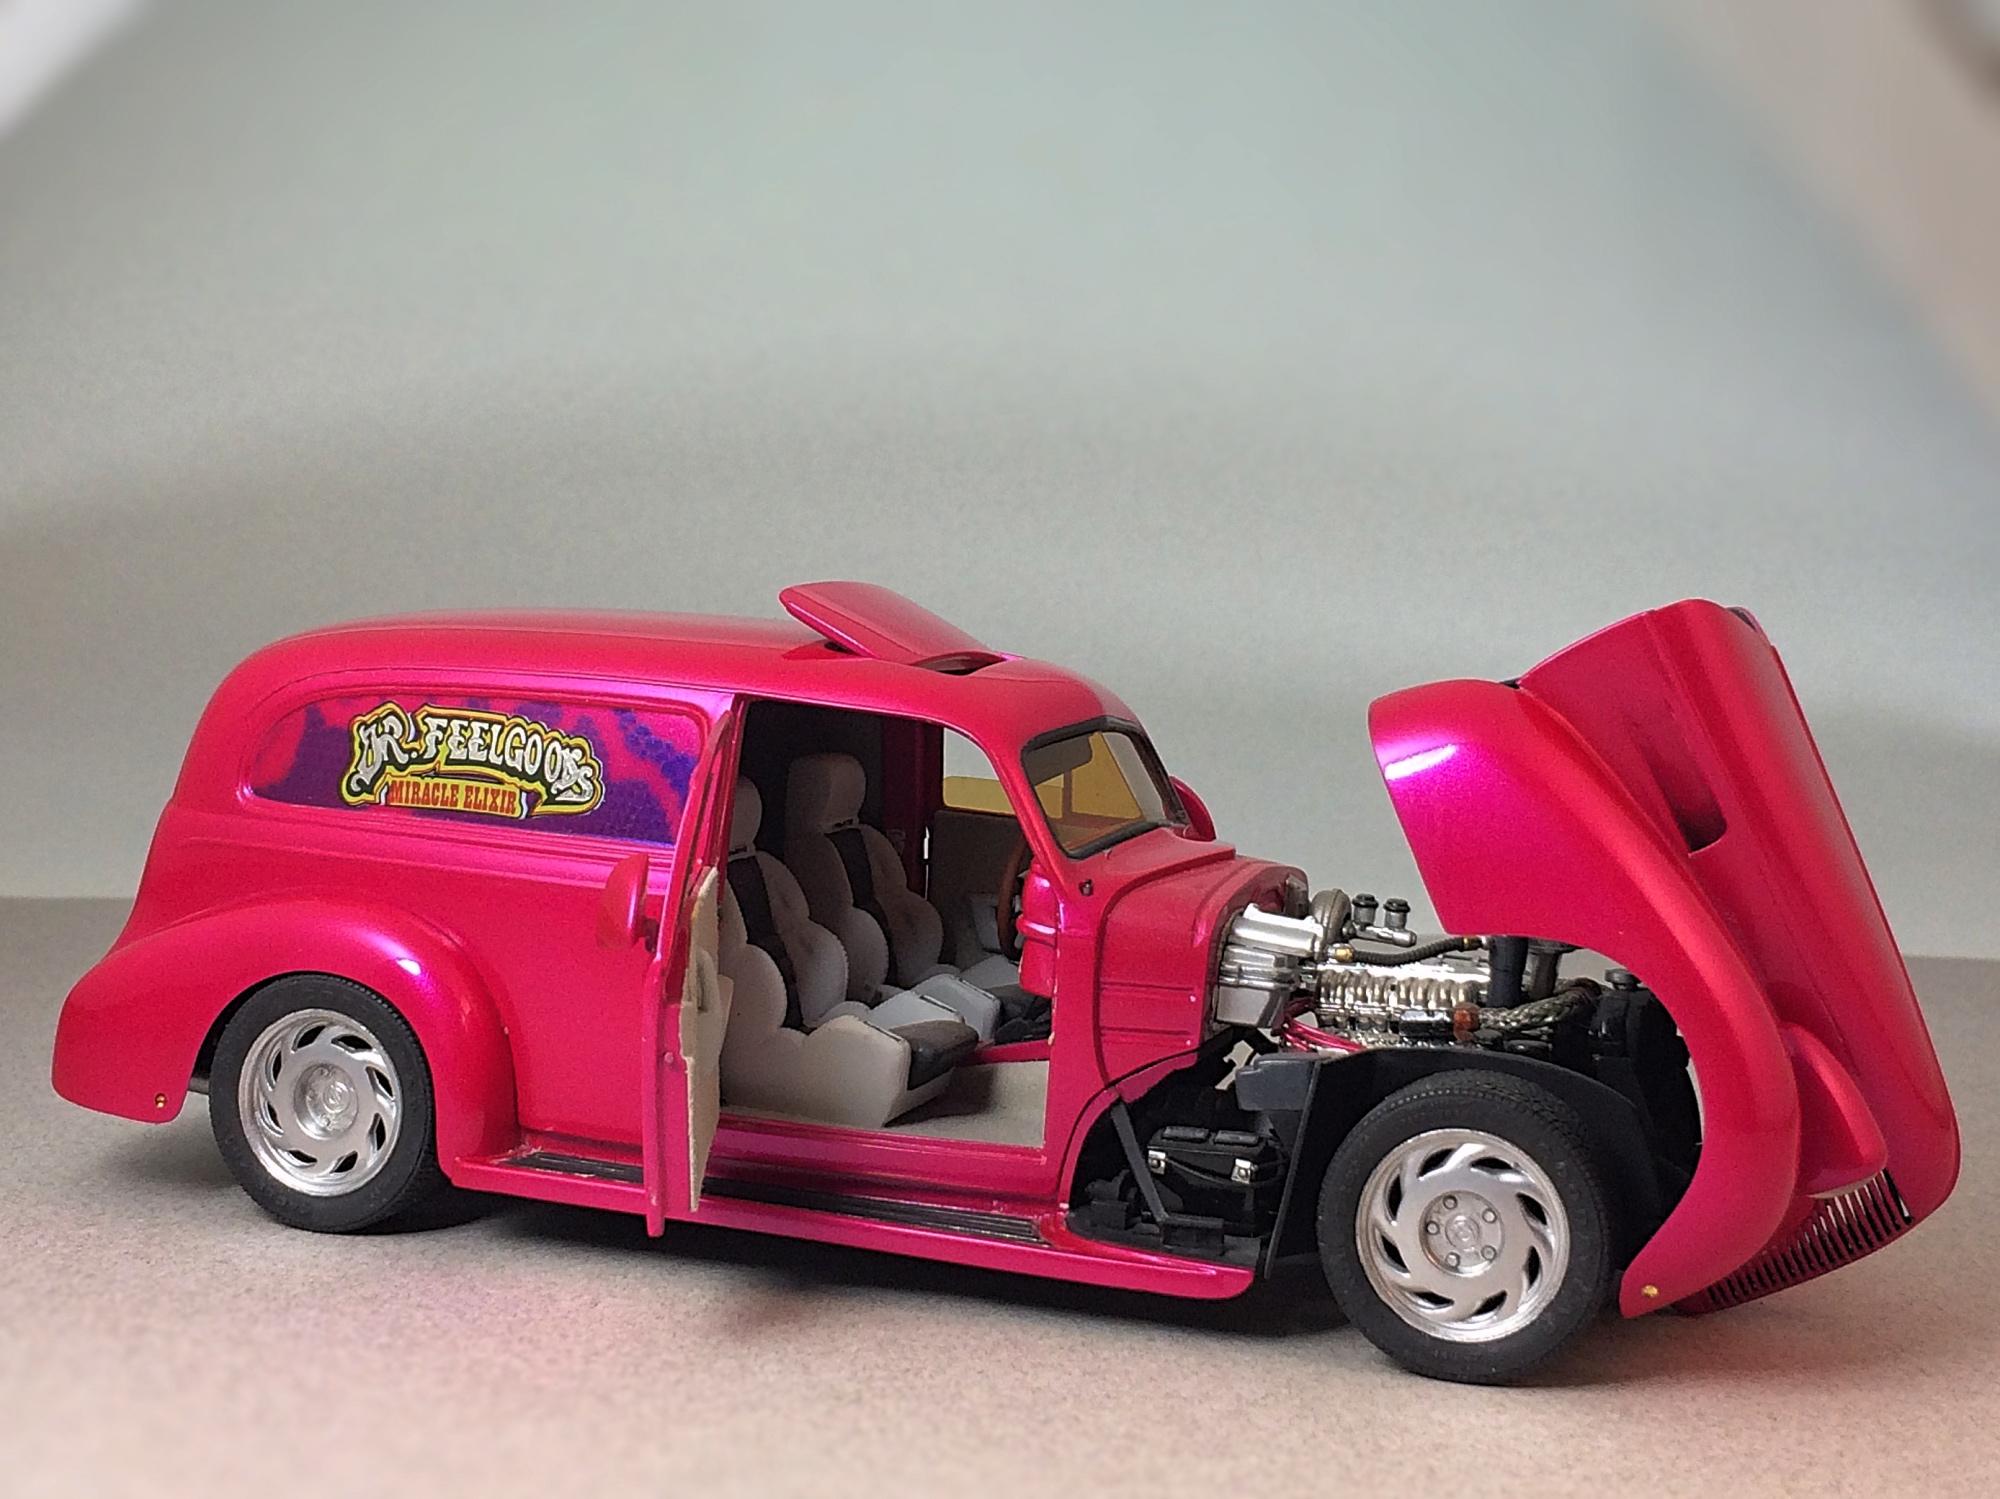
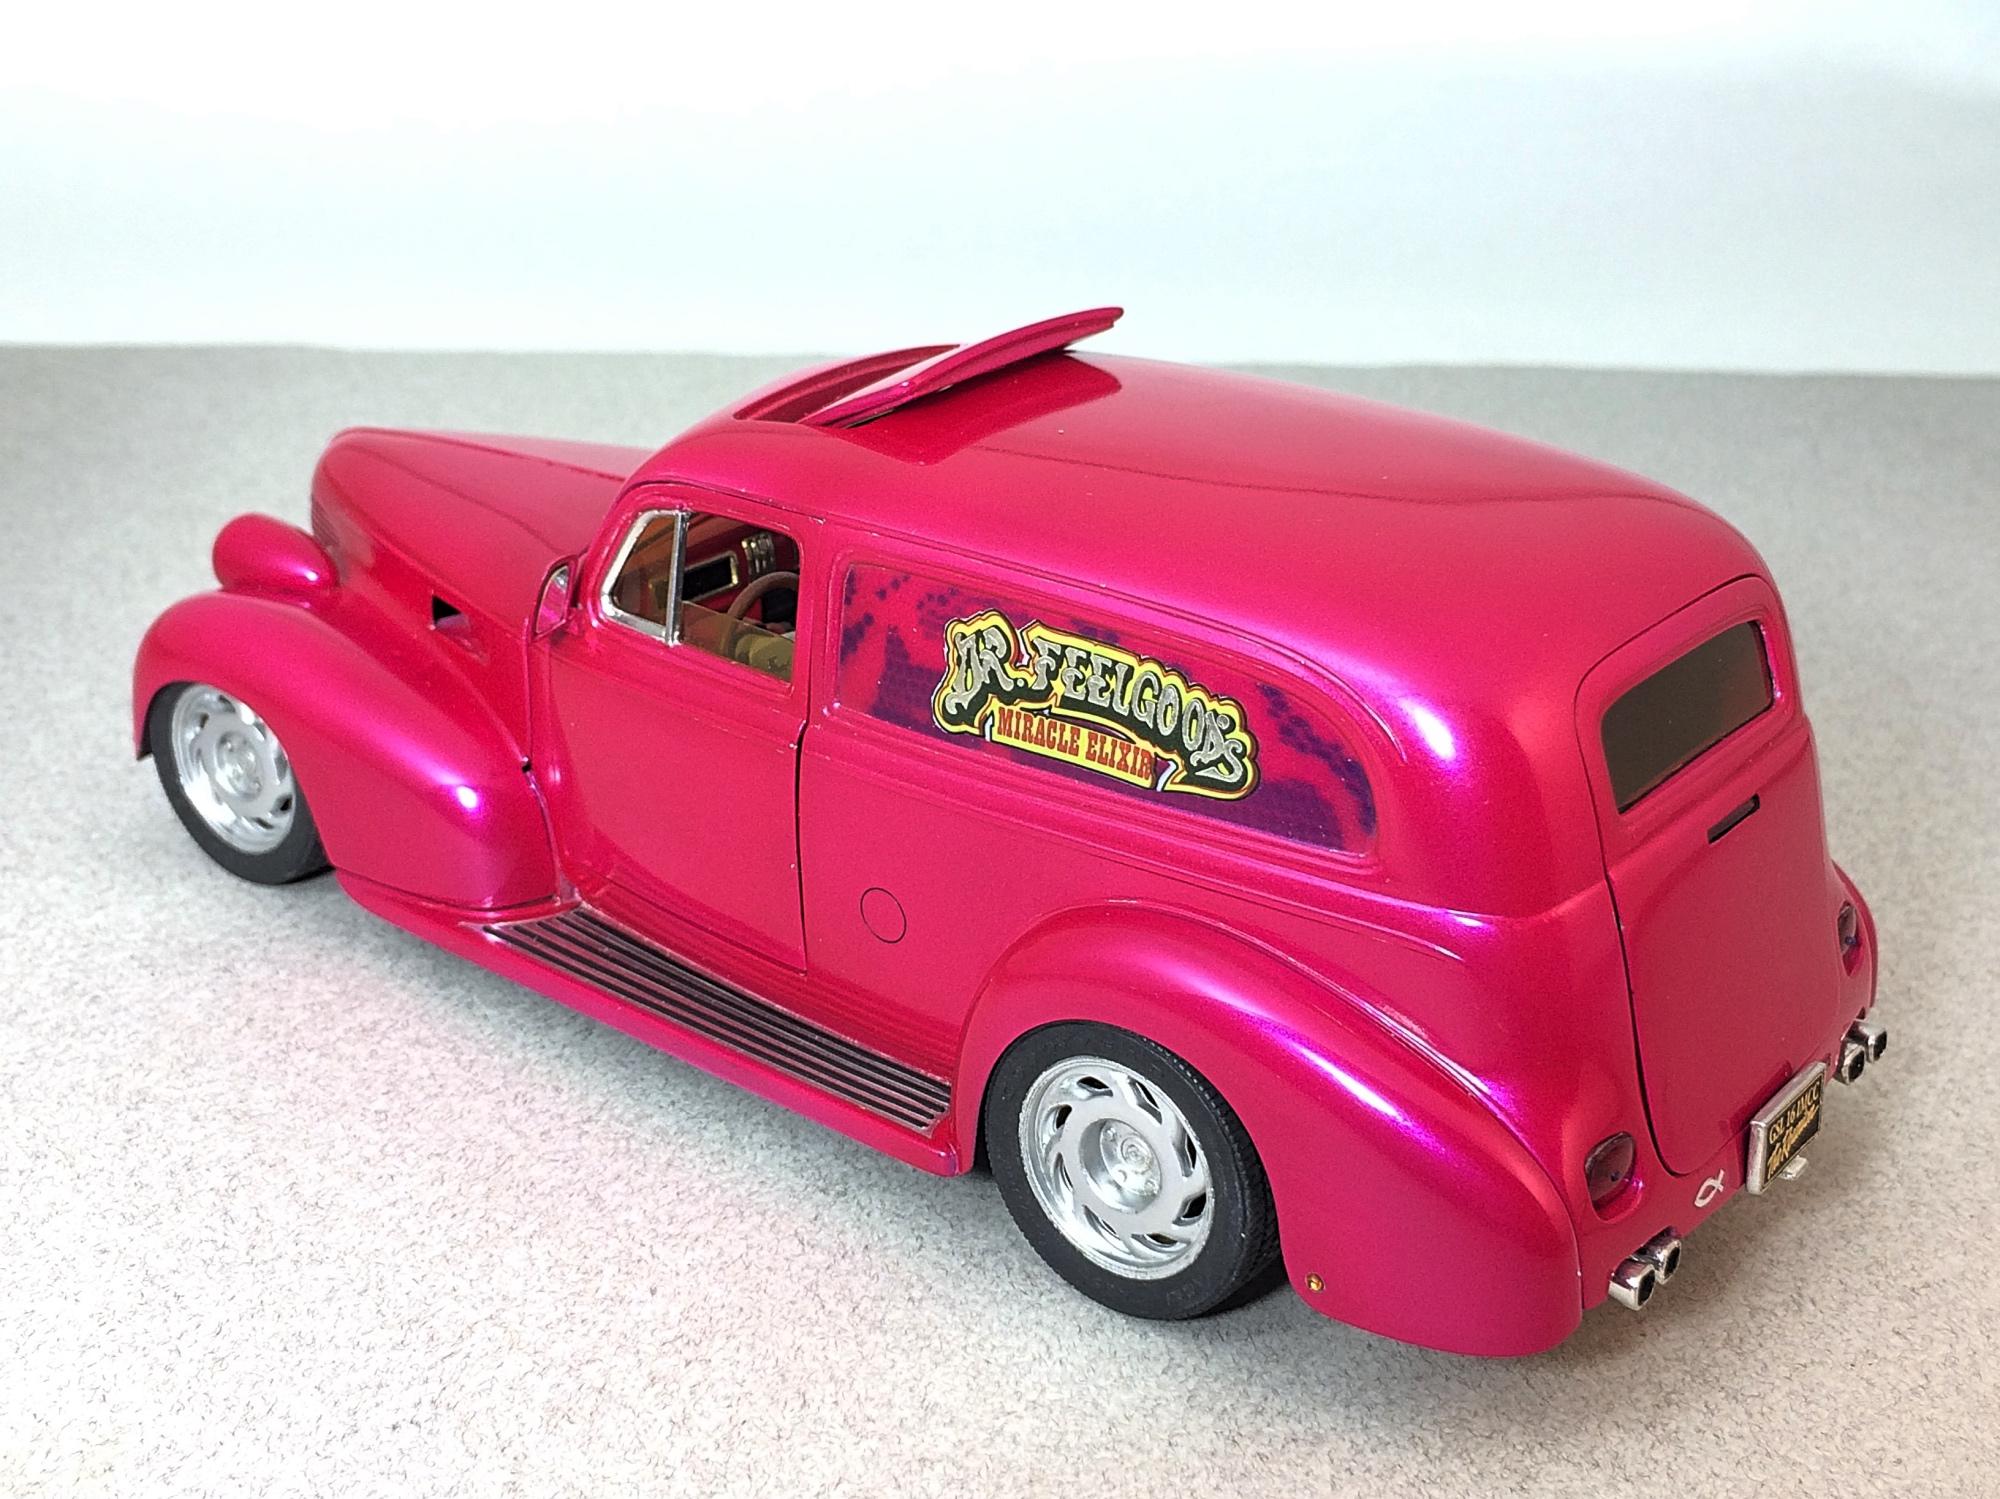
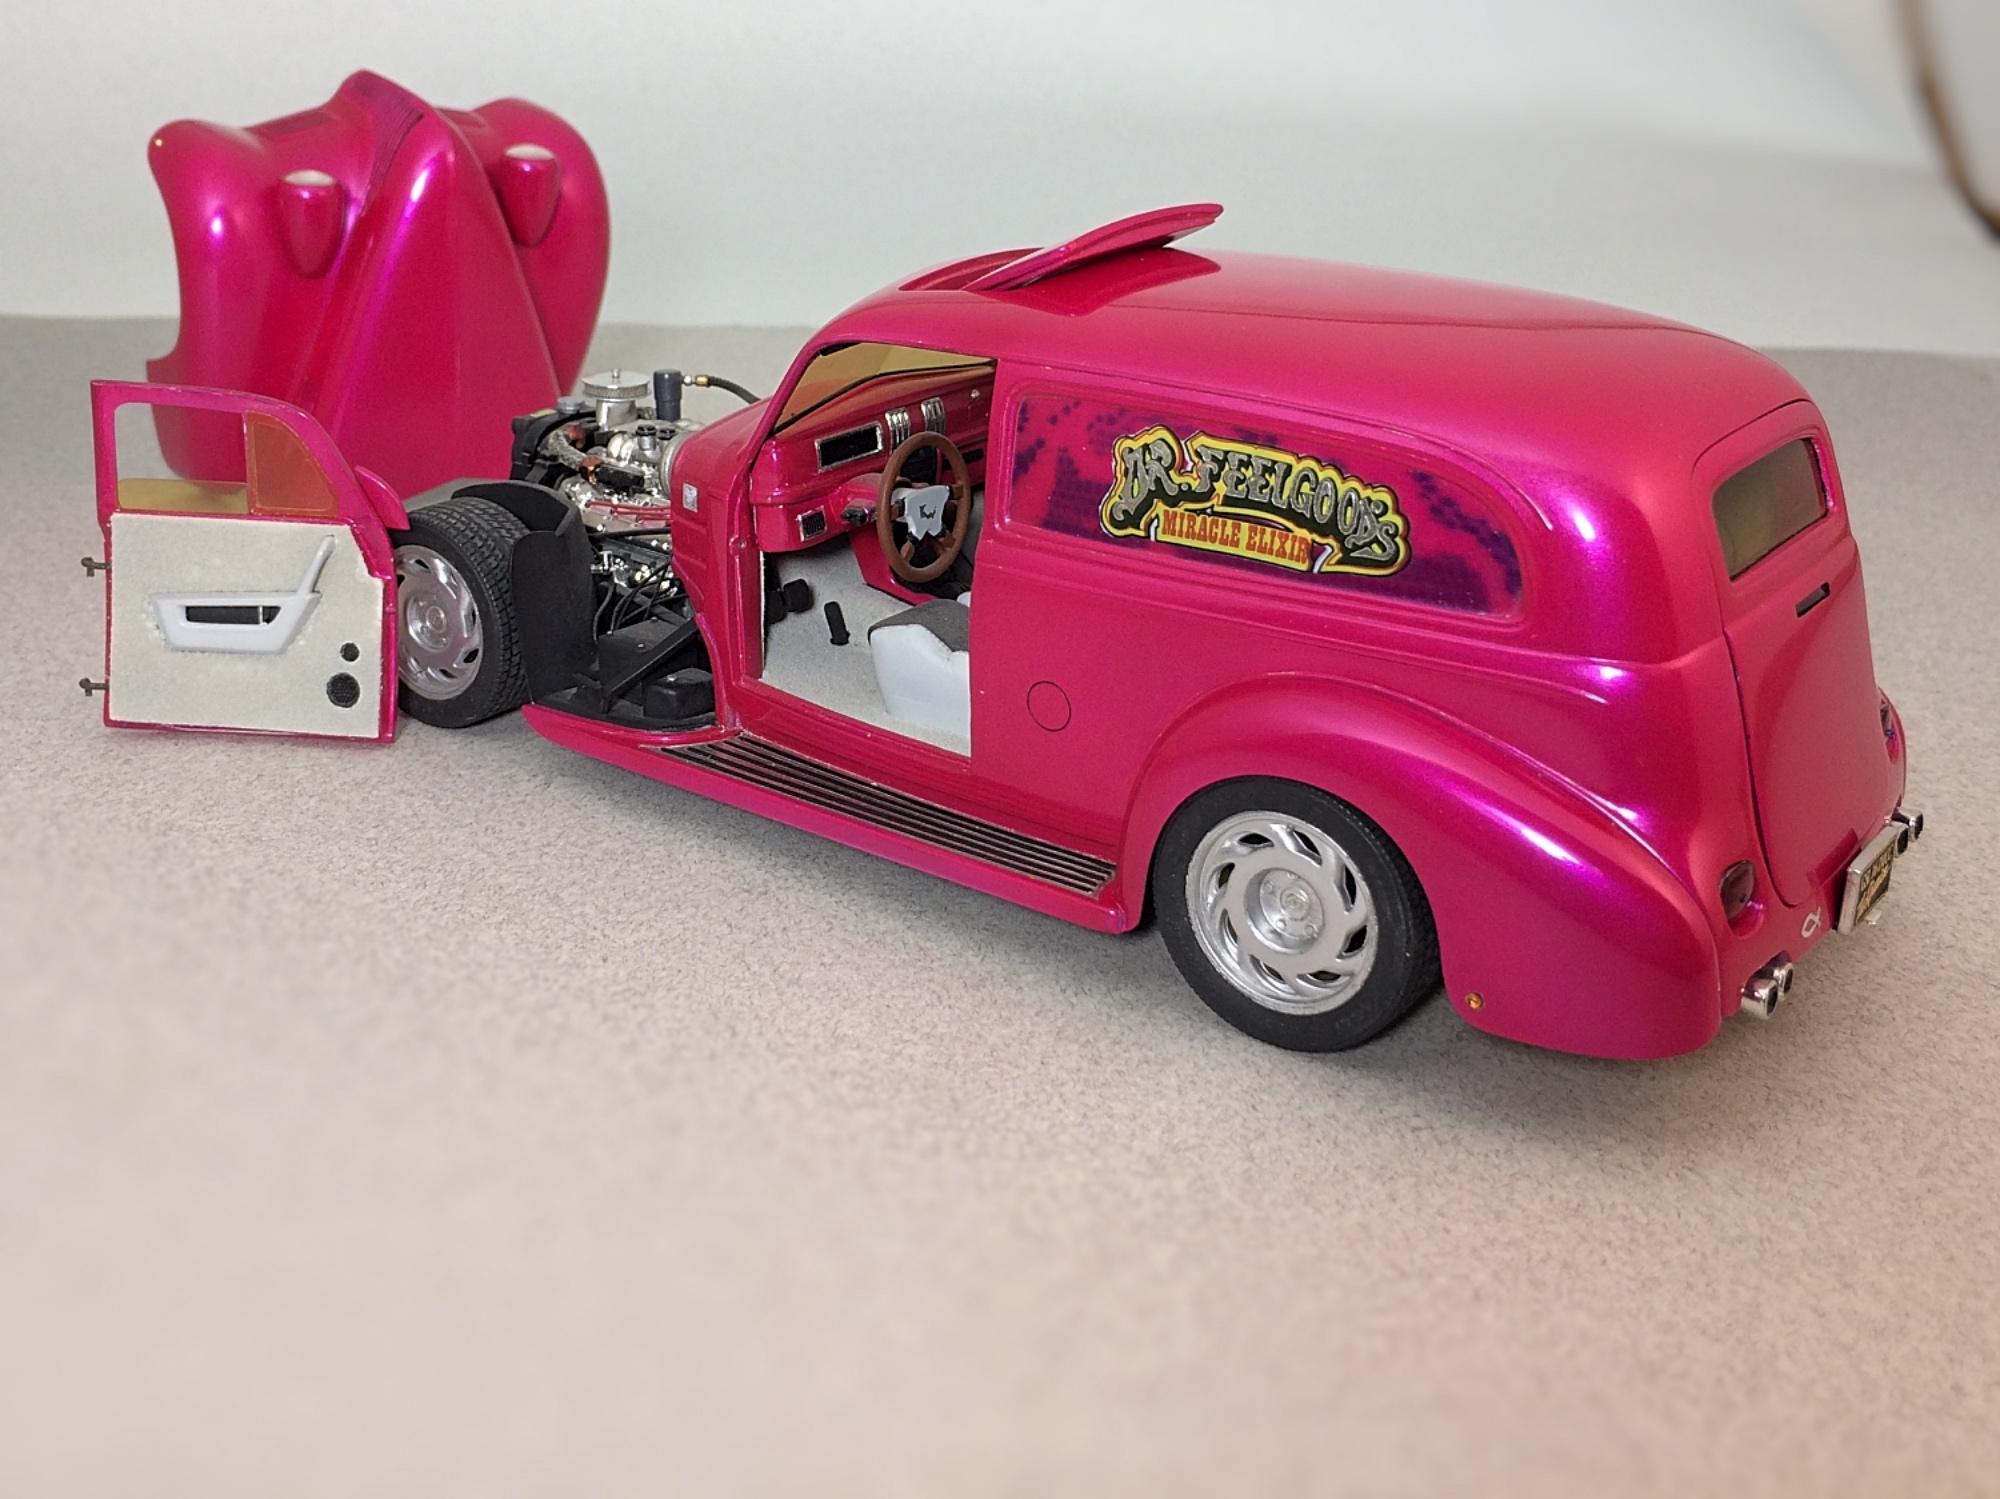
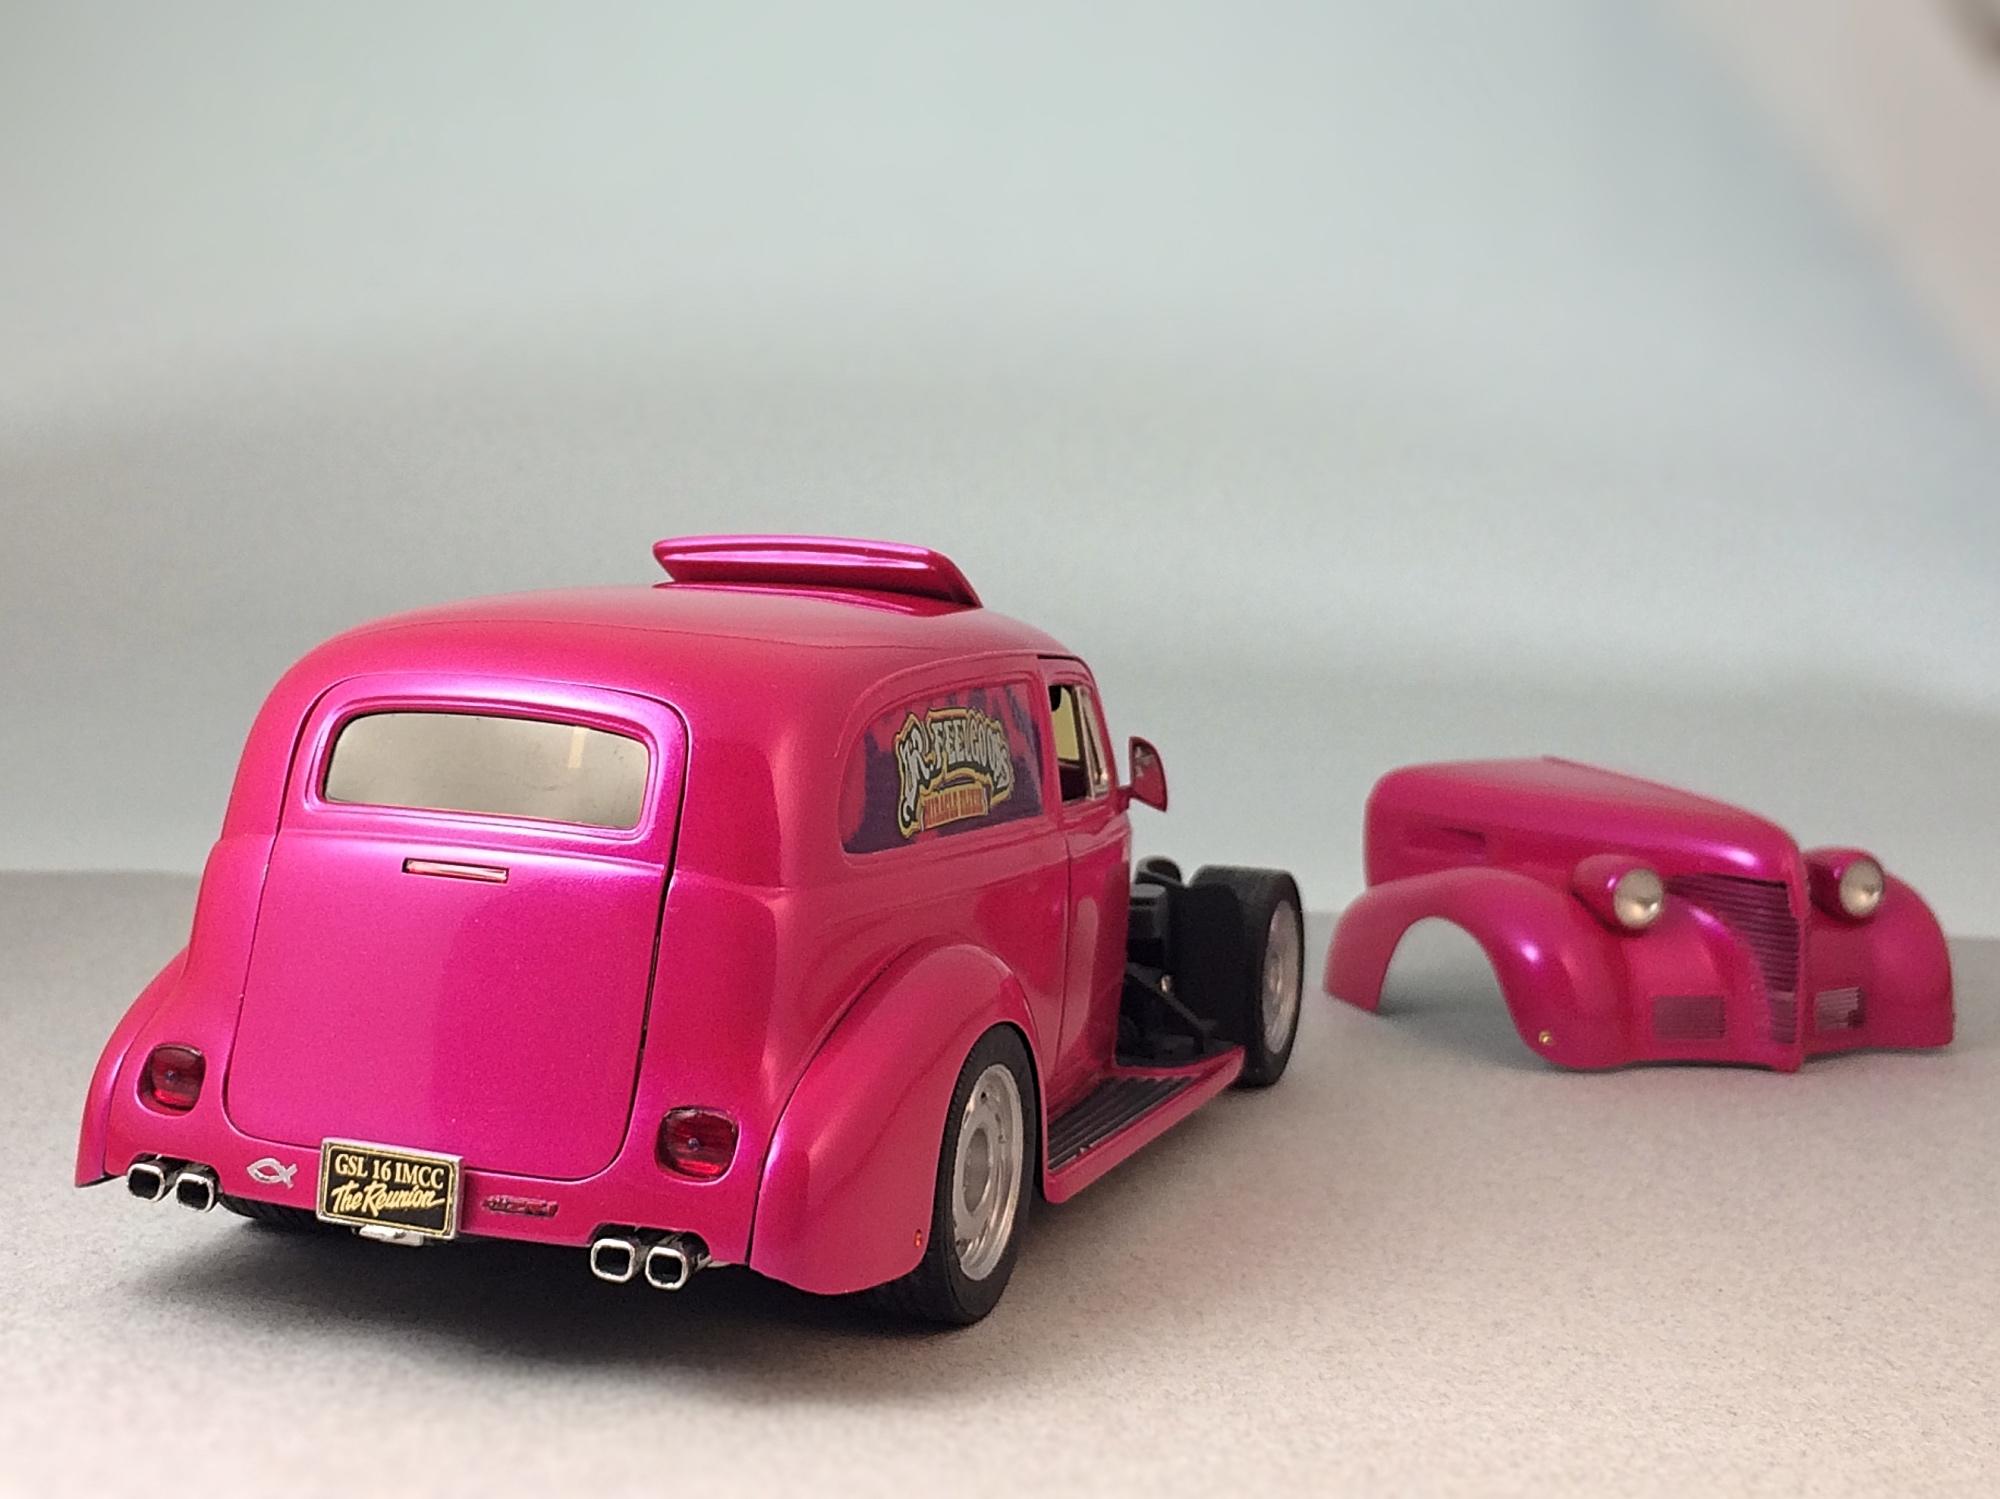
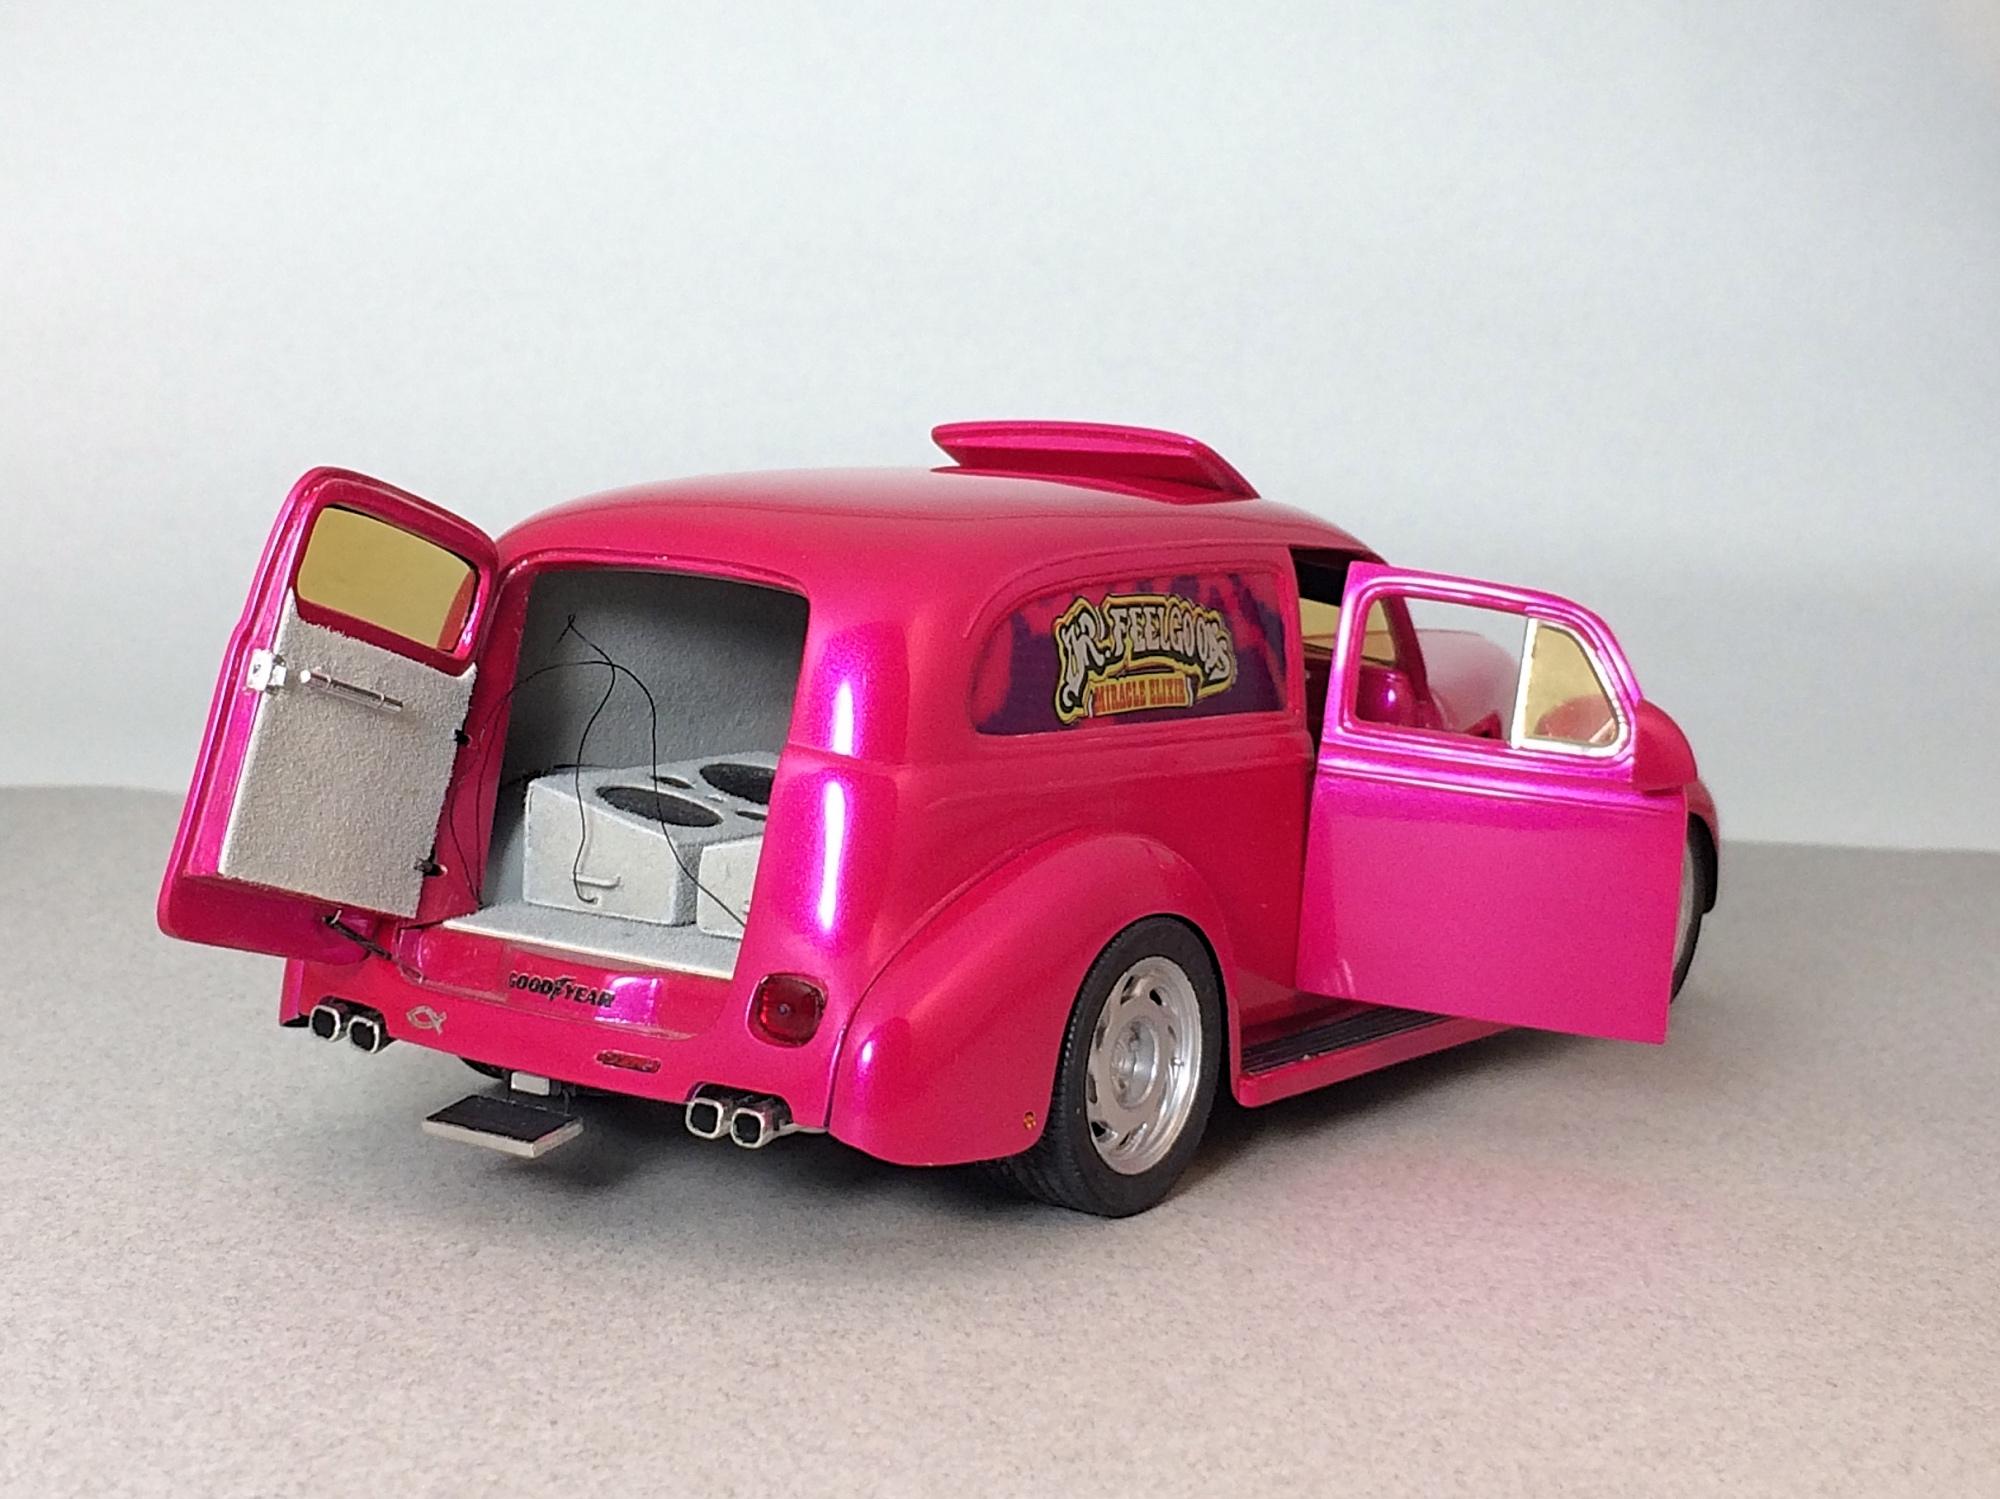
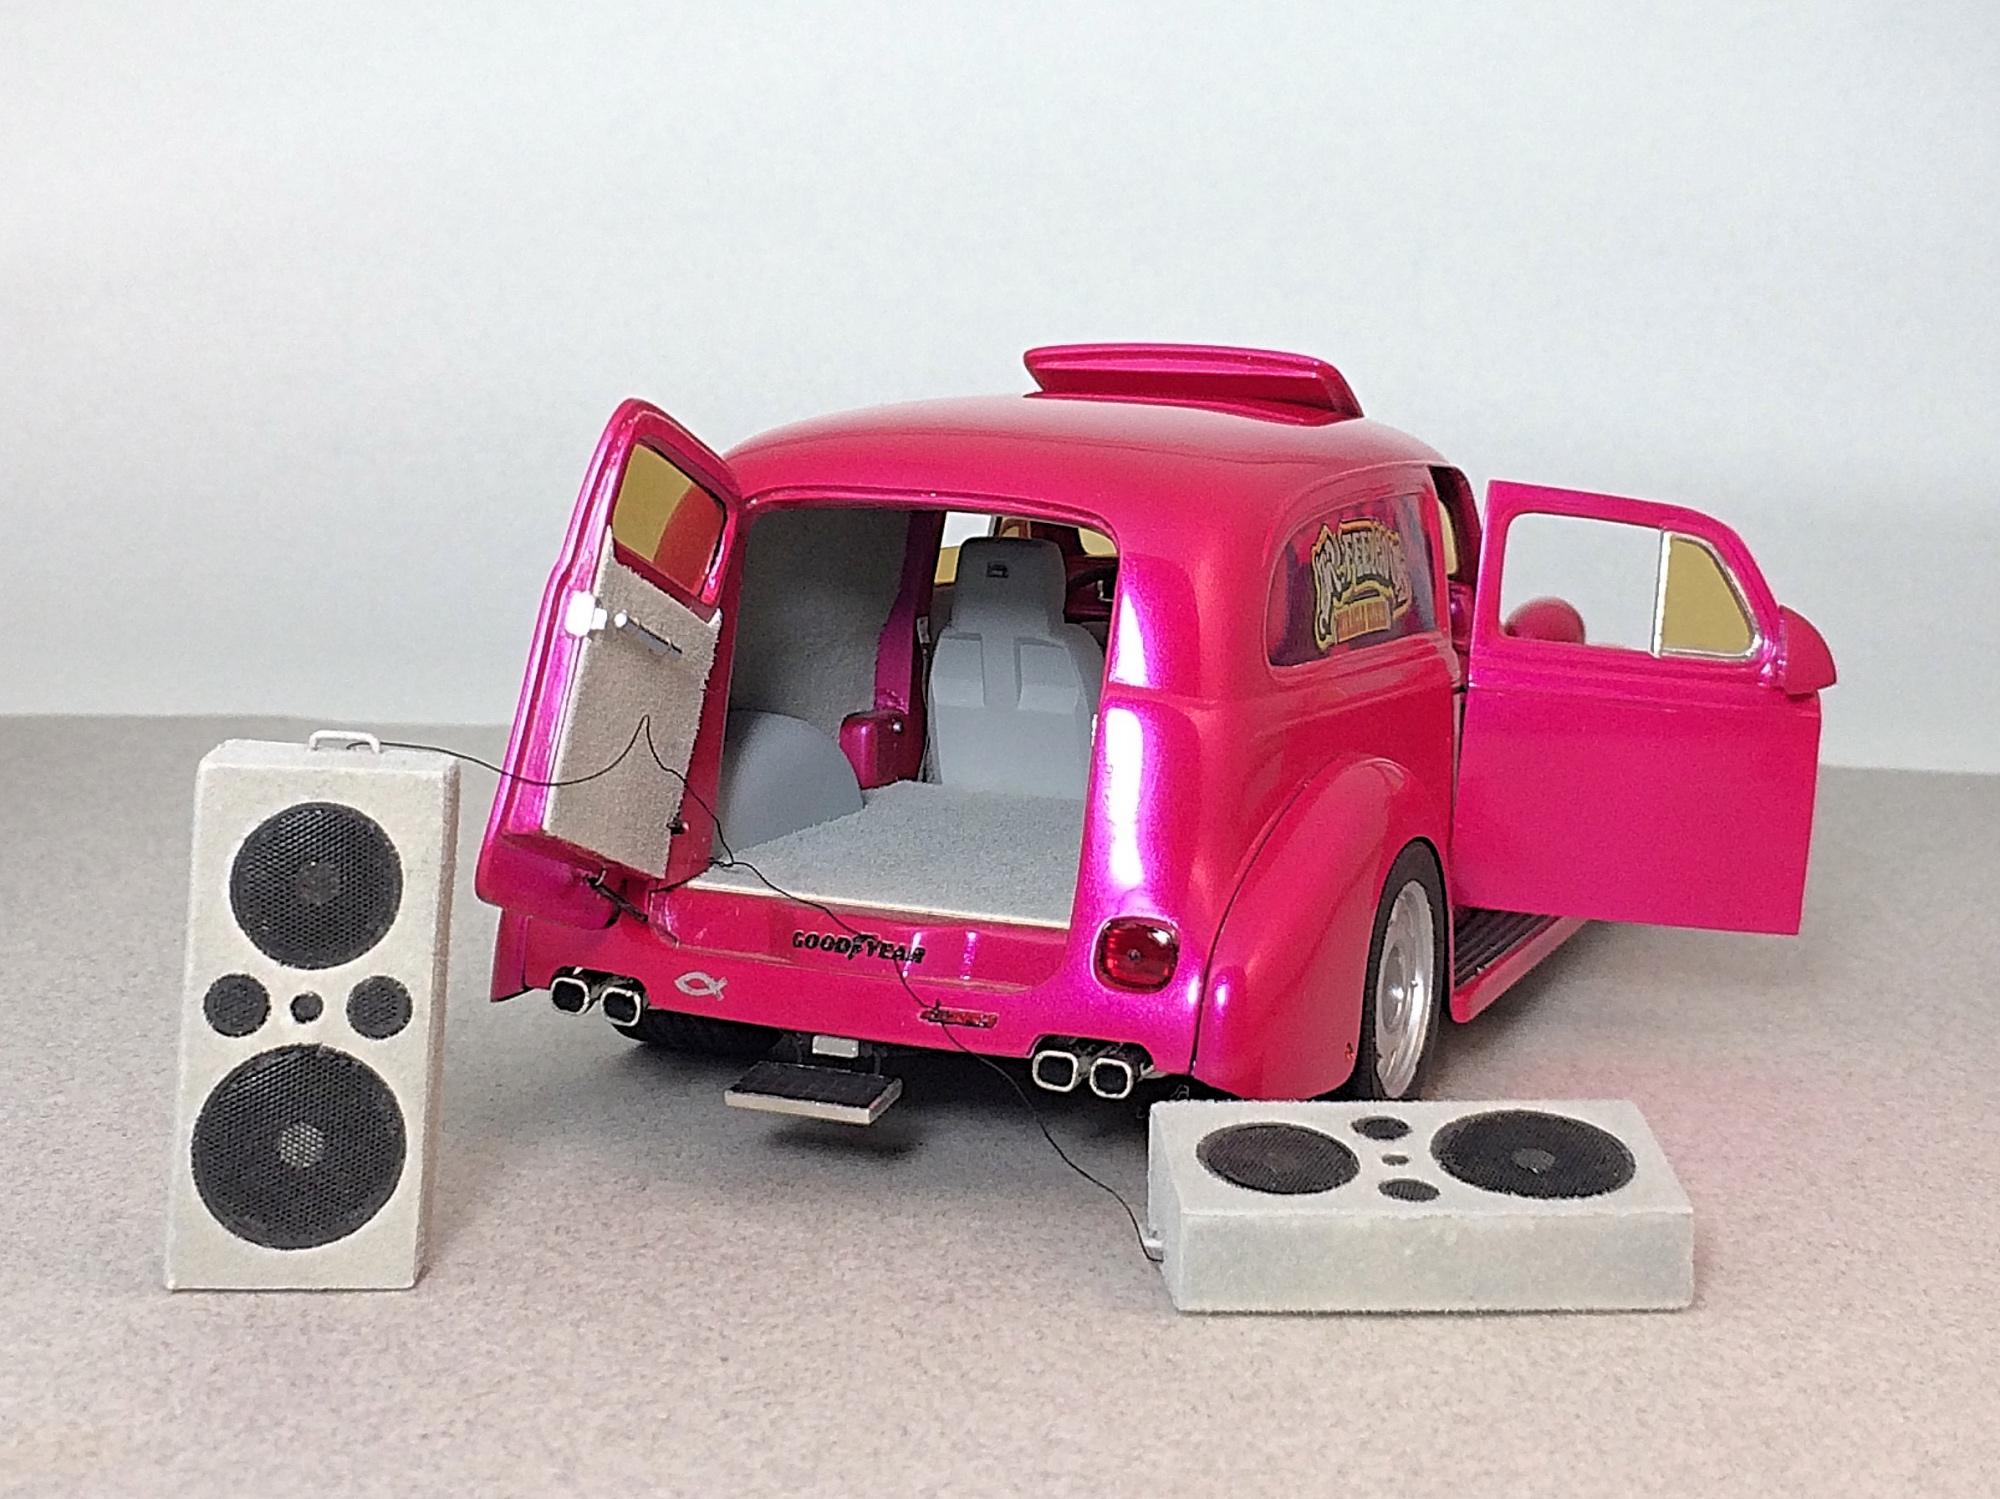
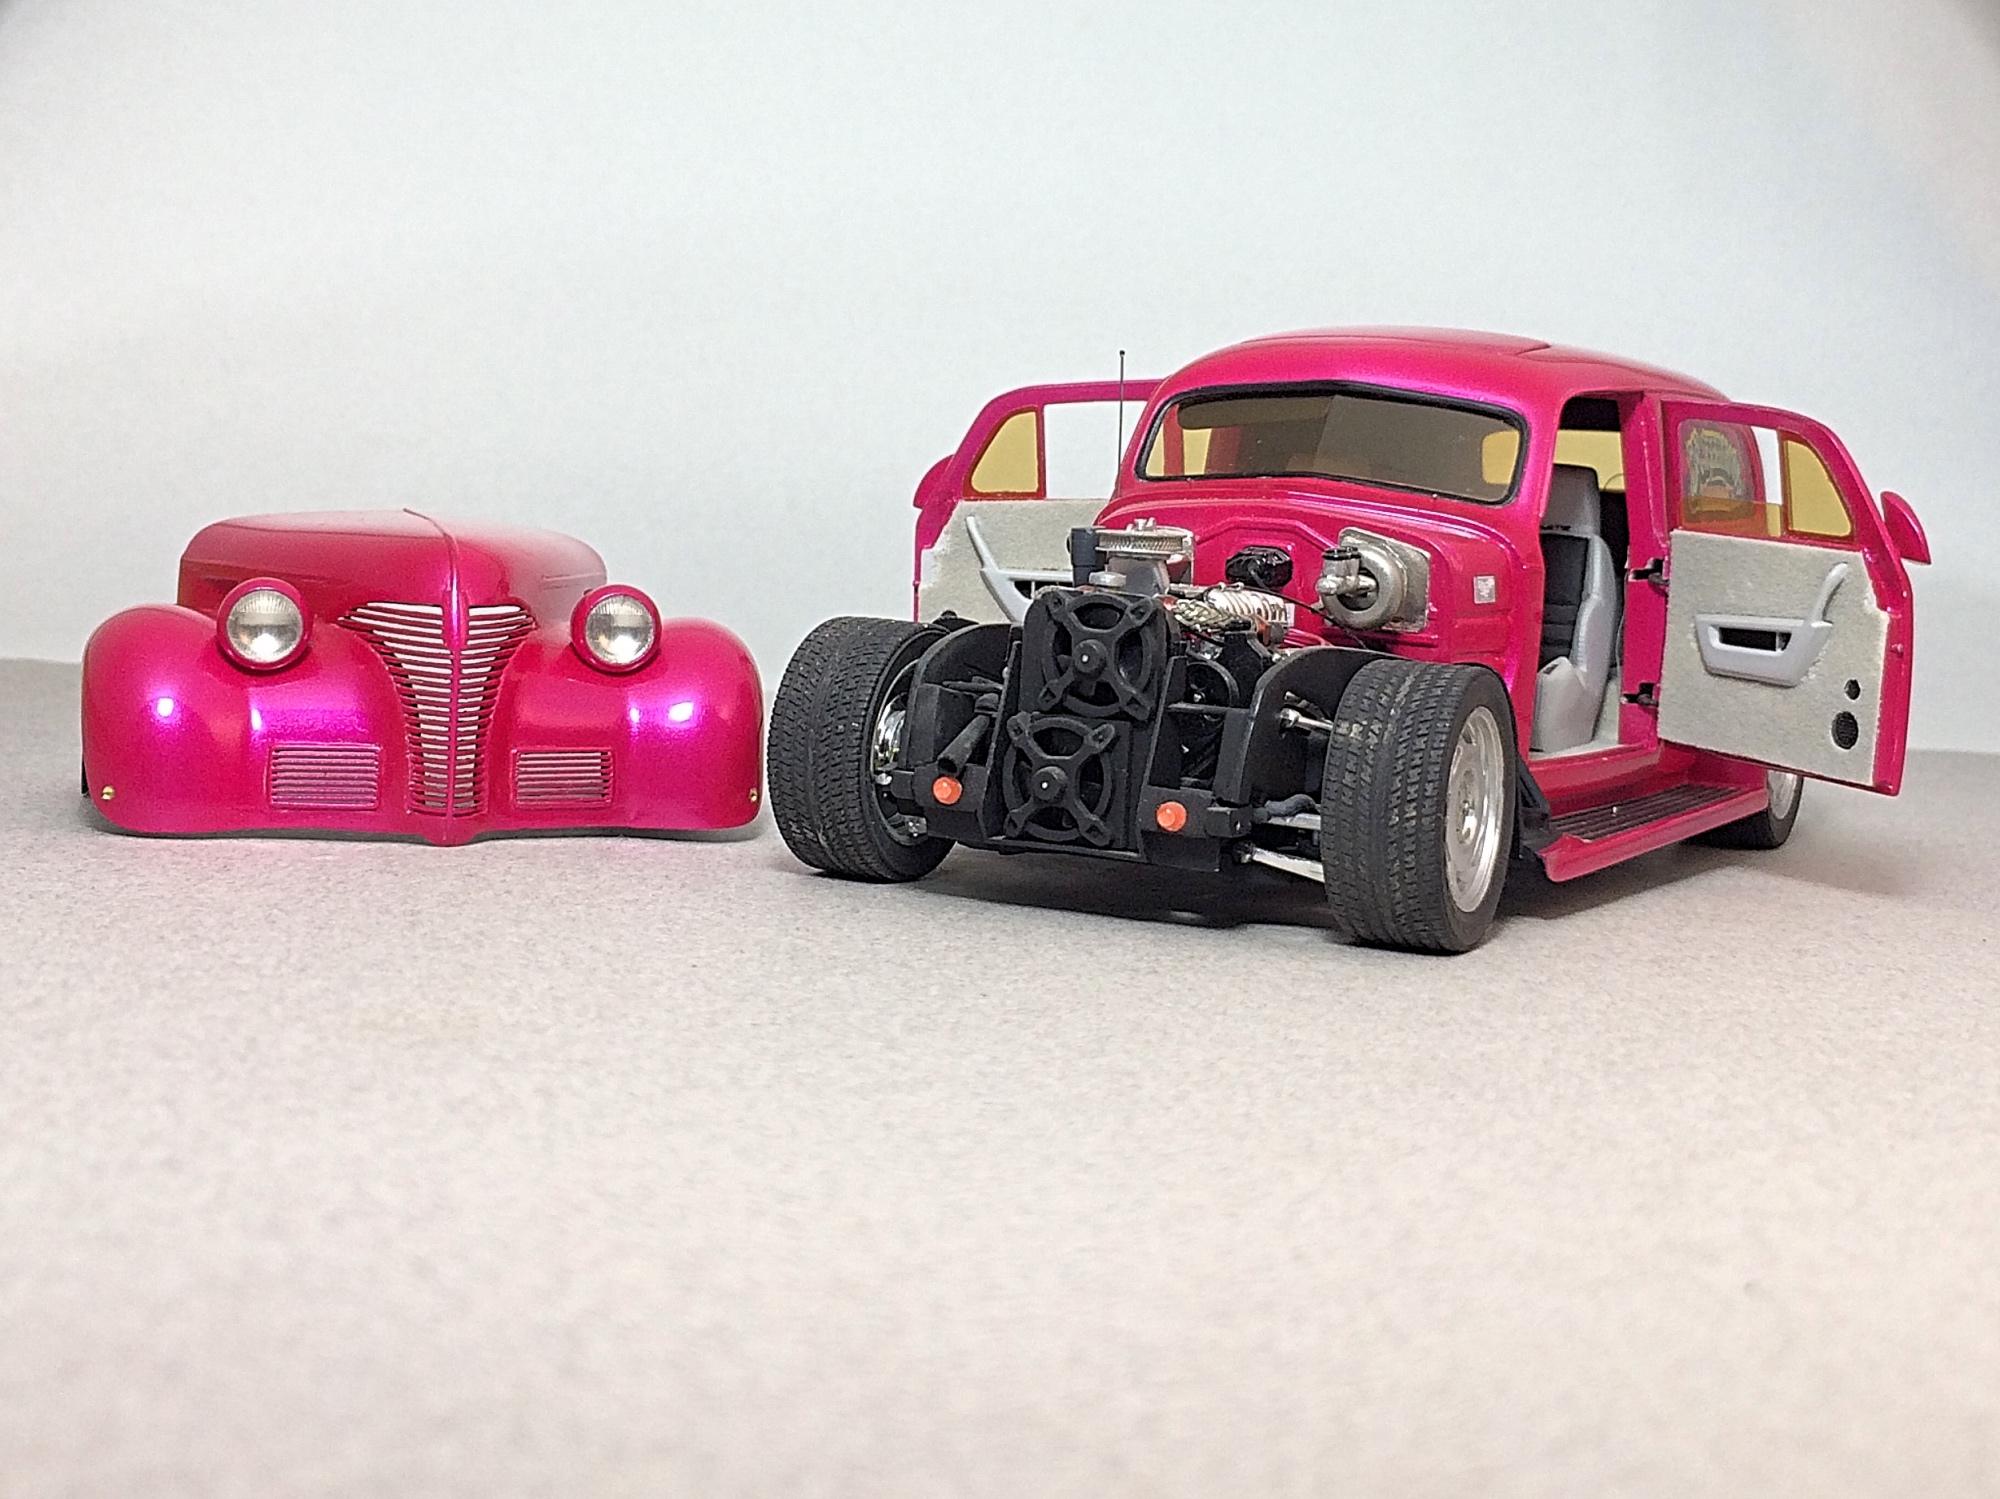
Built this so long ago, that all I have was prints of film photographs. ? Since I made a studio to take pictures for the Desert Scale Classic COVID Special contest, put this in the set and took some digital pictures. The first model car contest I entered, had kits for the entrant's package. There was a choice of some hot rod, or the Monogram Corvette ZR1, so that's what I got. Bought a Monogram 1939 Chevrolet sedan delivery, Dr. Feelgoods. Then I spent way over 300 hours to come up with this. Got a few awards with it, one was invented just for me, Paintjob Most Likely To Cause Global Warming. Opened all the doors (with spring latch pins), tilt hood, license plate swings down to serve as a step, moonroof opens, and retractible antennae. Chassis was adapted for the Corvette running gear. Painted with nail 'polish', wet lace technique used in the panel area. Detail Master was a new aftermarket company, used parts for the radiator hose and speaker screens, otherwise everything else is scratch-built. Over time, the plastic used for the glass has become tinted, which is a cool benefit. This is still my best street rod model, and don't plan to build any more (will be posting pictures of the only other one I built). Thanks for looking. ?
-
Stared this kit a week ago. Decided to post WIP’s again. I think it’s from the first release 1985. Fist painted it silver then lawyer down some black pearl paint. Paint is a bit rough and i scratched the roof. She will have some slight age to her now. Chassis completed plus front and back end. Working on the interior now. Thanks for looking all comments welcomed
-
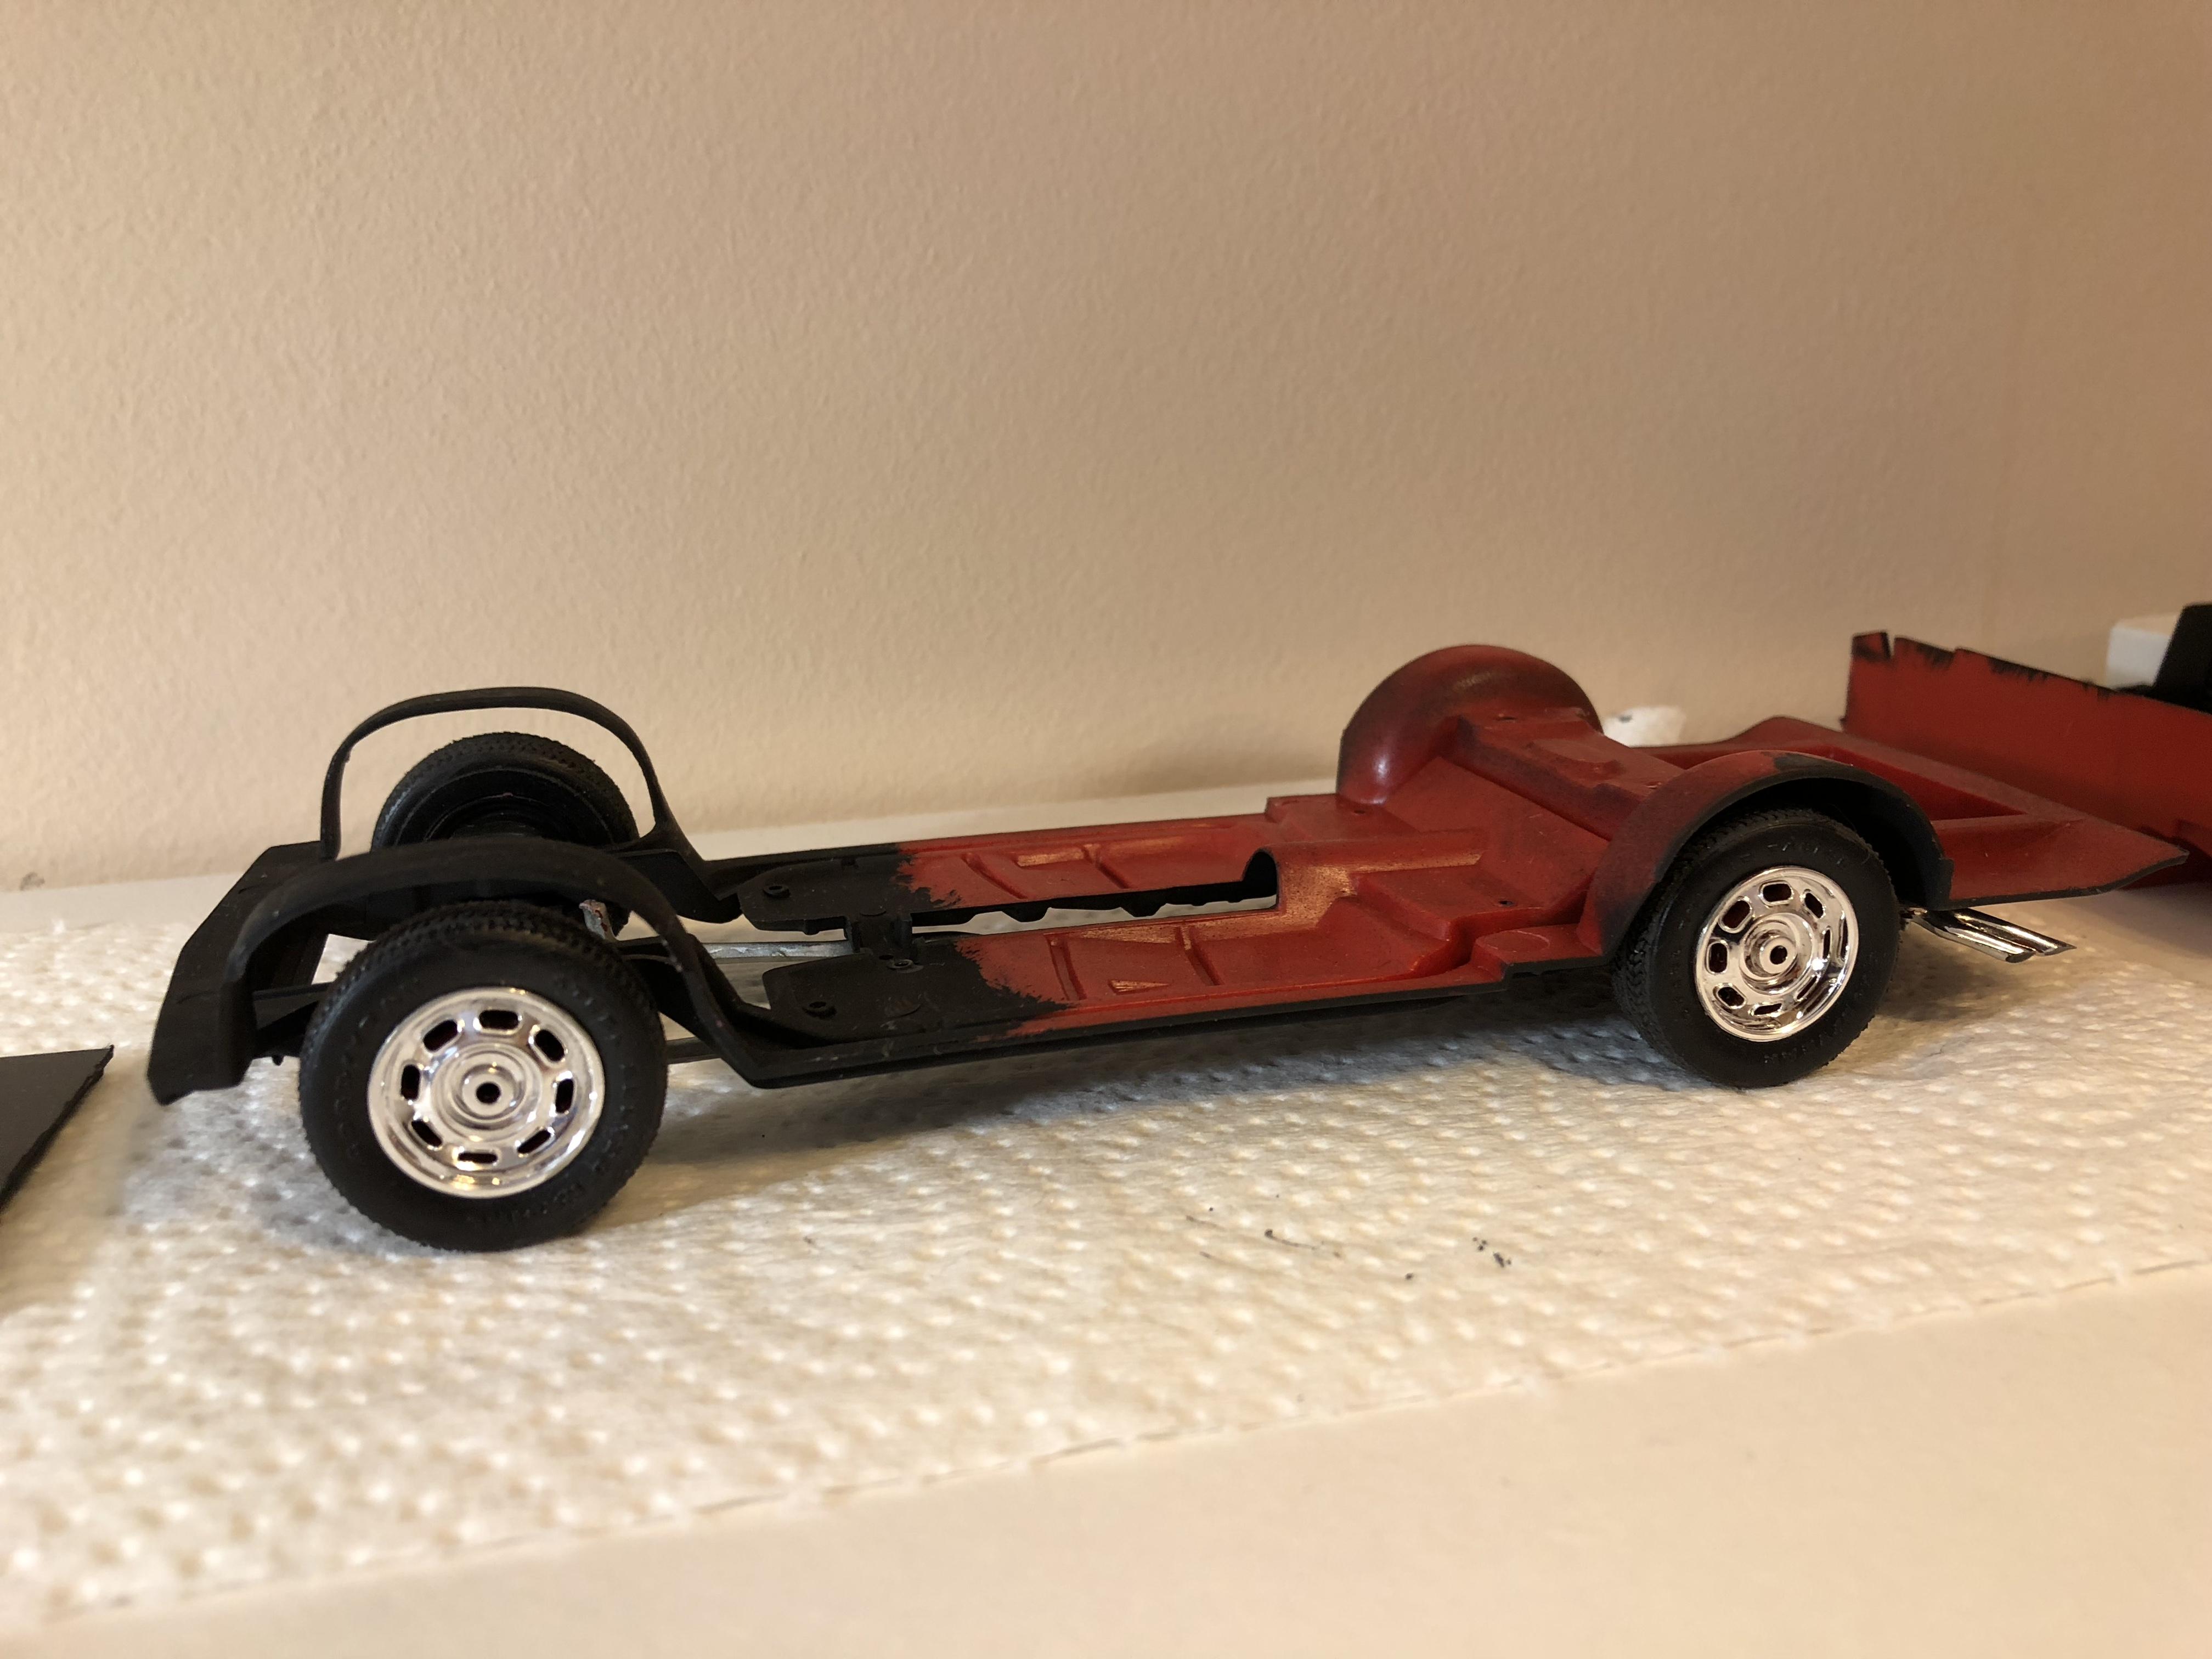
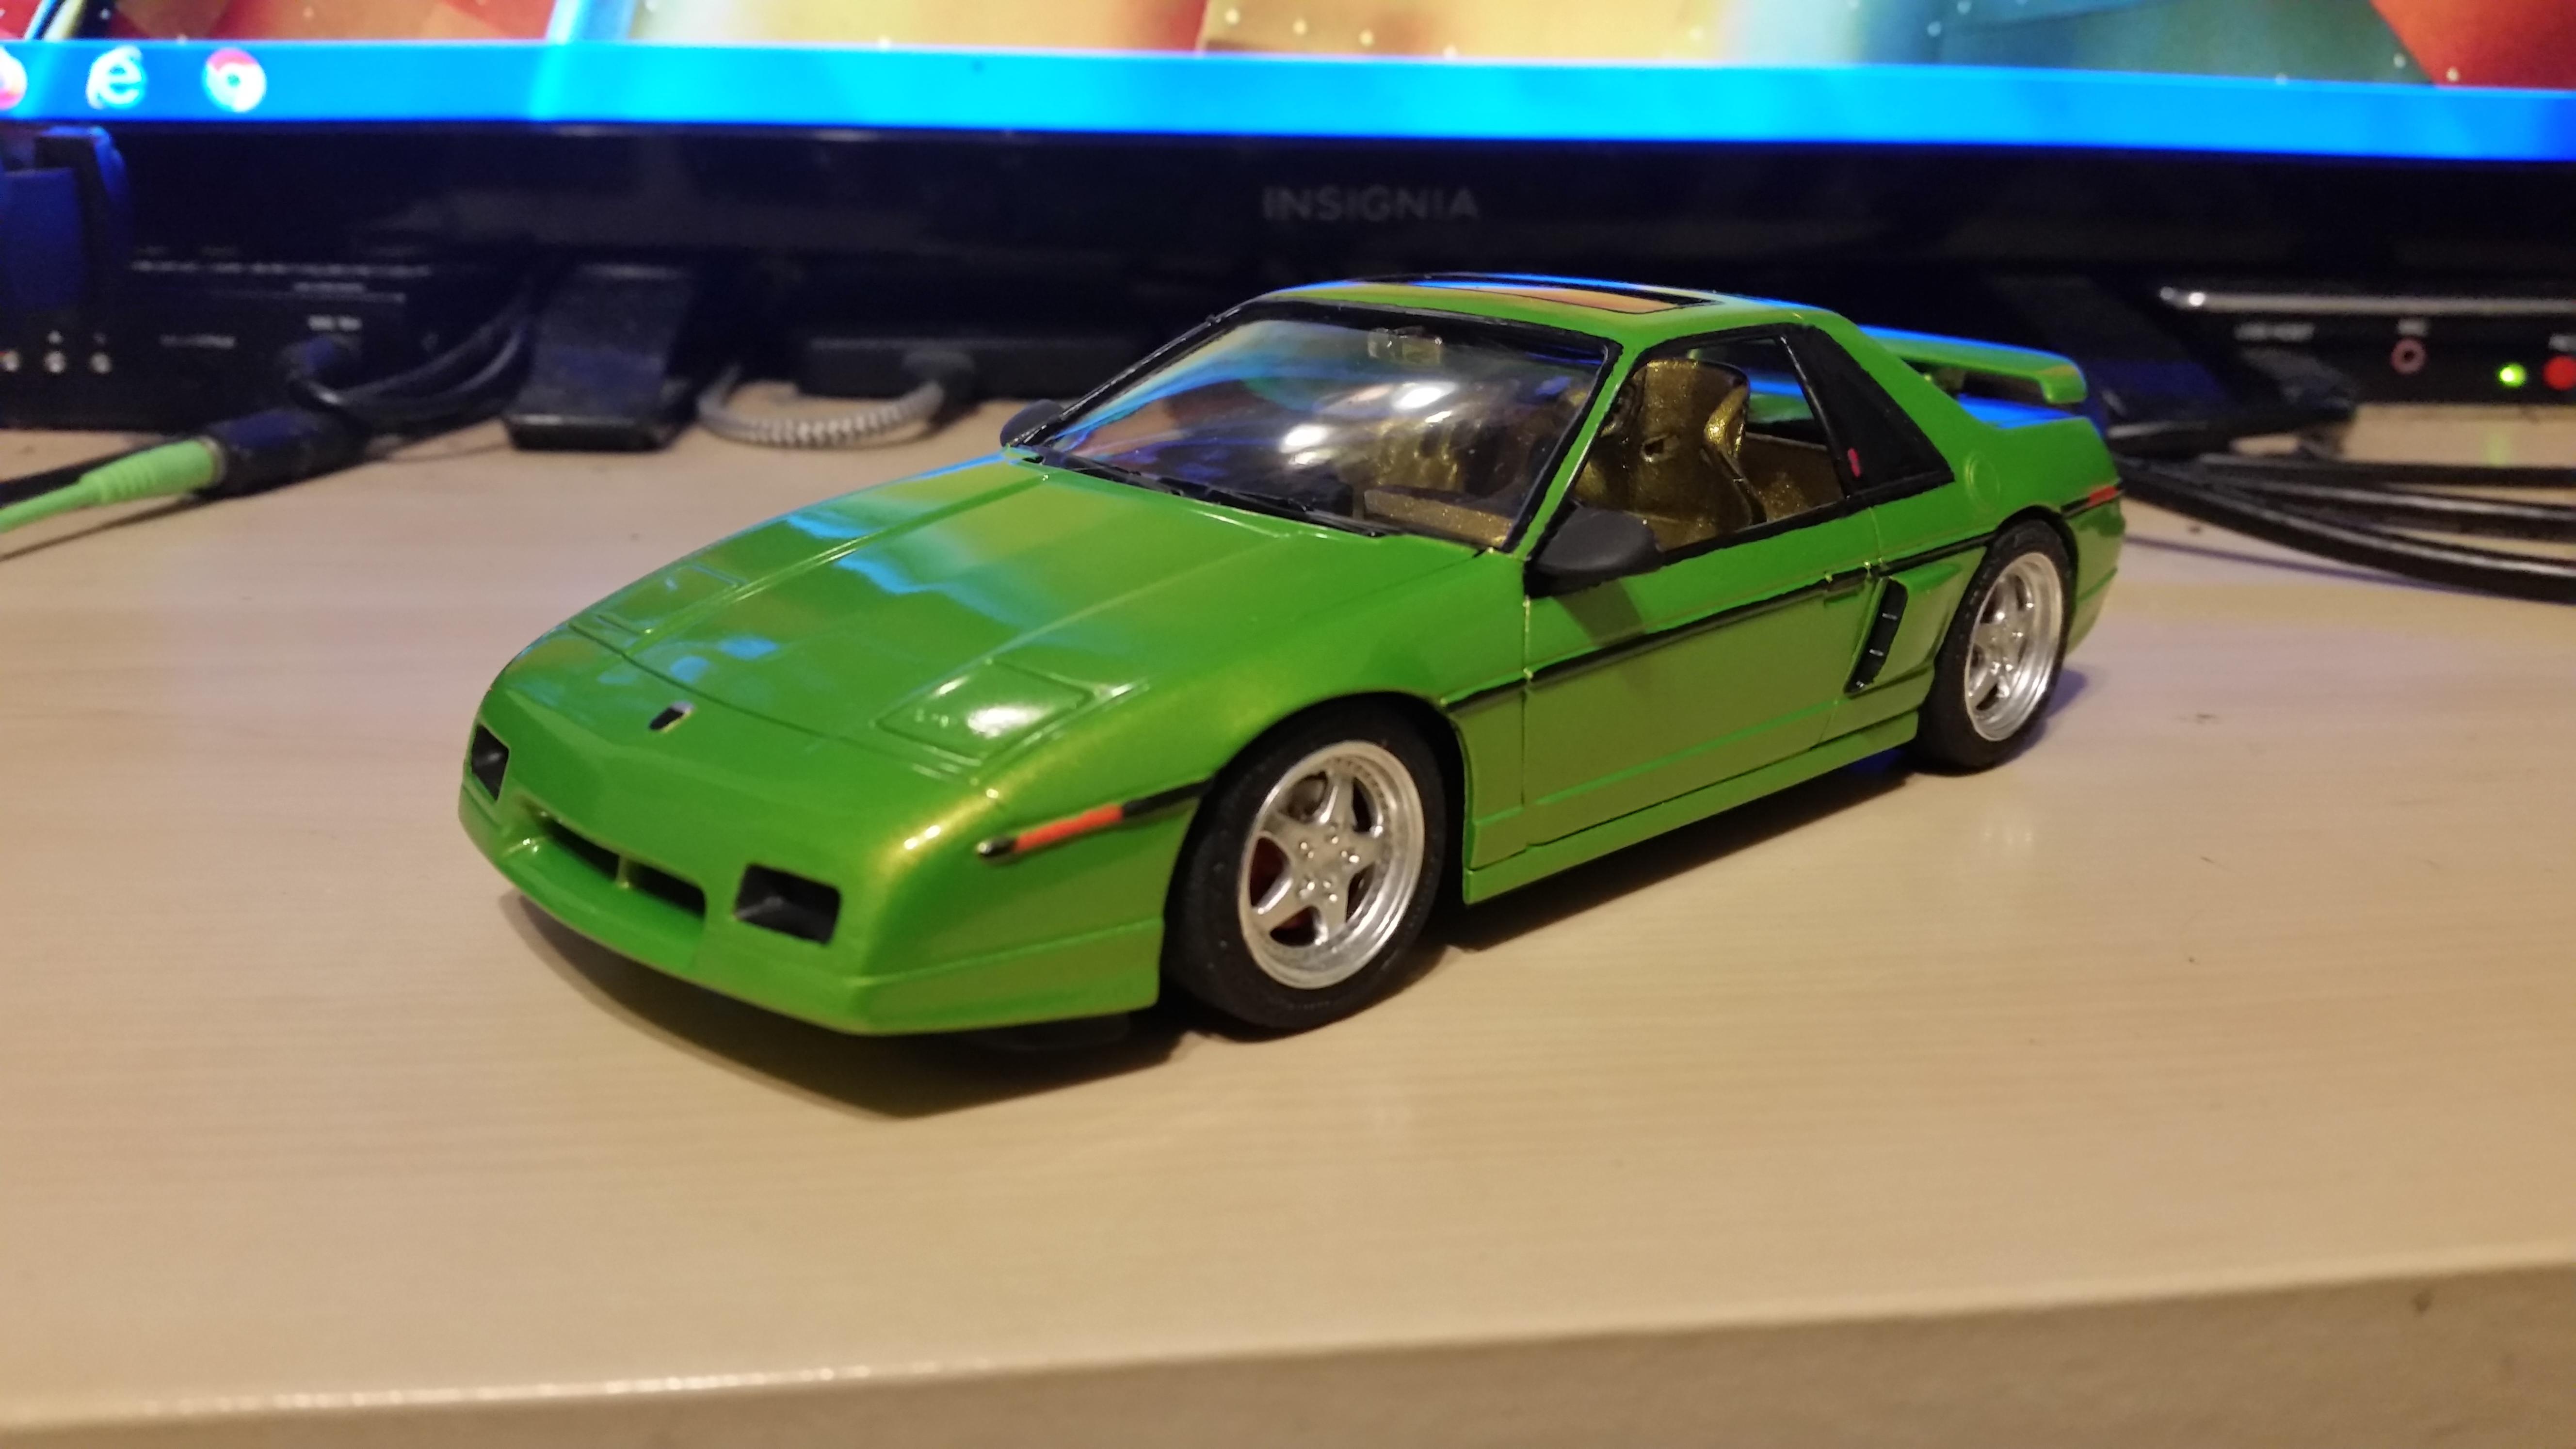
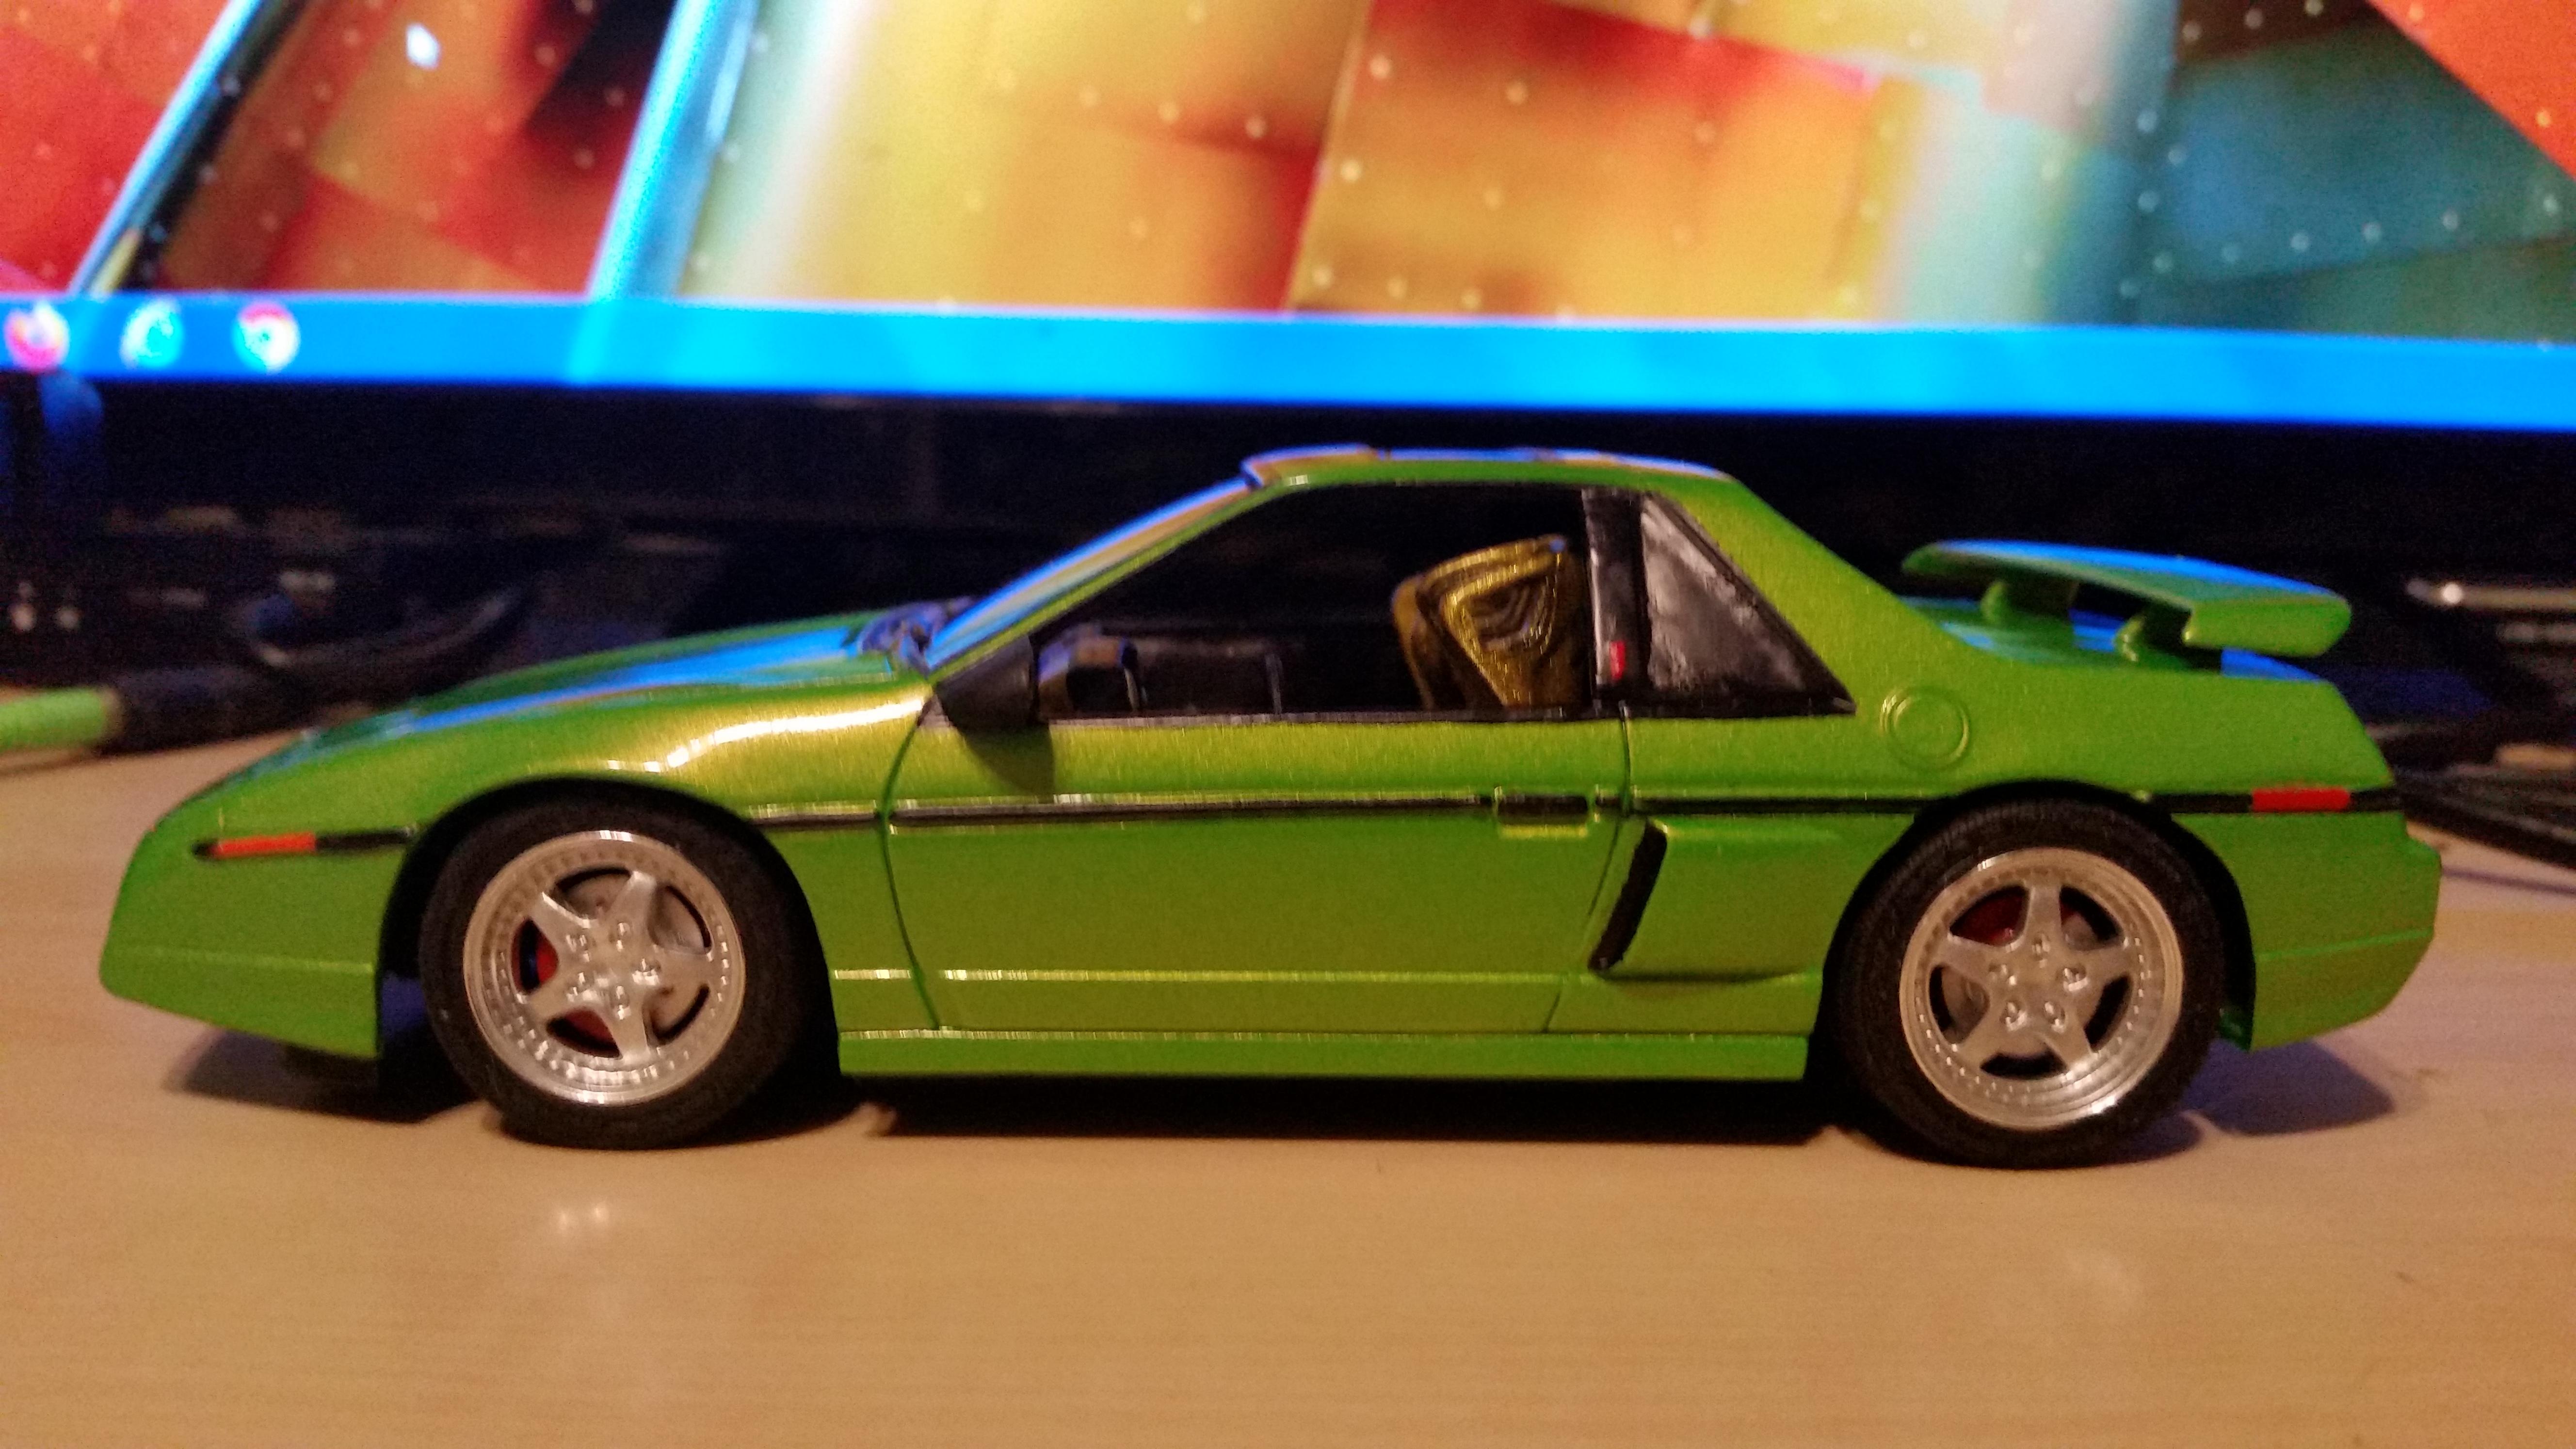
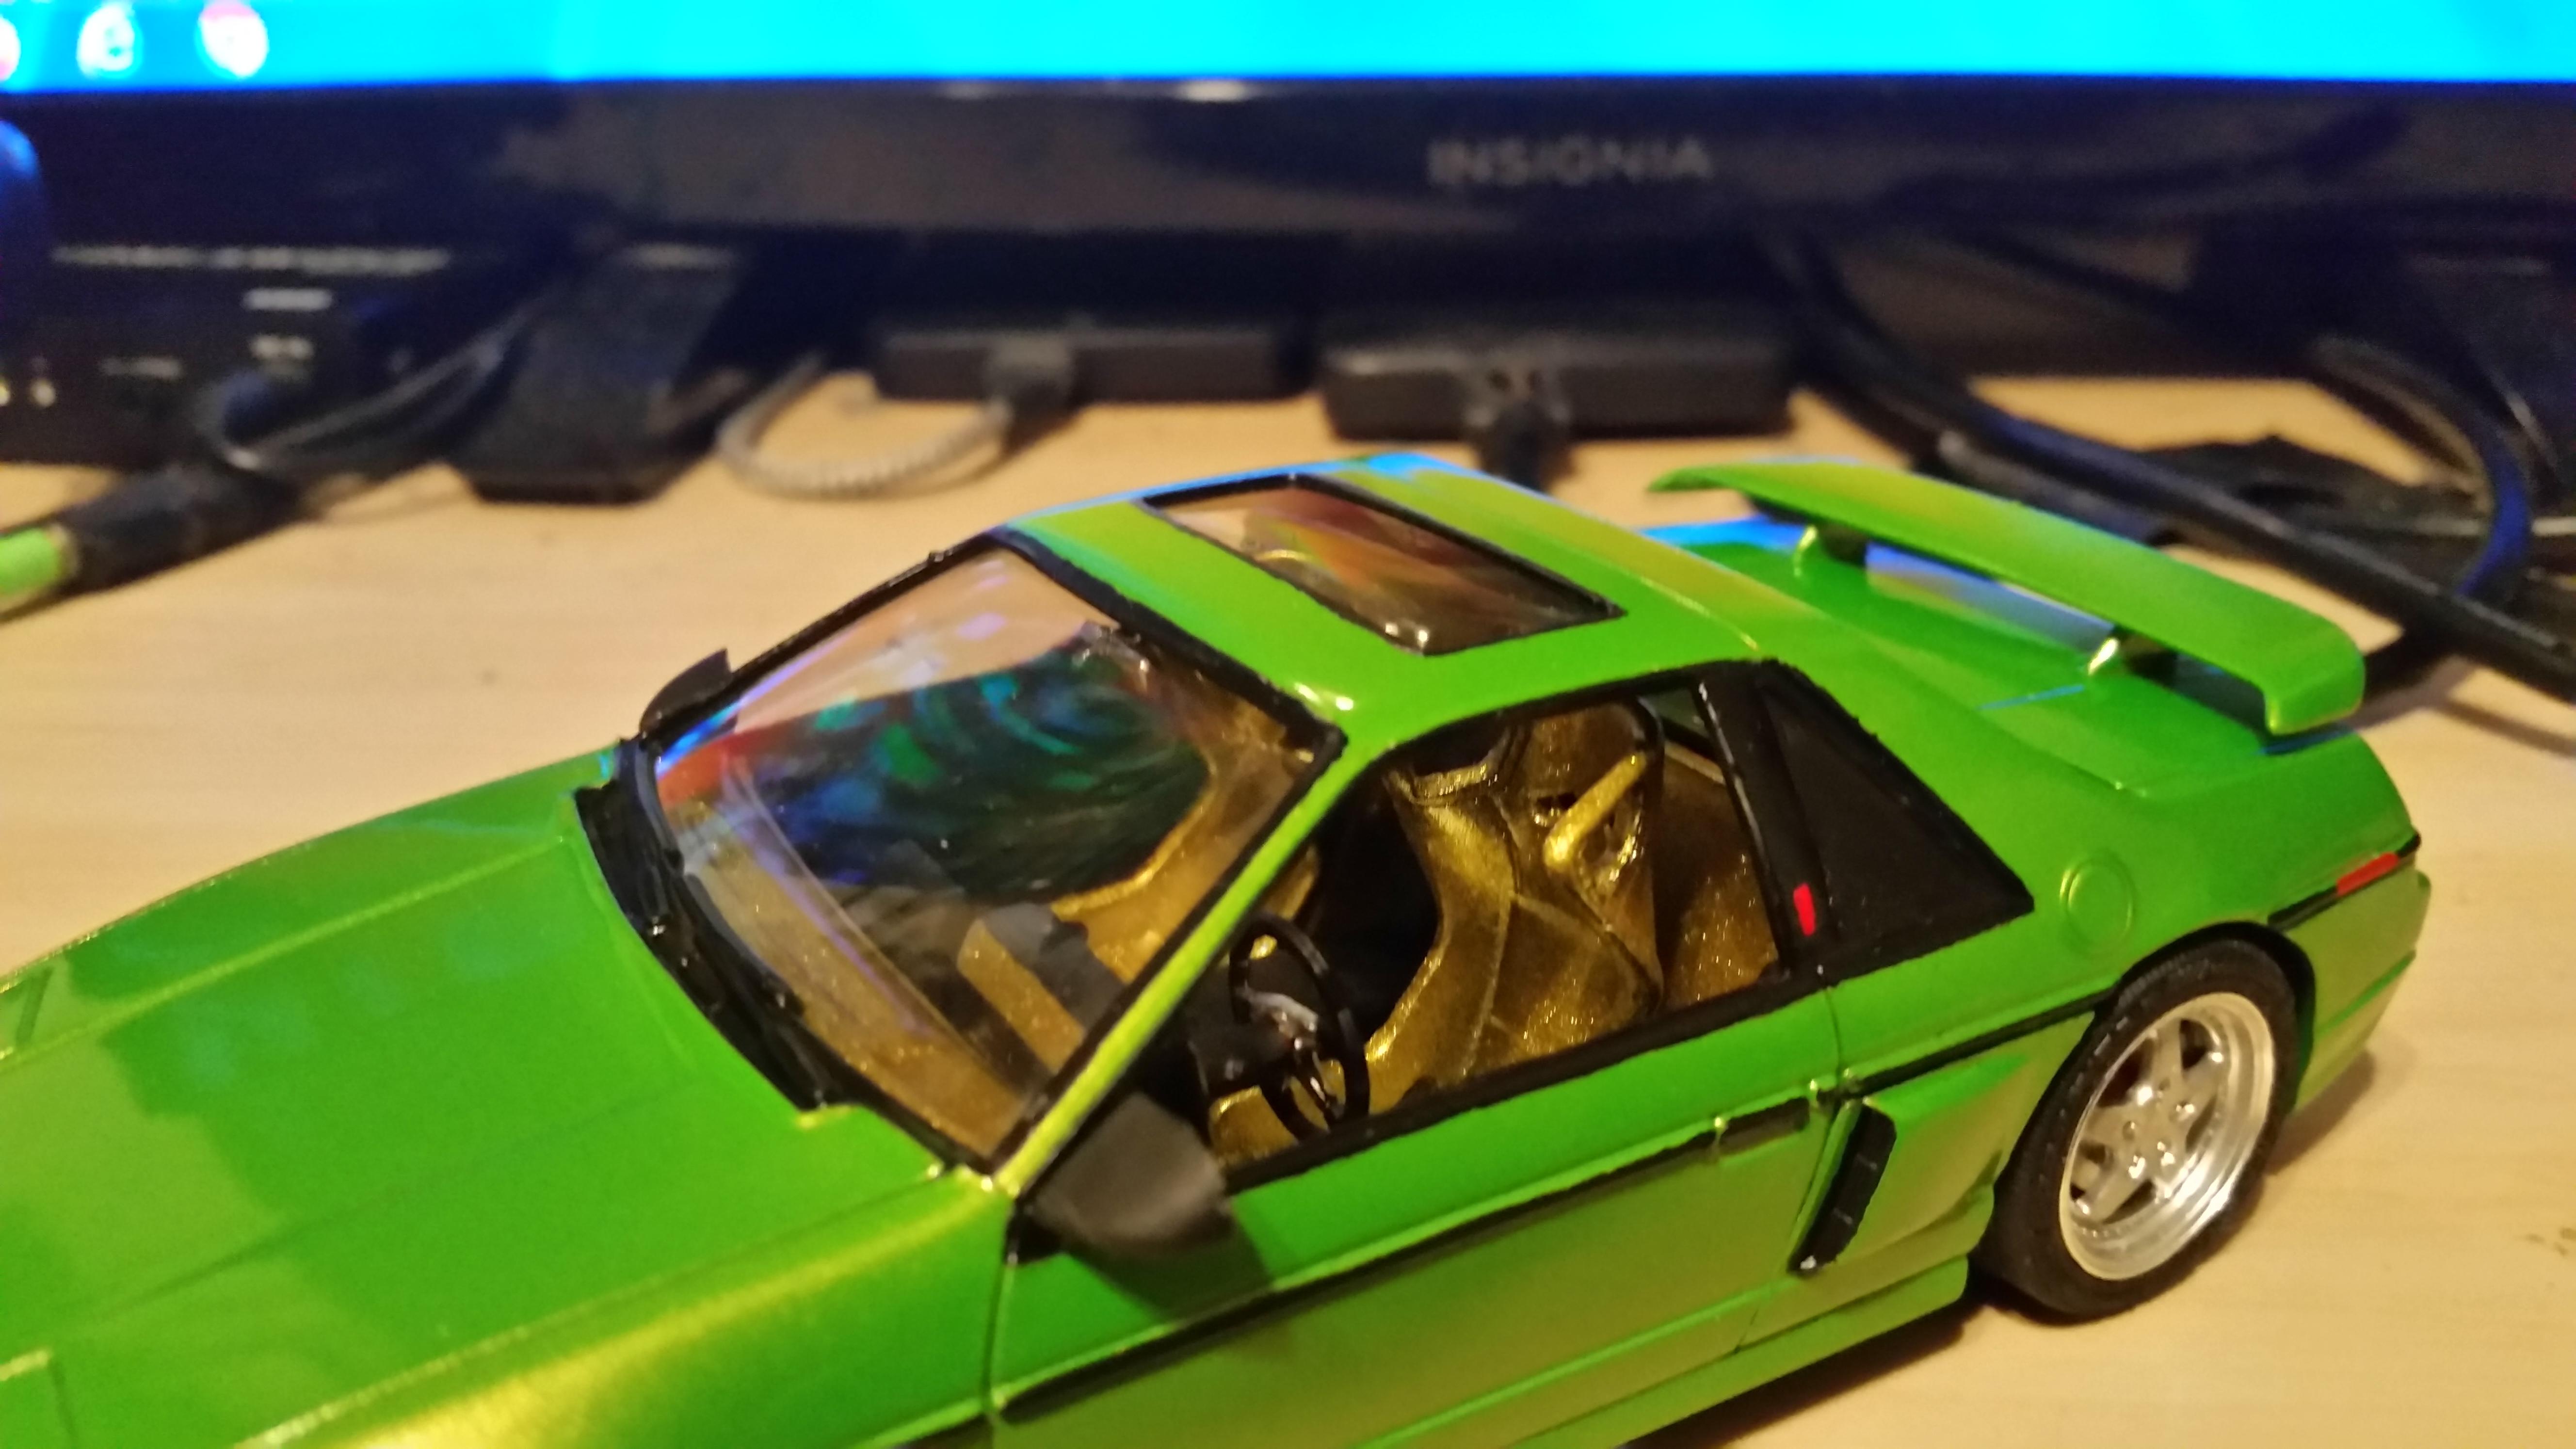
Monogram kit with modifications as followed: 4.0 supercharged Northstar motor from a failed scrap Revell Shelby Series 1 Wheels & tires + steering wheel from scrap Shelby Series 1 build Resin racing seats Chrome exhaust tips from AMT 93 Camaro Interior paint is Krylon Shimmer Metallic Candy Pear, exterior is Tamiya TS-52 Candy Lime Green cleared with Pledge (aka Future, but goes under 900,000 different names nowadays) Here are le pics, and enjoy!
-
After over a year. I am pulling her off the bench. Calling it done Thanks for looking all comments welcomed
-
Hello people. My next model on my bench that I will post is this. I am going to paint her two tone. Flat red that I used for my trans am and flat black Started the engine sprayed the chassis a few days ago The new tires unfortunately don’t have any side detail so I am going use the insert from my parts bin and use those Probably will grab the front runners from parts bin aswell progress so far Thanks for looking all comments welcomed
-
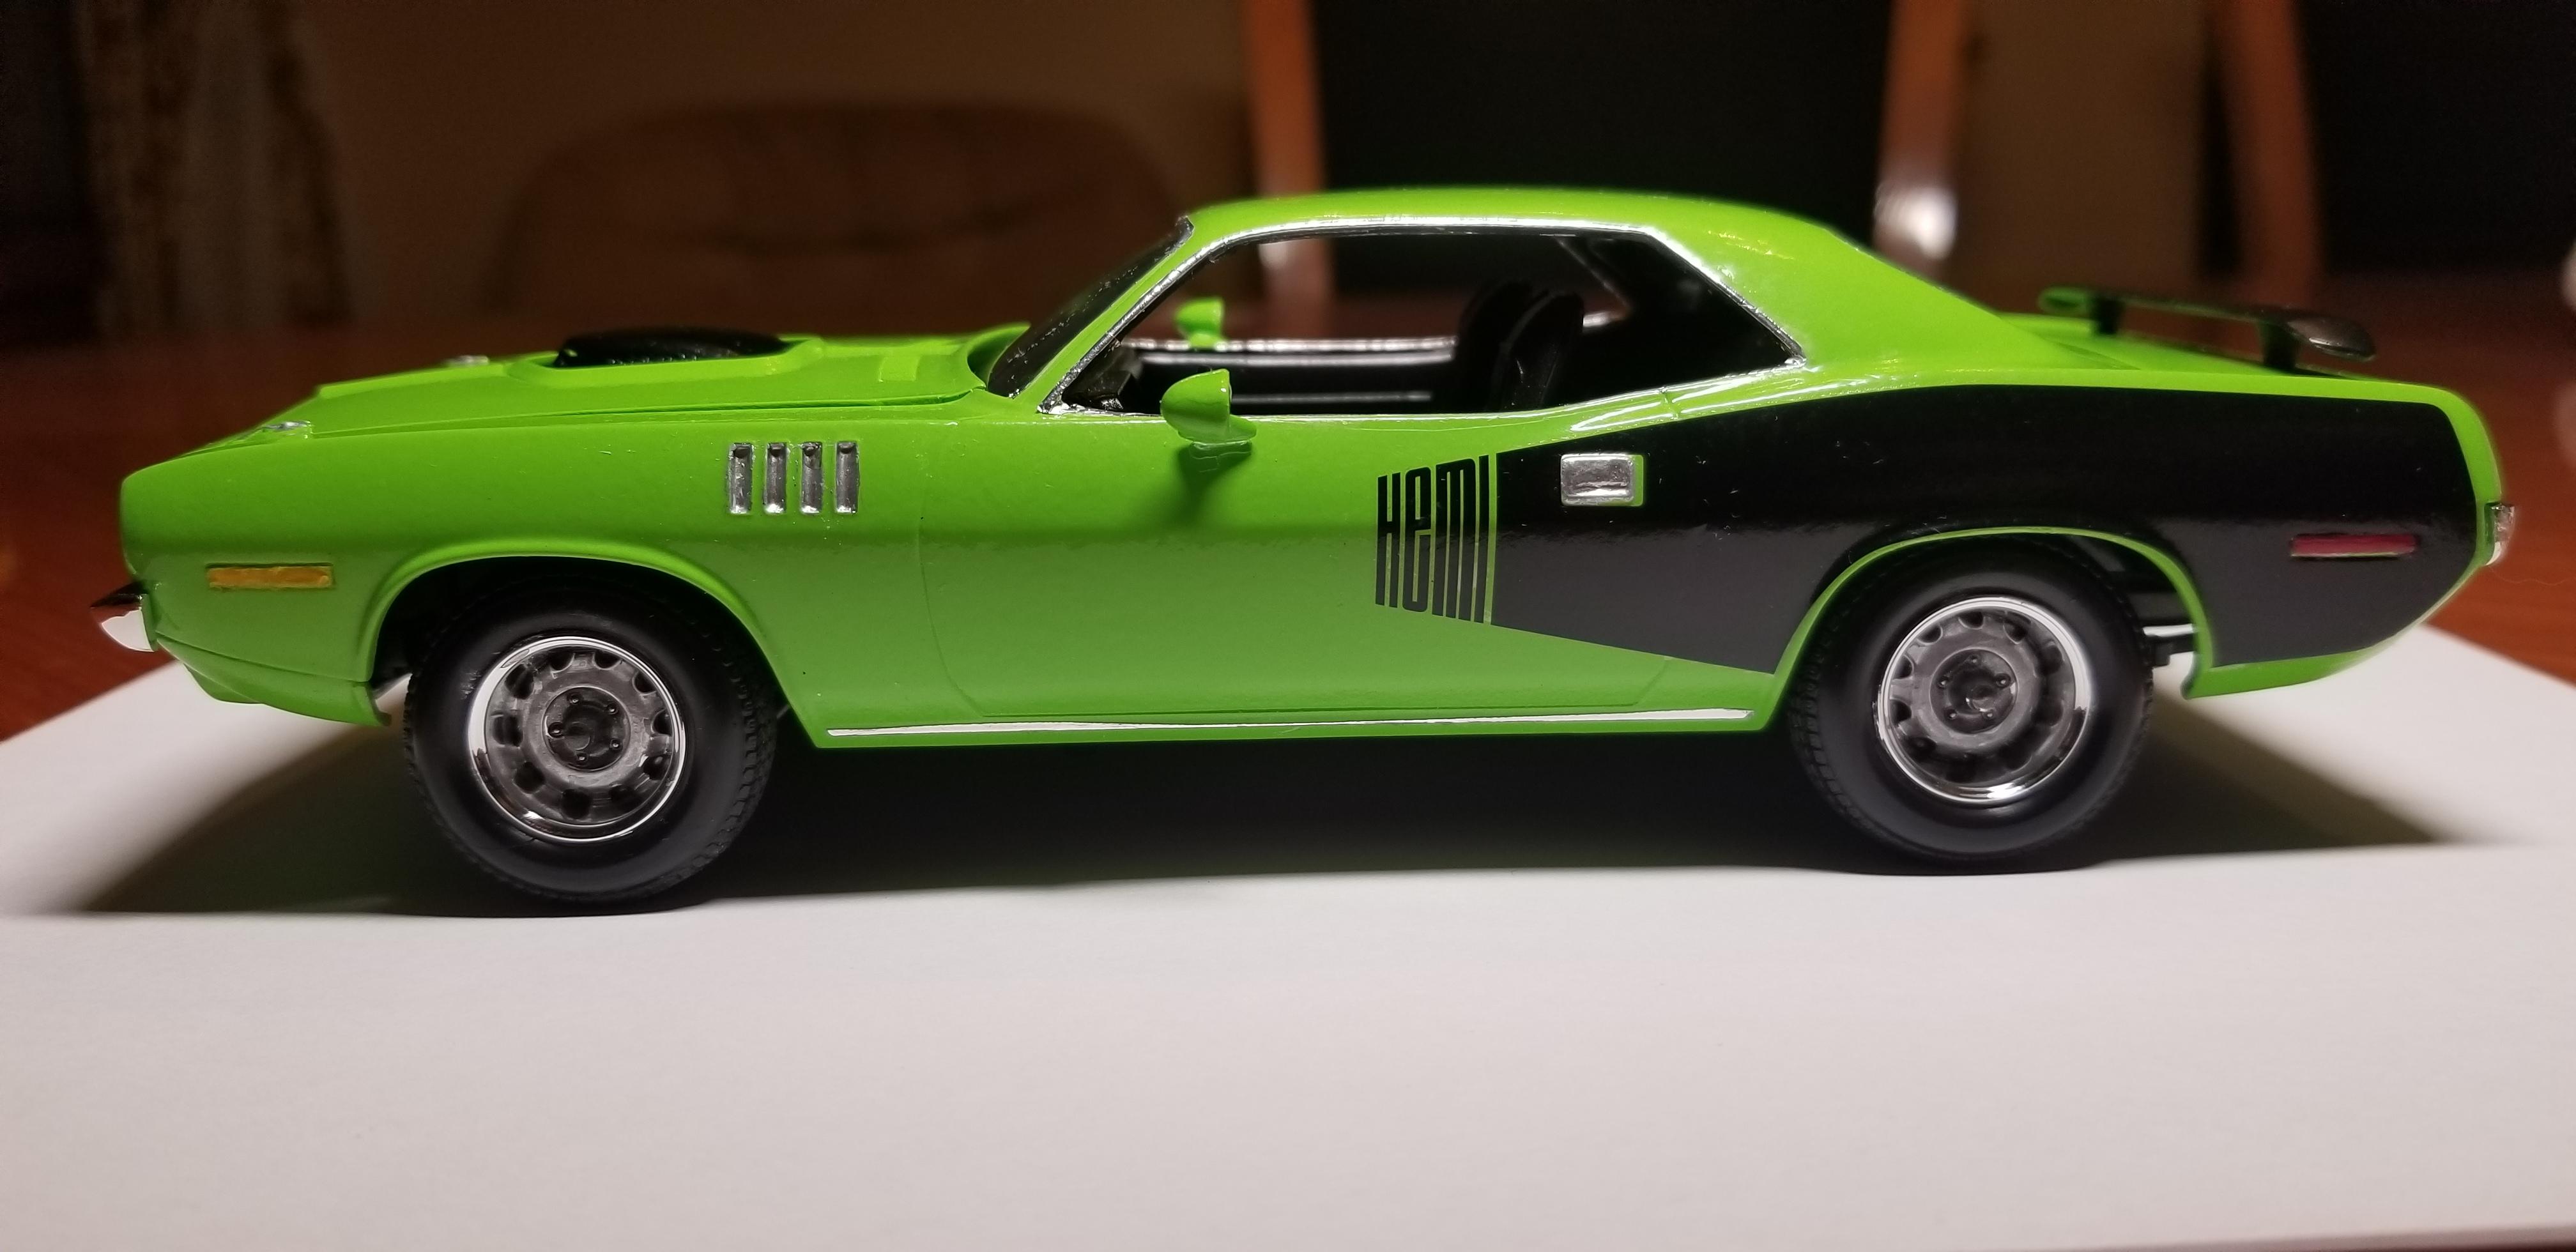
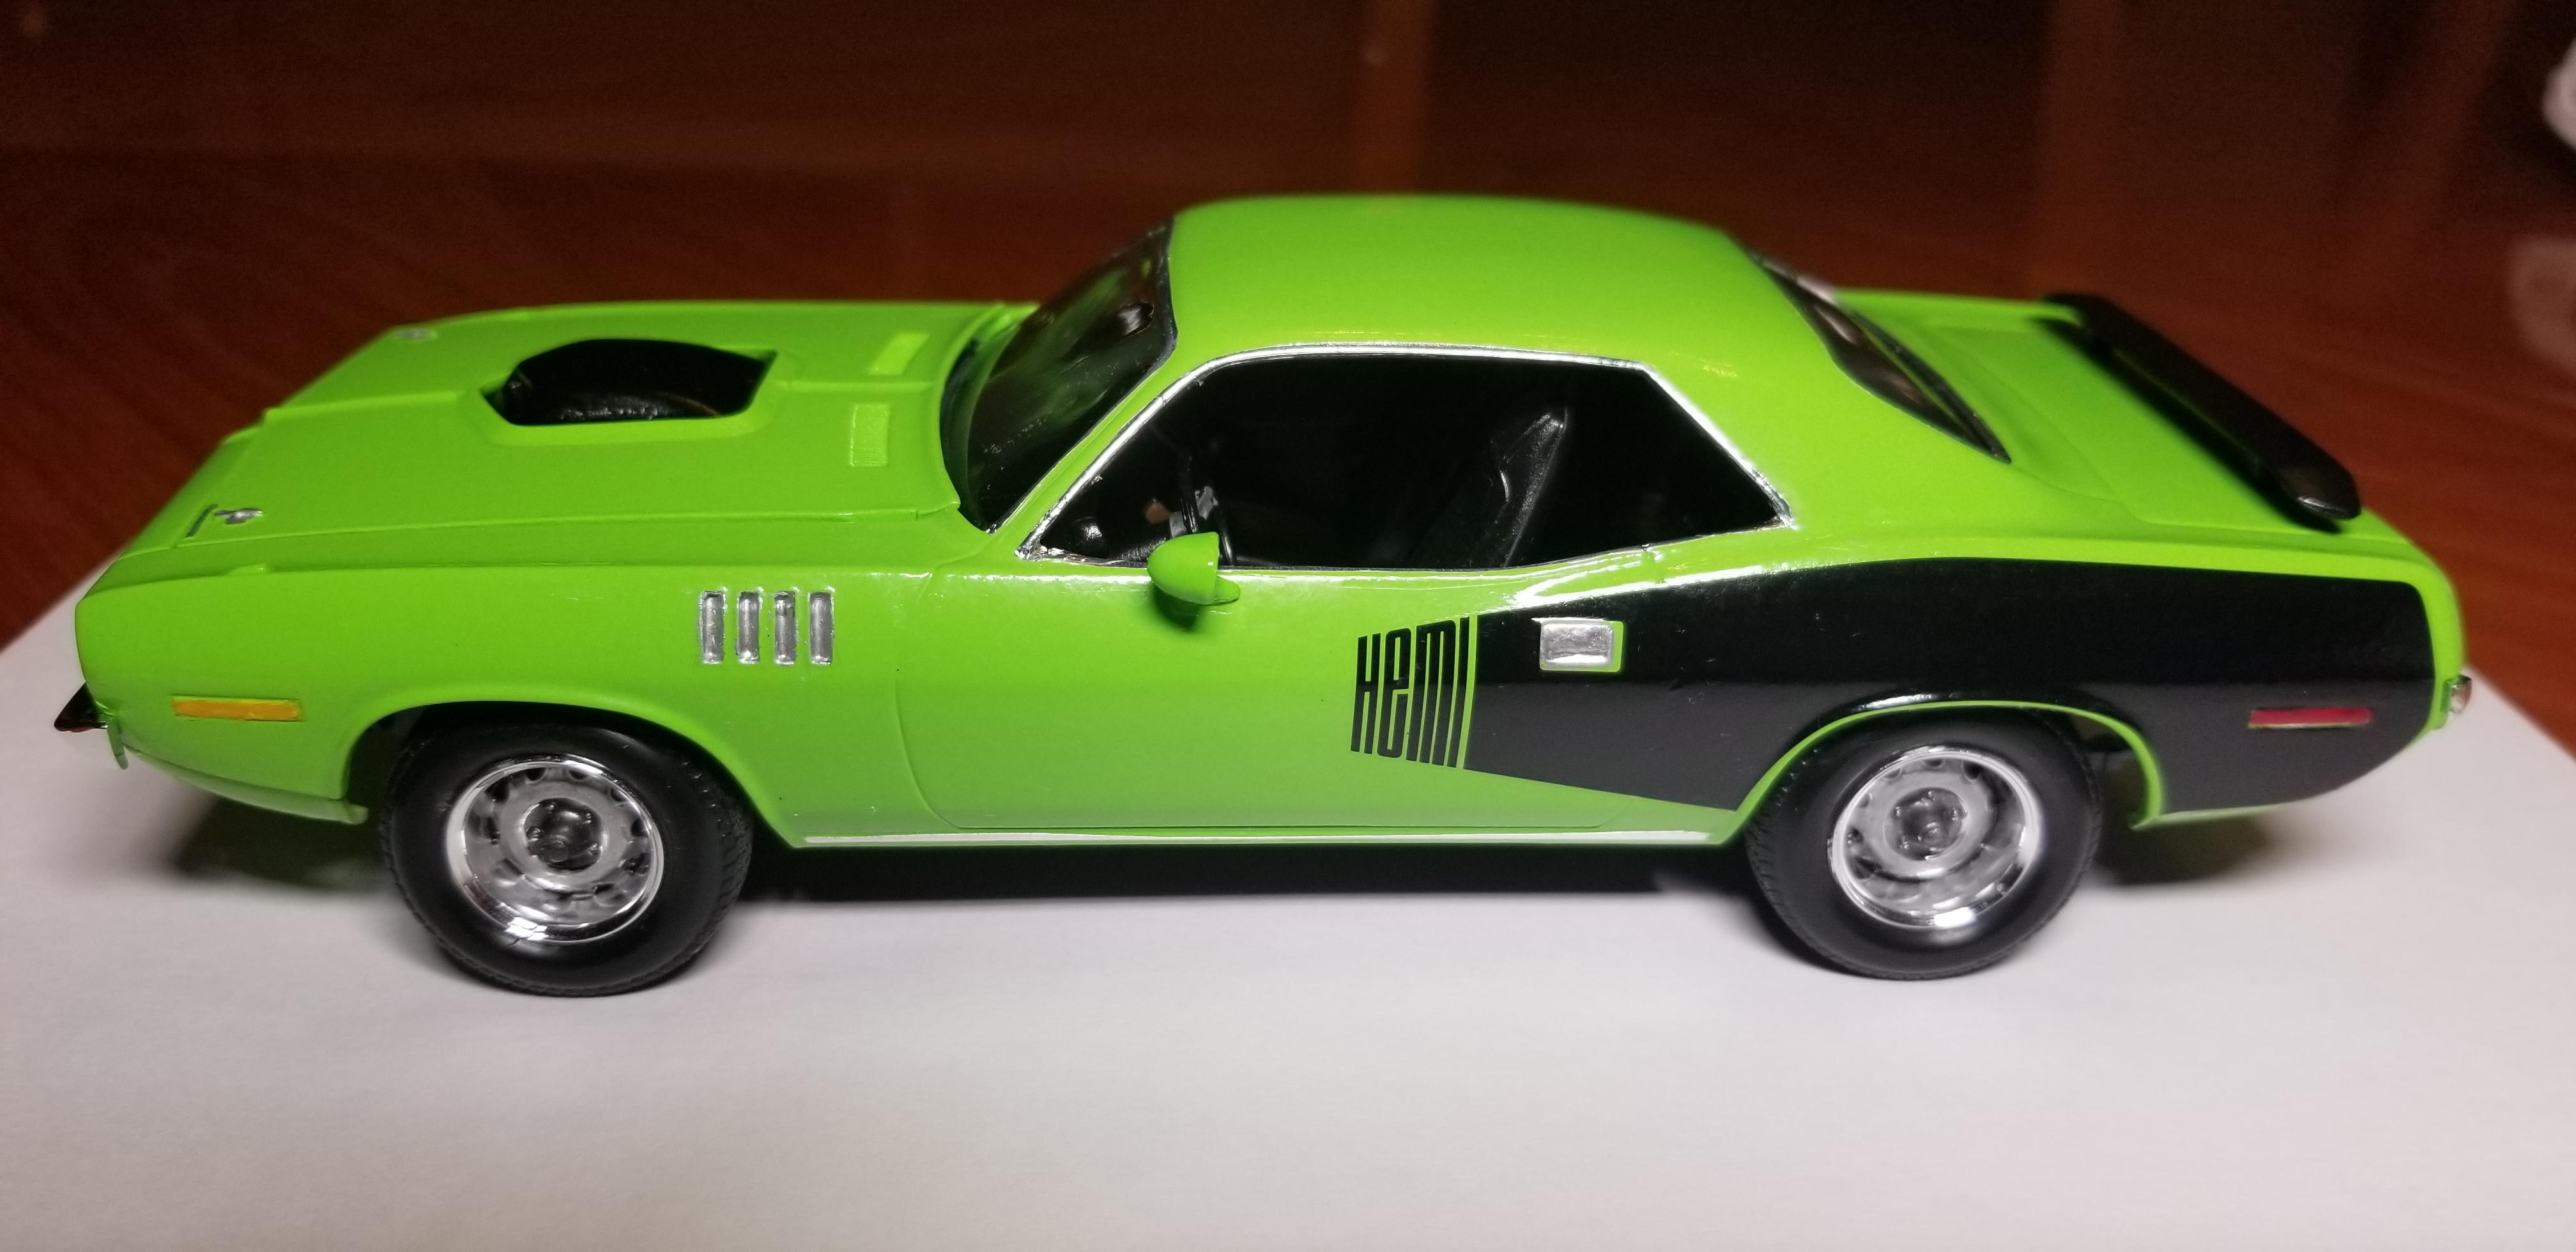
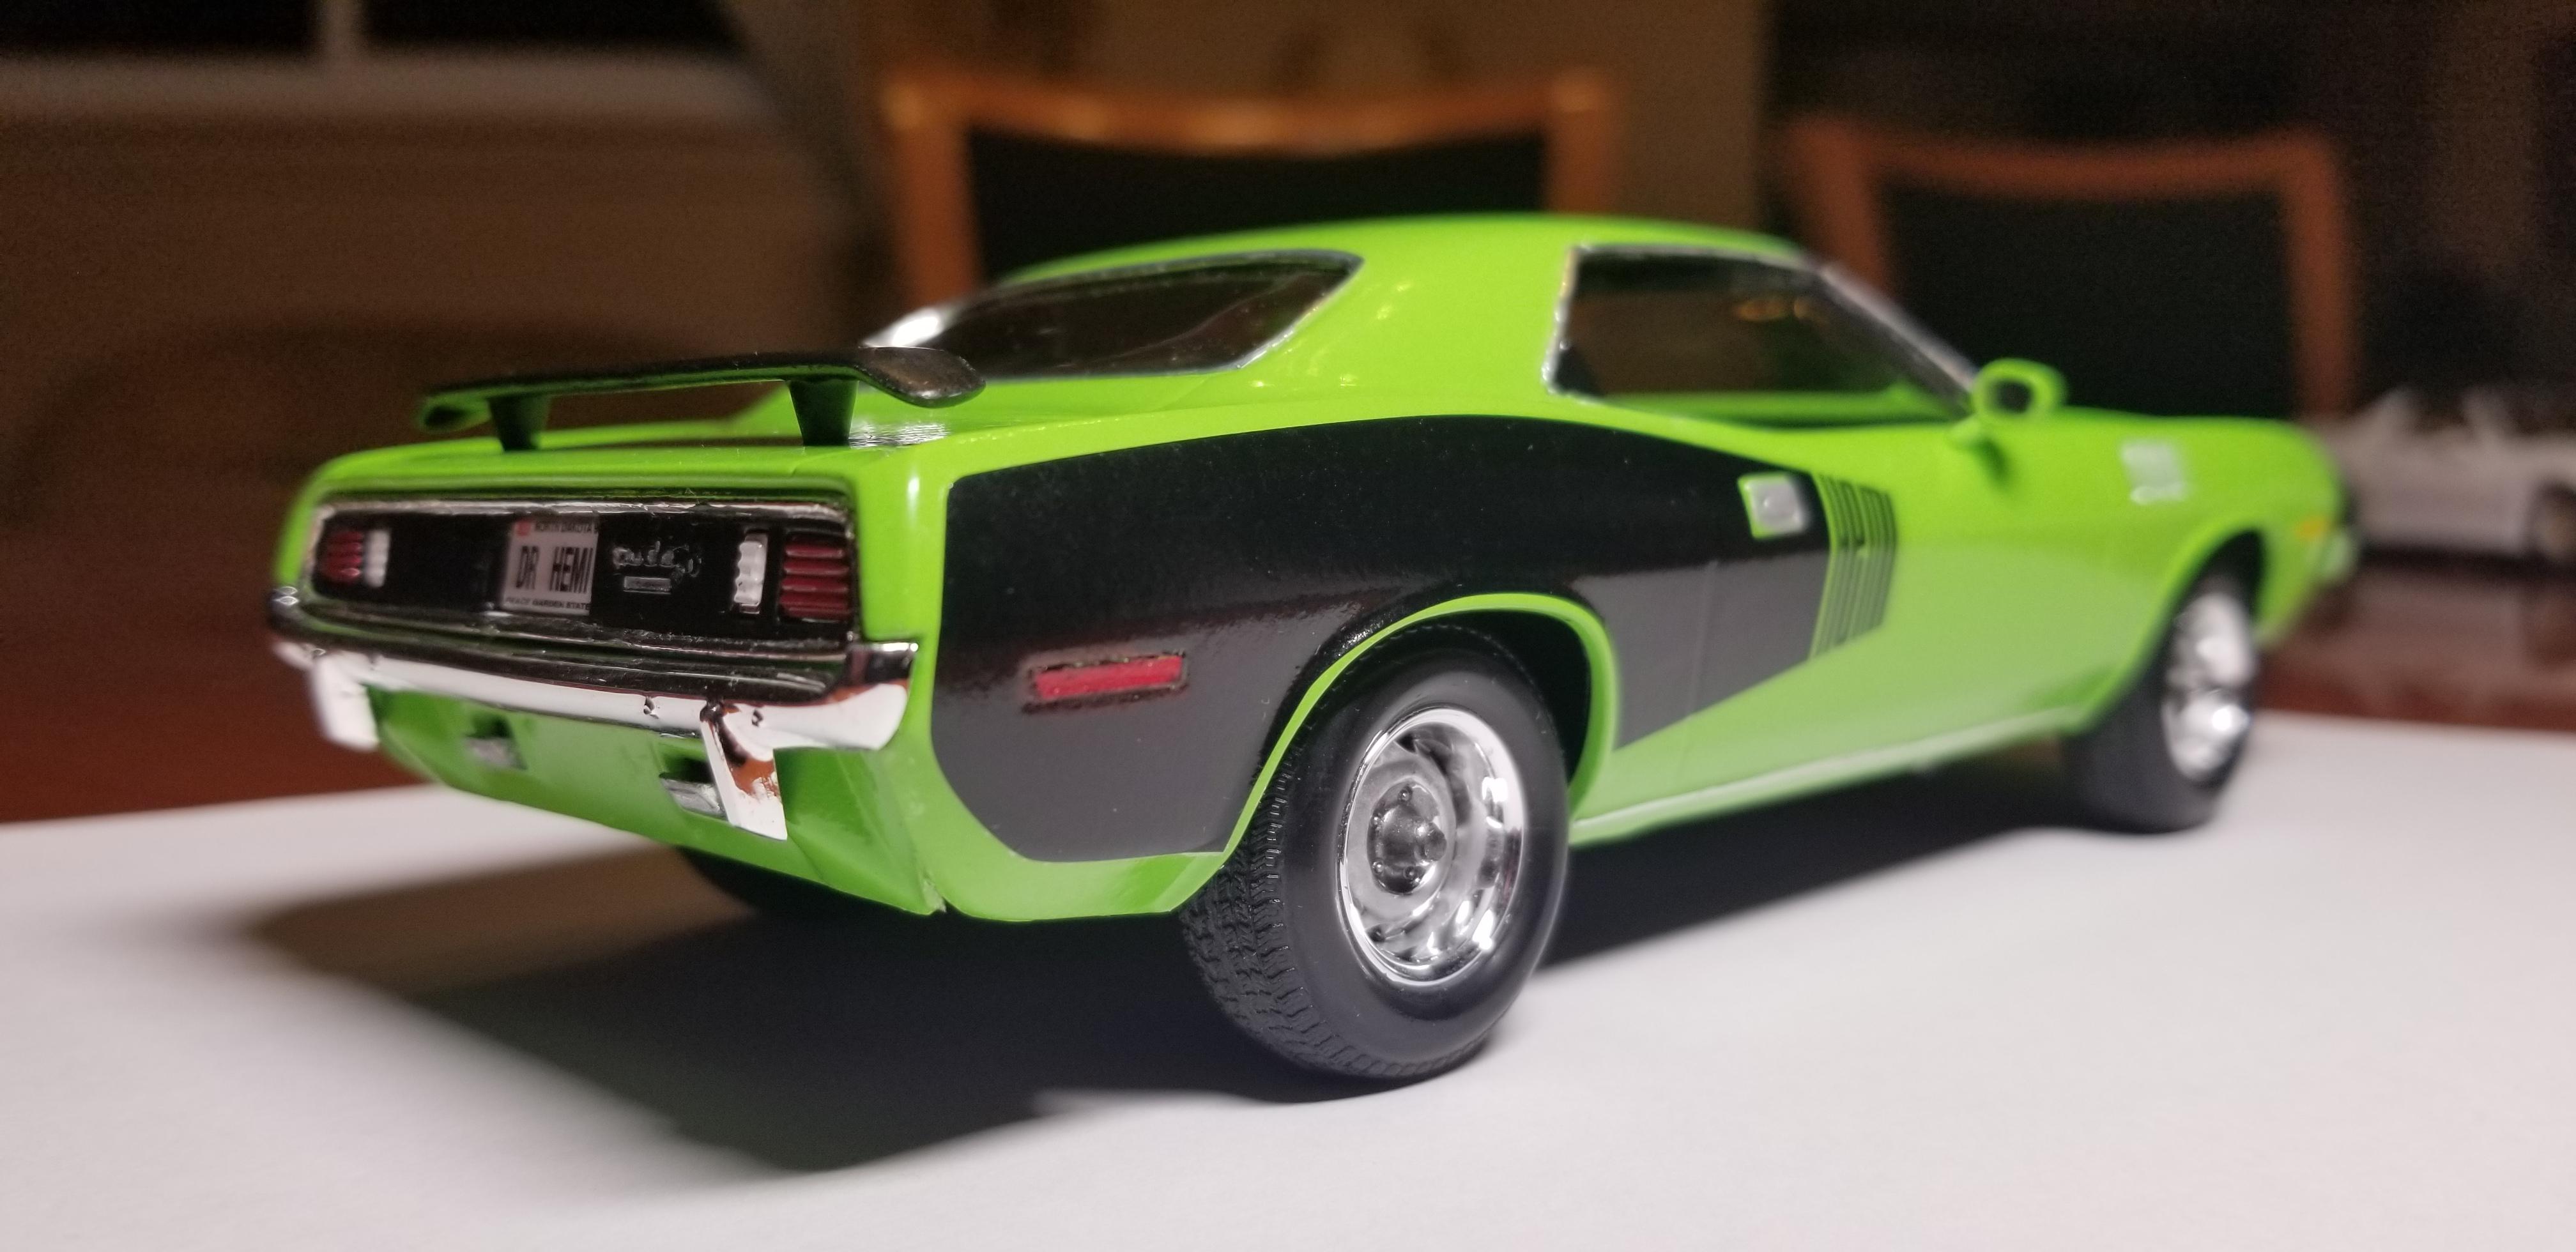
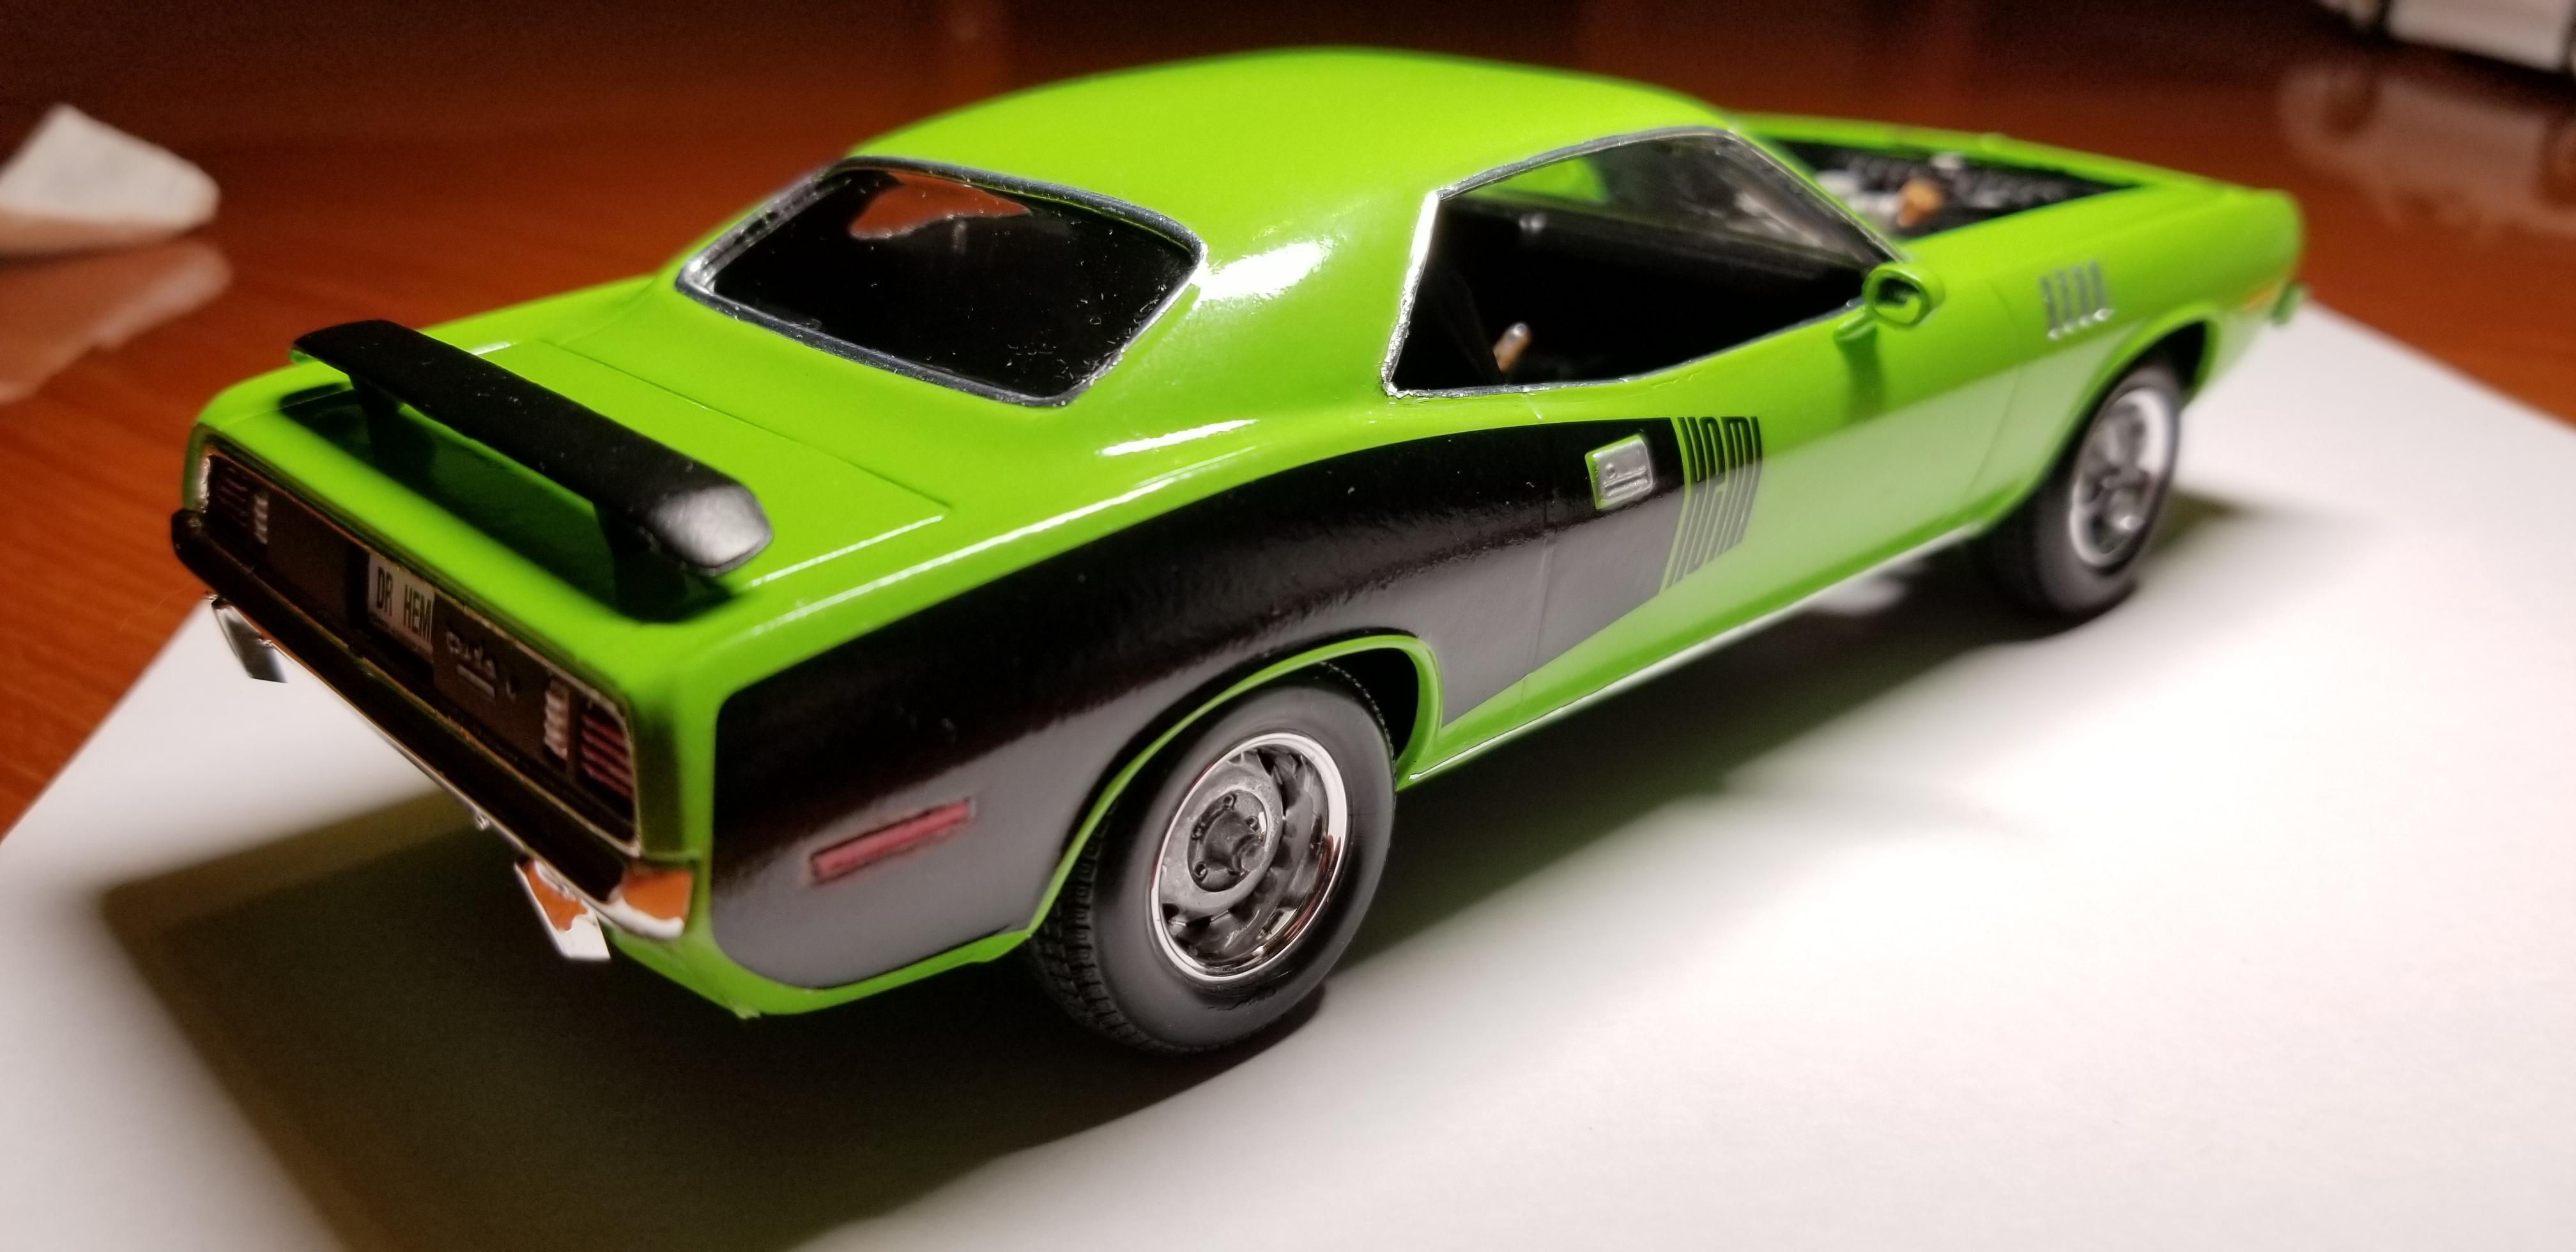
Another thread, two nights in a row. Kind of hard to ignore. My build of a '71 Cuda 426. The paint is model master Sublime green. I started and painted this car in January 2018. My first model build with bare metal foil!!! No looking back now. The pictures do not do it justice. The shaker hood scoop needs to be trimmed down. I just painted it and notice it won't let the hood sit flat. What do you think??
-
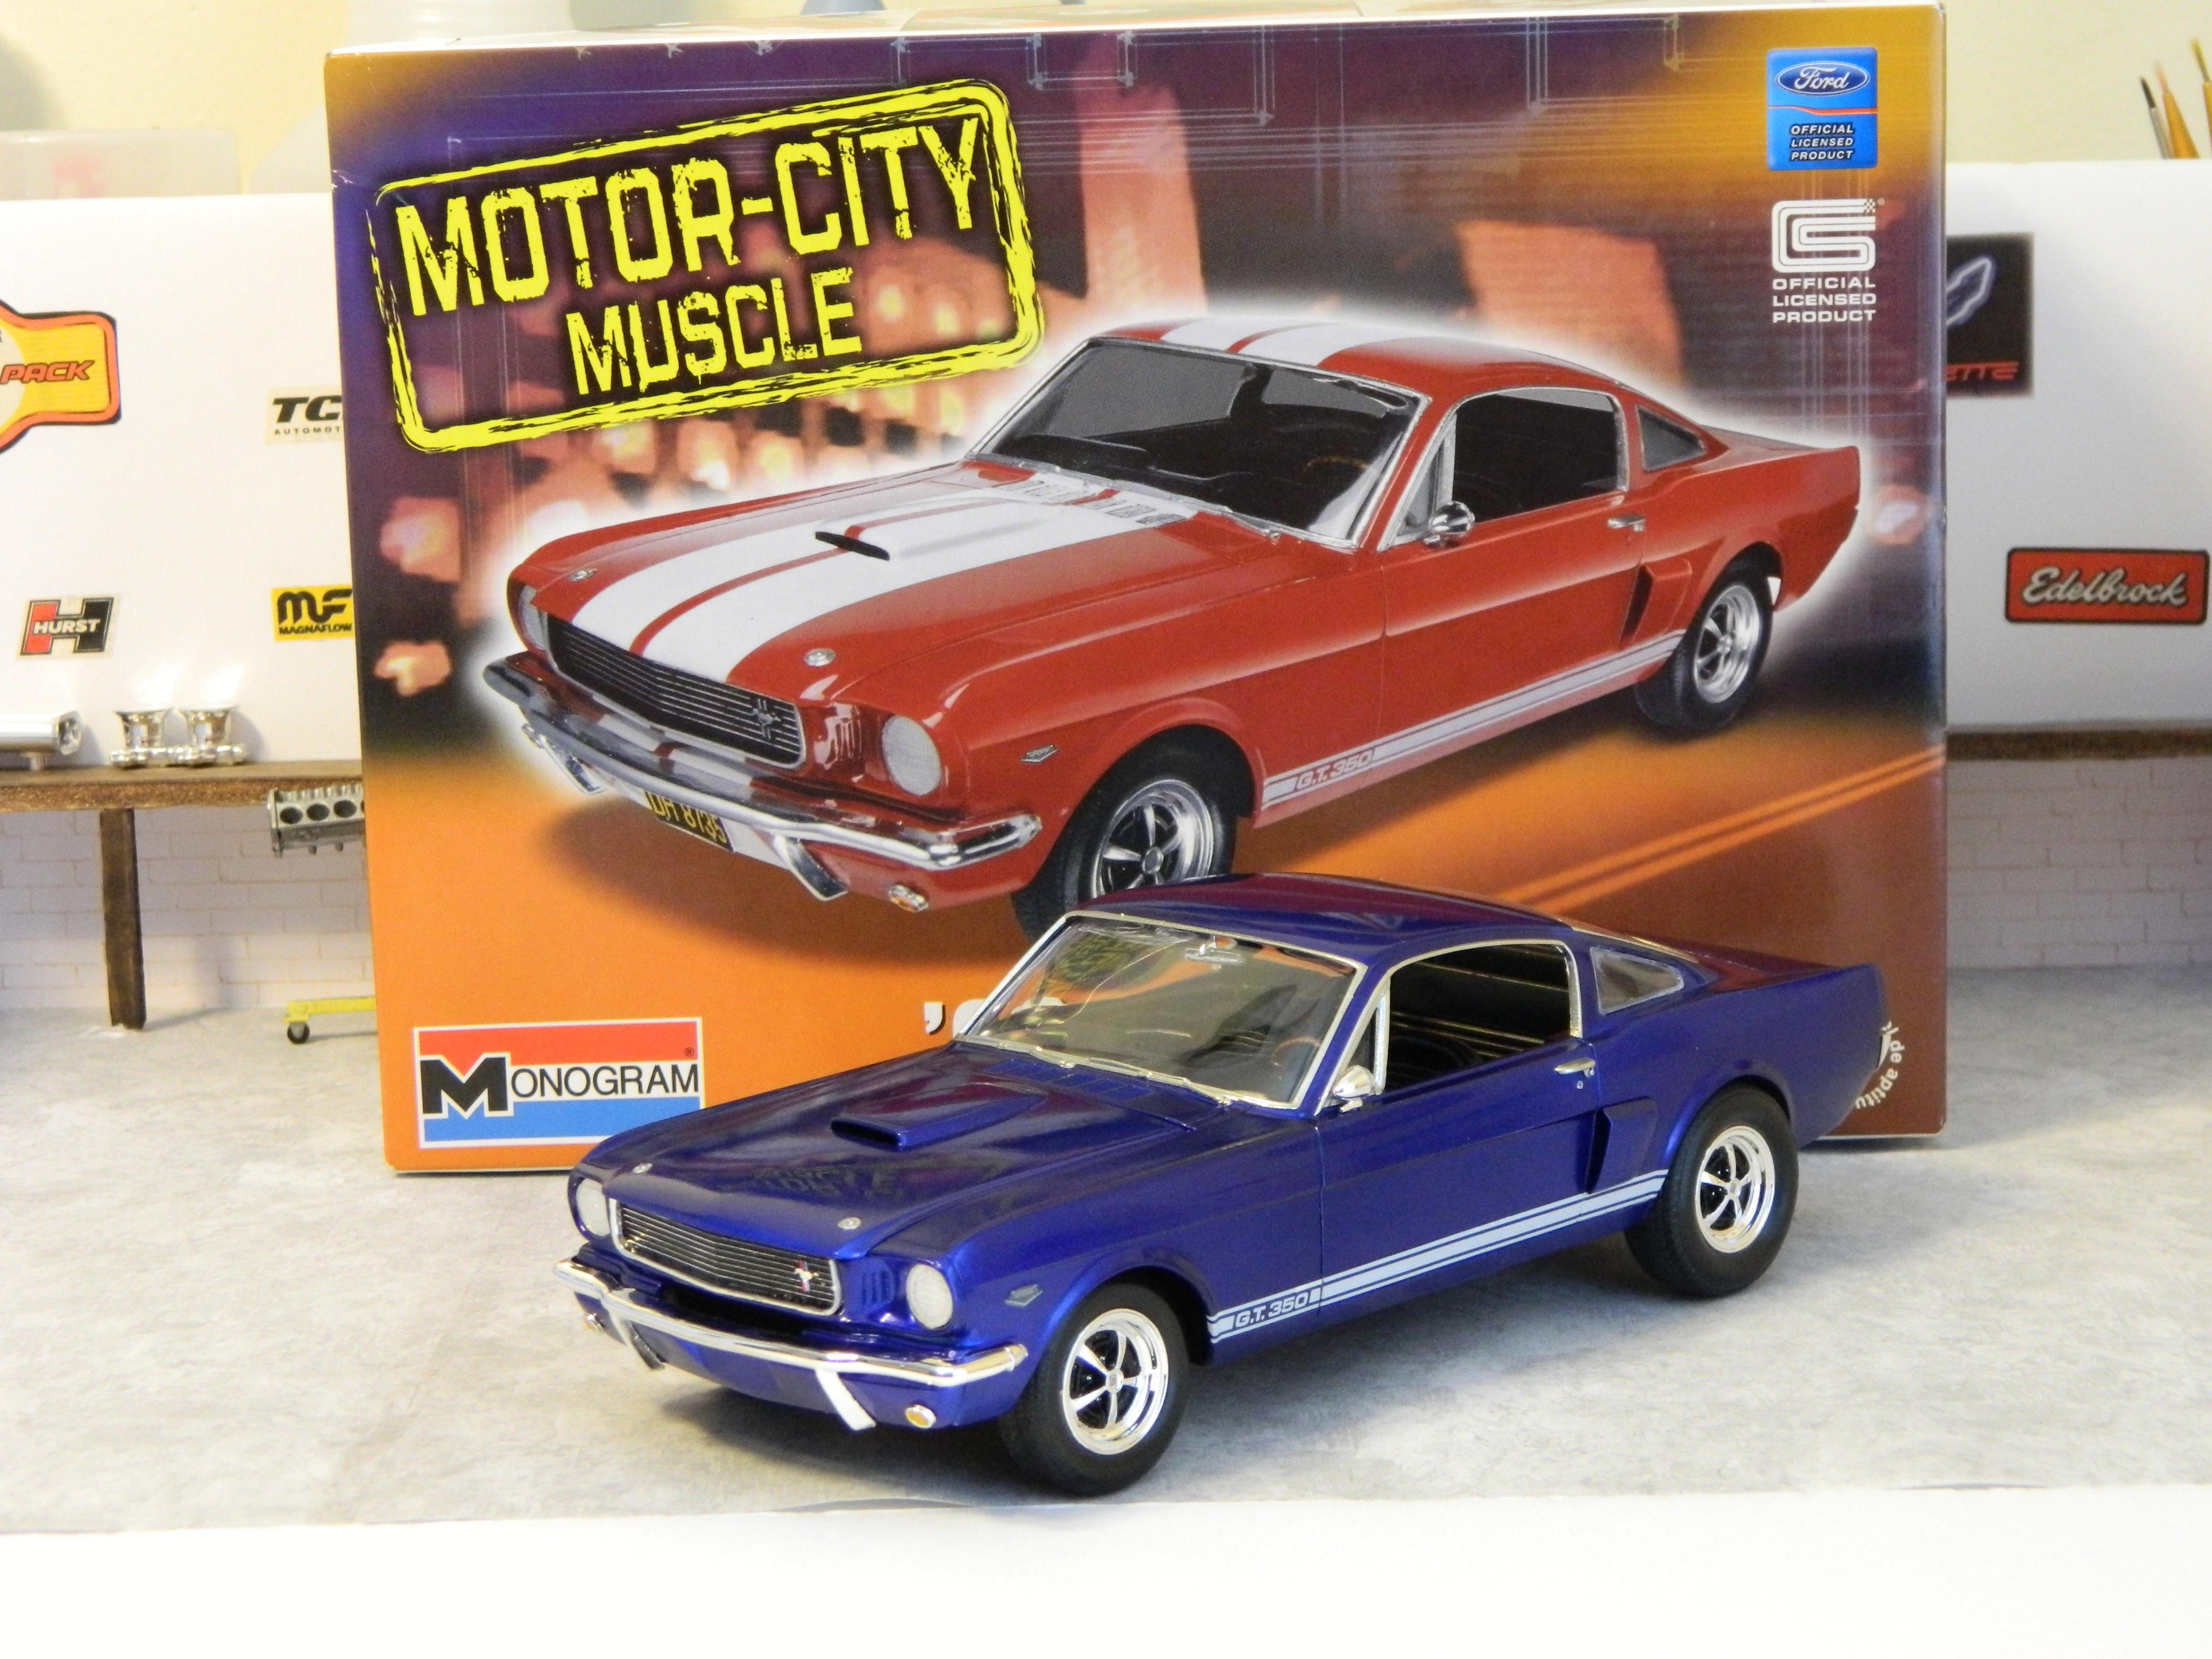
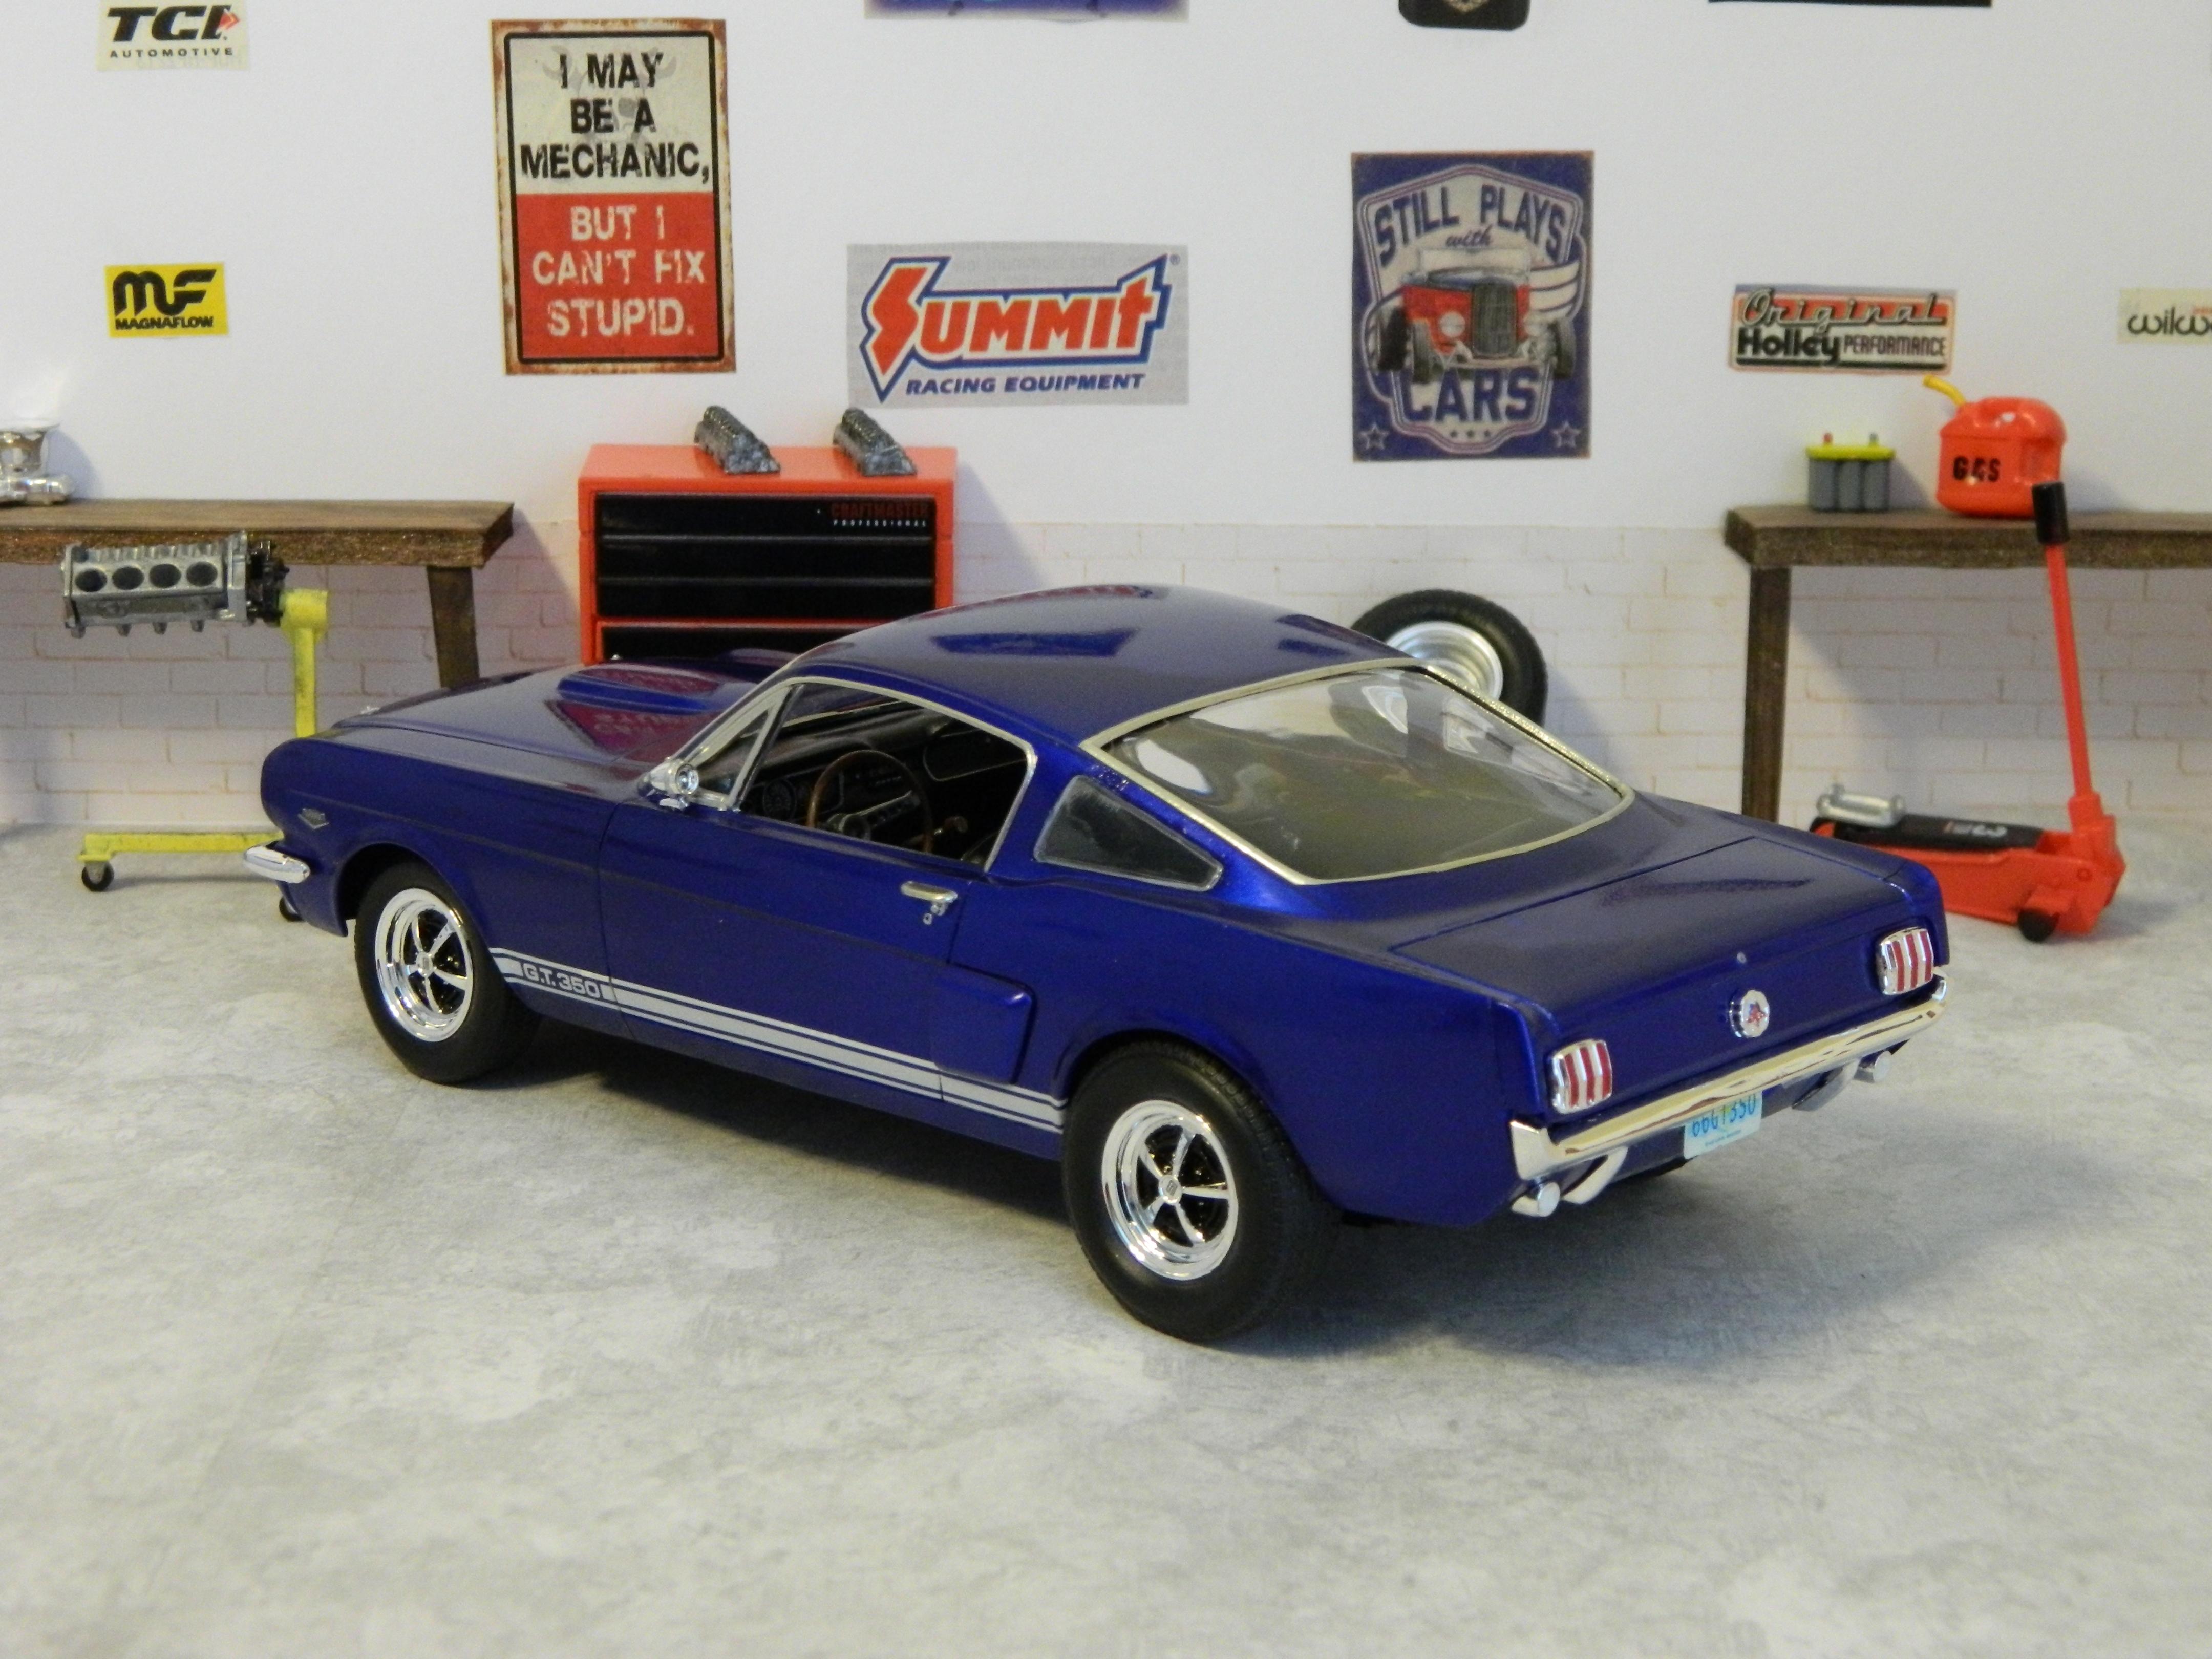
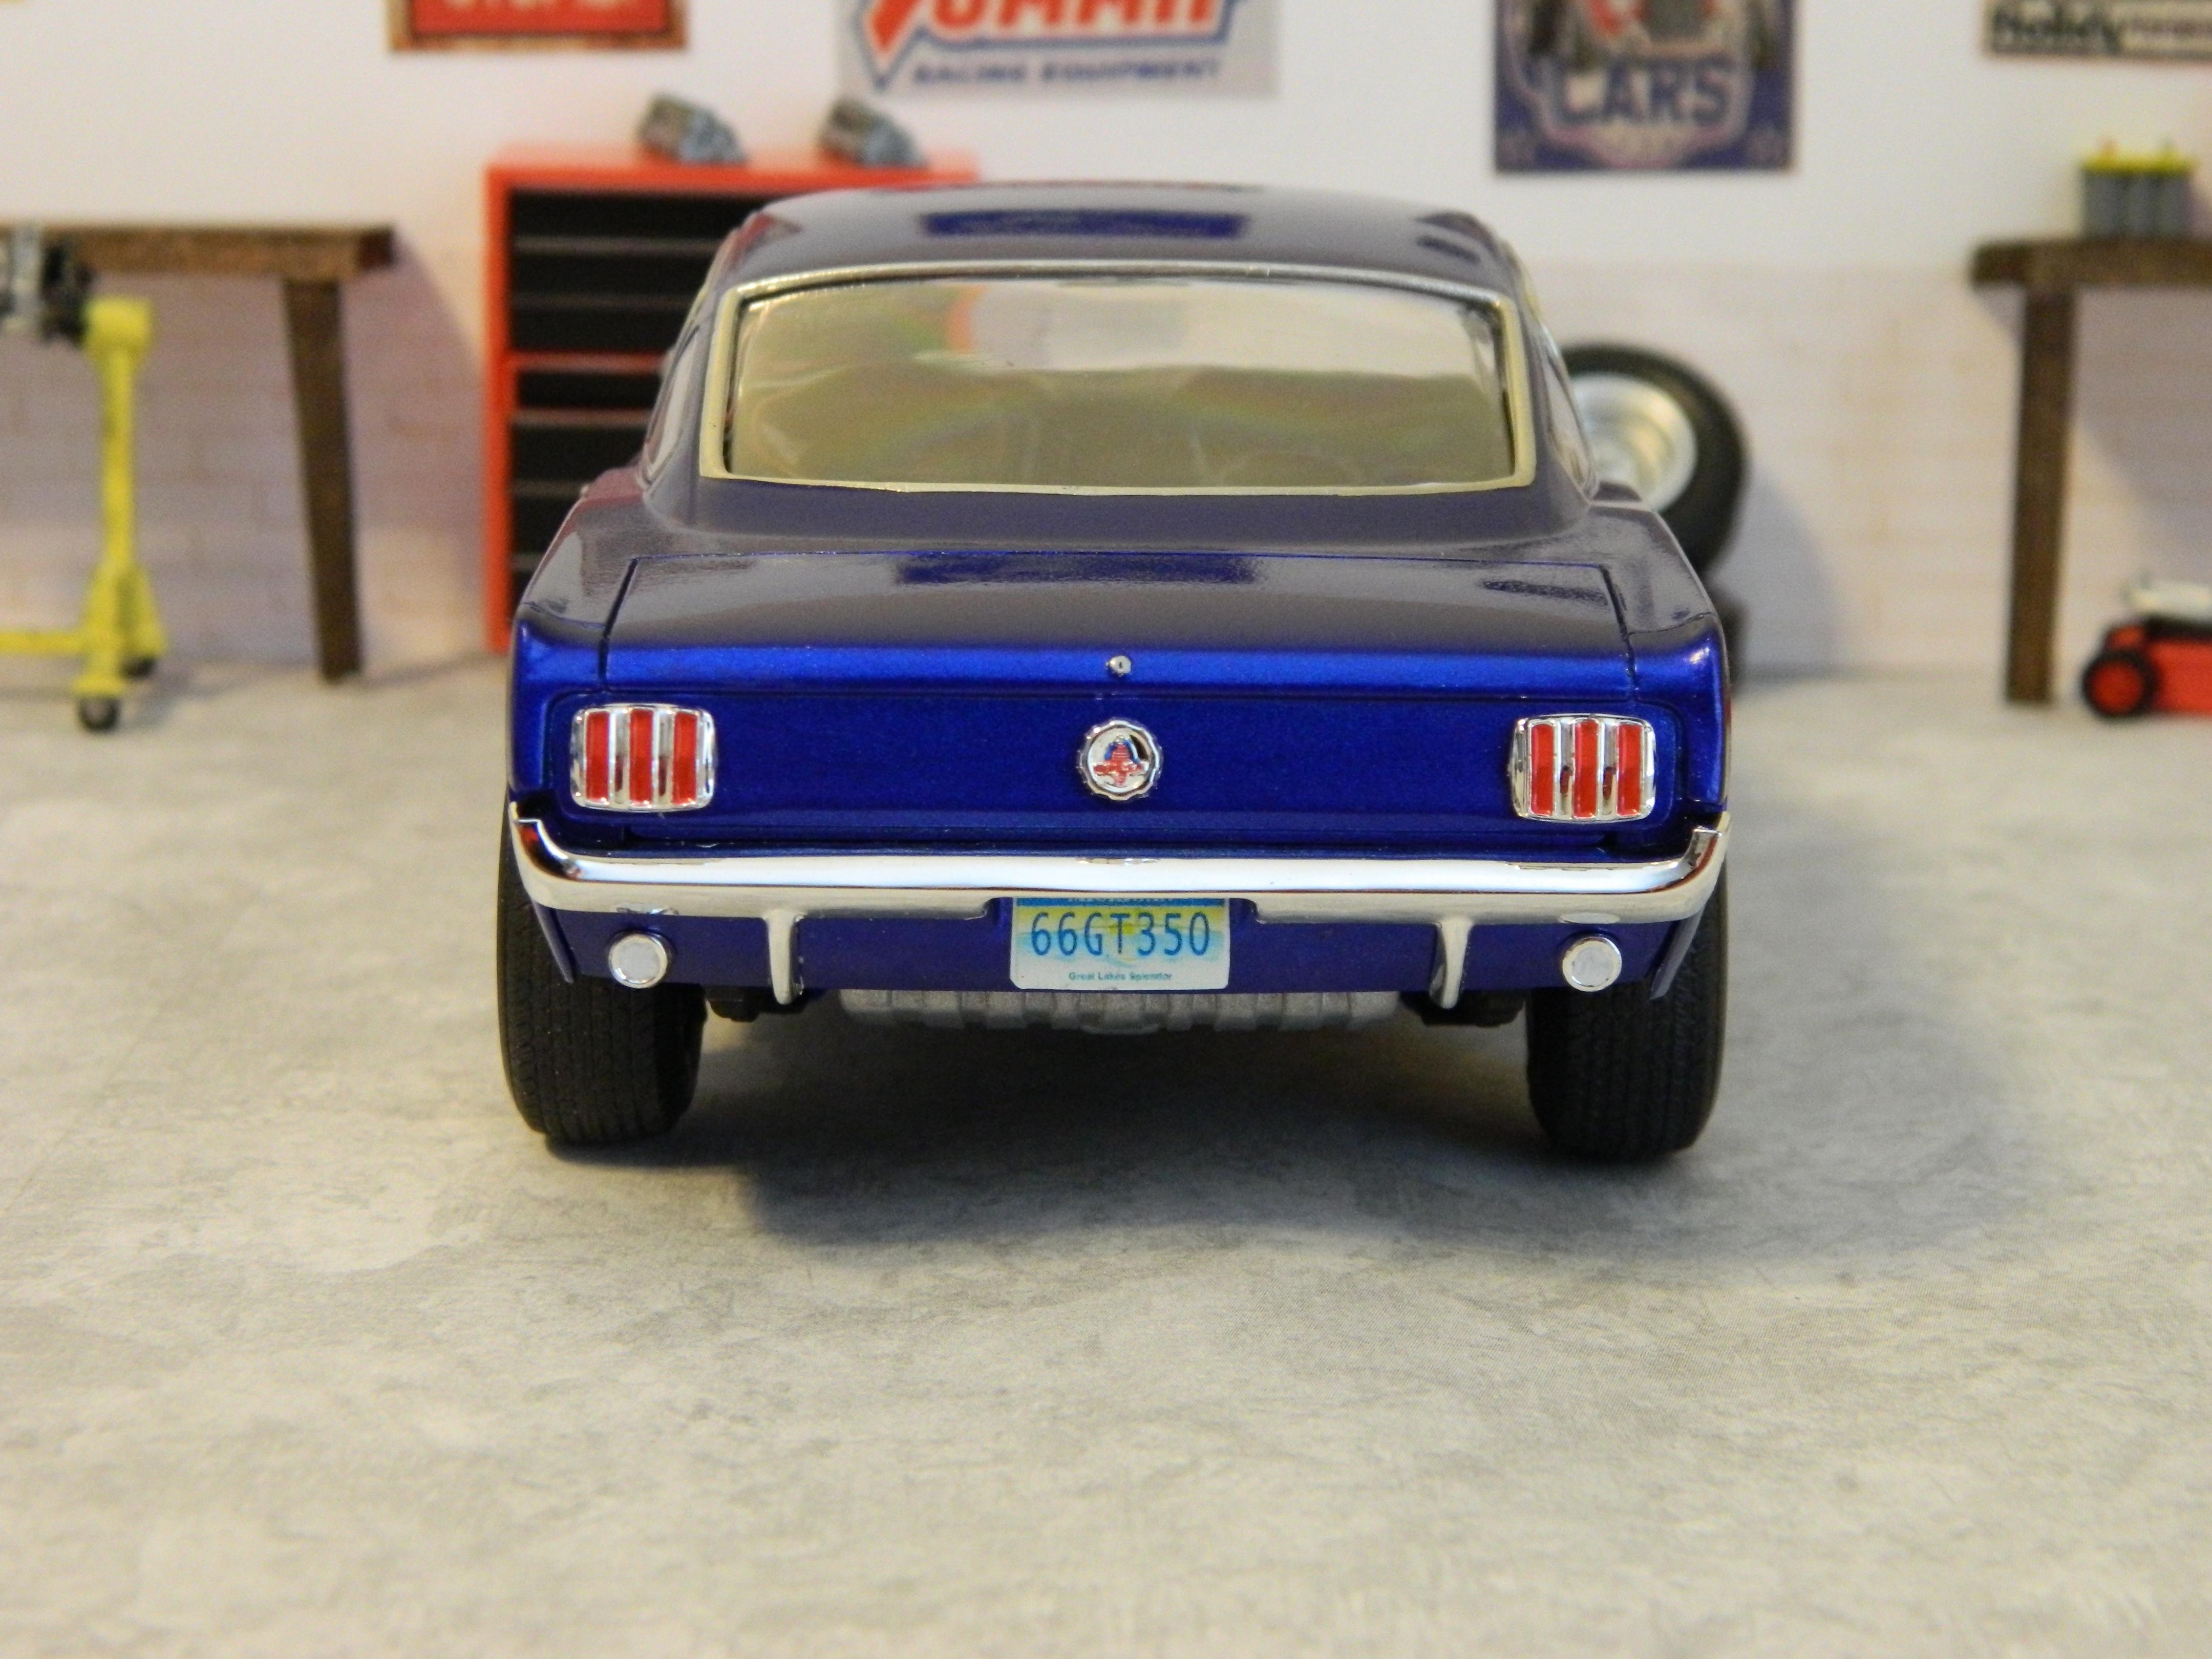
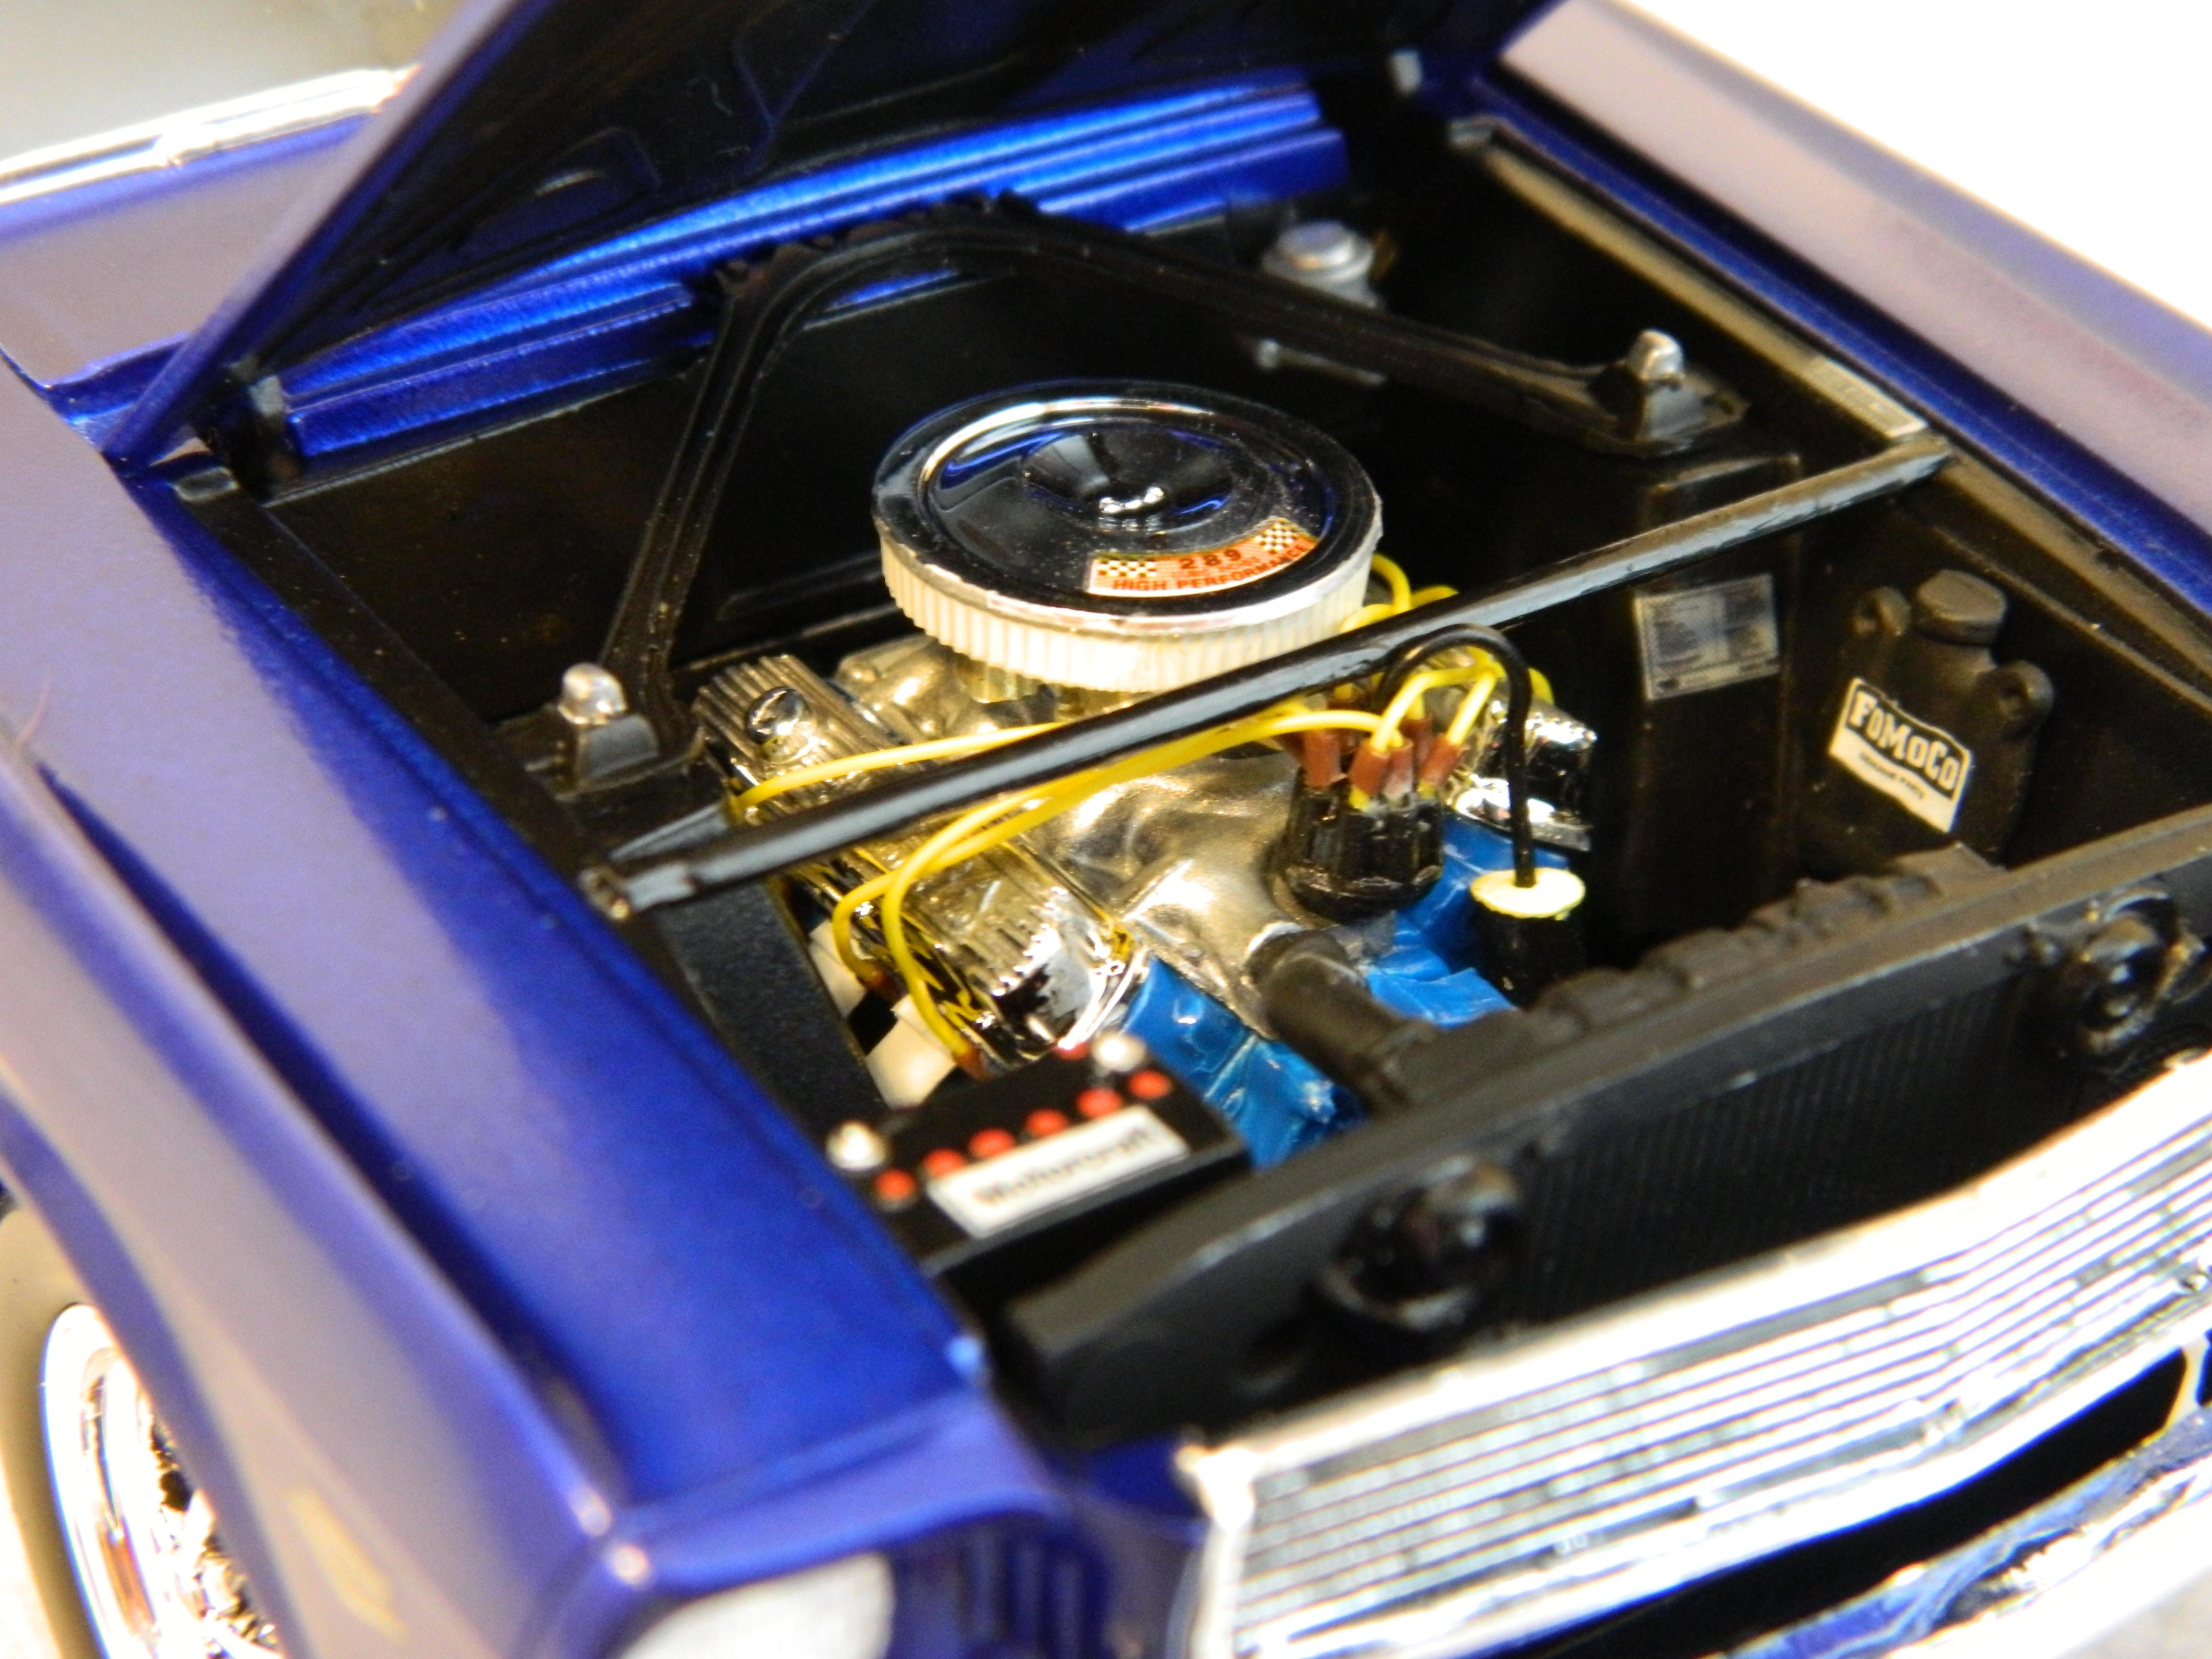
Finally finished the Monogram 1966 Shelby GT350. This one fought me pretty good, the closer I got to finishing it, the more it fought me. I was also fighting some motivational issues, I even put it away to work on my GSX that I posted a few weeks ago. The color is Tamiya TS-51 Racing Blue over Testors One Coat Diamond Dust, and the interior is done in an Apple Barrel craft paint mixture of Gloss and Flat Black. I added ignition wires and used BMF for the window trim. I also used a spare pair of bigger tires for the rear because I felt that the kit tires looked too skinny back there. The next four builds I have planned are going to be NASCAR cars, and I hope to have those done by May so I can get going on some street cars again. Thanks for looking!
-
My first build thread here! I've been working on the Revell reissue of the old Monogram RX-7. Revell have included parts for both the street car and the race car in one box. Monogram originally had them as separate kits. It's been a great kit, with hardly any flash, excellent fit, and decent detail. It looks and builds more like a modern kit than one that was first issued in the early '80s. The paint is Mazda Sunbeam Silver, custom mixed by Splash Paint, with Tamiya clear gloss lacquer. This was the first time I've used Splash Paint and I was impressed. I've since masked the body and rear window so I can paint the black bits. The cockpit is unmodified. I used black paints with different sheens (flat, semi gloss, mixture of the two) to paint the various surfaces. The kit includes decals for tartan seat inserts. The pattern is also molded into the seats and I'm thinking I might pull them out and hit them with a couple of coats of clear flat or a very dark flat gray so they look more like they have cloth inserts. The carpet is black embossing powder. I stripped the chrome off of the wheels and painted them Alclad White Aluminum and then hit them with a clear coat. I still have to paint the engine, engine bay details, and tires, and then it will be time to put it all together. Comments welcome. Thanks for looking! Ben
-
Hi everyone, My first finished build of the year. Texas Terry was my favorite driver growing up and I've always loved the look of the Hagan cars and the pre-aerocoupe Monte Carlo SS body. This build is stock, with the exception of Chimneyville Decals. Overall, the kit was a nice, fun build. I used Tamiya rattle can for the body and chassis. I went for an early season red chassis because I like the bright interior. For the rest of the car, I used Tamiya and Vallejo acrylics. My biggest issue was with the aftermarket decals, which peeled on the edges when applying clear. But it's going on the shelf and overall I'm fairly happy with it.
-
I have always loved this kit back from when I was a kid. I decided to build this box stock and as box art. I did not sweat all of the small details, instead, I concentrated on making a presentable shelf model. The model is actually built but I thought I would share a few pictures, tips and techniques with all of you. This is the kit I used. It is 1991 vintage.
-
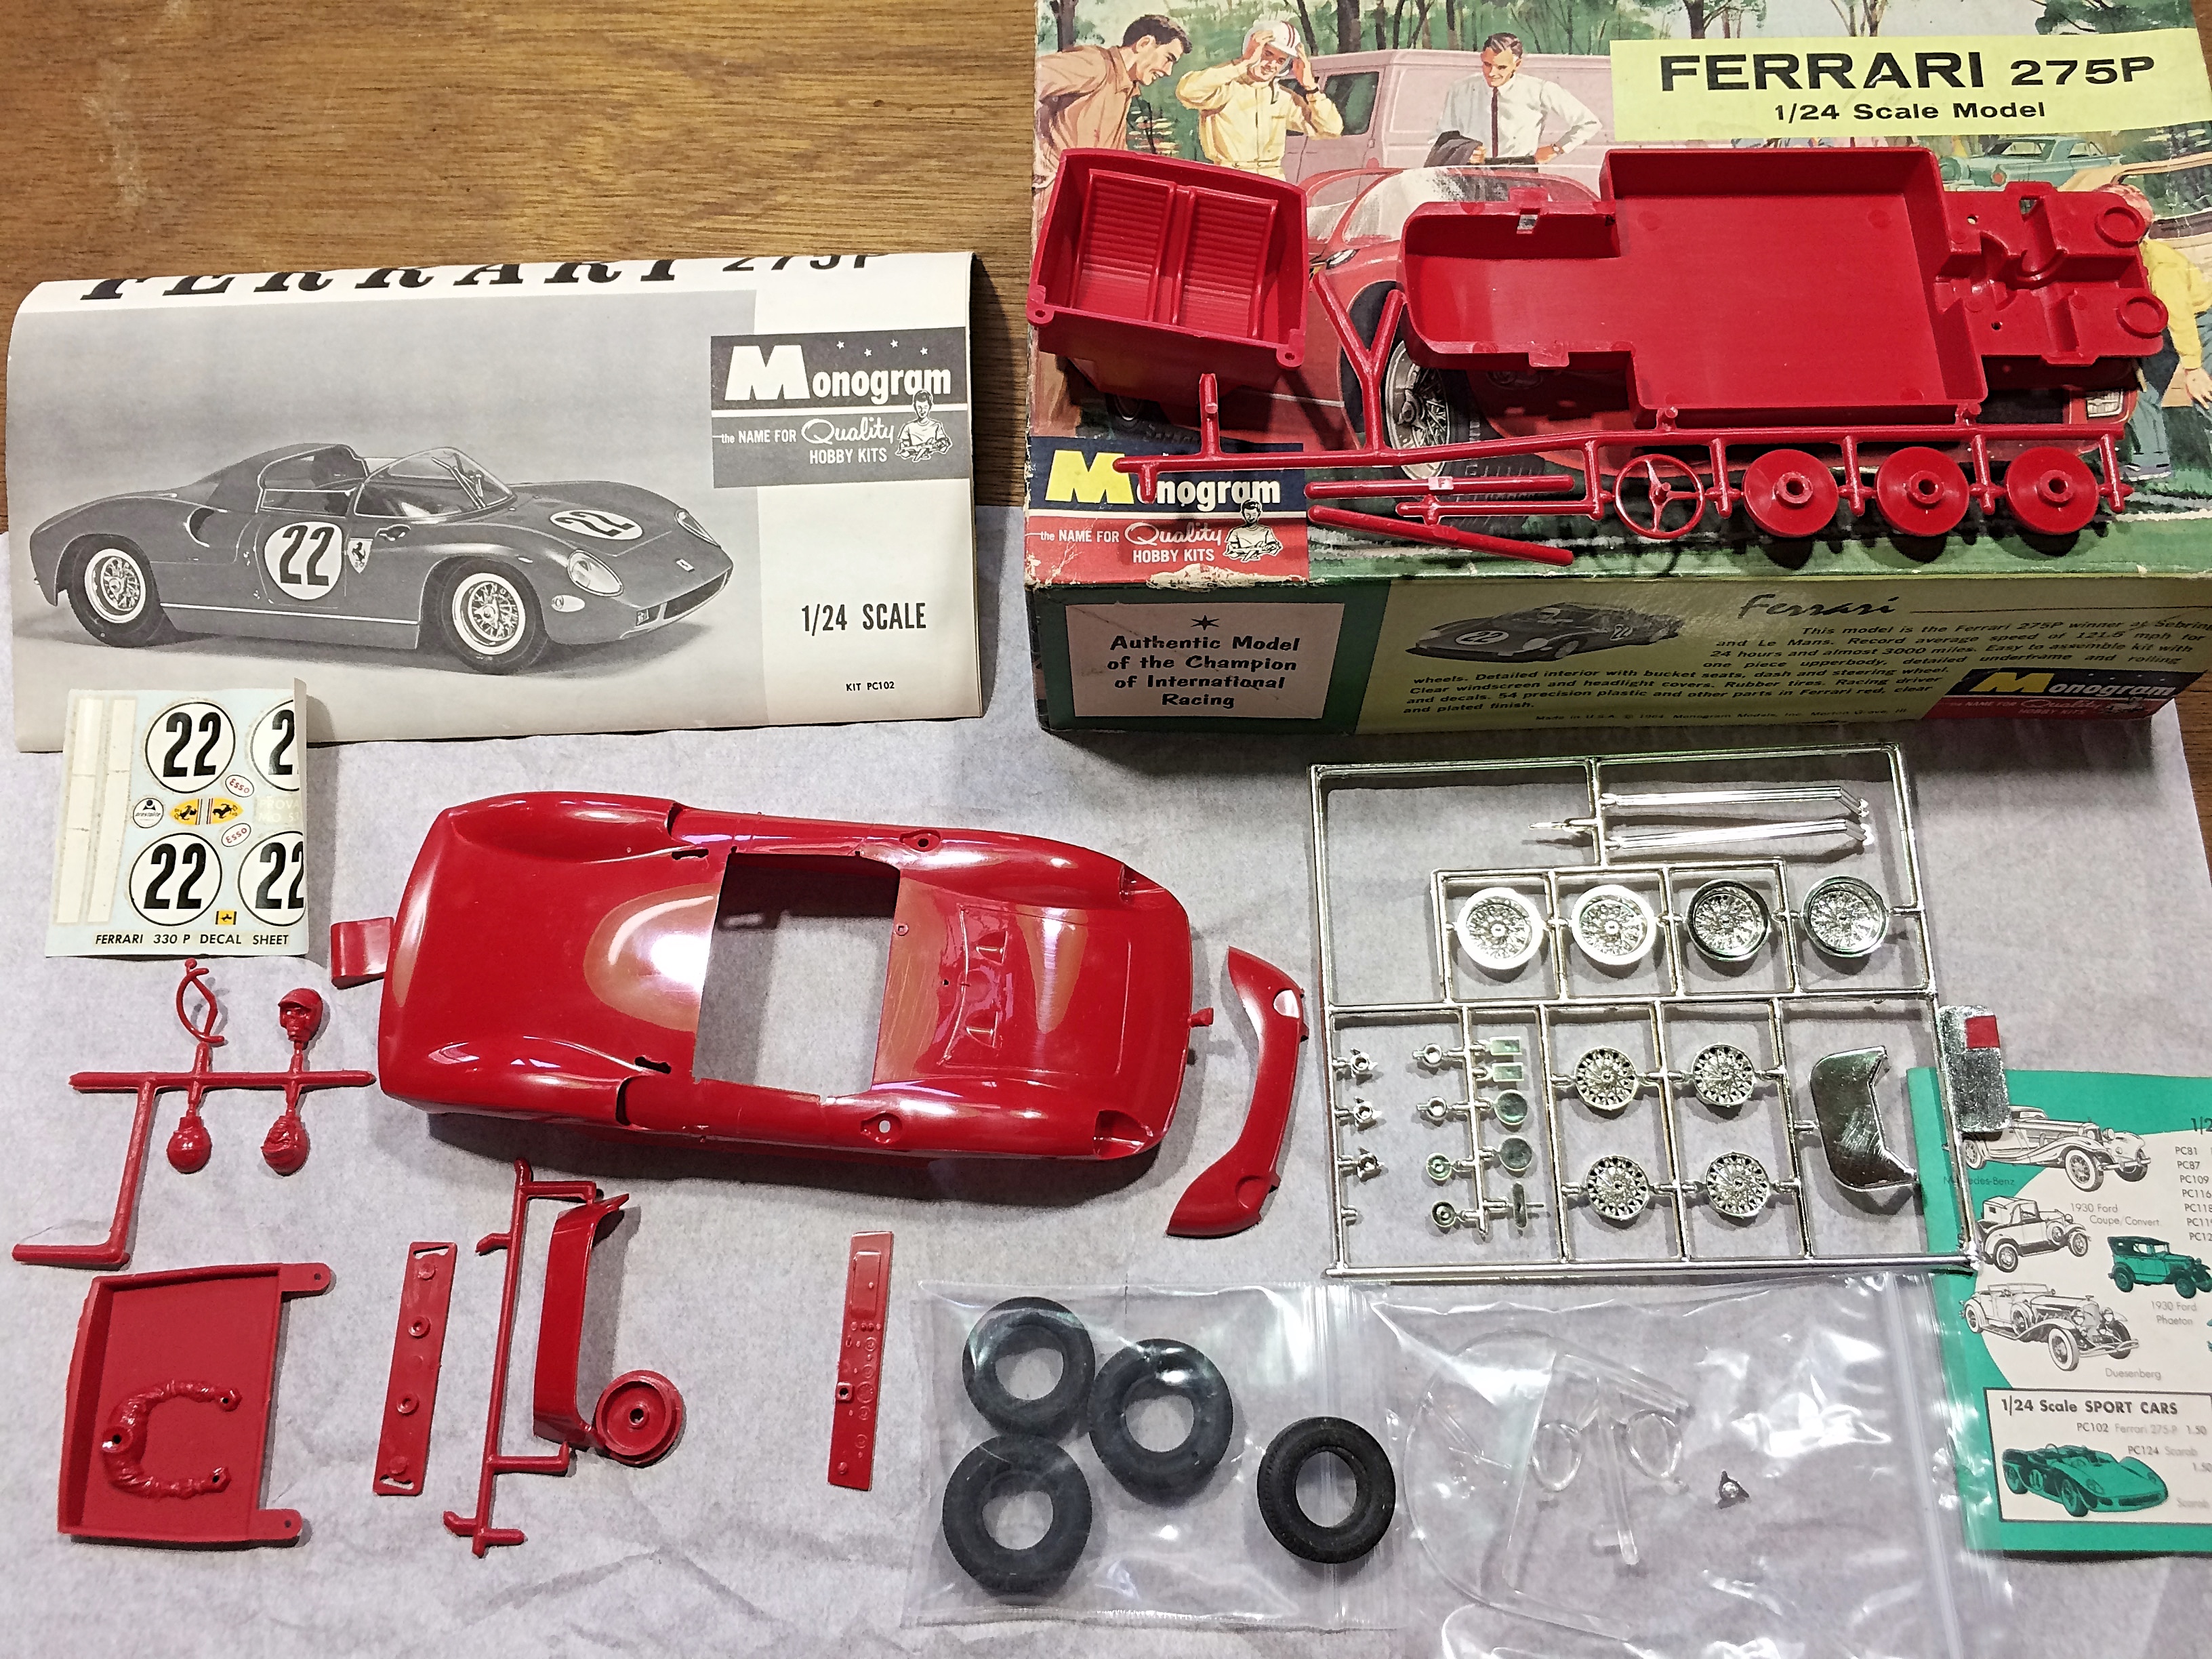
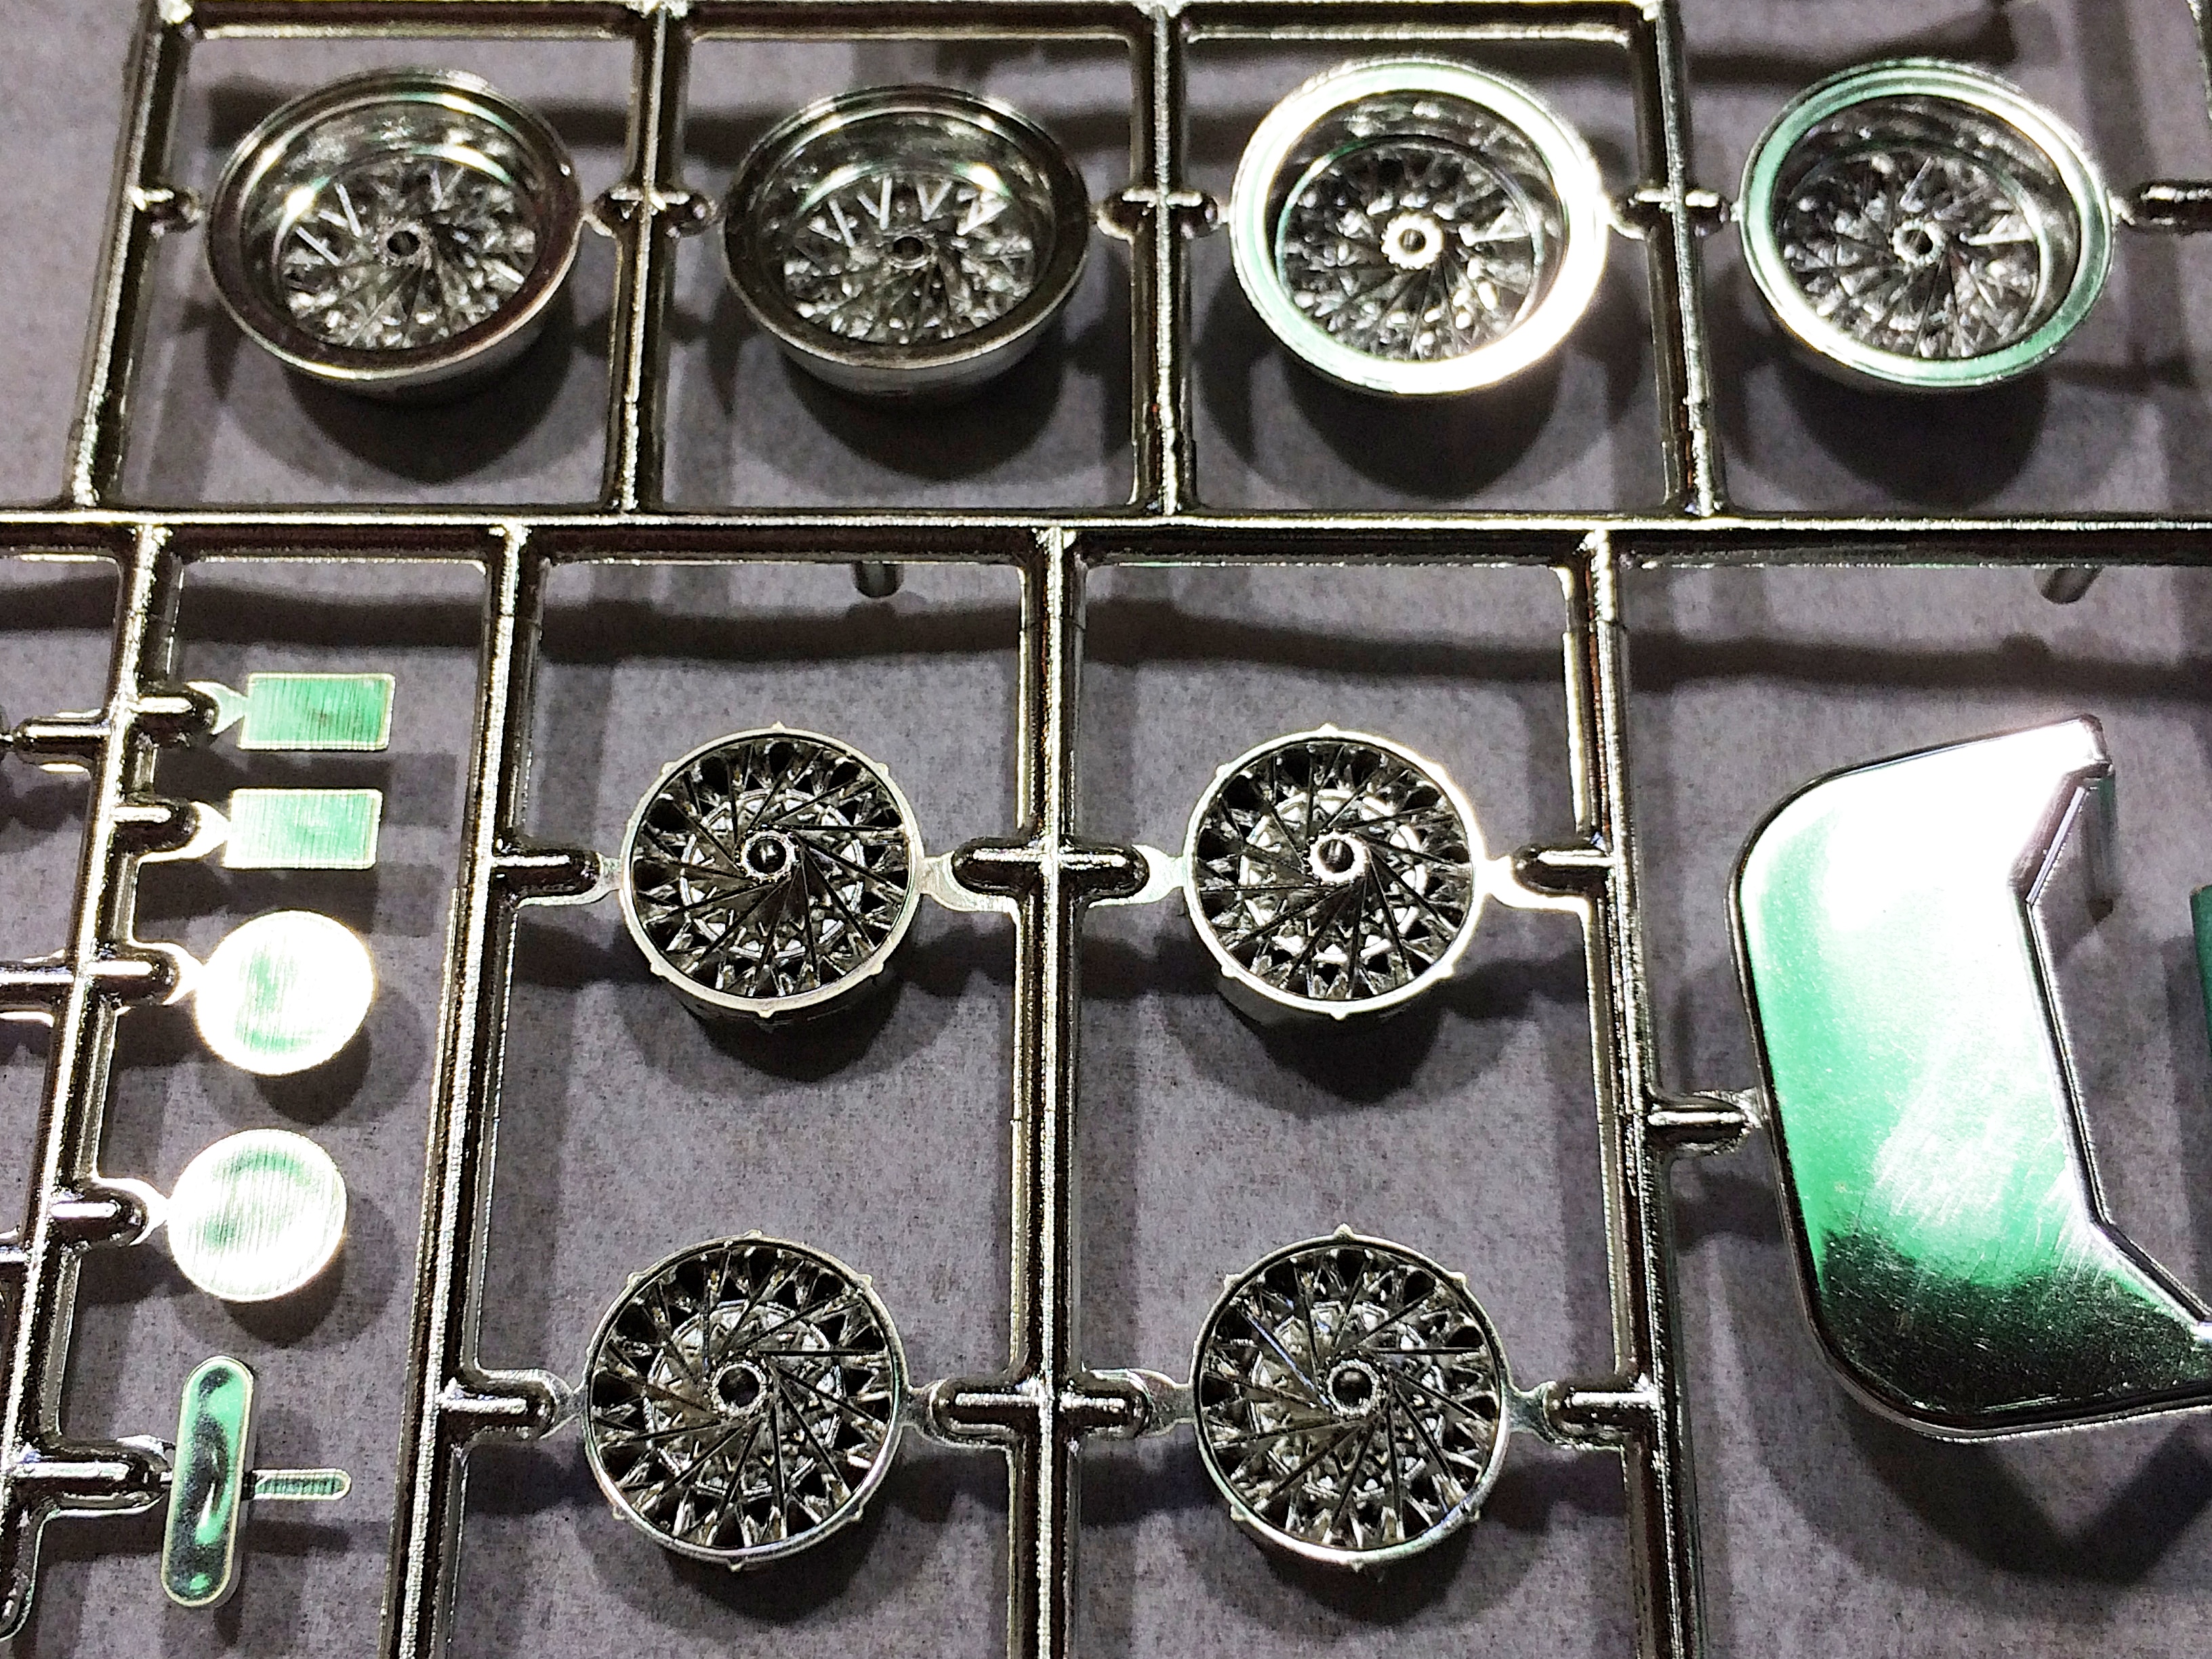
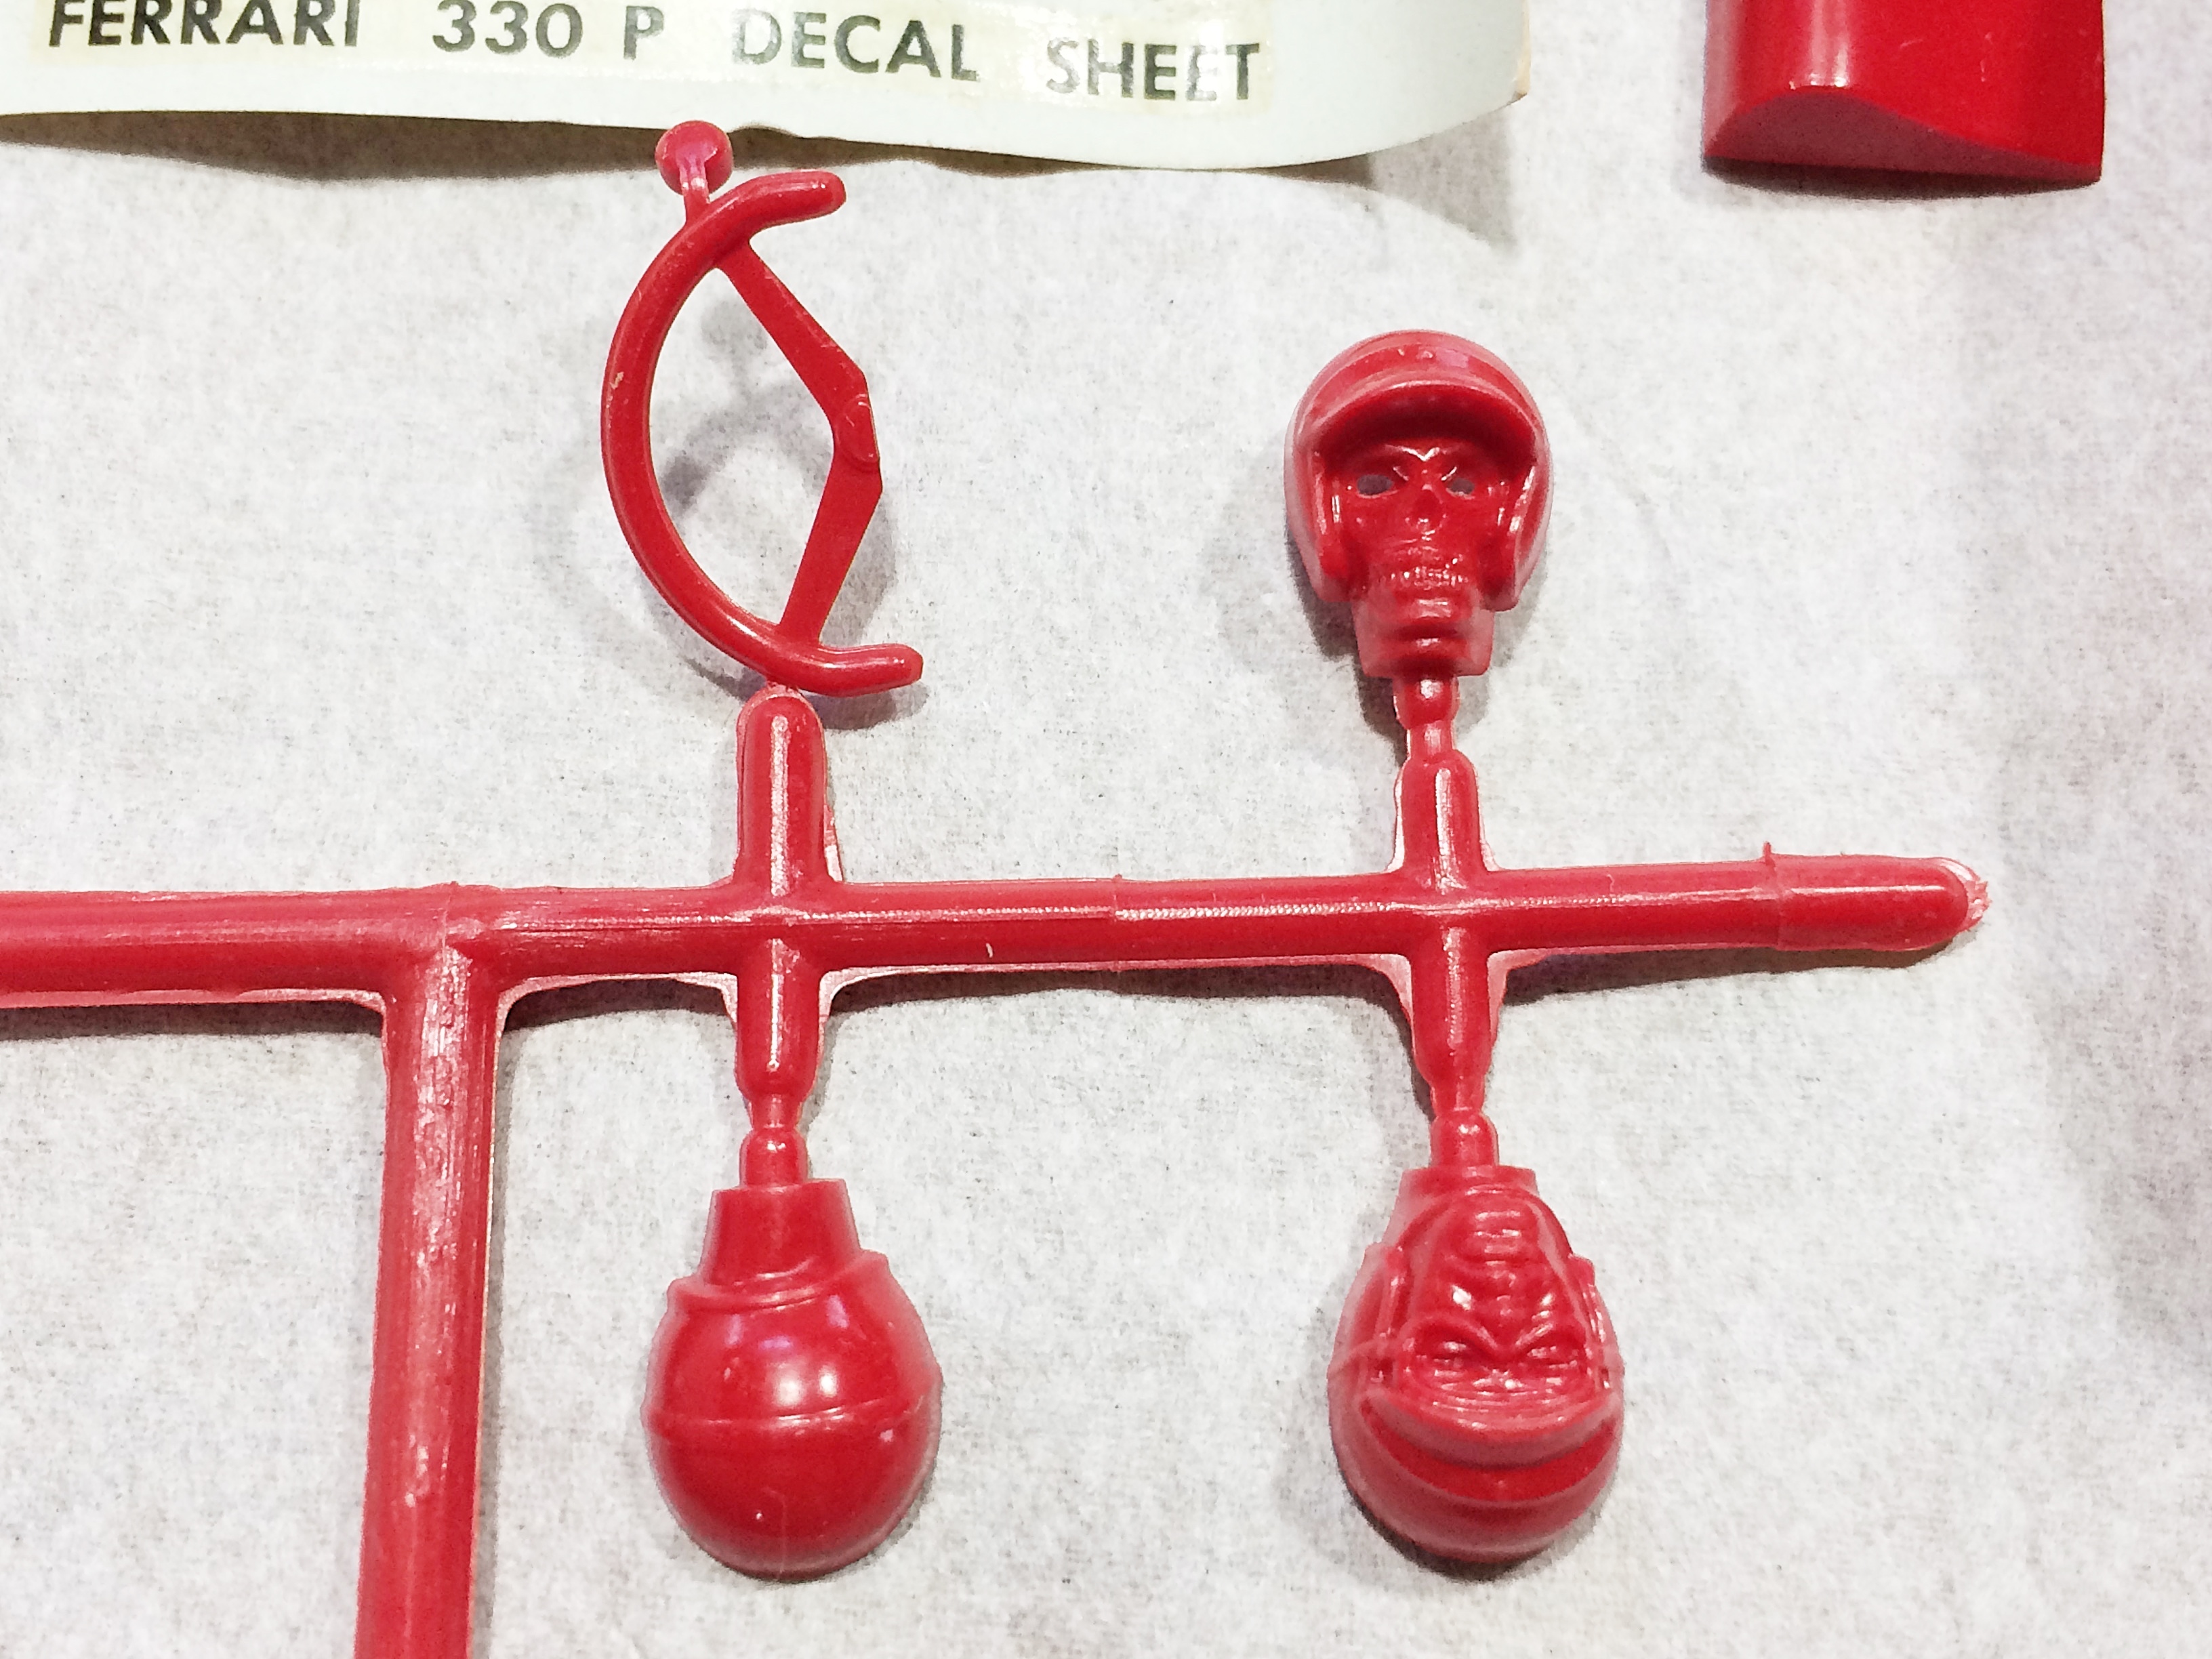
*Had to* get one of these vintage 1965 Monogram Ferrari 275P kits. No, it's not the gold-plated slot car kit, still wrapped. I've been watching prices on eBay, this one was not an auction, free shipping made it a few bucks less than some others, but still a chunk of change. I was surprised about the skeleton racer face. There are three nasty sink holes under the mounting points. The chrome headlights won't cut it for me. Tires are really flat sheen, but not cracked or brittle, but if I use modern wheel/tires that won't matter. Decals are toast. My plan is to kit bash with a modern Ferrari that has an engine and suspension, tub and seats. So will be scouting for a cheap donor. I'm jonesing to do a resto-rod Ferrari, yea I'm sick.
-
1982 Trans Am with a 80’s flavor. Engine from a NASCAR kit. And kitbached exhaust from parts bin. Took longer then expected. Body has a warp to it but decide to push on. Hope you like. Thanks for looking all comments welcomed
-
Never knew monogram did the 82 trans am. I have the mpc and revel version in my stash its Molded in red. So this one will be painted red with a grey interior