Search the Community
Showing results for tags 'mustang'.
-
Good morning all, I finally was able to get back to the bench after a long absence do to shoulder surgery and I jumped in with the new Boss 302 kit from Revell I did like this kit and thought it went together well I started by adding the basic plug wires and heater hoses but didn't go to extreme on details as I really was using only 1 arm then at the advise of my Brother inlaw I went with a Calypso Coral paint scheme i am happy with the way it turned out please enjoy and any comments or critiques are always welcome Thank you

-
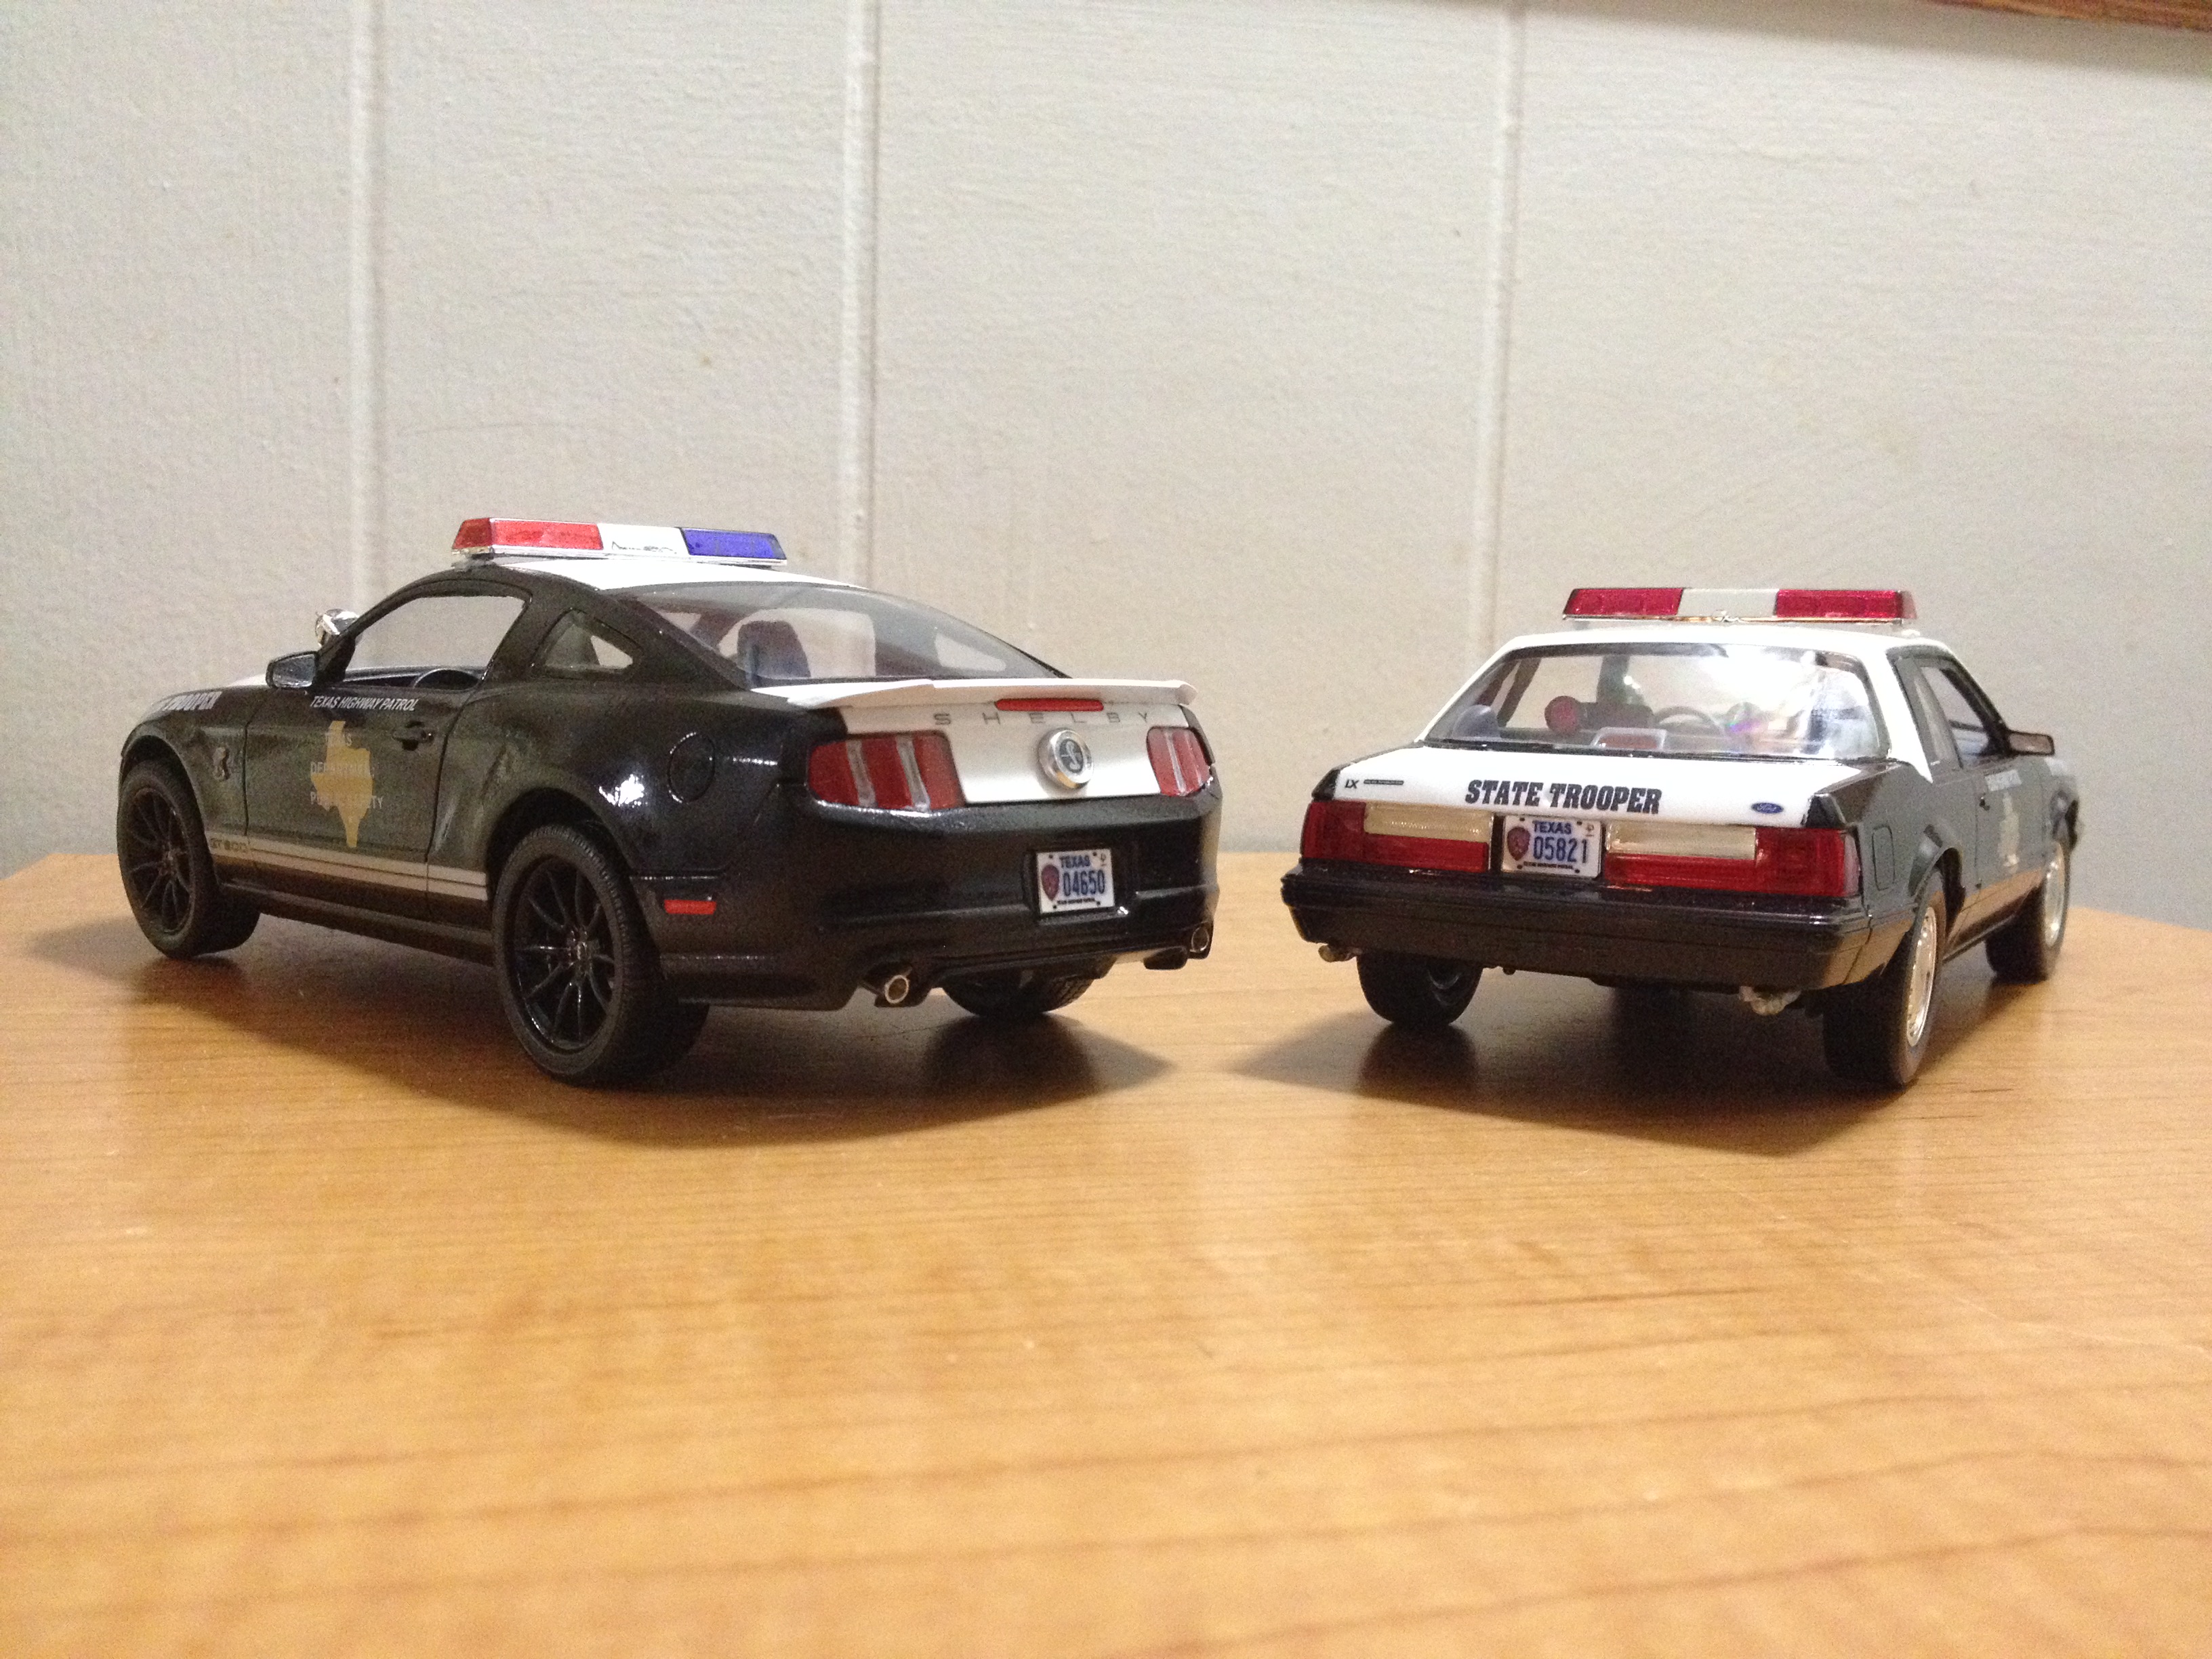
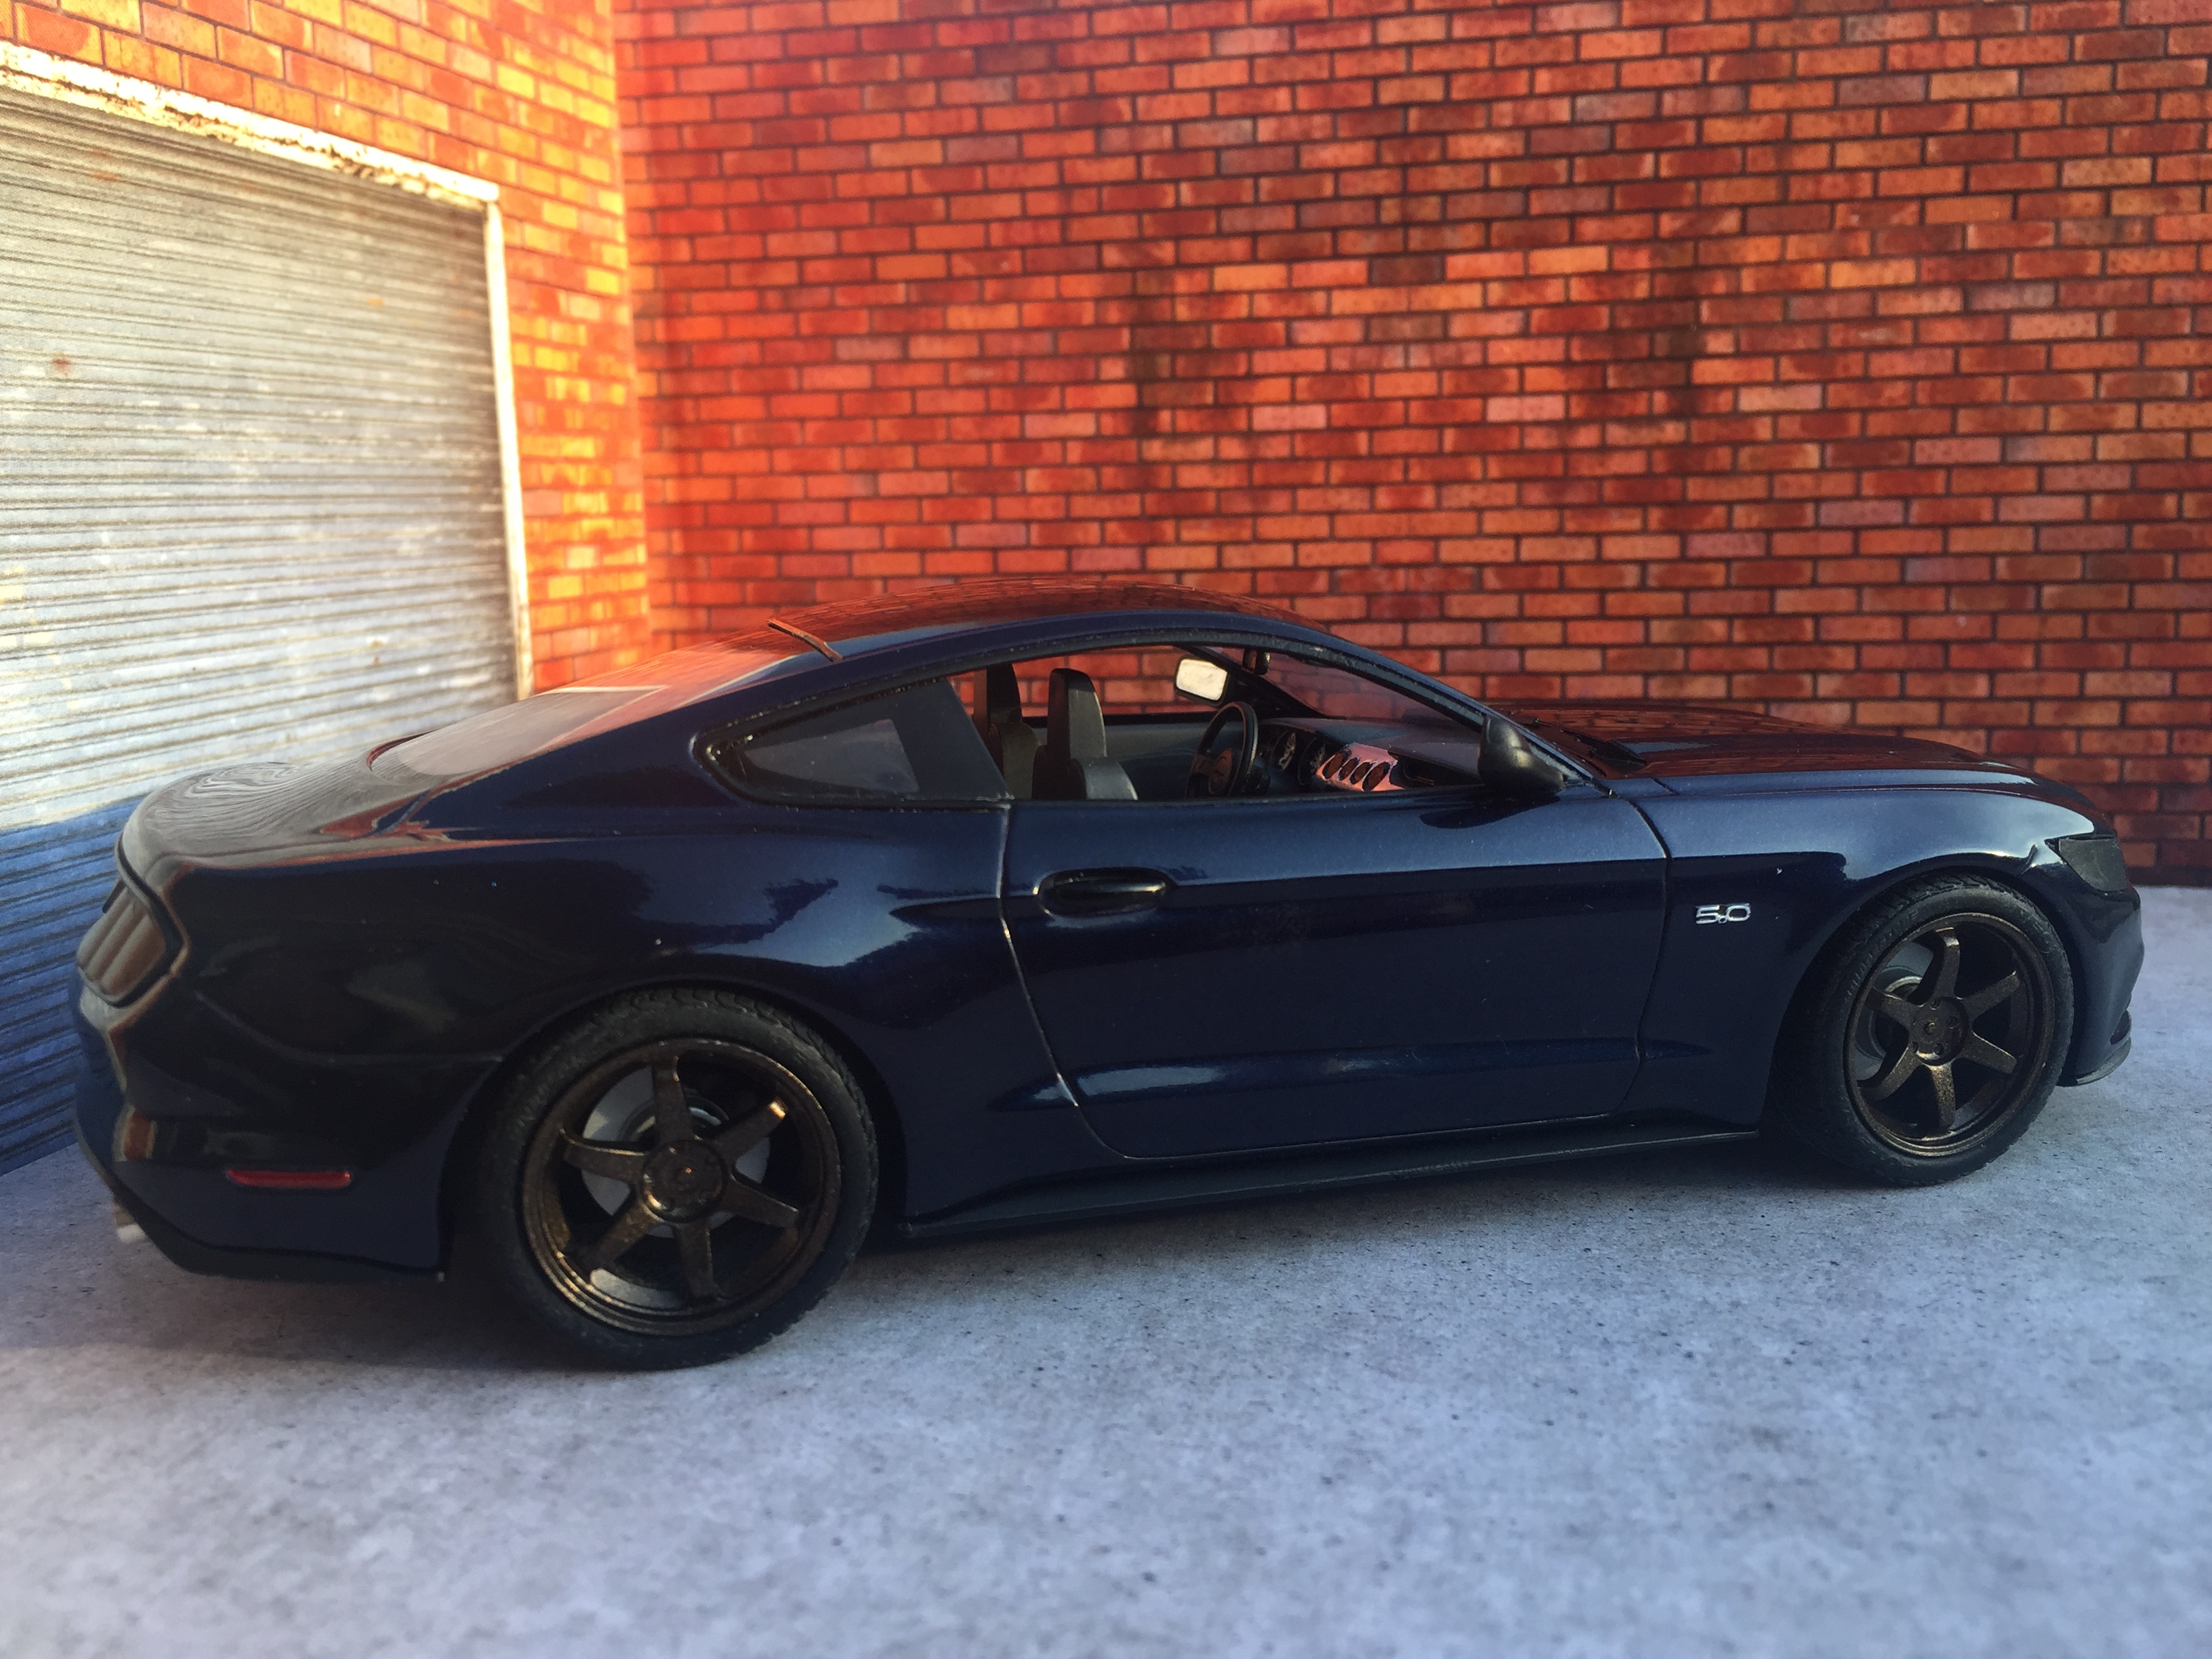
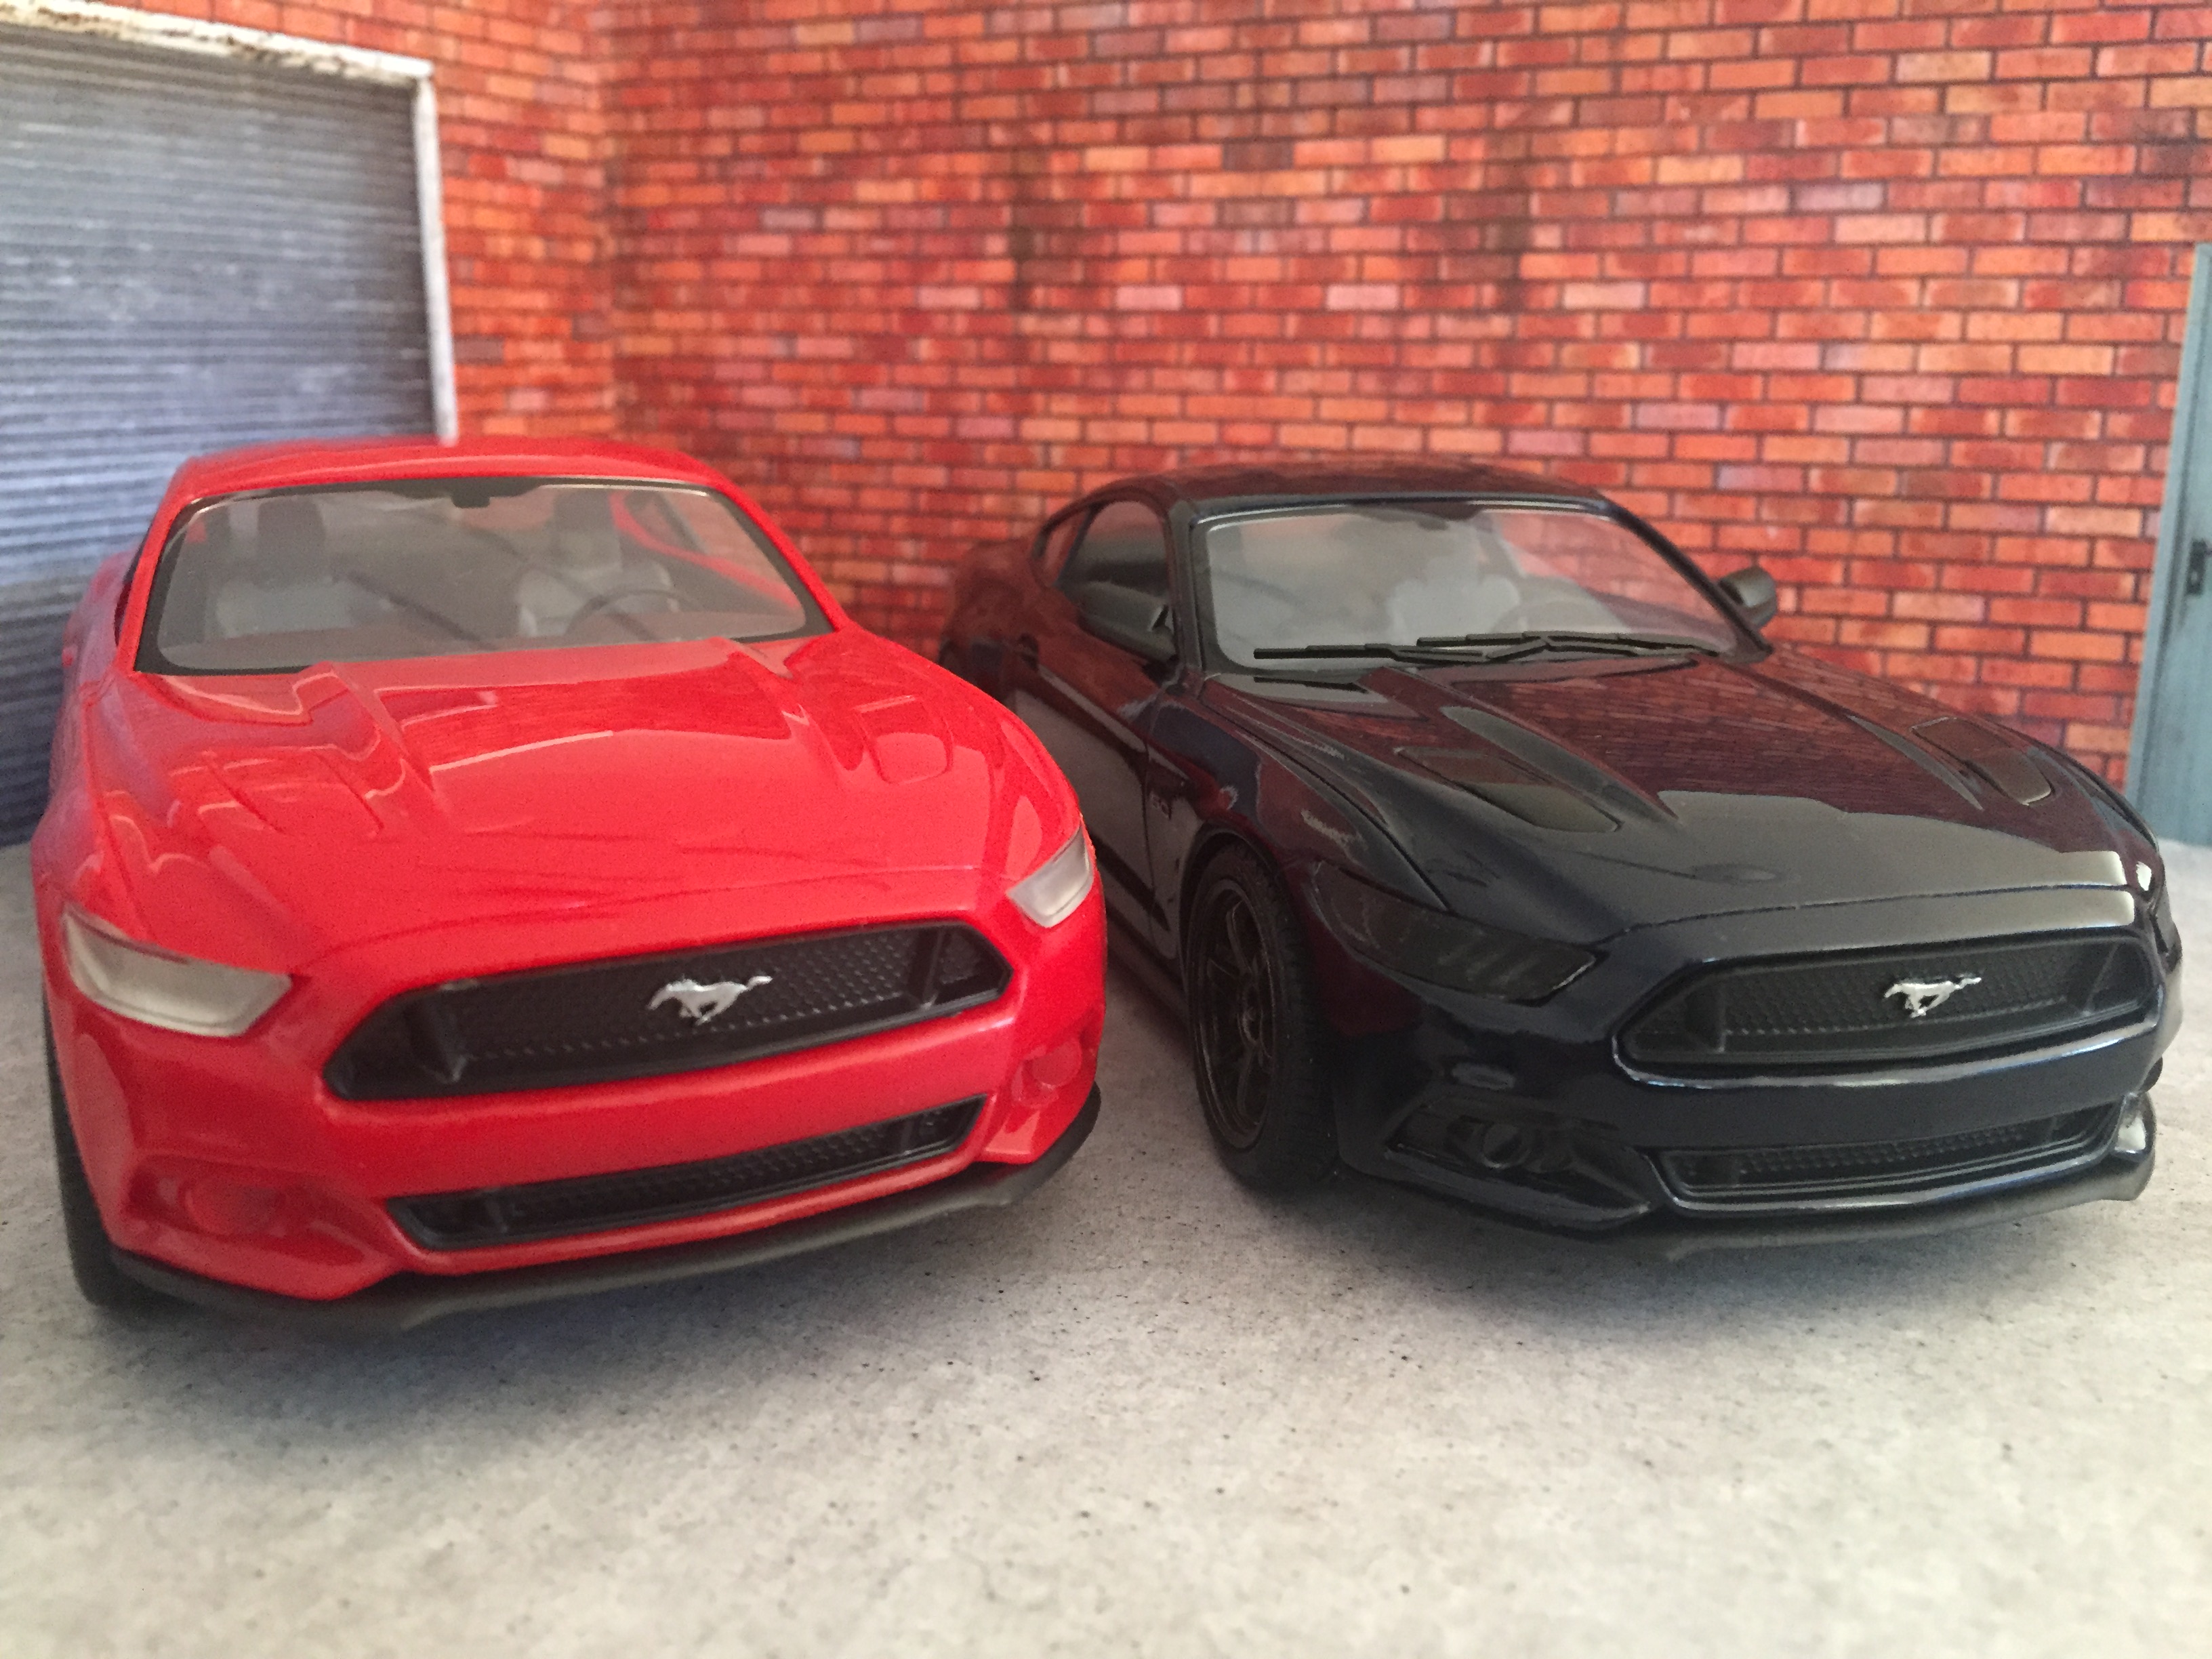
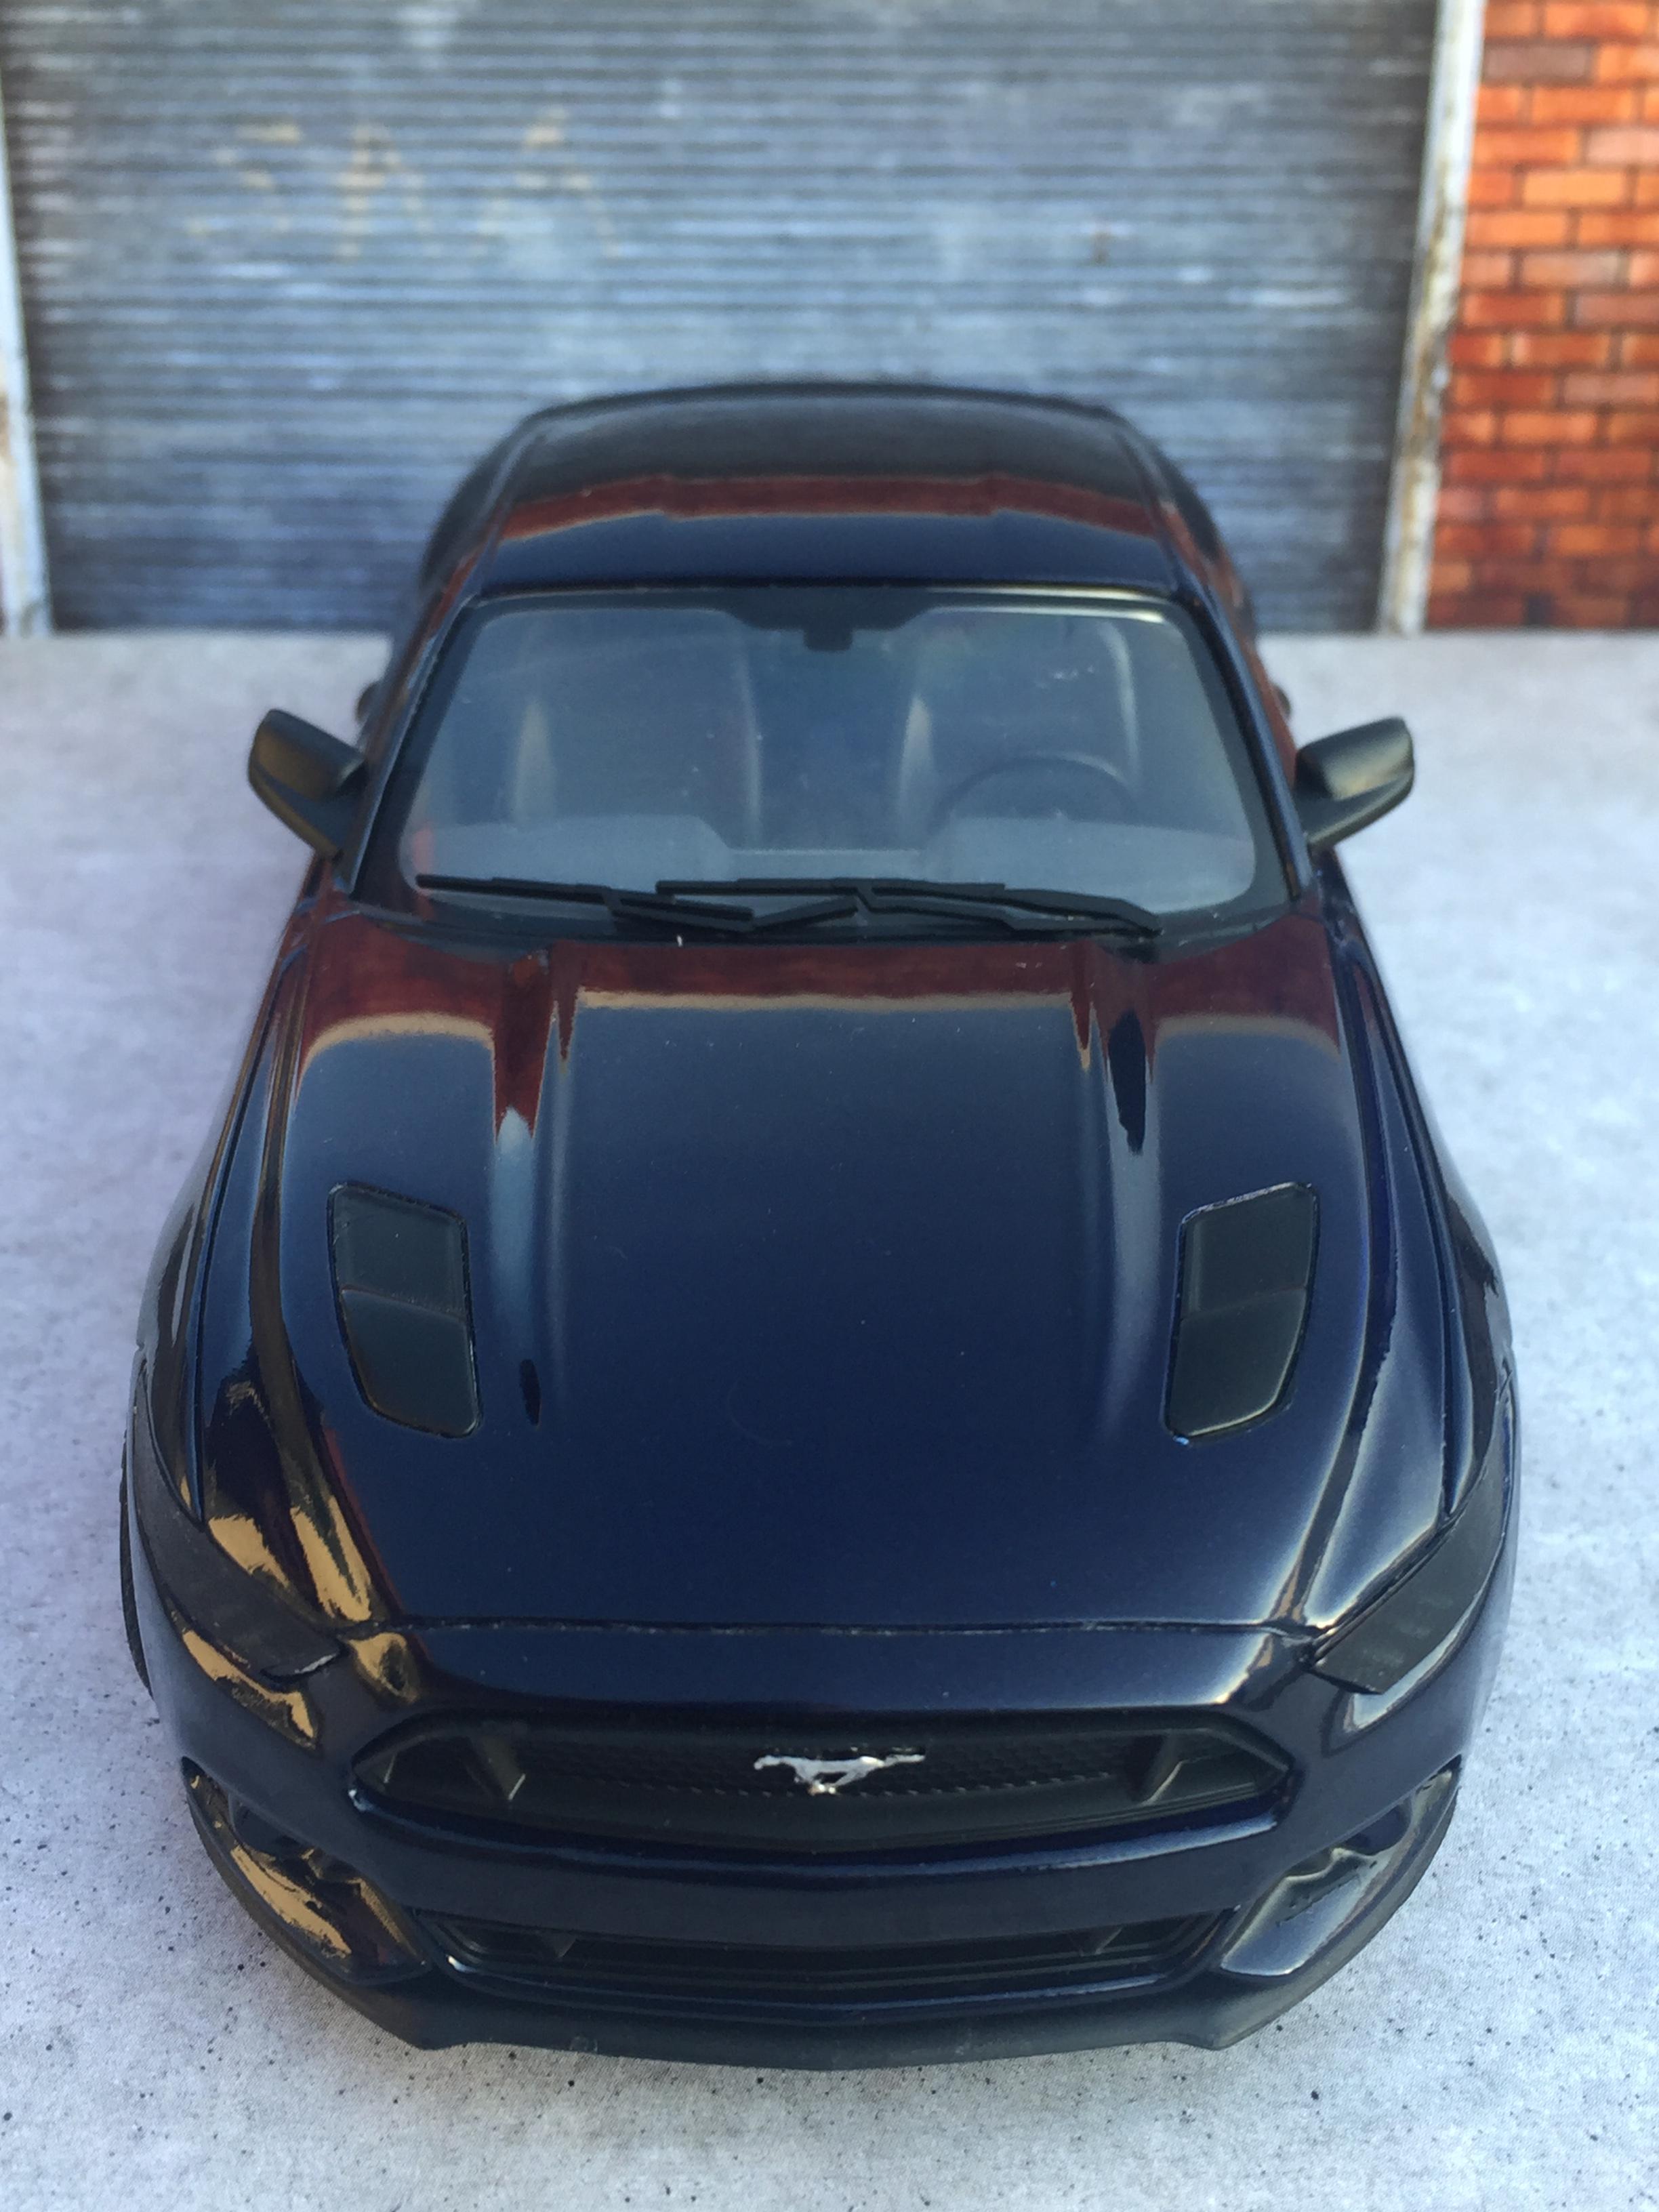
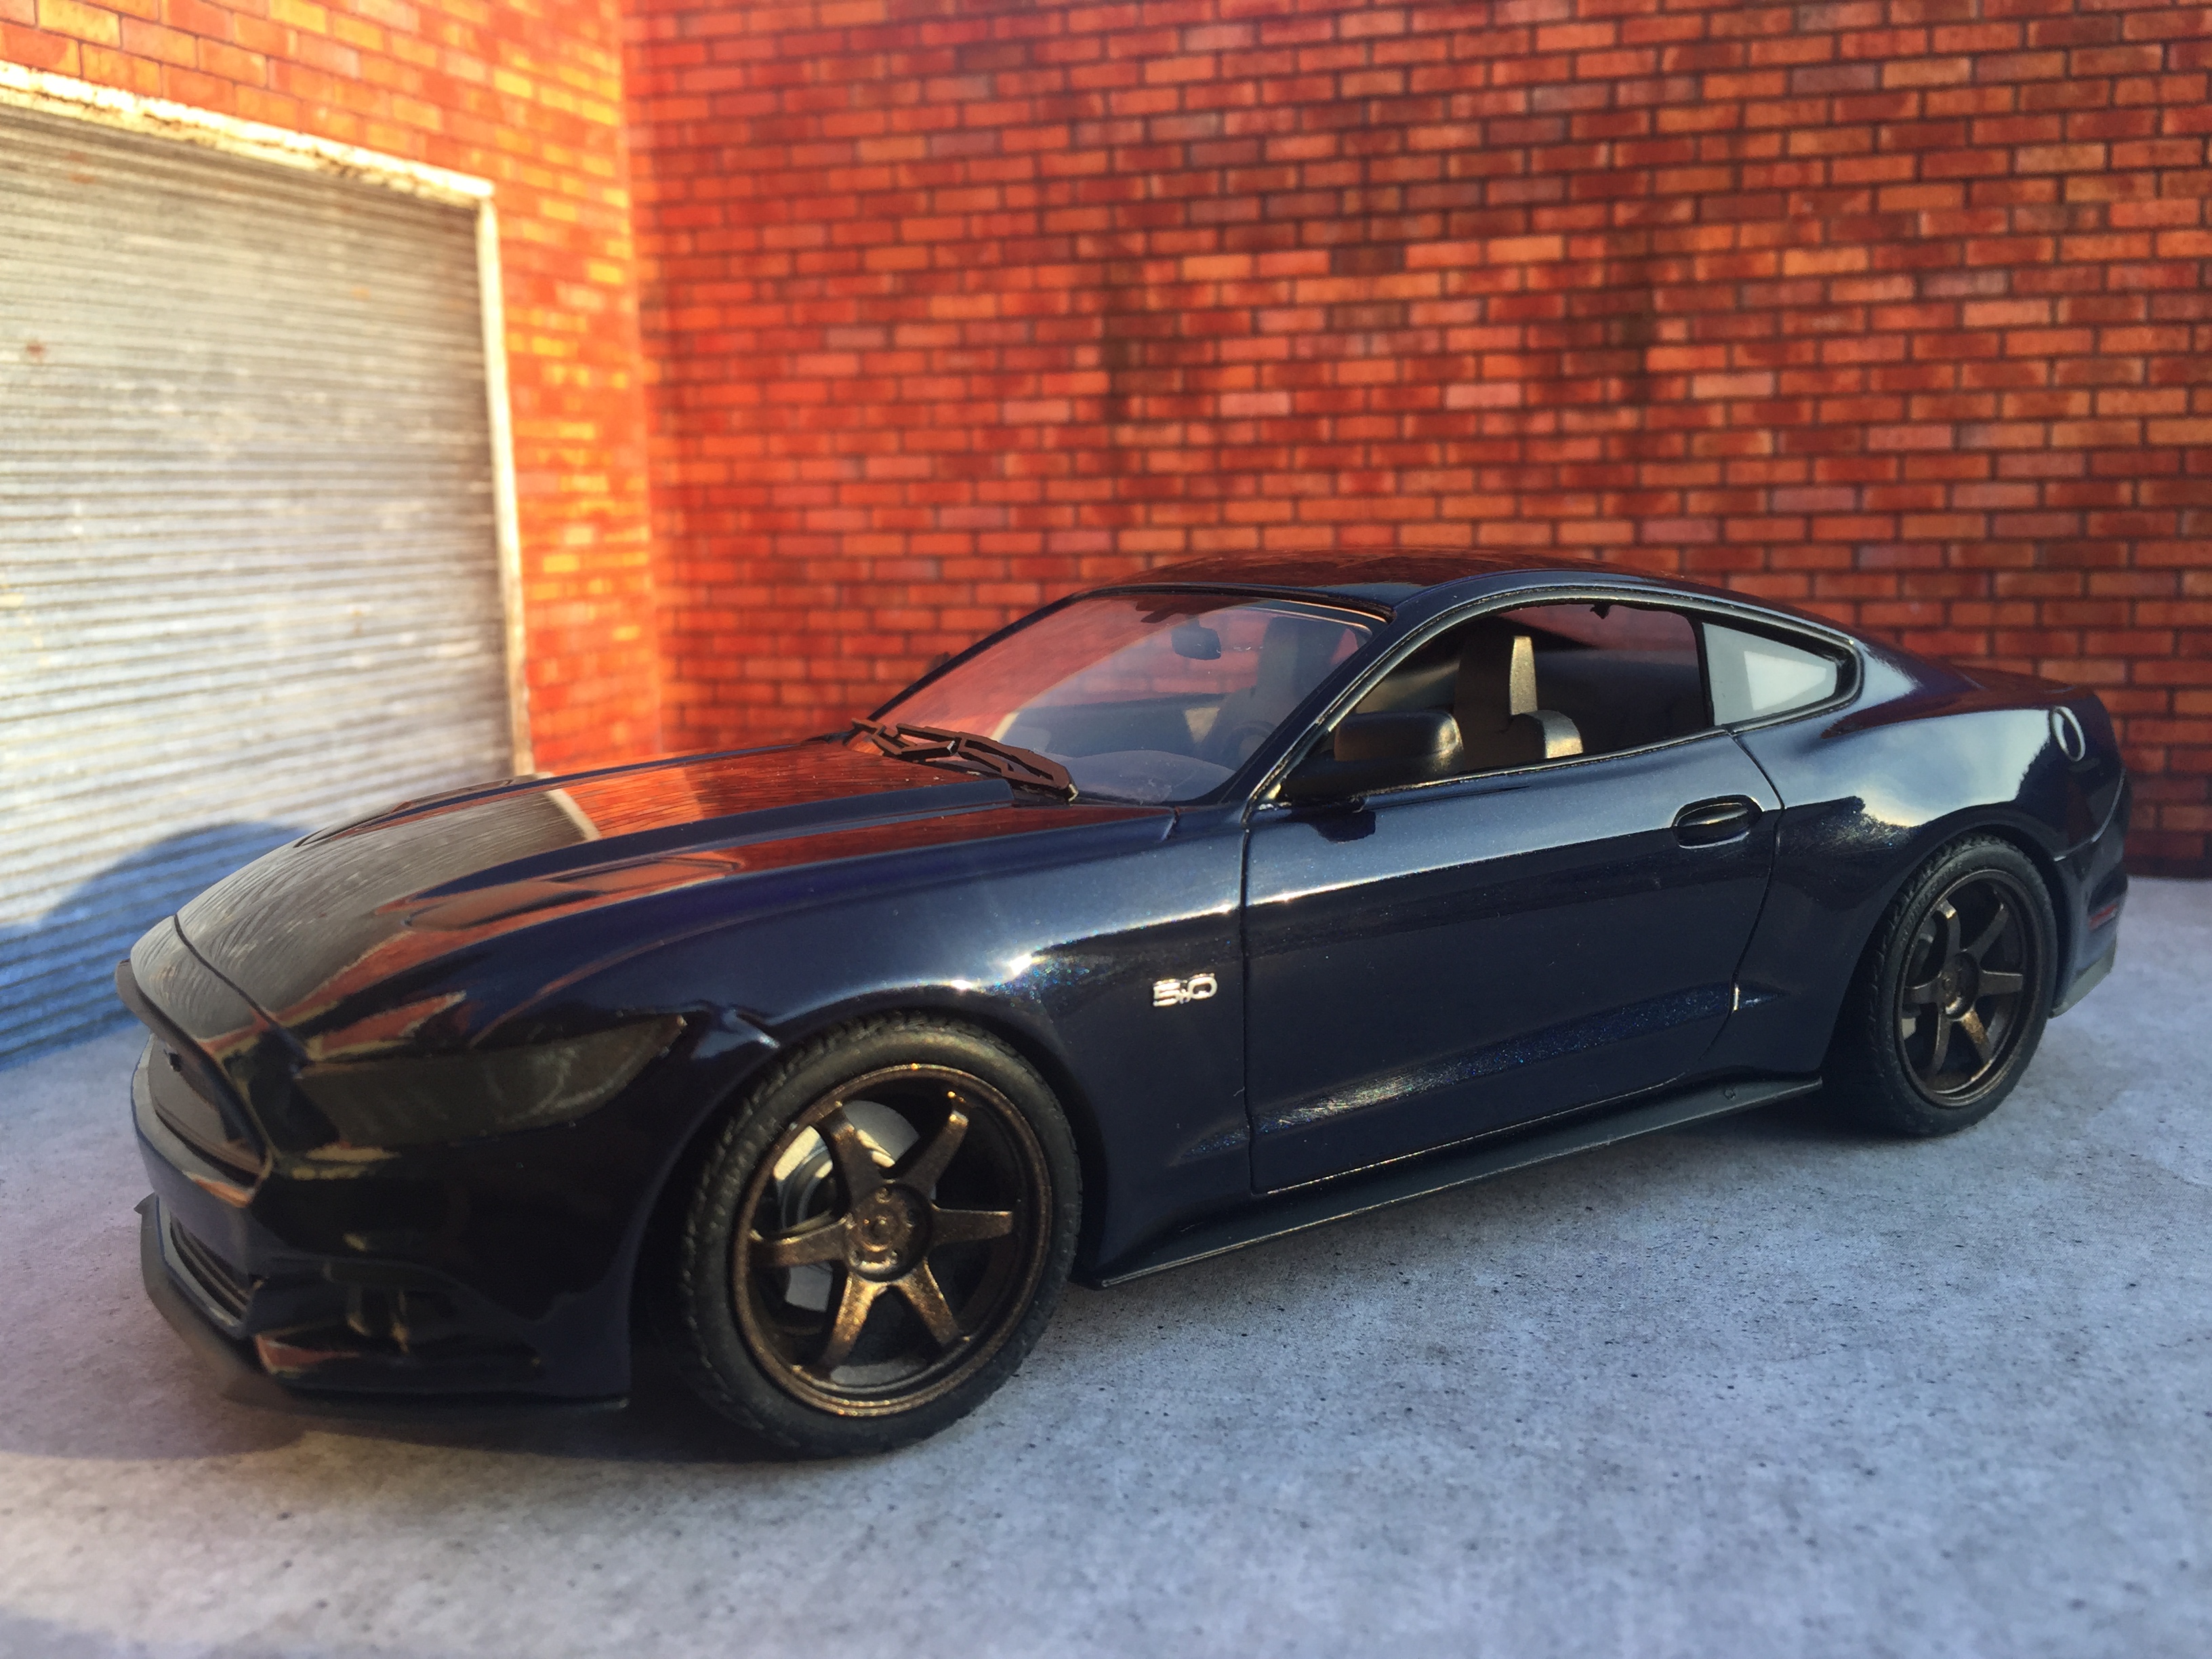
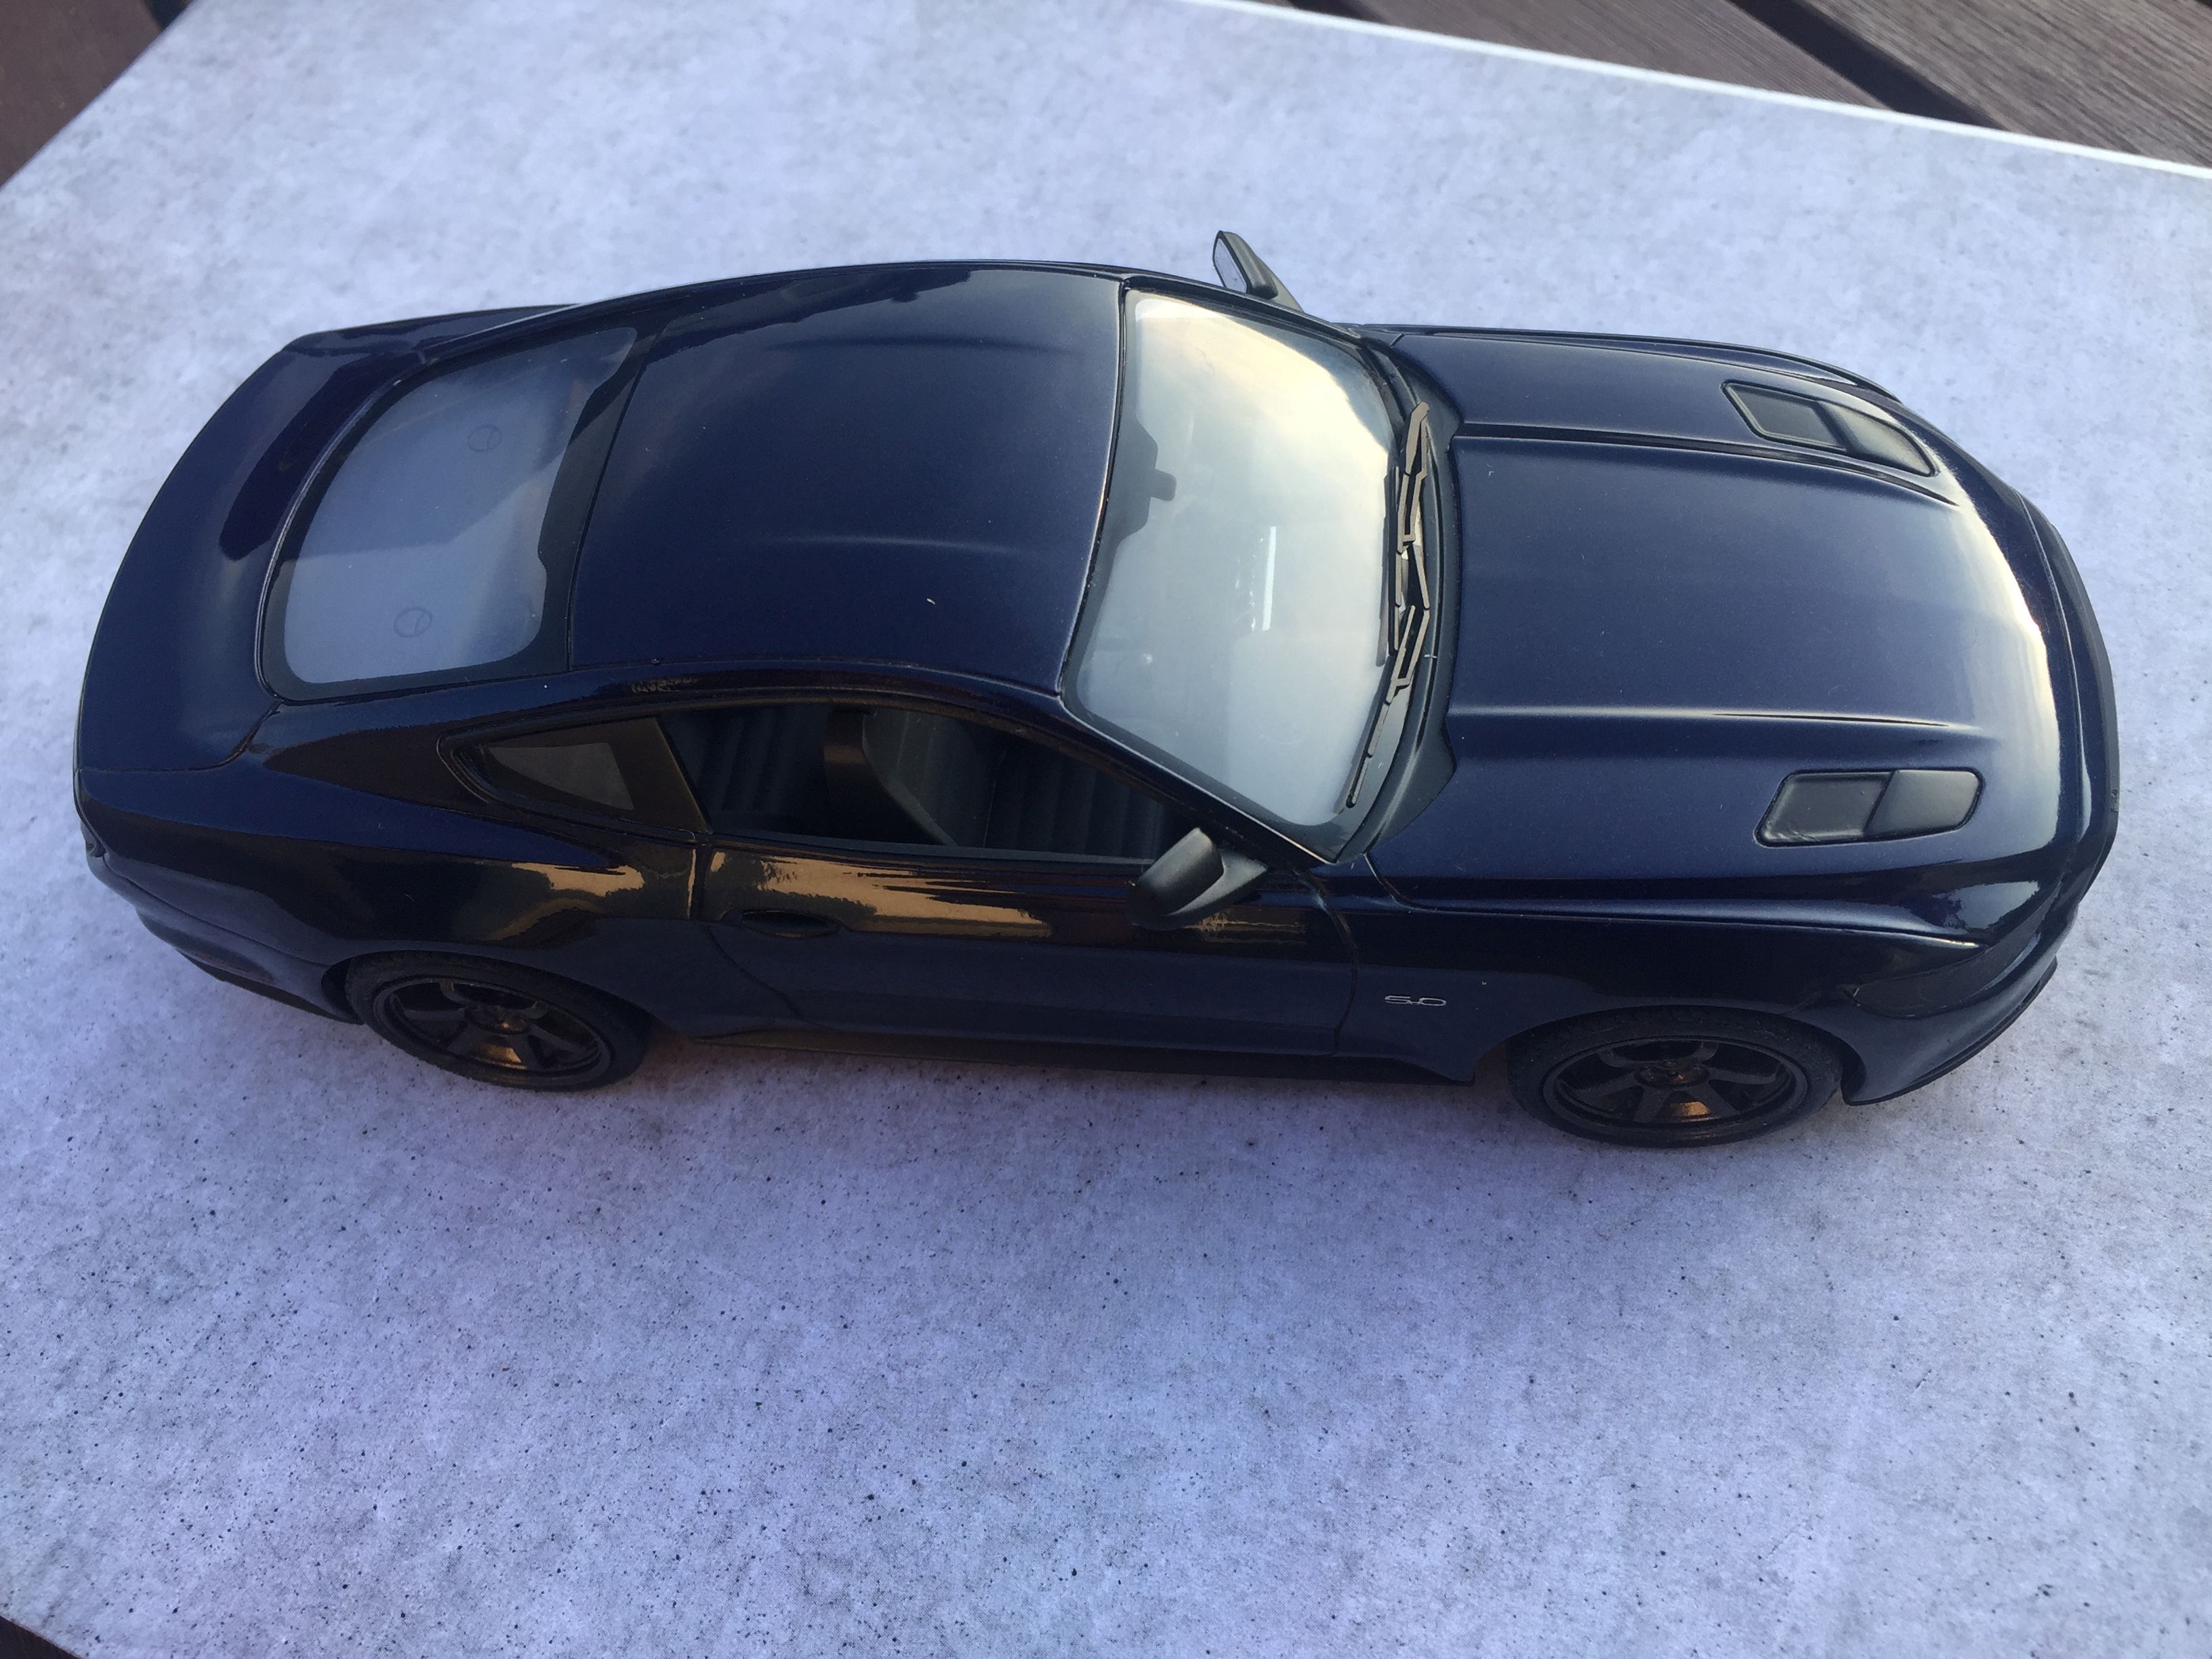
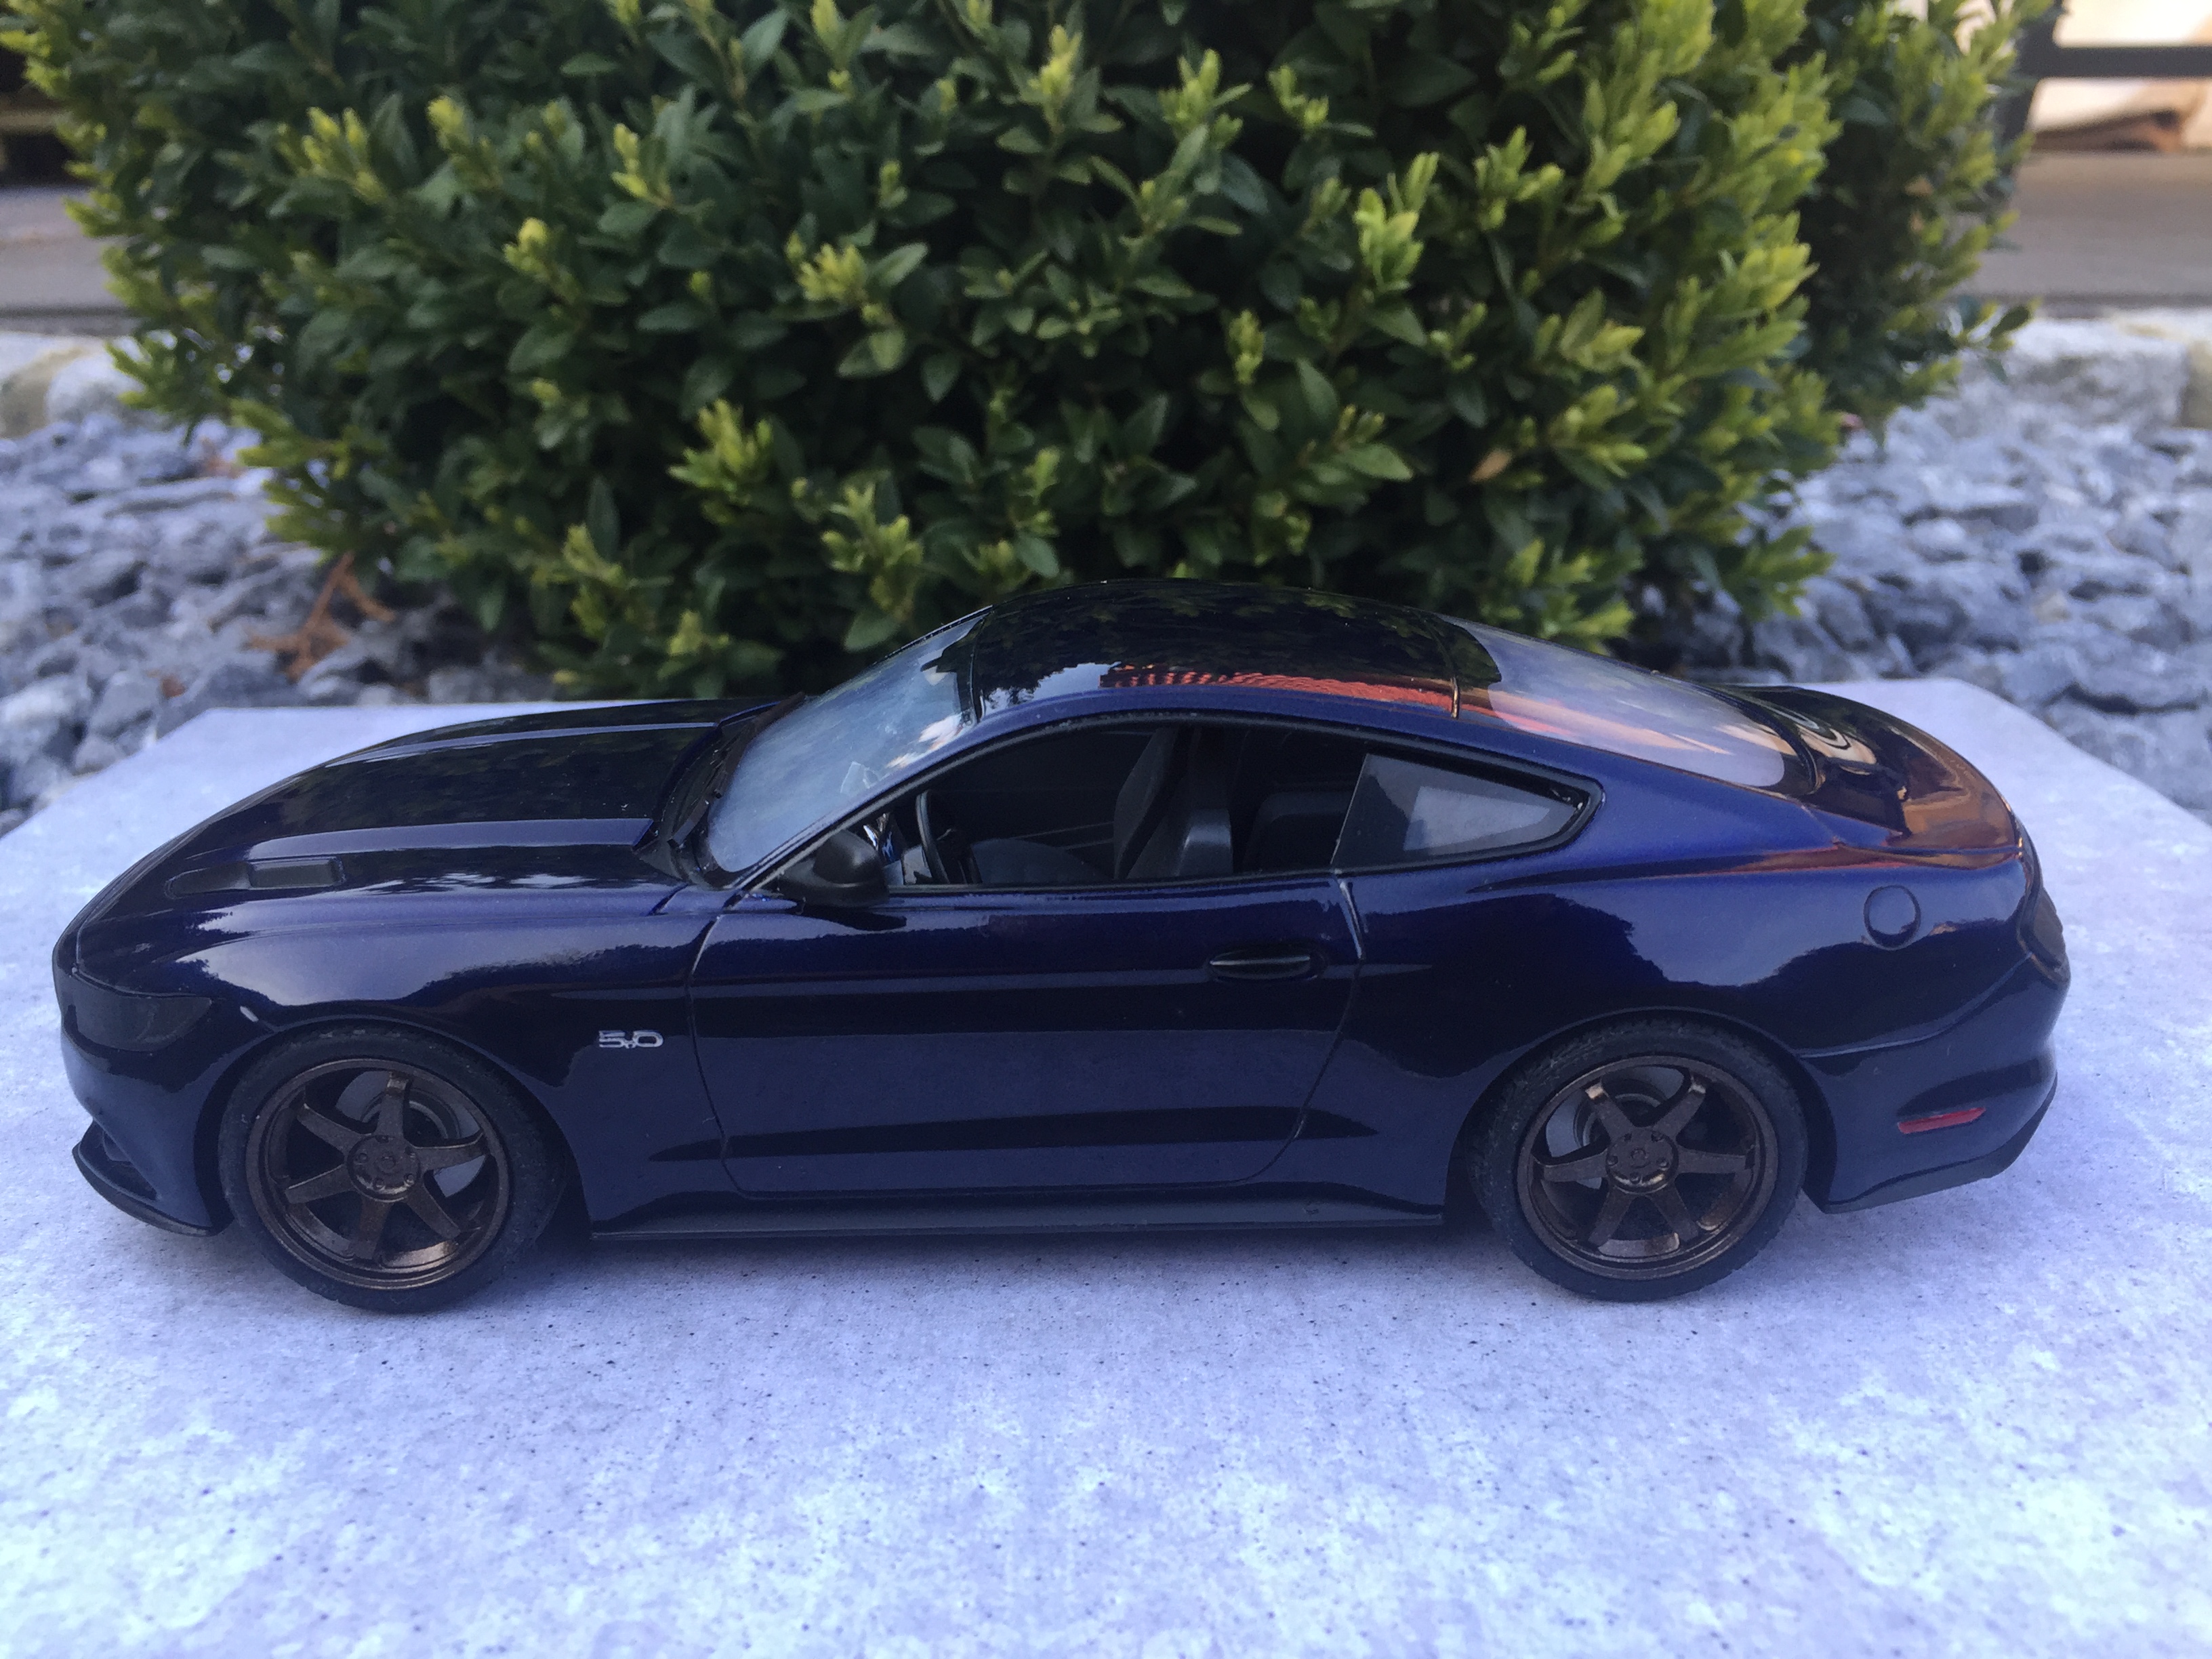
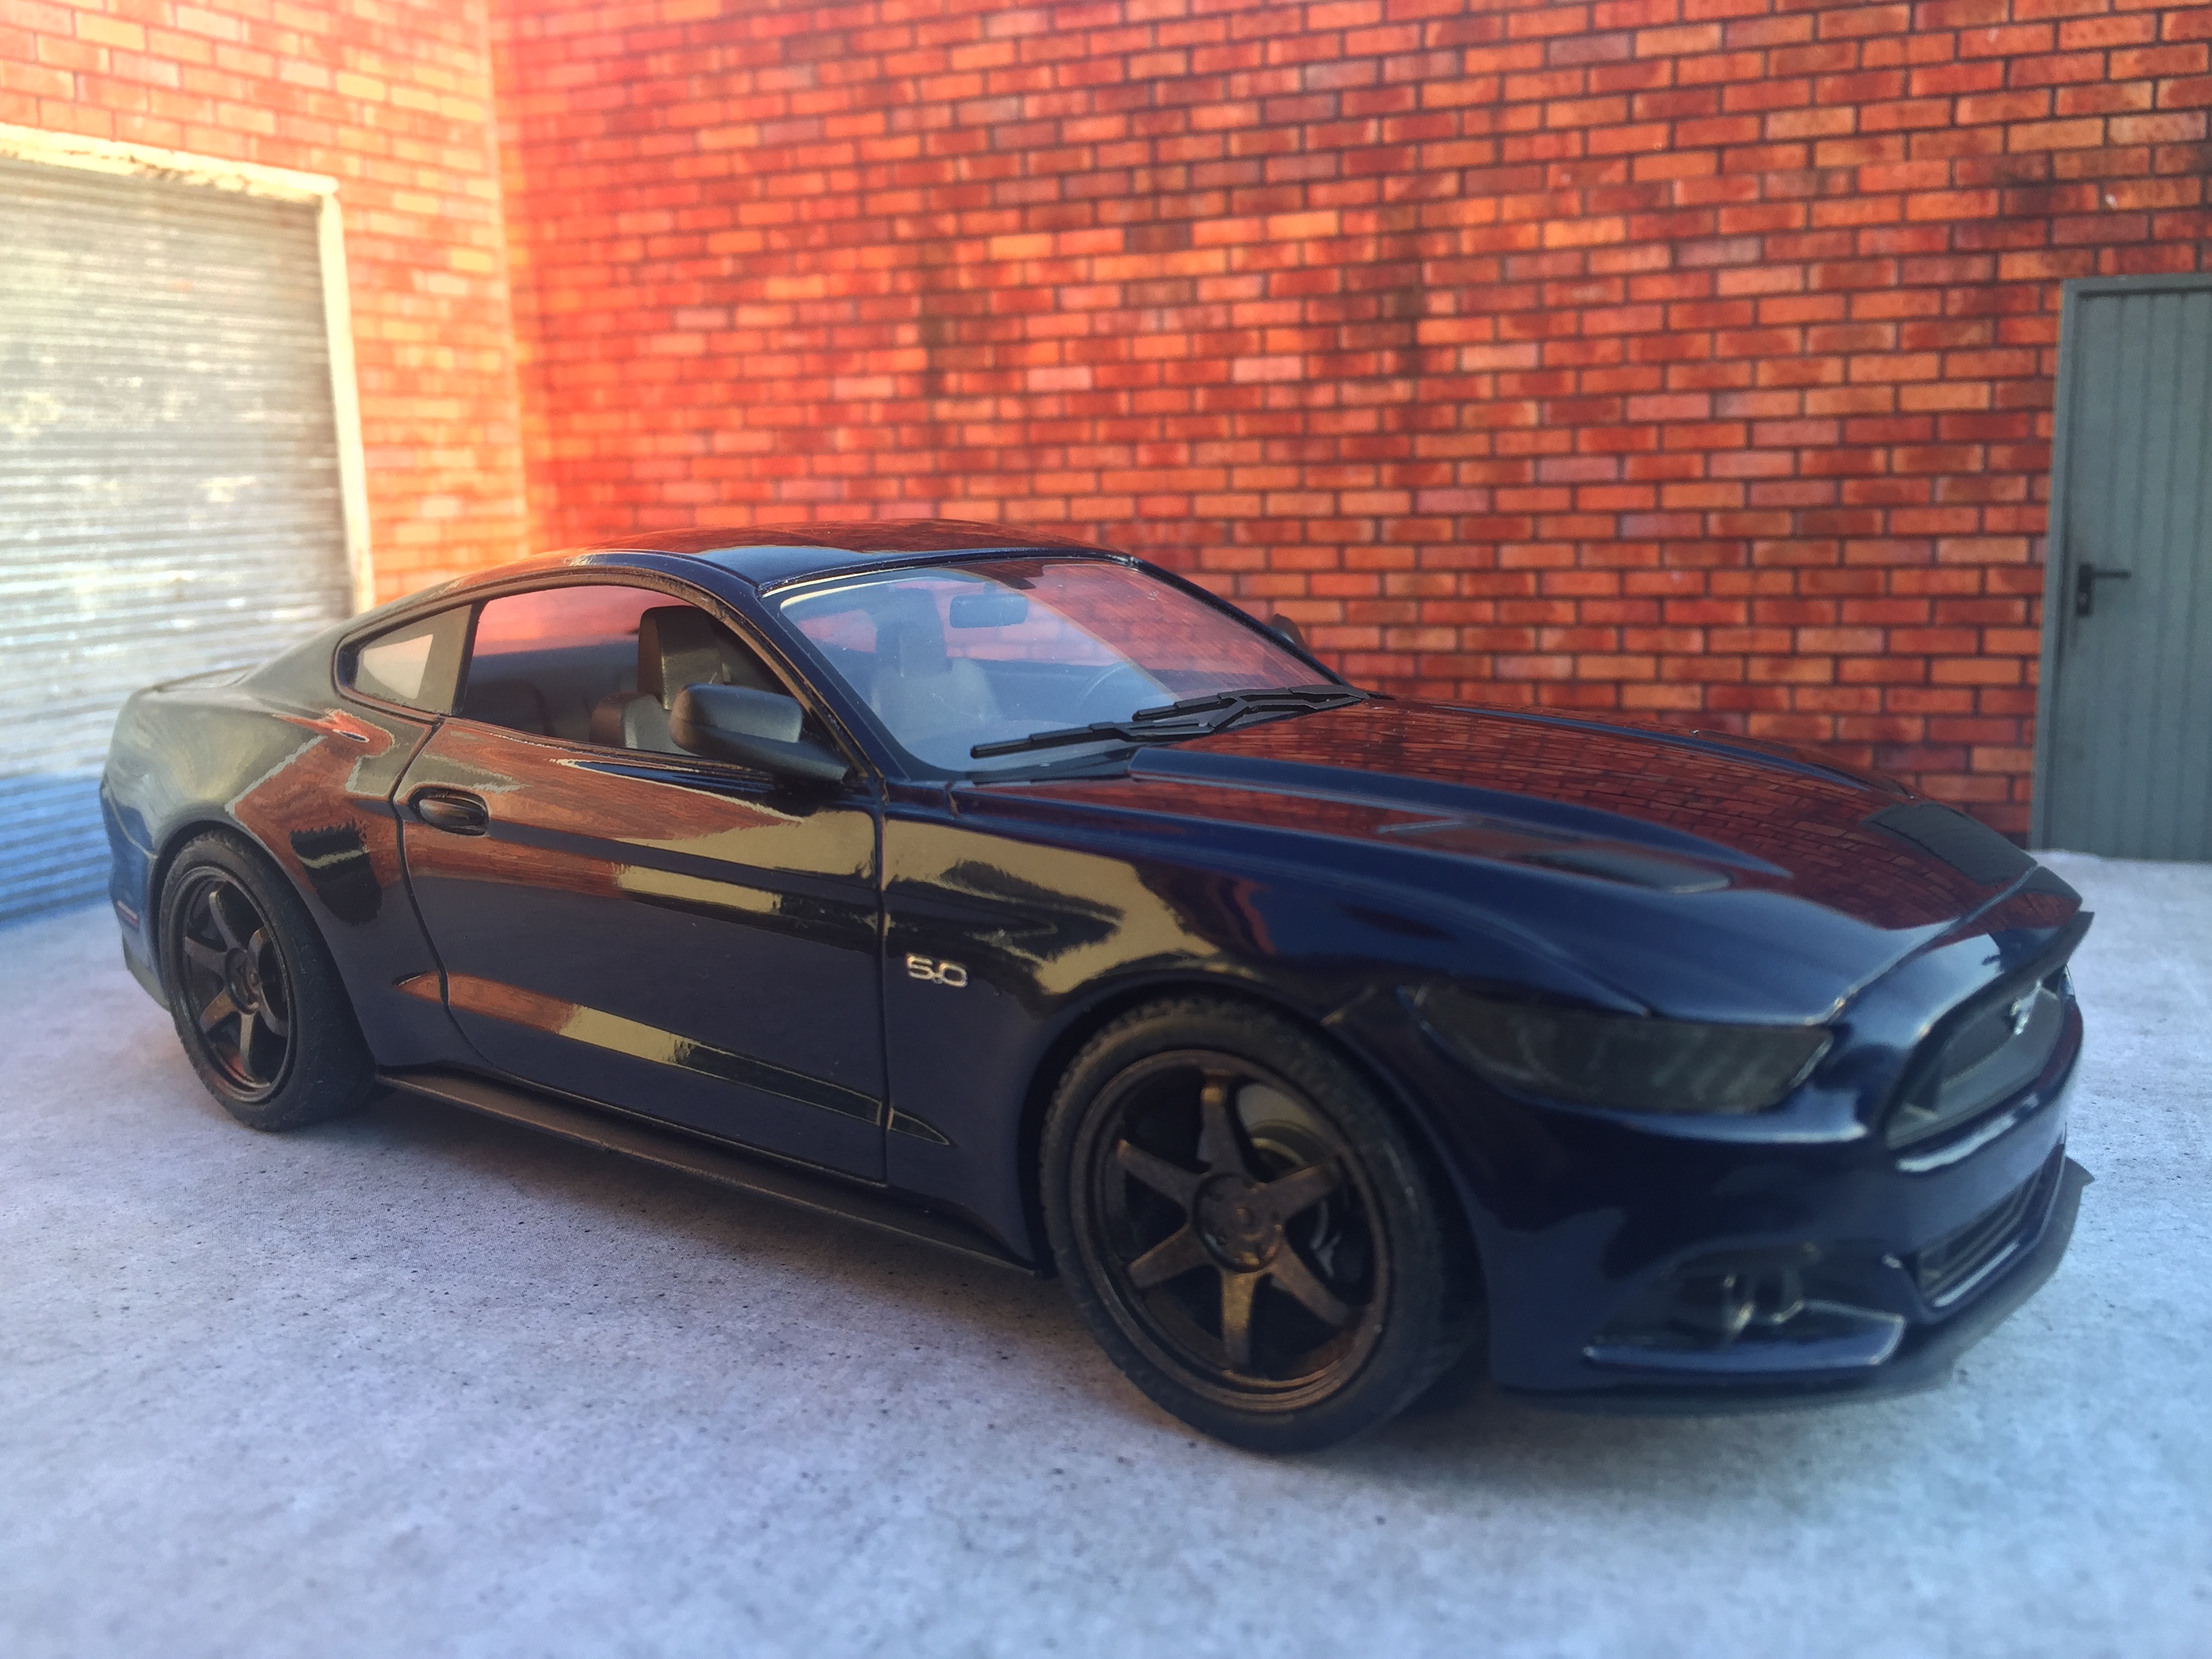
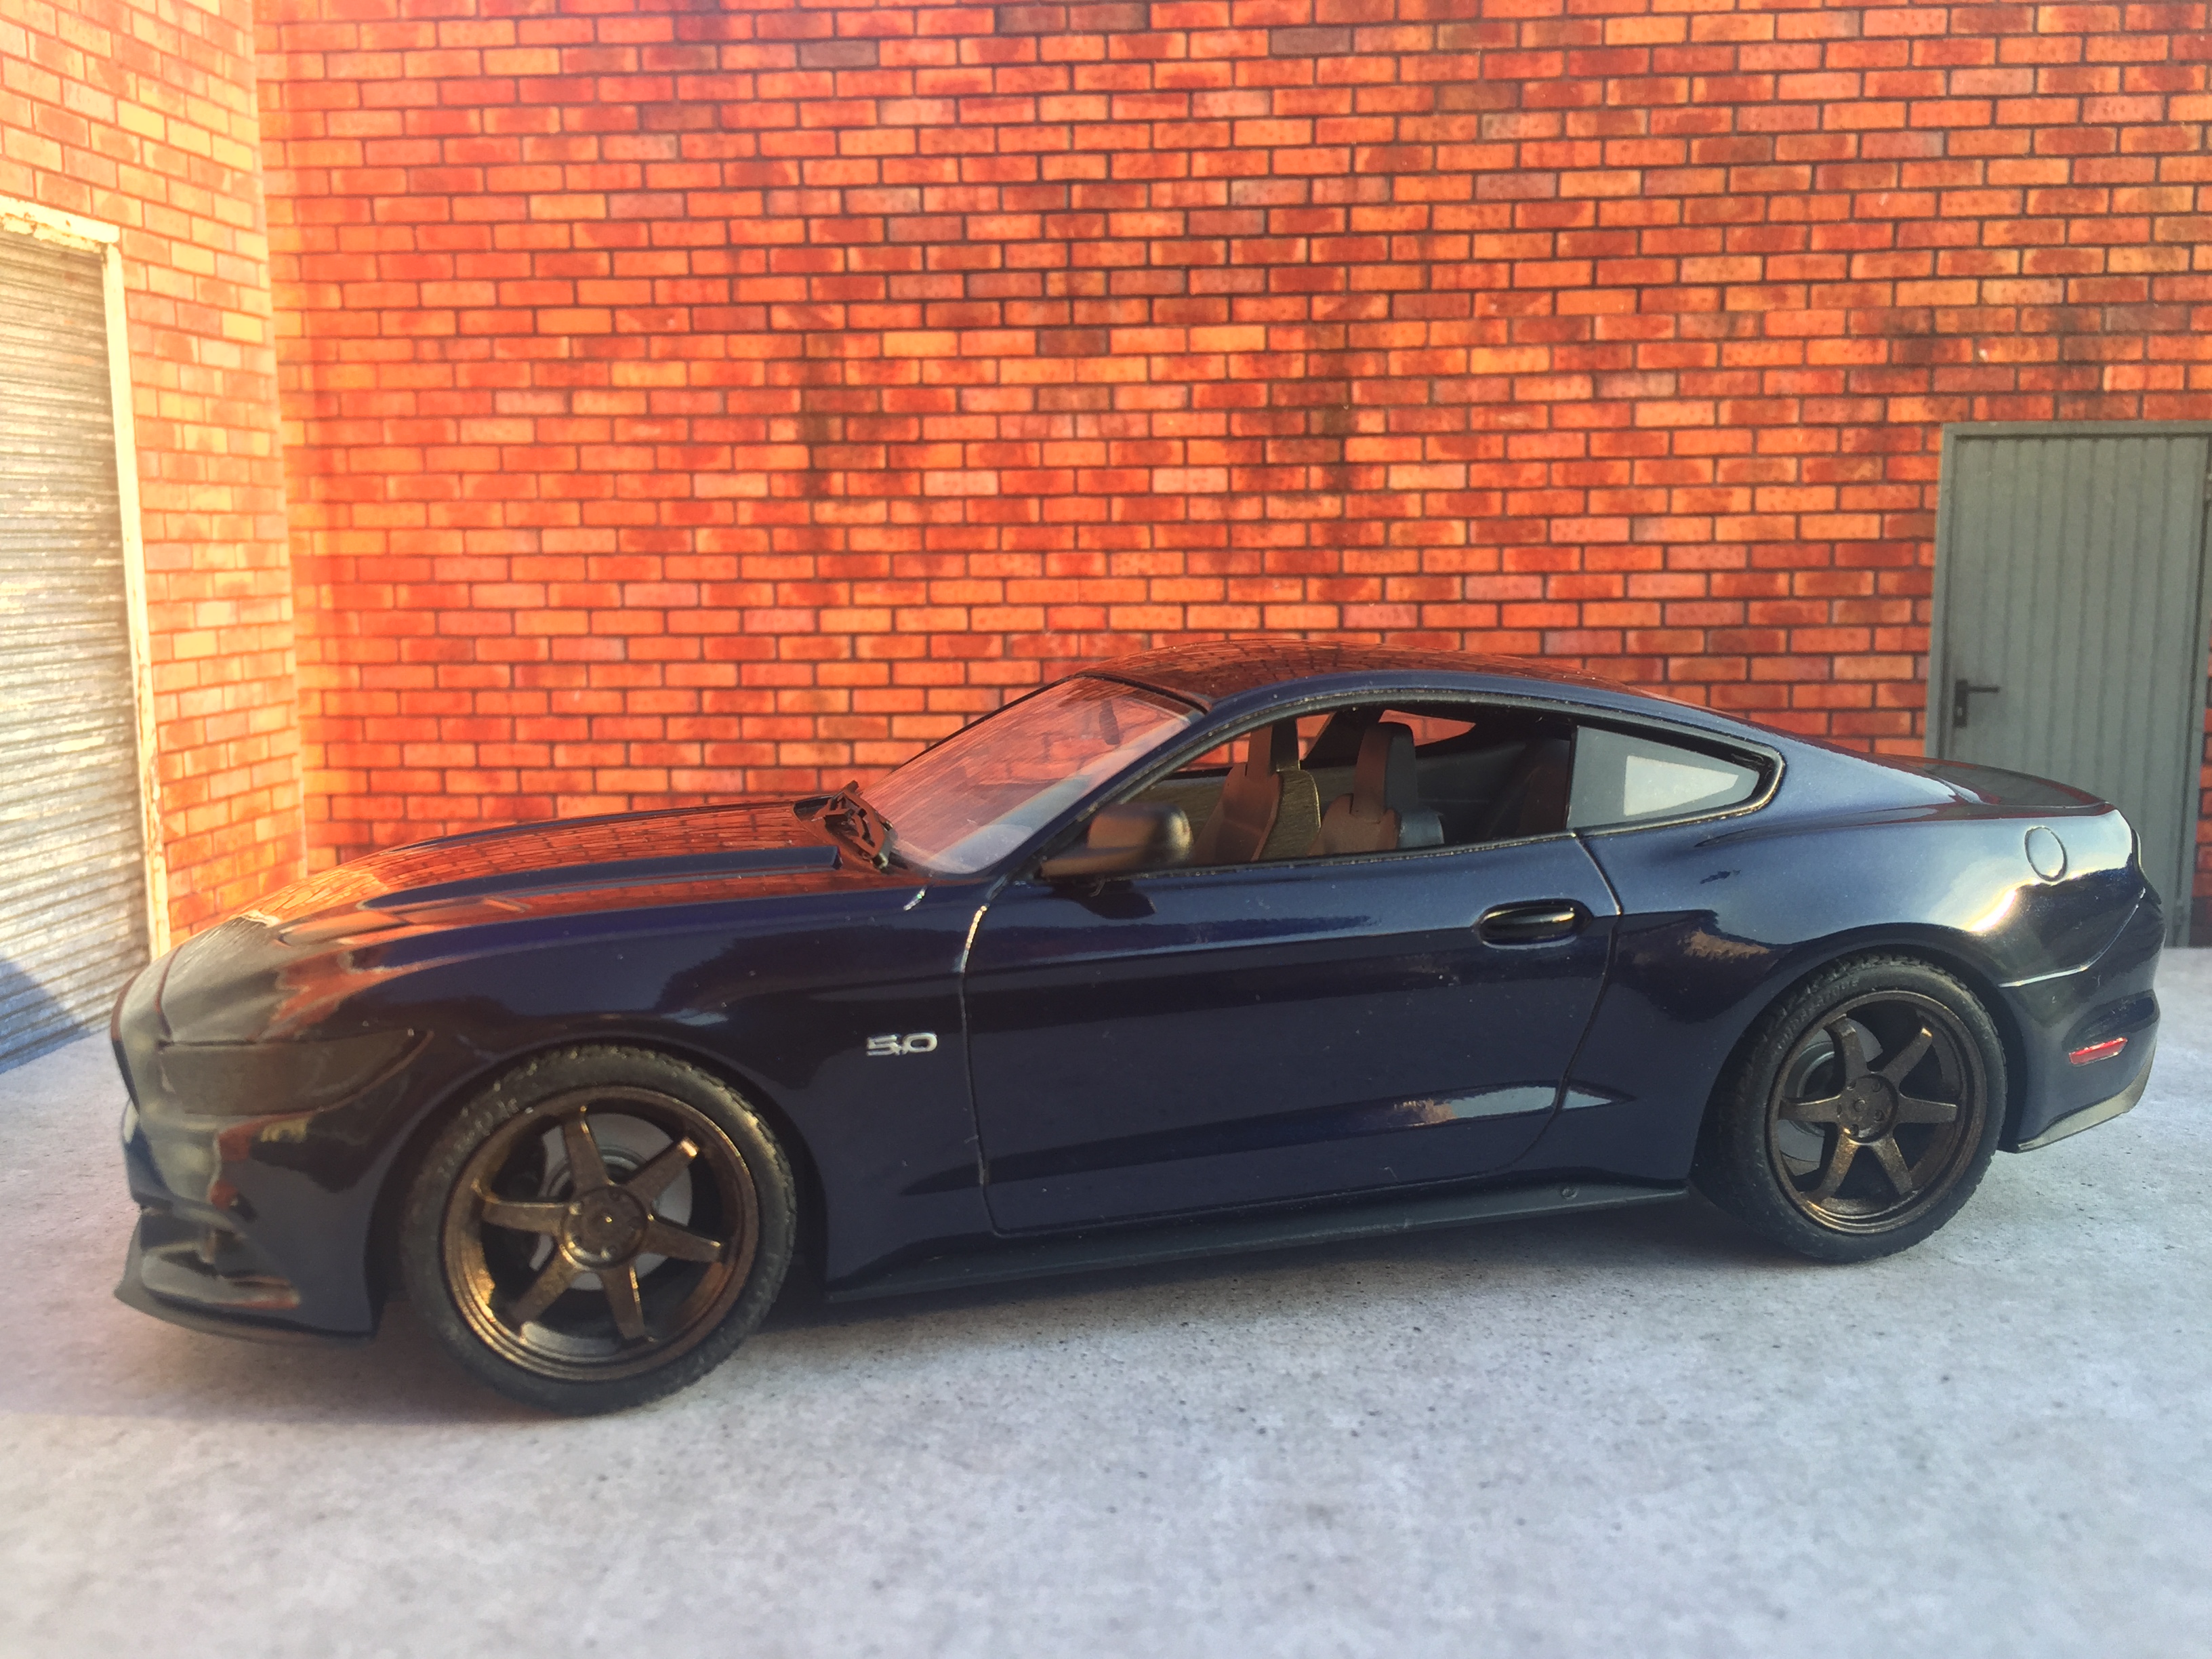
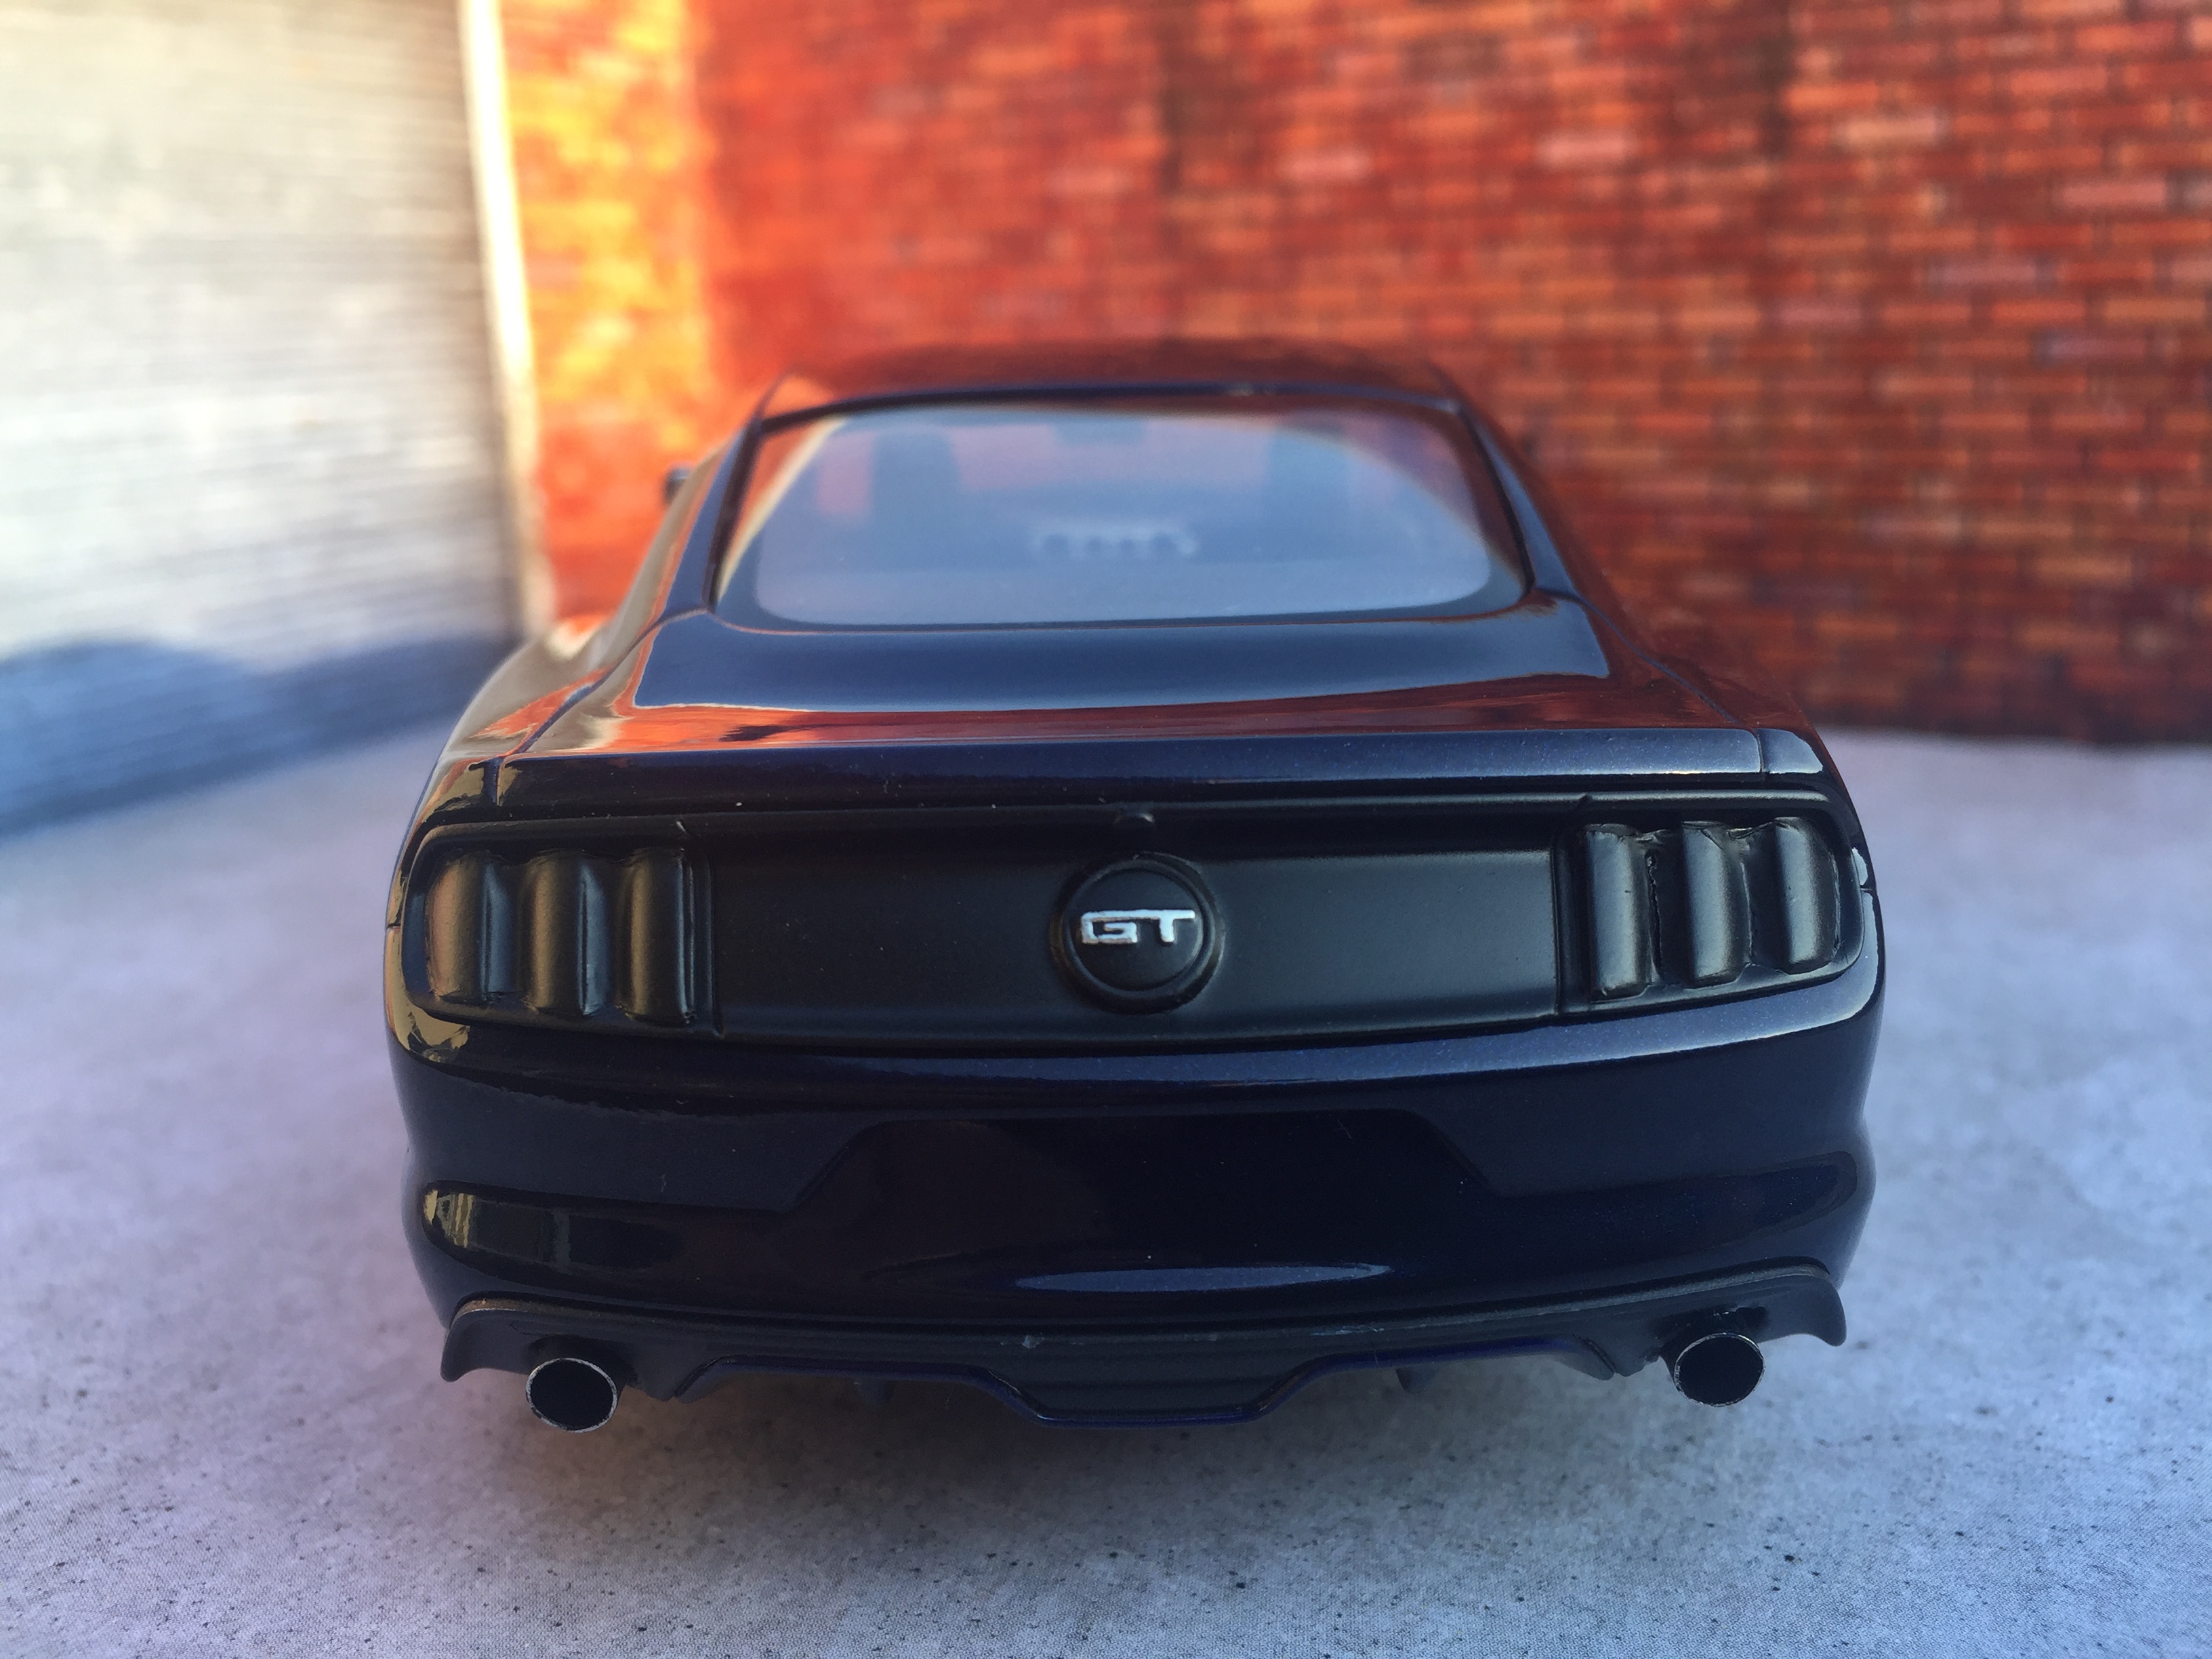
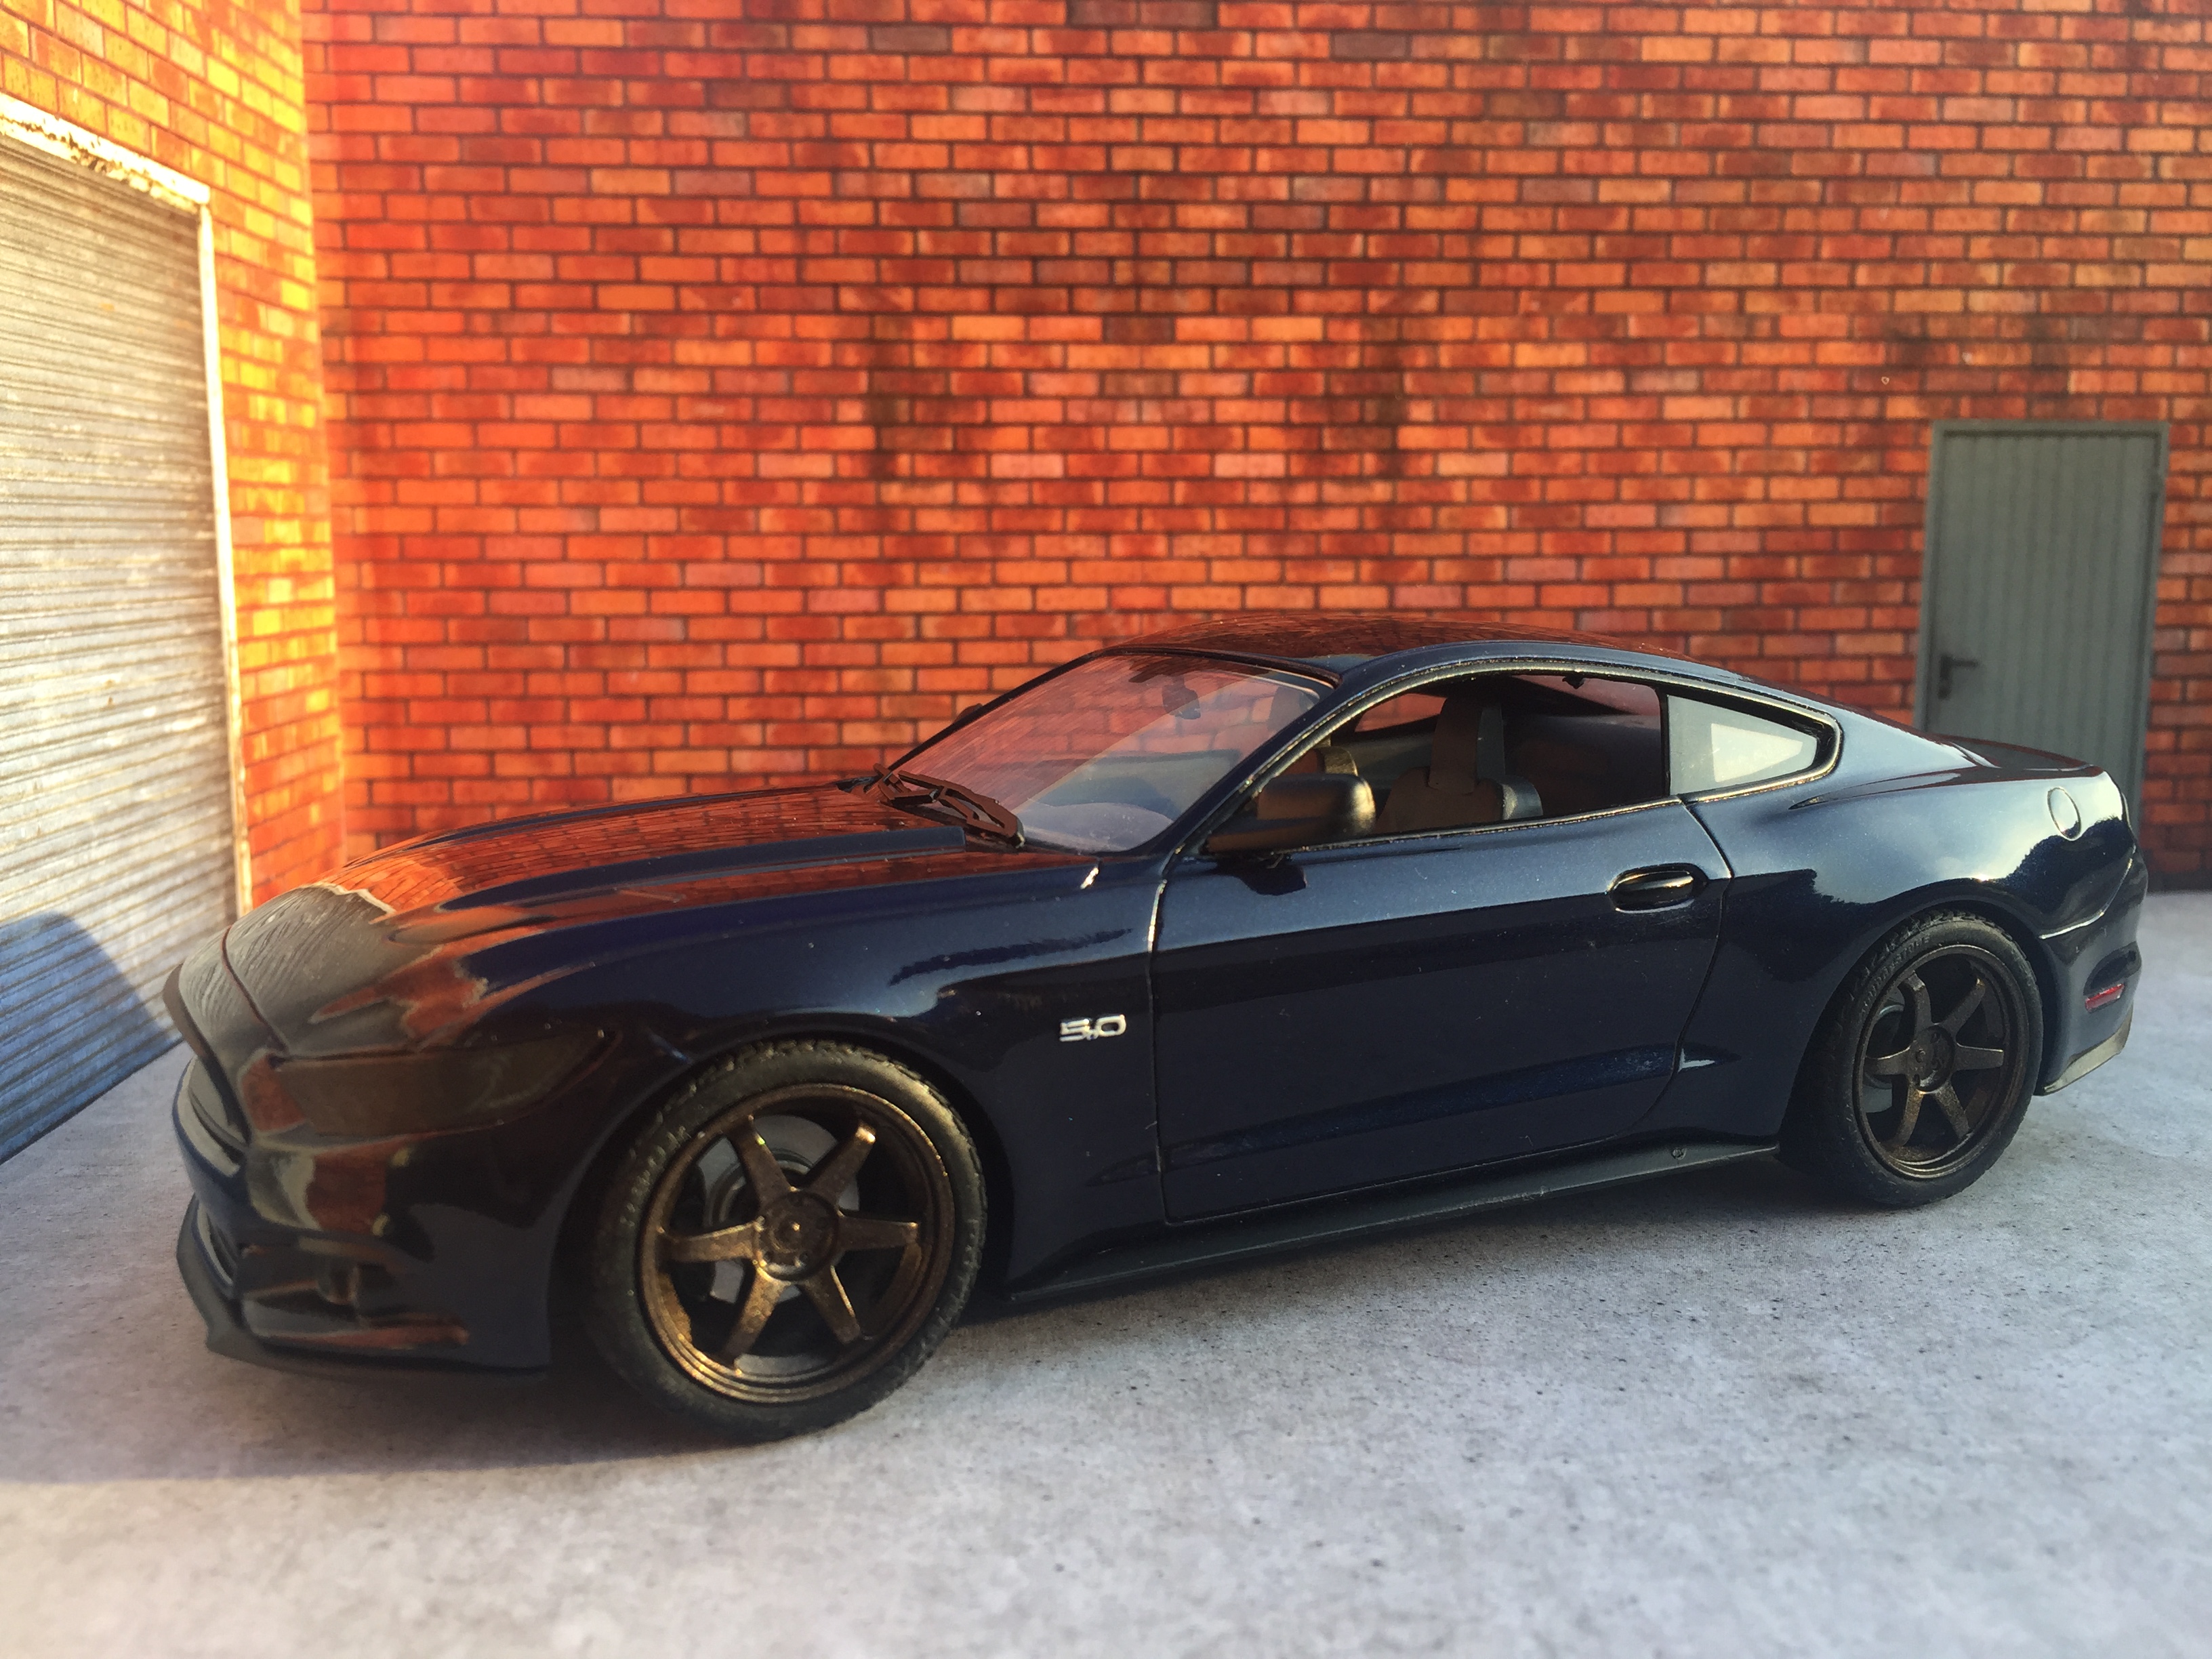
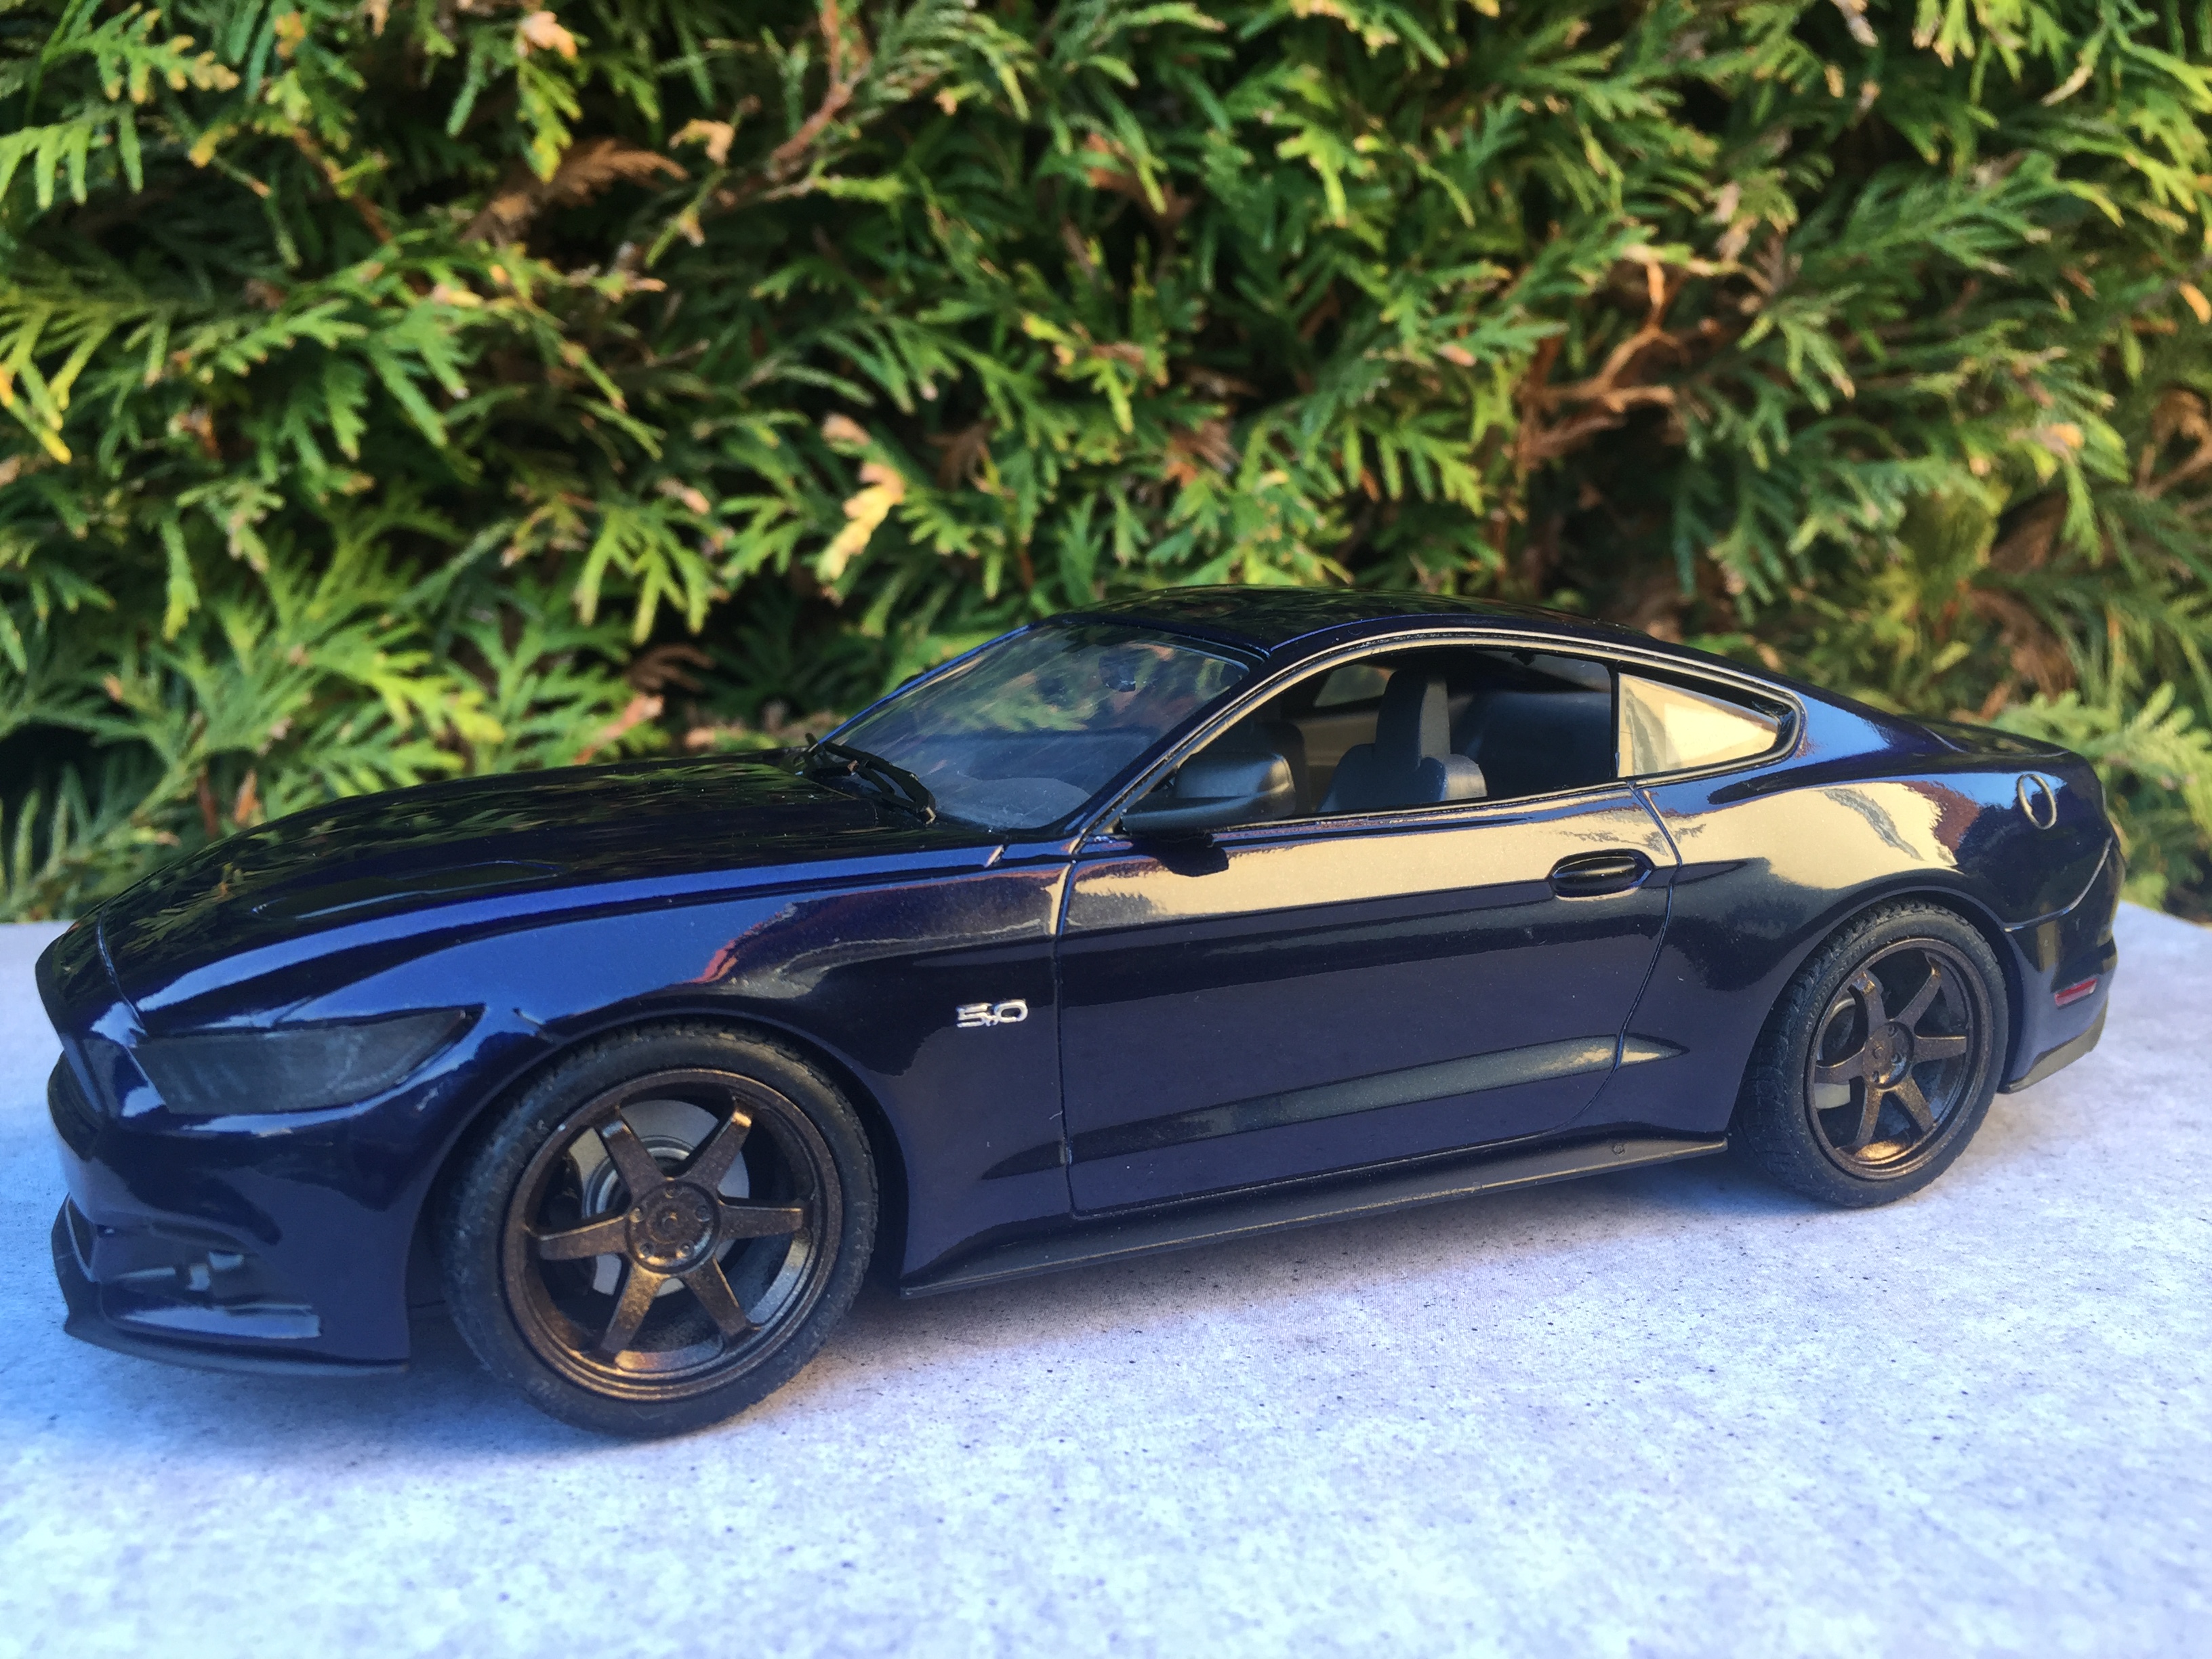
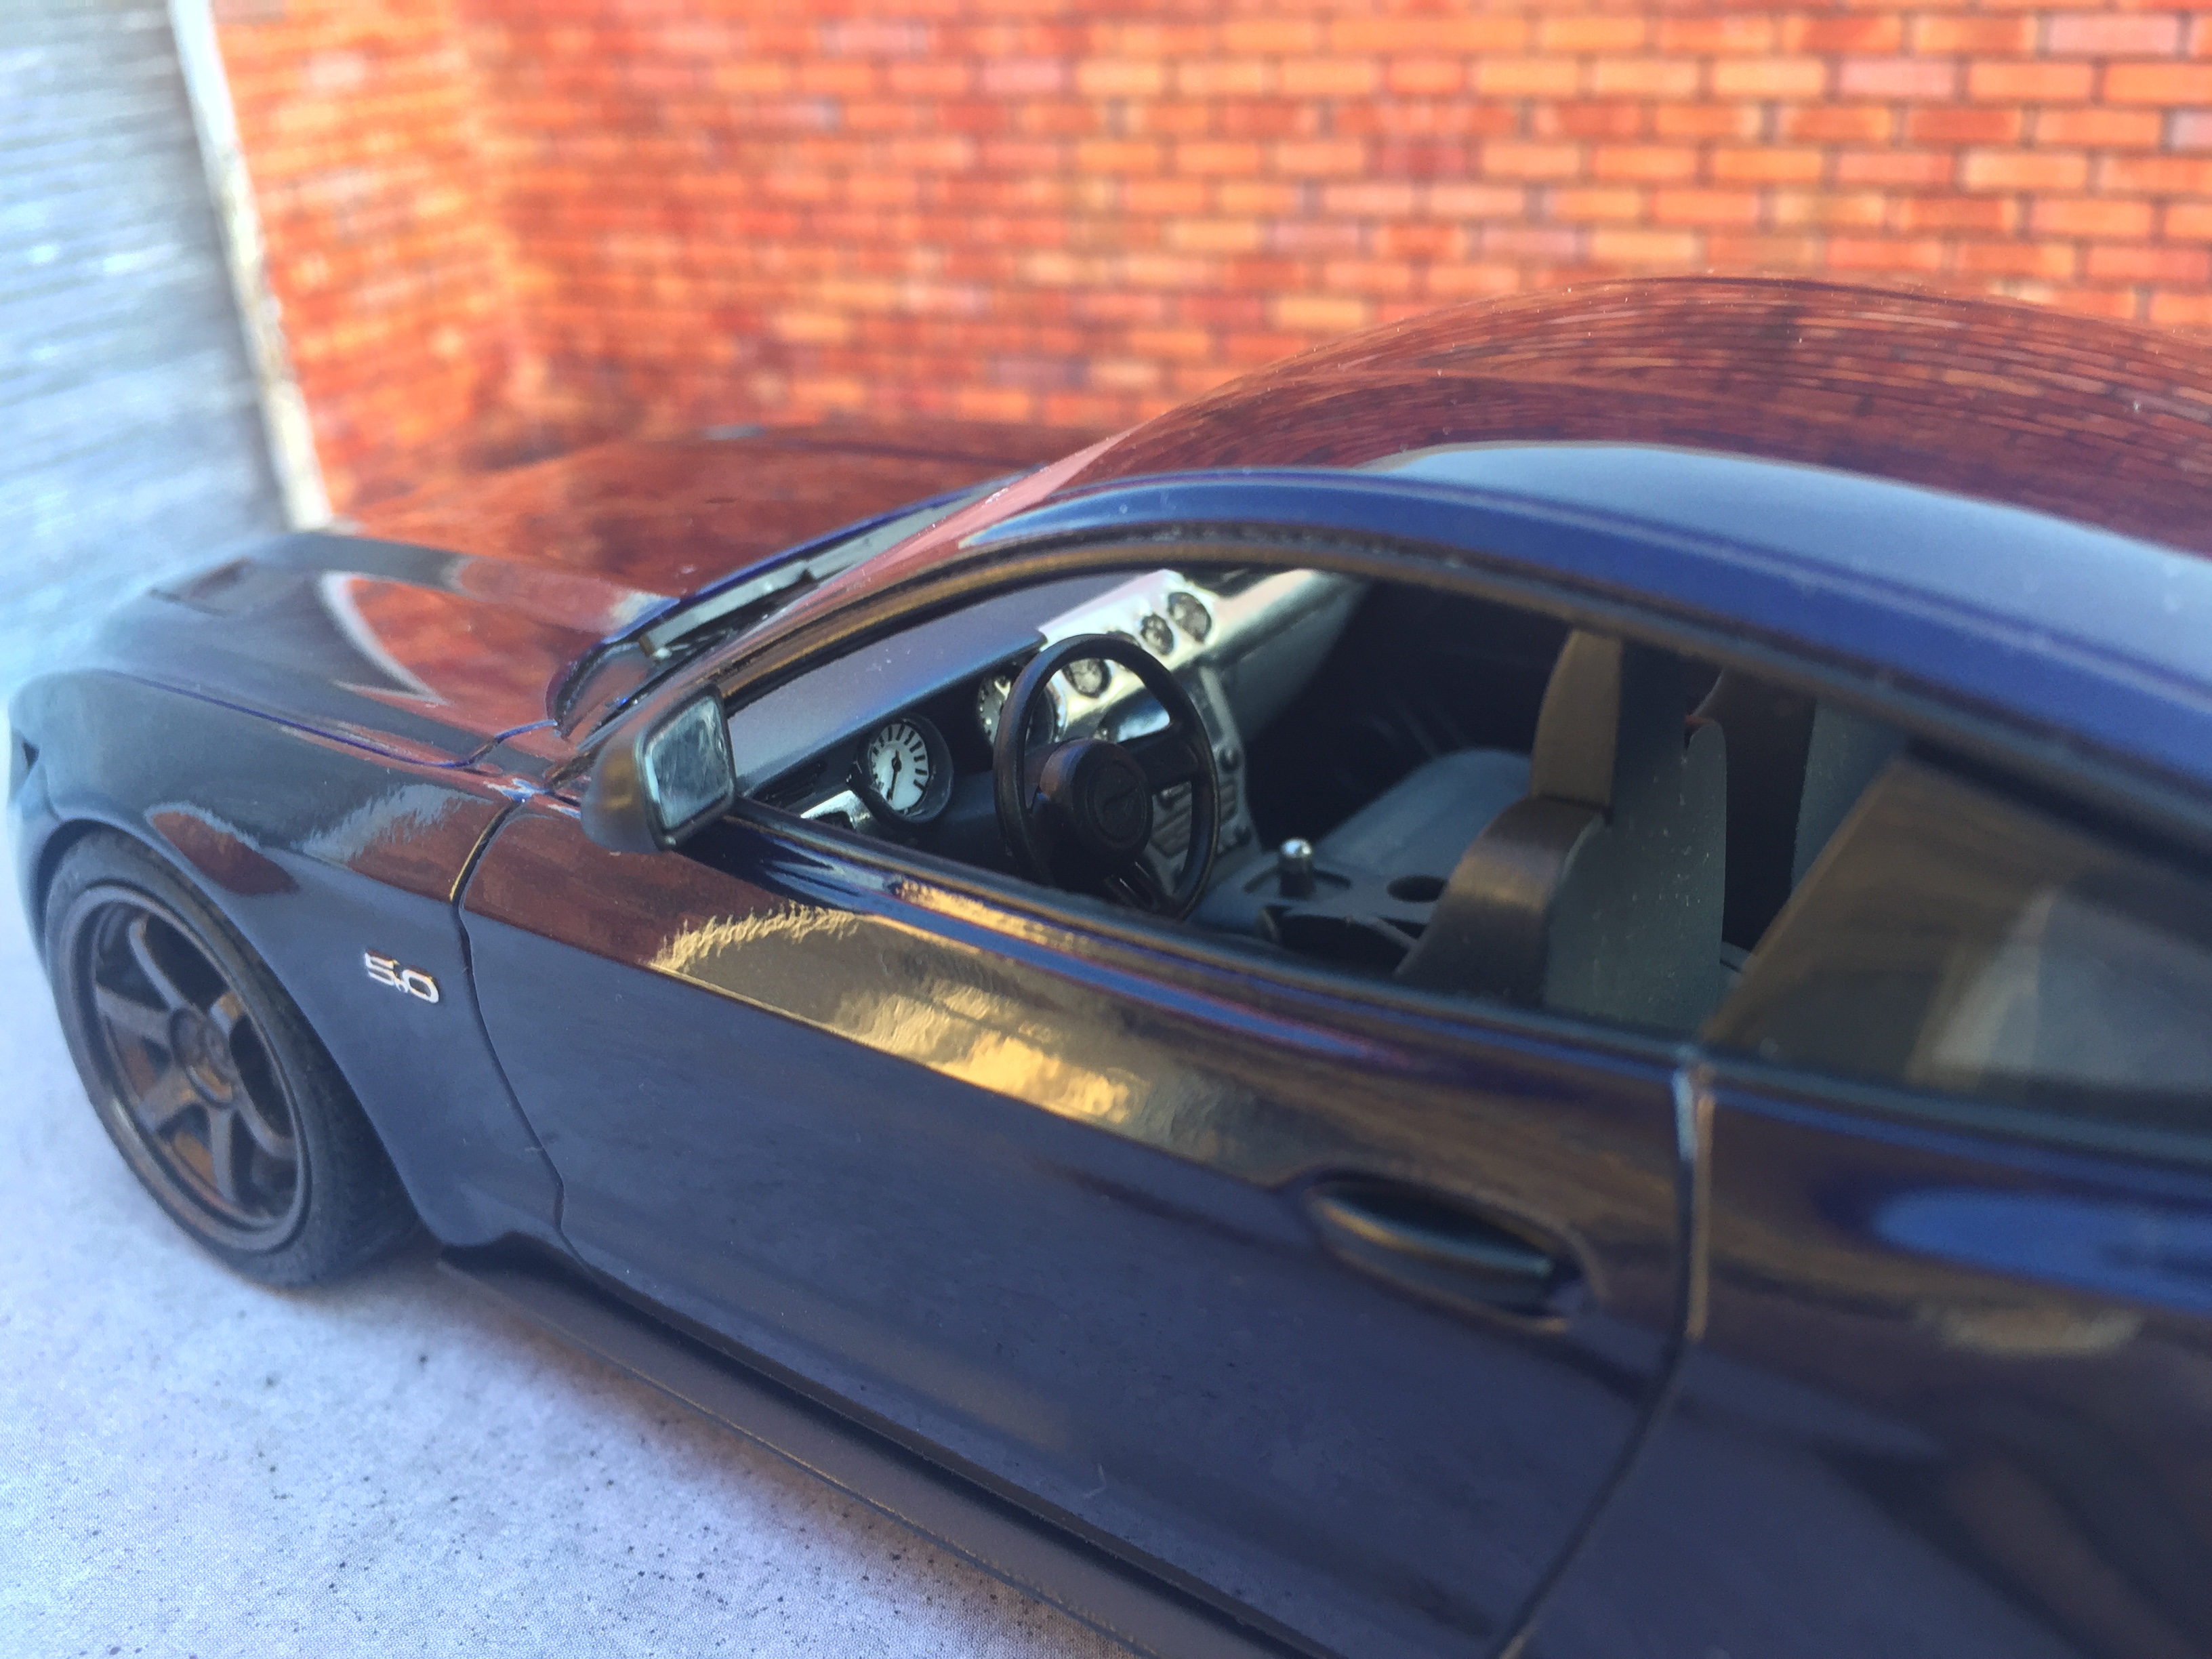
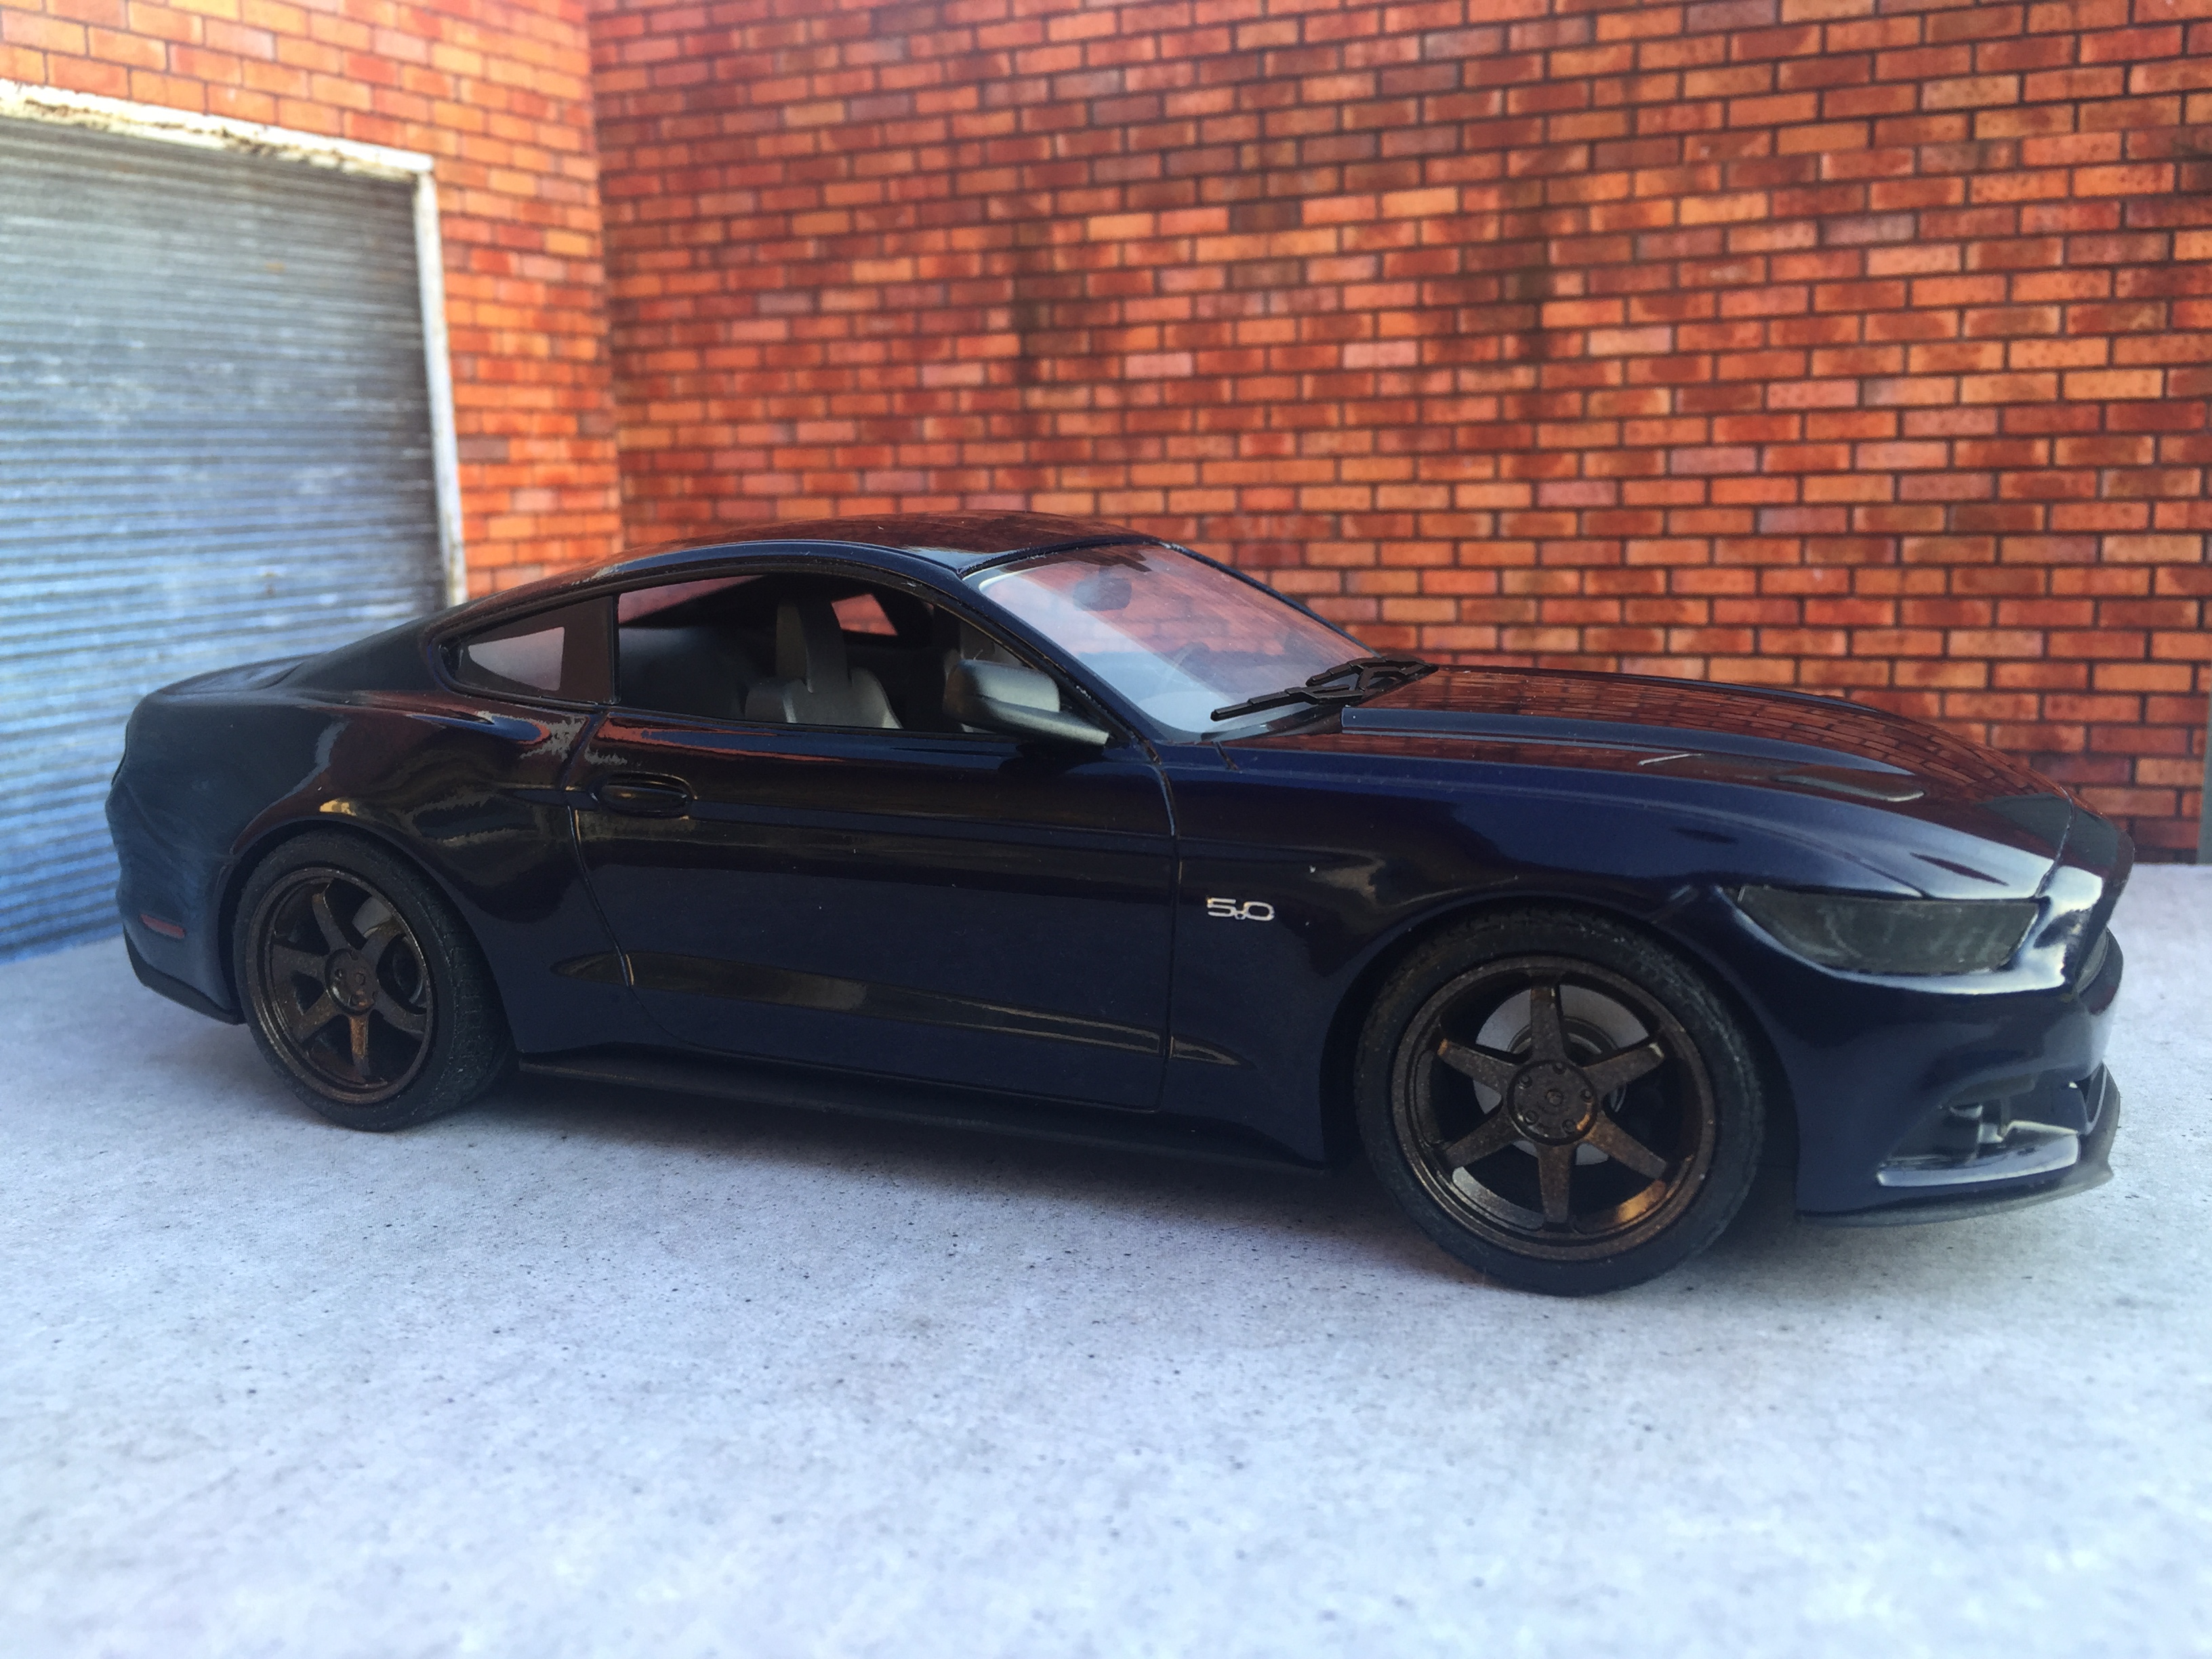
Hi folks, I finished this kit recently. As we all know, unfortunately there is only a Revell snap-kit for this 6th generation of the Pony. That kit isn't bad at all as a snapper and it sure has a nice body shape, but of course, it lacks a lot of details. That's why I put some work into it as follows: - lowered the body - added 19" rims + tyres - added brake discs from the spare parts bin - added windscreen wipers from the spare parts bin - added interior mirror from the spare parts bin - added exterior mirrors from the Shelby GT 500 kit - drilled the exhaust area open and added metal ferrules - added selfmade headlight printouts in tinted look in order to replace the horrible kit's parts I used Tamiya TS-101 primer to cover the kit's red plastic. I then painted the body using Tamiya dark metaillic Blue TS-53, cleared with Testors Wet Look. 'Nuff said, hope you like it: On the left hand side, you can see the "basic product", built by my son in 15 minutes. It took me 15 days to get my own done...
-
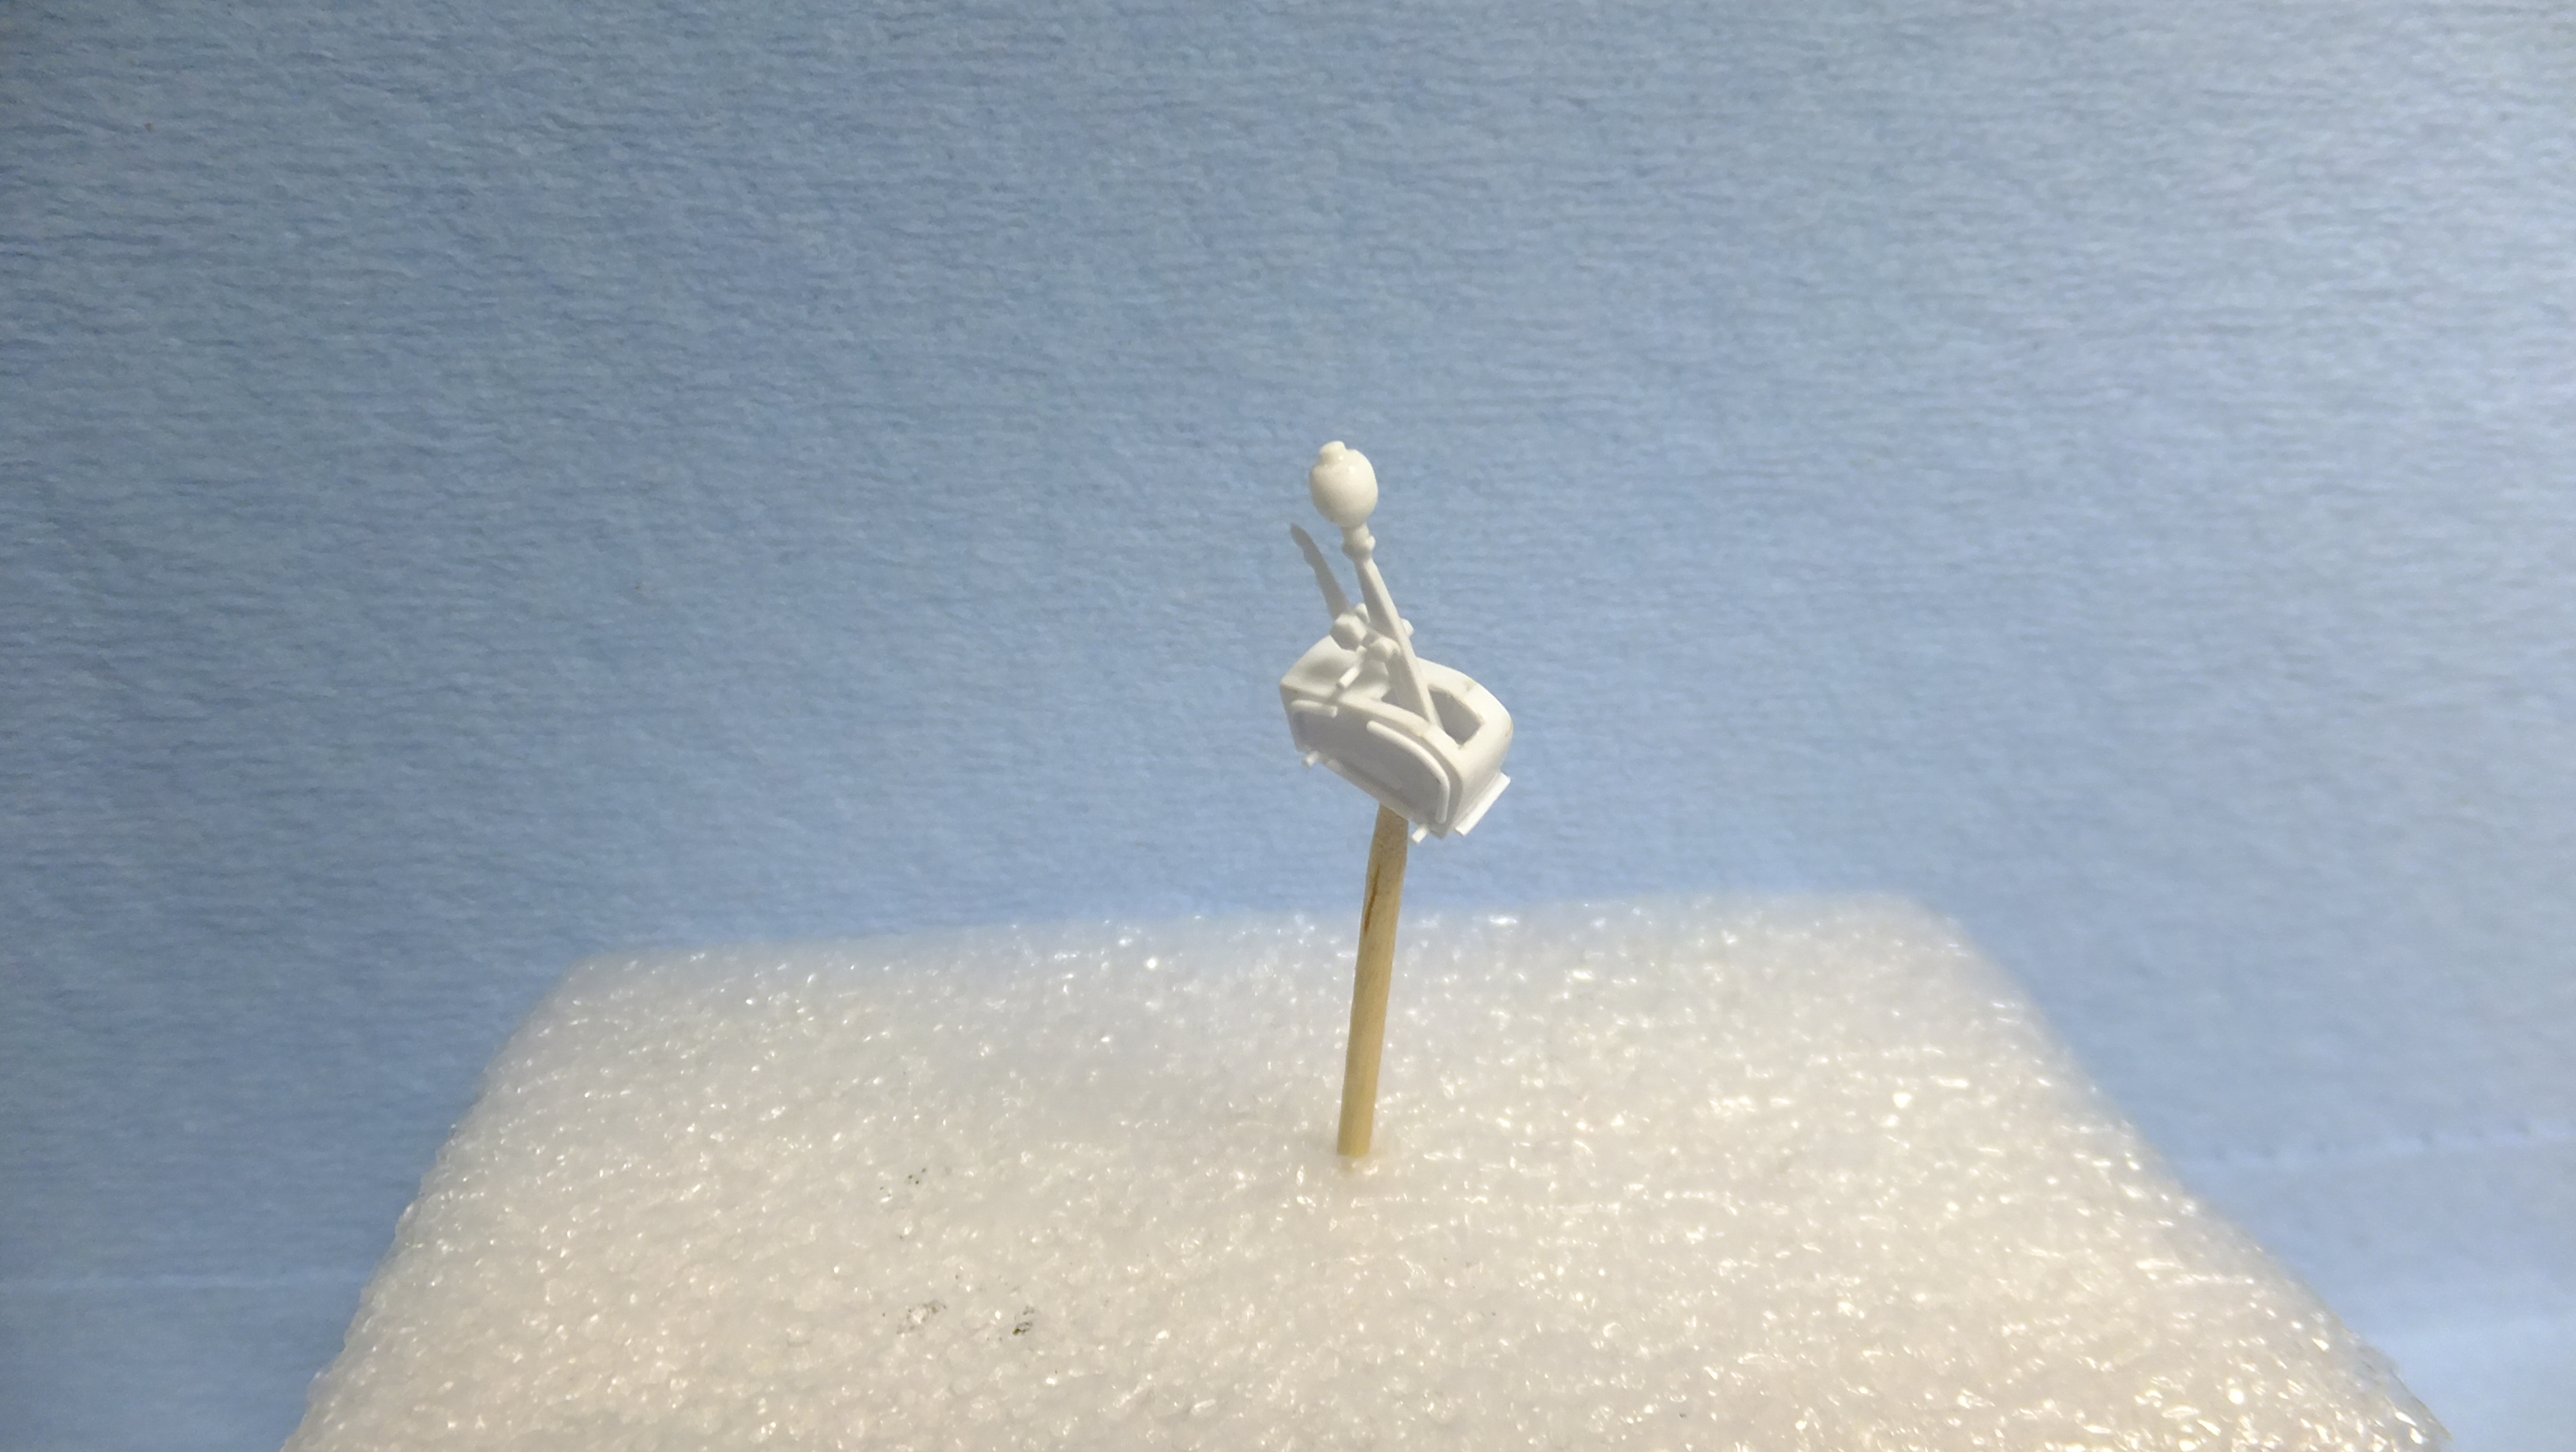
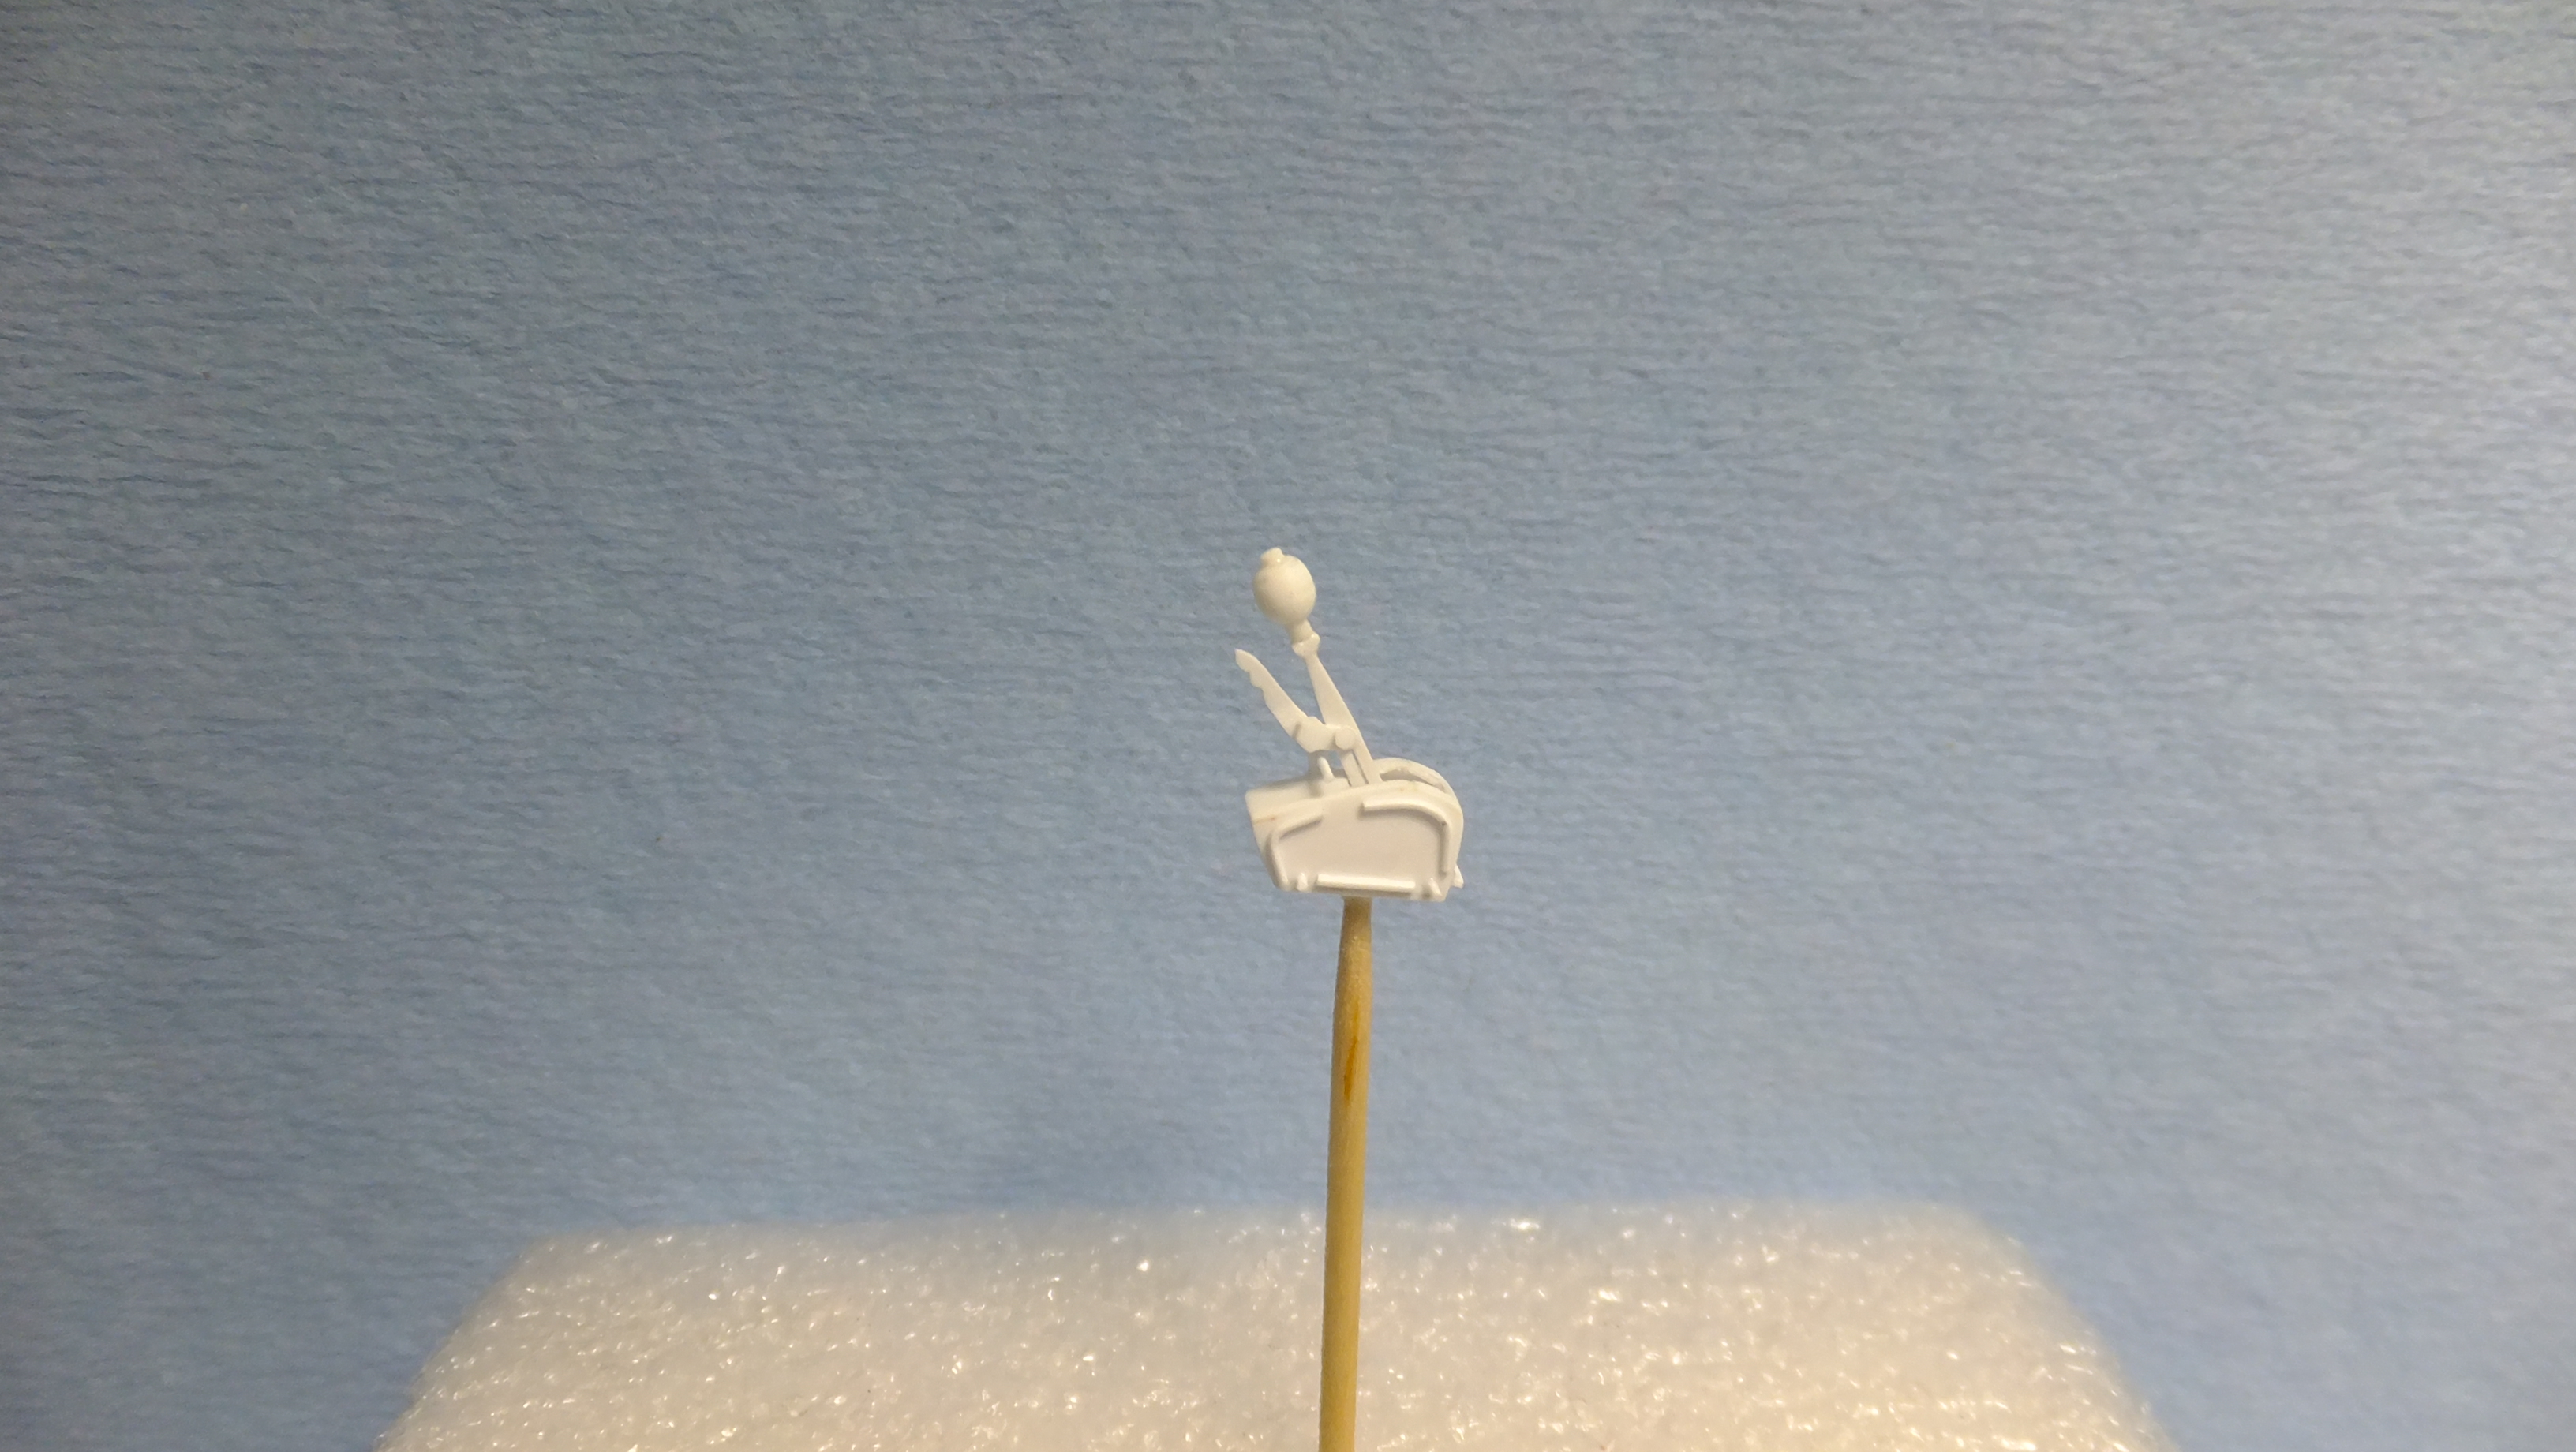
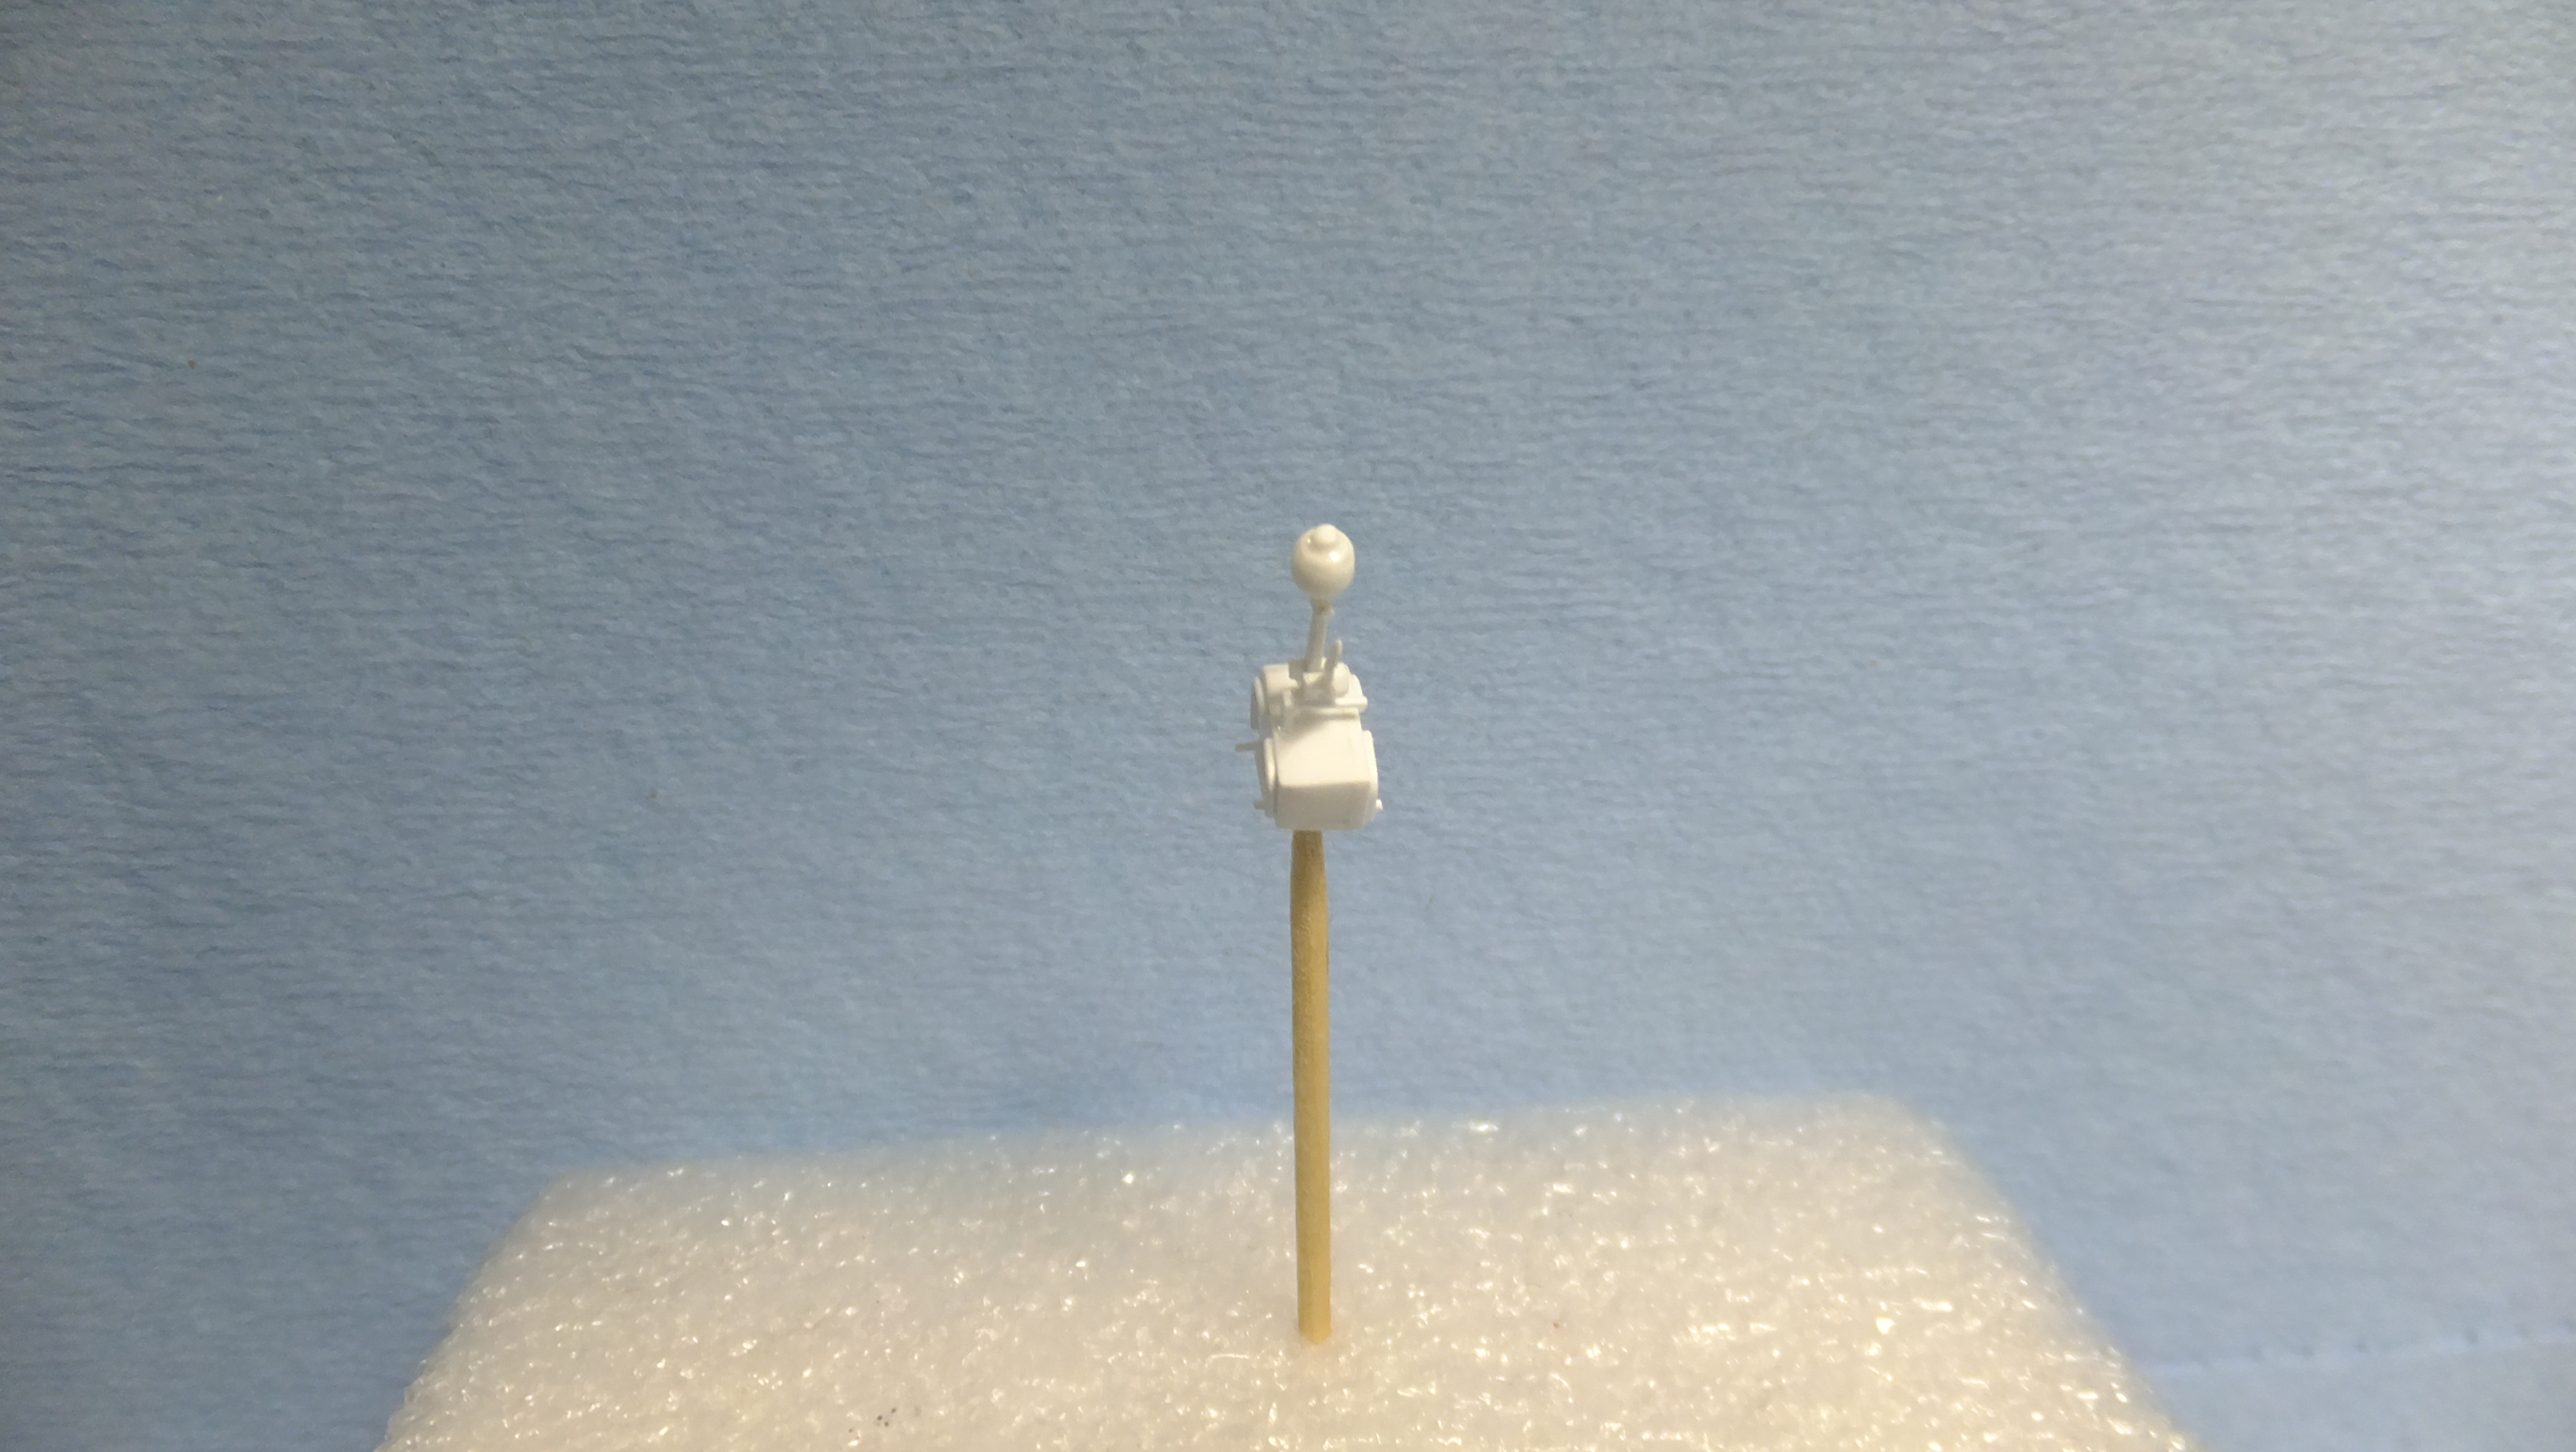
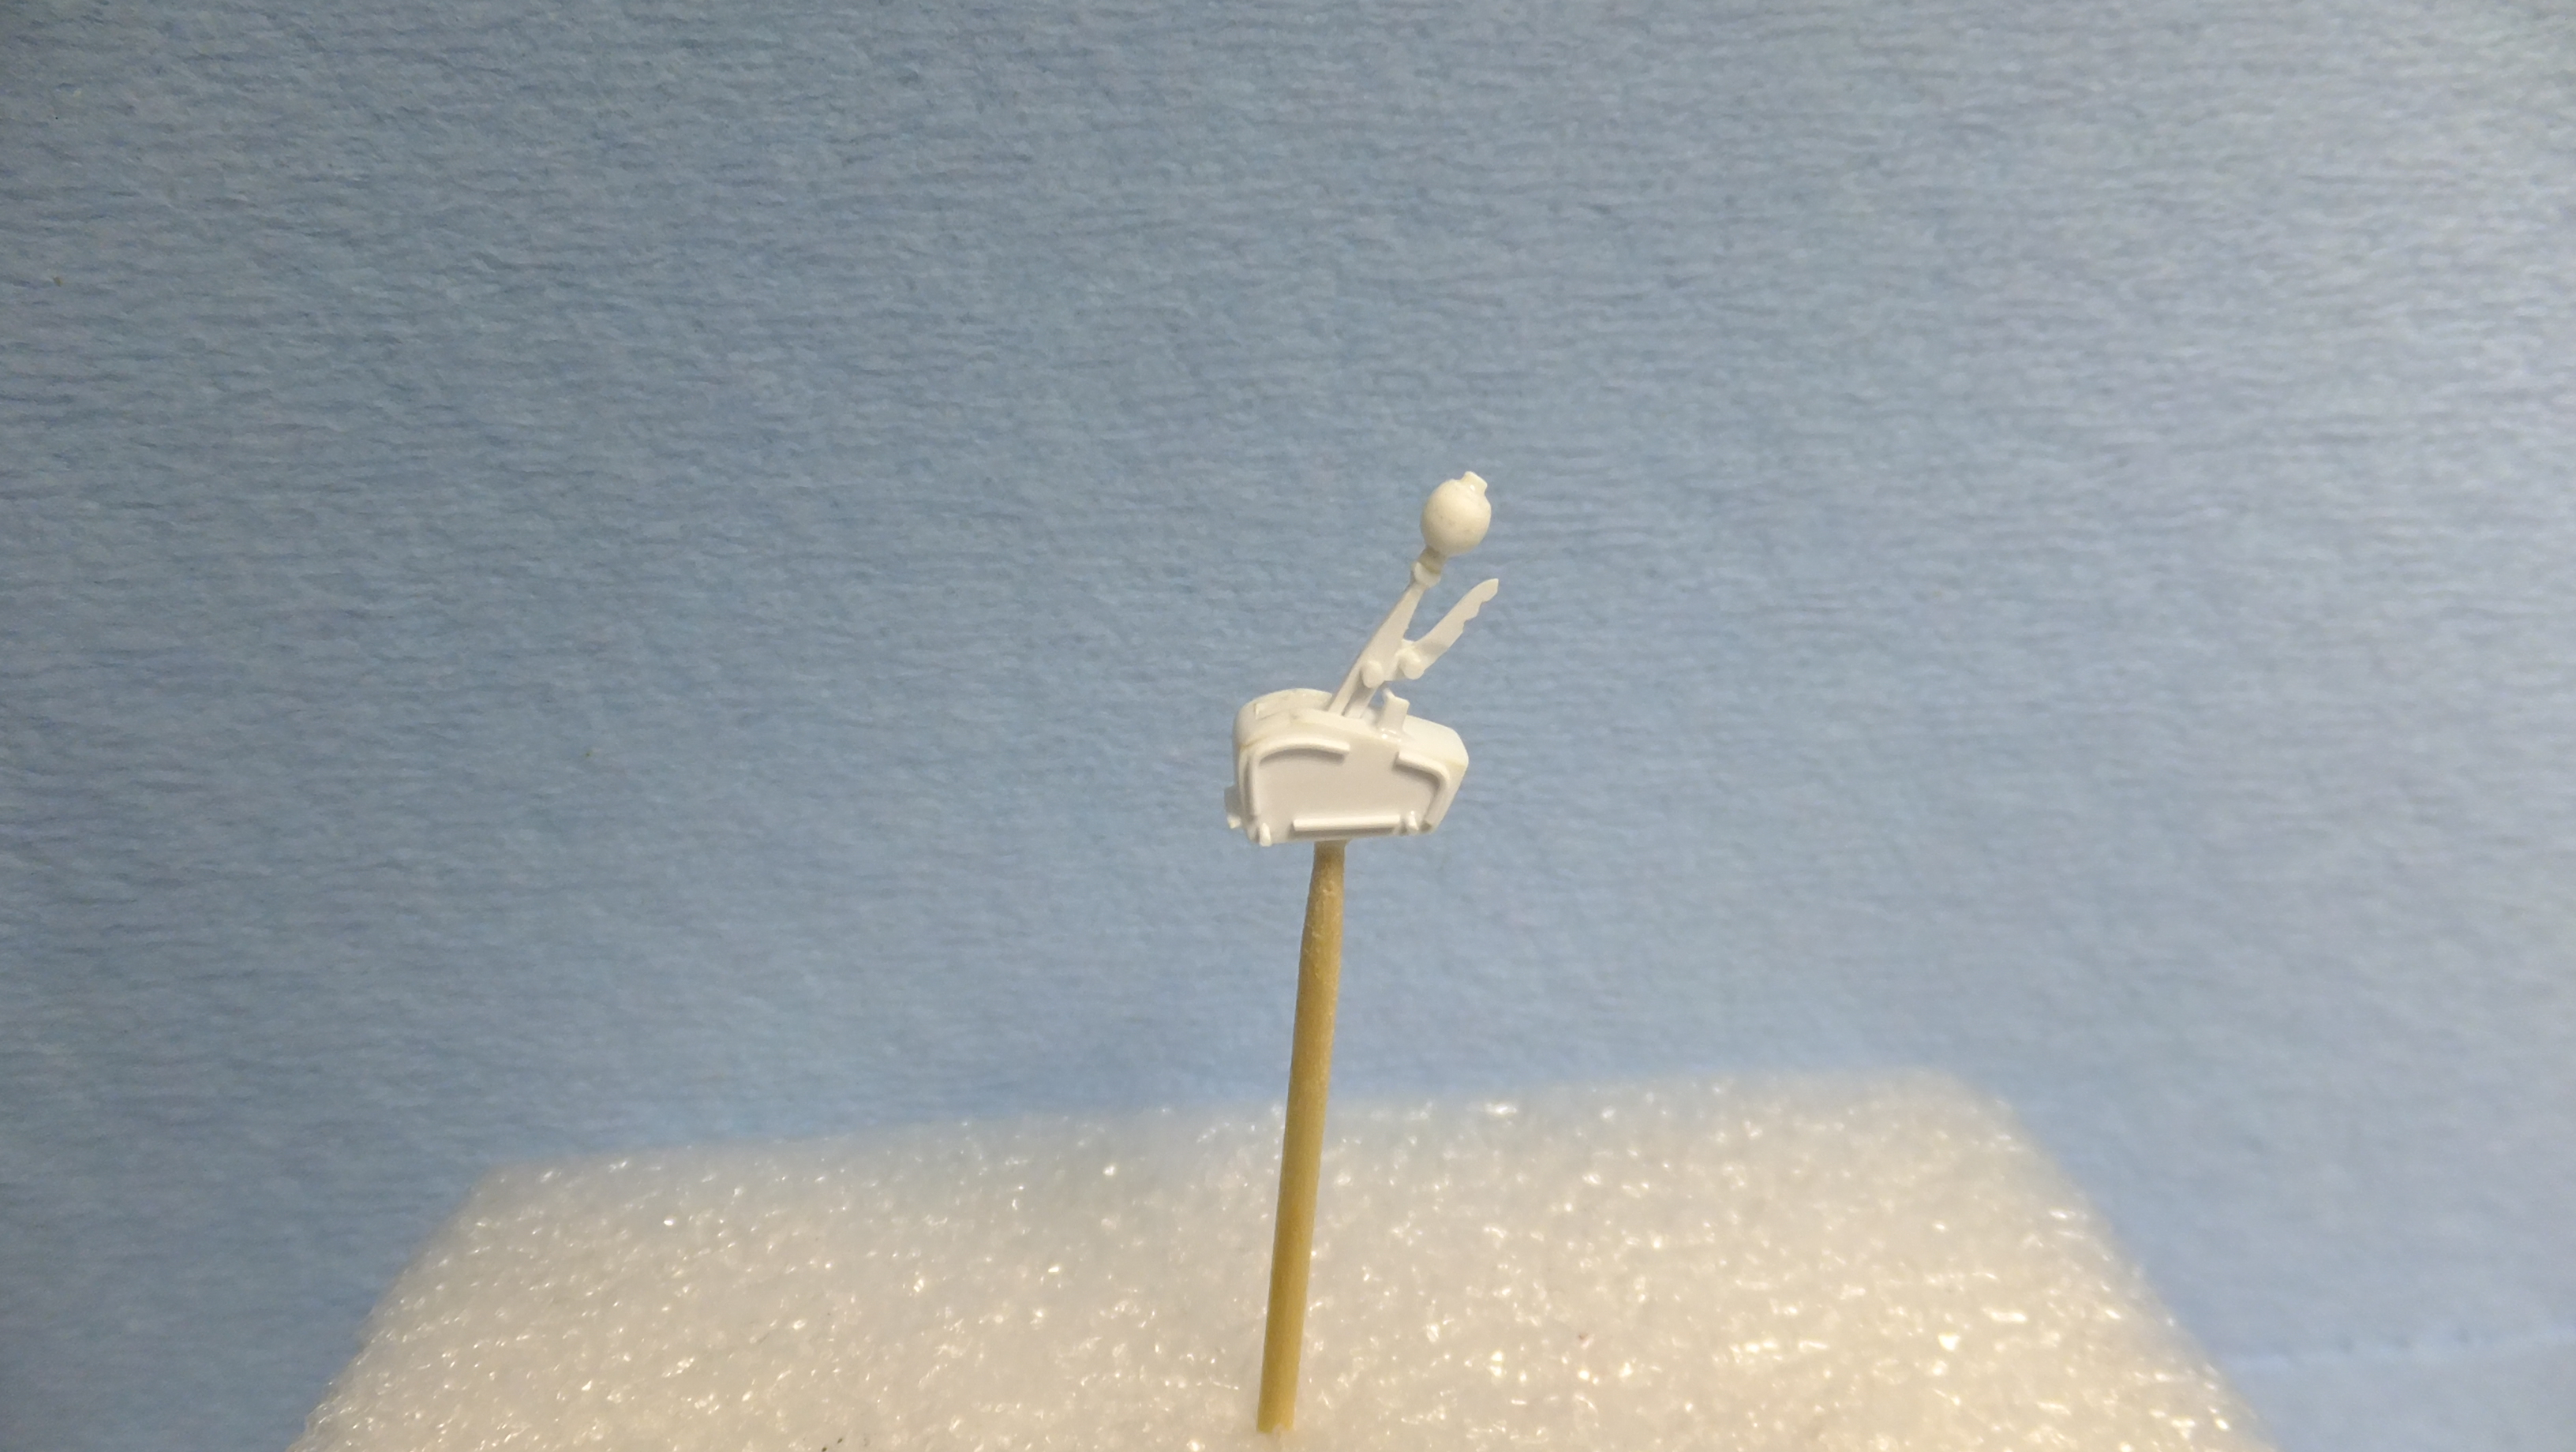
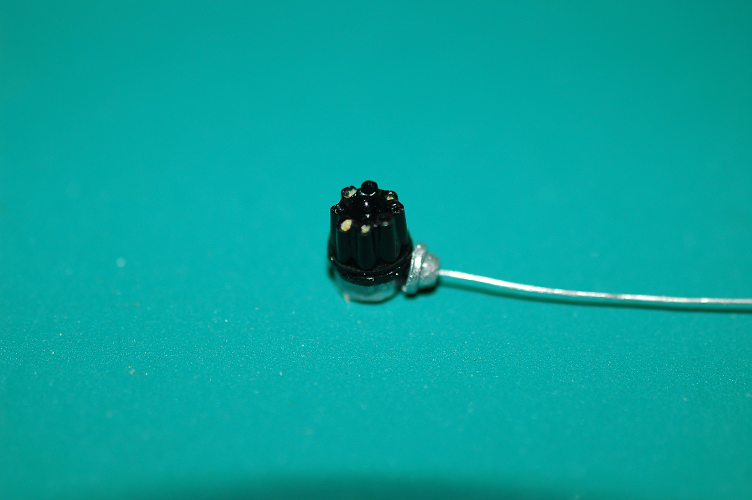
 Hey, everyone!, I just wanted to show you the shifter I made for a friend. It was a fun project - in itself...a model all its own...Hope you like, thanks for looking!!
-
When I found out that this model was coming out I almost cried. If it wasn't for the 1969 Mustang I would never have become a car guy and would never have gotten into model car building. By chance, one Sunday while getting ready for church, I passed a show on SPEED TV called the American Muscle Car and the 1969 Mustang was the subject of the show. They made the car sound like the greatest thing ever built and I became hooked on cars from that day forward. I watched the show every week, absorbing as much knowledge as I could. The color is Blue Angels Yellow. I had two issues with an otherwise excellent kit. The hood did not fit right, and the stripes for the hood got messed up, so i have to order new ones. Haven't had a chance to put on the clear coat yet. SAM_0450 by Eric Lucas, on Flickr SAM_0451 by Eric Lucas, on Flickr
-
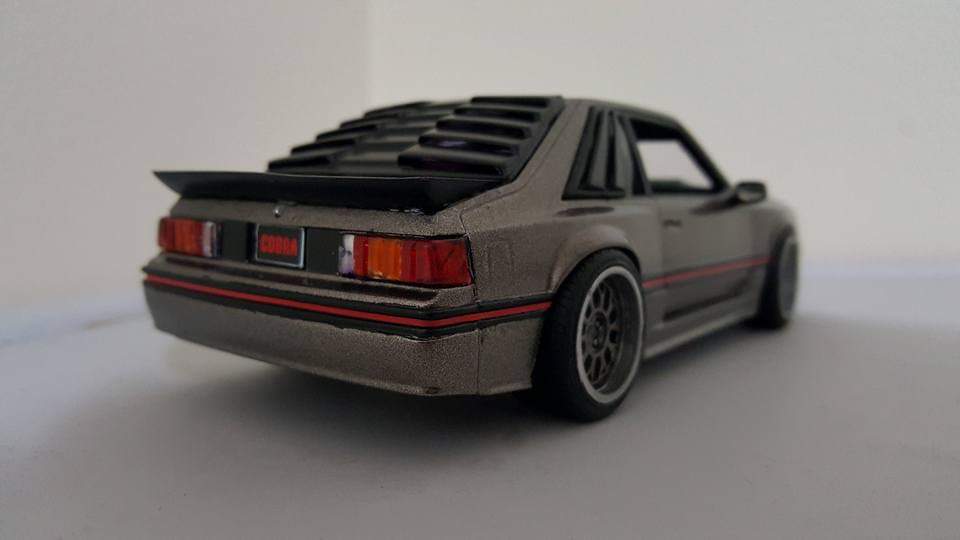
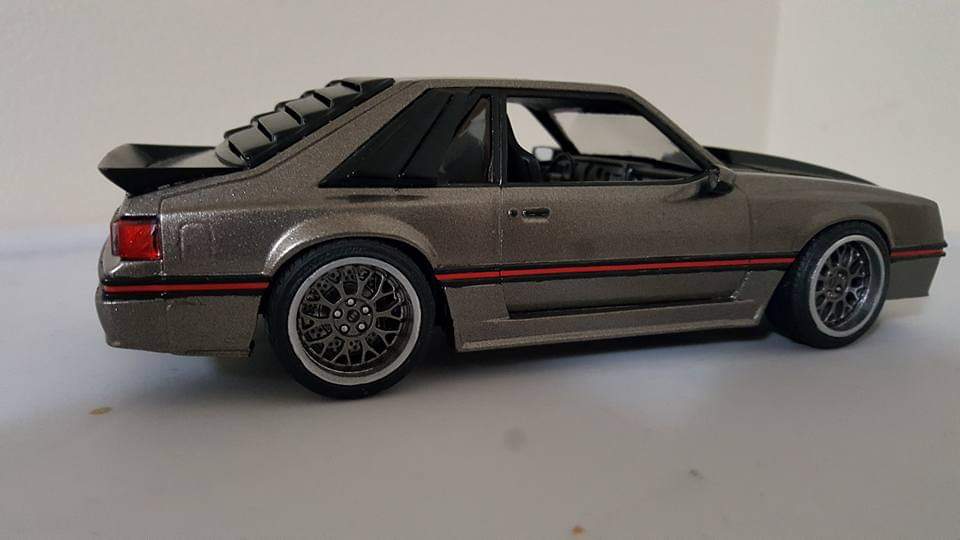
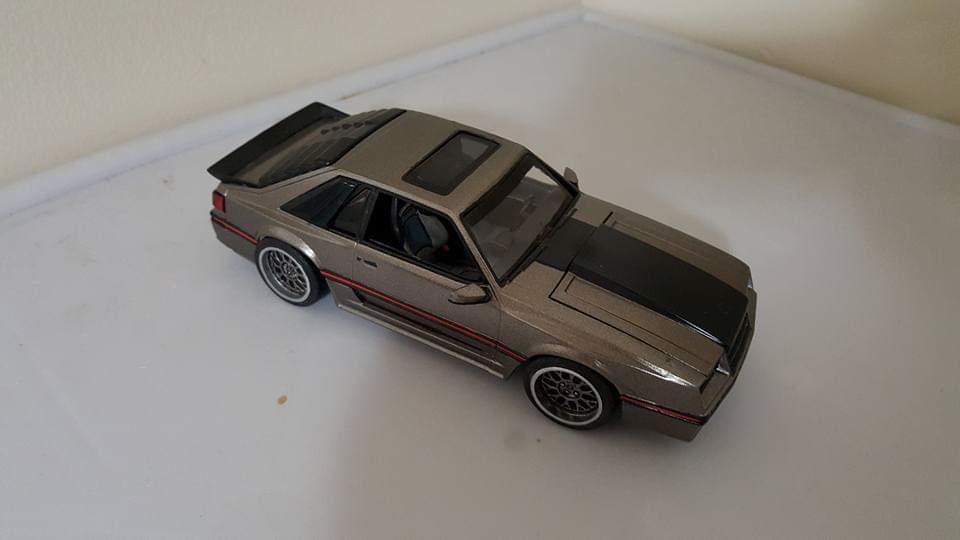
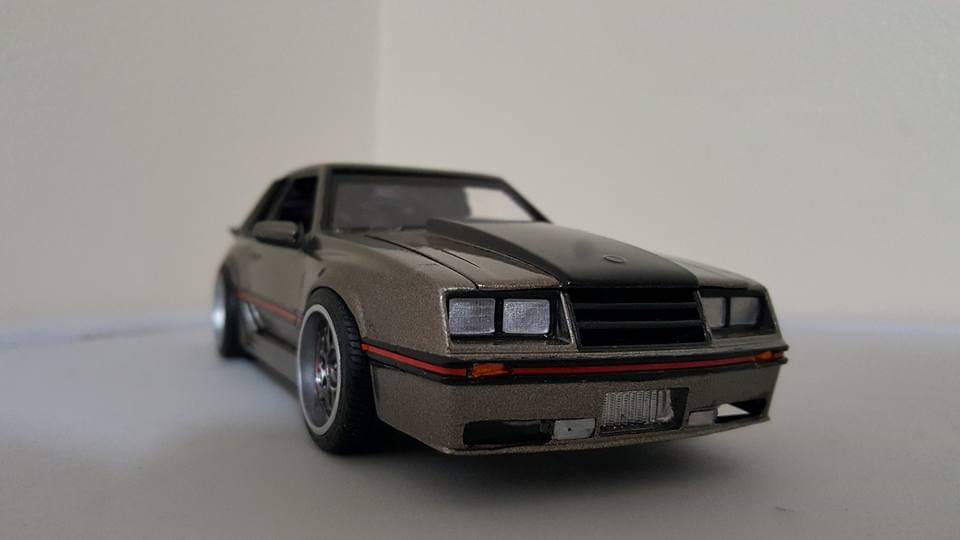
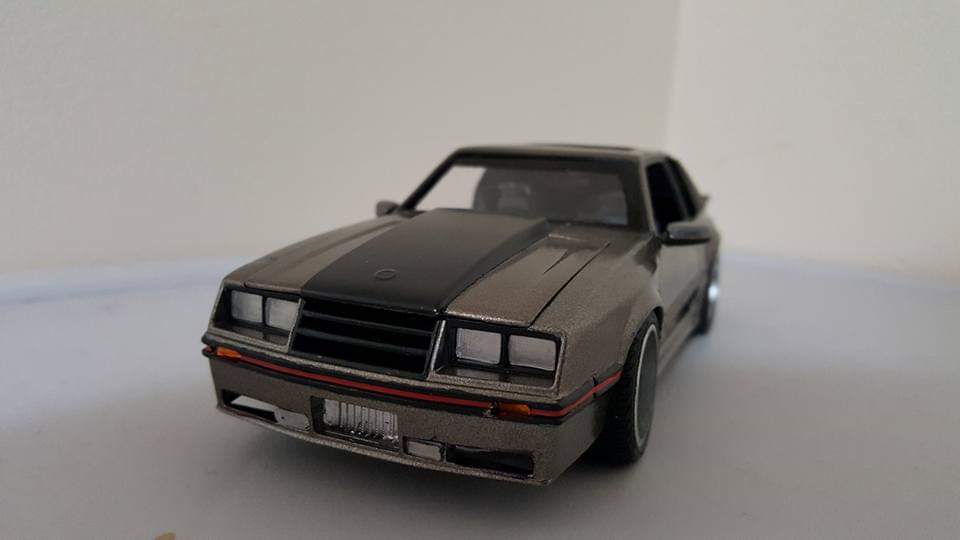
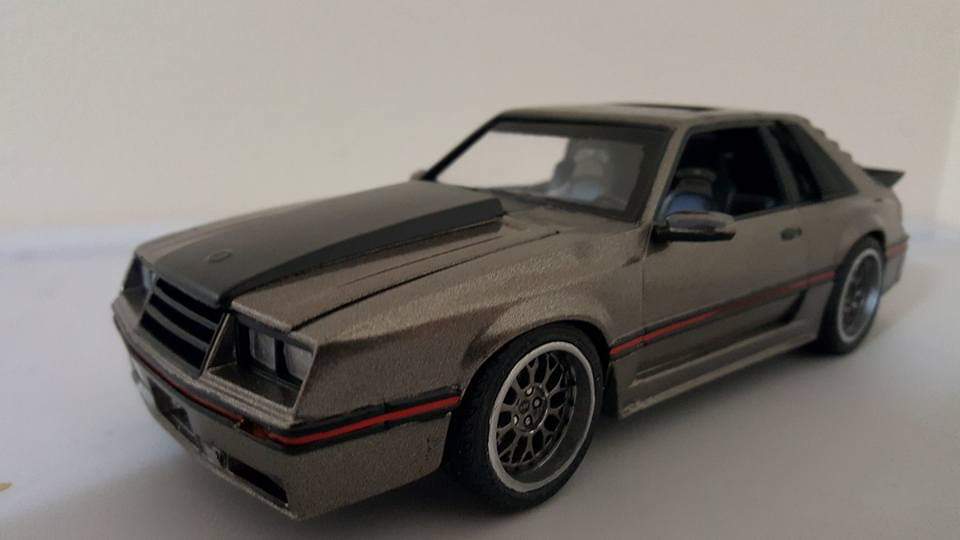
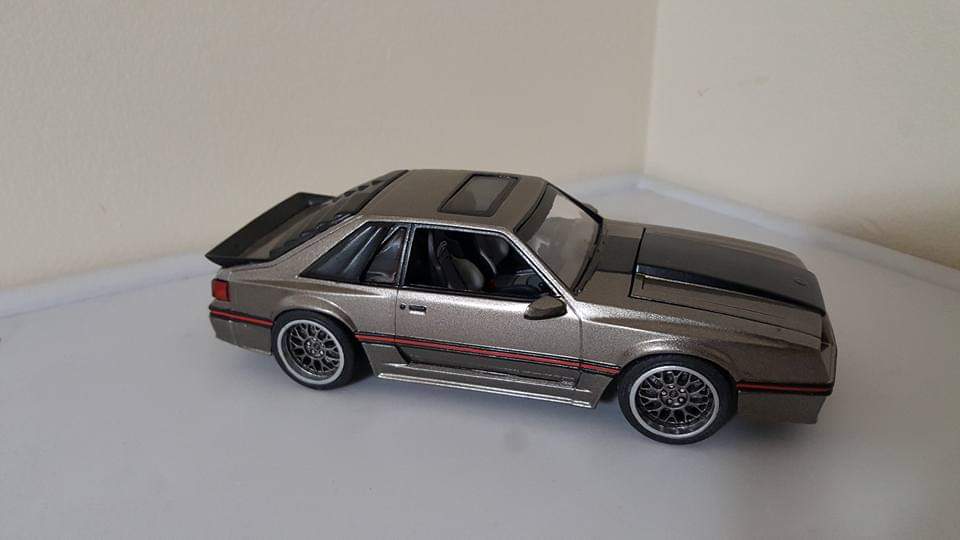
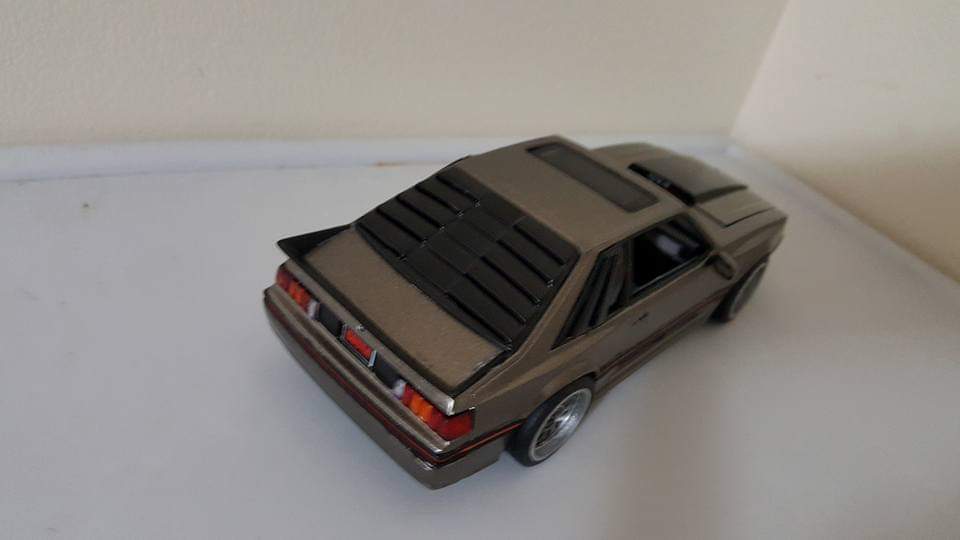
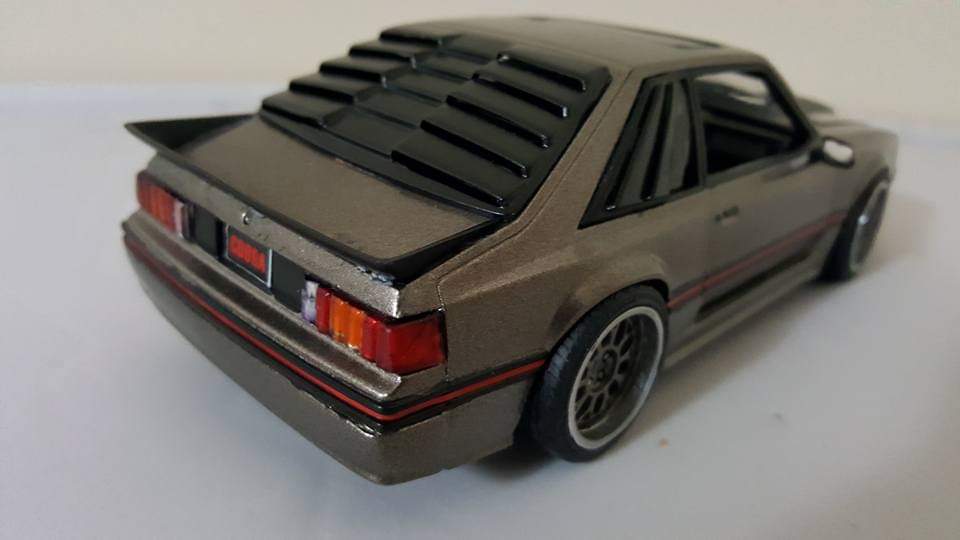
My favorite 4 eye. Color is Ford mineral grey. Updated the engine with and 87 Thunderbird turbo coupe, and added front intercooler
-
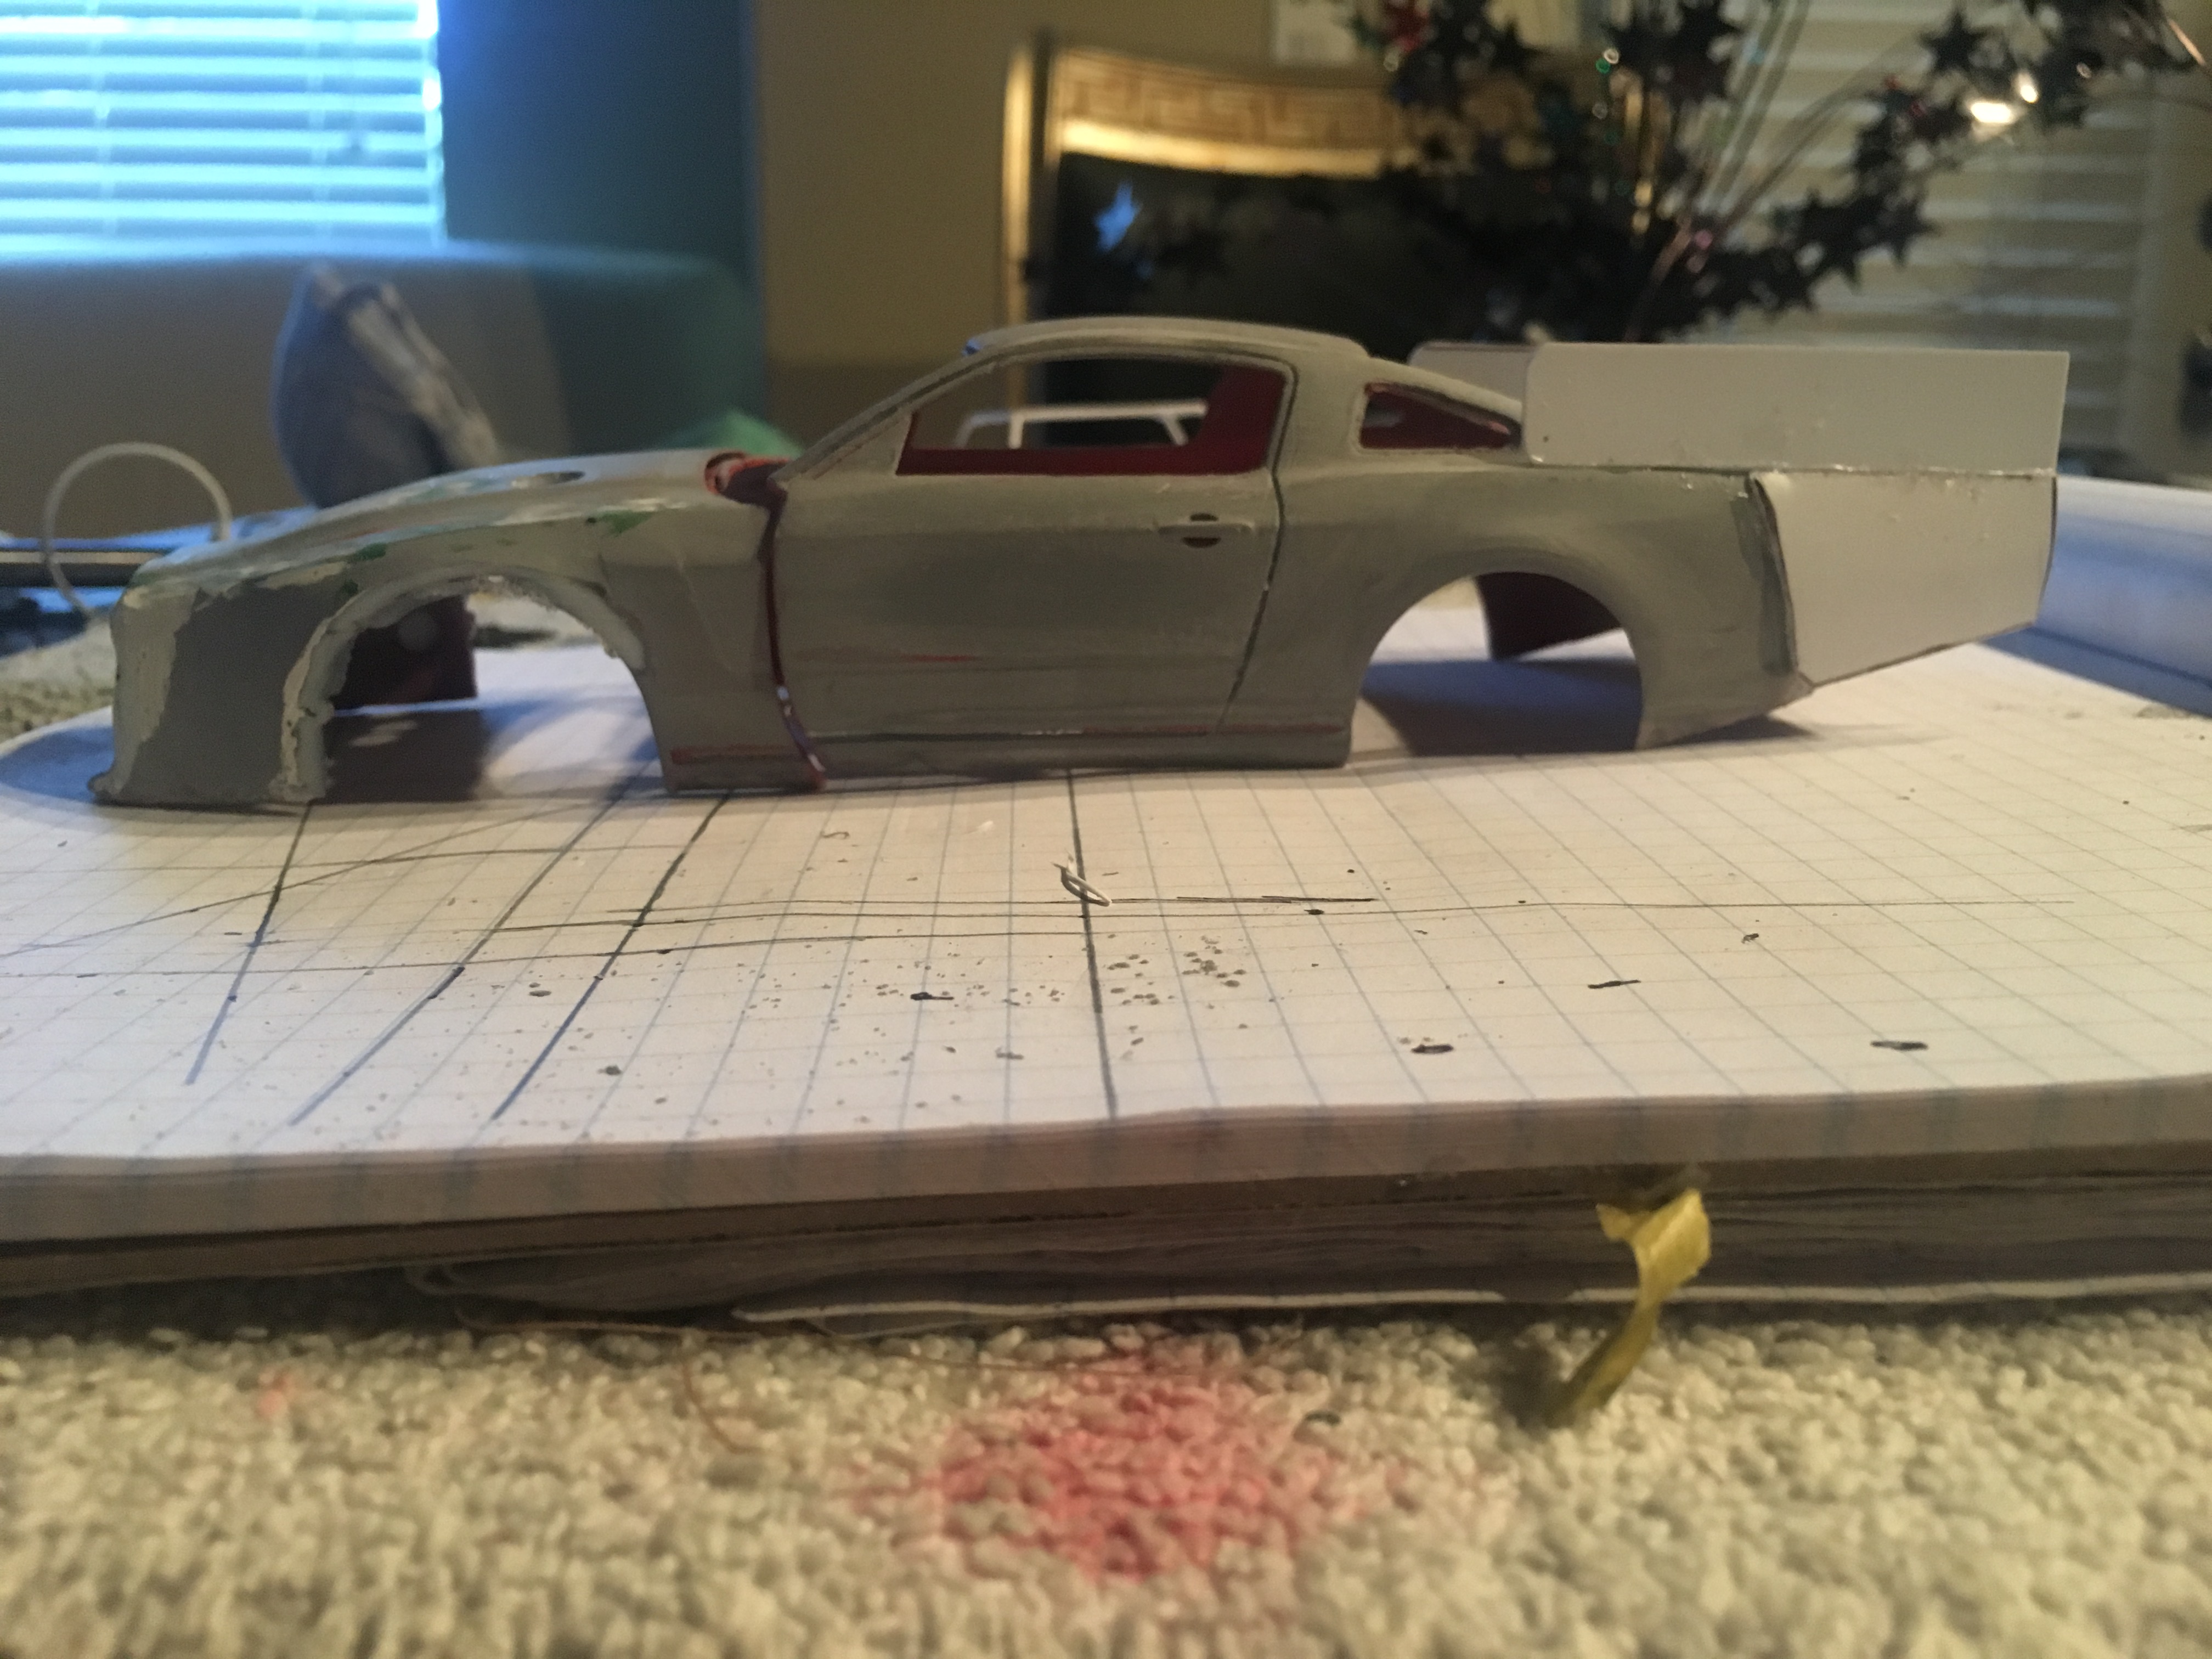
Hello, I start a new BB. The conversion is already in full swing. This Mustang will come along with the 5.0L engine of the 2014 Mustang GT and many other modifications. I started with the modification of the rear panel to mount other taillights. The part is from an Overtuned Maisto Mustang. Then I started to modify the engine compartment. Here I removed the battery, straightened everything with a sheet and filled with (my) version of GAP. It has also begun to make room for wider wheels. Then I have ever engine parts wrapped in color. And the engine itself too.
-
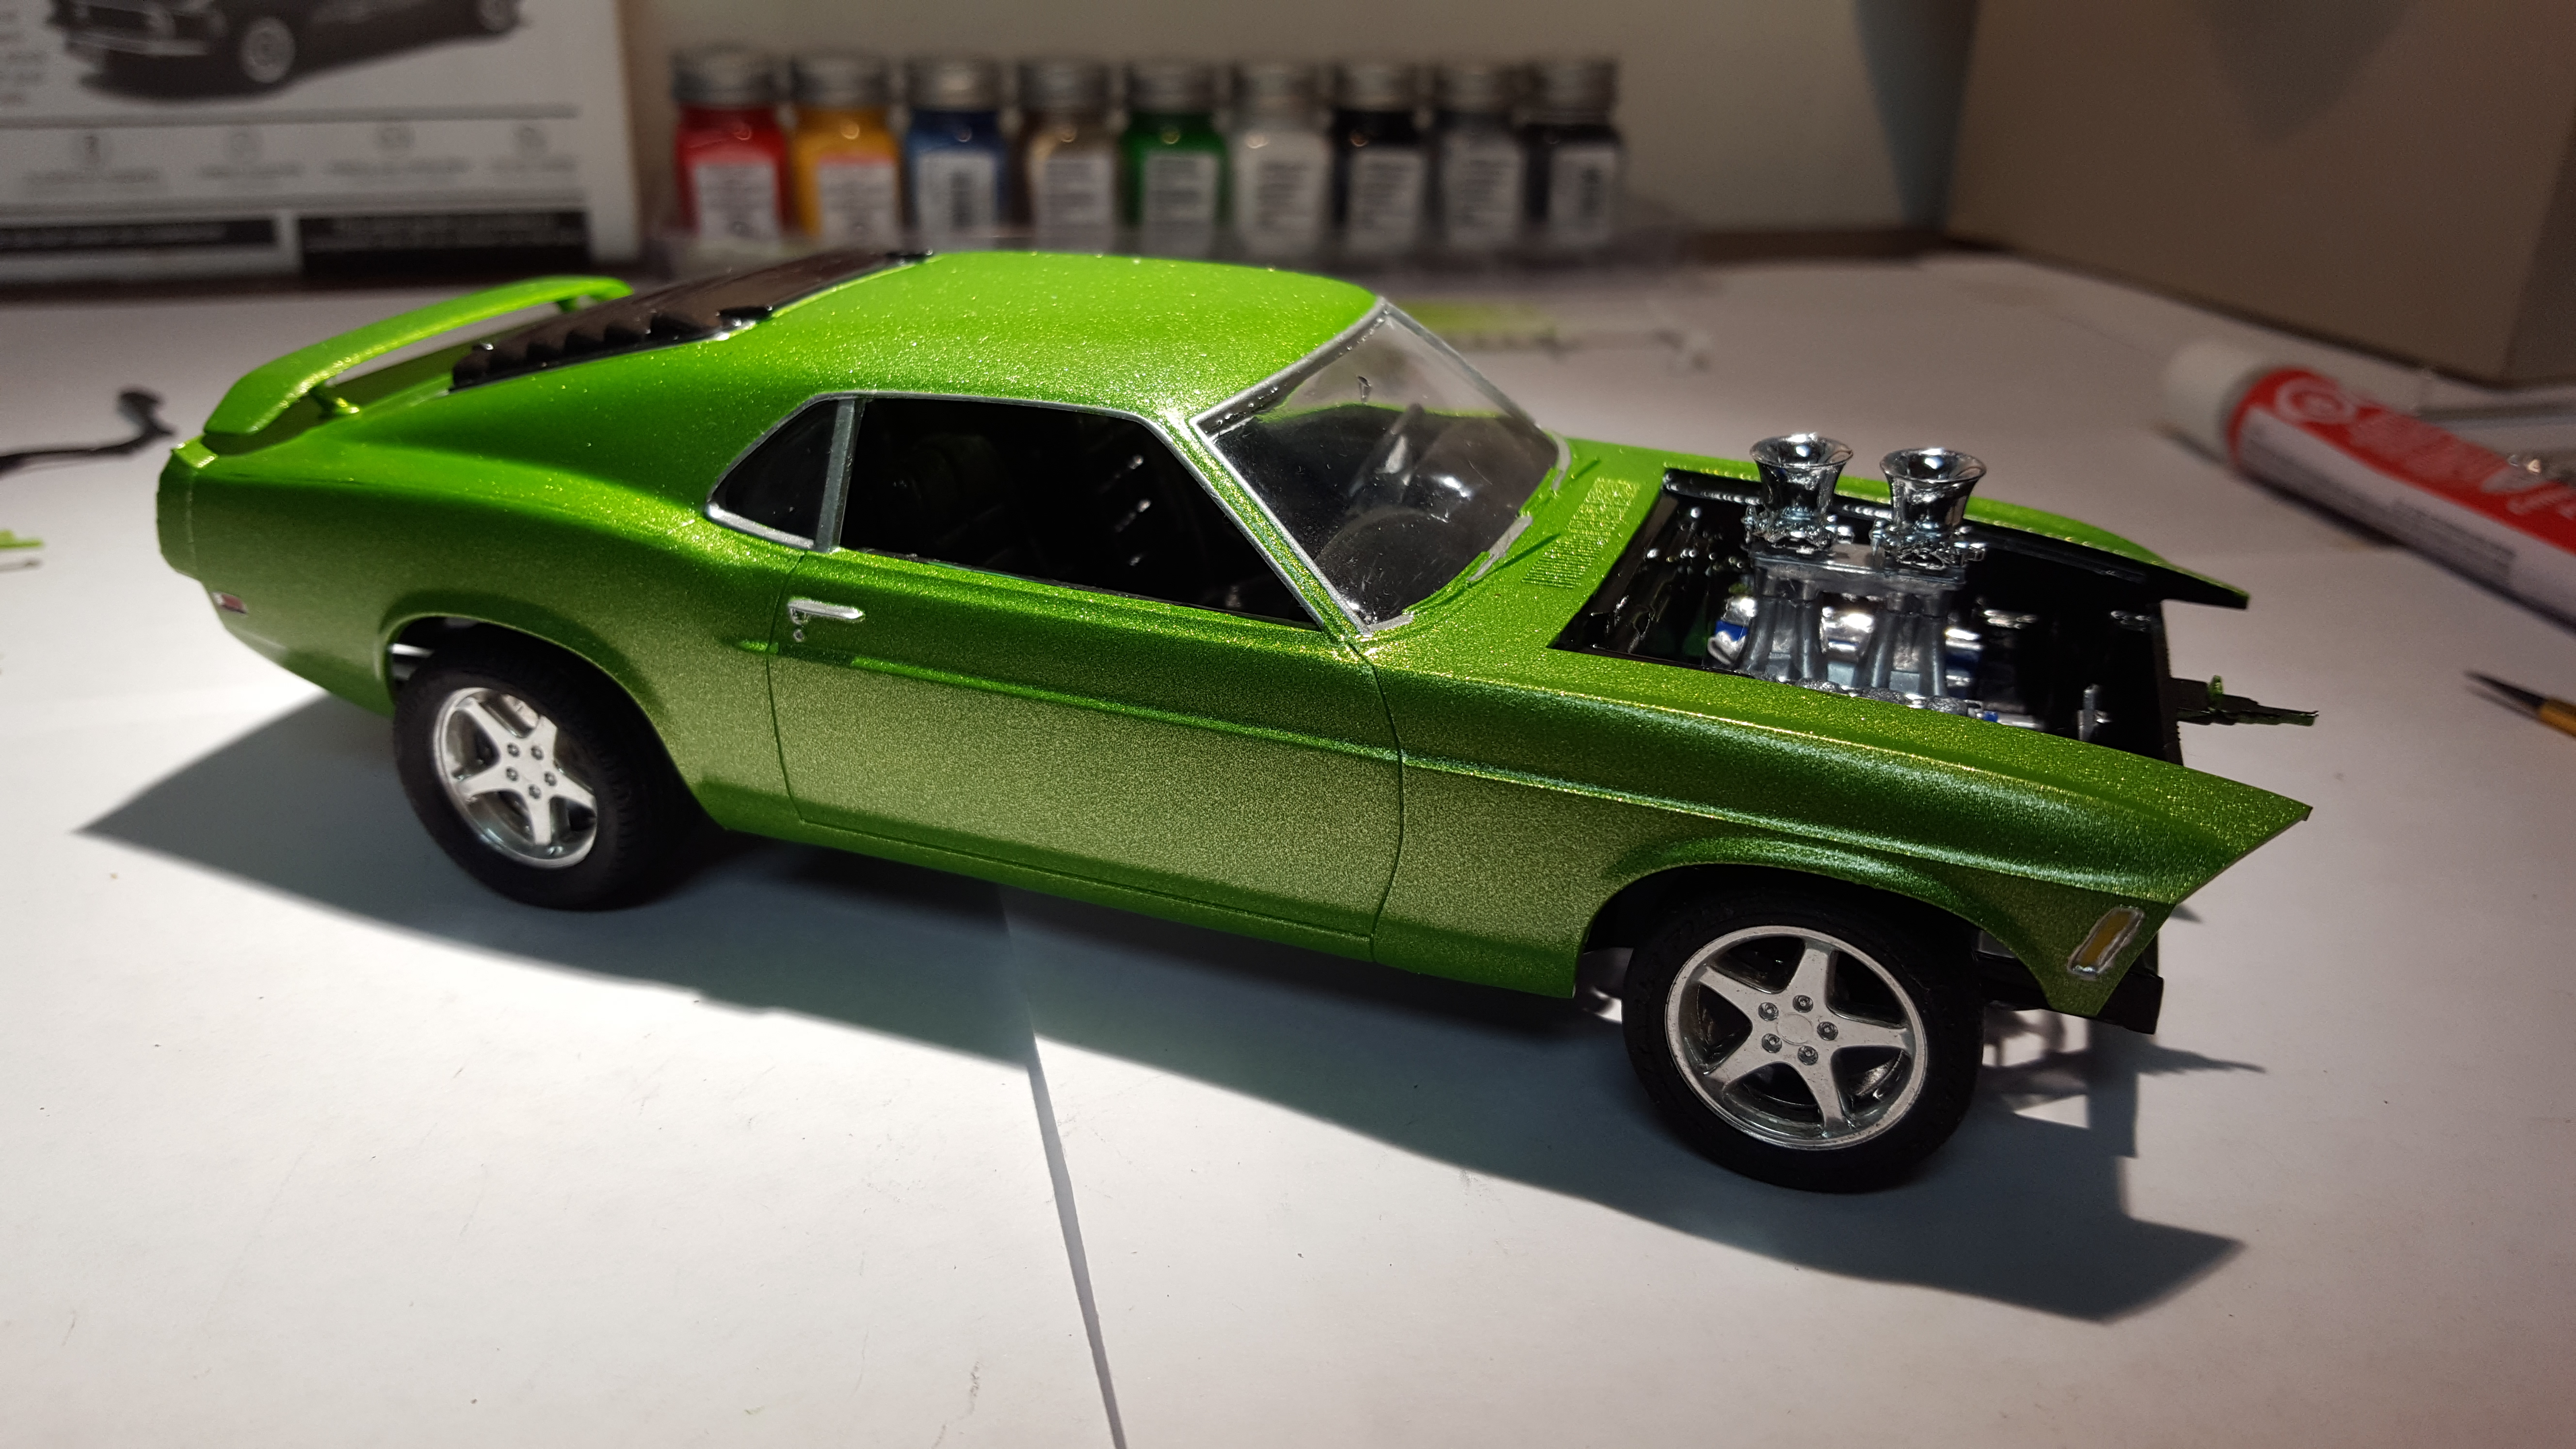
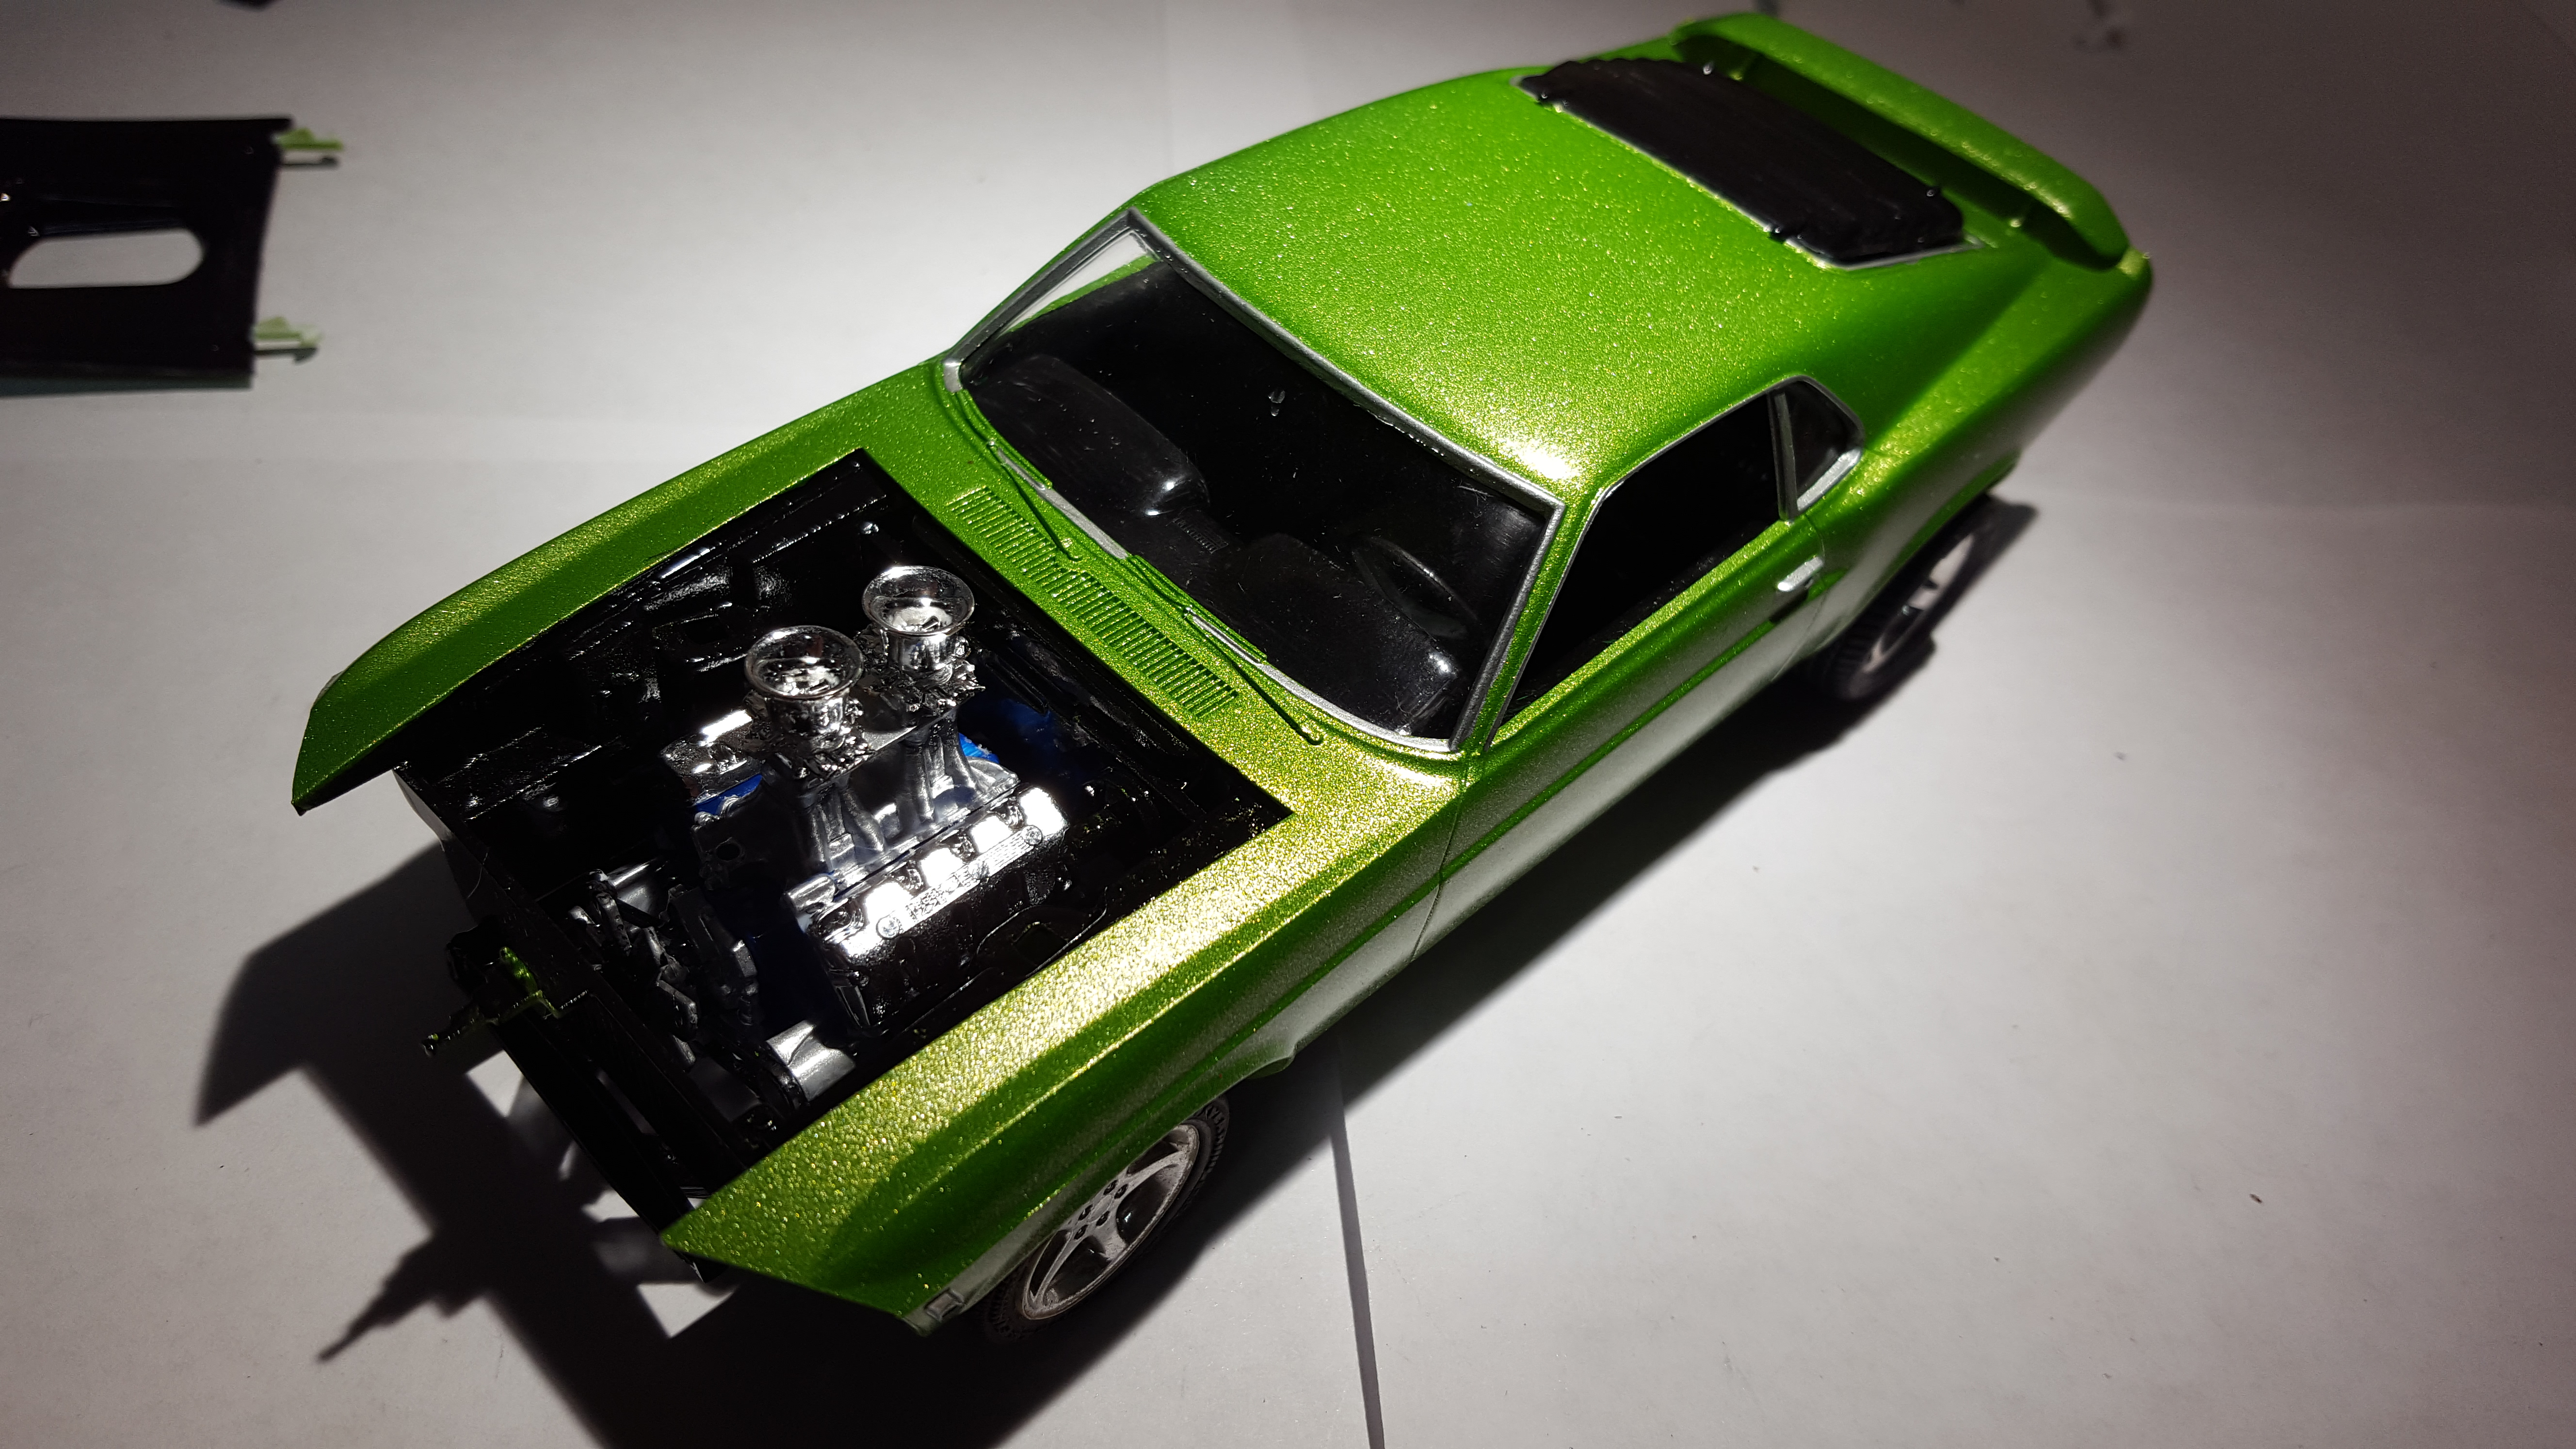
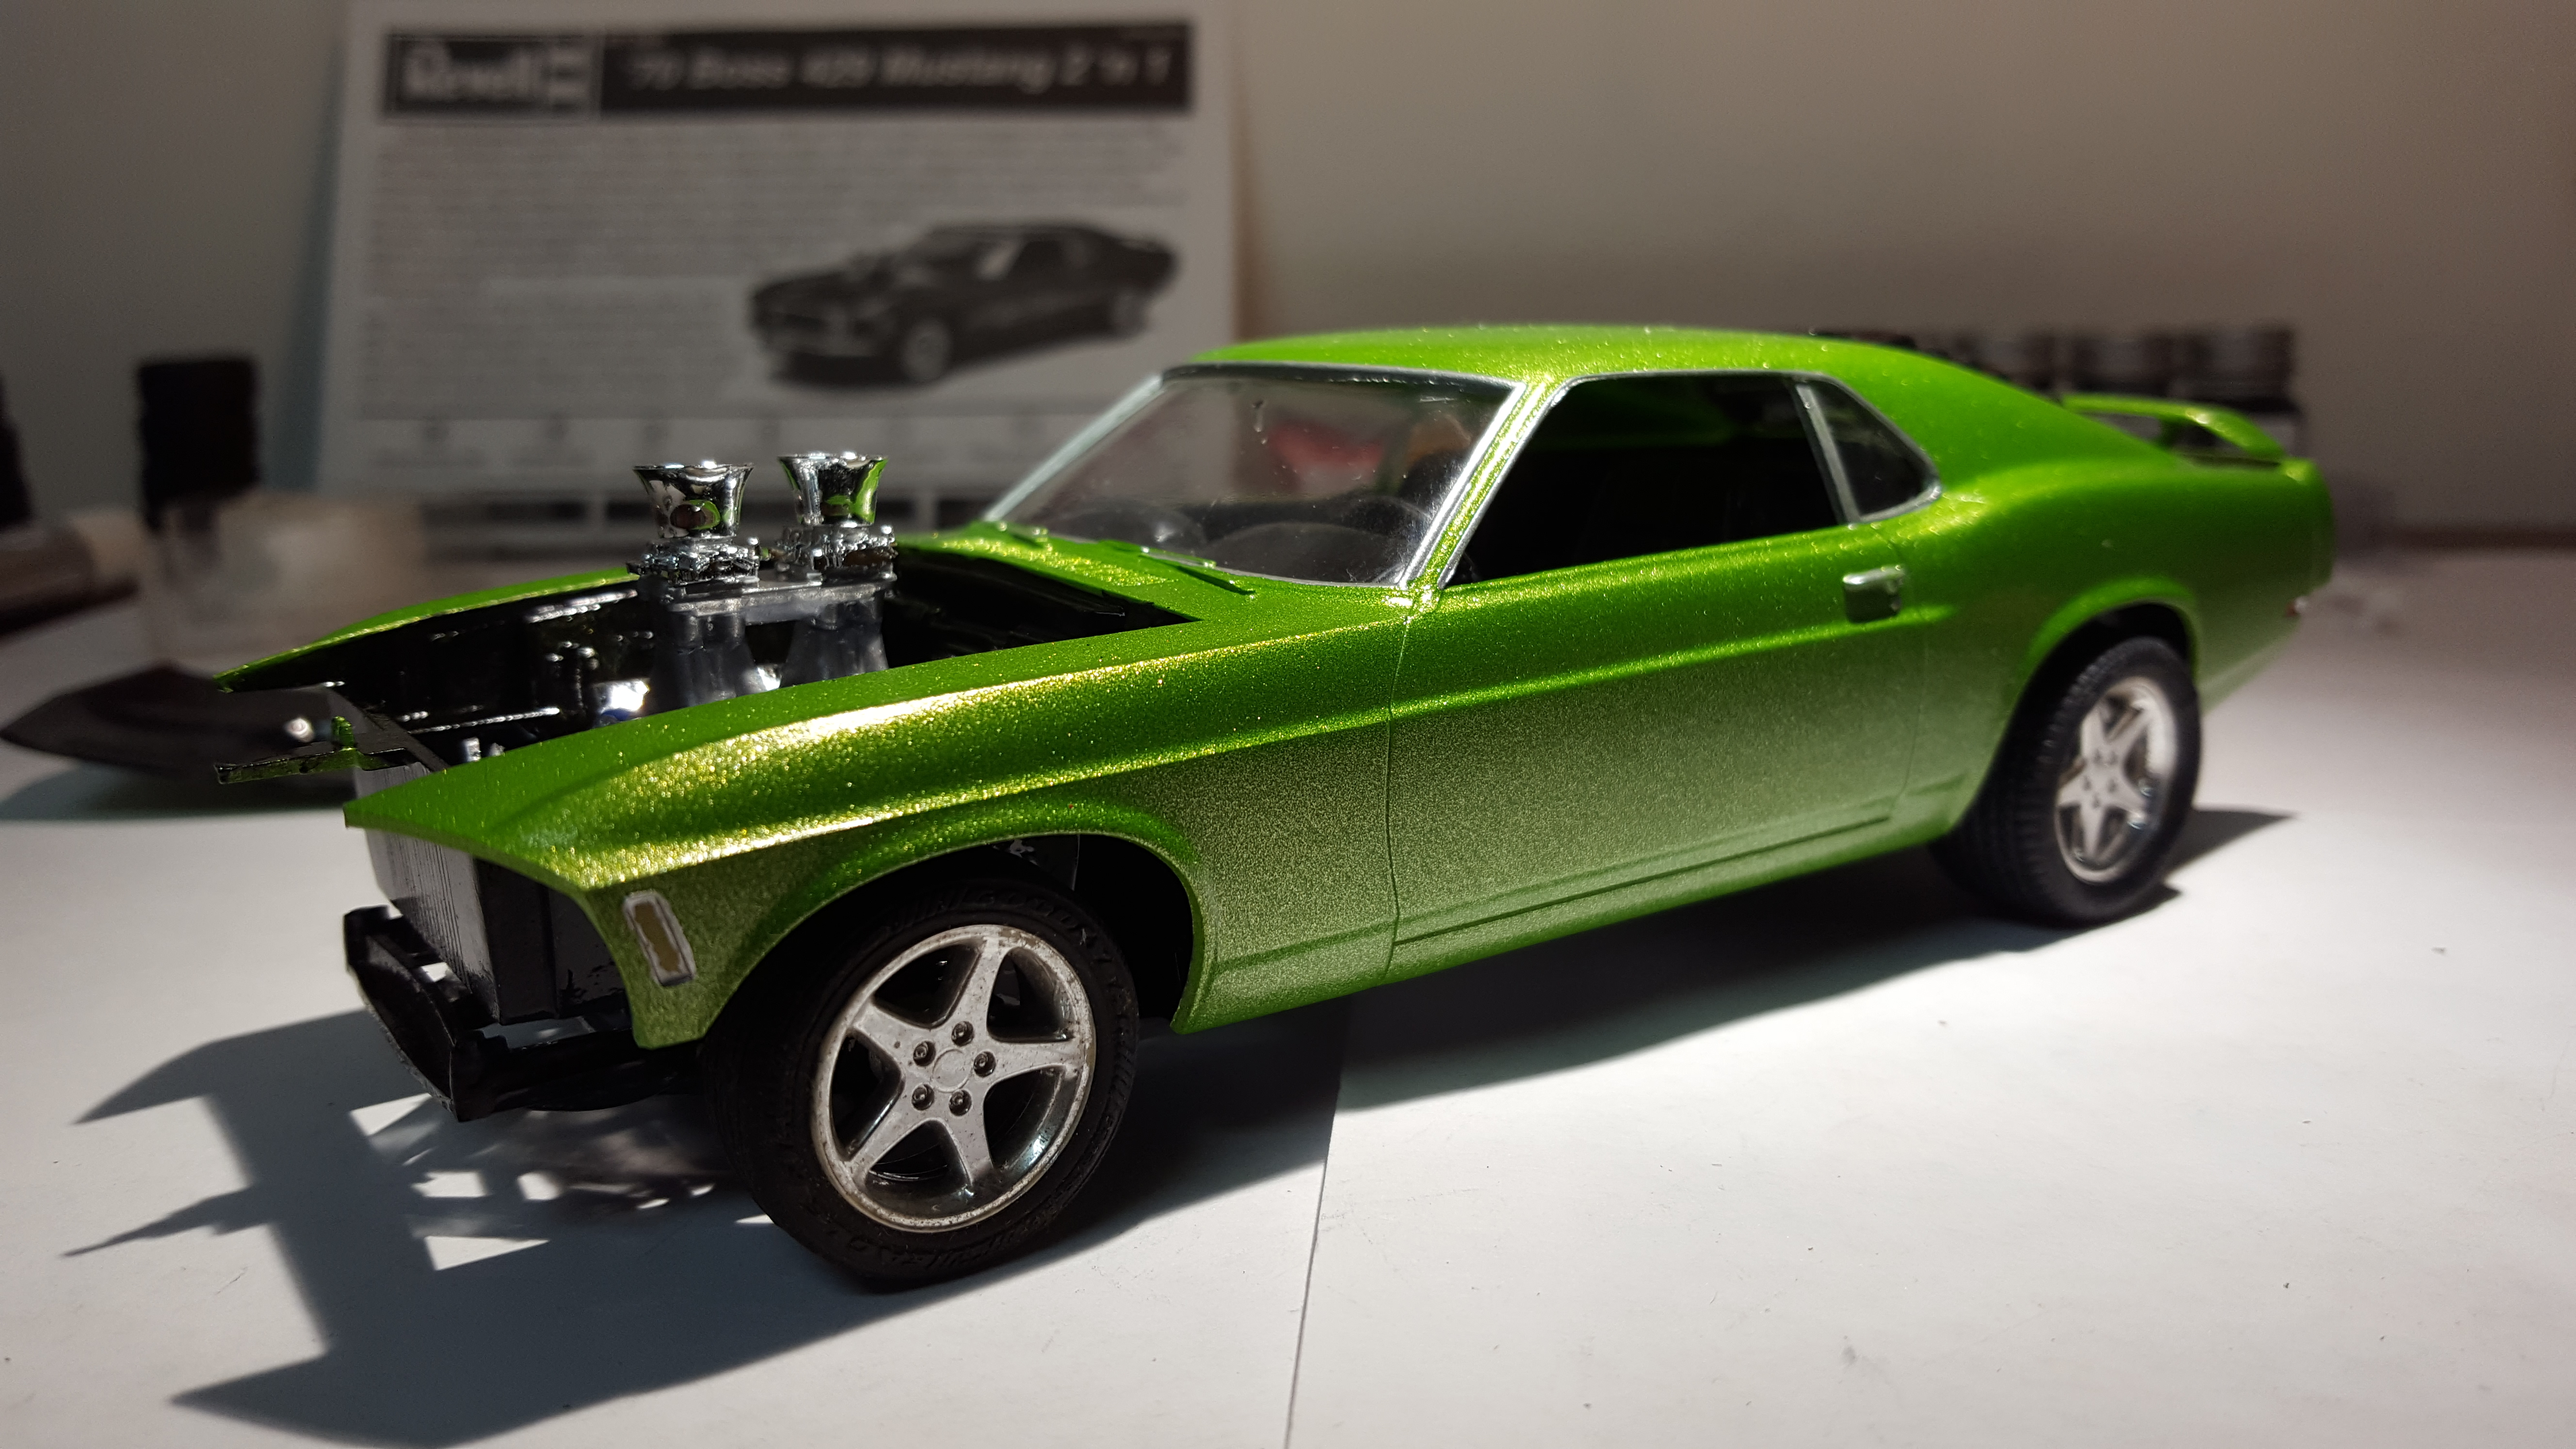
So I purchased this kit and decided to give it a go I haven't done much yet and most of my progress will be slow due to Life Stuff. If your patient with me you might enjoy the ride. <= car joke So first thing I did was drill out the door handles I then primed it (no pics of that) My real Issue is what to build!! Do I build the Mach 1, the Boss 302 or a Modified Boss 302? Here is the 351ci Mach 1 Engine vs the Boss 302 Engine Keep watching
-
My first build in years since getting back into model cars recently. First time posting here. Thanks for looking.
-
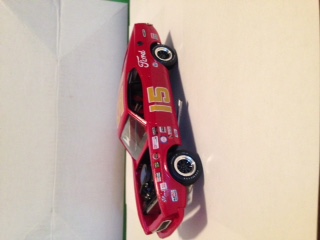
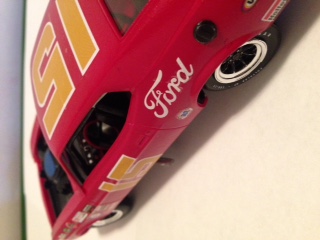
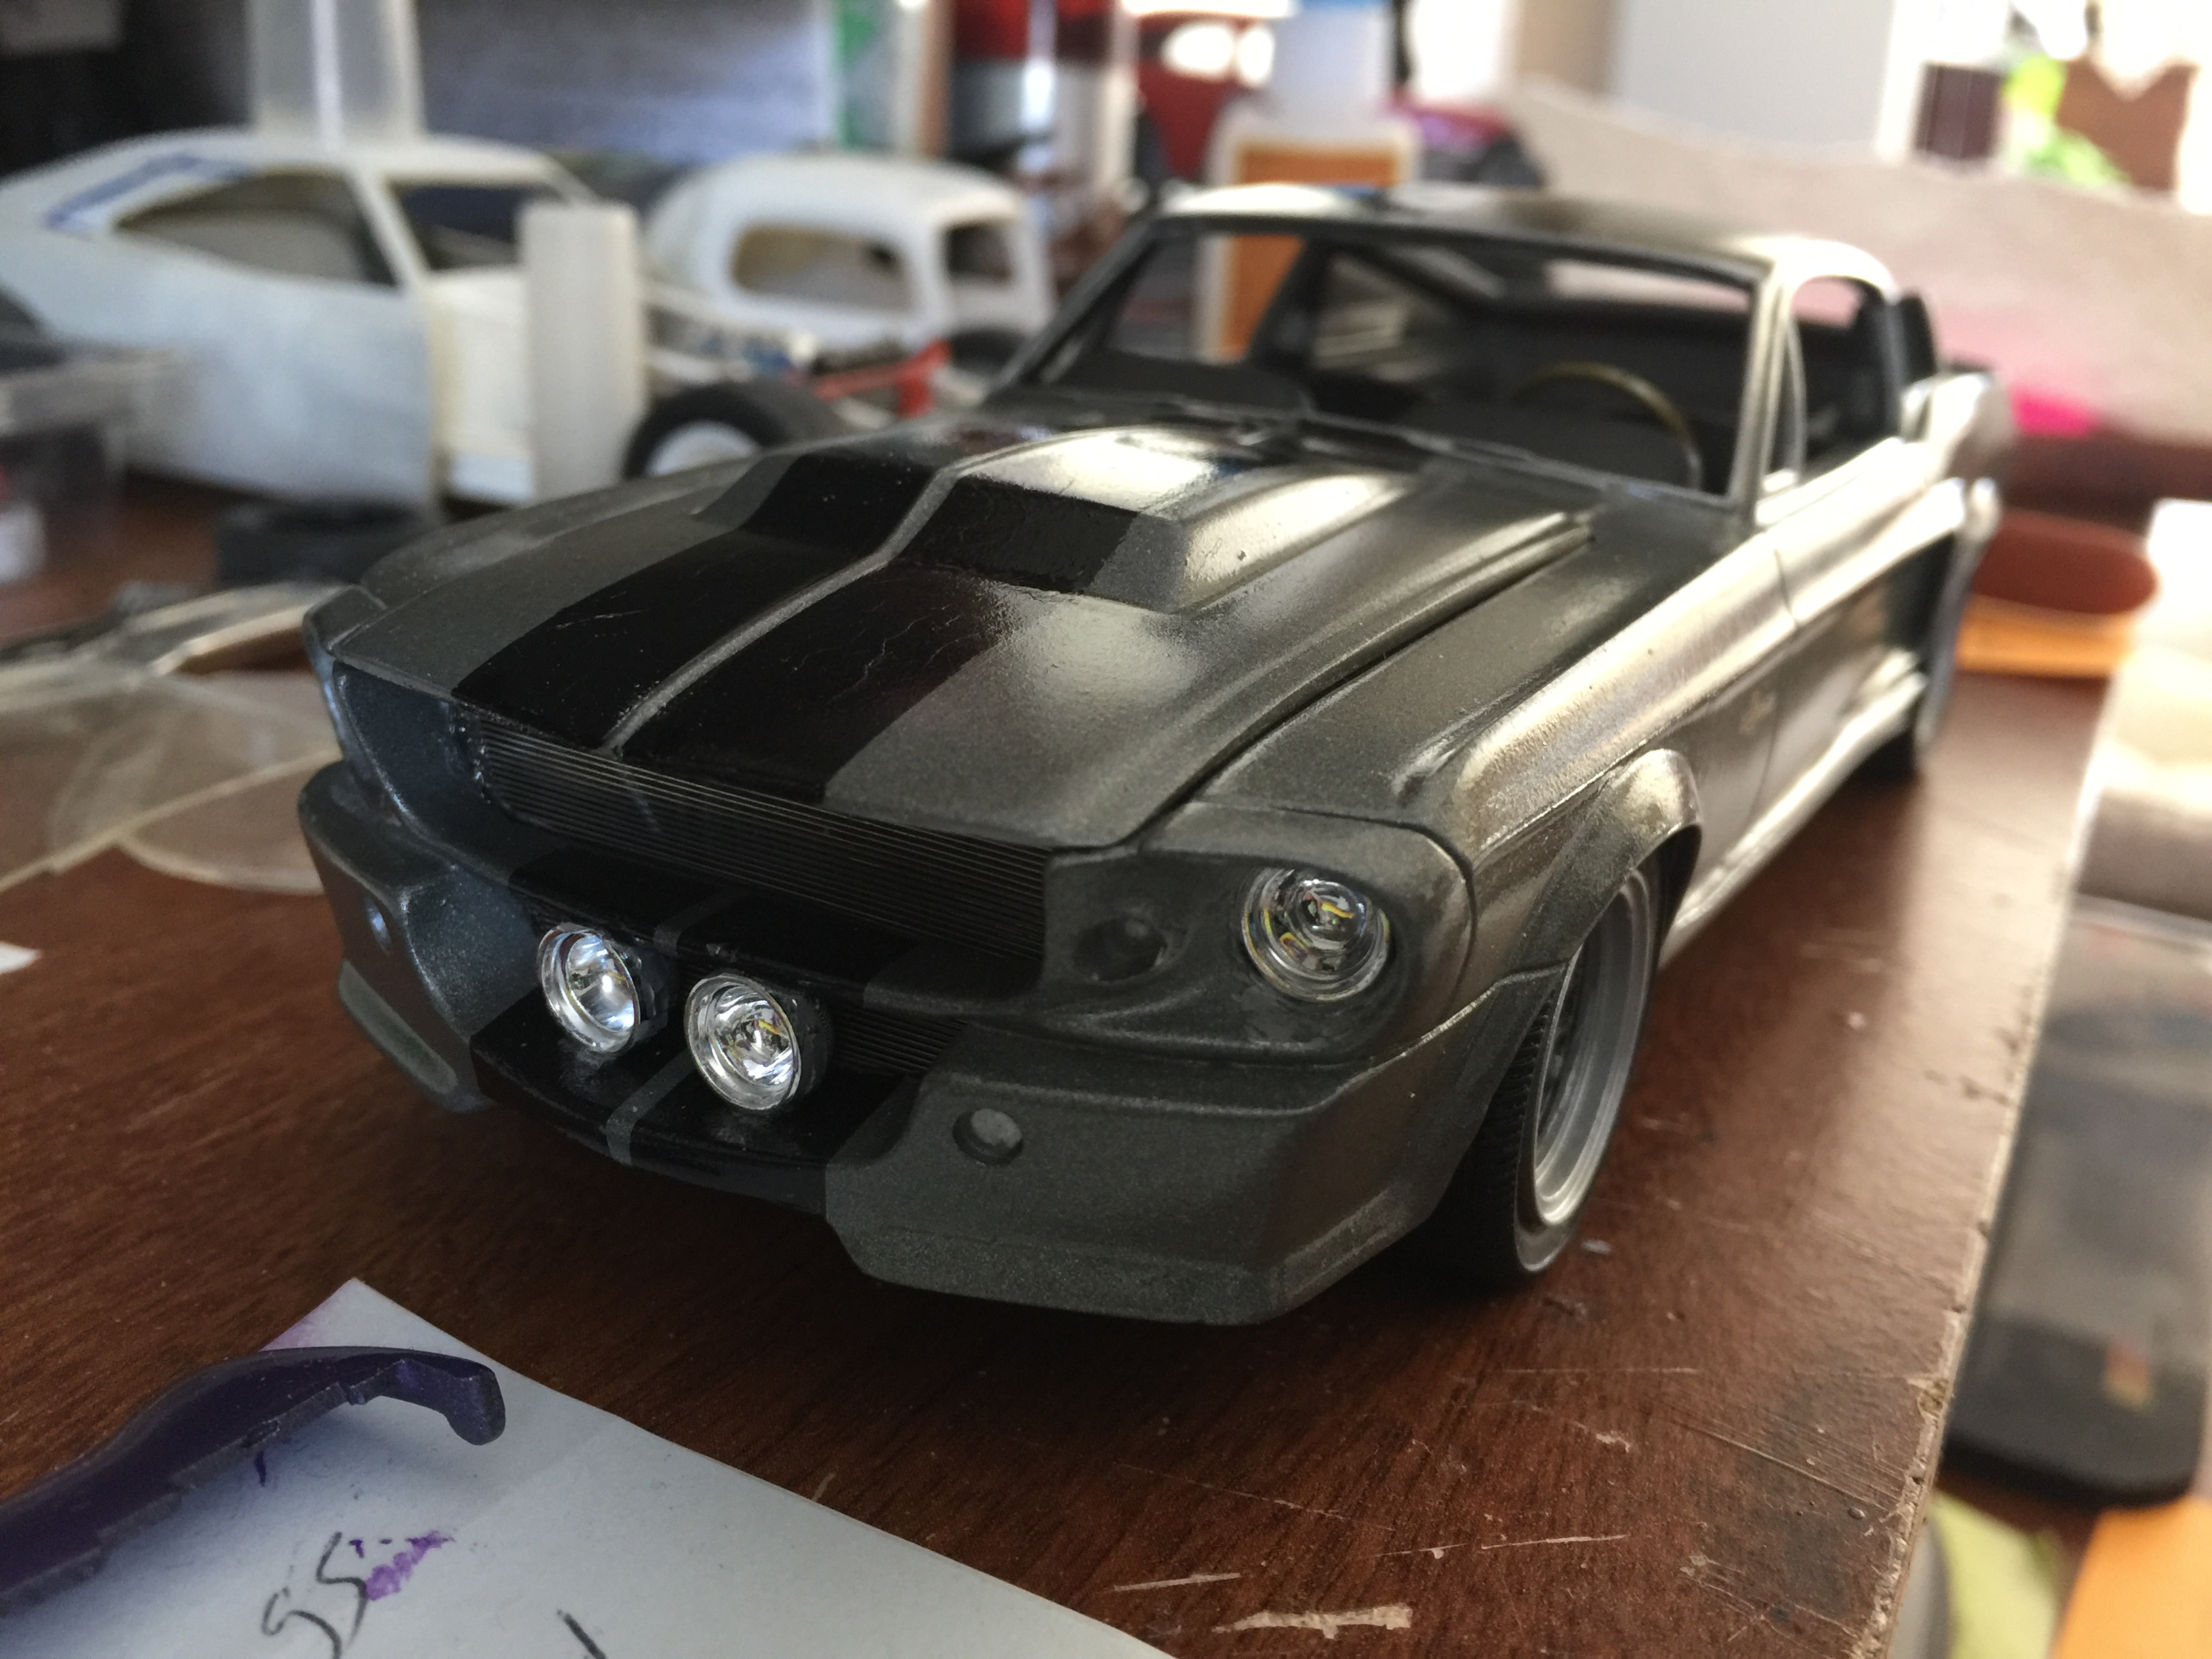
There was a thread talking about Greg Wahn's Eleanor and I didn't want to hi jack the thread by posting pics of it on there..... Greg's casting of the iconic movie Gone In 60 Seconds 2 is one of the best castings I've seen!!! As of these photos the car is near done!!! Just havle to put headlights in, strut tower braces and the three bar code spinners on the wheels!!!! Photos do not do this car justice!!!!! I used 32 Ford headlight buckets for the build, photoetched grille, three bar spinners. I can get some better pics up later if anyone wants me to!!!!! the paint is the actual color of the real car..... I also used Keith Marks GT 500 decal set...
-
-
just an update on this mustang build. it should be done soon
-
-
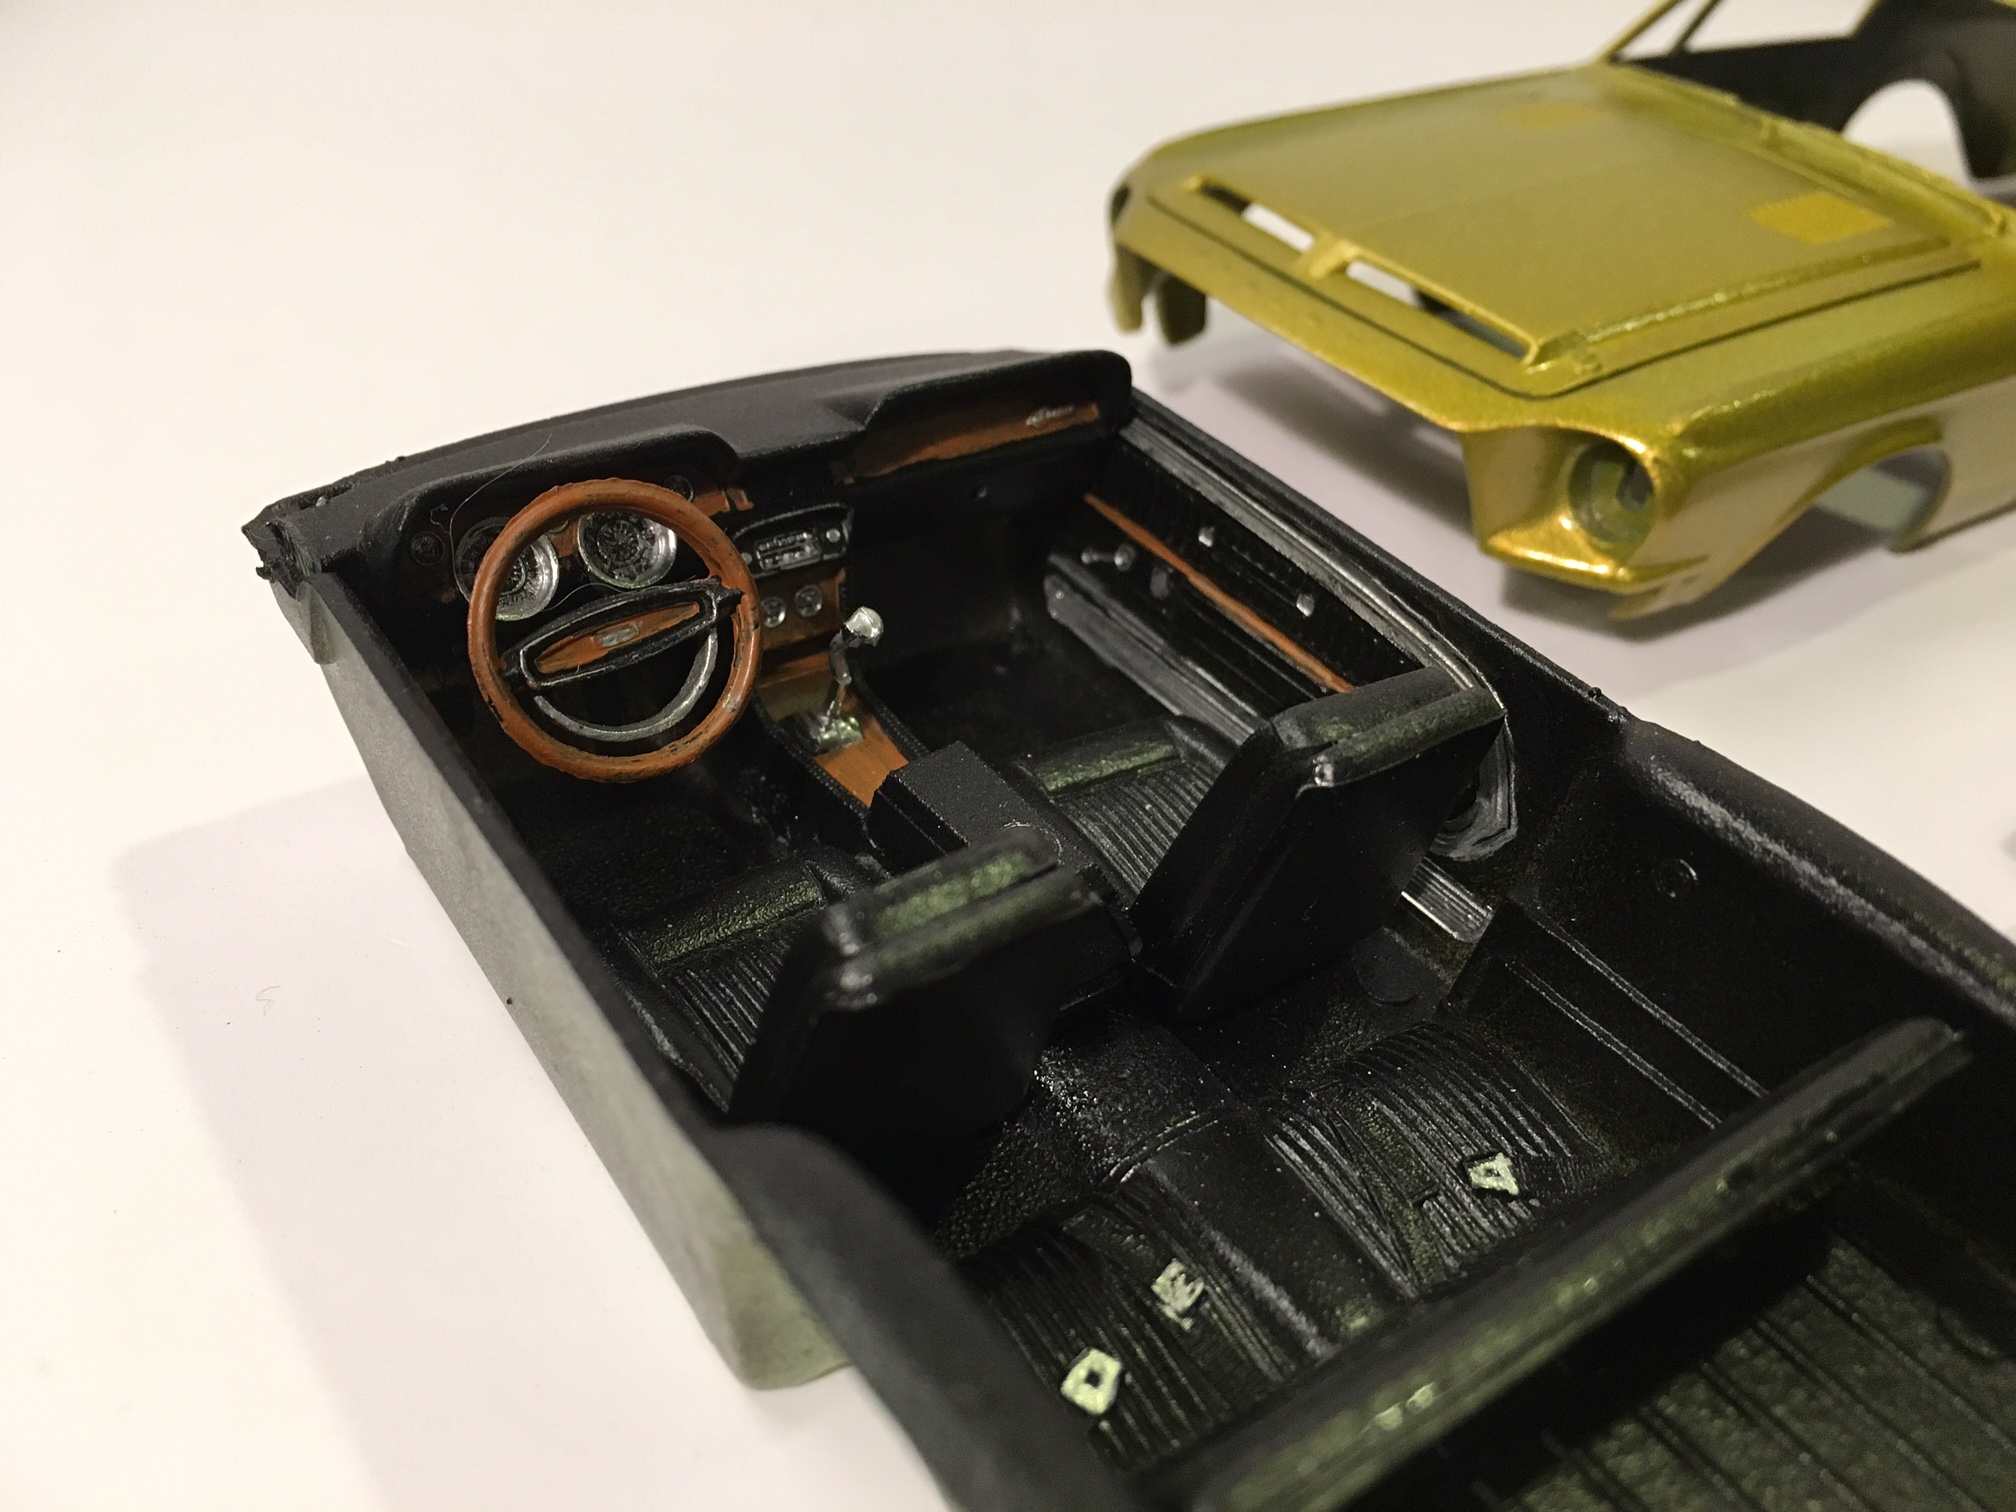
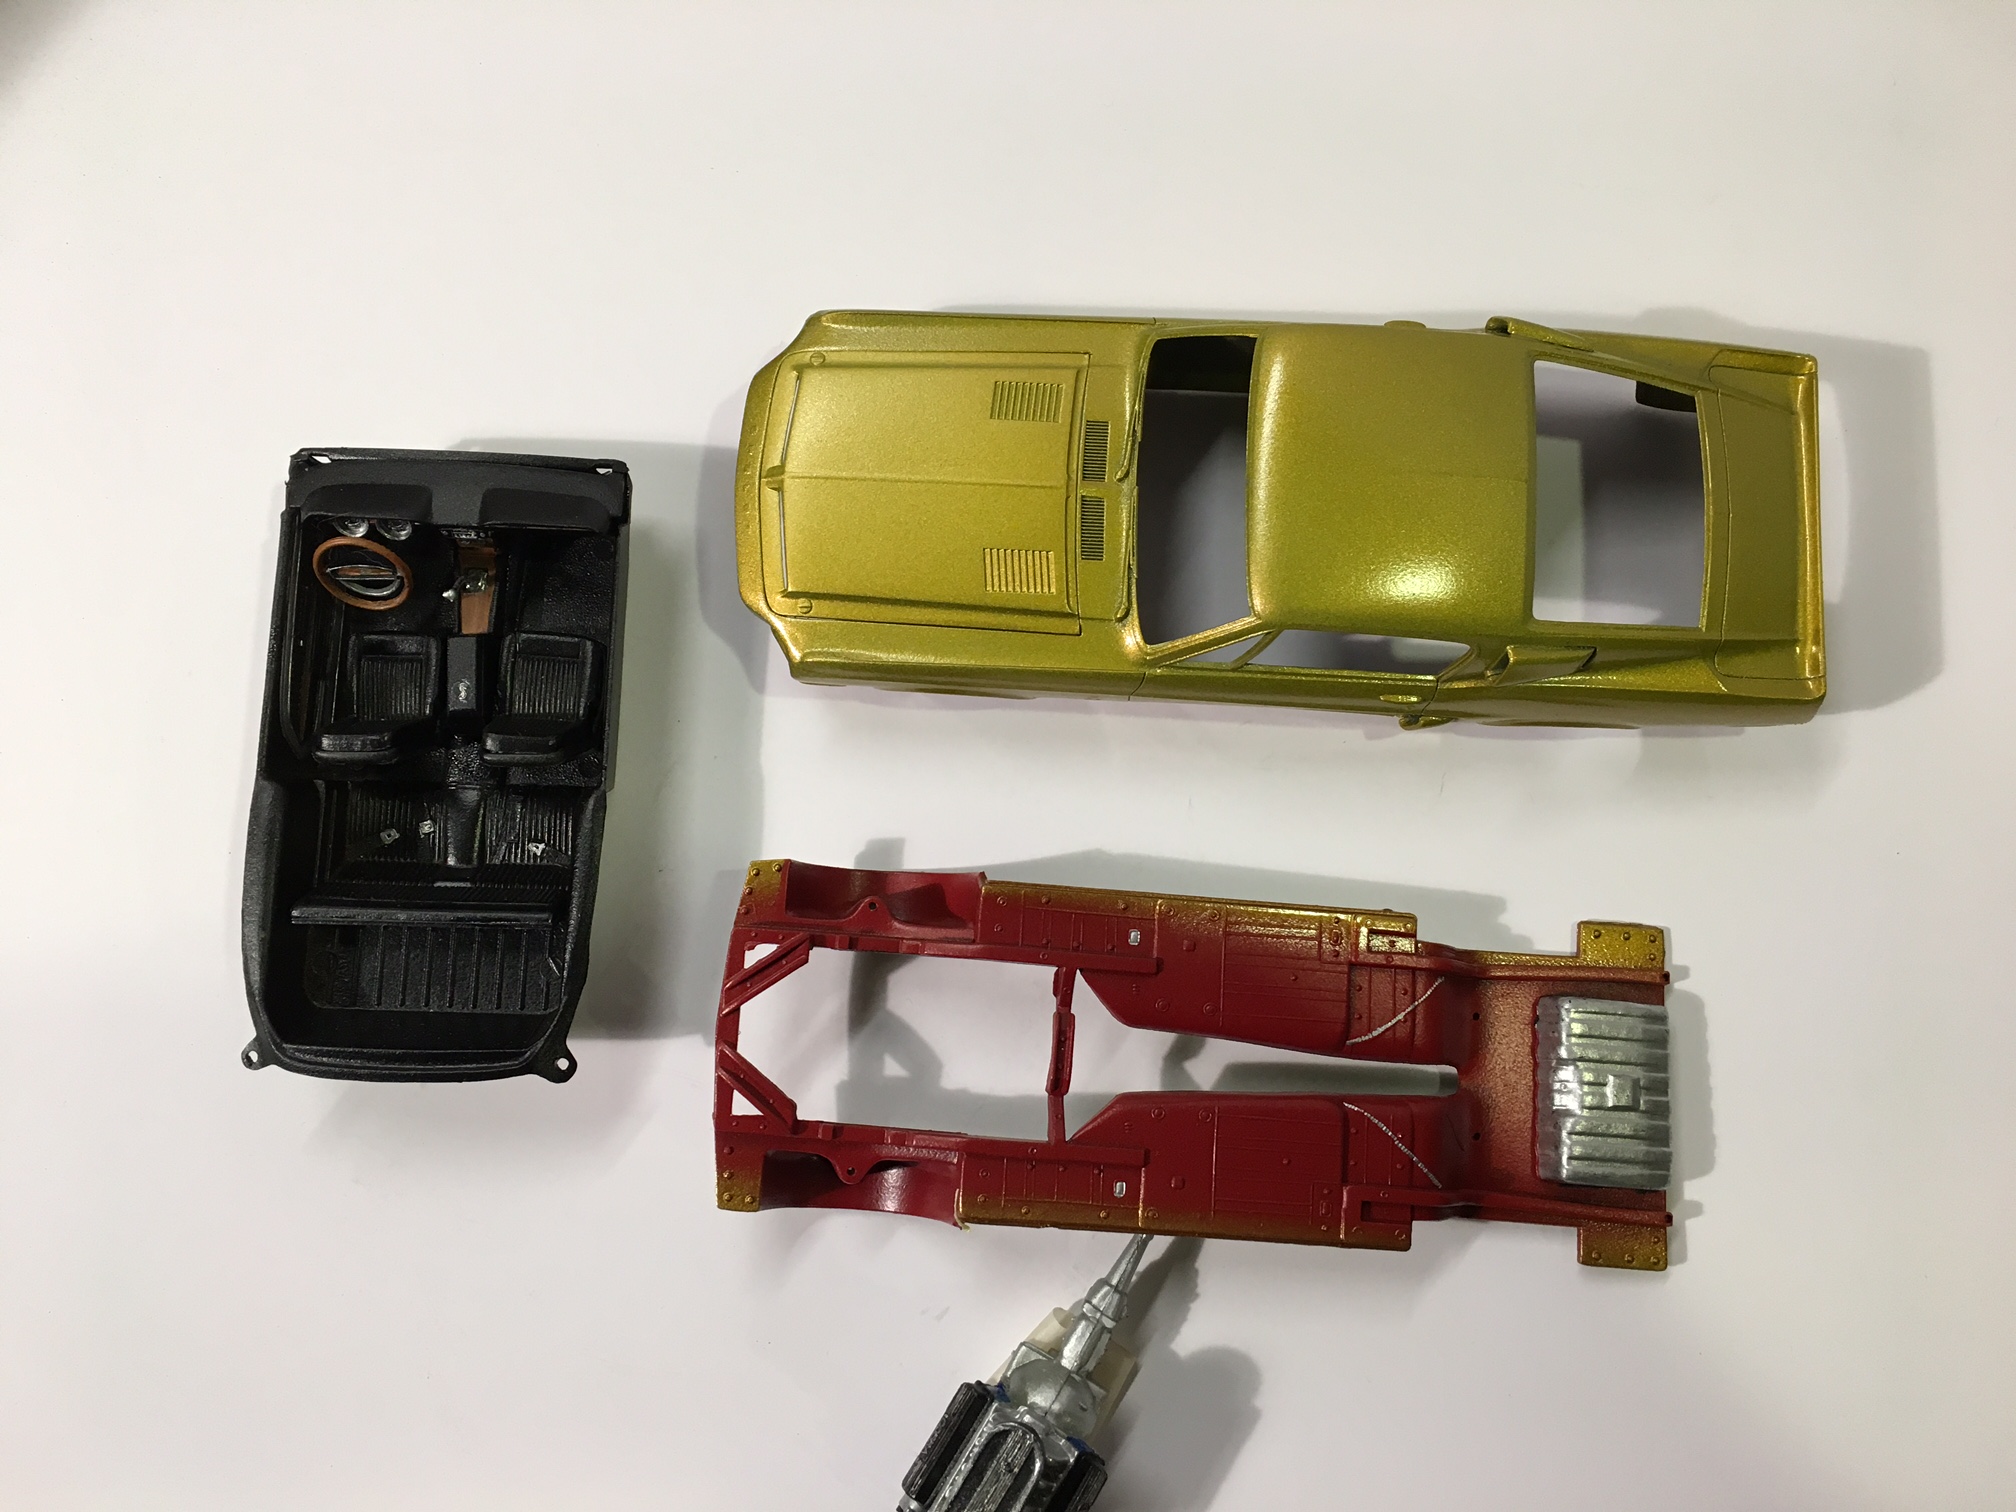
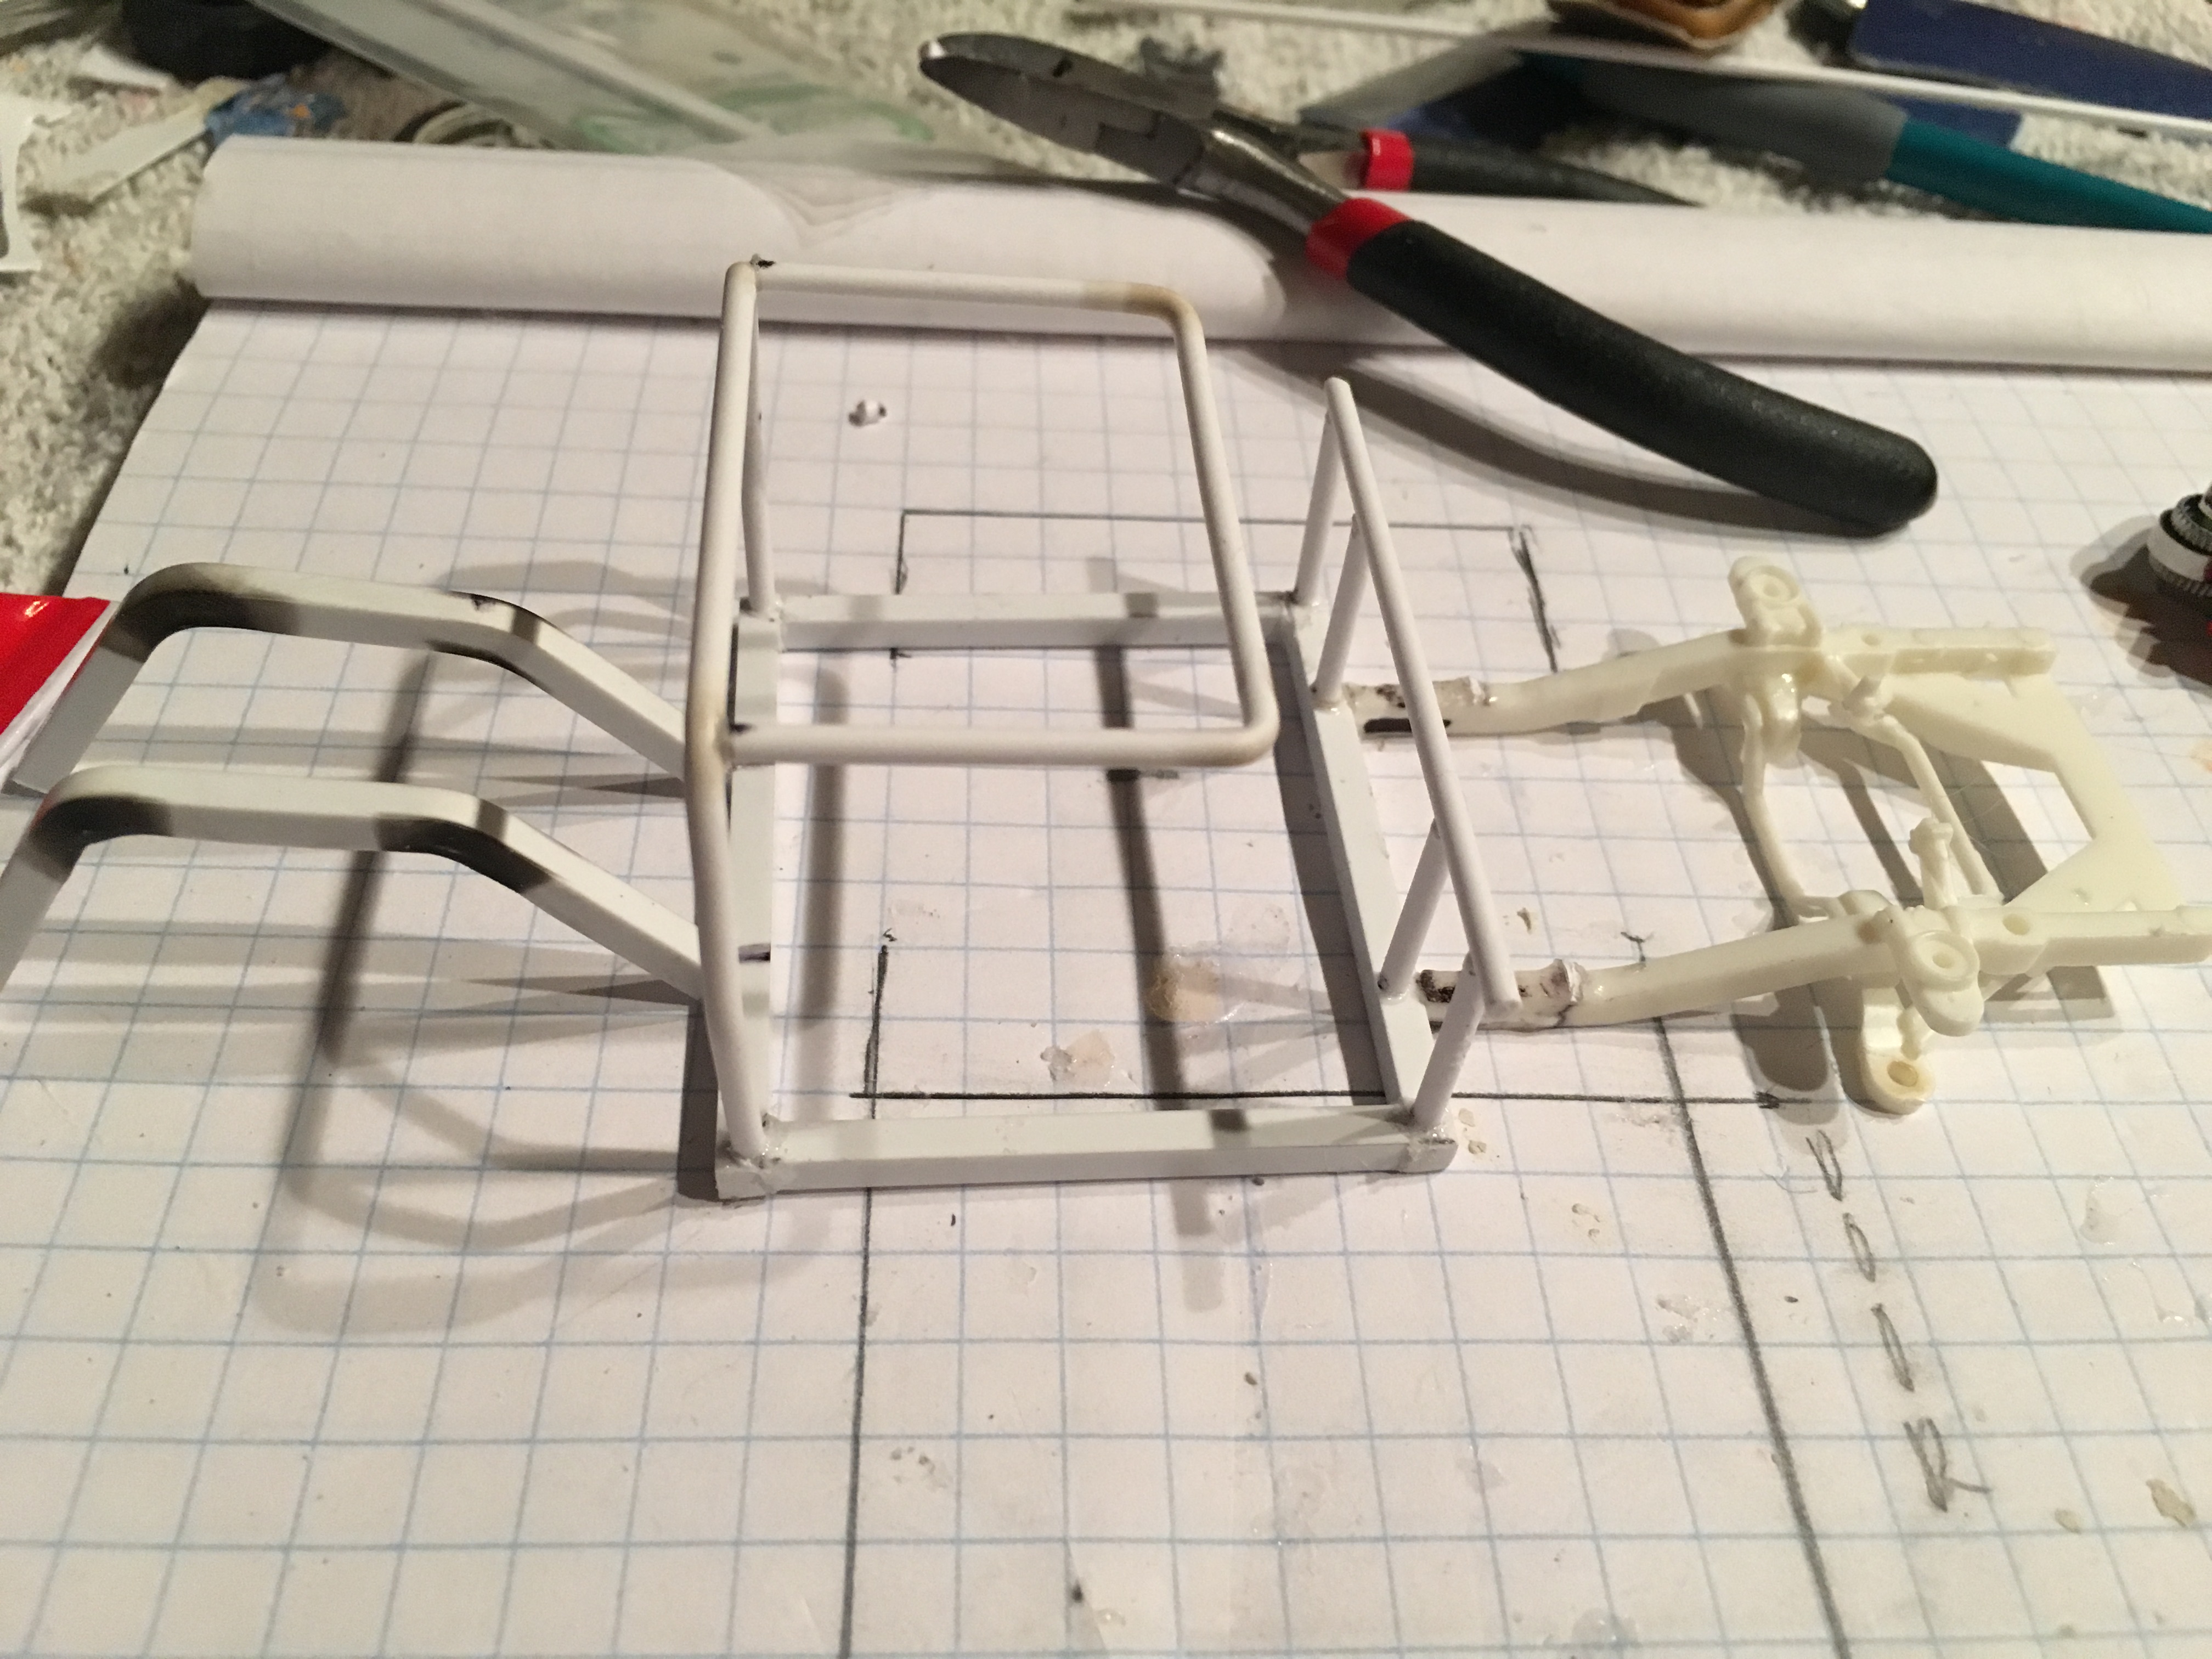
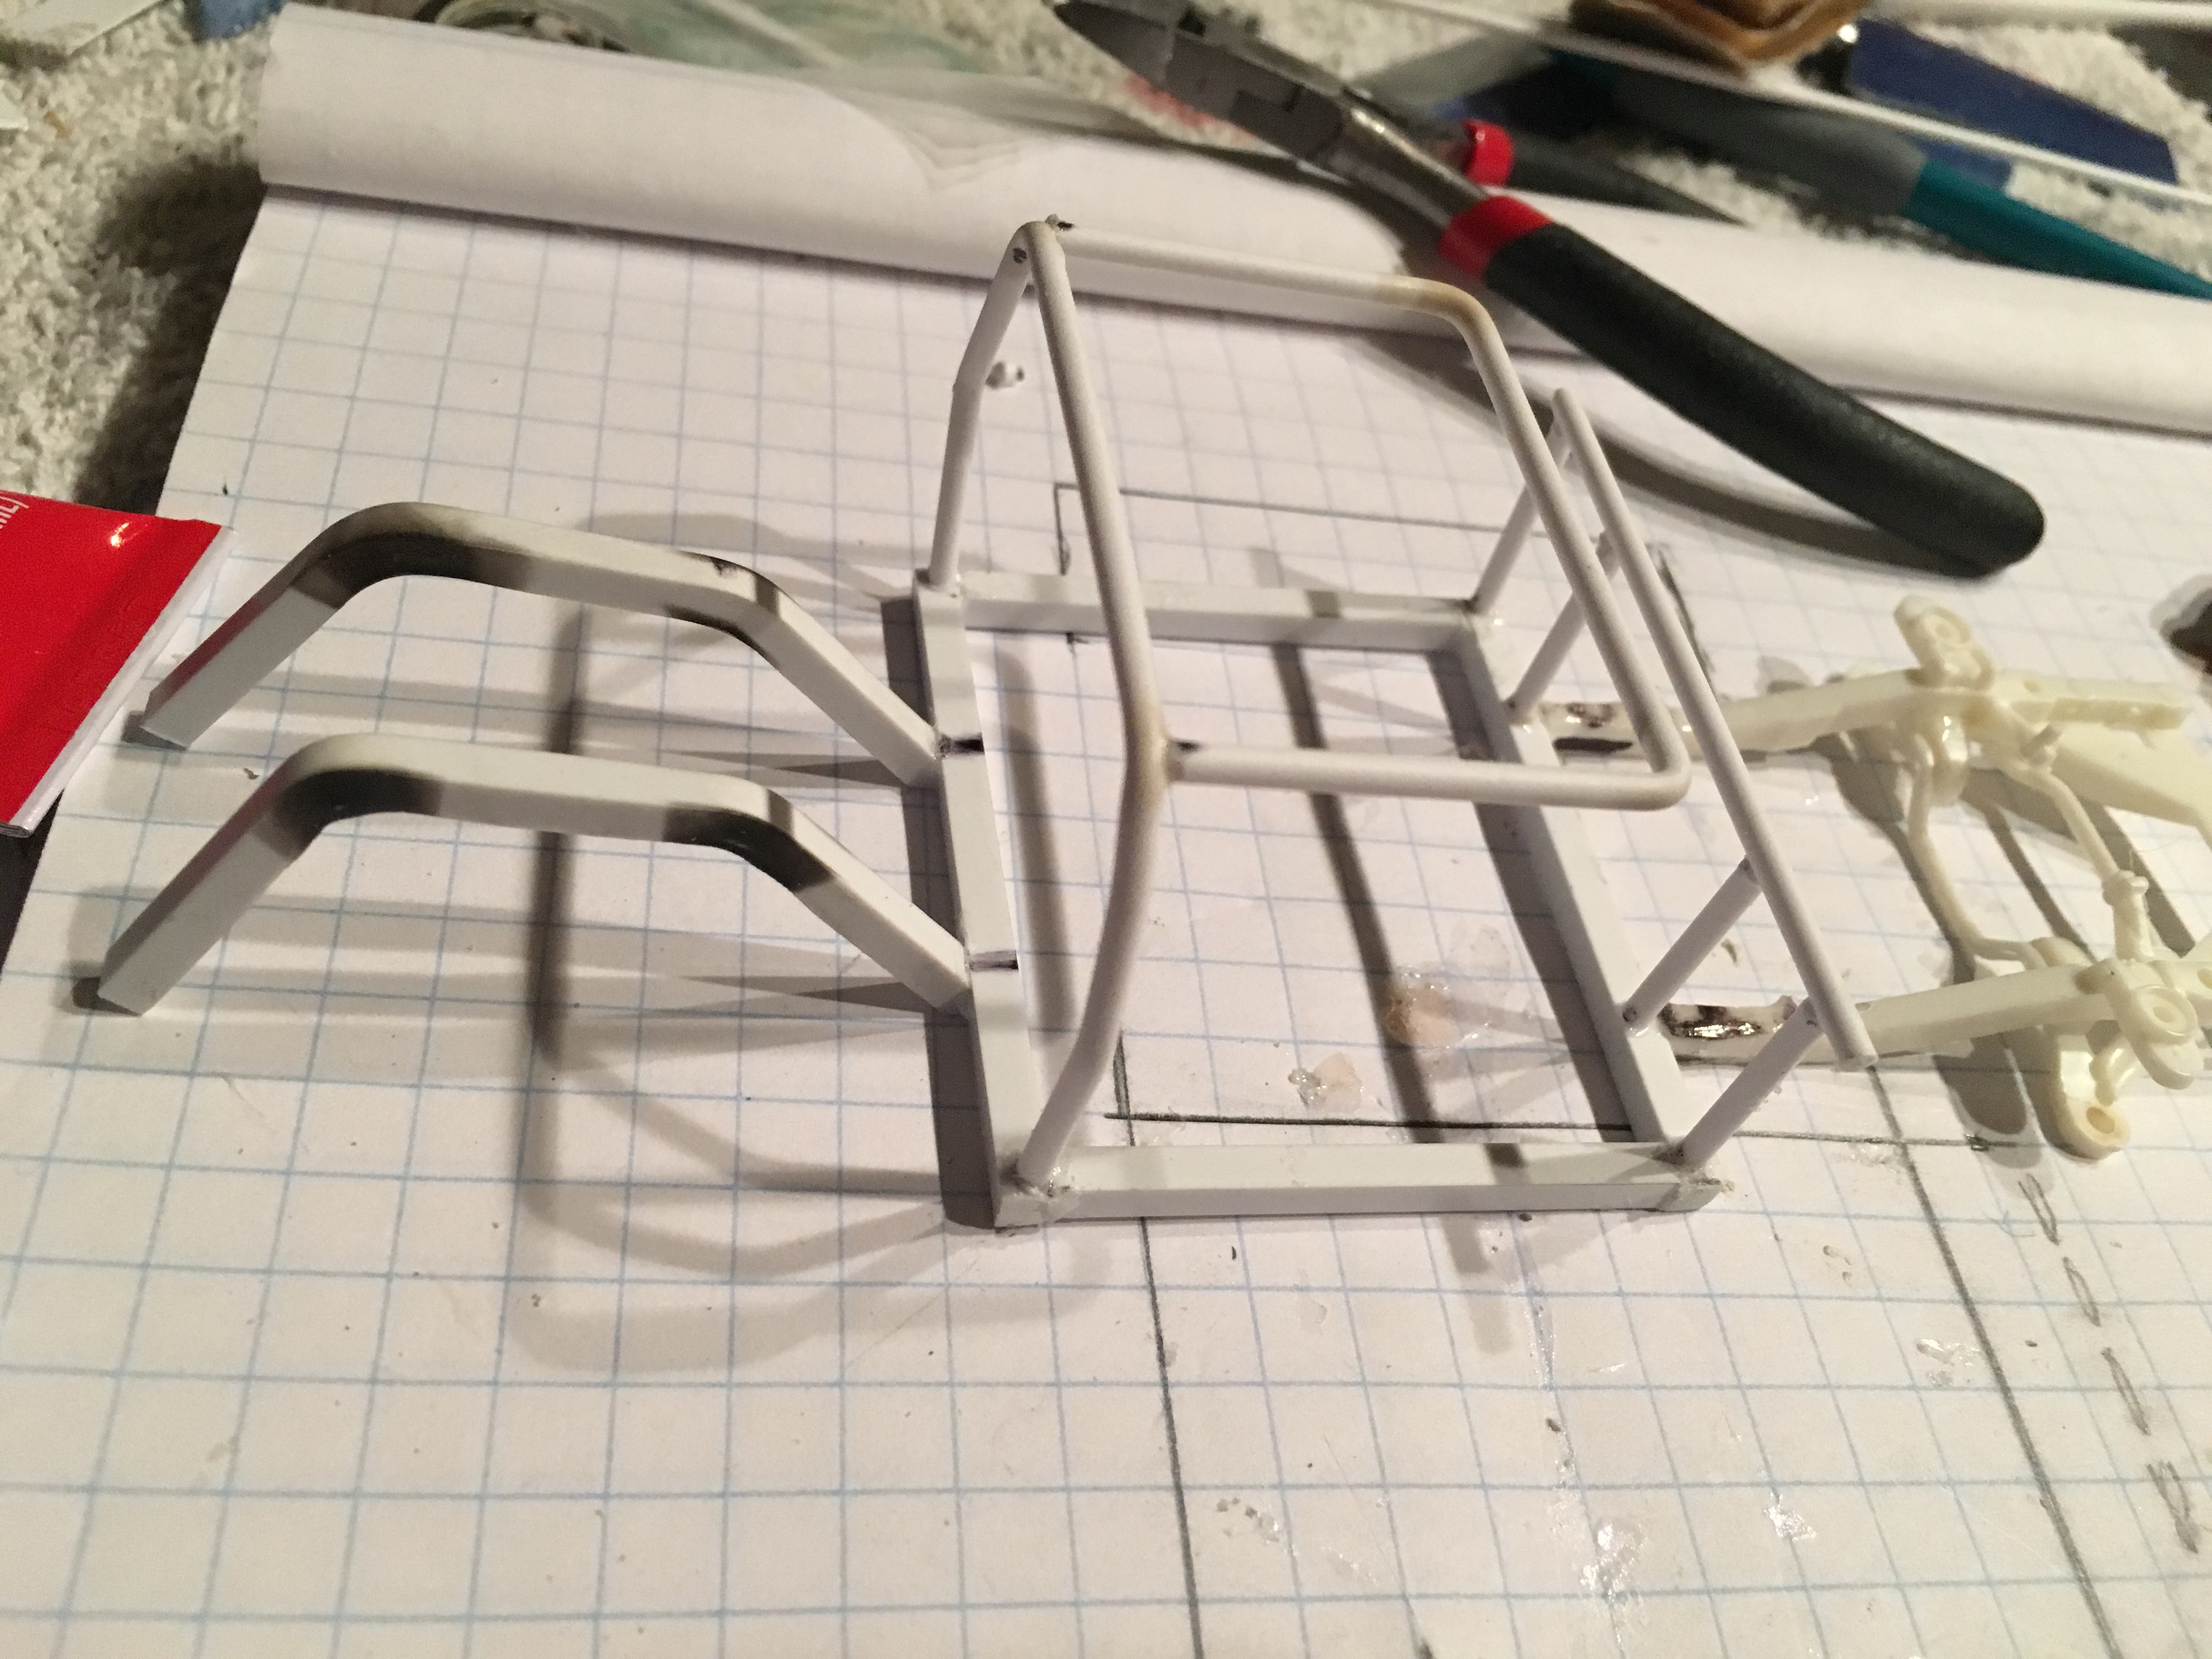
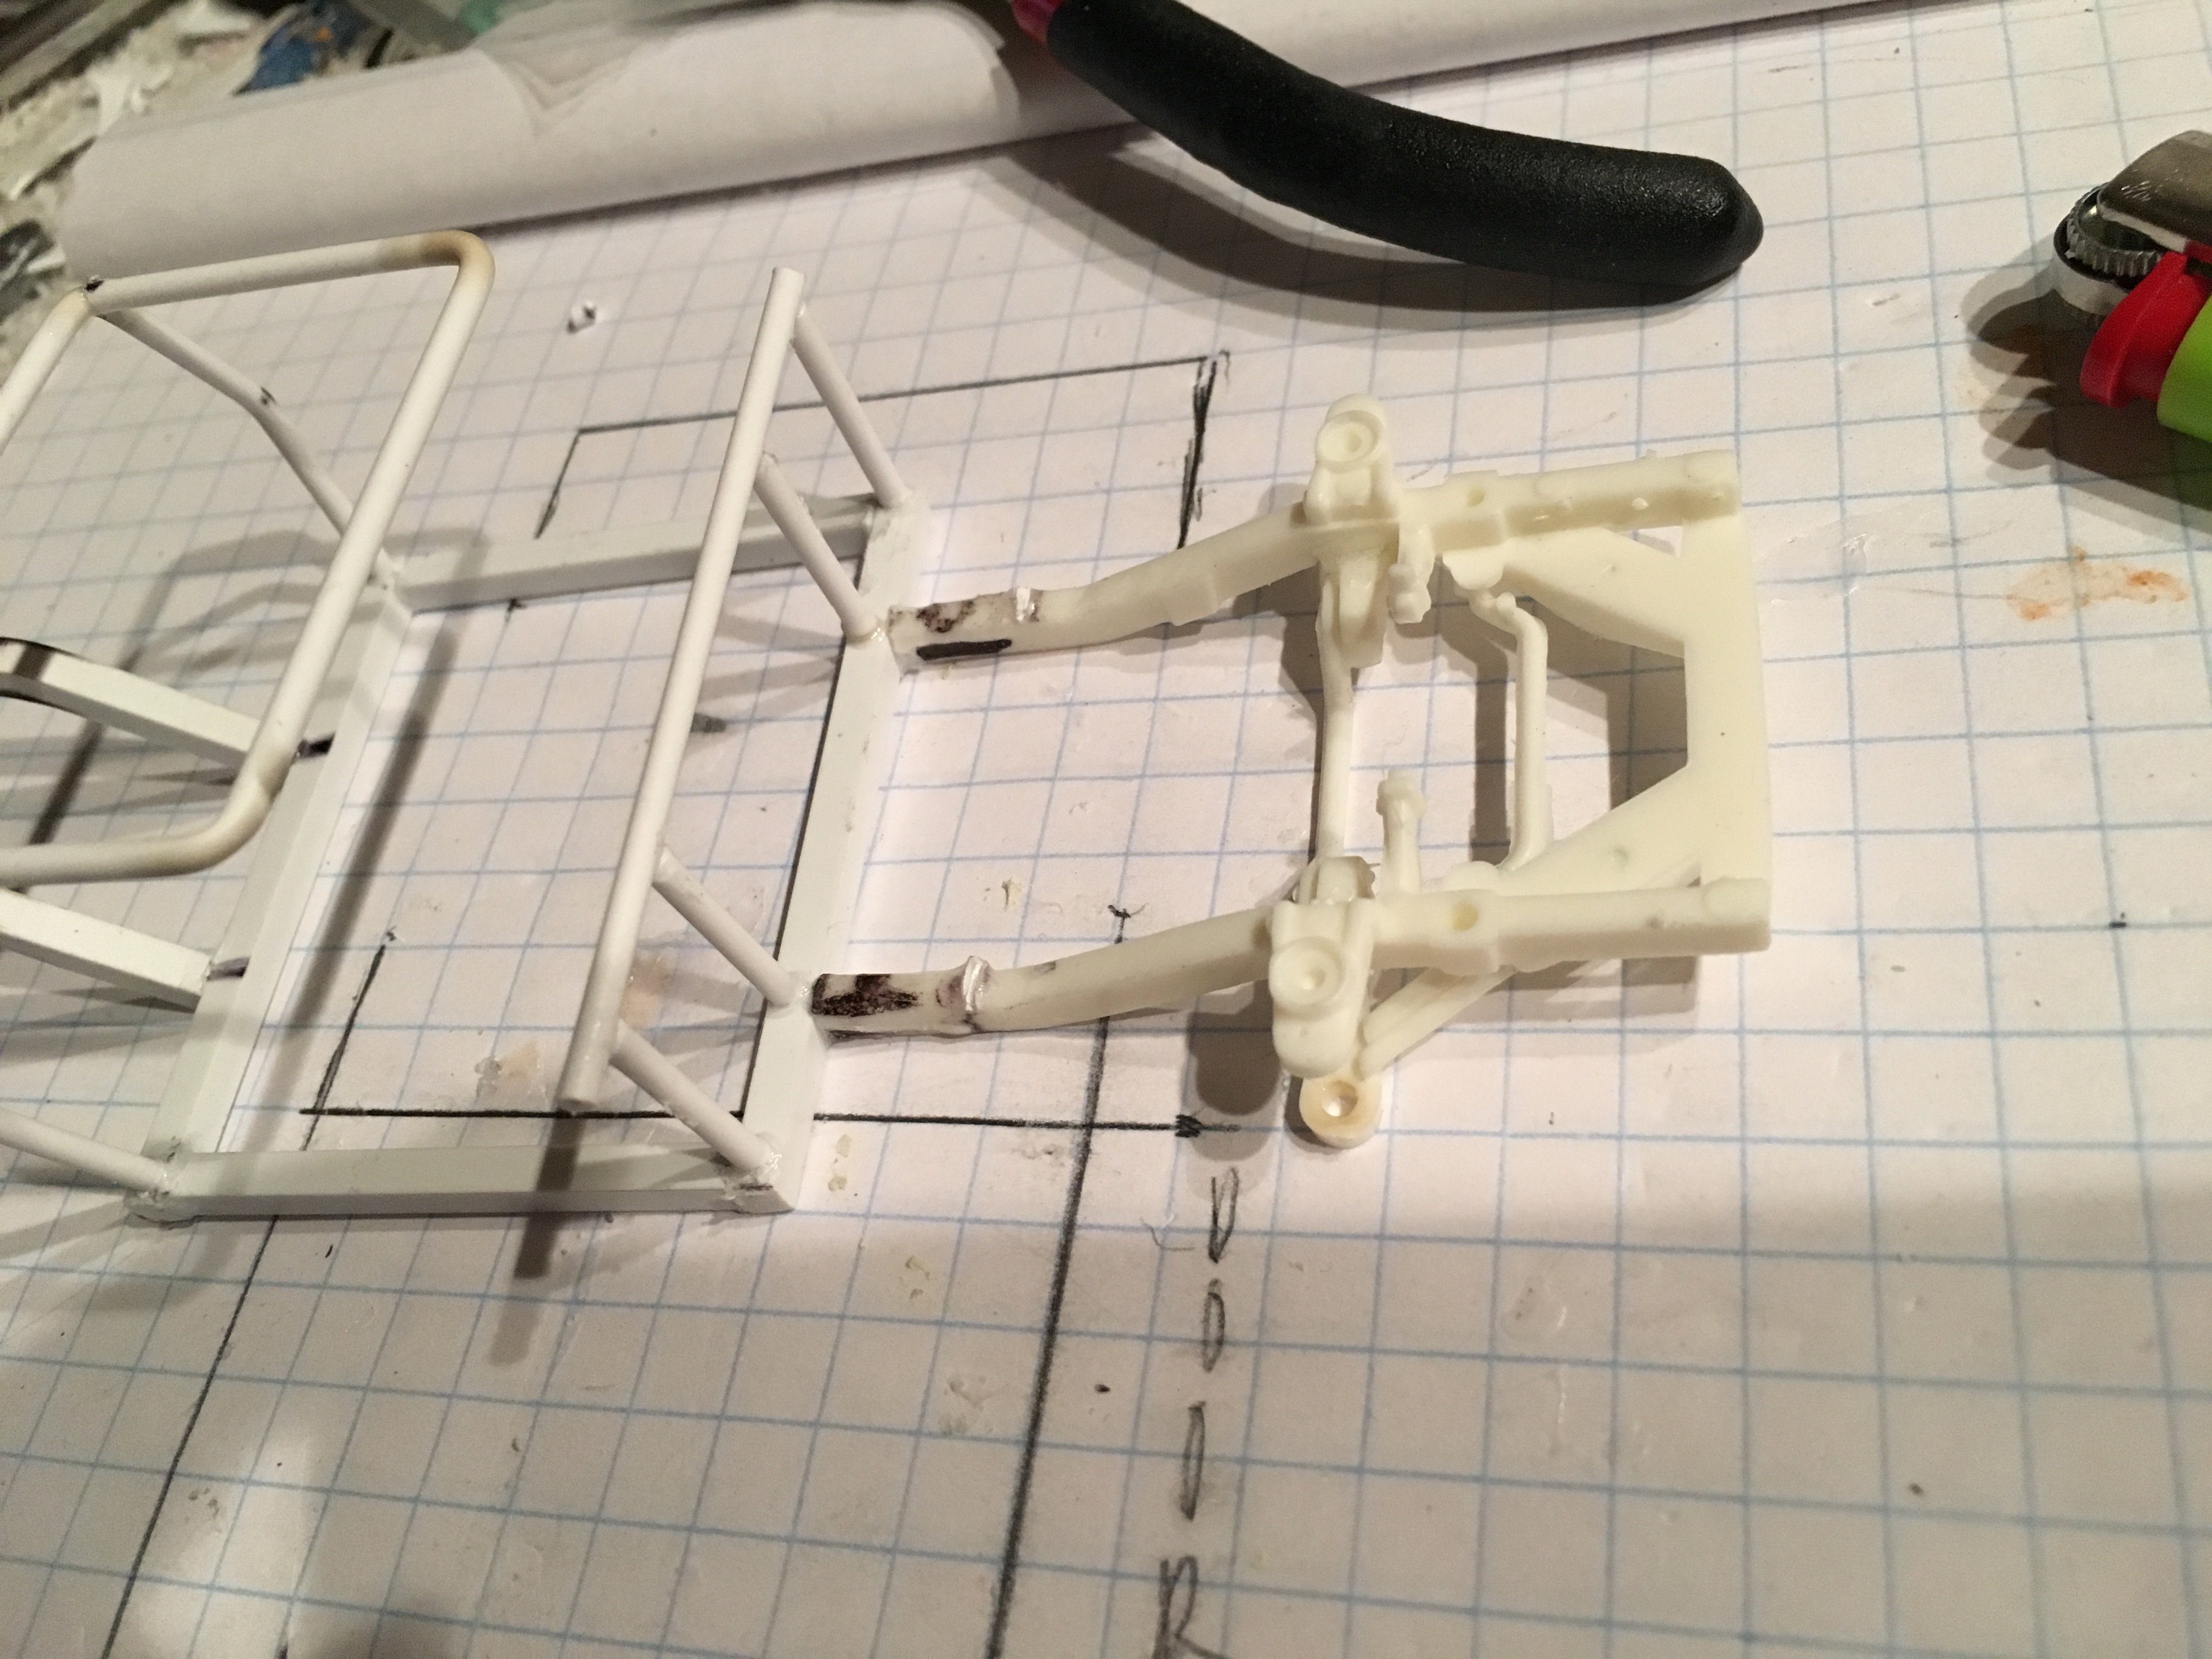
This is going to be a build of the first 1:1 car I owned. I bought it for $100 when I was 16, and yanked out the worn-out 6 and swapped in a 260 from a Falcon. It was a learning experience! The dents in the door are where I kicked it continuously. I was an angry young man! Ride height adjusted in the rear for the worn-out leaf springs. You've got to love metal axles! Chassis detail is not a priority on this one. The 4-lug wheels remained on the 1:1 car after the engine swap. I cast these in resin, cloned from a Tamiya Lotus Seven kit, thanks to fellow modeler from this site for the tip. The distributor on left supplied in the AMT kit is meager to say the least. Thanks to this site for a tip on casting your own distributor, I cast some pieces of wire insulation into a resin copy of a distributor from my parts box. The distributor vacuum advance sits right up front for all to see, so I thought I would add one. The following pics show the process of making one from some old pieces of sprue and a piece of wire. More to come..
-
This is my first build in about 6-7 years. Wanted to start off somewhat simple and get back to the basics. Not a huge fan of the kit that this came in, but I made it work. I would love feedback with tips etc!
-
Hi all, well after about two years I finally finished my model. This is probably the best level I have done. I bought a compressor to do air brush painting, chrome marker for window trim. Stuff I never did before. Undercarriage is based on some stock looks when they resprayed at the Shelby facilities. Still had some funky stuff with fitting things (hood warped, body doesn't fit exactly flush on passenger side, etc...) But overall, very pleased on final results. Of course I love to take photos so here they are!
-
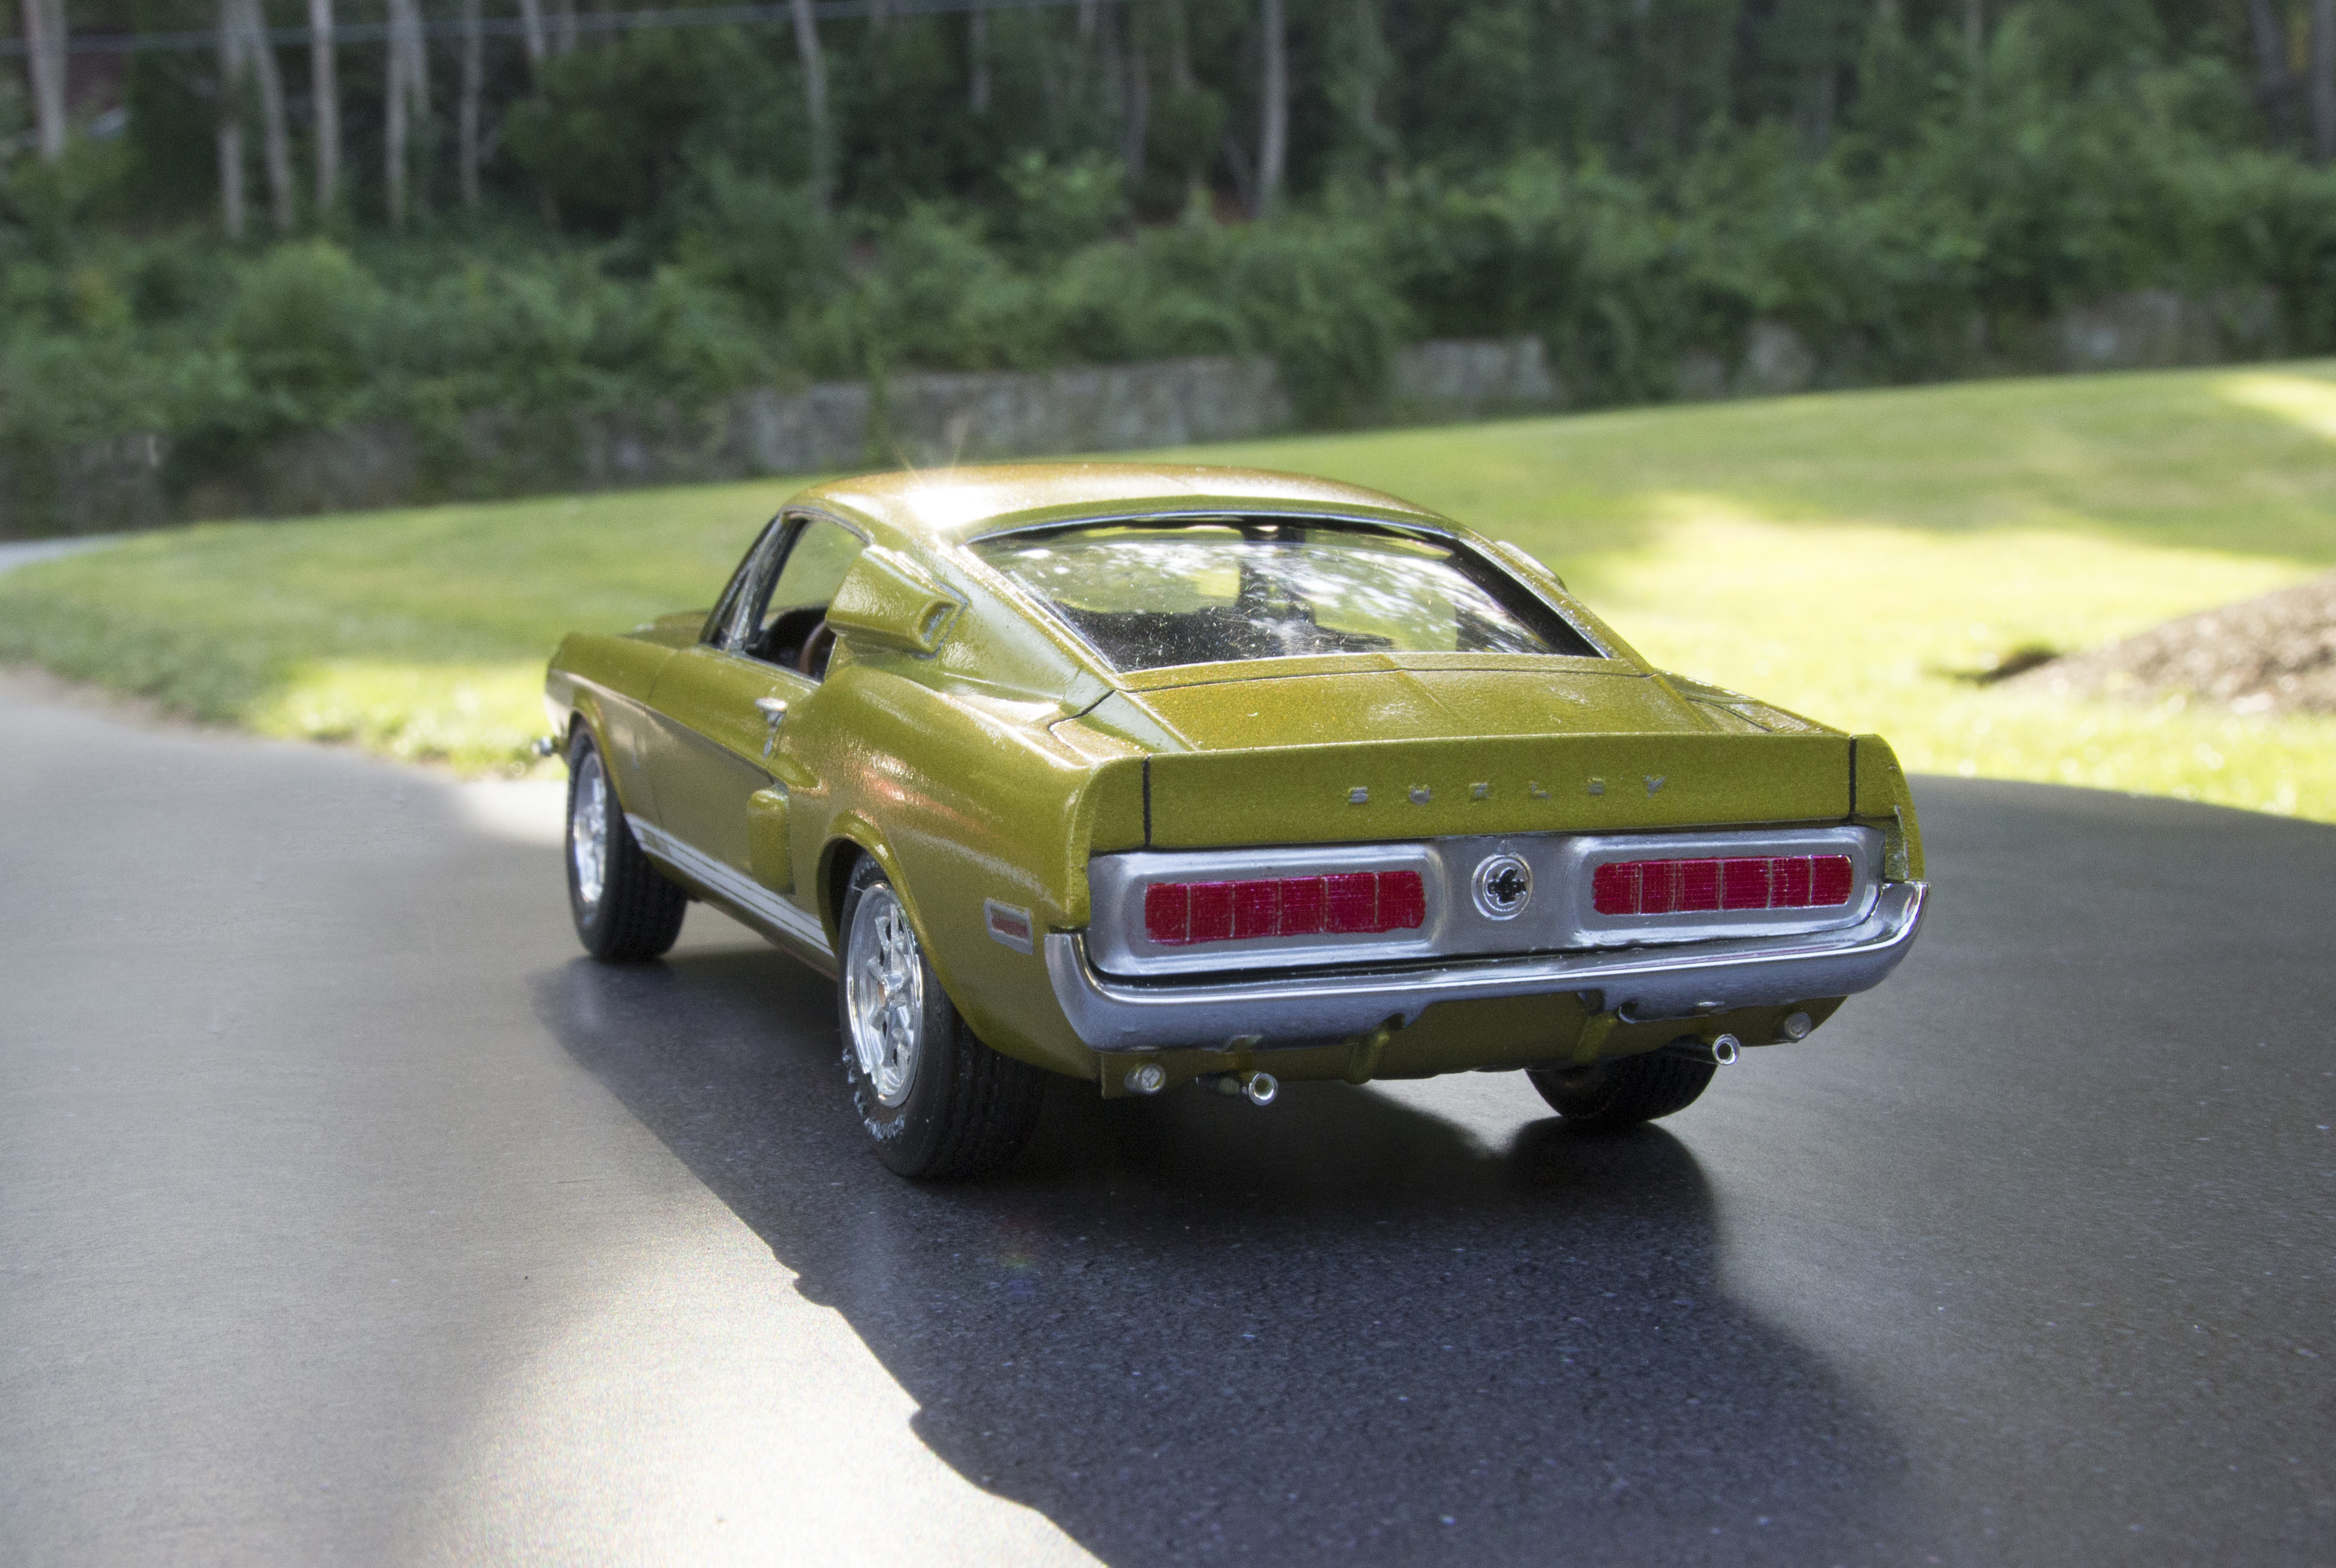
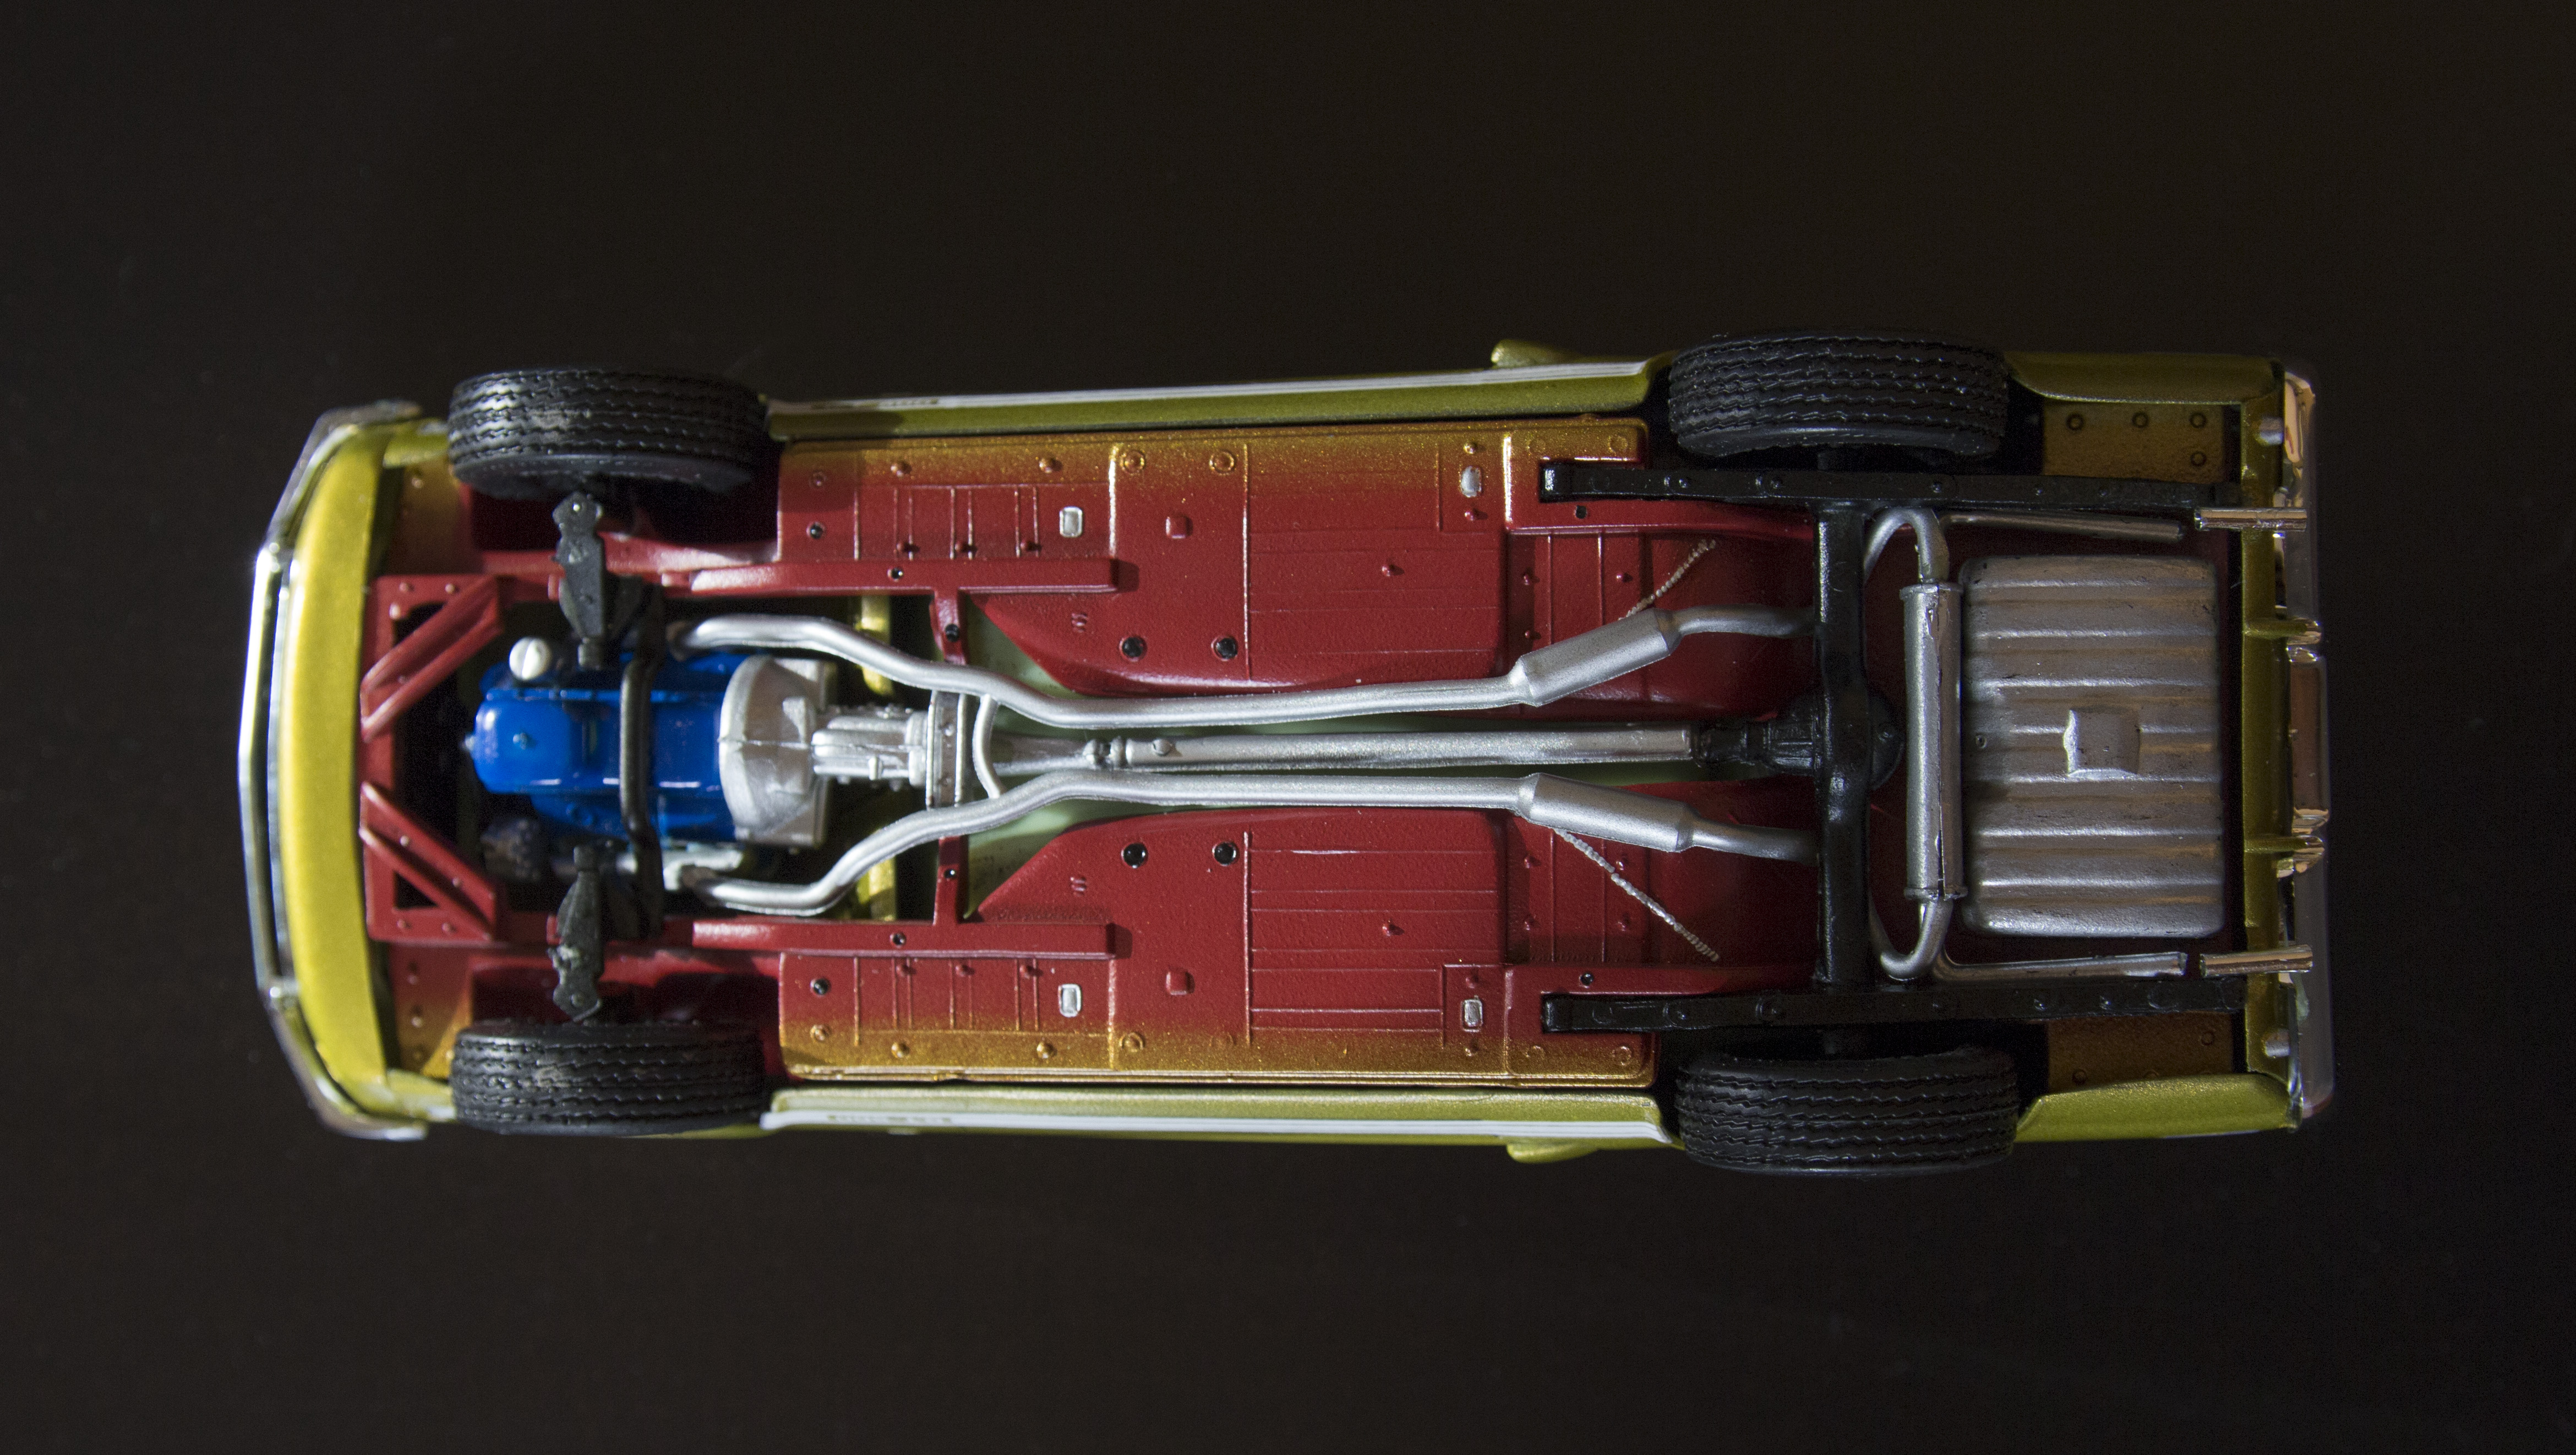
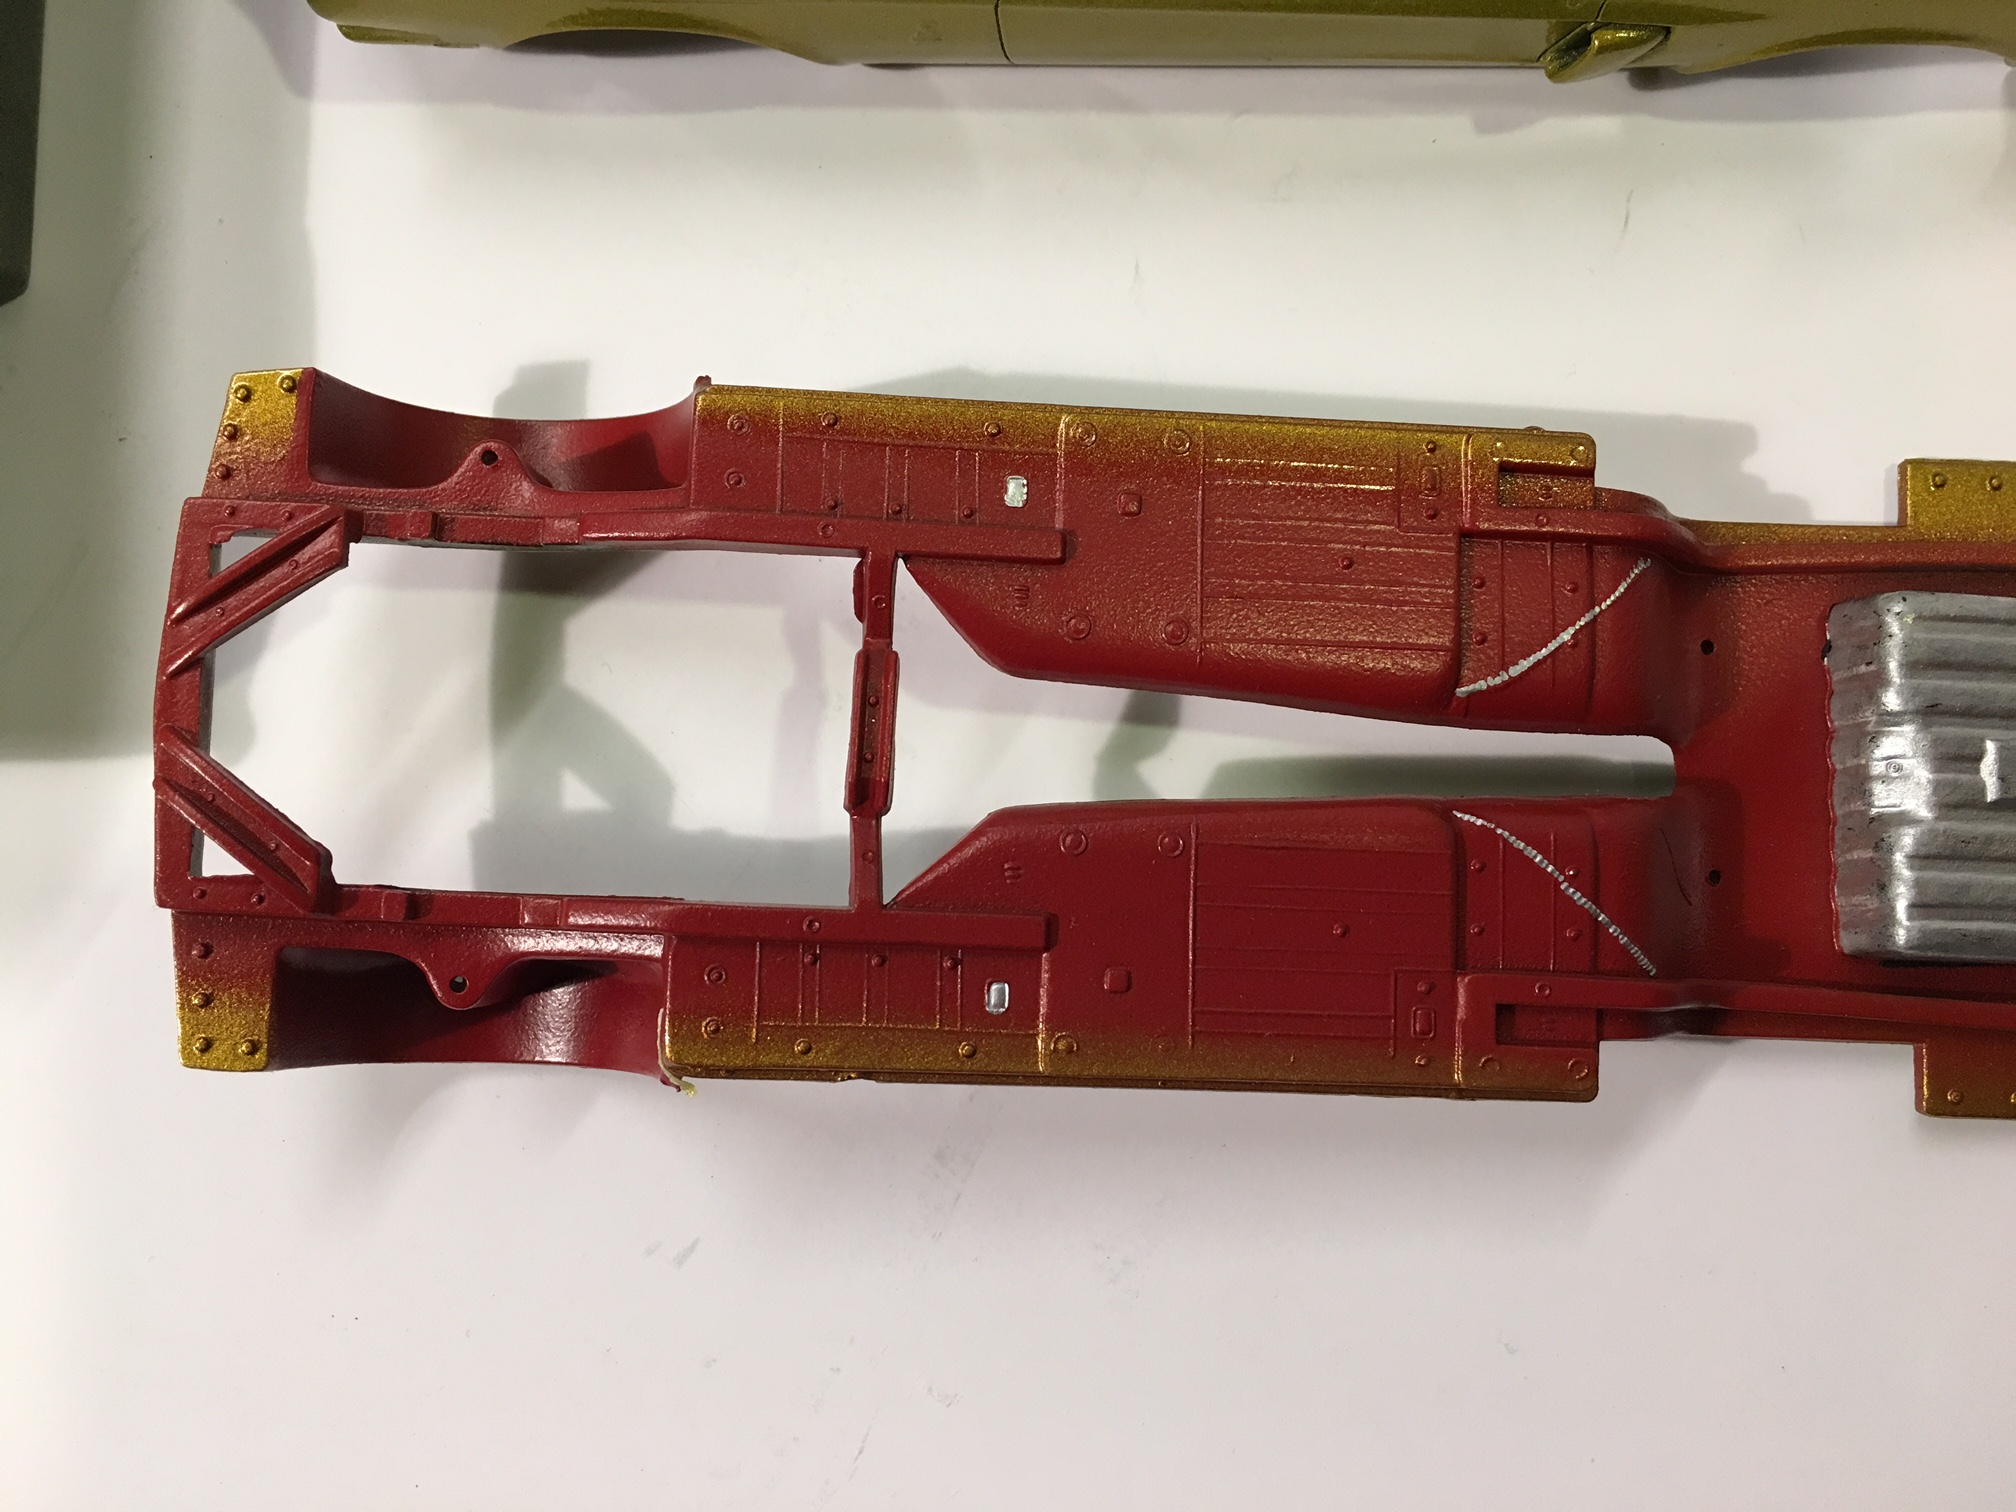
I started this build way back around Christmas of 2016 and recently got around to finishing it. I hope it isn't too hard on the eyes. I had allot of problems with getting the frontal area to fit right, warped pieces and my eyes don't mix too well these days. At any rate it was a fun build when things went right. I call her "GOLD FINGER"! IMGP0010.PEF IMGP0019.PEF IMGP0012.PEF IMGP0024.PEF IMGP0030.PEF IMGP0034.PEF IMGP0031.PEF
-
-
Hi all. Well this is been a slow ongoing model build. I finally got the body sprayed and just yesterday I clear coated it. This is the first time I've gone this this level of spraying using a Badger air brush. These pix are before clear coat. The undercarriage is based on some pre undercoated Shelby bodies I've seen on the web. They have that little over spray on them which I thought was cool to try. Next step is wet sanding/compounding the final clear coat. Really want to see if I can make this thing shine!
-
Hi all, I've been working on a '68 Shelby Mustang for about 1 year now. Trying to get back into it from a long time not building. I wanted to really step up my game with an air brush. I just finished with the color and now I'm going to be going to the clear coating. I looked up Shelby Mustangs and they had this cool "over spray" on bottom of car when it was not undercoated. So I went the red undercarriage and did a little overspray for the bottom. Haven't done much else yet.
-
Does anyone know where I could get some rear window louvers made or purchased for my 1965 Mustang fastback 2+2 Revell Germany 1/24th model kit? My car in real life has a set of those on it as an aftermarket add on. I purchased a 1970 Mach1 1/24th kit that had louvers with it, but they were too small for my mustang kit. The rear window of the 65 fastback is wider that the mach1 rear window. Would pay a good price for a set if it is even possible to do or to find. Any help or direction would be greatly appreciated, thanks!!! Kevin
-
Hey everyone! I decided to pick up one of the Revell 2015 Mustang GT kits from the build and play series. I got tired of waiting to see if there would be a full detail kit coming soon. Are you listening, Revell? People will buy this kit! Anyway, I decided to detail the interior and what little that I could on this kit, for as simply detailed it is as it stand. I just wanted a quick and satisfying build. The body was painted in Duplicolor's Storm Gray over Duplicolor gray primer. The color is close to Ford's Guardsman Gray Metallic. I'll hopefully be able to get the clear coat sprayed tomorrow and I'll try and get the interior pictures up tonight or tomorrow. Thanks for looking!
-
Starting on a Custom Monogram 94' Mustang GT in 1:25 Scale. I plan to paint it Testors Gloss Bright Blue. (Changed To Testors Blue Metal Flake) Wanted to get rid of the side badges that said GT Mustang before paint (already sanded). The mold is in yellow and I need to get primer so I will paint as soon as I get some. As for the wheels I will be using spare painted Tamiya R32 Skyline Rims and Tires (Black/Blue Lip, will touch them up a little). It's also going to be Wingless and the Headlights will be yellow tinted and Taillights black tinted. Kinda what I'm going for, could not make exact vision but good enough. Hope you all Enjoy!
-
Finished my Shelby. I'm pretty pleased with it. Learned a few things I'll apply to my next shiny build. I'm used to building beaters my last 3 builds
-
This is the Mustang 1970 Boss 429 I just finished. First model in 20+ year for me and I must admit that I'm quite happy with the result. Far from perfect but I've learnt so many things while doing it, it's only going to make the next model better. Body Color: Testor Competition Orange/Flat Black, Tamiya Clear Coat. (all rattle can...don't have an airbush yet...) Scratchbuilt the battery (and cables),front shocks and spring, windshield washer fluid tank, wired the engine ignition...(well partially...) IMG_9573 IMG_9579 IMG_9545 IMG_9568
-
I've been building models for exactly 1 year now. Most of my builds have been turbocharged outlaw cars and have scratch built chassis along with a lot of other things.


.JPG.2c134f9f049e0e489b39e9ba81234bd4.JPG)