Search the Community
Showing results for tags 'pontiac'.
-
Another project I am working on simultaneously with my 91 Ford LTD Crown Victoria P71. A 76-77 Pontiac LeMans Enforcer, or in other words, Sheriff Buford T. Justice's ride. :-) Also used by many other dept.'s across the country including my buddy Bill in DFW who is waiting oh, so patiently for this one. So I THINK I am finally getting past the 80% mark. Apologies for the pics. My regular camera died, and I don't know much about adjusting the controls of my video cam that also takes pics but here are a few of it as best I could get. On top of it all they removed my fav. pic grooming program as well from my 'puter. Still a bit rough, but almost ready for drip moldings, trim, tail lights and other fine details and then it will be done. At least to me. Feel free to criticize & point out deficiencies, and thanks for stopping by..

-
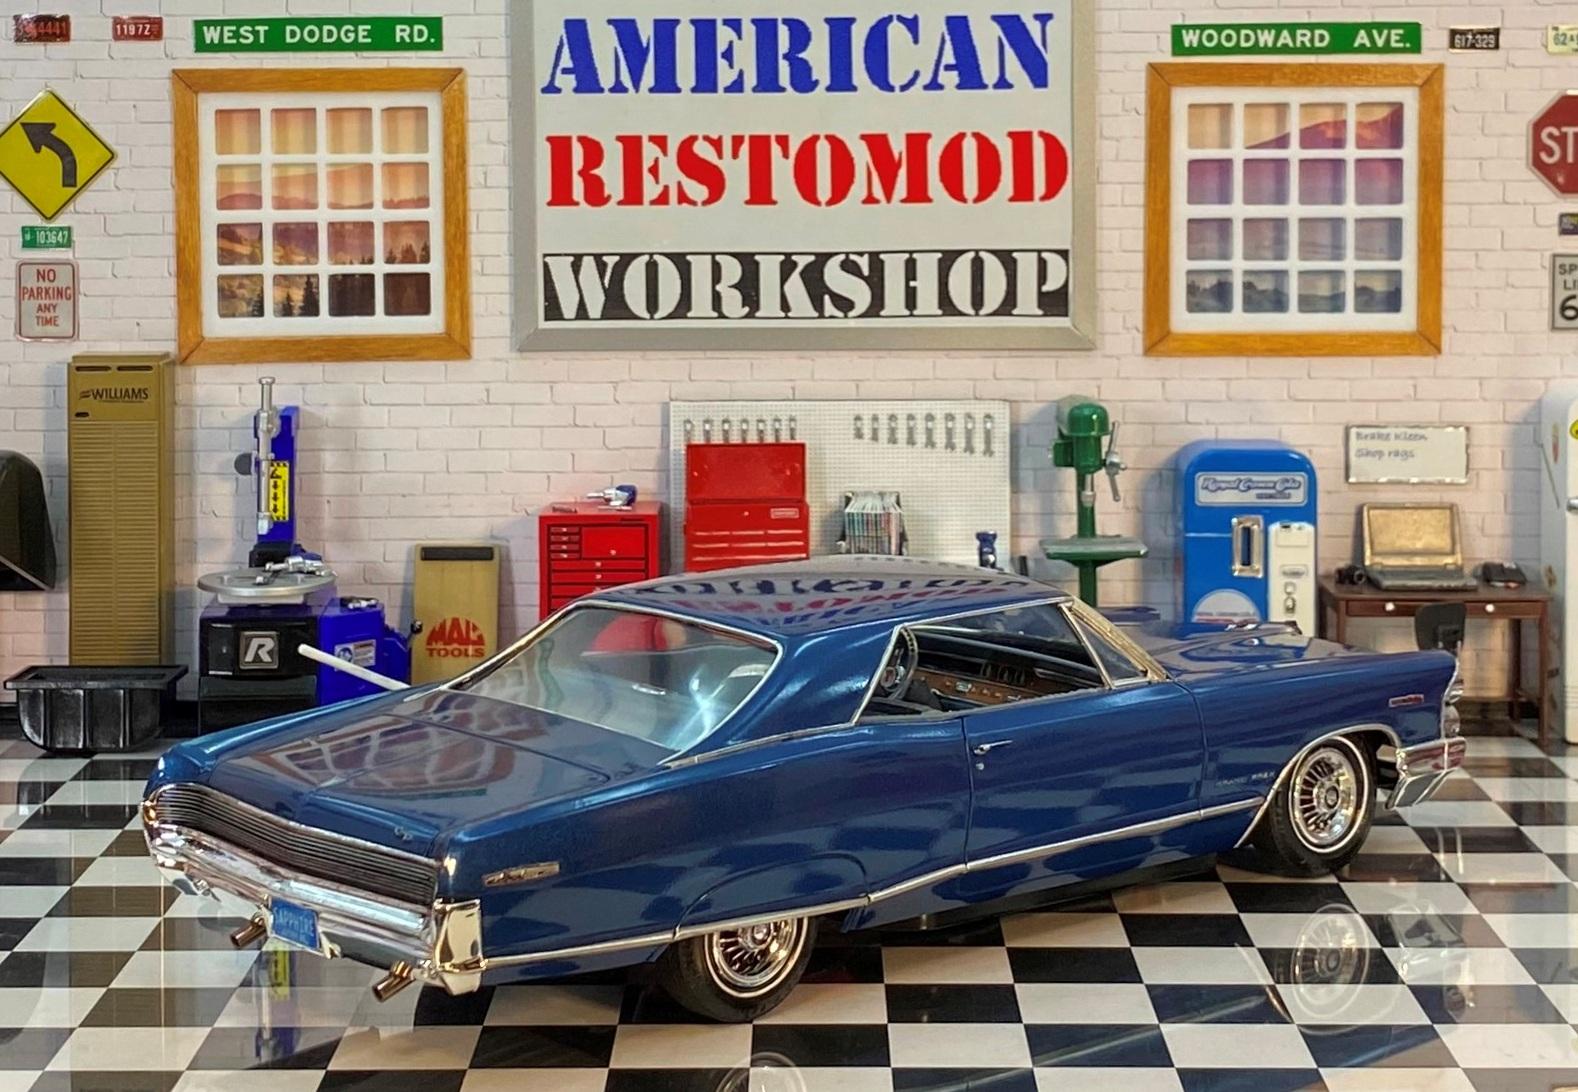
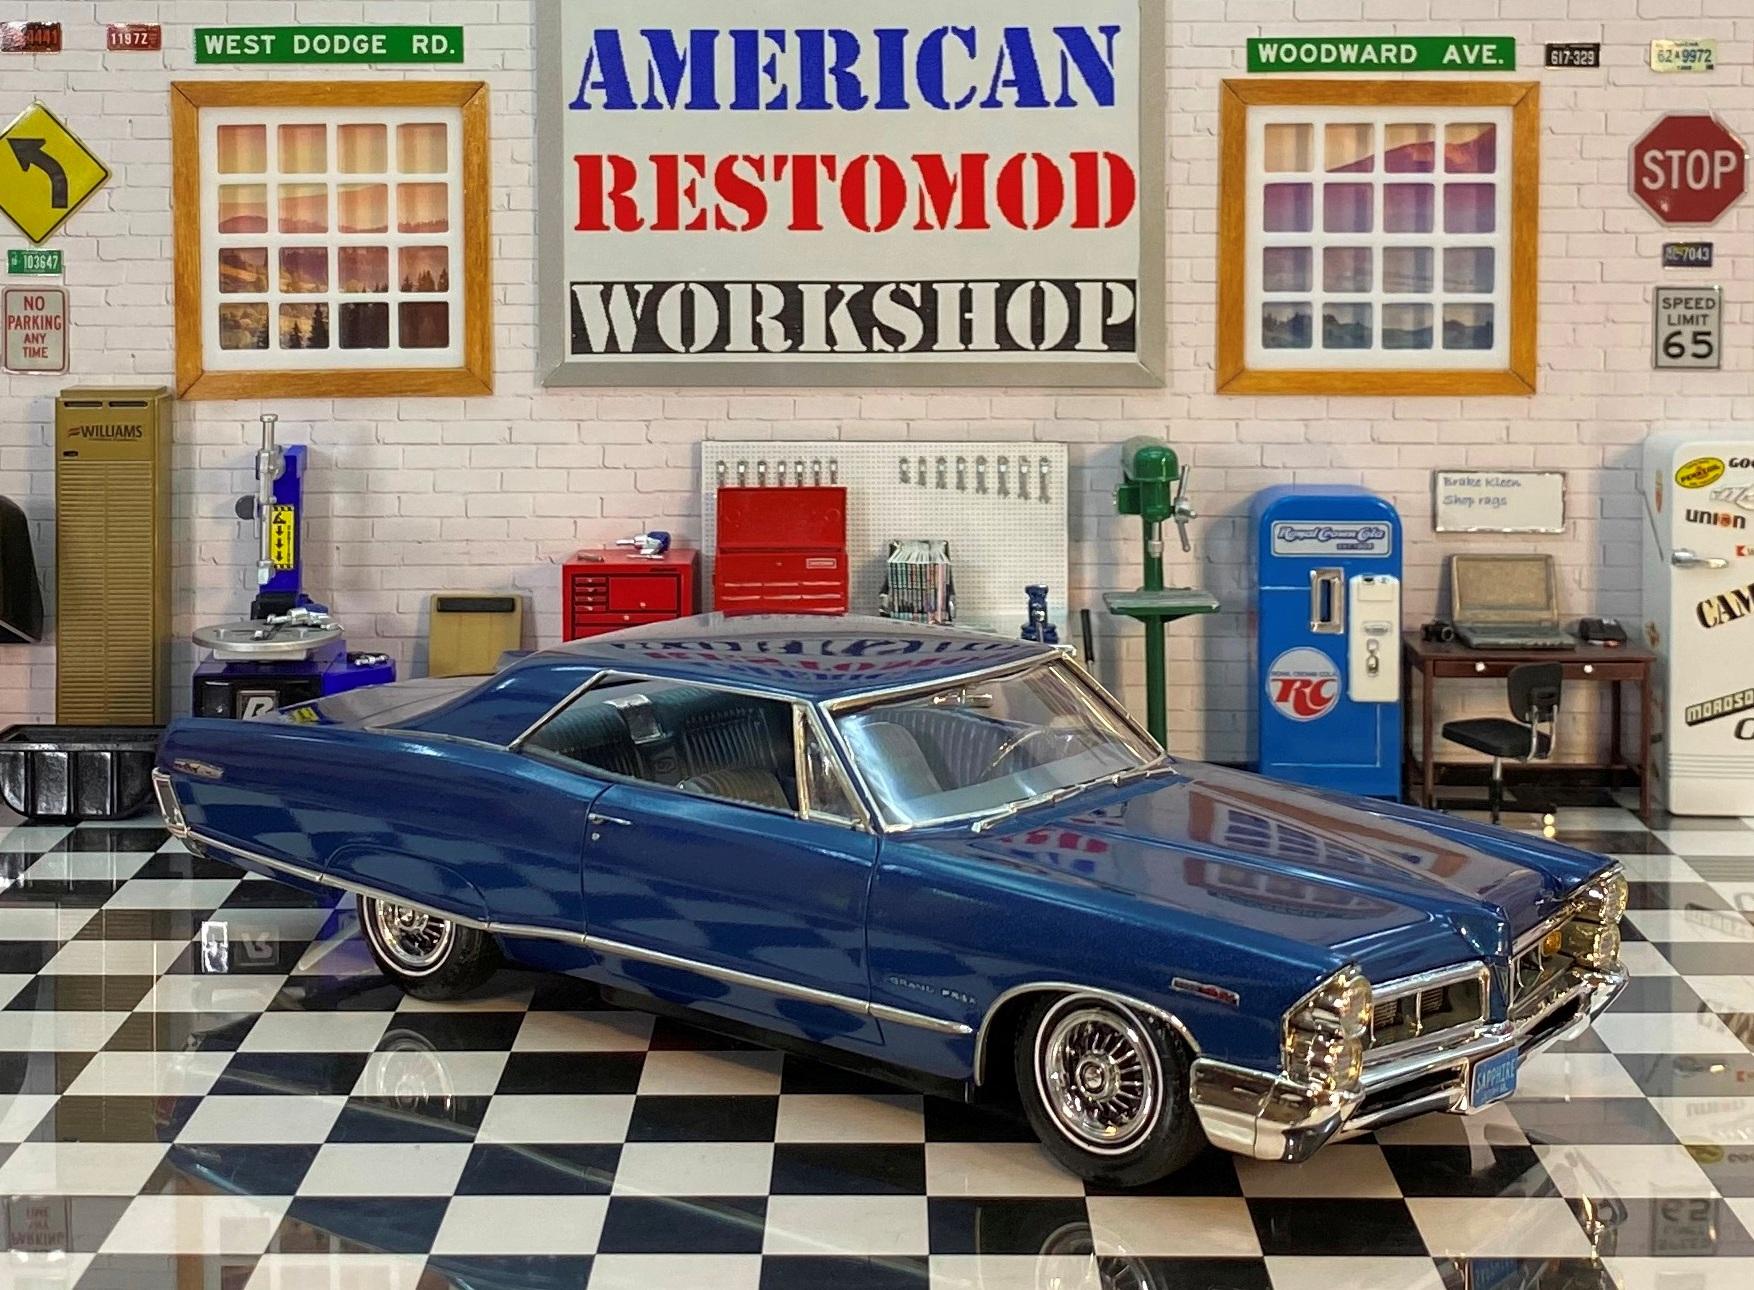
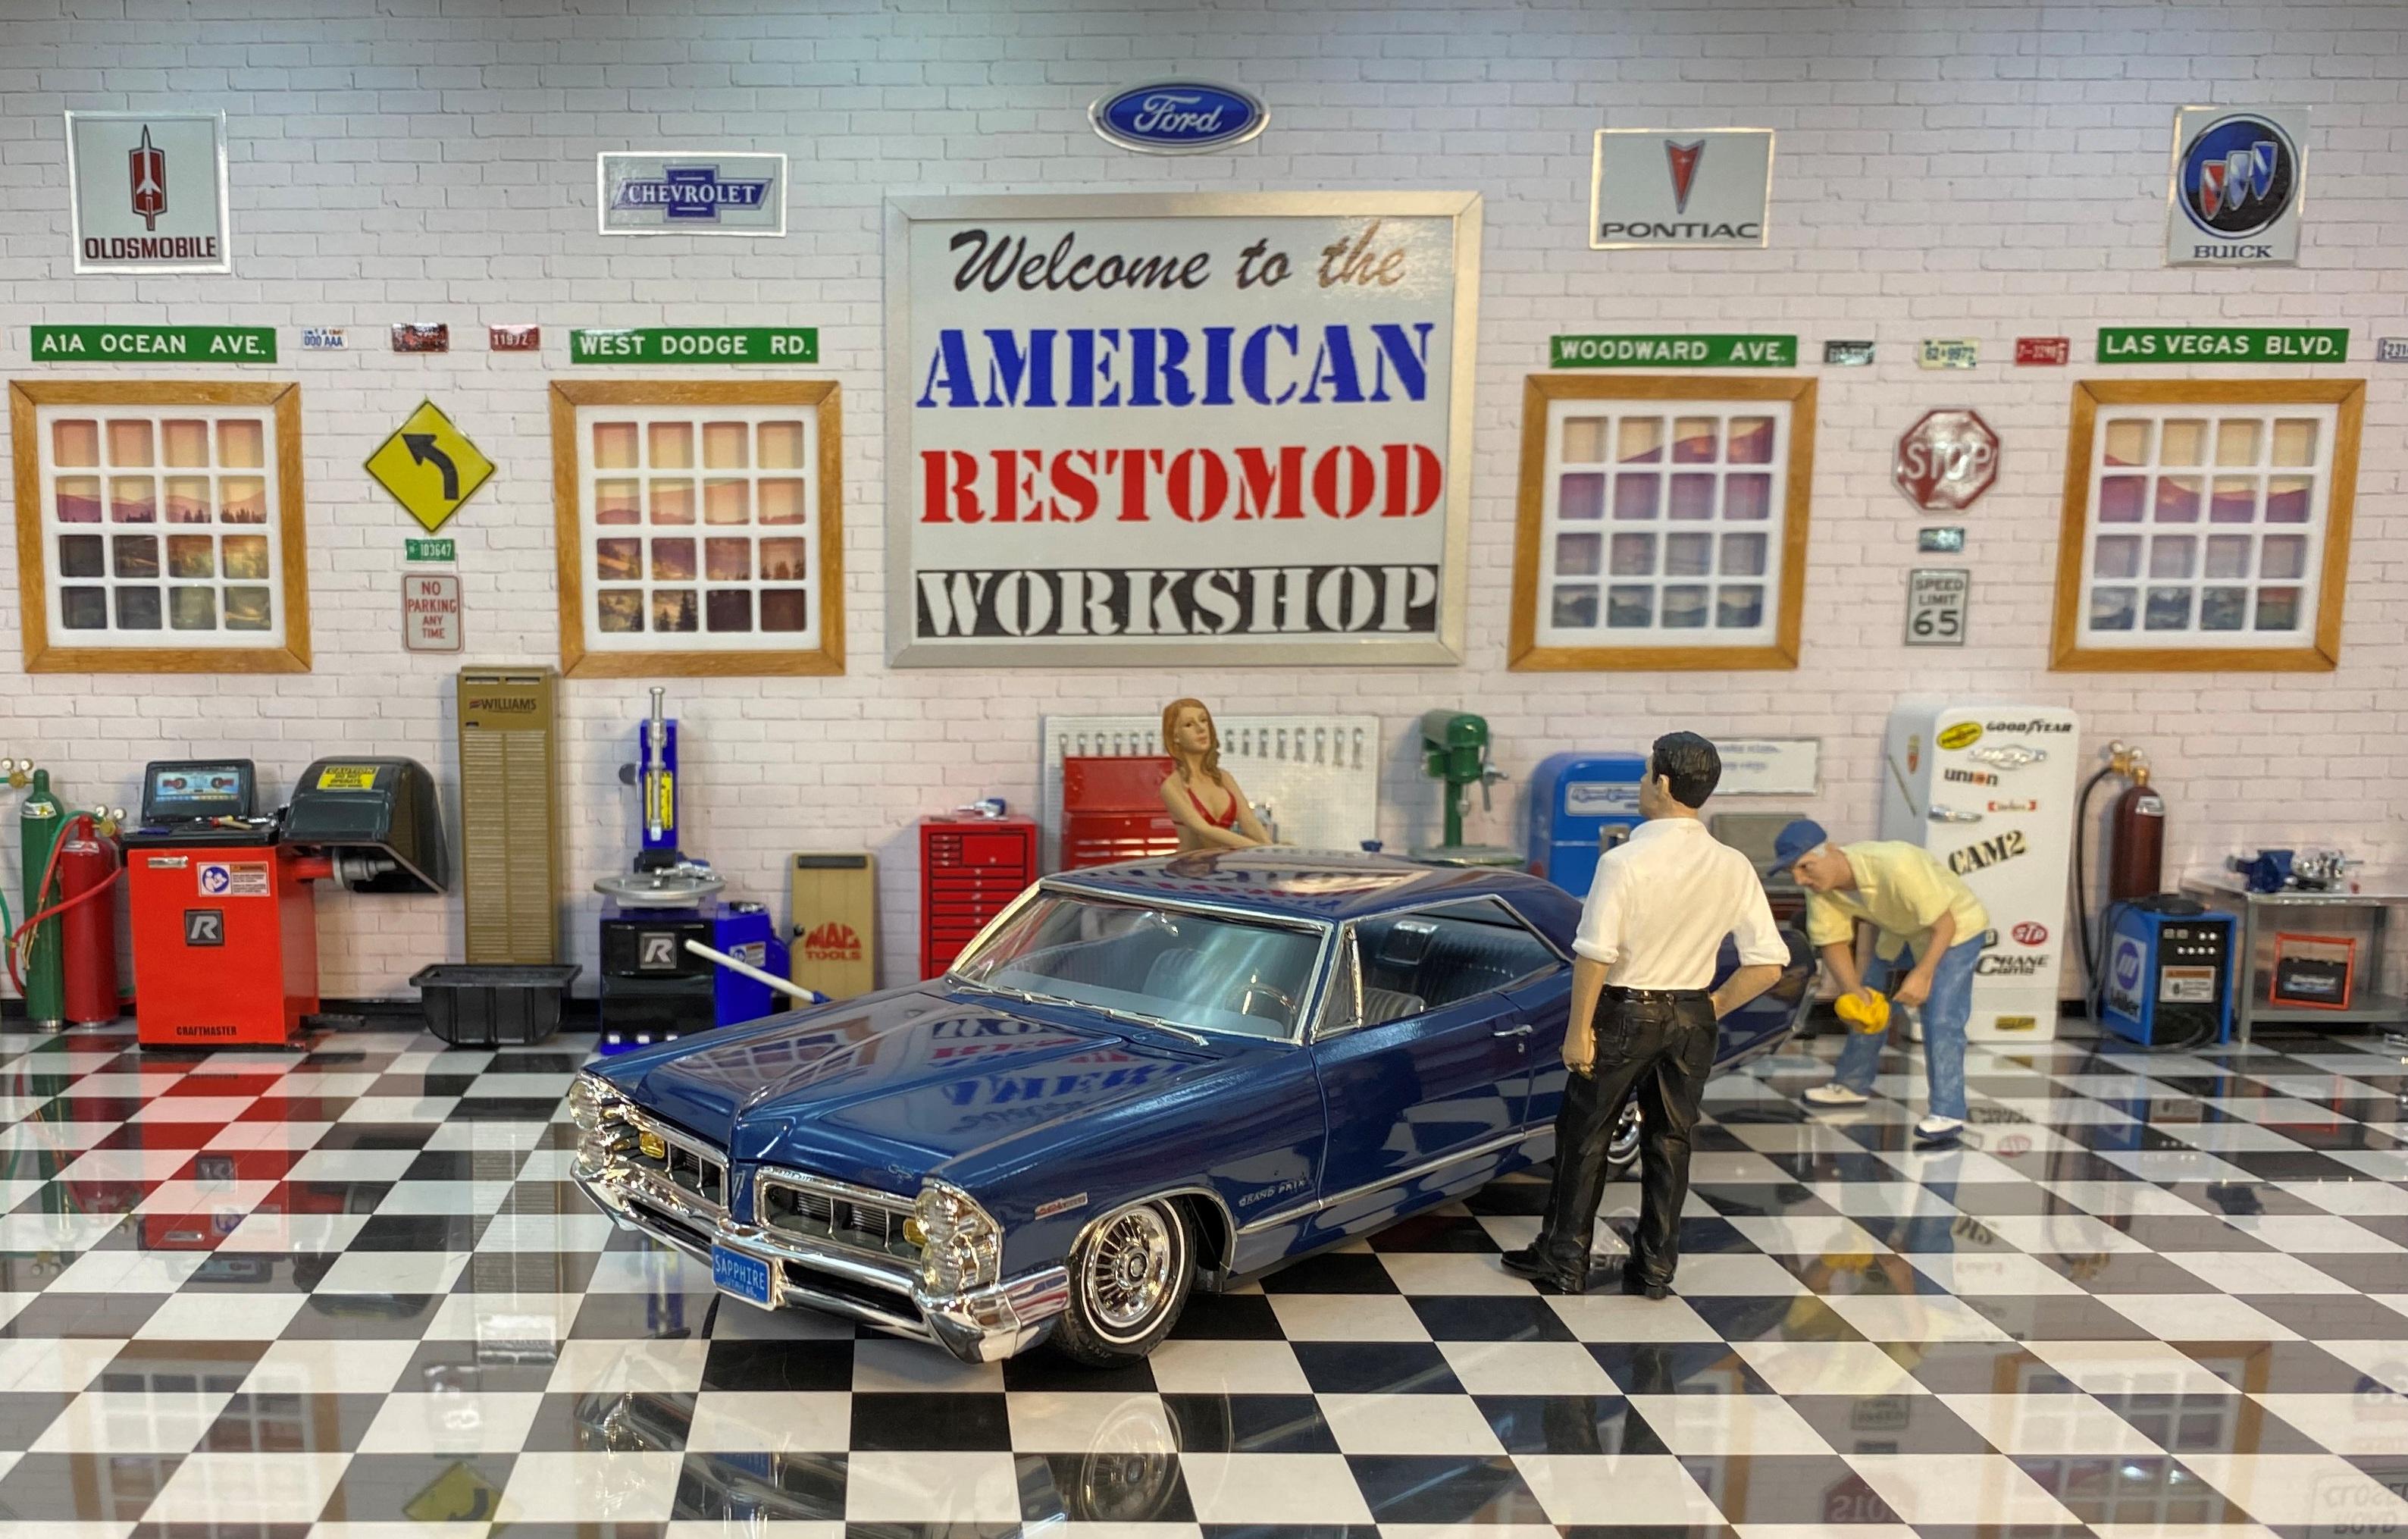
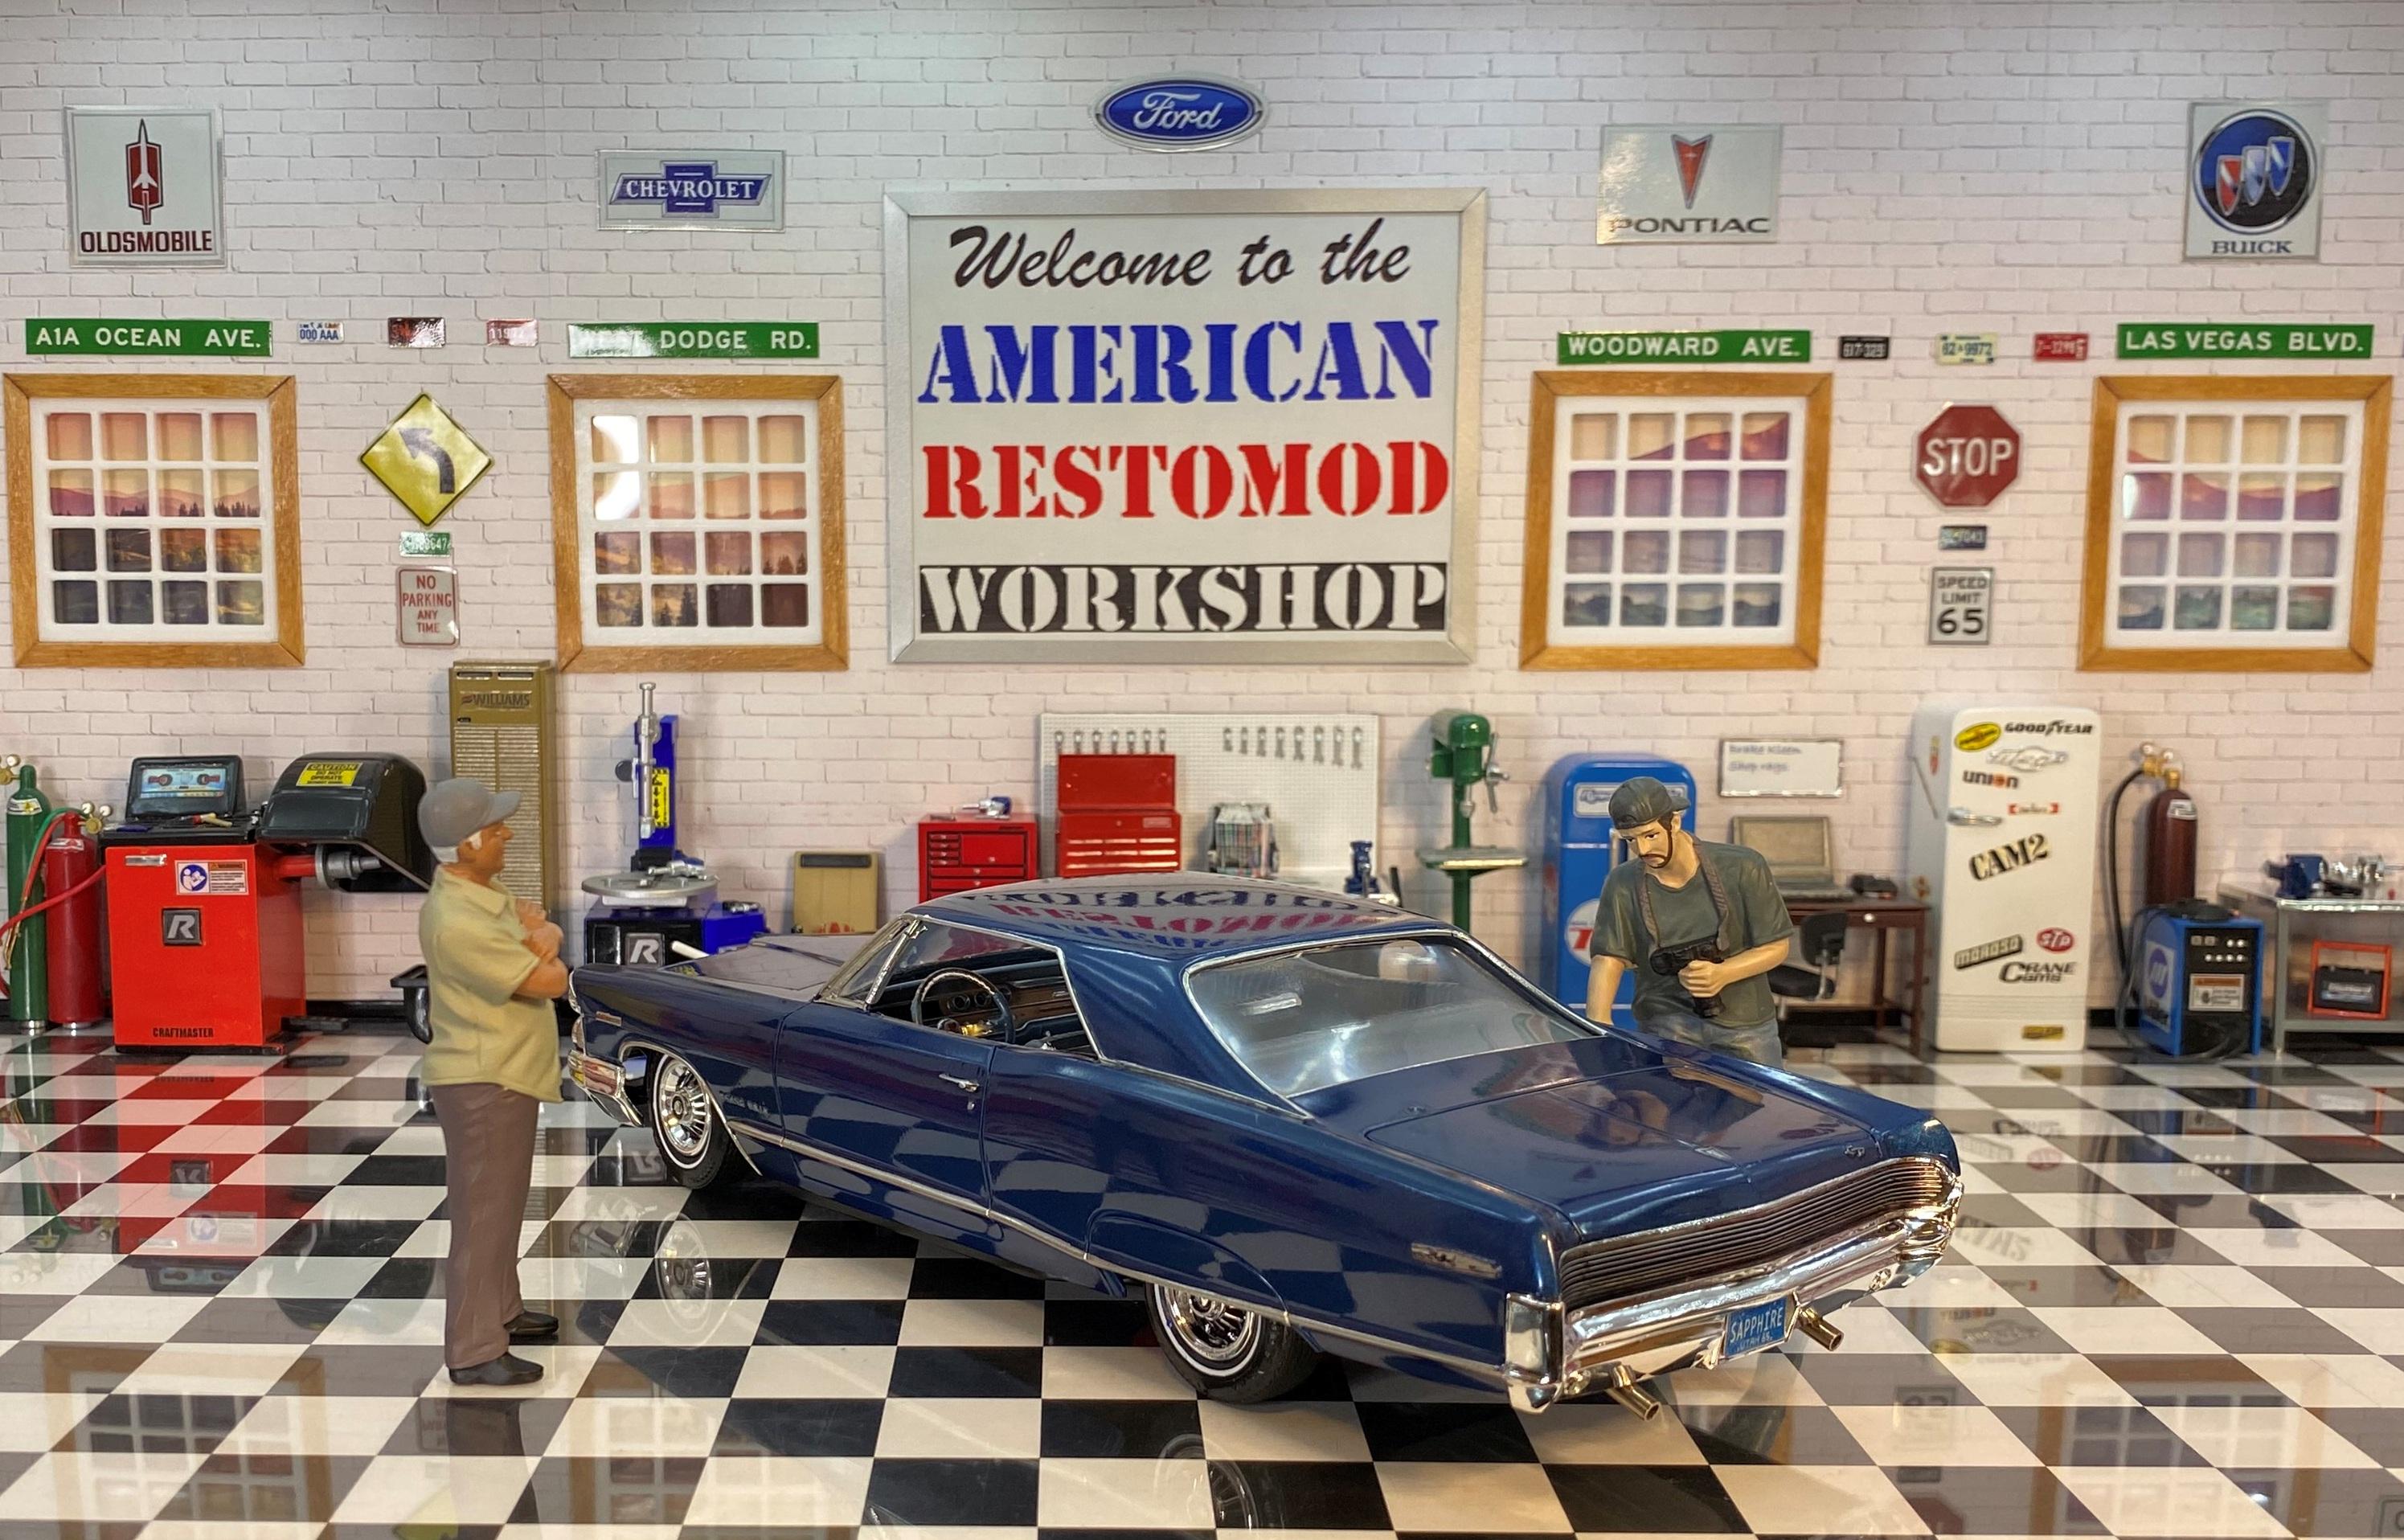
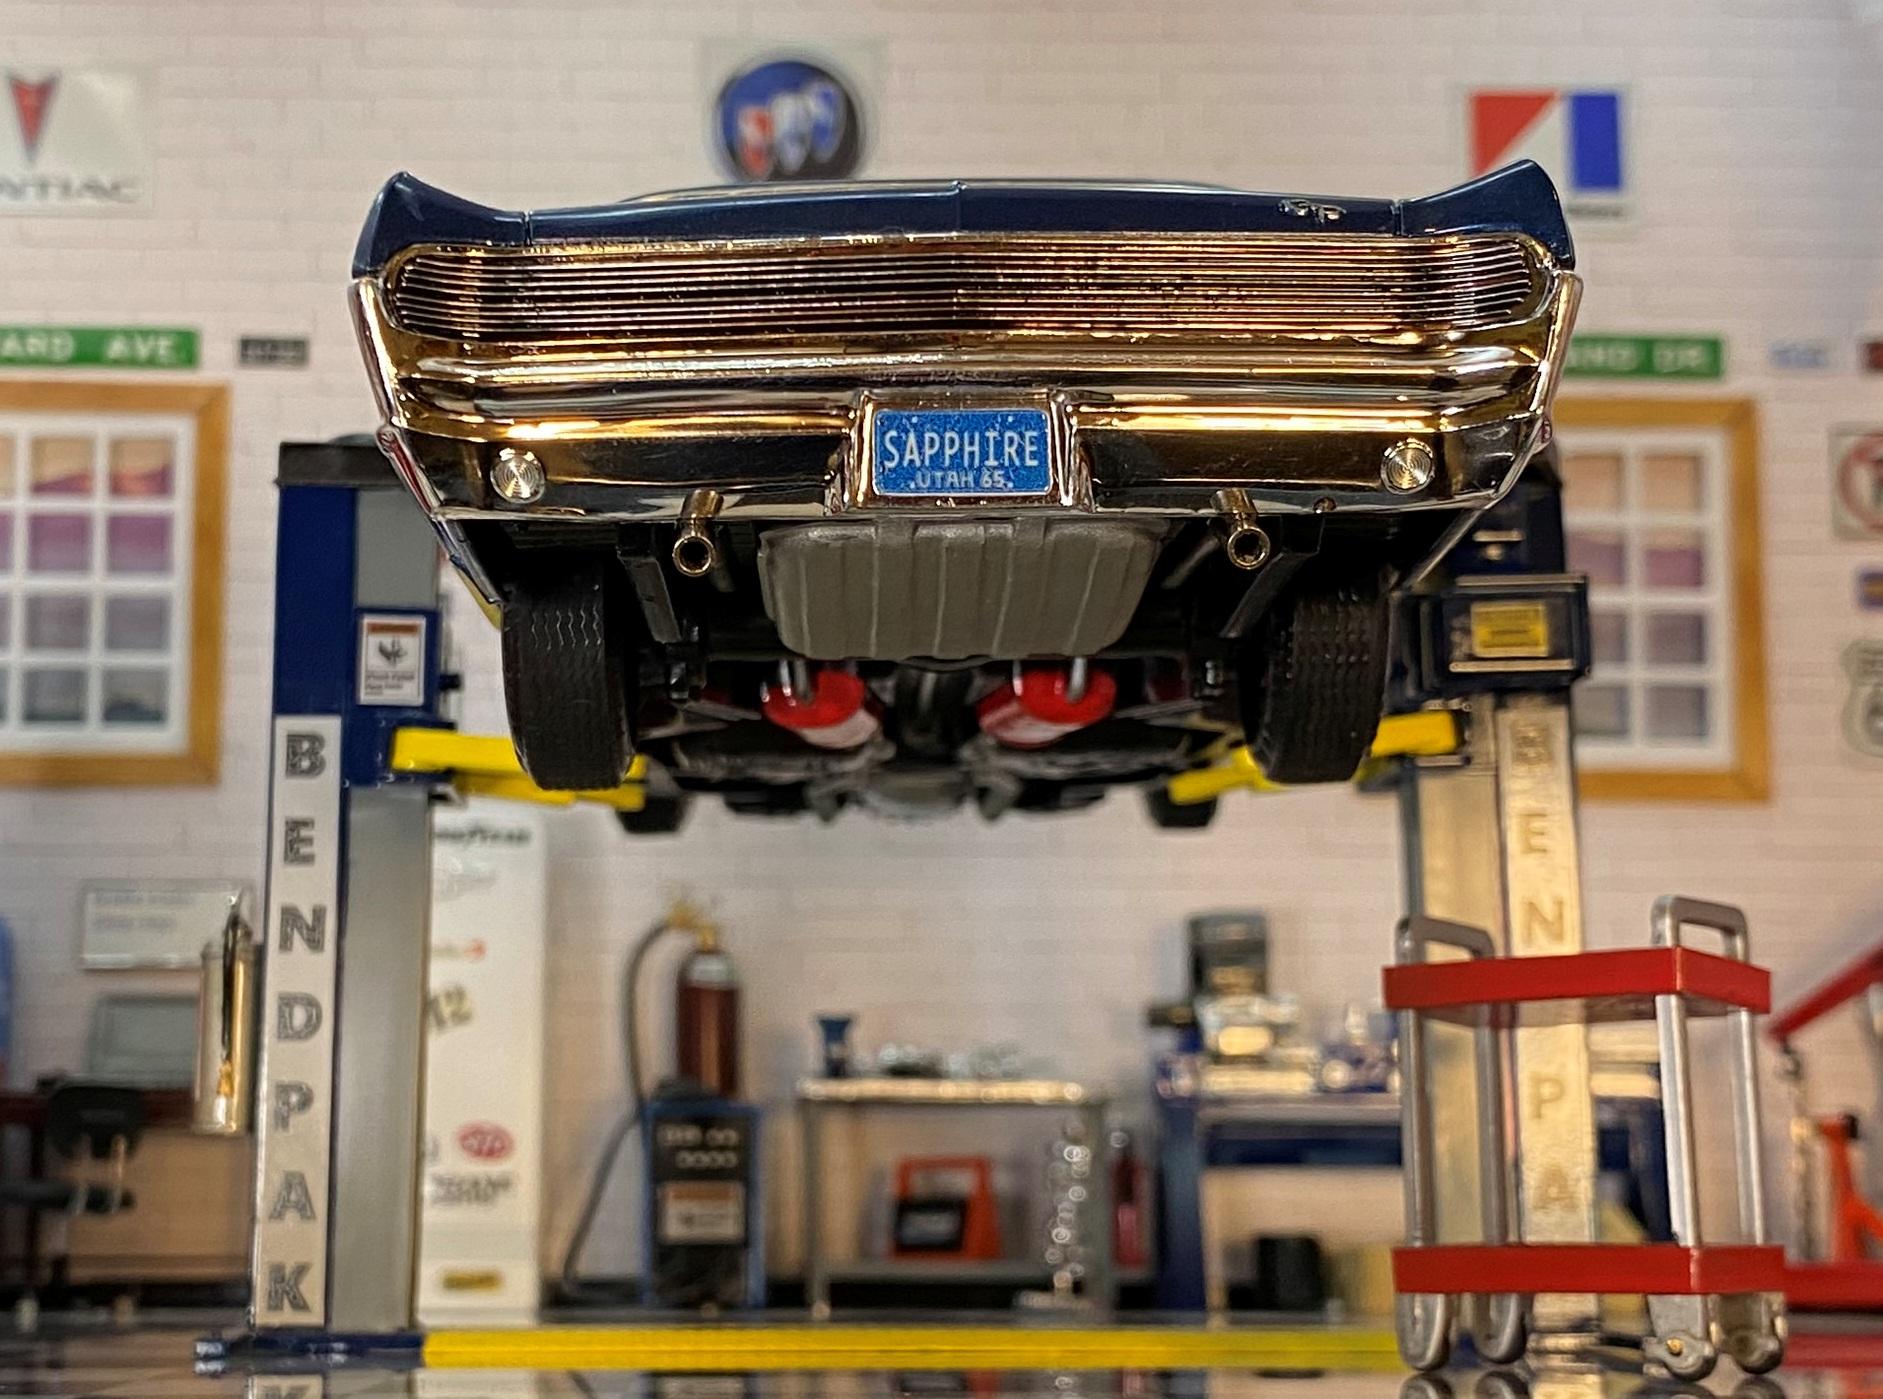
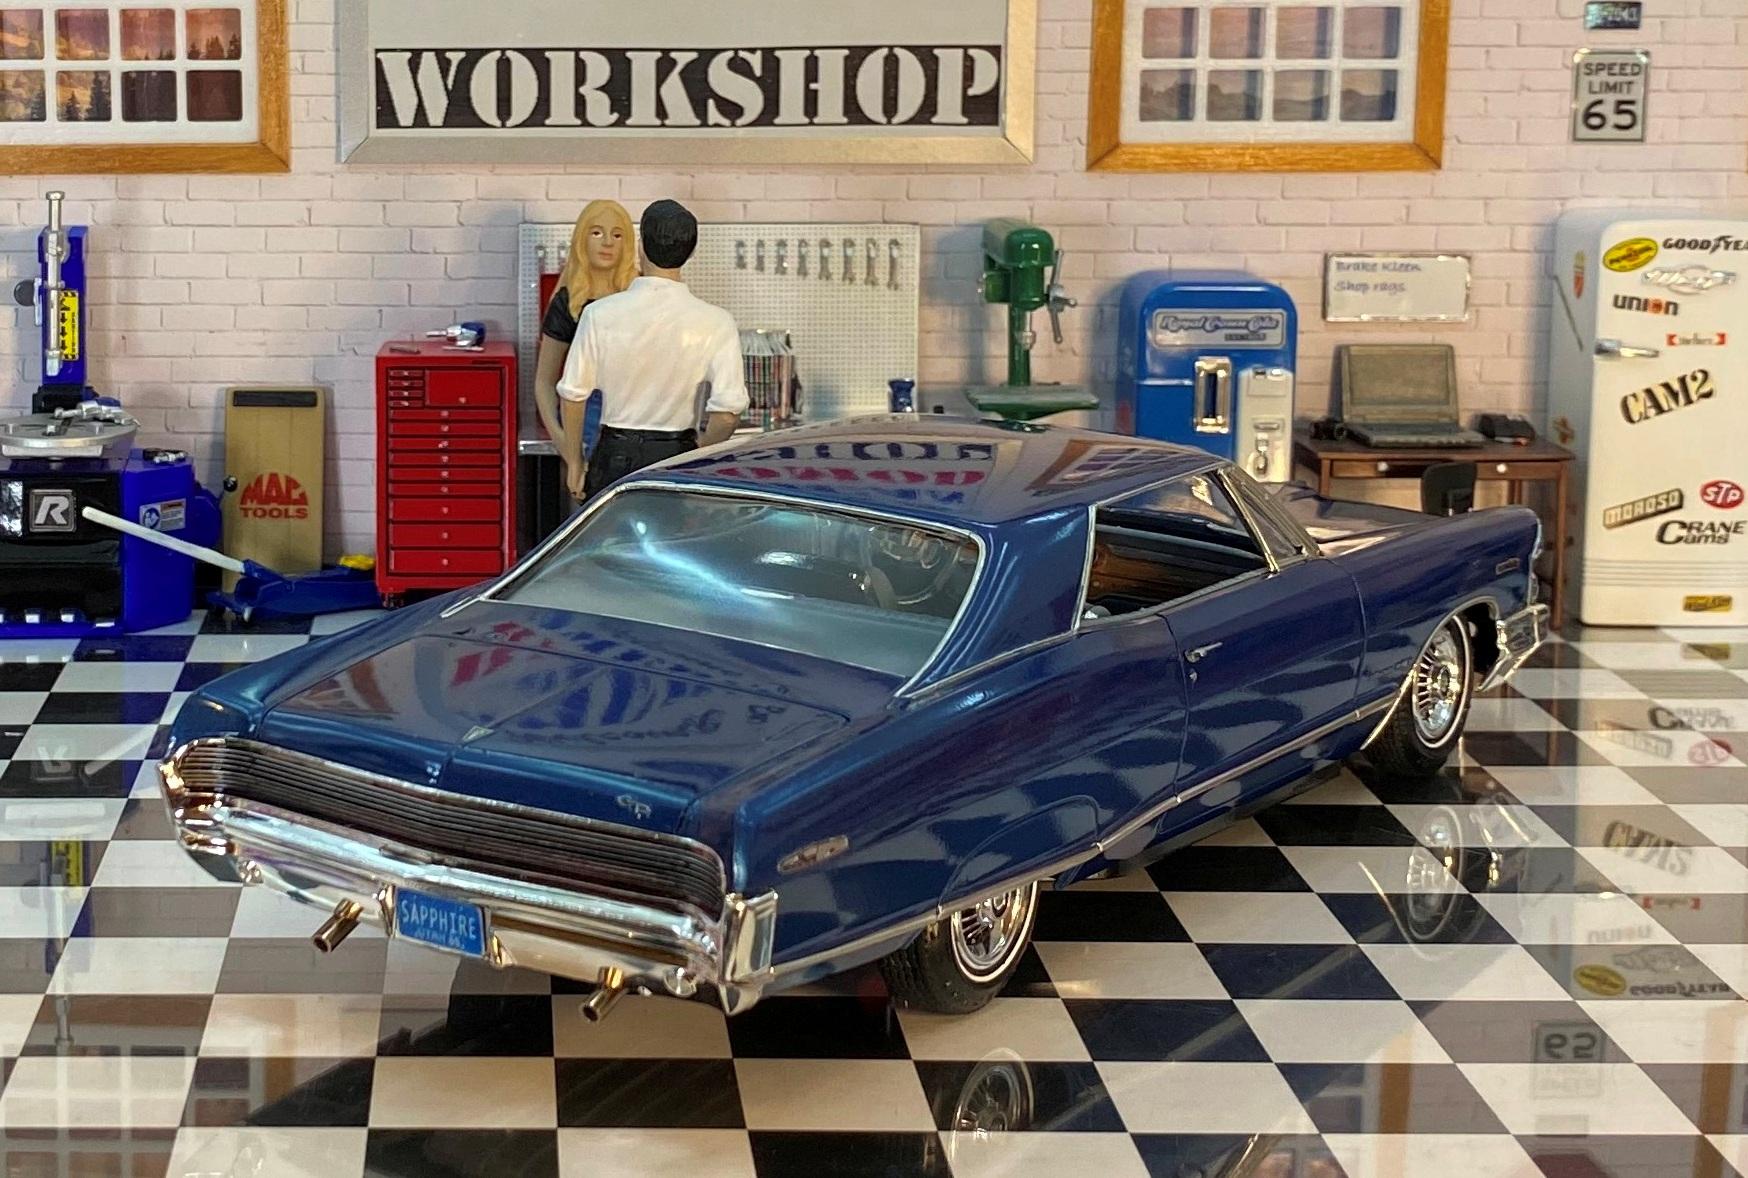
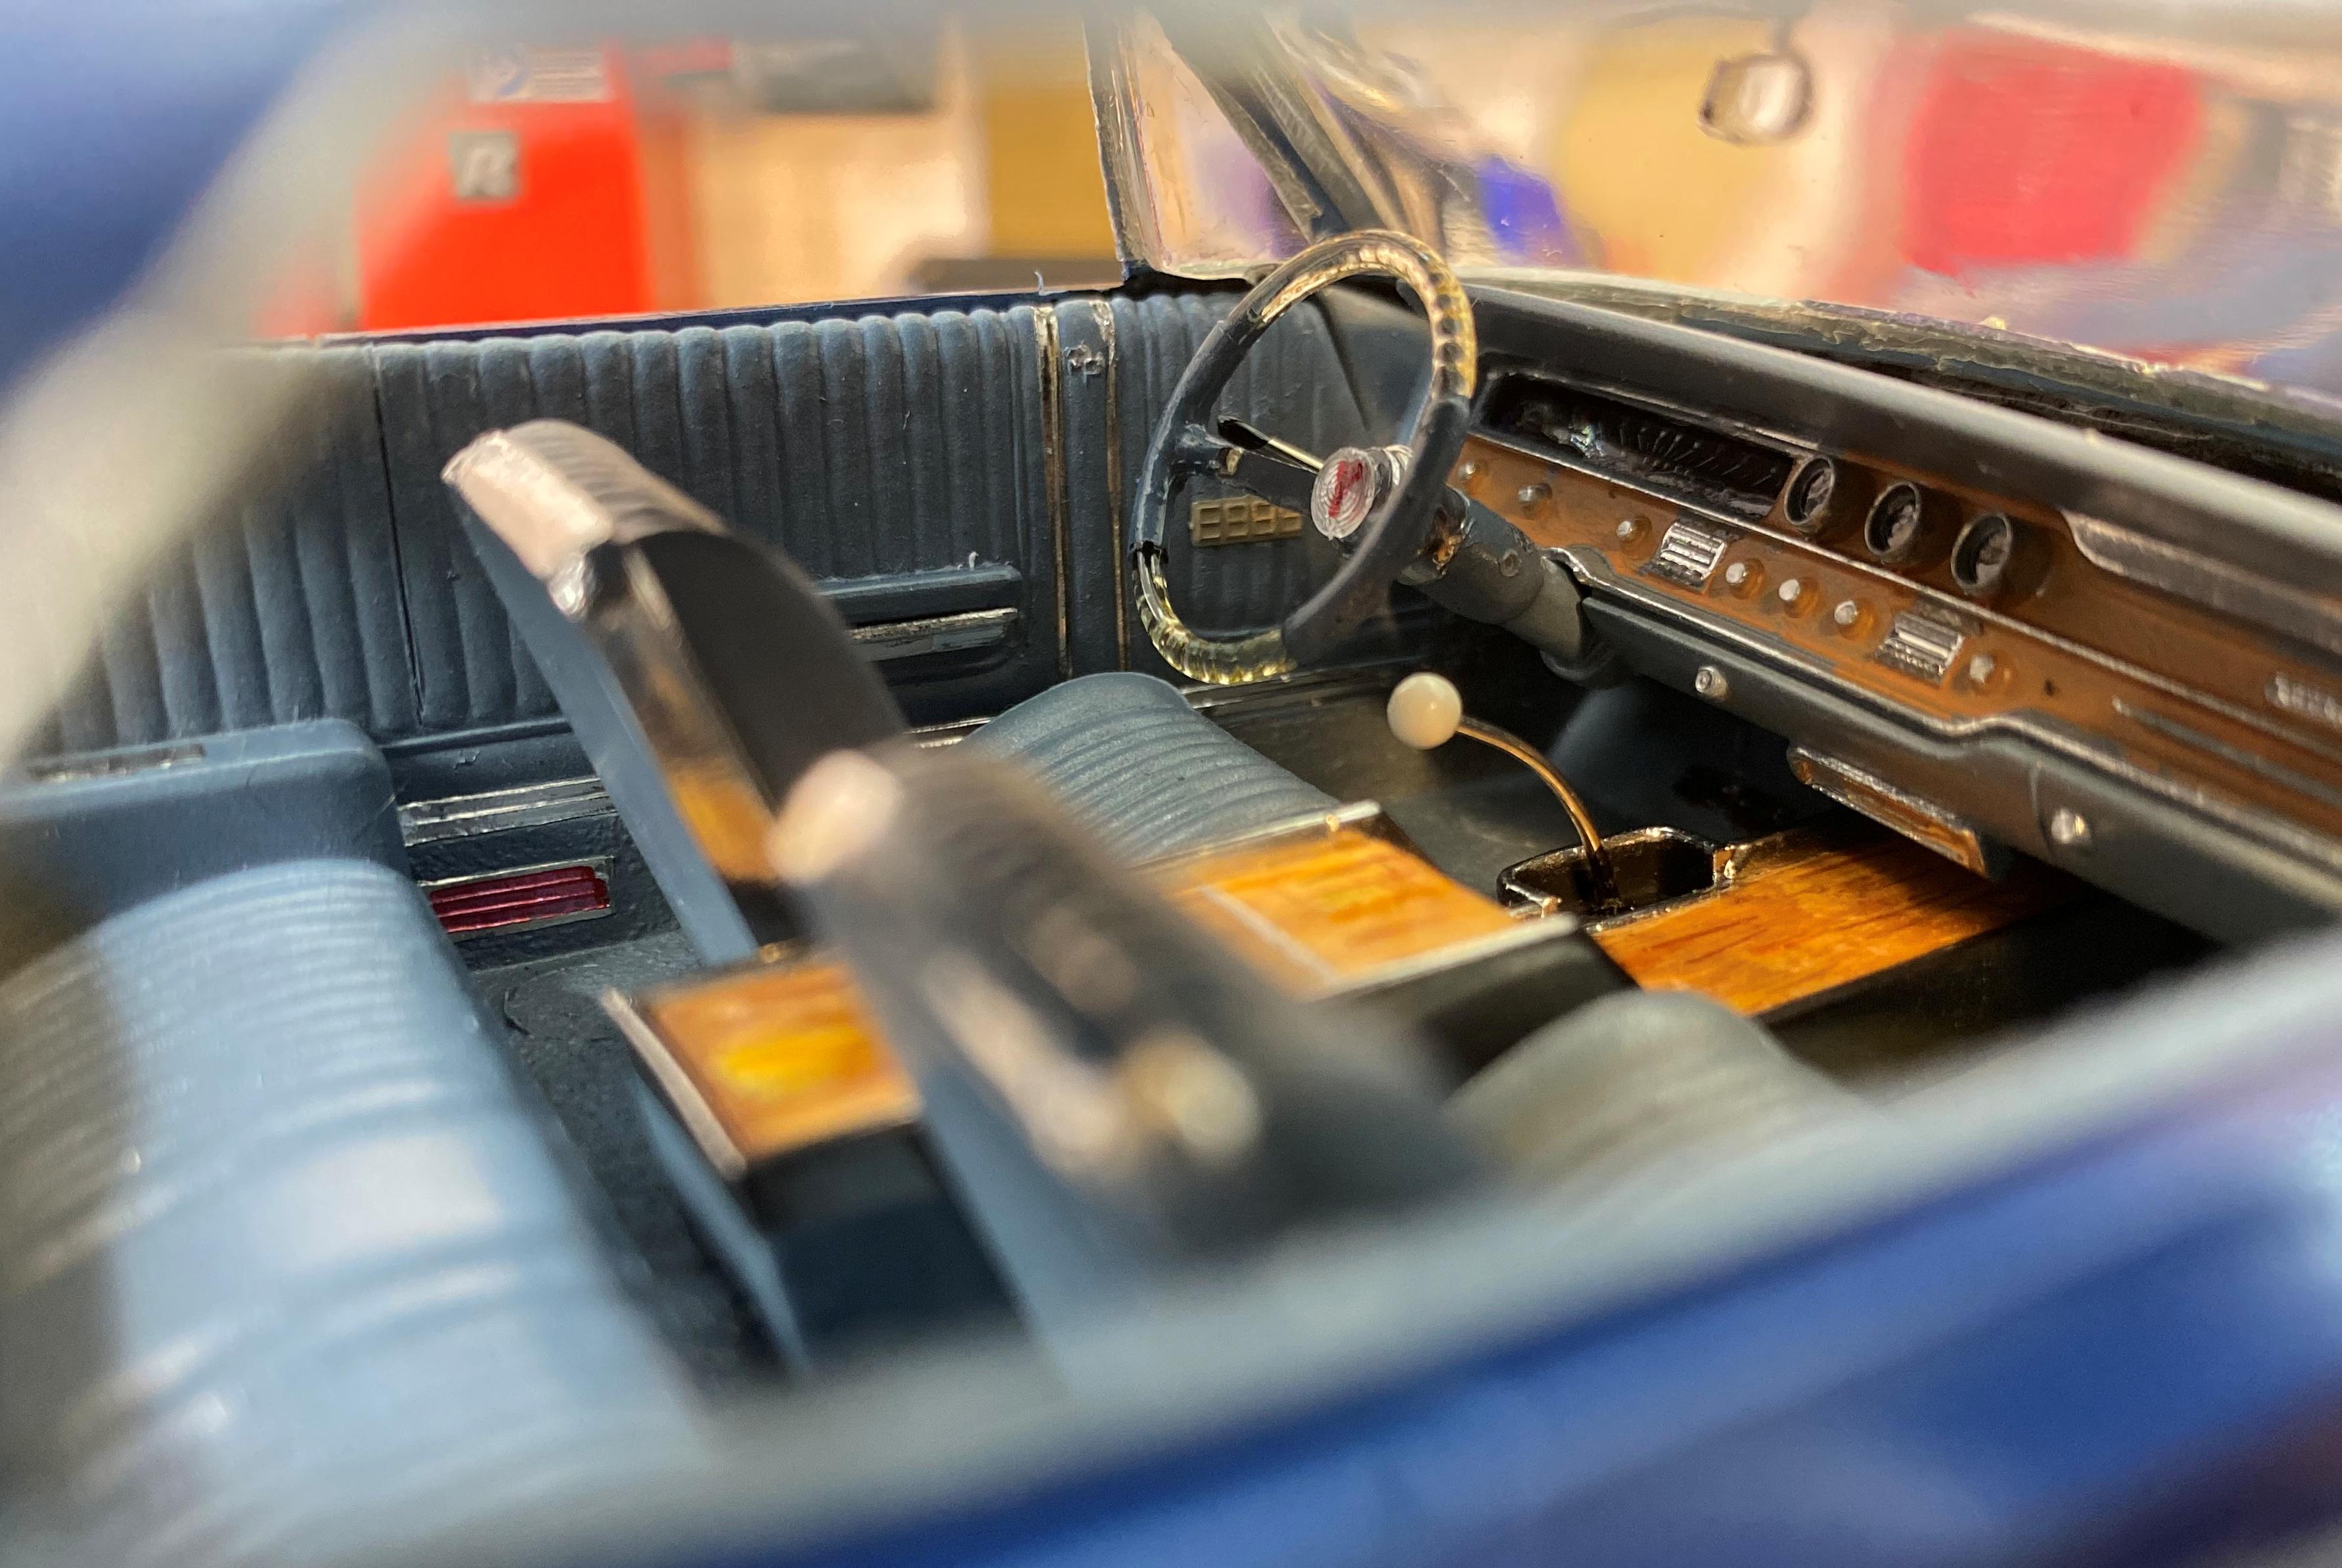
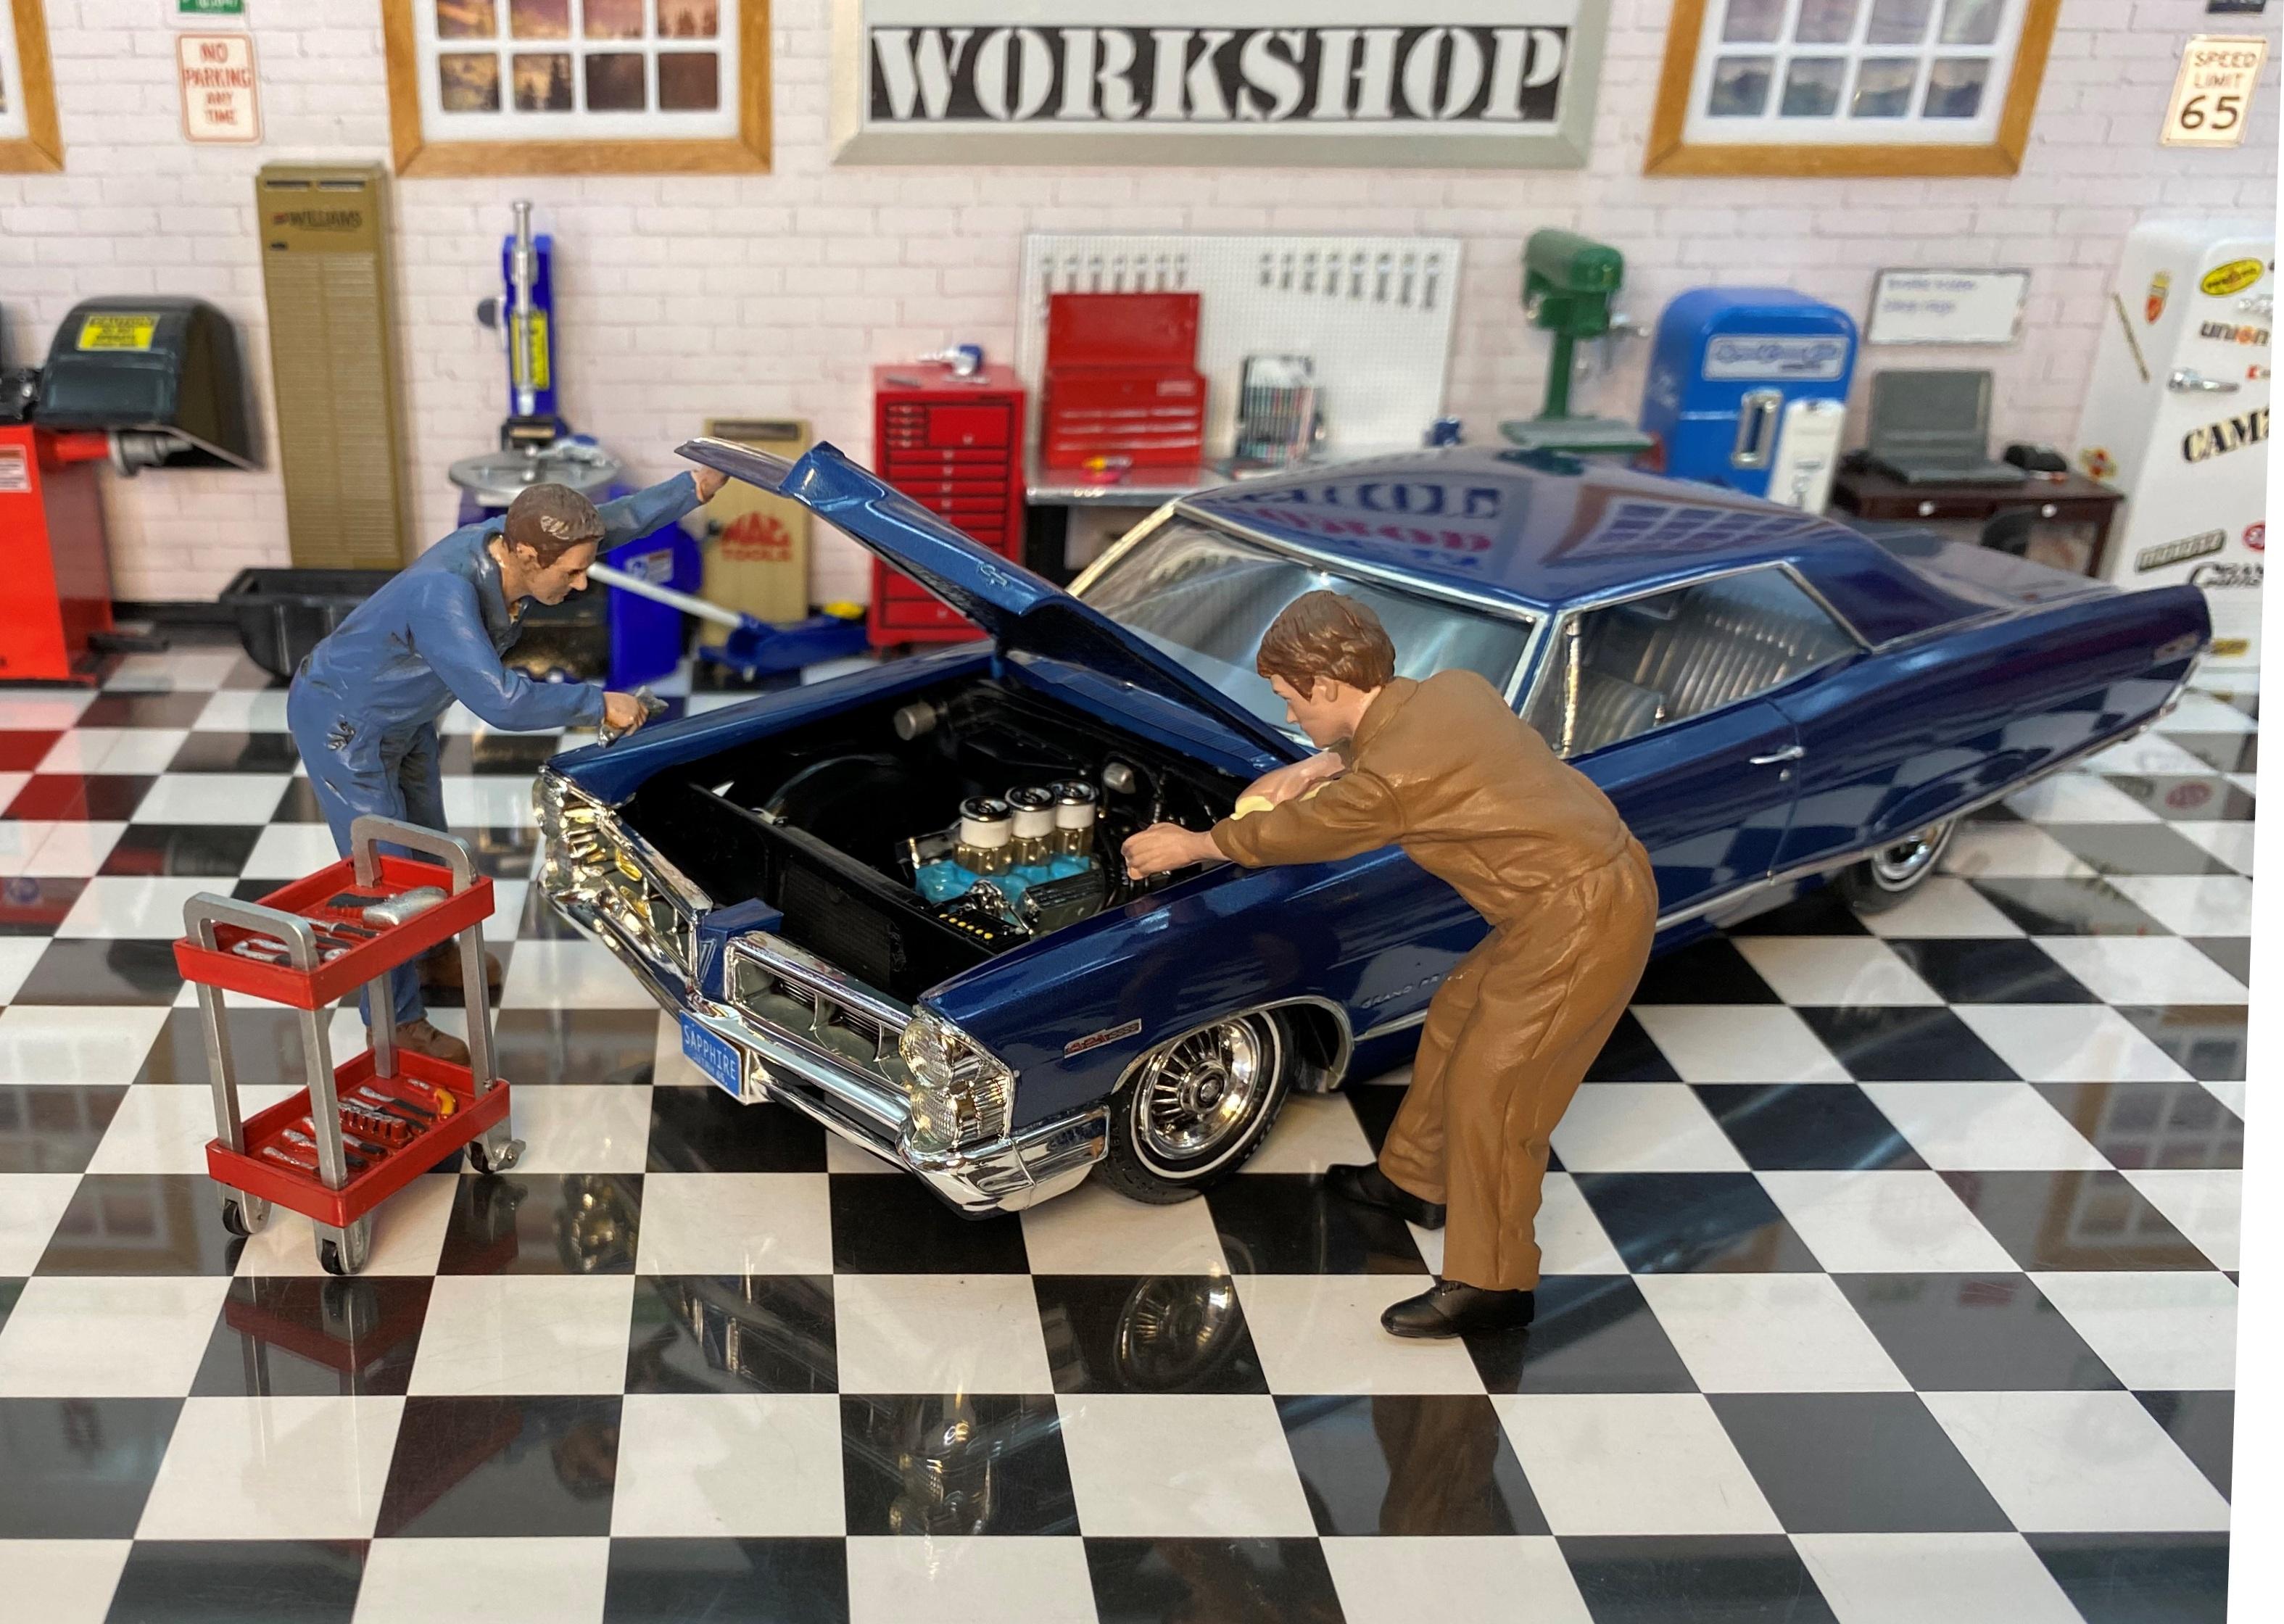
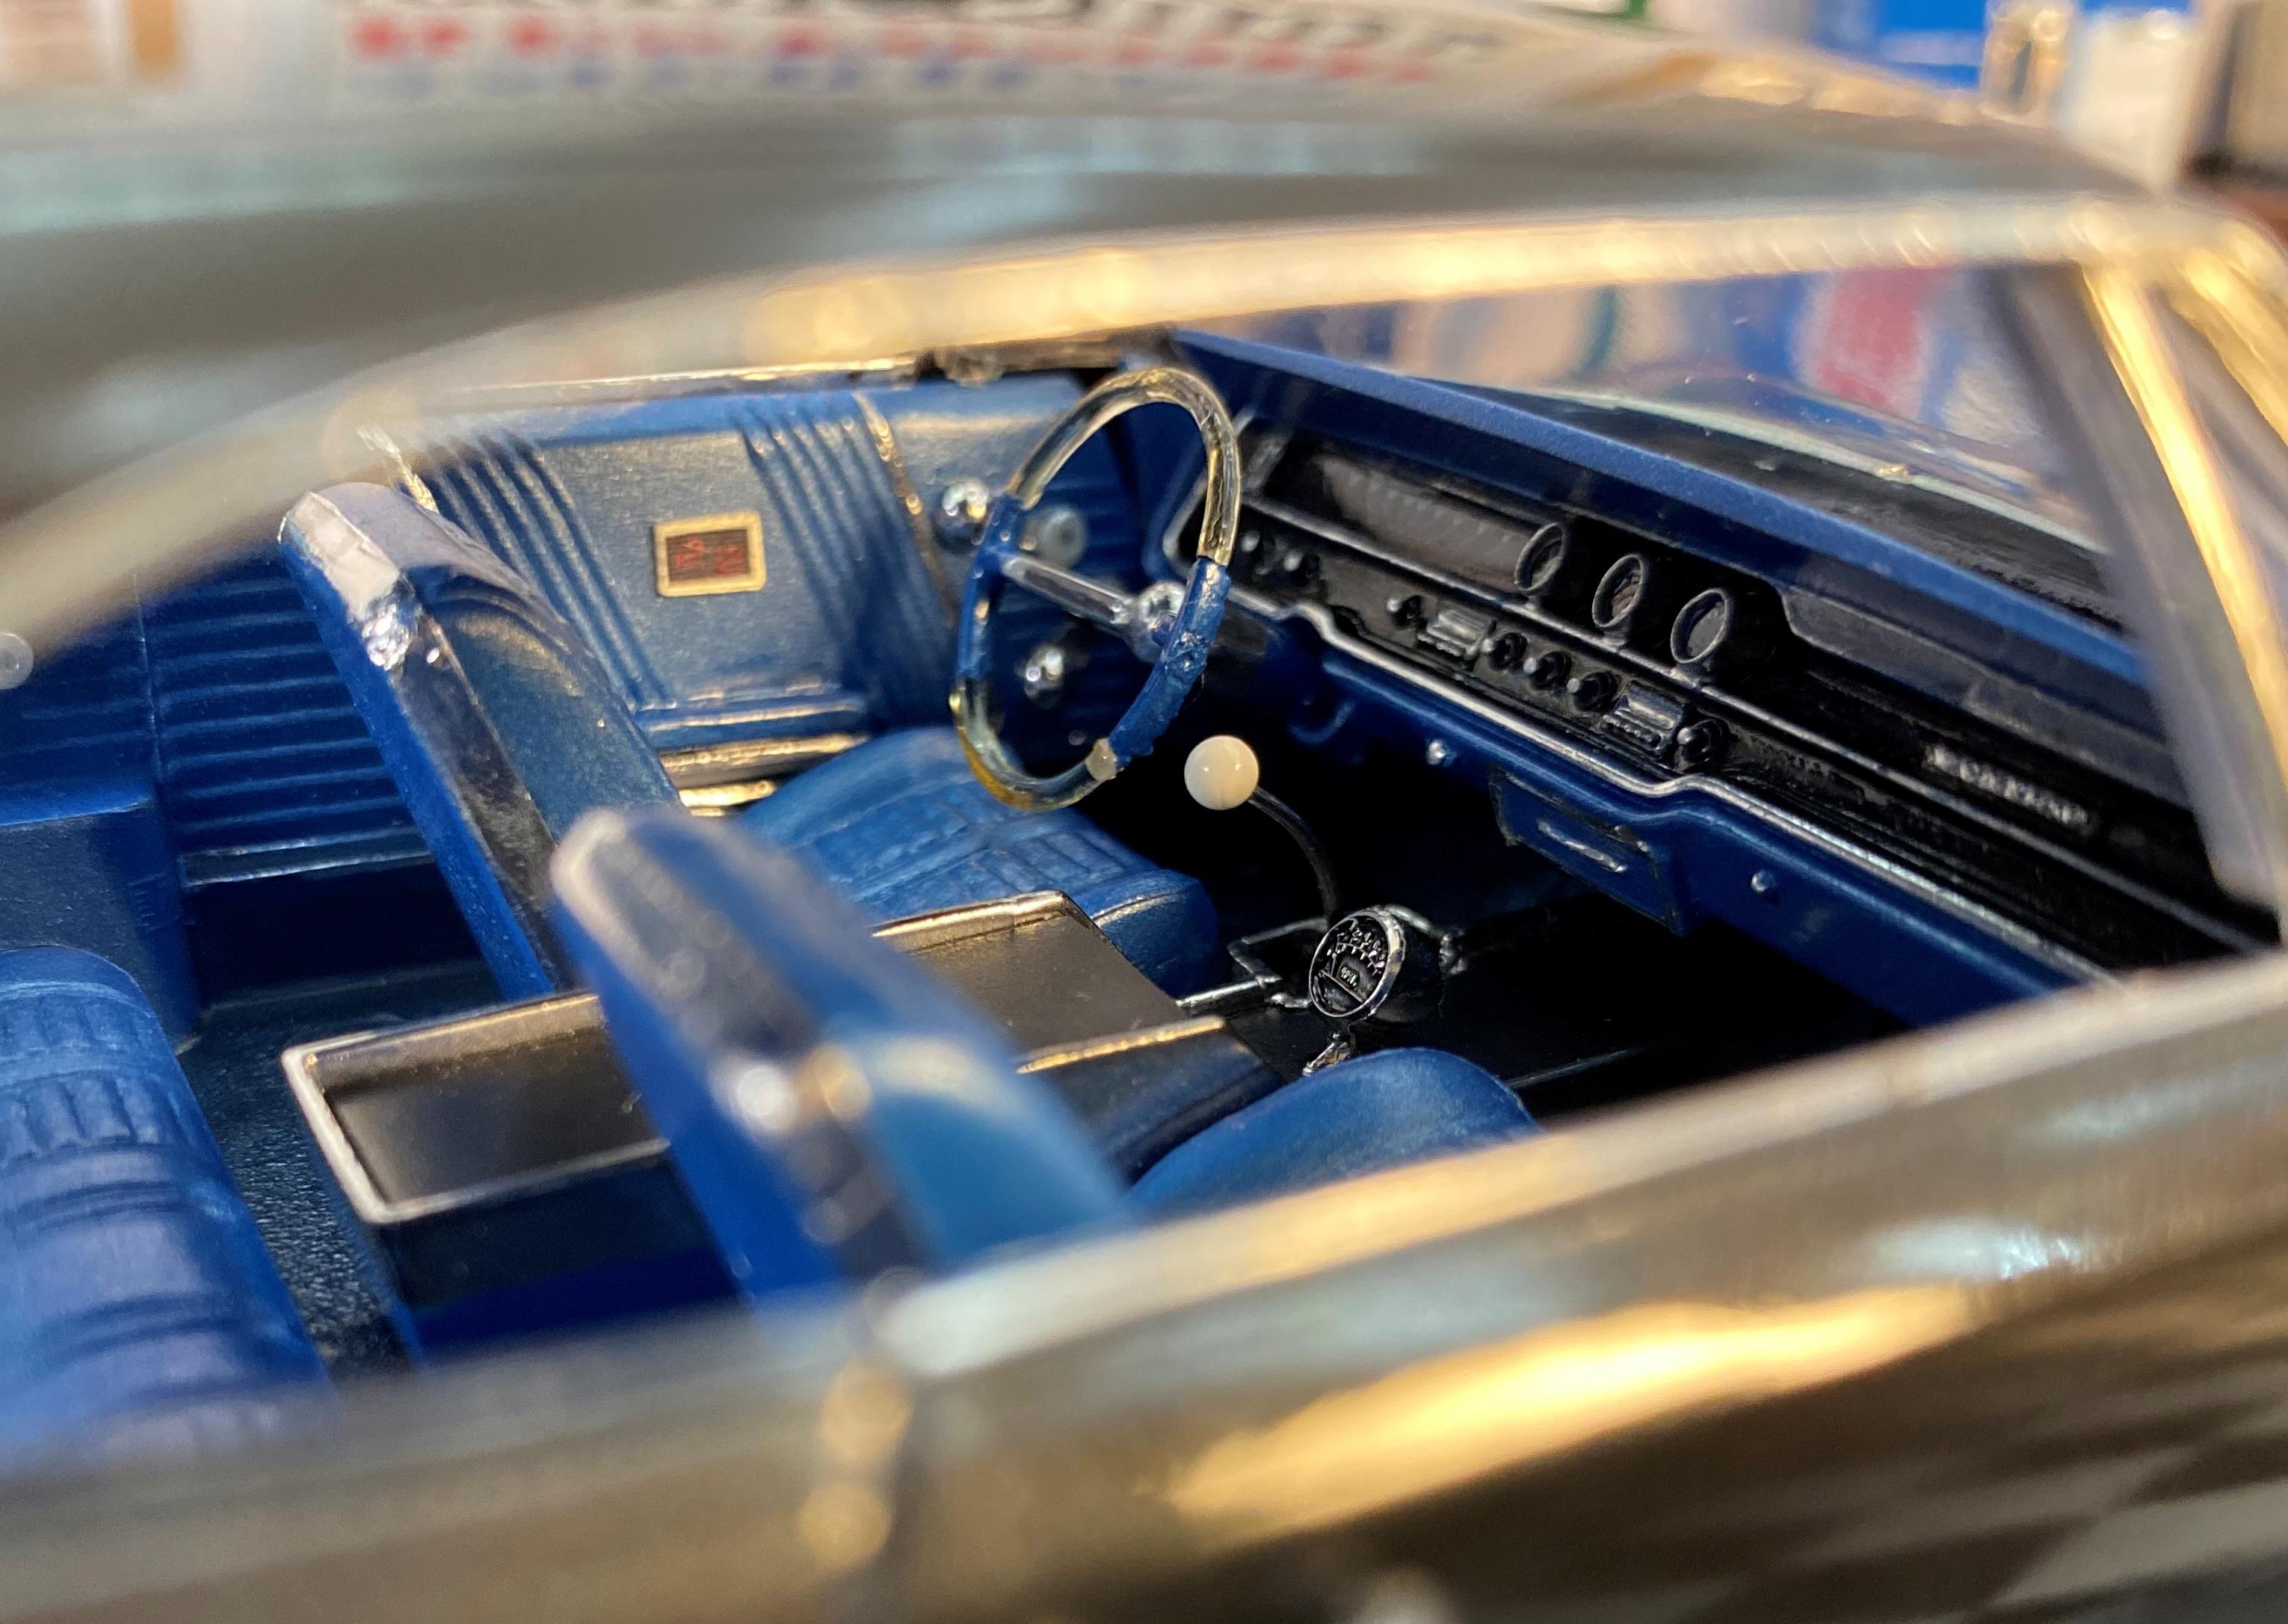
 This one is now done. Introducing Sapphire. She is painted with Testors Arctic Blue enamel and has a, factory optional, slate interior. The console was scratch built and photoetched power window switches were installed. It is the luxury version of a Pontiac after all. She is one of the sisters in my Big Girls batch build.
- 38 replies
-
- 15
-

-
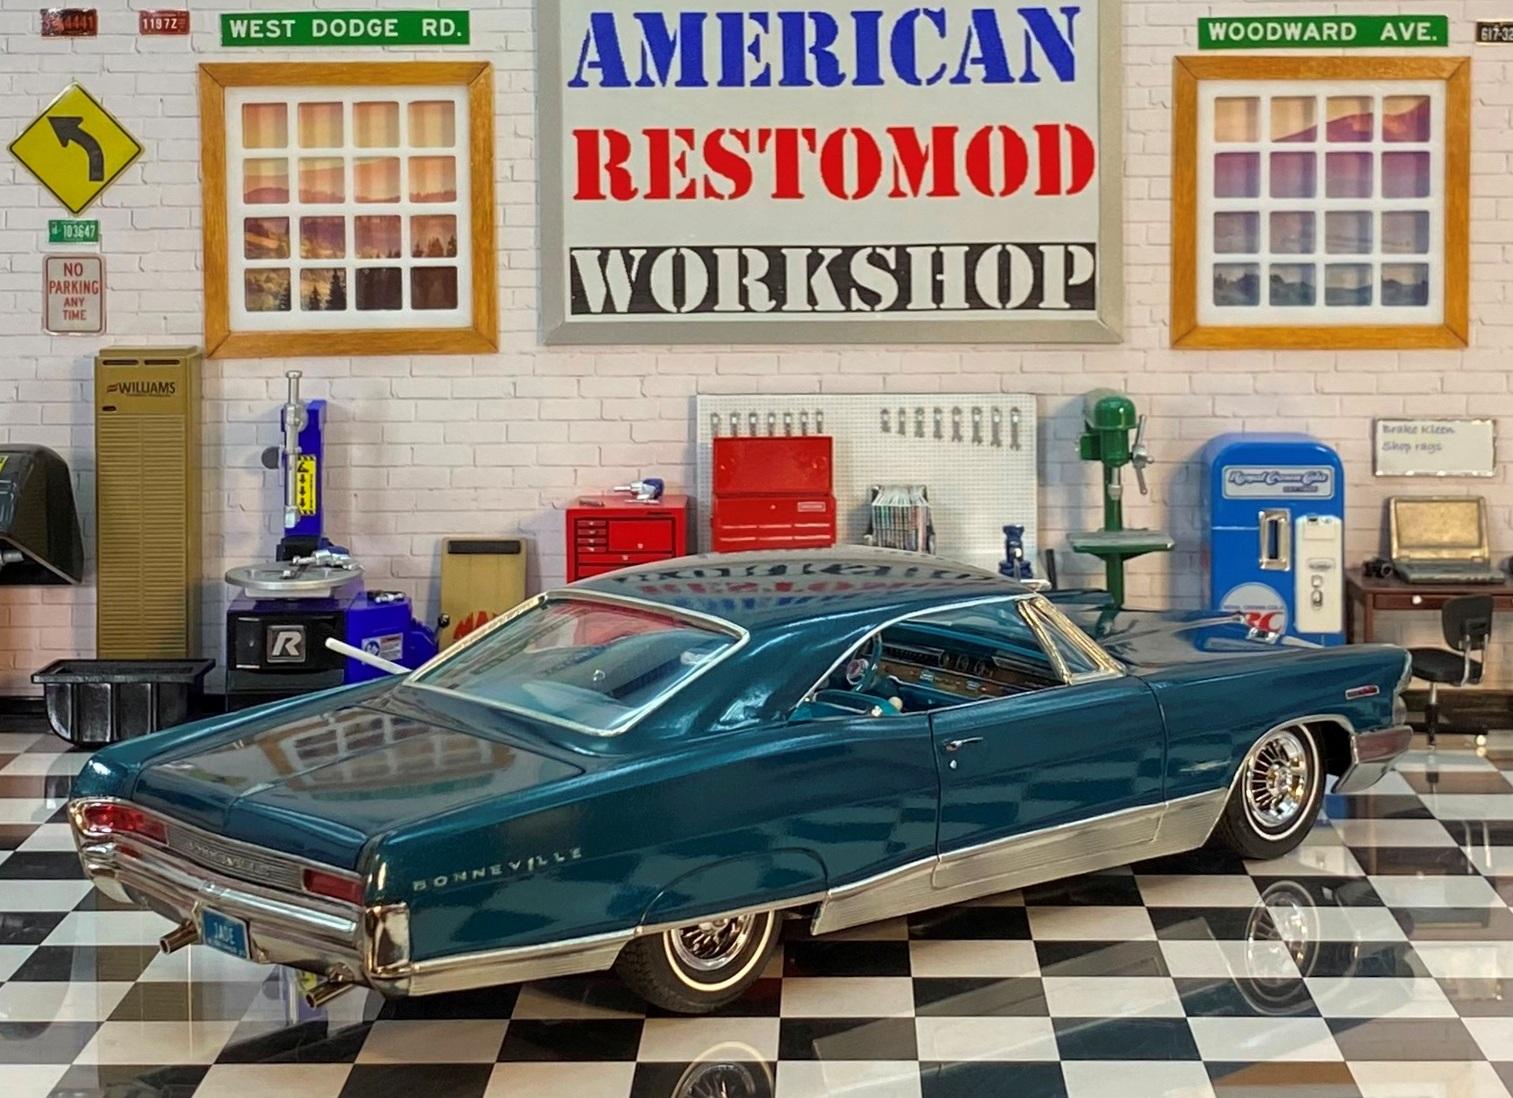
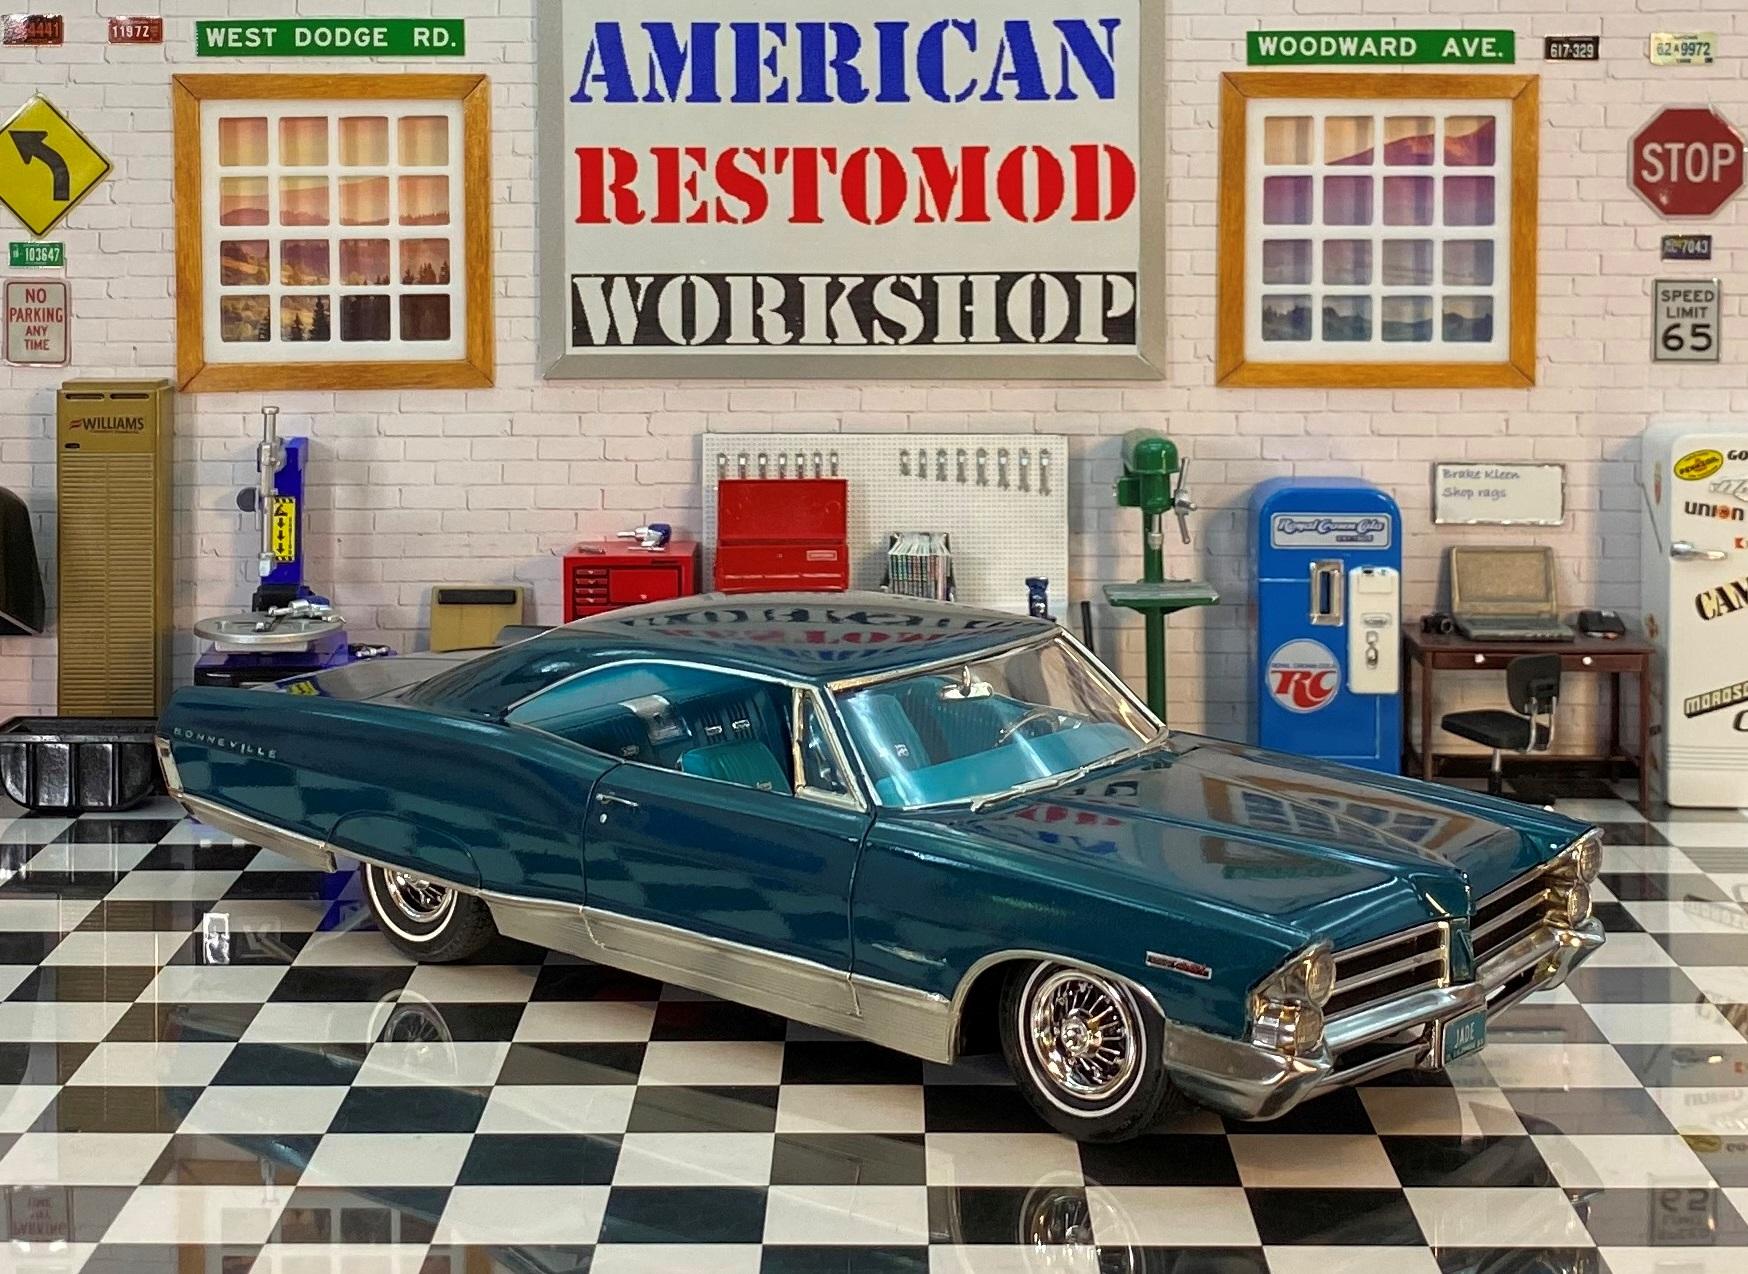
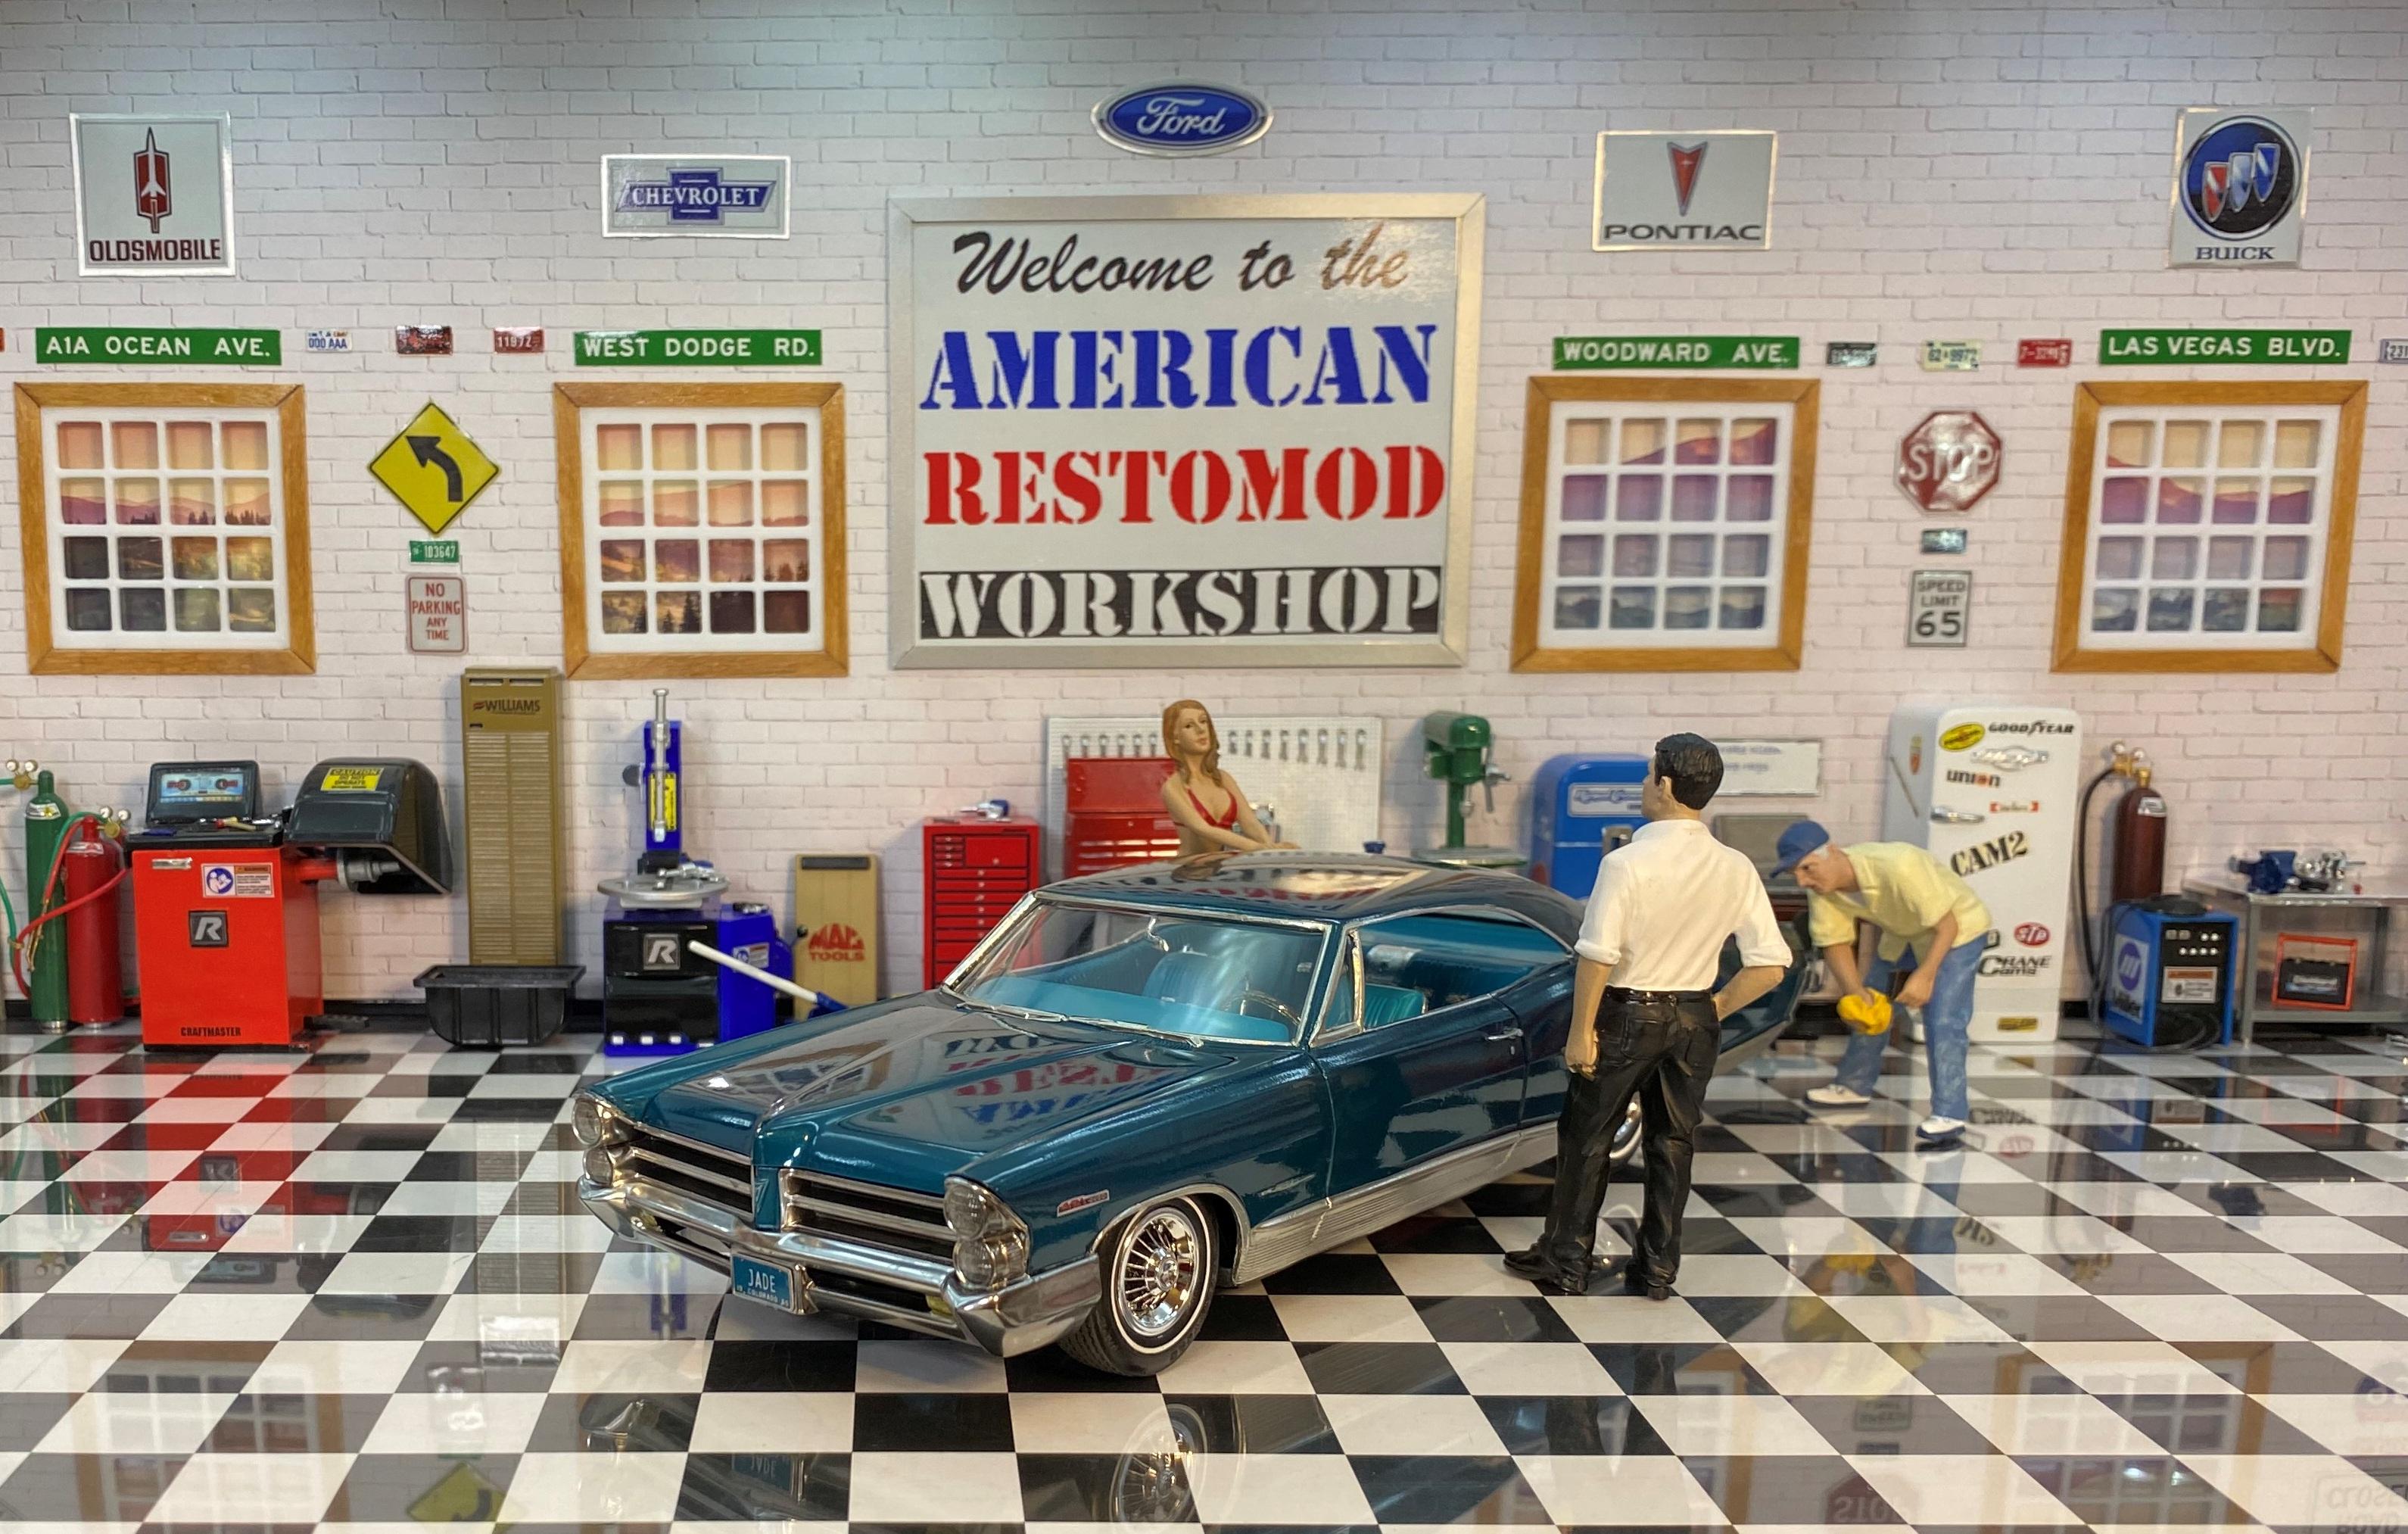
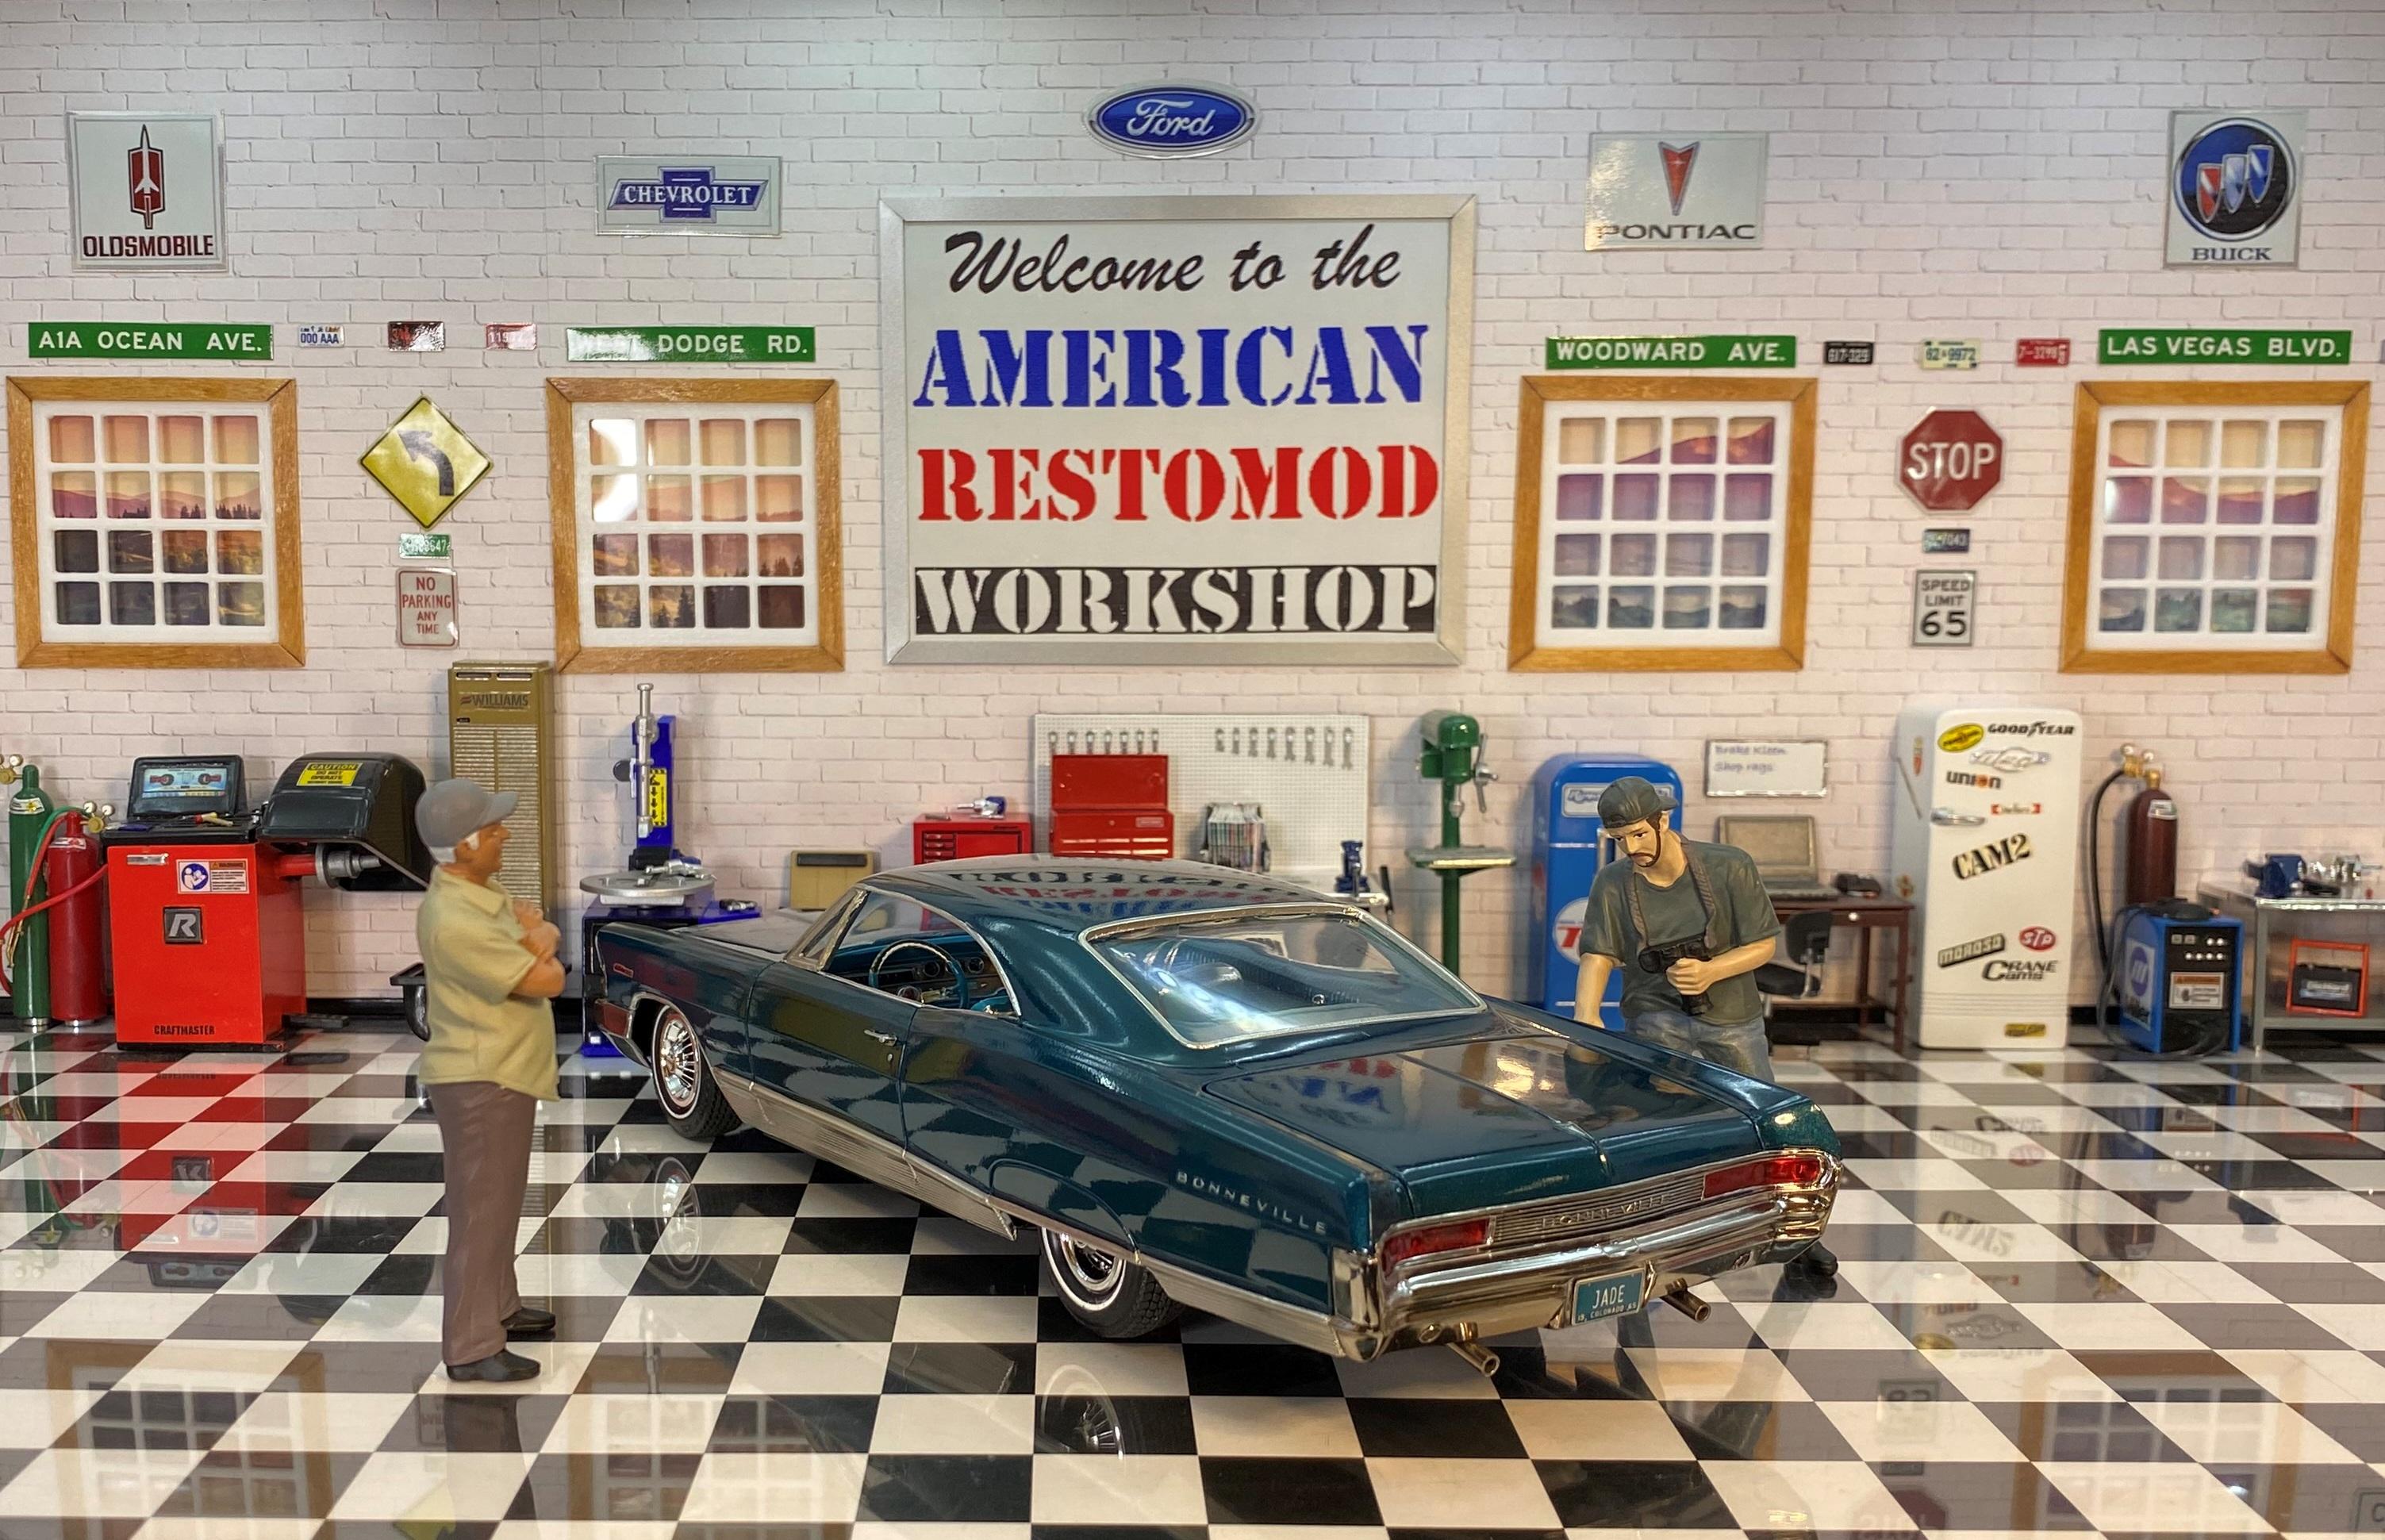
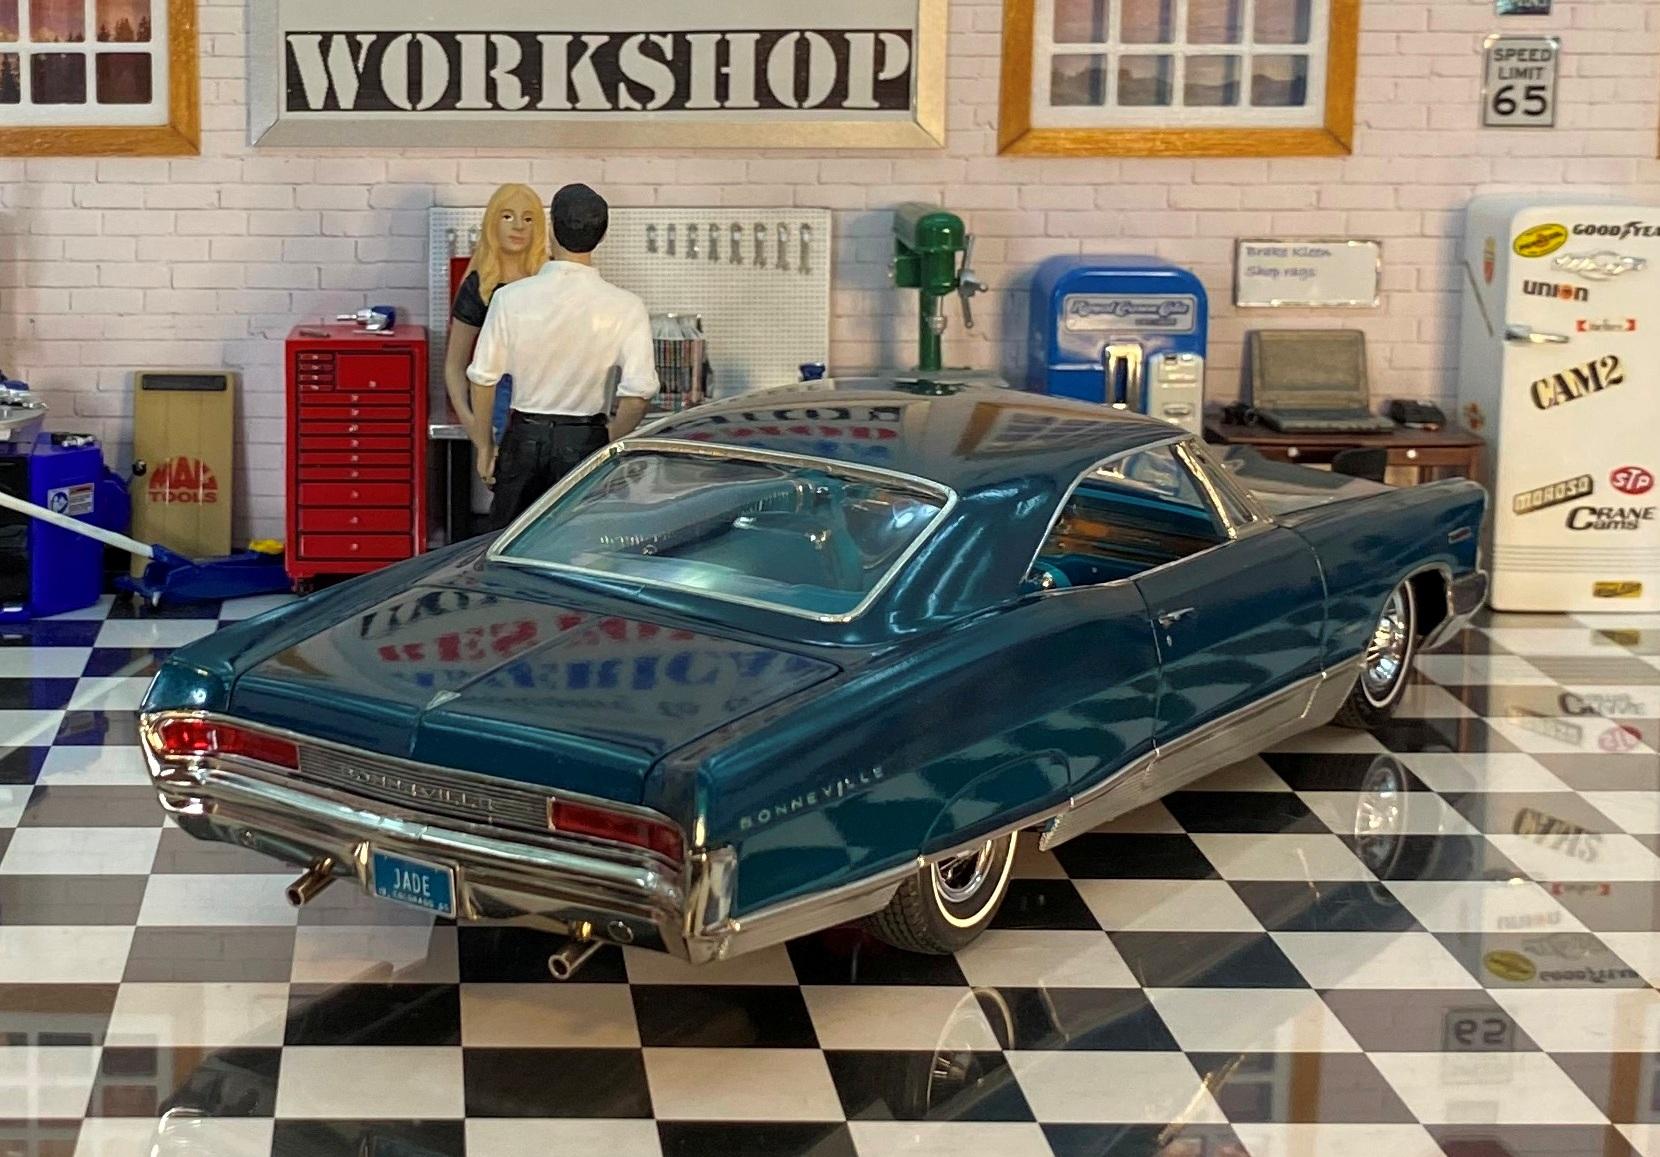
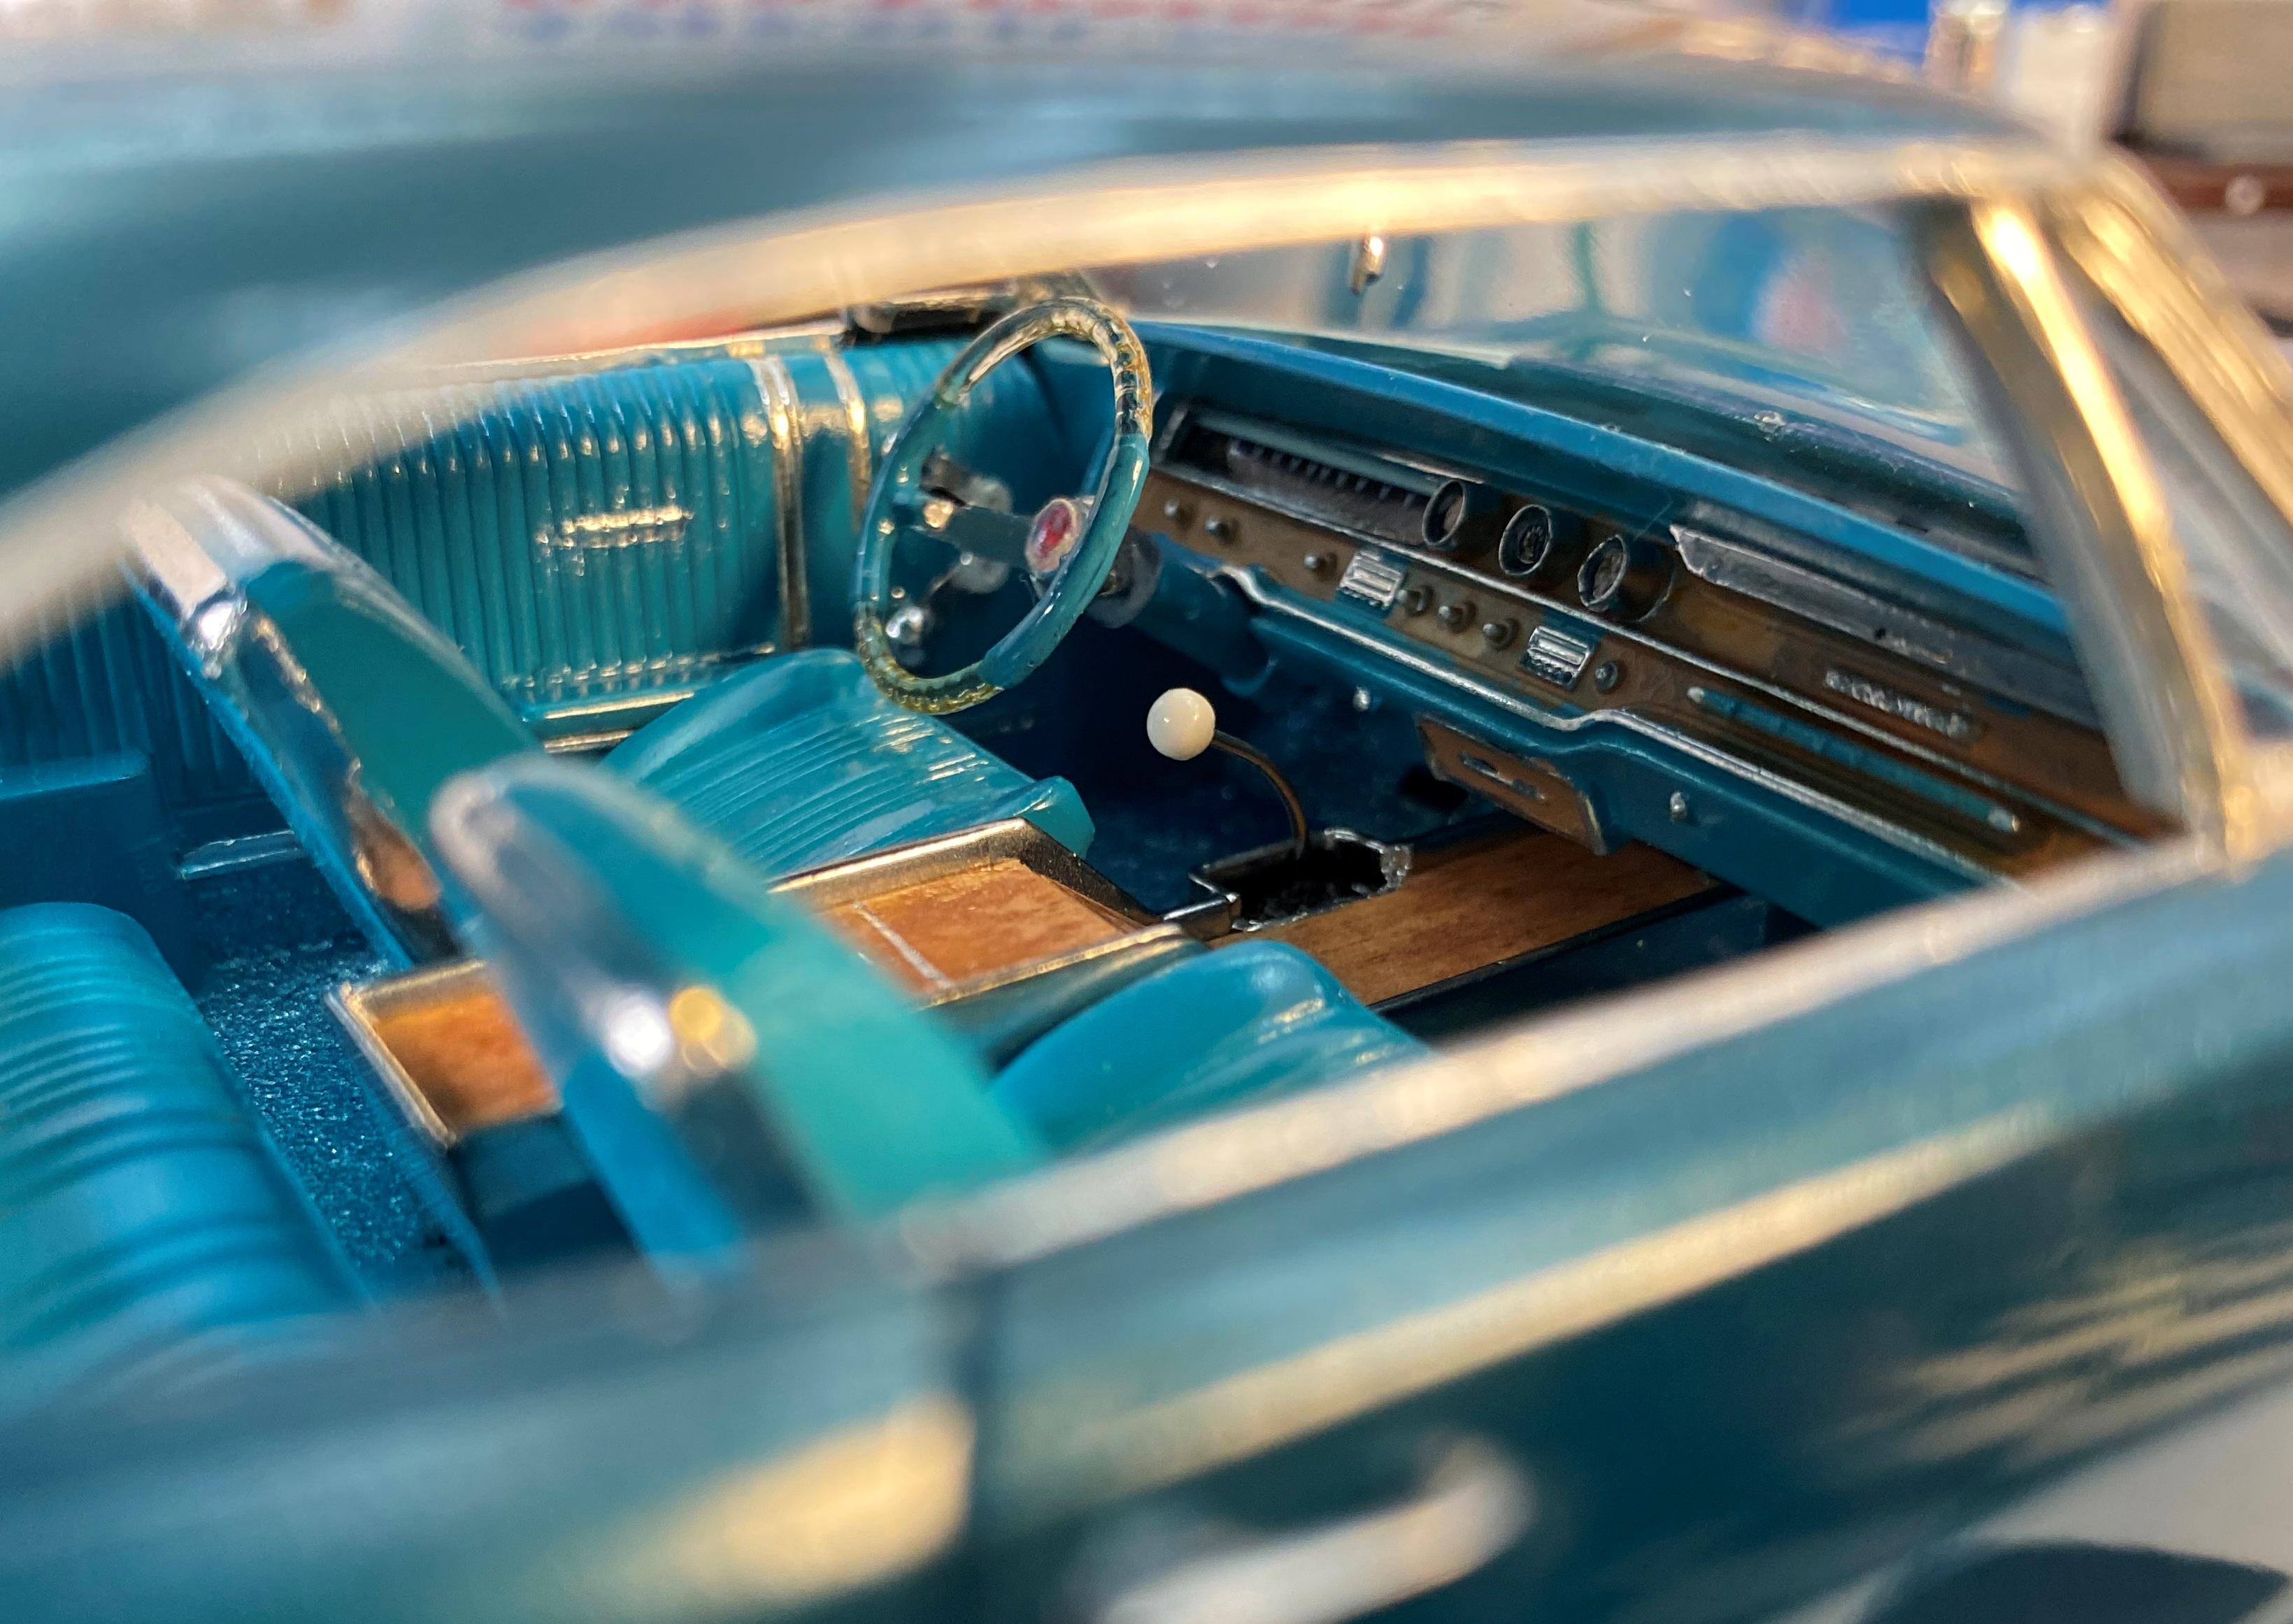
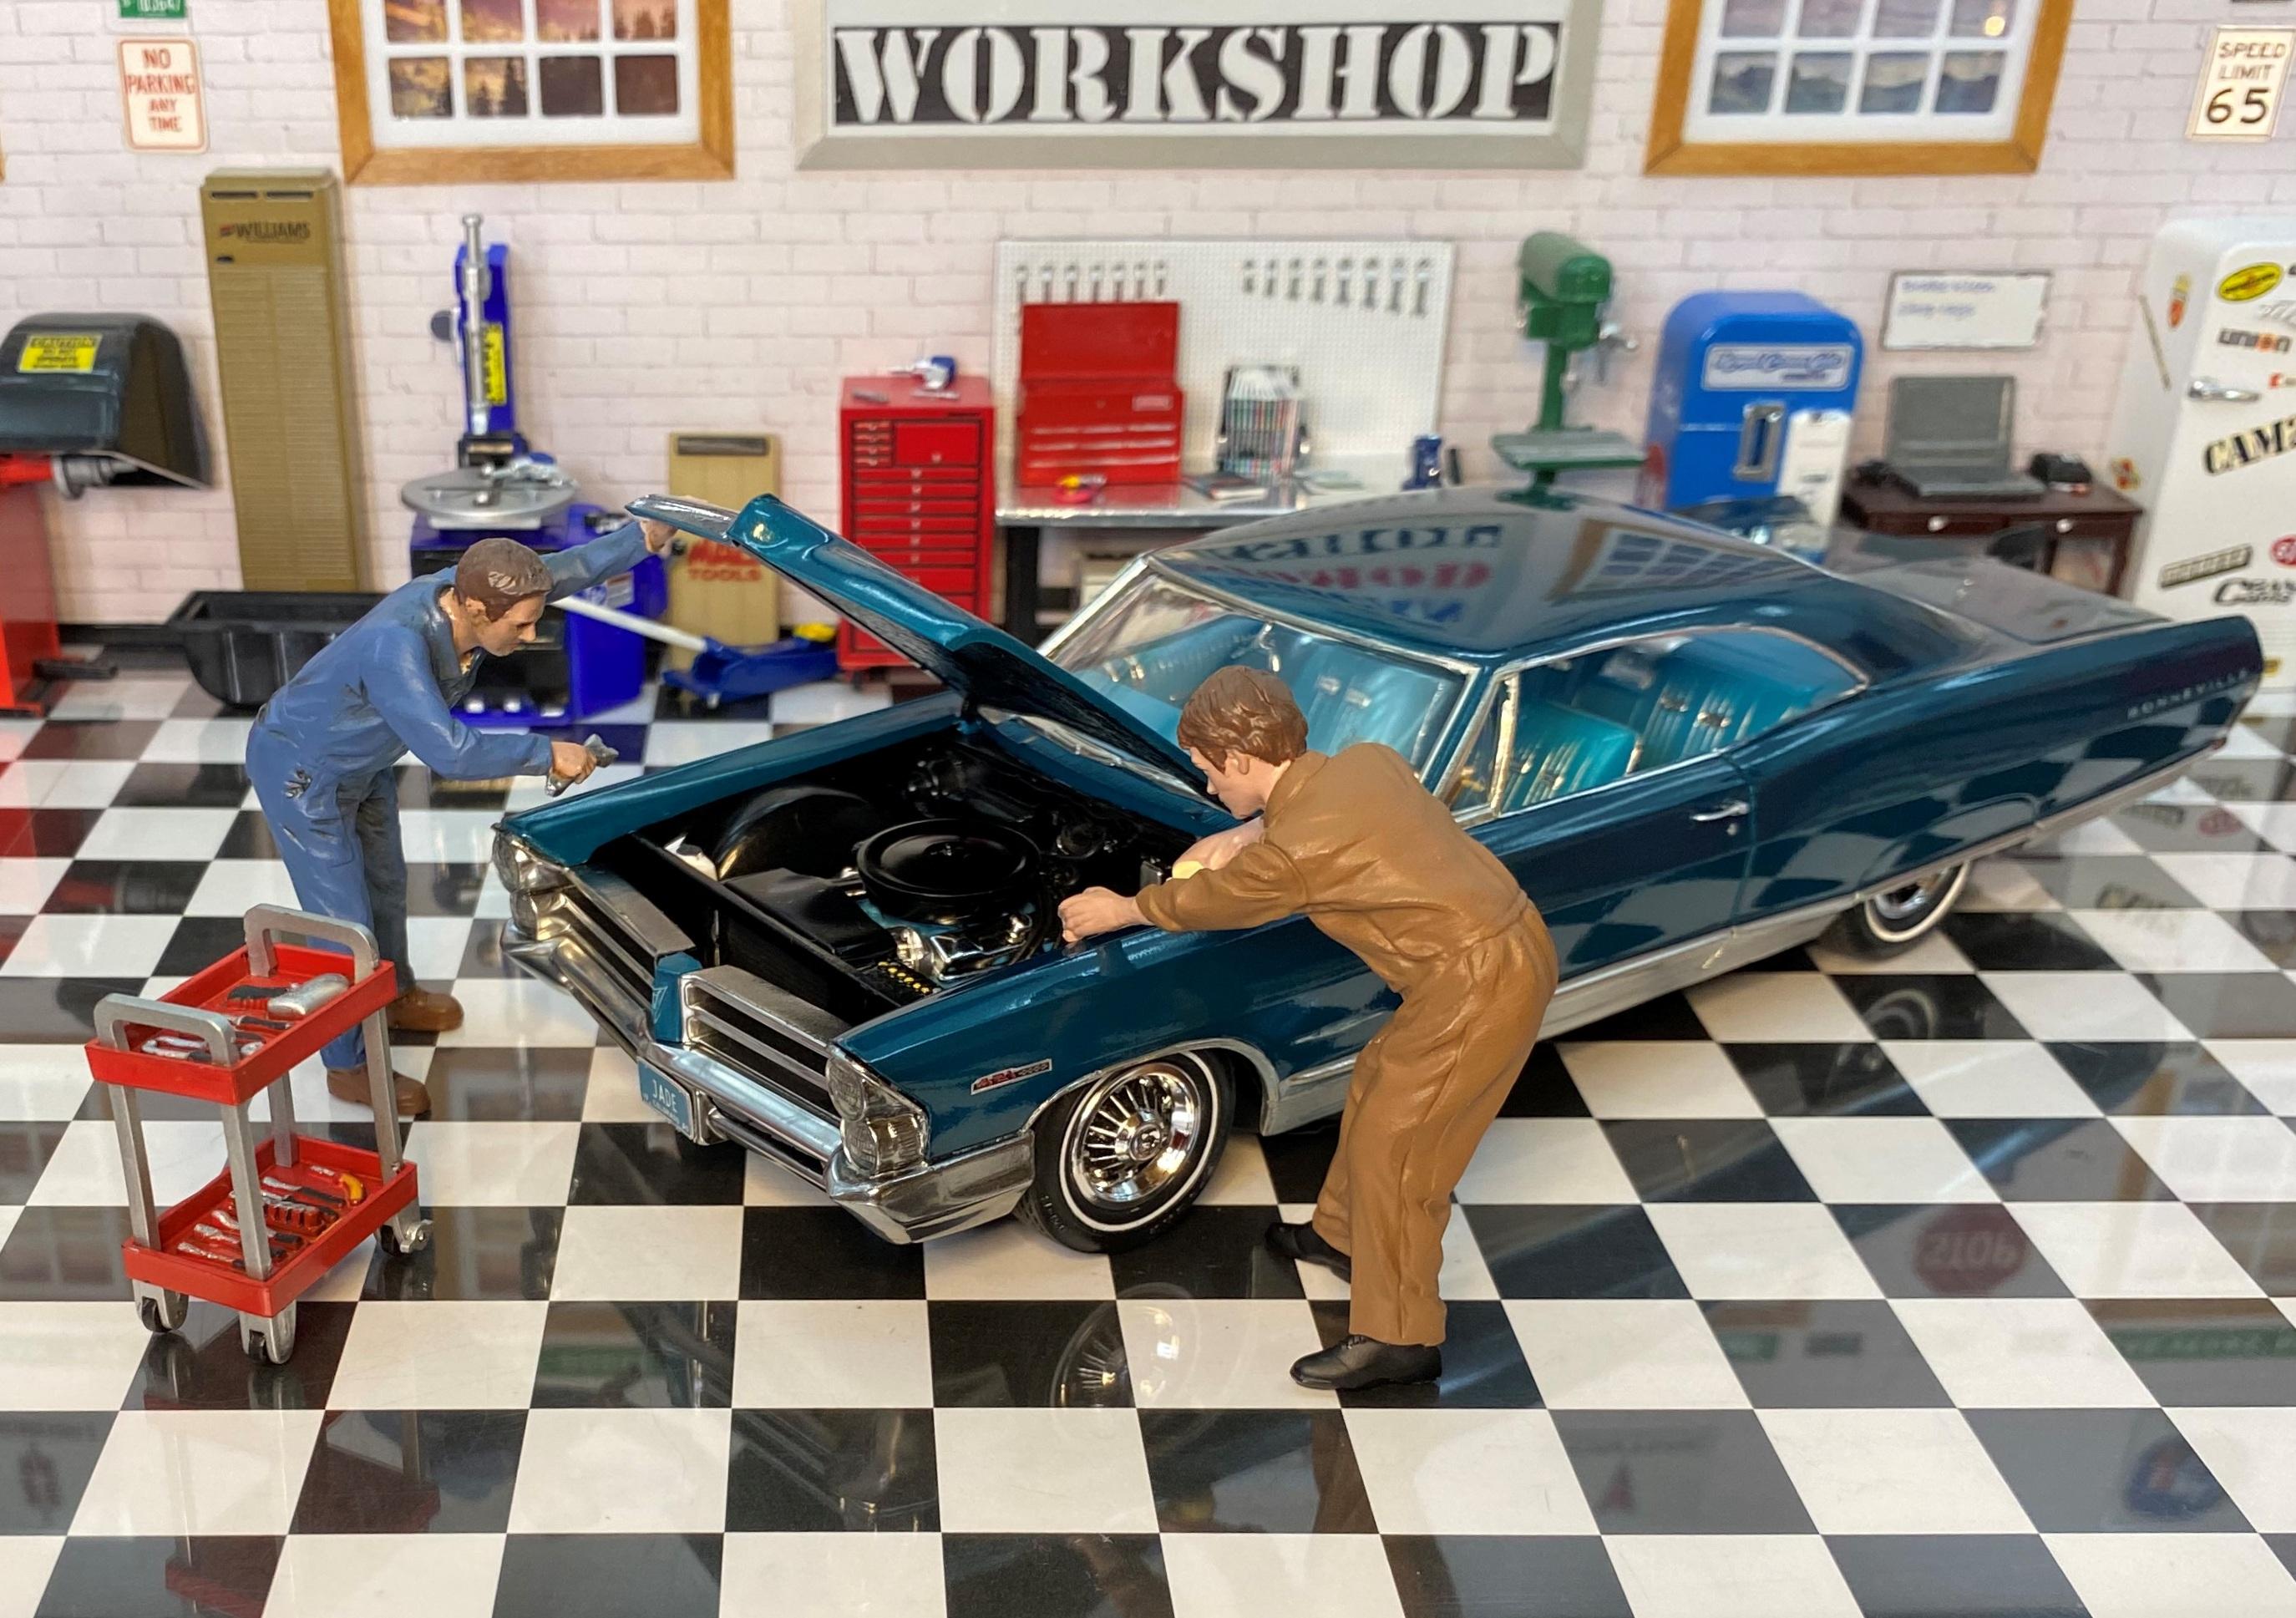
Well gents. This one got done along with her Big Girl sisters. I present to you JADE. She is painted in Testors Chezoom Teal Pearl metallic with a well detailed turquoise interior. Lots of skill expanding detail has been put into her including scratch built console with REAL wood inlays and my 1st successful interior flocking.
- 40 replies
-
- 14
-
-
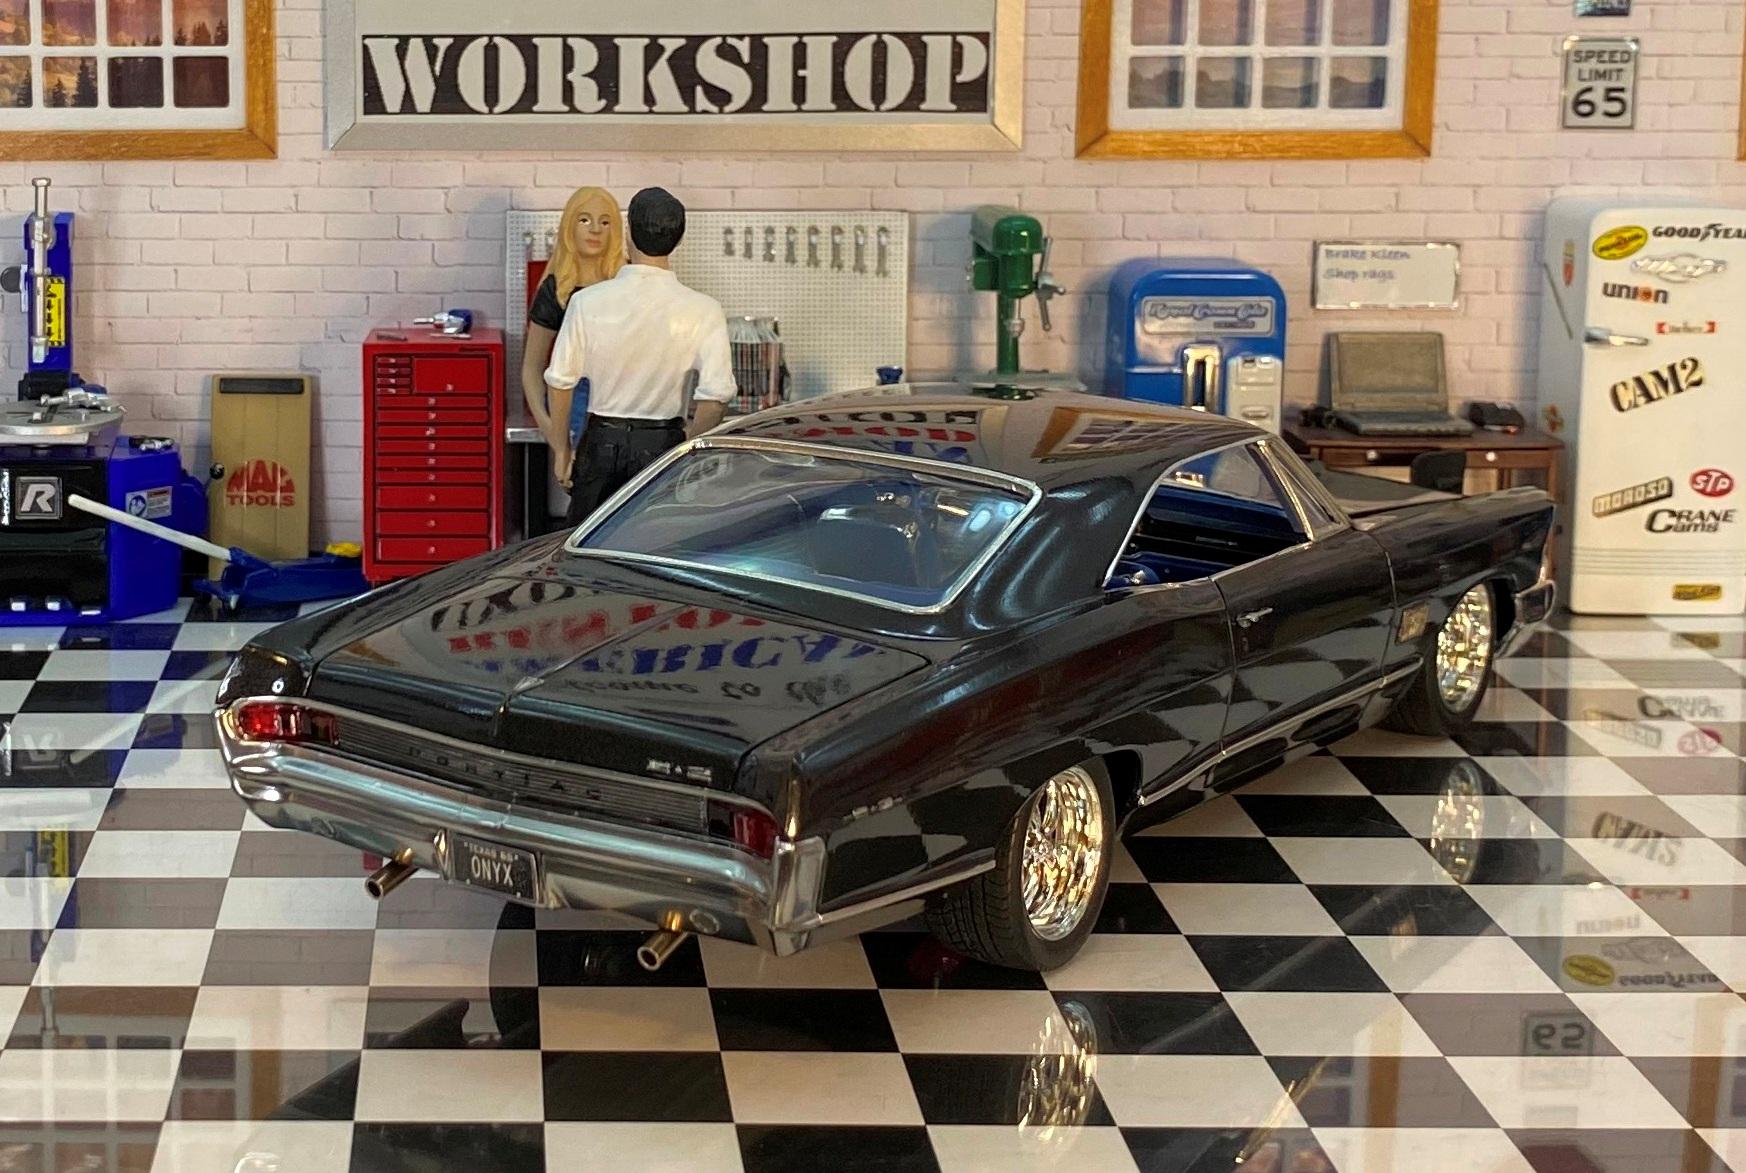
This is the the last of my Pontiac Big Girls. She wears Pegasus wheels and disc brakes. I upgraded the tires to be taller to fill the wheel wells better. I also use different inlays on the console. Comments welcome.
- 42 replies
-
- 17
-
-
Here is the 3rd of my 4 Big Girls batch build. This was the hardest, as the kit is a curbside with no engine or engine compartment.
- 18 replies
-
- 11
-
-
- pontiac
- bonneville
- (and 2 more)
-
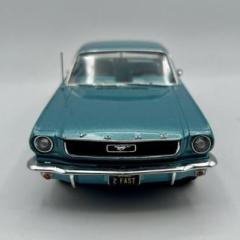
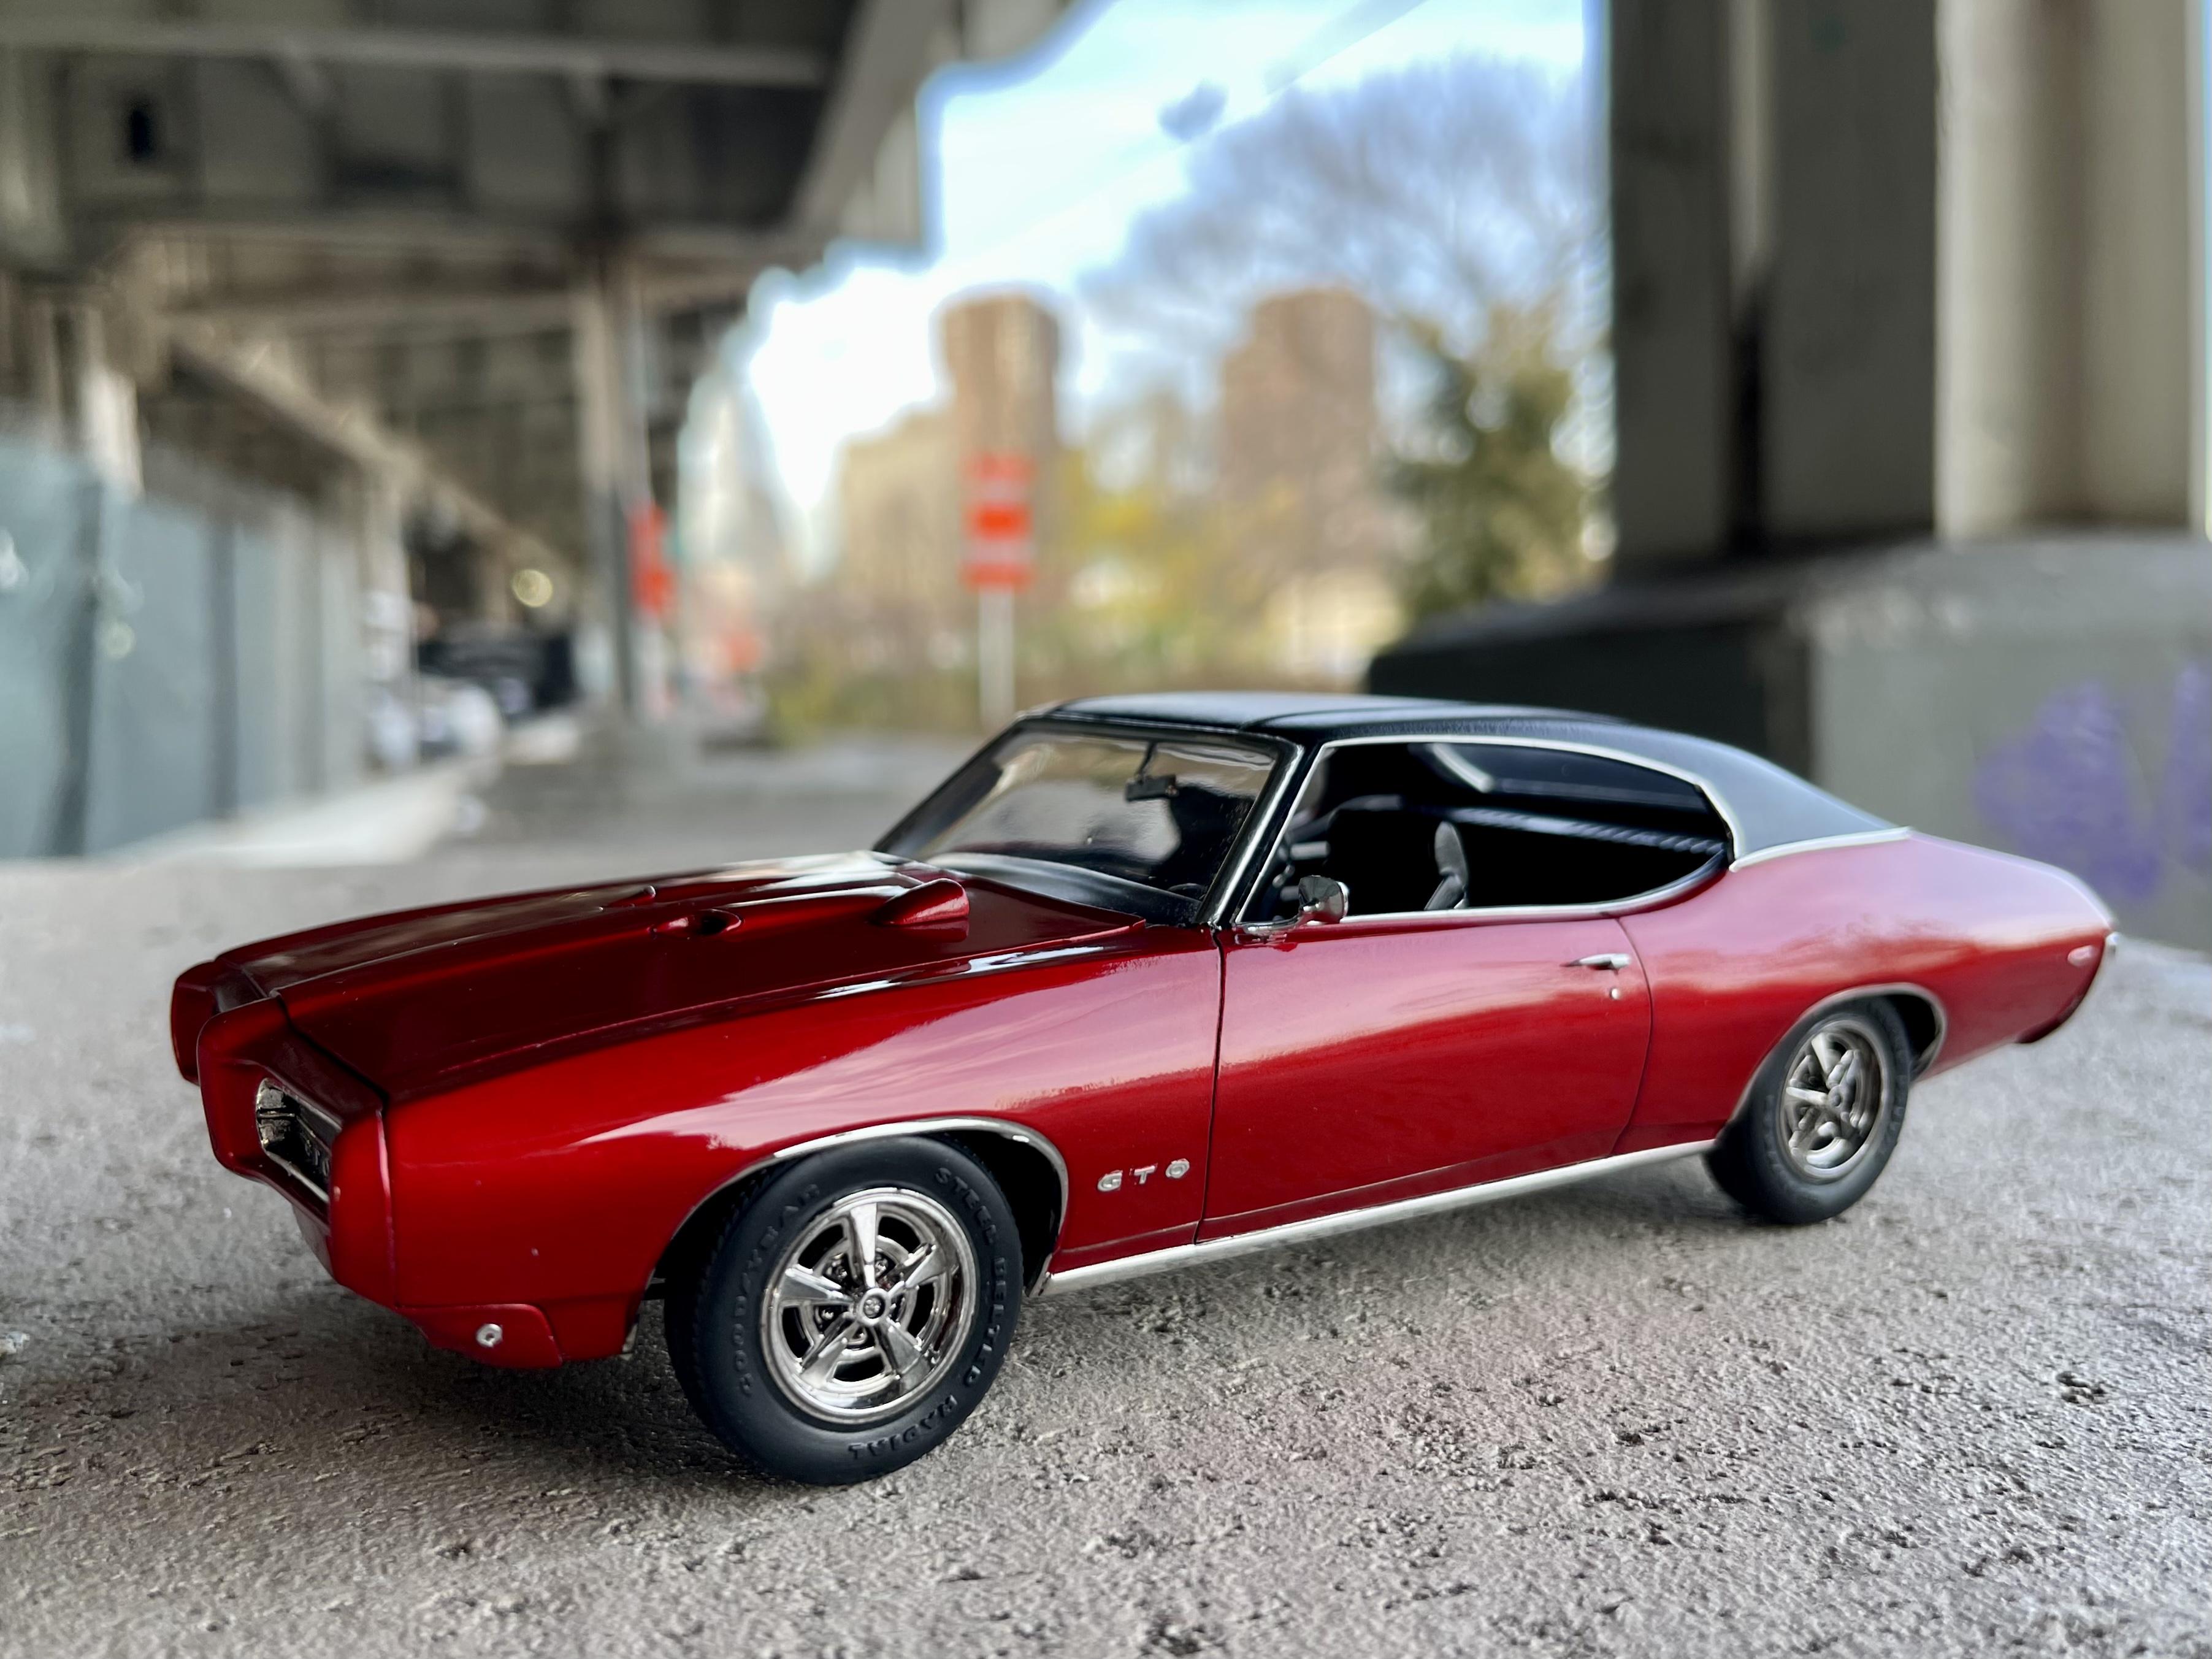
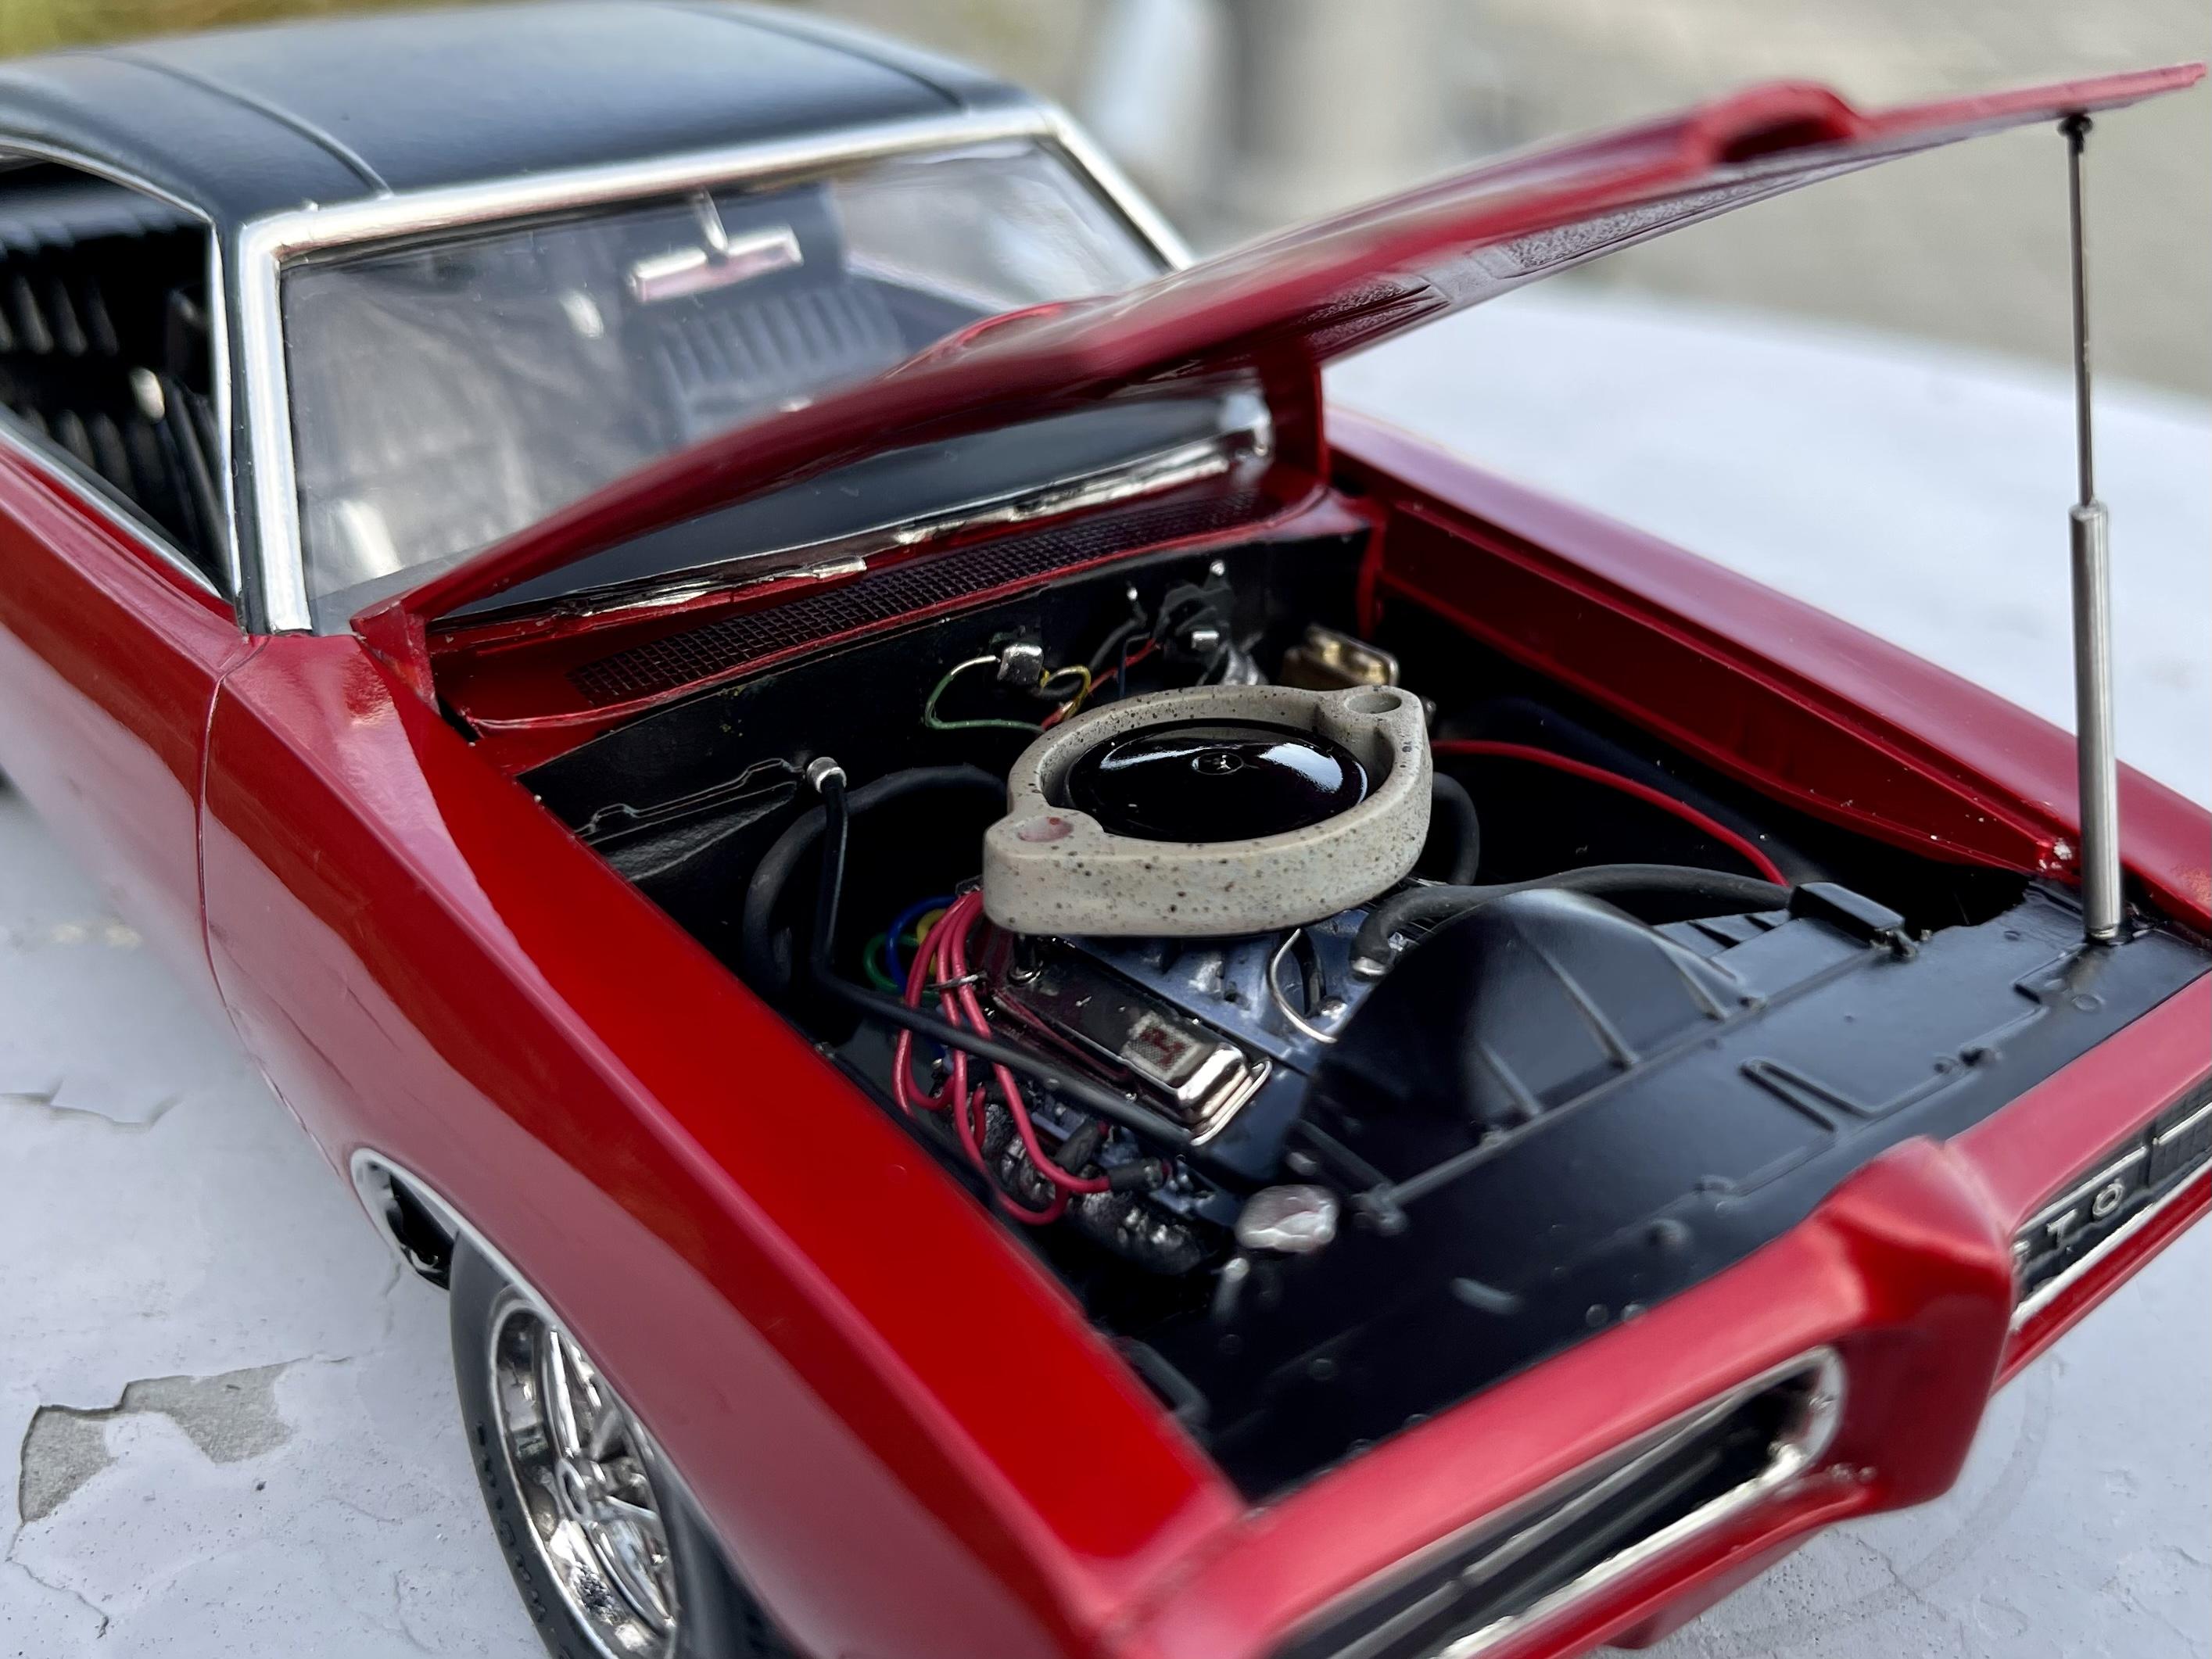
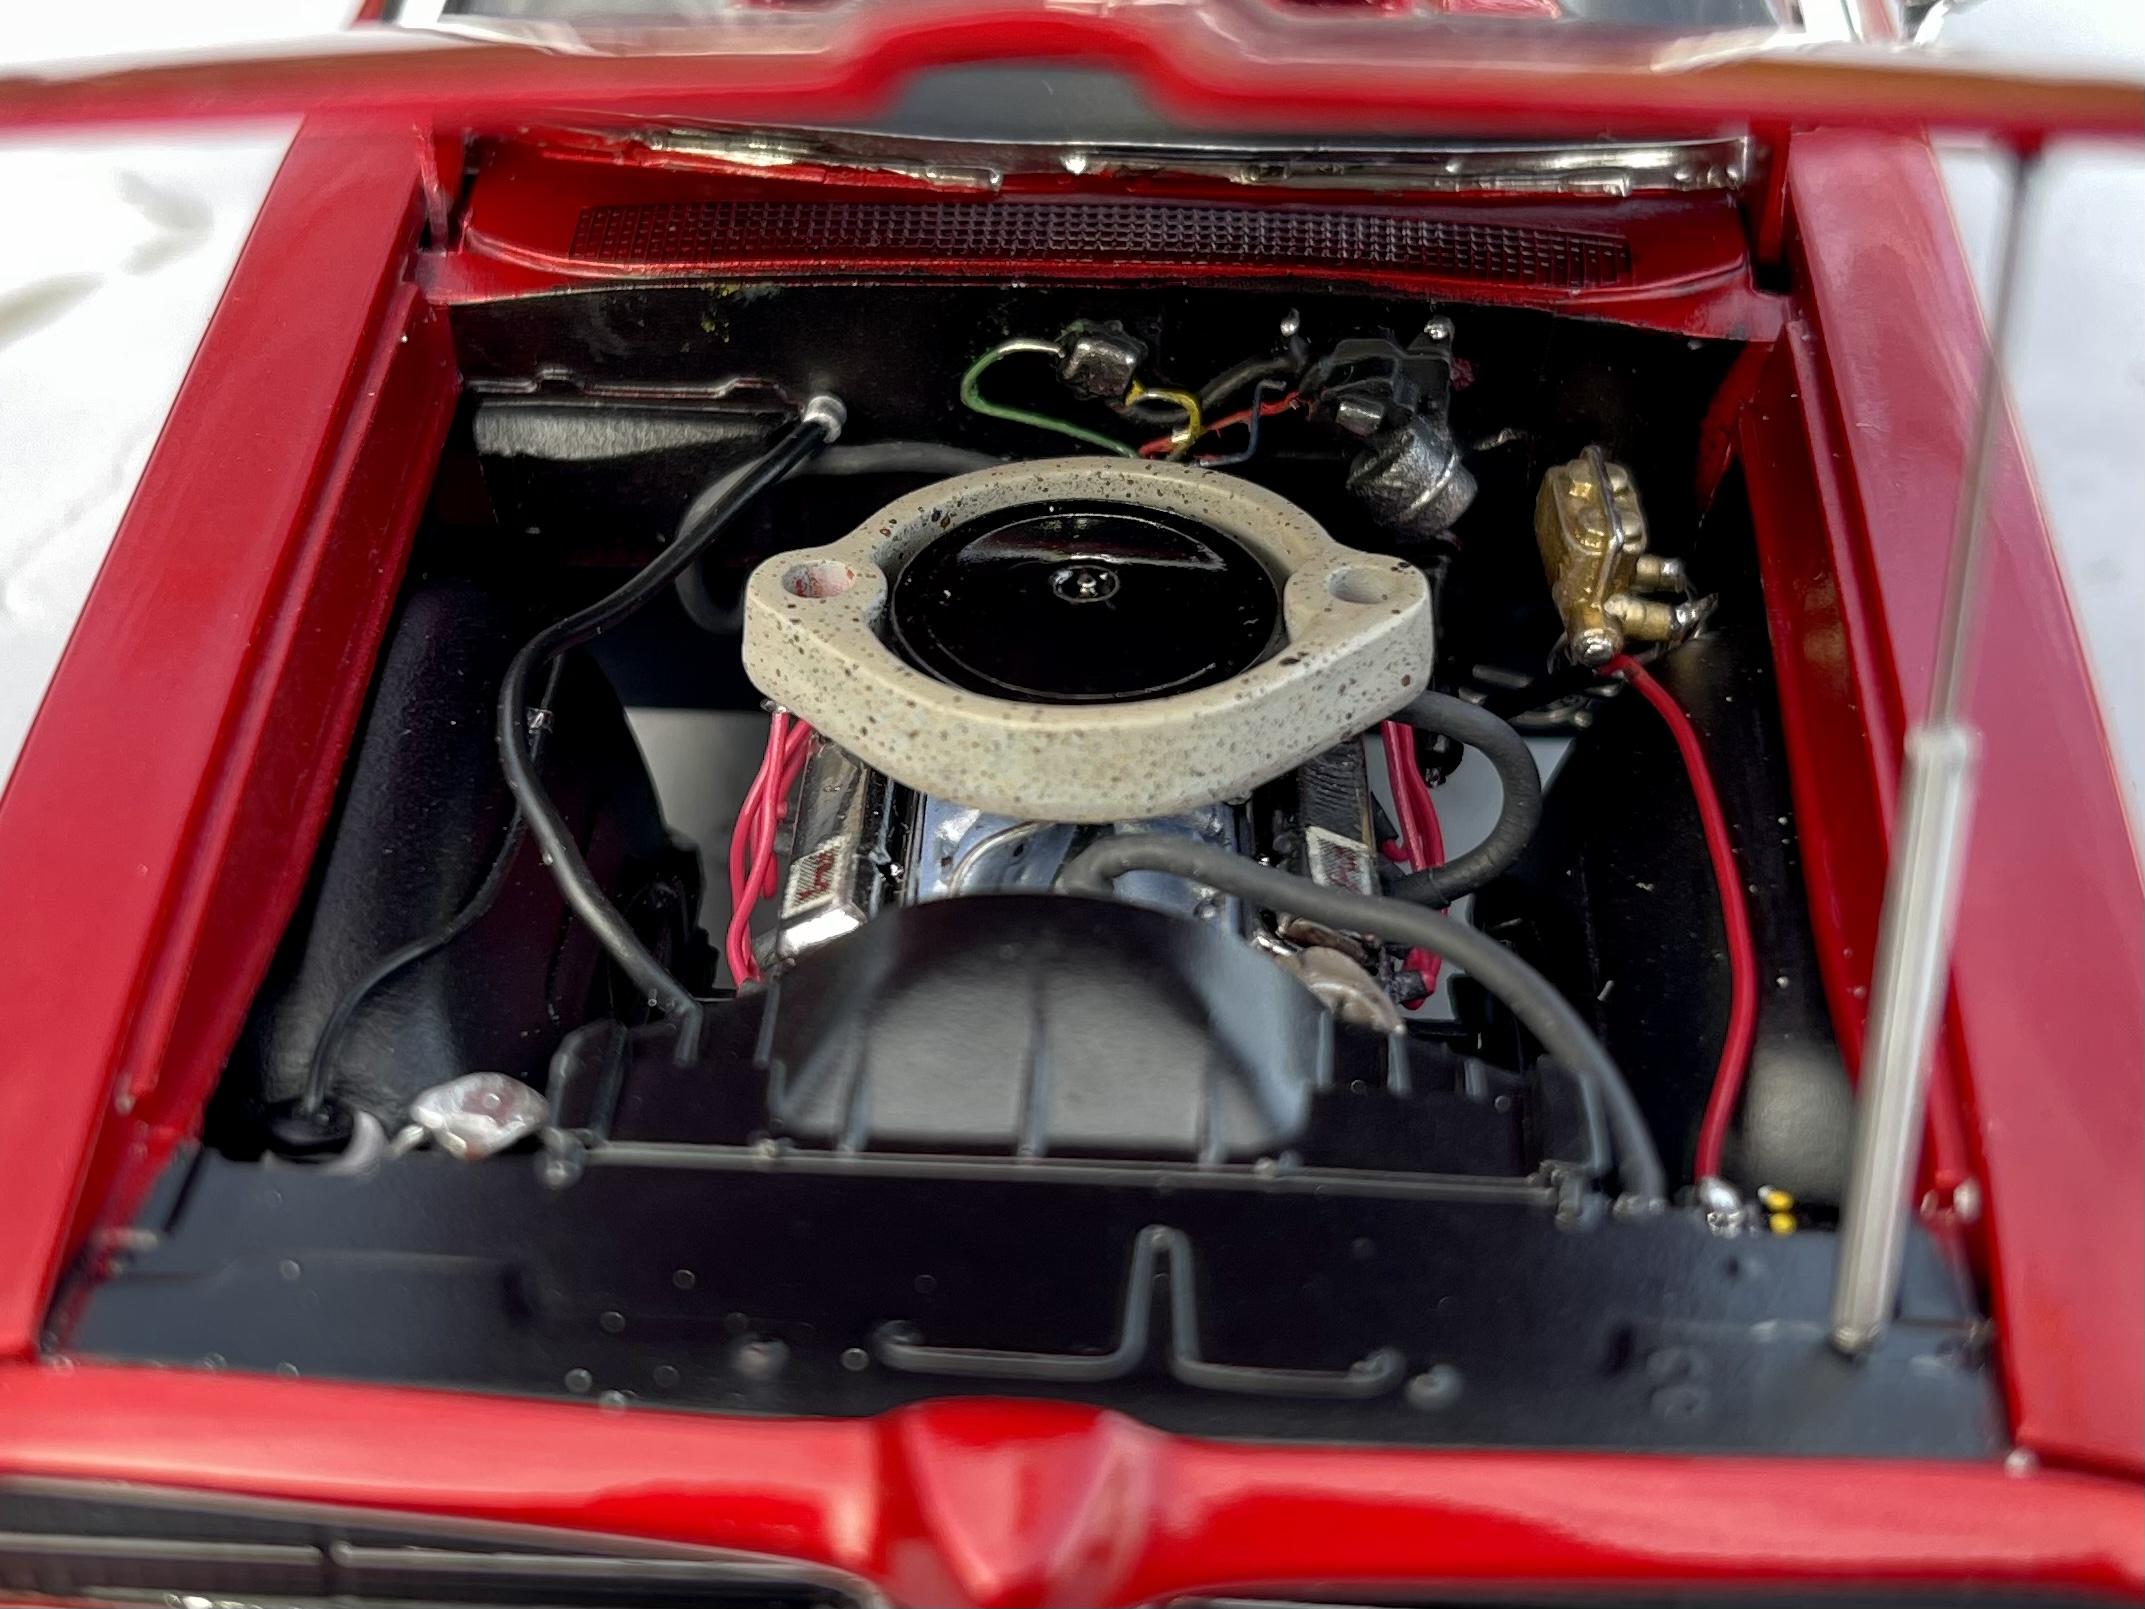
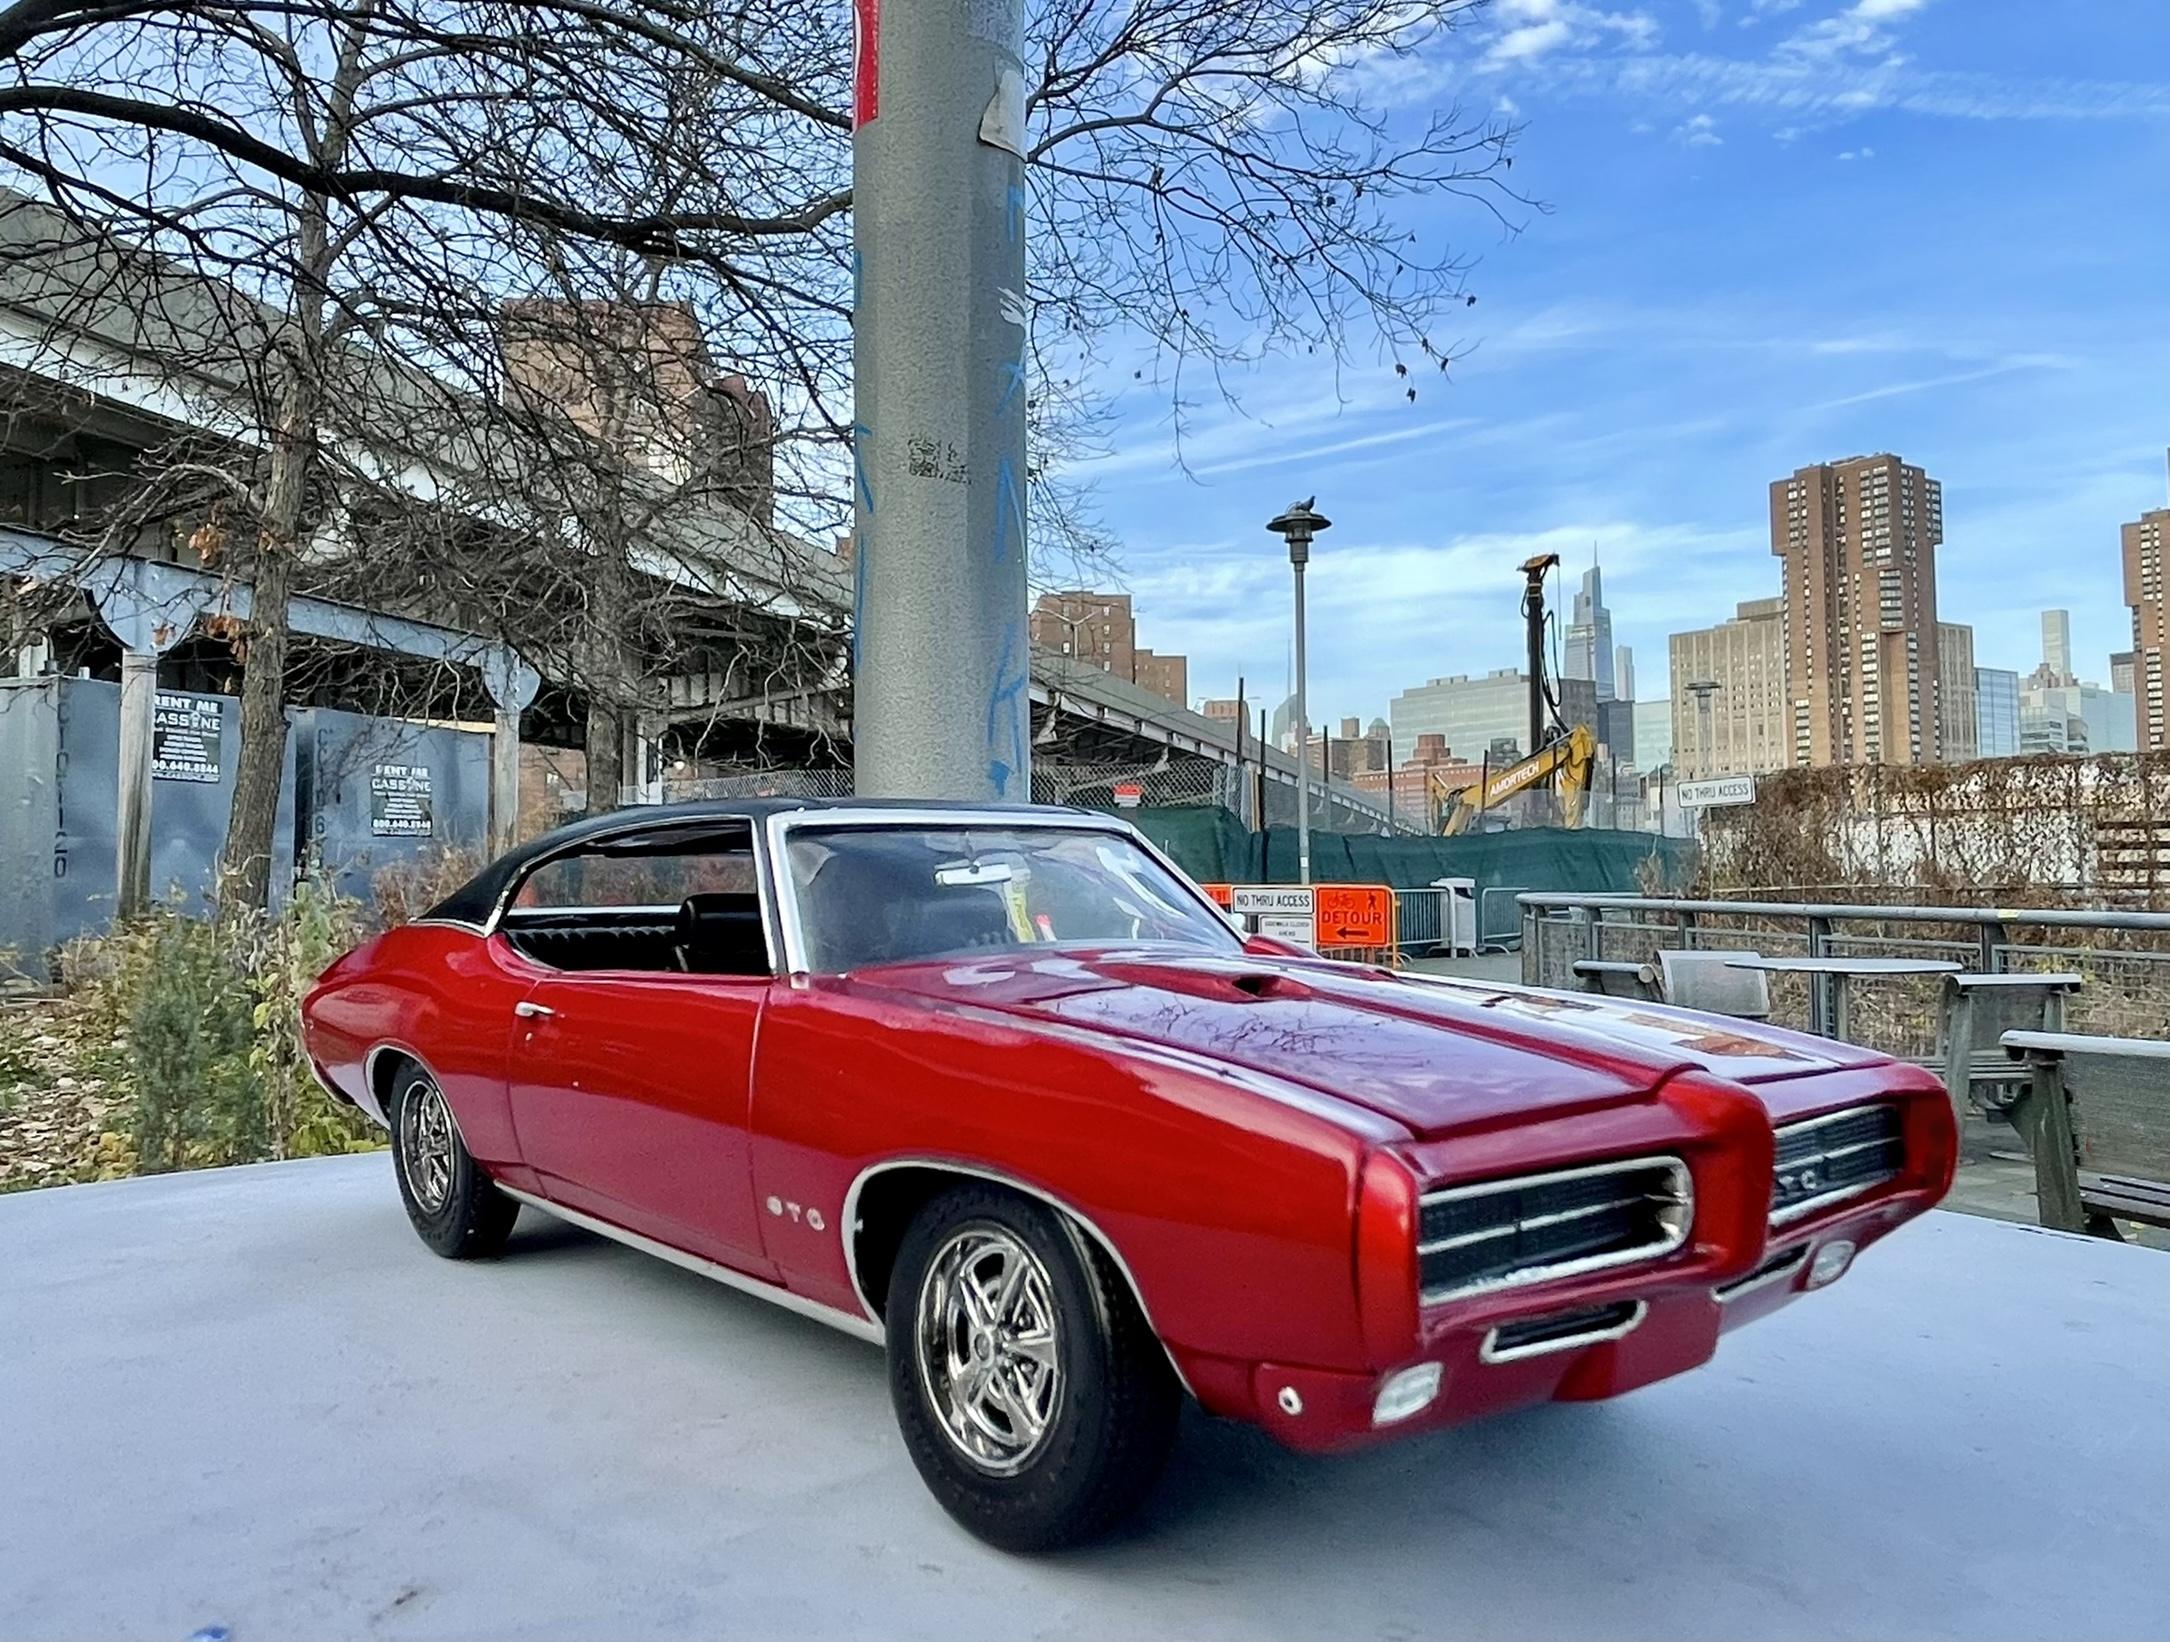
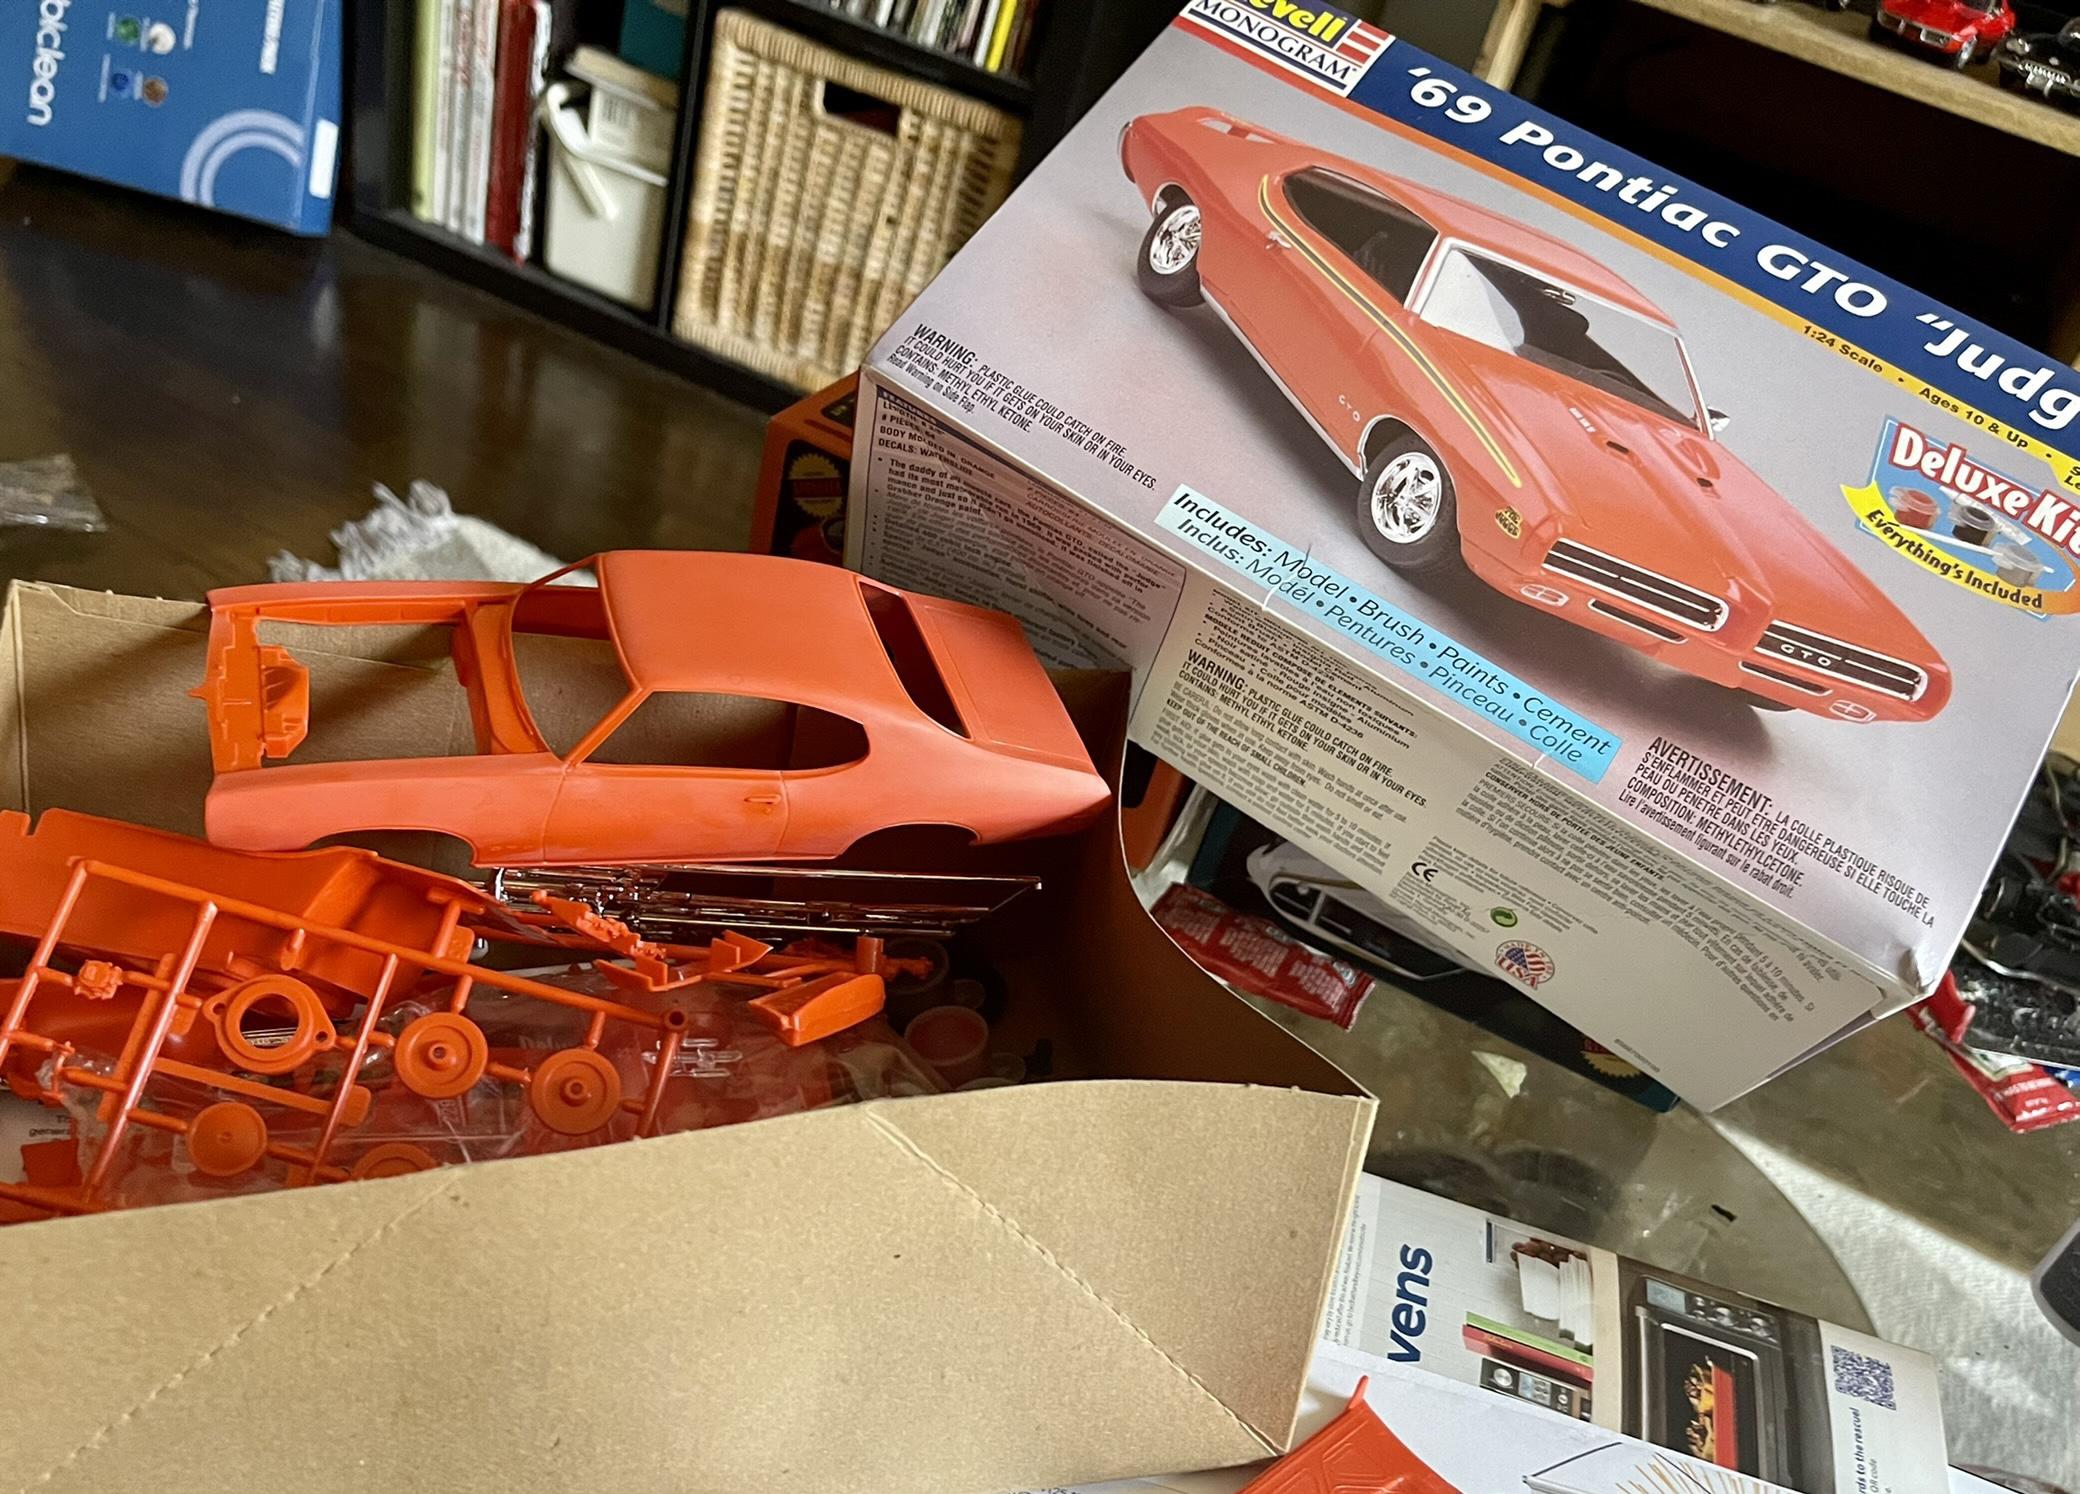
This is the new Revell GTO. I had gotten one of the older kits in the early 2000's, but botched the paint job. Ever since I have wanted a new kit. The body in the new kit is pretty nice........and that's all I have nice to say about the kit. I don't remember the old kit being this bad. I thought I was building an AMT kit. The interior is just a tub with not a lot of detail. The chassis has some detail, but the suspension is not that detailed; and the engine bay? It may as well not even have had one. The fire wall has no detail, the engine has little detail, and the rest of the bay is pretty open. The fit of the front and rear is also bad. I had to trim the chassis to get the front on, and the trunk hangs over the top tail lights. I also don't understand why they would have you paint the marker lights in front. Make a recess there and have a plated piece fit in there that can be translucent painted. Over all though, the kit didn't come out looking too bad. SAM_1471 by Eric Lucas, on Flickr SAM_1472 by Eric Lucas, on Flickr
-
Hi Guys (and lady's) - I'm looking to build a replica of my buddy's 1976 Pontiac Firebird Trans Am - I have the Revell 'Smokey and the Bandit' edition Looking to see if anyone knows of a aftermarket company that makes a '76 nose for it? I think Reliable Resin did a conversion kit years ago but I can't find that one anywhere online! Help? Thank you - Tim
-
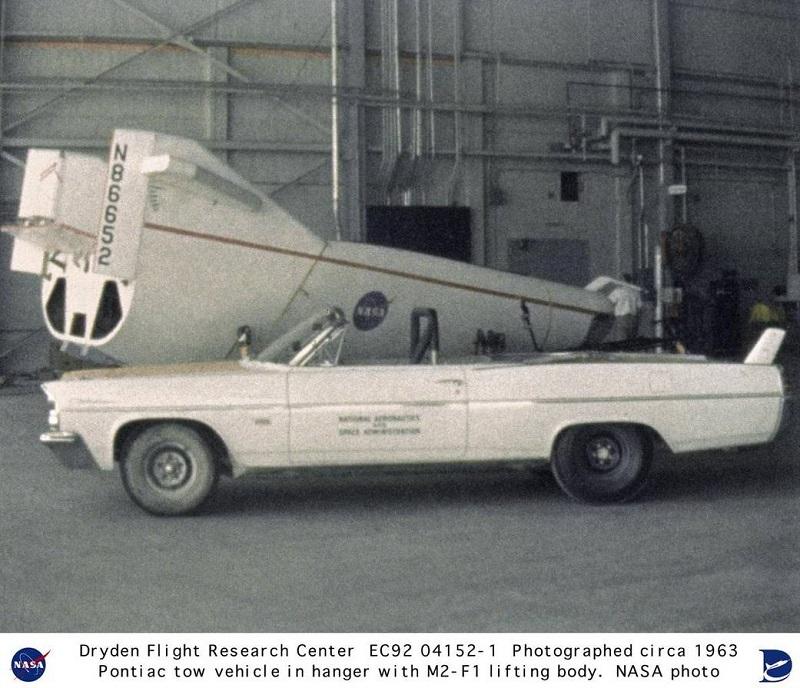
 History Hits: NASA’s Hot-Rodded Pontiac Convertible Wouldn't that make a cool diorama?
-
Looks like the 1/16 scale MPC '79 Pontiac Firebird kit is being reissued as kit #862. Hopefully it's the "Turbo Blackbird" version and not the 10th Anniversary T/A version.
-
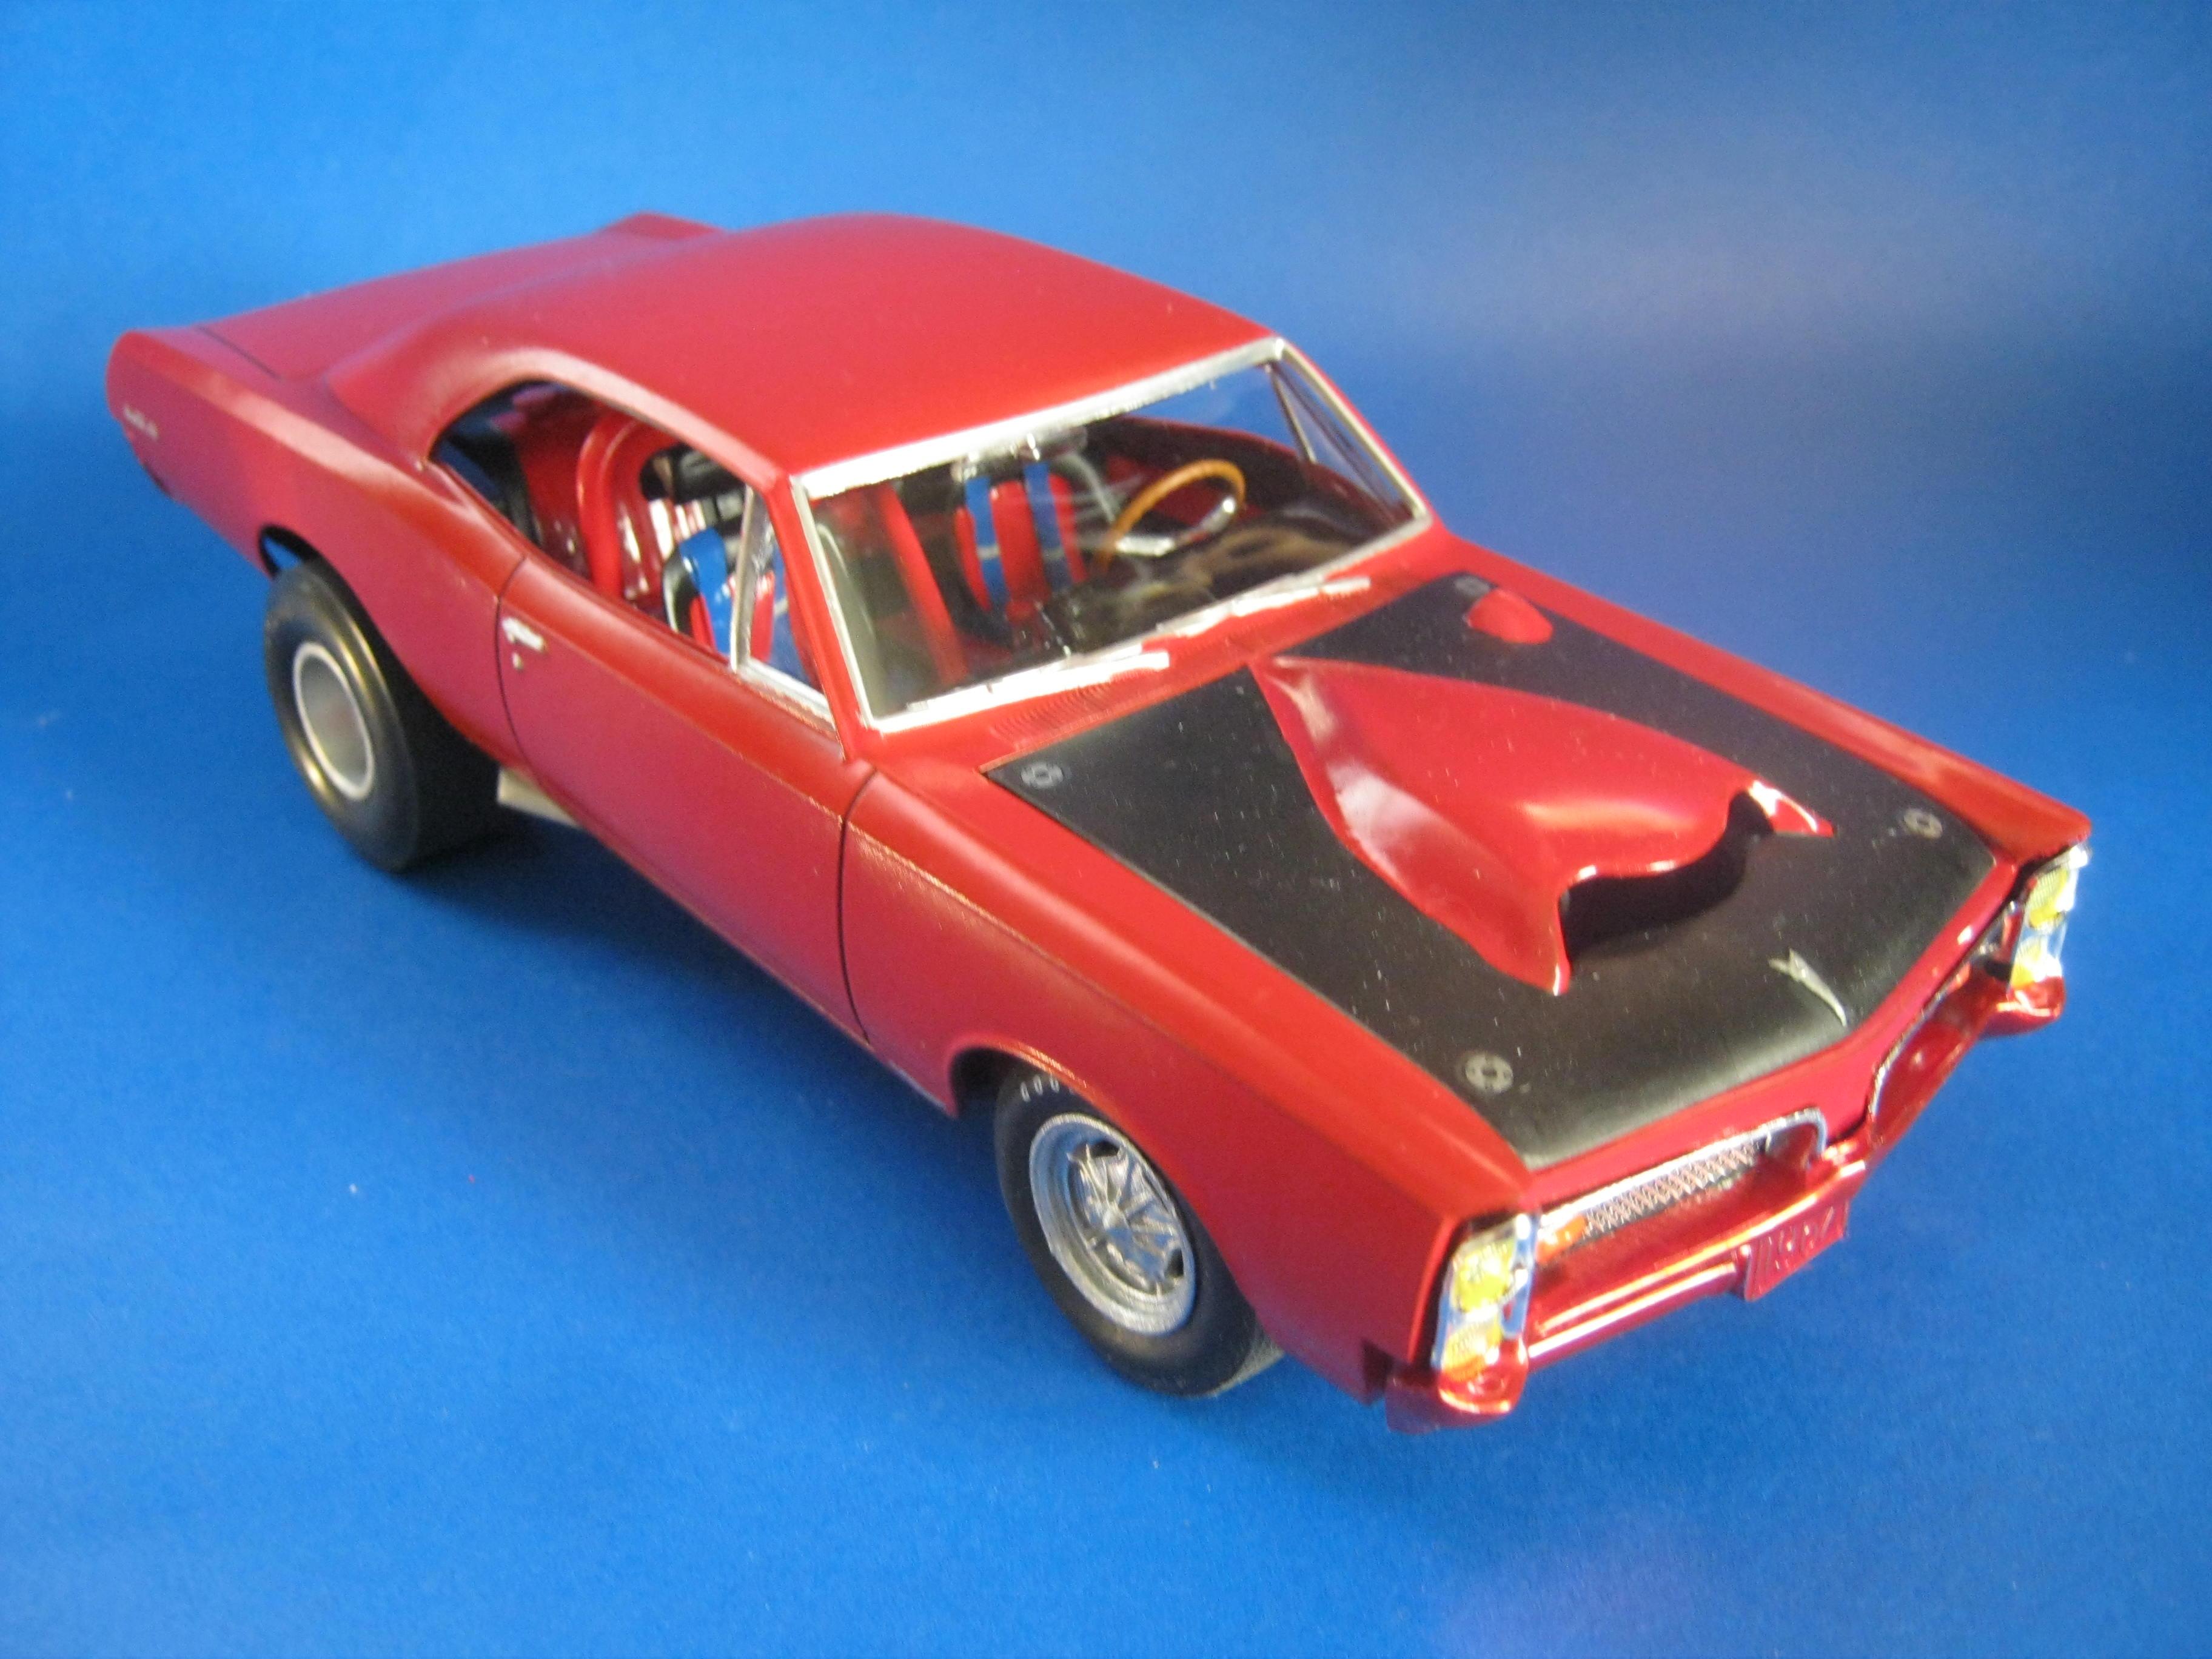
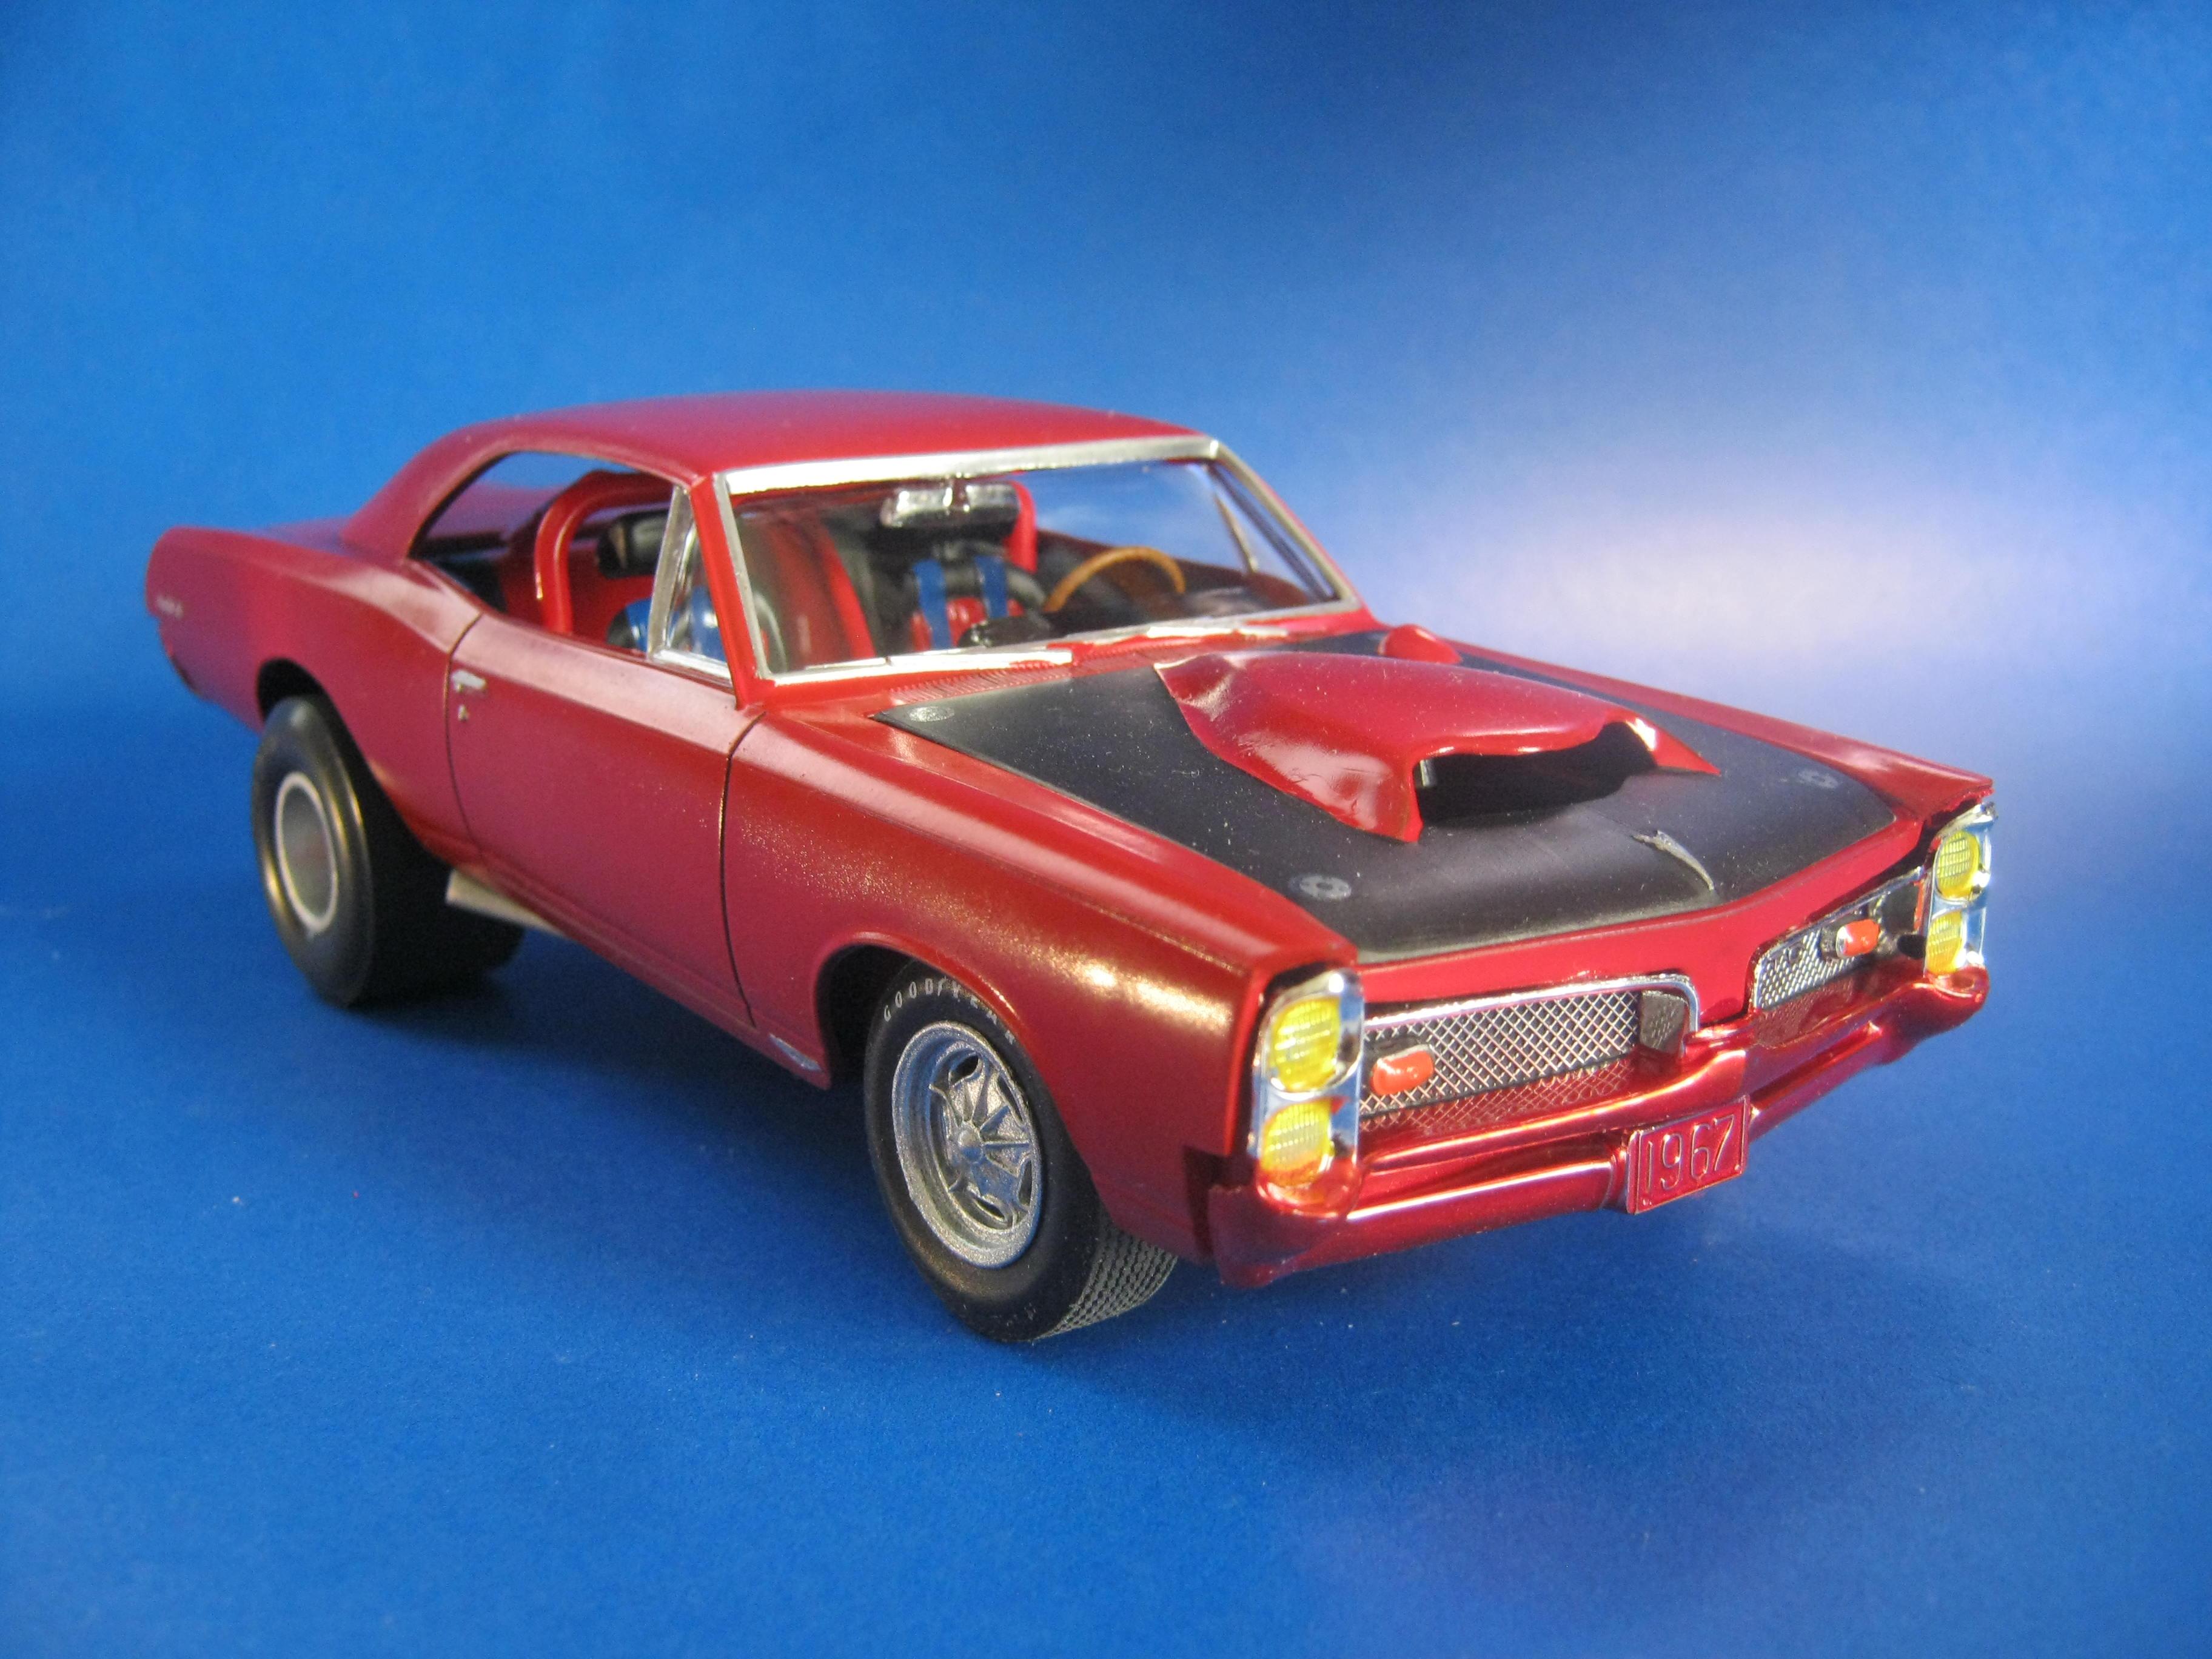
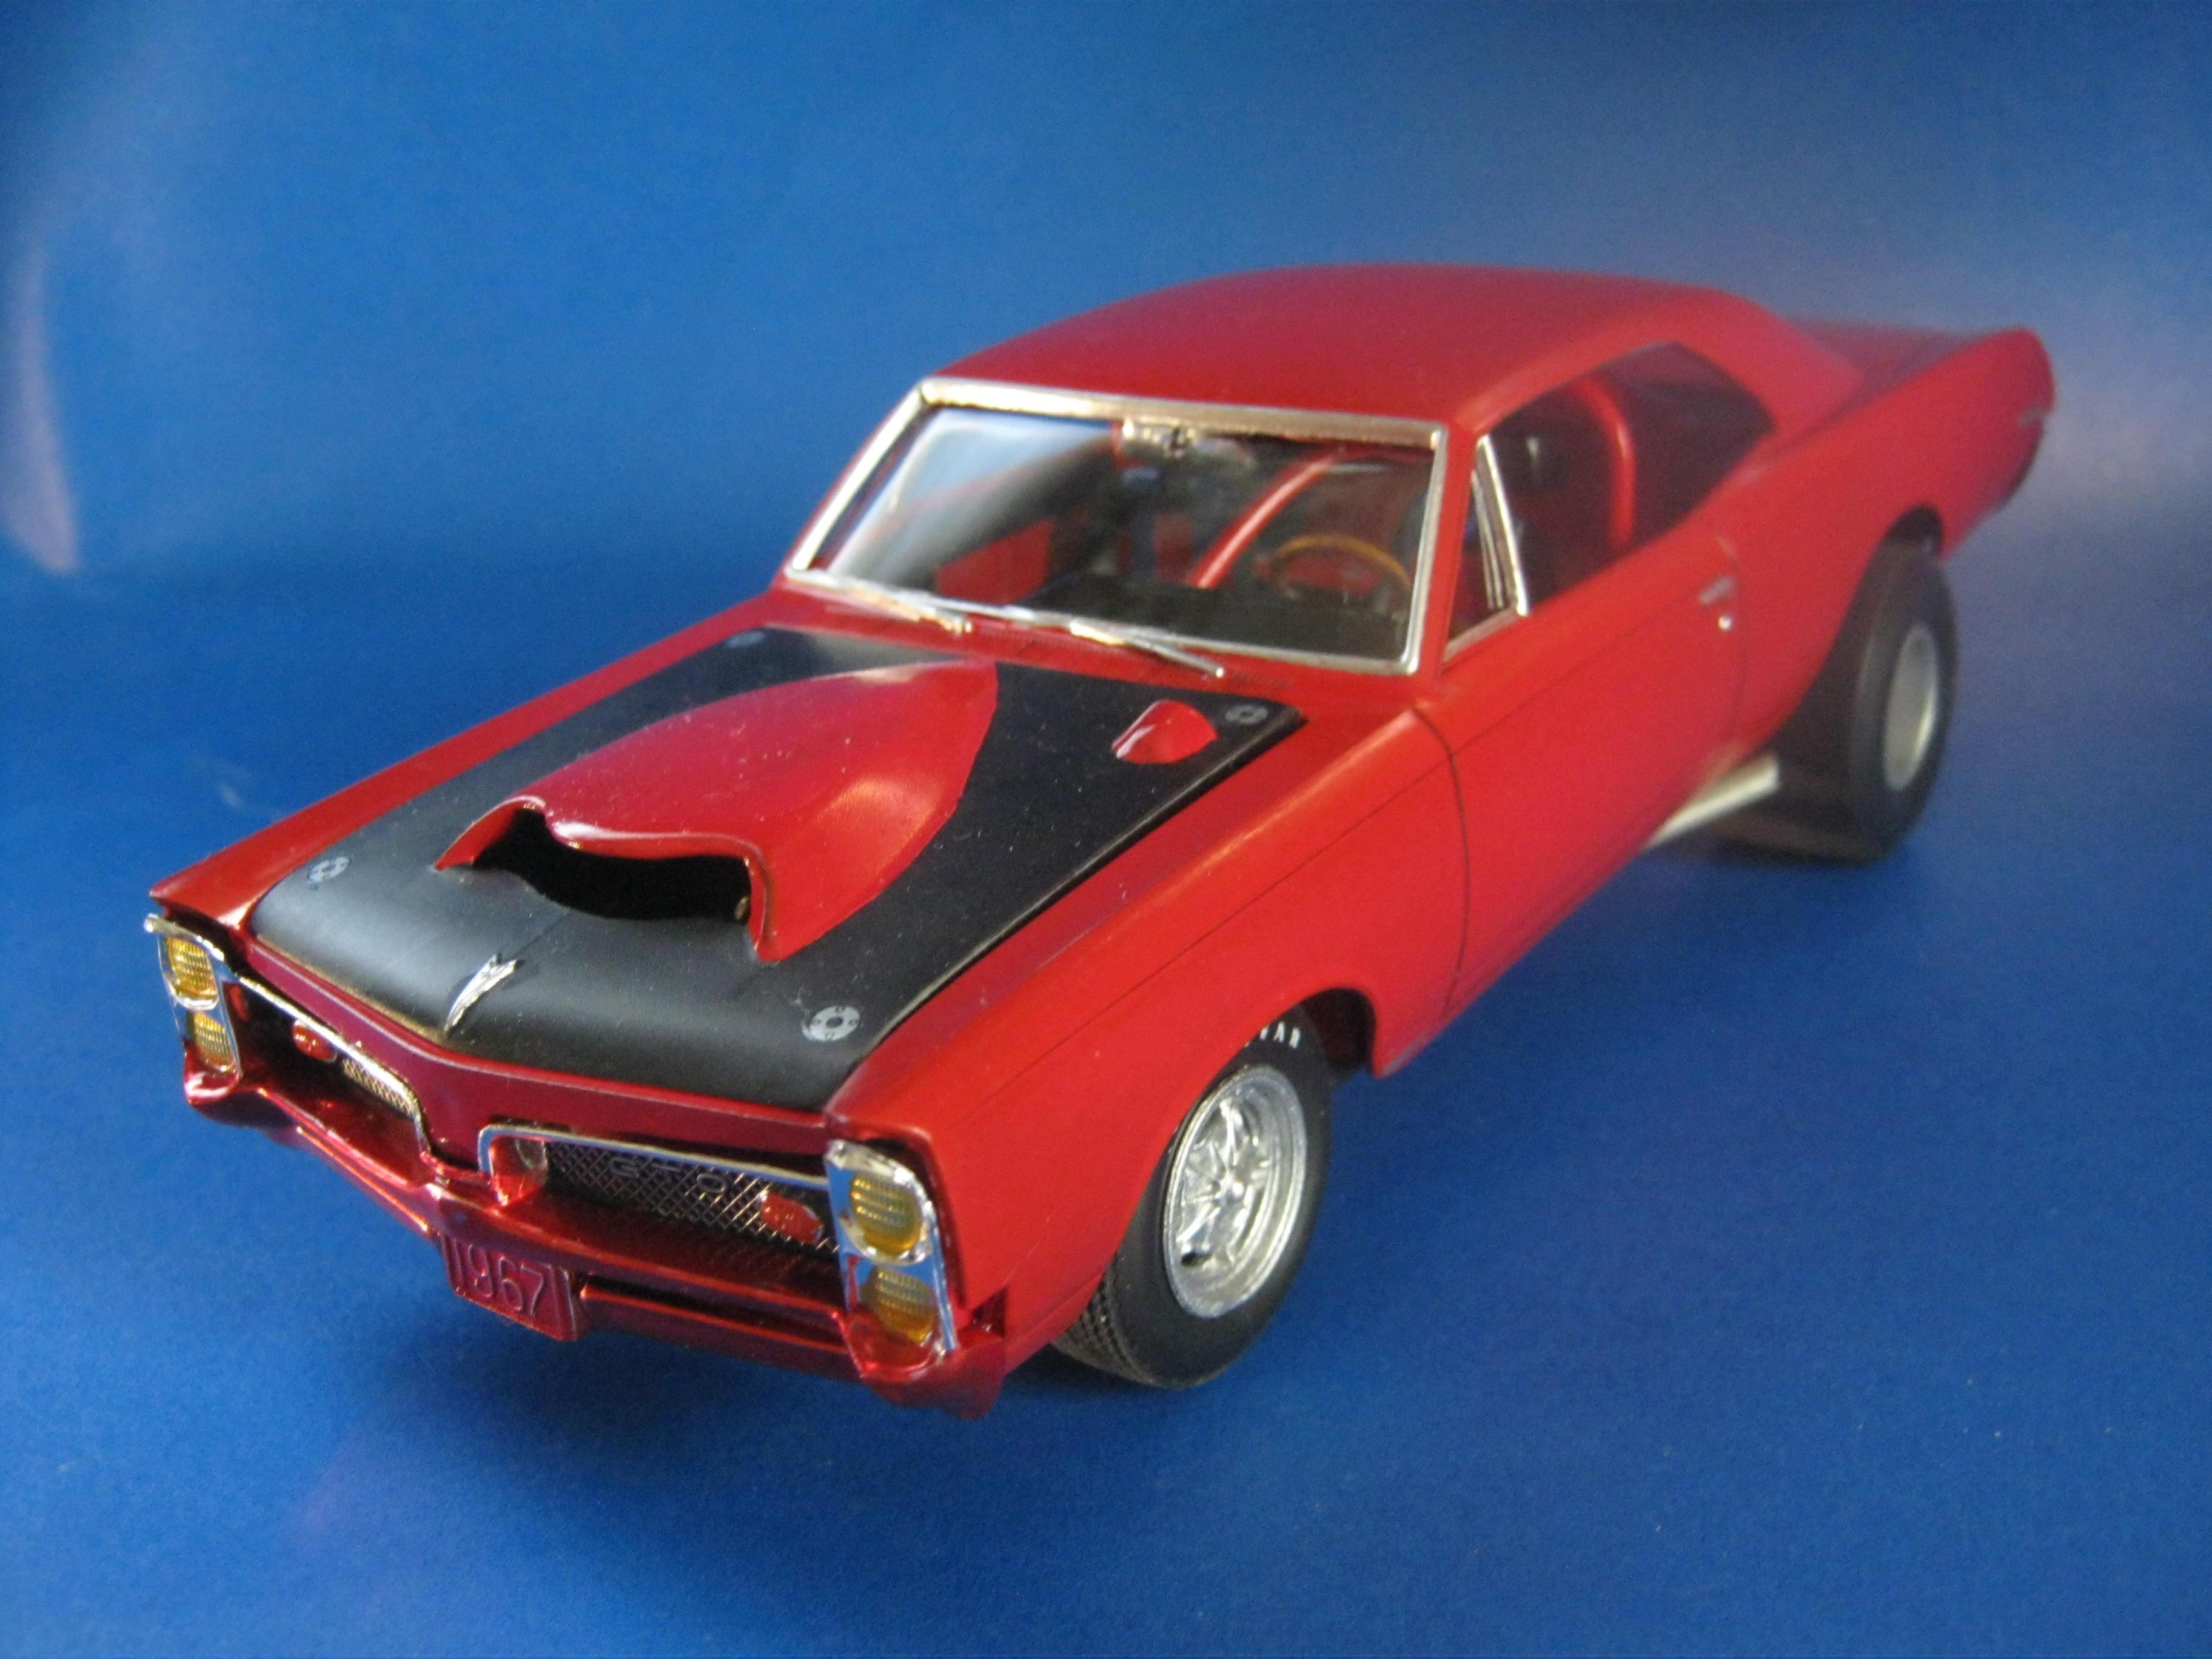
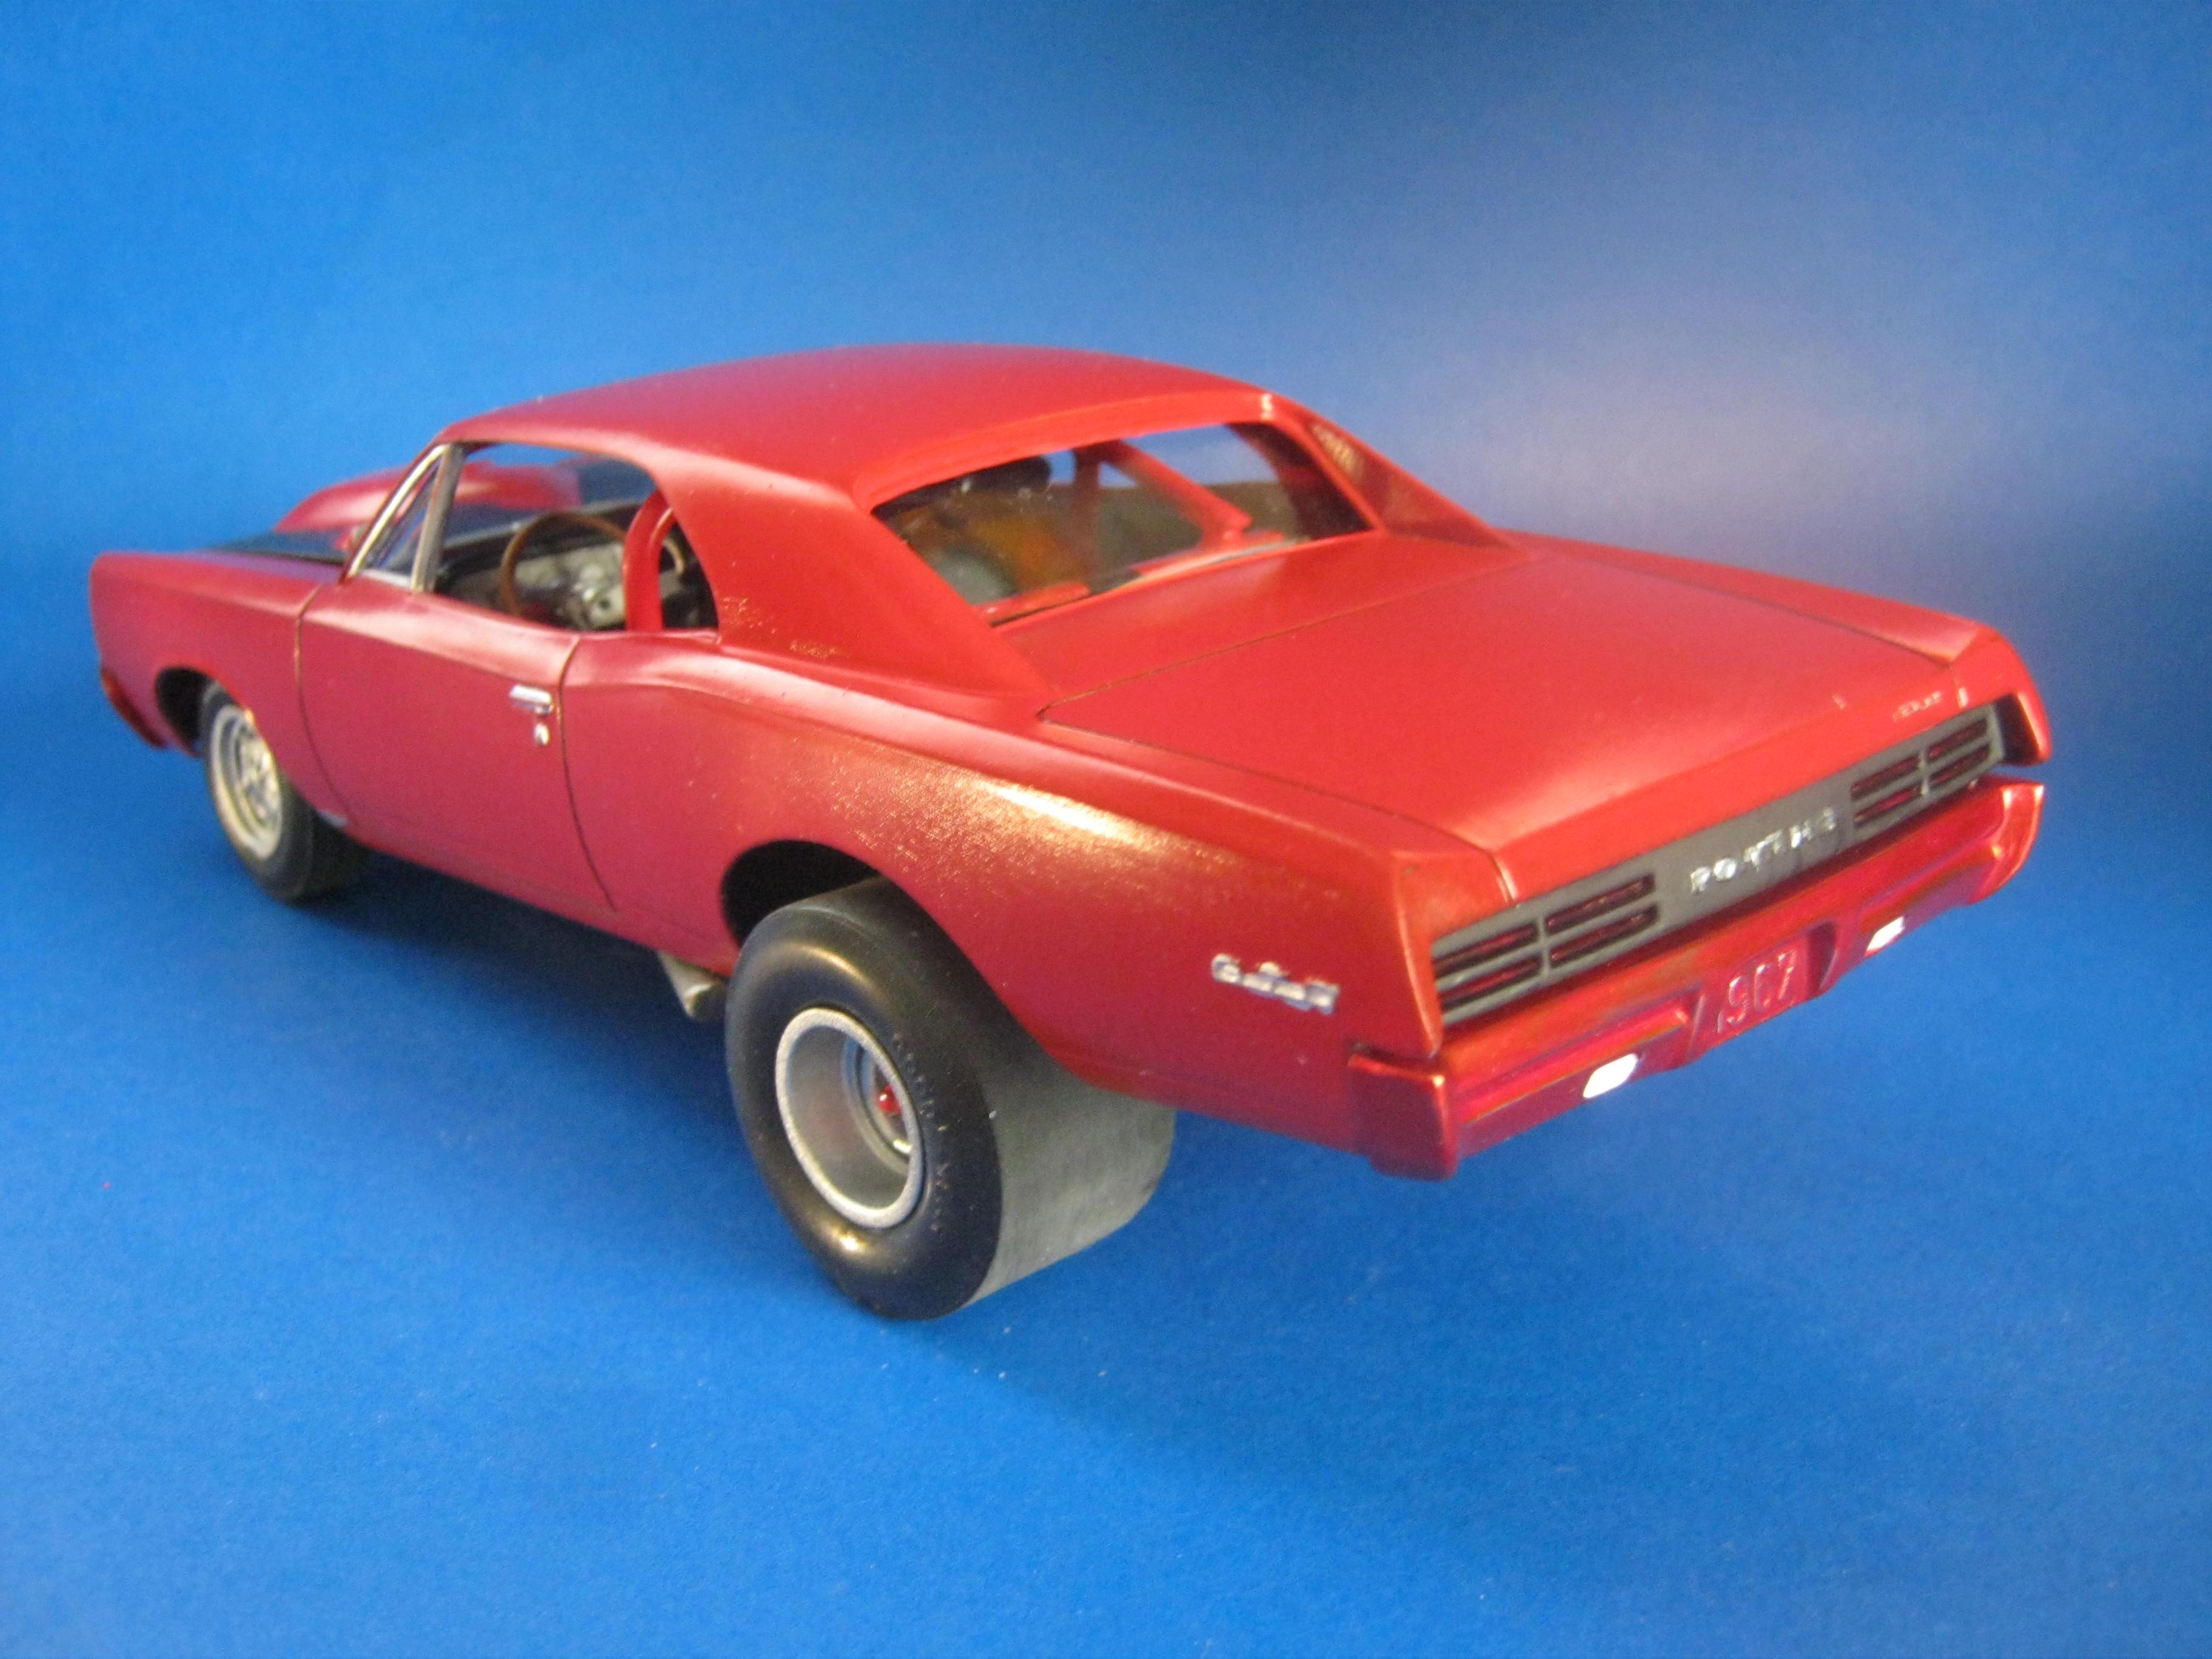
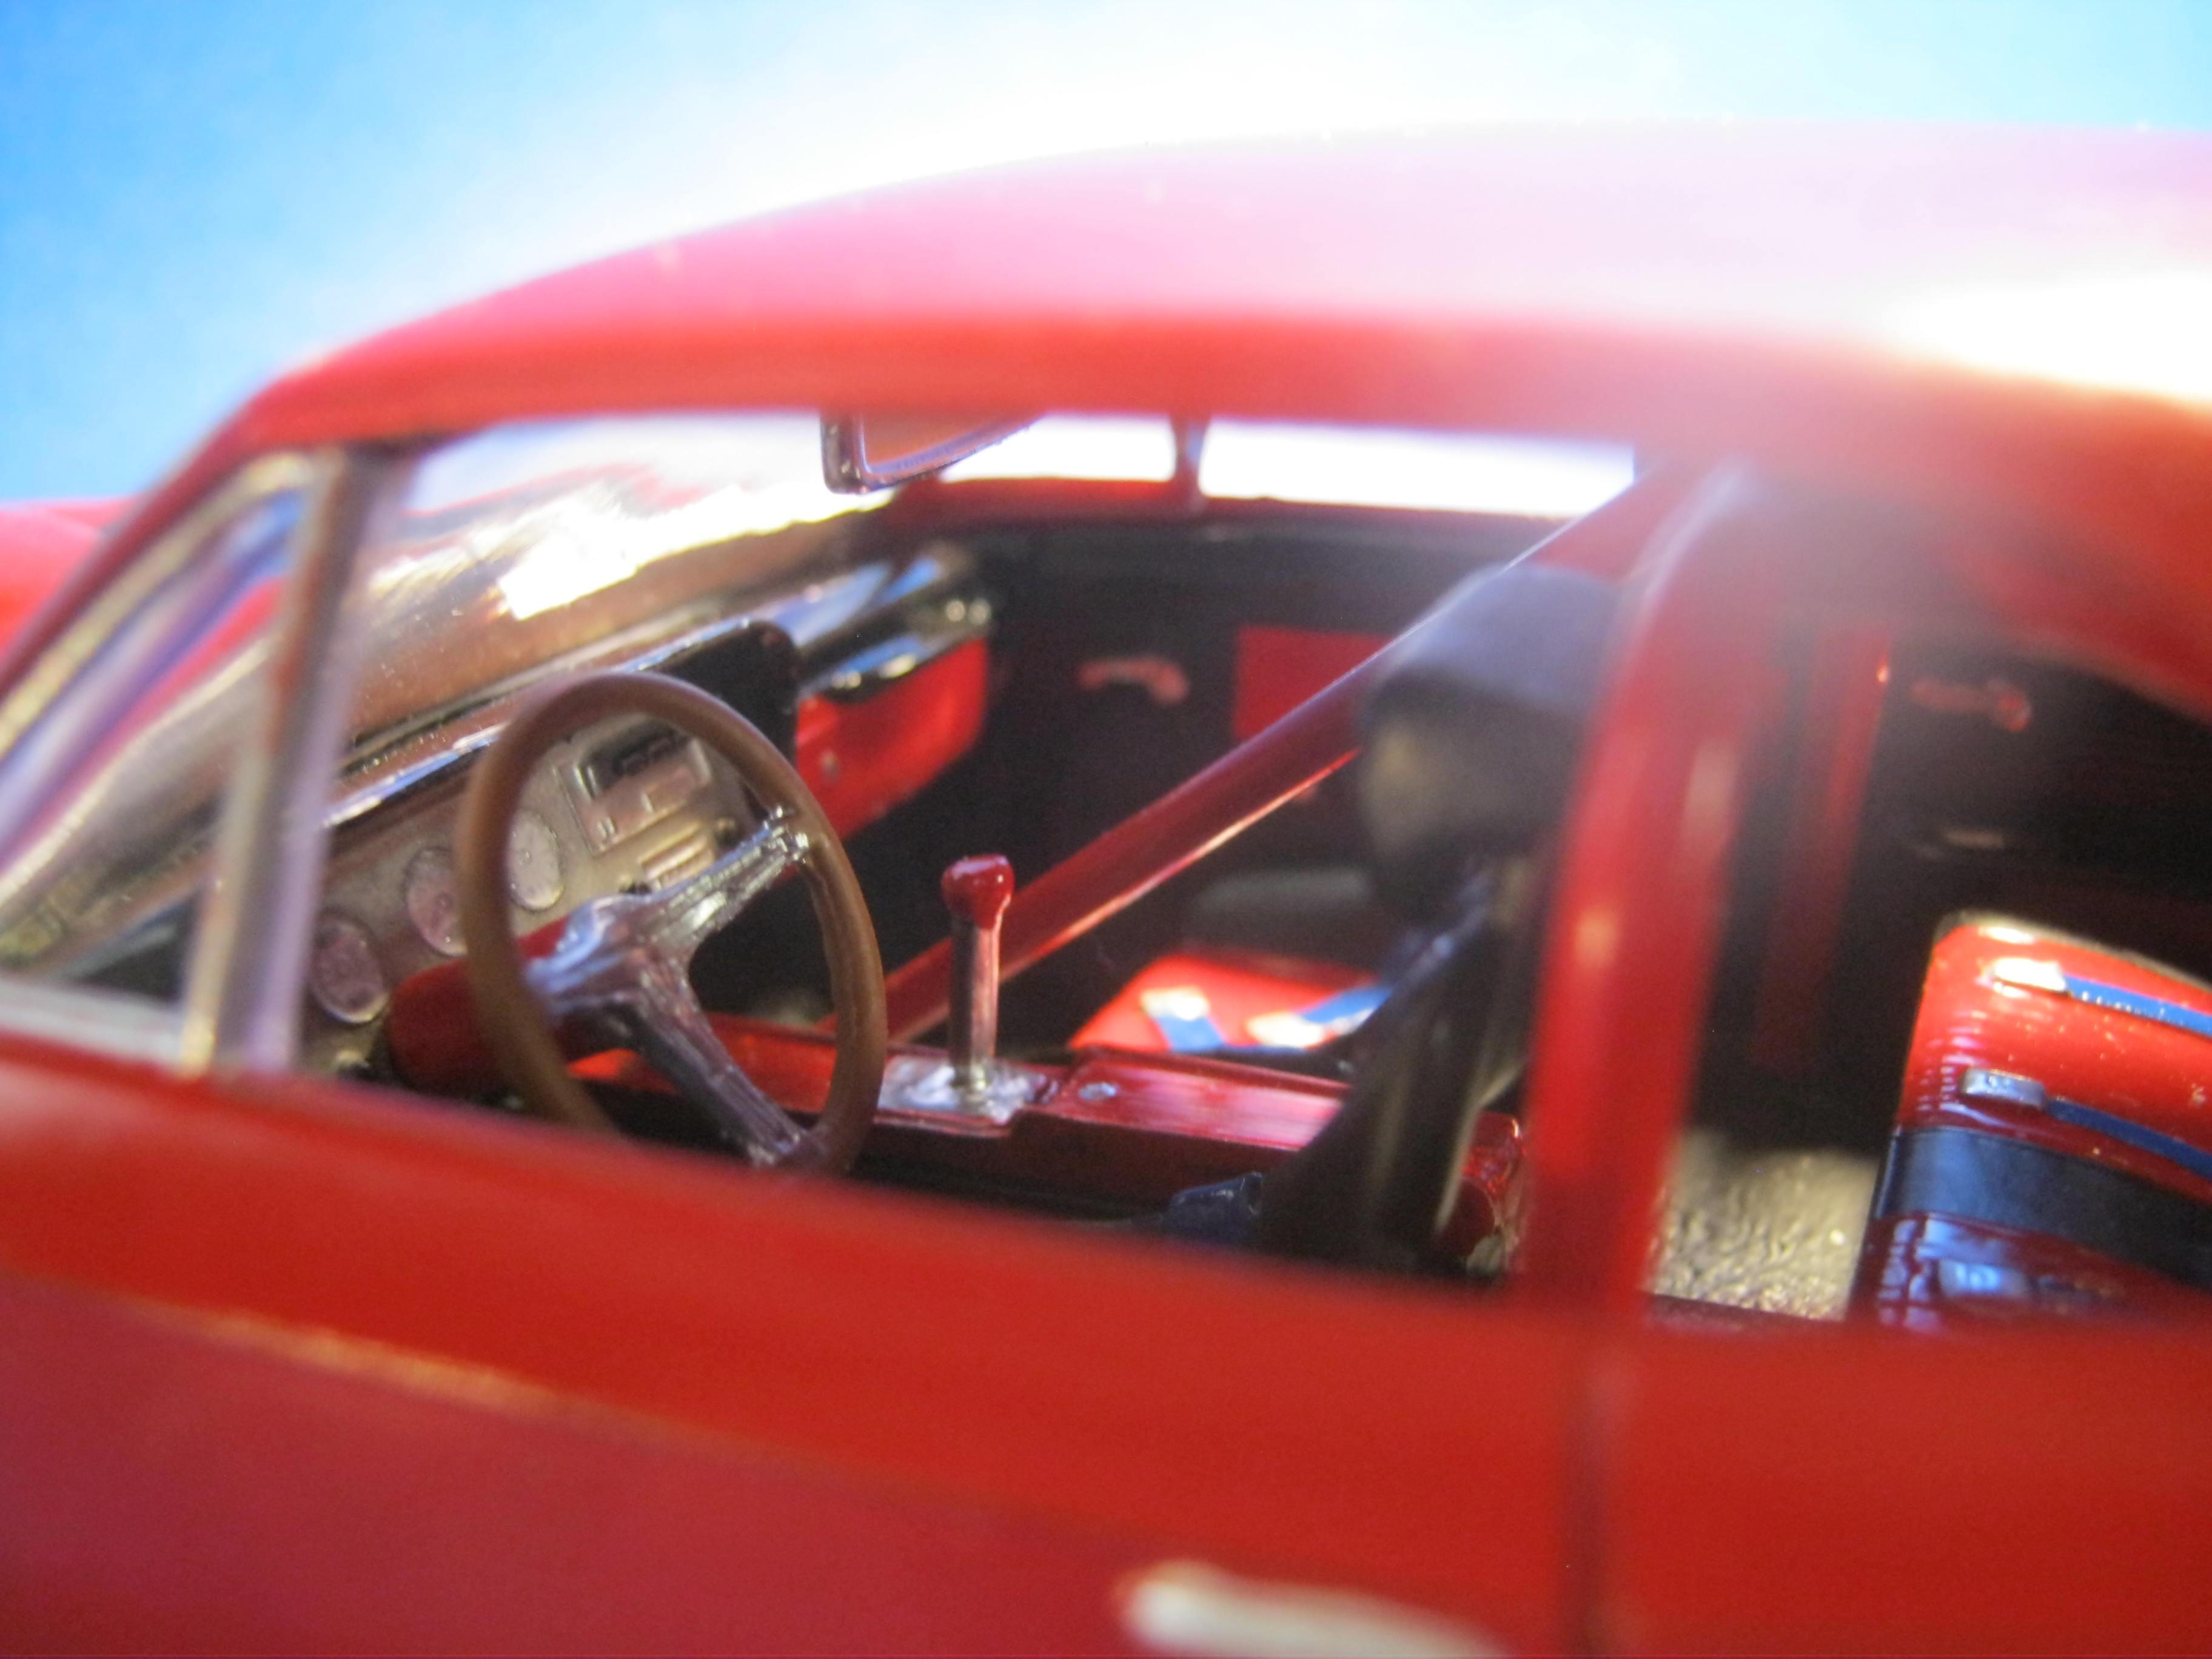
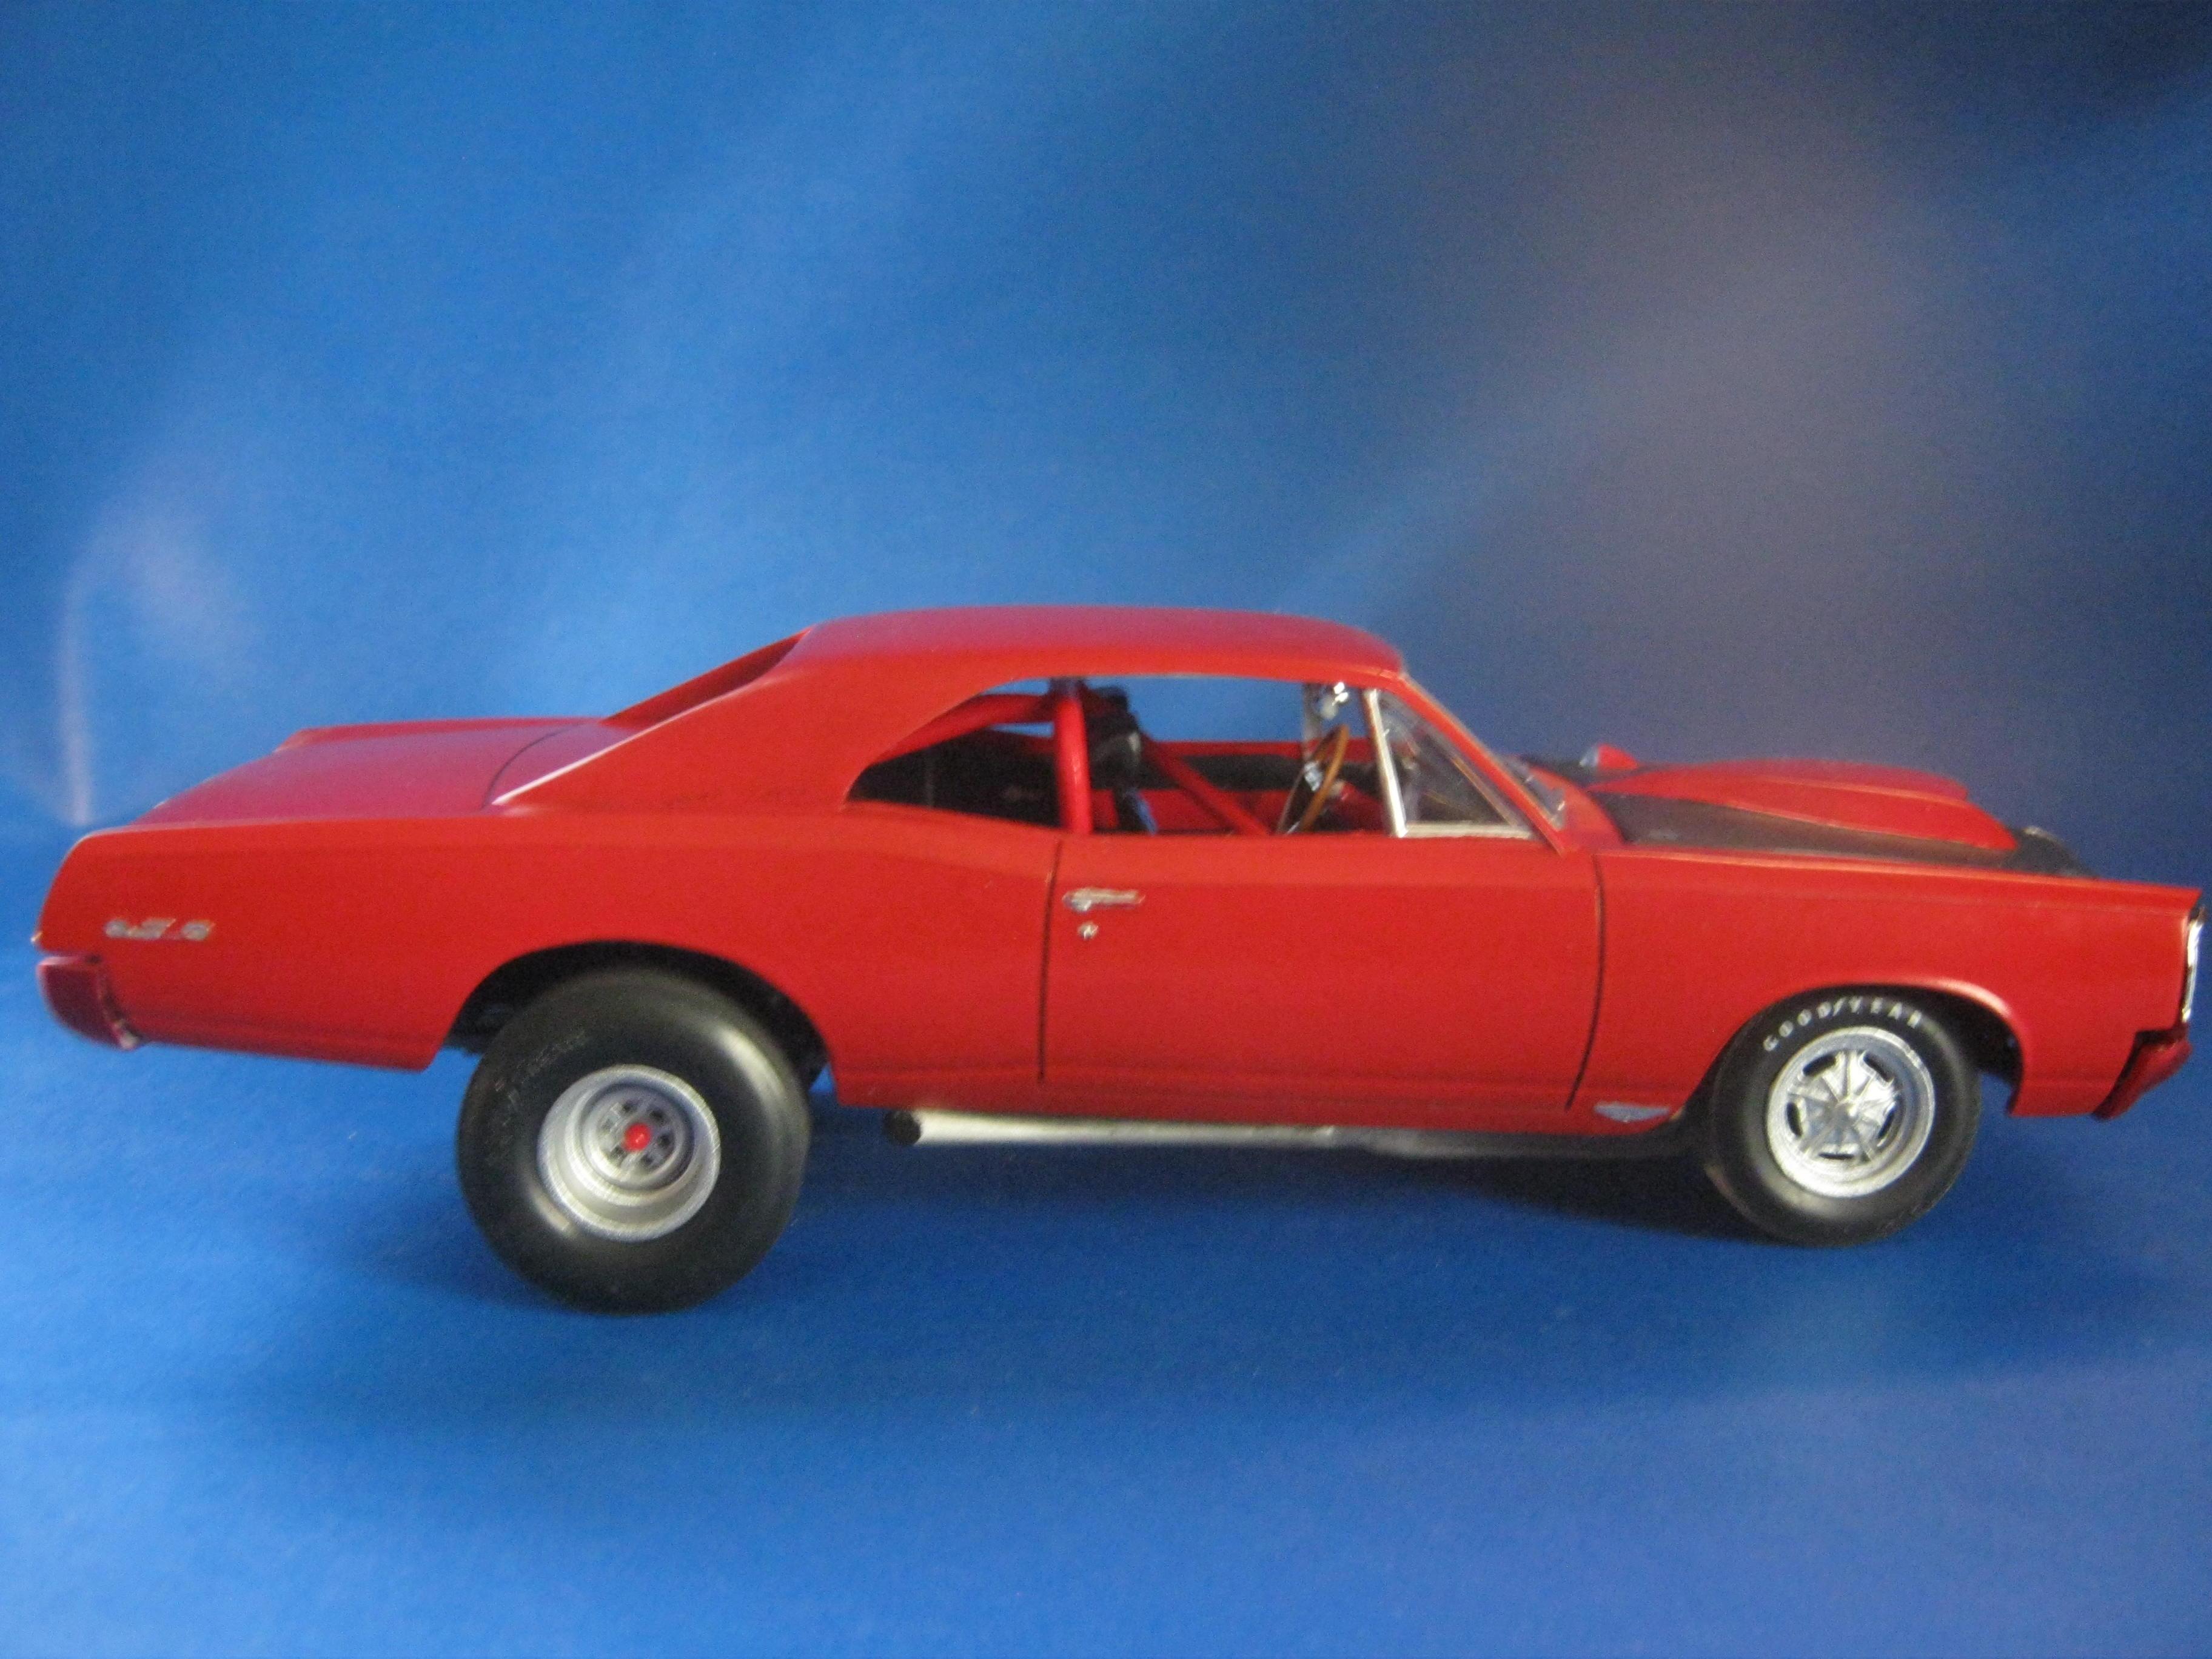
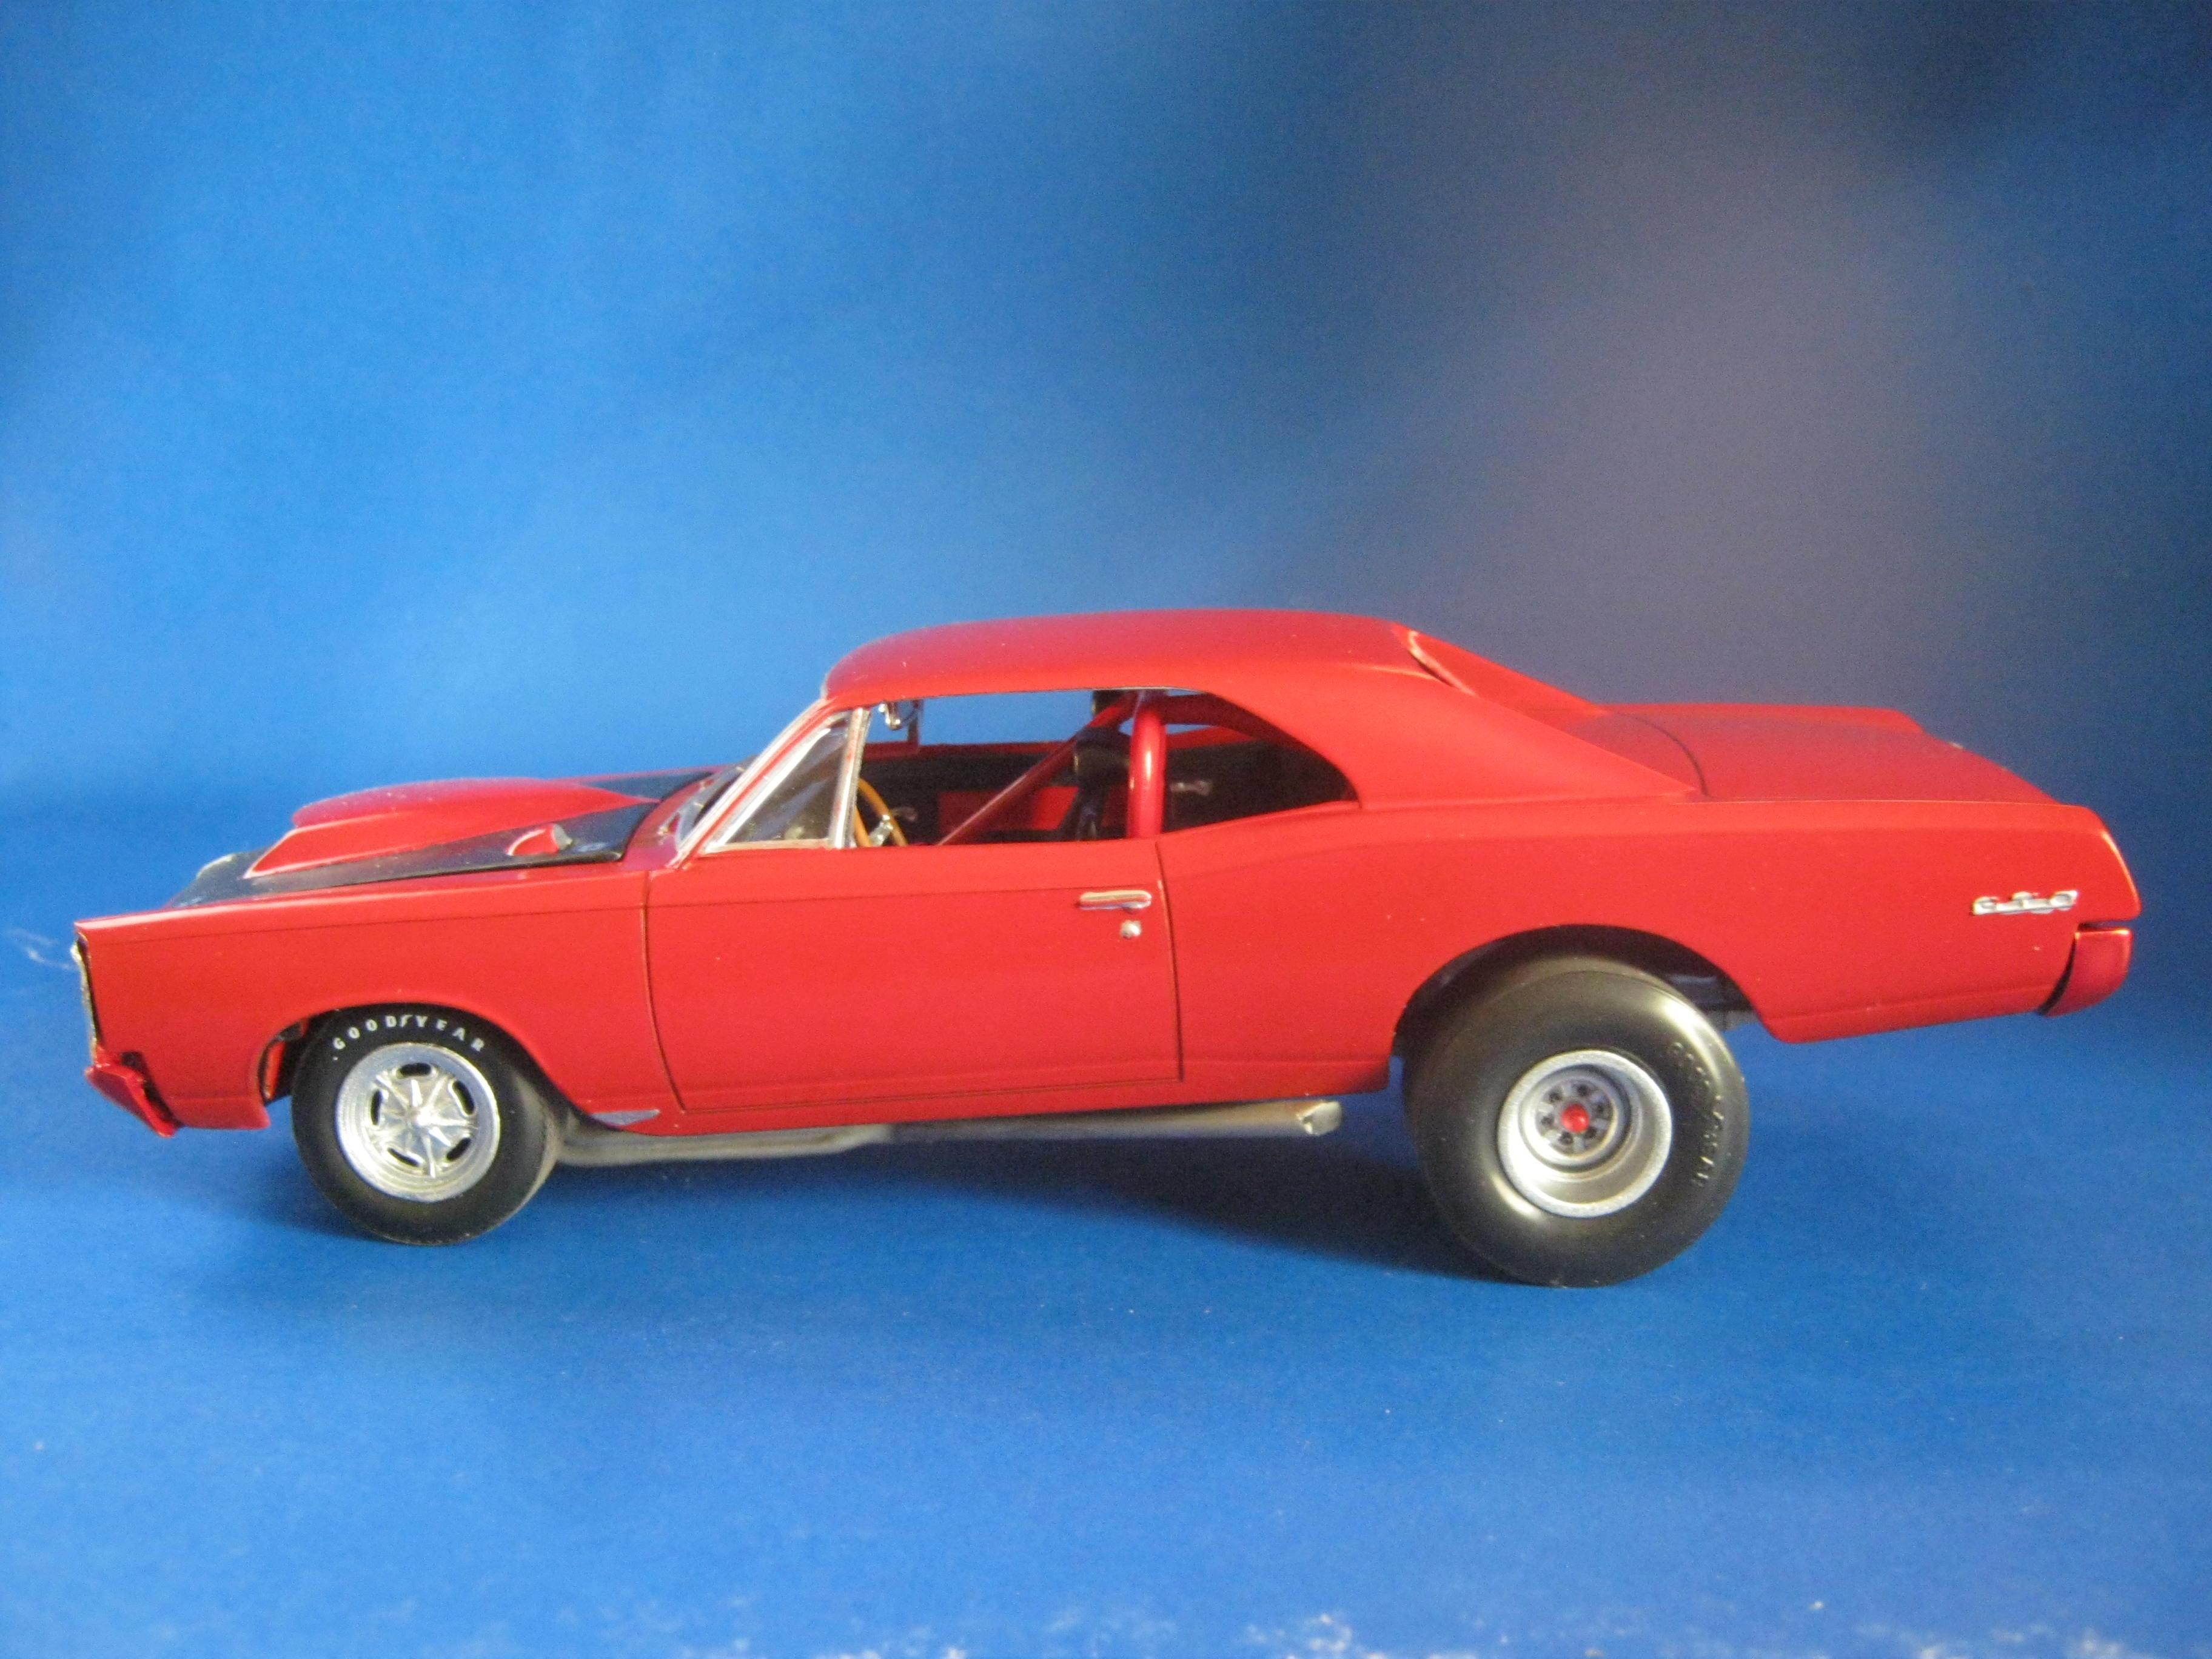
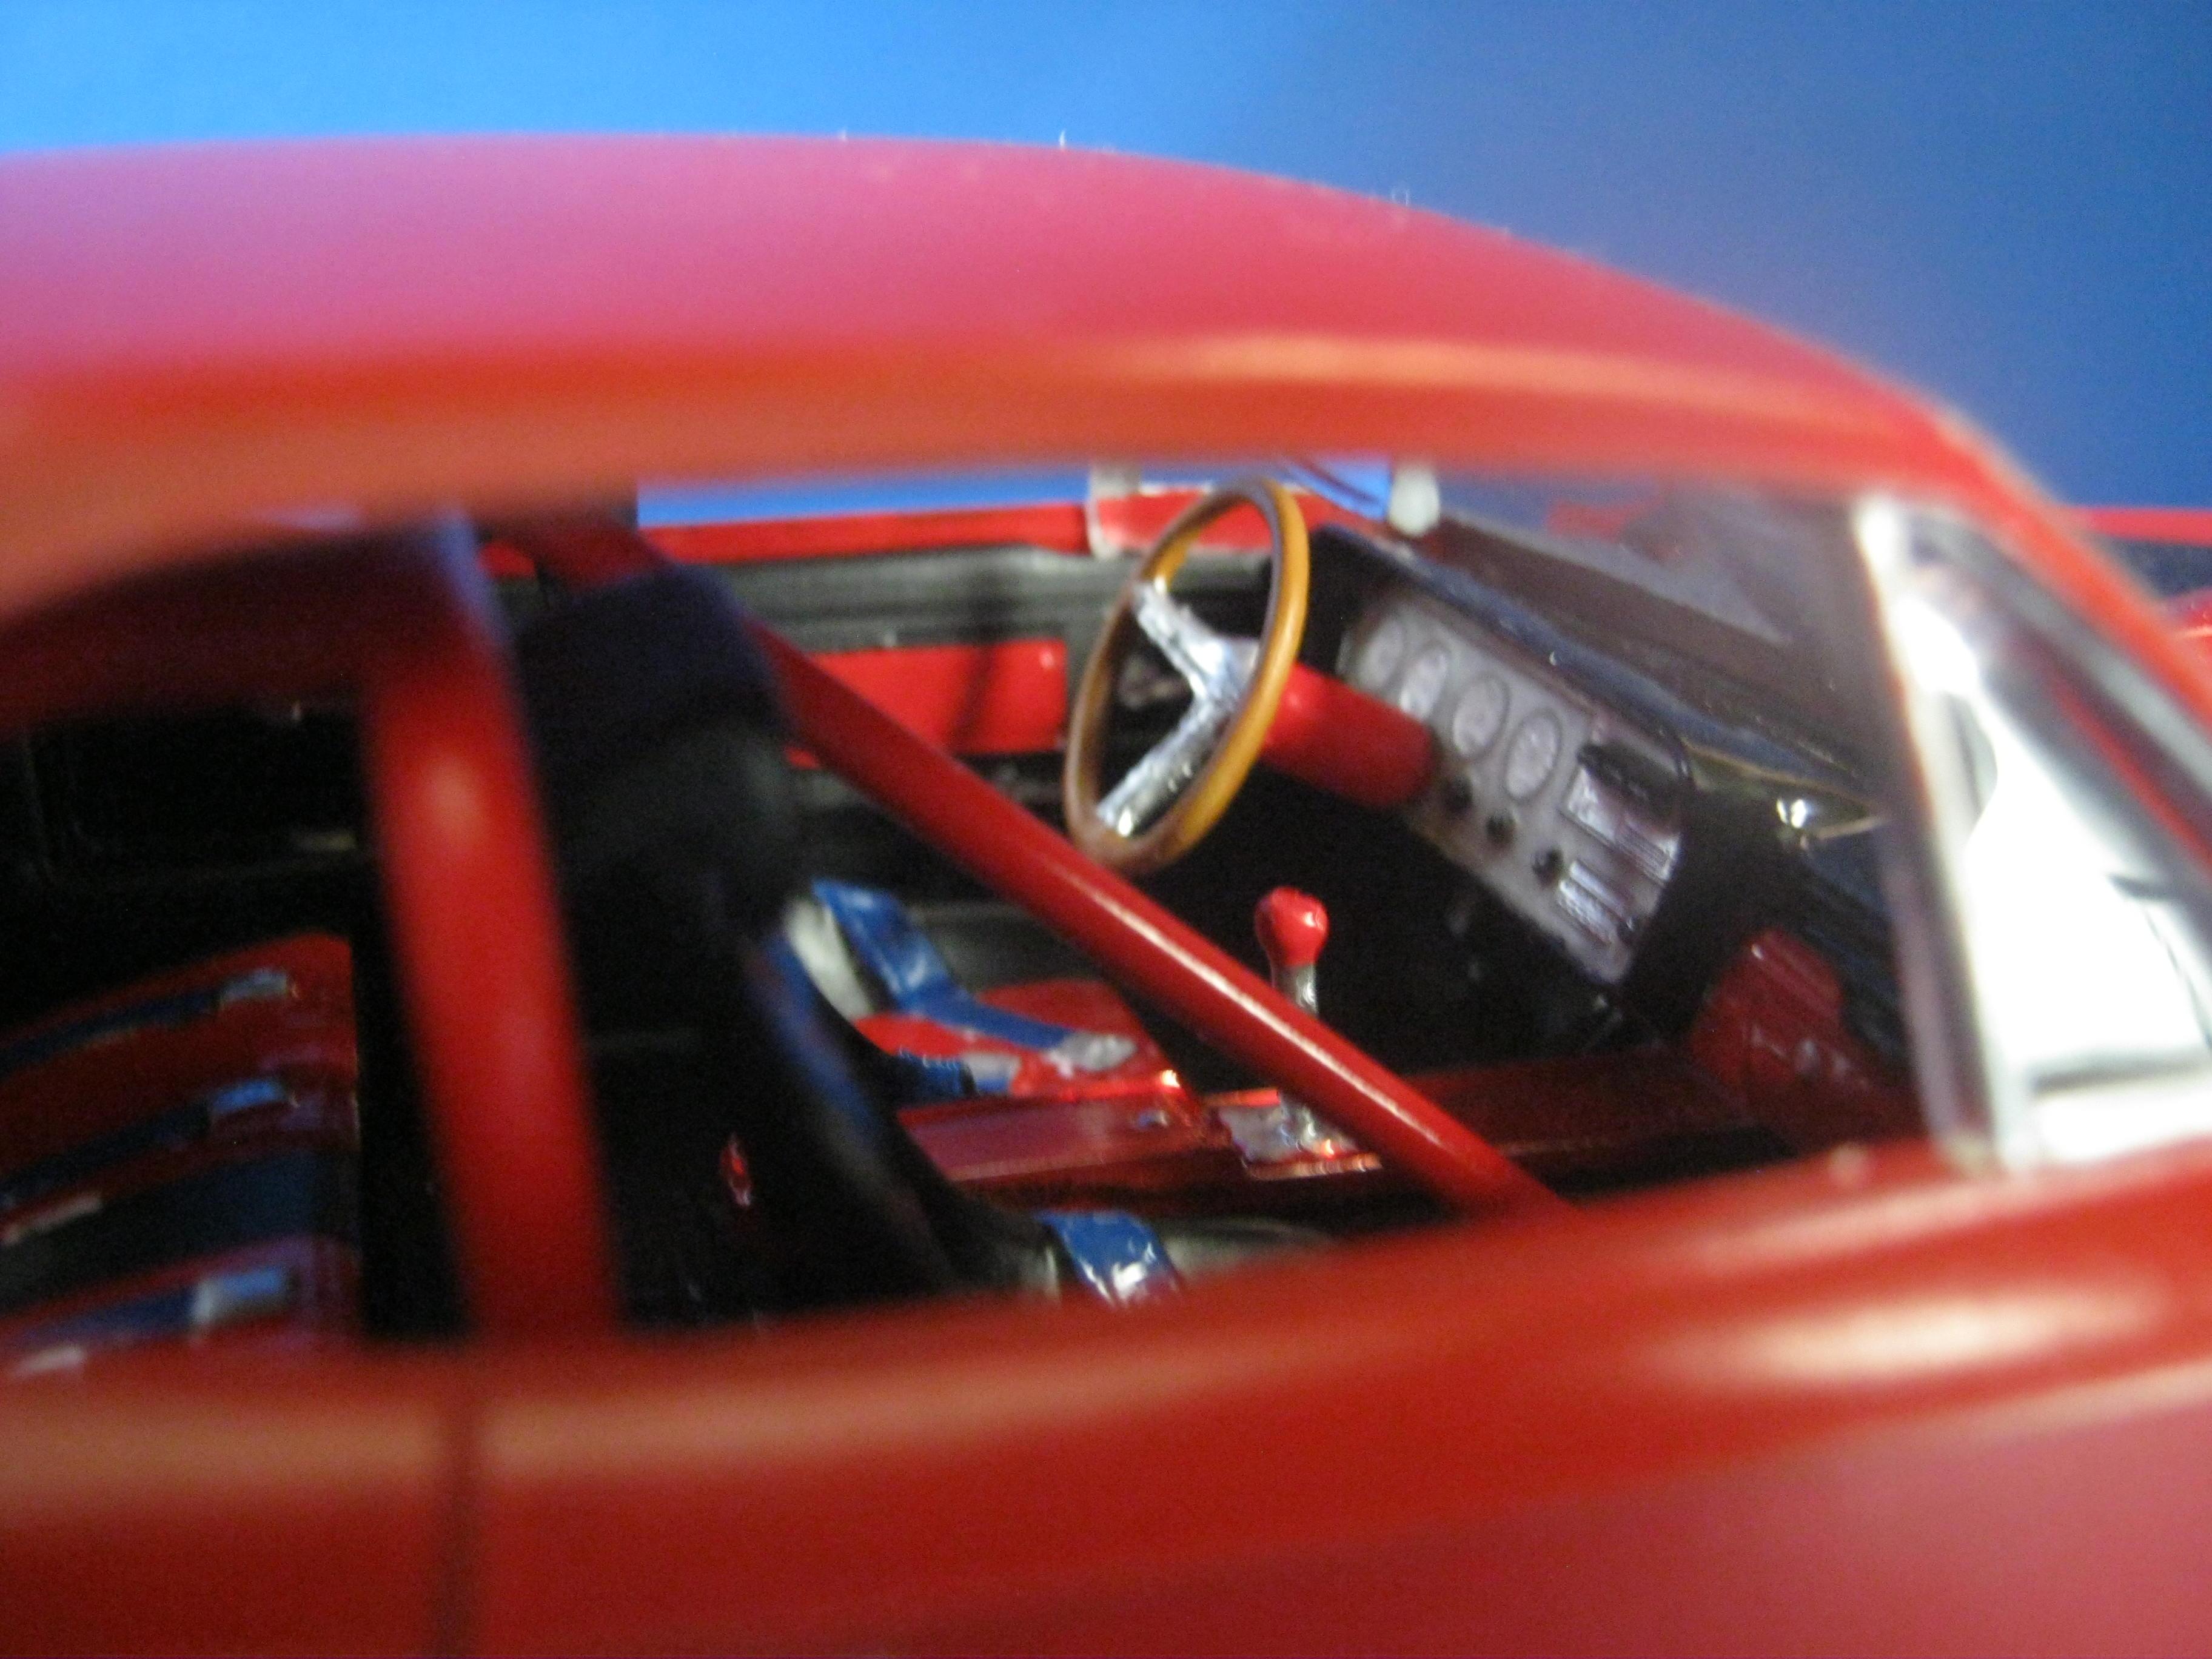
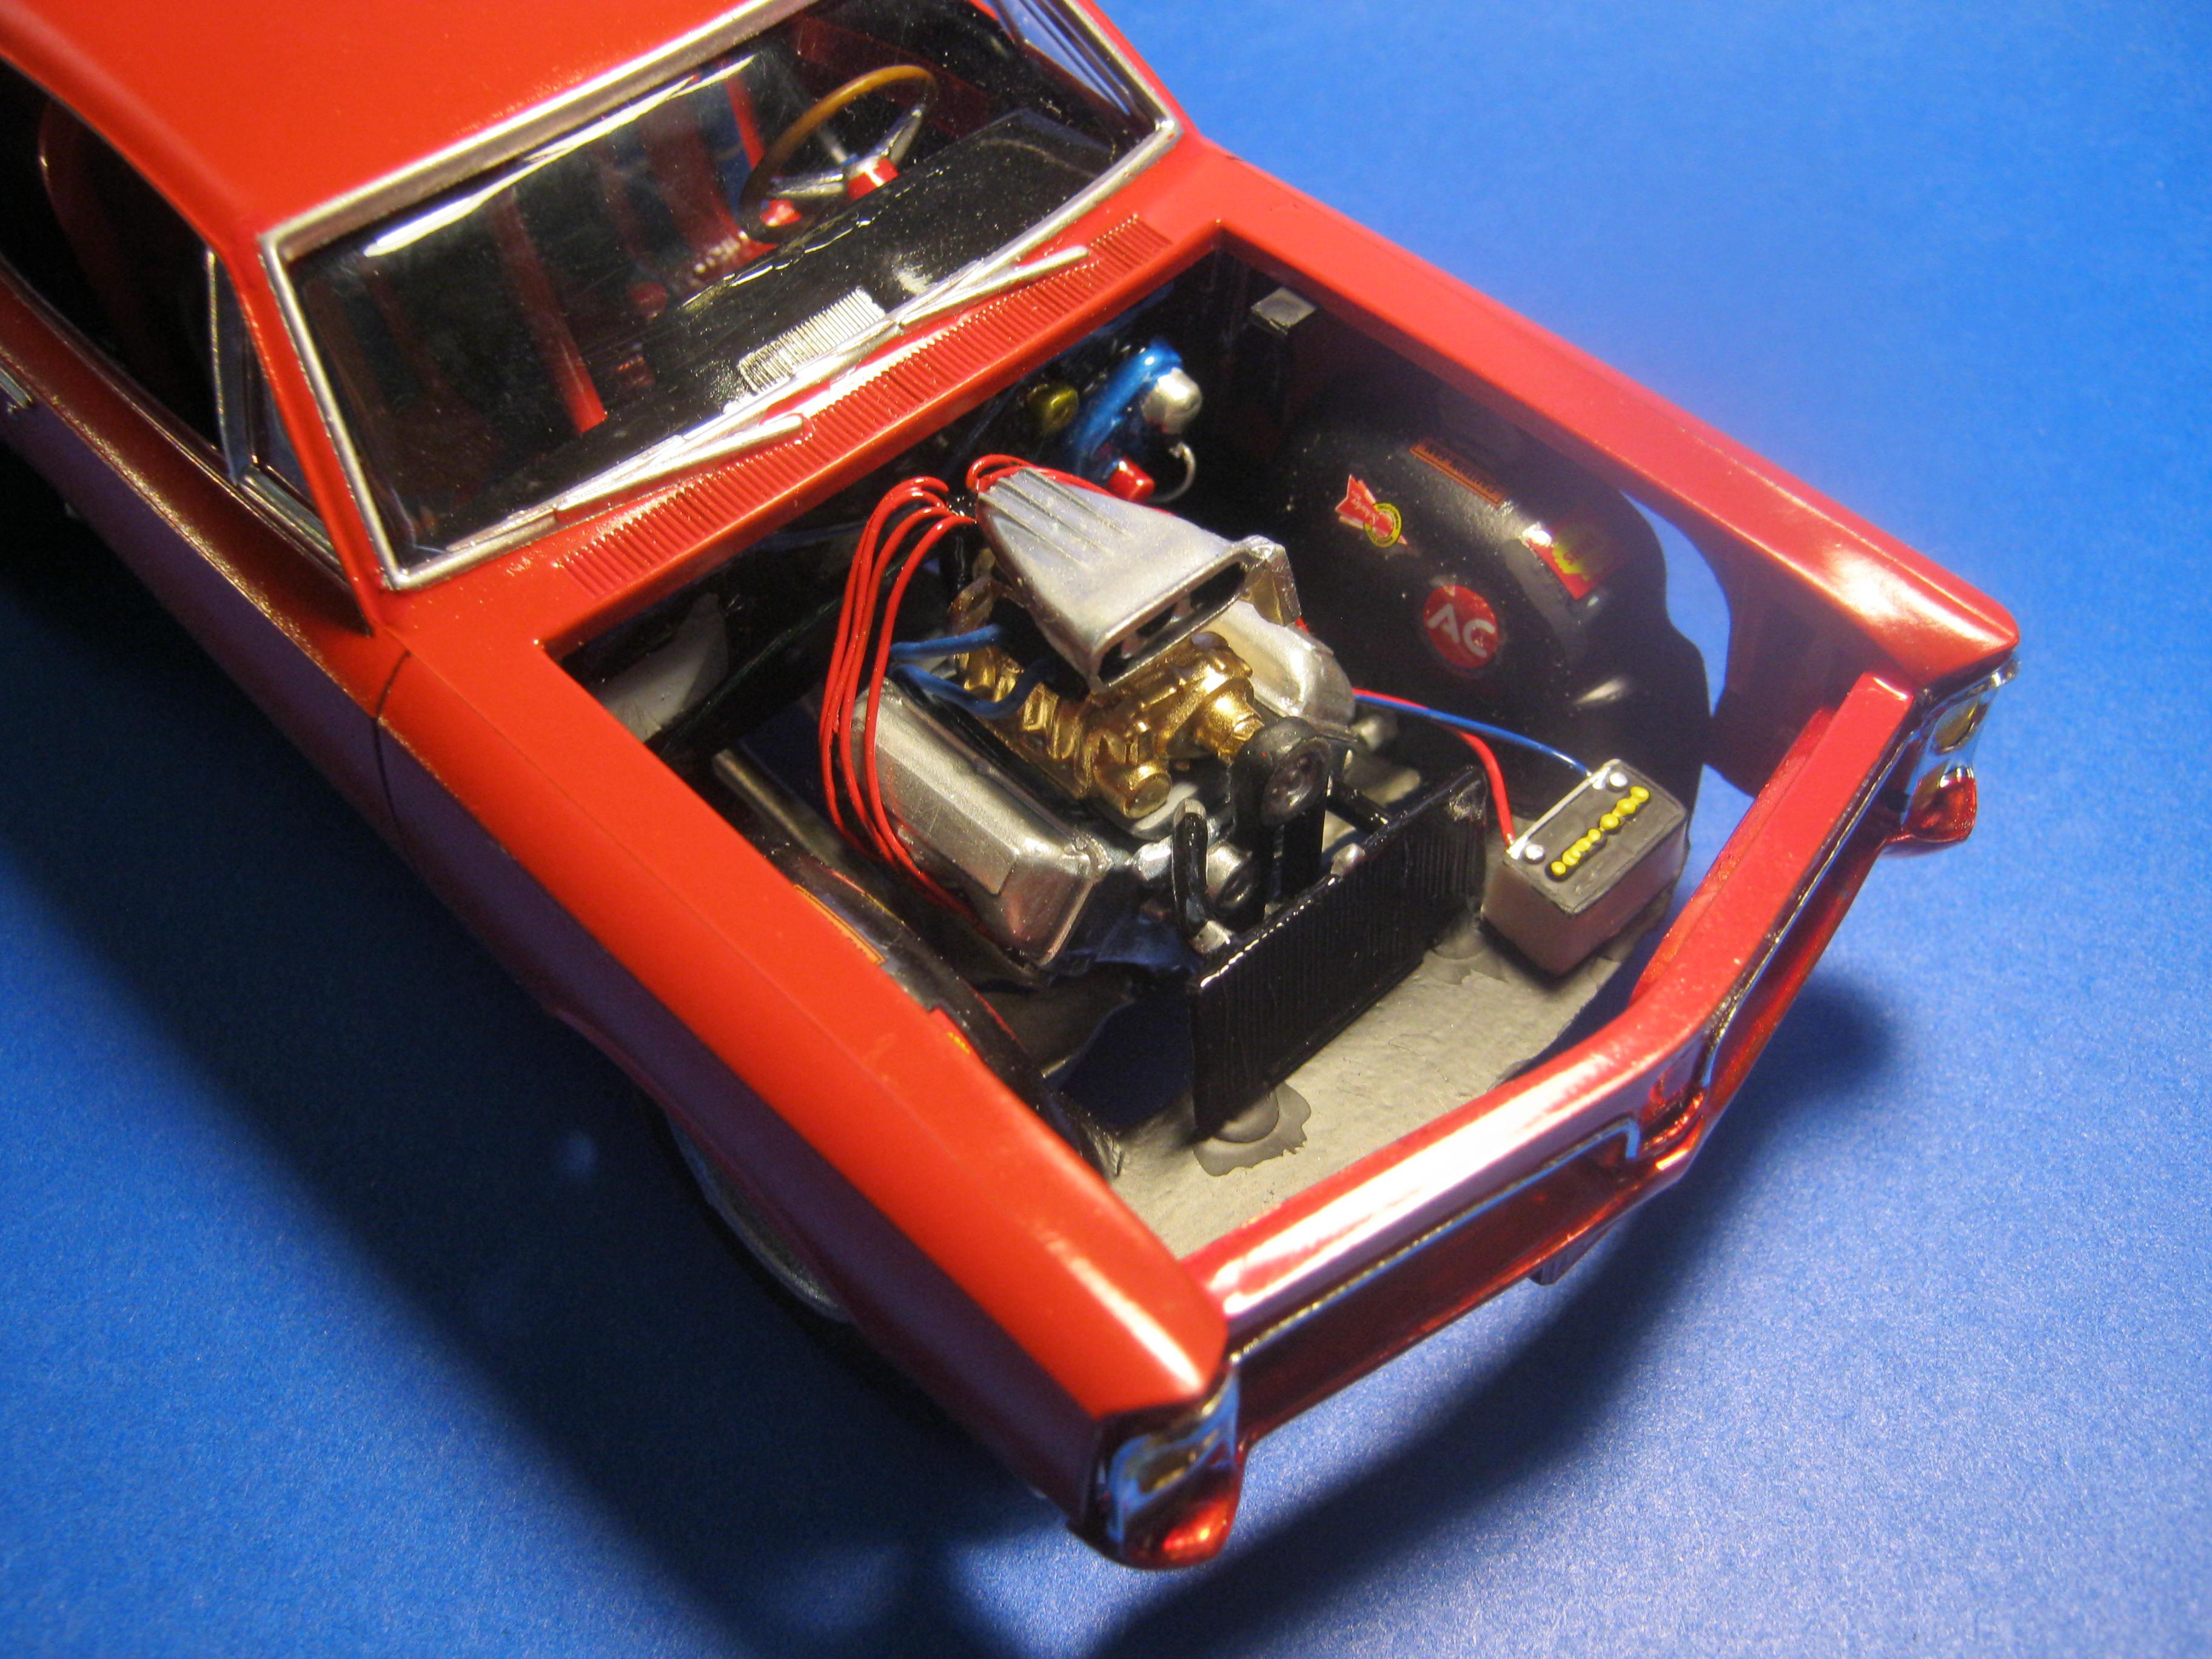
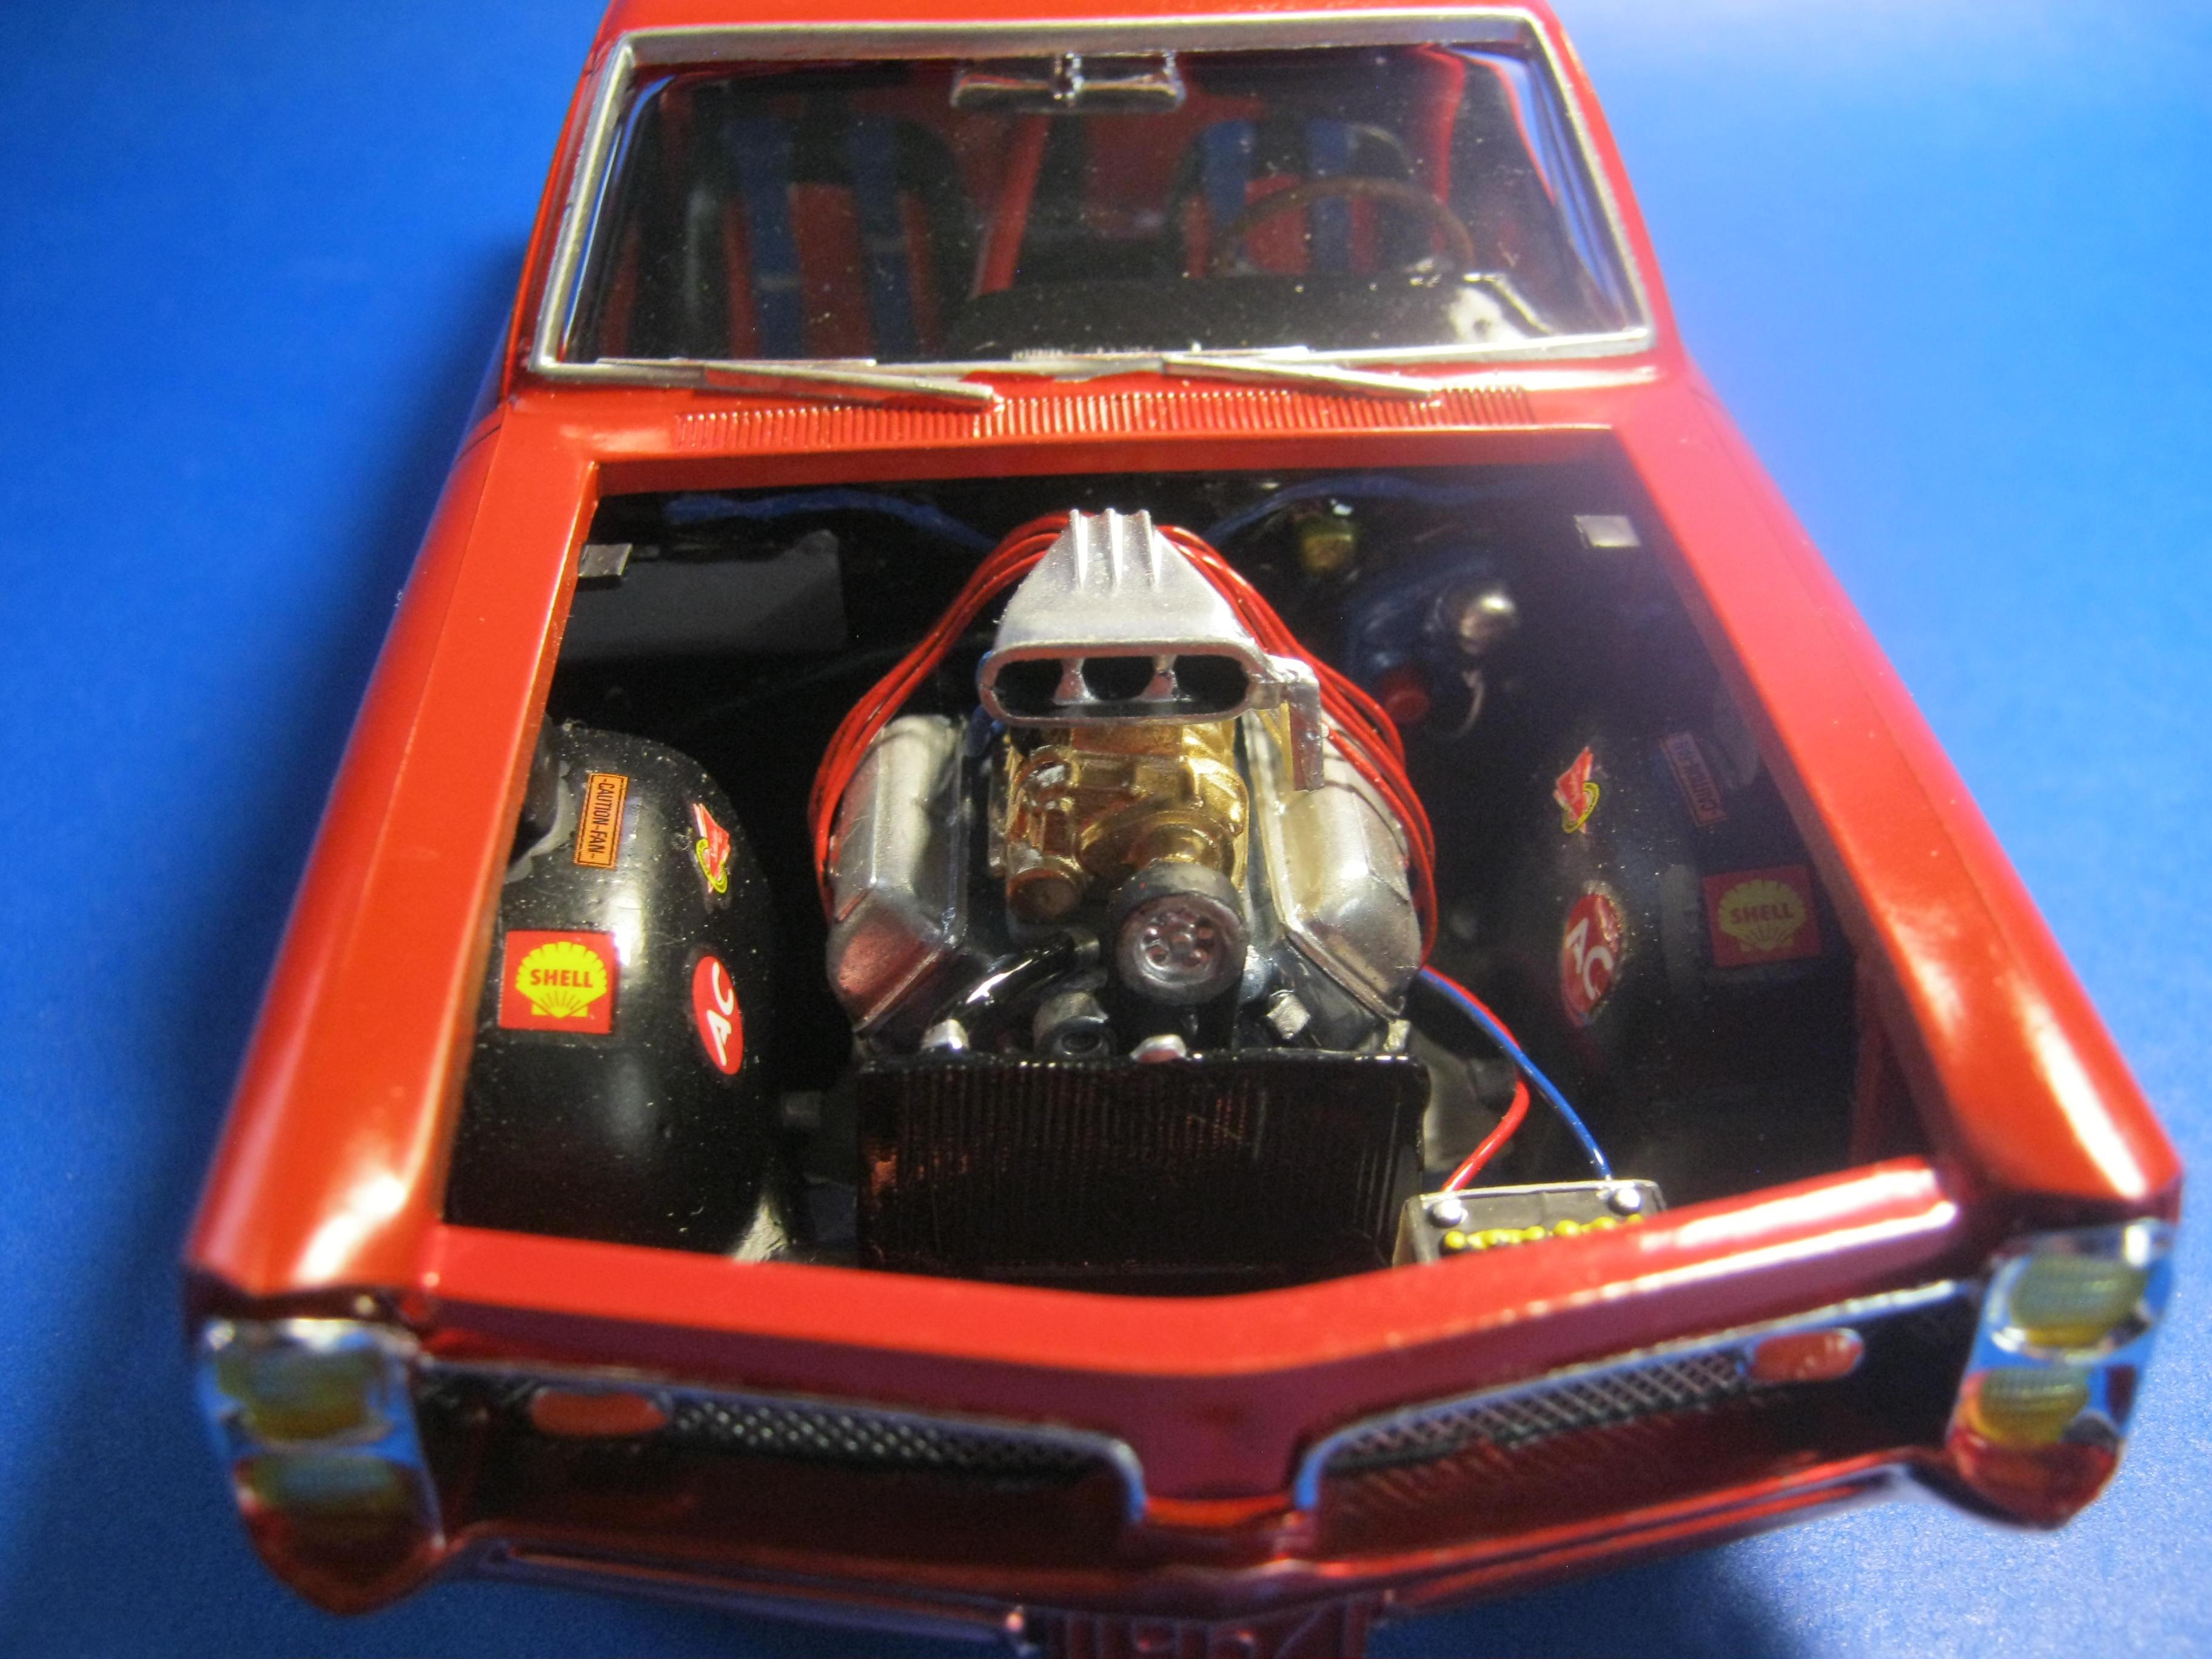
Happy Spring all,,its warming up here in motor City,,getting ready for the Autorama at cobo hall,,one of the best car shows in the nation,,along with the Woodward cruise in August. I just finished the MPC 67 ' GTO,,it turned out ok,,,warning about the front grill set. It dosent fit right. lol. not sure if its just the production lot I got my kit from Hobby lobby or what,,but man ,,had to file ..sand ect to get it this close. And as always I chopped,,cut,,modified quite a bit of it. I put some real tires on the back,,added some headrest to the seats,,added some side dump header pipes,,opened up the rear wheel wells to fit back tires,,installed a 409 mtr from the x-tras bx,,and 671 blower. Installed a replacement rear end from the x-tras bx. Rattle can sprayed red from the hardware store paint. hand painted everything else. Overall its a cool kit,,but it will test your fabrication+ modification skills. maybe if I had just left it stock it would have been easy,,but I hardly ever do that often. Build on!
-
Another Craftsman Series I purchased. After I disassembled I repaired the C pillars and started smoothing things out. The plastic is very brittle so I'm taking care not to crack anything else.
-
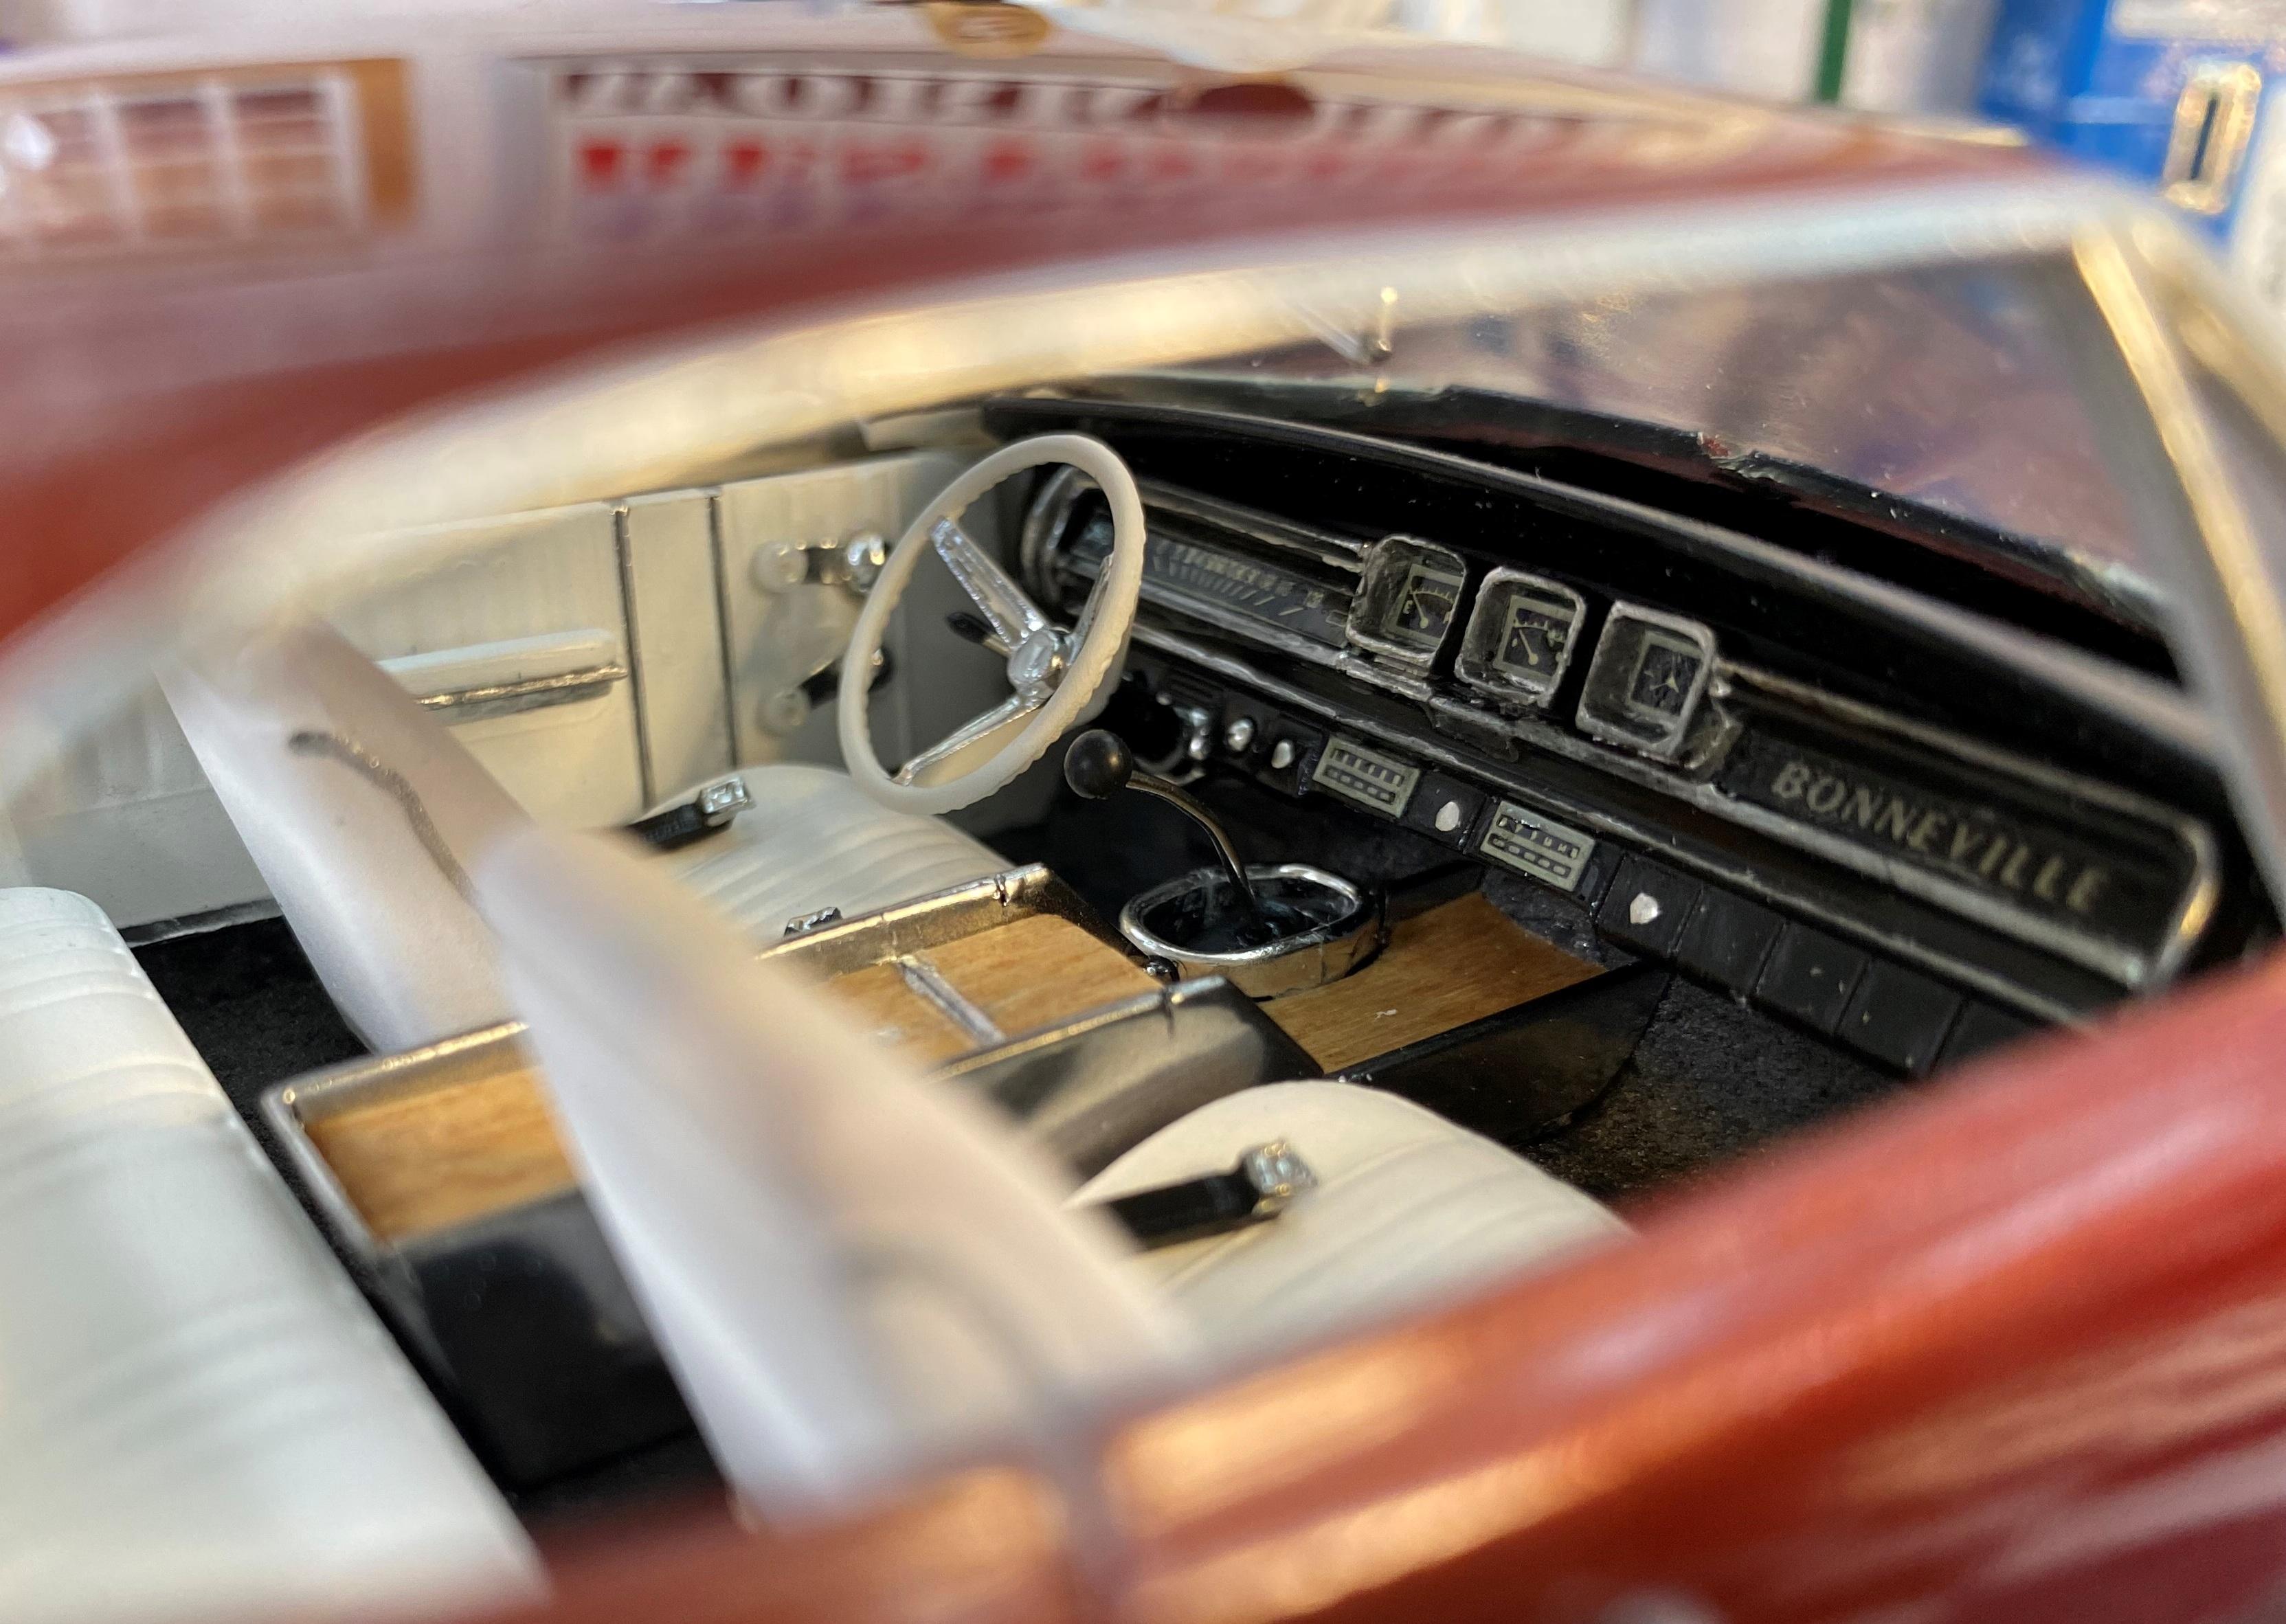
Lots of fun was had by all, some were victorious, others not. Some, like me, dragged the stubborn mules across the finish line regardless of how hard they protested! MPC 1969 Pontiac Bonneville convertible Resin rally wheels and aftermarket gauge decals. Painted Tamiya TS-97 Pearl yellow over Testors' Daytona yellow. This is the one with the cut out for a truck version which I was not going to use. So I filled the gap on the underside with Tamiya putty and thought I had the problem fixed. Nope, the cut lines started showing through on the top. Numerous applications of filler failed to stop them showing so I "built like a 12-year-old would" and shot over the body imperfections. I'll have to address why it's not sitting flat on the frame later. MPC 1969 Pontiac Bonneville Hardtop Resin rally wheels and aftermarket gauge decals. Painted Tamiya Mica Red over some bad Testors' Inca Gold. Original undercoat was Tamiya TS-21 gold but it fish eyed really bad so after sanding that down I shot it with the Inca gold which really came out bad. No time to strip and repaint so "doing like a 12-year-old" would do, I shot the red over it. Actually it looks kind of like a car with the paint fading and the clear coat coming off in some shots, so I could say I was building a replica 🙂 Here are some group shots of them. Engines Interiors - The whiter interior is the hardtops. thanks for looking all comments welcomed.
-
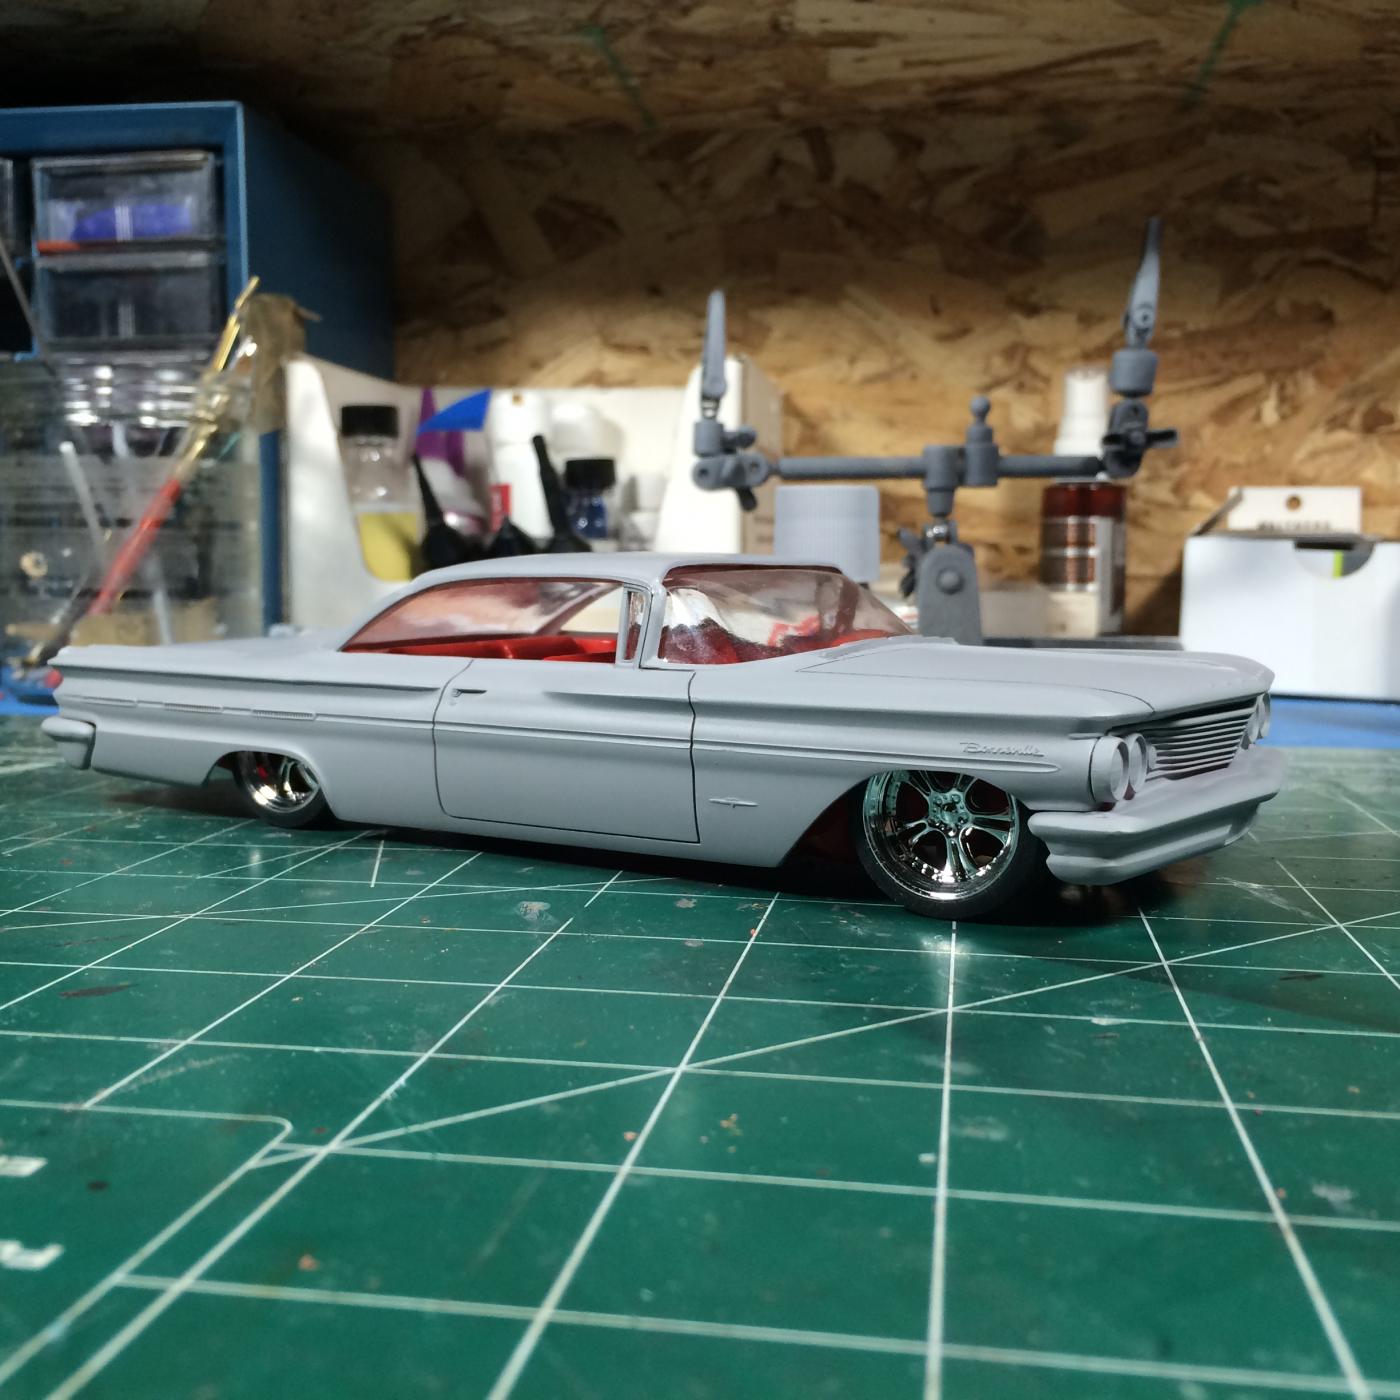
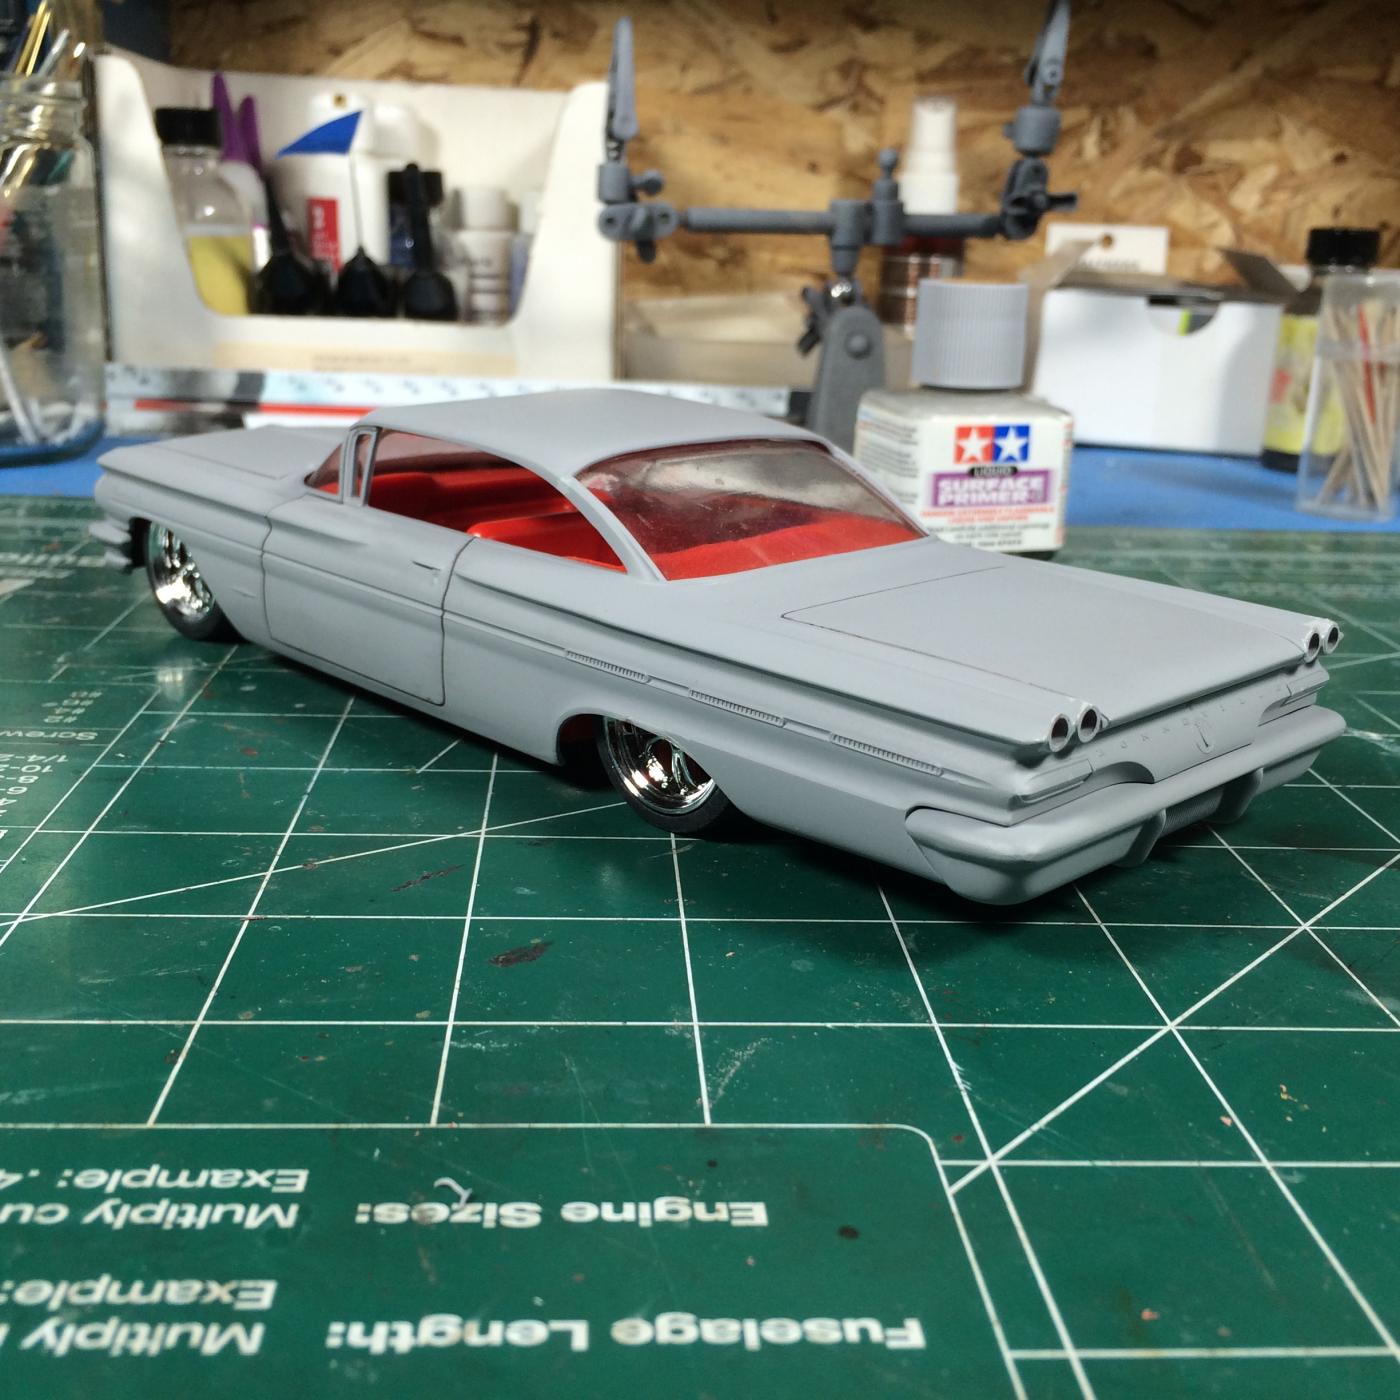
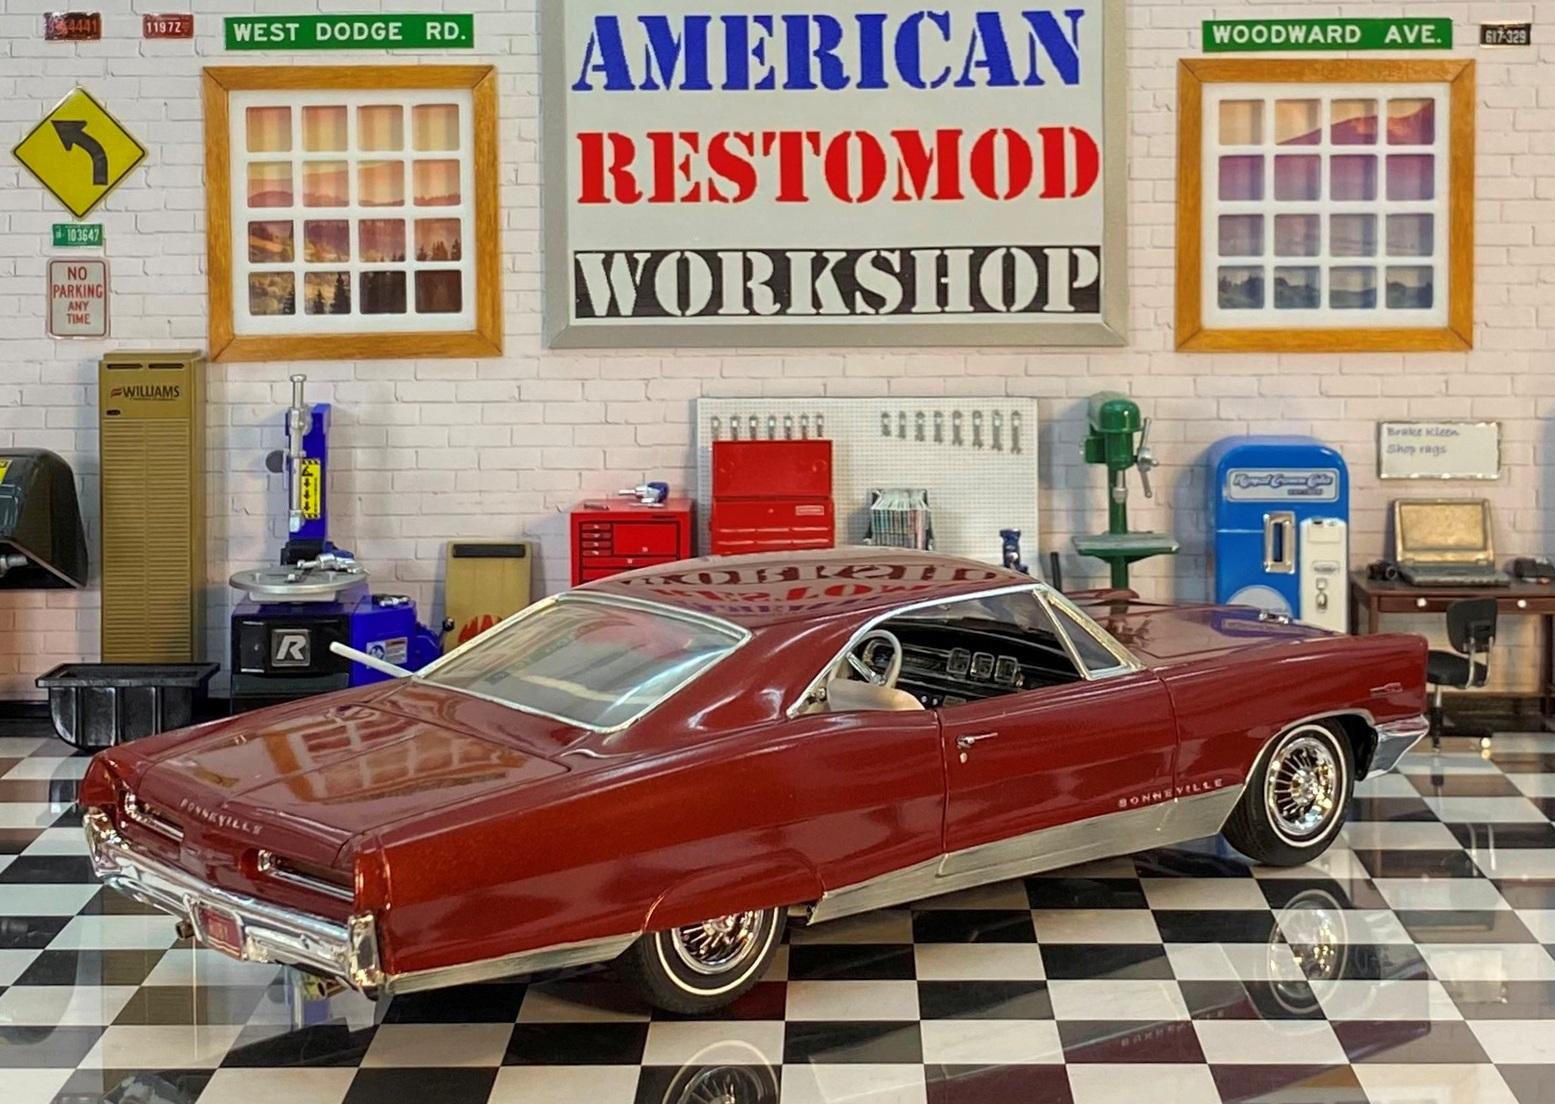
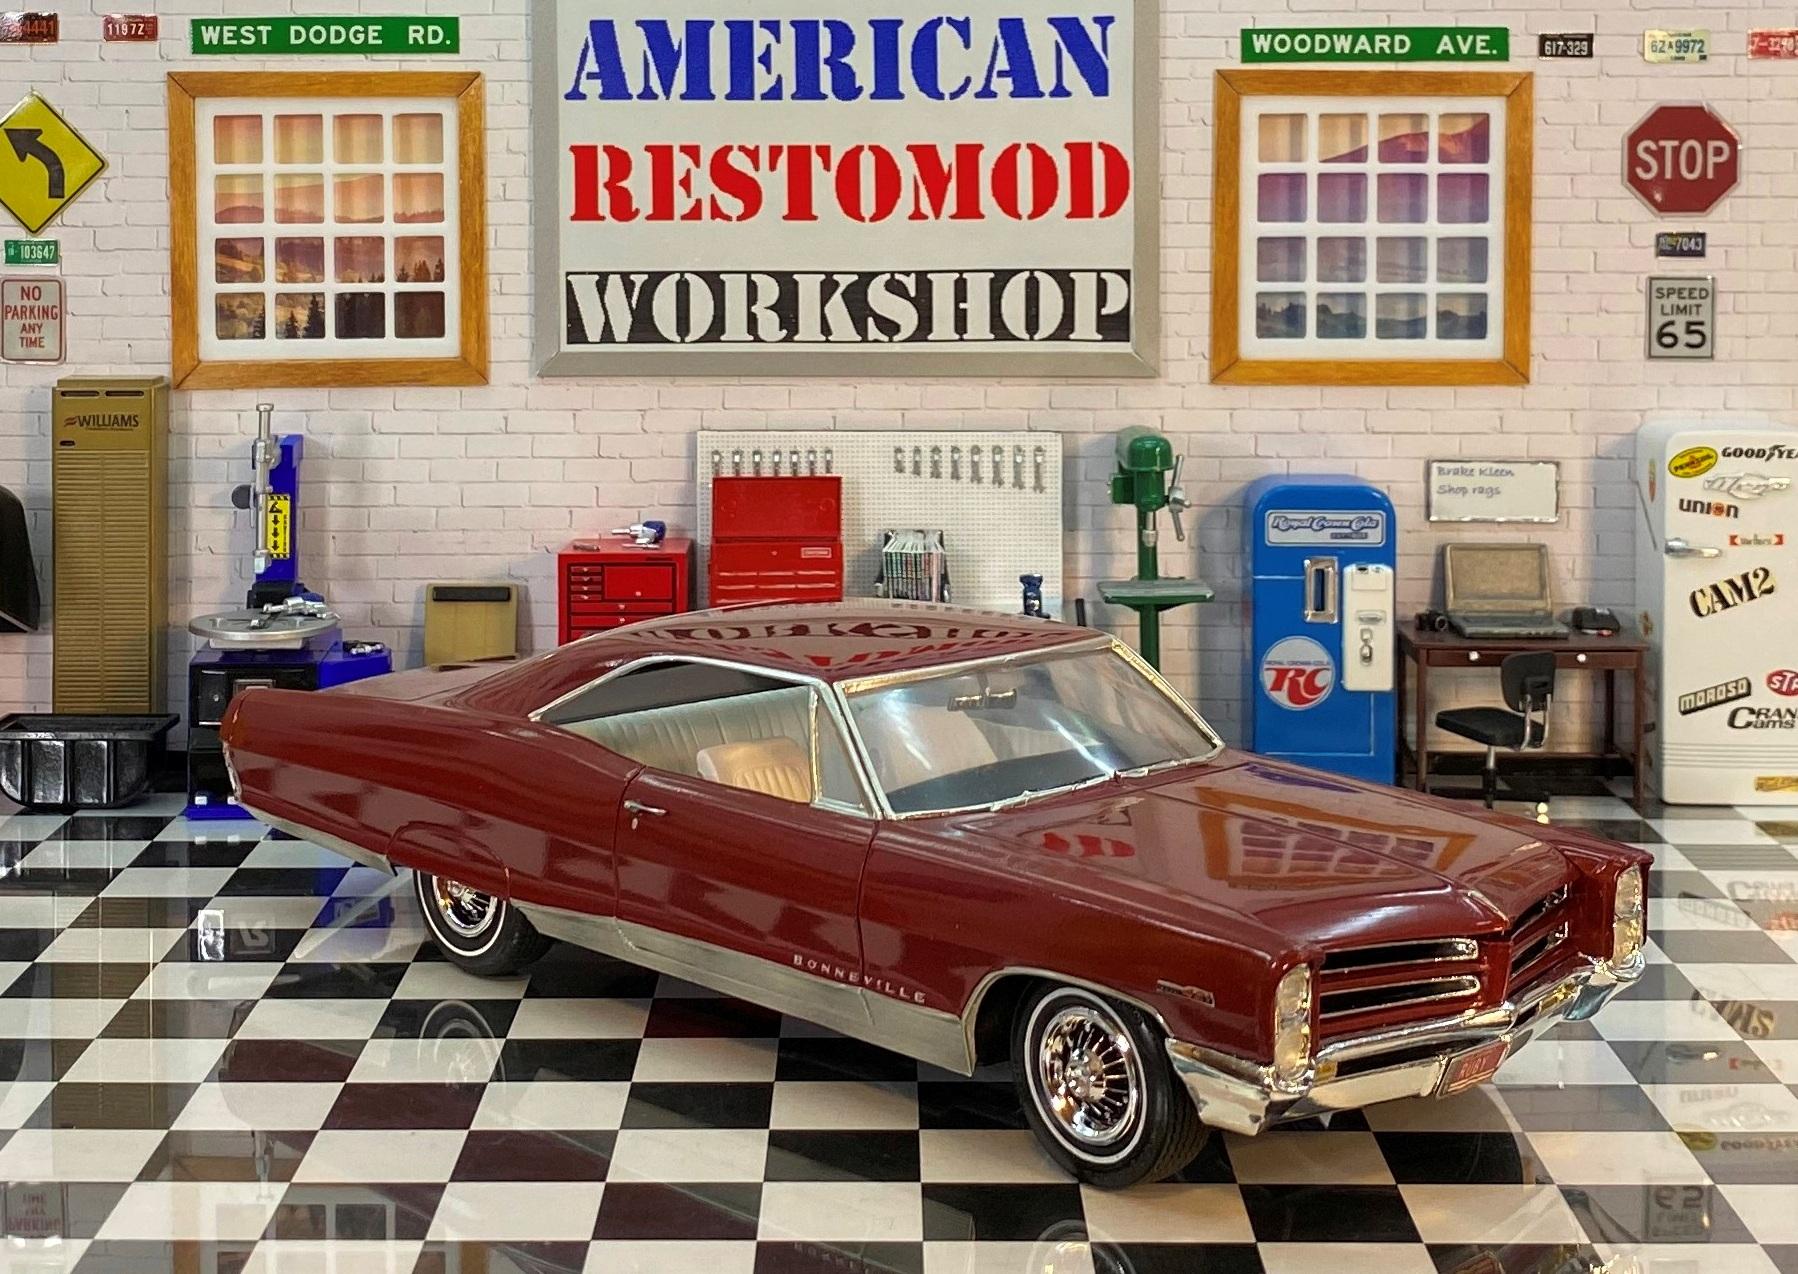
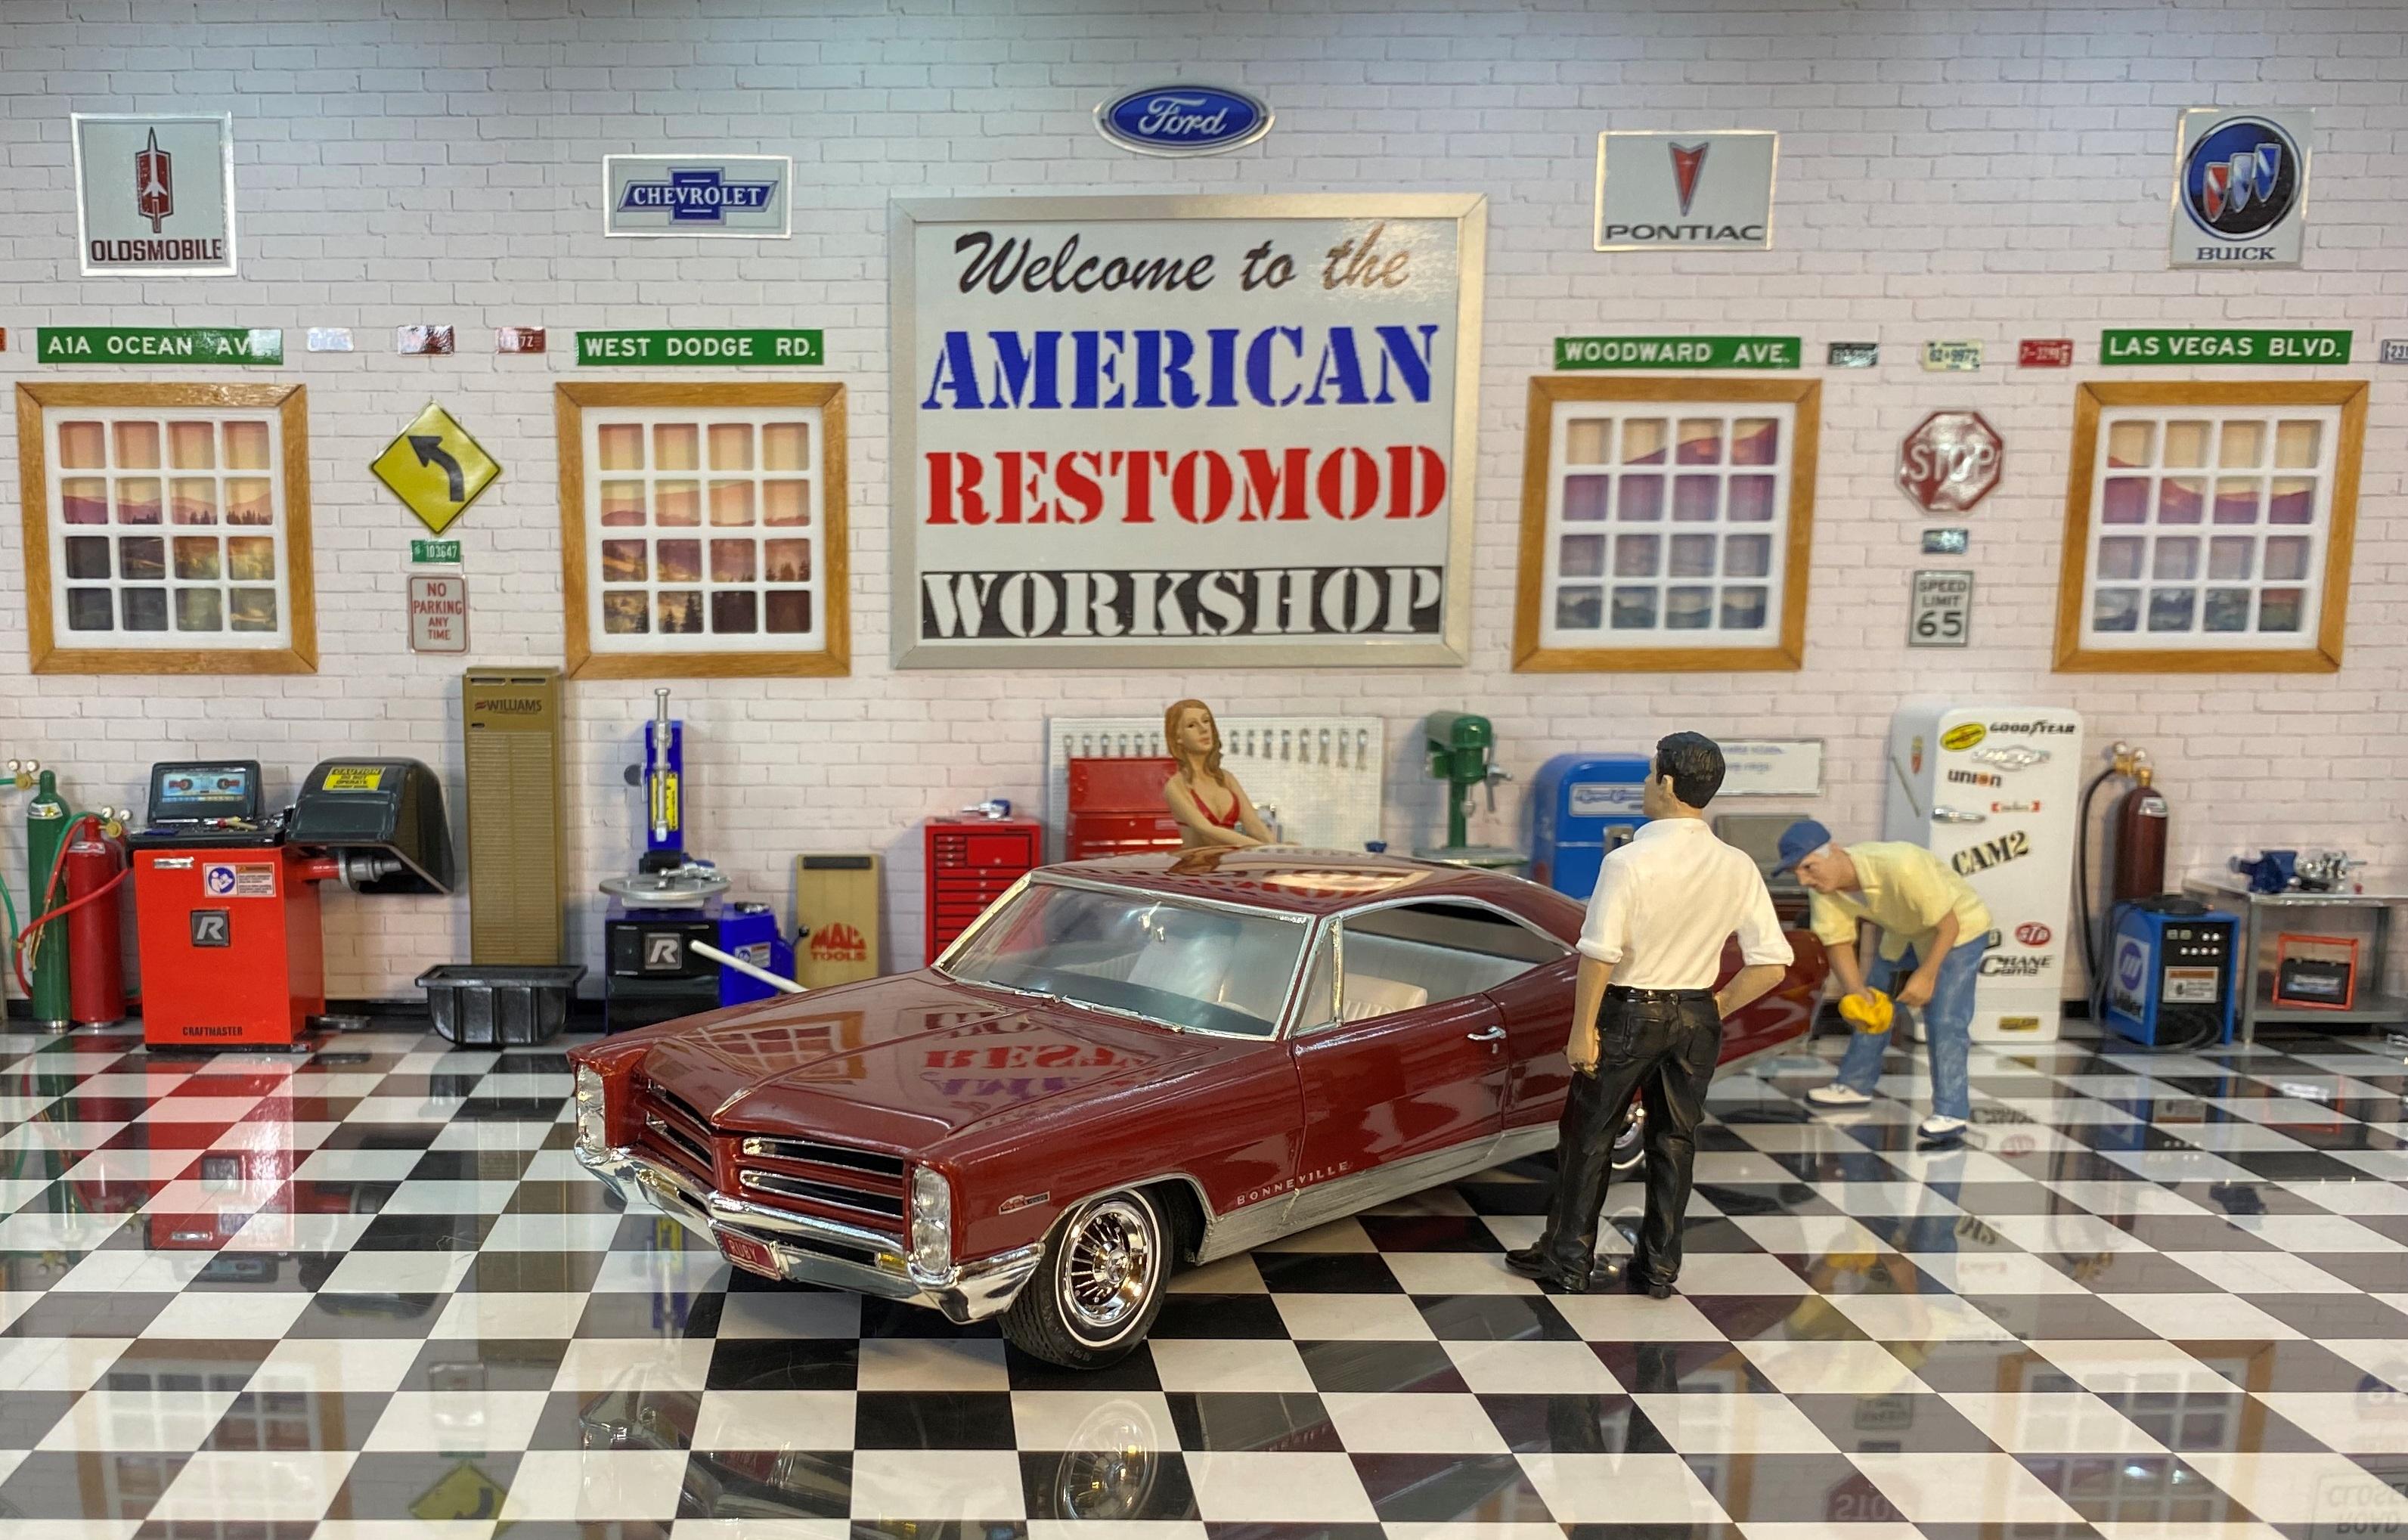
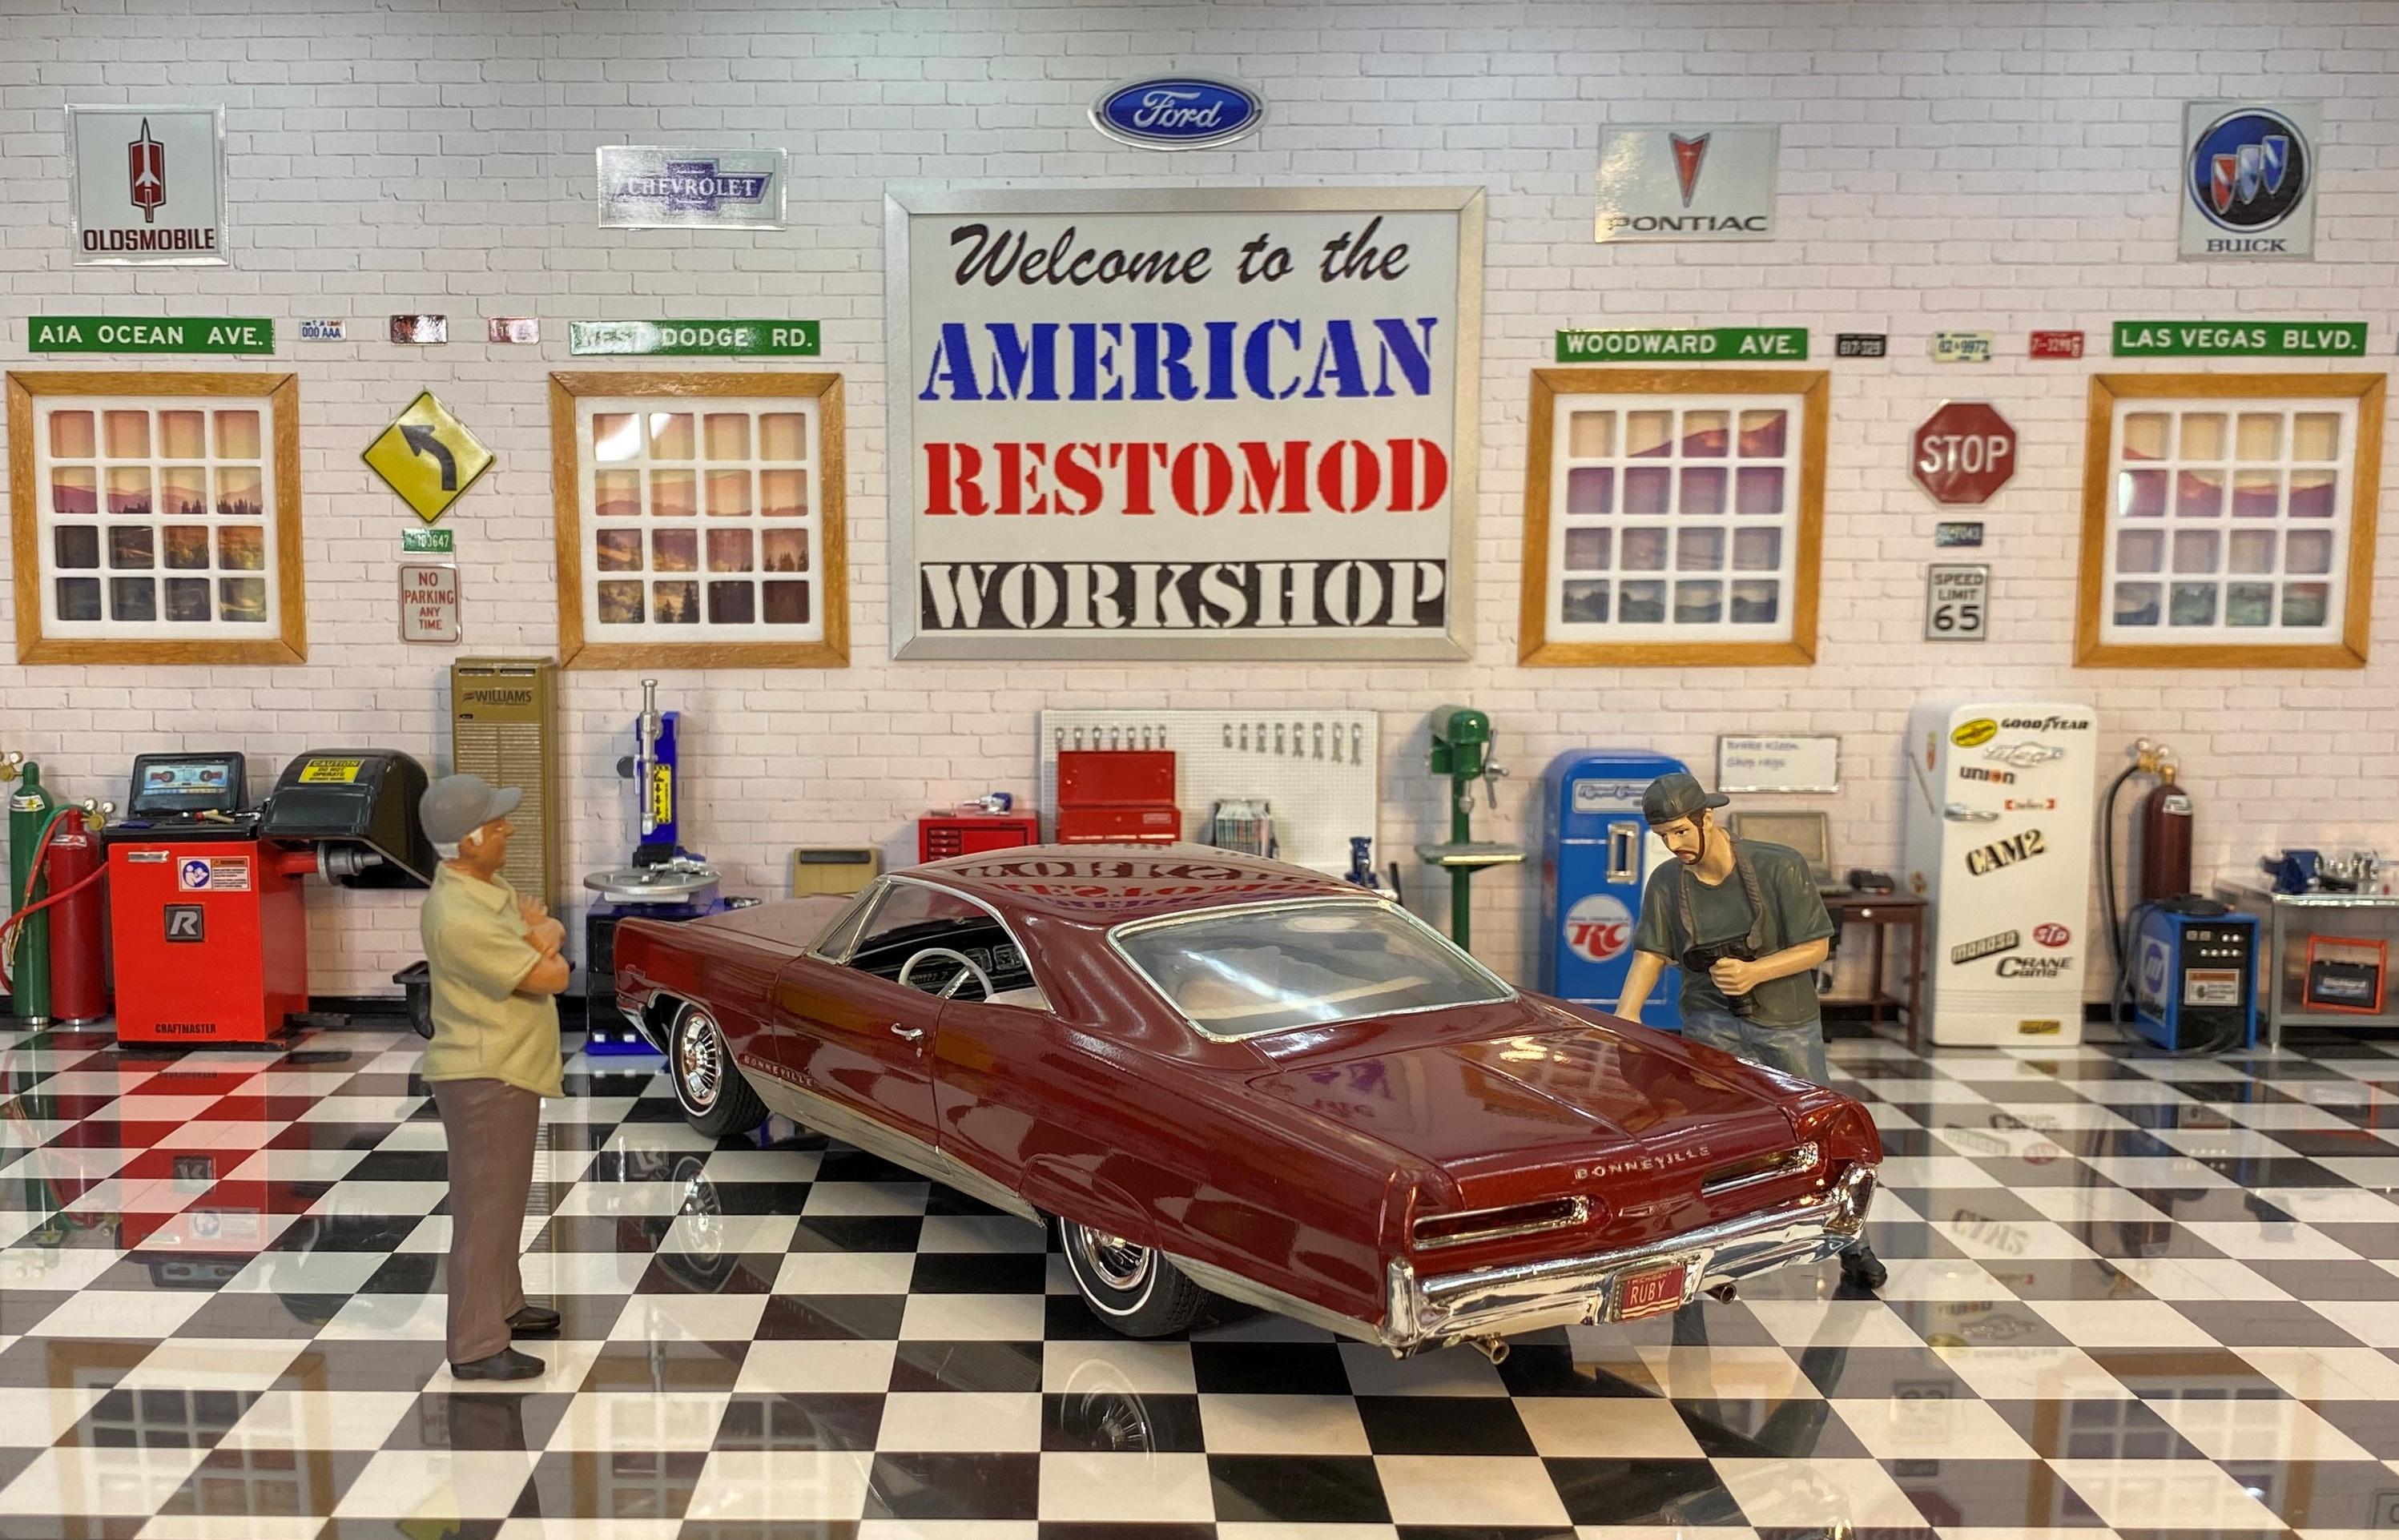
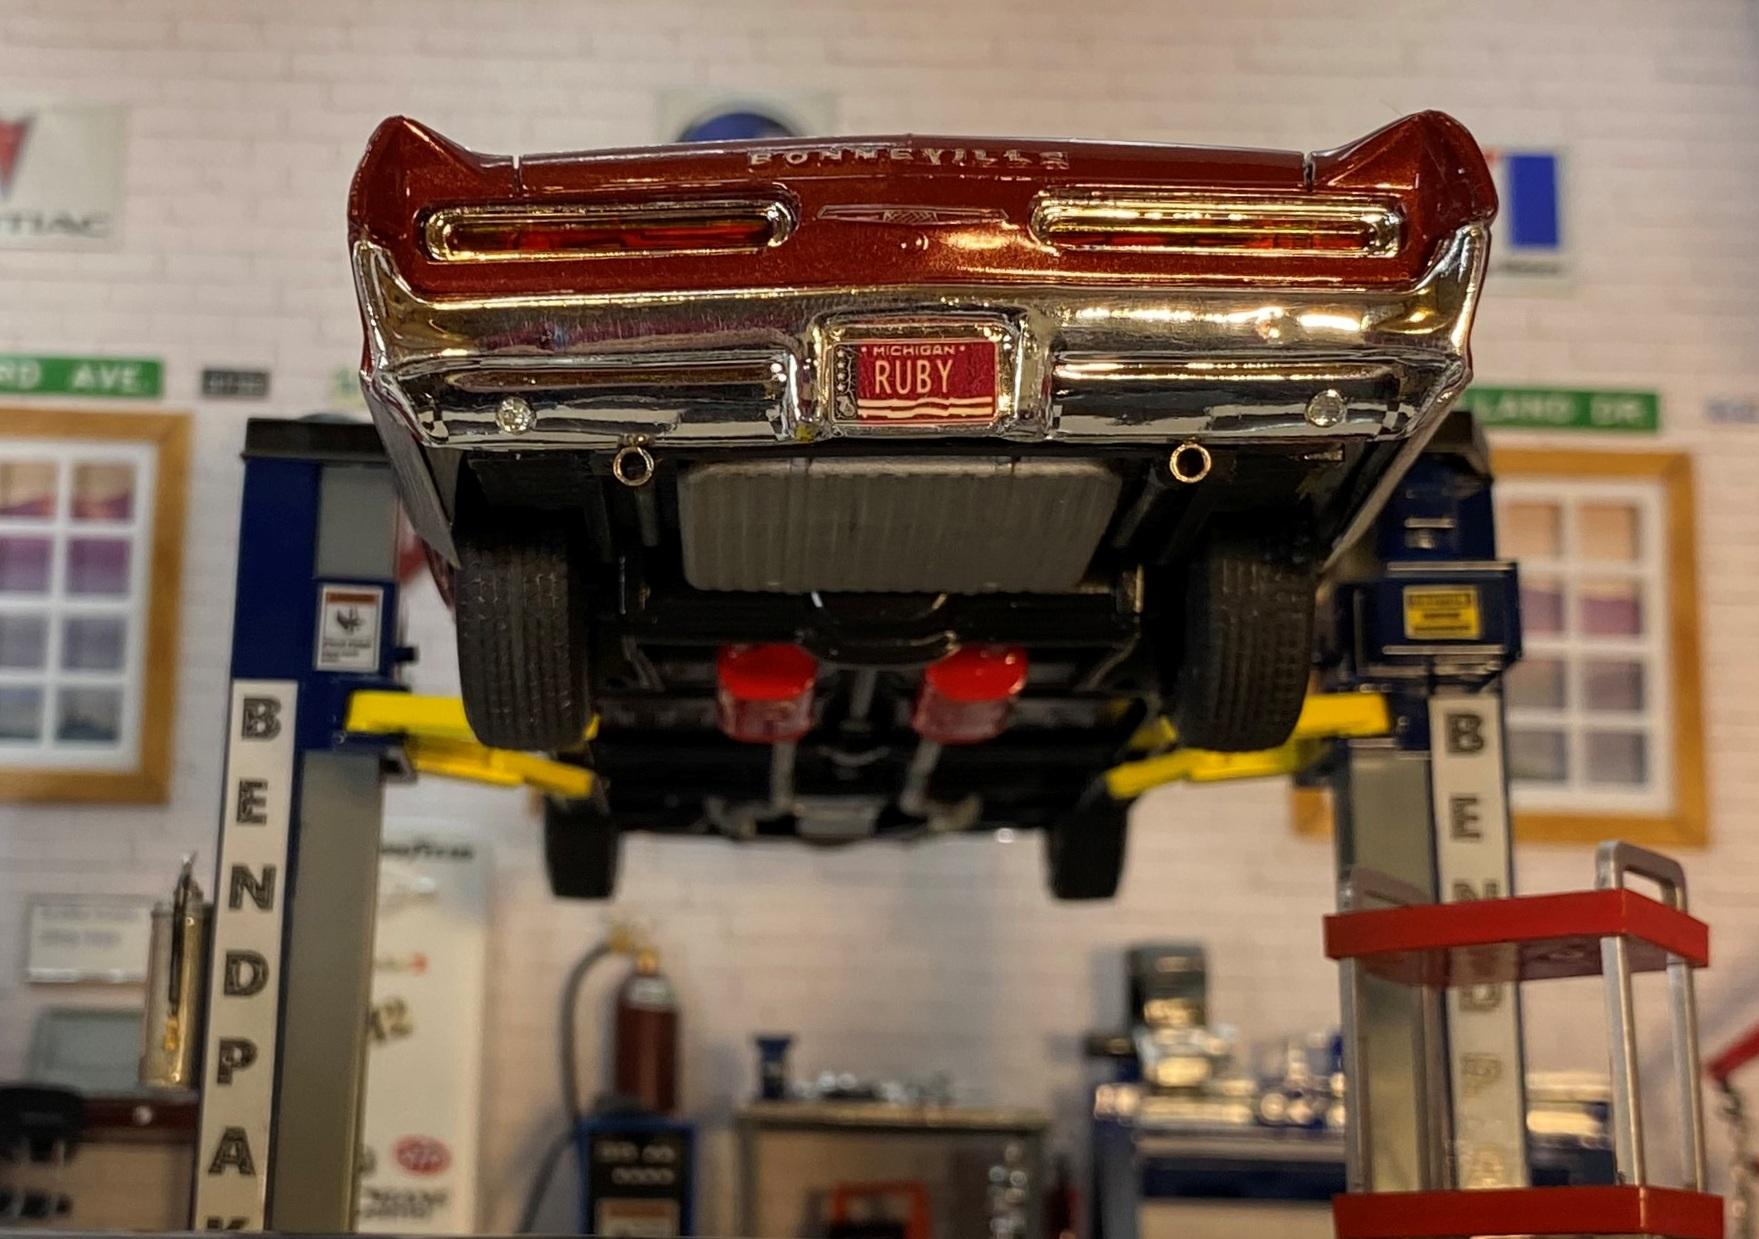
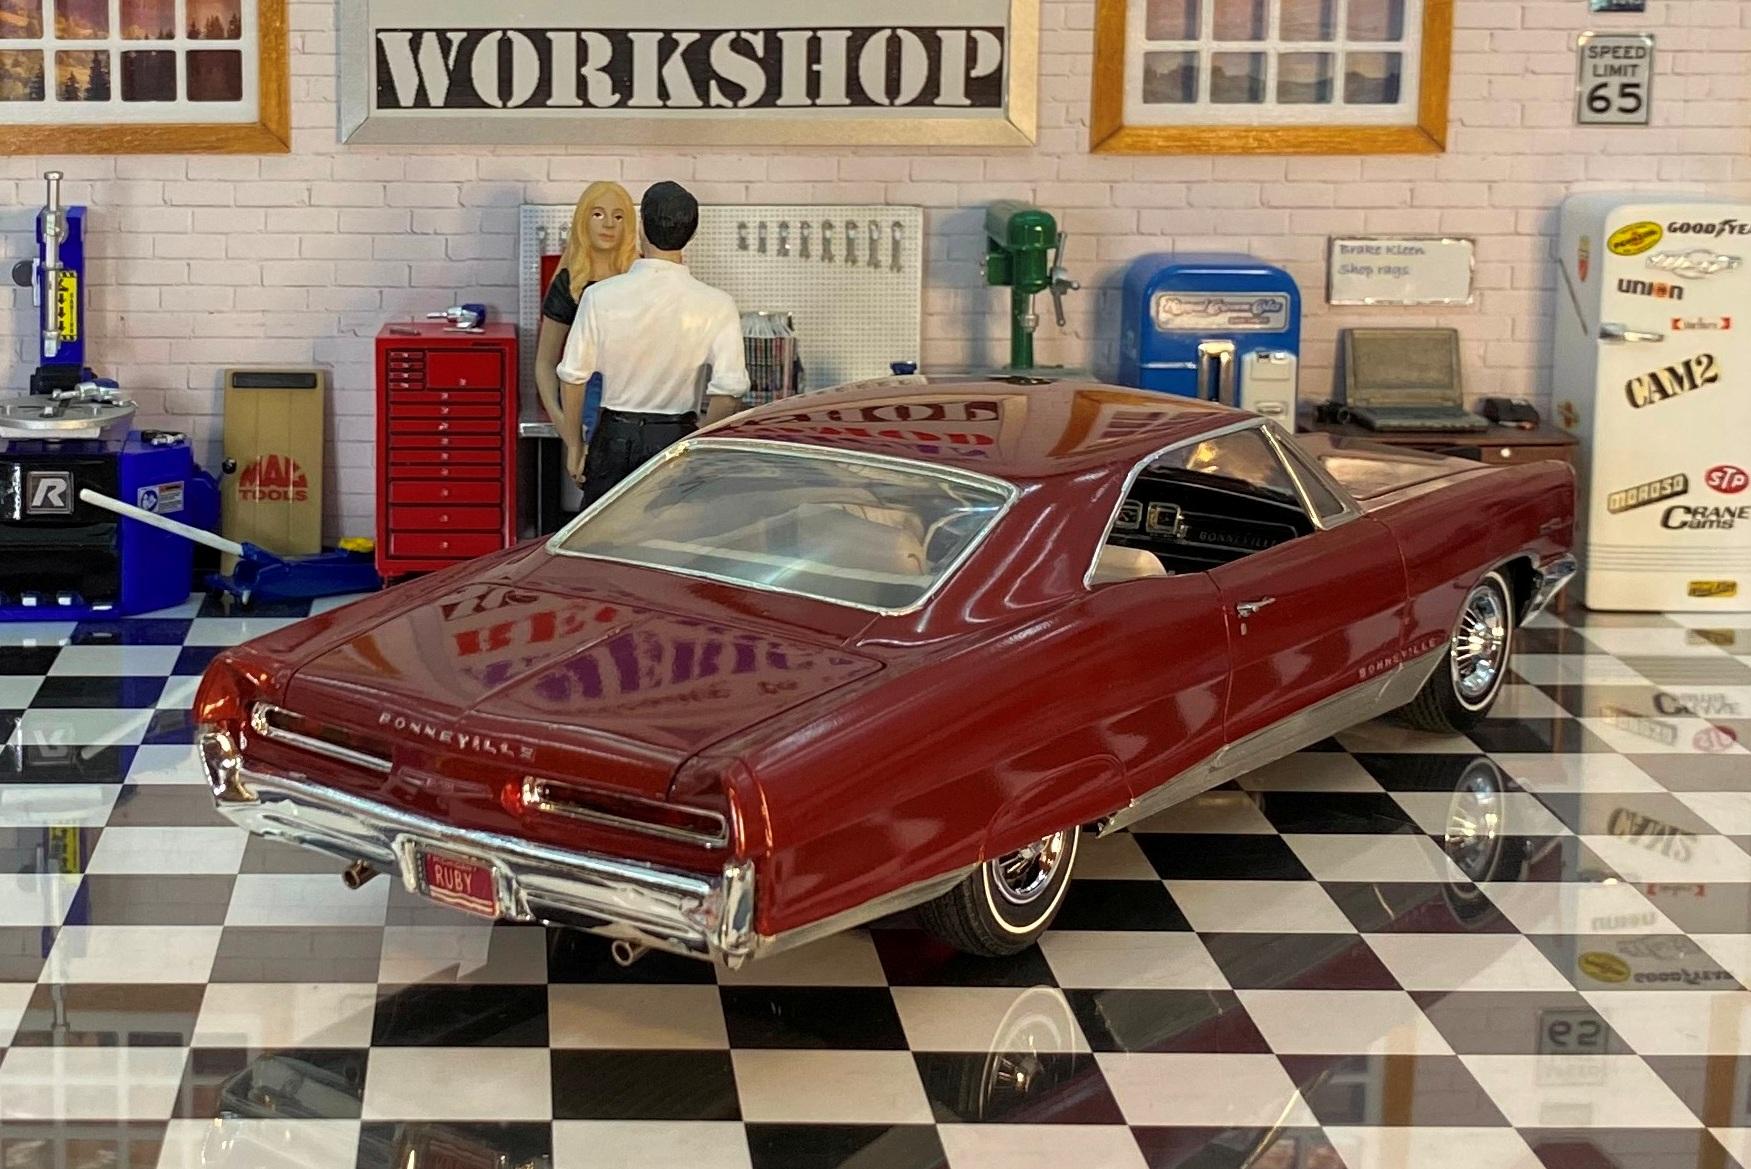
At the Art Center here in Aberdeen SD they have an "Open Art Session" every Thursday between 10am and 12pm. My wife and I go there, she usually works on her book while I prep models. Today I took in the 64 Cutlass 442 and the Bonneville kits. I moved the front axle holes forward on the Olds so the wheels look better balance in the wells. Then I started to work on the Pontiac. I had already started to narrow the rear for some big tires at home, so I thought I'd work on the engine. You can guess what I came up with. Yeah, I'm going to have to cut out the hood on the Bonnie! Here it is mocked up with the wide tires on the rear and the set of wheels from an AMT 66 Nova pro-street kit. Not sure if they will be the ones I use or not. I "narrowed" the rear the old-fashioned way. I removed the wheel wells and sanded down where the axles go through until I had enough clearance. I also thinned the fenders on the body as well. I'm using the backing plates for the slicks from the AMT 50 Ford convertible to mount them with a custom-made metal axle. Front tires are the BF Goodrich tires from the kit. I'll remove badges and door handles on the side and probably paint the lower finned panels grey. I'll get some card stock to remake the rear wheel wells so the inner body don't show. So, what do ya think? Is the world ready for a blown, tubbed 65 Bonneville? Thanks for looking, all comments welcomed.
-
I had originally gotten the kit to build as a convertible. However, I quickly learned that Reliable Resin isn't exactly reliable, but more like a scam. So I built it the way I wanted to build my other one the first time around. The 68 Firebird was one of the first kits I ever bought. SAM_0610 by Eric Lucas, on Flickr SAM_0611 by Eric Lucas, on Flickr SAM_0612 by Eric Lucas, on Flickr SAM_0613 by Eric Lucas, on Flickr SAM_0614 by Eric Lucas, on Flickr
-
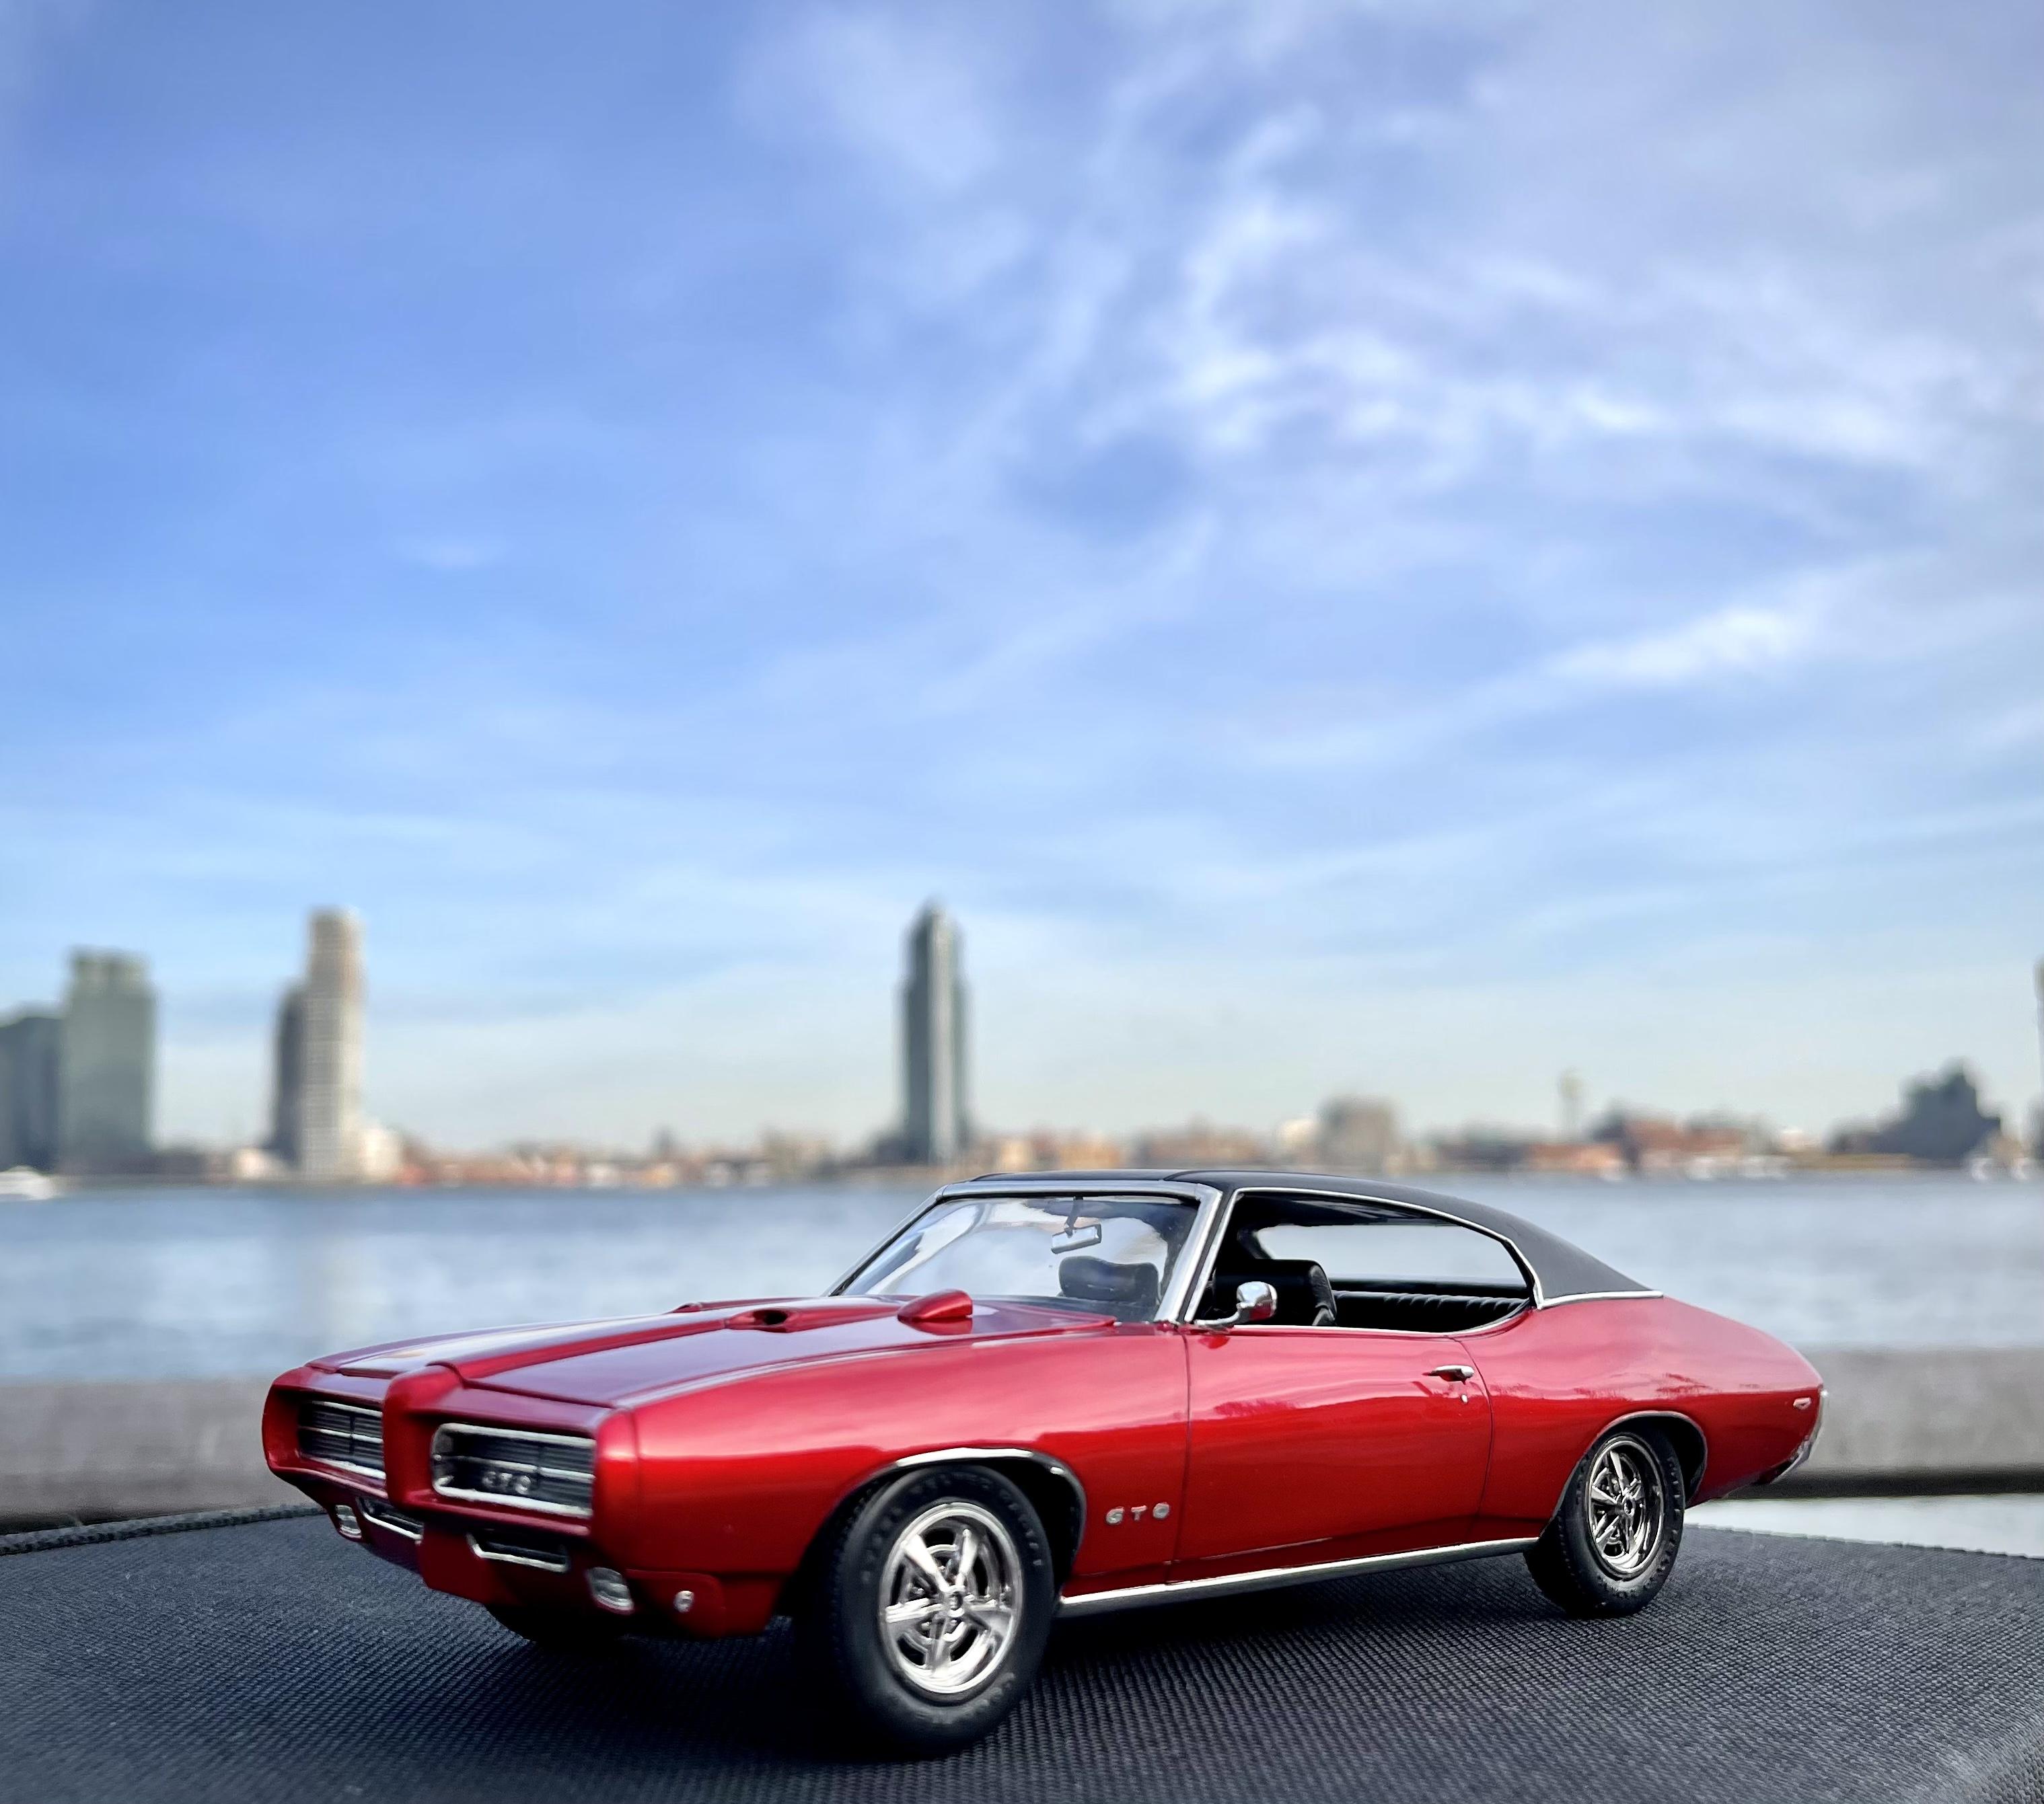
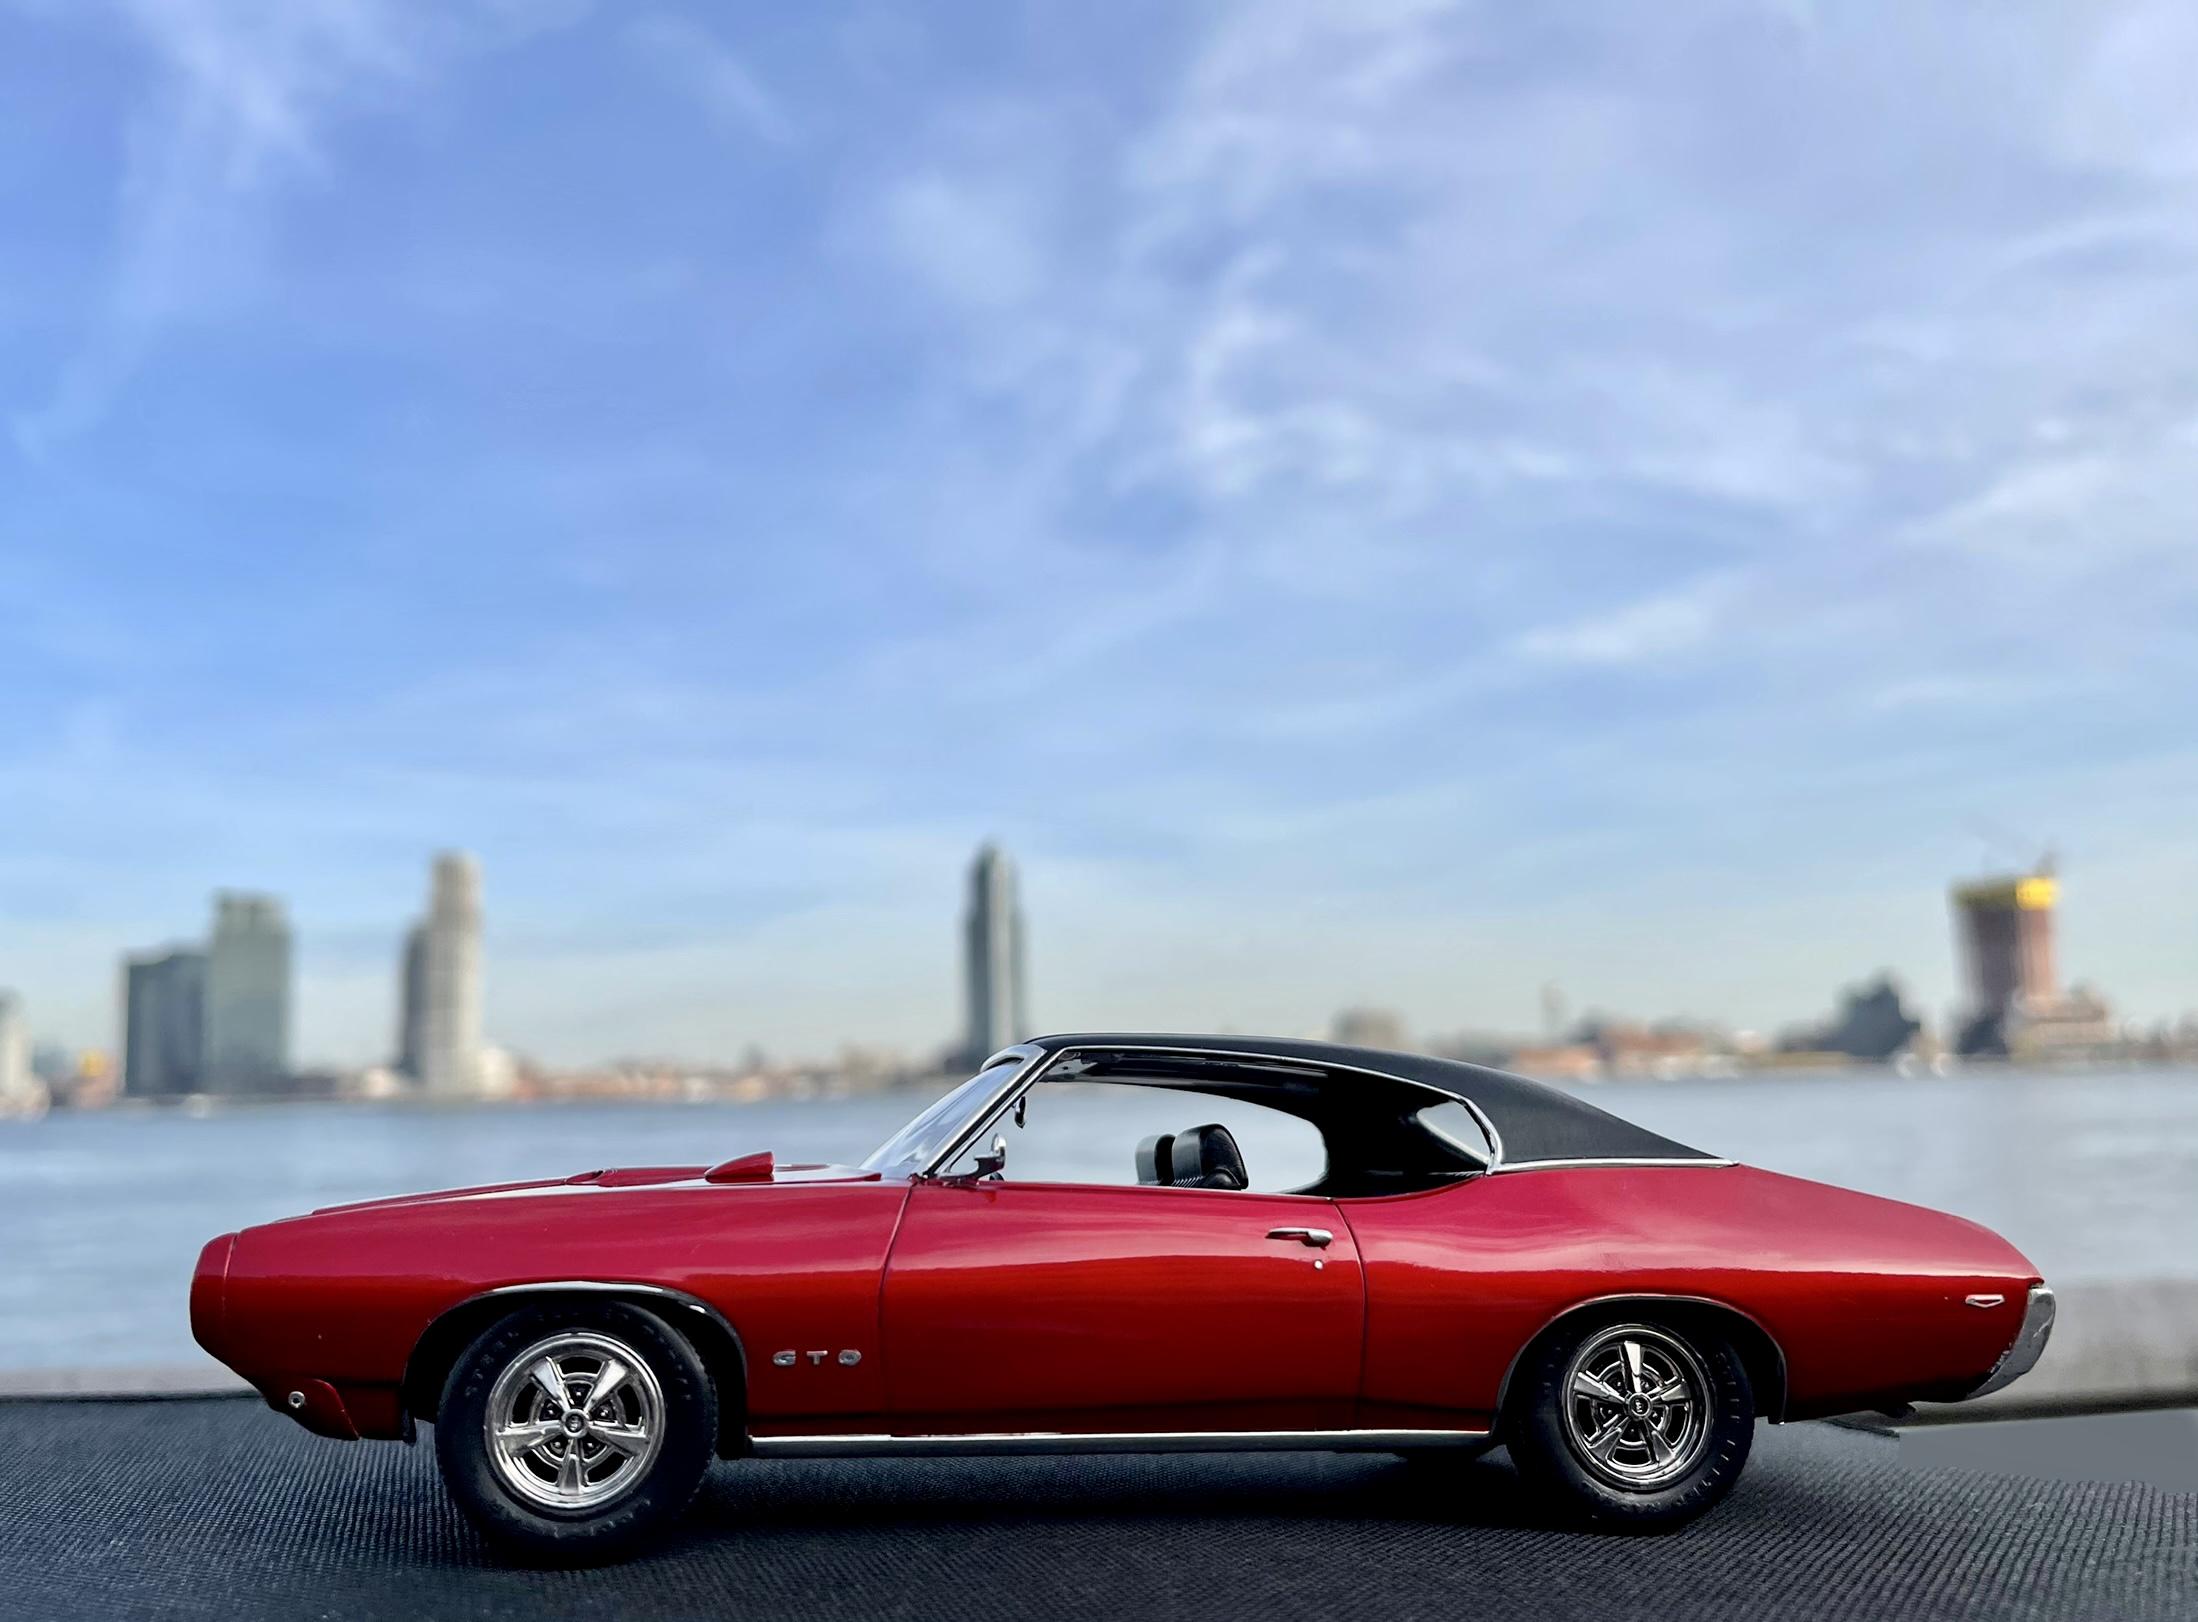
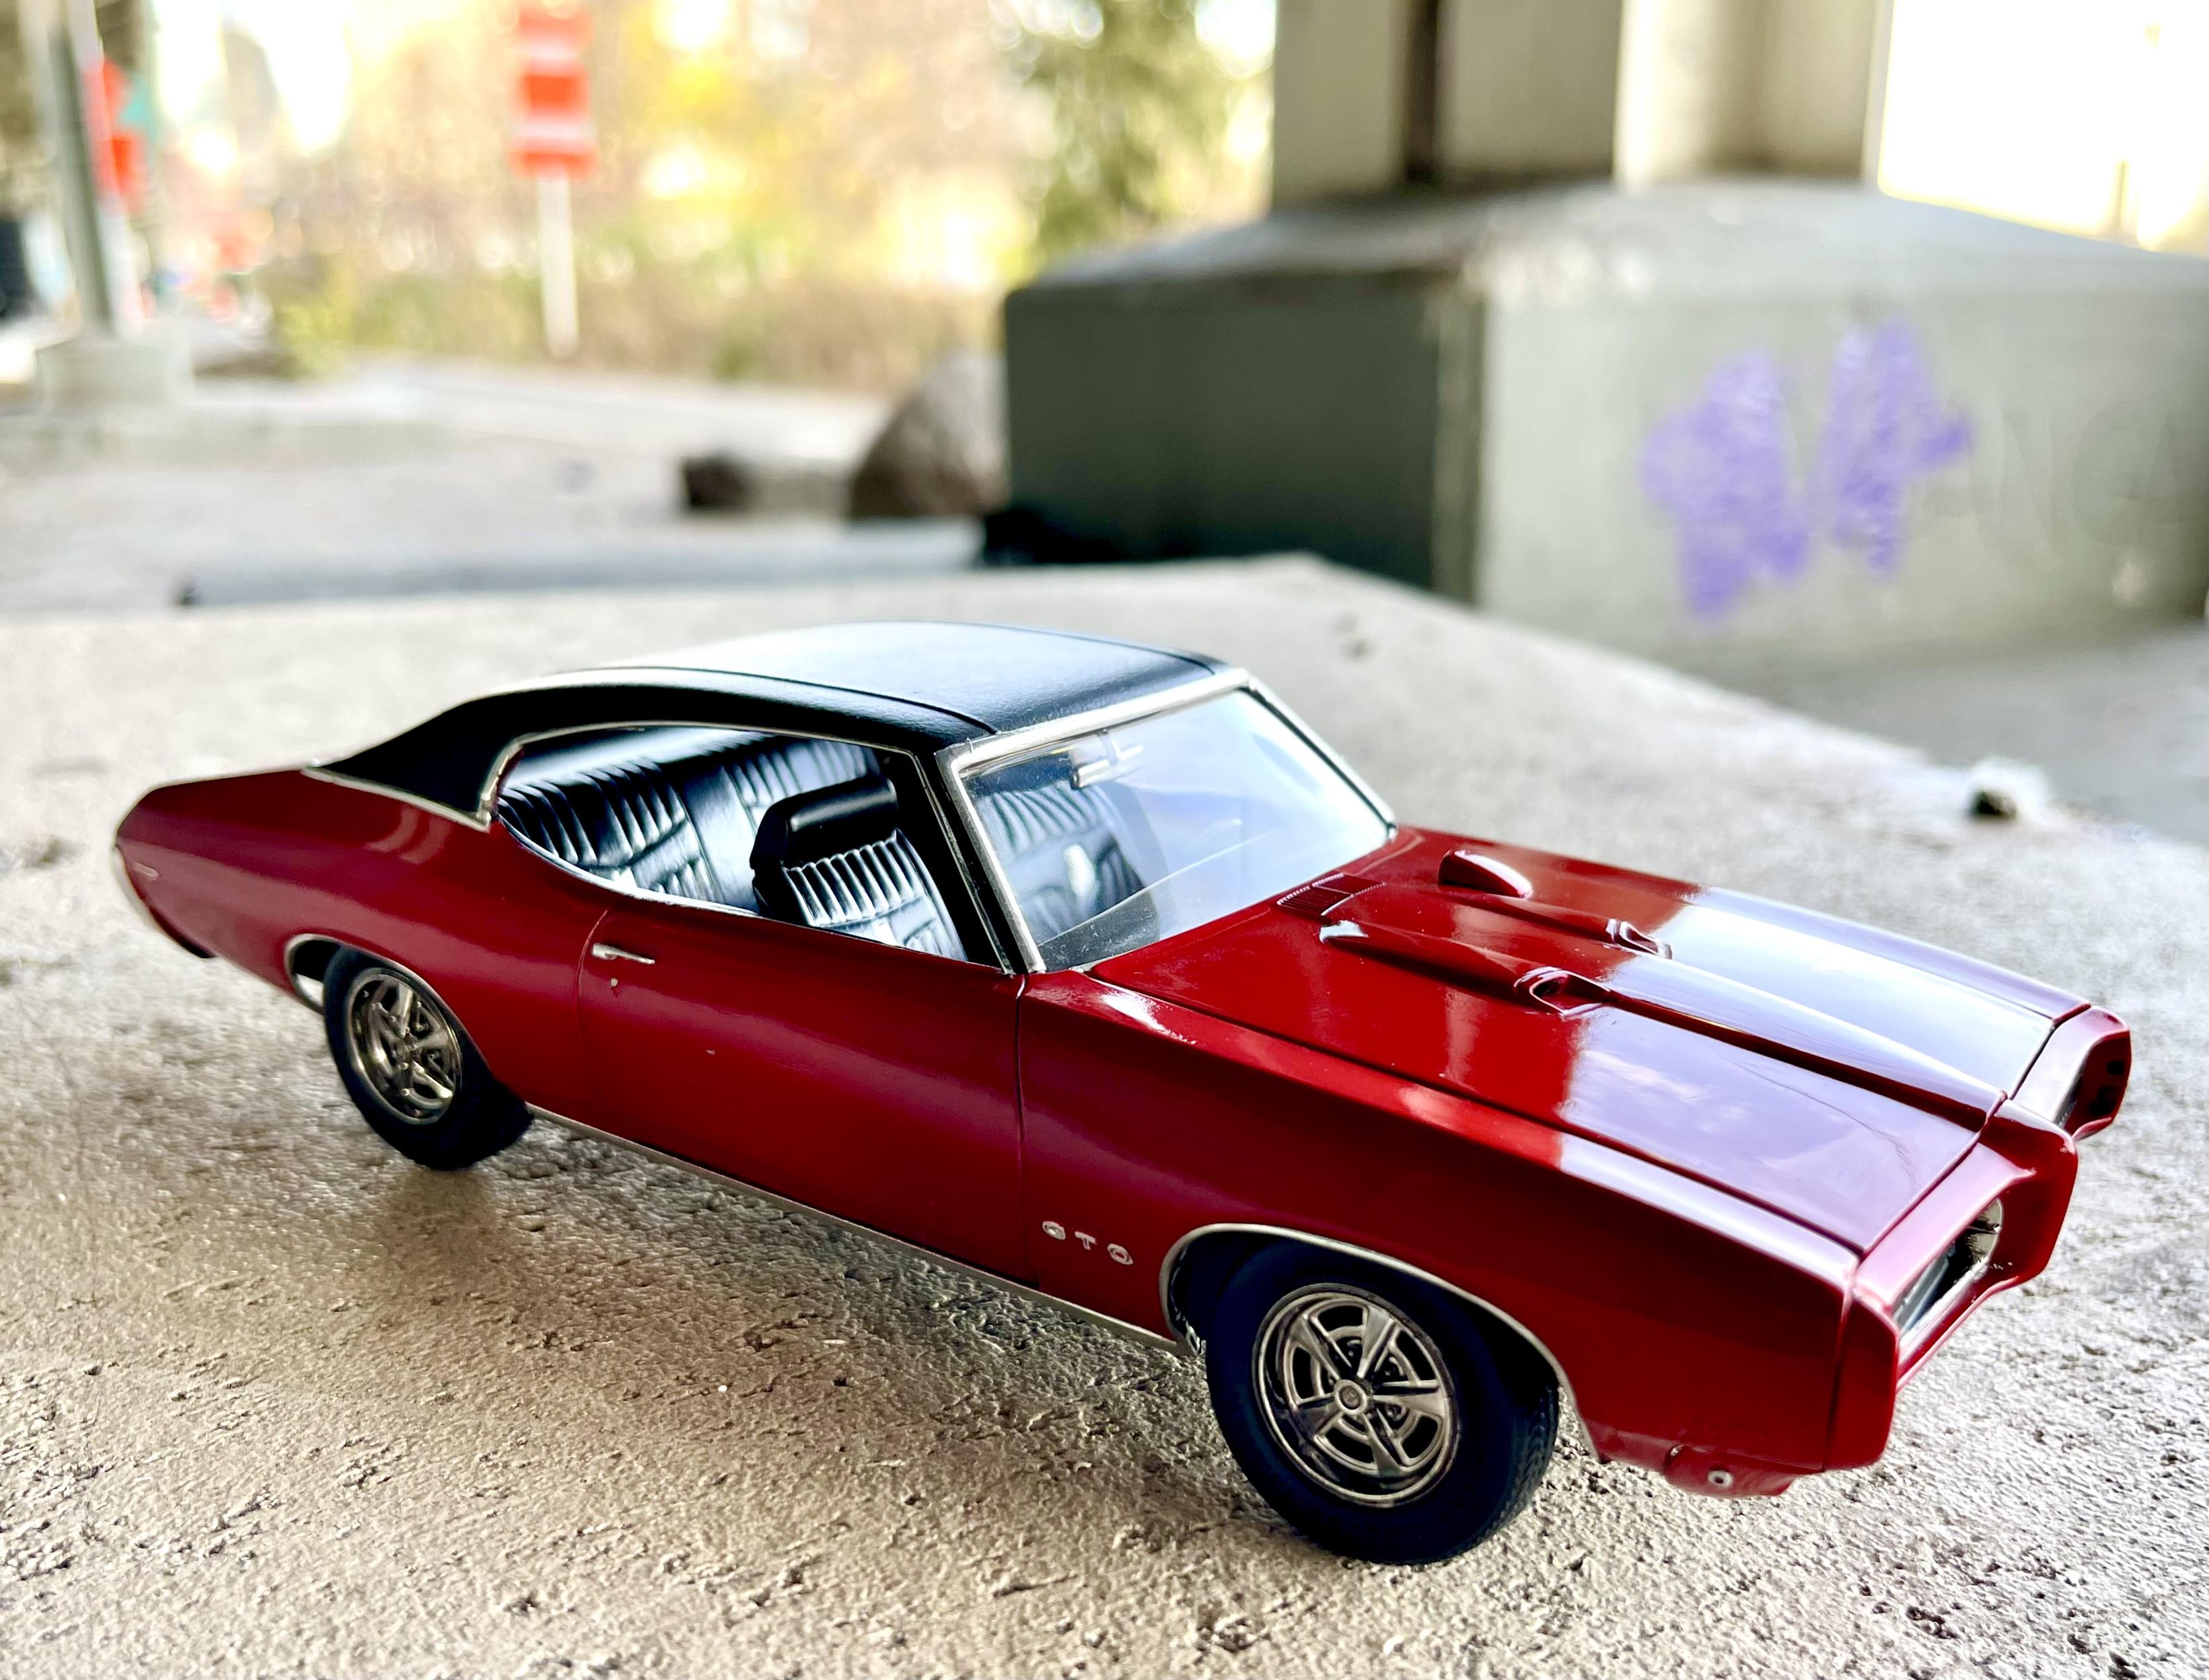
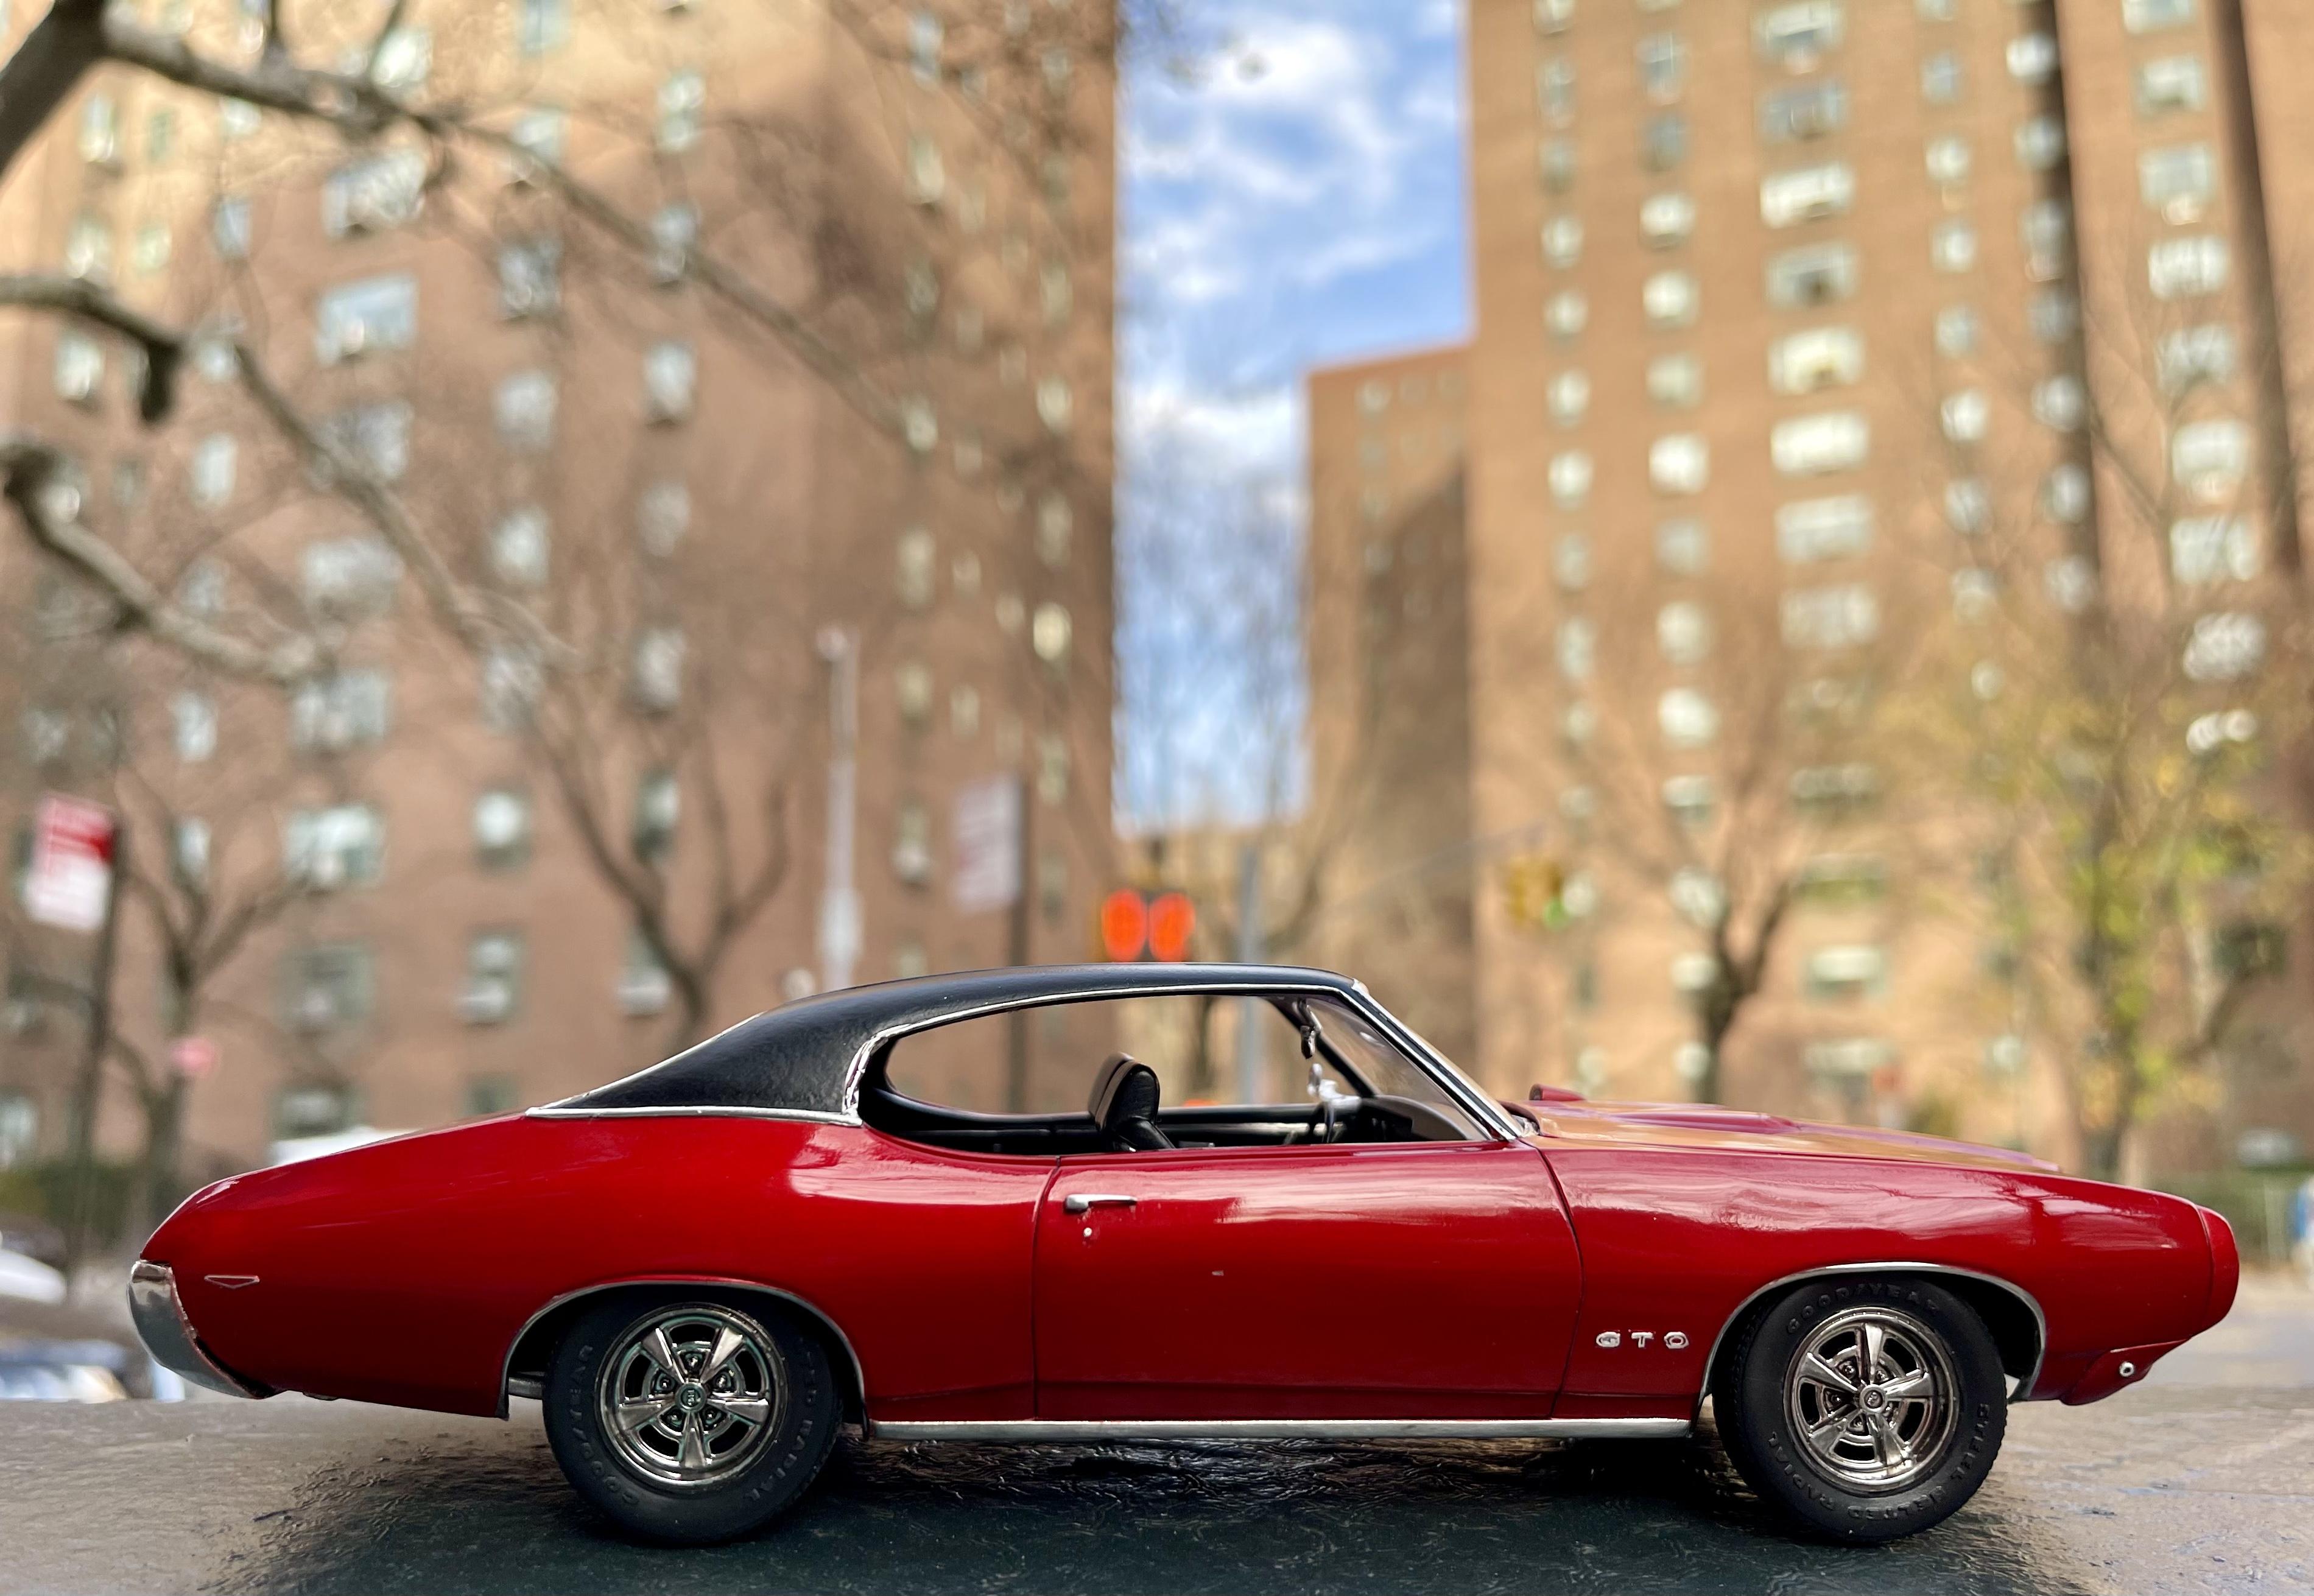
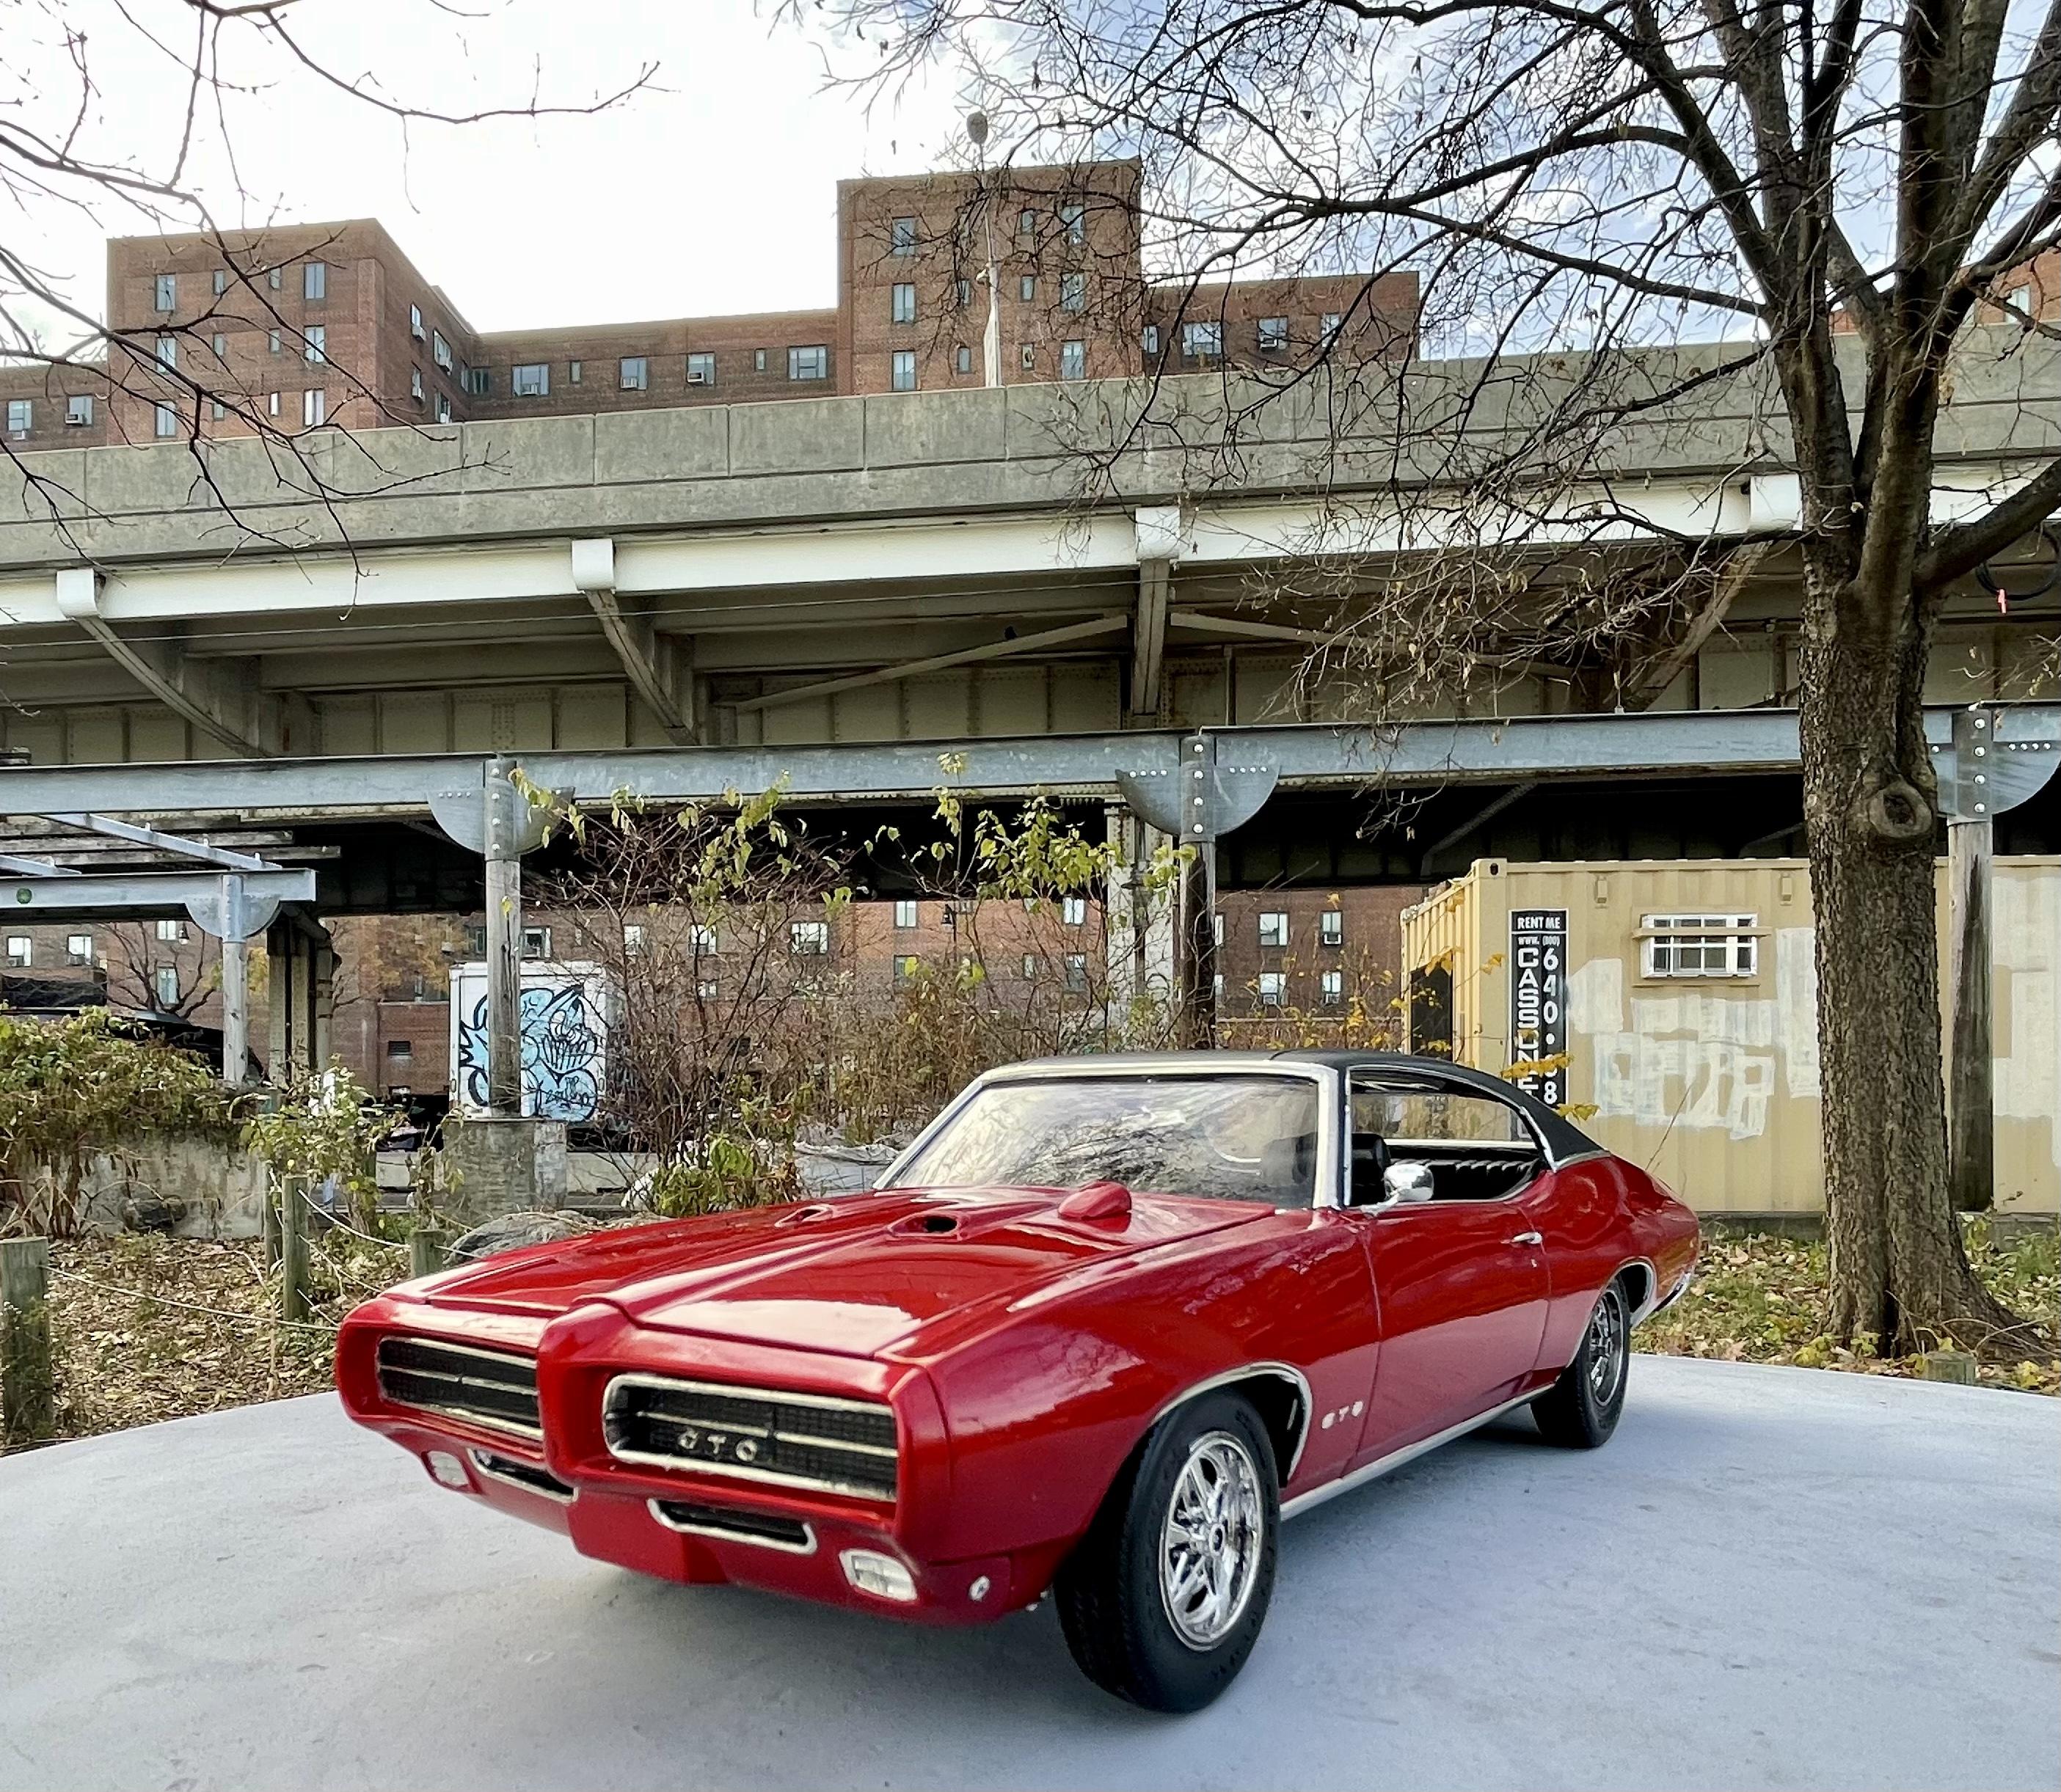
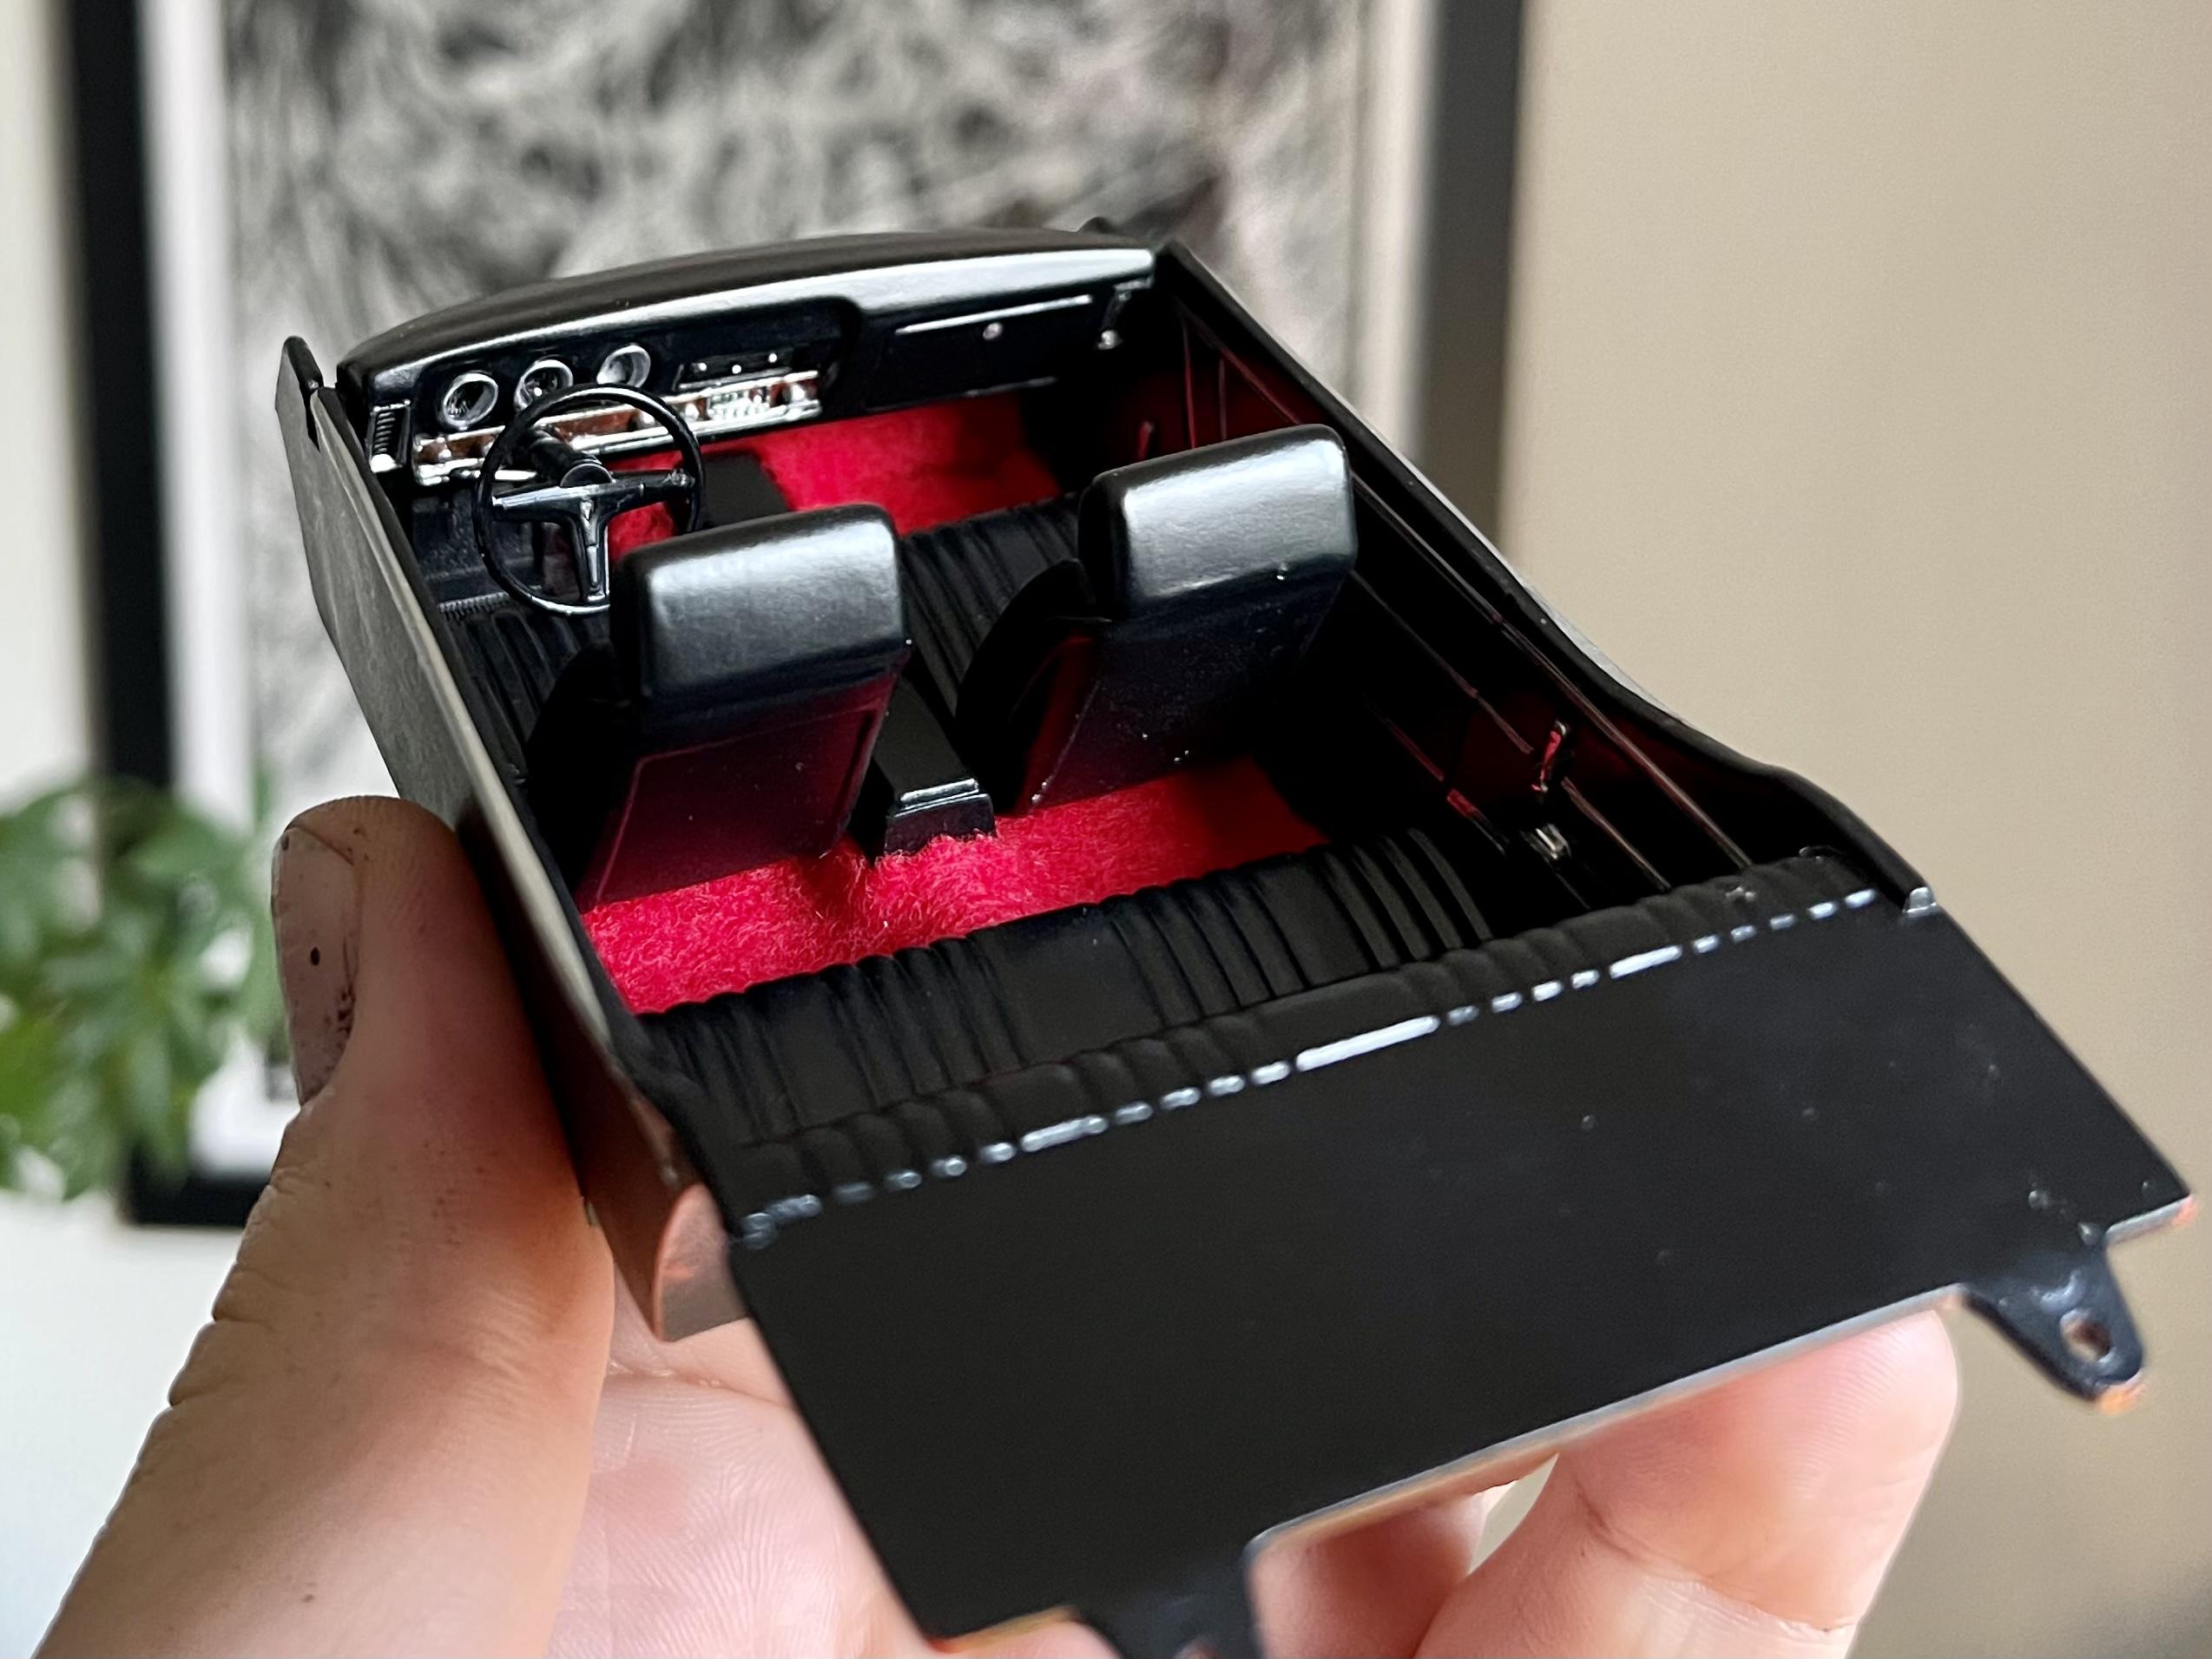
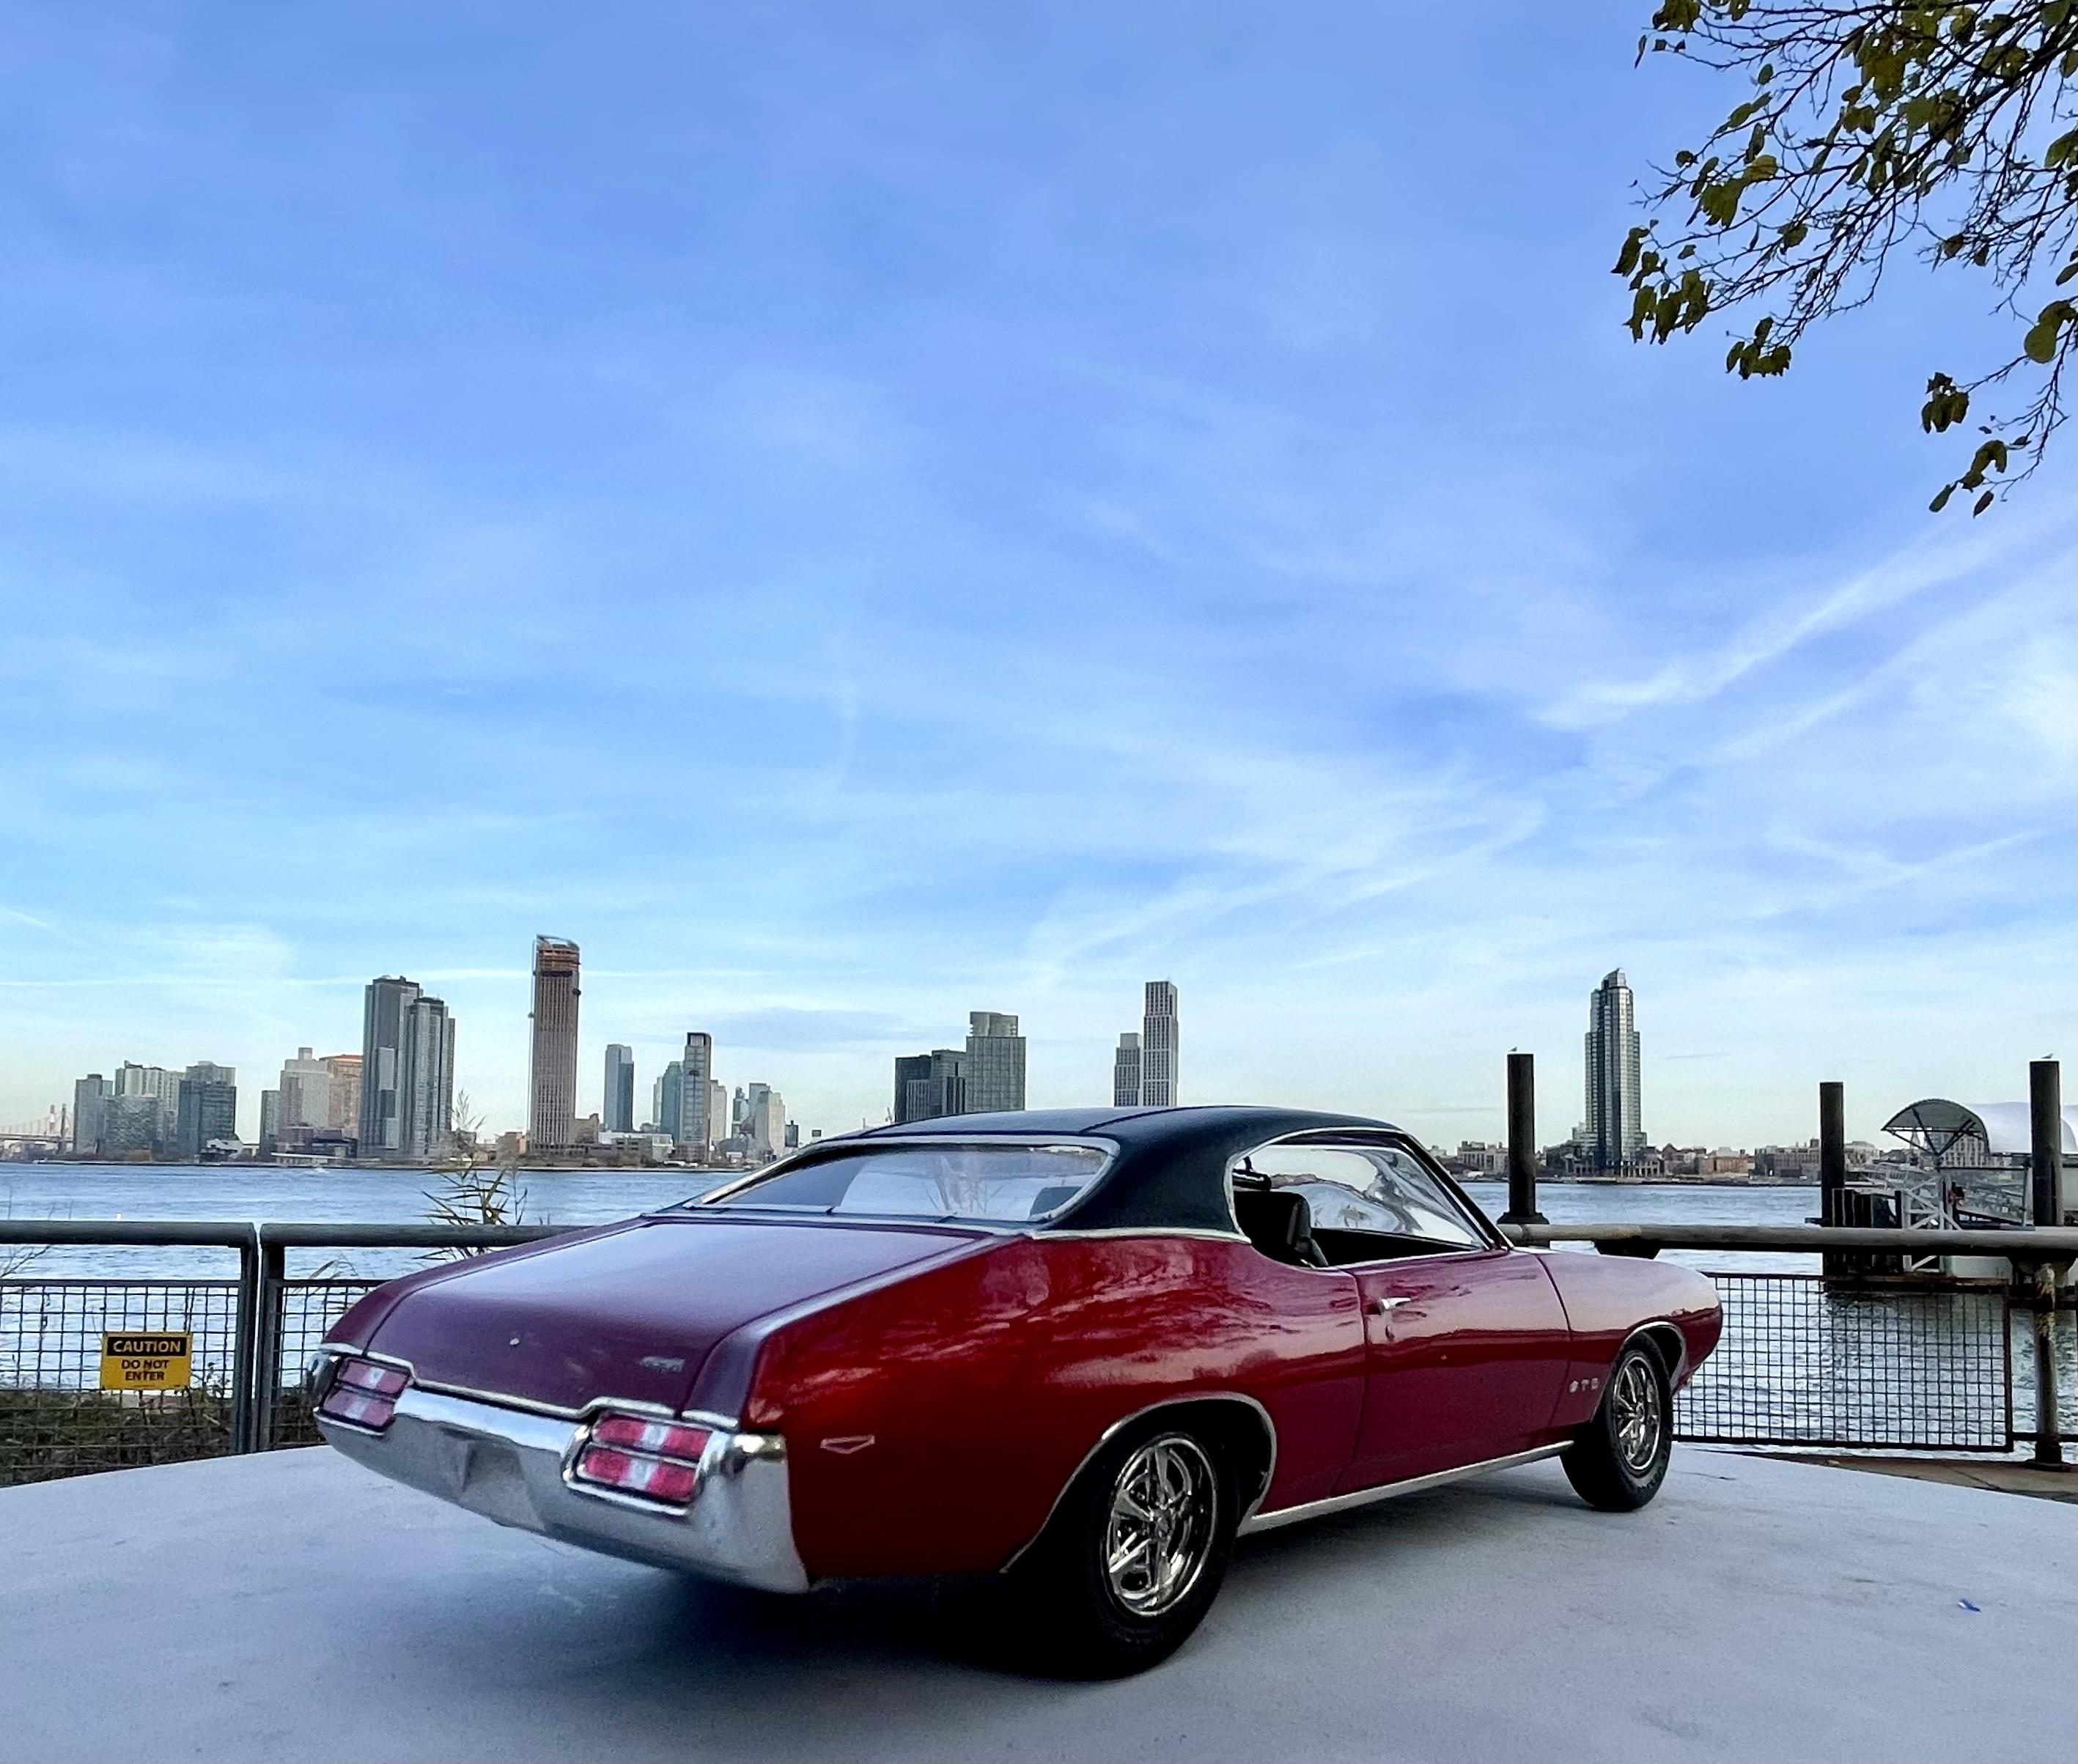
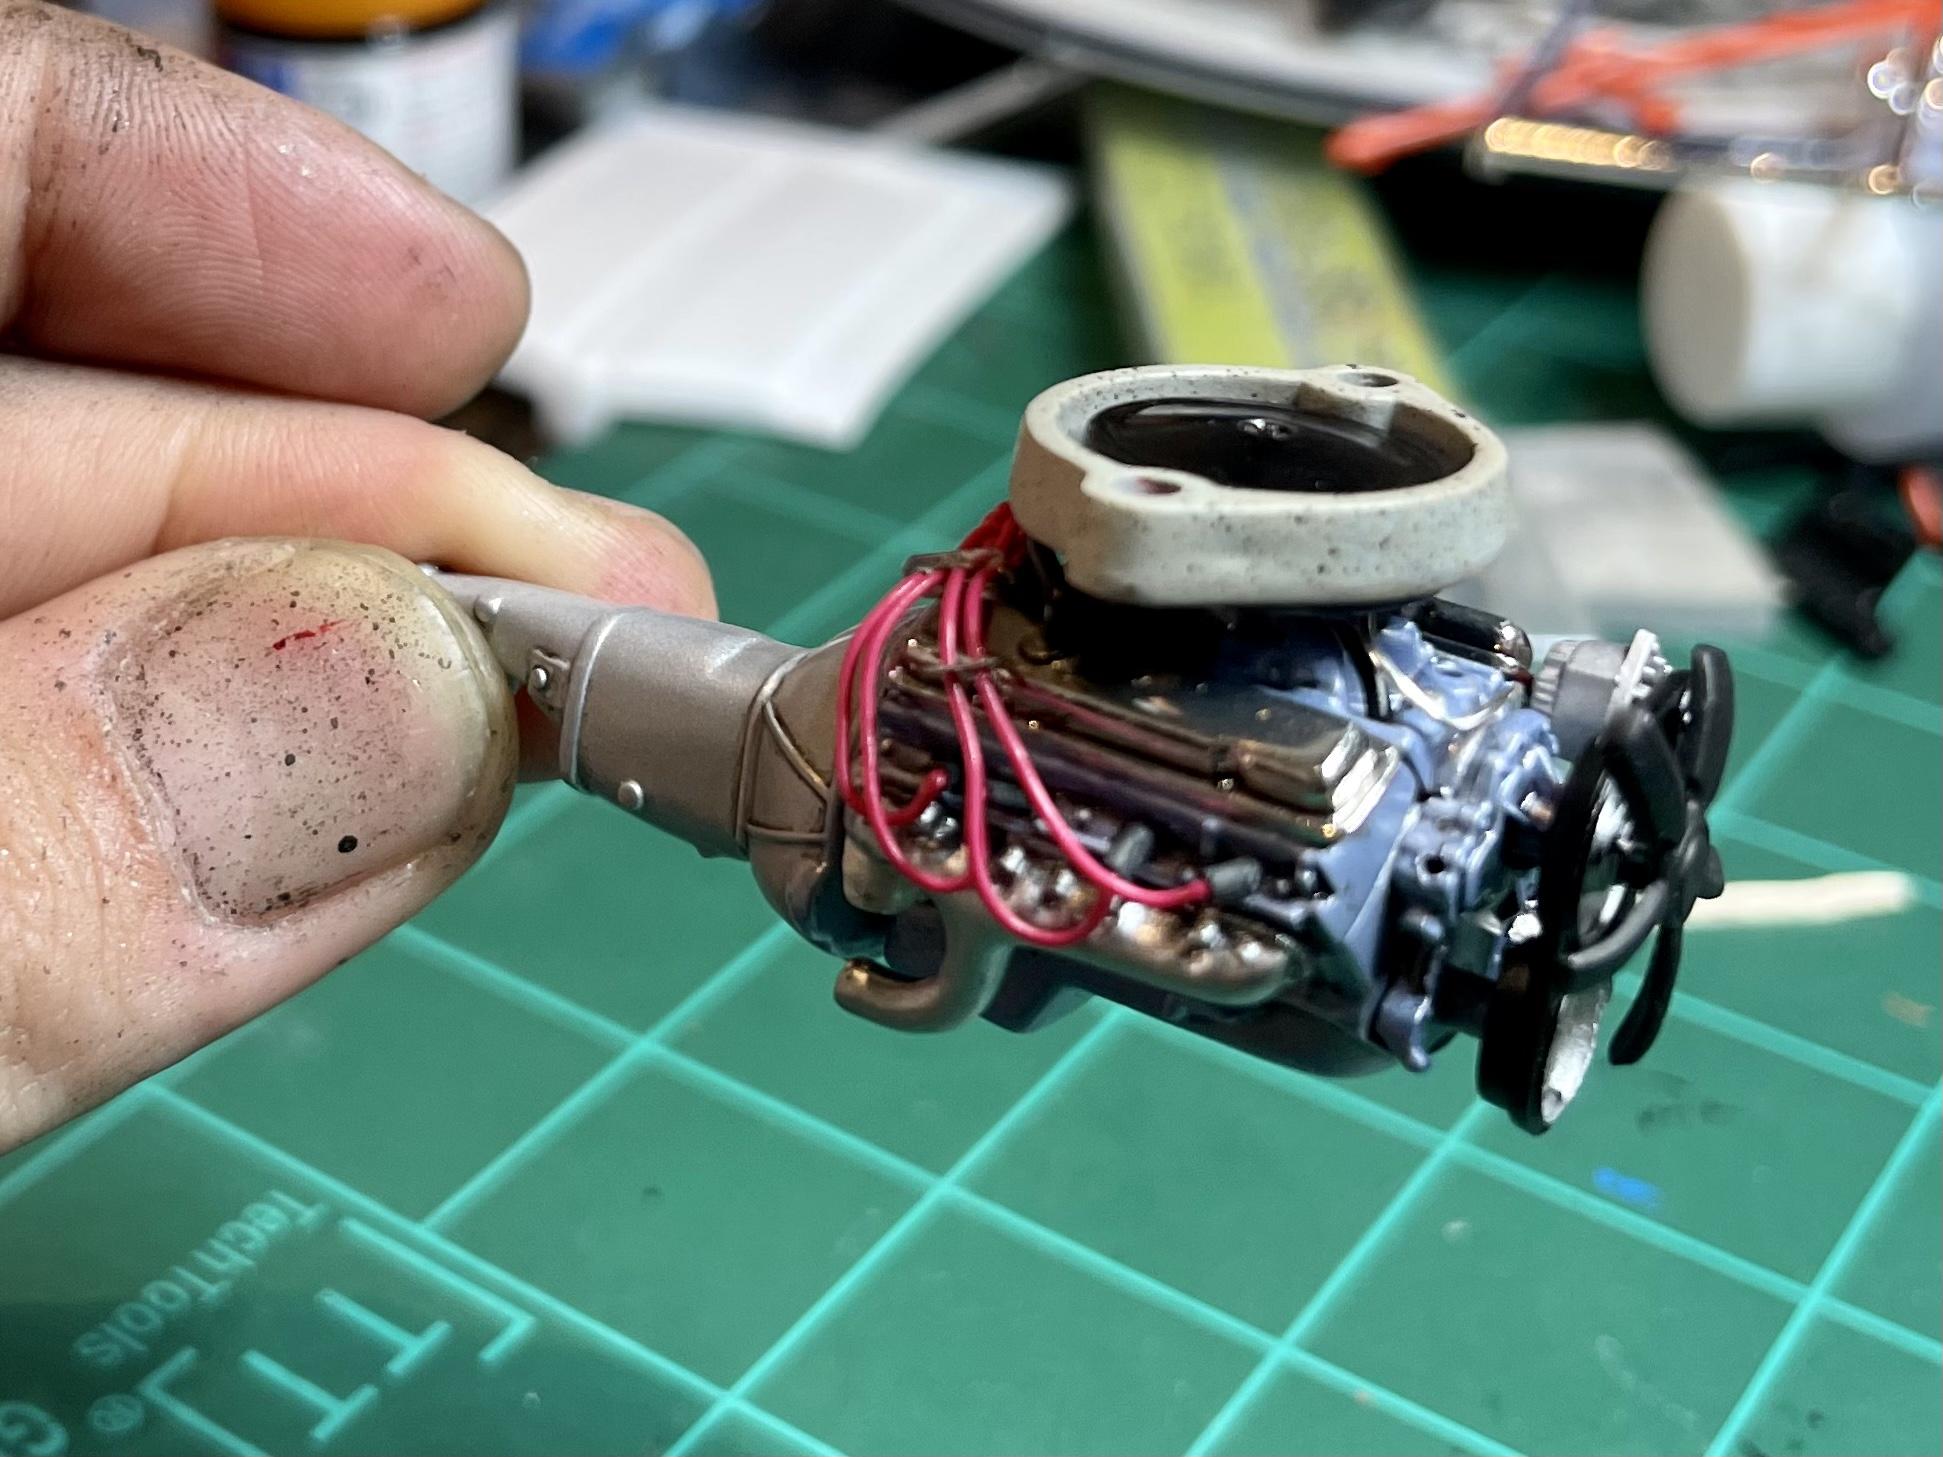
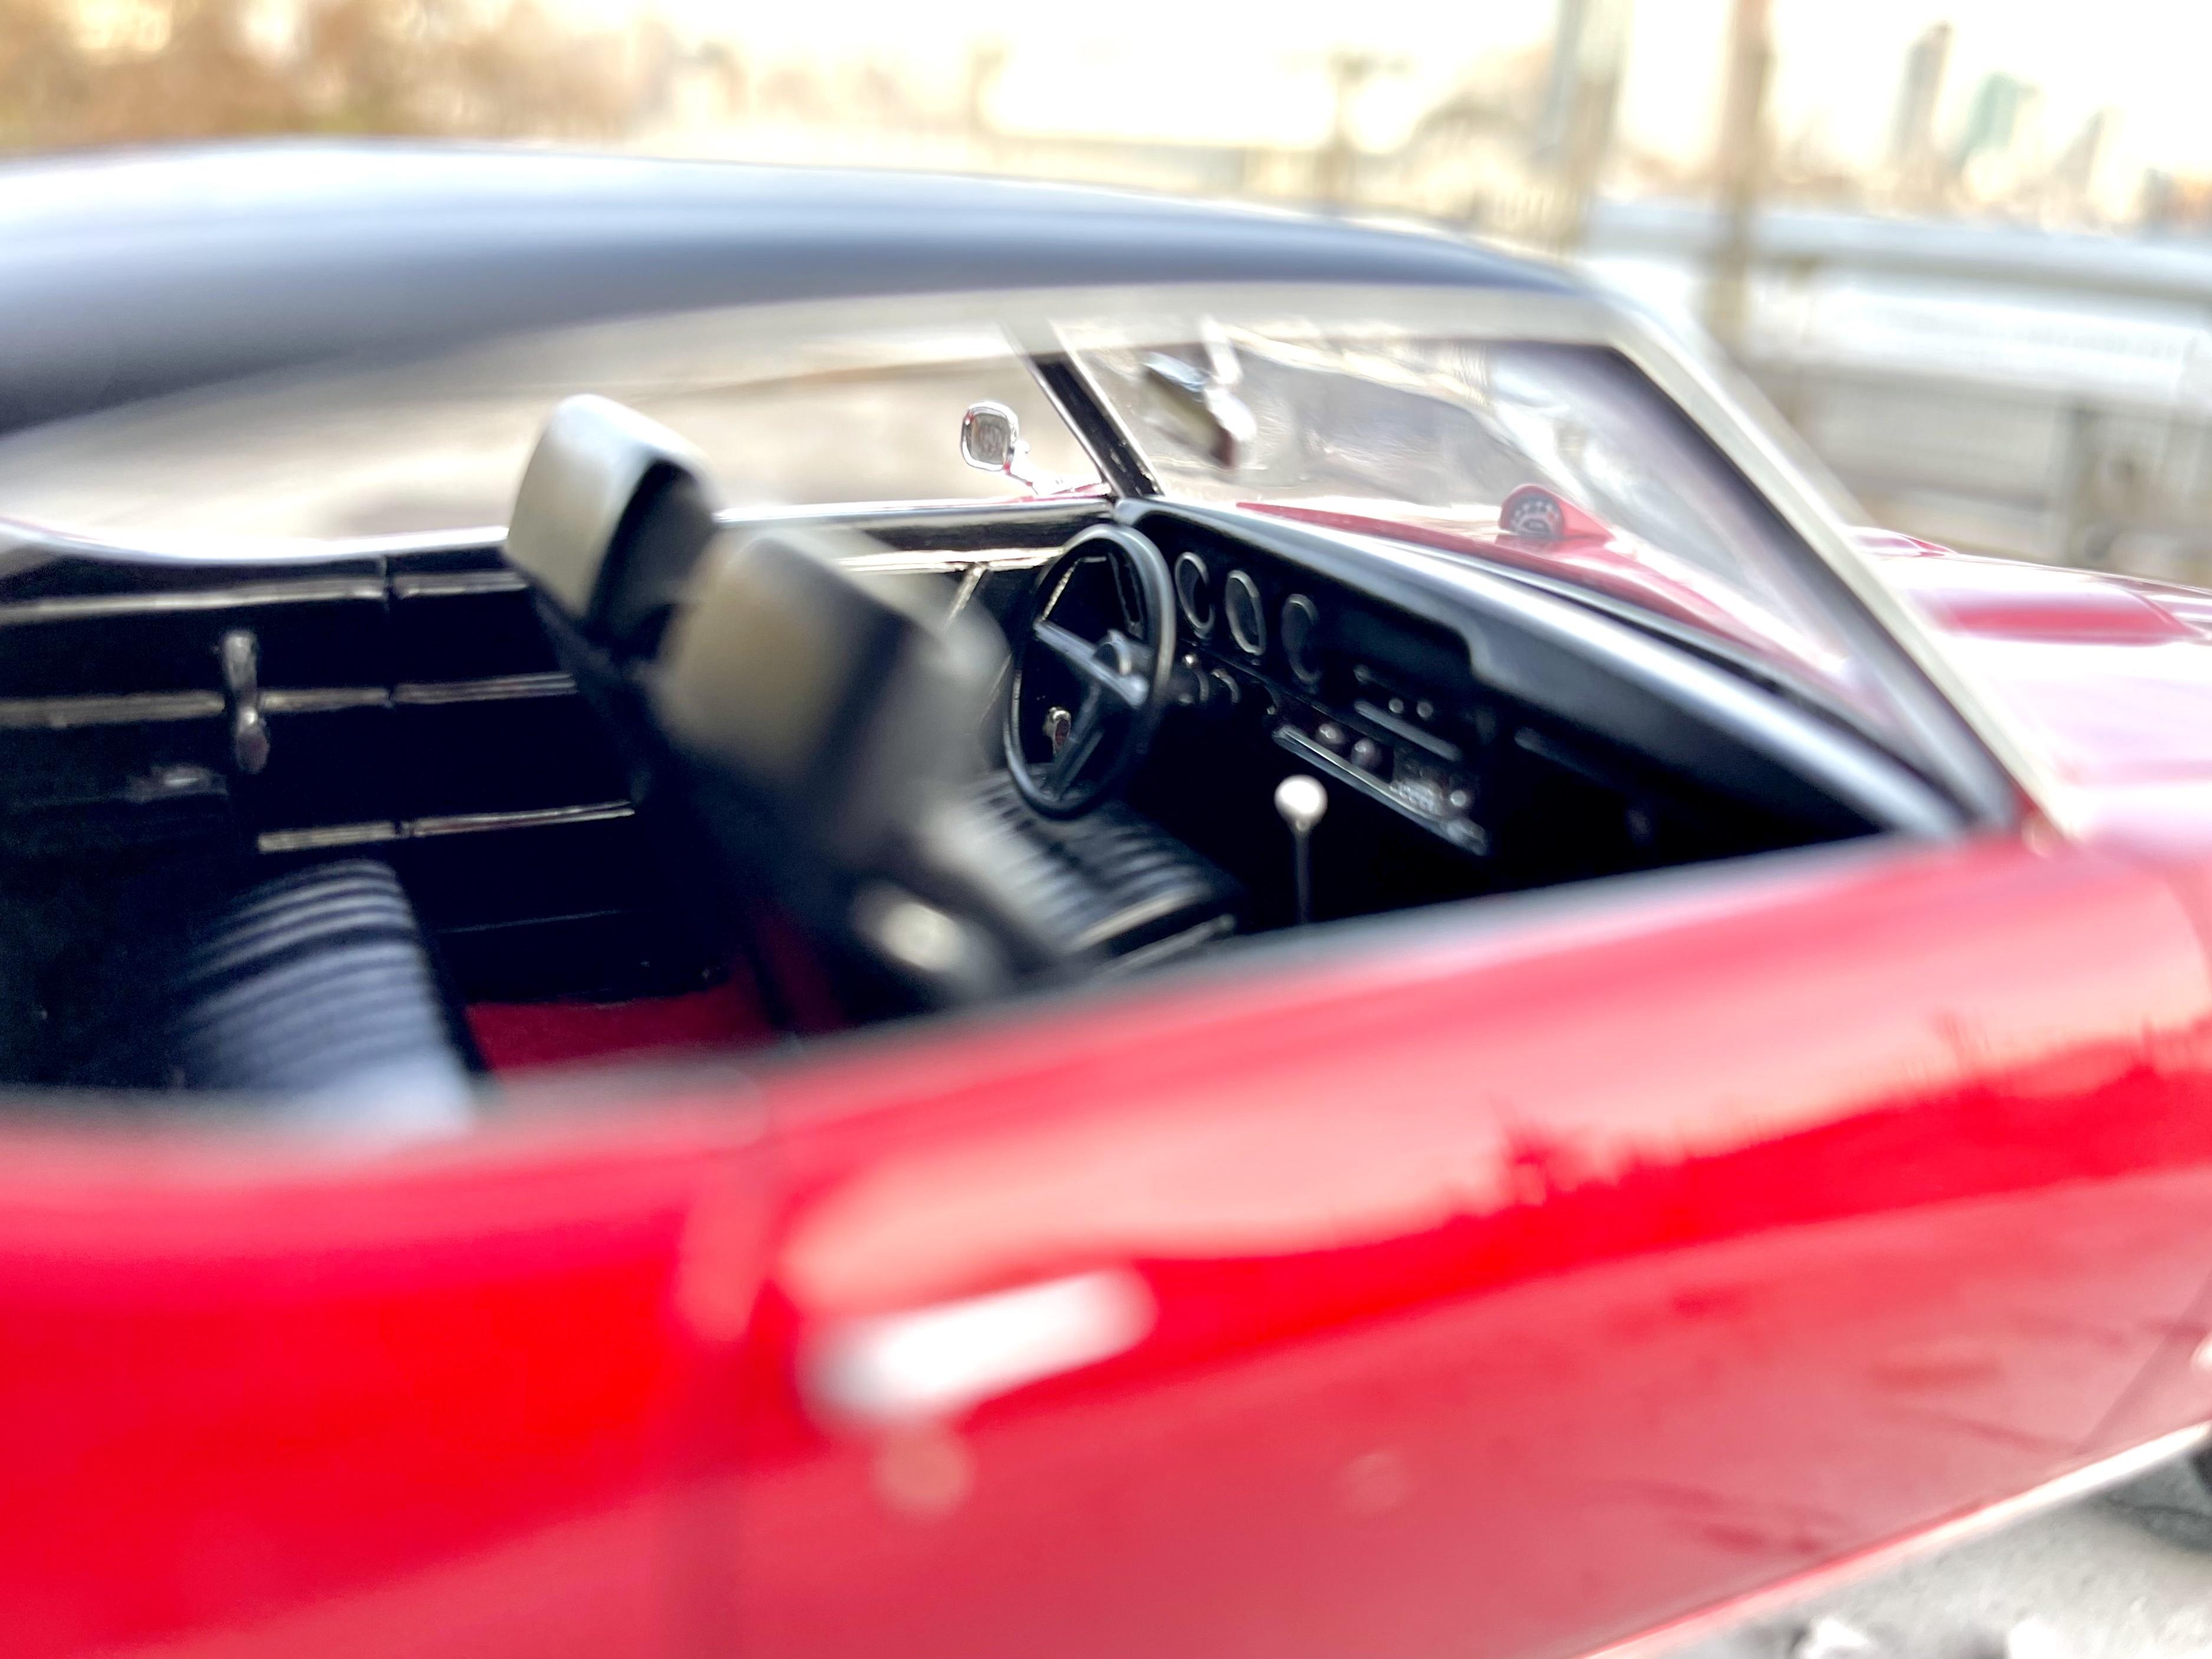
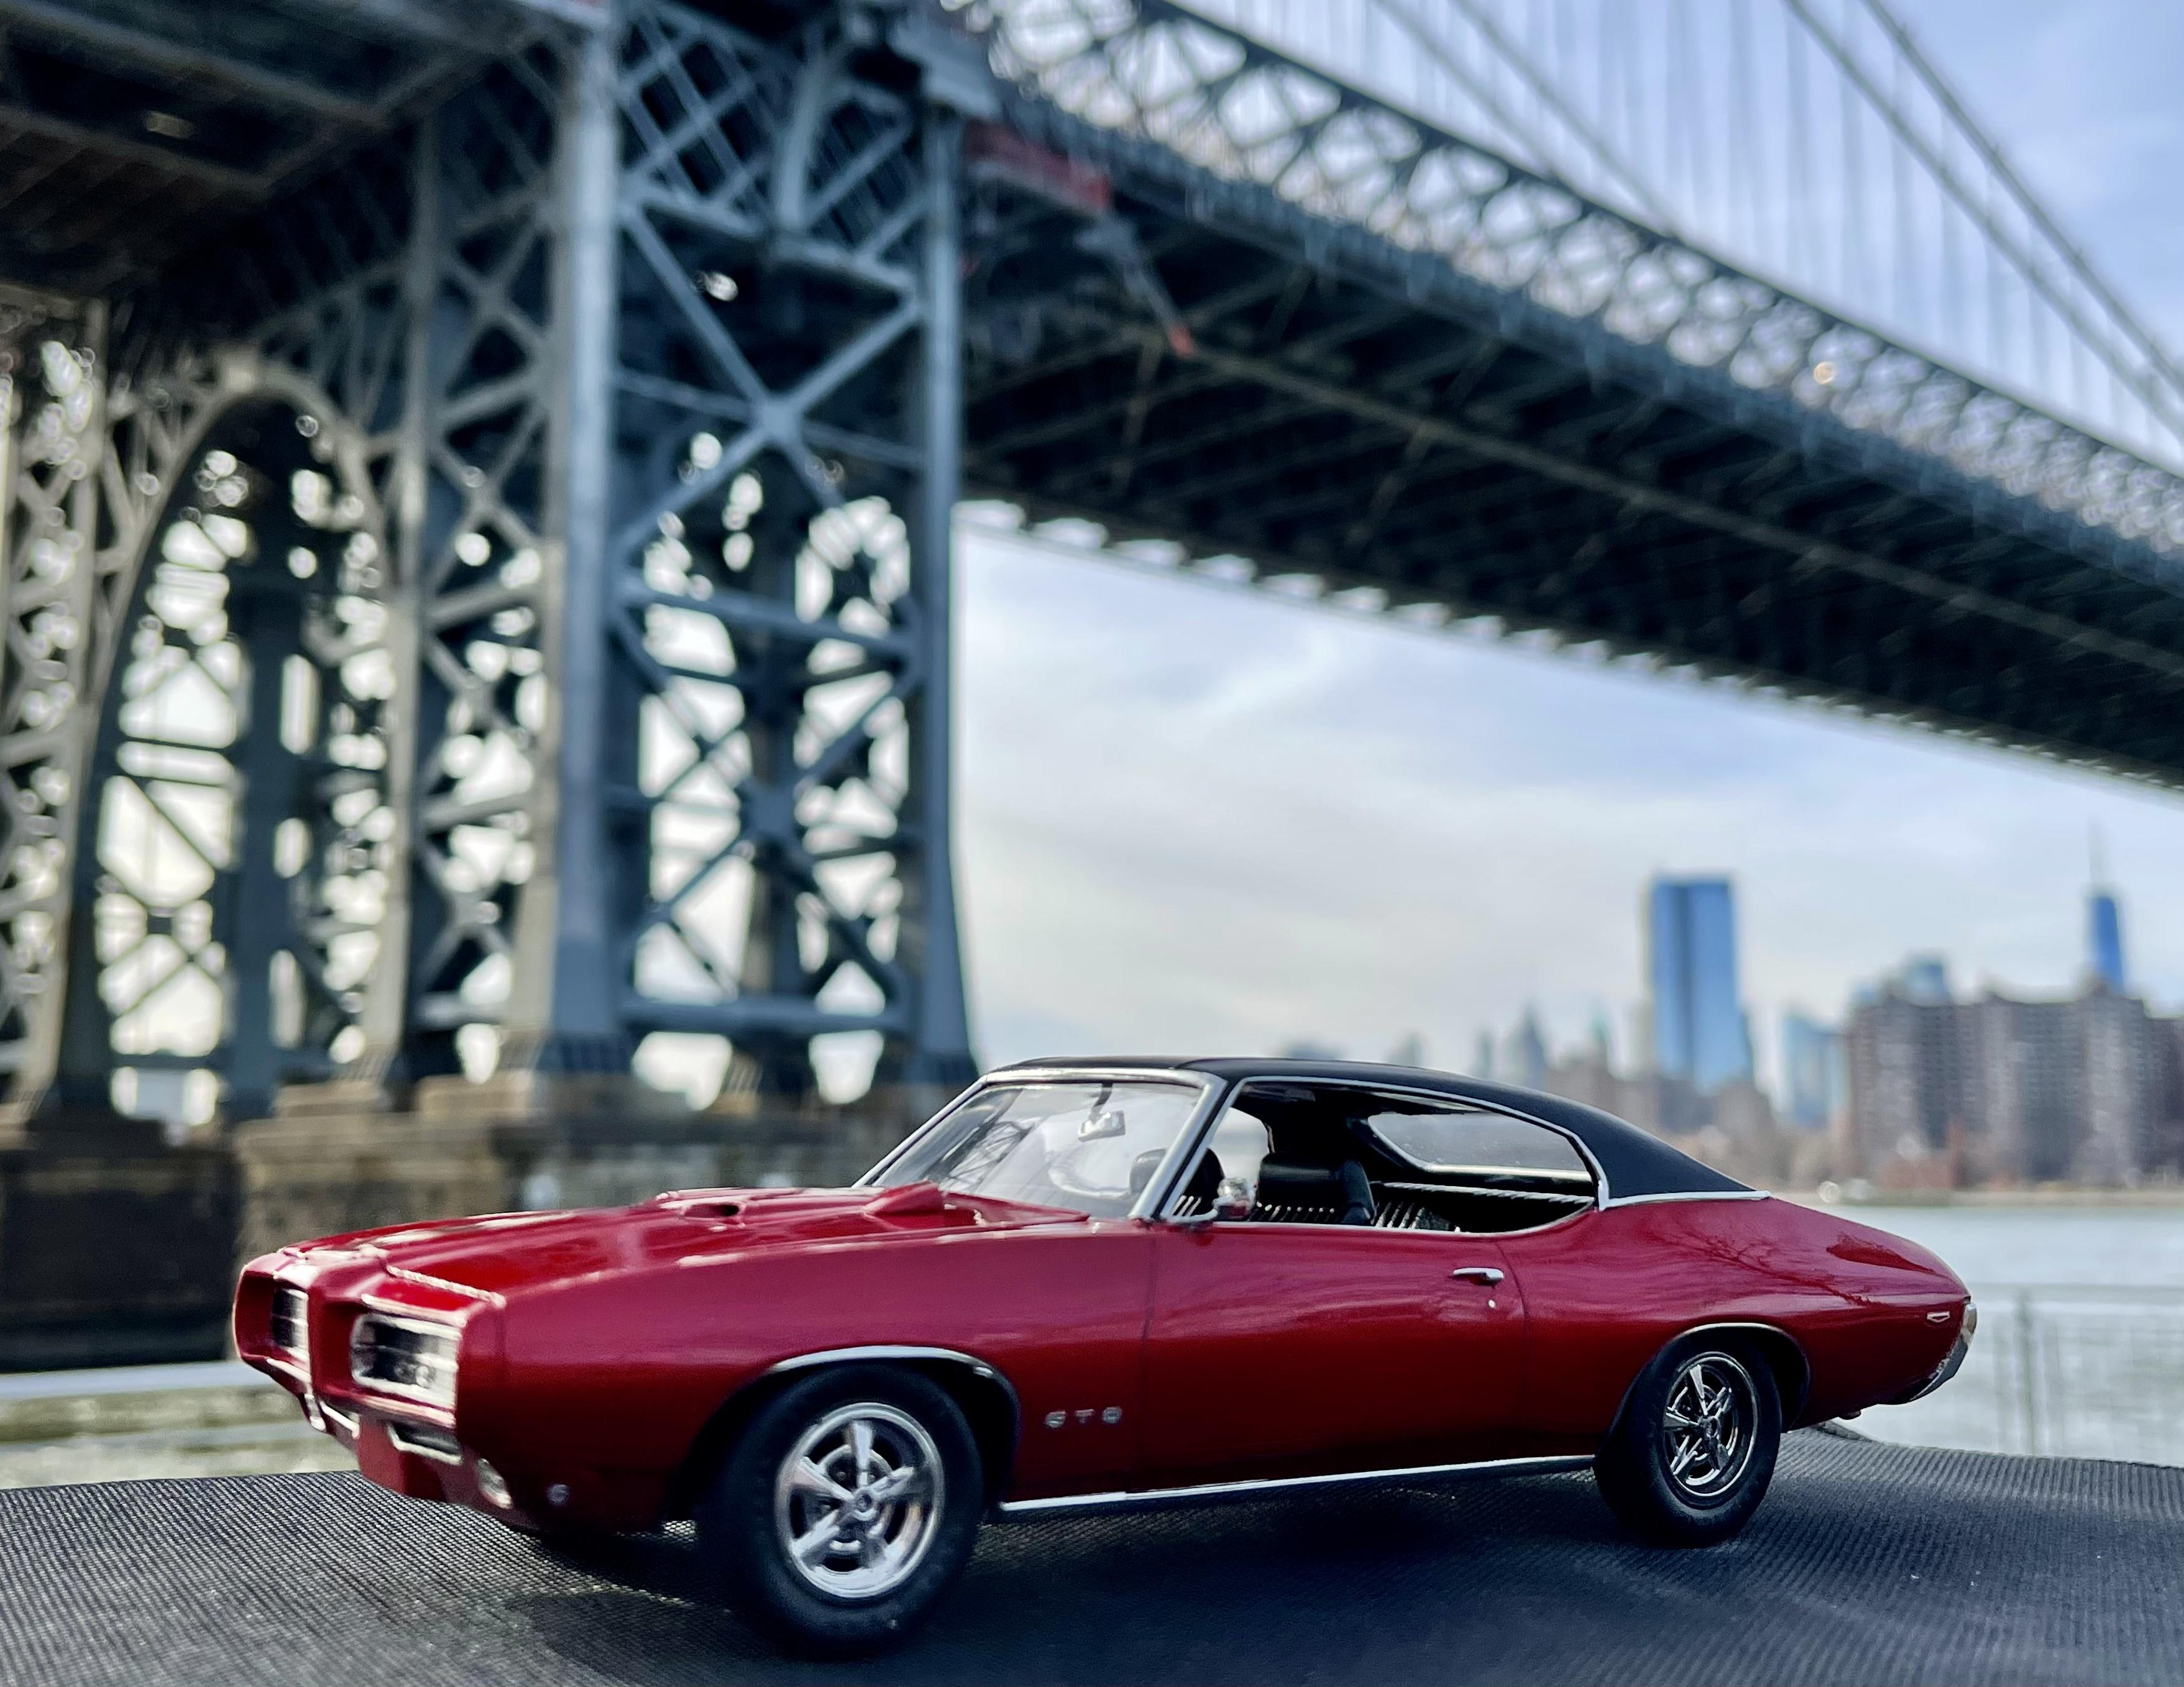
Just finished the ‘69 GTO by Revell/Monogram. I really had fun with this one. It took a lot of work to get the nose to line up flush with the body, but other than that there were no real issues. The kit was pretty basic so I had to make a few small tweaks/additions (engine bay, door handles, mirrors, tail lights, dash bezels, gauge faces, side reflectors, etc.) It was my first “candy” paint job and I really like how it added depth and realism to the little car - it almost changes color depending on the light. Tamiya spray cans - 2 coats grey primer, 3 light coats of clear red over two coats of gloss aluminum, wet sanded then cleared with ts-13 and polished out. Will definitely use that combo again. Gonna try it with clear blue next… Foiling the trim tested my patience more than usual but I eventually calmed down and got it done. Had no choice but to do the window and wheel trim with Hasegawa mirror finish since I simply could not get the bmf to stick (may redo it if/when bmf ever sorts out their product - it’s been brutal and almost ruined the build). Ok enough complaining 😜 I want to drive this car!!
-
Started in September 2008 and finally finished up February 2021. AMT 65 Bonneville in Evening orchid. I have some body warp but it is done! Basic black interior, BMF for the trim, Molotow pen for lettering.
-
Here are a few pics of my finished T/A. The WIP can be seen here: MPC 1979 Pontiac Firebird Trans Am - WIP: Model Cars - Model Cars Magazine Forum In that thread I explain why I did what I did and how I got what I got...lol. Thanks for giving my less than stellar model a look!
-
Painted with some auto touch up grey, interior is done with Humbrol reds. I lost interest in this when the decals disintegrated on me. Today I decided I either needed to finish it or toss it, so here it is finished! Box stock except for tires and wheels. Thanks for looking, all comments welcomed. This is my 4th for the year!
-
I thought I would share the WIP on a '79 T/A that I recently built. I am posting this WIP to help out anyone who is thinking of building this kit. Maybe it will help someone. This is the MPC kit that was popped in 2015. I really fell in love with the box art. Yup, I'm a sucker for box art, always have been and probably always will be...?. I have been around plenty long enough to know that what is on the box doesn't always match what is in the box...lol. This kit was a bit of a pig. As they say, a picture is worth a thousand words. Let's take a look. What I started with. The ubiquitous spoon test. In the end, I got carried away and put too many coats on the body and it was a little darker than I wanted. A picture of the beautiful decals. They really are nice! It goes downhill from here...lol. Here is how the bumpers and spoiler are attached to the sprue. Why?!?! Here is an example of what you will find in the kit. At least this is what I had in mine. I started work on the body. I attached the front and rear bumpers. They did not fit. Not. At. All. I compromise a little on the fit and still had to add shims to fill in the massive gaps. Pictures are from both sides of the rear end.
-
.
-
 From a Shop Manual I purchased at a swap meet.
-
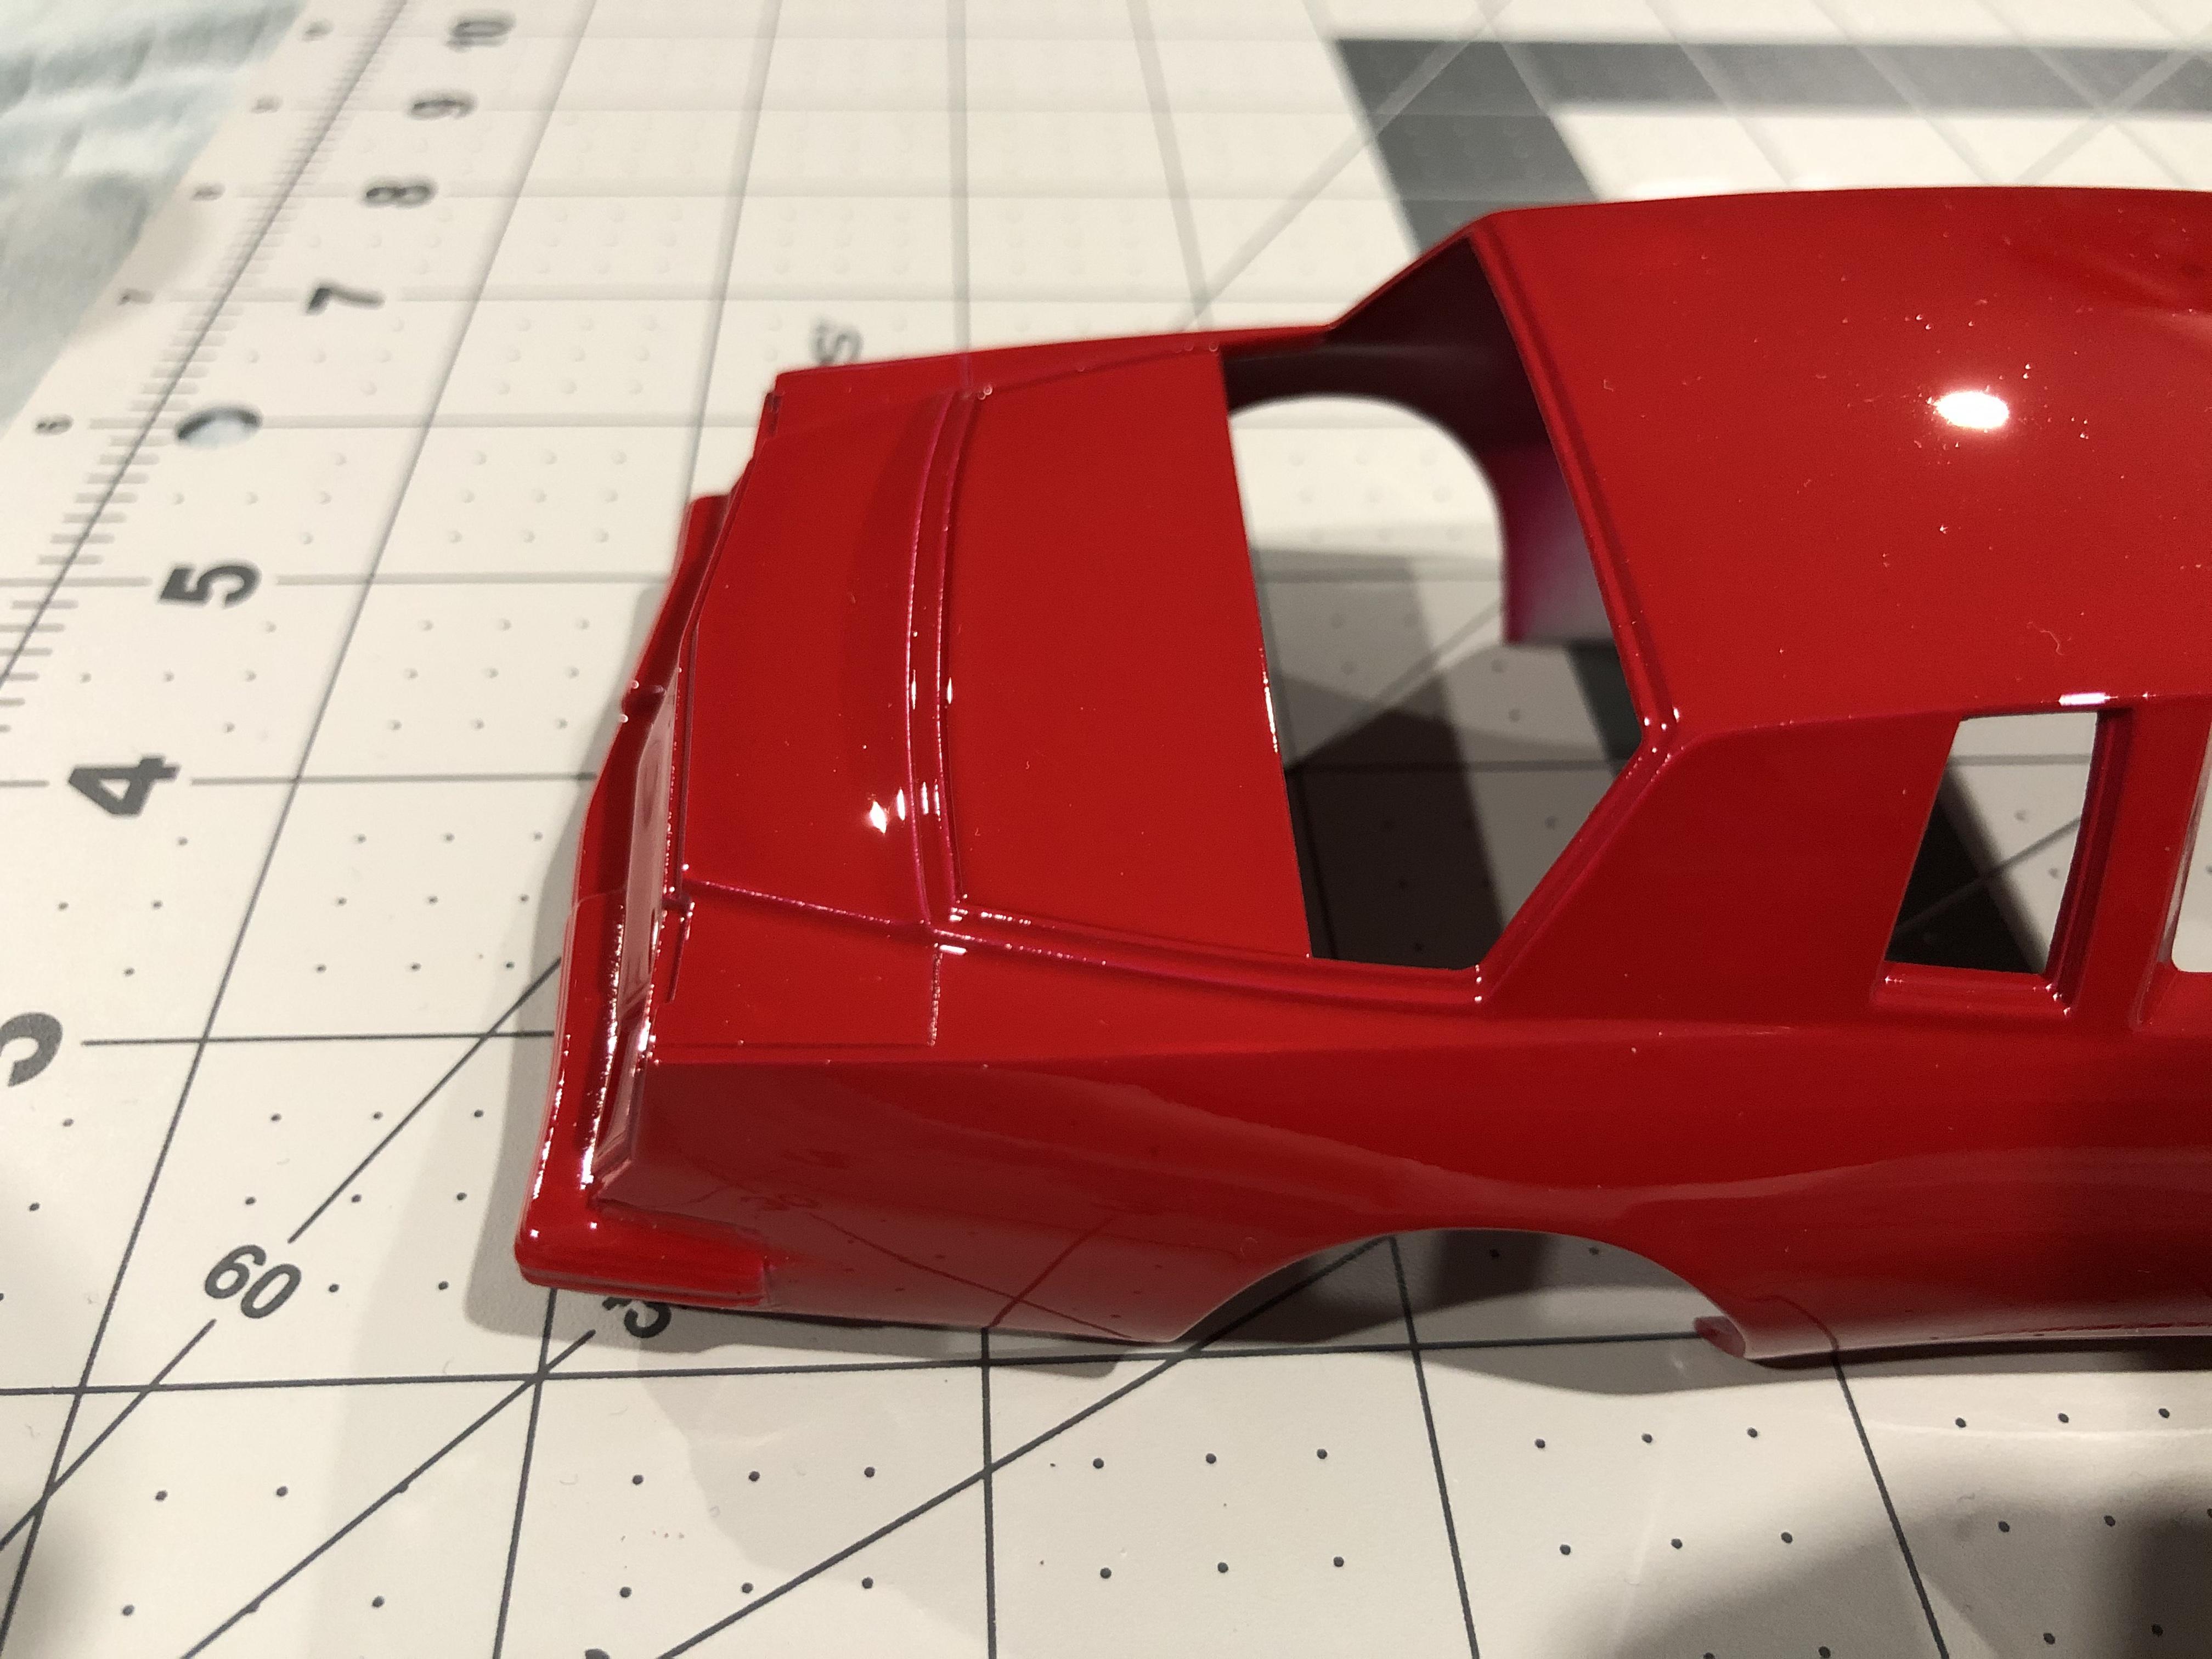
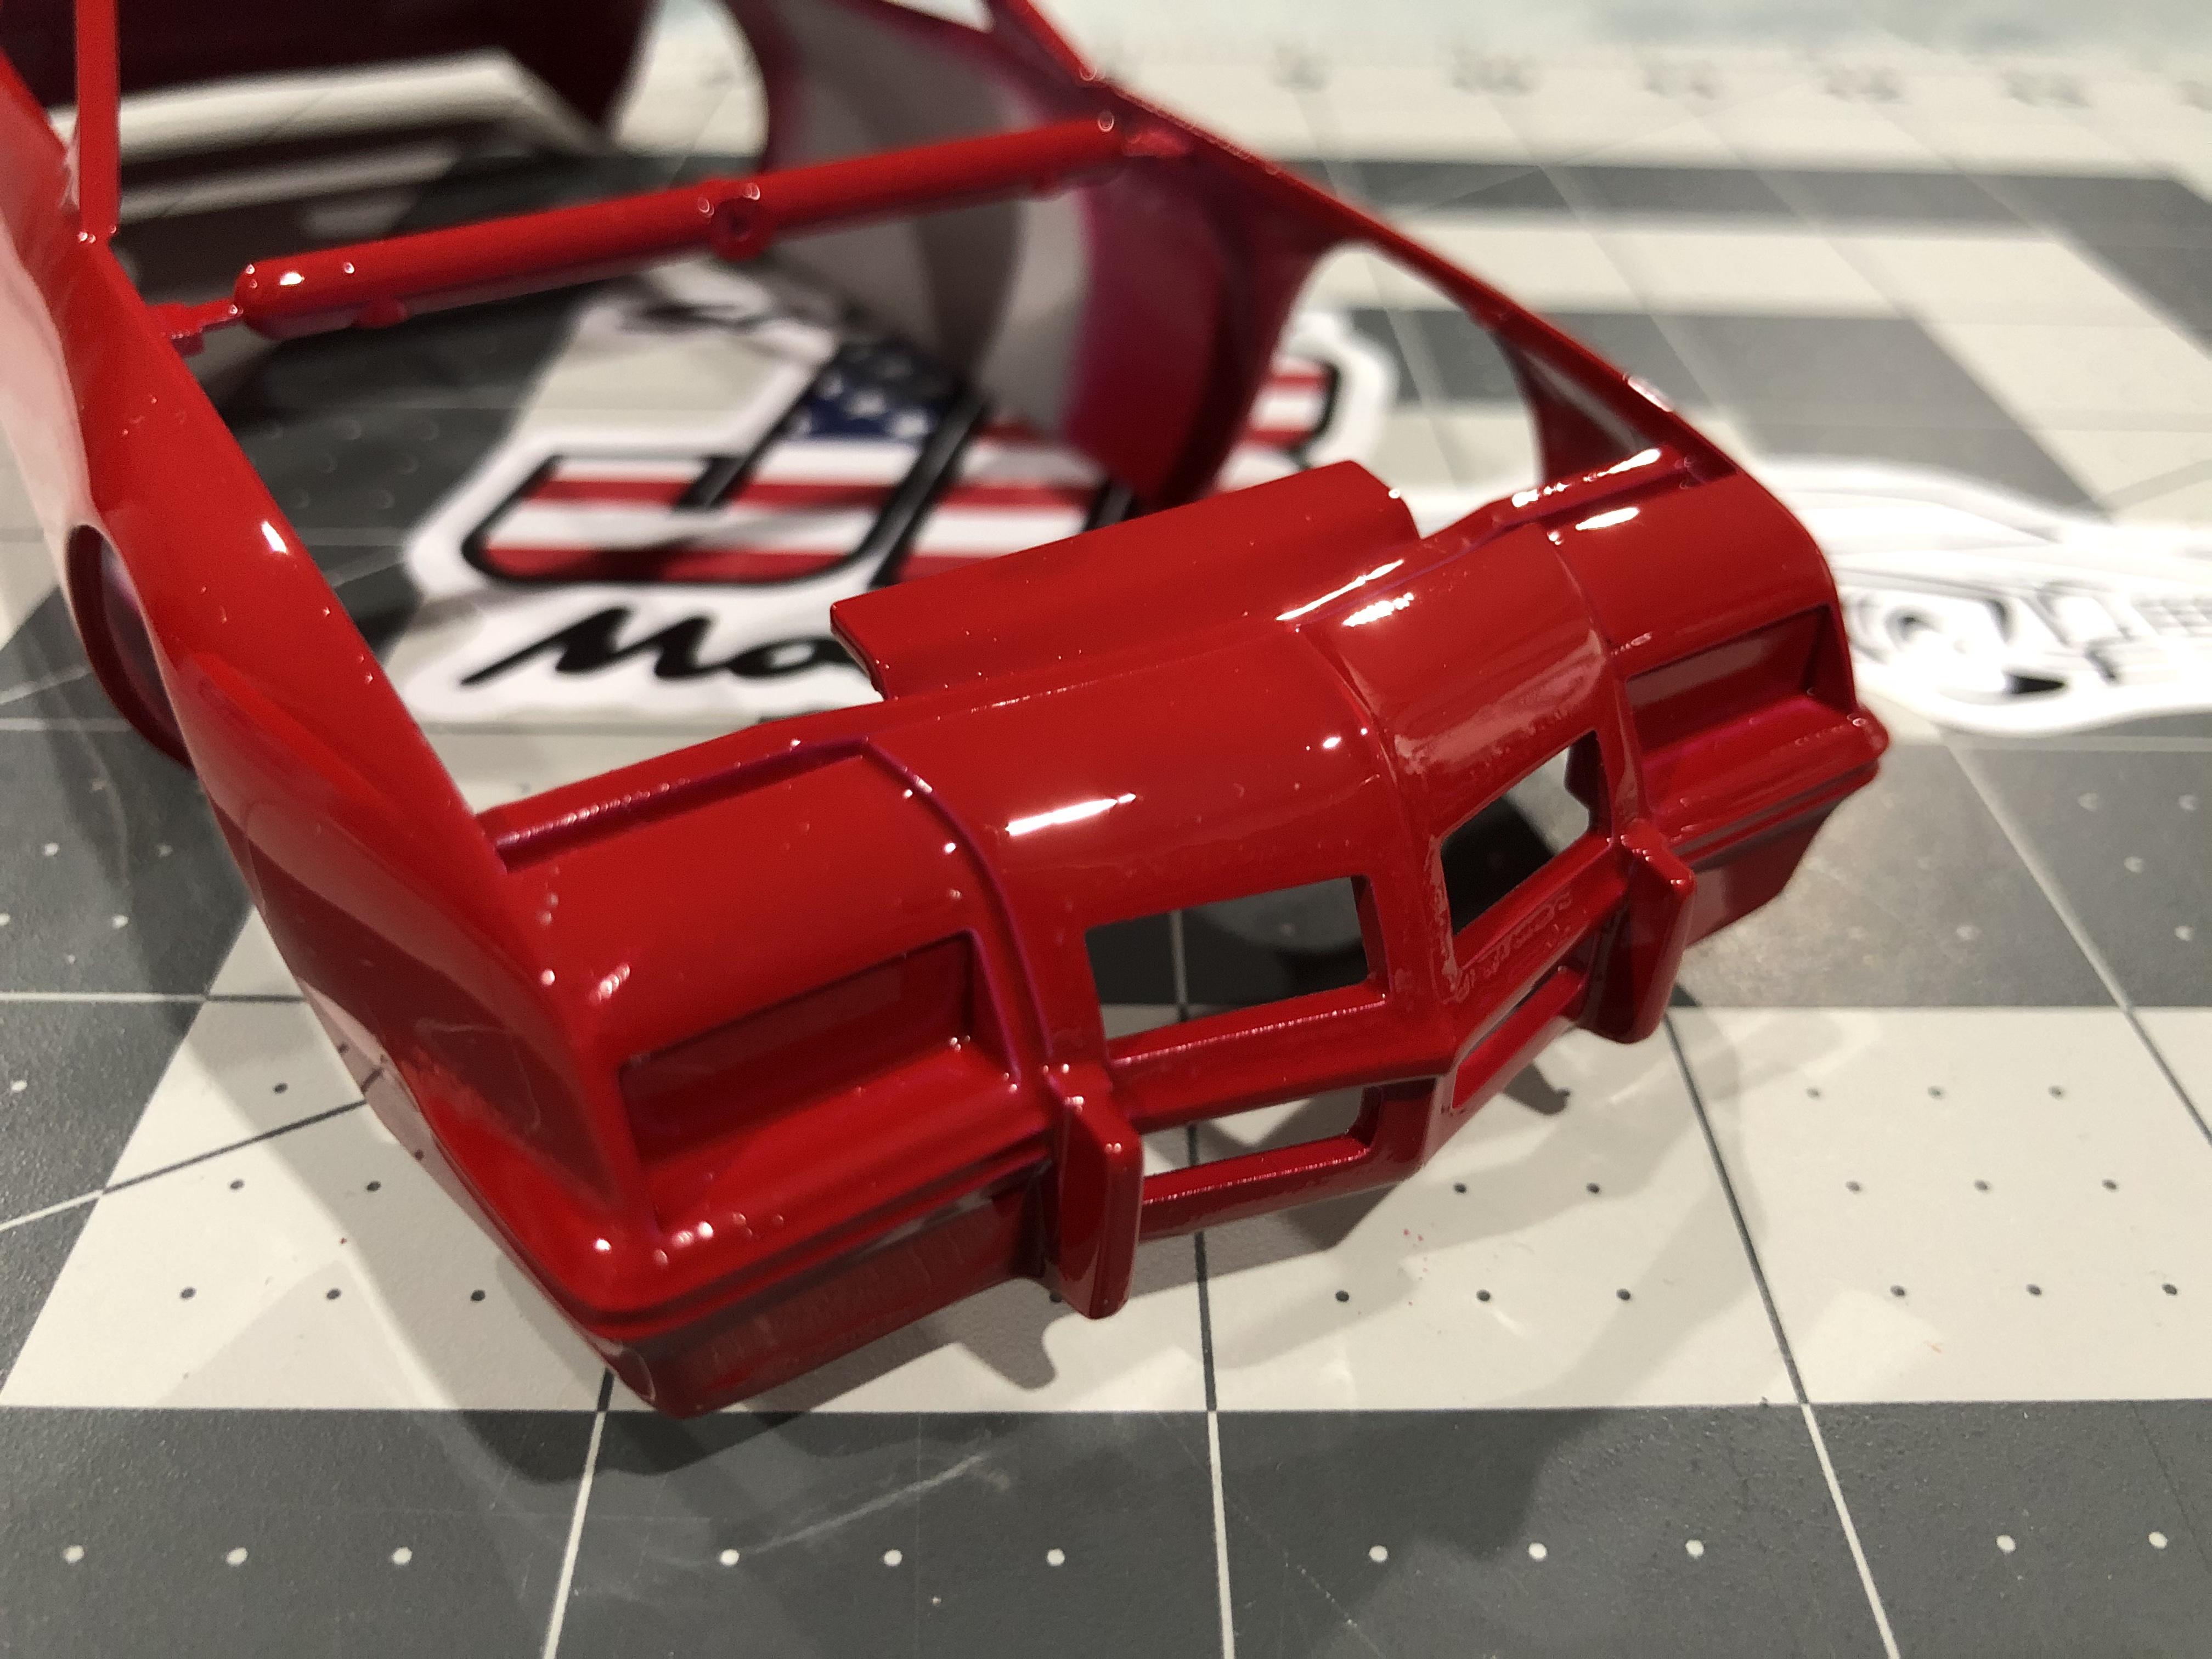
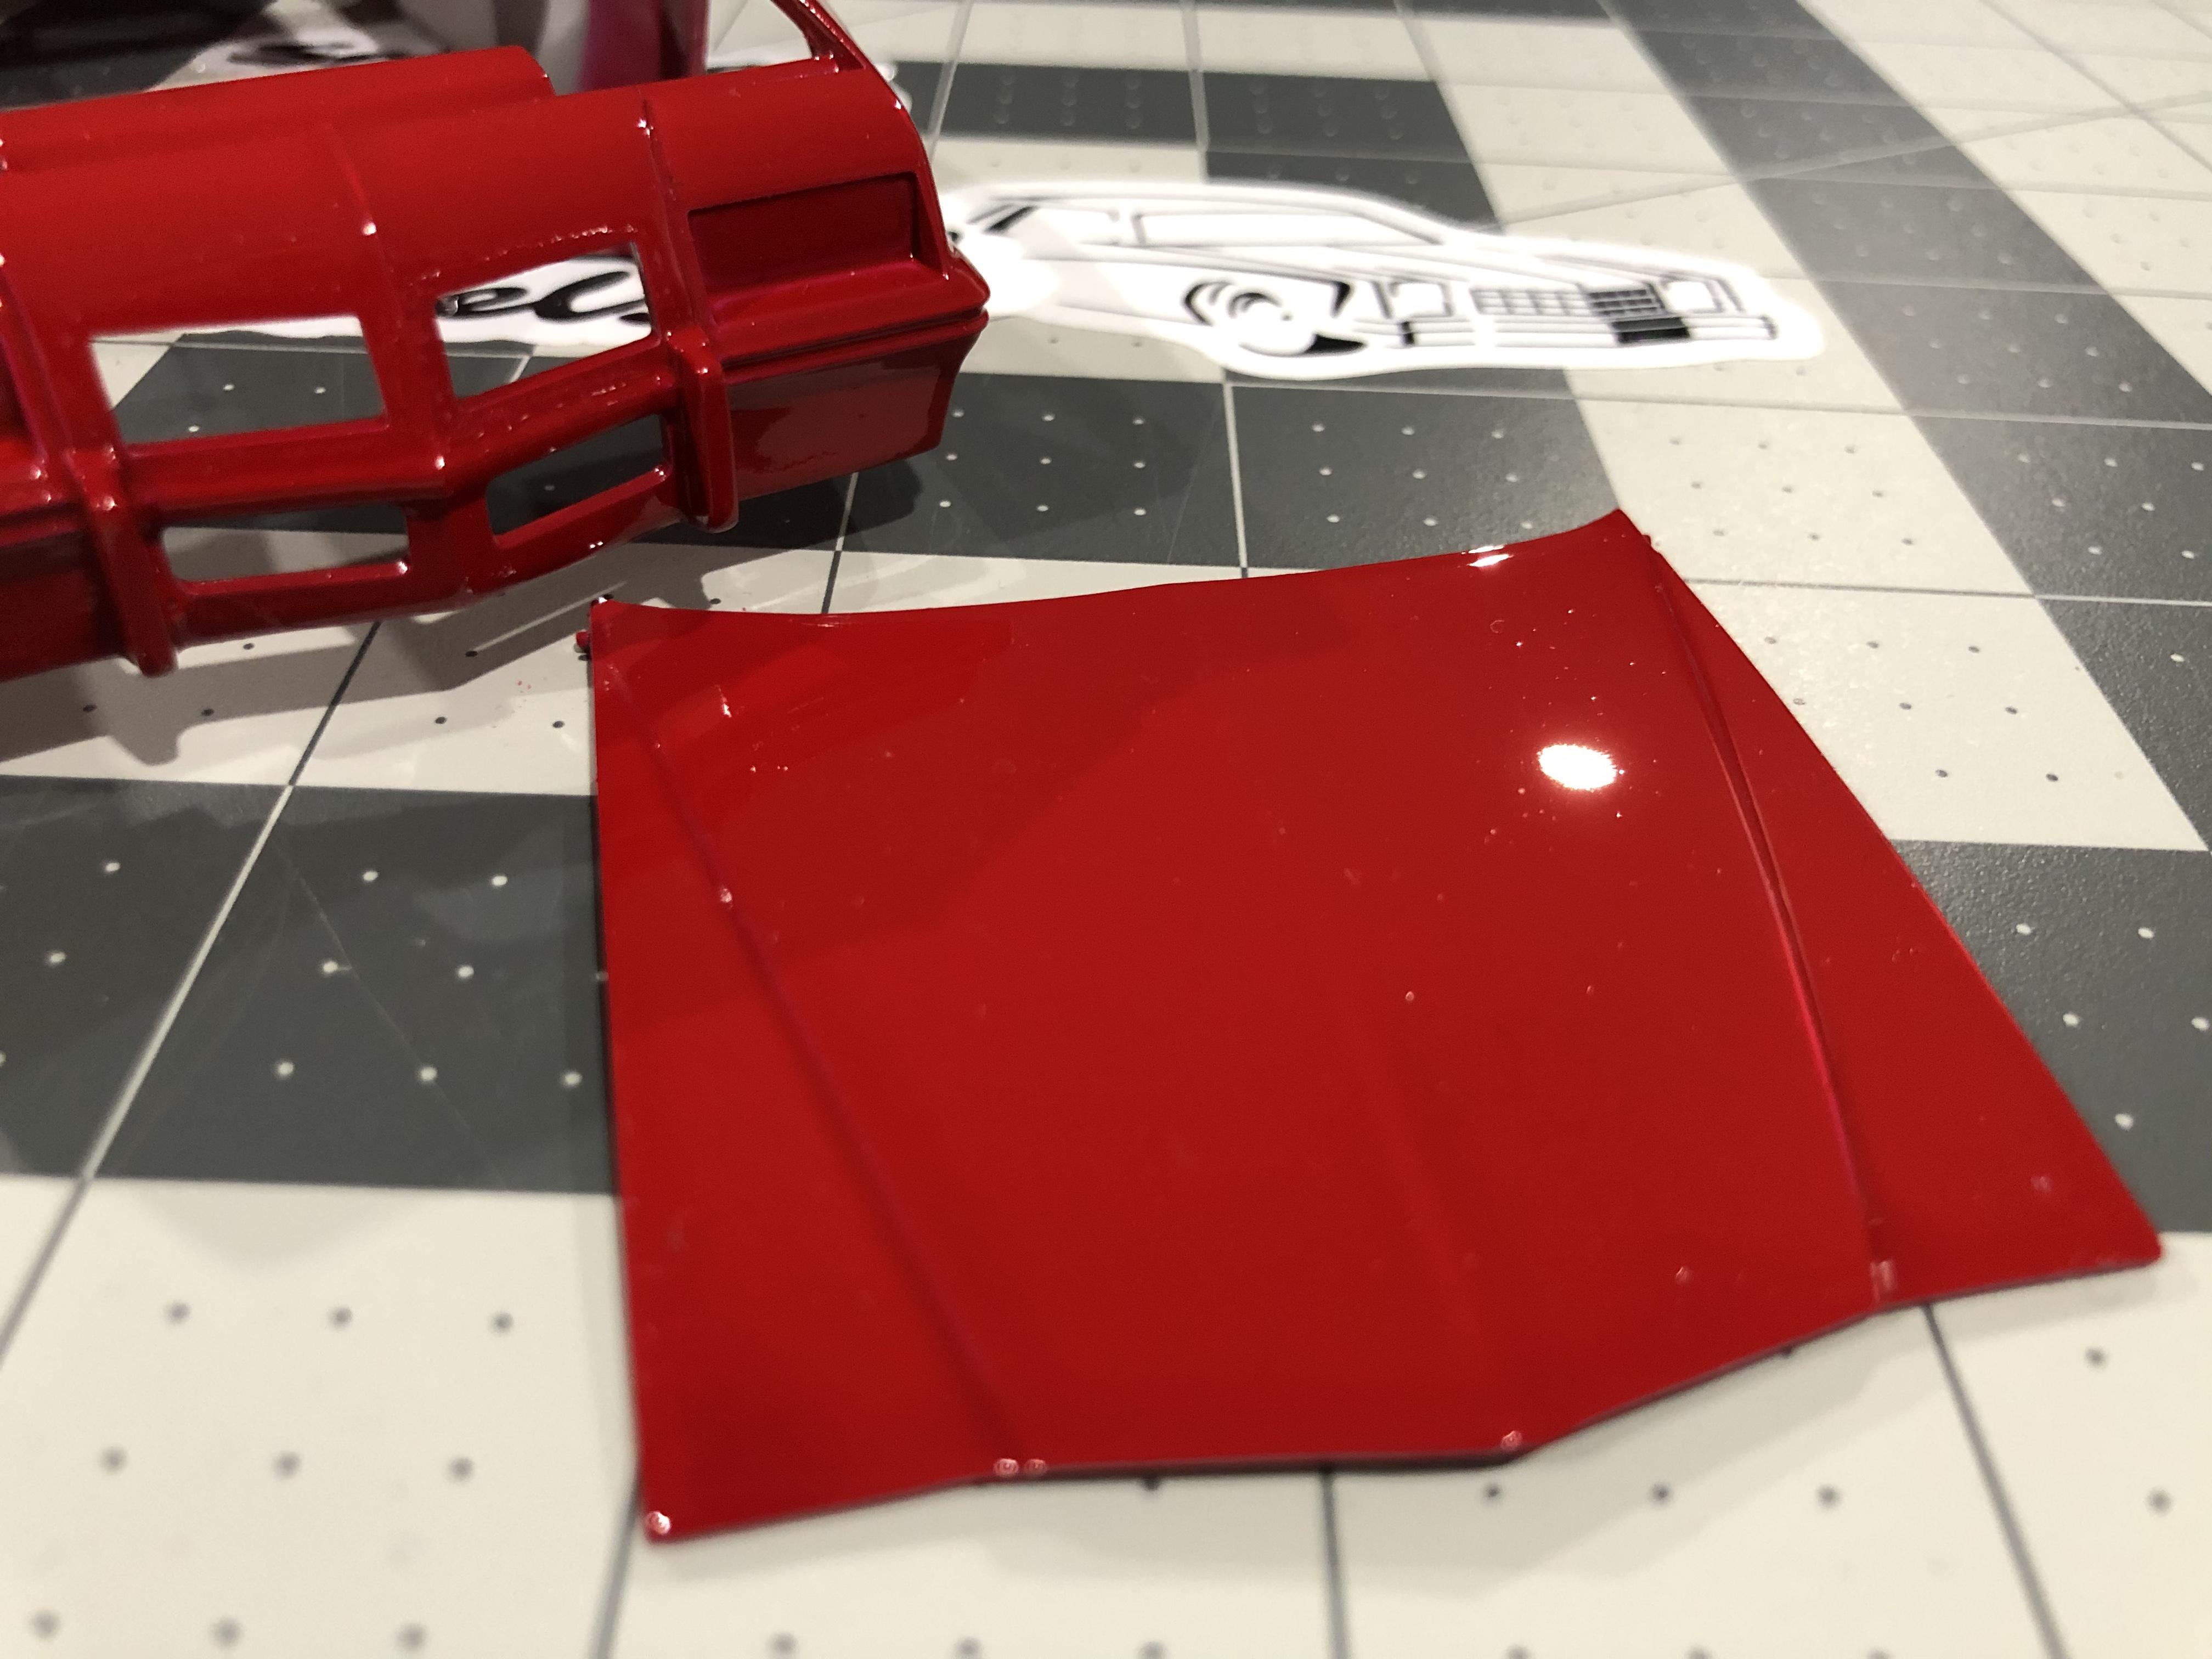
So this morning I broke open a can of Tamiya TS-36 fluorescent red. I laid a light coat down over gray primer. It looked purple. (As seen here on the paint stand) I had warmed up the can, so it went on real light. I’ll let that flash and then started putting on slightly heavier coats. Something did not seem right. The more paint I put on, the more it went from purple to blood red. I was hoping for Richard Petty’s vermilion red. Not quite. But it came out too nice to take the paint off and start over. As luck would have it I have the Hawaiian punch decals. So I guess this will be the Hawaiian punch car now. I’m going to have to do some testing on spoons to get this color situation straightened out. Is it possible that the wrong color is in the can? Has this happen to anyone? Your thoughts are appreciated thank you!
-
I've been wanting a 70 GTO for awhile, but there aren't any modern kits, and the vintage kits are way to pricey. The other day I saw a conversion kit for the 72 MPC GTO and decided to give it a try based on my previous experience with the Challenger conversions. IMPORTANT DISCLAIMER: DO NOT ATTEMPT UNLESS YOU ARE AT PRO LEVEL! So, with that being said; this kit and build was a nightmare. First off the conversion was way over molded. The hood alone was a 1/4 in thick. There was a lot of sanding...........so much sanding. I never did get it sanded down. I ended up doing some cutting and gluing the hood to the body. Irritation number two, the MPC kit front end is attached to the body. So I had to cut the front end off and sand some more, YAY! So, I get it the way I think it would be good. I go to see how the new front end will look once put on and..............The hood is too long. Yay, more sanding, just what I wanted. So, now I get it good, and I go to glue the front end on. There's now a gap because it doesn't want to glue all the way down. Great! A lot of cursing later and I finally get it some what looking....... OK. As a previous poster commented on their build; the rear end on the MPC kit has a fit issue. I tried to get it looking good, but it was pretty hard. I also hate that the MPC kit is molded in orange. It's a pretty bad, basic kit. There's also a problem with the pipes. They hang down way too far. Gotta glue them to the body later. My last problem was the stripes. They are Keith Marks and look good. However, they are not one piece. Yeah, I had to put on a strip, let it set, and put another strip over it. What could go wrong? A lot. Had one double over on itself and it's also hard to line them up.. Over all though, it looks passable for my collection. SAM_0078 by Eric Lucas, on Flickr SAM_0079 by Eric Lucas, on Flickr SAM_0080 by Eric Lucas, on Flickr SAM_0081 by Eric Lucas, on Flickr
-
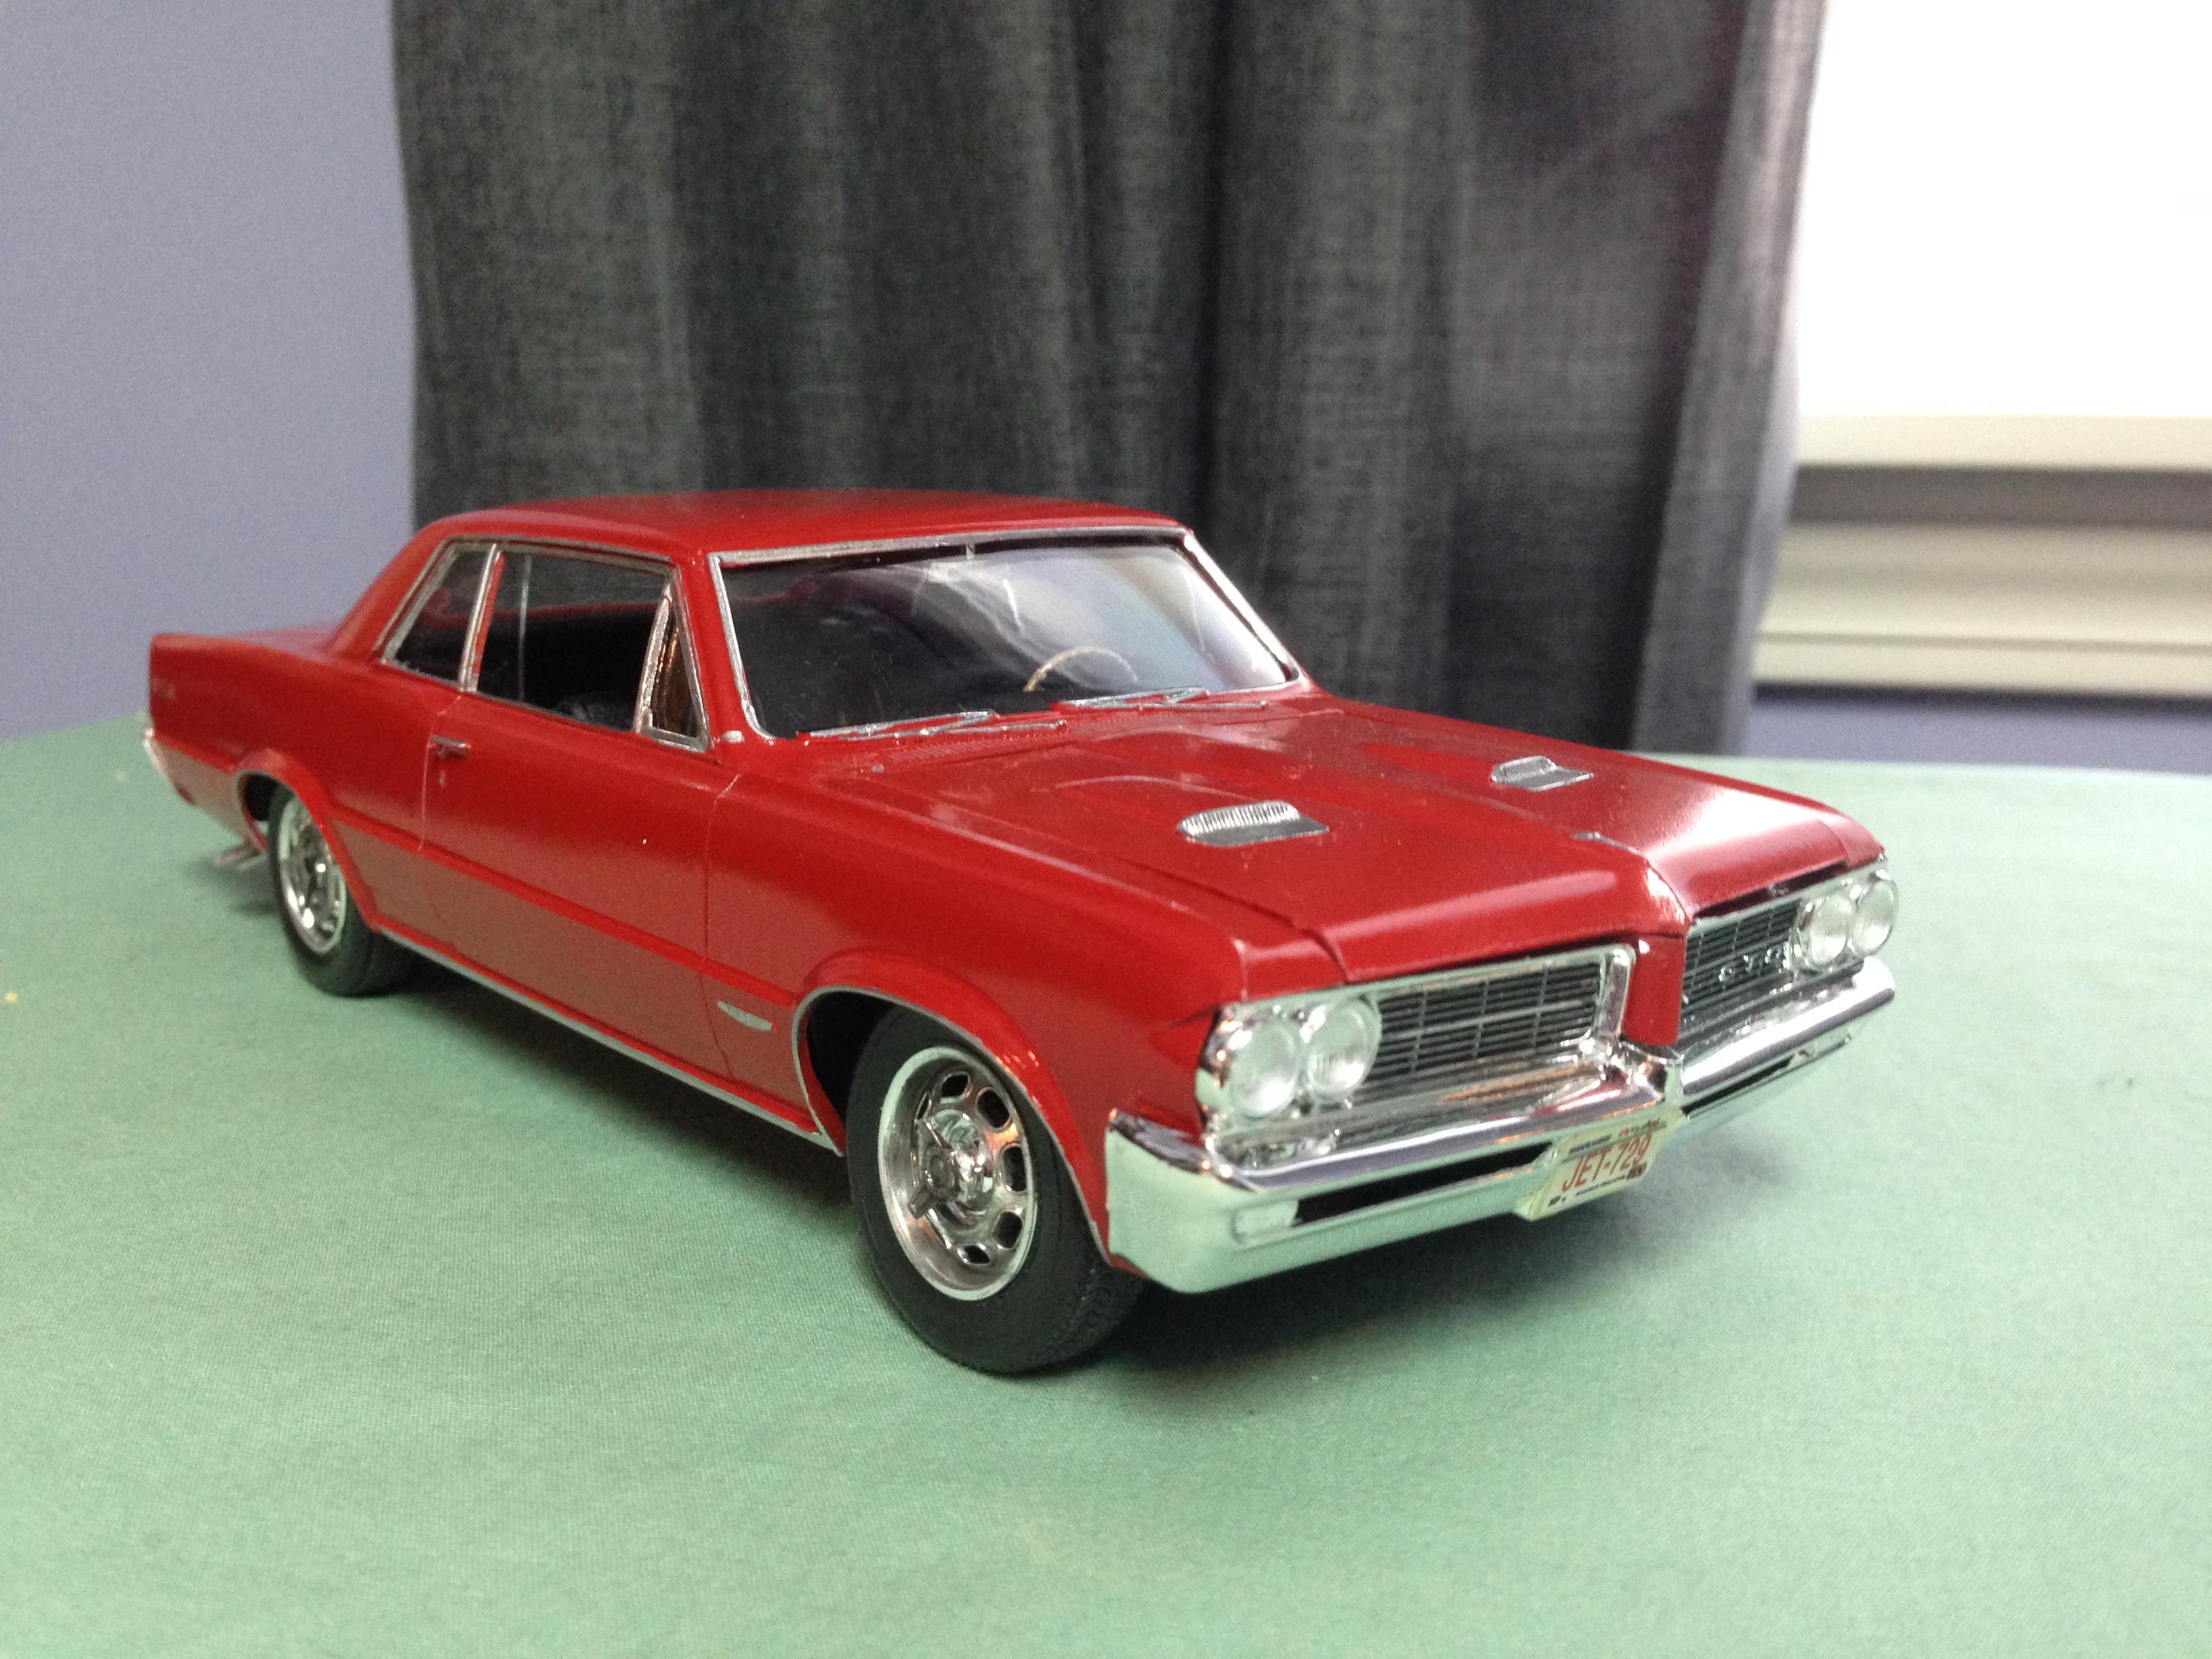
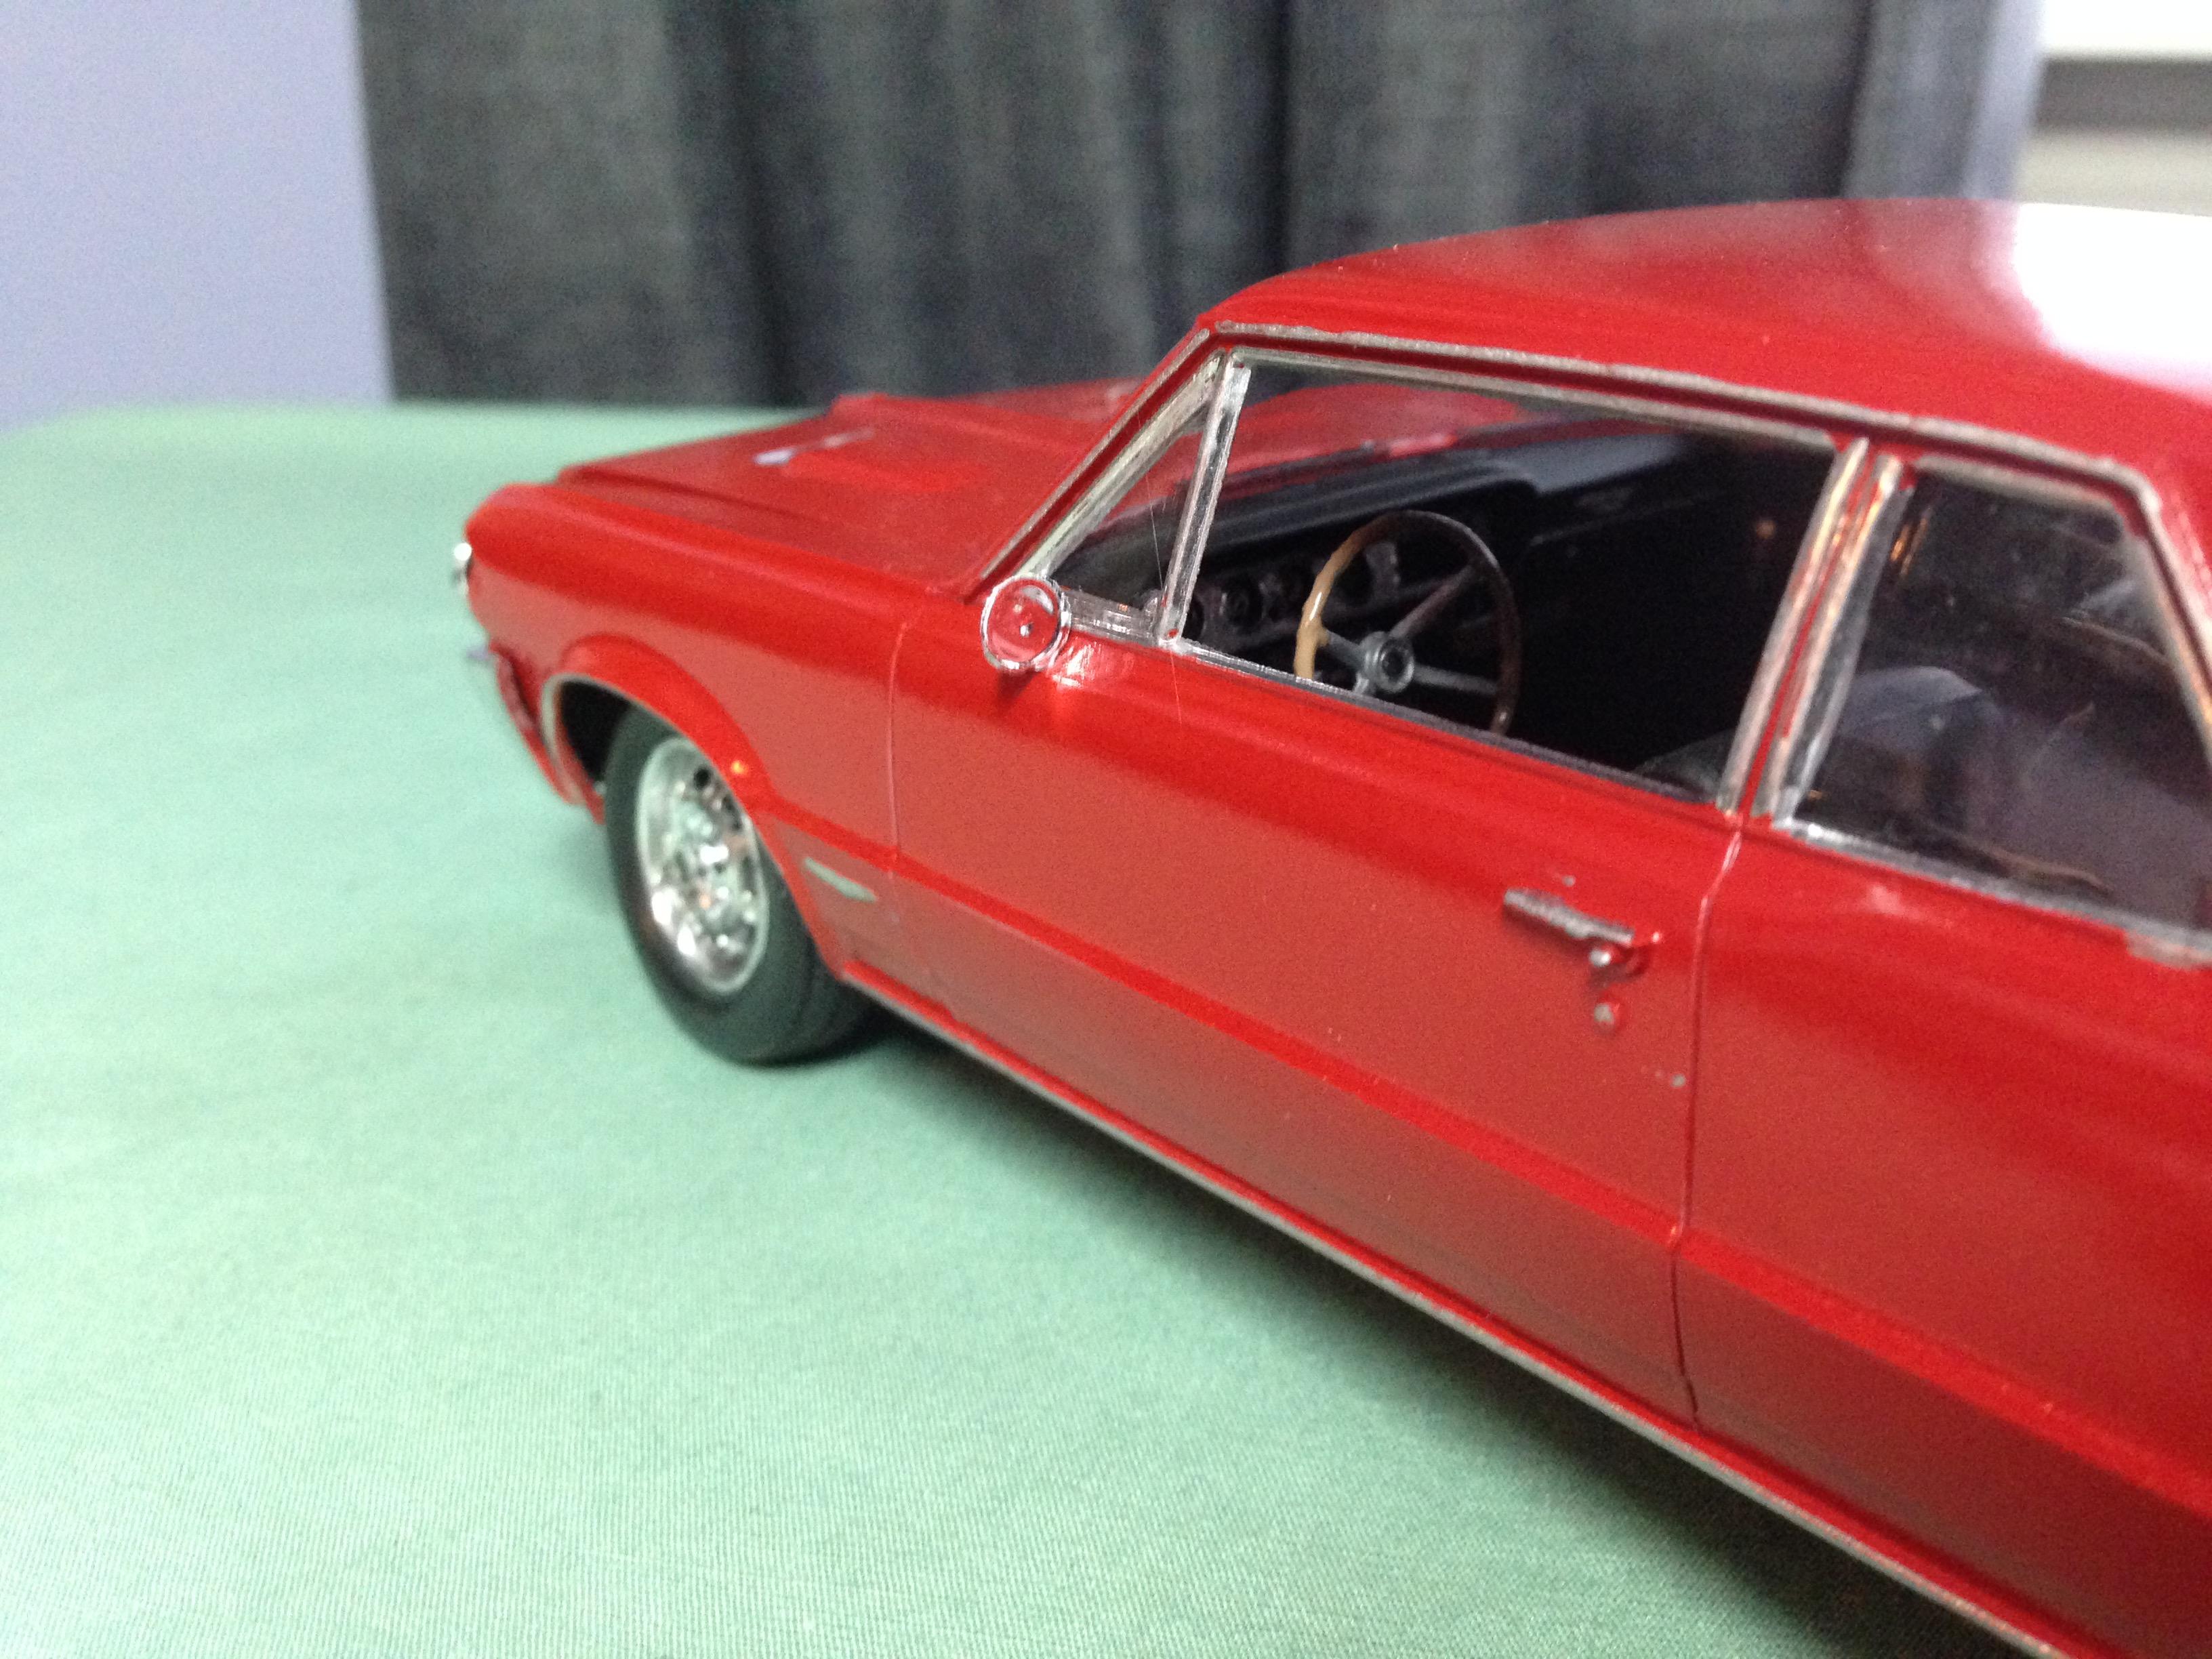
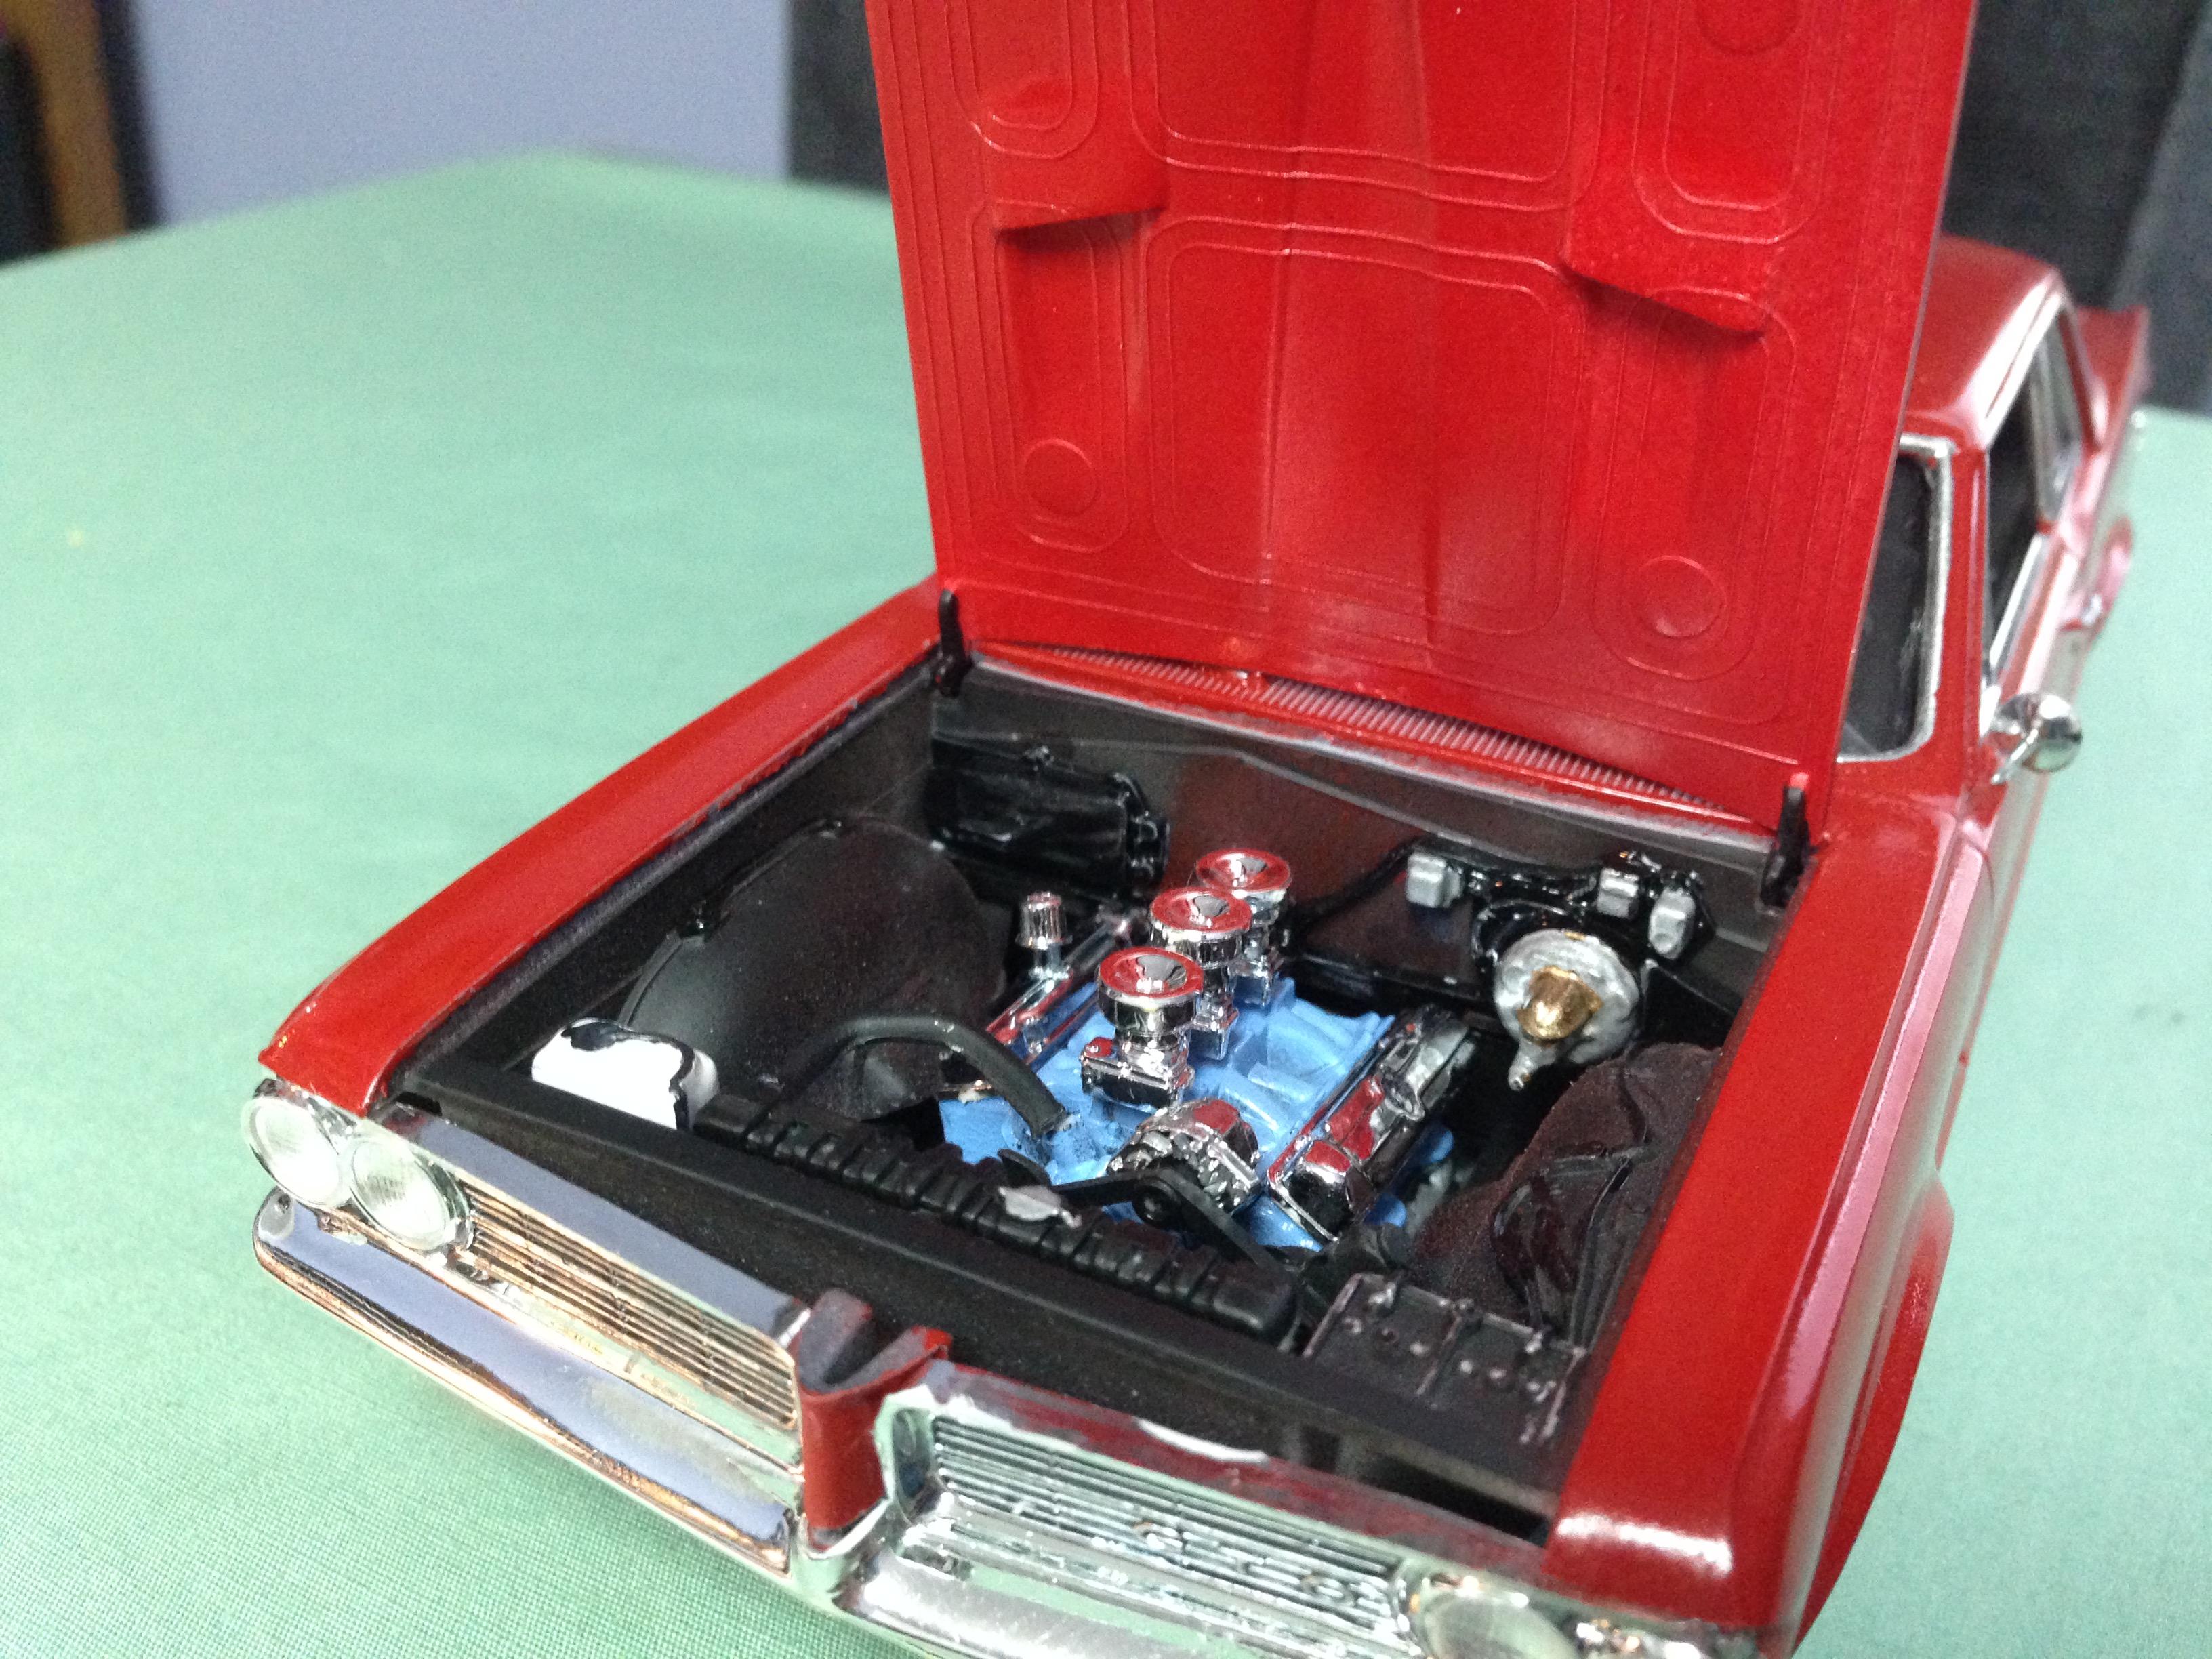
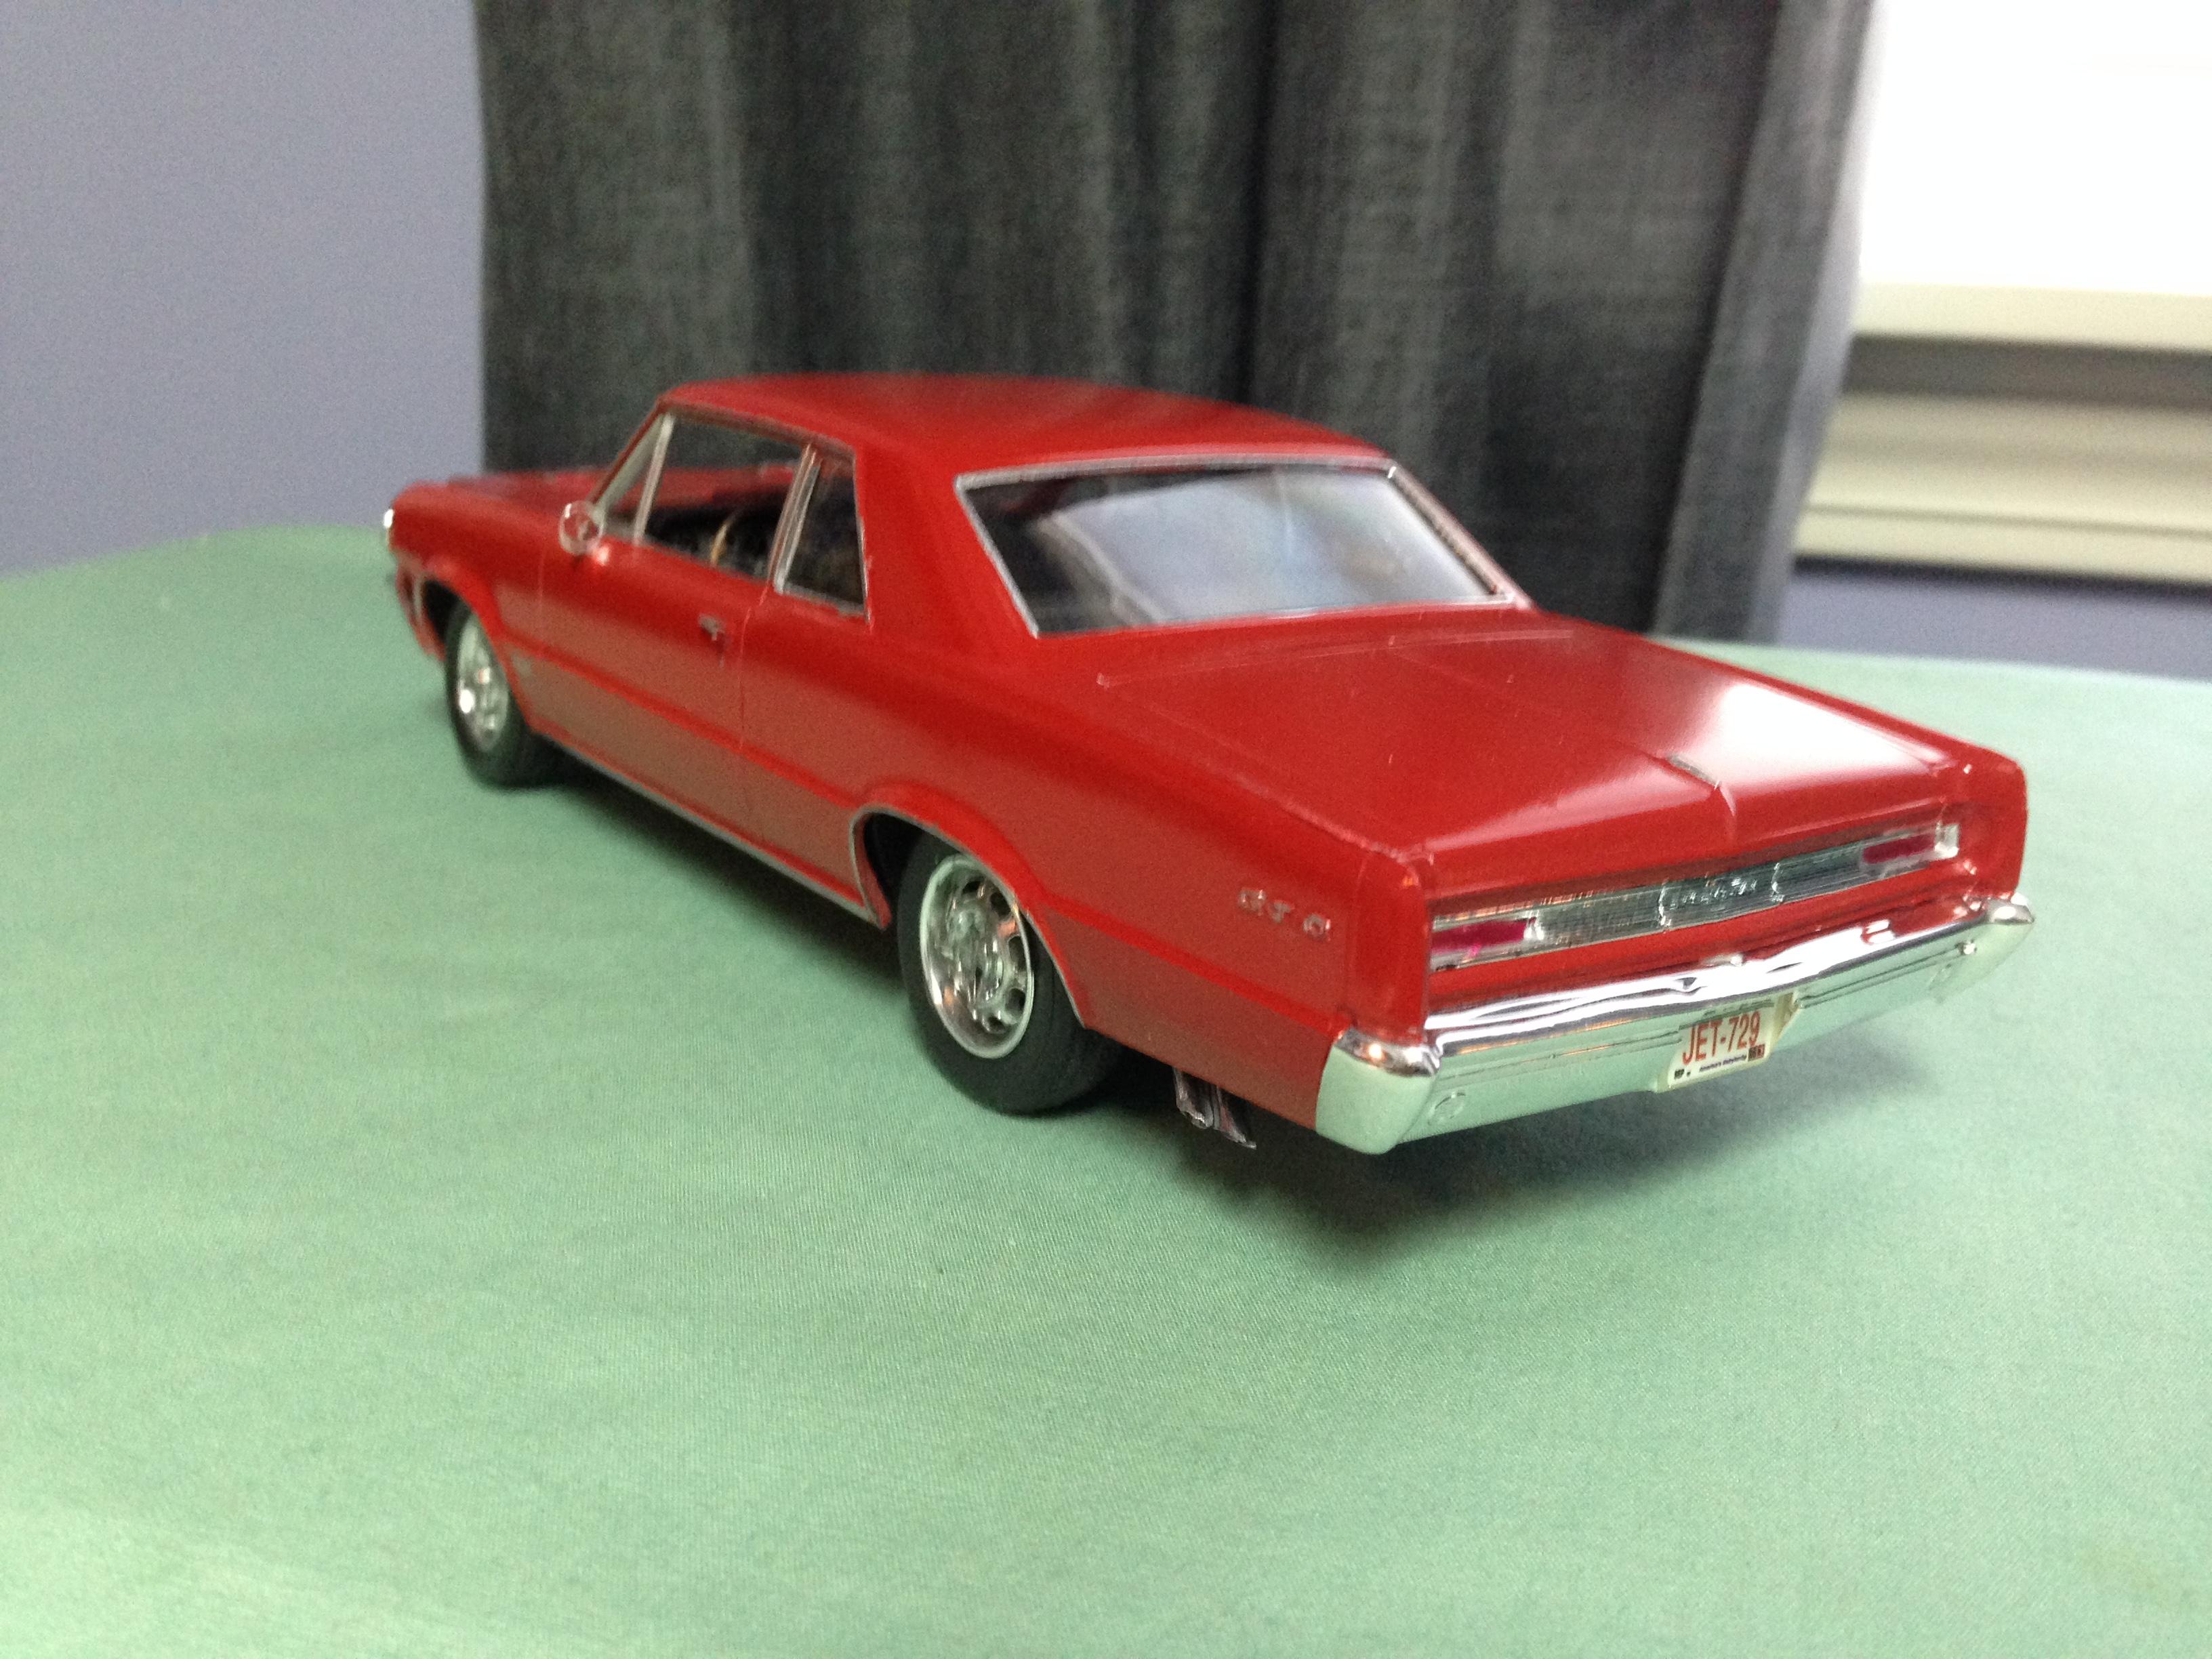
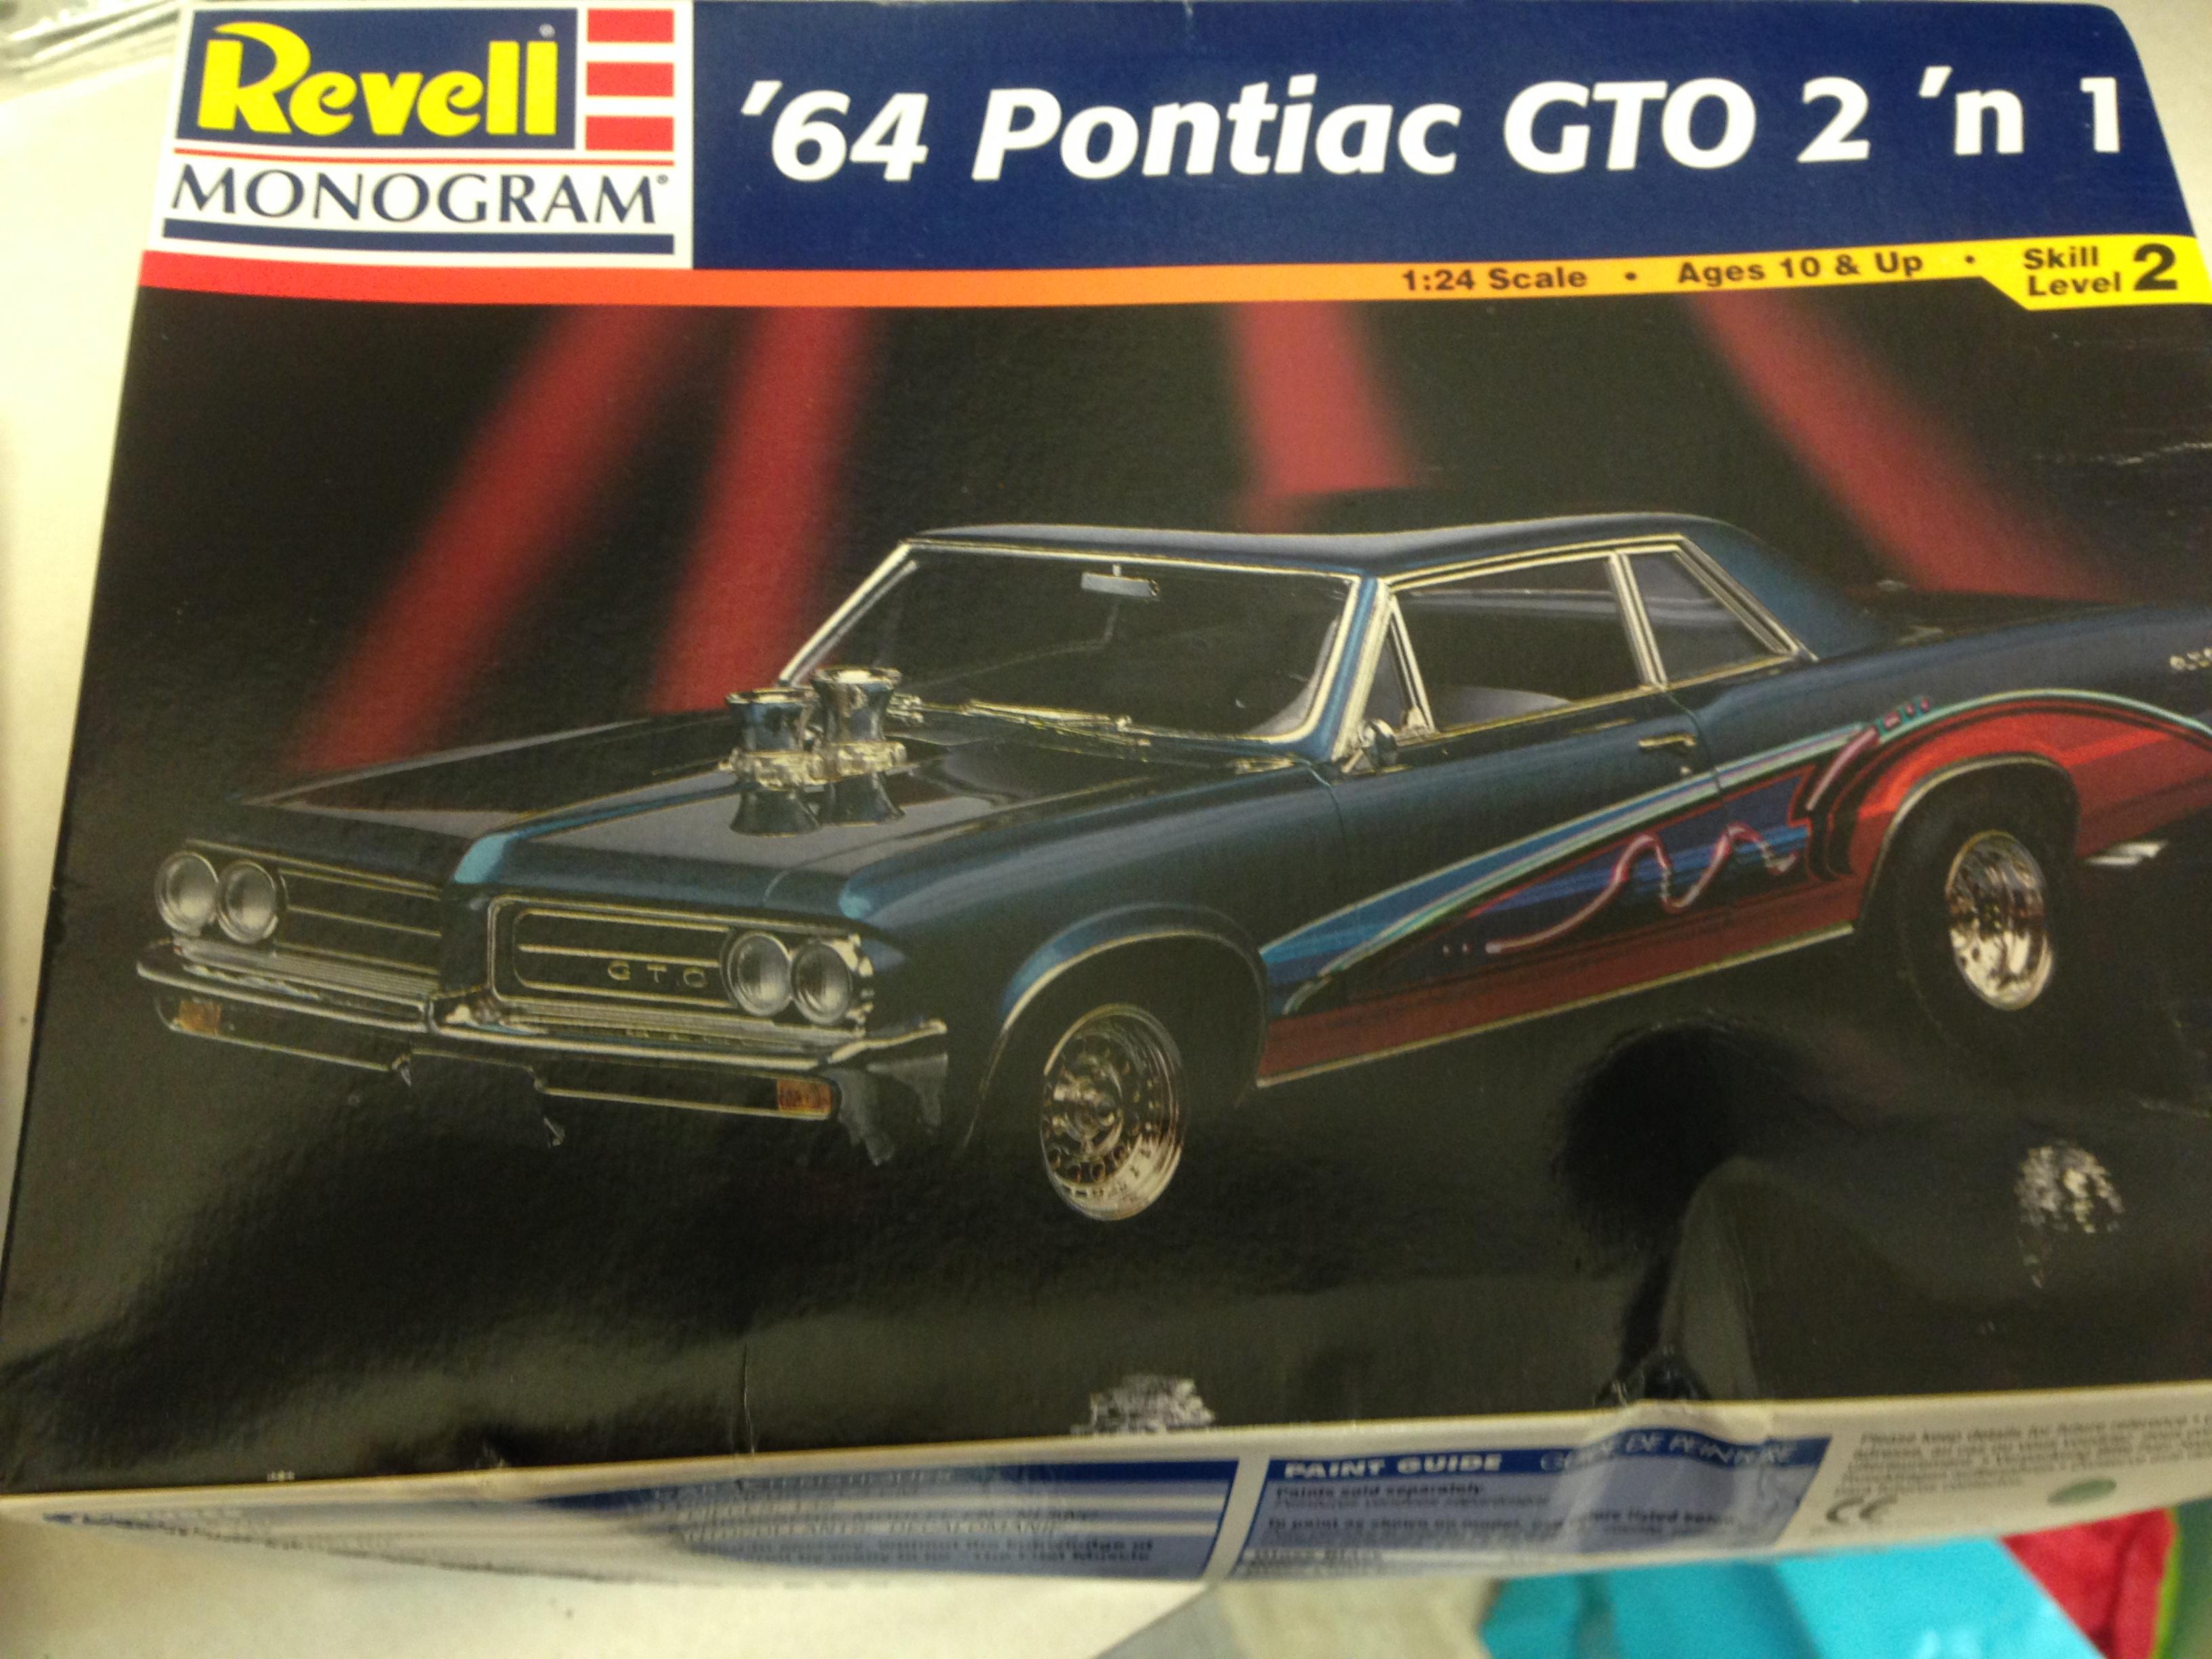
It's been a long time since I've posted anything, but the other day I pulled from my stash Revell's 1964 GTO. This kit is dated 1998, and I really didn't have a lot of interest in it. But I was pleasantly surprised at how well it went together and how solid it feels! I'm not the best builder, but I really like the way it turned out. I guess one good thing about CoronaVirus is that it got me thinking about old kits. I hope you are all staying well and enjoying some extra building time.
-
I'm back! At least for a few posts. So, a quick update on my situation: I have not bought a home yet, but I have moved out of my old place and into a cheaper place that's just as nice. I'm still looking into a home and talking things over with a lender. I didn't want to start any builds until I moved into a more permanent home, but they've been piling up and it's going to take awhile to get them all built. So, I decided to build a few and save the boxes to make sure they don't get damaged when i do finally move. So...........here is my first of the new year. It's a 1971 Trans Am based on the Revell model of a 1970. It's a very nice model and I highly recommend it. SAM_0001 by Eric Lucas, on Flickr SAM_0002 by Eric Lucas, on Flickr SAM_0003 by Eric Lucas, on Flickr SAM_0004 by Eric Lucas, on Flickr SAM_0005 by Eric Lucas, on Flickr

.JPG.2f4c55524ac084aa900cc3e4d74e51eb.JPG)
.JPG.56c7282be36e4a50051a8d4bfda33fdd.JPG)
.JPG.b991fc7de161e52d81e7505bf763cdb2.JPG)
.JPG.91d4fc3a5cd602936f9e7e9a42bedb79.JPG)
.JPG.cf690a739ffb97a0796995913a329208.JPG)
.JPG.425e7dfaf8a4057d01075203cd22fd0f.JPG)
.JPG.ce24f9a1b81f43a95c7553d956f5f2fd.JPG)


.thumb.jpg.e0420fe52e683c60d19e843462316523.jpg)