Search the Community
Showing results for tags 'tamiya'.
-
Hey everyone!, after a failed 2nd attempt at a Tamiya Ferrari F40, I decided to turn it into the accident aftermath on the famed Autobahn. It all went bad when I was accelerating to the end of the build....the body got stuck 3/4 of a mile down on the chassis.....I tried to separate the two, but it was no good.....thoughts were Zipping by me at high speeds!!….WHAT TO DO???!!!……..Then, as the finish line was in sight, my hand slipped!!…...CHIPS OF PAINT WENT FLYING!!!...…..THEN IT HIT THE WALL IN A SHOWER OF PLASTIC, AND BITS!!!......It was over, and I had lost. -This tragedy did eventually have a happy ending, I purchased a Fujimi kit instead, and actually liked it waaaay better than the Tamiya versions.

-
Hi all. First post here and thought I'd share something I just finished up, which also happens to be my first time making a kit like this so theres a few things I could have done better but overall i'm happy with the result and cant wait to make more! (I already have 3 more Skyline kits on the go lol) I have experience restoring and painting real cars so I sprayed this with automotive paints and lacquers, detailed with Tamiya acrylics by hand. The paint isn't Bayside Blue of course, and is infact a Ford colour I had left over, but I think it's pretty close and I'm happy with how it turned out. I decided to go with the Japanese plates for that full on JDM look ?? The interior was flocked but you can't really see that in the photos. I had never done flocking before though so that was a fun experience. Anyway let me know what you all think and thanks for looking. X
-
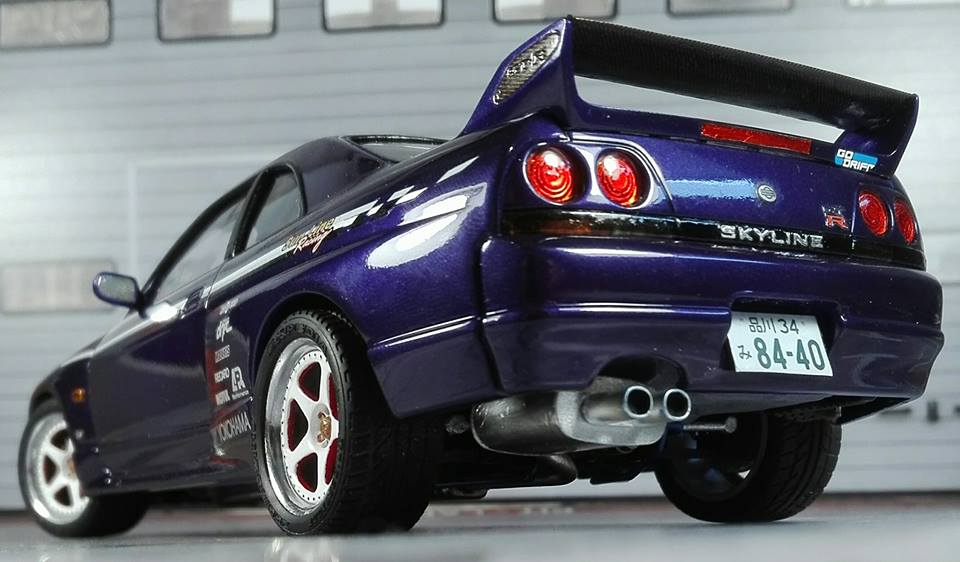
This has been 99% finished for a while now, around the same time my R32 was done, I just procrastinated on adding the finishing touches. Overall i'm happy with how it turned out, all things considered (had to strip it to re-do the paint, issues like that etc), some things I wish I could have done better, but these are only micro scale issues so I'm willing to let it slide. I didn't like the wheels that came with the kit, they seemed too small. I tried using some wheels off of an R32 kit but they also looked too small, so I went with some spare R34 wheels as thats all I had, but I think they suit it quite well. Let me know what you think and thanks for stopping by.
-
Another one finished. I'm a bit "meh" with how this one turned out. I dunno something about it just doesn't sit right with me, and I'm not 100% happy with it. But no point dwelling on it, just gotta move onto the next one. I did have fun painting the inside of the bonnet though I might revisit this kit at a later date and try to see if I can do better.
-
Another day another Skyline This time I'm going old skool! I love all the extras this kit comes with! I've never worked with anything photo etched before so I'm very excited to start putting everything together! Not sure i'll paint the little man up, but we'll see. Thinking of going with black and red two-tone on this one. The kit: As usual work starts with finding and removing all the mold seams: That's all for now!
-
This one is really kicking my butt. Everything that can go wrong seemingly has, especially as far as paint is concerned. This is my first time working with Zero Paints and i know everybody raves about these people but honestly ive had much better experiences just using rattle cans. Still, this paint is expensive so im not going to let it beat me, but for now this is where i am so far: The kit: The body and getting rid of the mould seams: Body prepped and primed: Everything was going smoothly as normal until... My nemesis: Looks ok right? Well not really... For some reason you can still see an issue with the moulding of the body itself...im not sure how these swirls are visible through the primer and paint layer: But thats not the only problem....look at the weird texture i have from the paint itself: Hard to see in the photos but there are these circular spirals in the paint, most visible where the door meets the front wing: I think this was my fault, as I think I must have put the paint on too thick too quickly, so time to strip and start again I guess... Re-primed and prepped for round two: But thats not where the story ends. I attempted to do the paint a second time, making sure to take things slower with thinner coats (compressor at the recommended PSI, airbrush was set up correctly etc), but once again the paint looked like BLAH_BLAH_BLAH_BLAH and showed up every last minor imperfection in my primer layer, which usually isn't a problem as I usually put my paint on nice and thick (without sacrificing detail) which usually fills in all the tiny imperfections, but because you have to put this stuff on in such thin coats that wasn't happening...you'd think the primer wasn't prepped properly, however I did everything I normally do (primer, guide coat, wet sand to a smooth finish etc) but it still looked like BLAH_BLAH_BLAH_BLAH. I dont have pictures of this as I was too upset and annoyed so I forgot to take any. So I stripped it down for a second time and I'm currently trying to figure out what I should do next. I have a plan, but whether it will work remains to be seen.
-
I think I might be a little obsessed with Skylines....lol Heres my R33. As usual, getting rid of the mould seam lines and worked on the panel lines: Then on to primer, but i forgot to take a photo of this, so on to paint.....which is where the trouble starts :banghead: At first it looked good, Ford Diamond white: Looked pretty good, right? Then this happened: Despite leaving the paint to cure for a couple of days, it was still soft and had left this impression on the bumper where it was leaning on something. I later found out that i forgot to add hardener to the 2k paint i used, so it was time to strip and start again. :banghead: I wasn't very happy with the finish anyway, as i had lost some fine details because i went too heavy with the spray gun. I'm not working with an optimum set up at the moment so im blaming that on my mistakes :oops: One bottle of isopropyl alcohol and Amazon Prime later: Thankfully as far as strip downs go, it went without a hitch and turned out quite well, despite technically not having enough alcohol to fully submerge the body and chassis. Some scrubbing later and i was back to square one: So....take two: This time i used a different paint, from an aerosol and its actually a Nissan color so....accuracy? lol Whats most important is the paint actually cured solid, as did the lacquer so I wet sanded it and buffed it to a shine: So with crisis averted I moved onto detailing the chassis: Thats all for now! x
-
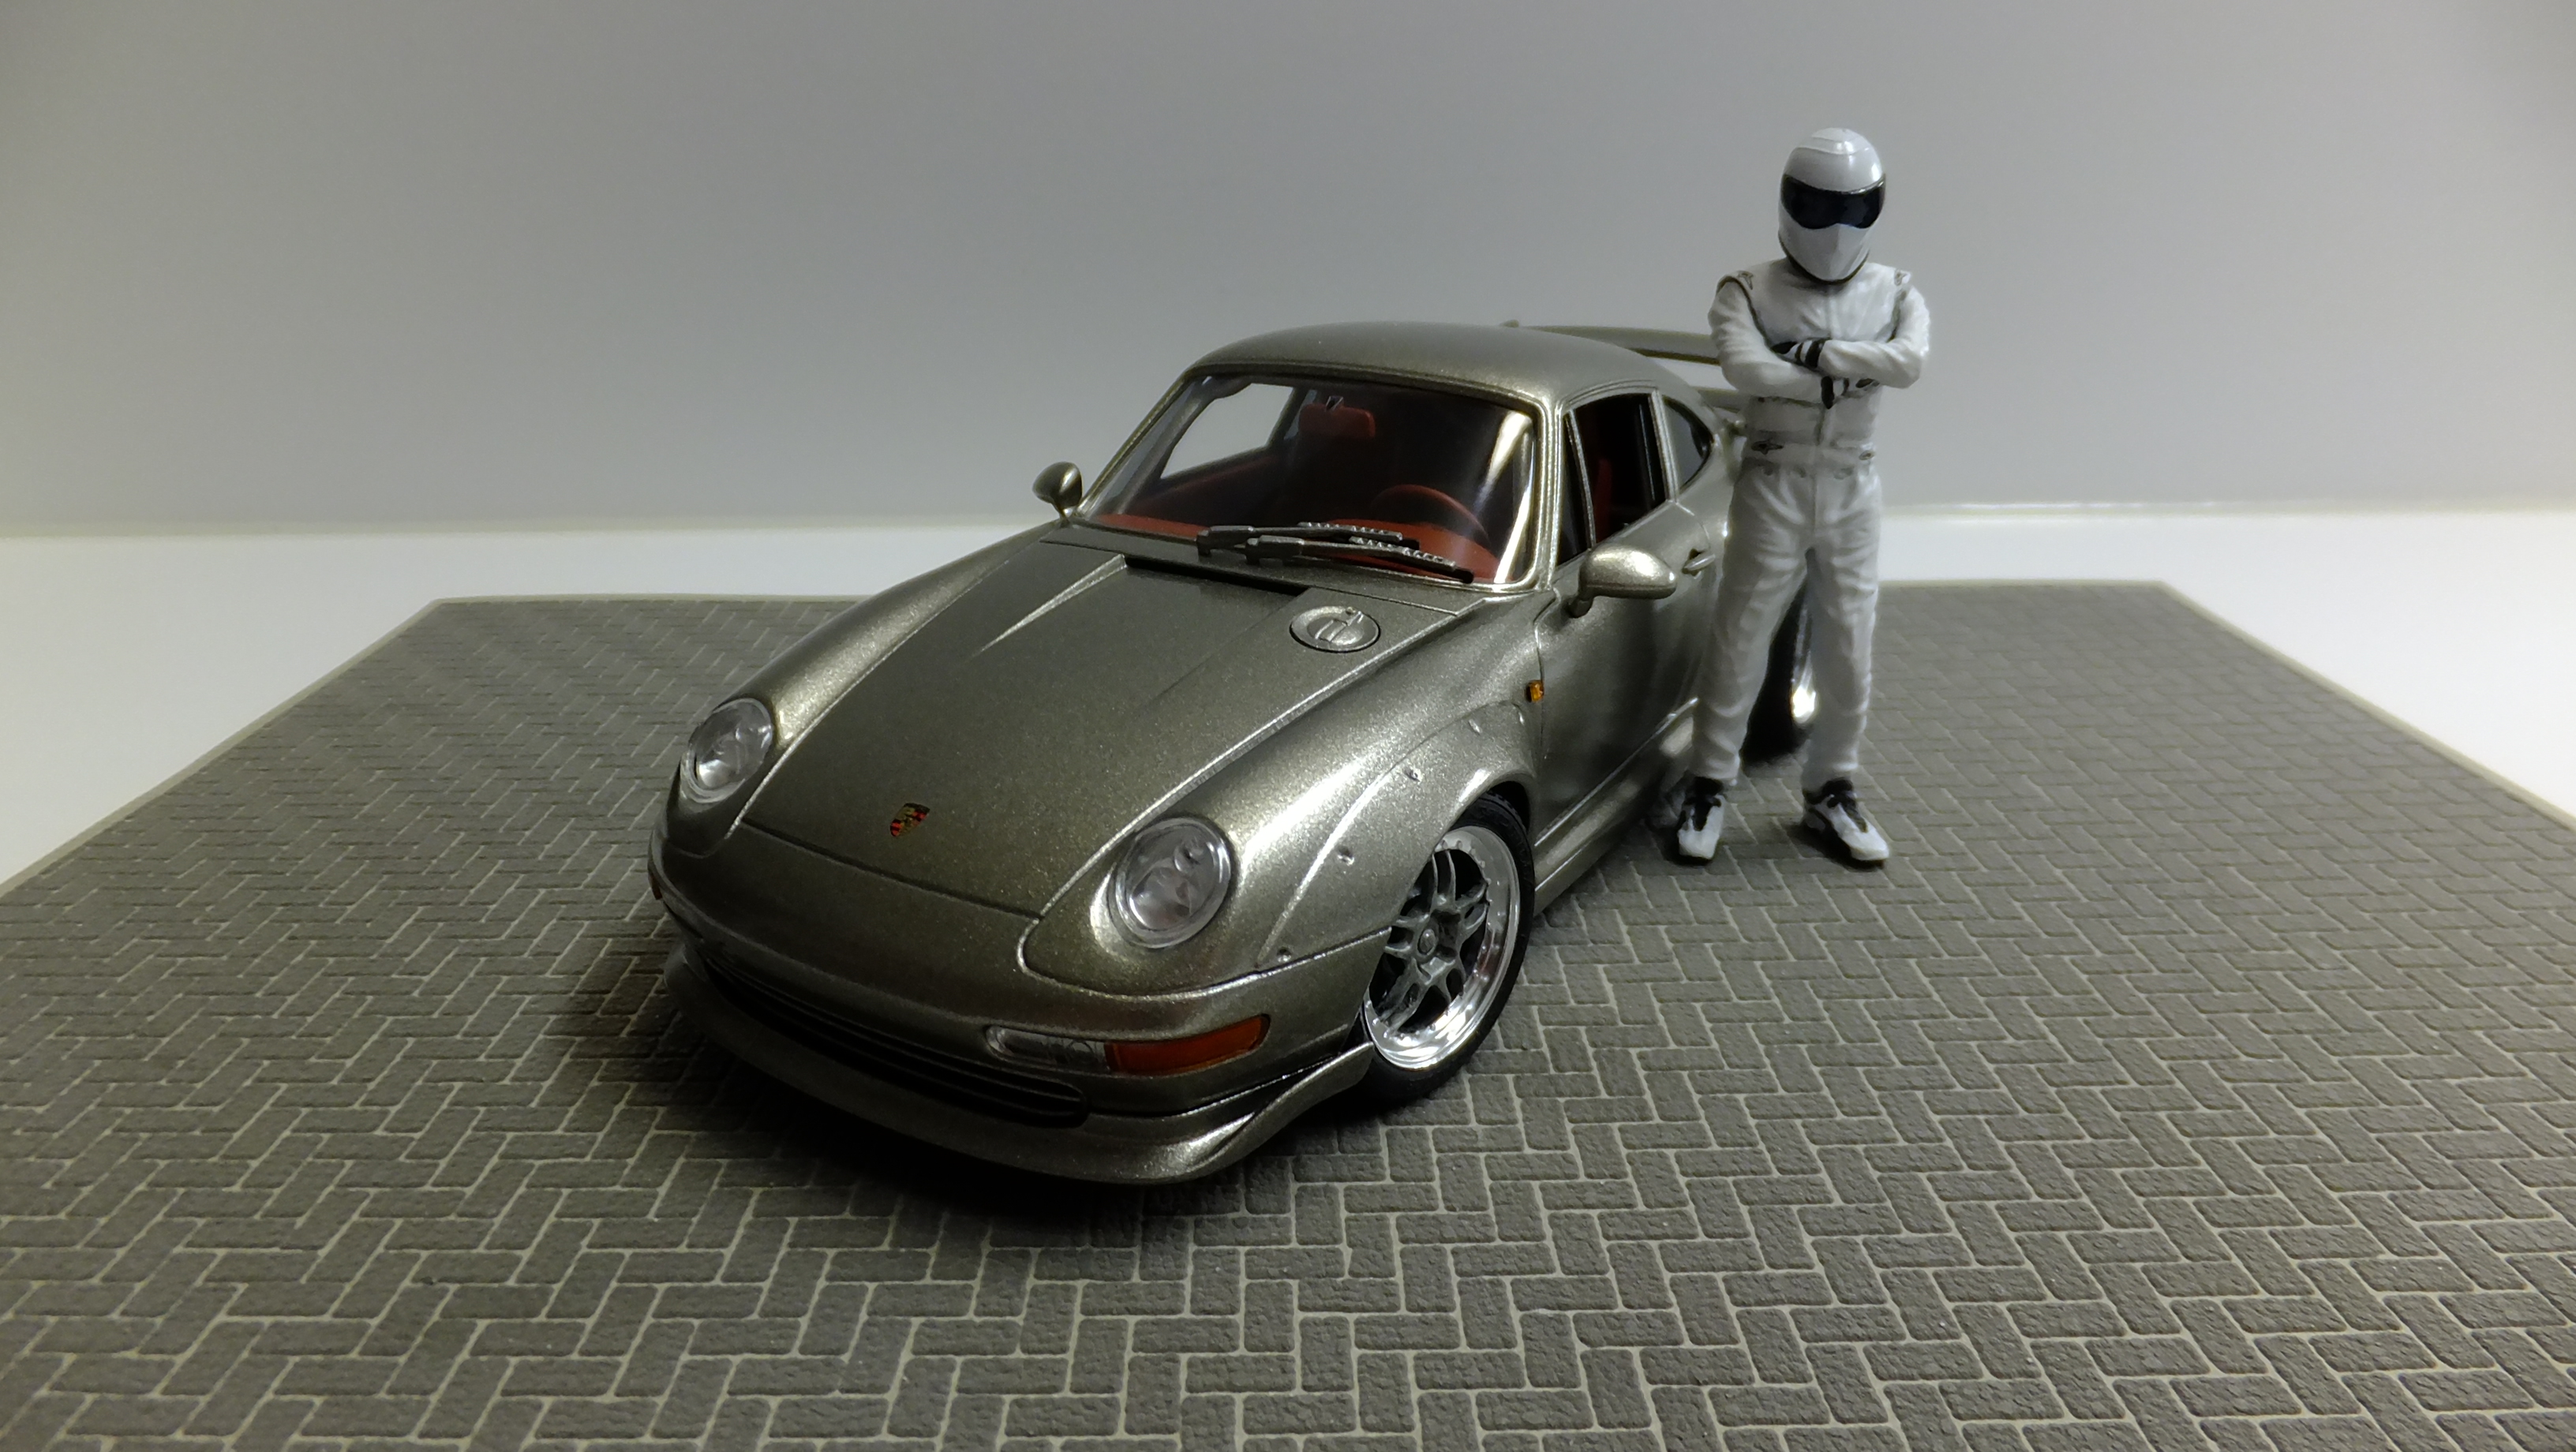
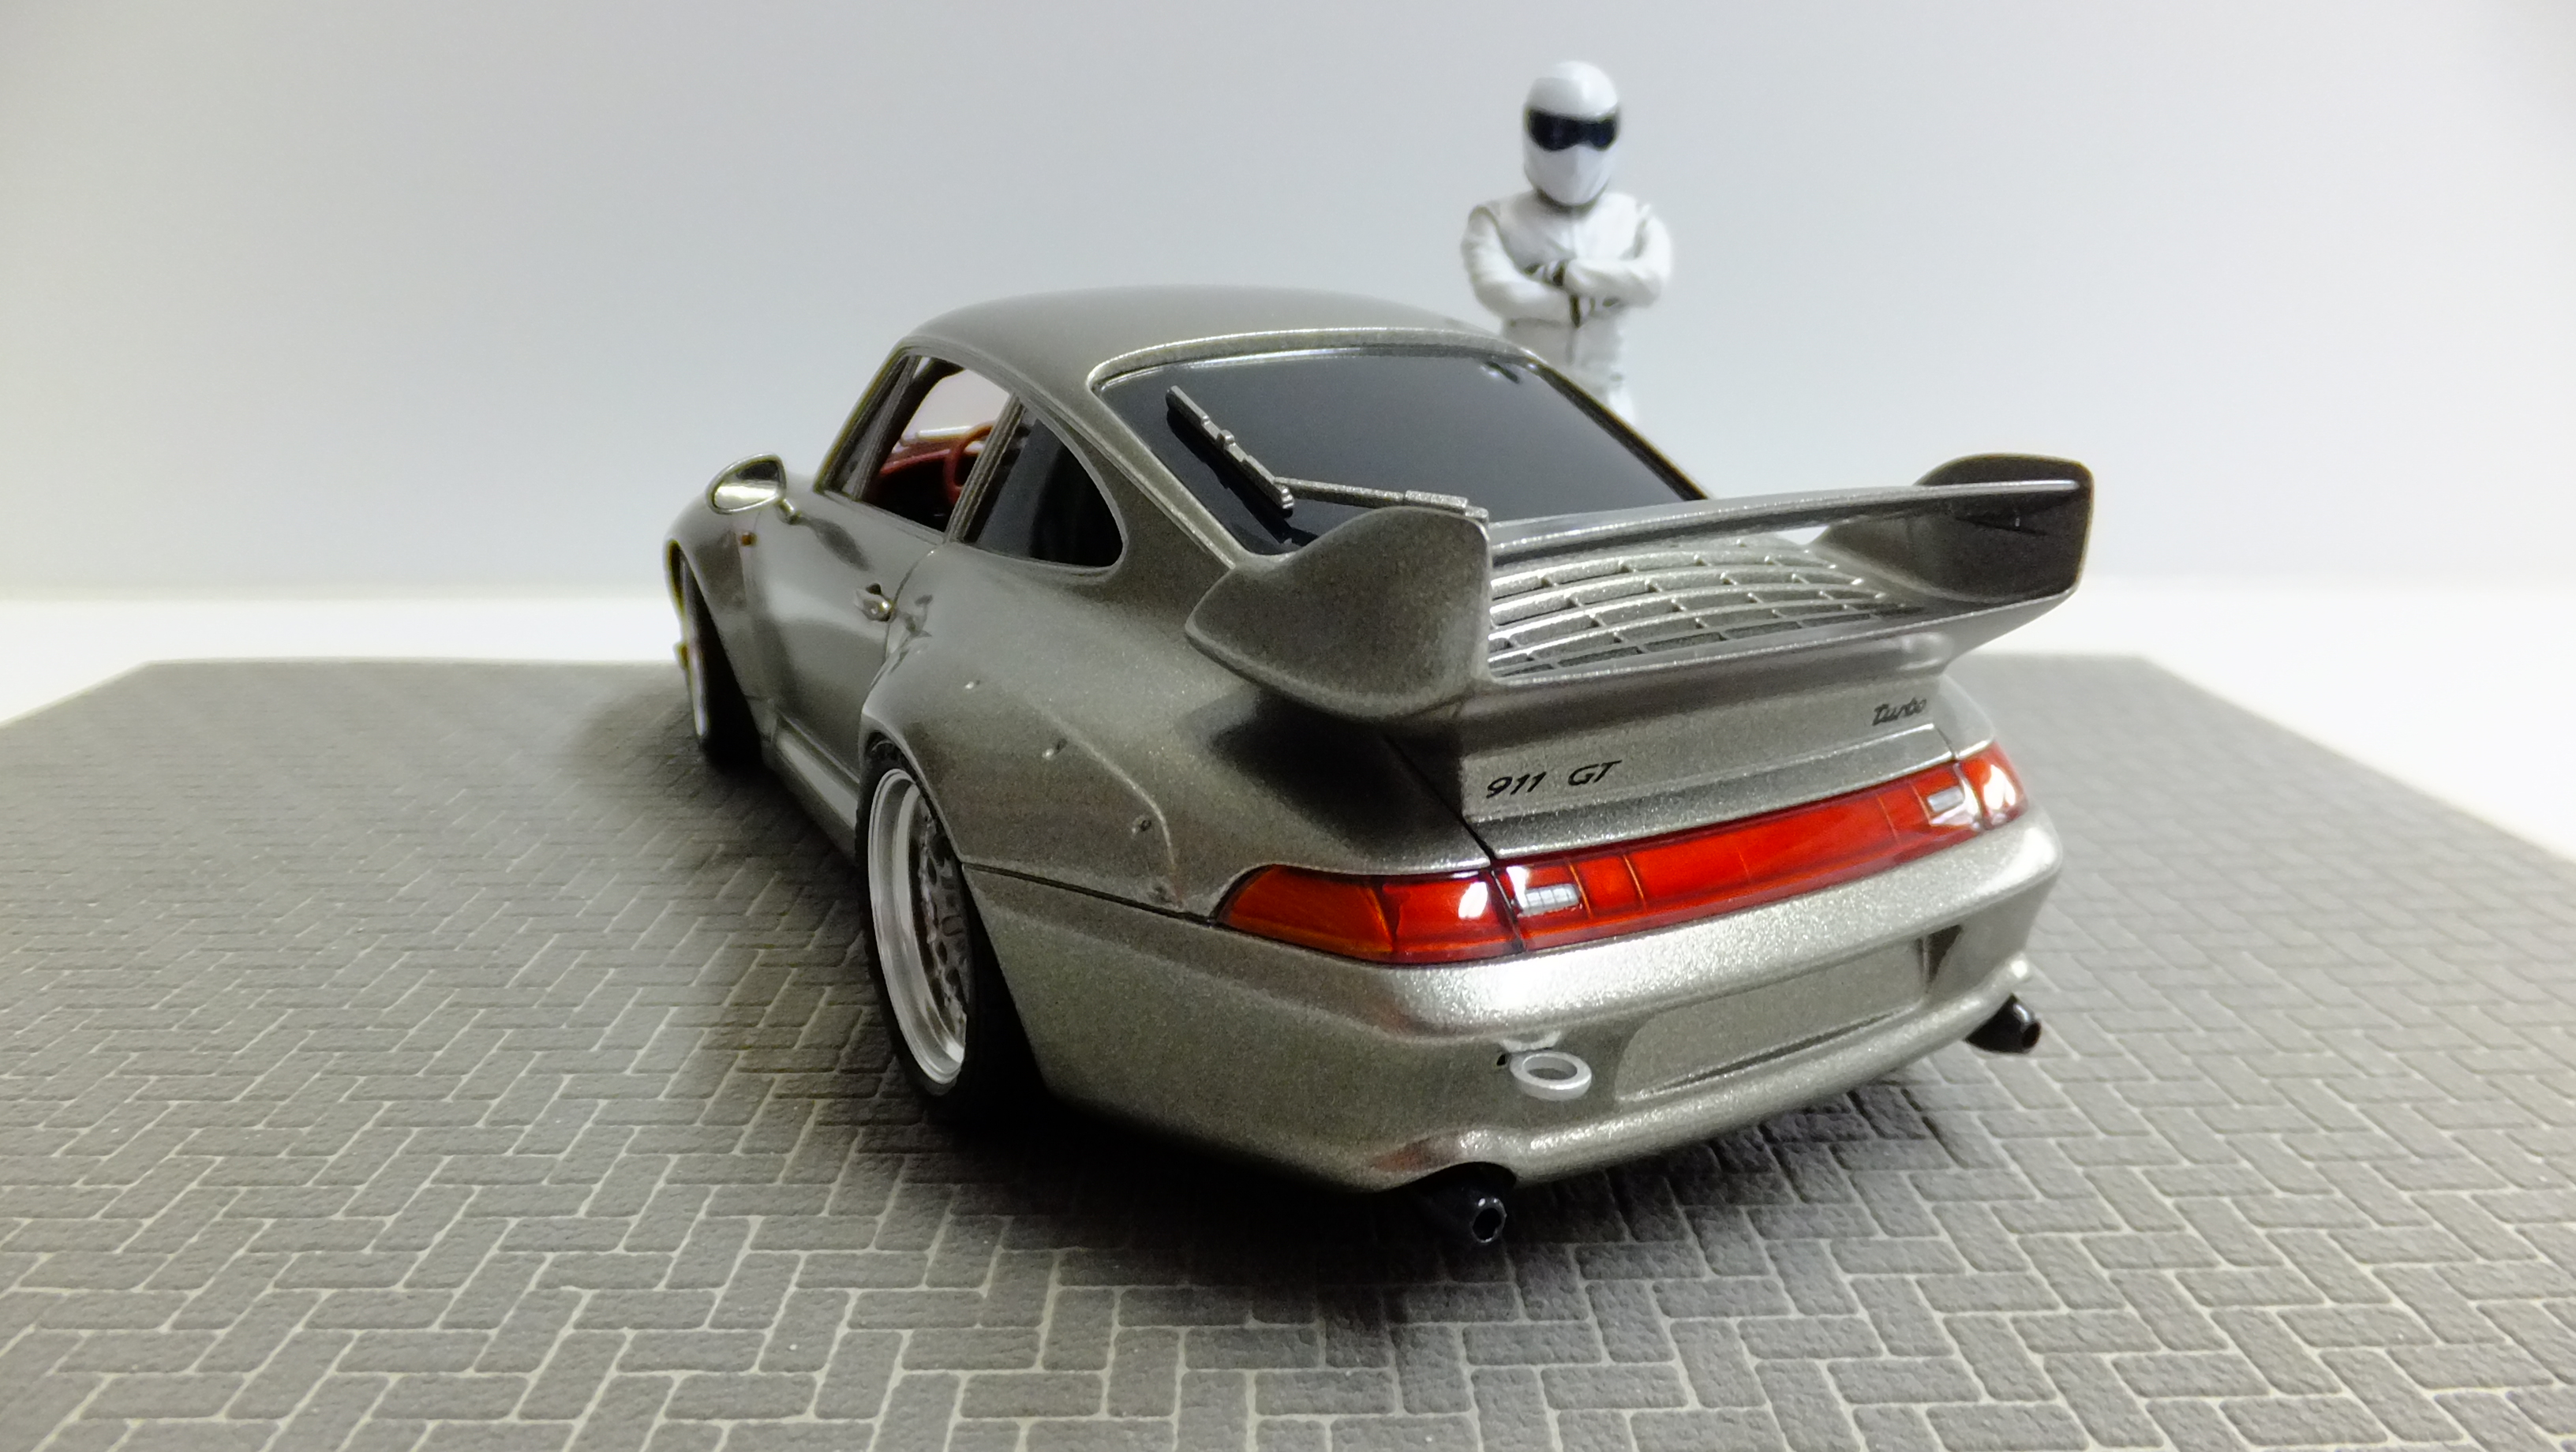
This is the Tamiya 911 GT2 road version kit. I was going for a "Barely street legal look", and I added carpet, and various other parts to make a "closer to stock" looking interior. I got rid of most of the racing bits on the body, relocated thecustom petrol cap, and since I couldn't stand that type of wheel, a modified them by removing some of the "Spindles". Thanks for looking-in!!
-
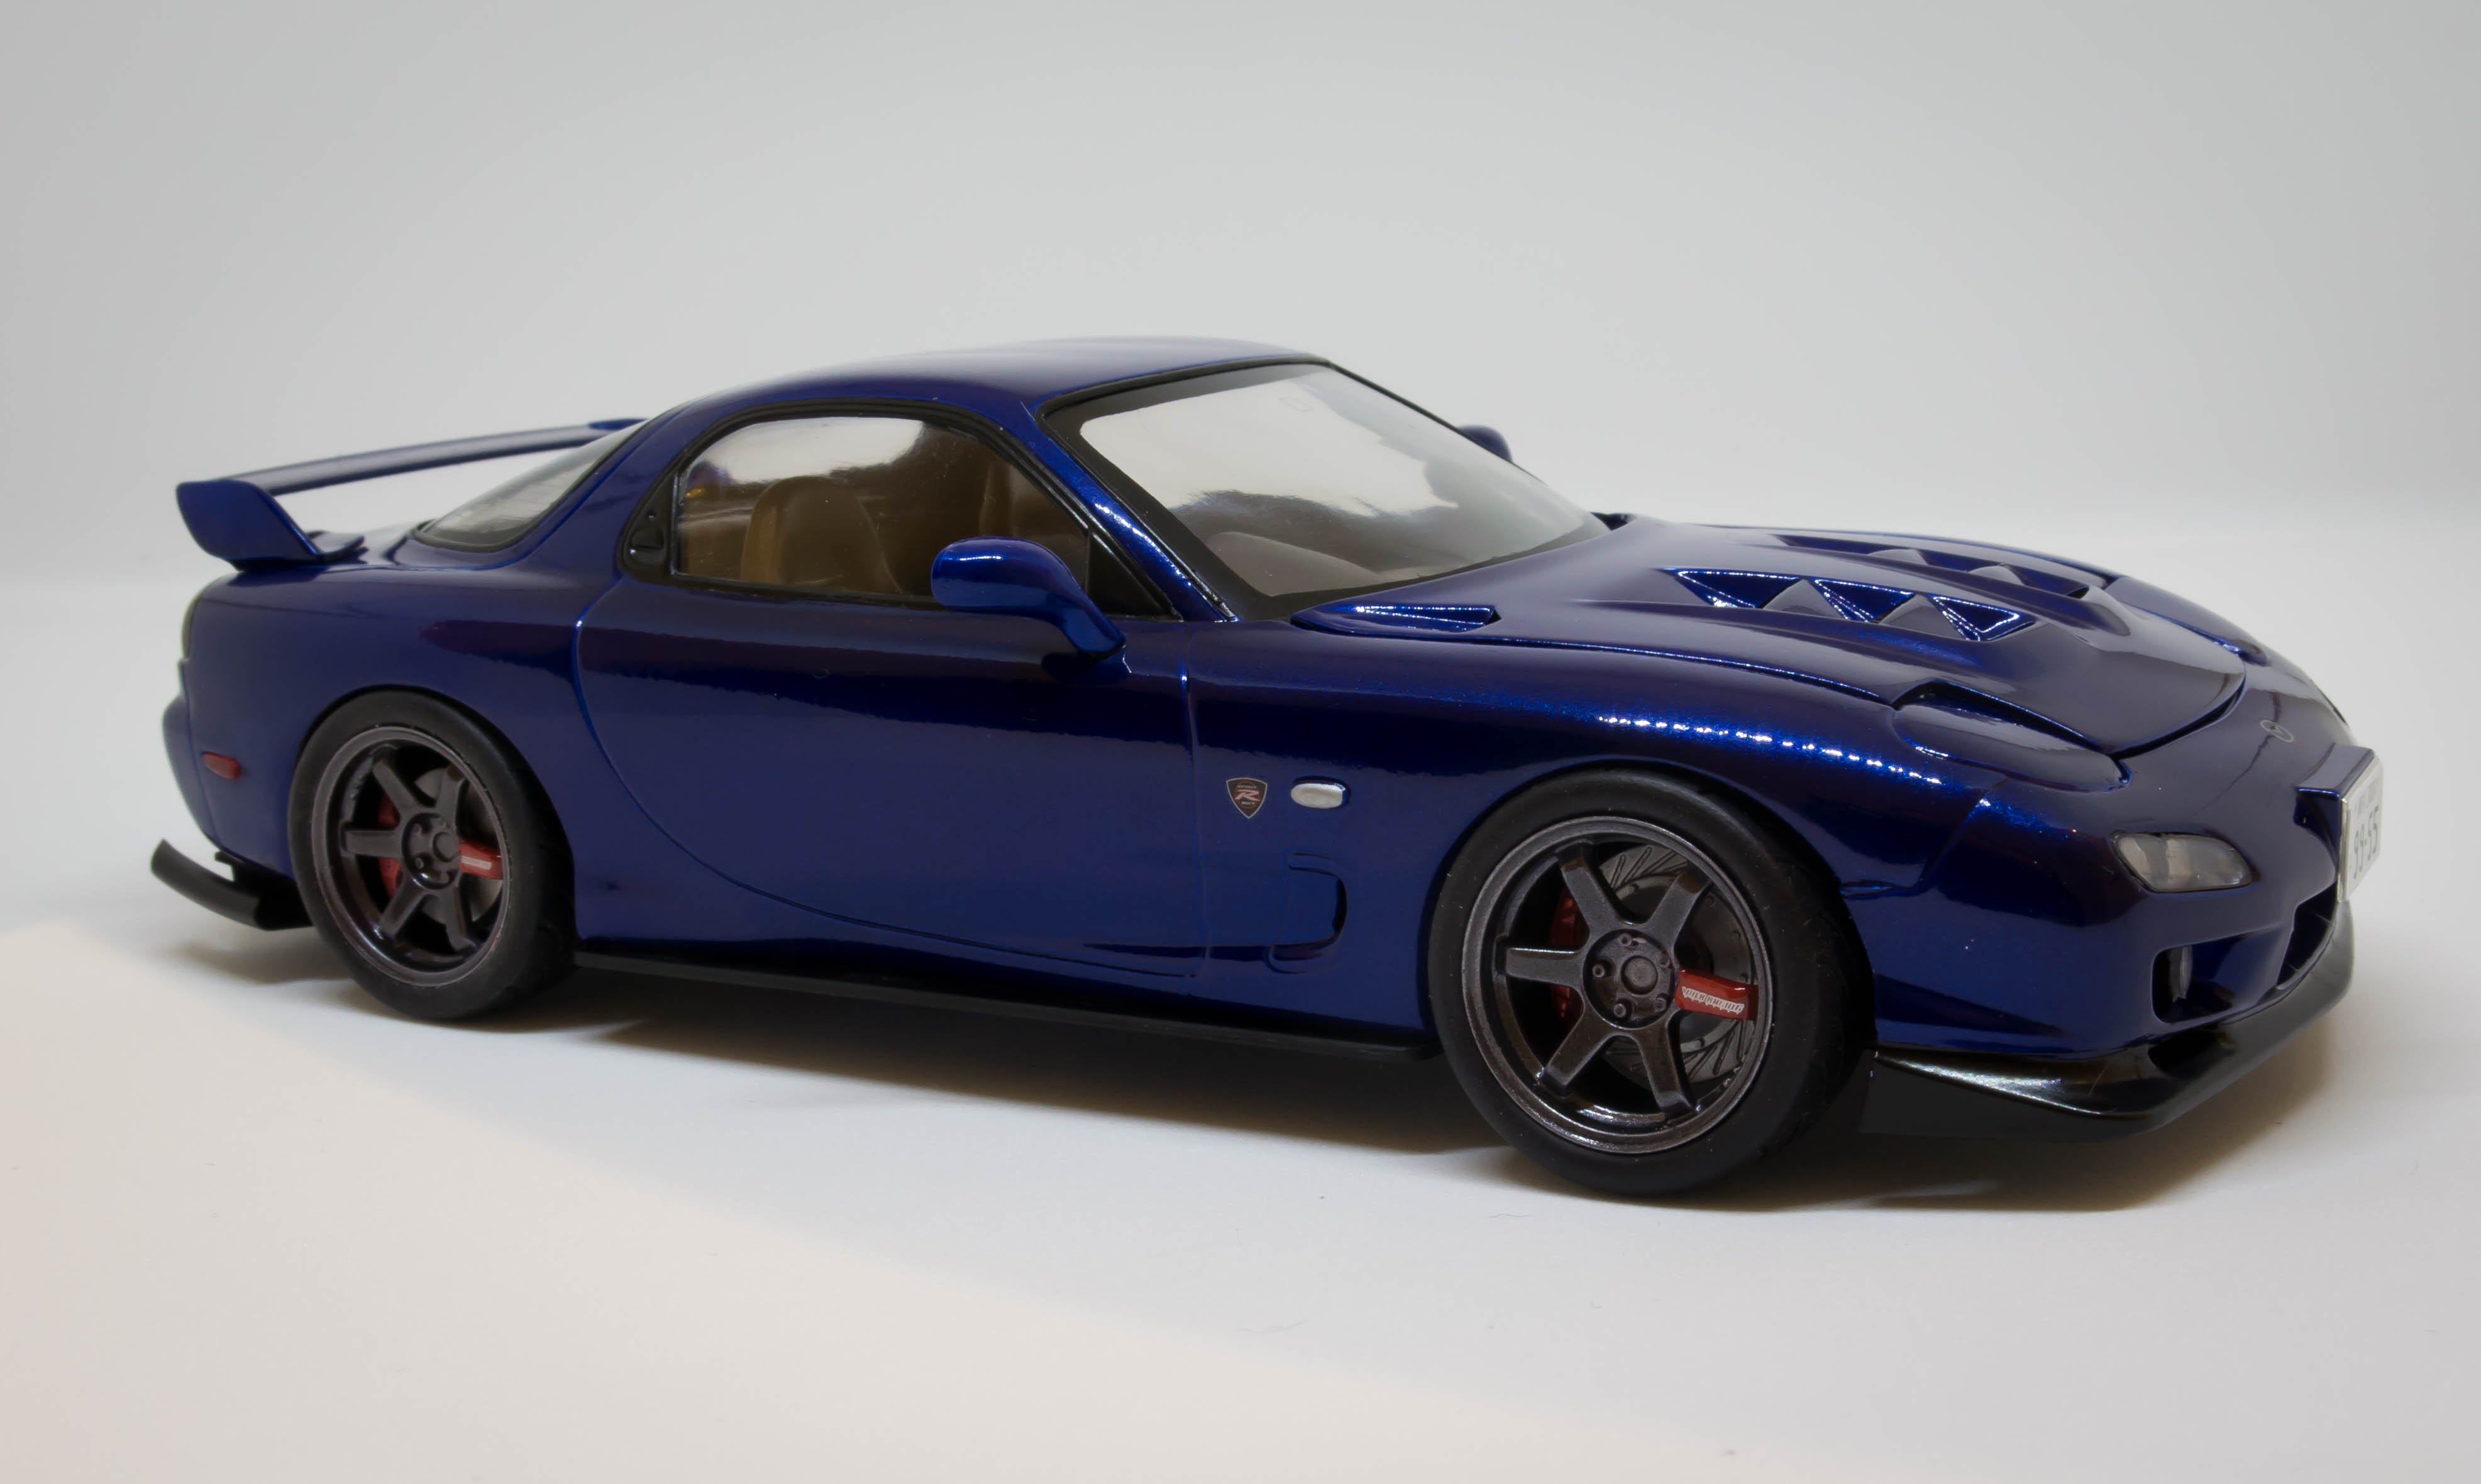
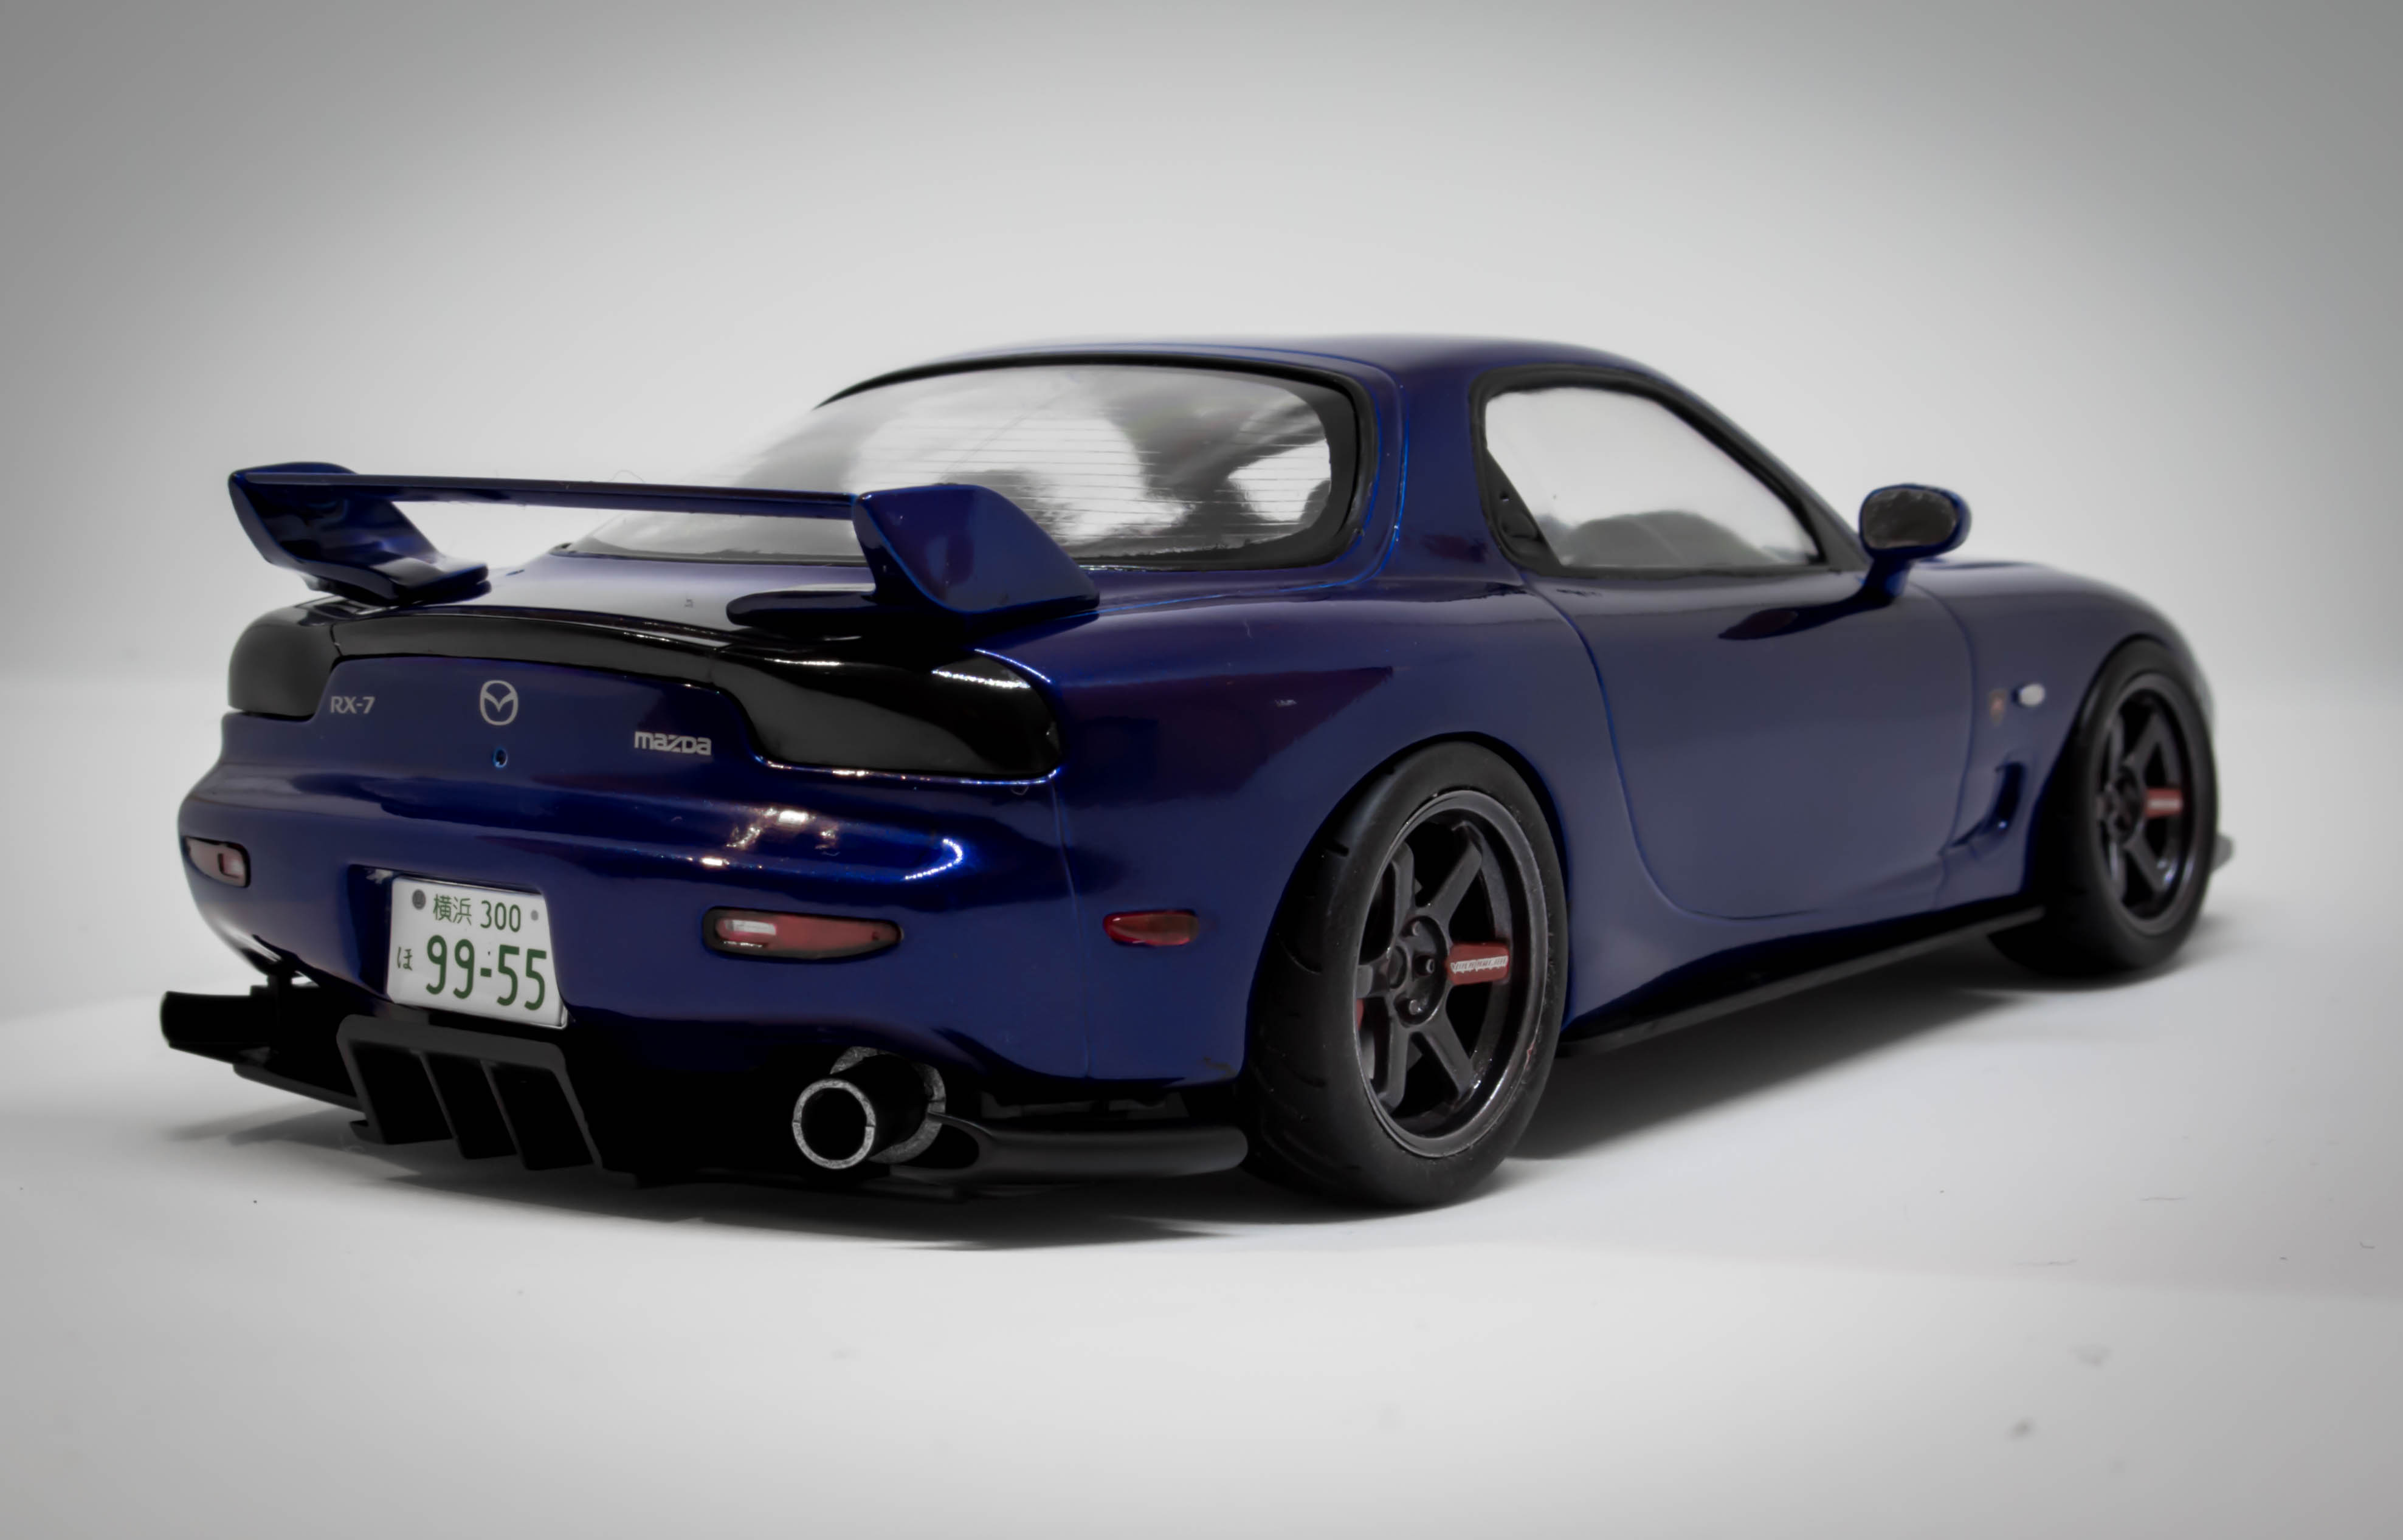
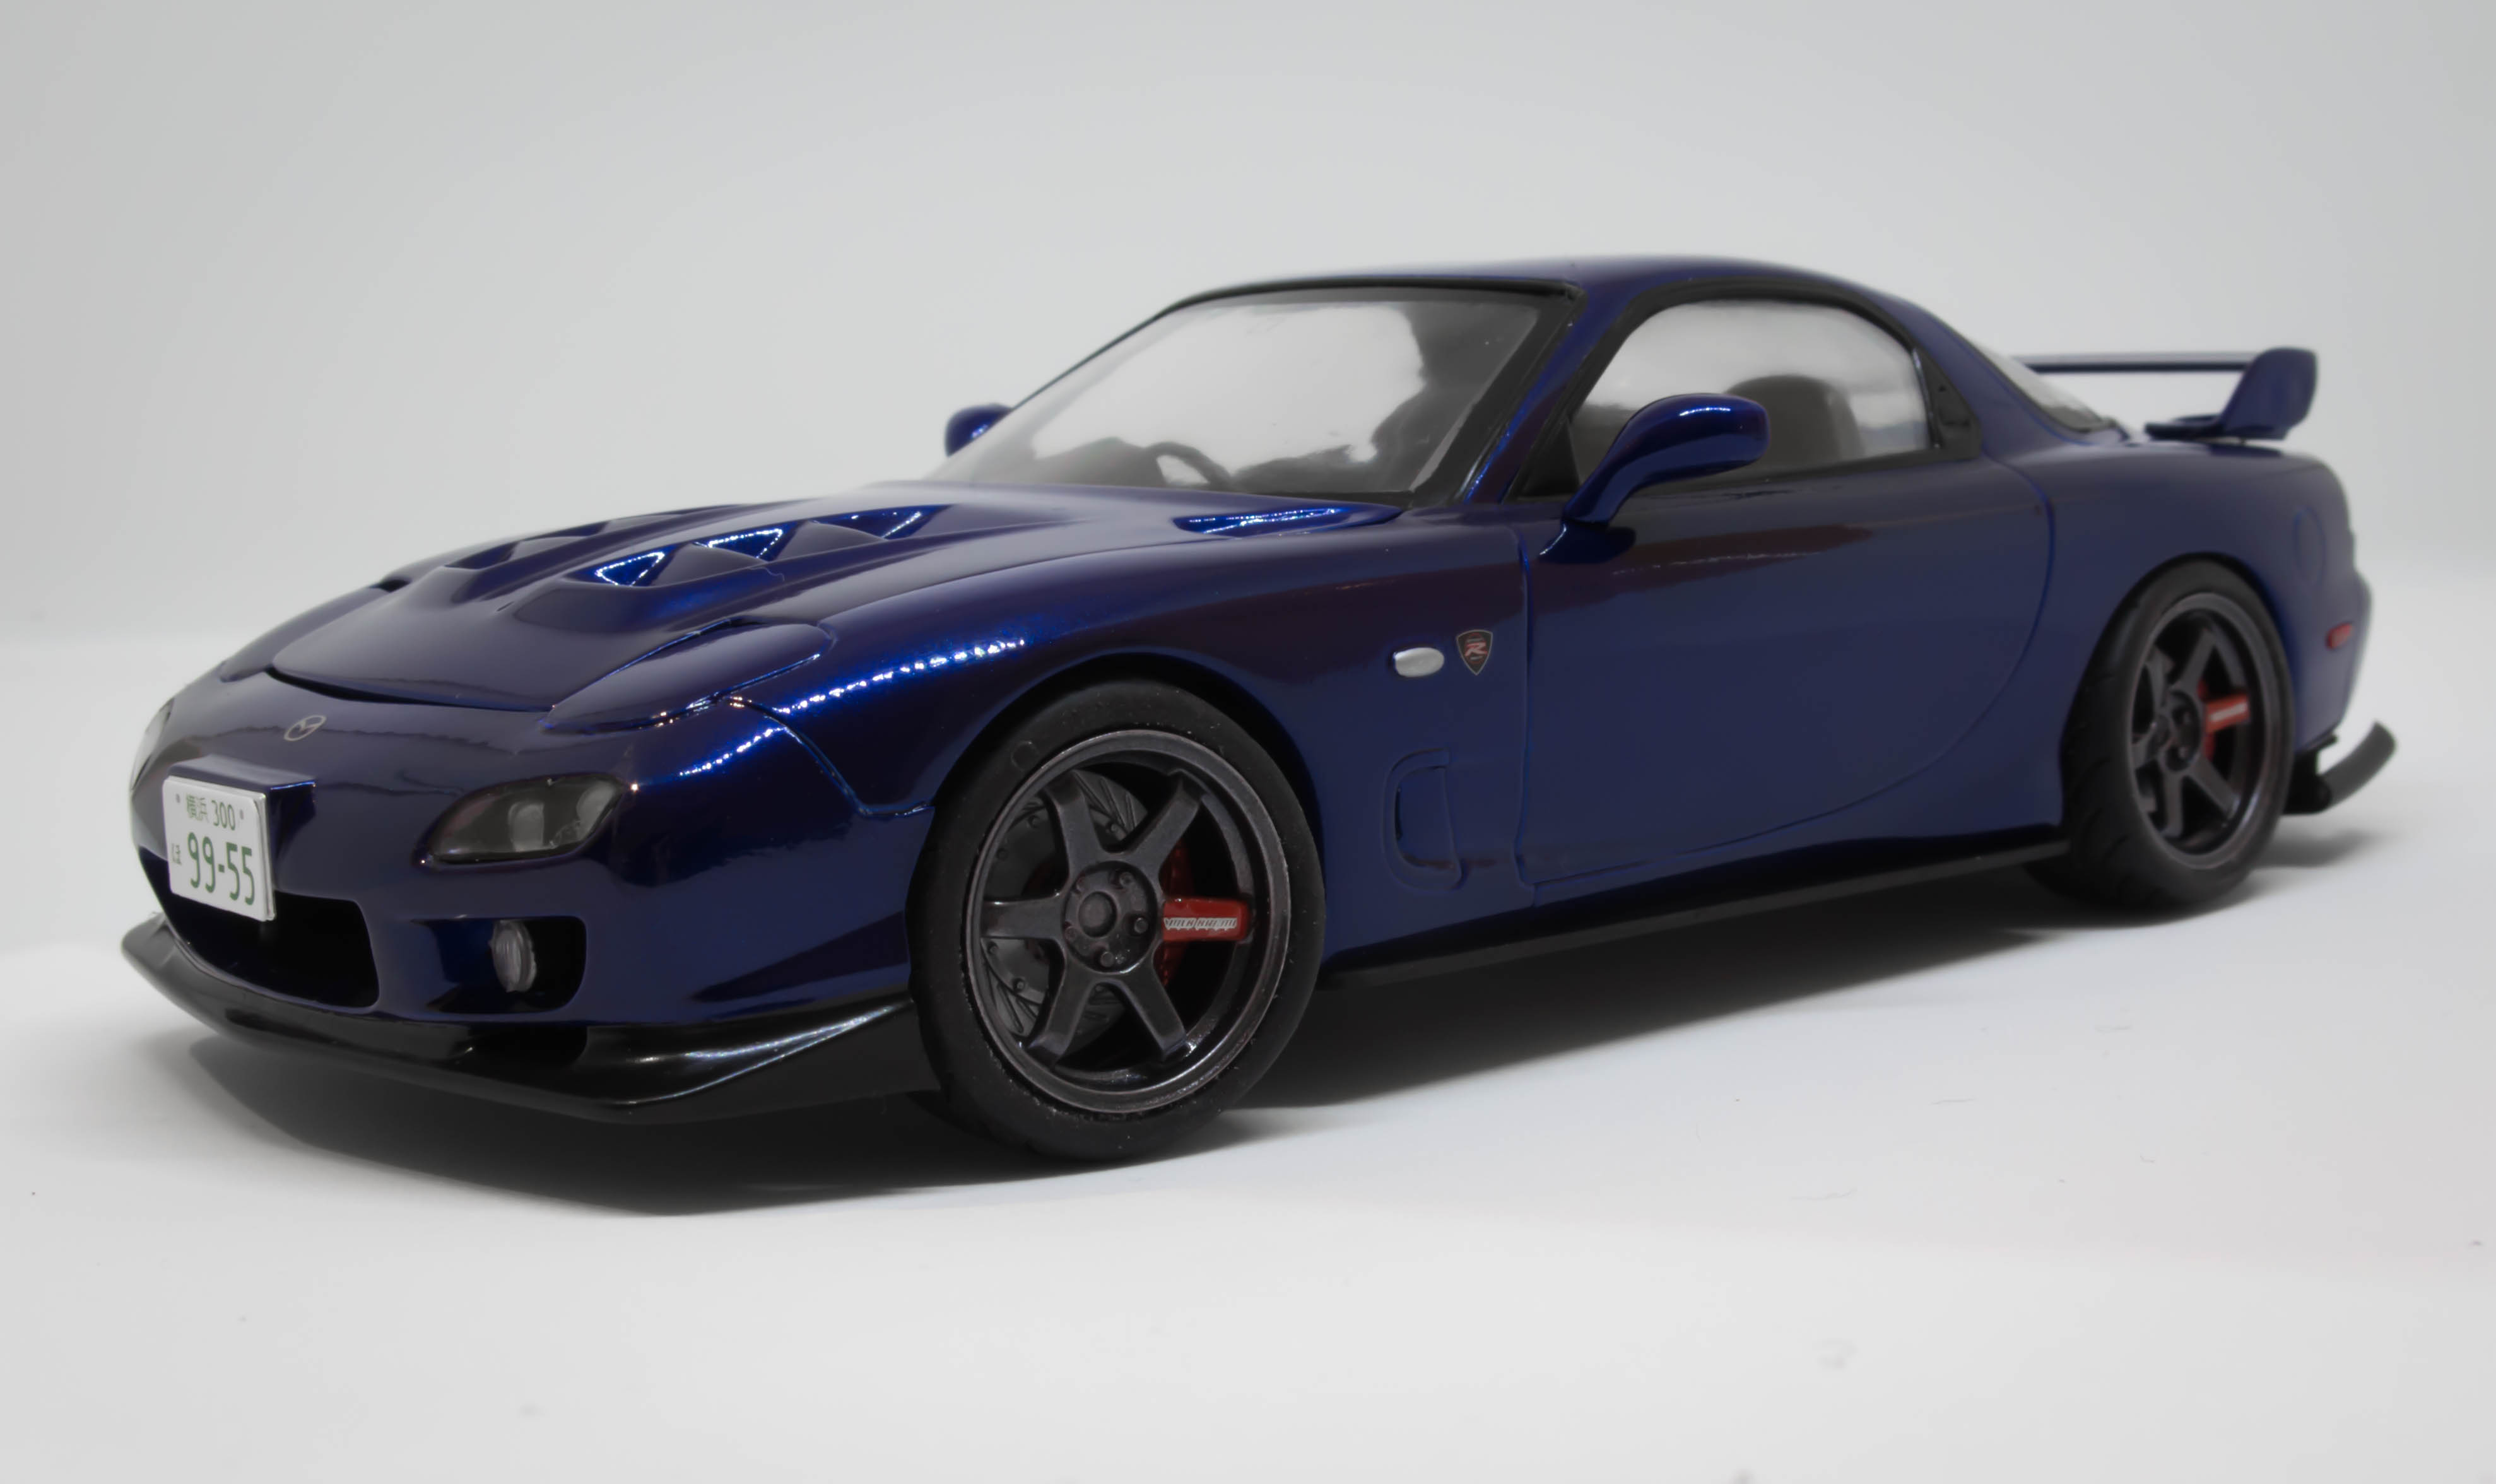
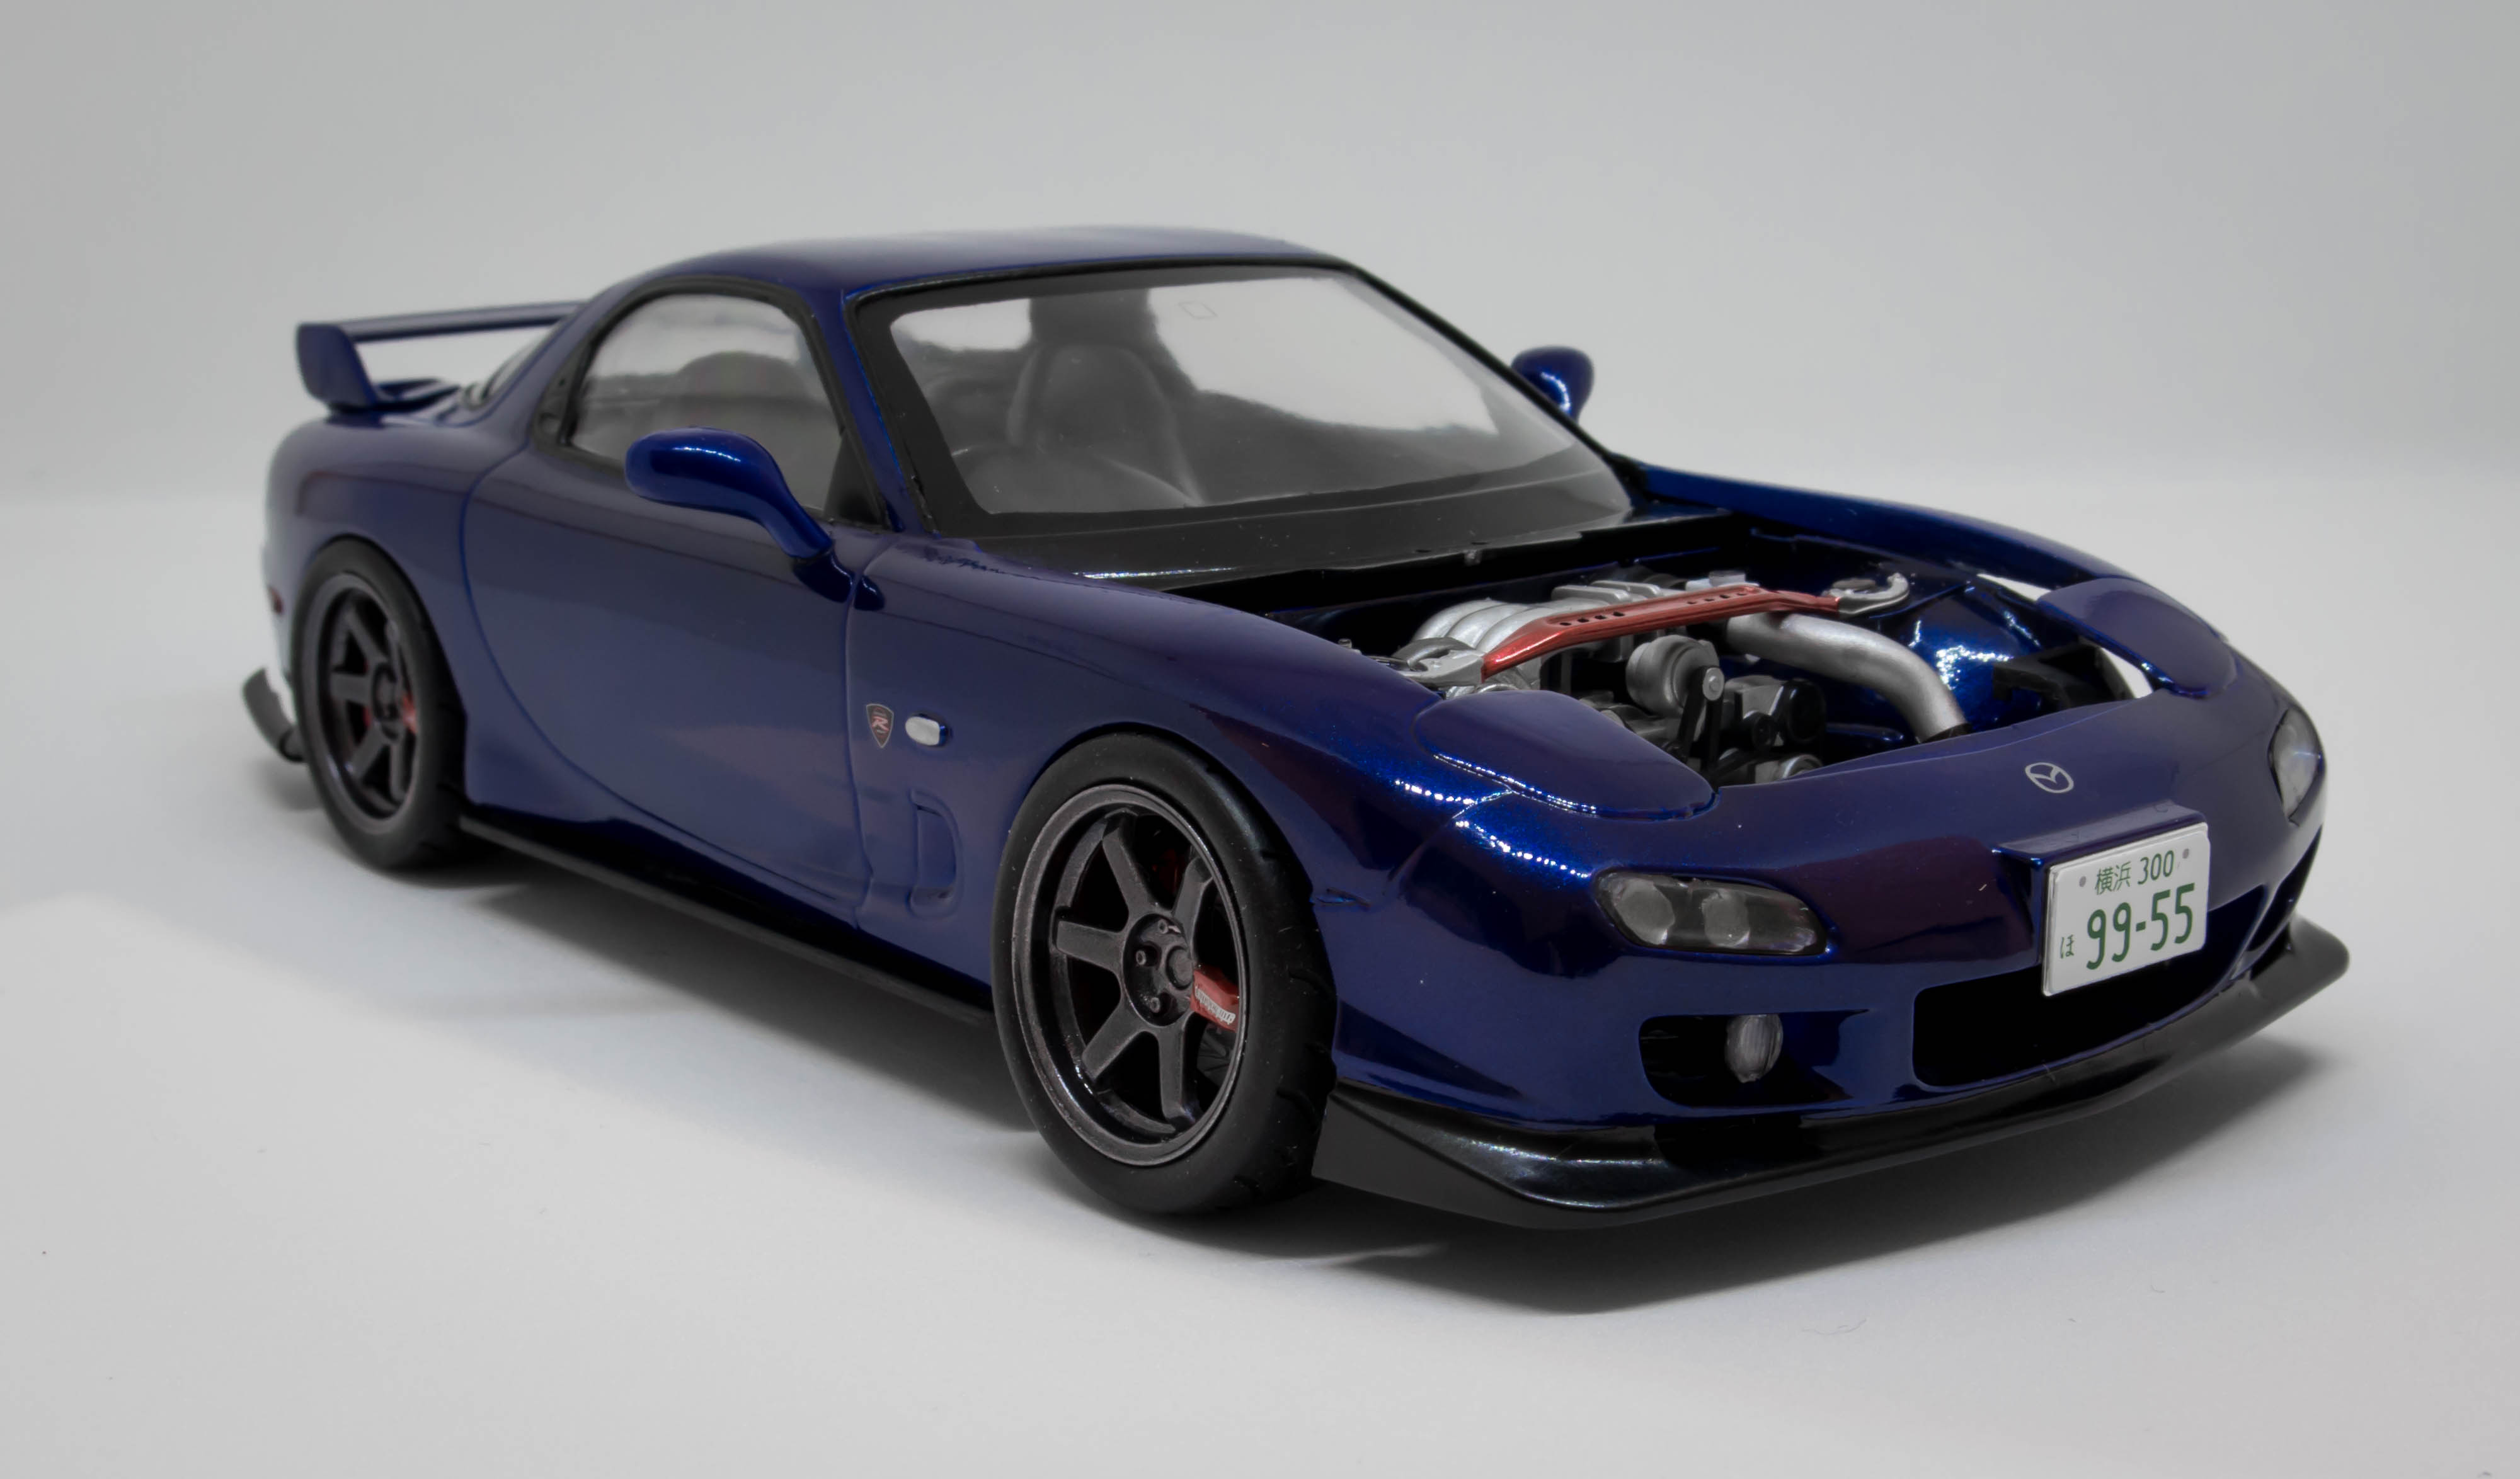
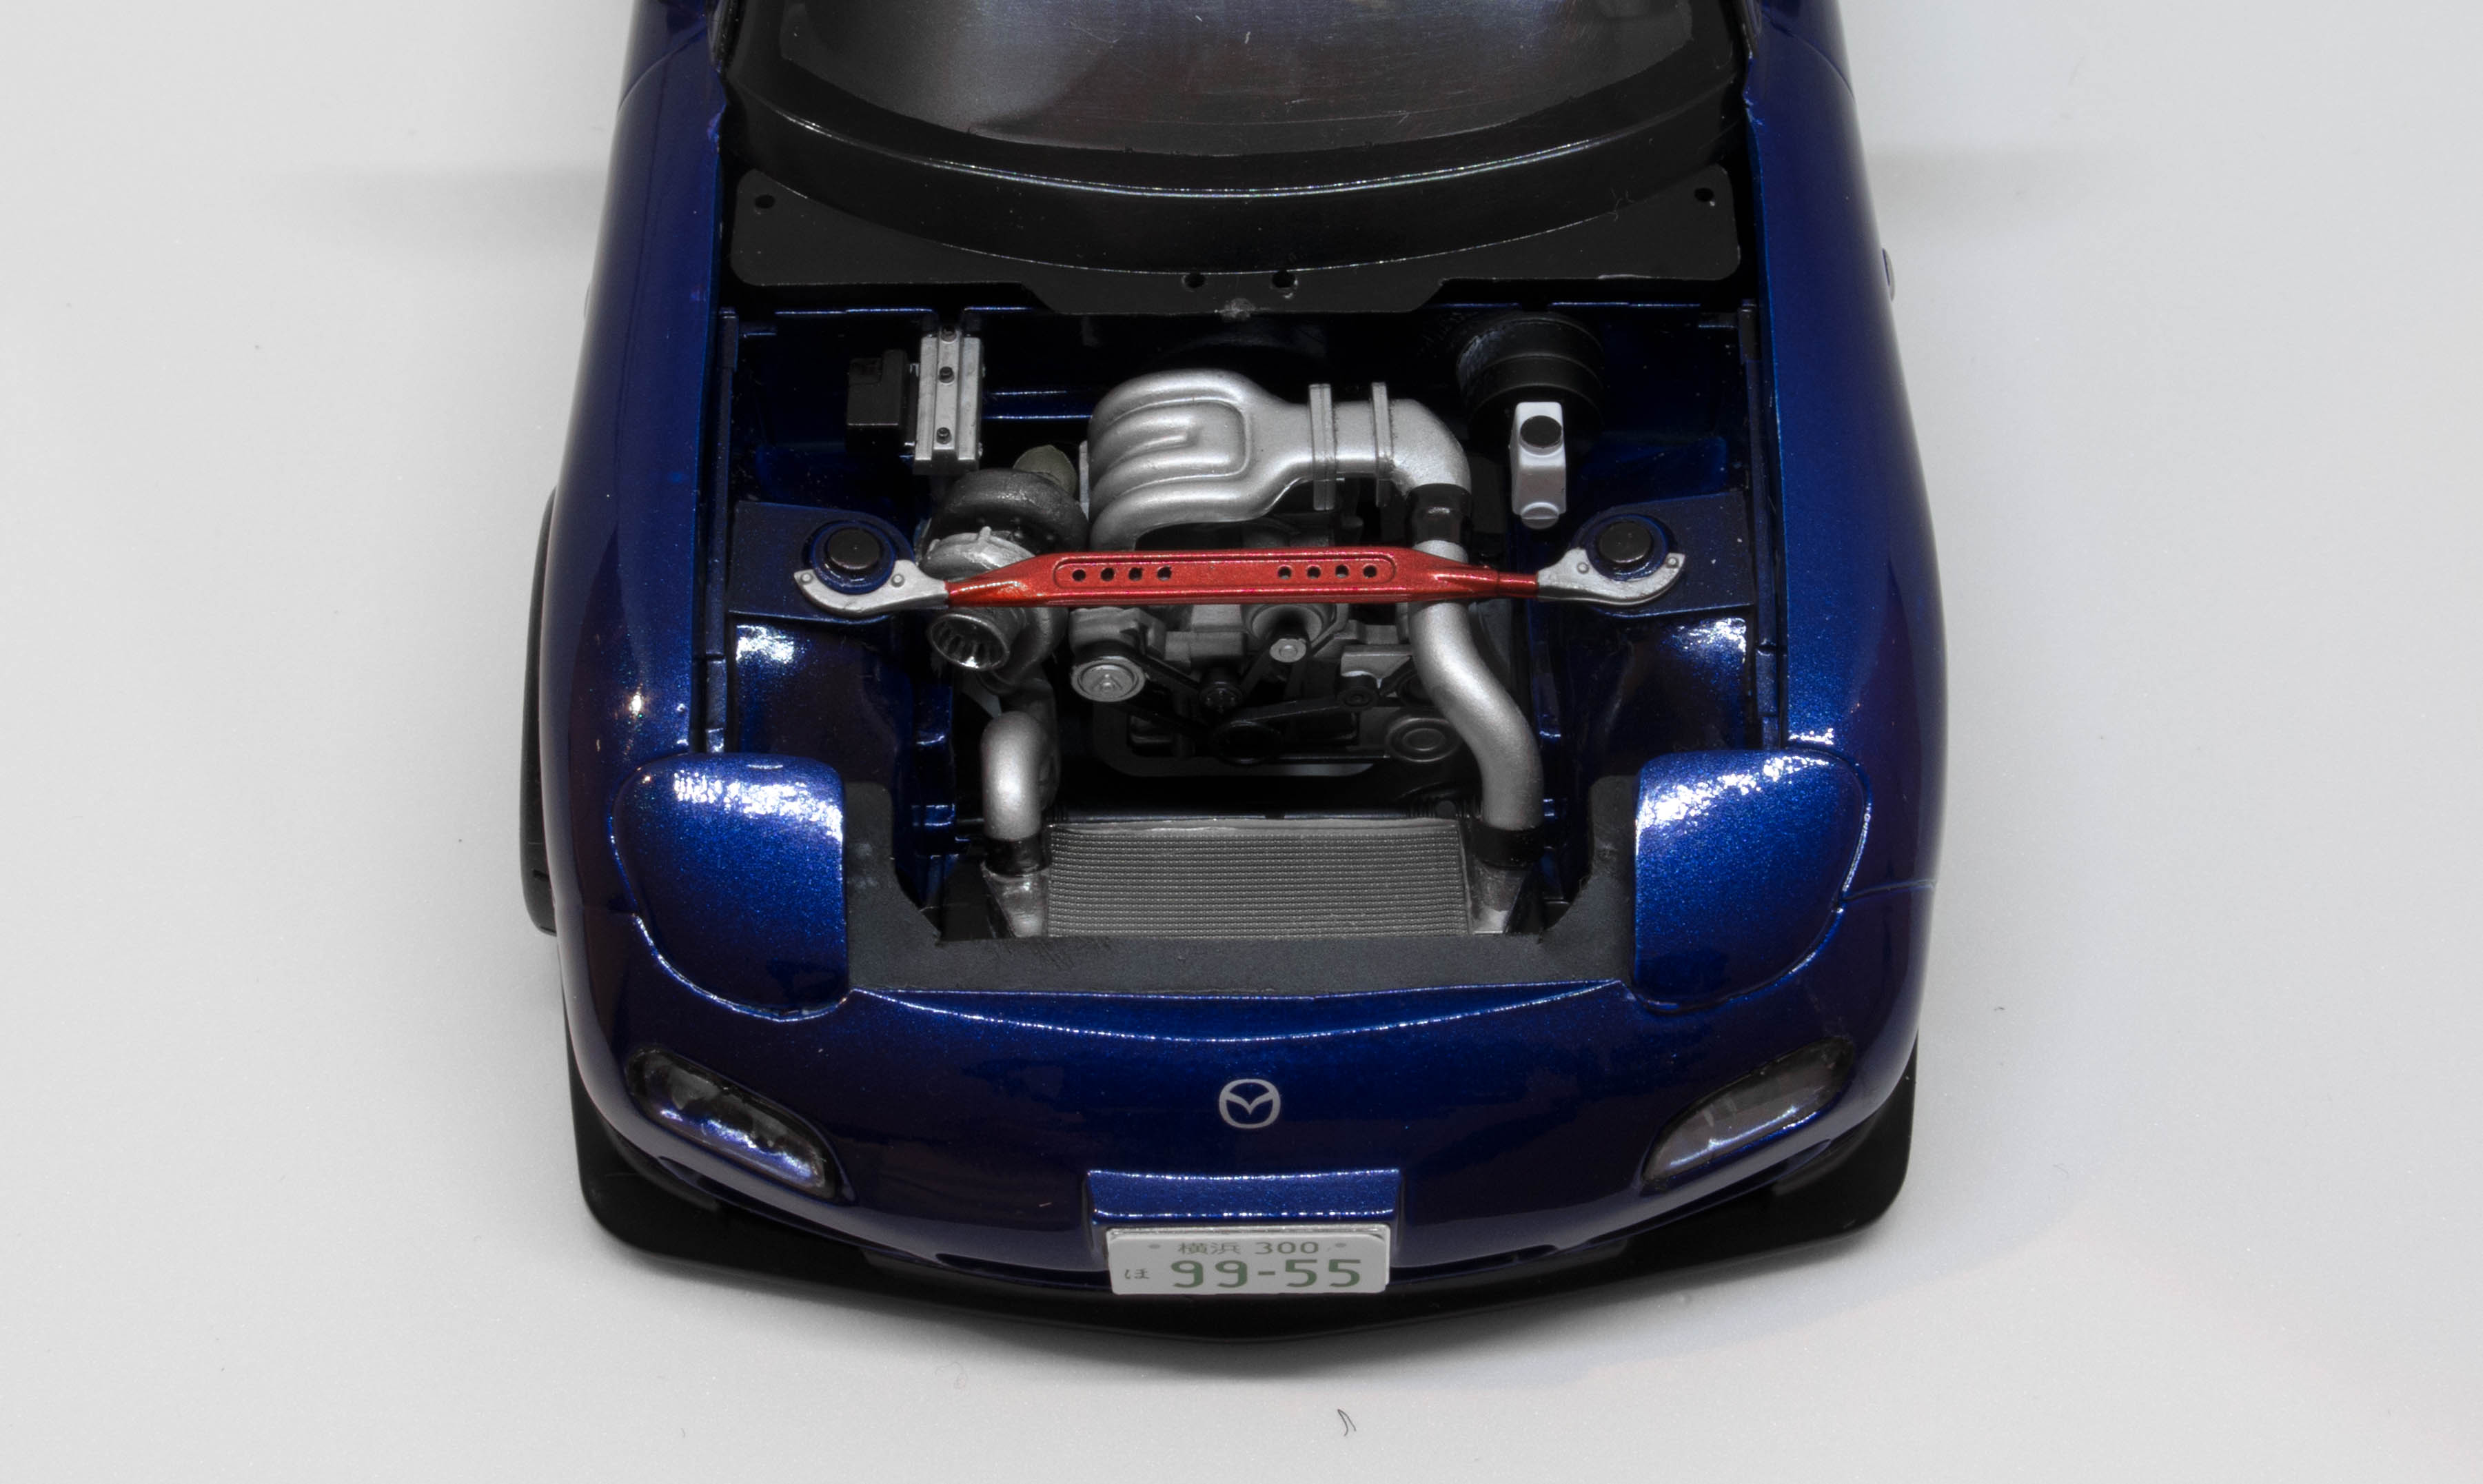
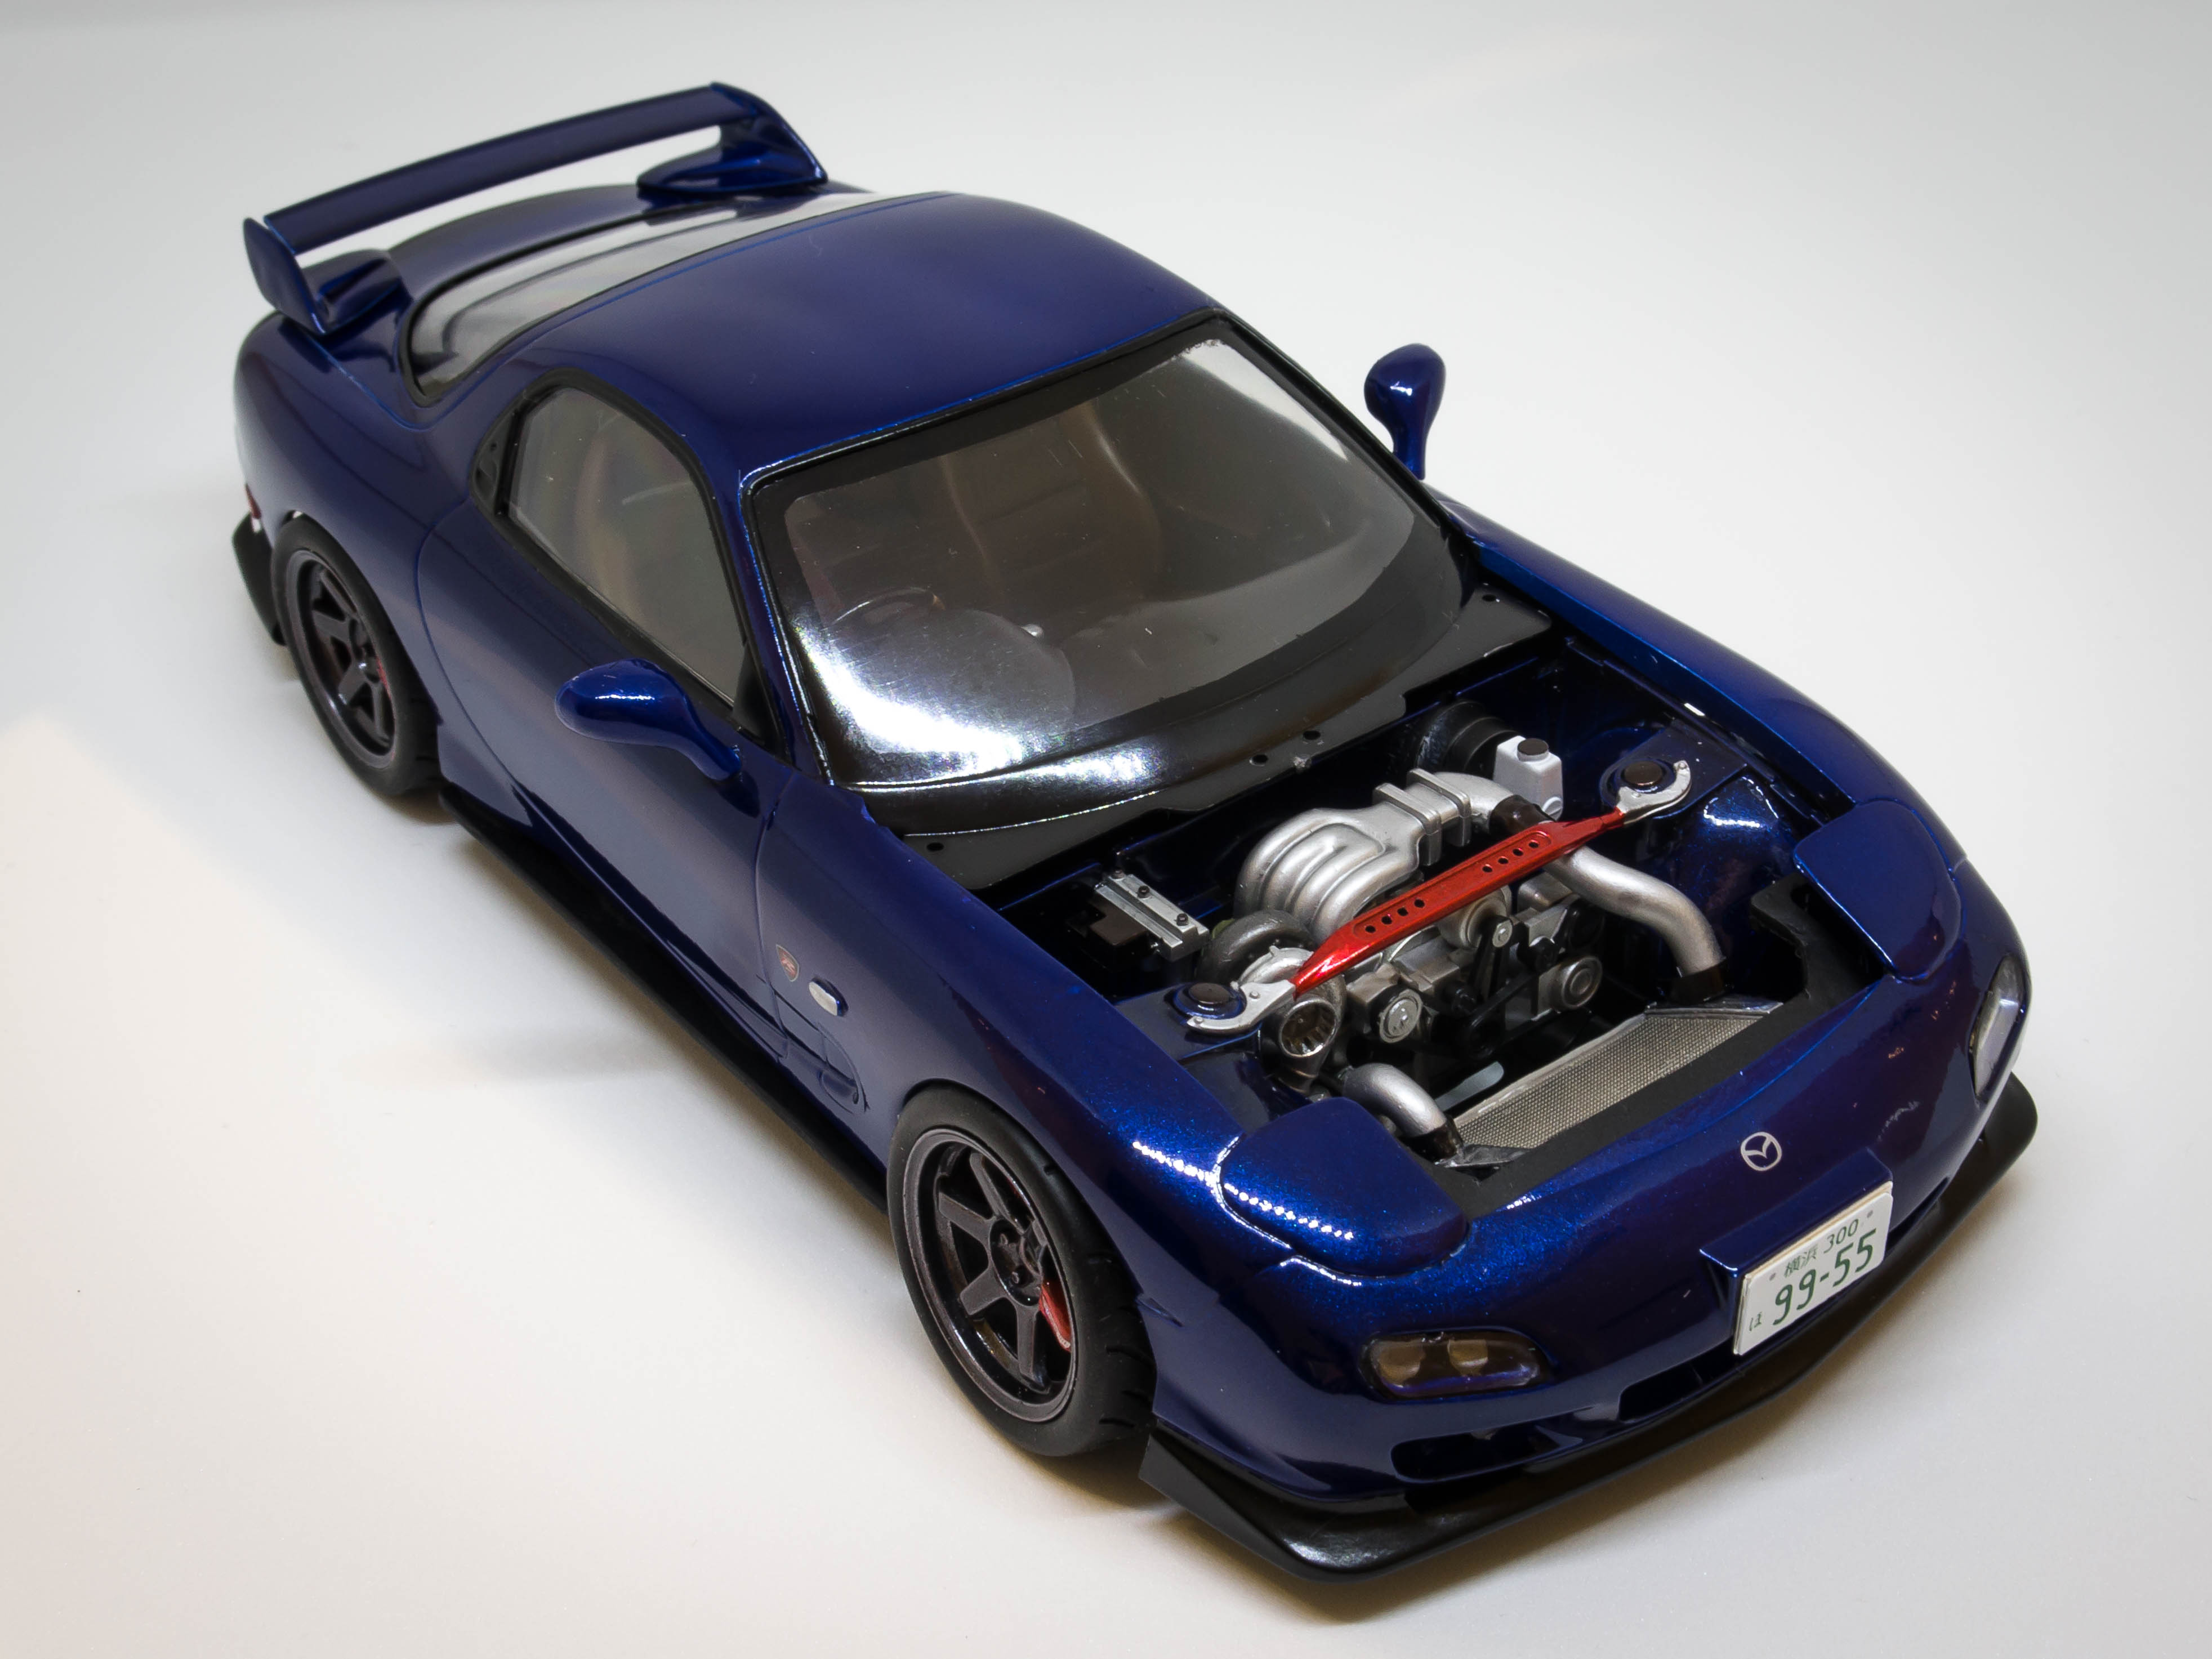
Hi All, I finished this kit over the weekend, after several weeks, of slow progress. I am really pleased with how it came out. The body is from the Aoshima RX7 Spirit R kit, engine and chassis are from the tamiya kit, and the aero bits are from a fujimi kit. I discovered along the way that even though they are all the same car, and scale, each brand has modeled the car slightly differently, and so not all the parts played together all that nicely. A lot of filling and sanding had to happen to the bonnet, and chassis to make it work with the aoshima body. I didnt get around to doing a WIP on this build, Thanks for looking Nathan
-
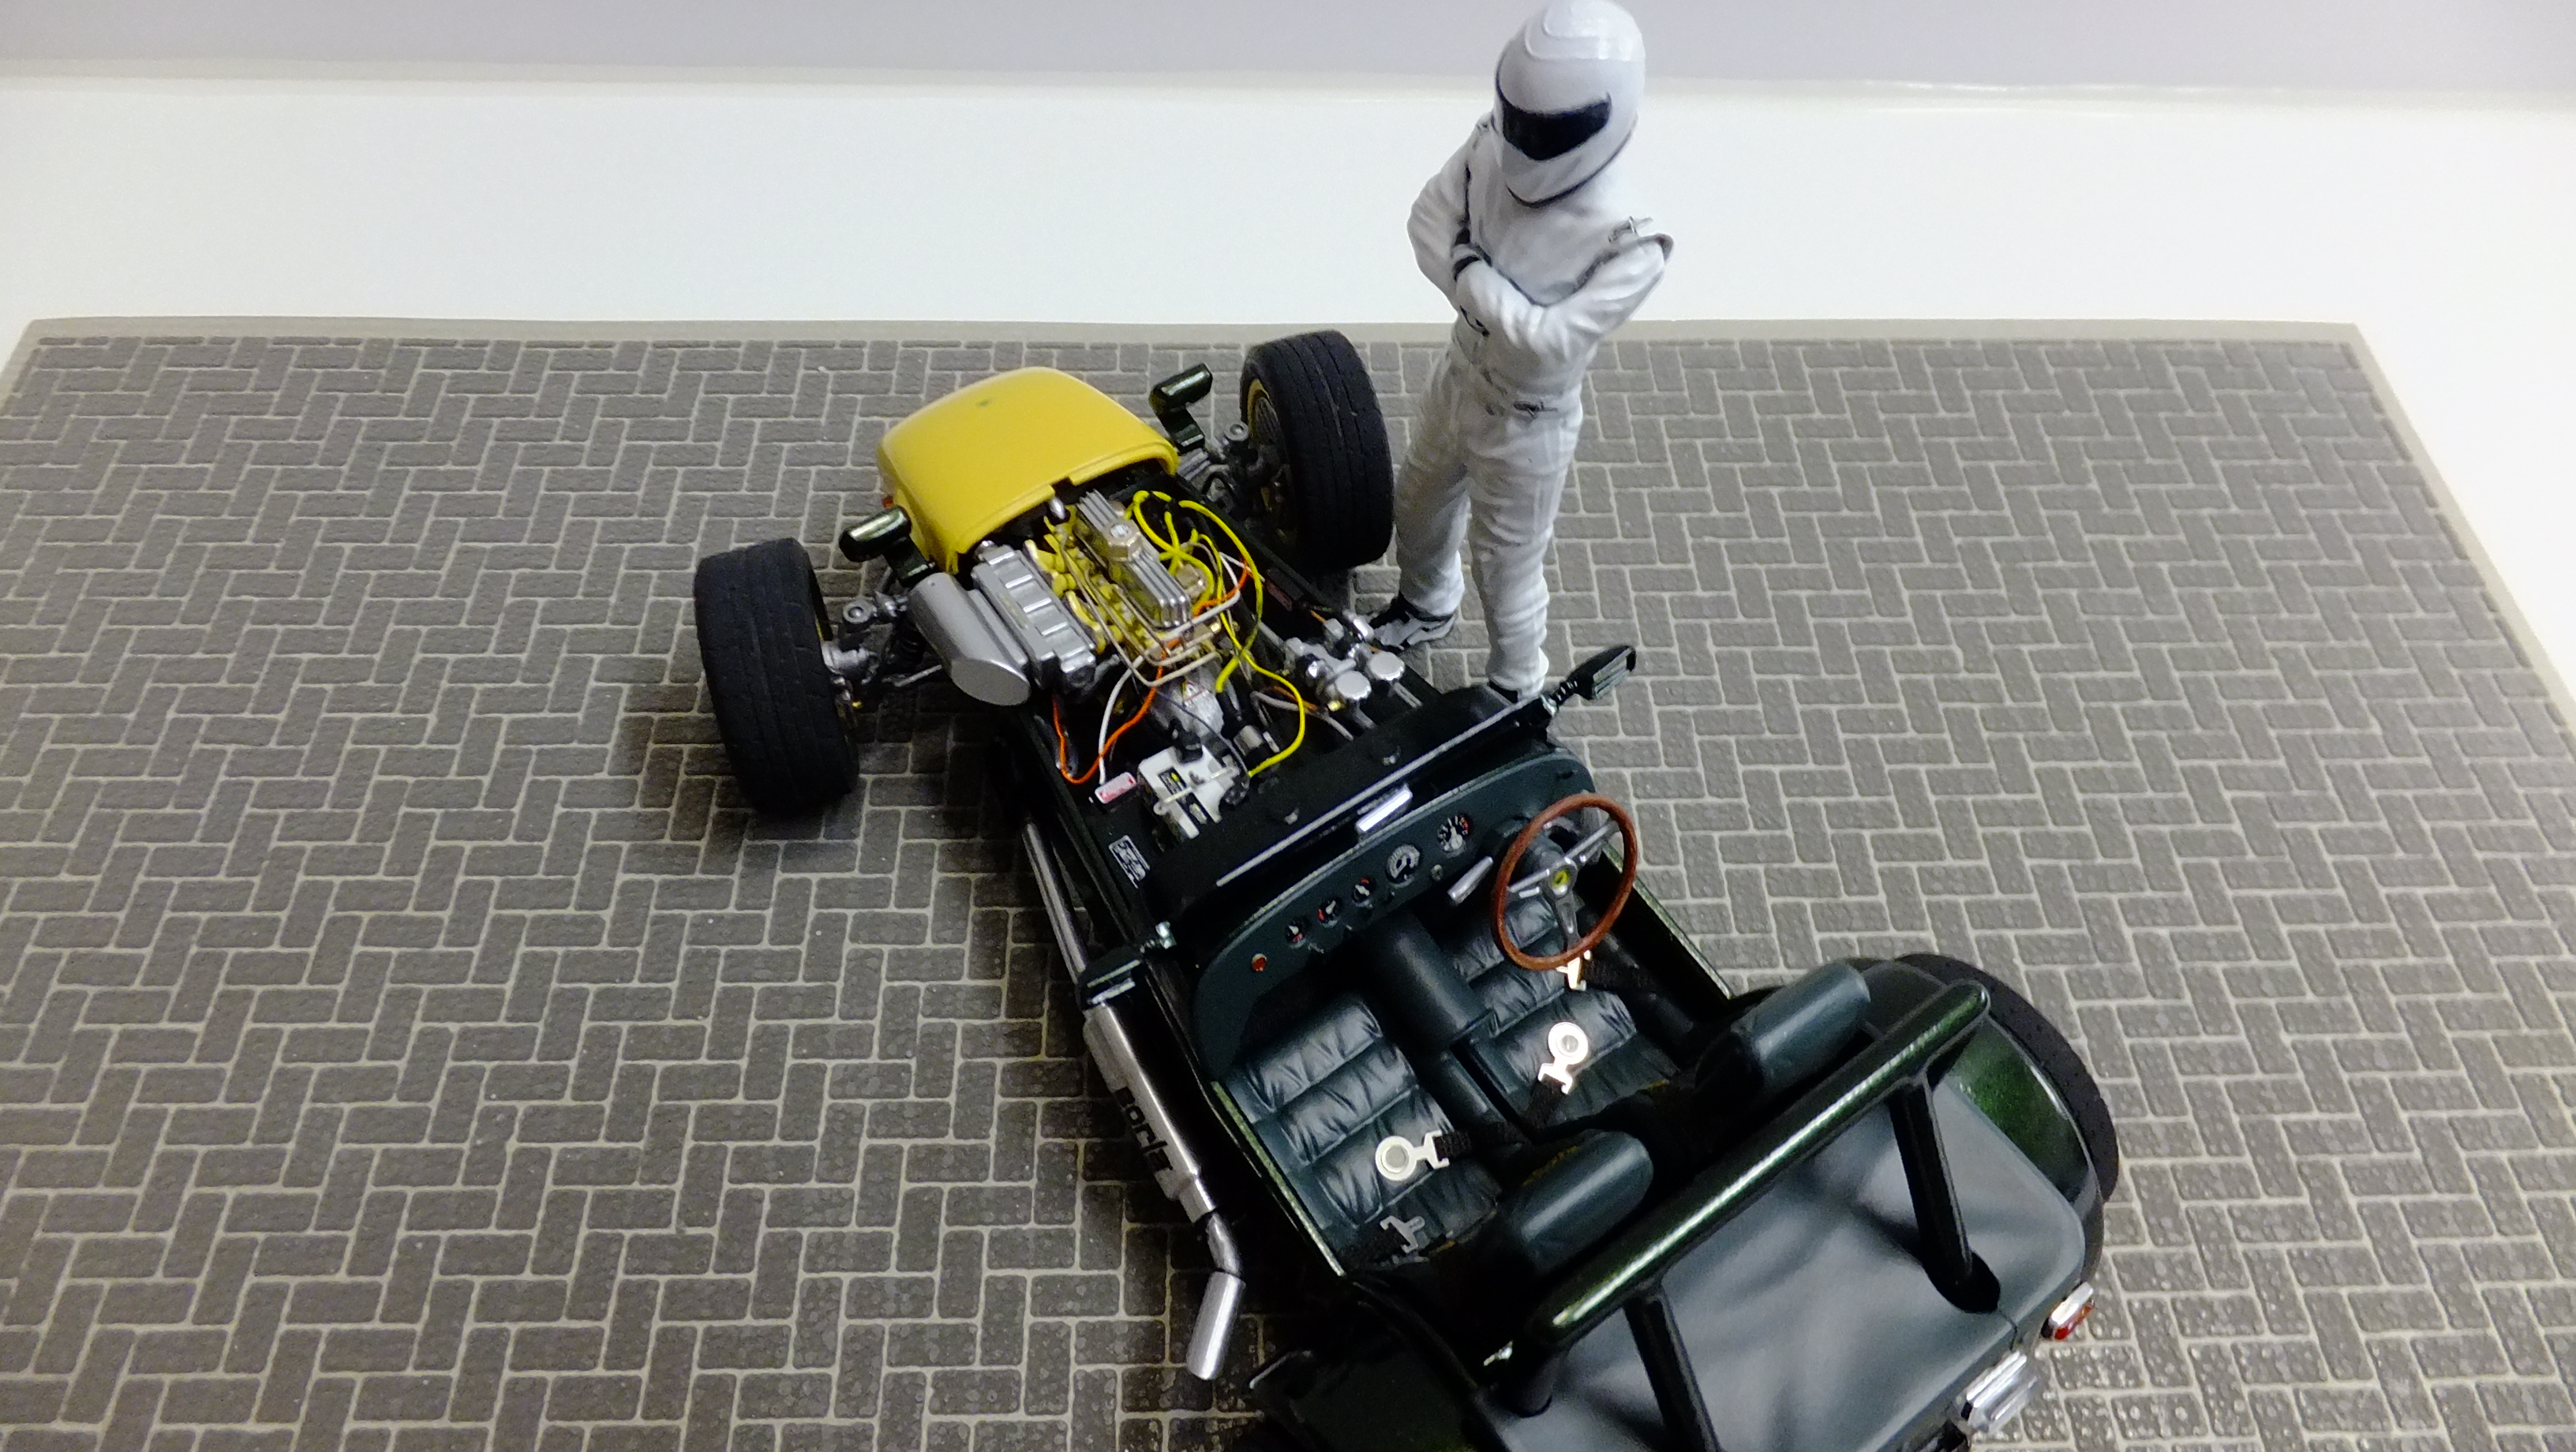
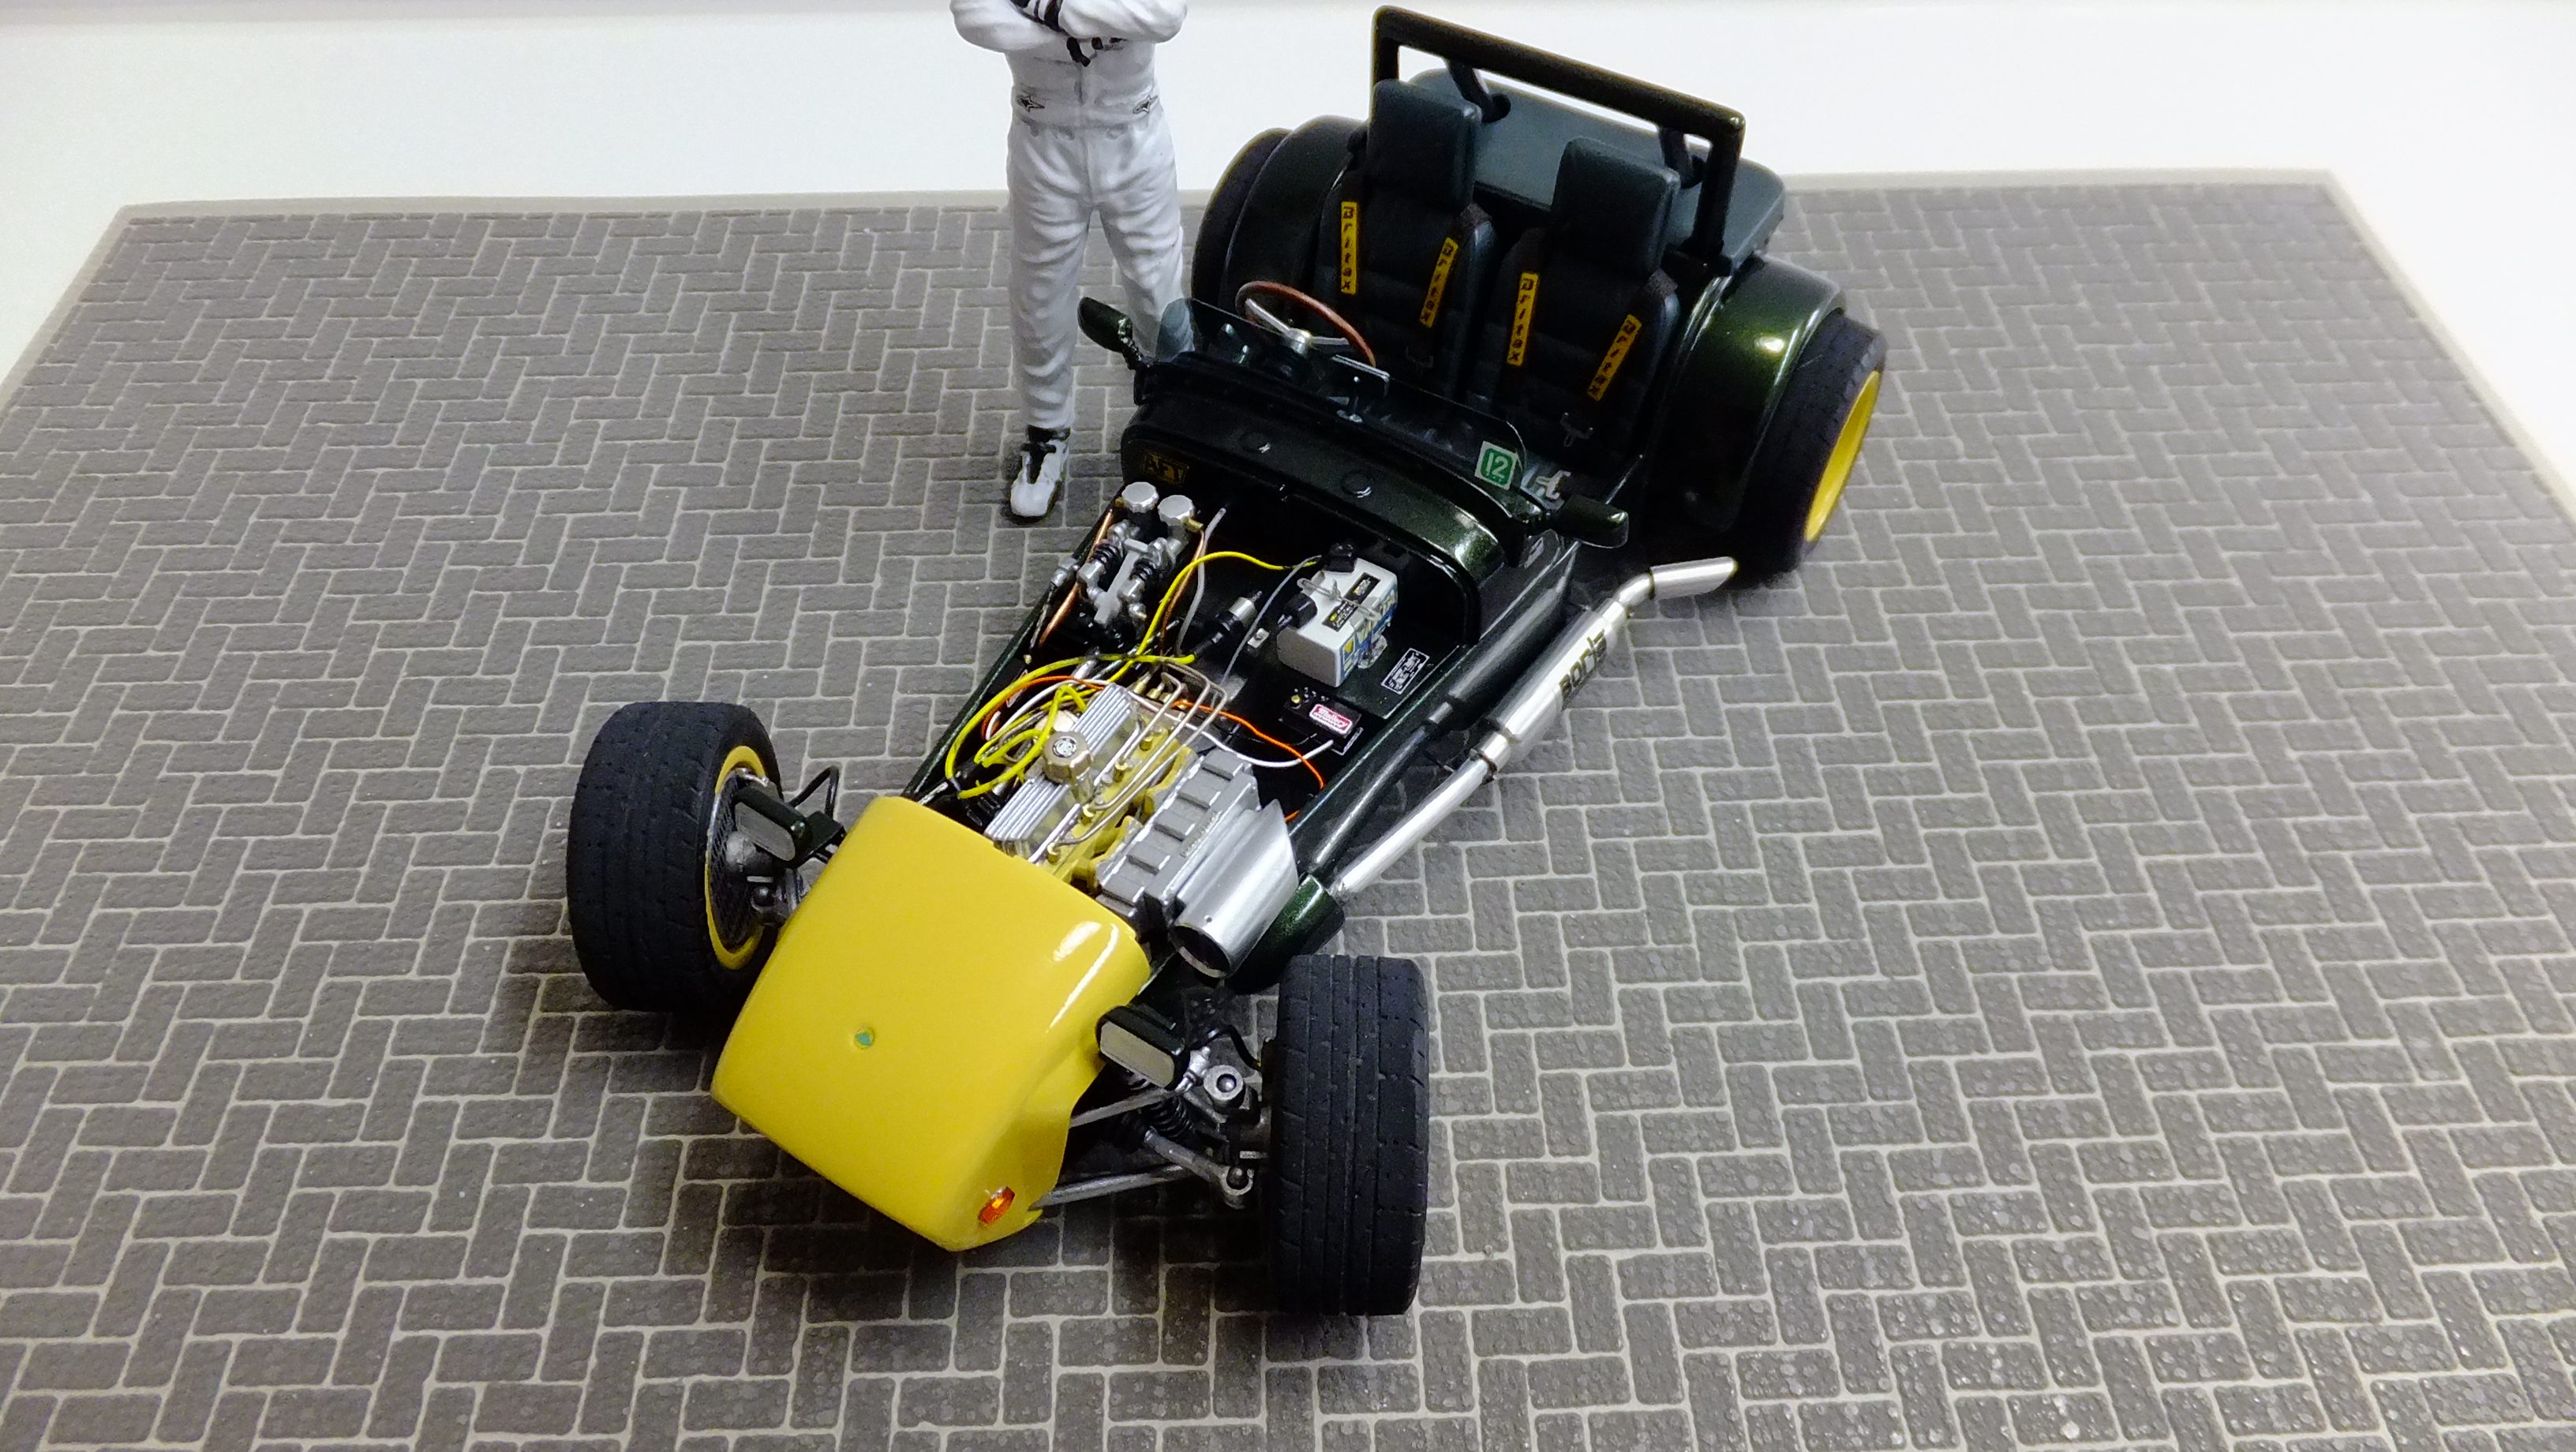
This is the first in my "Stig Collection". Its Tamiyas 1/24 Lotus Super Seven with ALOT of modifying. SB supercharger, dash, exhaust, roll bar, and windscreen. The hoodscoupe came from Fujimis Cobra 427 kit, and the seats are from a Lotus Esprit kit. I also added a paddle shifter. Got to try-out doing better photos with a new camera too!
-
I started this project about 8 years ago... 8 years... In 2010 huh and now its done.. Its Tamiya model kit of Nissan Skyline GT-R 2000, also known as Hakosuka. It came far from perfect, but its still pretty nice, and after all im happy i can call it done now..
-
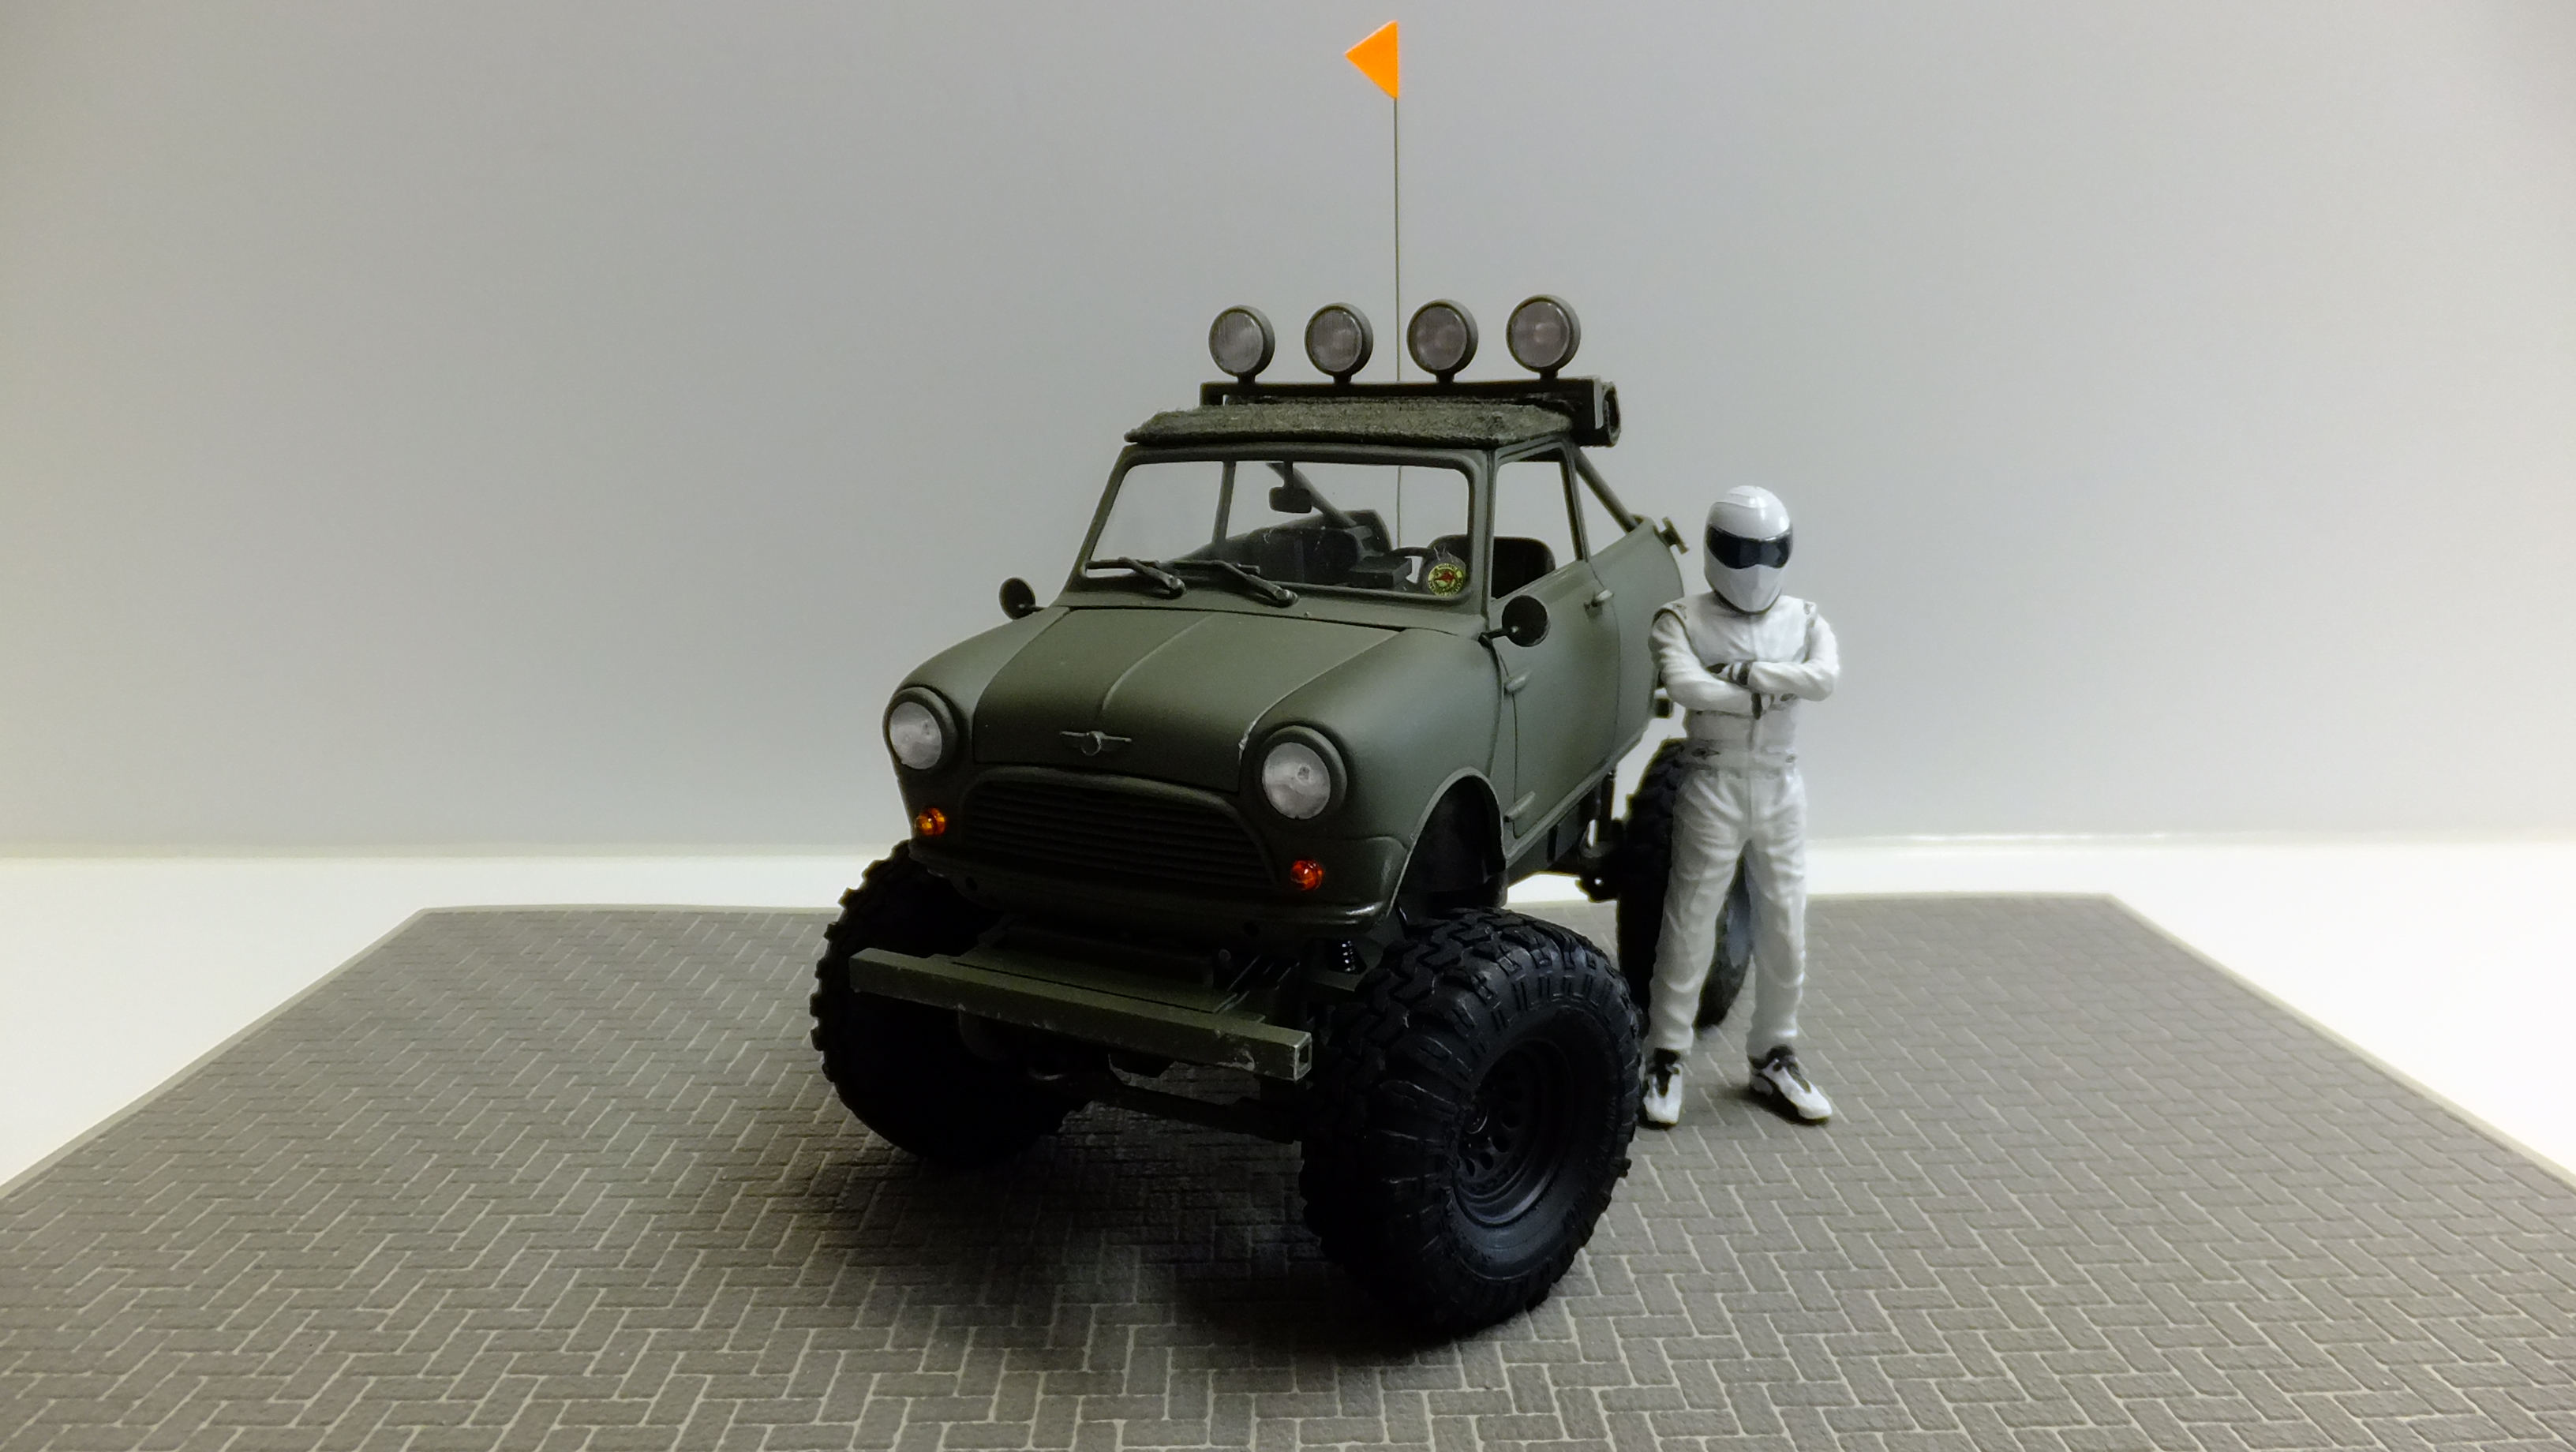
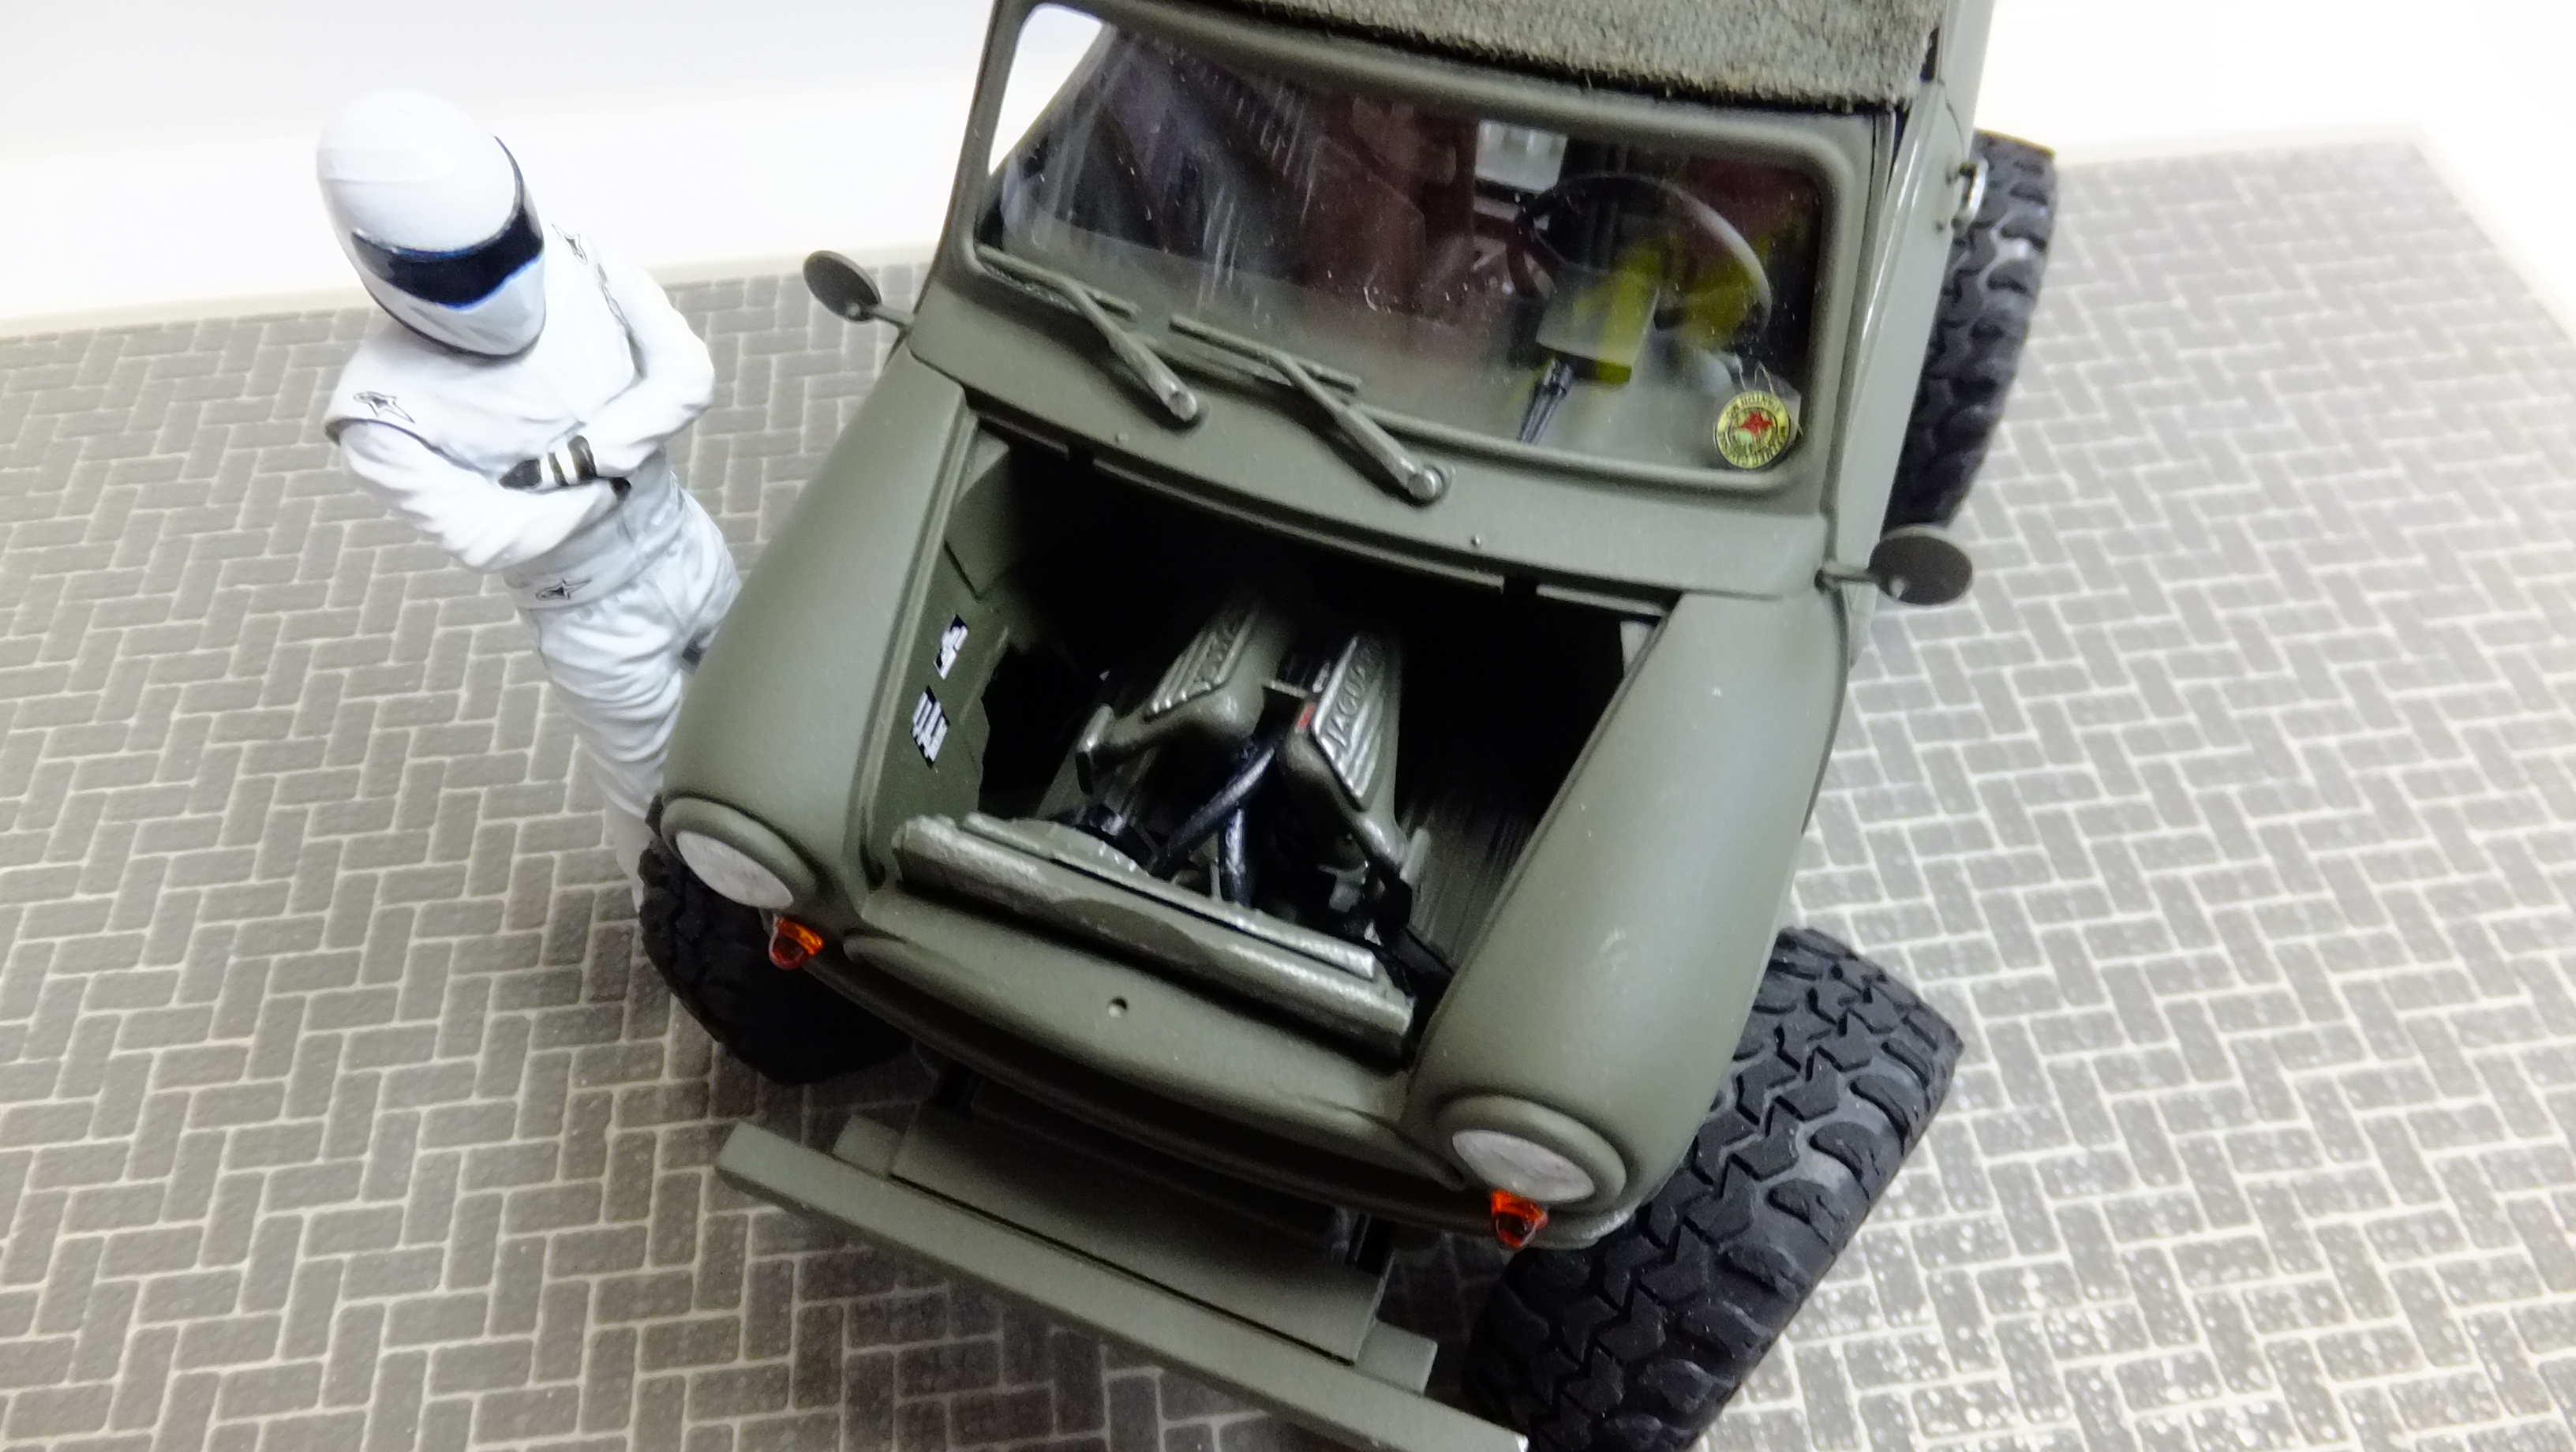
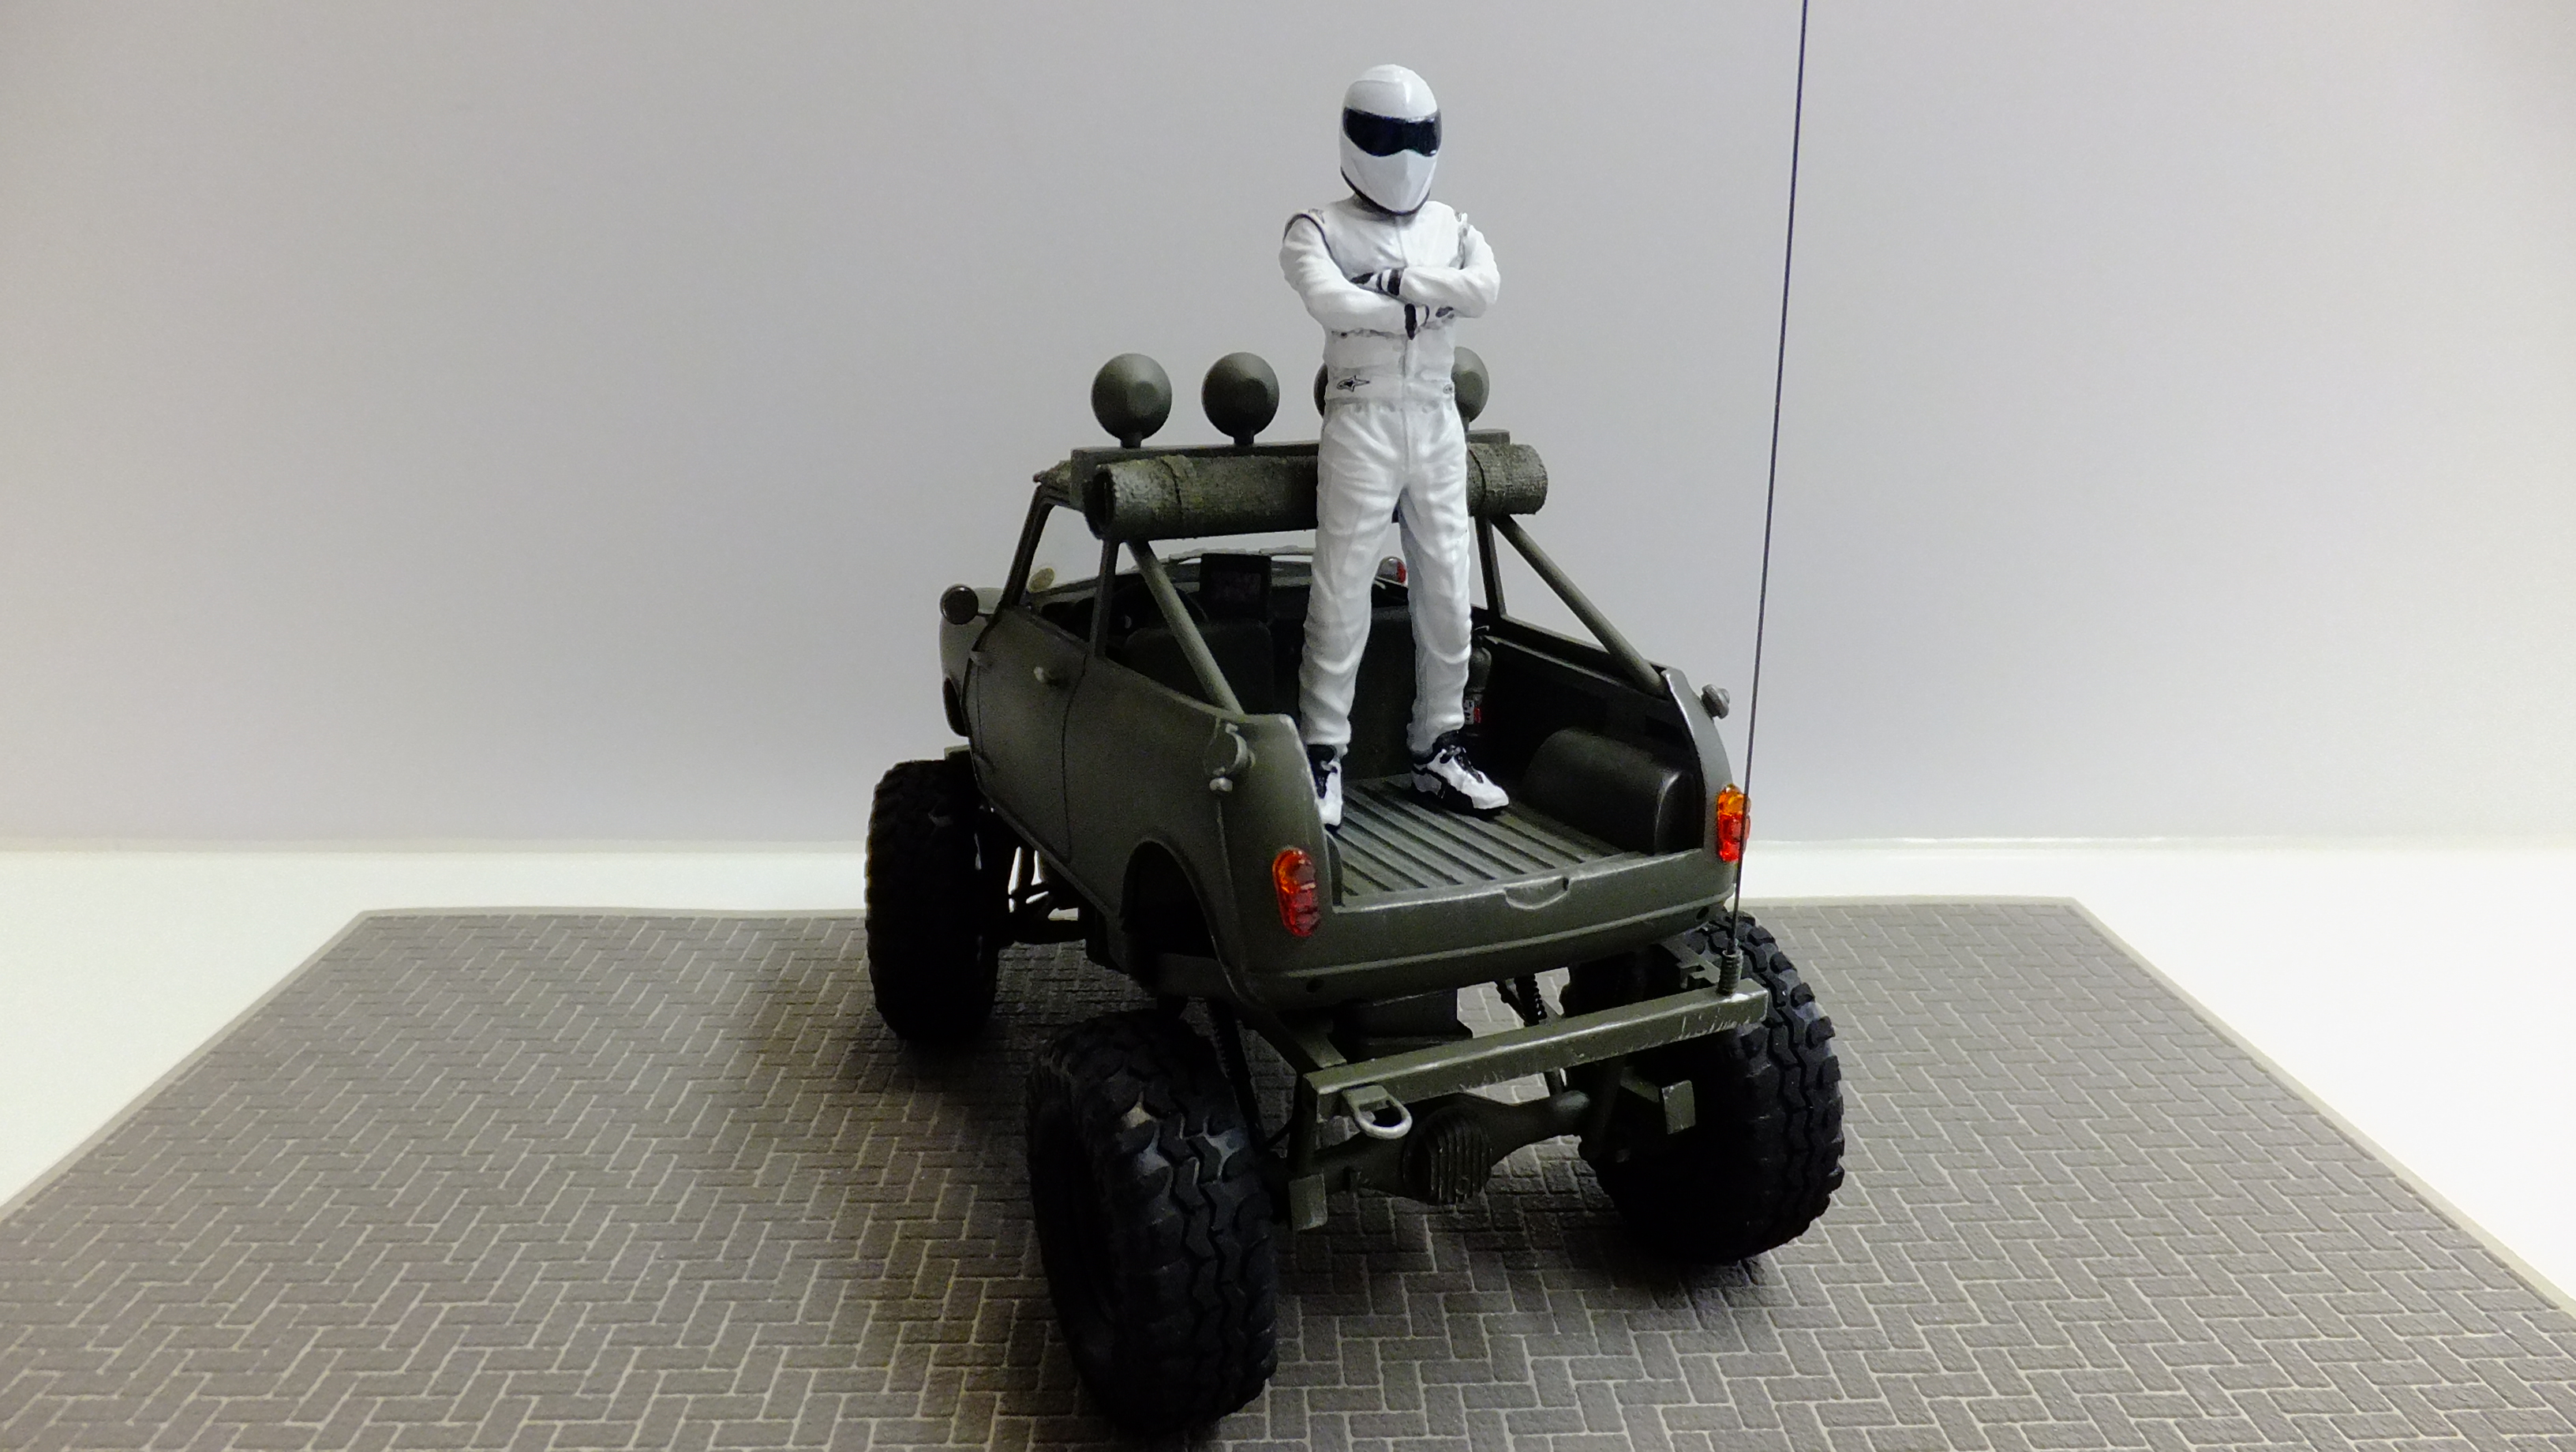
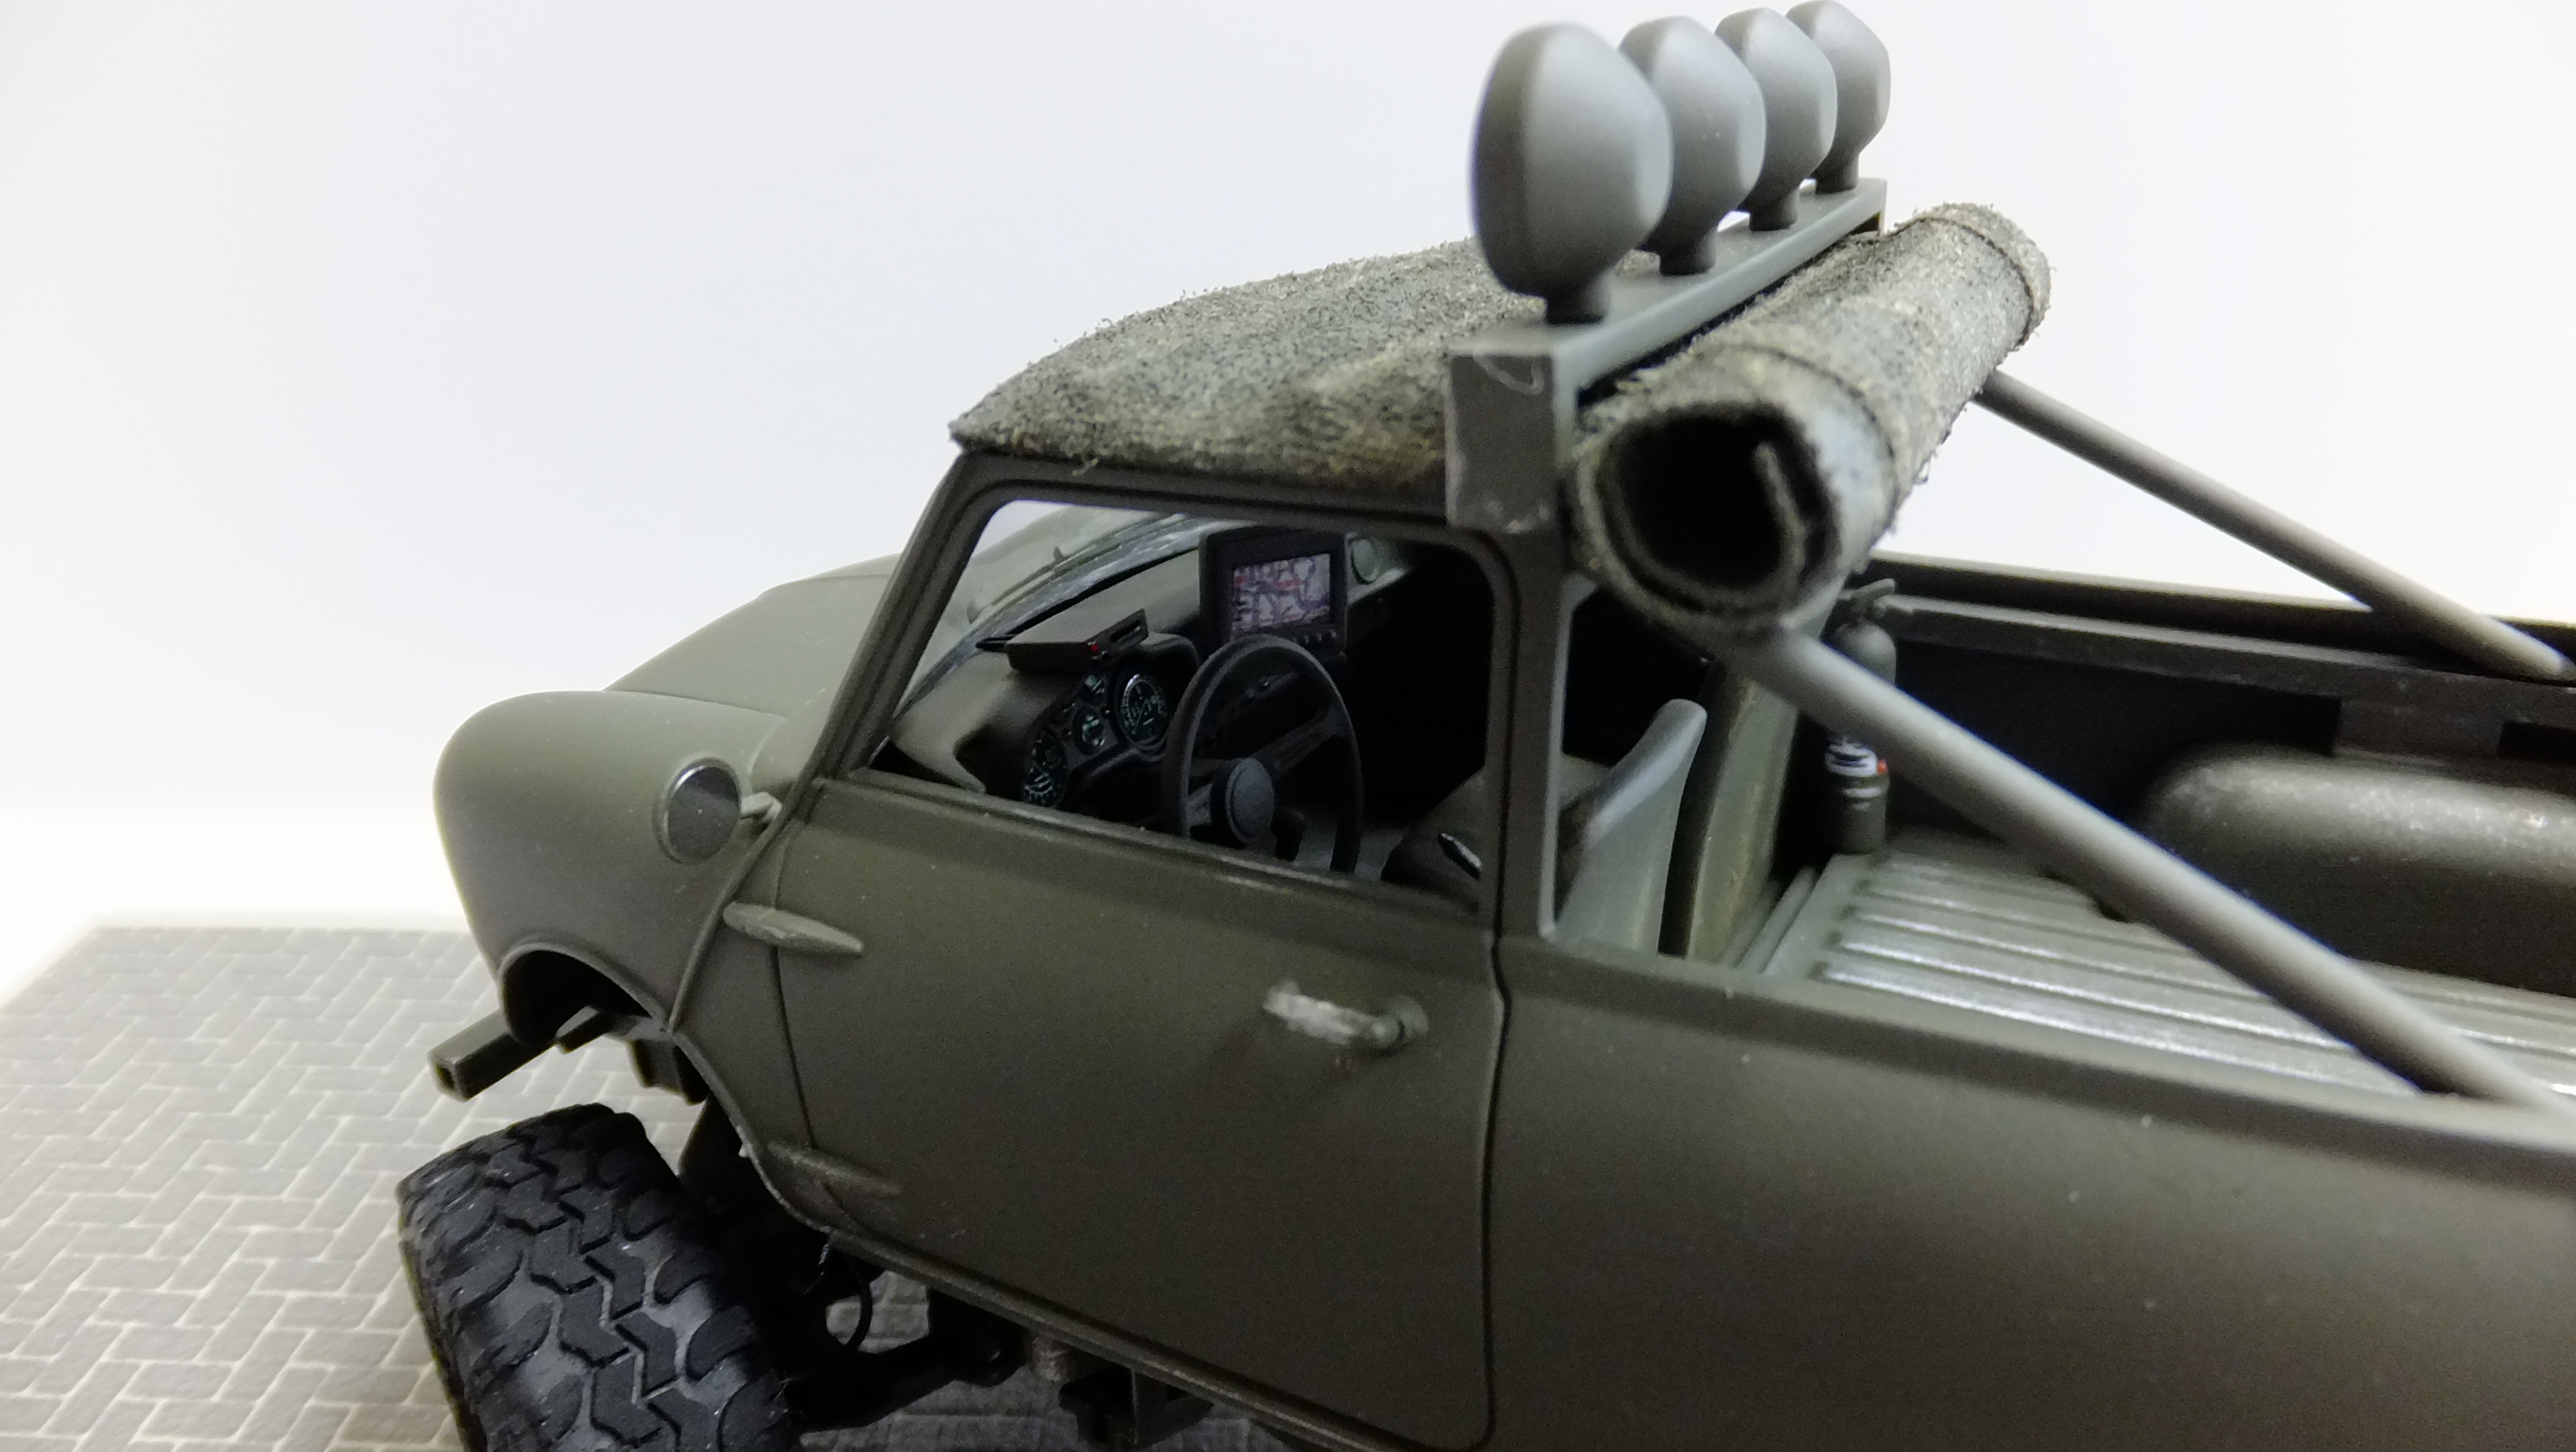
Hey everyone!, this is my Tamiya BMC Mini Cooper by Tamiya. I wanted to see if I could build an interesting model within a week, so I decided to build this. Somehow it looks right at home up there...lol!! This was just suppose to be pure fun, and it was!, everything under it is from an Aoshima Hilux kit, the dash is from a Renault Alpine, and the engine is laughably from a Tamiya Jaguar XJ220! -I think I will go back and add a few things to it, like a winch....
-
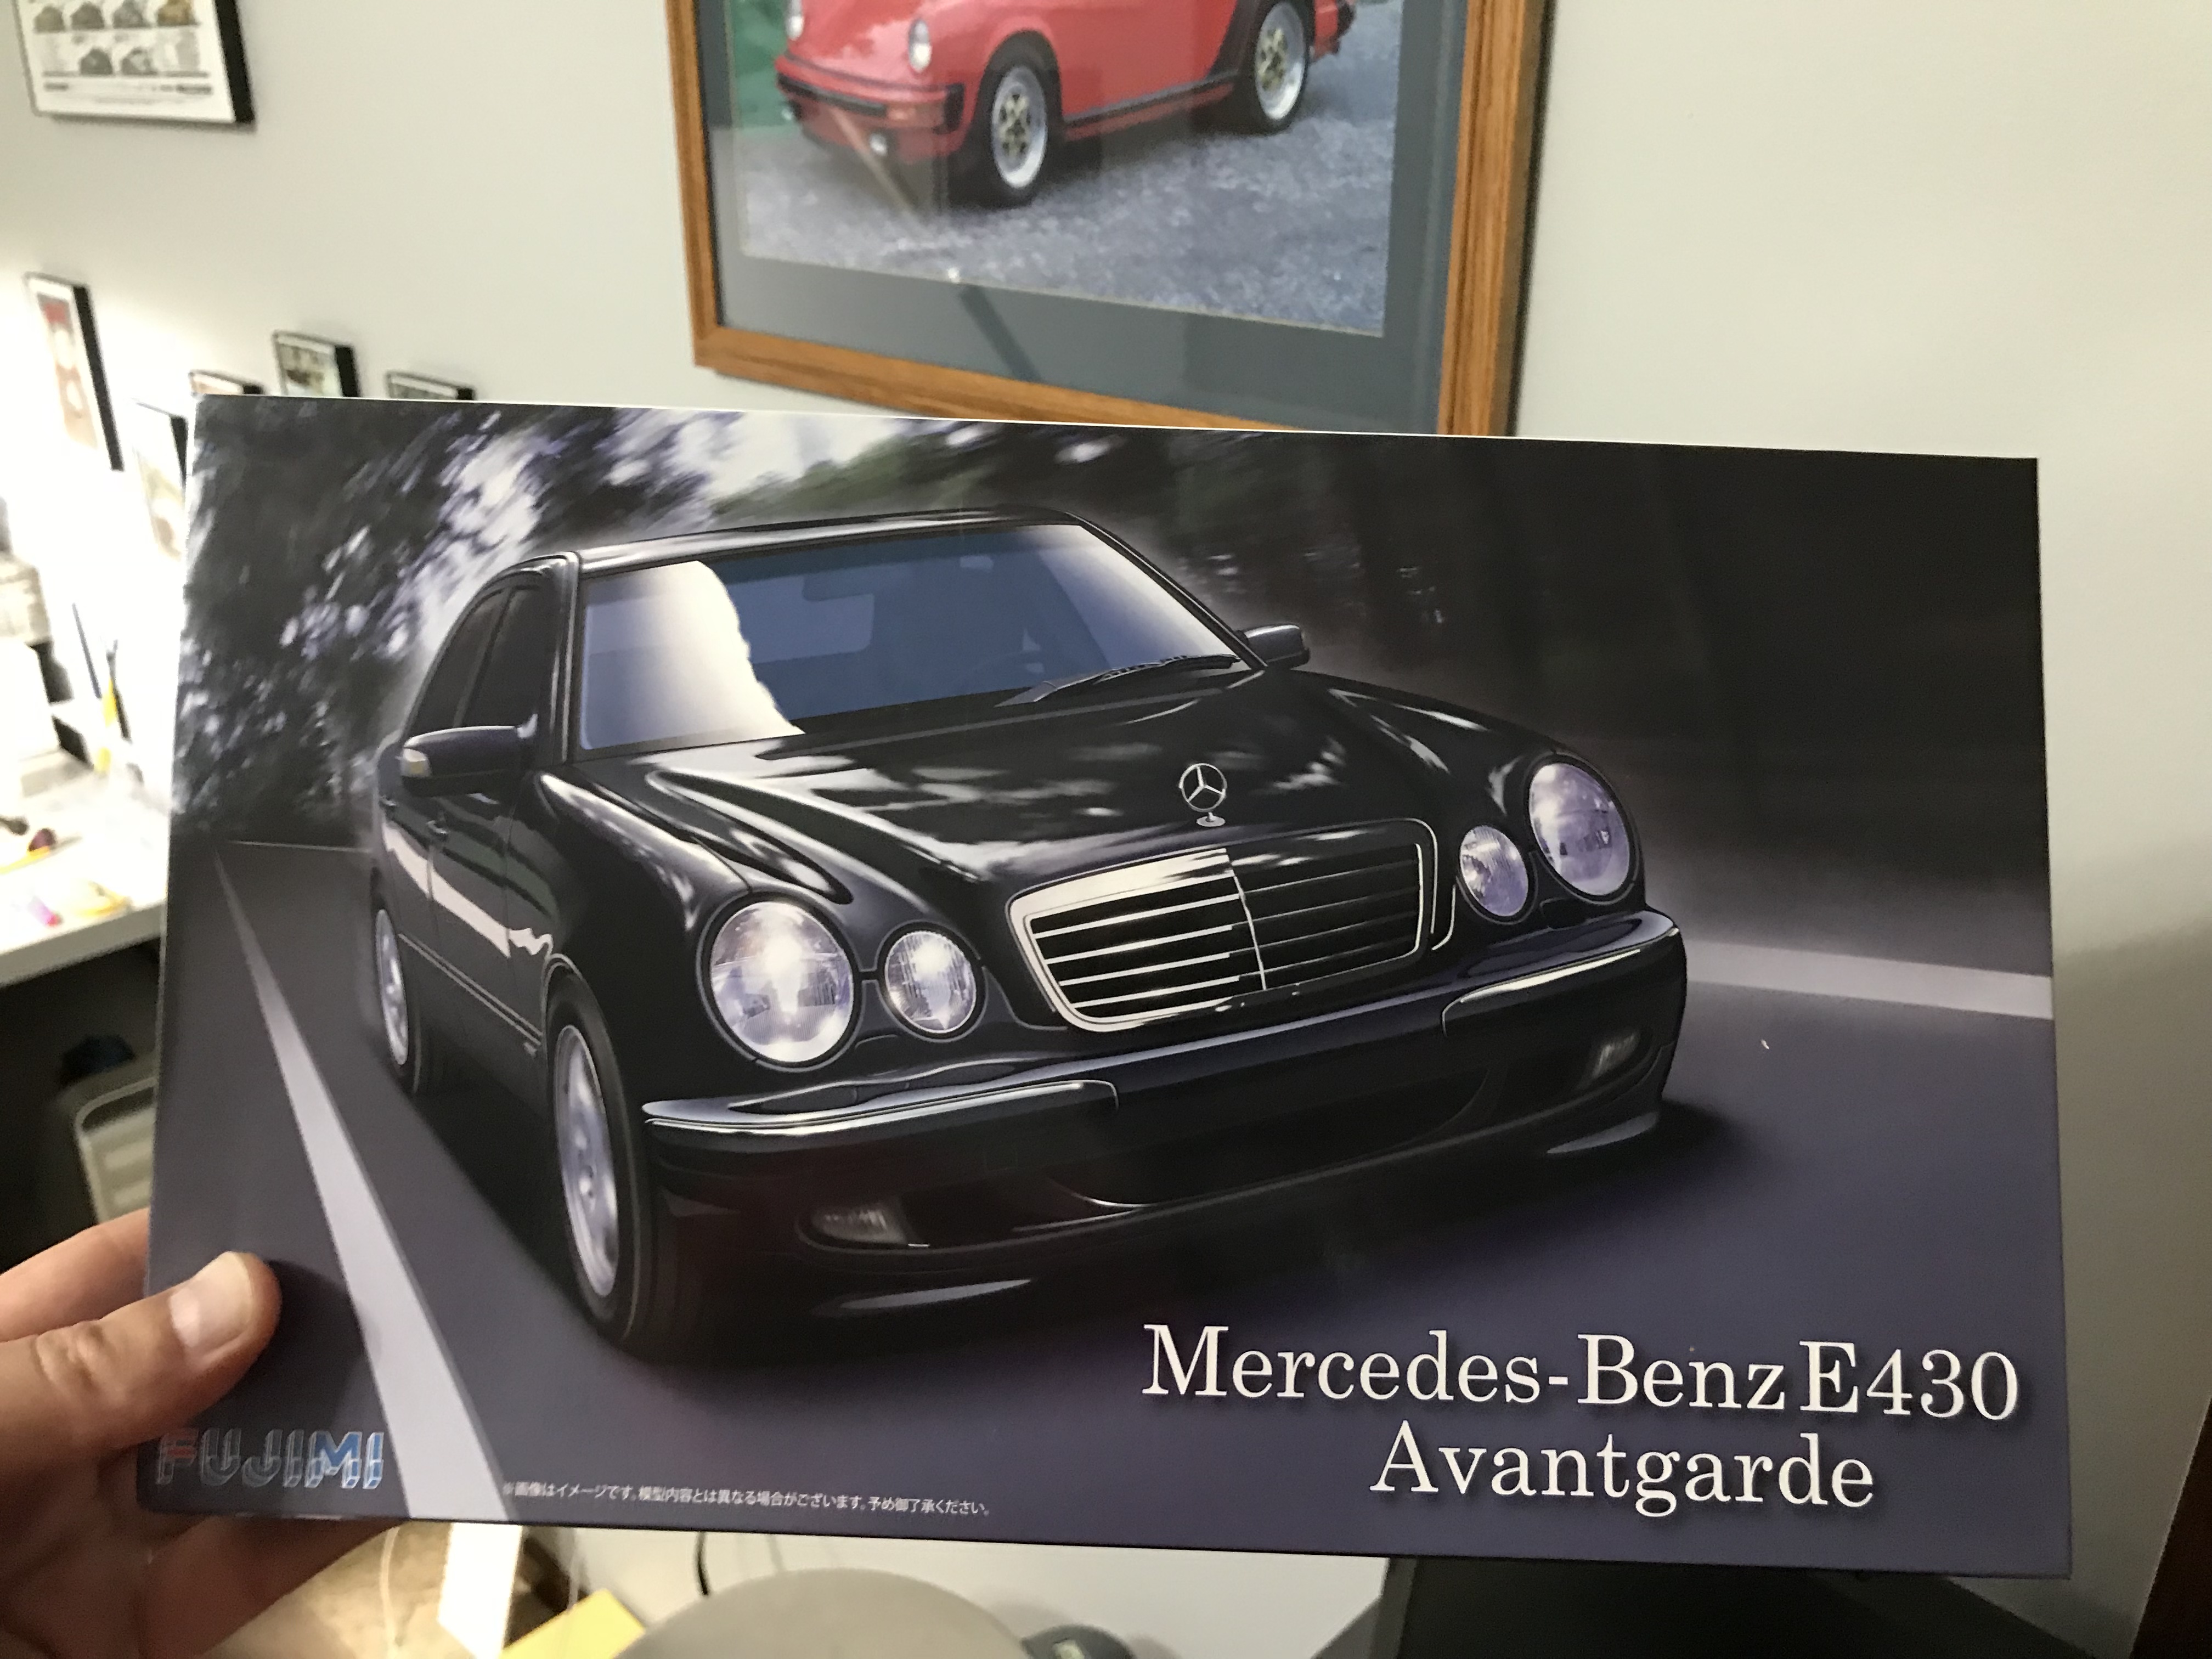
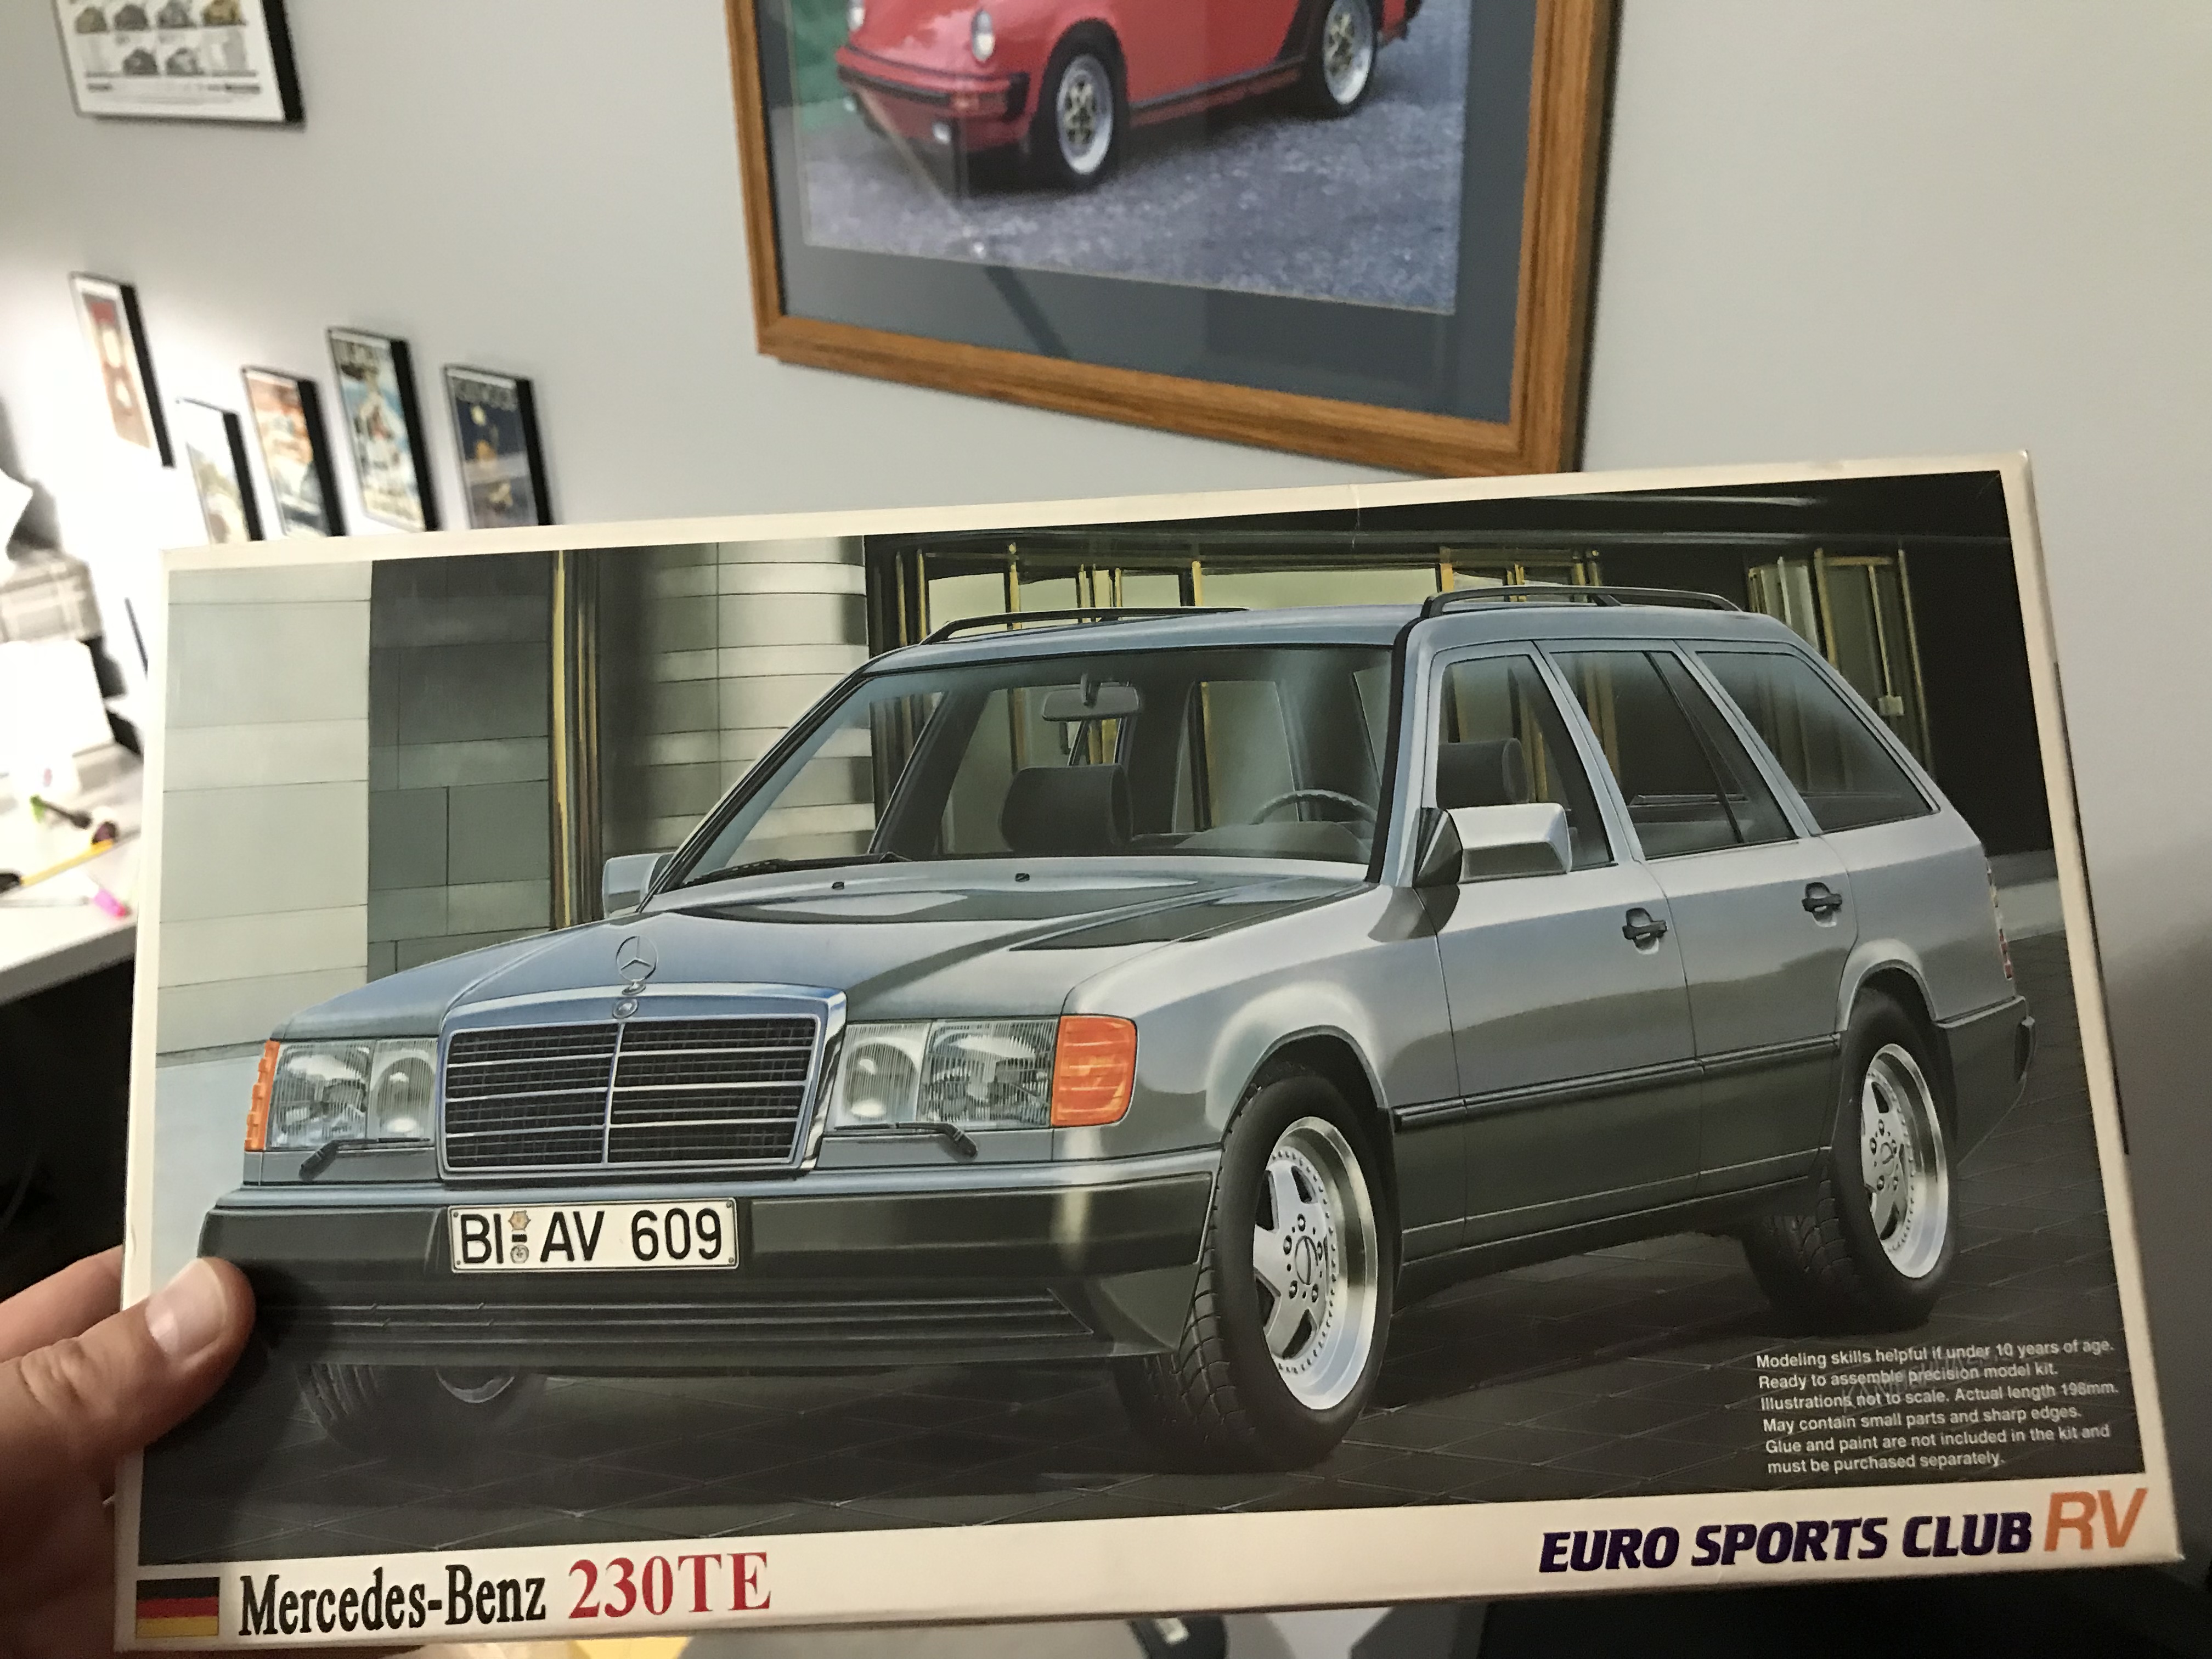
Well, I finally wrapped this up. I opted to not apply the tire decals due to fat-finger difficulties (I messed up). I also got two more Mercedes kits this week, both from Japan.
-
 Doin some cleaning today,,and ran across this in the storage area,,Tamiya makes some really great kits,,this being the CB 750 thats been out forever. One of my fav in-line 4 bikes.
-
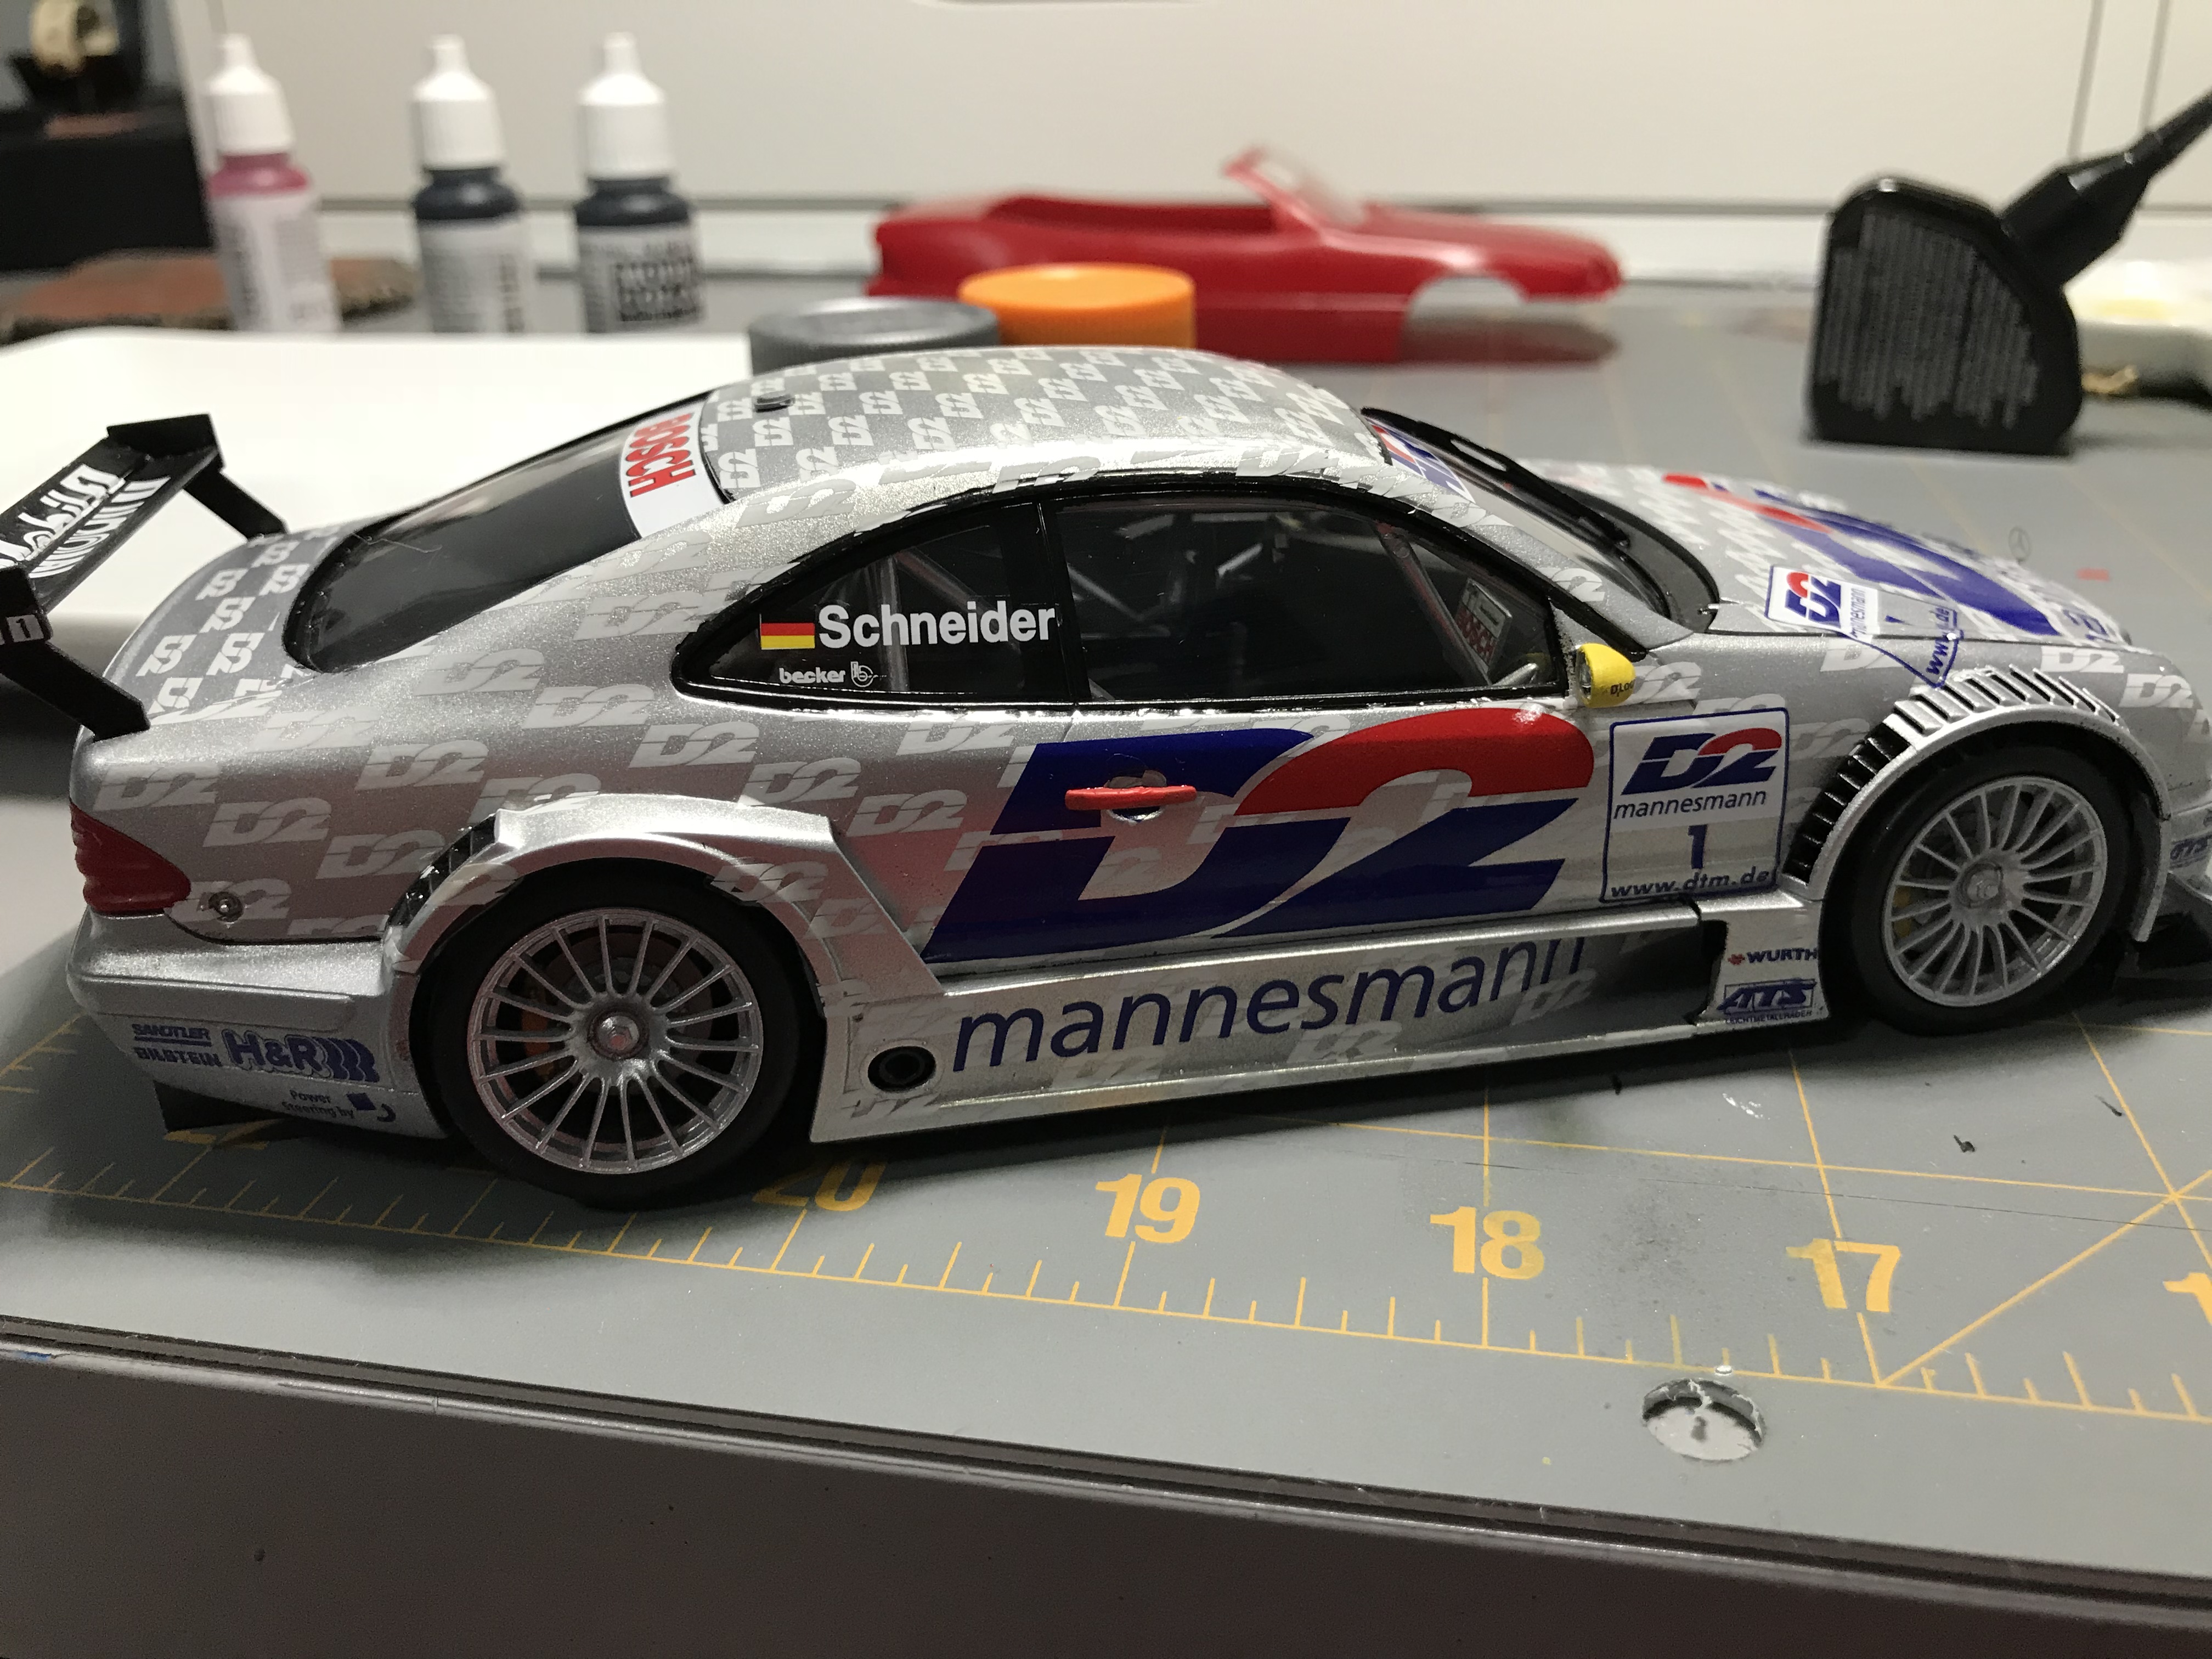
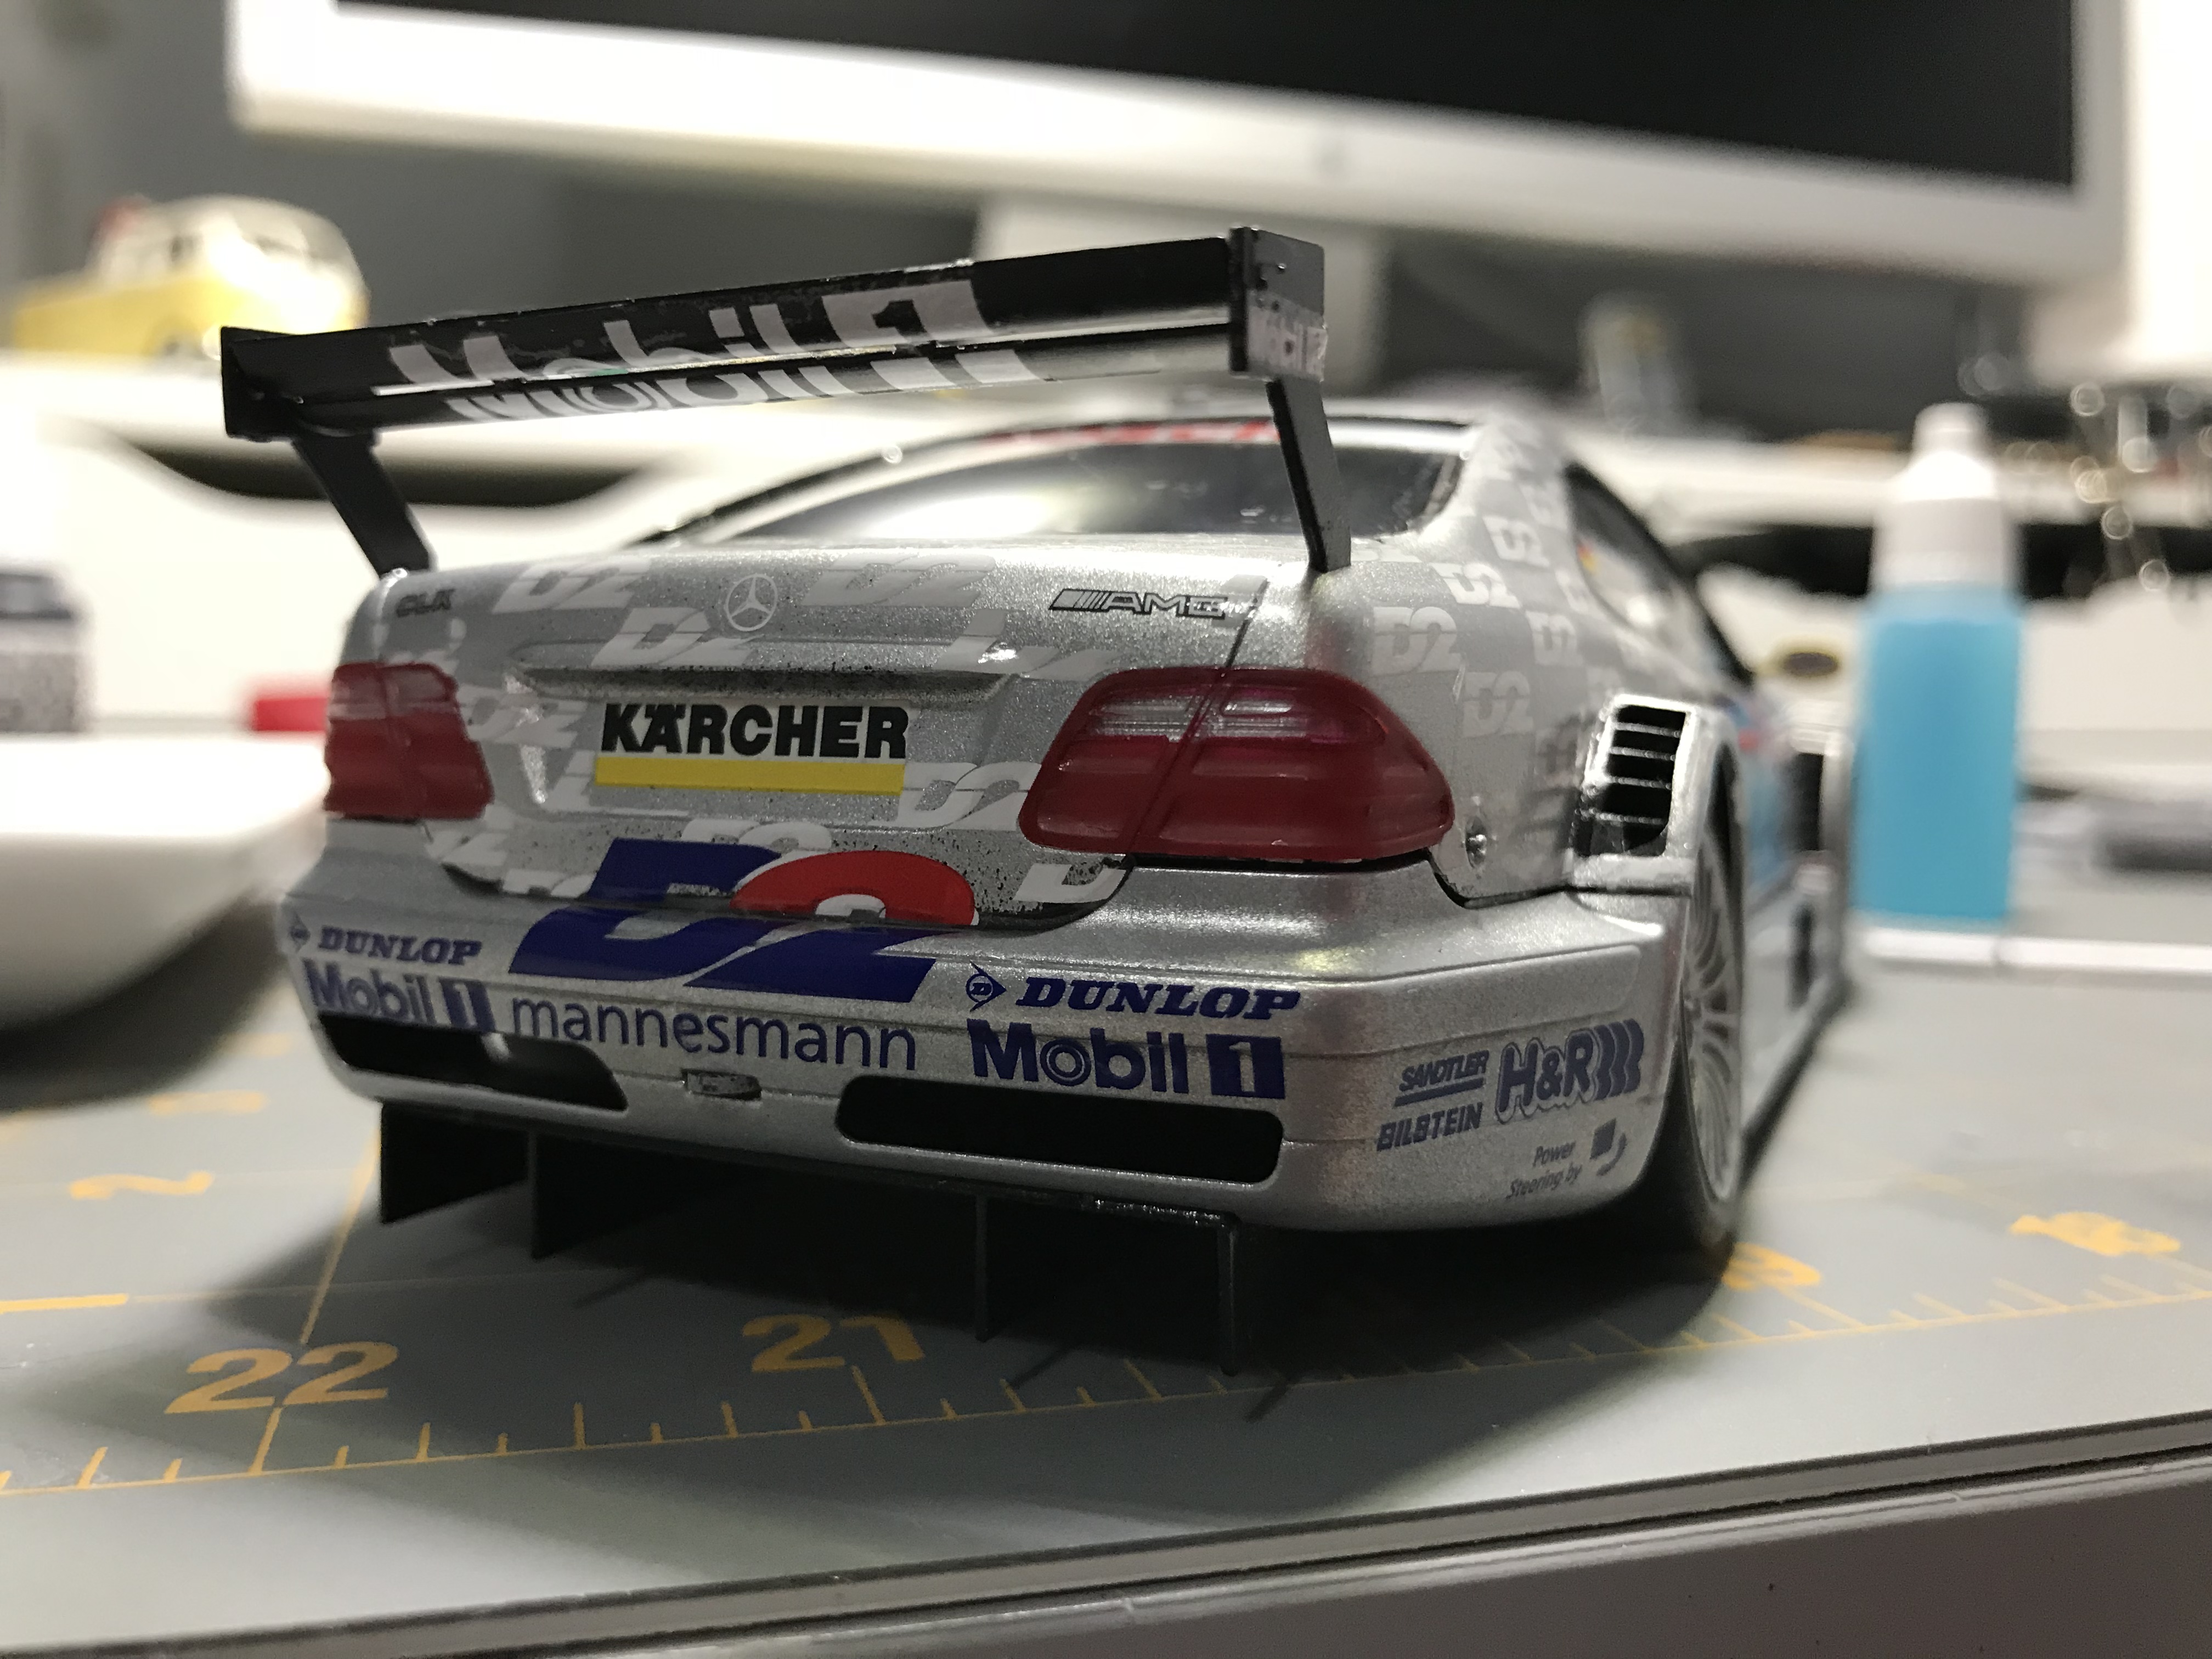
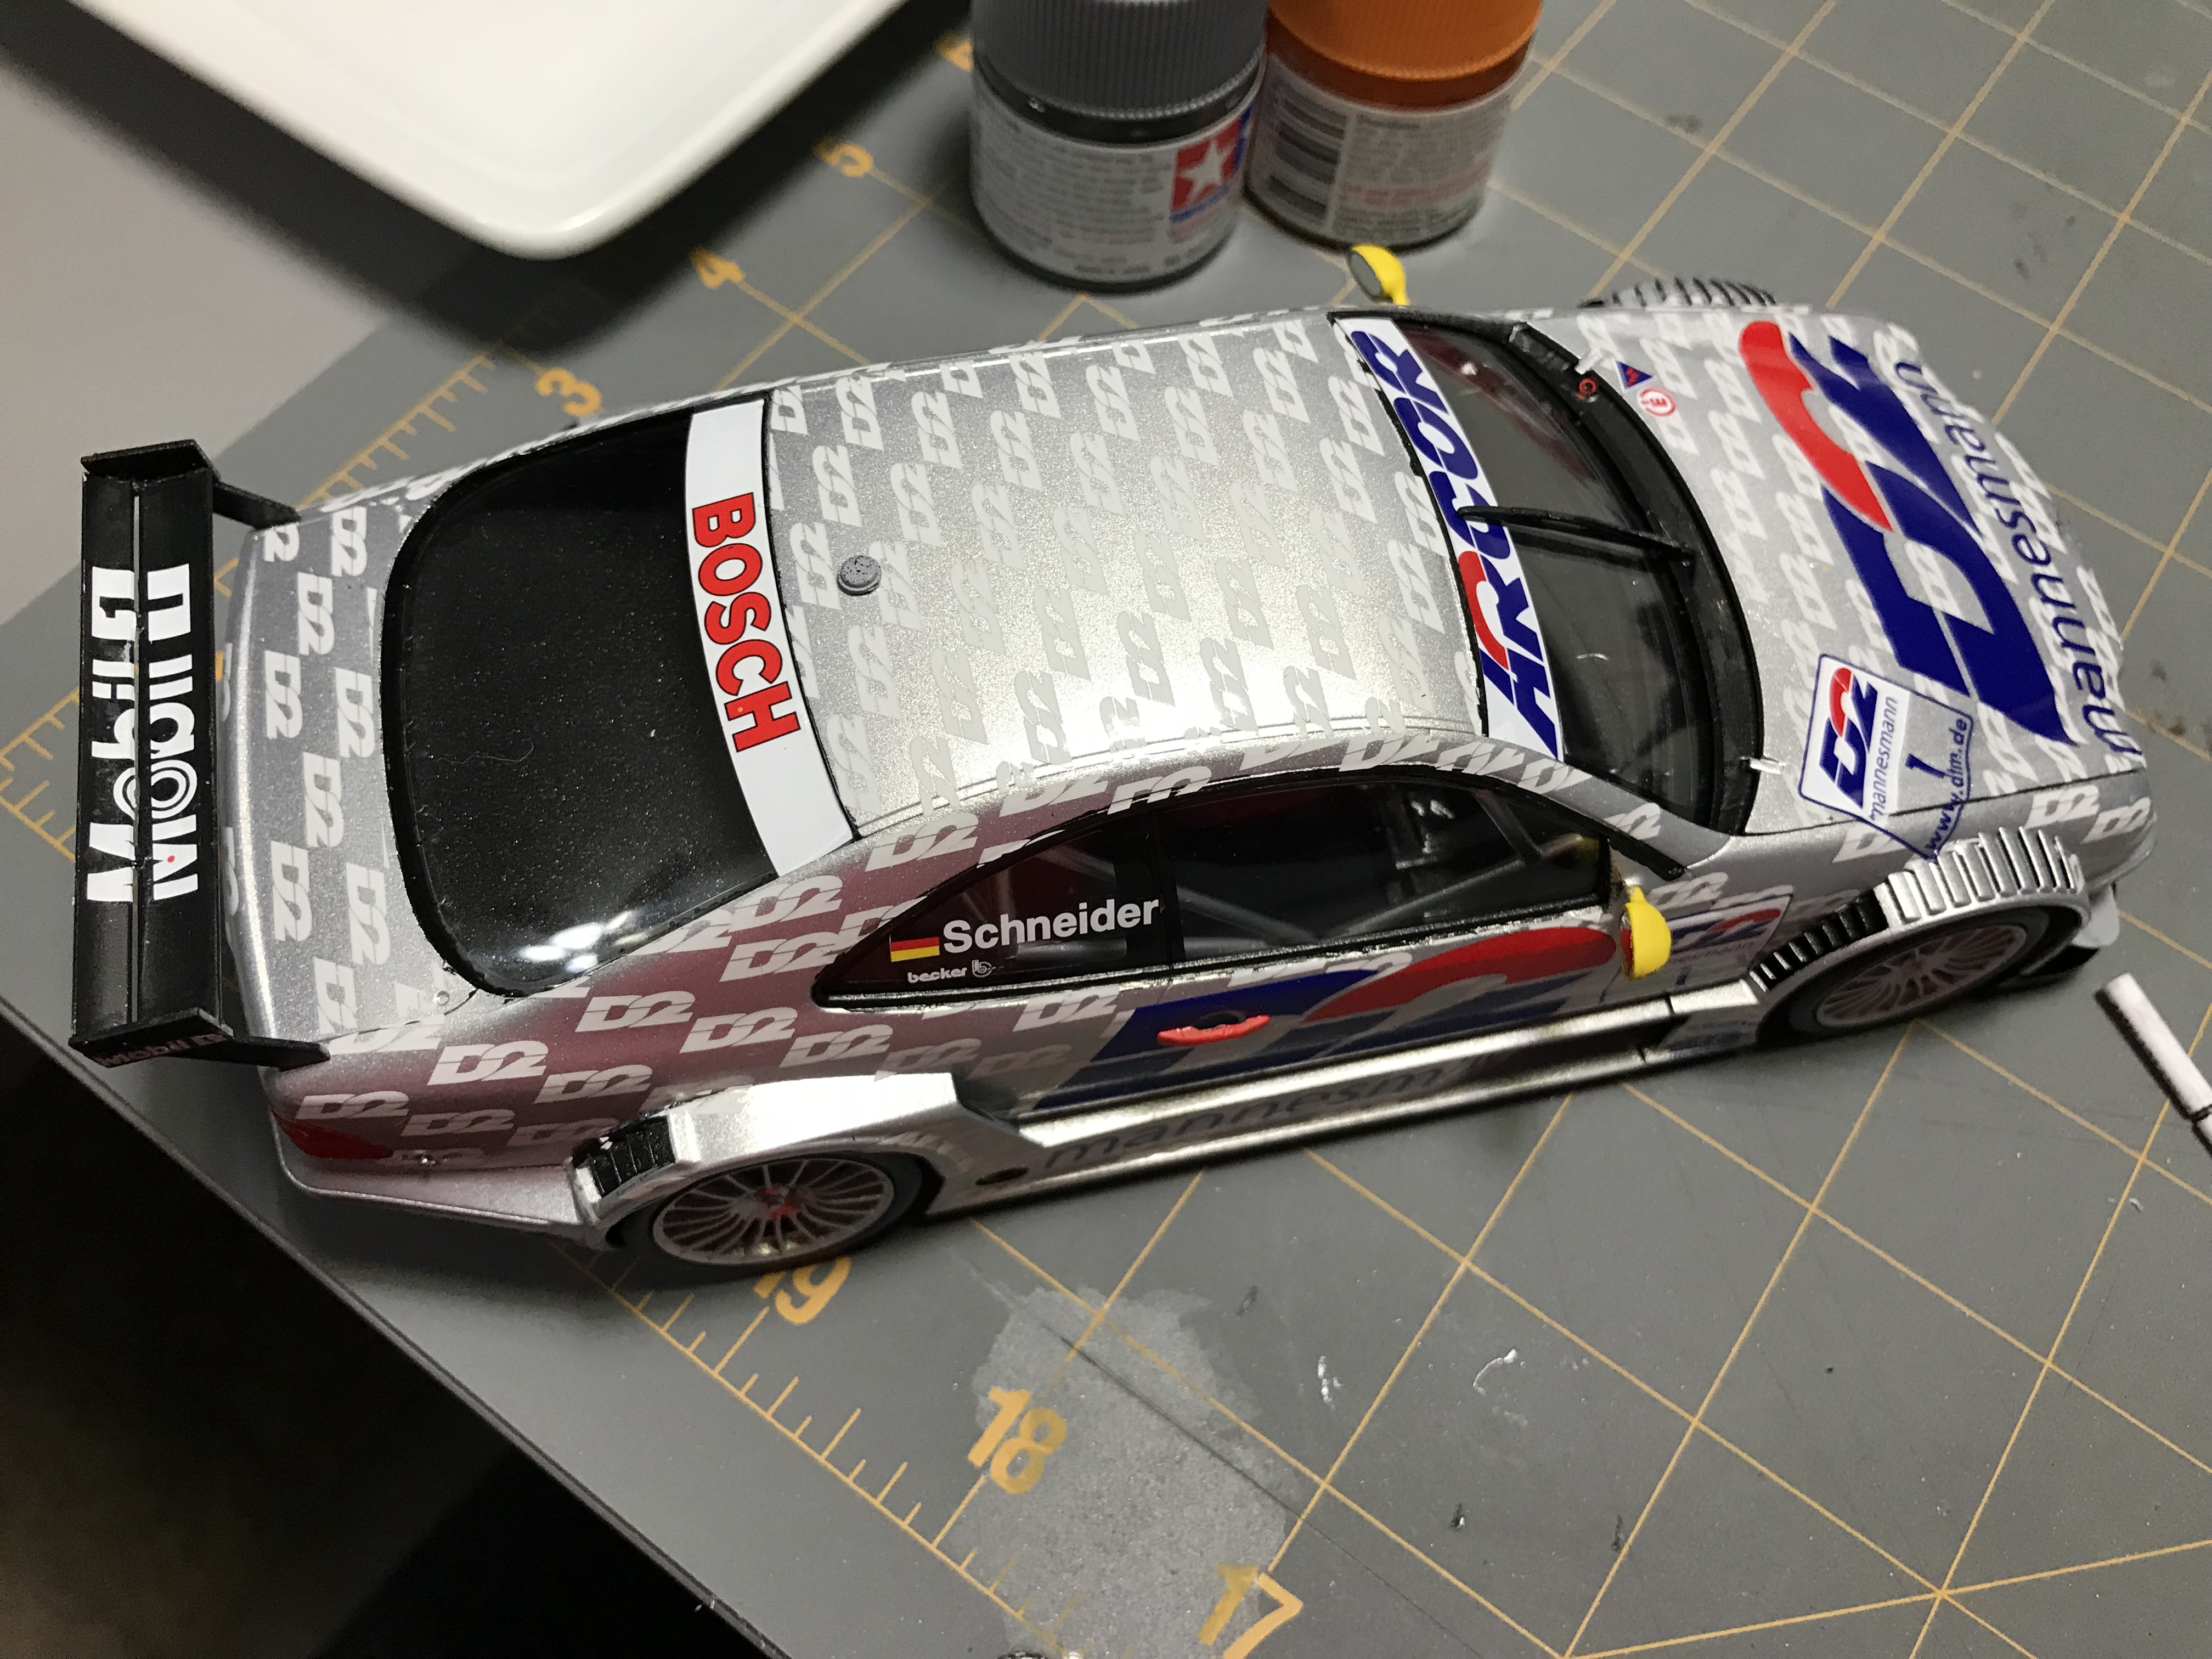
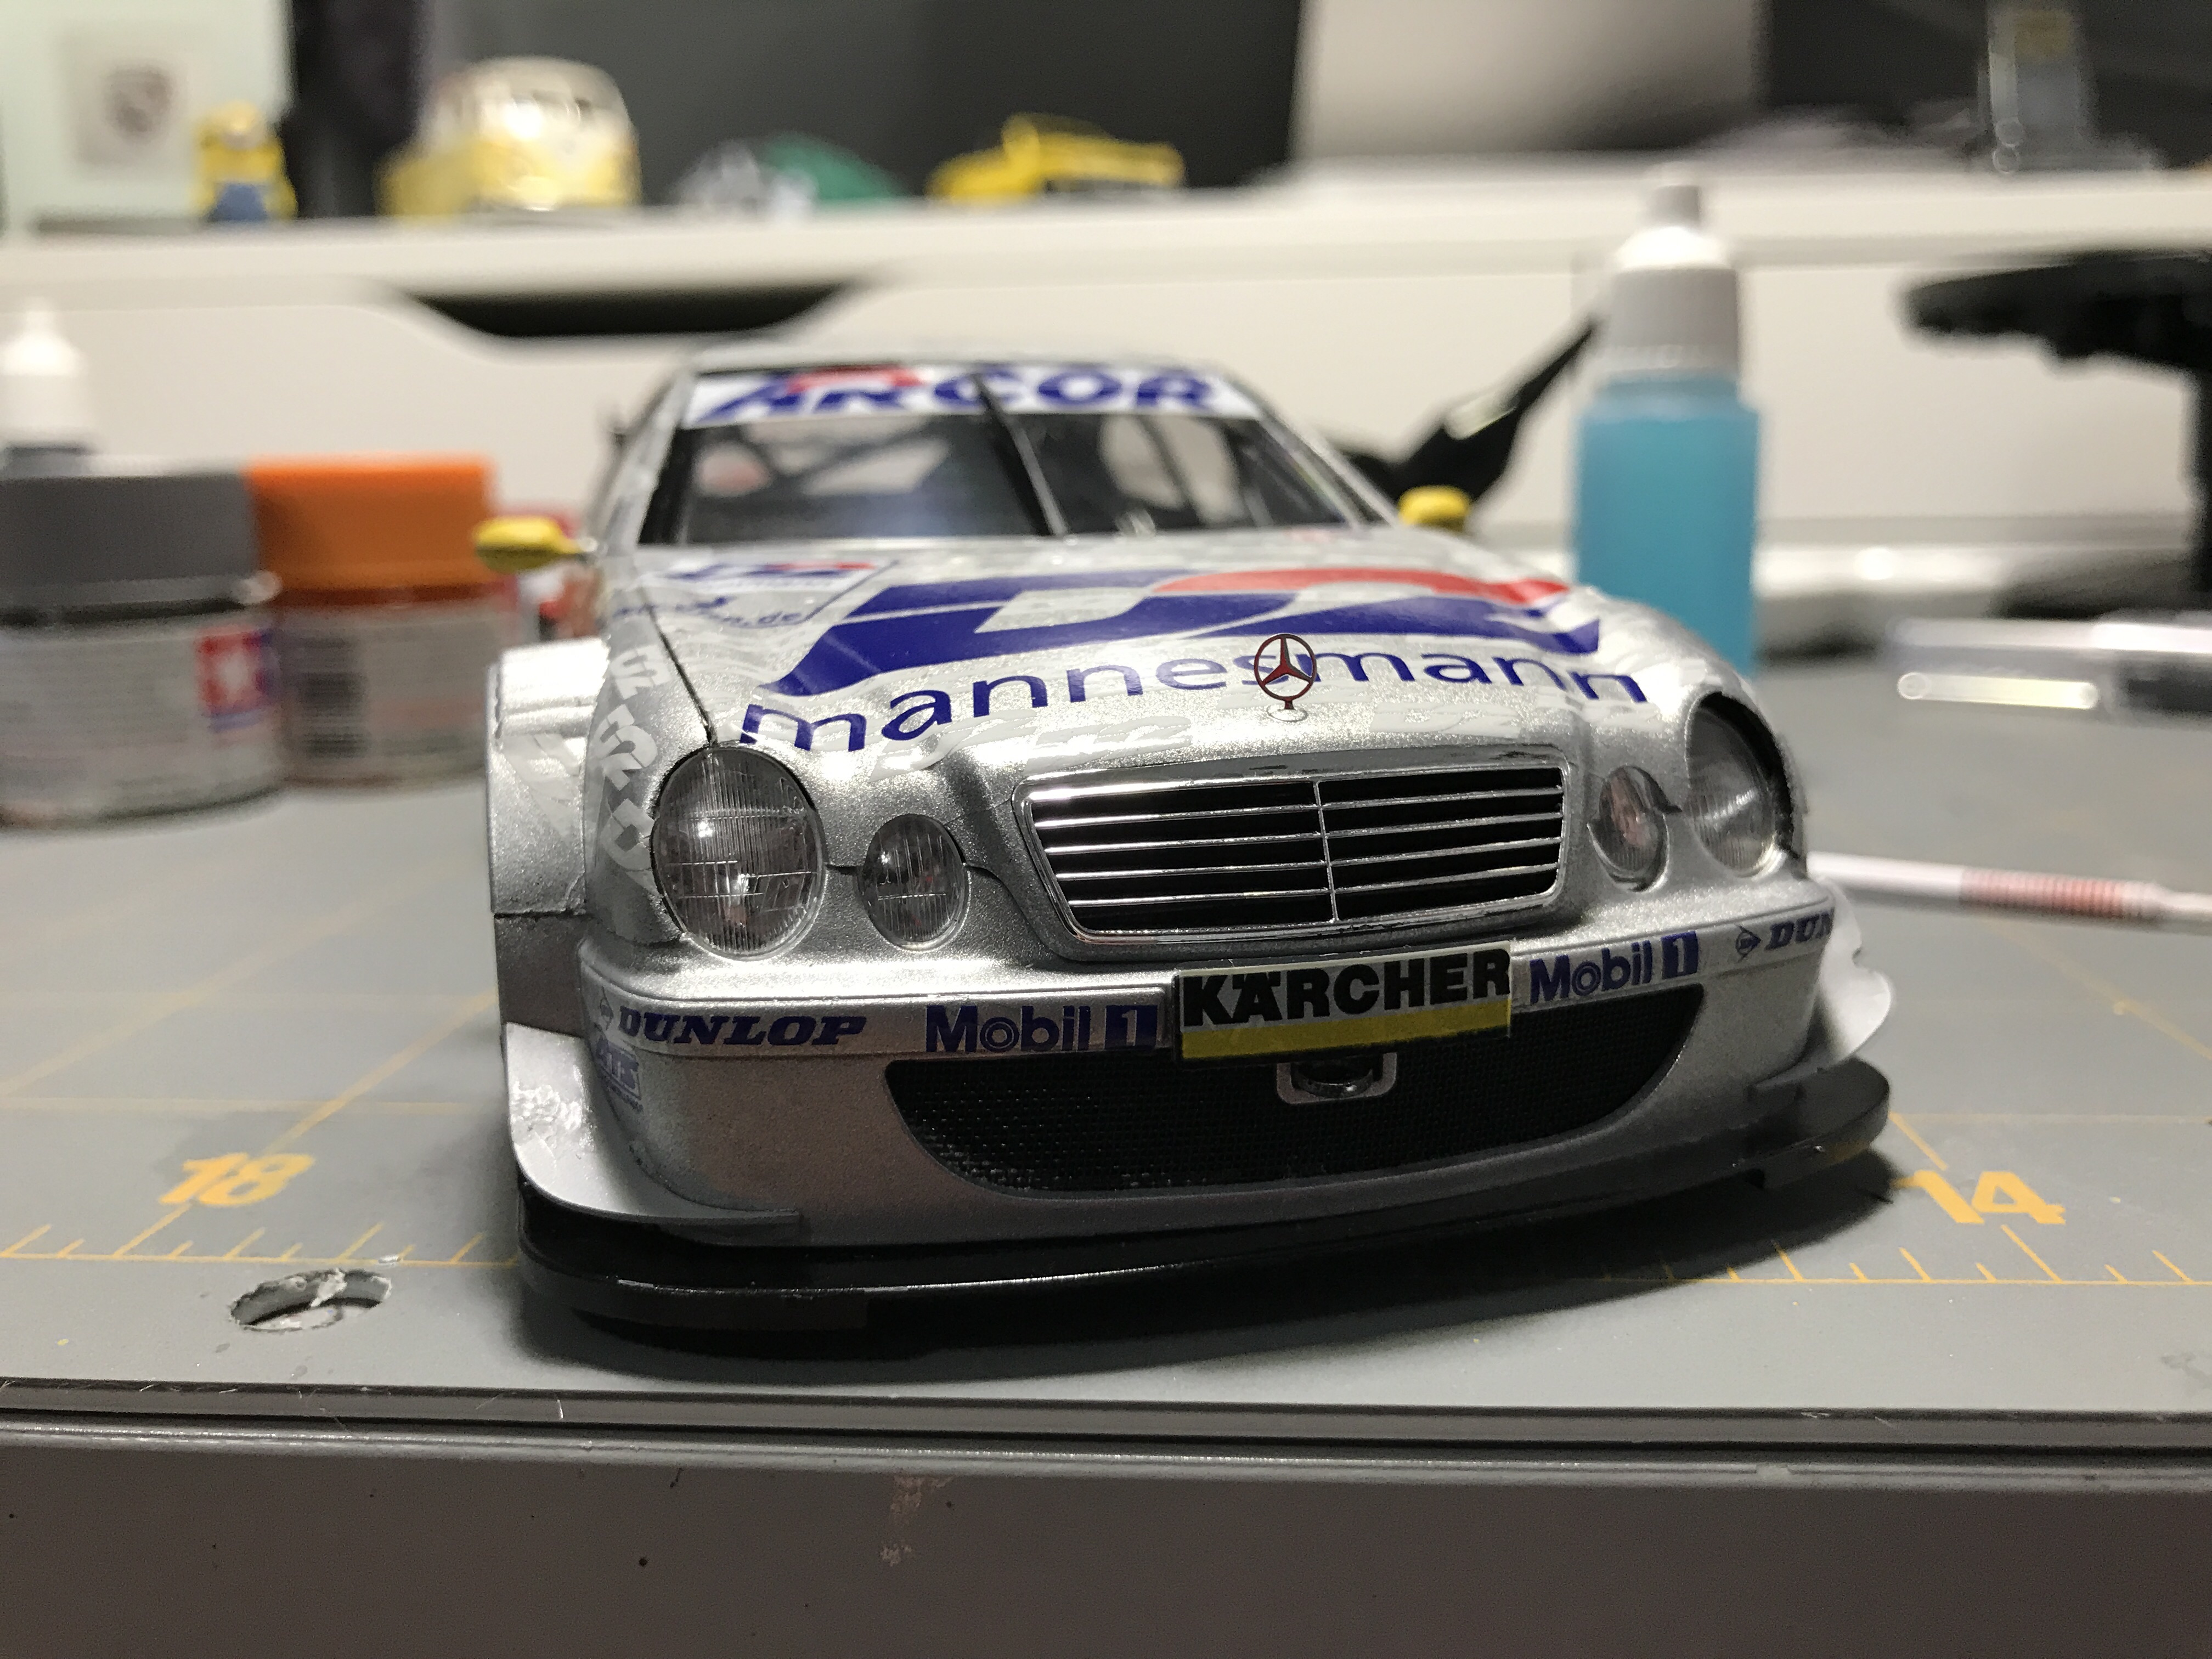
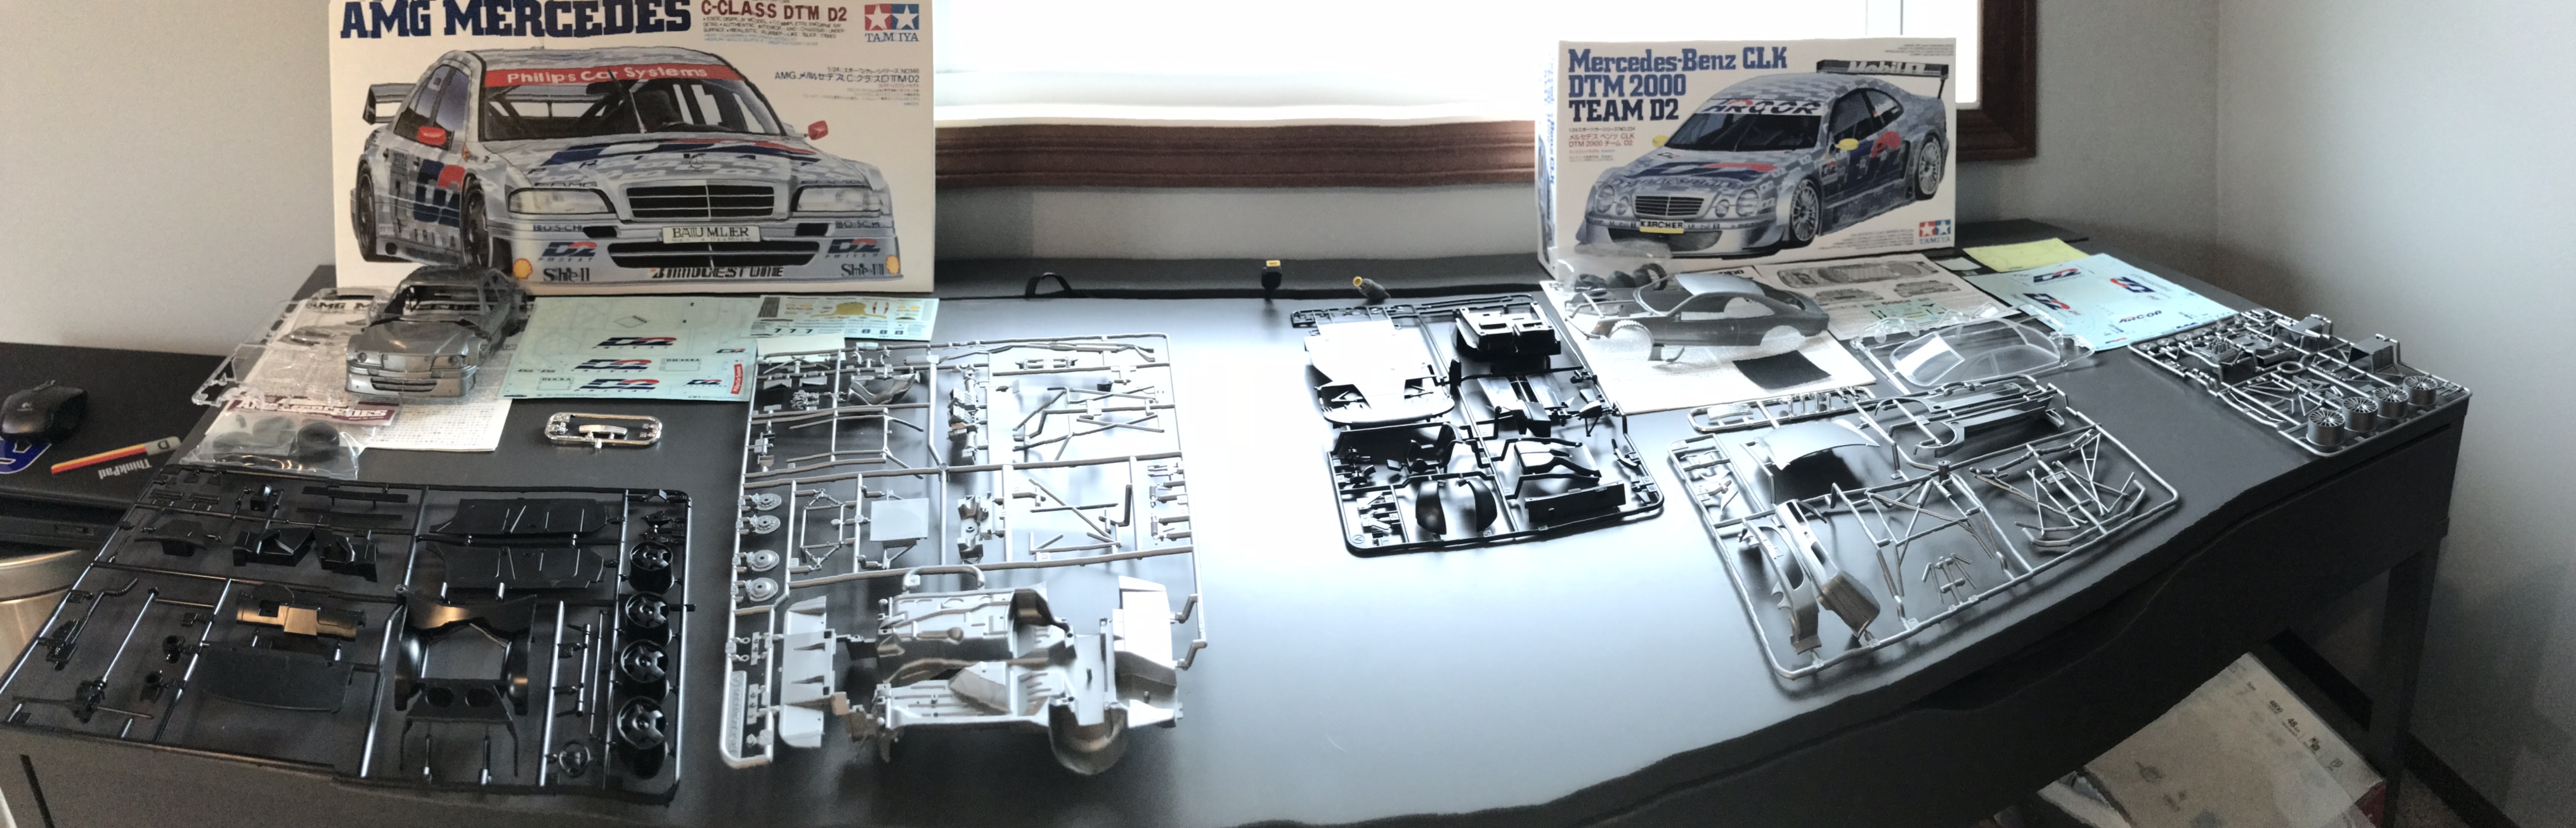
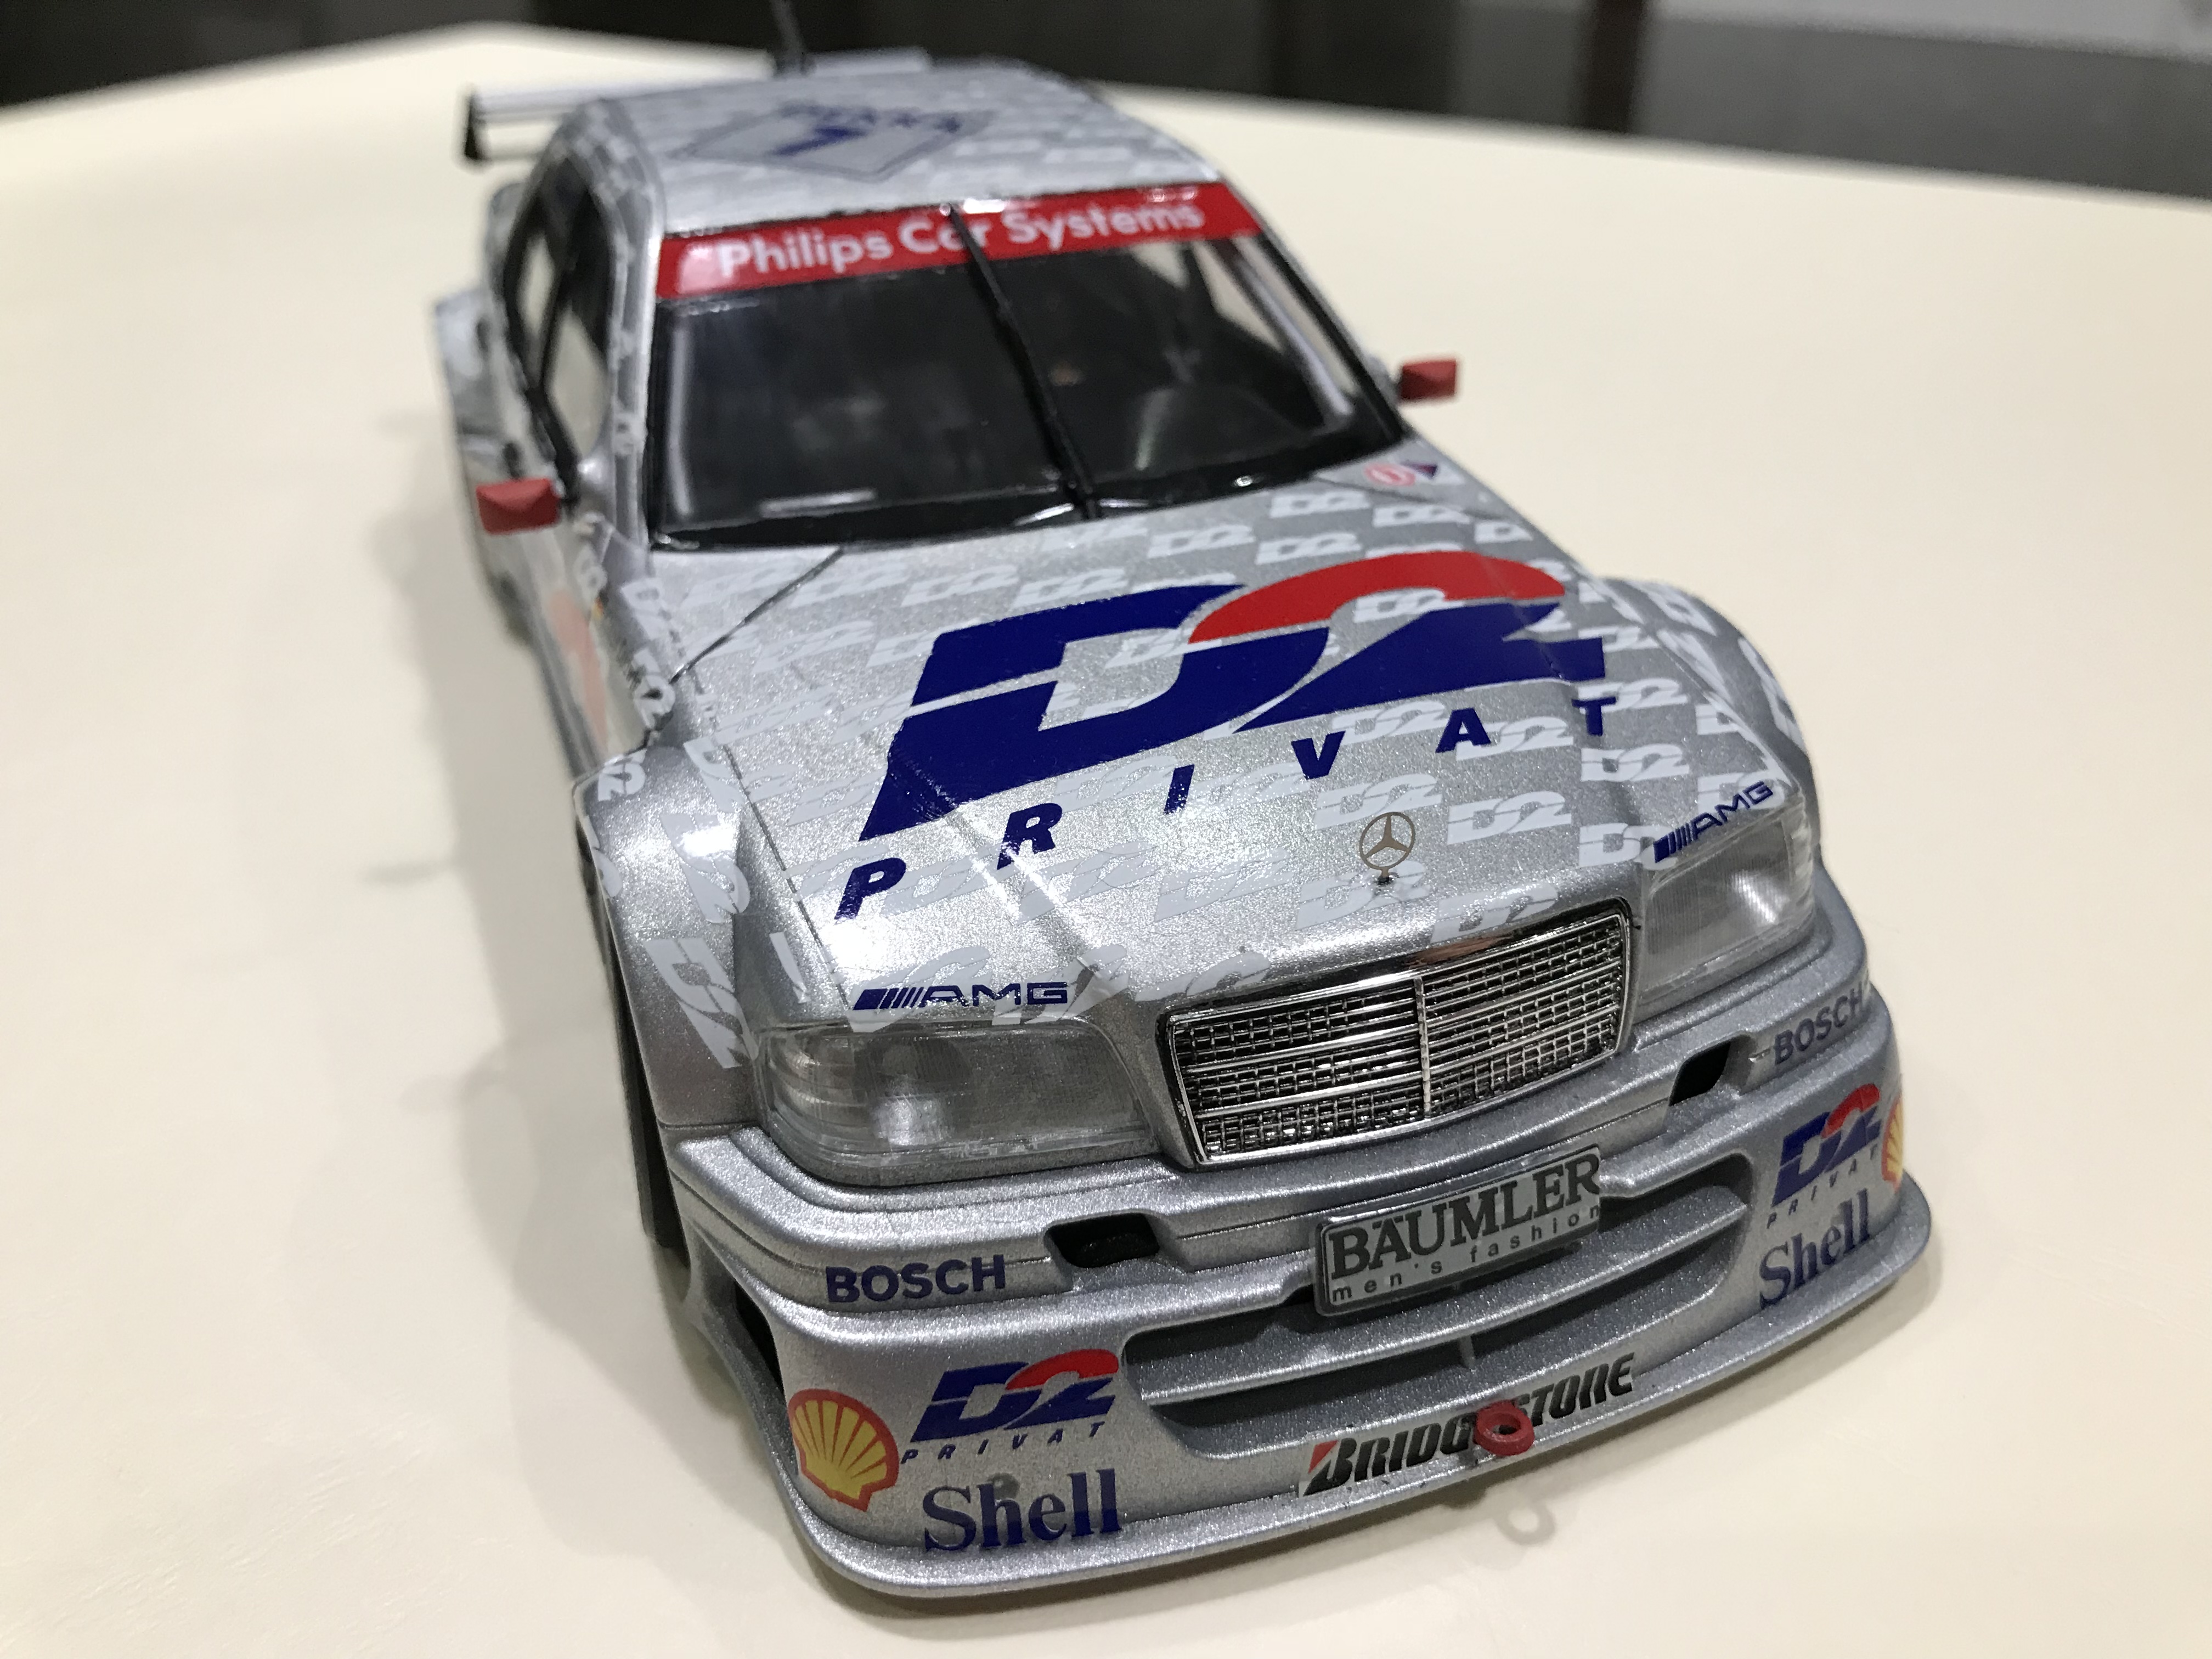
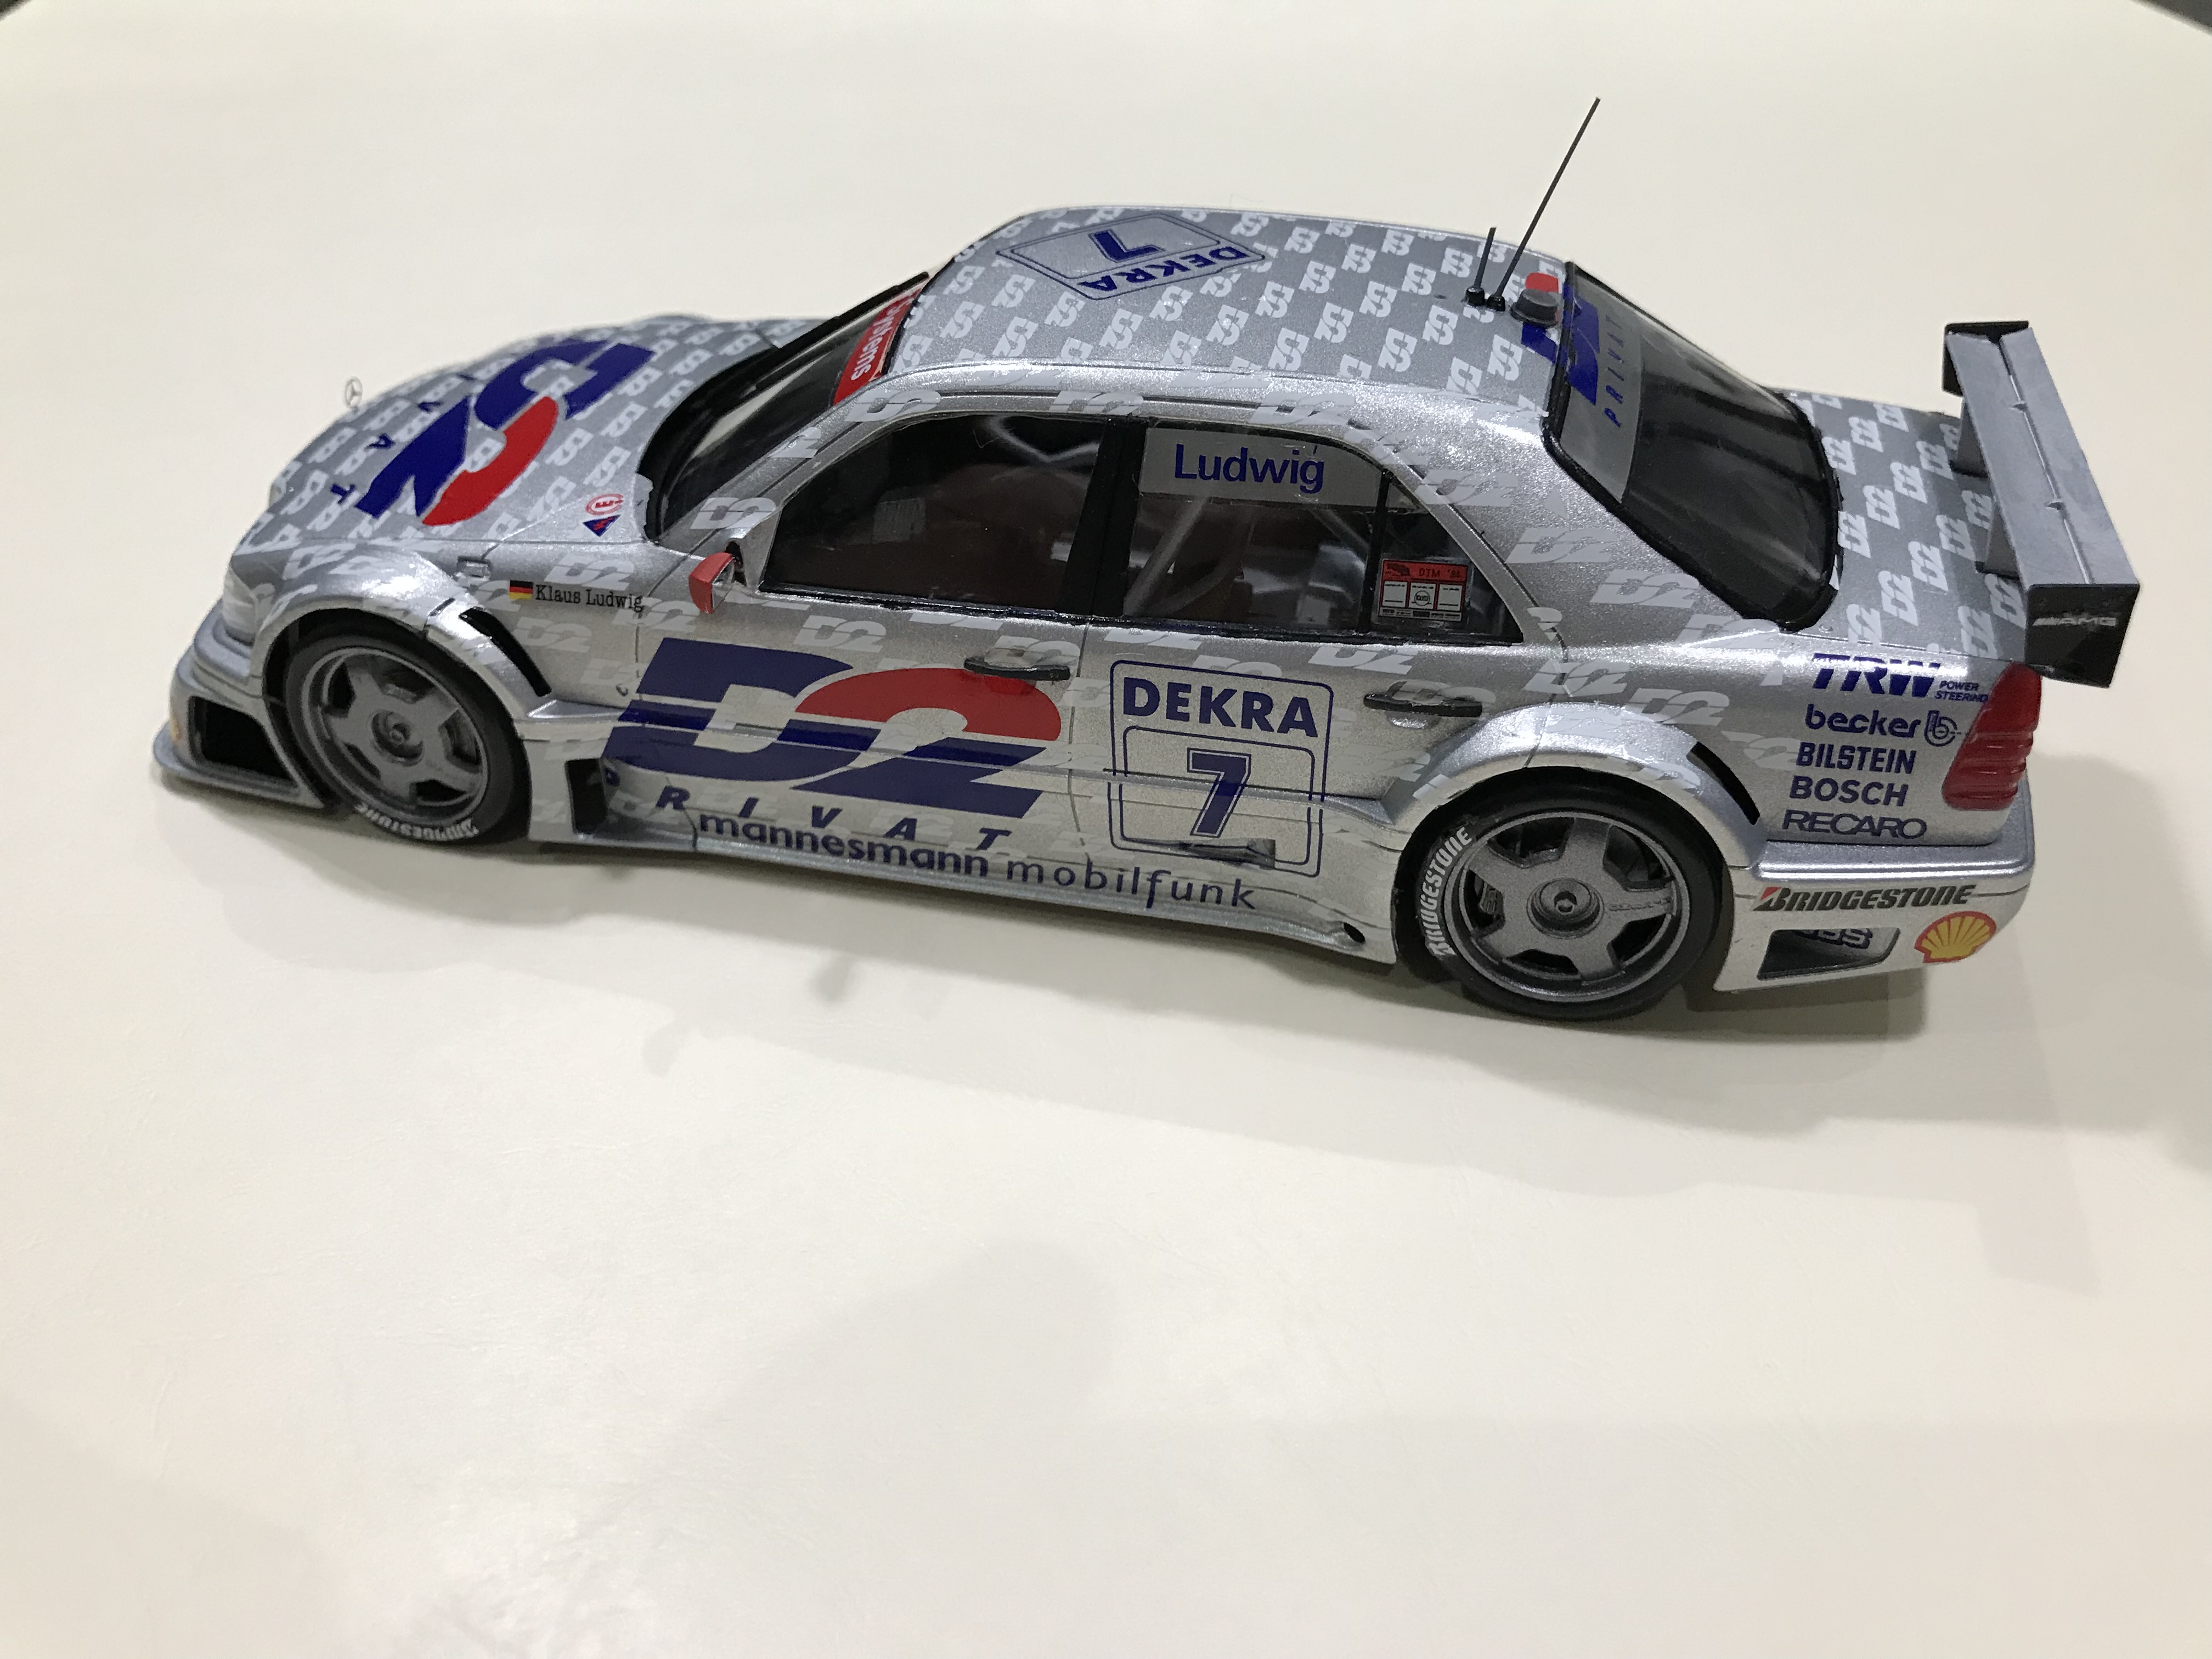
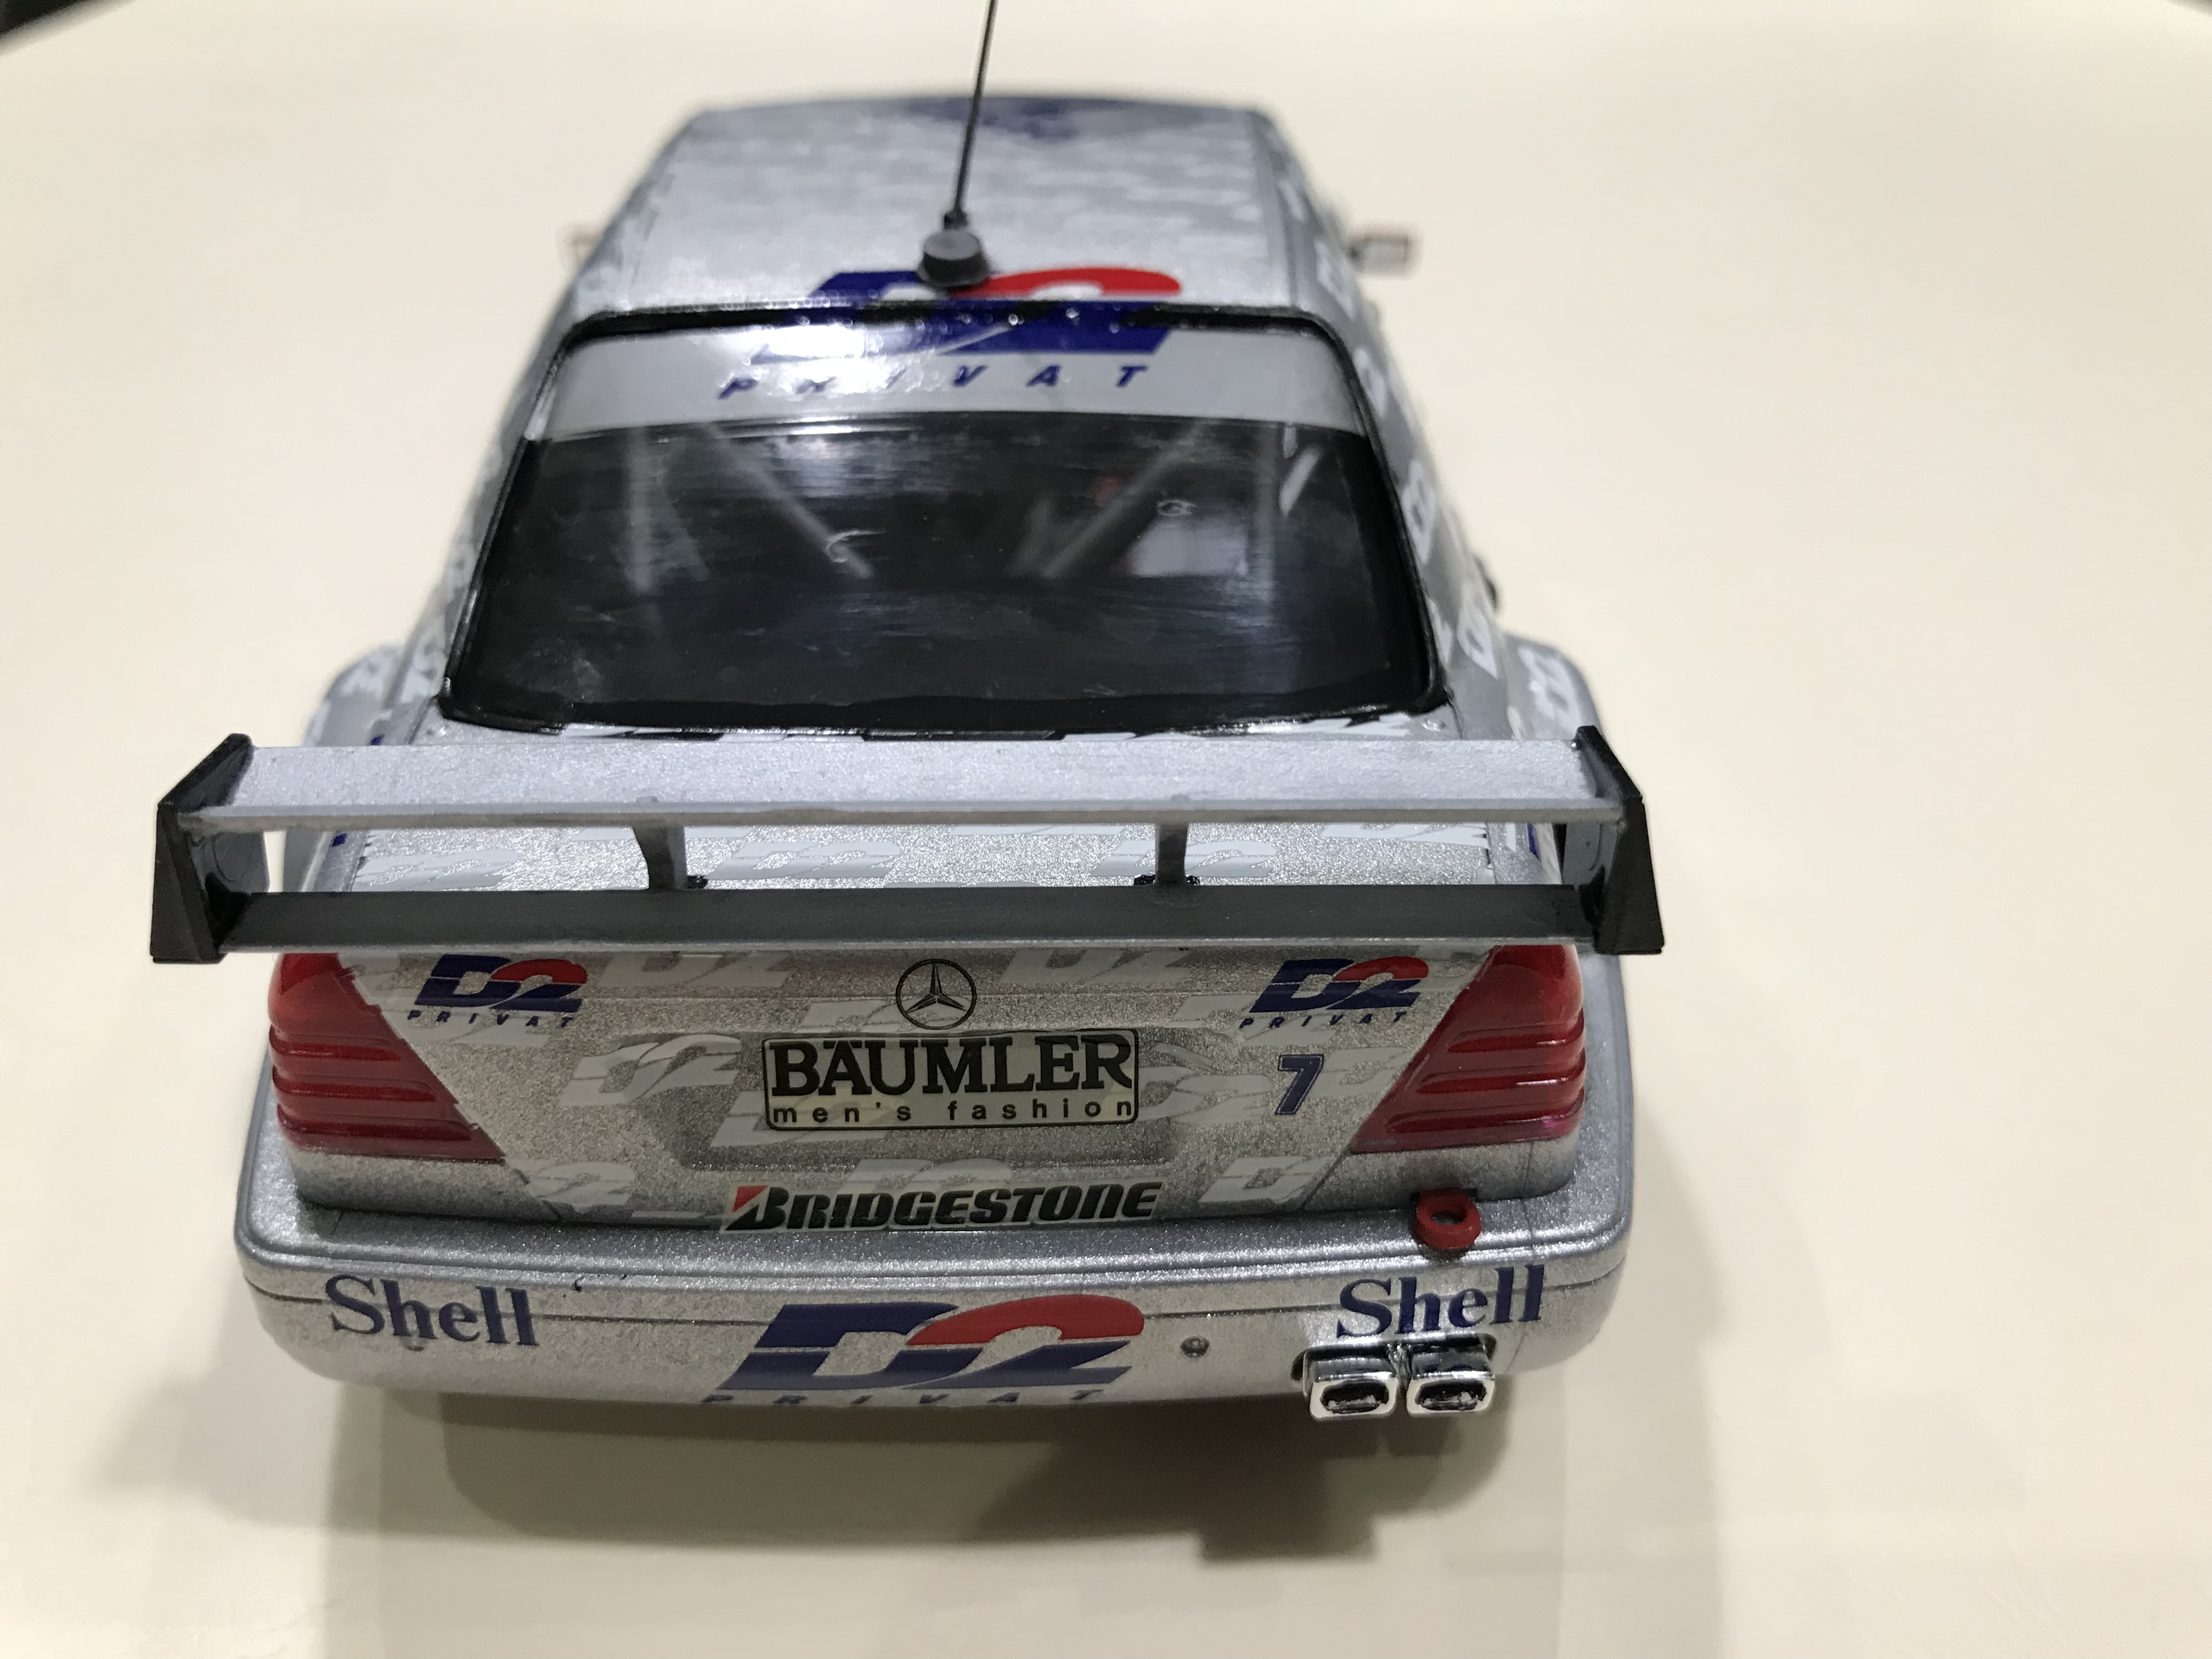
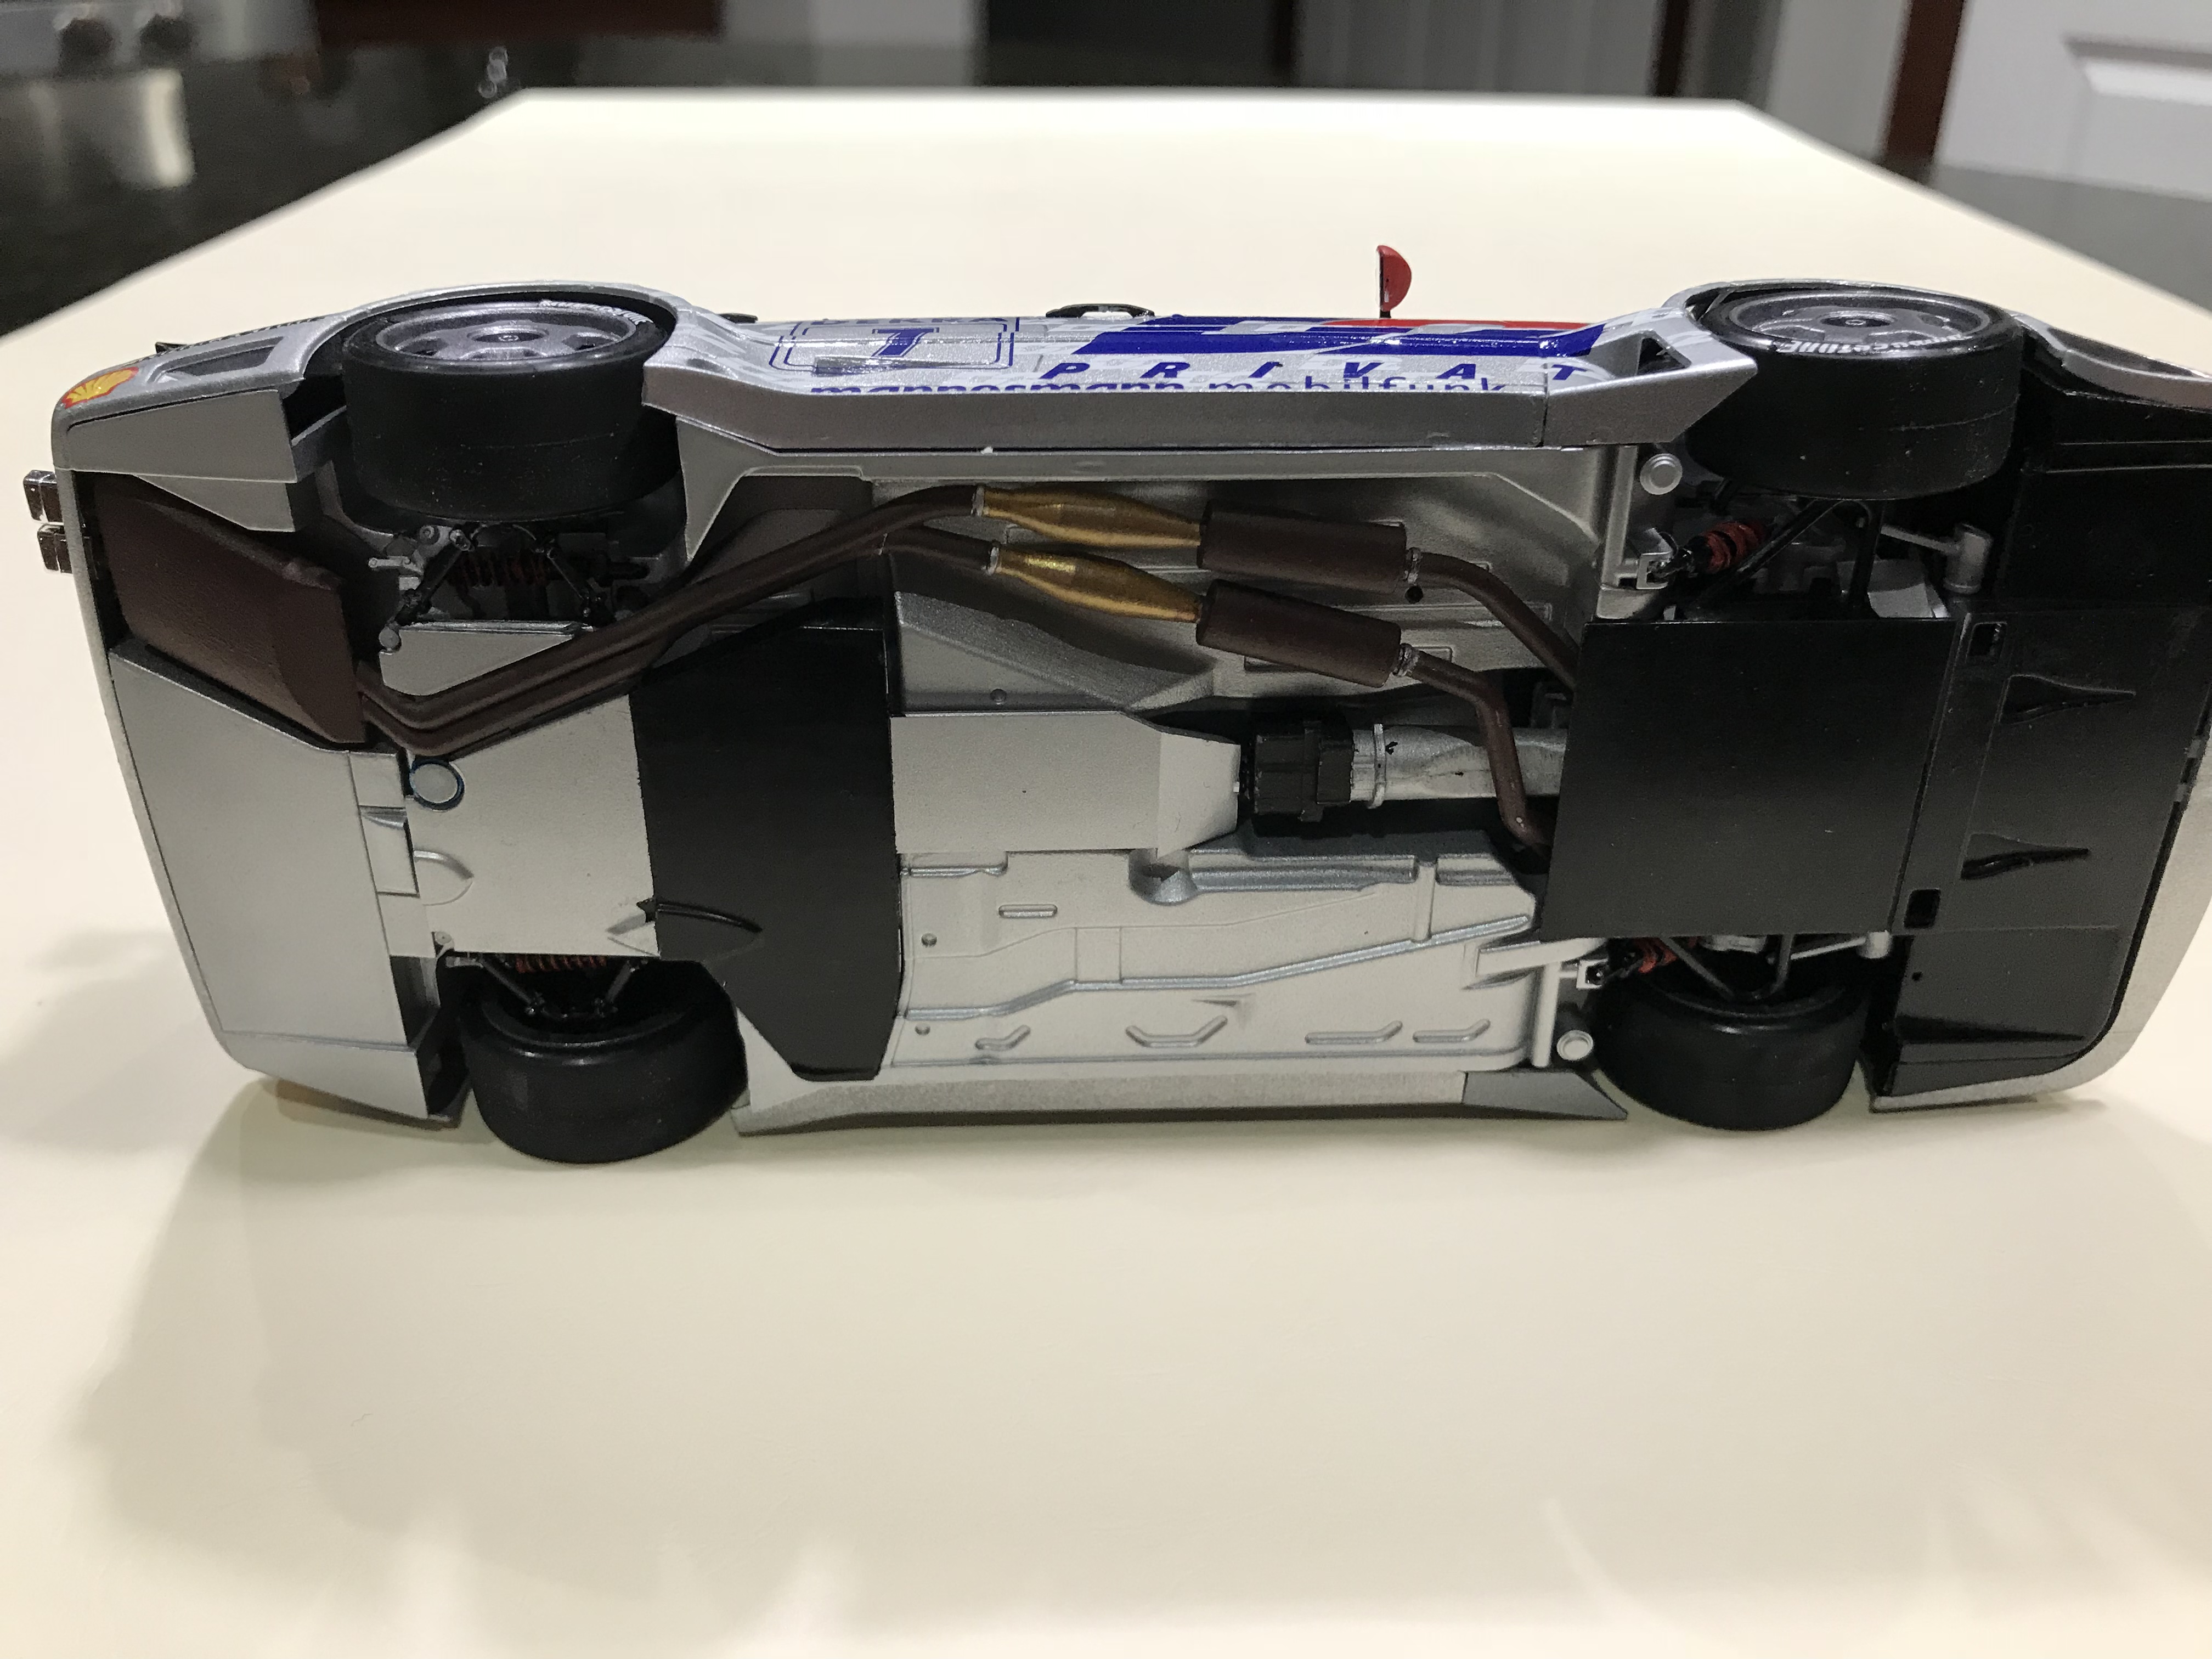
I’m in the process of fitting a bumper on a frustrating Revell AMG GT so while it’s clamped and drying I thought I’d start prepping the next project. I acquired these from my wife for my birthday last year and decided to build them in parallel since they are the different generations of the same car. They just came out of the soap bath and have been dried with the garage compressor. Let the fun begin.
-
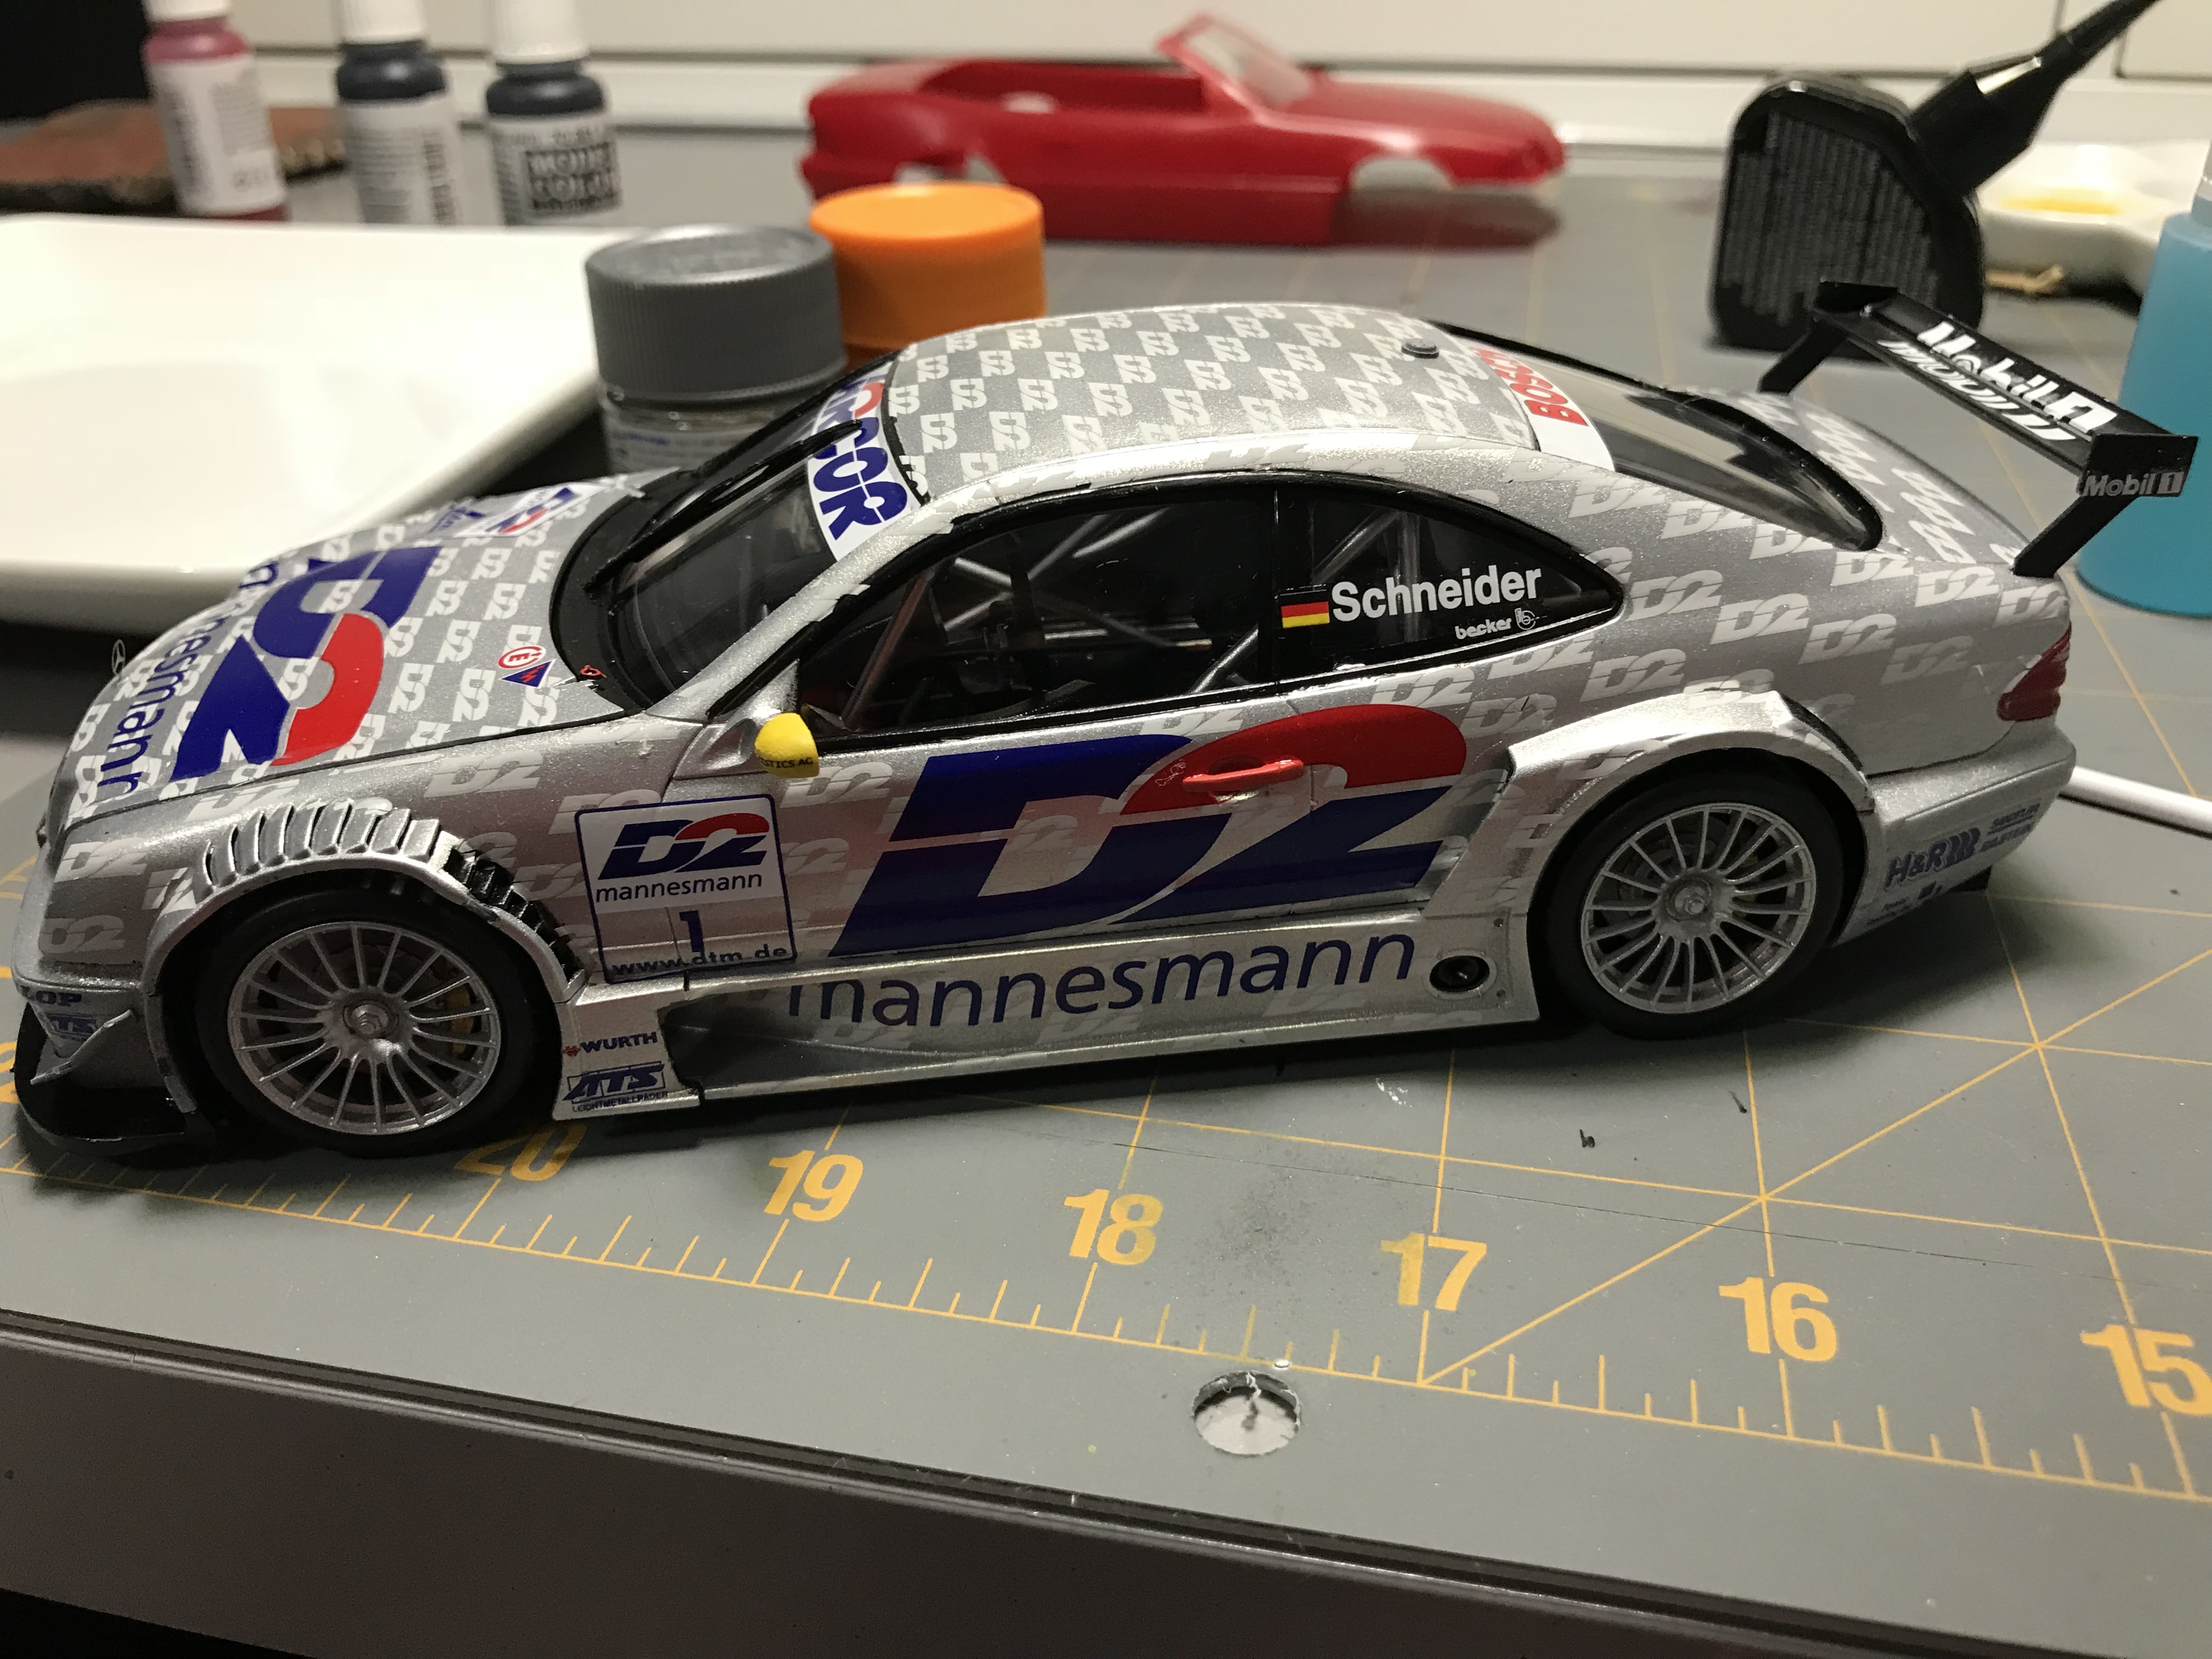
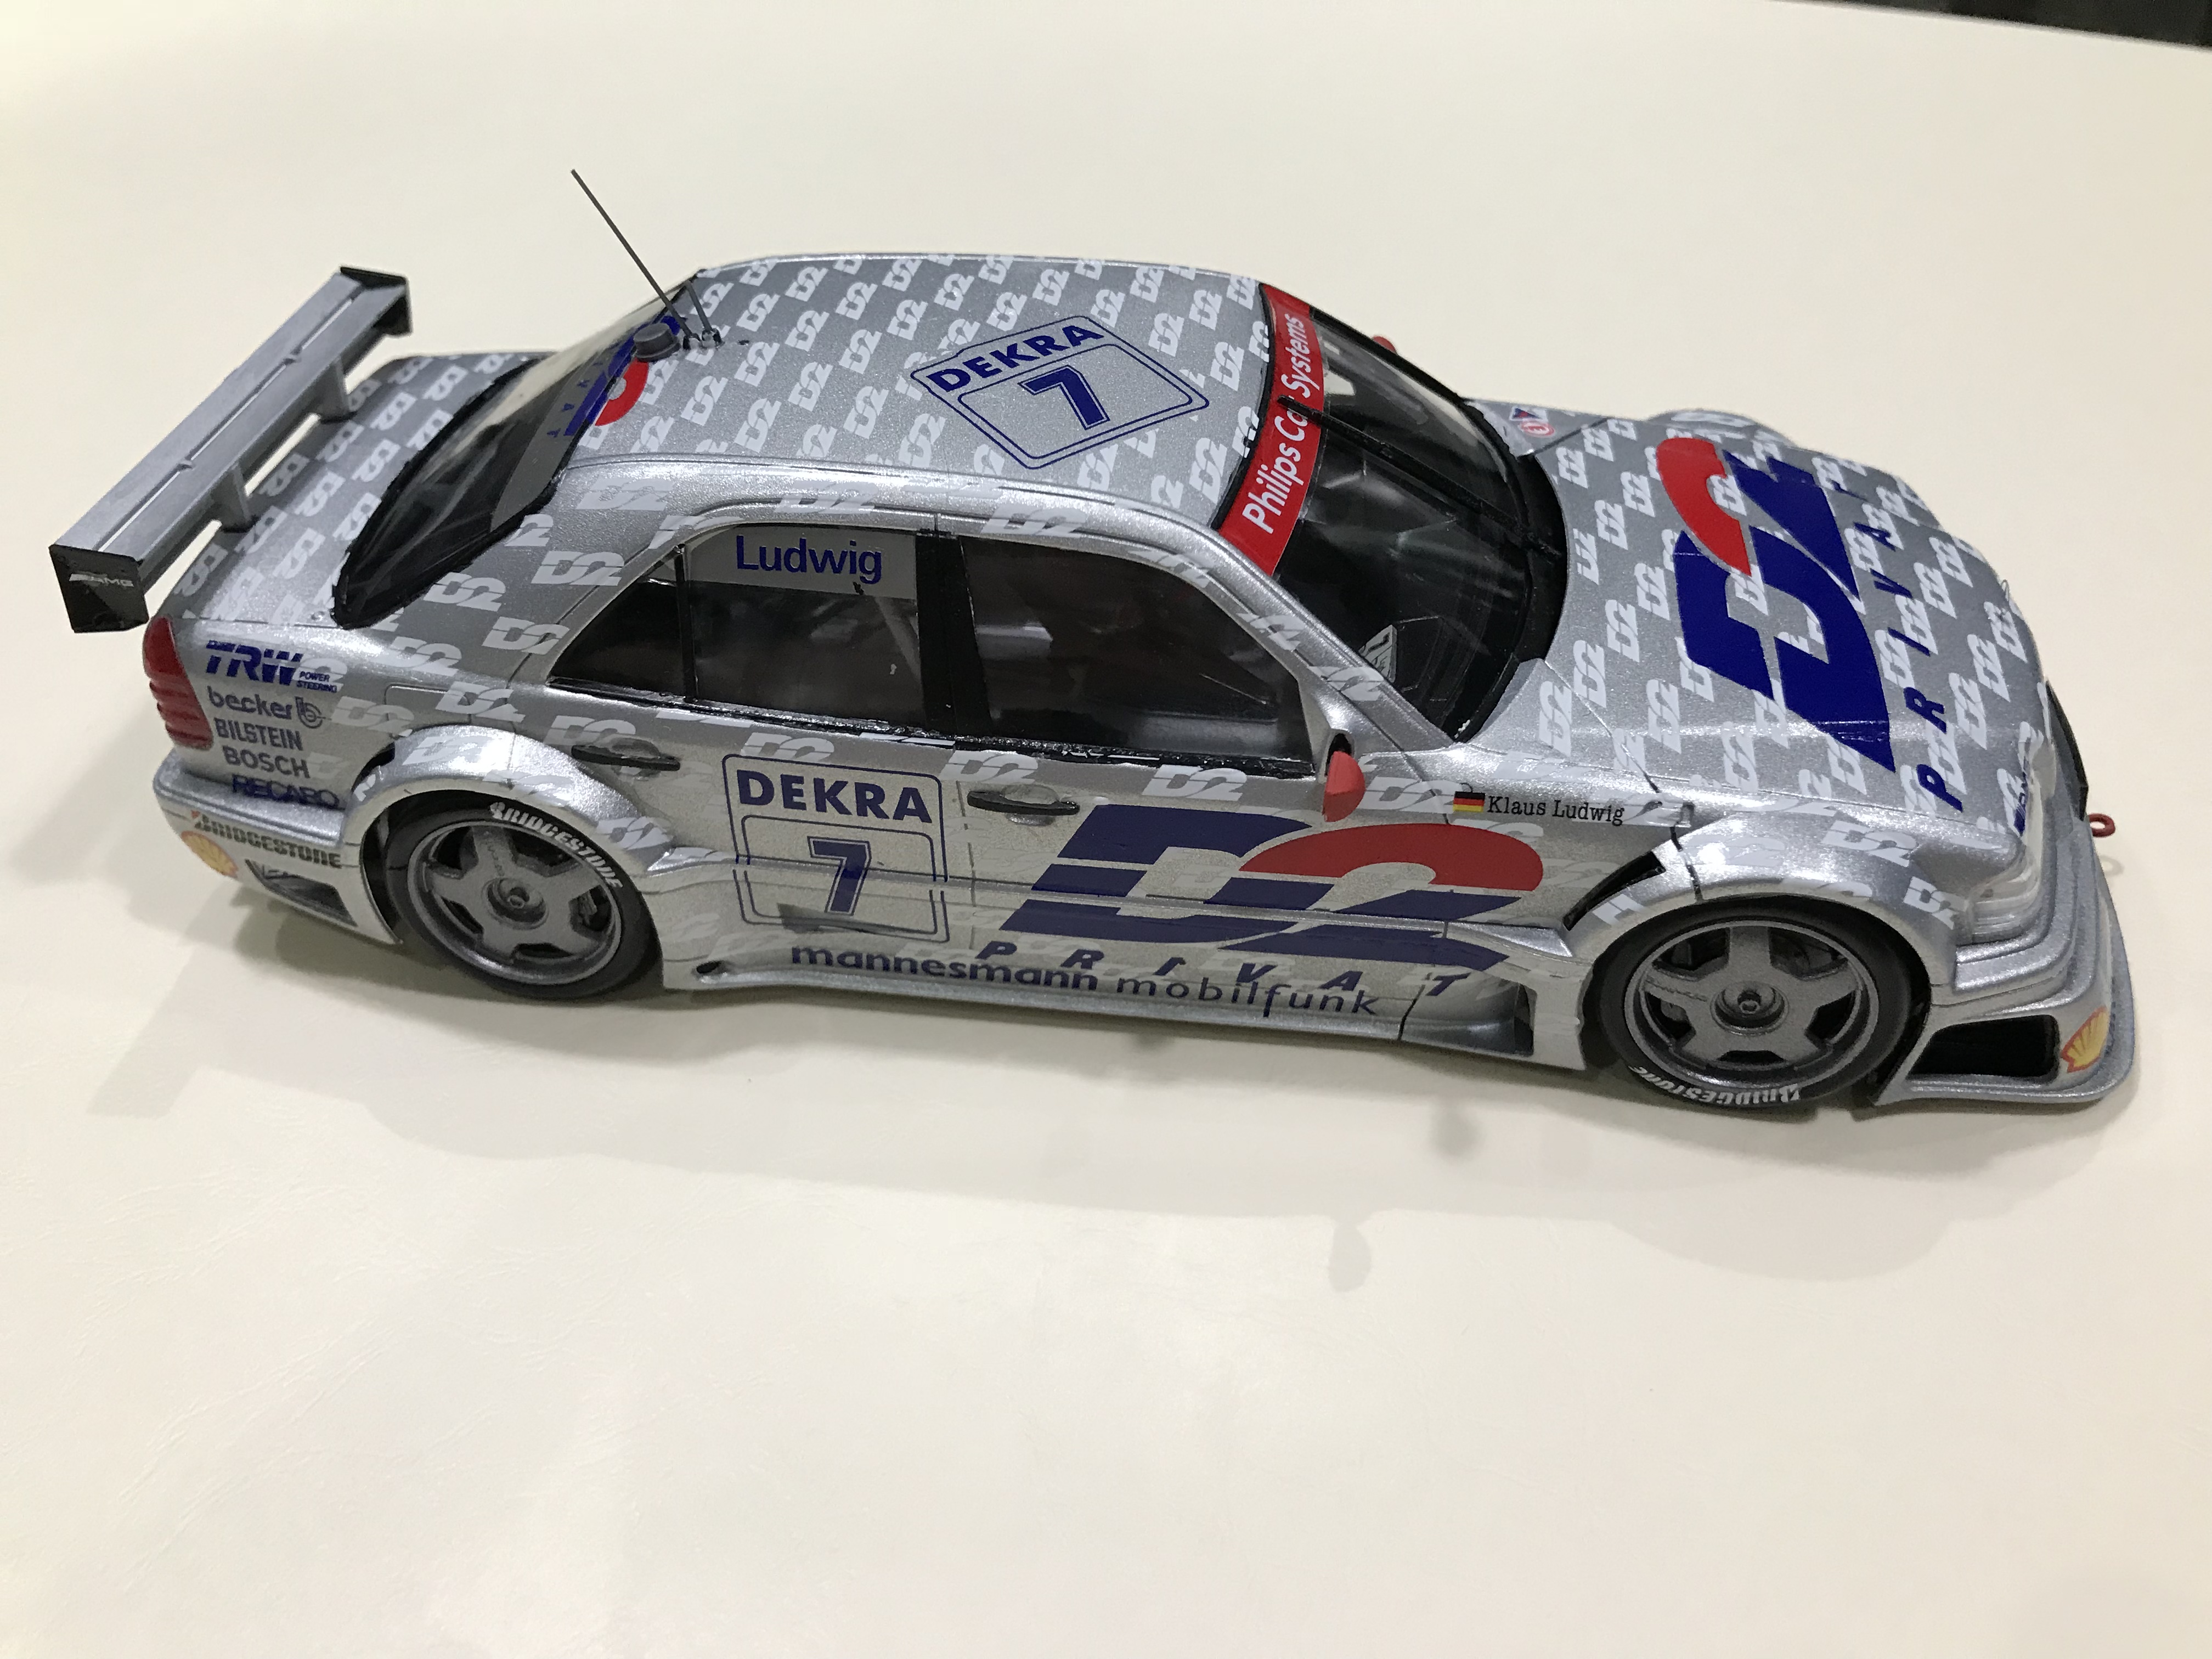
Finished up the 1994 DTM car. I don’t care for how the decals turned out the full sheets of the D2 wrap wrinkled. Given that they’re 24 years old, I’m glad they were as good as they are.
-
Mentioned after the Kodiak Lumina, that my next car build would definitely not be any sort of race-car, so keeping my word here's Tamiya's gorgeous little 1966 1300 Beetle wearing Tamiya Mica Red & Light Gunmetal (TS-42). Decals are from the RoG Beetle and are superb. As ever please feel free to make any comments, hurl any abuse or ask a question. Next build will have wheels, but will also fly, so probably won't be seen here at MCM. Until next time... Ian.
-
I know this is an old kit, a search did not find any threads, so here goes..... Has anyone built the Tamiya Ferrari F40, using aftermarket carbon-fiber decals? The real car pioneered c-f, some is yellow weave, some is not as black as most decals available. I built the Fujimi last century, tried painting the seat backs.
-
Here is my new finished build.. Its Tamiya Nissan Skyline, with Hobby design Nismo LMGT2 wheels, some decals from differend manifactures. color is airbrushed Model master Grape pearl, with Tamiya spray clear coat. First time i used Tamiya polishing compound, and i like results. This JDM tuner is far from perfect, but i like it a lot. For some reason i couldnt upload photos from my photo bank on here, so i upload them directly to forum.. Enjoy
-
Just completed this one. Had some issues with the decals so worked with what I had.
-
Yep. another completed, but to be fair it was started long before the 350Z that I posted here a couple of weeks ago. So straight to the point, this is another Tamiya kit, and it is as ever superbly engineered, and fits just about perfectly. The BIG thing for this project however was the excellent Tamiya plastic - this is the 'Taisan' boxing and it's molded entirely in glossy black !! - so I'll let y'all guess how many primer coats it took before applying the glossy white top coats. Decals are by Scale Design, no I've not heard of them either but they're the best part of twenty years old and behaved flawlessly. As ever thanks for taking the time to look and / or comment, please ask any question or hurl any criticism. Not sure what's next, will see what calls to me from the stash when I go in to the cave next week. AFN Ian.
-
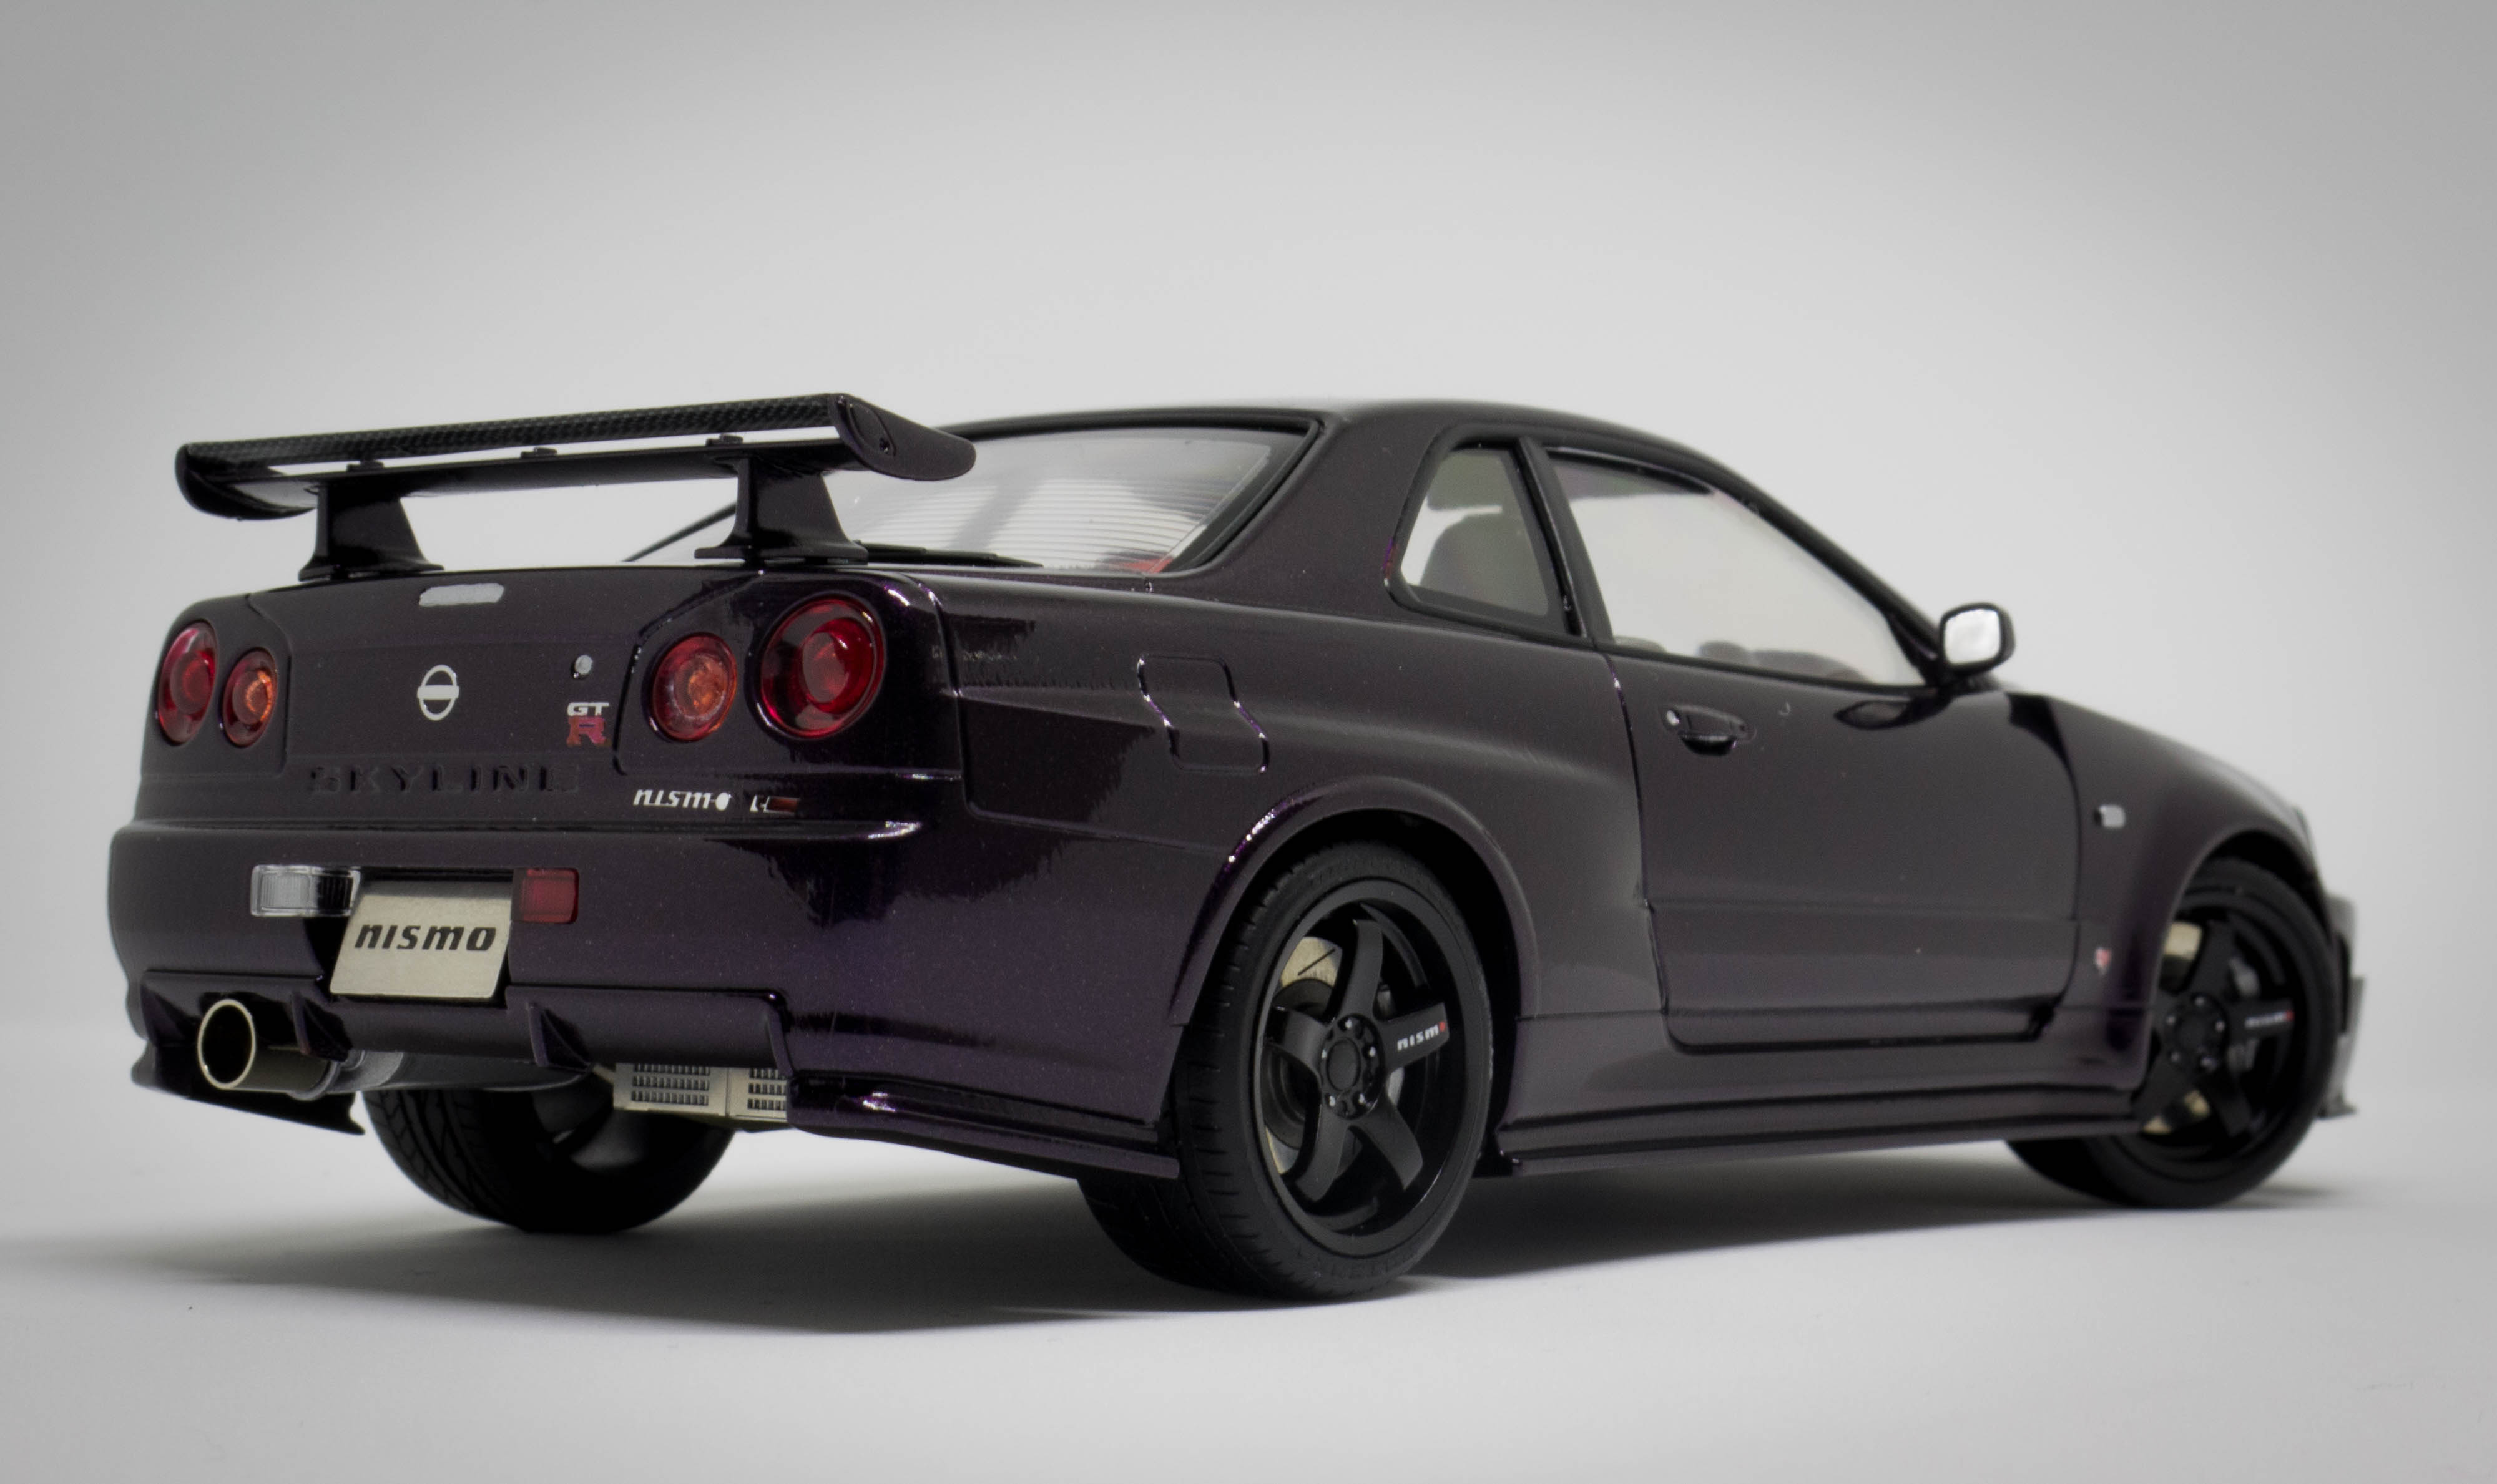
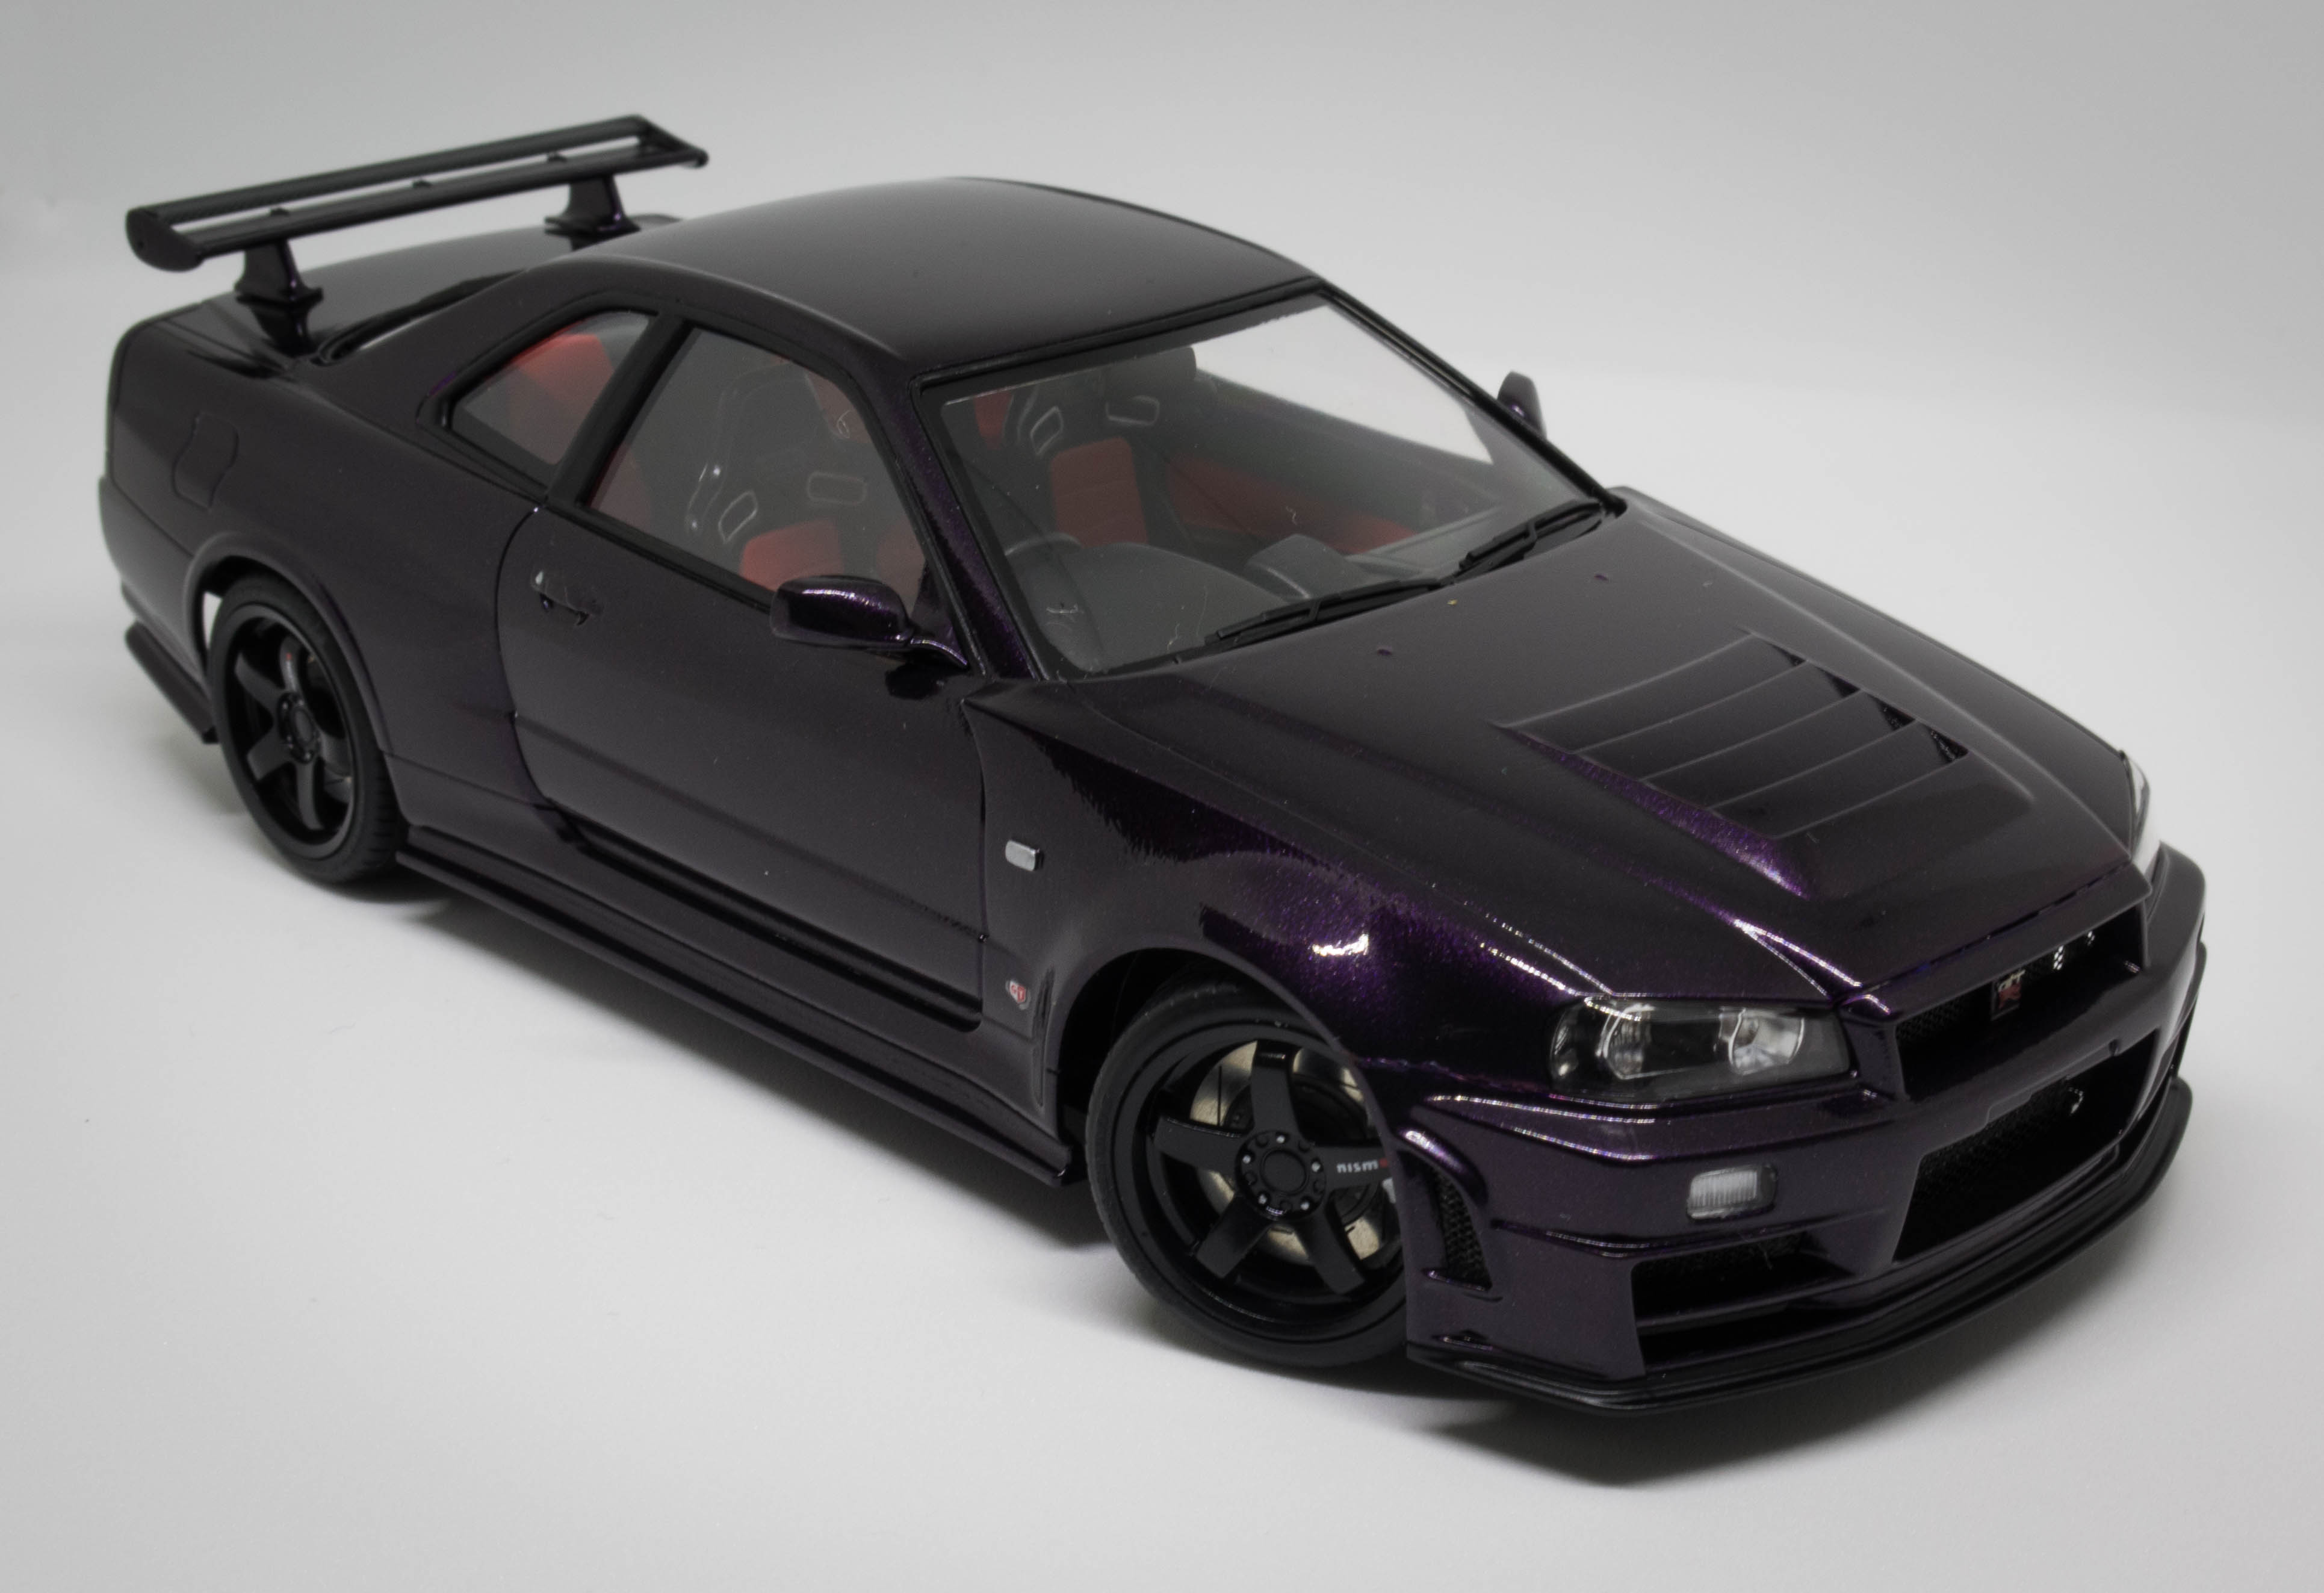
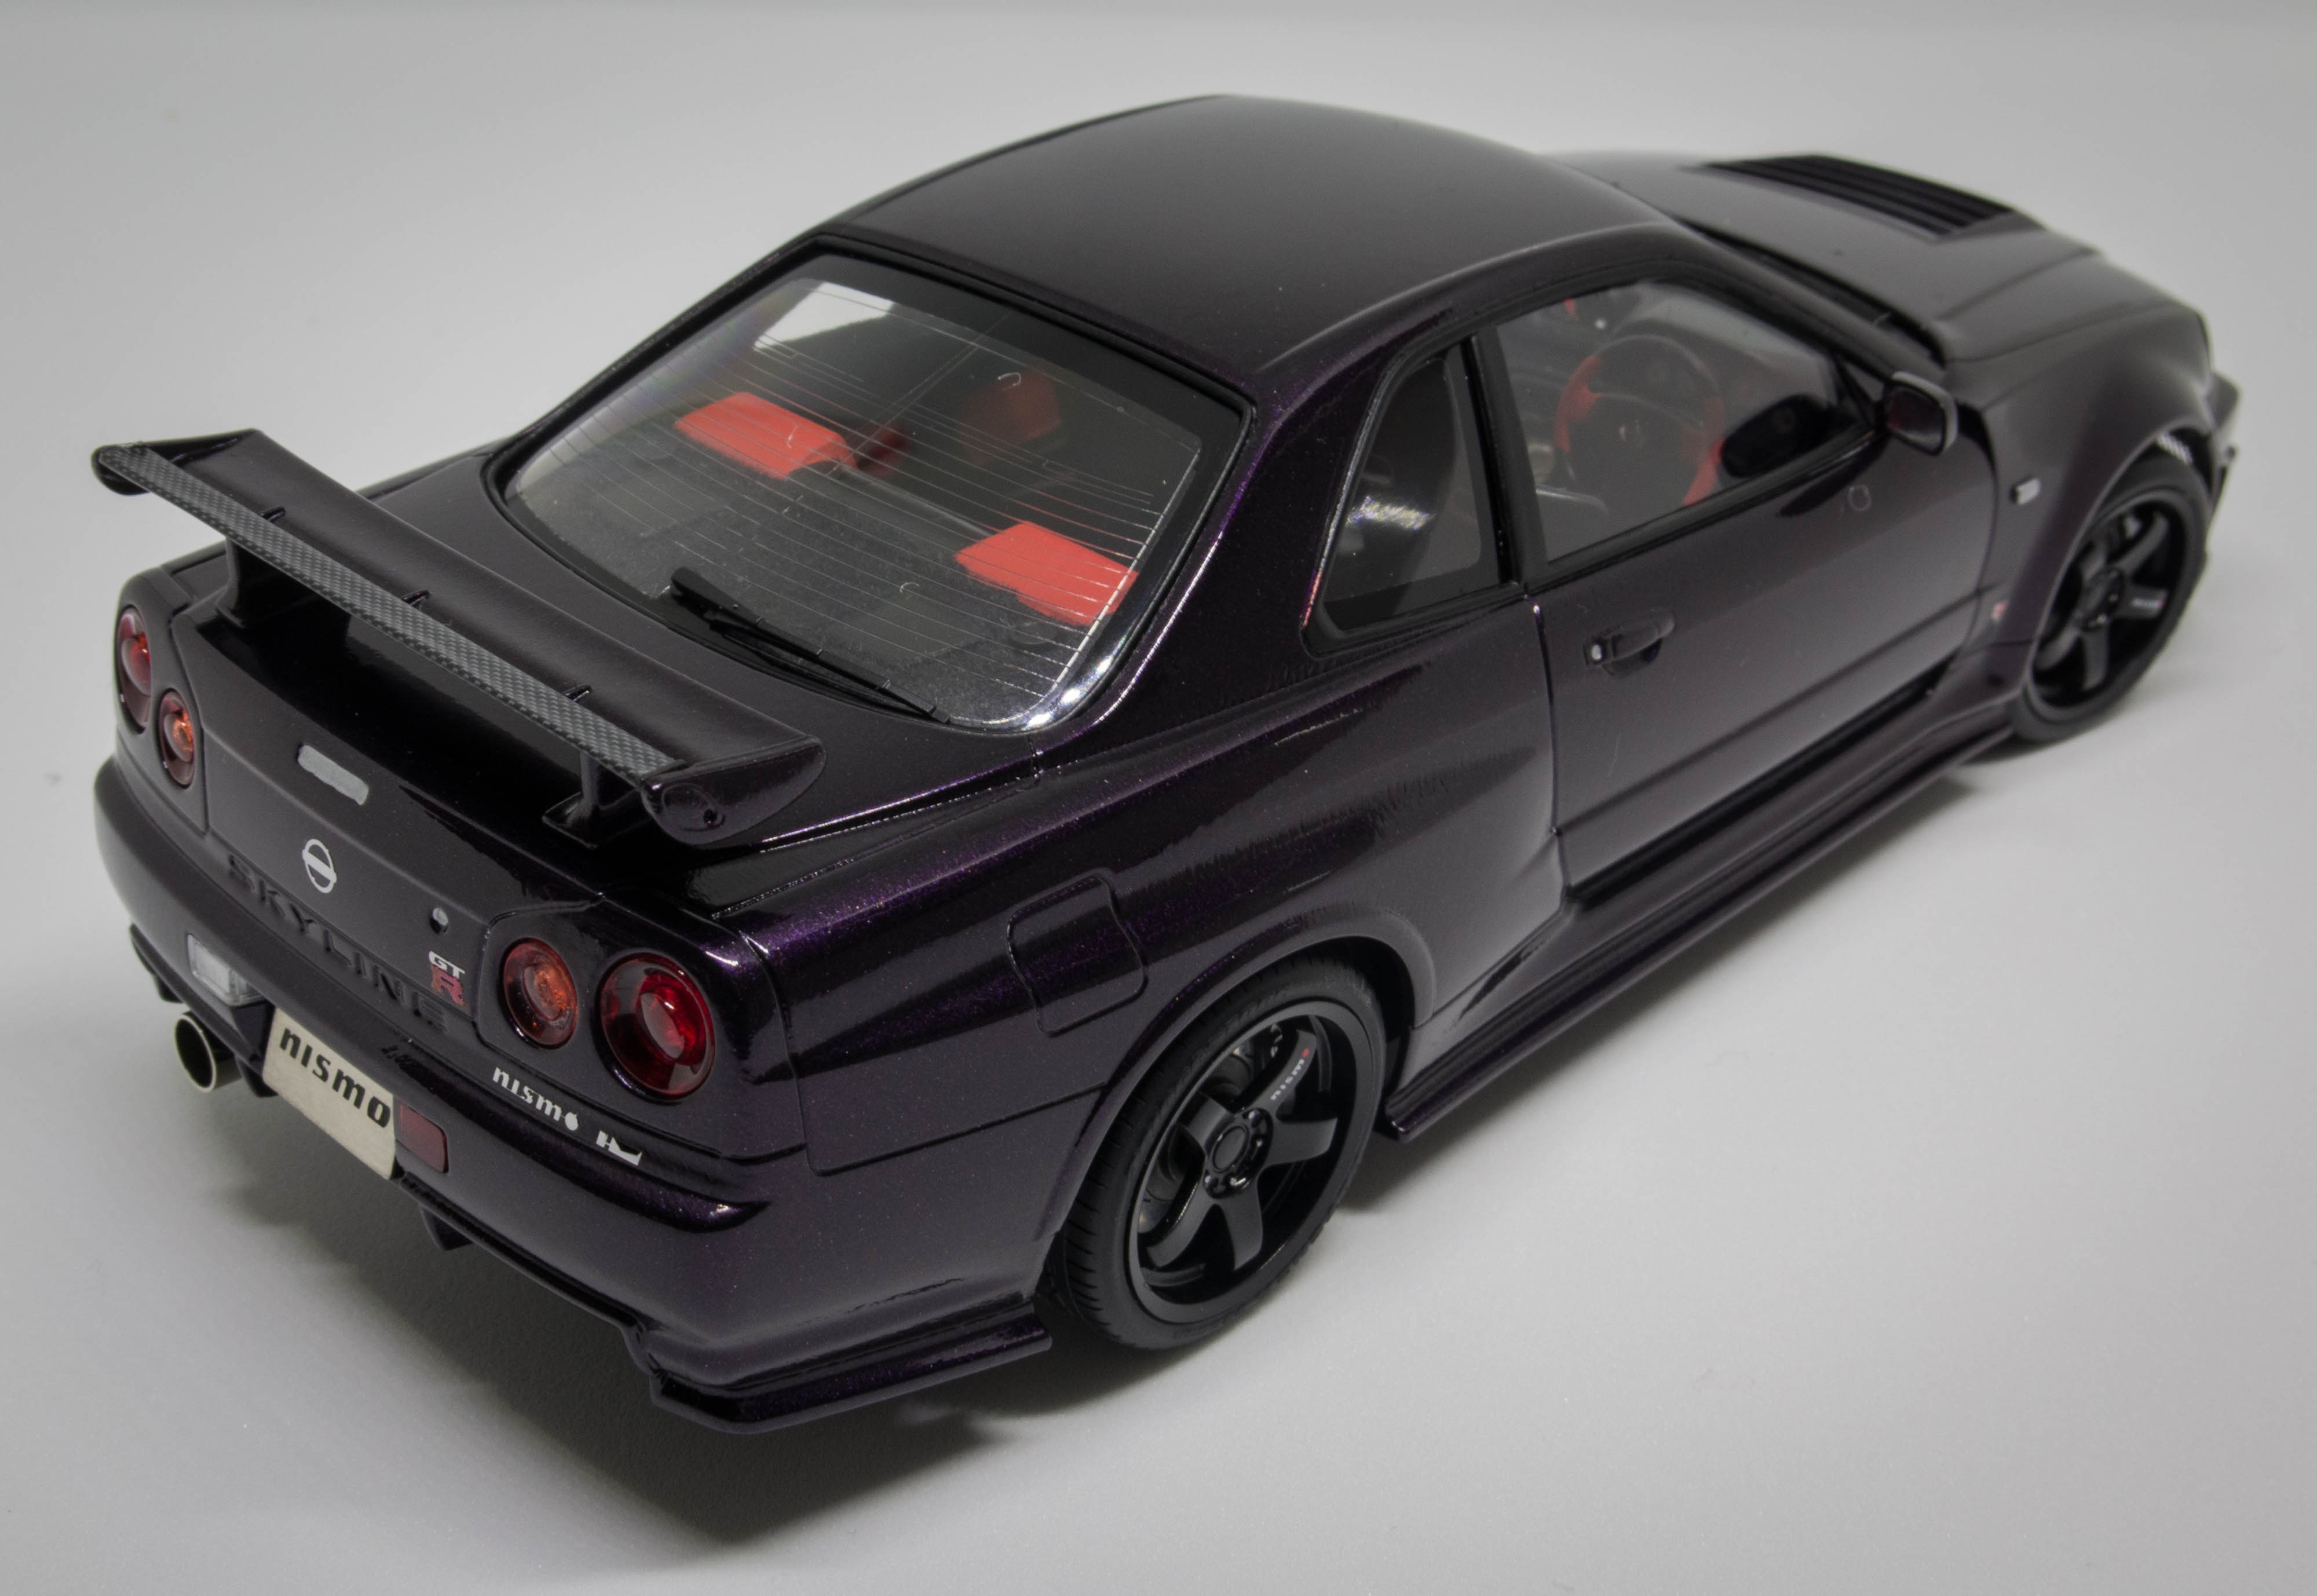
Hi All, I just completed my latest build, of the Nissan skyline GTR R34 Z-Tune by Tamiya. I first attempted this kit about 8 years ago and stiffed it up completely, so i really wanted to do it again properly. you can check out my WIP here: Now for the pretty pictures Thanks for looking Nathan
-
Wonderful kit, and yes it did start-out in glossy black plastic !! - Please feel free to criticise, comment and question. Thanks for taking the time to look. Ian.
-
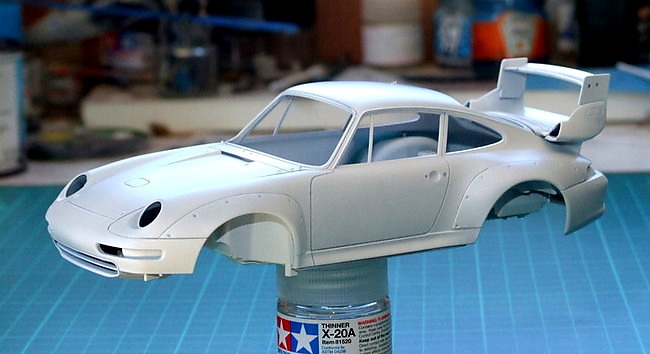
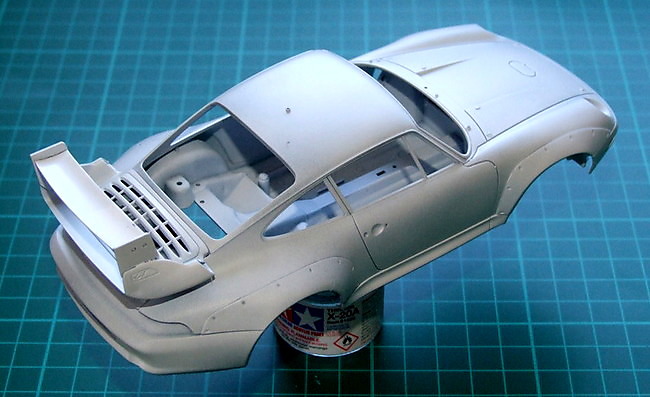
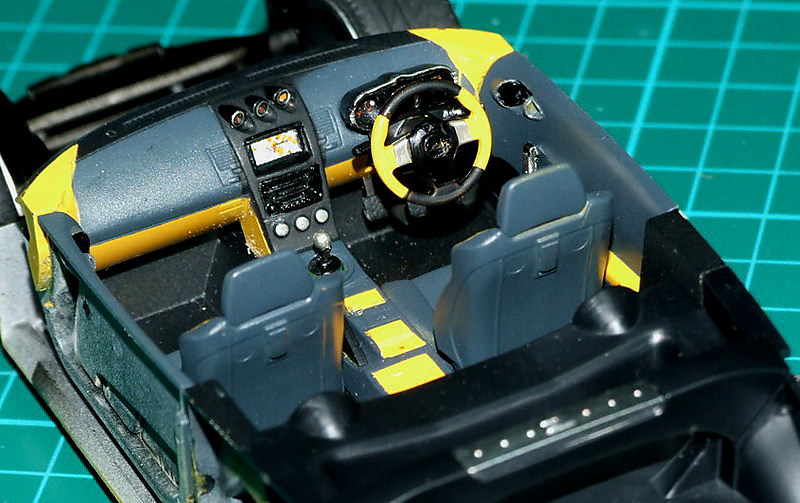
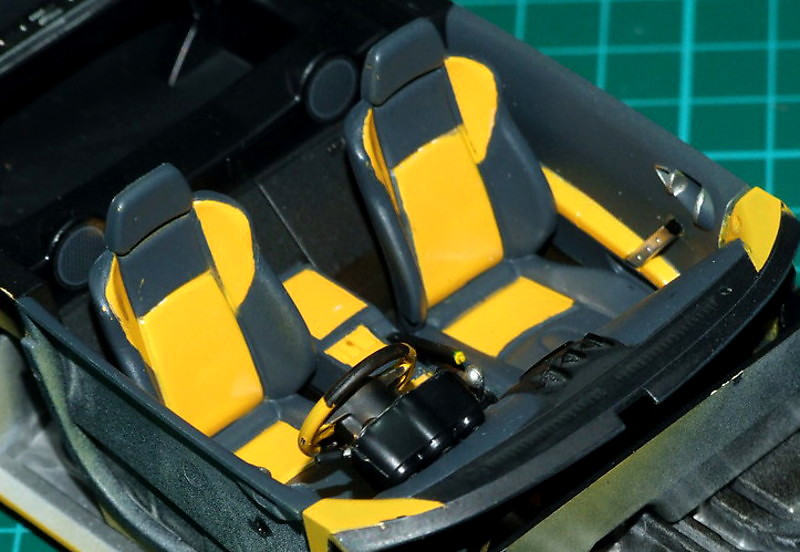
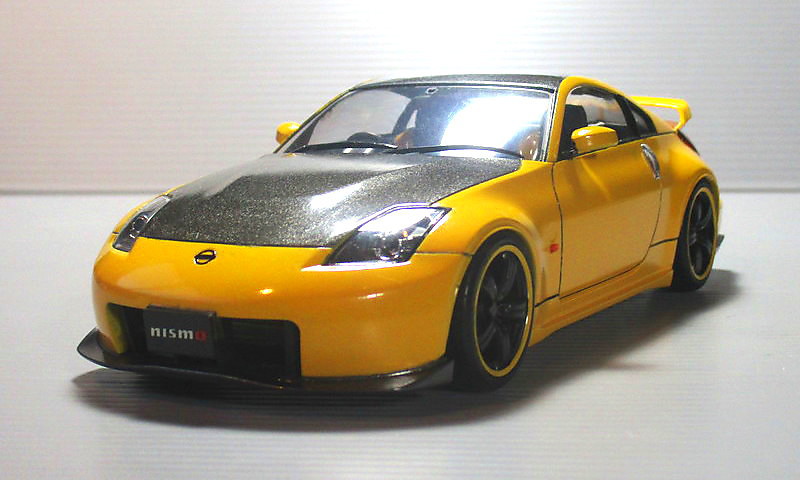
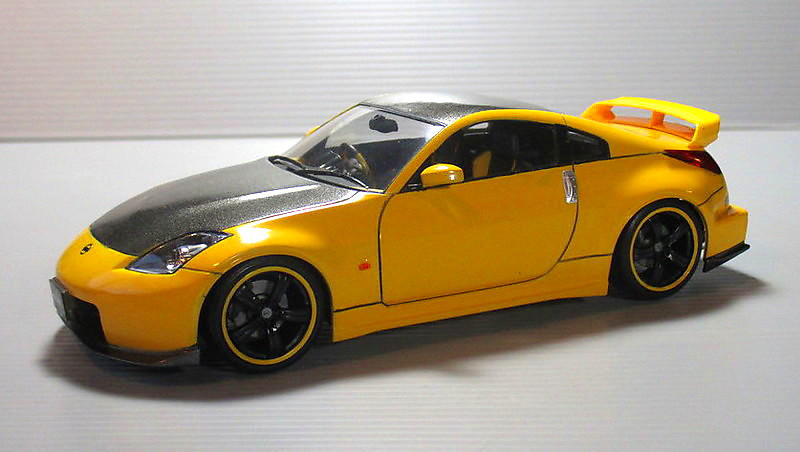
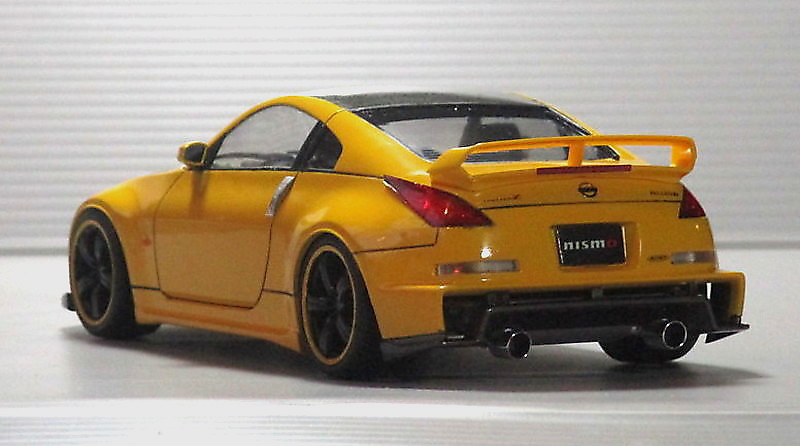
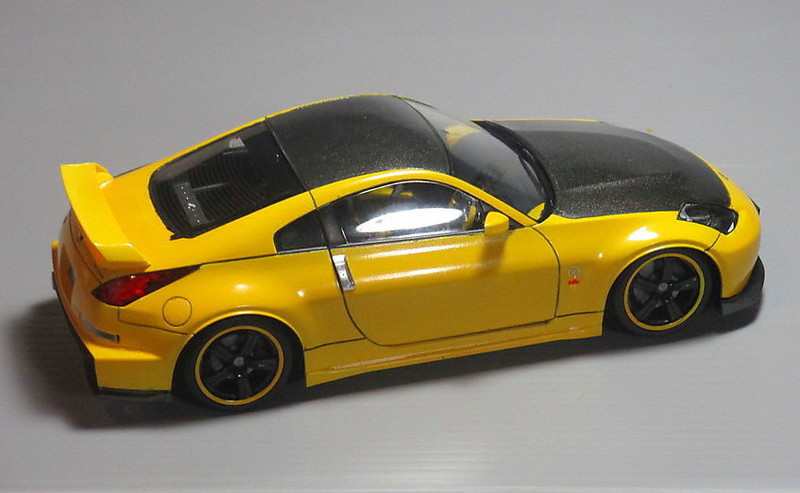
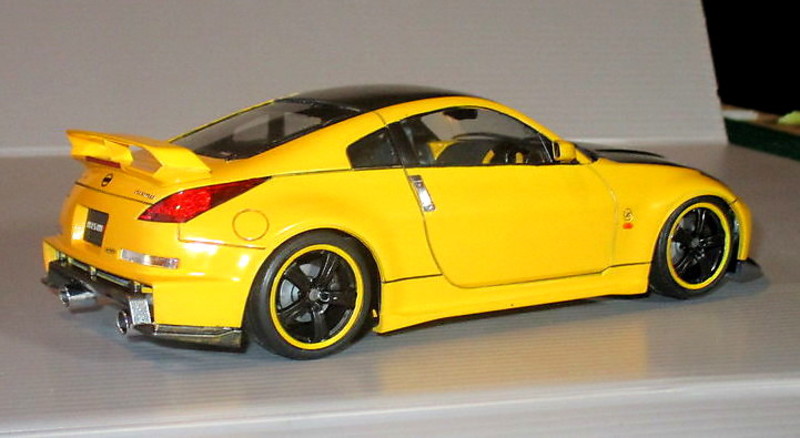
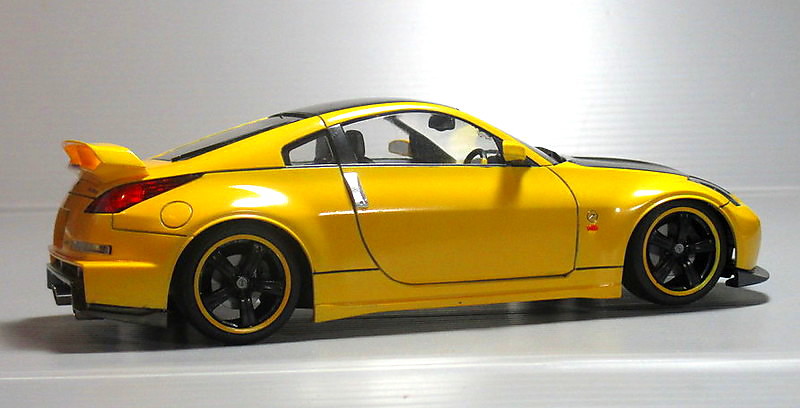
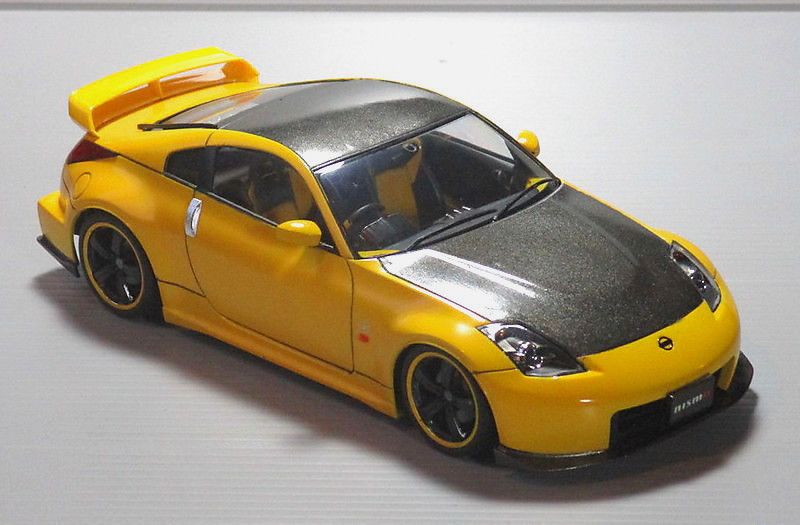
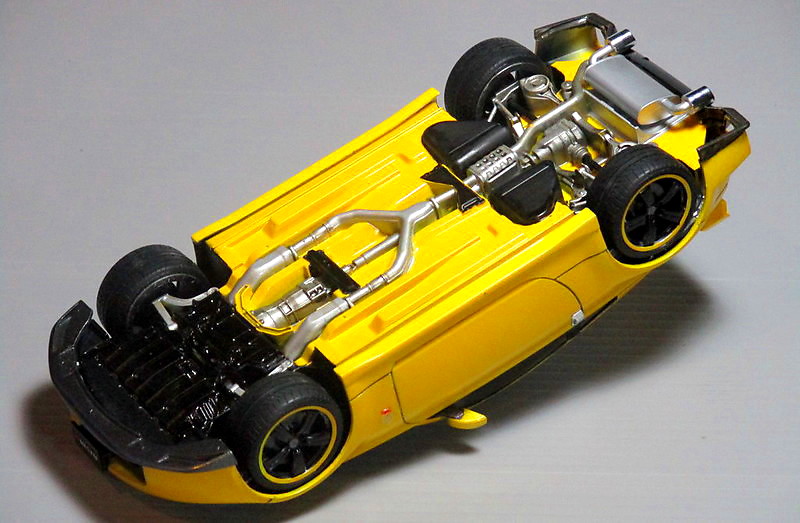
Been a while since I posted a car build here, that's almost certainly because I haven't finished one in a while, however... So, as usual for a Tamiya car kit, it’s perfectly engineered with fit so finely tuned that it almost doesn’t require glue for some of the larger pieces. Build took almost no time at all, painting the insides however… that was another story !! – I knew precisely how I wanted it to look before I even bought the kit, and just for once, I’ve built exactly what was in my minds’ eye. Talking of the paint, I’ve used my ‘default setting’ and gone with two Tamiya rattle-cans – Metallic Grey and Chrome Yellow, simply polished with and off-the-shelf ‘cutting agent’, no clear coat as we can’t get ‘Gravity’ or ‘Zero’ brands here and I simply don’t trust anything else. As ever please feel free to shout abuse, ask a question or make a comment. Have a great weekend all. Ian.
-
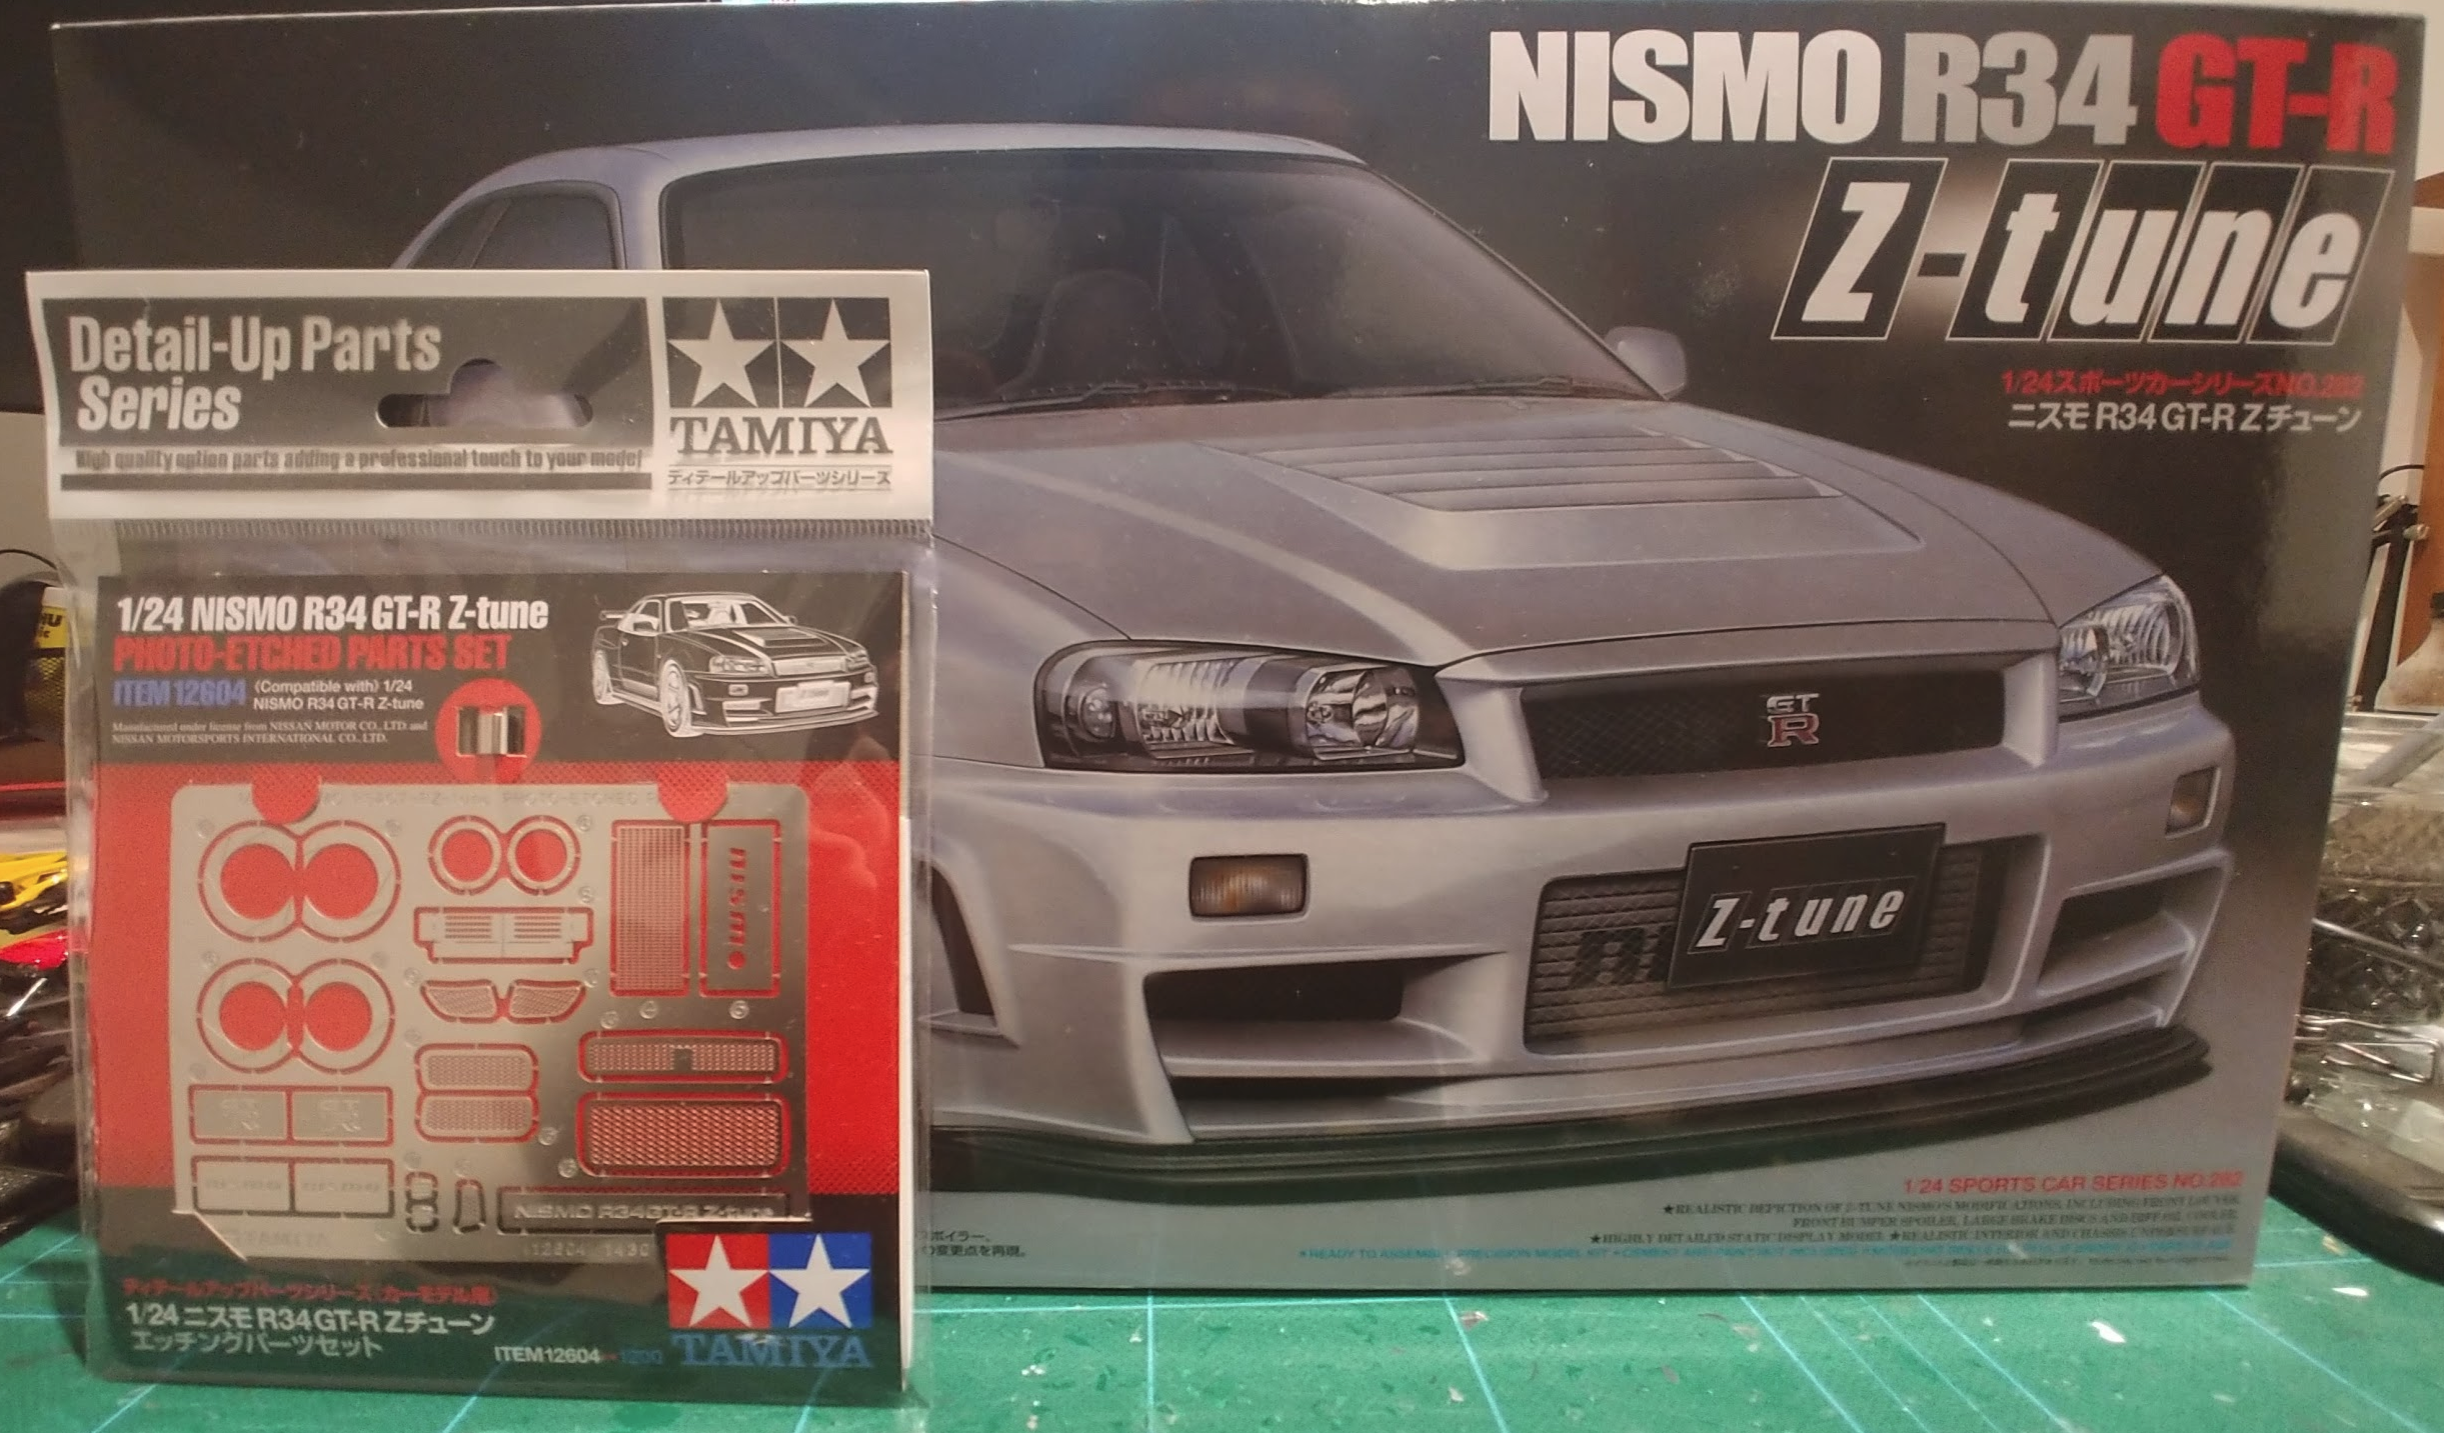
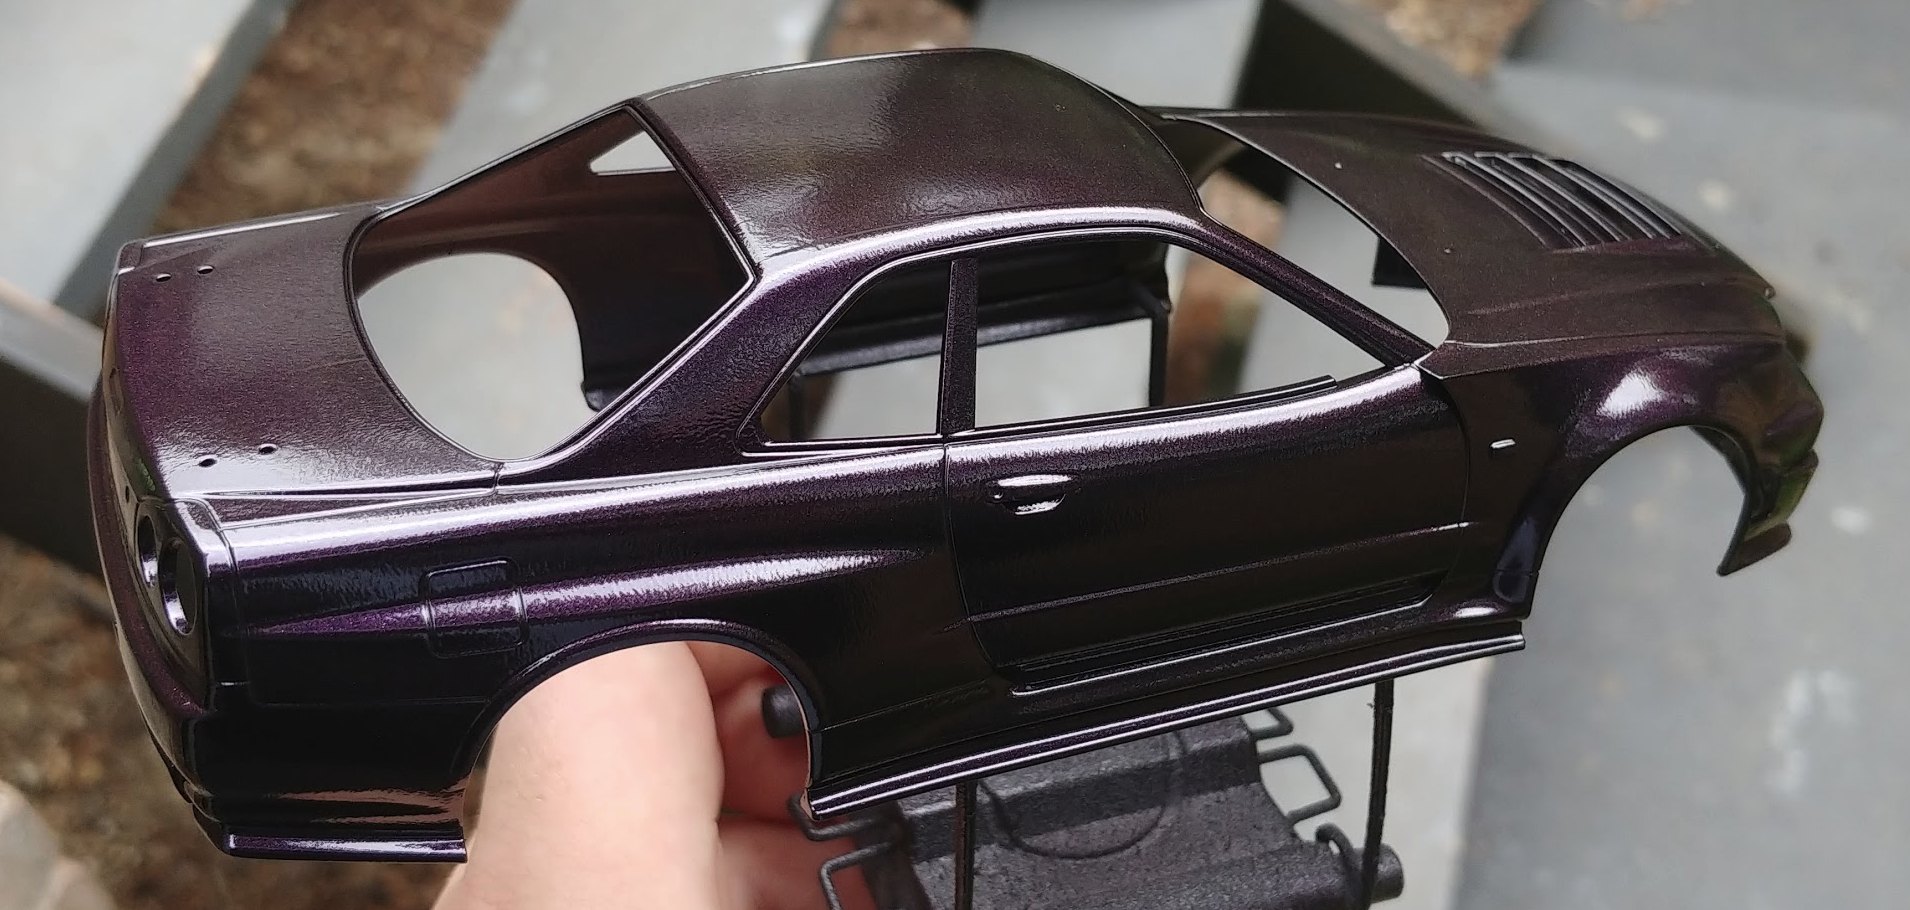
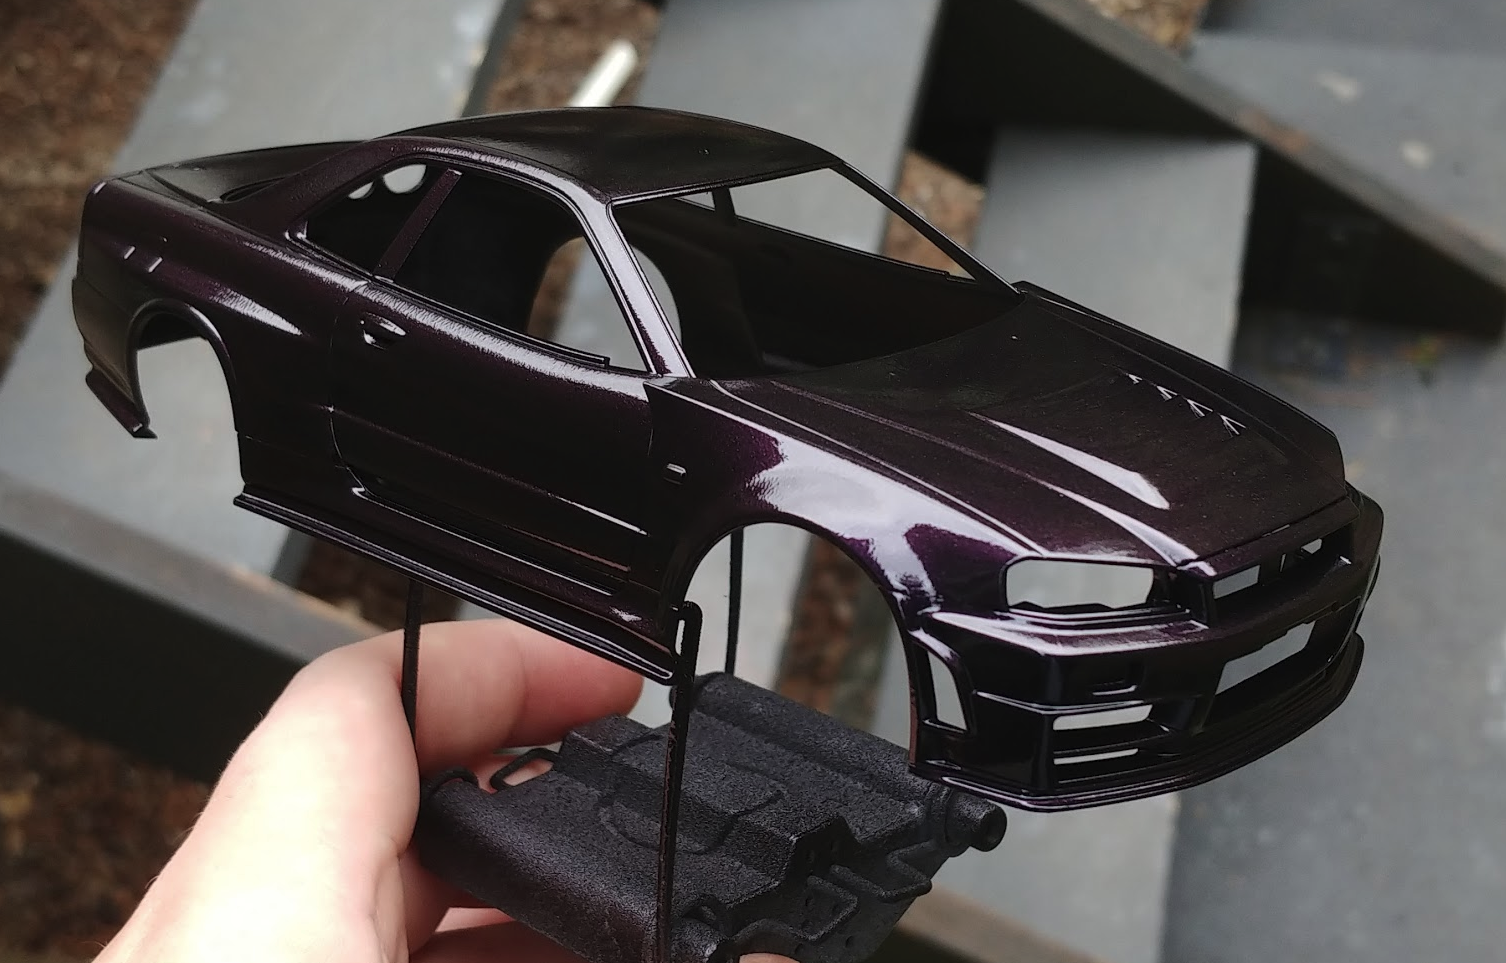
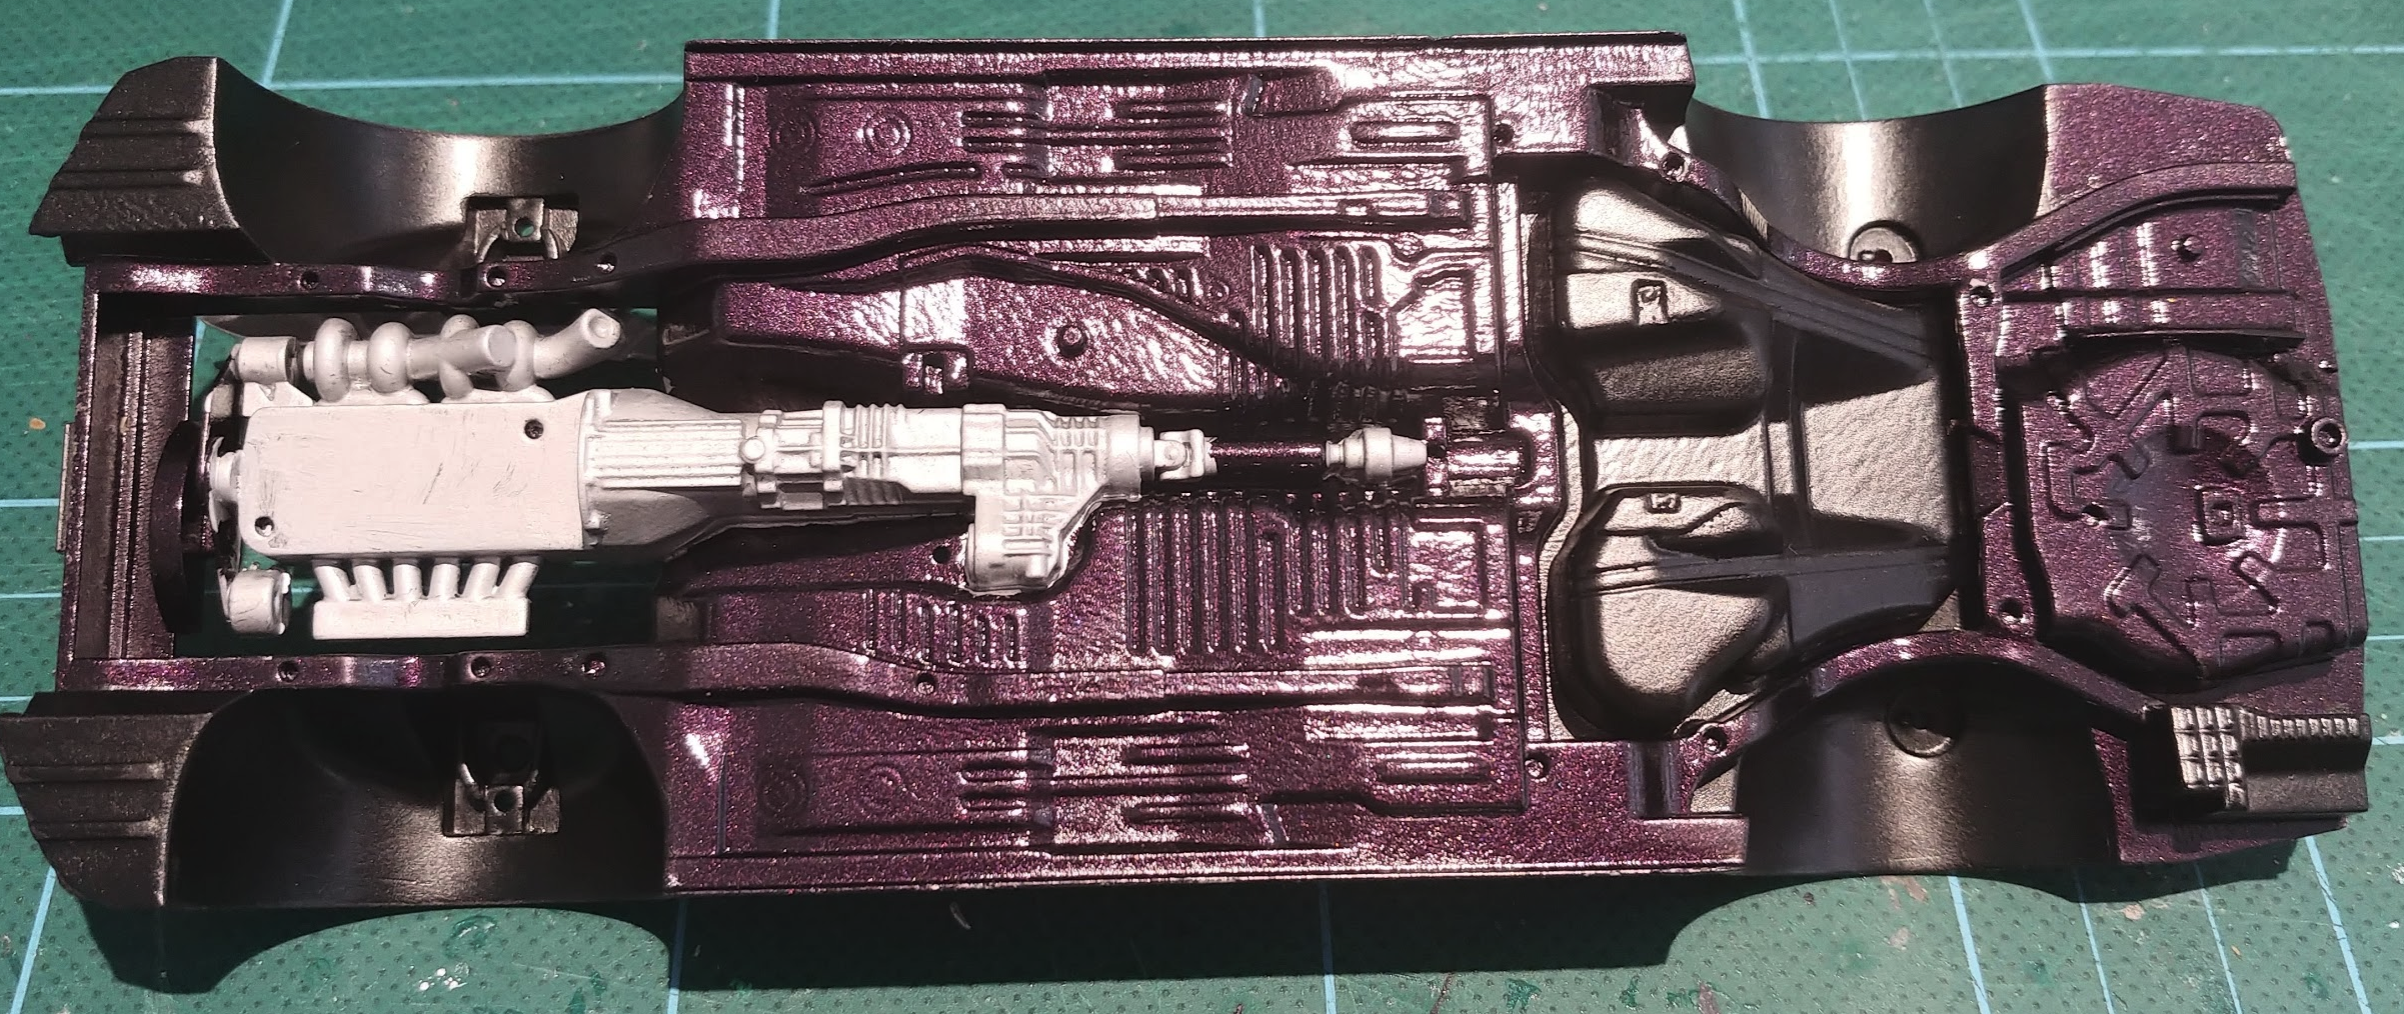
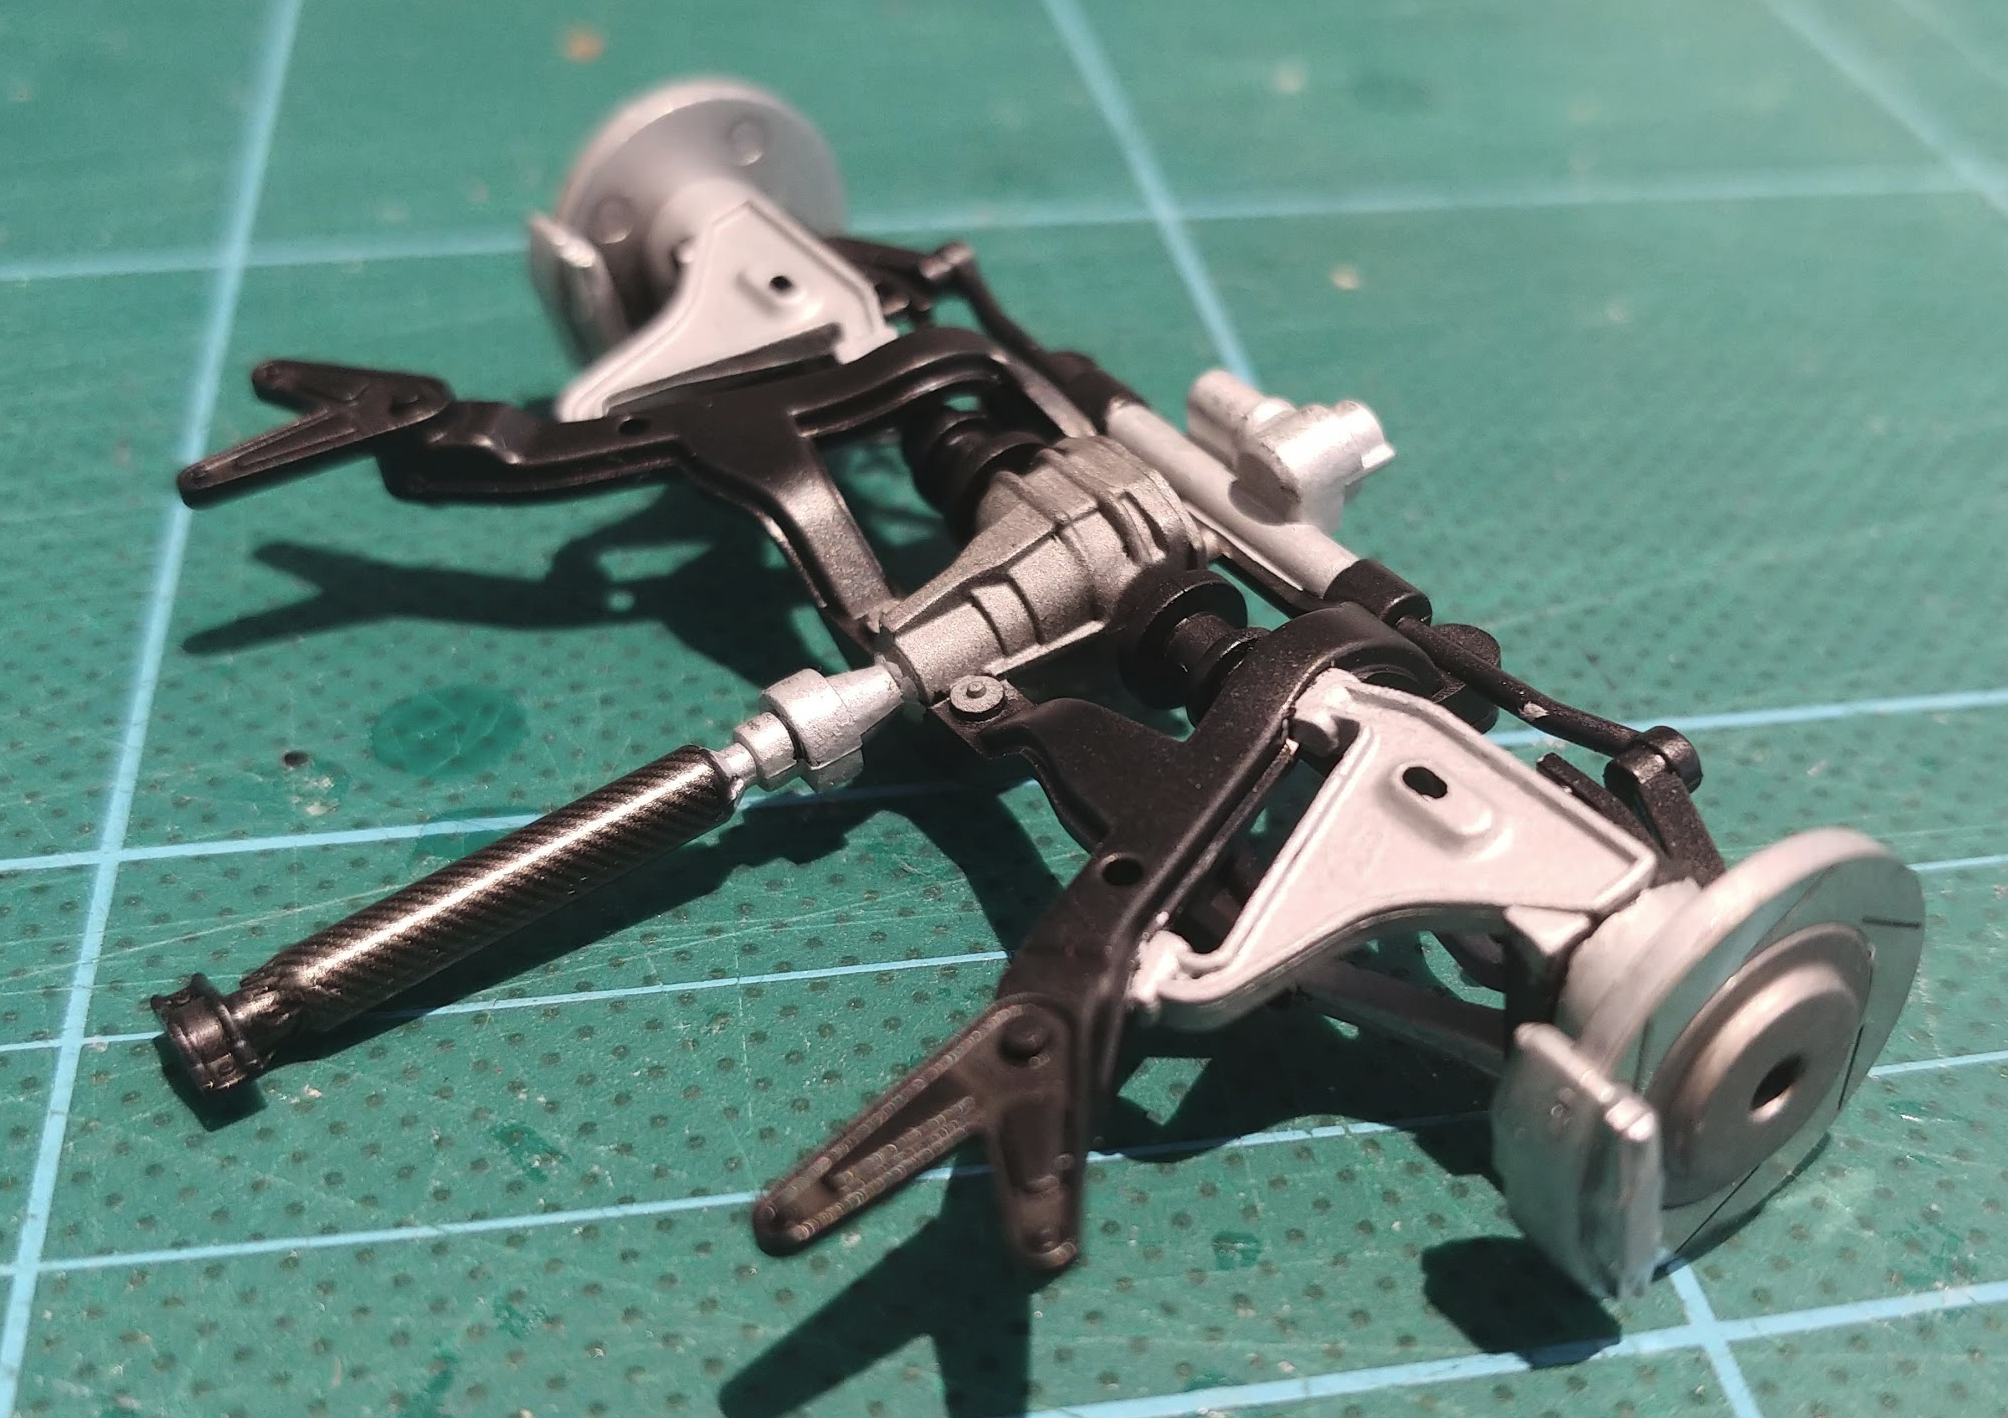
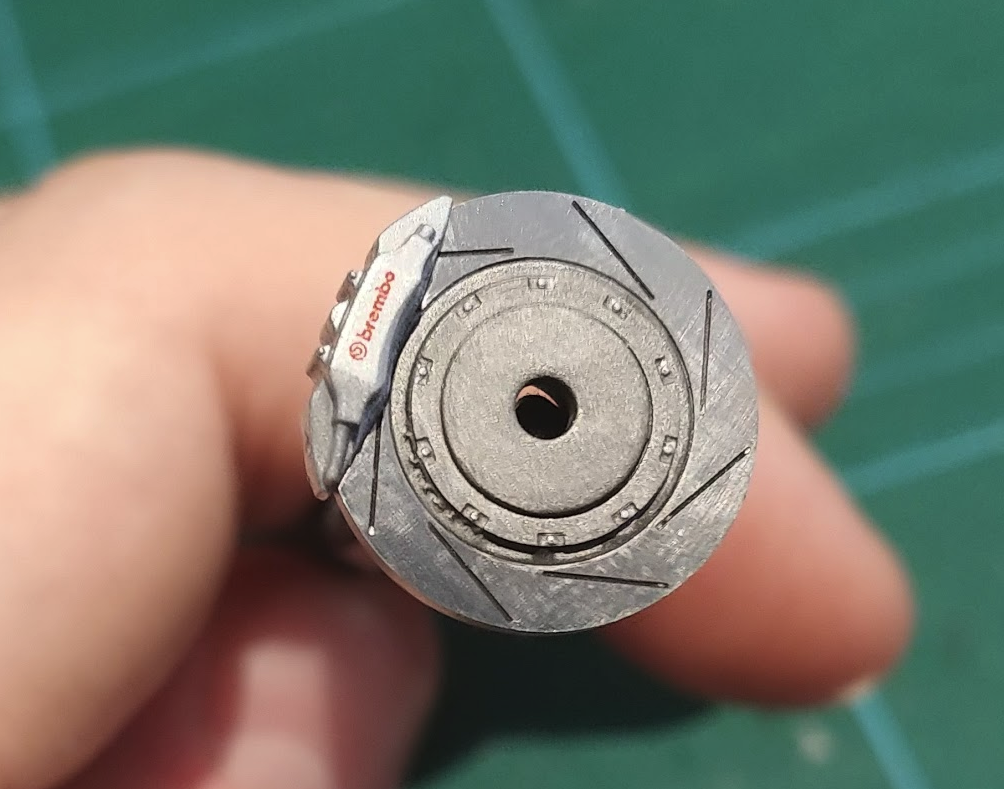
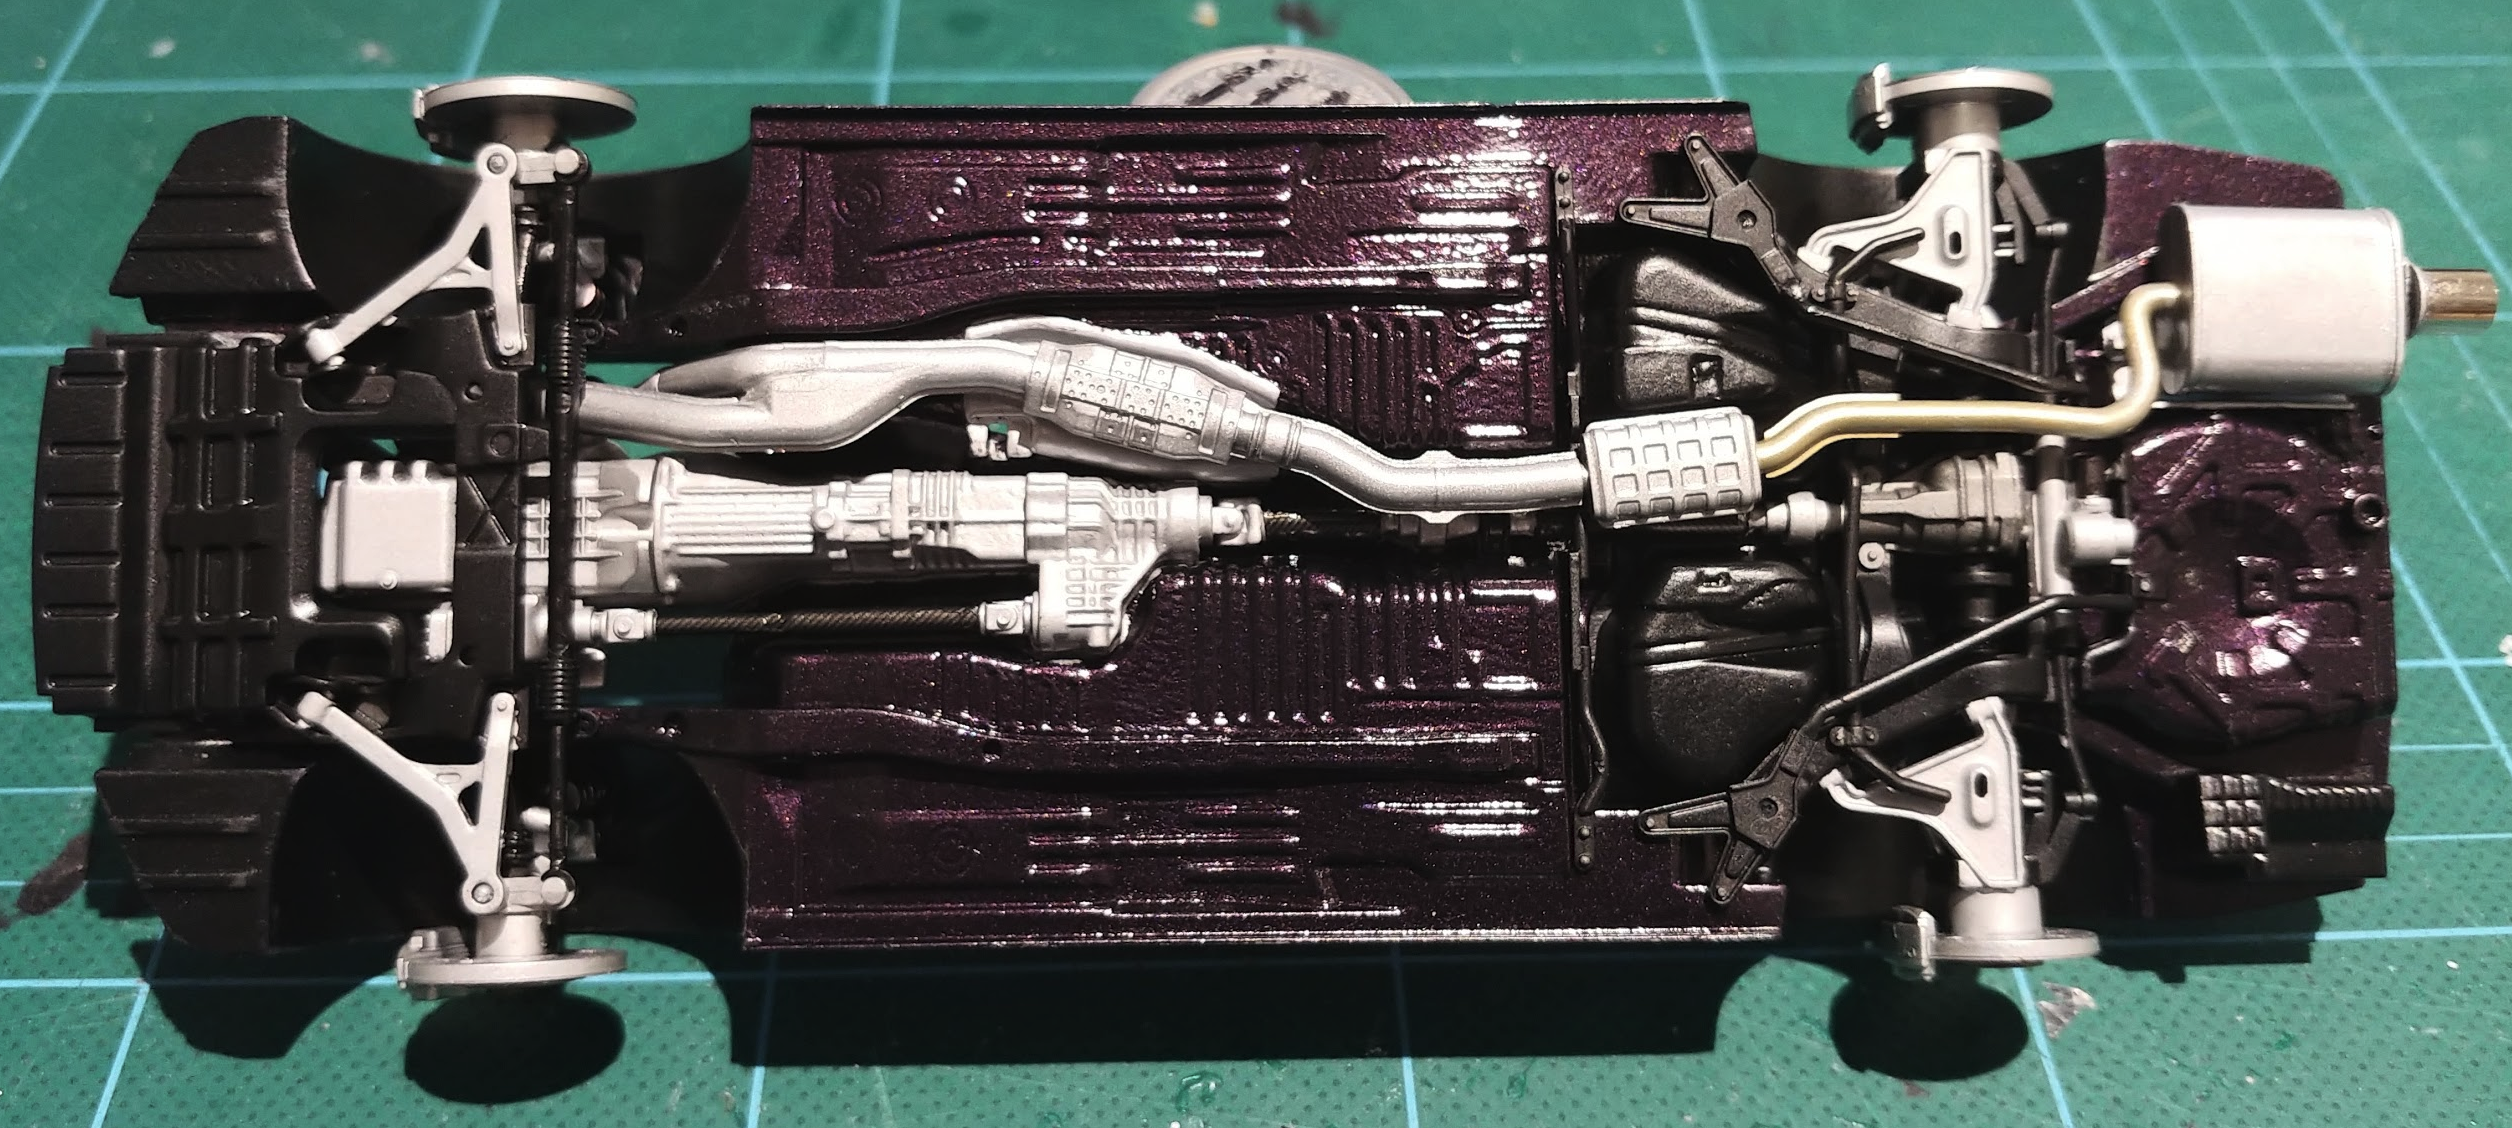
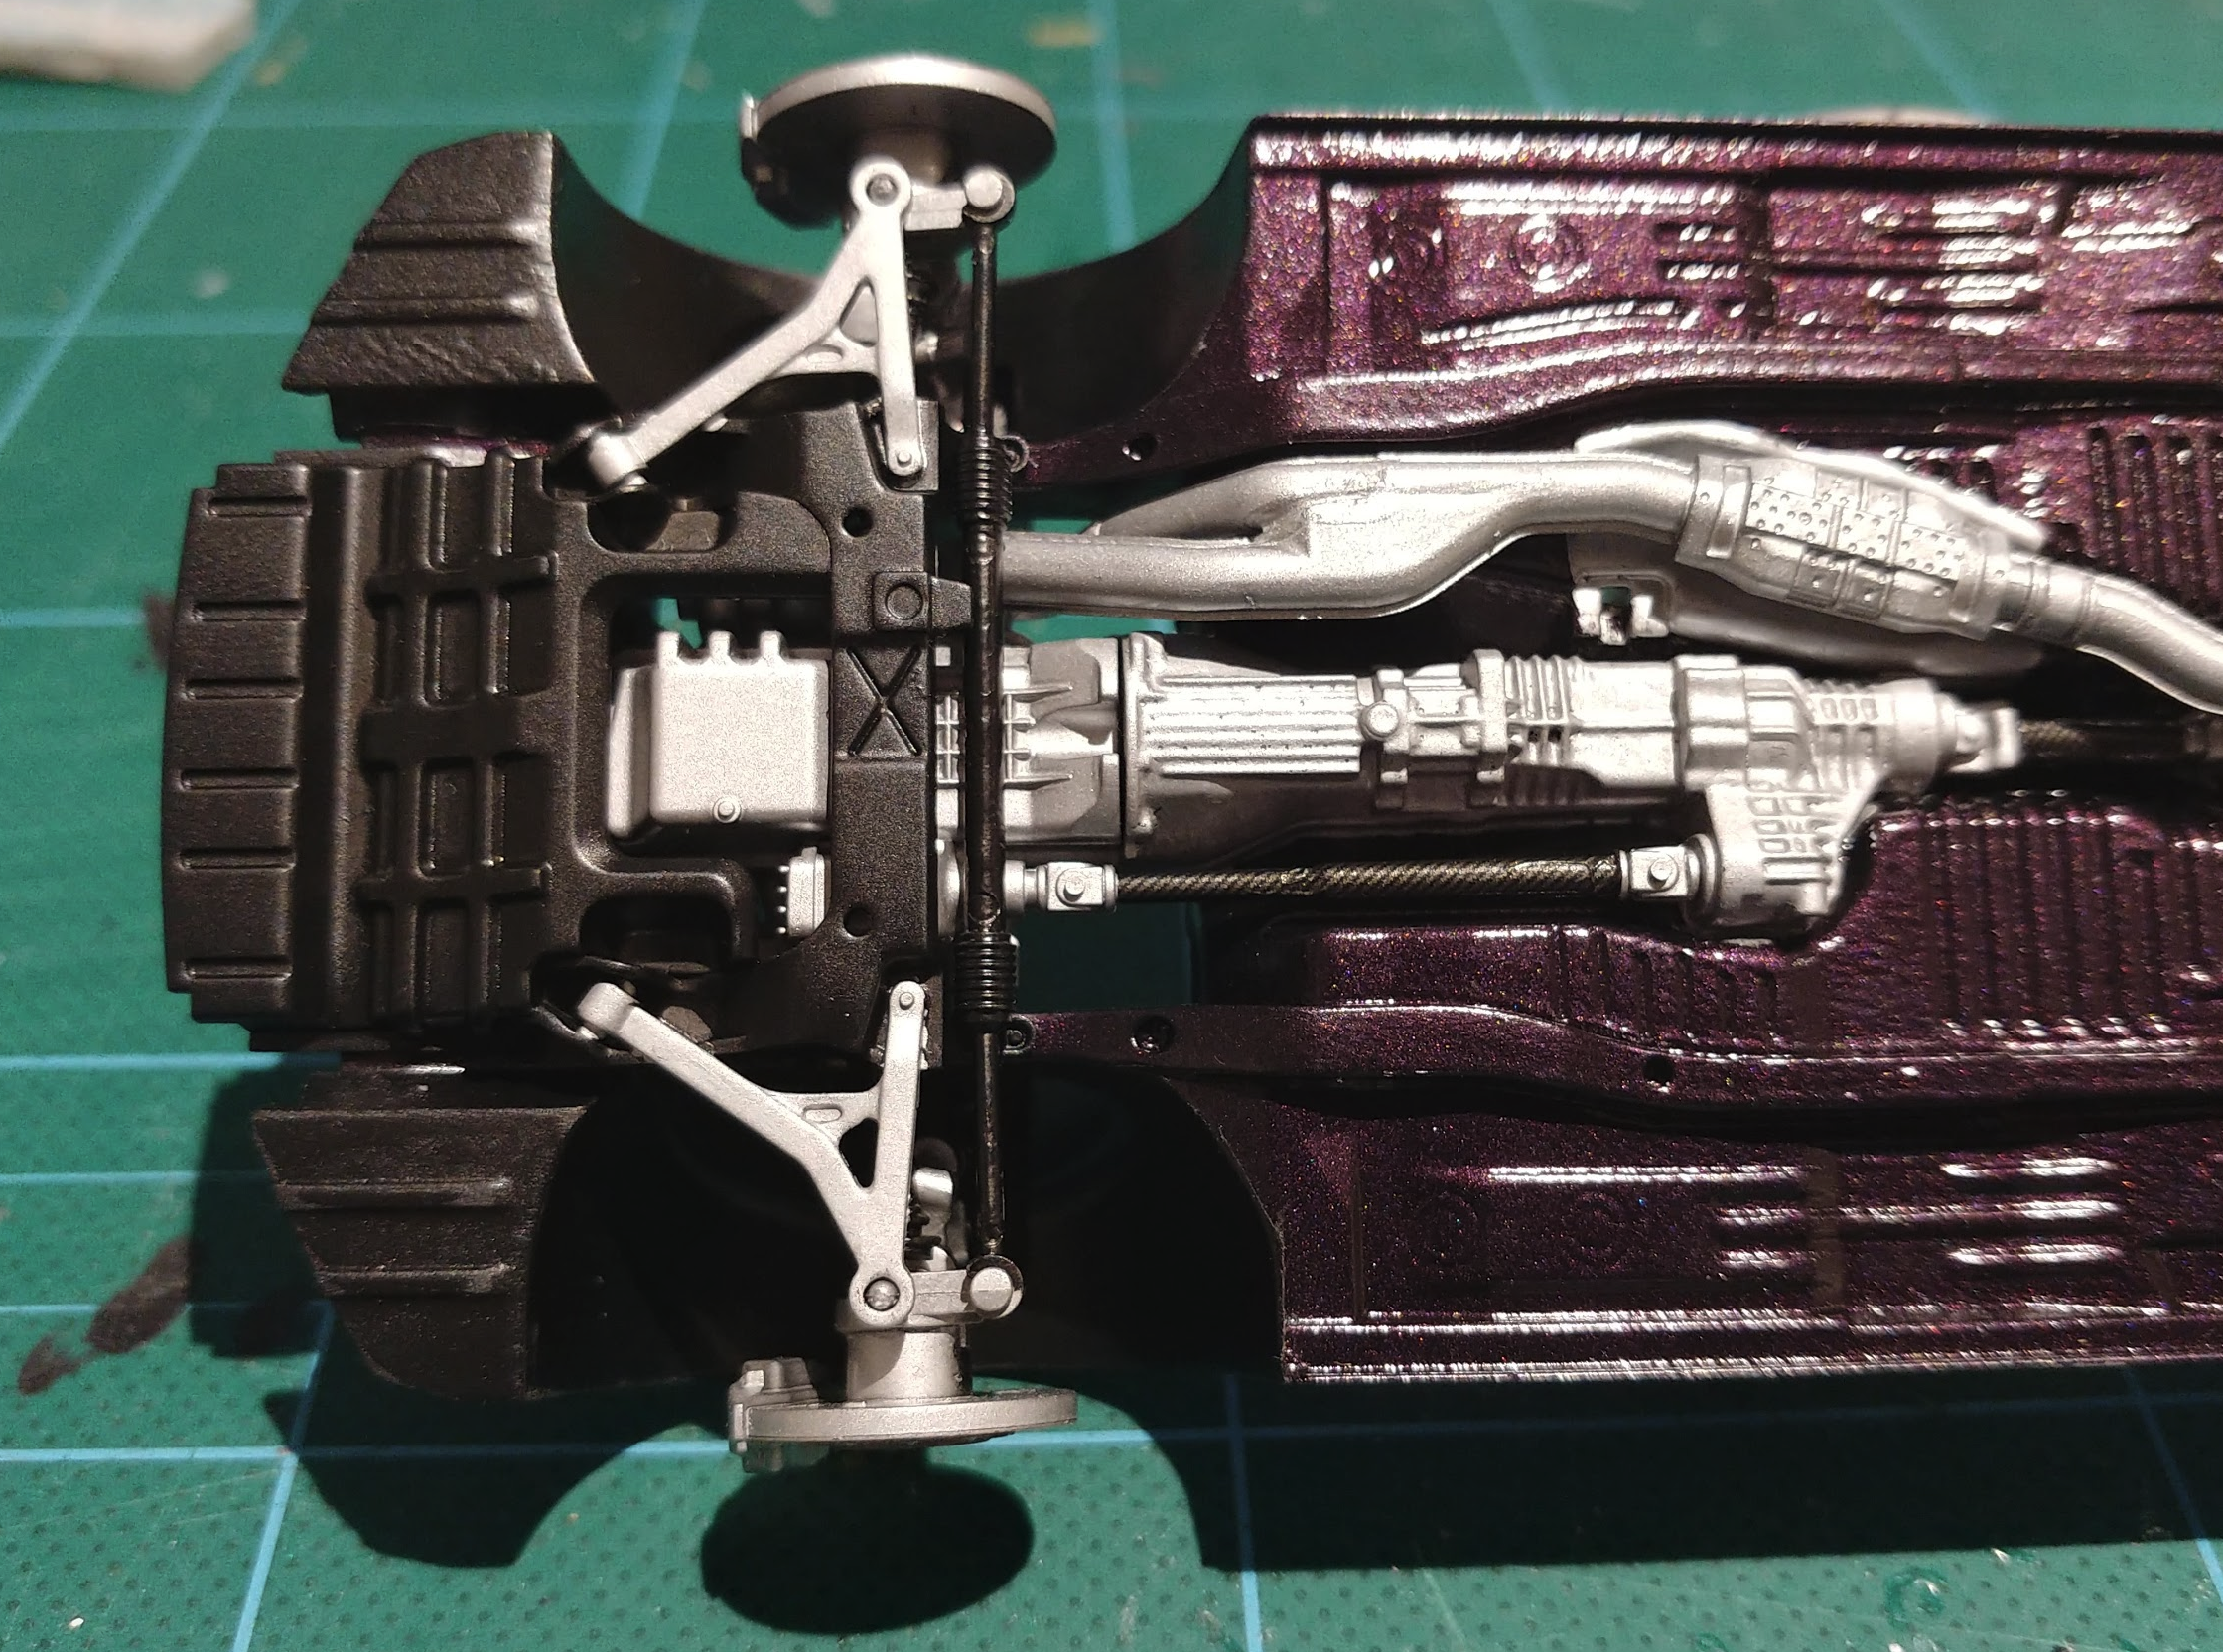
Hi All, I recently started my next project which is the Nissan Skyline R34 GTR Z-tune by Tamiya. Along with the kit, i bougt the tamiya detail up set for a bit more detail and realism. The Z-tune is my favourite version of the R34 skyline, and also the most rare, with only 19 produced worldwide. 18 of the 19 were produced in silver, but one was built in Midnight Purple. This is one of my all time favourite car colours. It apprears black in shadows, and purple in the light. In order to get this colour, I had to go to the autostore, and get them to mix me a can of touch up spray paint to the correct paint paint code (Nissan LP2) I know that zero paints make their own version of this colour, but its not available in Australia (and i dont have an airbrush...) so spray can it had to be. Unfortunately, the spray nozzle didn't allow the paint to lay very flat. There was a fair bit of orange peel in the body & chassis. The body can be fixed with a sanding and then polish, but that will have to wait until it is properly cured. While the body cured, i got working on the chassis. Most of this had to be the same as the body colour. Again, because of the spray nozzle being too blotchy, the finish didn't come out great, but it looks ok. A few areas were masked off and semi gloss black was applied. The orange peel in the purple actually helped with the black, to make it look like a textured black finish that is often found on the underside of a car. The moulded in engine and gearbox were hand painted in flat aluminium paint. Next up was the front and rear suspension sub assemblies. These parts were very accurately detailed and went together perfectly. (like all tamiya kits) From some research i did, i found that some of the paint insrtuctions were a bit off, and i found that the drive shafts are actually made from carbon fibre. so i made those changes, and added some carbon decals. Im really happy with how the brakes came out. the PE disk rotors look really realistic. I added some black paint to the slots, and sanded back the face to look like they had been used. Final Chassis assembly. Thanks for looking, Nathan