Search the Community
Showing results for tags 'Diorama'.
-
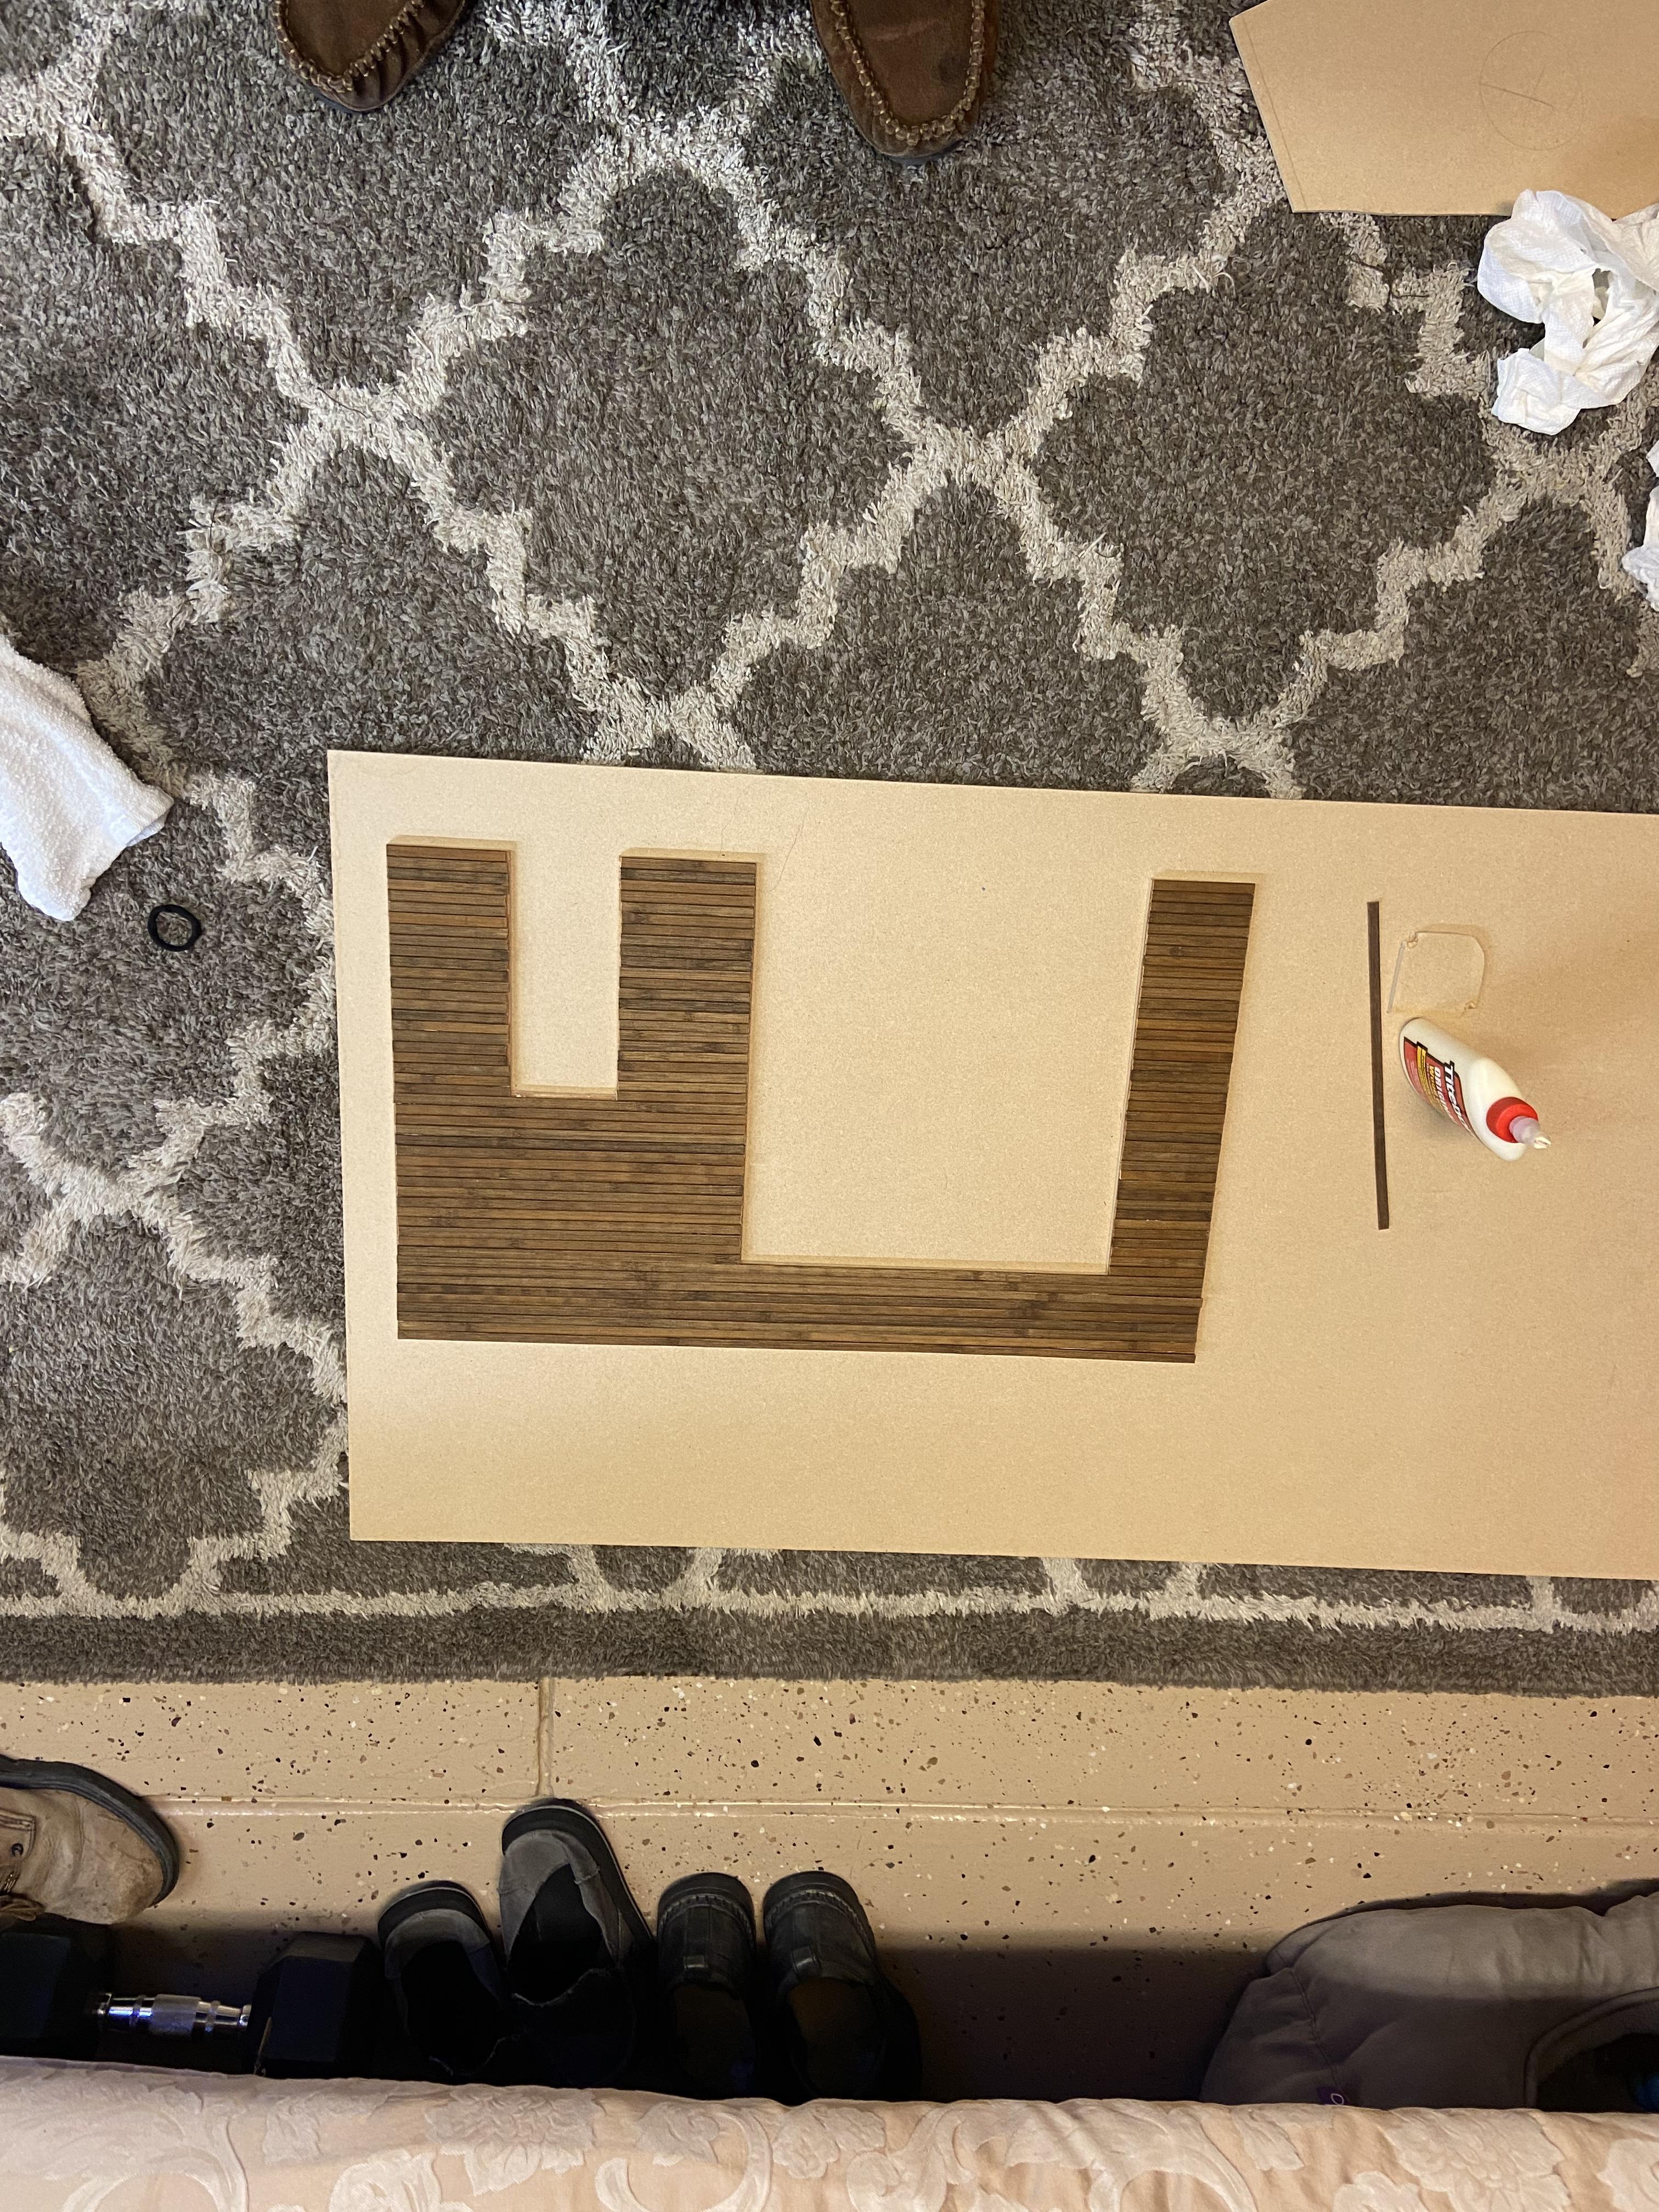
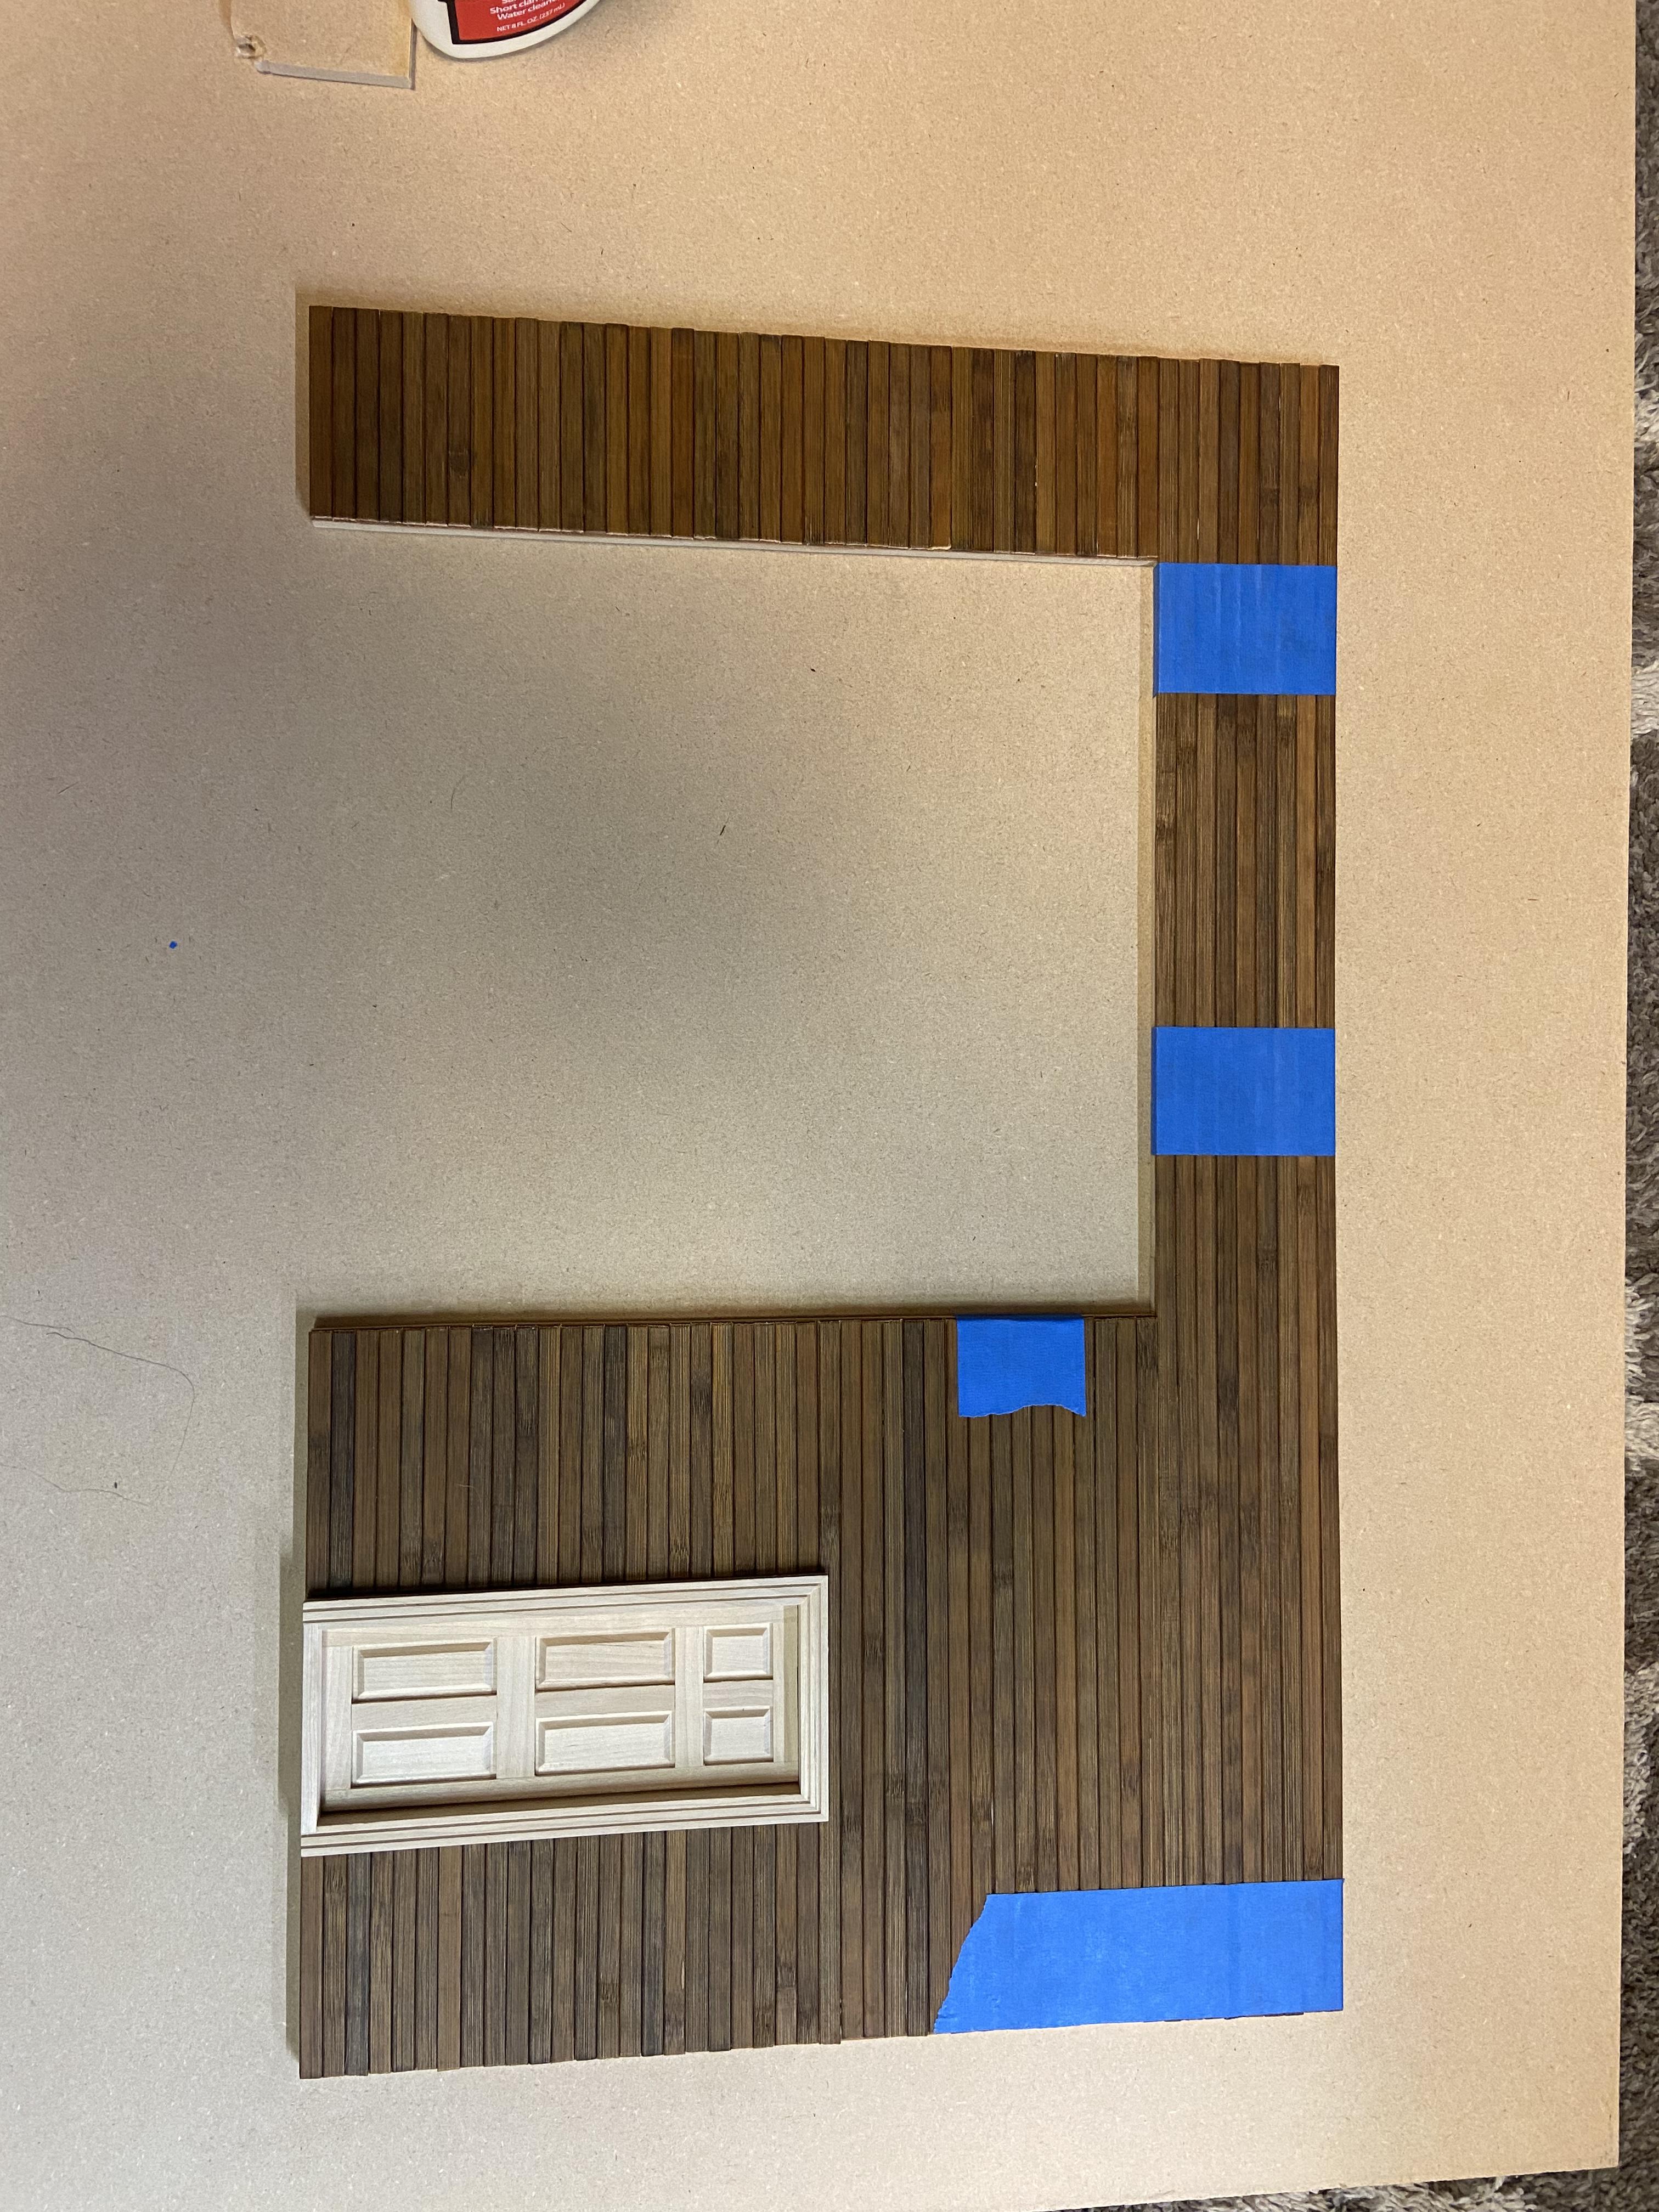
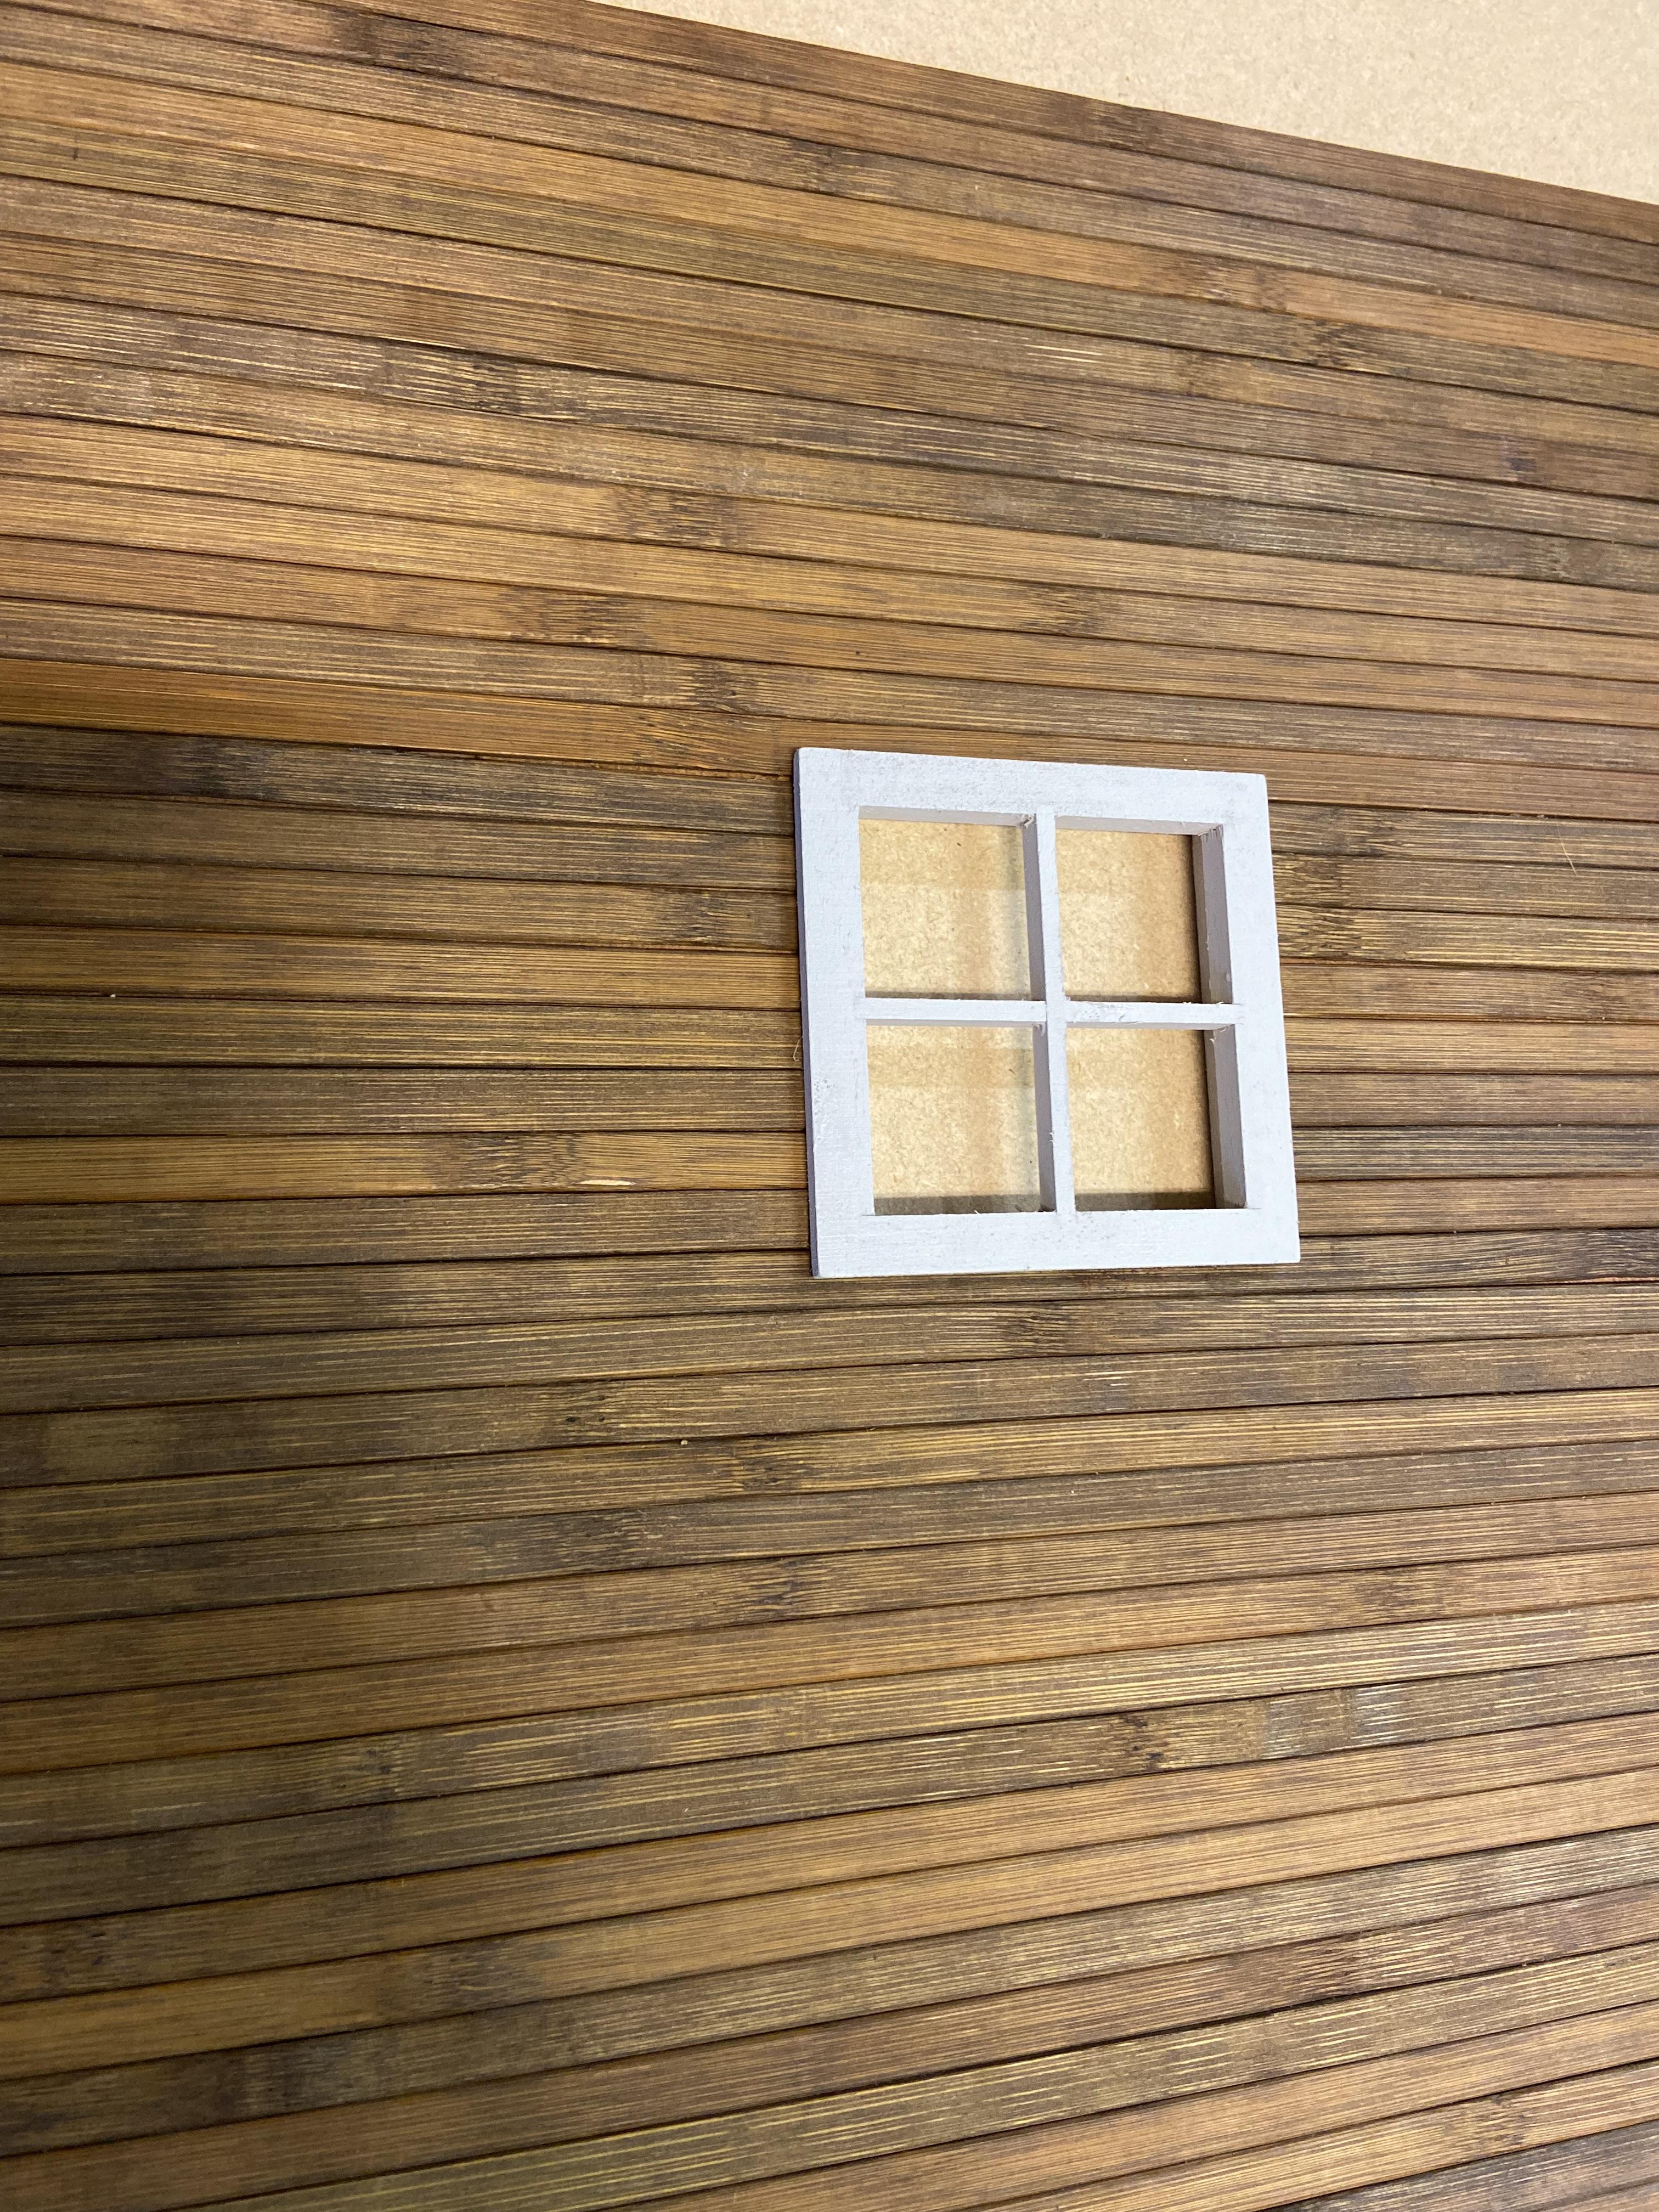
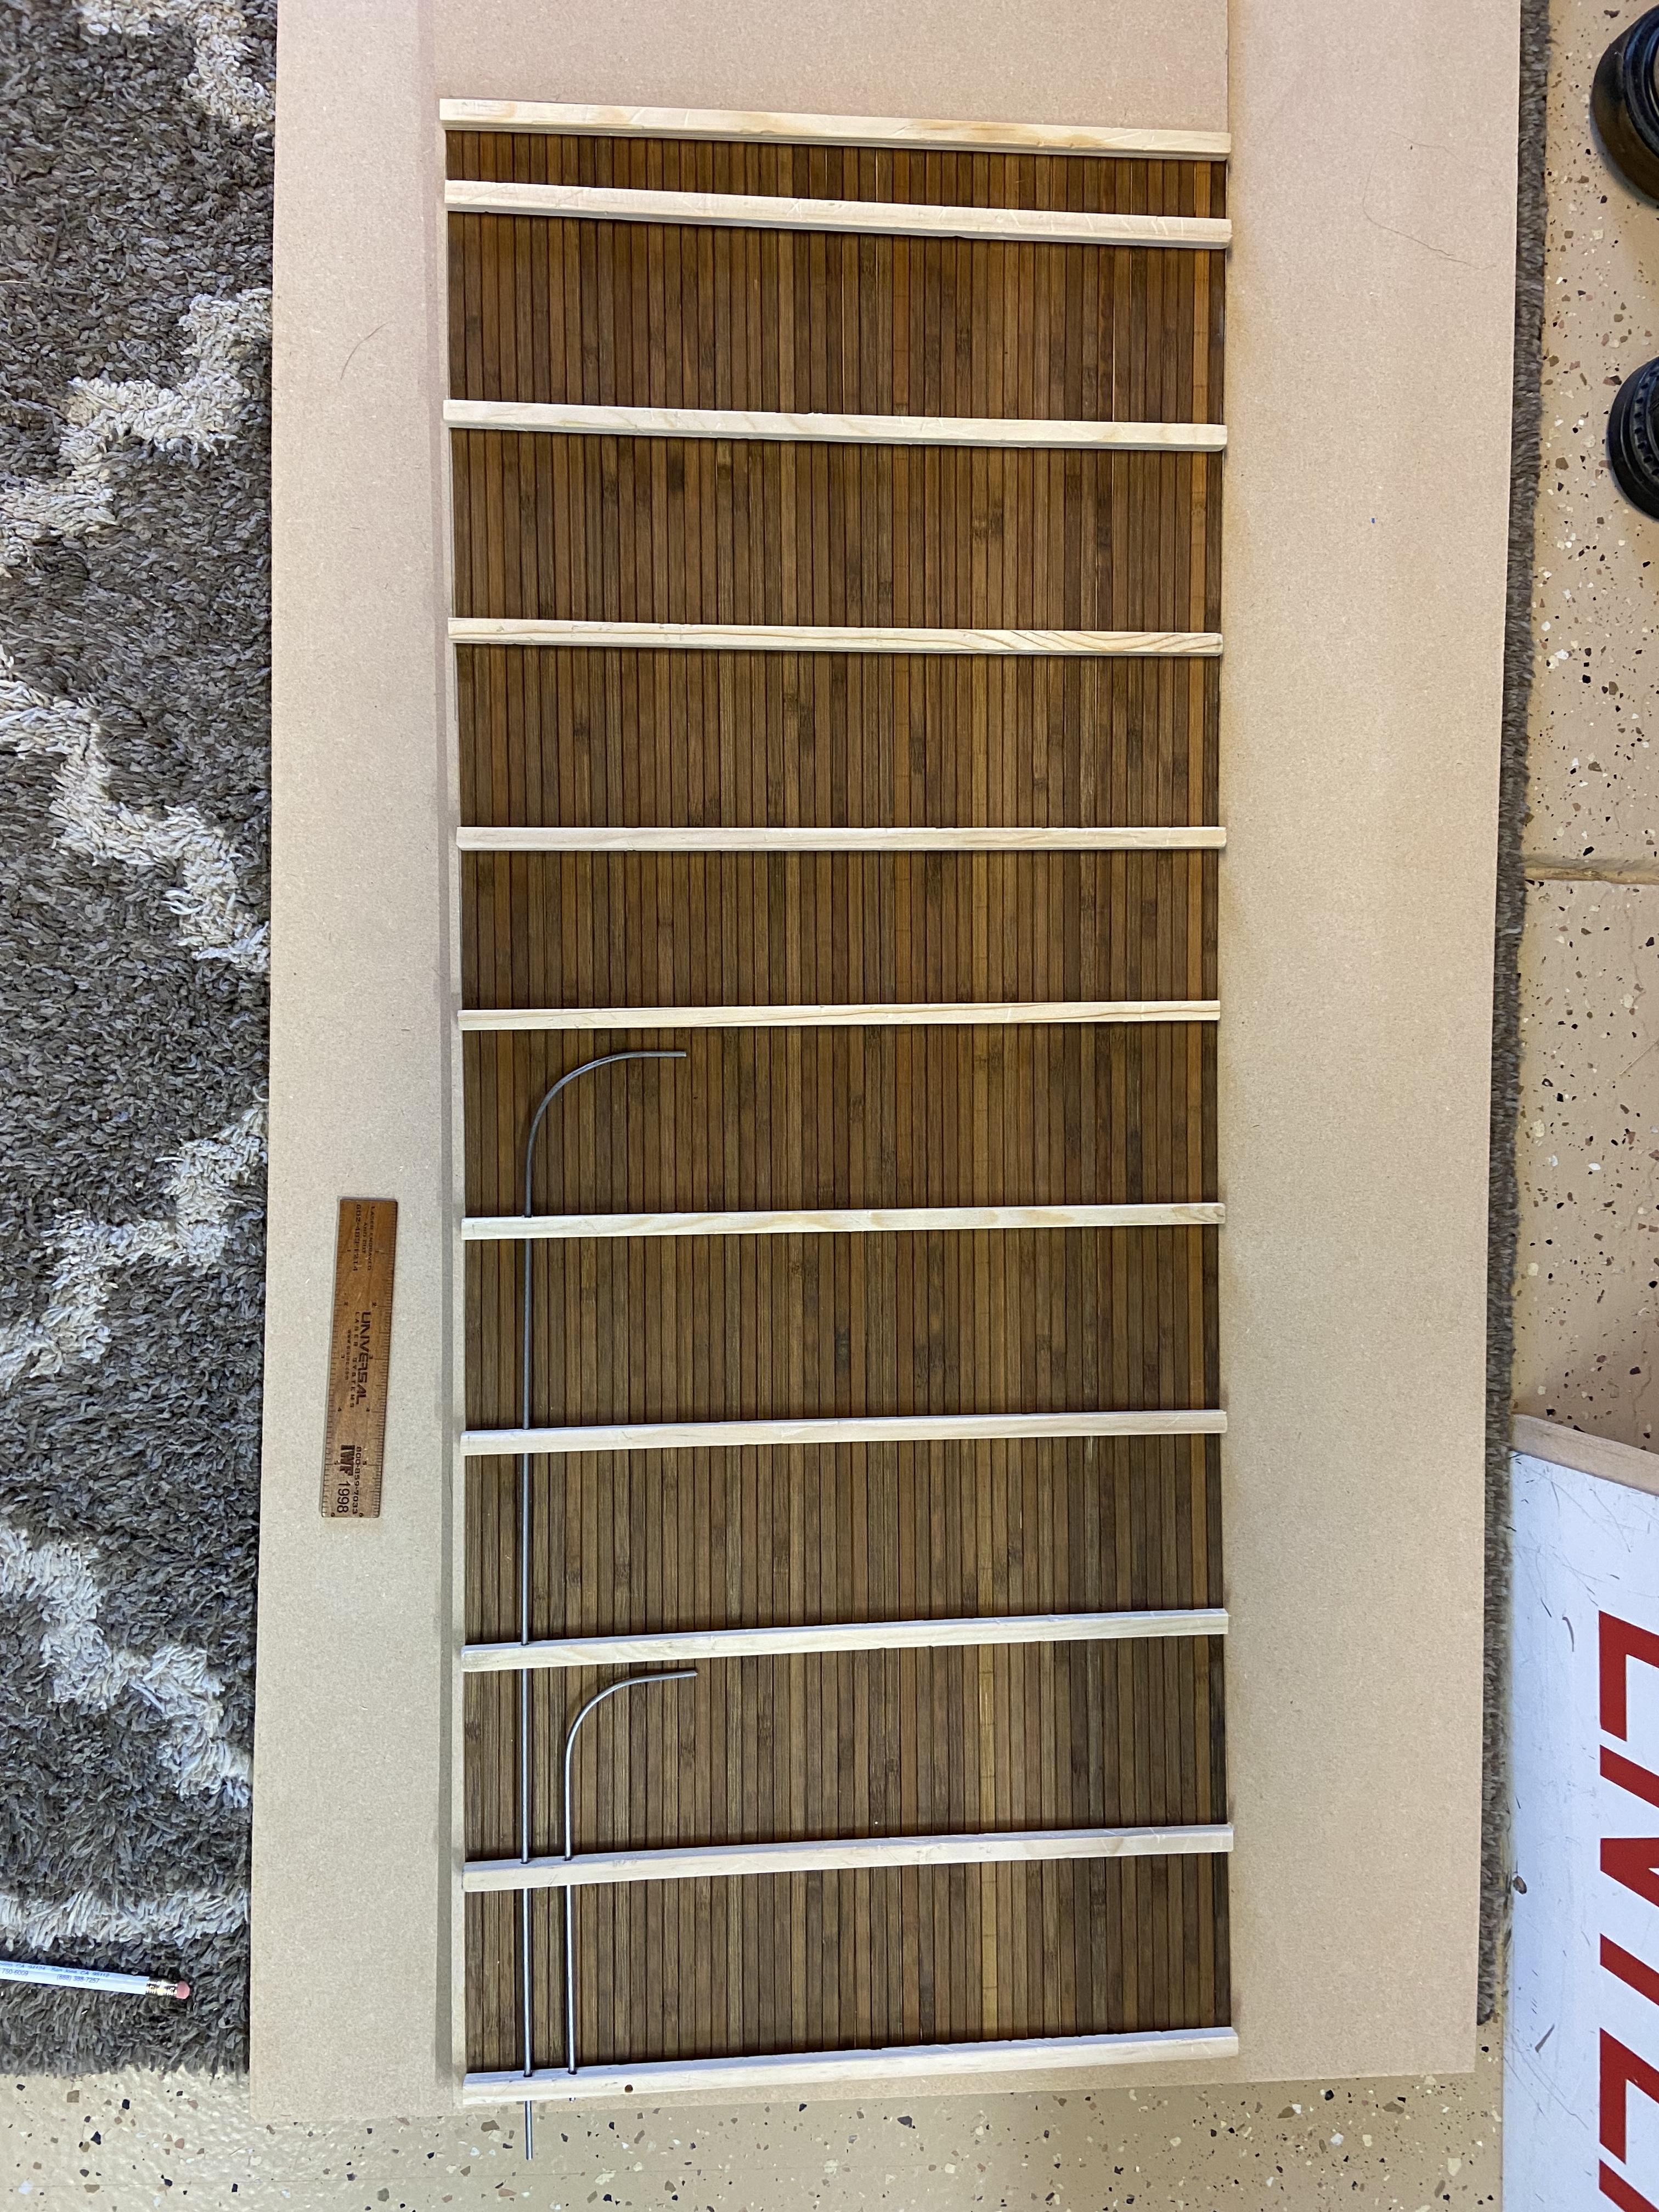
I am starting a new diorama; this one being a 4 foot by 4 foot offering. I have the base built, using old scrap wood that was lying around, in the way. The beginning will be the garage, which is given the history of an old, small railroad freight depot. It is constructed of plastic sheet and strip. The floor/foundation utilizes layered plexiglass for strength. It will represent being built around the 1880s as a small town freight depot, and thereafter having a multitude of uses, before finally becoming a garage for the junkyard. This is the base, which is built in modular sections of 2 feet by 4 feet, thus making it more easily transportable, should the need arise. The floor is designed to fit into the structure to add strength. The walls are .080 Plastruct sheet. All will be covered with appropriate flooring and siding material.

-
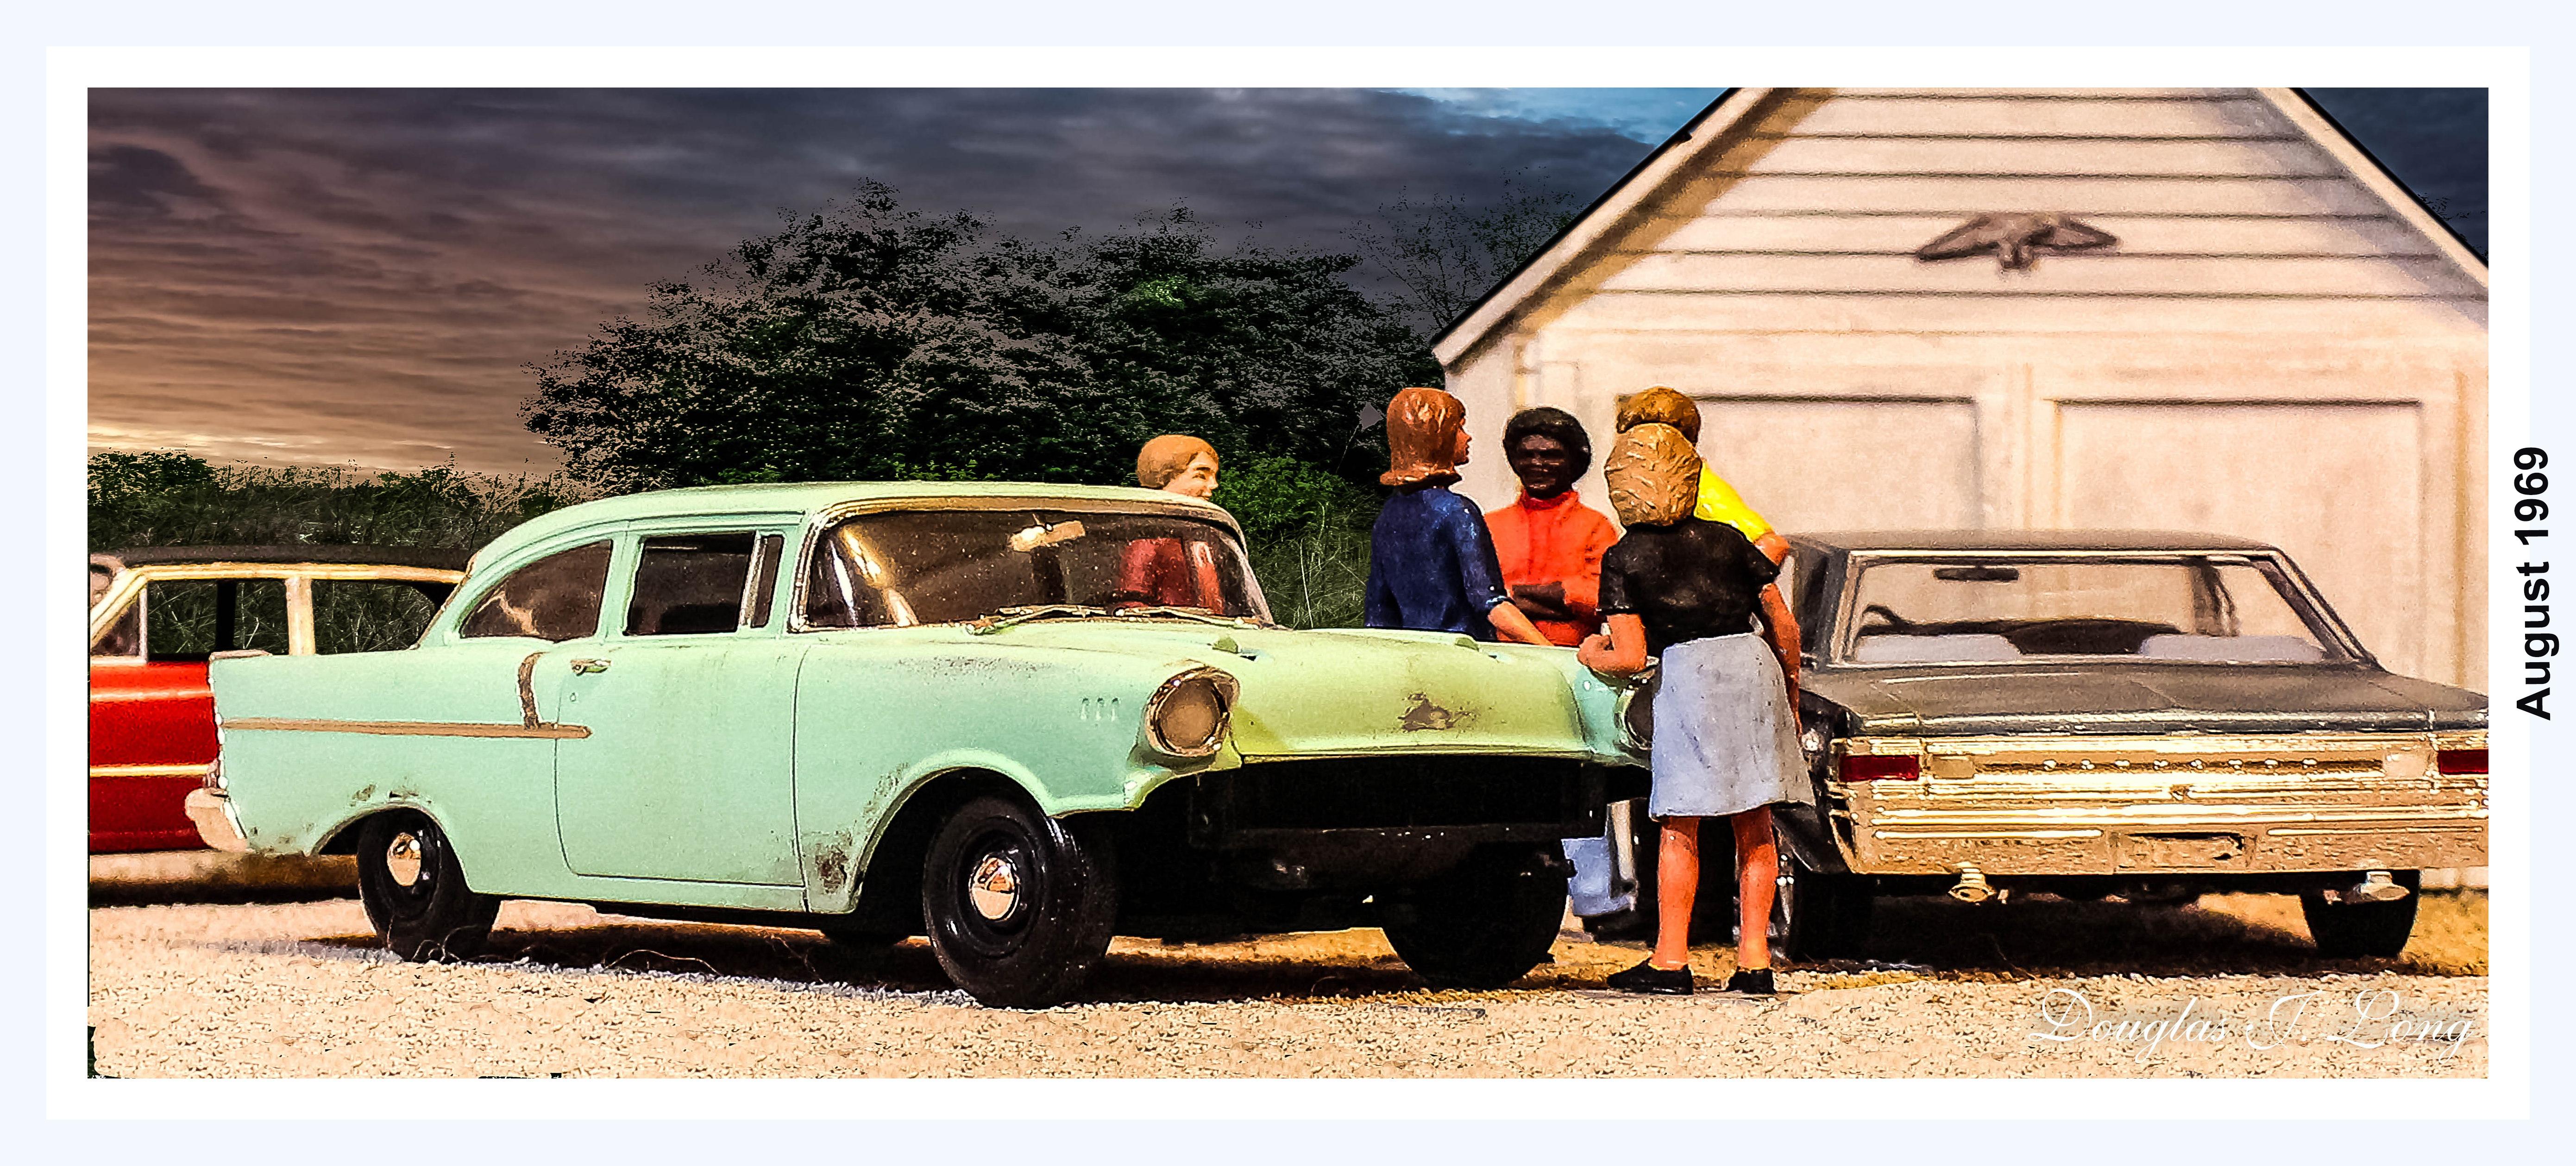
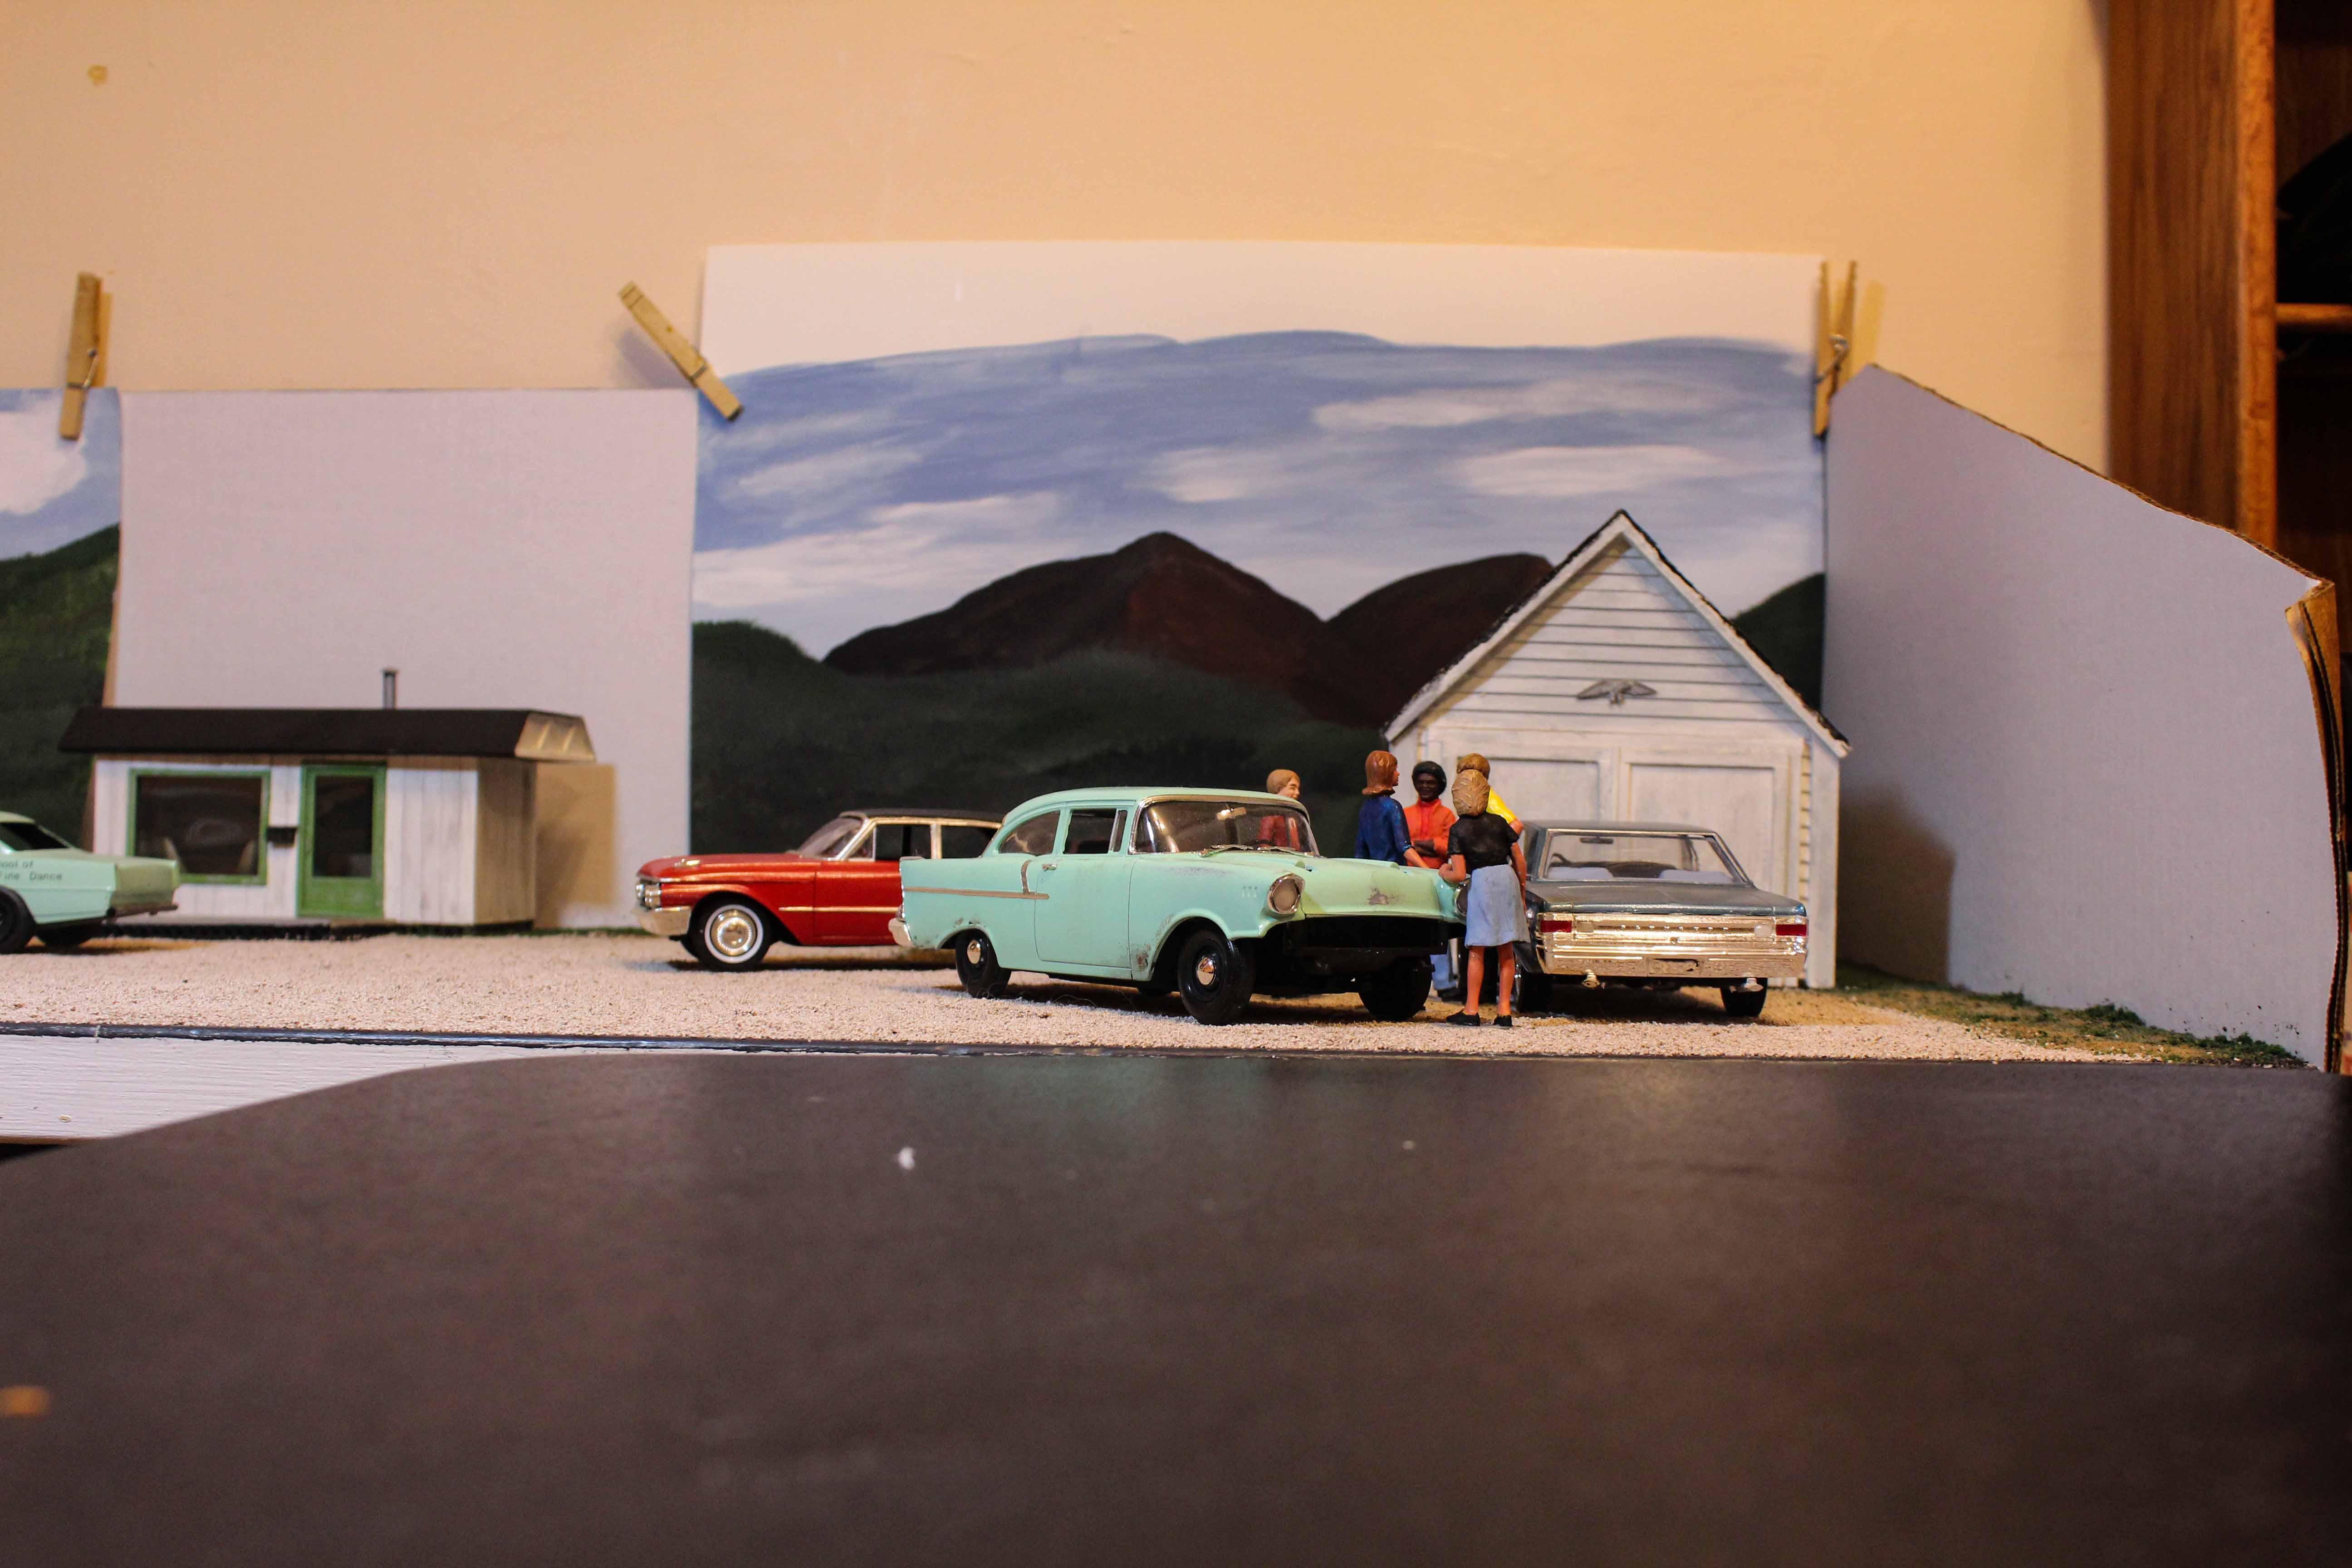
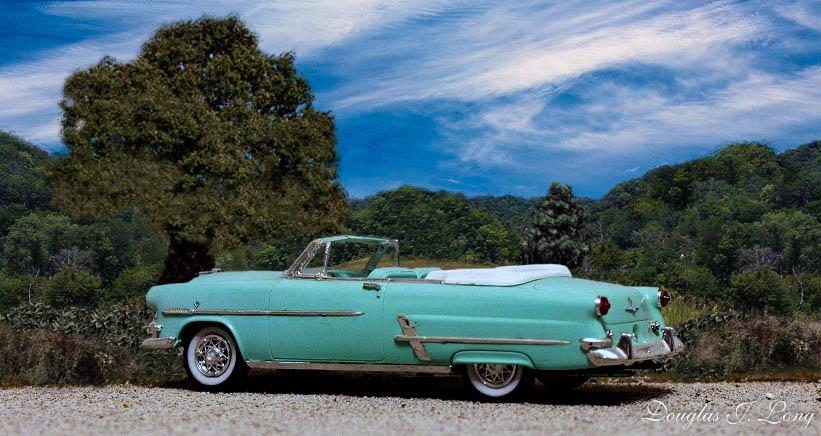
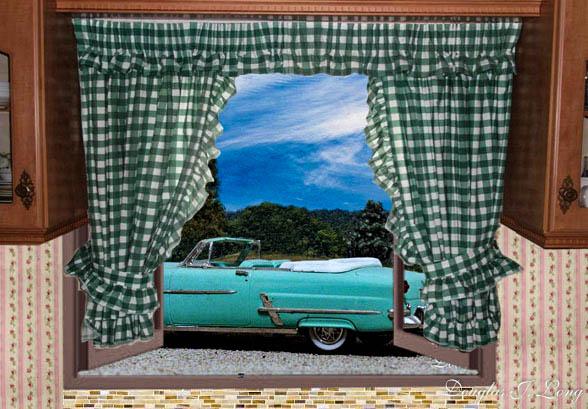
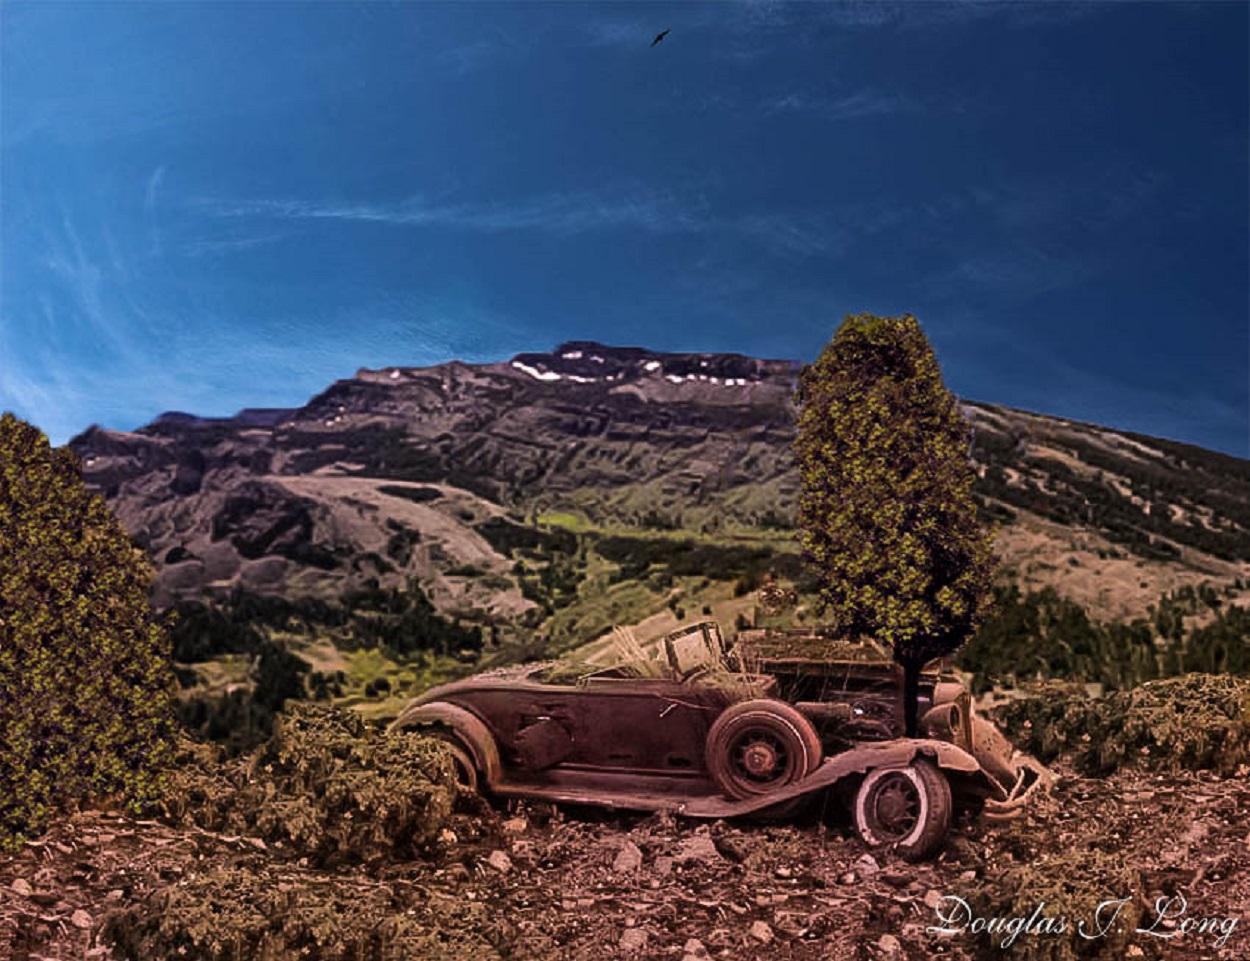
There are many who view dioramas with awe and wonderment, wishing that they could create works of art like that. Often, they lack the space for a diorama, or even the space for a model. I know several model builders that have to place their models back in the box when completed because they have no place to display their creations. For this reason, I am introducing you to the world of the cyber-diorama. You may still lack tangible display room, but you now have alternatives. The 'August 1969' diorama was a cyber-diorama. The base for it was 2 foot by 4 foot 1/2 inch plywood. It had fine gravel from Woodland Scenics glued to it. Everything else was extra to be placed when needed. In this case there were five figures, three cars, and a garage. The scene represents a group of young friends just enjoying being together on an August day. The second picture displays what I actually took a picture of. I then went to Photoshop to remove all the elements that I didn't want in the photo. From that I added trees, background, and sky, to be blended to form the first picture. There are many miniaturists that just don't have the room to keep their works of art on display. Building cyber-displays around them allows them a way to be able to see their treasures, even when tucked away in boxes. Using the figures, presents them in real life settings, or as in the case of 'August 1969', a 'Polaroid' picture. So you like working with photo-editing, well, here is something that you can do with any photo to personalize it. In this case, I used a model car photo, but don't let that limit you. This is a cyber-diorama that I created from a cyber-diorama. In the first one, the base and gravel on it, along with the car are tangible. Everything else was photo-edited in to create a scene. In the second picture, we are looking out of a window to see the car. Each element in that kitchen scene is separate. The wall paper, curtains, cupboards, window frames; each one had to be grafted in to give the impression that one is looking out the kitchen window to see the scene. How hard is it to create a diorama? This one consists of just four elements; the model, a metal table, a calendar picture, and a cereal box. The model was set on the metal table, a full cereal box (full for stability) was placed behind the model, and then the calendar picture was placed against the box. Admittedly, is is a very temporary diorama, but you can easily remember it by taking a picture. What would it take to make it a permanent diorama? A couple of pieces of sturdy plastic, one for the base and one for the back would be your start. Paint the base flat gray or flat black. Glue the back to the base, and then the calendar picture to the back. Place the car on the base, and with the exception of some bracing, you have a diorama. Don't be intimidated by all the fabulous dioramas that you see the miniaturists display. We all had to start somewhere, and we place our work here, not to gloat, but to encourage others. In the second picture, you see a small diorama that my late wife built. As a tribute to her, in her last days, I created an acrylic painting involving the model. However, the disclaimer would be that the painting doesn't exist outside of the cyber world. The work was all done using Photoshop. It consisted of a picture taken of the model and the diorama base. Once brought to Photoshop, the ground and trees were altered to reflect that which is found in much of Alaska. The bush was made to look like the Salmonberry bush that was so common around Kodiak. The sapling tree was given growth and a friend. Behind the car are multiple layers of mountain pictures, followed by the sky. All of that was blended together, and then further reworked to reflect an acrylic painting. You now get an idea of just what you can accomplish in the cyber-world, but I have more. As your skills evolve, and note the word 'evolve'... ...you will find yourself adjusting the adjustments... This picture, although generally rather simple in most terms, does require another skill. To begin, the rock, figures, car, and buildings are all tangible. The backdrop is a calendar picture. To this point it would follow the same procedure as the 1961 Cadillac, shown earlier. The trick is that this car was photographed in front of a gray screen. The photo was added in photo-editing. The reason is that the photo had to have a mirror image made from it. The left side is original, with the right being the mirror image, which then had to have work done to it. What one is left with is a very New England setting. We return to layers in photo-editing. In this example, the car and the gravel close to it are tangible. Everything else is edited in. Each tree, bush, area of grass, sky, and building, are separate layers. Each layer then receives detailing, and attention to such things as lighting and shadow direction. You can also rework the car. In this case I made a Series 62 from an Eldorado. Just how elaborate can one get? Once again, all that is tangible is the automobile and some gravel. Everything else that you see is cyber generated. This one was constructed with a purpose. That purpose was to move the viewer's eye from the front to the rear of the picture. For those who were around in the 80s & 90s, you might remember an art show with a Mr. Bob Ross. I followed his guidelines in this work. The front trees help to frame the photo, while at the same time working to 'move' the scene back. In order to do this, construction began at the rear and moved to the front. This is where things can get difficult, not so much from the work, but in hiding objects. Many of those objects are very interesting, such as the house to the left. Note the 'steeple' on the house behind it. These work to add depth. That depth is gained by hiding said houses, and also much of the trees seen behind the hedge. The hedge plays a key role. It adds a backdrop for the vehicle, while at the same time creating depth. Surprisingly, is how much the small grassy area between the car and the hedge also add to the depth. As we move foreword from the car and the rock, we encounter another grassy and bushy area, along with the aforementioned, trees. These all work together to create a scene that looks quite deep, but what helps to really convey the depth impression, is the simple jet stream, which tells the viewer that there is more world behind the photo. Remember to start off simple, as in the 1961 Cadillac picture. As you gain experience, you will find yourself taking pictures of every model you have, and giving it a cyber-world. When you get to the level of the last picture, it won't be work nor difficult, it will be a blast. I am thankful that I did make all of these pictures. With my wife contracting terminal Cancer, we had to move from Alaska, and she passed shortly thereafter. I had to let my collection go to a friend there. Those models are still in my collection, although only on cyber form. So whether you have room for a model collection or just want to back up your collection, give cyber-dioramas a try.
- 1 reply
-
- 3
-

-
- diorama
- 1/25 scale
- (and 1 more)
-
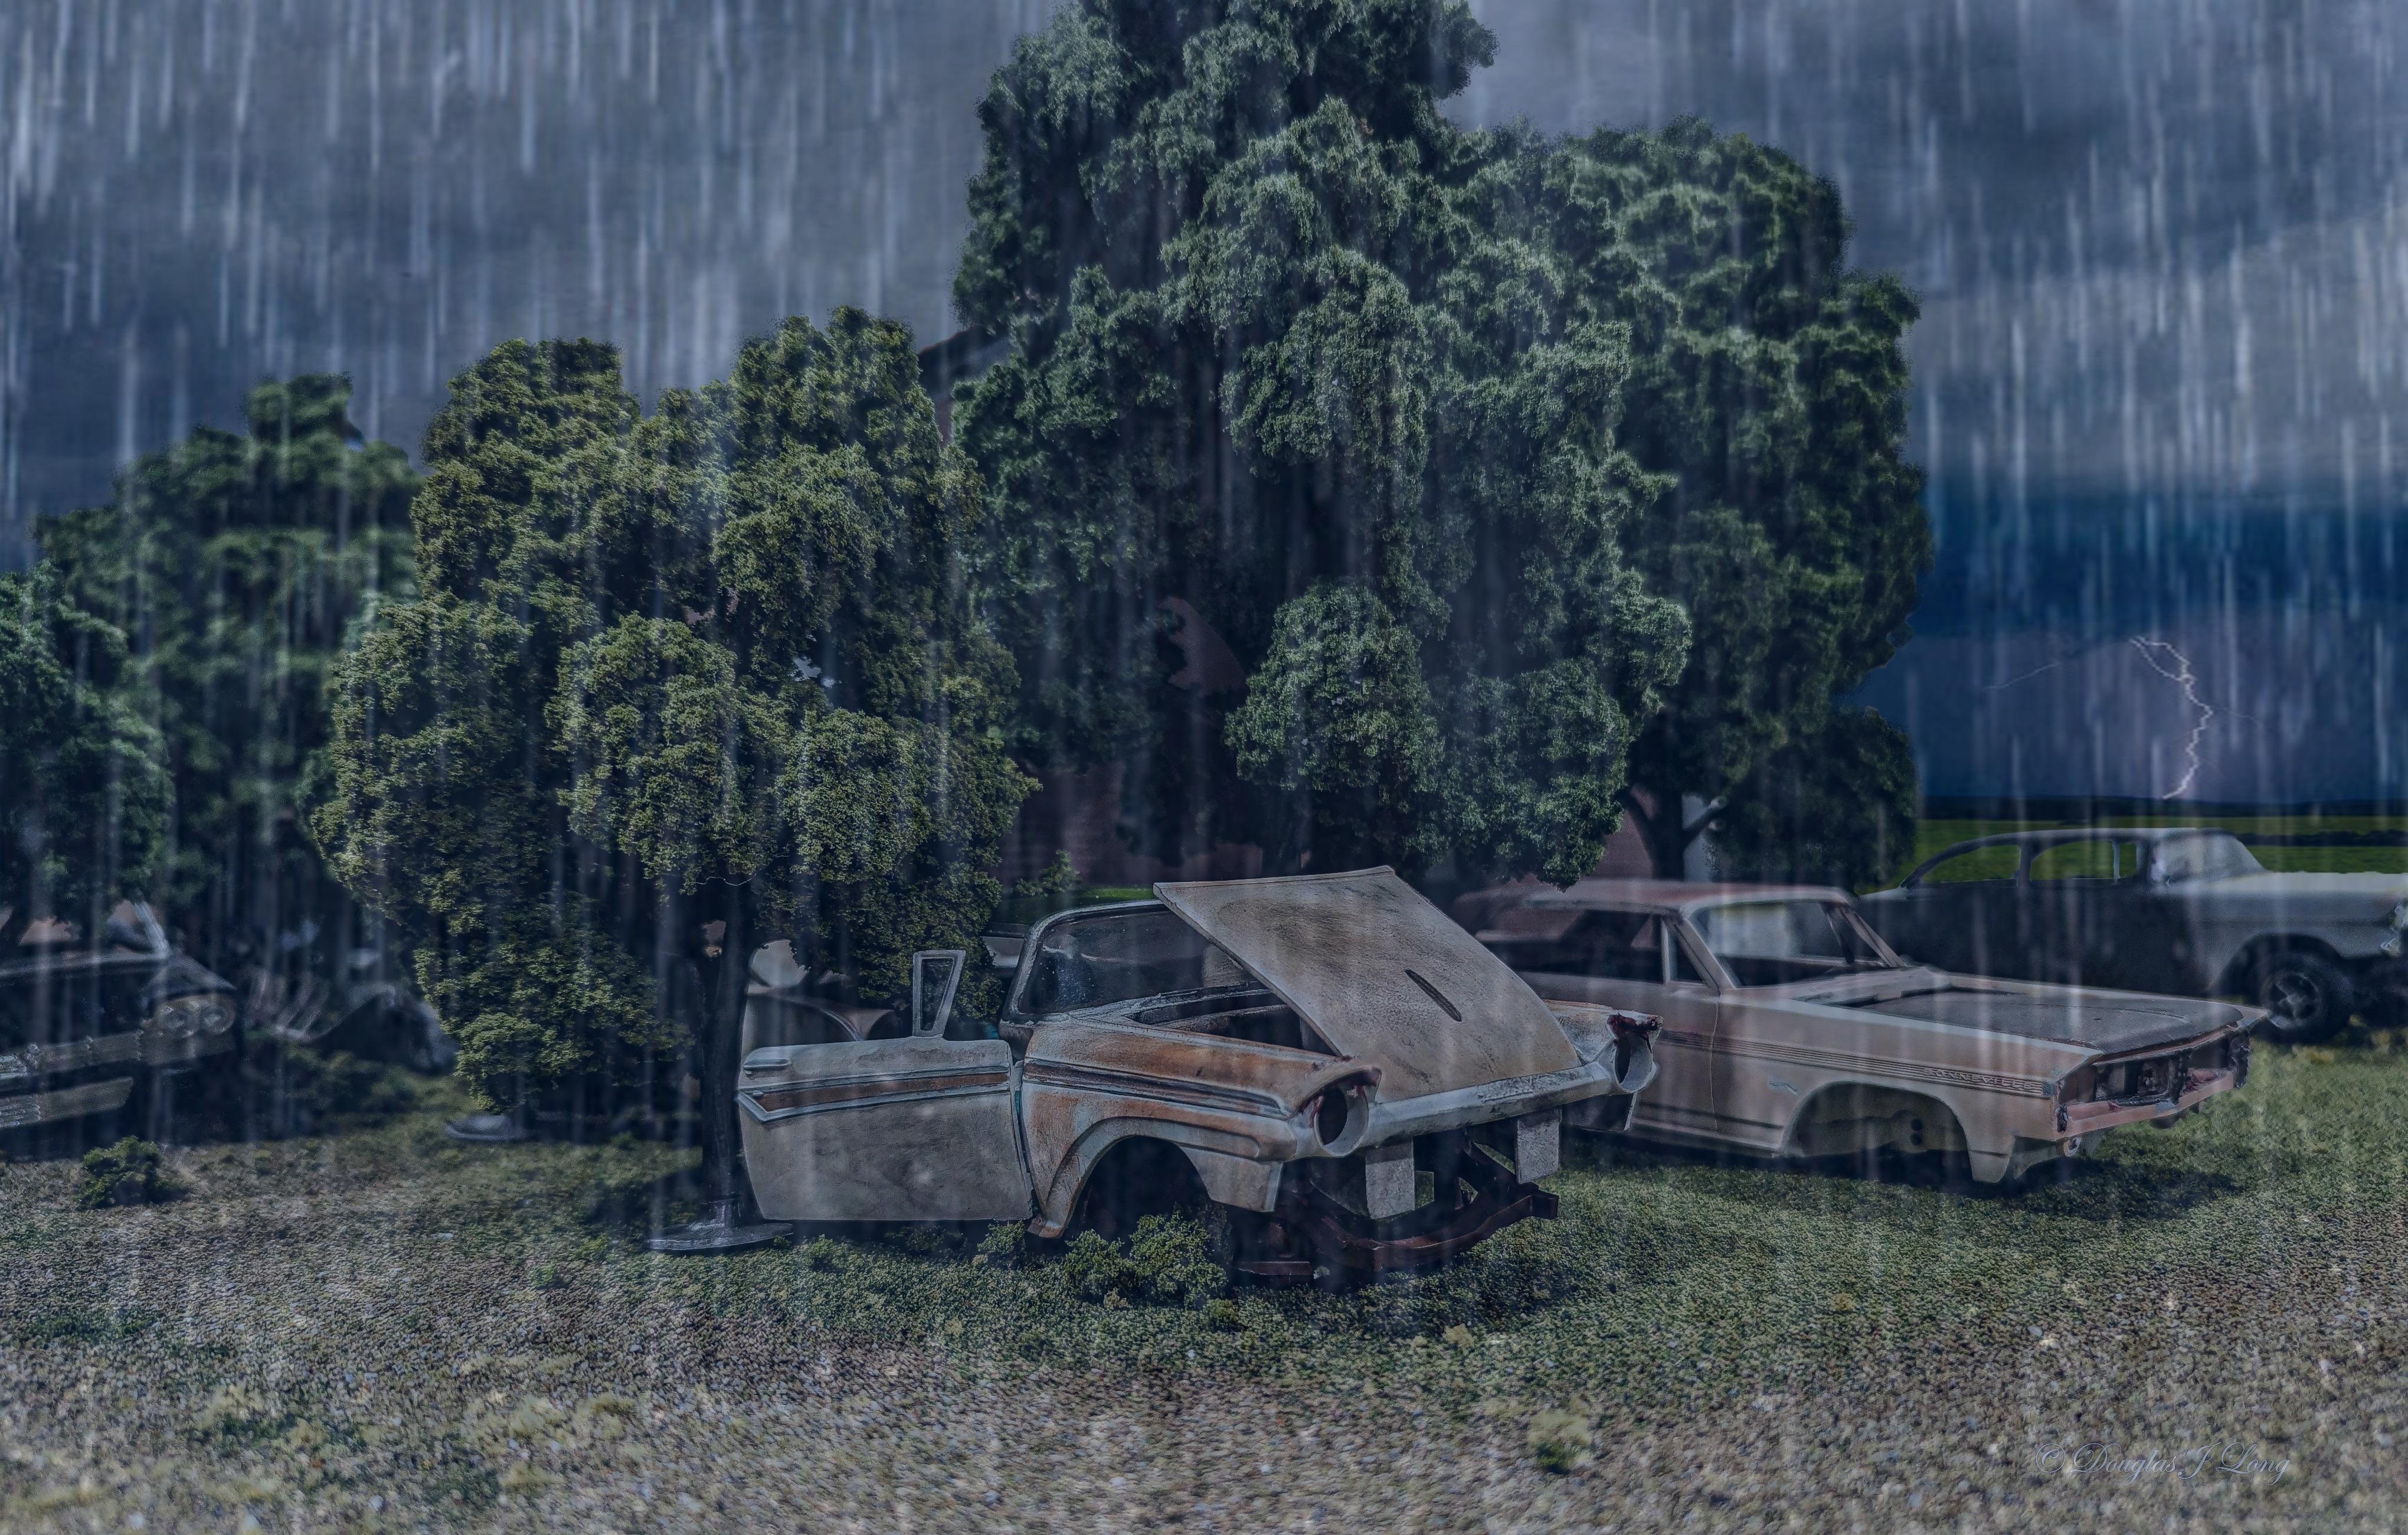
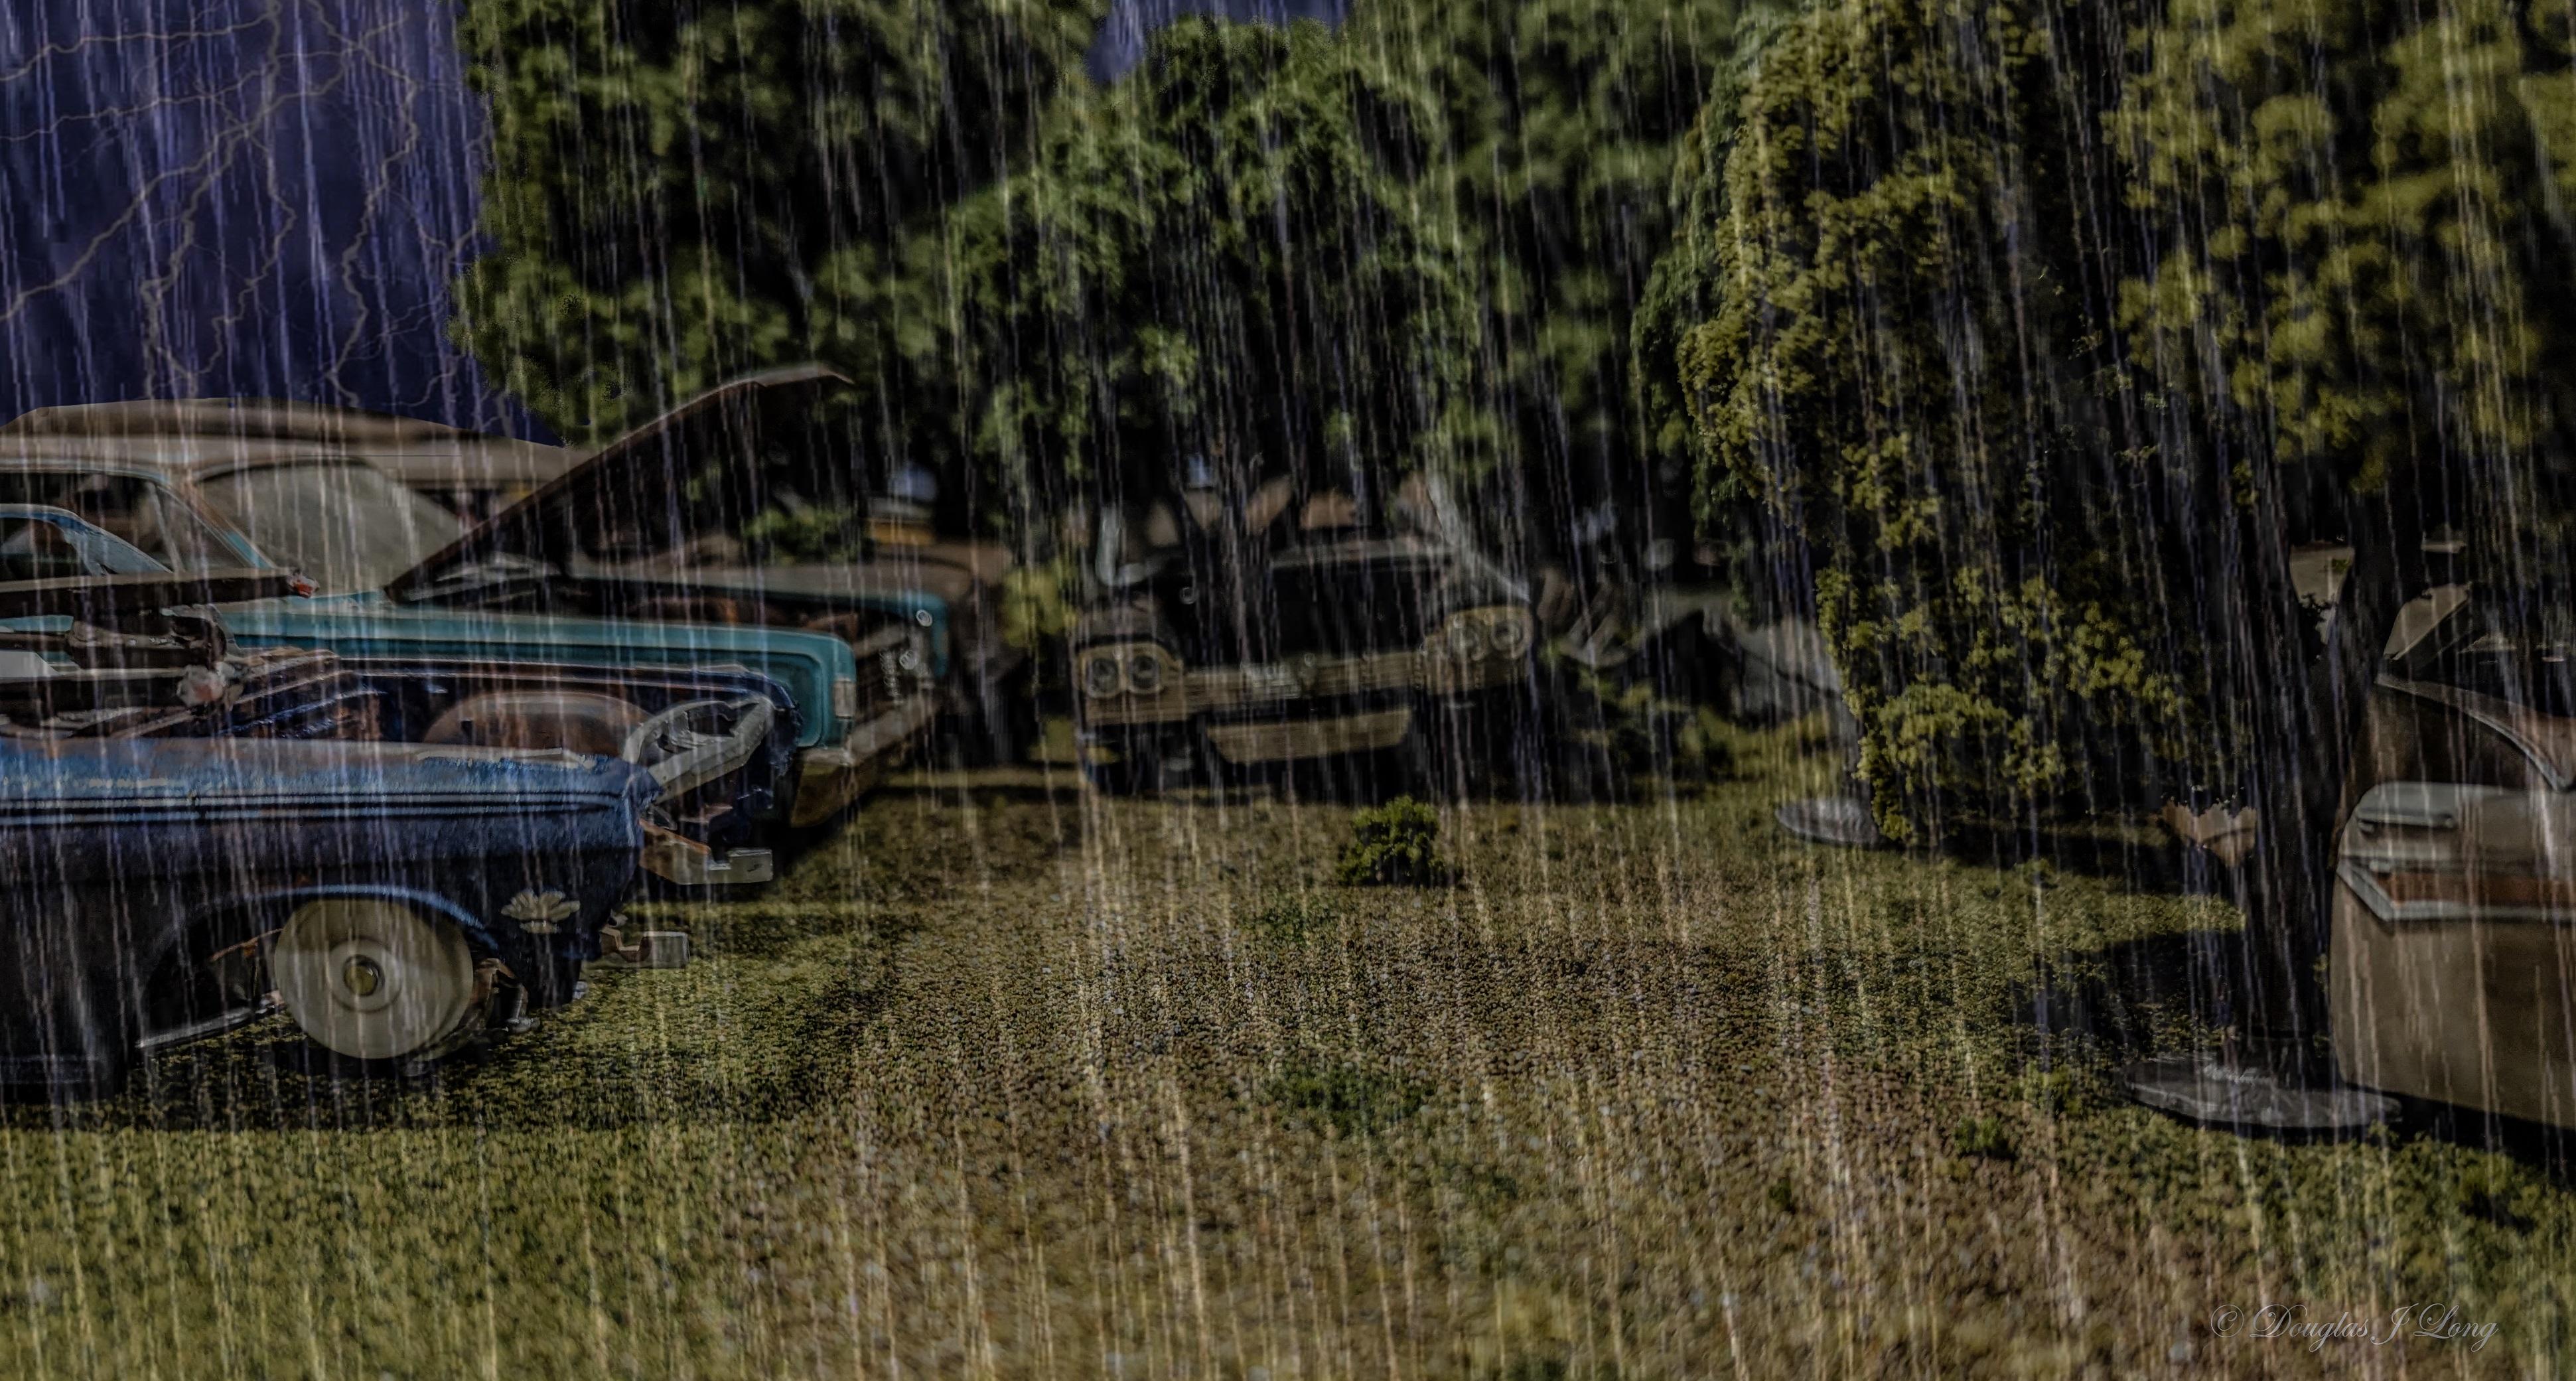
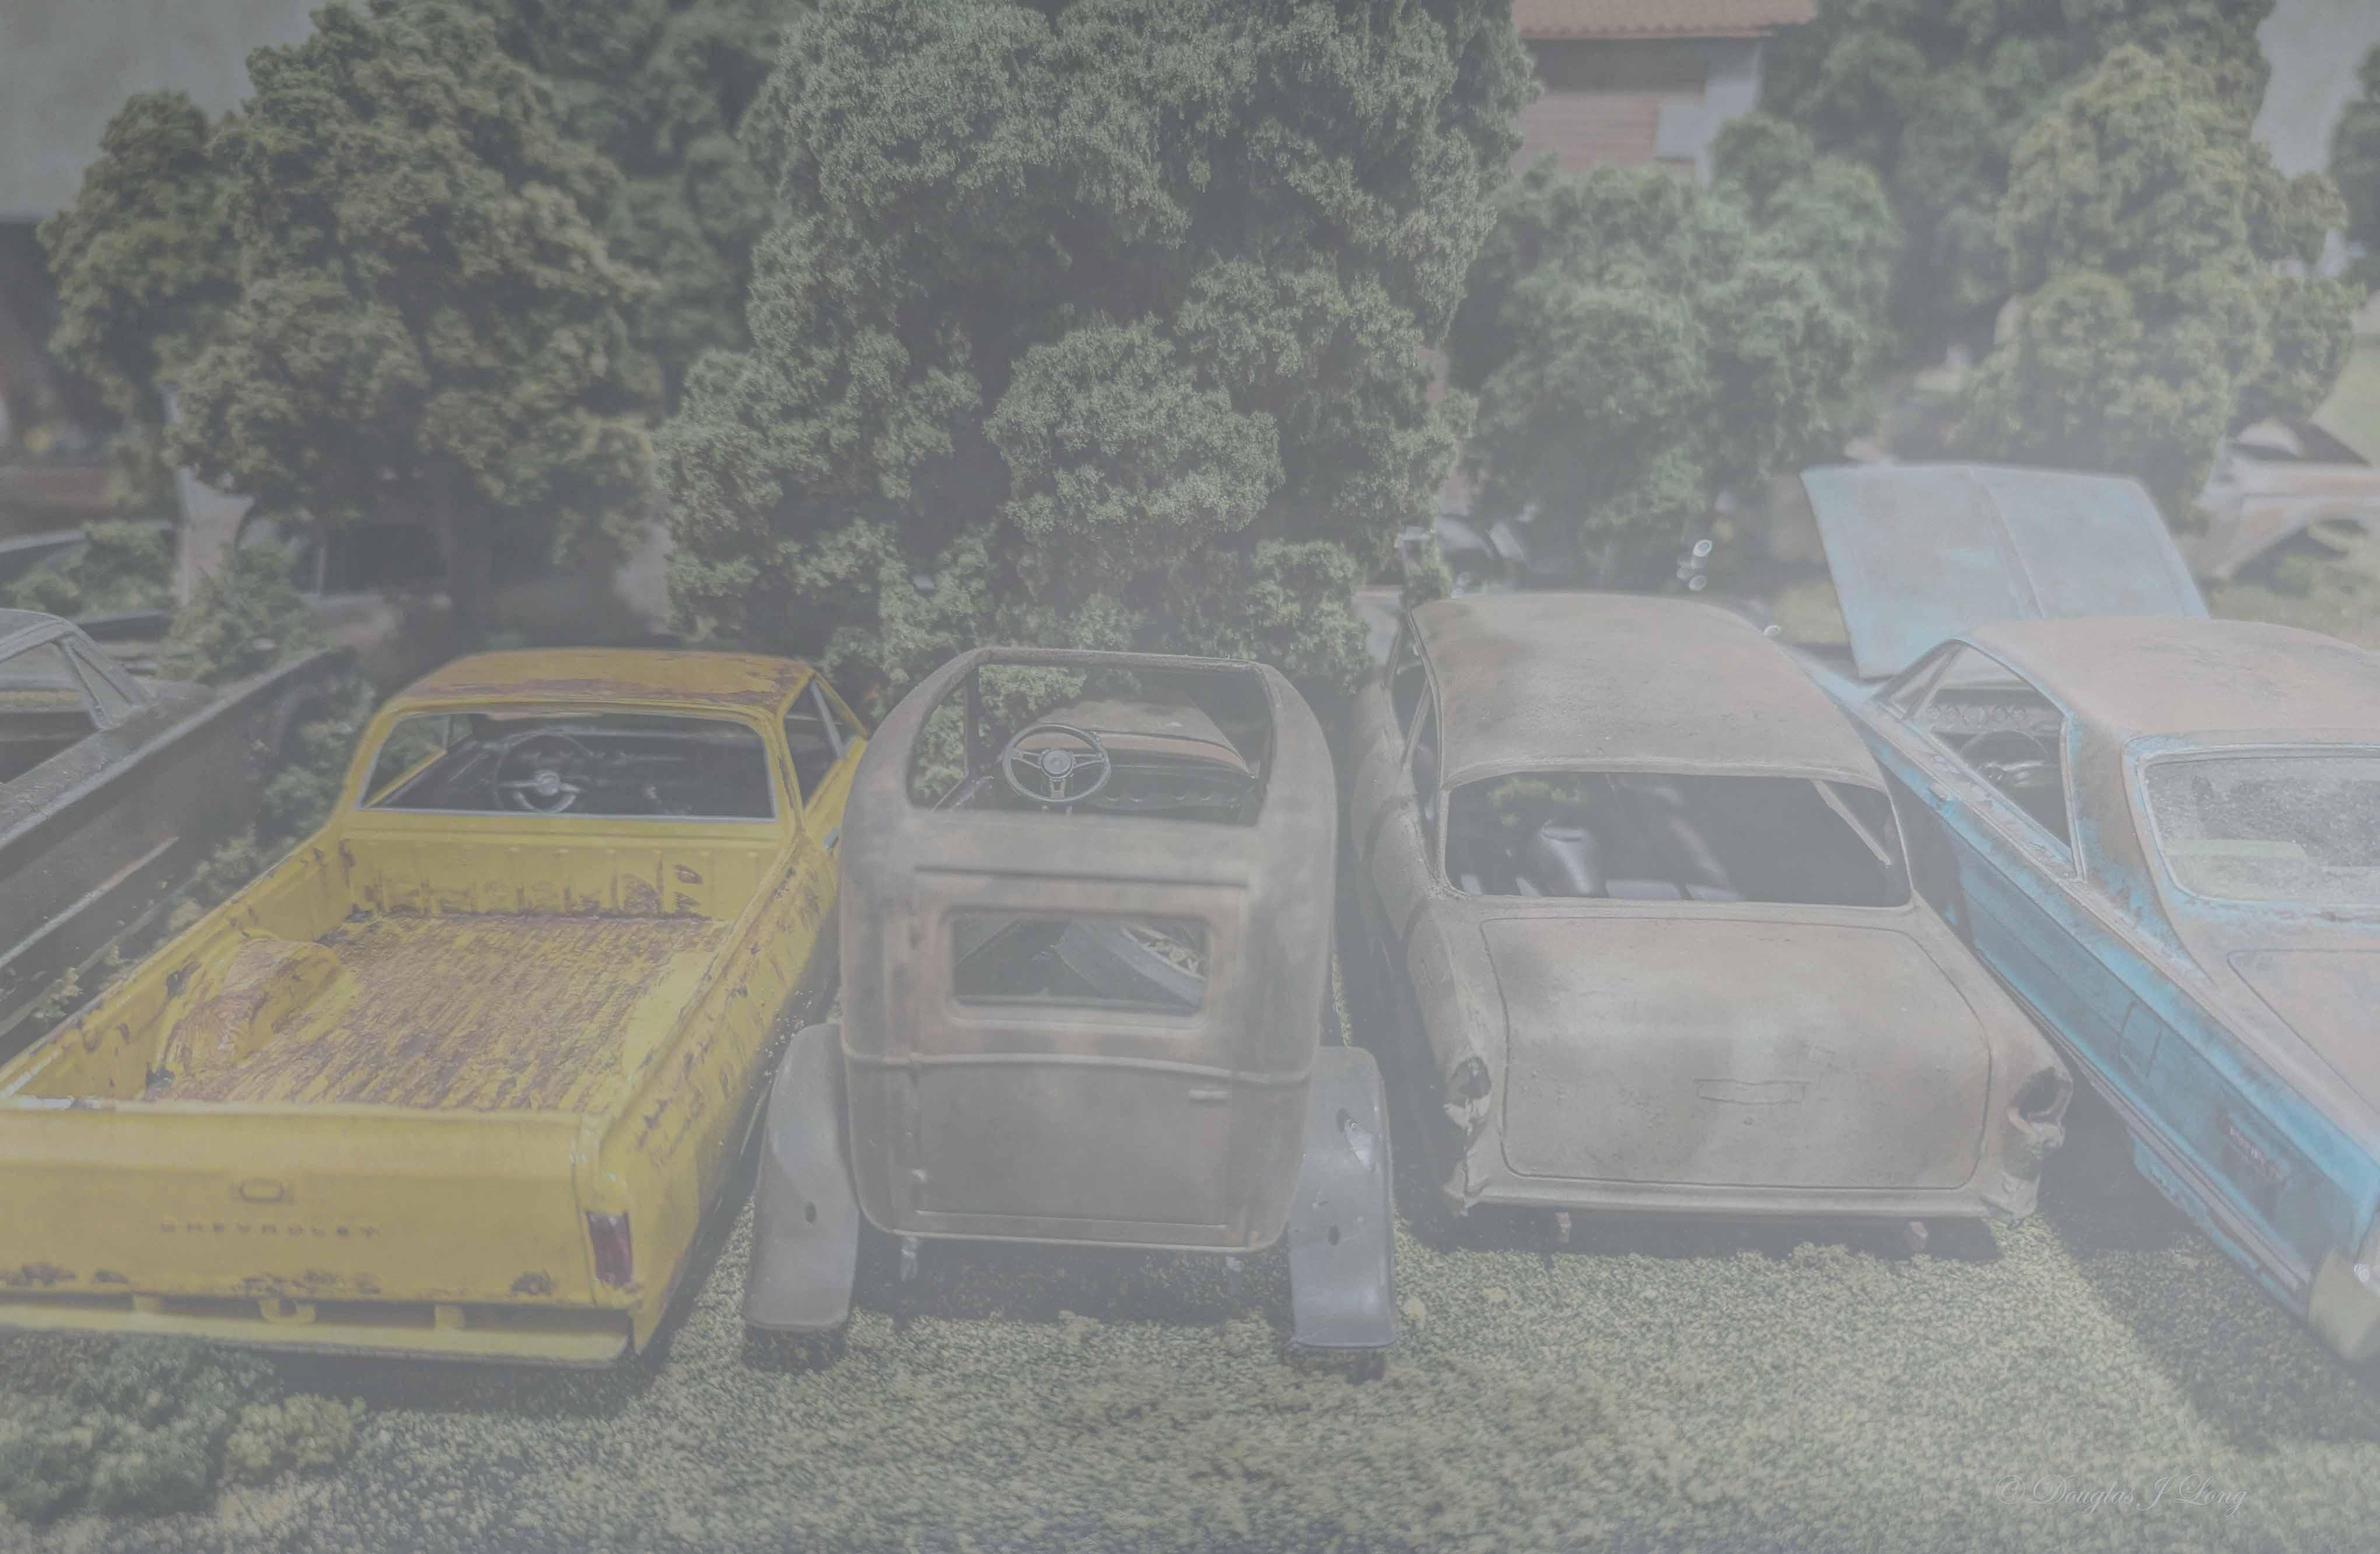
One day it rains so hard that you can't work in the junkyard. The next day it's so foggy that you can't find the junkyard. At least when it clears up, everything will be nice and clean to work on.
-
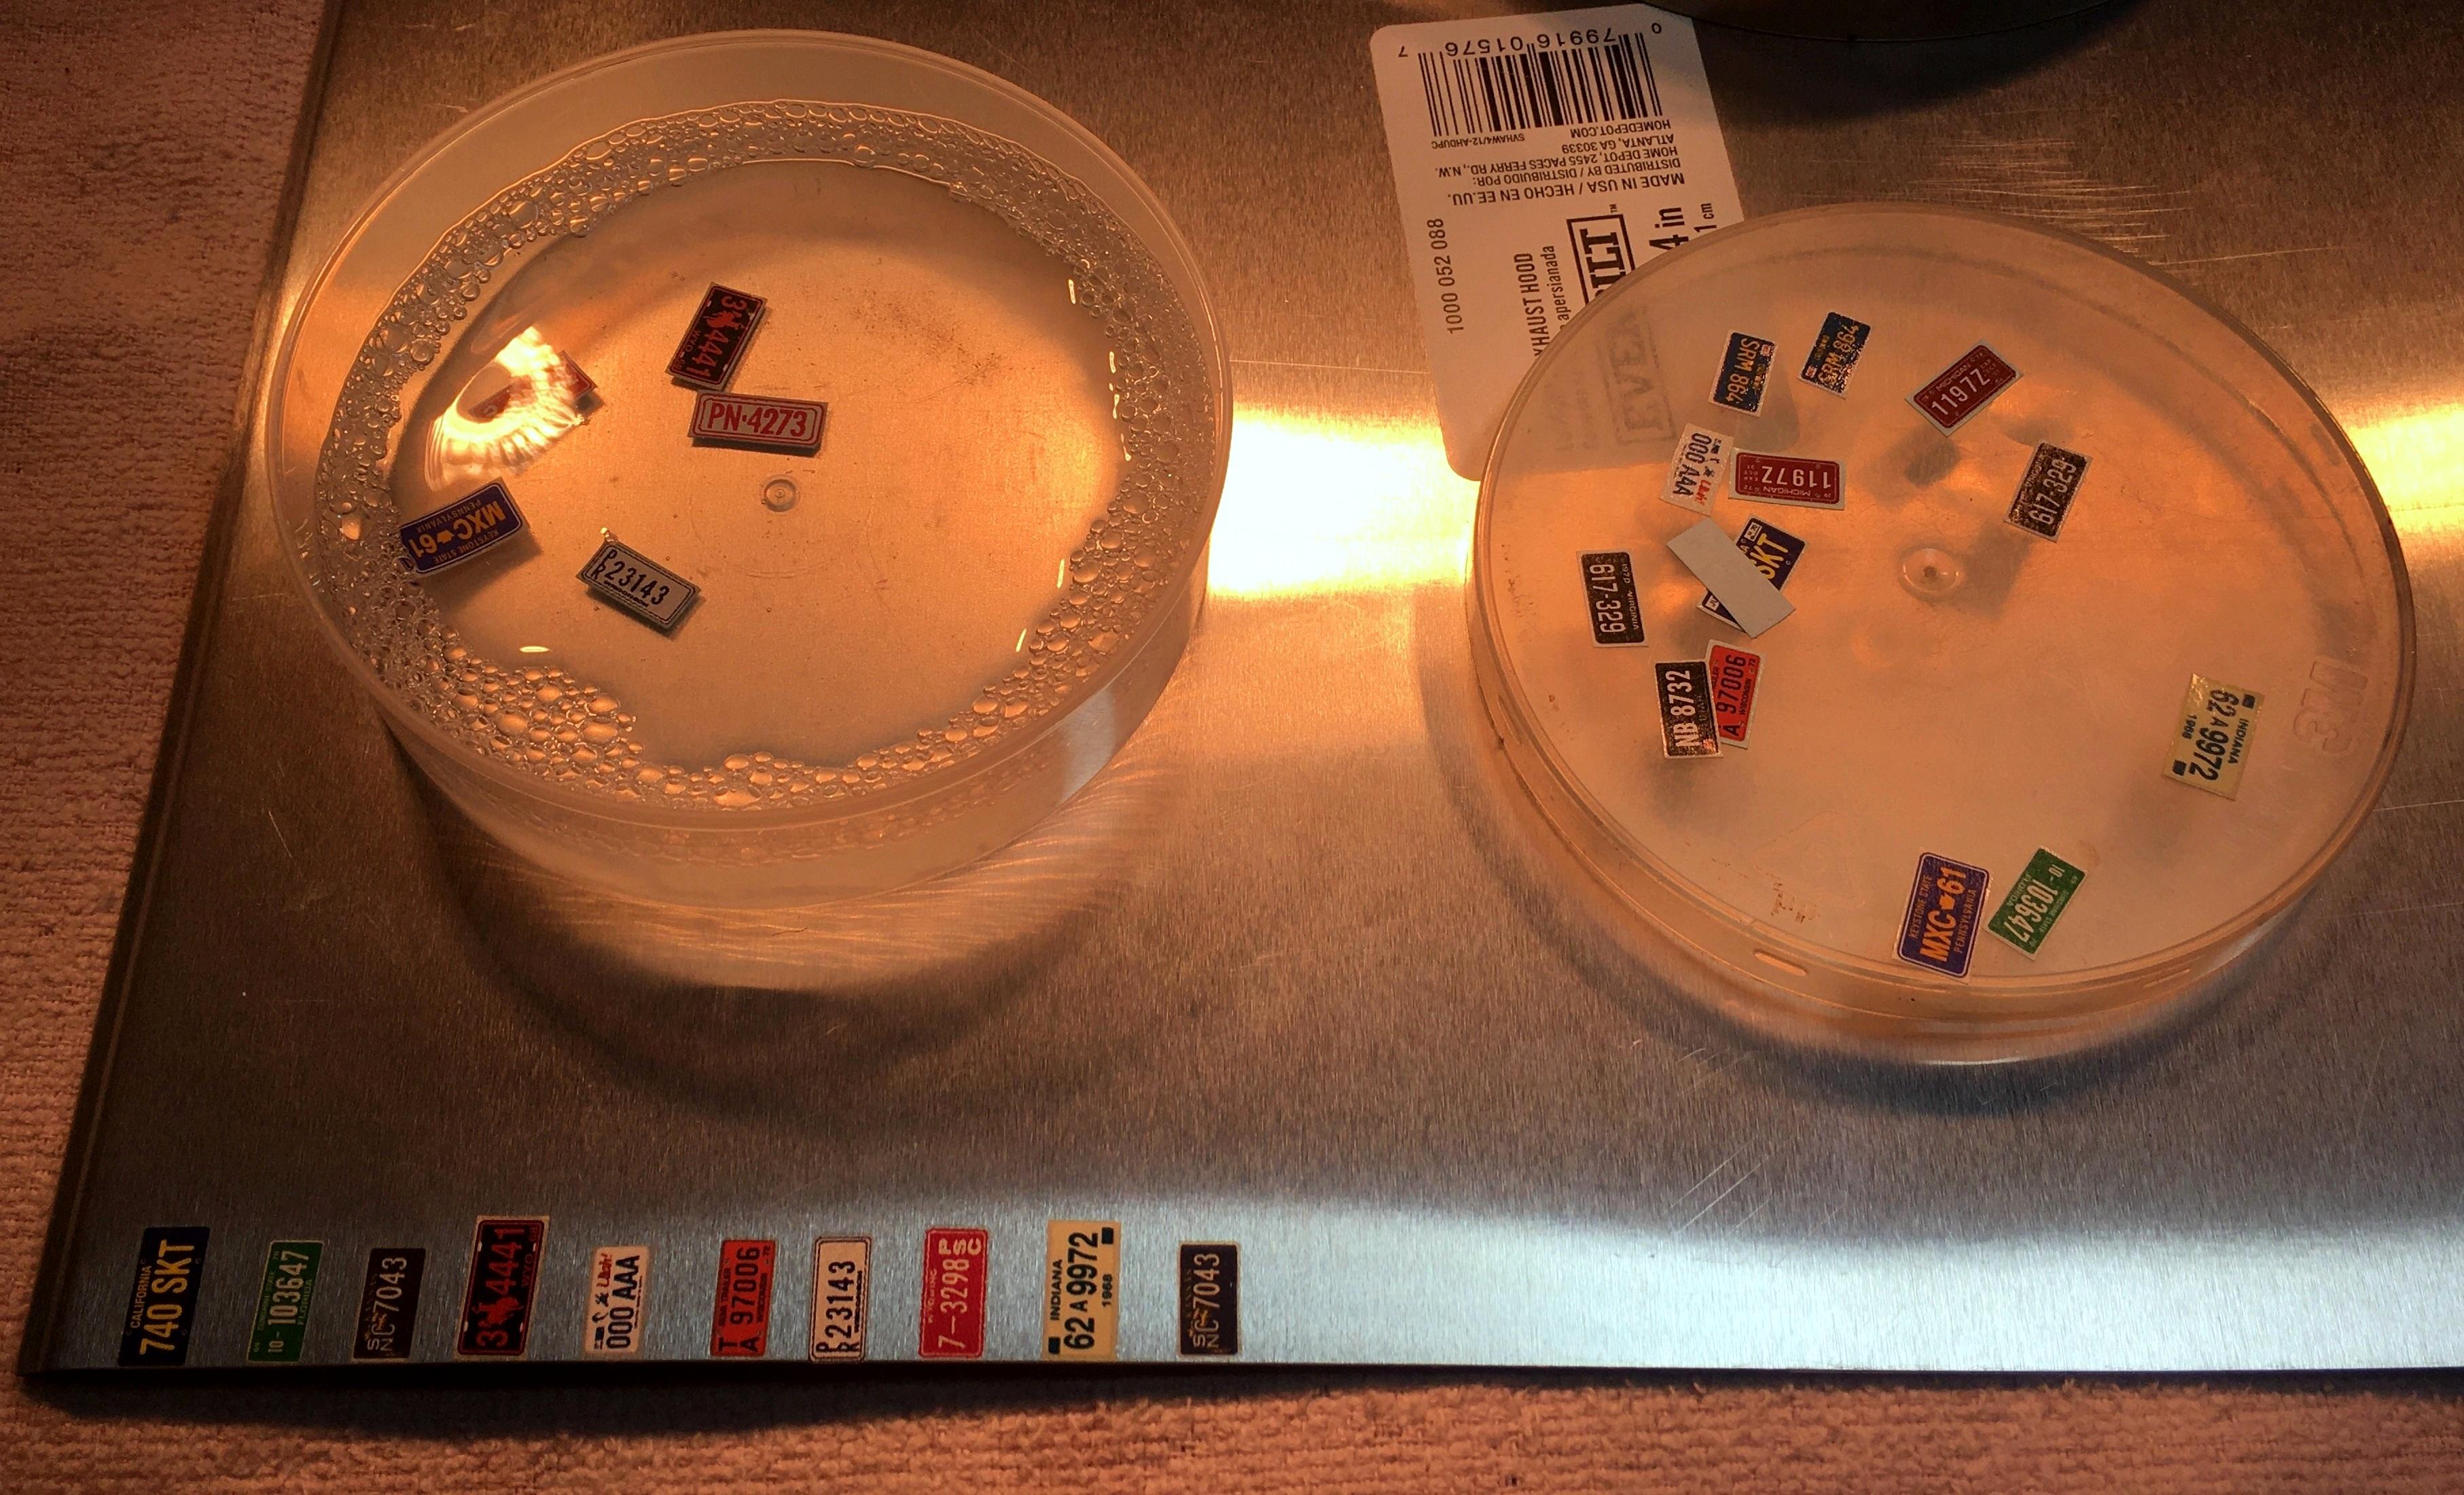
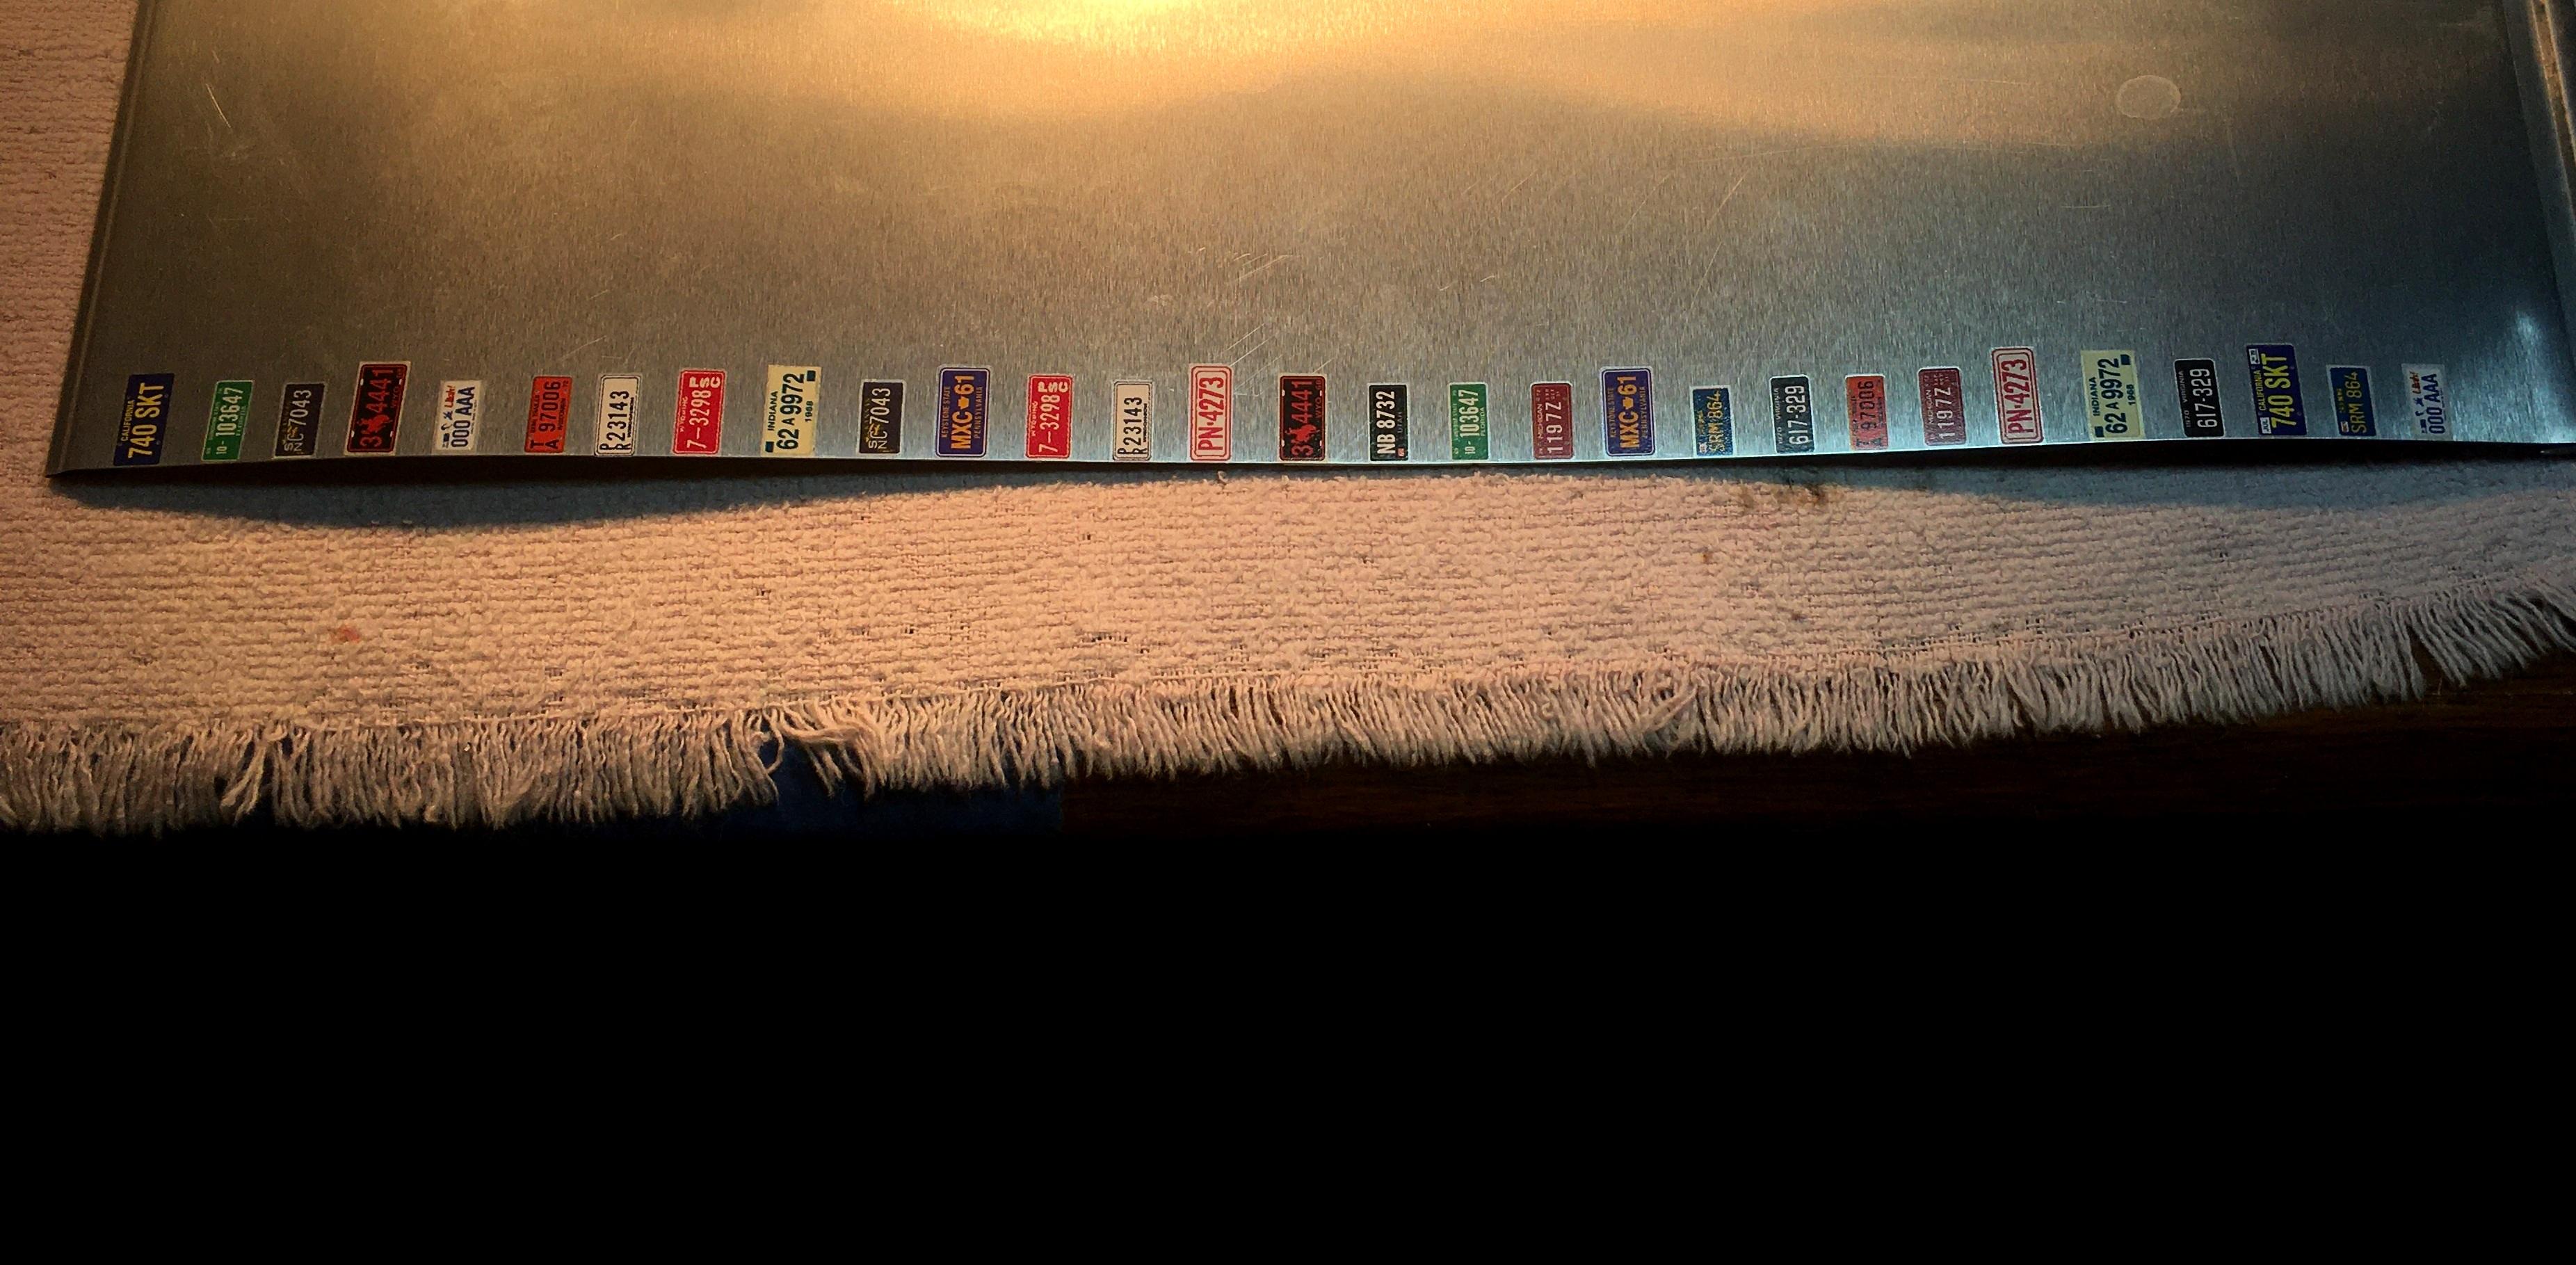
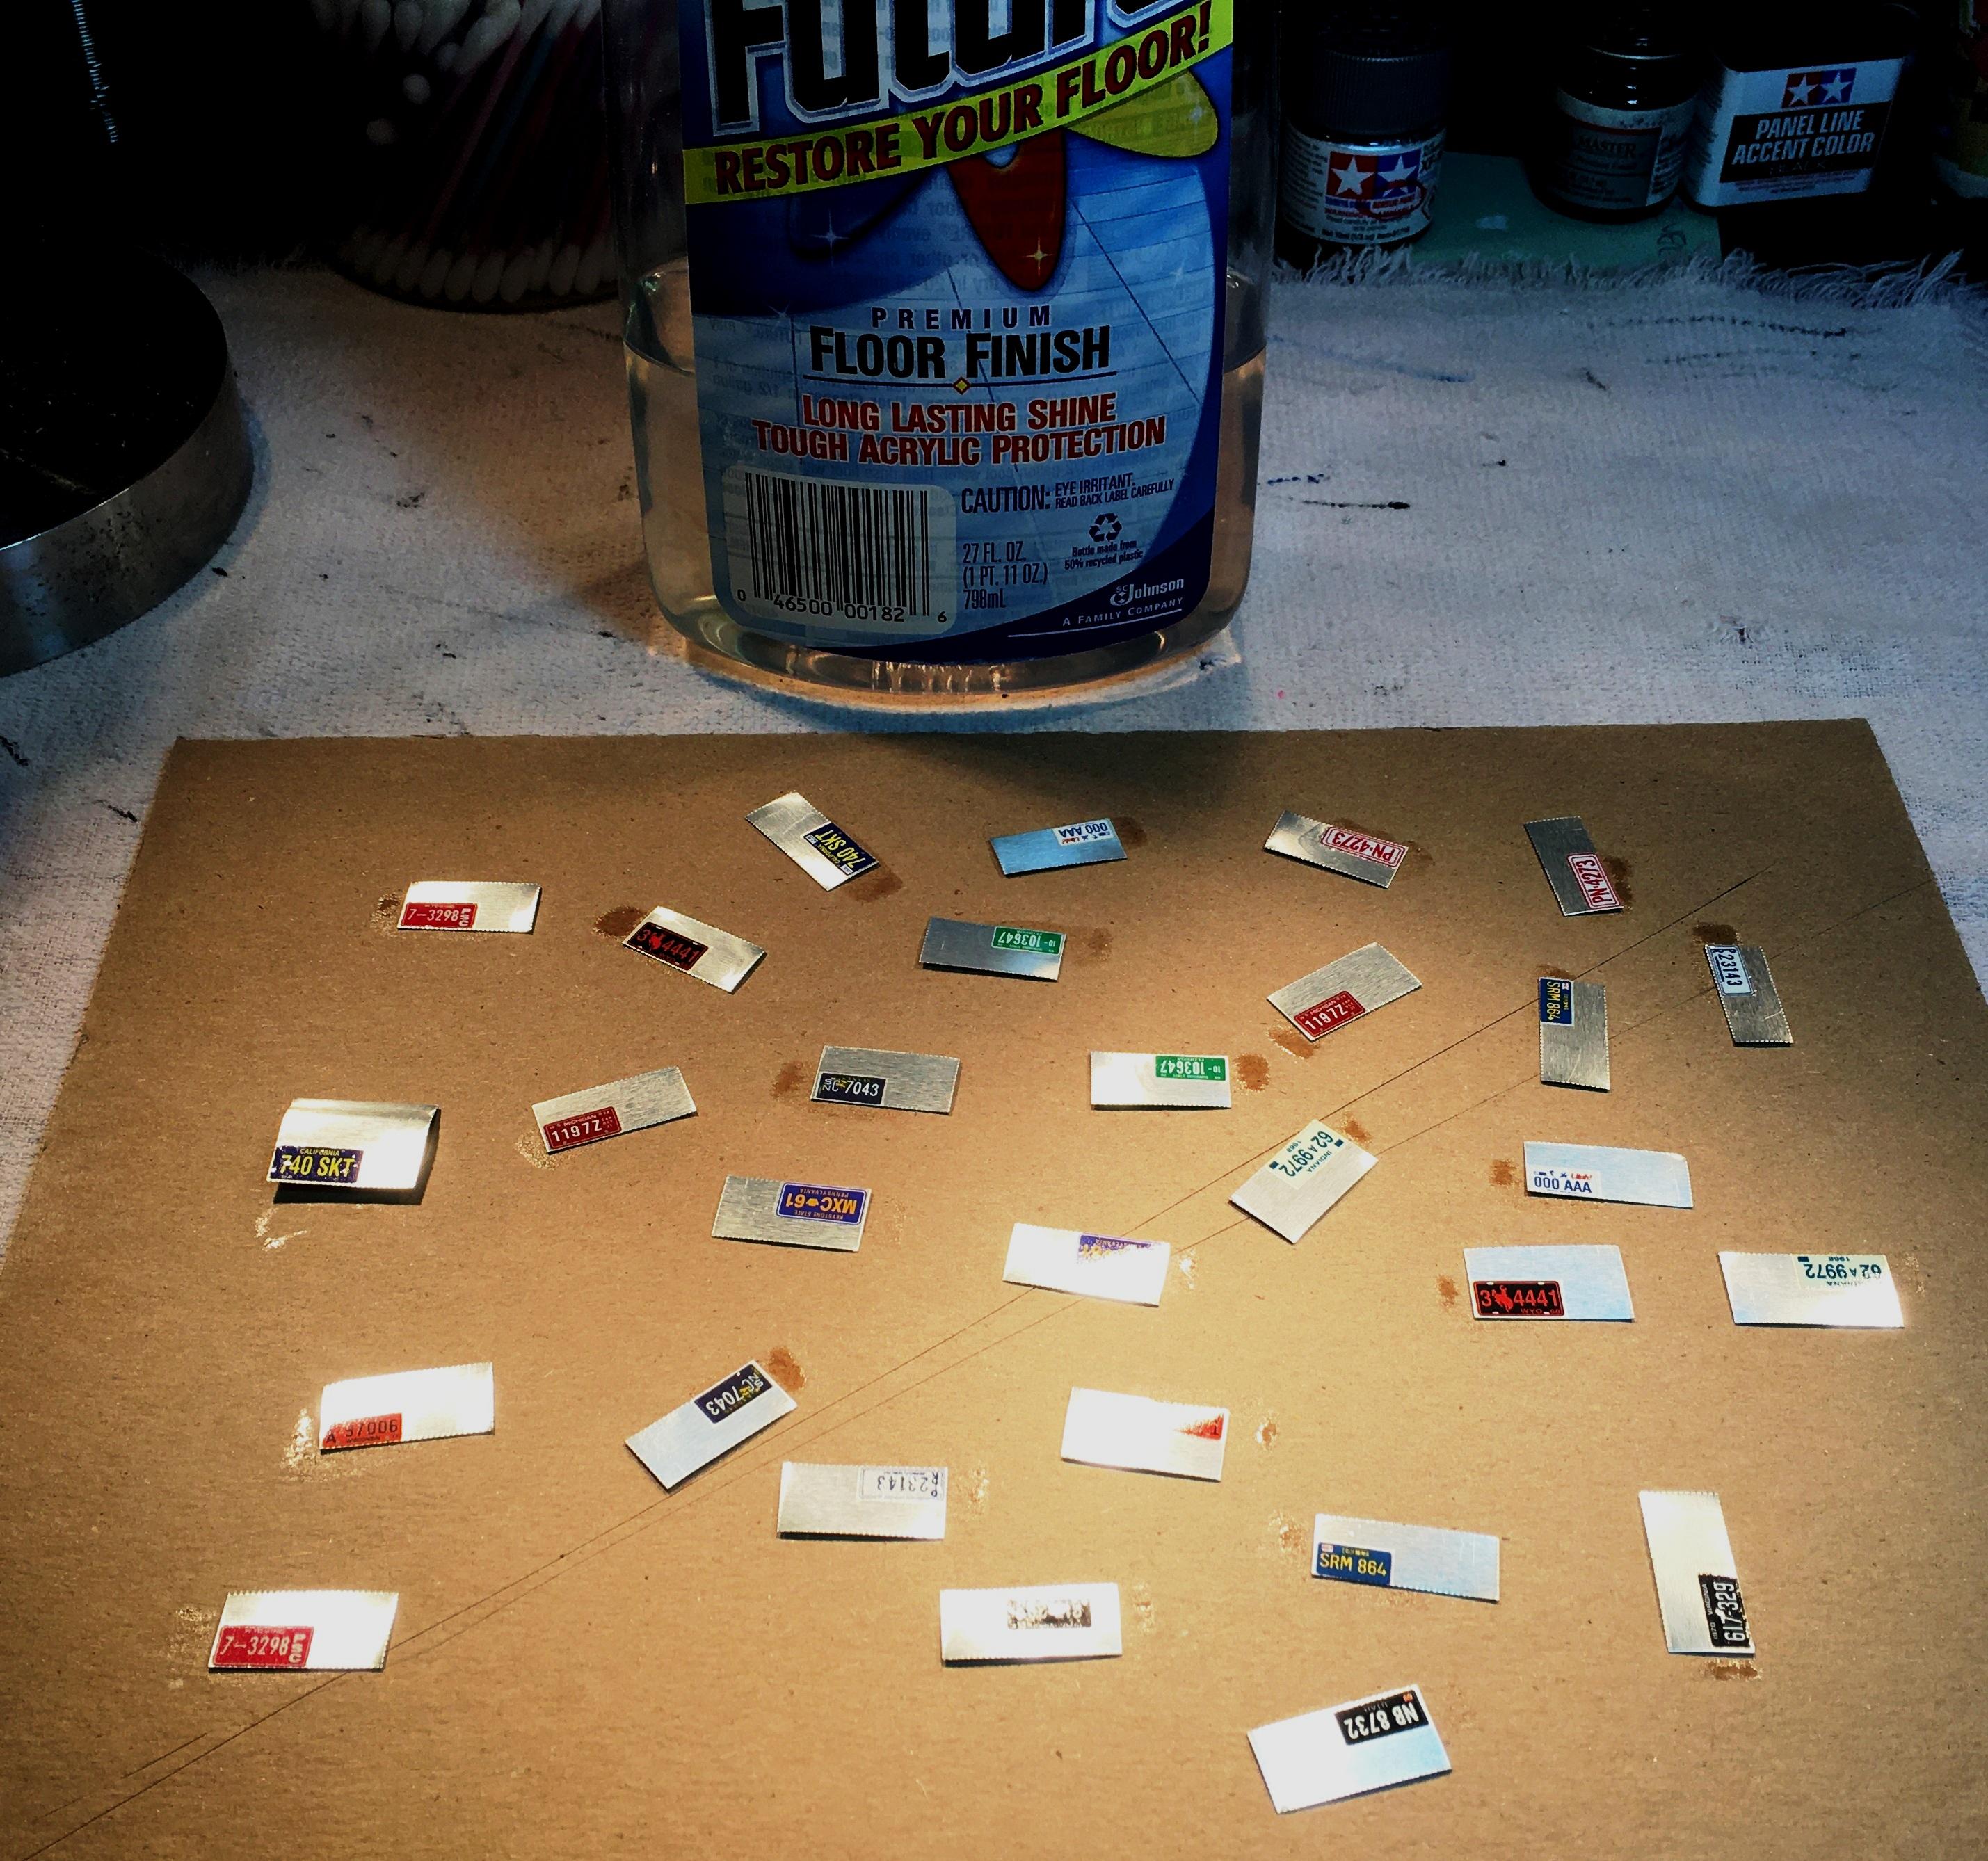
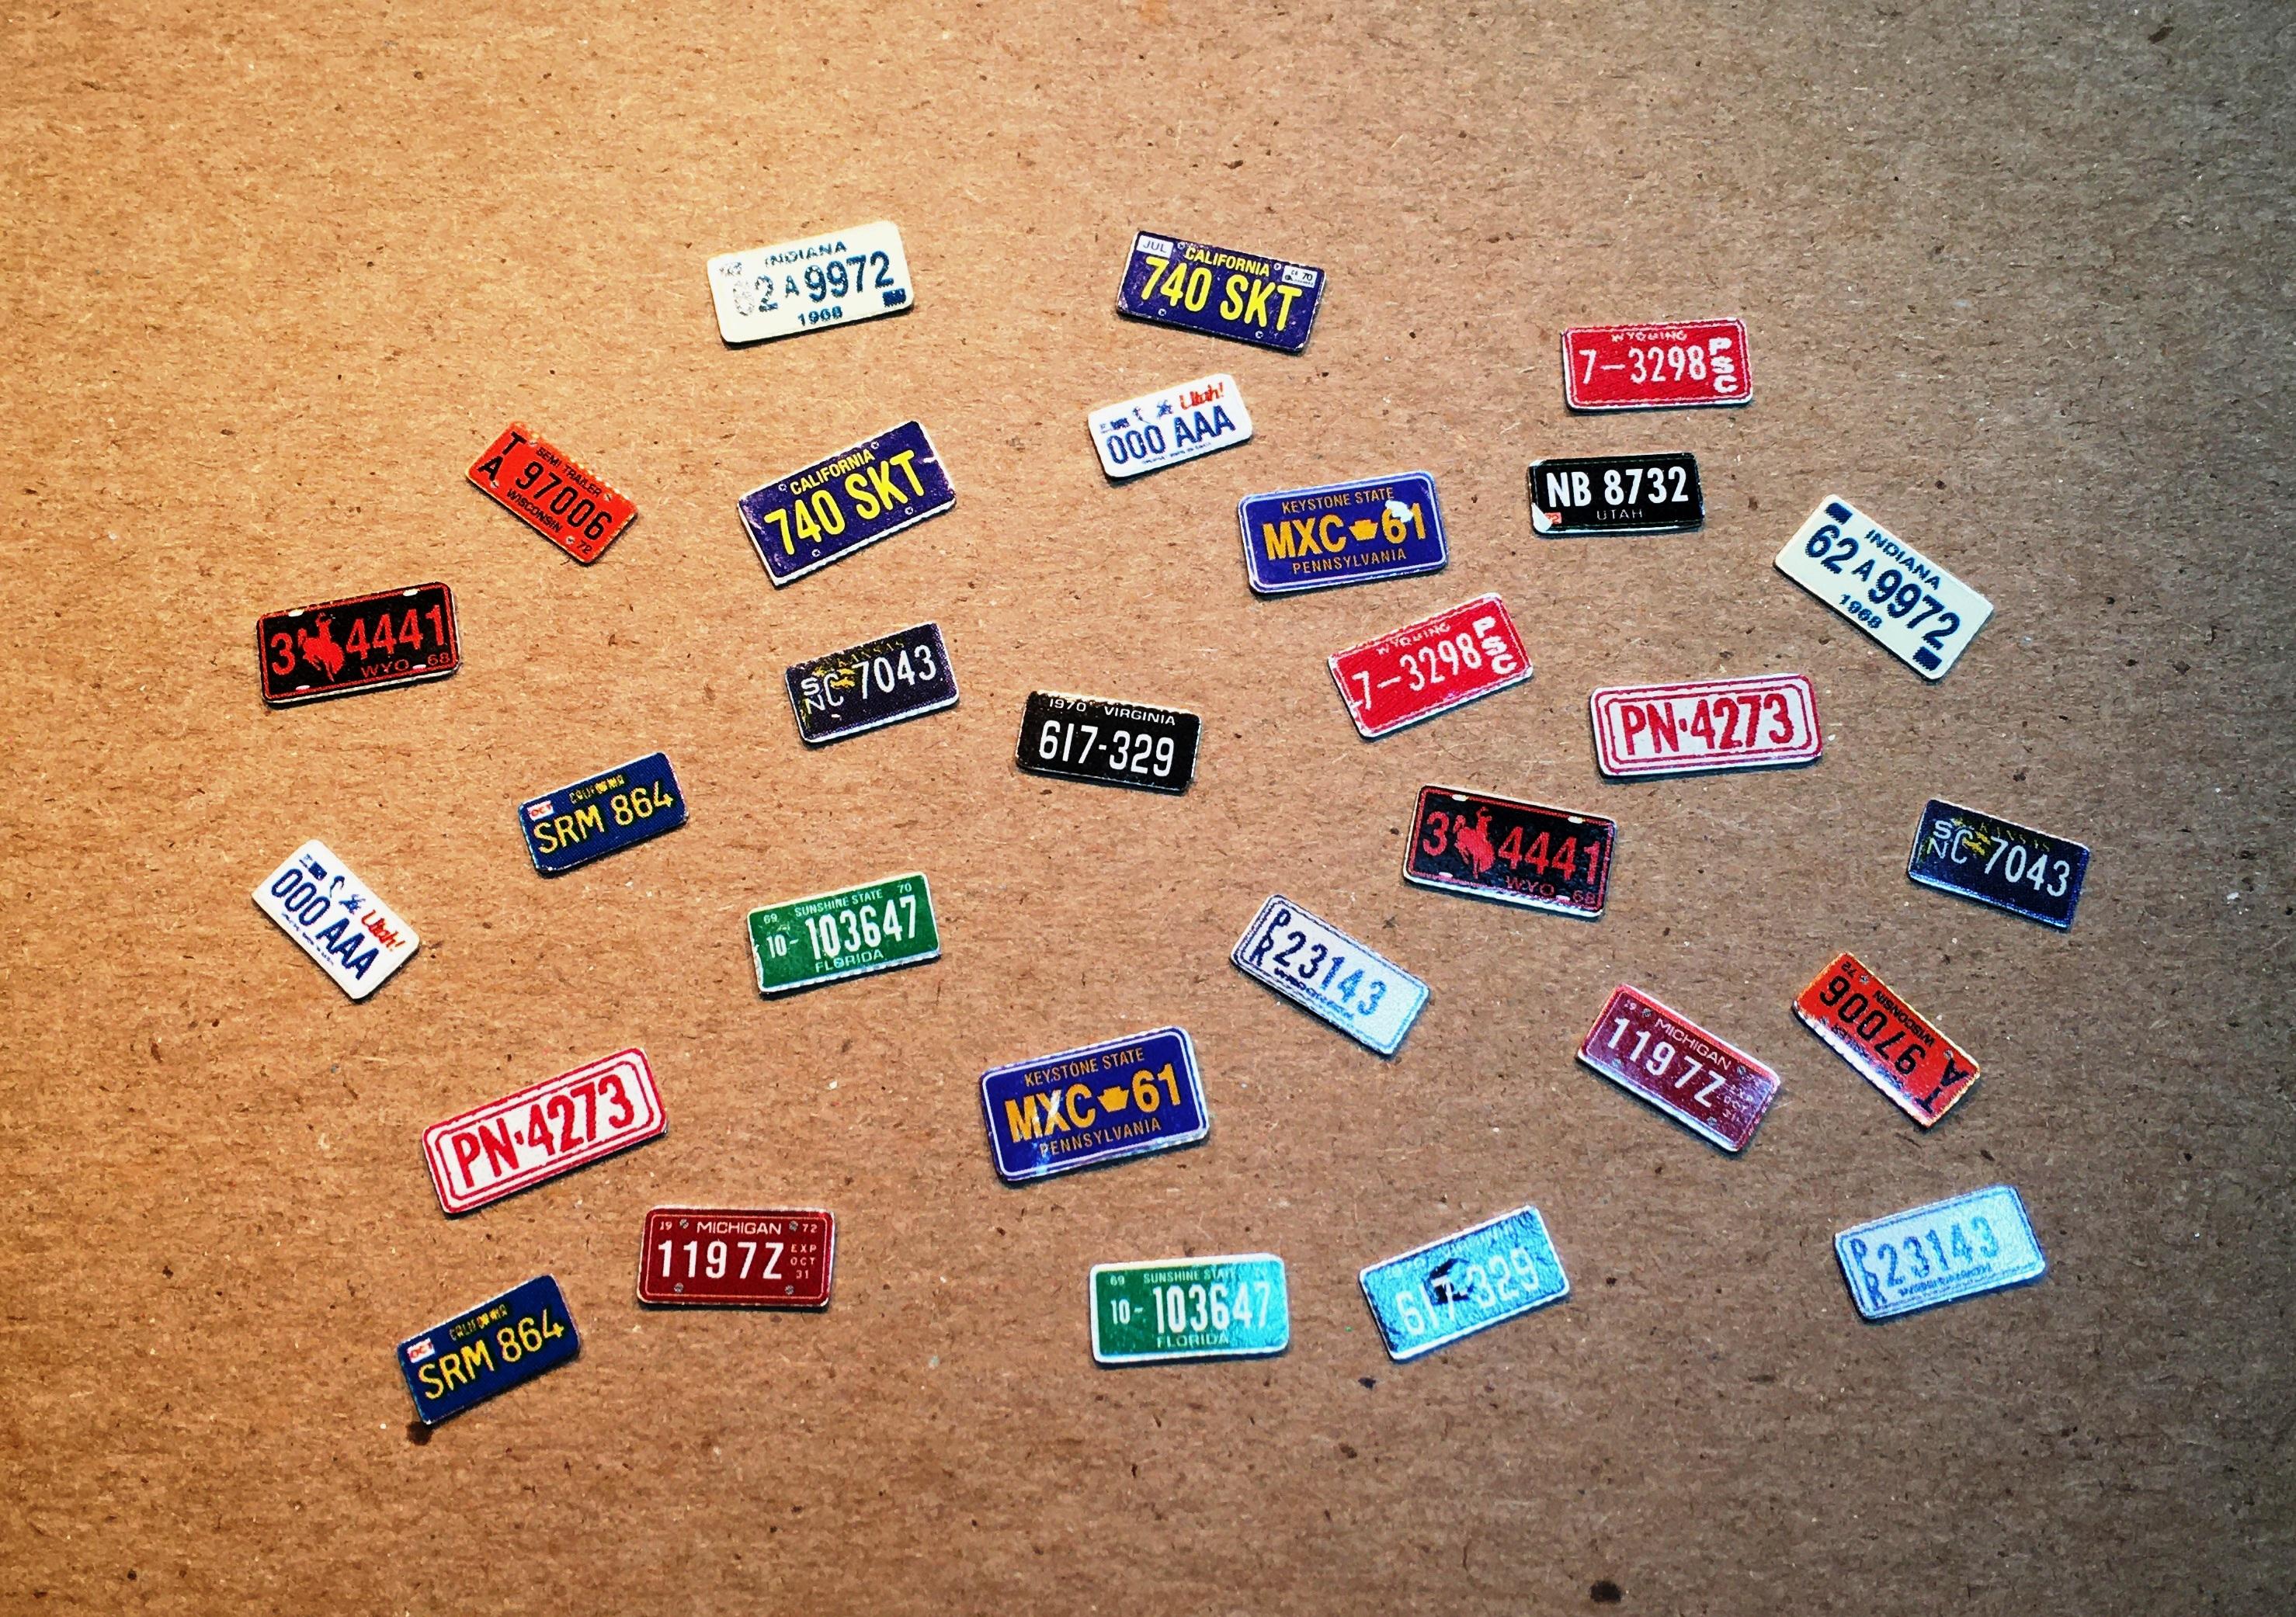
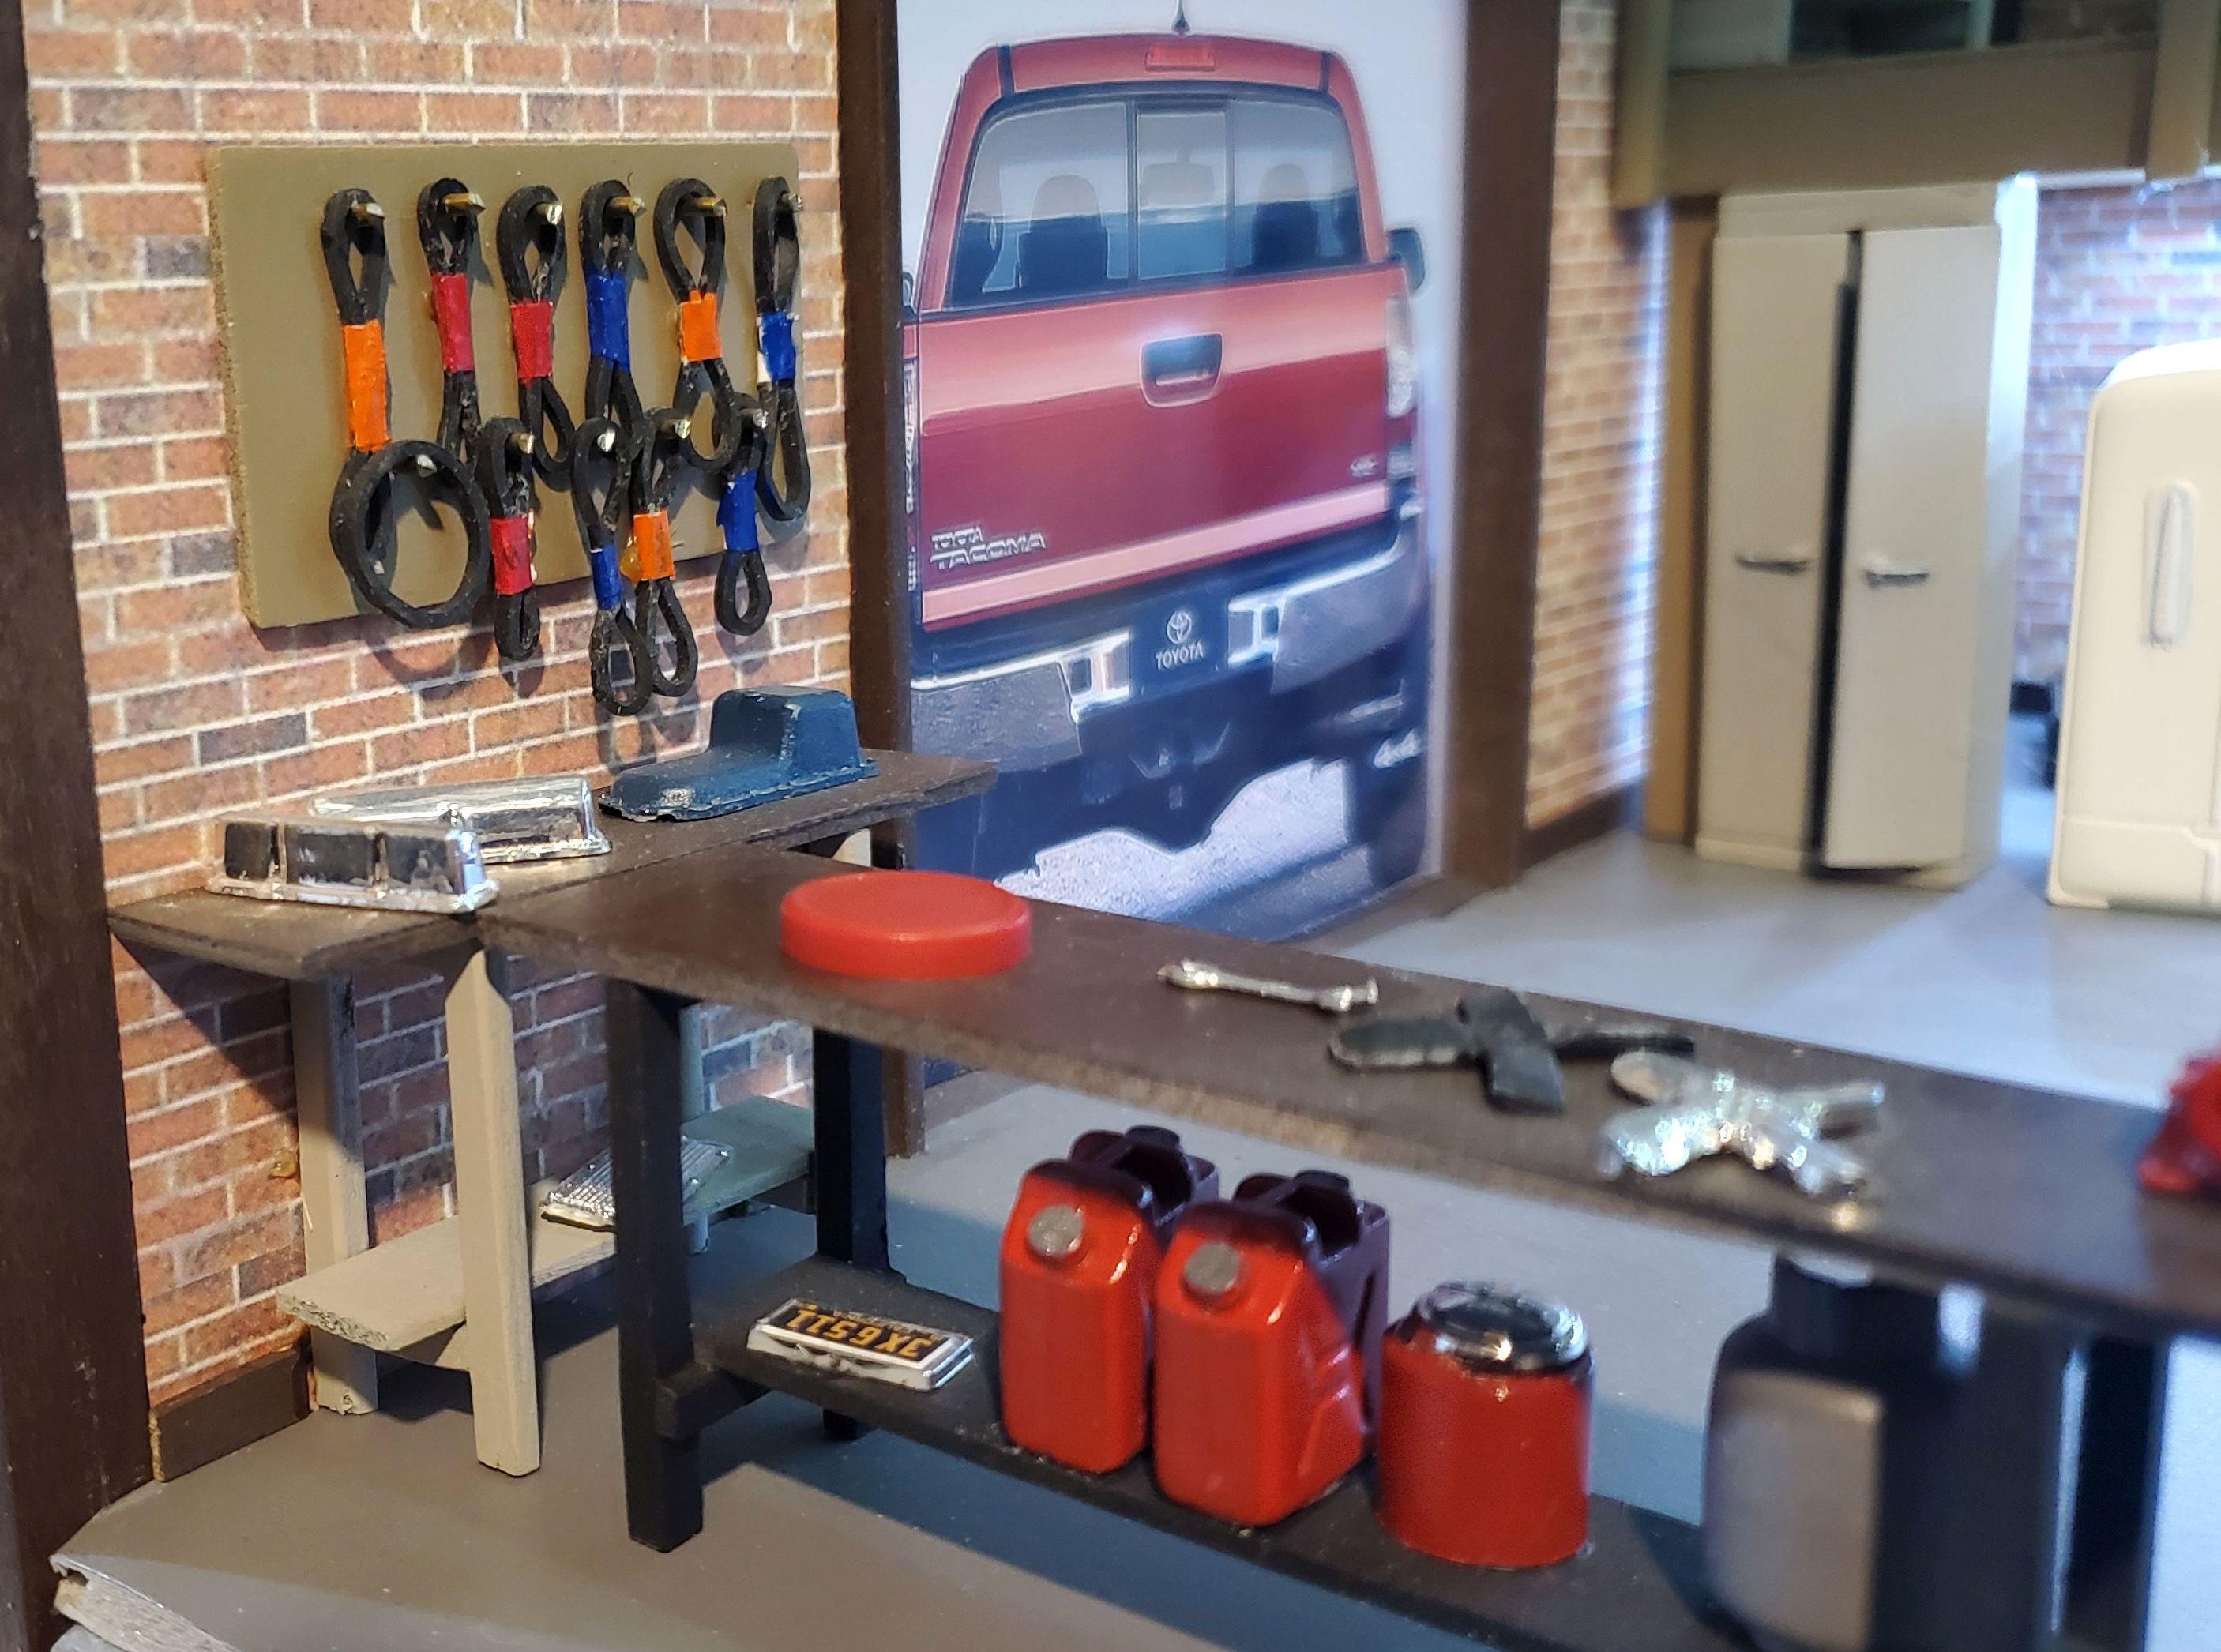
I was in my garage at home and found this nice, thin aluminum duct. I remembered I have a collection of various license plate decals and I thought They would be great as wall art in my garage diorama. I went through all the steps to make them realistic as possible by even rounding off all the corners. Now if only I had a laser to make the holes...........
-
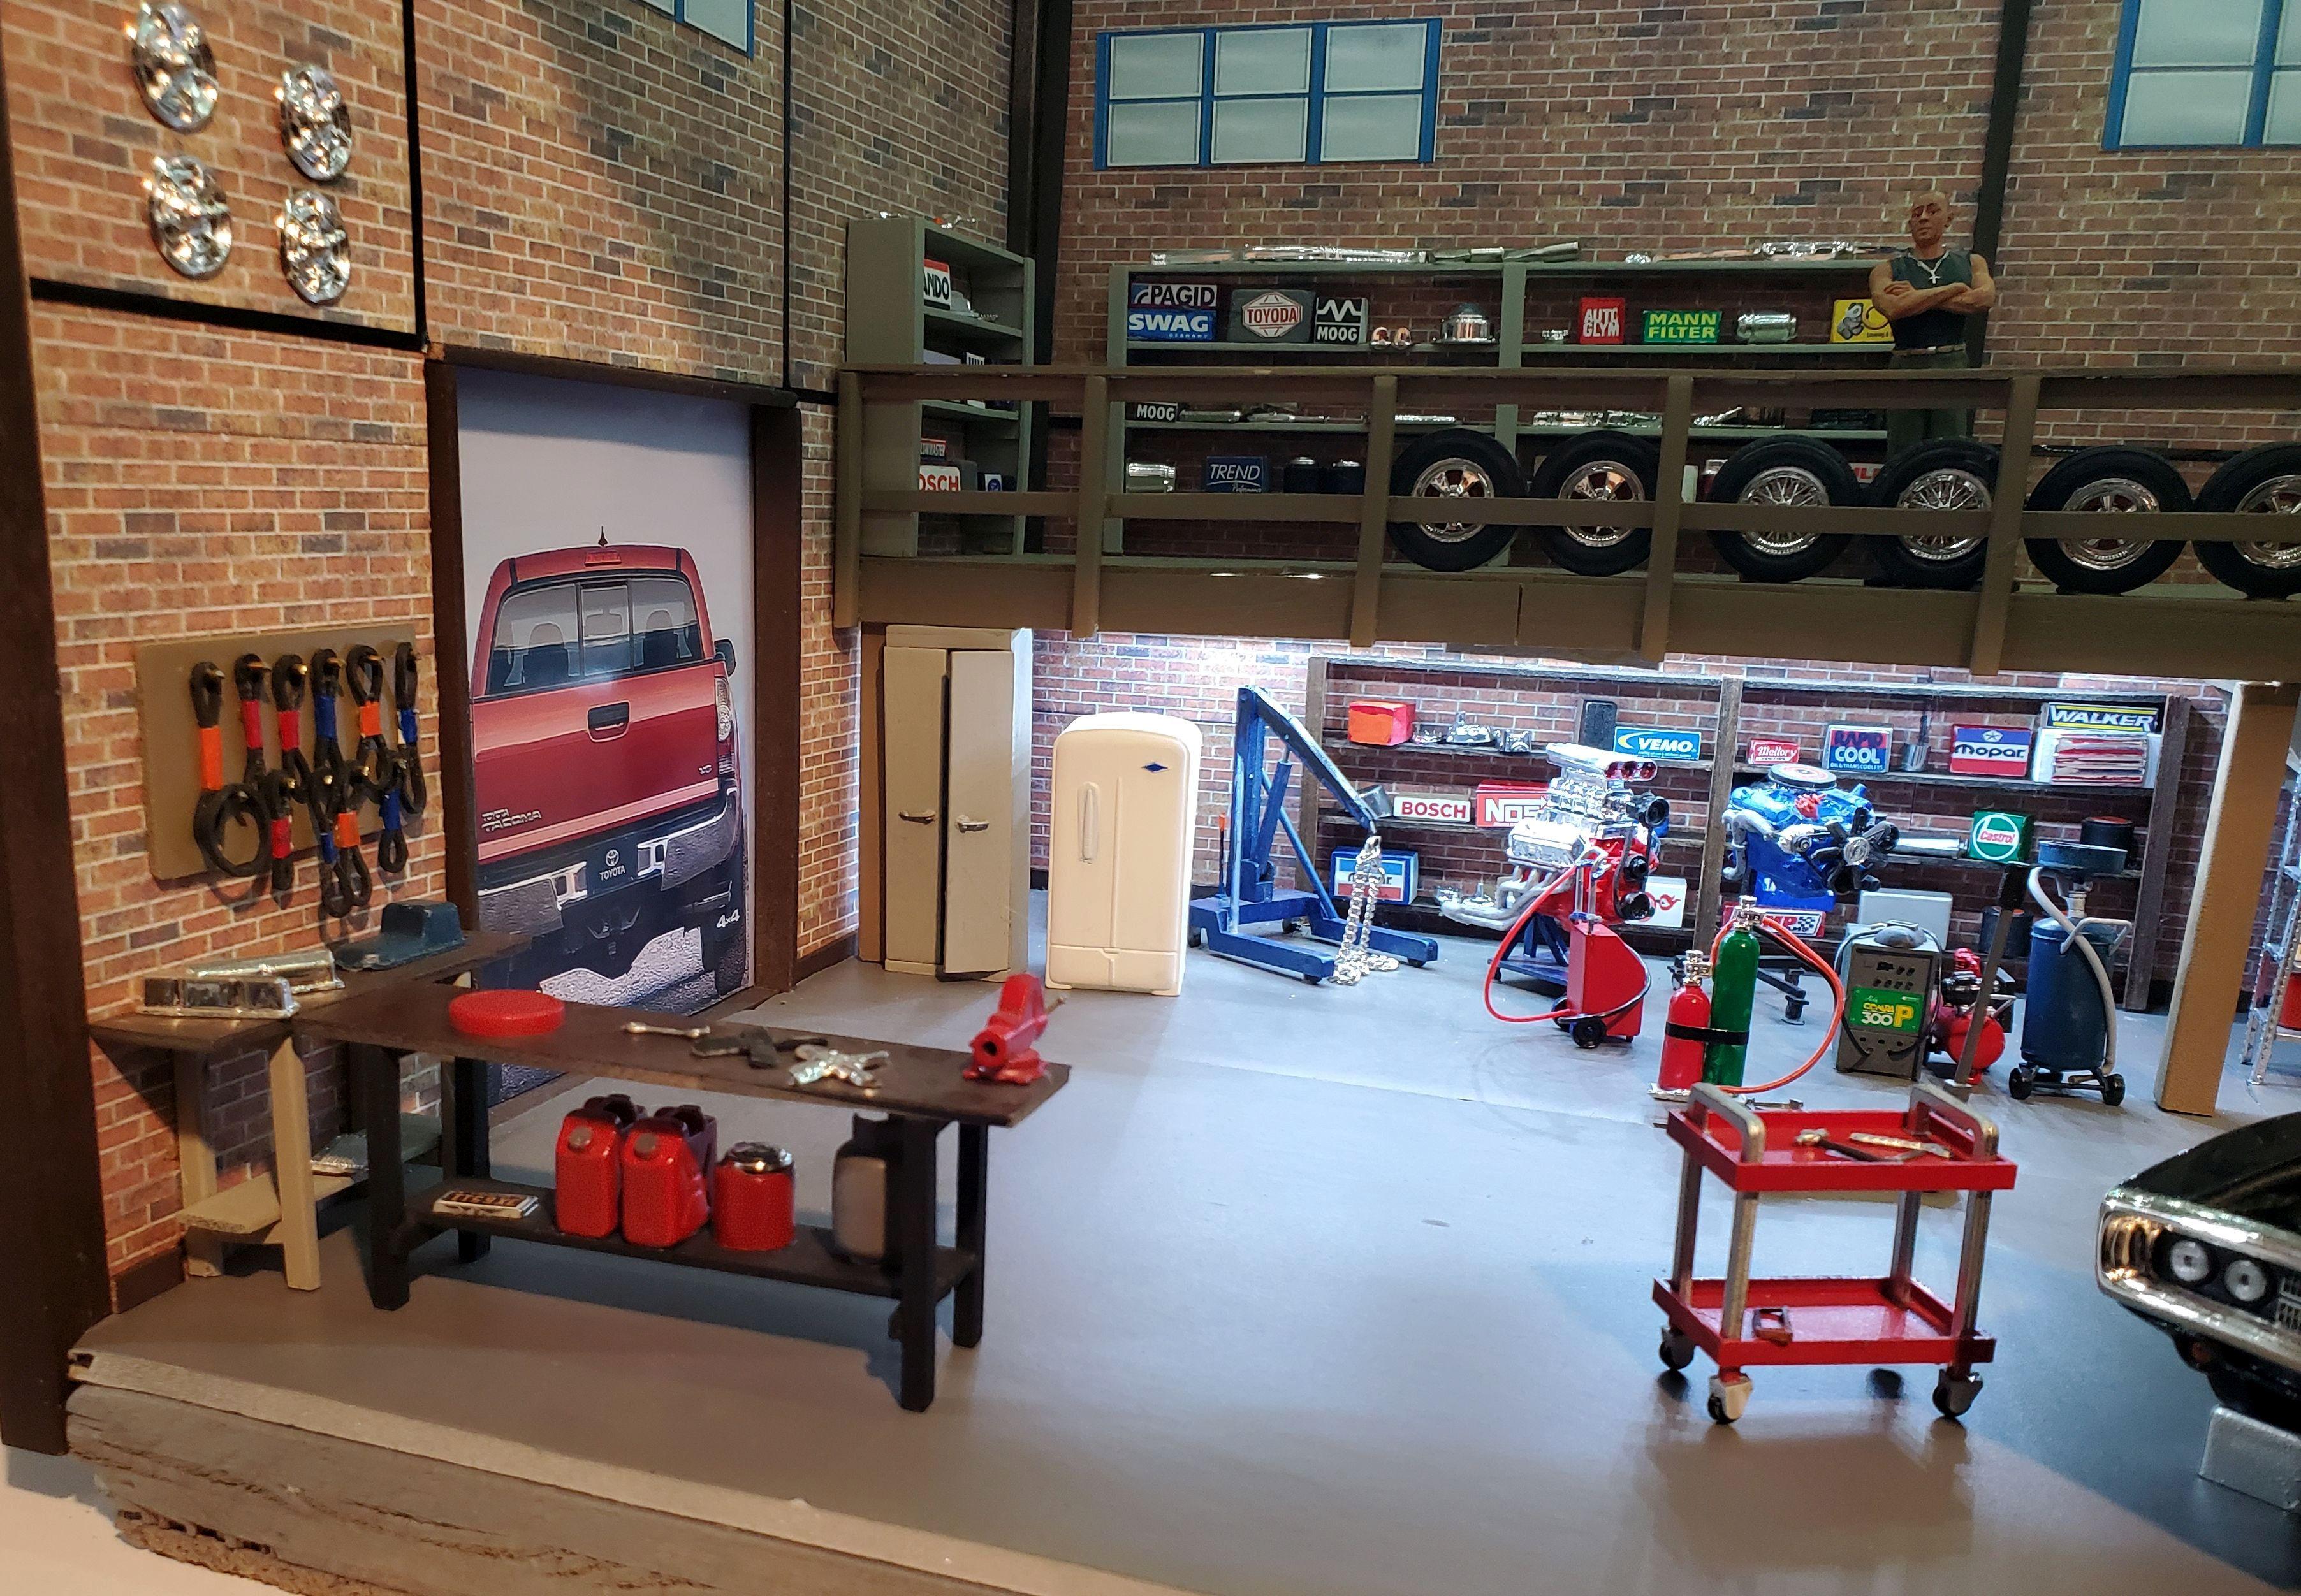
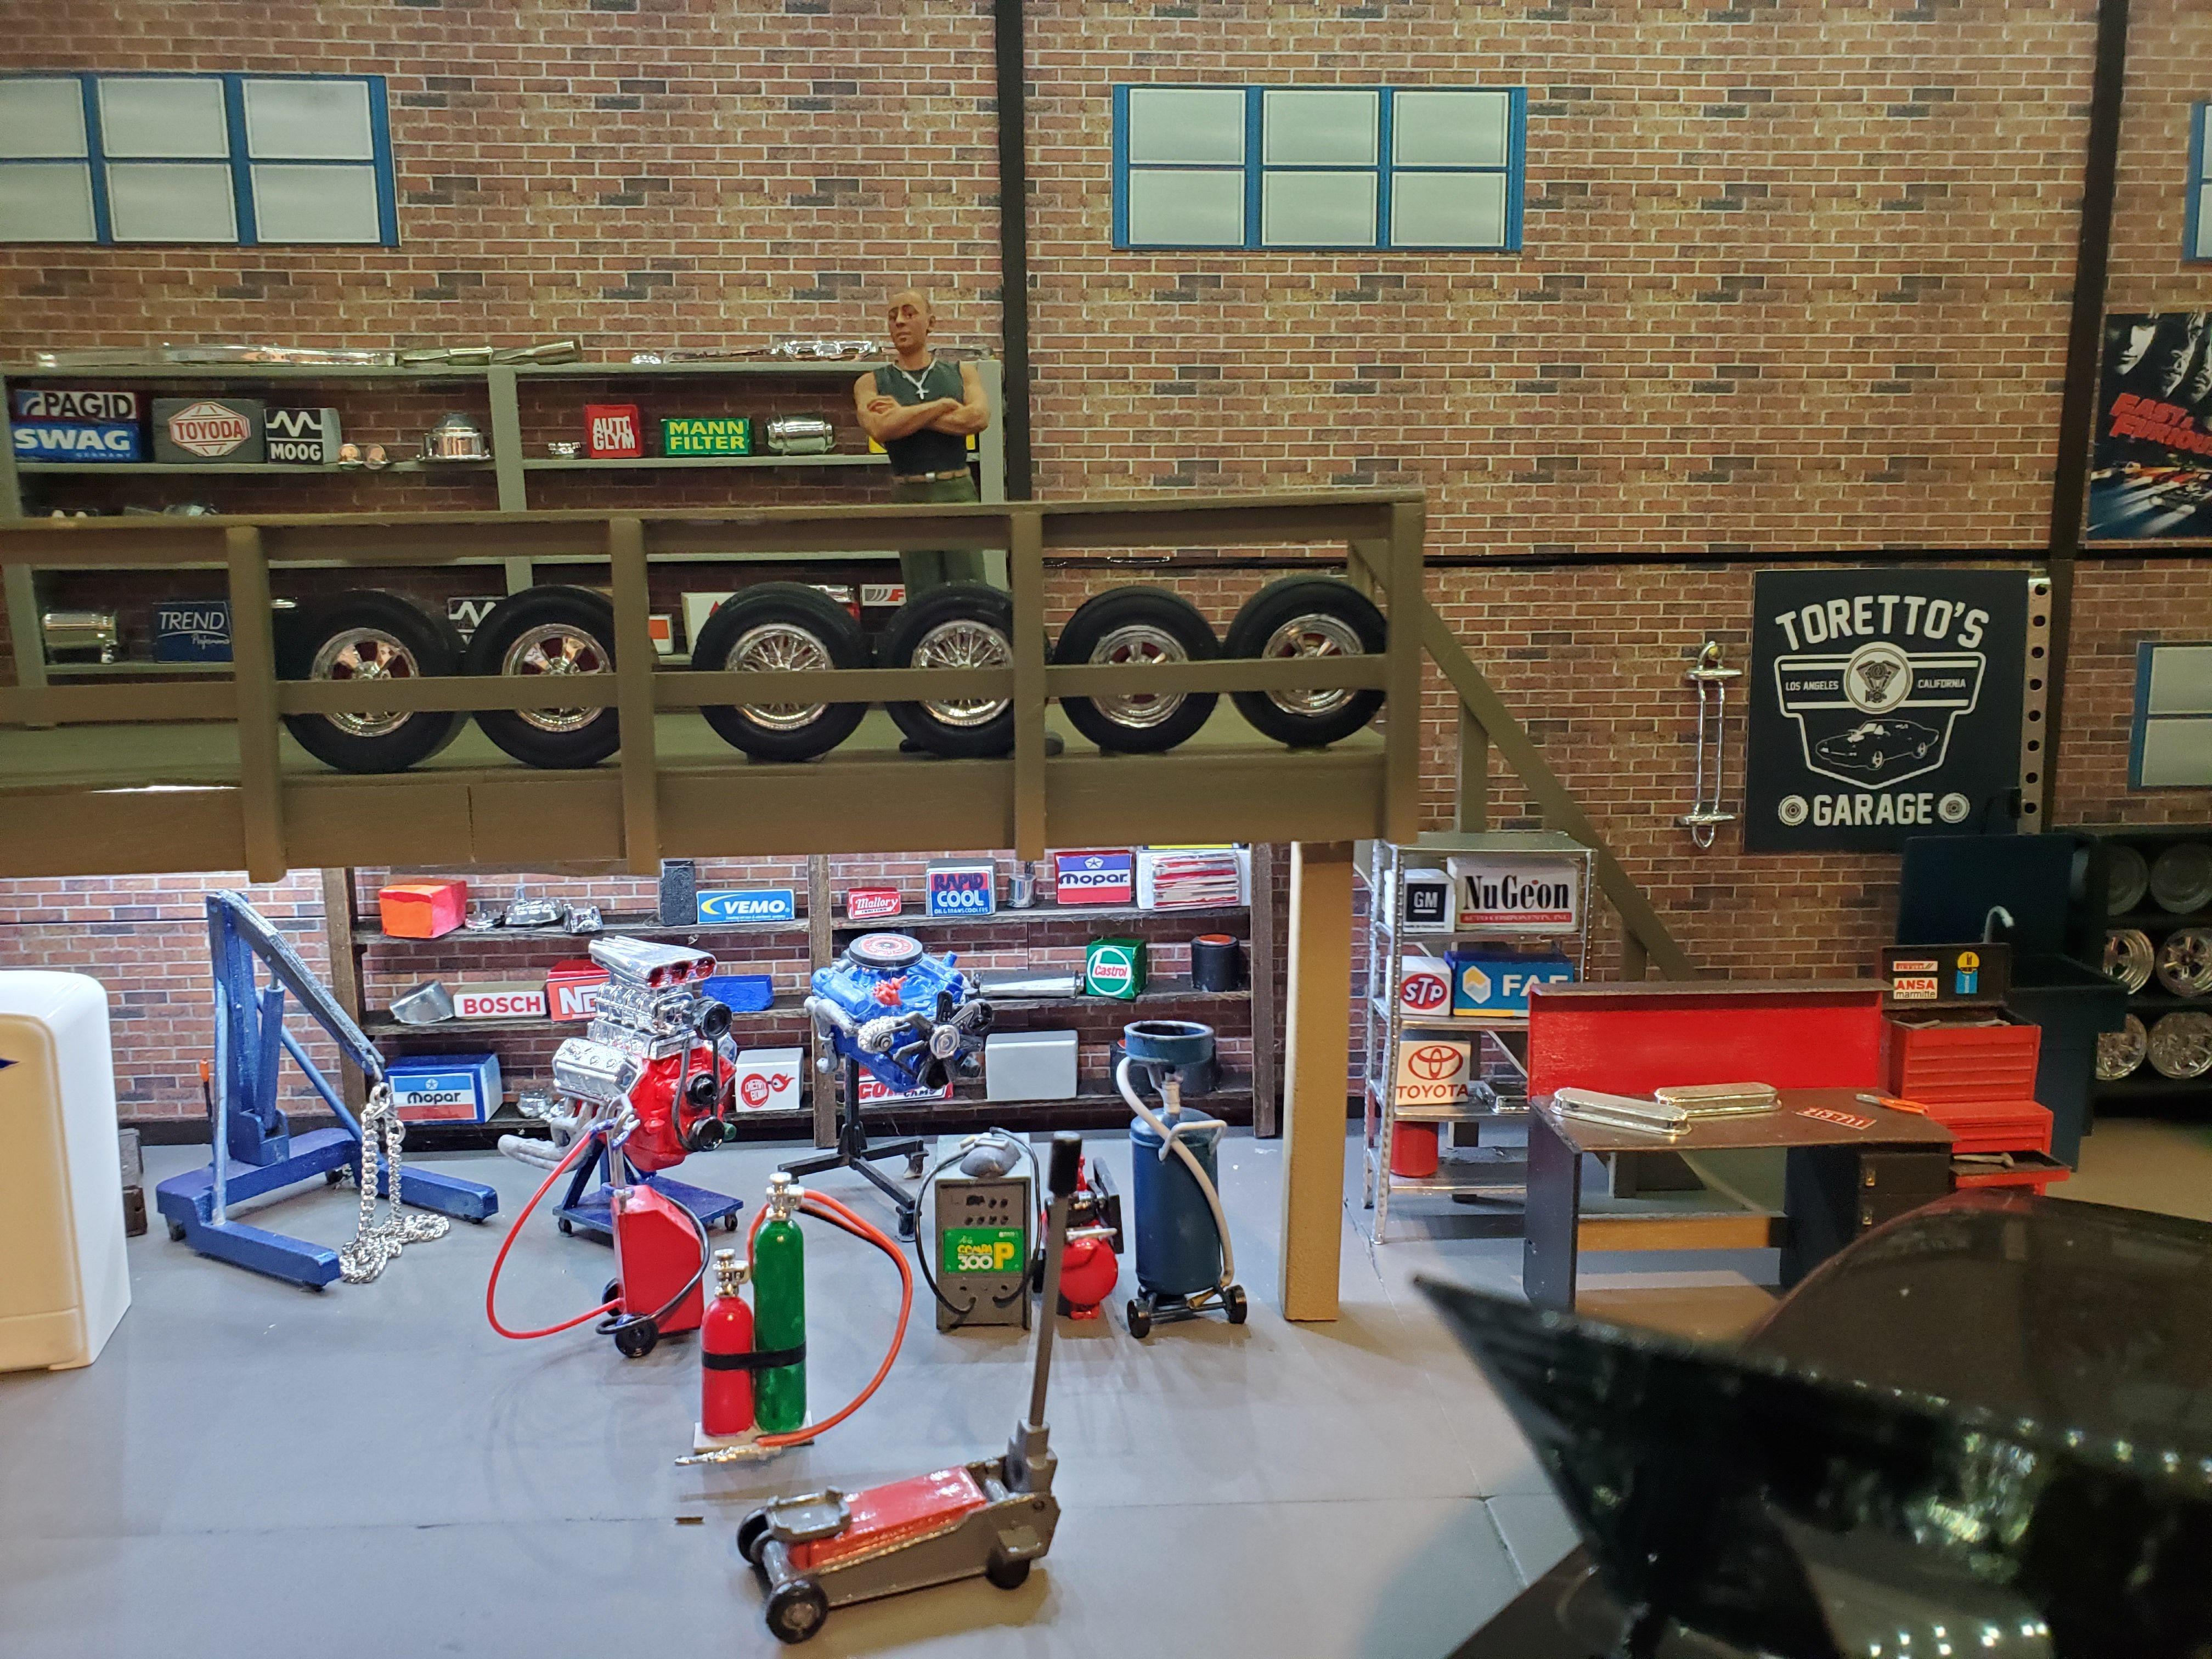
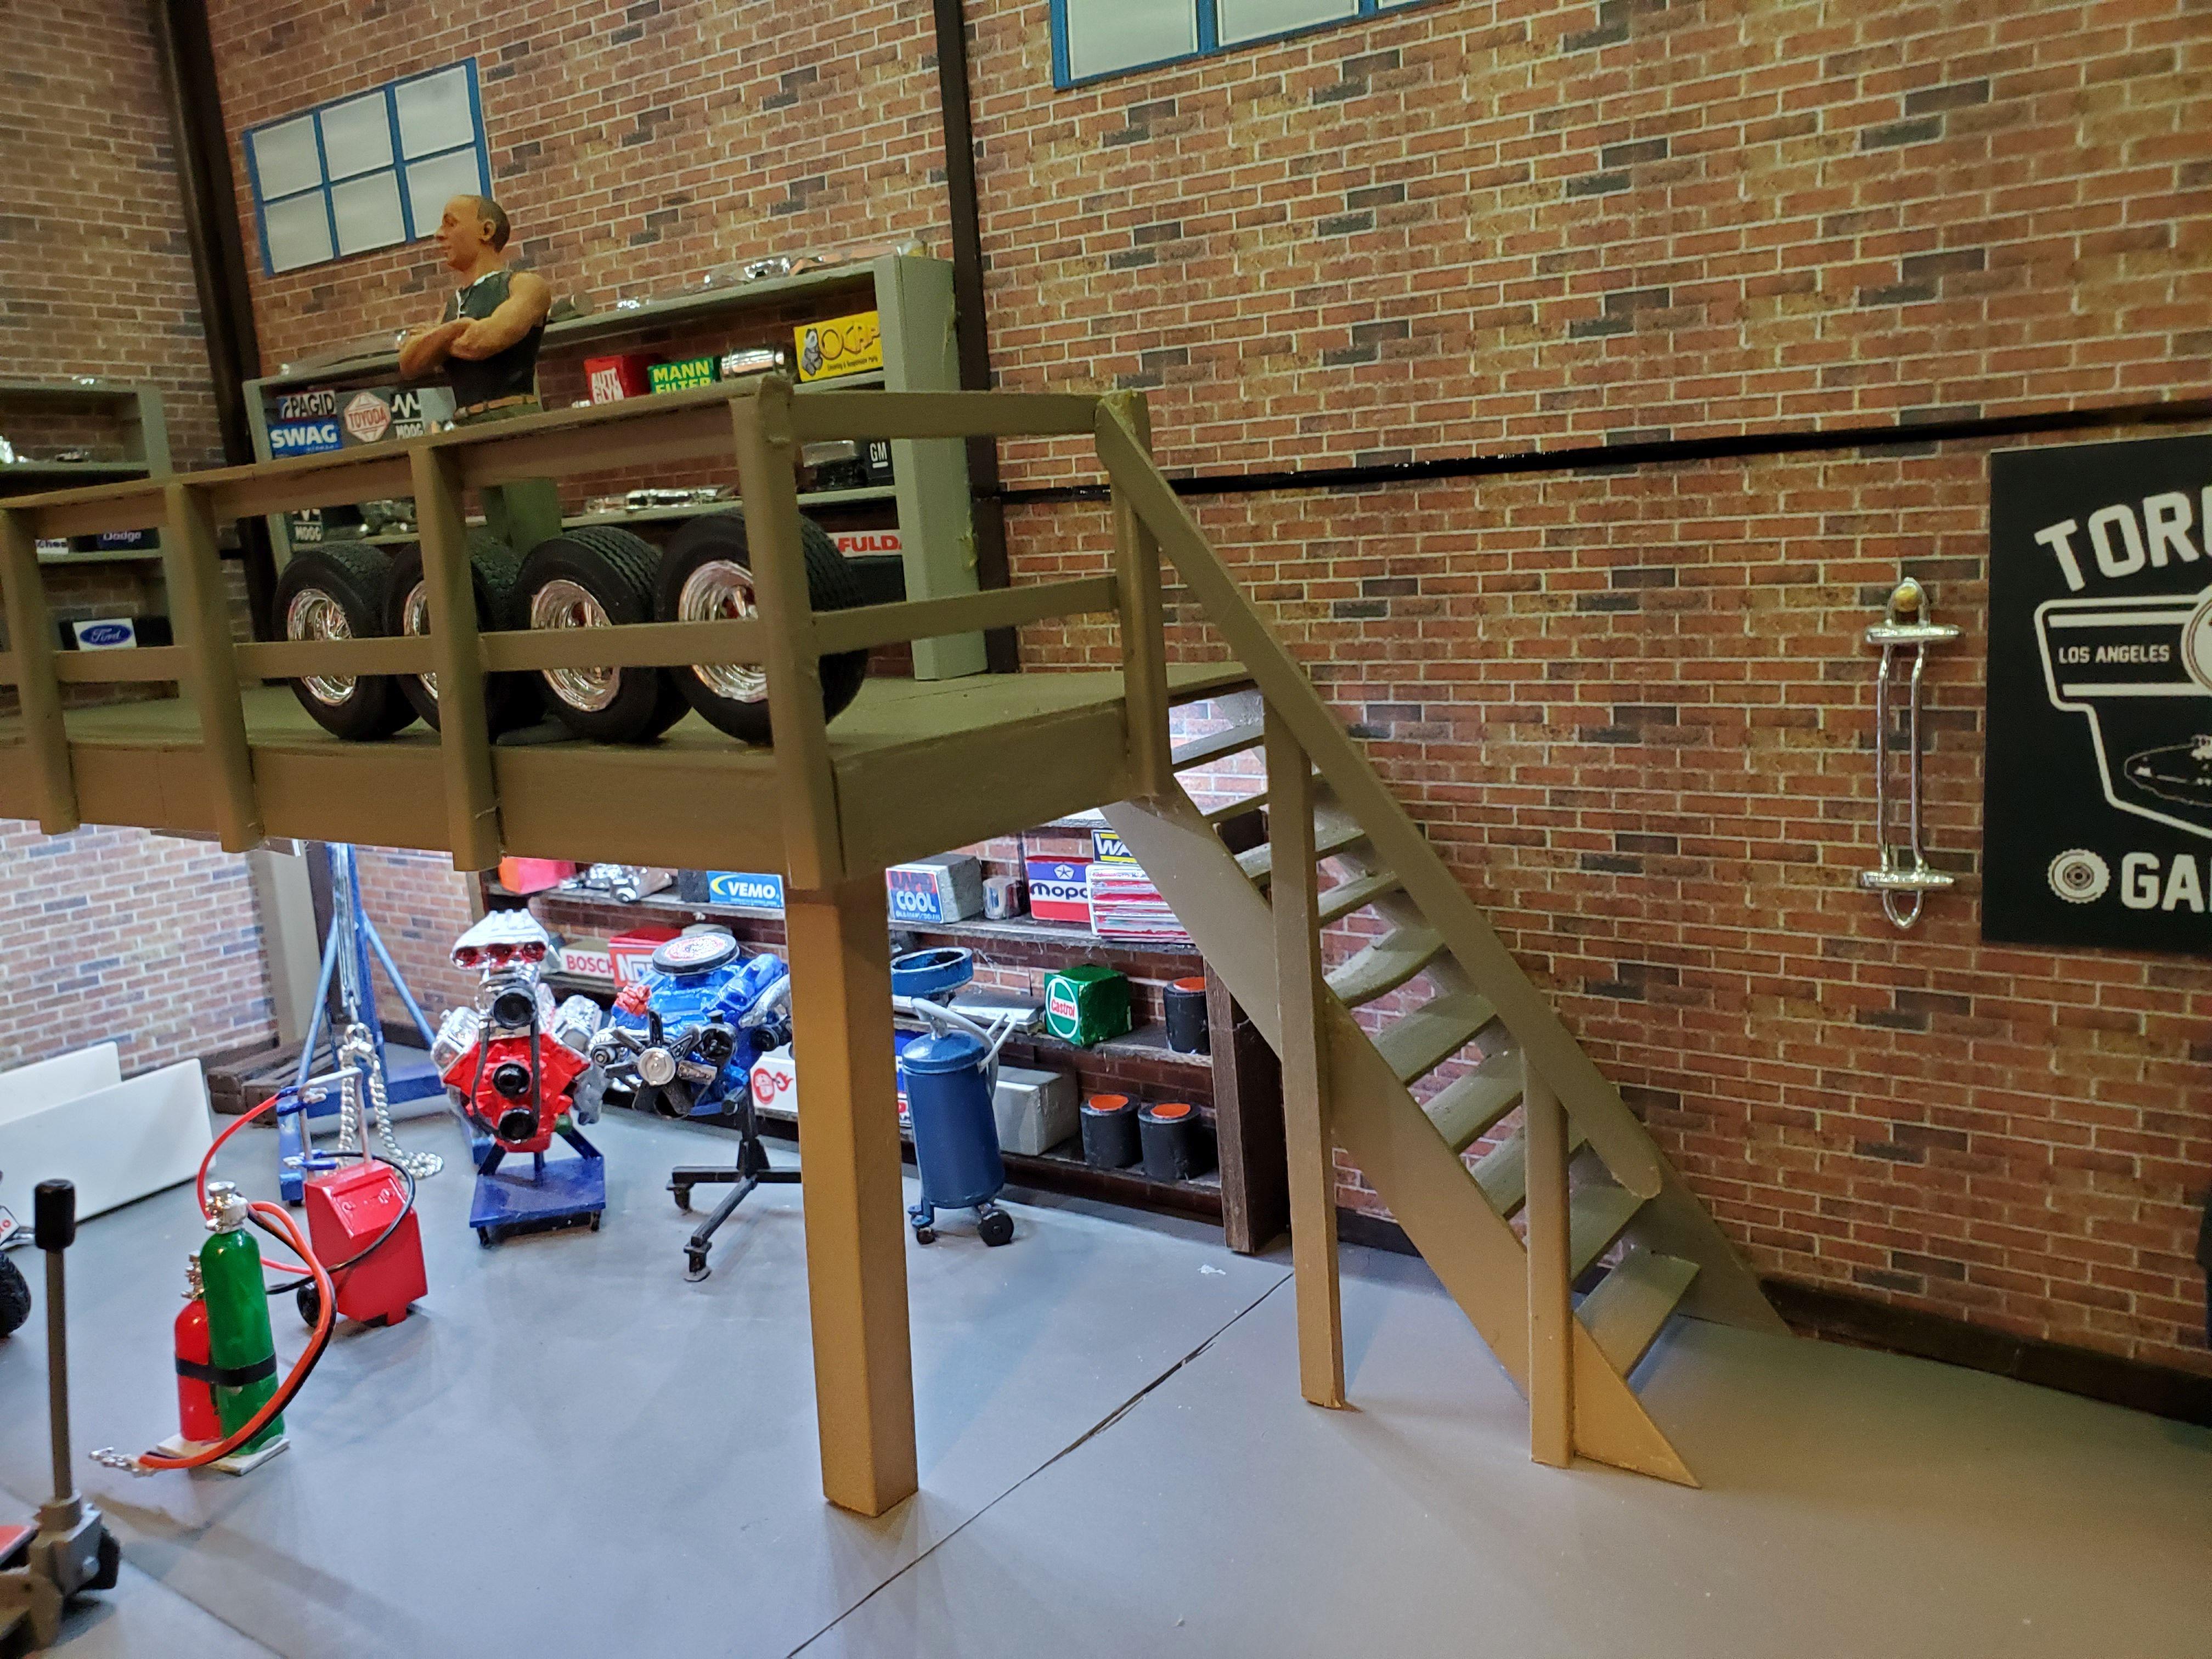
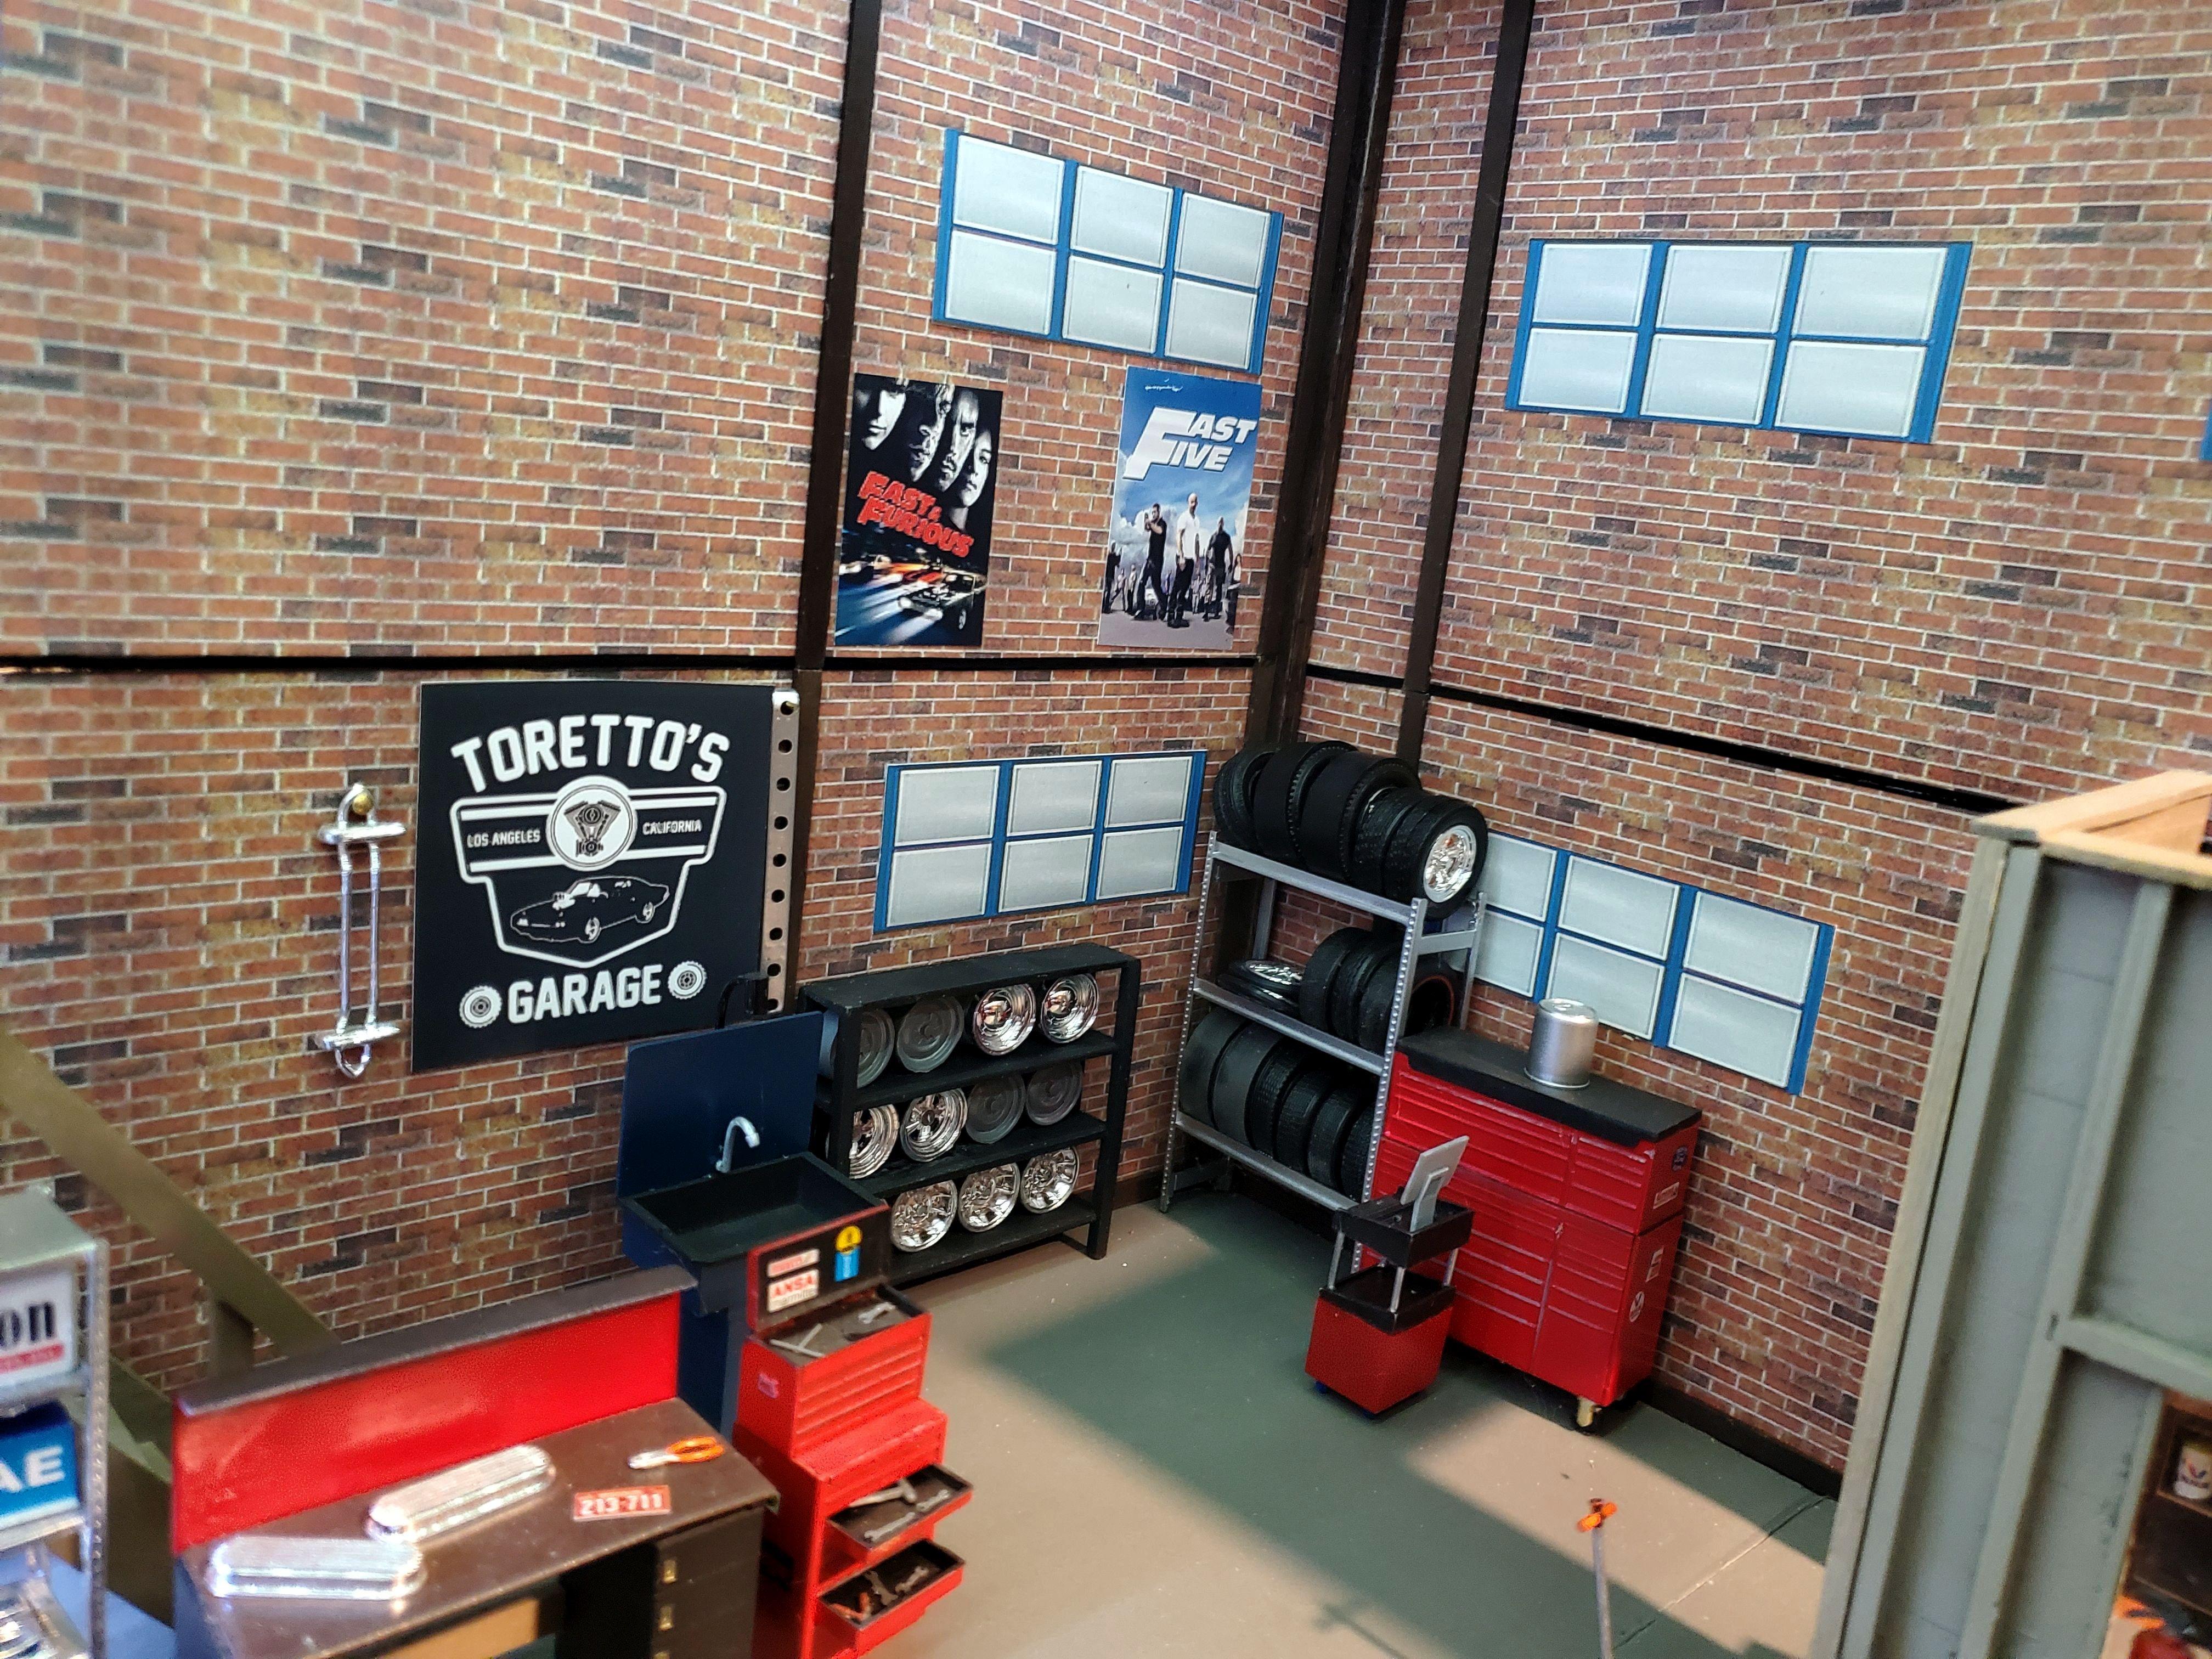
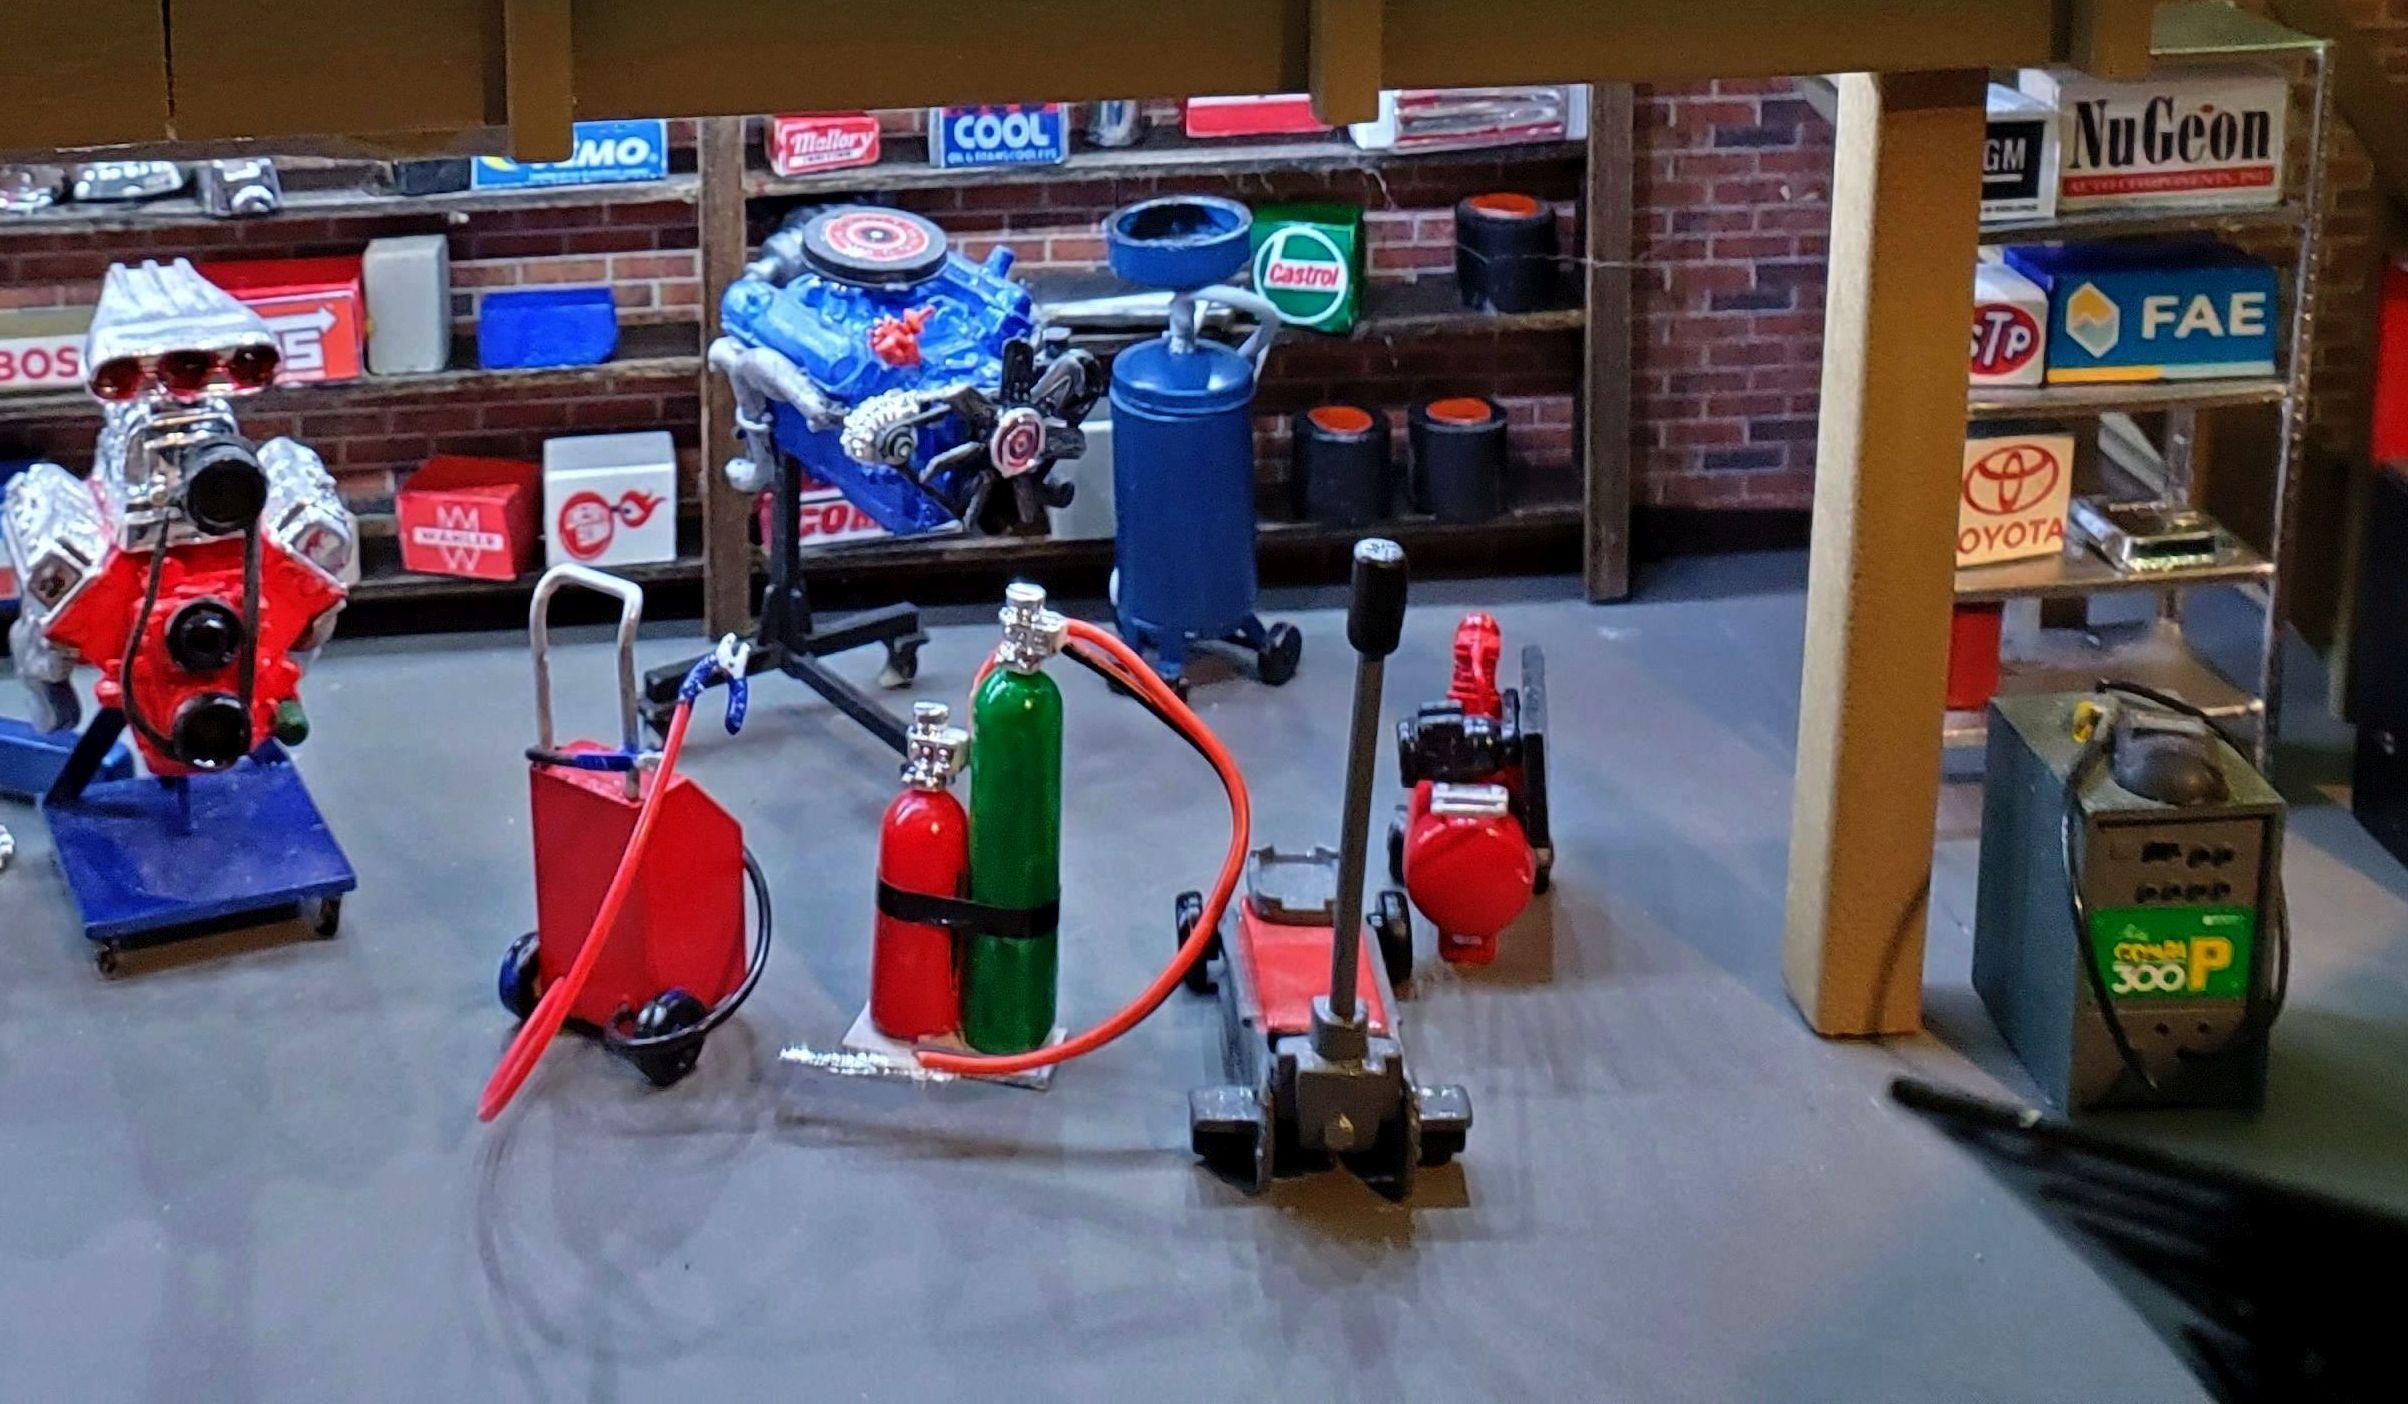
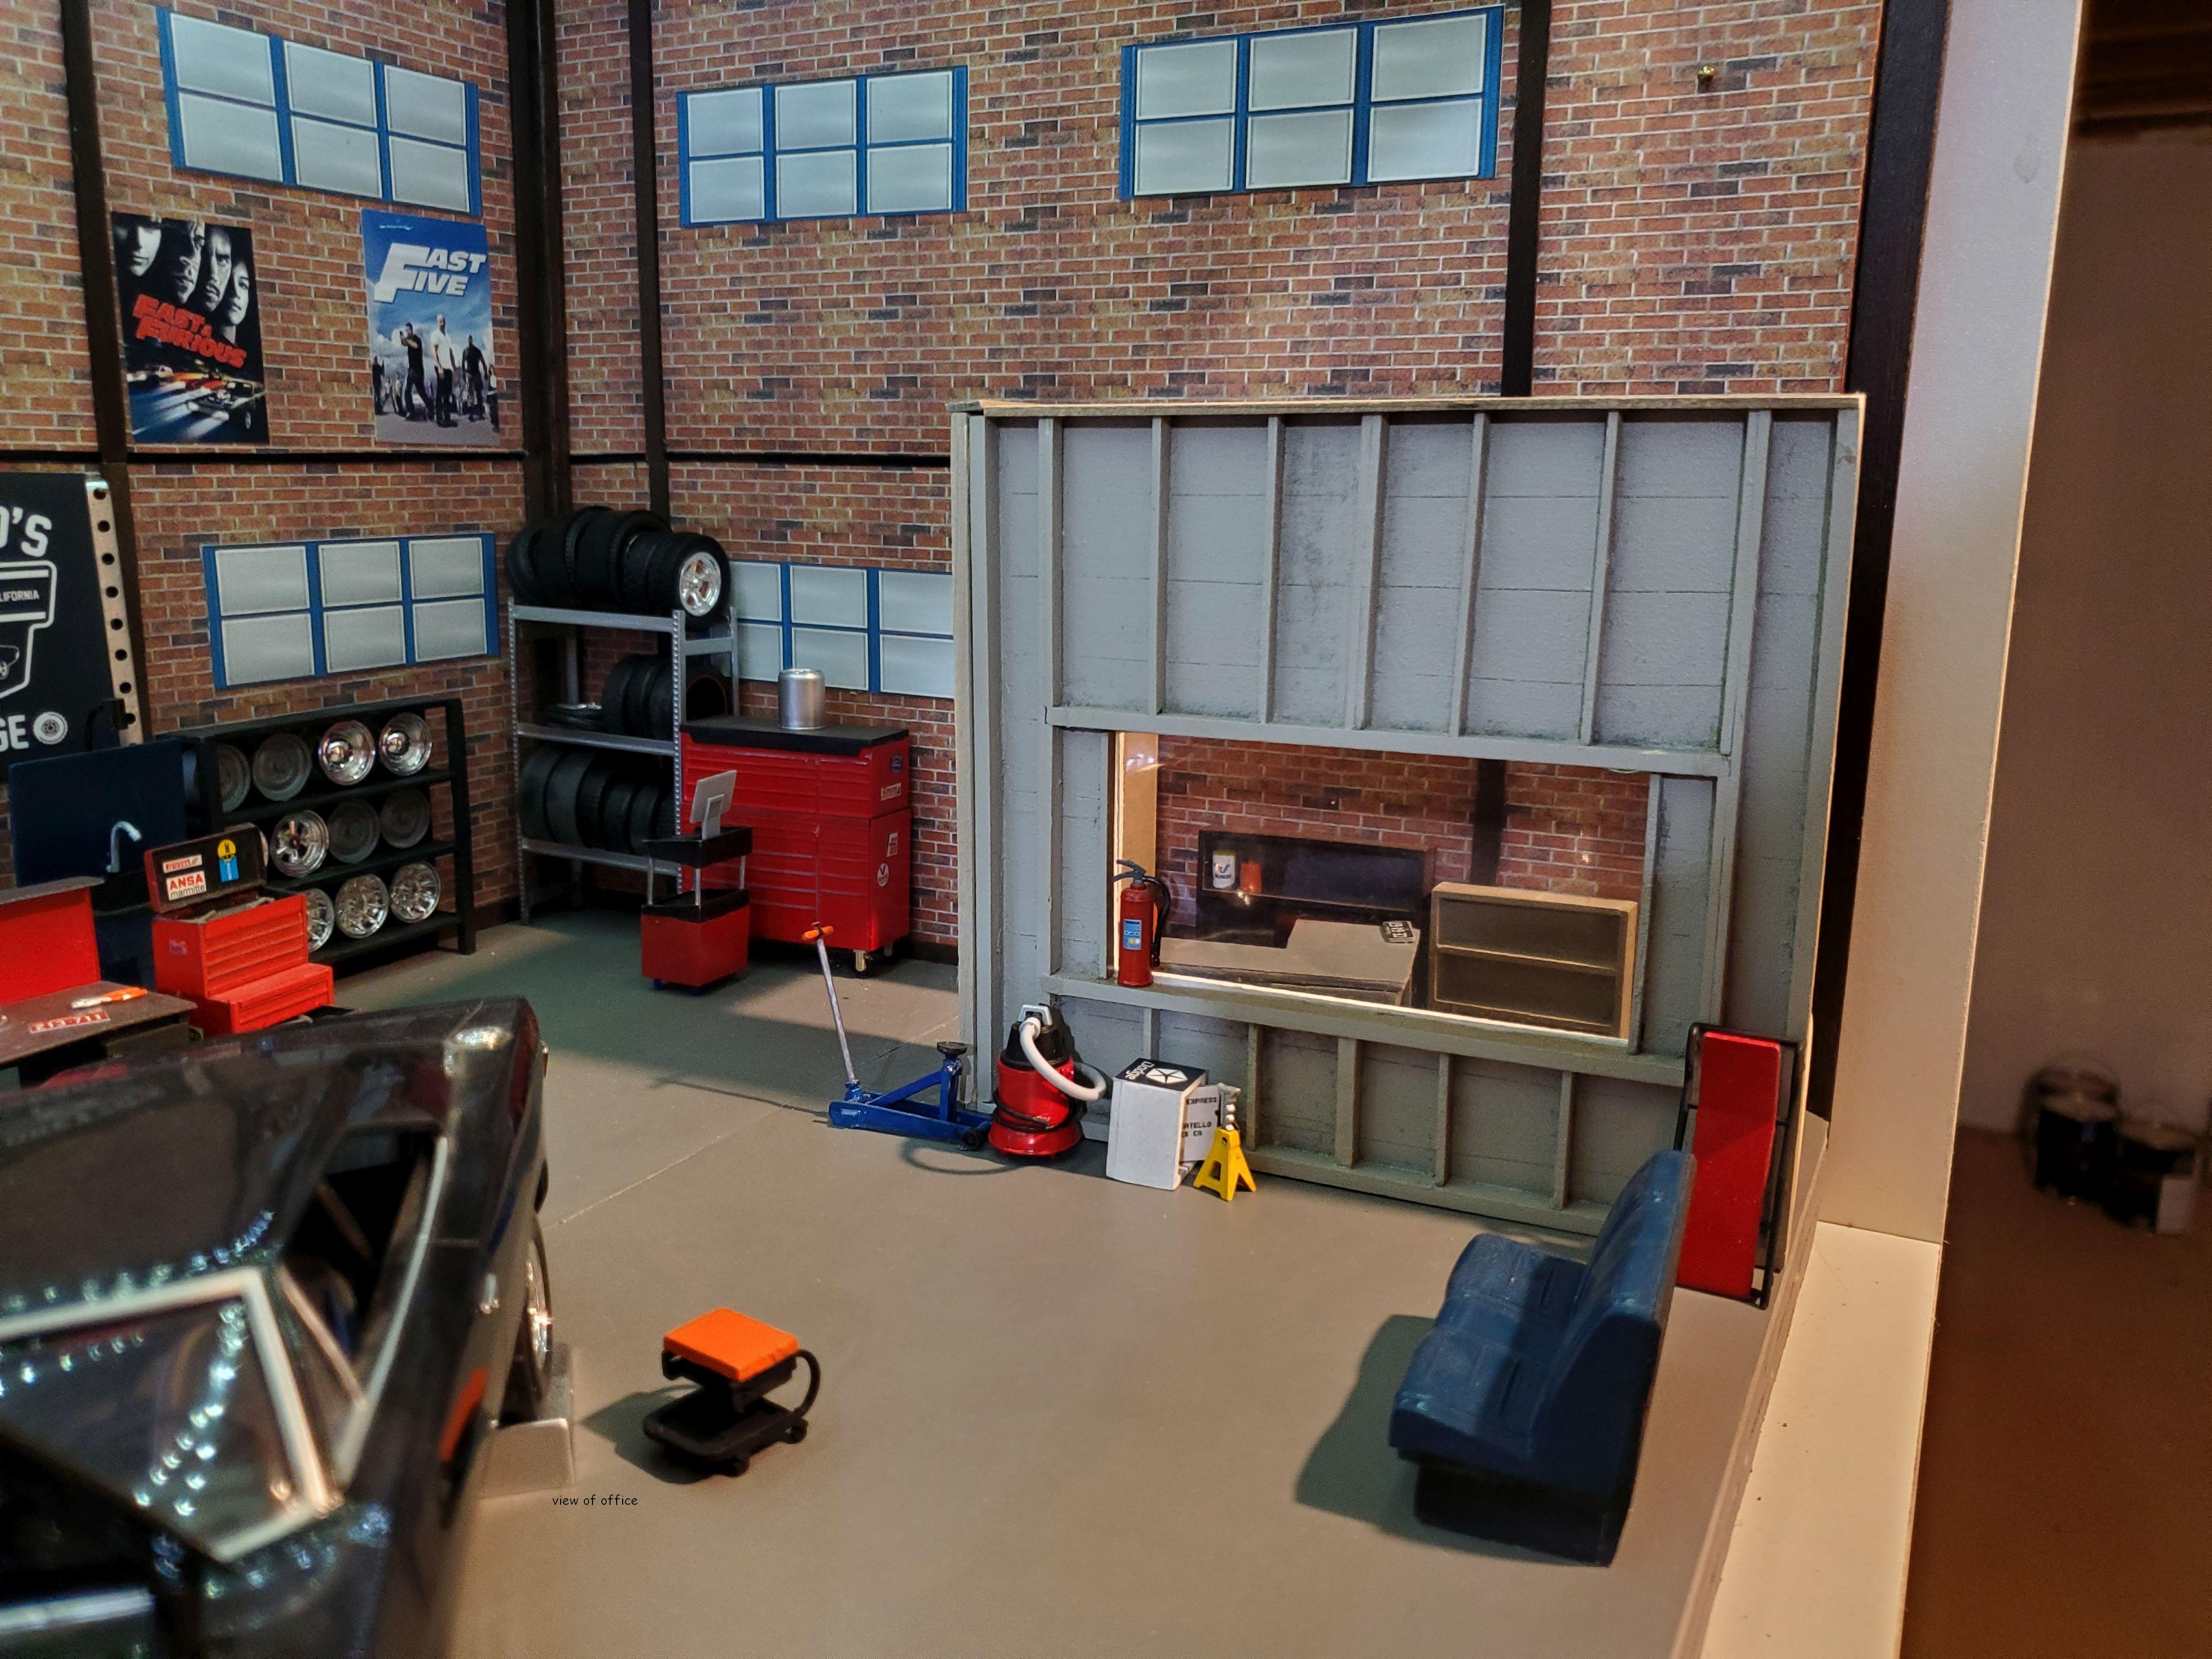
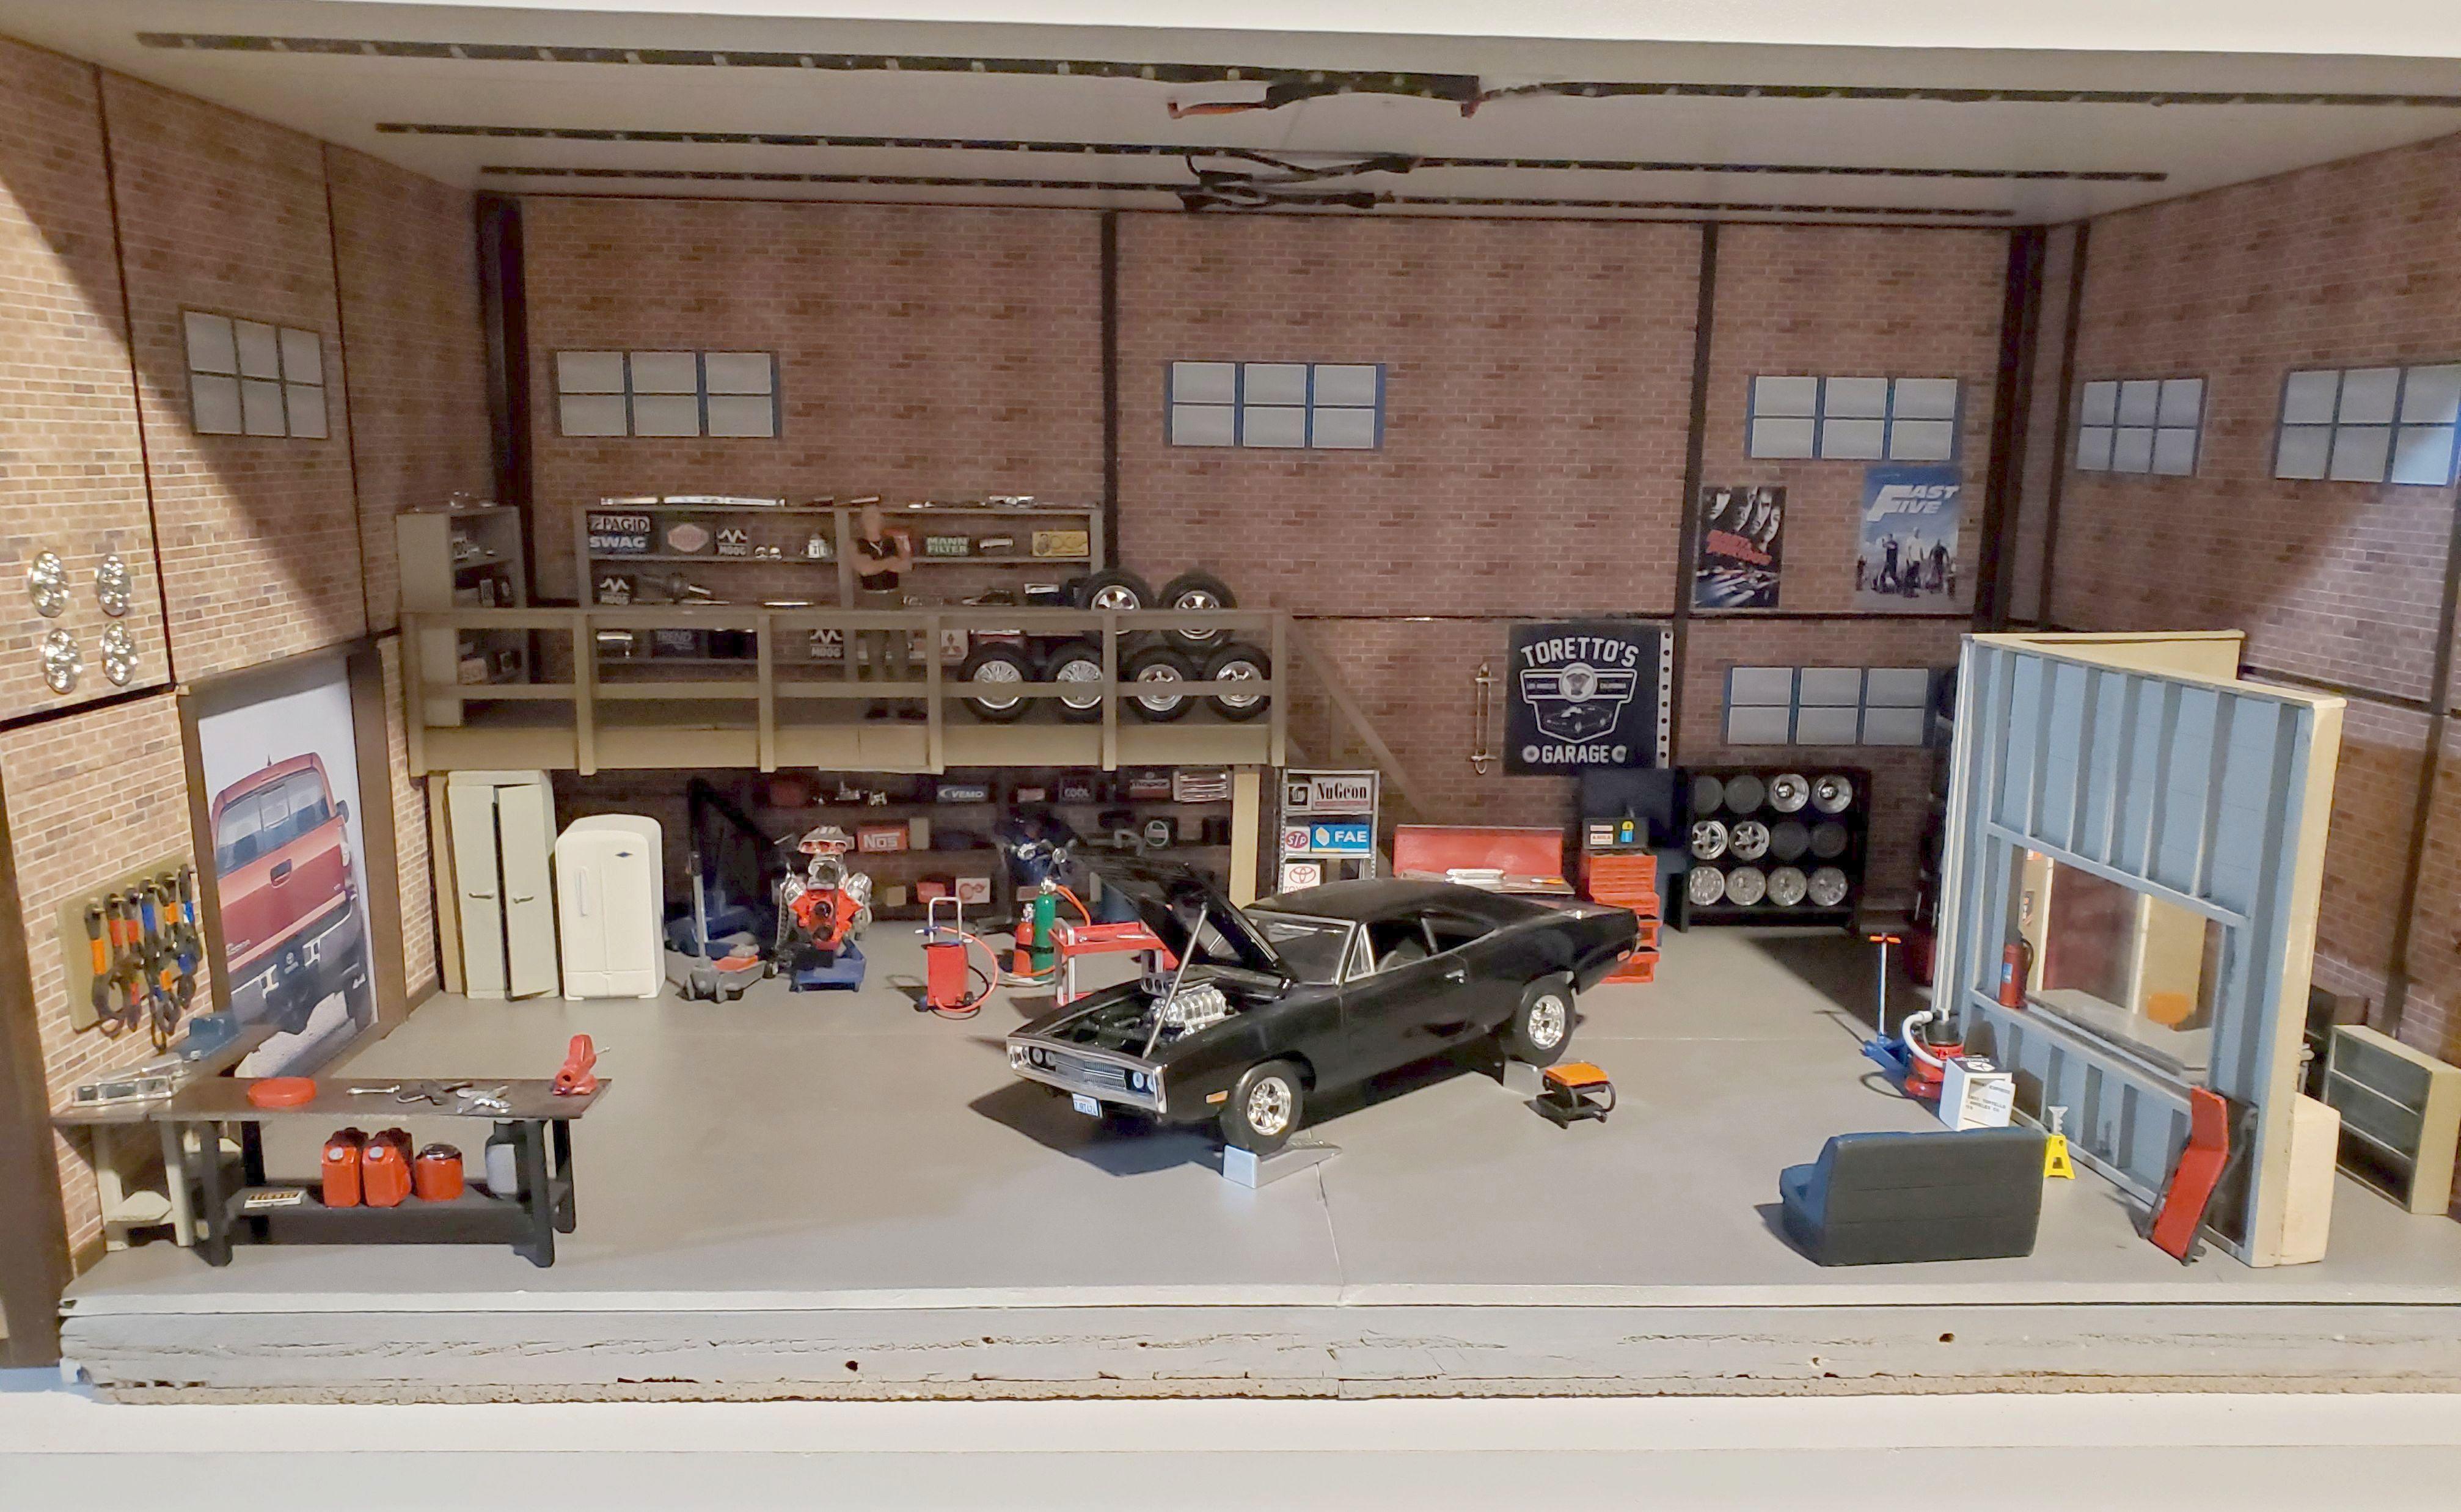
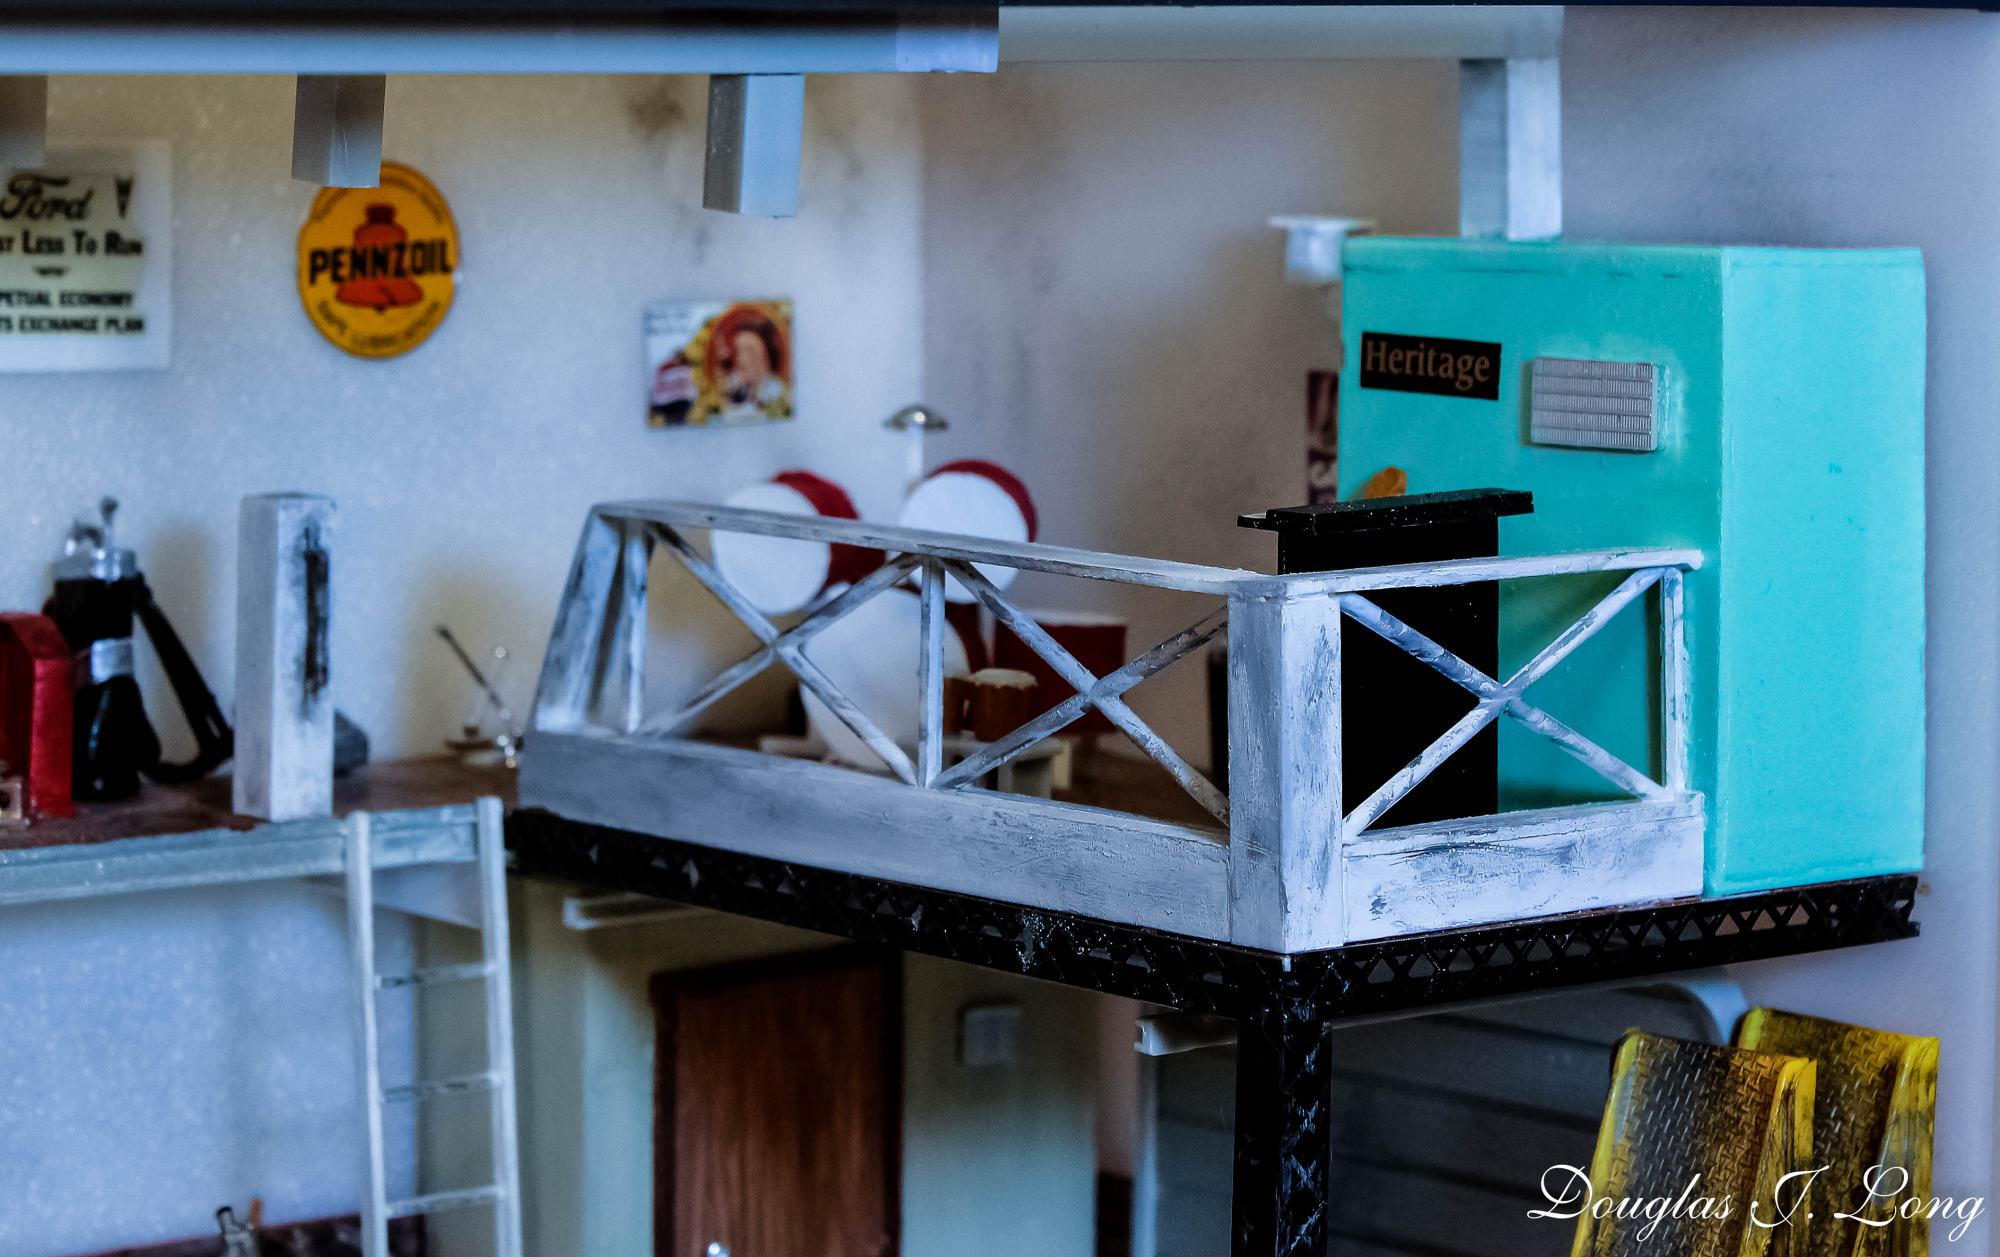
Because I enjoyed the movie so much, It was a natural for me to build a diorama based on it. Dom's garage was only shown in the first movie & was featured in 4 scenes, for a total of only 60-70 seconds. But I thought I could manage it, if I used common sense & my imagination to fill in what I could not see in the film. Right off the top, because I had a few big empty spaces in some basement shelving, I figured to make a large display. Measures 2' wide, 14" deep and 13" tall. Walls and base are foam board. Found the brick wall paper on line. Once the walls and ceiling were done, I started out with the stairs and loft. as that looked as the most difficult. I took my time . The stair treads, risers & railing are exactly as the stairs going to my basement in 1/24th scale. All of it is made of wood as is the shelves and walls of Dom's office. I used strips of small LED lights on the underside of the loft, just as I did on the ceiling. Some things were easy to put in the right place as per the film. The board on the wall holding the fan belts (tiny rubber bands) went to the left of the overhead door. along with a work bench. I've posted a screen grab from the film to illustrate that. On the right side of the opening, as was shown in the film, there is what appears to be a school locker & an old refrigerator (thanx ebay). Behind that stuff, & under the loft, was a bunch of equipment, including an engine hoist which was standing on it's end. I didn't repeat that error. The car is a die cast. I had bought a model charger, but only to use the blown Hemi & 383 Magnum engines, tires and wheels. Dom's office was briefly shown in the film. I guessed that it would be at the back of the shop. Sharp eyed viewers will note the sofa made out of the back seat of the donor charger. Dom and his girlfriend, Lettie, were shown in a short scene sharing an intimate moment on it. I stocked the shelves with boxes & crates made of small blocks of wood. The lights are nice & bright. I had to turn them off to take some of the pics. Taking advantage of that, on top of the shelves I've placed some chrome parts left over from various model builds & a couple small pieces of metal, to reflect the light, to sparkle , making it more interesting for viewers. At least a couple people have commented on it. Thanks for looking, it was a fun project. Questions & suggestions welcome.
-
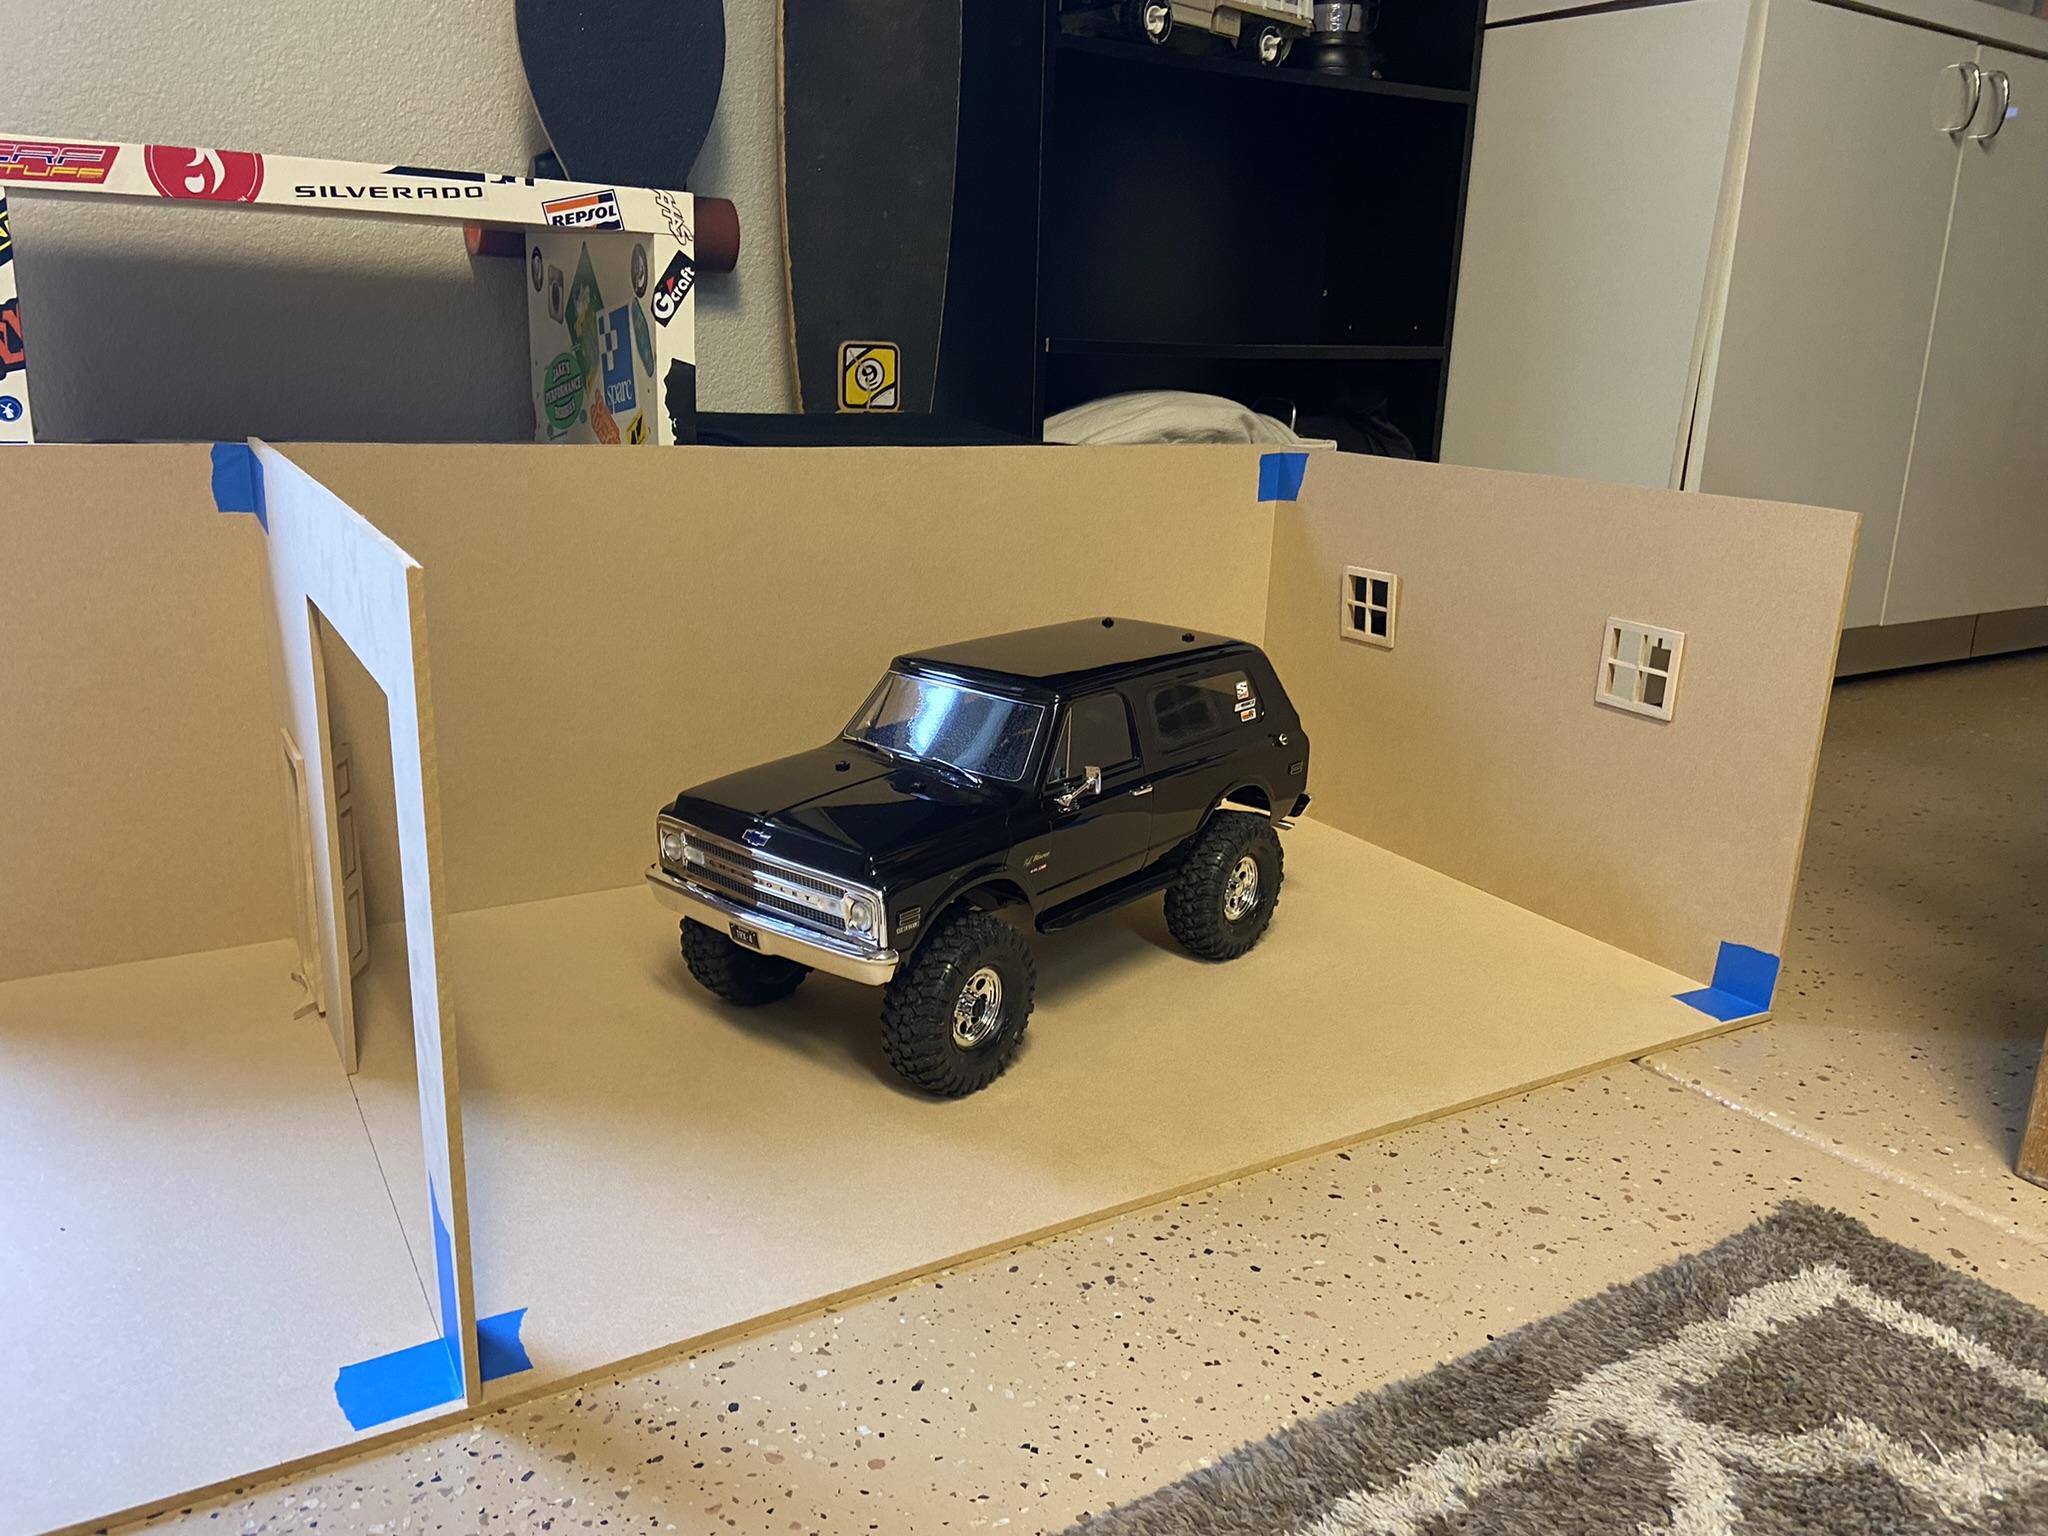
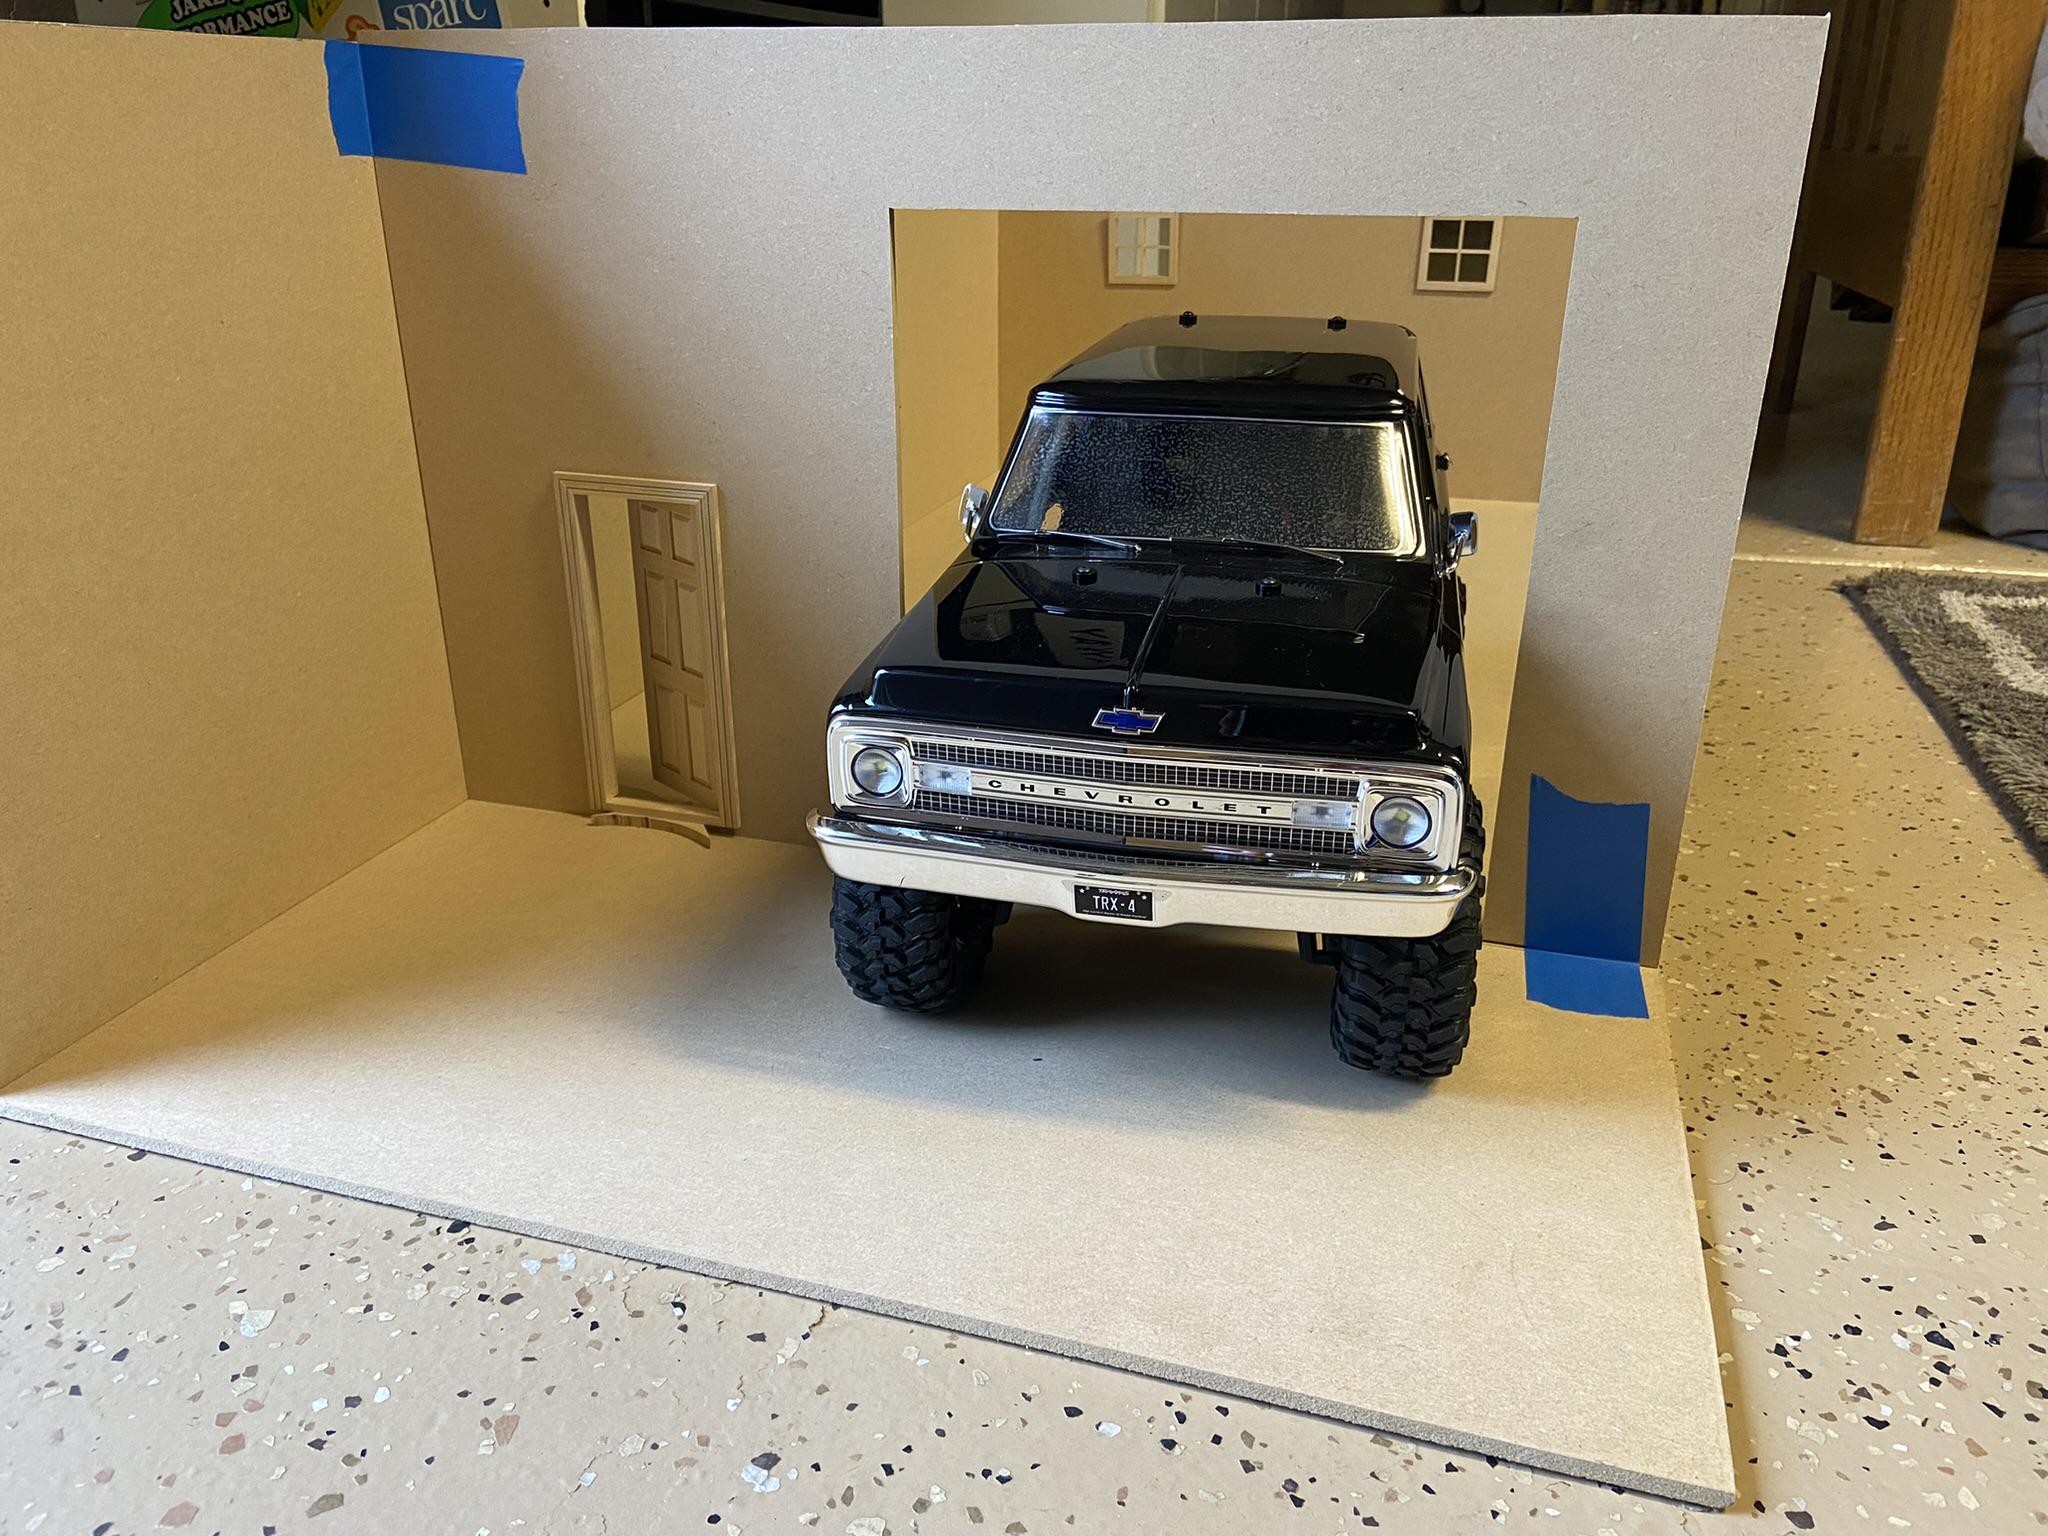
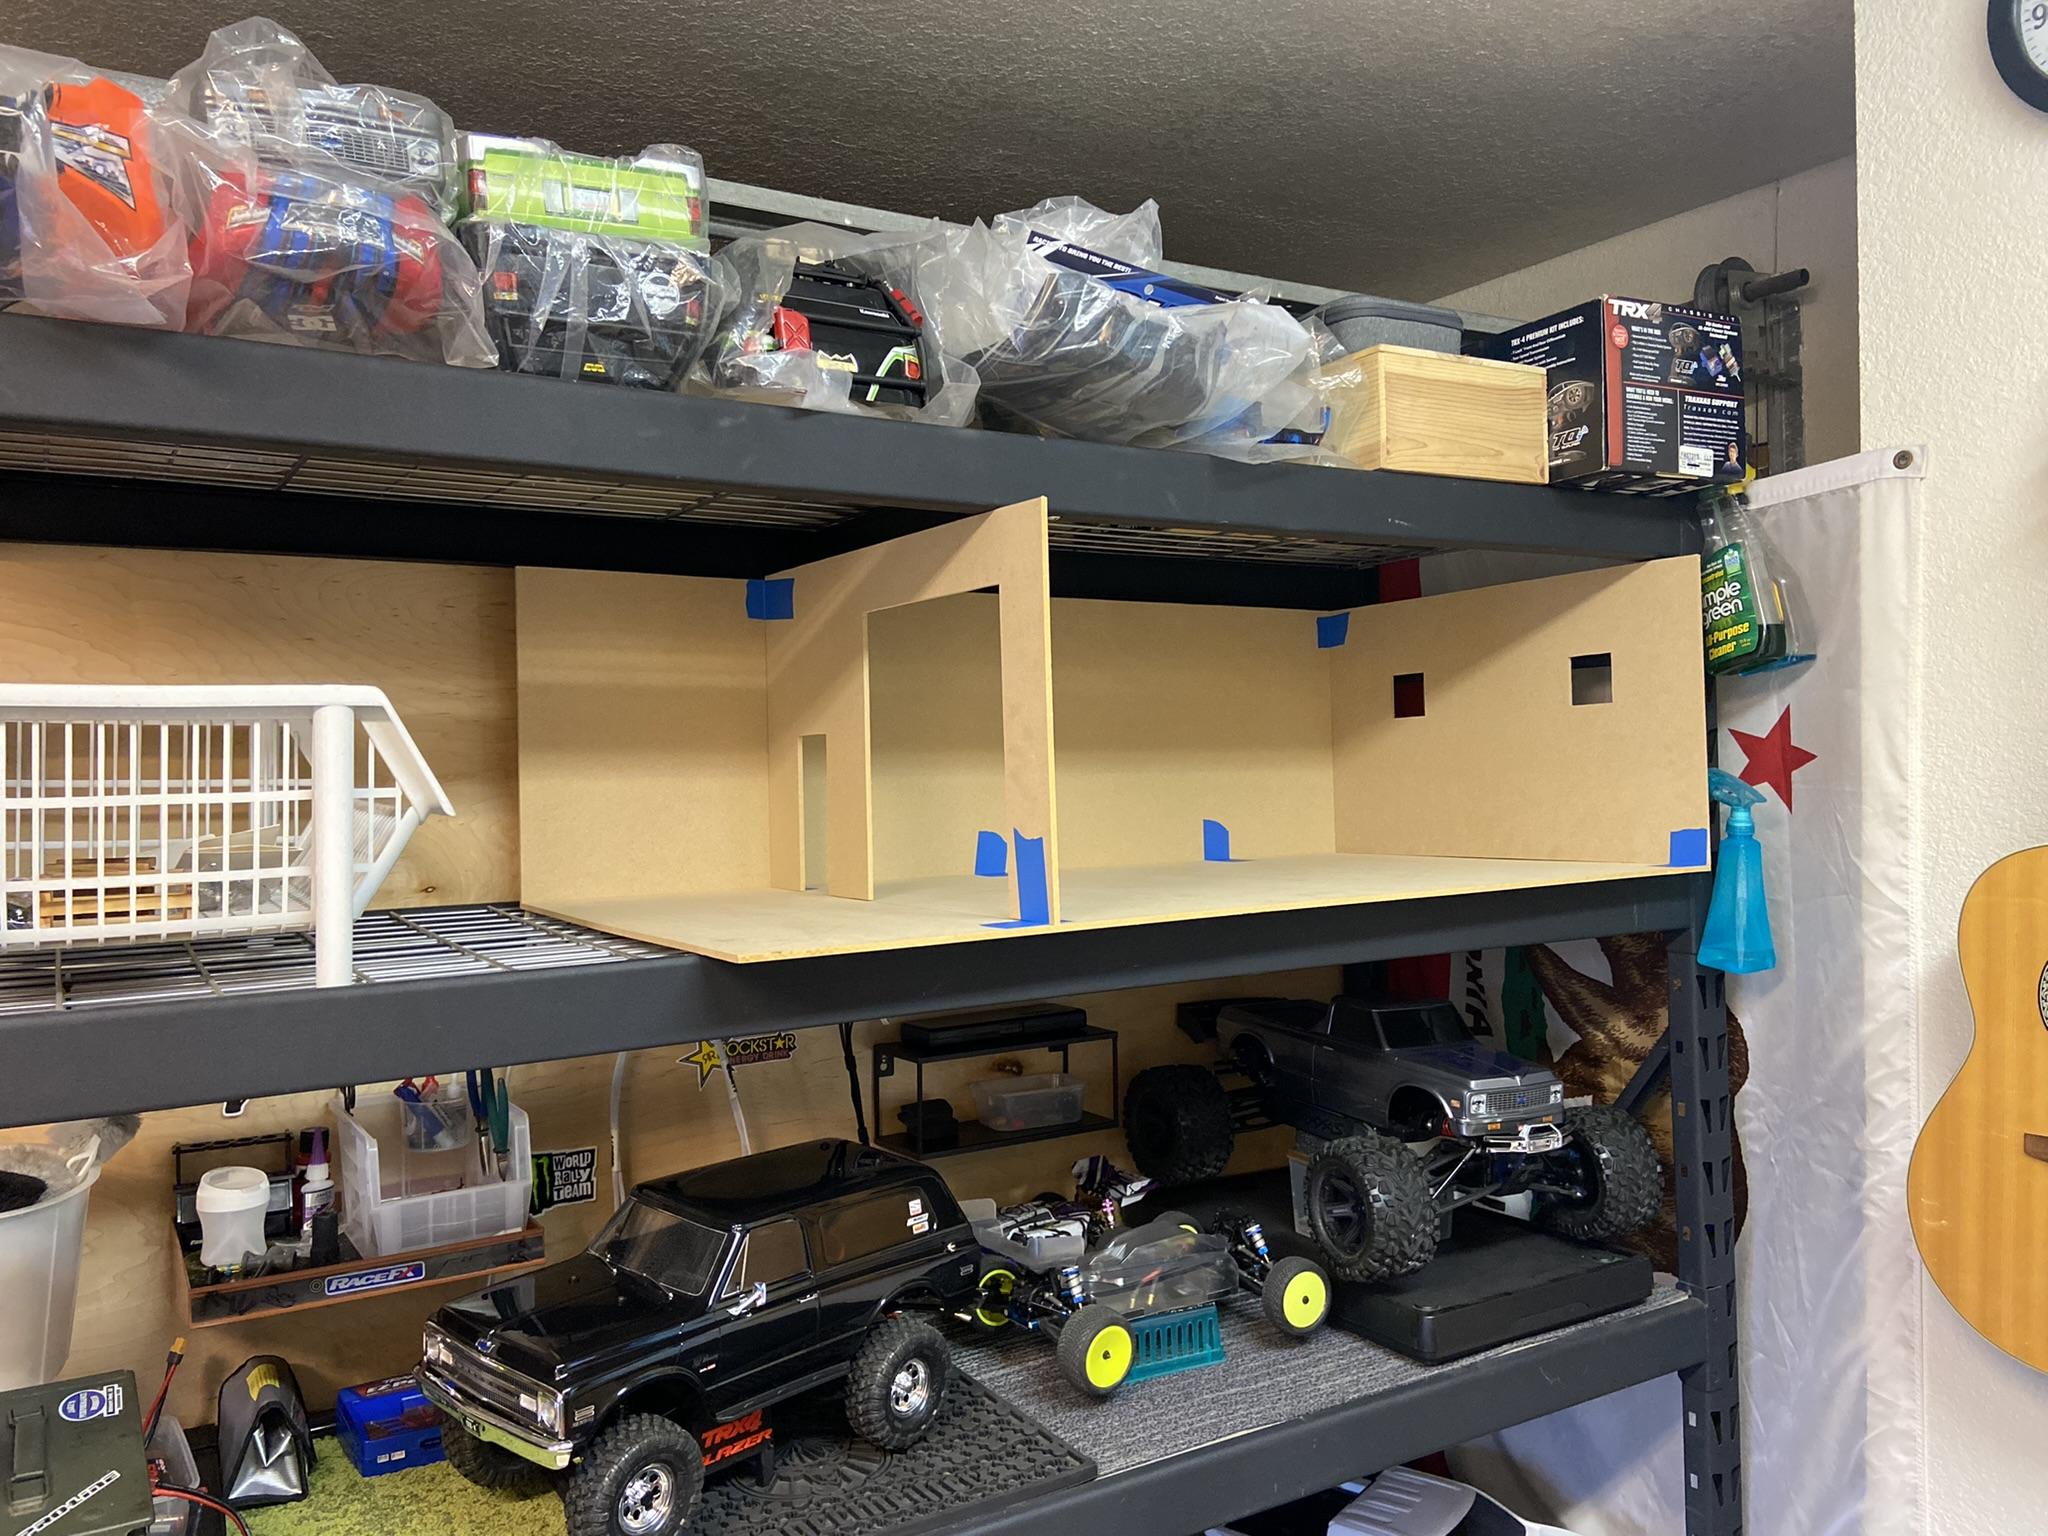
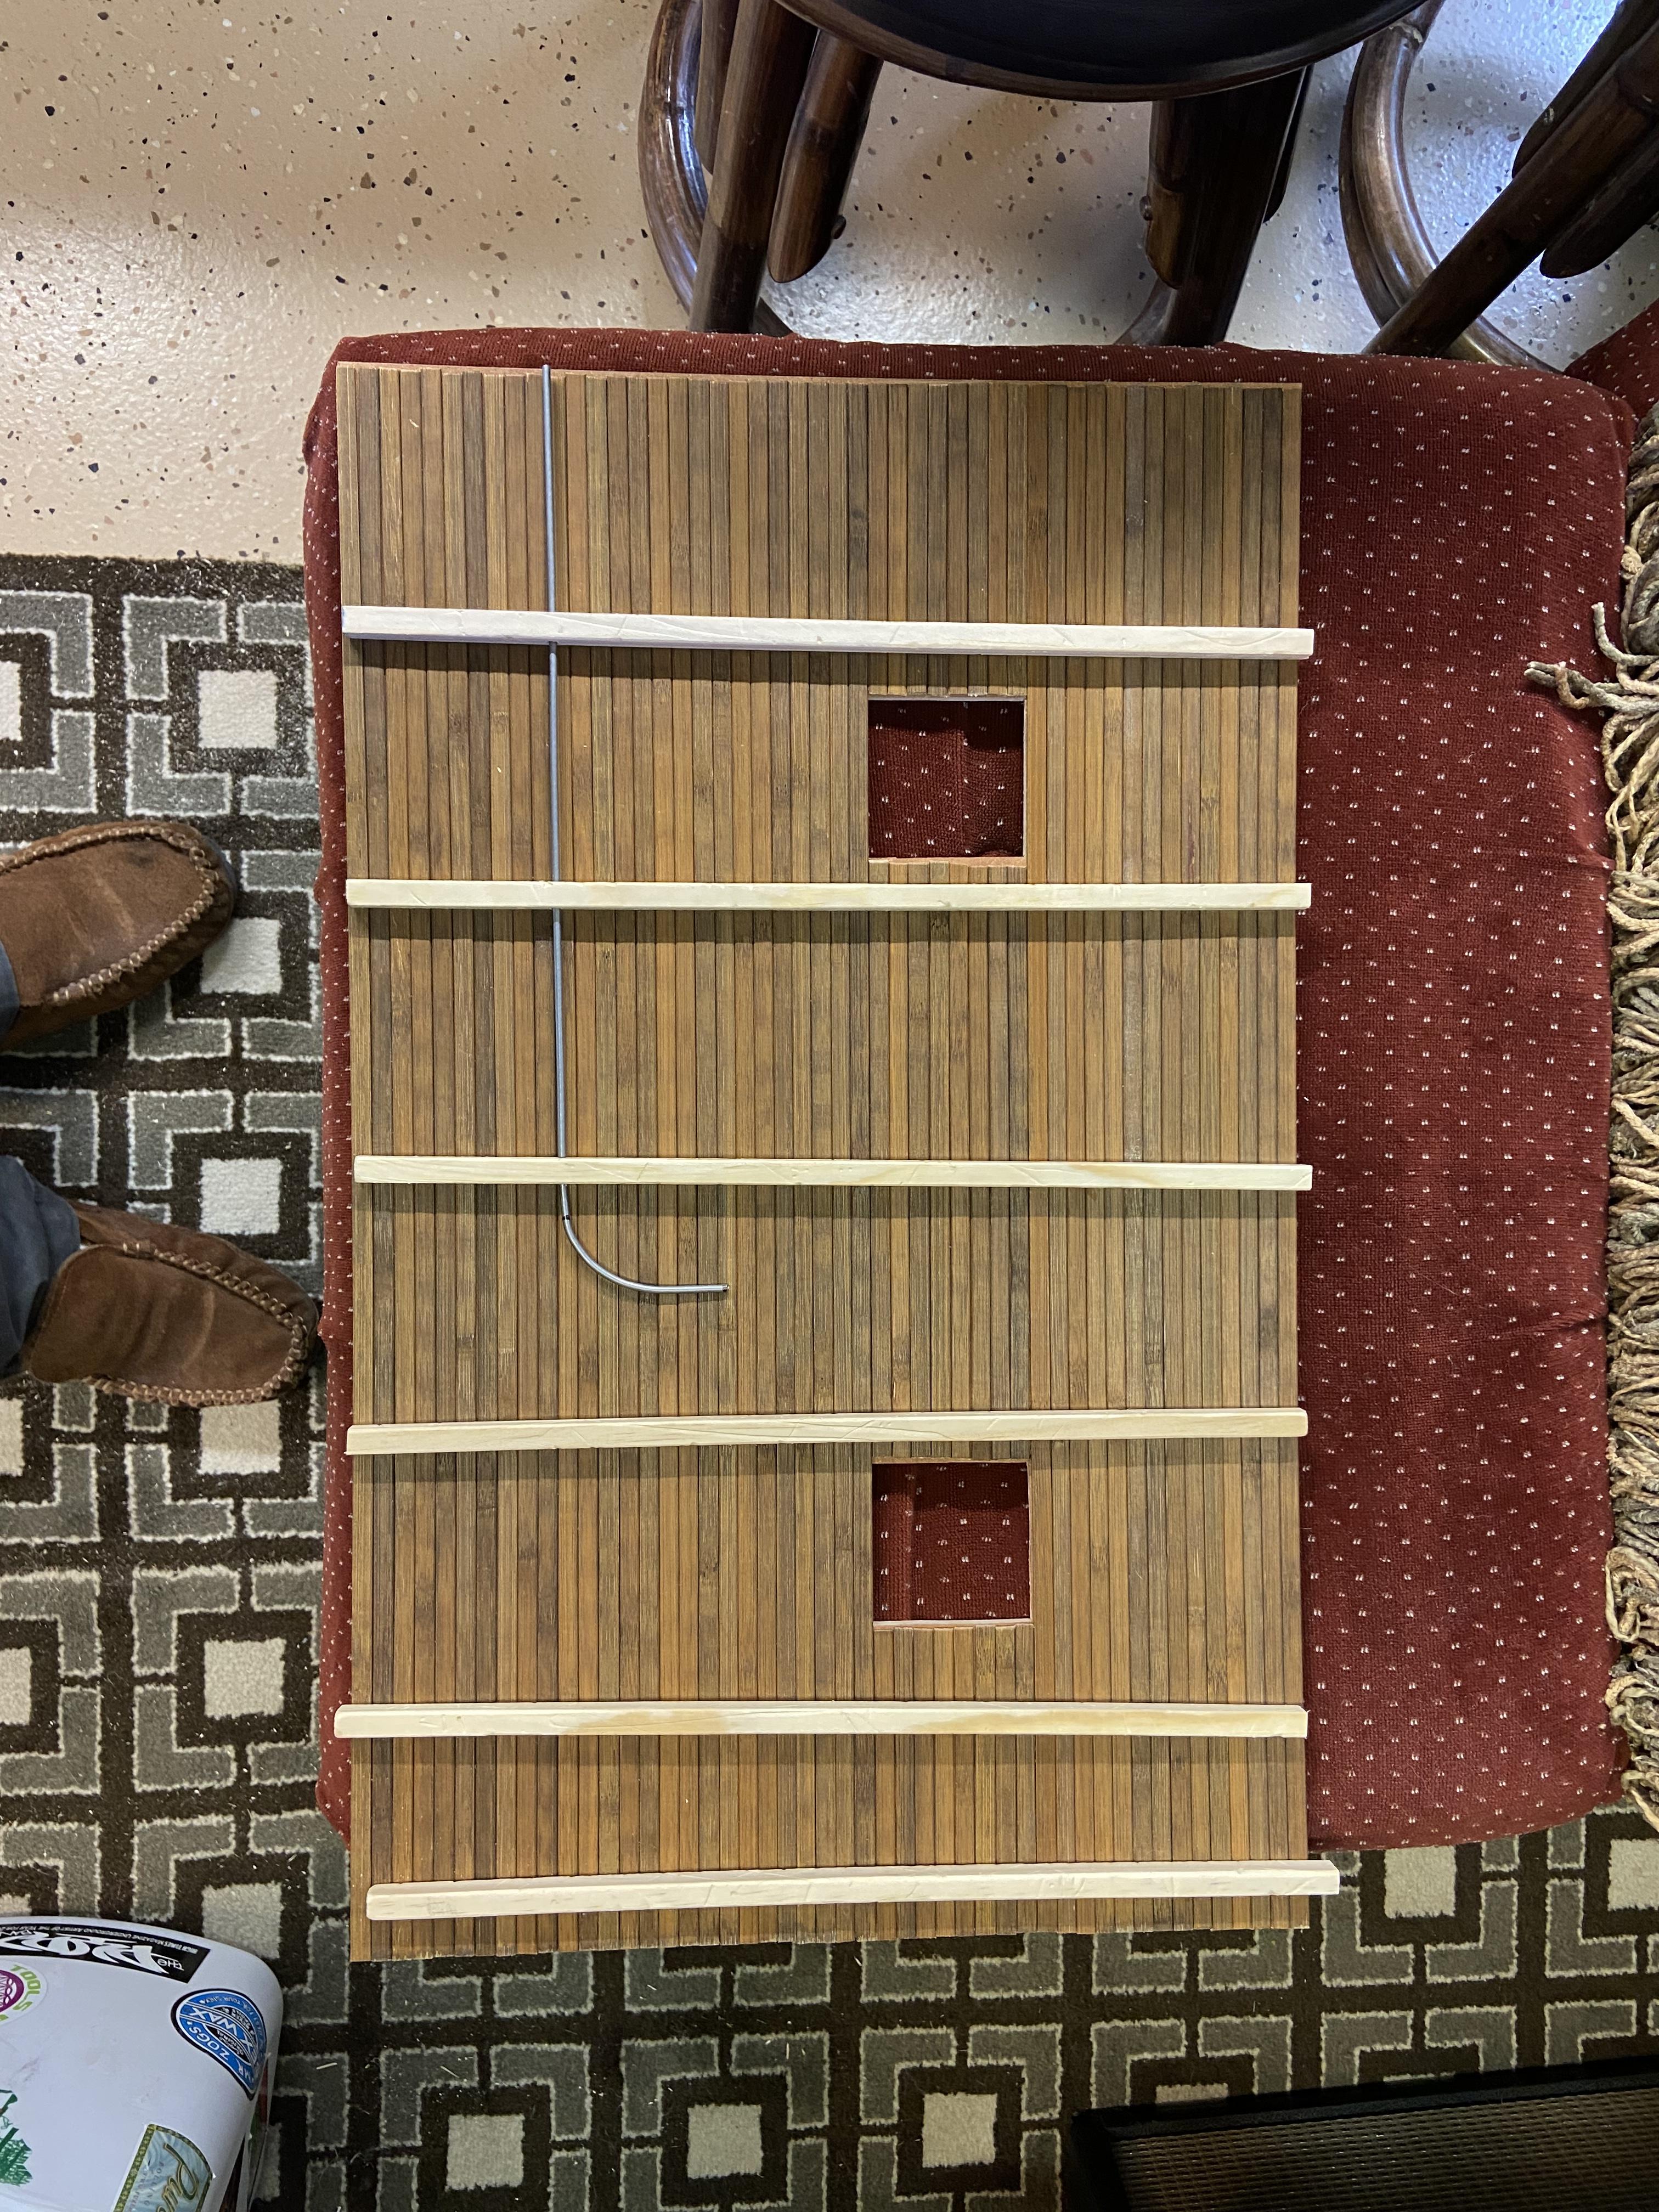
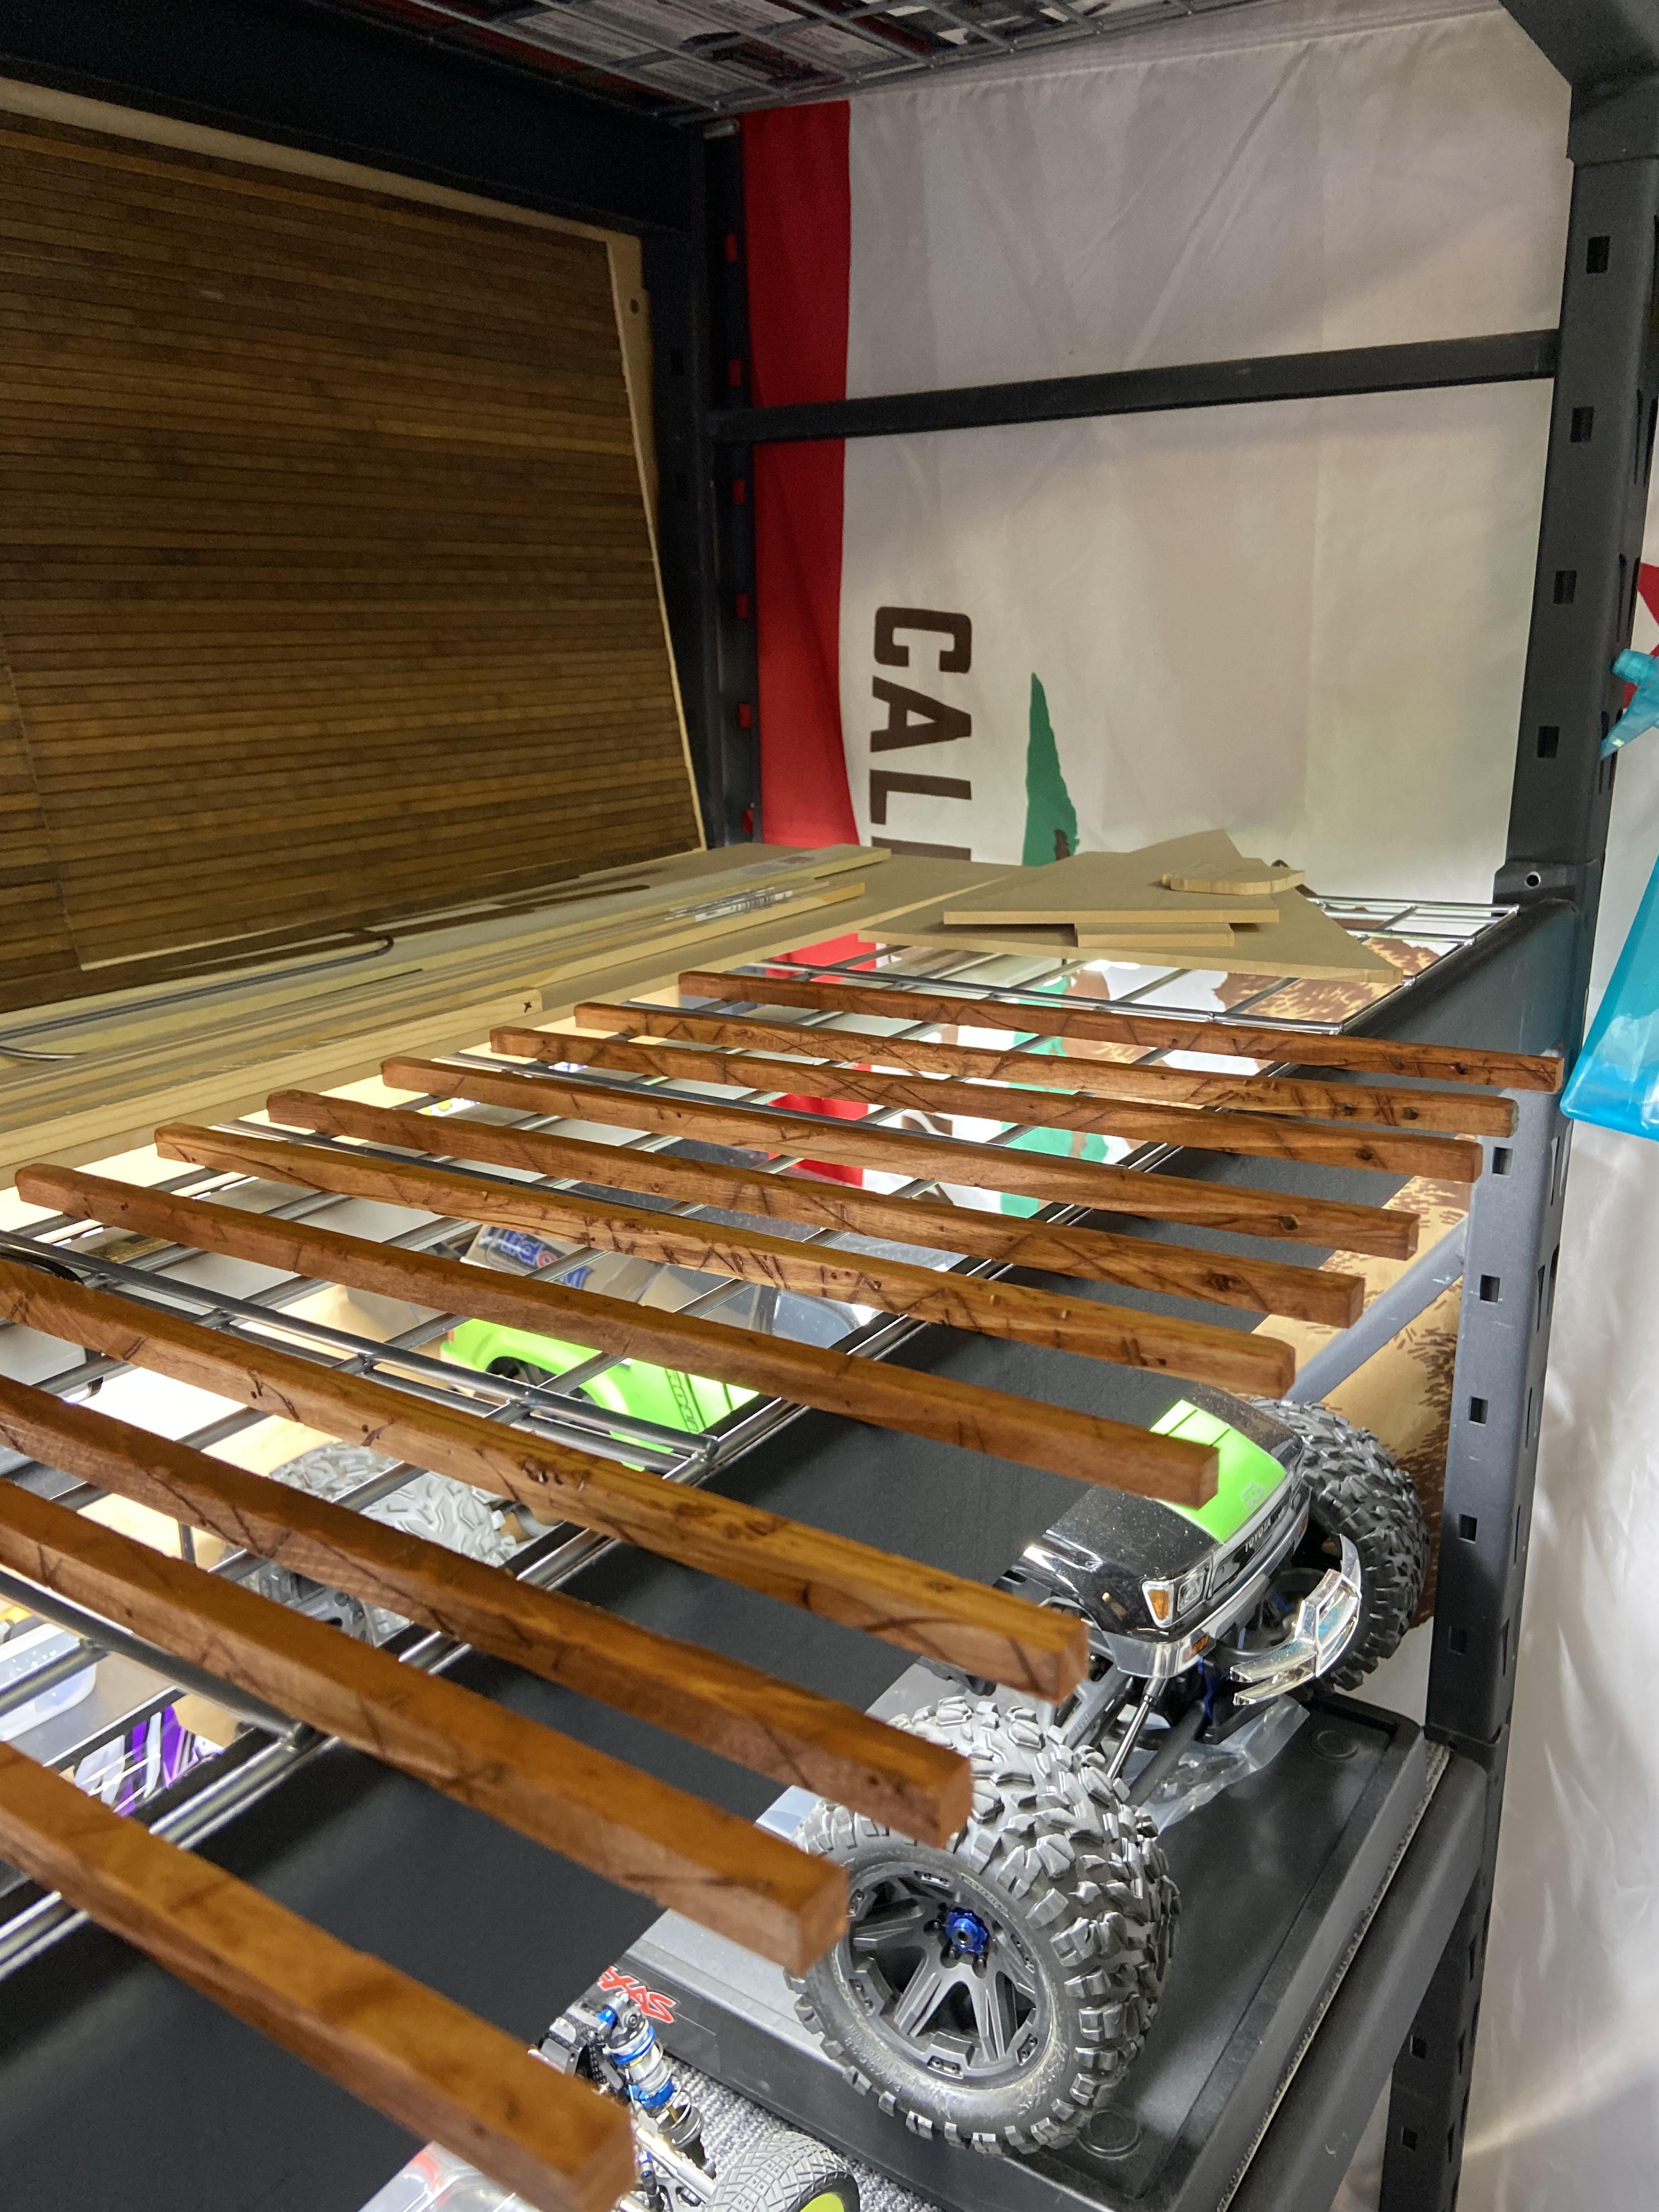
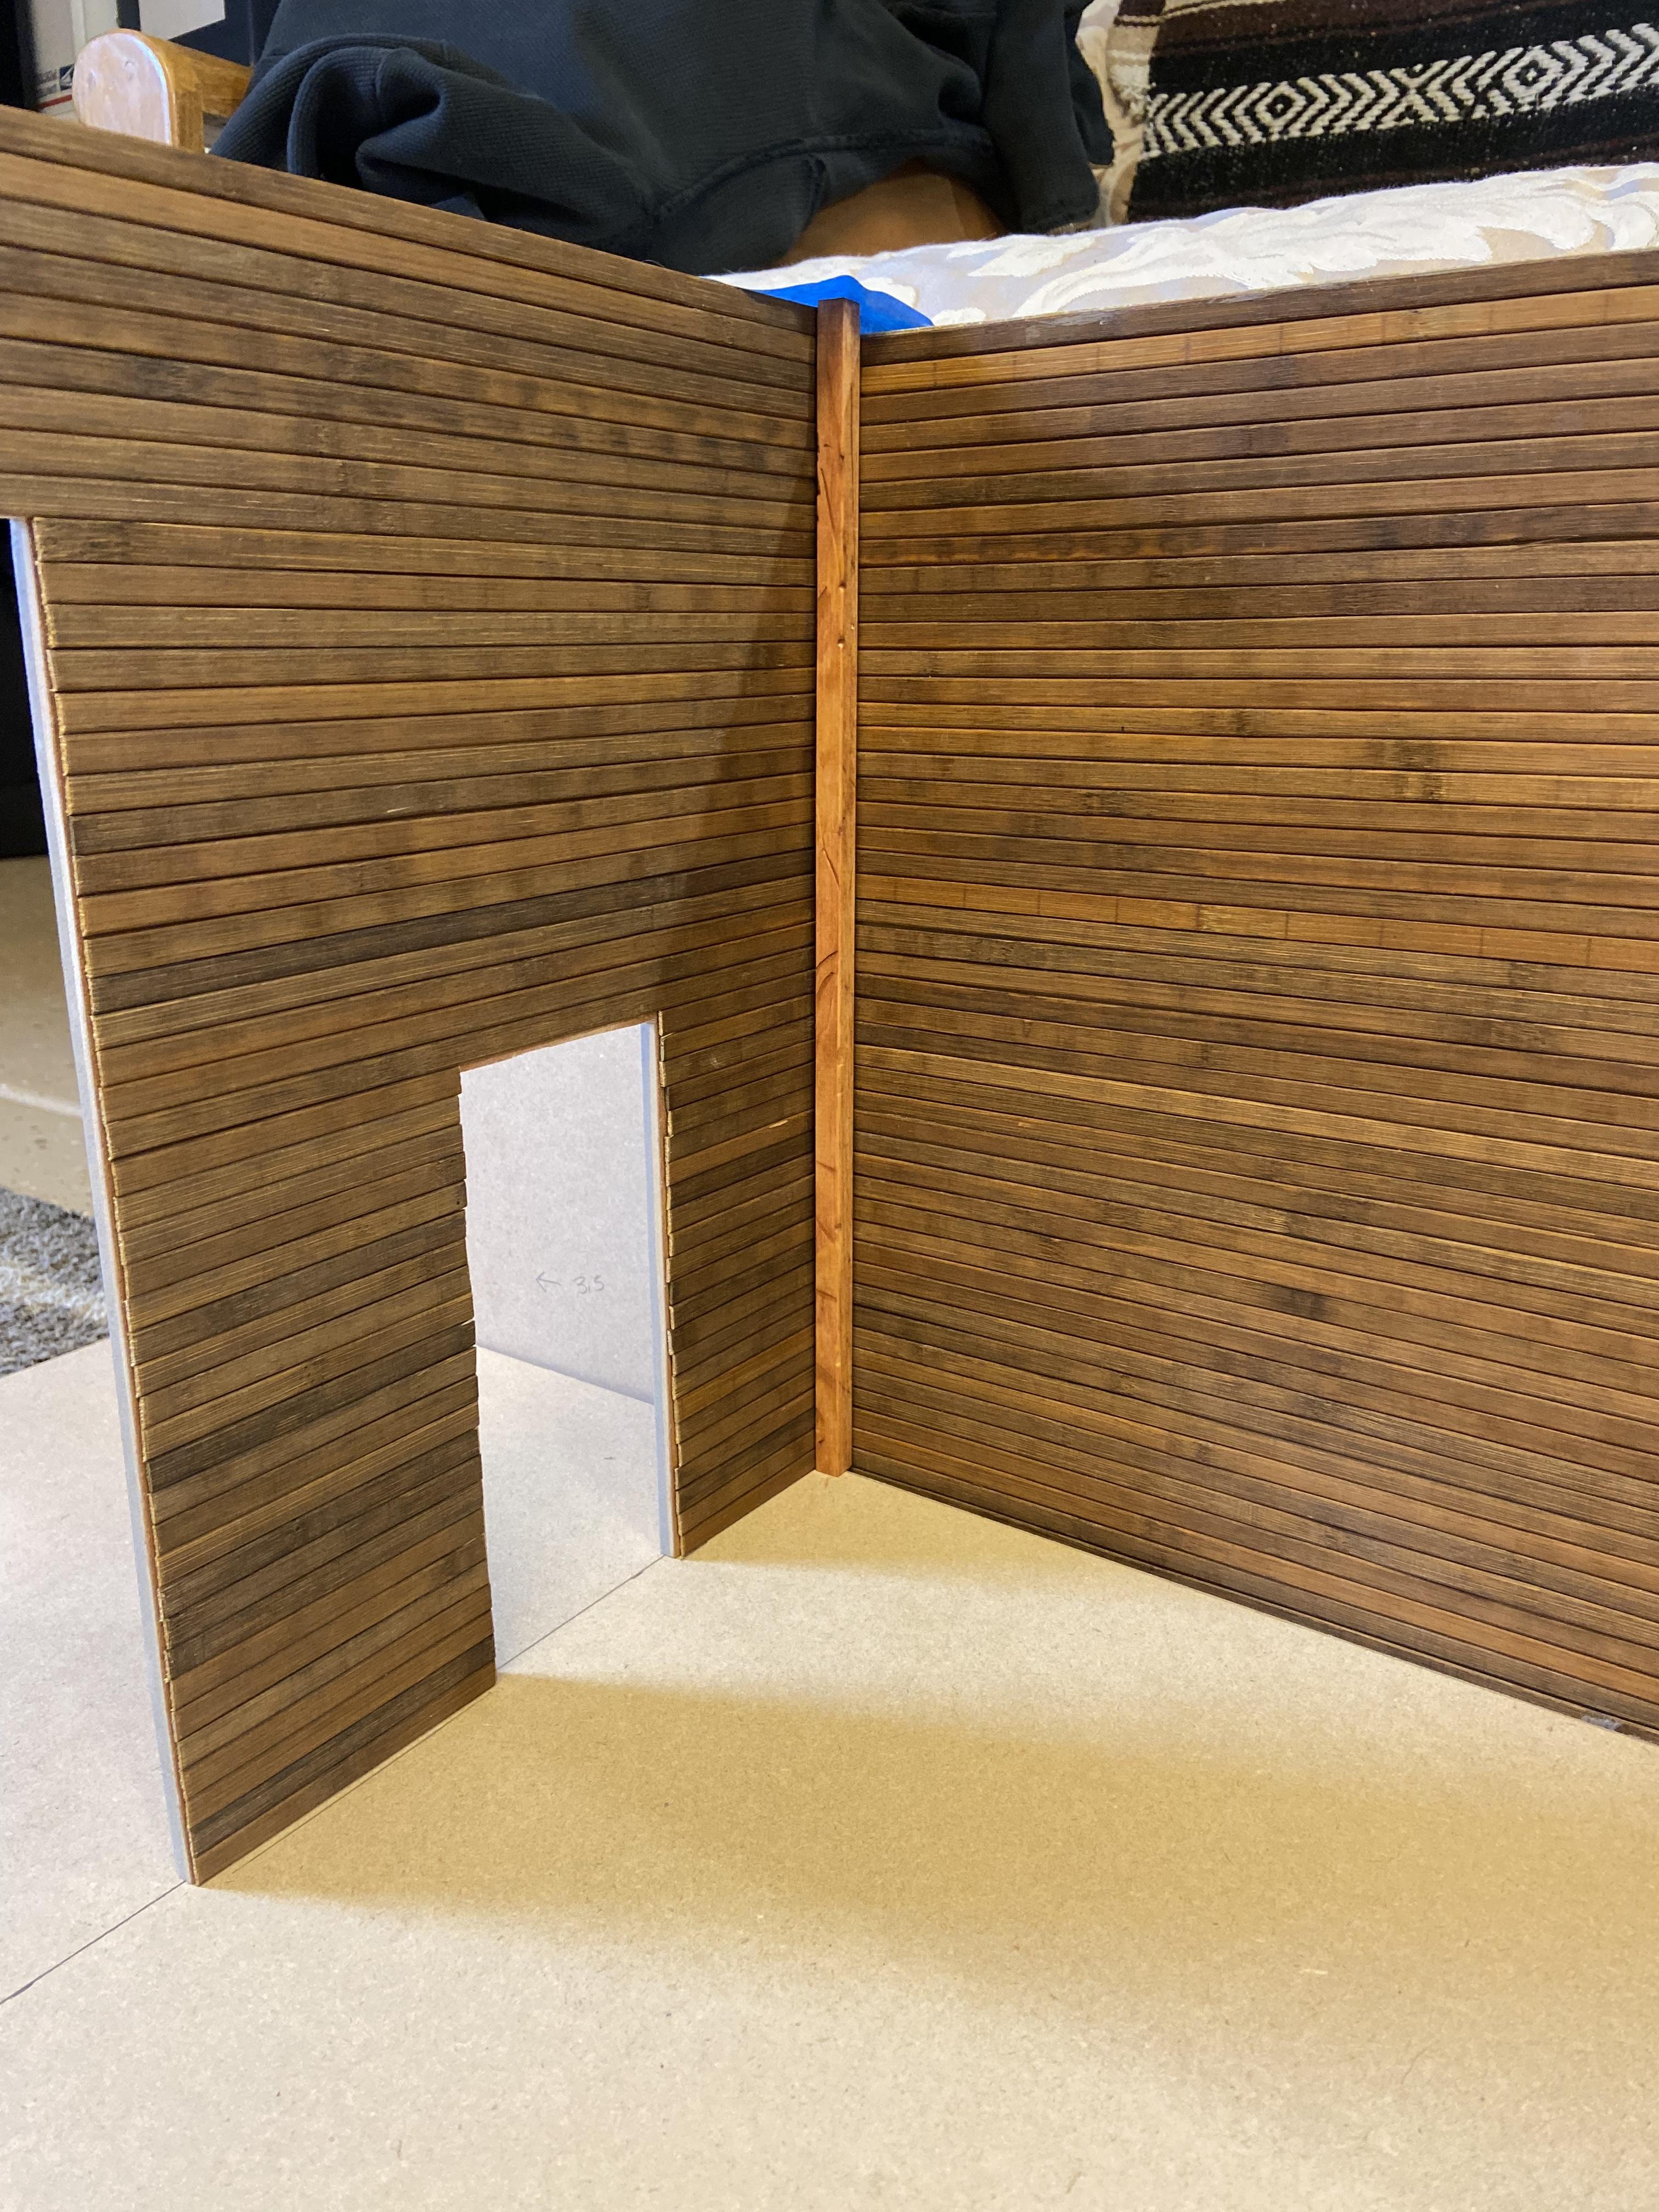
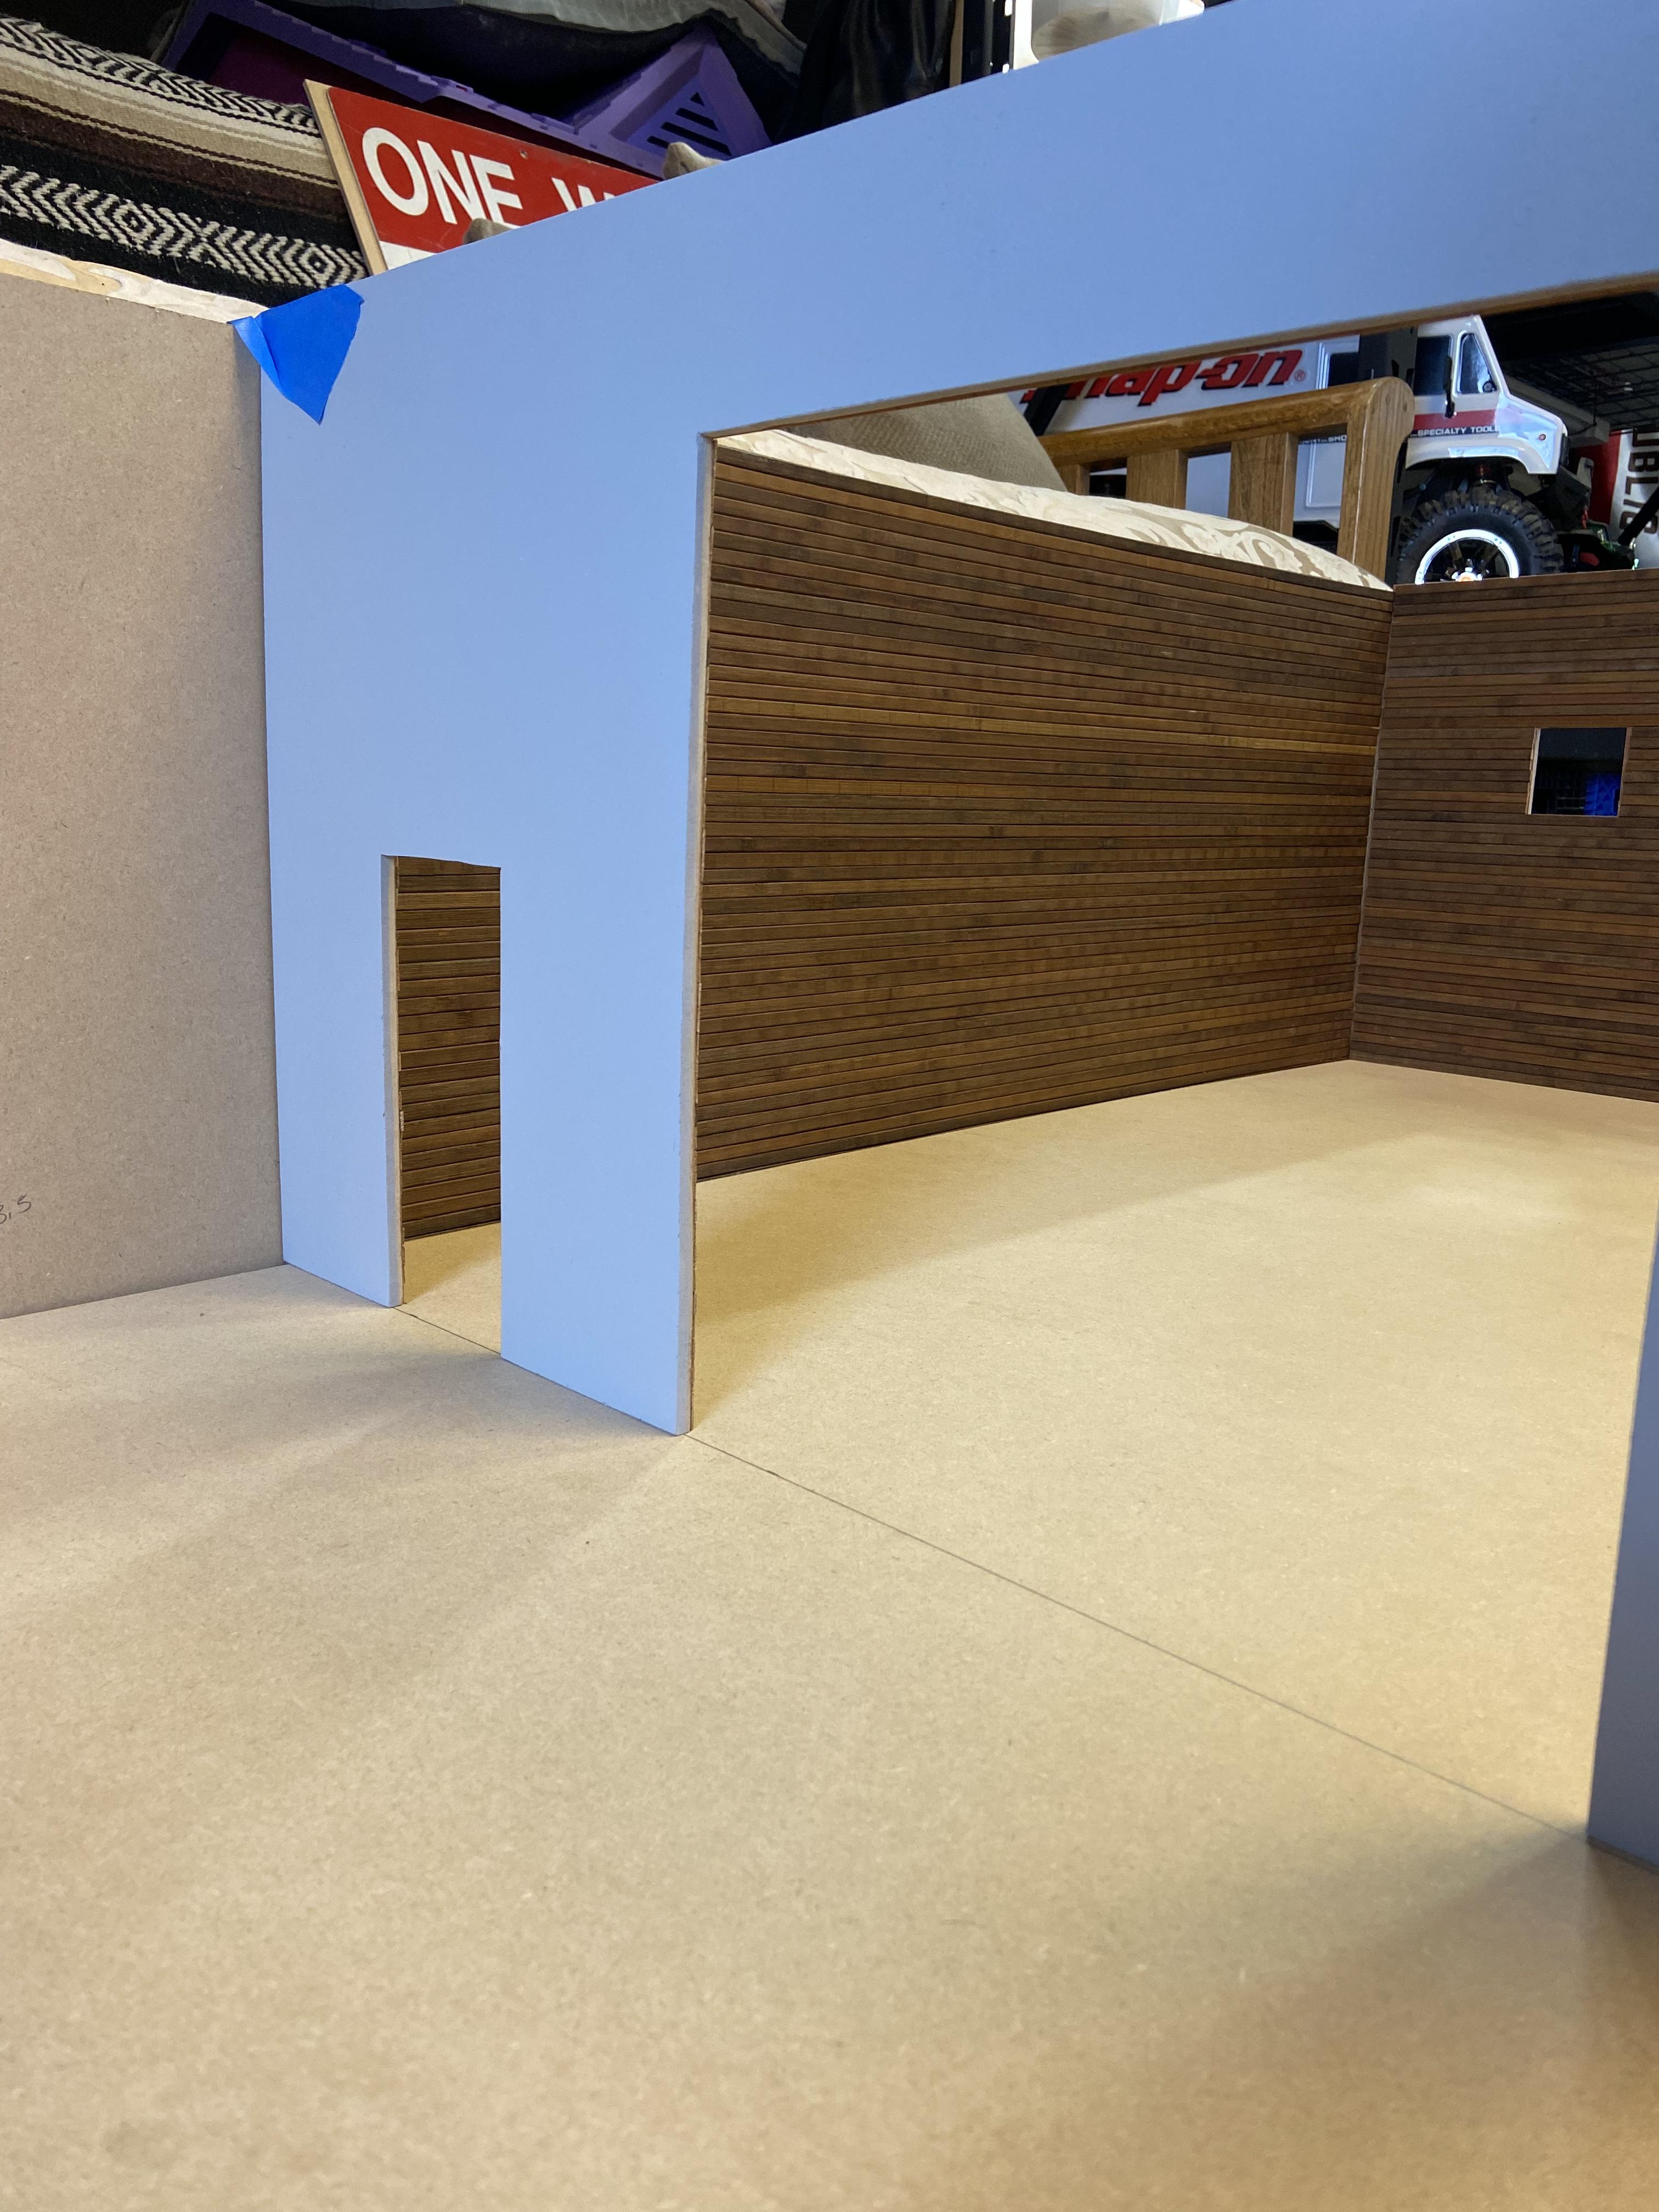
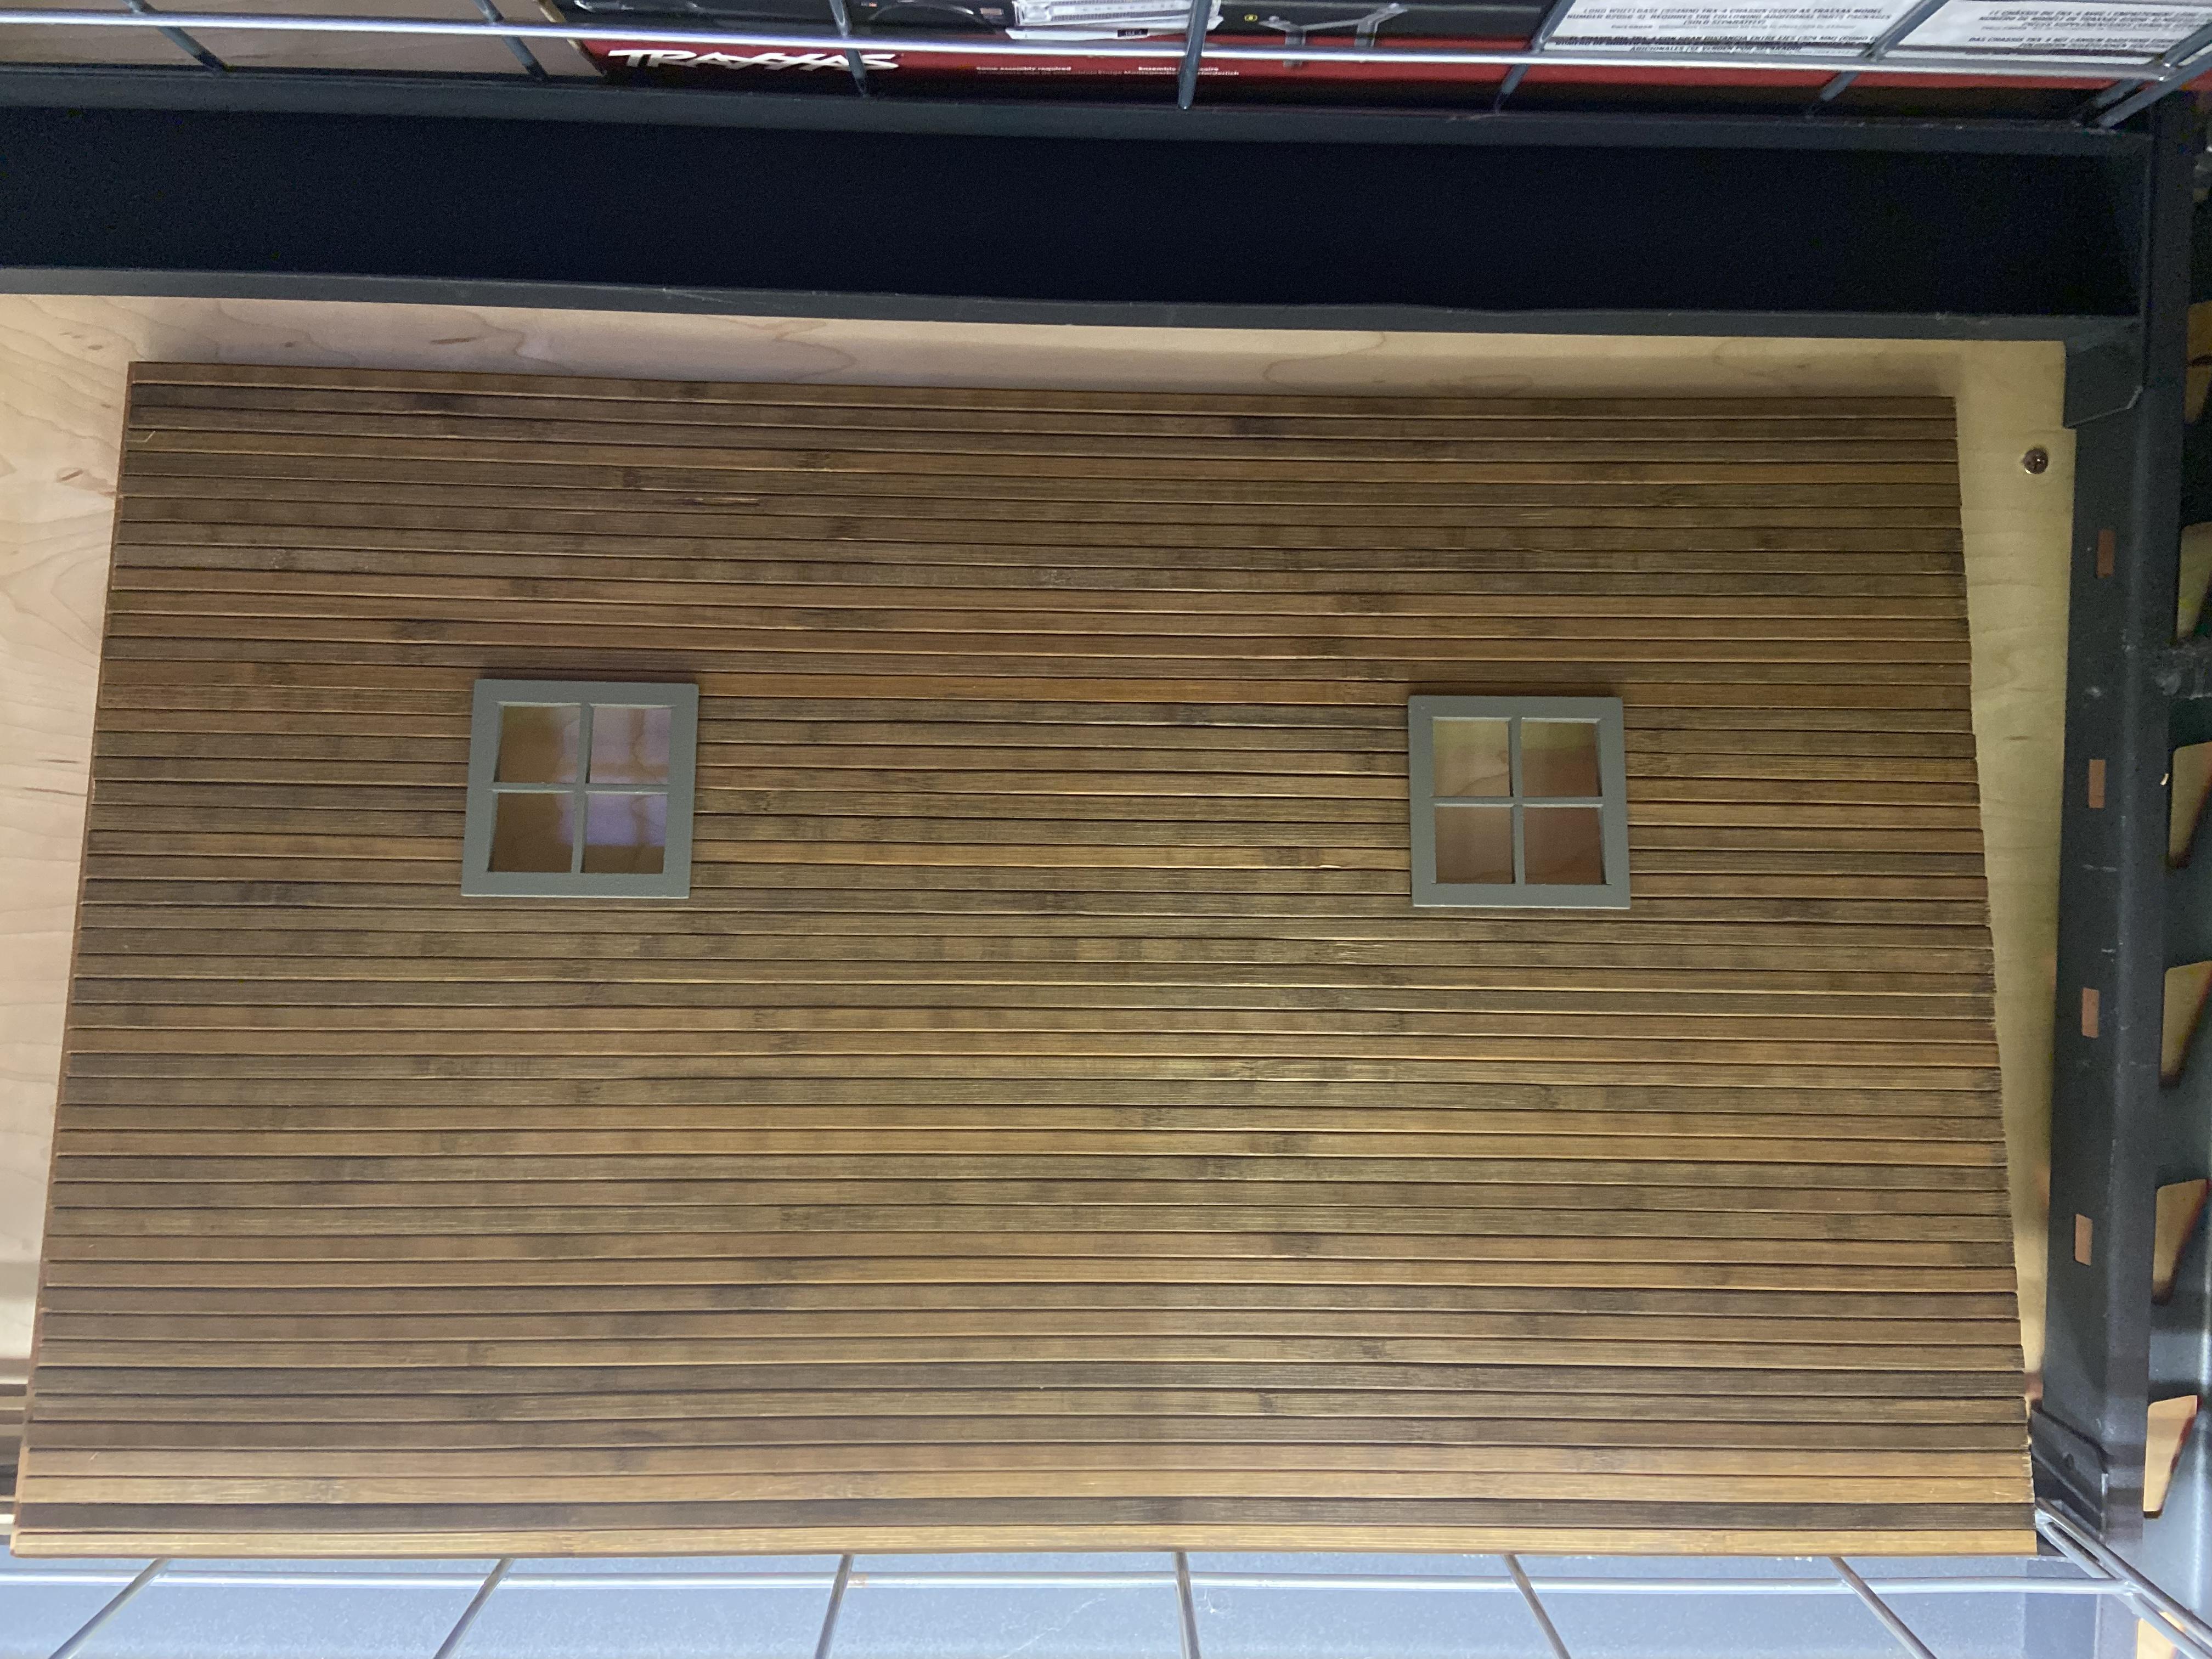
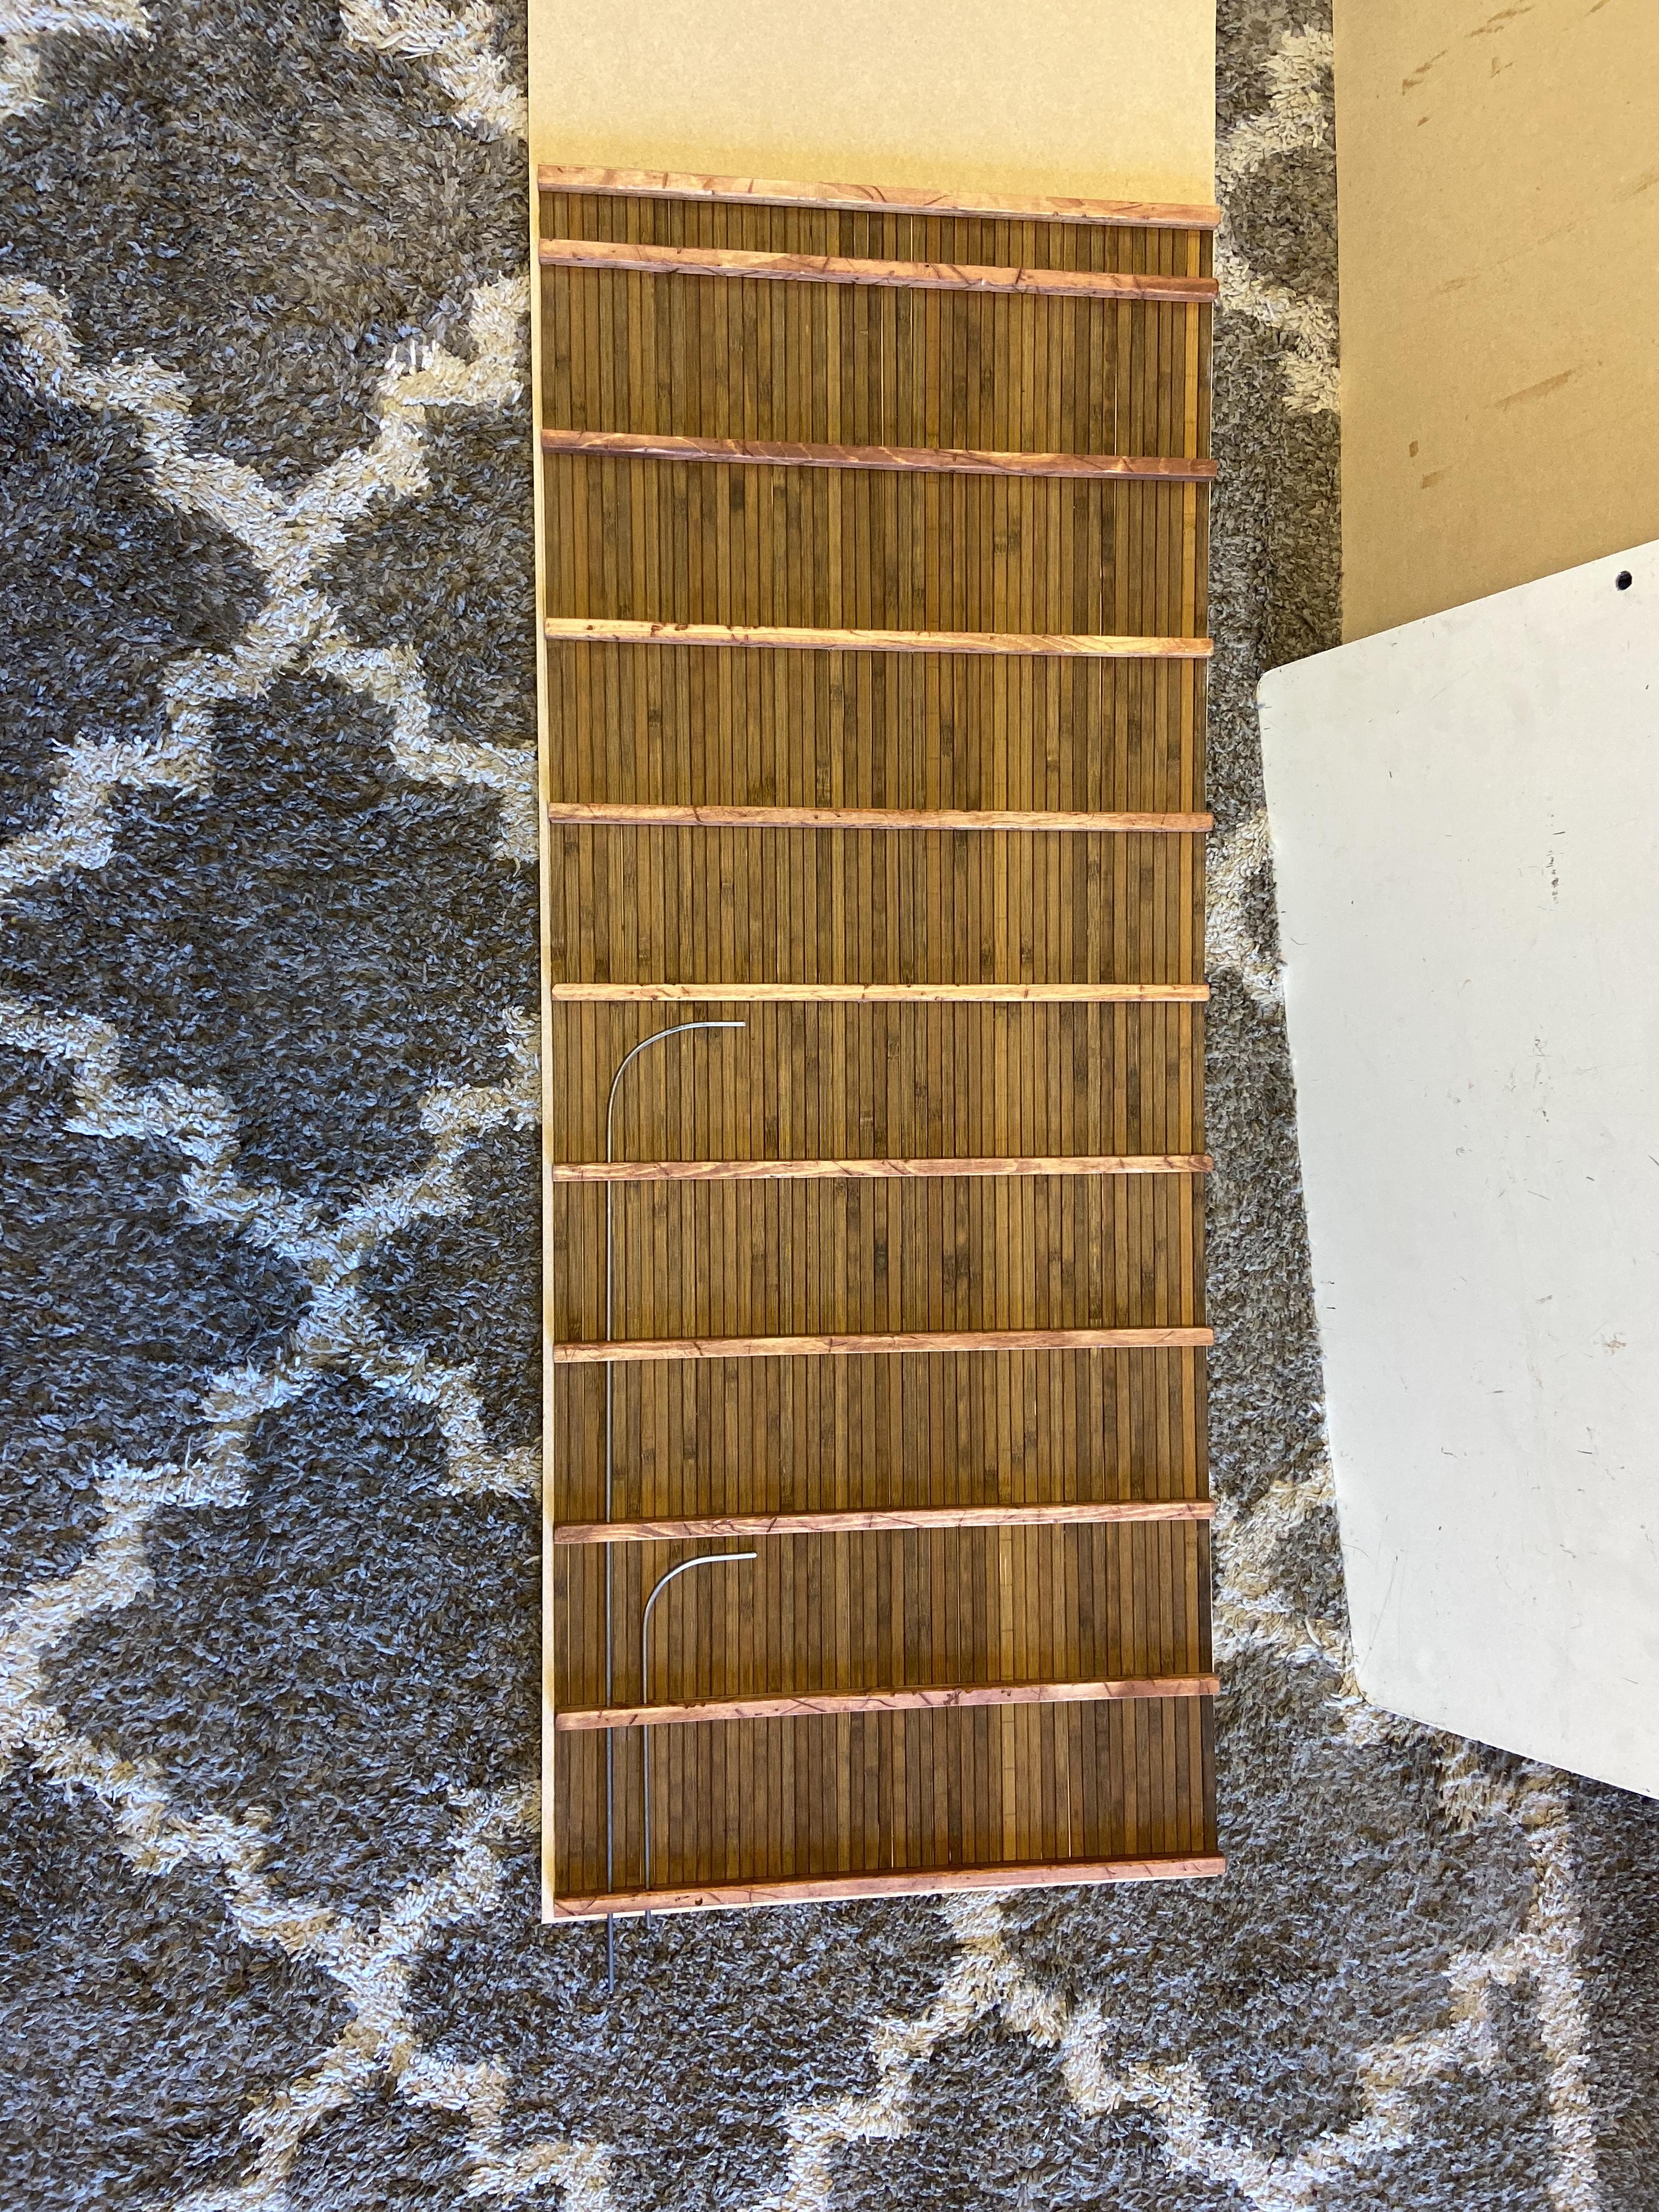
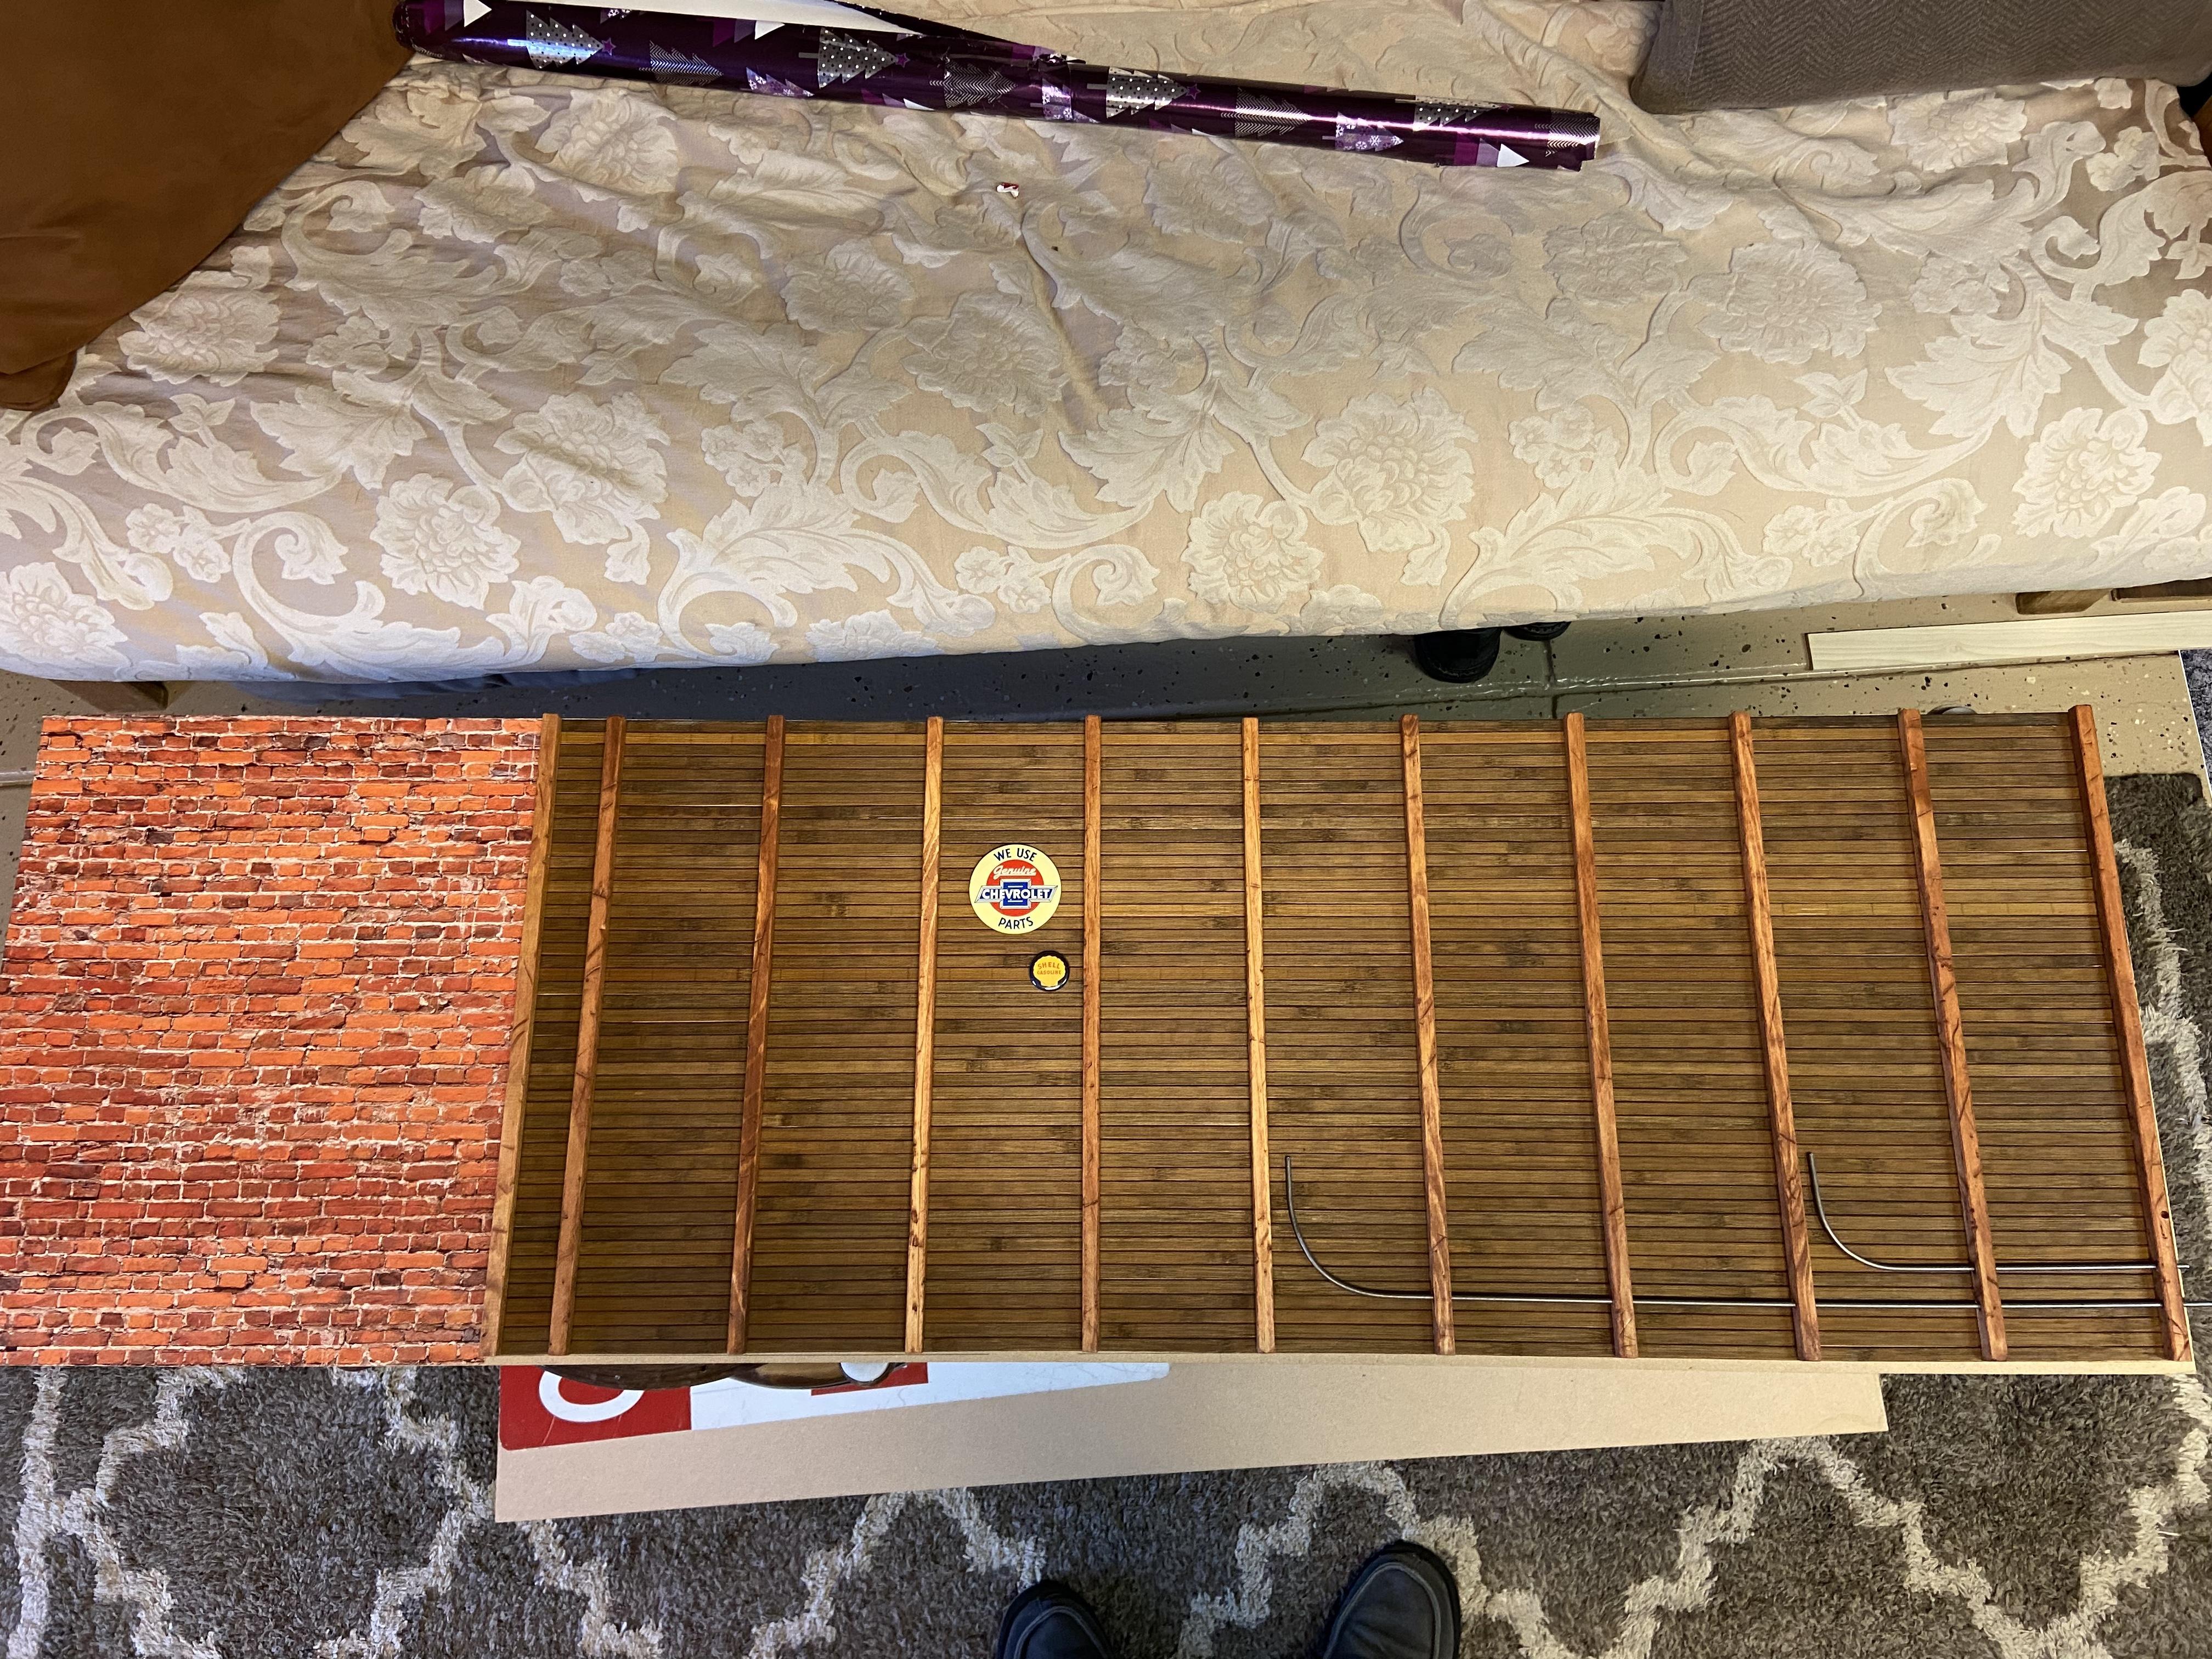
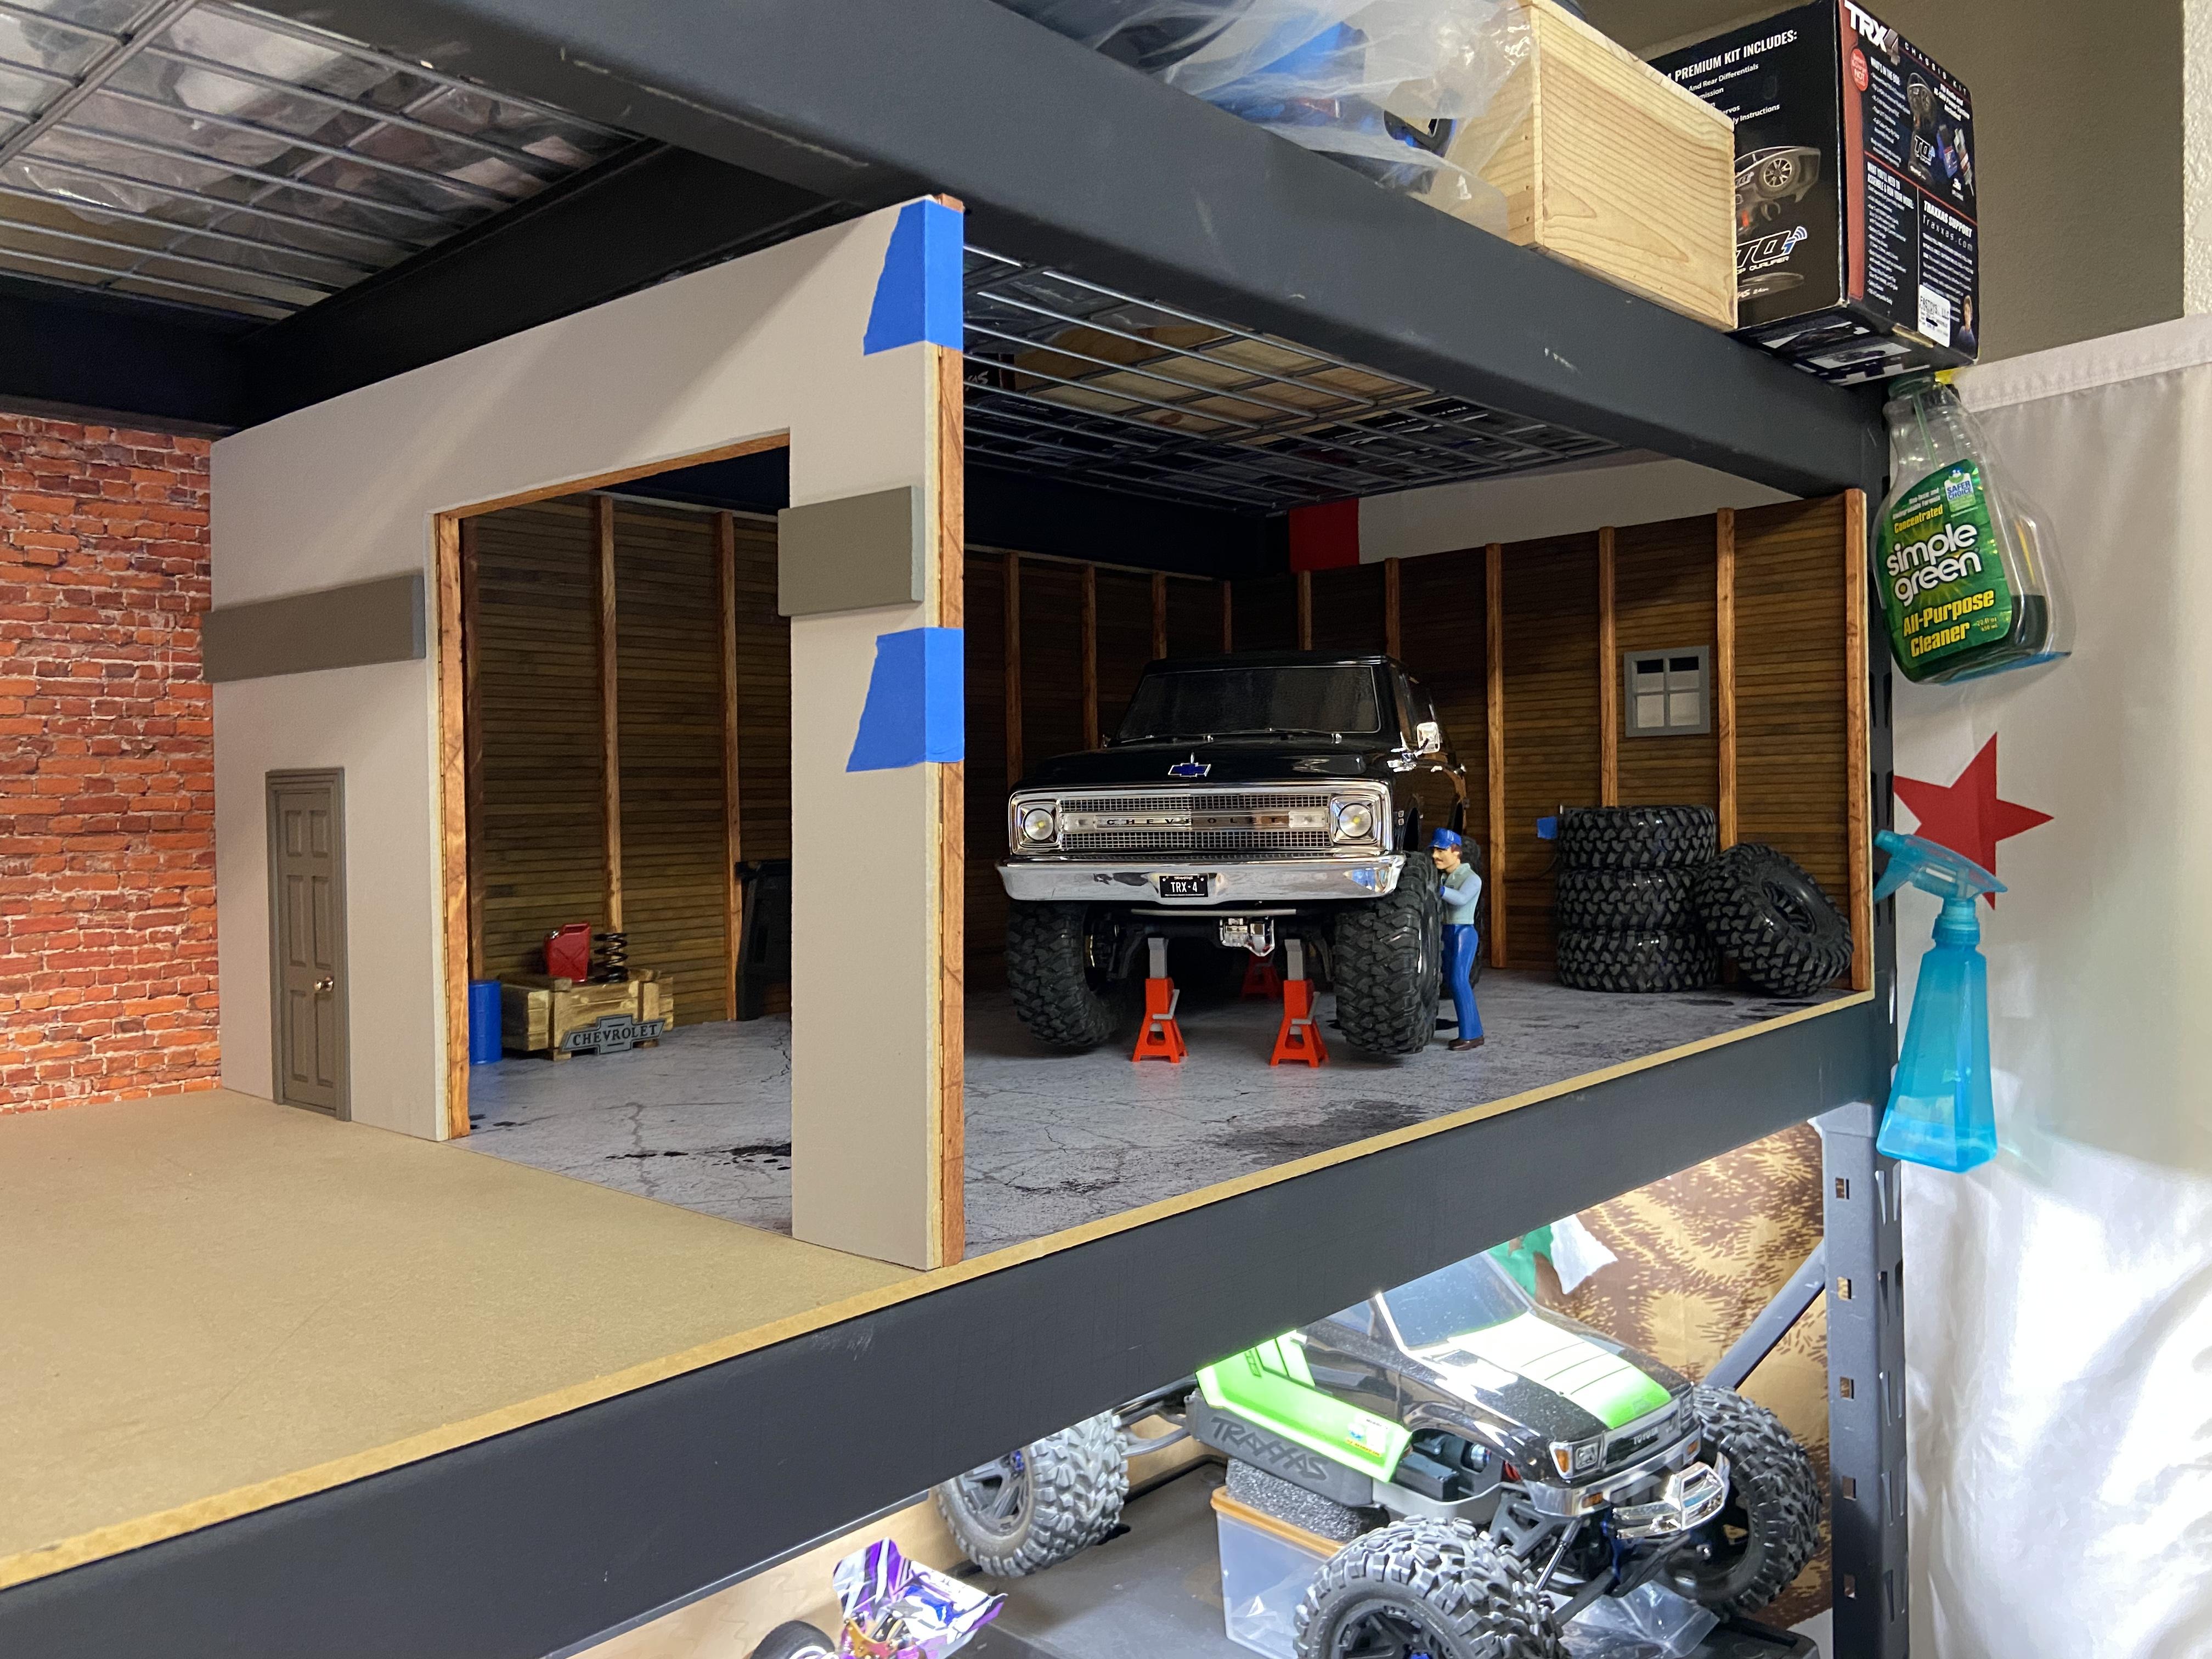
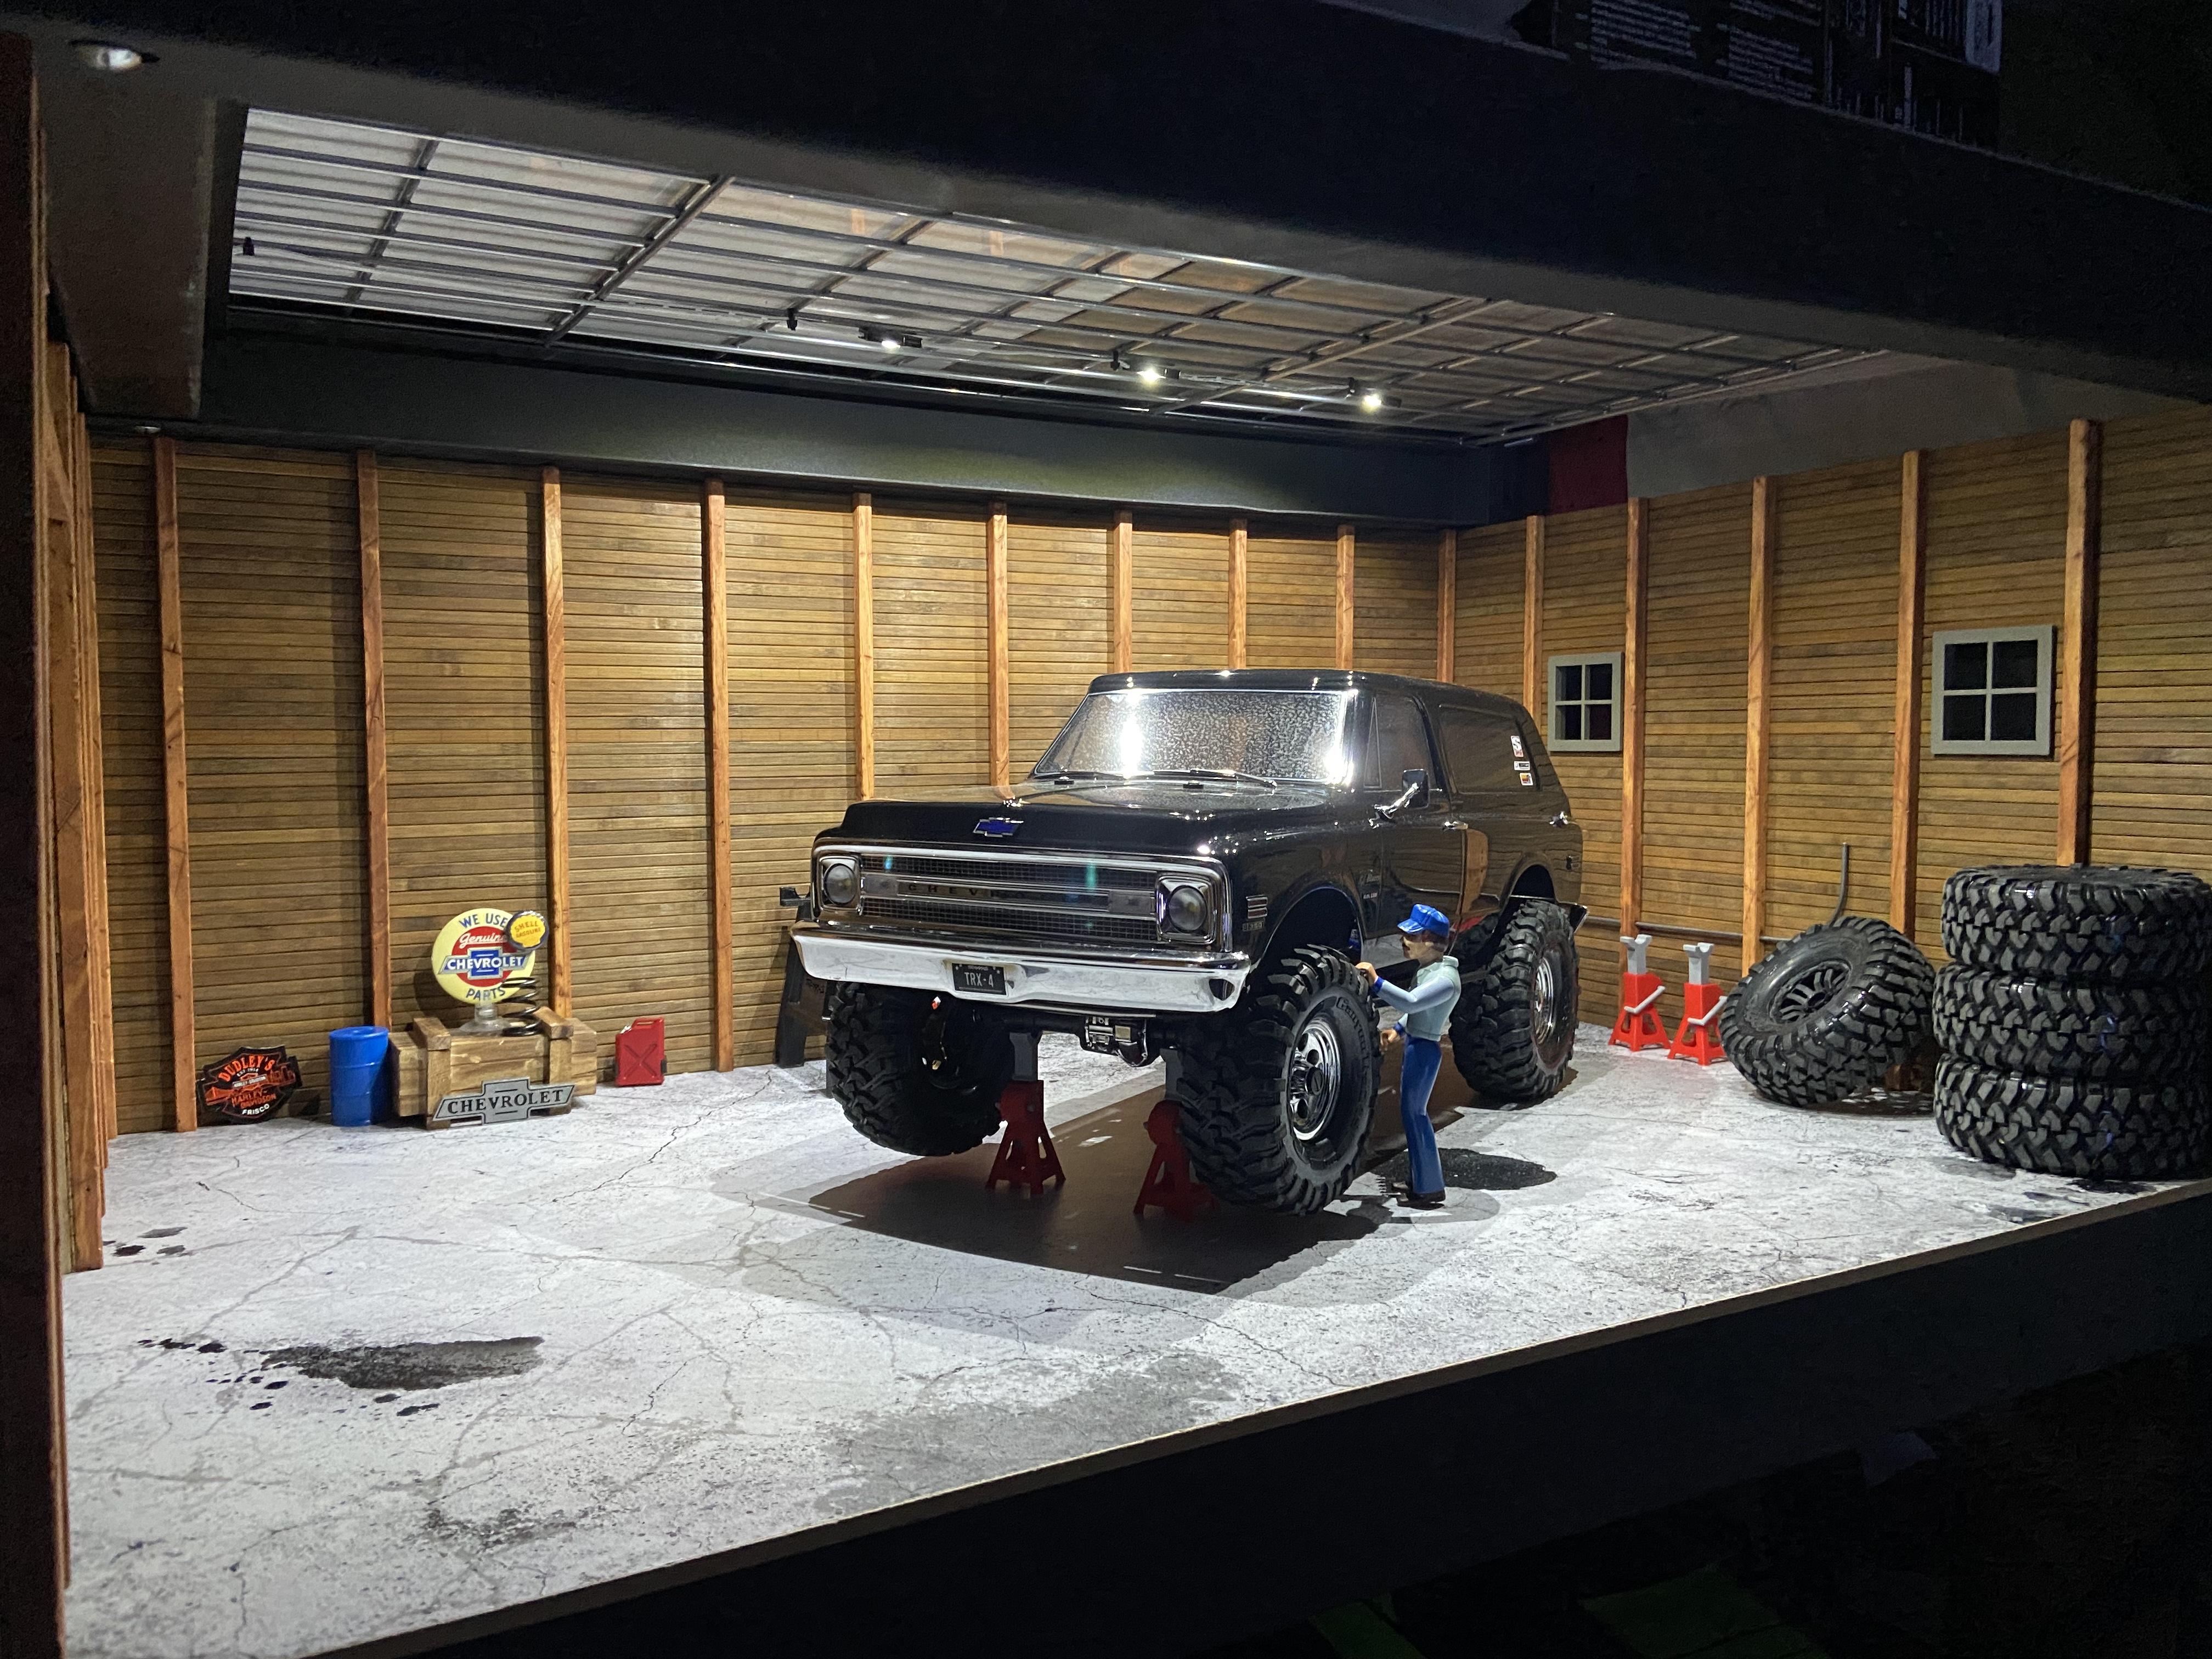
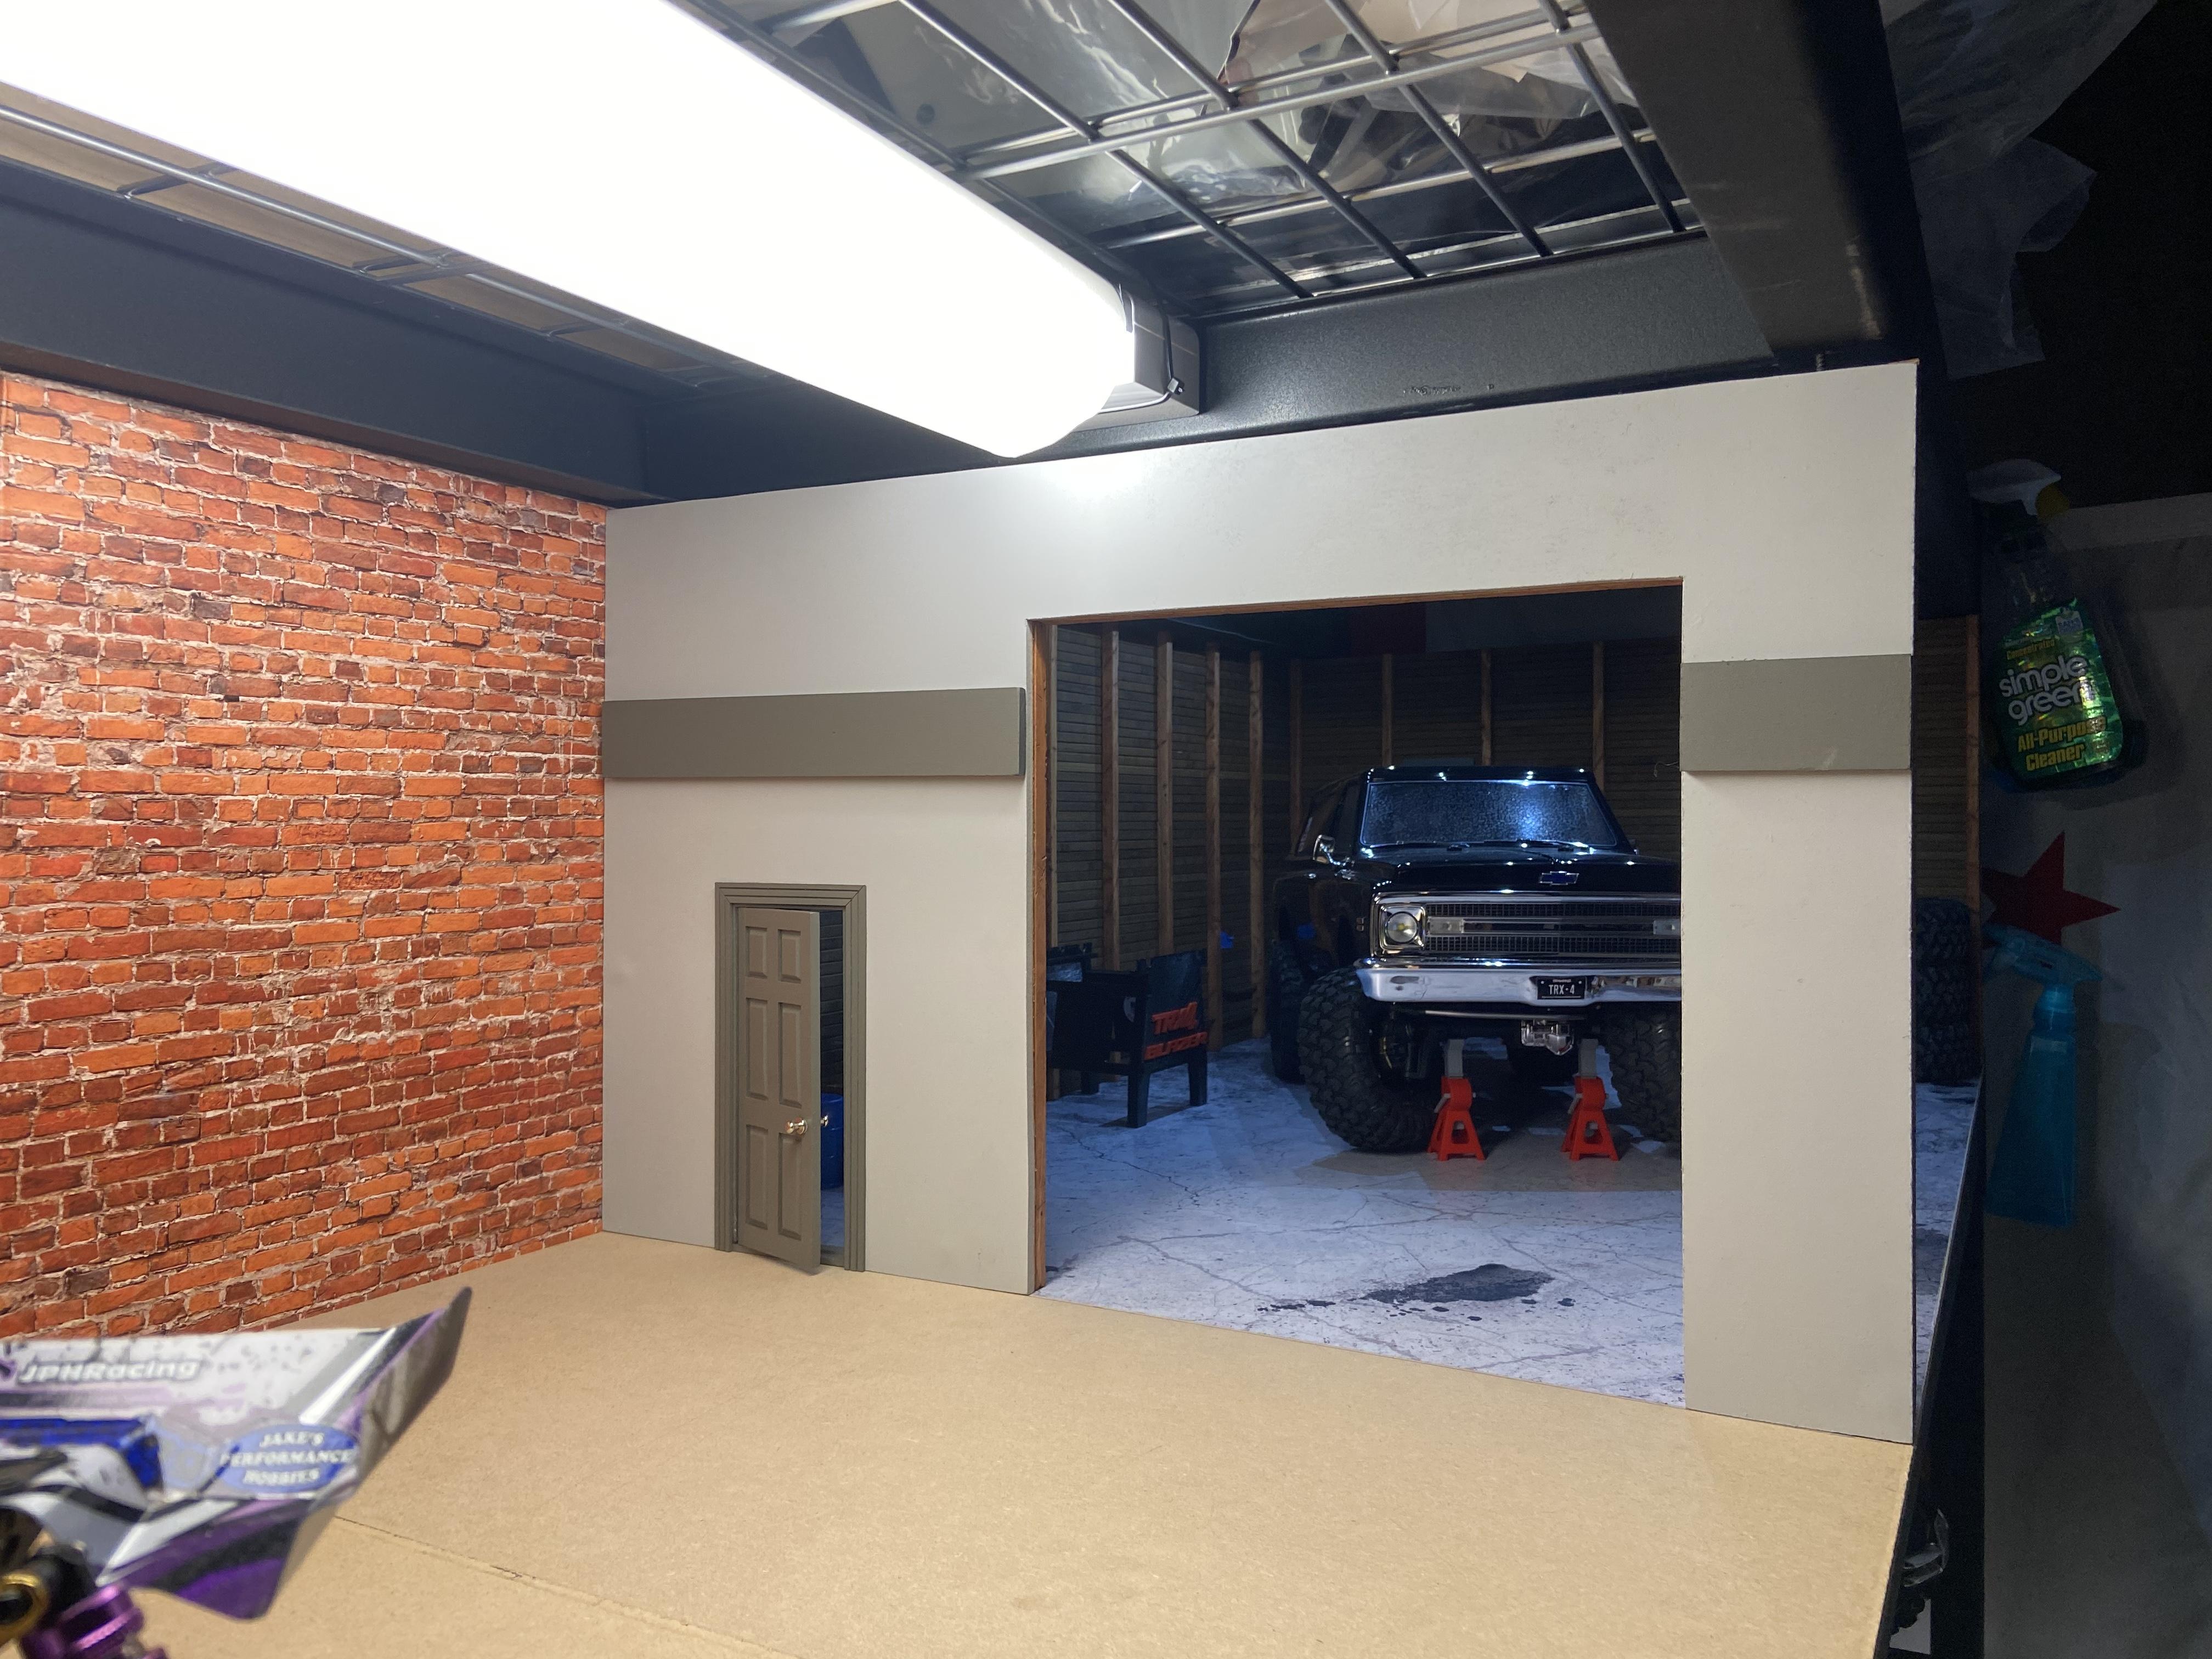
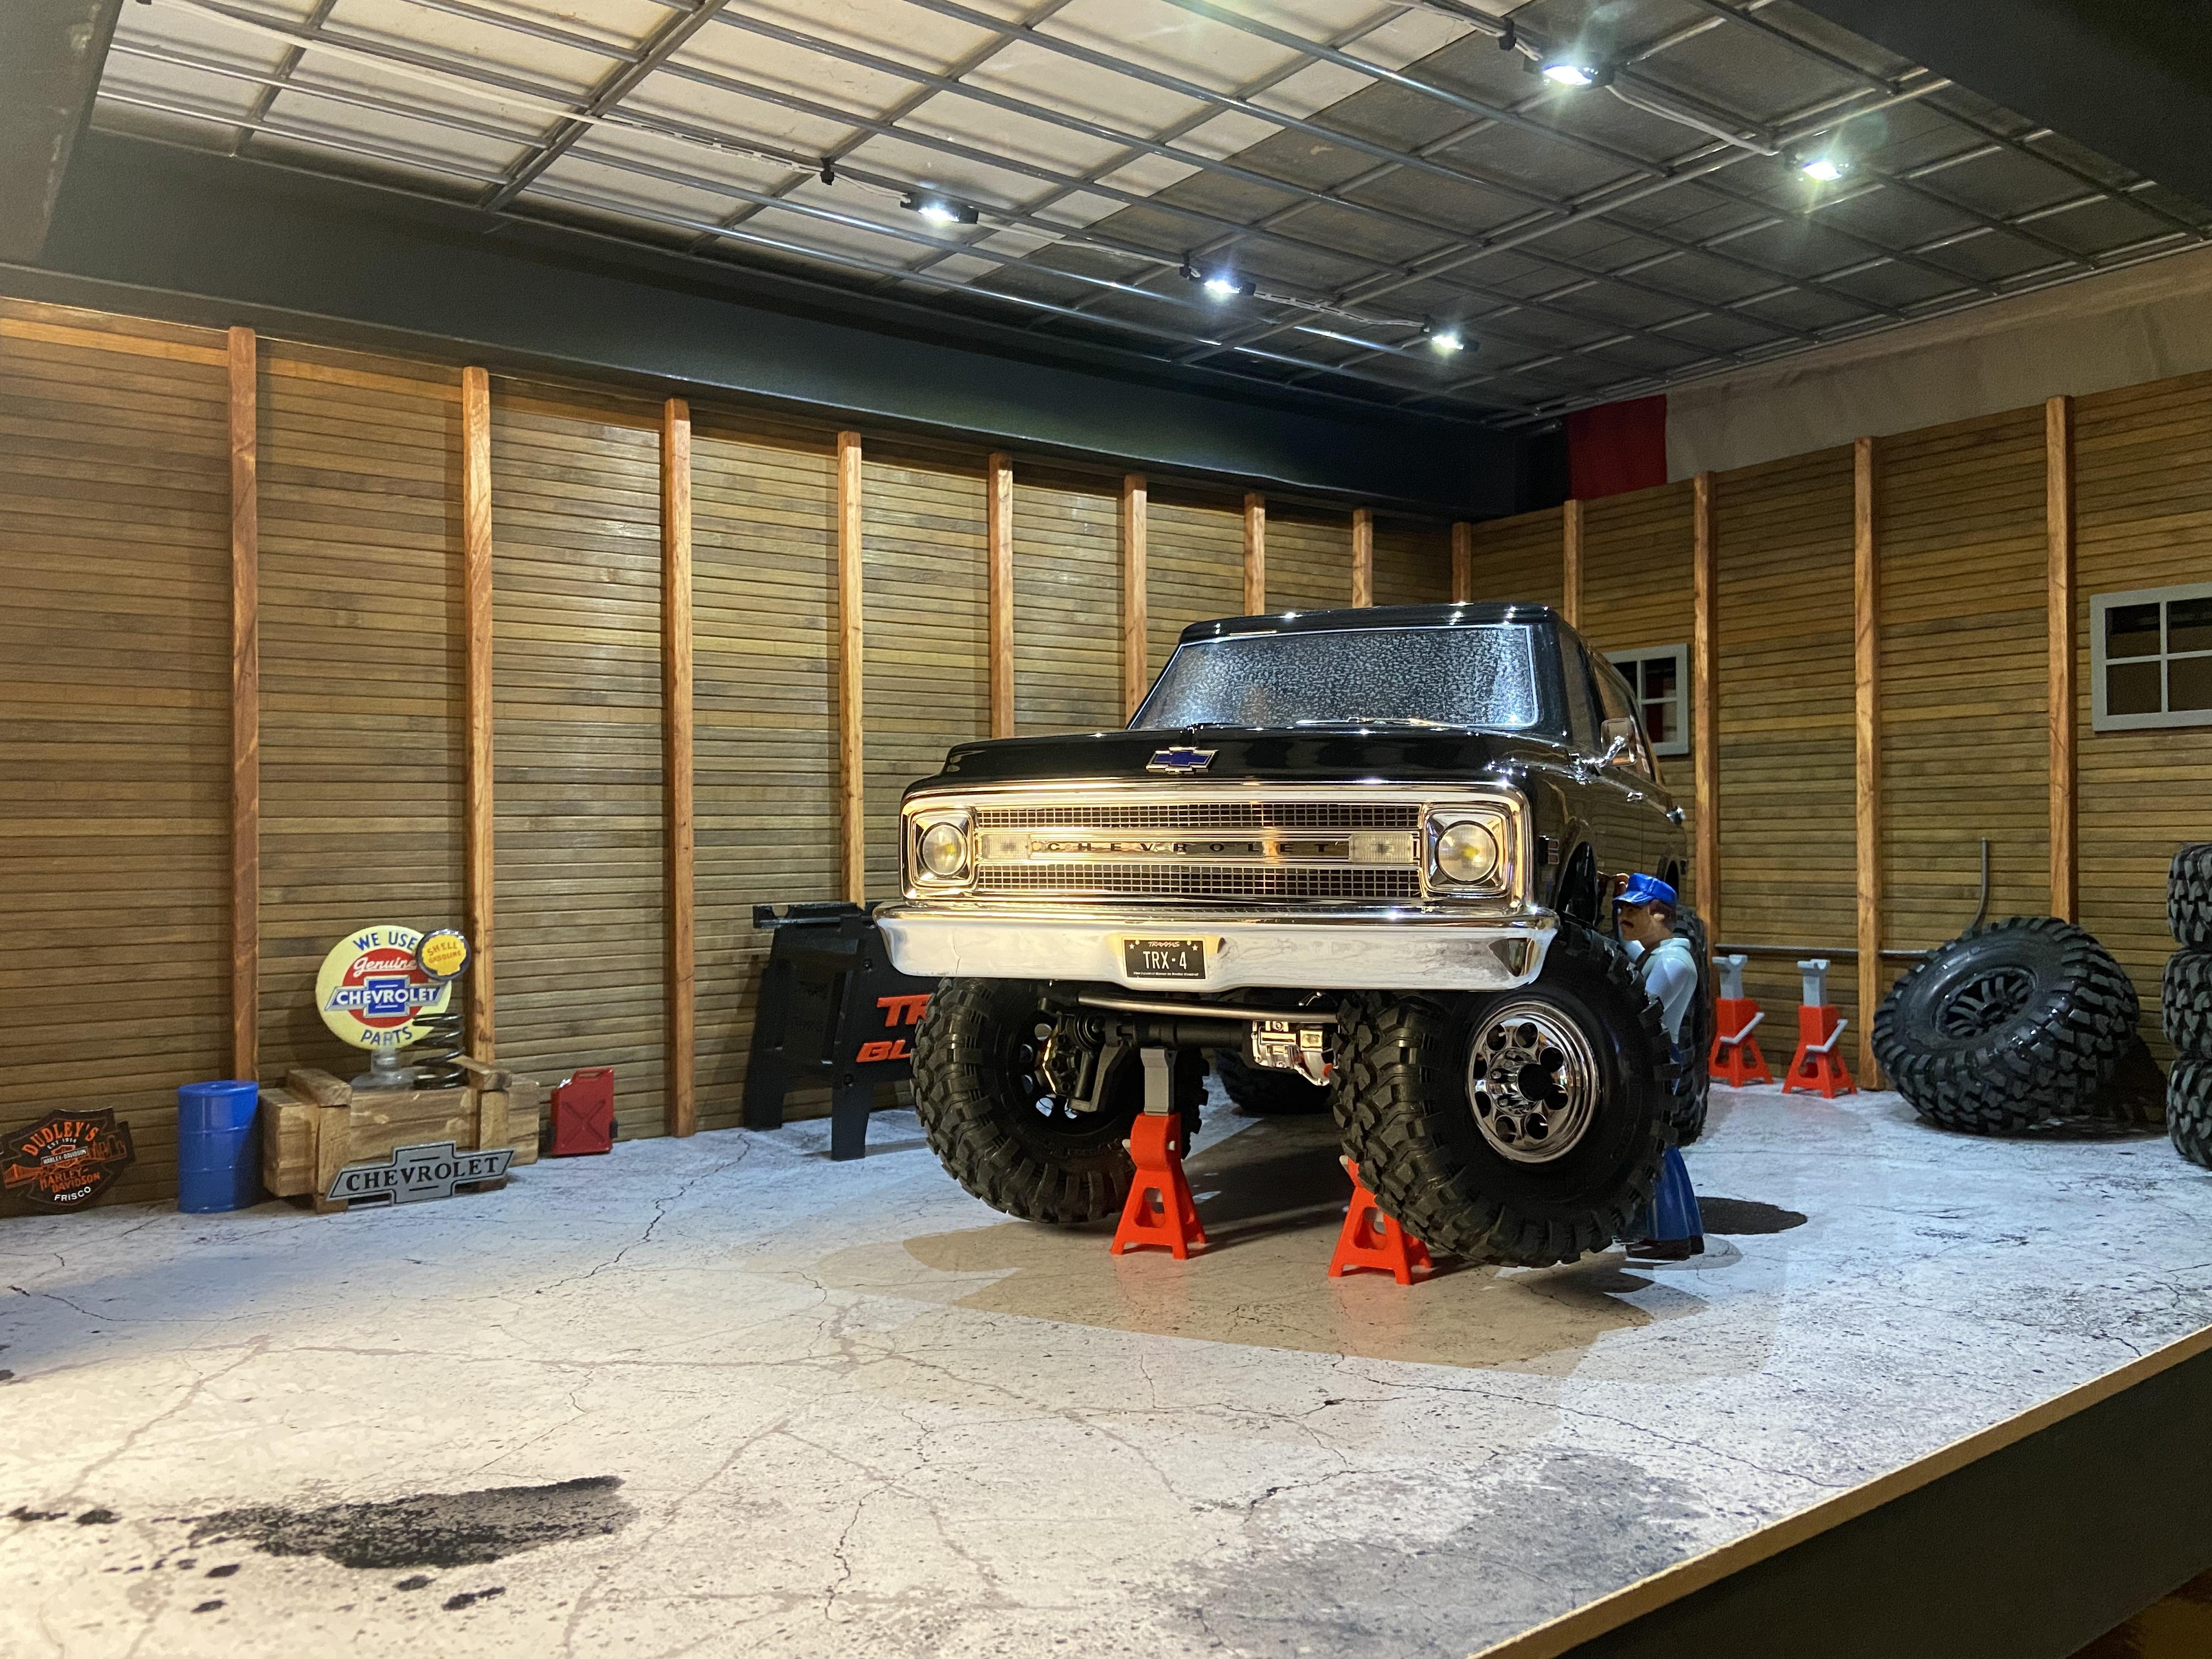
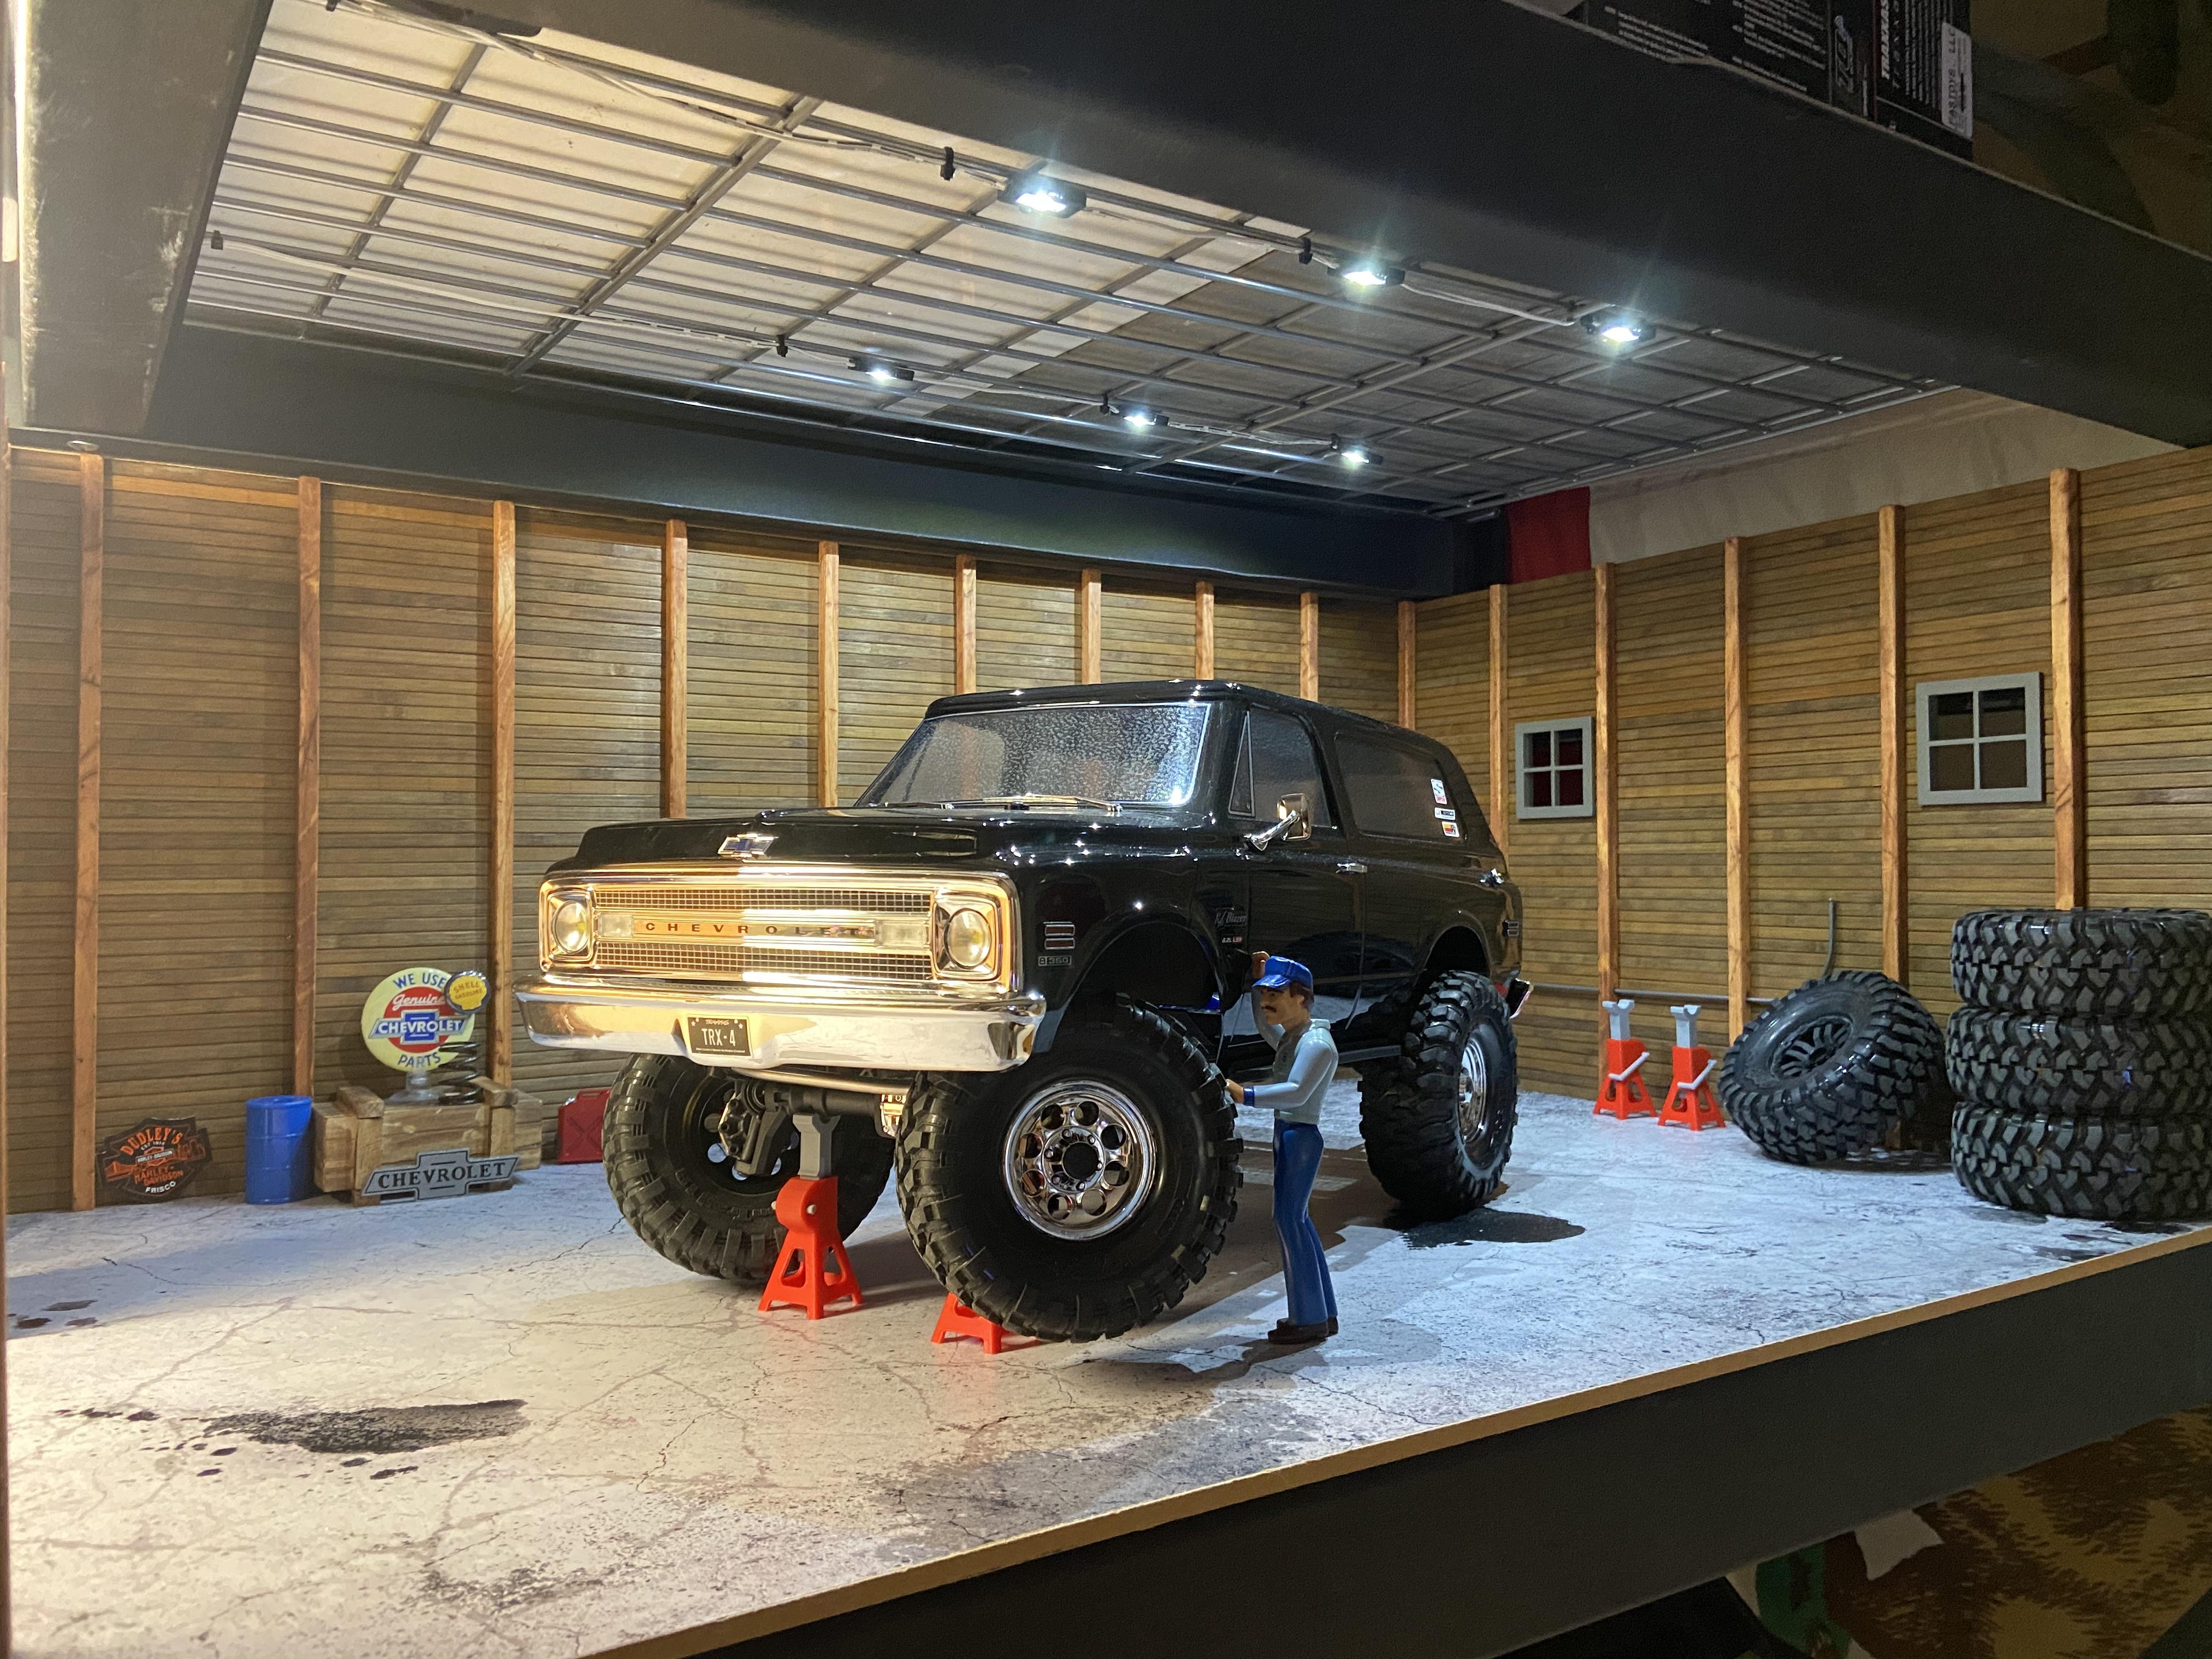
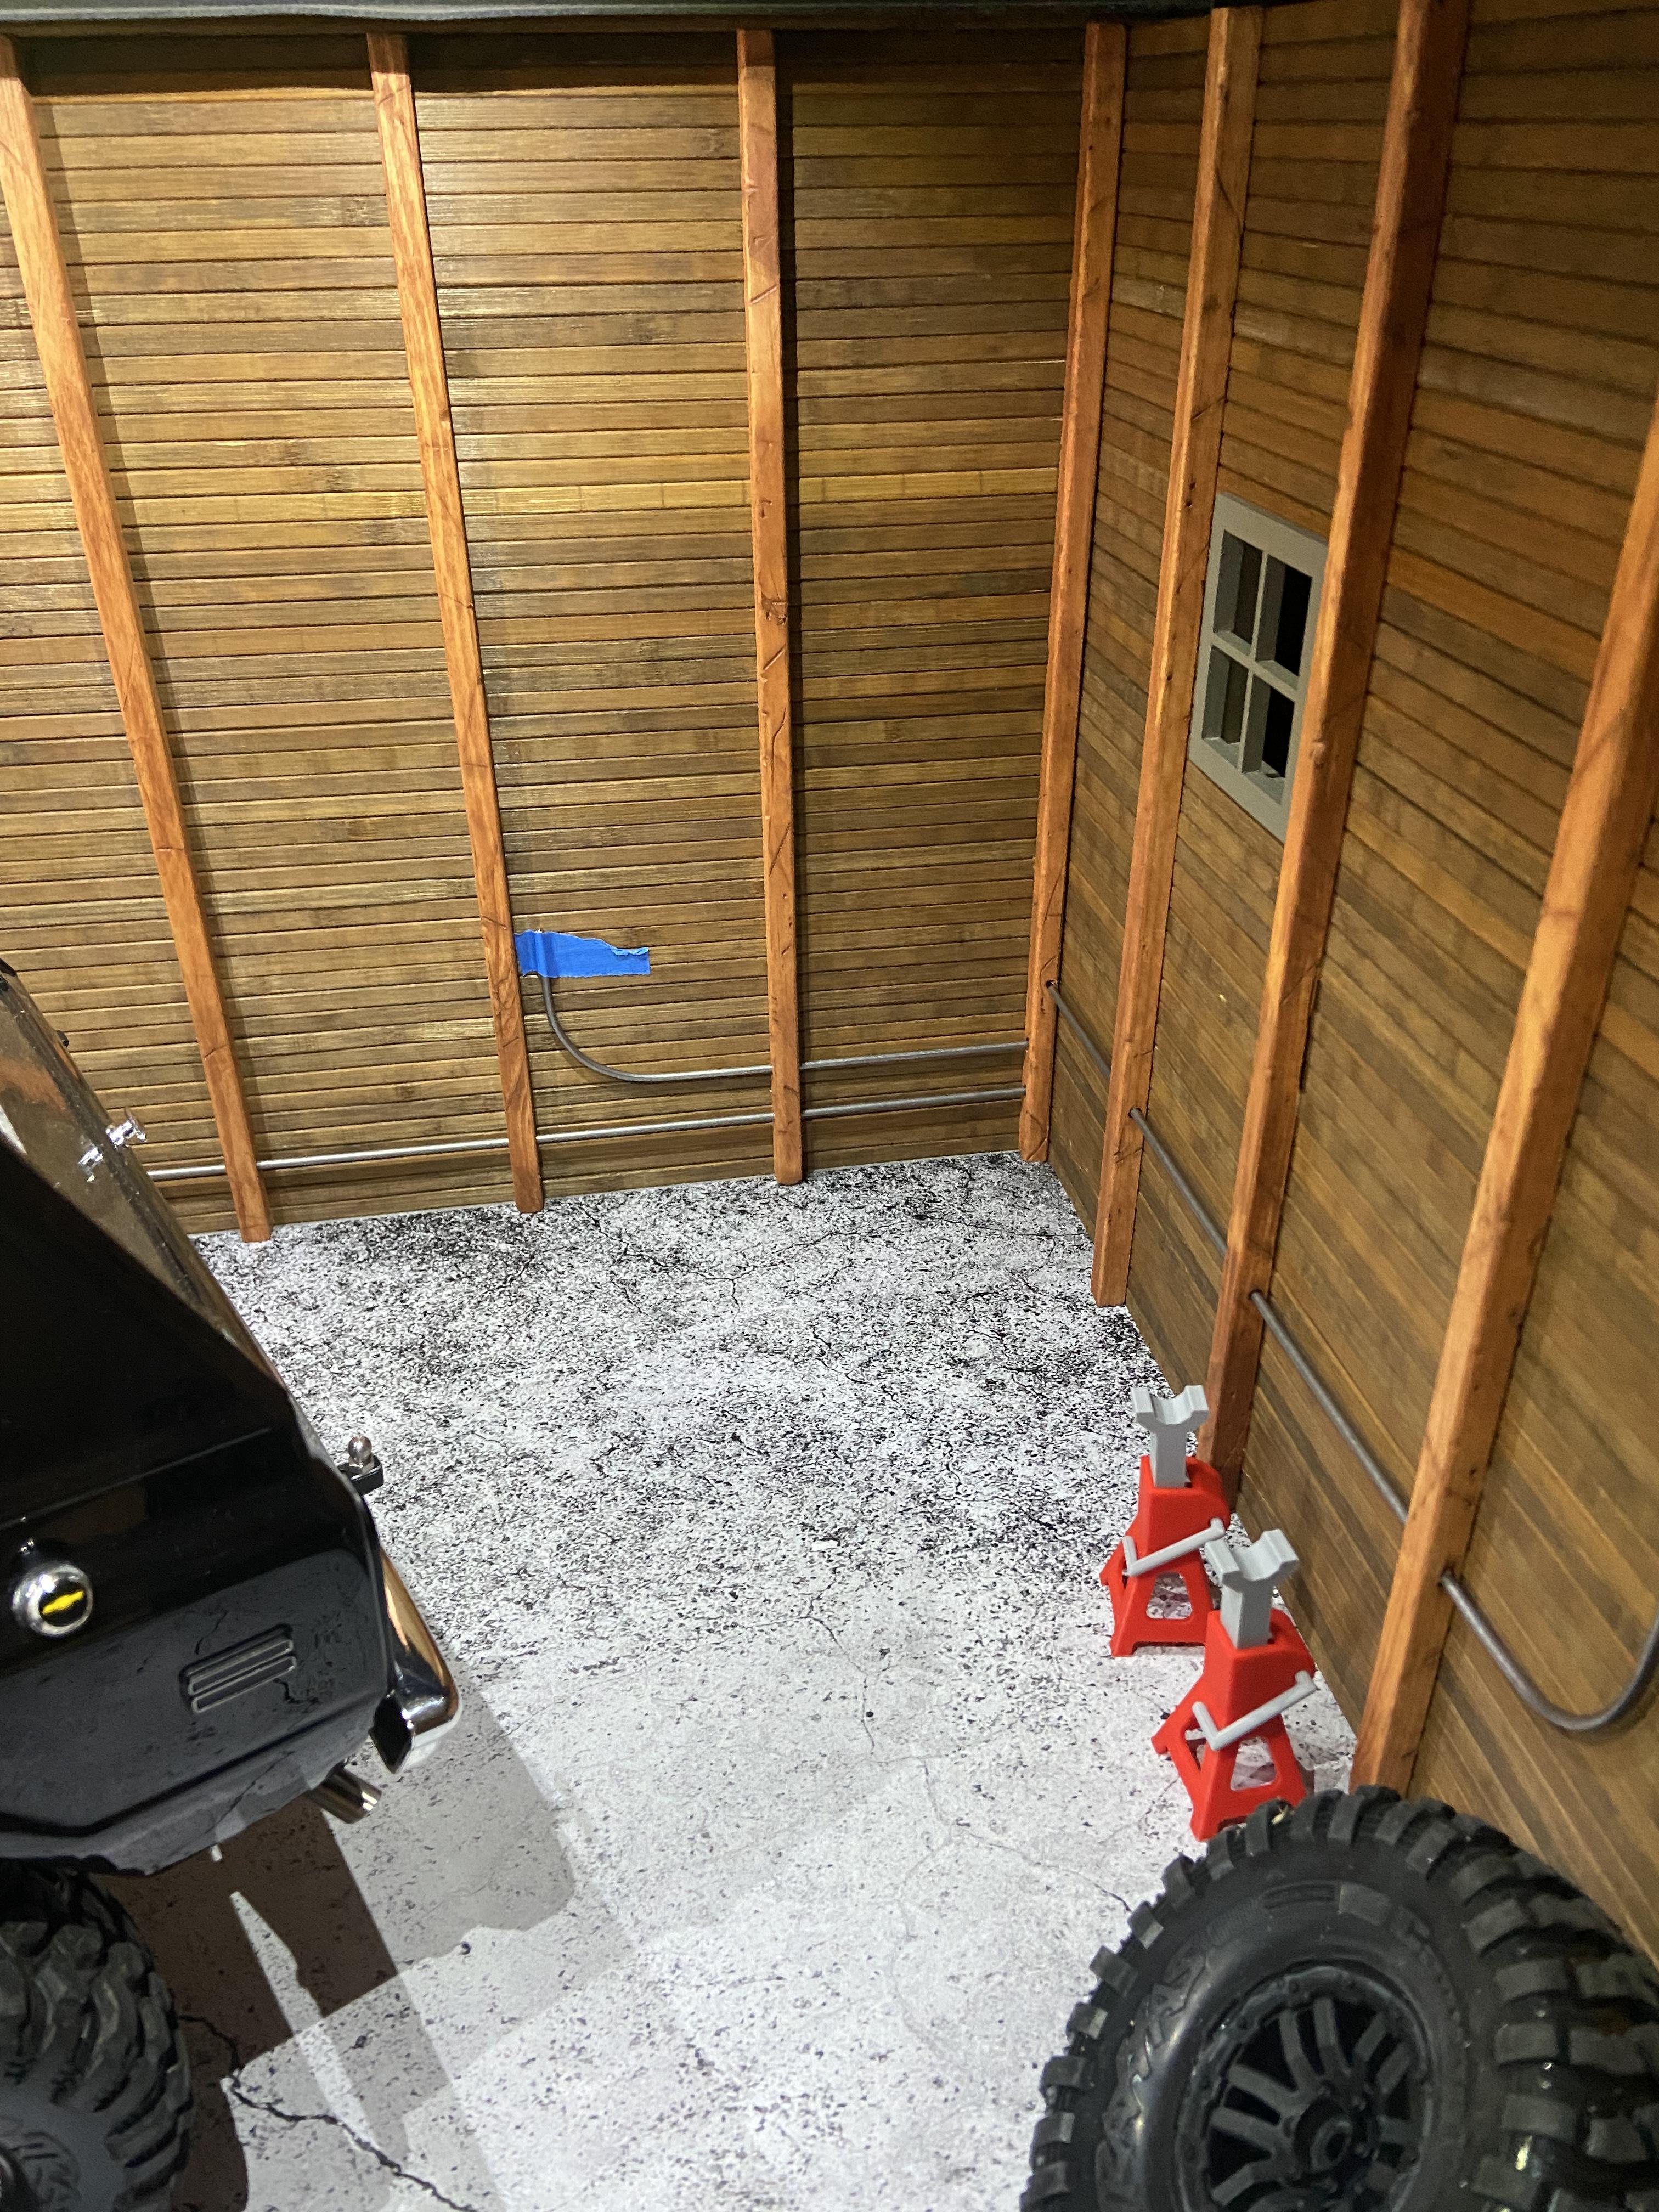
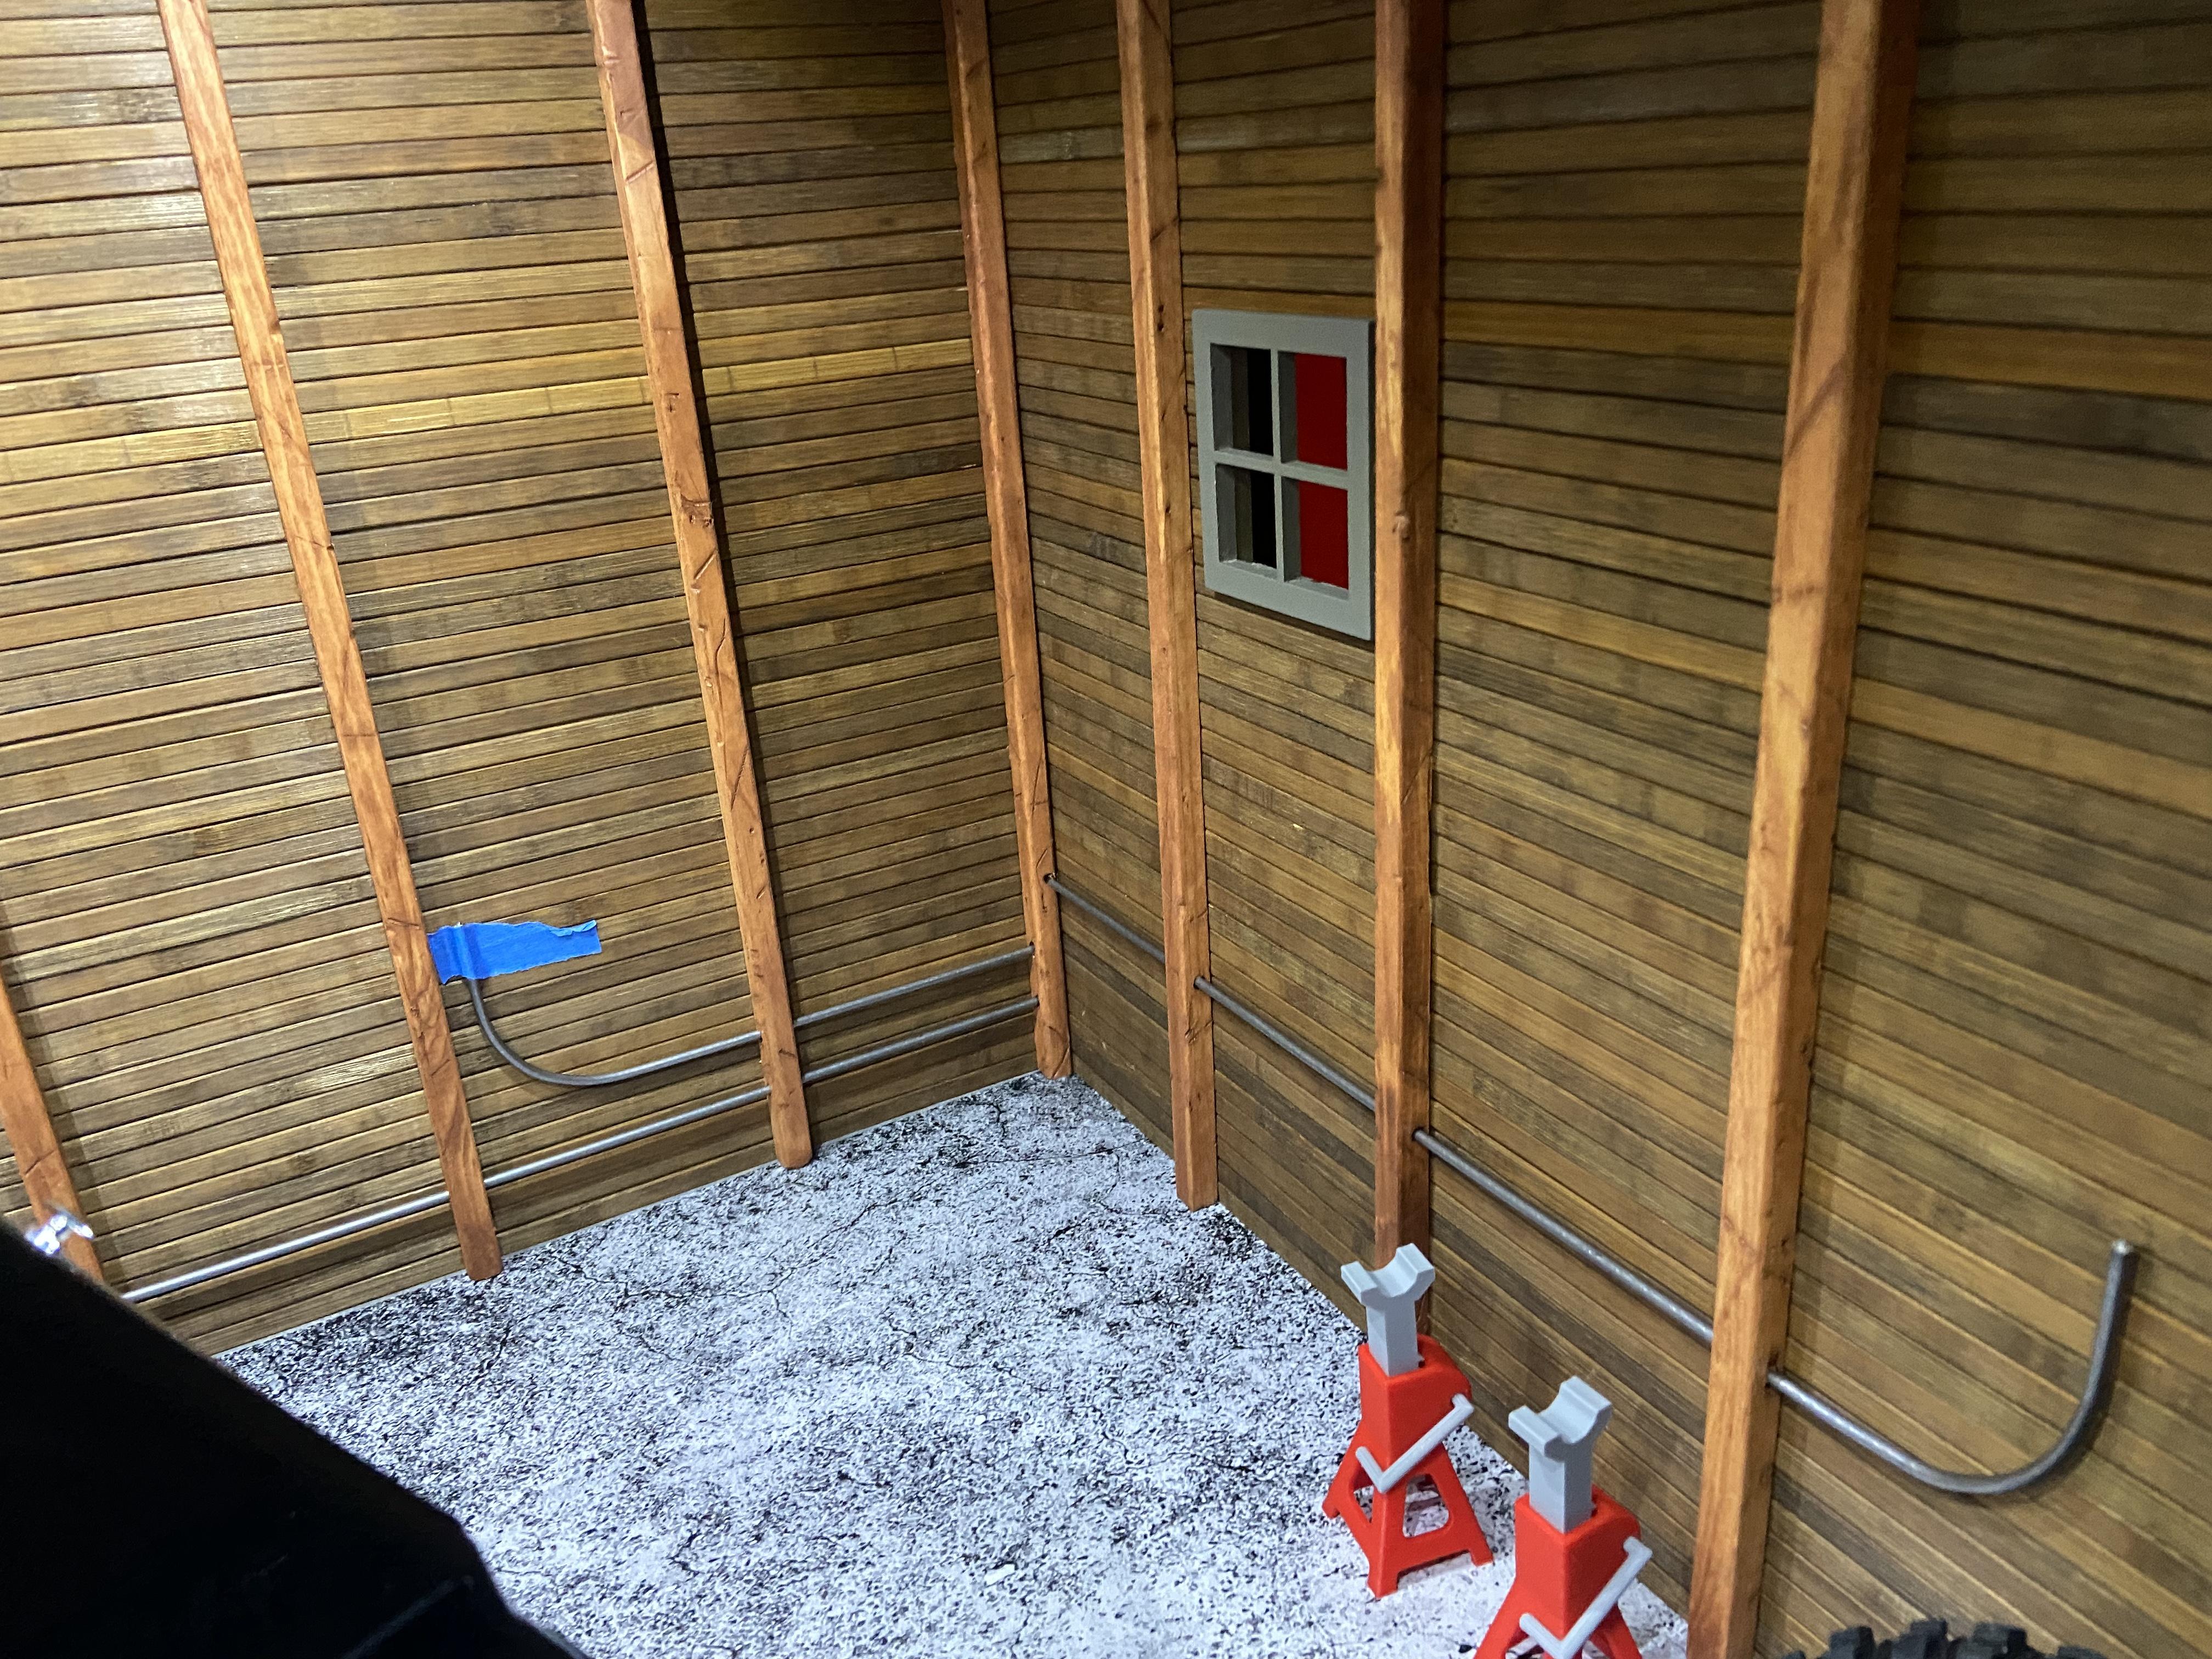
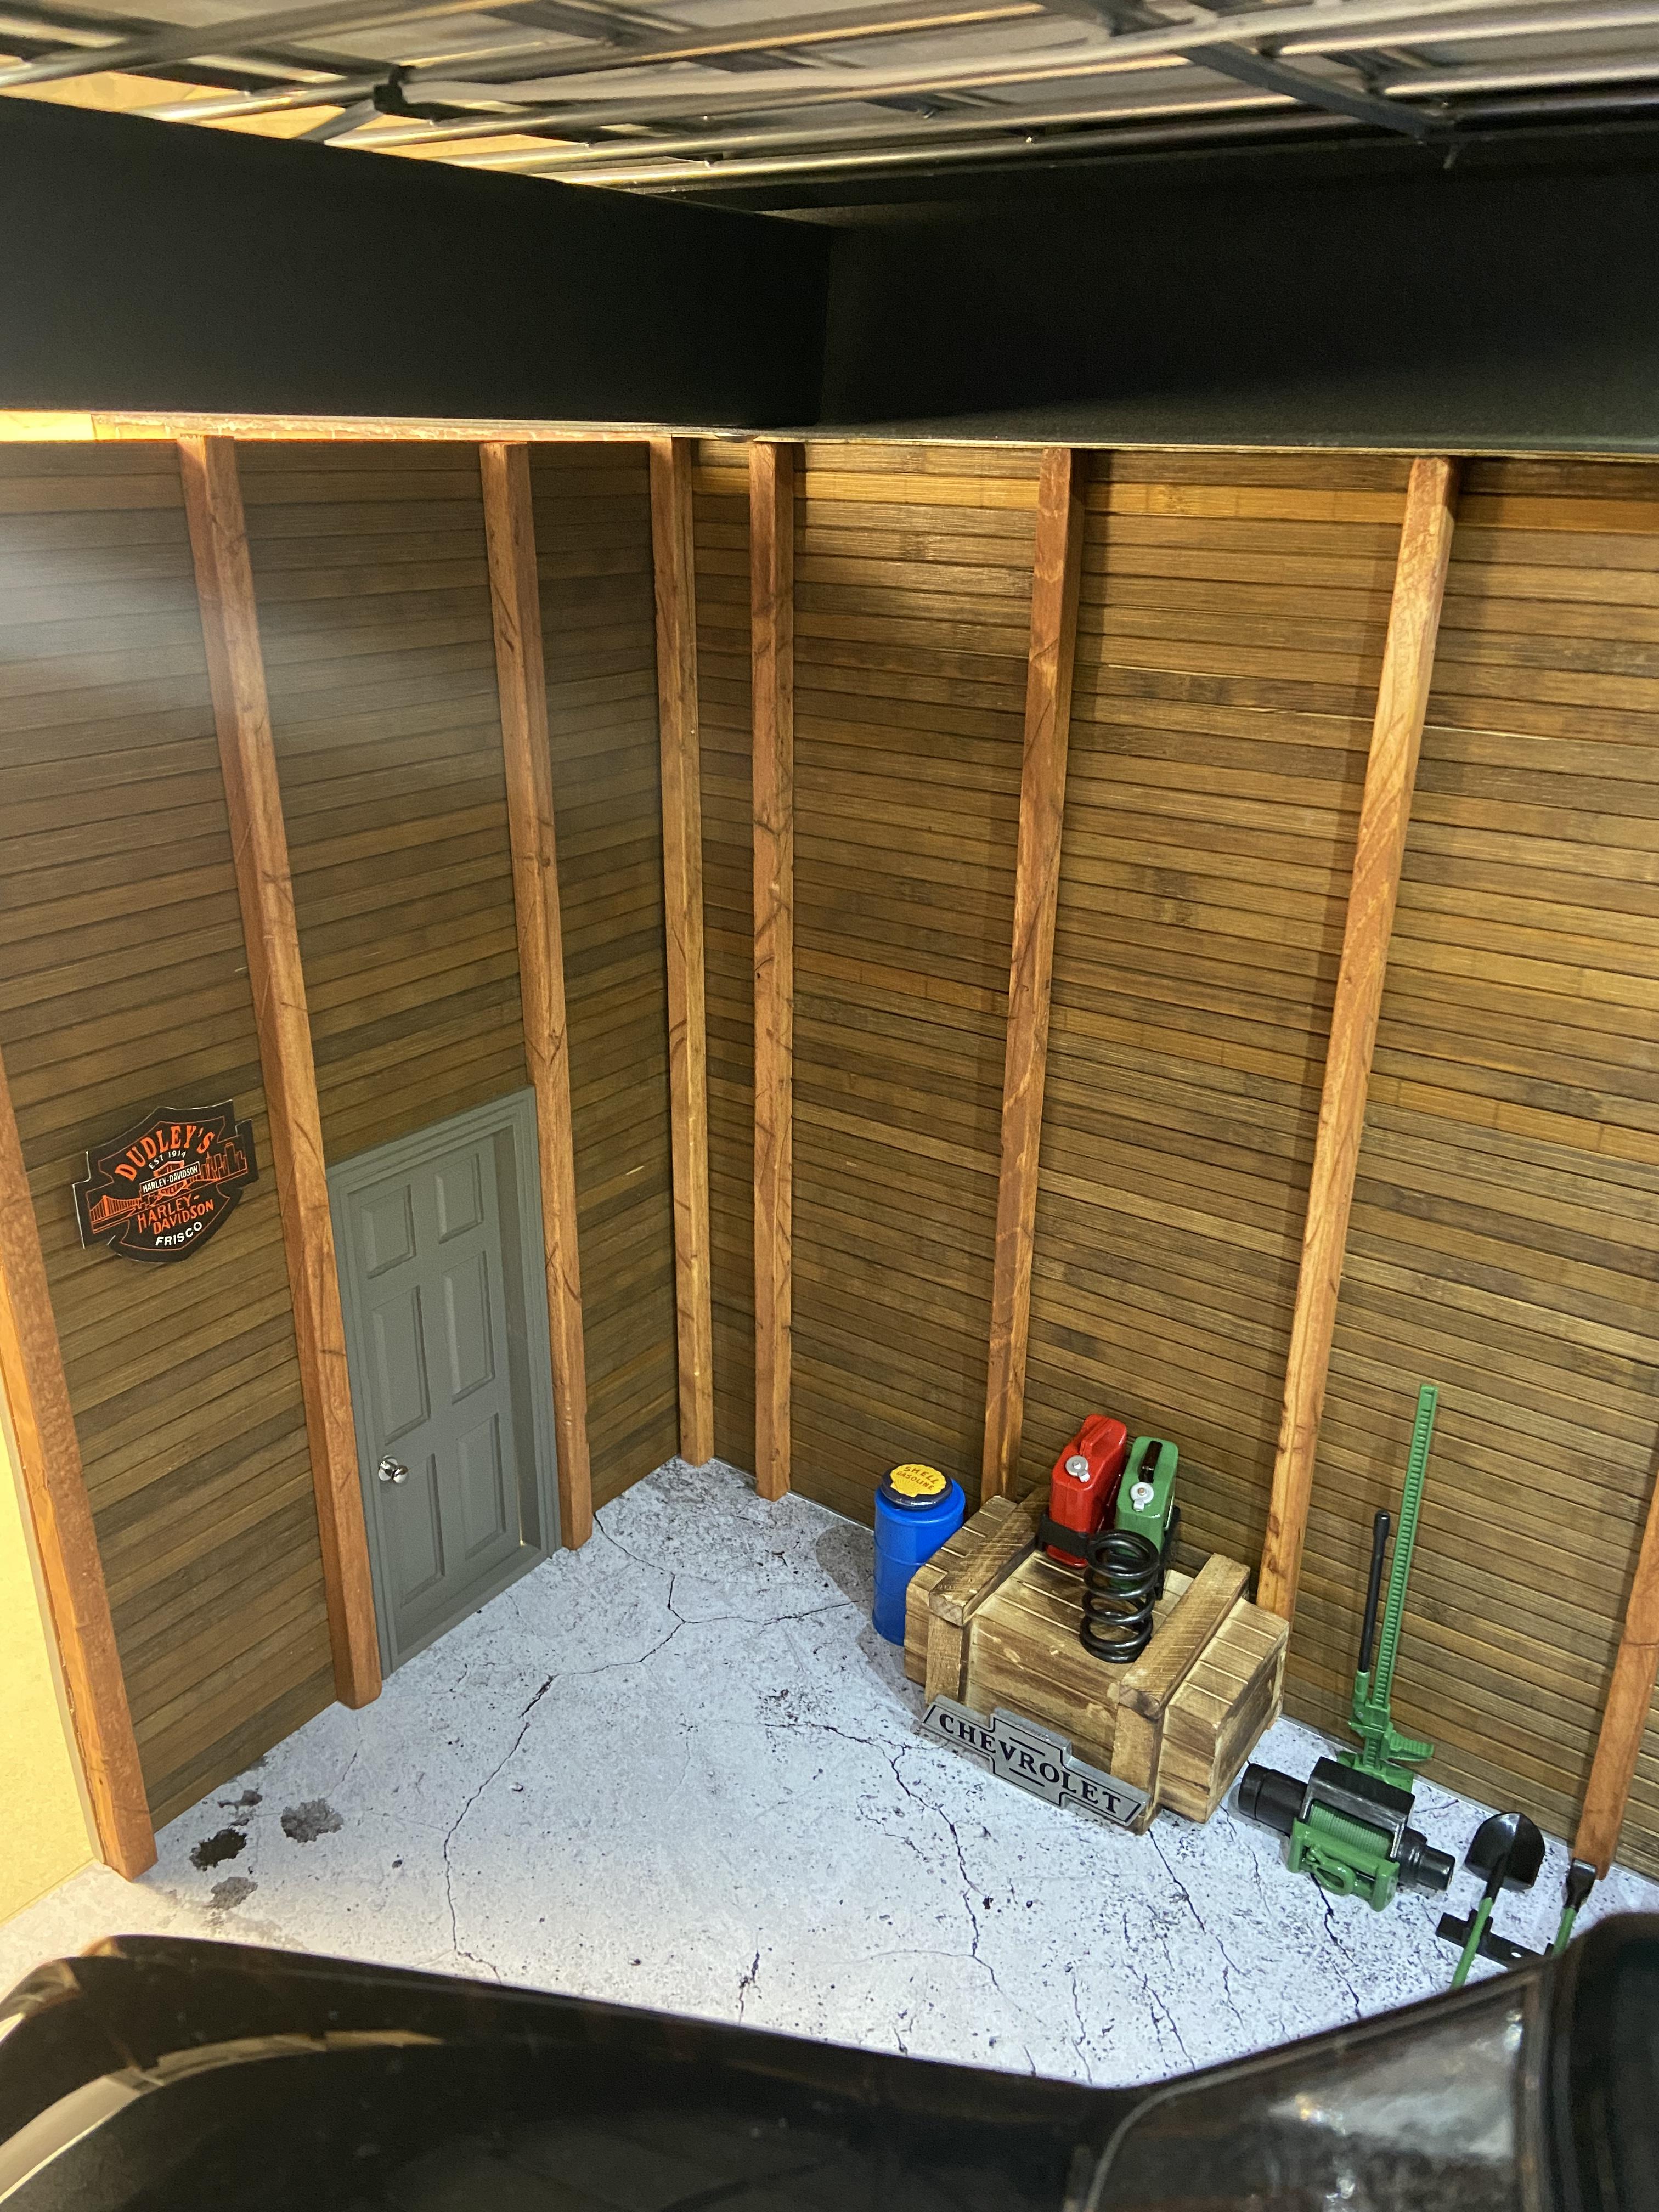
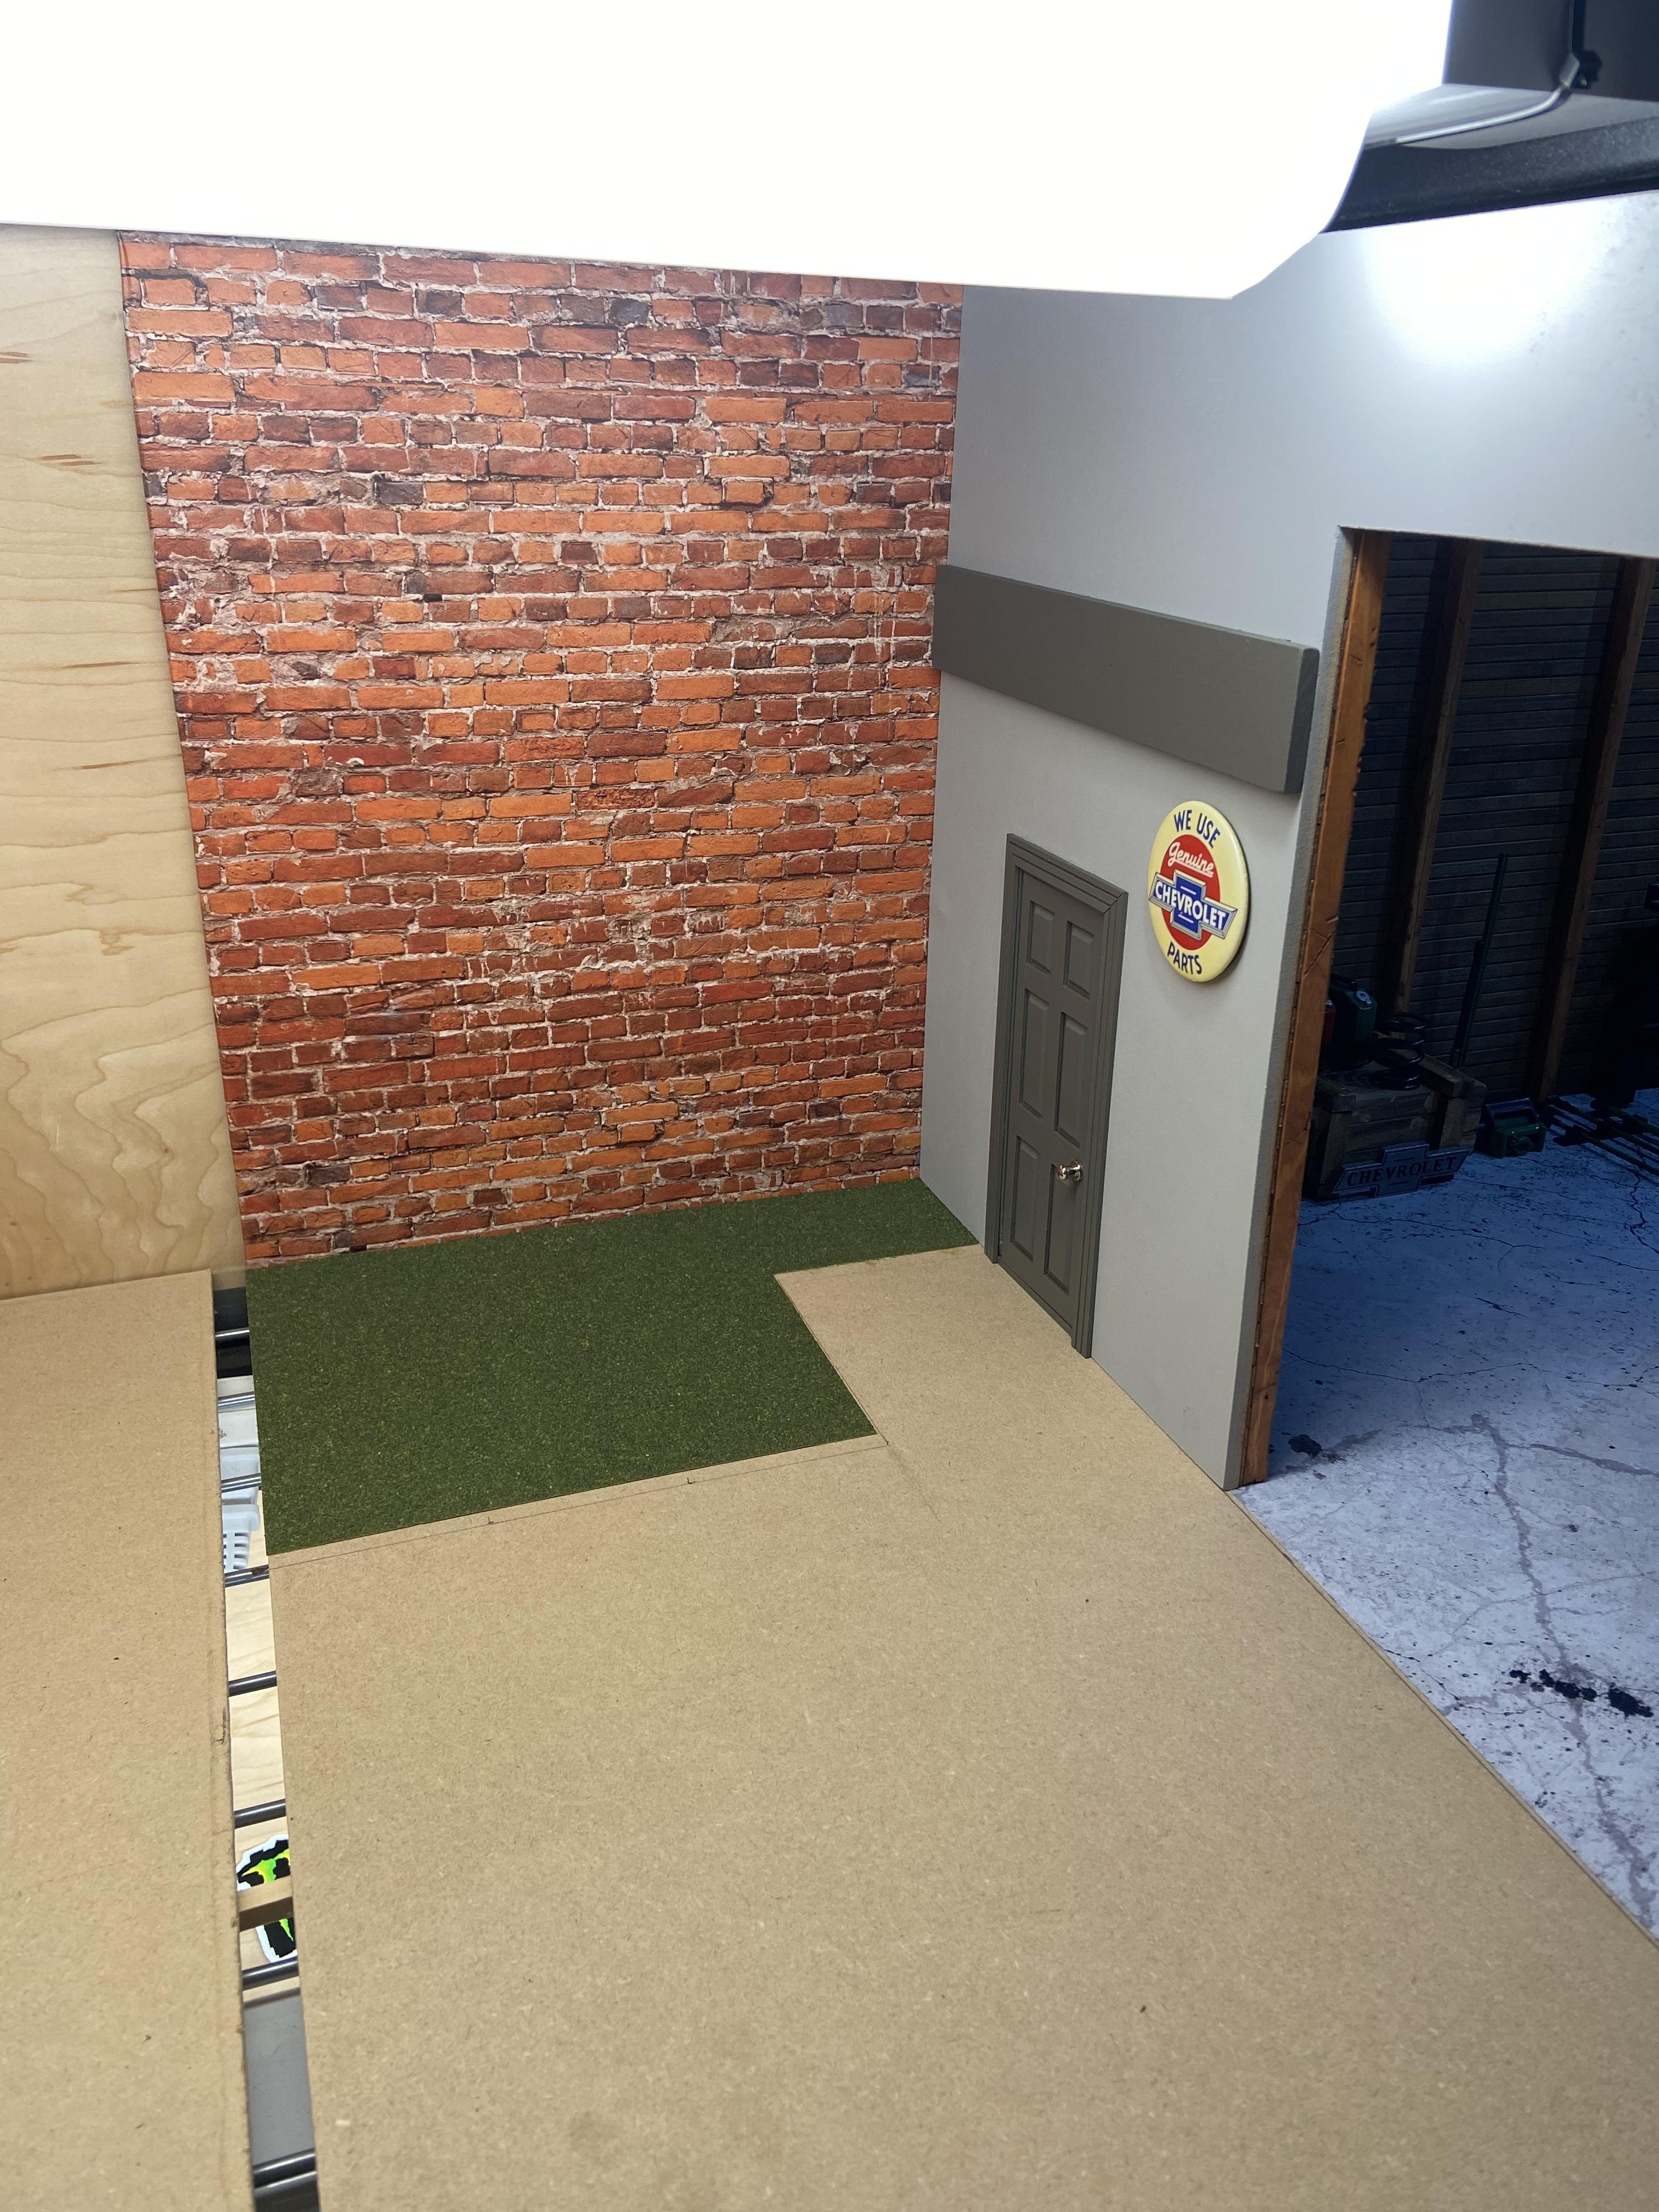
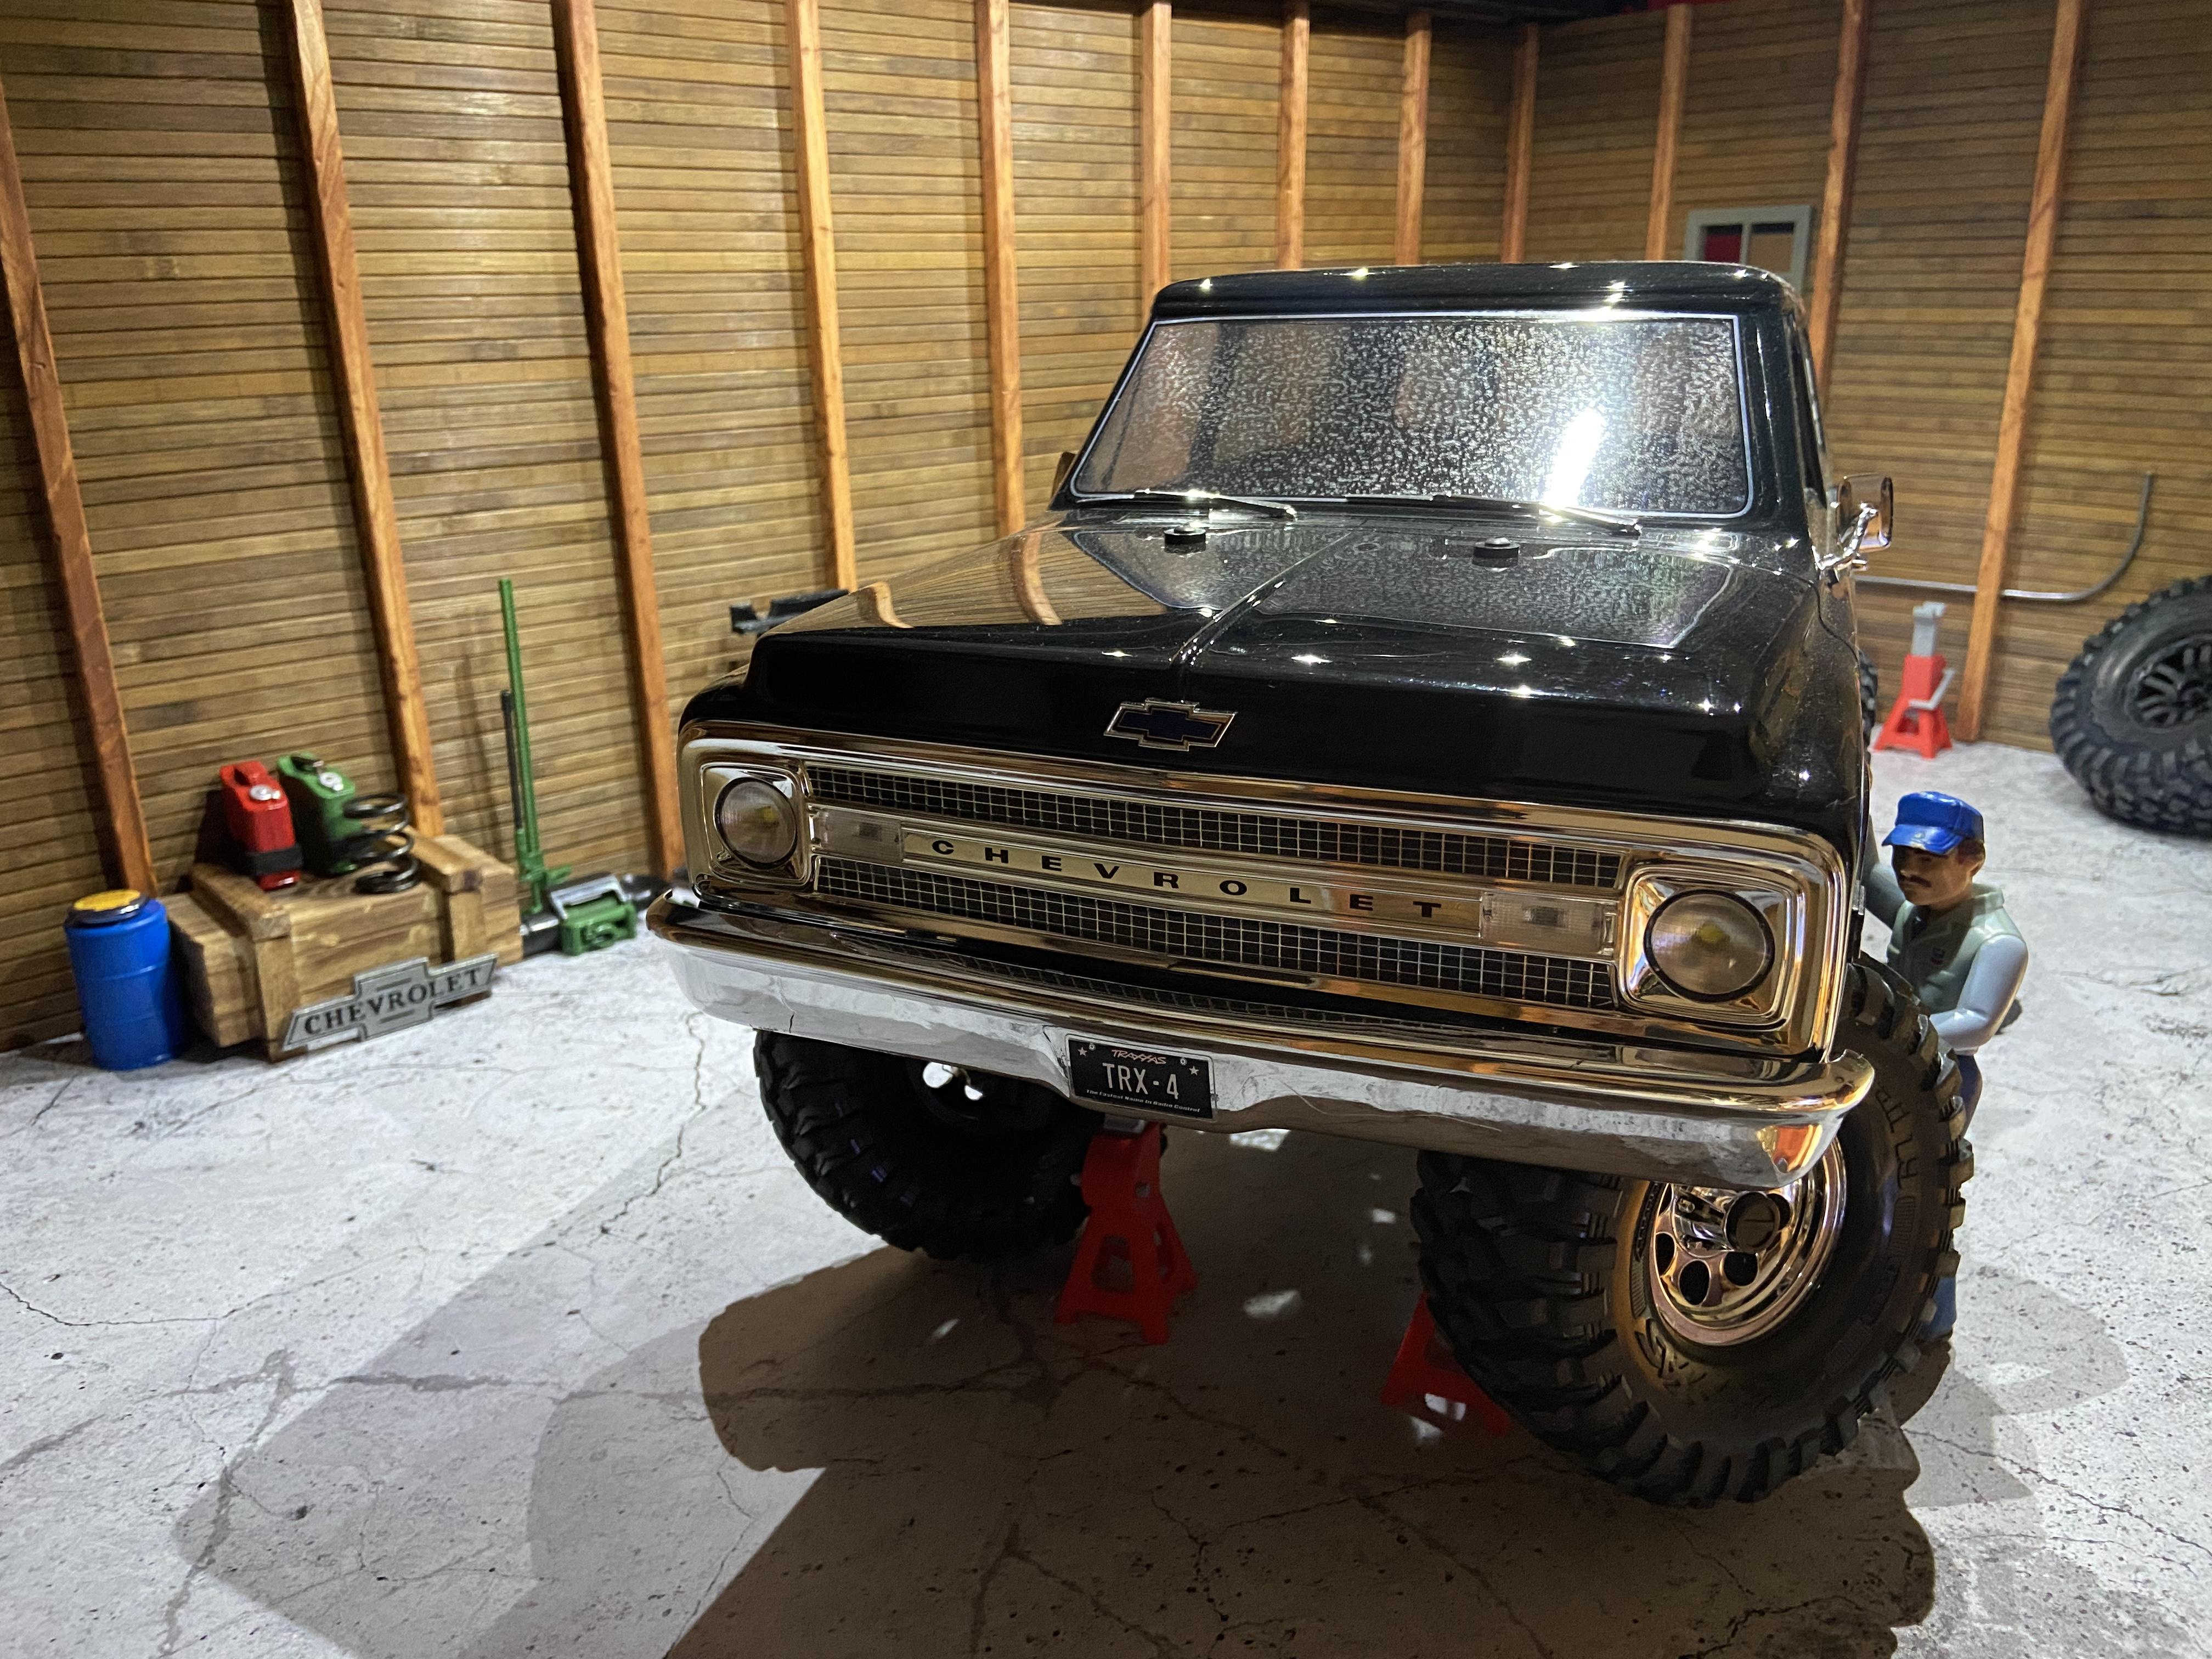
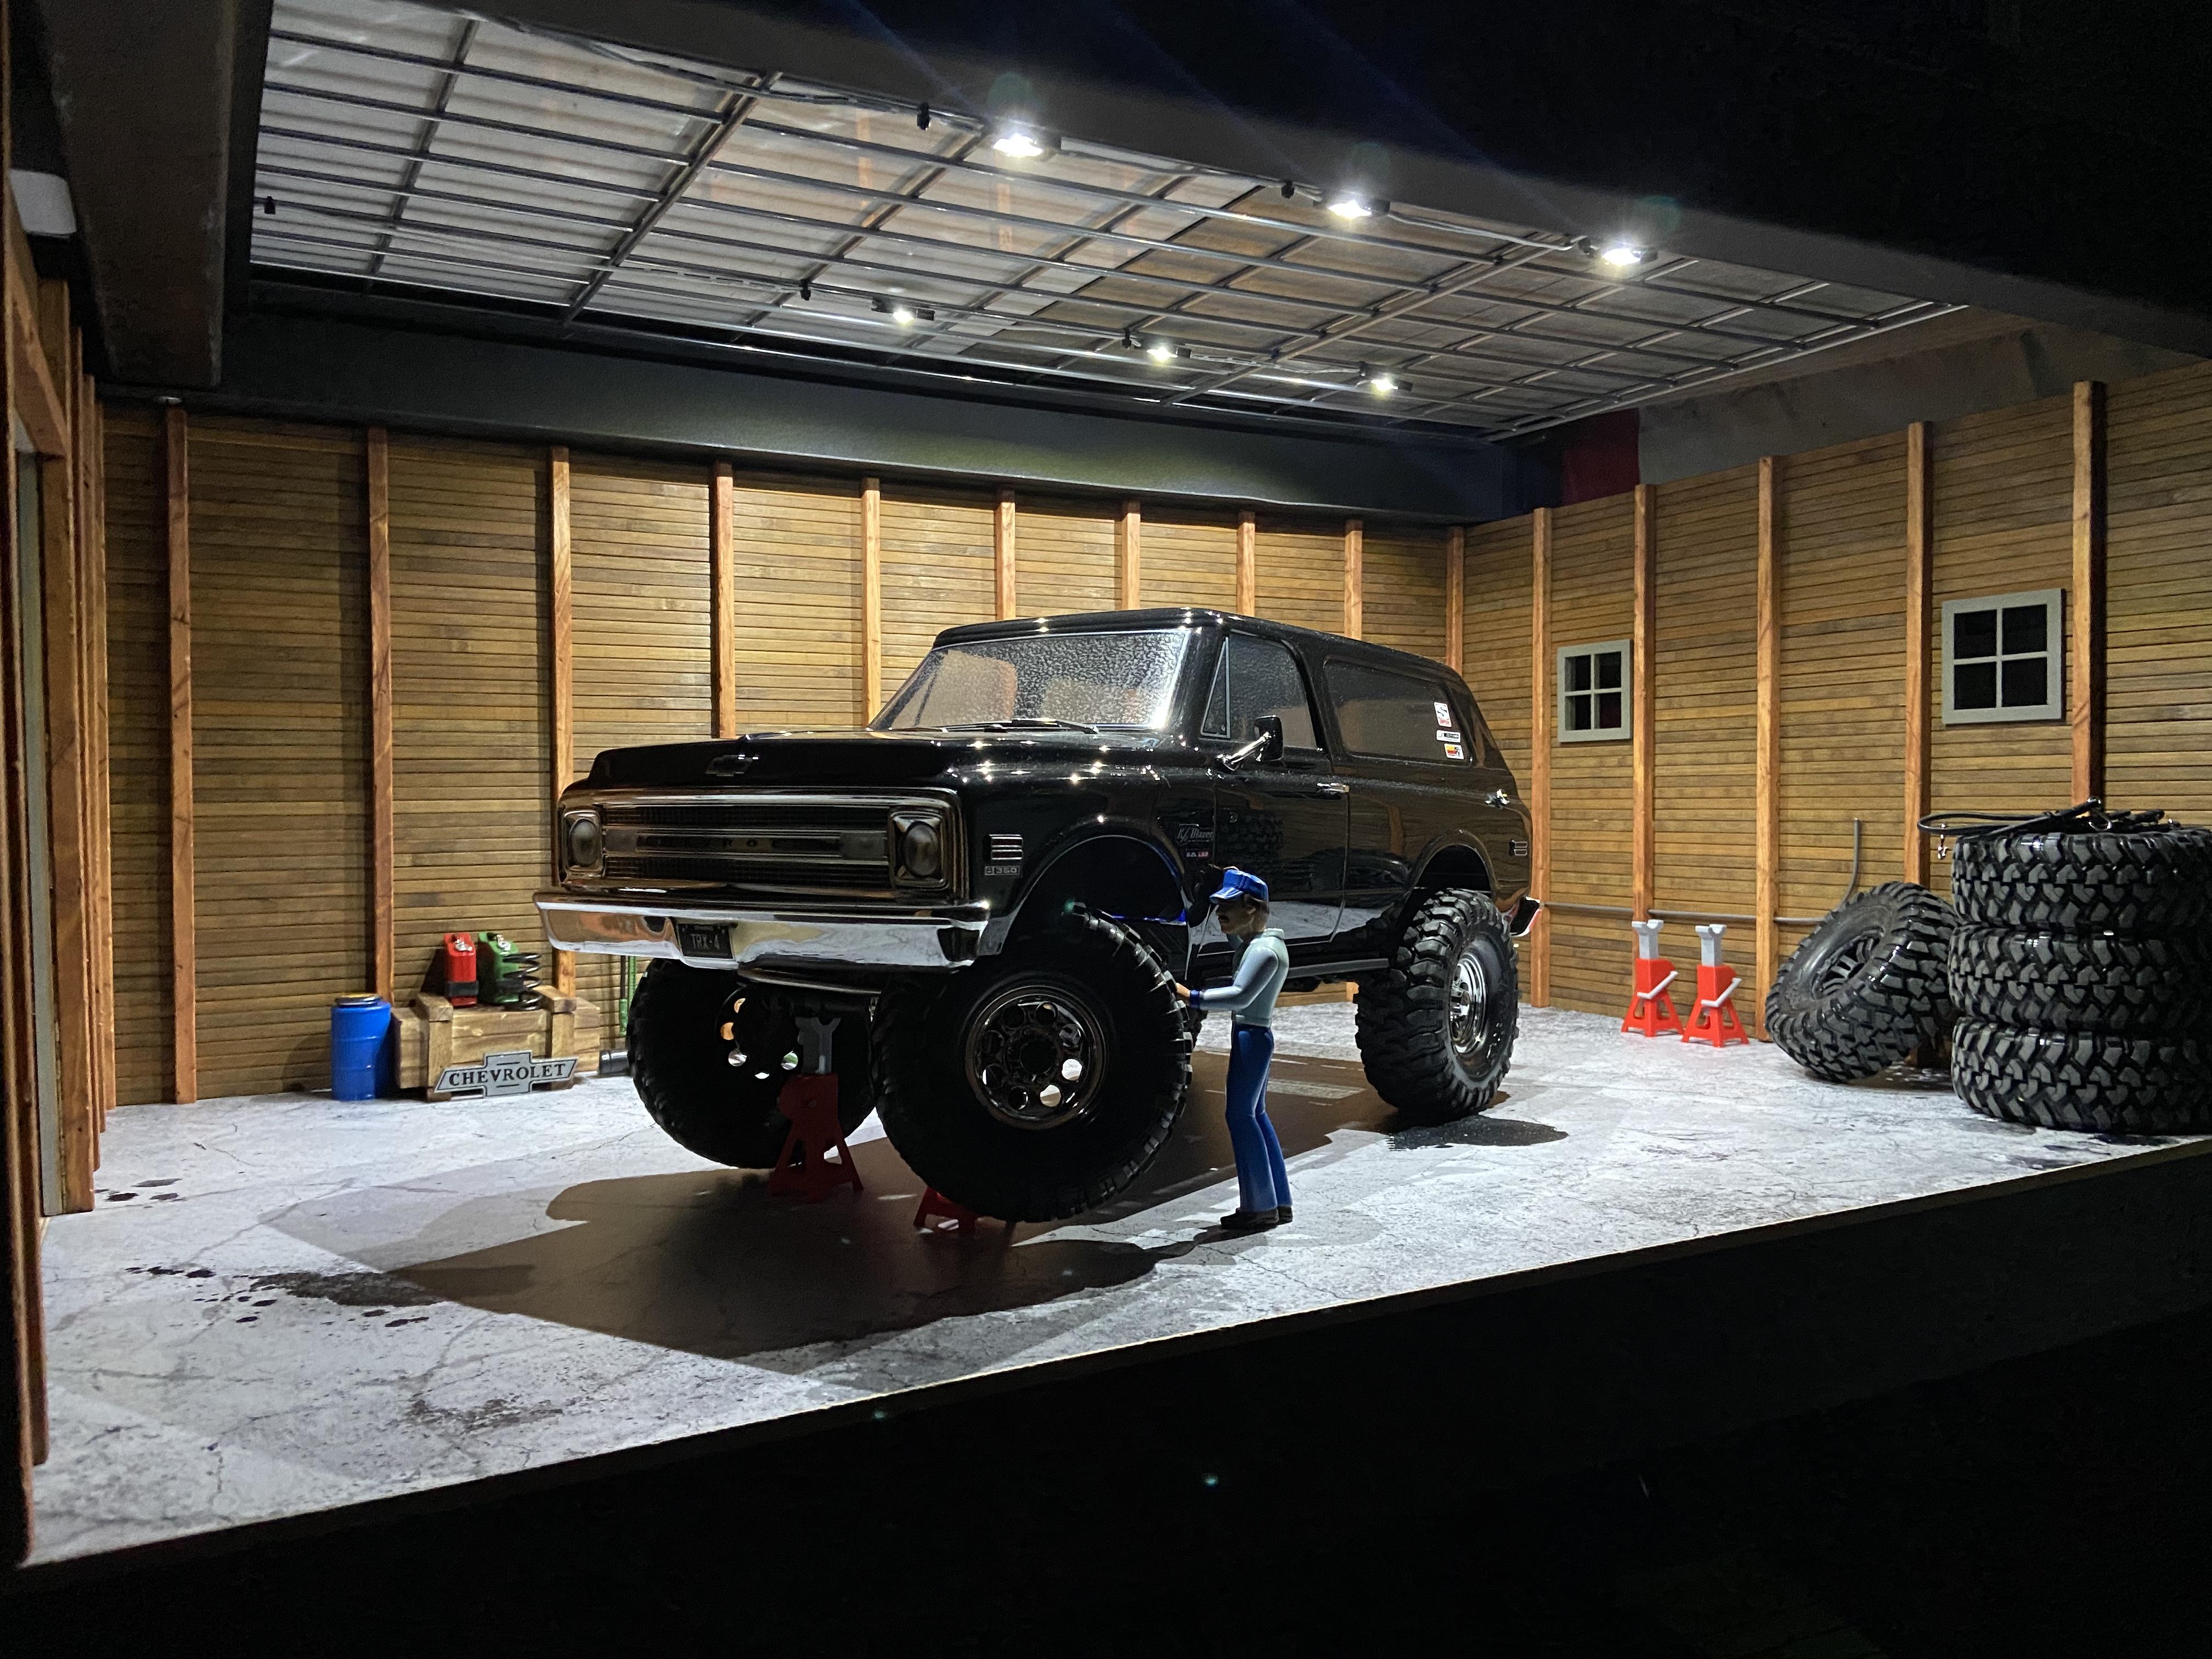
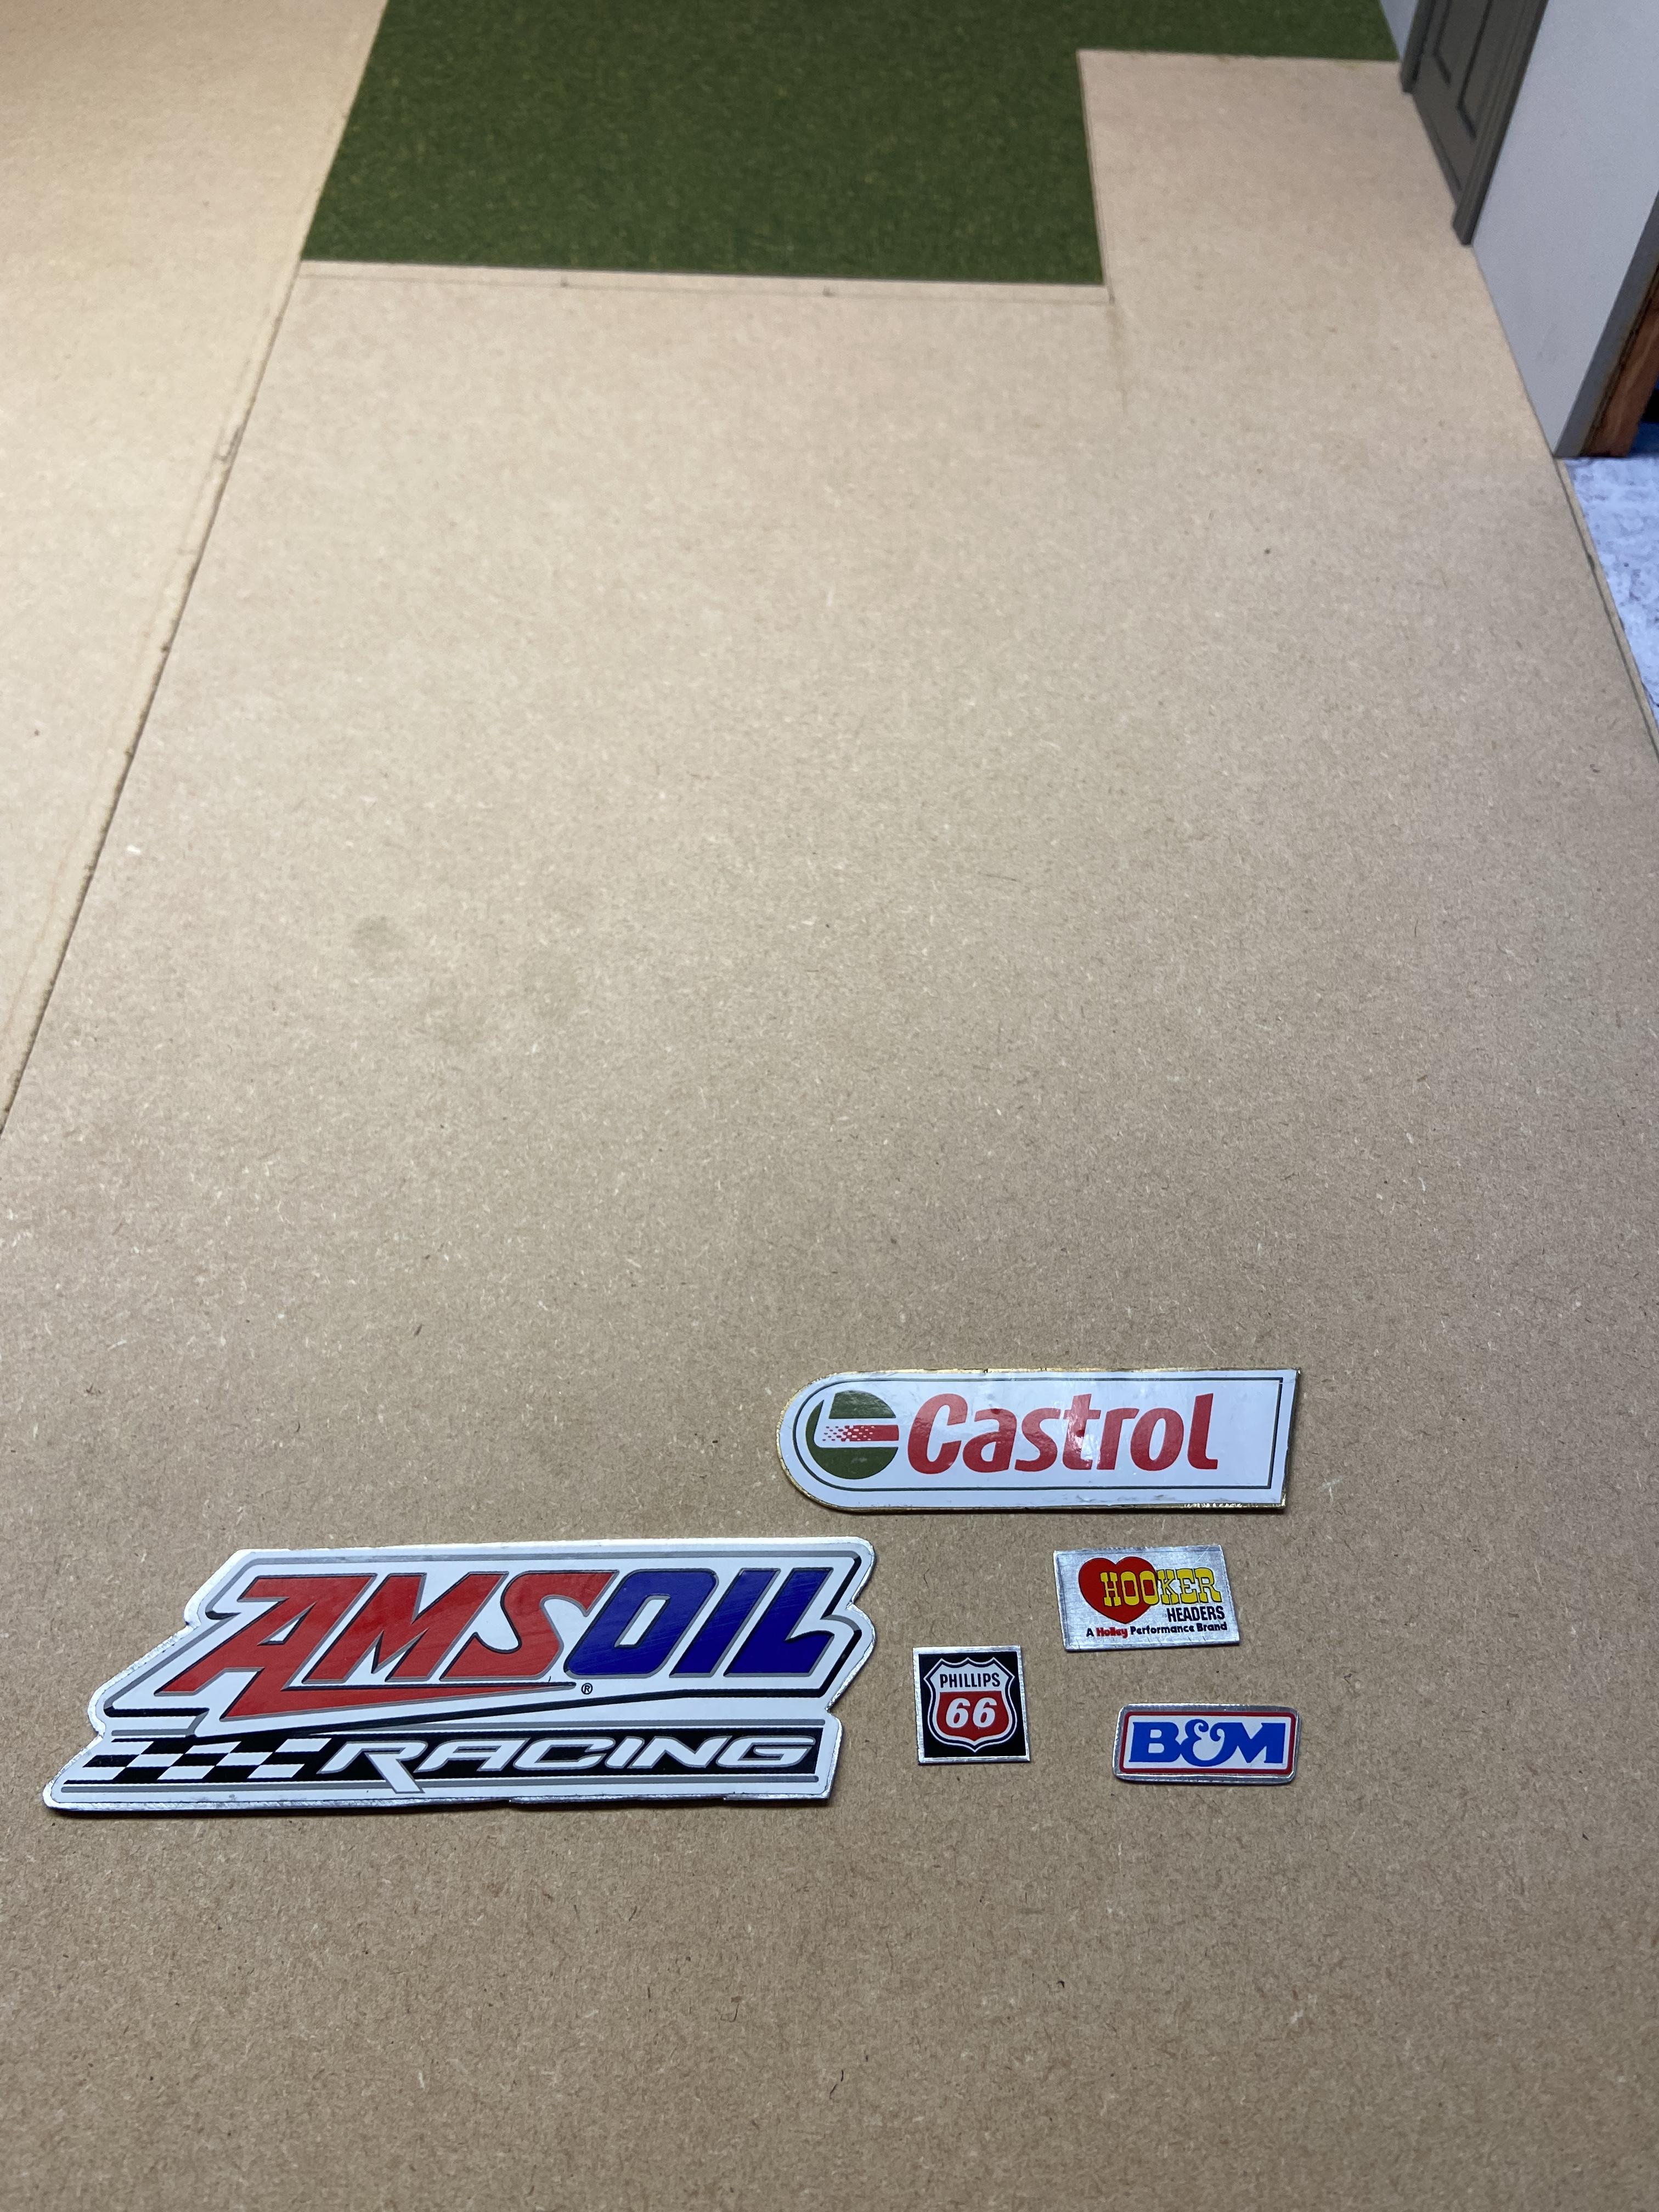
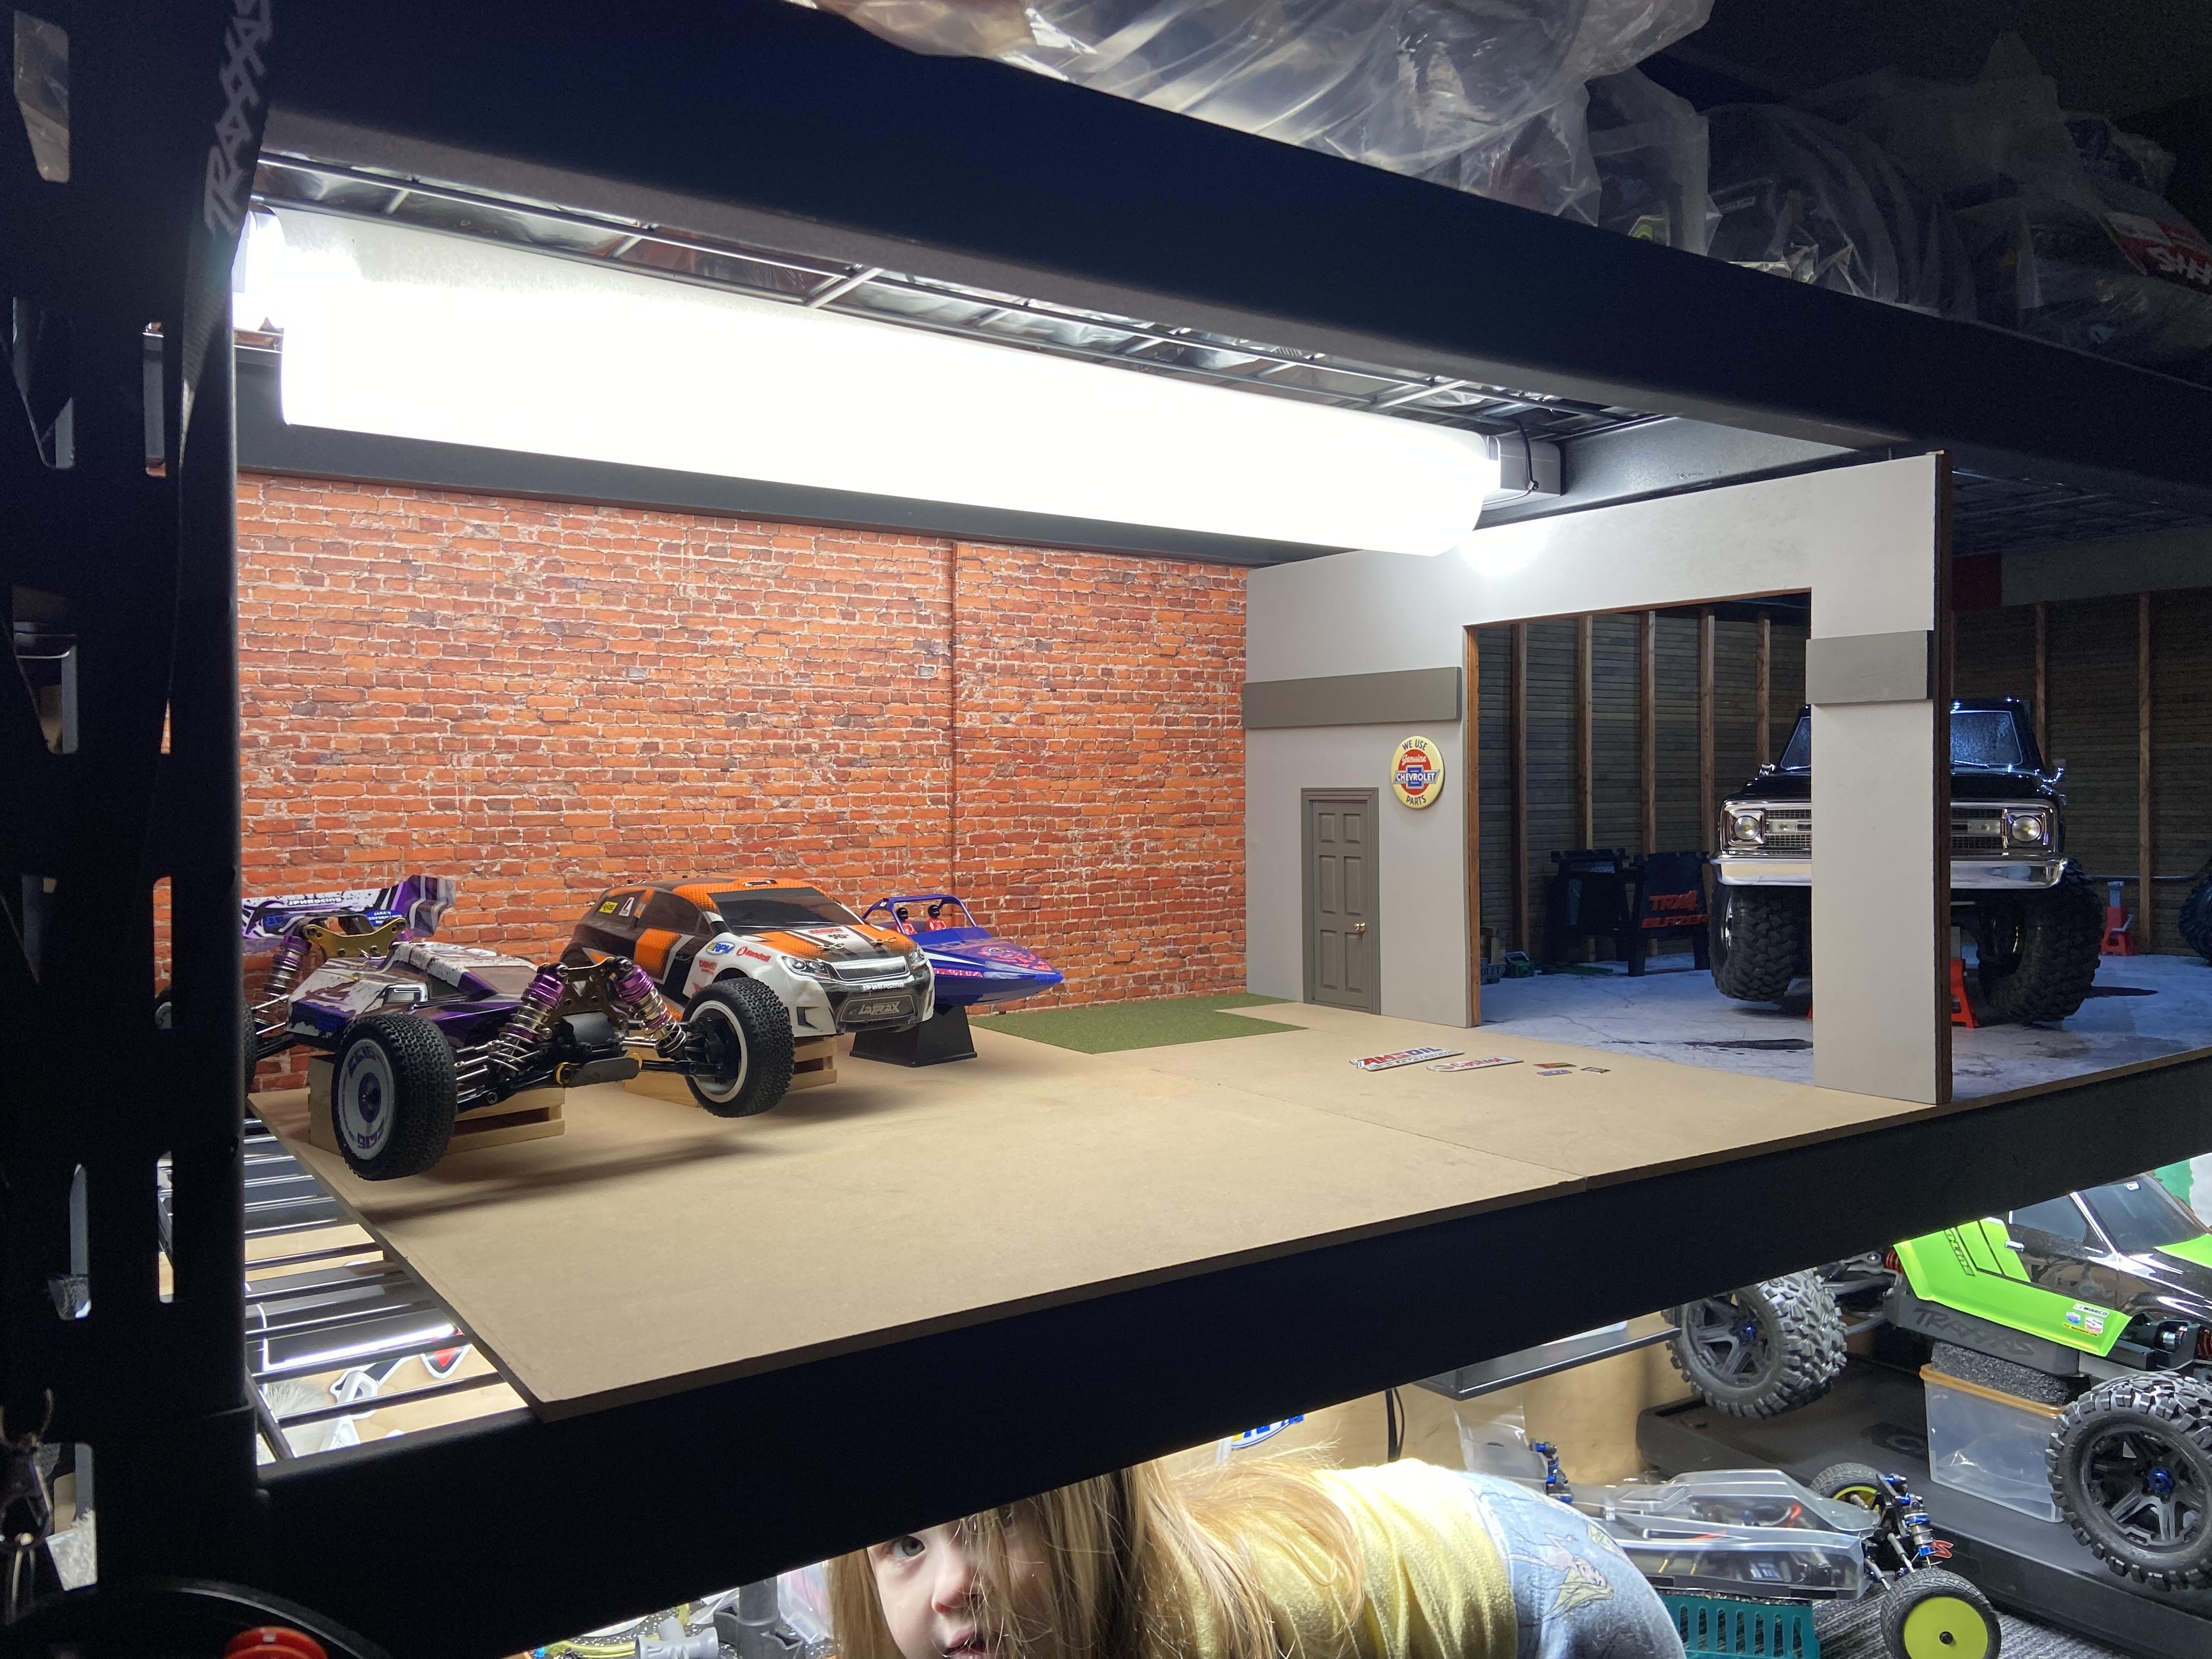
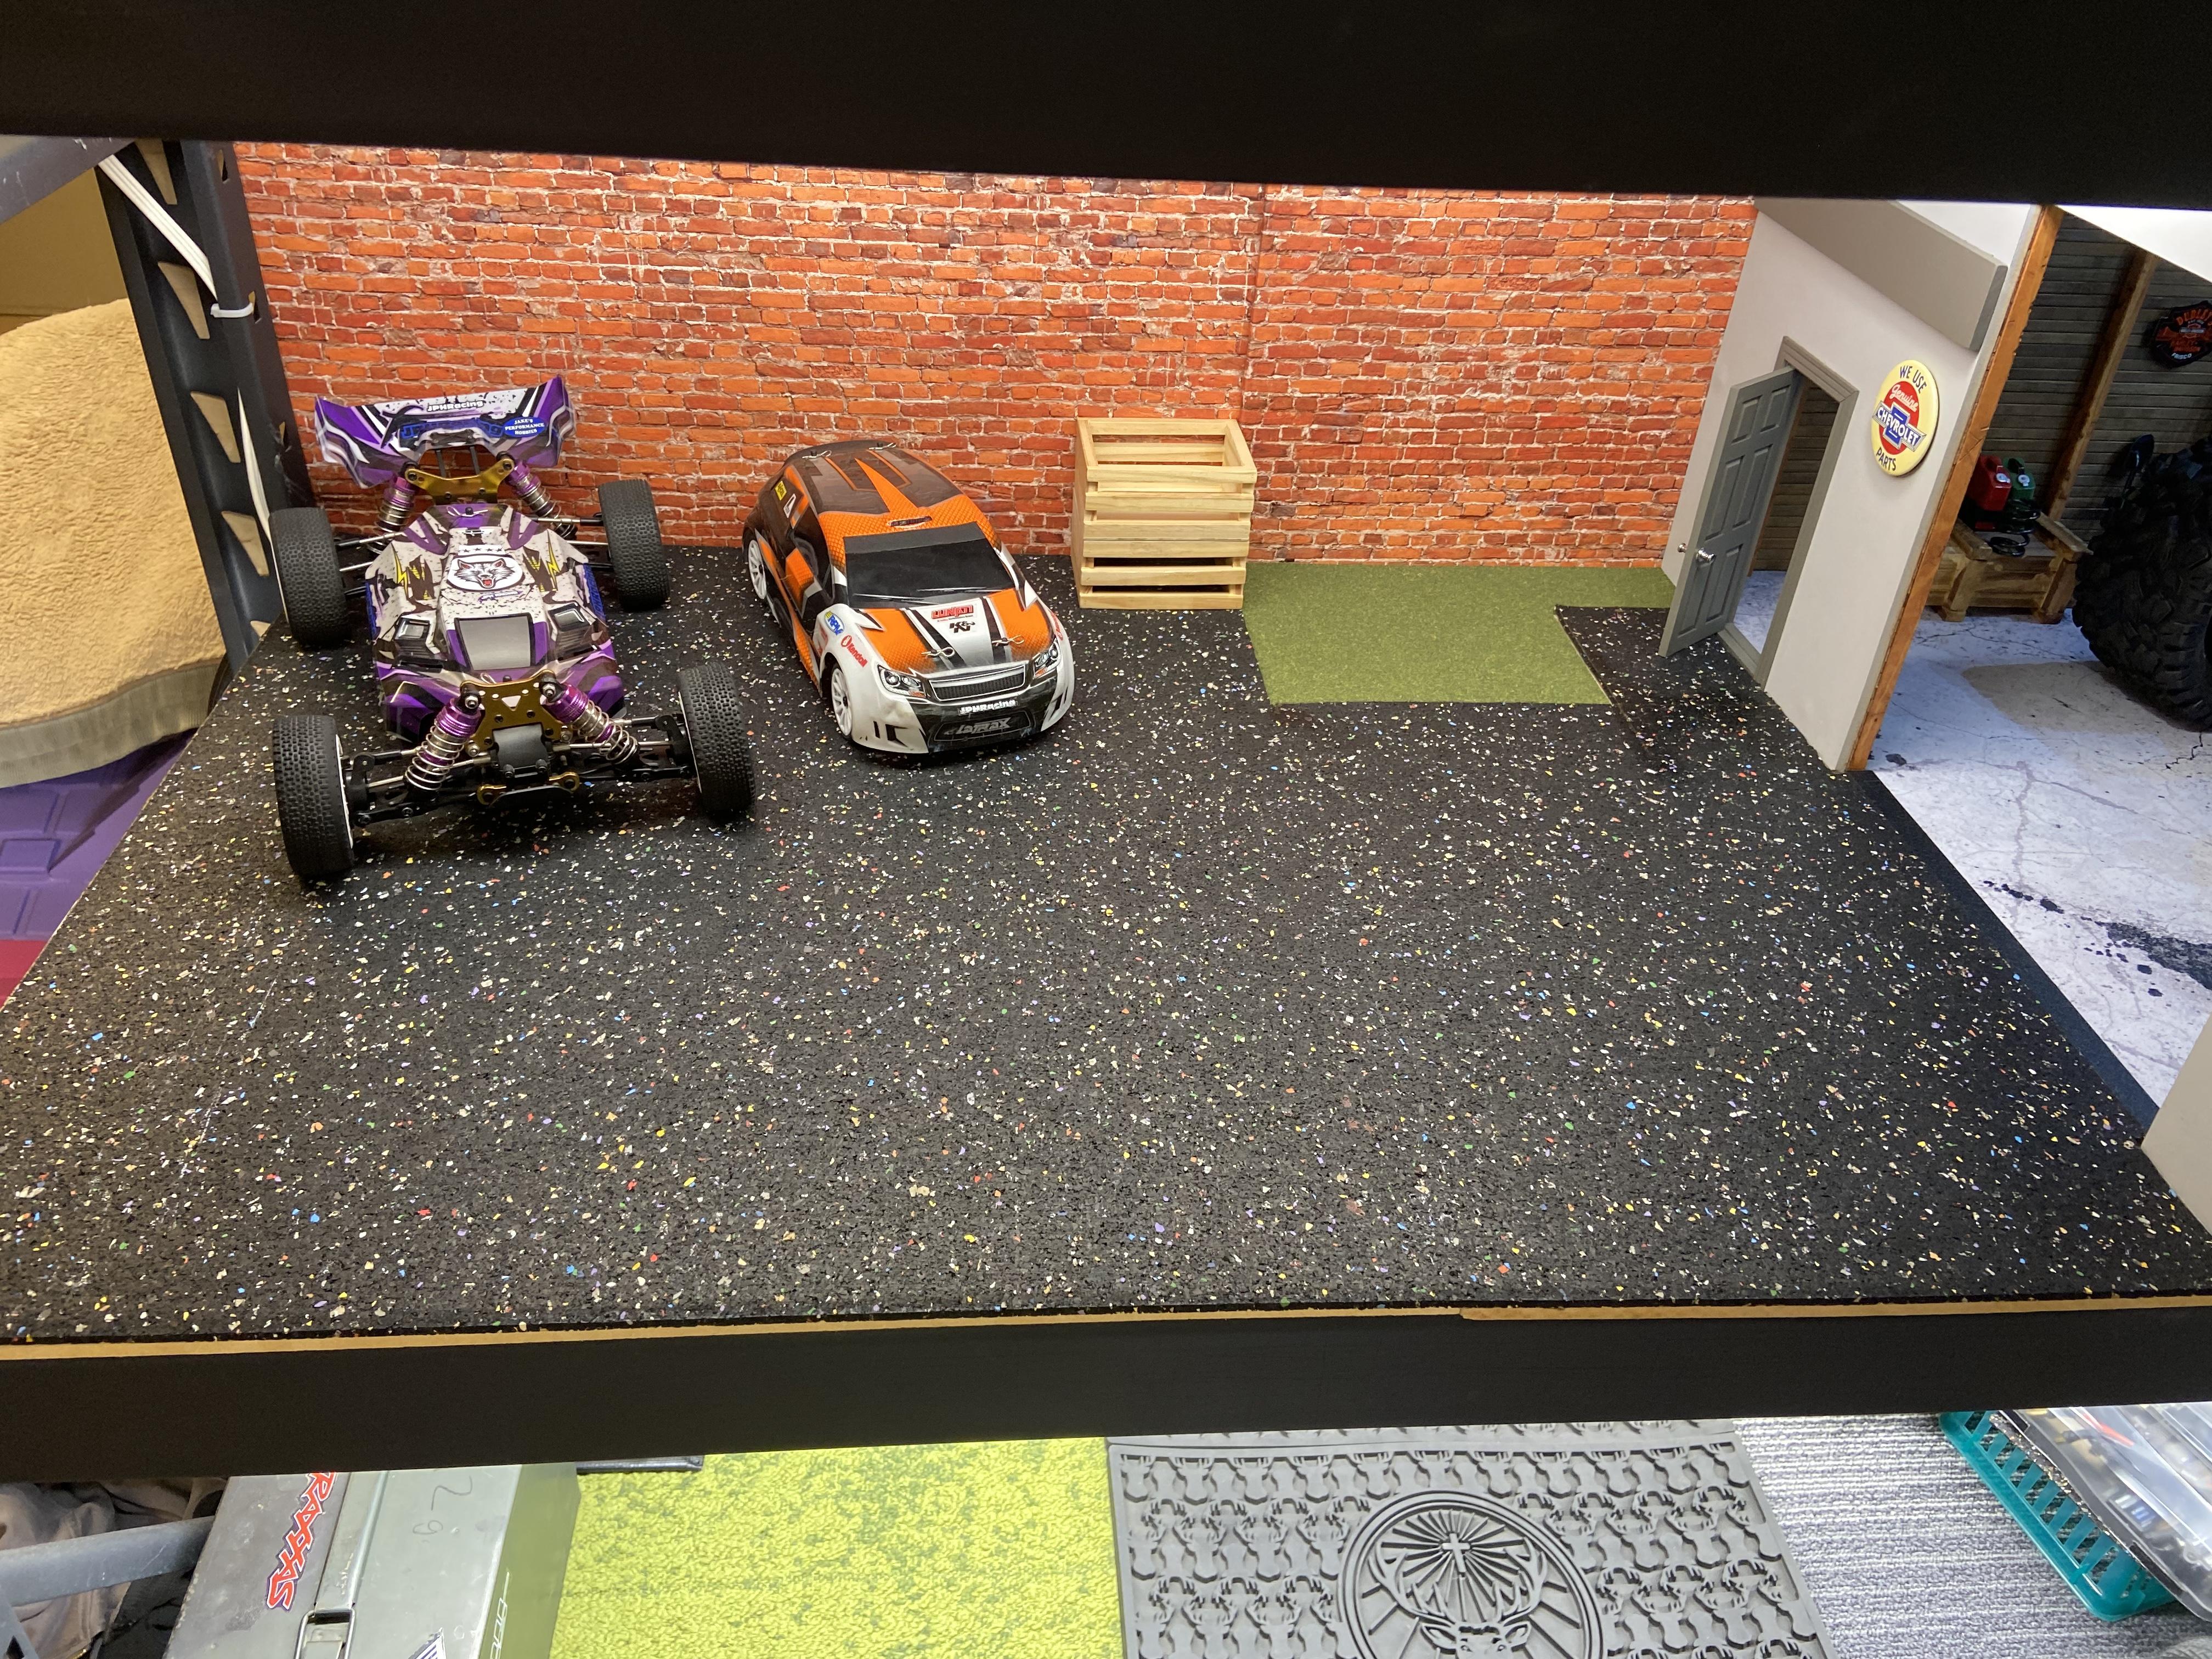
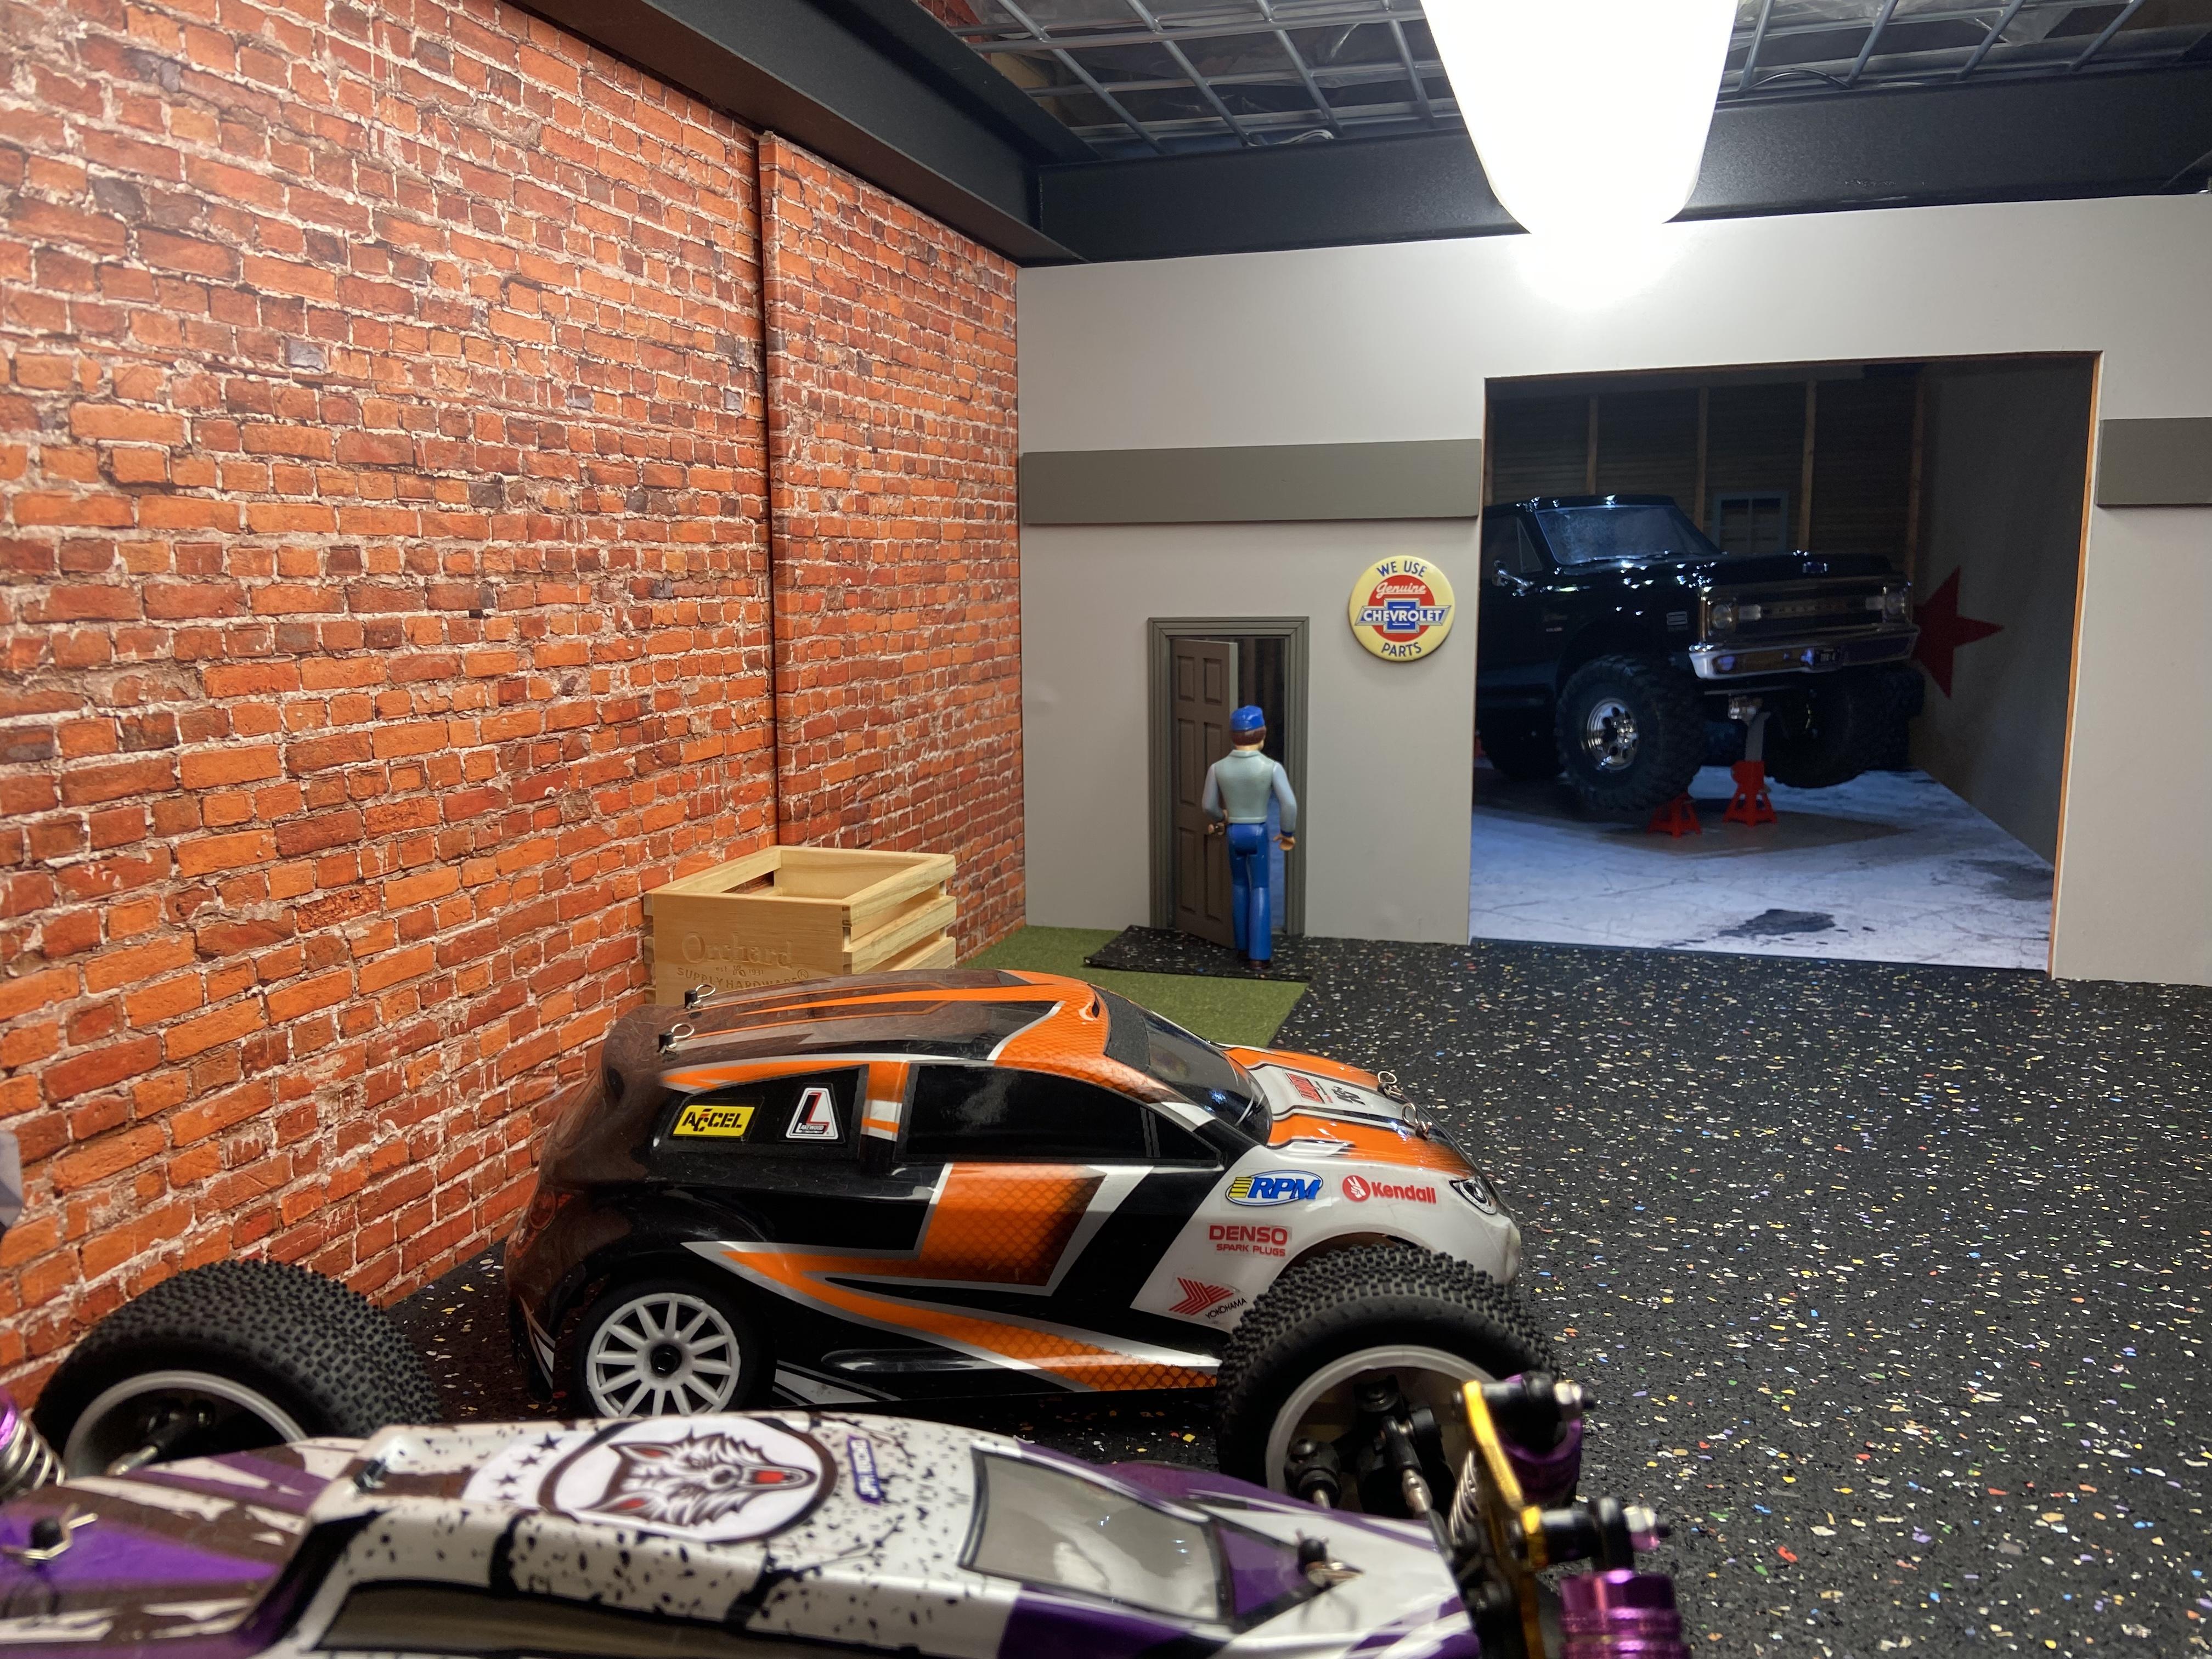
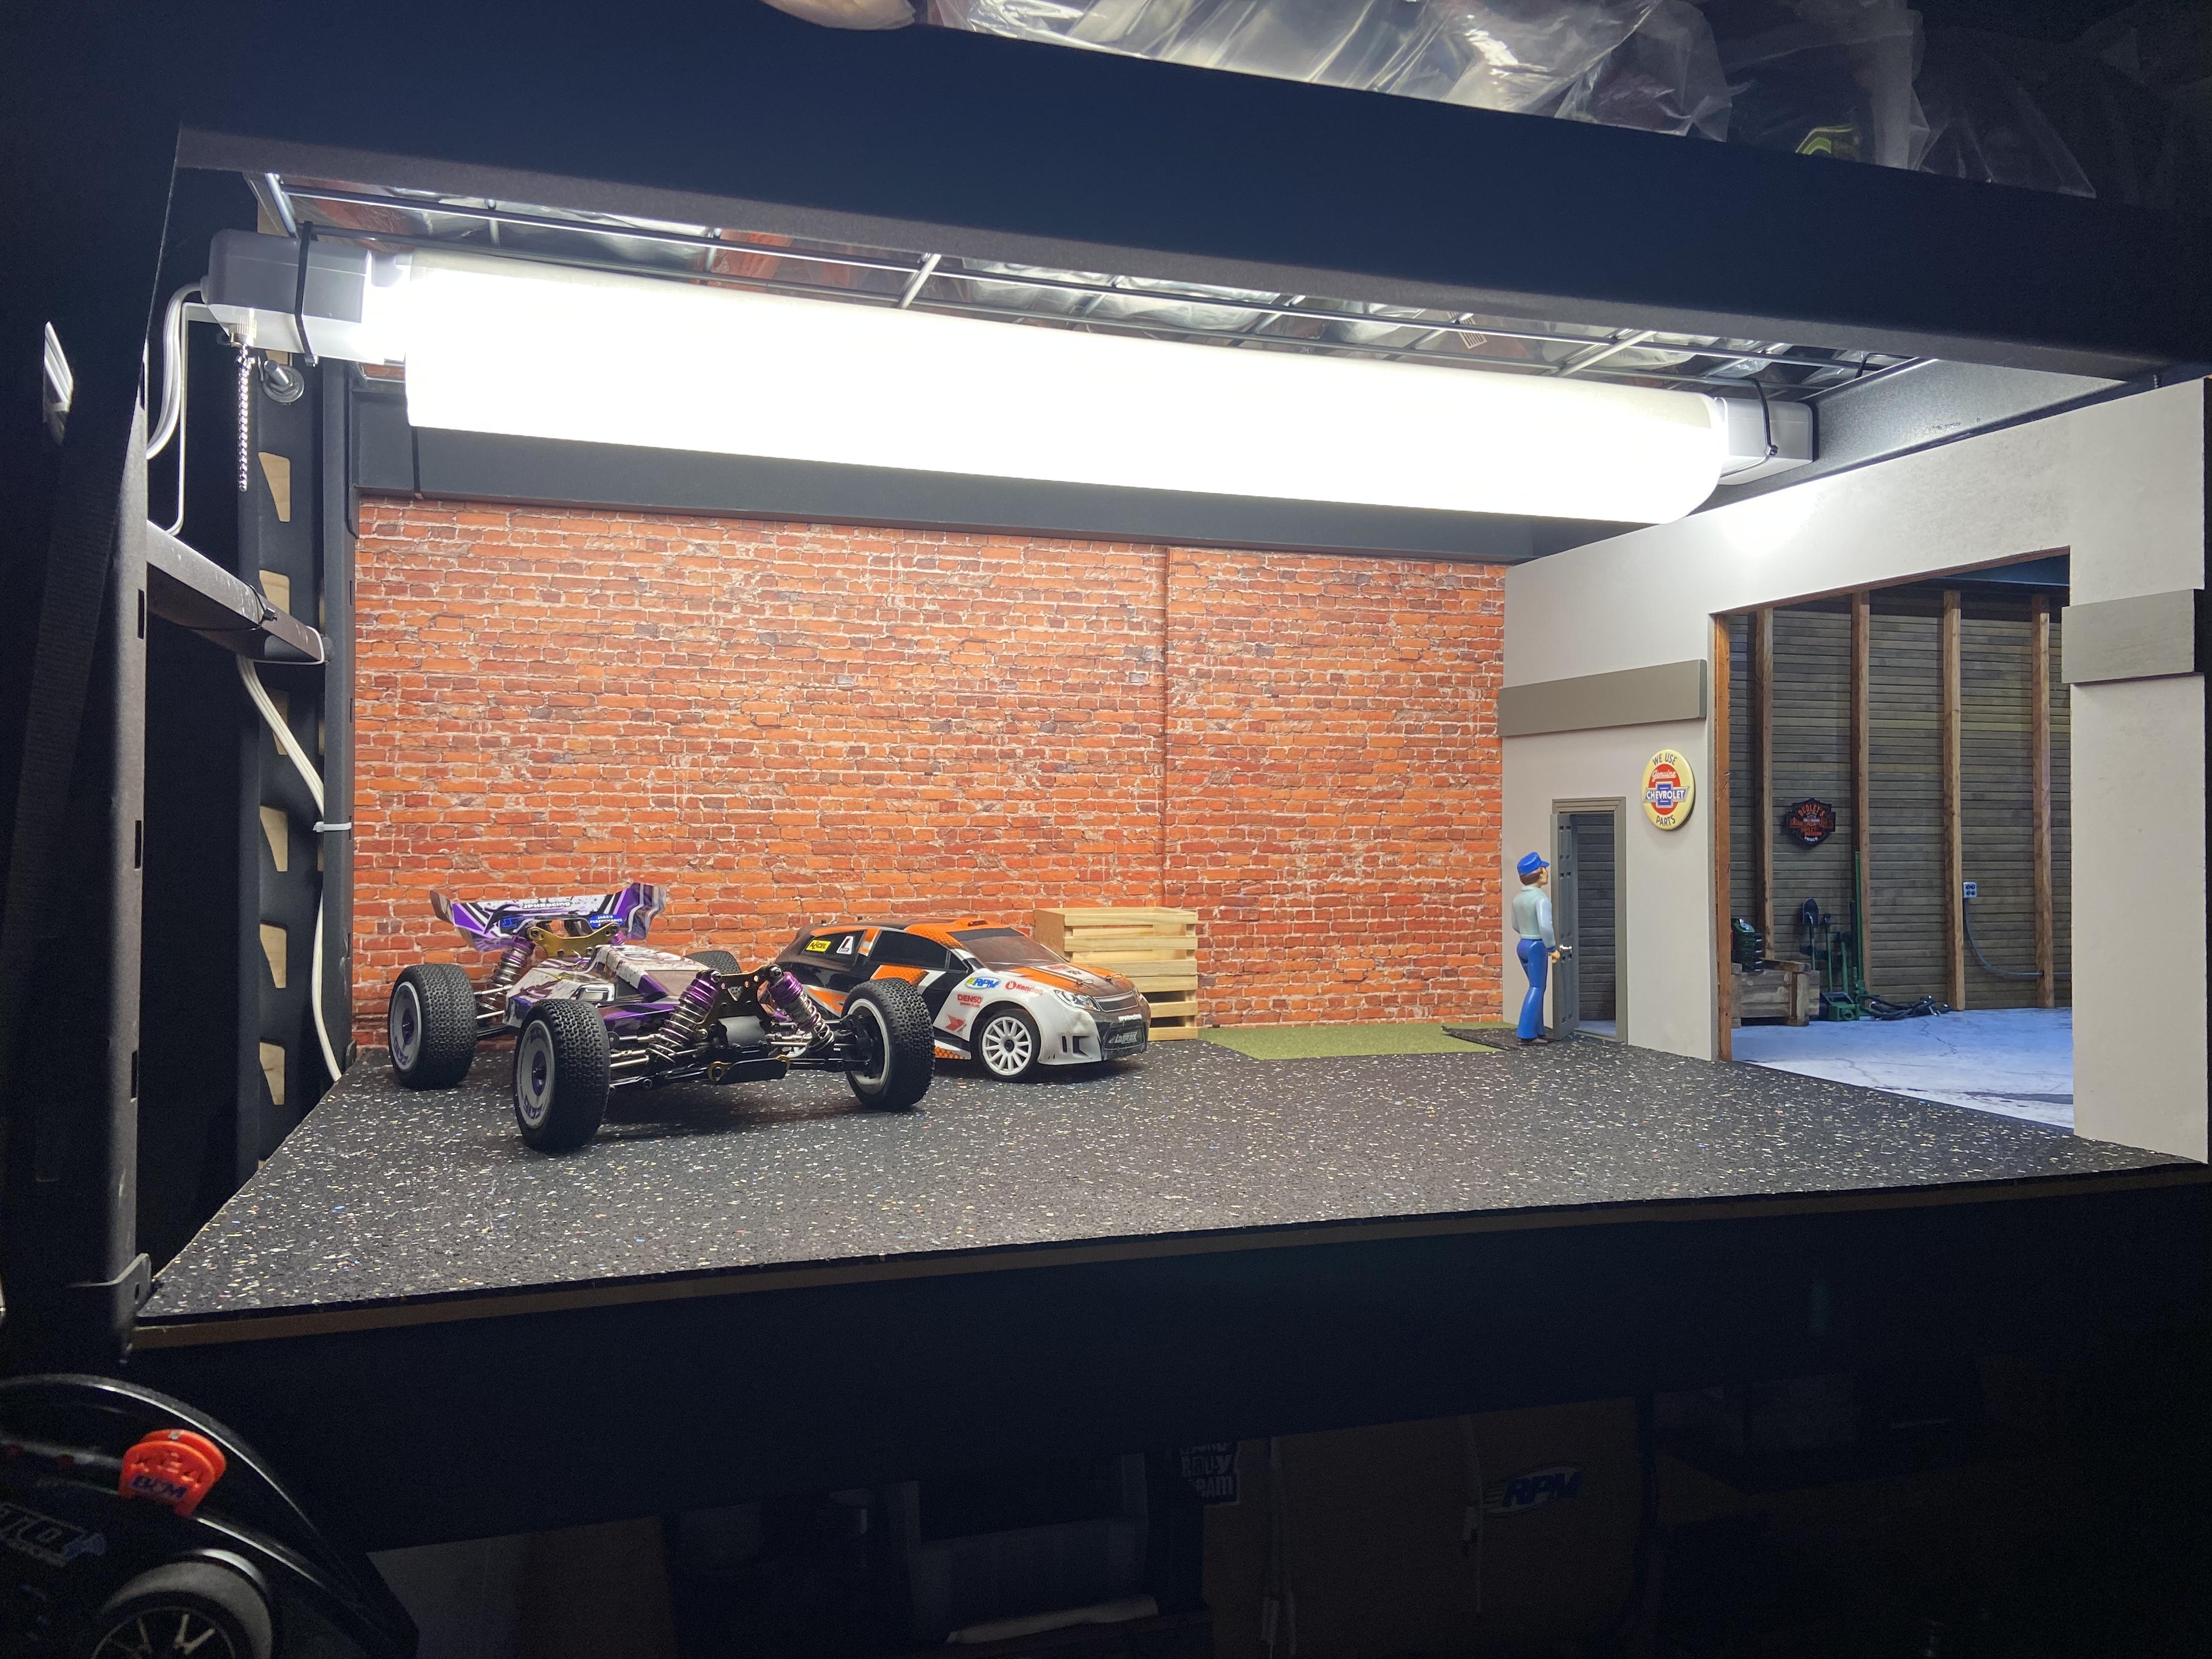
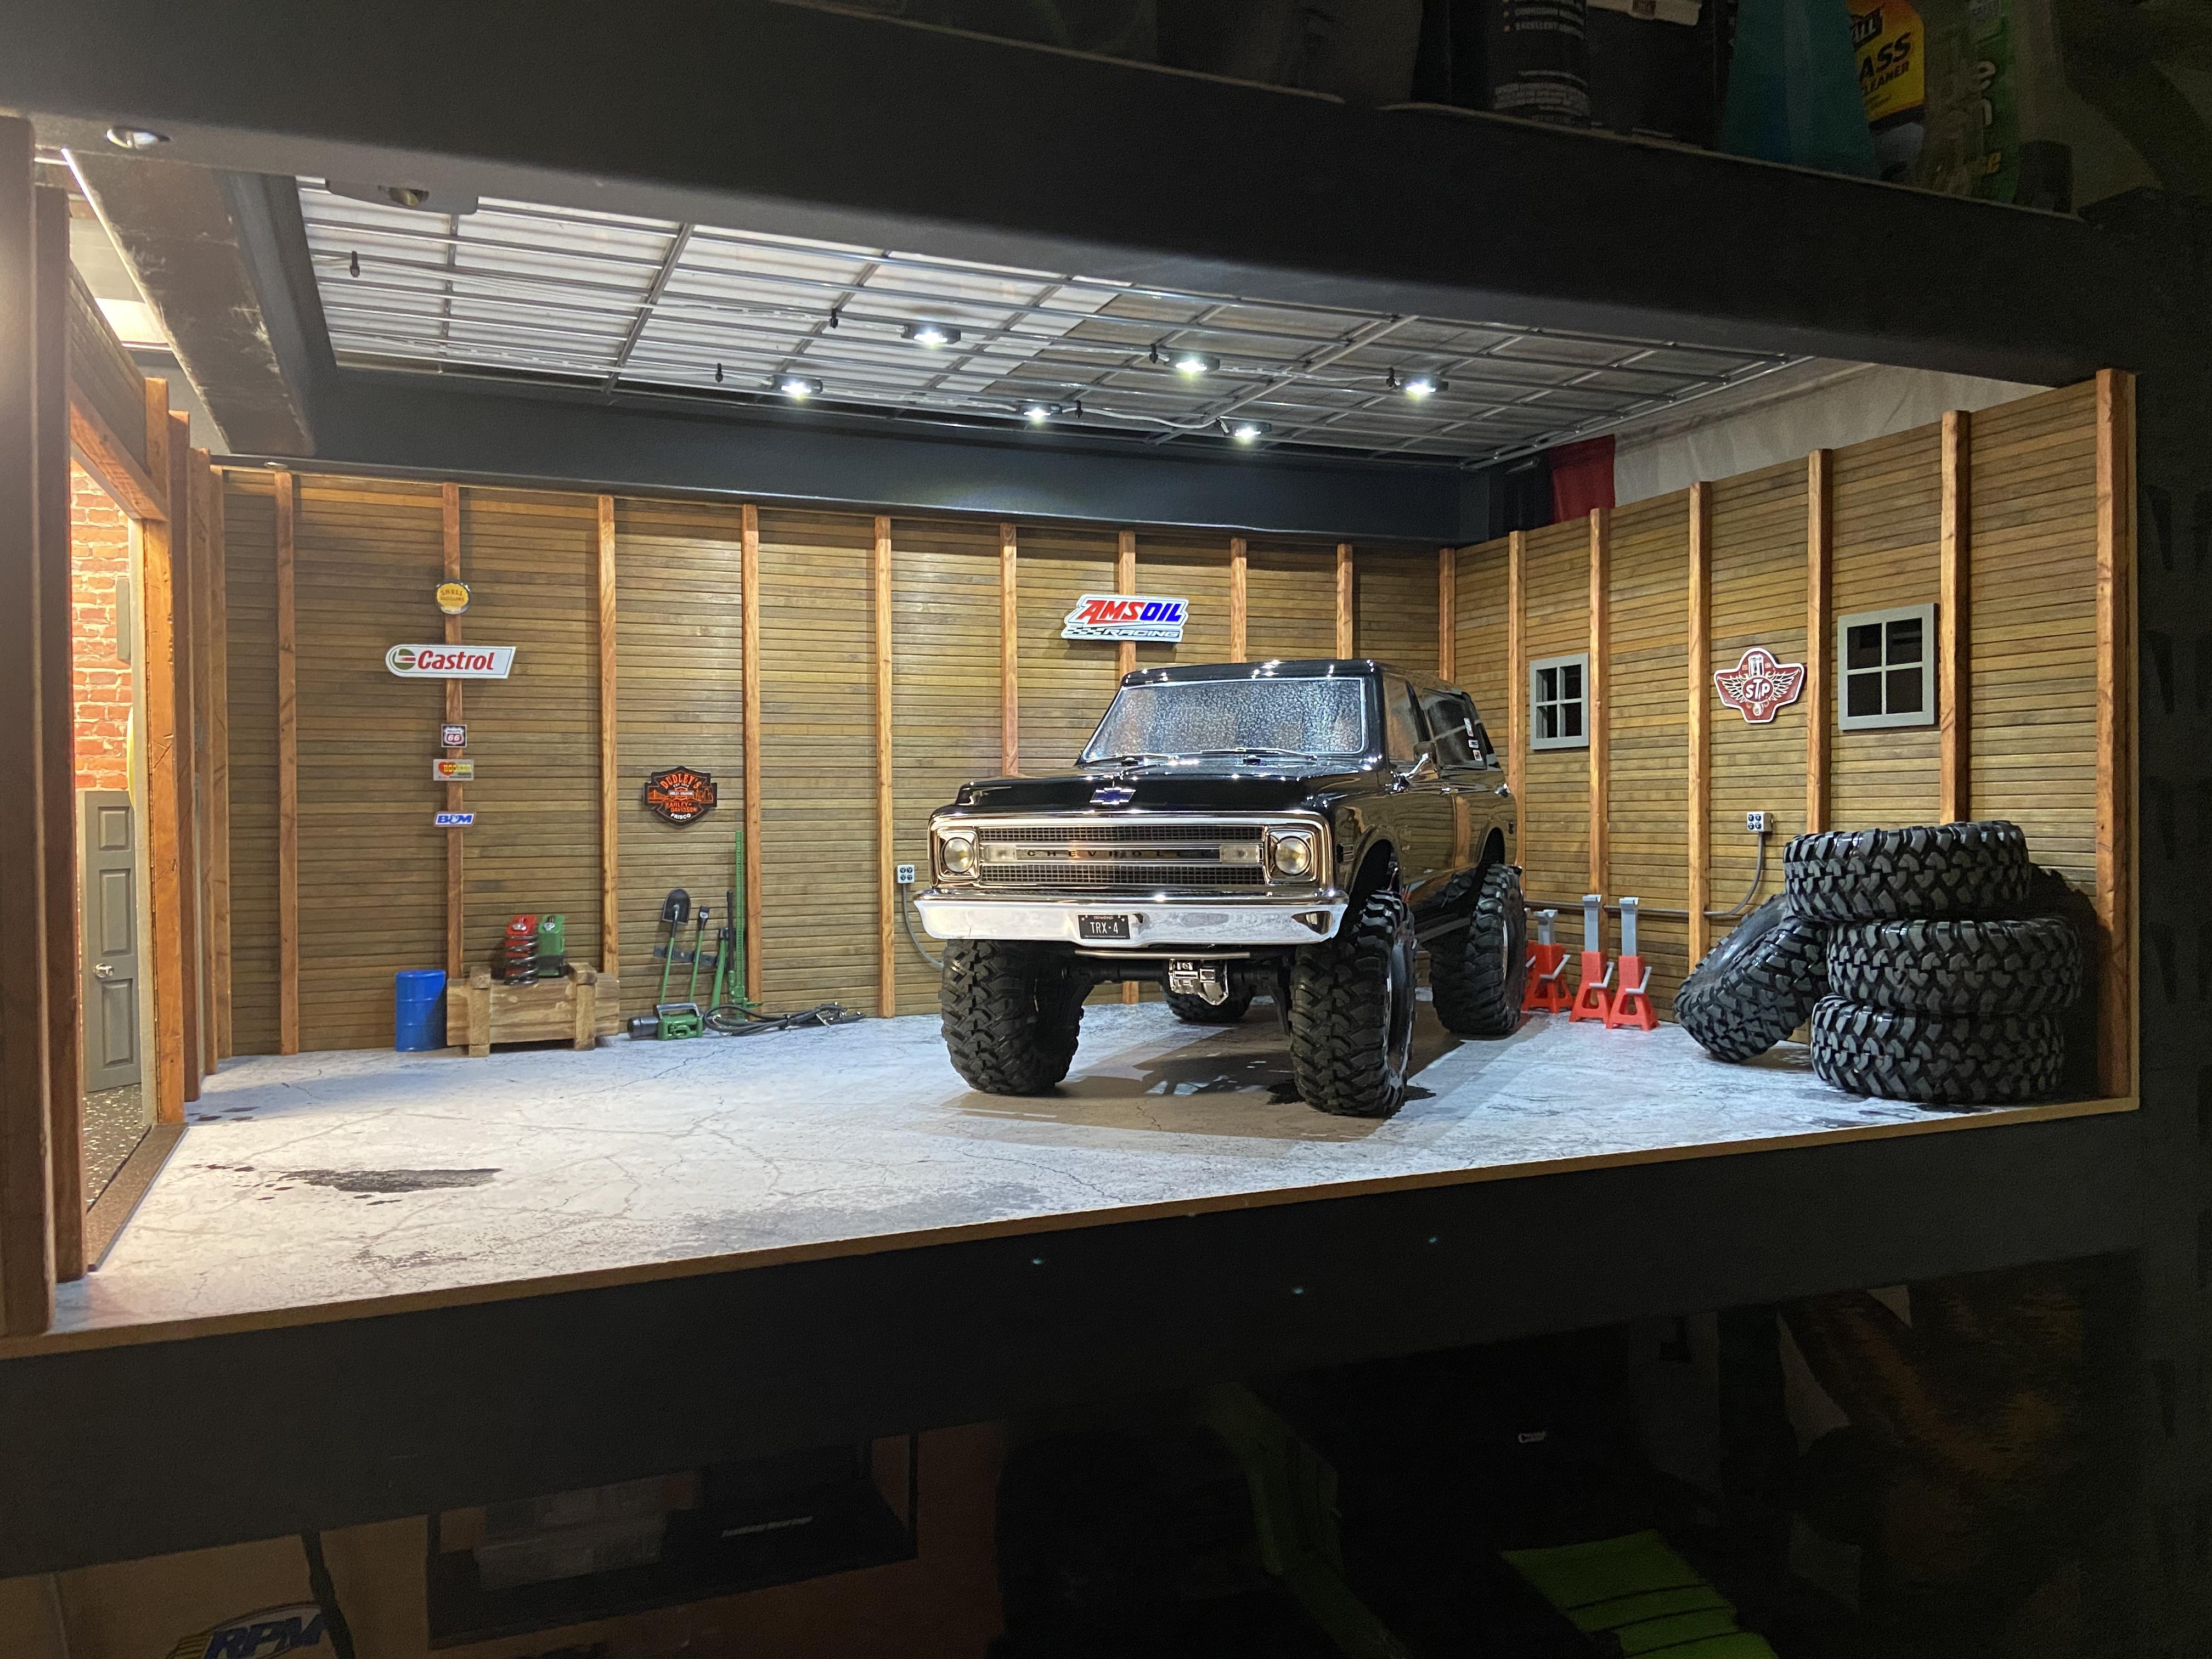
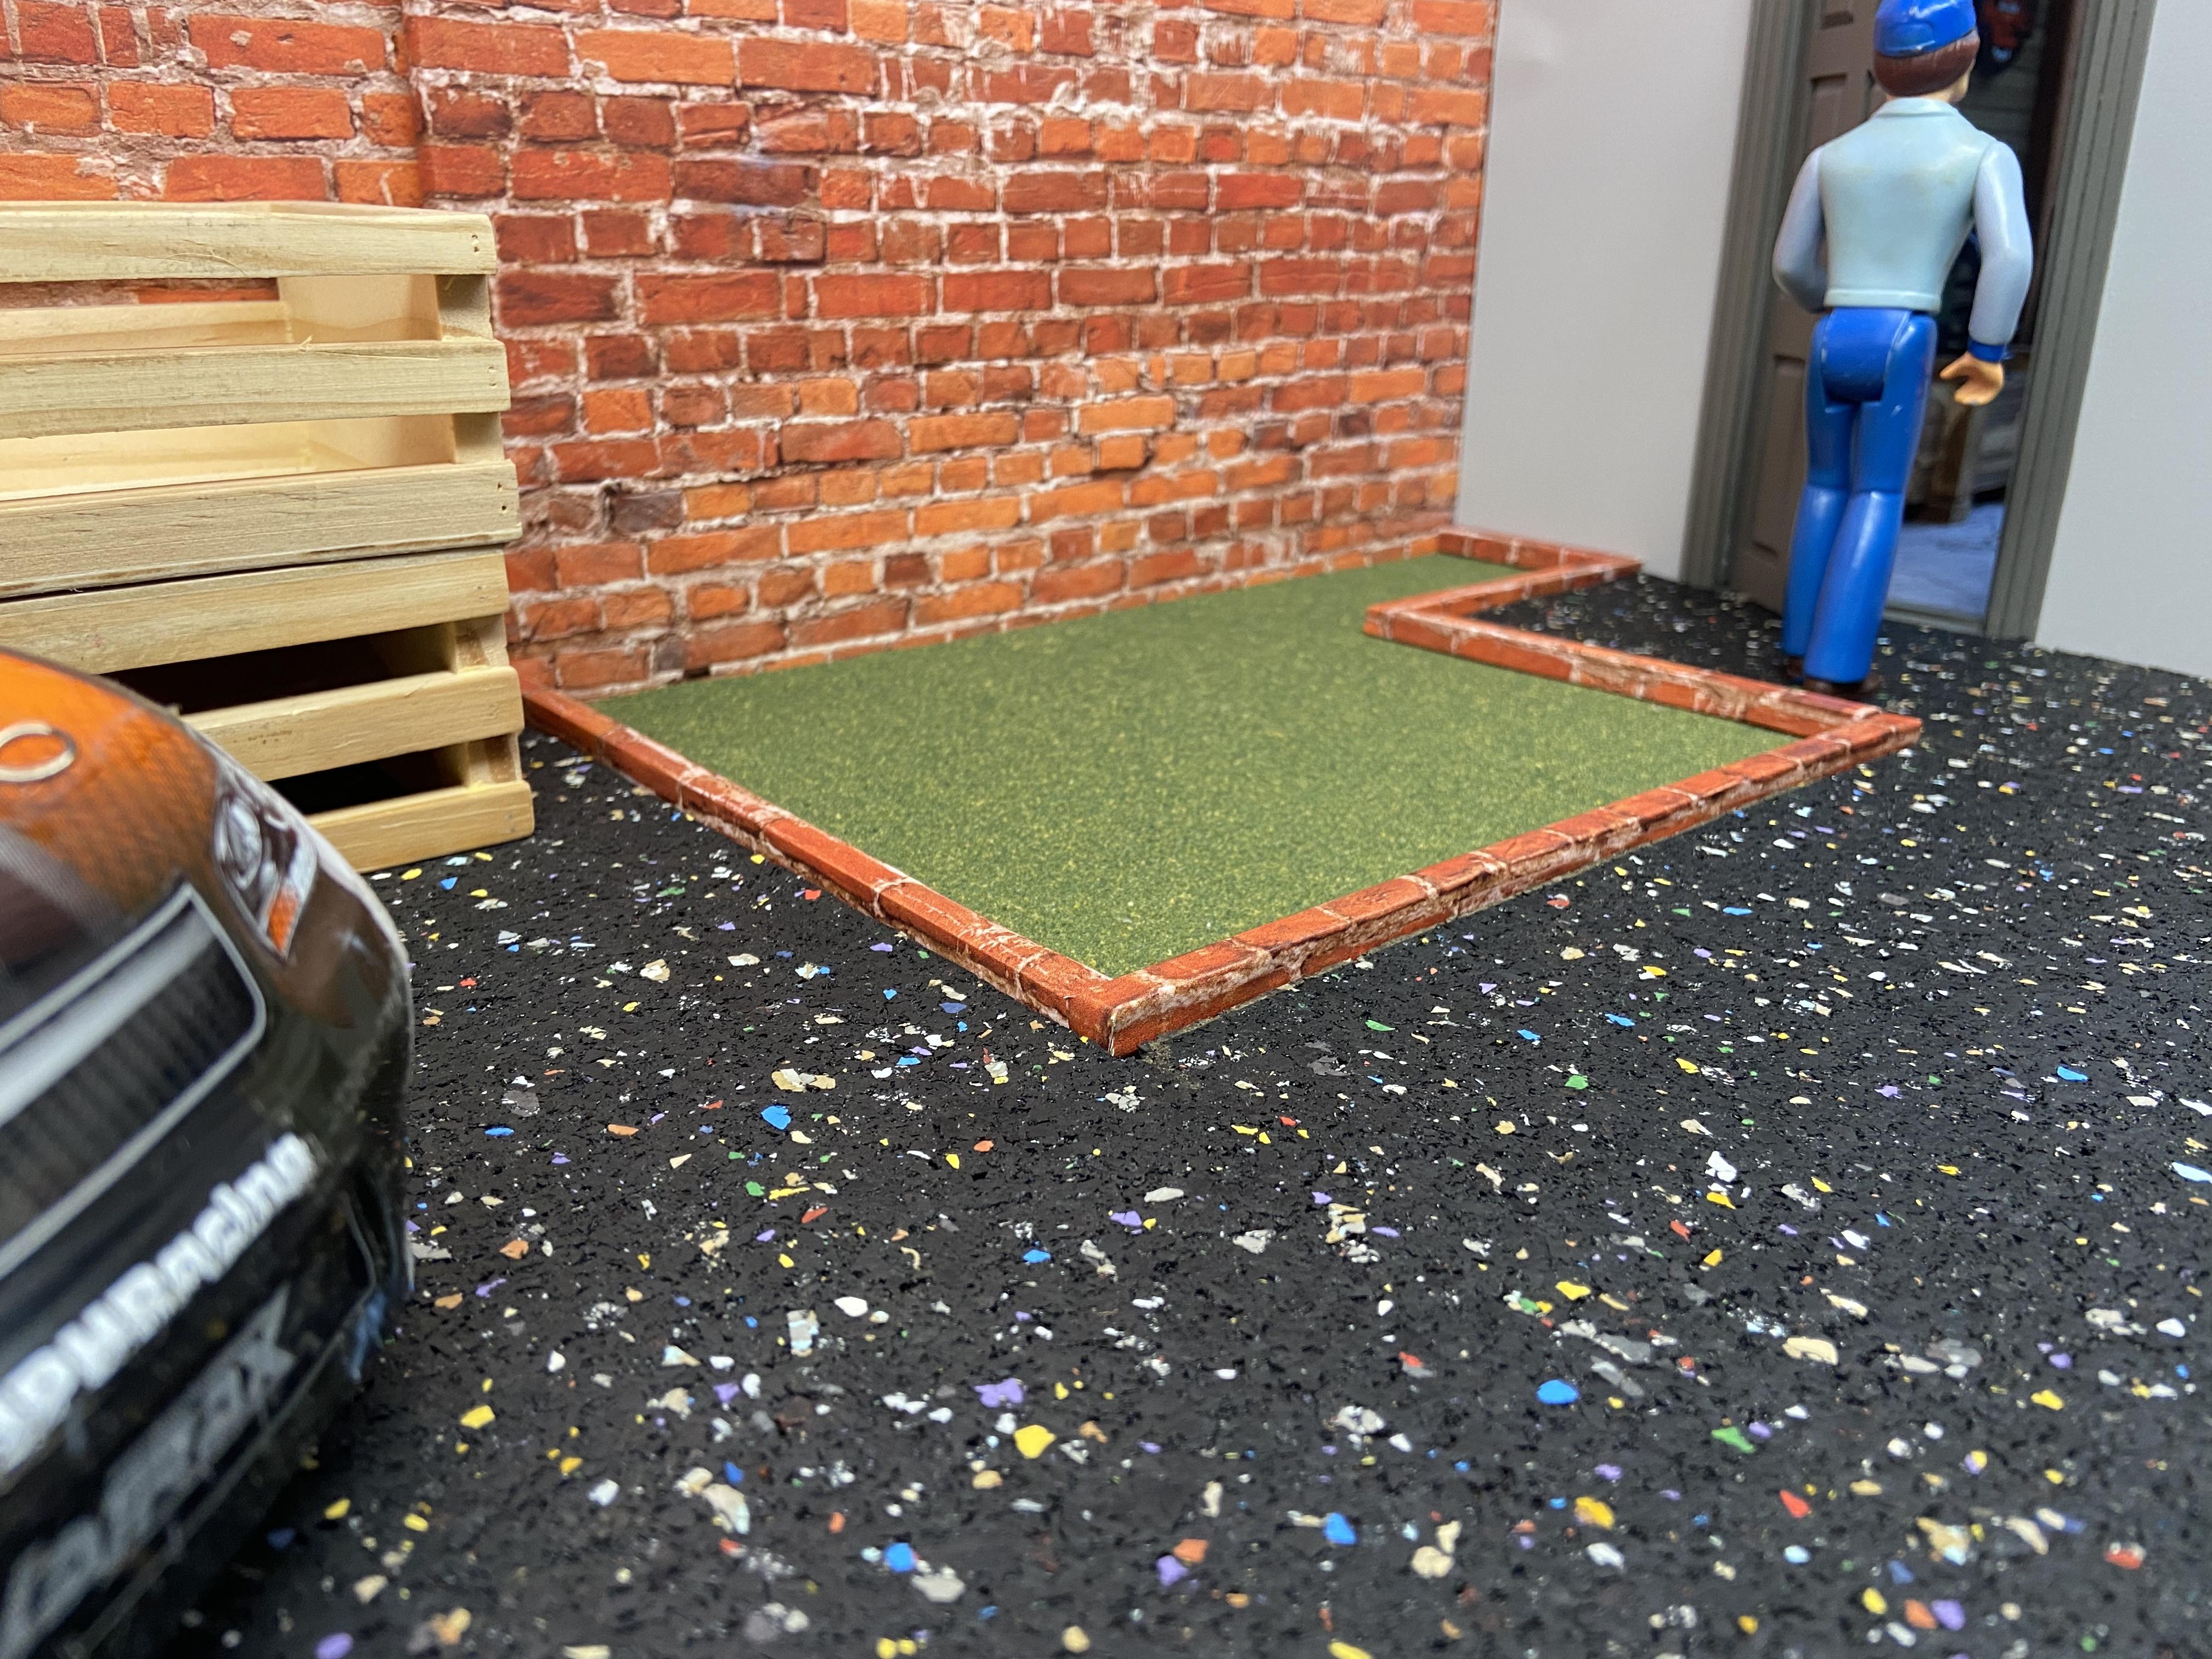
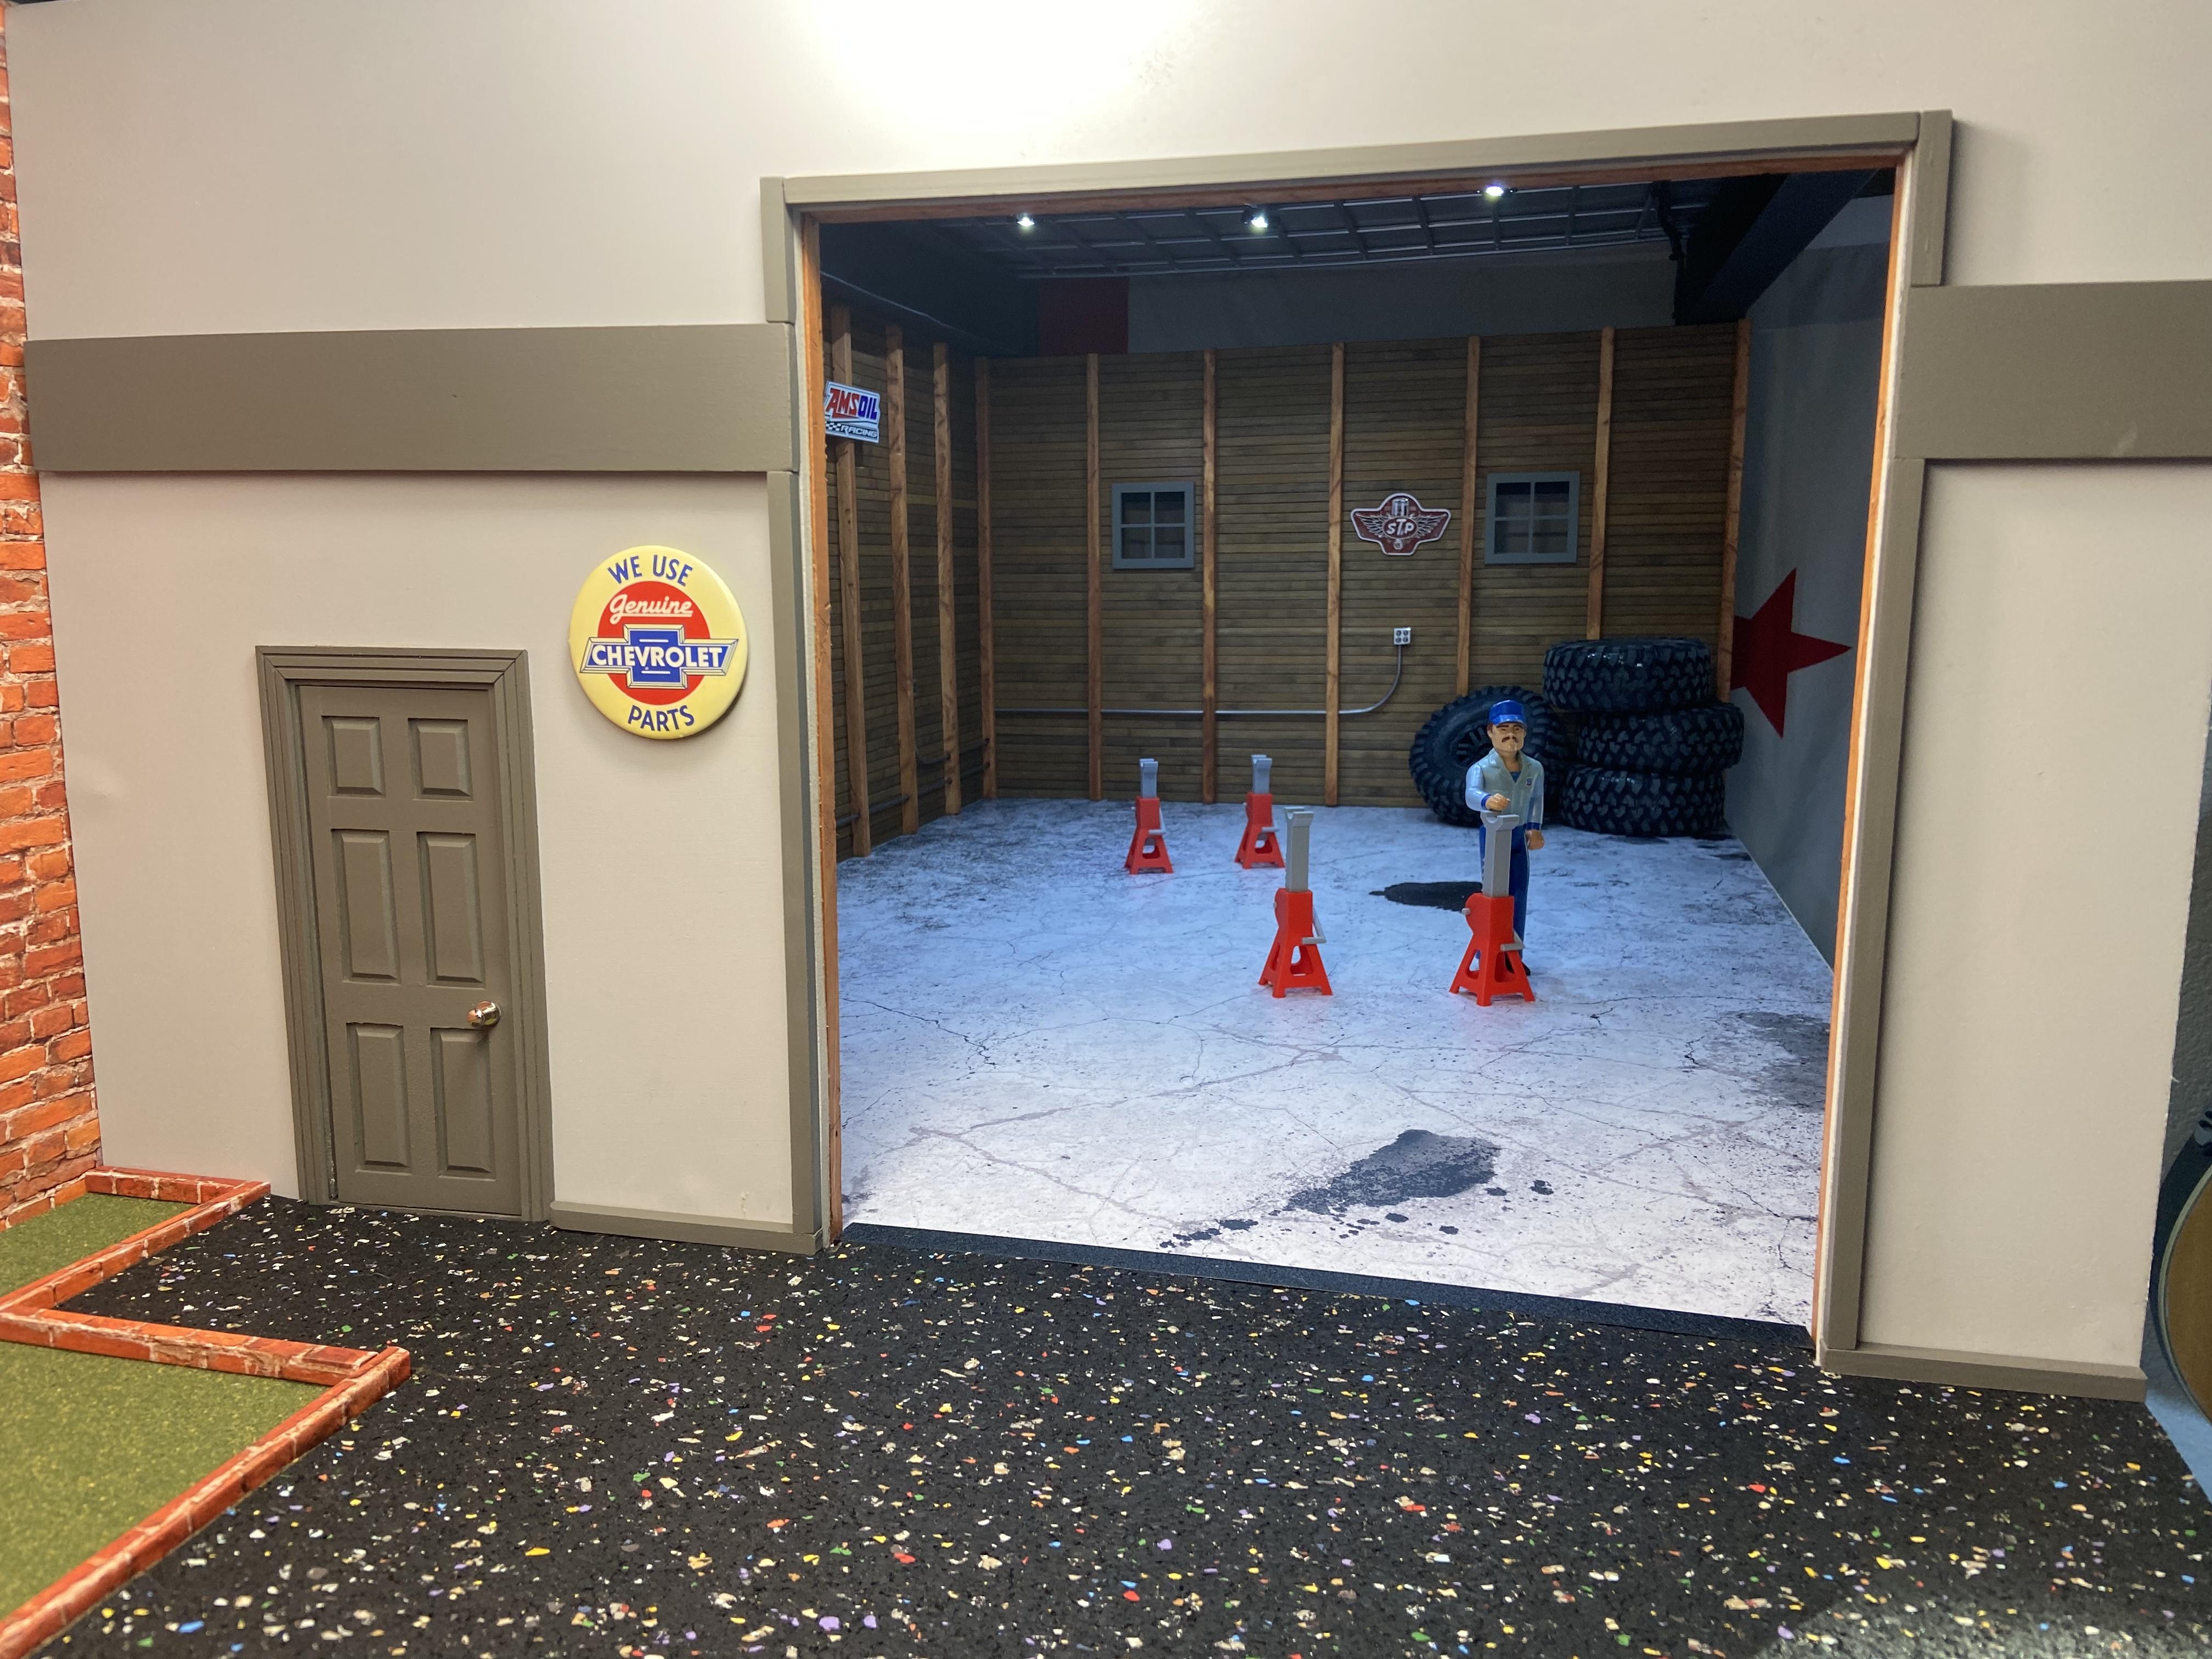
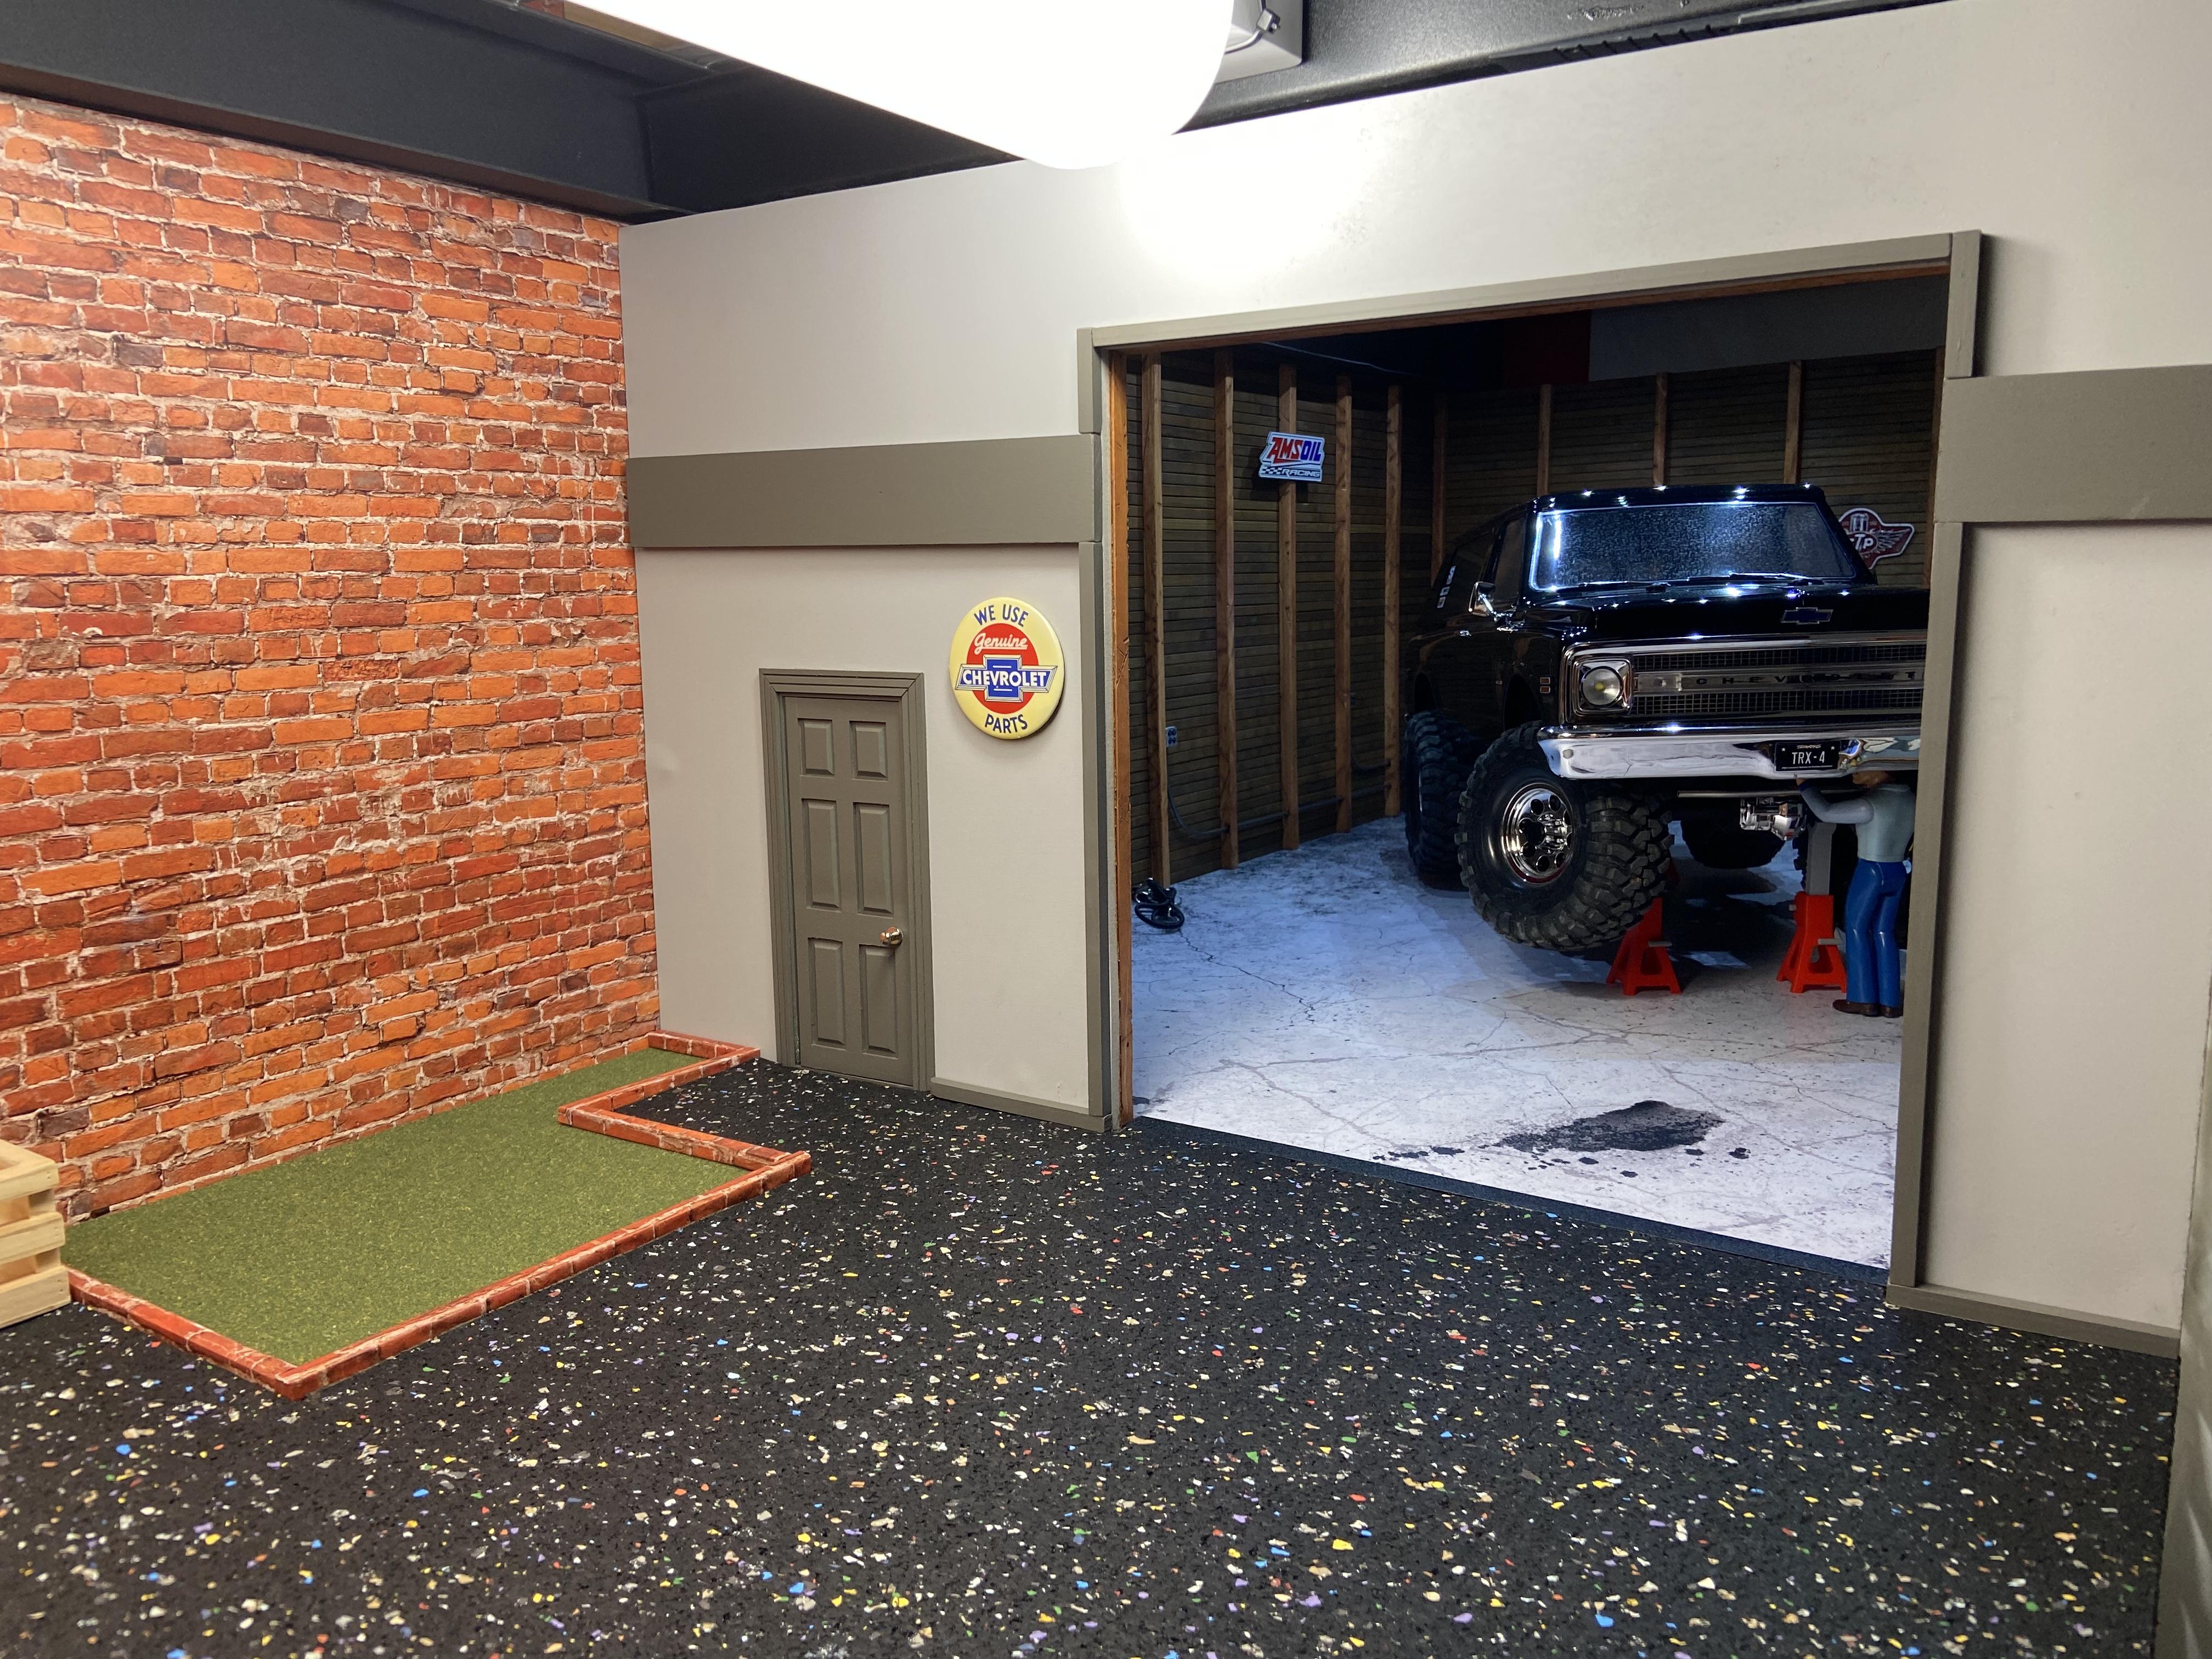
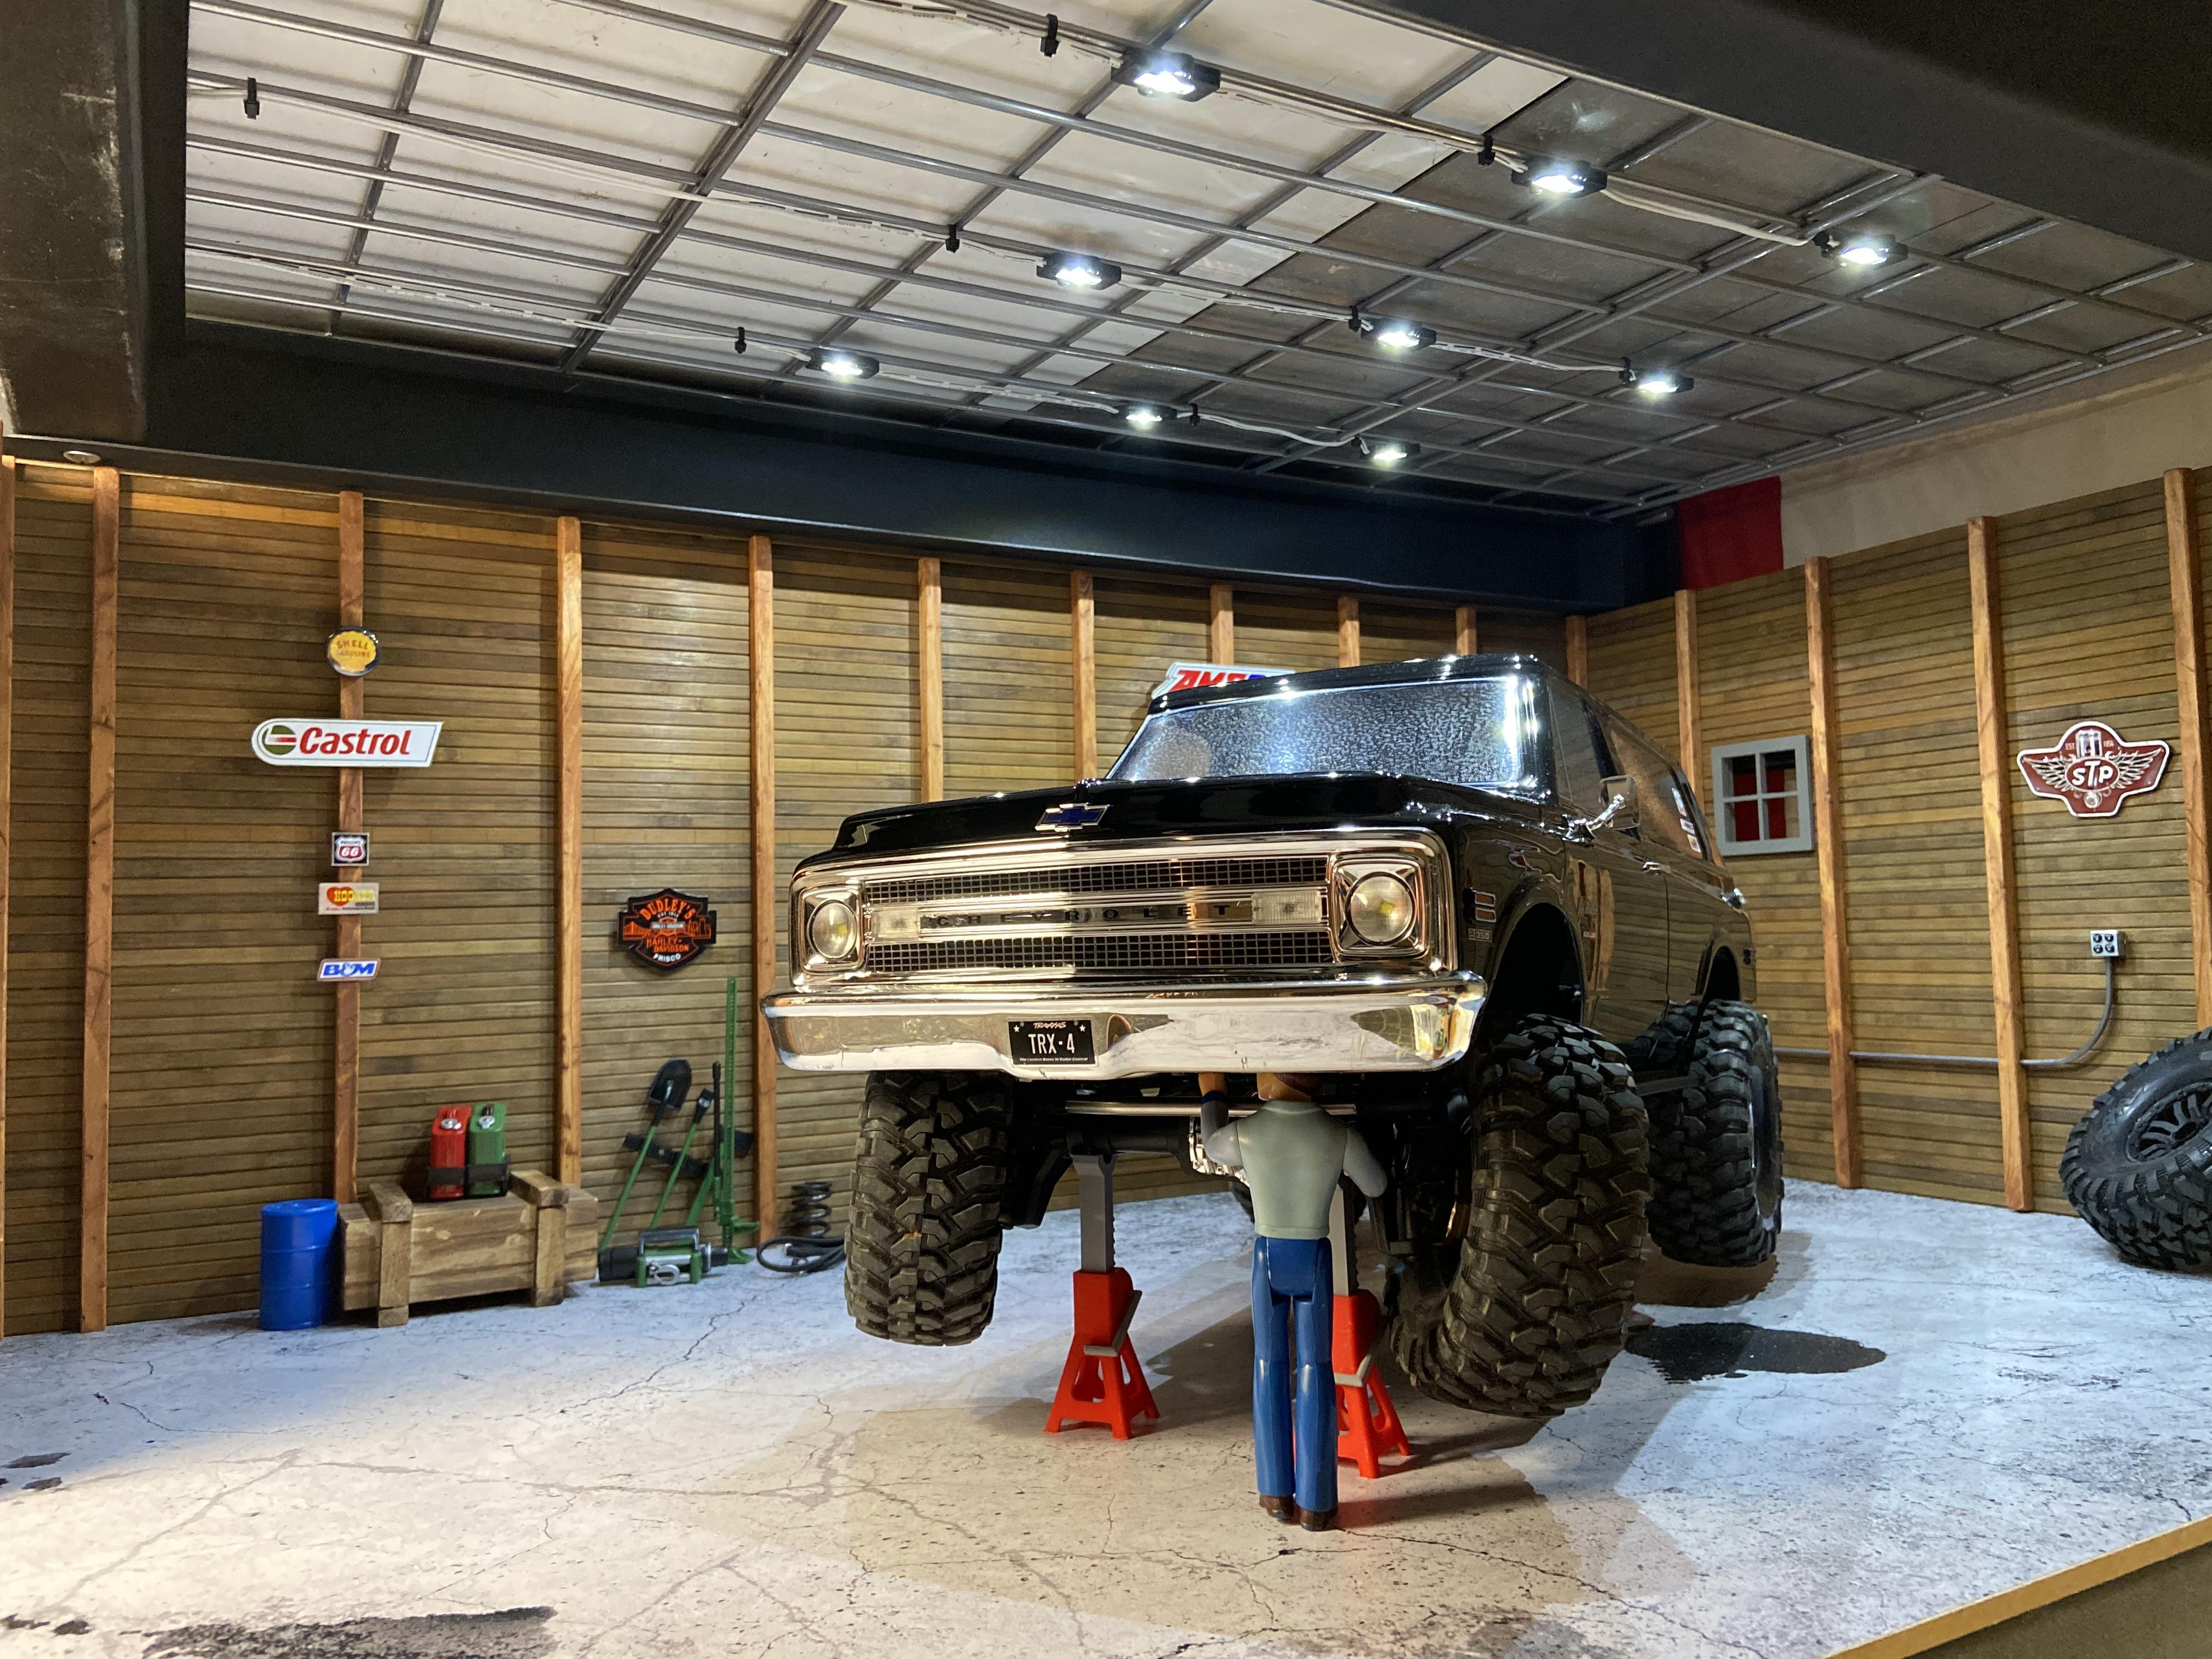
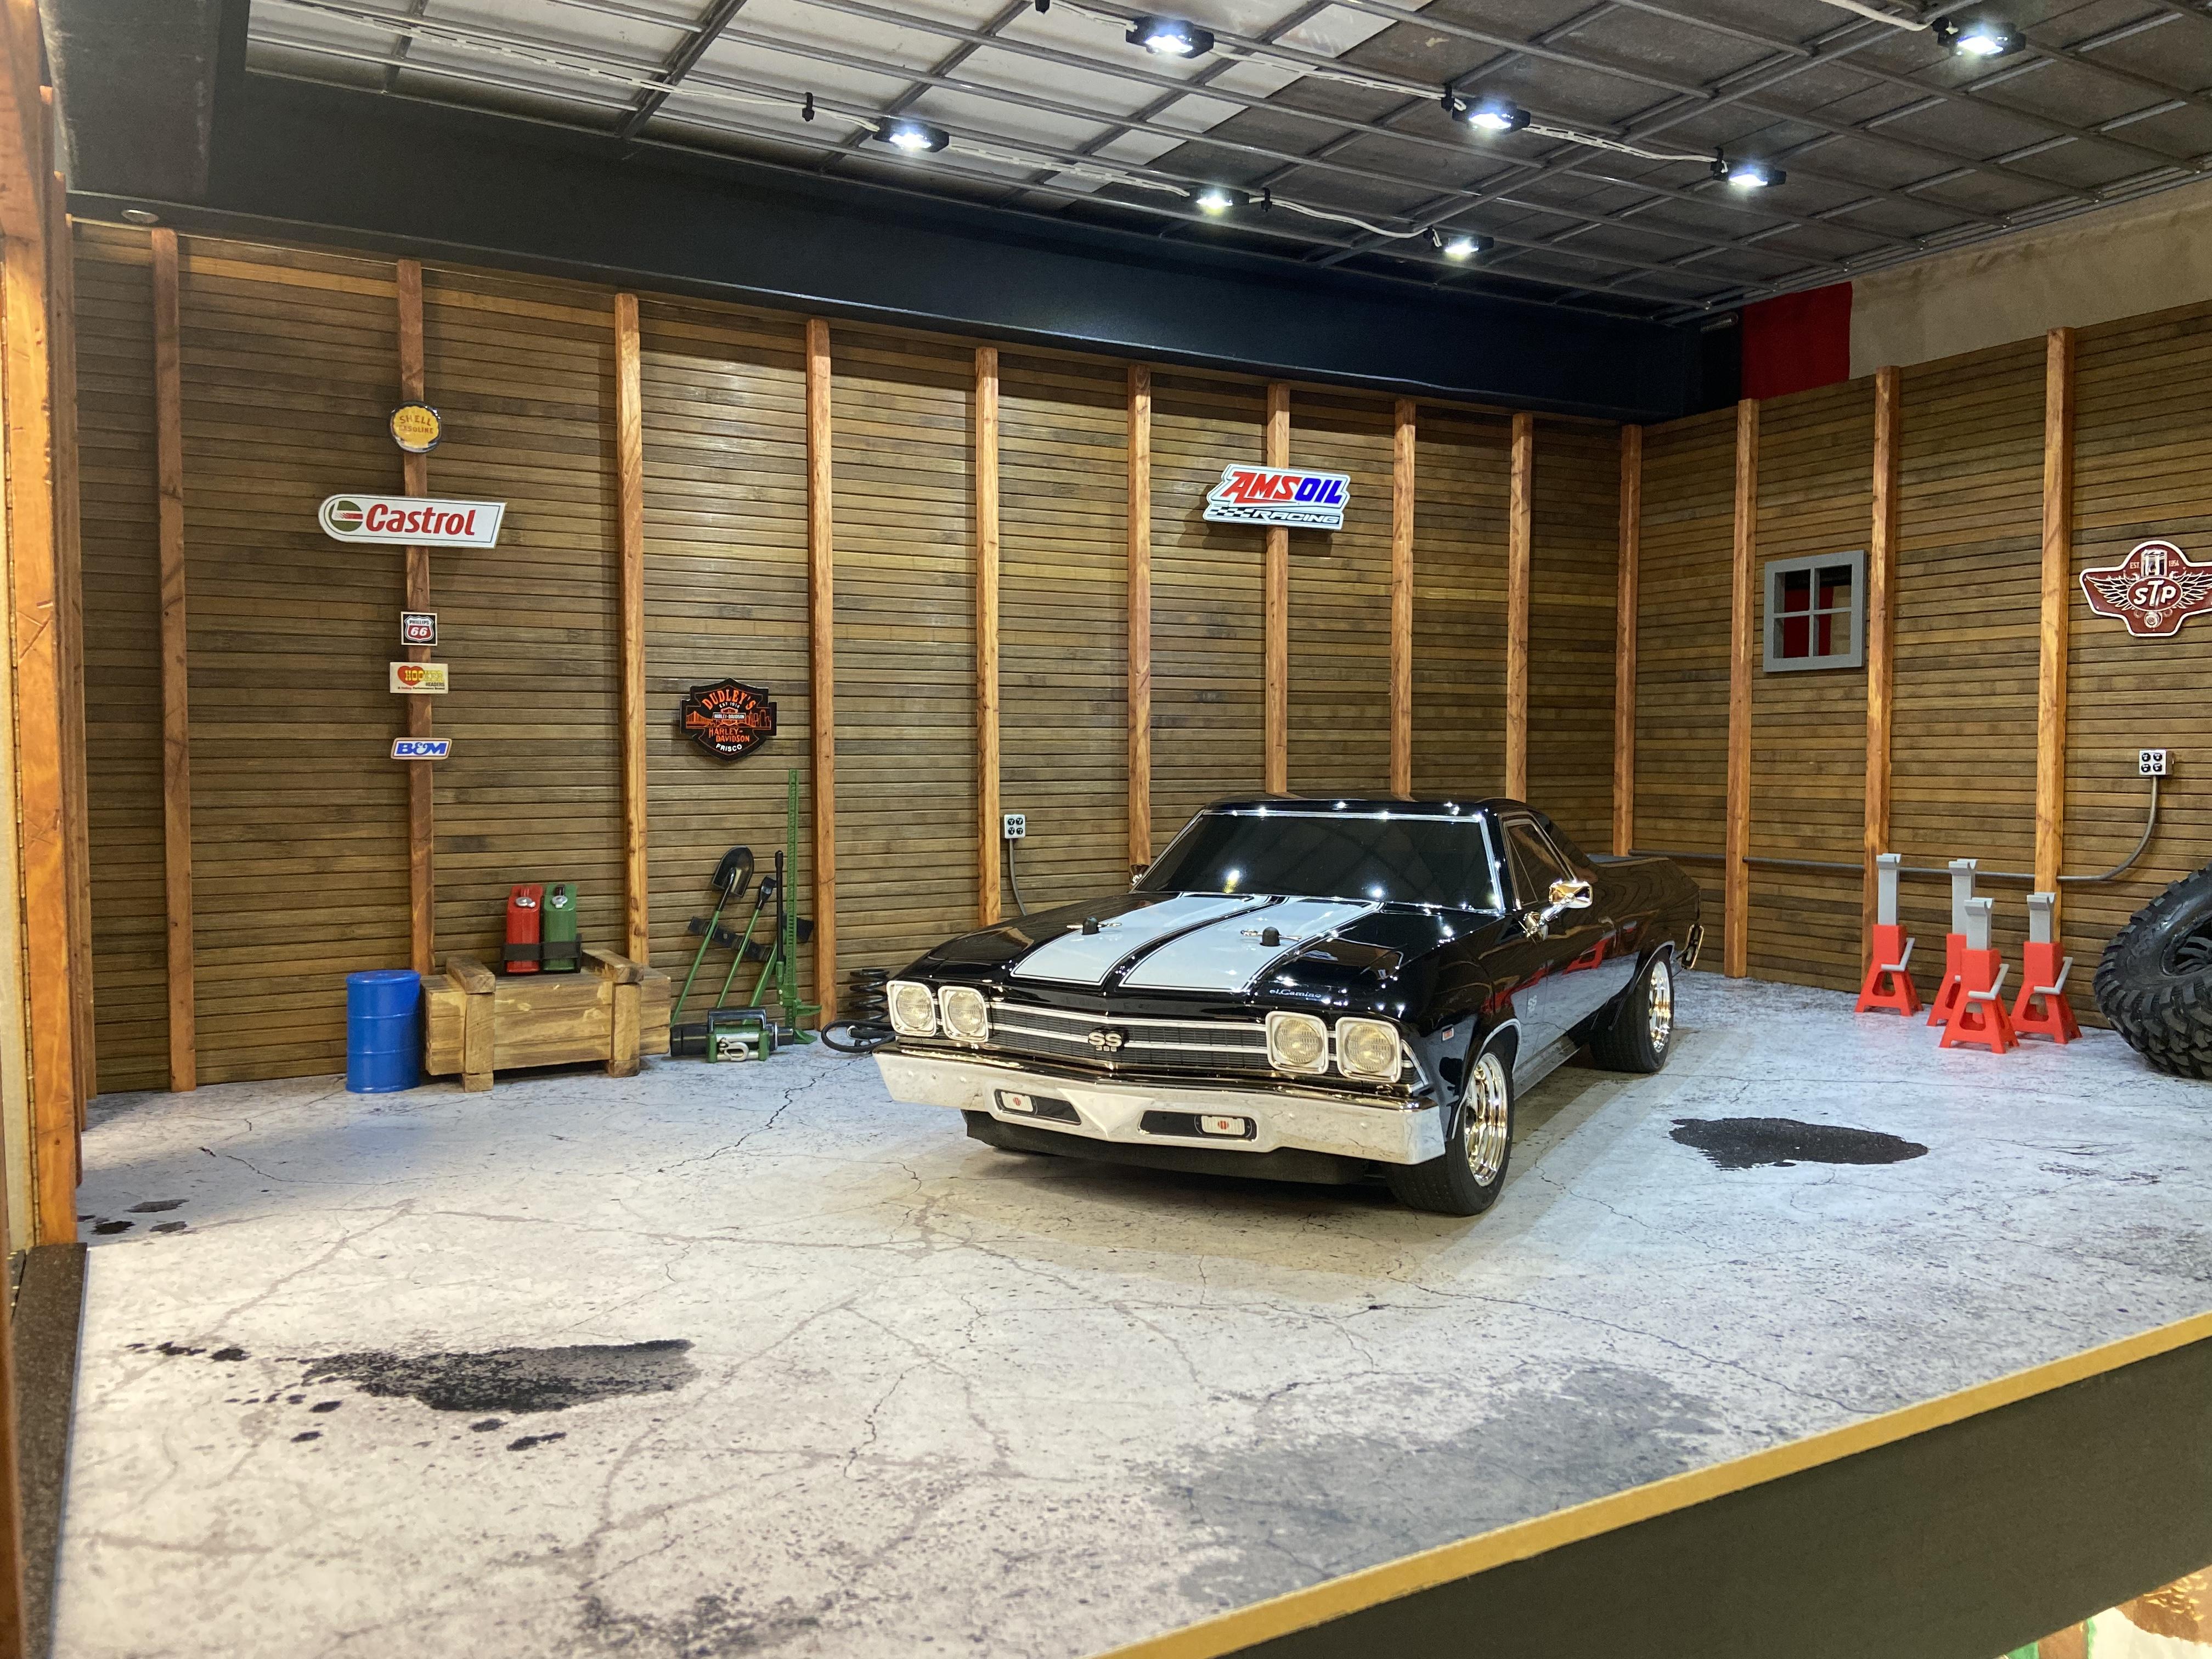
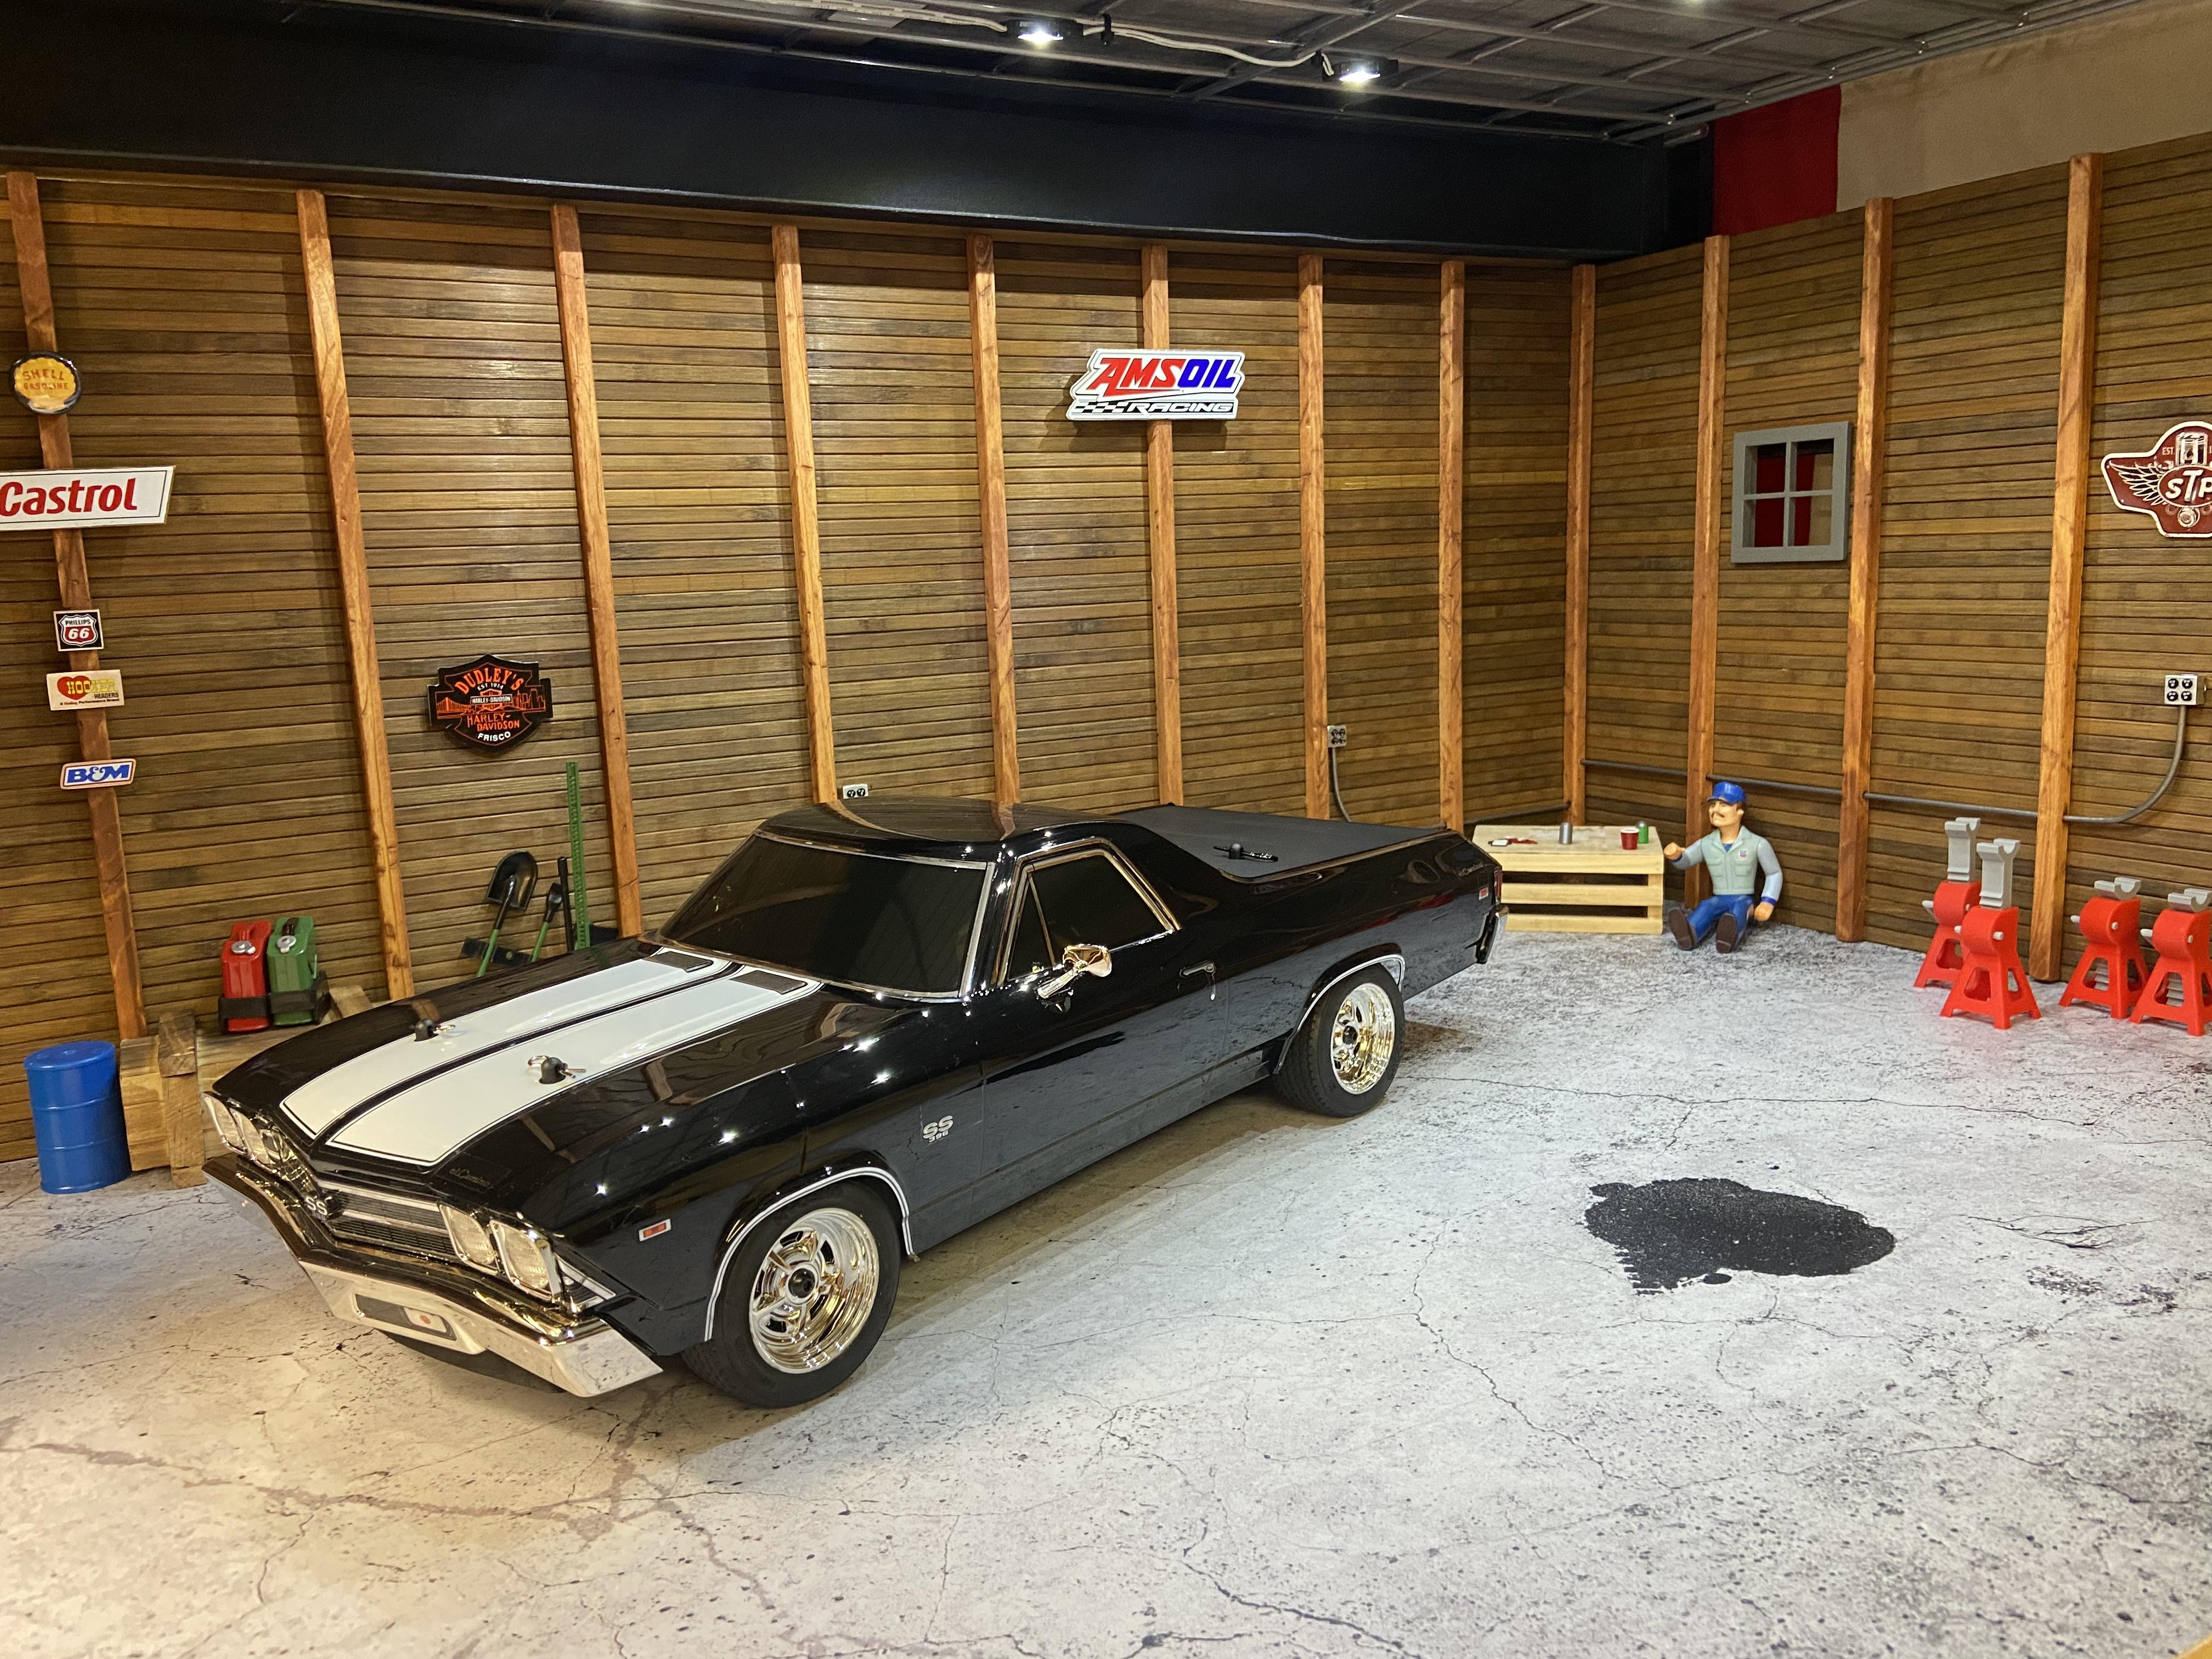
Hello everyone! New to the forum and new to the diorama hobby! I’ve been into RC cars, car models and the scale realism of them since I was a young boy, and now I’ve decided to take things a bit further with building a ‘somewhat’ 1/10 scale garage! I say somewhat because I didn’t try to scale everything to 1/10 but did the best I could with materials I could find around the house and things bought inexpensively from a hardware store. The entire thing is mostly made of wood and some vinyl stickers. Hoping to learn more as time goes by, like how to make realistic looking concrete and bricks instead of just using stickers! I’m posting this in the finished dioramas, but I keep thinking of more I can do to it lol, can’t slow down a creative mind! Will post more pics as I add more!! Thanks for looking!!! greg
-
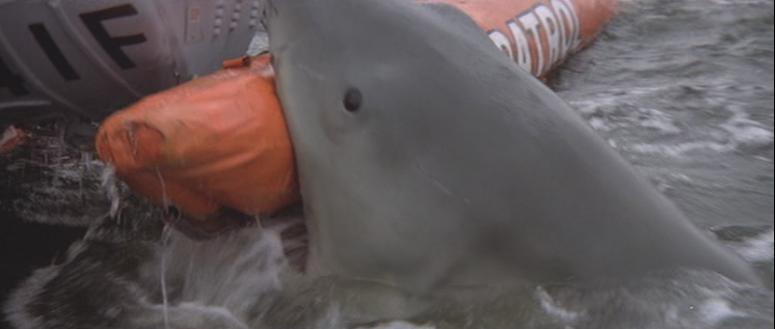
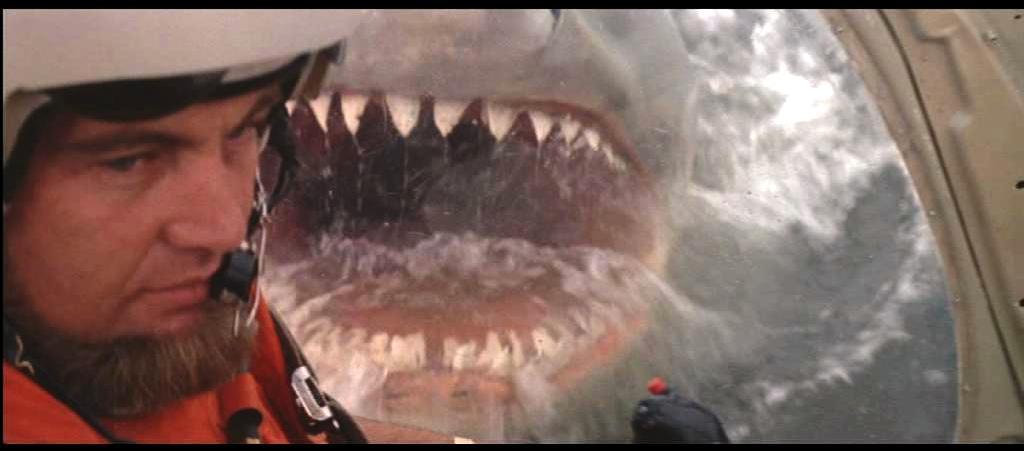
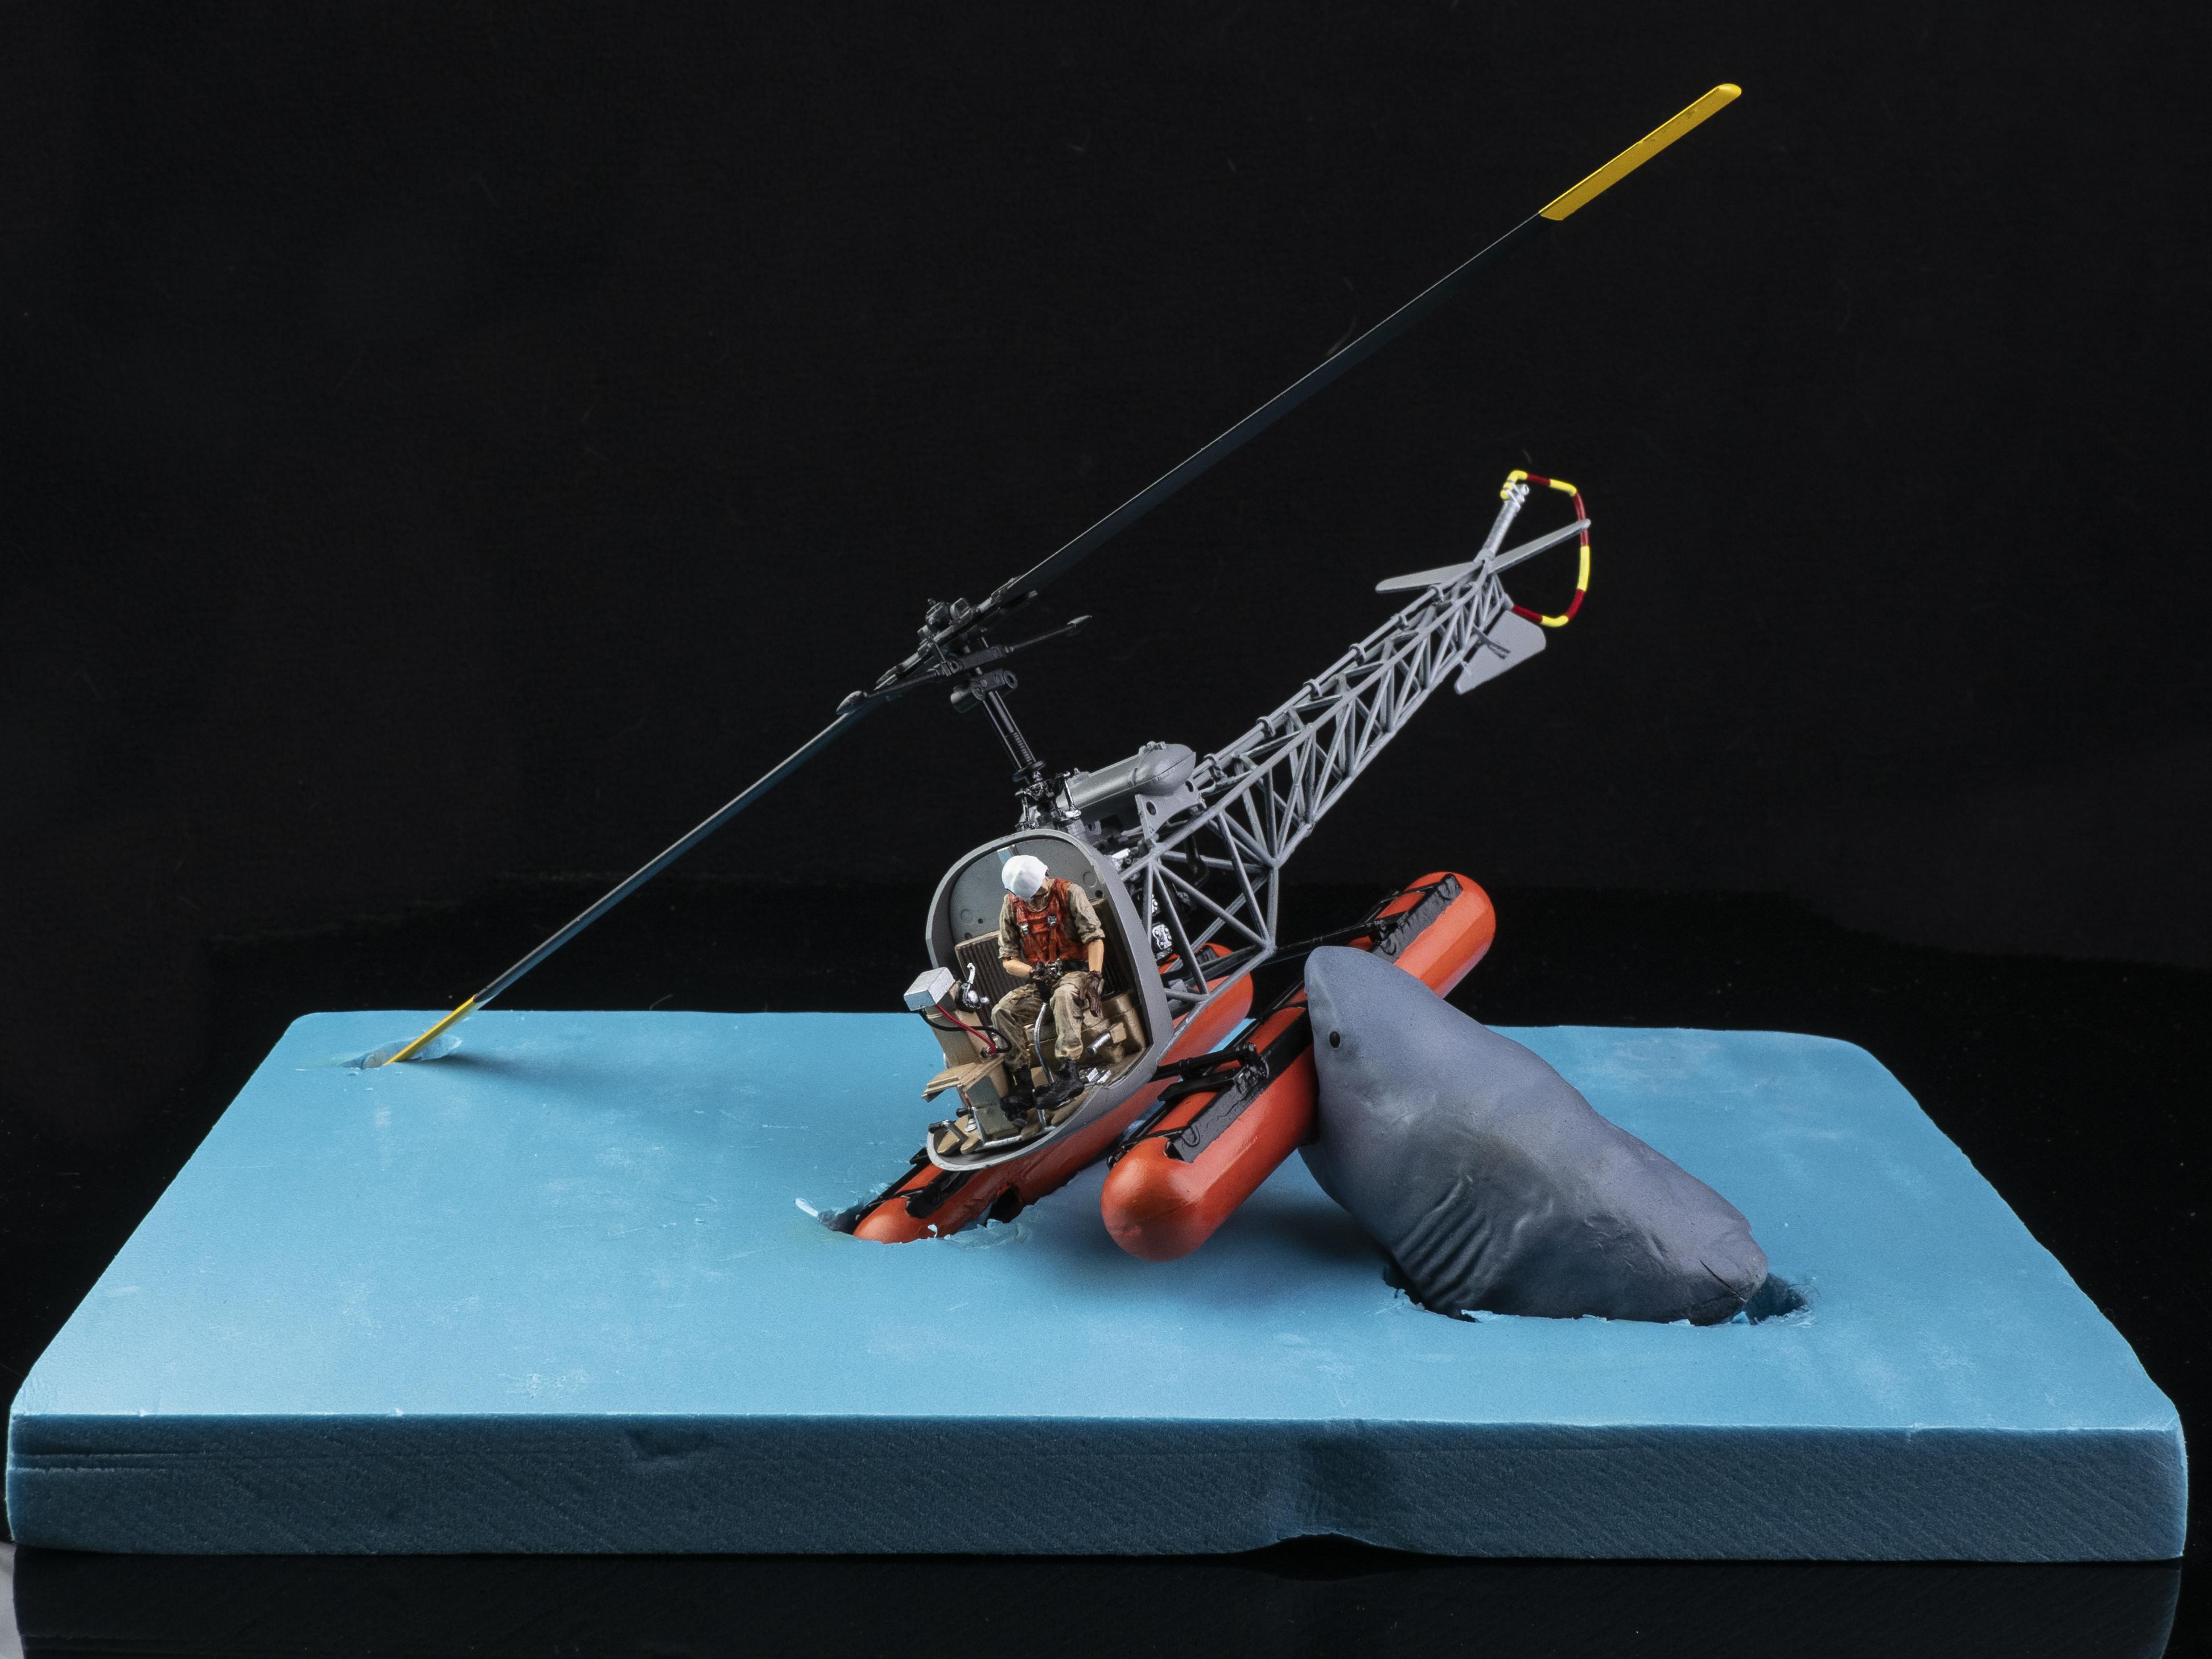
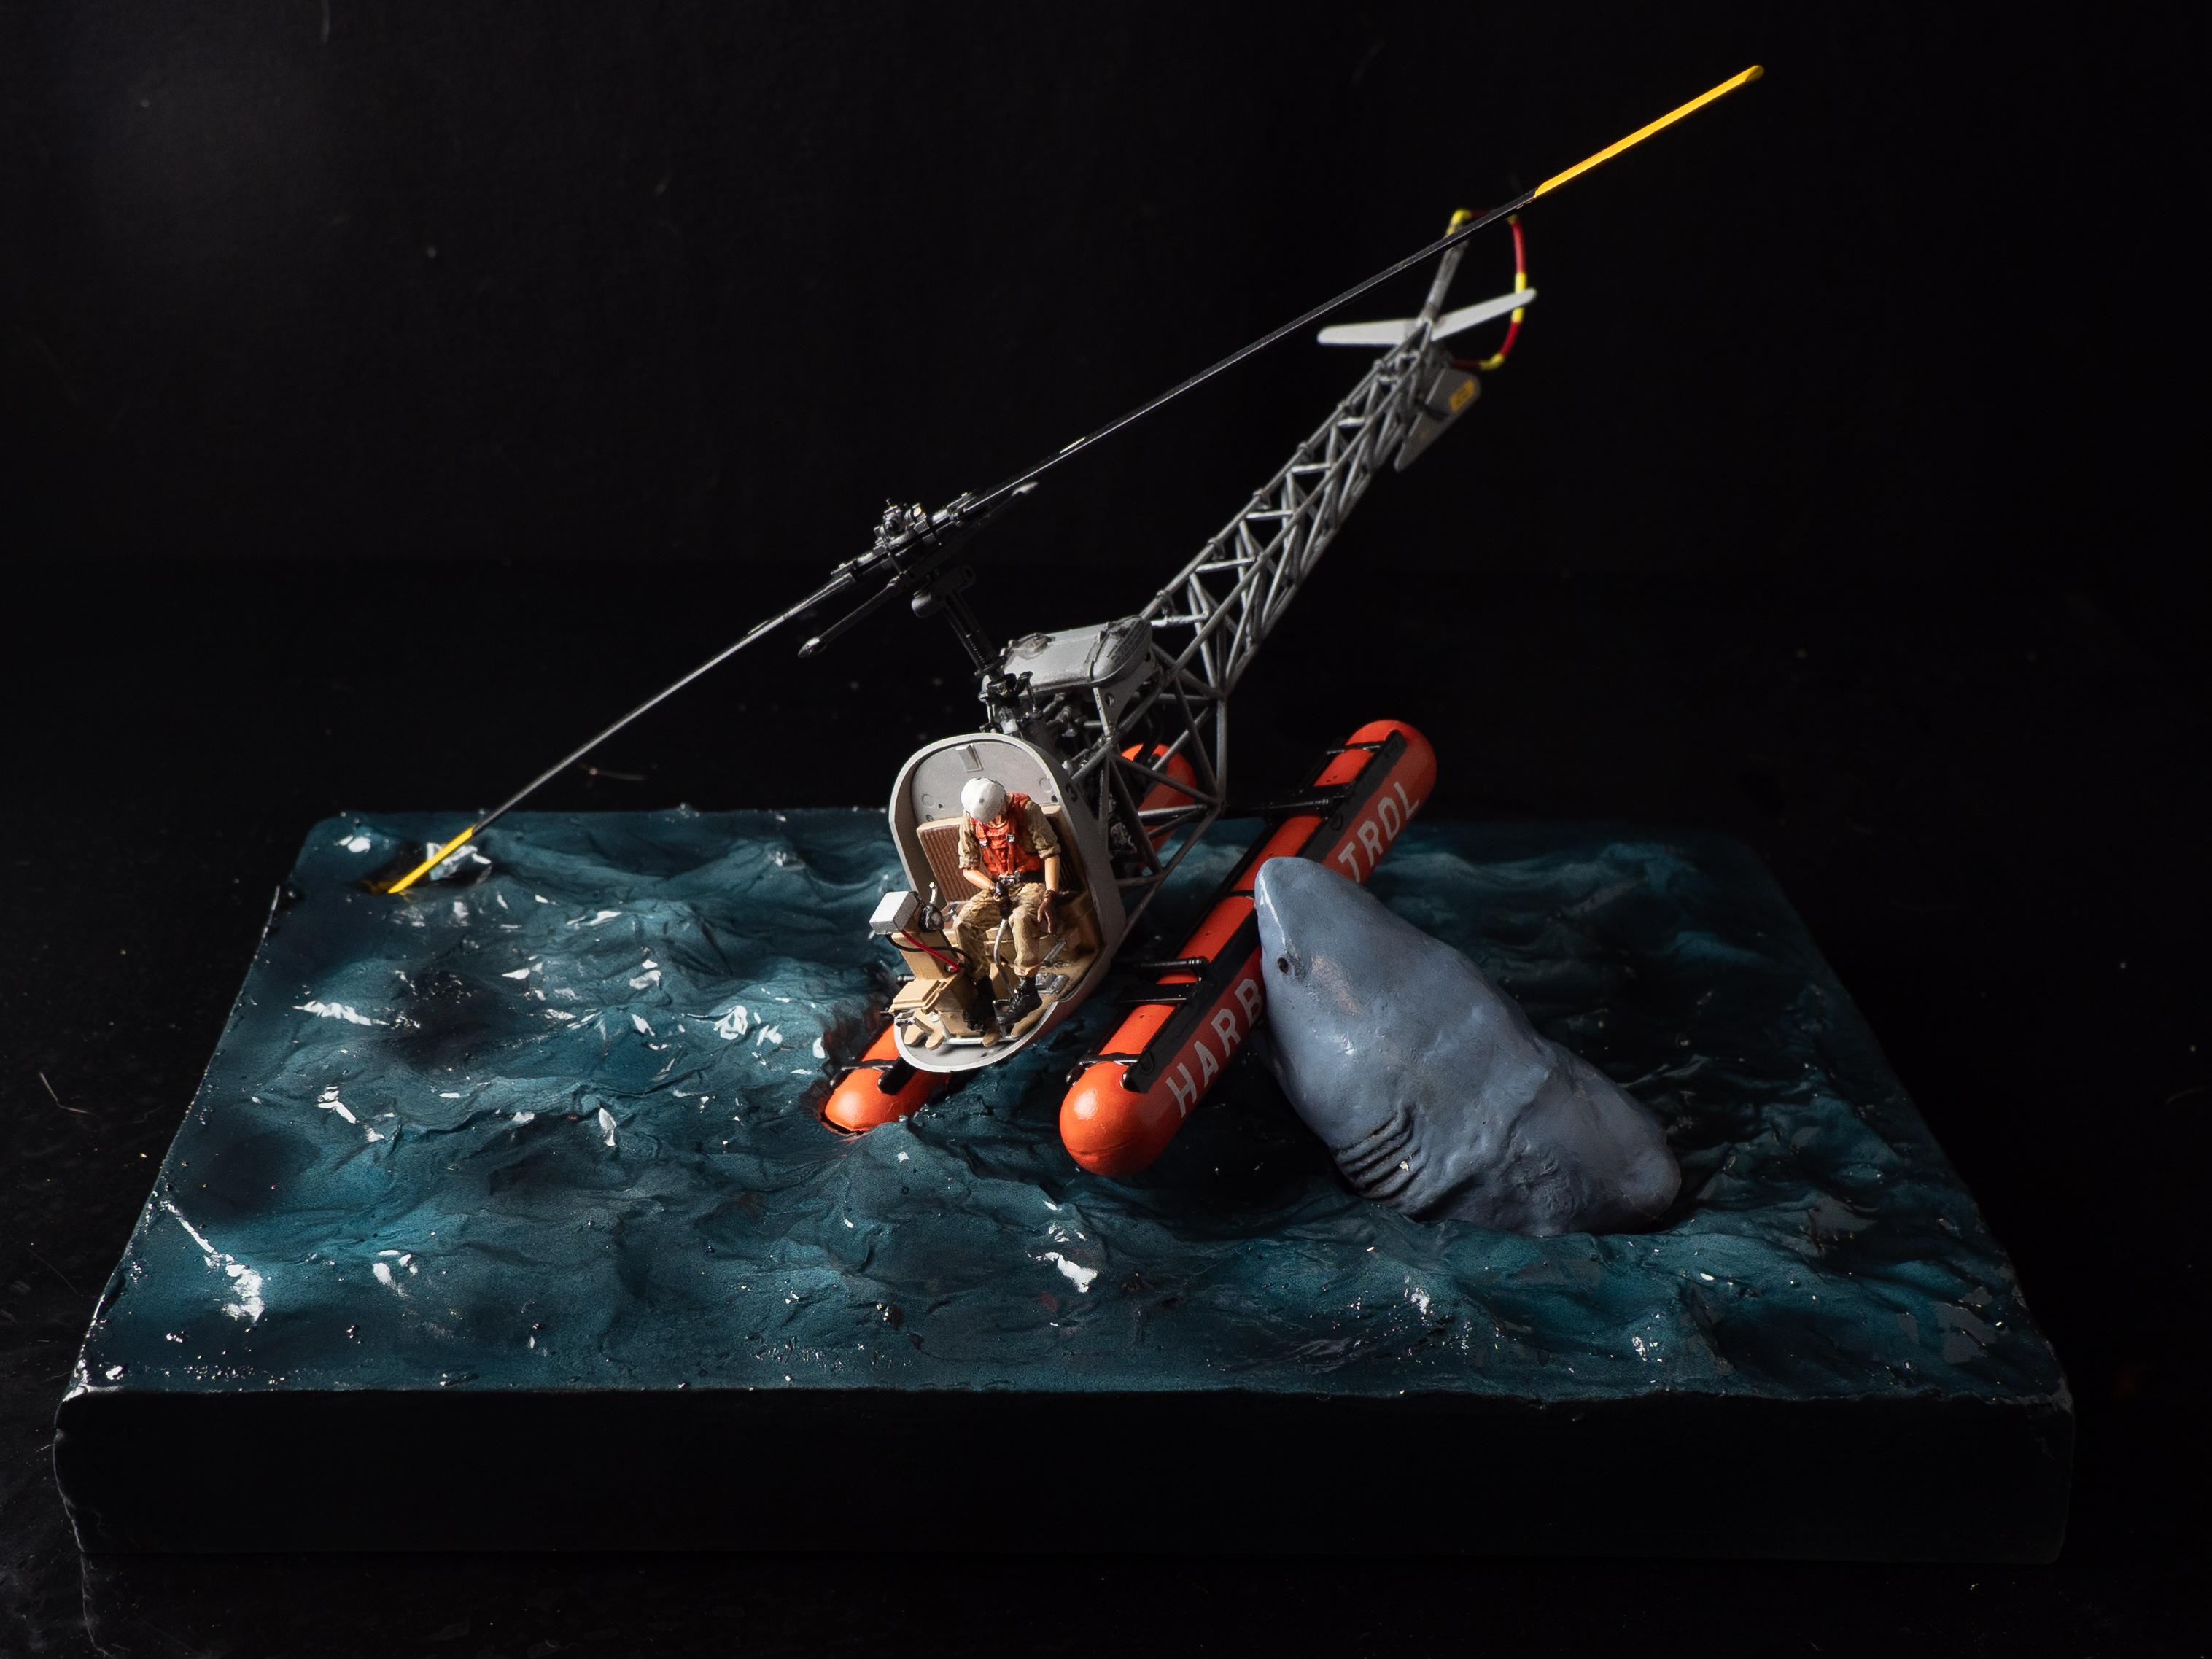
 I've been wanting for a long time to create this diorama, as I love this scene from jaws 2 when I was a kid. Its so over the top. So I bought an old MRC kit for the bell helicopter HTL-4 (1:35), I think its made by Academy now. I found the real helicopter from the movie (Hughes 269B) but it was too expensive and a bit out of scale. the MRC instructions are really weird and difficult to follow, its easy to forget pieces or skip some steps. I didnt use all the detail form the engine (too fragile) but add some wires in the cockpit. I found a shark figure and a vietnam helicopter pilot (better figure for the dio than the one in the kit). First time i use the tin foil method...work very well.
-
This is what I call a photo diorama, as it's purpose is to be able to photograph different models, generally for publication. The scale on this is 1/25 with the size being 12 inches X 12inches footprint and 7 inches in height.
- 5 replies
-
- 1
-
-
- garage diorama
- diorama
- (and 1 more)
-
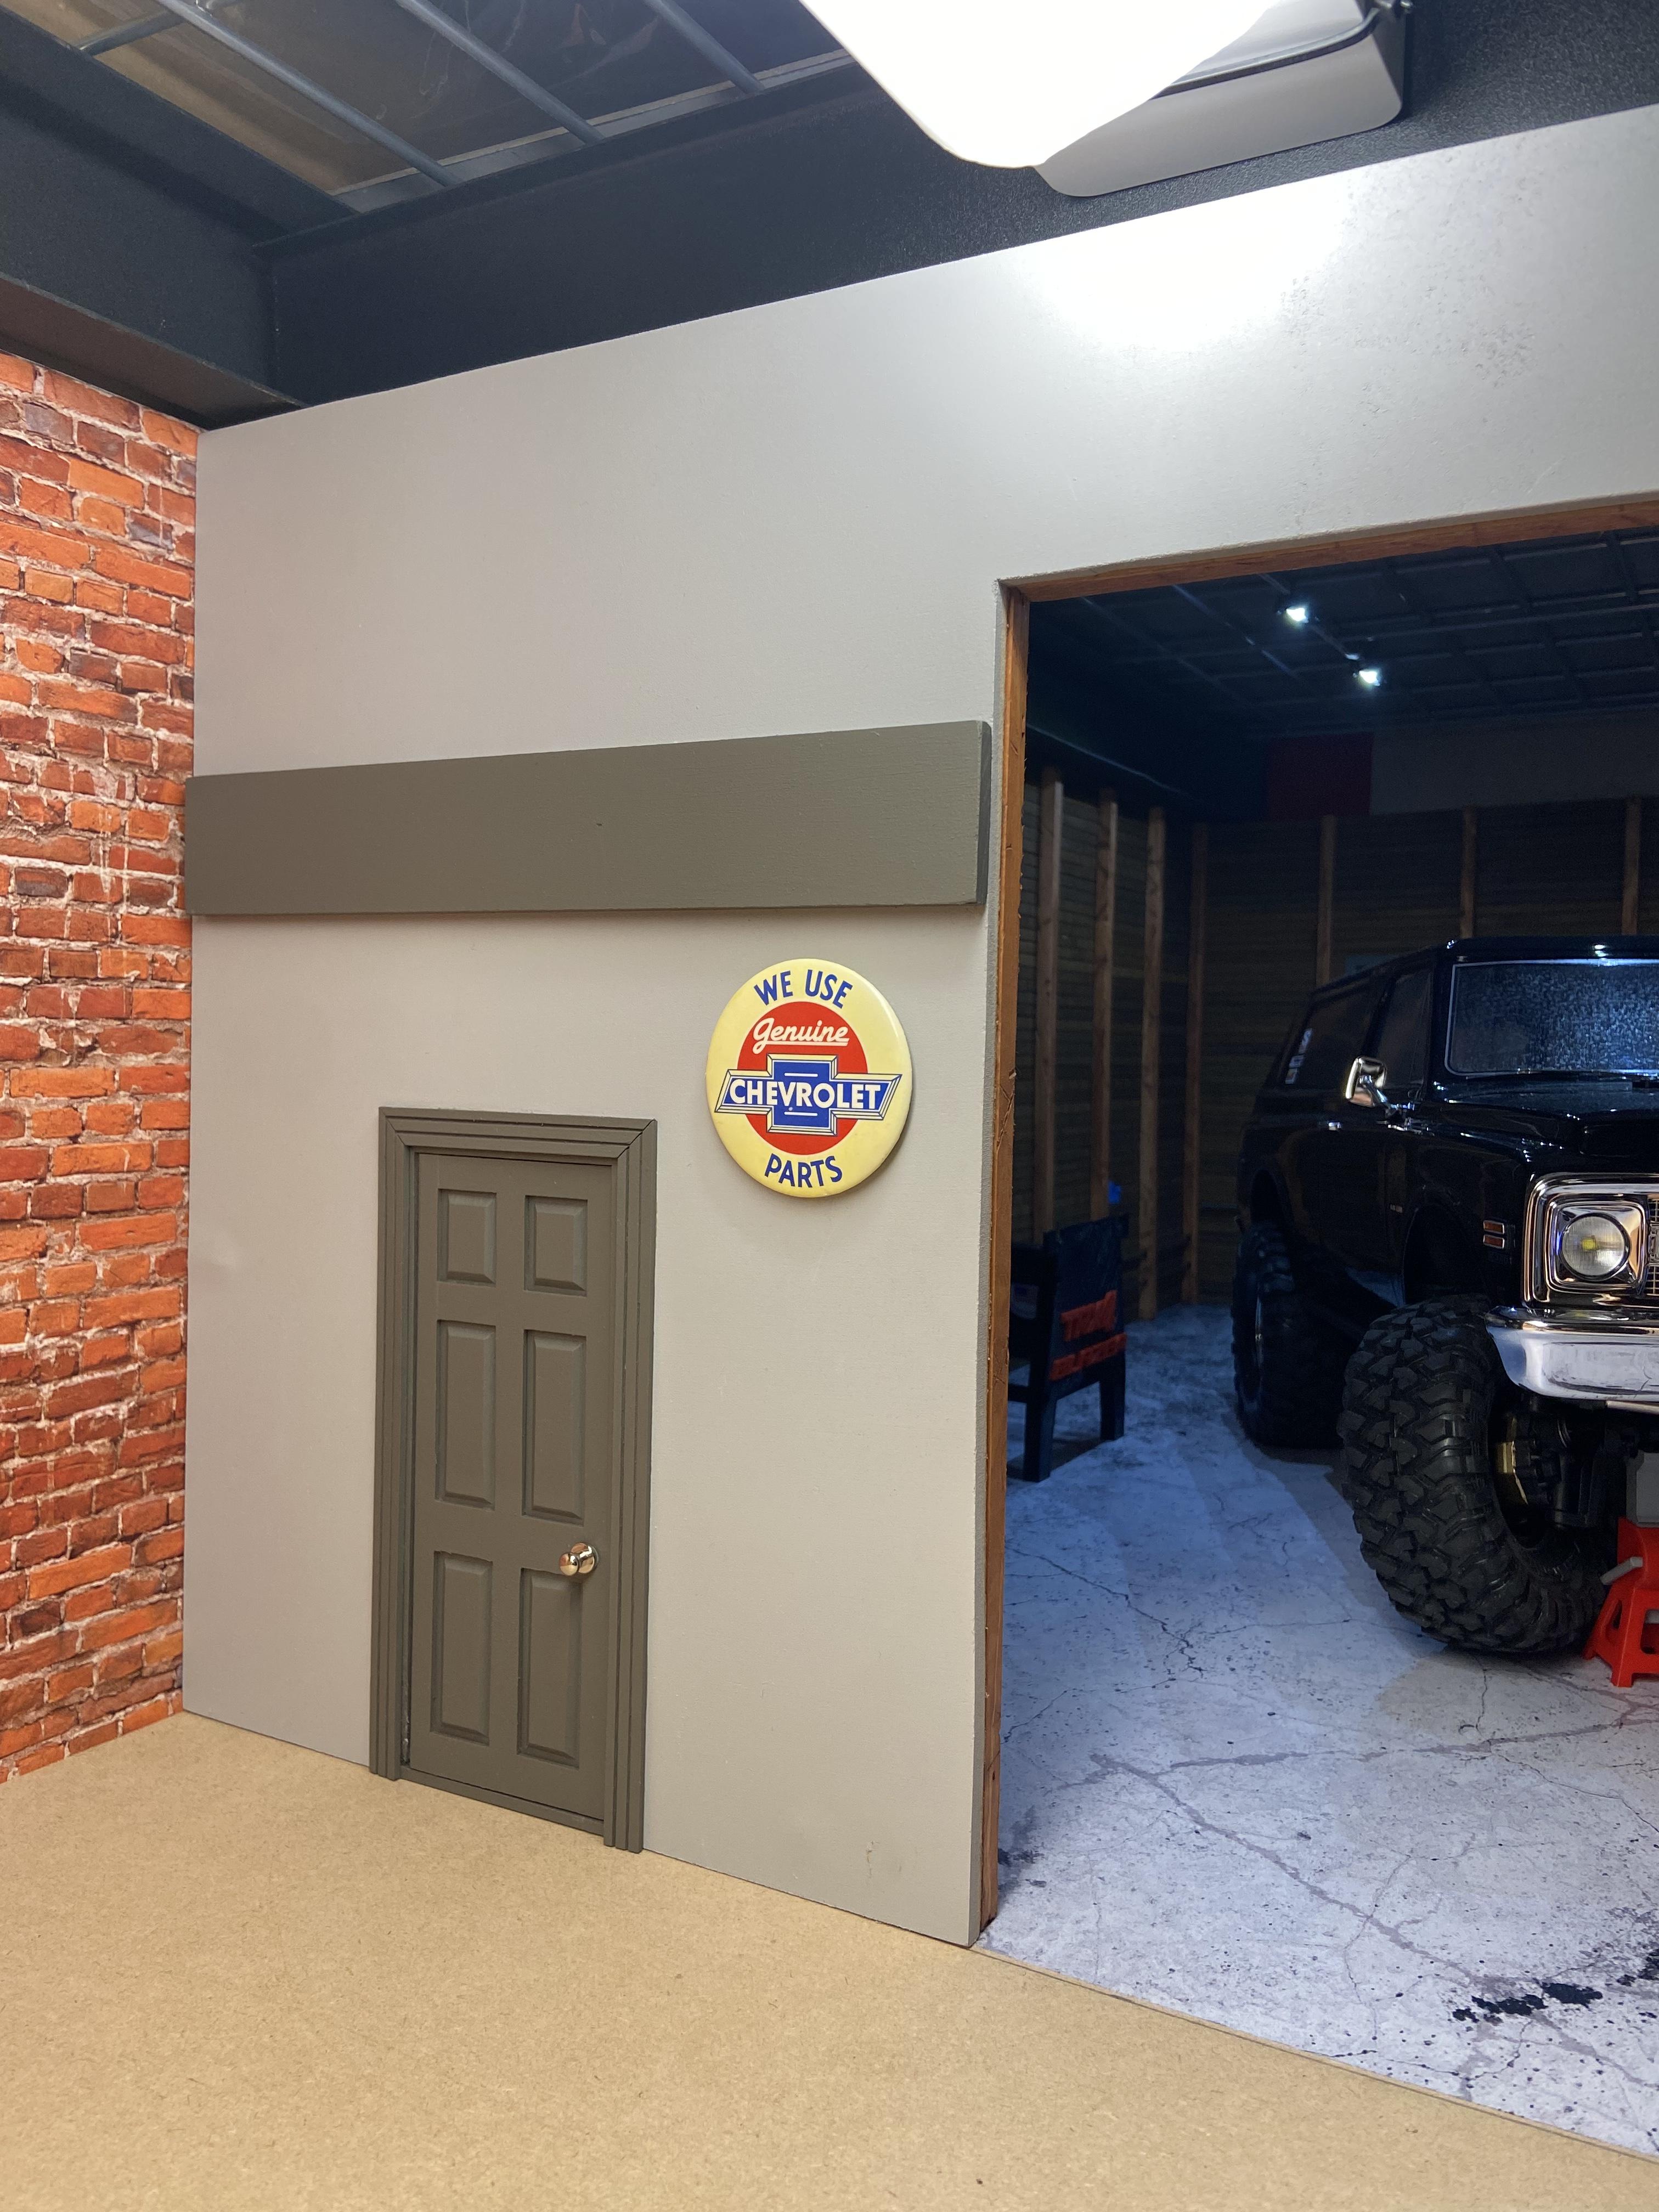
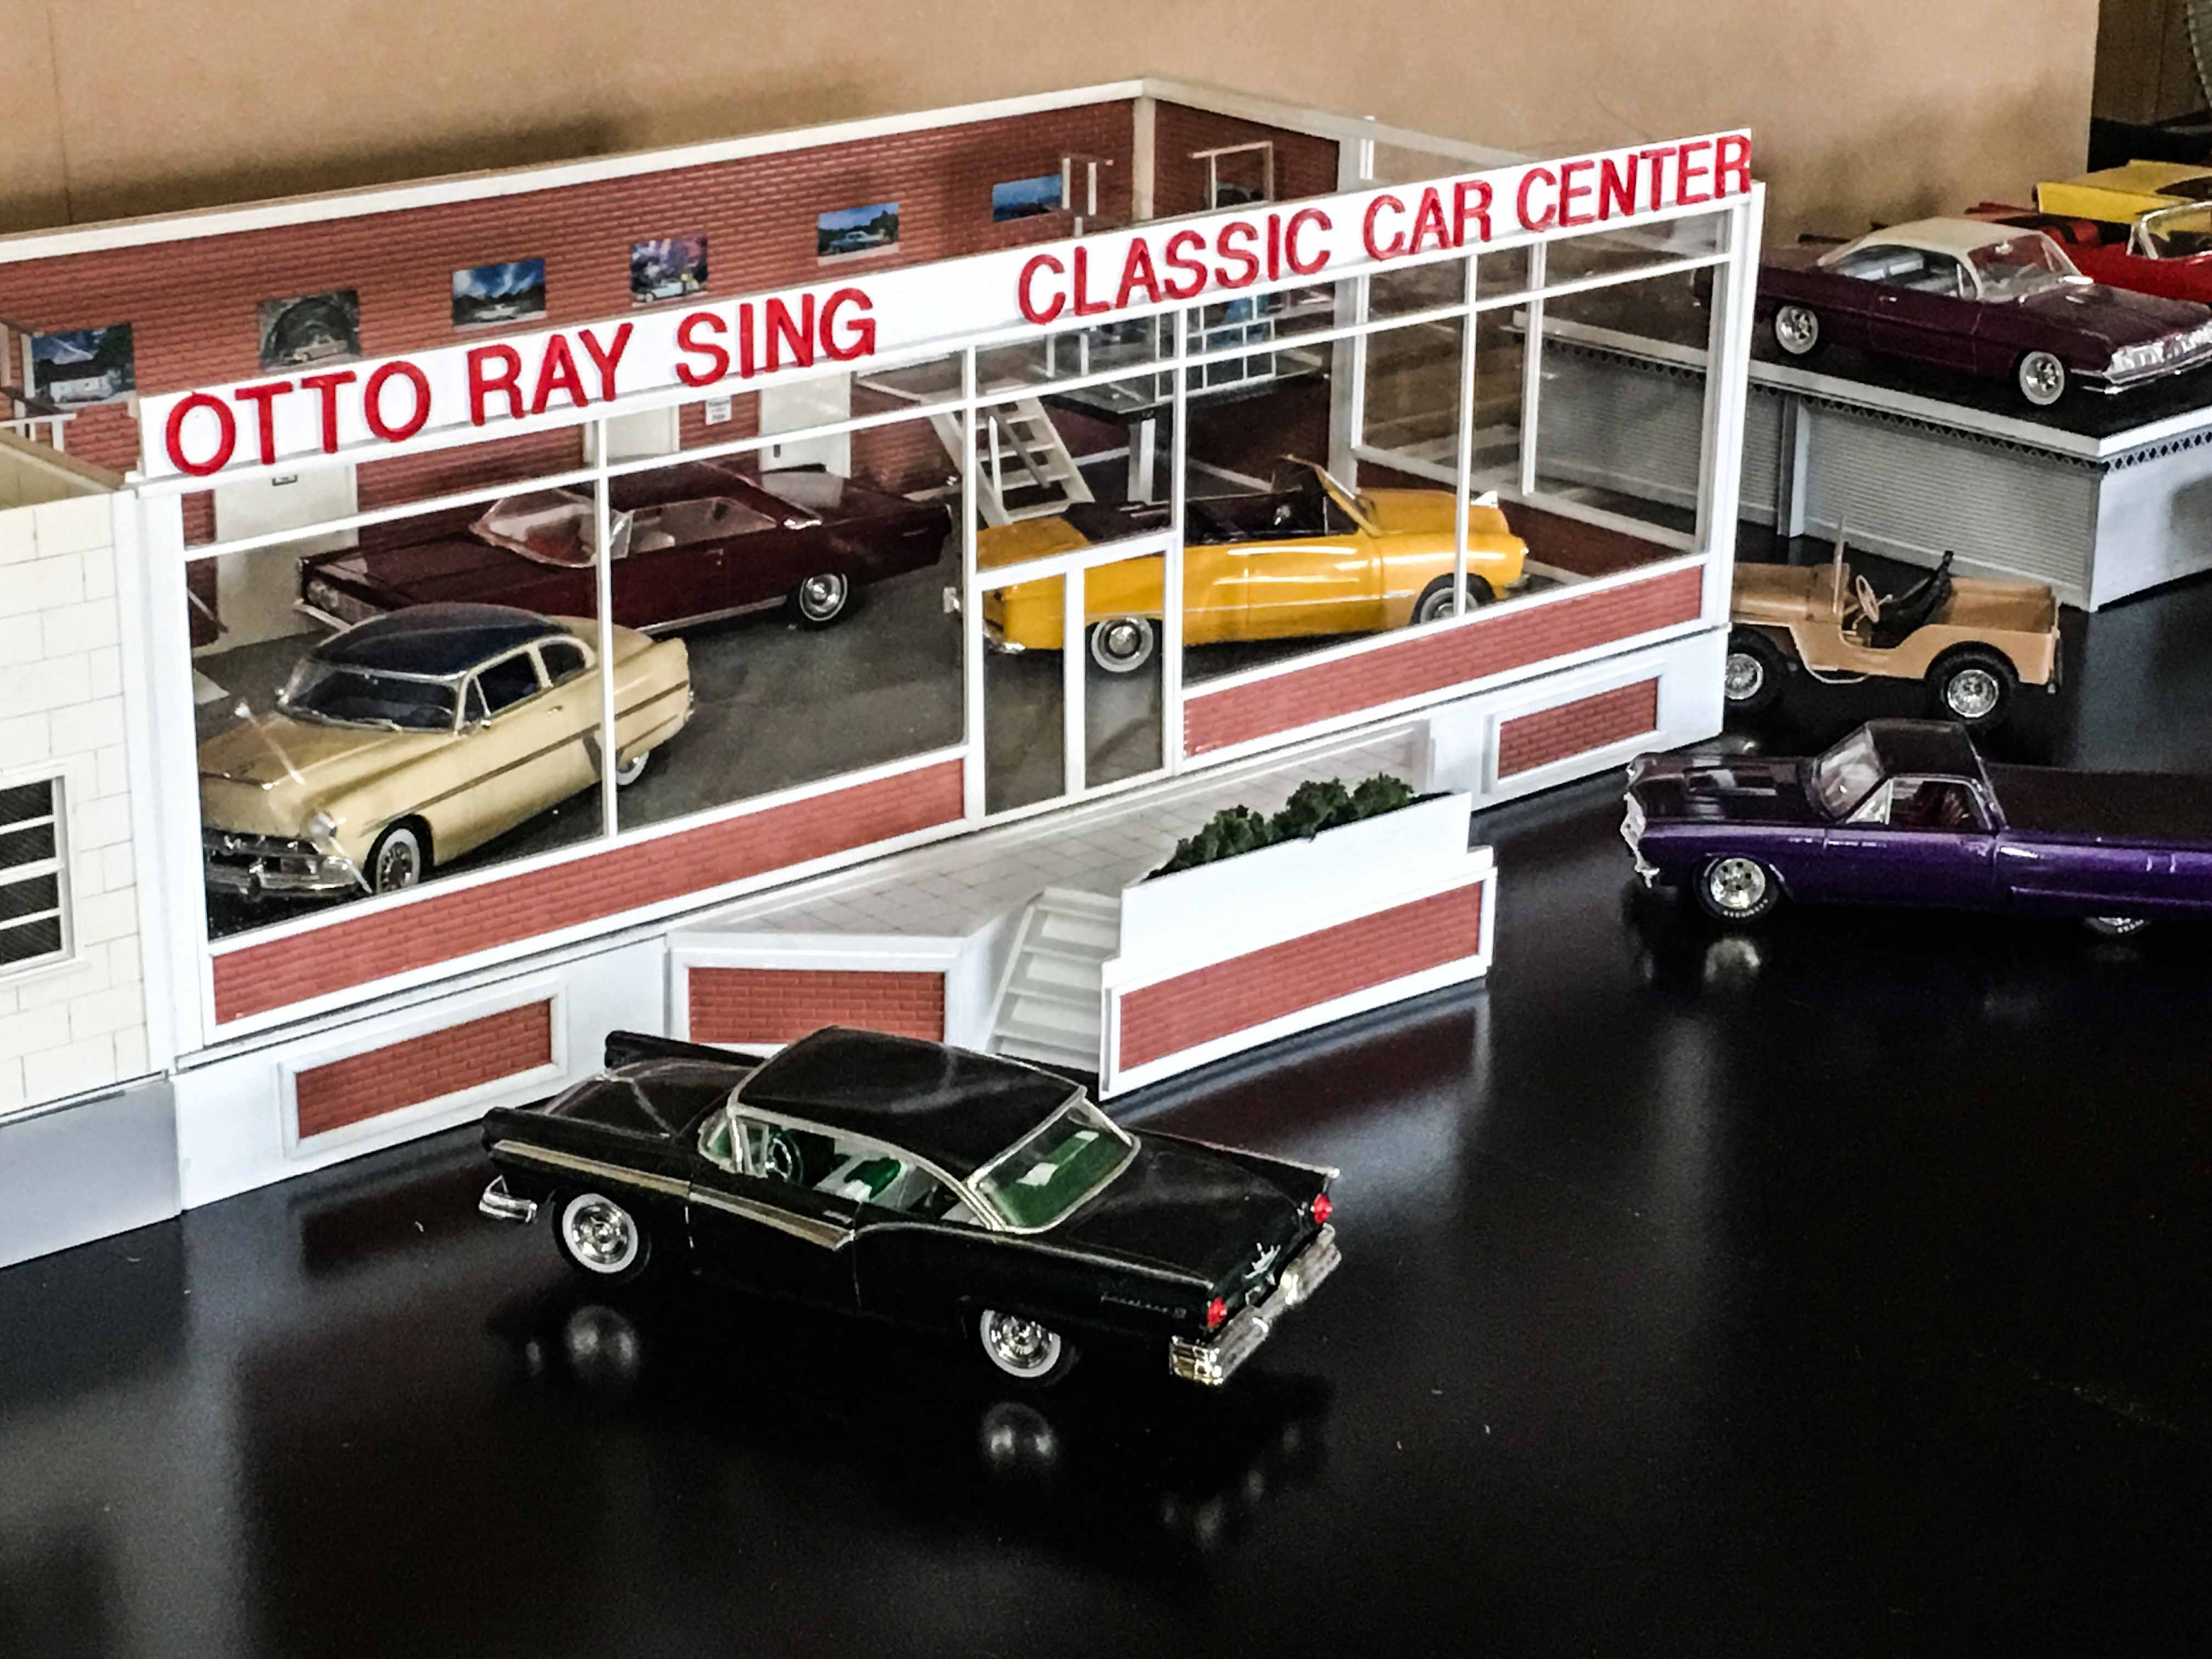
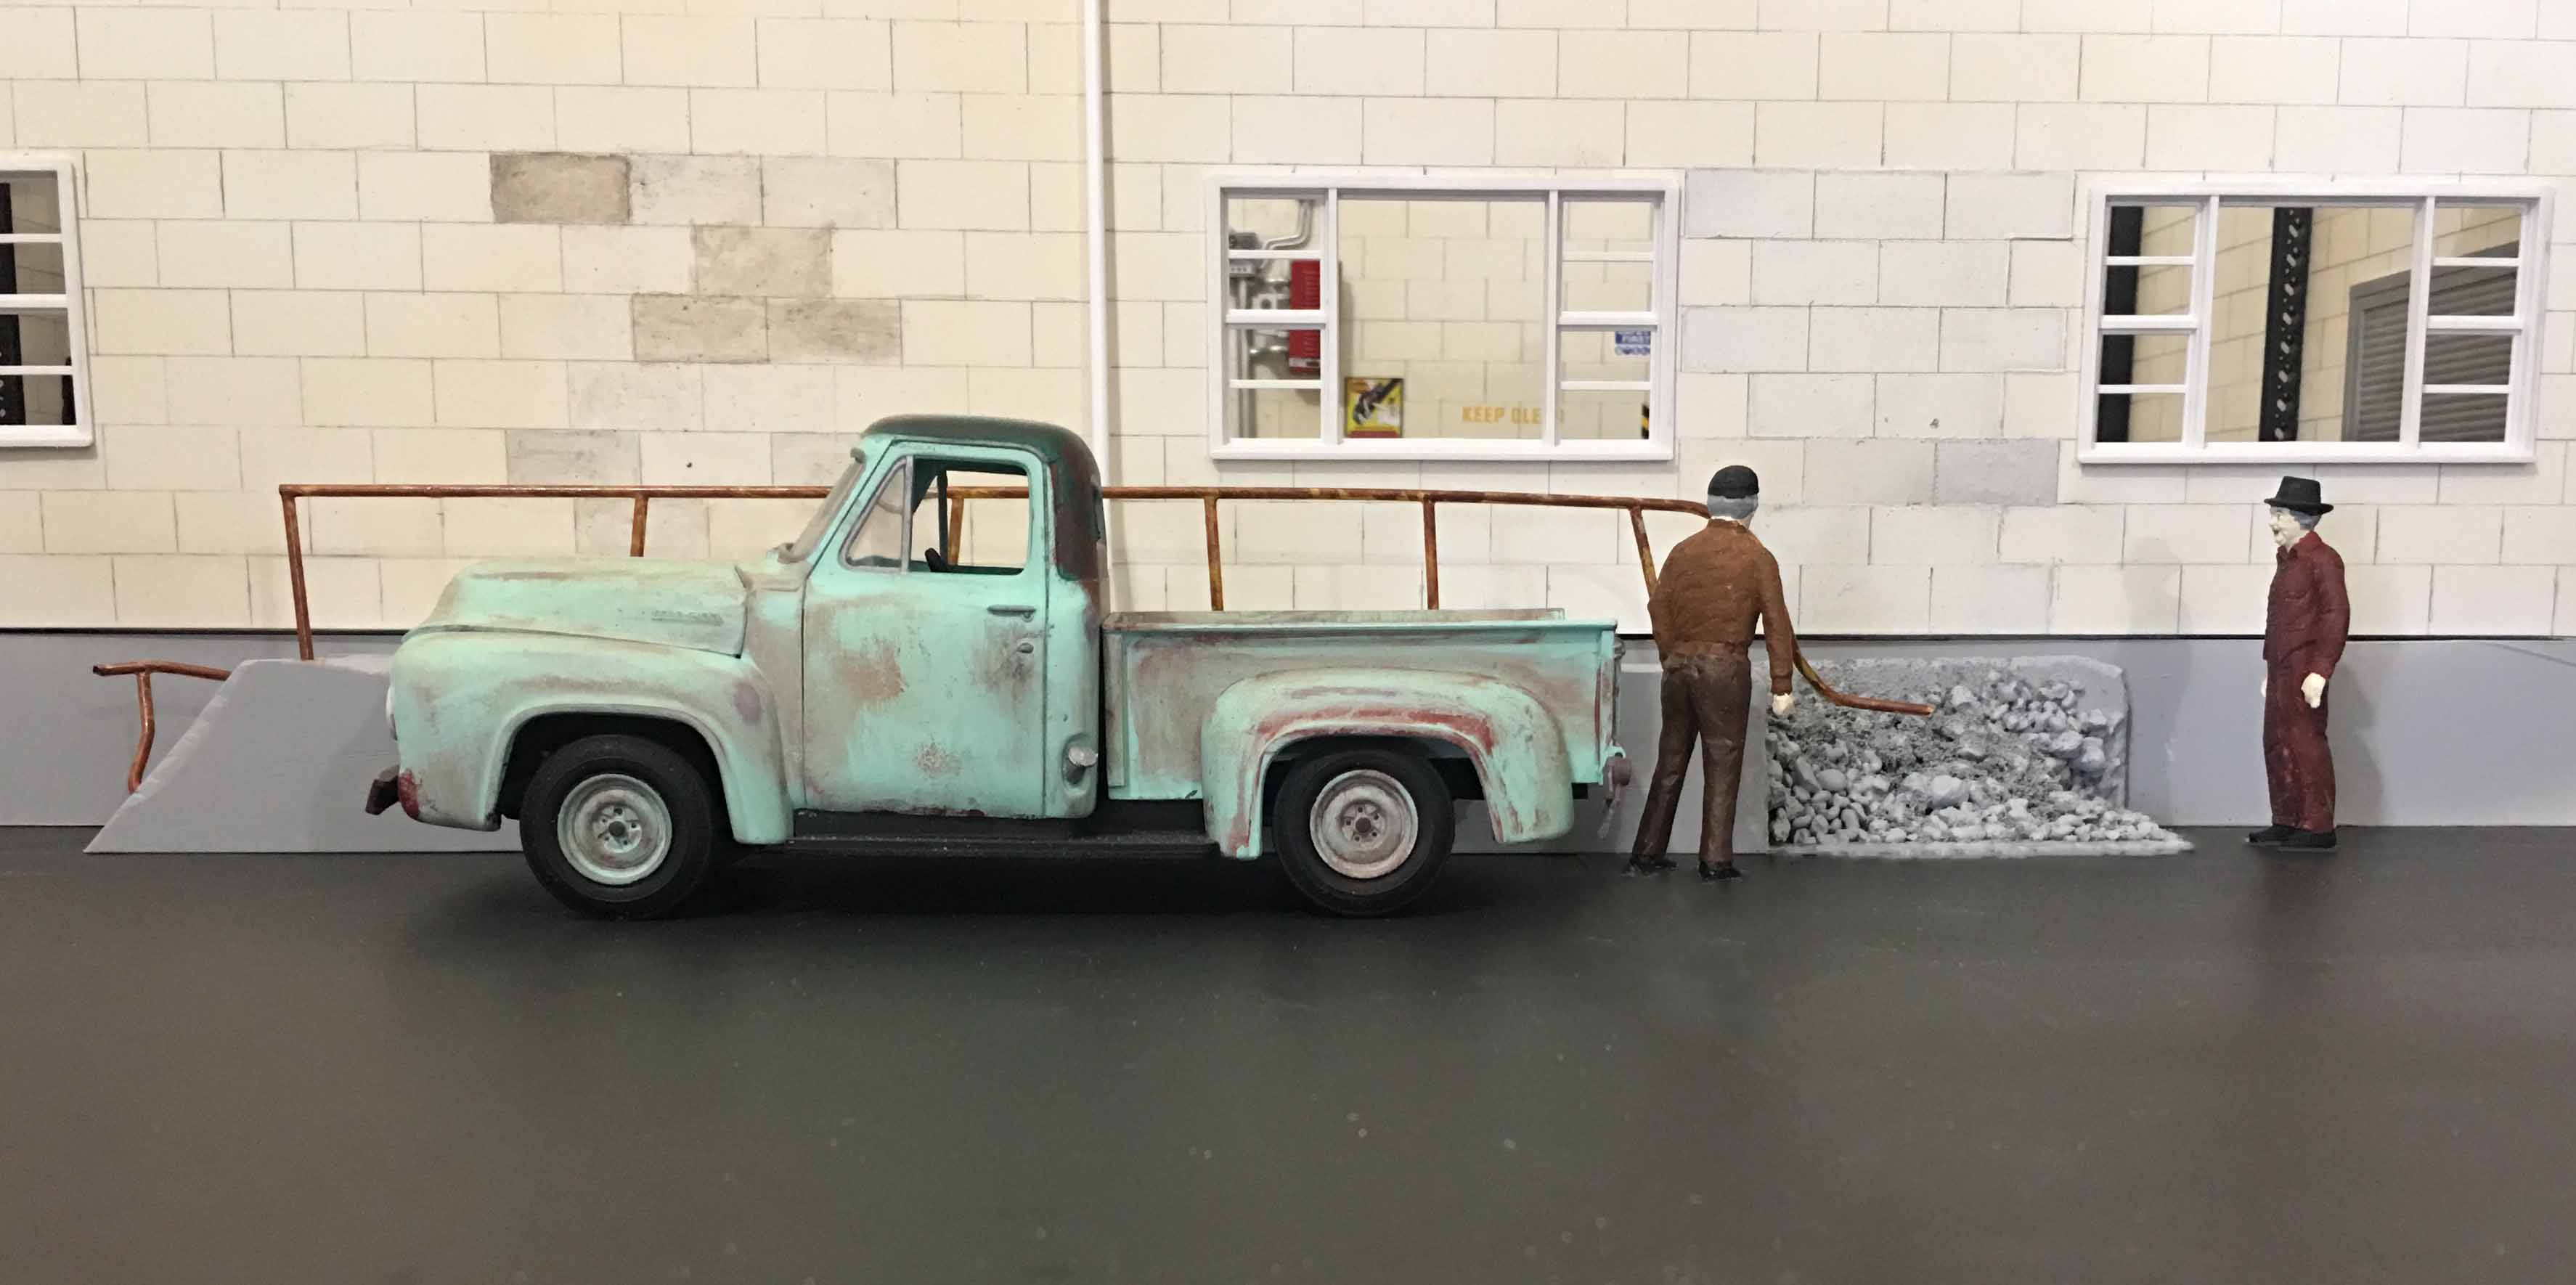
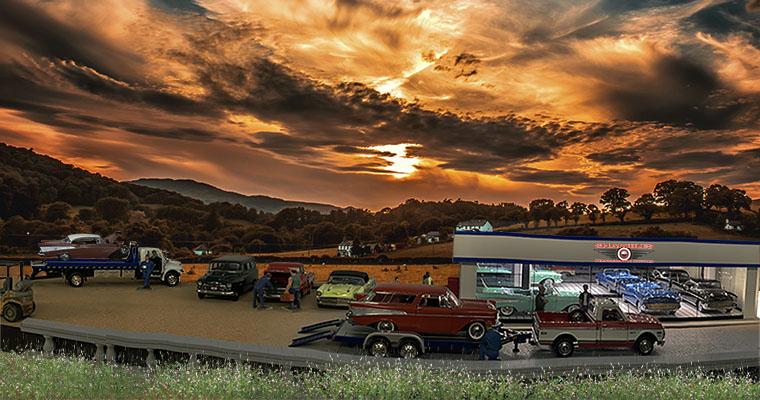
Welcome to the current Otto Ray Sing Classic Car Center. After rather humble beginnings, and now under new ownership, the business has expanded and become even more efficient. The garage area is much larger than the previous versions, and results in more efficient repairs, as well as increased customer satisfaction. The show room is large enough to display three cars. It follows the mid-century modern theme and allows customers to view their dream cars at all times.. The dealership is inviting and always stocked with beautiful cars to please any taste. Actually, there is one detriment. In front of the garage is a cement walkway, that has so far, resisted all attempts to remove it. These two workers will attest that it is much easier to stand around and look at it, than it is to perform the exercise in futility of trying to remove it. Management had a sense of humor when they put up the restroom signs. The entryway to the showroom was also well thought out to draw customers eyes to the vehicles found within. A classic car is always in view while approaching the building. This is what I call a 'photographic diorama', as the purpose is for it to be able to have scenery, vehicles, & figures changed to suit the needs of the vehicle being photographed. I will be adding a history to this as well as introducing figures, etc, if there is interest.
-
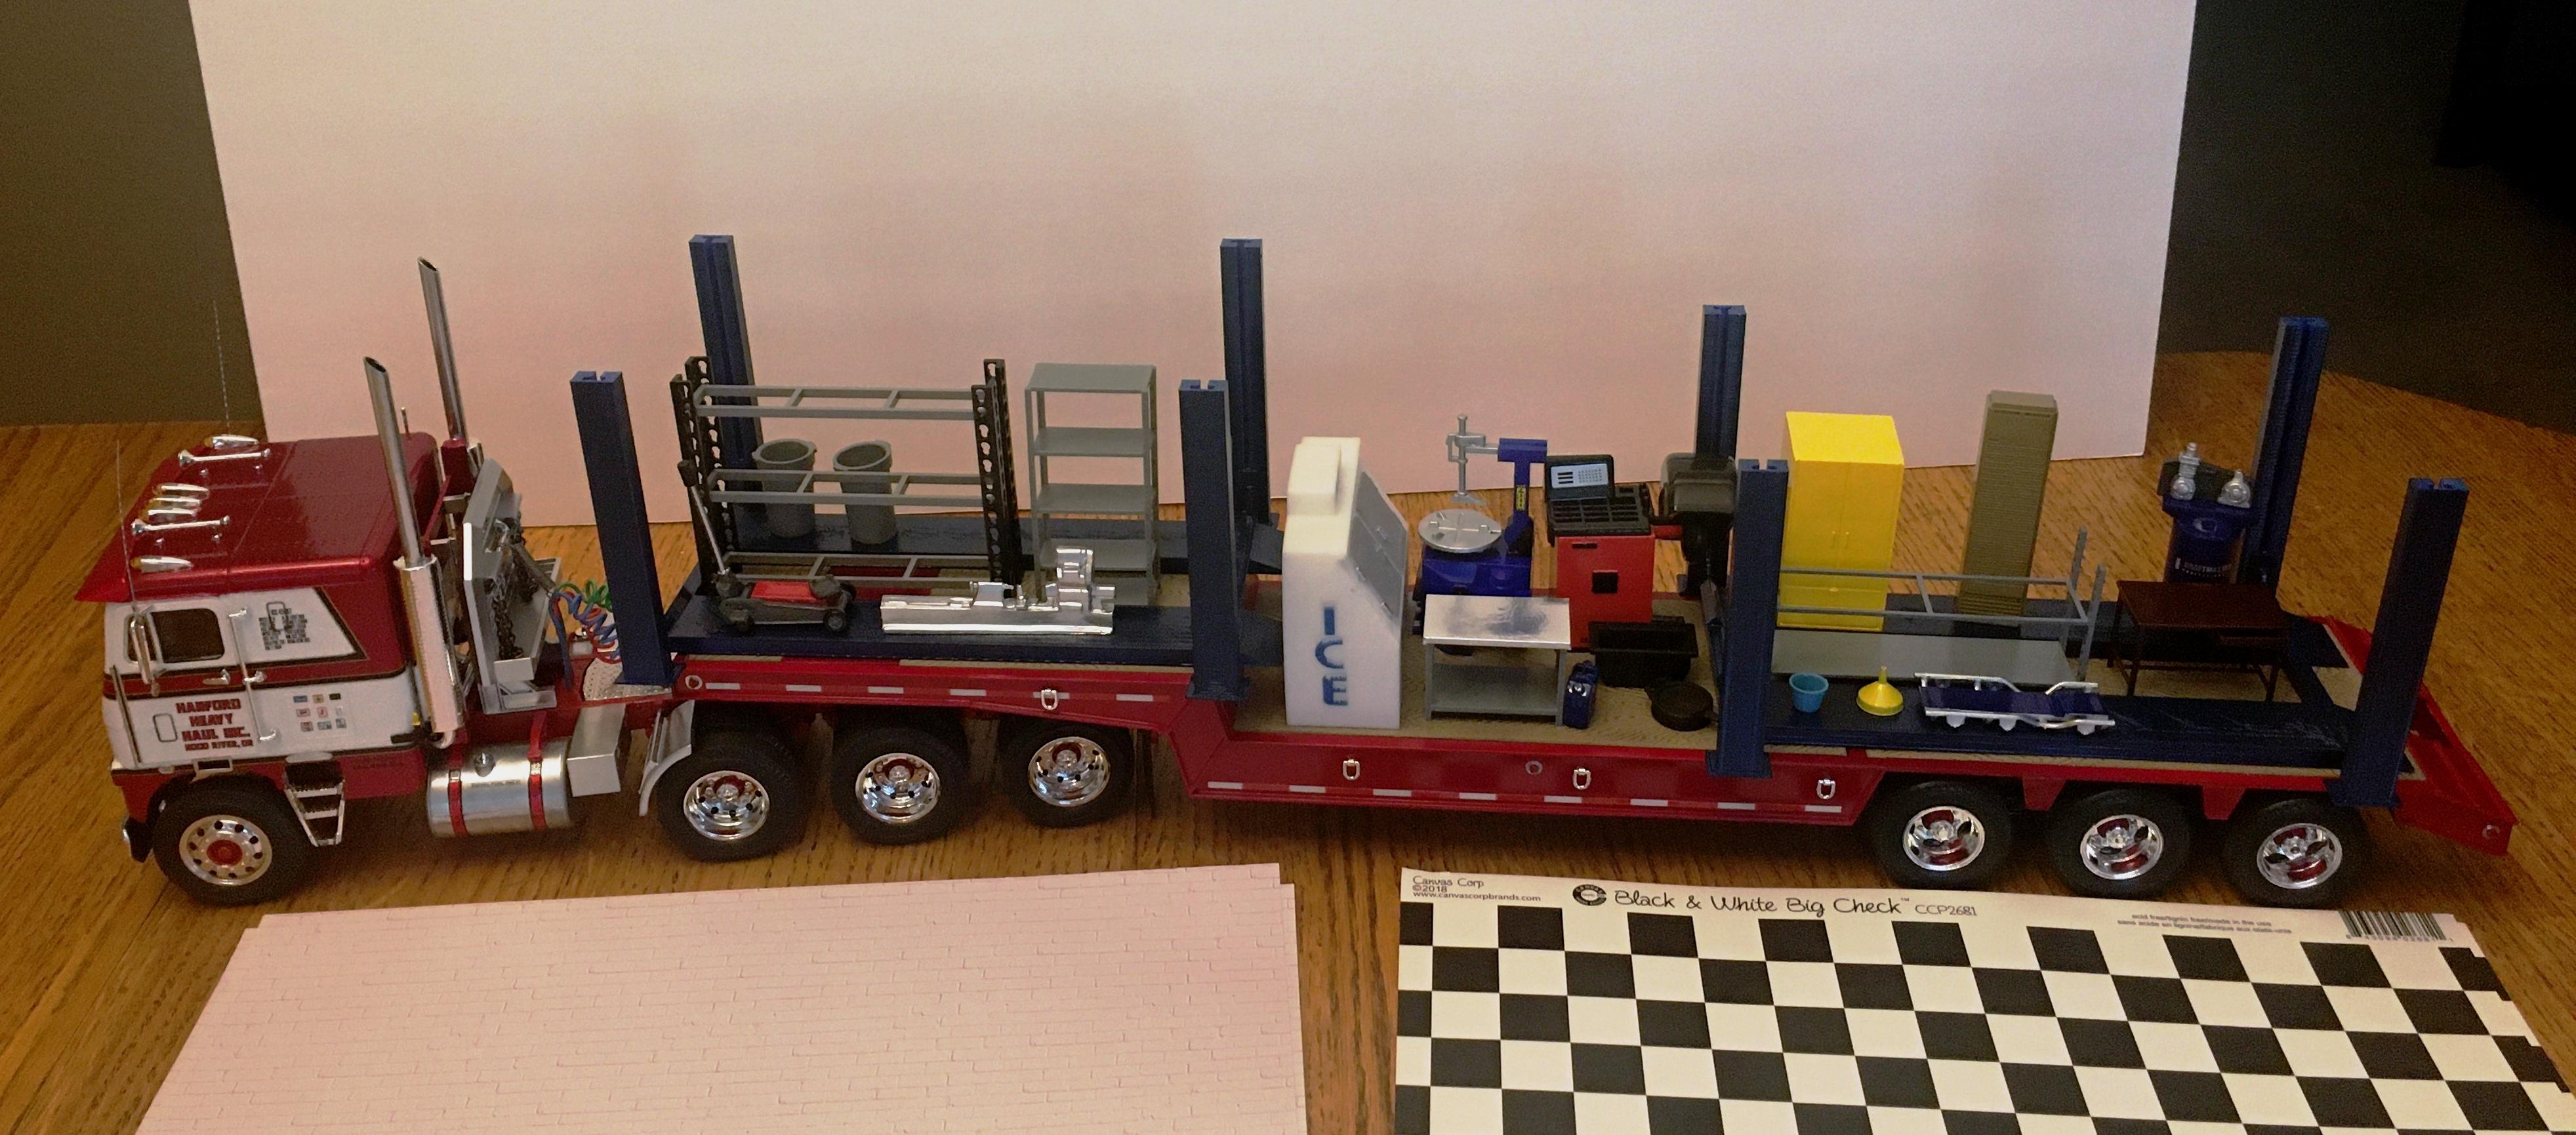
 I have surprised myself in that I completed no cars this year. I did get two big rigs and my diorama start to finish (except for lights).
-
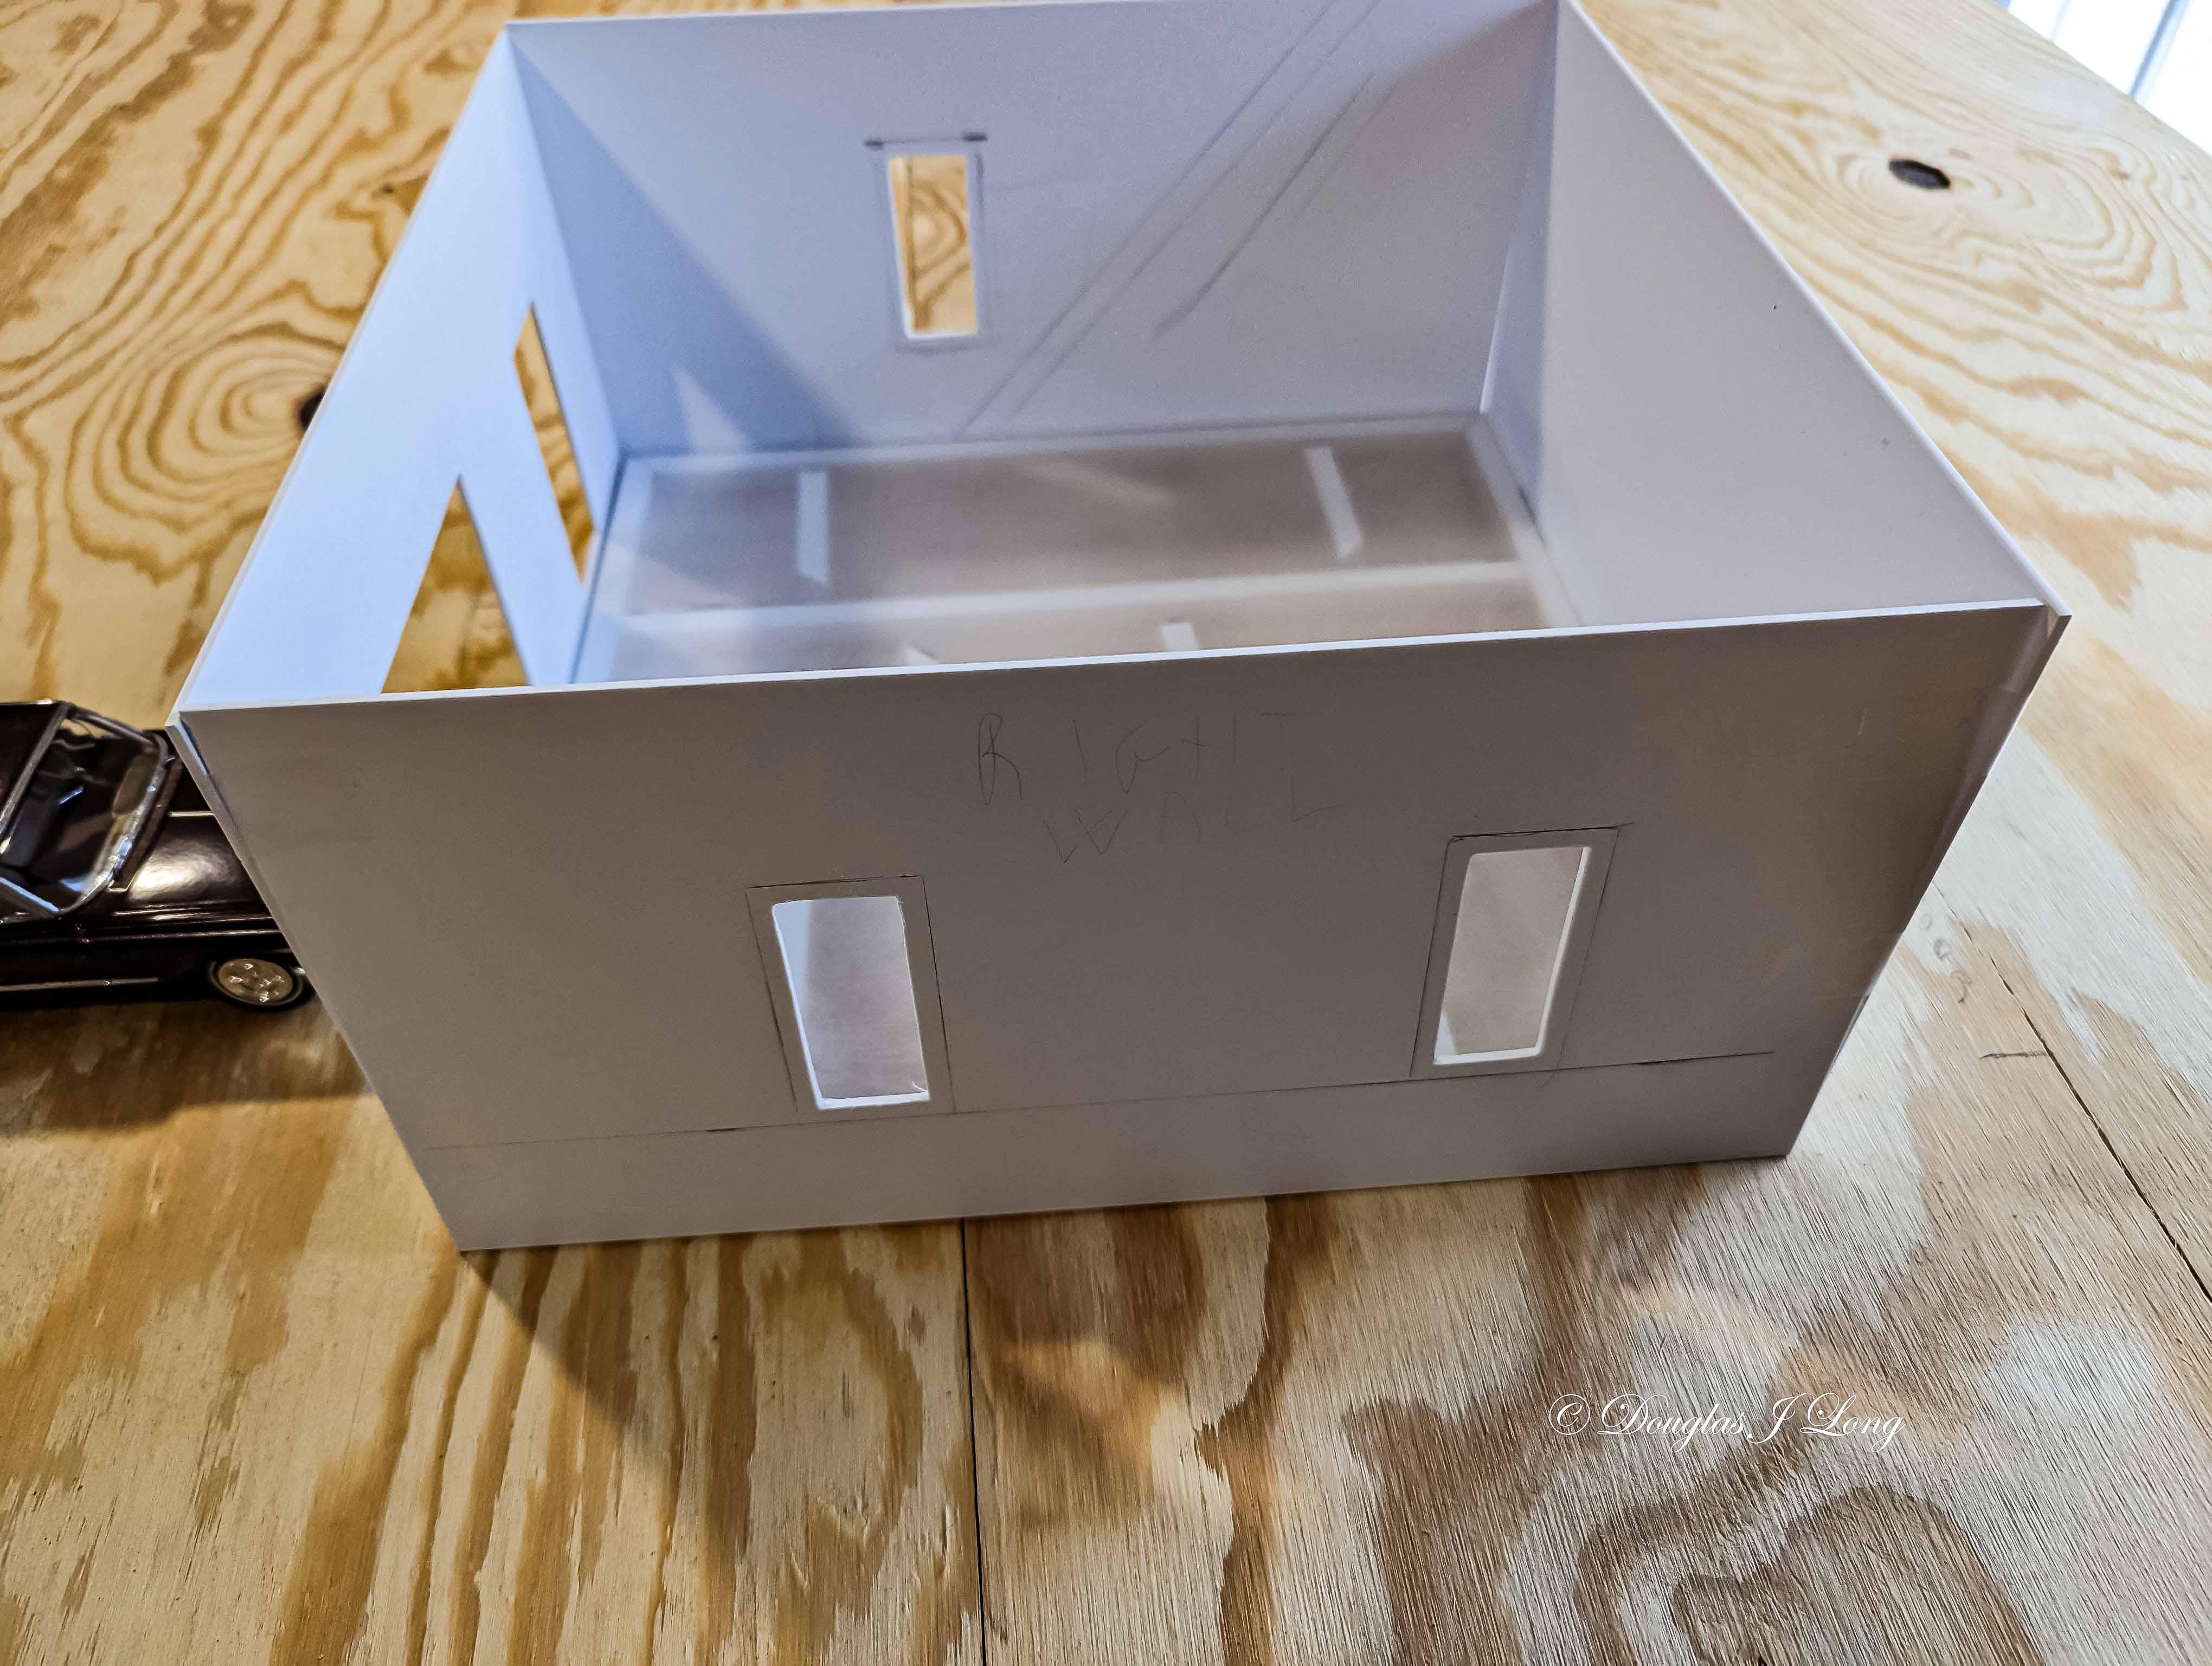
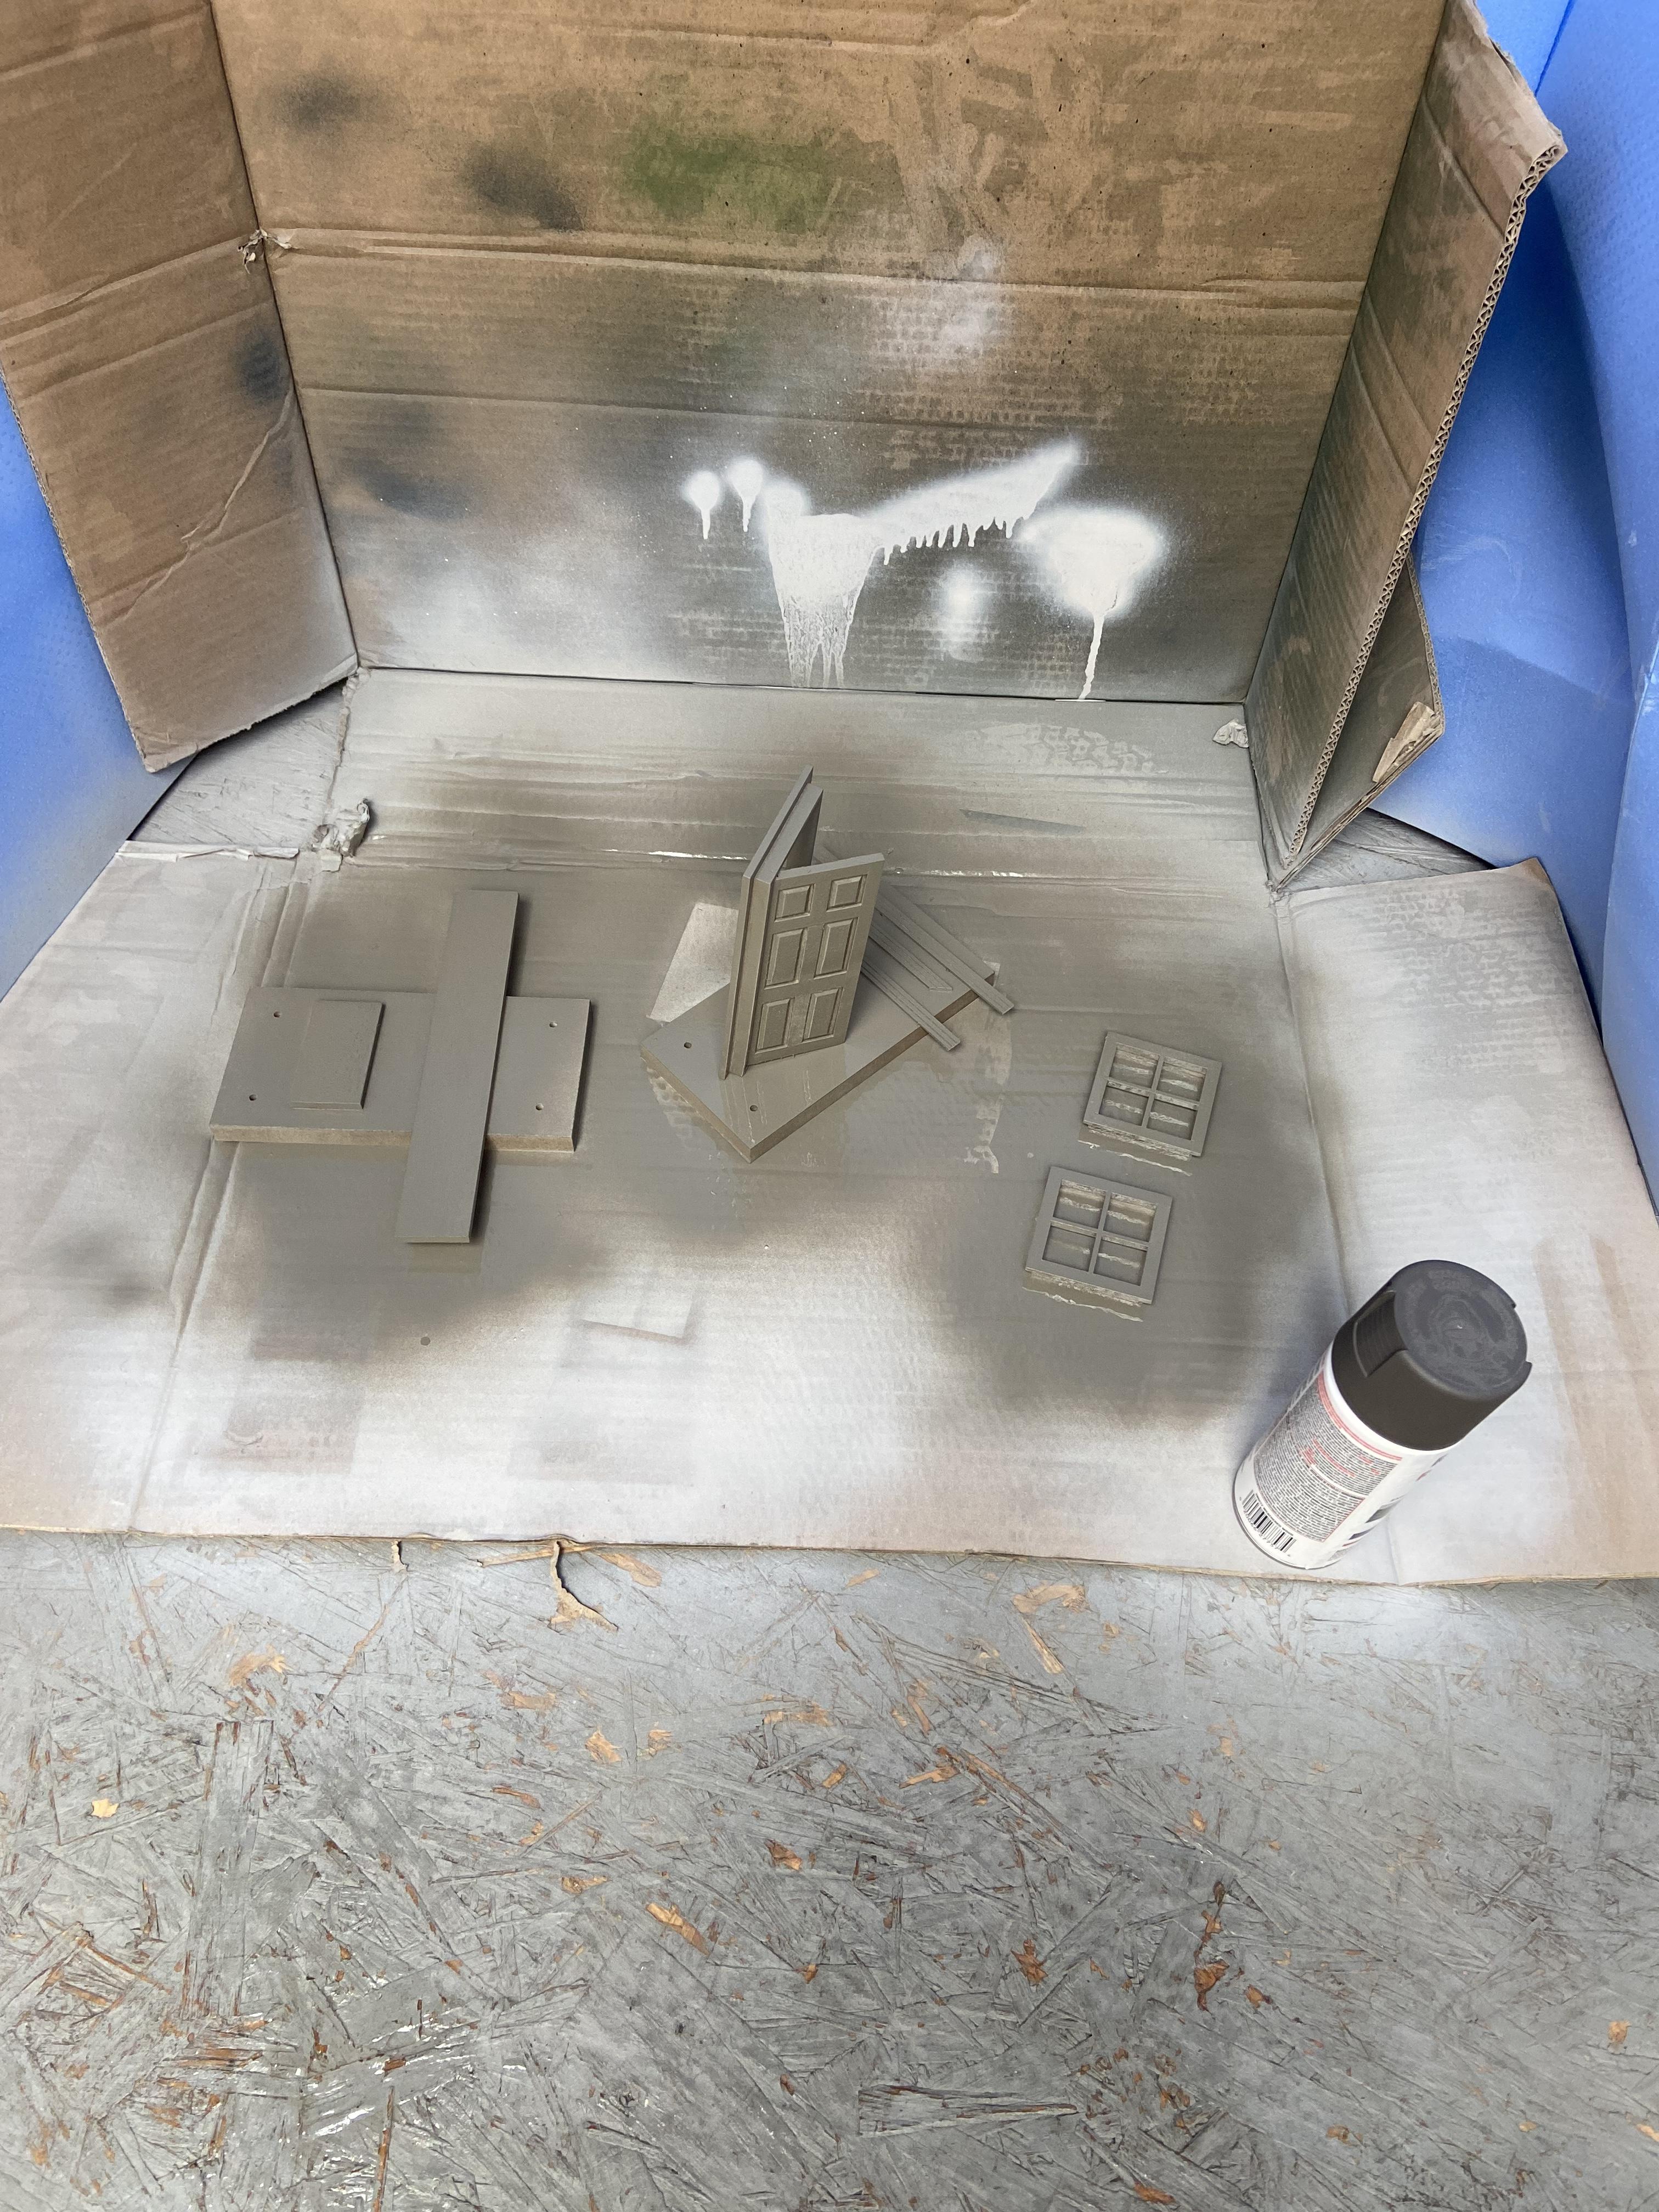
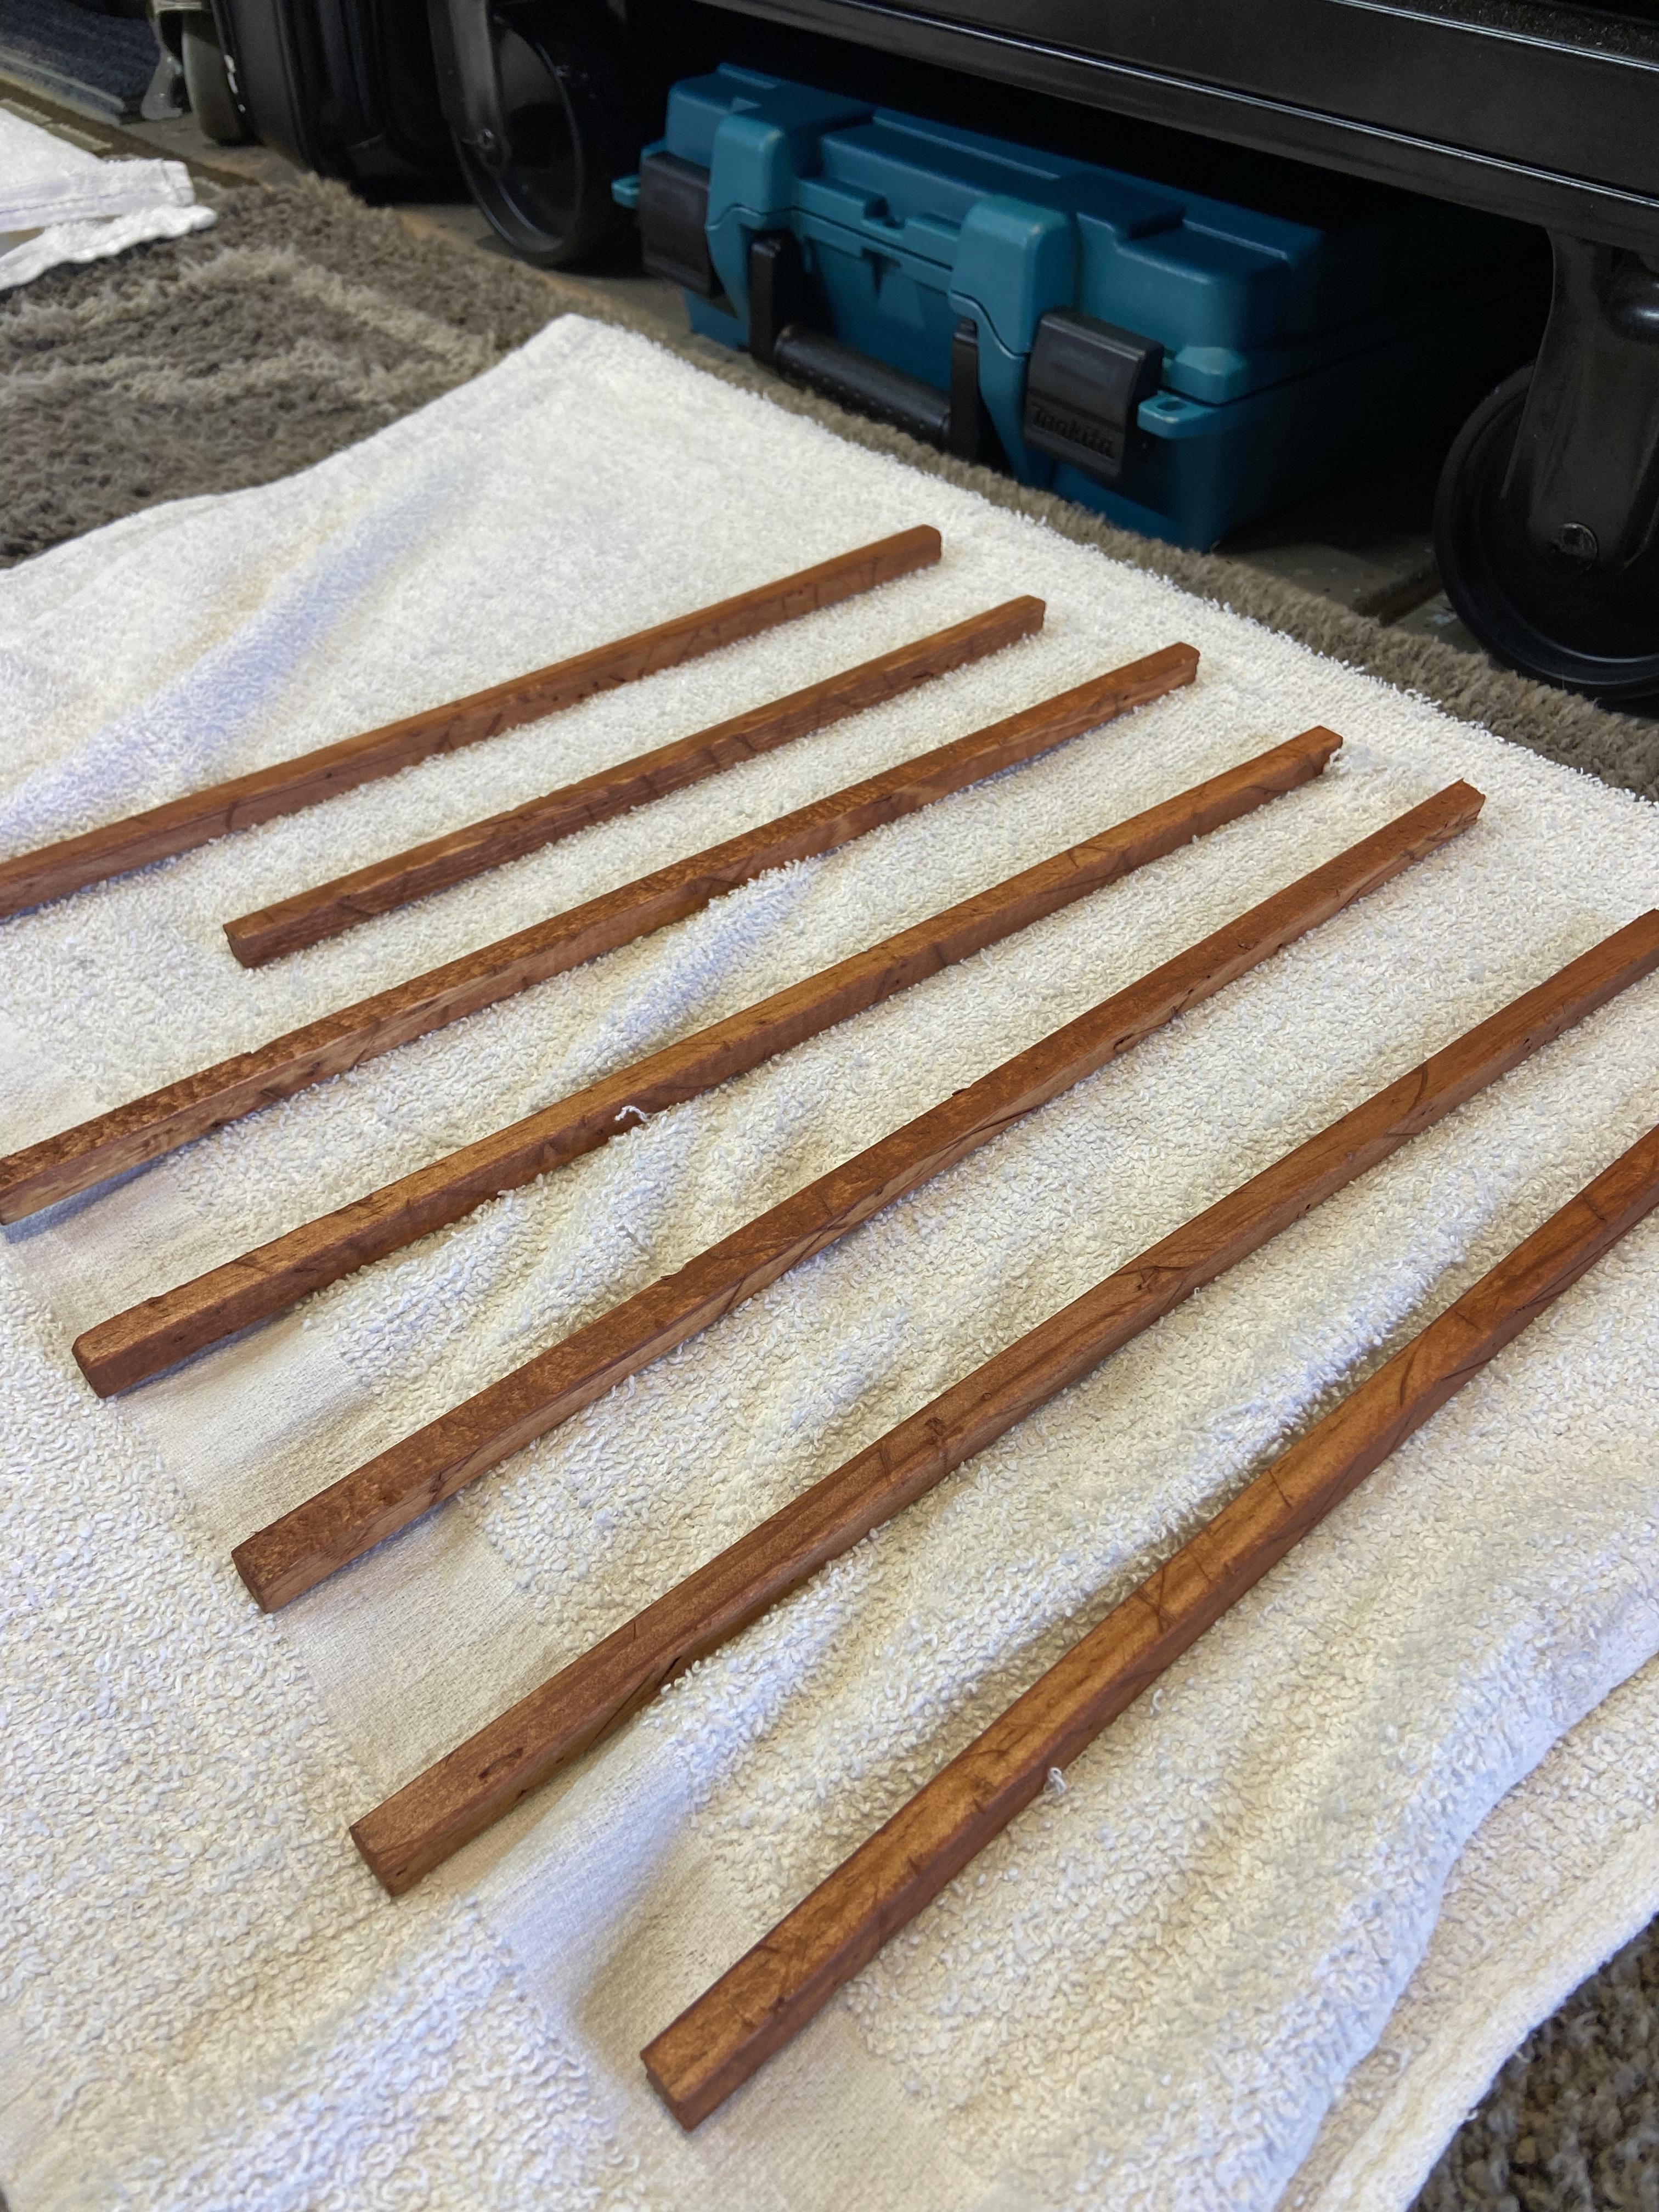
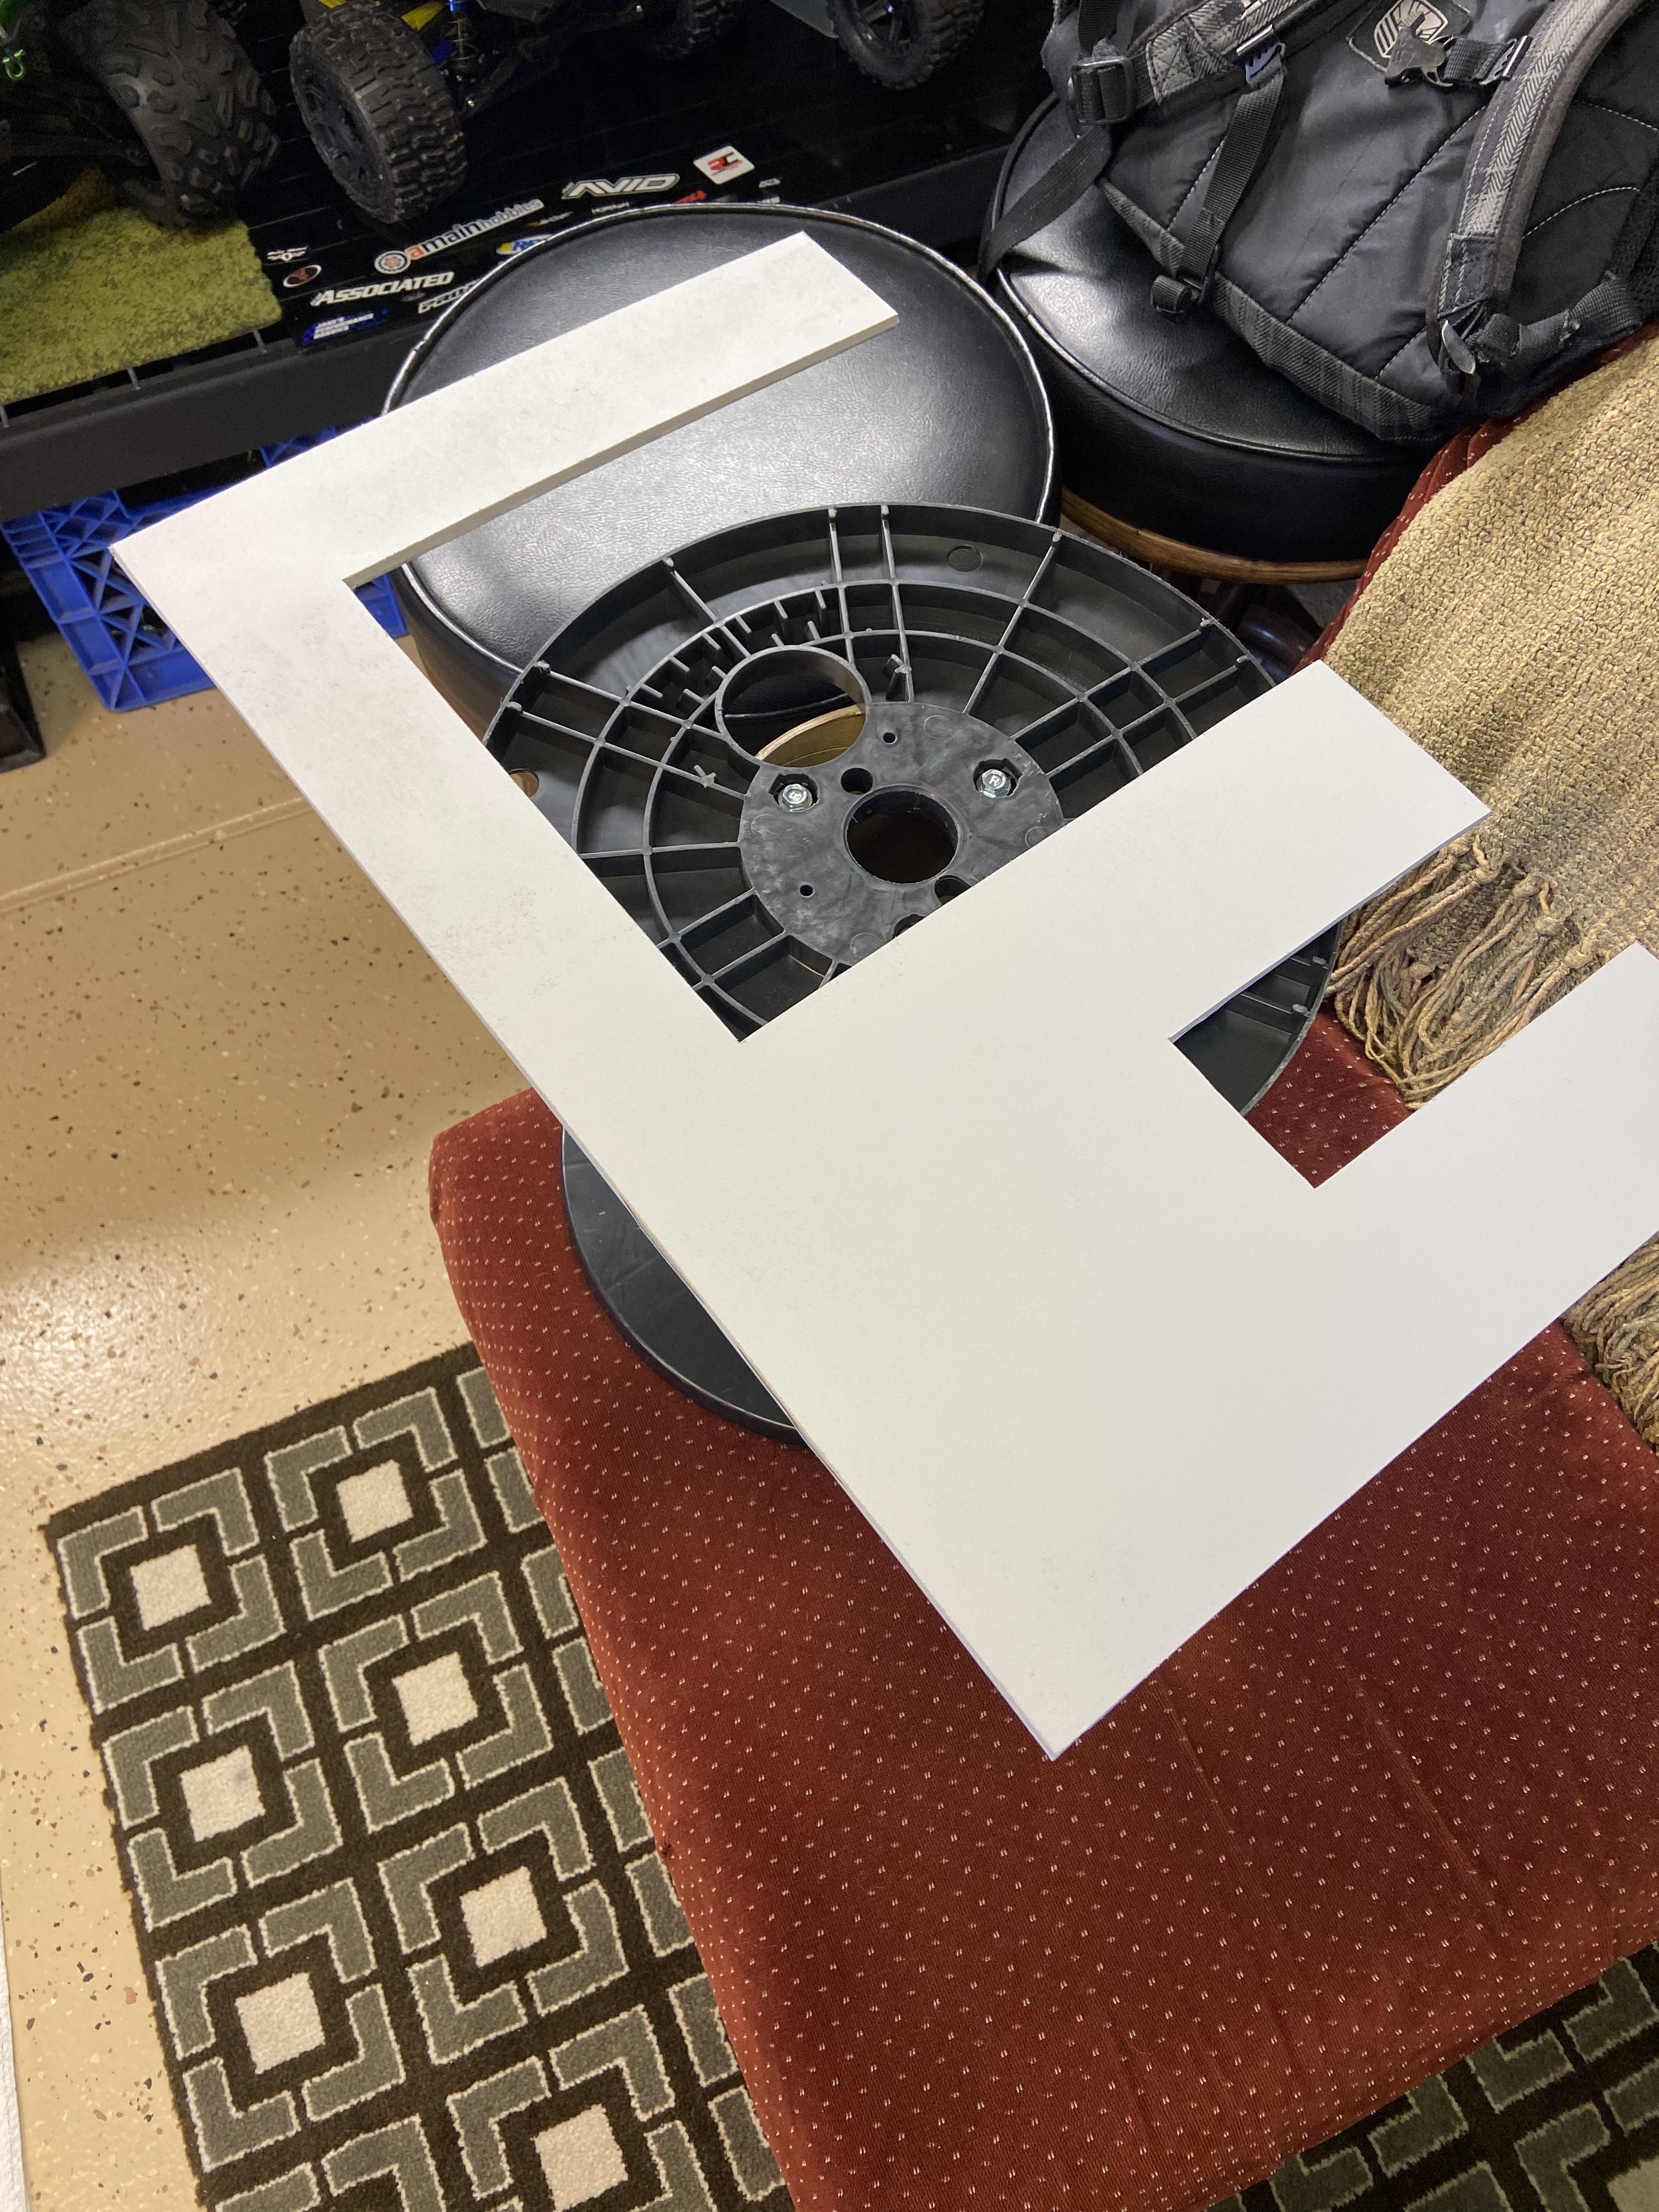
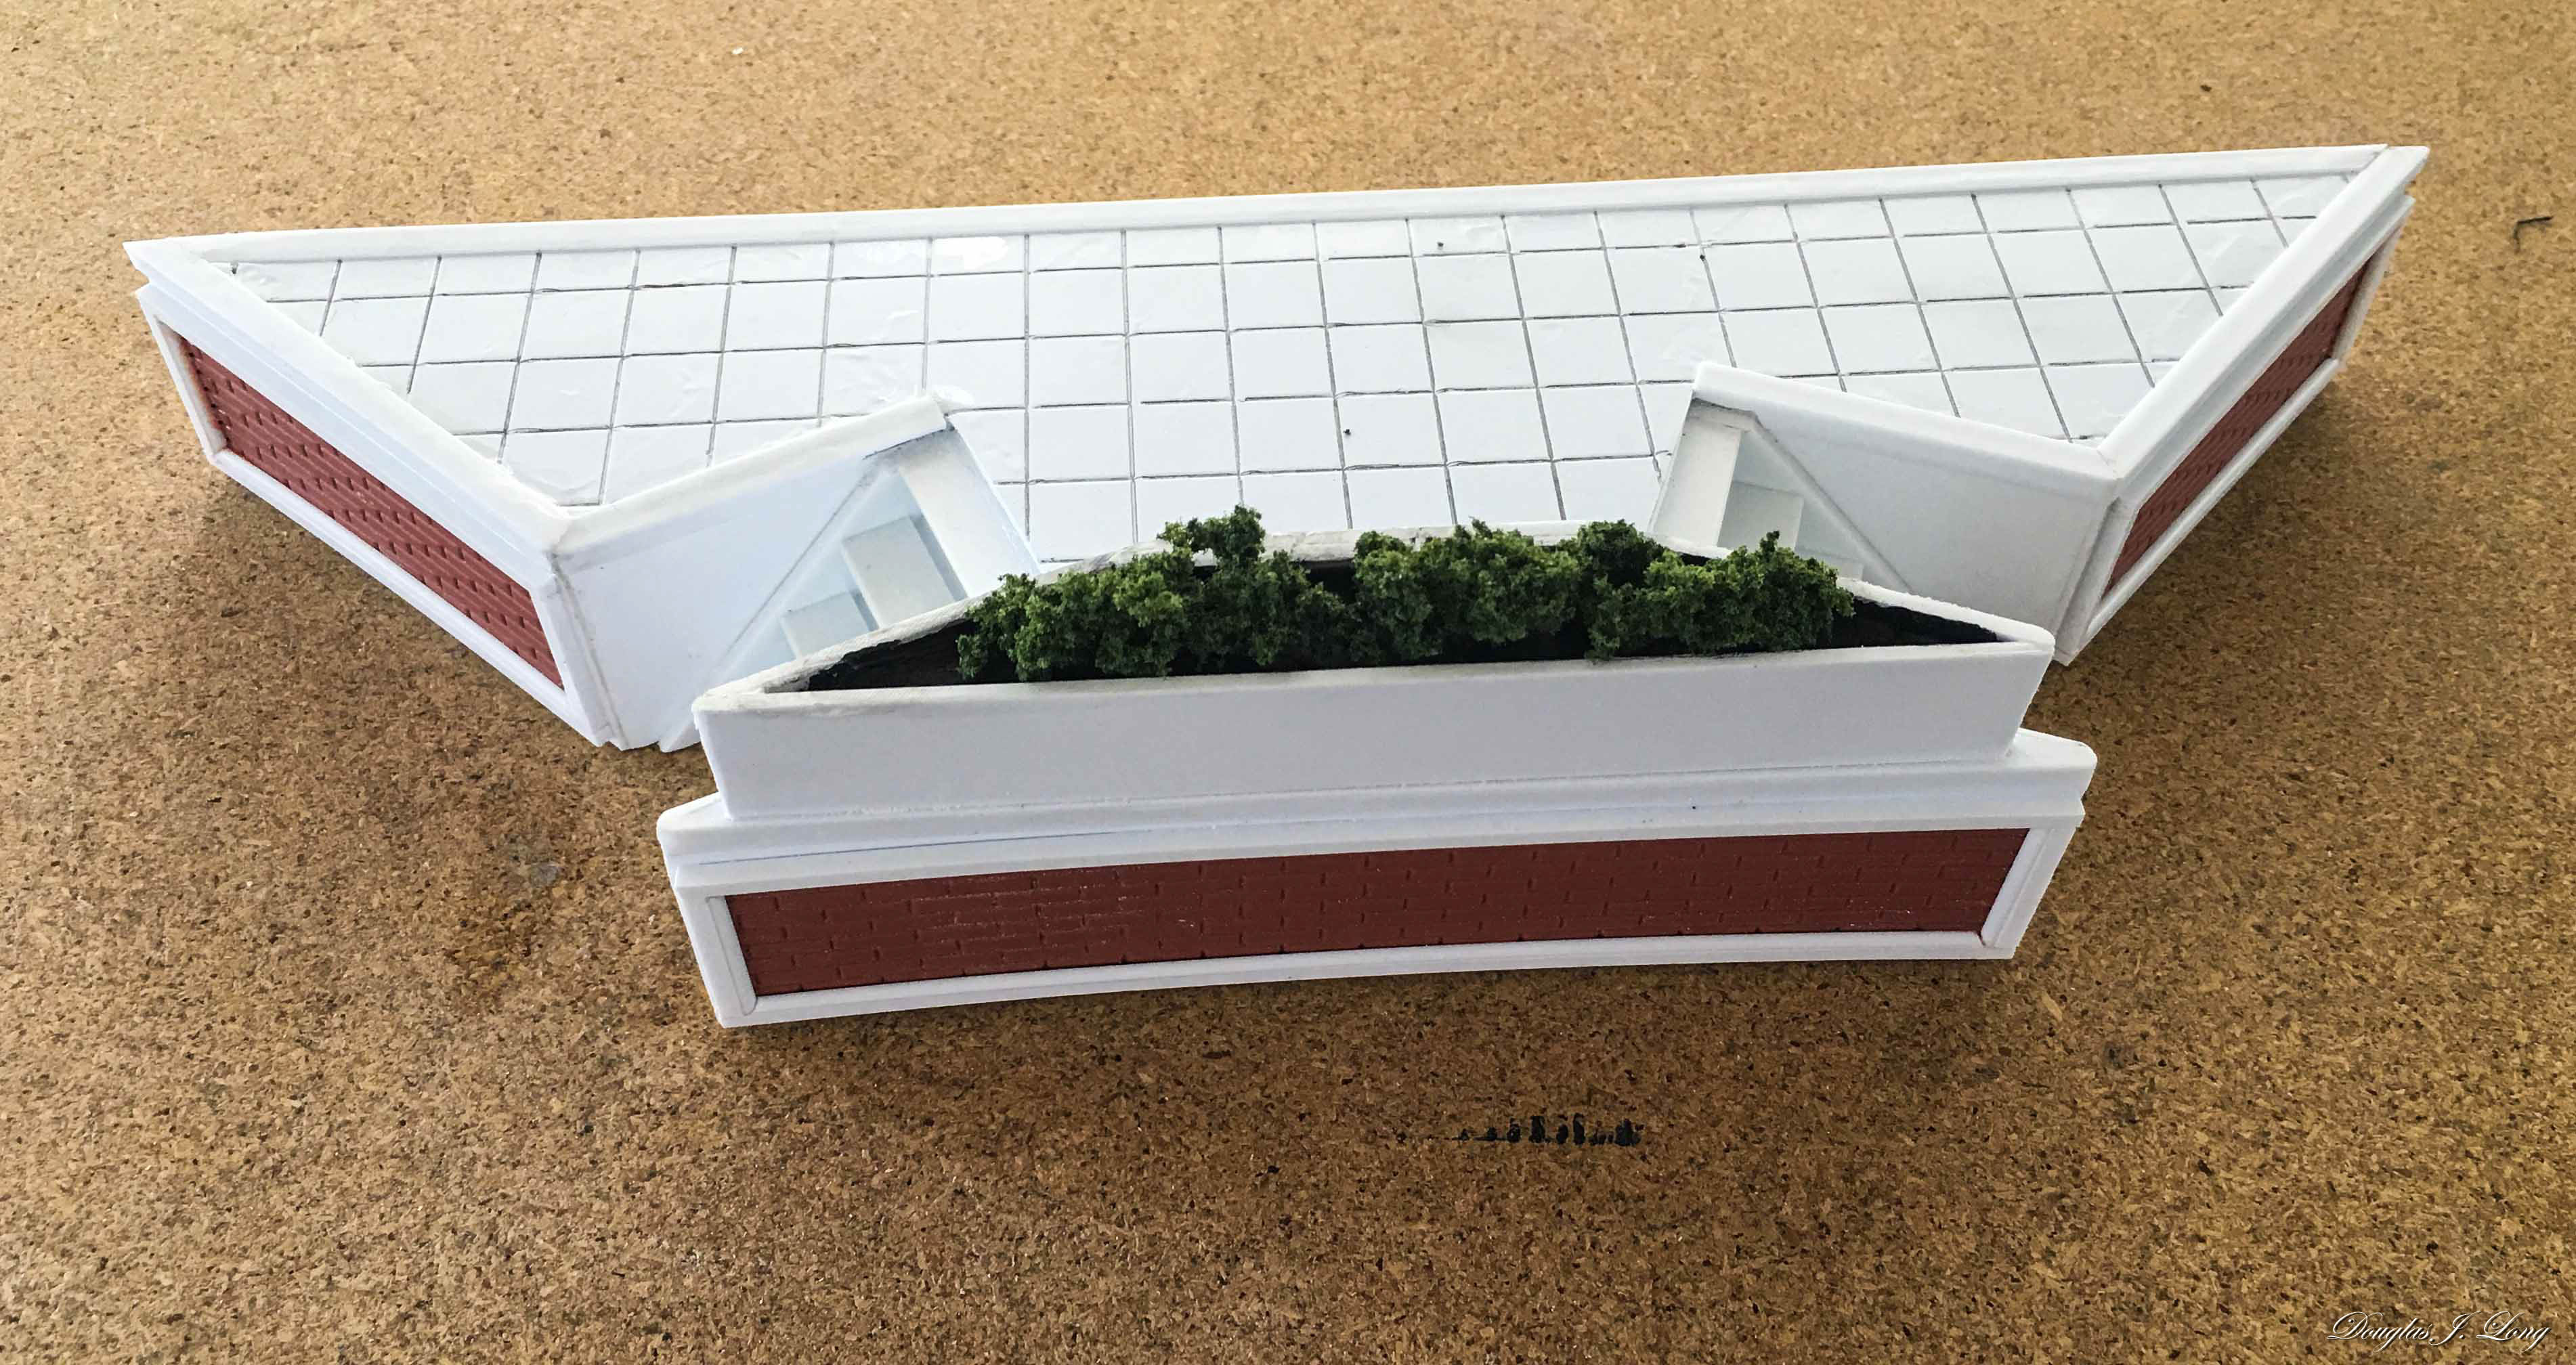
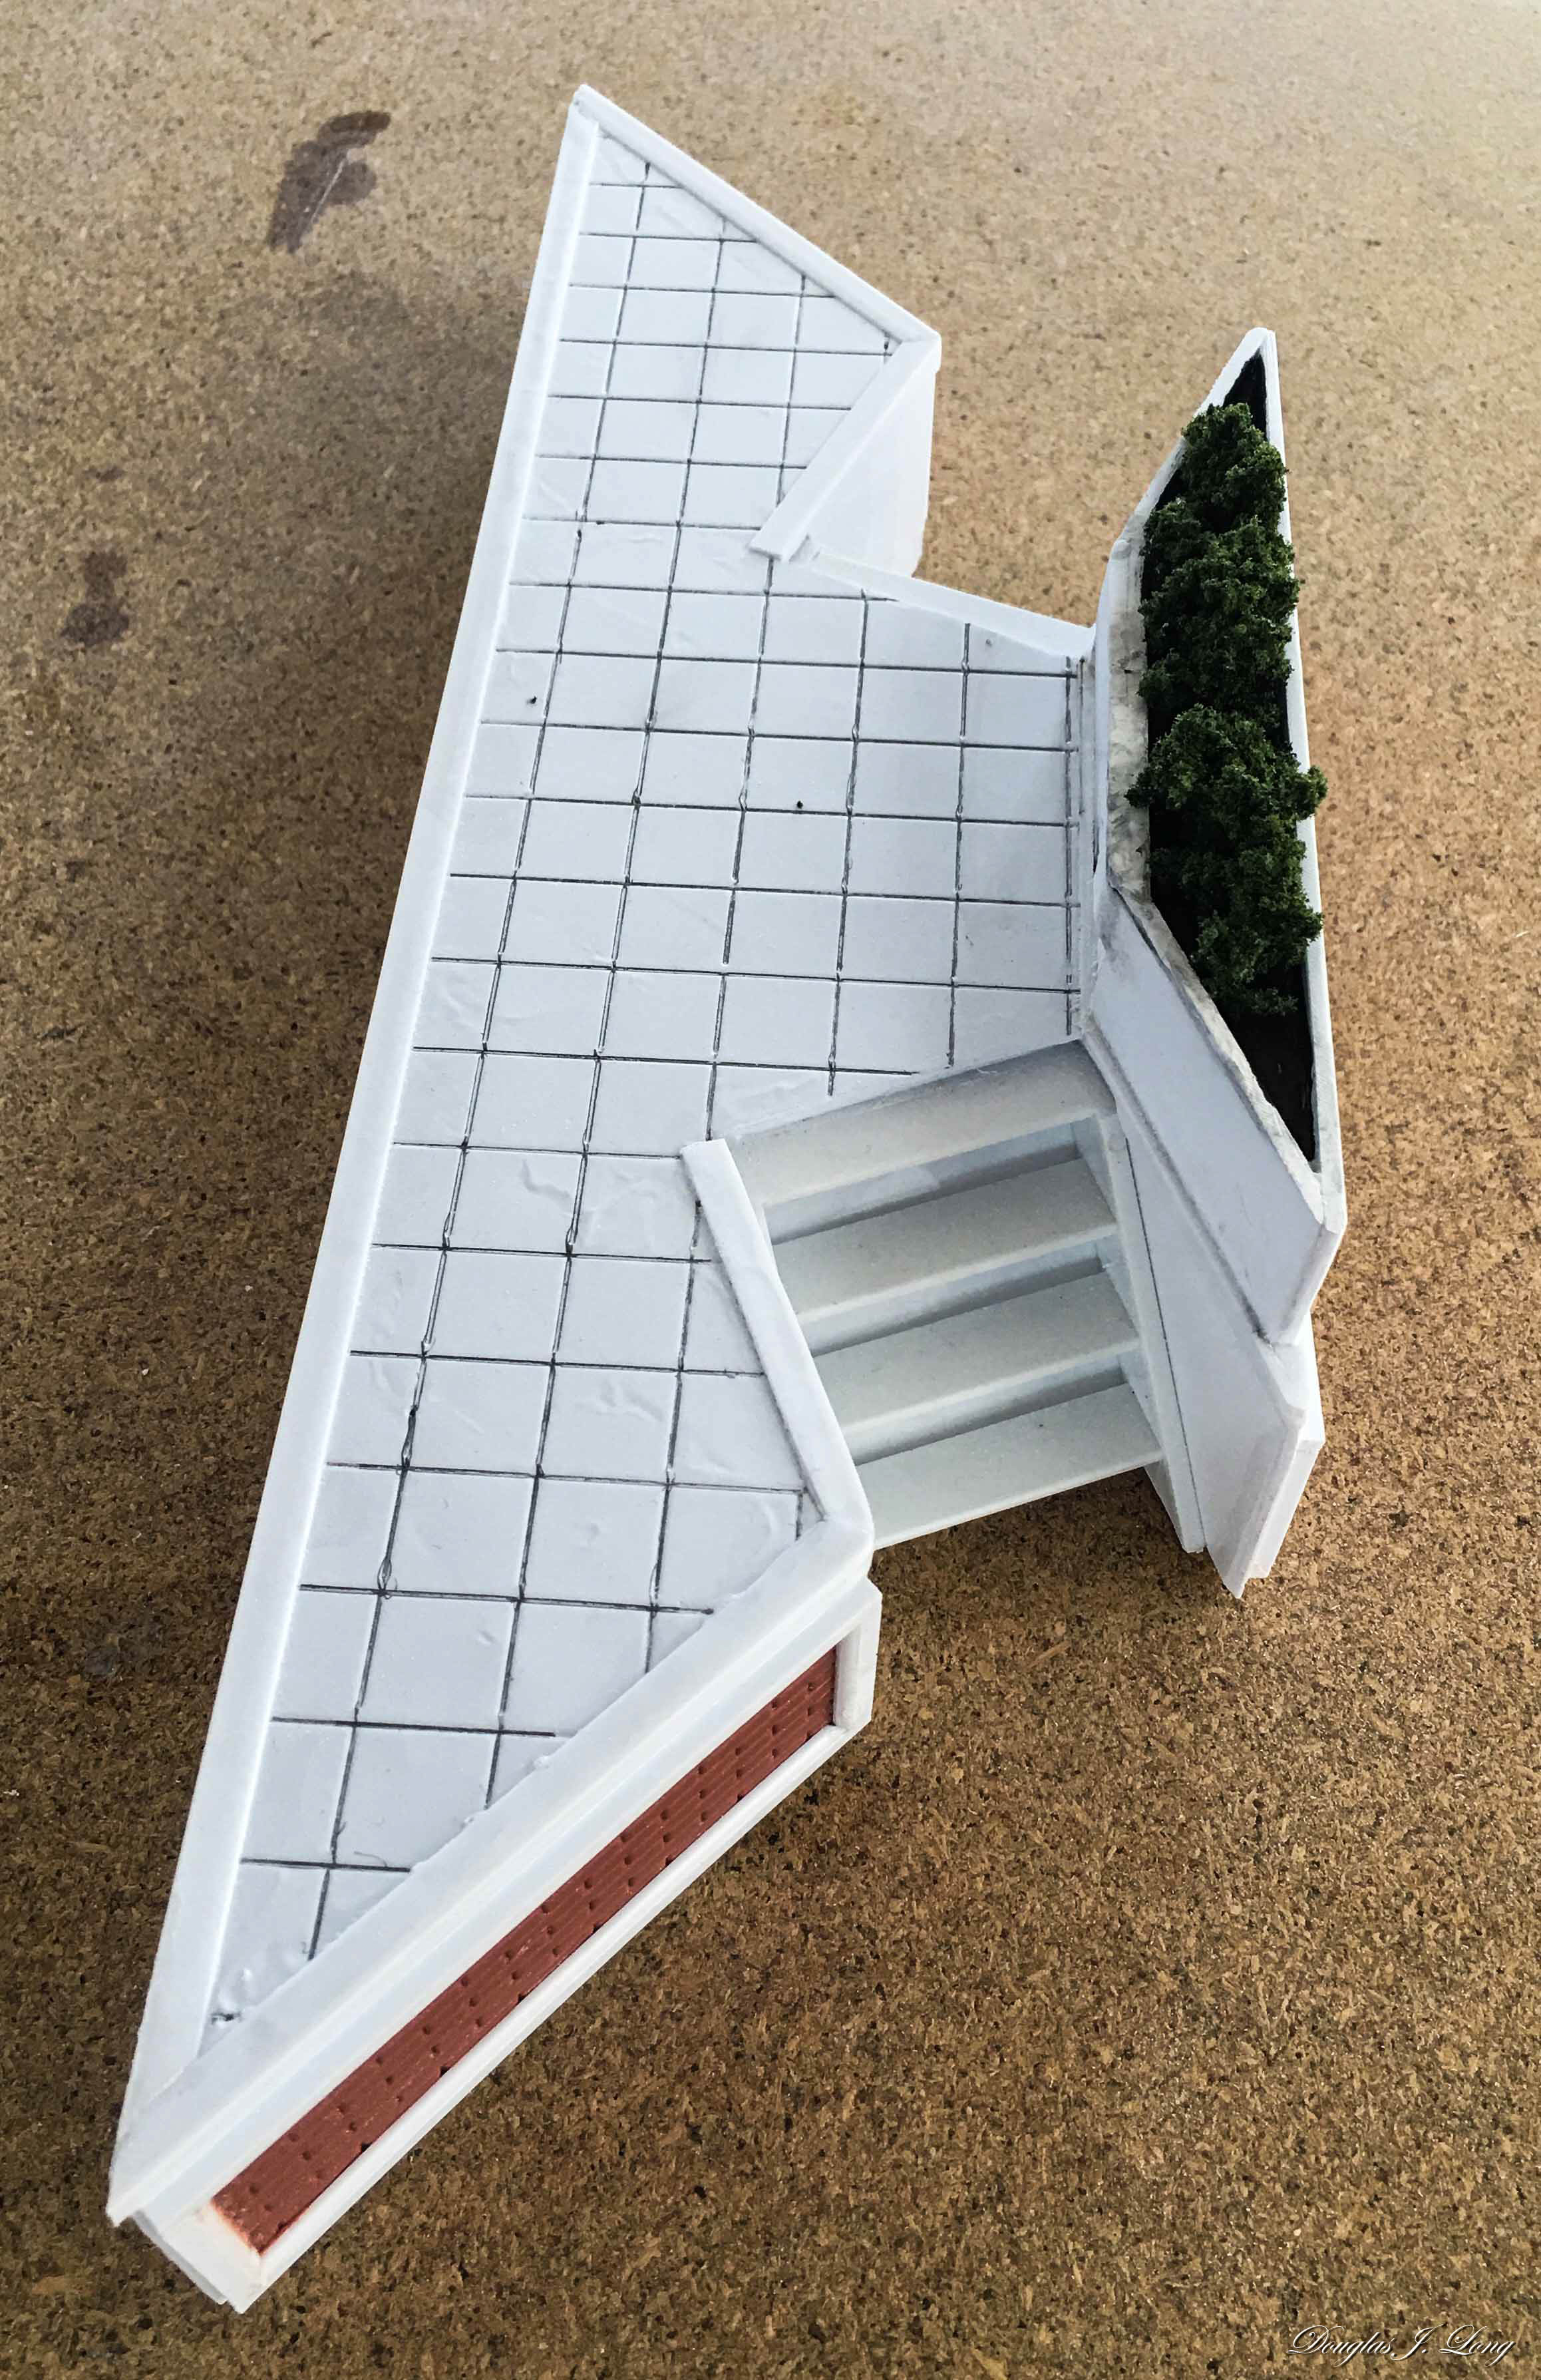
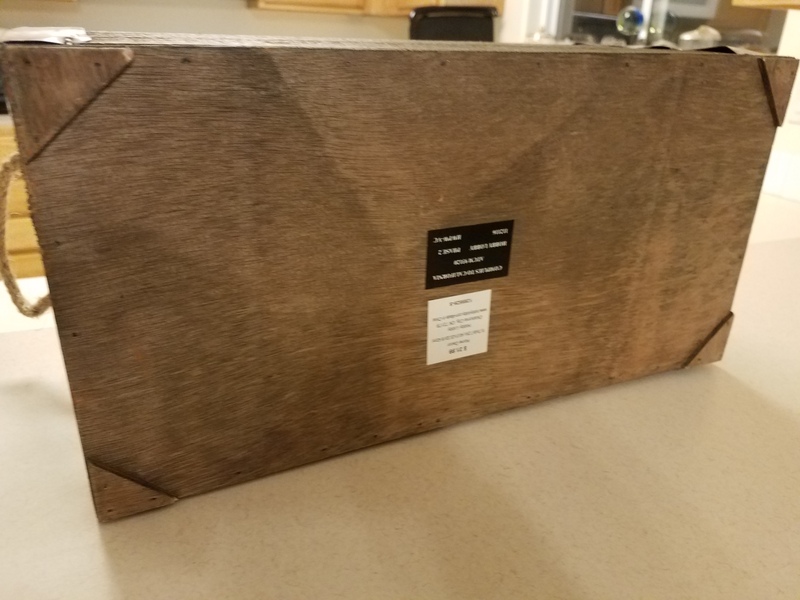
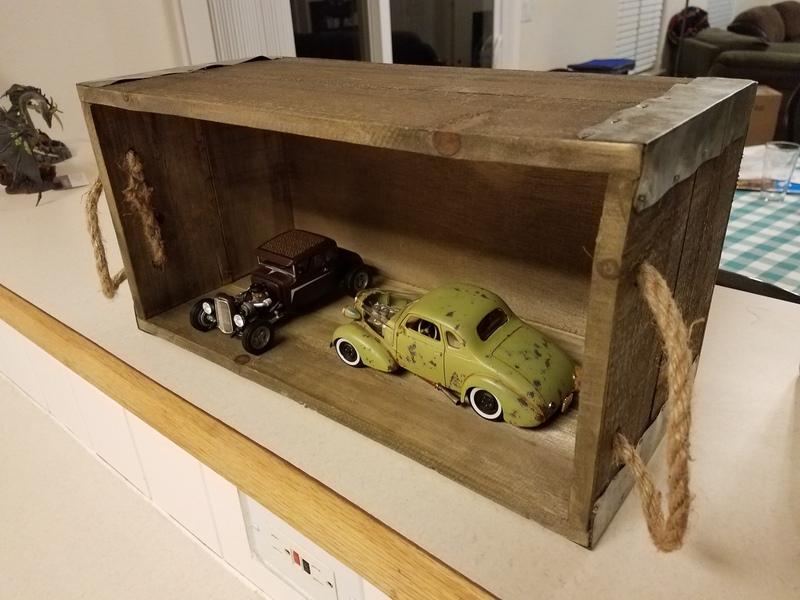
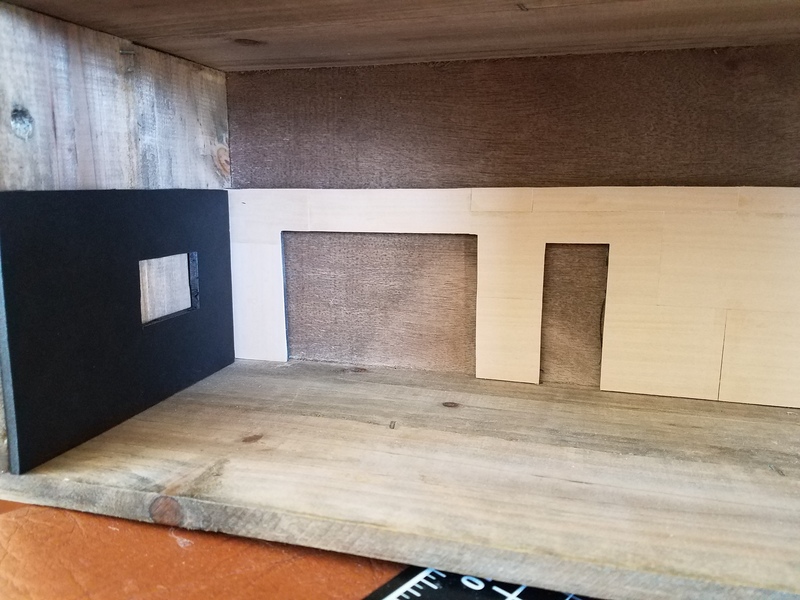
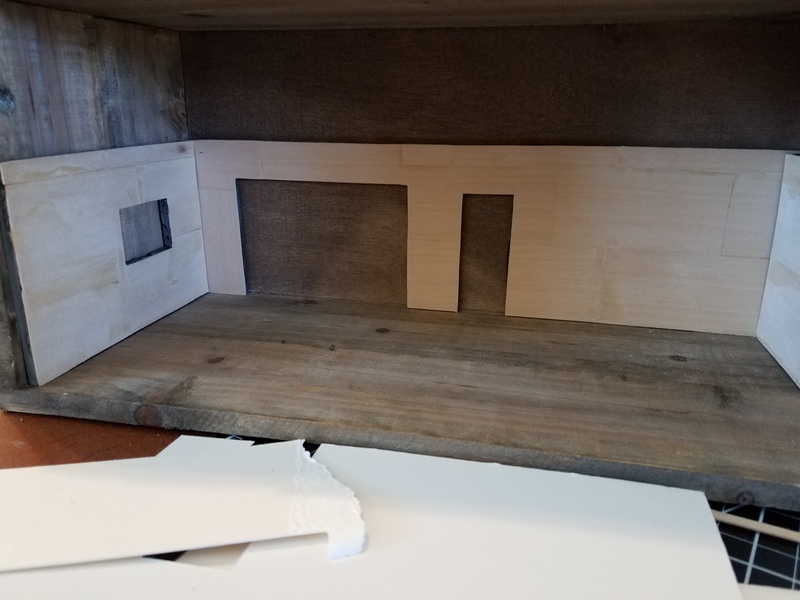
I've been wanting to do a shadowbox garage scene dio for a while. I finally found a box. Good size. Plenty of room for two models. Hobby Lobby item, its got a nice patina. In scale, the interior dimensions are 31.2 feet long and 14.5 feet deep and high. The plan is to do a lighted garage scene with a crawl space above for storage. Rather than do the bare framed garage, I've decided to do the garage that's been plywood sheathed. One window, double barn doors, concrete floor, one door. I'll be using washes to get an aged patina on the wood, with color added to break up the "man that's a lot of wood". The walls are basswood over foam core. The foam core will give me some depth for the windows and doors as well as a support for the ceiling which will be framed out to look realistic. I cut out templates from poster board for each wall and then cut the foam core and added the basswood over that. I'm gonna need to get some resin garage pieces or a Fujimi garage set. Here's where I'm at so far.
-
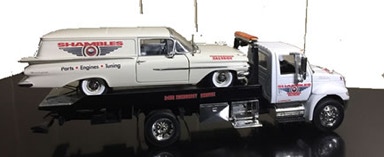
for the REST of the story, go to: https://www.shamblesmodels.com/the-story.html
-
This is one shot of my car dealership diorama during "57 Chevy Week". I've got an ongoing back story with several episodes on https://www.diecast.org/diecast98/html/asp/forums/bulletinboard/default.asp I've ordered a 3 bay shop building that will go on the left of the showroom...
-
I may have posted some of photos of this diorama I did a couple of years ago. Last year, I accidentlly erased my hard drive and lost a lot of photos. I've been coming across a few that were saved in various places. Here's a couple I just found.
-
This appeared on our local news website today. Looks like nice work. https://www.mysanantonio.com/entertainment/arts-culture/article/San-Antonio-artist-creates-miniature-models-of-14120518.php
-
 Convert your IKEA or similar shelf to display your 1:64, 1:25, 1:24, 1:18 scale diecast and plastic models cars / bikes for super CHEAP!! I have a yt video on how I built it, not sure if I'm allowed to post that. Thanks all!
-
I've done a couple of iterations on this theme. Planning on doing another one soon.
-
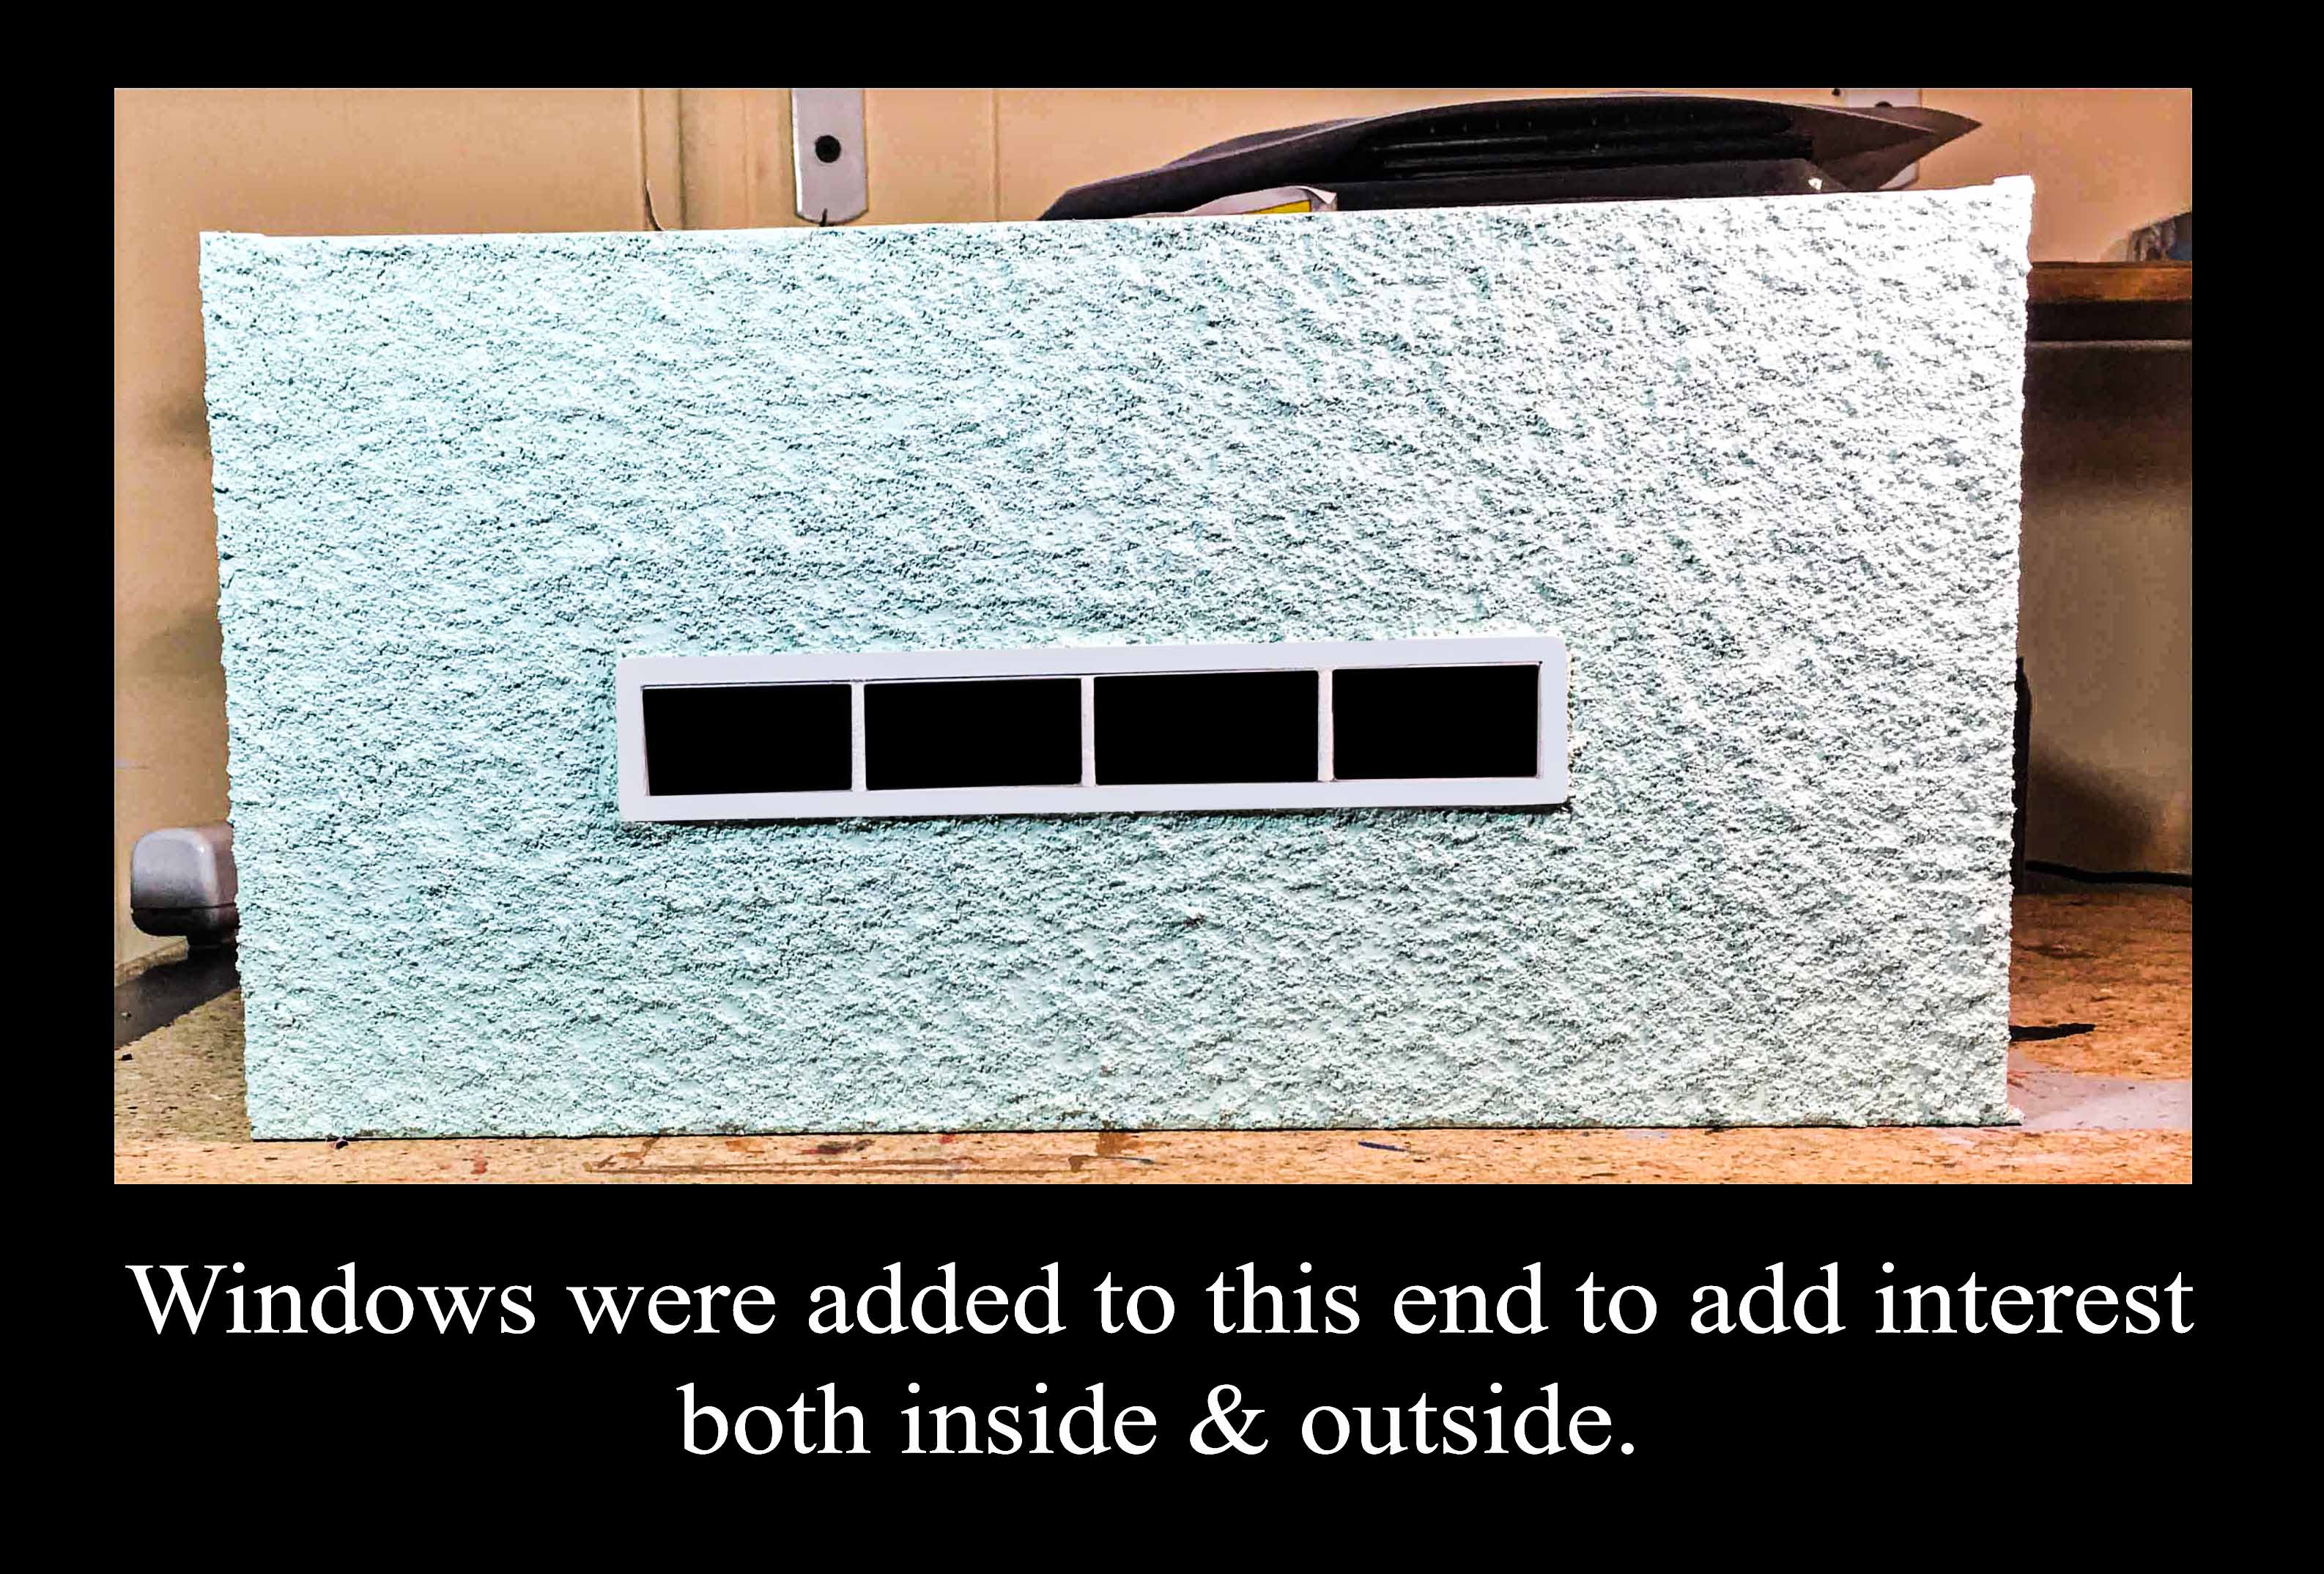
One of the things I noticed about most of my background buildings is the lack of foundations. Be they brick, masonry, or siding the walls go right down to the ground. That is not right nor very realistic so I am thinking about taking some time to modify my existing ones and maybe add a touch of grass along the edge. Your thoughts? Gary
-
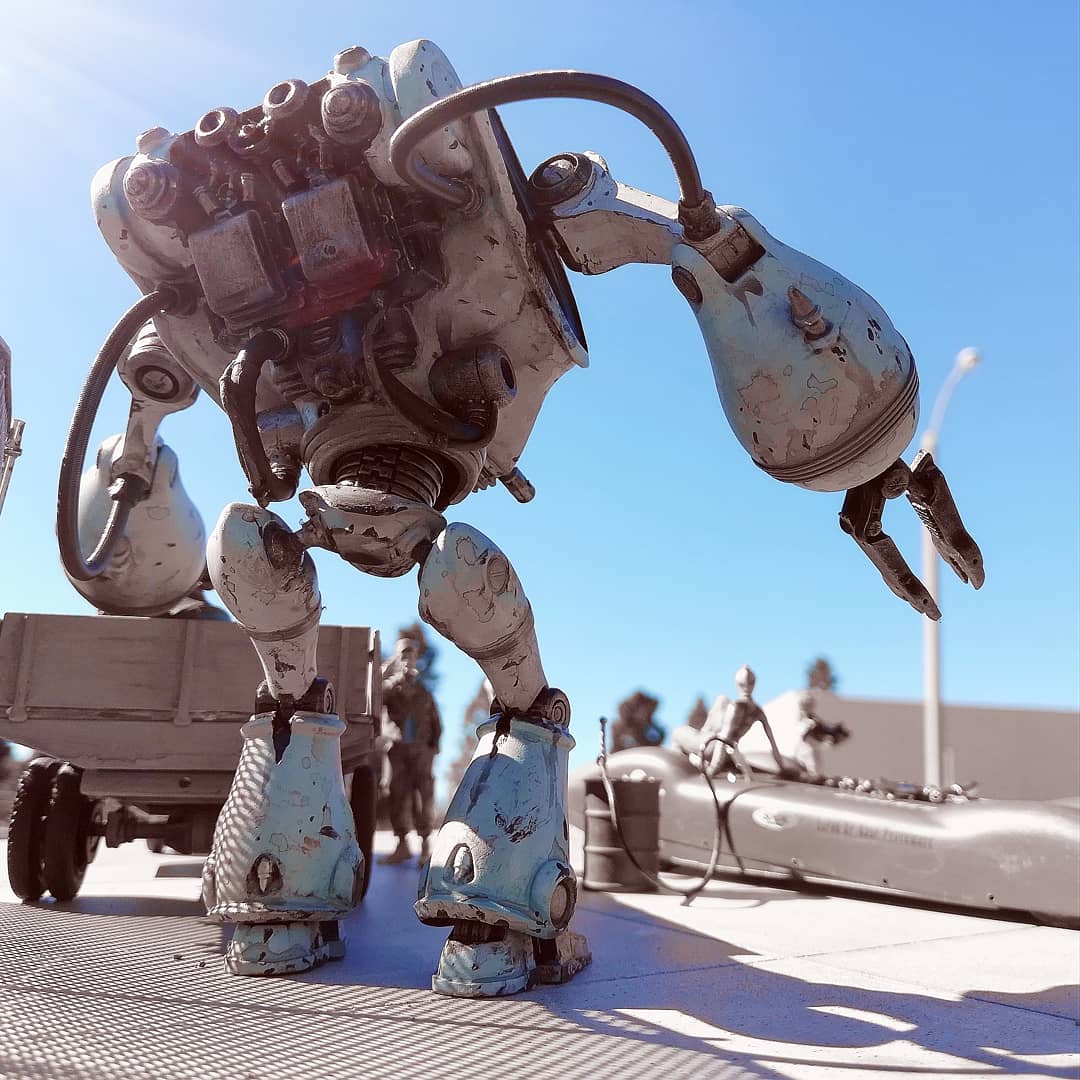
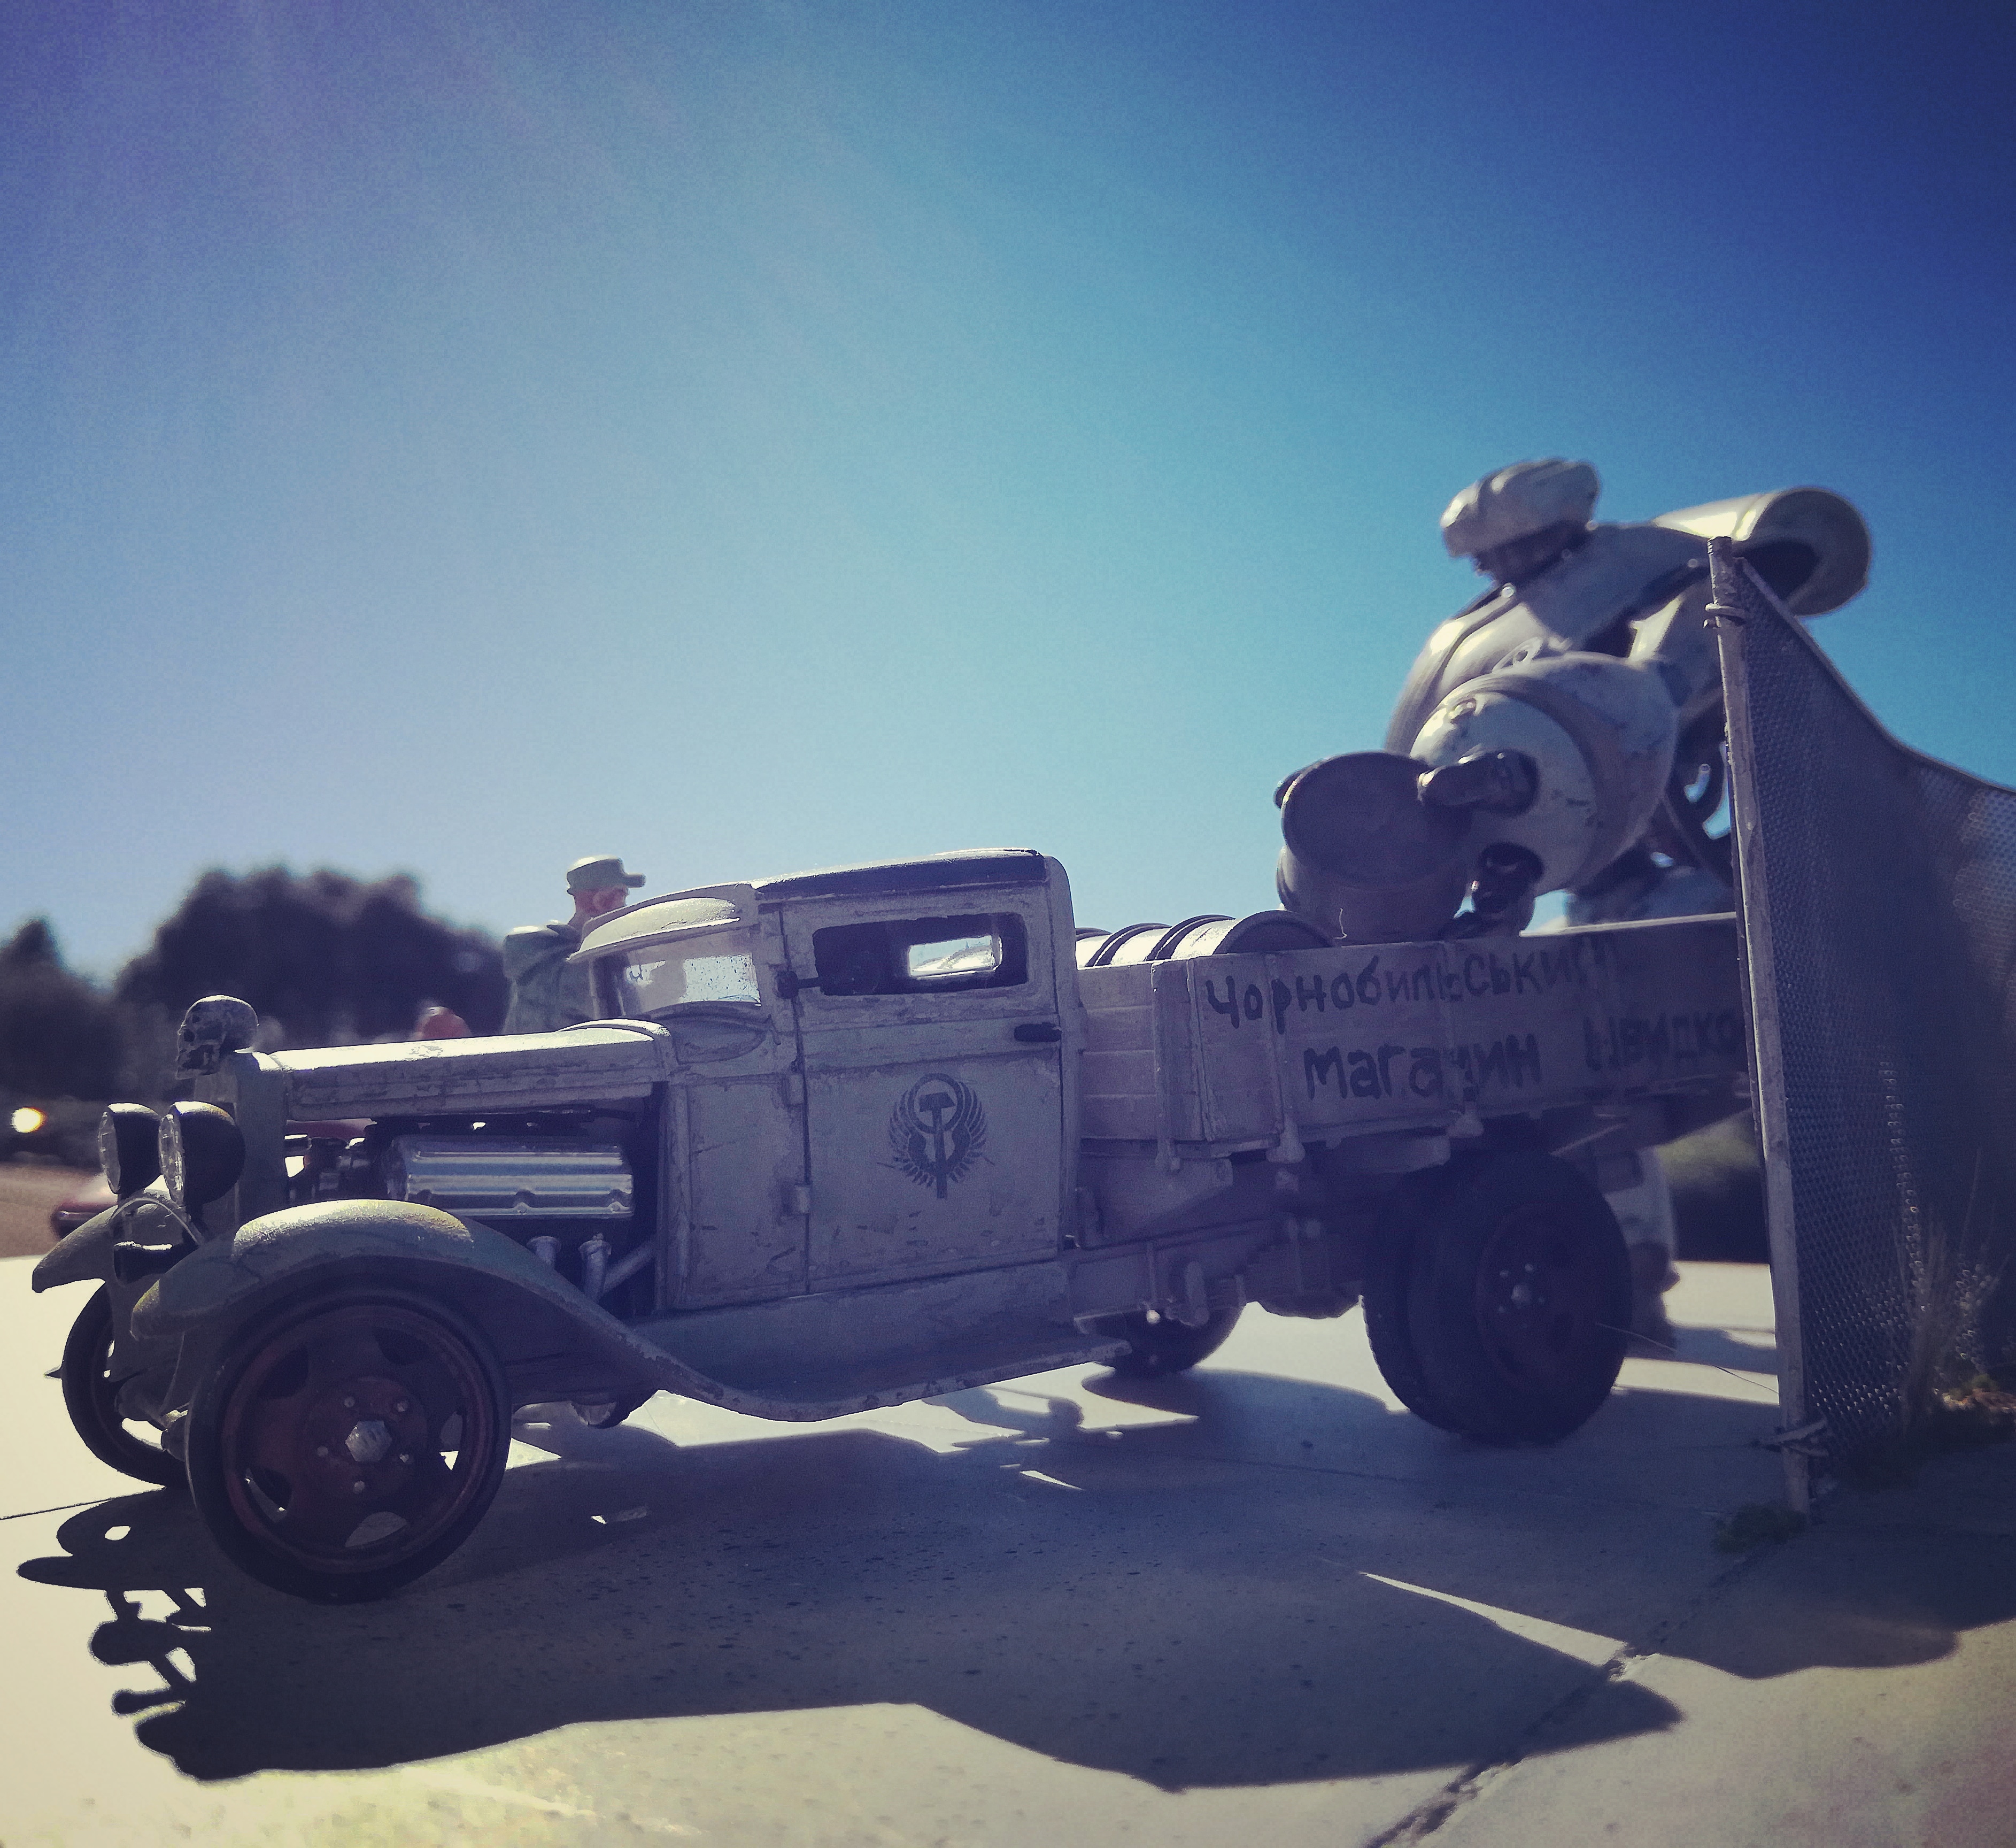
Just finished up my Chornobyl Speed Shop diorama, which takes place in an alternative universe's Ukraine where robot labor was a thing during the Cold War. The car kits are a Toko Models GAZ-AA truck in 1:35, while the land speed racer is based on an old rubber band powered Hawk kit, which I narrowed, built a full bellypan and cockpit for, and stuffed full with a Tatra V12 tank engine. Figures are from Imaquinaria, Industria Mechanika, and Blacksmith Miniatures. The robot is STAN, from Futuristic Models. The base was plaster of paris that I carved the lines into after it had set up, painted, and then added weeds and fencing.
-
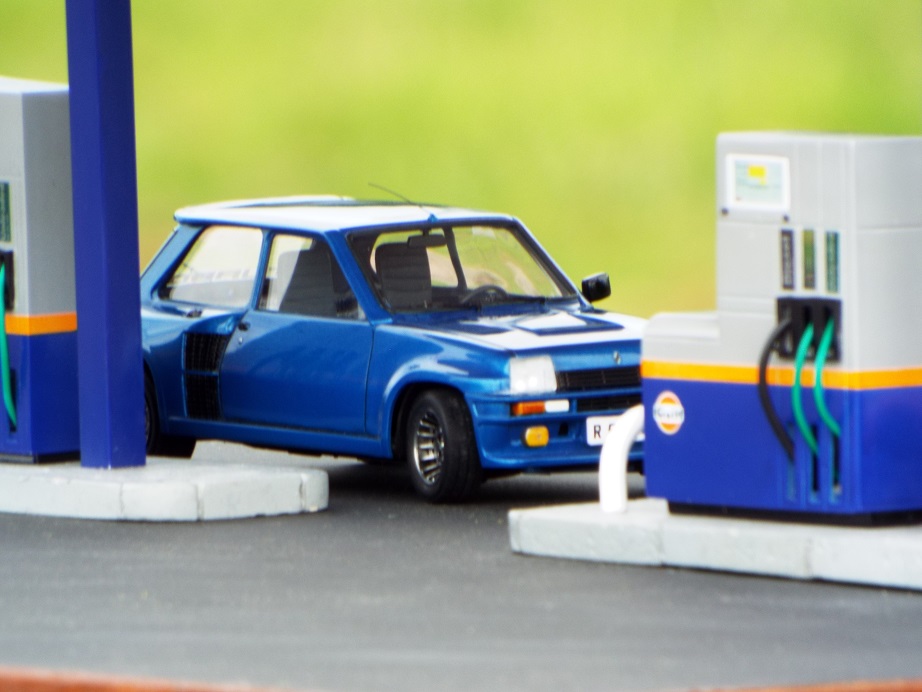
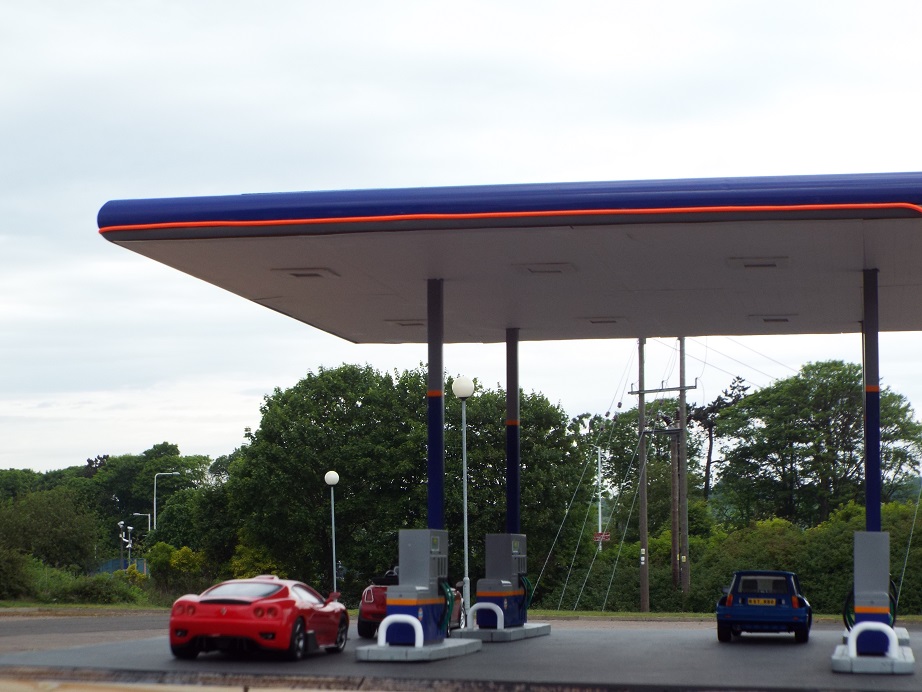
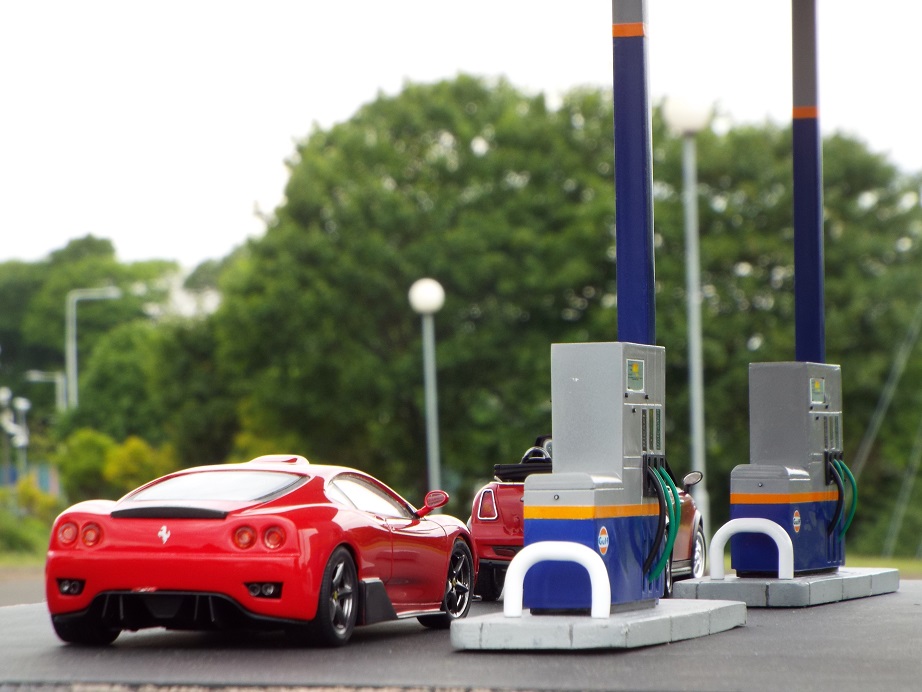
Here are some pics of a gas station project a couple of us in our club have been working on. It''s still got more to be added, including working lighting but here are the first shots.
-
Here's my first diorama. Two Fujimi garages and one tool set. I'm in the process of adding more to it, from my parts box and I'm also making some filter and spark plug boxes, from photo reduced prints. Having seen the quality of the dioramas here, I know it's got a long way to go, but I love the way a diorama gives added realism to our builds. Dang. something's gone wrong with Photobucket. I can't seem to link to an image that will appear. maybe this might work.. http://s173.photobucket.com/user/geetee66/media/Garage Diorama/261ED9A5-7BA9-4367-8B70-A726FF679522_zpsqagegd3i.jpg.html thanks for looking
-
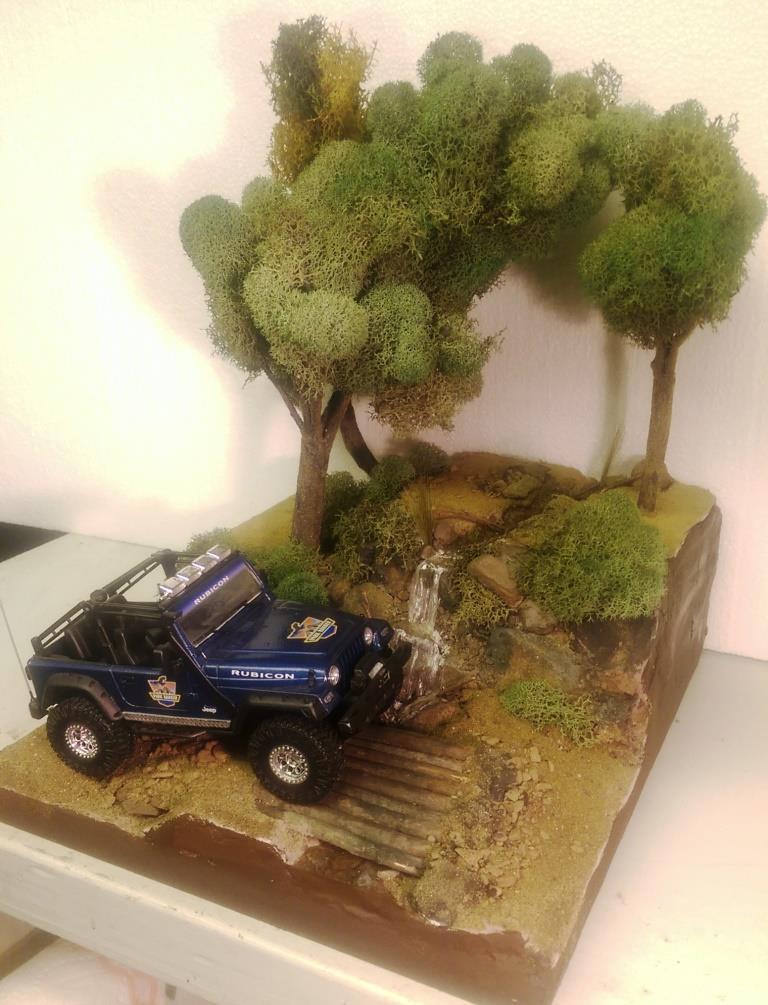
I was looking at the 1/25 Jeep Wrangler Rubicon that I put together sometime ago and had a great idea for a diorama. I started out with the idea of making a desert scene and have the jeep climbing a hill. However I got a little carried away and built it up too tall. So I decided to make a stream and waterfall instead. I started with a wood base, sealed it and glued 2 layers of that pink styrofoam on top of each other. I then covered the entire thing in tinted joint compound. Some rock gathering at a local park proved to work out well. I painted the rocks and dusted the entire thing with sand and blended turf for model railroading. The bridge is made out of similar sized maple branches I found in the back of my property. I used Scene A Rama Ripplin' Water Kit for the stream and waterfall. The three trees turned out the best. I used a thick wire I had, attached several tree branches found laying around the property to the wire using florist tape. Then I "painted" a couple of thin layers of joint compound on the trunks to blend them together. Once it was dry I painted the entire tree the same color, then added some variations in coloring with washes. I then took some stuff I got from my local craft store called Reindeer Moss and glued it to the branches. The final step in making the trees involved spraying them with diluted white glue the help hold them together and sprinkling some blended turf on the trunks to make then look like moss. The trees were then attached in holes with some foam-safe CA glue.
-
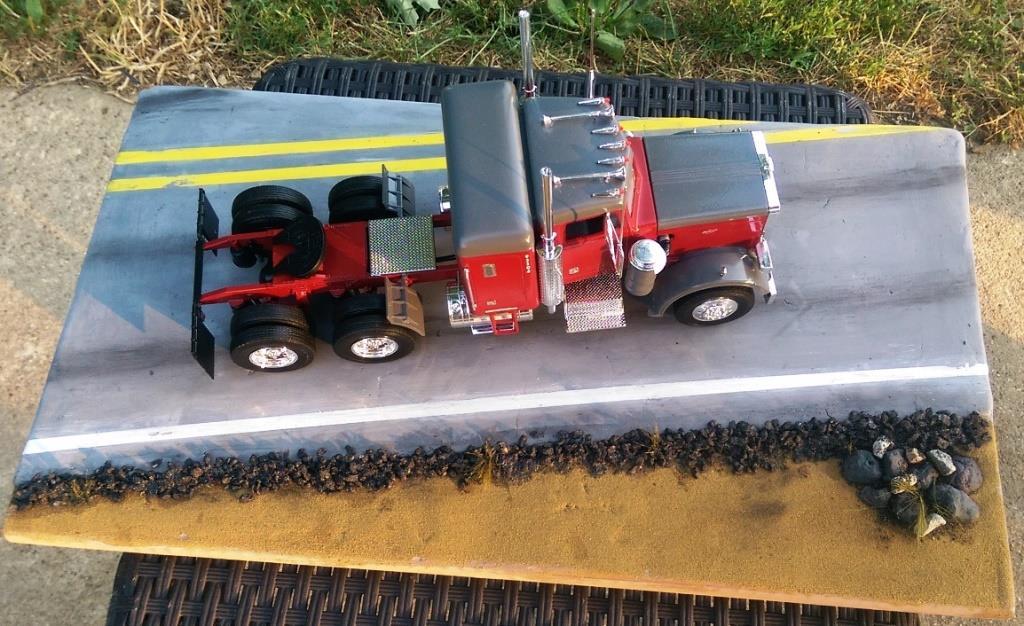
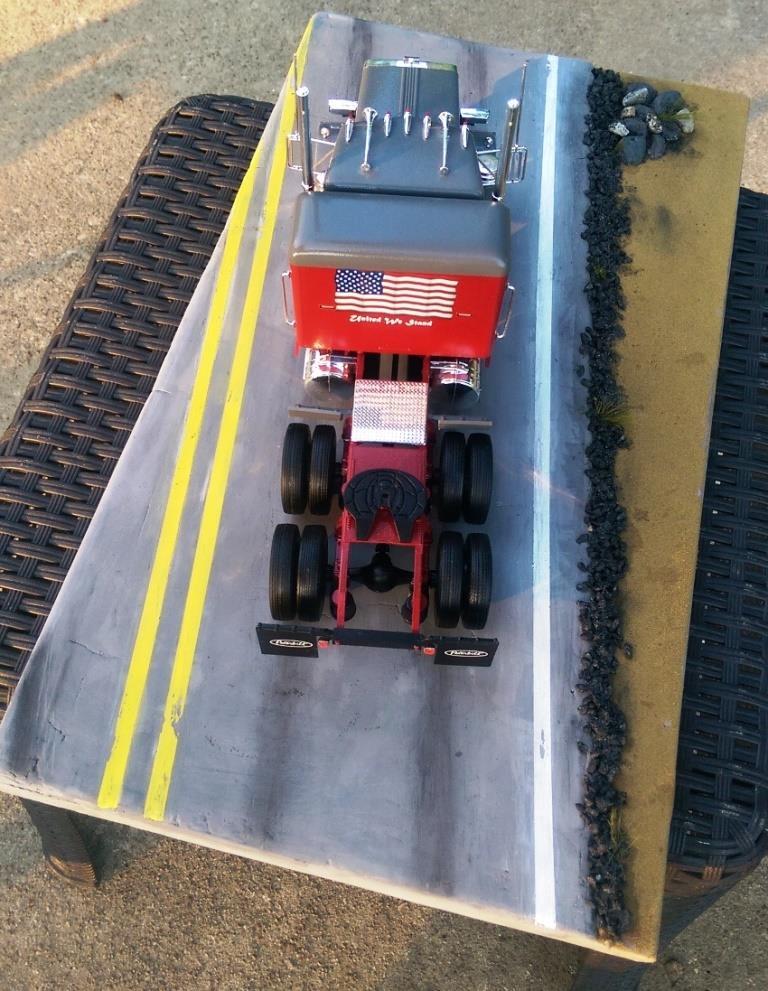
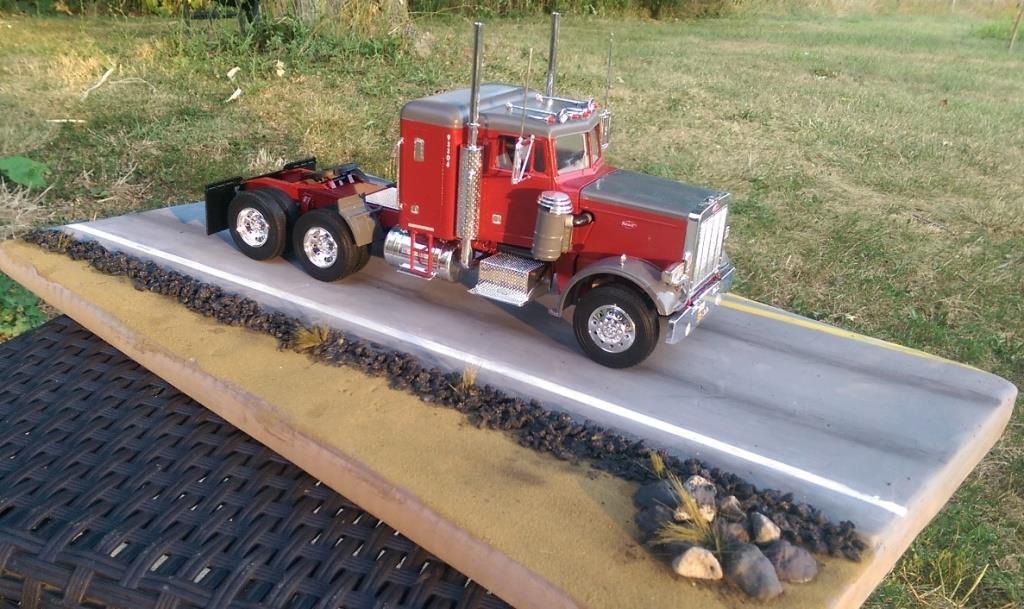
I made a diorama for my Peterbilt to enter in the local fair, however I missed the deadline for entries. But I will still let you guys enjoy the pictures. Thank for looking.
-
I like old car dealership showrooms and thought that I would like to build a small one. I placed it in my Otto Ray Sing Classic Model Car Sales collective. I feel the best dioramas are those that have a history to them. In this instance I've relied on some of my own. During the late 1960s to mid 1970s, my sister worked for and eventually became manager of the local movie theater and drive-in theater in our hometown. I had the fun of running projectors at both theaters. Both those theaters are now long gone, but I've incorporated my fond memories of them into this diorama. In the beginning Mr. Sing had purchase a used car dealership from a couple that wanted to retire. With the purchase complete, he chose to go into a different direction and start selling collectible cars. The lot was rather modest, with display limited to maybe 20 cars on a gravel surface, a one car garage for repairs, and a small office. It wasn't much, but it was a beginning. Mr. Sing eventually found a building that would provide space for two vehicles where he could perform more involved servicing. Things were progressing quite well as the business grew and he saved money for proper, more fitting accommodations. However, as is so often the case, government regulations intervened. Newly elected government officials decided to enforce an ordinance that had long gone ignored to the point of becoming forgotten. It stated that all automobile dealers must have a showroom. This sent many used car dealers scrambling including Mr. Sing There wasn't much available, but he found an abandoned movie theater in what had been the central business district. It was not large, but with some imagination he could make it work. The little lot as it appeared in the mid-sixties. A larger garage added to a much higher quality of work while at the same time making working conditions more bearable Remember the days when we were teenagers and had a crush on the "hot chick" that was at least ten years our senior. Here in the larger garage a young kid leans on a broom telling the classic car appraiser some of his favorite stories, which she knows are all lies. After a hard days work, there's nothing like a good blues jam session to wind down. How many people does it take to change a license plate? The Tall Pines Theater is now Otto Ray Sing Classic Model Car Sales. Mr. Sing has a respect for community history as well as a love for Art Deco, so he was very careful to retain as much of the facade as possible. The location may not be perfect, but there is now a showroom nestled between Popazit's Beauty & Figure and Scianda's Clothing for the Elegant Woman.
-
 Just to prove I have not been sitting on my hands doing nothing all year...movie scene diorama from Star Wars. Luke has just stepped out of X Wing, R2 hasn't fallen into swamp yet


.jpg.6696236dd7735eb1334ca6553538761e.jpg)
.jpg.73377bfb60d0f98b138047162c8f12ef.jpg)
.jpg.1d0dfd1c49b4f9f05197077018aa67ff.jpg)


.jpg.114d3f3e45322af422ba2da4c8ab3f78.jpg)


.jpg.de44cf9adde4dbf07ed36339b072de87.jpg)

.jpg.cb3cedfb01304422aba553d83c878974.jpg)
.jpg.5be90f8252ccff7e86adc032efc7988d.jpg)
.jpg.f6778fee6b92acf89a3aa4d18876caa7.jpg)


.jpg.3473c48705f282845663a873cceeaa90.jpg)
