Search the Community
Showing results for tags 'Woody'.
Found 15 results
-
Recent Woody posts encouraged me look to see if I could find a thread where modelers could post their Woodie builds. This may have been done before but my search did not turn up a thread devoted to Woodie/Woody builds so I have started this one. I think it would be cool to see lots of Woodies in one place, like the 1/1 annual Wavecrest Woodie Meet in Encinitas California.
-
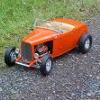
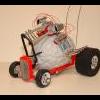
I have been participating in the 24 Hour Build since 2013. There are years I finished, years I came close and years that I crashed and burned! Not ashamed to say it! This year I was successful! As board members will note, I've been on this Monogram Model A trip recently. So why not add vehicle number four? That had me choosing the Woody Wagon. And so it goes.... Early on I decided this wagon was a packing crate on wheels. This photo is a pregame taped mockup done early in the week to gain knowledge about how the kit assembles and get some inspiration. I had been burned in the past with kits where the body panels were to be finished before assembly.... think Heller Citroen Borden's milk truck, where things didn't pan out as planned. So I was leery! Also shown in this photo are seats I found in my parts box but still have not identified. They were used in this build. Also, the wheel set was chosen for my Model A chopped coupe build, then some board heroes came forward and gave me the stock cool wheel covers I actually used on that build, leaving this set for a future build. So here they went... they are the custom cap set from the AMT 41 Plymouth kit. > I decided I wanted to build a woody roadster pickup. I sat and stared at the mockup and came up with the plan. Later in the week I saw I should lower the bed one wood row lower to add interest, and mimic the one roadster pickup I had already completed. Since I had determined what I wanted to do, and that the modifications were essentially just cuts, here we were at 1:38pm. I taped up the panels for a fit and photo. I hadn't decided to add a top cap of Evergreen half round strip stock to the top of the bed sides at that point. They worked brilliantly to finish it off! By 6:45pm I had the chassis up on wheels. I had predetermined how I wanted to lower it... I left out the rear spring and cut down the front suspension mount. I also had to scratch build a drag link because the kit one was a lump. I also had the main body parts primed and color painted with Dupicolor by this time. This photo was taken at 9:30pm, when I had the first color done on the wood graining. The engine was ready to wire, with a prewired dizzy at that point. A lot of details happened into the wee hours of the morning. These photos were shot at 4:45 am. There were a few more coats of paint on body parts. I had detailed out the grill shell and headlights. The chrome was stripped on these before the build started, allowed in the rules. Engine was finalized by 5:30 am and I started final assembly. That didn't go without it's problems. Many of my issues were because of the speed of the build. Where I would've taken a break for things to dry, I had to keep moving forward. The nice dashboard fell into the interior. Left to dry over night it would've been fine. Things refused to assemble according to plan. New words were added to our dictionary in the wee hours. I learned a few things about this series of kits. I knew that the later versions had narrowed suspension parts to allow for wider tires. BUT I didn't know that the rear assembly had changed to allow for a longer engine assembly! I had used an older rear, and had to pry it off, prep and paint a later one and glue it in place. That took precious time! And because of my chassis lowering, the exhaust system didn't fit. We don't need no stinkin' exhaust, so I simply tossed it aside. I will modify and install it another day. My wife woke up and came into the model room about 8am. She left shortly thereafter because I was in the middle of fit issues! In the end, it was all worth it! I finished at 11am with an hour to spare! I took some photos, posted my completion on the site by 11:30am. Then I fell asleep in my chair! I slept most of the day! The rest of the photos don't need captions! Here's my two roadster pickups. I'd really love to own a 1:1! One of these days! And here's the whole set so far! I have not duplicated any details between them, it's a work in progress! I successfully completed the challenge. This isn't a contest, we're not seeing who can finish first. This is a personal challenge to see if you can build a credible model within the 24 hour time span. Cheating only cheats oneself from the accomplishment. And then there is the camaraderie of working with over 100 modelers around the USA, Canada, Europe and Australia! There is nothing like posting your progress photos in the middle of the night and instantly having people "Like" and comment! And of course seeing where everyone else was, and cheering them on to finish! Like with many races, there were people who had issues and had to bail out. There were people who just gave up and went to bed. There was one guy who decided to dry his painted body on top of bricks set on top of his wood stove. He ruined his body... did he quit? Nooooo, he went on to start a new kit in the middle of the night AND FINISHED! That's tenacity! This was a lotta fun for the past seven years, and I hope to participate until I can no longer hold an exacto! Not only was it a fun exercise, but you learn a lot about building overall. I've learned things that make my building more organized and systematic. I tried things I wouldn't have changed on a "serious" build that worked! Thanks to all Gary Kulchock for organizing this lunacy and to all who participated!
-
Picked this up for $8 at a place called Ollies that sells discount goods along with a few other models. Came out really good, I just hate having to make the suspension on these things. I don't have four arms to hold the things down and glue. SAM_2188 by Eric Lucas, on Flickr SAM_2189 by Eric Lucas, on Flickr SAM_2190 by Eric Lucas, on Flickr SAM_2191 by Eric Lucas, on Flickr SAM_2192 by Eric Lucas, on Flickr SAM_2193 by Eric Lucas, on Flickr SAM_2194 by Eric Lucas, on Flickr SAM_2195 by Eric Lucas, on Flickr
-
 hello to all I wanted to make this kit that a friend had offered me in March, but not to do what he expected of me. After some research on the net, I found a UTE military version. I made a Woody version .... the project was launched ideal to present it to NNL EAST. I used Primer Tamiya for the first time. And ZeroPaints painting, I was bluffing by this painting! Without dilution top! Vernish hobby colors. The roof has been lowered, the body studs have been modified, ben in scratch with real wood ...... Seen at NNL EAST 2017. WIP Photos : https://public.fotki.com/Zelkam/stock/ford-1941-ute-woody-/ WIP in Video : https://youtu.be/_89mZYN2UxY
 -
My 1st woody! Revell did a good job on this kit. It's really nice to build. Lowered and riding on Pegasus chrome reverse wheels. The nose decal doesn't fit the raised letters, as it's too short. So I cut up the decal and applied the letters one at a time: I put an Aloha garland in there,,, nearly forgot the chassis: I hope you like it Comments appreciated + or -
-
I know a lot of you guys will have built either this, or the chopped version, so you'll know how nice this kit goes together. Anyone who's wondering if they should build one; Do yourself a favour and buy this kit. I've been used to old kits and re-pops of old kits, where the tooling is dodgy. But this is like a Tamiya kit in its engineering and moulding. The decals are also some of the best I've ever used. That said, the review in ModelCars Mag, proved to be very useful, especially when highlighting symmetry issues on the front end. All of the following photos are from my phone, so please excuse the quality. Body issues dealt with. Rattle-can primer. One of my favourite parts of building a kit, is the engine. I added a rudimentary attempt at a fuel system (it looks ok to the naked eye). I made the fuel filter from clear sprue, tinted with a yellow and silver Sharpie. I drilled out the kit distributor and added plug wires. The coil was about to be added after this photo I decided to make the Woody more 'surf'. So I gave it hibiscus upholstery . Here's the rear seats too The engine got some wires to the alternator and a basic throttle linkage. These Caddy engines are nice to detail.
-
Had a few issues with fit and still have to do a few touch ups, but it came out great.
-
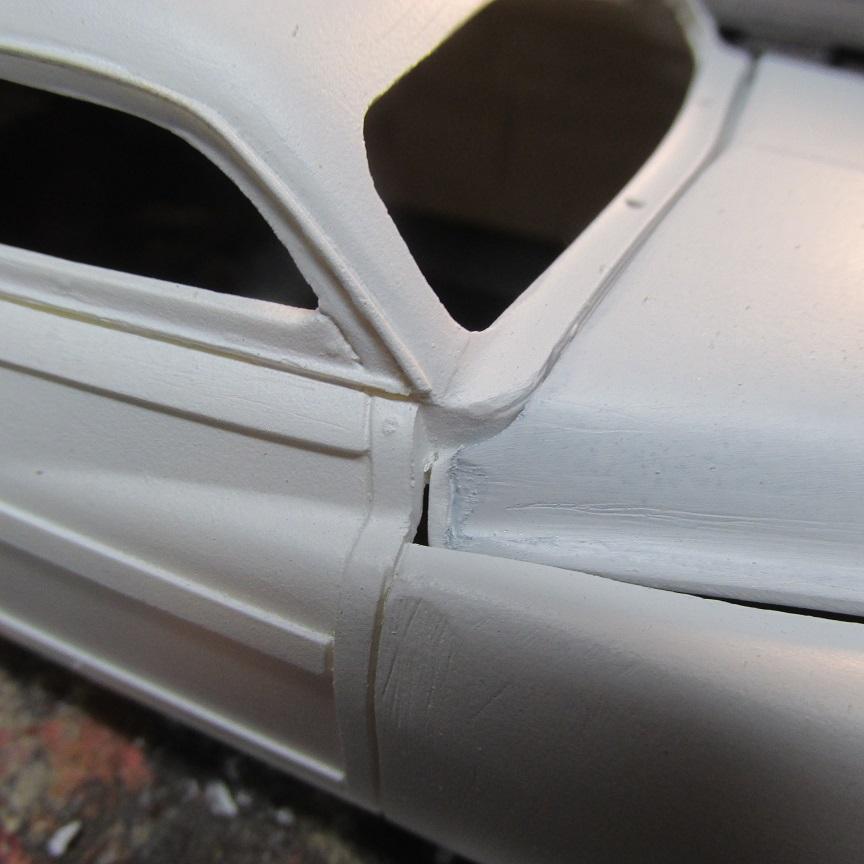
Well, here is my latest project - a chopped 49 Merc woodie sedan delivery. Resin body on an old 49 Merc chassis & interior I had laying around. It will be curbside - no engine. The body was warped when I got it, but some hot water and a twist fixed that. The body came with no hood, but I have hoods from both the Revell and old AMT 49's, so I figured one of them would fit. Wrong! The AMT hood came closest, so I'm using it, but it's a real pain! I had to shorten it and add strips to widen it, and it still doesn't fit at the cowling! I'll keep at it, I guess! I paneled in the side windows with styrene sheet, and removed the rear window divider. Taillights will be the custom lenses from the Revell 59 chevy convertible. Color will be a bright orange. Here are some pics of it in primer. Still lots of putty and sanding to do! Sam

-
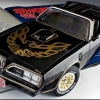
Hello to all, Here is my latest creation presented at NNL EAST. I wanted to create a "Cadillac Viewmaster Hess & Eisenhardt 1956" To create this car, I used: -Cadillac 1956 Coupe deVille resin from Modelhaus -2 chevy Nomad 1955 -tires and rims 1957 cadillac modelhaus -rivets at Top Studio -decals wood in Uschi military modelisme -letters from settlers -photoetched: The Model Car Garage -paint and varnish Mr colors -interior and exterior door handles, made for me in "bestmodelcarparts " headlight I used the headlights of the 55 Chevy I modifier.Scratch interior, roof rack, rear lights.I invite you to watch the WiP of the build. there a chassis, an engine that I can show you the cover does not open Five months were needed to create this car during assembly. Full WIP HERE: http://public.fotki.com/Zelkam/stock/cadillac-1956-/ the video to the build : http://www.youtube.com/watch?v=TBlOvwayEtk&list=UUg8dXM3LPkBCQ2xSgM6SJyQ&feature=share interior Finish
-
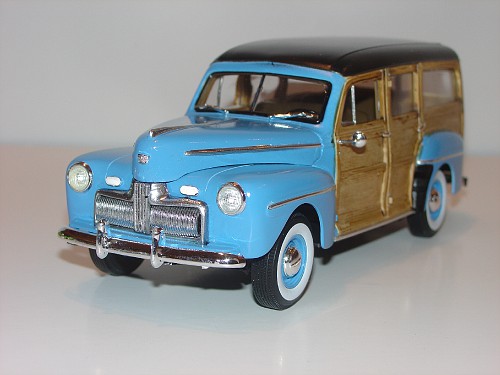
 These Matrix models are really Fantastic. Check out the chrome trim around the trunk lid, and the beautiful interior.
 -
I'm loving the quality of parts in the Monogram 48 Ford Woody kit. But I'm real hesitant to start drilling the "crab style" distributor. Any tips on how to wire this up? Thanks!
-
Greetings from Motown!,,just finished this "Woody". Its kindof what you might call a "GT" package if it were ever to be offered back in the day,,lol. Lots of scratch built stuff,,no after market parts on this,,just leftovers from the junk bxs. Some of the pcs were missing when I got the kit{ swap meet kit} so had to use the thunderbird tire cover in back,,different rear bumper,turn signals on front fenders,scratch built,,And the mtr is some hemi out of a prostock kit,,have no idea which one. Tinted the windshield + wing windows blue Scratch built visors,,roll bar,,seatbelts. I really like the AMT kit supplied " woodgrain" inner panel decals for the sides,,nice feature. They went on with no problems. Its a bit different than the stock version,,but what a fun version it would be to drive!
-
Howdy all,,well Im thinking of spring coming soon,,summer soon after,,got in kindof a fair weather building mood on this one. Its kindof a WIP side project I work on from time to time. Its the AMT 41' Woody,,but its missing the back doors,,and its top,,and a Hemi somehow got in there,,other than that its somewhat stock. Engine is totally from the leftover prts bx's. As are the tires+ rims. Gonna do a 2 tone dark blue seat insets,,with the white interior. Made little floor mats for it,,kindof a summertime ride,,all I need now is the $$ for the 1:1 car! Cheers!
-
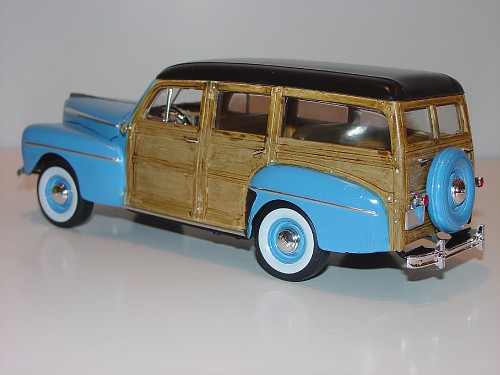
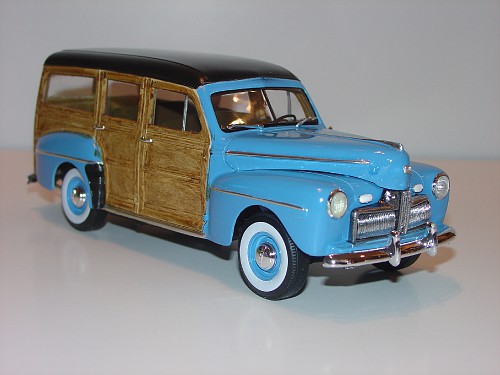
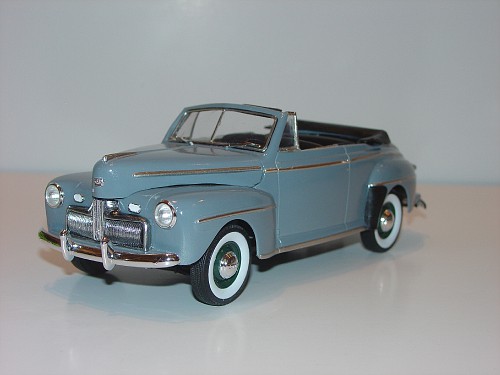
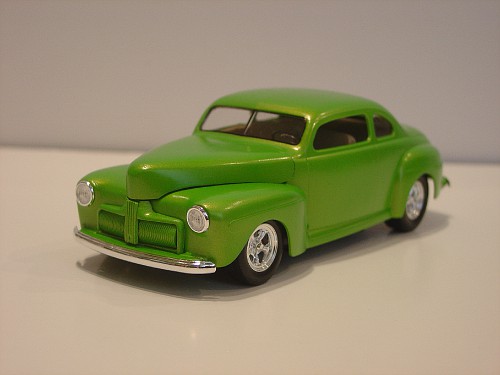
Here are some pics of my latest completion. It's based on the Revell 48 Woody. I mastered the grille and hood to convert it to a 42 Model. I painted the grille pieces with Alclad. I think they actually look better in the picture than in reality. Maybe it's the flash that highlights the chrome look. Here are a couple of other conversions I have done as well. A stock 42 Convertible and a custom 42 coupe.
-
I put this one together with the idea that a surfing rodder built something to get him to the beach quickly and with style. Since getting it on the road the sun, salt air and windblown sand has taken it's toll, the roof fabric has had to be patched due to wear & tear and carrying greasy engine parts for his mates has wrecked the carpets. But it'll still get him to the beach quickly and with style. Not a r## rod, just used. It's the Revellogram '30 Woody kit with the engine & tuning parts from the Revell '40 convertible. Front wheels are from the Heller/Revell BMW Dixie with AMT '29 roadster tyres. Rear wheels are from my parts box with tyres from an AMT '96 Blazer with the sidewall script shaved off. Paint is cheap rattle can enamel unpolished and not cleared. Woodwork is dry brushed acrylics and the kit decals. Carpet is felt and Mexican blanket is printed onto toilet paper. Roof patches are toilet paper with thinned black acrylic dabbed into it from a brush which dries nice & patchy and looks like the roof was fixed with something cheap & thin that they had knocking around. Surf board is scratch built using a resin one as a template.