Search the Community
Showing results for tags 'wood grain'.
Found 2 results
-
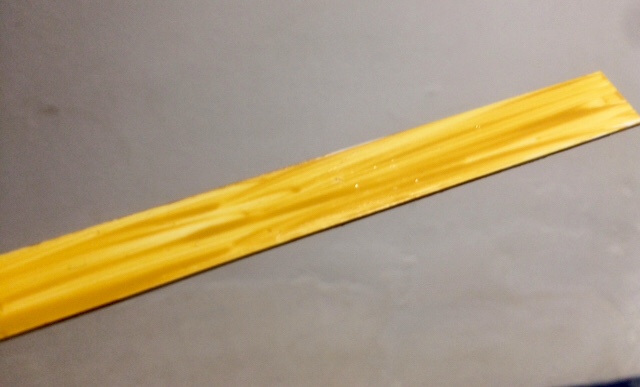
I was tinkering with my Vallejo acrylics and thought I would try something I did at 1:1 scale for a friend’s faux wood grain. On a 10mm wide strip of styrene sheet sanded with 2000 grit, I applied light coats of Yellow Ochre with a 3mm brush in the required grain direction. This base coat was left to dry briefly and the required result is fairly streaky; here the trick is to use long strokes and try to even out as much as you feel is necessary, remembering that wood is not uniform. With the base now reasonably dry, I mixed yellow ochre, red and black 4:2:1, and applied dabs of this mix randomly over the whole strip. I did not apply this like the base coat, - just random thick-ish dabs. Think leopard skin. Instantly running a clean dry fingertip along the whole length and simultaneously rolling it back and forth gives a fine random graining. You may decide to run another clean fingertip along the length if required. After a short dry I could rub the surface again with my clean dry fingers and buff it to a satin varnish/wax finish. I hope this is of use, I shall be searching for opportunities!

-
 Not a model kit per se, but a little project that will be part of a I’m Woody building. Mainly posting the pics to show that you don’t need to purchase expensive decals to get realistic wood grain look, although there are some fantastic products available that I would like to try some day. The surf boards themselves are left over parts from the Revell ’31 Ford Sedan kit. To get the wood grain, I did a couple of slow, hard passes of coarse sand paper. Then applied Testor’s “Wood” enamel with a brush, then “dry brushed” gloss brown enamel over that. Next, I brushed on a layer of Tamiya clear yellow. Final coat is Testor’s One Coat Lacquer, then polished. Decals are from my parts box. Quite happy with the results. Plan on laying down another coat or two of clear on top of the decals to finish it off.