chepp Posted April 11, 2017 Share Posted April 11, 2017 In by 9, out by 5. That was an Earl Scheib slogan. We'll do a similar quickie paint job on AMT's model for the GSL Group 17 class. Uh oh, it's after 9 already. More details later. The Group model for 2017 is as follows (copied from the GSL downloads): "For GSL-XXVI, the “Group” kit is the 1969 Chevy Corvair. Entries may be built from any original or reissue release of the Round 2/AMT kit, in any style, with the skills and craftsmanship you have today, but using only parts, materials and supplies (except current putties, adhesives and paints) available 35 years ago (1982 or earlier). Entrants may use the newly re-issued Round 2 Corvair engine kit (AMTPP010) if desired. There are just three additional limitations: no one-off machined or photo-etched parts not fabricated entirely by the entrant; no aftermarket products not available in 1982 or earlier; and no resin bodies or resin body parts (regardless of who made these resin parts). Bare Metal Foil may be used." Quote Link to comment Share on other sites More sharing options...
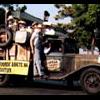
chepp Posted April 11, 2017 Author Share Posted April 11, 2017 Just in case you don't know about Earl Scheib, here's a circa 1978 TV commercial: We'll presume that our victim, er customer, just brought in a nine-year-old car that was originally red. That way, he won't have to pay extra to have the door jambs painted. Riiiiiiiight. Quote Link to comment Share on other sites More sharing options...
chepp Posted April 11, 2017 Author Share Posted April 11, 2017 The worst of the flash and parting lines have been removed. Windows and engine cover were cemented in place. The windows won't be seen in the completed model — they just provide structure for masking in a later step. The engine cover didn't fit very well so it needed quite a bit of shimming and improvement of the opening that it fit into. While the body parts are setting up it's time to move on the chassis. This is more like "performance art" than model building. Quote Link to comment Share on other sites More sharing options...
Draggon Posted April 11, 2017 Share Posted April 11, 2017 Be sure to include masking errors on the chrome, and overspray on the tires A short story. There was a competitor of Shieb who had could actually do a good paintjob if you did all the prep. I took my car there prepped and primered but something got lost in translation. They did some very aggressive sanding, ruined my arrow-straight panels and left sanding scratches so deep that you could feel them. But the paint itself was so smooth and glossy. Quote Link to comment Share on other sites More sharing options...
chepp Posted April 11, 2017 Author Share Posted April 11, 2017 (edited) There definitely will be masking errors and overspray. Thanks, Draggon. From what I've seen, they didn't mask the smaller or complicated things like emblems — somebody might just wipe a gasoline-soaked rag over the top surface of the emblem after painting to reveal the chrome. But if that guy was busy with something else, like picking boogers out of the just-sprayed paint, then the emblems would be 100% body color. The floorpan has been cleaned up, the dash cemented to the interior bucket and the parts dry-fitted to be sure that they will fit together later. The chassis shows vestiges of the plugged holes from the promo attachment screws so blobs of putty were applied. When it hardens it will be carved to simulate what should have been there. Edited April 11, 2017 by chepp Fixing typos. Quote Link to comment Share on other sites More sharing options...
chepp Posted April 11, 2017 Author Share Posted April 11, 2017 The filler on the chassis was carved and looks pretty good but will need a little more after the primer dries. Does that constitute the $10 free metalwork from the Scheib ads? The underside of the bucket was sprayed, just in case parts of it will be visible later from underneath. 0.020" styrene sheet was hacked to size and cemented into the side openings on the body. Hey boss, can I go to lunch now? Quote Link to comment Share on other sites More sharing options...
chepp Posted April 11, 2017 Author Share Posted April 11, 2017 The filler on the front of the chassis floor pan was shaped and sanded a little more then some spray can red was lightly spritzed on. A quick online search didn't result in any photos of Corvair undersides so I don't know how much body color would have been on there from the factory. More time than I would have expected was spent on getting the bumpers/lights to fit decently to the body. They will be covered with masking but, still, they needed a lot of help. Quote Link to comment Share on other sites More sharing options...
chepp Posted April 11, 2017 Author Share Posted April 11, 2017 The body was wetsanded with 320 and 400 then the trim parts were cemented on. After a quick wash in detergent and drying, a thin coat of white primer was sprayed on. The basics of the engine are assembled but more parts and cleanup will be needed. Quote Link to comment Share on other sites More sharing options...
bobthehobbyguy Posted April 11, 2017 Share Posted April 11, 2017 Very cool project. Quote Link to comment Share on other sites More sharing options...
espo Posted April 13, 2017 Share Posted April 13, 2017 Looks like a fun "Poke in the eye" type build. Very original idea. Quote Link to comment Share on other sites More sharing options...
chepp Posted April 13, 2017 Author Share Posted April 13, 2017 Thanks for the encouragement. What I thought would be a one-day quickie build with most of the time spent adding the tape/paper masking turned out to be much more involved. I had bought the kit knowing that it was missing the stock exhaust but that was OK because there were several other exhaust options. However, a pair of those other parts were also missing. But there was still the option of headers + mufflers that would work. Unfortunately, the headers didn't have the 180 degree bend on the end as shown in the instructions. I'll have to scratchbuild that. The biggest problem turned out to be the tires. The stock tires shown in the instructions appear to be vinyl but in my kit there were only four white styrene half-tires. They sure look narrow — maybe they were to be mated to wider "halves" (that were missing from the kit). That's OK, I'll use them (see below) and put the wider vinyl kit tires in the rear (above). I kluged a motor tool rubber sanding cylinder with masking tape so the assembled styrene tire would fit snugly then trued them up on a big file. The skinny "treads" look like they had recaps that flew off but they should be perfect for this build. Unfortunately, the wide tires are too wide for the body and despite the kit's plethora of "rally" parts none of them are fender flares. So, I'll just radius the rear fenders to clear the tires. It'll look like a homemade hack job of the '70s. This is my first (and probably last) kit to have 13" wheels/tires so I don't have any spares to substitute. Sure, I could section each rear tire to narrow it but this one-day project is on its third day already so that is not an option. Quote Link to comment Share on other sites More sharing options...
espo Posted April 14, 2017 Share Posted April 14, 2017 In the original issue of this kit and I think most of the reissues the small narrow tires were to be added to the stock tire to make the wide tires for the rally version. Quote Link to comment Share on other sites More sharing options...
tedd60 Posted April 14, 2017 Share Posted April 14, 2017 I remember in the 1950's his ad was: "I'm Earl Scheib, and I'll paint any car, any color for $19.95. No ups, no extras."You could probably have done a better job with a can of Rustoleum and a roller, especially if you washed the car first. Quote Link to comment Share on other sites More sharing options...
chepp Posted April 14, 2017 Author Share Posted April 14, 2017 (edited) In the original issue of this kit and I think most of the reissues the small narrow tires were to be added to the stock tire to make the wide tires for the rally version. I'm not so sure. The vinyl tires in my kit were the wider ones (a little too wide to fit). Still, it was an opened box and I bought it with the knowledge that some parts were missing so anything is possible. I remember in the 1950's his ad was: "I'm Earl Scheib, and I'll paint any car, any color for $19.95. No ups, no extras." You could probably have done a better job with a can of Rustoleum and a roller, especially if you washed the car first. That's the spirit! If only I had a 1/25 scale roller... Finally, I'm ready to start weathering the underside. I located some nice shots for reference. Before assembly, the various components were painted in a variety of grays and flat black. Some of the plating on the oil pan and exhaust system is still there after scraping off the parting lines so I'll try to let some of it show through. I'll be careful not to put any rust on the engine or trans. The intent will be to simulate just a regular grungy underside — nothing too severe. It looks like AMT forgot to include the heater shroud. Oh well, this will represent a 9-year-old car so I'll just say that mine fell off. A couple of .020" styrene rods were added, roughly based on the photos, around the transaxle to try to make it look more detailed. The front wheel covers were detailed a little with flat black and flat clear while the rear wheels will remain untouched. My story is that the third owner bought two new wheels and a pair of used tires for the rear. He then realized that they wouldn't fit so he radiused the rear wheel openings and, running short on money, took it to Earl Scheib for a $49.95 paint job to try to make it look sporty. Someday he'll get two more new wheels and tires for the front. Edited April 14, 2017 by chepp Quote Link to comment Share on other sites More sharing options...
Ace-Garageguy Posted April 14, 2017 Share Posted April 14, 2017 (edited) I think Sheib's boys were the ones who pioneered the painted-with-a-dirty-pinecone look. I've seen cars come out of there with the trash that blew out of the vent grilles at the base of the windshield firmly stuck in the paint on the hood. Nize. They also had a thing about running the DA over window glass and chrome. Gotta love the consistent quality approach to everything. Edited April 14, 2017 by Ace-Garageguy Quote Link to comment Share on other sites More sharing options...
chepp Posted April 16, 2017 Author Share Posted April 16, 2017 The chassis is weathered. There's not much point to doing much when you're keeping things like the kit's inner wheels and molded-in front suspension. Masking is progressing. The brown paper is from a shopping bag (shown in the first post above). Double-coated tape is adhered to the window area, the brown paper is cut to size and stuck down. Finally, Approx. 2-scale-inch wide actual masking tape is applied. Quote Link to comment Share on other sites More sharing options...
Lordmodelbuilder Posted April 16, 2017 Share Posted April 16, 2017 Very cool project Charley. I too have been thrashing on a Corvair for GSL. Hope I can get it done. Looking forward to seeing yours in person. Quote Link to comment Share on other sites More sharing options...
Draggon Posted April 16, 2017 Share Posted April 16, 2017 Low air pressure in one of the front tires is a nice touch. Quote Link to comment Share on other sites More sharing options...
Snake45 Posted April 16, 2017 Share Posted April 16, 2017 That's good chassis weathering, similar to what I do. I just mix some light gray and some tan in Testor Dullcoat and lay it on thin until I get it where I want it. Quote Link to comment Share on other sites More sharing options...
horsepower Posted April 17, 2017 Share Posted April 17, 2017 Earl used his own formulas for his paints that was based on a fish oil. Your car would be extremely popular with the neighborhood cats for about a week after you got it painted and if you parked it in a closed up garage you would have to roll your windows down for a month regardless of the weather.I had an aunt and uncle who had there '58 Chevy Del-Ray painted that Olive green metallic that was popular in the sixties and during the summer of '65 I spent the summer with them (they lived in Los Banos CA.) and my cousin (who had just got his license) and I took it out along the California Aquaduct that was under construction and when we came home decided to wash it to avoid a big lecture. Little did we know that with the Scheib base job they just washed the car with an abrasive cleanser like Comet, it cost extra to actually sand the car, and when you used the two bit car wash imagine our surprise when the pressure from their nozzle removed three foot long pieces of paint if you got to close when rinsing the soap off. Quote Link to comment Share on other sites More sharing options...
horsepower Posted April 17, 2017 Share Posted April 17, 2017 Thanks for the encouragement. What I thought would be a one-day quickie build with most of the time spent adding the tape/paper masking turned out to be much more involved. I had bought the kit knowing that it was missing the stock exhaust but that was OK because there were several other exhaust options. However, a pair of those other parts were also missing. But there was still the option of headers + mufflers that would work. Unfortunately, the headers didn't have the 180 degree bend on the end as shown in the instructions. I'll have to scratchbuild that. The biggest problem turned out to be the tires. The stock tires shown in the instructions appear to be vinyl but in my kit there were only four white styrene half-tires. They sure look narrow — maybe they were to be mated to wider "halves" (that were missing from the kit). That's OK, I'll use them (see below) and put the wider vinyl kit tires in the rear (above). I kluged a motor tool rubber sanding cylinder with masking tape so the assembled styrene tire would fit snugly then trued them up on a big file. The skinny "treads" look like they had recaps that flew off but they should be perfect for this build. Unfortunately, the wide tires are too wide for the body and despite the kit's plethora of "rally" parts none of them are fender flares. So, I'll just radius the rear fenders to clear the tires. It'll look like a homemade hack job of the '70s. This is my first (and probably last) kit to have 13" wheels/tires so I don't have any spares to substitute. Sure, I could section each rear tire to narrow it but this one-day project is on its third day already so that is not an option. 13" tires are easy to find. Almost all of the lowrider tires from Pegasus, and ALL of the Revell low rider tires are 13", just remove or hide the whitewalls and put them on appropriate wheels. Quote Link to comment Share on other sites More sharing options...
chepp Posted April 17, 2017 Author Share Posted April 17, 2017 Very cool project Charley. I too have been thrashing on a Corvair for GSL. Hope I can get it done. Looking forward to seeing yours in person. Good luck on yours -- could you post some pix? See you at GSL. Low air pressure in one of the front tires is a nice touch. Thanks. I was thinking about making the sidewall bulge, too, but didn't. That's good chassis weathering, similar to what I do. I just mix some light gray and some tan in Testor Dullcoat and lay it on thin until I get it where I want it. Thanks! Earl used his own formulas for his paints that was based on a fish oil... ... imagine our surprise when the pressure from their nozzle removed three foot long pieces of paint if you got to close when rinsing the soap off. Hmmm... Maybe I should hide a sponge wetted with fish oil inside the model. 13" tires are easy to find. Almost all of the lowrider tires from Pegasus, and ALL of the Revell low rider tires are 13", just remove or hide the whitewalls and put them on appropriate wheels. Doh! That's a good idea. Pegasus Hobbies is only about a mile away from me, too. Oh well, it's done now. Except for the kit itself, I've managed to not spend any additional dollars on this. Here's the first of the airbrushing. Since shooting this photo it's all painted now. Instead of Scheib's infra-red treatment the model is drying with a re-purposed computer fan blowing air at about 90 degrees F through my modified dehydrator. This is my last in-progress post. I expect to post photos of the finished model in an "Under Glass" thread in a few days. Quote Link to comment Share on other sites More sharing options...
Recommended Posts
Join the conversation
You can post now and register later. If you have an account, sign in now to post with your account.
Note: Your post will require moderator approval before it will be visible.