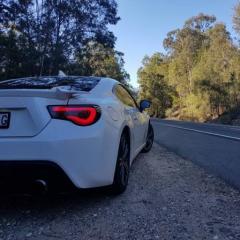
Mixalz Posted June 18, 2017 Share Posted June 18, 2017 (edited) Started a new kit in the last couple of days. First time I will be using a resin body kit. Has been a huge learning curve so far. I've managed to cut the old body up and place the resin kit on. Next step is to prime so I can highlight all the terrible body work that will need fixing. Any advice/feedback is welcomed as I know I have a lot to improve in this area! In the above photo You can see that I've cut the old front bar from the stock model and glued it to the inside of the new bar so that I can have somewhere for the chasis to slot into and so there wont be a large ugly gap under the model. I really feel like the resin kit should have accounted for this space as its rather unsightly otherwise. Cheers, Michael Edited July 3, 2017 by Mixalz Photobucket issues Quote Link to comment Share on other sites More sharing options...
Dann Tier Posted June 20, 2017 Share Posted June 20, 2017 This looks like ALOT of good work here!! Quote Link to comment Share on other sites More sharing options...
mod3l Lover Posted June 20, 2017 Share Posted June 20, 2017 Mike, that is going to look incredible!! David S. Quote Link to comment Share on other sites More sharing options...
da_ashman Posted June 21, 2017 Share Posted June 21, 2017 Great Start! cant wait to see more! Quote Link to comment Share on other sites More sharing options...
mod3l Lover Posted June 21, 2017 Share Posted June 21, 2017 Hey Mike, I would love to know moreabout the body kit and where you gotit from? David S. Quote Link to comment Share on other sites More sharing options...
Mixalz Posted June 21, 2017 Author Share Posted June 21, 2017 Hey Mike, I would love to know moreabout the body kit and where you gotit from? David S. Thanks for the comments so far.David,The kit is from Hobby Design (HD03-0441). Fits fairly well but still takes significant work to get perfect. Main issues I've had:- Air bubbles in resin (resulting in some of the thin "fins" being broken in the box and requiring repair). Other minor bubbles required simple filling.- Minor warping (required a bit of heat and flexing to restore)- Rubber tyres are quite poor quality on the under car surface. I've found nothing compares to Tamiya quality.- And the above point I mentioned in the first post about the front bumper not slotting onto the undercarriage (I'm in the process fabricating something but the height difference is making this very tricky. I may just glue a levelled piece of styreere and fill the space with a bit of putty that I smooth off).Michael Quote Link to comment Share on other sites More sharing options...
mod3l Lover Posted June 21, 2017 Share Posted June 21, 2017 (edited) Well nice work with this stuff!!I am looking forward to more. David S. Edited June 21, 2017 by mod3l Lover Quote Link to comment Share on other sites More sharing options...
Mixalz Posted July 17, 2017 Author Share Posted July 17, 2017 Well I have a minor update/ venting/ request for advice. I have spent more hours (yes hours lol) than I care to admit trying to get this spoiler to work. The frame is made of 8 PE pieces and 11 bolts per side. In order to glue the pieces together with the correct alignment I used piano wire as a "rail" to perfectly align the holes (don't cut piano wire with your modelling side cutters or they WILL be damaged....sigh being too lazy to get my toolbox costs big time) *this wire was inserted after the gluing to illustrate the technique I used* I did this in the hope that I could paint the framework black and used unpainted silver bolts for contrast. As seen here: http://www.speedhunters.com/2010/04/feature_gt_gt__evasive_honda_s2000/ Now problems arose when trying to assemble the framework. The freaking holes didnt line up despite the piano wire being used. I really do think this is a problem with the PE kit as the piano wire is very rigid and had zero play so everything was square. First I ended up enlarging the holes with a twist drill. When the new holes still werent large enough to accomodate the fitment I used a dental bur (stilletto bur specifically) to cut slots into the PE part instead. The consequence was the botls at the base would need to be epoxied prior to painting as the holes have play now. With the framework assembled I need to fit the right place to drill holes into the boot. I used some dental polyvinylsiloxane impression material which is a two part material that hardness up quite nicely but is still easy to remove. This was used to locate the wing to the framework so I cant find the right place for the holes on the boot. Now my question is. How on earth do I mark the boot through these holes (keep in mind I don't have straight line access and holes are 0.3mm)? Follow on question. Was there a better method of doing this. I was just kind of winging it. Luckily I have some dental gear to help but cant see how other would manage this scenario. Cheers Quote Link to comment Share on other sites More sharing options...
Mixalz Posted August 24, 2017 Author Share Posted August 24, 2017 Made some more progress recently. Interior is now complete Side note on an error: the seat belts mounting points should be situated more towards the midline near the head rest. I knew this beforehand but I cut the fabric length too short. By time I trimmed it a few times to thread it through the parts the final length was too short so I made this compromise instead of cutting it off and potentially ruining the tub/ PE parts. Lesson here leave enough for extra then double that amount!!! Quote Link to comment Share on other sites More sharing options...
iamsuperdan Posted August 24, 2017 Share Posted August 24, 2017 That interior is mint! Seriously, looks like it could be a pic from a Honda sales brochure. Quote Link to comment Share on other sites More sharing options...
kelson Posted August 25, 2017 Share Posted August 25, 2017 That interior looks awfully sharp!!. Quote Link to comment Share on other sites More sharing options...
superbike-shaun Posted August 25, 2017 Share Posted August 25, 2017 Dude looks great, so you didnt say if you owned a caliper (dial or digital) do you? Quote Link to comment Share on other sites More sharing options...
Mixalz Posted August 25, 2017 Author Share Posted August 25, 2017 That interior is mint! Seriously, looks like it could be a pic from a Honda sales brochure. That interior looks awfully sharp!!. Thanks! I'm really loving the Mr Color paints. They are so durable, it makes detailing with acrylics a breeze. No matter how bad the mistake you can rub it out with a cotton bud and water! Dude looks great, so you didnt say if you owned a caliper (dial or digital) do you? Sorry perhaps you meant someone else? I don't think calipers have come up in my threads, however, no I don't own one yet. Body is primed and needs some attention. Had problems flowing gap sealer which I didn't resolve before it set. Its gonna be detrimental to the final finish as sanding the areas in almost impossible but for a first try I'm happy. Quote Link to comment Share on other sites More sharing options...
vwdave92 Posted August 25, 2017 Share Posted August 25, 2017 On the spoiler location, can you simply glue the spoiler to the trunk where you want it then use the "bolts just for show? I have to admire your willingness to keep working on the frame to make the bolts fit. I would have likely glued it all together and then used the bolts just as show points instead of getting them through.If you'd like to "locate" the hole on the trunk could you put a piece of tape on the lid, hold the spoiler where you want it, mark the holes, remove the spoiler then drill through? Interior looks NICE. Quote Link to comment Share on other sites More sharing options...
Mixalz Posted August 27, 2017 Author Share Posted August 27, 2017 On the spoiler location, can you simply glue the spoiler to the trunk where you want it then use the "bolts just for show? I have to admire your willingness to keep working on the frame to make the bolts fit. I would have likely glued it all together and then used the bolts just as show points instead of getting them through. If you'd like to "locate" the hole on the trunk could you put a piece of tape on the lid, hold the spoiler where you want it, mark the holes, remove the spoiler then drill through? Interior looks NICE. I was tempted to assemble and glue as you mentioned. However im not super confident in the strength of the epoxy is such small surface area. The bolts passing through allow me to use of a "blobl" of epoxy on the other side of the lid to secure it. I ended up using a shapened toothpick with some thick paint to mark and then drilled the holes 0.5mm to allow some tolerance for error. Now it fits lines up Quote Link to comment Share on other sites More sharing options...
Mixalz Posted September 10, 2017 Author Share Posted September 10, 2017 (edited) Minor update: Lots of modifications. First time doing this sort of stuff so advice welcomed. I modified the exhaust. Its middle entry to the muffler now. That involved removal of the U bend and fabrication of a new pipe to connect to the centre pipe. The new pipes are made of bonsai wire and were epoxied to allow some flex on fitment. The tips were also extended and made larger diameter (you won't see the abnormally longer tips as the rear diffuser will block them from view) I decided to use some custom wheels which require some fabrication to fit. They are Enkei GTCO1RR. As they are made by Aoshima I needed to modify them to fit (Aoshima is female wheels; Tamiya is male wheels). This involved drilling the discs and attaching a styrene rod to make the hubs male. All that was done to keep the wheels rotating. Here you can see a major stuff up. I wasn't sure how to modify the suspension as its only thin bars. I decided on heat. I regret that decision lol. Took a good while to fix up the camber issue!!! Bonus - The front bar has been modified to slot into the undercarriage Finally I masked up the undercarriage. Now normally I'd hand paint this but I'm going all in on this model so why not. Edited September 10, 2017 by Mixalz Picture error Quote Link to comment Share on other sites More sharing options...
Mixalz Posted September 19, 2017 Author Share Posted September 19, 2017 Another quick update. I've still been struggling with the main body. Sanding and filling, sanding and filling, sanding and filling. On a good note I've painted the chassis and suspension components. Once I paint the brakes I will be able to assemble the entire base of the model. Since I was building a modified car I decided to trial painting a titanium tip exhaust. First time trying this but the Alcad Hotmetal paints made this a simple process. I painted red then violet then blue (DON'T paint the entire area one color then overlap as they are too transparent and you lose the effect - as I learned before repainting) The suspension was primed with Alcad and then hand painted with Vallejo metallic red and blue. Not really gonna be visible so its fine as is. Cheers Quote Link to comment Share on other sites More sharing options...
da_ashman Posted September 20, 2017 Share Posted September 20, 2017 Looking Good! Quote Link to comment Share on other sites More sharing options...
kelson Posted September 20, 2017 Share Posted September 20, 2017 Flawless work on the chassis! Quote Link to comment Share on other sites More sharing options...
Draggon Posted September 23, 2017 Share Posted September 23, 2017 Wow, that's turning out might nice! Quote Link to comment Share on other sites More sharing options...
Toast Posted September 25, 2017 Share Posted September 25, 2017 Very nice work so far. Those body modifications are really cool. Quote Link to comment Share on other sites More sharing options...
Scalper Posted September 25, 2017 Share Posted September 25, 2017 Chassis looks very nice Quote Link to comment Share on other sites More sharing options...
Mixalz Posted September 25, 2017 Author Share Posted September 25, 2017 Thanks for the comments! FINALLY laid down my colour coats today and yesterday (I had some dust bunnies to sand out of first coats as I didn't clean the airbrush or the booth before lol. Don't be lazy!) Here's a photo update of the body before it was placed in the dehydrator The picture looks better than in person. I'll post some photos later where you will see the drama I had with panel lines/fitting the kit. That being said for my first major kit modification I'm stoked so far. Quote Link to comment Share on other sites More sharing options...
Dragline Posted September 25, 2017 Share Posted September 25, 2017 That looks very good indeed. Very slick work. Quote Link to comment Share on other sites More sharing options...
bobthehobbyguy Posted September 25, 2017 Share Posted September 25, 2017 Looking good. Like the color. Quote Link to comment Share on other sites More sharing options...
Recommended Posts
Join the conversation
You can post now and register later. If you have an account, sign in now to post with your account.
Note: Your post will require moderator approval before it will be visible.