Steve Osbourne Posted July 31, 2017 Share Posted July 31, 2017 2010 SHELBY GT500 CUSTOM I’ve finally decided to get one of these after seeing so many nice build-ups here - although I hadn’t really decided about the direction I would take the build. I had a few ideas but nothing concrete. About a year ago I had picked up a set of 1/12 Porsche Carrera GT wheels and tires off eBay not knowing at the time what I would use them on. After measuring the Porsche tires I found them to be the same height as the Shelby tires but decidedly wider, which would be cool. That was all I needed. I would build the Shelby around the Porsche tires and rims. Of course, that meant widening or flaring the fenders but that shouldn’t be a problem. I want to make a few other minor body modifications – shave the door handles, fill the side marker lights and third brake light on the trunk and fill (delete) the stock gas filler door. I also want to smooth out most of the sharp edges on the Shelby. I’ve already filled the rear quarter windows and cut out a new opening where I will install the vents from the ’65 Shelby GT350. I also want to delete the large round Shelby logo on the trunk and make that the gas filler, perhaps frenching it in. I’m going to also delete the Shelby emblems on the front quarter panels. There will be other minor modifications, scratch-building, kit-bashing and after-market parts. I think I want to remove the rear seat and build a 4-point roll bar. I will add racing seats in the front with 4-point harnesses. Interior will be carpeted. Perhaps more speakers in the rear package tray area. That’s about it. I hope that anyone that decides to follow this build will enjoy it as much as I expect I will enjoy building it. Feel free to make suggestions or comments. For now, here are the fender flares – stage 1, made by gluing a strip of Evergreen plastic inside the wheel well and then applying a generous amount of Bondo to be shaped into smooth flares. The rears were a little bit wider. Also seen here is the filling of the side marker lights and door handles. You can also see where I filled the rear quarter panel windows and then traced around the ’65 vents and cut out. Quote Link to comment Share on other sites More sharing options...
Steve Osbourne Posted August 1, 2017 Author Share Posted August 1, 2017 Here I’ve smoothed out the Bondo and the flares have taken their shapes. Only need some minor filling in spots before primer. It’s quite noticeably here how much wider the Porsche tires are. I’ve also gone over the entire body with 120 grit wet-dry sandpaper and smoothed out the ridges and sharp edges. Quote Link to comment Share on other sites More sharing options...
cobraman Posted August 1, 2017 Share Posted August 1, 2017 I like it so far, keep it going ! Quote Link to comment Share on other sites More sharing options...
Steve Osbourne Posted August 1, 2017 Author Share Posted August 1, 2017 Thanks Ray. Things are moving right along. I was able to apply a few coats of Tamiya fine white primer and wet sand with 600 grit sandpaper and I like the results. Quote Link to comment Share on other sites More sharing options...
Steve Osbourne Posted August 1, 2017 Author Share Posted August 1, 2017 And here is one of the aforementioned Porsche wheels (rear). I plan to strip them and repaint with Tamiya titanium silver. Quote Link to comment Share on other sites More sharing options...
blackbeard Posted August 2, 2017 Share Posted August 2, 2017 Love how the body is shaping up Quote Link to comment Share on other sites More sharing options...
Steve Osbourne Posted August 2, 2017 Author Share Posted August 2, 2017 I found some cheap 1:1 Shelby valve stem caps on Amazon hoping that I would find a use for them someday. Here I cut a hole in the trunk and added a piece of sheet styrene underneath to simulate or replicate a "frenched in" look. I sawed off the end of one of the valve stem caps and filed the bottom flat and now I have a frenched in custom Shelby gas cap. Quote Link to comment Share on other sites More sharing options...
Steve Osbourne Posted August 3, 2017 Author Share Posted August 3, 2017 This is where the fun really begins. The Recaro racing seats are from 3D Specialties and made by Shapeways. You need to build your own seat brackets which I did from Evergreen sheet. The 4-point roll-bar is made from Plastruct tubing and fittings. I painted it Tamiya Gun Metal. The rear deck is made from sheet plastic after making 4 individual templates from card stock. The plastic sheets are held together from the rear by masking tape. After being satisfied with the individual panels I covered them with black velour Con-Tac paper, wrapping the velour under so there is no frayed edges. It’s best if you add masking tape on the backside to prevent the Con-Tac paper from coming unstuck. You can see that I also made seat belt brackets from Evergreen rectangular tube that are mounted to the rear floor panels. The seat belts will mount here with miniature hardware (00-90). Quote Link to comment Share on other sites More sharing options...
blackbeard Posted August 3, 2017 Share Posted August 3, 2017 the interior is looking great Quote Link to comment Share on other sites More sharing options...
Steve Osbourne Posted August 3, 2017 Author Share Posted August 3, 2017 Thanks Henry. I got the seat belts installed. Quote Link to comment Share on other sites More sharing options...
Steve Osbourne Posted August 3, 2017 Author Share Posted August 3, 2017 I should mention the oversized shift lever is a piece of 1/16" aluminum tube with a black ball-end dress pin inserted on the end. The little neck pads on the Recaro seats are adhesive-backed felt from a craft store. Quote Link to comment Share on other sites More sharing options...
blackbeard Posted August 3, 2017 Share Posted August 3, 2017 love all the little details that you are putting into this build Quote Link to comment Share on other sites More sharing options...
Steve Osbourne Posted August 3, 2017 Author Share Posted August 3, 2017 In between working on the interior I've had a chance to start applying the Tamiya Italian Red to the body. The temperatures here in Florida have been in the low 90's and my garage (where I paint) is a little warmer. The result is that I'm moving along quicker than expected. Here is the body in red... Quote Link to comment Share on other sites More sharing options...
Steve Osbourne Posted August 4, 2017 Author Share Posted August 4, 2017 While the paint has been drying between coats I've had a chance to work on the chassis, engine an other sub-assemblies. These parts are being kept mostly stock with a few exceptions. The yellow Dhelby wheel caps are from the 1:8 1967 Shelby GT500. Steering wheel is from the '65 Shelby GT350 (with black rim - not wood). I thought It might look nice to add a little accent color to the matt black interior panels. Since y\the body color I’ve chosen is Tamiya Italian Red so that’s what I used here. You can also see that I’ve removed the part of the rear panels above the belt line where the kit rear quarter windows were. They would have interfered with the ‘new’ ’65 Shelby vents. Quote Link to comment Share on other sites More sharing options...
Steve Osbourne Posted August 4, 2017 Author Share Posted August 4, 2017 The wheel hubs shown next to the engine are scratch-built to adapt the wider Porsche wheels to the Shelby kit. Quote Link to comment Share on other sites More sharing options...
blackbeard Posted August 4, 2017 Share Posted August 4, 2017 your killing this project with that great color Quote Link to comment Share on other sites More sharing options...
Steve Osbourne Posted August 6, 2017 Author Share Posted August 6, 2017 I masked off the body and painted the rocker panels and bumpers matt black. You can't tell from these photos but I also painted the headliner matt black as well. Quote Link to comment Share on other sites More sharing options...
Steve Osbourne Posted August 6, 2017 Author Share Posted August 6, 2017 I finished the engine and assembled the frame parts. Also finished the dash and installed the '65 Shelby steering wheel. Quote Link to comment Share on other sites More sharing options...
Steve Osbourne Posted August 6, 2017 Author Share Posted August 6, 2017 I made a license frame from 2 layers of Evergreen plastic sheet. First by tracing around the scale license plate from MINIPL8S.com and the using a standard 1/4" paper punch to punch out the center and then clean up the edges by filing. Then took that piece and glued it onto the 2nd piece of Evergreen plastic and then cut away the outside of both pieces until it was the right size. I drilled out the plate, frame and car body to accept 1mm screws which I used to mount it to the body. Quote Link to comment Share on other sites More sharing options...
Steve Osbourne Posted August 6, 2017 Author Share Posted August 6, 2017 Window glass was taped off on the inside and the edges blackened with a wide-tipped black Sharpie. I would recommend taping off the entire outer (opposite) side also to prevent scratching while doing the Sharpie thing. The kit glass is very thin so be careful. I painted the windshield wipers – which are molded into the body – by hand before installing the glass. Also installed the sub visors/overhead console/rearview mirroe assembly to the body. Now you can see the painted headliner. Quote Link to comment Share on other sites More sharing options...
Steve Osbourne Posted August 6, 2017 Author Share Posted August 6, 2017 More body parts attached. Quote Link to comment Share on other sites More sharing options...
Steve Osbourne Posted August 6, 2017 Author Share Posted August 6, 2017 Objects in mirror may appear closer than they are...I've pretty much finished the assembly so I waxed the body with some Meguiar's #7 Show Car Wax. It's supposed to be a nice day today so I'm going to take it out for a spin and get some outdoor photos which I'd like to post first before posting the indoor photos later. Quote Link to comment Share on other sites More sharing options...
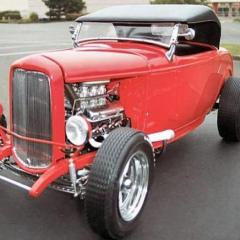
Steve Osbourne Posted August 6, 2017 Author Share Posted August 6, 2017 (edited) Here we go. Finished 2010 Shelby GT500 Custom. The first 3 pictures were taken just after sunrise and it was very humid. My camera lens fogged up as well as the windows on the model. The other pictures (next post) were taken late morning and the sun was very bright. Not exactly optimum conditions. Still, I was ablt to get a few good pictures. This was a fun build and I already want to do another one. There are so many different ways you can go with it. Although at first it seemed that I was doing too many modifications the end result was sort of a sleeper. You don't really notice the flared fenders unless you are looking for them and the smoothed body, minus door handles and other items seemed to work. I'm going to spend the afternoon taking some indoor pictures and I will post them later. Those will include interior, engine, chassis, etc. Thanks for looking. Edited August 6, 2017 by Steve Osbourne delete images Quote Link to comment Share on other sites More sharing options...
Steve Osbourne Posted August 6, 2017 Author Share Posted August 6, 2017 Sun pictures... Quote Link to comment Share on other sites More sharing options...
blackbeard Posted August 6, 2017 Share Posted August 6, 2017 looks great Quote Link to comment Share on other sites More sharing options...
Recommended Posts
Join the conversation
You can post now and register later. If you have an account, sign in now to post with your account.
Note: Your post will require moderator approval before it will be visible.