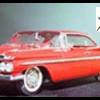
59 Impala Posted August 8, 2017 Share Posted August 8, 2017 This is the beginning of my build of this car. I haven't found any good pictures of the interior yet so I'm concentrating on the body and chassis for now. Thanks fer lookin. Dan Quote Link to comment Share on other sites More sharing options...
randyc Posted August 8, 2017 Share Posted August 8, 2017 (edited) Google "59 chevy seats" or "dash" or "gauges" or whatever part you are working on. Usually there will be pics of the surrounding parts and areas as well. These are great kits. Enjoy the build. Edit: just realized you are working on a race car - a little different to Google, but google other drivers of the era and see if you can find their cars - a lot of similarities that only an expert could spot and who;s to say it wasn't that way at some point? Edited August 8, 2017 by randyc Quote Link to comment Share on other sites More sharing options...
espo Posted August 8, 2017 Share Posted August 8, 2017 I built a model of Rex's '62 Chevrolet years ago when AMT first offered the '62 Bel Air. The information at that time showed the interior was lightly modified with removal of the door panels being replaced with smooth metal and the factory gauges replaced with a flat panel to mount the gauges. Roll Bar of course and a single bucket type seat. In the '60 era I think they may of still been using the factory bench with the passenger seat back removed, some what like the Revell '57 Ford kit. They fenders were opened up and "pushed" out a little. I did this by heating the wheel opening over a 100 watt light bulb and massaged the fenders with my fingers. Gloves would be a smart addition to protect your fingers. With the open trunk on this kit it will be easier to detail that area also. Quote Link to comment Share on other sites More sharing options...
59 Impala Posted August 20, 2017 Author Share Posted August 20, 2017 Thanks guys for the information. I have a small update on this. I've made a copy of the grill in fingernail resin and I'm working on that to modify it instead of using the kit grill and messing it up. LOL. Here are some pics of what I did today. Dan Quote Link to comment Share on other sites More sharing options...
Metaldrumm Posted August 20, 2017 Share Posted August 20, 2017 Nice custom work so far, looking good Quote Link to comment Share on other sites More sharing options...
Slotto Posted August 20, 2017 Share Posted August 20, 2017 Great stance! Quote Link to comment Share on other sites More sharing options...
59 Impala Posted August 21, 2017 Author Share Posted August 21, 2017 Thanks guys. Here are some more pics of Rex's car. I made a resin copy of the grill and a clutch pedal. I also got the white sprayed on this afternoon. It will dry a few days and then I'll spray the Gold on. Dan Quote Link to comment Share on other sites More sharing options...
Deathgoblin Posted August 21, 2017 Share Posted August 21, 2017 Looking good!! Quote Link to comment Share on other sites More sharing options...
59 Impala Posted August 22, 2017 Author Share Posted August 22, 2017 Thanks Brian. There's still a lot of work to be done. I'm letting the top, hood and trunk dry a few days before I mask it off and spray the Gold. I wish that Revell made these cars with a 4 speed and no power steering instead of the automatic that comes in the kit of this car and the 59. Also, they should have changed the spare tire well because the 60 didn't have one. They used the chassis from the 59. But, I did change that for this car. Dan Quote Link to comment Share on other sites More sharing options...
PARTSMARTY Posted August 22, 2017 Share Posted August 22, 2017 I love where this is going-you can change the trans !!! Quote Link to comment Share on other sites More sharing options...
59 Impala Posted August 23, 2017 Author Share Posted August 23, 2017 Yep. I used the four speed from AMT's 57 Chevy. Just remove the auto with bell housing and replace that with the four speed and bell housing from the 57 or other Chevy with a four speed. Dan Quote Link to comment Share on other sites More sharing options...
59 Impala Posted November 24, 2017 Author Share Posted November 24, 2017 I finally got some color on this tonight. I just finished spraying on the Copper color and when it dries for a few days, I'll install the decals and finish puttin it together. Thanks fer lookin. Dan Quote Link to comment Share on other sites More sharing options...
59 Impala Posted December 5, 2017 Author Share Posted December 5, 2017 A small update on this car. I finally got the paint on and it's a;most ready for the decals and wheels. It took a lot of work to get the chassis to fit under the car like the 59. I'll be installing the decals perty soon now. Thanks fer lookin. Dan Quote Link to comment Share on other sites More sharing options...
El Caballo Posted December 5, 2017 Share Posted December 5, 2017 Nice shave for the door handles. Quote Link to comment Share on other sites More sharing options...
59 Impala Posted December 6, 2017 Author Share Posted December 6, 2017 Thanks Ted. There's still a lot of work to be done. Dan Quote Link to comment Share on other sites More sharing options...
W-409 Posted December 6, 2017 Share Posted December 6, 2017 This looks great so far, plus that you can never have too many '60 Impalas (or other X-Frame Chevys)! Great job with the body mods and paint on this one. I can't wait to see more pics. Quote Link to comment Share on other sites More sharing options...
59 Impala Posted December 8, 2017 Author Share Posted December 8, 2017 Thanks Niko for the kind words. I'm almost ready to put the decals on. I also built Jim Reeds 59 Impala awhile back and it turned out perty good I think. He won the Darlington 500 in 59 with it. I also like the x frame Chevy's. I had a 59 Impala 2dr coupe back in 1966 before I got drafted. I sure wish that I still had that car. My avatar pic is a model that I built of my 1:1 car. Dan Quote Link to comment Share on other sites More sharing options...
W-409 Posted December 8, 2017 Share Posted December 8, 2017 That's cool! We have a '60 Impala 2D HT in our family. My dad bought it in the late '80s and just a few years ago I welded new quarter panels on it. Very fun car to cruise around with, under the hood is almost stock 283+PG. It's not fast, but it always takes you where you're going.Here it is in 2015. Sorry for the little offtopic, anyway, you can never see too many X-Frame cars! Quote Link to comment Share on other sites More sharing options...
59 Impala Posted December 10, 2017 Author Share Posted December 10, 2017 Nice 60, and don't worry about the topic. I like all x frame car also. Quote Link to comment Share on other sites More sharing options...
59 Impala Posted January 21, 2018 Author Share Posted January 21, 2018 I finally got a little work done on this car. I got the BMF and decals on today. Quote Link to comment Share on other sites More sharing options...
59 Impala Posted January 22, 2018 Author Share Posted January 22, 2018 I finally got-er-done today. It's not perfect but it's Ok for me. I worked and worked on the chassis and interior to try and get the chassis to fit where it's supposed to but after installing everything , it still sticks out on the bottom. I just gave up of trying to fix that. Thanks fer lookin. Dan Quote Link to comment Share on other sites More sharing options...
59 Impala Posted January 30, 2018 Author Share Posted January 30, 2018 Admins, this can be moved to the NASCAR section if you would, please. Thank you . Dan Quote Link to comment Share on other sites More sharing options...
John Goschke Posted January 30, 2018 Share Posted January 30, 2018 Nice build! By the way, the chassis problem isn't something you did wrong, it's RevelloGram! The only way to fix it to cut the protruding sections off. The problem is present on the '60 kit and both '59s. Quote Link to comment Share on other sites More sharing options...
59 Impala Posted January 31, 2018 Author Share Posted January 31, 2018 Thanks John, I know the problem is with Revellogram. I thought I had it fixed by removing a lot of plastic from the body, chassis and interior. Plus, I removed some from the glass also, but when I put this thing together, it showed it's ugly head again. Frustration set in. Oh well, that's the way the old plastic crumbles kinda thing I guess. All ya can do is laugh about it or cry, which ever ya want to do I guess. LOL. I also had to move the left front wheel assembly a tad forward to get it to set in the middle of the fender well on this kit and my 59's that i have. Bummer. Dan Quote Link to comment Share on other sites More sharing options...
Recommended Posts
Join the conversation
You can post now and register later. If you have an account, sign in now to post with your account.
Note: Your post will require moderator approval before it will be visible.