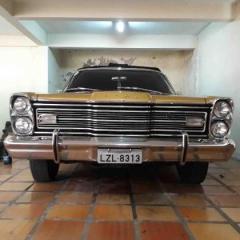
Lovefordgalaxie Posted October 6, 2018 Share Posted October 6, 2018 Started building this one (yes, another one of those) on Tuesday. The only thing done is the body paint. decided for Majestic Maroon metallic, a Lincoln color. One could get a Ford like this, but the car had to be special ordered ($$$). Had the color mixed with the original code, but as a base coat clear coat. On the pictures I took today, the body was just clear coated. Some polishing is going to be required. Now to start working on the interior. I'm divided between the brown/tan and gold option, and the red, white and black option. Quote Link to comment Share on other sites More sharing options...
Renegade Posted October 6, 2018 Share Posted October 6, 2018 Great color choice. I vote for tan/gold. Quote Link to comment Share on other sites More sharing options...
Italianhorses Posted October 6, 2018 Share Posted October 6, 2018 Shiny! Quote Link to comment Share on other sites More sharing options...
Bucky Posted October 6, 2018 Share Posted October 6, 2018 Looks wonderful already!! I go along with the brown/tan/gold interior, too. Quote Link to comment Share on other sites More sharing options...
66belair Posted October 6, 2018 Share Posted October 6, 2018 Beautiful, I would go with the tan/gold combo. Quote Link to comment Share on other sites More sharing options...
cobraman Posted October 6, 2018 Share Posted October 6, 2018 Another beauty in the making. Quote Link to comment Share on other sites More sharing options...
BigTallDad Posted October 6, 2018 Share Posted October 6, 2018 Another vote for the tan/gold. Quote Link to comment Share on other sites More sharing options...
Rider Posted October 6, 2018 Share Posted October 6, 2018 Man you are building machine. Good luck with the build. Quote Link to comment Share on other sites More sharing options...
Modelbuilder Mark Posted October 6, 2018 Share Posted October 6, 2018 Great color choice, laid on nice and smooth. Quote Link to comment Share on other sites More sharing options...
gman Posted October 6, 2018 Share Posted October 6, 2018 That is a really great colour for a Sunliner- if they would have thrown some in the showrooms, it would have probably generated several special orders back then. That will look really nice with the brown, tan & gold option. Quote Link to comment Share on other sites More sharing options...
Lovefordgalaxie Posted October 7, 2018 Author Share Posted October 7, 2018 Thanks guys, I just finished gluing the the front seat halves, and the engine halves together. Those are the only glue joints that will show, and now it's a waiting game for the Revell glue to dry. All going well, I guess the clear will be hard enough for me to polish the body tomorrow. Using automotive two part clear, so the stuff gets real hard and difficult to polish if I wait too much. Quote Link to comment Share on other sites More sharing options...
vintagercr Posted October 7, 2018 Share Posted October 7, 2018 That is a nice colour. I like your paint stand. Quote Link to comment Share on other sites More sharing options...
ewetwo Posted October 7, 2018 Share Posted October 7, 2018 Beautiful paint job. Quote Link to comment Share on other sites More sharing options...
Lovefordgalaxie Posted October 9, 2018 Author Share Posted October 9, 2018 (edited) So, here we are with some more work done. Yesterday, I gave the body a good polish, and I'm happy with the paint. No wax yet tough. The foil will go on before the wax. Also, started sanding away the glue joints on the front seat, on the engine, and blower motor. Also prepared the rear end sanding the mold lines, and gluing the leaf springs in place. The leaf springs have to be mounted in a way they will meet the mounts on the frame (springs converge to a imaginary point ahead of the car), and I'll still have to putty some sink marks on the top of the springs. The bumpers had some ugly scratches on the chrome, so I stripped them, sanded the mold lines, and airbrushed some Molotow chrome on them, and also on the dog dish hubcaps. Also gave the chrome a clear coat to protect the fragile Molotow paint. Not 100% happy about the chrome tough. Here go some pictures!! Edited October 9, 2018 by Lovefordgalaxie Quote Link to comment Share on other sites More sharing options...
espo Posted October 9, 2018 Share Posted October 9, 2018 The color, and of course the finish on it, are beautiful. Always enjoy watching your builds. Quote Link to comment Share on other sites More sharing options...
Lovefordgalaxie Posted October 11, 2018 Author Share Posted October 11, 2018 (edited) Tthanks for the comments guys! Did a little more to the car. Built the front suspension, the engine, and fixed some sink marks on the leaf springs. Also adapted the kits wheel backings to work with my resin "steel wheels" this way the wheels and tires will mount on the frame like they are supposed to, and I'll still have spinage action!! Lol. Next step is to prime and paint all the parts... Edited October 11, 2018 by Lovefordgalaxie Quote Link to comment Share on other sites More sharing options...
Lovefordgalaxie Posted October 13, 2018 Author Share Posted October 13, 2018 Painting started. Engine is painted, and I redid the chrome. This time I liked the result more. Also painted the basic colors on the interior. Quote Link to comment Share on other sites More sharing options...
Lovefordgalaxie Posted October 15, 2018 Author Share Posted October 15, 2018 OK gentlemen, I'm back!! More work done to the Sunliner. Painted the argent on the splash pan. Also, painted the body color overspray over the primer on the floor pans. Engine now painted "reddish orange", even tough it looks red on pictures. Some touch up necessary on the transmission. Wheels and tires ready. Black parts painted. All black now will be brush painted on (frame rails, inner fenders, radiator support, and small details). Interior is almost done, still missing the detail paint and foil. Steel, aluminum, and zink plated parts painted: Carburetor and fuel pump: Also have to foil the body. More to come. Quote Link to comment Share on other sites More sharing options...
gman Posted October 15, 2018 Share Posted October 15, 2018 As always, will be watching closely on how this model comes together (and expecting great things). Quote Link to comment Share on other sites More sharing options...
Lovefordgalaxie Posted October 17, 2018 Author Share Posted October 17, 2018 On 10/15/2018 at 2:59 AM, gman said: As always, will be watching closely on how this model comes together (and expecting great things). Thanks!! Quote Link to comment Share on other sites More sharing options...
Lovefordgalaxie Posted October 17, 2018 Author Share Posted October 17, 2018 Little more done. Finished the detail paint on the chassis. Almost finished detailing the dash. Finished detailing the engine bay, the door panels, and basic engine detail. Still have more little parts to detail paint, but at least the body is foiled, and the glass in on. Getting close to wrap this '53 up. Quote Link to comment Share on other sites More sharing options...
Lovefordgalaxie Posted October 18, 2018 Author Share Posted October 18, 2018 Finished!! Quote Link to comment Share on other sites More sharing options...
cobraman Posted October 19, 2018 Share Posted October 19, 2018 Car looks great ! Love that color. Quote Link to comment Share on other sites More sharing options...
Funkychiken Posted October 20, 2018 Share Posted October 20, 2018 Excellent! Quote Link to comment Share on other sites More sharing options...
Recommended Posts
Join the conversation
You can post now and register later. If you have an account, sign in now to post with your account.
Note: Your post will require moderator approval before it will be visible.