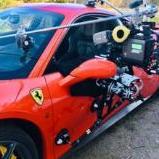
mitchy Posted February 1, 2019 Share Posted February 1, 2019 (edited) I received this cheap kit yesterday, and I could not resist getting the body out to have a look. This kit was started already, but only a few parts were painted, and everything is still in it’s tree thankfully. The body had been roughly painted inside with alu silver, I’ll probably leave it and go over again with the AB. I’m thinking deep gloss black with no stripes, satin black or metalized gunmetal for the brightwork. Kit chrome is, as always, too bright. I have gone over the shell with scalpel for the shut lines, small files and grit to re-shape and crisp up the slightly flabby front end. I have opened up all the intakes a little, to gain that agressive cobra look that the molding seems to miss. Proportions are excellent though. Next up will be some minor filler detailing, and I should probably then leave it alone and get some other WIPs under glass! I’m loving that naked body!! Thanks for watching Here’s the studio setup for those interested ? Edited February 1, 2019 by mitchy Quote Link to comment Share on other sites More sharing options...
Gramps46 Posted February 1, 2019 Share Posted February 1, 2019 I like what you have done and are planning on doing. I saw a photo of a black Cobra model recently and was really taken with it. Please keep us posted on this one. Oh, your studio gives an interesting light and dark effect which I may give it a try. Thanks for sharing that. Quote Link to comment Share on other sites More sharing options...
cobraman Posted February 1, 2019 Share Posted February 1, 2019 Happy to see another Cobra being built. I will be following. Quote Link to comment Share on other sites More sharing options...
Anglia105E Posted February 1, 2019 Share Posted February 1, 2019 Mitchy....... I was also interested in your lighting technique, which does appear to give a pleasant effect. Nice work on the Cobra body shell. David Quote Link to comment Share on other sites More sharing options...
mitchy Posted February 1, 2019 Author Share Posted February 1, 2019 (edited) That is a magnetic LED car workshop torch hanging from the overhead table lamp acting as a spotlight. There's also a bit of clumsy direct camera flash (iphone) being used. Not the best camera I know, but for these WIP pictures I reckon its enough. I shall however use my SLR for those higher resolution ‘Under glass’ shots in the near future. Thanks Edited February 1, 2019 by mitchy Quote Link to comment Share on other sites More sharing options...
Dann Tier Posted February 2, 2019 Share Posted February 2, 2019 Cant wait to see this evolve!! Quote Link to comment Share on other sites More sharing options...
mitchy Posted February 8, 2019 Author Share Posted February 8, 2019 (edited) Put down some paint, Tamiya fine surface primer straight from the can. A day or two later I airbrushed three mist coats of Vallejo Premium color diluted with distilled water, followed by four wetter coats. I hit too hard with one of the wet coats and it ran horribly. Under the tap with a soft toothbrush and start again with the misting. Acrylic paints are friendly this way, as well as their obvious health benefits. primer 1: hunting out those little imperfections primer 2: And after cleaning up my little disaster.... Mist 1: mist 2: mist 3: after the wet coats: This paint dries super-smooth satin-matt, so I will be following up with some coats of Tamiya x-22 clear. This could be cut and buffed to gloss without lacquer, but I fancy a deeper sheen to set off the other matt and satin parts for an aggressive monochrome look. Thanks for looking. Edited February 8, 2019 by mitchy Quote Link to comment Share on other sites More sharing options...
Geno Posted February 8, 2019 Share Posted February 8, 2019 Looking great so far. I love these Cobras. Quote Link to comment Share on other sites More sharing options...
Gramps46 Posted February 8, 2019 Share Posted February 8, 2019 Anxious to see what comes next. Quote Link to comment Share on other sites More sharing options...
mitchy Posted February 9, 2019 Author Share Posted February 9, 2019 Some more paint done. Details details details. I’ve been playing with a new metal colour from Vallejo: Apart from that, basic acrylic colours pure and mixed, plus some metalizer powder for some variation. lots of black on this model! Quote Link to comment Share on other sites More sharing options...
mitchy Posted February 10, 2019 Author Share Posted February 10, 2019 Number 11 Traced and cut the shutlines, nerve-racking stuff. Applied some paint to repair some edges, and to wrap the bonnet decal. I probably should have clear coated first, but I did not, so fingers crossed there will be no silvering. Tamiya X-22 gloss thinned with Tamiya Lacquer Thinner to follow. Thanks for looking. Quote Link to comment Share on other sites More sharing options...
Belugawrx Posted February 10, 2019 Share Posted February 10, 2019 Nice start, I'm working the same model right now. I have my fingers crossed for your clear coat Quote Link to comment Share on other sites More sharing options...
89AKurt Posted February 10, 2019 Share Posted February 10, 2019 Someone gave me this kit, so of course I'll have to watch how it goes together! Quote Link to comment Share on other sites More sharing options...
mitchy Posted February 10, 2019 Author Share Posted February 10, 2019 @89AKurtSo far so good, the kit is a decent standard with minimal flash. The chromed wheels and exhausts are disappointing, but a quick splash of ammonia and a lick of paint and the detail pops out again. I shall leave just the hood latches, head lamp surrounds and the gear stick in the original chrome, all else stripped and painted to my liking Quote Link to comment Share on other sites More sharing options...
mitchy Posted February 10, 2019 Author Share Posted February 10, 2019 @Belugawrx How will you be building yours? Box art green or blue? Or something completely different? First coat of clear is down, no dramas yet! I am expecting a fine sanding and polish immenently... Quote Link to comment Share on other sites More sharing options...
Belugawrx Posted February 10, 2019 Share Posted February 10, 2019 11 minutes ago, mitchy said: How will you be building yours? Box art green or blue? Or something completely different? First coat of clear is down, no dramas yet! I am expecting a fine sanding and polish immenently... Looking Great,...my fingers crossed seamed to do the trick,. I'm kind of taken with this chassis # 4170 Fender shape seems to be the same... Mine had a TON of flash, which needed attention.. will be following yours. Cheers Quote Link to comment Share on other sites More sharing options...
mitchy Posted February 10, 2019 Author Share Posted February 10, 2019 Black seems to be a popular choice. I think they look amazing in black. I’m not struck by the box art in the slightest. Here’s my inspiration- very much along the same lines, I just thought I would leave out the twin stripes. Maybe next time.... Quote Link to comment Share on other sites More sharing options...
mitchy Posted February 10, 2019 Author Share Posted February 10, 2019 And thanks for crossing your fingers. I shot that clear with my eyes closed! ? Quote Link to comment Share on other sites More sharing options...
mitchy Posted February 10, 2019 Author Share Posted February 10, 2019 Whilst the body work builds up some clear coats, I can get on with some other parts. Test fit chassis, tub and engine: I lopped off those unrealistic concave exhaust tips and replaced them with some styrene tube: Thanks for looking. Quote Link to comment Share on other sites More sharing options...
Belugawrx Posted February 10, 2019 Share Posted February 10, 2019 (edited) Nice progress M..looks like you will be wiring this,,...? Edited February 10, 2019 by Belugawrx Quote Link to comment Share on other sites More sharing options...
mitchy Posted February 11, 2019 Author Share Posted February 11, 2019 I think it will be inevitable, some added cabling and plumbing will just set the engine bay off. ? Quote Link to comment Share on other sites More sharing options...
mitchy Posted February 11, 2019 Author Share Posted February 11, 2019 Speaking of cabling, there is no way to employ the kit dizzy. Time to experiment with styrene tube, tiny weeny wire sleeving and guitar string. The guitar string is 0.333mm diameter, giving a 1:1 cable dia of 8mm, roughly 1/4”, which is pretty much spot on. The red cable boots look a bit fat, but as long as the cables do not look like hosepipe I am happy. The other benefit of guitar string is that it can be permanently bent into position for elbows and scale ‘cable sag’. ? I have no carpet, and the piece is relatively large, but gremlins ate suspension part #12, So I had to scratch one, coil springs and all. Quote Link to comment Share on other sites More sharing options...
mitchy Posted February 11, 2019 Author Share Posted February 11, 2019 (edited) Been hard at it today, yesterday’s clear coat got some minimal Micro Mesh 2500 and 6000 wet sanding plus some Tamiya polishing compound, followed by a dab of black Kiwi Parade Gloss shoe polish. As an additional note I have to say that Tamiya’s X-22 gloss mixed 50/50 with their own lacquer thinners creates a really easy to AB and quick drying clear. Highly recommended. thanks for looking Edited February 11, 2019 by mitchy Quote Link to comment Share on other sites More sharing options...
cobraman Posted February 11, 2019 Share Posted February 11, 2019 Looking great ! Quote Link to comment Share on other sites More sharing options...
mitchy Posted February 11, 2019 Author Share Posted February 11, 2019 Dammit. found the missing part. Too late. The gremlin appears to be me. Quote Link to comment Share on other sites More sharing options...
Recommended Posts
Join the conversation
You can post now and register later. If you have an account, sign in now to post with your account.
Note: Your post will require moderator approval before it will be visible.