ibj40 Posted November 22, 2019 Share Posted November 22, 2019 (edited) Back in the day, before the construction of haulers became big business, we saw lots of cobbled together, backyard specials showing up at the race tracks. This will be my effort to replicate a fantasy version. The donors are the tried and true ACME Chevy ramp back hauler, less ramp back (that has been repurposed to another project) and the older version of the GMP race trailer, with some pieces from another trailer that was a donor for another project. Here are some early pictures, with stuff just hung together, lots of fabrication in the future. Edited November 22, 2019 by ibj40 Quote Link to comment Share on other sites More sharing options...
ibj40 Posted November 23, 2019 Author Share Posted November 23, 2019 Going to need to clean up some of the chassis non-detail, as shown in the last picture above, and better here. So I fabricated some panels out of 0.30" styrene sheet, and painted them flat black, and just SuperGlued them on. Nothing fancy, but did the job. I took the trailer pieces by Kenny's house yesterday. He has a shop where he restores 1:1's, so has access to strippers and beed blasters. I should get them back next week. Put the original ramper body loosely back on the chassis. Wow, the rear track to clear the trailer wheel arches is going to be WIDE! Quote Link to comment Share on other sites More sharing options...
randyc Posted November 25, 2019 Share Posted November 25, 2019 Wow! Living in NC, we see all kinds of things like this on the roads. Scary and fascinationg all at the same time. Quote Link to comment Share on other sites More sharing options...
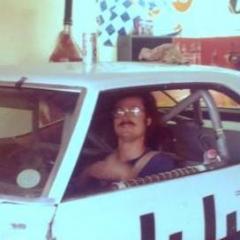
ibj40 Posted November 25, 2019 Author Share Posted November 25, 2019 (edited) 5 hours ago, randyc said: Wow! Living in NC, we see all kinds of things like this on the roads. Scary and fascinationg all at the same time. Yeah, that was my inspiration. Back in the day, I bought an IMSA Corvette body and chassis from Baird and Trivette in Atlanta. It was advertised as coming with a trailer with a tire rack installed. When we got to Atlanta, there sat the Corvette, on this rusted up single axle short tongue trailer, with a custom-made aluminum tire rack bolted to it. From looking at the fabrication detail, the rack must have been worth more than the trailer. When we got it all back to Dallas, we took off the tire rack and mounted it in the back of our dually, with holes cut through the bed and bolts extending down into the truck frame rails. We junked the trailer, it was a traffic hazard. Looked kind of like this one I made for myself out of a GMP trailer tire rack. The other racers nicknamed our truck "Bullwinkle". Edited November 25, 2019 by ibj40 Quote Link to comment Share on other sites More sharing options...
ibj40 Posted December 4, 2019 Author Share Posted December 4, 2019 Got the trailer parts back from Kenny, plus acquired a tool box from one of my favorite eBay custom parts vendors. Here's the mock up. Will probably JB Weld the ramp extensions this weekend. Quote Link to comment Share on other sites More sharing options...
ibj40 Posted January 28, 2020 Author Share Posted January 28, 2020 Making some progress, finally, on this one, after spending some of the time over the Holidays doing nothing. Should have taken a couple of in-progress shots, but used my favorite product, JB Weld, to bond the inner and outer fender pieces together from the bottom. Will fill the gap at the outside with JB Weld, as well (will take some pictures tonight and edit this post tomorrow). Quote Link to comment Share on other sites More sharing options...
ibj40 Posted January 29, 2020 Author Share Posted January 29, 2020 Thought I would share my technique for joining the two sets of fenders. First, I place a piece of masking tape under the one that is on the trailer, and then line up the second one as best as I can, and secure them both with the tape. I then liberally apply JB Weld along the seam. After that cured, I removed the masking tape, and applied a second coat along the smooth side of the fenders to hide the seam. I ground away just enough on the underside to clean up any sharp edges and burrs, but not enough, hopefully, that I weaken the joint. Then I tried to clean up the visible side, which may take a couple of coats of JB Weld due to the slight differences cause by putting the two fender pieces together. I attached the trailer runner extensions in much the same way, aligned them the best as I could, grinding away some material to get a close of a matching mating surface as possible, and then applied the JB Weld. With a little luck, maybe a coat of primer this weekend to make it look more homogeneous. Quote Link to comment Share on other sites More sharing options...
Gramps46 Posted January 29, 2020 Share Posted January 29, 2020 Thank you for sharing your technique. Based upon your earlier work I bought some JB Weld but have not give it a try yet. Quote Link to comment Share on other sites More sharing options...
ibj40 Posted January 29, 2020 Author Share Posted January 29, 2020 2 hours ago, Gramps46 said: Thank you for sharing your technique. Based upon your earlier work I bought some JB Weld but have not give it a try yet. It's kind of like the catch phase for Frank's Red Hot Sauce. Quote Link to comment Share on other sites More sharing options...
kilrathy10 Posted January 30, 2020 Share Posted January 30, 2020 looks like you're having fun... Good job, Man.... Quote Link to comment Share on other sites More sharing options...
ibj40 Posted January 31, 2020 Author Share Posted January 31, 2020 Threw some Bondo on the fenders to smooth them up a little. If the weather's right this weekend, at least a coat of primer. Quote Link to comment Share on other sites More sharing options...
ibj40 Posted February 1, 2020 Author Share Posted February 1, 2020 Laid down a coat of primer. Now the question is, should I lengthen the rear axle to fill up the wheel wells? Quote Link to comment Share on other sites More sharing options...
ibj40 Posted February 2, 2020 Author Share Posted February 2, 2020 Go big, or go home! Widened the rear track by 3/8 inch on each side, in order to fill out the wheel wells. I think this is where we're going to go. Quote Link to comment Share on other sites More sharing options...
ibj40 Posted February 3, 2020 Author Share Posted February 3, 2020 Got a coat of Classic White paint on it yesterday, hung it on my basketball net to dry in the sun. Came out decent, for what I intended it for, although a lot of work. Quote Link to comment Share on other sites More sharing options...
kilrathy10 Posted February 5, 2020 Share Posted February 5, 2020 Actually looks pretty good with some paint on it.... Nice work... On to the next project... ? Quote Link to comment Share on other sites More sharing options...
Recommended Posts
Join the conversation
You can post now and register later. If you have an account, sign in now to post with your account.
Note: Your post will require moderator approval before it will be visible.