Mike Williams Posted March 28, 2020 Share Posted March 28, 2020 (edited) A couple of members have asked for a closer look at lacing wire wheels for dragsters. We all know how the kit wheels look on 1:25 models, we can do better with a little effort. A couple sets on finished cars from last year are here; http://www.modelcarsmag.com/forums/topic/146828-the-old-master-1966-125-brass-model/ http://www.modelcarsmag.com/forums/topic/143663-amt-23-ford-t-fuel-altered-new-pics/ 1. First off a hardwood base is needed. Here a rest piece from a hardwood floor. This will be a 32 spoke wheel, so 8 studs are needed, evenly spaced to make a "clock". The studs should be inserted deep enough to hold up to a little pressure, but steady enough to not wiggle around; 2. Since this wheel will be soldered, I chose an 18mm copper tube from a plumbers supply shop, and cut slices off the tube to end up at about 1mm thickness each. Two rims will be needed for one wheel; 3. Here the wire used, a 100yd. roll of silver plated copper wire, 0.20mm thin. Amazon has this, but comes from China...your choice. 4. Start the procedure by wrapping the wire around the top most stud. For ease in fabrication, number the studs as you would a clock. The first wire should be wrapped around often enough to secure it from wandering. Wrapping around the center stud, which will be the hub, go straight across, then one number to the left, or counterclockwise. This would be starting at #2, then go around the hub to #8; 5. Go around #8, then straight across then one number left, would be now #14. Continue this way until the last remaining stud is completed. Then the last single wire should go back to where you started, being in this case #2. Wrap it up and secure the last wire; 6. Now the wires and rim can be centered and the wires evenly spaced out on the rim, solder them up to the rim. at this point let me write that a hard plastic tube could be used, and for the wires you can use fly-fishing line in ultra thin gauge. The stuff is cheap. Glue it on the rims with a good CA. 7. Cut the wires off between the studs and the rim, then carefully lift the single rim off the middle stud; 8. Here the visible side. The inside, soldered up parts will be soldered together to make a complete rim. 9. The excess wires should be removed right up to the rim surface. If soldering these wires, there's an immenent danger the excess wires would otherwise start to float around and lose their position when soldering the rims together. Clean the rims up, here the visible side of a rim; 10. Any excess solder should be removed between the wires to reduce the overall thickness, and to let the two halves come together better. With two rims at about 1mm width each, the final result will end up being about 2.5mm, which makes out for a scale of about 2.5", perfect for a dragster tire, and perfect for the Tony Nancy kit tire. Here the finished laced wheel in direct comparison to the kit wheel. Left is a 32 spoke wheel, right is the better, 40 spoke laced wire wheel. 11. Here on a vintage FED model, the 32 spoke version. I like the 40 spoke better though, in the last photo from the current WIP. 12. The 40 spoke version; I hope this might work for you in case you're interested. Mike.. Edited March 28, 2020 by Mike Williams Quote Link to comment Share on other sites More sharing options...
Ace-Garageguy Posted March 28, 2020 Share Posted March 28, 2020 Excellent. Much appreciated. Quote Link to comment Share on other sites More sharing options...
grodudulle77 Posted March 28, 2020 Share Posted March 28, 2020 Very, very, very awesome work Mike, as usual !!!??? Quote Link to comment Share on other sites More sharing options...
Khils Posted March 28, 2020 Share Posted March 28, 2020 9 hours ago, Mike Williams said: interested????? THAT is genius! !! Quote Link to comment Share on other sites More sharing options...
CabDriver Posted March 28, 2020 Share Posted March 28, 2020 One of the best tutorials I’ve seen anywhere for a while! You make it look so simple! I’ll definitely be trying this! Quote Link to comment Share on other sites More sharing options...
PappyD340 Posted March 29, 2020 Share Posted March 29, 2020 Excellent tutorial Quote Link to comment Share on other sites More sharing options...
Mike Williams Posted March 29, 2020 Author Share Posted March 29, 2020 Ace-Garageguy, you're quite welcome. It works, I've played with this for a while now, this is the best and the easiest method to date. No special tools needed. grodudulle77, thank you for the kind comment, a good thing that you approve. Khils, genial things are often so simple. I've spent a lot of time trying to make a better wheel for our kits. The visual difference with the car sitting on the shelf is worth a try! CabDriver, I wish I knew of a hard plastic tube that has 18mm diameter. This would simplify the method immensely. I'd even use plastic and fishing line if I could find the correct source to slice off thin rims. Maybe some kind of plastic tube to be found in a drugstore? I have at home a vitamin-magnesium tablet, comes in a thin plastic tube, but has 20mm diameter, close, but something along these lines. Then fly-fishing line attached with CA, a touch of Alclad and you have a wheel like you haven't seen yet on a dragster model. After a couple of trial runs, I do feel that you can agree. I'd say after the rims are made and trimmed to size, about 15 minutes per wheel. !! Cost? A couple of cents. PappyD340, thanks for looking and the decent comment. The method works. Mike.. Quote Link to comment Share on other sites More sharing options...
CabDriver Posted March 30, 2020 Share Posted March 30, 2020 Mike - you say you’d like to find some 18mm tube...but would it HAVE to be tube? What about a plastic sheet cut into rings? The first thing I thought of when I saw this tutorial was that I could maybe use some styrene sheet of an appropriate thickness and a circle cutter or similar to make rims that way instead perhaps? Quote Link to comment Share on other sites More sharing options...
Mike Williams Posted March 31, 2020 Author Share Posted March 31, 2020 Jim King, sure, sheet of styrene would be fine, no reason this direction wouldn't work. I'd suggest 1mm thickness, thicker will get you problems with tire to wheel fitment. Still, I'd rather go with a finished size, as the circle is already at hand, all that's needed are thin slices. By the way, I found an 18mm source. It's the neck nozzle of a plastic pump spray bottle. I'd really like to try out a laced wheel using non-metals. More on this later on... Thanks for your interest, I hope you have success with this deal. Mike.. Quote Link to comment Share on other sites More sharing options...
mcandela Posted April 8, 2020 Share Posted April 8, 2020 Great, thanks for sharing!! Quote Link to comment Share on other sites More sharing options...
Mike Williams Posted April 8, 2020 Author Share Posted April 8, 2020 7 hours ago, mcandela said: Great, thanks for sharing!! I thank you for looking Mike, much appreciated. Quote Link to comment Share on other sites More sharing options...
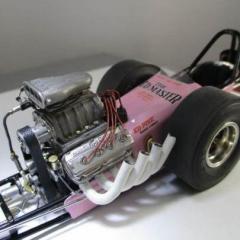
WHOSBAD Posted March 1, 2022 Share Posted March 1, 2022 (edited) My first wheel done with the kit rim filed down and fishing line. These are certainly the weak point of the kits, thx for the idea. Edited March 1, 2022 by WHOSBAD Quote Link to comment Share on other sites More sharing options...
Mike Williams Posted March 1, 2022 Author Share Posted March 1, 2022 @WHOSBAD, looks very nice! Not sure of the scale shown, maybe 1.25? If so, sensational! The rims come together very nicely! Compliments! The hub is a bit cluttered still, might like to not make too sharp of winding the "wire" around the hub. Perhaps go instead of trying one less turn on the first twist, instead of going 2 to the side. This will reduce loading and clogging at the hub..the paint will come out better, too. Sensational job, well done! Mike.. Quote Link to comment Share on other sites More sharing options...
WHOSBAD Posted March 3, 2022 Share Posted March 3, 2022 (edited) Thanks Mike. These are indeed 1/25 and yes working on cleaning up around the furrell for the hub, trying wire that should hold its shape a bit more than the plastic fishing line. This pattern was only moving one spoke past the opposite pin, so minimal wrapping. Just trying to make this FED look a little more real. Edited March 3, 2022 by WHOSBAD Quote Link to comment Share on other sites More sharing options...
Ian McLaren Posted March 3, 2022 Share Posted March 3, 2022 Great post Mike! Definitely going to try this method, I've been using A/M wheels on my last couple of models but this looks as good or better (especially with being able to vary the spoke count) and the cost appeals to my Scottish heritage. Good to see you posting again. Quote Link to comment Share on other sites More sharing options...
WHOSBAD Posted March 5, 2022 Share Posted March 5, 2022 And the steel wire worked much better than the plastic fishing line. Quote Link to comment Share on other sites More sharing options...
Bugatti Fan Posted March 5, 2022 Share Posted March 5, 2022 Even photo etched wife wheels do not compare with using real wire for a more realistic appearance. This thread has shown that making real wire wheels need not be daunting. Thanks for sharing! Quote Link to comment Share on other sites More sharing options...
Mike Williams Posted March 7, 2022 Author Share Posted March 7, 2022 On 3/5/2022 at 4:03 AM, WHOSBAD said: And the steel wire worked much better than the plastic fishing line. Very nice! You have it! Quote Link to comment Share on other sites More sharing options...
Mike Williams Posted March 7, 2022 Author Share Posted March 7, 2022 On 3/5/2022 at 9:17 AM, Bugatti Fan said: Even photo etched wife wheels do not compare with using real wire for a more realistic appearance. This thread has shown that making real wire wheels need not be daunting. Thanks for sharing! Yes sir! Please attempt, you will be very surprised the difference! Nothing better than real, especially in our small scale world! Mike.. Quote Link to comment Share on other sites More sharing options...
Bugatti Fan Posted March 8, 2022 Share Posted March 8, 2022 (edited) Mike, I have used your method and a few others down the years to re spoke wire wheels, like lacing and fitting individual spokes. Your tutorial will be very helpful, particularly to modellers who work in smaller scales to show that there is a reasonably straight forward method to achieve better realism. This goes to show that there is no great mystique about making wire wheels to scale, just the willingness to give it a go and a bit of patience as the process is a bit time consuming. But it is very rewarding. I can remember clearly how good it felt when I completed my very first wire wheel and saw how much better it was than a kit or photo etched item. I have found that plated beading wire available in different gauges is very good for simulating chrome wires when fitted to pre prepared wheel rims and hubs. Edited March 8, 2022 by Bugatti Fan Quote Link to comment Share on other sites More sharing options...
Nitrobarry Posted March 9, 2022 Share Posted March 9, 2022 Thanks for this! Quote Link to comment Share on other sites More sharing options...
Mike Williams Posted March 9, 2022 Author Share Posted March 9, 2022 On 3/8/2022 at 9:25 AM, Bugatti Fan said: Mike, I have used your method and a few others down the years to re spoke wire wheels, like lacing and fitting individual spokes. Your tutorial will be very helpful, particularly to modellers who work in smaller scales to show that there is a reasonably straight forward method to achieve better realism. This goes to show that there is no great mystique about making wire wheels to scale, just the willingness to give it a go and a bit of patience as the process is a bit time consuming. But it is very rewarding. I can remember clearly how good it felt when I completed my very first wire wheel and saw how much better it was than a kit or photo etched item. I have found that plated beading wire available in different gauges is very good for simulating chrome wires when fitted to pre prepared wheel rims and hubs. Hello Noel, yes, you are absolutely correct. Please, give it a try, you will be rewarded! I like the 'silver plated' thin copper wires available. Just, you have to order from China, nothing elsewhere to be found. Amazon. In this case, I was not personally bothered. I'd like to add, your British hubs, Jaguar and Co., Ferrari as well, need another dimension, a third row at least. But the tutorial is, I believe, a decent starter. Best of luck to you, and above all, my best greetings to the UK. Thank you for your input! Mike.. Quote Link to comment Share on other sites More sharing options...
Bugatti Fan Posted March 10, 2022 Share Posted March 10, 2022 Mike, yes different styles of wheels need a bit of research as you pointed out about wheels with three spoke layers. Your method is perfectly good as a starting point for those too. Regarding plated wire. I would imagine that there are craft shops in Germany that sell bits and pieces for jewellery making and might well sell beading wire. I got some of mine from a department store in the area where they sold needles and threads etc. Quote Link to comment Share on other sites More sharing options...
Belugawrx Posted March 10, 2022 Share Posted March 10, 2022 Thanks Mike ! Quote Link to comment Share on other sites More sharing options...
Recommended Posts
Join the conversation
You can post now and register later. If you have an account, sign in now to post with your account.
Note: Your post will require moderator approval before it will be visible.