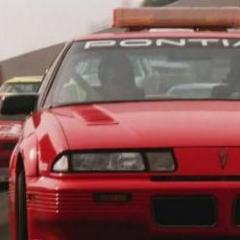
polybius Posted May 21, 2020 Share Posted May 21, 2020 This '89 T/A Turbo is the third in a series of 3rd generation F-body Pontiac builds that started with an '82 T/A and will end whenever I build the last one. I'm less a fan of GM F-bodies and more a fan of 80s Monogram kits like these. I had two of these kits on the shelf and one will be converted to into a GTA, so this one got the box stock 20th anniversary V-6 turbo livery. It was going to build it with the Indy Pace Car door markings but around the time the paint was drying I looked at the decal sheet and saw there were no Indy decals. Then it hit me that it was the AMT version that came with the Indy decals, and without any in my stash it was destined to be a showroom stock T/A Turbo. At least the color choice was easy since they were only offered in white. The interior work came first and it was converted from the kit's 5-speed to the correct 4-speed automatic by scratchbuilding a shifter, removing the clutch pedal, and enlarging the brake pedal. In 1989 the T/A had a fancy new steering wheel with duplicate radio control buttons. The kit, however, offered only the earlier three-spoke wheel. After studying the correct 1:1 steering wheel, I found a spare AMT 1990 Taurus steering wheel with four spokes to use as a start. The wheel was trimmed, smoothed, and scribed, and with some detail painting it was close enough for my eye. The rest was painted two-tone camel and tan, and it got some tan flocking for the floor and cargo area carpeting. The engine and chassis were assembled, painted, and detailed with the kit's ignition wiring. The kit's dull chrome wheels were stripped and airbrushed in Vallejo duraluminum, dry-brushed Mr. Color gold lacquer, and acrylic black wash. Finally the bodywork began. The bumbers and side skits were fitted, but the kit's parts lacked the endcaps for all of the skirts resulting in gaps at the lower wheelwells. Endcaps were cut and trimmed from thin sheet styrene and were blended with the bodywork for the correct OE look. The hood vents were opened up by filing away material underneath. The exterior finish started as rattlecan Plastikote Super White acrylic lacquer until two coats in when the can's nozzle freaked out and spewed buckets of white paint all over me, the floor, and the body. I stopped immediately and let the body dry, then sanded the globs and splatters while deciding the next steps. After trying different spray nozzles it was obvious there was a defect in the can and there'd be no way to finish the remaining coats using it. Since it was the only can I had, the remaining paint was decanted and the final color coats were airbrushed. The glosscoats were my usual rattlecan Rustoleum clear gloss lacquer followed by some wet sanding and polishing. The kit's decals were 30 years old and very difficult to work with. No amount of decal solvent seemed to settle them down but at least they survived the hot clearcoat. While Monogram made some effort to convert their existing GTA tooling to the T/A Turbo, they overlooked some of the badging and other details so I did the best with what they offered. The tail lights were particularly tricky but some 1:1 reference photos were handy. Overall this one really fought me the whole way it seemed, much unlike the previous two 'Birds that seemed to go together a bit easier. Regardless, it looks at home with its two siblings on the shelf and plans are in the works for more sometime down the road. 2 Quote Link to comment Share on other sites More sharing options...
Dragonhawk1066 Posted May 21, 2020 Share Posted May 21, 2020 Nicely done! All three look very good together. Quote Link to comment Share on other sites More sharing options...
Rbray47 Posted May 22, 2020 Share Posted May 22, 2020 Awesome build! Quote Link to comment Share on other sites More sharing options...
charger74 Posted May 22, 2020 Share Posted May 22, 2020 It looks very good Quote Link to comment Share on other sites More sharing options...
Tommy124 Posted May 22, 2020 Share Posted May 22, 2020 Great work and detailing all over! I like the other 2 aswell! Quote Link to comment Share on other sites More sharing options...
MrObsessive Posted May 22, 2020 Share Posted May 22, 2020 Those three look fantastic! Very nice interior work on the Turbo Trans Am! Those turbos were real BEASTS on the street! I can't remember the last time I've seen one of those as they're just not many of those 3rd gen F bodies out there any longer. Quote Link to comment Share on other sites More sharing options...
crazyjim Posted May 22, 2020 Share Posted May 22, 2020 Most excellent. A friend of mine has a 1:1 in white. I believe it's an Indy pace car edition. Quote Link to comment Share on other sites More sharing options...
kelson Posted May 22, 2020 Share Posted May 22, 2020 I'm a F-body fan and your build turned out great!,some of the details are off but with a little scratch building they can look good!.If you're building a series don't forget the Monogram 83'T/A and 85'T/A. Quote Link to comment Share on other sites More sharing options...
Dann Tier Posted May 22, 2020 Share Posted May 22, 2020 This is BEAUTIFUL!!!!, but how did you do your taillights? Quote Link to comment Share on other sites More sharing options...
PappyD340 Posted May 23, 2020 Share Posted May 23, 2020 Very nice and clean, well done! Quote Link to comment Share on other sites More sharing options...
Italianhorses Posted May 23, 2020 Share Posted May 23, 2020 Love it in white! Top job. Quote Link to comment Share on other sites More sharing options...
ChrisR Posted May 23, 2020 Share Posted May 23, 2020 Looks great! Quote Link to comment Share on other sites More sharing options...
polybius Posted May 23, 2020 Author Share Posted May 23, 2020 Thanks so much everyone, I appreciate the comments and the stroll down memory lane! As a kid in the 80s I built the '85 T/A and '87 GTA but they came out as gluebombs and ended up unfortunately like most of the F-bodies of the era in a scrap heap. I remember being excited to have gotten a nice grey metallic finish from a Testors enamel rattle can on the GTA, but couldn't wait for the paint to dry before globbing it all together in a matter of hours. By then the paint was smudged and the tube of cement was empty. Fastforwarding a few decades, the plans are to build all of the '82-92 Monogram/Revell iterations including the '85 and '87. I have the '85 kit but the '87 GTA is getting scarce and pricey. This '89 version would be an easy conversion since the body is molded with the GTA badging that had to be removed for this Turbo livery, and these kits seem to be easier to find at a reasonable price. It helped that the tail lights were molded in smoke clear to begin with, but it'd be nice to have the rest of the clear parts including the fog lights molded in clear rather than tinted. After masking the inside of the tail lights with thin strips of tape, first horizontally then vertically, they first got the black grid laid down and then Tamiya clear red. On the frontside, a thin strip of foil with a coat of clear red was used for the reflector strip. A small section of black vinyl tape with some gold accents simulated the turbo-specific center, and the bird was dry brushed in gold with white accents carefully dabbed in. I swapped out the tinted windshield for a clear unit from the later Revell Formula kit but kept the original kit's tinted hatch glass. There are still some inaccuracies such as the missing Indy wing&wheel emblems on the front edge of the side skirts. I found several decals that would have been suitable but none were gold, and I didn't want to risk a catastrophe trying to hand-paint them. Thanks again for taking a look and for the encouraging comments!! Quote Link to comment Share on other sites More sharing options...
slusher Posted May 25, 2020 Share Posted May 25, 2020 Super nice build and trio.... Quote Link to comment Share on other sites More sharing options...
kelson Posted May 26, 2020 Share Posted May 26, 2020 If you use the 89'T/A to backdate to an 87'GTA note the engine compartments are a little different. Quote Link to comment Share on other sites More sharing options...
iamsuperdan Posted May 26, 2020 Share Posted May 26, 2020 Excellent work! Quote Link to comment Share on other sites More sharing options...
Scalper Posted May 26, 2020 Share Posted May 26, 2020 Great work... been looking for this kit. Quote Link to comment Share on other sites More sharing options...
polybius Posted May 27, 2020 Author Share Posted May 27, 2020 On 5/25/2020 at 9:33 PM, kelson said: If you use the 89'T/A to backdate to an 87'GTA note the engine compartments are a little different. Excellent point, thanks! I don't have the '87 kit for comparison but I see the battery placement in the '85 is different than the '89, and the Formula has a separate battery to accomodate the intake hose. By the time I borrow parts from two or three different kits it might be best just to drop the bucks on the original '87 kit. I appreciate the insight! Quote Link to comment Share on other sites More sharing options...
Funkychiken Posted May 28, 2020 Share Posted May 28, 2020 I feel your paint with the paint splurting! Looks great now, I remember this kit from about 25 years ago! Quote Link to comment Share on other sites More sharing options...
RAMBENNA Posted May 29, 2020 Share Posted May 29, 2020 great job , very nice builds Quote Link to comment Share on other sites More sharing options...
BeakDoc Posted May 31, 2020 Share Posted May 31, 2020 Well done. Ya just don’t see enough of these built and built well. That engine bay and interior are works of art. Quote Link to comment Share on other sites More sharing options...
av405 Posted June 1, 2020 Share Posted June 1, 2020 Very clean build! Quote Link to comment Share on other sites More sharing options...
beeRS Posted June 6, 2020 Share Posted June 6, 2020 Very nice! I don't think I have ever seen an F body built so well. I really like the part filled screen wash tank. Quote Link to comment Share on other sites More sharing options...
Husky1943 Posted June 24, 2020 Share Posted June 24, 2020 Wow, just wow! that interior is absolutely perfect! Do you guys work in sterile laboratories or what? I feel like the most ham-handed guy on this website! Great job Quote Link to comment Share on other sites More sharing options...
TransAmMike Posted June 24, 2020 Share Posted June 24, 2020 Beeeee-utiful!!? You've done us Trans Am owners proud. Quote Link to comment Share on other sites More sharing options...
Recommended Posts
Join the conversation
You can post now and register later. If you have an account, sign in now to post with your account.
Note: Your post will require moderator approval before it will be visible.