delta99 Posted July 11, 2020 Share Posted July 11, 2020 I've started to build the most recent release of the Round 2 359. First, a few things about the kit. I've built AMT kits before, and the kit is just as I expected. These molds are old, and there's lots of flash, seams, mutant parts, etc. Pieces don't fit together. I was surprised that it did not include the sleeper, but not a big deal, since I'm building a daycab anyways. But I'm very disappointed that there is no visor. I'm guessing the visor is on the sleeper parts tree. Anyways, I got to work on the engine and chassis. I started by stretching the frame, 2' in scale This is my first time building the detroit, it went together ok I painted the chassis, and mounted the engine I relocated the air tanks inside the frame, as I will be using longer fuel tanks on both sides I don't like the rounded look of the older style front wheels with the rings, so I decided to use snap wheels from the parts box They didn't quite match up to the axle the right way, so I wound up making bushings from styrene rod to attach them to the axle and have them at the correct width Quote Link to comment Share on other sites More sharing options...
Jim B Posted July 11, 2020 Share Posted July 11, 2020 Nice progress so far. I like your Green Leaker, and the red frame is nice. Quote Link to comment Share on other sites More sharing options...
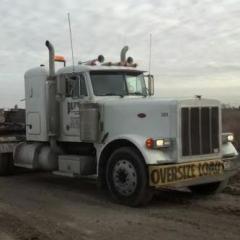
delta99 Posted July 11, 2020 Author Share Posted July 11, 2020 1 hour ago, Jim B said: Nice progress so far. I like your Green Leaker, and the red frame is nice. Thank you! I have a photo of an updated old 359 that is my inspiration. I think the final color combo will look sharp Quote Link to comment Share on other sites More sharing options...
Mopar - D Posted July 11, 2020 Share Posted July 11, 2020 Nice work on your 359. Quote Link to comment Share on other sites More sharing options...
CRUSADER2 Posted July 12, 2020 Share Posted July 12, 2020 It's looking good, nice paint job on the chassis and Detroit, these A M T kits sure do make modeling life interesting, keep batteling along its going to be worth it I am sure. Quote Link to comment Share on other sites More sharing options...
delta99 Posted July 13, 2020 Author Share Posted July 13, 2020 A little progess today. I got the wheels mounted. I used battery and storage boxes from the 378 kit. Prepped the mudflaps (1 1/2" thick in scale (eyeroll)). I'm using the fuel tanks from the snap kw, and spent some time filling the seams. 5th wheel in place Quote Link to comment Share on other sites More sharing options...
Jim B Posted July 13, 2020 Share Posted July 13, 2020 Looking pretty good. Nice job on the fuel tanks. Quote Link to comment Share on other sites More sharing options...
Mopar - D Posted July 13, 2020 Share Posted July 13, 2020 Nice progress. Quote Link to comment Share on other sites More sharing options...
MINIARE DELUXE Posted July 16, 2020 Share Posted July 16, 2020 Nice Work!! Its going to be a beauty when finished i can tell! I have thought long and hard about buying this kit but haven't pulled the trigger yet. Still finishing the revell version and its taking a while because other 1:1 projects and printing product for customers is taking precedence. I saw you had mentioned no visor in that kit. Had the same deal in the revell kit as well i was able to rob out of the parts bin and i think mine was from the AMT/Ertl W900a kit. Fit was good. Keep up the good work defiantly watching this build! Quote Link to comment Share on other sites More sharing options...
CRUSADER2 Posted July 16, 2020 Share Posted July 16, 2020 Nice finish on the fuel tanks. Quote Link to comment Share on other sites More sharing options...
Pete68 Posted July 19, 2020 Share Posted July 19, 2020 Frame looks nice and straight and I love your tanks Quote Link to comment Share on other sites More sharing options...
delta99 Posted July 24, 2020 Author Share Posted July 24, 2020 On 7/16/2020 at 11:46 AM, MINIARE DELUXE said: Nice Work!! Its going to be a beauty when finished i can tell! I have thought long and hard about buying this kit but haven't pulled the trigger yet. Still finishing the revell version and its taking a while because other 1:1 projects and printing product for customers is taking precedence. I saw you had mentioned no visor in that kit. Had the same deal in the revell kit as well i was able to rob out of the parts bin and i think mine was from the AMT/Ertl W900a kit. Fit was good. Keep up the good work defiantly watching this build! Well, some previous versions of this kit came with a visor, I just wasn't aware that this release didn't. Made me very dissapointed since I really like the lines on that one. The Revell snap kit never came with one. My first attempt at replicating the visor was a fail, I'll have to try again. Thanks everyone for the kind words. This truck will be a looker for sure! Quote Link to comment Share on other sites More sharing options...
delta99 Posted July 26, 2020 Author Share Posted July 26, 2020 Some progress here. I've been working on it a lot, but feel like I haven't accomplished much. I put on half fenders from snap KW kit, and sanded off diamond tread. Made mud flaps for under the steps my dash painting skills aren't great, but I did what I could on the interior. I went with oxblood red I want dual air filters on this rig, so I made a cowl for the driver's side i got the cab painted, and did some test fitting. I had lots of problems with fitment of the firewall i was reluctant to modify the cab and hood for the air cleaners. I didn't really want to cross that point of no return, but I really wanted the dual filters, so I decided to go for it. I'm using the filters from the snap kw. For some reason, this detroit has the air compressor mounted a FOOT above the engine, right at the firewall. Right in the way of the air intake piping. It will take some creative modification to route the ducting around the compressor. But, I'm up for the challenge. I already drilled holes in the cab for the air filters, so I have to figure it out. And here's how she sits Quote Link to comment Share on other sites More sharing options...
extmcdriver Posted July 27, 2020 Share Posted July 27, 2020 Very nice job! Quote Link to comment Share on other sites More sharing options...
Mopar - D Posted July 27, 2020 Share Posted July 27, 2020 Looking good I’m sure you will get everything figured out for the duct work. Quote Link to comment Share on other sites More sharing options...
delta99 Posted August 2, 2020 Author Share Posted August 2, 2020 Some more progress... I cut out the air filter relief on the driver's side of the hood for the other air filter And I detailed the exhaust heat shields, I'll be using the taller stacks from the snap kit And a little mock up with the cab and hood just sitting in place I have the air intake piping all set up, but can't put it in place until I mount the cab. I like to do the decals before I mount it, since it's much easier. So I'm at a standstill until I get the decals which are on order. Thanks for looking Quote Link to comment Share on other sites More sharing options...
delta99 Posted August 2, 2020 Author Share Posted August 2, 2020 Sorry for the negativity, but I must add another complaint about the kit. The steering shaft does not line up at all. The angle between the steering column and the steering box does not match. The steering box is mounted to the frame with a D shaped tab, so can only mount one way. The steering column attaches to the dash, and can only mount one way as well. The column can adjust up and down in the opening in the firewall, but the angle does not change. I couldn't get the shaft to line up properly, so I had to just omit it. Just another reason for being disappointed with this kit Quote Link to comment Share on other sites More sharing options...
Pete68 Posted August 5, 2020 Share Posted August 5, 2020 Cut the tab and do it your way can’t always use the tabs and the mounts the model companies make or show you where to put them I’ve done it lots of times. Your truck is looking good and I don’t see negativity in what you say in your reply these old kits and be a nuisance sometimes Quote Link to comment Share on other sites More sharing options...
gatorincebu Posted August 6, 2020 Share Posted August 6, 2020 Andrew, Looks to me like you are moving right along and making good progress at it as well . I like your fuel tanks they look great And Black over red is always a nice color combination ! Be Well Gator Quote Link to comment Share on other sites More sharing options...
Aerodyne03 Posted August 6, 2020 Share Posted August 6, 2020 Wow, great looking truck! "California hauler style!"? Quote Link to comment Share on other sites More sharing options...
delta99 Posted August 16, 2020 Author Share Posted August 16, 2020 It's finished, posted underglass Quote Link to comment Share on other sites More sharing options...
Mopar - D Posted August 17, 2020 Share Posted August 17, 2020 Nice clean build Andrew. Quote Link to comment Share on other sites More sharing options...
Aerodyne03 Posted August 18, 2020 Share Posted August 18, 2020 Spectacular !! ?? It transmits the same power as Duel??'s truck Quote Link to comment Share on other sites More sharing options...
Recommended Posts
Join the conversation
You can post now and register later. If you have an account, sign in now to post with your account.
Note: Your post will require moderator approval before it will be visible.