disconovaman Posted October 16, 2022 Author Share Posted October 16, 2022 (edited) Here is the updated list...Regardless if you aren't able to finish this year we do declare all entities active in case they qualify for future CBR runs. Thanks for all the intrest, support, and participation to everyone. 2022 Cannonball Roster #1. Mattilacken - 1988 Chevrolet 1500 #2. Pat Minarick -1966 Barracuda #3. Fat Brian - 1981 Fox Body Mustang #4. 4mula1fan - 1958 Chevrolet Impala #5. MrObsessive - 1961 Pontiac Ventura STC #6. Oldmopars - 1970 Land Rover STC #7. Bullybeef - 1970 Mercury Cyclone #8. fivesuns - 1957 Ford Custom #9. Jantrix - 1968 Buick Riviera #10. Lunajammer - 1961 Ford Ranchero #11. Beans - 1970 Camaro Z28 #12. camaro69 - 1977 Nova #13. stinkybritches - 1966 427 Ford Fairlane #14. Spottedlaurel - 1970 Challenger #15. avidinha - 1977 Ford E350 Centurion conversion van #16. MeatMan - 1956 Club DeMer concept car #17. spencer1984 - 1978 Ferrari 308 GTB #18. cheyenne93 - 1962 Pontiac Catalina #19. landman - 1951 Studebaker #20. Koellefornia Kid - 1978 Dodge Monaco #21. KWT - 1978 Chevrolet Elcamino #22. Iarman - 1969 Dodge Super Bee #23. tooltime-fan - 1977 Lamborghini Urraco. #24. Jhedir6 - 1971 AMX Javelin #25. LouO - 1968 Chevelle SS 396 #26. Just Jim - 1969 Karmann Ghia #27. matthijsgrit - 1976 Lamborghini #28. Alexis - 1963 CJ-5 #29. 426 pack - 2001 Toyota hilux #30. stitchdup - 1976 Escort #31. TarheelRick - 1949 Ford #32. Misha - 1953 Ford Crown Vic #33. ybsluos - The Californian 1970 Toronado #34. 89AKurt - 1961 Mercedes 190 SL #35. Belugawrx -1962 Buick Electra #36. Sam I Am - 1967 Chevelle #37. Tim08 - 1963 Impala #38. disconovaman - 1973 Chevy Wrecker #39. USMC_LB - 1967 Mustang GT 350 Shelby #40. Tim H - 1964 Chevy II wagon #41. RandyBoBandy- 1982 Porsche #42. Dragonhawk1066-1966 Shelby Cobra #43. White Rabbit-1980 Porsche 911 Targa Carrera Outlaw Edited October 16, 2022 by disconovaman Quote Link to comment Share on other sites More sharing options...
disconovaman Posted October 16, 2022 Author Share Posted October 16, 2022 Now for my update... 😆 I've been making plans to finish my 1973 Wicked Pro-street Wrecker here is my progress... This Repo-man style Tow Truck Grab-N-Go rig will fit nicely in a stock bed with room for some hefty size tires... not exactly what I had envisioned but it will be a great feature with the build and I'll be able to Tow away all those CBR entries stopped for fuel, leaving you guys stranded...So ya better have extra fuel reserves 😆🤣😂 2 Quote Link to comment Share on other sites More sharing options...
slusher Posted October 16, 2022 Share Posted October 16, 2022 3 hours ago, disconovaman said: Now for my update... 😆 I've been making plans to finish my 1973 Wicked Pro-street Wrecker here is my progress... This Repo-man style Tow Truck Grab-N-Go rig will fit nicely in a stock bed with room for some hefty size tires... not exactly what I had envisioned but it will be a great feature with the build and I'll be able to Tow away all those CBR entries stopped for fuel, leaving you guys stranded...So ya better have extra fuel reserves 😆🤣😂 A pro street wrecker now that’s different and cool! 1 Quote Link to comment Share on other sites More sharing options...
Fat Brian Posted October 17, 2022 Share Posted October 17, 2022 19 hours ago, disconovaman said: Now for my update... 😆 I've been making plans to finish my 1973 Wicked Pro-street Wrecker here is my progress... This Repo-man style Tow Truck Grab-N-Go rig will fit nicely in a stock bed with room for some hefty size tires... not exactly what I had envisioned but it will be a great feature with the build and I'll be able to Tow away all those CBR entries stopped for fuel, leaving you guys stranded...So ya better have extra fuel reserves 😆🤣😂 Very cool to have the hidden tow setup. 1 Quote Link to comment Share on other sites More sharing options...
disconovaman Posted October 18, 2022 Author Share Posted October 18, 2022 I've collected a few images of my vision with the build... I think I've got my work cut out for me. 🤔 It's gonna be a challenge but I think I can knock it out. I'm only chopping the top, stretching the bed into a longed stepside, fabbing a complete interior, and I also want to back-half the frame. Better get cracking... 1 Quote Link to comment Share on other sites More sharing options...
disconovaman Posted October 18, 2022 Author Share Posted October 18, 2022 Oh and I got this Hemi from the Hard Hat Hauler I'm thinking about trying to fit into the truck also...Its 1:20th scale but looks so cool! Talk me out of it please! 😆🤣😂 Quote Link to comment Share on other sites More sharing options...
Mattilacken Posted October 18, 2022 Share Posted October 18, 2022 7 hours ago, disconovaman said: Talk me out of it please! 😆 What would the the gas milage be!? And how far would the truck go before the first belt came of! He will never get there! 😁 I did my best. Cool idea on the truck btw! 1 1 Quote Link to comment Share on other sites More sharing options...
MeatMan Posted October 23, 2022 Share Posted October 23, 2022 (edited) Well you can add my Club deMer to the completed list. All done. Edited October 23, 2022 by MeatMan 4 Quote Link to comment Share on other sites More sharing options...
Mattilacken Posted October 23, 2022 Share Posted October 23, 2022 2 hours ago, MeatMan said: Well you can add my Club deMer to the completed list. All done. Wow great build! 1 Quote Link to comment Share on other sites More sharing options...
disconovaman Posted October 24, 2022 Author Share Posted October 24, 2022 6 hours ago, MeatMan said: my Club deMer Stunning finish! I especially love the details on that interior. This makes me want to get a move on with my build, speaking of which... So I'm into the chopped top but I realized that the triple stacked blower engine is gonna sit radically over the roof now so I'm either gonna eliminate the middle blower or go with a tunnel ram and two fours on a conventional Chevy bigblock... atleast that will likely have a better chance of making the trip anyway... I'm stretching the bed and working on the interior... pics to come as soon as I get something accomplished... And the Hemi would've been a Monster for the Chevy but I may save it for another build...🤔 Quote Link to comment Share on other sites More sharing options...
slusher Posted October 24, 2022 Share Posted October 24, 2022 11 hours ago, MeatMan said: Well you can add my Club deMer to the completed list. All done. Beautifully done! 1 Quote Link to comment Share on other sites More sharing options...
MeatMan Posted October 24, 2022 Share Posted October 24, 2022 10 hours ago, disconovaman said: Stunning finish! I especially love the details on that interior. This makes me want to get a move on with my build, speaking of which... So I'm into the chopped top but I realized that the triple stacked blower engine is gonna sit radically over the roof now so I'm either gonna eliminate the middle blower or go with a tunnel ram and two fours on a conventional Chevy bigblock... atleast that will likely have a better chance of making the trip anyway... I'm stretching the bed and working on the interior... pics to come as soon as I get something accomplished... And the Hemi would've been a Monster for the Chevy but I may save it for another build...🤔 Thanks, and good luck! Quote Link to comment Share on other sites More sharing options...
Misha Posted October 30, 2022 Share Posted October 30, 2022 (edited) Ford 53-302 back on the Workbench! It has been awhile since my last update, though now with autumn in full swing I’ve been able to get to the workbench. Recent work has focused upon the interior, mocking up the 302 engine to fit the chassis, and finishing off the body work. Having decided on using the Mustang buckets and rear seat along with the console I had to modify the parts to fit. The buckets only required a simple notch at the base yet the rear seat was sectioned to reduce its overall height. The rear portion of the interior platform had to be rebuilt once the seat was removed to provide a background support for the Mustang folding rear bench. I also detailed the interior roof section with headliner braces and detailing the side window detailing as it is so prominent with the hardtop design allowing it to be seen readily. Luckily the 302 required very little work to fit with the only modification needed was to thin the interior tranny hump somewhat for greater clearance. The four part engine bay comes together easily by fitting it on the chassis and tacking the four pieces together while keeping any glue off the chassis. The body work in now complete with the final primer coat on it. The trickiest part has been the hood since shaving it the hood ornament indent had to be filled while still retaining its bull nose shape. Next step is beginning the two tone paint finish with an orange 🍊 metallic body with a cream coloured top. I’ve debated using the faux connie kit on the trunk and decided against it as ti interfered with the clean, more aerodynamic look I’m after (saving it for the rag top version). Cheers Misha Edited October 30, 2022 by Misha Title 4 Quote Link to comment Share on other sites More sharing options...
disconovaman Posted November 1, 2022 Author Share Posted November 1, 2022 We are officially down to the wire with the run guys... one month to go! So I'm calling out all the unfinished entries (myself included) to finish up in these last few weeks. I have a long way to go and a short while to get there but, with all I have in me I will give it my best effort to finish. My Wrecker progress is minimal but I work best under pressure so I'm committed to getting it done! Thanks agian for the support from everyone. Let's kick it into high gear! See you all at the finish line! 1 Quote Link to comment Share on other sites More sharing options...
slusher Posted November 2, 2022 Share Posted November 2, 2022 4 hours ago, disconovaman said: We are officially down to the wire with the run guys... one month to go! So I'm calling out all the unfinished entries (myself included) to finish up in these last few weeks. I have a long way to go and a short while to get there but, with all I have in me I will give it my best effort to finish. My Wrecker progress is minimal but I work best under pressure so I'm committed to getting it done! Thanks agian for the support from everyone. Let's kick it into high gear! See you all at the finish line! You have it down nice and low, very nice.. Quote Link to comment Share on other sites More sharing options...
matthijsgrit Posted November 3, 2022 Share Posted November 3, 2022 (edited) On 12/14/2021 at 4:44 PM, matthijsgrit said: I might join in as well, not sure what 2022 will bring though... Haven't been building lately... So, I'm hoping to finish this in the next 11 months or so (if my submission is allowed): 1/24 Lamborghini Jota SVR (1975) Plastic Model (plazajapan.com) My 'build year is 1976' (conceived in 1975 😜 ), the kit says 1975, but other sources state the car was built in 1974 and it took 18 months to transform it into what it is now, and that would be 1976. SO...... Is this OK? Polo Storico Restored the Rarest Miura Ever (lamborghini.com) If it is, then it can be as far from stock as I'd like, as long as it looks street legal, etc? Like this one looks stock, but anyway... Well..., 2022. I was really looking forward to this build, but unfortunately this year turns out quite different then expected and hoped. I've been ill and at home (not work) since January and haven't touched a sprue and won't in the next months. So unfortunately I'm out :-( I'll be following though! Love this buildoff. Idea for next year: Scale-SEMA? Edited November 3, 2022 by matthijsgrit Spelling Quote Link to comment Share on other sites More sharing options...
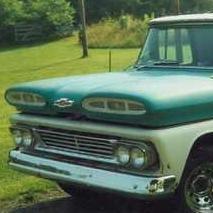
Mattilacken Posted November 3, 2022 Share Posted November 3, 2022 Made a stupid mistake.. I was looking for my Tamiya clear but could not find it.. so I took a generic brand clear and sprayed it. Turned out ok in most places but the hood and roof looks strange.. I hope it buffs out since I am out of the black paint. Ideas? I could not resist starting the detailing of the grill and got started on the lights but had an acident with the grill, except for my painting, can you spot the problem? And just to show the Swedish Norrlänings stuk. We in the North like our extra high beams.. so they are going behind the grill so when it gets dark the High Lighters can be turned on and leave al the other cars to see bad, but these guys keep on going flat out! the paint problem.. Quote Link to comment Share on other sites More sharing options...
disconovaman Posted November 4, 2022 Author Share Posted November 4, 2022 4 hours ago, matthijsgrit said: I've been ill and at home Don't sweat it, We all have reasons for not building but your health is most important so focus on getting healthy so you can get back to building agian. 29 minutes ago, Mattilacken said: can you spot the problem? That grill is Awesome with the back opened up, was it super fragile when it was filed/cut out? I have one of those 90 Chevy 1500 kits. I want to do this to the grill (if I can)... really great detail! Quote Link to comment Share on other sites More sharing options...
Mattilacken Posted November 4, 2022 Share Posted November 4, 2022 6 hours ago, disconovaman said: That grill is Awesome with the back opened up, was it super fragile when it was filed/cut out? I have one of those 90 Chevy 1500 kits. I want to do this to the grill (if I can)... really great detail! Sweet, yes it’s definitely fragile. It went to the floor and the center rib broke of to never be seen again. 1 Quote Link to comment Share on other sites More sharing options...
White Rabbit Posted November 5, 2022 Share Posted November 5, 2022 (edited) On 11/3/2022 at 3:00 PM, matthijsgrit said: Idea for next year: Scale-SEMA? I'm not sure if a different topic should be started, but I would like to add my suggestions for the 2023 Cannonball: Phantomball Run: build a street legal vehicle that might have been but never was. Luxury Car Challenge: coast-to-coast in full comfort. Any type and any year so long as they are street legal and considered luxury vehicles. Trivia: It was 50 years ago this year (2022) that a drive-away Cadillac Coupe de Ville won the Cannonball. Edited November 7, 2022 by White Rabbit Quote Link to comment Share on other sites More sharing options...
Tim08 Posted November 10, 2022 Share Posted November 10, 2022 Been trying to get the impala done. Was trying to figure out something to dress this blob of a carb up. So I got these springs out of old throw away oil seals we use at work. Cut, stretched, stuck to the side. I figured the carb is going to be covered with the cleaner anyway. Quote Link to comment Share on other sites More sharing options...
Tim08 Posted November 10, 2022 Share Posted November 10, 2022 Got more pics but I didnt realize they are bmp files and wont load. I'll try to fix and get back. Quote Link to comment Share on other sites More sharing options...
Tim08 Posted November 10, 2022 Share Posted November 10, 2022 (edited) Installed Interior done Got it on its tires. Used the blackwall sid and used panel line wash on the wheels. Kind of gives it more of a sleeper look. Final color. Gonna try to get it done before the end of the month. Edited November 10, 2022 by Tim08 spelling Quote Link to comment Share on other sites More sharing options...
Misha Posted November 11, 2022 Share Posted November 11, 2022 Ford 53 - 302 Update! I’m moving forward with this project, yet it may be my second consecutive CannonBall DNF! Time is very limited especially with our planned return to the Valley of the Sun, Arizona for the first time in three years. Oy vey. Nonetheless most of the parts have been cleaned up and primered and colour coats have begun with the body. I also constructed the new fuel cell with extra capacity to replace the stock tank and spare wheel well. After cutting out the part I used thin and flexible sheet to provide a mounting surface. Once I was happy with the primer finish on the body I wet sanded it with 3,000 sponge in preparation for the Sparkling Silver (LP 48) undercoat for the metallic orange finish. I also sprayed the window chrome trim surround and may go with it as the final trim treatment. The roof will be an off-white, perhaps creamy solid colour. To prepare for airbrushing the body was washed with Ivory Snow dish soap, rinsed and allowed to dry. The choice of soap is based upon the pureness, as many dish soaps today contain a silicone like additive to make dishes sparkle and ruin paint jobs. The initial session required the usual misting coat beginning with rocker panel, wheel well surrounds and other more convoluted shapes on the body to ensure good coverage followed by light coats applied at right angles; front to back then side to side. Allowing for the paint to set off, usually five or so minutes two more wet coats were applied in the same manner. Quite happy with the results as it appears to be in the original metal finish awaiting the colour coats. The next step will be to mask the window trim and roof in preparation for the lower body colour. Thanks for checking in, all comments & suggestions are most welcome 🤗Cheers Misha 2 Quote Link to comment Share on other sites More sharing options...
disconovaman Posted November 11, 2022 Author Share Posted November 11, 2022 23 hours ago, Tim08 said: Installed Some fine modeling skills there... 10 hours ago, Misha said: Quite happy with the results This is not what I was expecting but I like it! 1 Quote Link to comment Share on other sites More sharing options...
Recommended Posts
Join the conversation
You can post now and register later. If you have an account, sign in now to post with your account.
Note: Your post will require moderator approval before it will be visible.