The Brush Posted December 31, 2021 Share Posted December 31, 2021 (edited) Hi, I saw a picture of a crew cab superliner & decided to build one, A gentleman at a model show gave me a box of bits some yearrs back, in this box was parts of the can do wrecker & a Italeri frame with cummins motor, This is the start of the project, 2 resin cabs were used cut & joined with plastic card, The roof filled with balsawood , I will make a frame extension from card & perspex & hopefully all other bits from the spares stash. this is more like recycling than a new build. Hers a few pics to start with. Edited December 31, 2021 by The Brush Quote Link to comment Share on other sites More sharing options...
gotnitro? Posted December 31, 2021 Share Posted December 31, 2021 Following ! Quote Link to comment Share on other sites More sharing options...
Rockford Posted January 12, 2022 Share Posted January 12, 2022 This is going to be another masterpiece like your green Mack (that sounds like a coat 🤔). I'm intrigued with the different materials you use. Quote Link to comment Share on other sites More sharing options...
The Brush Posted January 22, 2022 Author Share Posted January 22, 2022 (edited) Hi, Thanks for the comments . I extended the frame & repaired the front axle with ali tube & cut down nails, Because the frame is long & empty looking i added some basic plumbing, The lift axle is scratch built along the lines of the original, the grill was also repaired, new hinges made & mack letters added, The cab still needs more work although it`s in primer. Thanks for looking. Graham. Edited January 22, 2022 by The Brush Quote Link to comment Share on other sites More sharing options...
Mopar - D Posted January 22, 2022 Share Posted January 22, 2022 Very interesting build Graham. Great scratch building I’m looking forward to seeing more progress. Quote Link to comment Share on other sites More sharing options...
chris chabre Posted January 22, 2022 Share Posted January 22, 2022 Im digging it! Quote Link to comment Share on other sites More sharing options...
DRIPTROIT 71 Posted January 22, 2022 Share Posted January 22, 2022 Great job on the bodywork! Quote Link to comment Share on other sites More sharing options...
The Brush Posted March 26, 2022 Author Share Posted March 26, 2022 Hi, Off to a slow start, but finaly got the frame painted, Rear wheels are italeri, Front are resin tyres & revell wheel with italeri rim, The body had been sprayed with cellulose on plastic ,so i decided to not waste time trying to make it good & make new parts, as i go , wheels & stacks are chrome alclad, this is it so far. Thanks for looking Graham. Quote Link to comment Share on other sites More sharing options...
Gary Chastain Posted March 26, 2022 Share Posted March 26, 2022 Watching your bed fabrication, looks really good Quote Link to comment Share on other sites More sharing options...
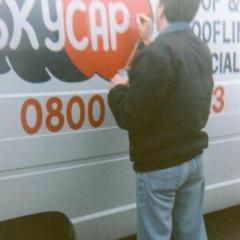
The Brush Posted July 16, 2022 Author Share Posted July 16, 2022 Hi, After being press ganged into helping in garden, I am finaly making more progress, Cab & body sprayed satin white with satin black stipes, All chrome is alclad, Mirror arms are made from thin wire, interior from various bits, headlight lens cut from amber acetate with decal detail added. I added under hood detail with card strips covered in tissue paper , PVA glue brushed on then black added. other bits & pieces from the spares box. still some touching up to do on cab strips But now i can start on the body etc. Thanks for looking Graham 1 Quote Link to comment Share on other sites More sharing options...
Rockford Posted July 16, 2022 Share Posted July 16, 2022 (edited) As usual, your work is unbelievable! Such quality and insight. Fantastic. Edited July 16, 2022 by Rockford Quote Link to comment Share on other sites More sharing options...
Bainford Posted July 22, 2022 Share Posted July 22, 2022 The Mack is looking fantastic. Cool project. Quote Link to comment Share on other sites More sharing options...
DRIPTROIT 71 Posted July 23, 2022 Share Posted July 23, 2022 That looks Awesome! Quote Link to comment Share on other sites More sharing options...
The Brush Posted August 27, 2022 Author Share Posted August 27, 2022 Hi, Thanks for the comments much appreciated. This is final WIP post, The body is now all painted just needs me to make the lights & decals then it will be in Under Glass. all the parts missing i have made from plastic card & resin + hinge pins from variuos nails. Thanks for looking. Back soon. Quote Link to comment Share on other sites More sharing options...
DRIPTROIT 71 Posted August 27, 2022 Share Posted August 27, 2022 Awesome work! It looks amazing!! Quote Link to comment Share on other sites More sharing options...
gatorincebu Posted August 28, 2022 Share Posted August 28, 2022 Graham, I like the concept here. And as always I enjoy your fabrication skills . This looks to be a winner in my book ! Be Well Gator Quote Link to comment Share on other sites More sharing options...
Recommended Posts
Join the conversation
You can post now and register later. If you have an account, sign in now to post with your account.
Note: Your post will require moderator approval before it will be visible.