Dpate Posted January 14, 2022 Share Posted January 14, 2022 17 hours ago, rightrudder said: Thanks, Dusty. I did buy some and just haven't tried it yet. I'll do another test panel with the stuff before I shoot the body. Yeah stuff is amazing. It's almost exclusively the only thinner i use lol. I do also have mr hobbys rapid thinner which is great for metallic paints and flat paints. Quote Link to comment Share on other sites More sharing options...
rightrudder Posted January 14, 2022 Author Share Posted January 14, 2022 18 hours ago, CabDriver said: I’d be more than happy with that finish you showed above as being ready for clearcoat - looks great! Thank you...that's very encouraging! Quote Link to comment Share on other sites More sharing options...
rightrudder Posted January 15, 2022 Author Share Posted January 15, 2022 (edited) So here's a test panel with the Mr. Leveler. Bare plastic, no prep, three coats You're right, good stuff! I think at this point I'd gently wet sand, add one more coat, then clear. Also experimenting with interior colors. The door panel is done in Tamiya Medium Blue (XF-18), kind of a neat blue/gray. Brush painted here, but I'll spray it on the new project. Got some of that good Tamiya masking tape at the hobby shop too. I might mix a little dark blue with the XF-18. Edited January 15, 2022 by rightrudder 1 Quote Link to comment Share on other sites More sharing options...
Dpate Posted January 15, 2022 Share Posted January 15, 2022 2 hours ago, rightrudder said: So here's a test panel with the Mr. Leveler. Bare plastic, no prep, three coats You're right, good stuff! I think at this point I'd gently wet sand, add one more coat, then clear. Also experimenting with interior colors. The door panel is done in Tamiya Medium Blue (XF-18), kind of a neat blue/gray. Brush painted here, but I'll spray it on the new project. Got some of that good Tamiya masking tape at the hobby shop too. I might mix a little dark blue with the XF-18. Yeah that looks great man. I can tell a big difference from your last picture. Quote Link to comment Share on other sites More sharing options...
rightrudder Posted January 15, 2022 Author Share Posted January 15, 2022 Thanks! Wet sanding didn't really work here--looked a little blotchy and easy to cut through the paint--so I think I'll be content to lay it on as smooth as possible. It seems the Mr. Hobby clear I'm going to use is more tolerant to sanding, and if it looks glossy enough at that point I may just polish and forgo sanding altogether. I'm glad I have some time to experiment. I appreciate all the great input! Quote Link to comment Share on other sites More sharing options...
rightrudder Posted January 16, 2022 Author Share Posted January 16, 2022 Final pic of test panel with a couple wet coats of Mr. Hobby clear. Too embarrassed to show lower part of door panel...there's a giant cat hair in the middle, and a thumbprint too...ugh. Mr. Hobby clear dries fast, but not two hours fast on a humid day! I'm really pleased with the finish & gloss. My big takeaway is to NOT wet sand the acrylic as it's ultra easy to burn through it, even with 2000 grit. Maybe it's a function of laying the paint on too thin? Or maybe acrylics are just more fragile this way. Anyway, I've got the game plan for the real thing now. Thanks for all the advice, everyone...invaluable! 2 Quote Link to comment Share on other sites More sharing options...
Dpate Posted January 16, 2022 Share Posted January 16, 2022 2 hours ago, rightrudder said: Final pic of test panel with a couple wet coats of Mr. Hobby clear. Too embarrassed to show lower part of door panel...there's a giant cat hair in the middle, and a thumbprint too...ugh. Mr. Hobby clear dries fast, but not two hours fast on a humid day! I'm really pleased with the finish & gloss. My big takeaway is to NOT wet sand the acrylic as it's ultra easy to burn through it, even with 2000 grit. Maybe it's a function of laying the paint on too thin? Or maybe acrylics are just more fragile this way. Anyway, I've got the game plan for the real thing now. Thanks for all the advice, everyone...invaluable! Yeah there pretty fragile, and with thin coats yeah you'll burn through pretty fast especially if your clear coats are thin too. But if you burnt through the clear too the color coat than that tells you your clear coats where too thin. You can burn through clear coat fast too, but not that fast unless you're really giving it the grit lol. Quote Link to comment Share on other sites More sharing options...
rightrudder Posted January 16, 2022 Author Share Posted January 16, 2022 Thanks for that, Dusty. It seems if the mixing of the base metallic isn't perfect, each coat goes on a slightly different way, so even sanding through the last base coat applied can reveal paint that looks different. Fun to learn this stuff, especially on scrap parts!! Quote Link to comment Share on other sites More sharing options...
Dpate Posted January 16, 2022 Share Posted January 16, 2022 4 hours ago, rightrudder said: Thanks for that, Dusty. It seems if the mixing of the base metallic isn't perfect, each coat goes on a slightly different way, so even sanding through the last base coat applied can reveal paint that looks different. Fun to learn this stuff, especially on scrap parts!! Oh I'm still learning too man. I haven't been in the hobby that long like less than a year, and i watch, read, and learn as much as i can. I turned my old bedroom at my parents house into a hobby room - like literally remodeled the whole room new flooring etc lol. Dang room looks like a store with kits and paint and legos lol. Anyways this is my next project I'll be doing sometime soon - the 62 ford thunderbird "flash" galore haha. I have the photo etch set for the kit too as i do with every kit i own just about lol. Quote Link to comment Share on other sites More sharing options...
rightrudder Posted January 17, 2022 Author Share Posted January 17, 2022 Very cool! Sounds like you have a great setup for building, and look forward to seeing what you do with the '62. I don't have a stash of kits as I tend to fixate on one and build it nonstop! Incidentally, my '62 'Bird showed up this morning! You're right about the flash; requires a lot of patience with the X-Acto. I managed to break the front anti-roll bar already. The detail is really impressive! I'll start a thread over in WIP on it. Quote Link to comment Share on other sites More sharing options...
Dpate Posted January 17, 2022 Share Posted January 17, 2022 (edited) 17 hours ago, rightrudder said: Very cool! Sounds like you have a great setup for building, and look forward to seeing what you do with the '62. I don't have a stash of kits as I tend to fixate on one and build it nonstop! Incidentally, my '62 'Bird showed up this morning! You're right about the flash; requires a lot of patience with the X-Acto. I managed to break the front anti-roll bar already. The detail is really impressive! I'll start a thread over in WIP on it. Yeah you should see my stash lol i have a stash that would take some folks years to get. Also yeah the flash is pretty bad on the kit even though i've seen worse. I don't use a x acto blade though for most flash or mold lines. Have you seen SMS ceramic scrapper? https://www.scalemodeller.com.au/products/ceramic-scraper its pricey, but it's amazing. Impossible to gauge the plastic when cleaning or any mistake you can make with a X-acto blade. Best part is you can't cut yourself even though it's super sharp. Was you able to fix the roll bar? Edited January 17, 2022 by Dpate Quote Link to comment Share on other sites More sharing options...
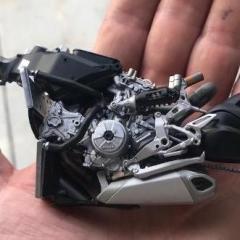
rightrudder Posted January 18, 2022 Author Share Posted January 18, 2022 7 hours ago, Dpate said: Yeah you should see my stash lol i have a stash that would take some folks years to get. Also yeah the flash is pretty bad on the kit even though i've seen worse. I don't use a x acto blade though for most flash or mold lines. Have you seen SMS ceramic scrapper? https://www.scalemodeller.com.au/products/ceramic-scraper its pricey, but it's amazing. Impossible to gauge the plastic when cleaning or any mistake you can make with a X-acto blade. Best part is you can't cut yourself even though it's super sharp. Was you able to fix the roll bar? I haven't seen that scraper. I watched the video on your link and it looks like exactly the right tool for the job! Thx. The bar should glue together just fine. Working away on the engine, test fitting the bumpers, prepping interior parts. I get so fixated that I lose track of time and forget to eat! Quote Link to comment Share on other sites More sharing options...
NOBLNG Posted January 18, 2022 Share Posted January 18, 2022 On 1/13/2022 at 8:46 PM, Dpate said: You should ditch the rubbing alcohol and get some mr hobby leveling thinner. https://spraygunner.com/gsi-creos-mr-color-leveling-thinner/?sku=T108&gclid=Cj0KCQiAuP-OBhDqARIsAD4XHpf9mUZVLEco-G7H5ziXyf6gBHGJodkjyuQHTojDbsQ5mWD-jBPT0Y4aApQdEALw_wcB Can this stuff be used with Tamiya or Mr. Color laquers as well as their acrylics? Thanks. Quote Link to comment Share on other sites More sharing options...
Dpate Posted January 19, 2022 Share Posted January 19, 2022 (edited) 18 hours ago, rightrudder said: I haven't seen that scraper. I watched the video on your link and it looks like exactly the right tool for the job! Thx. The bar should glue together just fine. Working away on the engine, test fitting the bumpers, prepping interior parts. I get so fixated that I lose track of time and forget to eat! Well so far with my kit the side skirts only one fits properly, and the other fits but has a gap. So i'm not going to use them at all. I test fitted the front and rear bumper too, but there kinda iffy. Probably will fit better once i dechrome them and clean them up - than do another test fit. When i first opened the box i knew this was gonna be a iffy kit to begin with lol. I mean there is like 5 ejector pin makes under the hood lol, and the chrome is so thick it took me a few mins to find the windshield wipers lol. There so issues here and there on the chrome too along with flash - so I'm glad i know how and love dechroming and rechroming parts. 11 hours ago, NOBLNG said: Can this stuff be used with Tamiya or Mr. Color laquers as well as their acrylics? Thanks. Yes except i wouldn't use it for Mr.color acrylic line up. Edited January 19, 2022 by Dpate Quote Link to comment Share on other sites More sharing options...
Sandboarder Posted January 19, 2022 Share Posted January 19, 2022 On 1/18/2022 at 11:38 PM, NOBLNG said: Can this stuff be used with Tamiya or Mr. Color laquers as well as their acrylics? Thanks. Use it the same as any other lacquer thinner. So don’t mix it with water based paints. The the Mr Hobby paints are solvent based acrylic, essential lacquer. They’re aqueous range is water based and have a blue label. Quote Link to comment Share on other sites More sharing options...
Sandboarder Posted January 19, 2022 Share Posted January 19, 2022 On 1/16/2022 at 11:42 AM, rightrudder said: Thanks for all the advice, everyone...invaluable! WOW!!! You have achieved an excellent finish!! I won’t sand any metallics ever as a rule. I can damage the metallic flakes and ruin the effect. Use Mr hobby primer as a micro filler and wet sand if needed. Spray your metallic colour (which yours look great to me before clear) apply the clear and use that to achieve the wet shiny look as you have done. again great job!! Quote Link to comment Share on other sites More sharing options...
rightrudder Posted January 20, 2022 Author Share Posted January 20, 2022 17 hours ago, Sandboarder said: WOW!!! You have achieved an excellent finish!! I won’t sand any metallics ever as a rule. I can damage the metallic flakes and ruin the effect. Use Mr hobby primer as a micro filler and wet sand if needed. Spray your metallic colour (which yours look great to me before clear) apply the clear and use that to achieve the wet shiny look as you have done. again great job!! Thank you, Chris! I'm totally pleased with it. Great advice on not sanding the metallic...these Tamiya acrylics are wonderful and easy to work with, but they scratch easily until you apply the clear coat. The Mr. Hobby clear dries hard as a rock. I'm gonna apply the base coats to bare plastic, as the primer changes the color too much, so I'll just have to live with any imperfections in the plastic. I'll sand the bodyshell thoroughly with 1000 grit, which should help. On 1/18/2022 at 4:17 PM, Dpate said: Well so far with my kit the side skirts only one fits properly, and the other fits but has a gap. So i'm not going to use them at all. I test fitted the front and rear bumper too, but there kinda iffy. Probably will fit better once i dechrome them and clean them up - than do another test fit. When i first opened the box i knew this was gonna be a iffy kit to begin with lol. I mean there is like 5 ejector pin makes under the hood lol, and the chrome is so thick it took me a few mins to find the windshield wipers lol. There so issues here and there on the chrome too along with flash - so I'm glad i know how and love dechroming and rechroming parts. Yes except i wouldn't use it for Mr.color acrylic line up. Dusty, I hear you on the thick chrome! I couldn't even identify the wipers as wipers until I studied the instructions. I'm with you on the skirts...I'm leaving them off. The car just looks right without them and it shows off the wire wheels better. My bumpers are OK; the rear one is actually pretty nice, but the outboard ends for the front one splay out a bit. I think I'll soak it in hot tap water and see if I can bend it in a little. I might try covering the ends with BMF, as they look a little scratchy. What do you use to dechrome and rechrome? Making good progress. Wow, when you zoom in it really brings out the flaws. Soft, diffused light is your friend! I'm really digging the blue/gray interior color, and I'm using the PE parts sparingly...just the HVAC grille on the conter console. Will use a few more of them in the engine compartment. The set comes with a full set of aluminum interior inserts, but it looked too hard to shave all the door handles, etc. to install them, so I went with Tamiya chrome acrylic instead. 2 Quote Link to comment Share on other sites More sharing options...
rightrudder Posted January 20, 2022 Author Share Posted January 20, 2022 I'm glad I'm experimenting a lot, because when spraying the firewall, the metallic blue with Mr. Hobby leveler turned out far more silver than desired. I thought, is the paint going bad? But then I reshot it with IPA as a thinner and I got the rich blue that I wanted. Interesting that a thinner can affect the color that much...probably just a metallics thing. Probably lays all those flakes down flat where they become more effective at reflecting light. So, Mr. Leveler reserved for non-metallics, and I can use el cheapo IPA for now. Quote Link to comment Share on other sites More sharing options...
Dpate Posted January 21, 2022 Share Posted January 21, 2022 (edited) 9 hours ago, rightrudder said: Thank you, Chris! I'm totally pleased with it. Great advice on not sanding the metallic...these Tamiya acrylics are wonderful and easy to work with, but they scratch easily until you apply the clear coat. The Mr. Hobby clear dries hard as a rock. I'm gonna apply the base coats to bare plastic, as the primer changes the color too much, so I'll just have to live with any imperfections in the plastic. I'll sand the bodyshell thoroughly with 1000 grit, which should help. Dusty, I hear you on the thick chrome! I couldn't even identify the wipers as wipers until I studied the instructions. I'm with you on the skirts...I'm leaving them off. The car just looks right without them and it shows off the wire wheels better. My bumpers are OK; the rear one is actually pretty nice, but the outboard ends for the front one splay out a bit. I think I'll soak it in hot tap water and see if I can bend it in a little. I might try covering the ends with BMF, as they look a little scratchy. What do you use to dechrome and rechrome? Making good progress. Wow, when you zoom in it really brings out the flaws. Soft, diffused light is your friend! I'm really digging the blue/gray interior color, and I'm using the PE parts sparingly...just the HVAC grille on the conter console. Will use a few more of them in the engine compartment. The set comes with a full set of aluminum interior inserts, but it looked too hard to shave all the door handles, etc. to install them, so I went with Tamiya chrome acrylic instead. 5 hours ago, rightrudder said: I'm glad I'm experimenting a lot, because when spraying the firewall, the metallic blue with Mr. Hobby leveler turned out far more silver than desired. I thought, is the paint going bad? But then I reshot it with IPA as a thinner and I got the rich blue that I wanted. Interesting that a thinner can affect the color that much...probably just a metallics thing. Probably lays all those flakes down flat where they become more effective at reflecting light. So, Mr. Leveler reserved for non-metallics, and I can use el cheapo IPA for now. Looking good so far man awesome job. I use superclean sometimes and 100% lye to dechrome and i use alclad and spaz stix to rechrome using alclads gloss black base. Far as mr hobby leveling thinner causing issues with the paint that's the first time I've heard anything like that. But I'm sure it's cause it didn't dry fast enough which is what probably caused your issue. The flakes settle faster than it dried. There rapid thinner they designed to use for flats and metallics allows the paint to dry before the flakes can settle. Also for the dash gauges did you apply them right over the raised detail? You're suppose to remove those details before applying them it's in step 3 in the instructions 😁 I'm also going to use the custom rims instead of the stock rims and lower the ride height front and back since the kit includes all the parts to do so. I'm probably going to remove the side trim from the body as well, because i think it looks cleaner without that. Edited January 21, 2022 by Dpate Quote Link to comment Share on other sites More sharing options...
Ace-Garageguy Posted January 21, 2022 Share Posted January 21, 2022 5 hours ago, rightrudder said: ...Interesting that a thinner can affect the color that much...probably just a metallics thing. Yup, as I learned over 5 decades of painting real ones. Quote Link to comment Share on other sites More sharing options...
rightrudder Posted January 21, 2022 Author Share Posted January 21, 2022 Hey Dusty, Thank you for the specific info on your chroming process. I might try that with both the wipers and the vent windows, as they're the biggest offenders. I might try to san the vent window clear plastic down to 1/3 thickness and re-polish, as the thick plastic looks a little clunky. On the gauges, I basically removed the center nubs off the faces, and the decals laid down nice. Make sure you precisely trim the decals to remove all the surrounding clear part, right down to the black circles, so the decals will sit inside the hoods. I messed up the clock decal, and used a photo-reduced one with paper backing, but it matches pretty well. I'm still mulling over the side trim, I might shave it as you're planning to do. I'm a noob at BMF so the fender-peak trim will be hard enough! Quote Link to comment Share on other sites More sharing options...
meoirosiosi Posted June 28, 2023 Share Posted June 28, 2023 After wet sanding the base coat before applying the clear coat, it is generally recommended to polish the surface to achieve a smooth and glossy finish. Polishing can enhance the appearance of the paint job. However, it's important to use a compatible polish and ensure that the surface is thoroughly cleaned before applying the clear coat. If done correctly, polishing should not interfere with the adhesion of the clear coat. With proper sanding using 2500 grit, the very fine sanding lines are unlikely to show through the clear coat. https://paintsgeek.com/do-you-sand-metallic-paint-before-clear-coat/ Quote Link to comment Share on other sites More sharing options...
ctruss53 Posted June 28, 2023 Share Posted June 28, 2023 I am of the opinion that you should never sand during the paint process unless there is junk in the paint that you need to remove. Apply your primer. Only sand it if there is junk in it. Apply a little more if needed after sanding out the junk. Then apply your paint. Again, only sand it if there is junk in it. And if I know I am using a clearcoat, I apply the color coats very light. Build up the paint slowly and as evenly as possible. And stop as soon as the color is evenly applied with as little paint as possible. Then when you apply the clearcoat. Apply the first 2-3 coats very lightly. Slowly build up the clearcoat. Then apply a couple more final clearcoats that are heavier. Put them on wet so you can see the gloss. I usually only do 1-2 final wet coats for race cars. And I'll do 3 or even 4 final wet coats for show cars. Then I do all my wet sanding and polishing at the very end. But everyone does this different. This is what works for me. And it works consistently. So I stick with it. Quote Link to comment Share on other sites More sharing options...
StevenGuthmiller Posted June 28, 2023 Share Posted June 28, 2023 (edited) I agree with Chad. Never polish the raw color before clear. There can be numerous problems that can arise from this practice, especially if you're using hot acrylic lacquers. Aside from the obvious possibility of fish eyes in the clear from silicates left on the surface from polishing after a possible incomplete cleaning, sanding a raw metallic paint can "smear" the metallic particles and cause all kinds of weird blushing issues that will only be magnified by clear coats. I've also had circumstances where the lacquer clear can eat into the broken surface of the sanded areas and leave horrible striations in the paint, completely ruining the paint job. If you must sand or polish before clear, do it prior to a final color coat to seal any repairs under an even and unbroken coat of paint, and then begin clear coating. As a rule, you can lightly sand between coats of clear without issue, but there's really no need unless you experience fairly heavy orange peel, or foreign particles in the clear. Steve Edited June 28, 2023 by StevenGuthmiller 1 Quote Link to comment Share on other sites More sharing options...
Recommended Posts
Join the conversation
You can post now and register later. If you have an account, sign in now to post with your account.
Note: Your post will require moderator approval before it will be visible.