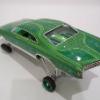
Lownslow Posted February 18, 2007 Posted February 18, 2007 i wanna cast this wheel exactly as it is the pinhole doesnt matter but the face and backside do the lip was already molded with a single sided mold. this wheel will be my second double sided mold but ive never casted a wheel before. can a tire be done off a single side mold?
Marc @ MPC Motorsports Posted February 18, 2007 Posted February 18, 2007 Never cast a wheel either. Tires need to be two part molds. I've done lots of tires with Micro Mark Tire Casting Resin. I hope someone shows us how to cast a rim.
Bigjeepzz Posted February 20, 2007 Posted February 20, 2007 I can show you exactly how to cast that wheel. I will post some info and pictures later this afternoon. Jake
Lownslow Posted February 20, 2007 Author Posted February 20, 2007 I can show you exactly how to cast that wheel. I will post some info and pictures later this afternoon. Jake that would be great
Bigjeepzz Posted February 22, 2007 Posted February 22, 2007 Sorry I have not posted the pictures yet. I have had a rough week and I have not had time to put something together. Hopefully I can sit down tonight and take some pics for you. Jake
novadose71 Posted February 24, 2007 Posted February 24, 2007 Can't wait for the pics. Just bought a casting kit this week. Wanna do a one piece wheel and tire first.
gowjobs Posted March 4, 2007 Posted March 4, 2007 Pretty easy, actually. Put medical tape across the backside of those openings between the spokes, then fill the backside of the wheel with oil-based modeling clay. in the box in which you plan to cast, set this wheel clay-side down on a short pillar of clay, and trim it all to the outer diameter of that lip, pehaps tapering outward a bit. Use an acid brush to put an even coat of vaseline (or use spray silicon mold release) over the outside of the wheel, and the inside of your mold box. Pour your rubber in and let it set. When it's all solidified, pop it out, flip it over and remove the clay, then add mold release to the backside and put it and the first half of the mold back in the box with the open side facing up. Fill this second side up, and when it's solid, you should be able to pop the unit out of the box, split the mold, and remove the wheel from the two-part mold. If you find that a certain area of the casting is prone to pinholes (bubbles in the resin), you can put a vent into the mold by pushing a piece of aluminum tubing through the rubber into that location of the casting, locating it on the backside or someplace it's easily cleaned up.
Bigjeepzz Posted March 7, 2007 Posted March 7, 2007 Sorry it took so long to get back to this topic. Dave has pretty much explained what needs to happen. Just make sure you use some type of mold to mold release. Here are some pics of how one of my molds looks for a wheel. I had to make a two piece mold to cast this wheel. I wanted the same features you are looking for in this wheel. I don't have any pics of the mold making process but with Daves explanation and these pics, you should be able to see what needs to be done. This is the two mold halves. You can see the pour hole and the area where the resin flows. Here you can see the two halves placed together. The large hole is the pour hole, the smaller hole allows the mold to breathe as it fills with resin. Resin poured, cured Two halves seperated. You can see where the resin cured in the pour hole and you can also see the wheel that was created. Trimmed wheel ready to prep for paint Jake
Recommended Posts
Create an account or sign in to comment
You need to be a member in order to leave a comment
Create an account
Sign up for a new account in our community. It's easy!
Register a new accountSign in
Already have an account? Sign in here.
Sign In Now