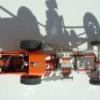
Eshaver Posted May 14, 2013 Share Posted May 14, 2013 Greg, if Revell was to re release the Porsche , I would build it again very close to the one I had back I guess about 1968. It was a good kit . I just don't understand some of the "Timid " builders we have here ......................... Quote Link to comment Share on other sites More sharing options...
Tom Geiger Posted May 14, 2013 Share Posted May 14, 2013 (edited) all kinds of things you can do with that Healey Cool. Never saw that pic before. Ida Automotive is up on Route 9 not far from Raceway Park in Englishtown, NJ. They are the folks who were cranking out new Tuckers not too long ago. Edited May 14, 2013 by Tom Geiger Quote Link to comment Share on other sites More sharing options...
Wagoneer81 Posted May 15, 2013 Share Posted May 15, 2013 I've built several multi-piece body kits, through the years. To me, no more difficult than one-piece. I don't have any problems with them. I don't see the need for the fuss. Just as with other parts of the kit, work slow, use plenty of tape, fit, trim, fit, repeat.... No worries. I have a couple of Heller kits that are multi-piece bodys. I loved building them! Quote Link to comment Share on other sites More sharing options...
Bob Ellis Posted July 3, 2015 Share Posted July 3, 2015 The multi piece bodies are easier to modify. With liquid plastic cement, easy to assemble. Quote Link to comment Share on other sites More sharing options...
Jon Haigwood Posted July 3, 2015 Share Posted July 3, 2015 Only one I've tried was the Aluma Coupe, not very happy with it. I do have a 59 Galaxie waiting on the shelf. Quote Link to comment Share on other sites More sharing options...
Hemified71 Posted July 4, 2015 Share Posted July 4, 2015 While I have these kits in my stash, I have yet to start building them, though I have seen on various different forums, wonderful & excellent builds of them, probably because they're Tamiya, Fujimi & Aoshima offerings... Tamiya's La Ferrari & Enzo. Fujimi's Lamborghini Veneno & Aoshima's Lamborghini Aventador Roadster ( which I have on the bench ). Another I have built, without too much of a problem/hassle is Revell's Dodge Siderwinder - a prototype Ram Roadster. That was pretty basic, ( parts wise ), but with time & patience can be made into quite a nice looking kit ?? The only drama I had was with Aoshima's Aventador Roadster. It is very fragile, particularly because once all the sprues holding the frame together are cut off/away, in order to paint the body, the bottom of the sill is the only section holding the body together & even with careful attention NOT to have it snap off, it can & it did.. Leaving the body in 2 parts... ?? I believe I wasn't the only one it happened to. It can be fixed, with some liquid cement ( better this than superglue, because the superglue doesn't actually bond the plastic back together, whereas the liquid cement, over enough time, will. Quote Link to comment Share on other sites More sharing options...
Bob Ellis Posted February 11, 2021 Share Posted February 11, 2021 The Revell 1959 Ford Sky-liner and 1959 Corvette are exceptional models. They fit vey well. I find multi-piece bodies to mold more correct shapes than sigle piece bodies. Quote Link to comment Share on other sites More sharing options...
Snake45 Posted February 12, 2021 Share Posted February 12, 2021 I've built three or four hundred model airplanes, every one of which had a "multi-piece body." Do they count? Quote Link to comment Share on other sites More sharing options...
89AKurt Posted February 12, 2021 Share Posted February 12, 2021 On 5/1/2013 at 3:17 PM, sjordan2 said: When I was a kid, I almost quit building after dealing with the Revell 57 Cadillac Brougham, Ford Skyliner, and Austin-Healey 100-6. I was saved by JoHan and AMT. Revell 57 Cadillac Brougham I have that in my stash, afraid to touch it! Cool that this old topic was bumped. Quote Link to comment Share on other sites More sharing options...
Dave Van Posted February 12, 2021 Share Posted February 12, 2021 This body is multi piece........but built well..... Quote Link to comment Share on other sites More sharing options...
Bills72sj Posted February 12, 2021 Share Posted February 12, 2021 I built the Skyliner when I was a kid. I did not remember it being that difficult. Of course it was molded in Yellow and I did not paint it. I thought is was cool that the top actually worked. I have a few Revell tri-five Chevys in my stash. I am still afraid to tackle them in spite of my improved skillset. Quote Link to comment Share on other sites More sharing options...
Scott Colmer Posted February 12, 2021 Share Posted February 12, 2021 I built the Ranchero in about 78. I don't remember any serious issues. The boot Hill Express gave me problems with the toe board. Sorry no pics. The one that was so hard it never got finished was the AMT Scorpion. I took another shot at it as an adult. It came out much better. What a difference waiting for glue to dry makes. Quote Link to comment Share on other sites More sharing options...
NOBLNG Posted February 12, 2021 Share Posted February 12, 2021 On 5/1/2013 at 5:20 PM, Ace-Garageguy said: I have a soft spot for the old Revell multi-piece '60 Corvette, reissued in a couple of different boxes.I This is the first multi piece body I have come across, and was my only attempt at building one. I can see why people like it because it does build up very nicely! Waaay better than the AMT I did at the same time. Quote Link to comment Share on other sites More sharing options...
magicmustang Posted February 12, 2021 Share Posted February 12, 2021 9 hours ago, Scott Colmer said: The one that was so hard it never got finished was the AMT Scorpion. I took another shot at it as an adult. It came out much better. What a difference waiting for glue to dry makes. Wow, neat build. Don't remember that kit. Quote Link to comment Share on other sites More sharing options...
BeakDoc Posted February 12, 2021 Share Posted February 12, 2021 I recently completed the Skip’s Fiesta version of the ‘59 Skyliner. I’ll attempt to chronicle the adventure whilst it’s still fresh in my noggin. As far as the multi-piece body is concerned, to me it equated to nothing more than extra steps in the process. It certainly required more patience, ingenuity, forward thinking and mock-ups than anything I’ve encountered, but I have zero complaints about Revell’s engineering as it pertains to the body. My biggest complaint with this particular version of this kit is the salmon-colored goo from which it is molded. I played hell finding the right glue (more accurately; glue combinations) to hold this house of cards together. Typically one of my first steps in a build is to, at least, partially assemble my suspension parts so that I can mock things up to check the stance and ride height. Luckily, I suppose, this is when I discovered what a headache the adhesive issue was going to be. I glued the two part rear end and axle together with Plastruct Plastic Weld (orange label) clamped it and went to bed. The next morning I found that the Plastruct had reacted badly with the soft plastic and the spring loaded clamps had squished the axle housing into a flat piece of sticky, yet crackly, pinkish goop. (Think baseball card chewing gum exposed to a light spring shower.) I cut the leaf springs off, salvaged the pumpkin and scratched out a new axle housing from aluminum tubing and kept pushing forward. For the engine halves I applied Testors liquid cement, clamped and waited. Upon removing the clamp the two halves, by no force other than gravity, fell apart as if I’d used sugar water to glue them. Tamiya liquid cement (orange label) didn’t bare fruit either. Plastruct Bondene (white label) actually dried but didn’t hold well at all. In a fit of desperation I mixed 2 parts Tamiya Extra Thin (green label) with 1 part Plastruct Bondene (white label) and low and behold it worked great without distorting the plastic. The downside is that it is very thin. In the end, 90% of the build is stuck together with Gorilla brand clear 5 minute epoxy with the thin home brew run into seams and joints where applicable. Also, Tamiya putty seemed to react poorly with this particular variation of styrene. I had much better results with Squadron putty. Where the roof and deck lid are concerned, again, lots of patience and test fitting but no real issues. I drilled and pinned all of the hinge points but that was for my own piece of mind and not out of necessity. Probably the most daunting and migraine inducing step in this entire build for me was the windshield and it’s spindly, delicate, ill-fitting frame. In it’s natural, unmolested state the frame neither fits nor forms to either the body or the windshield. The icing on the cake is that the windshield would either fit the contours of the cowl or the contour of the roof, but not both at the same time, and neither when fitted to the windshield frame. After 2 days of nervously shaving, sanding and using steam to gently reshape all parties involved, I got it to fit with very little forceful persuasion. All I had to do now was affix it to the body without destroying the paint job. In summation, the multi-piece body was the least of this kit’s issues. I’ll say this much, even though the build is far from perfect, I cannot imagine being more proud of any accomplishment in this hobby than when I pause and look at this one on the shelf. And I’m not even a Ford guy. Quote Link to comment Share on other sites More sharing options...
Sledsel Posted February 12, 2021 Share Posted February 12, 2021 20 minutes ago, BeakDoc said: I recently completed the Skip’s Fiesta version of the ‘59 Skyliner. I’ll attempt to chronicle the adventure whilst it’s still fresh in my noggin. As far as the multi-piece body is concerned, to me it equated to nothing more than extra steps in the process. It certainly required more patience, ingenuity, forward thinking and mock-ups than anything I’ve encountered, but I have zero complaints about Revell’s engineering as it pertains to the body. My biggest complaint with this particular version of this kit is the salmon-colored goo from which it is molded. I played hell finding the right glue (more accurately; glue combinations) to hold this house of cards together. Typically one of my first steps in a build is to, at least, partially assemble my suspension parts so that I can mock things up to check the stance and ride height. Luckily, I suppose, this is when I discovered what a headache the adhesive issue was going to be. I glued the two part rear end and axle together with Plastruct Plastic Weld (orange label) clamped it and went to bed. The next morning I found that the Plastruct had reacted badly with the soft plastic and the spring loaded clamps had squished the axle housing into a flat piece of sticky, yet crackly, pinkish goop. (Think baseball card chewing gum exposed to a light spring shower.) I cut the leaf springs off, salvaged the pumpkin and scratched out a new axle housing from aluminum tubing and kept pushing forward. For the engine halves I applied Testors liquid cement, clamped and waited. Upon removing the clamp the two halves, by no force other than gravity, fell apart as if I’d used sugar water to glue them. Tamiya liquid cement (orange label) didn’t bare fruit either. Plastruct Bondene (white label) actually dried but didn’t hold well at all. In a fit of desperation I mixed 2 parts Tamiya Extra Thin (green label) with 1 part Plastruct Bondene (white label) and low and behold it worked great without distorting the plastic. The downside is that it is very thin. In the end, 90% of the build is stuck together with Gorilla brand clear 5 minute epoxy with the thin home brew run into seams and joints where applicable. Also, Tamiya putty seemed to react poorly with this particular variation of styrene. I had much better results with Squadron putty. Where the roof and deck lid are concerned, again, lots of patience and test fitting but no real issues. I drilled and pinned all of the hinge points but that was for my own piece of mind and not out of necessity. Probably the most daunting and migraine inducing step in this entire build for me was the windshield and it’s spindly, delicate, ill-fitting frame. In it’s natural, unmolested state the frame neither fits nor forms to either the body or the windshield. The icing on the cake is that the windshield would either fit the contours of the cowl or the contour of the roof, but not both at the same time, and neither when fitted to the windshield frame. After 2 days of nervously shaving, sanding and using steam to gently reshape all parties involved, I got it to fit with very little forceful persuasion. All I had to do now was affix it to the body without destroying the paint job. In summation, the multi-piece body was the least of this kit’s issues. I’ll say this much, even though the build is far from perfect, I cannot imagine being more proud of any accomplishment in this hobby than when I pause and look at this one on the shelf. And I’m not even a Ford guy. That is a great looking build. I have never had an issue with a multi-piece body, but of course even as a kid did nor follow the instructions. I always assembled the body and clamped, rubber banded it to the chassis. Granted, my 2 experiences were the 57 Ranchero and 59 Skyliner. As shown above and other postings can be great looking builds. Actually, the 57 Ranchero is much more accurate when it comes to the body contours than the current Revell 57's Quote Link to comment Share on other sites More sharing options...
Modelbuilder Mark Posted February 12, 2021 Share Posted February 12, 2021 4 hours ago, BeakDoc said: I recently completed the Skip’s Fiesta version of the ‘59 Skyliner. I’ll attempt to chronicle the adventure whilst it’s still fresh in my noggin. As far as the multi-piece body is concerned, to me it equated to nothing more than extra steps in the process. It certainly required more patience, ingenuity, forward thinking and mock-ups than anything I’ve encountered, but I have zero complaints about Revell’s engineering as it pertains to the body. My biggest complaint with this particular version of this kit is the salmon-colored goo from which it is molded. <snip> Your work looks great. I do not mind multi piece bodies, and in fact a lot of modern cars because of all the deep cuts etc., must be molded that way, but to your point it is about the engineering. Think Palmer vs this kit. If it is done well, it should not create too much and an issue, and may actually allow for more detail, Quote Link to comment Share on other sites More sharing options...
The Junkman Posted February 12, 2021 Share Posted February 12, 2021 The only one I've got is the subject of this thread. There's talk about shape issues and protruding wheels but nothing about how it builds. Quote Link to comment Share on other sites More sharing options...
alan barton Posted February 13, 2021 Share Posted February 13, 2021 (edited) 9 hours ago, BeakDoc said: In summation, the multi-piece body was the least of this kit’s issues. I’ll say this much, even though the build is far from perfect, I cannot imagine being more proud of any accomplishment in this hobby than when I pause and look at this one on the shelf. And I’m not even a Ford guy. Chris, that is a truly superb model you have constructed there and the colours give a very custom look to a showroom stock build. Congratulations for persevering. I too have a Skip's Fiesta 59 that was returned to the box over twenty years ago. I don't recall having adhesion issues up to the point that I stopped at ( rolling chassis, first coat of primer on body) but my problem was a combination of the multi-piece body with the standard Revell warpage. As all of us who built models from this era know, Revell employed a particularly sadistic little man to sit next to the body moulding machine and upon ejection of each body, he would take it with both hands and give it a firm twist, like you were wringing out a dish towel. This ensured that none of the opening doors, hood or trunk would ever fit so you would never know how bad the hinging was. A simple but effective form of quality control. Now old Fred feared being made redundant when Revell started reissuing these multi piece bodies so in a desperate attempt to keep his job, he selected the cowl/dashboard/upper front fender piece of the 59 and gave that a tweak instead. So when I came along to complete this model in my early adulthood and I attempted to assemble the two side panels to that front section , I found that the left hand side pointed north while the right hand side pointed south. I persevered and eventually got the body assembled but alas, after umpteen attempts at joining these parts accurately, I incurred some glue damage along the top edge of the chrome spear along the join. It's not major but with the application of Bare Metal foil it will stick out like canine testicles so for now, it rests in the dark. Seeing all these fine builds on this thread , and especially yours, is making me reconsider it though! Cheers Alan Edited February 13, 2021 by alan barton Quote Link to comment Share on other sites More sharing options...
magicmustang Posted February 13, 2021 Share Posted February 13, 2021 (edited) 14 hours ago, alan barton said: The standard Revell warpage. As all of us who built models from this era know, Revell employed a particularly sadistic little man to sit next to the body moulding machine and upon ejection of each body, he would take it with both hands and give it a firm twist, like you were wringing out a dish towel. This ensured that none of the opening doors, hood or trunk would ever fit so you would never know how bad the hinging was. A simple but effective form of quality control. Now old Fred feared being made redundant when Revell started reissuing these multi piece bodies so in a desperate attempt to keep his job, he selected the cowl/dashboard/upper front fender piece of the 59 and gave that a tweak instead. So when I came along to complete this model in my early adulthood and I attempted to assemble the two side panels to that front section , I found that the left hand side pointed north while the right hand side pointed south. I persevered and eventually got the body assembled but alas, after umpteen attempts at joining these parts accurately, I incurred some glue damage along the top edge of the chrome spear along the join. It's not major but with the application of Bare Metal foil it will stick out like canine testicles so for now, it rests in the dark. Seeing all these fine builds on this thread , and especially yours, is making me reconsider it though! Cheers Alan So it was Fred. I always thought it was my lack of ability. Great story. Edited February 13, 2021 by magicmustang Quote Link to comment Share on other sites More sharing options...
Toast Posted February 13, 2021 Share Posted February 13, 2021 I'm interested to see how well this Protar F40 body goes together. Yet, exhaust system, all one piece. Quote Link to comment Share on other sites More sharing options...
Modelbuilder Mark Posted February 13, 2021 Share Posted February 13, 2021 18 minutes ago, Toast said: Yet, exhaust system, all one piece. Very interesting, I am surprised by this bit Quote Link to comment Share on other sites More sharing options...
Danno Posted February 13, 2021 Share Posted February 13, 2021 I'm doing it now. 1/35 Zvezda (kit brand) GAZ-AA. It's the Russian version of the Ford AA truck. Wish me luck. I think the only other times I ever attempted to build multi-piece bodied kits were YEARS ago, as a youngster. My first ever car model was the AMT/Revell 1/32 1956 Chrysler custom kit . . . when it was new. My parents gave it to me as an instant baby-sitter one night while they had a party. I agree: tube glue was not the ticket with multi-piece bodies. We'll see. 🌵😎 Quote Link to comment Share on other sites More sharing options...
Sixties Sam Posted February 13, 2021 Share Posted February 13, 2021 I built the 59 Ford Skyliner a few years ago with no problems with the multi-piece body. The top mechanism gave me trouble, though! Quote Link to comment Share on other sites More sharing options...
Richard Bartrop Posted February 13, 2021 Share Posted February 13, 2021 It's like any other thing, some kits are better than others. The Aurora 1/32 Porsche and Ferrari bodies were a pain because the parts didn't quite fit, and I was young, and didn't know what I was doing. The Italeri Rolls and Cadillac went together fairly painlessly. Quote Link to comment Share on other sites More sharing options...
Recommended Posts
Join the conversation
You can post now and register later. If you have an account, sign in now to post with your account.
Note: Your post will require moderator approval before it will be visible.