jbwelda Posted August 23, 2014 Share Posted August 23, 2014 that thing is looking KOOL! jb Quote Link to comment Share on other sites More sharing options...
Ace-Garageguy Posted August 24, 2014 Share Posted August 24, 2014 (edited) I love what you're doing here. Very nice work, all the way. Edited August 24, 2014 by Ace-Garageguy Quote Link to comment Share on other sites More sharing options...
Mooneyzs Posted August 24, 2014 Share Posted August 24, 2014 Dirk... Wow I have to say this build is just fantastic and Bad A$$. I love the direction you are going with this. Your work is amazing. I know I am a little late to the game but I will be following along. Keep up the killer work. What brand of lathe do you have for the parts you machined? Quote Link to comment Share on other sites More sharing options...
Zeekodadi Posted August 24, 2014 Share Posted August 24, 2014 amazing work!!!! where did you get the shocks from? Quote Link to comment Share on other sites More sharing options...
crazyrichard Posted August 24, 2014 Share Posted August 24, 2014 one of the most exiting builds around , just looks sooo good and those wheels > whow Quote Link to comment Share on other sites More sharing options...
Jeremy Jon Posted August 24, 2014 Share Posted August 24, 2014 Very cool build Scrappy, keep up the fantastic work x2 on this Fuch wheel centers, great workmanship! how to contact that fellow? Quote Link to comment Share on other sites More sharing options...
ScrappyJ Posted August 24, 2014 Author Share Posted August 24, 2014 Dirk... Wow I have to say this build is just fantastic and Bad A$$. I love the direction you are going with this. Your work is amazing. I know I am a little late to the game but I will be following along. Keep up the killer work. What brand of lathe do you have for the parts you machined? Thanks, Chris! I us the Sherline set up. In my opinion, it is the best for your money, particularly with the amount of accessories they have for their system and the ease of use of those accessories. When you decide, to go for it, let me know and I can tell you what all accessories I think you should go with. Again, thanks for the kind words on the Ghia project! Quote Link to comment Share on other sites More sharing options...
ScrappyJ Posted August 24, 2014 Author Share Posted August 24, 2014 (edited) Thanks for the kind words, fellas! It is good to get back at it, but with Jim's wheels in tow, I had no choice but to get back at it. To say those wheels are the shiznit, is an understatement! Edited August 27, 2014 by ScrappyJ Quote Link to comment Share on other sites More sharing options...
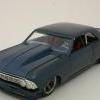
ScrappyJ Posted August 24, 2014 Author Share Posted August 24, 2014 (edited) Dirk, Glad to see you back on this one. I really like this build on many levels. The bodywork mods you've made so far are just perfect. Love the stance and the car just "looks right" from all angles. Nice machining as well. Cheers, Tim Thanks, Codi, I'm just waiting for more progress on the Henry J. That thing is just sick! You have a cool ability to capture realism with things most don't even think about. Very cool indeed!glad to see see some one making some progress Dirk, I can't seem to make any! The Ghia is really shaping up, every thing is looking perfect! do we have a color picked out for this badboy??? all ways a treat my friend! I'm still thinking about a blue. There is a Tamiya blue I like but then David Thibodeau also gave me a blue from from scalefinishes (a Ferrari 524 Azzurro blue) that looks pretty good too. I haven't decided yet which blue. As ALWAYS, thanks for the kind words, Bill! Edited August 24, 2014 by ScrappyJ Quote Link to comment Share on other sites More sharing options...
Mooneyzs Posted August 27, 2014 Share Posted August 27, 2014 Thanks, Chris! I us the Sherline set up. In my opinion, it is the best for your money, particularly with the amount of accessories they have for their system and the ease of use of those accessories. When you decide, to go for it, let me know and I can tell you what all accessories I think you should go with. Again, thanks for the kind words on the Ghia project! Thanks Dirk... I will have take you up on the offer about which accessories to go with. I have been eyeing the 6200 Lathe and Mill "Ultimate Machine Shop Package" with the Digital Read outs. I just need to save up the 3 grand cash.... LMAO http://www.sherline.com/packages.htm Quote Link to comment Share on other sites More sharing options...
David@MinidreamsInc. Posted August 27, 2014 Share Posted August 27, 2014 WOW ! WOW ! WOW !!!!!!!!!!!!!!!!!!!!!! I cant say anything else ! This is just OUTSTANDING ! Quote Link to comment Share on other sites More sharing options...
ningoth4 Posted August 27, 2014 Share Posted August 27, 2014 Yep, this is turning out beautifully! Love those Fuchs. Happy to see new progress on the project. Kevin Quote Link to comment Share on other sites More sharing options...
ScrappyJ Posted August 27, 2014 Author Share Posted August 27, 2014 (edited) Thanks Dirk... I will have take you up on the offer about which accessories to go with. I have been eyeing the 6200 Lathe and Mill "Ultimate Machine Shop Package" with the Digital Read outs. I just need to save up the 3 grand cash.... LMAO http://www.sherline.com/packages.htm Hahaha...I know what you mean about the cost, it is pretty steep; however, worth the cost. I would definitely get the DRO! I had the zero-resettable in my mill, but once I got the DRO (i believe Mike Lawrence, GT Mike, encouraged me to get them) I've been hooked ever since. Don't get me wrong, the basically serve the same purpose, but the DRO makes it so much easier. I'll go and check out the package and let. You know my thoughts (only MY personal thoughts and not meant to be expert advise). Also, on Sherline's site, there is a monthly sale of about 20% off and sometimes you can get the mill, lathe and/or both at a more reasonable price. Looks like a good set-up. When I started some 20+ years ago, i started with just the lathe, milling attachment, rotary table and other accessories like the vice. I wish I cold have gotten everything at once, but couldn't afford it. Some items that I'm not sure I saw in huge package would be: - 1012, Sensitive Drilling Attachment - 3065, Slitting Saw Holder - 3570, Rotating Mill Vise Base With your attention to detail (like many others on here), I get excited when others join the machining fraternity. I can't wait for you to get a set-up to see what you come up with. Edited August 27, 2014 by ScrappyJ Quote Link to comment Share on other sites More sharing options...
ScrappyJ Posted August 27, 2014 Author Share Posted August 27, 2014 Some more pics. It is difficult to tell with my crappy pictures and all, but the two outer gauges (oil pressure and volt) are notched so that they fit onto the radius of the two main, center gauges (the tach and speedo). That idea came from Mike Lawrence to emulate the exhaust pipes on some of the Porshce cars. Again, due to the crappy pictures, you can't tell that the rotors have been crossed drilled and vented. In huias is picture, the rotor is sitting on the post-it I wrote some of the math on for dividing the drilled holes. Because I wanted to simulate a "carbon" look for the rotors, I used some solid blank, black, resin stock that David Morton creates when he is luring resin and has left over. The molds for the stock are made from deep-sockets. Here are the rotors with the rotor hats. Again sorry for the poor quality of the pictures that the I-phone produces Here is one of them in process and ready to be cut off. While the machining process does create a chalky-looking residue, once you wash it with some Dawn and rinse it, that residue goes away Quote Link to comment Share on other sites More sharing options...
jbwelda Posted August 27, 2014 Share Posted August 27, 2014 too much, this just keeps getting better. I gotta go back and read where you bent those tubes and stuff, got a similar project coming up and could use some tips. I take it they are actually rod and not tube? jb Quote Link to comment Share on other sites More sharing options...
DrKerry Posted August 28, 2014 Share Posted August 28, 2014 Wheels and dash are looking awesome!!!! Quote Link to comment Share on other sites More sharing options...
Codi Posted August 28, 2014 Share Posted August 28, 2014 NICE Scrappy. Everything you're doing is just fantastic. Your brakes are very slick. Cheers, Tim Quote Link to comment Share on other sites More sharing options...
ScrappyJ Posted August 29, 2014 Author Share Posted August 29, 2014 Thanks fellas! Quote Link to comment Share on other sites More sharing options...
ScrappyJ Posted August 29, 2014 Author Share Posted August 29, 2014 too much, this just keeps getting better. I gotta go back and read where you bent those tubes and stuff, got a similar project coming up and could use some tips. I take it they are actually rod and not tube? jb Correct, JB, I used rods and not tubes. Quote Link to comment Share on other sites More sharing options...
Plasticfanatic Posted August 29, 2014 Share Posted August 29, 2014 Superb work, the side profile picture show how beautiful and subtle your body modifications integrate in the original body design, and all the other custom/scrachtbuilt parts just add more to this fantastic build, looking forward for more updates. Quote Link to comment Share on other sites More sharing options...
Mooneyzs Posted September 5, 2014 Share Posted September 5, 2014 Hahaha...I know what you mean about the cost, it is pretty steep; however, worth the cost. I would definitely get the DRO! I had the zero-resettable in my mill, but once I got the DRO (i believe Mike Lawrence, GT Mike, encouraged me to get them) I've been hooked ever since. Don't get me wrong, the basically serve the same purpose, but the DRO makes it so much easier. I'll go and check out the package and let. You know my thoughts (only MY personal thoughts and not meant to be expert advise). Also, on Sherline's site, there is a monthly sale of about 20% off and sometimes you can get the mill, lathe and/or both at a more reasonable price. Looks like a good set-up. When I started some 20+ years ago, i started with just the lathe, milling attachment, rotary table and other accessories like the vice. I wish I cold have gotten everything at once, but couldn't afford it. Some items that I'm not sure I saw in huge package would be: - 1012, Sensitive Drilling Attachment - 3065, Slitting Saw Holder - 3570, Rotating Mill Vise Base With your attention to detail (like many others on here), I get excited when others join the machining fraternity. I can't wait for you to get a set-up to see what you come up with. Dirk... Thank you for the advice on these other items. I will definitely look at getting them as well. I am hoping possibly after the first of the year that I will be able to go ahead and purchase the set up I want. I will tell you this I am itching and excited about making some of my own parts. I have been putting off buying it because I have had to take care of other things first .... I Have had to replace my roof and paint my house this year, was a pretty penny too....lol I will keep you posted on the Sherline stuff. Any more updates to this beauty?? I am also curious what you used for the faces on your gages. They turned out great! Quote Link to comment Share on other sites More sharing options...
Codi Posted October 19, 2014 Share Posted October 19, 2014 Hey Dirk, hope things are well, just checking on your builds progress. I'm sure everyone that visits the forum is anxious to see what you are doing on this very slick build. Cheers, Tim Quote Link to comment Share on other sites More sharing options...
ScrappyJ Posted October 23, 2014 Author Share Posted October 23, 2014 Hey Dirk, hope things are well, just checking on your builds progress. I'm sure everyone that visits the forum is anxious to see what you are doing on this very slick build. Cheers, Tim Thanks for following along, Codi (ands everyone)! I ran into some issues with paint on this thing, I used Duplicolor's self-etching primer and had some complications during the application phase. I actually had to strip it twice and probably needed to do it a fourth time, but just gave up and went with what I have. I've also had a problems with my clear, I just switched to HOK and can't seem to dial it in. I normally use PPG's concept 2021, but it is so expensive. I was running low and although I likely had enough to do the Ghia, I didn't want to chance it and switched. I've been talking to Dave Thibodeau and it could be a variety of things (wrong temp reducer, humidity, mix ratio- although I went by their mix ratio). To be honest, a big part is likely haste in trying to get things done for ATL. For the last couple of days, I've been sorting through fitment issues. I normally engineer and fabricate my parts to such a tight tolerance, that I don't compensate for paint and plating. I thiugh I made the necessary adjustments this time, but in some areas, not (I joked with David Morton that you know your tolerance are tight when your panels don't fit until your paint/flea gasses out). In addition to trying to keep on pace with the project, we had the Wolrd Street Cqr Finals in Orlando this past weekend and are having the import challenge this coming weekend, so because there aren't many events like this for the year here, I've taken some time to attend the drags. I hope to (actually I have to) make some serious progress this weekend I and take some pics. If I get a chance to, I will post some pics. Quote Link to comment Share on other sites More sharing options...
jbwelda Posted October 24, 2014 Share Posted October 24, 2014 I think I would just switch to Tamiya spray can primer and probably clear too. just a suggestion it might be easier than messing with all the variables you got going. shame to ruin the body of such a beautiful project. jb Quote Link to comment Share on other sites More sharing options...
ScrappyJ Posted November 3, 2014 Author Share Posted November 3, 2014 Thanks for the continued kind words and encouragement fellas! I don't have much to say (or maybe too much to describe), but I did want to get some updated pictures up: Not sure if I had mentioned before, but the sets of valve covers (will four), and throttle mechanisms (except for he actual linkage part, was machined (the center part was Lawrence's idea). The coil packs were machined from styrene with brass pins for mounting. I was hoping to cast them, but thought it would be more time to make one piece and then our a mold and resin copies. This way worked out a lot quicker, I think. Lawrence helped me out with the rear and side covers. I did the sift linkage, starter and solenoid. The solenoid has brass hardware from Scale Hardware and a banjo from RB Motion that will simulate the connector from the battery cable Adding some detailing. Hardware is from RB Motion Quote Link to comment Share on other sites More sharing options...
Recommended Posts
Join the conversation
You can post now and register later. If you have an account, sign in now to post with your account.
Note: Your post will require moderator approval before it will be visible.